This walkthrough of the Main Story quest “The High Keep” will help you join Natty in seeking justice, as she attempts to take down the villainous Harlow. As Harlow is a henchman of Rookwood and leader of a band of poachers, you’ve got plenty of reasons to want to help Natsai Onai with her plan: find evidence of Harlow’s misdeeds that can be brought to Officer Singer.
Quest Type: Main Story
Location: Falbarton Castle, Hogsmeade Valley (map)
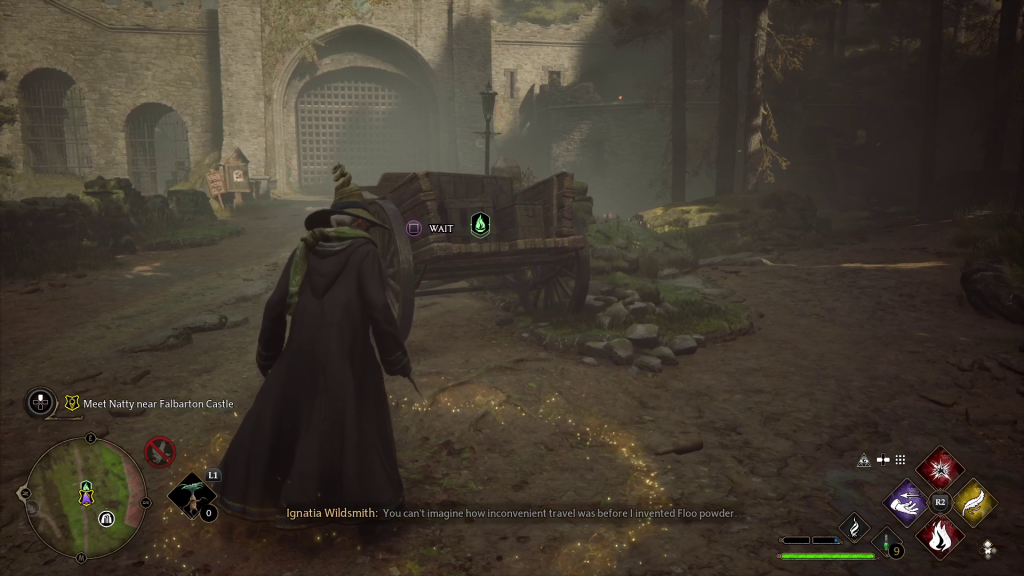
Natsai Onai is waiting at Falbarton Castle, east of Hogsmeade. Find whatever Floo Flame is closest to the castle (Upper Hogsfield, west-northwest of the castle is a likely candidate), then use your broom to cover the rest of the distance. This is a nighttime quest, so if you arrive during the day, your only option will be to wait. Once it’s night, speak with Natty to begin a cutscene (and the quest).
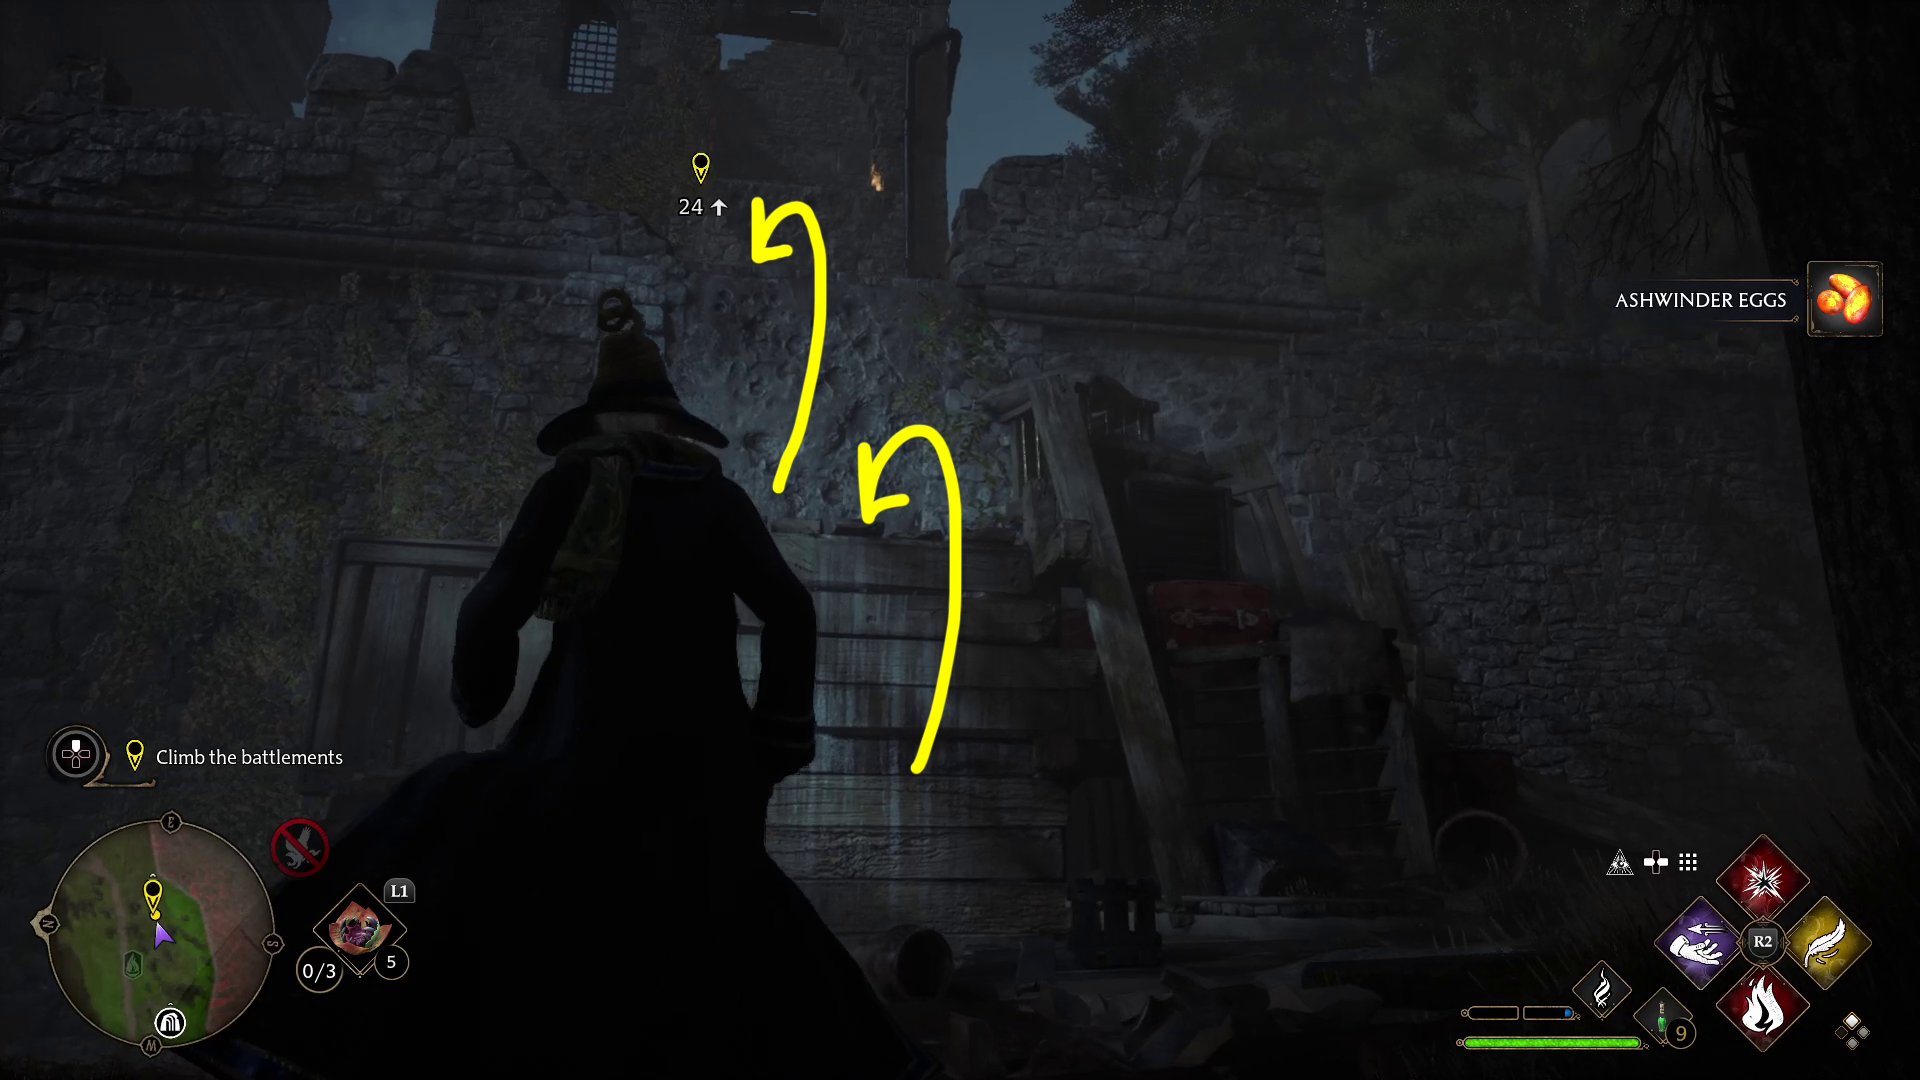
Climb the battlements
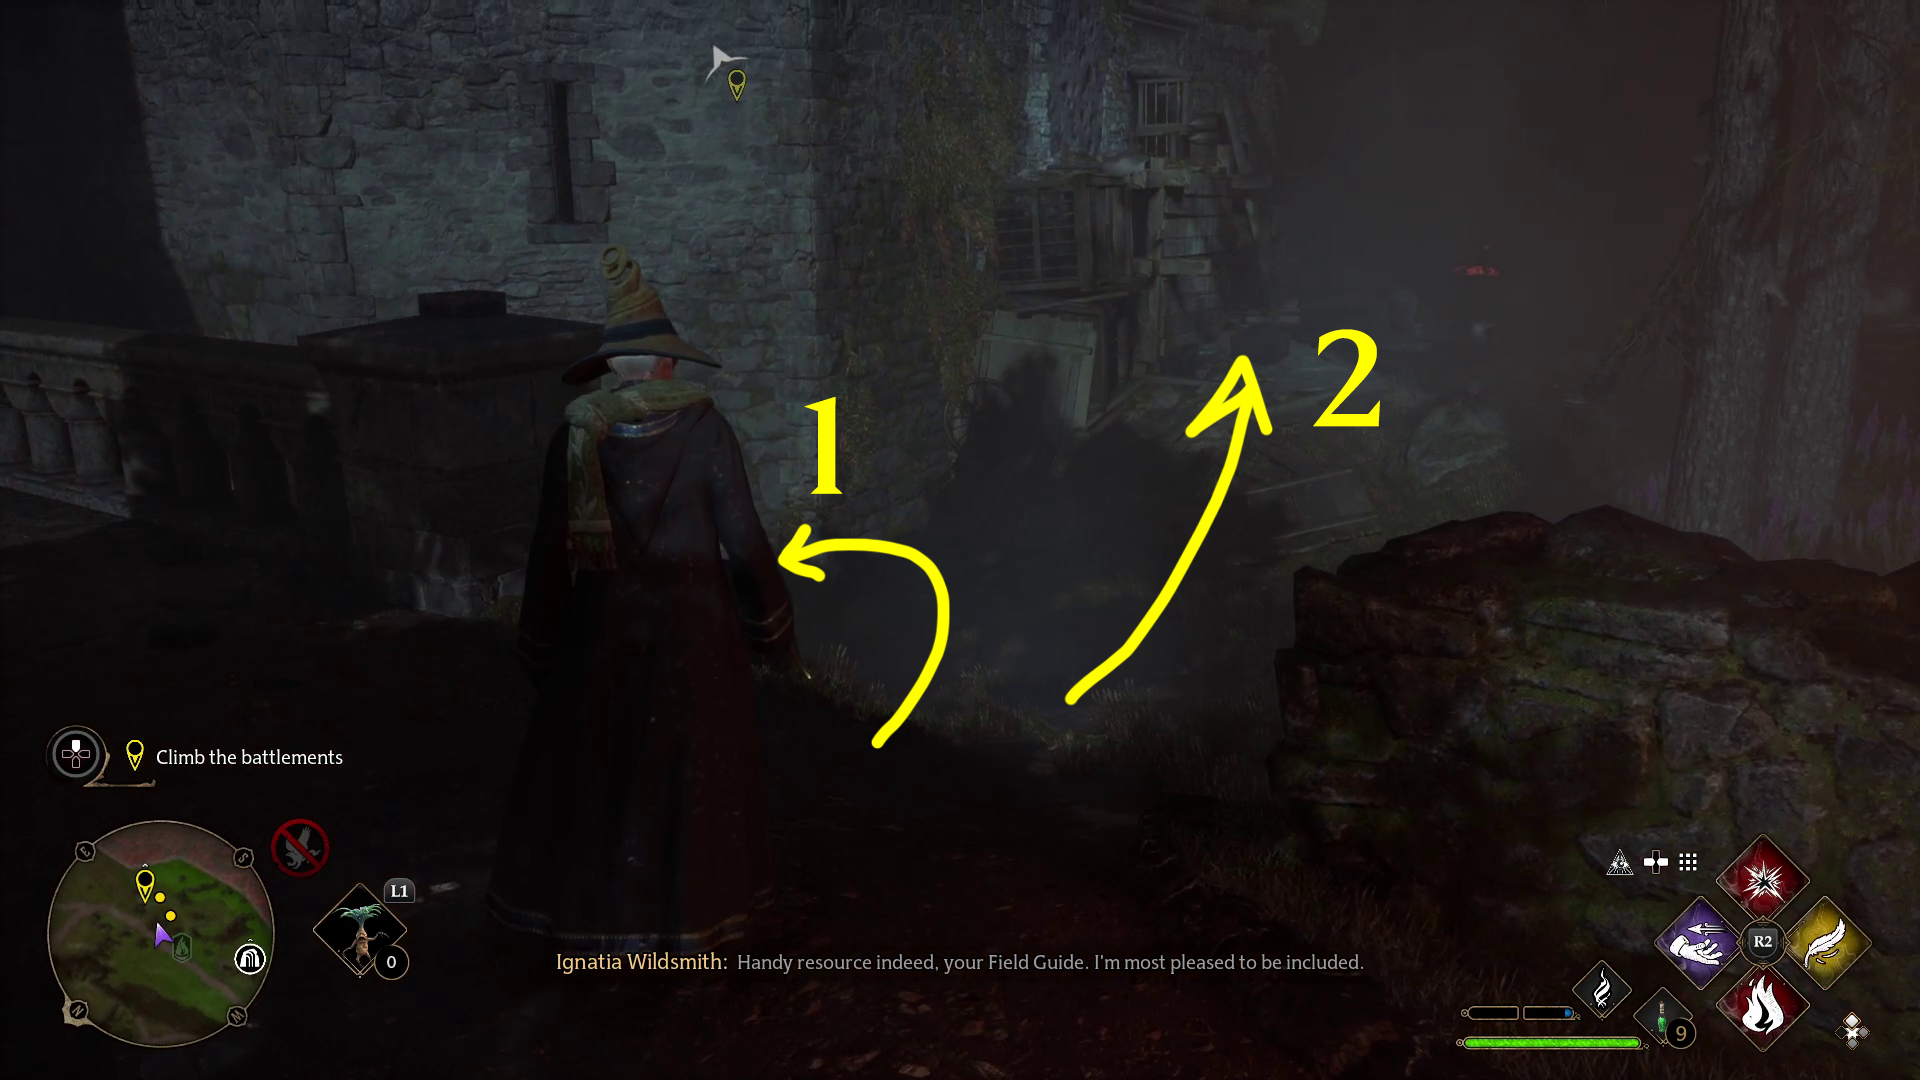
Grab the Floo Flame just behind the cart if you haven’t already, and then continue towards the main gate. On your right, there will be a break in the low wall (1). Head through it, and then — if you want some crafting materials and a bit of gold — first go under the bridge and into the water (1.1). Cast Revelio once under the bridge to make it easier to find everything. Then go over to the pile of junk (1.2), grab the Ashwinder Eggs that are nearby, then climb up to the battlements (2).
12
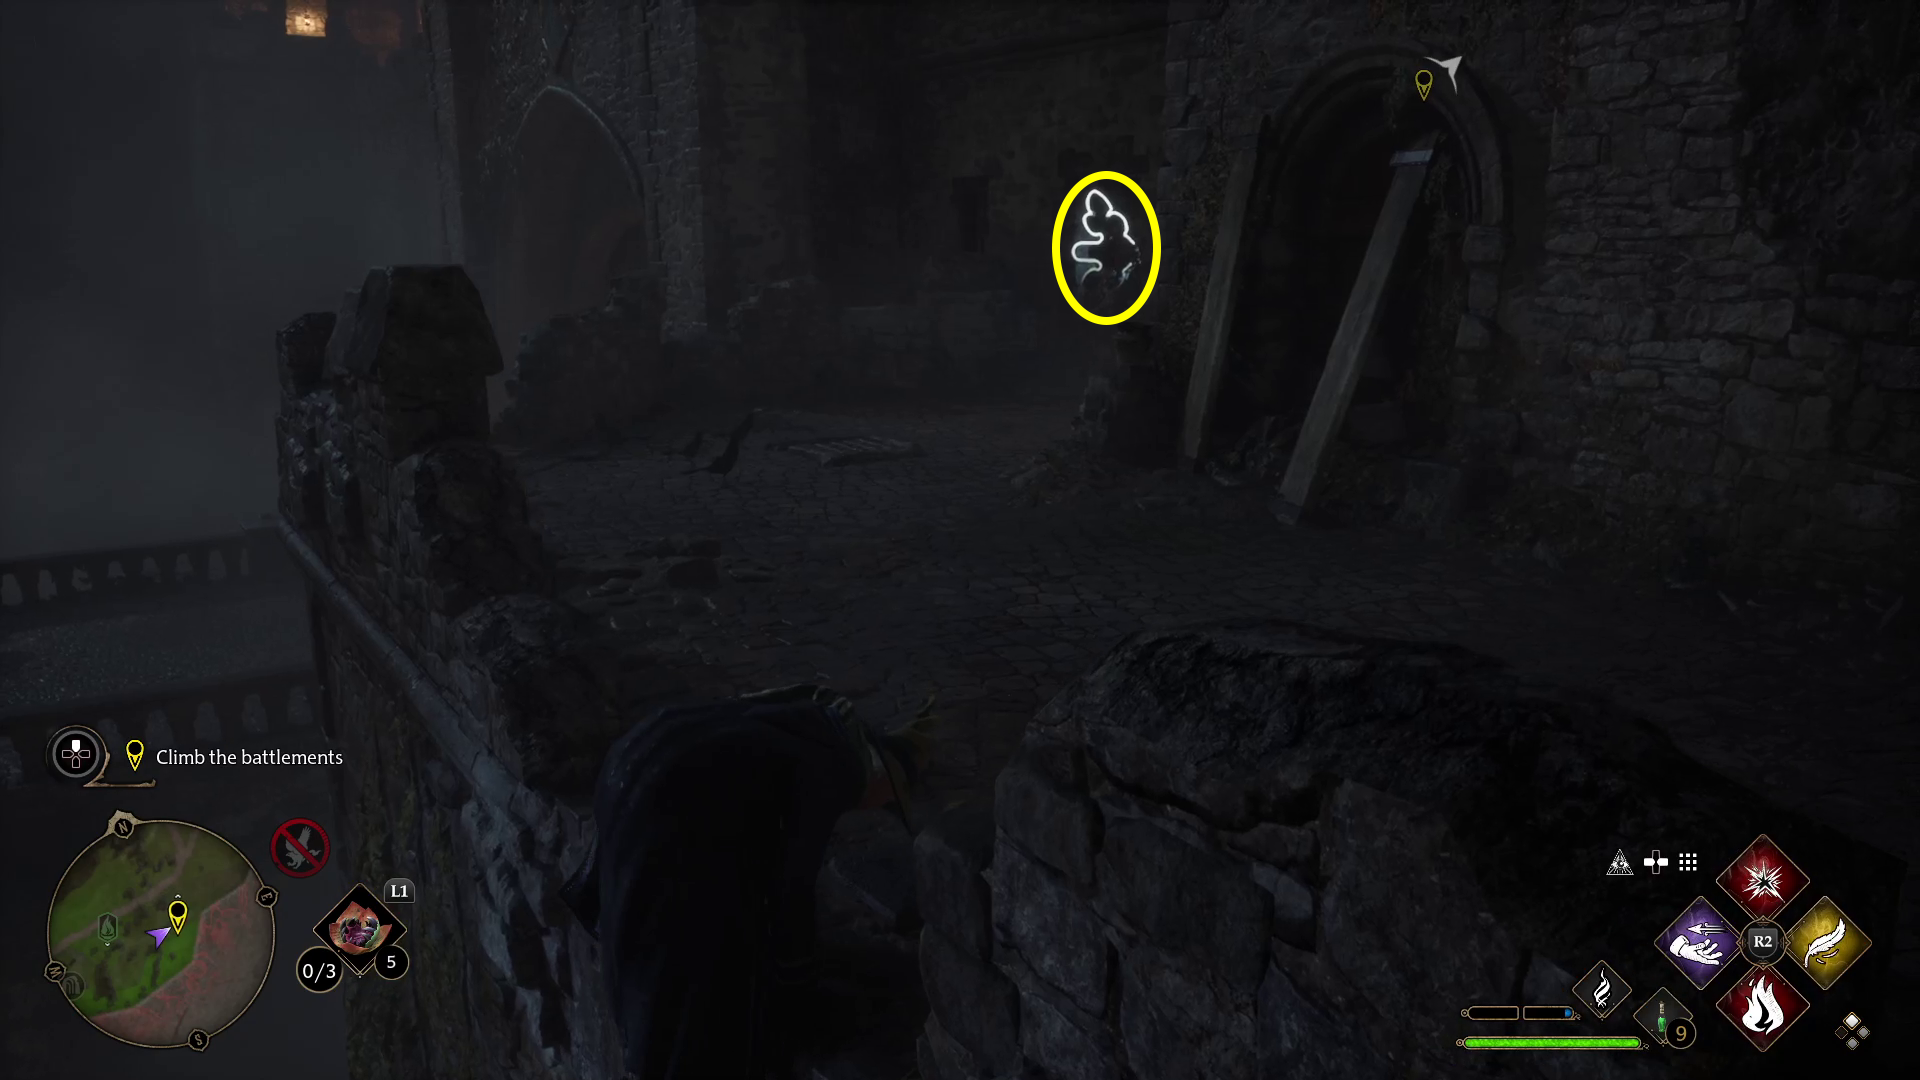
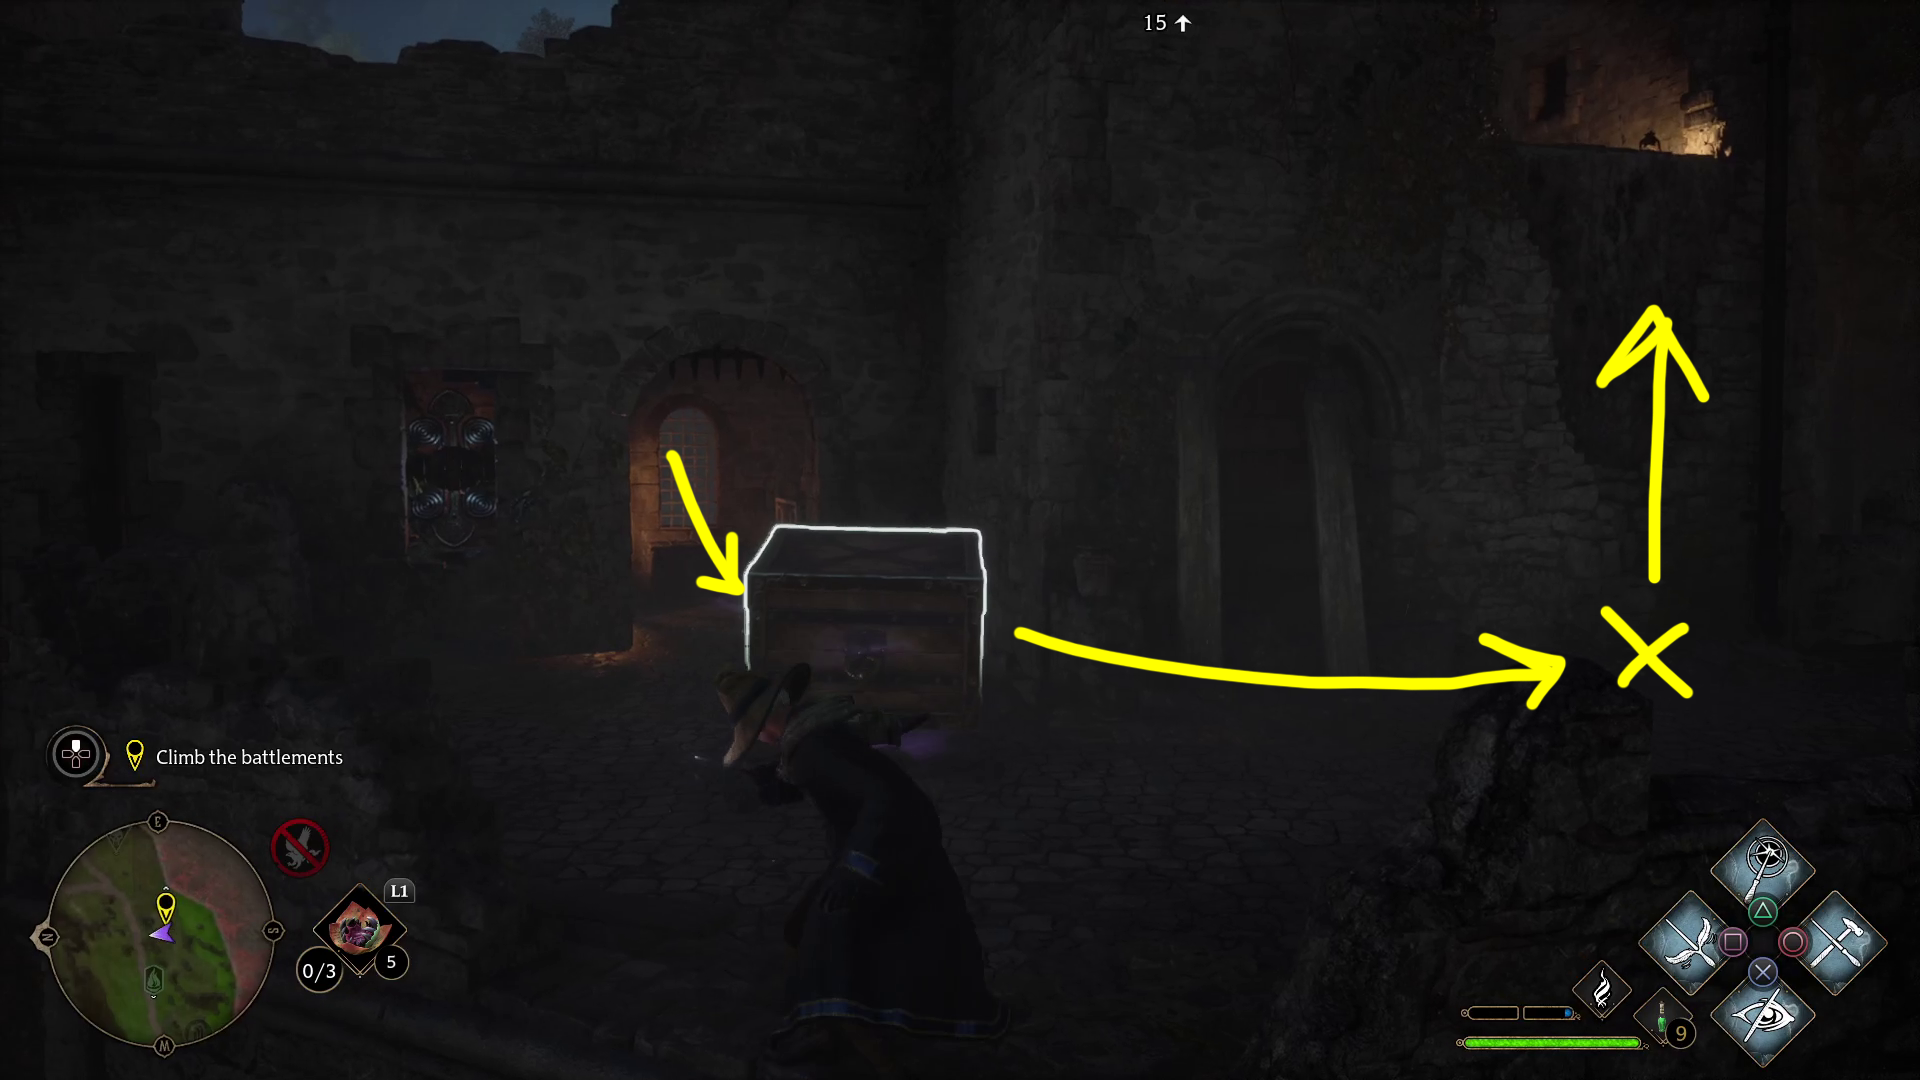
After climbing up, go left and cast Depulso on the mechanism in the wall (1) — it will spin, opening a small chamber and allowing you to loot a chest on the left side of the chamber. Then back out a bit and cast Accio on the crate inside the chamber, and bring it over to the nearby wall to your right. It can be tricky to get the crate out without it hitting the walls, so make sure you rotate it with the d-pad so it slides out cleanly. Move it to the indicated spot (2) and then release Accio and cast Levioso; that done, you can climb up onto the crate, and from there higher onto the battlements.
12
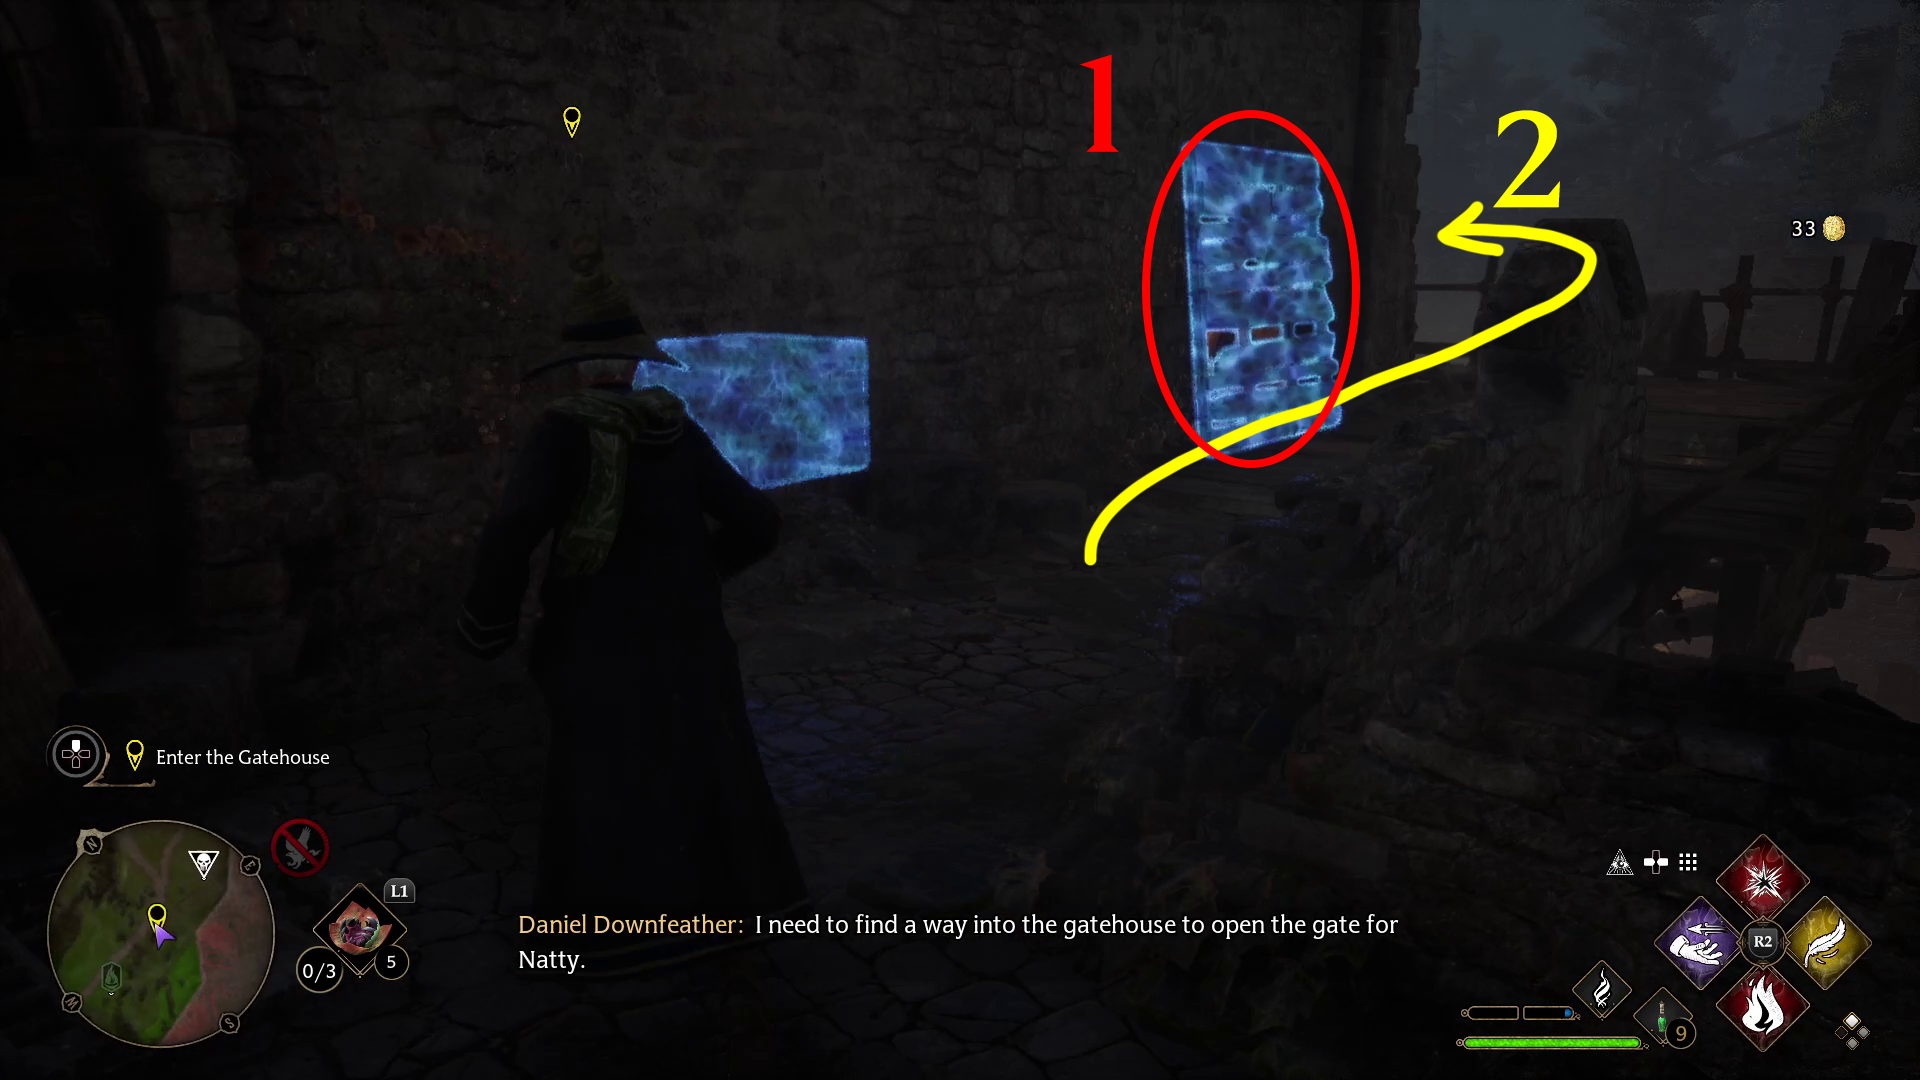
Enter the Gatehouse
In the room you climb into, cast Revelio and loot the nearby bag, then go north. Note the planks on the wall ahead (1.1) before continuing around the corner (1.2). Continue north and turn the next corner, then look through the window on the left up ahead. From here, cast Accio on the crate inside the room, pulling it close to you (2). Then go back the way you came and cast Accio on the planks on the wall (1.1), and go through the small hole this reveals to enter the Gatehouse.
Open the main gate & Follow Natty
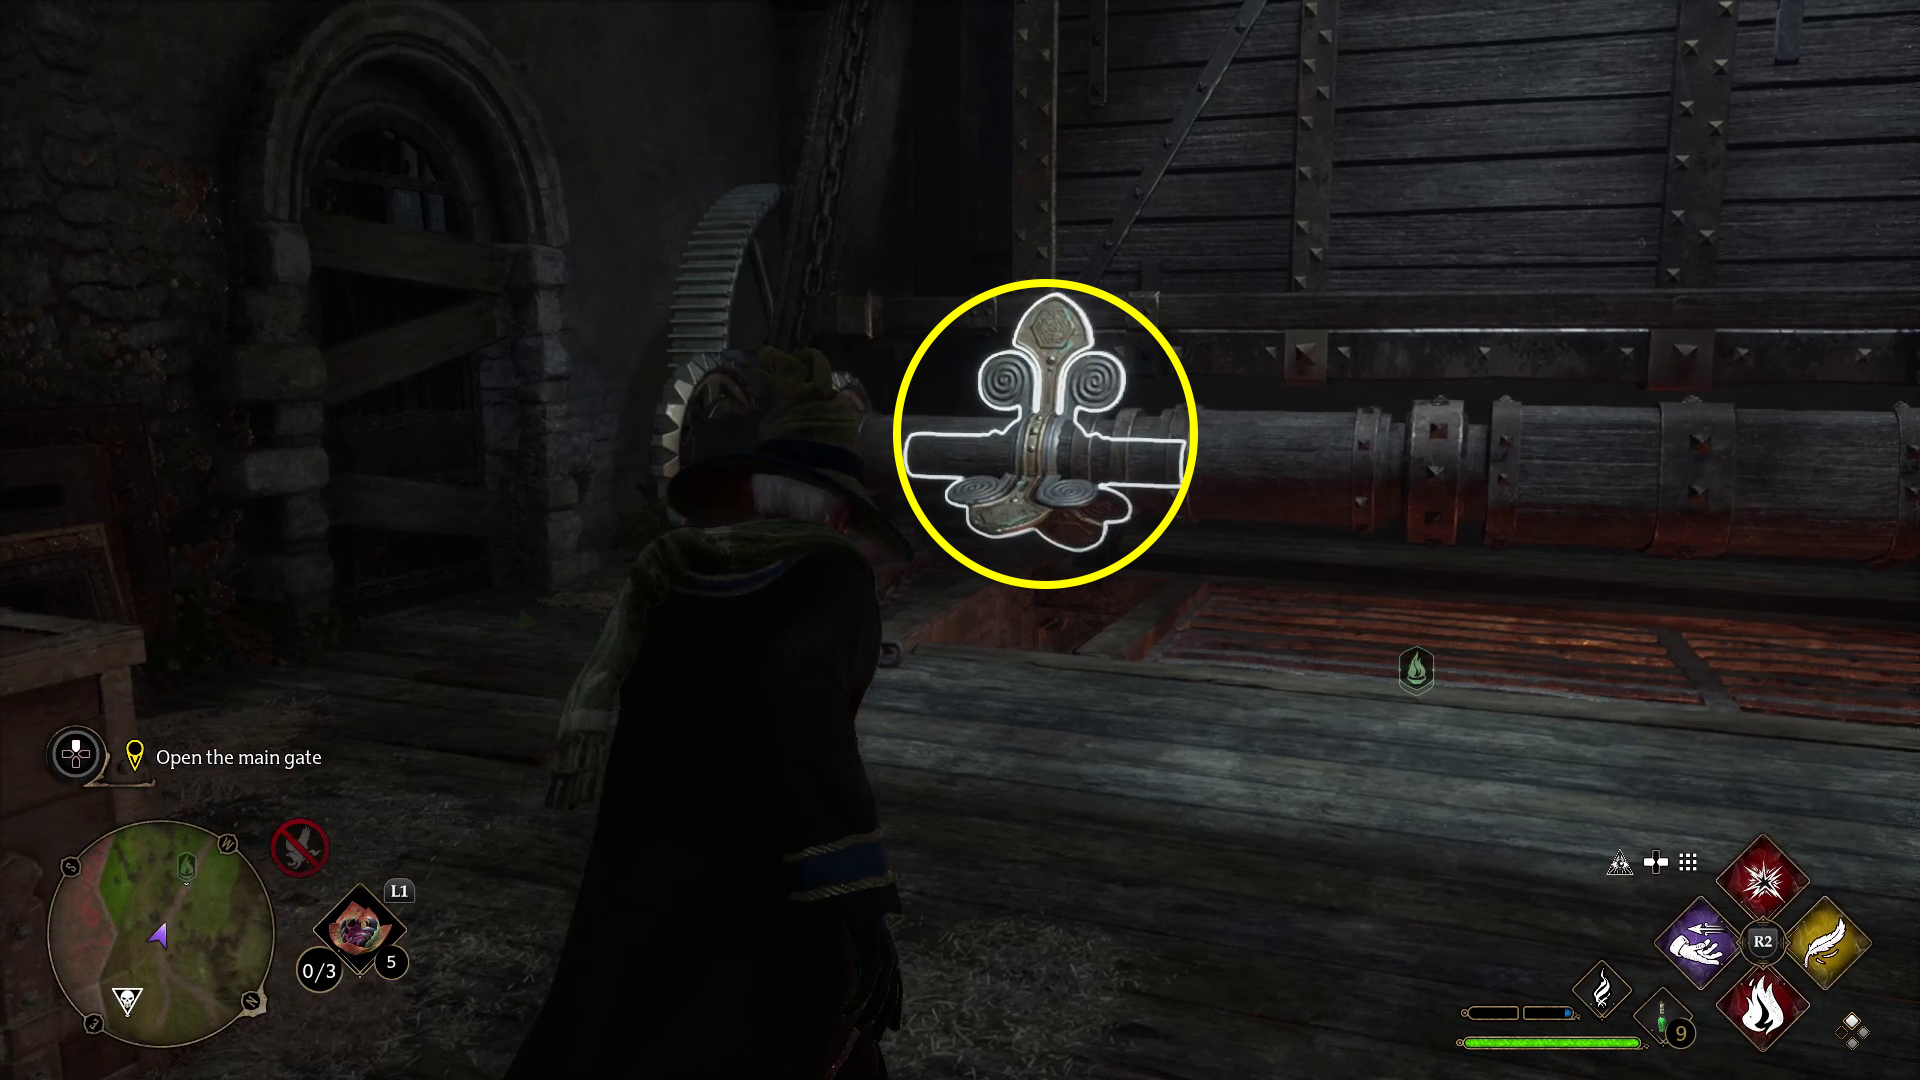
On the left side of the gate mechanism is another object you can spin with Depulso. Make sure you have both Depulso and Accio ready, then cast Depulso twice on the mechanism (1), then look up and slightly to the right and cast Accio on the metal ring there (2). After a brief delay, Natty will appear. Grab the Gatehouse Note from the floor, then follow Natty out the door she unlocks. Continue up the stairs and a cutscene will play.
Get to the roof
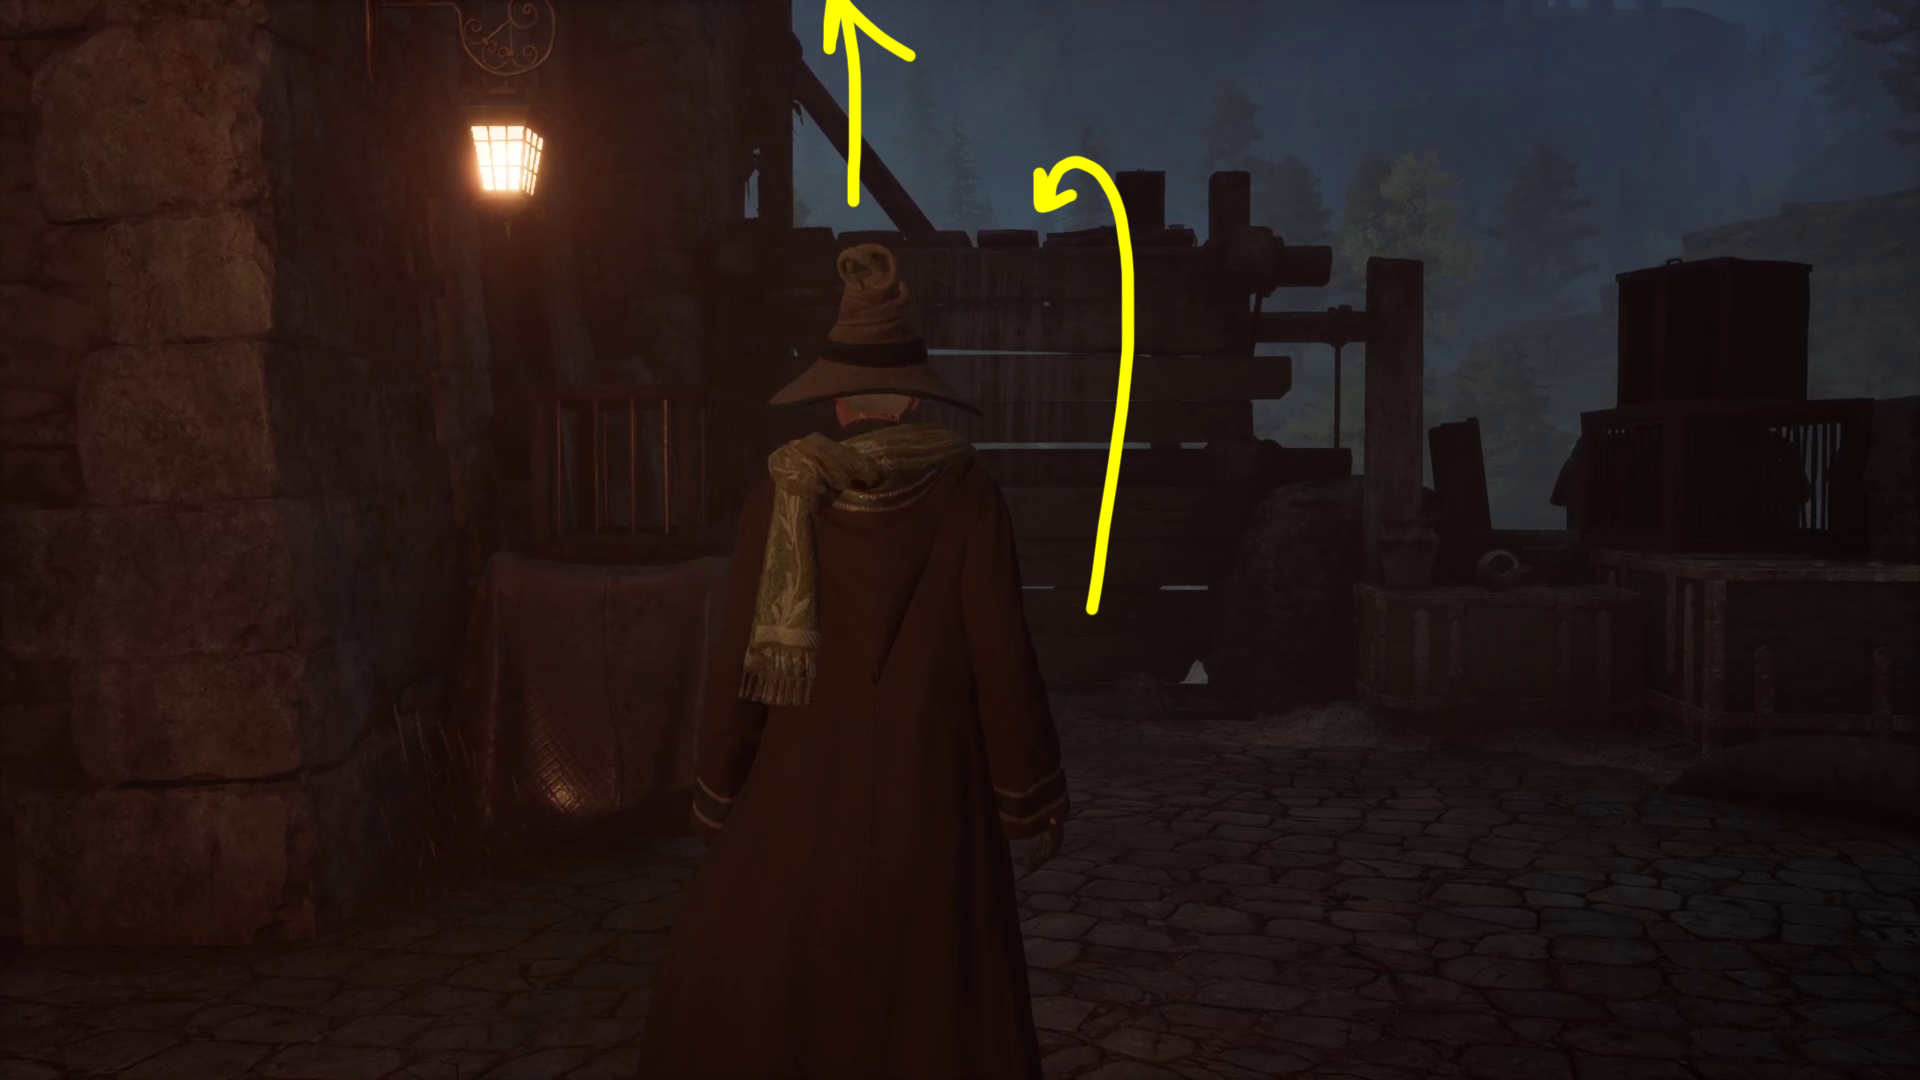
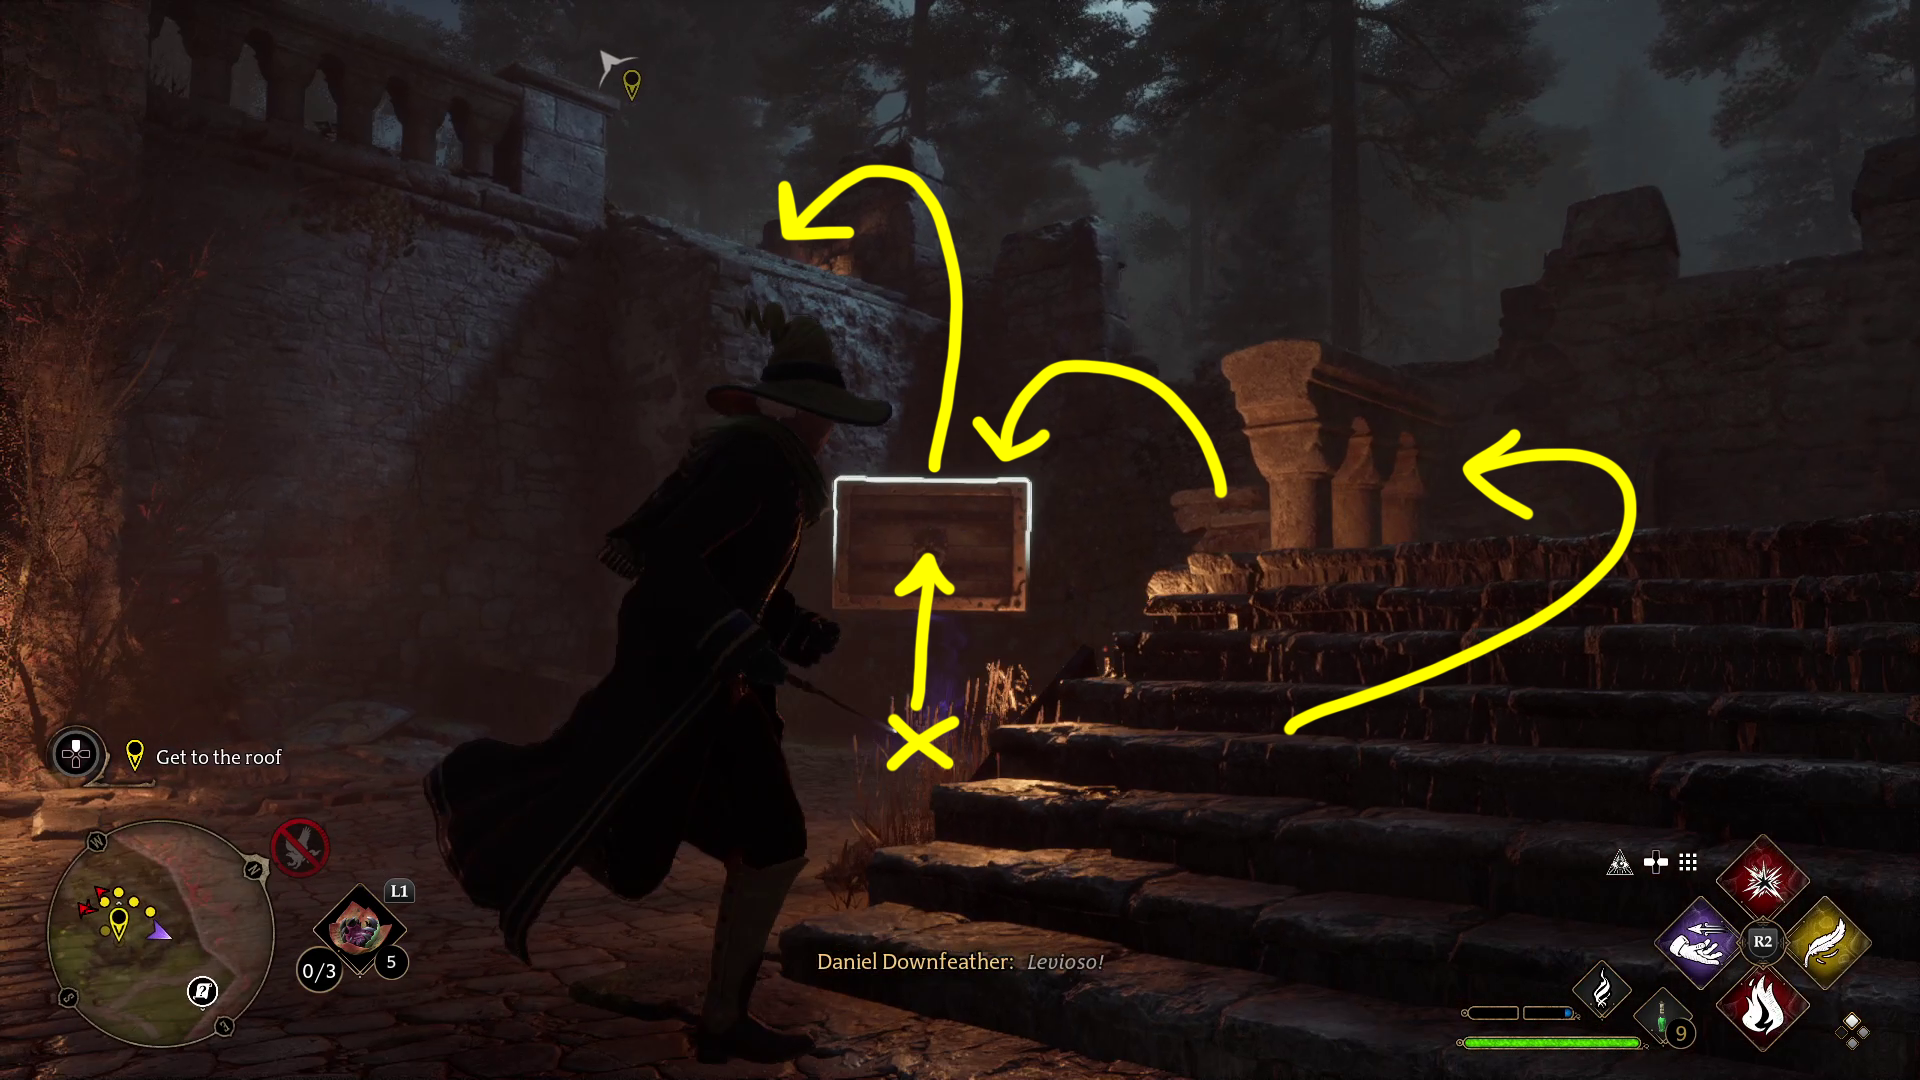
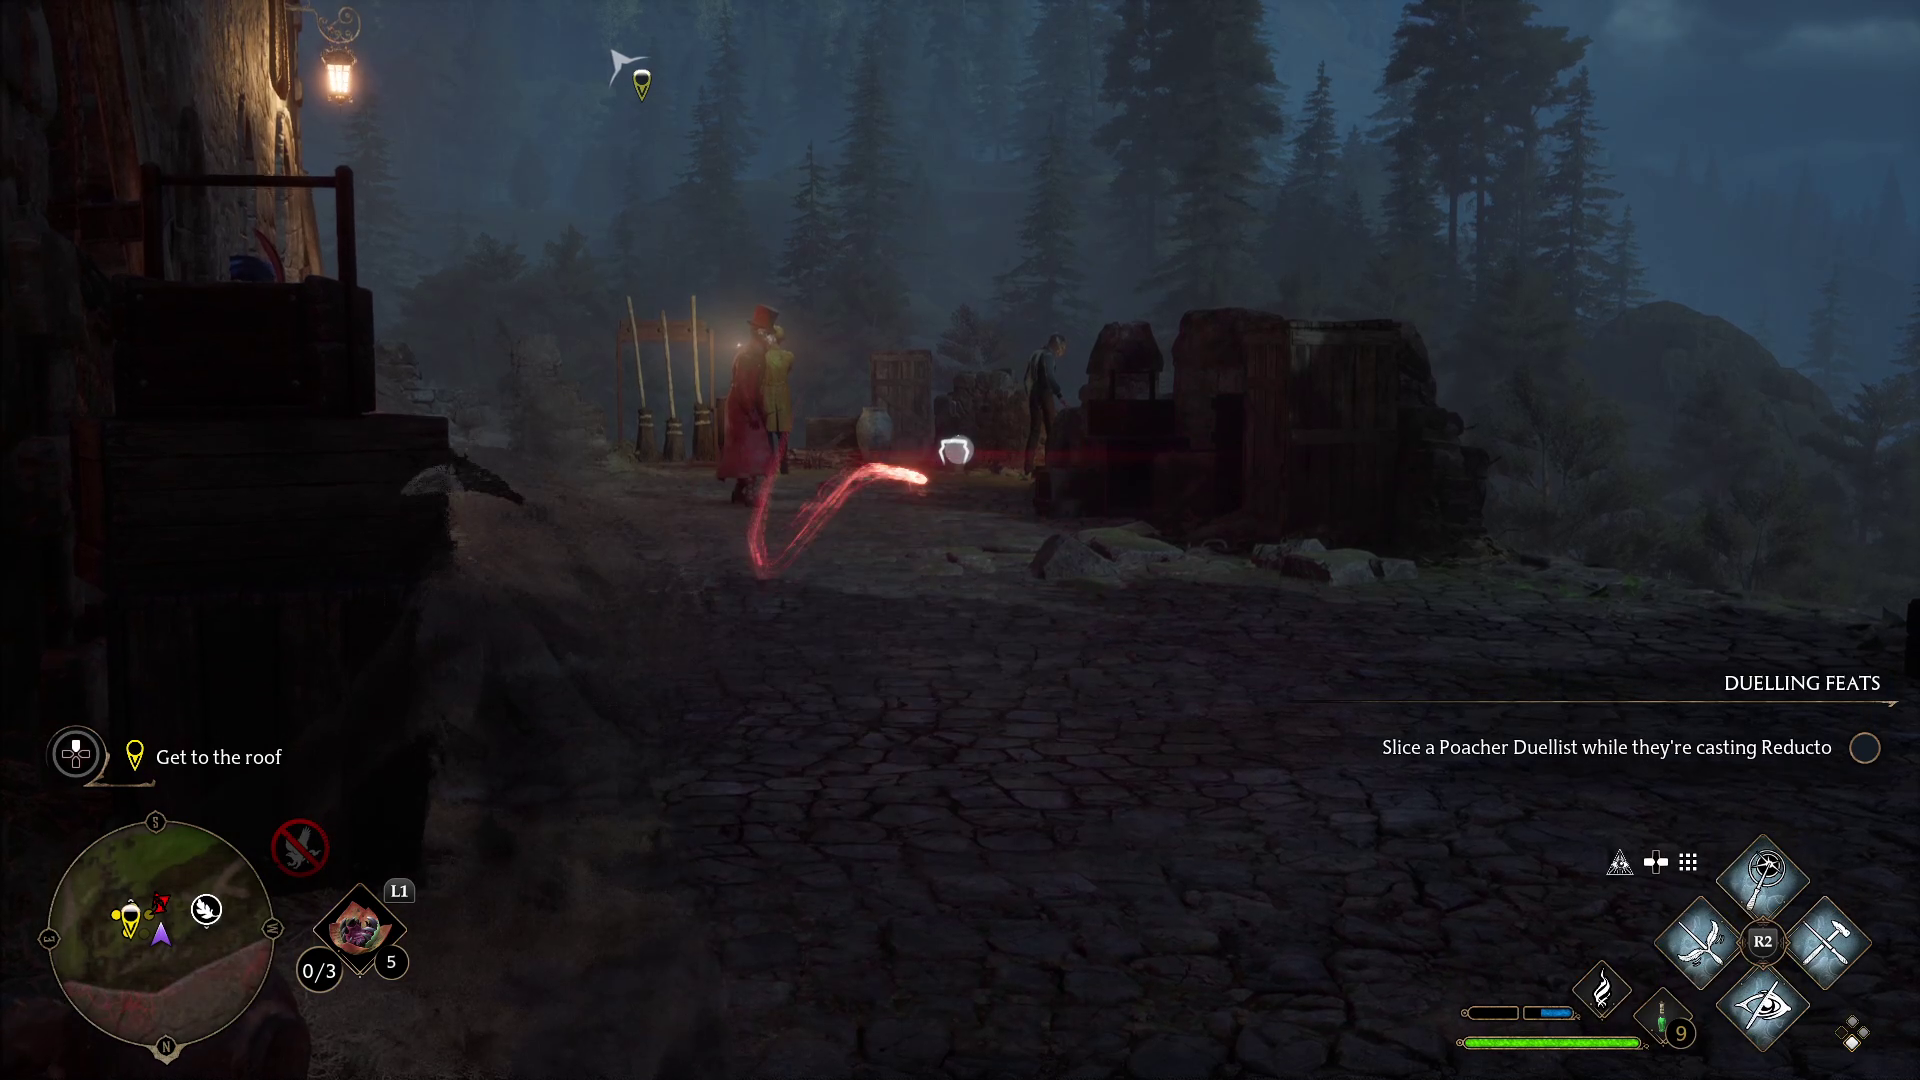
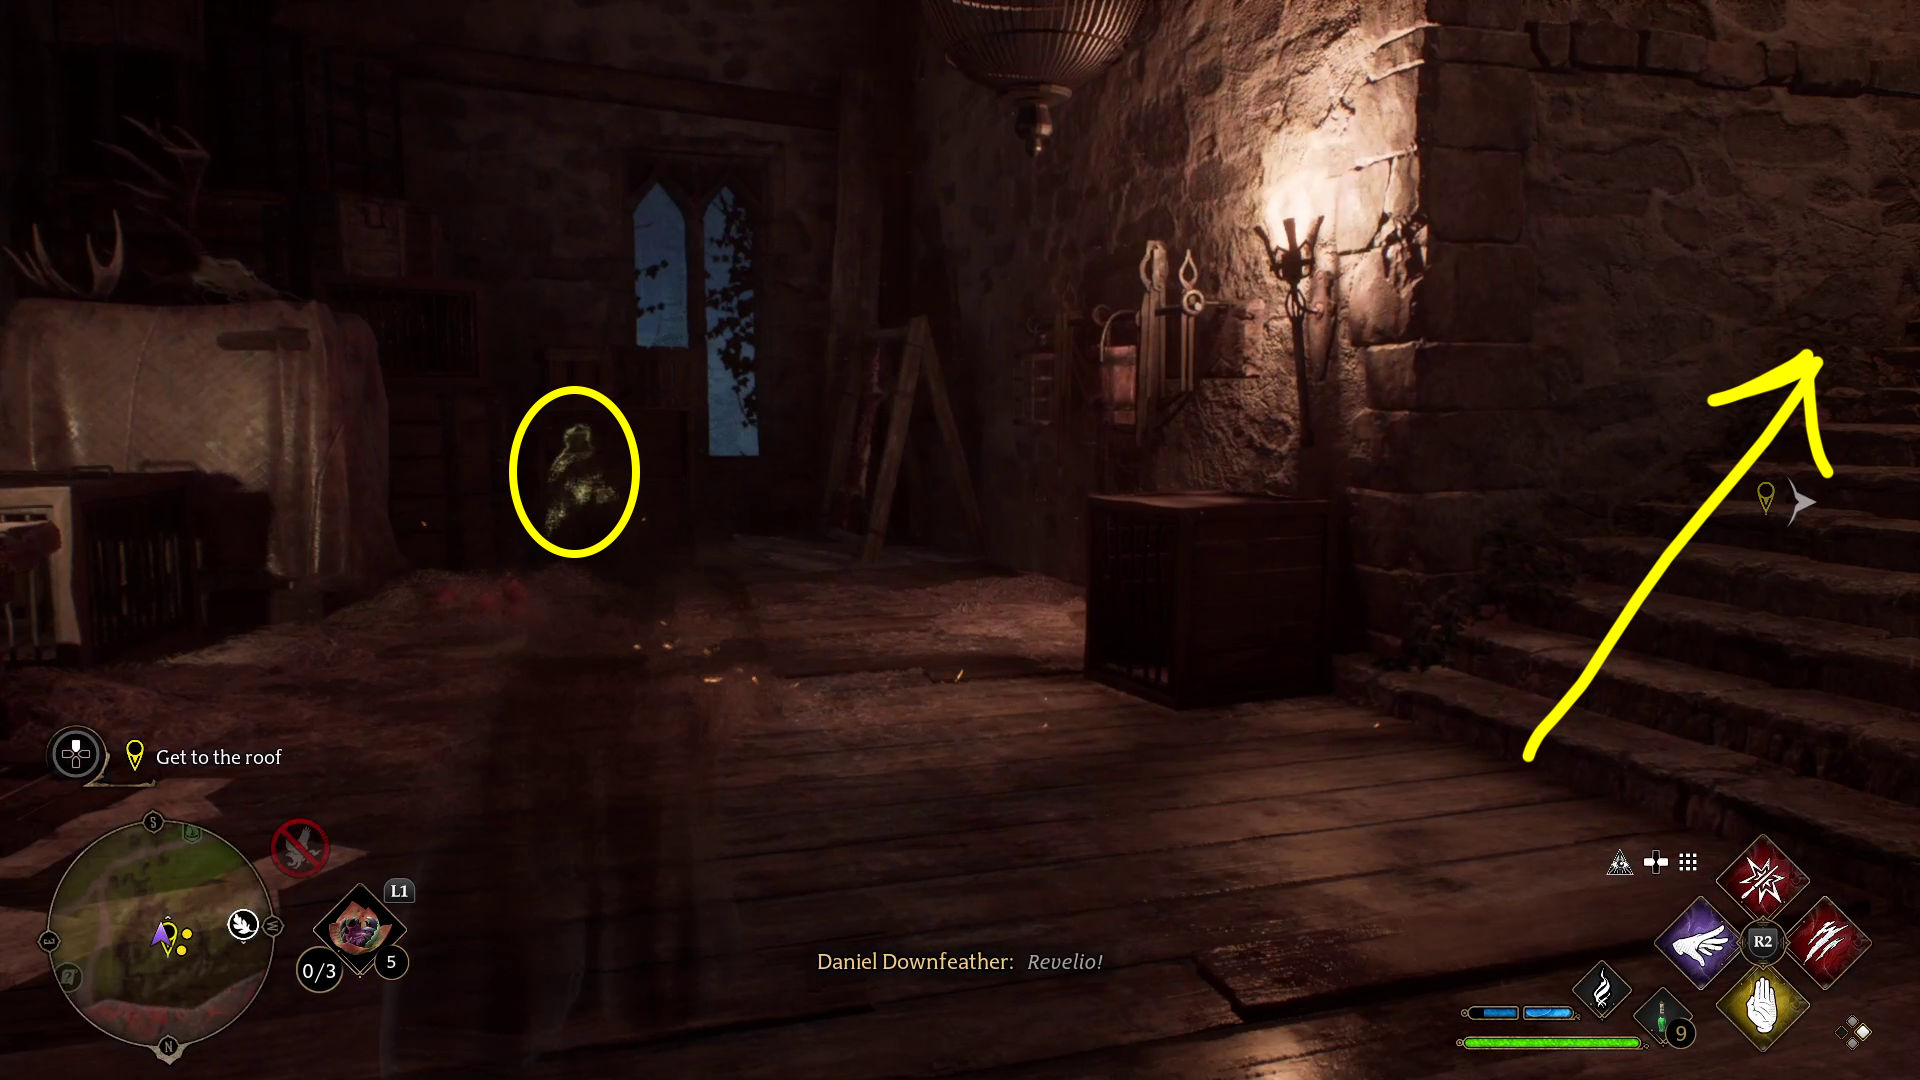
When the cutscene ends, you’ll be facing a wooden platform you can climb (1). Do so, then climb up the wall to the left. Straight ahead is a hole through which you need to cast Depulso on a crate (2). Then turn right and go down the stairs (looting the bag in the corner on the right of the landing), and at the bottom of the stairs look left to find the crate. Cast Wingardium Leviosa (or Accio, either works) on it and bring it to the indicated spot (3), then cast Levioso on it so you can jump from the stairs to it, and from it to the battlements. Before you make the jumps, equip Disillusionment if you don’t have it available, and put Depulso on your favorite spell diamond.
123
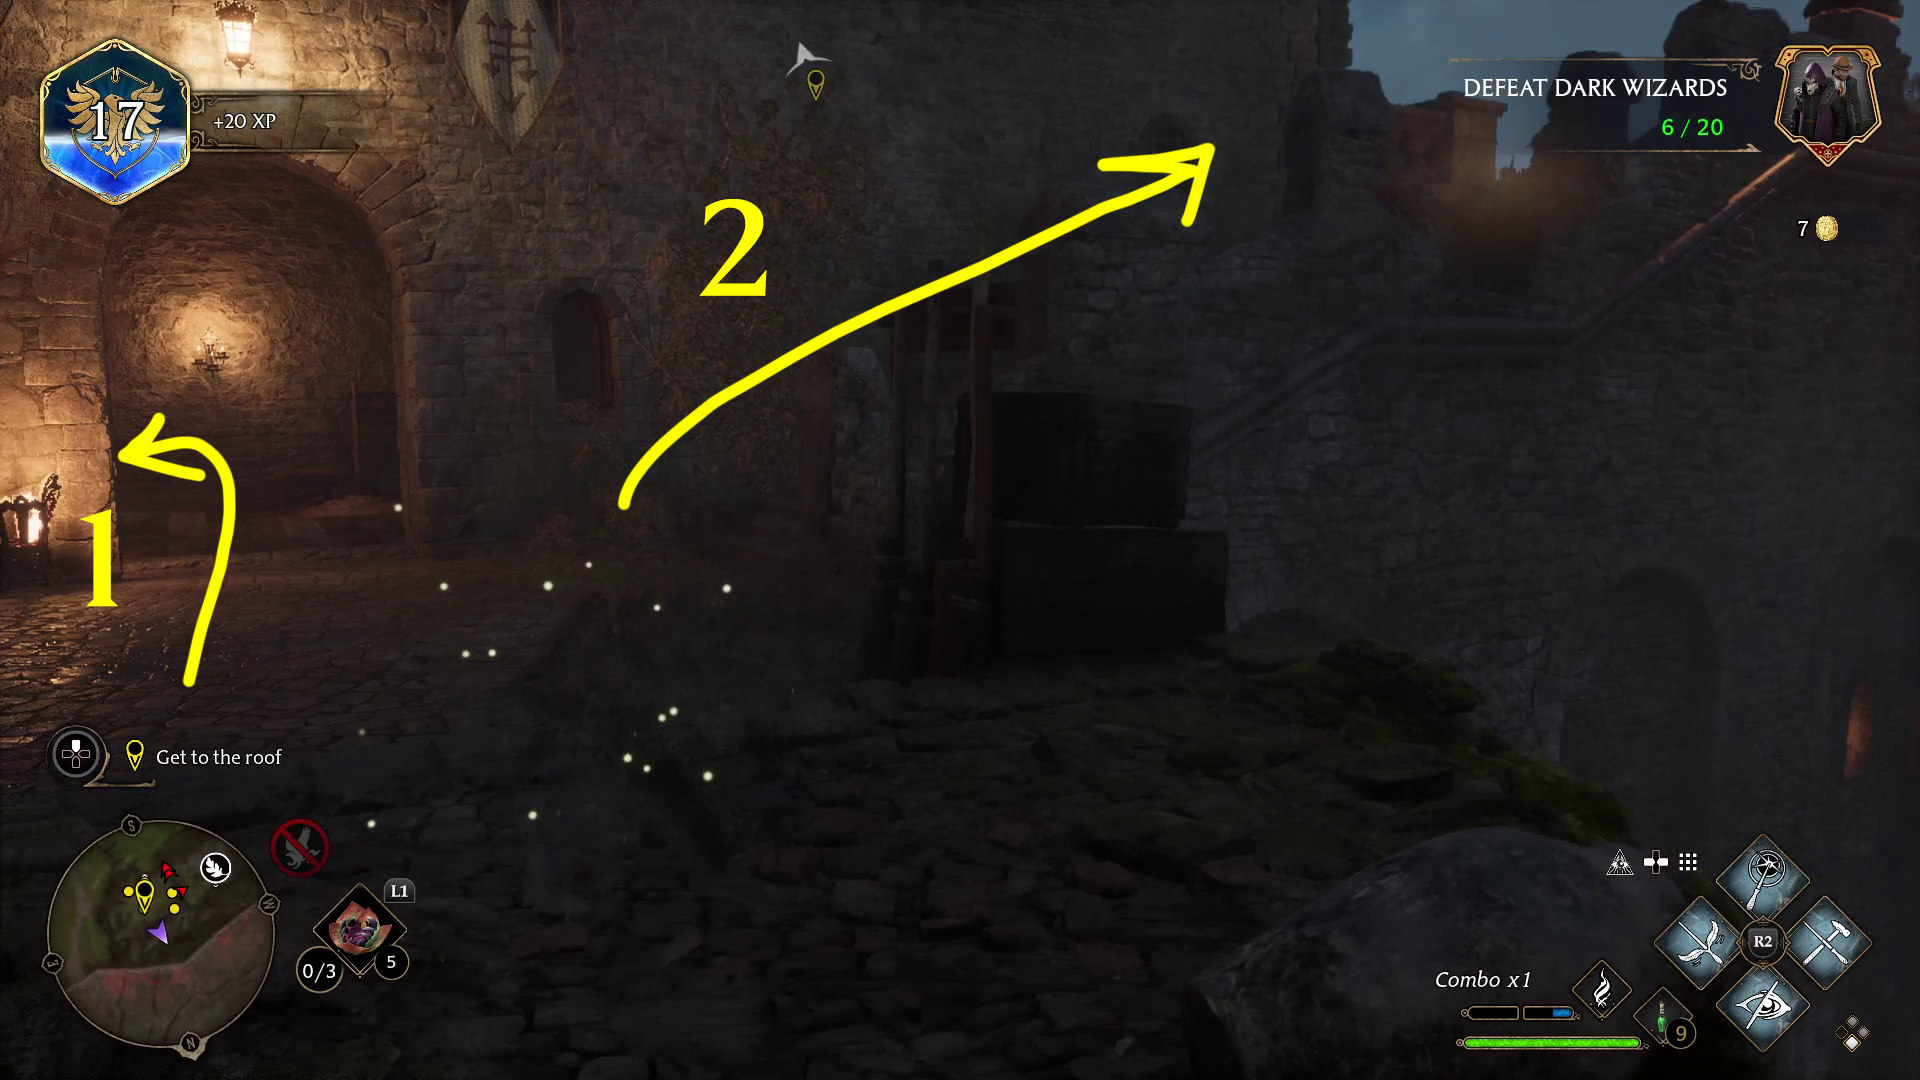
Immediately cast Disillusionment after climbing from the crate to the battlements, then sneak up on the enemy that walks to the edge of the battlements and cast Petrificus Totalus on them. Go into the room they just came out of and cast Revelio to find some loot (1.1), then go up the stairs (1.2). Turn left at the top of the stairs, and sneak up on the nearest poacher and Petrify them. Then continue southeast towards the other two poachers, but be ready — a Poacher Stalker will land near you, so quickly sneak back the way you came, then Basic Cast the battlement in the corner to distract them (2). Then you can safely sneak up and Petrify all three foes.
12
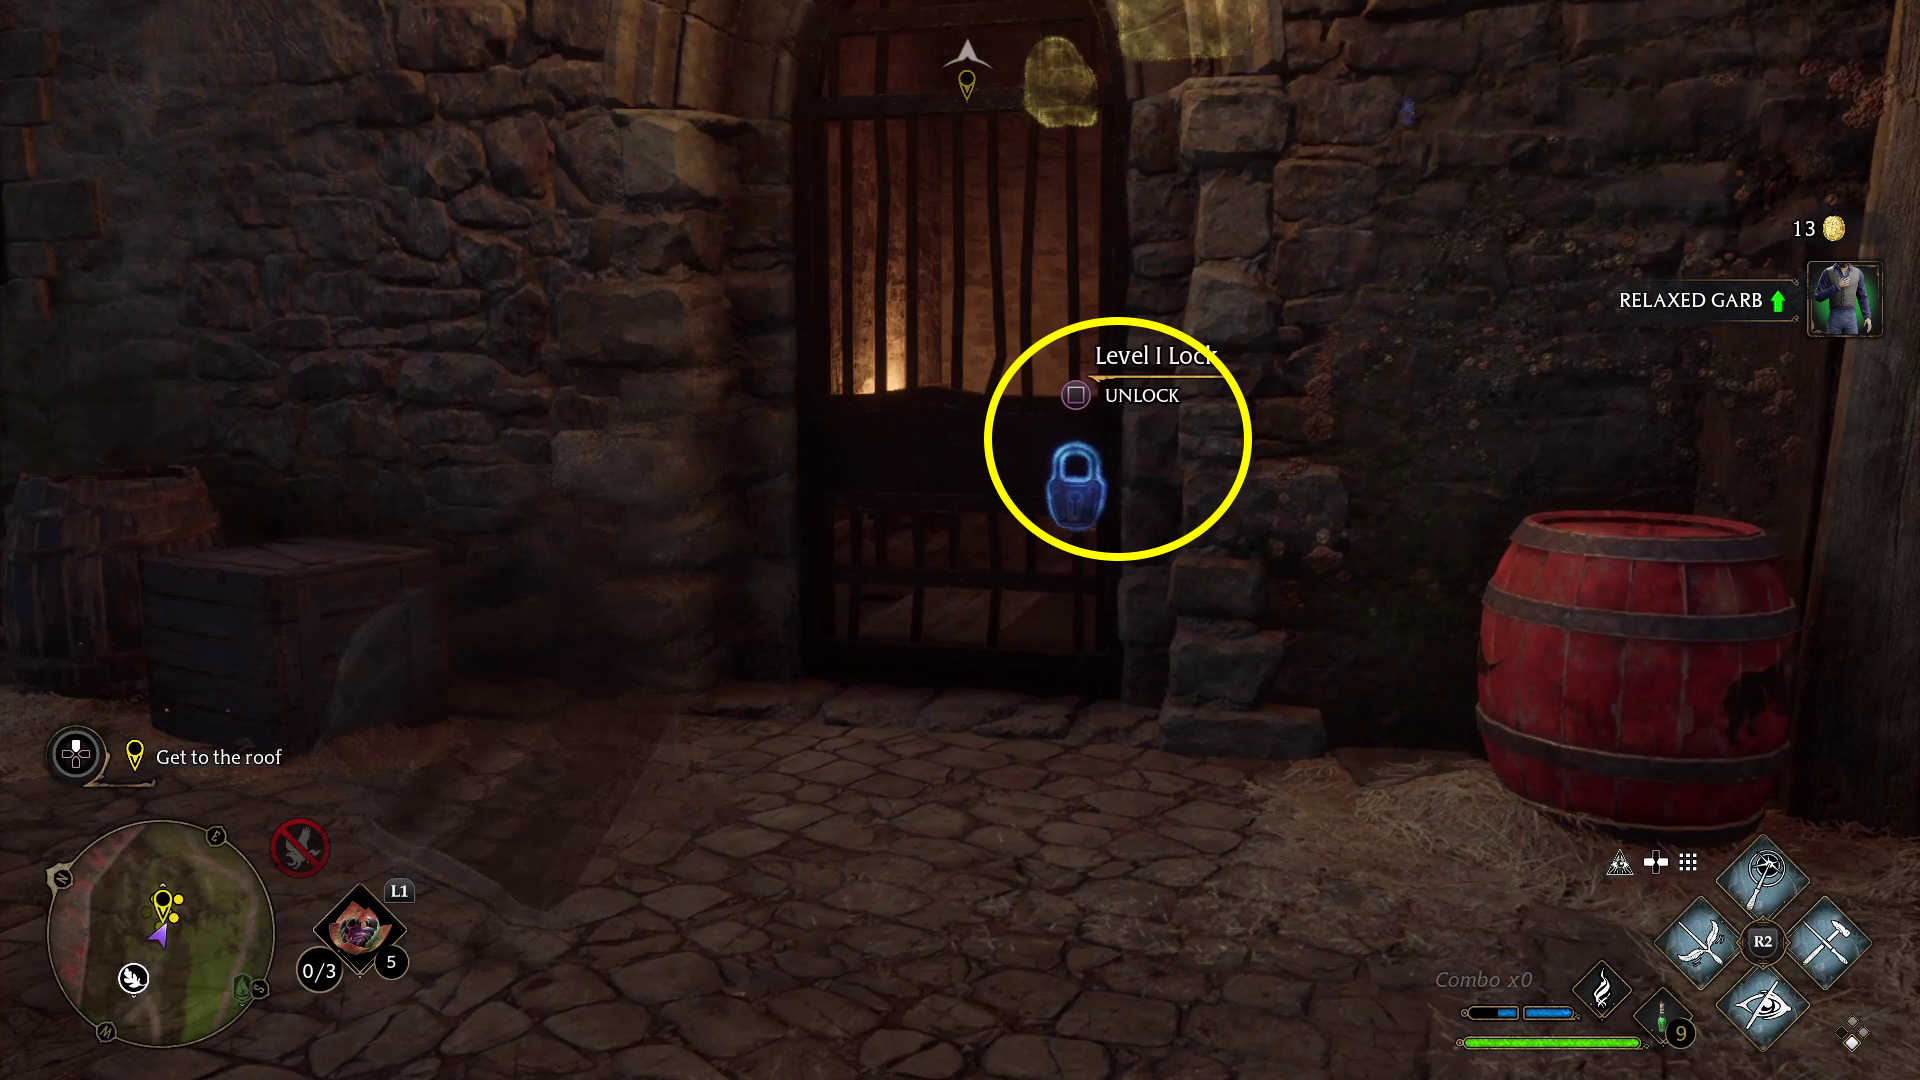
If you are detected, quickly use your Ancient Magic Throw on the Stalker (try to hit them with the red barrel, as it should one-shot them), then use Depulso to push the other enemies off the battlements. That done, you can Alohomora your way through the door on the wall (1) near where the Stalker landed. Go left into the next room and loot the bag in the corner, then go back south and climb up the low wall (2).
12
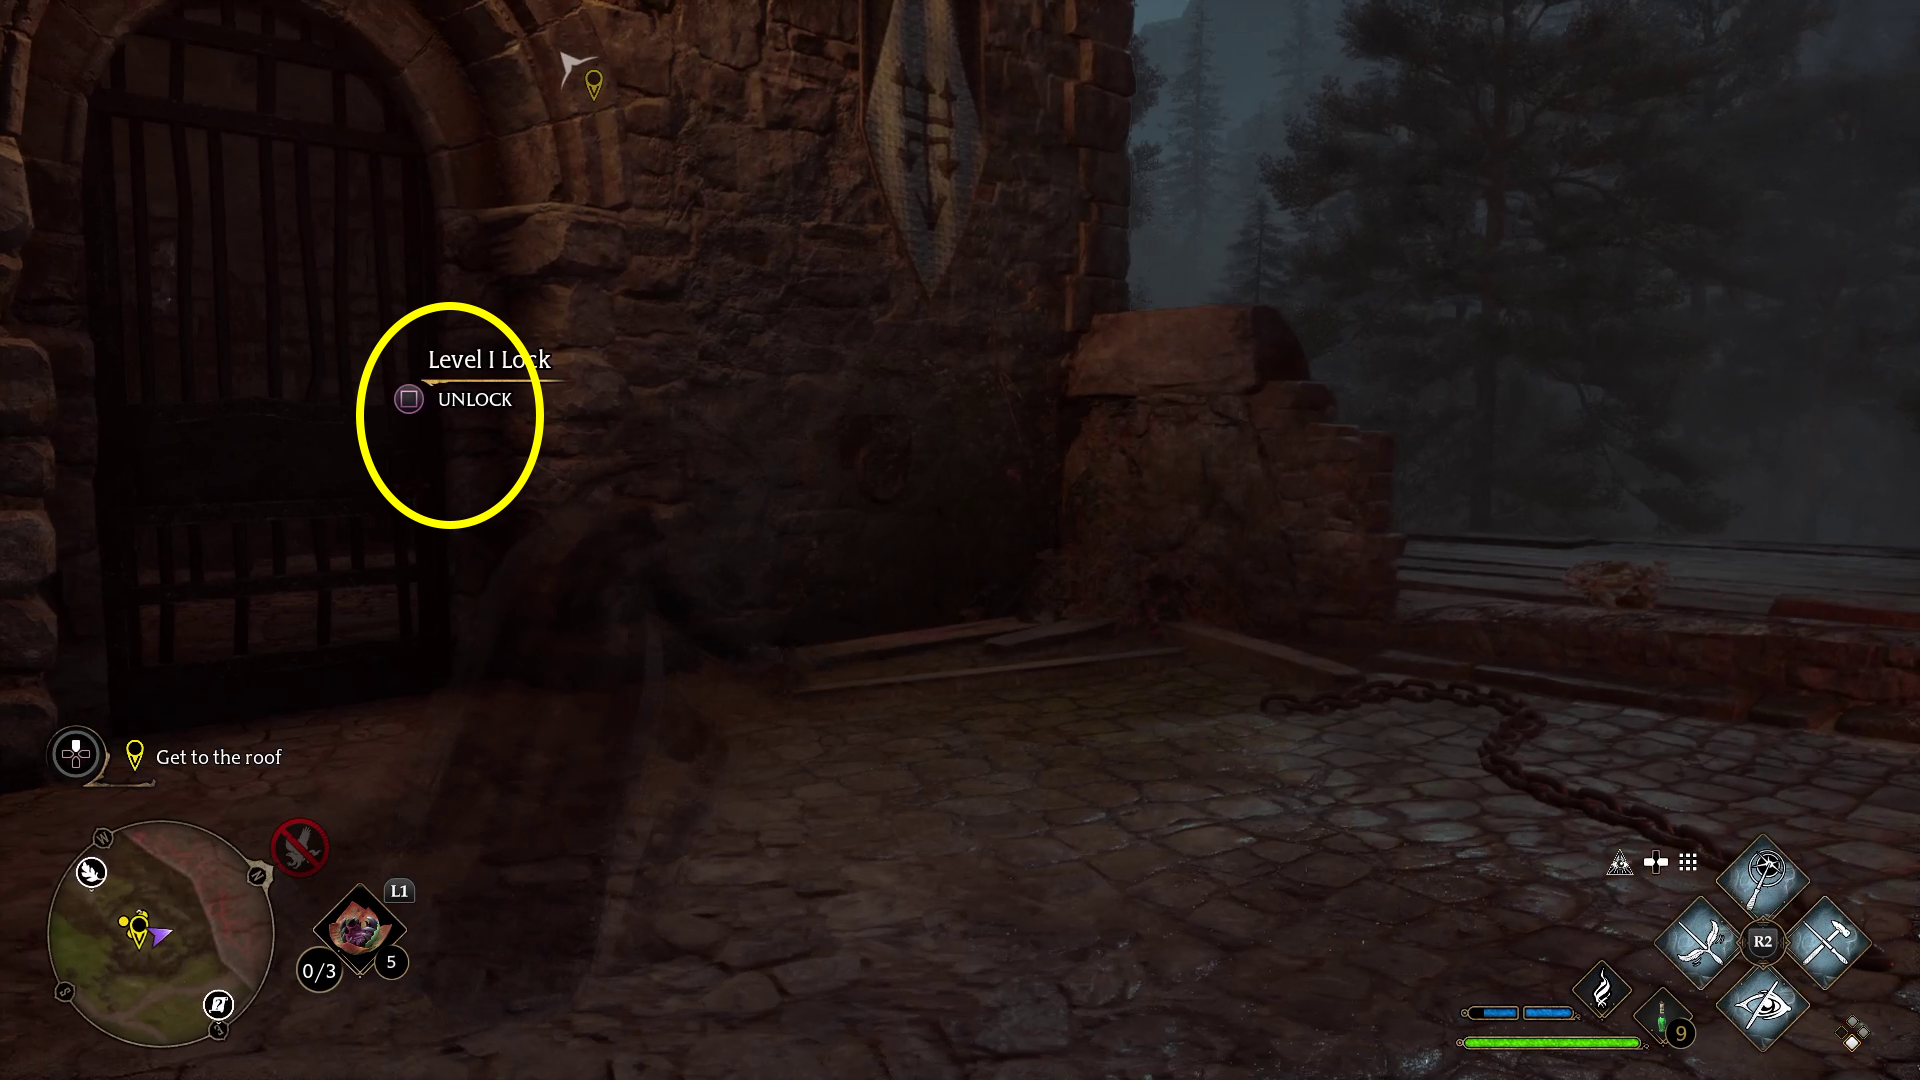
Turn left and continue up the stairs — if you have Alohomora level II, you can unlock a door on the left, otherwise just keep going and take the next left. Cast Disillusionment if you aren’t invisible yet, as more enemies will appear near the top of the stairs, which is the way forward (1). When they do, cast Depulso to fling them off the castle wall. After the first enemy, two more will show up shortly afterwards, so be ready. Once you’ve dealt with them, unlock the door near the top of the stairs and head through (2).
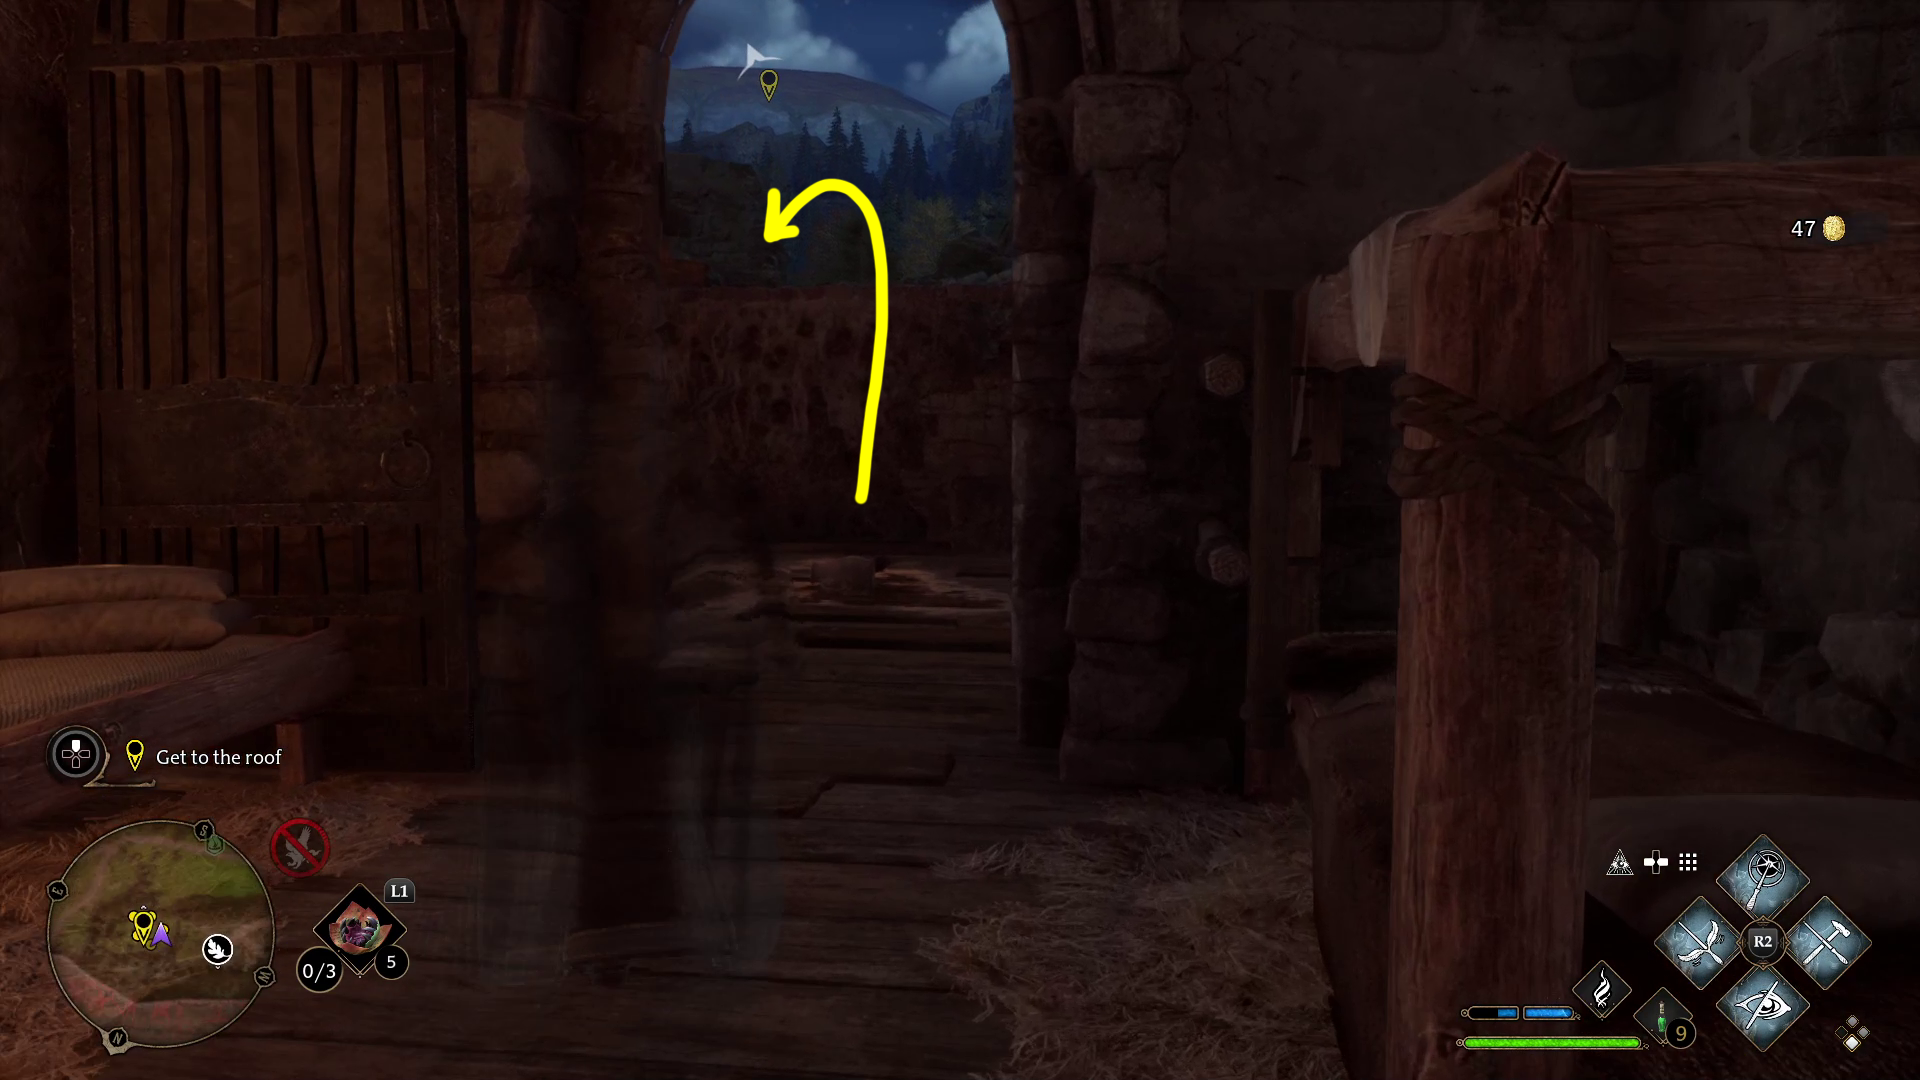
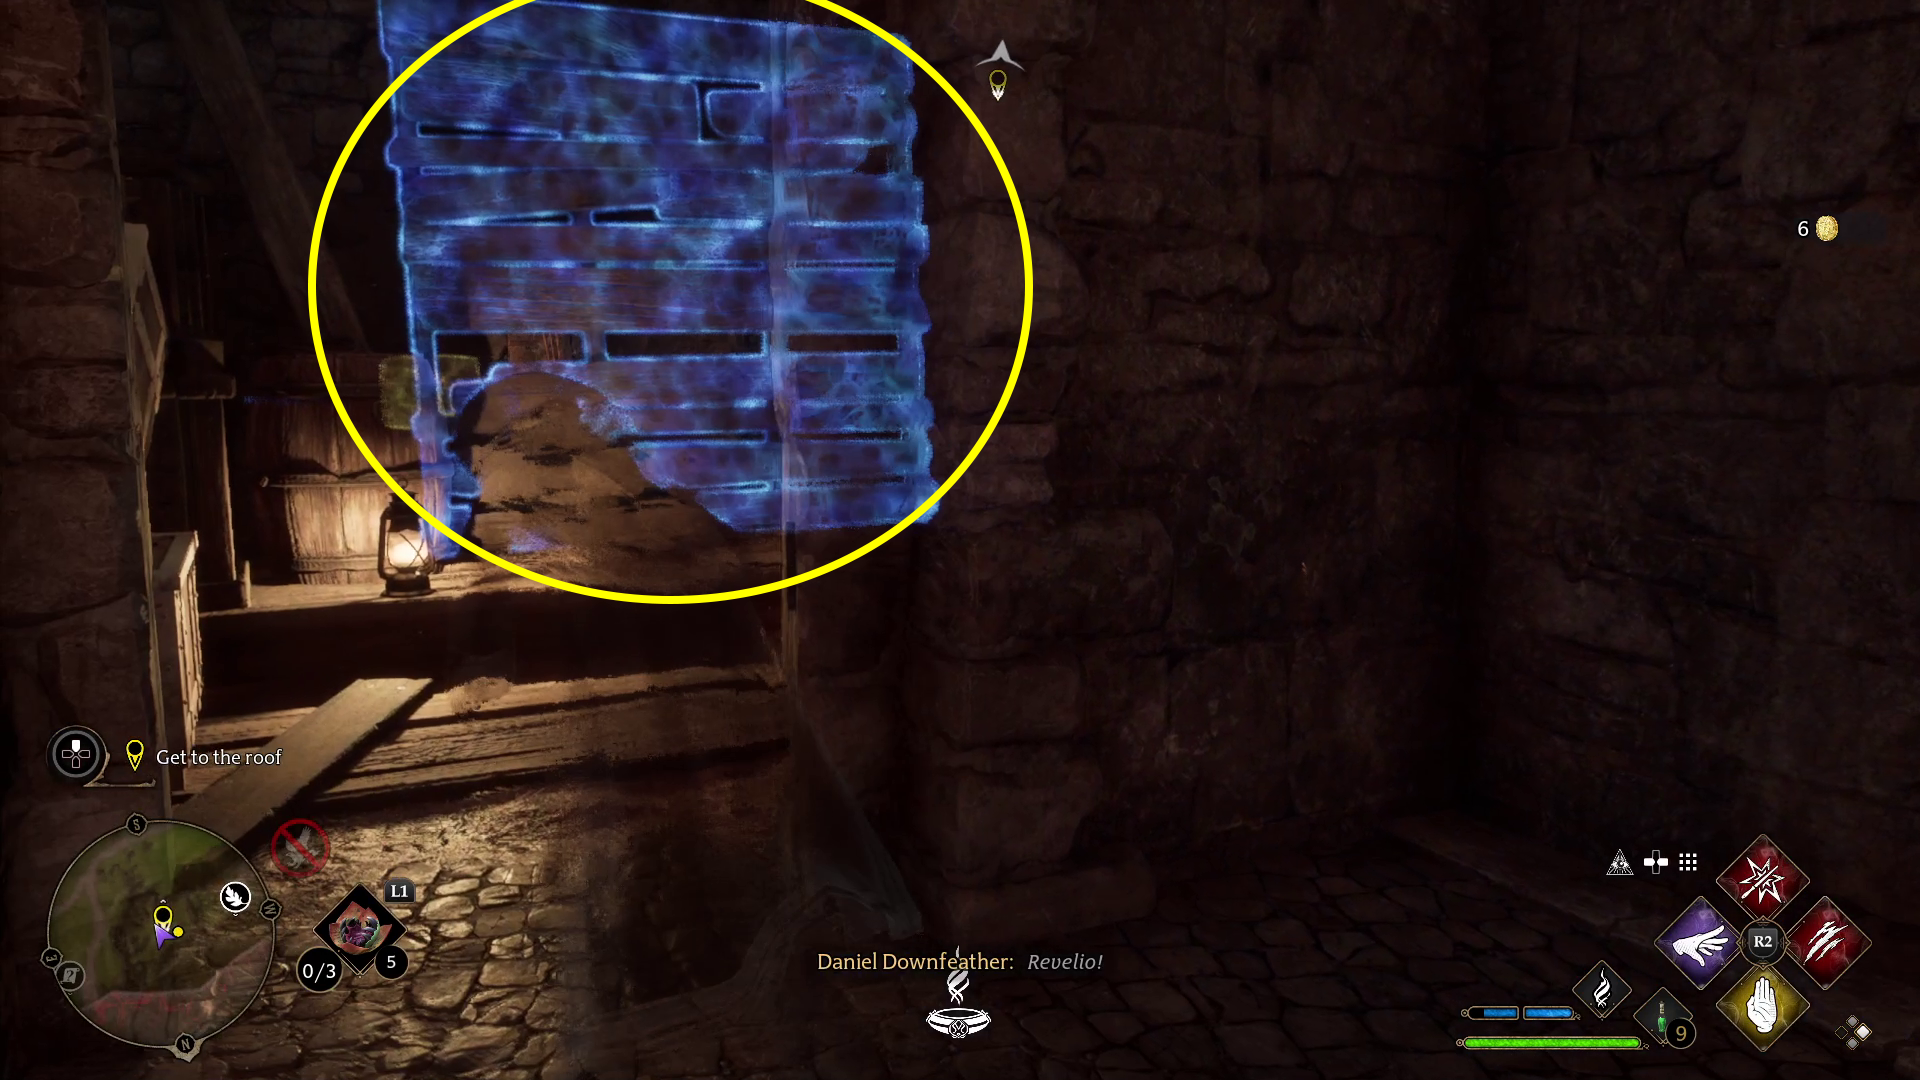
Once inside, go through the first door on the right and use the Nab-Sack to rescue all the beasts in the room, then cast Revelio and pick up the nearby coins and note. Leave the room that held the beasts and turn right to continue south. Near the next set of stairs cast Revelio again and look south to see a sack, then go up the stairs (1) and continue forward. You’ll come to a door on your right — go inside the cell and grab the coins, then leave the room, turn right, and take the next right as well to find a wall you can destroy with Depulso (2).
2
Head out onto the wooden planks into the small room with the note and the two chests, then go back the way you came and continue north up the small set of stairs. Turn left, go up more stairs, and continue out onto the roof, where a cutscene will play.
Follow Natty on Highwing
When the cutscene ends, you’ll be on Highwing the Hippogriff. The flight controls are the same as a broom, with the left stick controlling left/right, and the right stick making you fly higher/lower. Hold to fly faster and keep up with Natty, and enjoy the flight towards Hogwarts! When you land, you’ll speak with Natty, and then the quest will end.
You now have access to Mounts. Like your broom, you can access your mount by holding the Tool Wheel button (). With it open, pressing / will cause you to release and hop on your mount.
If you’ve already completed Astronomy Class, then the next main story mission is Back on the Path!
Unabashed FromSoftware fanboy still learning to take his time with games (and everything else, really). The time he doesn't spend on games is spent on music, books, or occasionally going outside.


