Feldcroft Battle Arena is one of the three Battle Arenas in Hogwarts Legacy, where you get a chance to put your skills to the test! (The third arena, The Dark Arts Battle Arena is a DLC content). This particular arena will pit you against Trolls, Goblins, Spiders, and Mongrels; this guide will cover where to find the arena, how to unlock it, and offer a full walkthrough of all of its Rounds along with some tips and strategies for the opponents.
Note: The walkthrough below is designed for the Hard Difficulty. We intend to help you conquer the arena on the hardest of the difficulties, but not all of the warnings and tips will matter as much on the Normal or Easy Difficulty, where some of our strategic suggestions might end up being deadly on their own.
What Are Battle Arenas?
You might not need a strict definition here if you have played RPGs before: Hogwarts Legacy’s battle arenas pit young Witches and Wizards against multiple rounds of enemies, who tend to get tougher each round, to test out their skill and mettle. To complete the arena you need to remain the last combatant standing. This means you will need to eliminate each enemy and survive until the end!
Battle Arena Rewards
Completing two regular Battle Arenas (Feldcroft Battle Arena and the North Ford Bog Battle Arena) will unlock the Rise to the Challenges achievement. The third arena, The Dark Arts Battle Arena, comes as a pre-order DLC bonus, or it can be purchased as a part of the Dark Arts Pack — completing it is not required for the achievement.
Participating in the Battle Arenas gets you a good amount of XP (in fact, you can just keep completing them over and over to farm XP), as well as legendary cosmetic items.
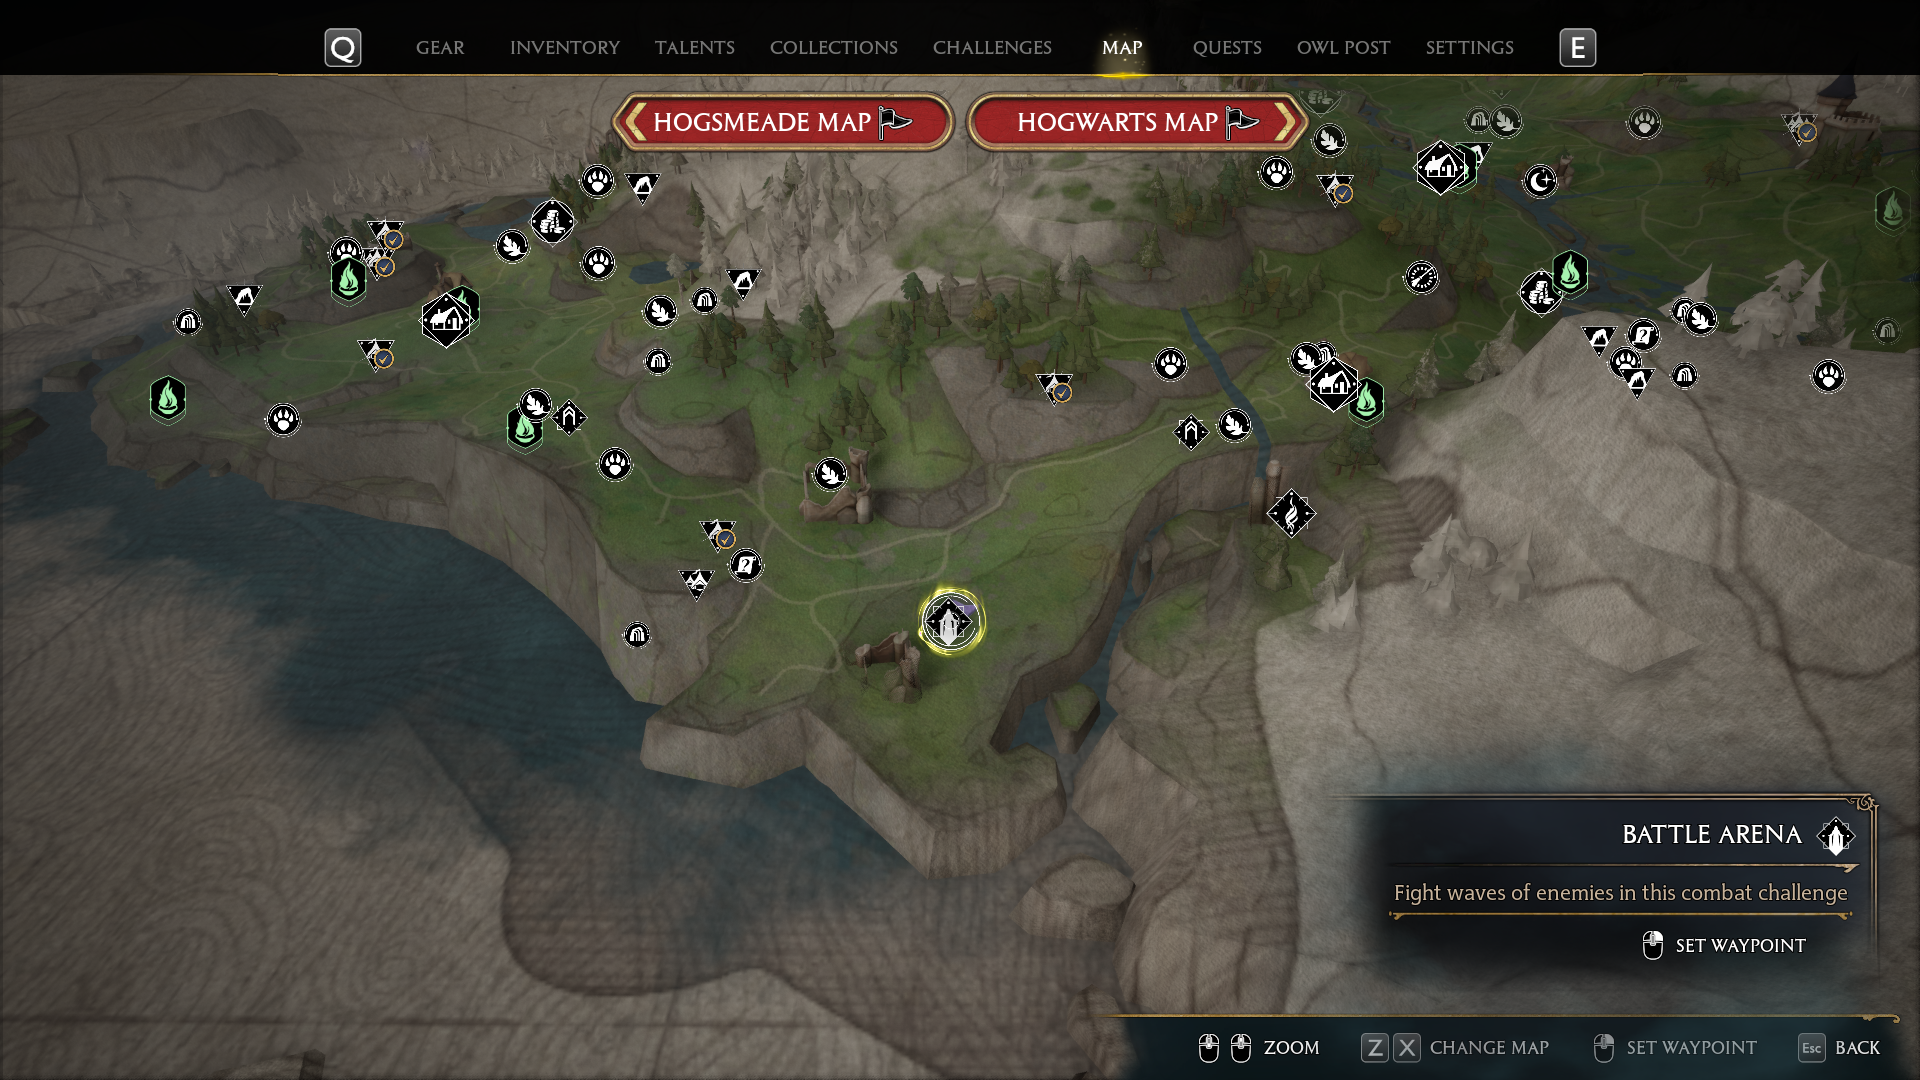
Feldcroft Battle Arena is located between Irondale and Feldcroft: in the southwest of Irondale or southeast of Feldcroft, within the larger Feldcroft Region — see our map image below!
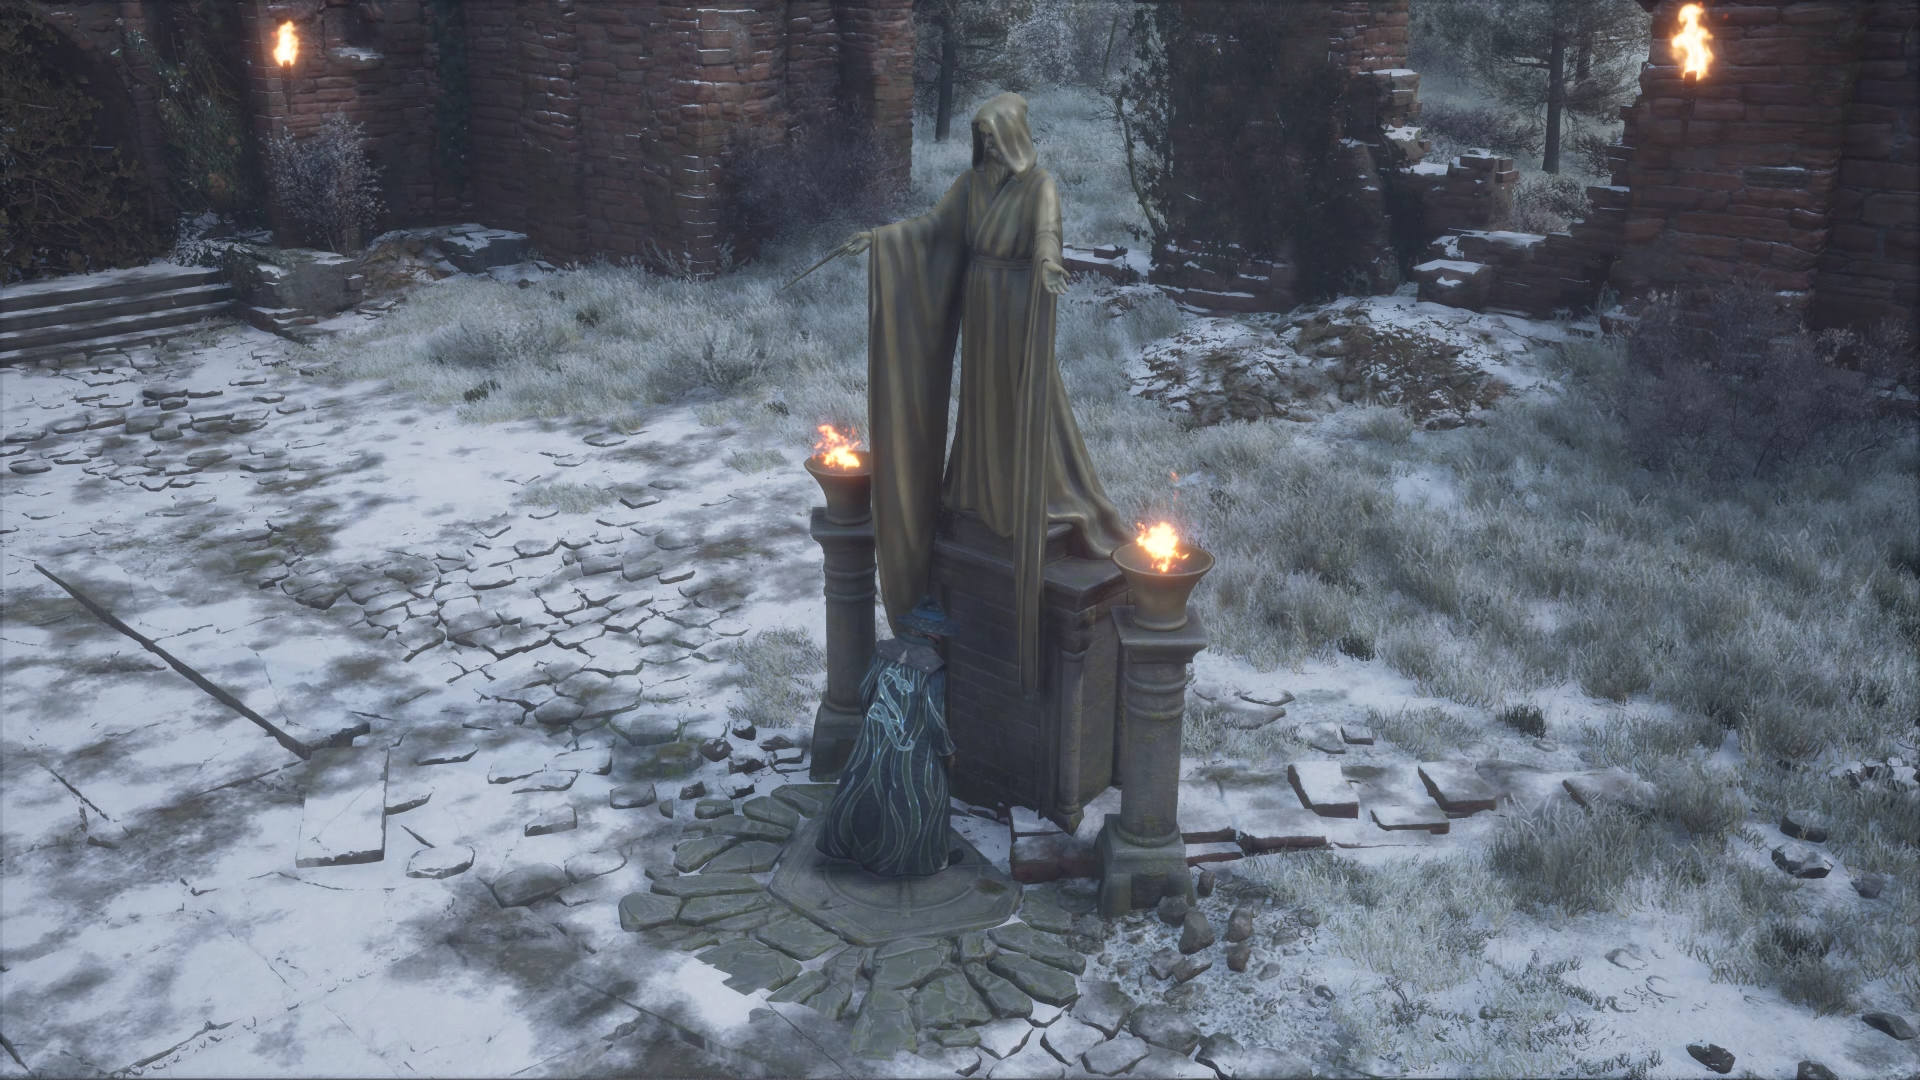
Felcroft Battle Arena Map LocationFeldcroft Battle Arena Entrance through the Statue
How to Unlock the Feldcroft Battle Arena
The Feldcroft Battle Arena is unlocked after you complete the quest E-Vase-Ive Manouver. The quest can be picked up in Irondale, and will feature a brief puzzle that serves as the key to the arena itself. For a complete in-depth guide on how to complete the quest, check out our dedicated E-Vase-Ive Maneouver walkthrough!
Once you complete the puzzle, the statue in the middle of the ruins will serve as an entry point to the Feldcroft Battle Arena.
Feldcroft Battle Arena Walkthrough
Prepare yourself; the Feldcroft Battle Arena is designed to test your mastery, ingenuity, and resilience! It is comprised of 5 rounds, getting progressively tougher each round. In this part of the guide, we will cover each round and point out a few tips and tricks on how to deal with each specific enemy type. We will also list the number of enemies and enemy types that each round unleashes upon you.
Round I
Round I will be the easiest. You will face a single Armored Troll during this round, with the arena being filled with various boxes, rocks, explosive barrels, and anvils that can be used as projectiles against the Troll. You may choose to use all of the available projectiles with your Ancient Magic Throw in the first round, or you may save some of these for the following rounds!
Trolls are mighty and fierce opponents — so, we will demonstrate 4 different strategies that can be used to reduce the difficulty of the fight!
Round I Tips and Tricks
Troll crashes into the wall and gets weakenedBoulder Redirected with Protego and Ancient Magic ThrowImperio Used on Troll to render him unable to moveFlipendo used on Troll to weaken and disable him
As shown in the clips above, there are multiple strategies that can be used to weaken a Troll and counter with massive amounts of damage:
You can use Protego to counter an overhead swing, followed up by Flipendo to fling the Armored Troll’s bat into his face and massively weaken him.
You can use Protego to block a boulder thrown by the Troll, followed up by a quick Ancient Magic Throw to damage the Troll and severely weaken him.
You can avoid the Troll’s charge attack by rolling to his left side, causing him to crash into a wall. This will massively weaken the Troll and cause him to remain stunned.
Keep in mind, however, that you will fail to avoid his charge if you attempt to dodge to its right side! Dodging to its right will result in you being damaged by a shockwave from his charge attack.
You can use Imperio to pacify the Troll entirely and then attack him while he can’t move!
This will only work if the Troll is alone, however. If you use Imperio while there are other enemies nearby, the Troll will promptly attack them.
Round II
Round II starts picking up the pace, pitting you against 7 Dark Mongrels. At the very start of the round you will only see 1-2Dark Mongrels, however, the rest of them will spawn in immediately, causing you to become surrounded. This round requires fast reactions and proper use of Protego and Dodge!
Round II Tips and Tricks
Repeated Protego use against Dark Mongrels and Perfecto Protego unleashedDepulso used in the middle of a Dark Mongrel Lunge Attack in order to execute it
As shown in the clips above, you will become surrounded quite quickly in the second round:
The best option is to spam Protego, as you will be assaulted with Lunge Attacks from Dark Mongrels.
If you have the Protego Mastery Talent, a perfectly timed Protego will unleash a shockwave that damages and stuns all surrounding enemies!
You can use Confringo paired up with the Confringo Mastery talent to dispatch several Dark Mongrels quickly.
Use Depulso to instantly obliterate a Dark Mongrel if cast during its Lunge Attack!
Round III
Round III is arguably one of the tougher fights in the Feldcroft Battle Arena, as it forces you to fight 9 enemies, with 2 different enemy categories that prefer lunge attacks, and another that prefers ranged attacks. This round will pit you against 2 Thornback Scurriours, 1 Venomous Scurriour, 3 Loyalist Rangers, 2 Stoneback Dugbogs, and 1 Cottongrass Dugbog.
This combination of enemies is quite problematic as the Loyalist Rangers will be sitting on platforms and will attempt to snipe you at all times; at the same time, Spiders and Dugbogs will attempt various lunge attacks, combined with a burrow-strike attack from the Spiders and a stun-attack from the Dugbogs!
Round III Tips and Tricks
Confringo used on Thornback Scurriour to horrify it, followed up by explosion upon Basic AttackUsing Flipendo to Flip Dugbogs on their backs and weaken them significantlyLoyalist Ranger’s Crossbow Bolt redirected with Ancient Magic ThrowExecuting a burrowing Thornback Scurriour with FlipendoIncapacitating a Dugbog with Levioso during its Tongue Attack, then Executing it with Bombarda and Diffindo
As you may notice in the clips above, constantly moving around while dodging or counteracting enemy attacks will be essential in this fight:
Using Flipendo on a Spider that is about to burrow will make it explode.
Using Confringo or Incendio on a Spider that has low health can make it rattle and flee in terror! Additionally, killing a Spider on fire will cause it to explode.
Ancient Magic Throw can be used to redirect a Crossbow Bolt shot by a Loyalist Ranger back at them.
A Dugbog’s Tongue Attack can be interrupted by casting Levioso to hang it by its tongue in the air!
Round IV
Now the Arenastarts to truly test your mettle! This time you will face 7 enemies, 6 of which are on the weaker side, but the 7th will be quite hard to eliminate! You will face 3 Dark Mongrels, 3 Venomous Ambushers, and one mean and tough Fighter Troll.
This combination of enemies can be deadly if you have a habit of randomly spamming your movement keys, since Venomous Ambushers will use a specific attack that will block you within a cocoon which then requires a specific movement key to escape from. If you do not use the required movement key, you will leave yourself open to the various deadly attacks coming in from the Dark Mongrels and the Fighter Troll!
Round IV Tips and Tricks
Using Flipendo against a Venomous Ambusher to expose its weak undersideImperio being used on the Fighter Troll to destroy a Venomous AmbusherBoulder Thrown by the Fighter Troll redirected with Protego and Ancient Magic ThrowOverhead Strike blocked with Protego followed up by Flipendo to weaken the Fighter TrollFighter Troll crashes into a wall after the Player dodges to the Troll’s left sideAvada Kadavra used on the Fighter Troll as means of instant execution
Dealing with the Dark Mongrels quickly and executing at least one of the Venomous Ambushers with Ancient Magic as fast as possible will be the key to this round, especially since you want to leave the Fighter Troll for the last.
Alternatively, you can either use Imperio to turn the Fighter Troll into an ally, or Avada Kadavra to rid yourself of it from the very beginning of the round. (If you are a fan of the instant execution option, we discuss more of these deadly tactics in our Dark Arts Build guide.)
Dispatch enemies quickly! Remember that Depulso can be used to instantly kill Dark Mongrels as they use their Charge Attack on you.
Attempt to kill at least one enemy with Ancient Magic.
Using the right movement key when stuck in a Spider Cocoon will prevent you from taking massive damage from the other enemies!
Venomous Ambushers are extremely dangerous foes which will place a DoT effect on you if they manage to hit you, in addition to using their Cocoon!
One way to instantly counter them is by using spells like Levioso, Accio, Arresto Momentum, and Flipendo to launch them into the air and expose their weak underside. This will help you deal heavy damage against a Venomous Ambusher.
The final round is the toughest in the entire Feldcroft Battle Arena, pitting you against a massive 16 enemies, all of which are high-profile foes! This time, the round will get progressively harder with the number of foes increasing each time you pass a certain kill threshold.
This means that you will start the round with 7 enemies, until you dispatch some of them, and it will then increase to 10 enemies total, growing up to 16 enemies as you continue dispatching foes! During the fifth round, you will encounter 2 Armored Trolls, 5 Loyalist Warriors, 2 Loyalist Assassins, 3 Loyalist Sentinels, 2 Loyalist Commanders, and 2 Loyalist Rangers.
This combination of enemies is extremely deadly and might mess with a lot of your strategies — attempting to counter enemies like in the previous round will be a lot more difficult.
As a recommendation, you should use Edurus Potions with the Edurus Potion Potency Talent, combined with Maxima Potions and the Maxima Potion Potency Talent at the beginning of the fight to maximize the damage you deal! The Edurus Potion will allow you to ignore any form of damage, which will be a key to success in this scenario, as you will be flanked and outnumbered immediately as the round begins.
Round V Tips and Tricks
Goblins attack Troll controlled by Imperio while he attacks all nearby enemiesPlants used right before the start of the Last RoundUsing Bombarda to counter a Loyalist Sentinel’s Charged AttackUsing Descendo to Counter a Loyalist Commander’s Leap AttackUsing Avada Kadavra to eliminate both Trolls quicklyUsing Ancient Magic to Eliminate Loyalist Rangers
As shown in the clips above, there are certain spells that you can use to successfully counter your enemies:
You can use Arresto Momentum to completely block a Loyalist Assassin from doing their Dash Attack. You can’t use combo attacks on a Loyalist Assassinunless you apply Arresto Momentum on them first.
You can disable a Loyalist Commander with any Force Spell such as Accio, Depulso, Descendo, and Flipendo. You can use Descendo to deal massive amounts of damage to them when they use their Leap Attack.
Just as was mentioned before, you can use Ancient Magic Throw to redirect boulders thrown by Armored Trolls or Crossbow Bolts shot by Loyalist Rangers.
Use Ancient Magic whenever possible to instantly eliminate a Goblin.
UsingImperio on one of the Armored Trolls will force him to attack his allies.
There is a particular special interaction here where all Goblins will rush to attack the Troll cursed by Imperio. However, the other Trollwill ignore him completely and still choose to pursue you.
Using Curses will help you break all types of Shields more quickly, allowing you to deal with the issue of being flanked!
Use Combat Plants before the enemies have a chance to spawn, as this will greatly aid you at the beginning of the Round.
Using Crucio to spread the Cursed Status + Avada Kadavra early on will get rid of powerful enemies in an instant.
We discuss more of these deadly tactics in our Dark Arts Build guide.
Now that you have been empowered with the insider knowledge and the strategies for the Feldcroft Battle Arena, we hope it serves you as a place to hone your skills against deadly foes! (Or grind XP.) Let us know in the comment section below which round you had the most fun or the most difficulty with, and let us know about any other strategies you have discovered!
Share this article:
Nevermore
Hey there folks!
I am Nevermore, a passionate gamer that is here in the hopes that you will tag along on many adventures! Here to share my experience and any valuable knowledge that may make your day better.