After revealing the truth about the Map Chamber, you must now head to a mysterious tower to the north, where Percival Rackham has set up your first Trial, which you must complete in order to unleash the true power of your Ancient Magic.
Quest Type: Main Story
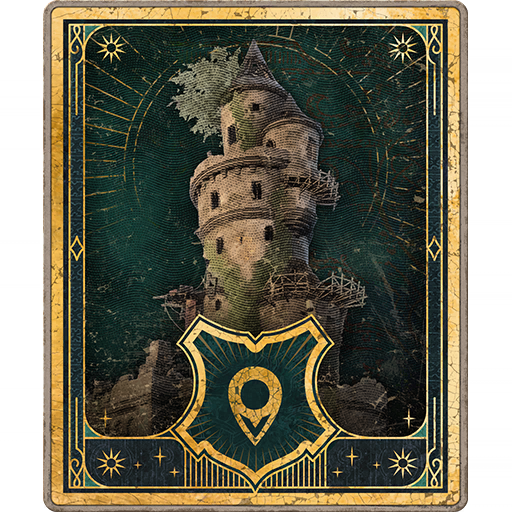
Location: San Bakar’s Tower, North Ford Bog, Highlands (map)
To begin the quest, you’ll need to travel north of Hogwarts, to one of the northernmost areas of the map. There, you’ll meet Professor Fig. Walk up and talk to him (/), and he’ll tell you the reason he’s waiting outside — it appears that goblins have taken over the area, and you’ll need to deal with them before heading in.
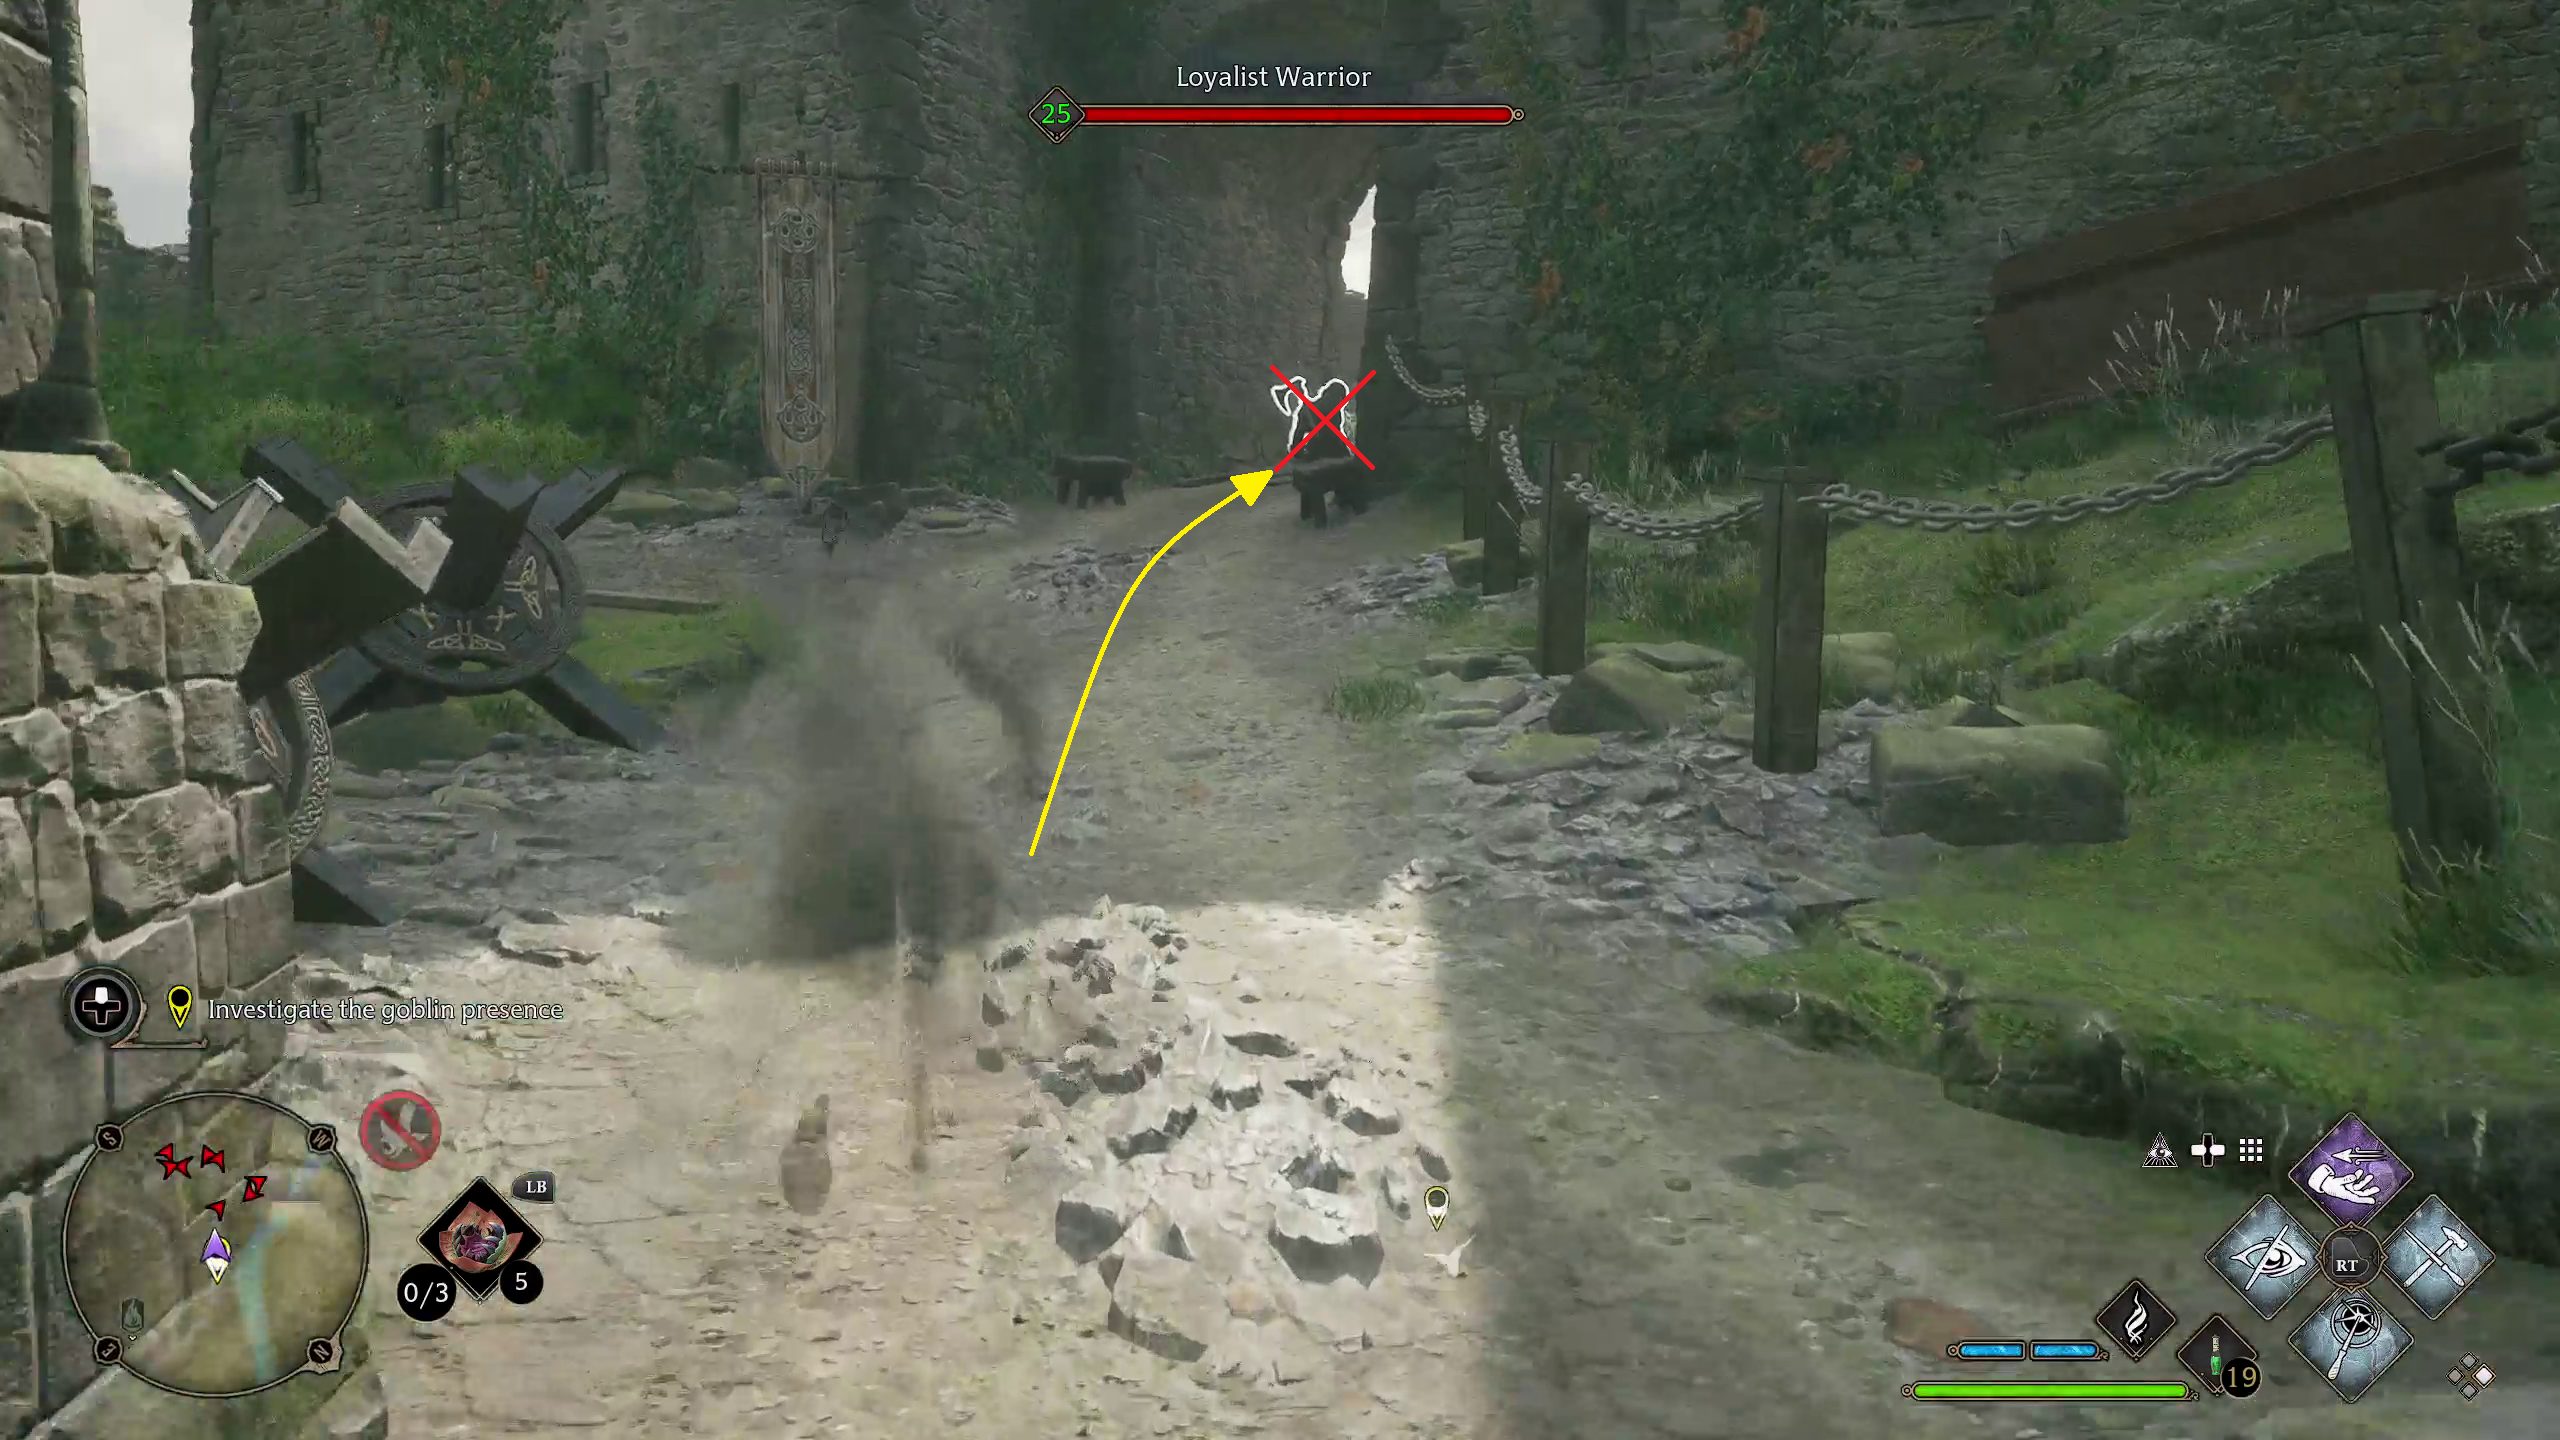
Investigate the Goblin Presence
He will suggest for you to use Disillusionment to sneak into the camp and take out as many goblins as you can before being spotted. This is a good strategy, as you can usually clear out most or all of the goblins without being spotted by sneaking up behind them until you get a prompt, and then casting Petrificus Totalus on them with / to take them out instantly.
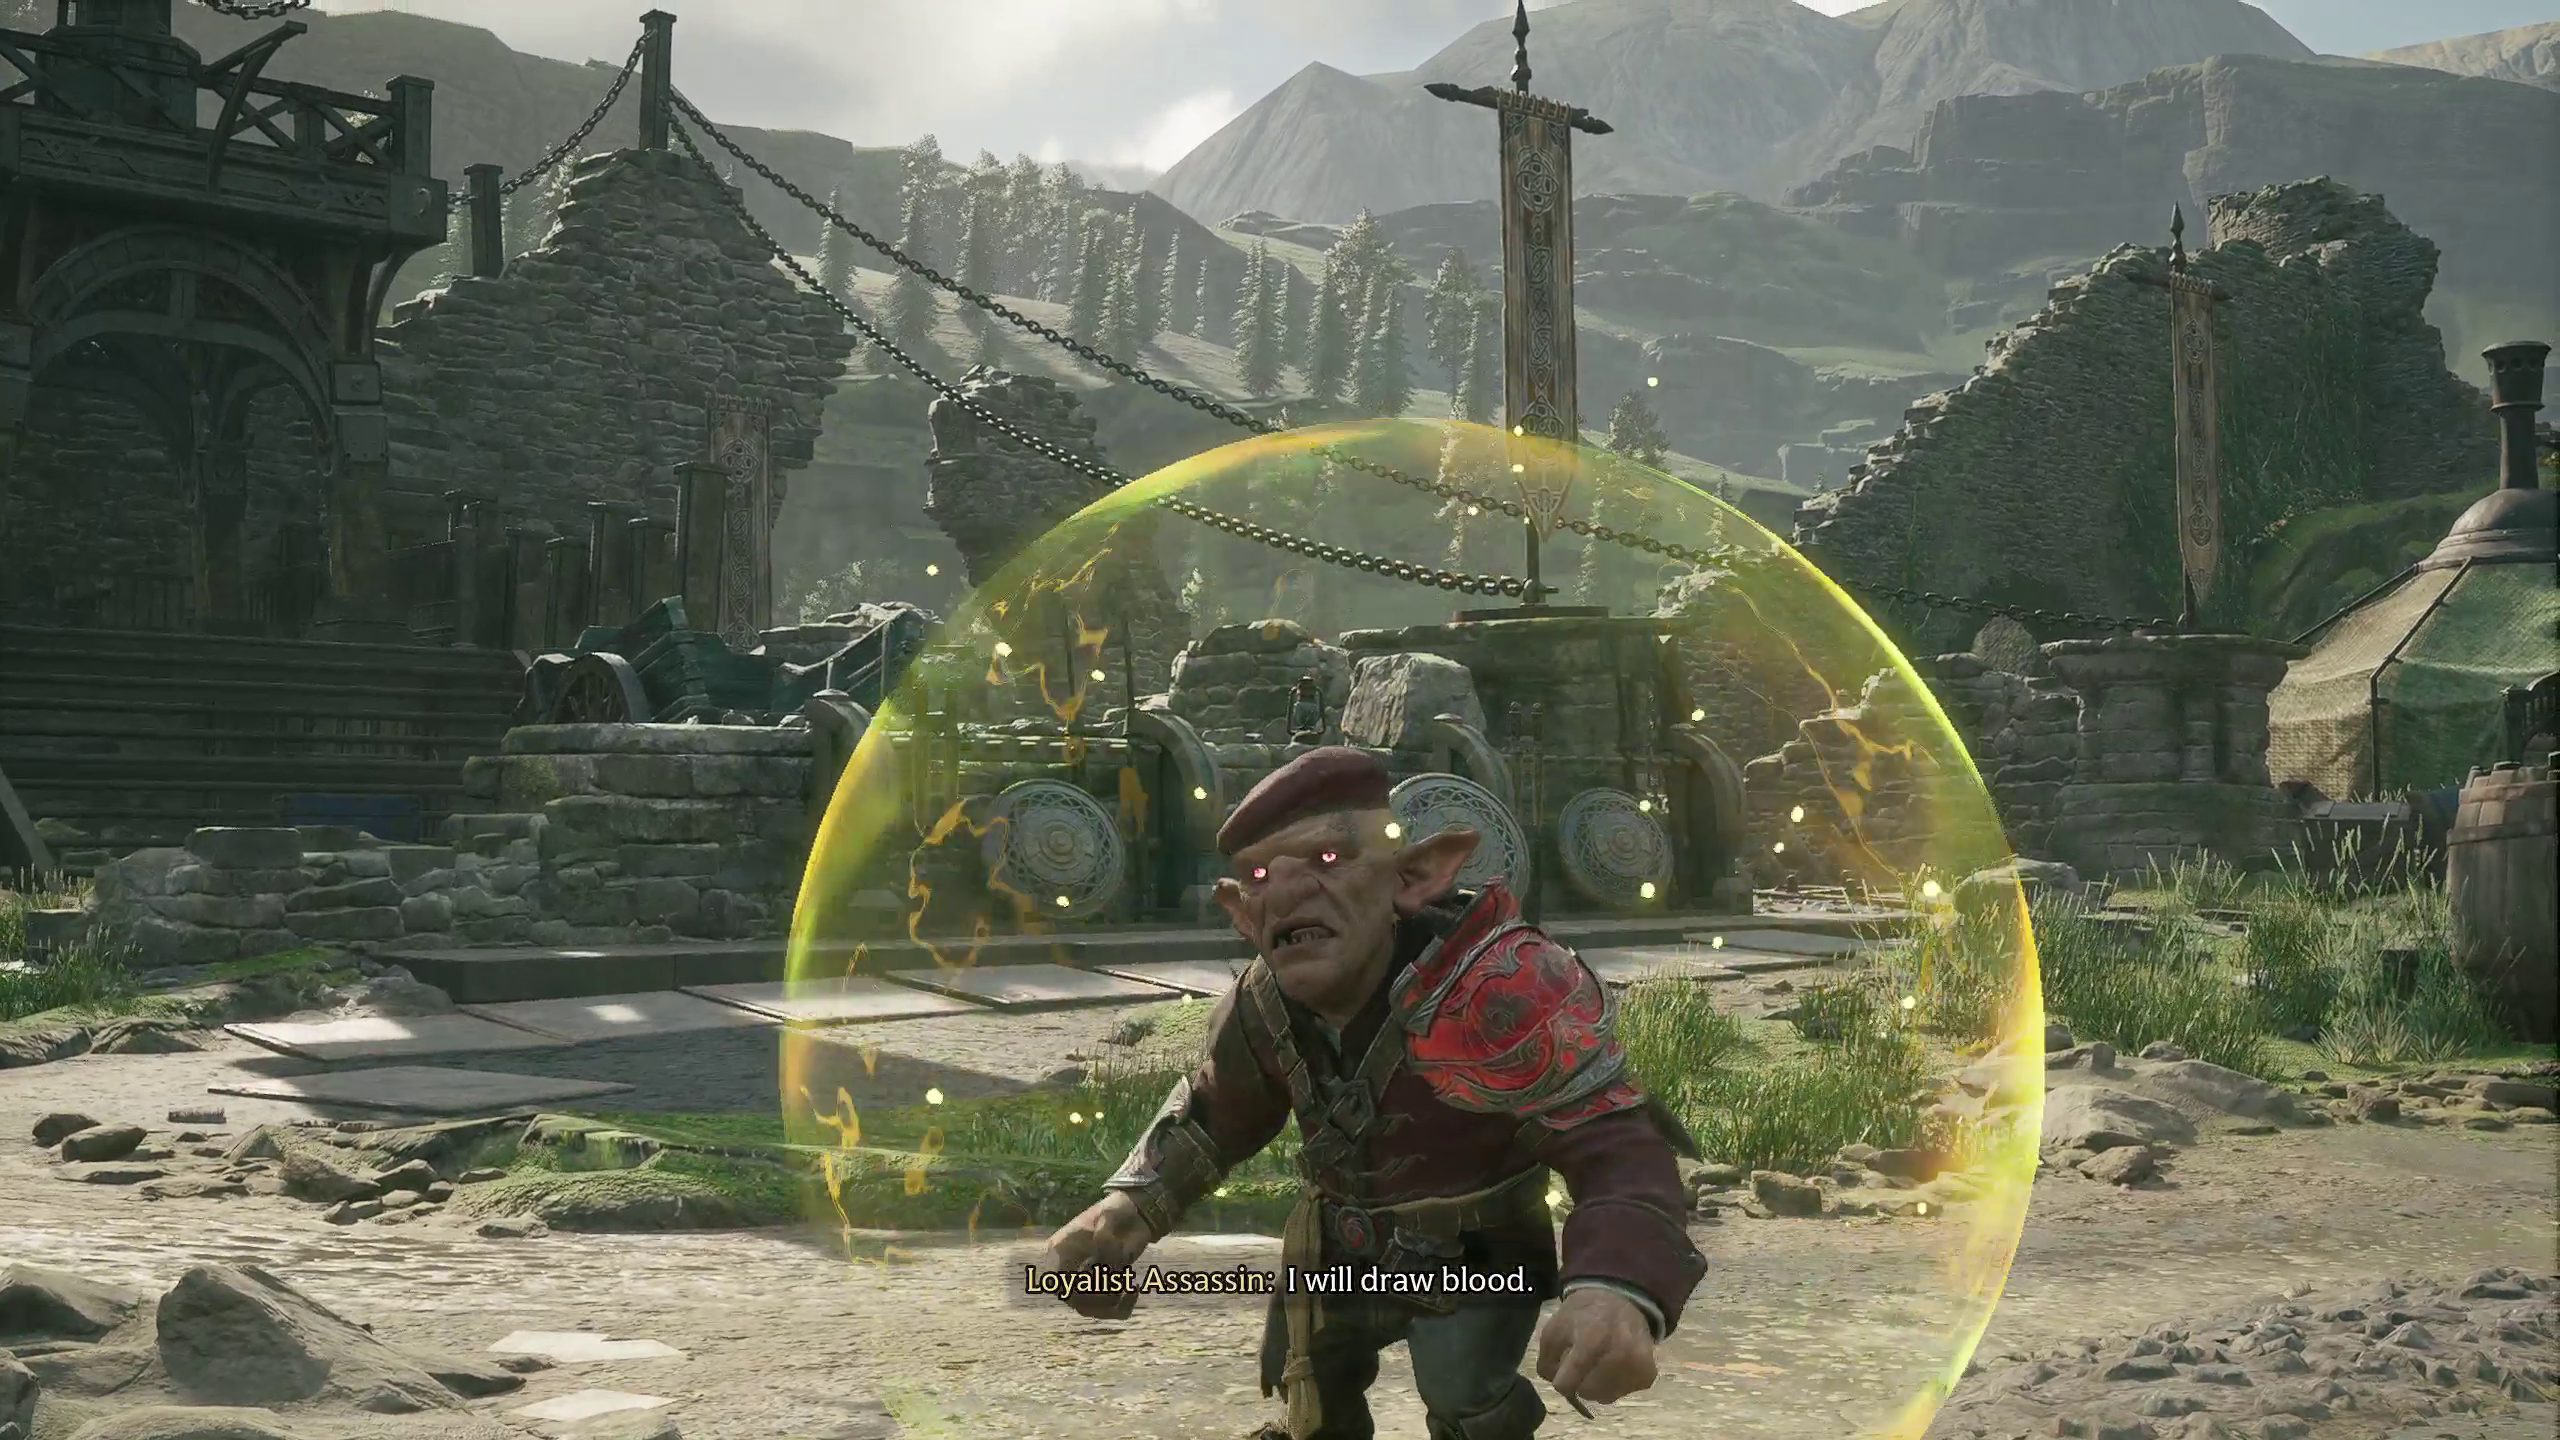
After you’ve dealt with the goblins in the courtyard, turn to the south and go to the green tent (1). Inside, there will be a note, which you can pick up in order to learn the reason for the goblins’ presence (2). Be ready, though: once you leave the tent again, you’ll be faced with a few Goblins to fight, including an assassin whose shield you’ll need to break with control spells (3) like Levioso or Glacius.
123
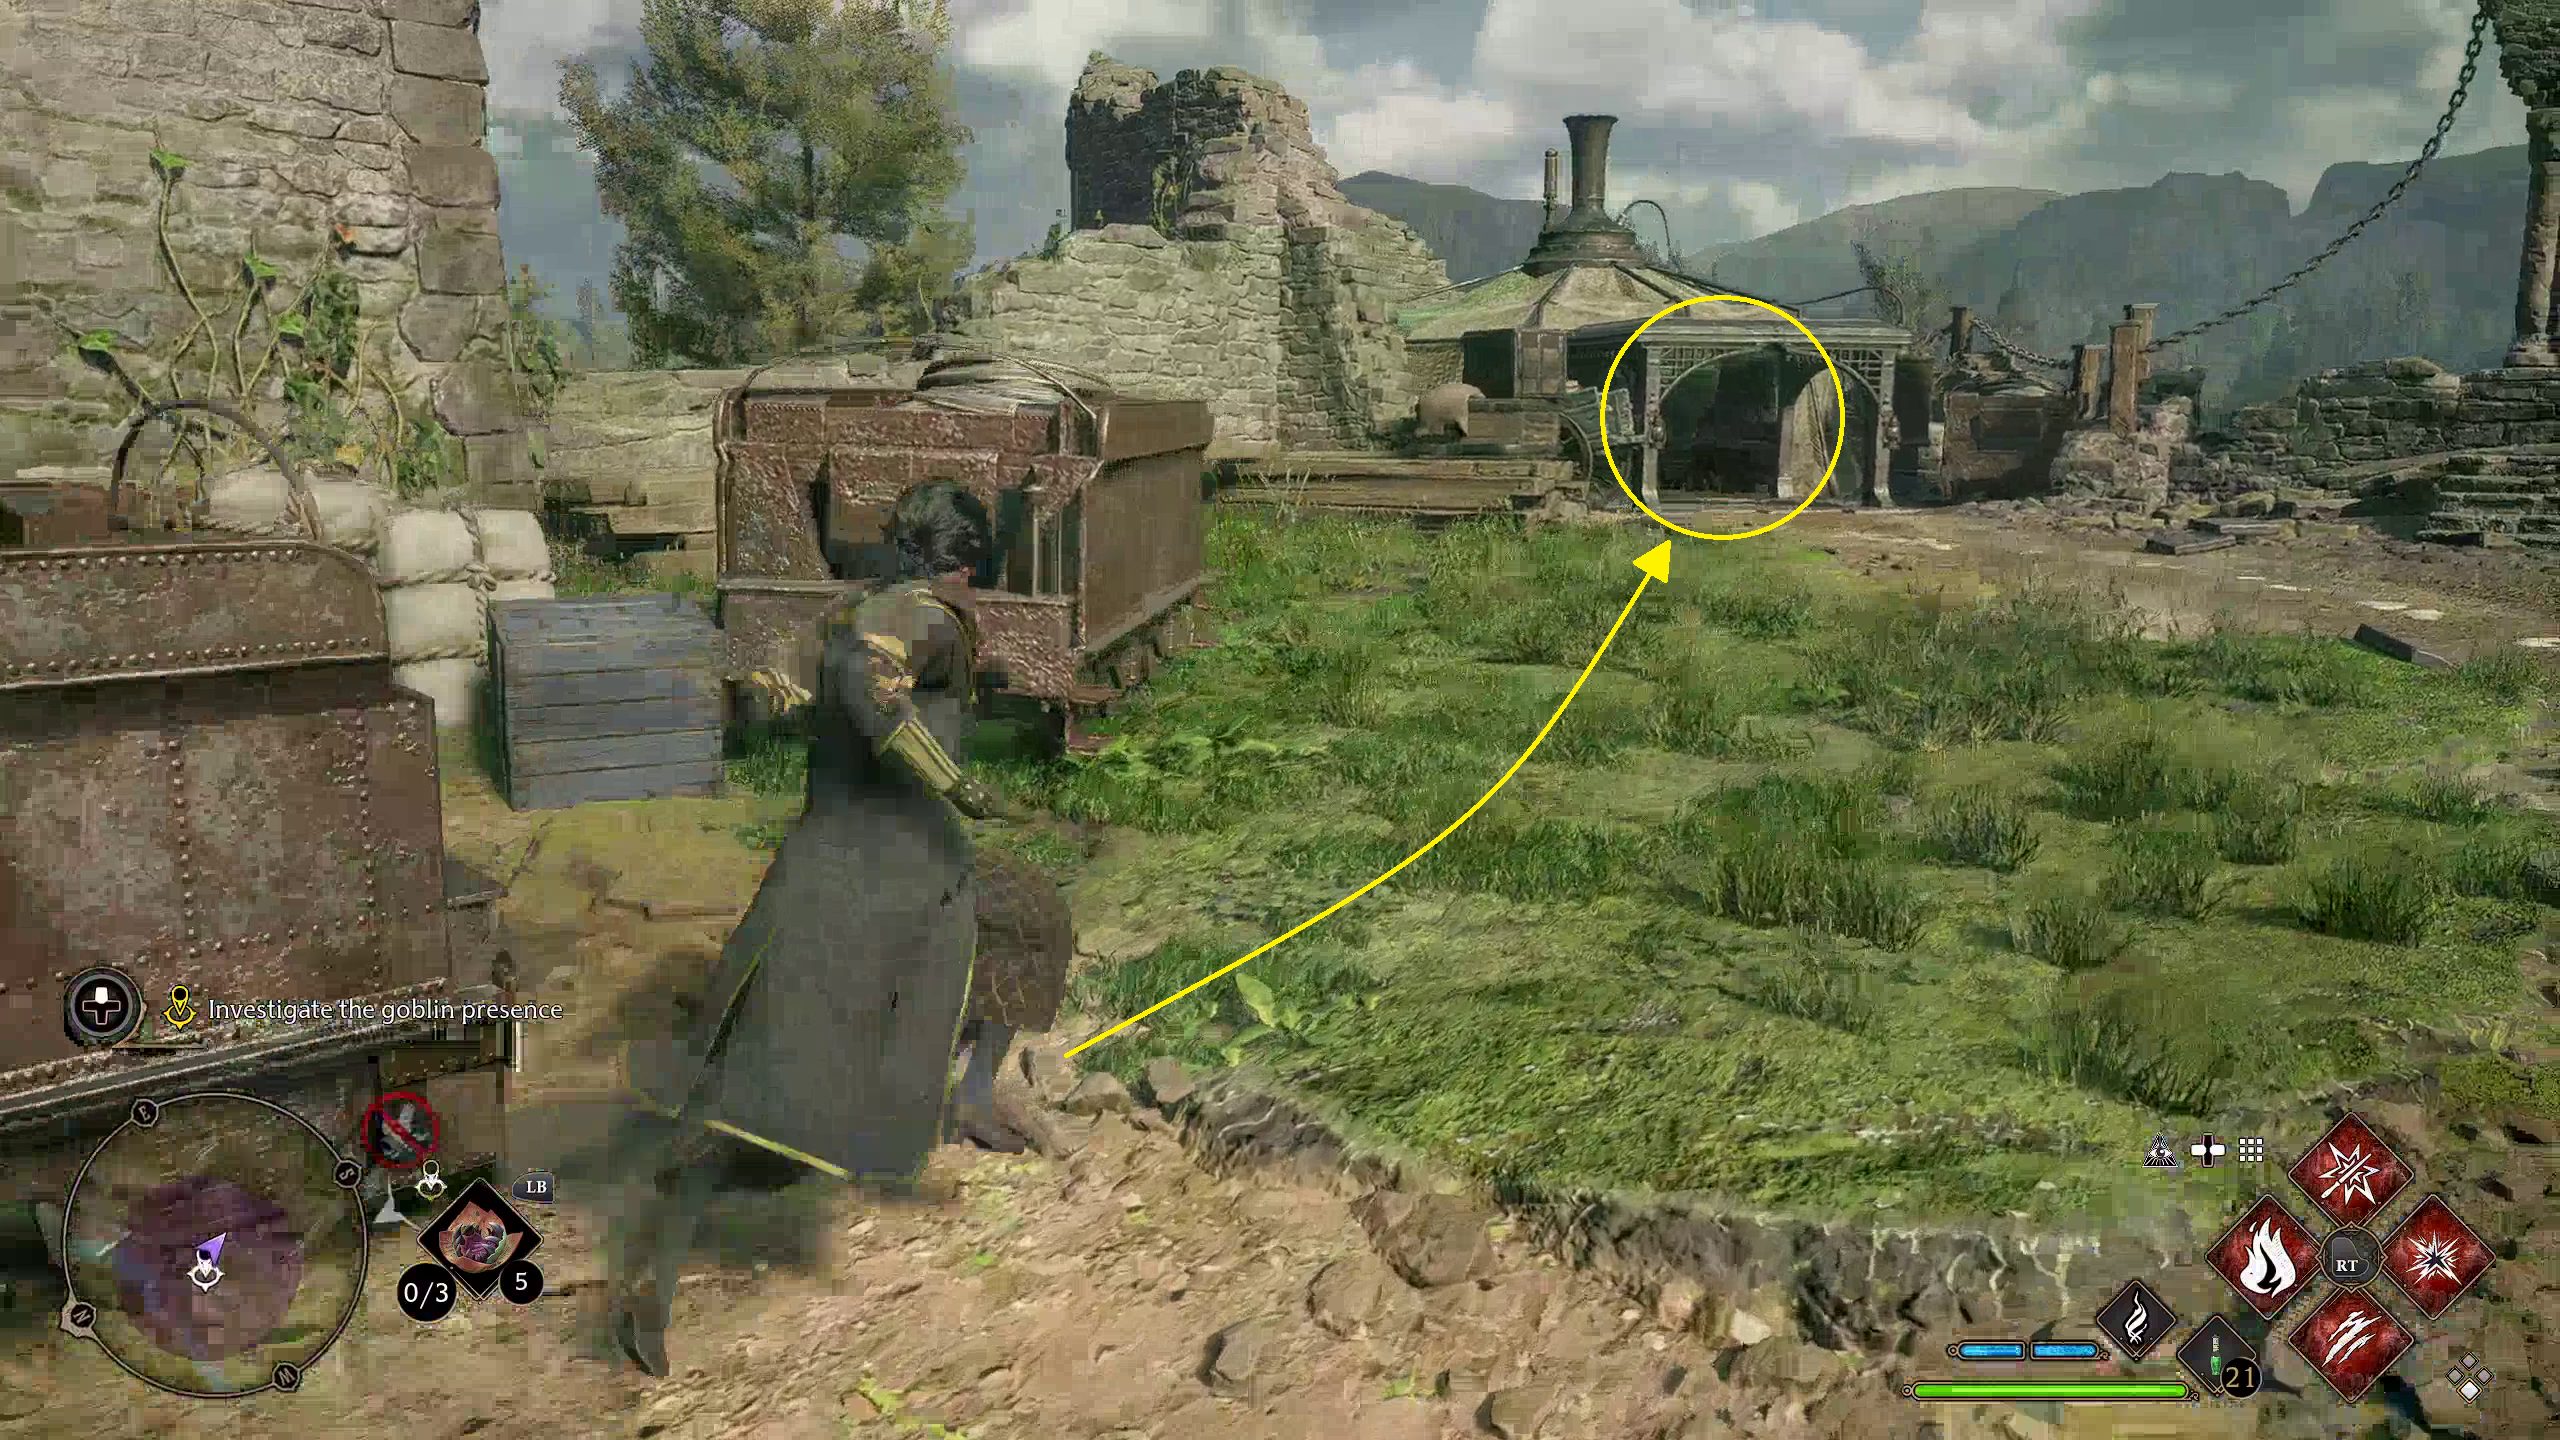
Search the Tower
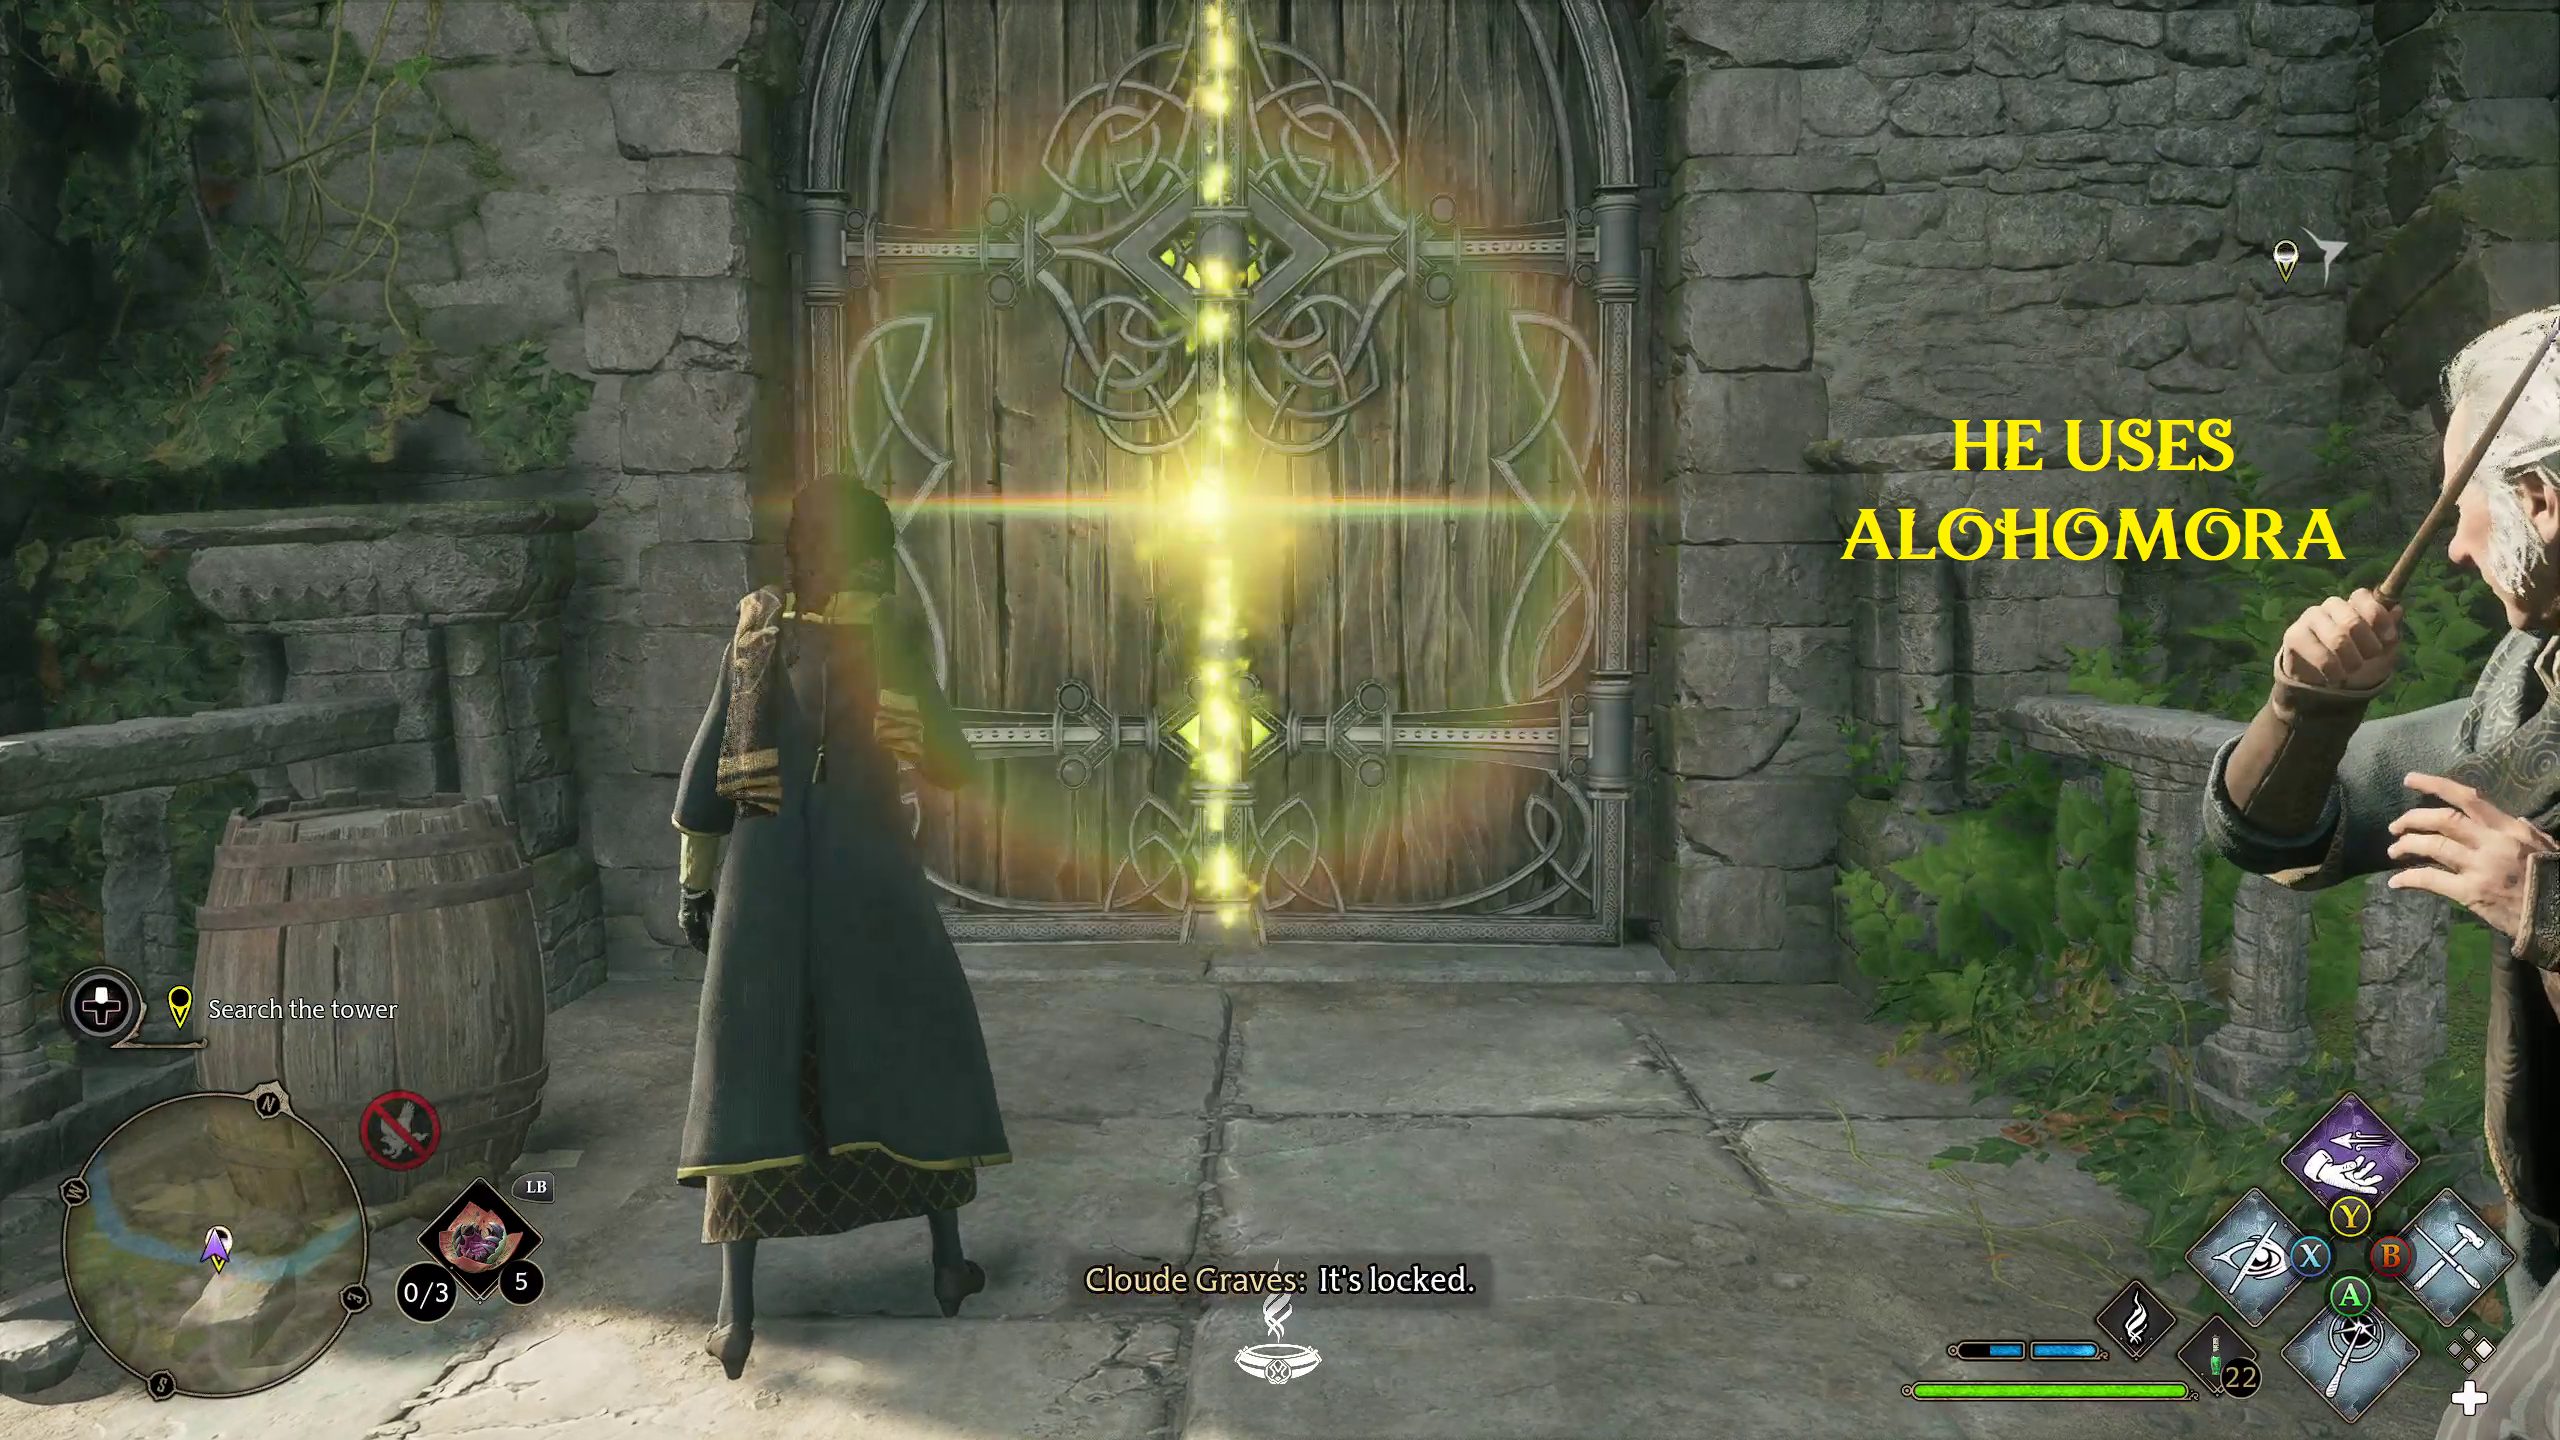
Once you and Professor Fig have taken care of the Goblins, you will be ready to enter the tower. Head up to the tower’s door (1), where Fig will be ready. Once, you’re there, he will cast Alohomora on the door (2), unlocking it so that you can enter.
12
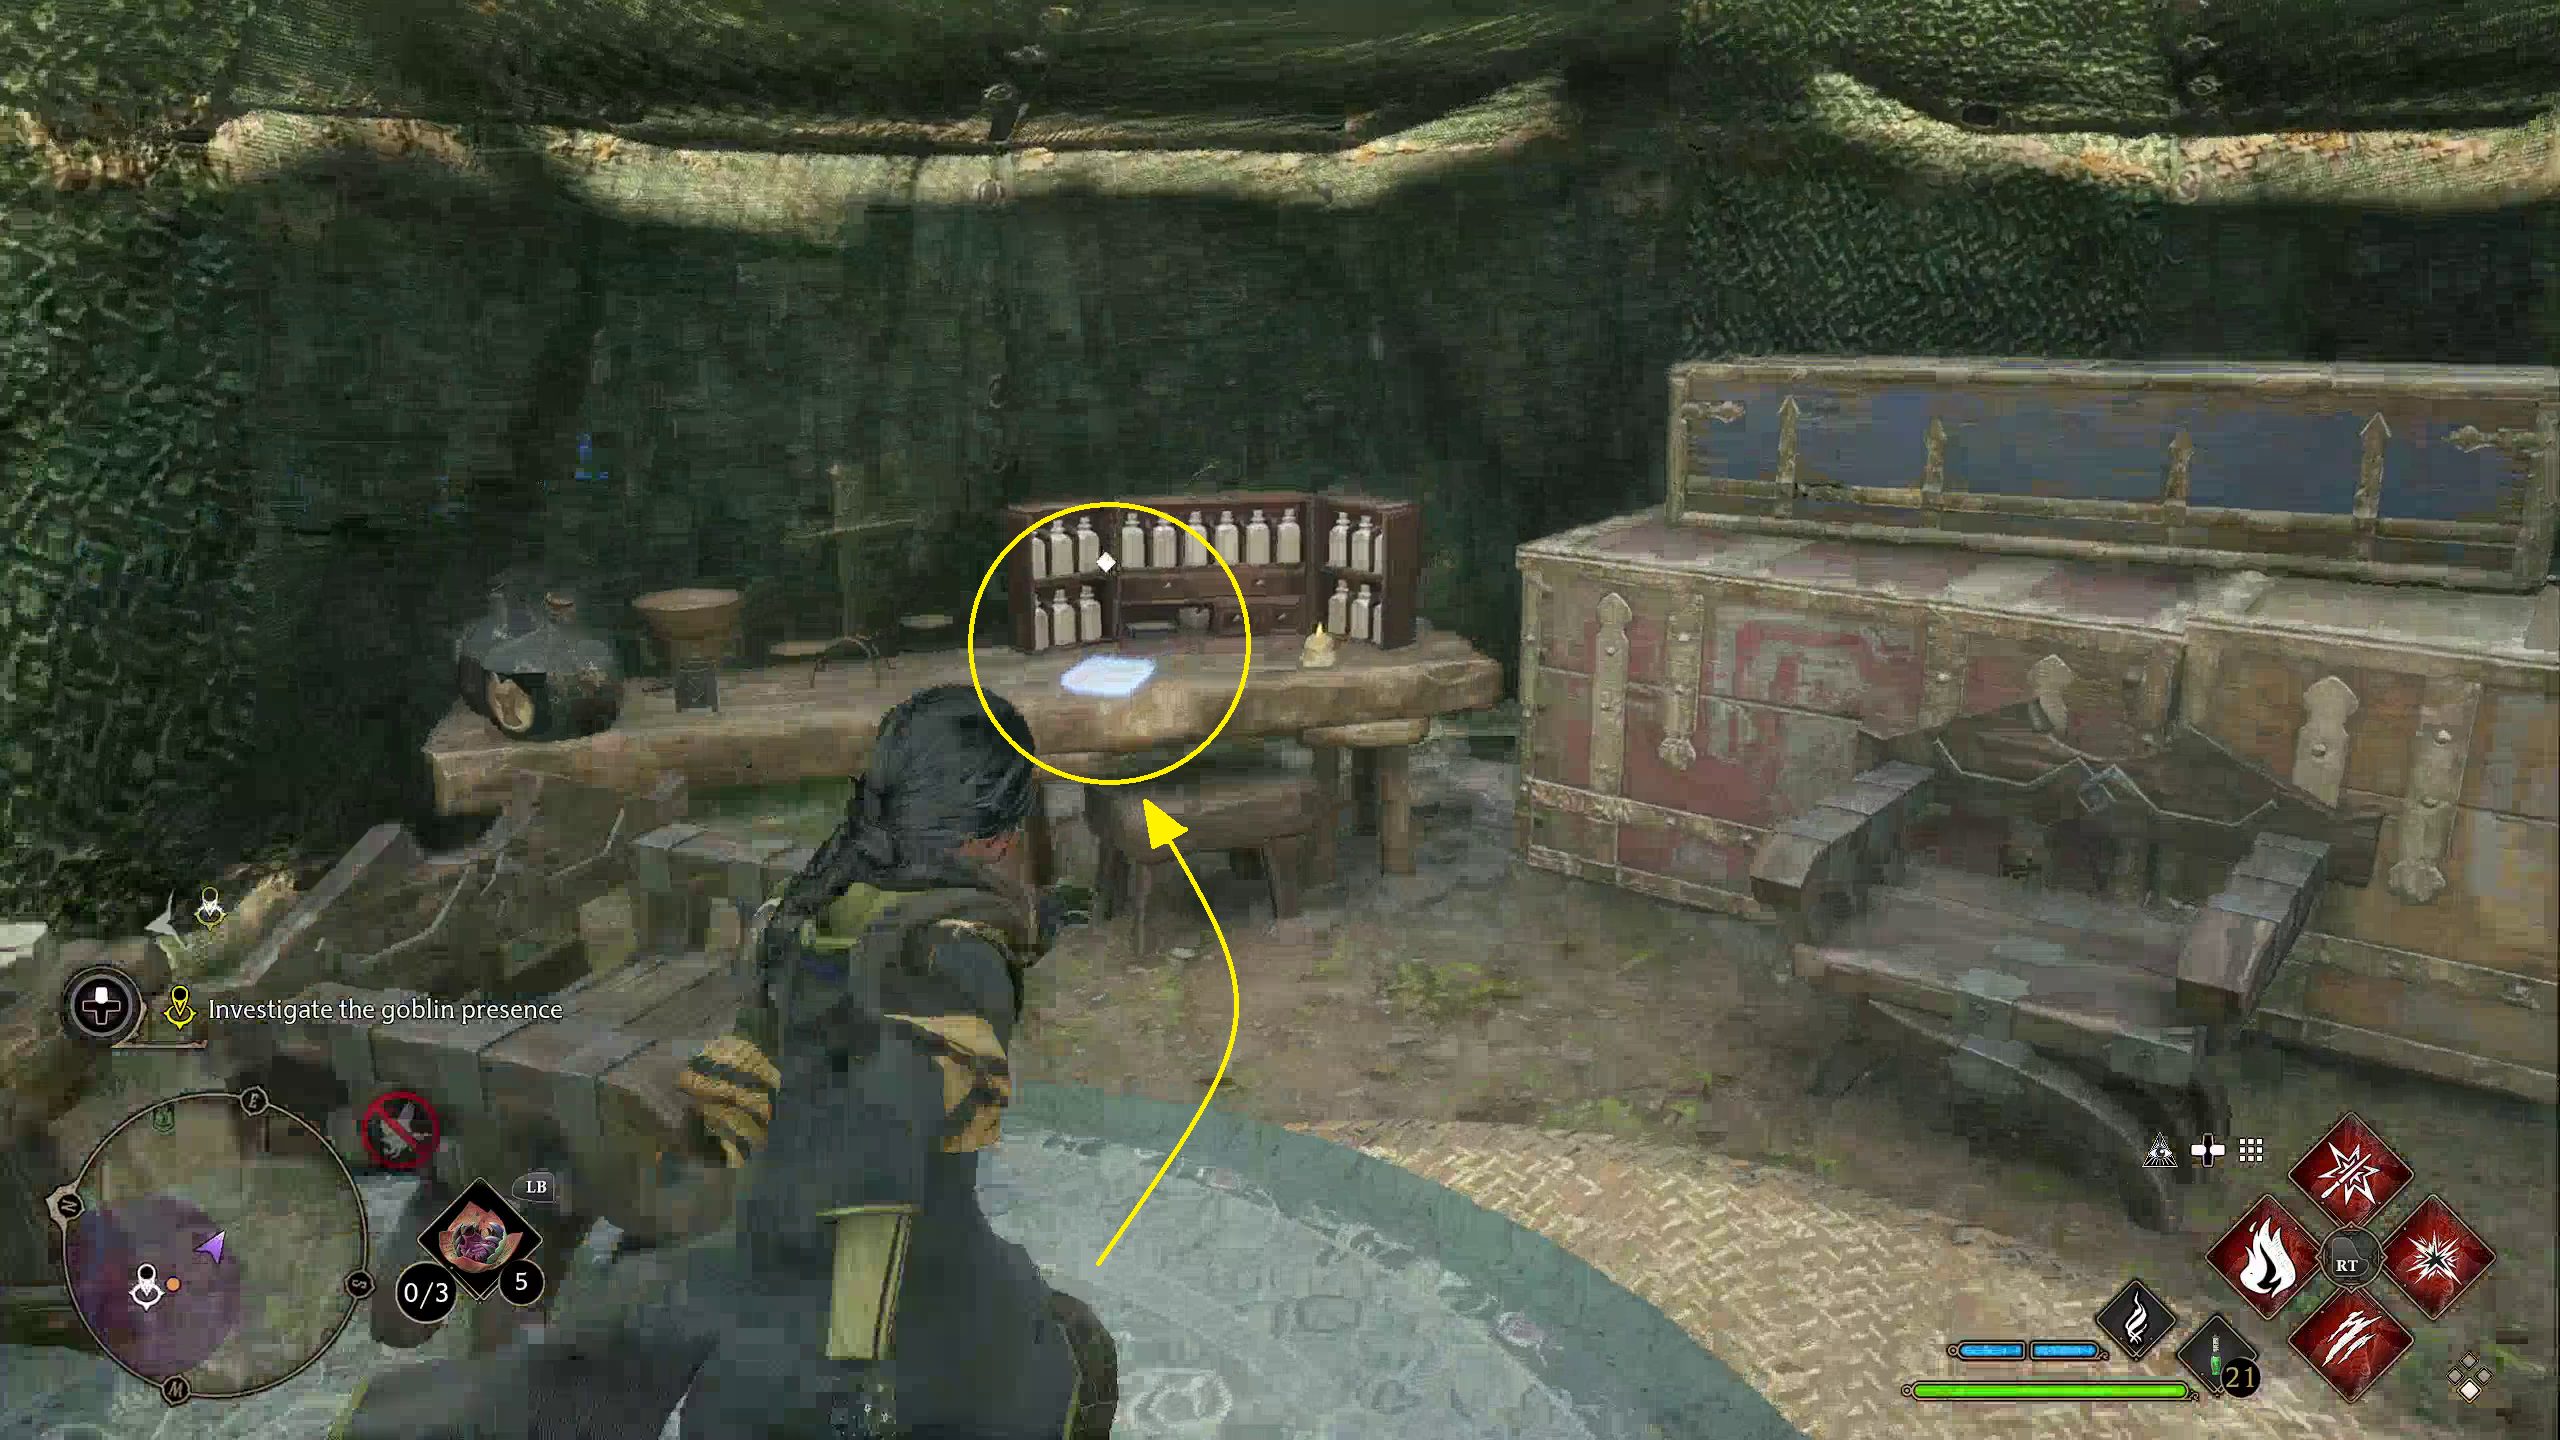
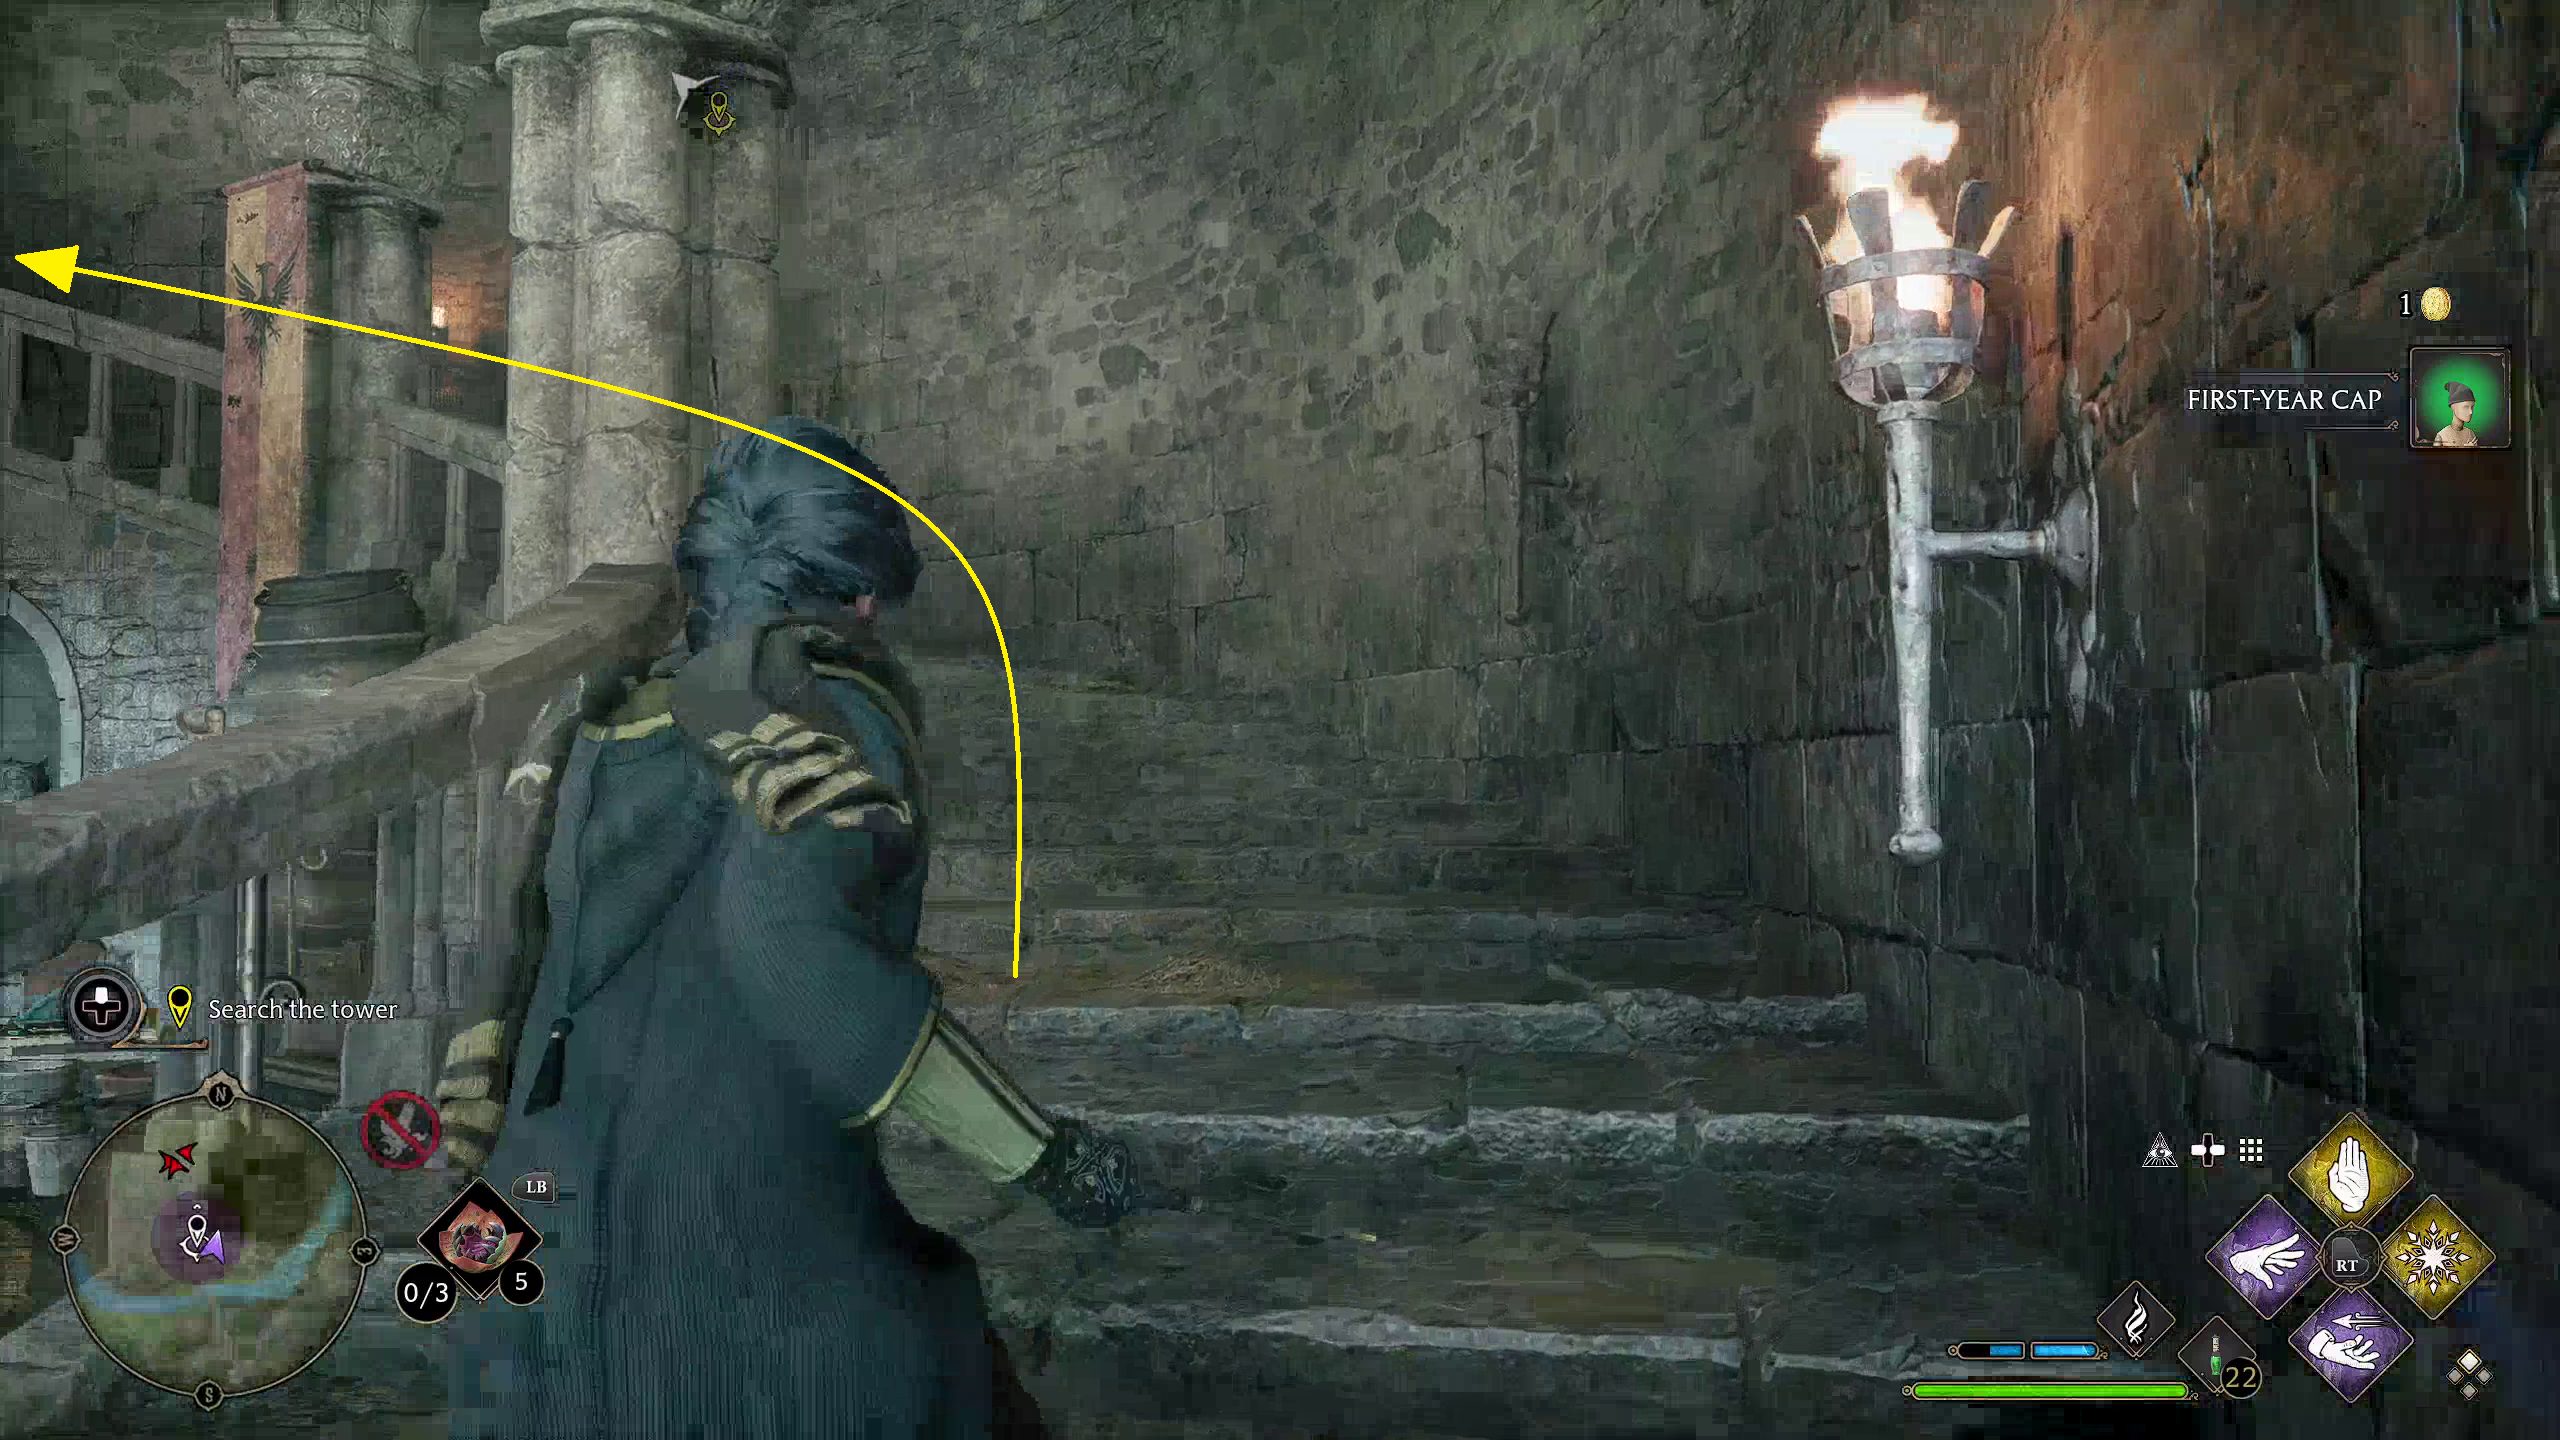
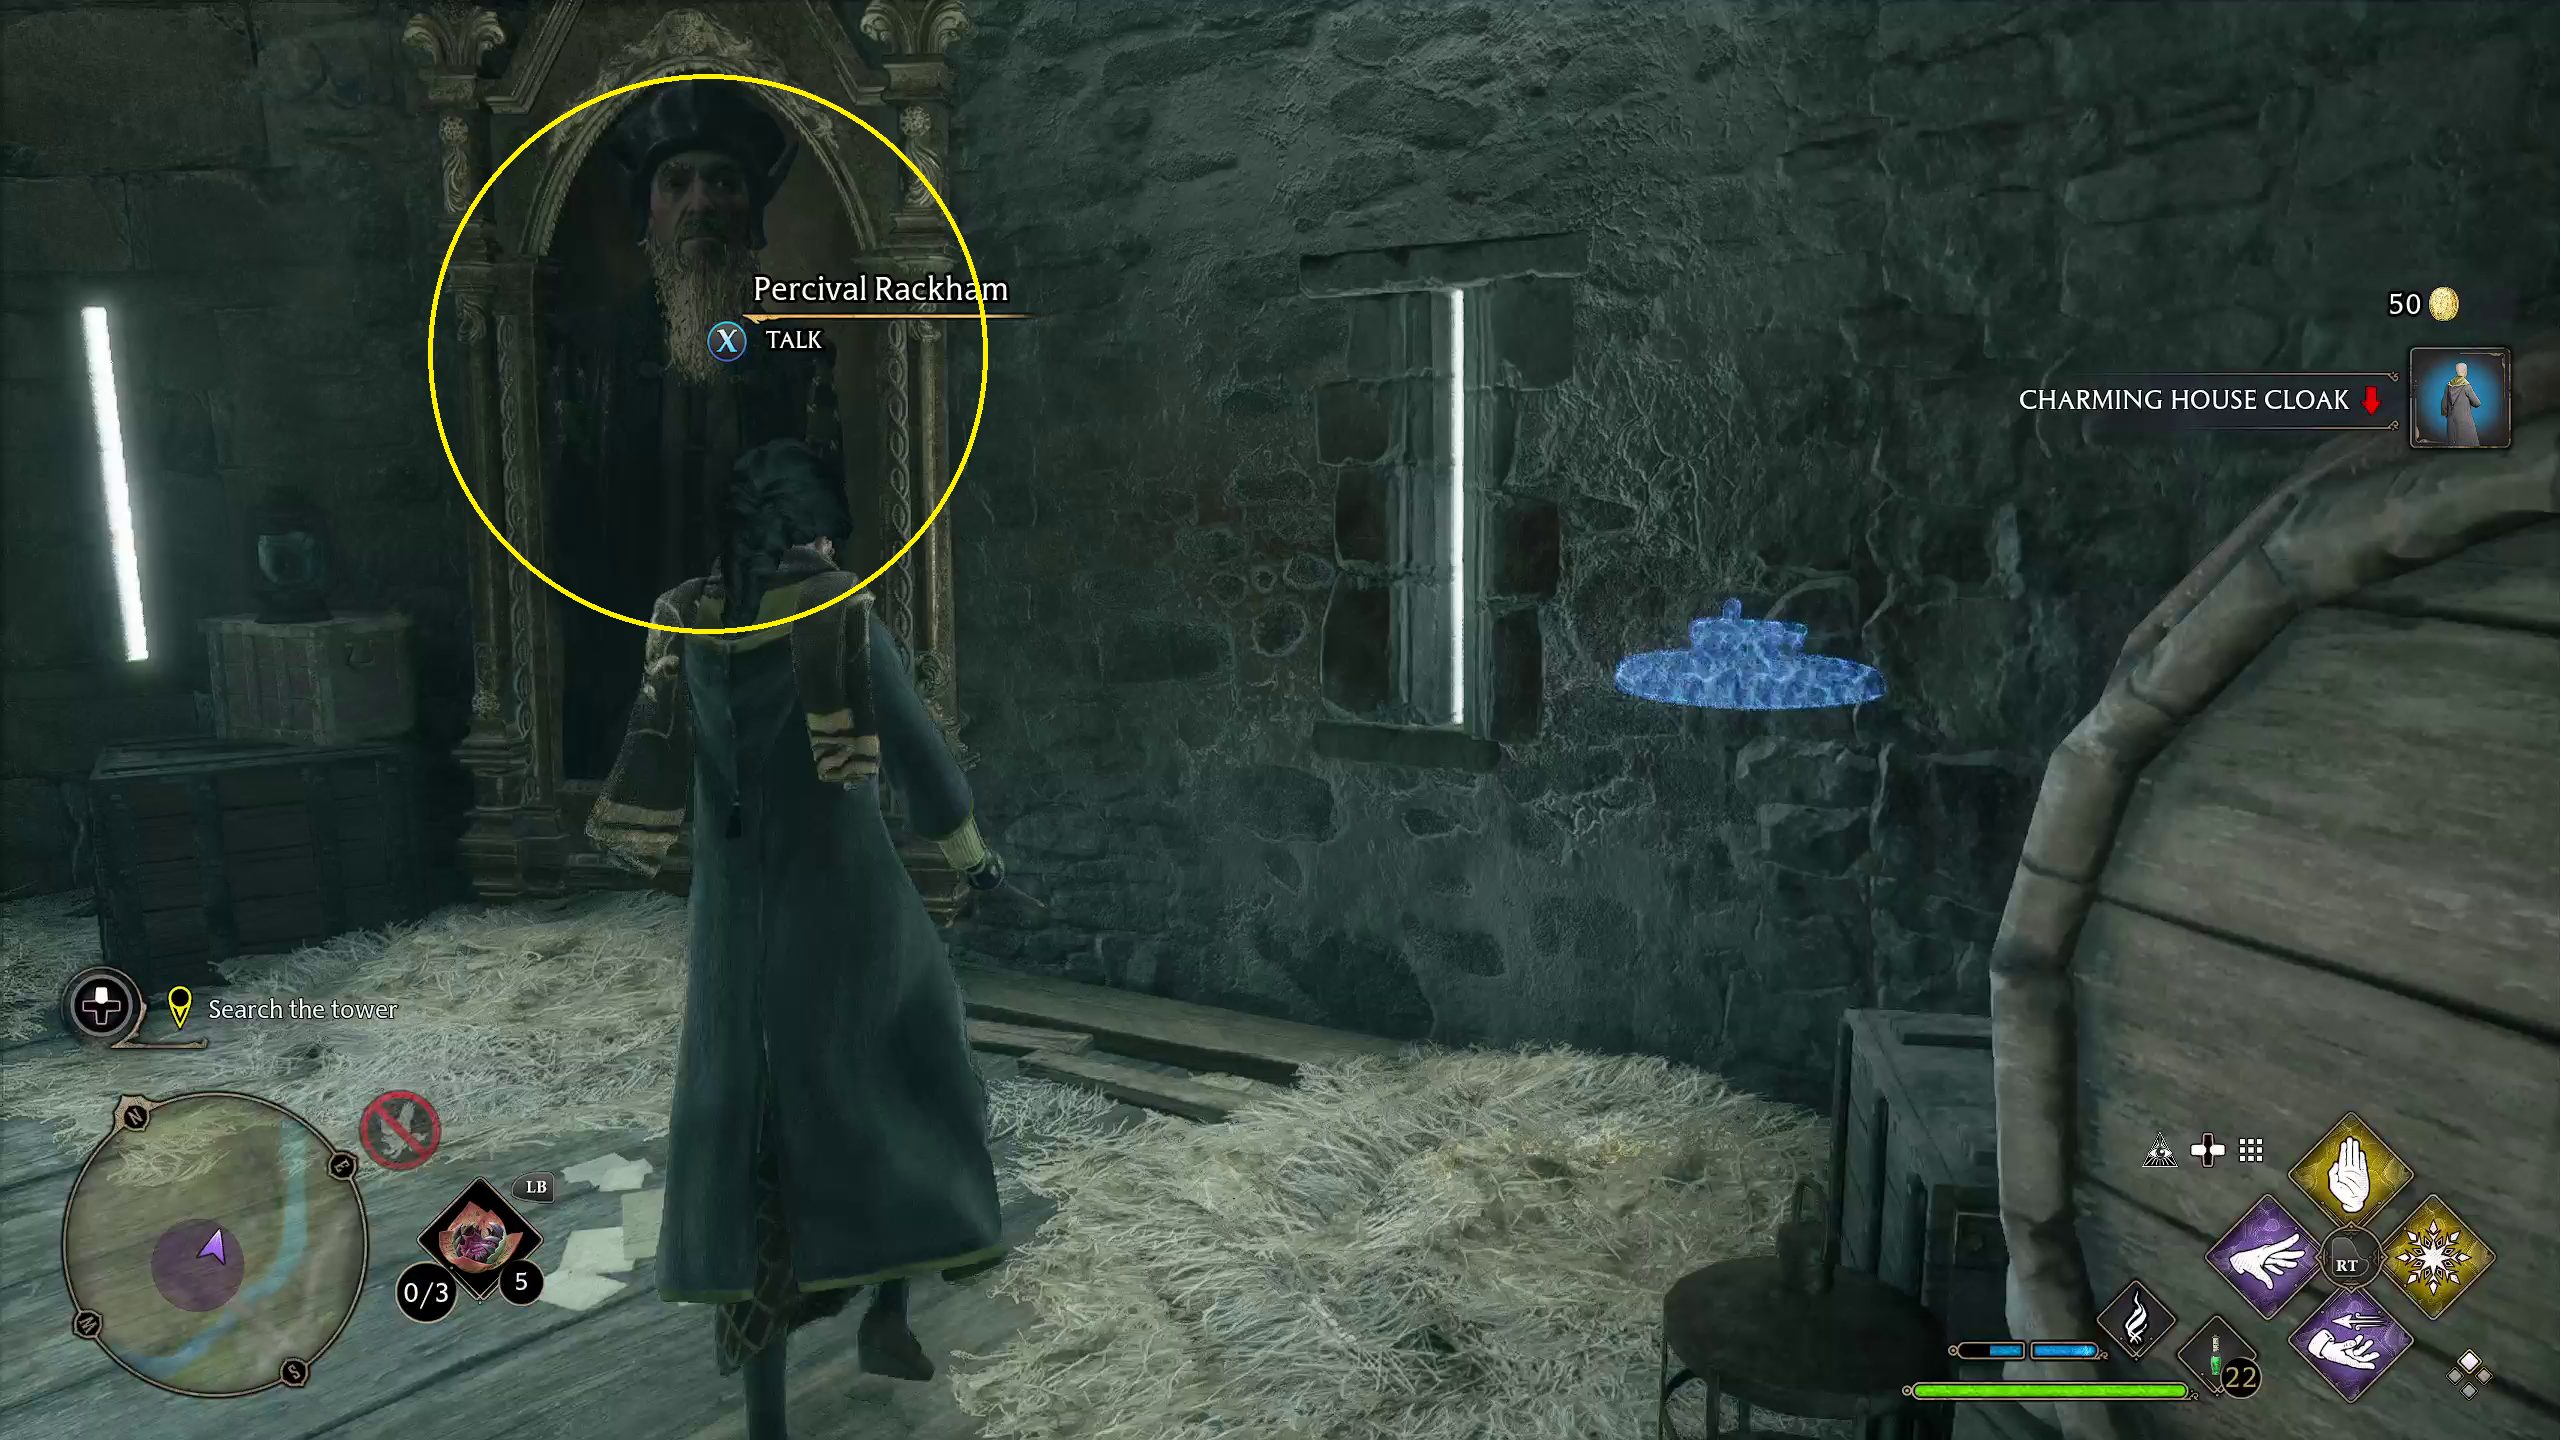
Immediately in front of you, there will be a chest (1). Grab it, and then head upstairs (2), making sure to cast Revelio () to find a couple of very small piles of coins. Once you are at the top, another portrait of Professor Percival Rackham will be waiting to speak with you (3).
123
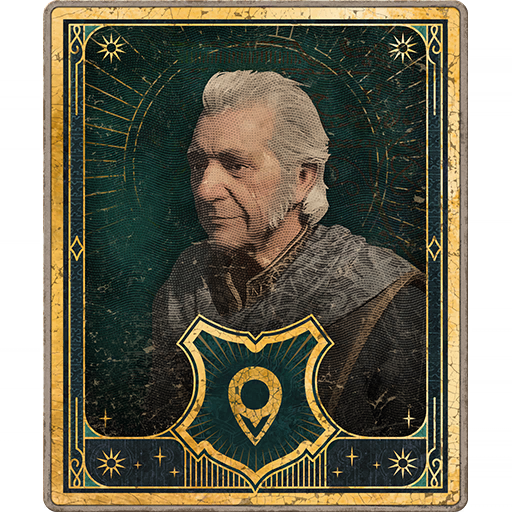
He will inform you that you must complete a trial to prove your Ancient Magical abilities and that Professor Fig will not be able to go with you. He tells you to go back downstairs, where you’ll be able to locate an entrance to his trial.
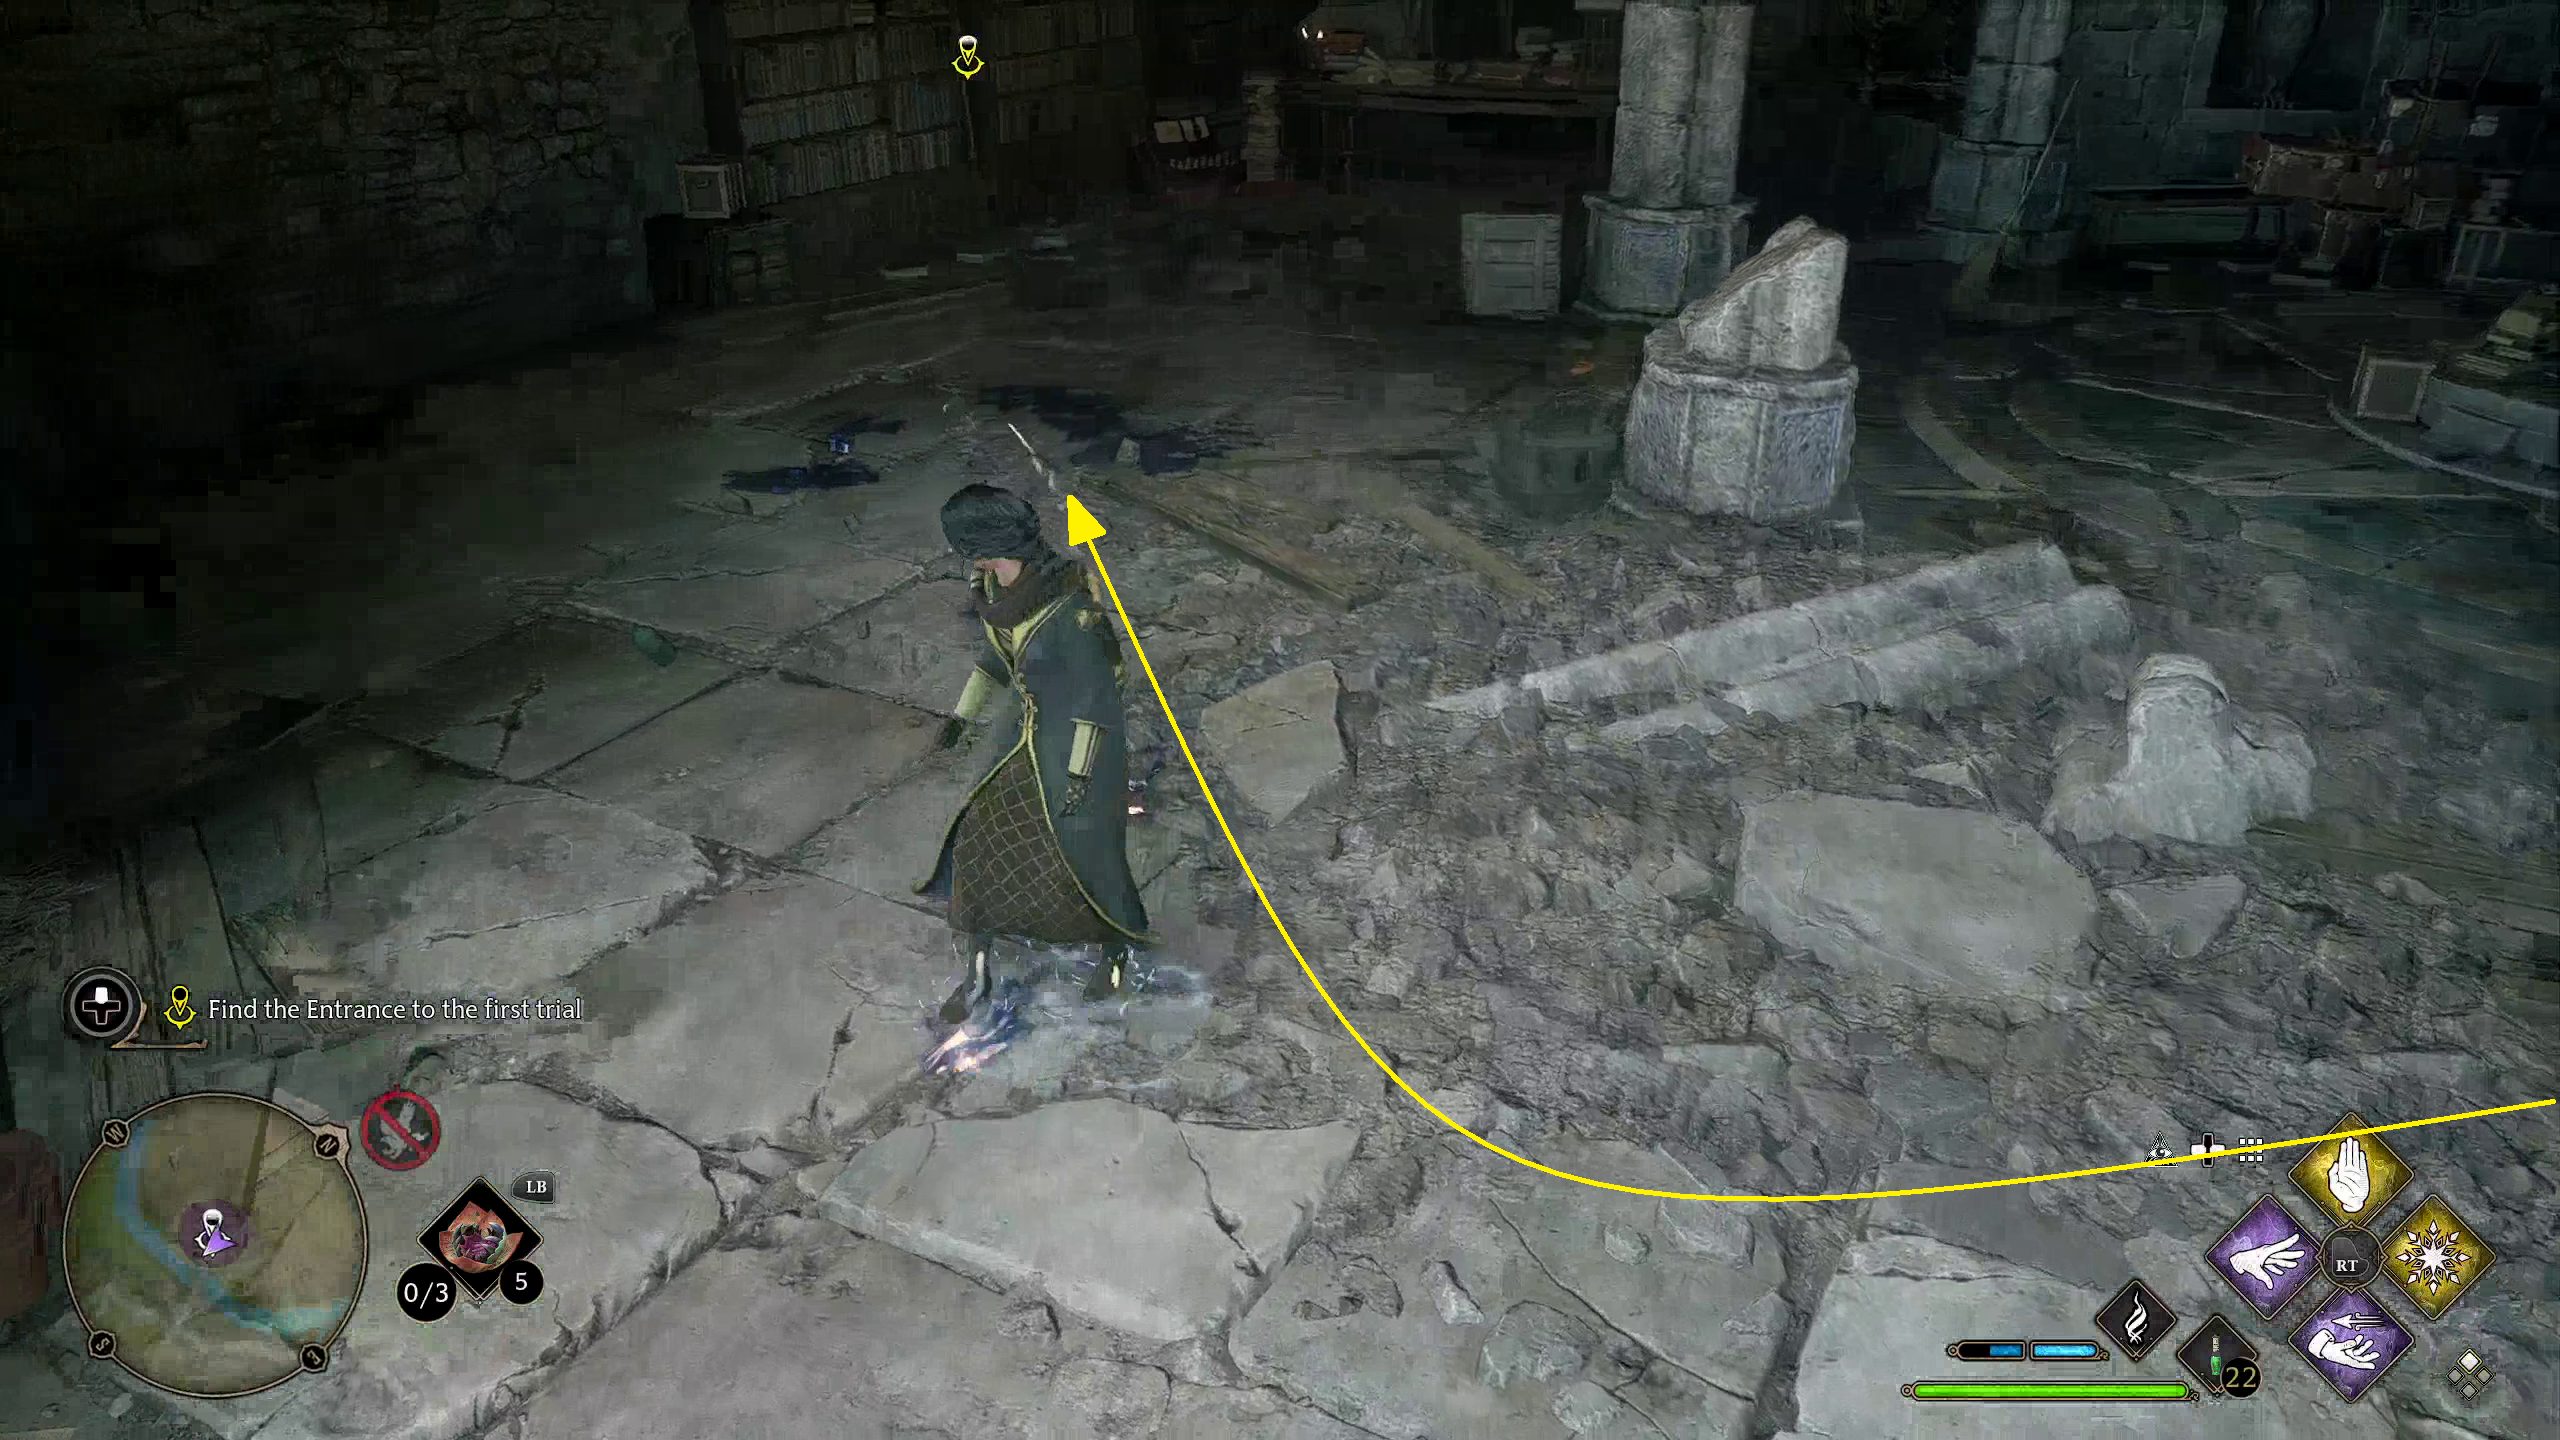
Find the Entrance to the First Trial
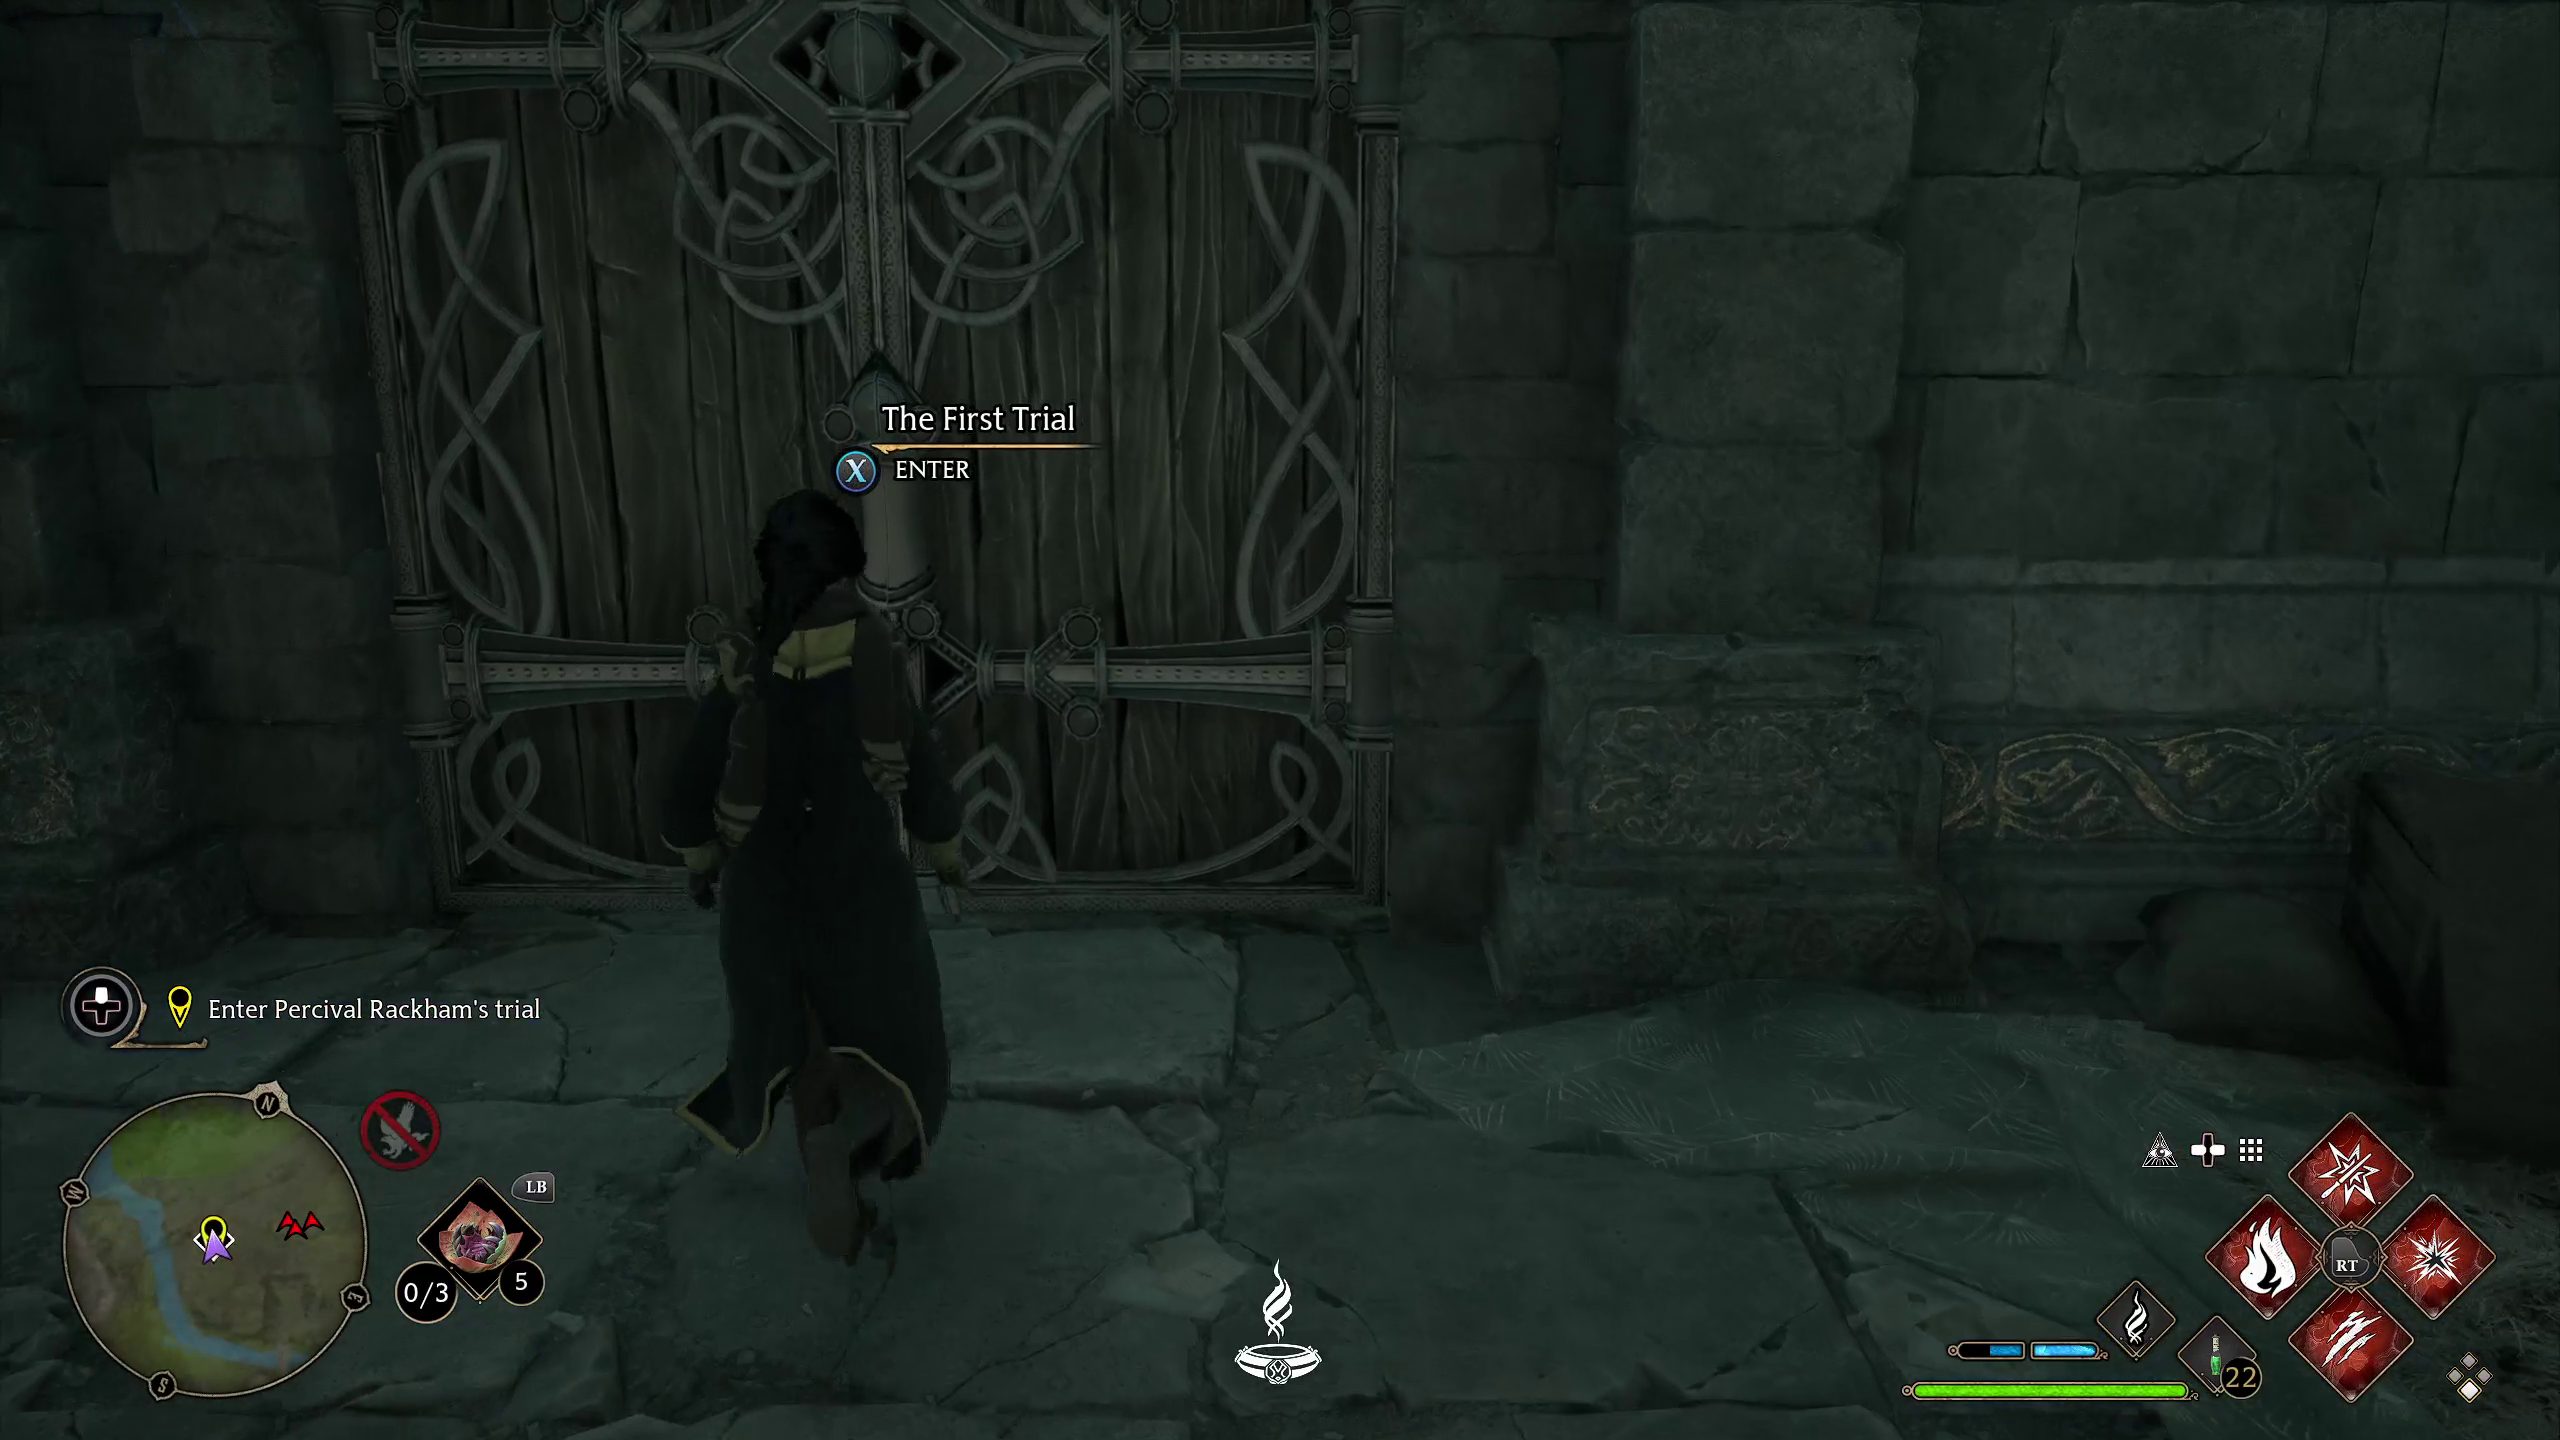
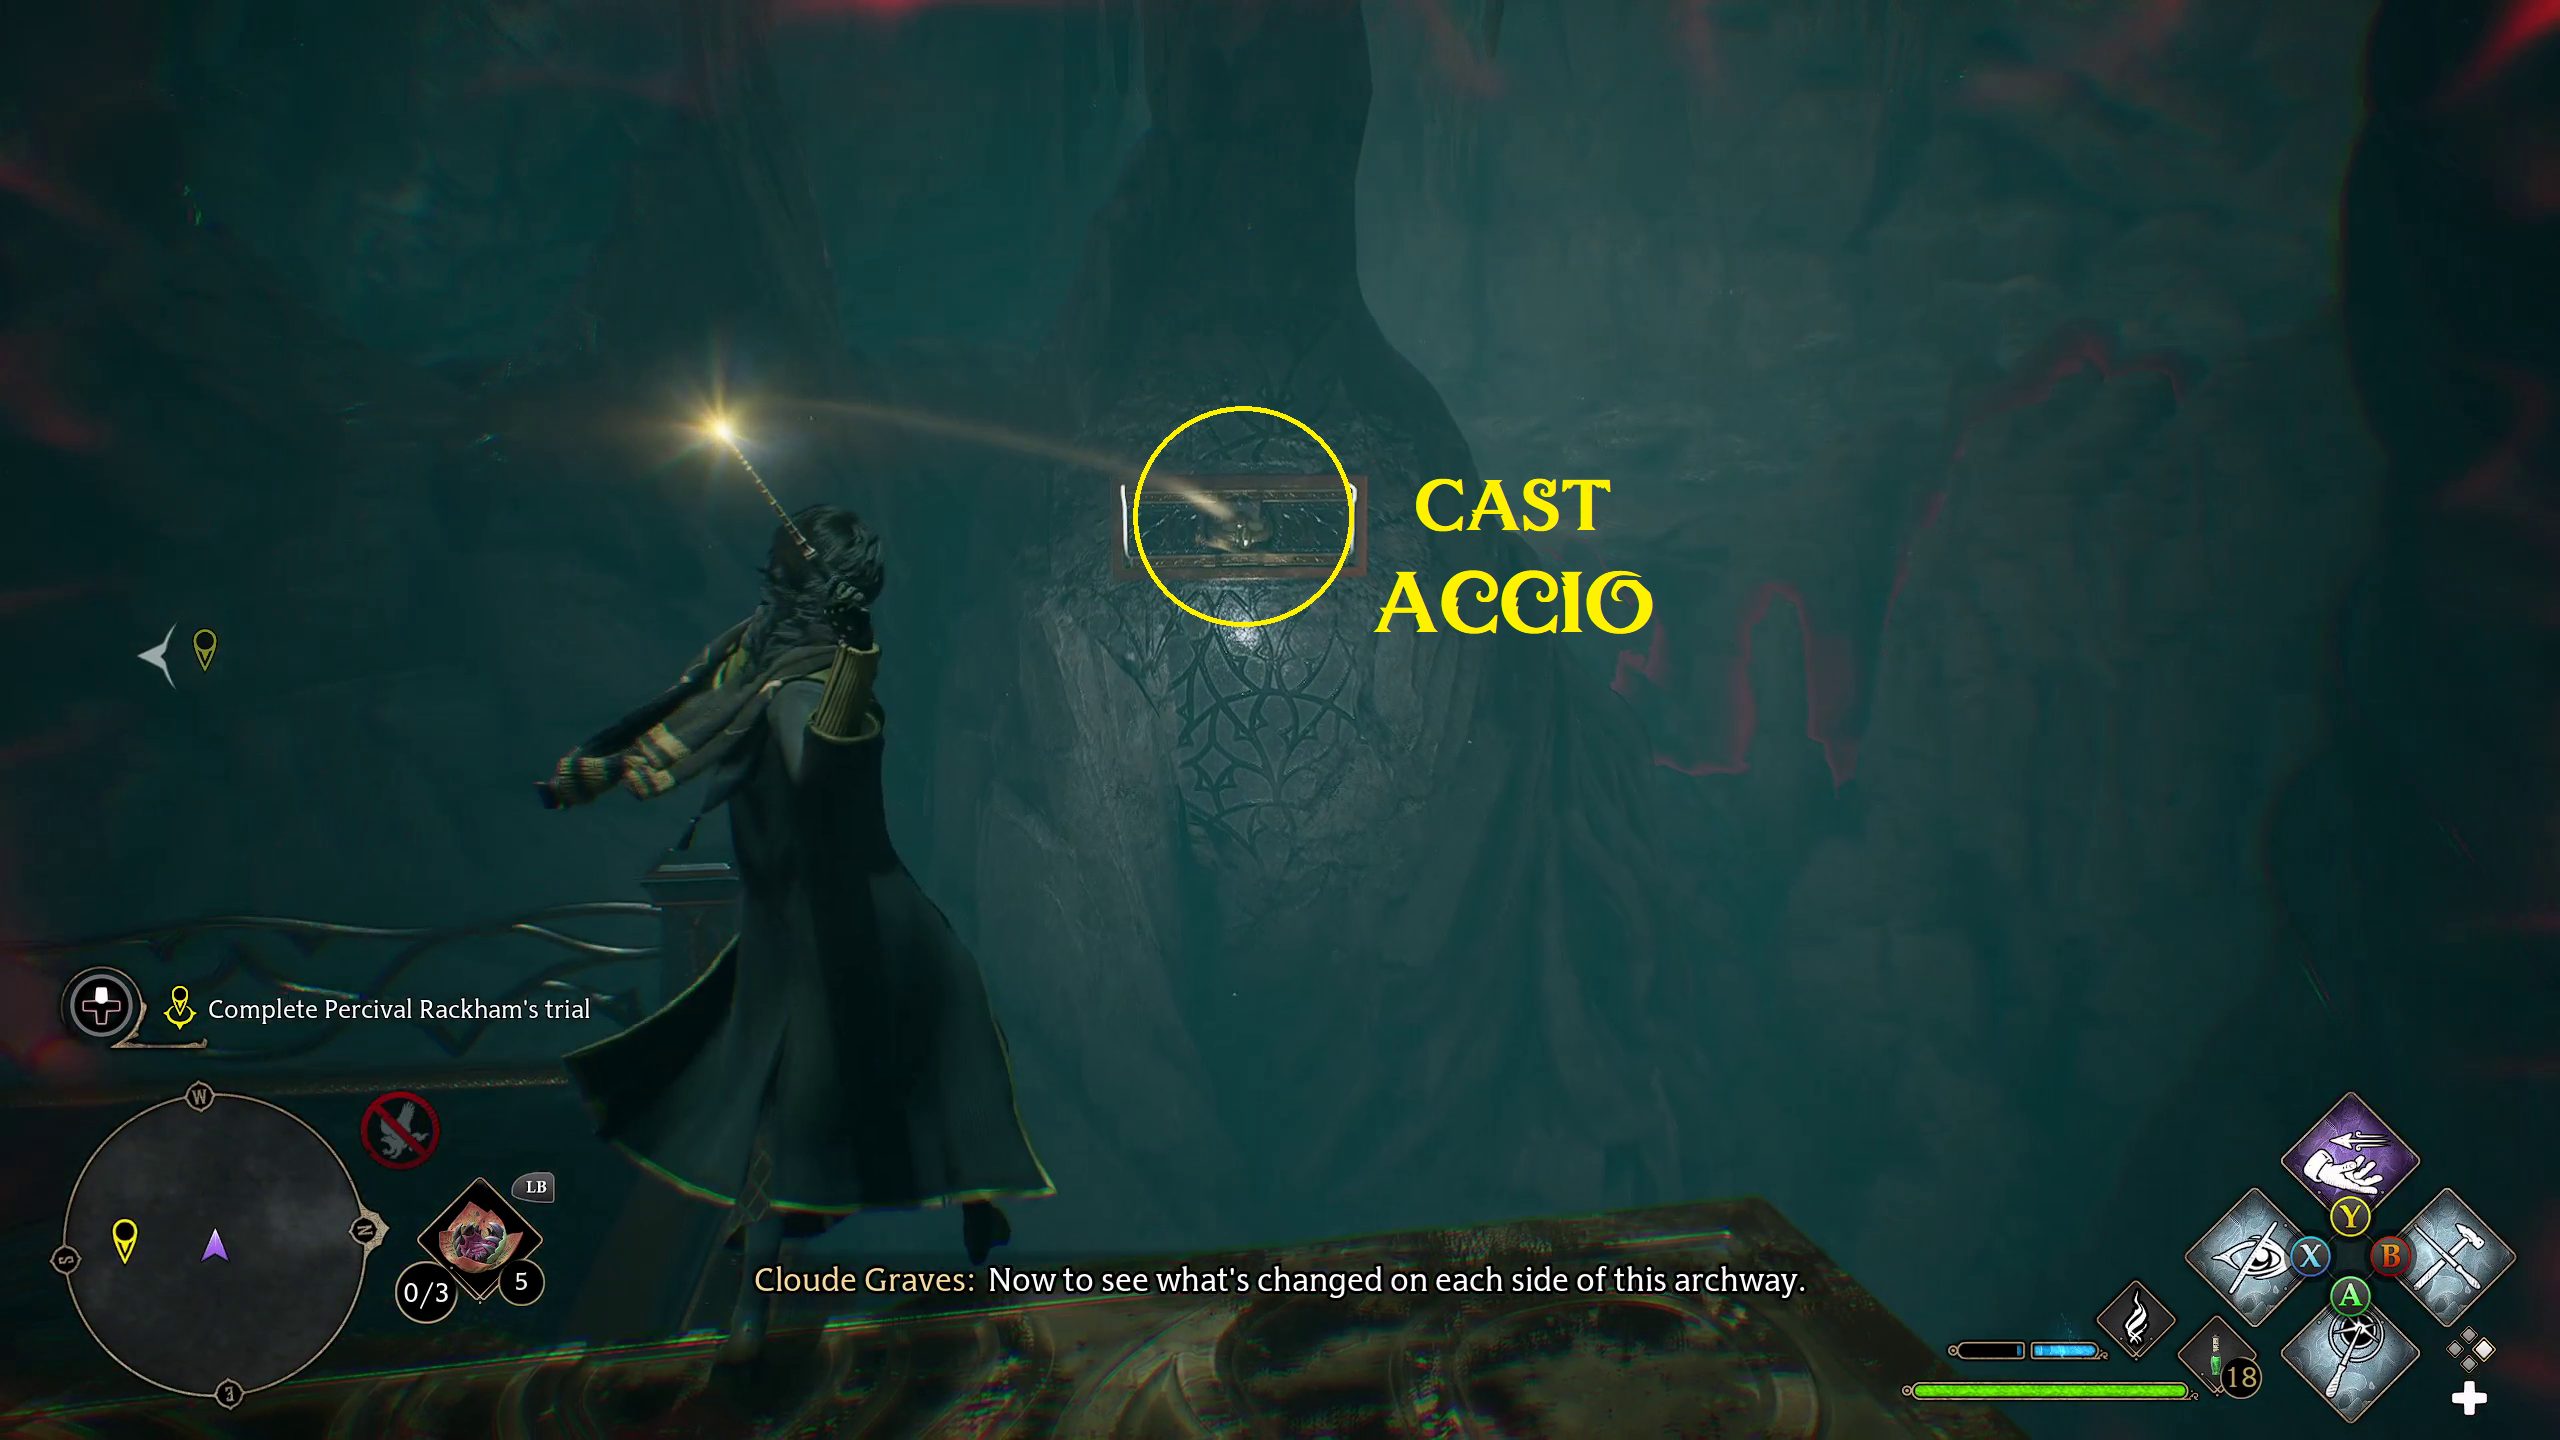
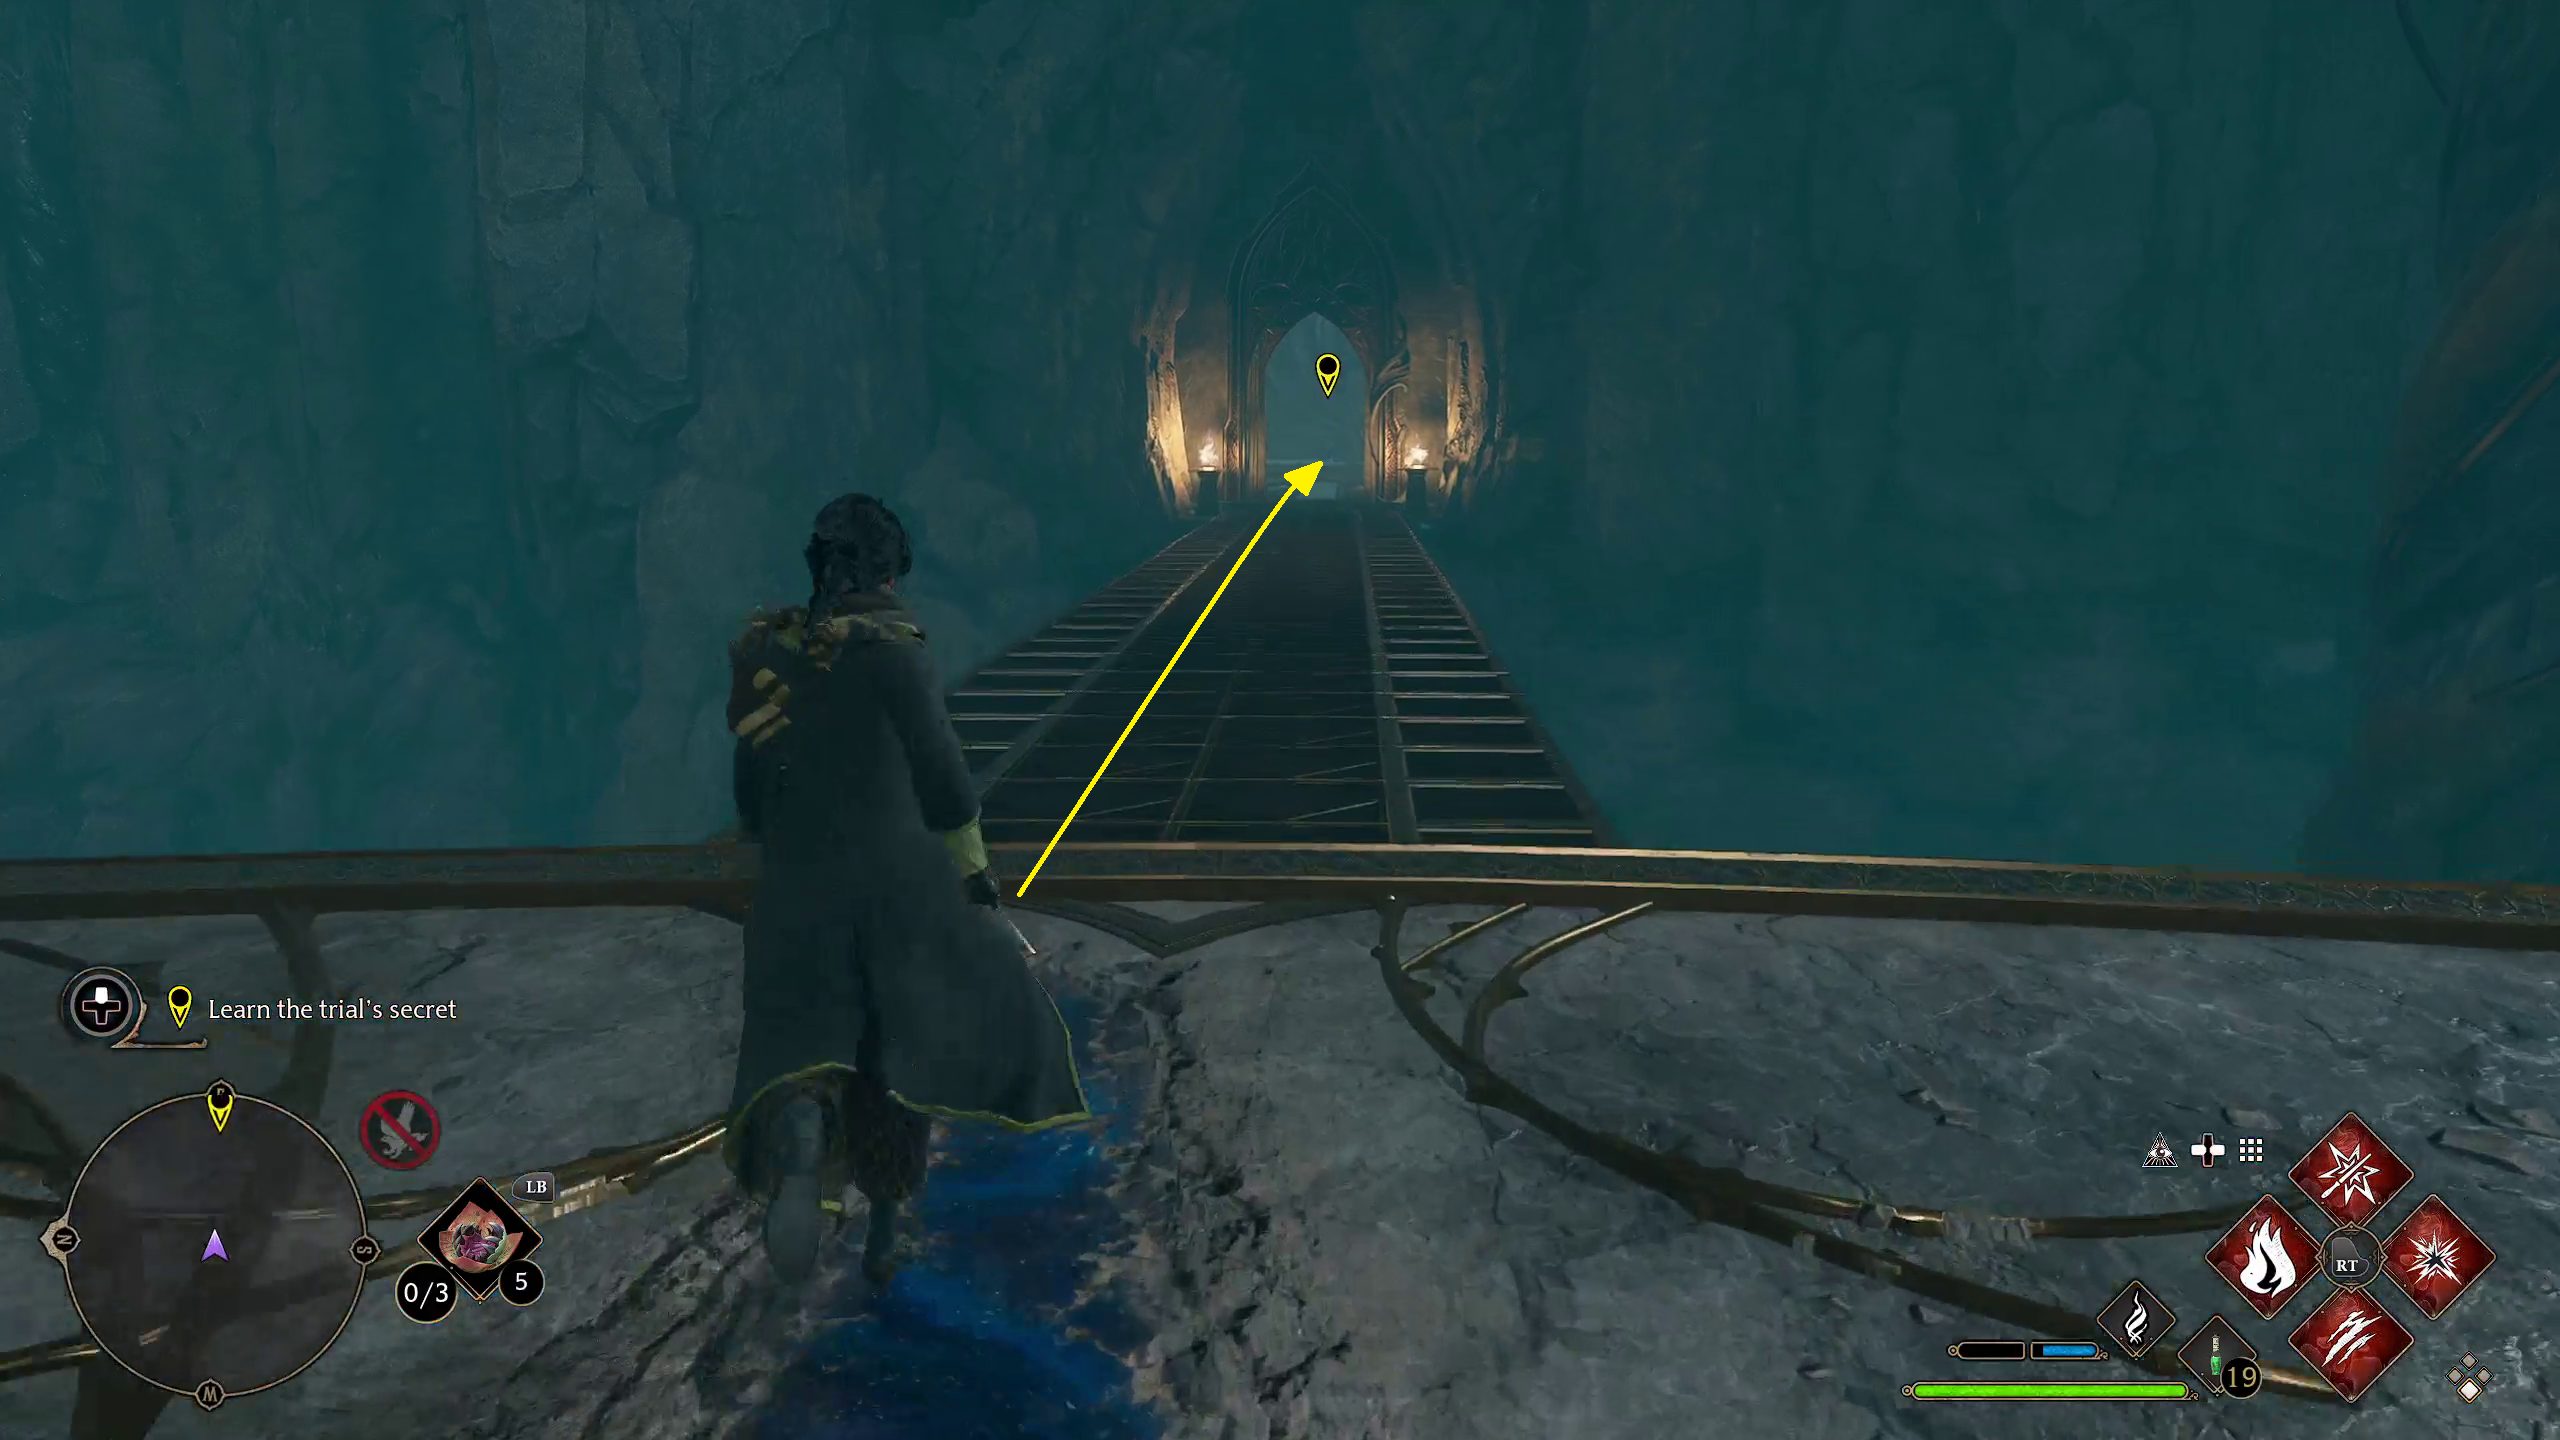
Head back downstairs, and you’ll notice some Ancient Magic darts going to a spot on the floor (1). Investigating this spot with / (2) will reveal a secret doorway, which seems to be a portal somewhere else. Head through it, and then you’ll come to the door to The First Trial, which you can enter with / (4).
1234
Complete Percival Rackham’s First Trial
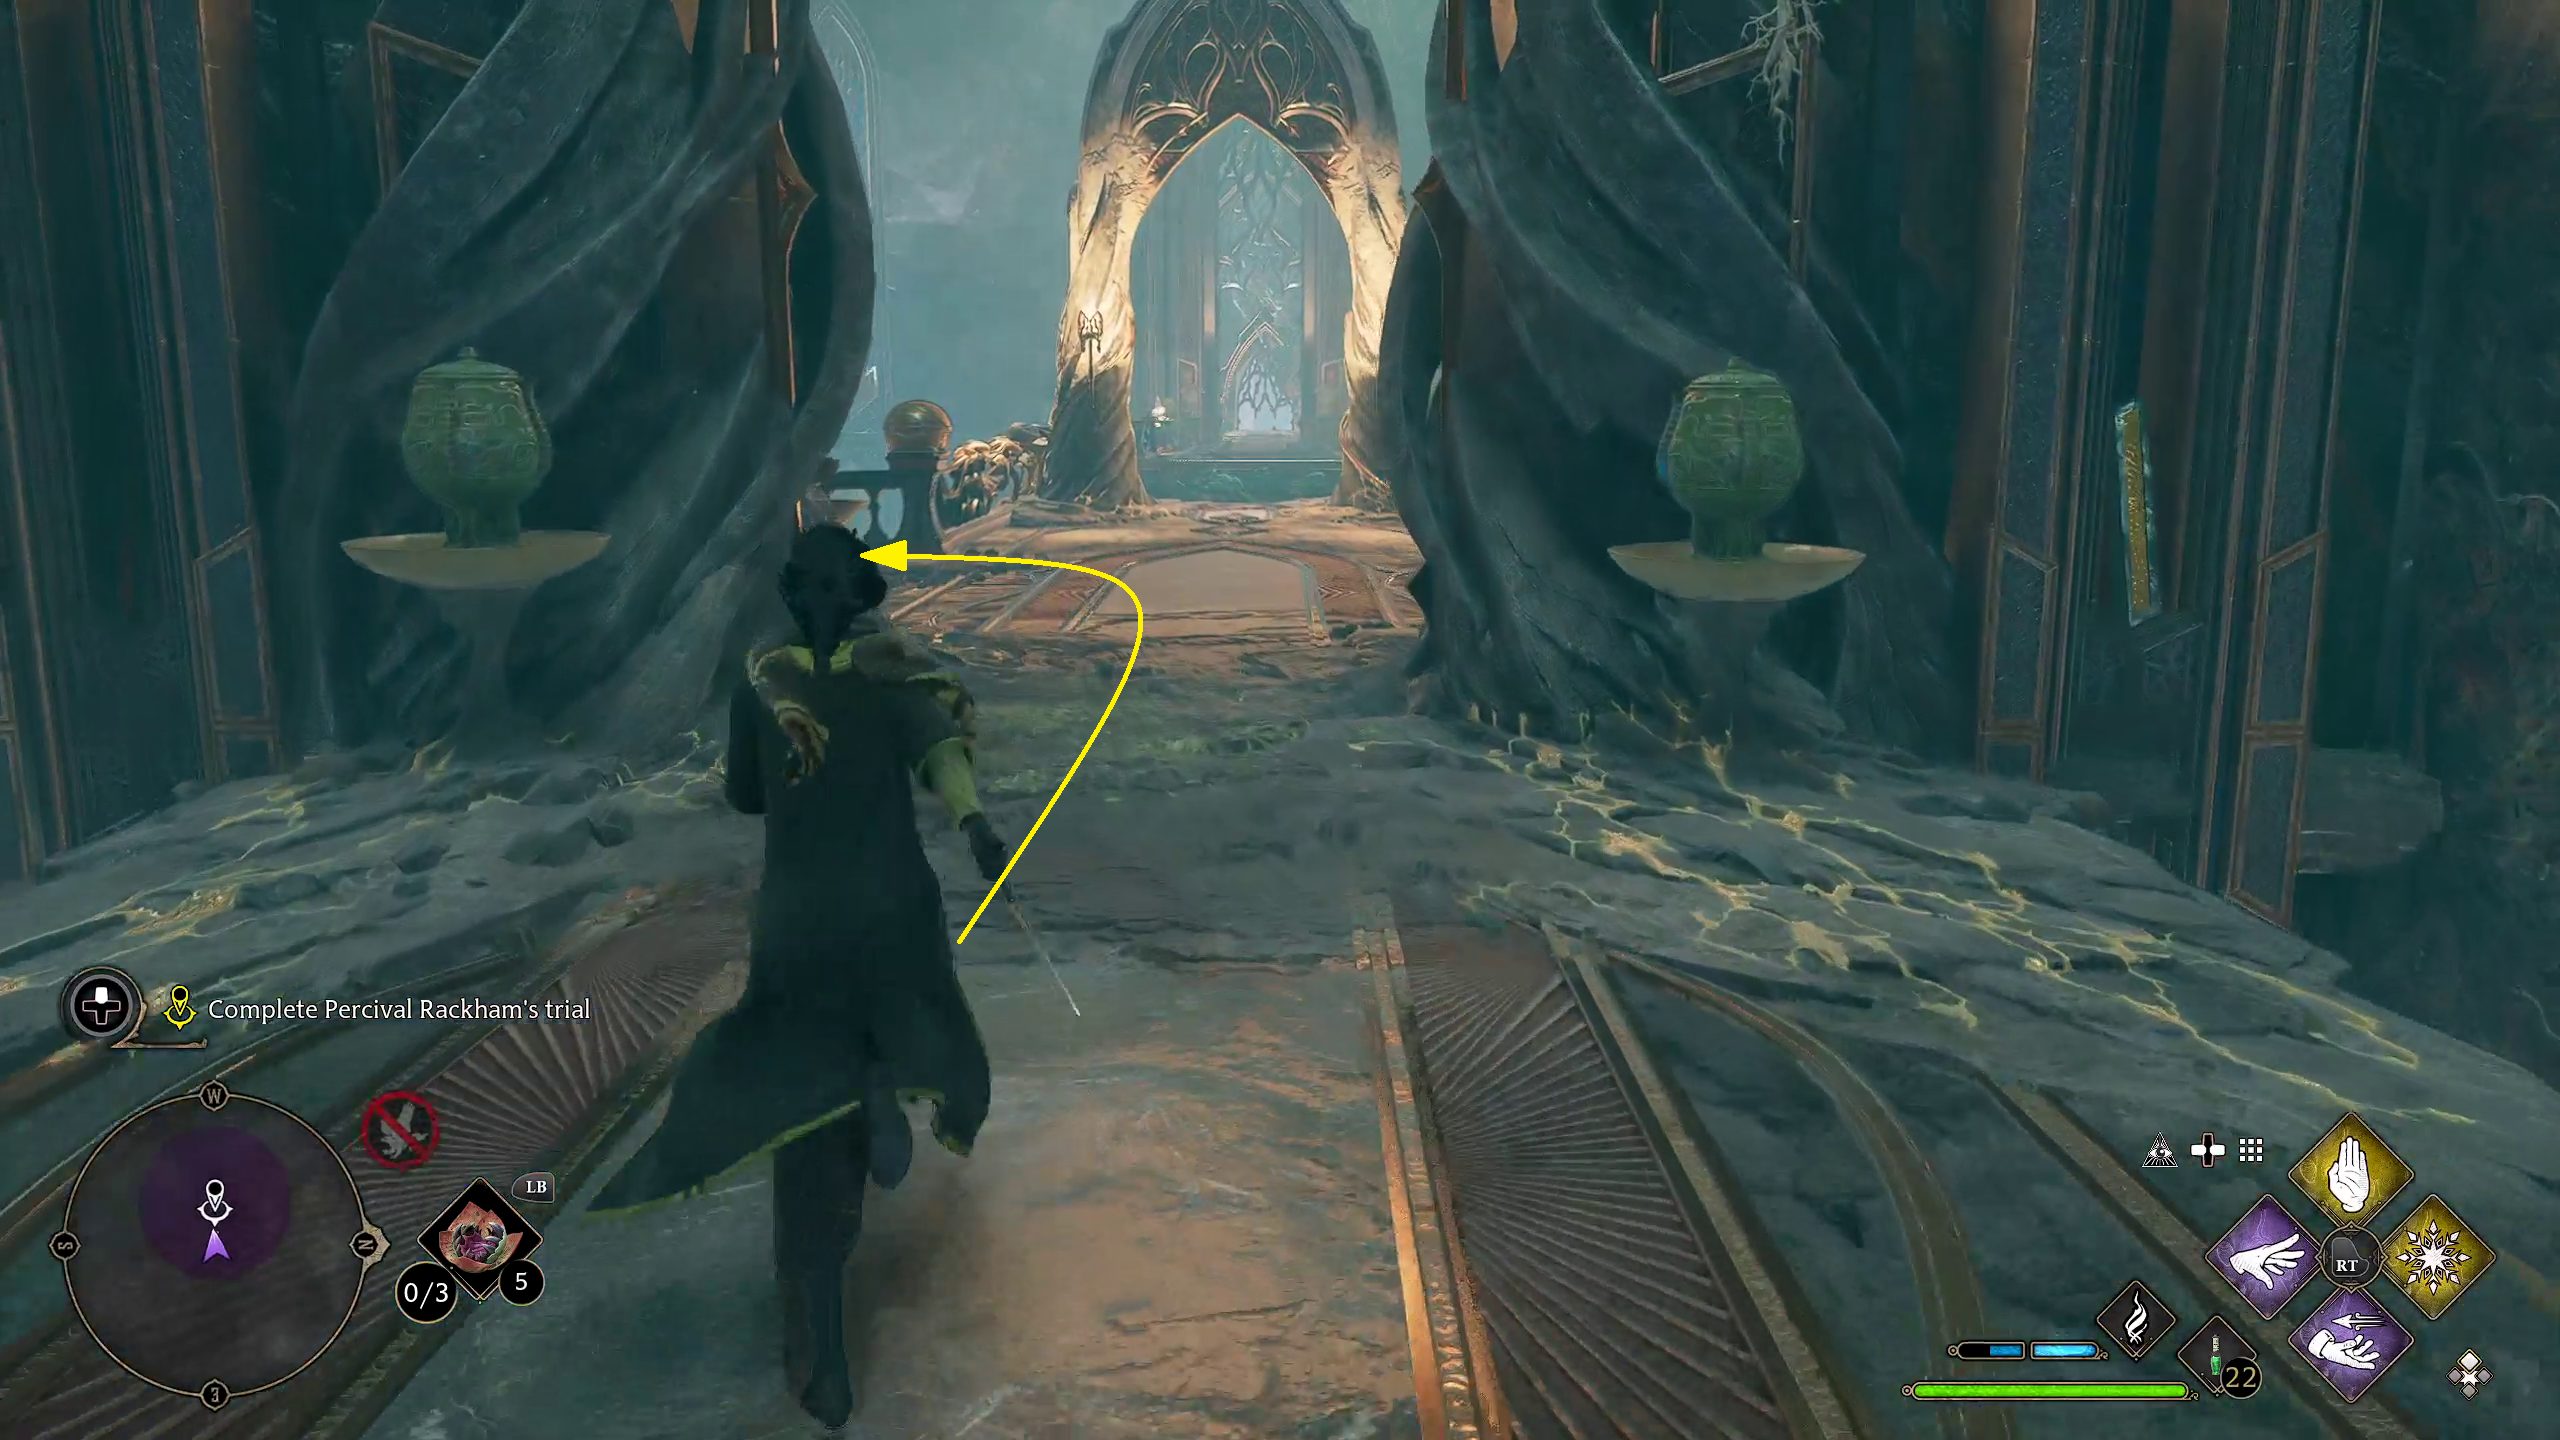
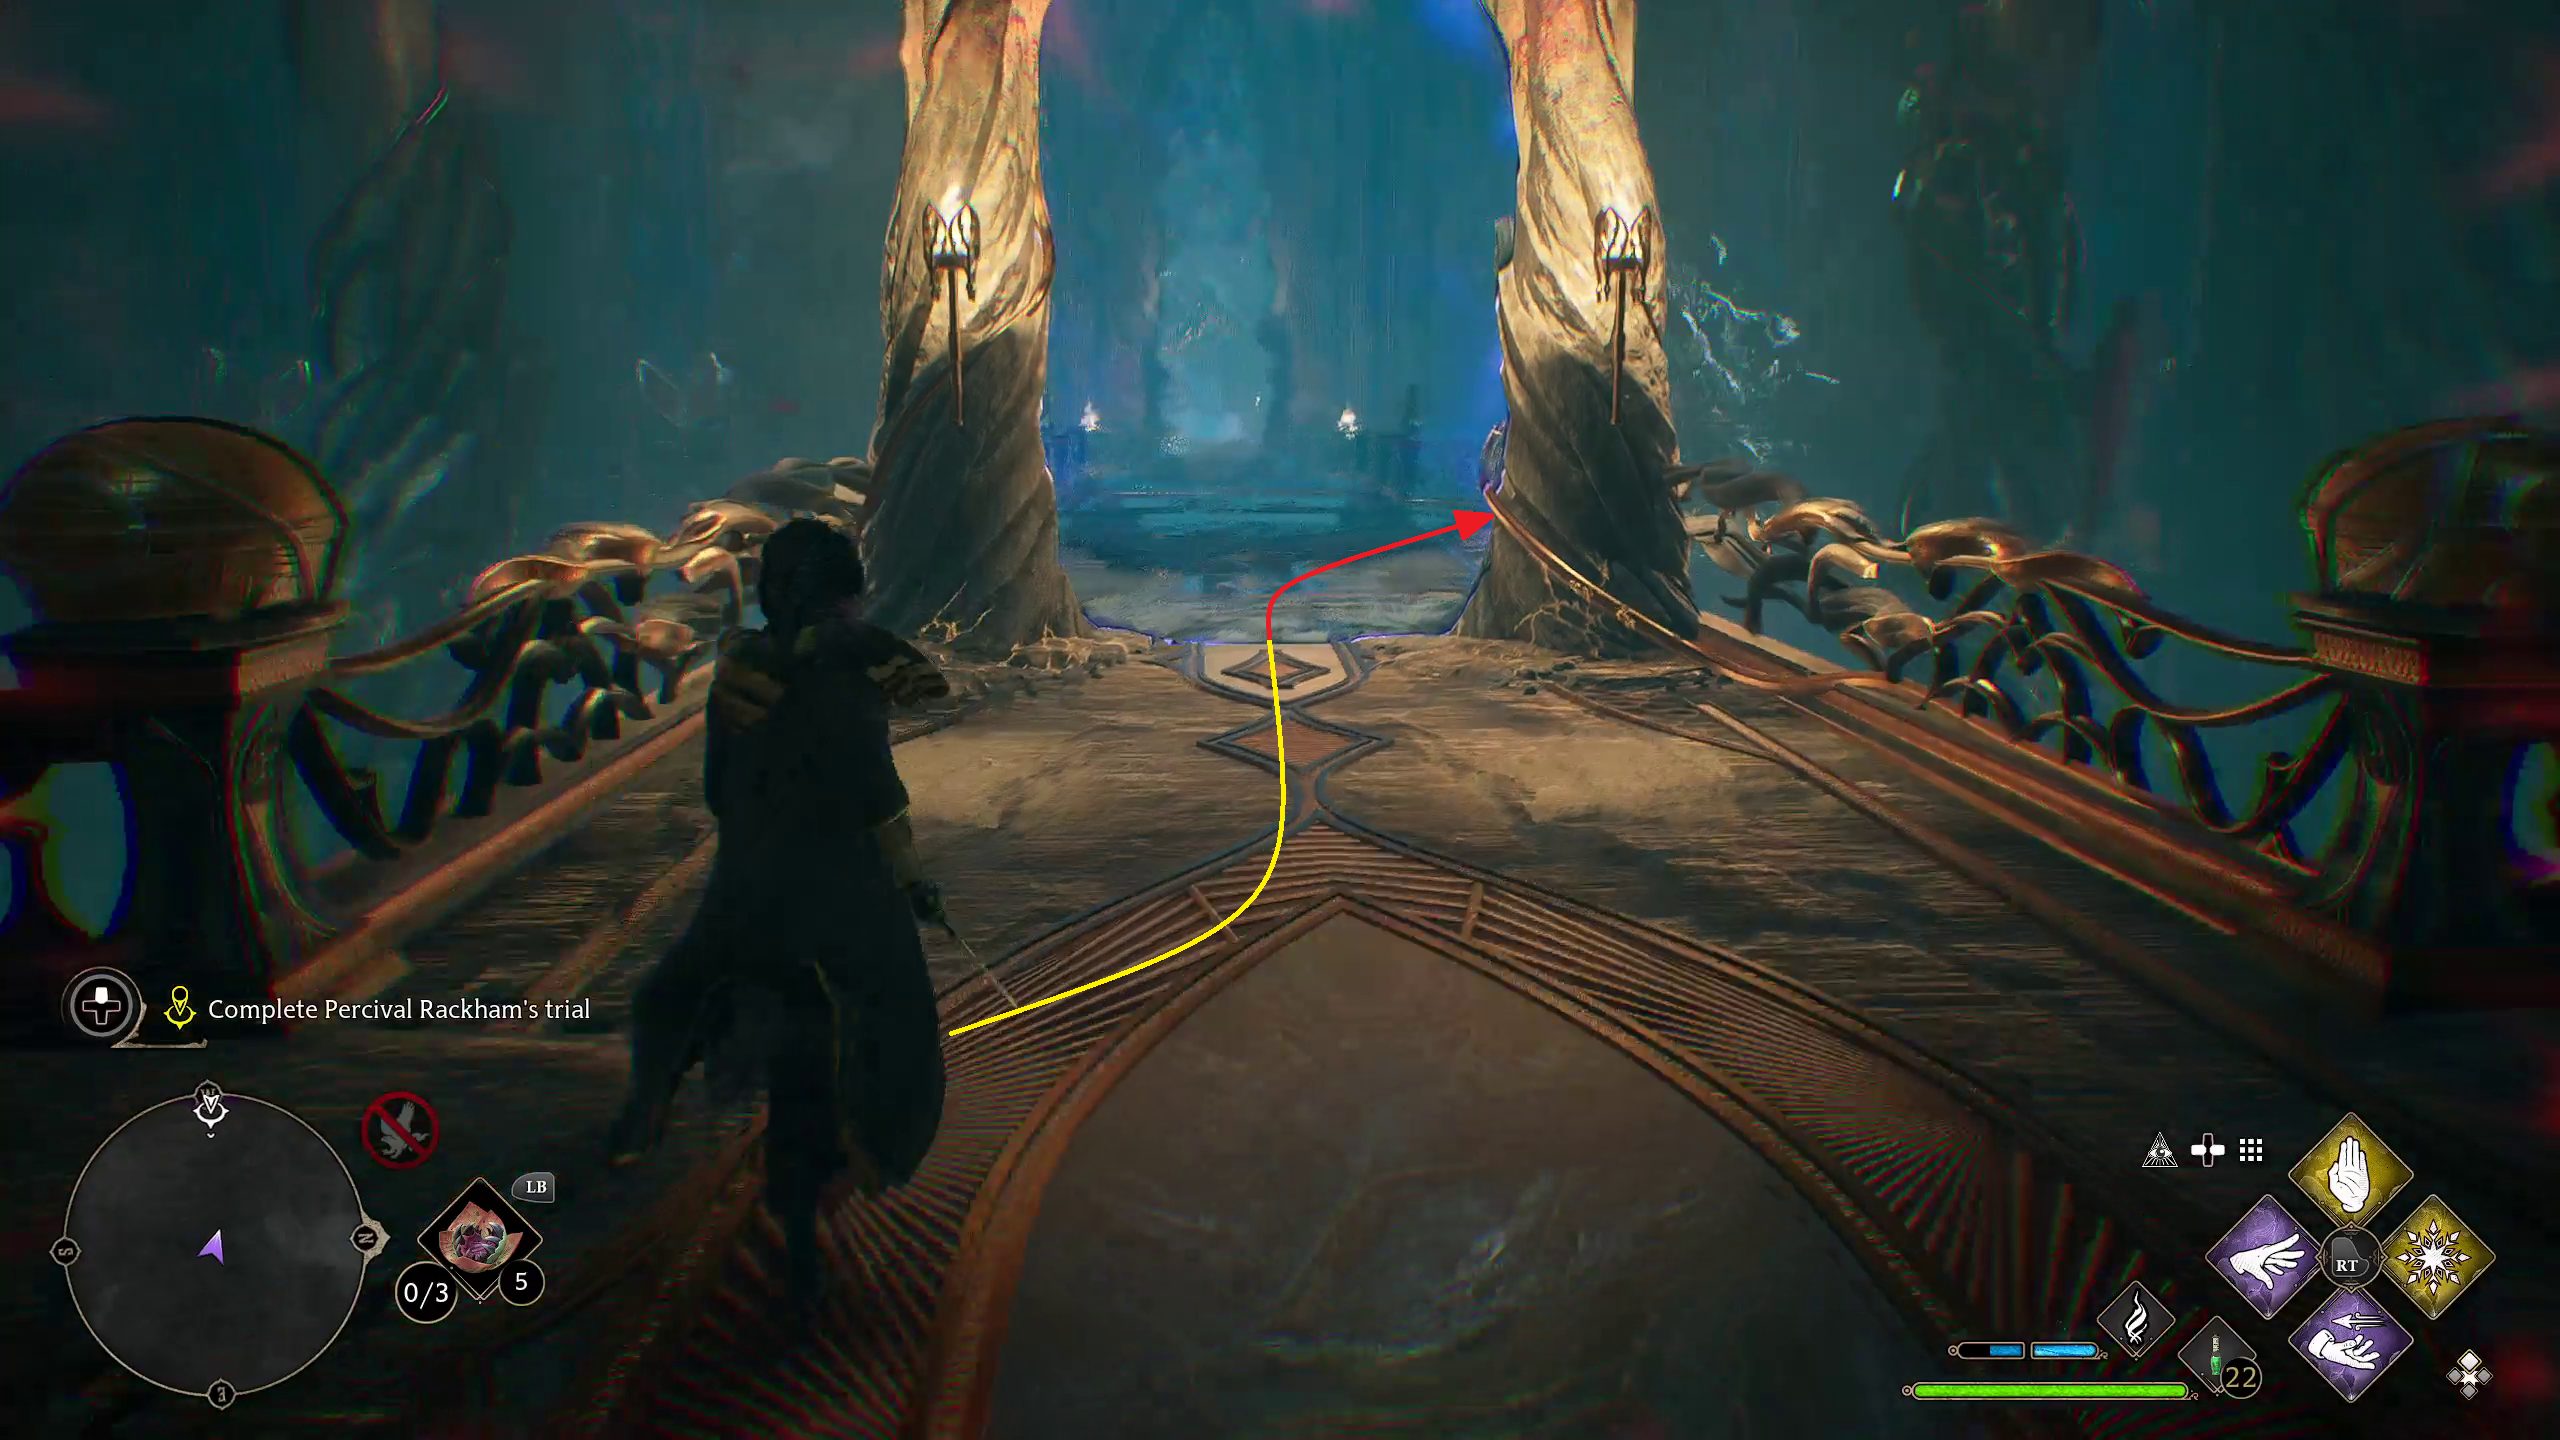
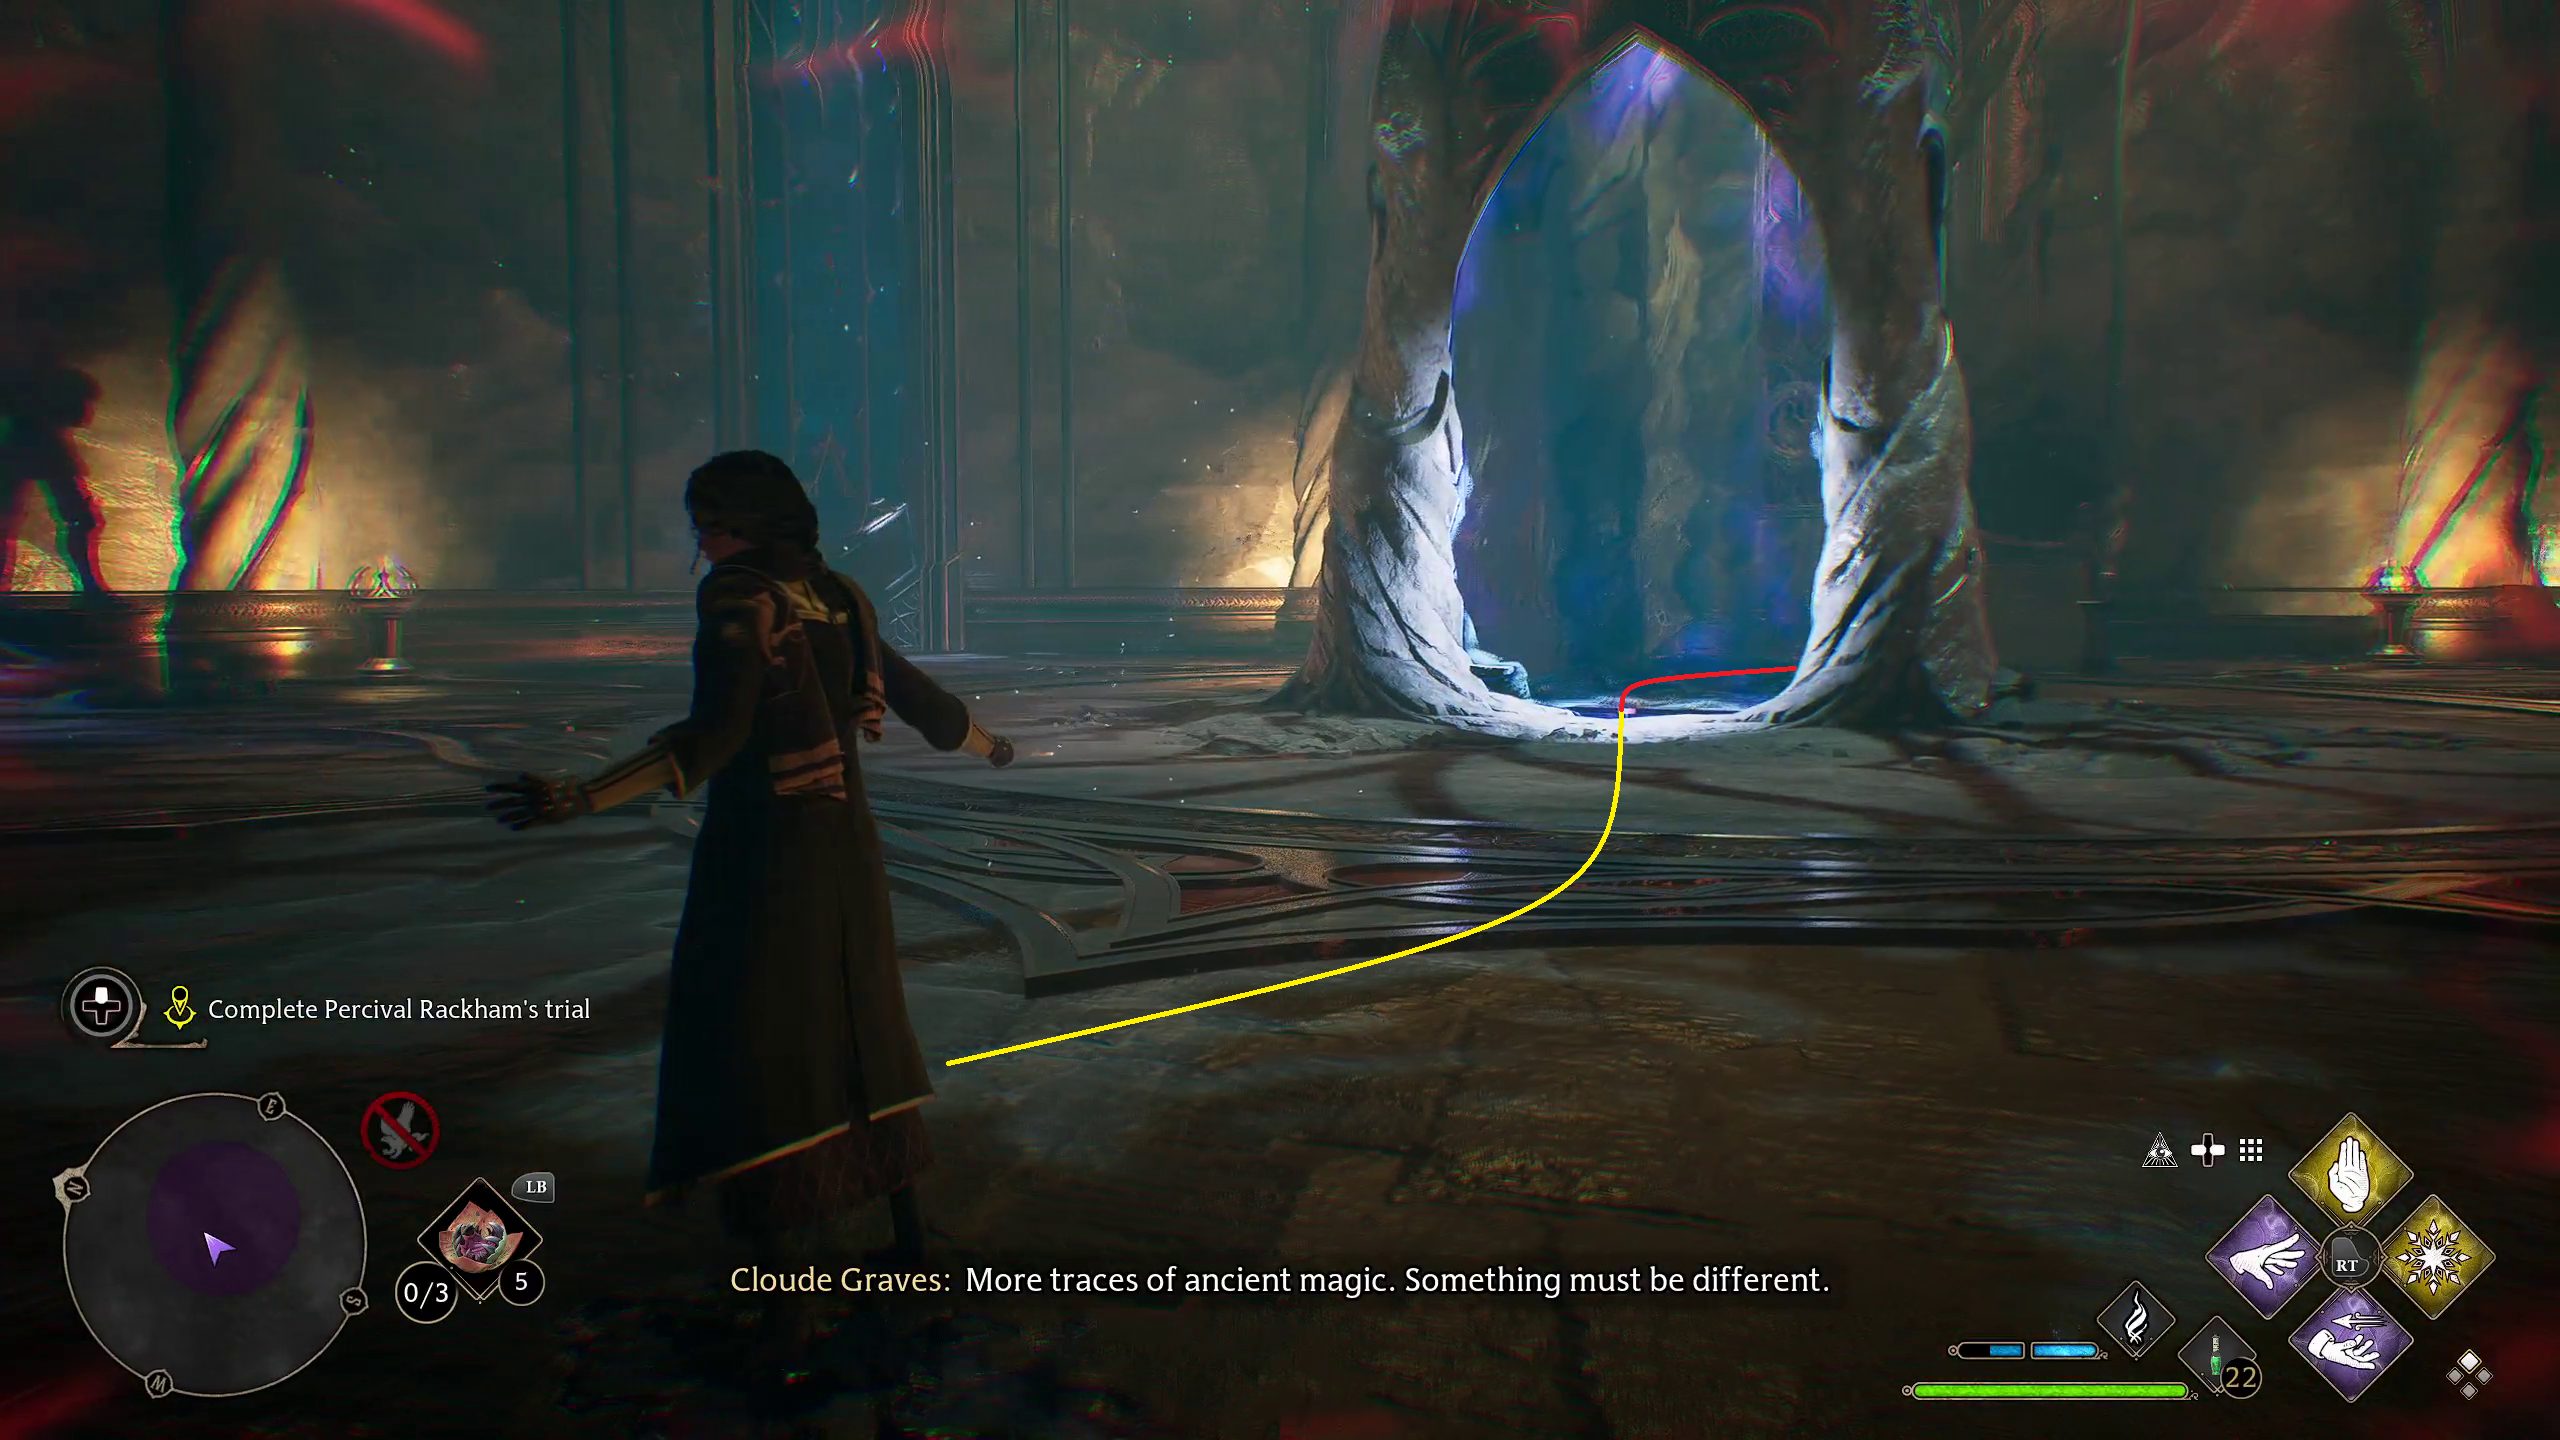
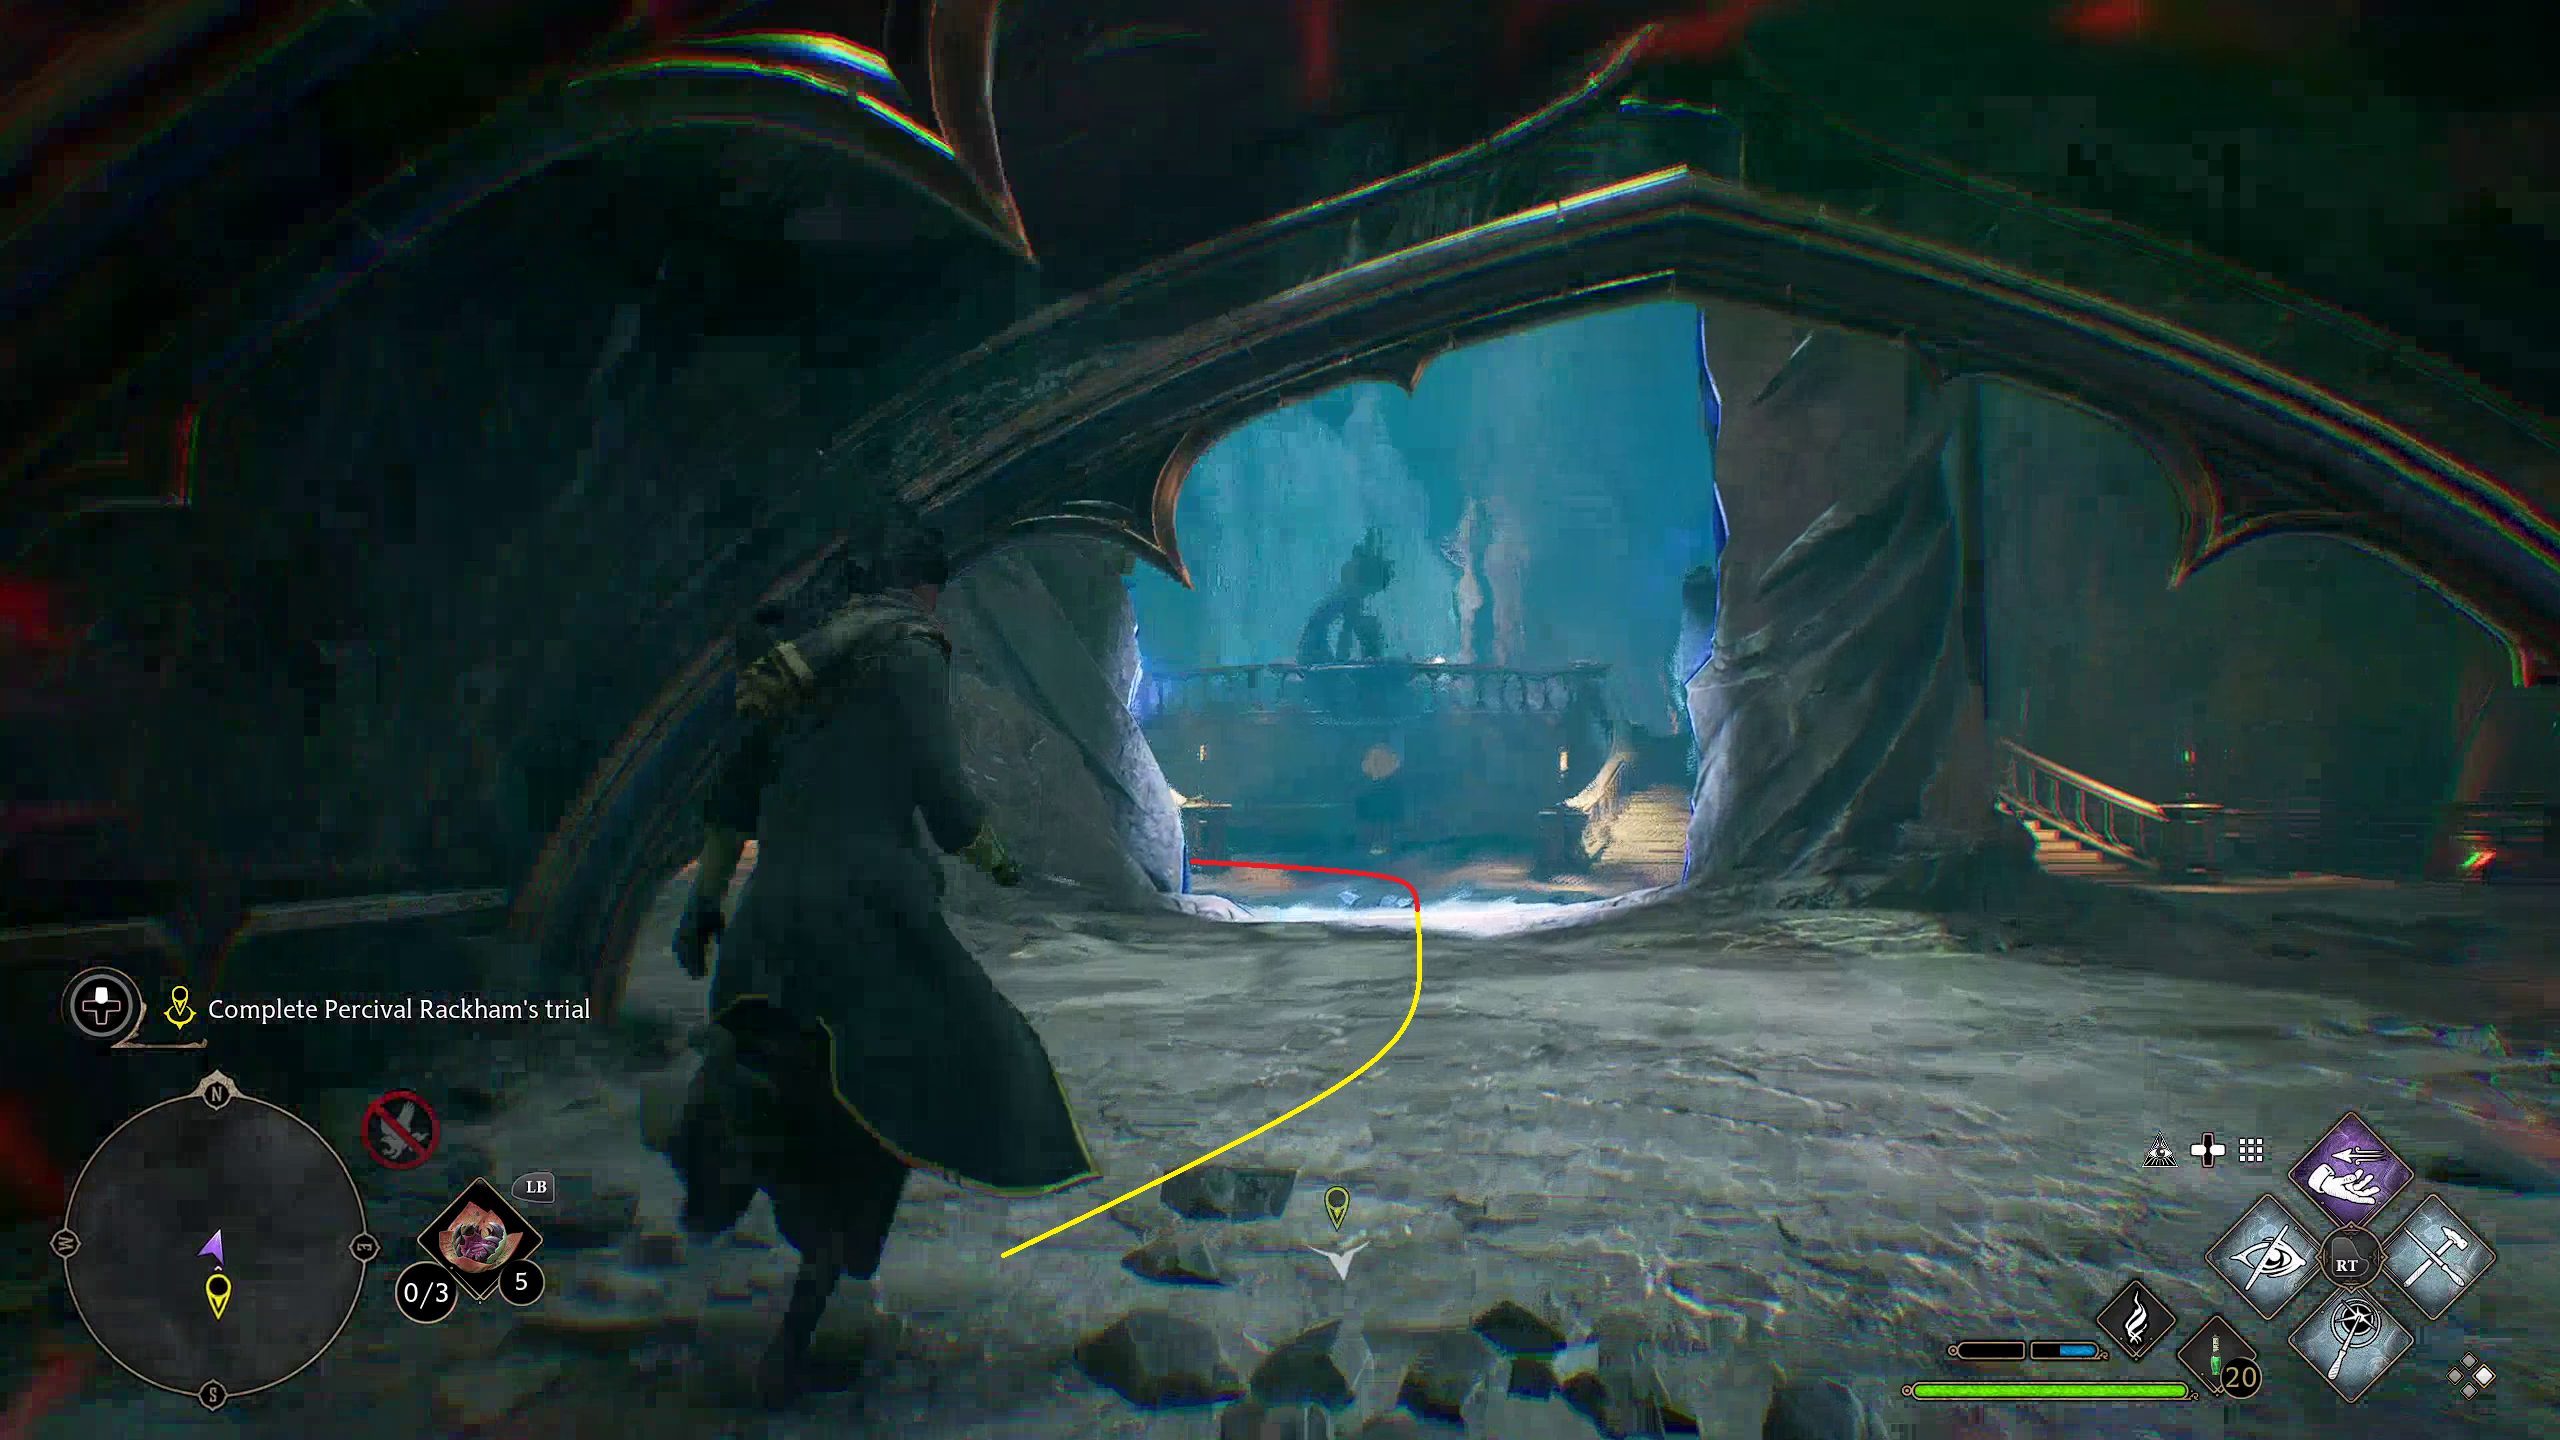
Immediately, you’ll come across an uncrossable gap in a huge atrium. Don’t head to the archway right in front of you. Instead, make a turn to the left or right (1) and then head down the stairs (2). At the bottom, there will be another Ancient Magic swell which you can investigate (/) (3). Now, you can head back up, and you’ll see that the archway has become a portal which you can walk through (4).
1234
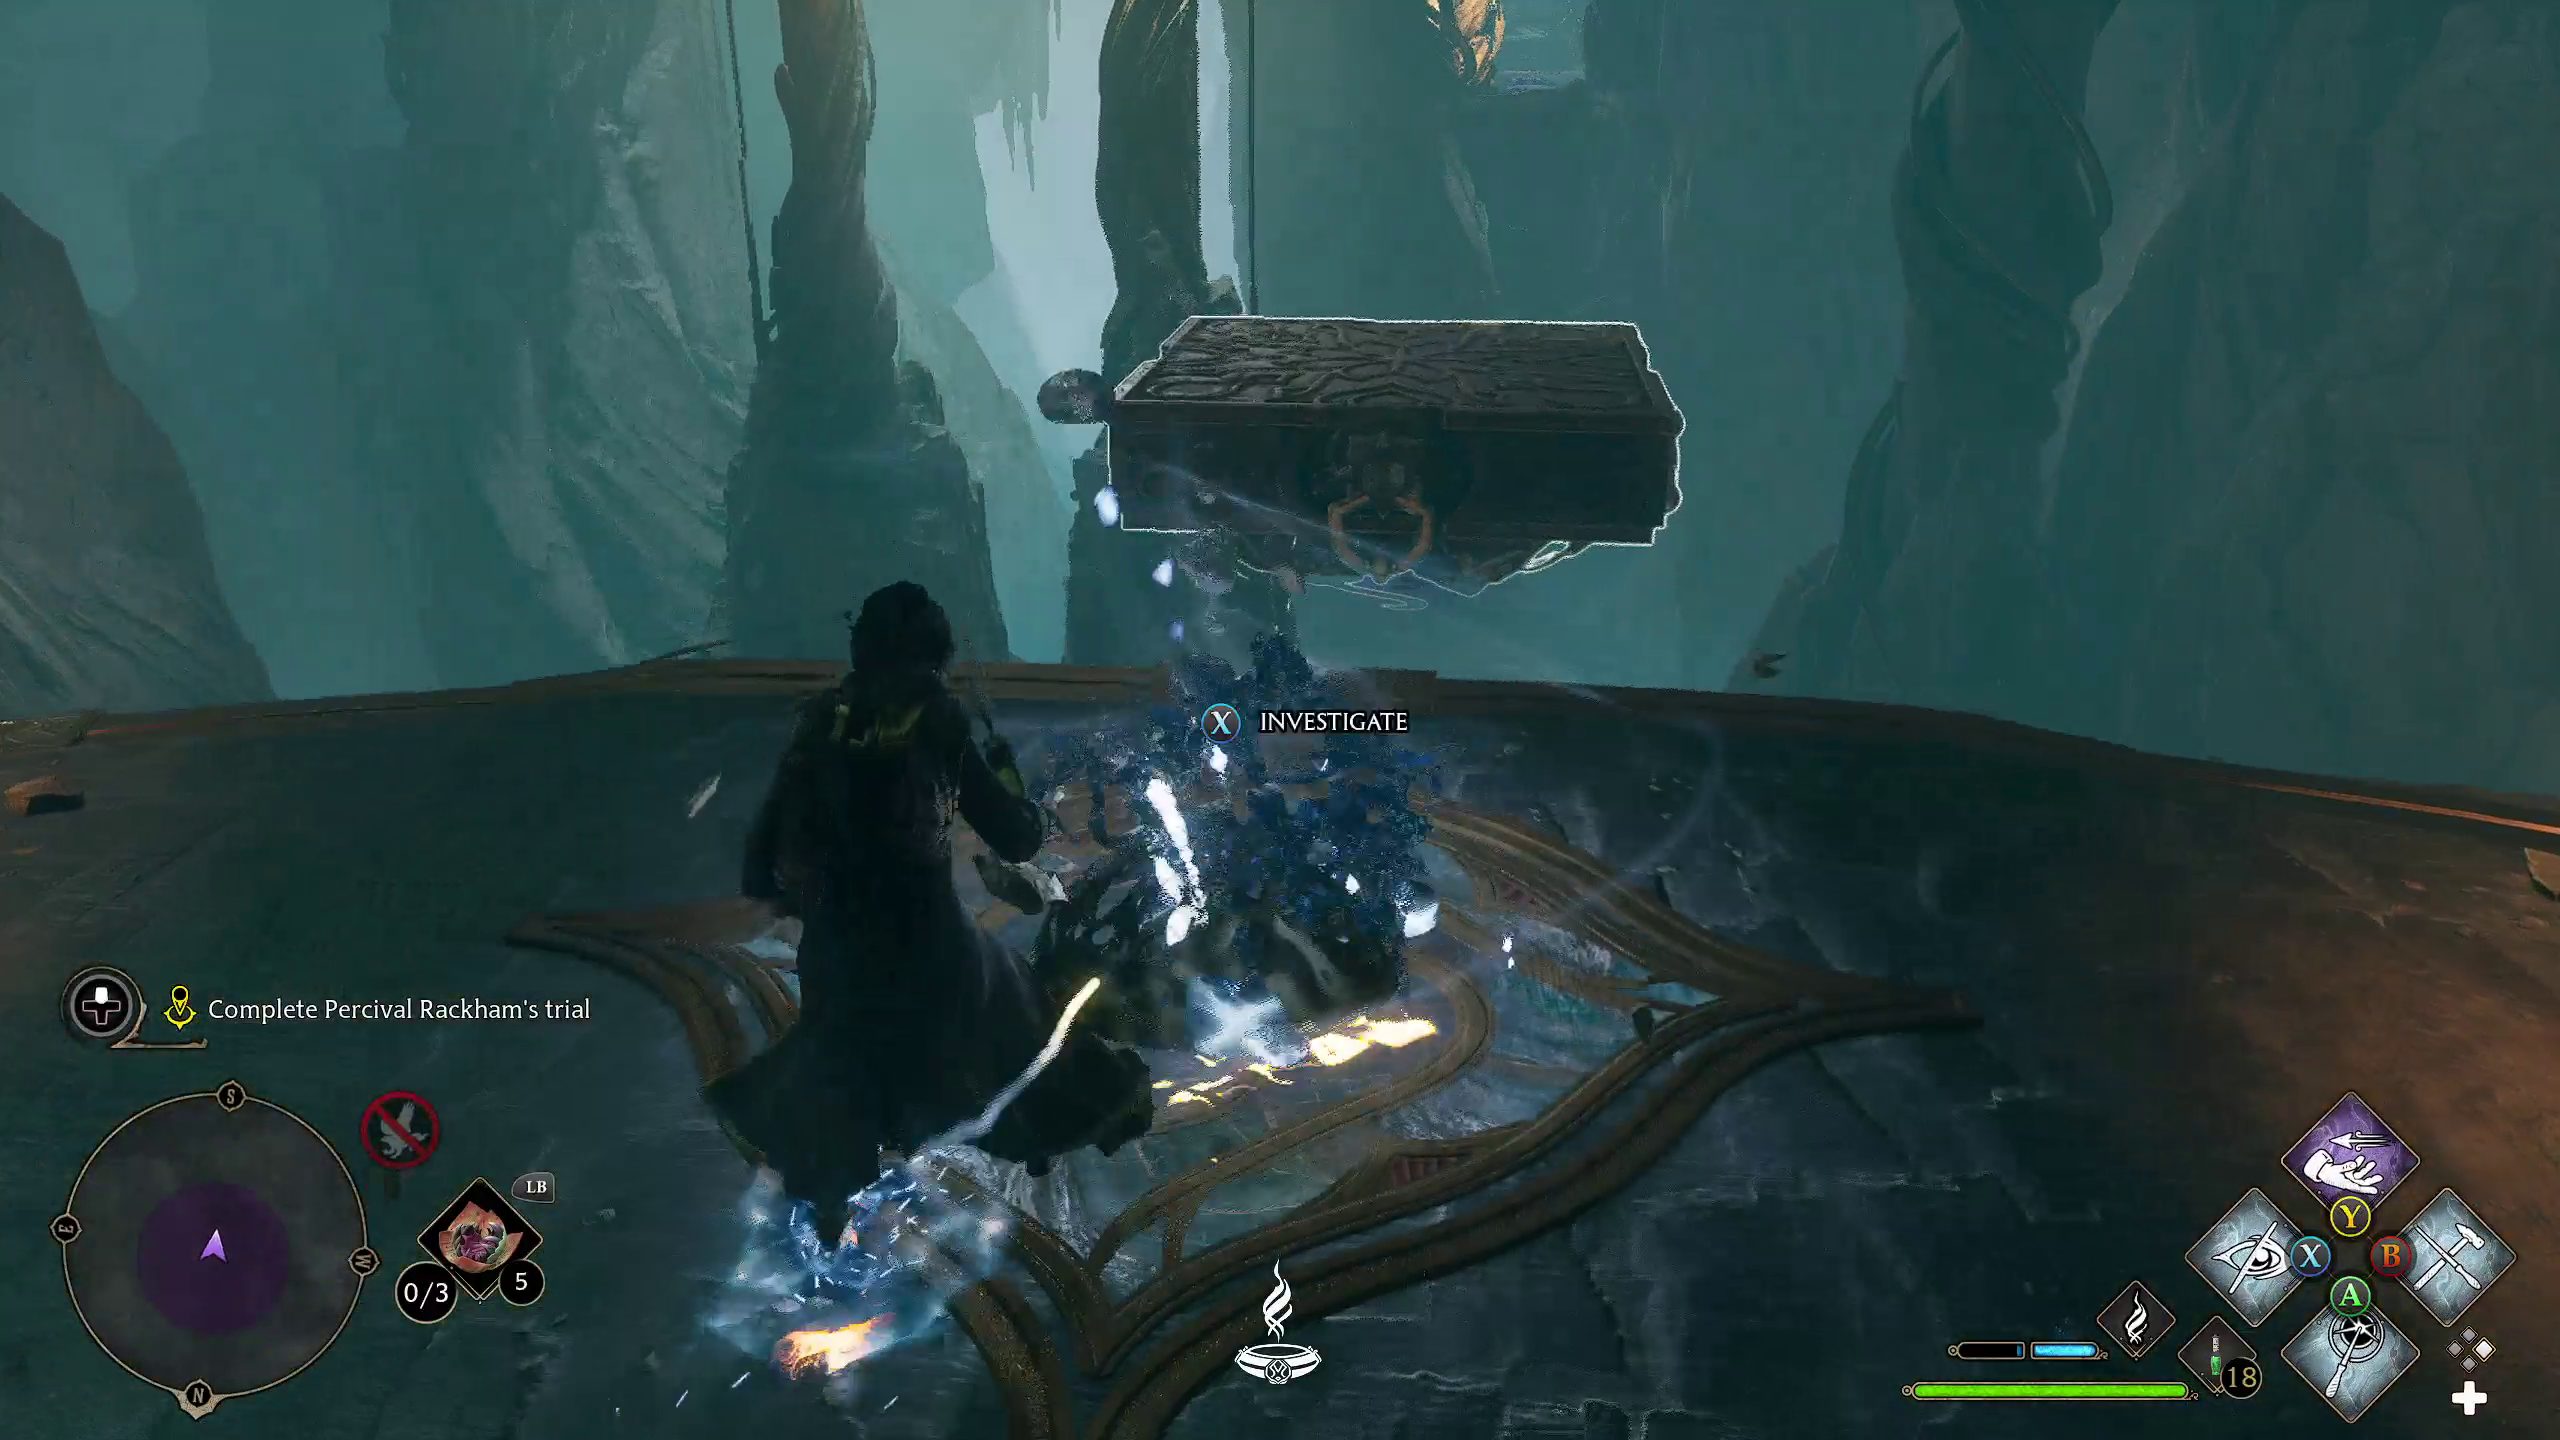
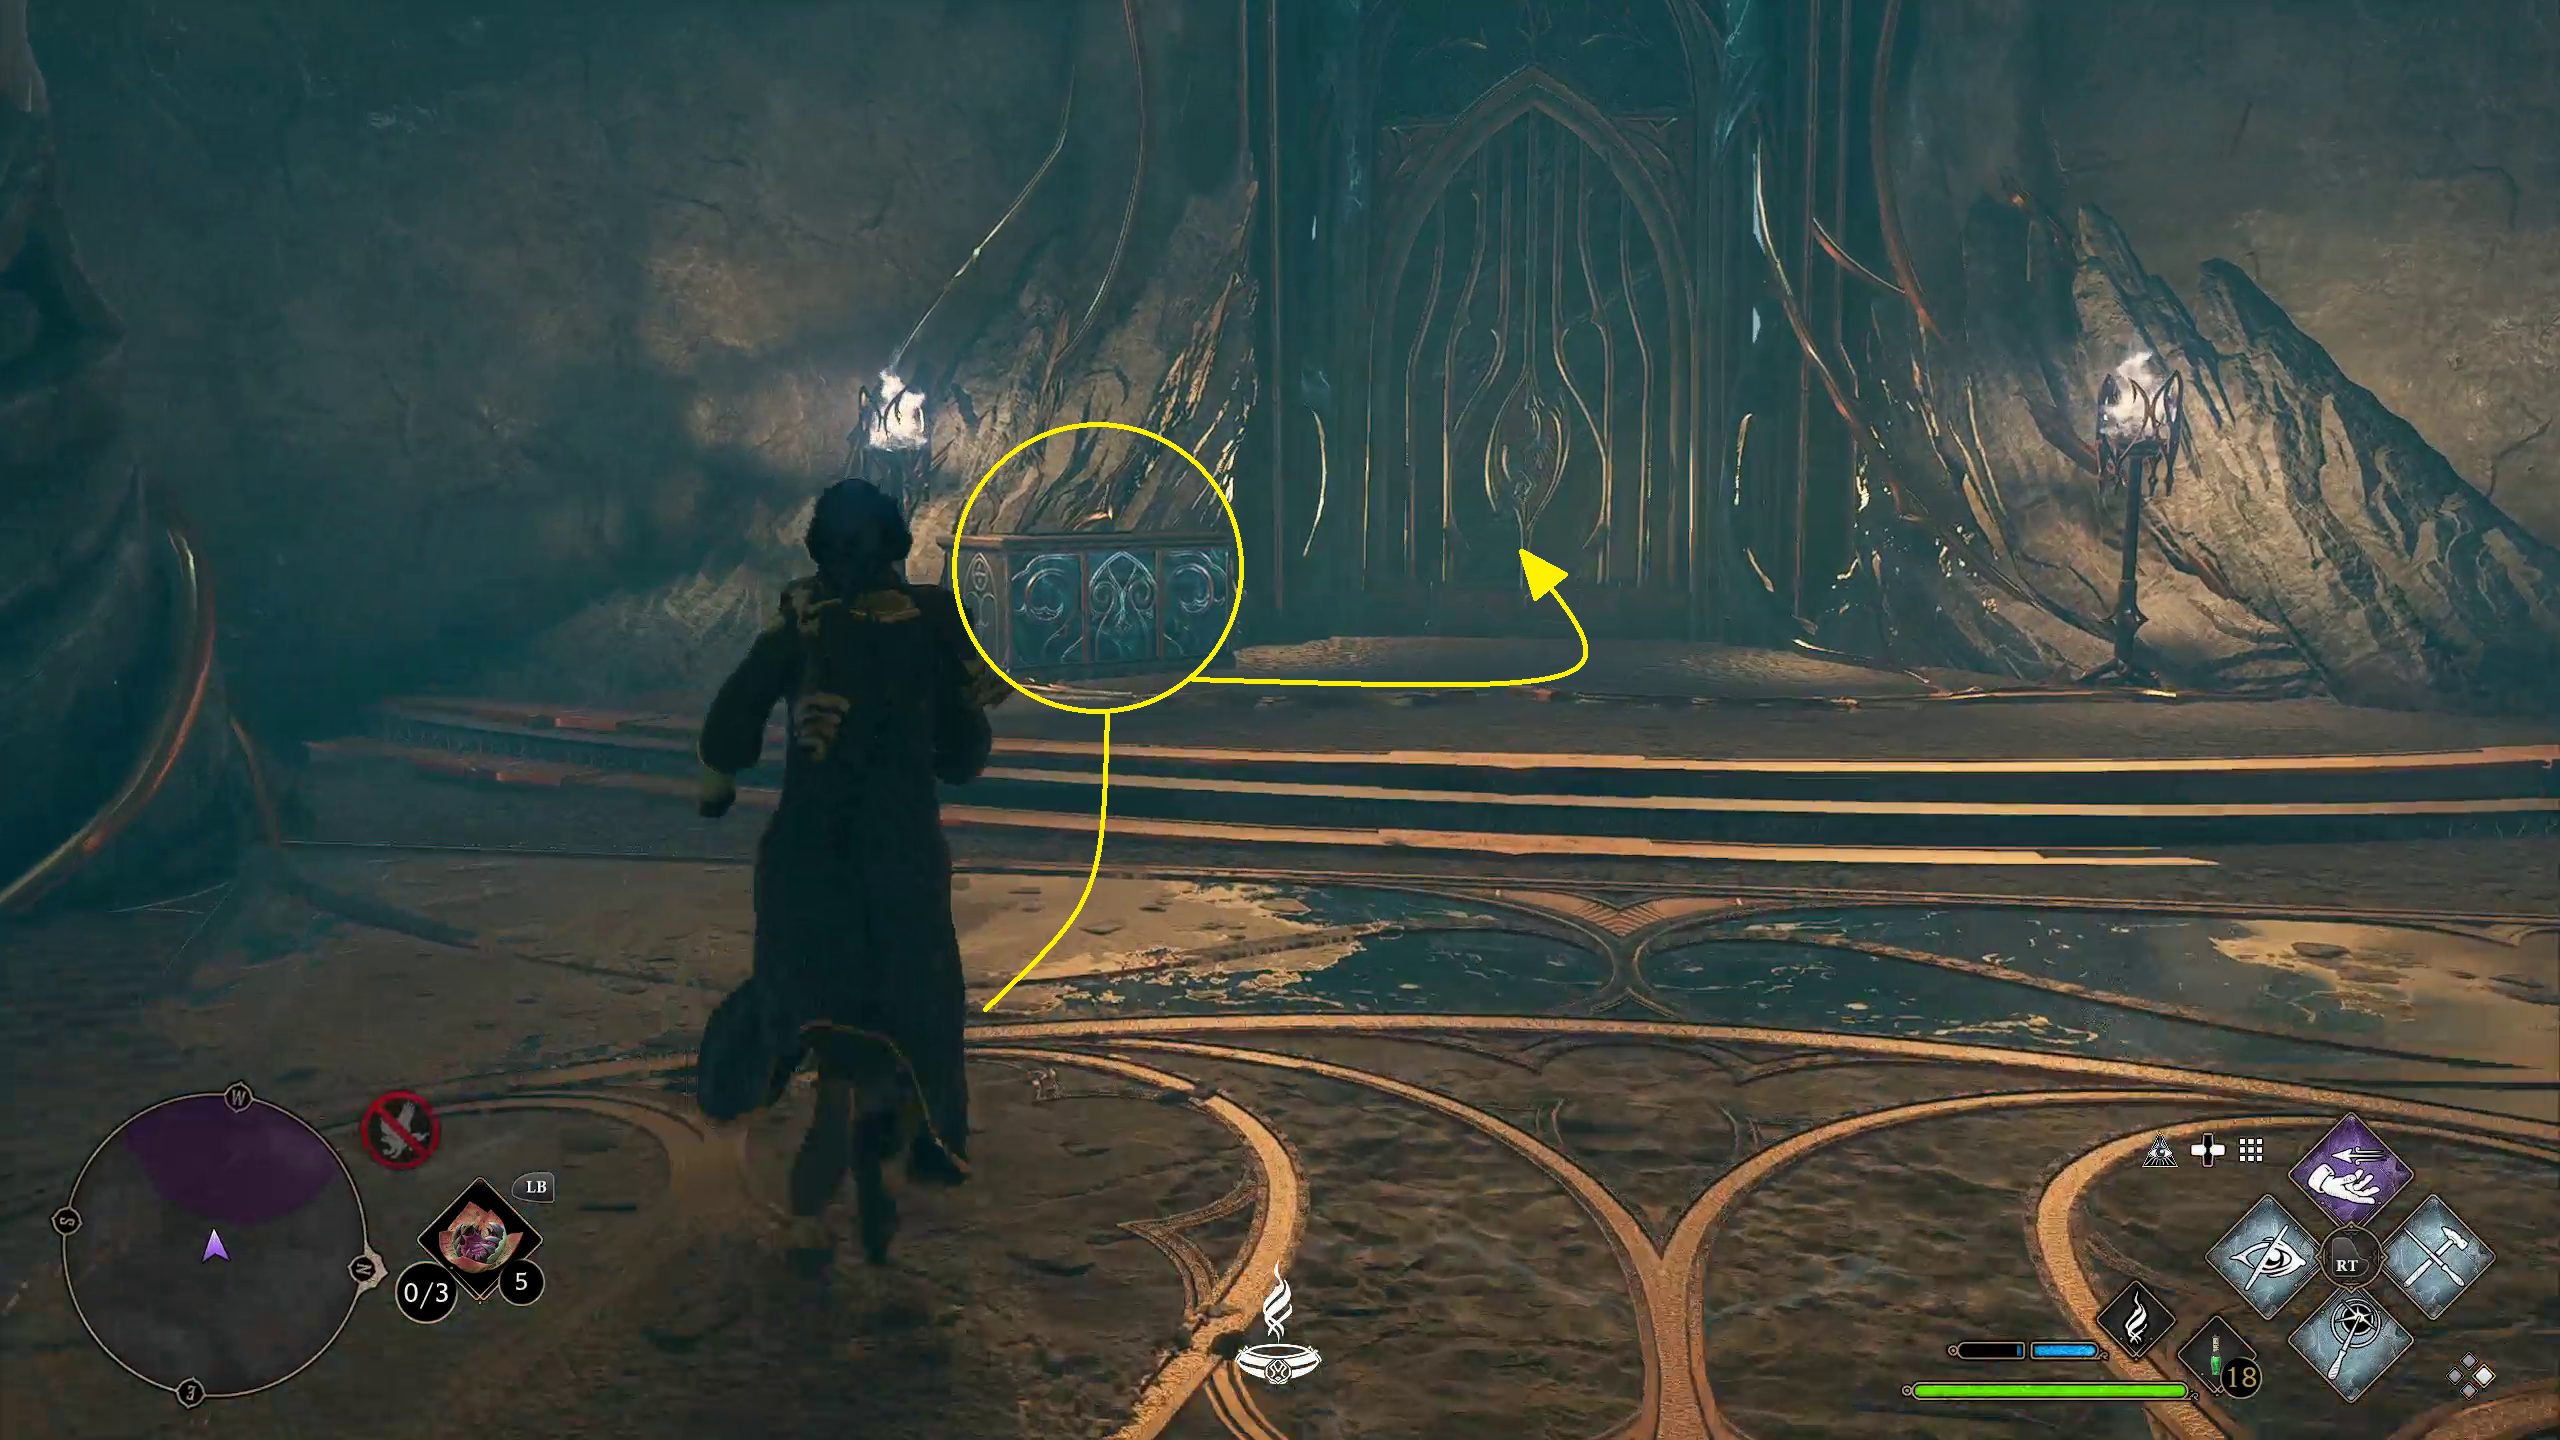
After passing through the portal, there will be chests down the paths to your left and right (1 and 2). Grab them, then continue on, where you’ll come across a wibbly walkway (3) which will take you down into an ominous room with statues all around.
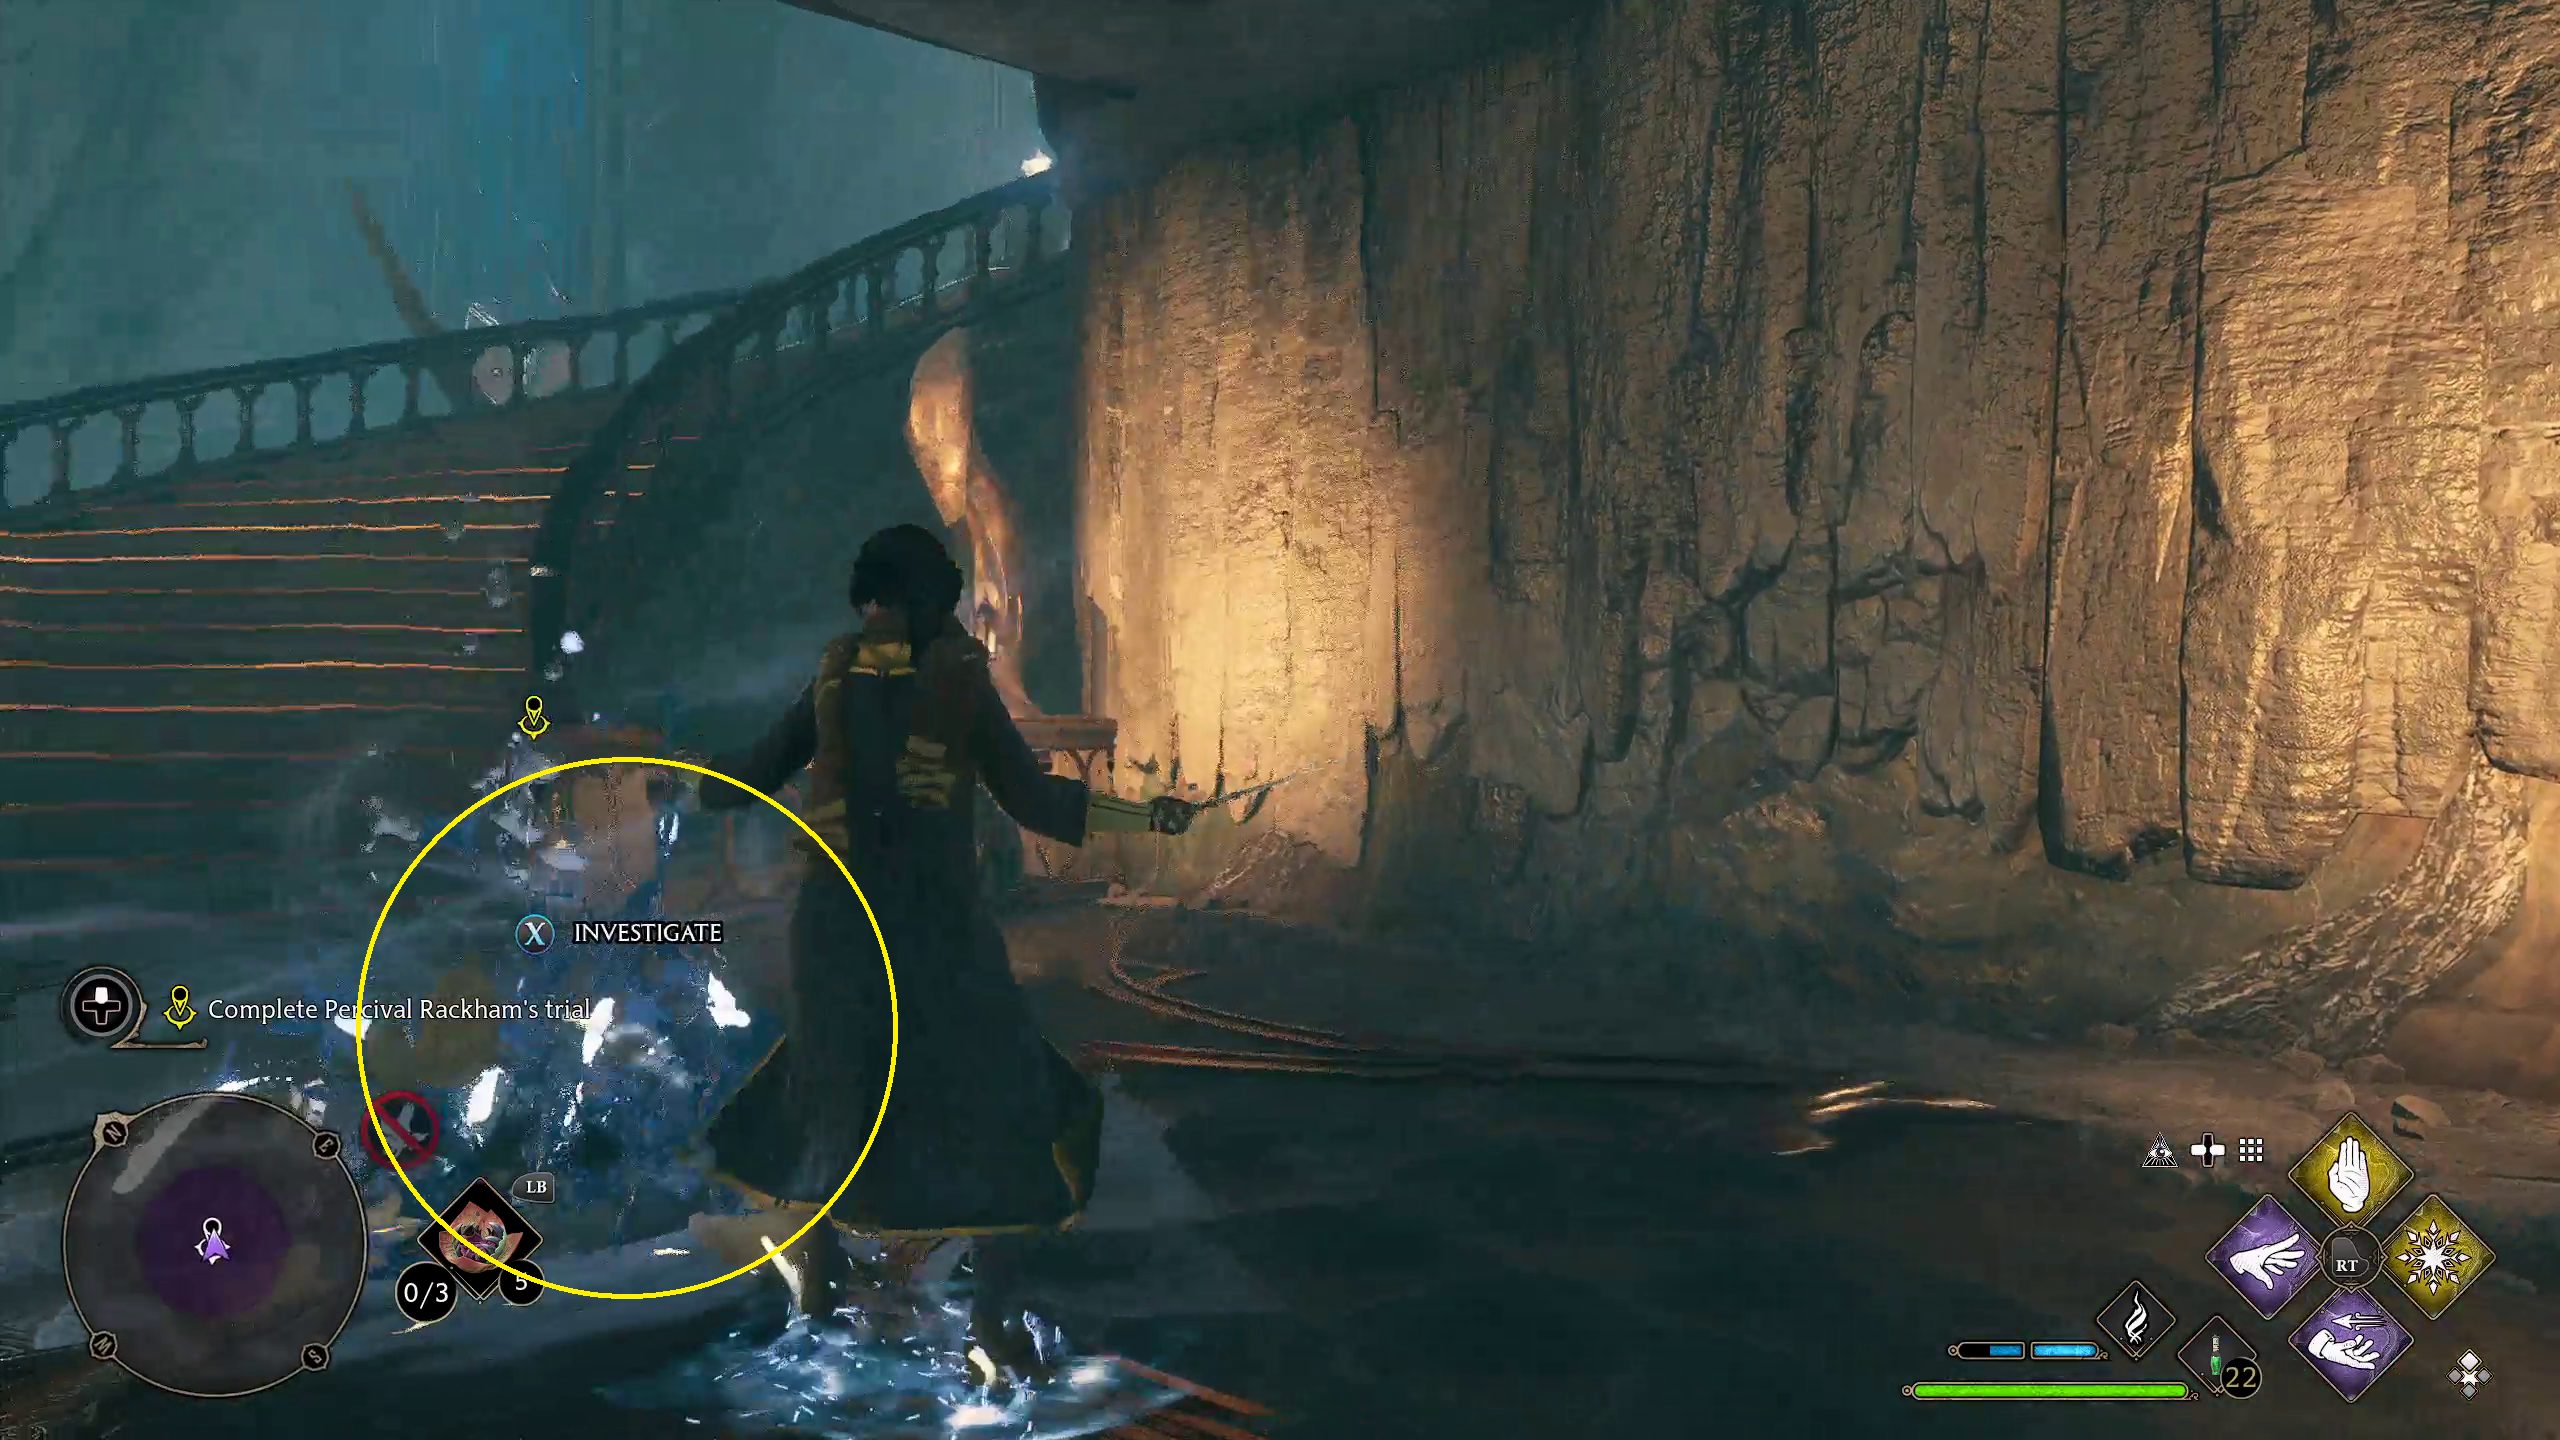
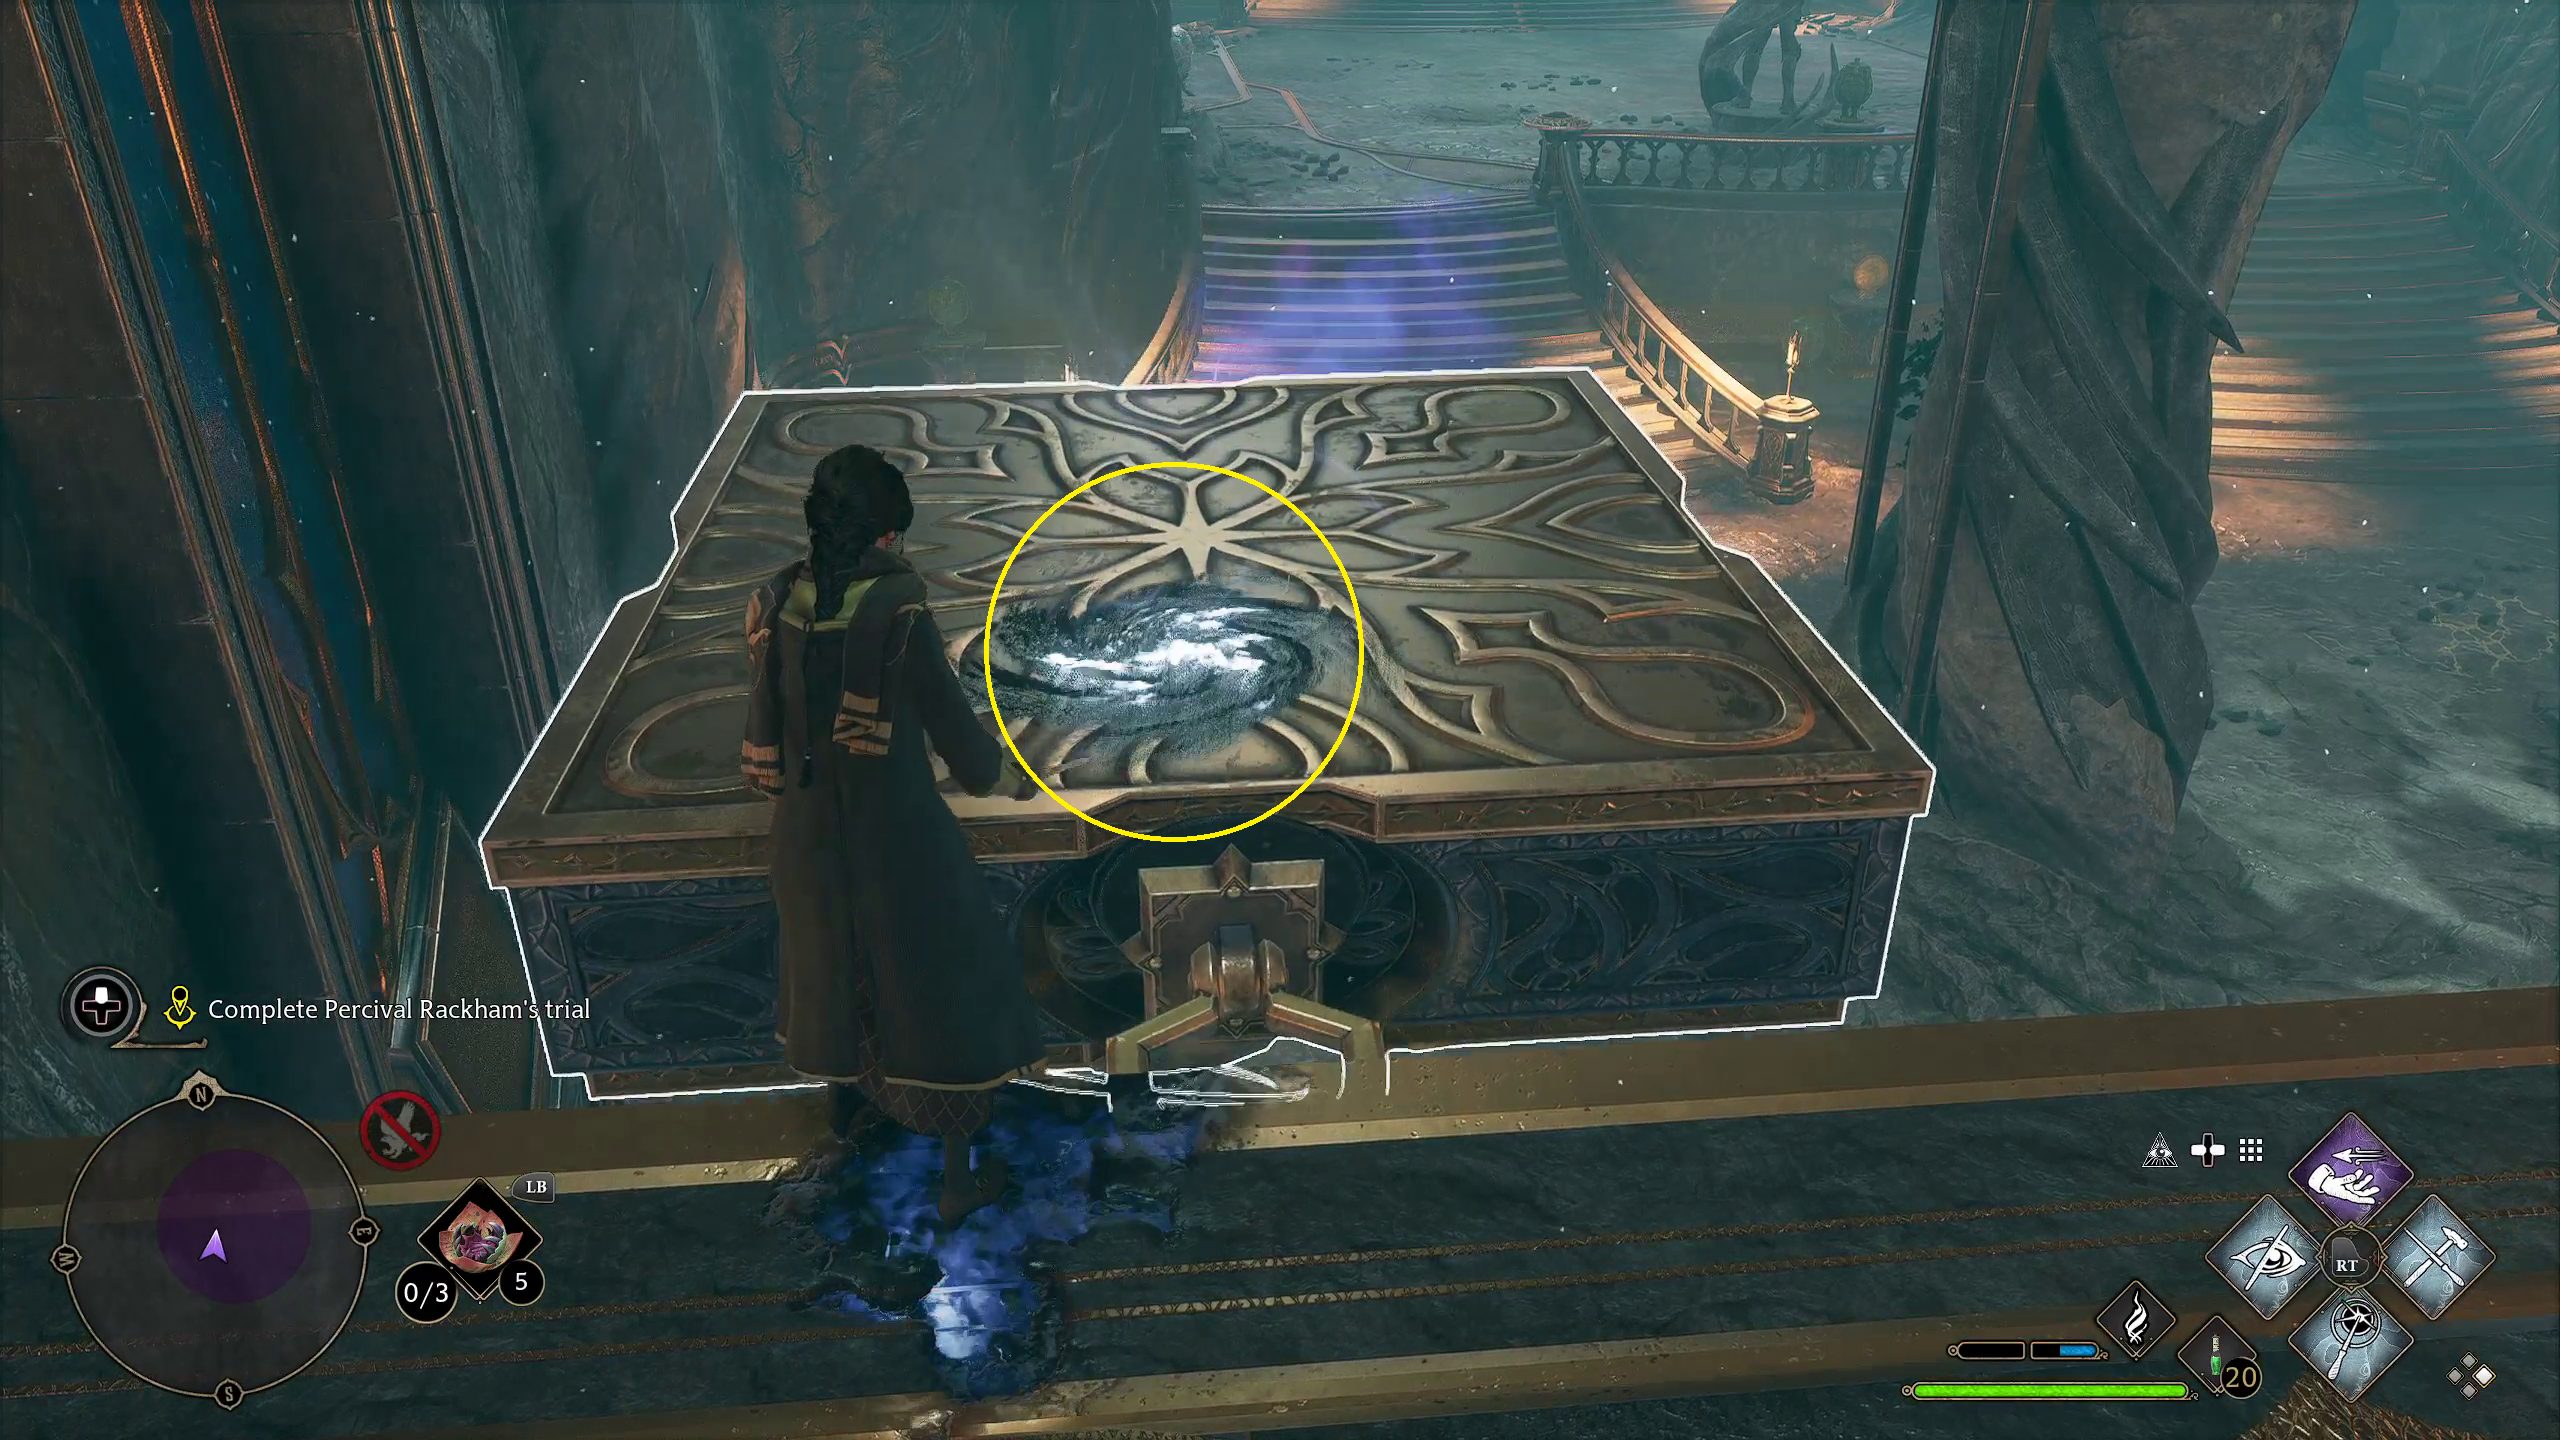
Thankfully, however, these statues aren’t going to come to life (yet). Instead, walk past them. You’ll come across another ancient magic swell, but go grab the chest behind it (1) before coming back to activate it (2). Once you do, go through the portal which will open up (3).
123
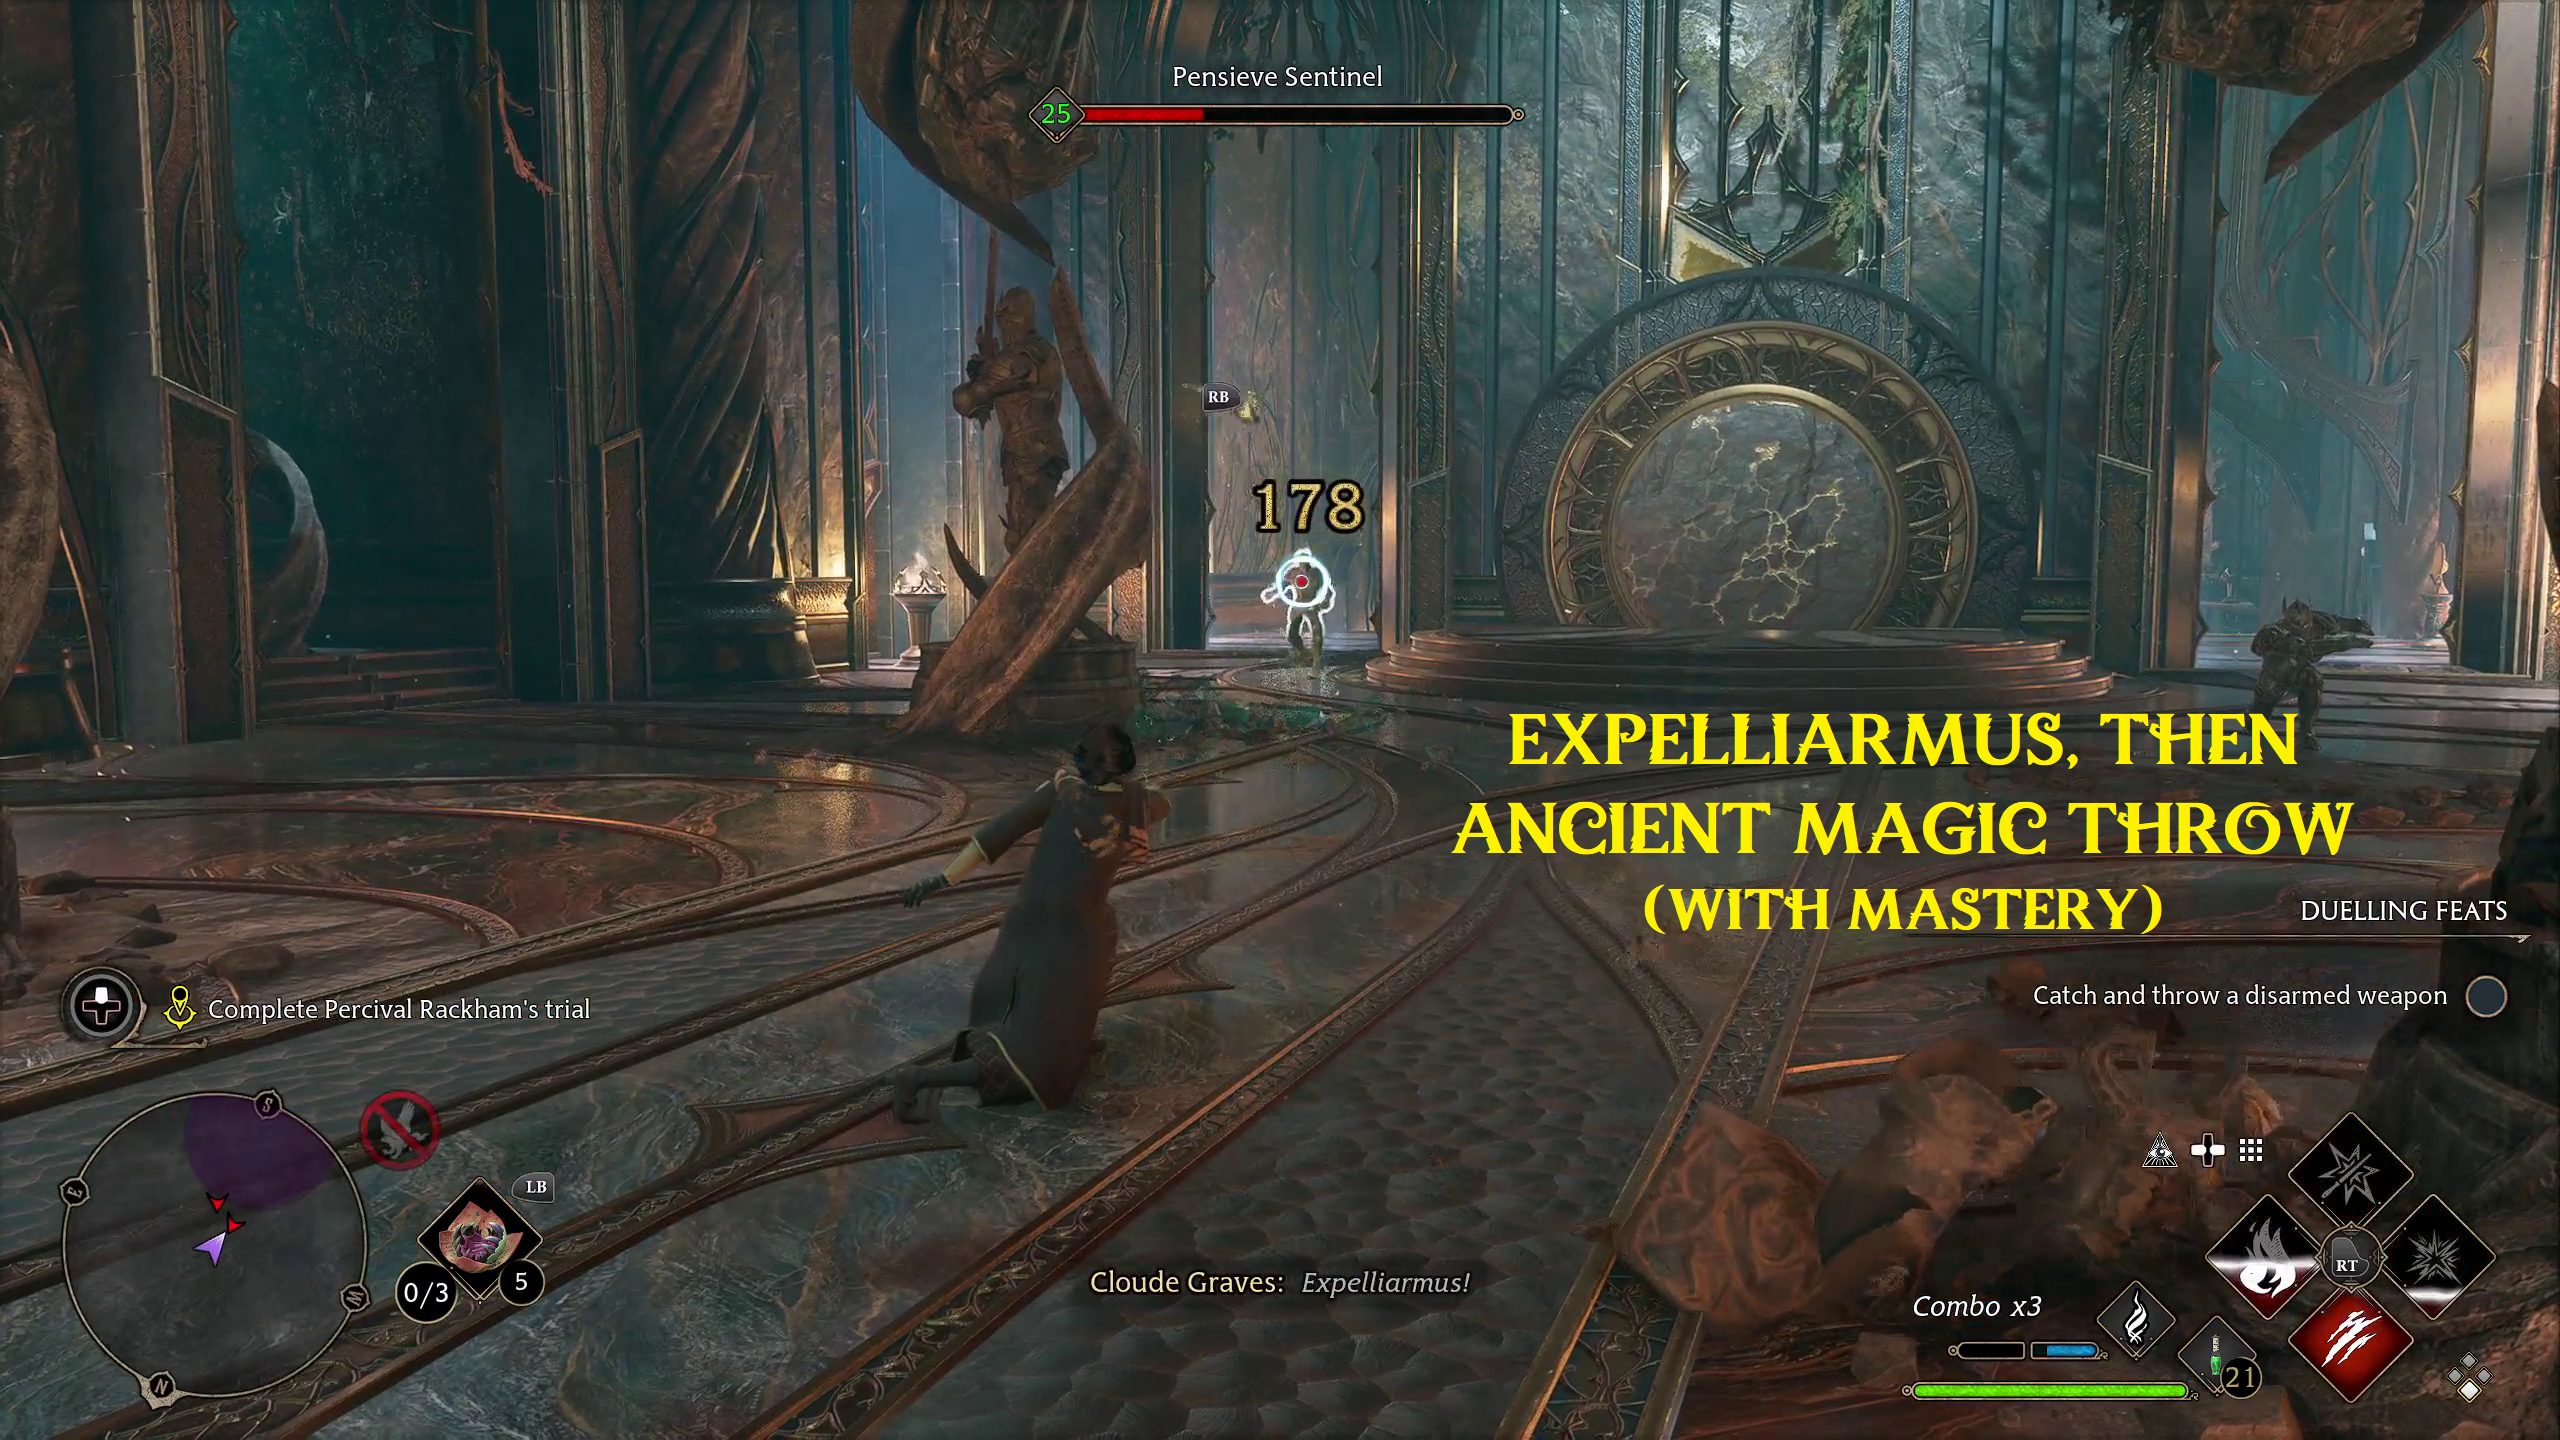
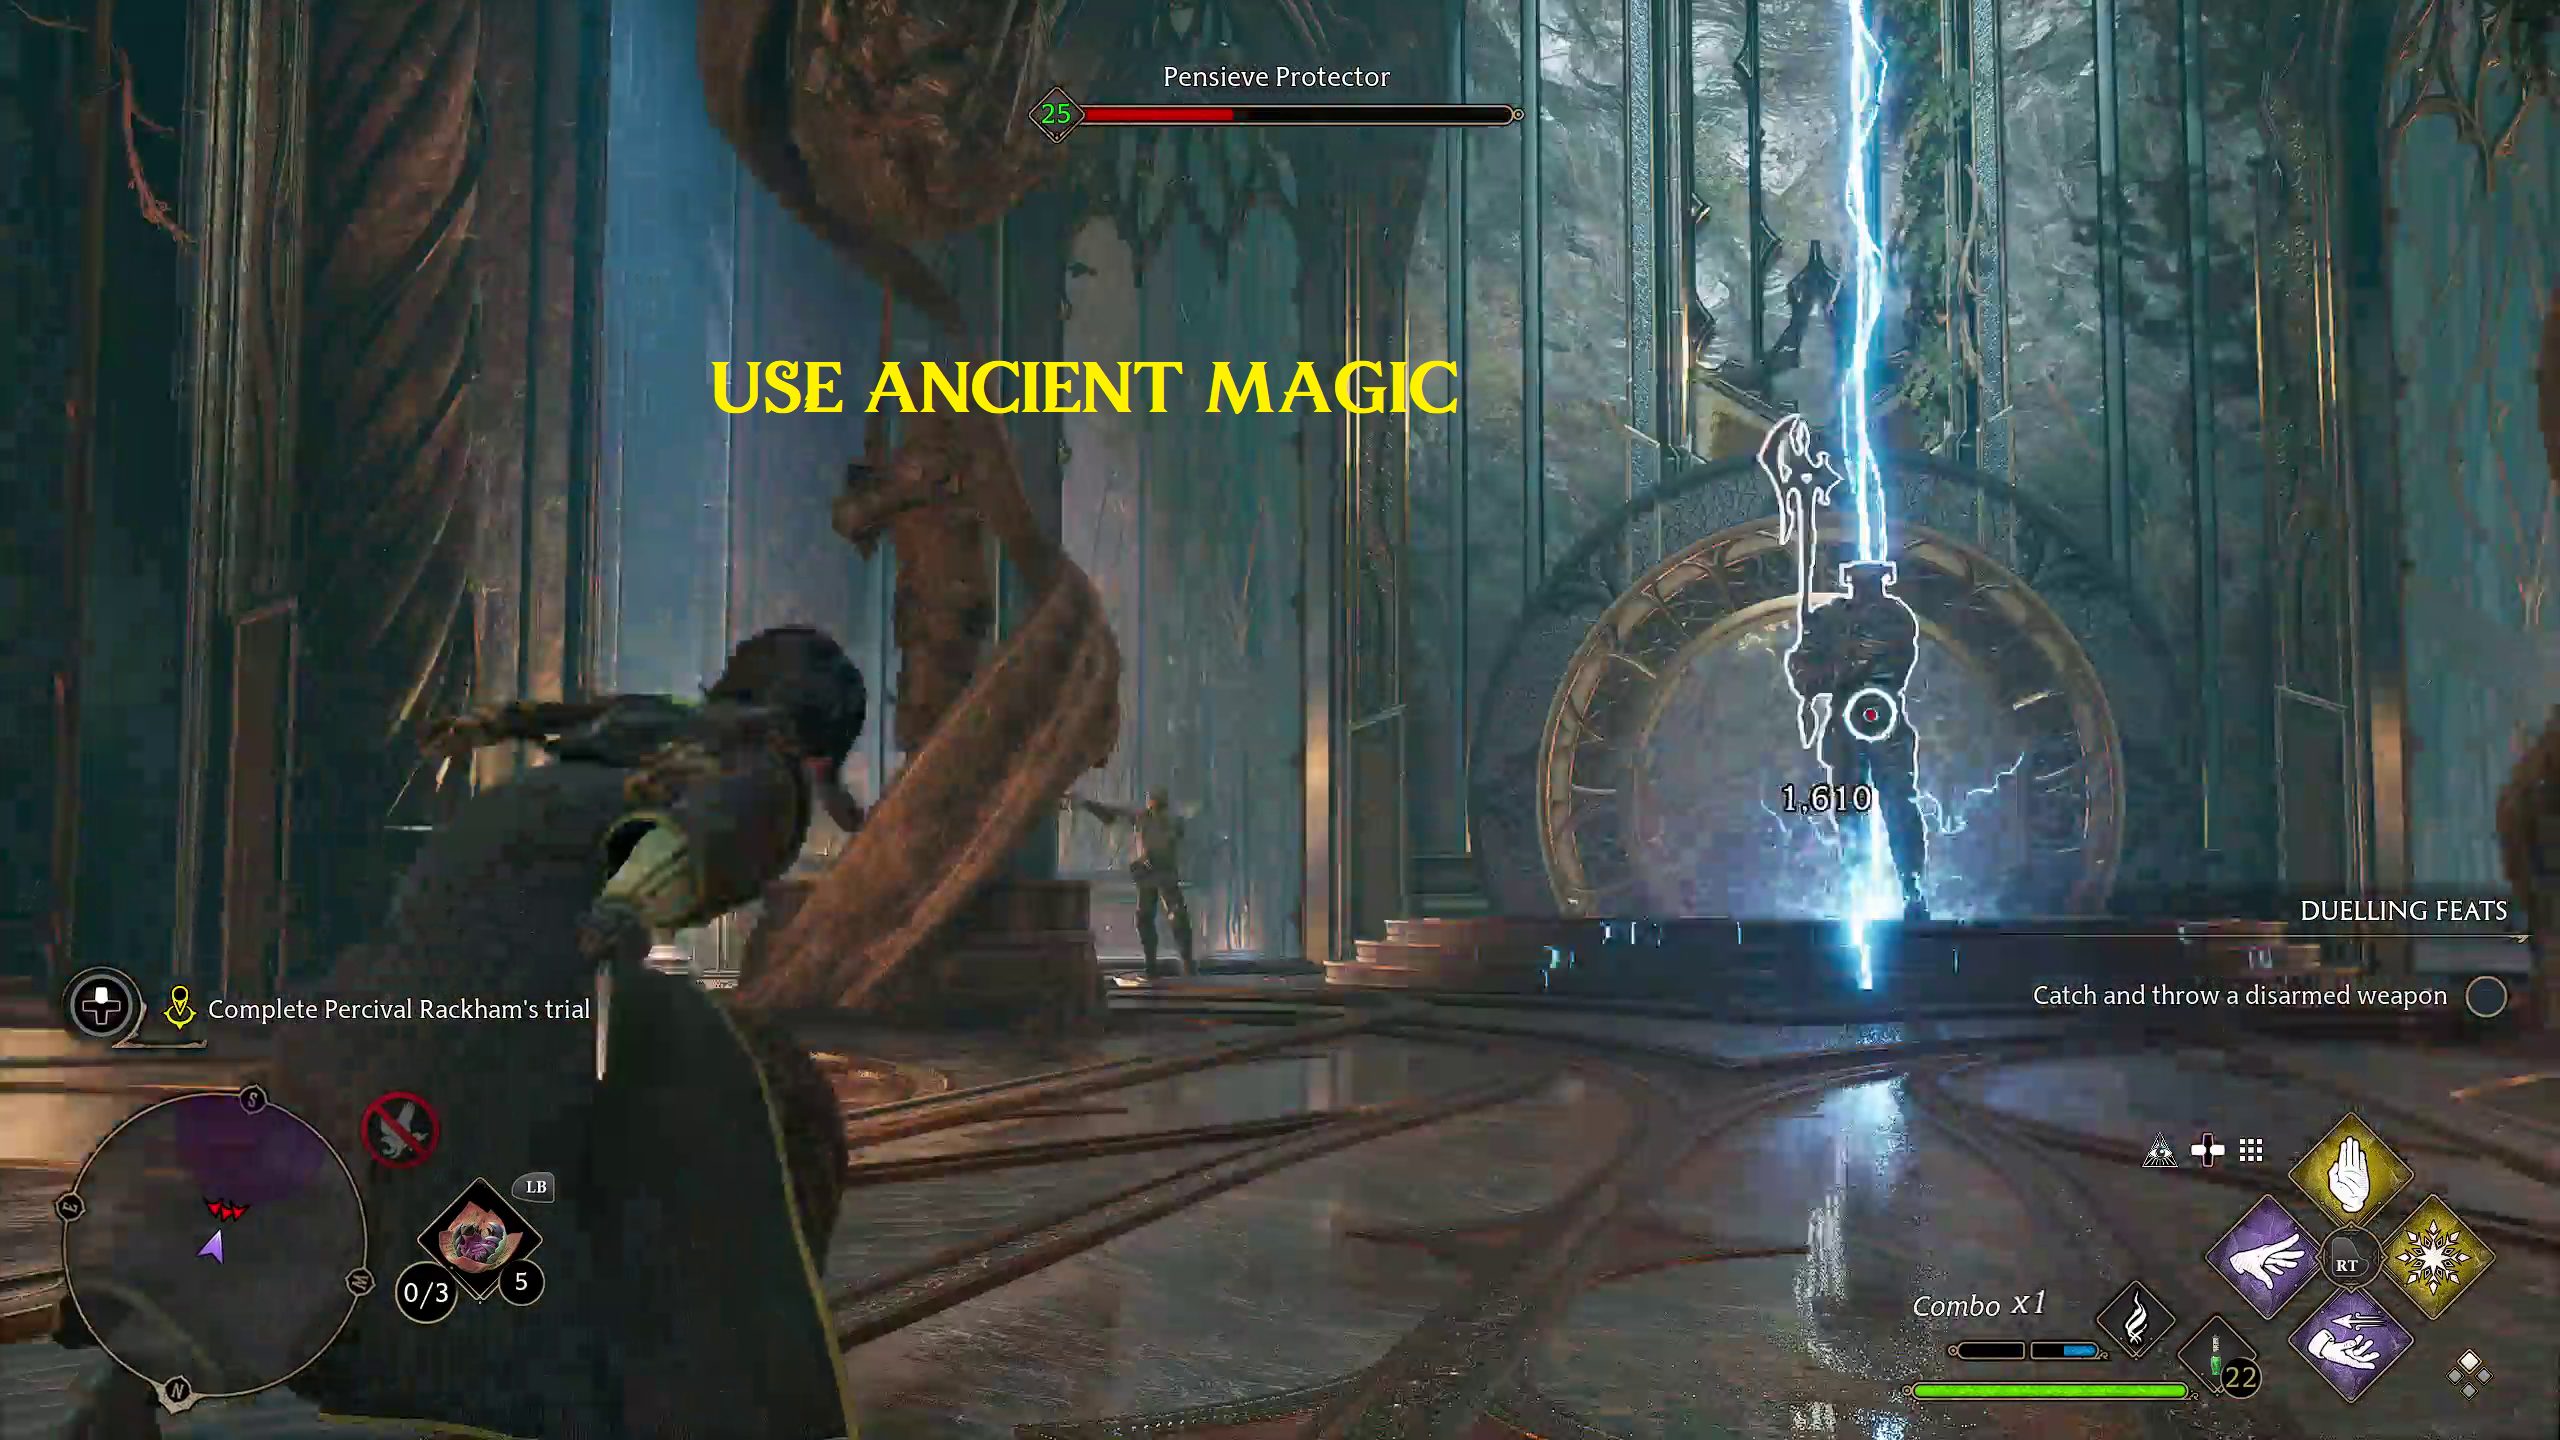
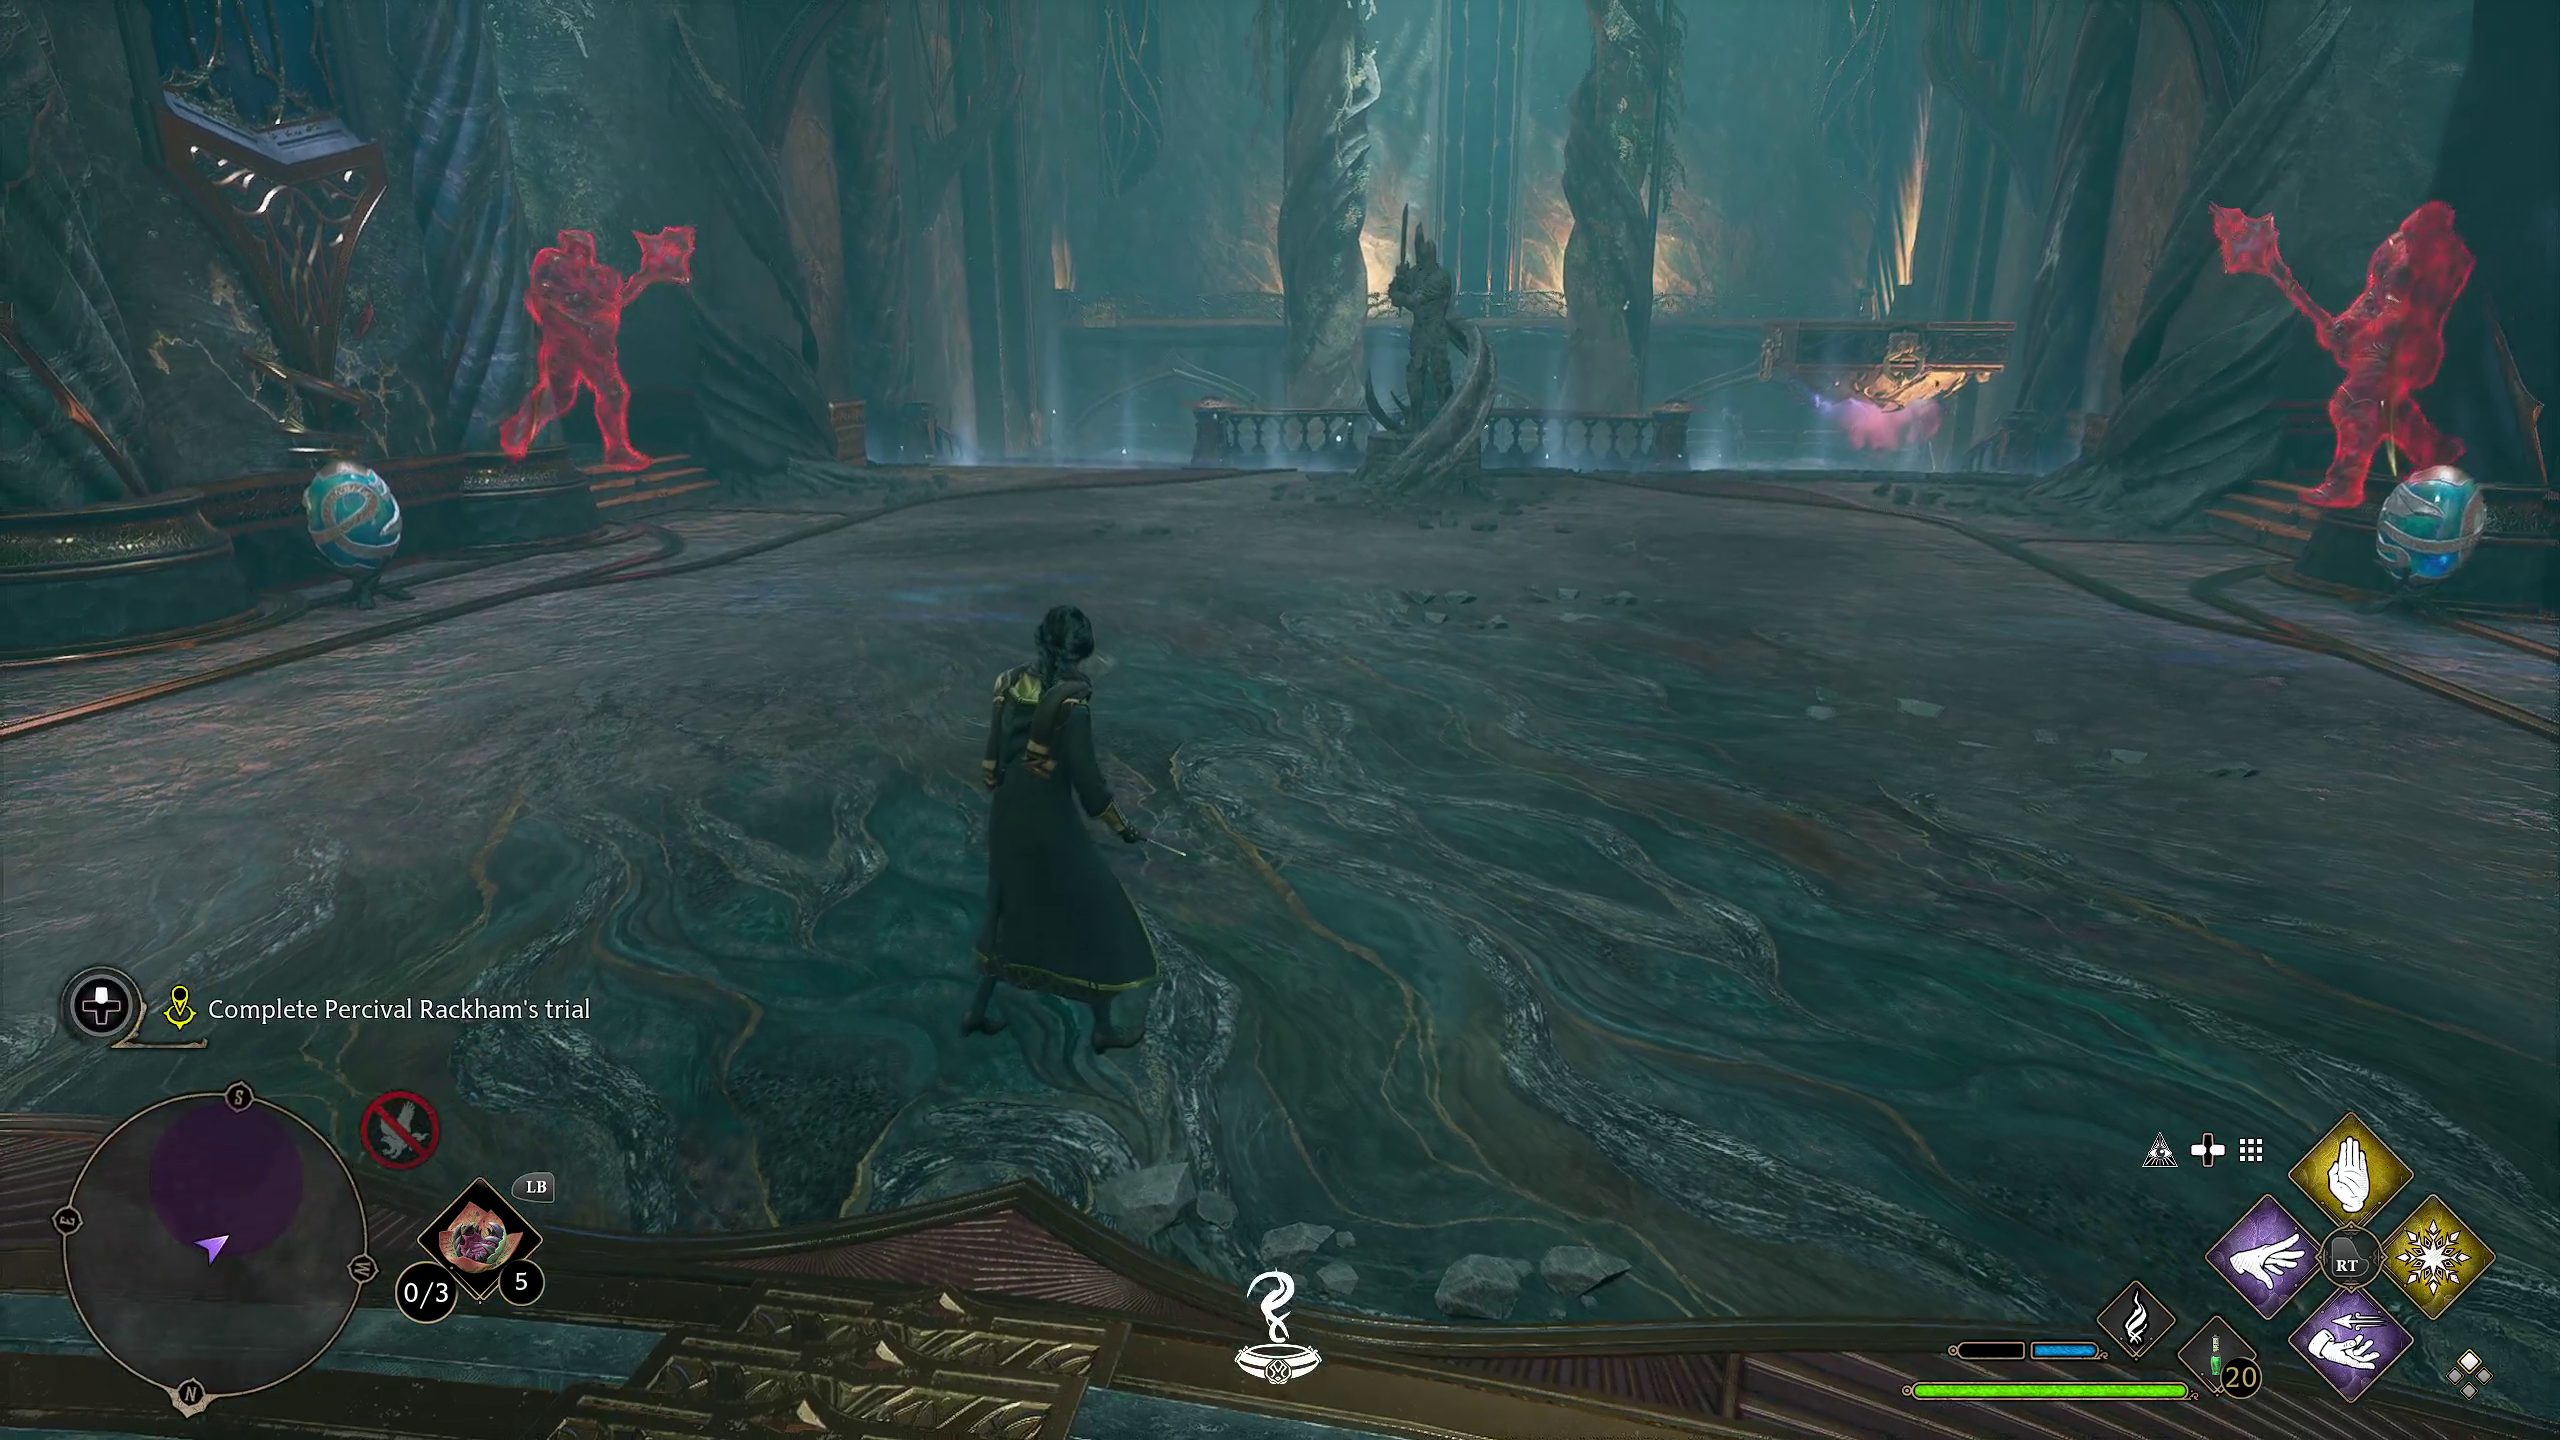
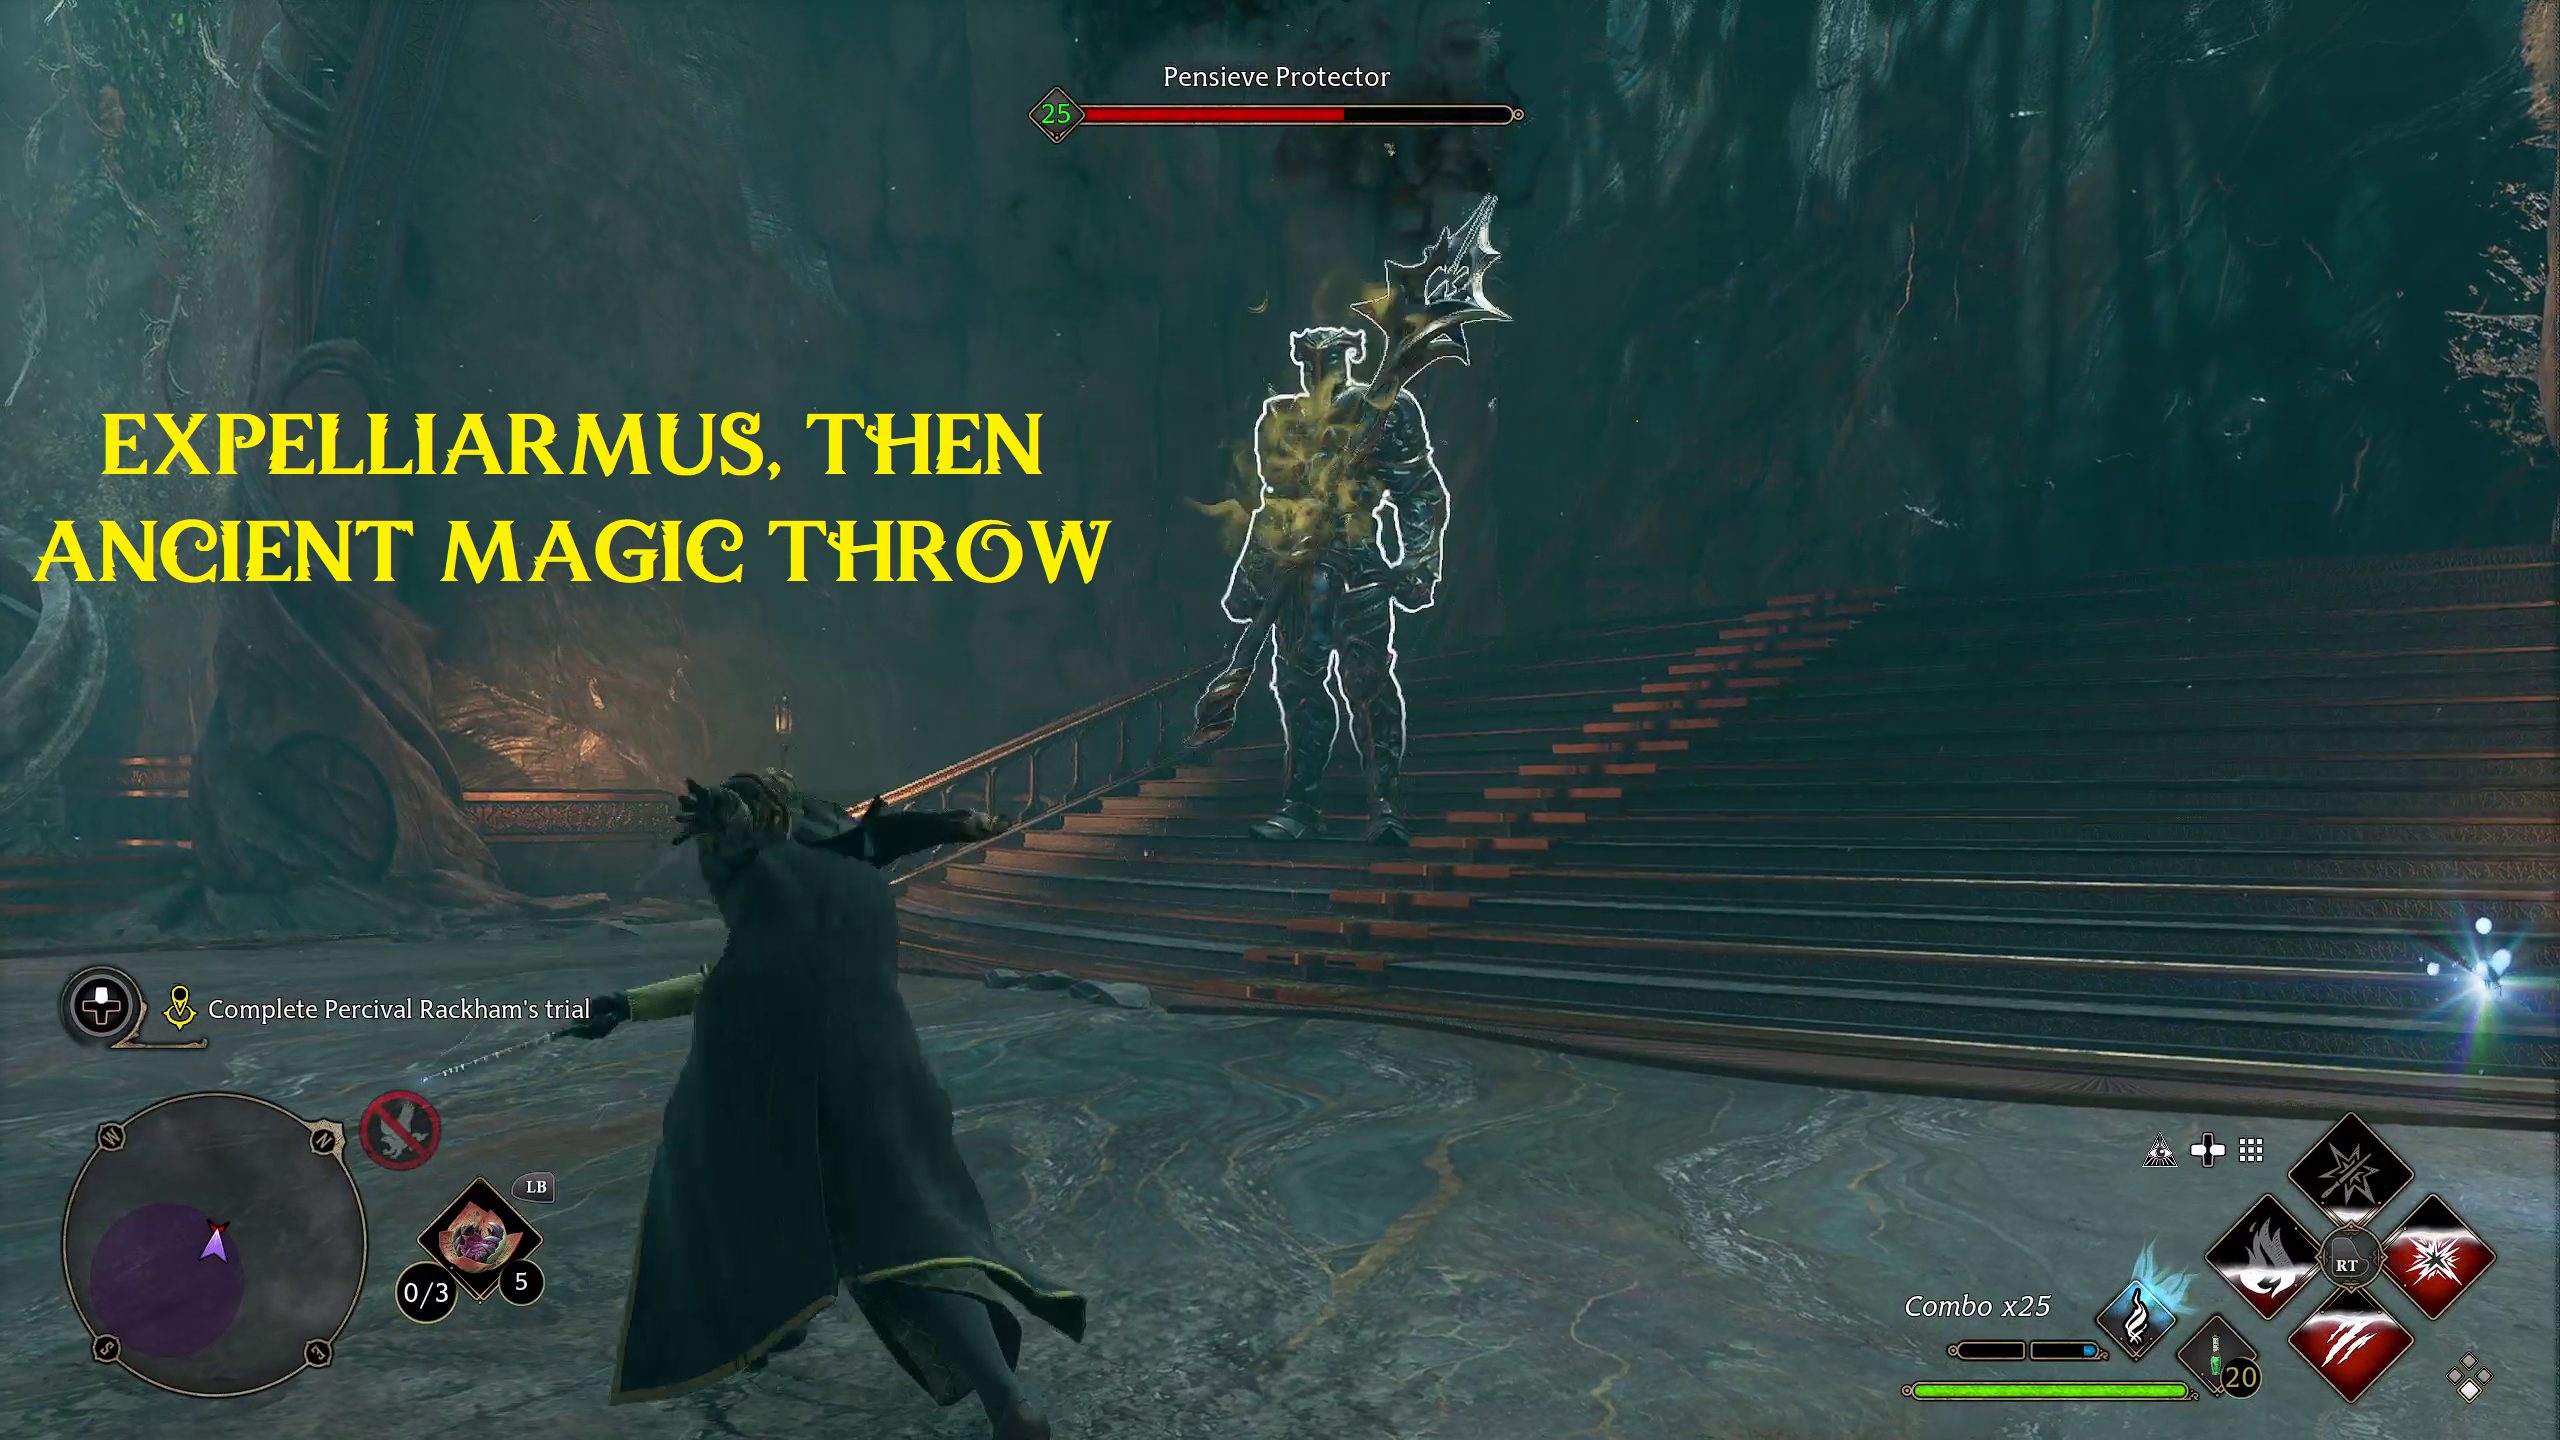
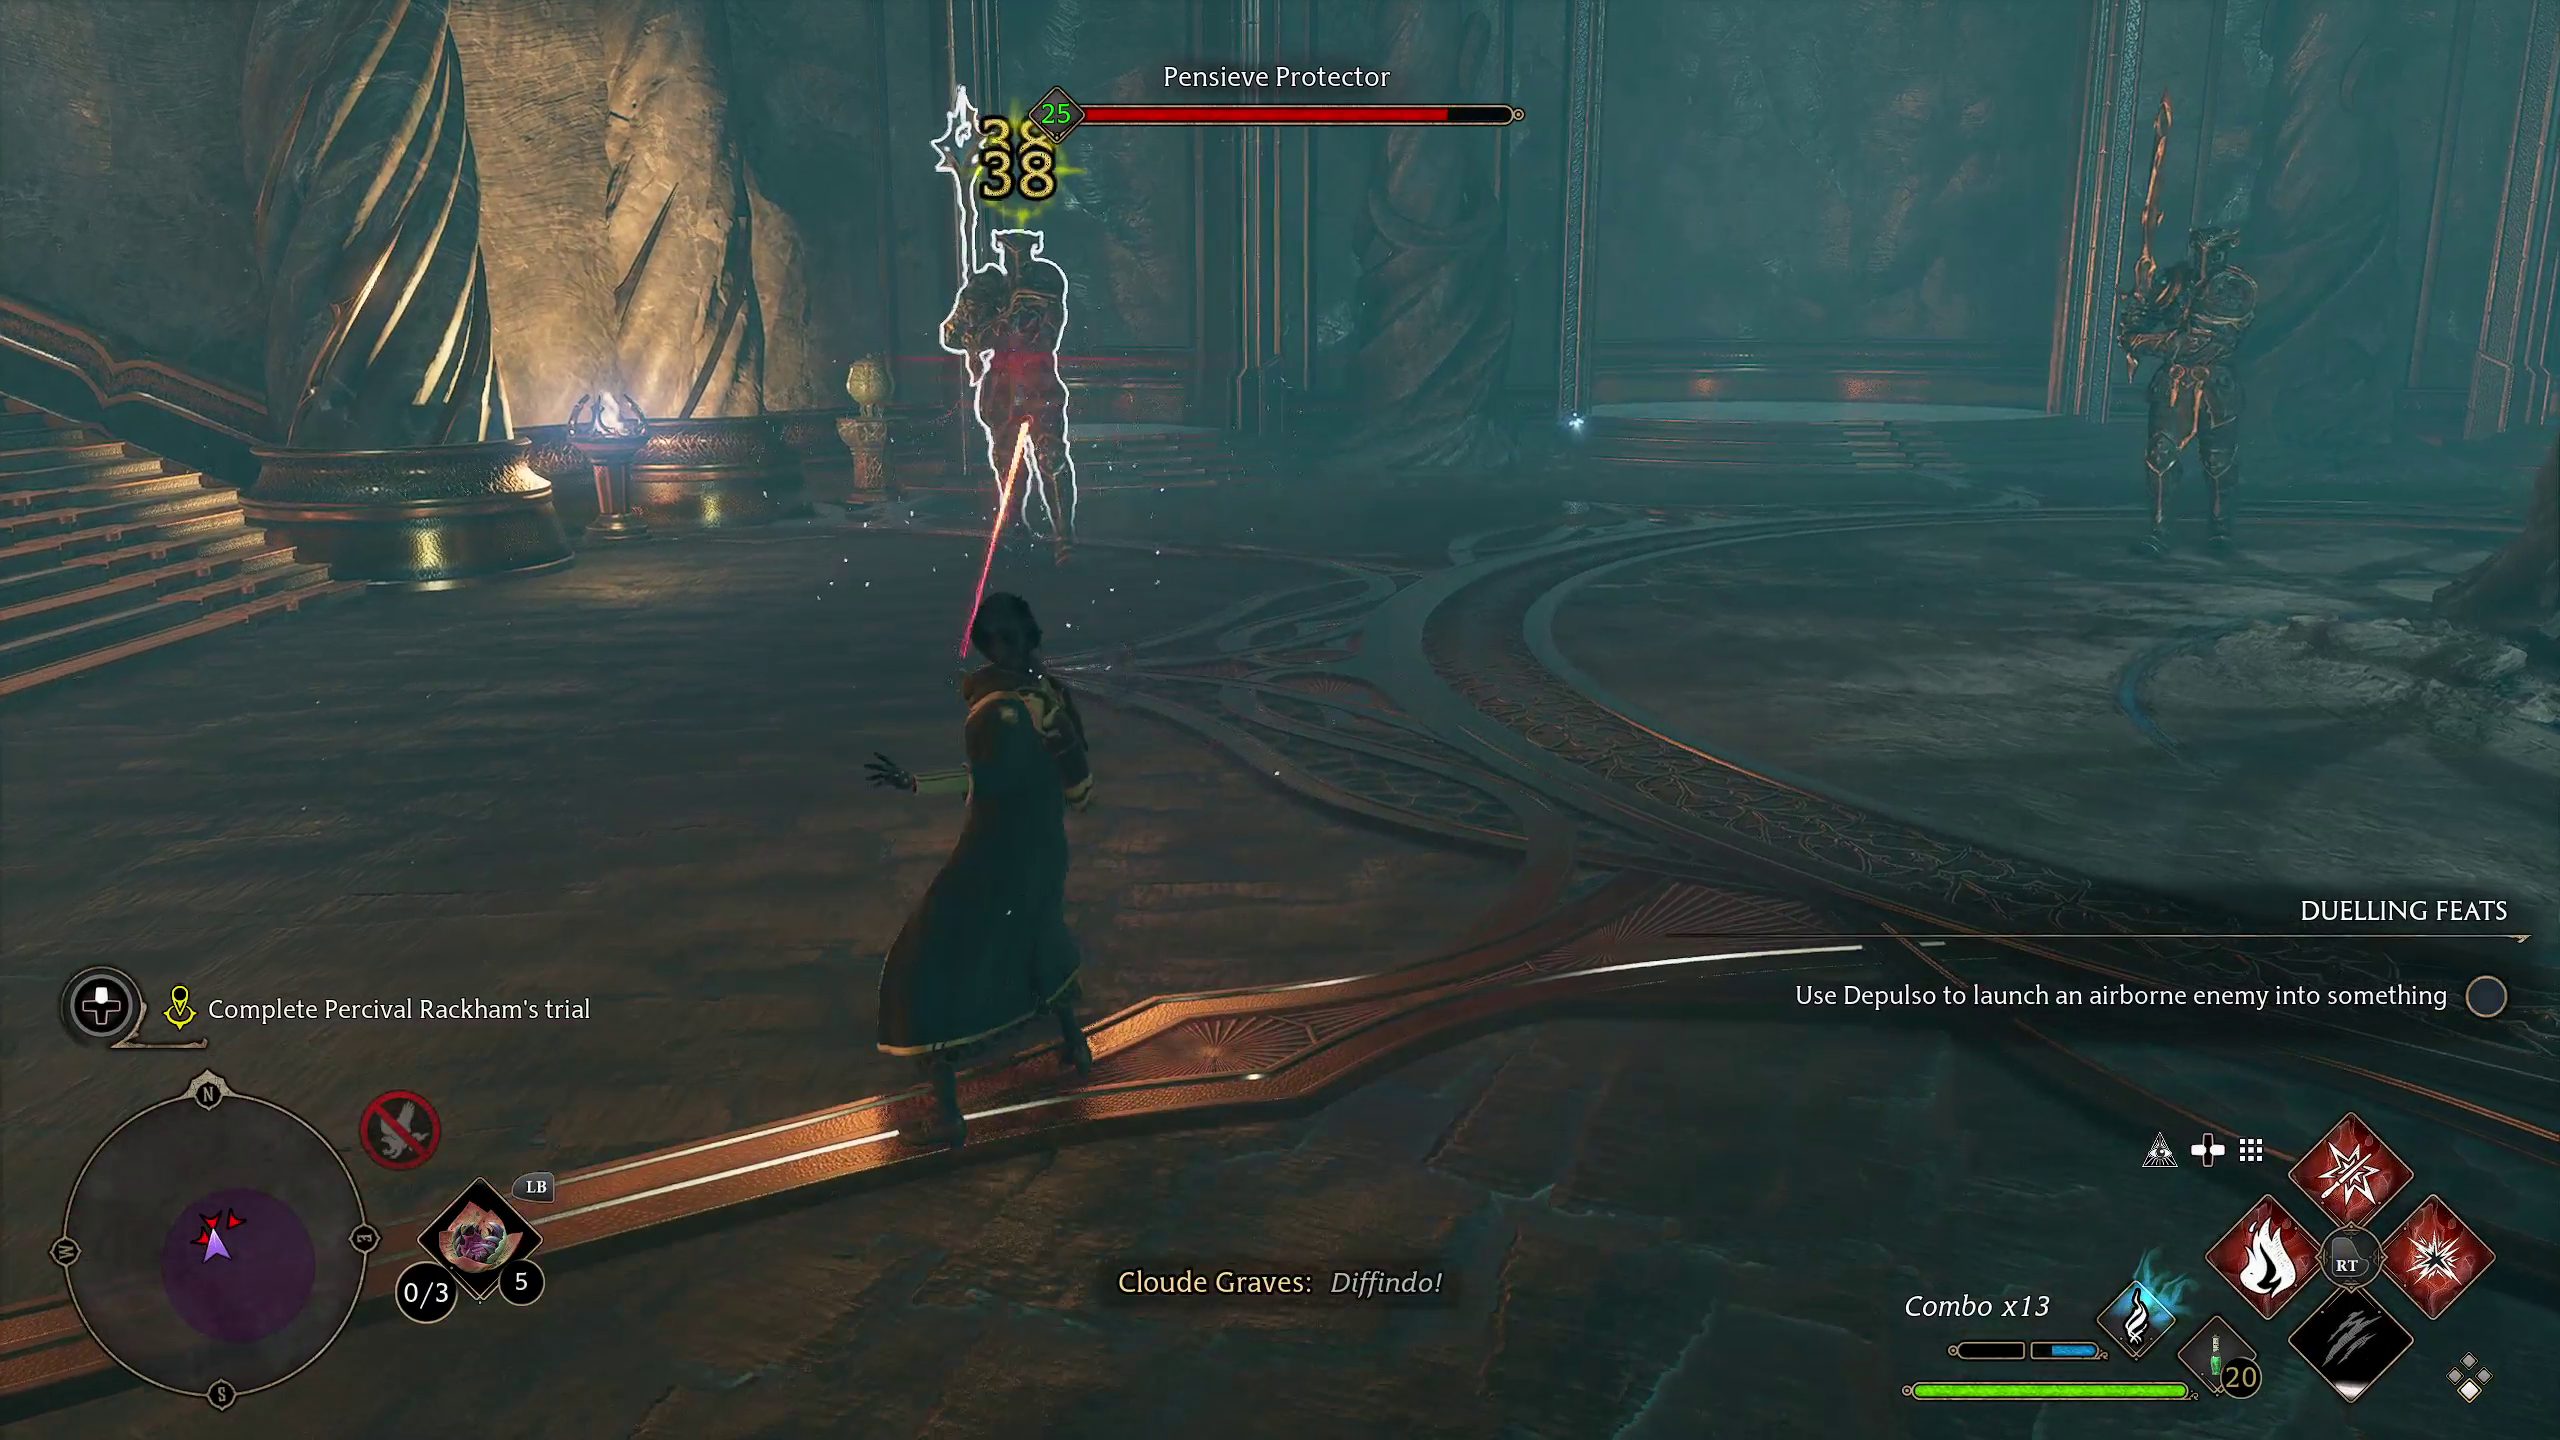
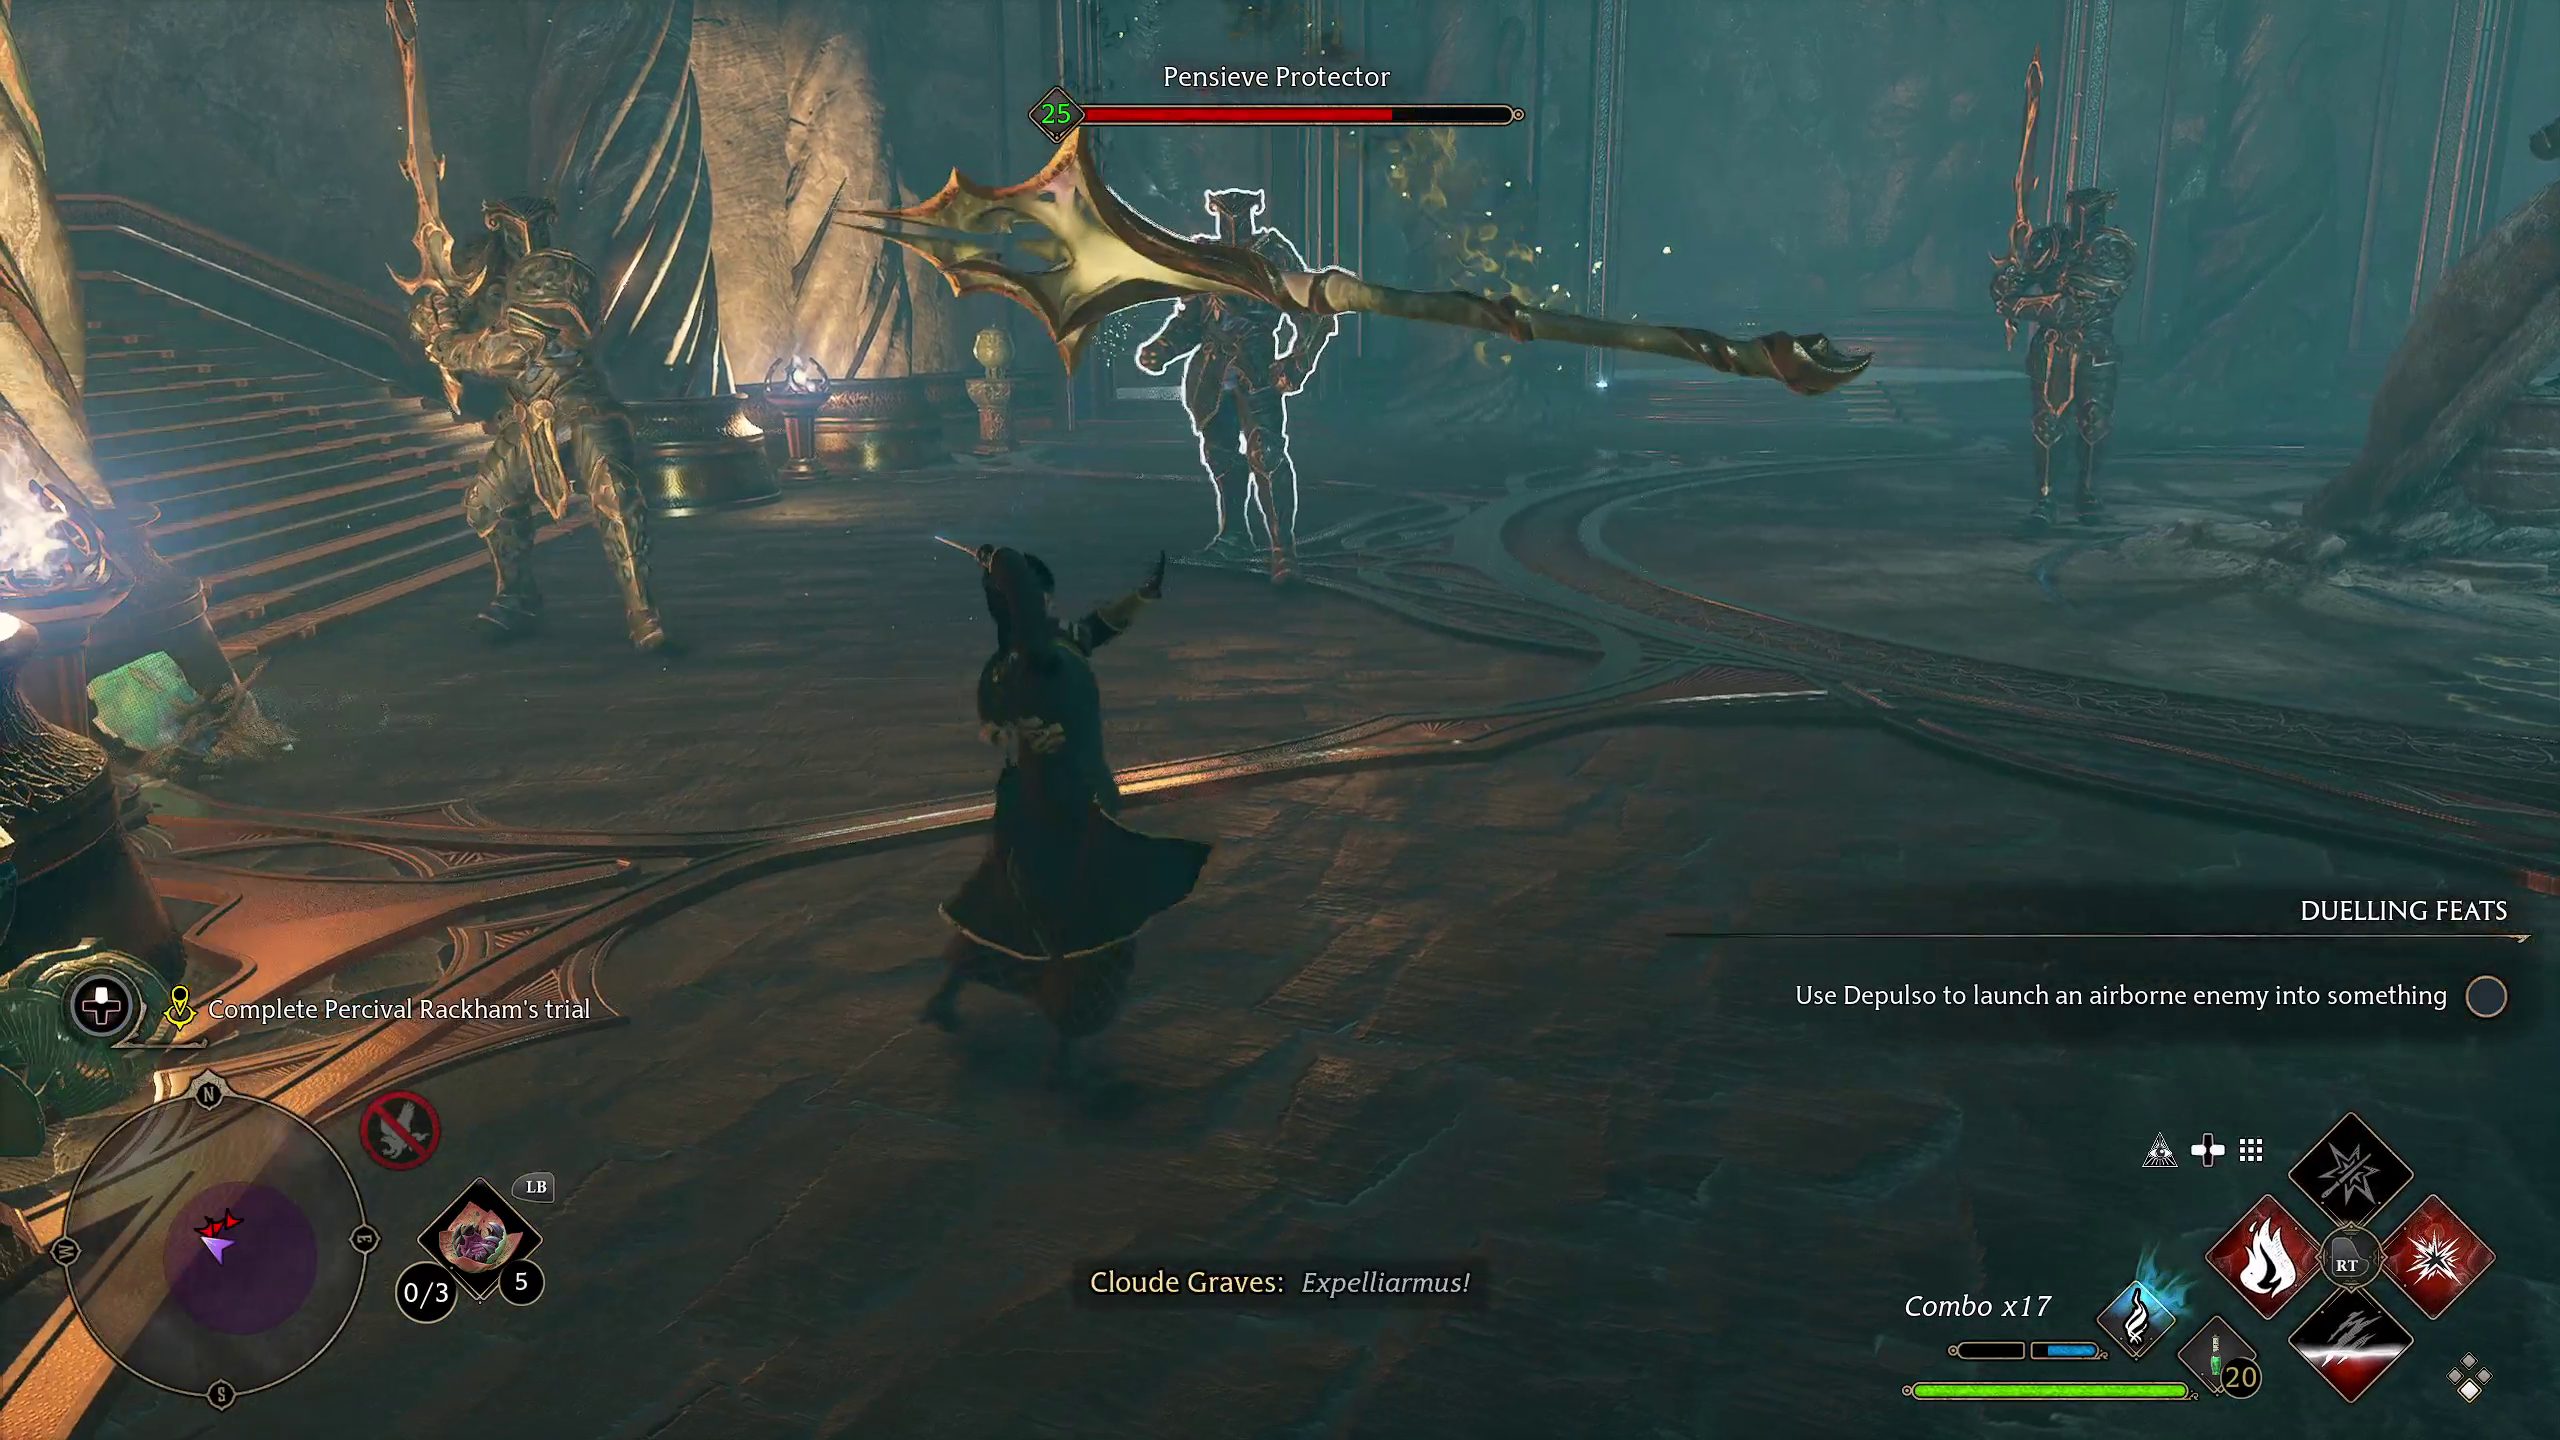
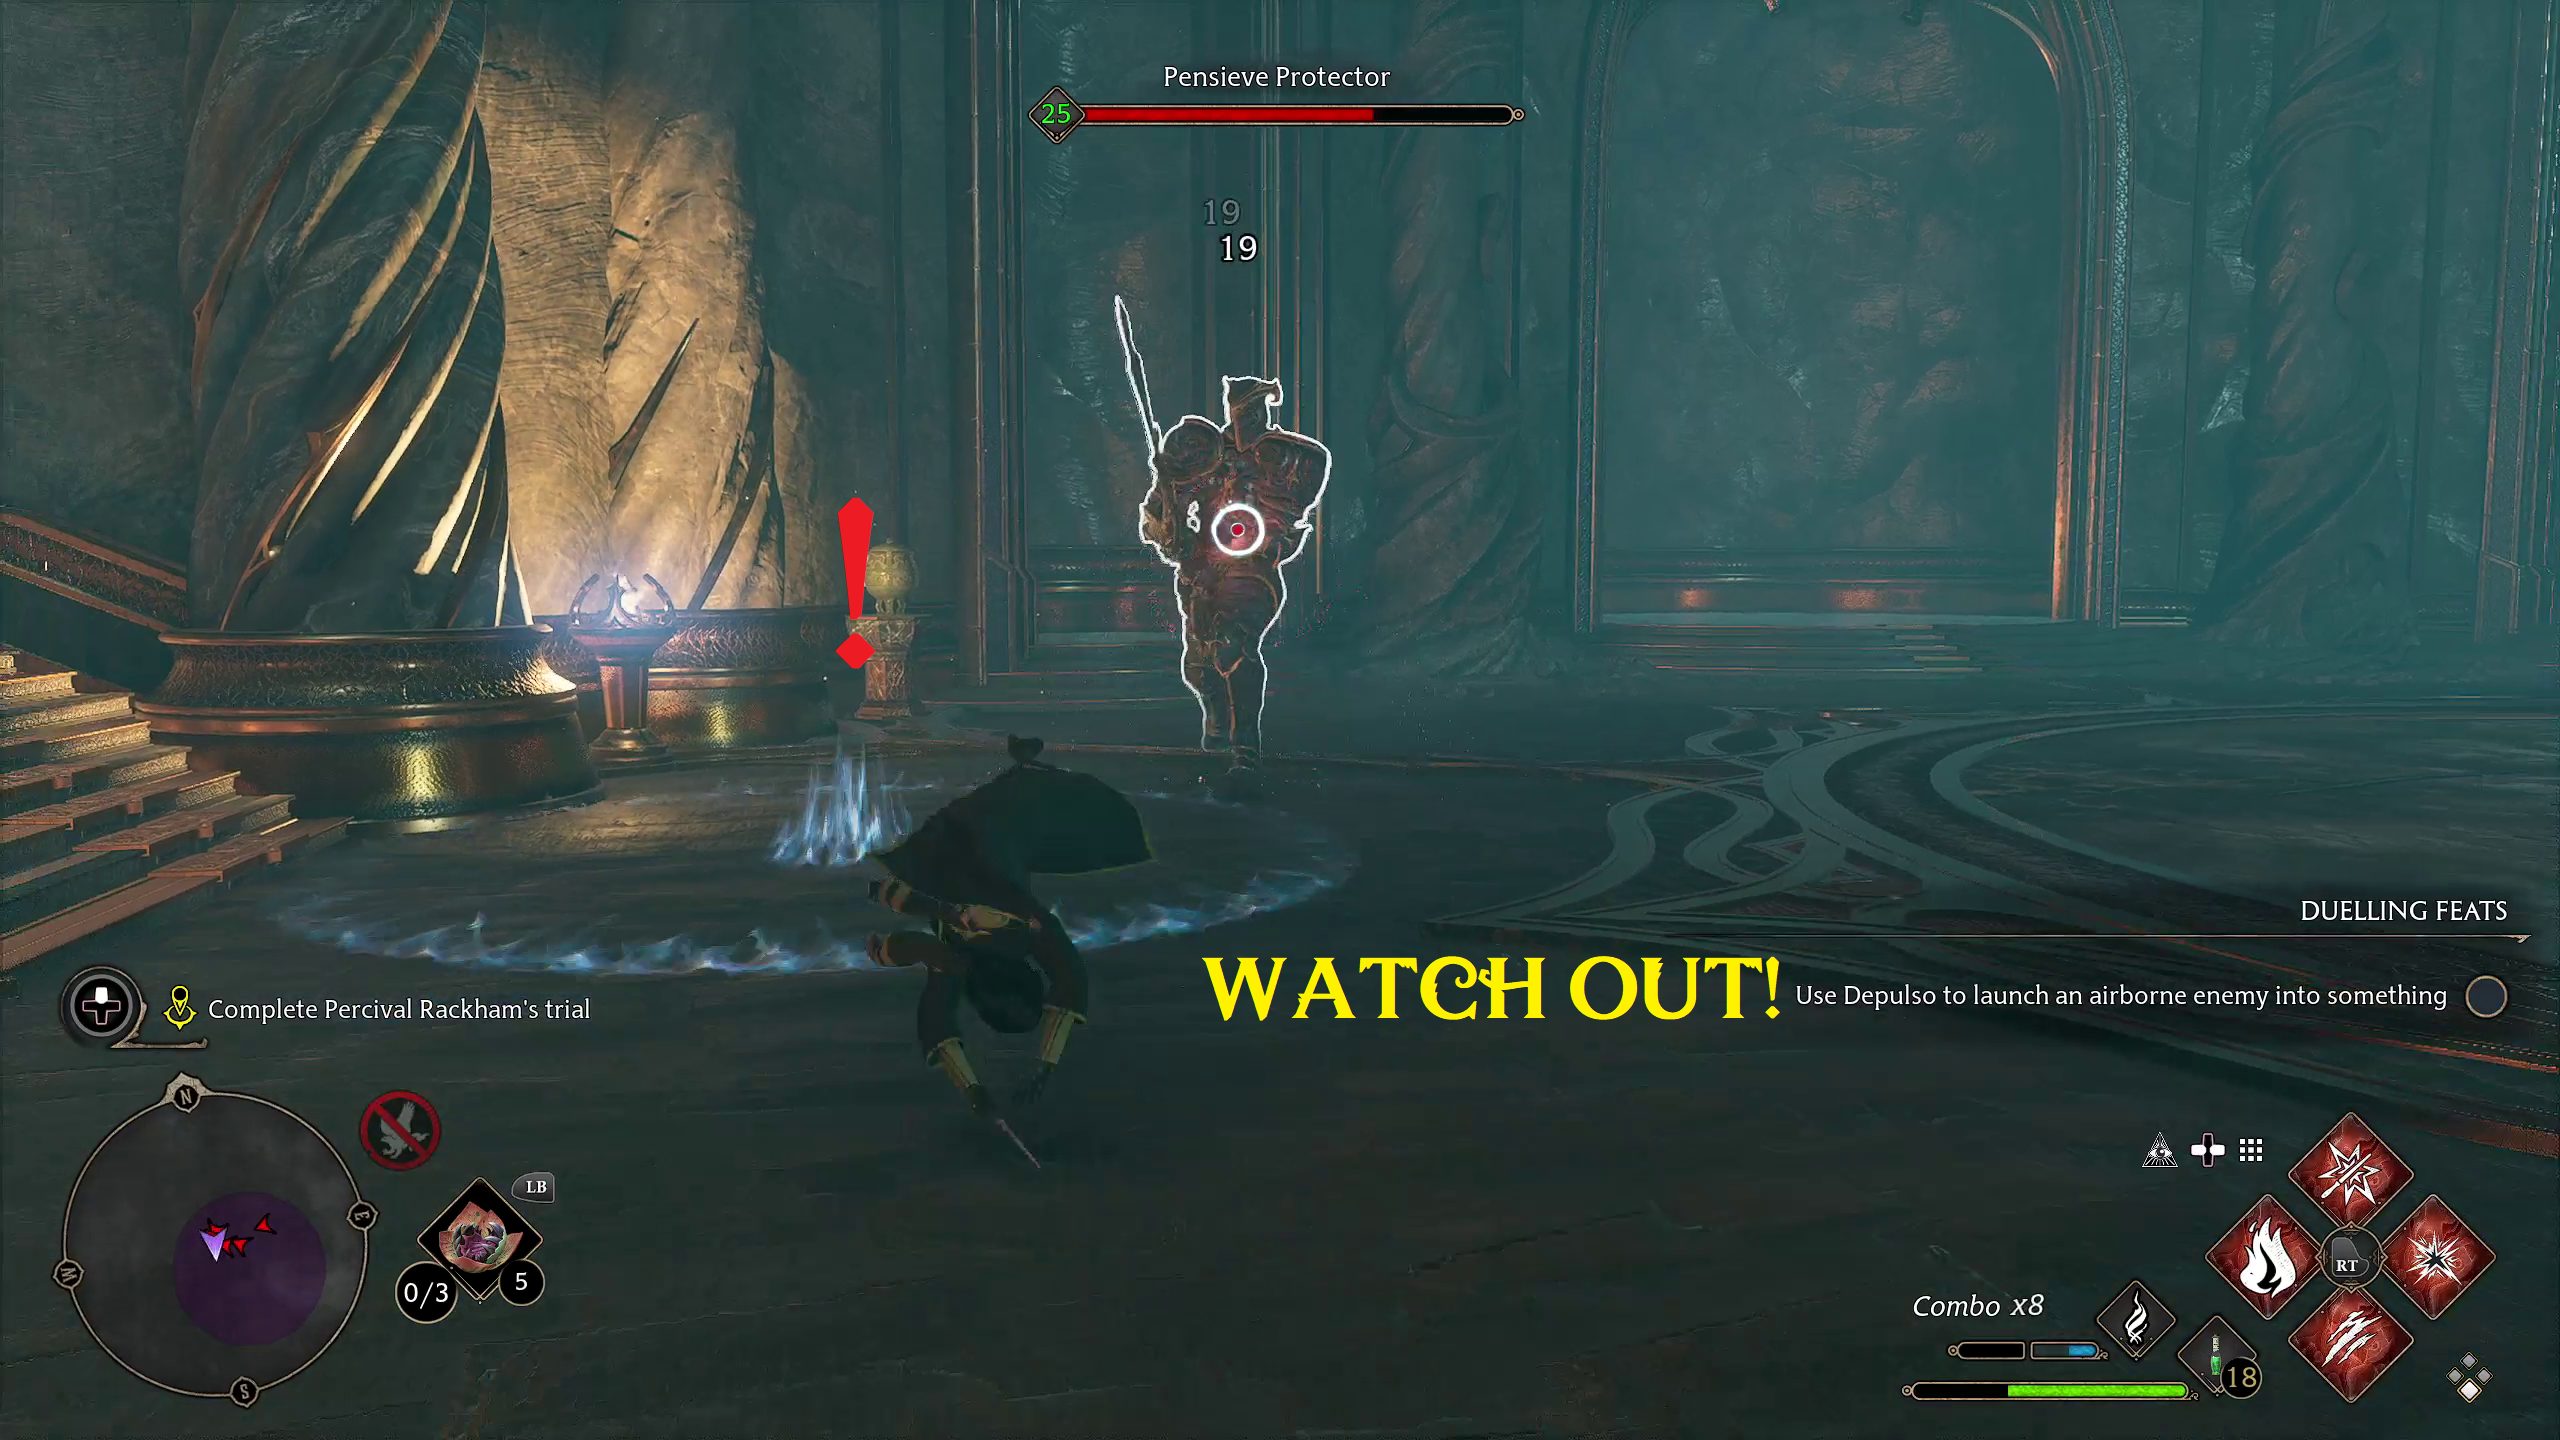
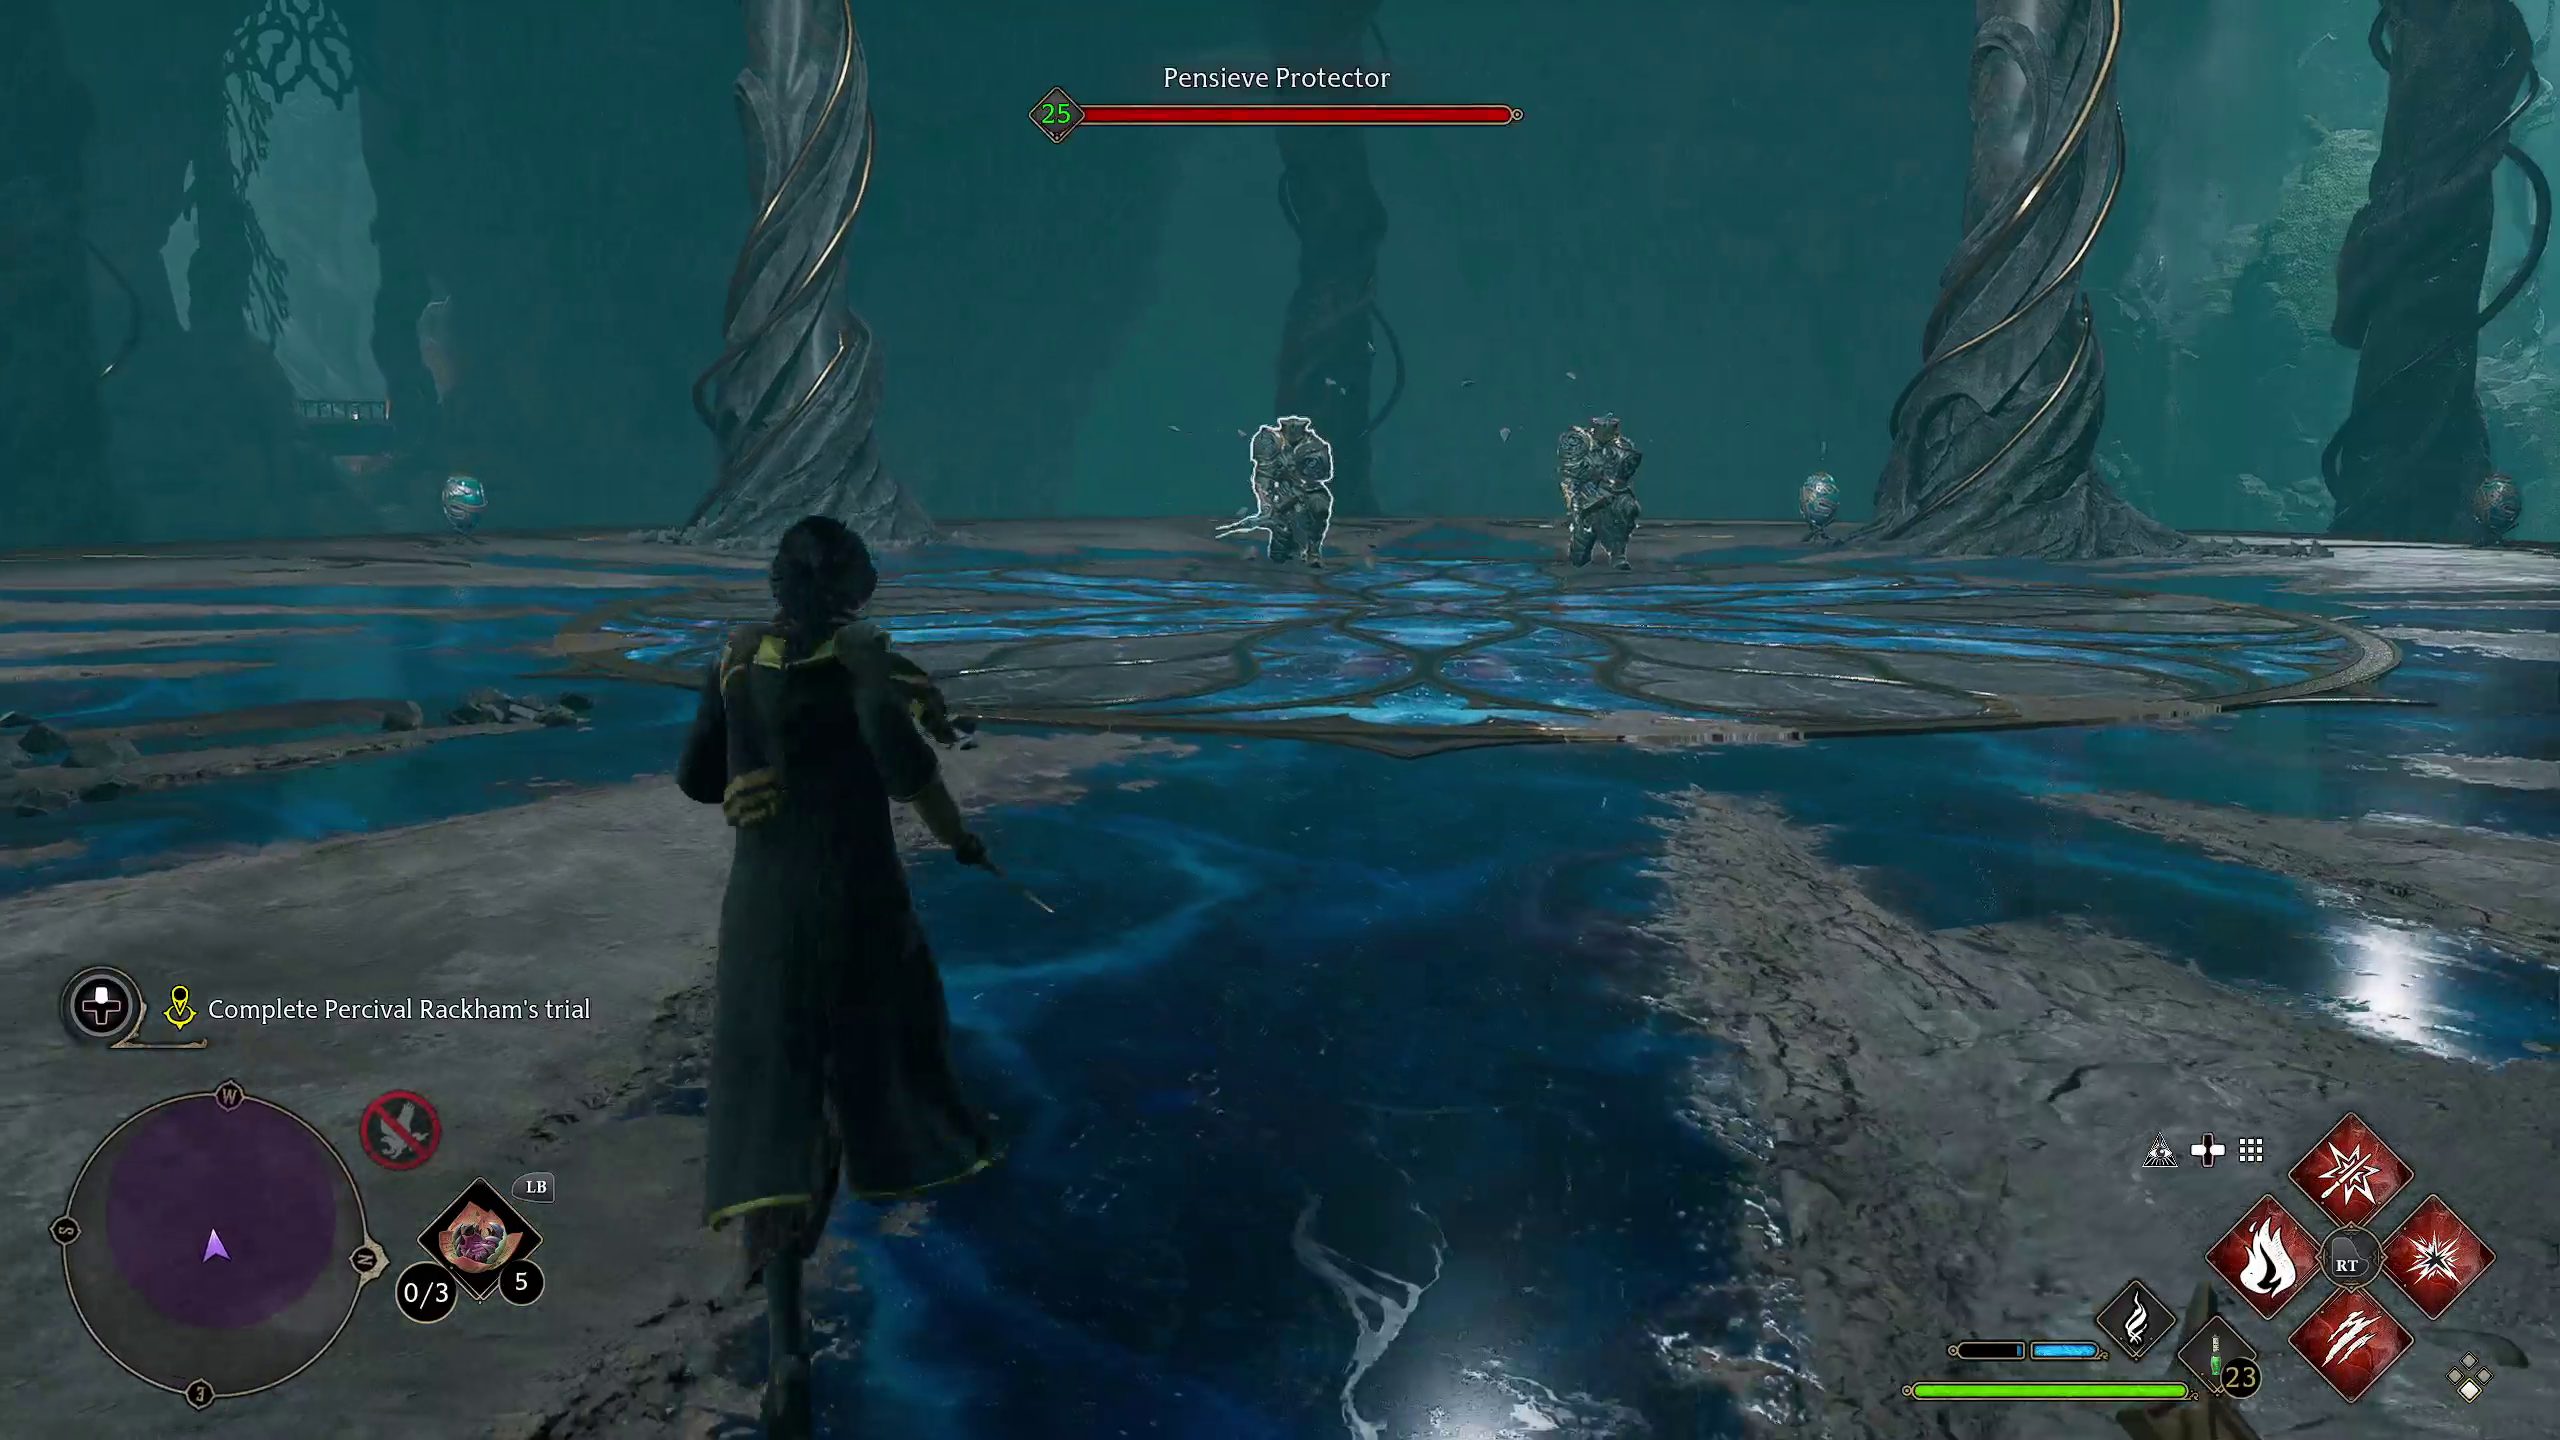
After going through the portal, you’ll be met with a combat arena. This one will introduce the Pensieve Protector, a more powerful version of the Sentries and Sentinel’s you’ve fought up until now. The best way to deal with any Pensieve Guards is to use Expelliarmus to disarm them, giving you plenty of time to deal critical damage to them (2). This is even more powerful if you have Ancient Magic Throw Expertise, which enables you to throw the weapon back at them for massive damage. Ancient Magic and Ancient Magic Throws are also very powerful here.
123
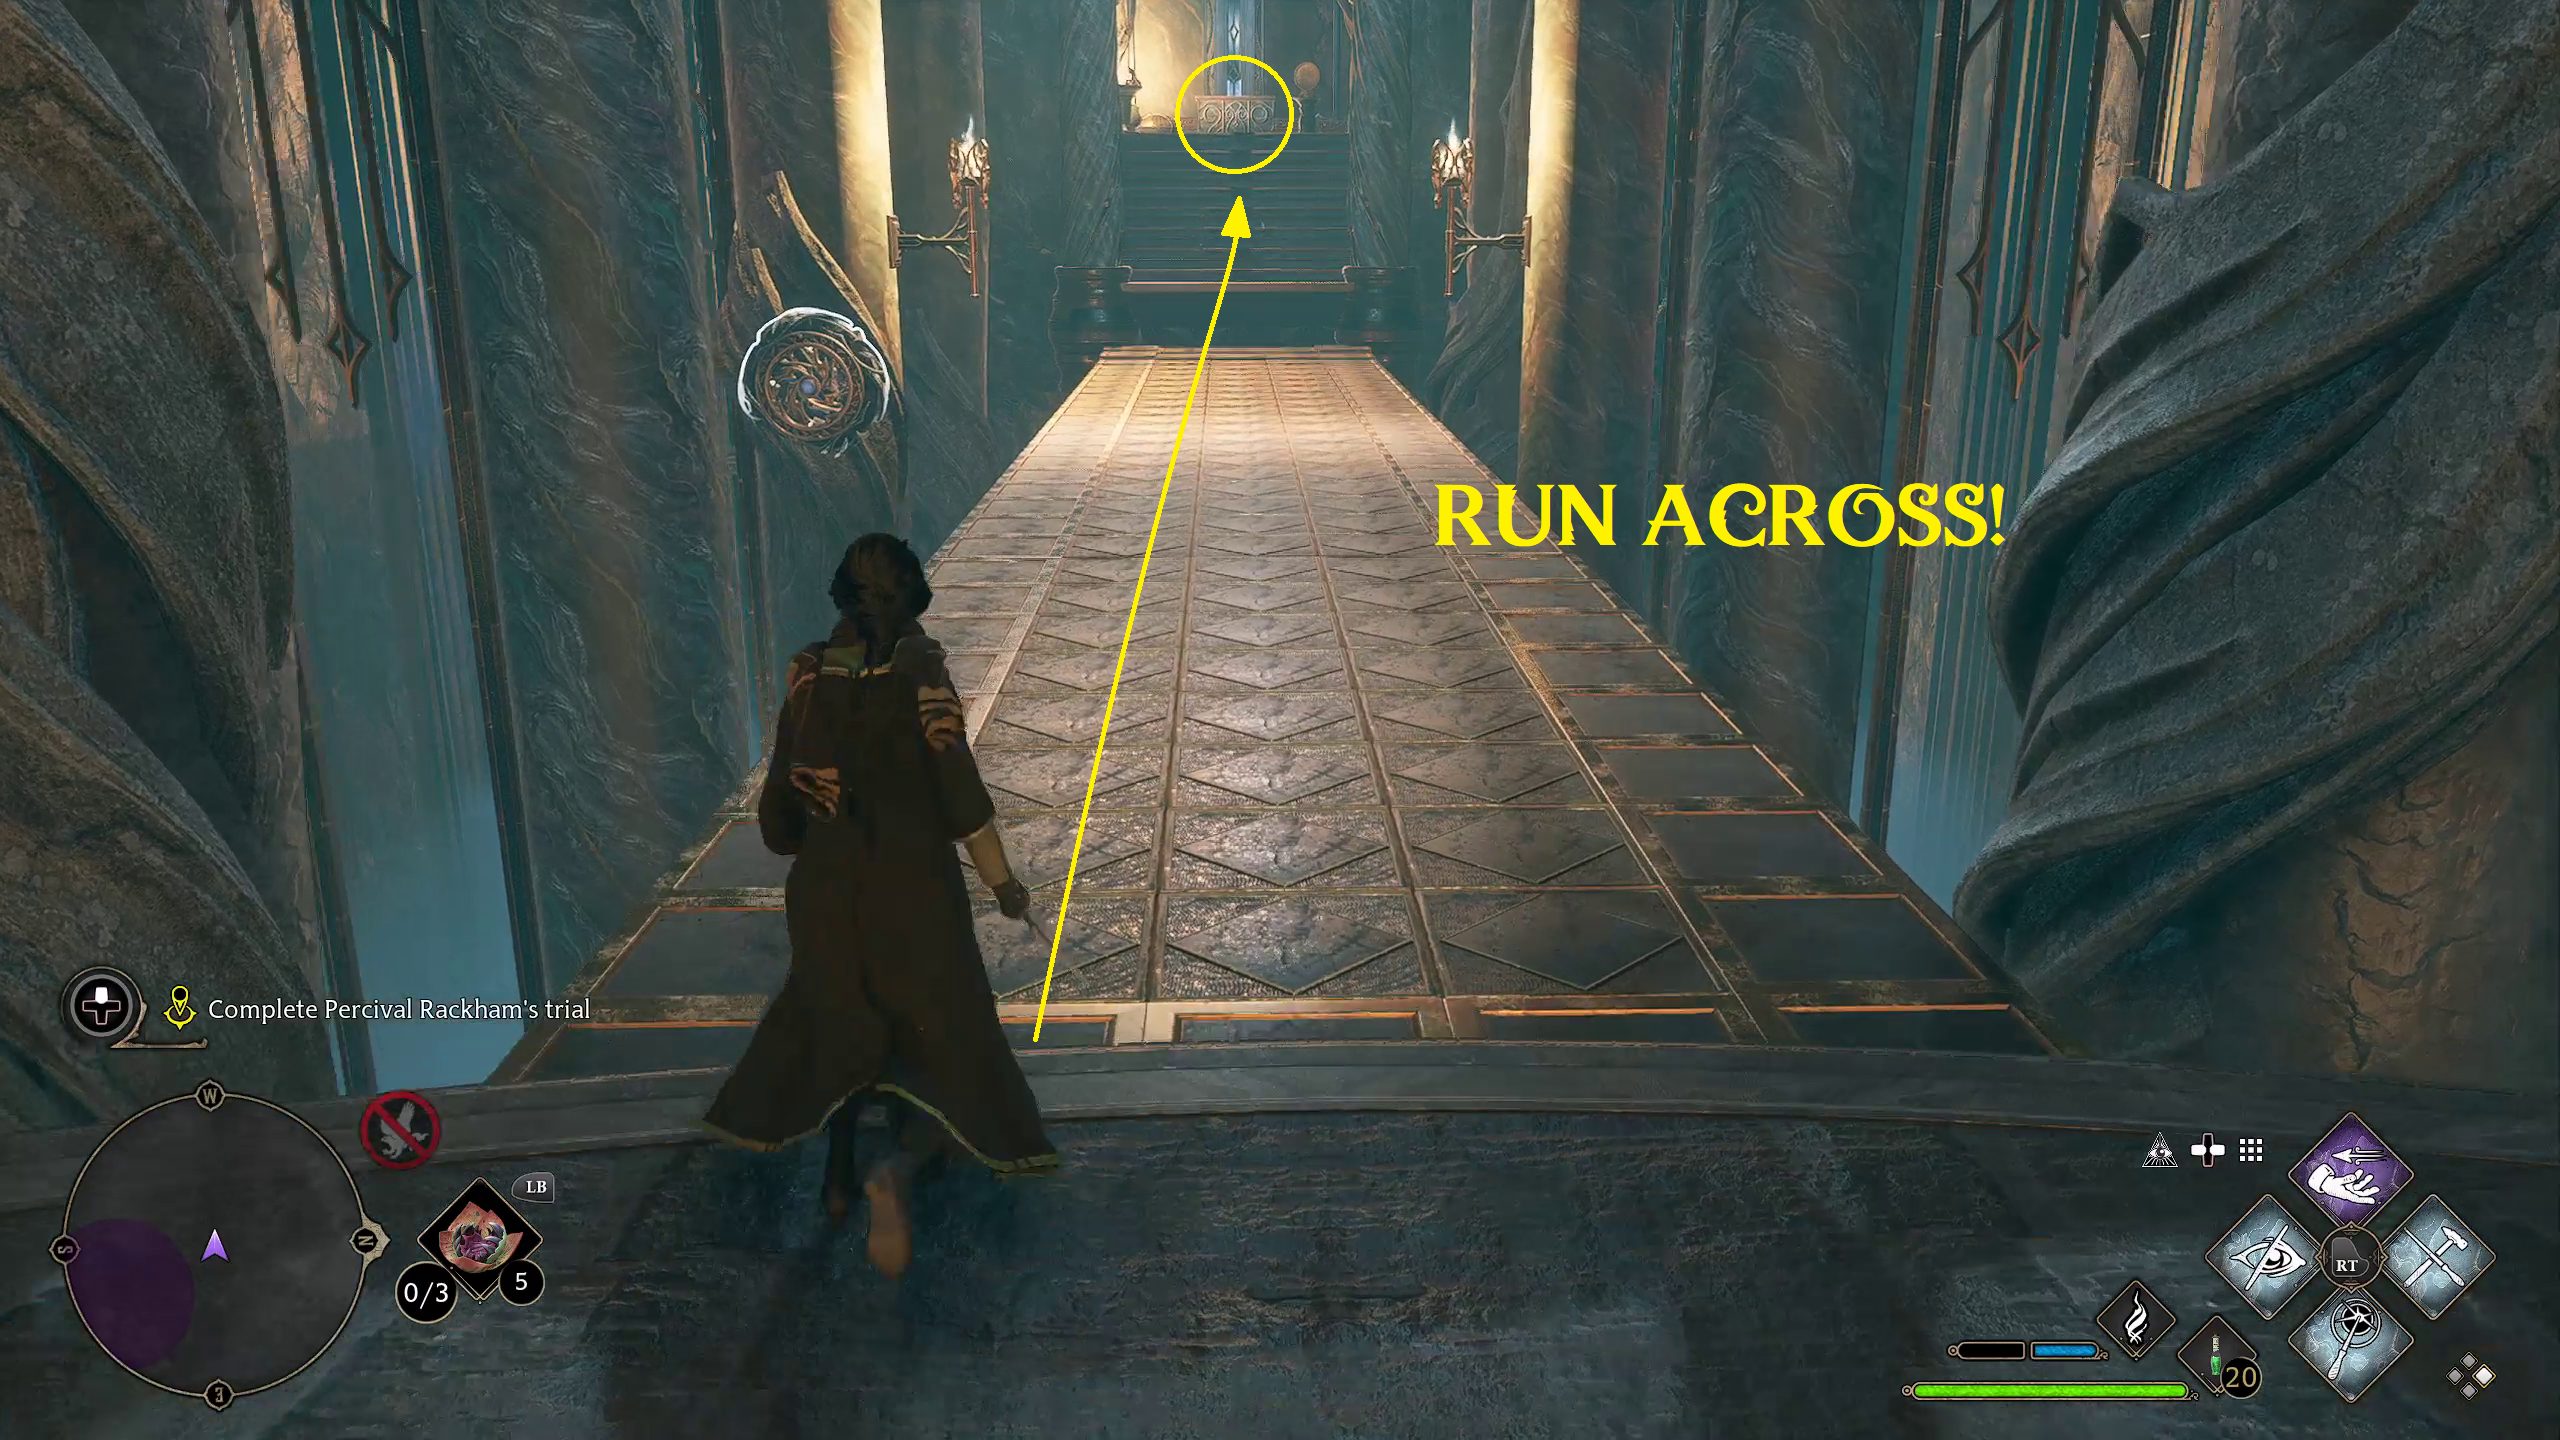
After you defeat them, there will be a door you can go through on the right side of the room (1). Head in, then use Basic Cast on the rune in front of you. This will raise up a wibbly bridge, which you’ll need to run across in order to get a chest on the other side (3). After you grab it, you can head back and continue on, following your minimap.
123
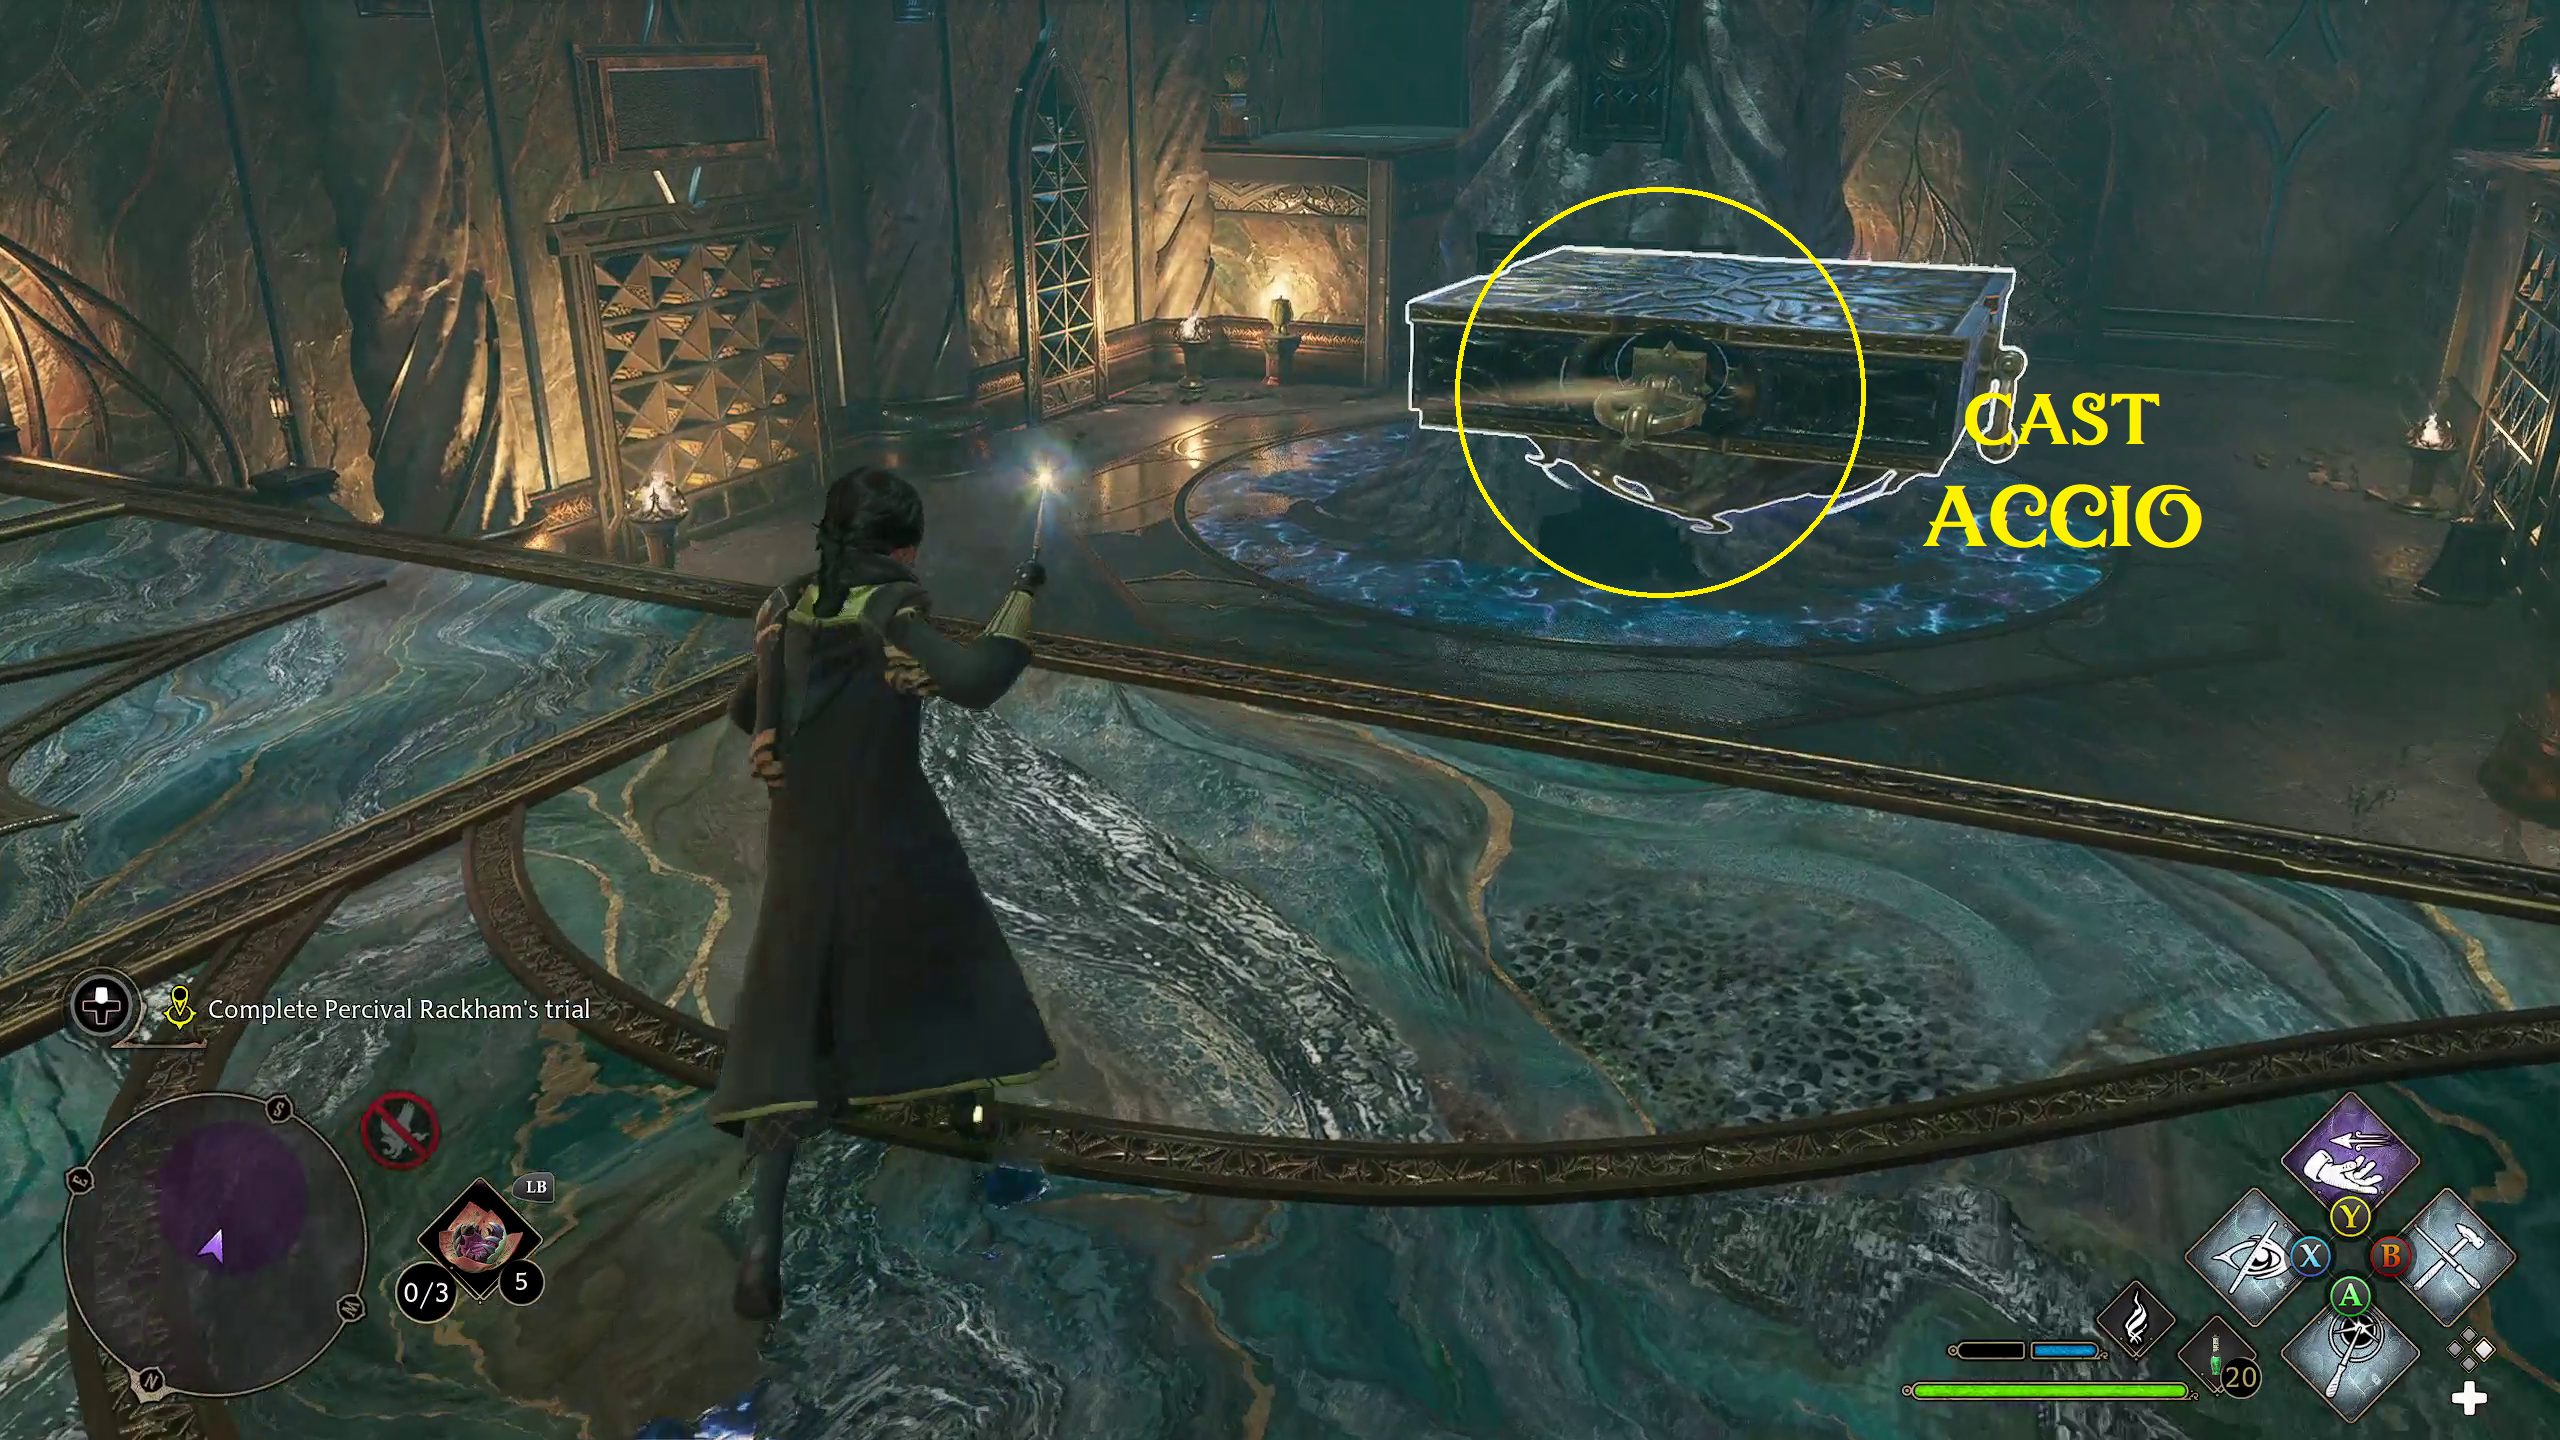
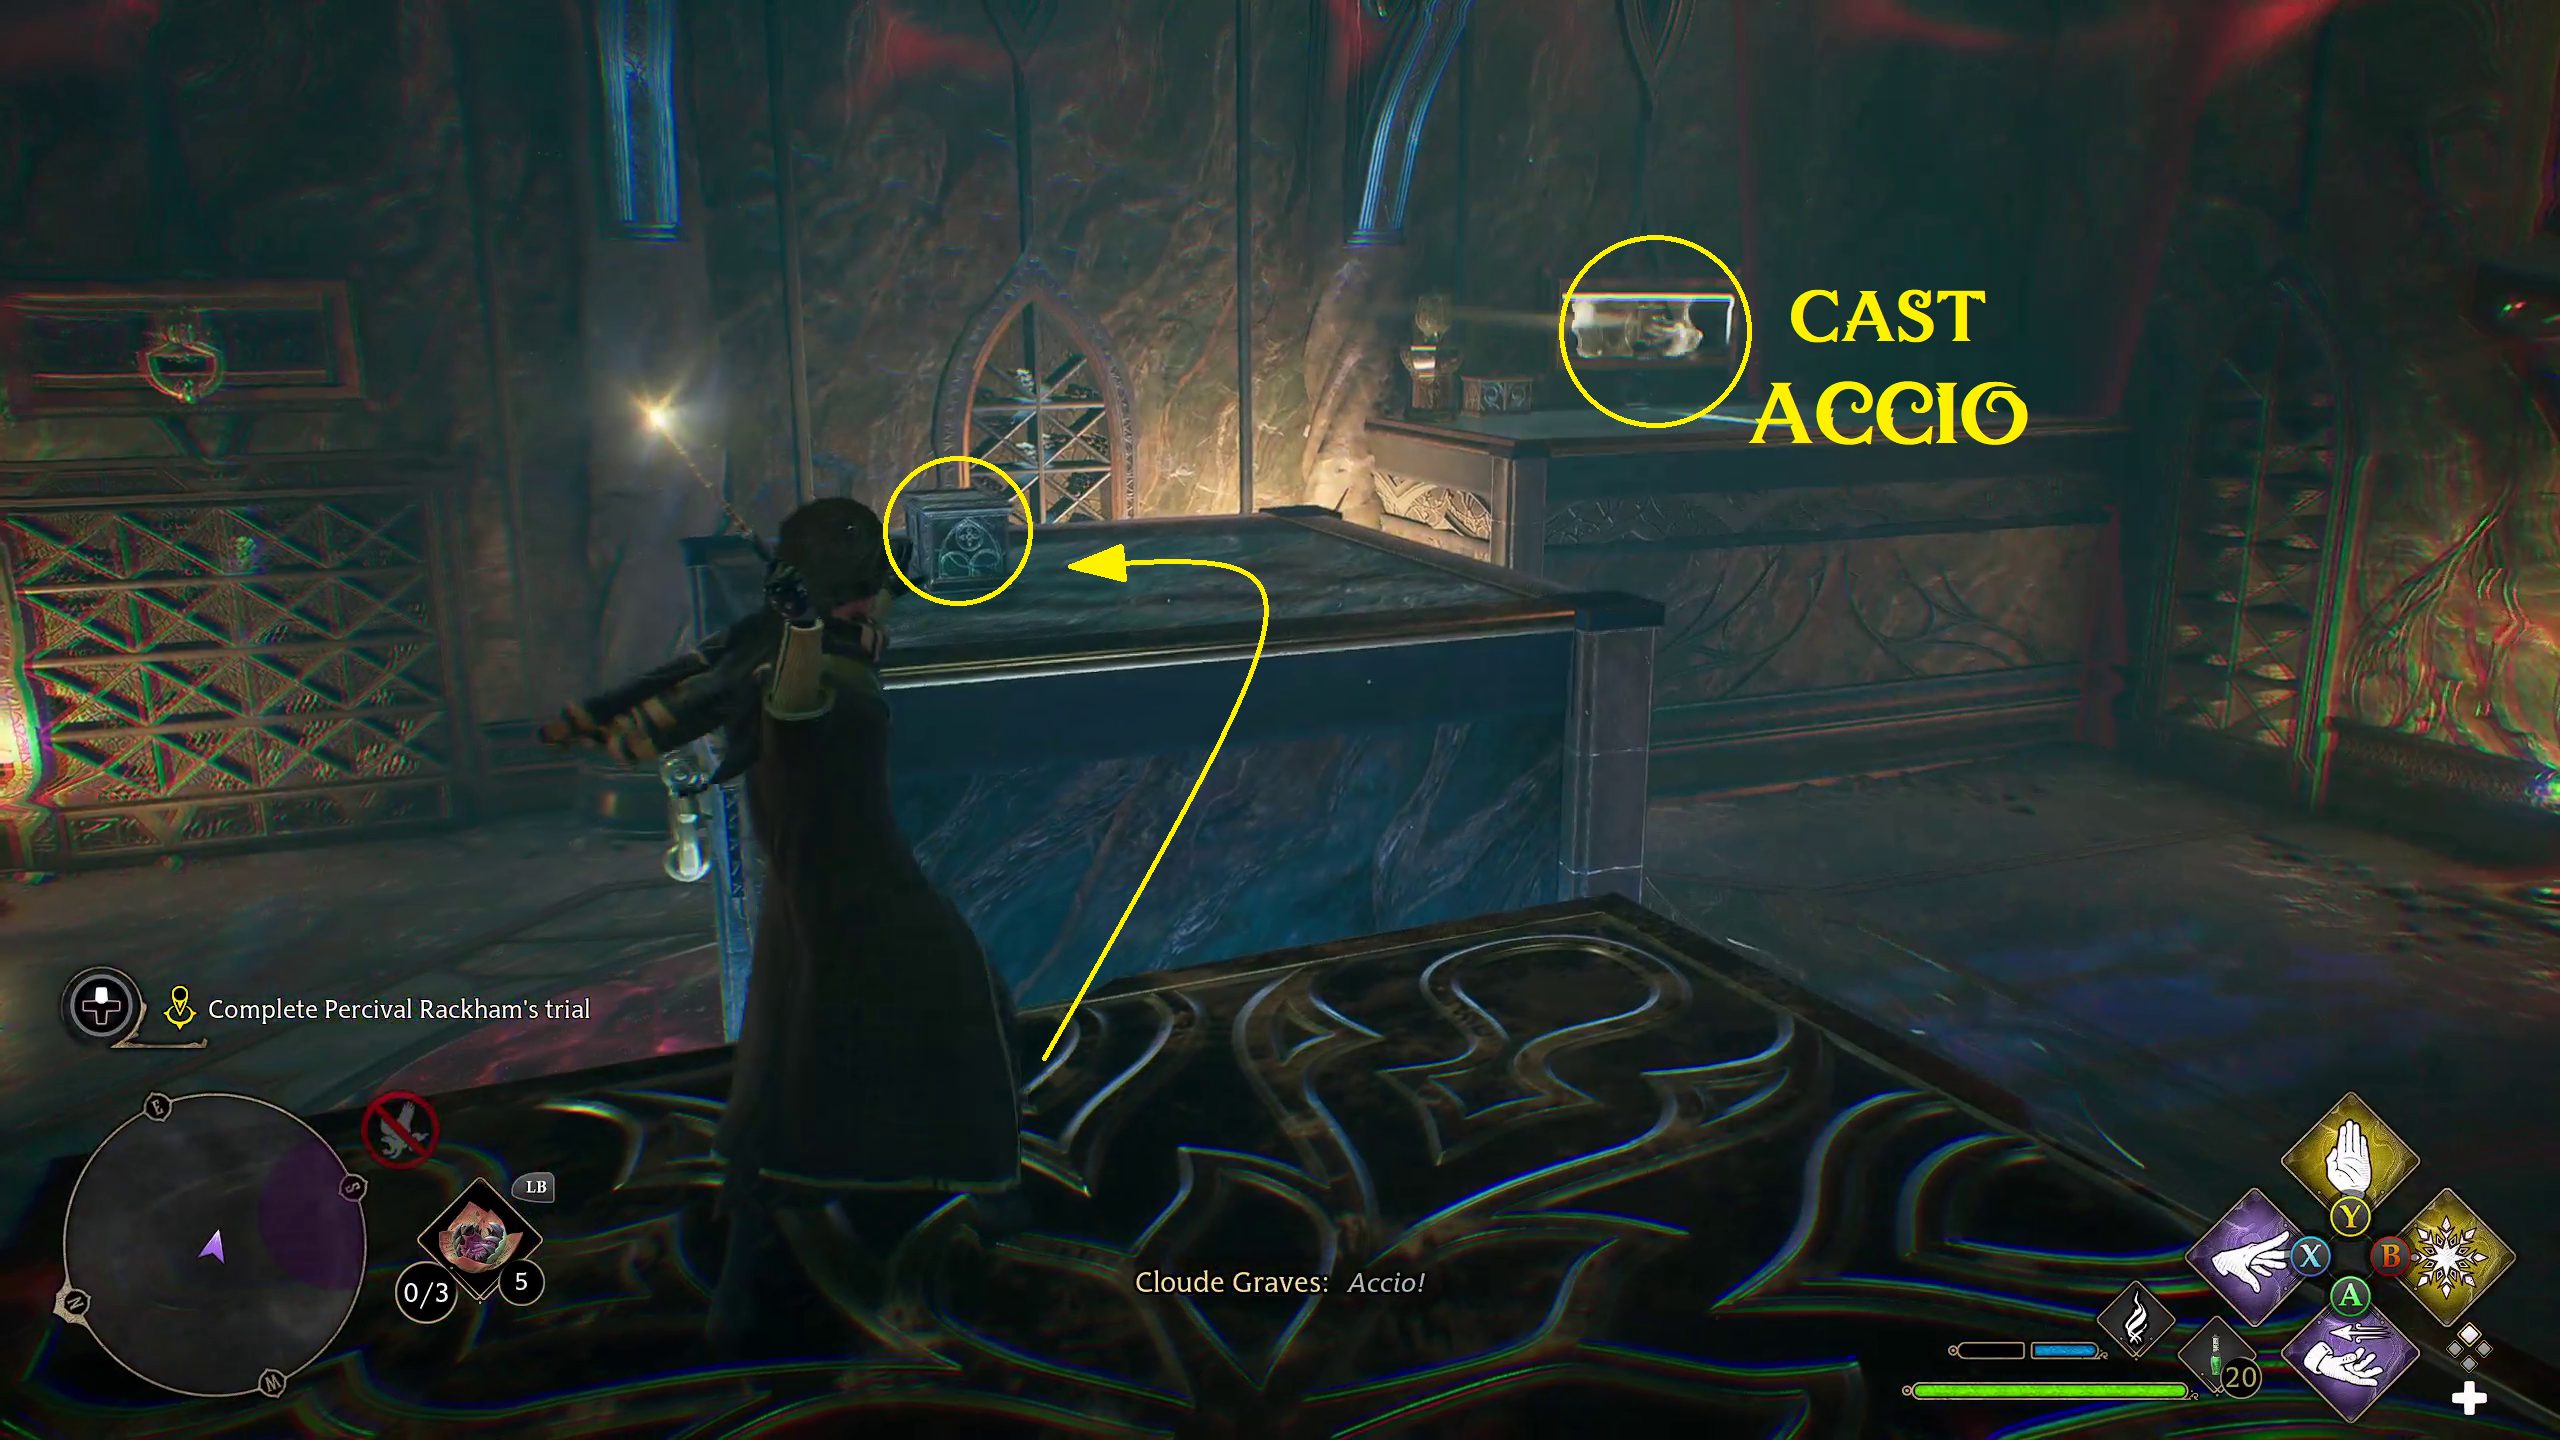
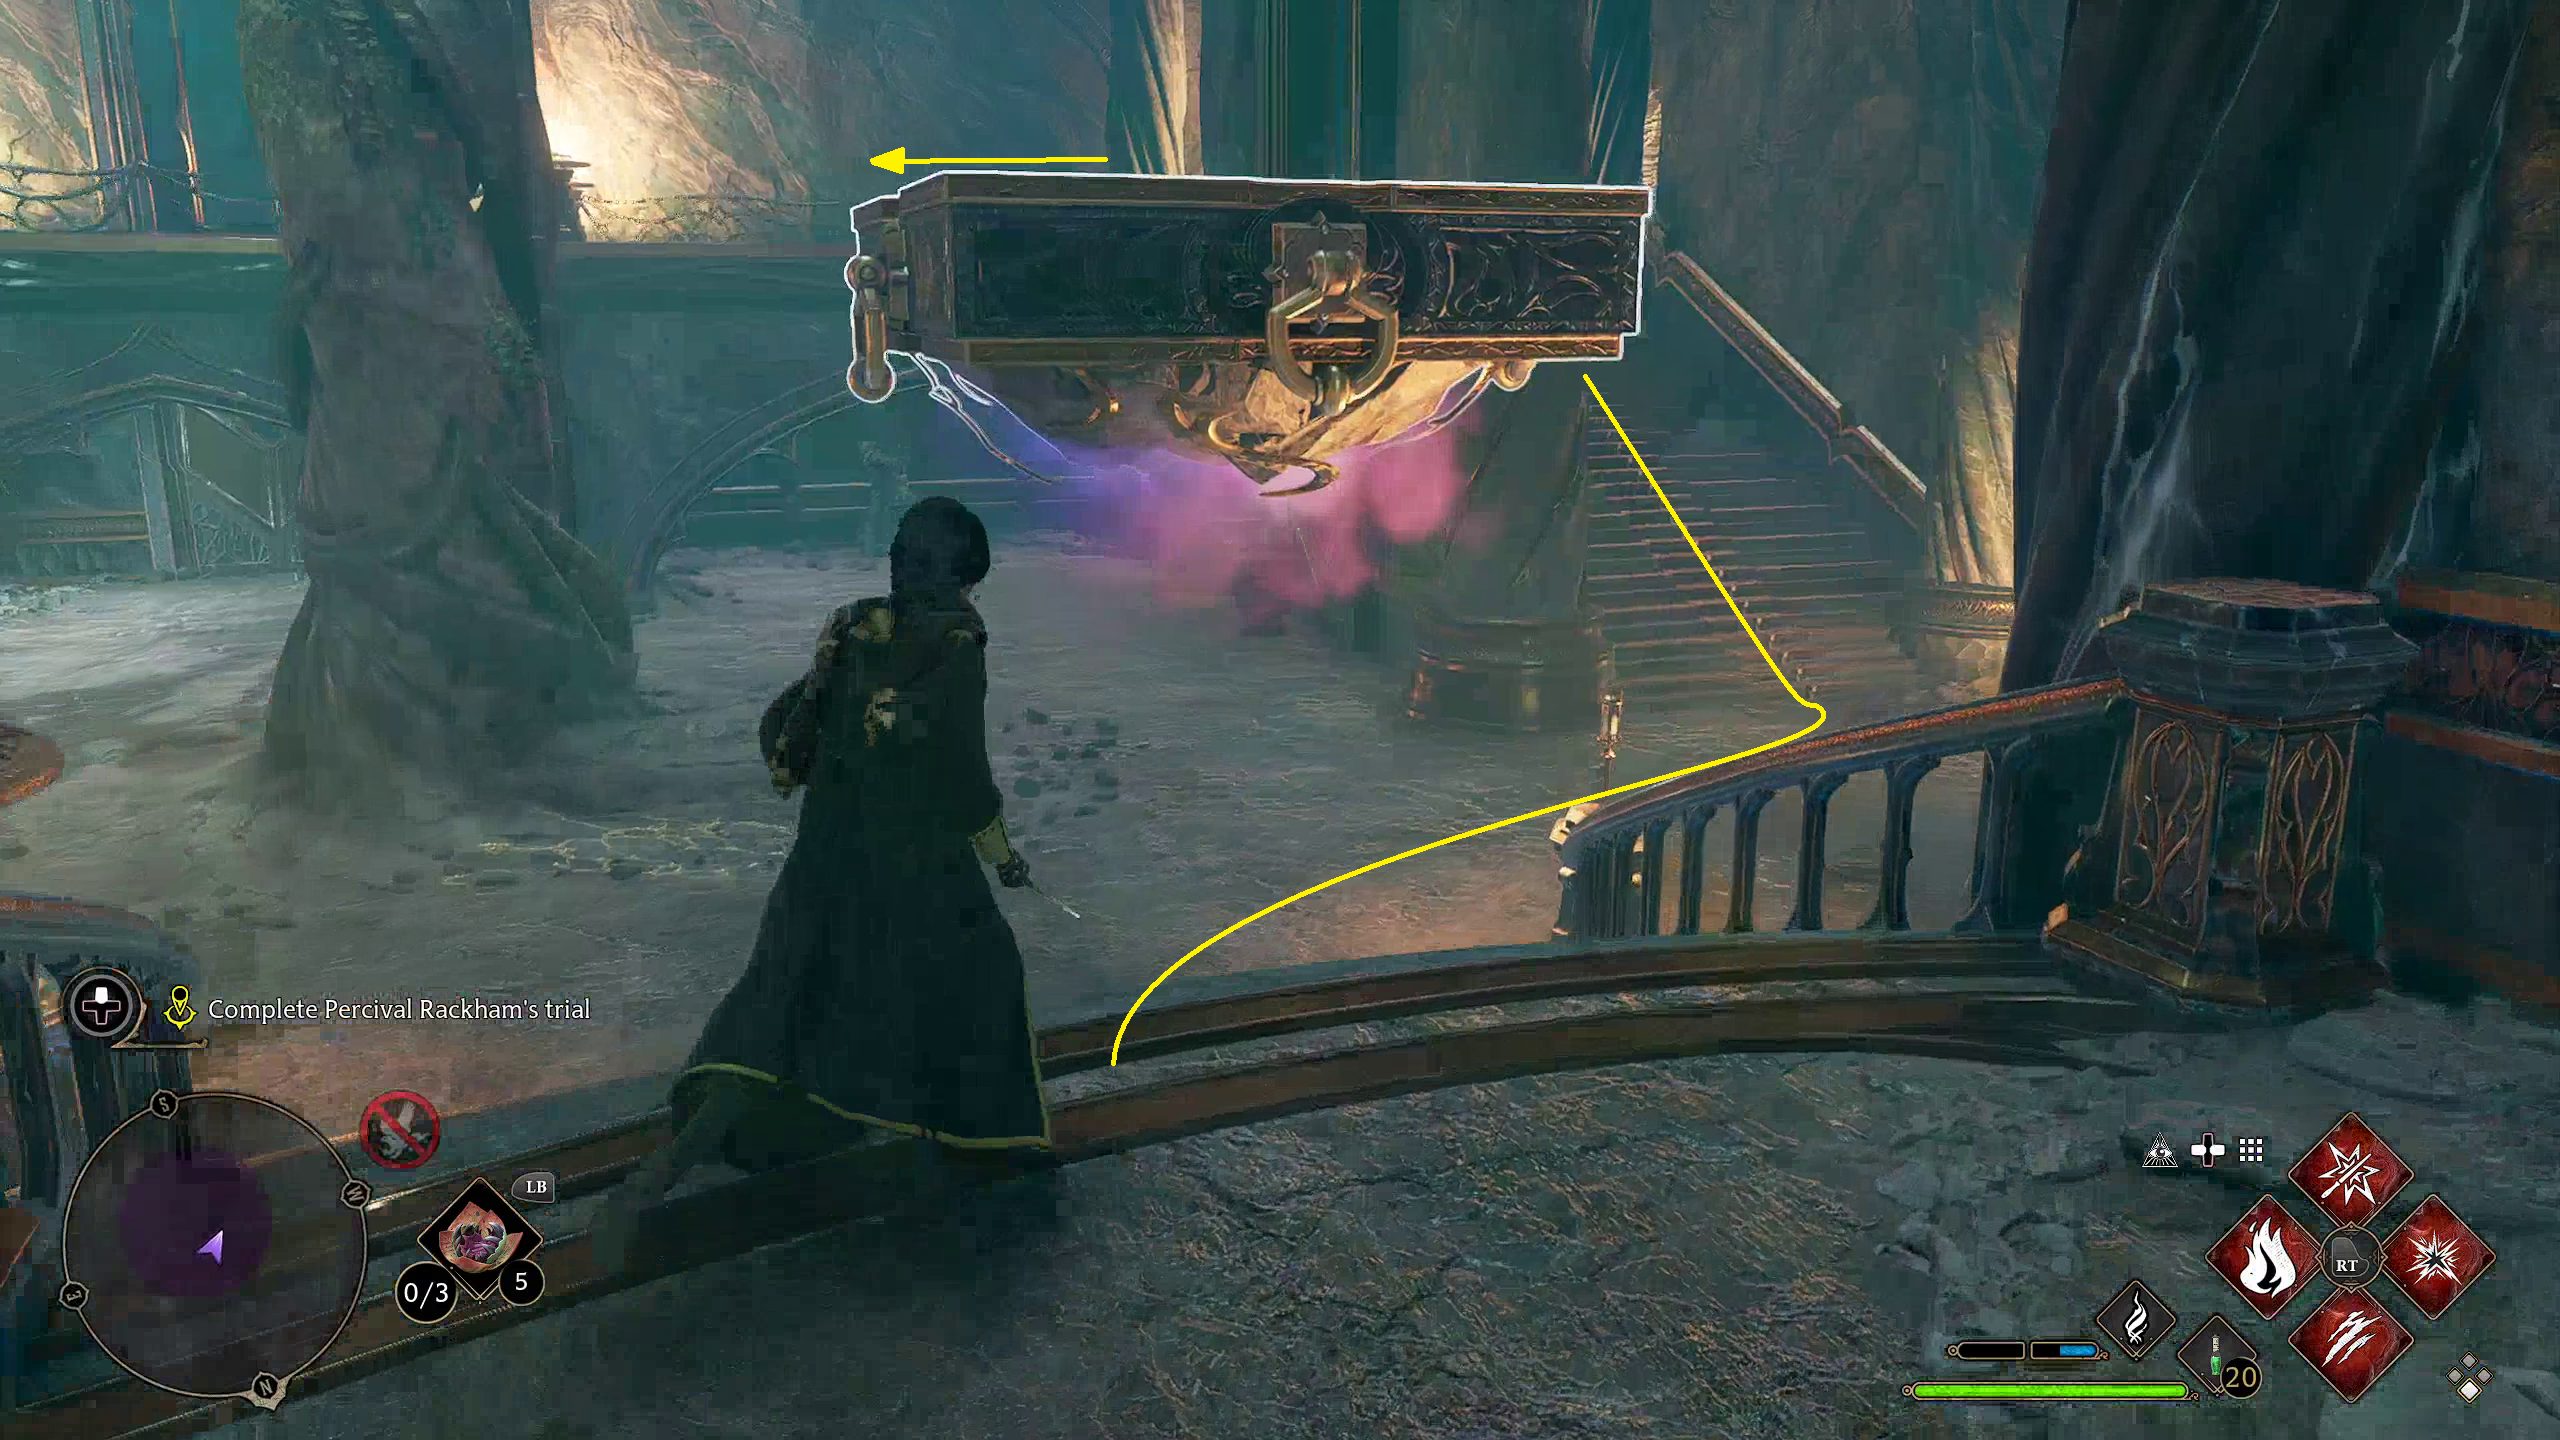
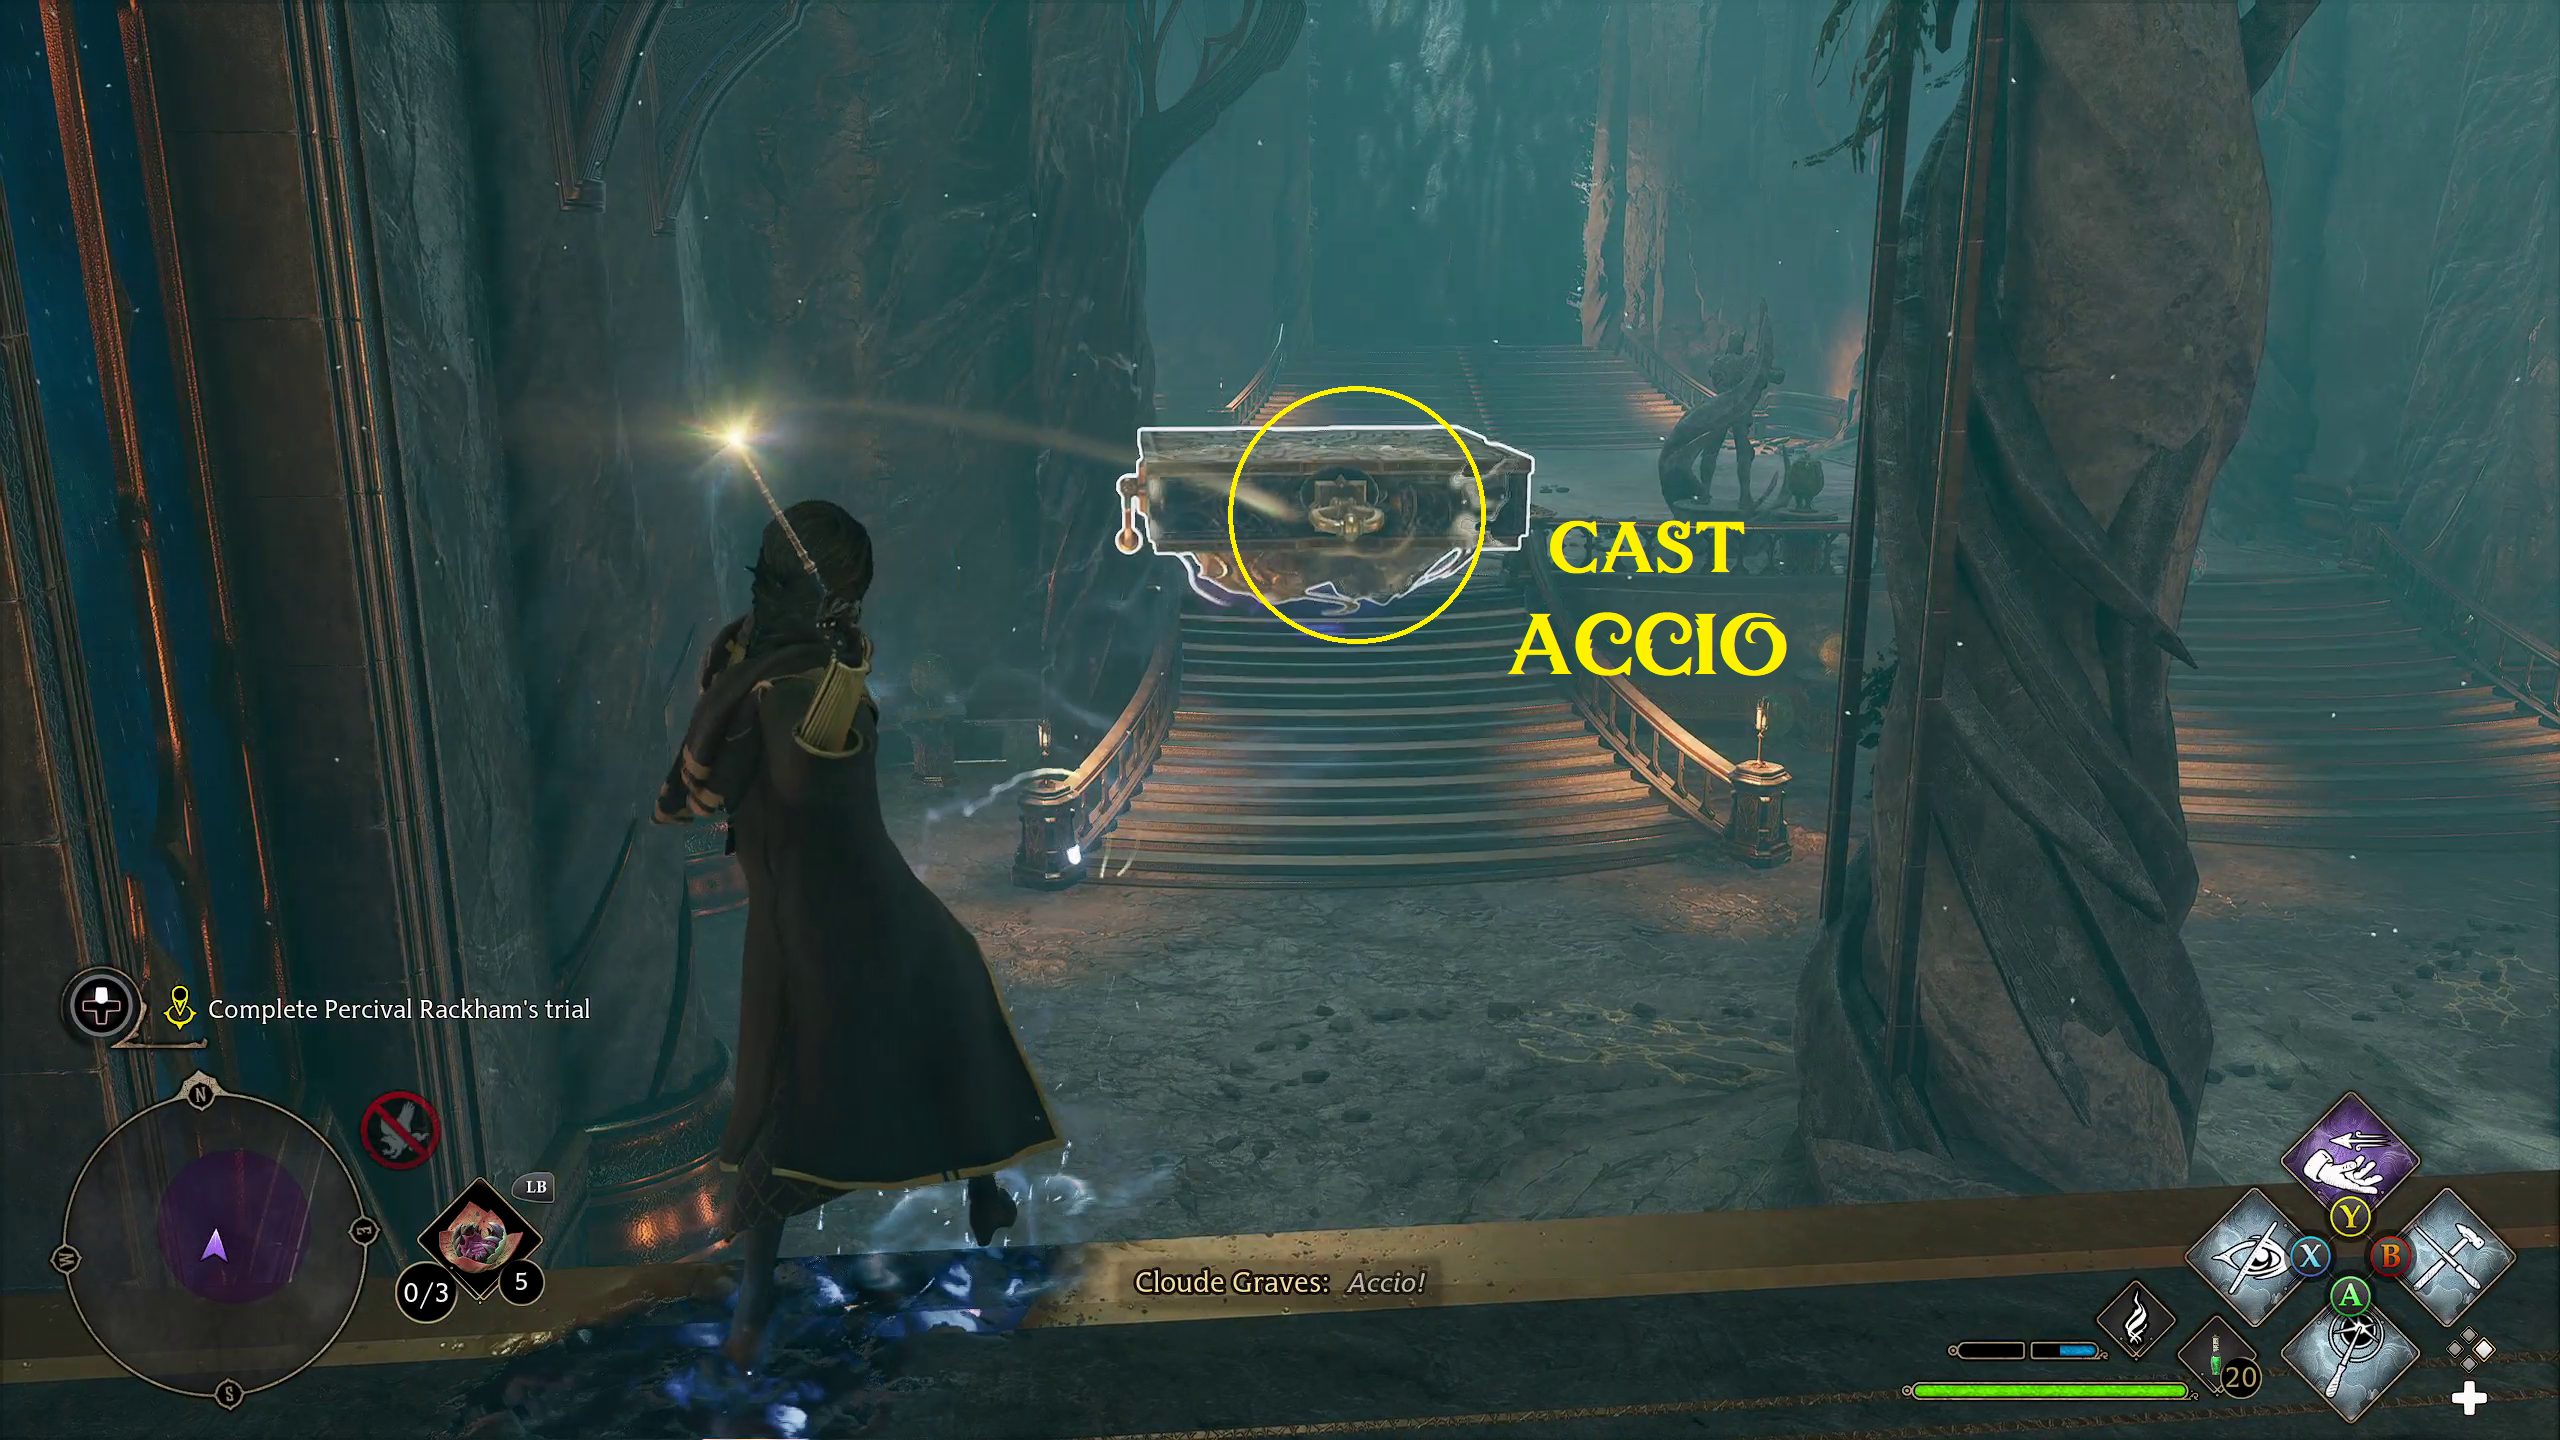
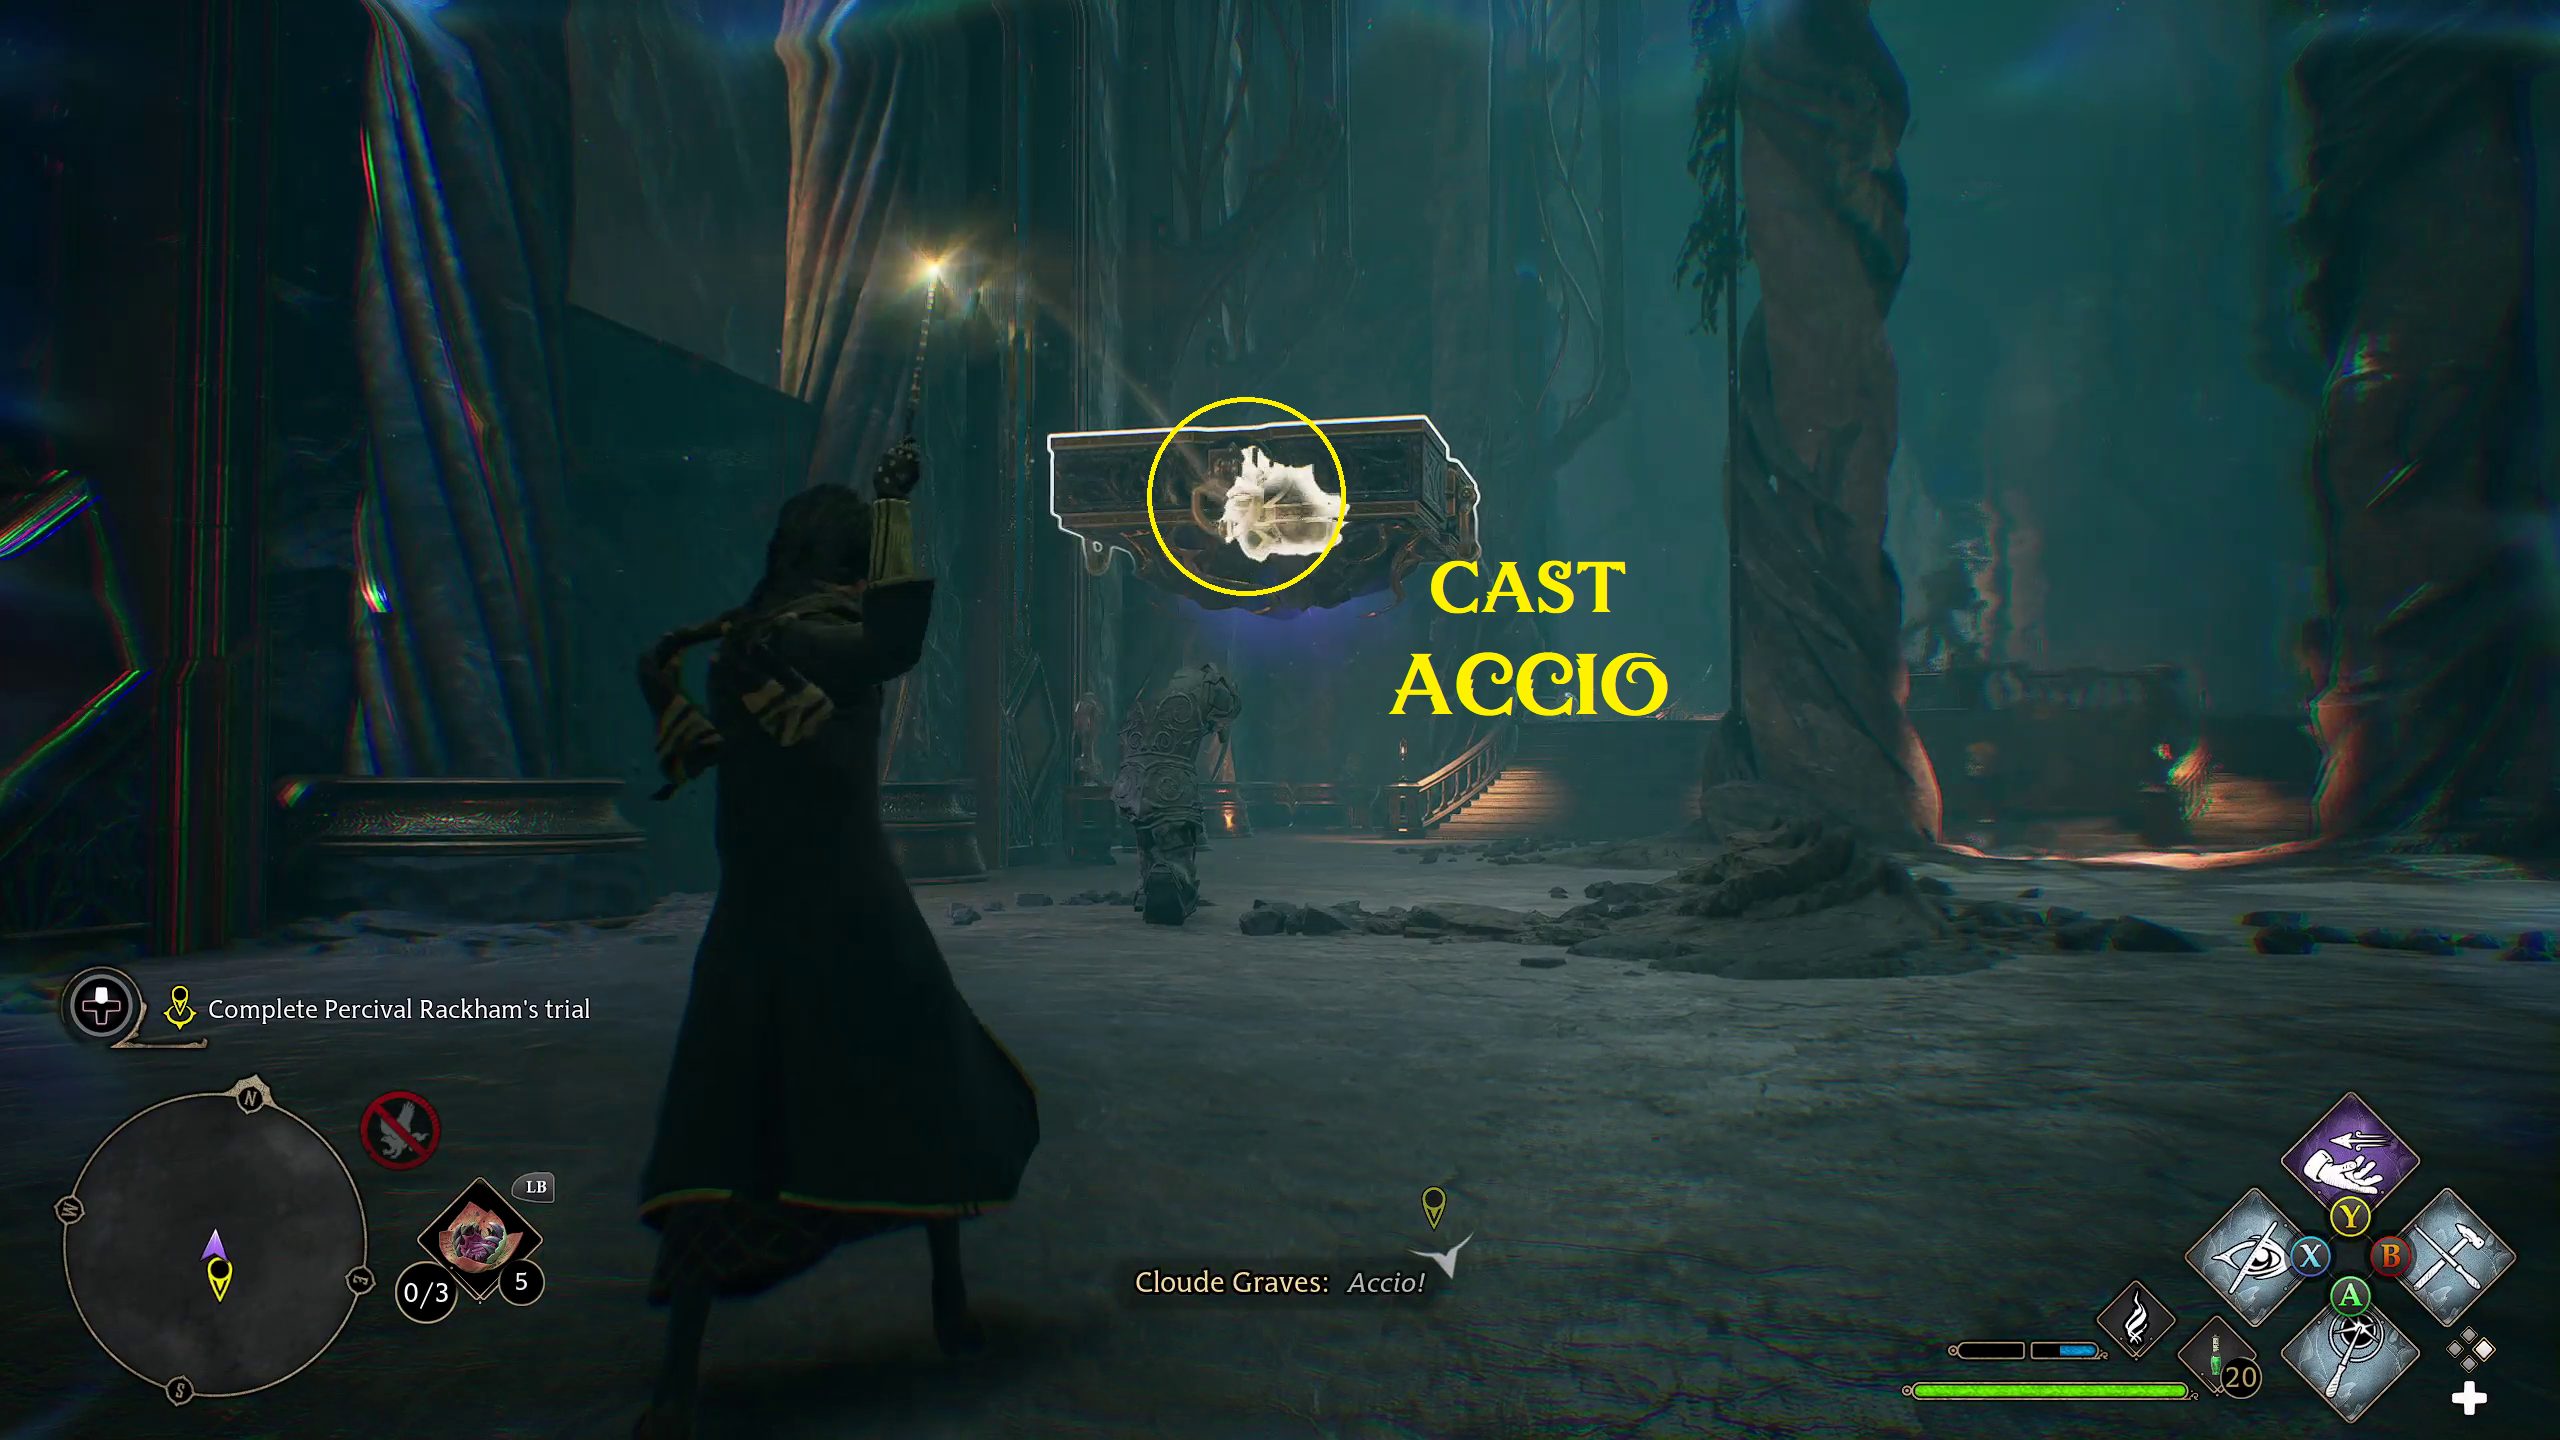
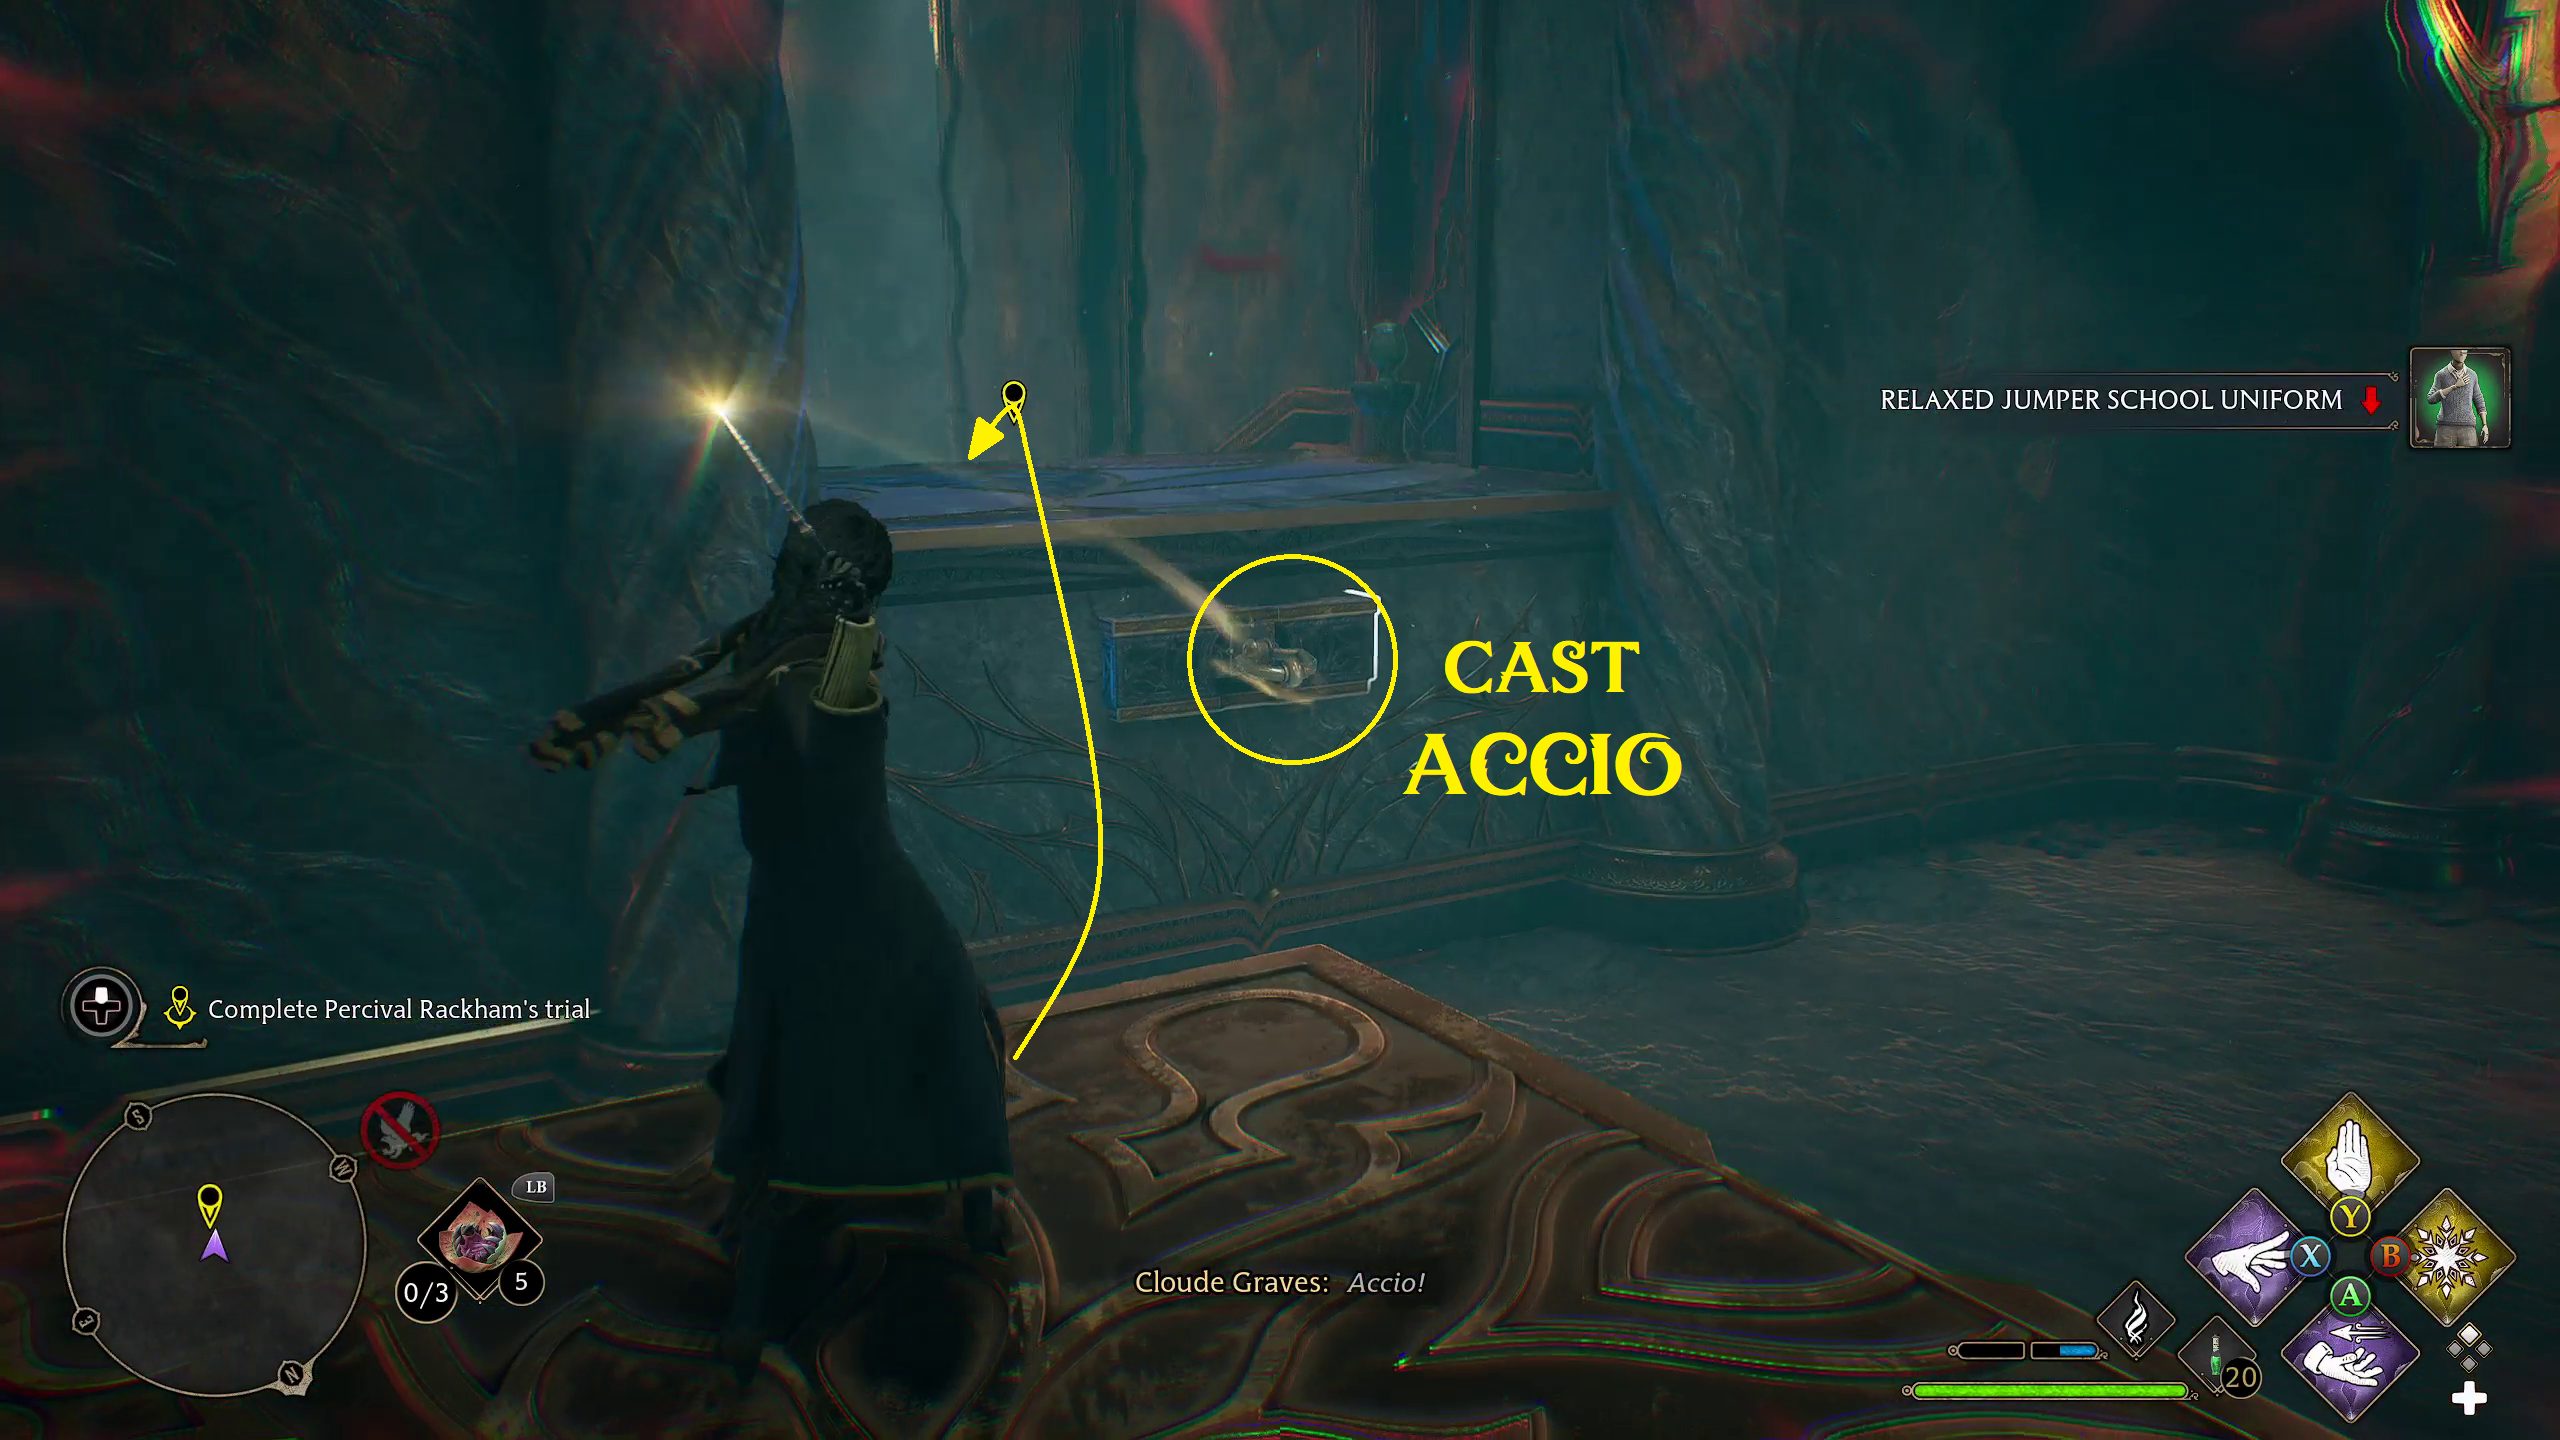
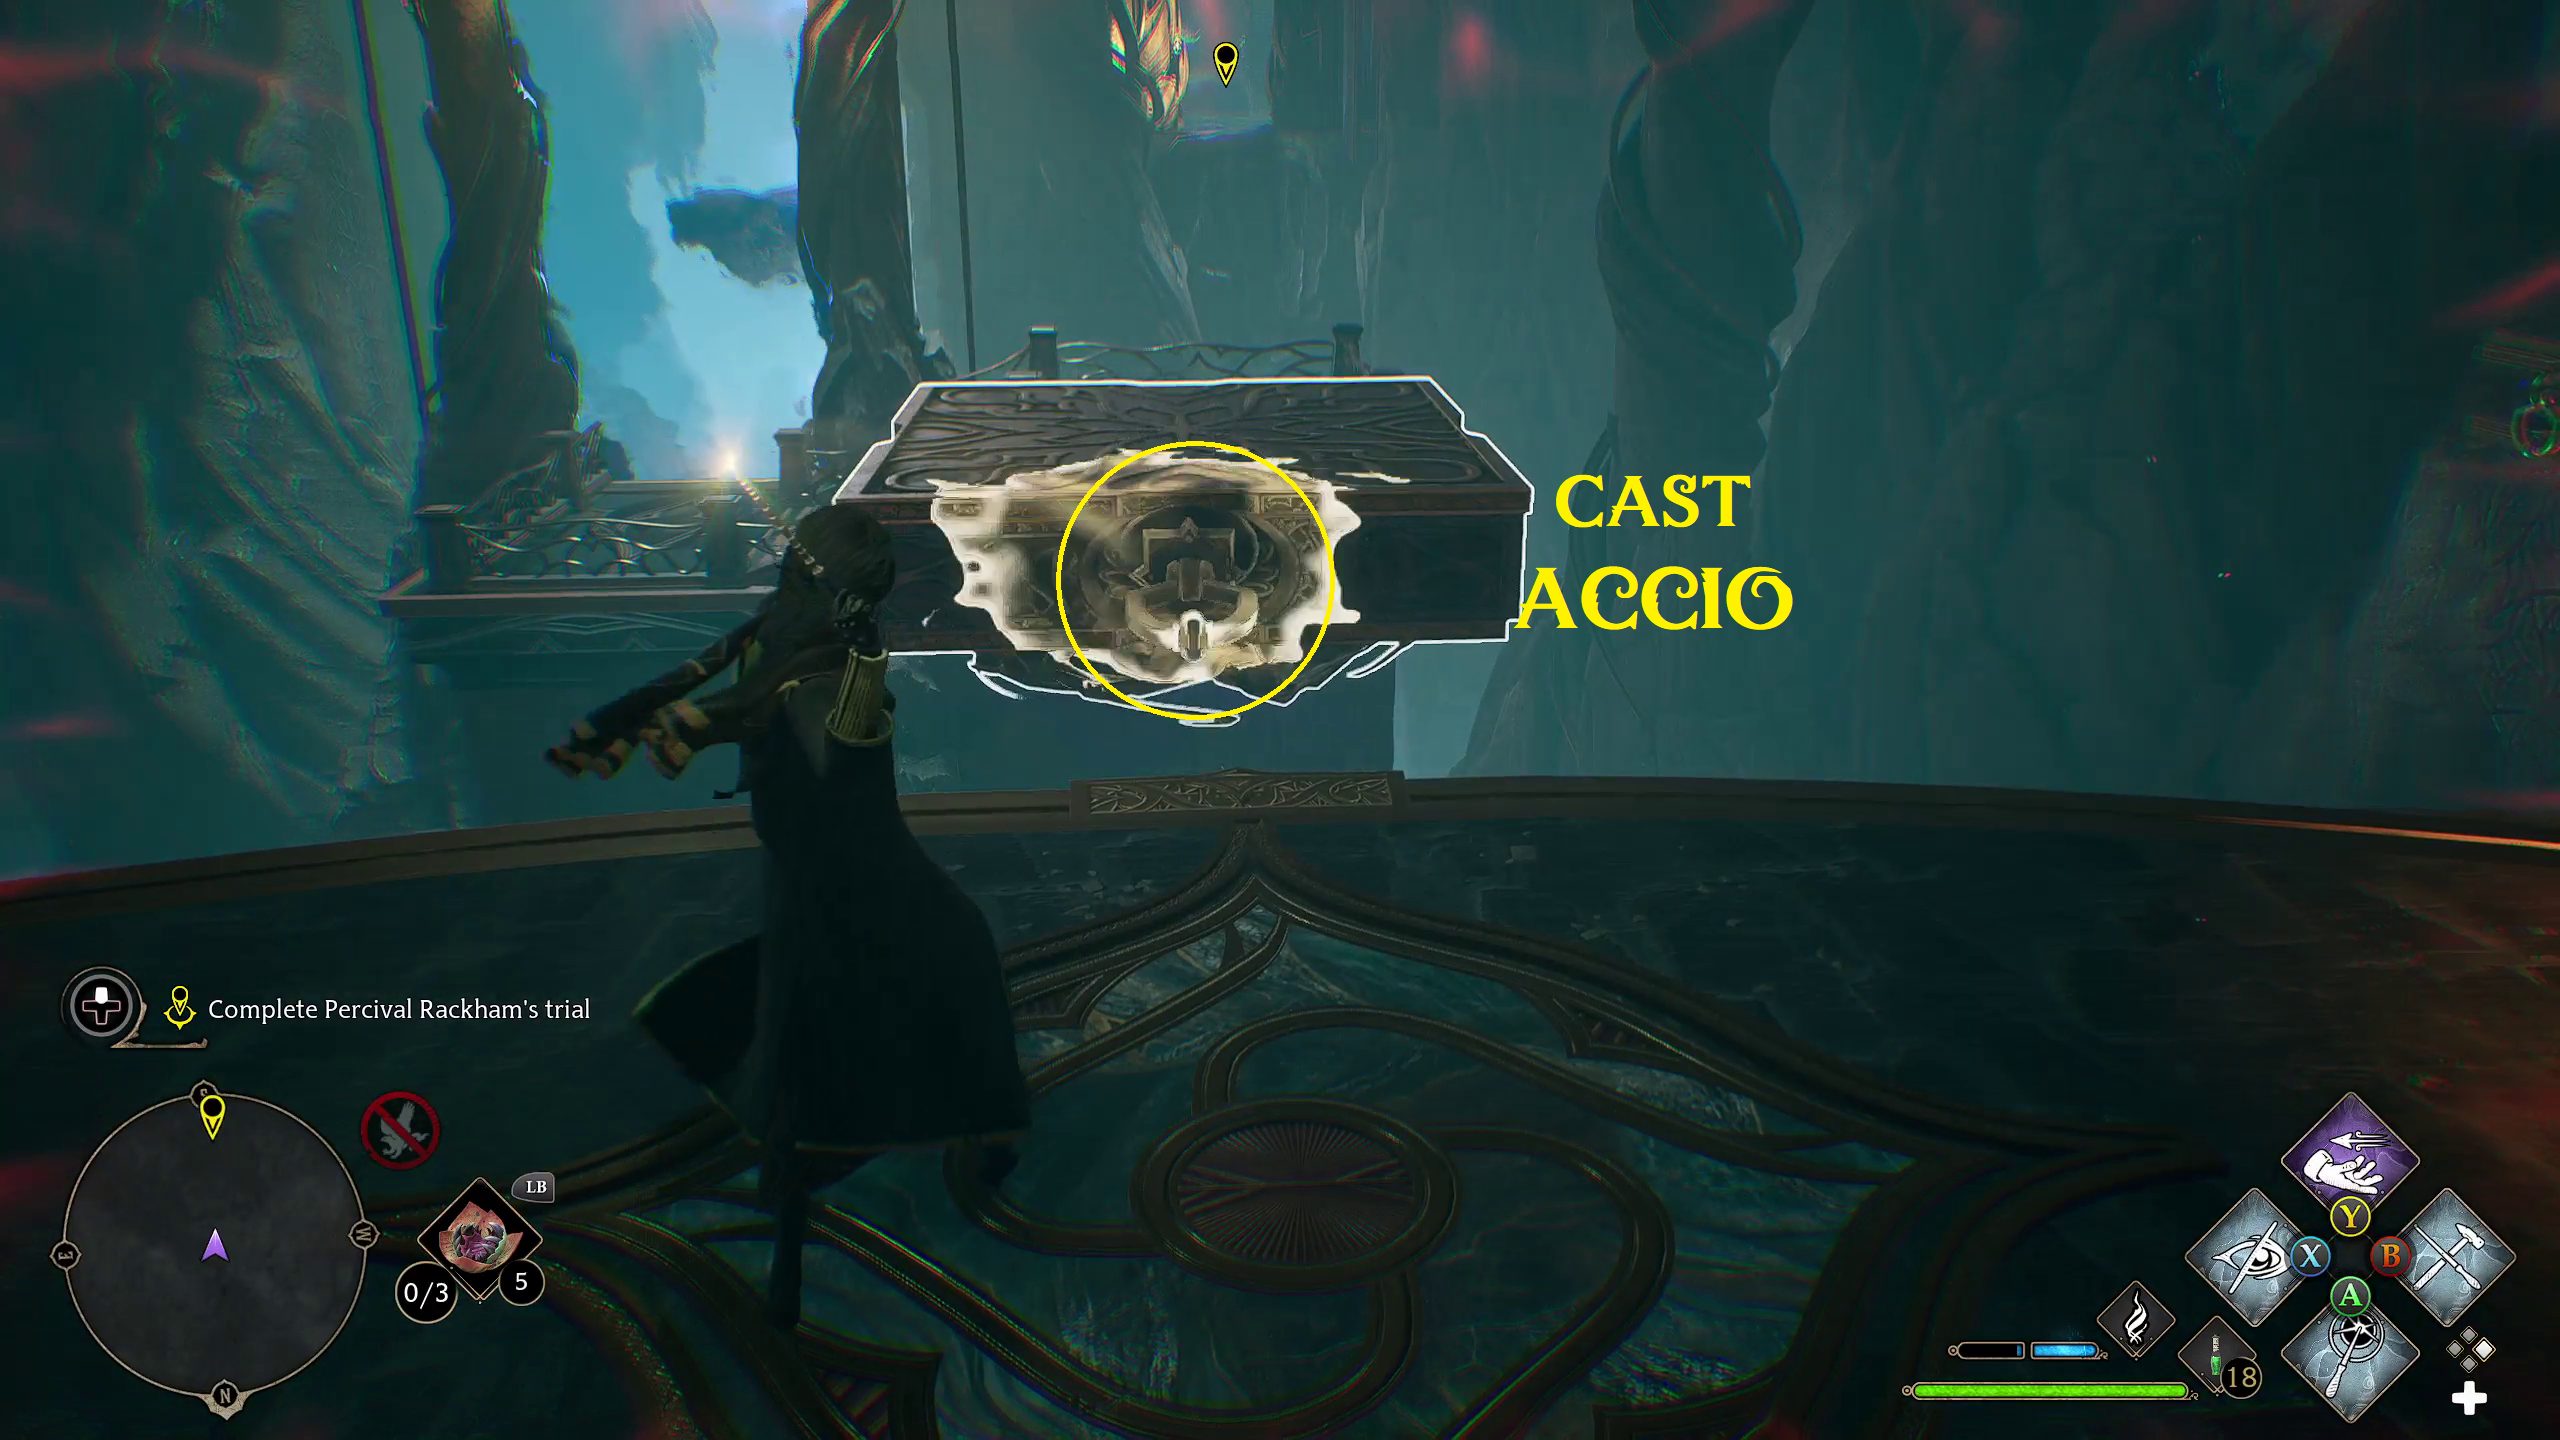
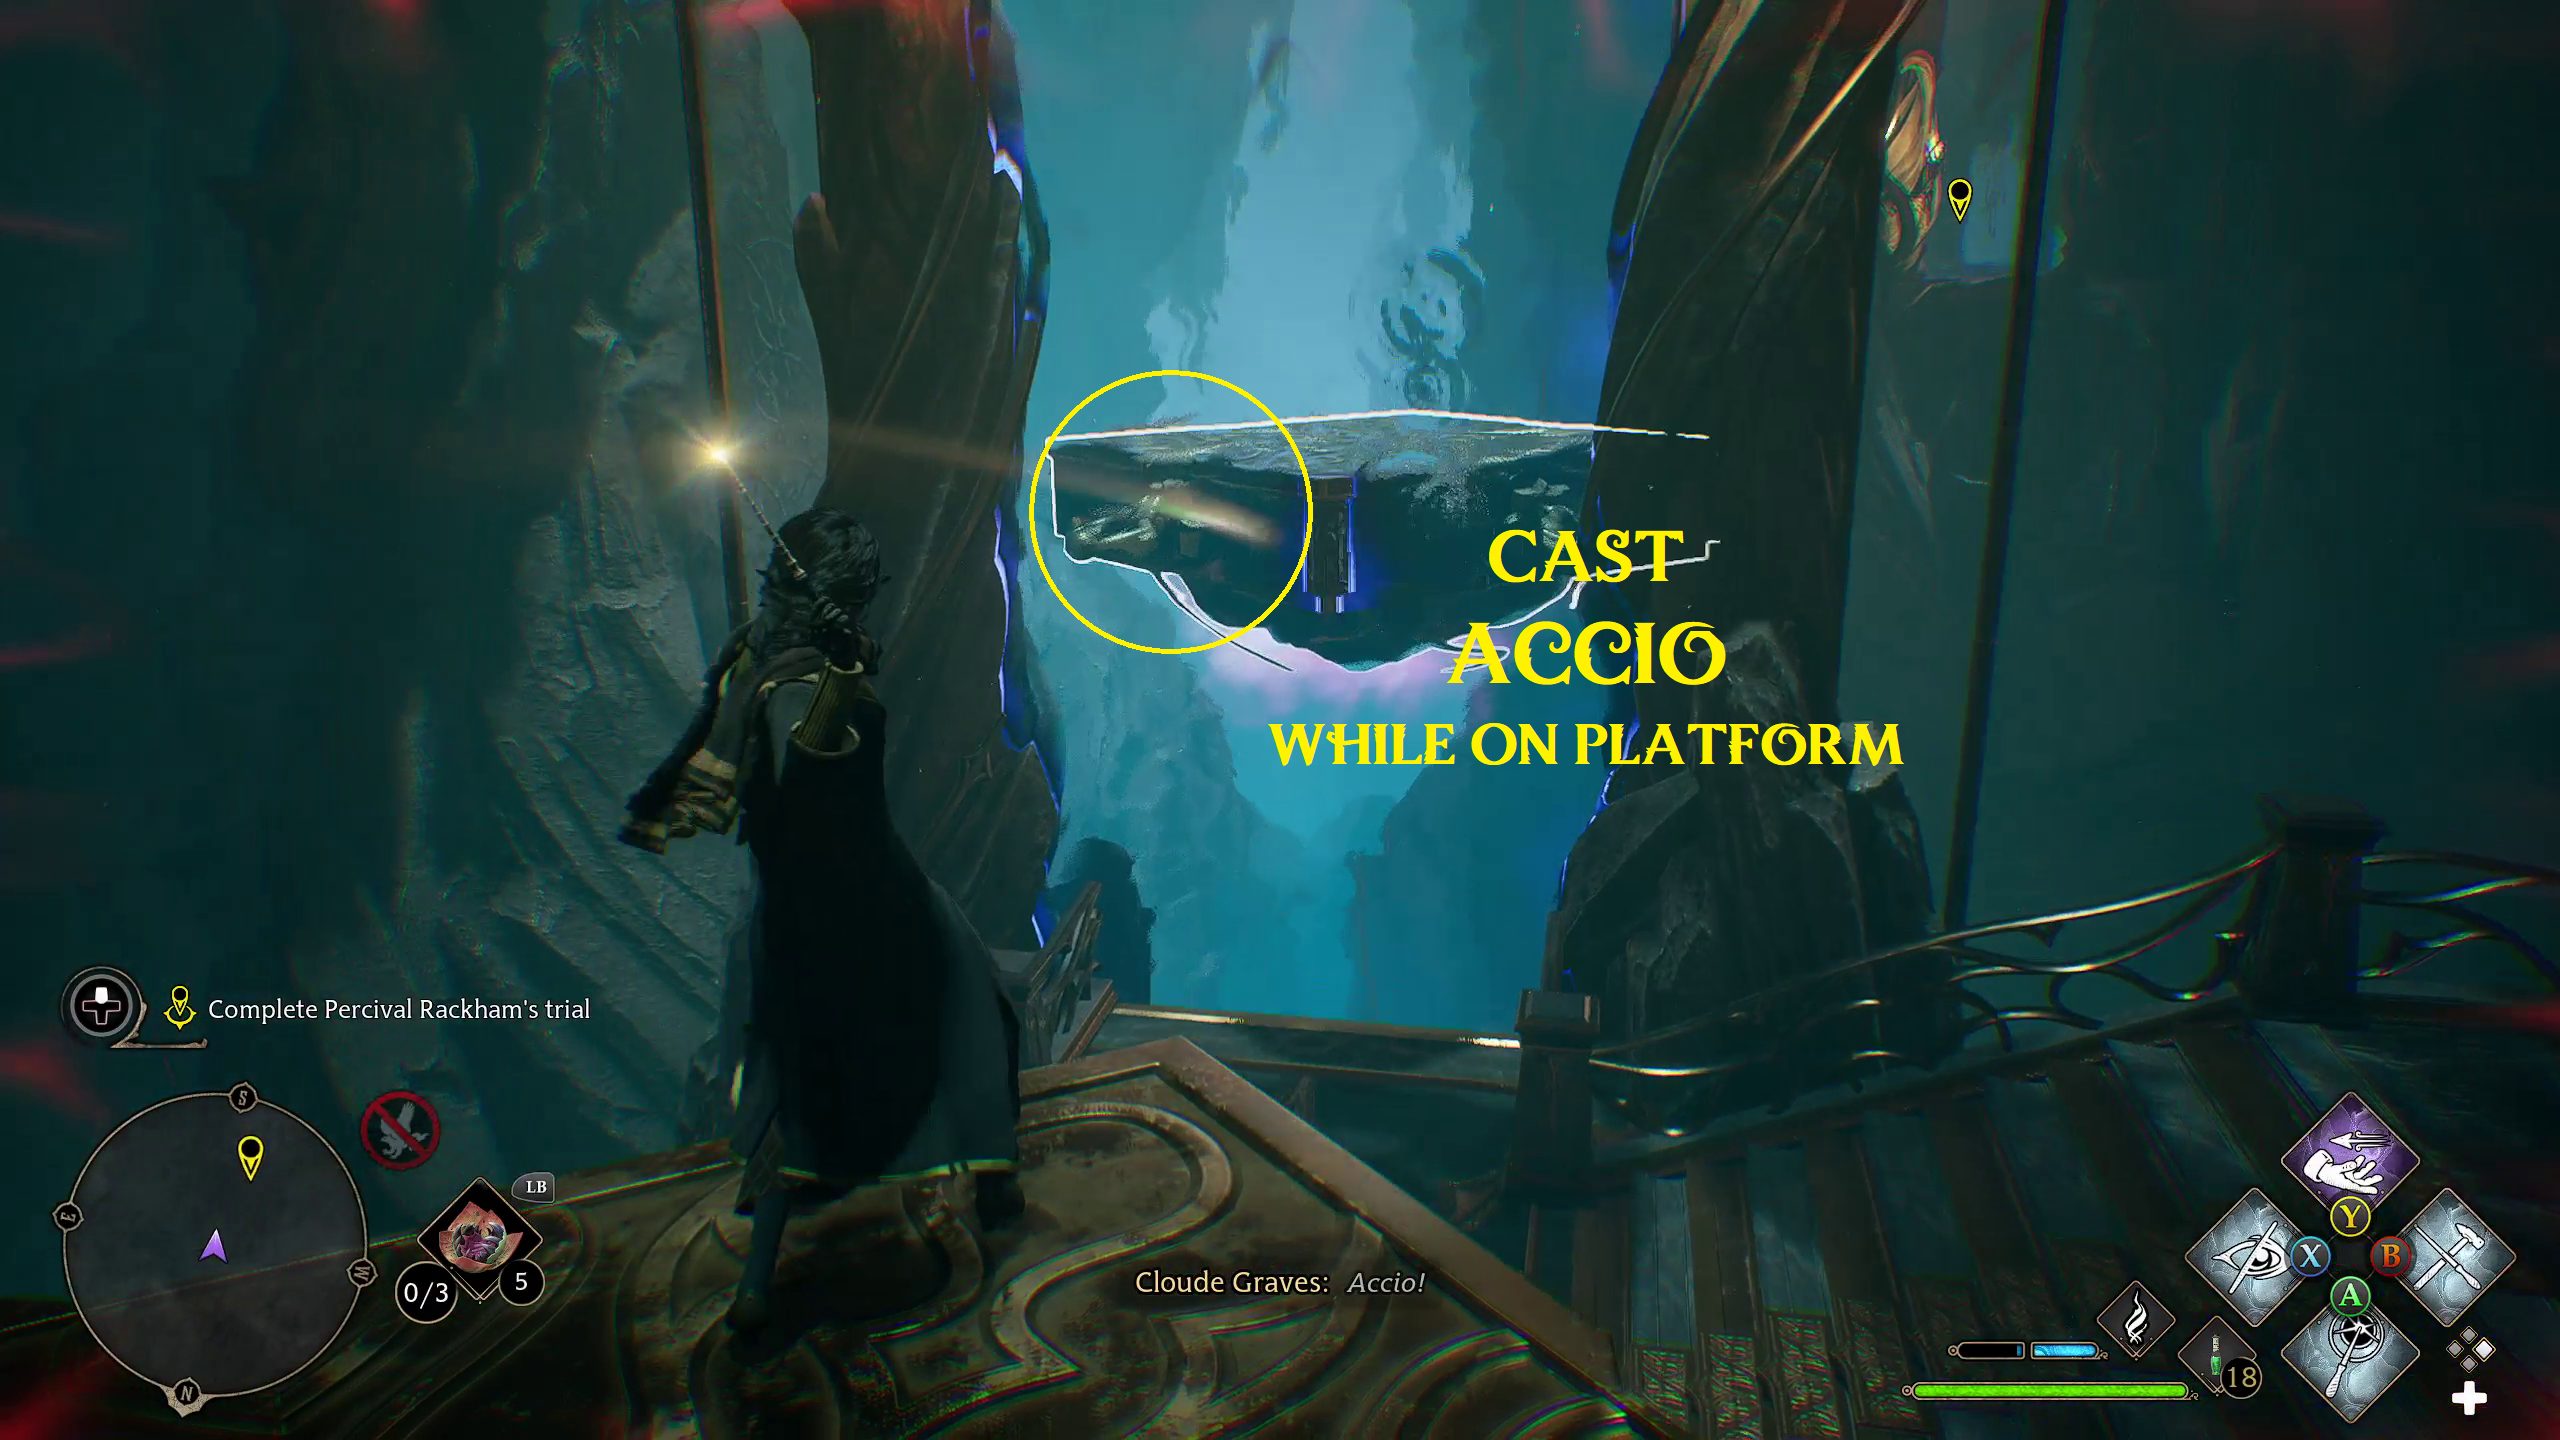
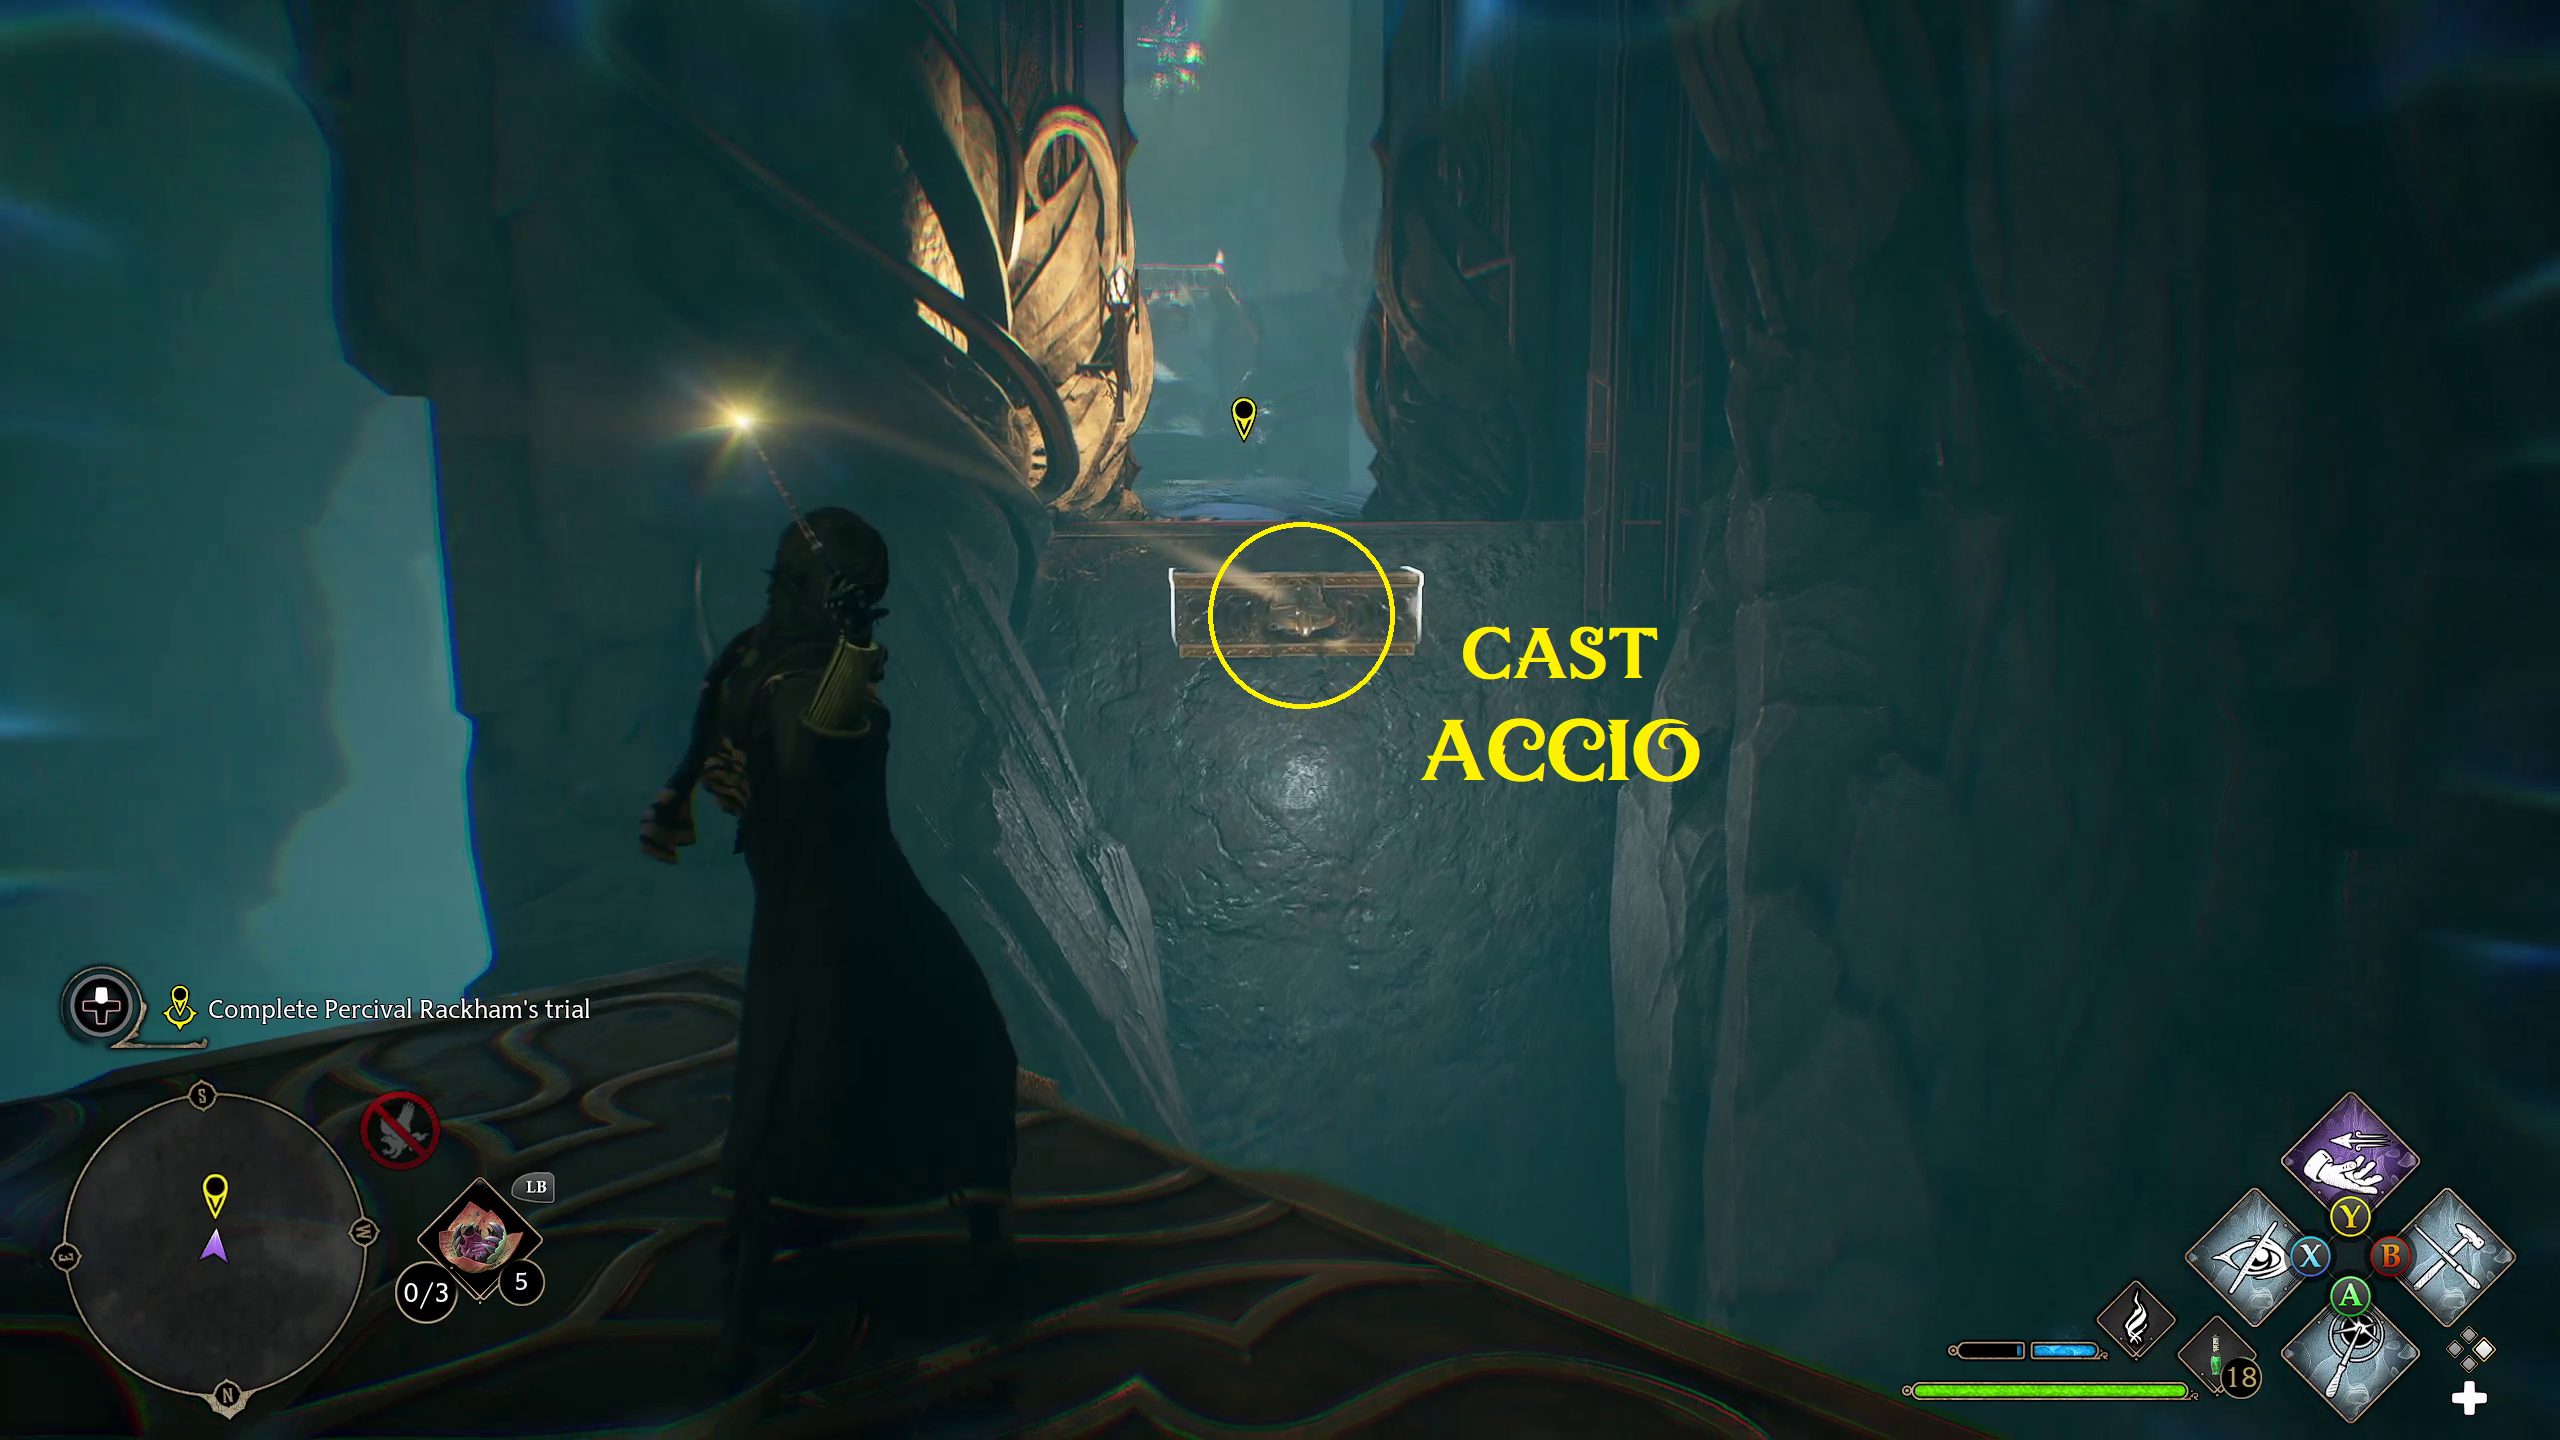
The next room is a puzzle, albeit quite a basic one. There is a floating platform in the center of the room, which you’ll need to cast Accio on to bring it closer to you (1). While on the platform, cast Accio on the handle on the pillar in the center of the room (2), then turn to your right and cast Accio on the handle stuck into the wall above (3). One you do, you can hop off and activate the Ancient Magic swell.
1234
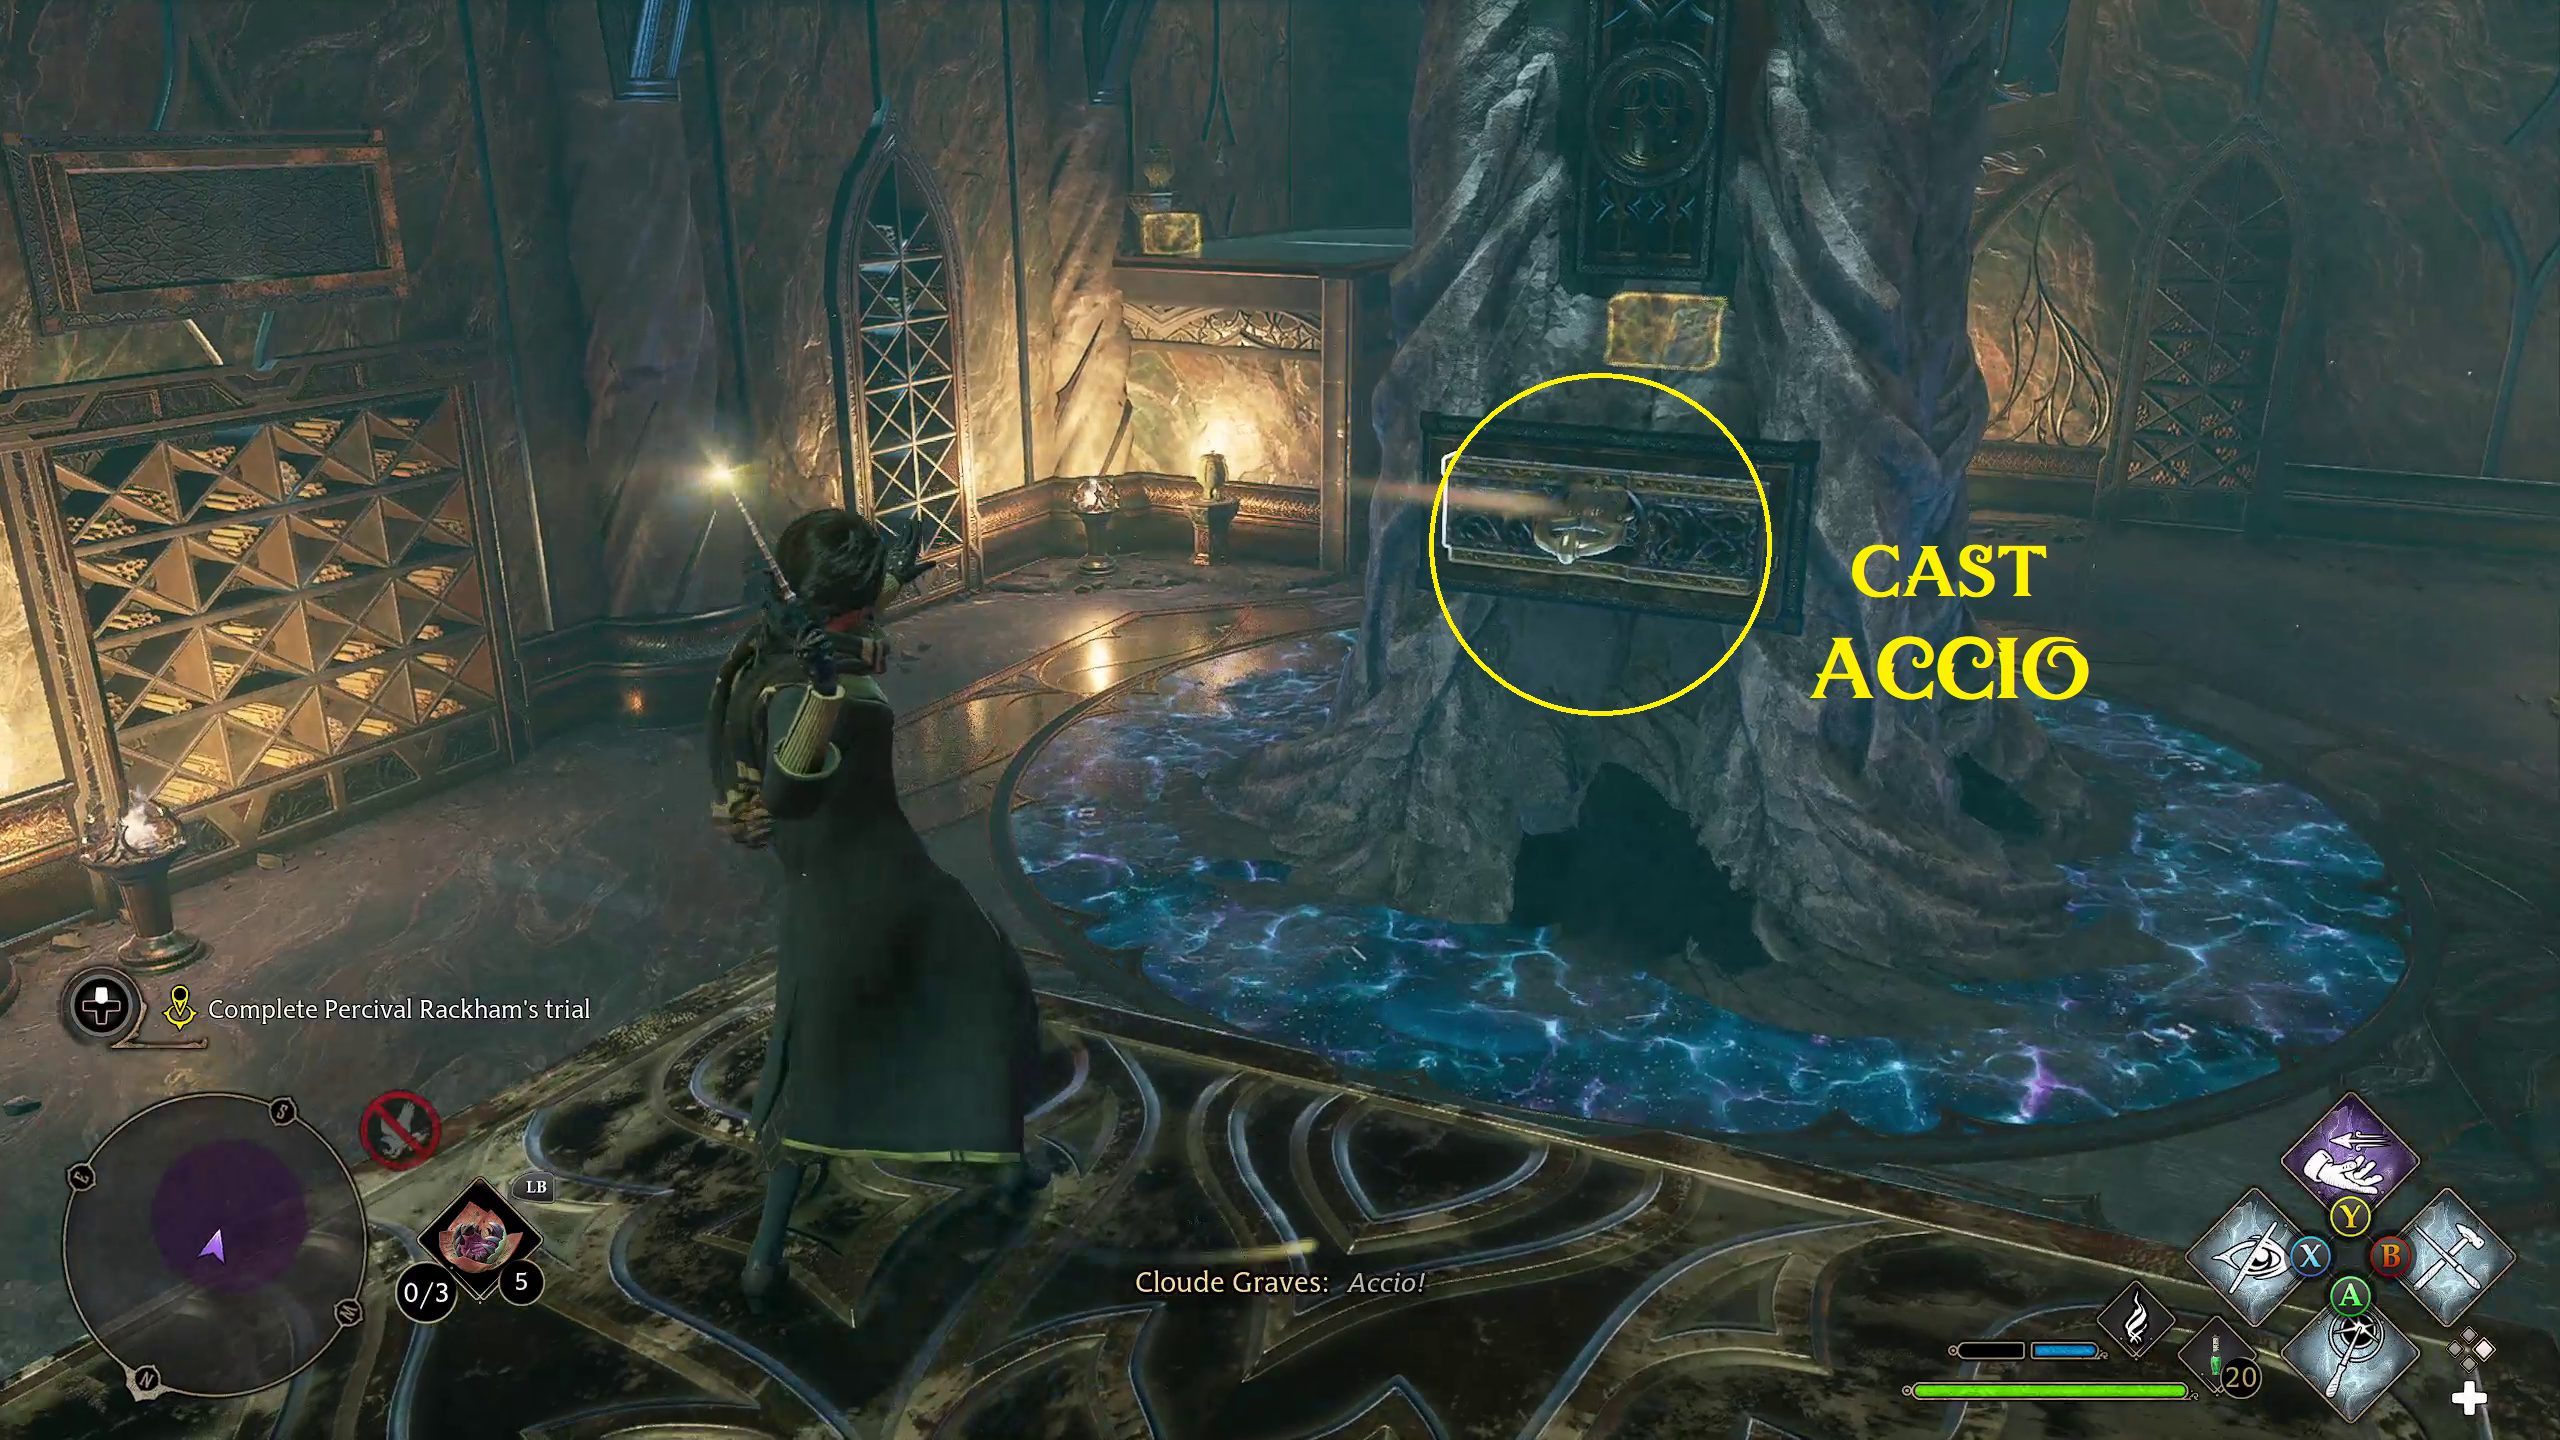
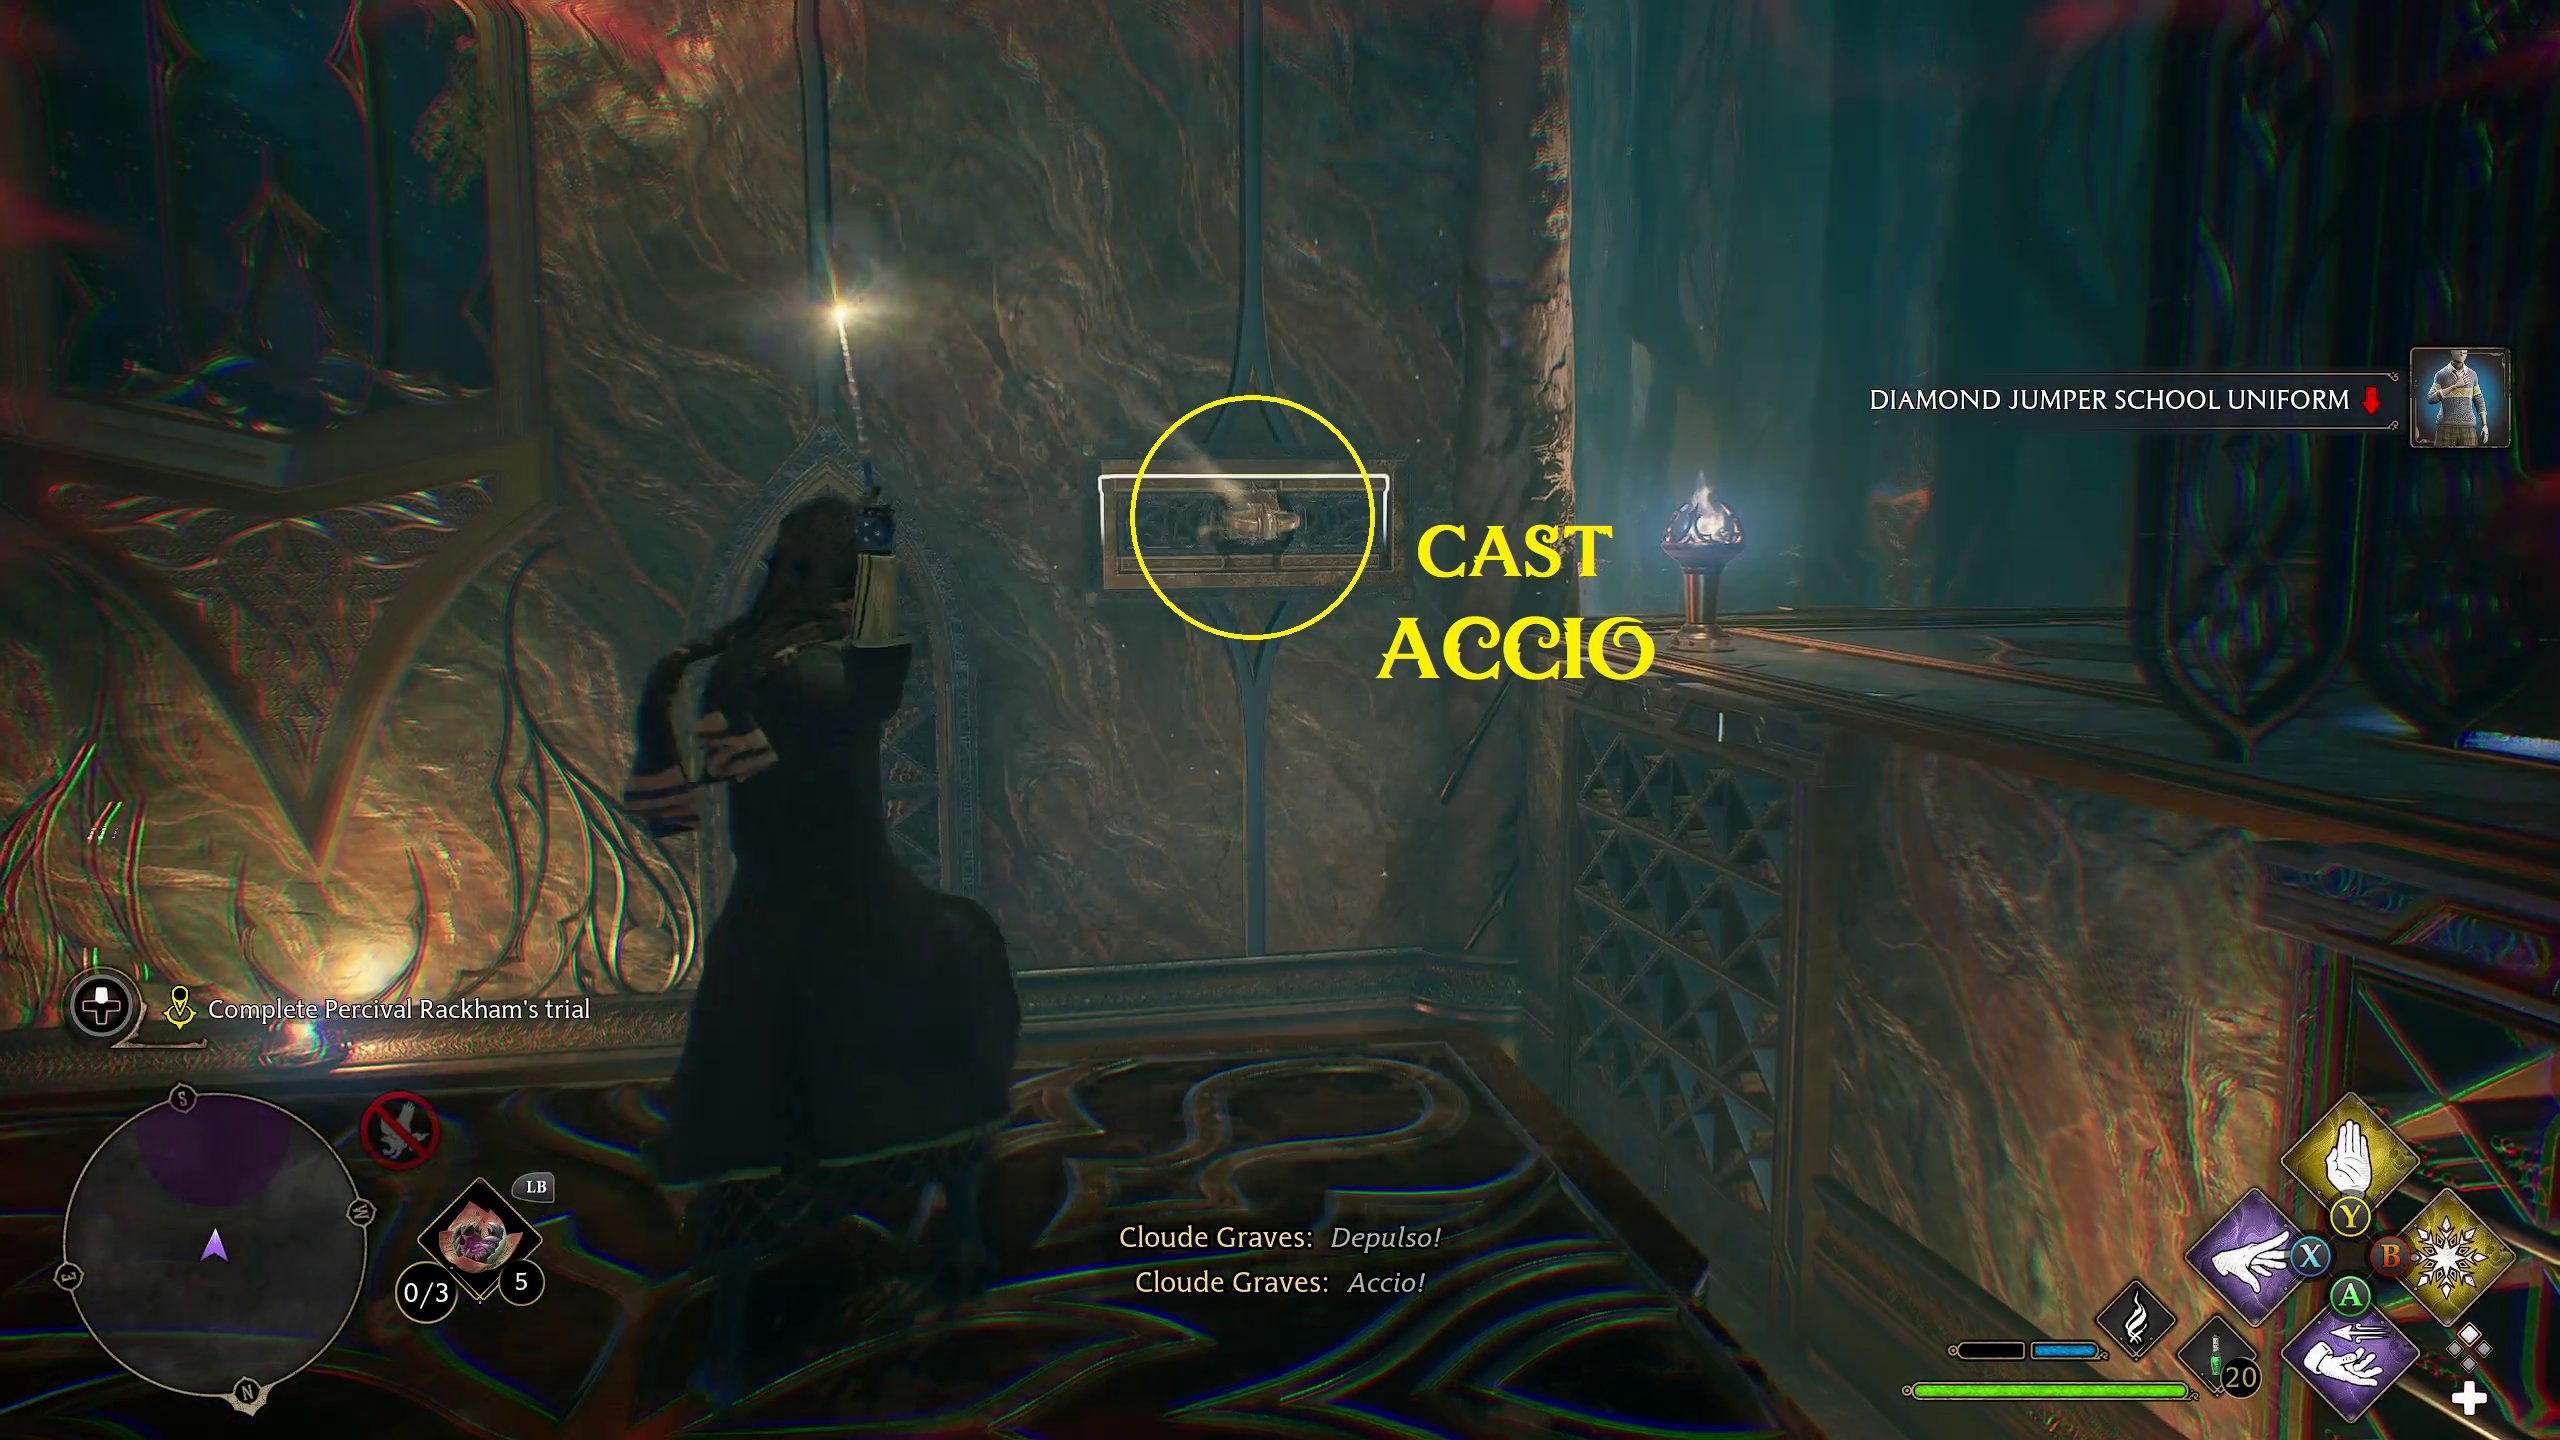
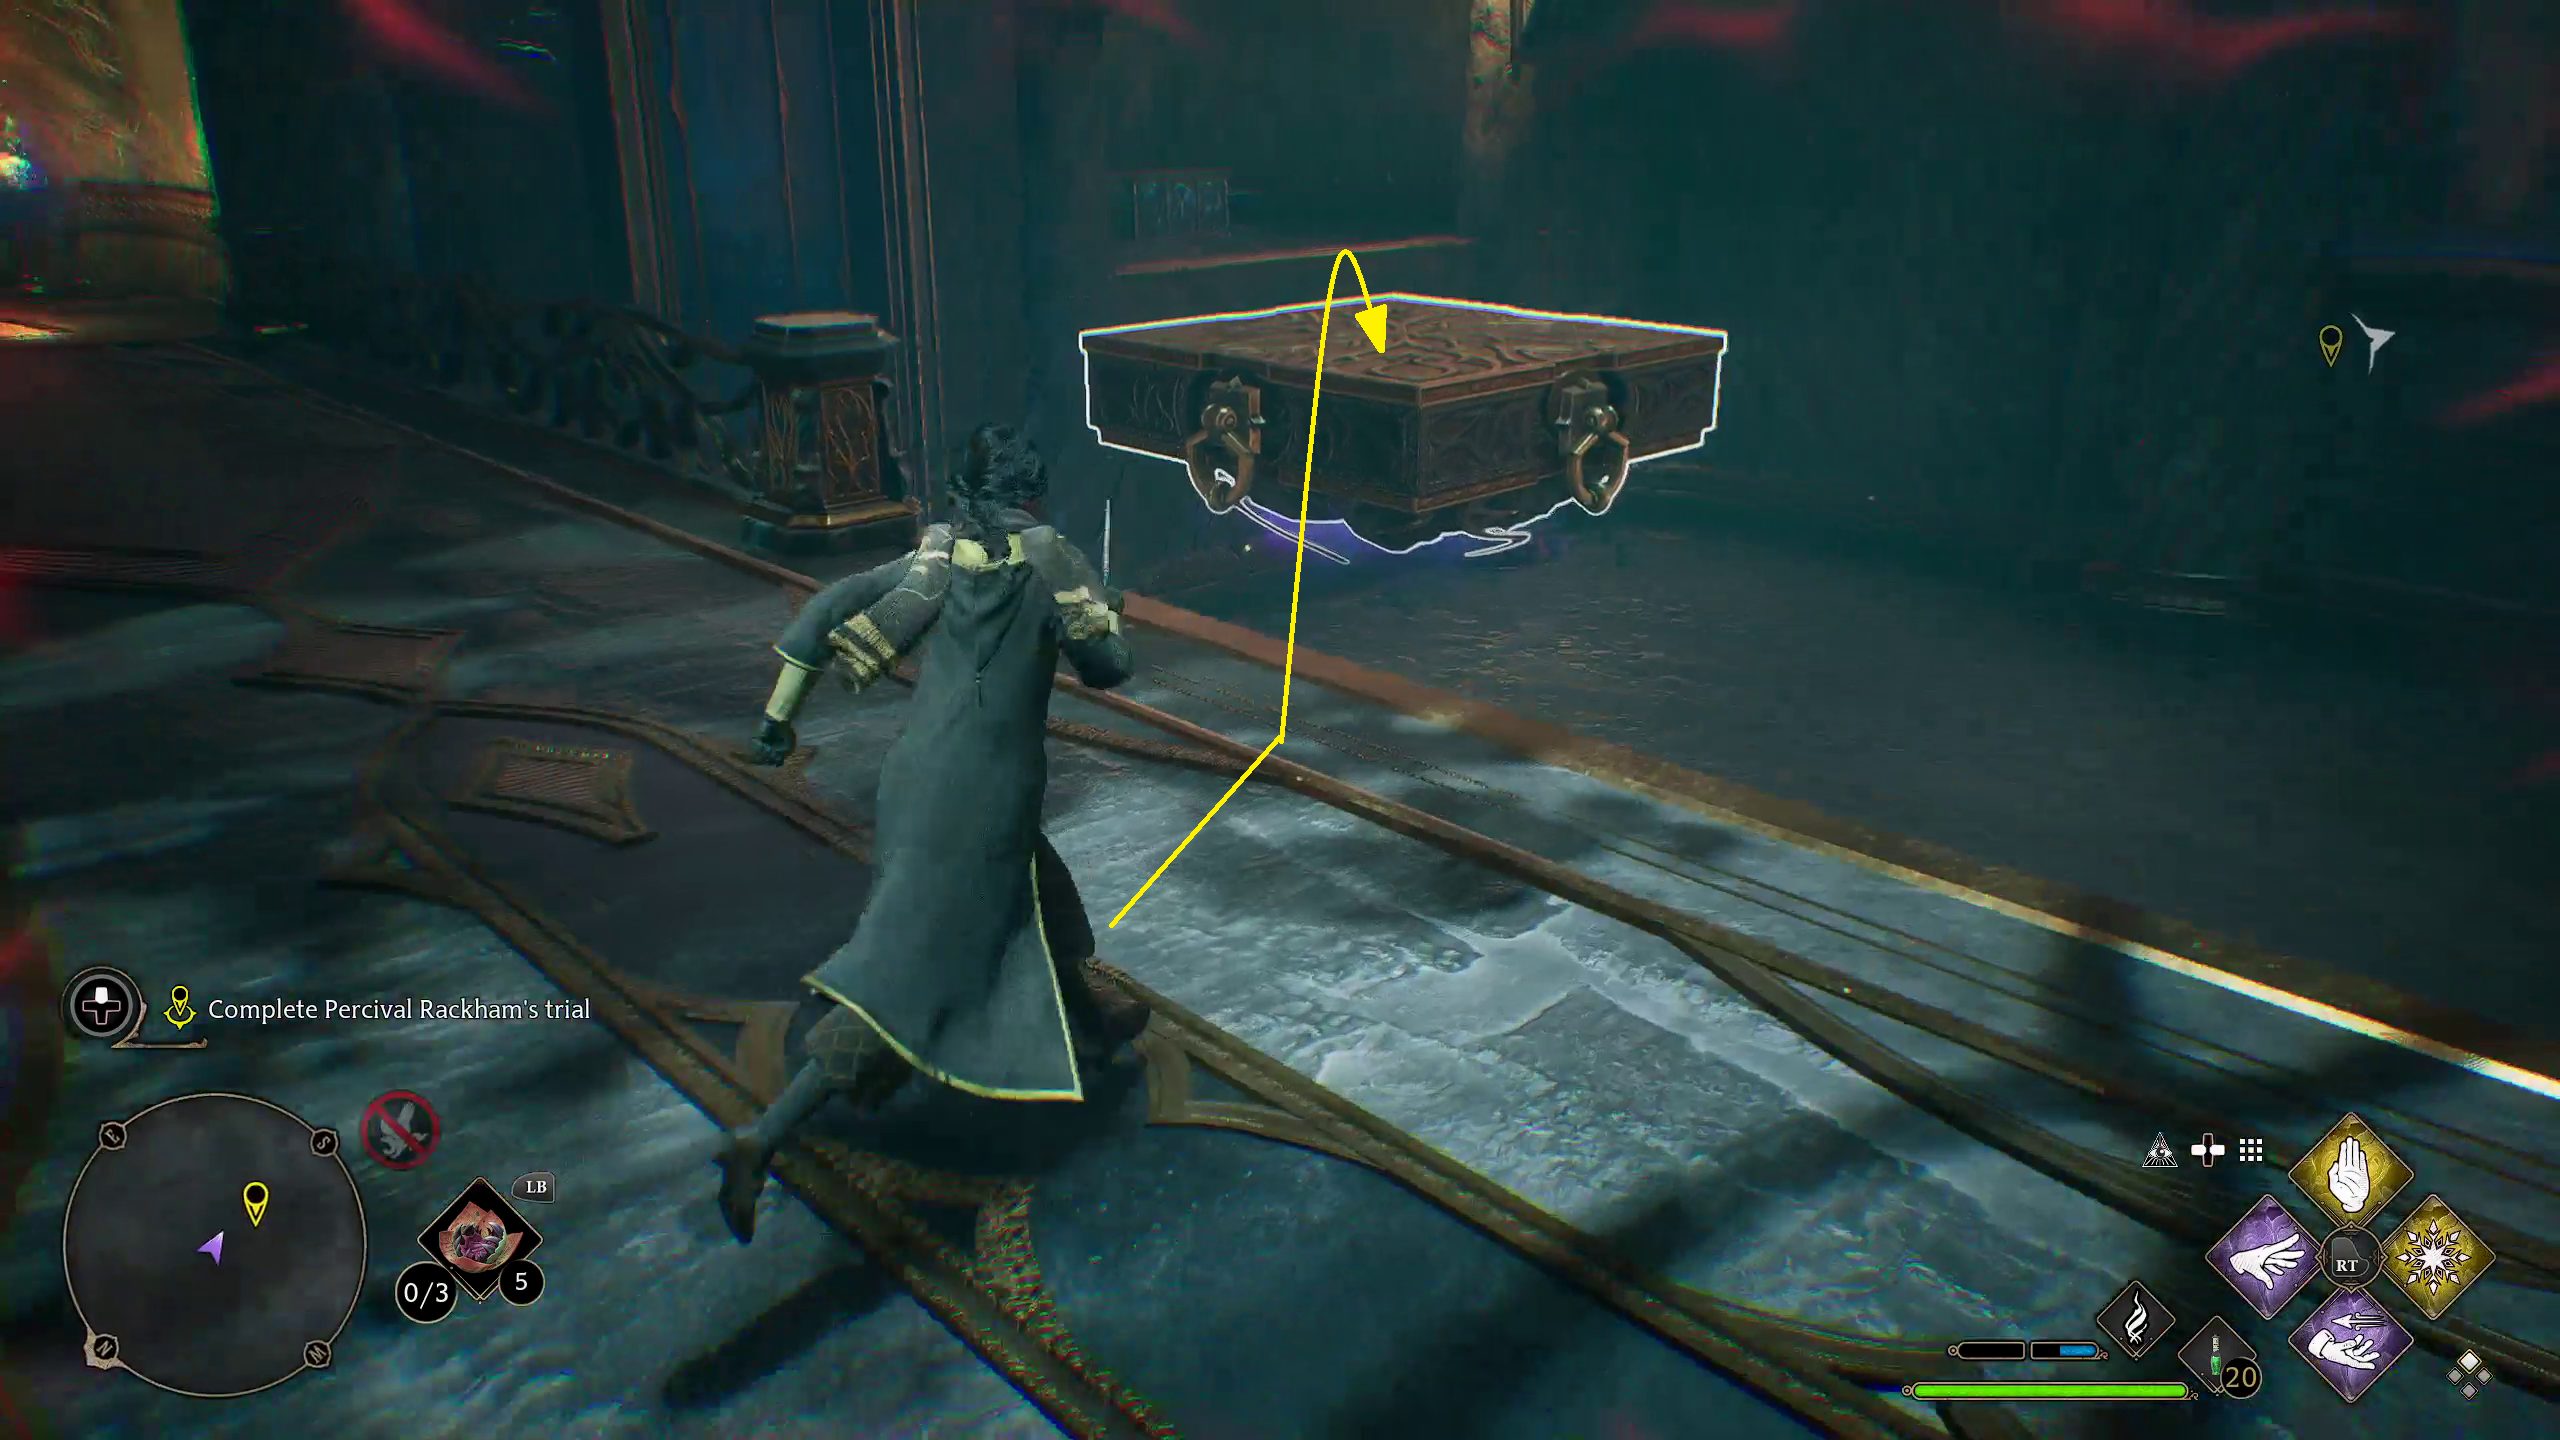
Before going through the newly-opened portal, you can look around and see that things have changed! Now, you can hop back on the floating platform and use Accio on the handle way on the other side of the room in order to reach the chest on the pillar in the middle (1). Then, turn to your right and cast Accio on the handle next to the exit (2) before turning left and casting Accio back on the handle across the room, which will enable you to grab another chest (3). After that, Accio the handle next to the exit again so you can progress (4)
1234
The next area will be another combat arena, where you can use the same techniques as before to dispatch the Pensieve Guards.
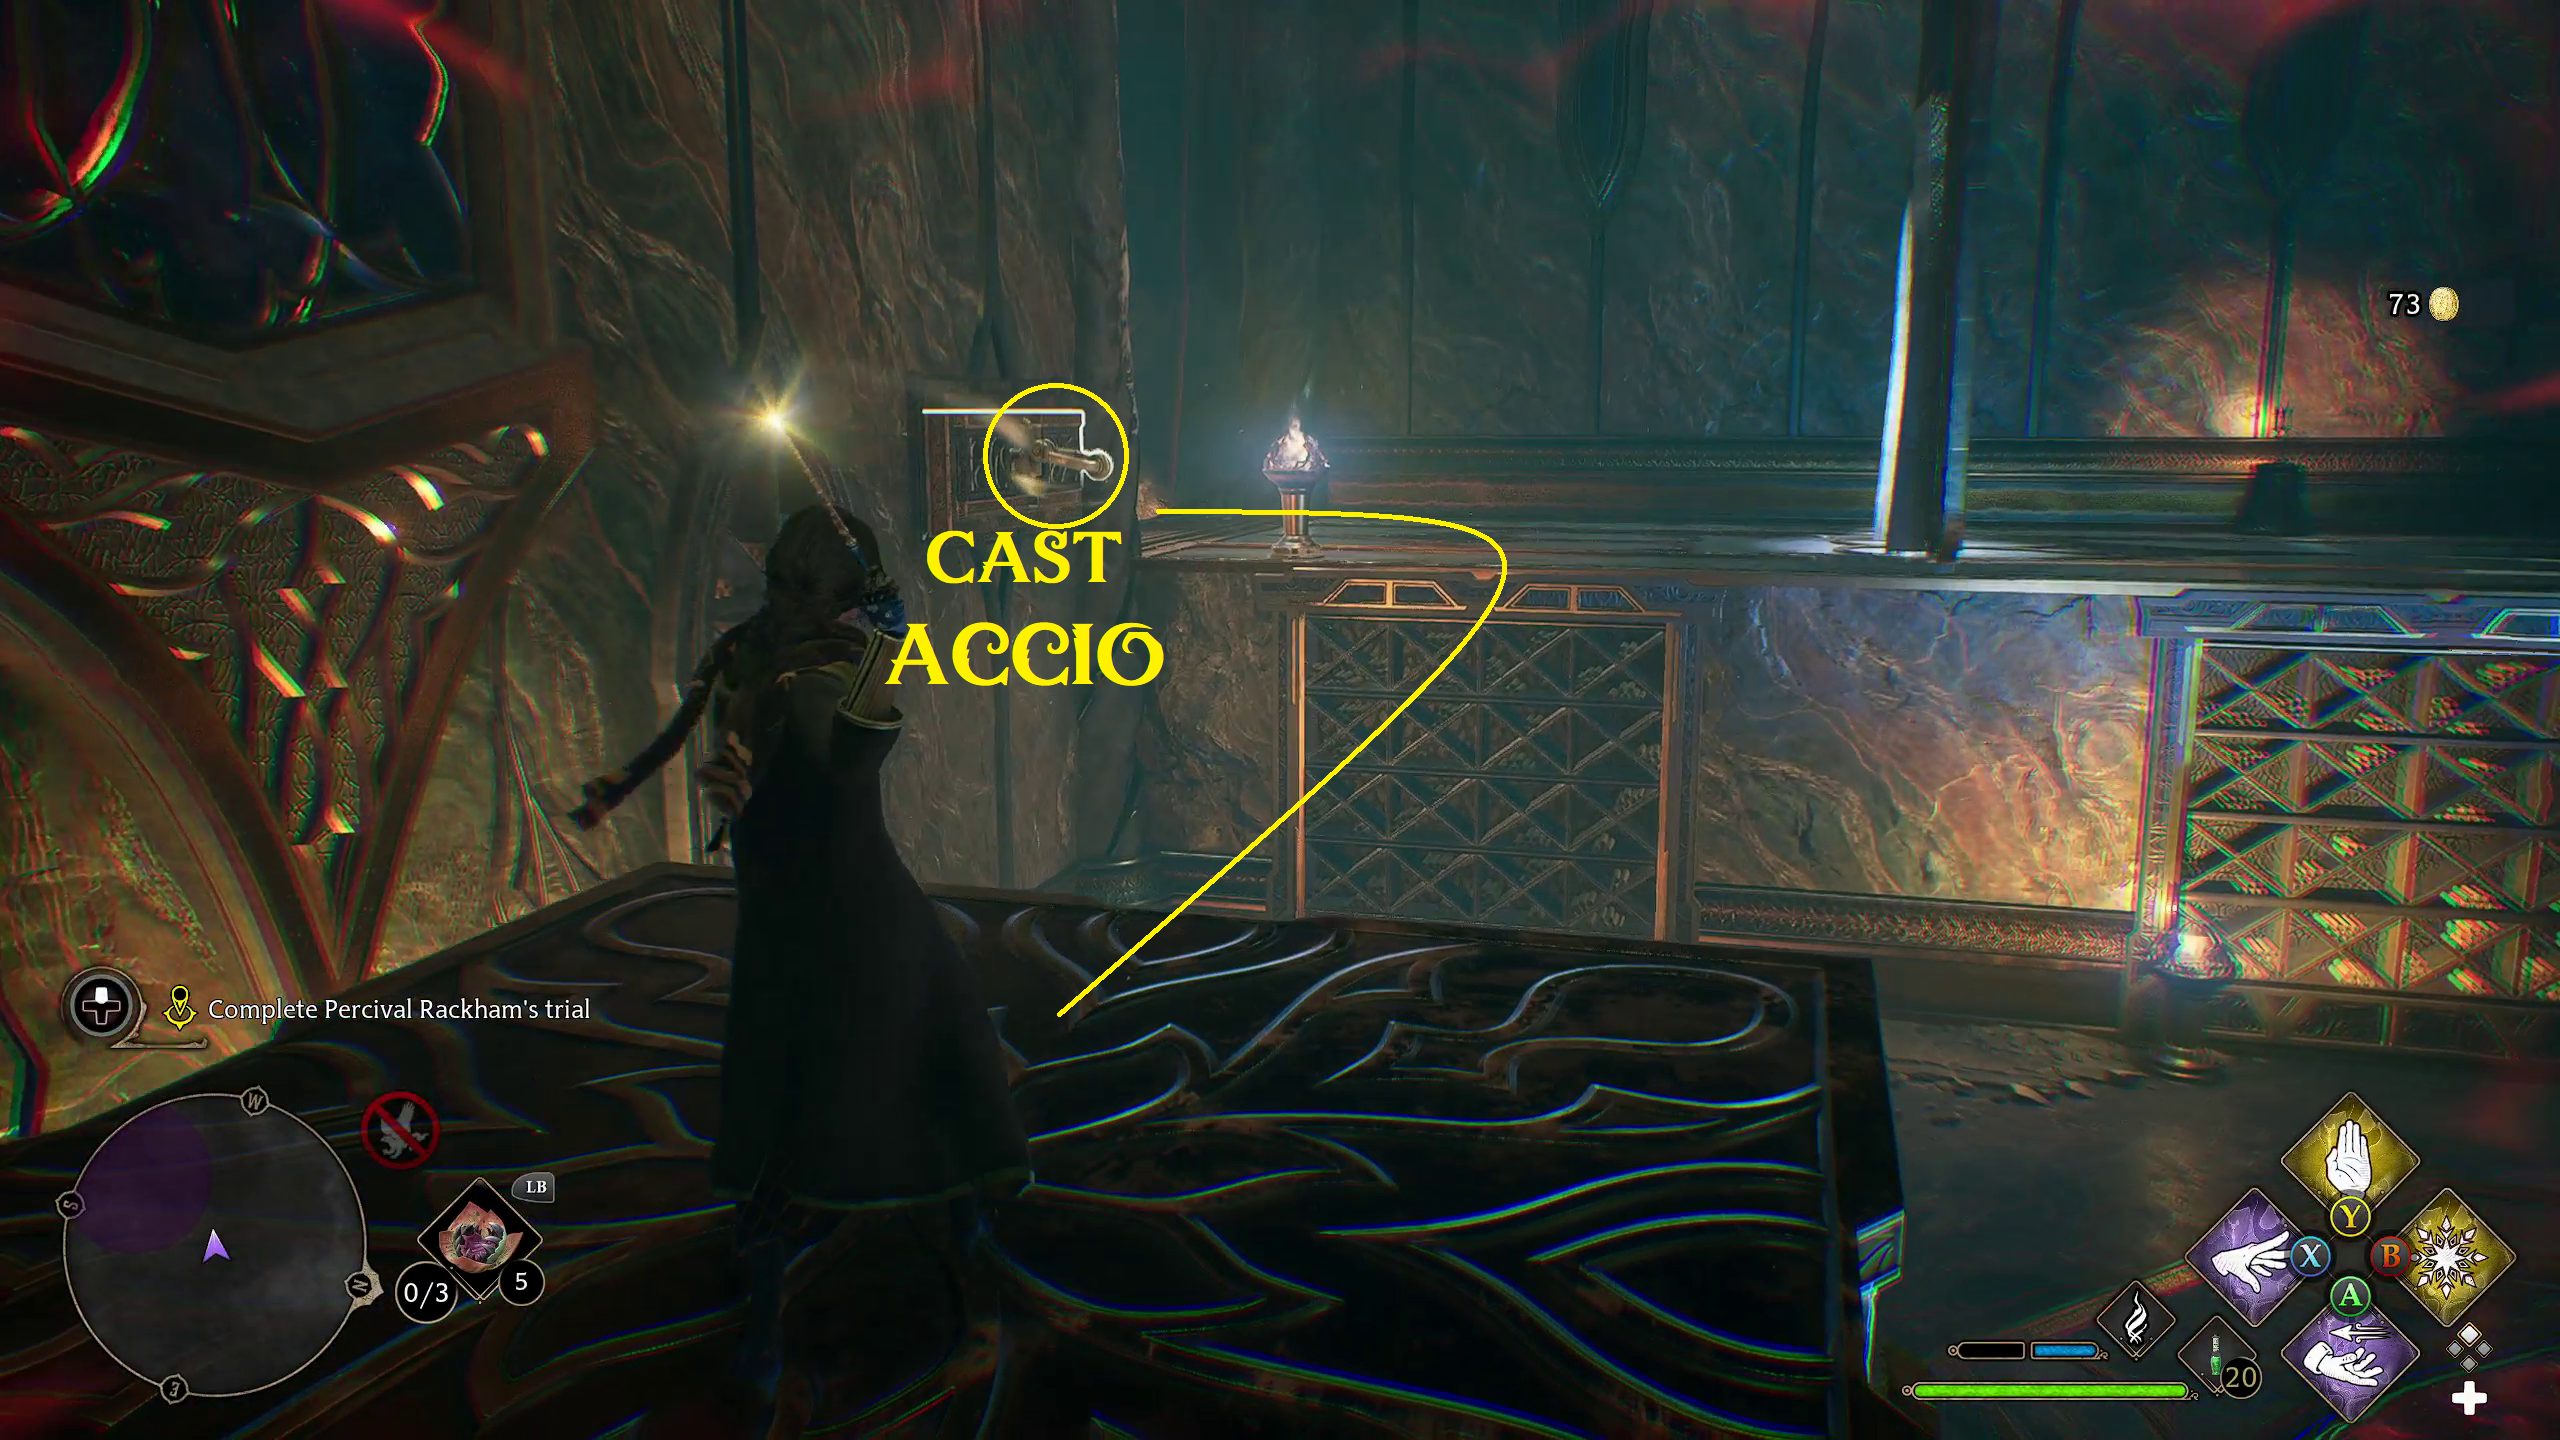
After destroying the automatons, you can move on to the next puzzle. This one is a bit trickier than the last, but not by much. To start, you’ll go under the floating platform in front of you and to the stairs to your right, which will being you to a walkway (1). The Ancient Magic swell is just barely off the edge of the walkway, though, so you’ll need to Accio the floating platform to you (2). Then, you can jump on it and activate the Ancient Magic Swell (3).
123
Now, a portal will open up. Going through it (1) will take you to a version of this same room without the walkway in the middle. This will enable you to use Accio to bring the platform to the other side of the room (2). This means that, when you go back through the portal (3), you’ll be able to the platform to traverse the other side.
123
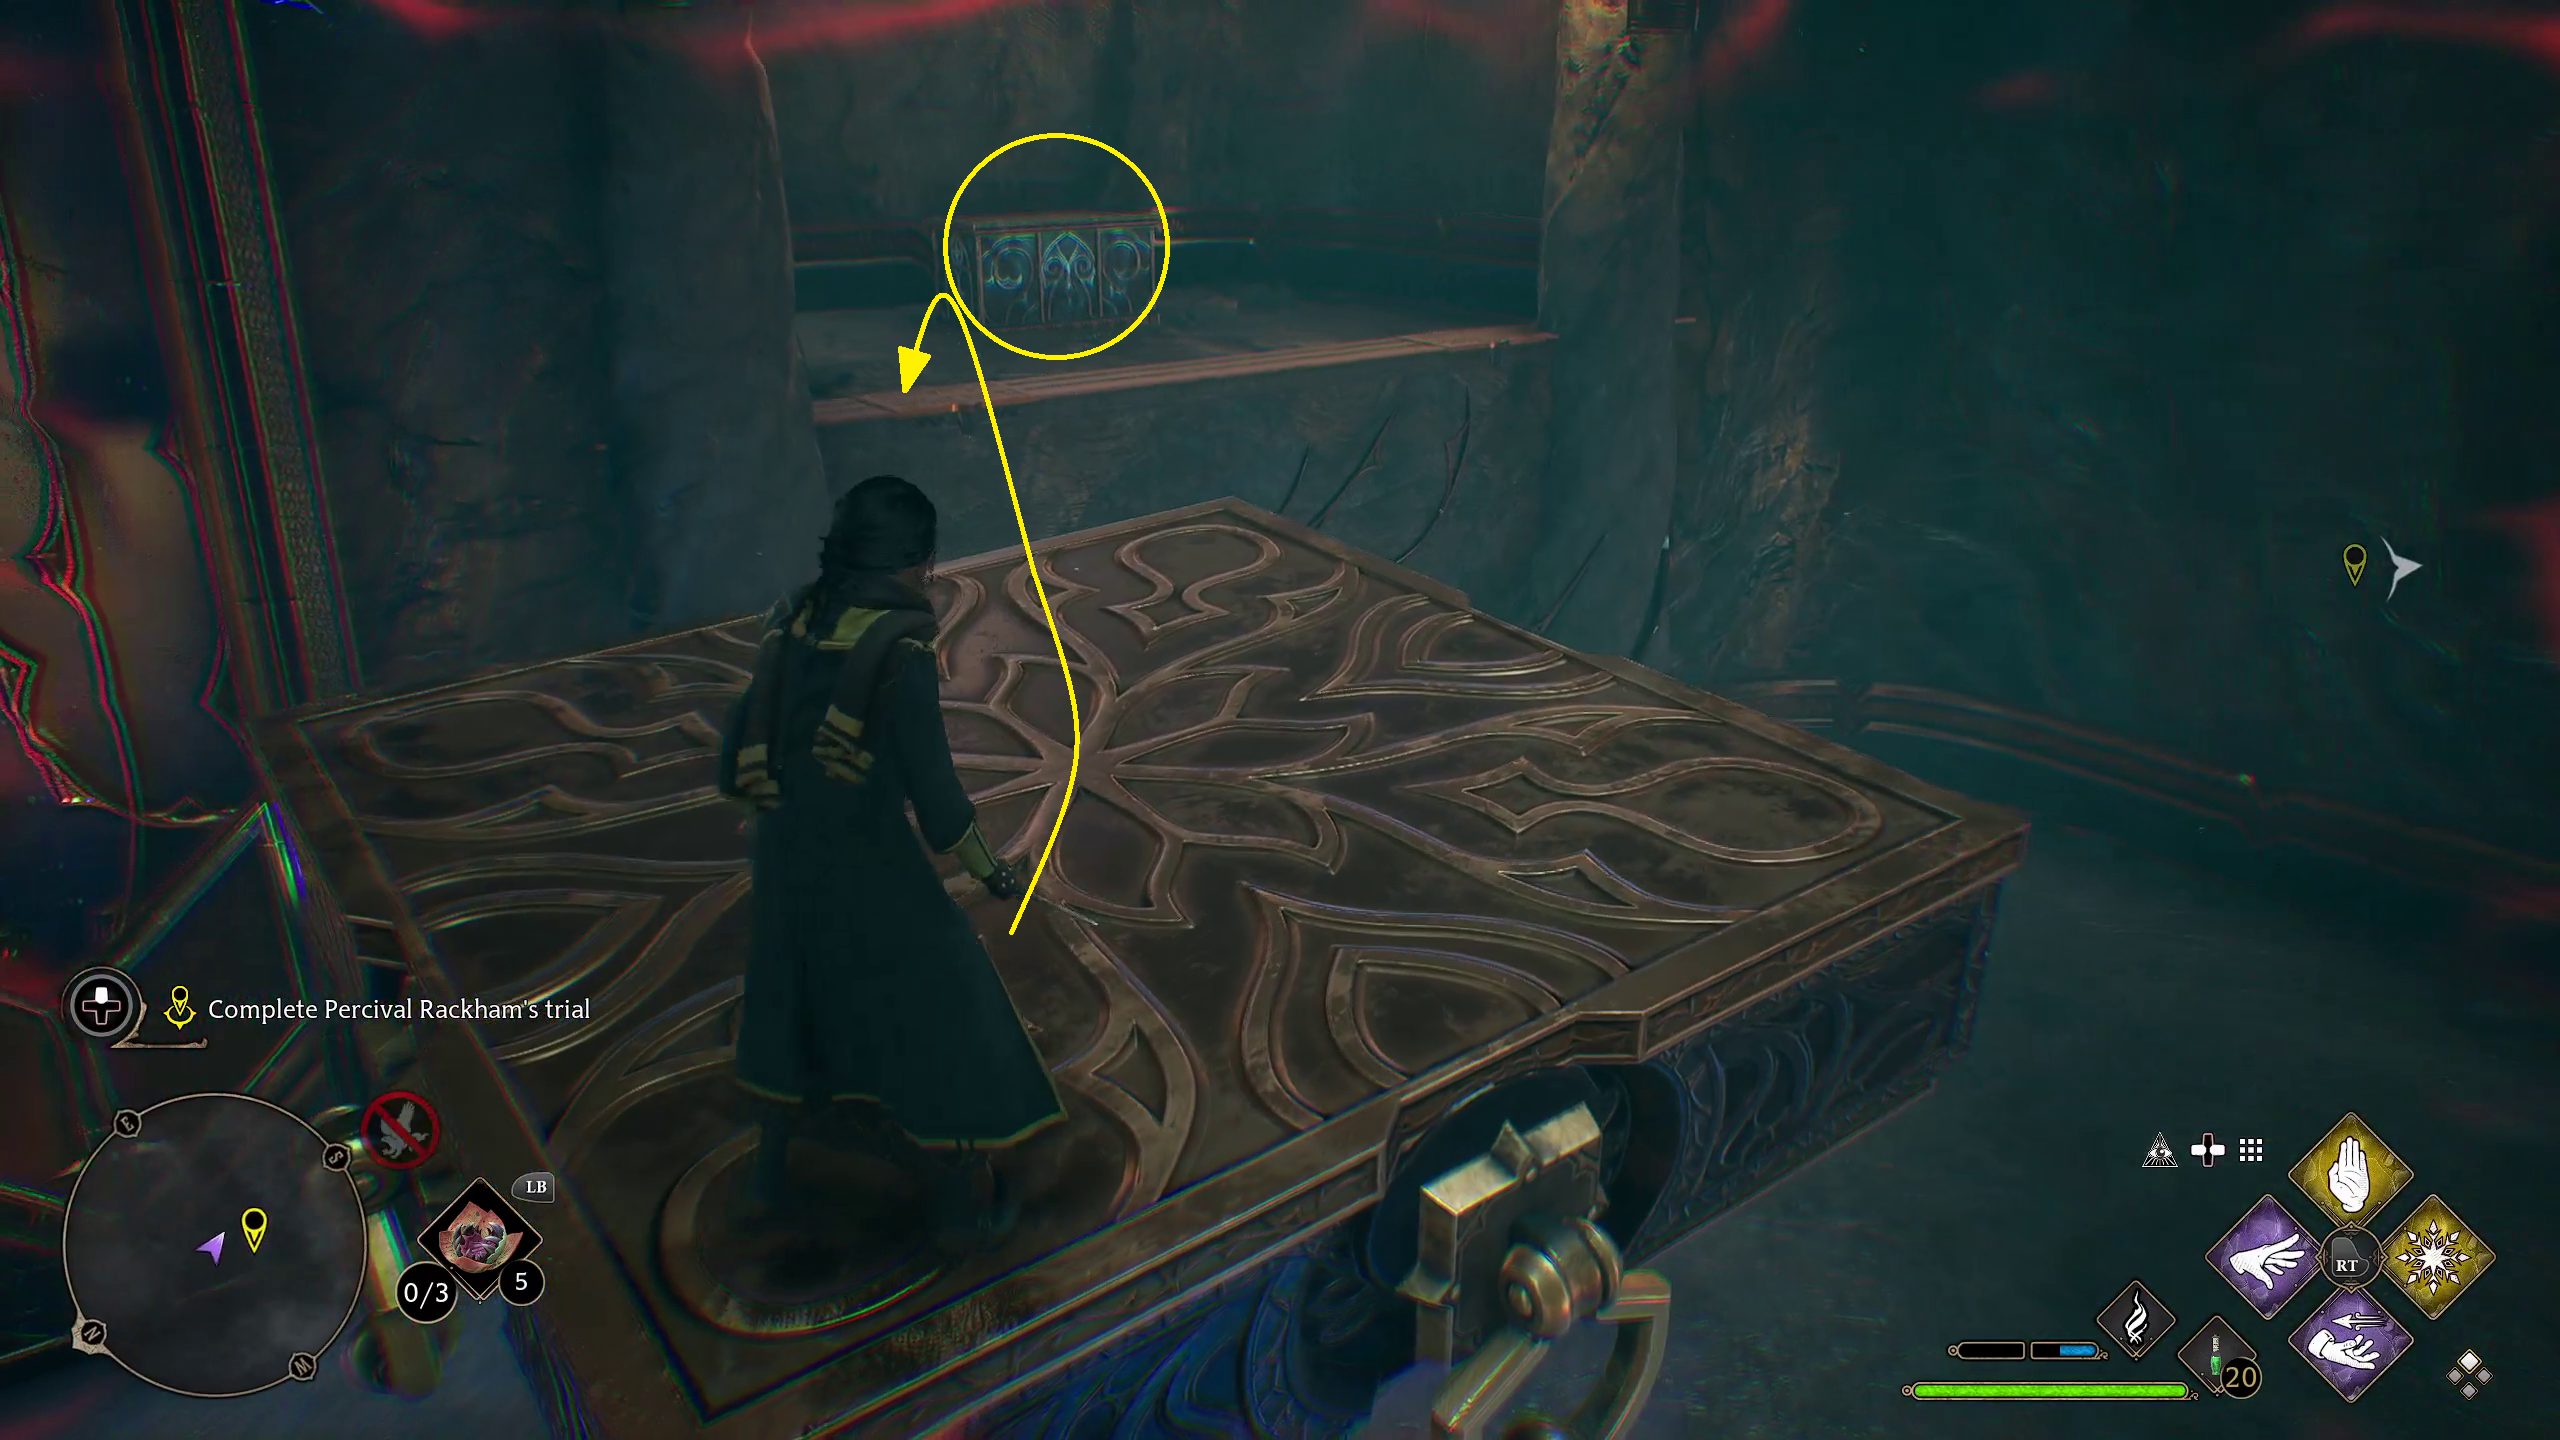
In order to get to the chest on the left side of the room, you’ll need to exactly position the floating platform so that you can jump from the walkway to it, then from it to the chest alcove. This is easiest to do if you have Wingardium Leviosa, and can therefore manipulate objects more finely.
After grabbing the chest, hop back on the platform, cast Accio on the handle below the exit, and continue on (1). After you do, make sure to look to your right to grab a chest (2).
In the next room, you’ll have another combat encounter with a few pensieve guards. As before, use Ancient Magic and Expelliarmus to deal with them most effectively.
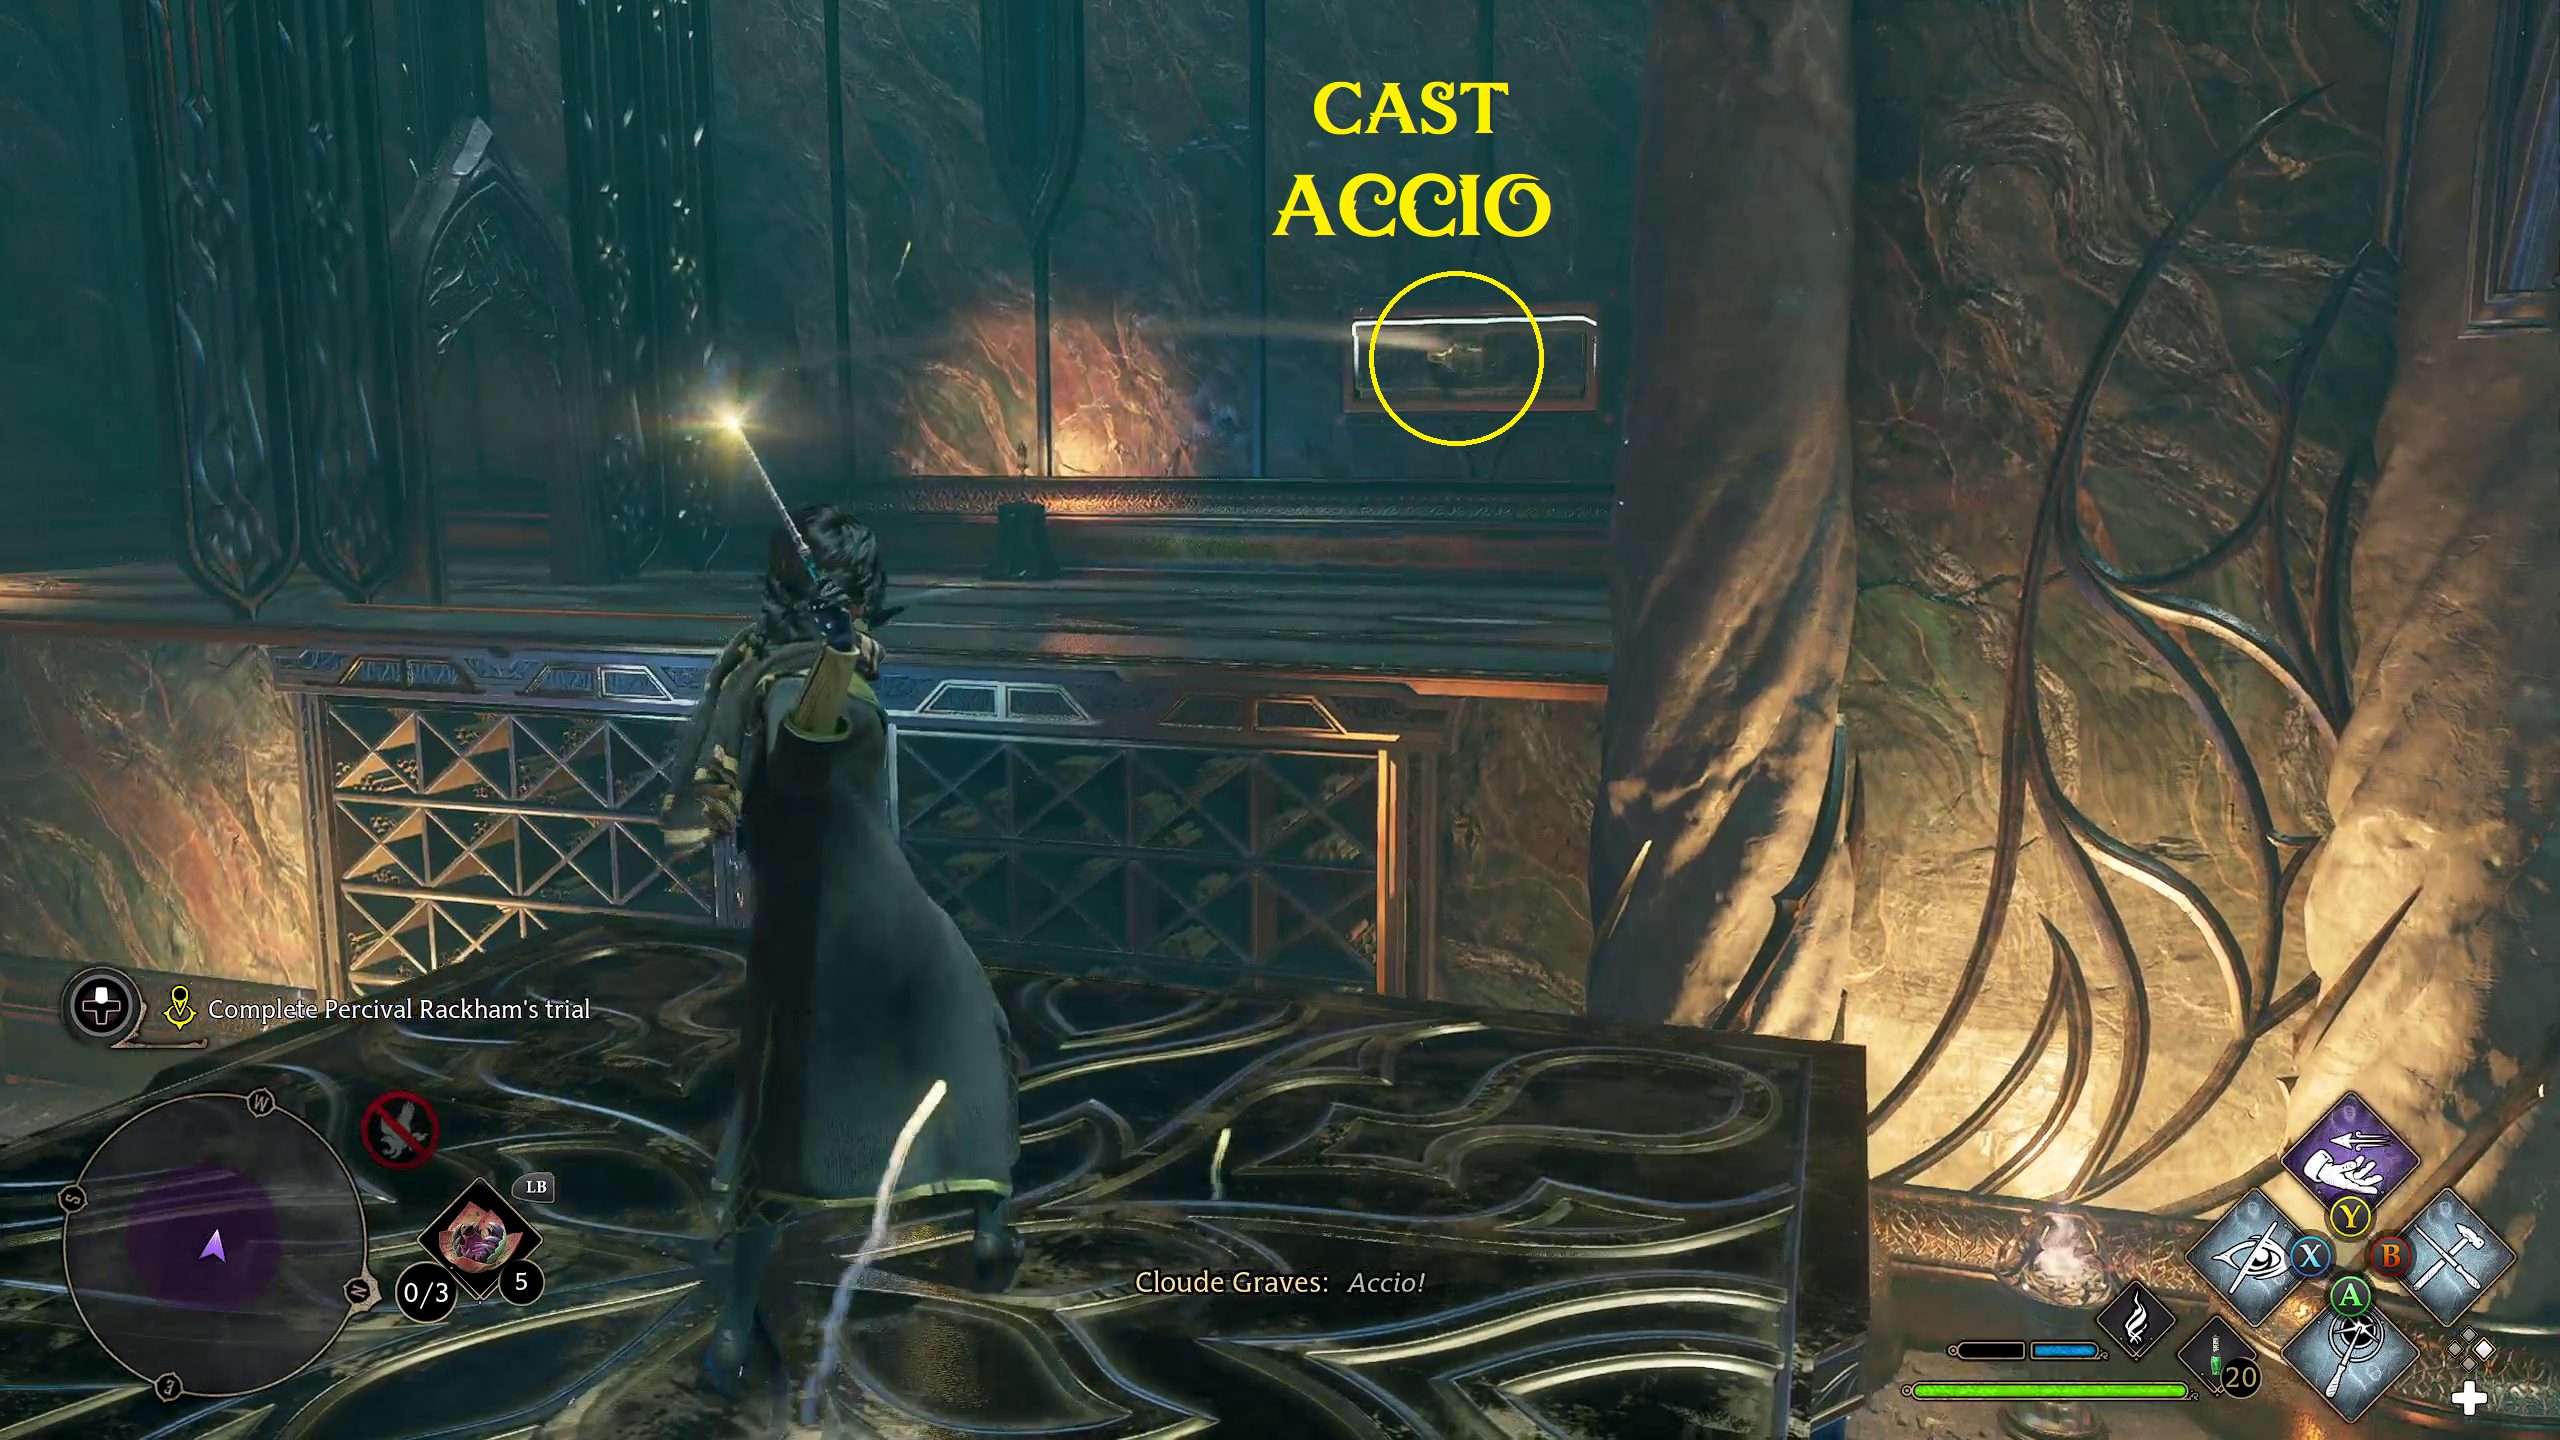
After taking them out, you’ll come across the final Accio puzzle. Activate the Ancient Magic Swell (1), then cast Accio on the floating platform in front of you (2). Jump on it and turn to the right, then cast Accio on the handle there (3). Next, look past the portal, to where there is an overhang with a chest, and cast Accio on the handle below the platform (4). Once there, jump down to grab the chest, then you can head through the portal, this time to actually solve it.
1234
To complete the puzzle, manipulate the platform that you were on to begin with so that you can get on it again, then look through the portal and cast Accio on floating platform on the other side of it (1). Once on the other platform, you can simply Accio your way to the exit. Once through, you’ll come across a chest (ominously filled with Wiggenweld potions) and a door to go through.
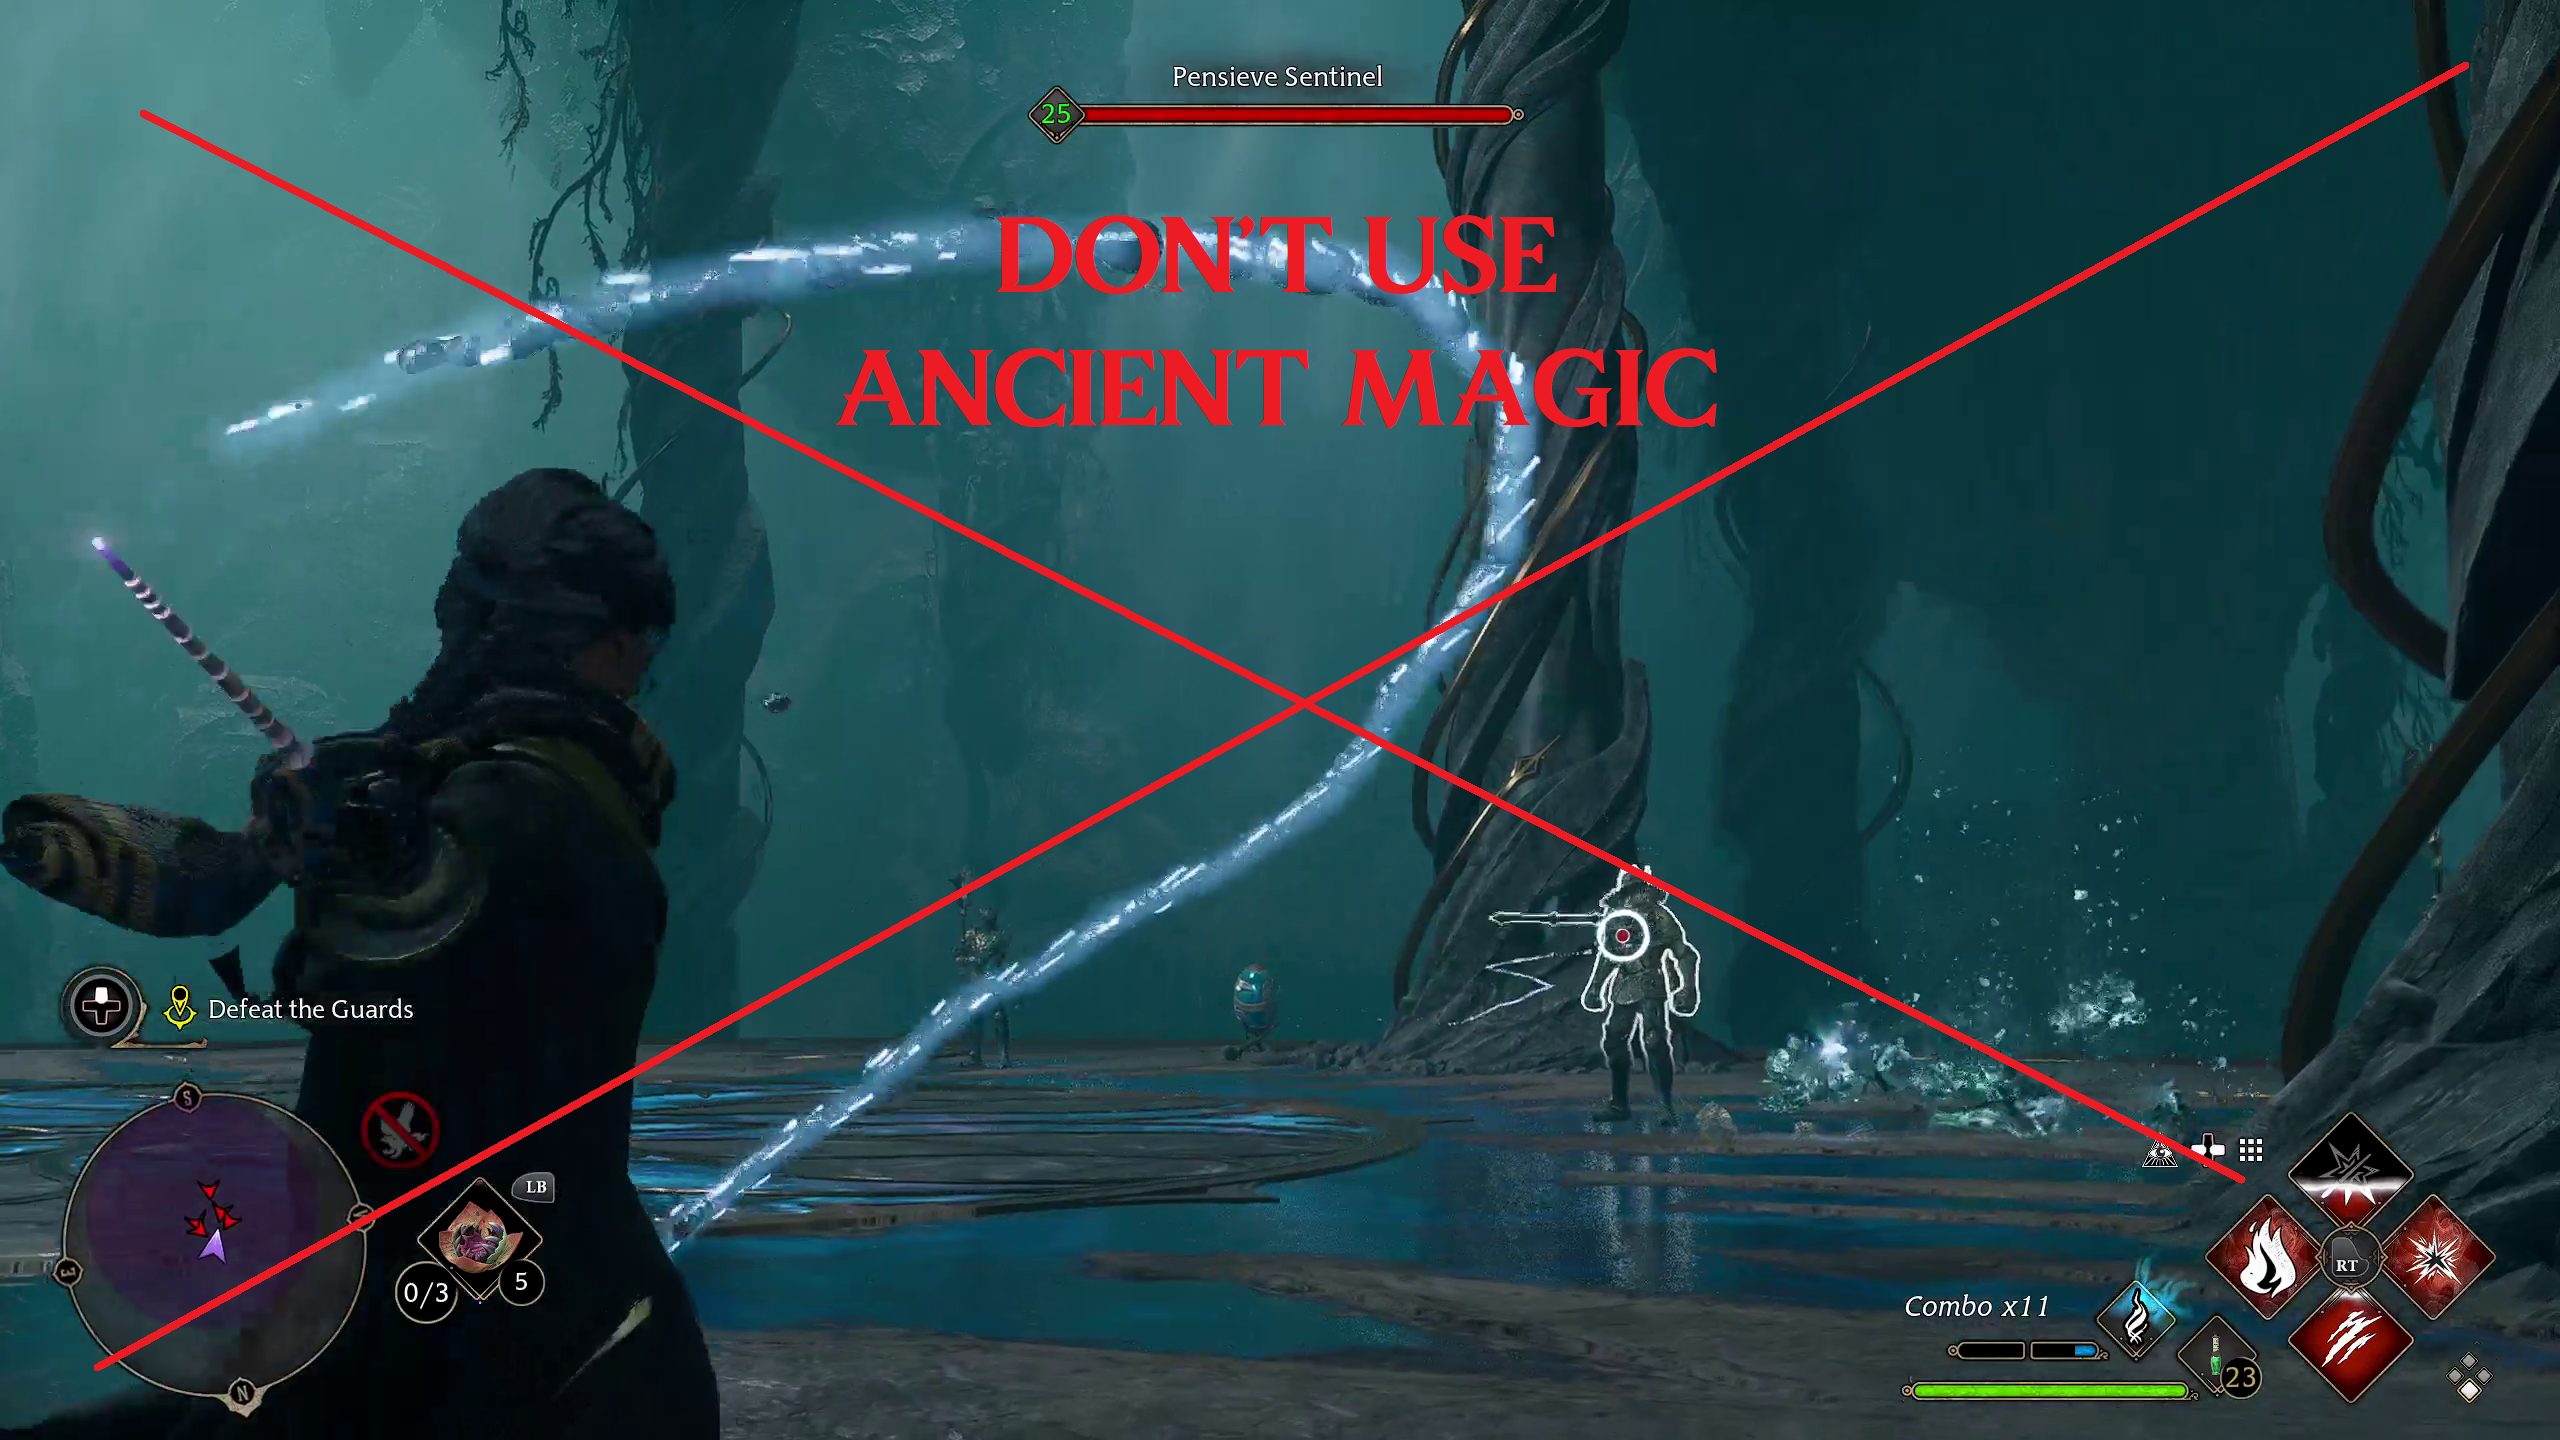
Defeat the Guards
The next room will begin with another combat encounter with a few Pensieve Guards. You can use whatever strategy works for you to deal with them, but it is highly recommended you DON’T use your Ancient Magic here, as you’ll want a full bar for the next fight.
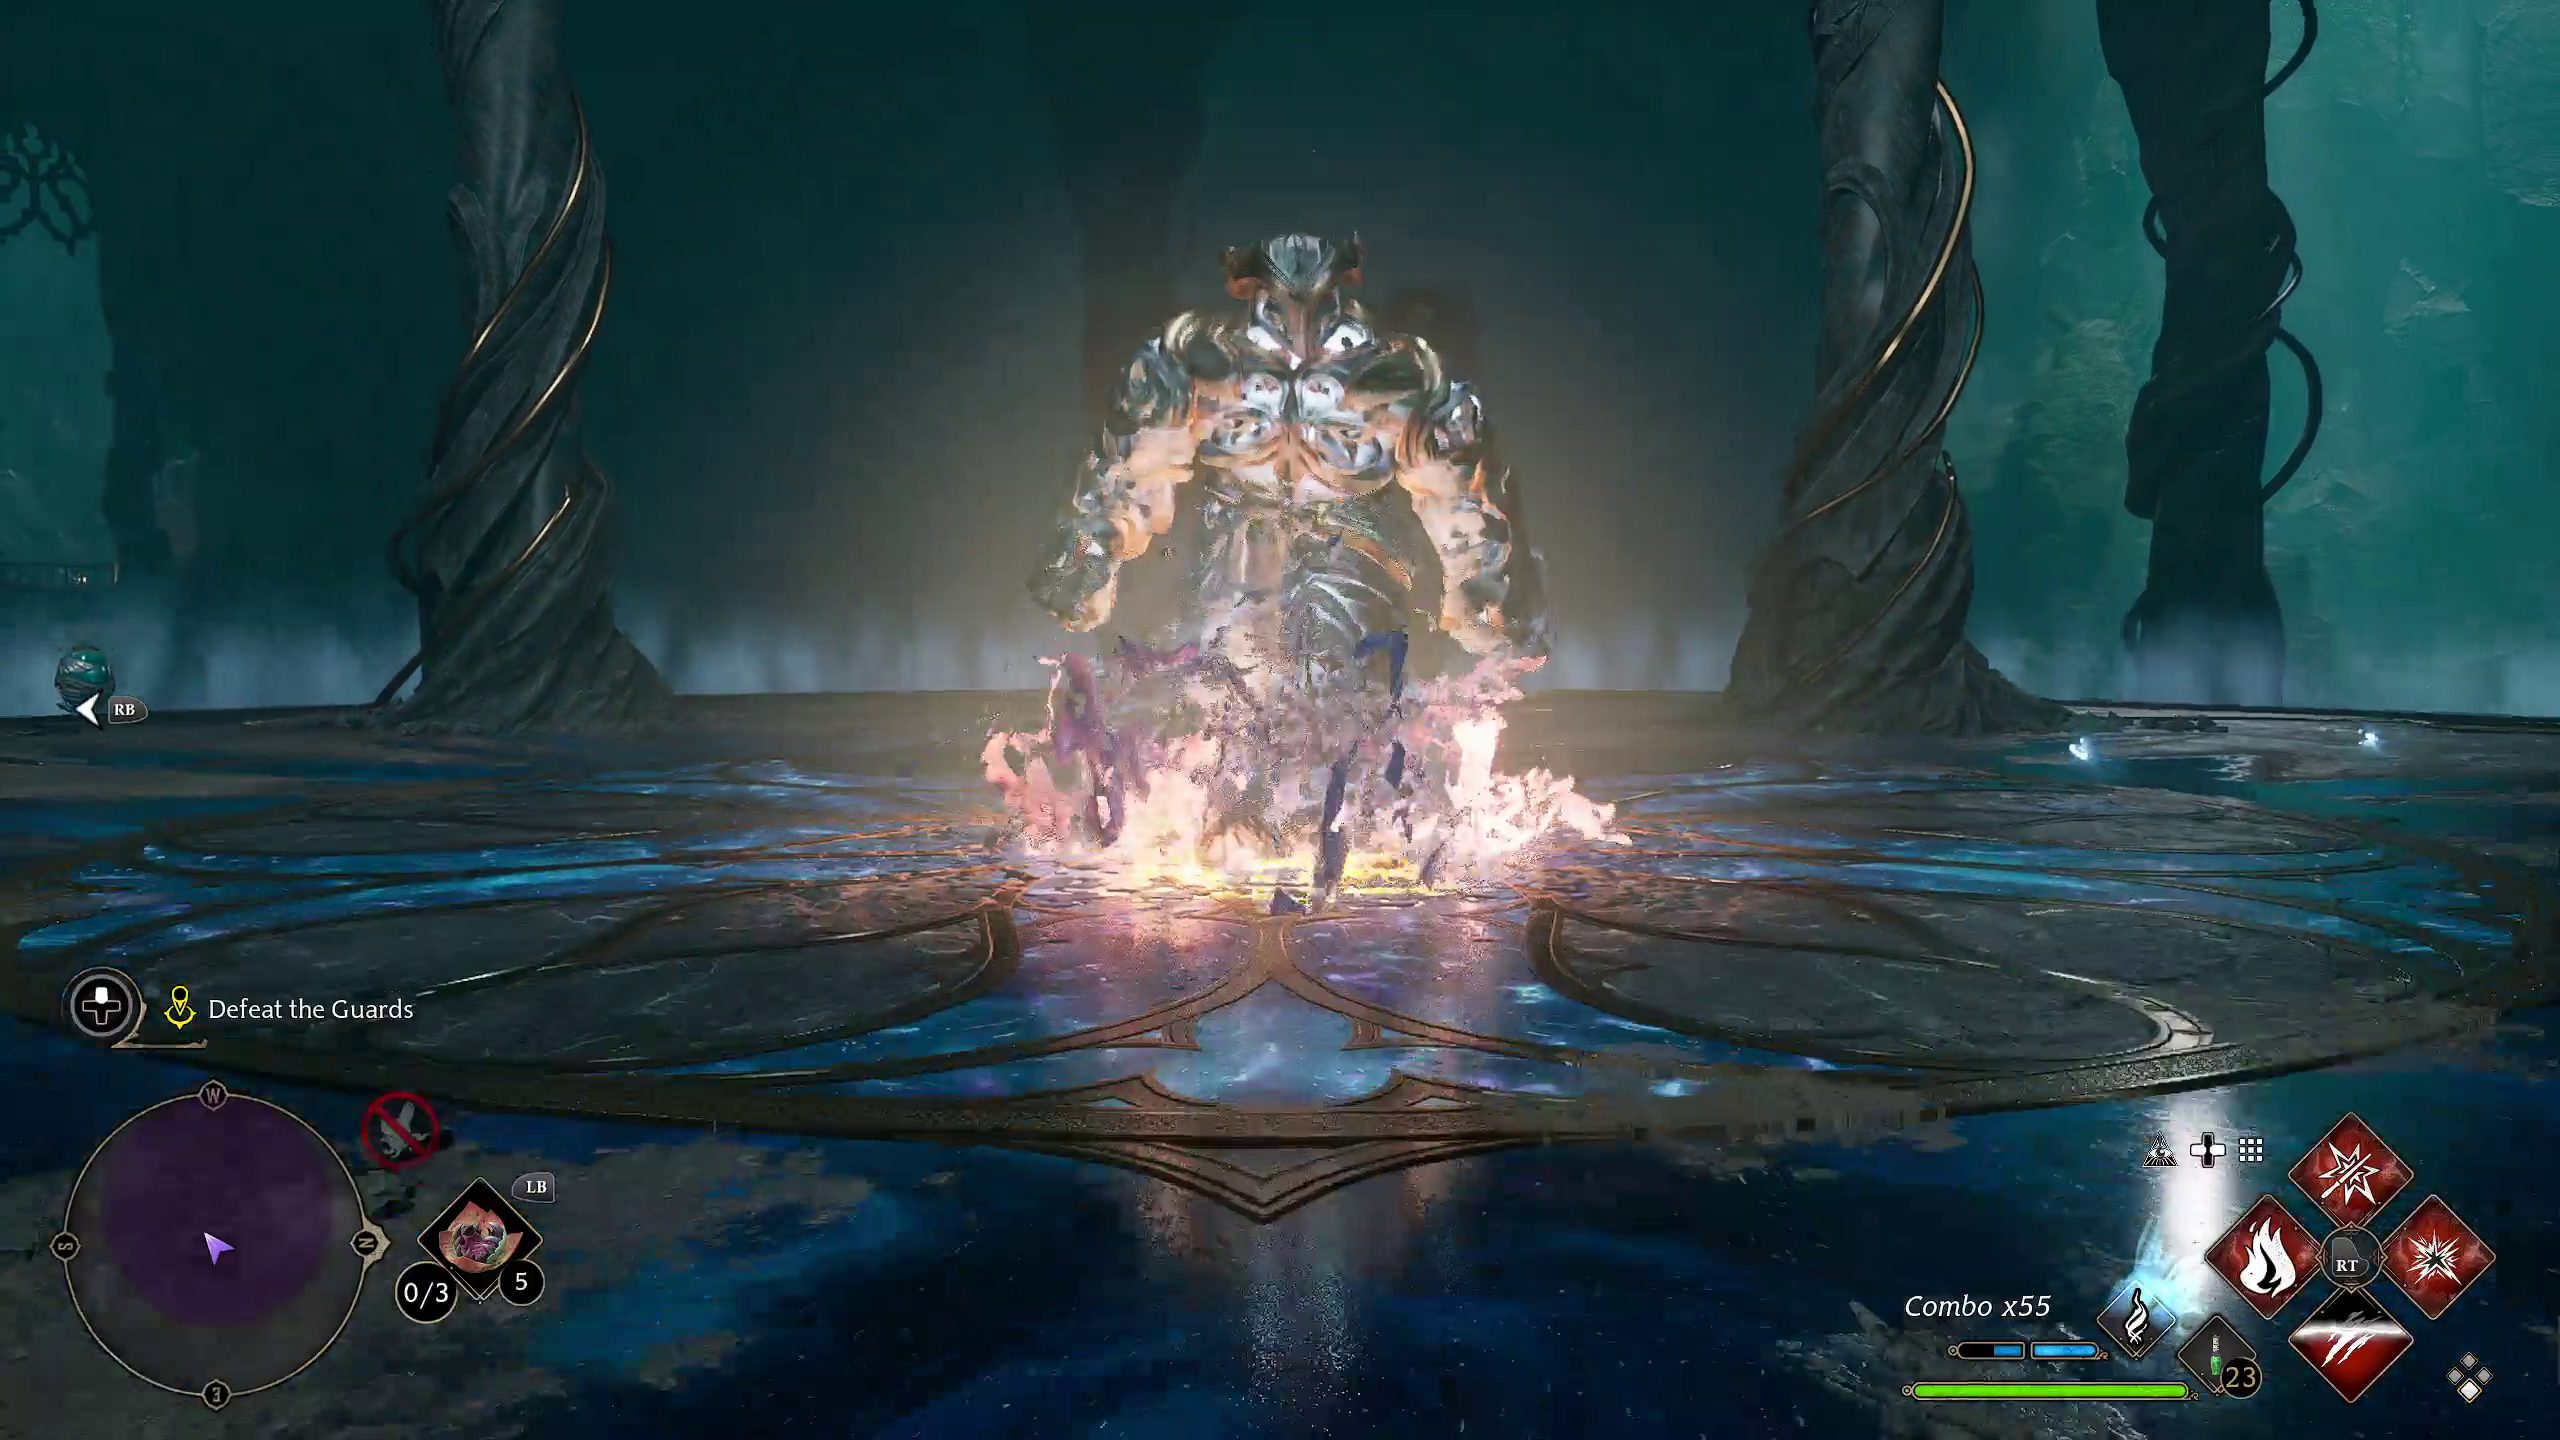
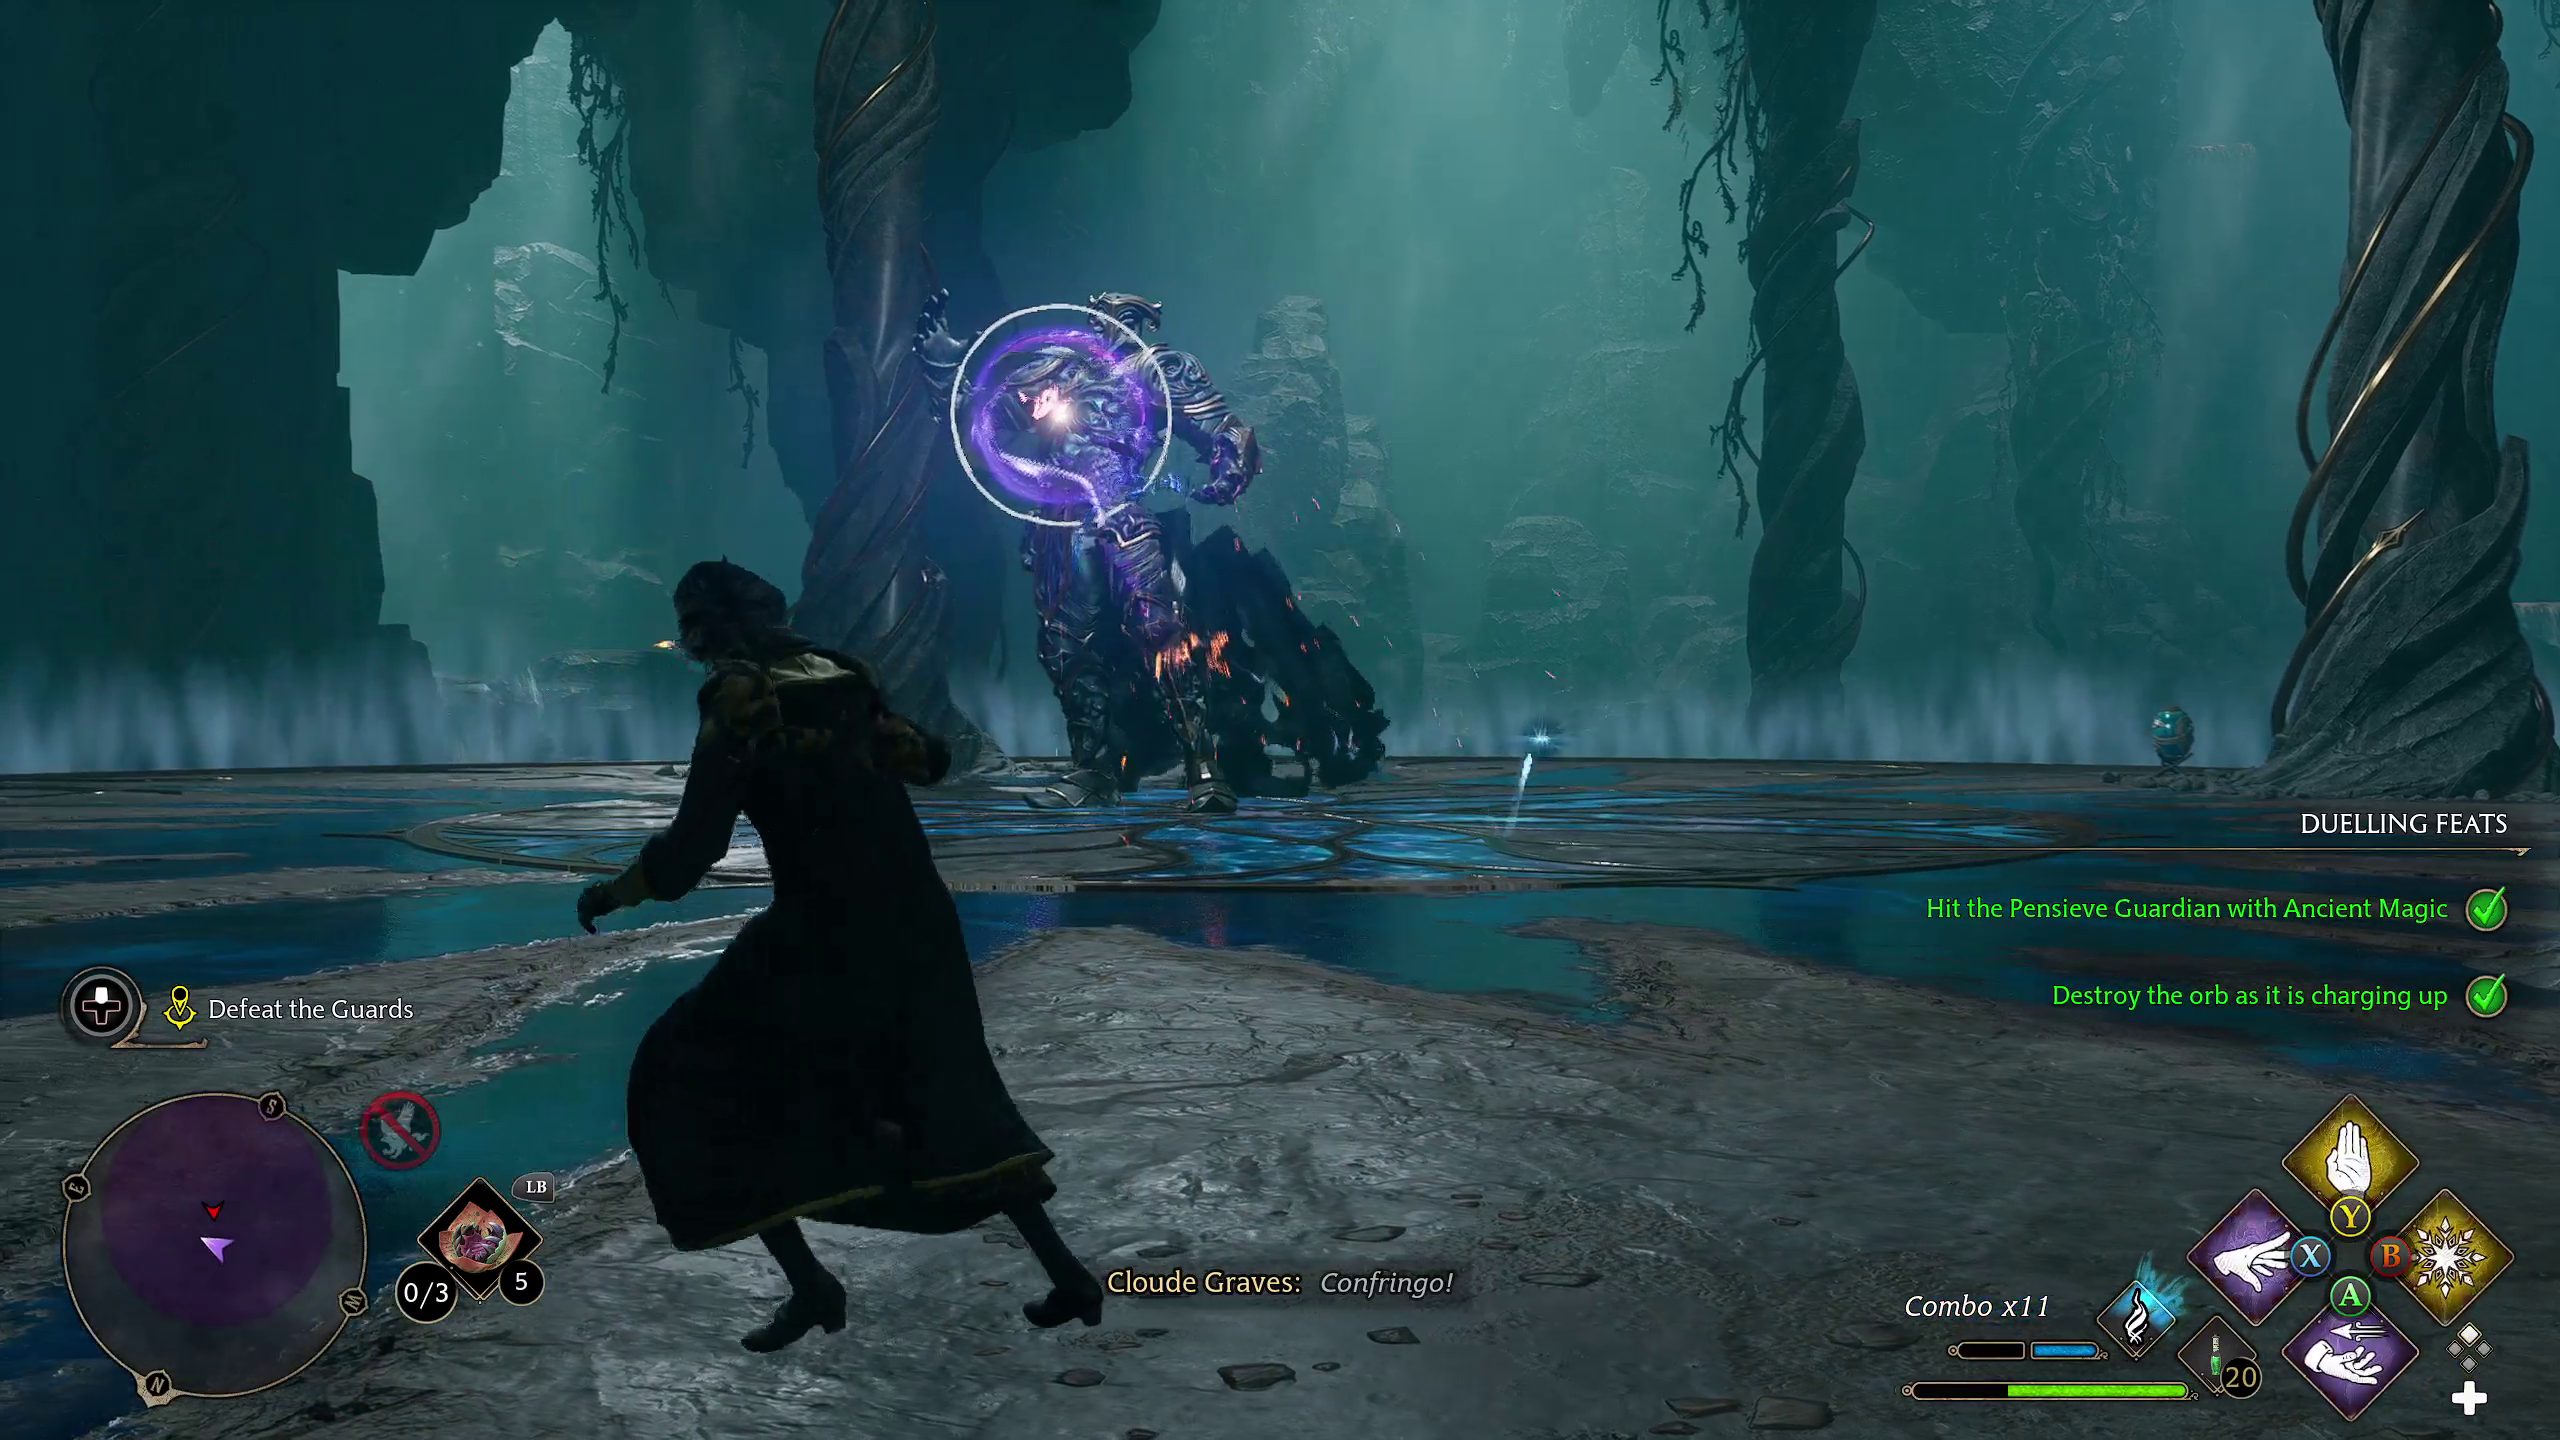
Pensieve Guardian Boss Fight
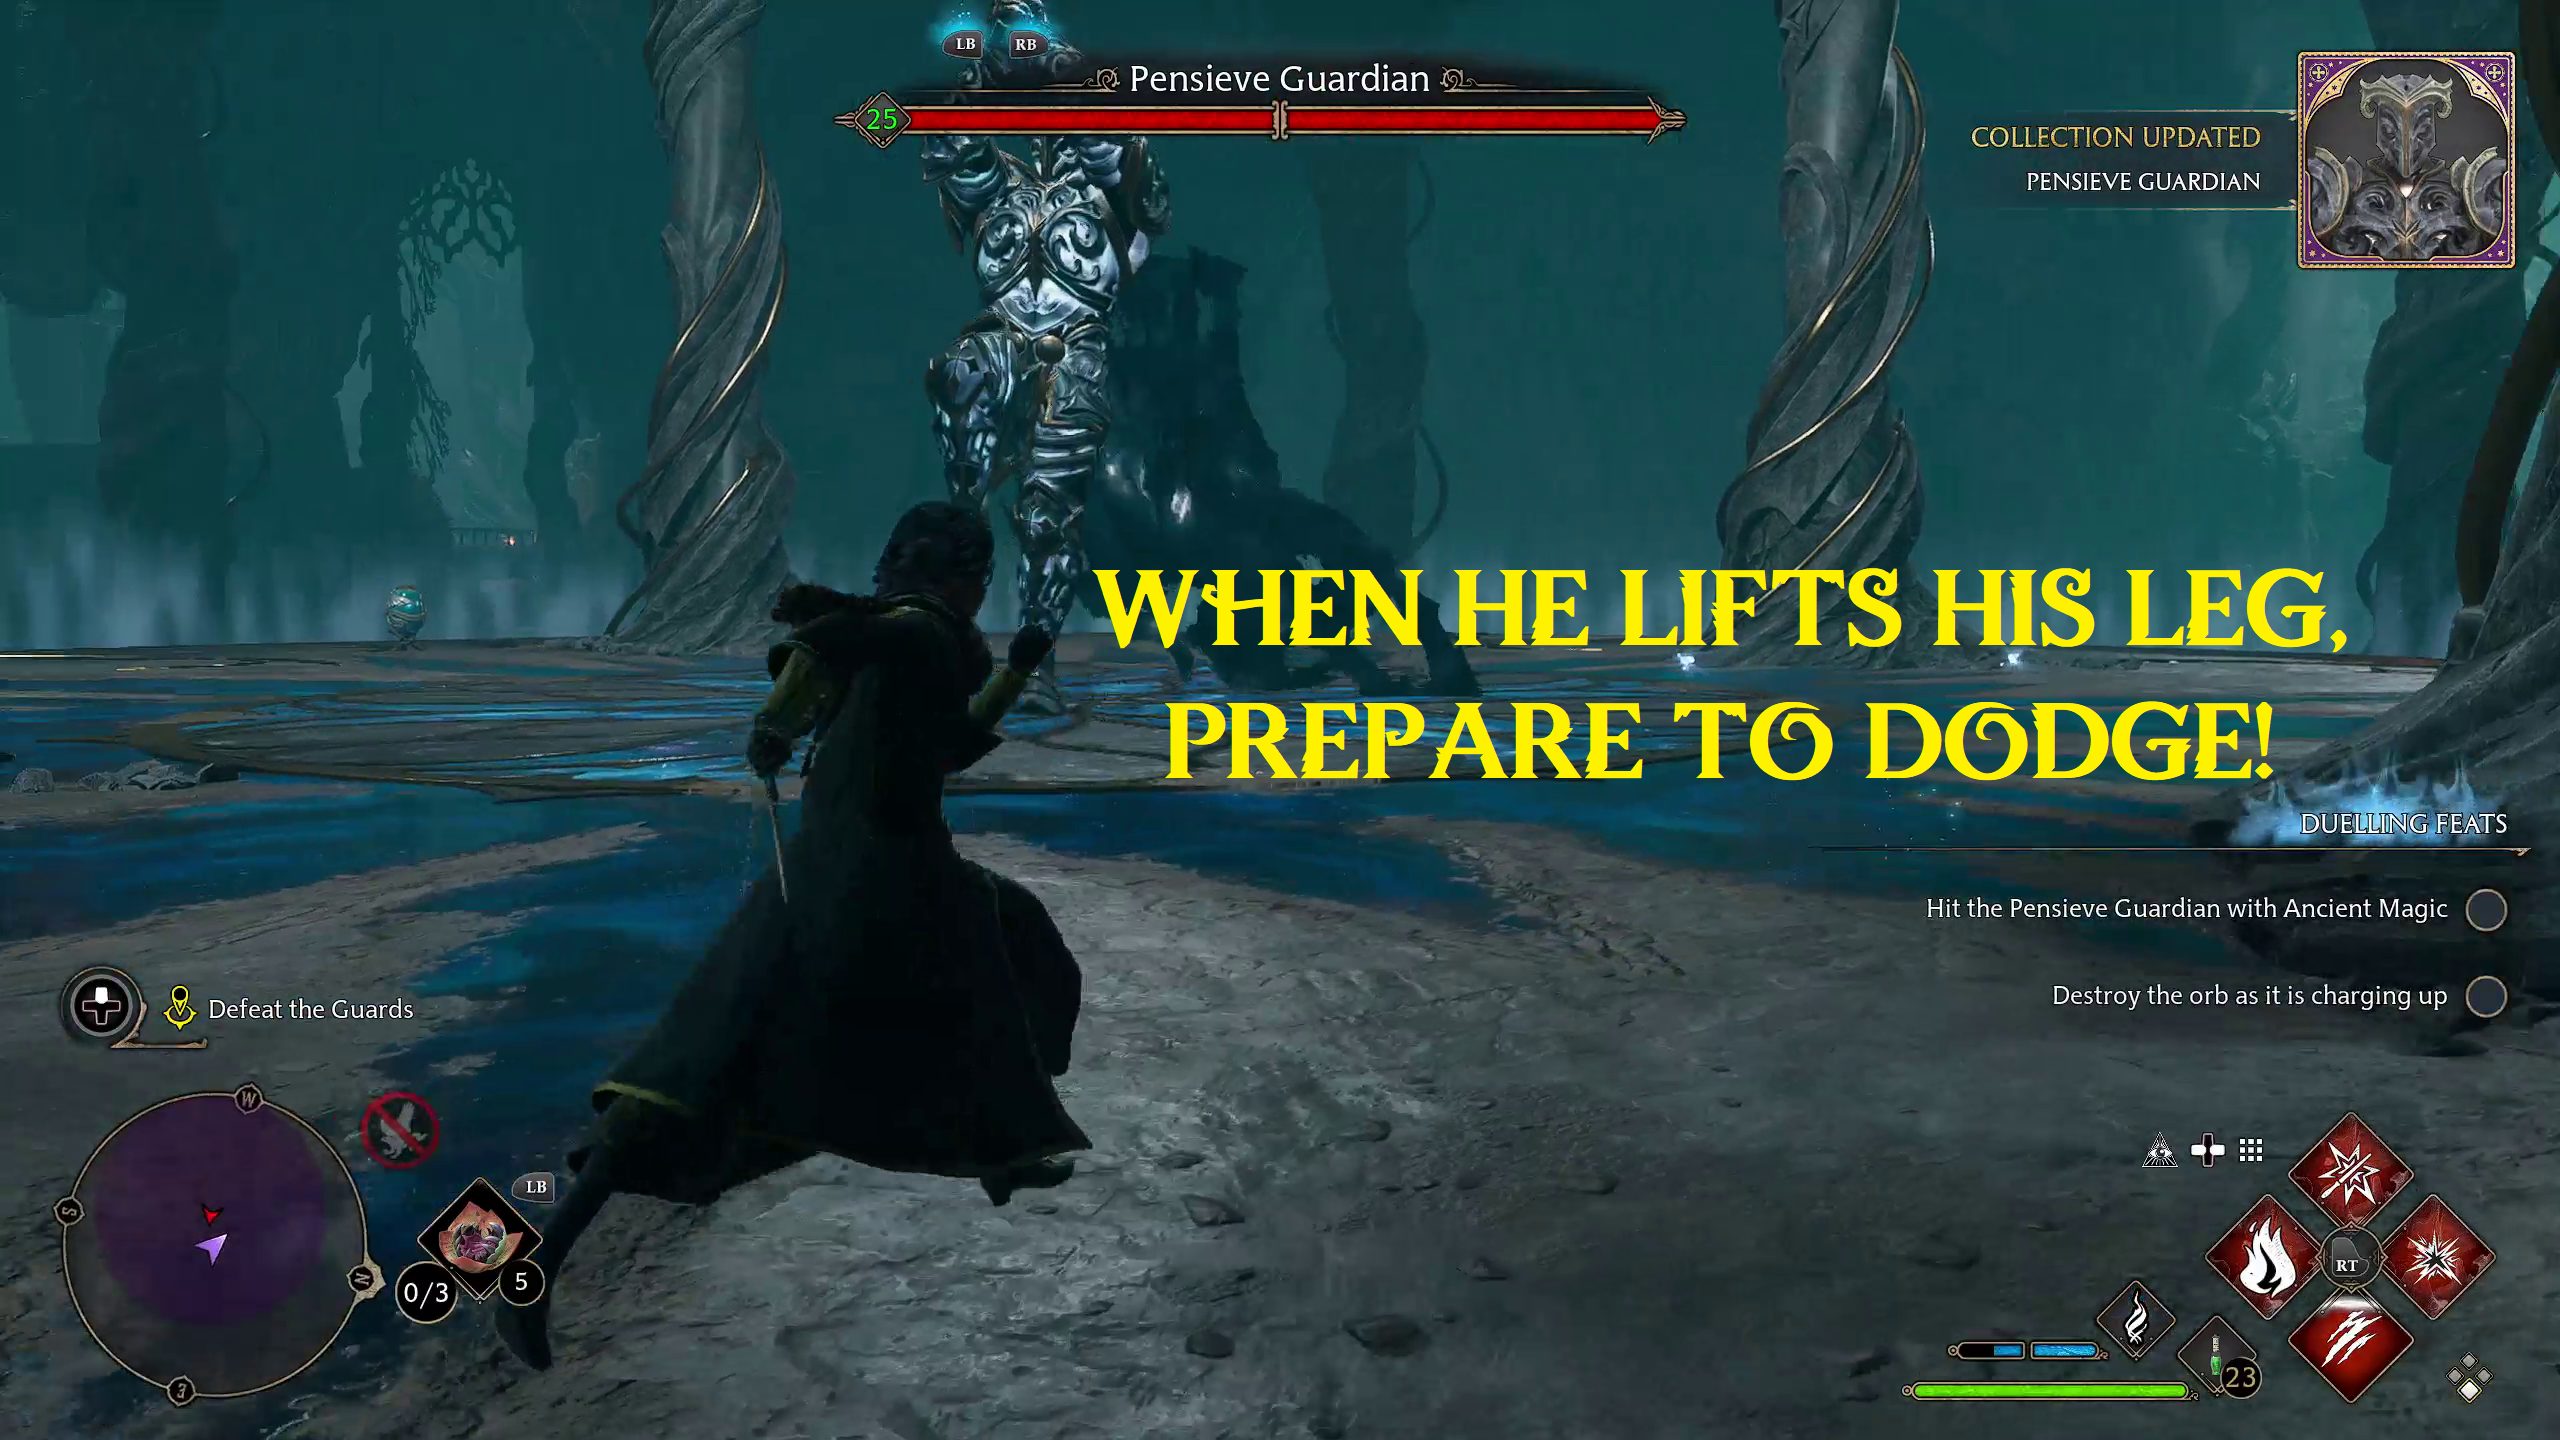
After you defeat the wave of guards, a Pensieve Guardian will emerge from the floor. This boss is much tougher than the other Guards you’ve fought, and you’ll need to be on your toes to defeat him. Here are some tips to defeat the Pensieve Guardian as easily as possible.
His most dangerous attack at the beginning is his stomp, where he will raise his foot, then bring it down to create a shockwave that you’ll need to dodge.
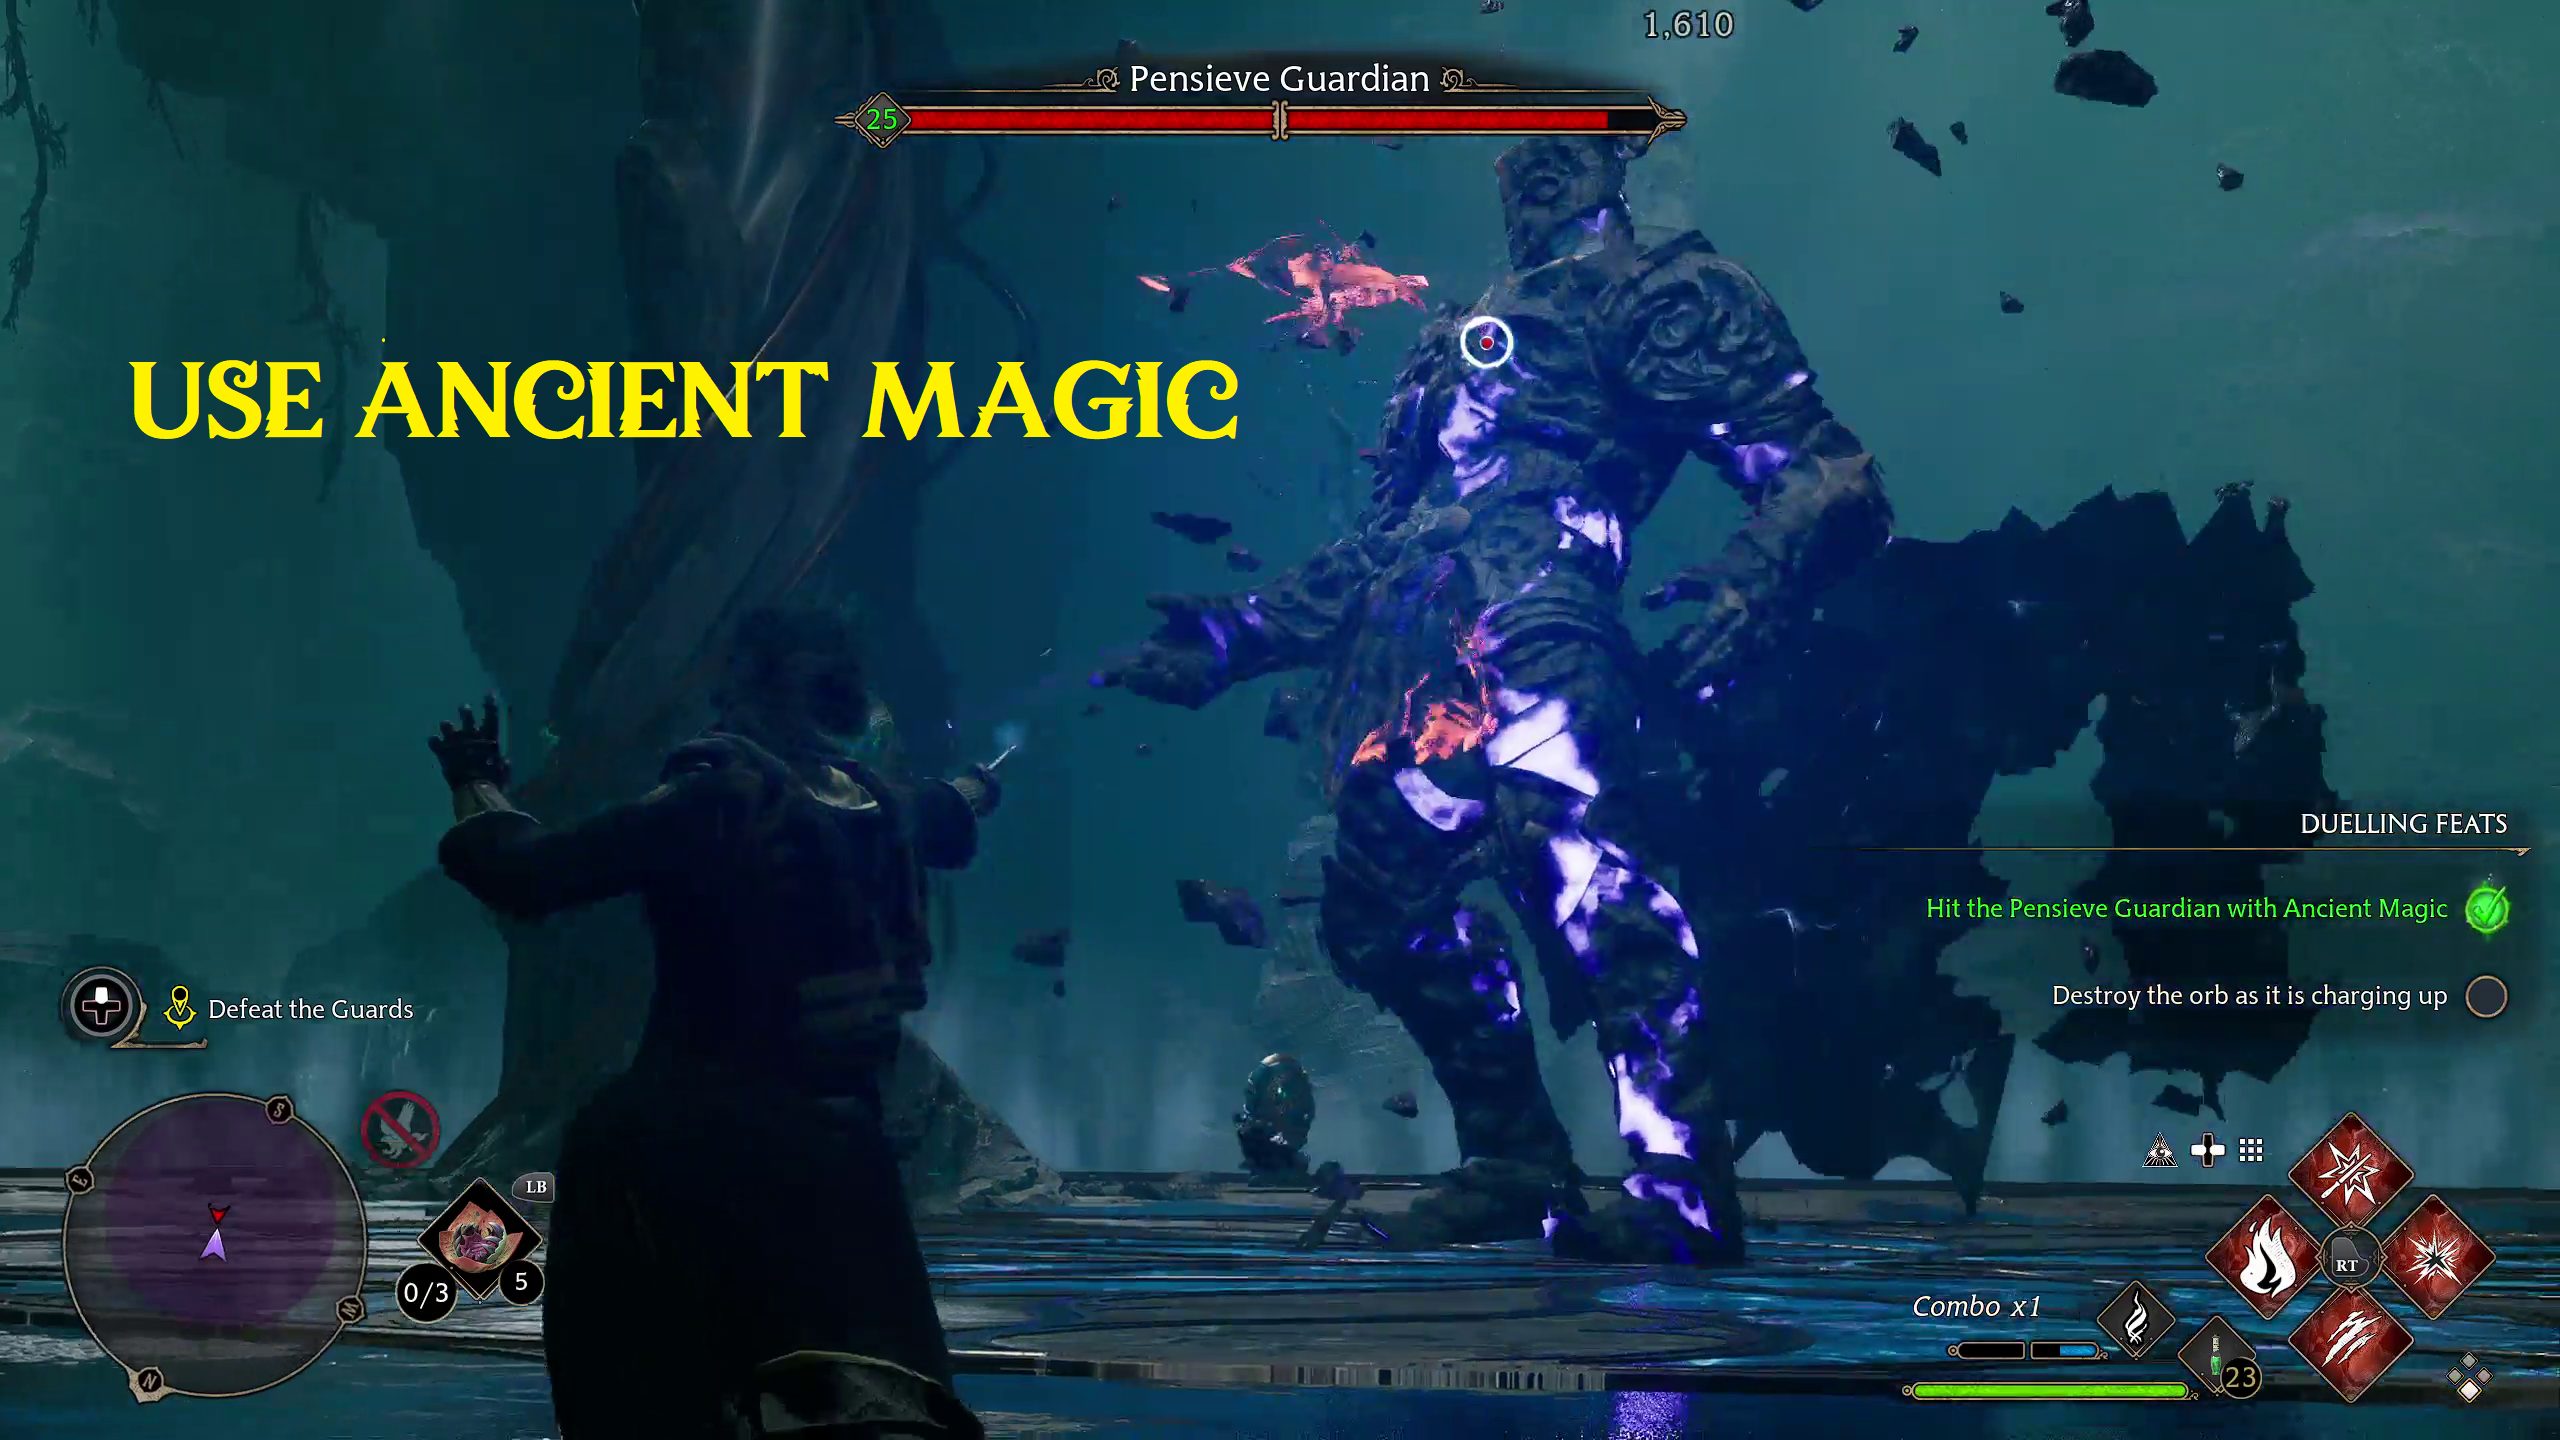
Use Ancient Magic and Ancient Magic Throws to chip away at his health. Otherwise, use Damage Spells for general damage.
When he falls to one knee, you should get in close in order to cast as many Damage spells — especially Incendio — as possible.
Just make sure to back away when he starts standing back up, to avoid his AoE attack.
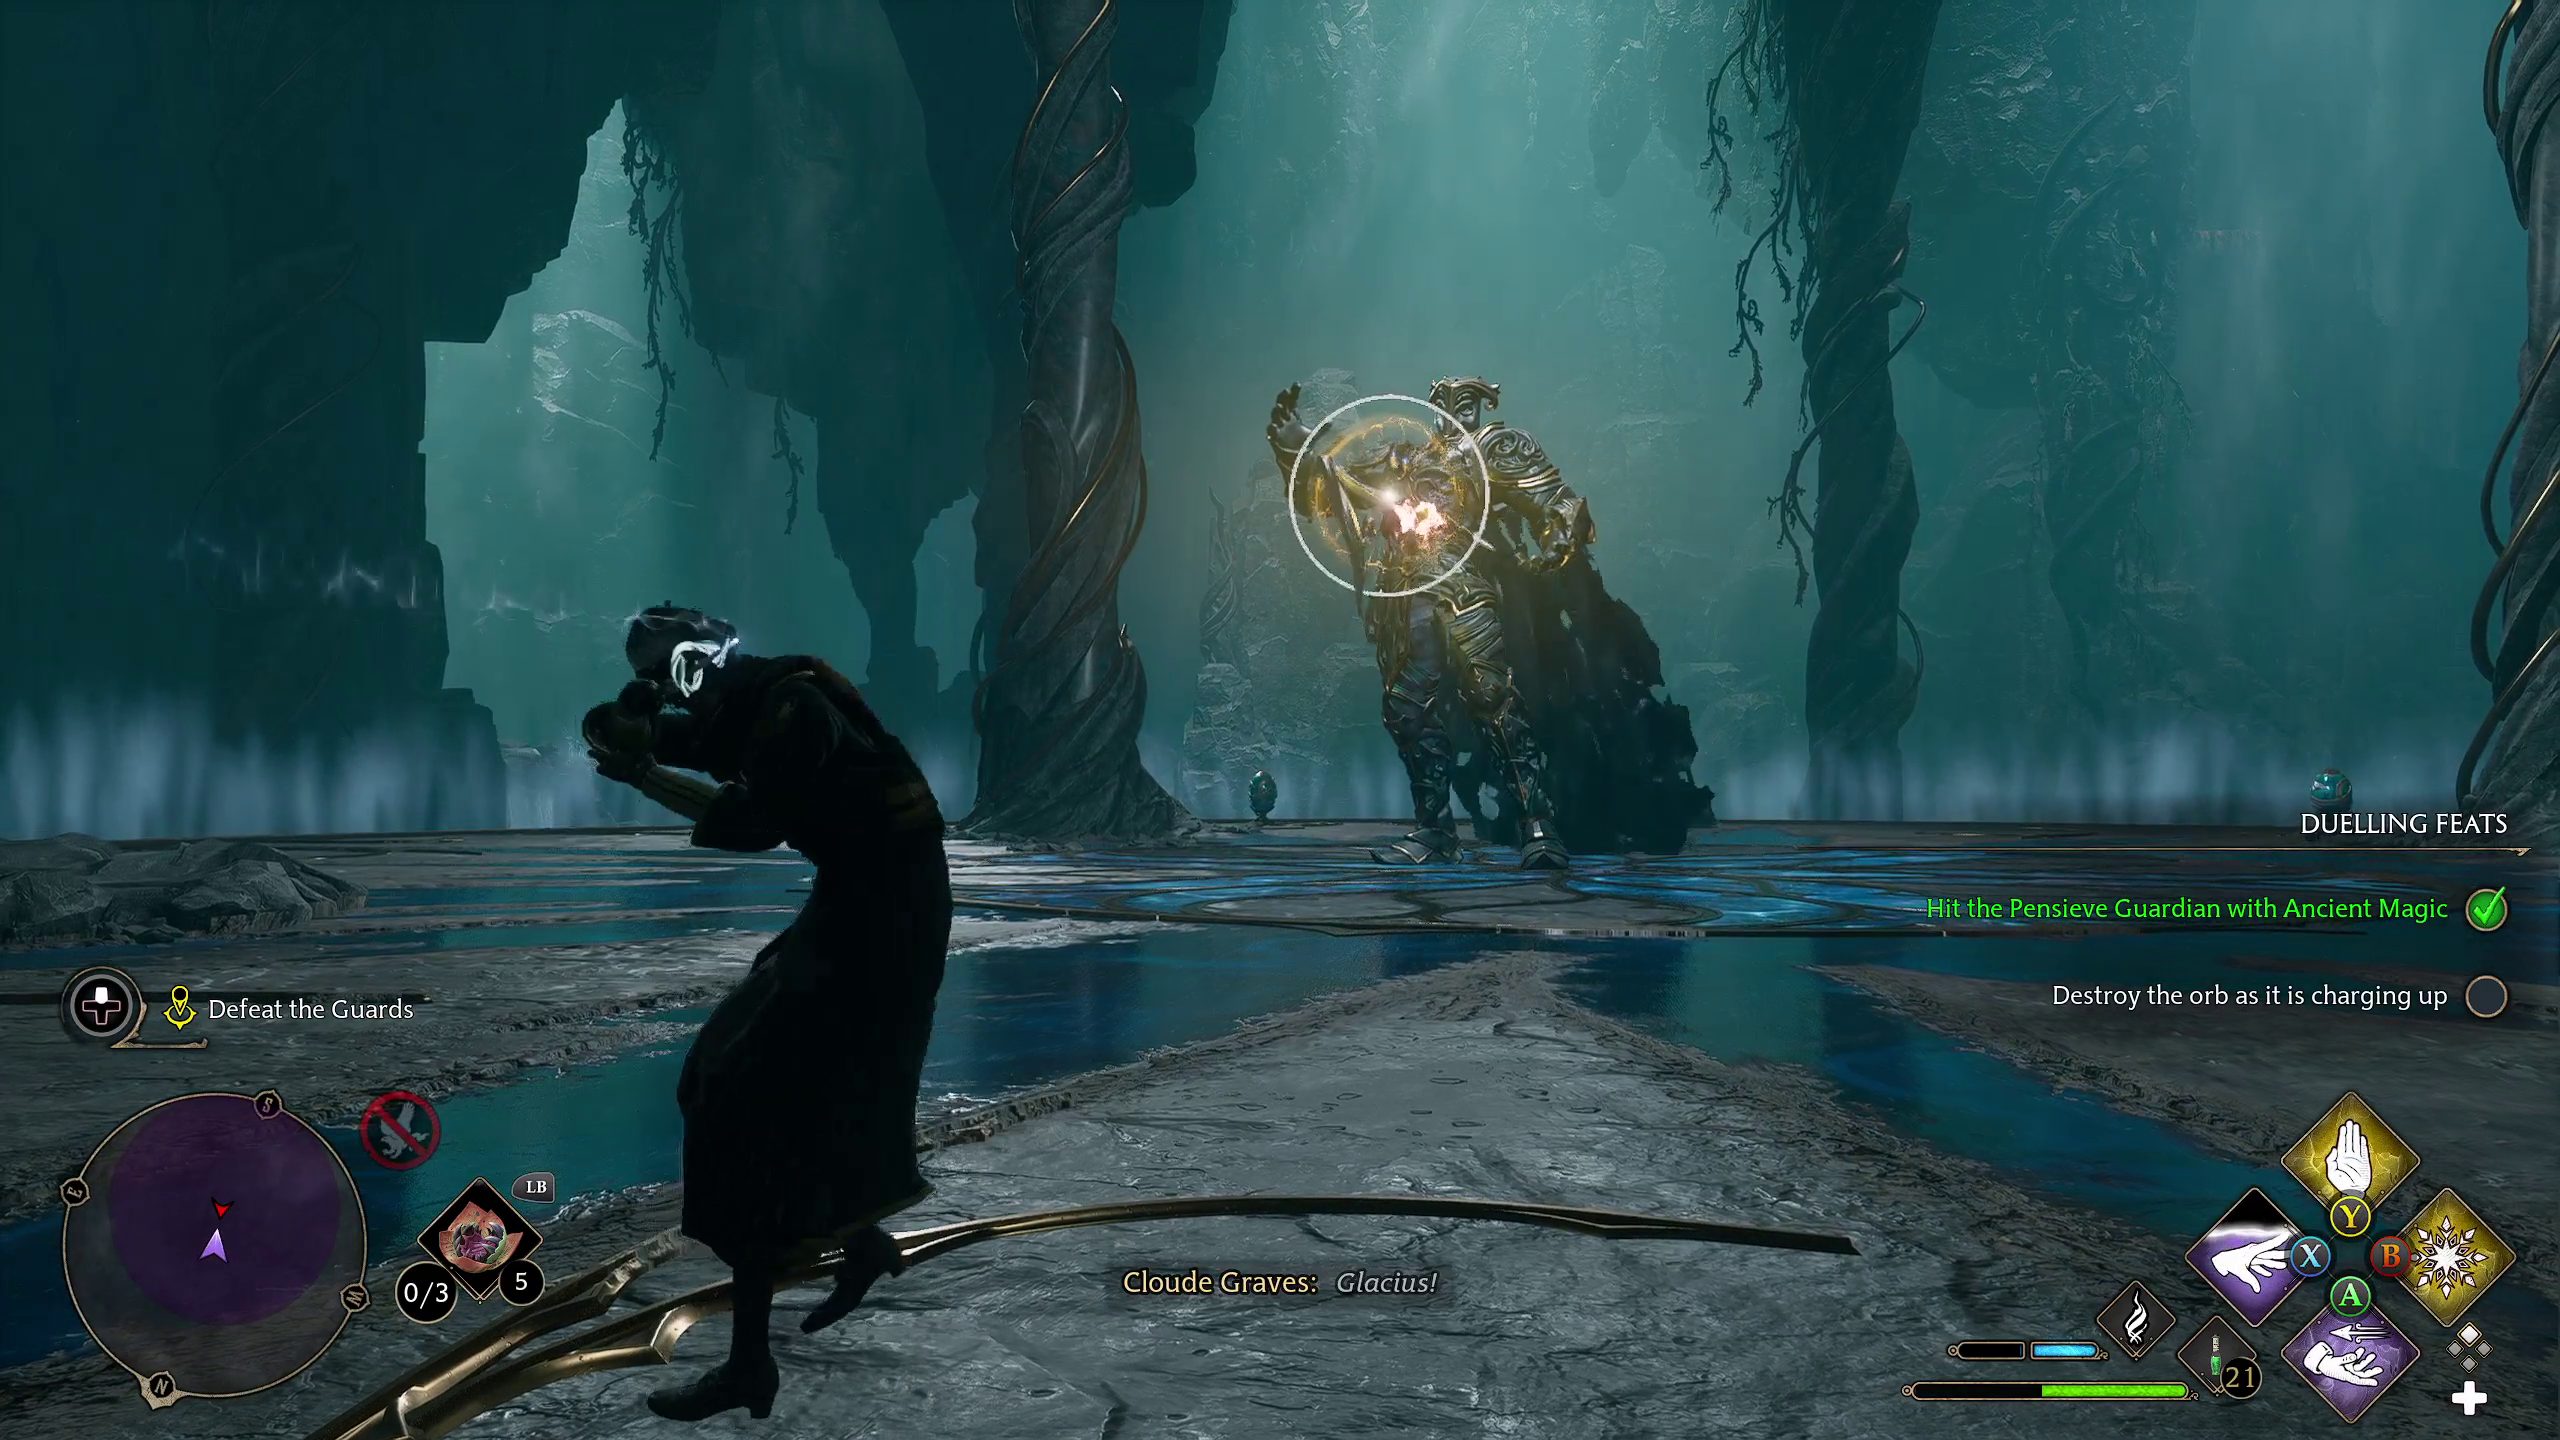
When he begins to cast colored orbs, you should use a spell matching that color.
For a Yellow orb, use a Control spell. For a Purple orb, use a Force spell.
If you are not able to disrupt his orb, be ready to dodge, as it can deal a massive amount of damage.
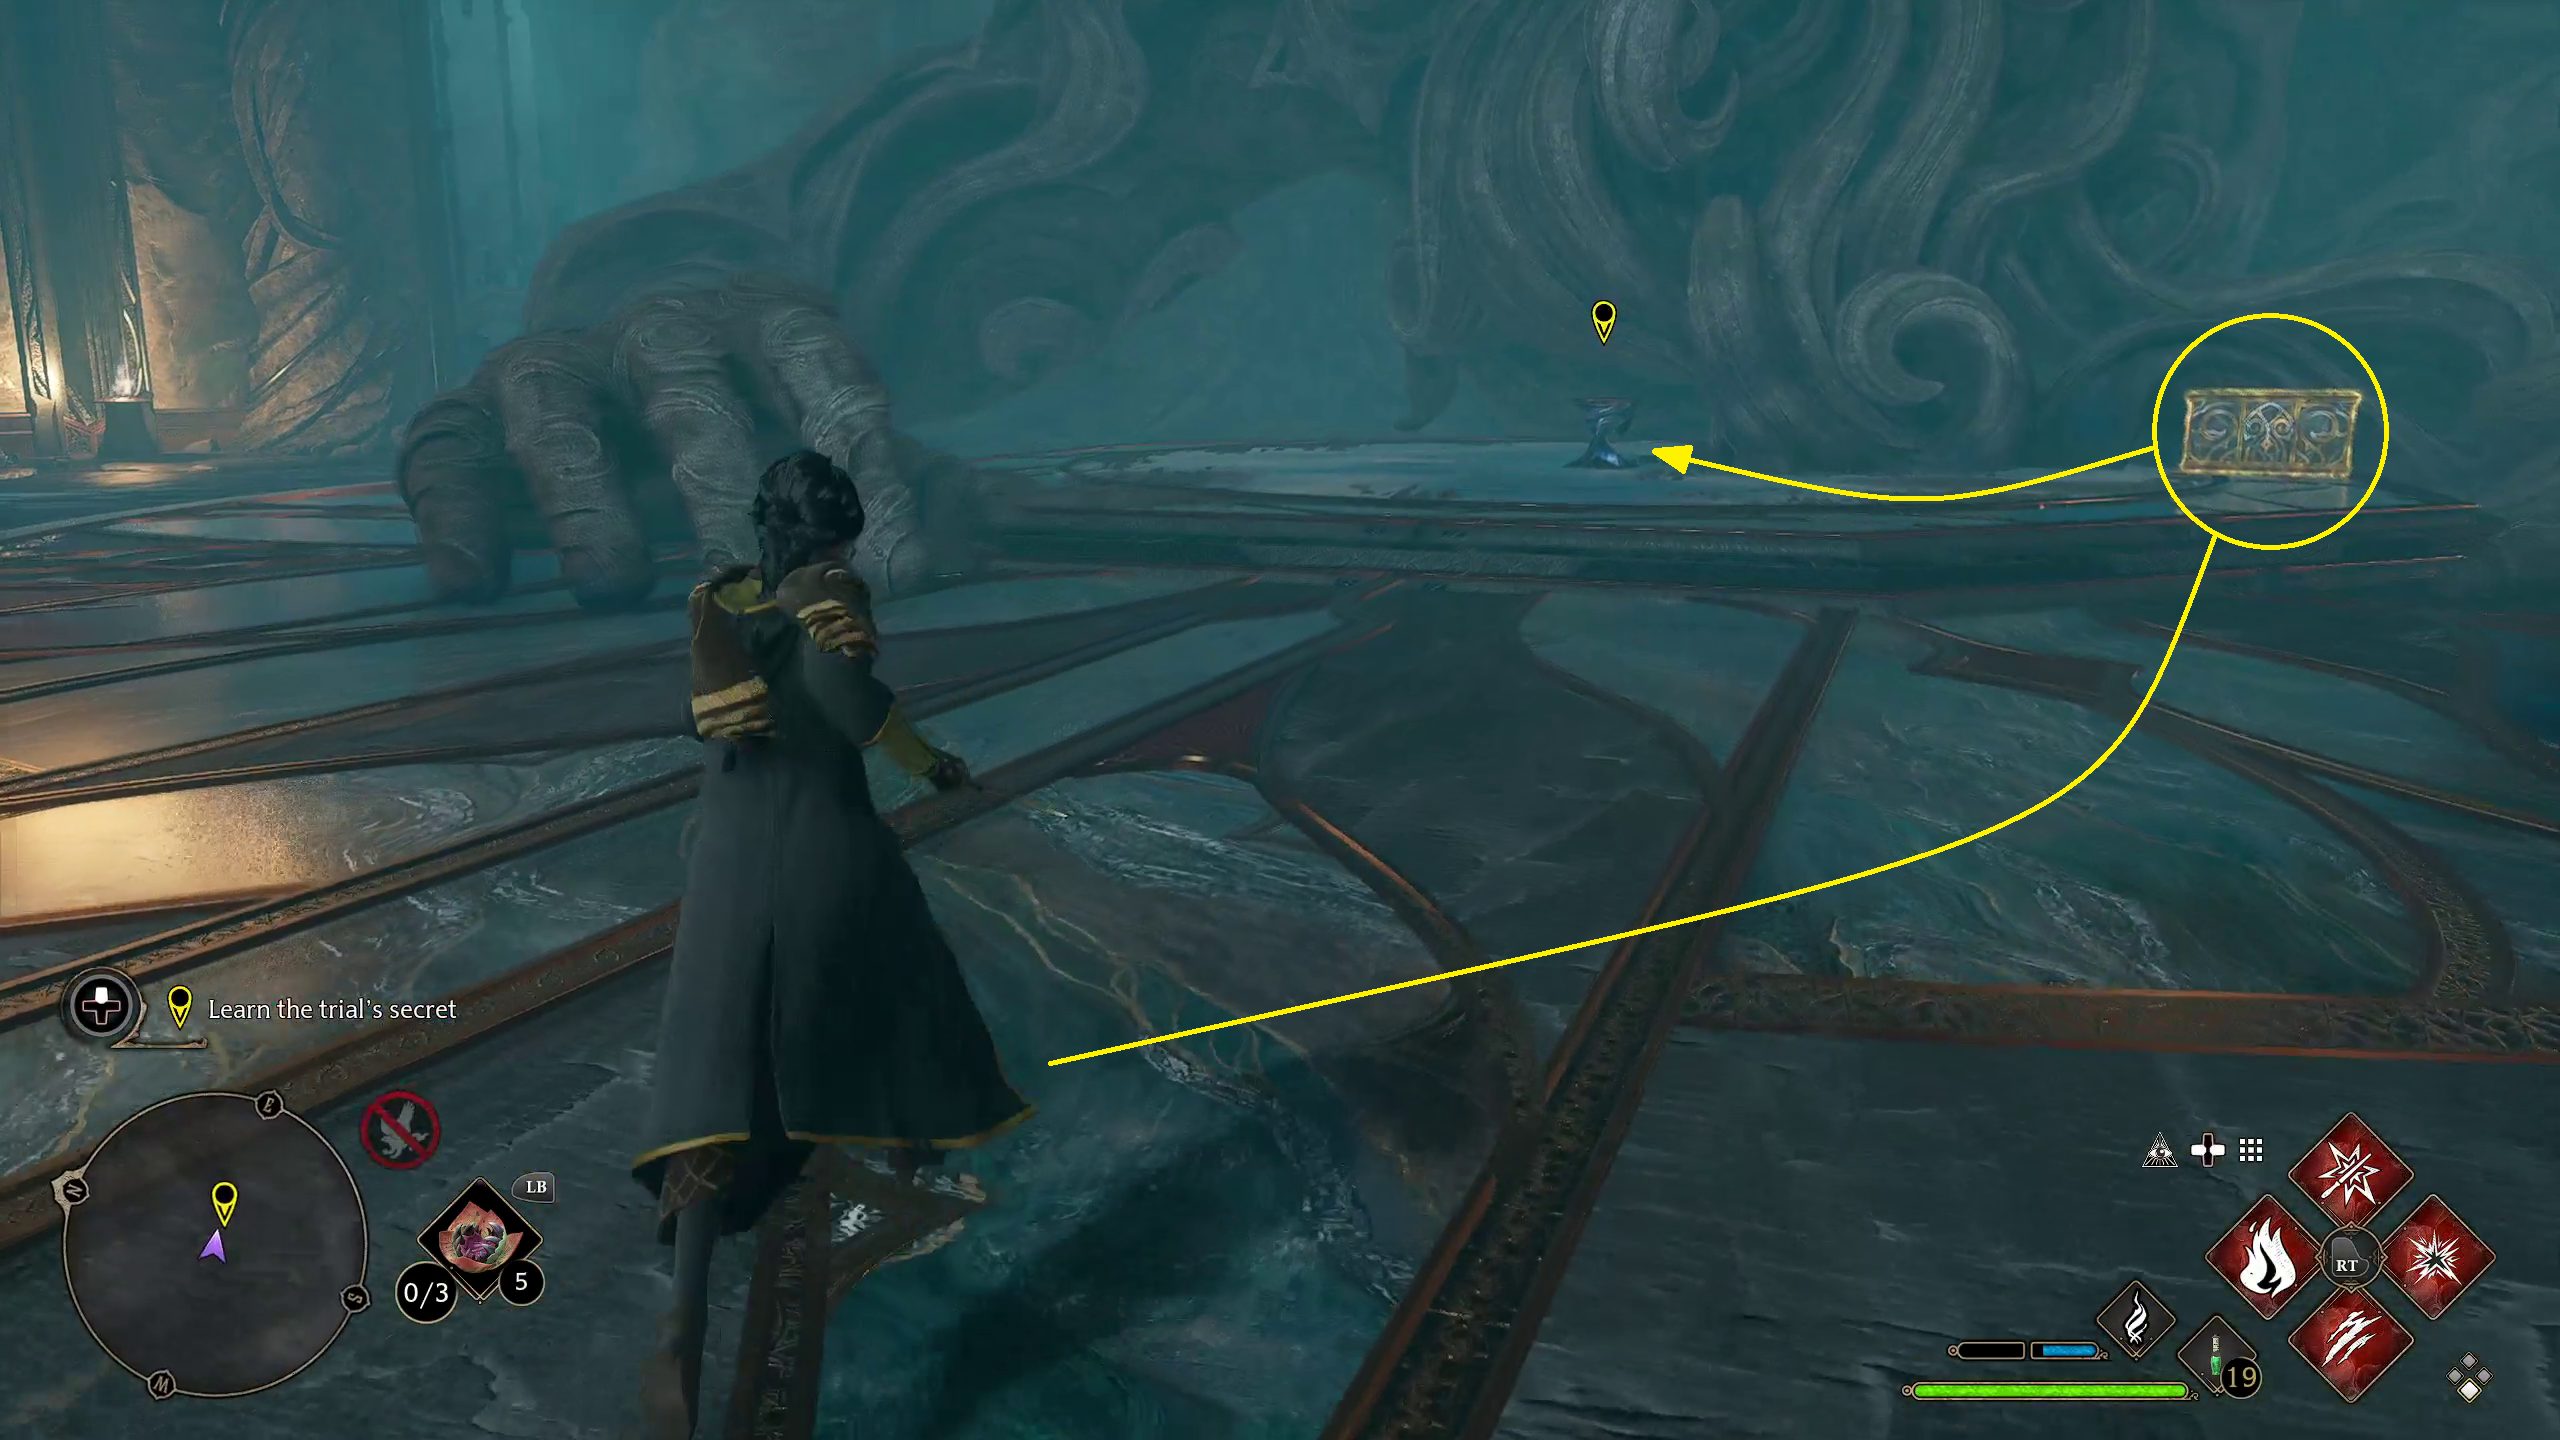
Learn the Trial’s Secret
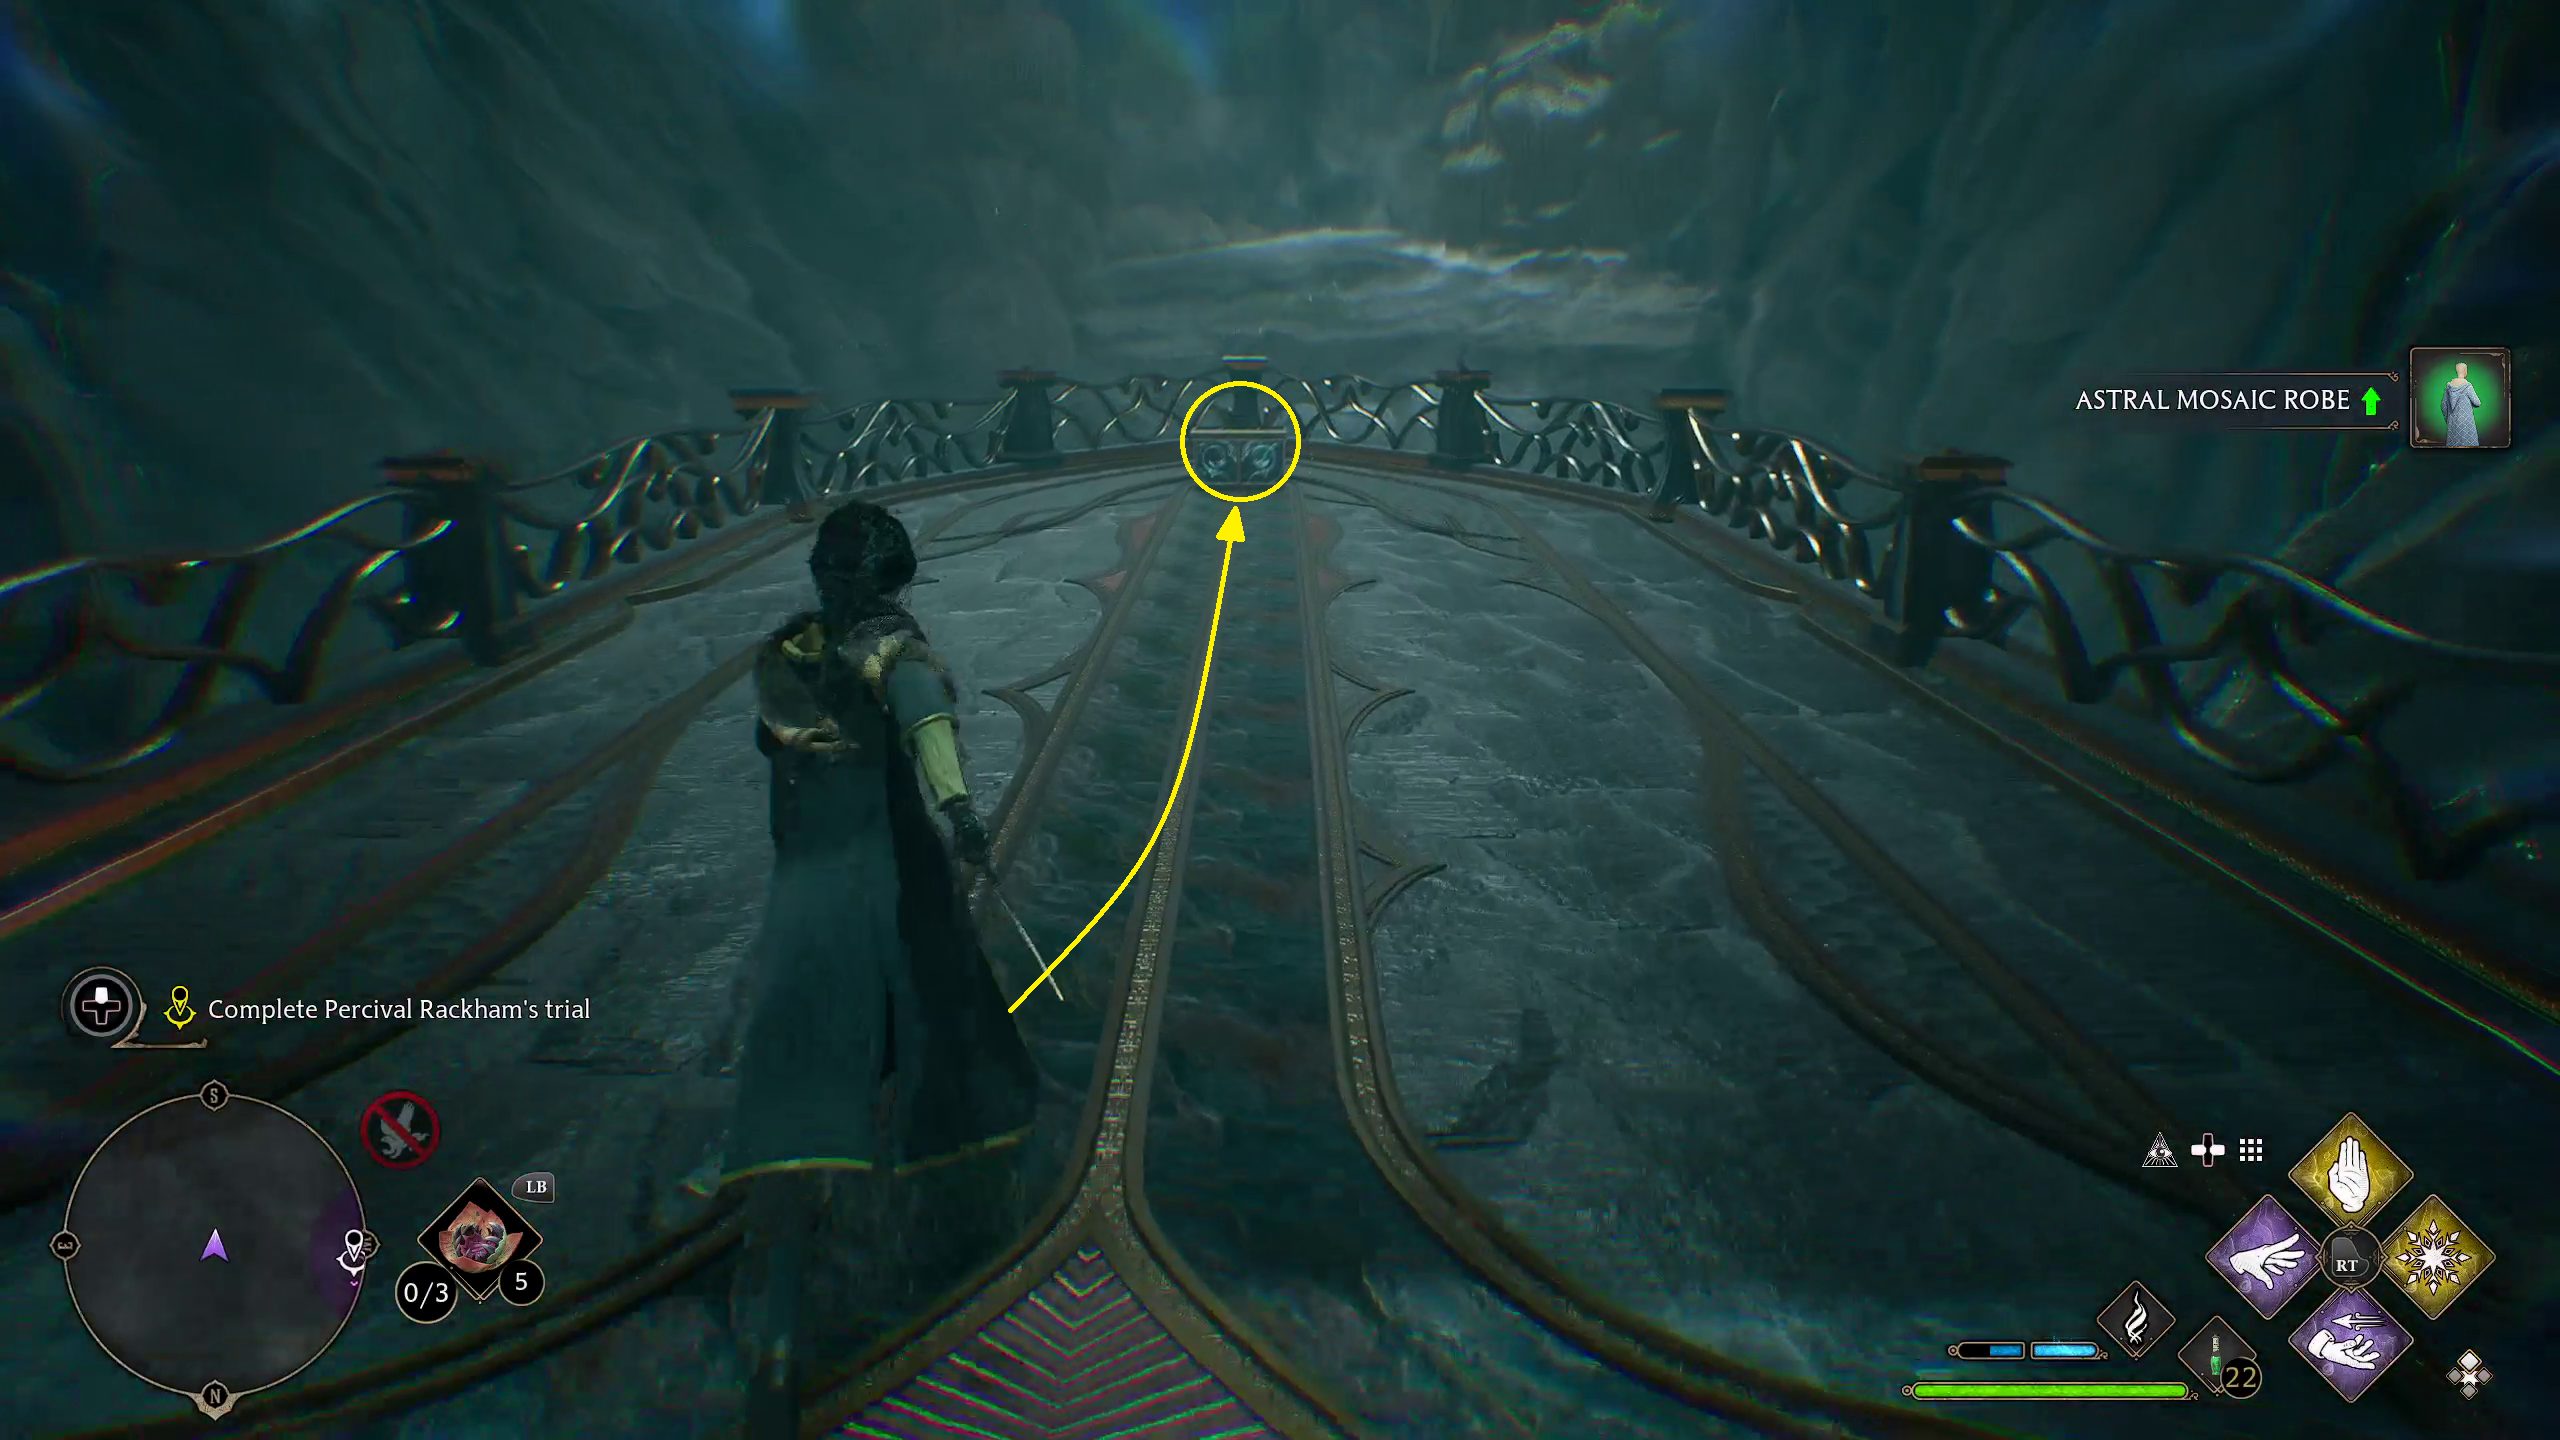
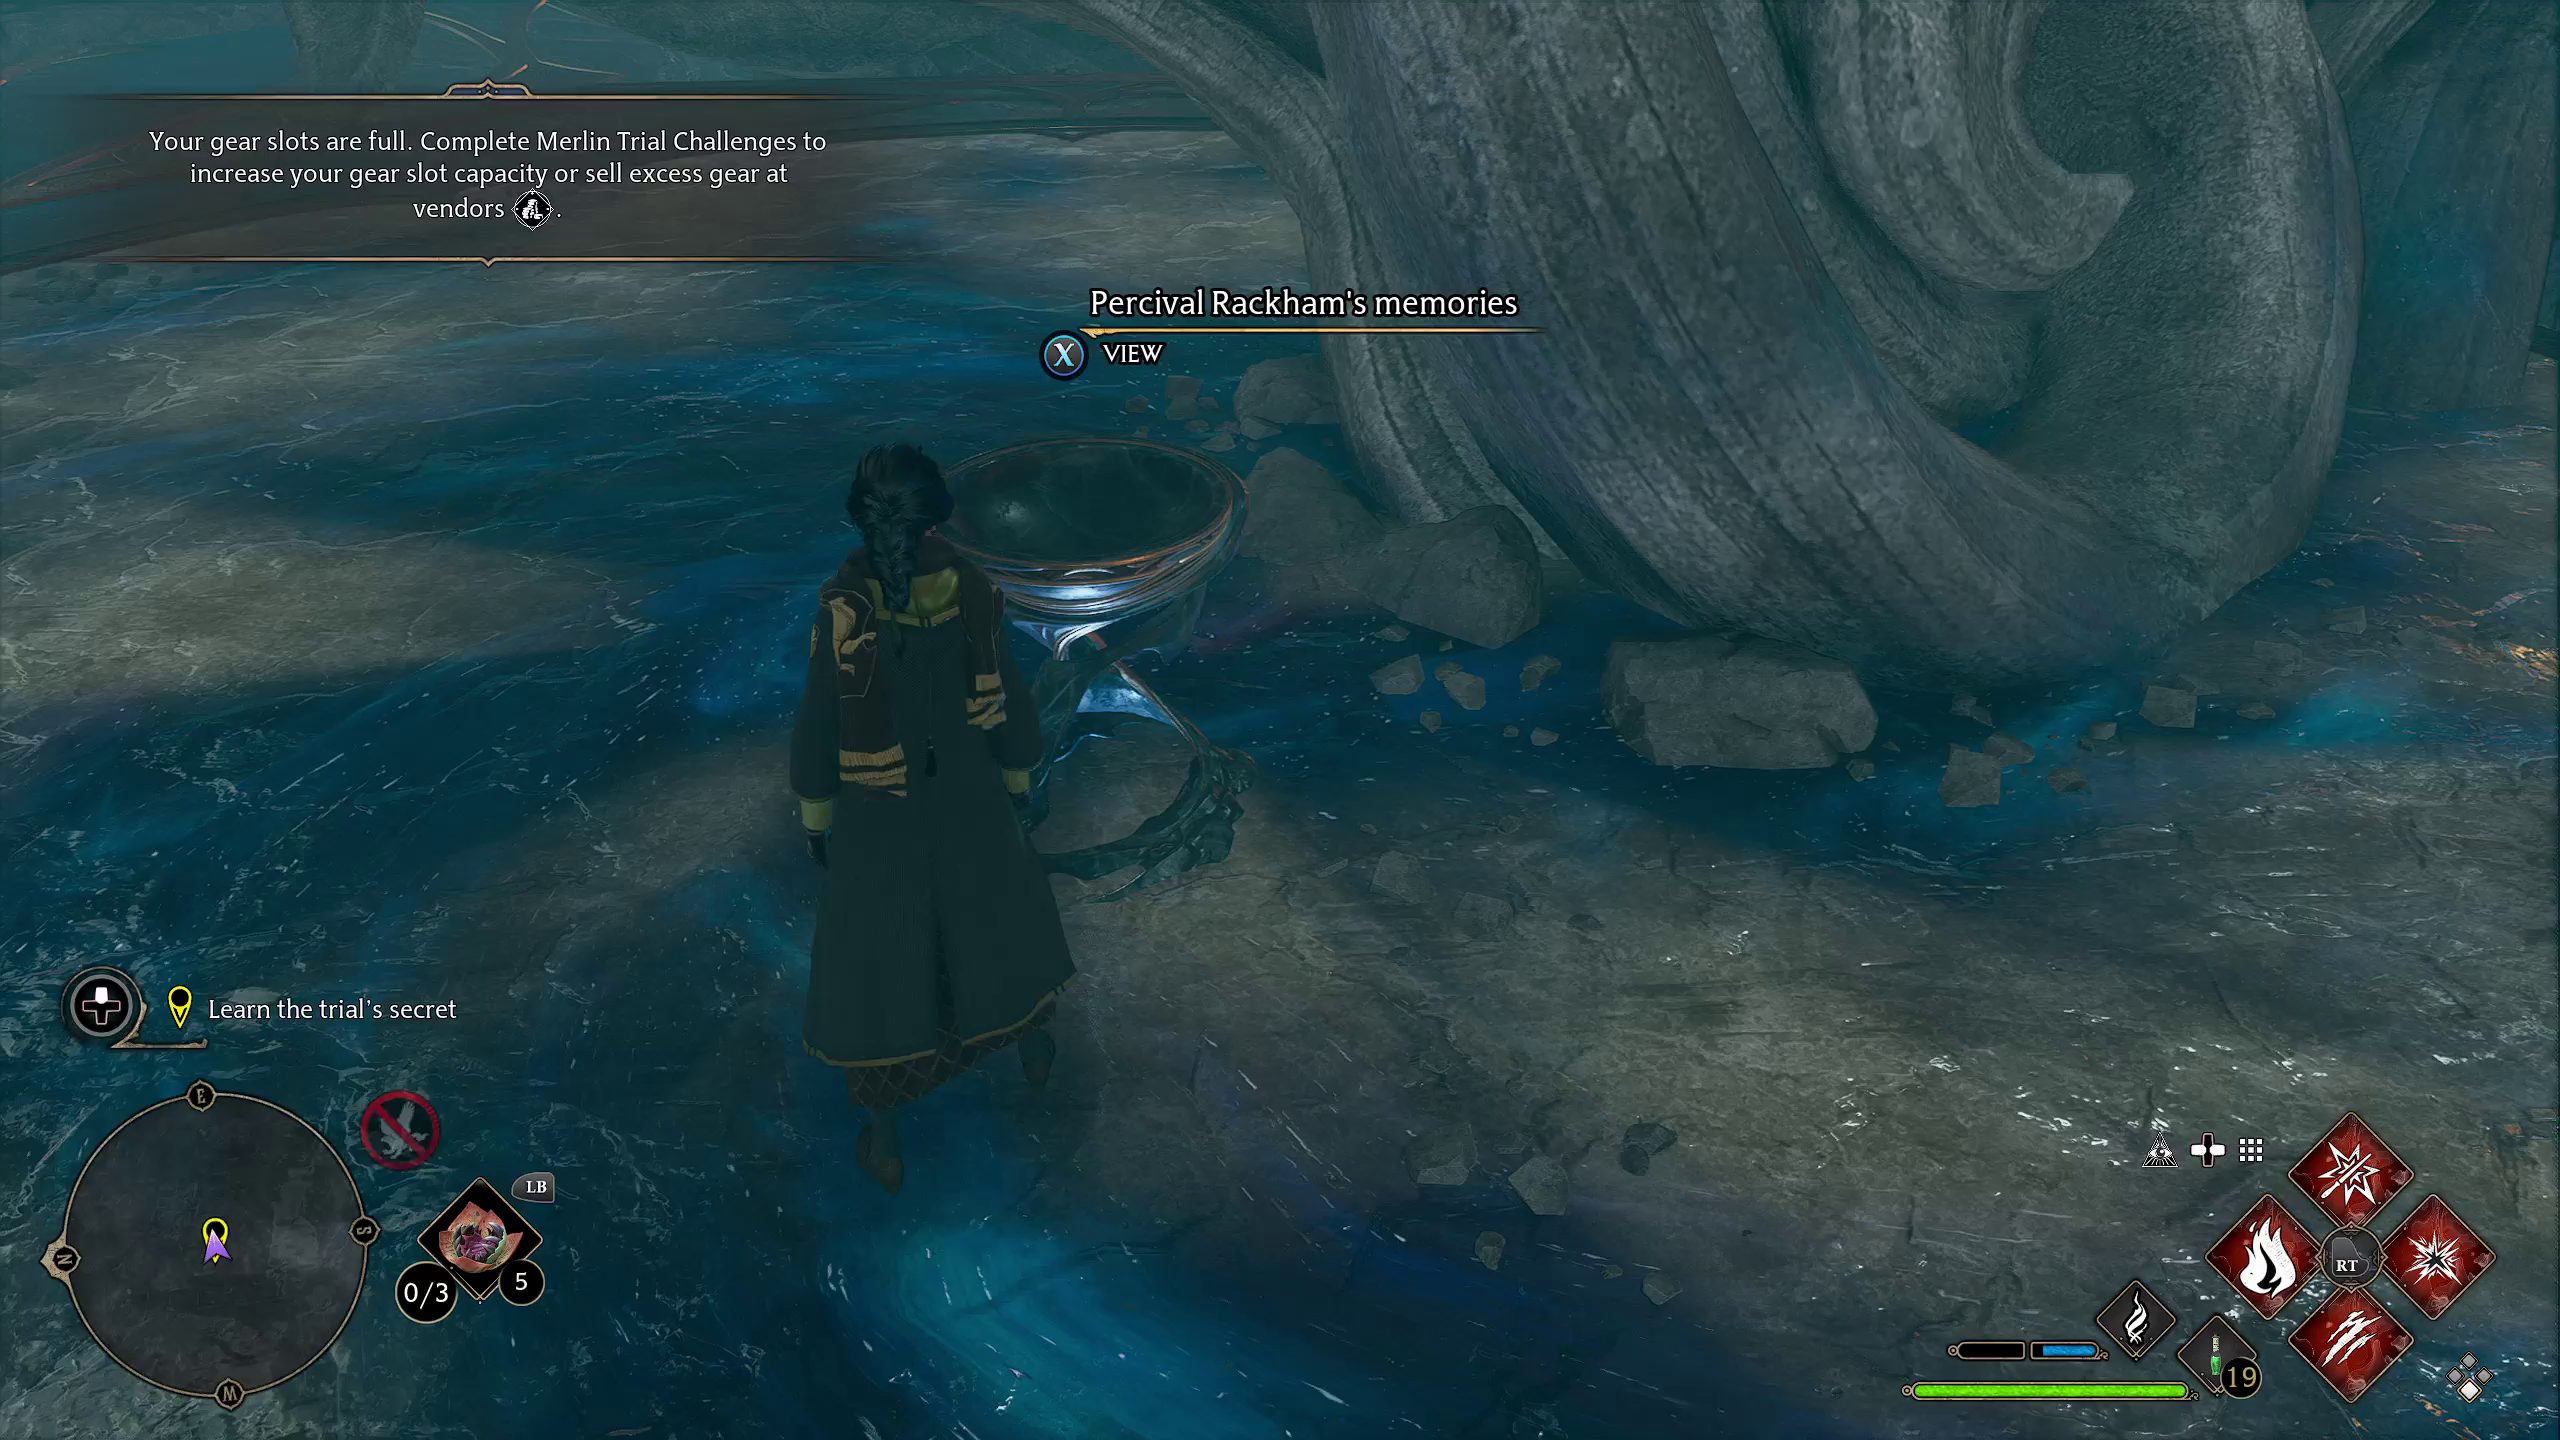
Once you’ve defeated the Pensieve Guardian, a walkway will rise up, taking you to the final room of the trial (1). In this room, grab the chest (2) and then go and interact with the Pensieve pool in the center of the room, next to the statue’s beard (3).
A long cutscene will play, revealing much more about Percival Rackham’s past, and the past of the Keepers in general. While more context will still be needed to understand, it is beginning to become clearer the nature of your Ancient Magic, and the past surrounding the Keepers.
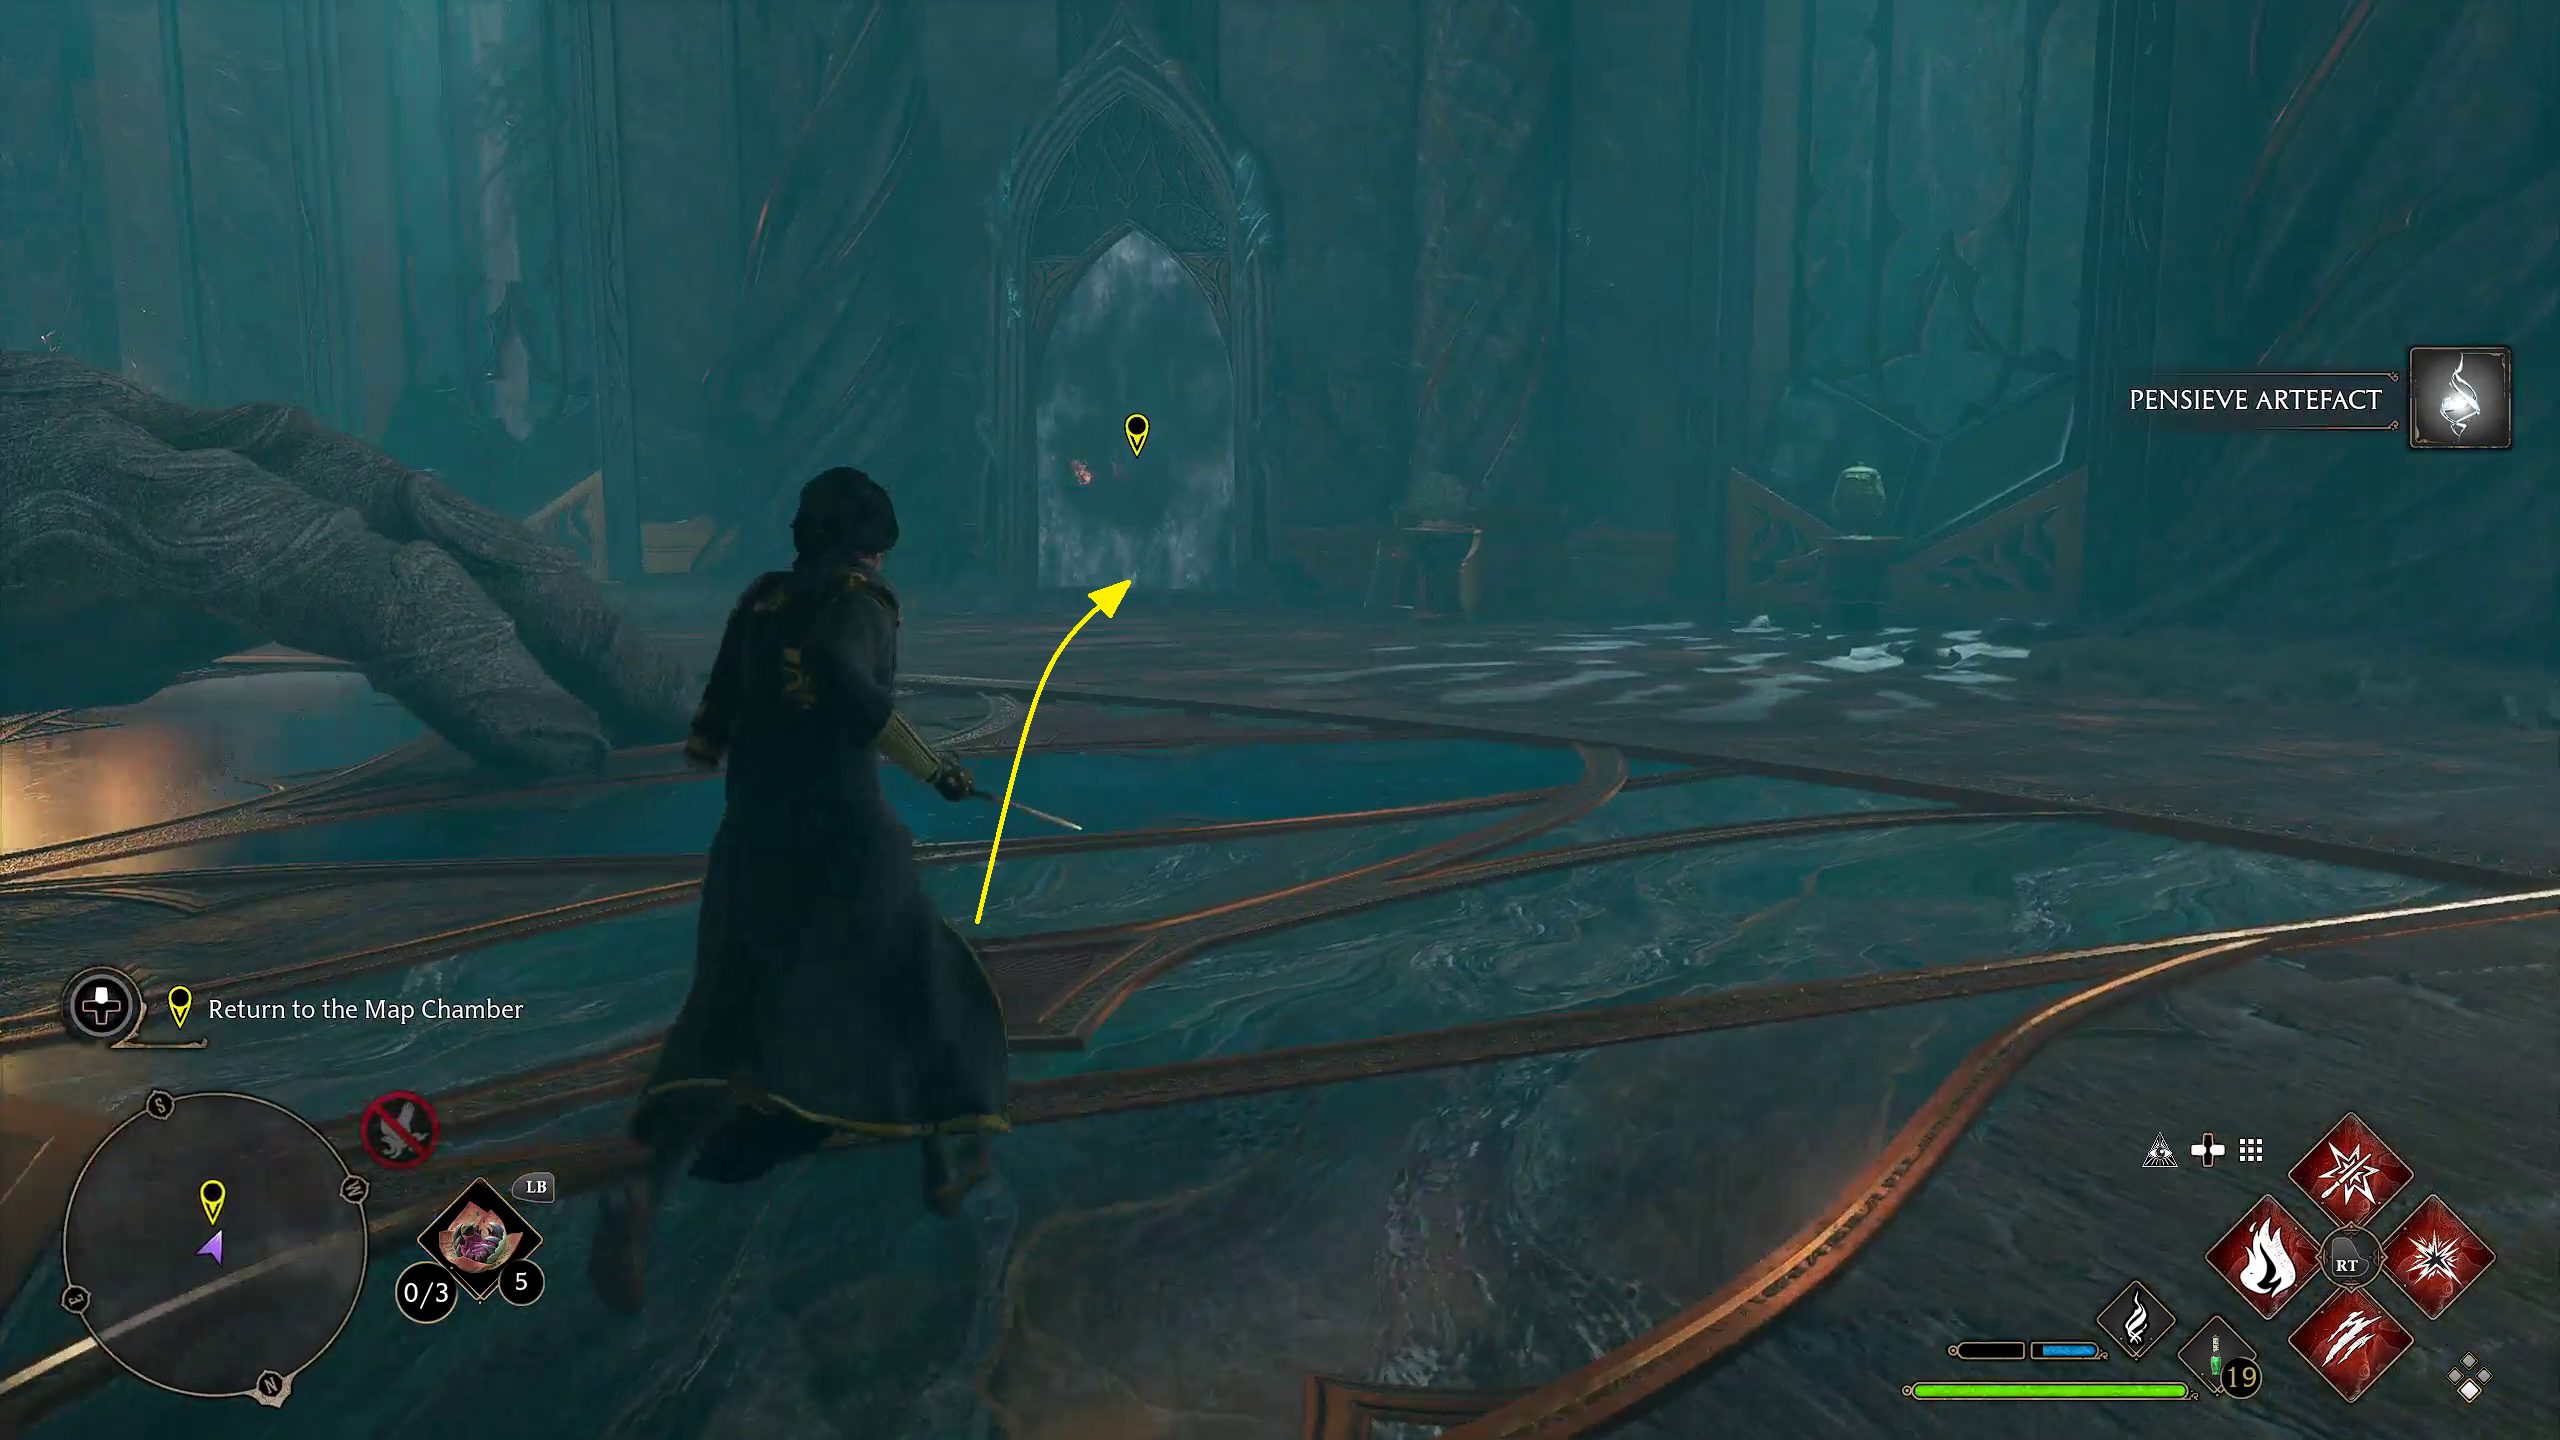
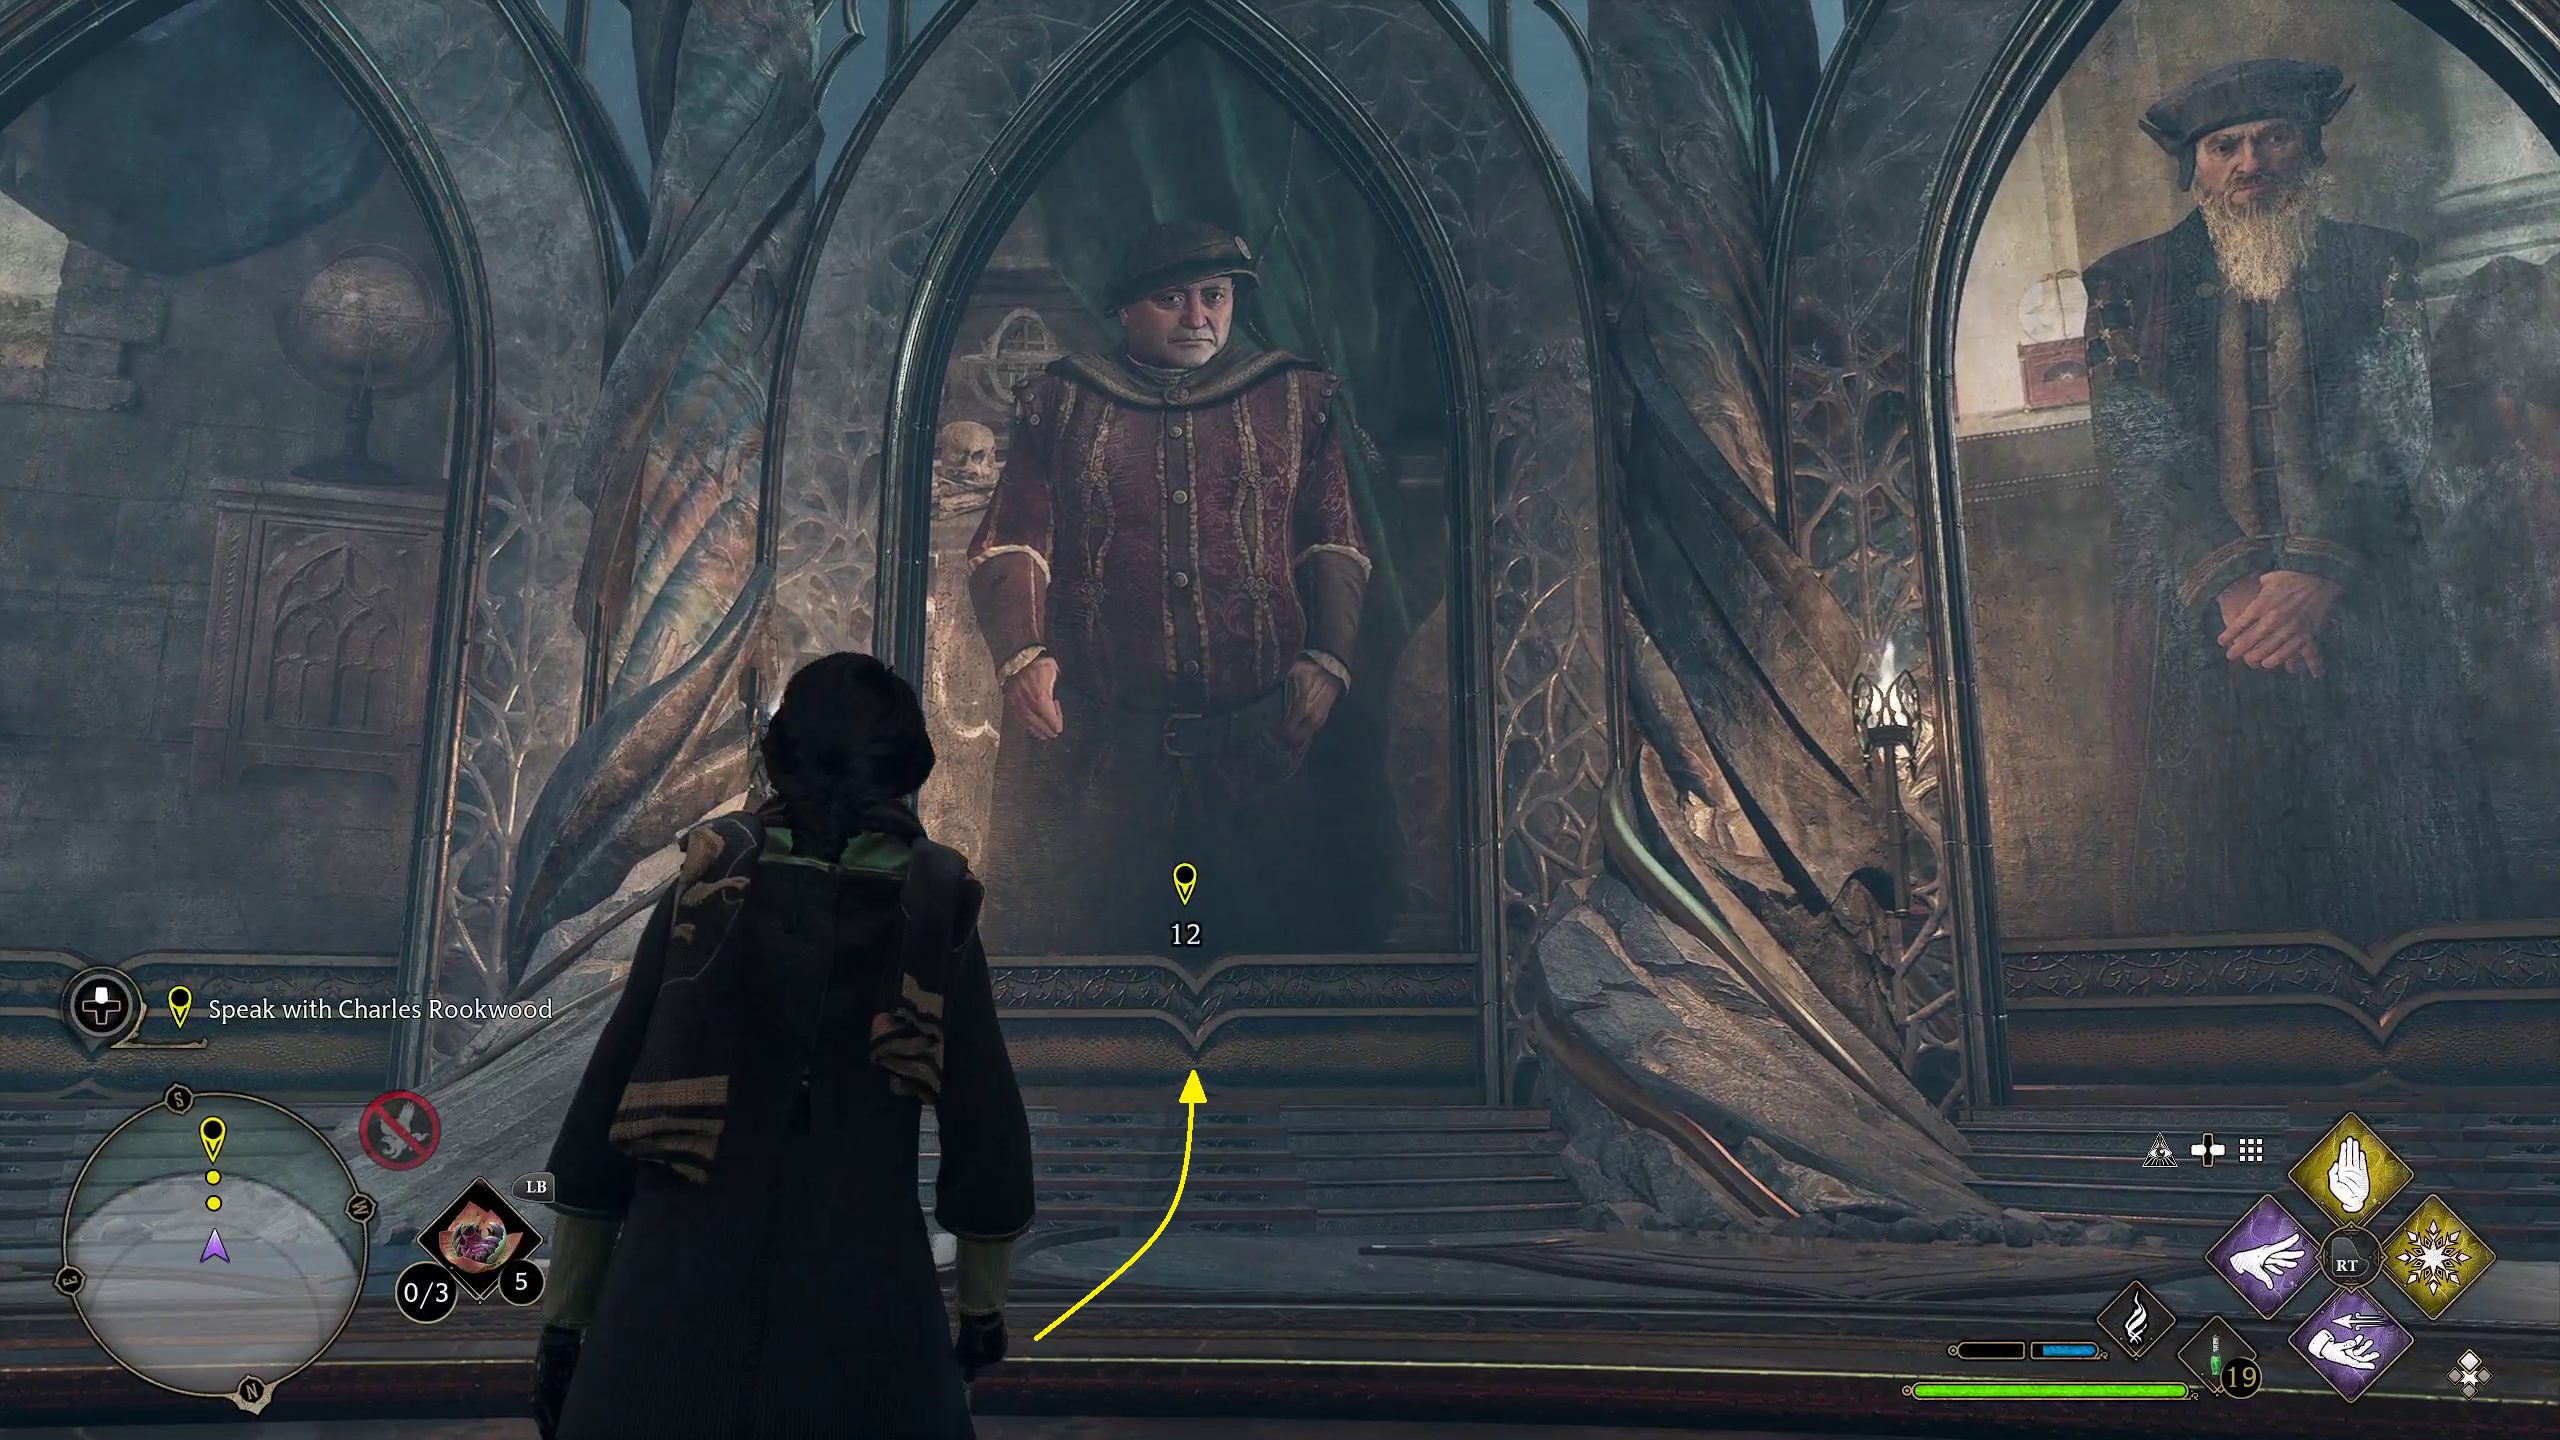
Return to the Map Chamber
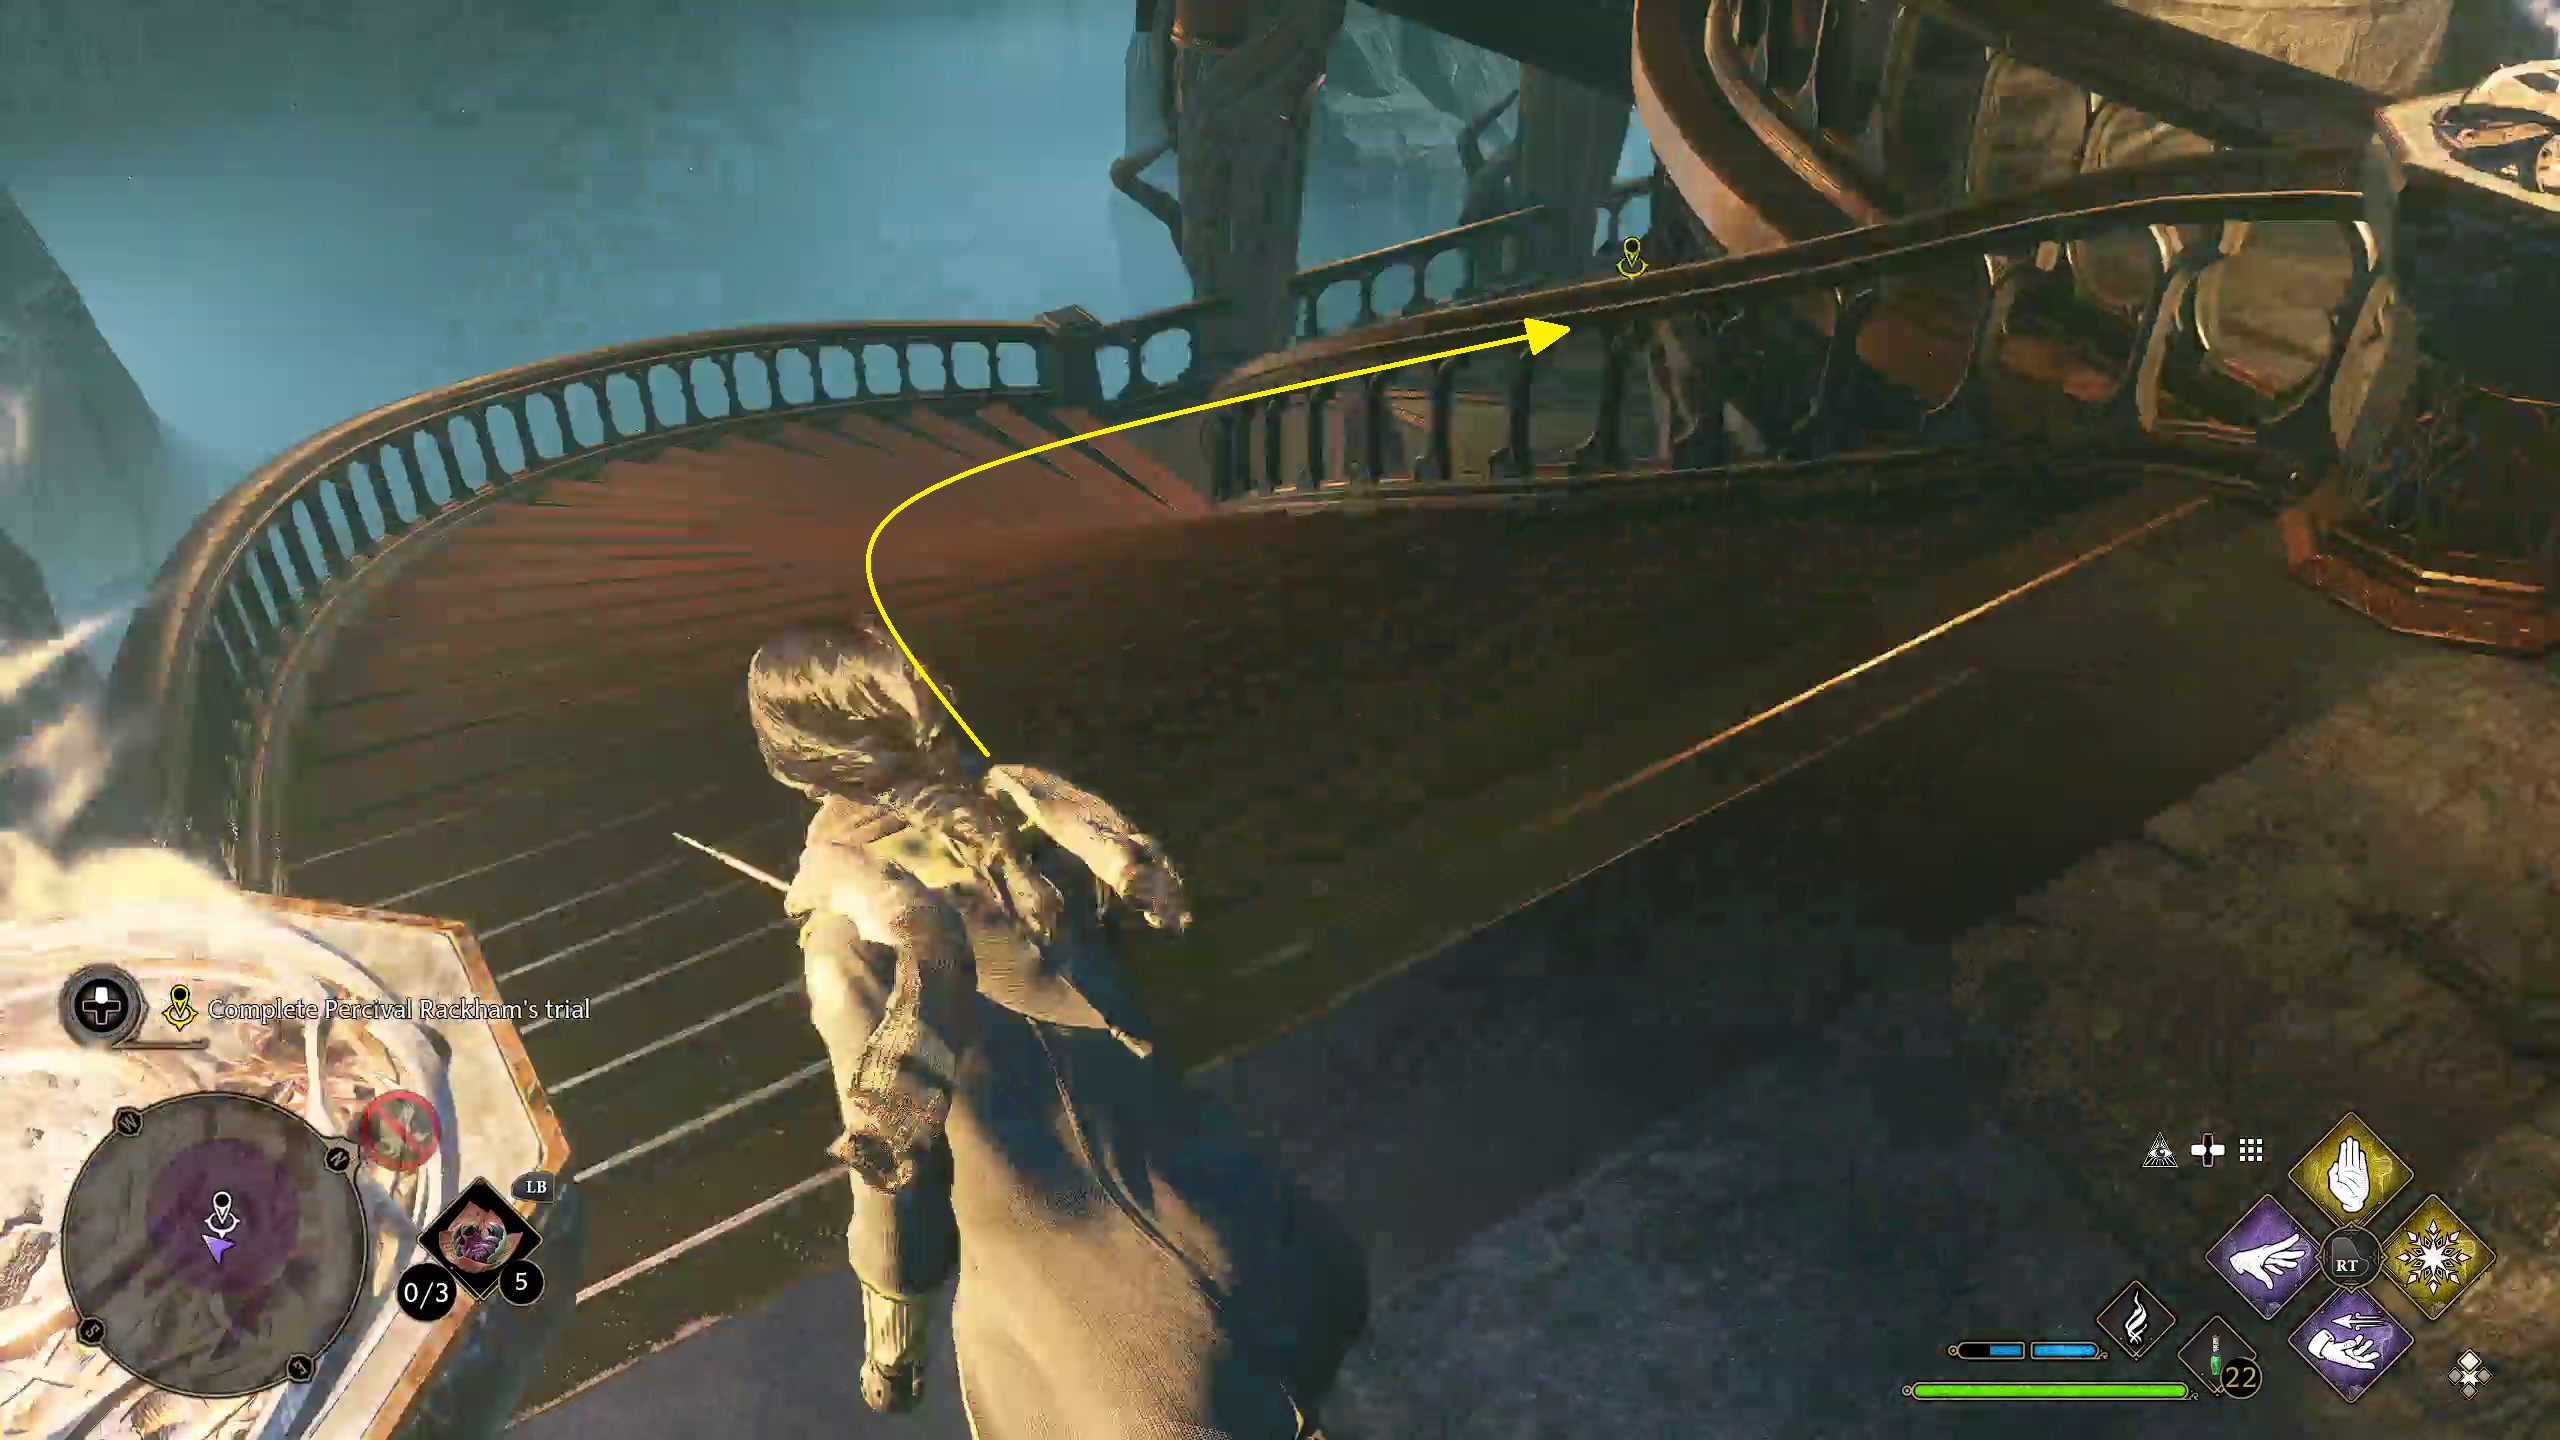
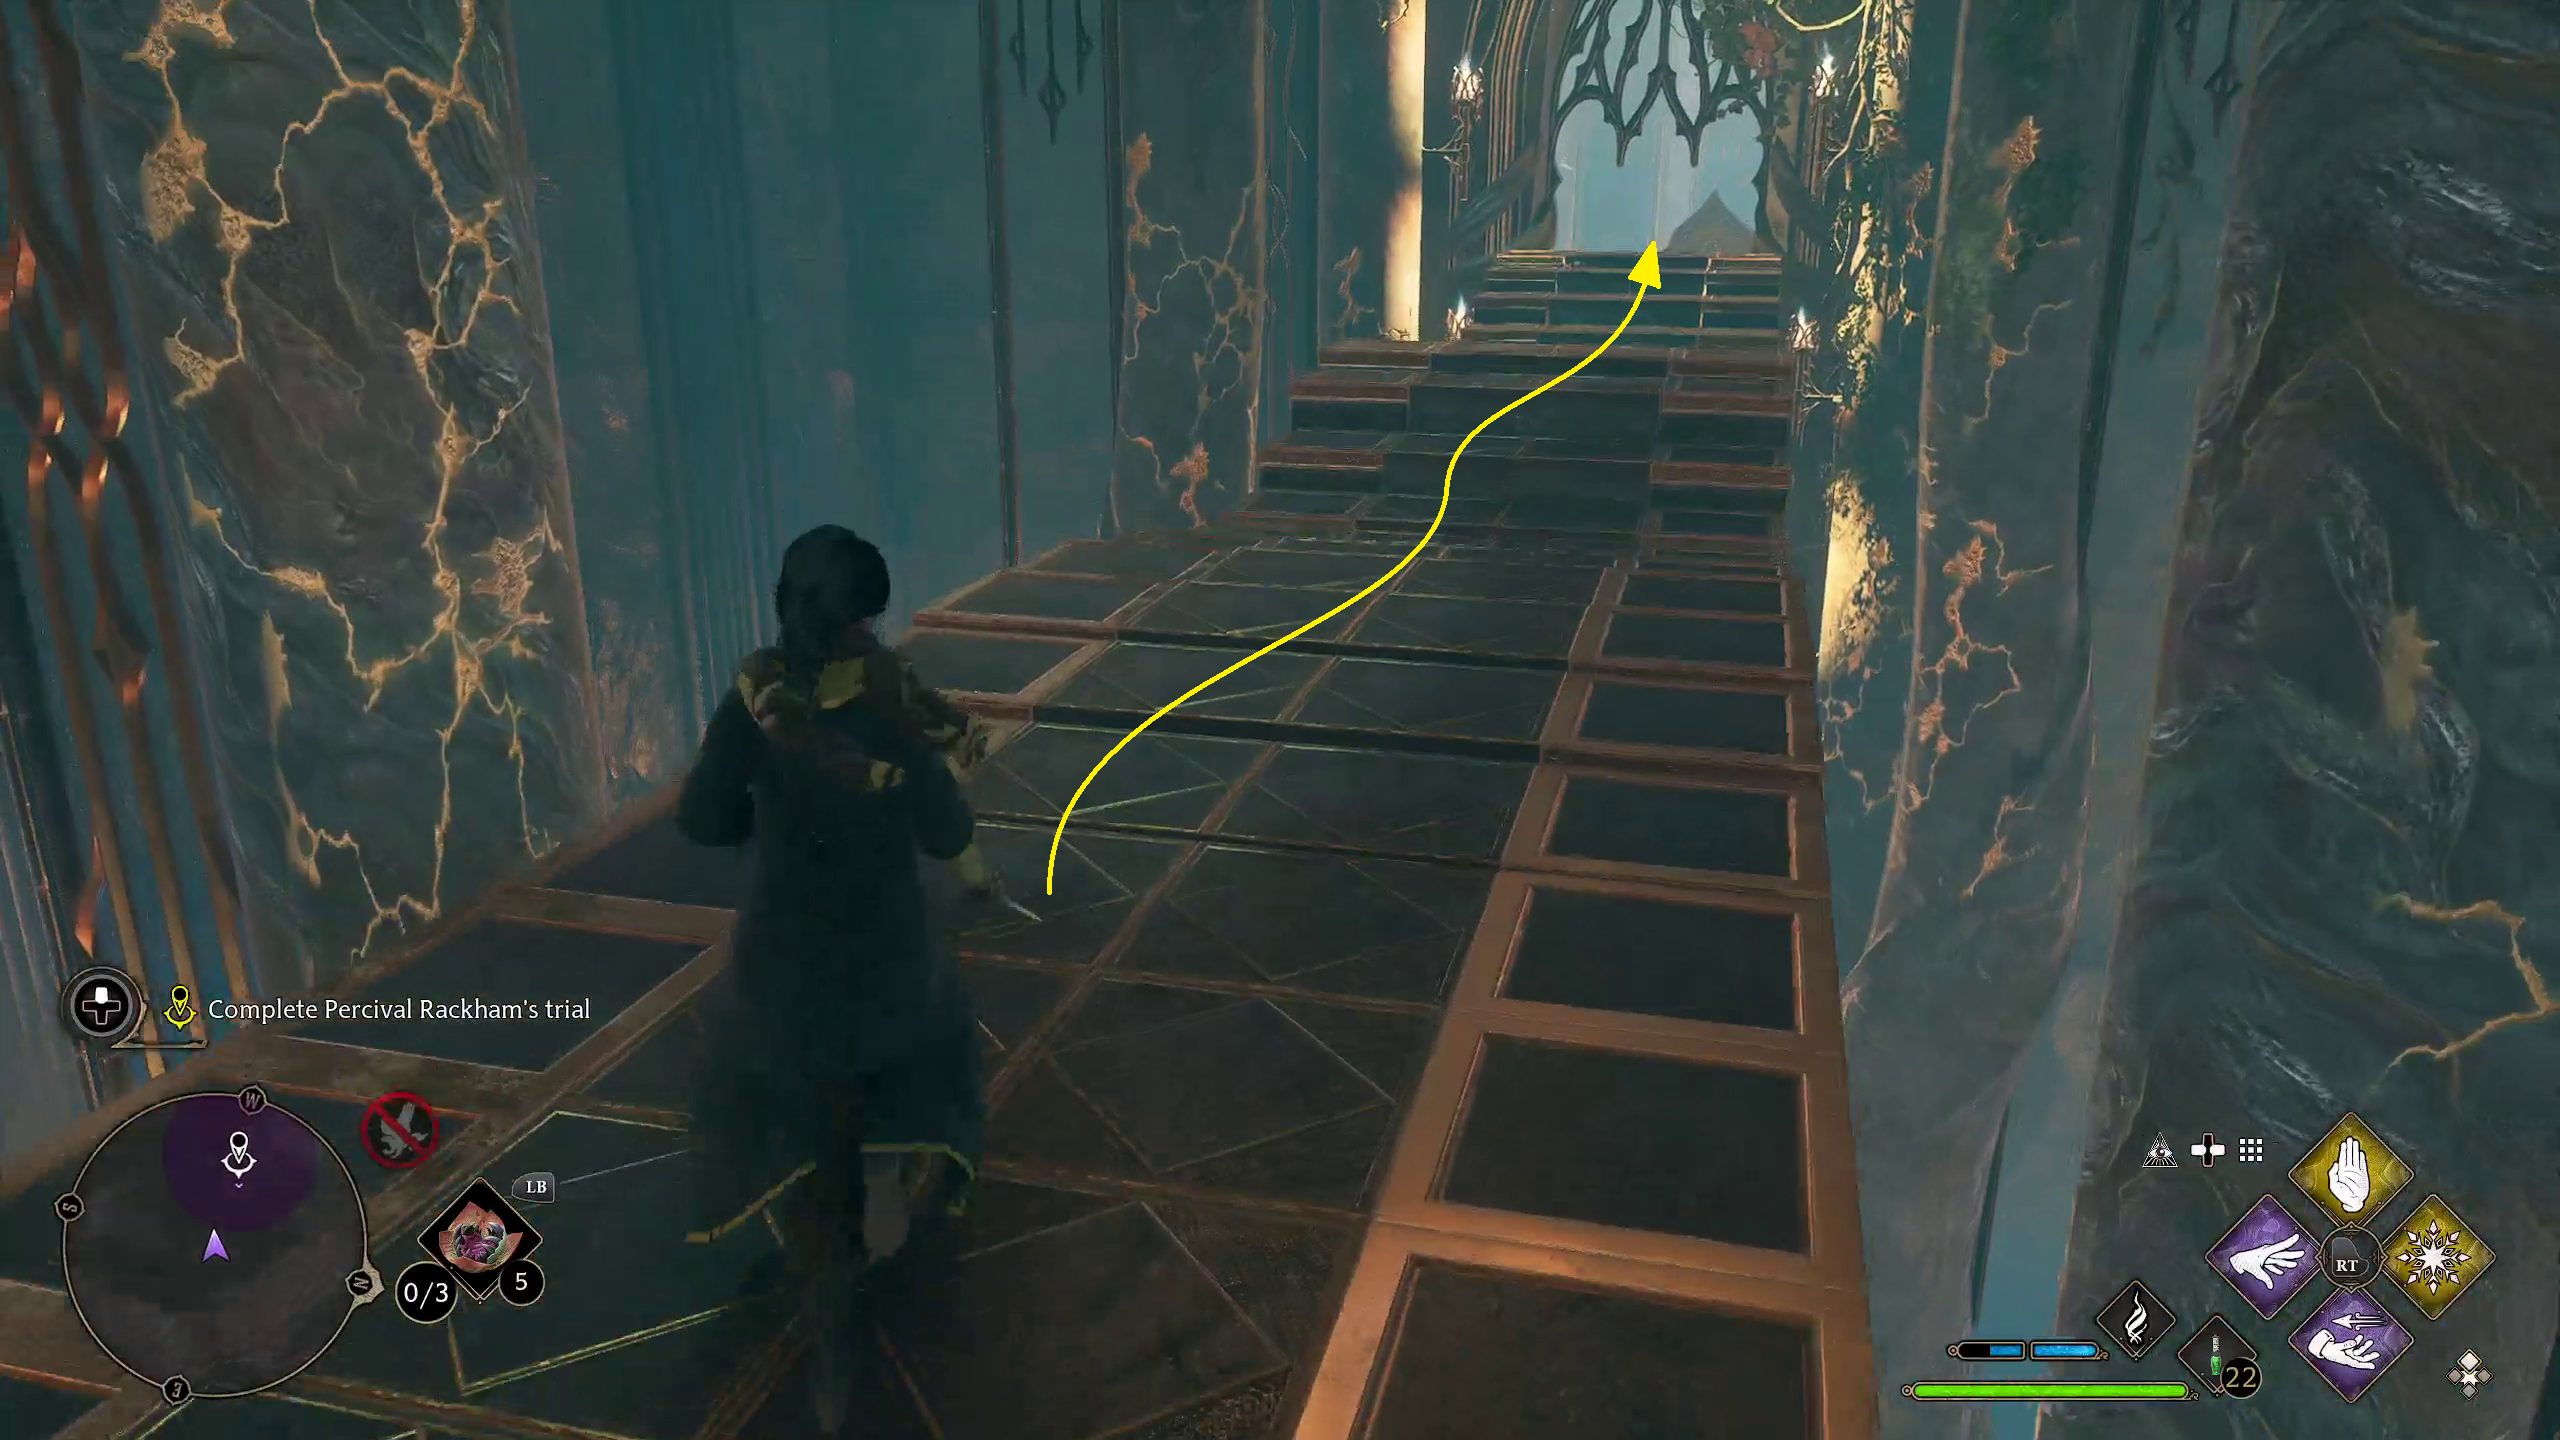
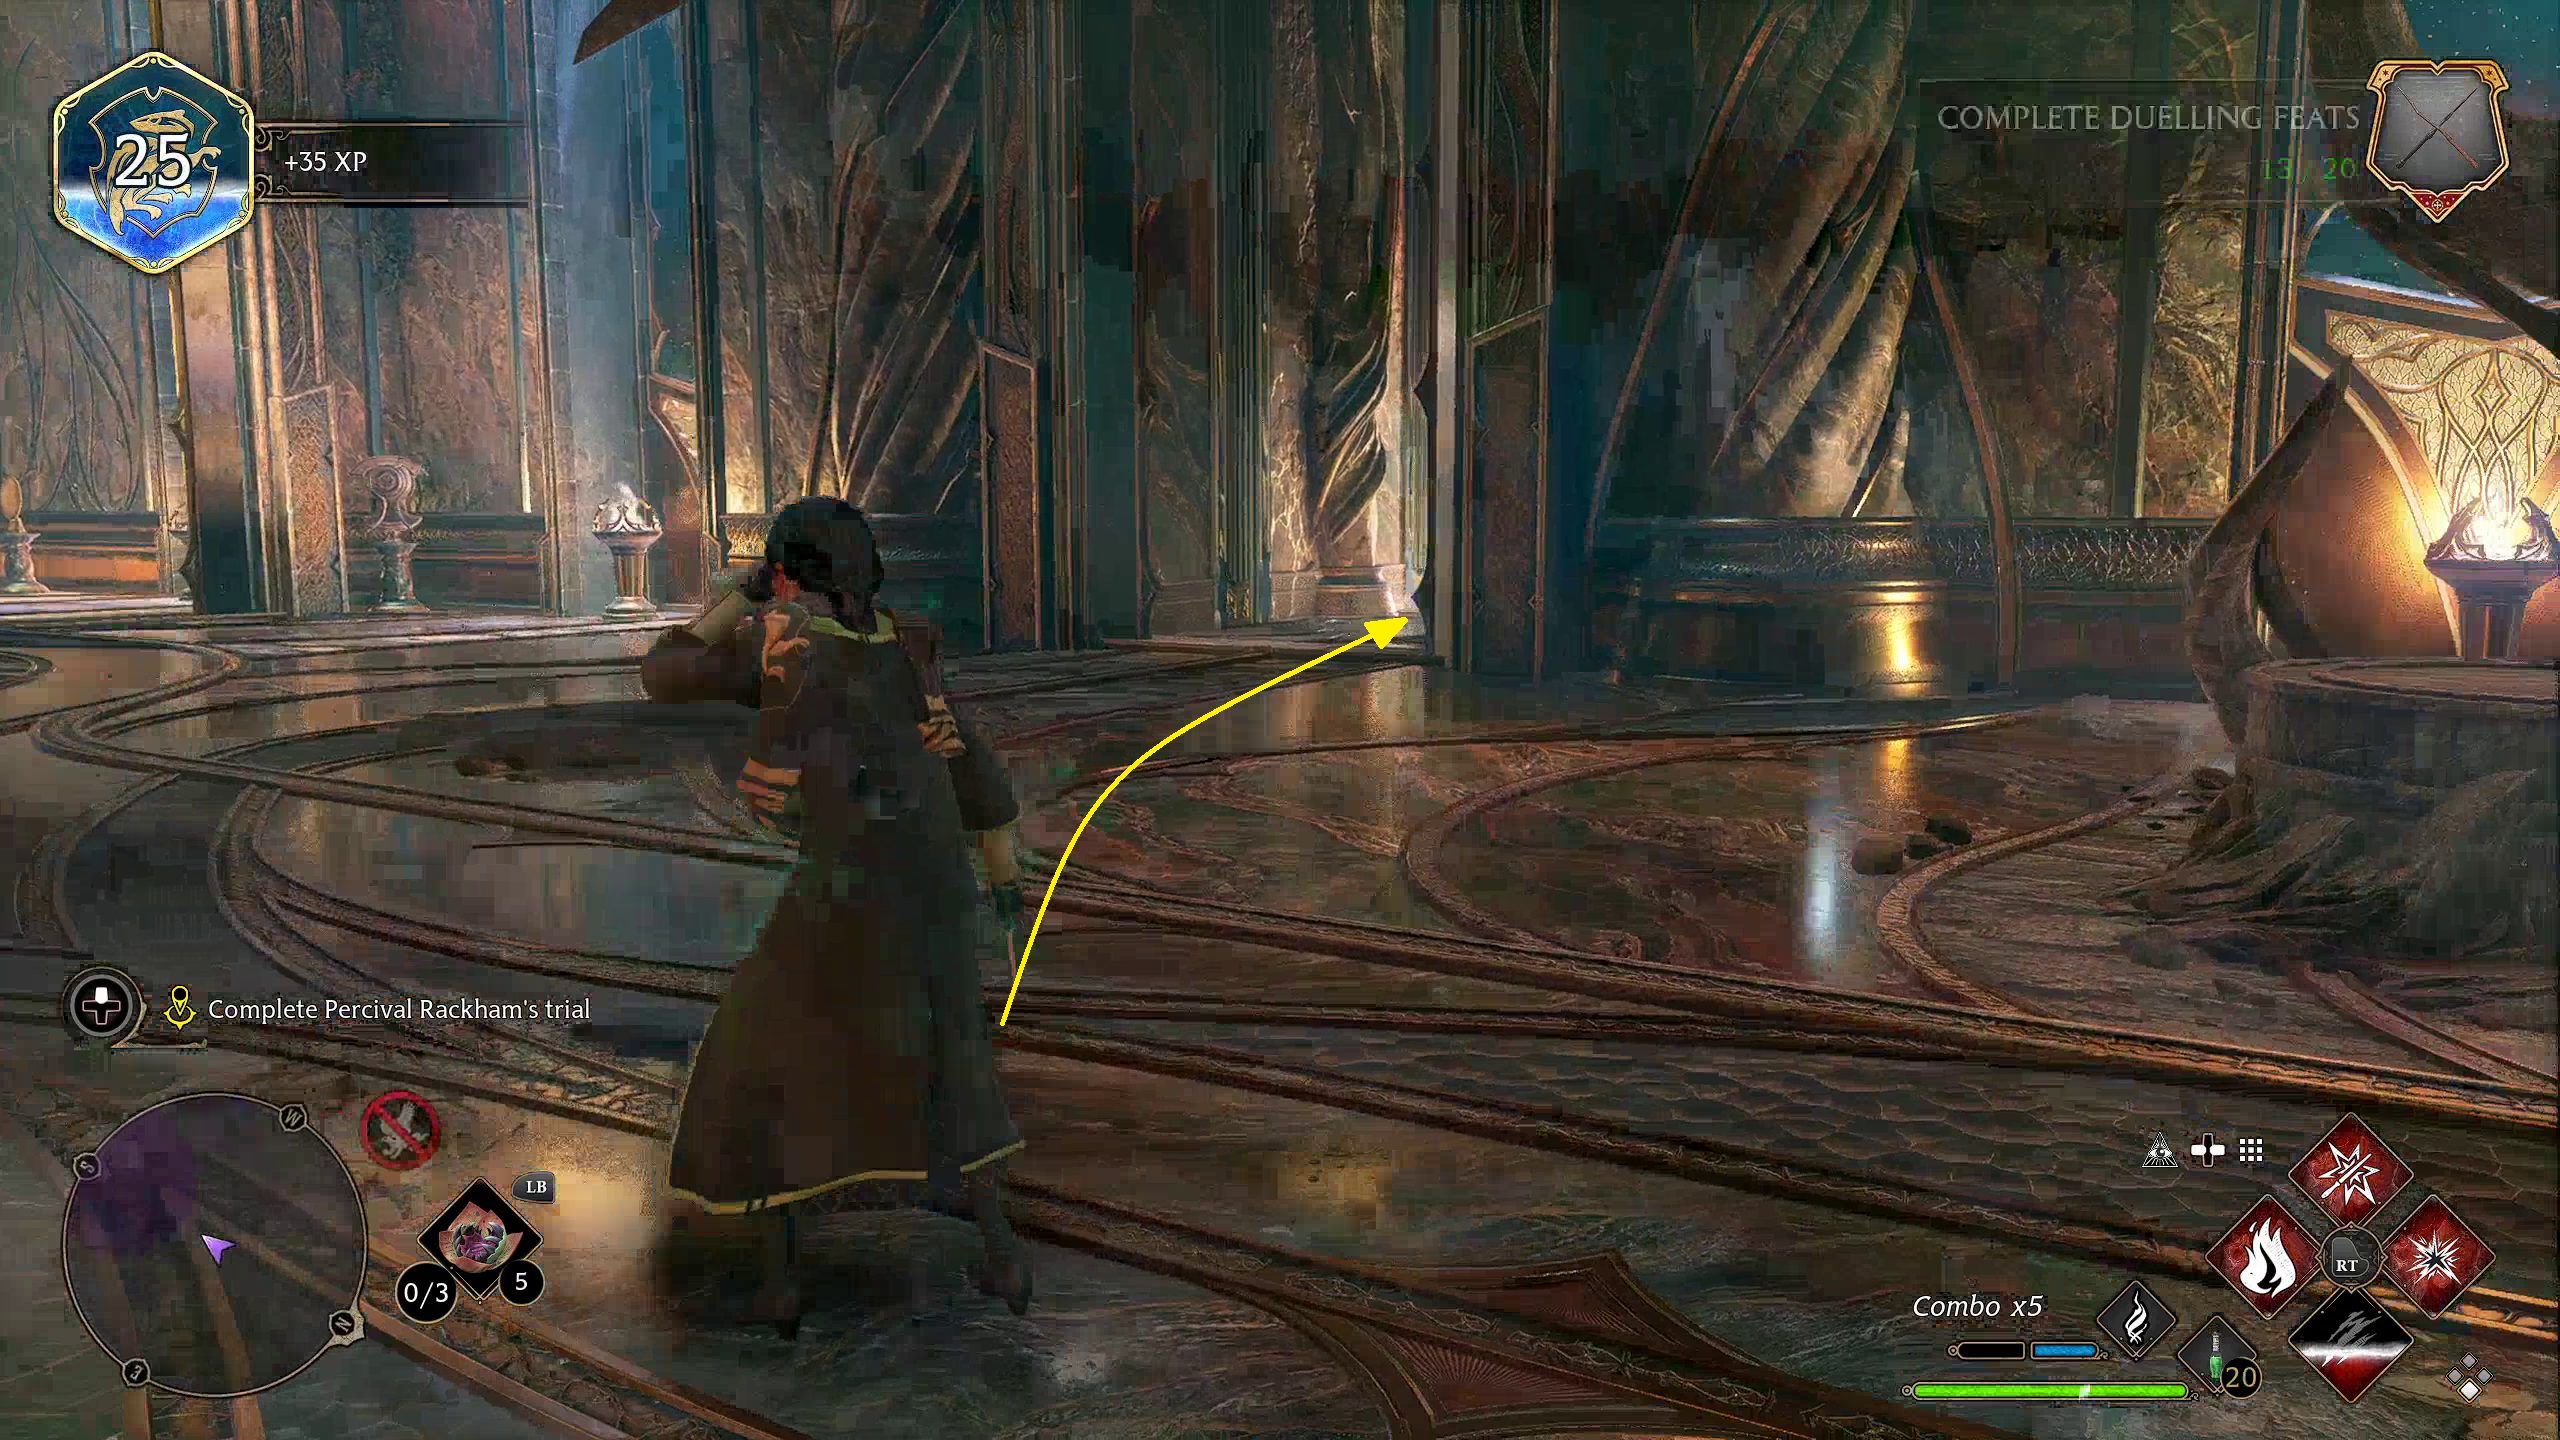
Once you’ve finished watching the Pensieve, it is time to return to the Map Chamber. And, lucky for you, there is an easy way out in the very same chamber you’re in right now (1). Go through it, and you’ll find yourself in the Map Chamber again. You can head toward Professor Fig (2), where a cutscene will play. Once it is done, you’ll be able to speak to the portrait of Charles Rookwood (3), who will tell you to wait while they determine what to do next.
After this, time will progress. When you regain control of your character, it will be spring, and you will have completed Percival Rackham’s Trial.
You’ll have plenty to do in and around Hogwarts now that Fall is upon you, as many new missions will open up with this changing of the seasons.
Graves is an avid writer, web designer, and gamer, with more ideas than he could hope to achieve in a lifetime. But, armed with a mug of coffee and an overactive imagination, he'll try. When he isn't working on a creative project, he is painting miniatures, reading cheesy sci-fi novels, or making music.


