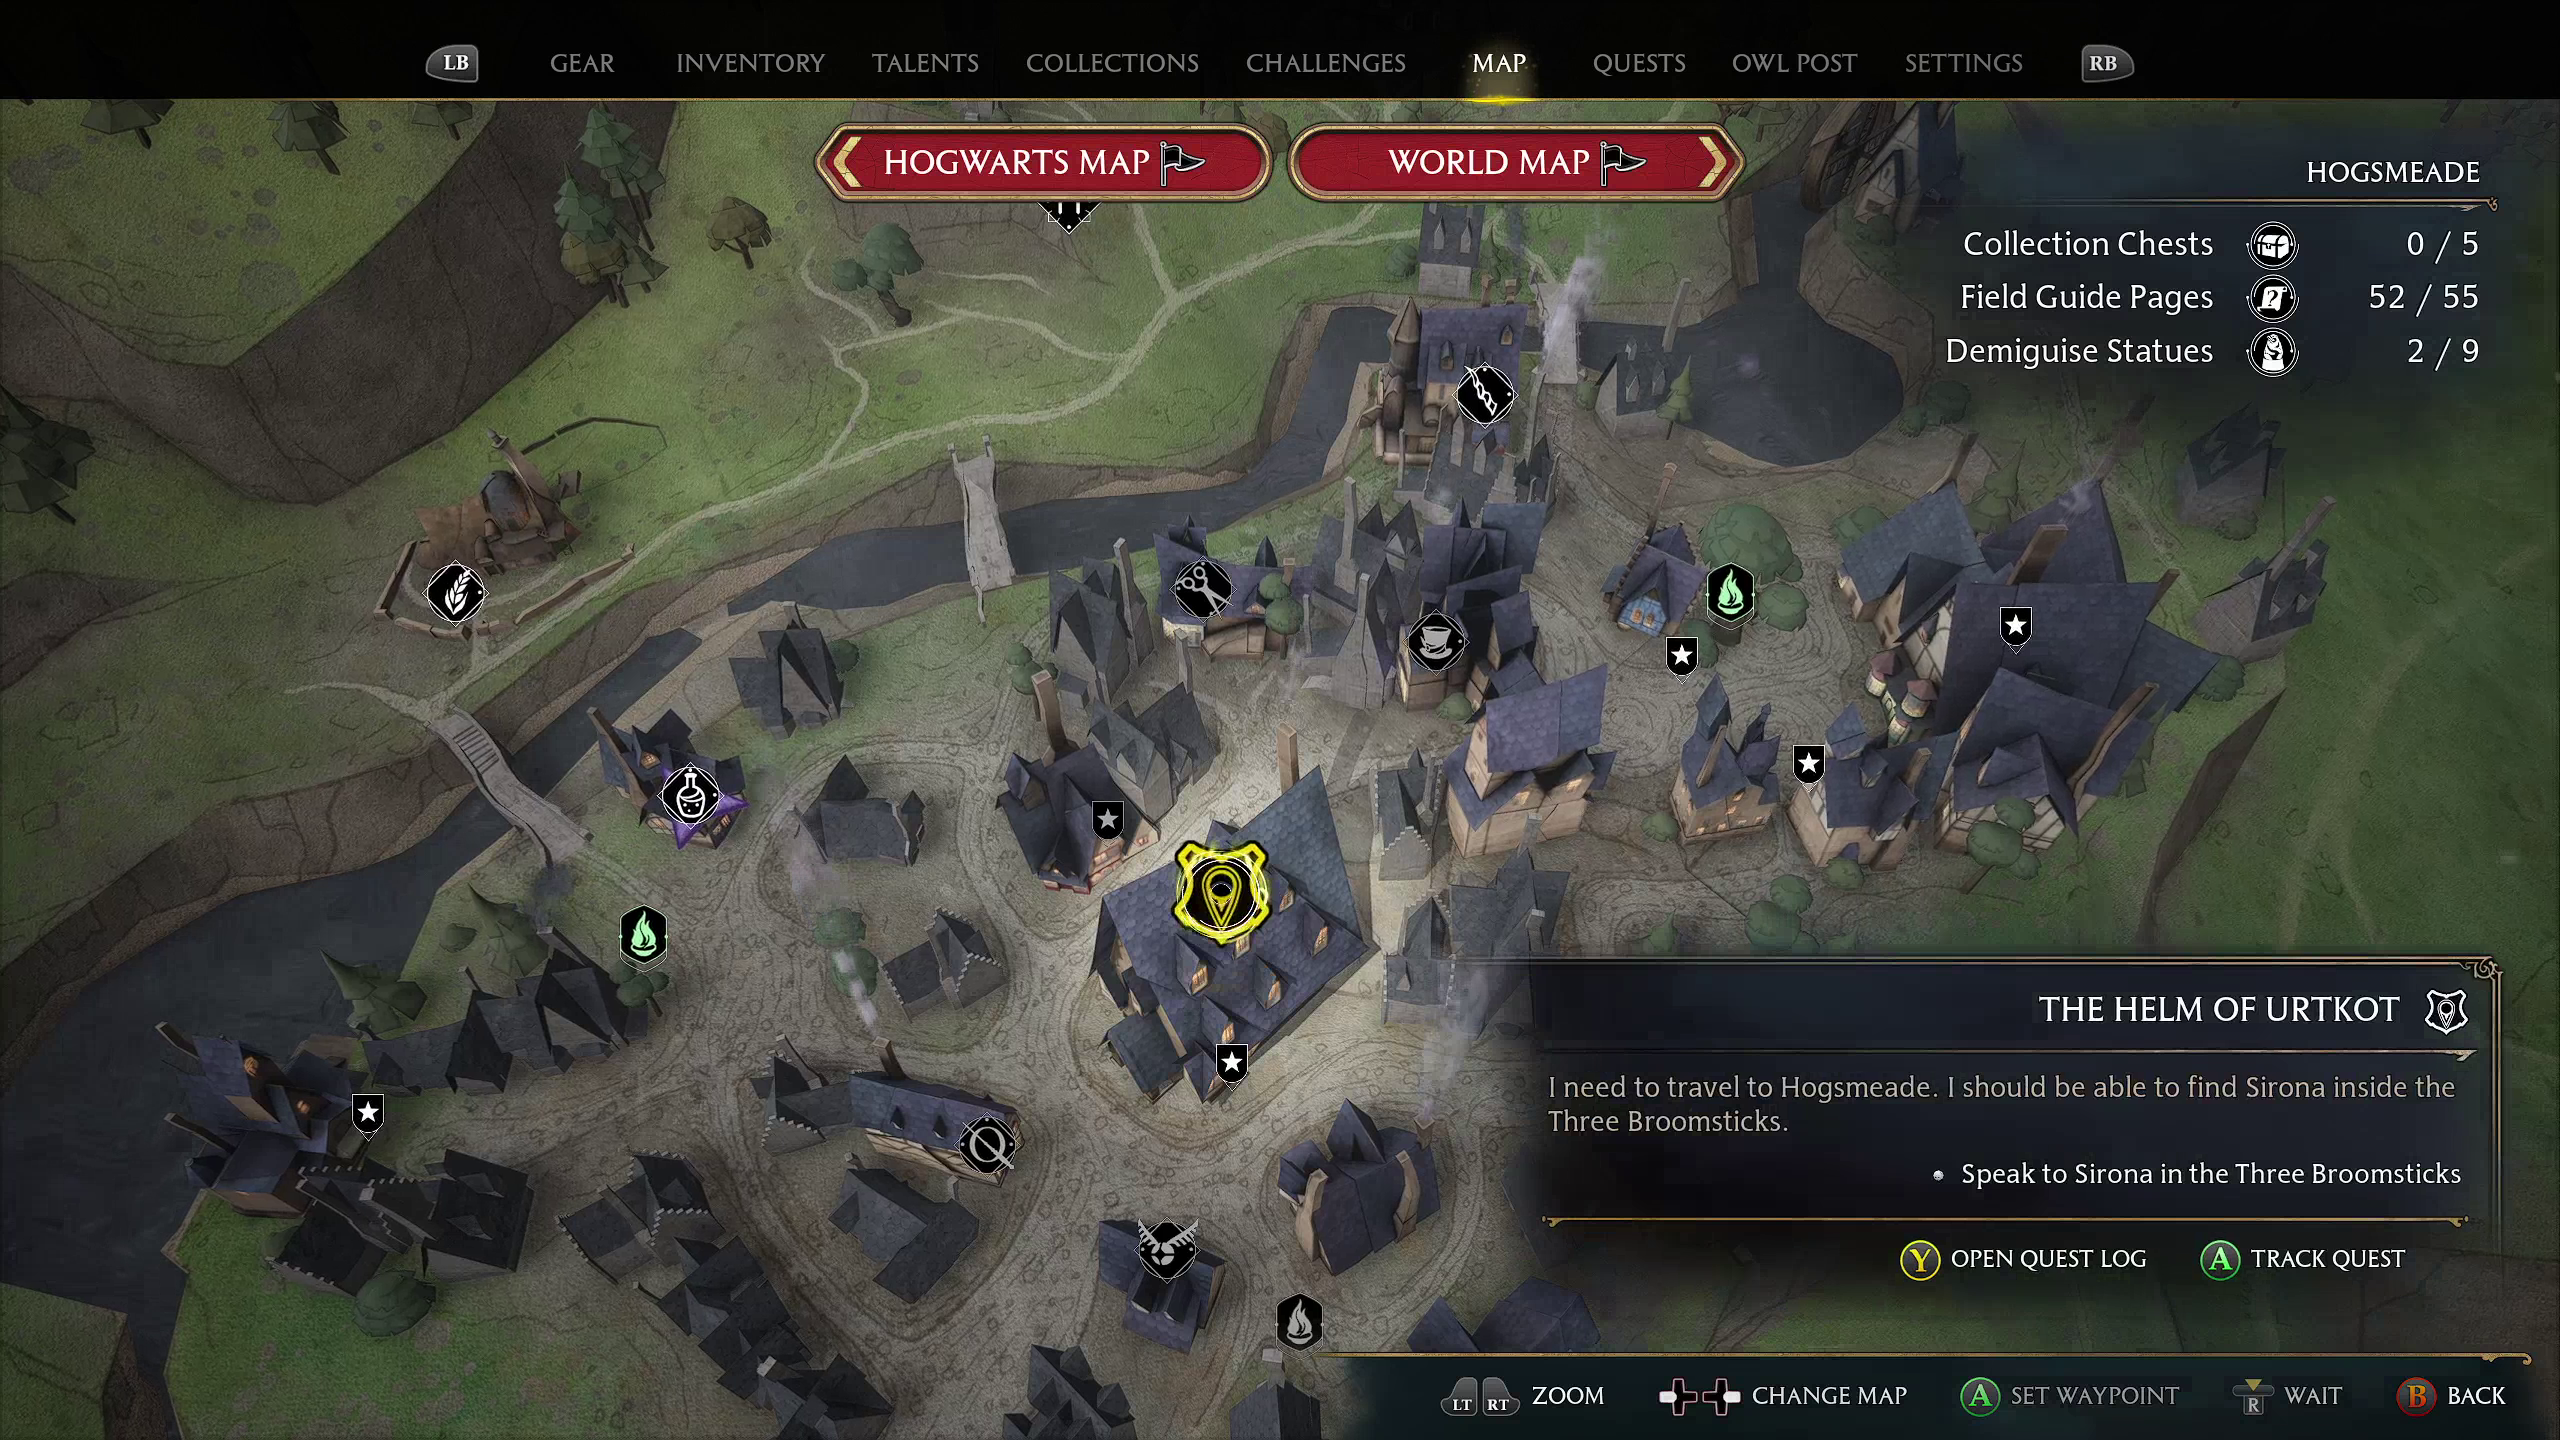
While you wait to learn about the next trial, there is information you should gather about Ranrok. And, lucky for you, you know someone who might have information: Lodgok, a goblin who might’ve once had ties to Ranrok’s rebellion. You last saw him when you went to the Three Broomsticks, so your best bet is to ask Sirona Ryan where to find him.
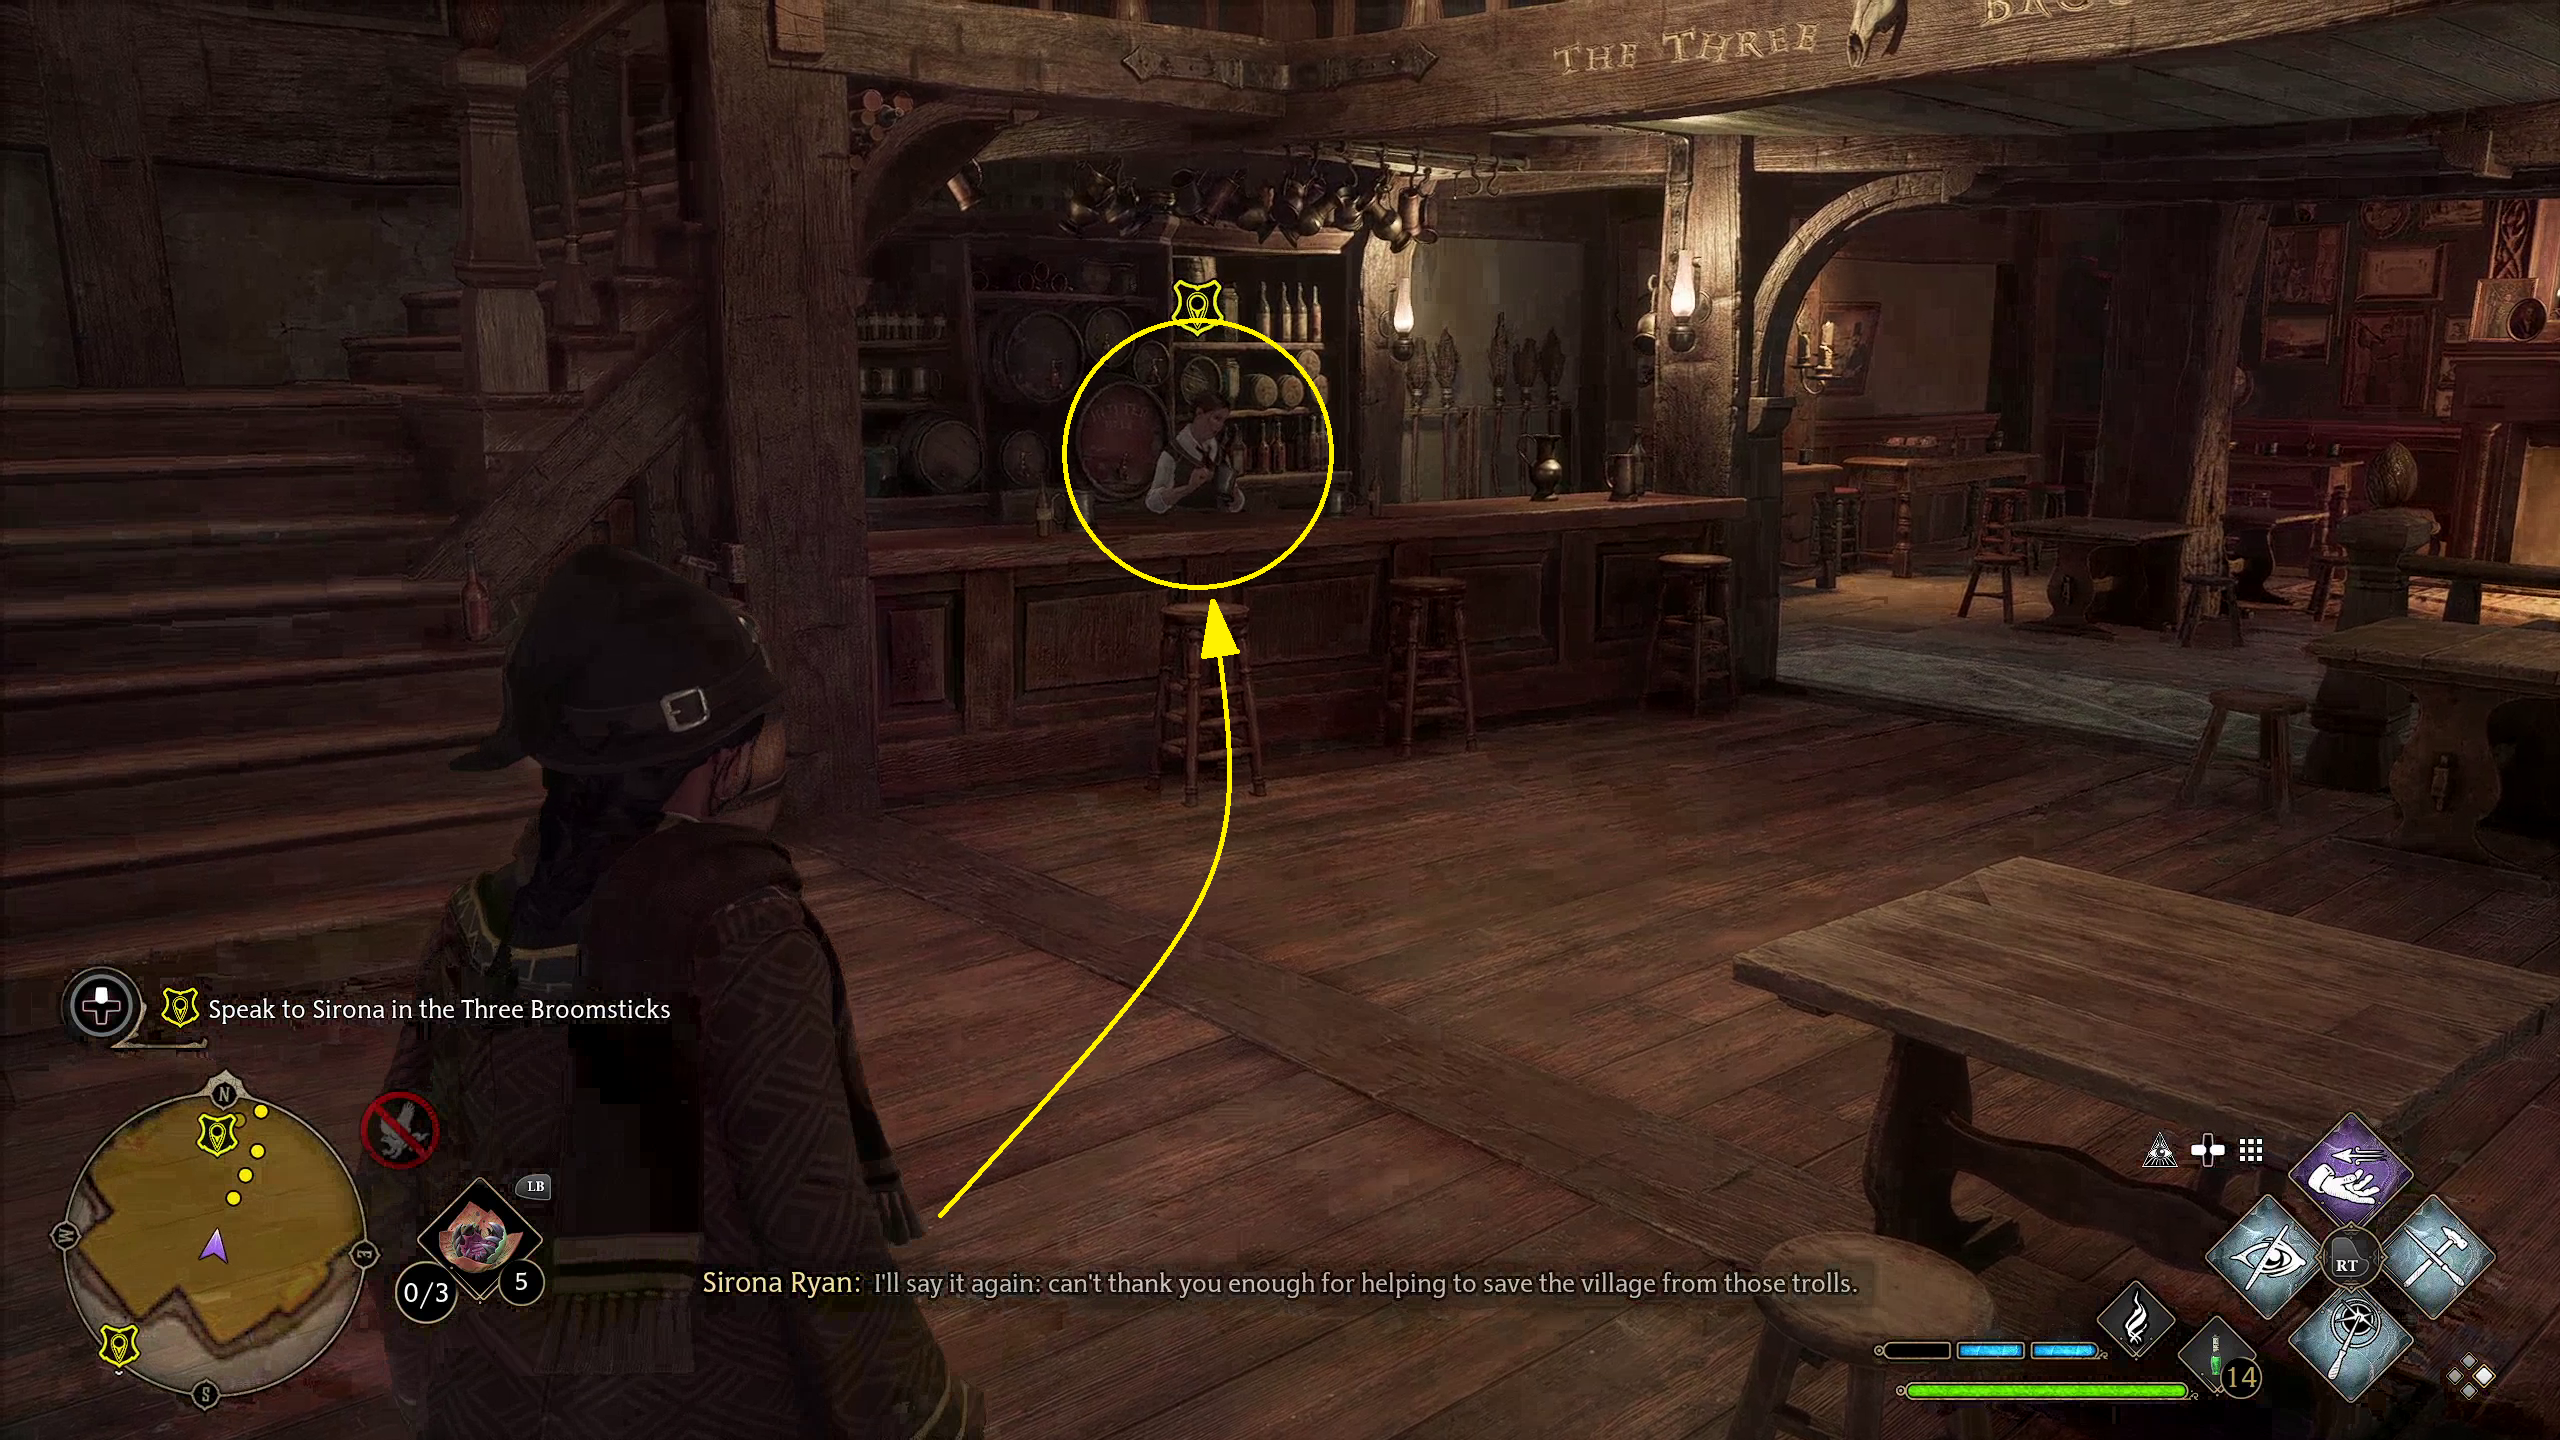
To begin with, you’ll need to speak to Sirona Ryan at the Three Broomsticks Tavern. Head to her and speak to her with /. As thanks for your help in Hogsmeade, she will happily tell you where to find Lodgok, who might know about Ranrok.
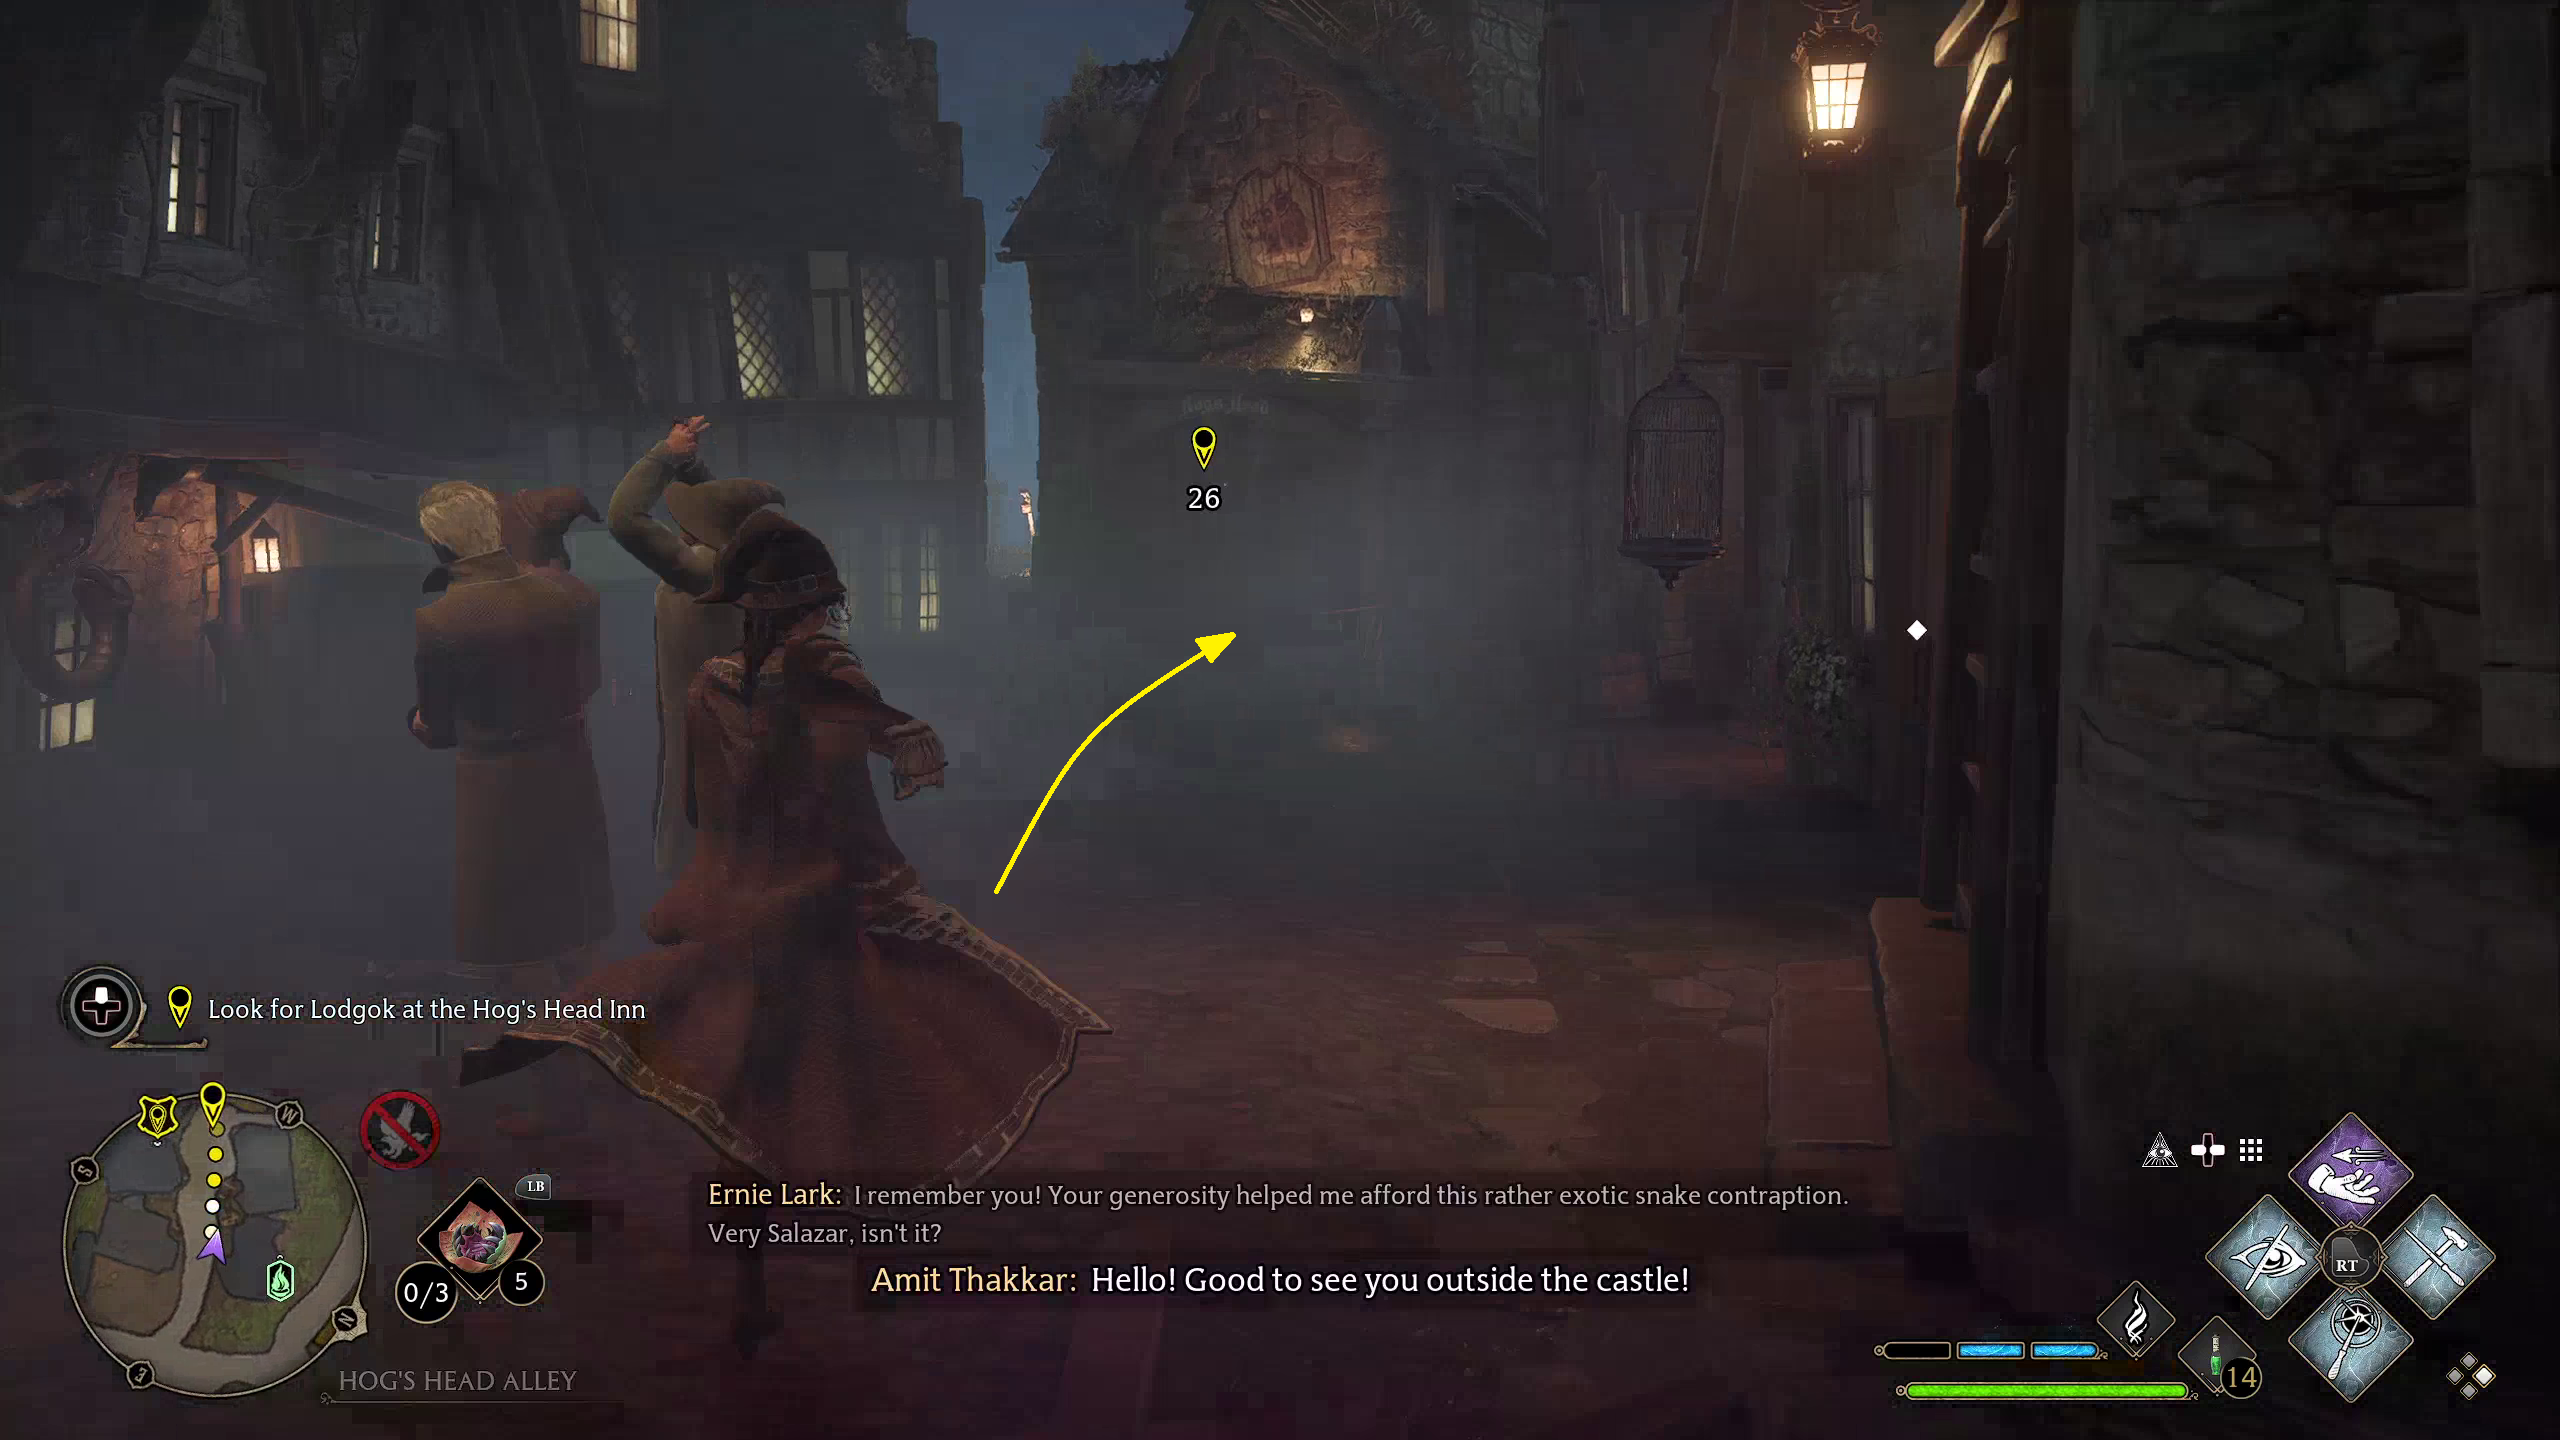
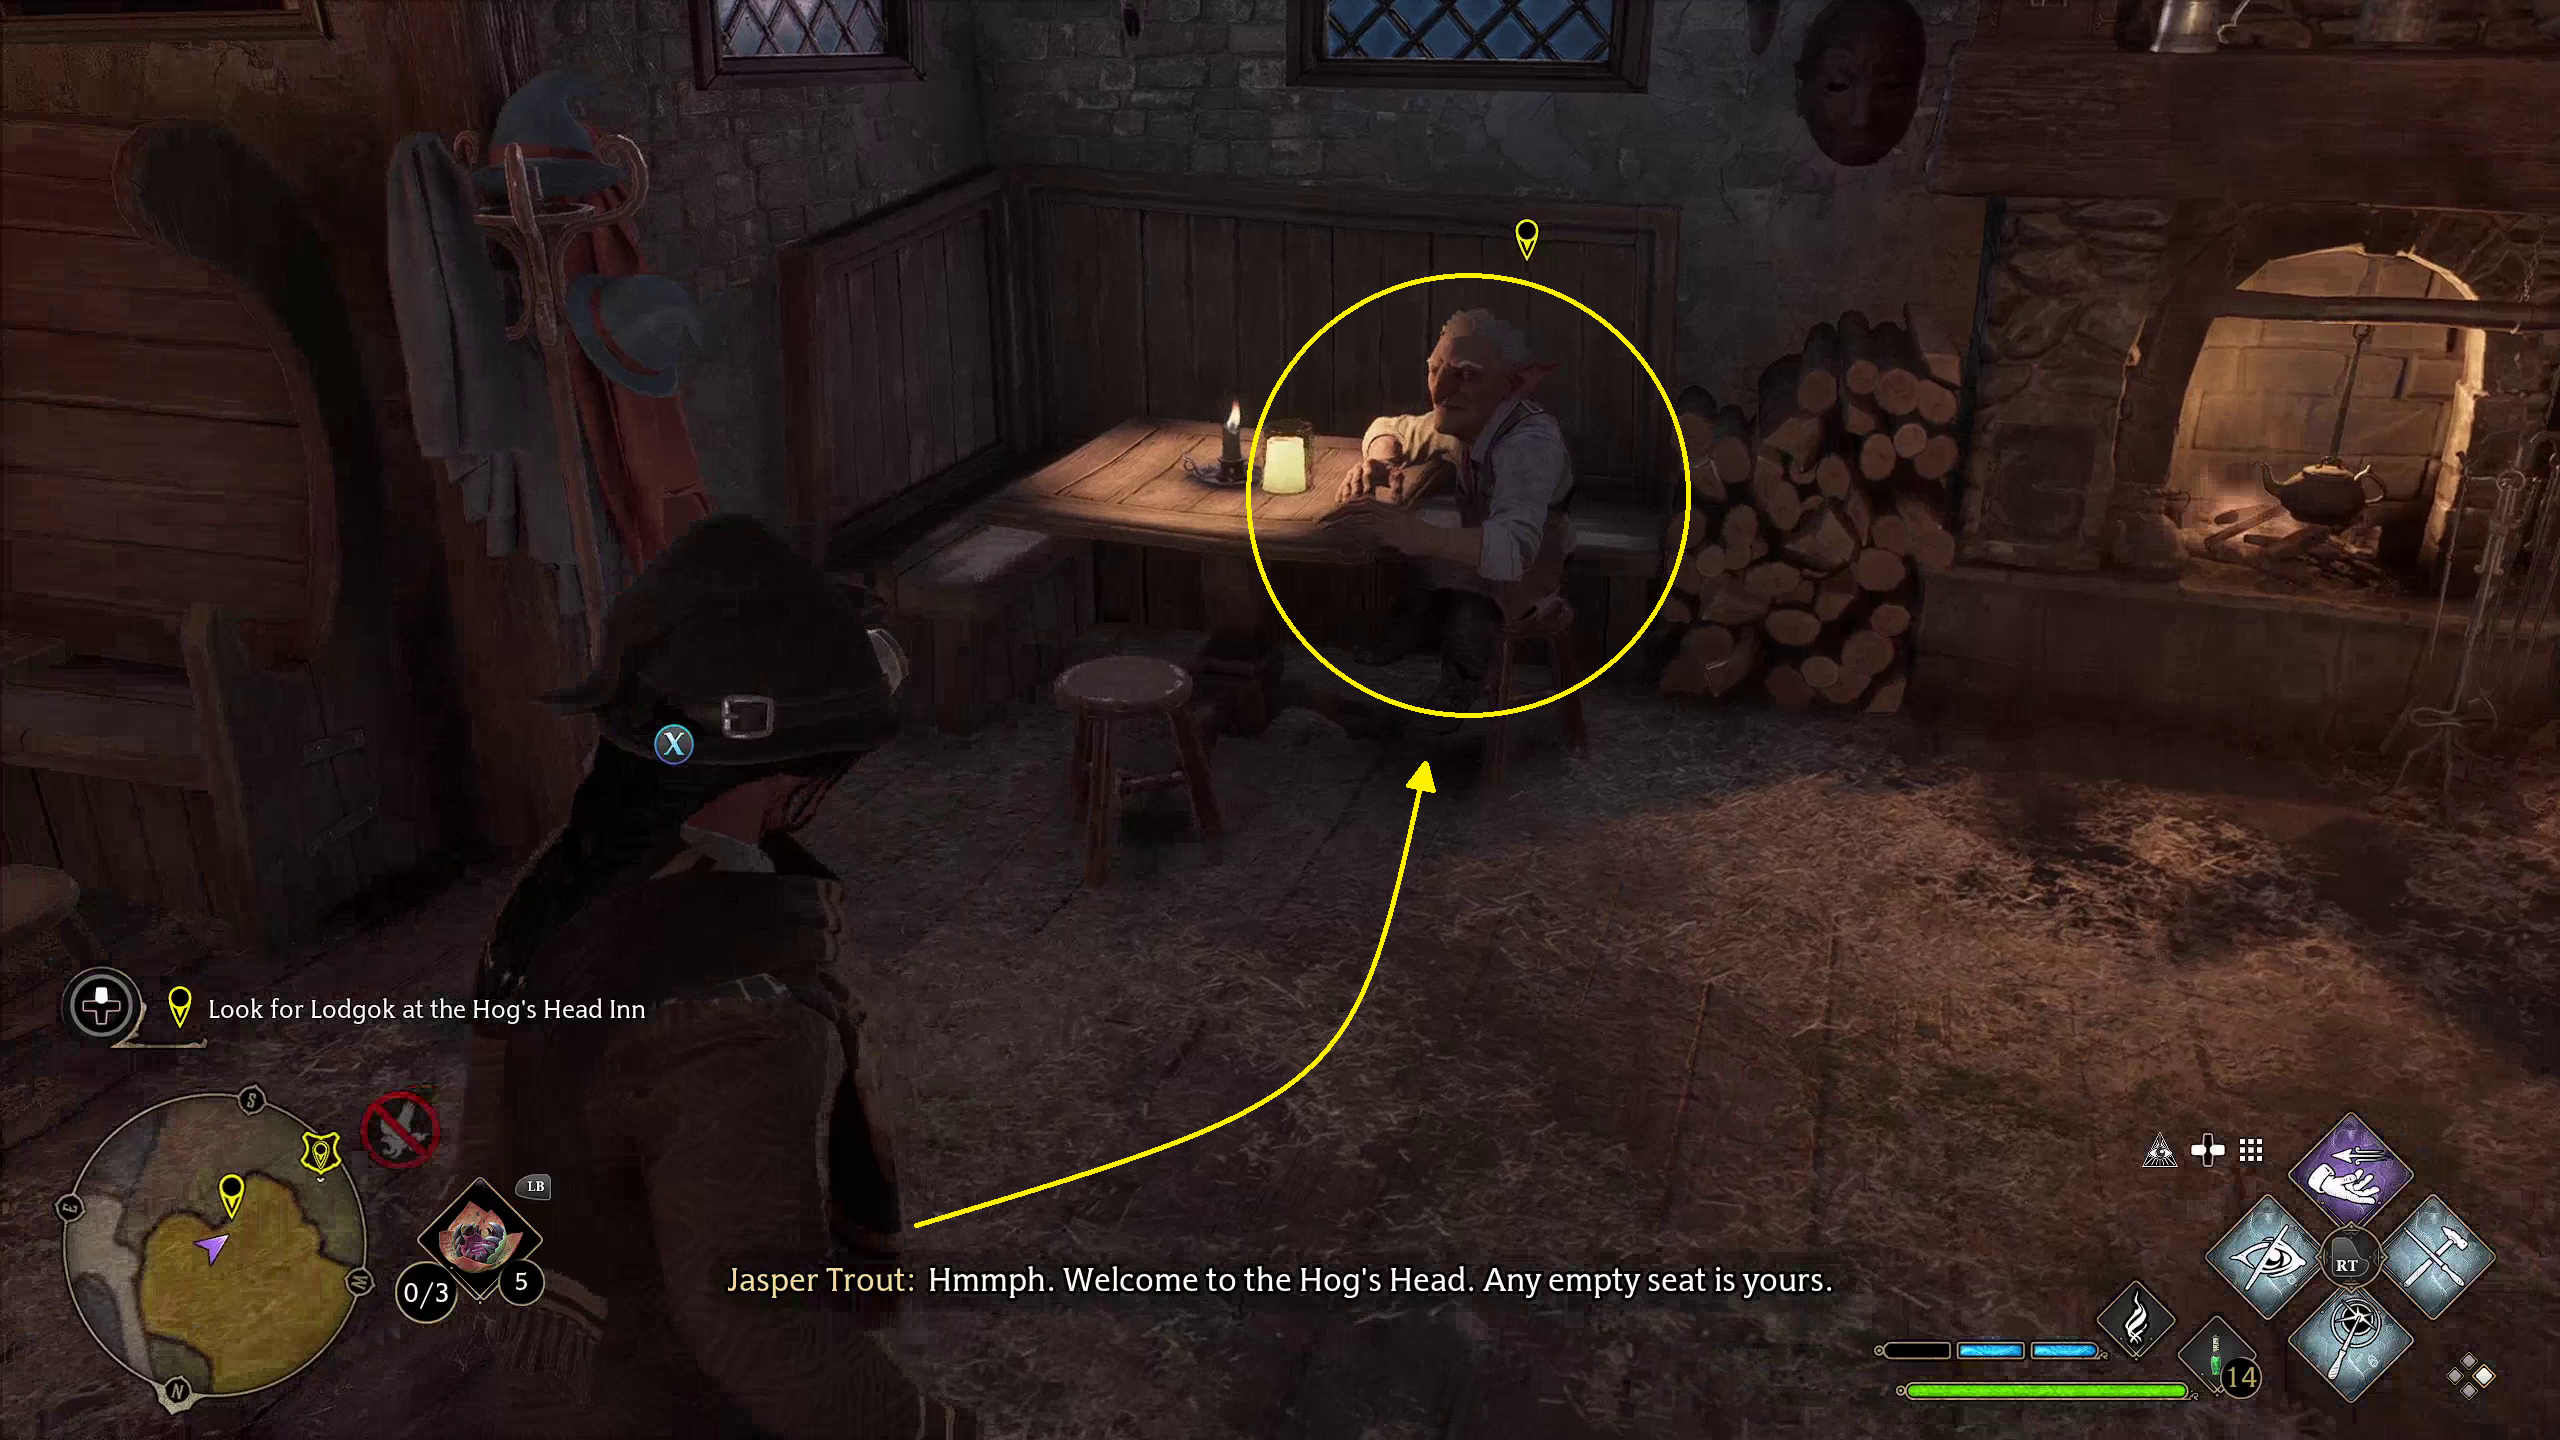
Look for Lodgok in the Hog’s Head Inn
After speaking to Sirona, you can head to the Hog’s Head Inn, at the edge of town. Lodgok will be in the corner inside, and you can speak to him with /. He will tell you that he used to be close with Ranrok, but that they had a falling out — presumably because of his friendship with wizards. However, he thinks that he might be able to get back in Ranrok’s circle, and therefor able to find out about his plans, if you are able to retrieve the Helm of Urtkot, a long-lost Goblin artifact.
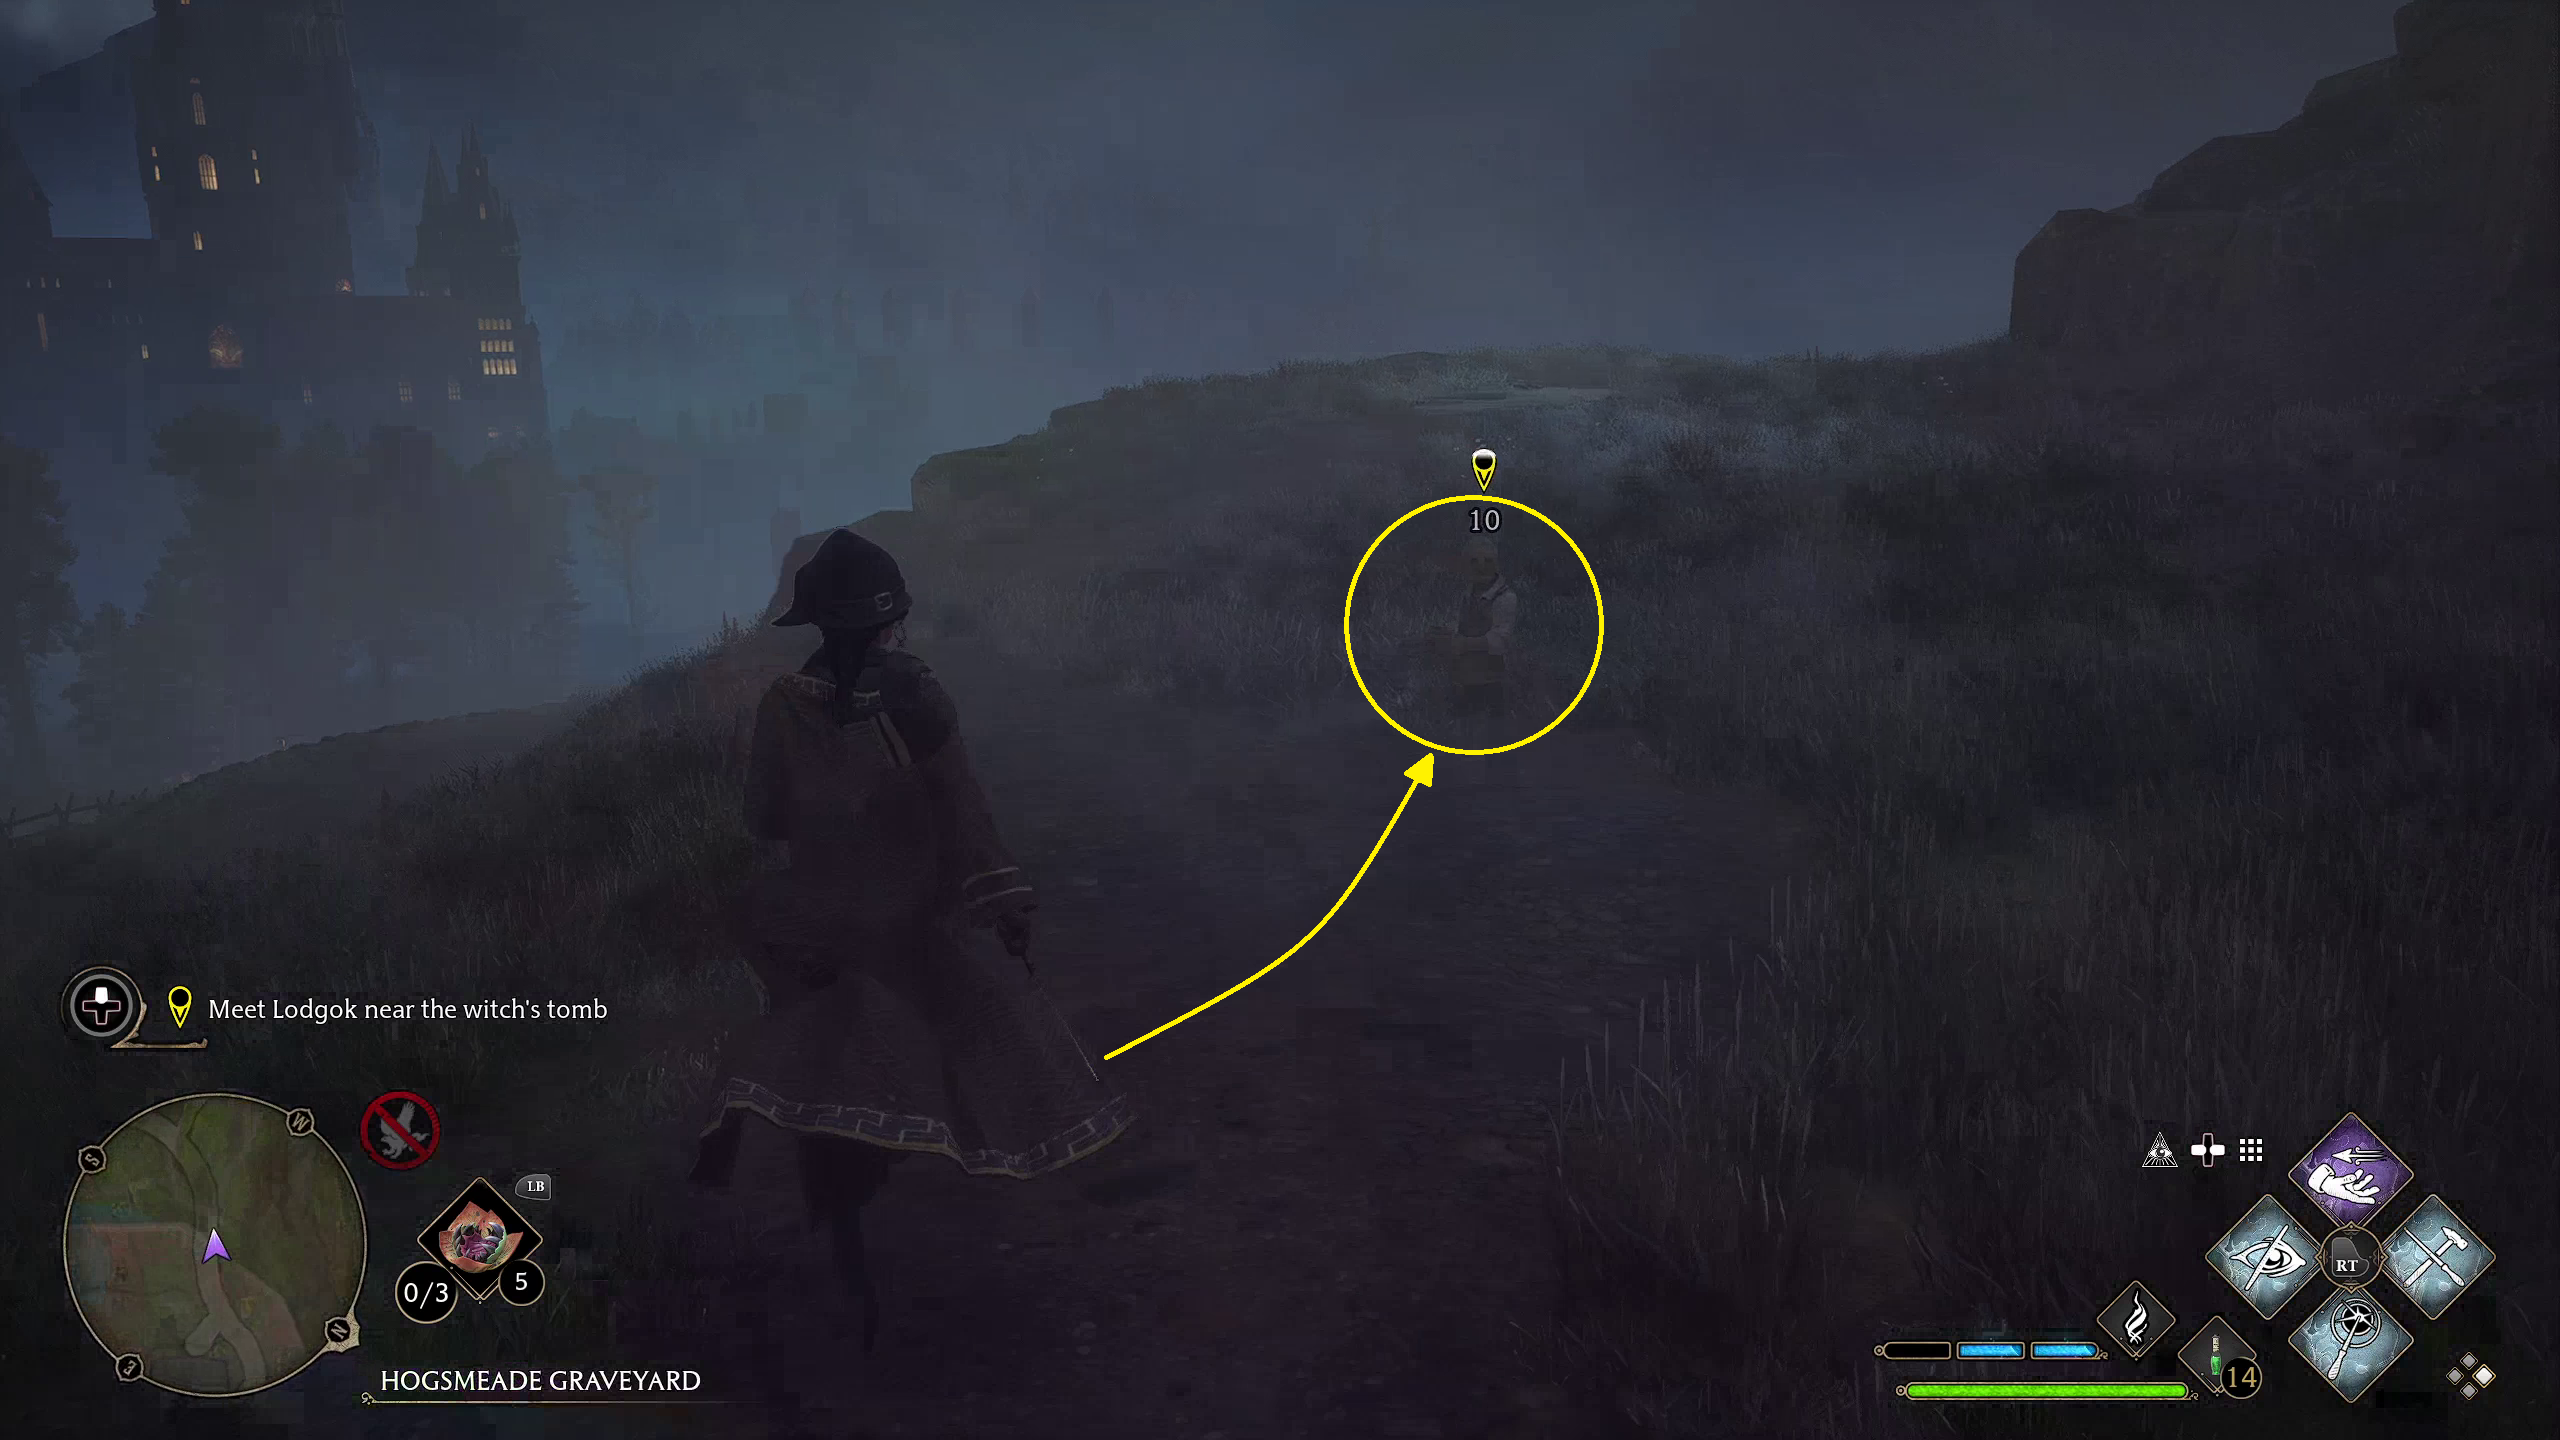
Meet Lodgok near the Witch’s Tomb
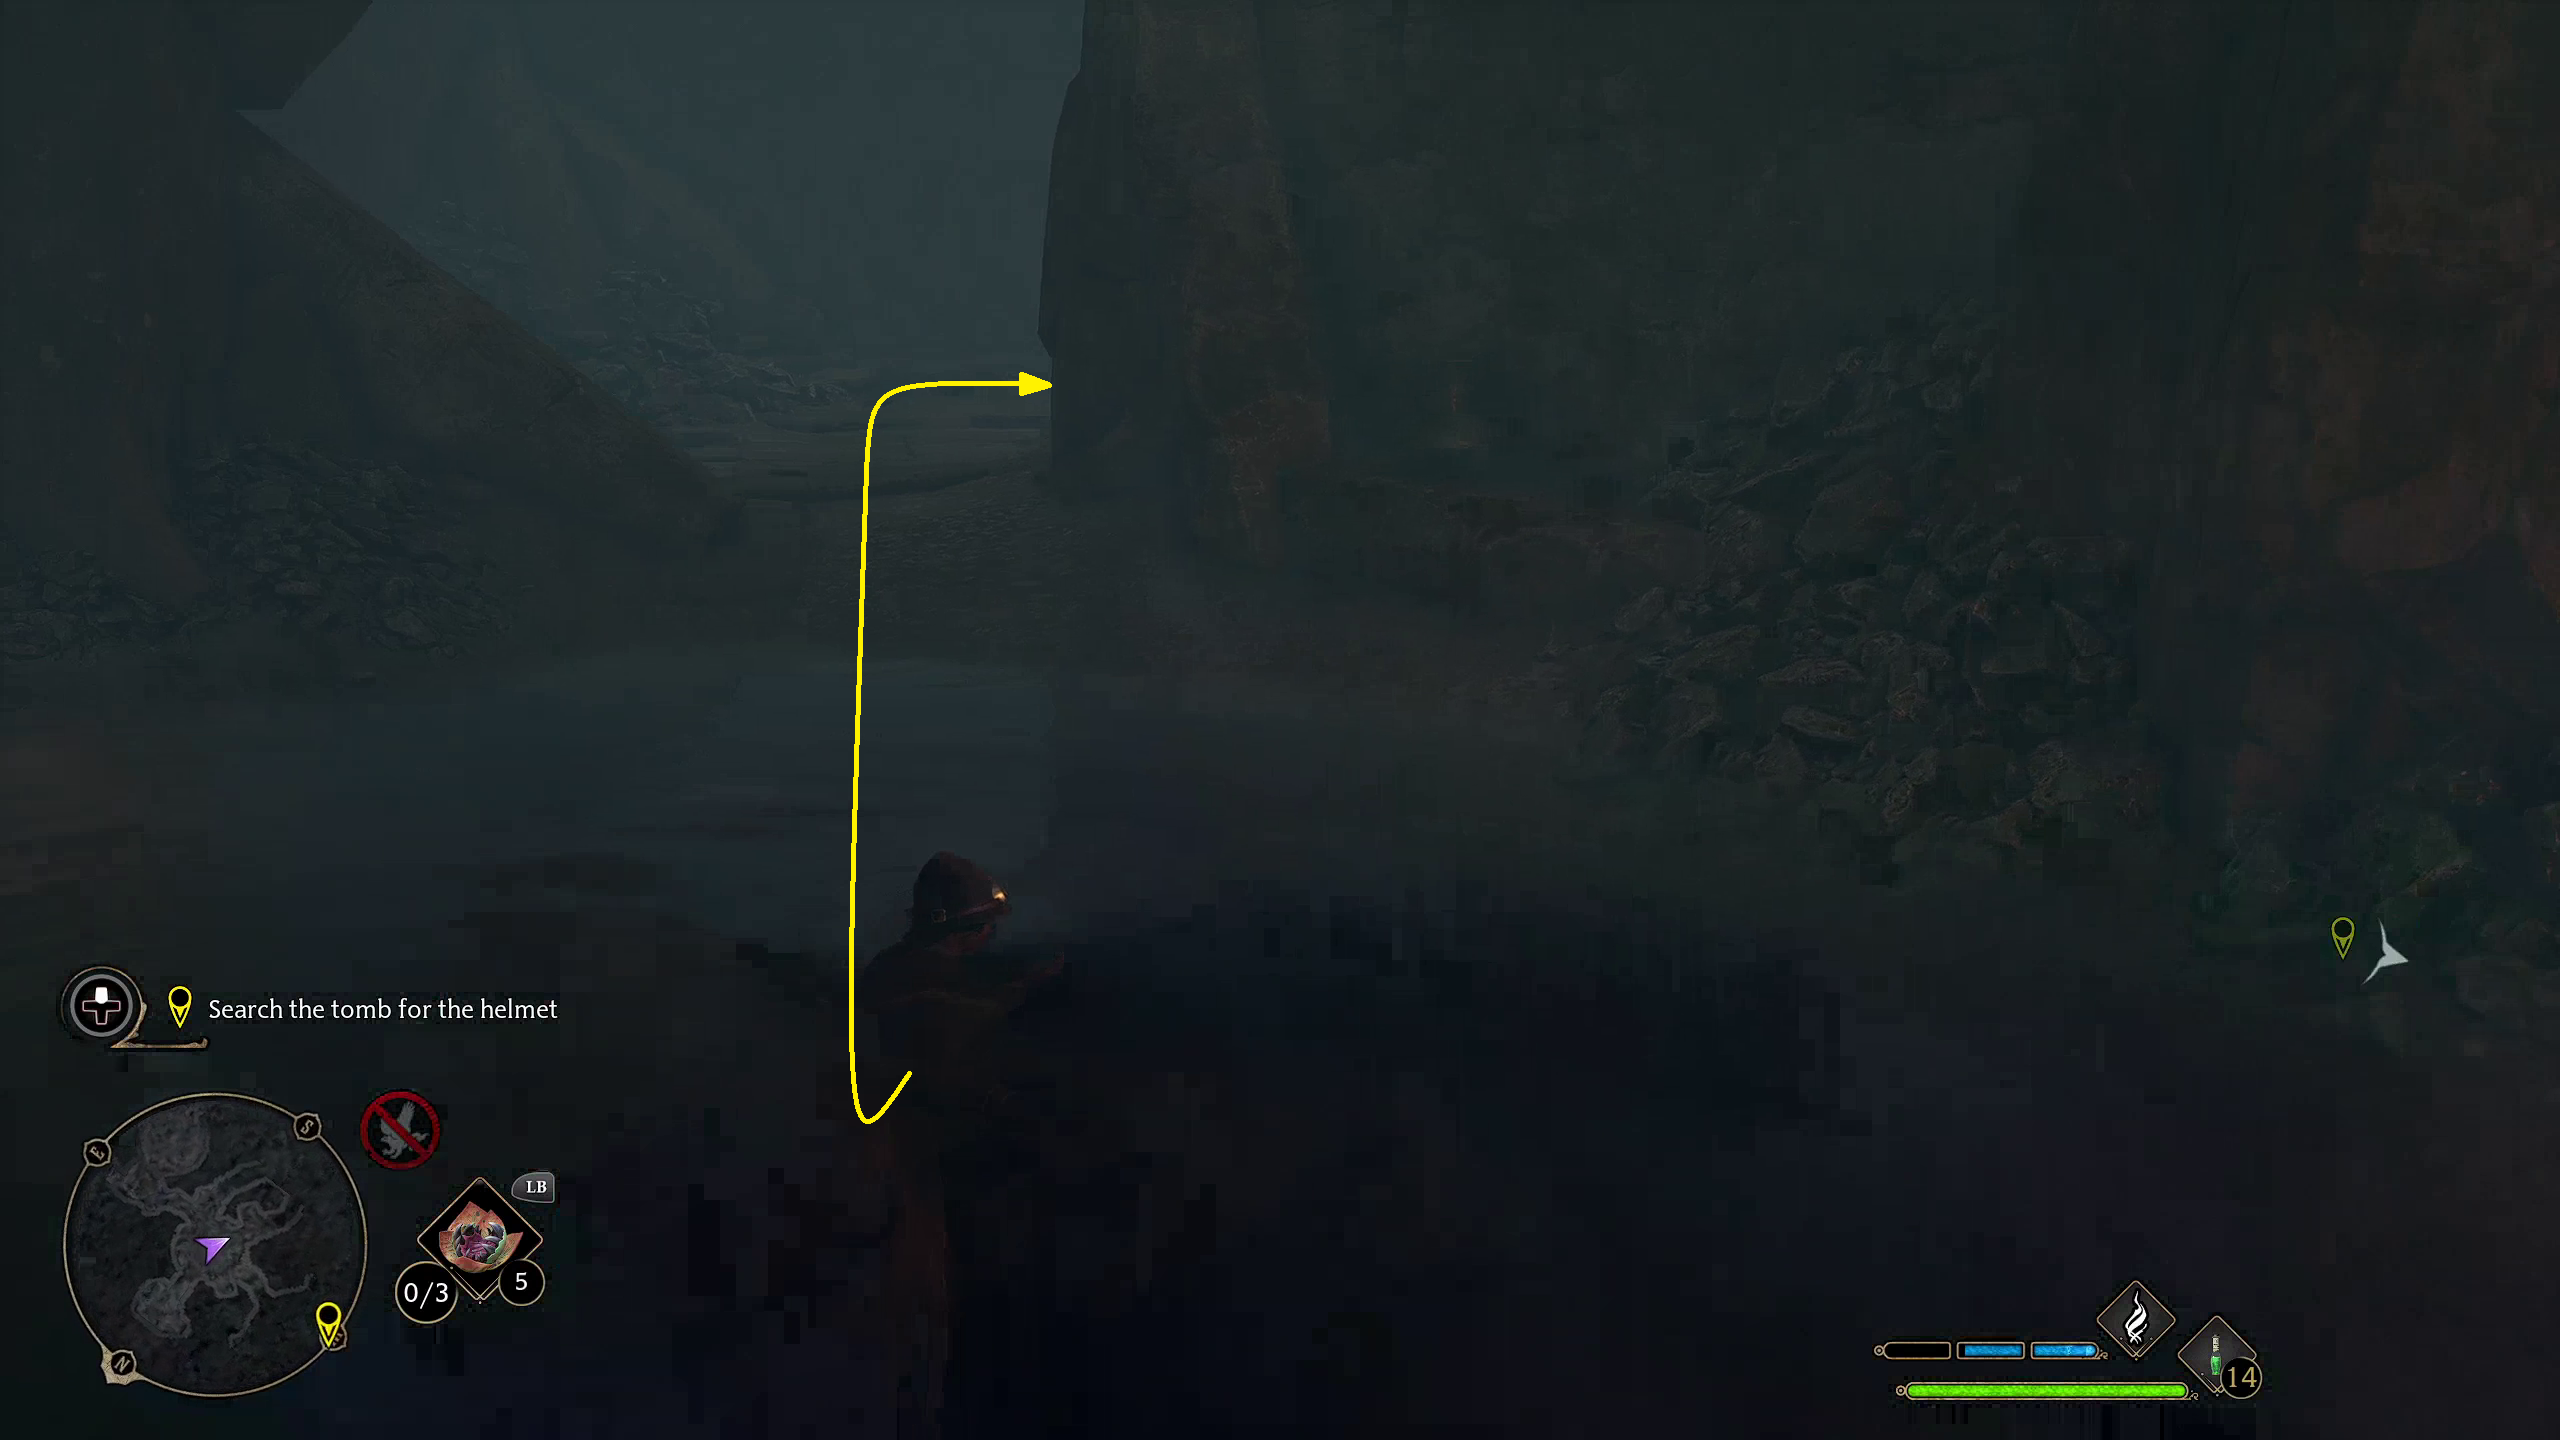
At the end of your conversation, Lodgok will agree to meet you at the edge of Hogsmeade, where he will lead you to the tomb where the Helm has been buried. When you get close to him, he will start heading there. Just follow him.
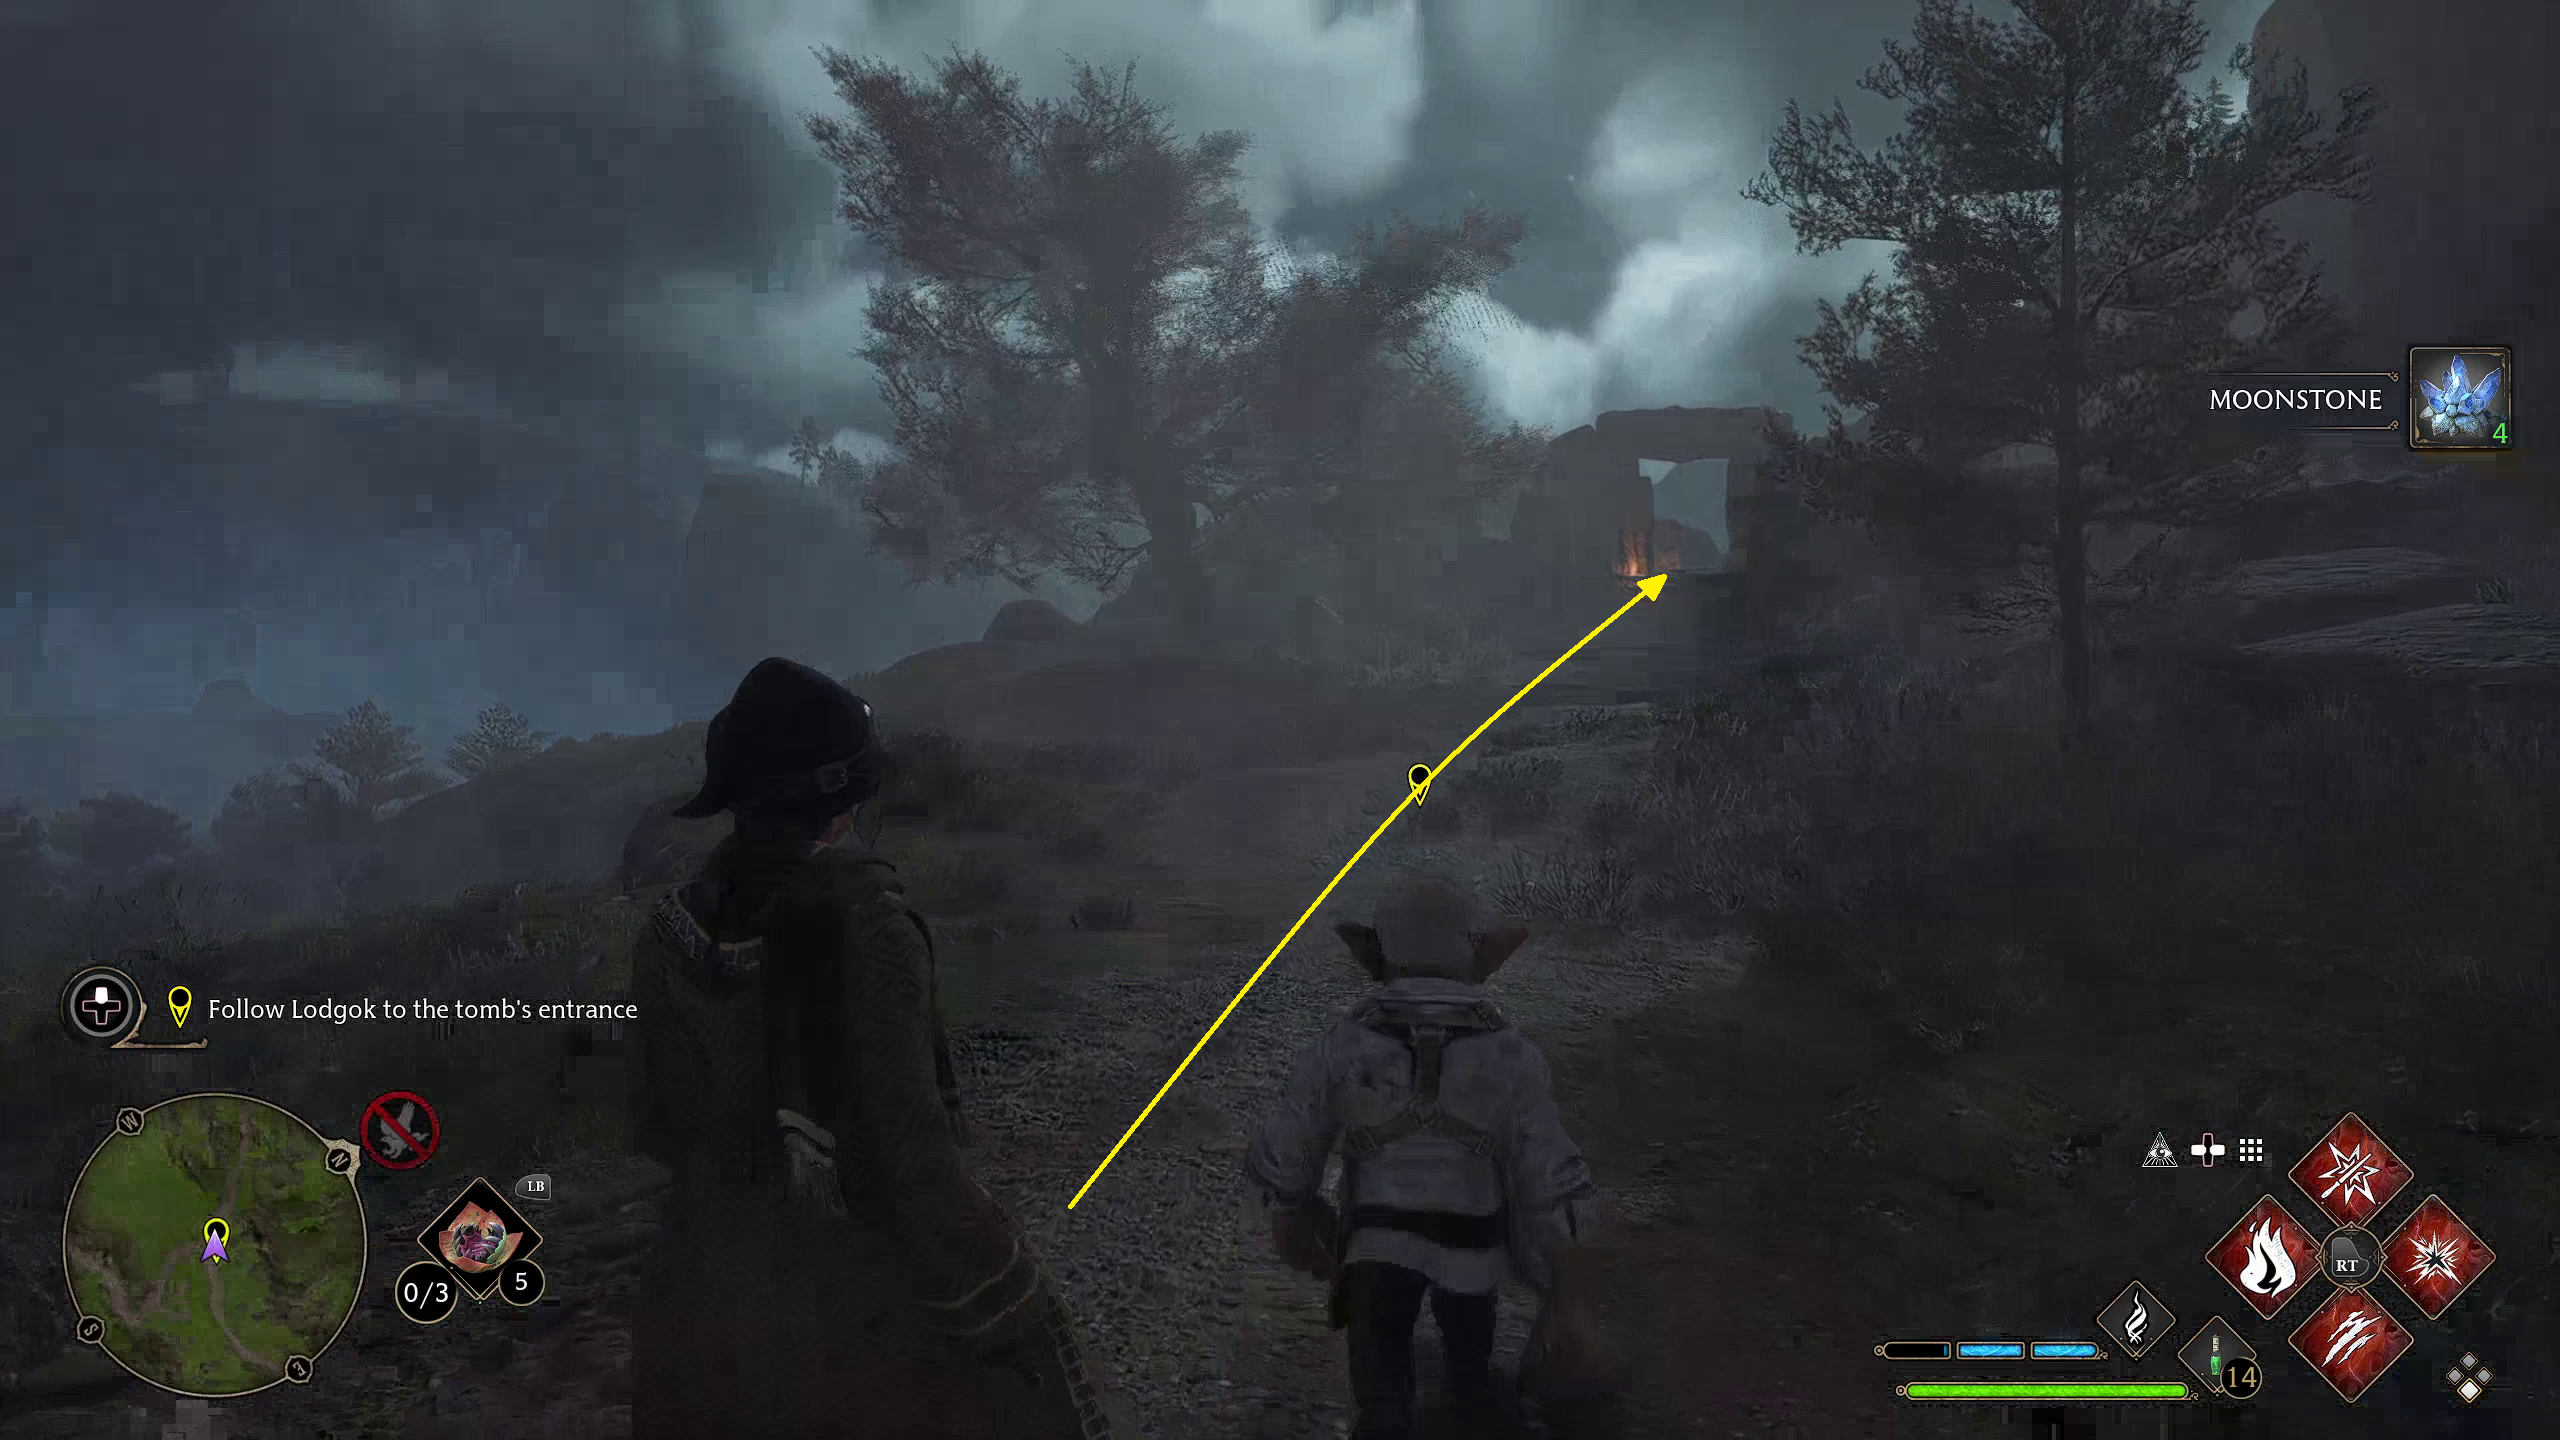
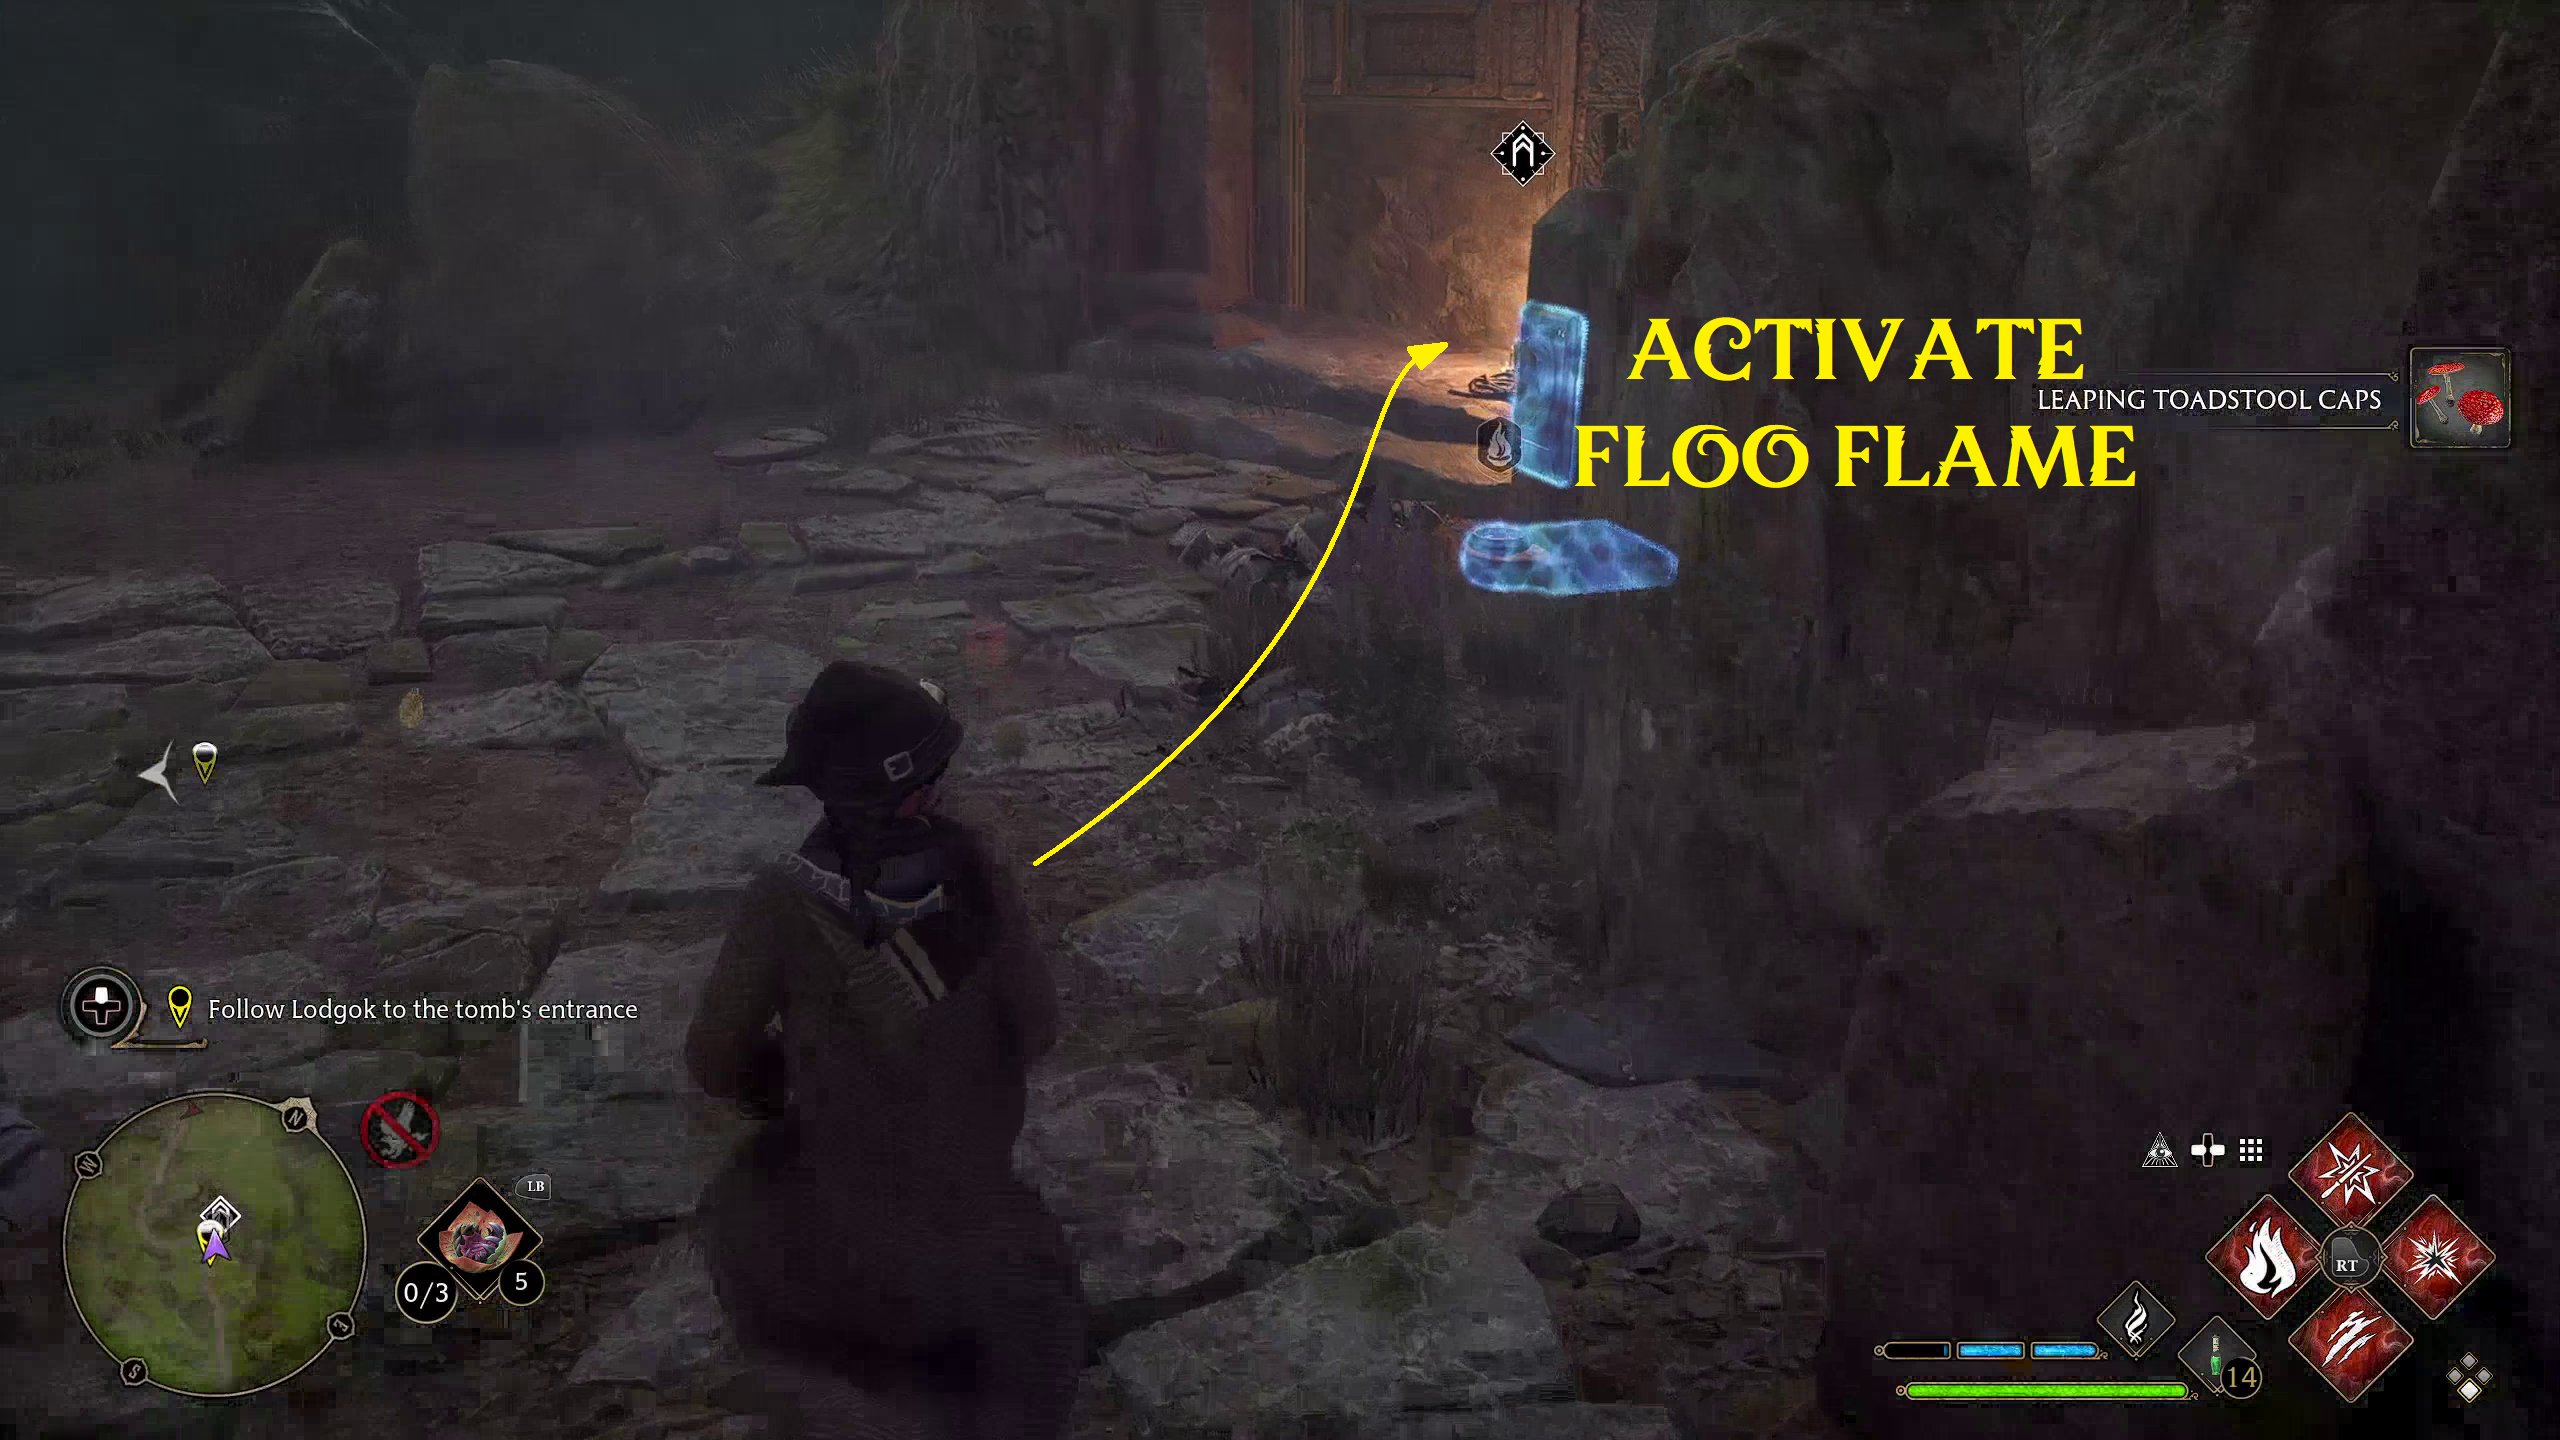
Once you get to the tomb, make sure to pass close enough to the Floo Flame to activate it, so you can fast travel back here later. After you get the Floo Flame, Lodgok will tell you that he won’t go any further, then will ask you to continue. Head into the Collector’s Cave with /, and prepare for some puzzles.
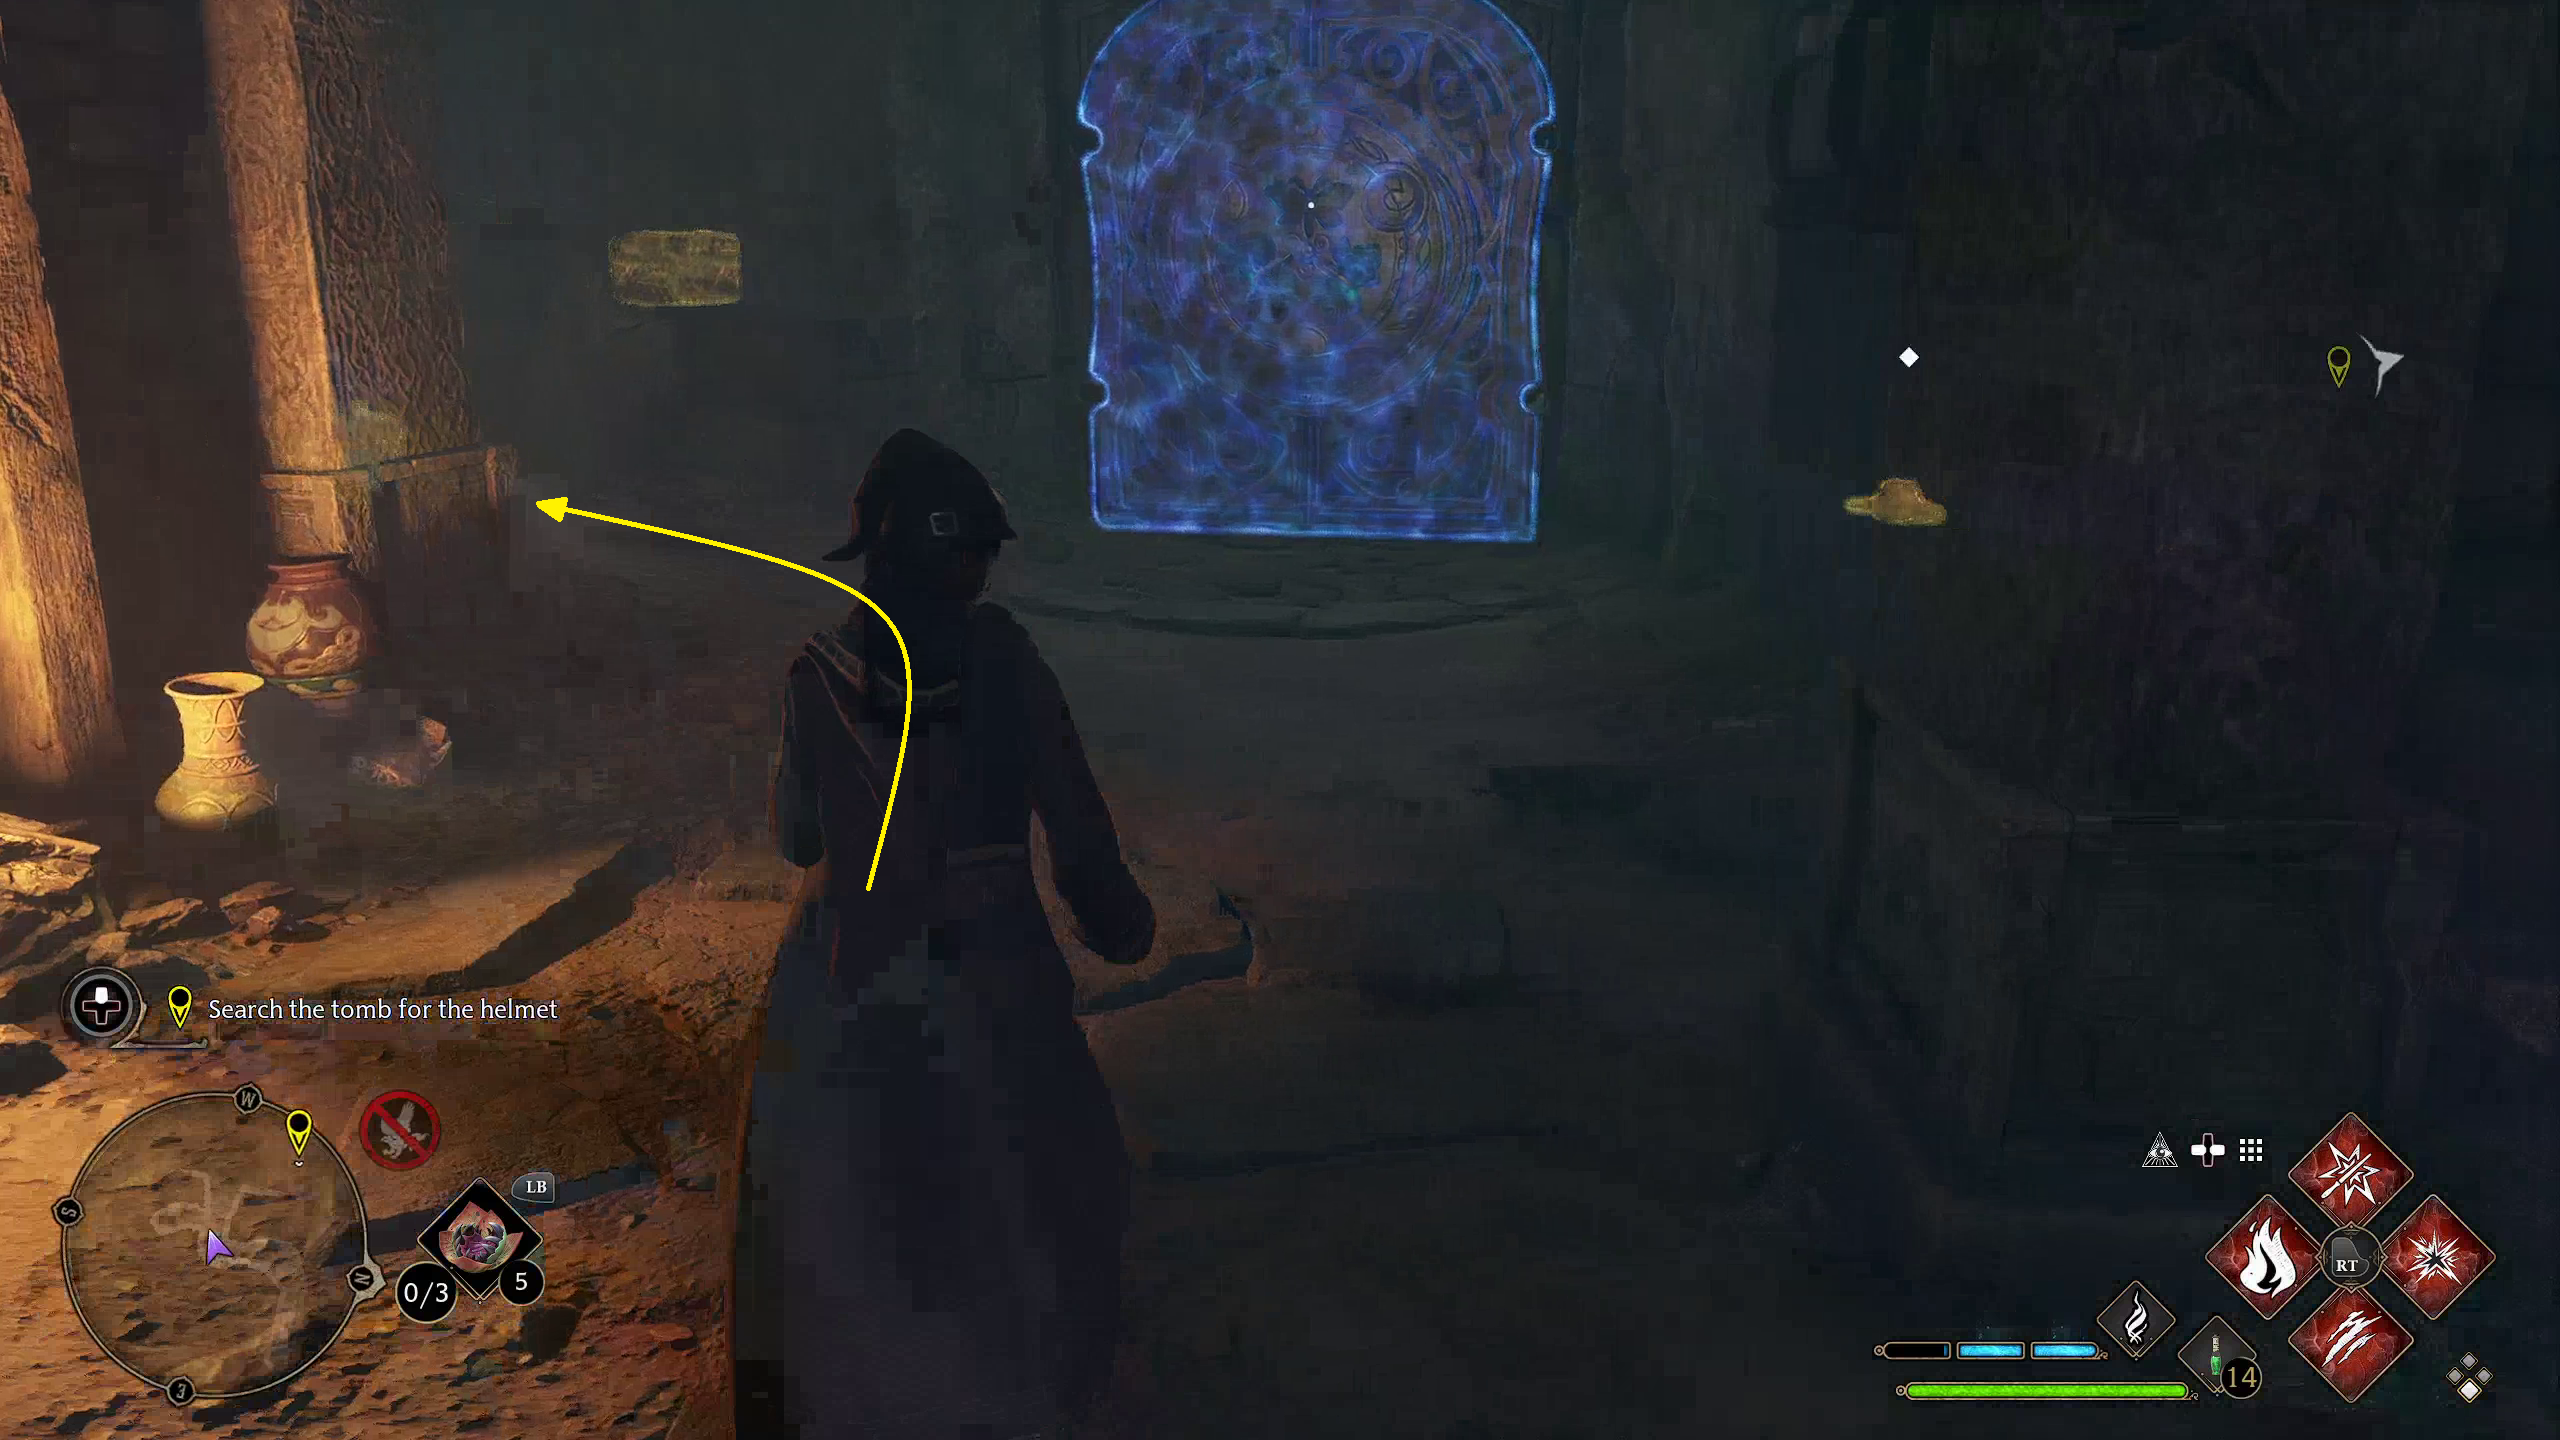
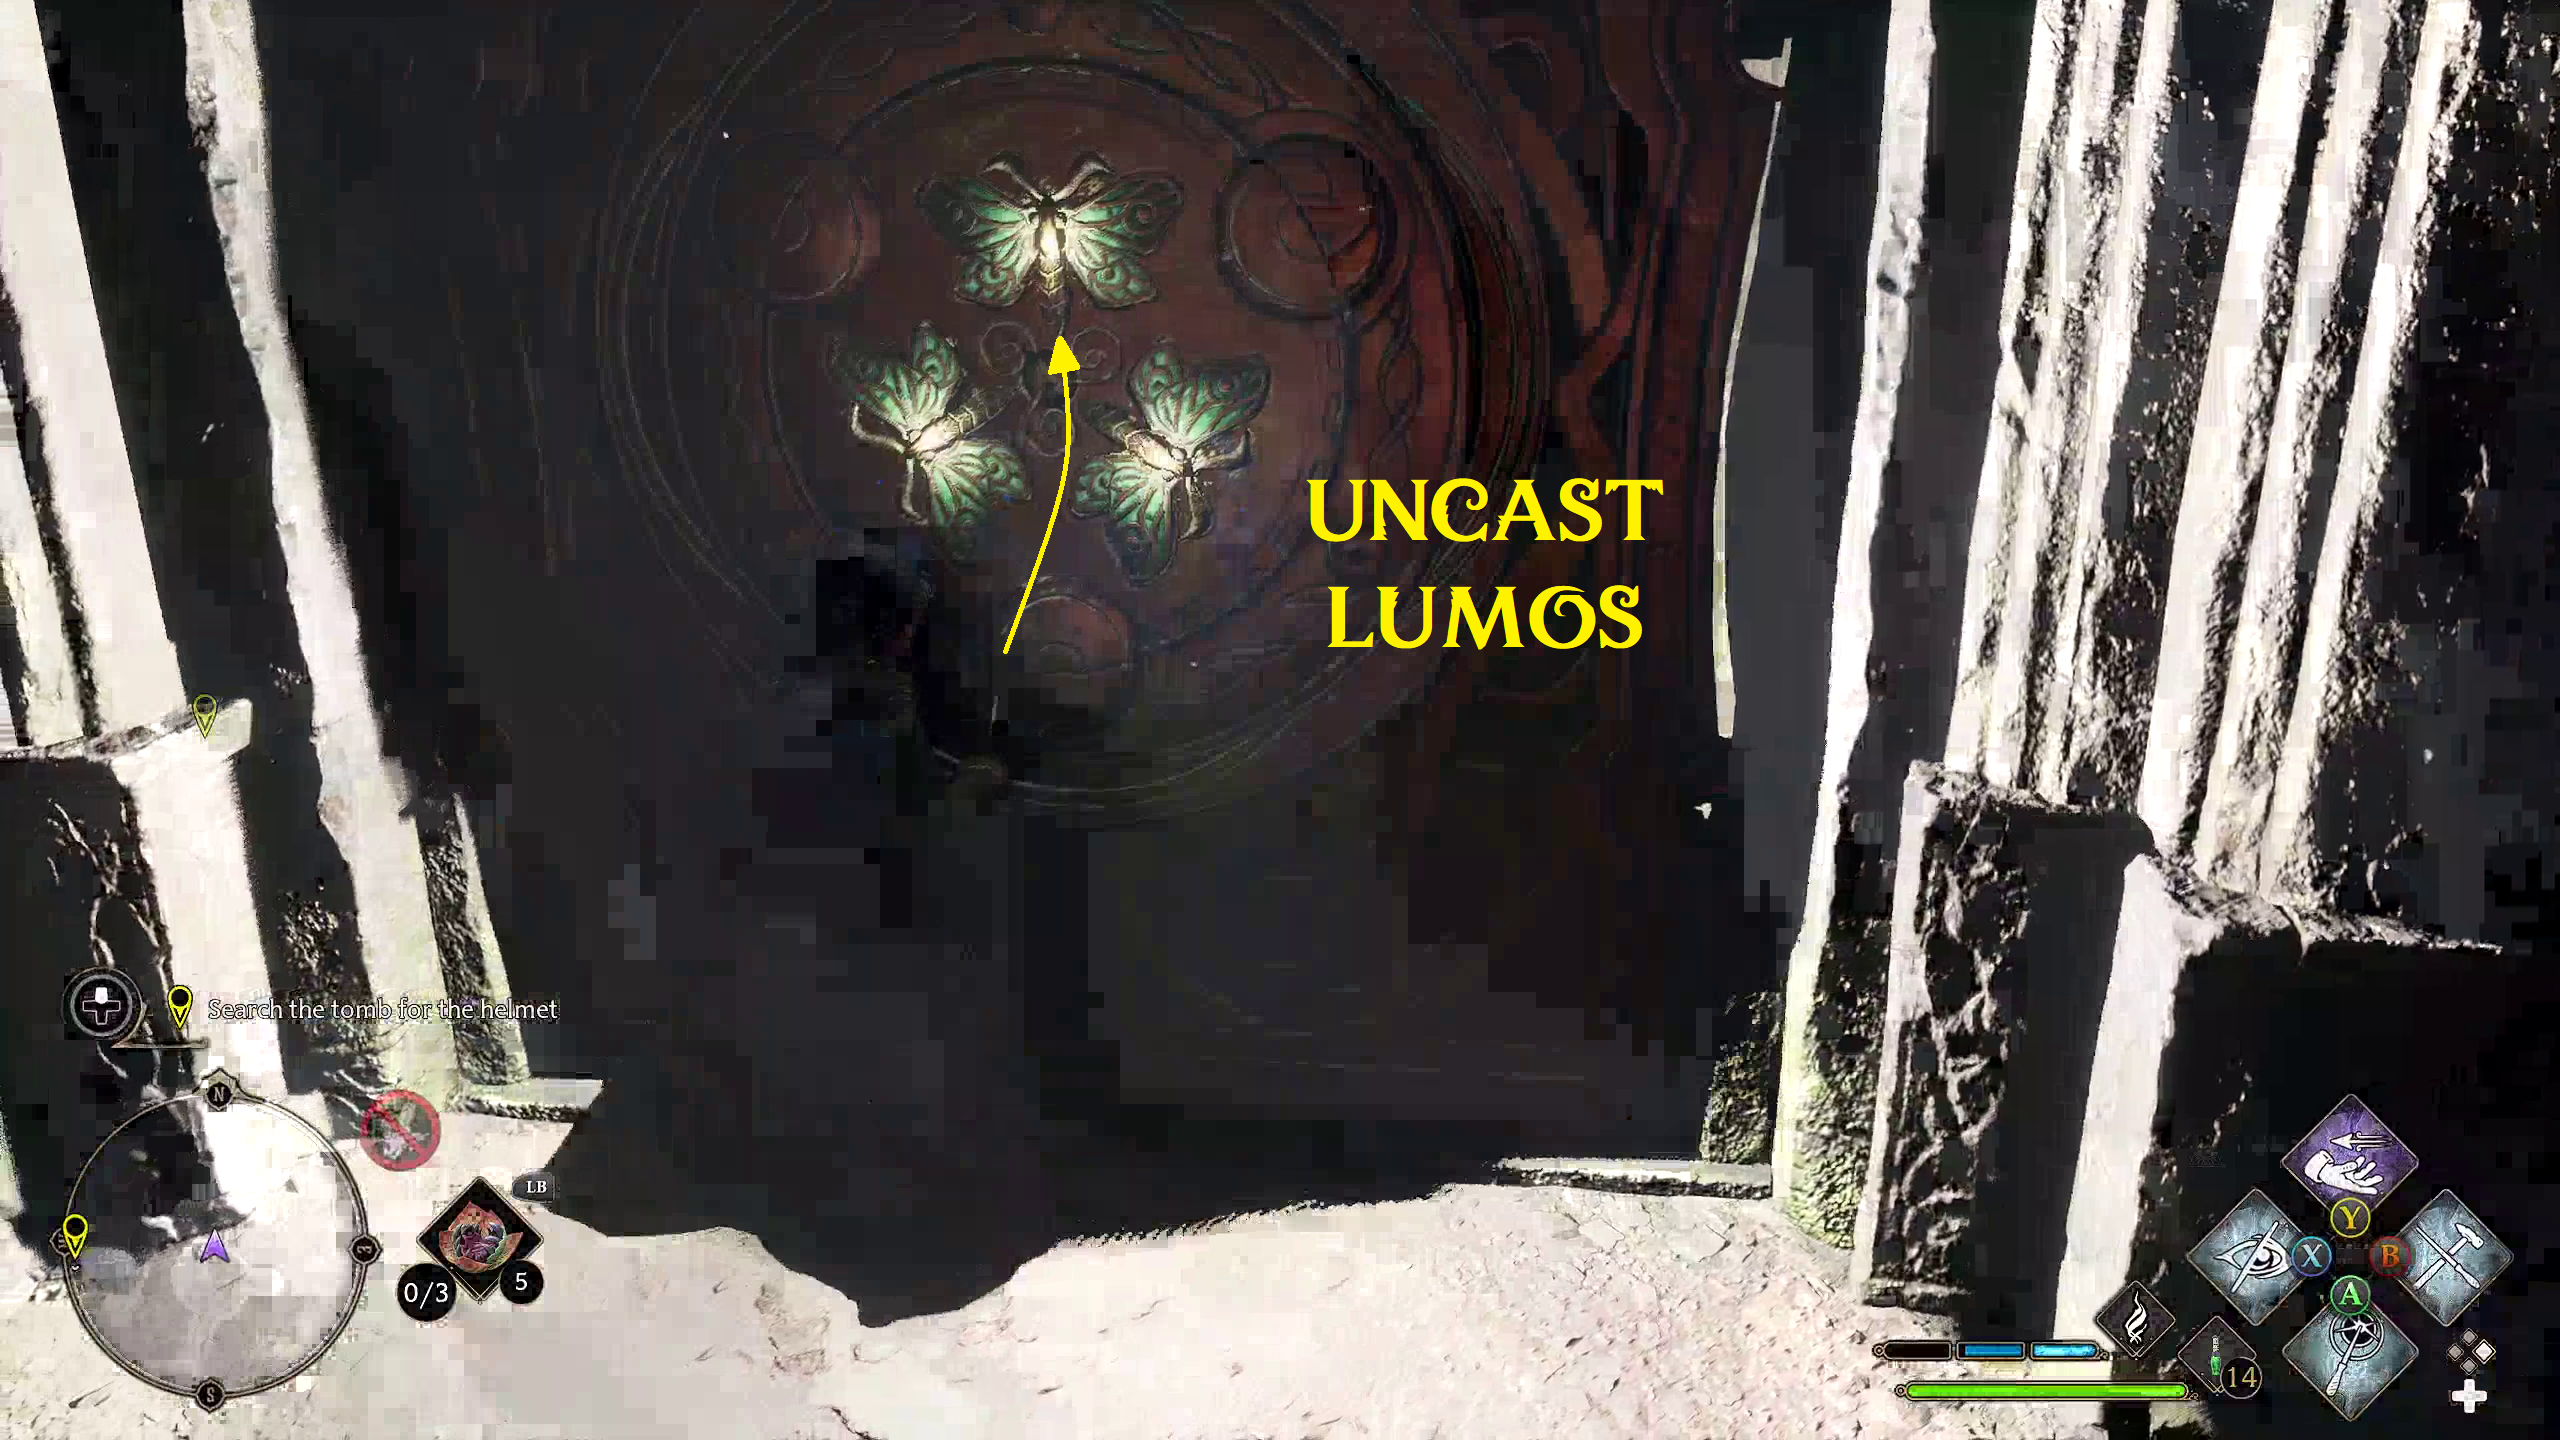
Search the Tomb for the Helmet
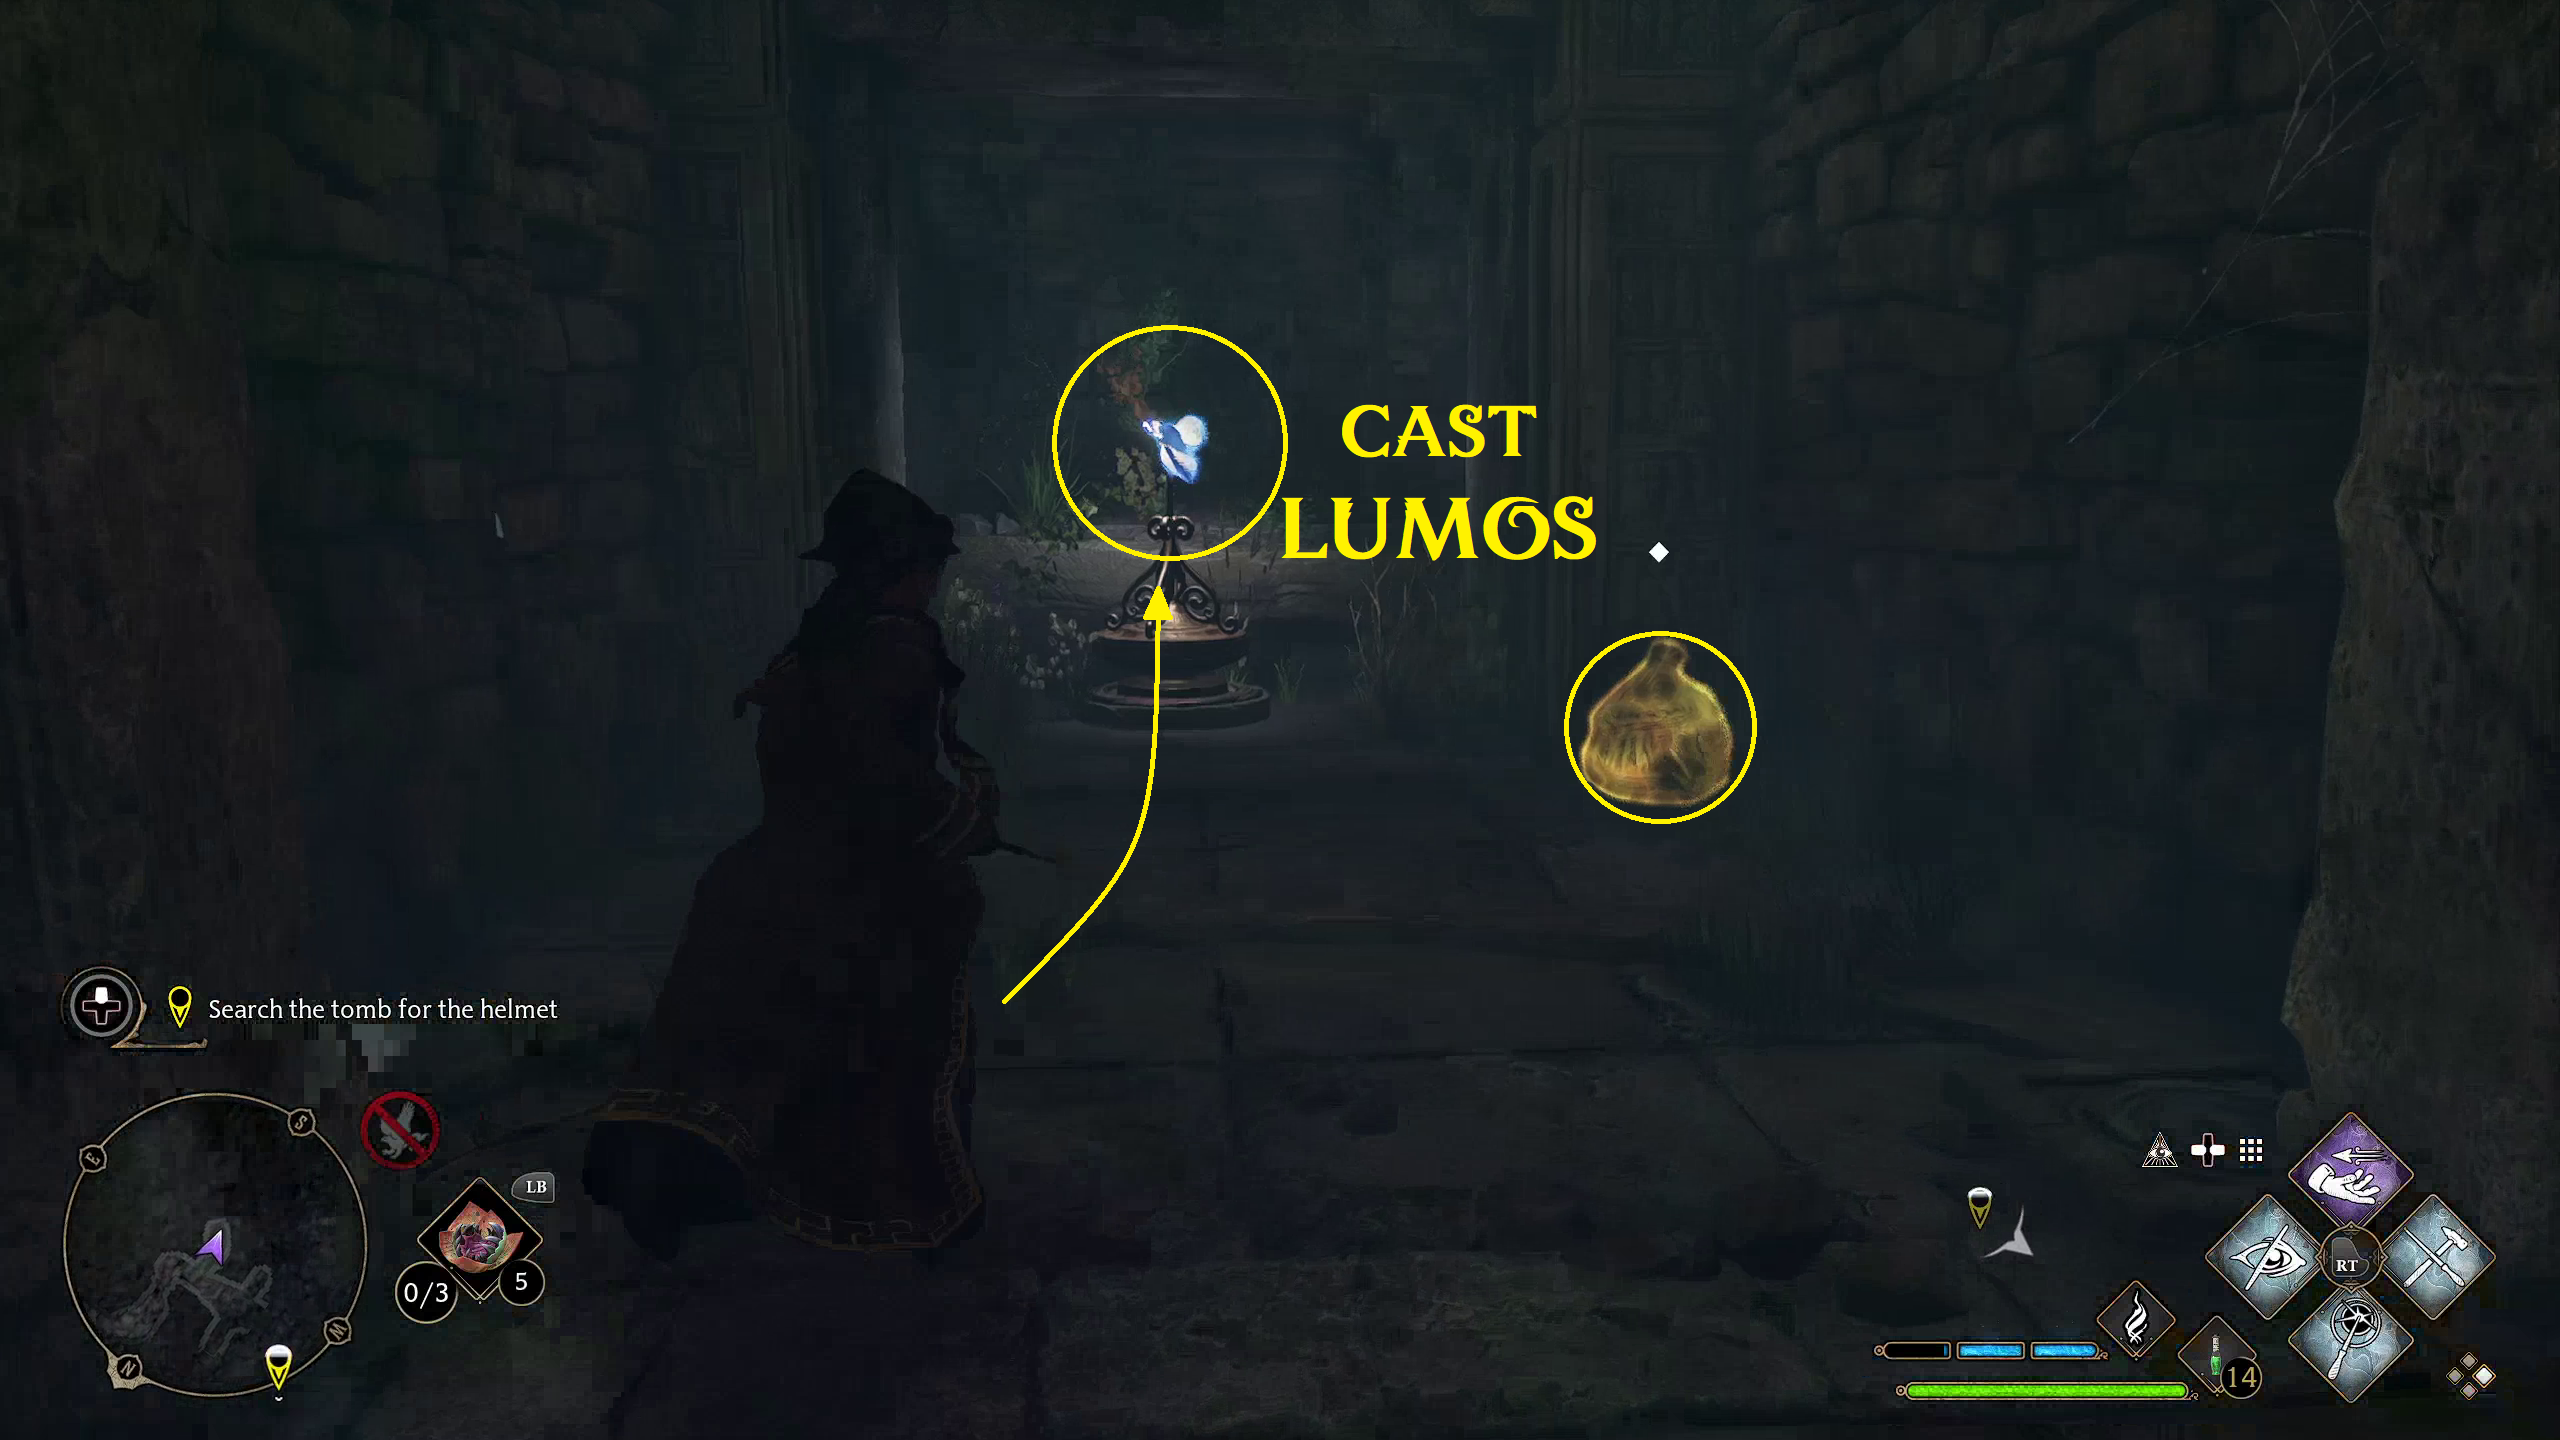
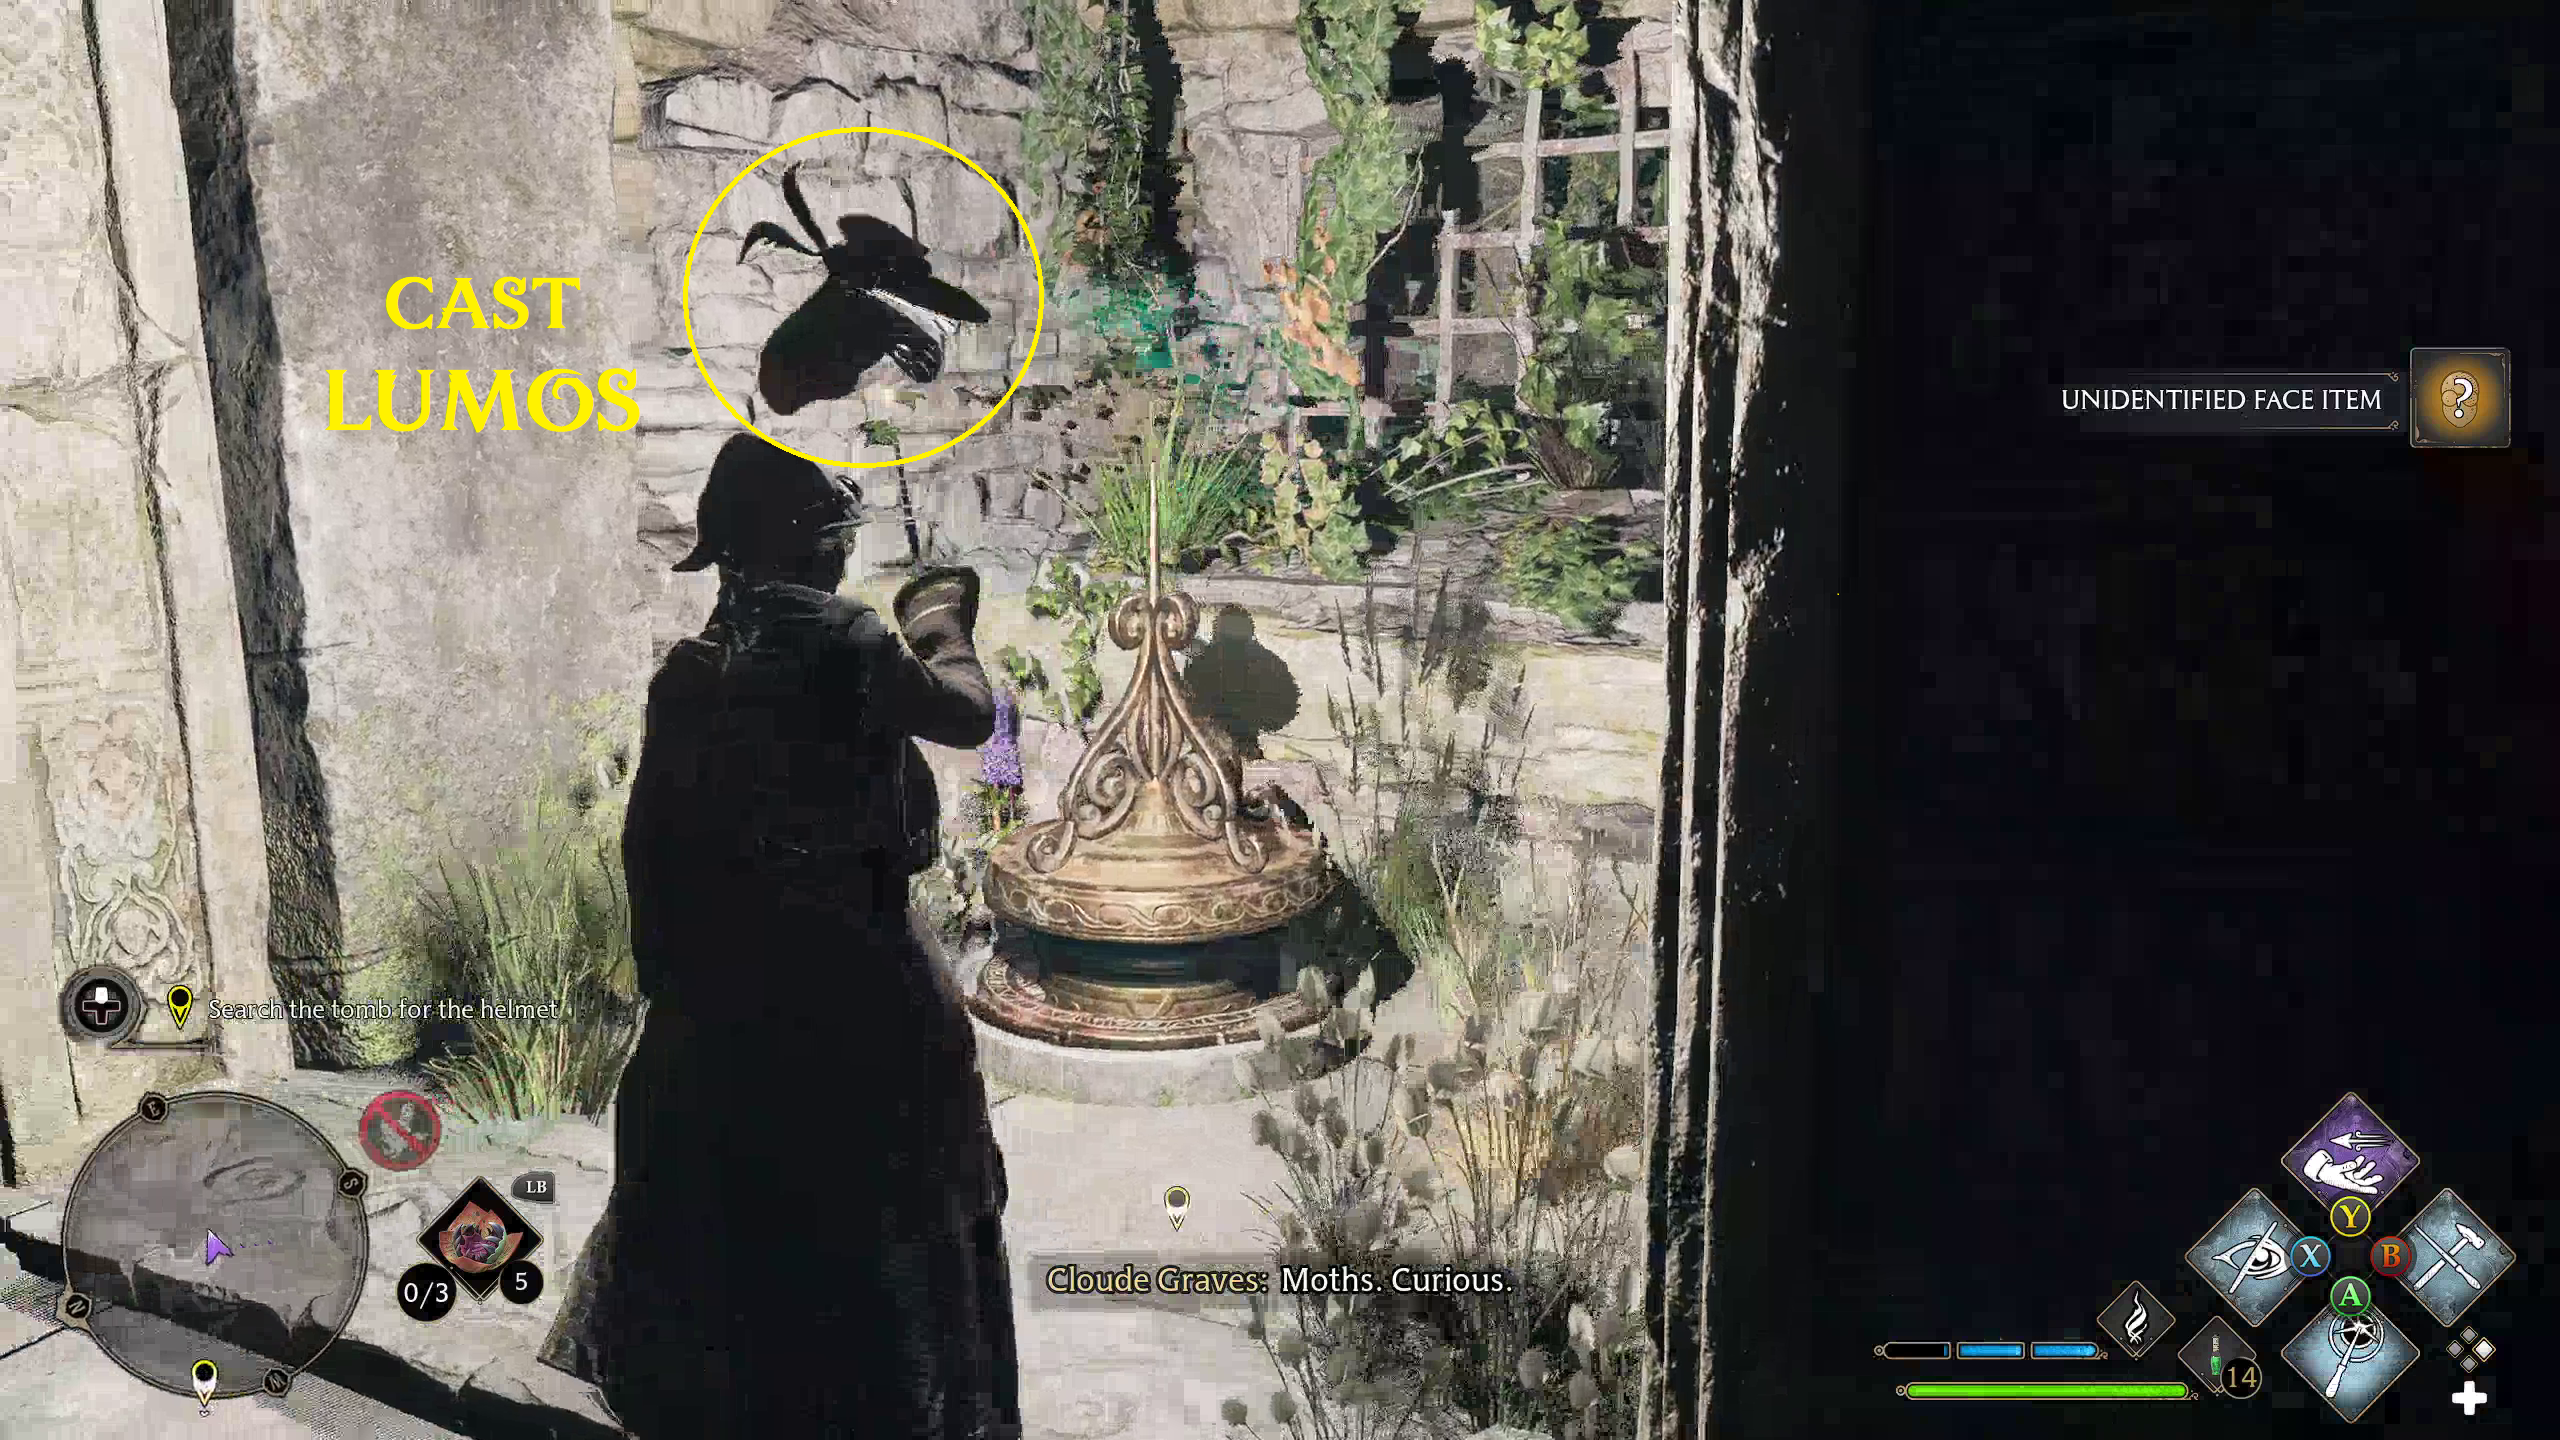
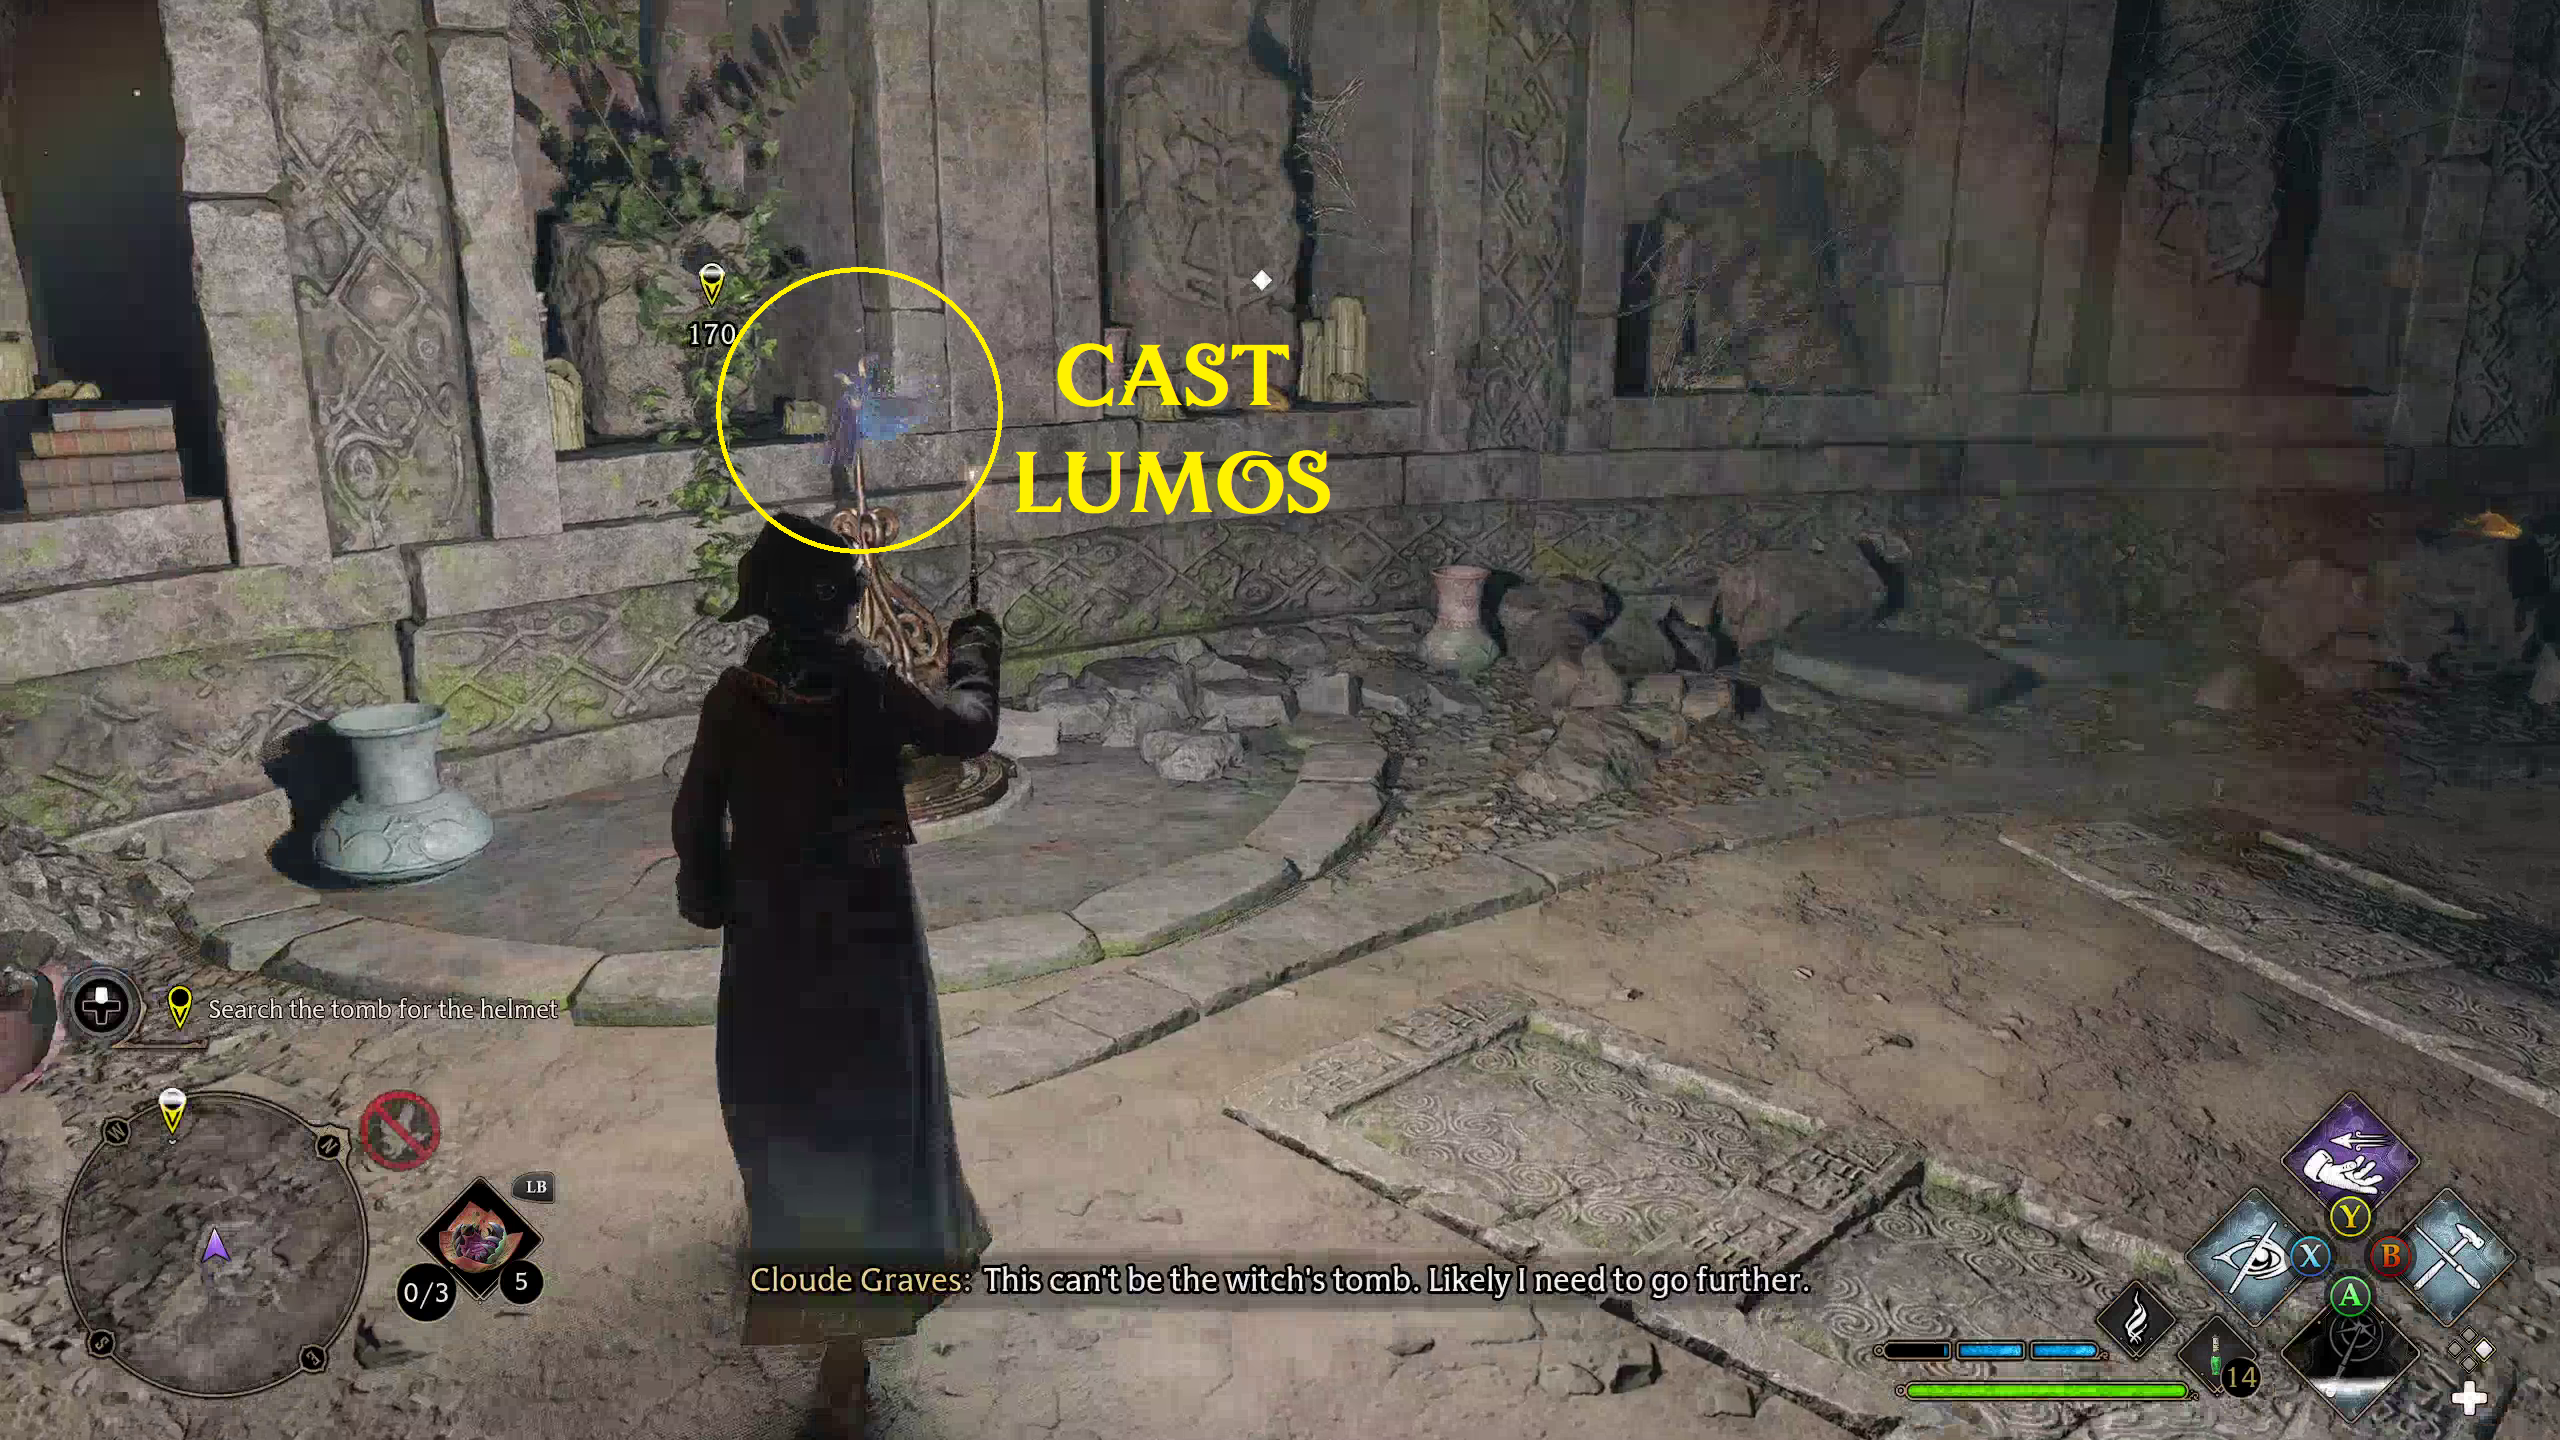
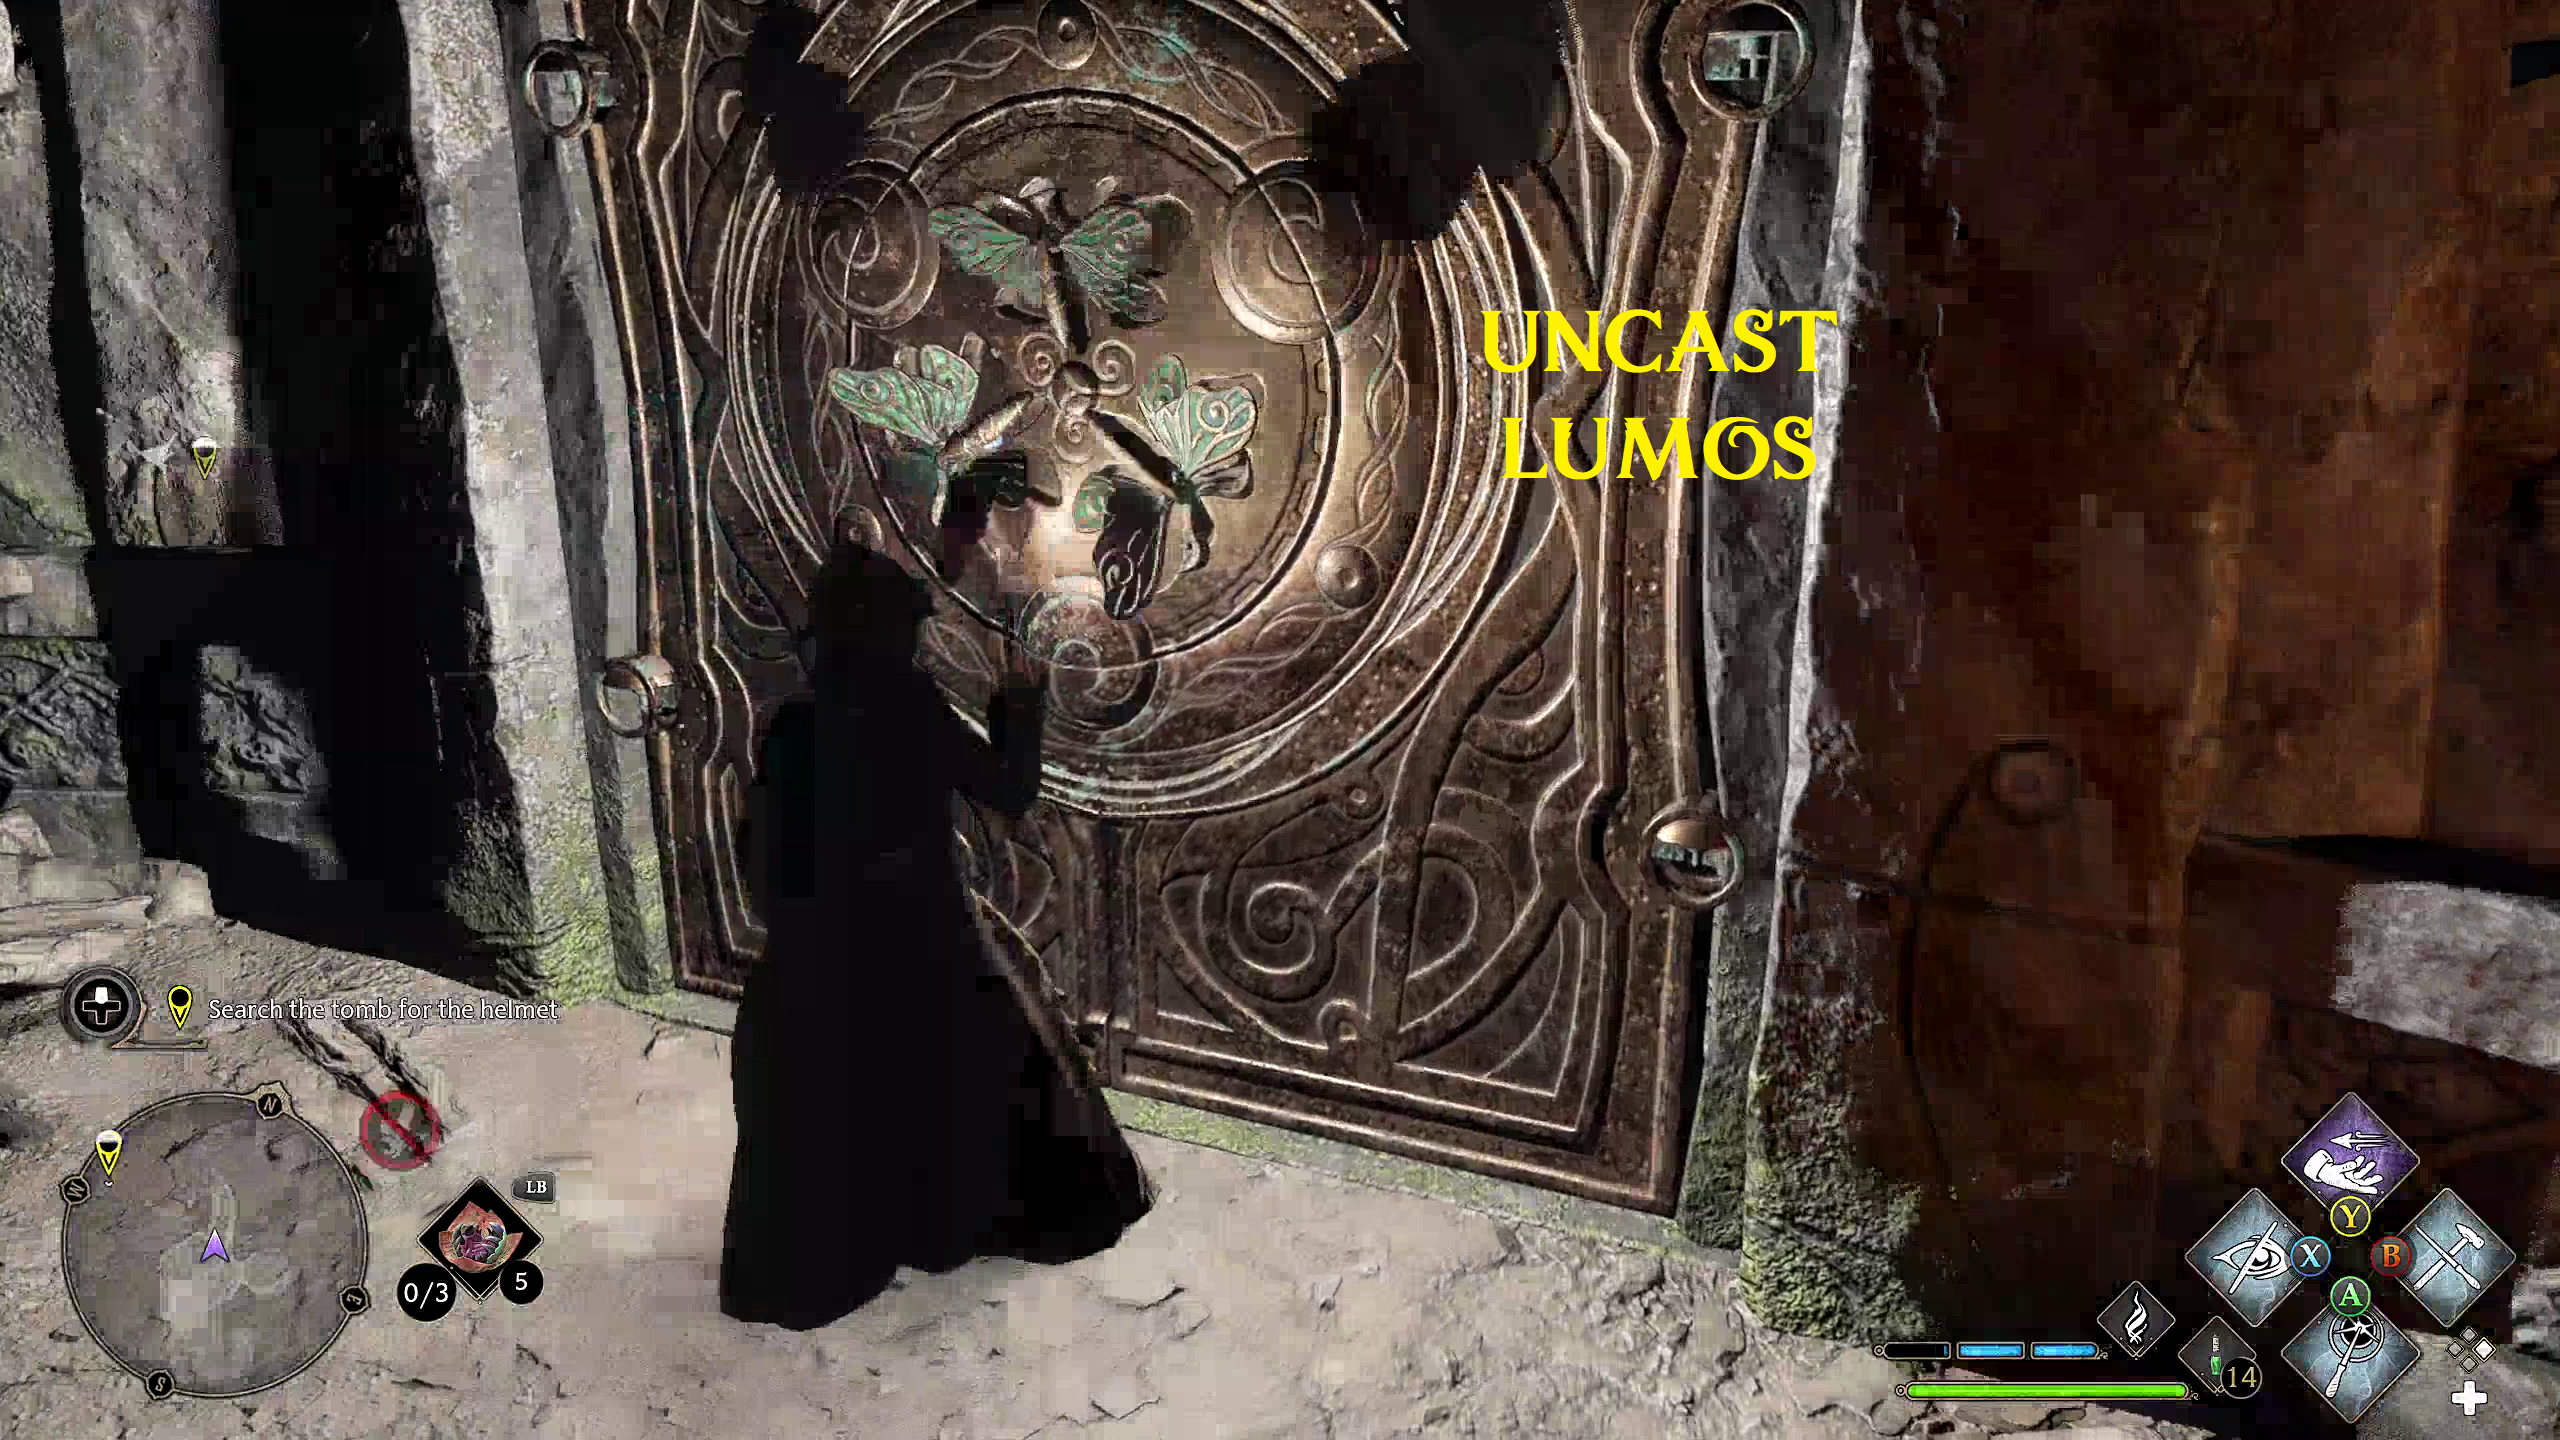
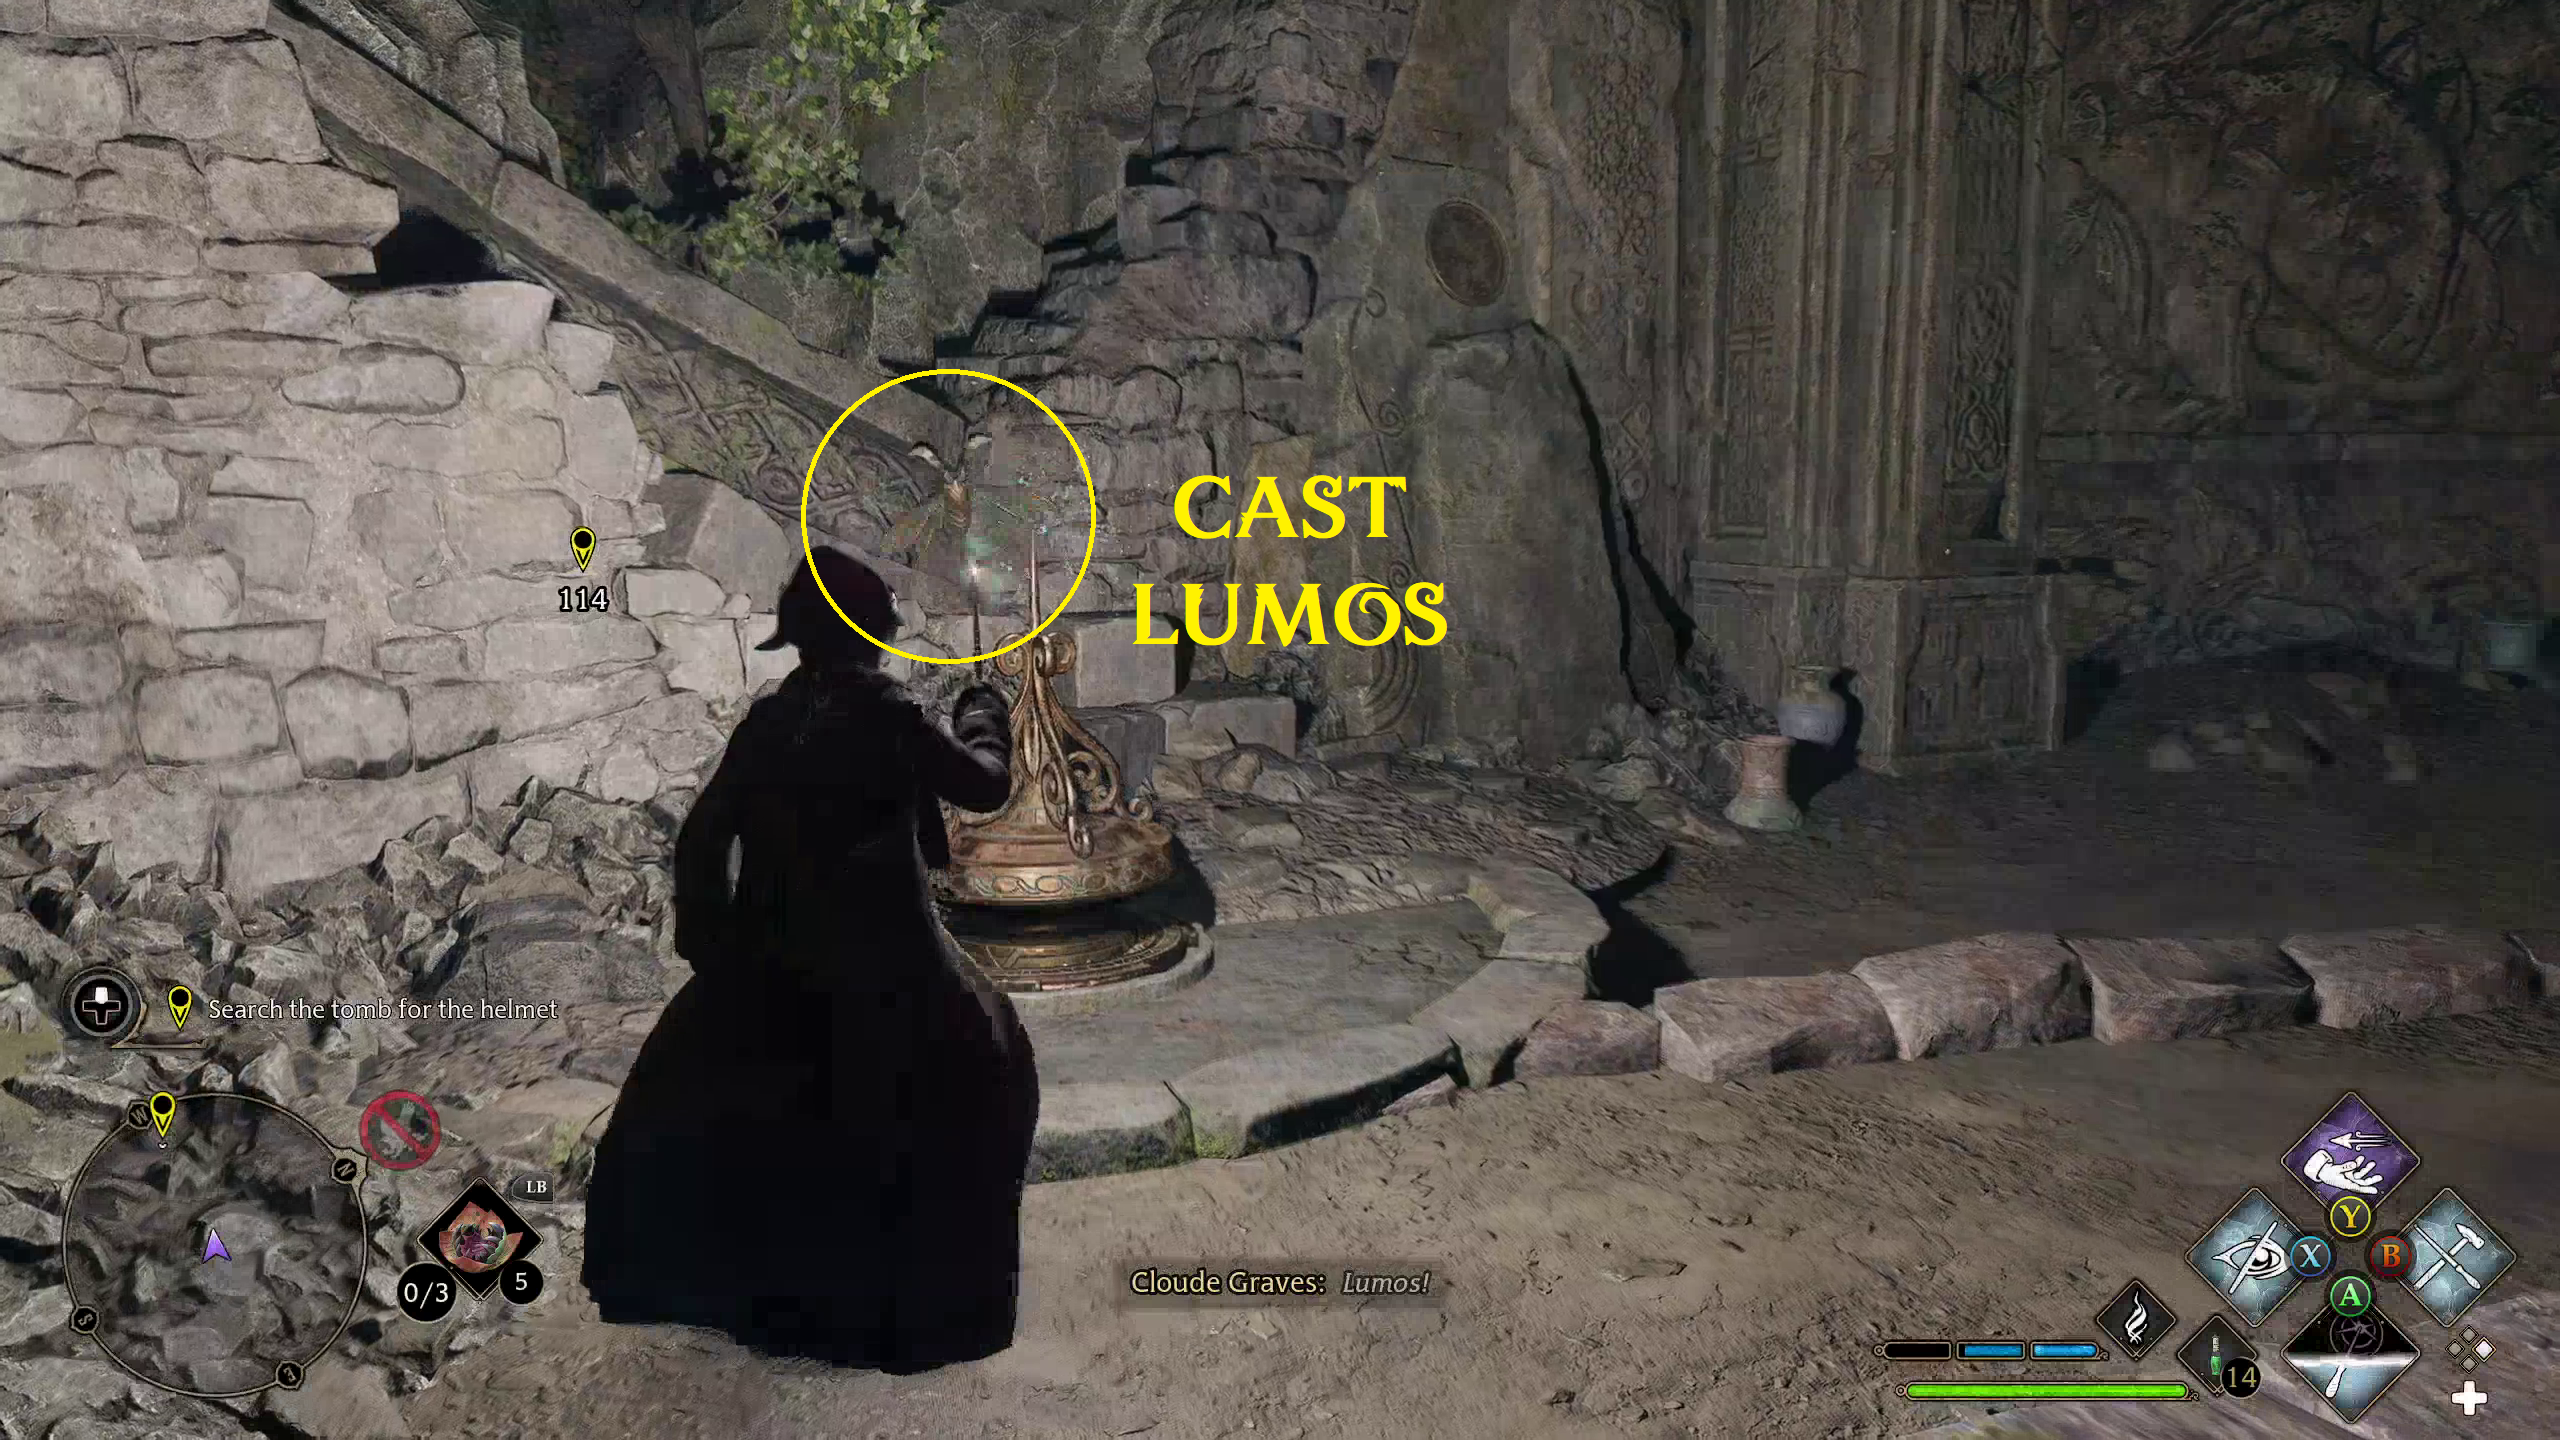
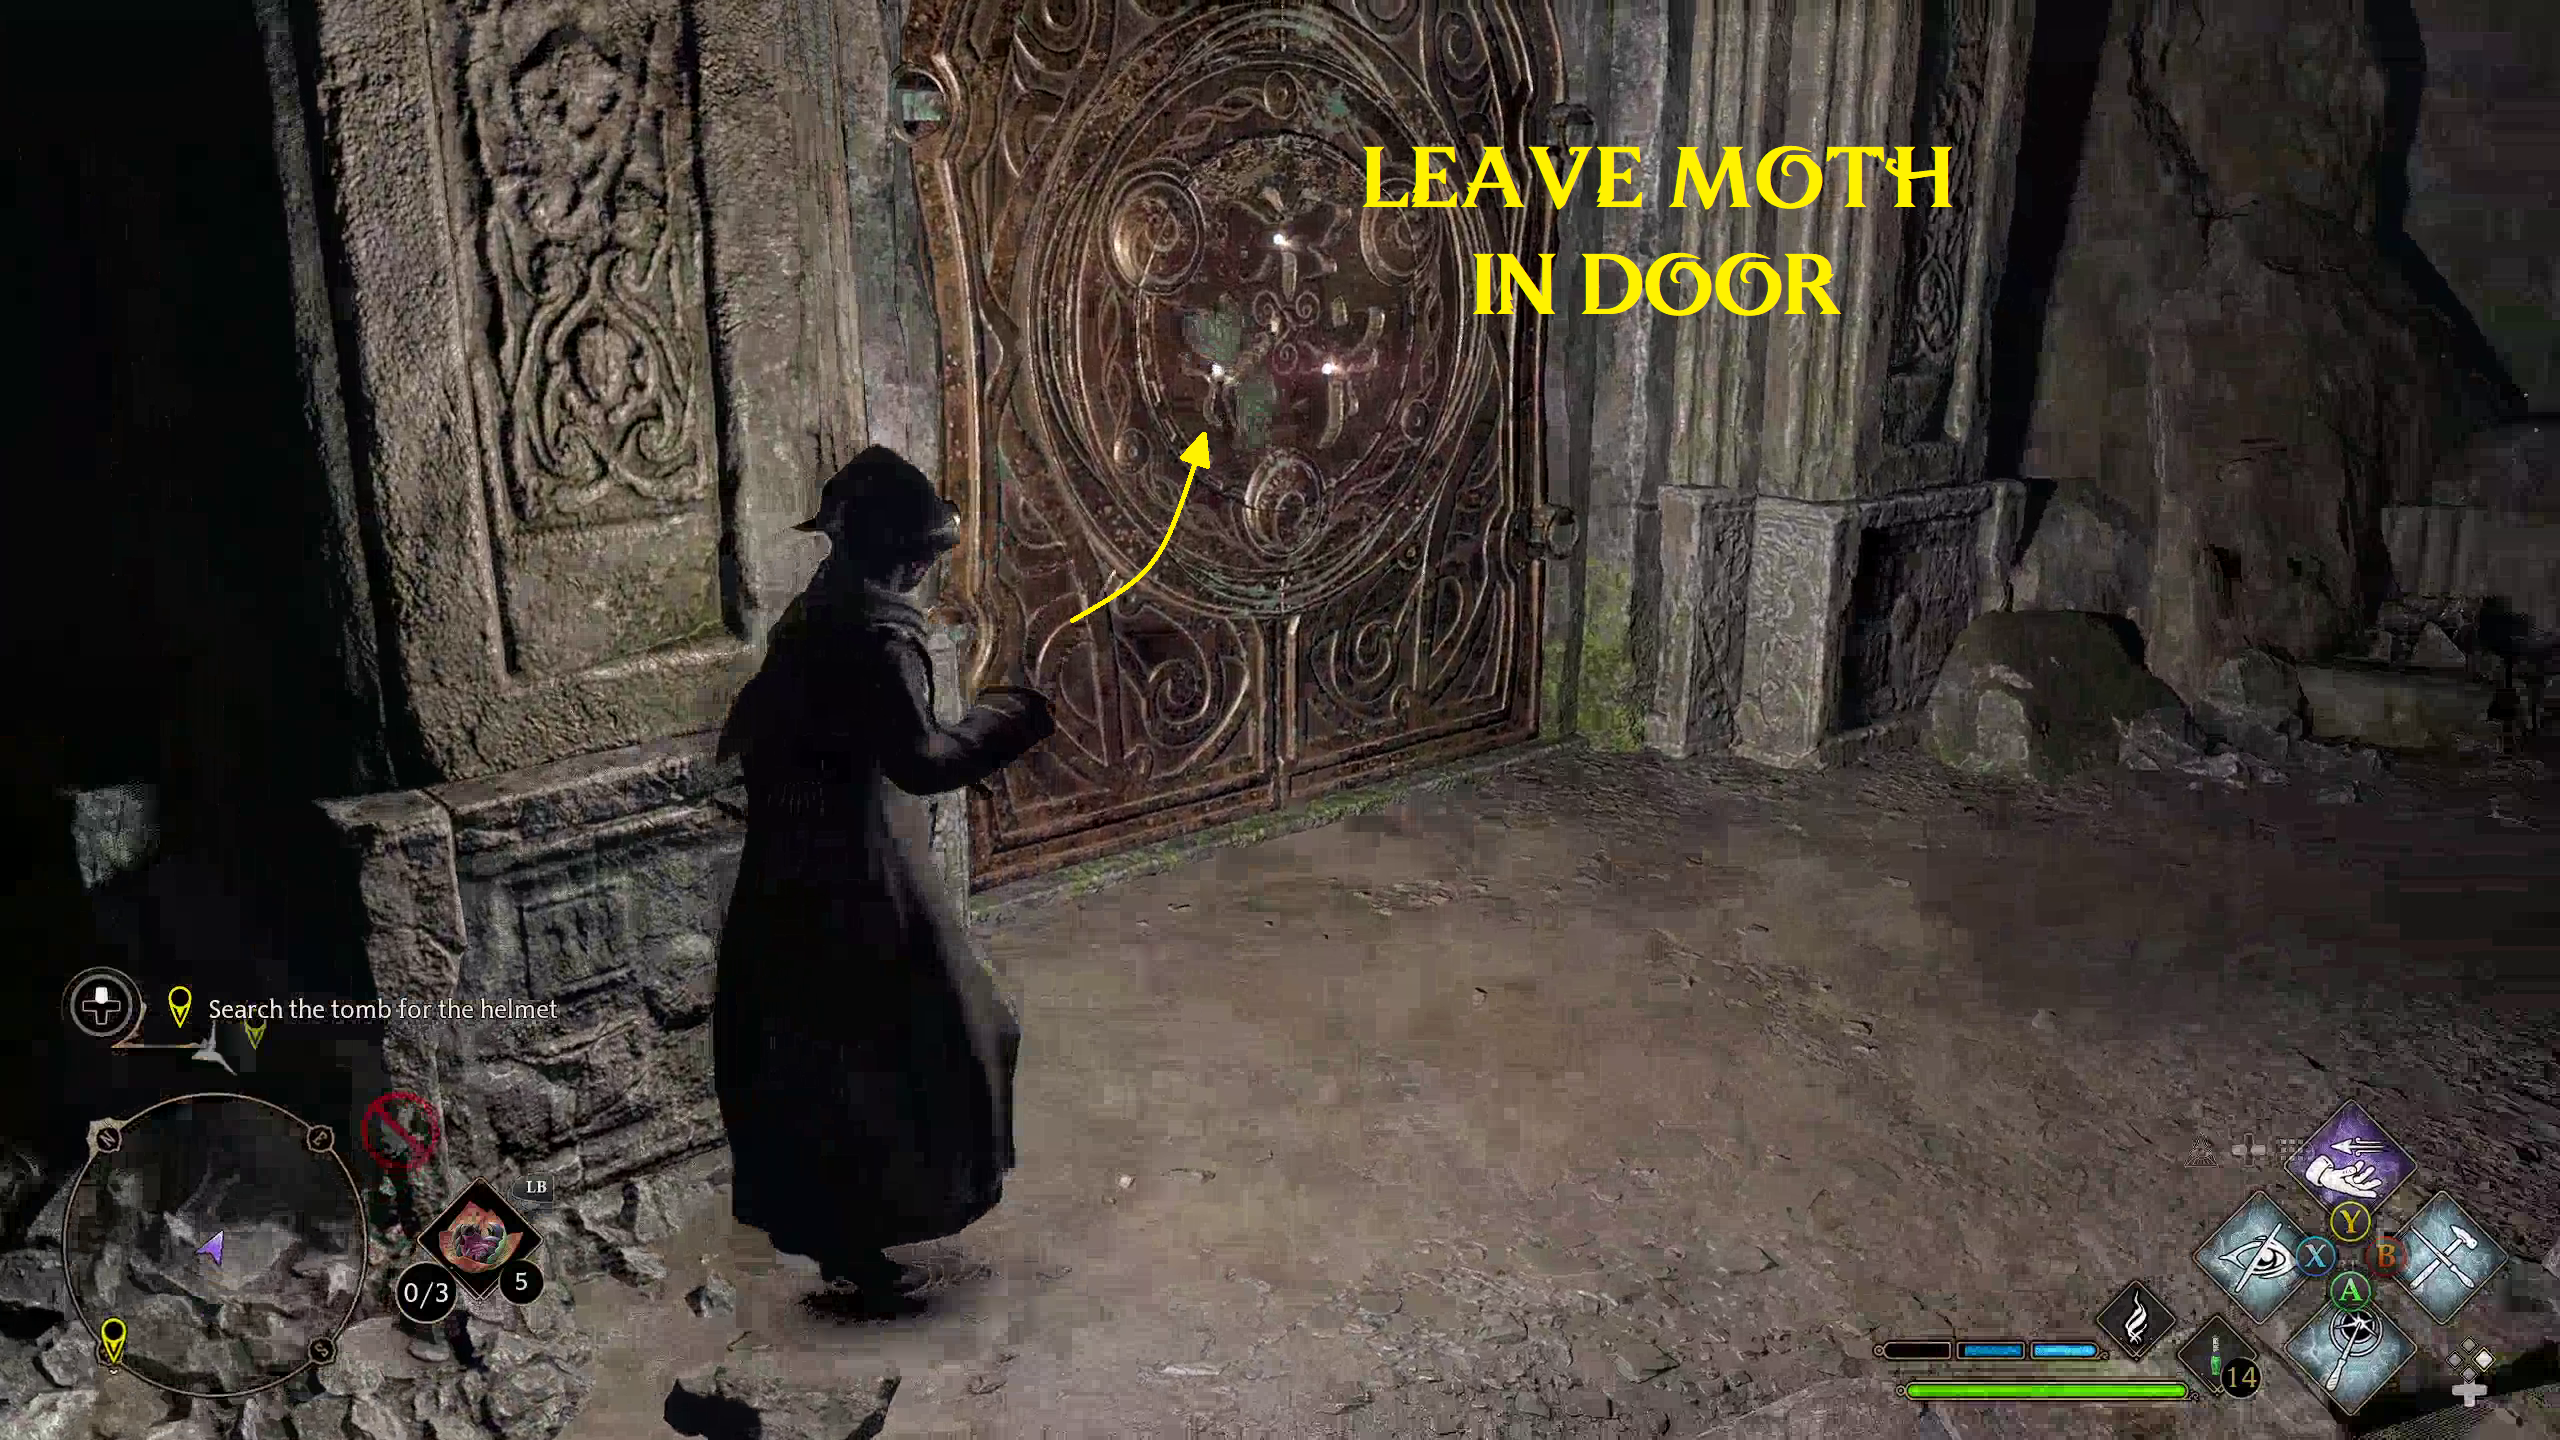
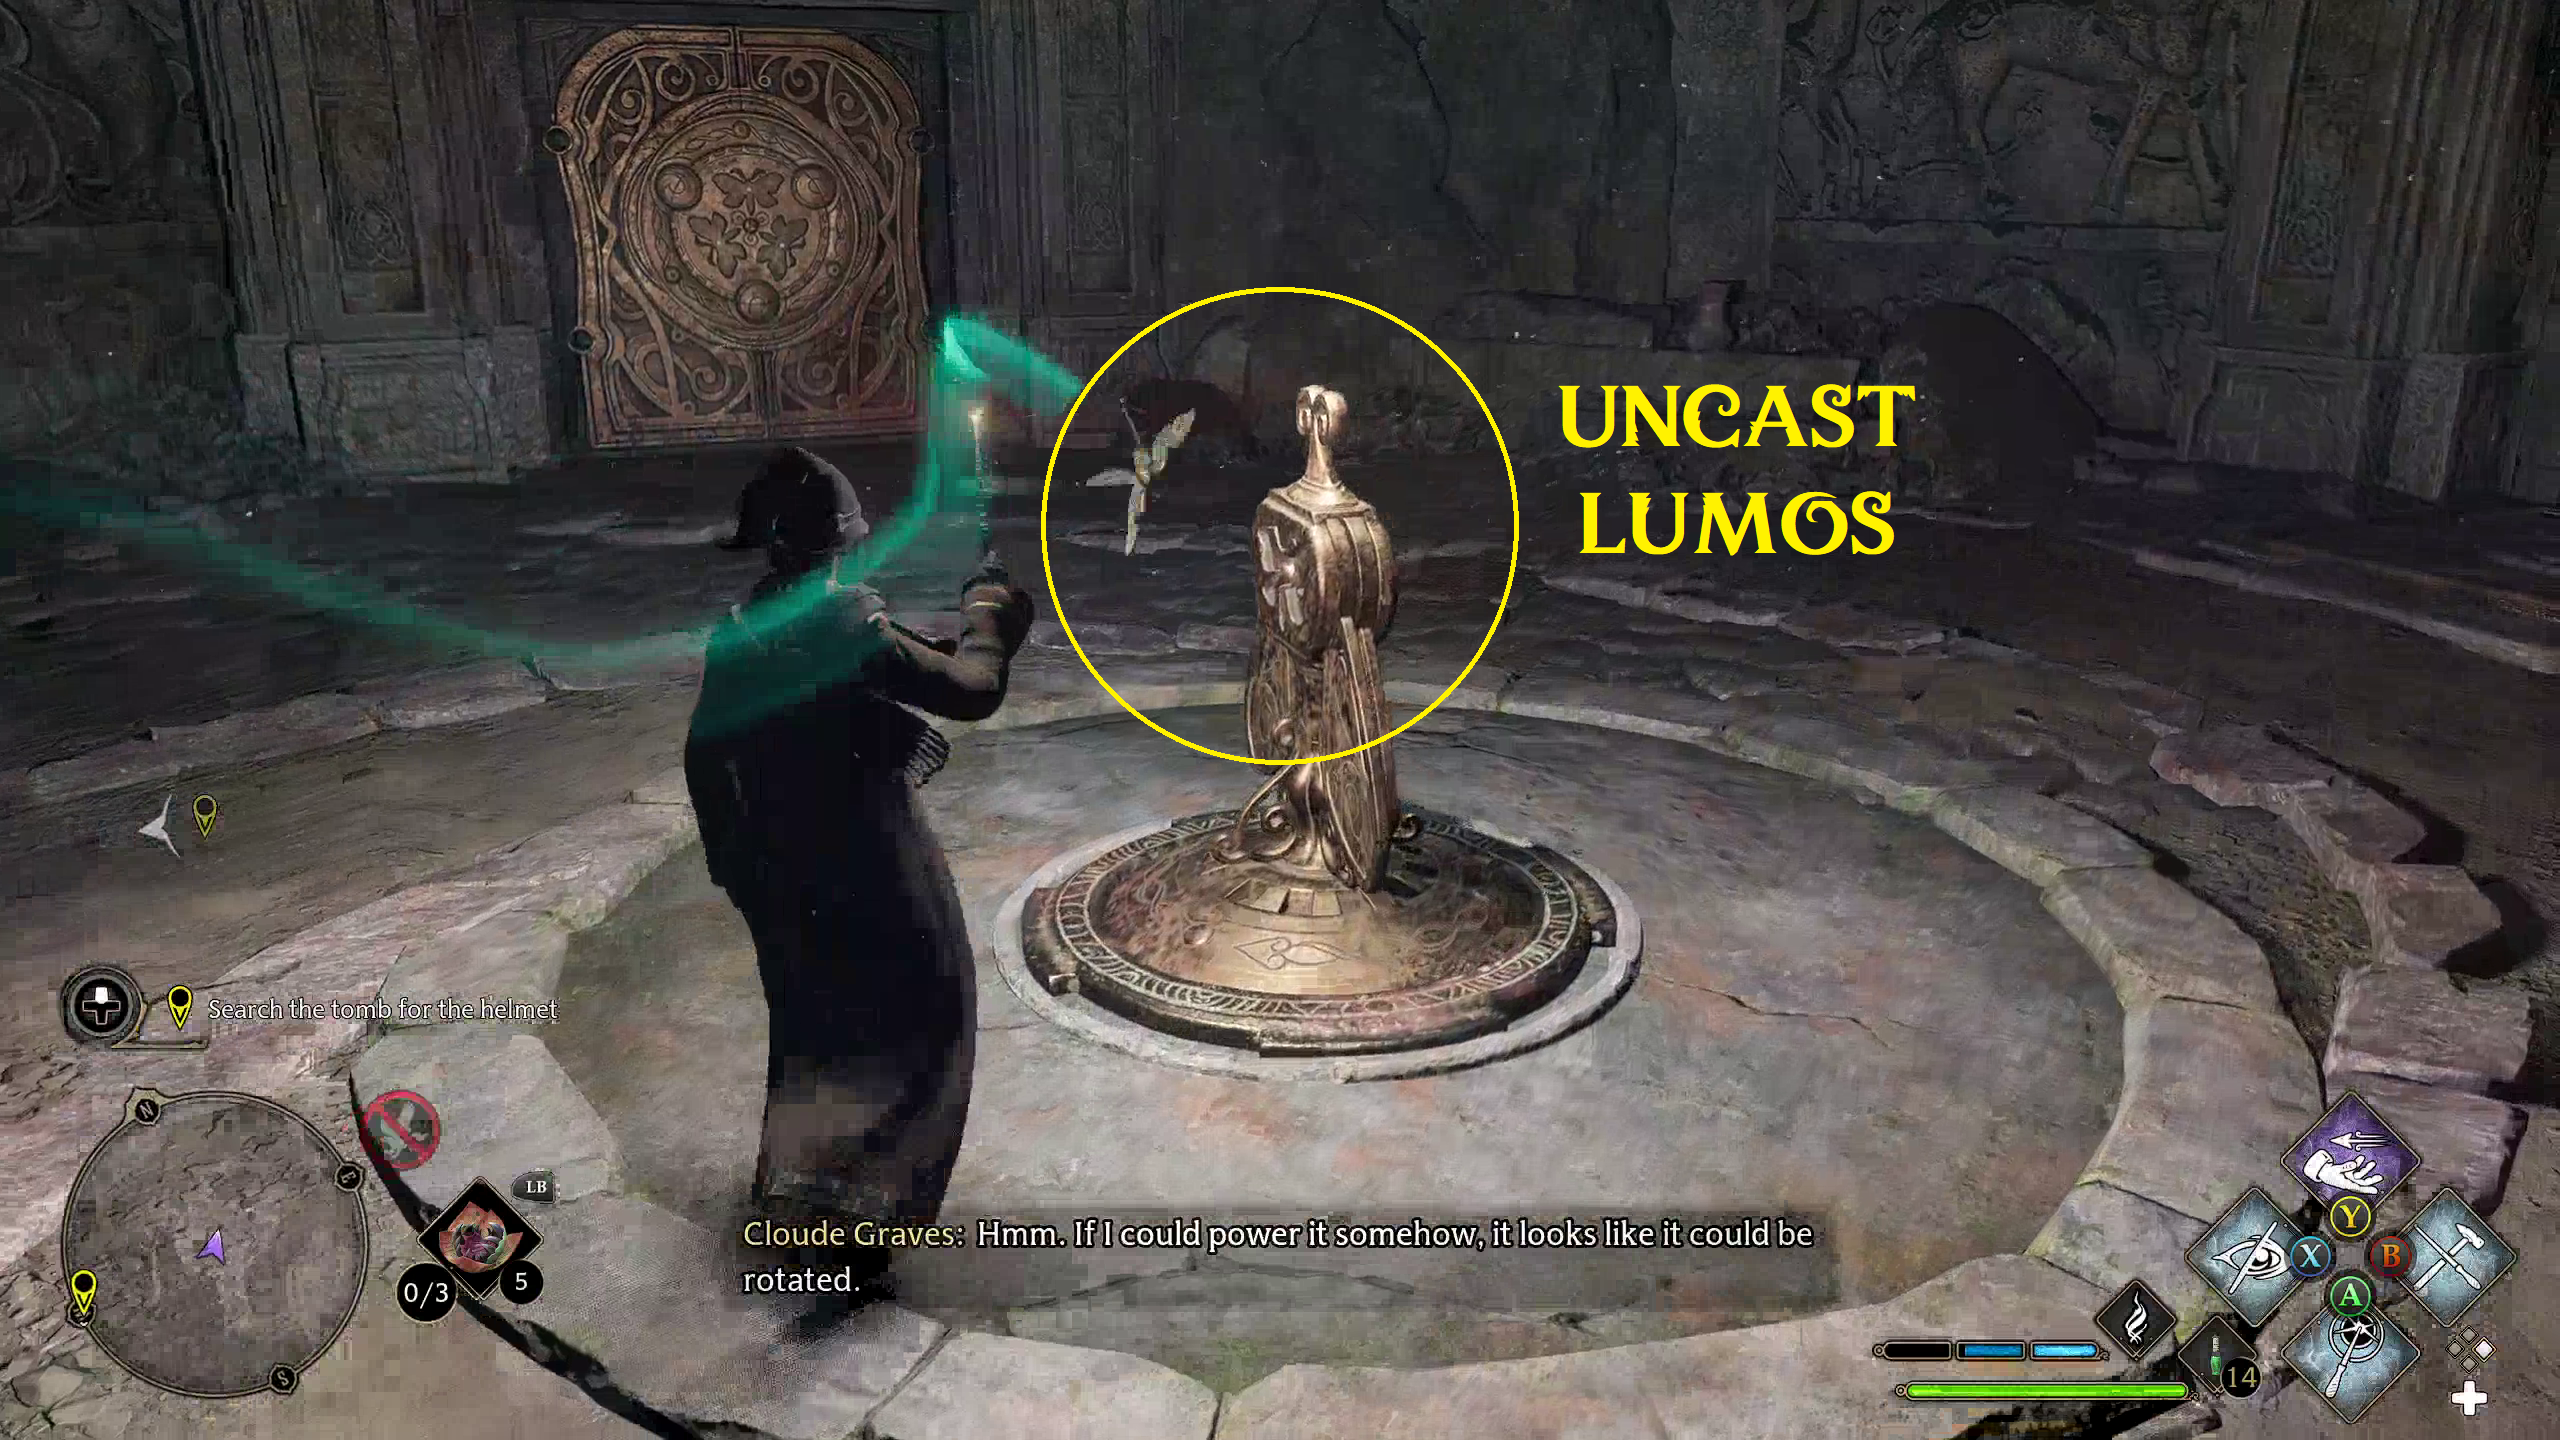
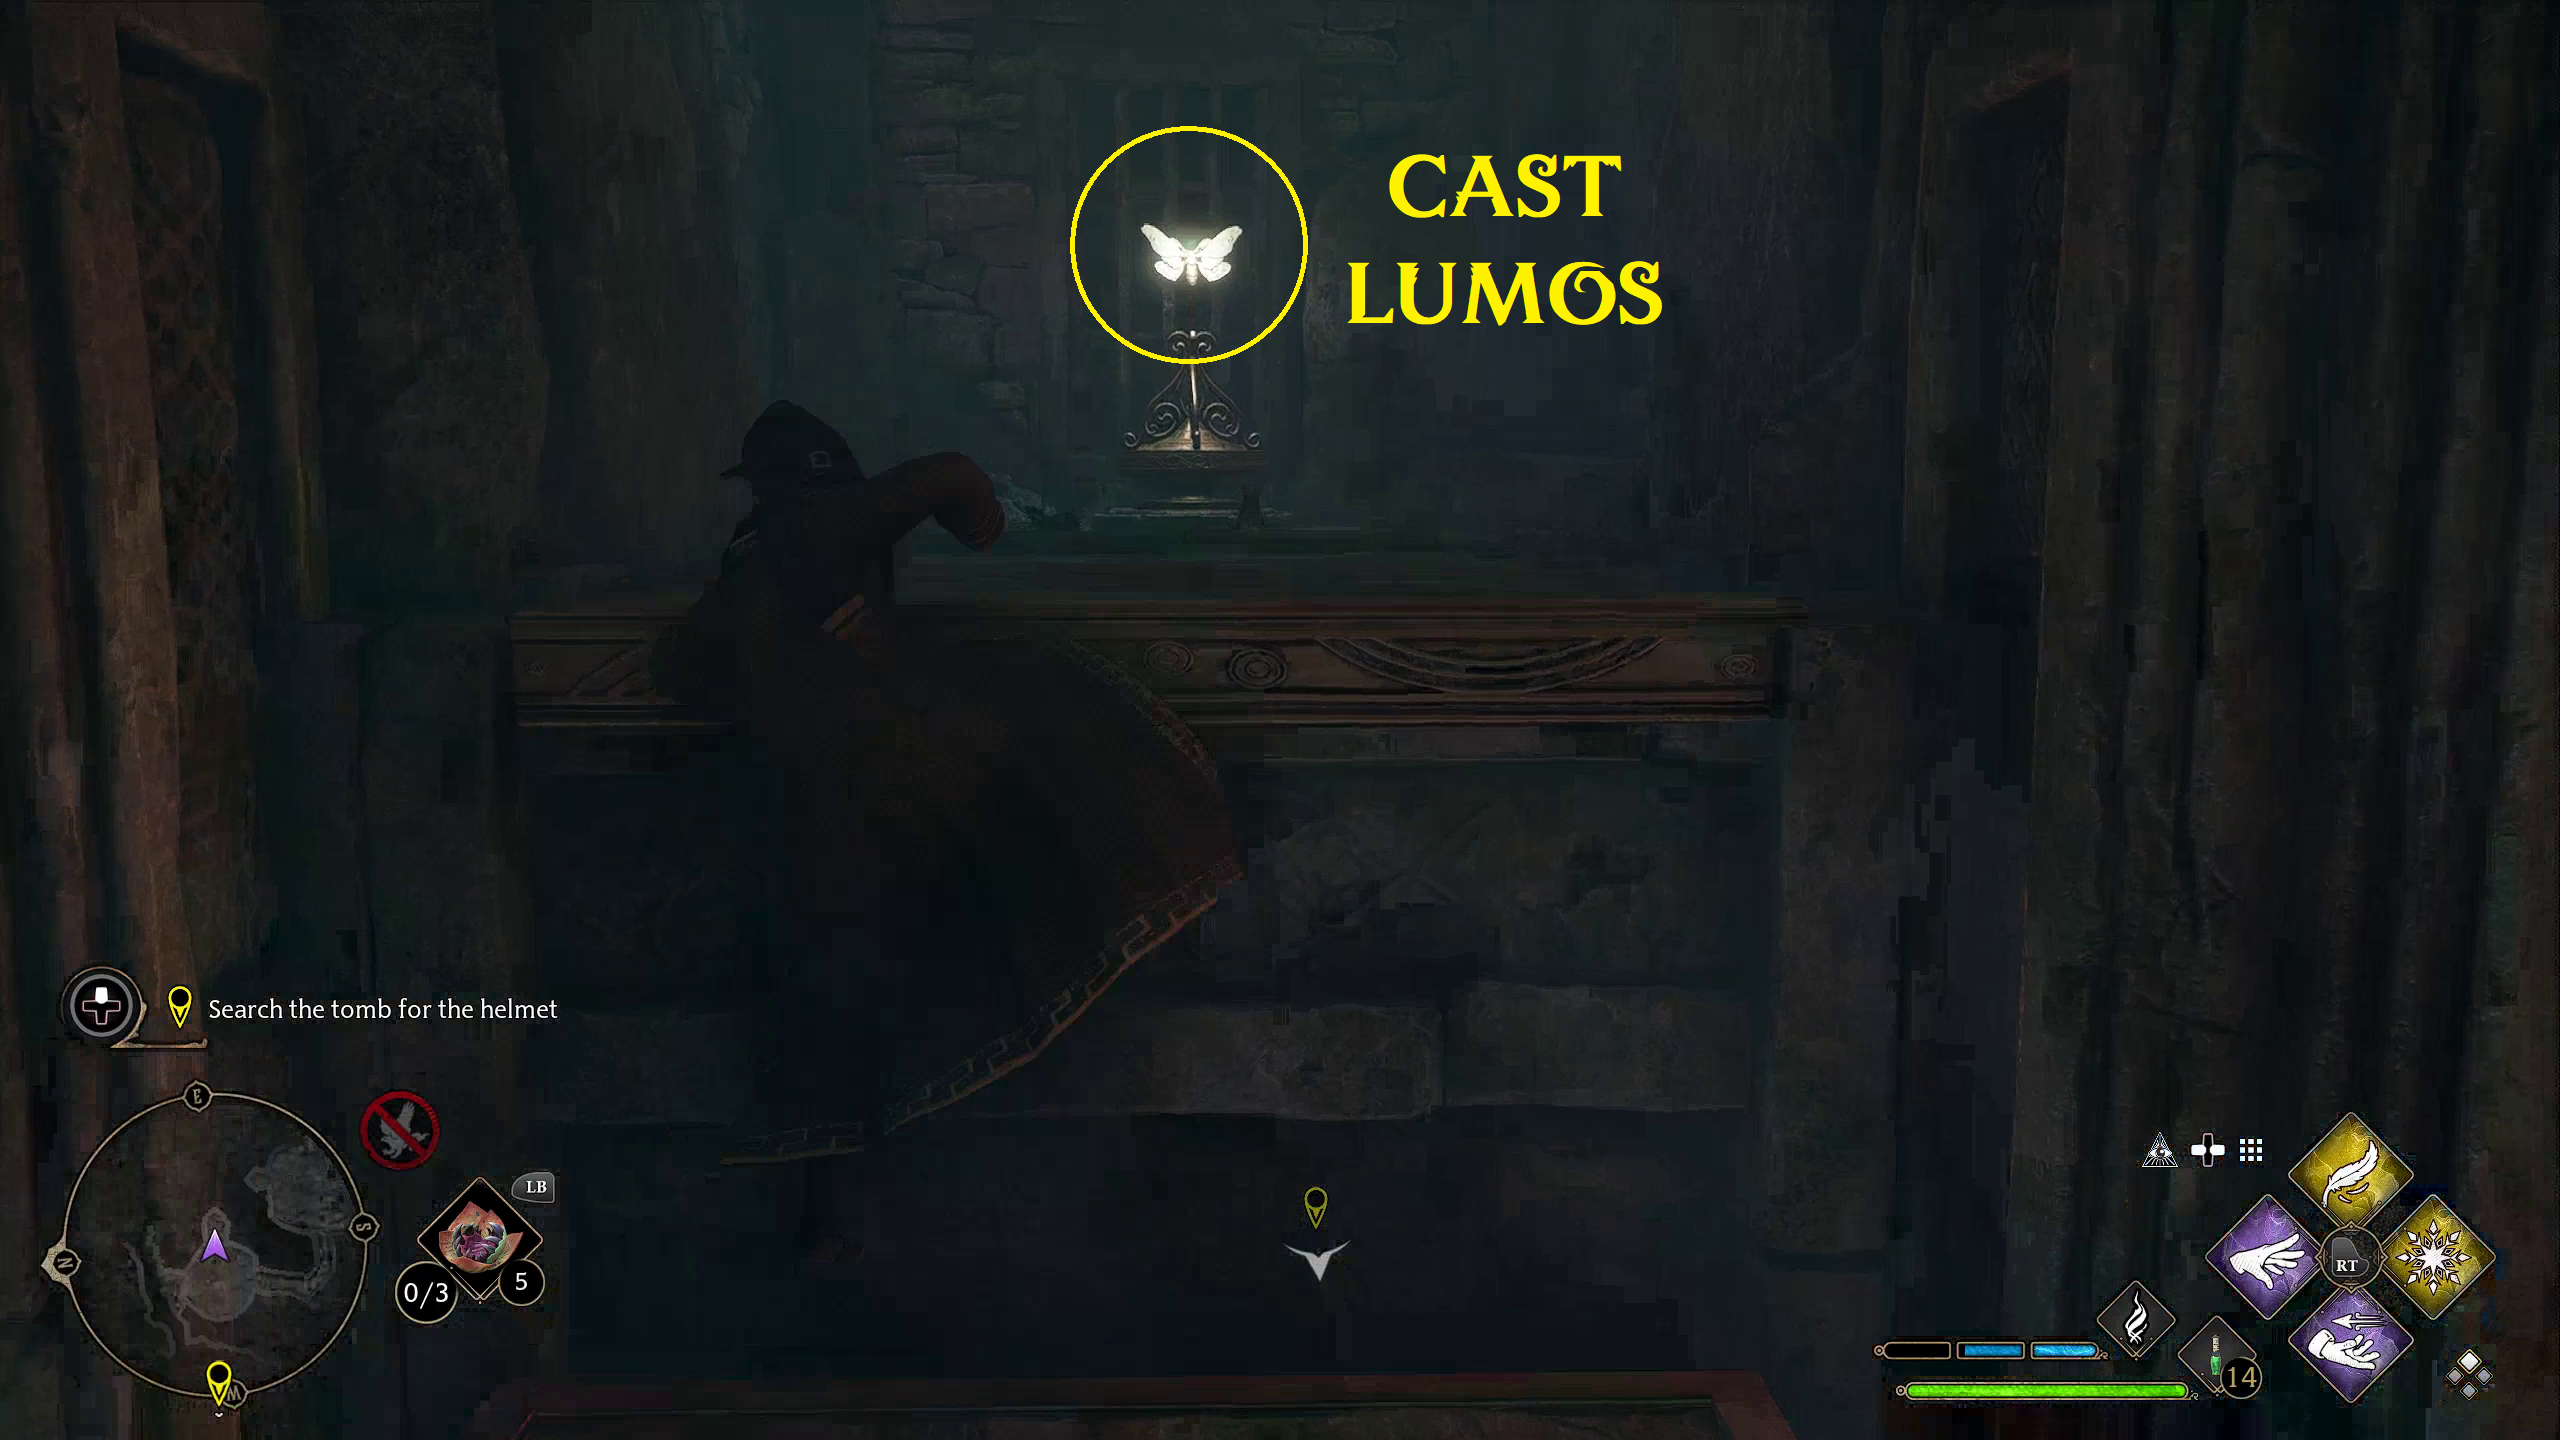
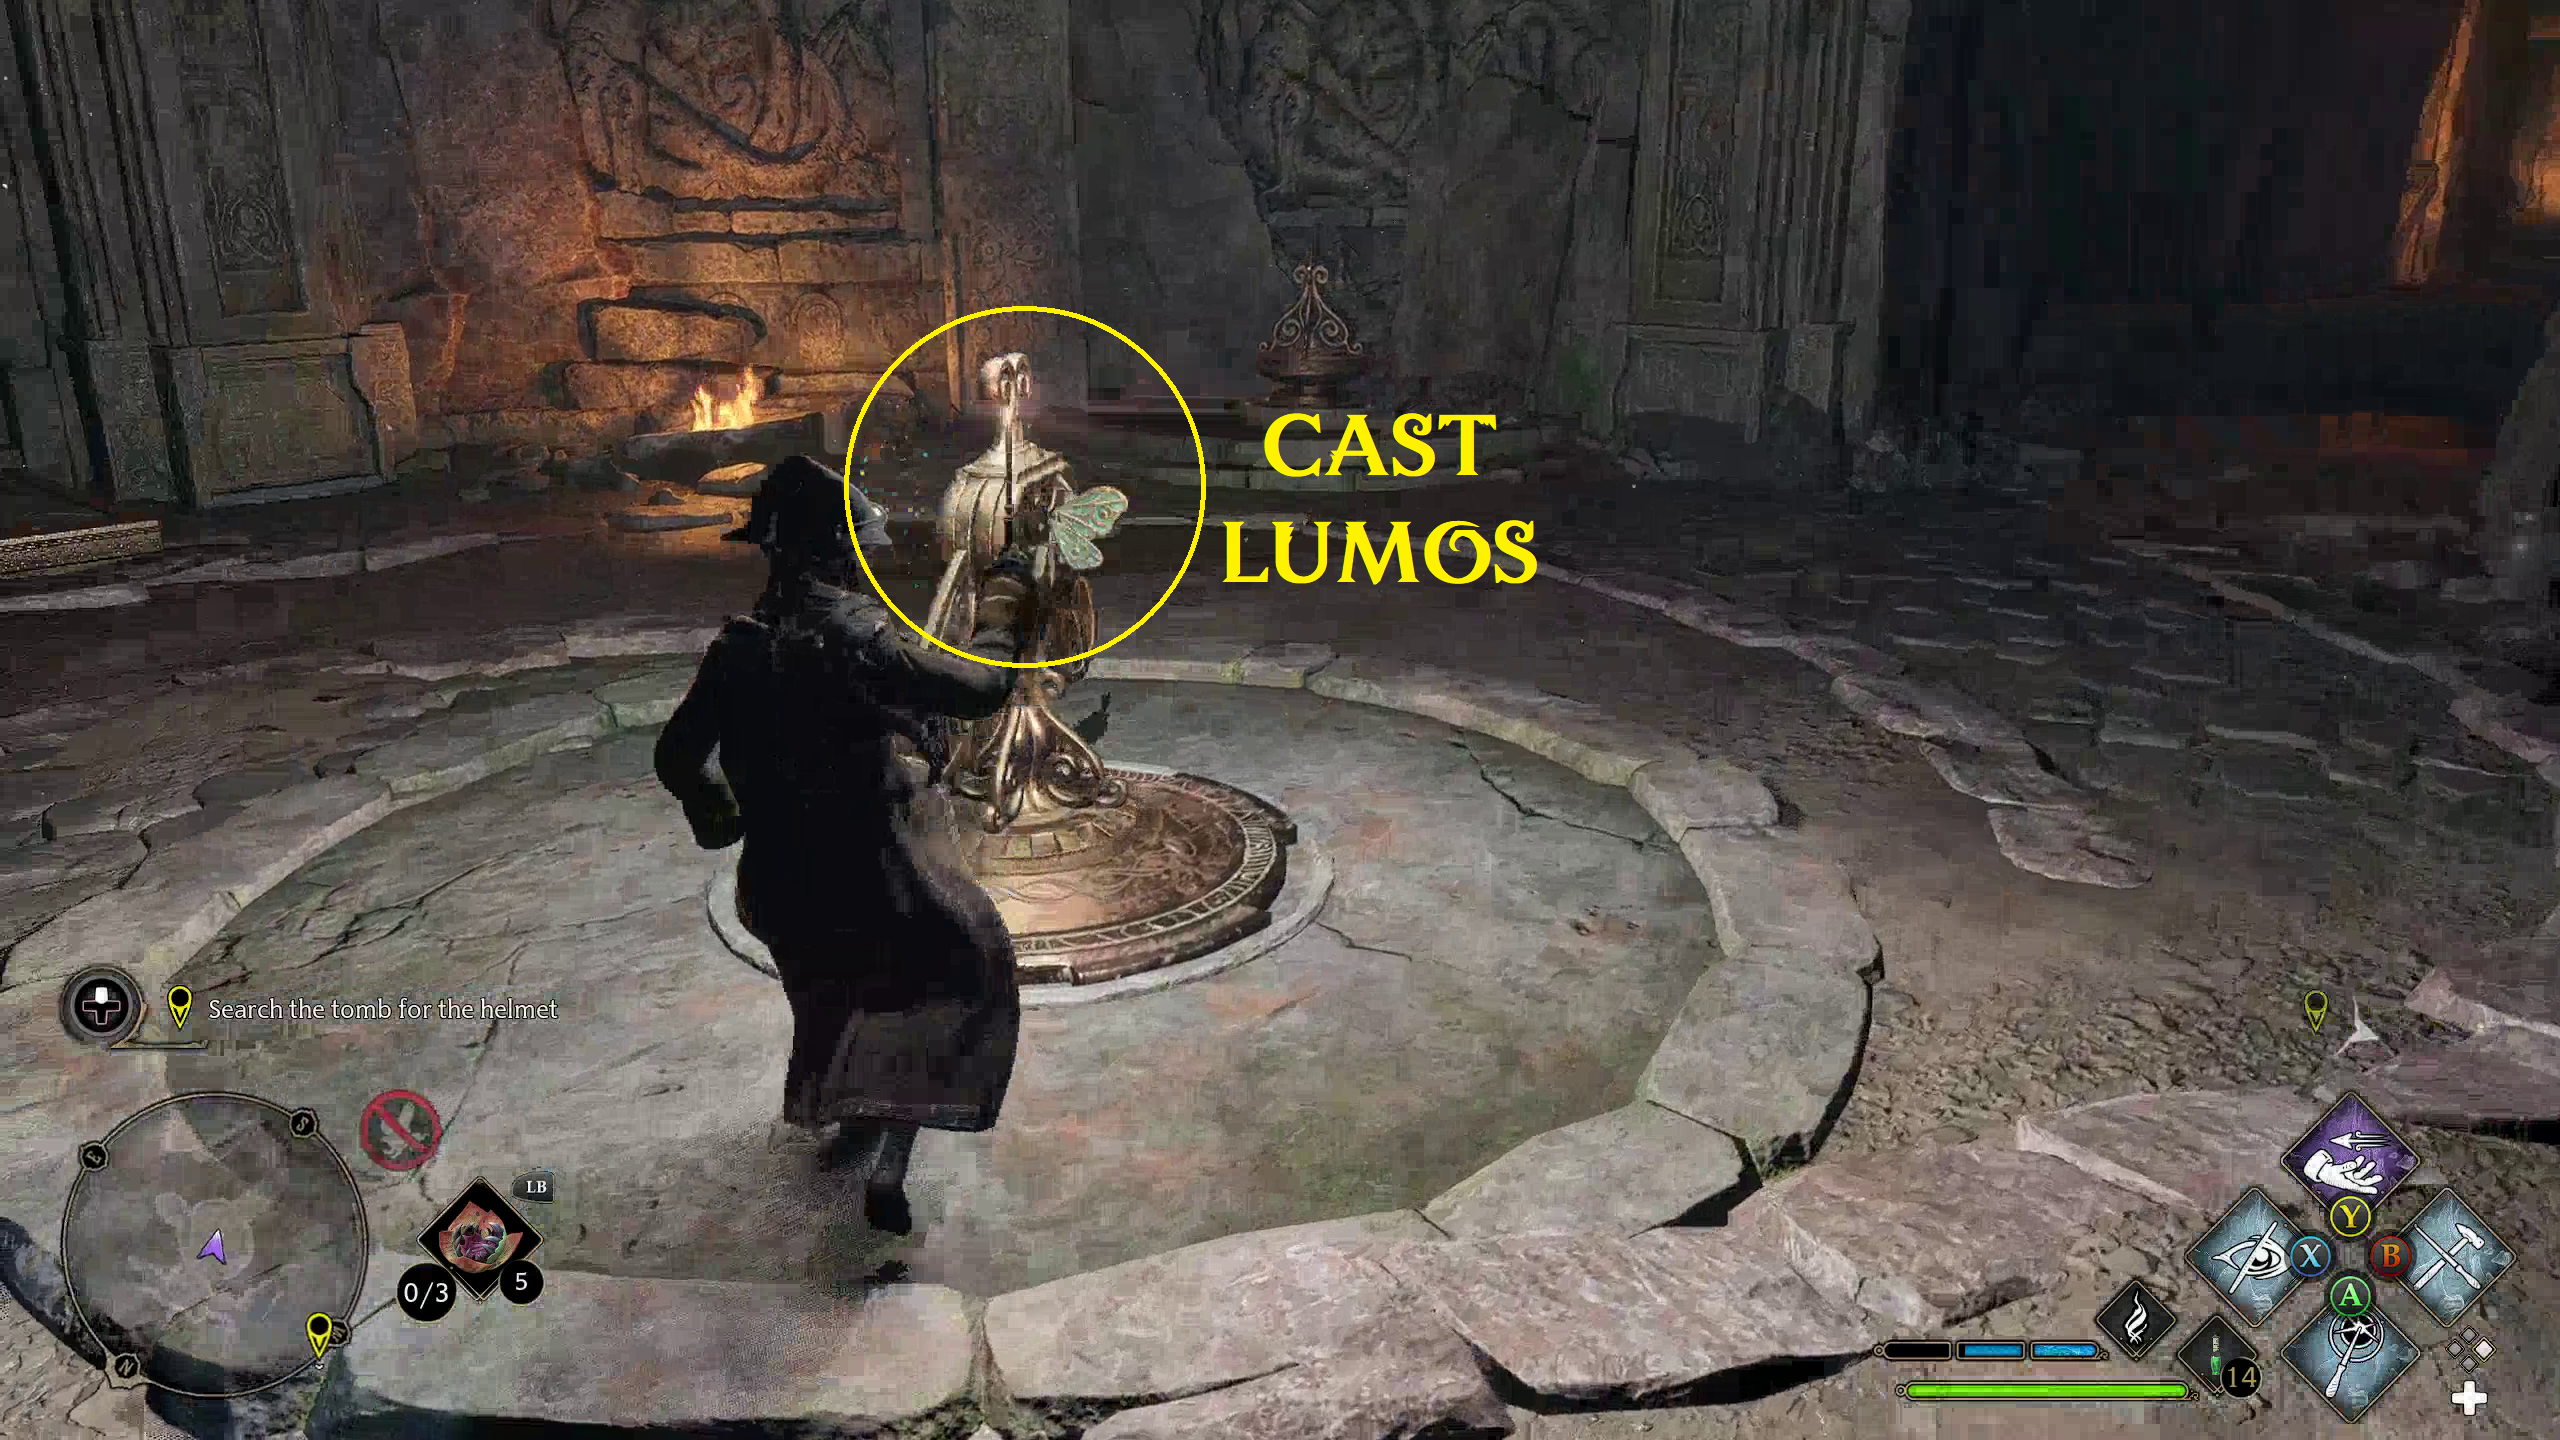
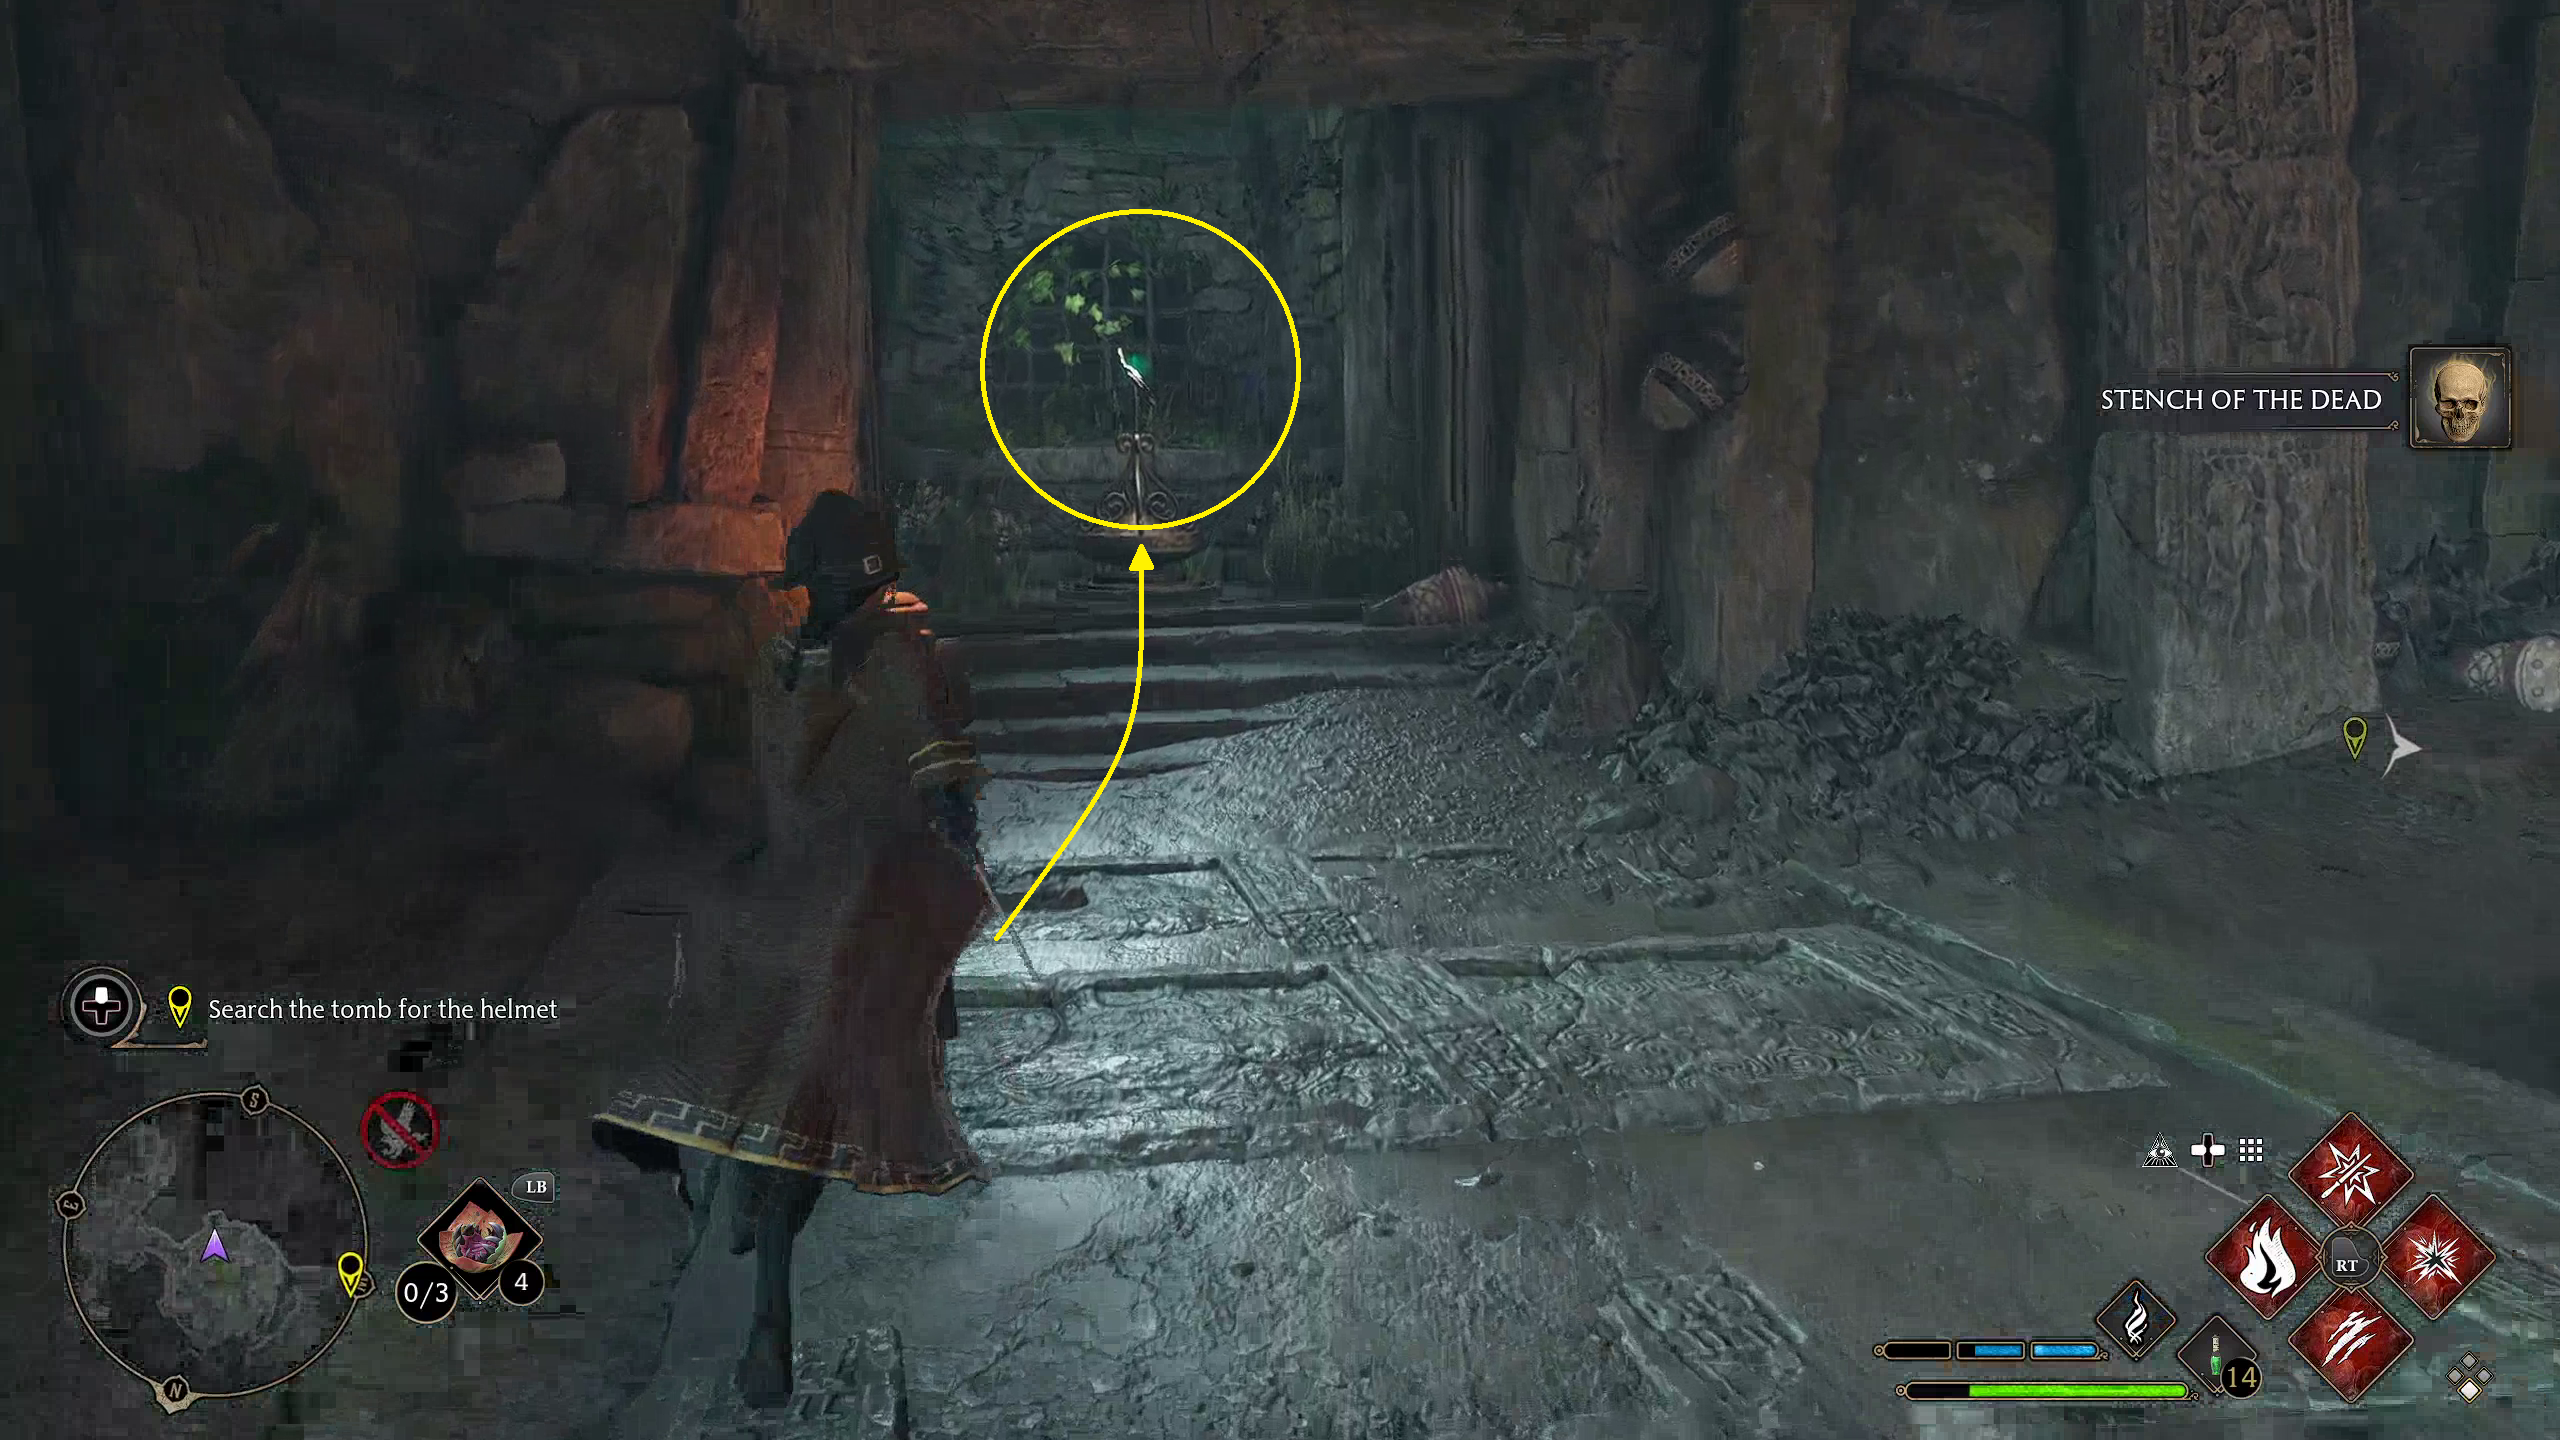
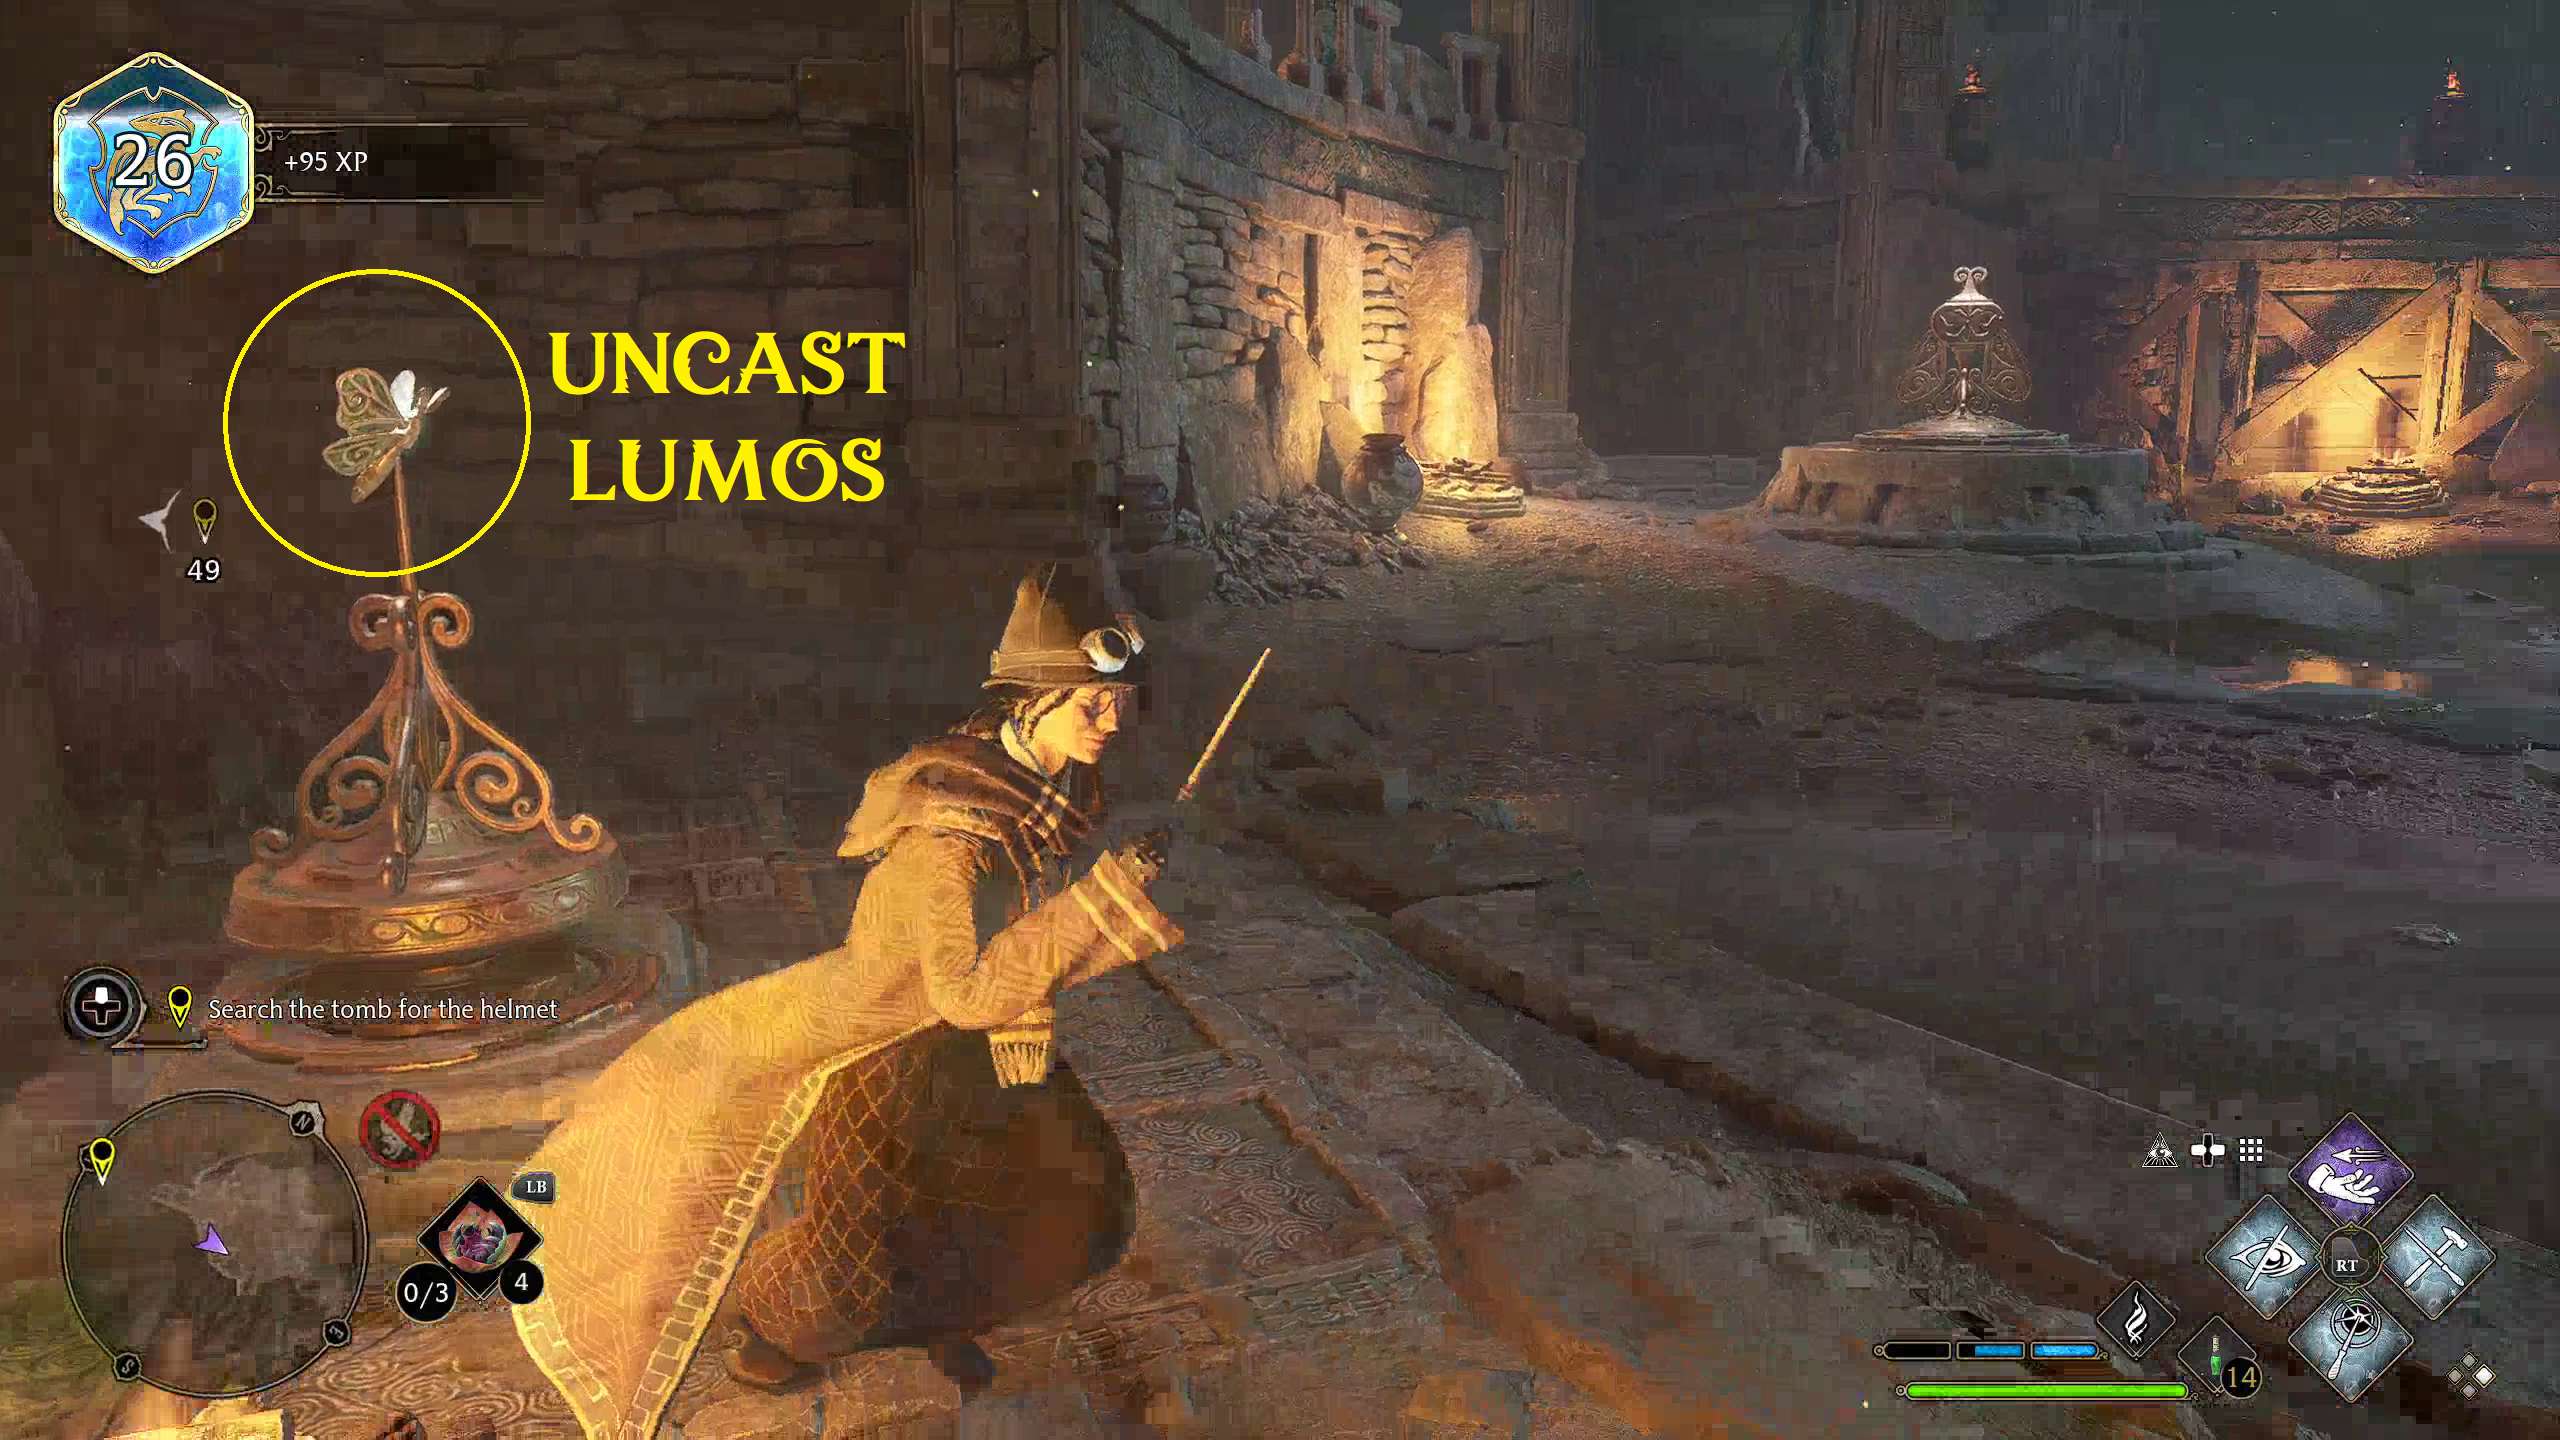
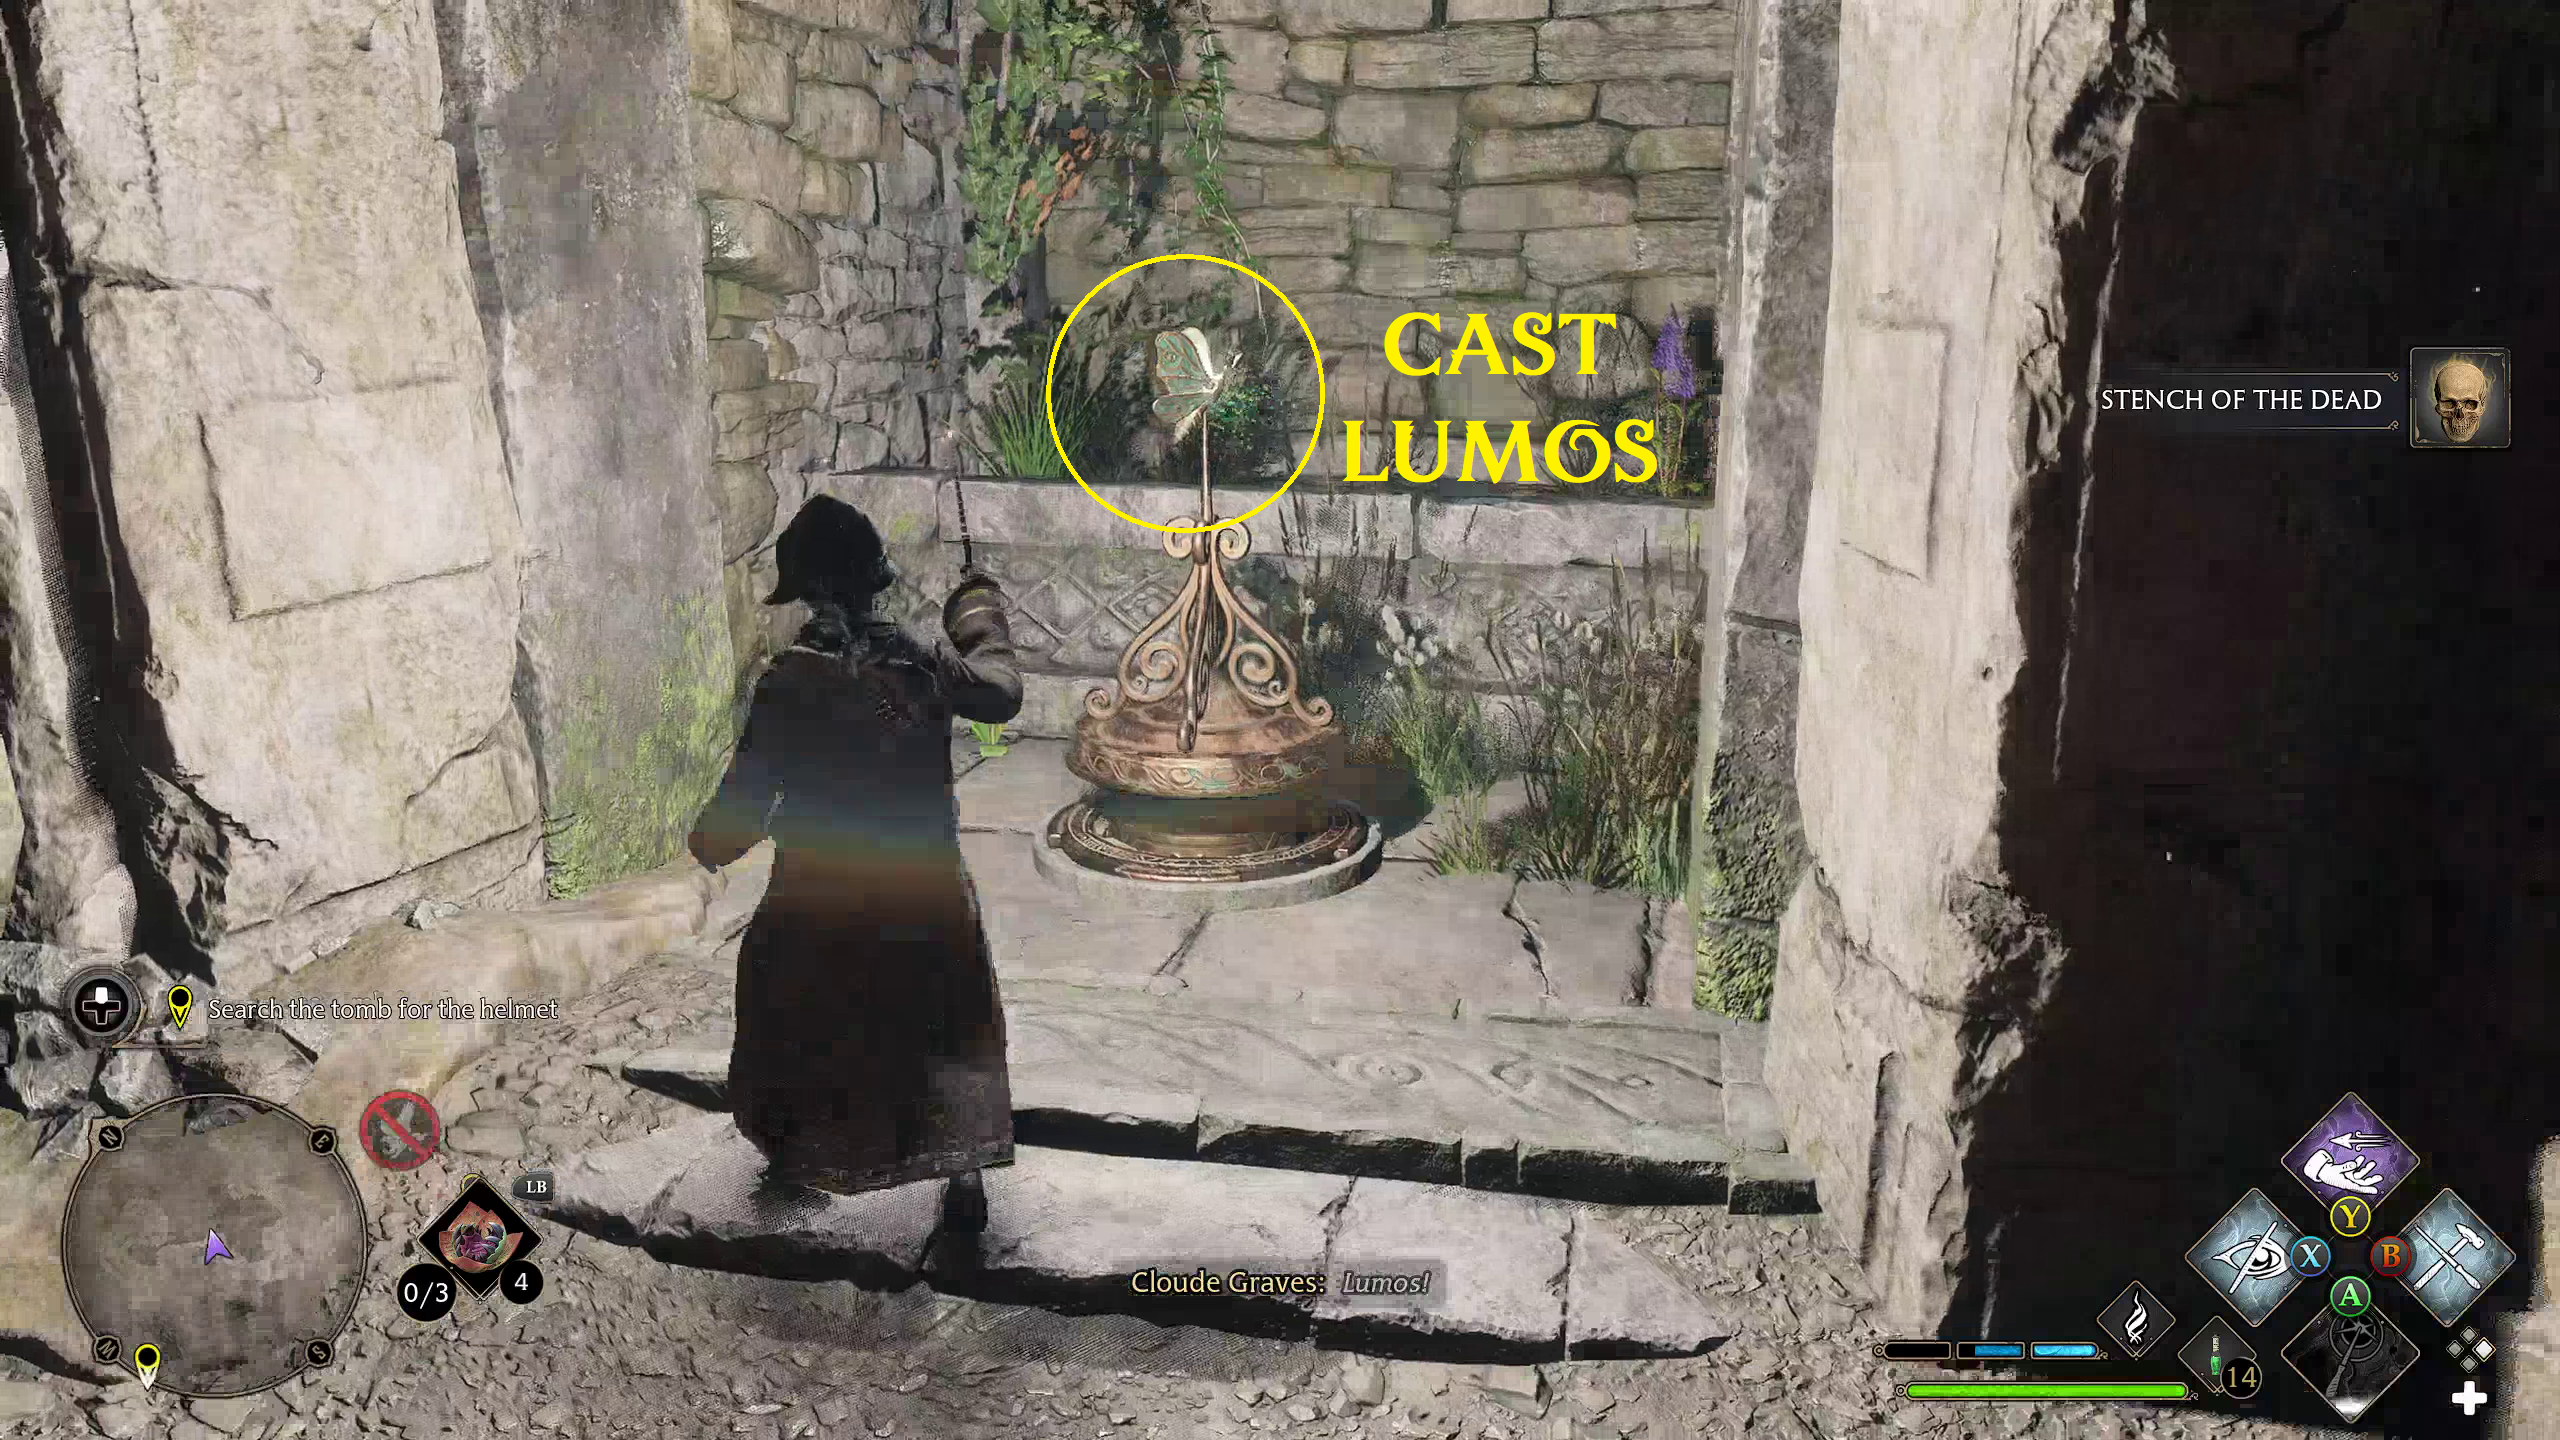
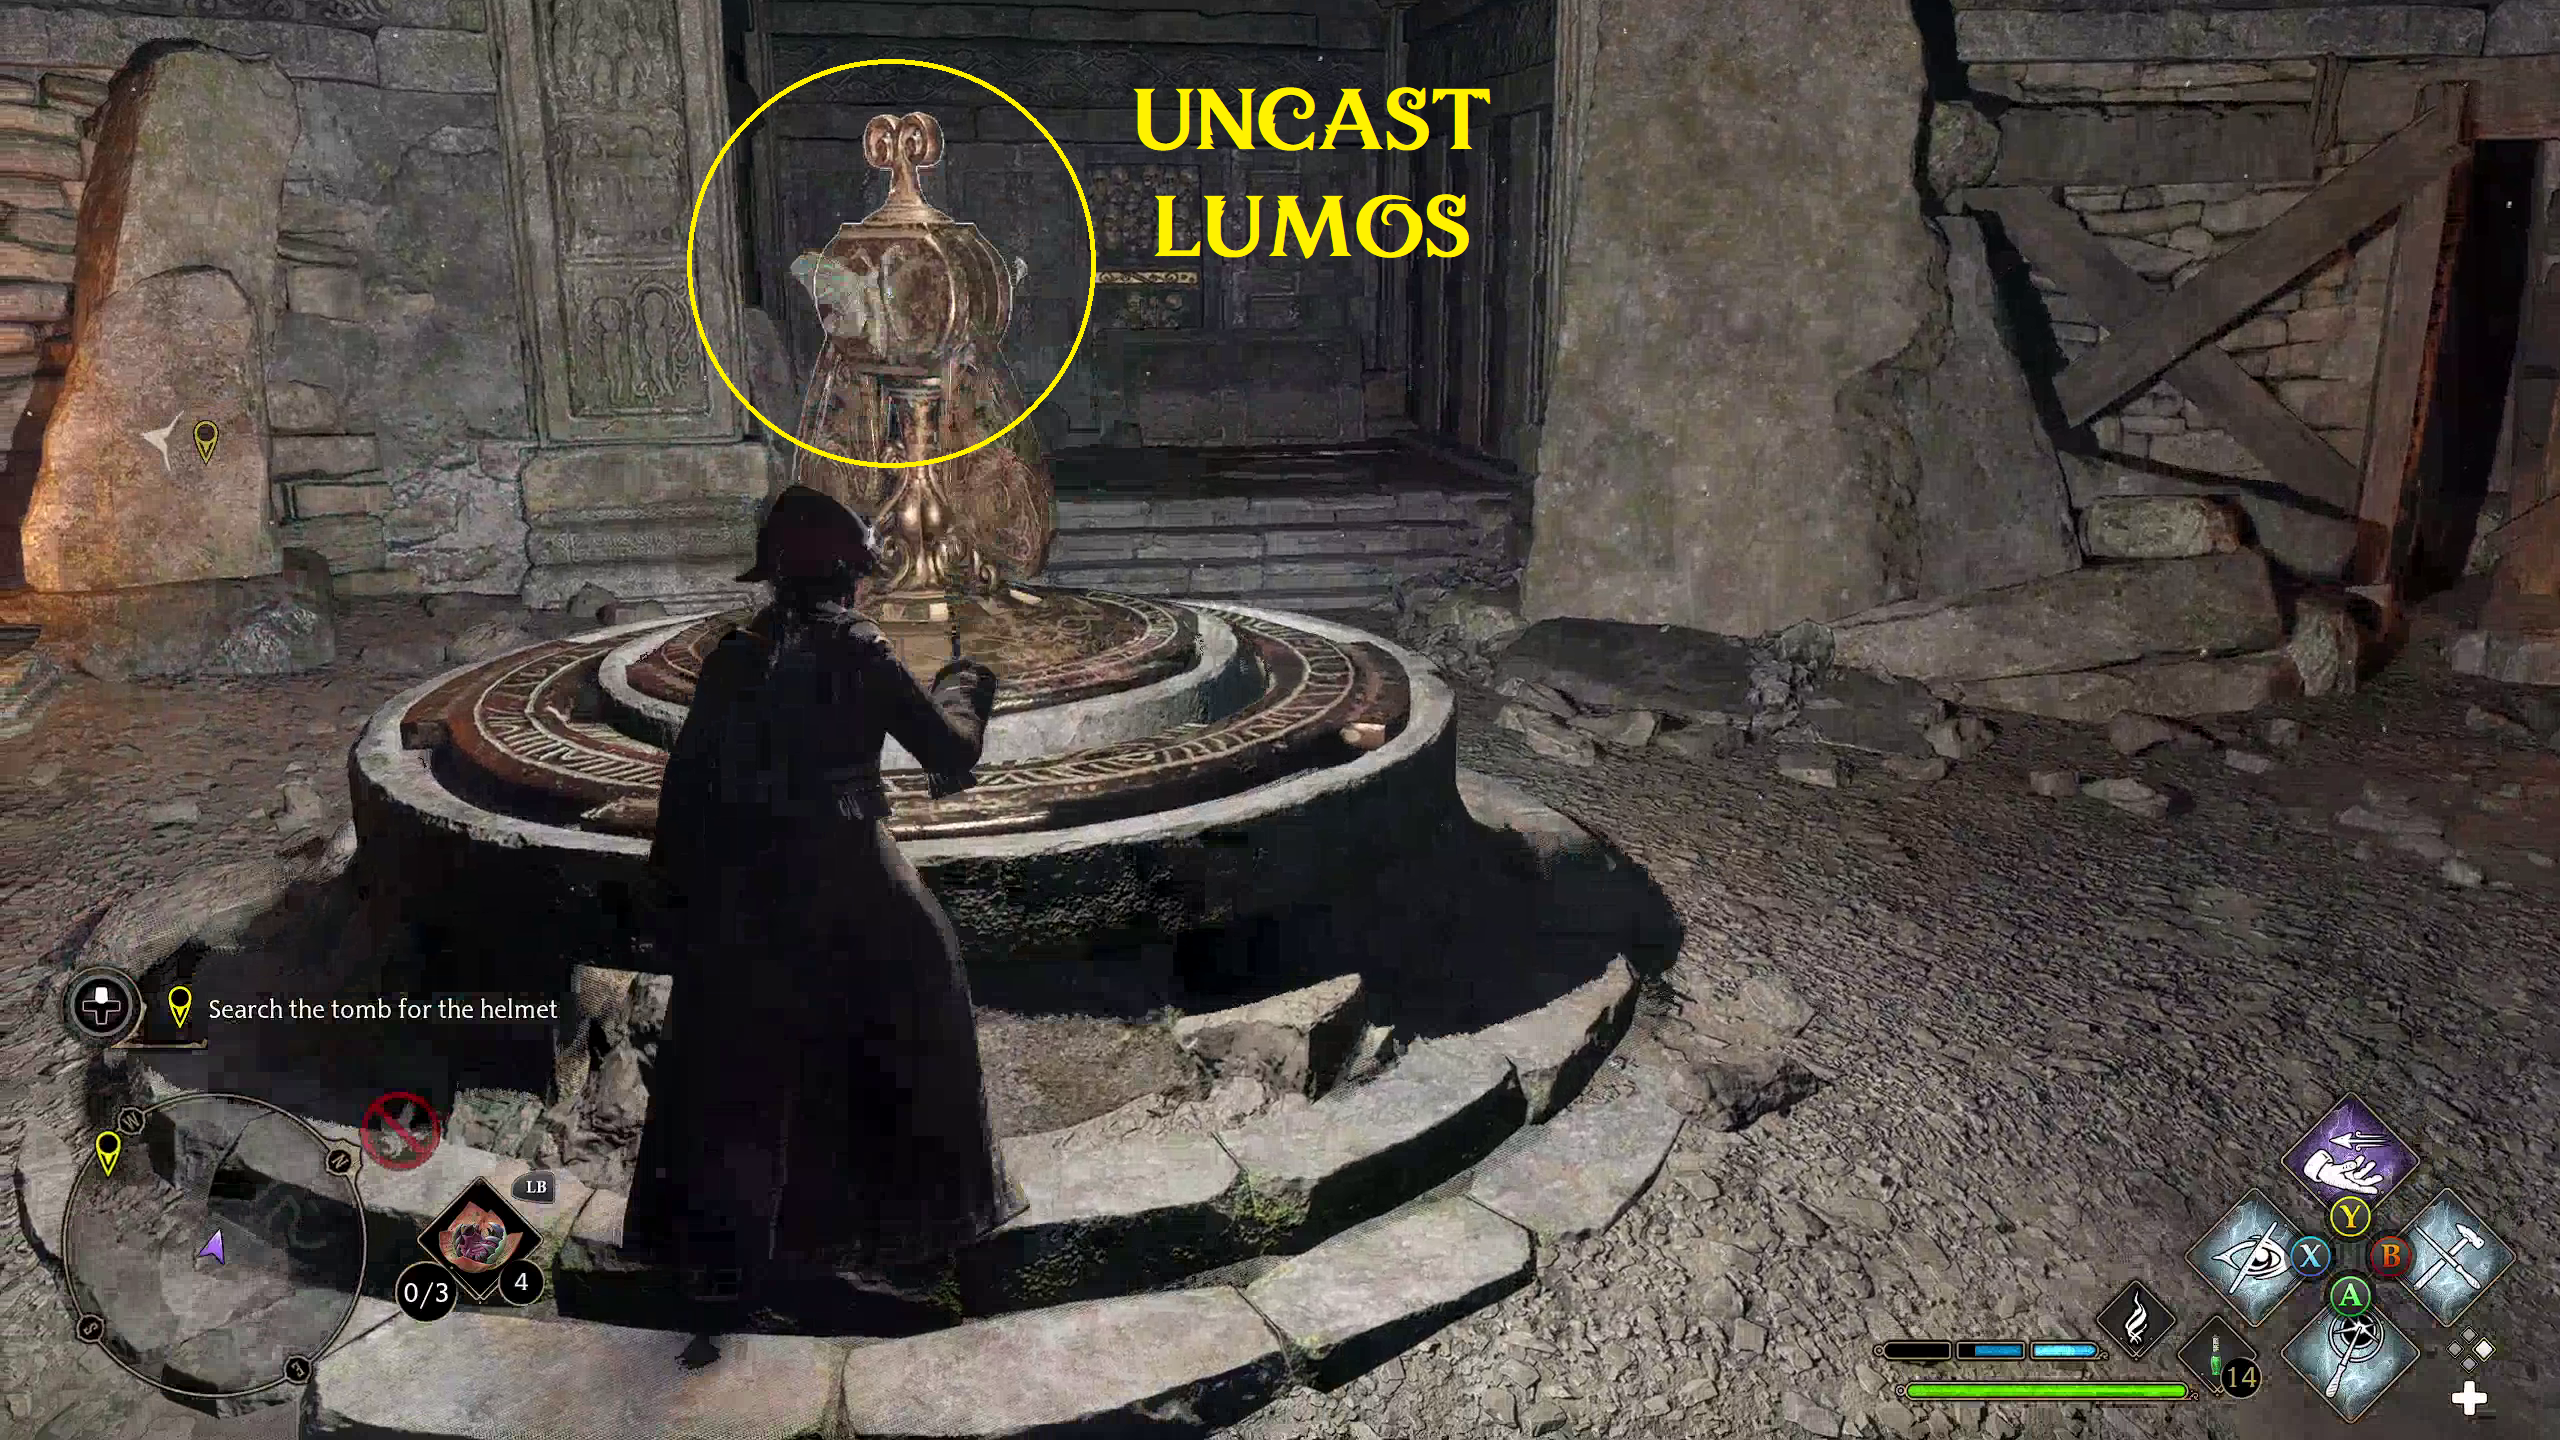
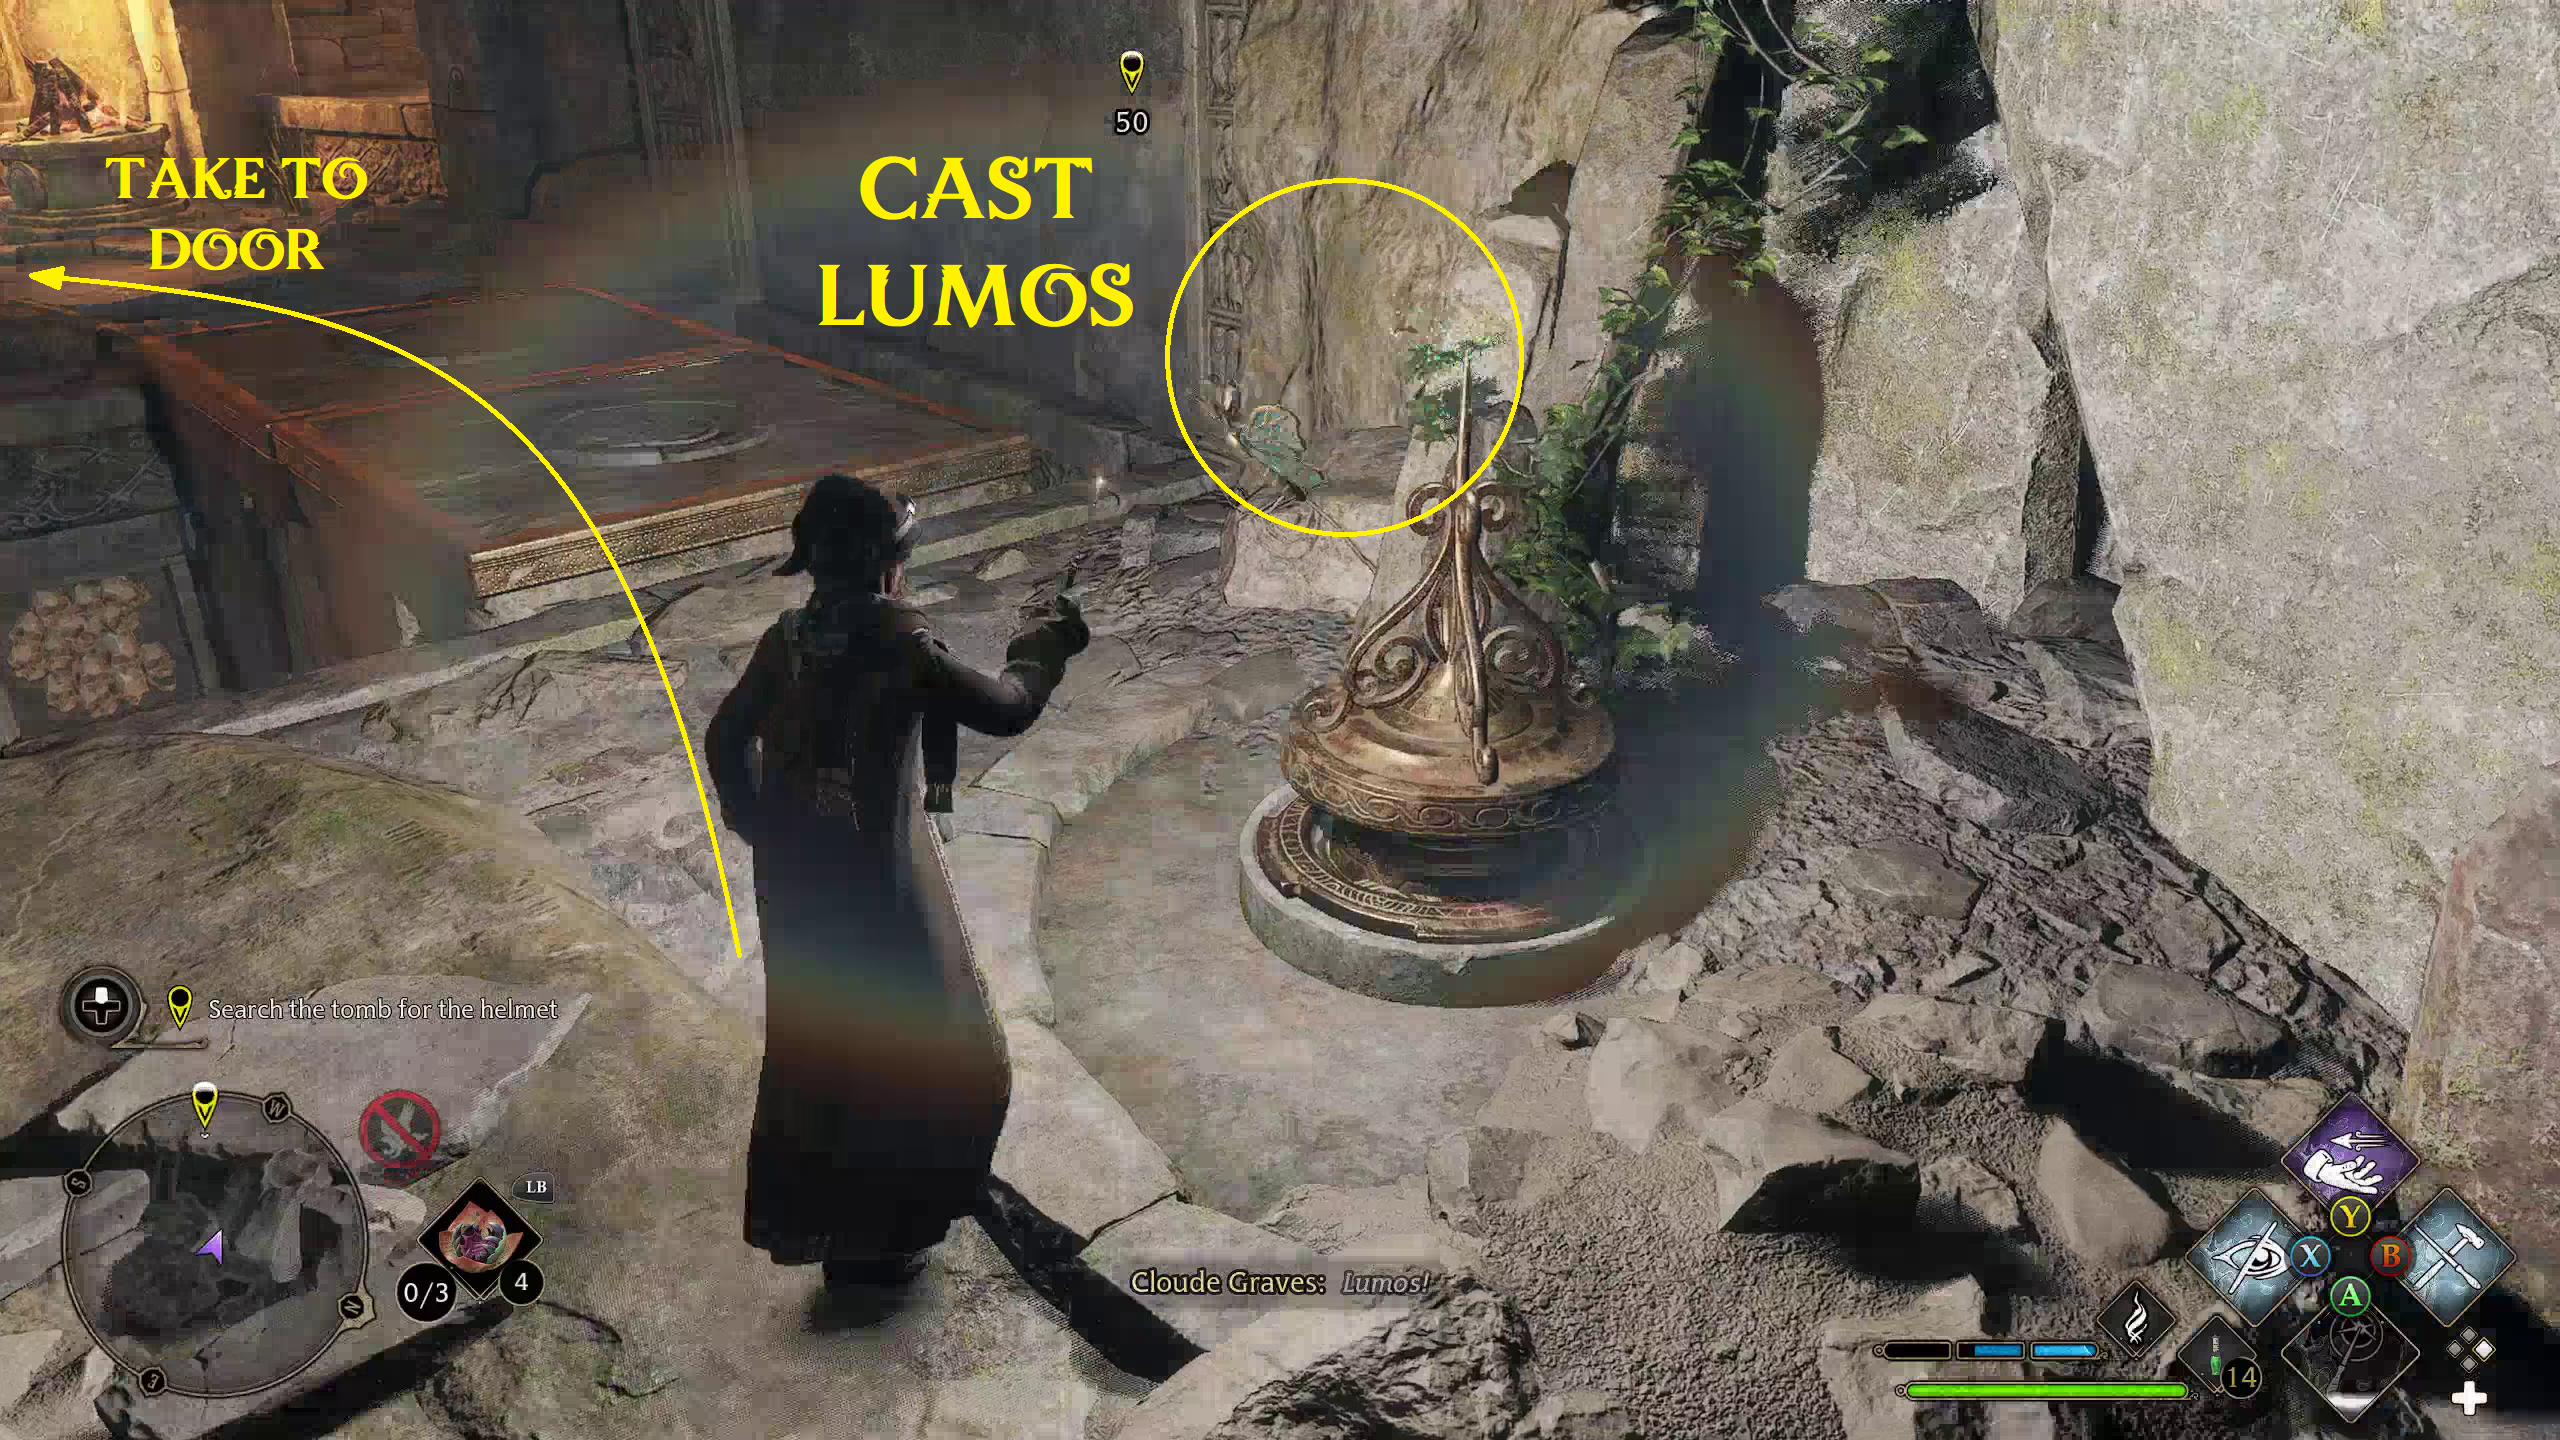
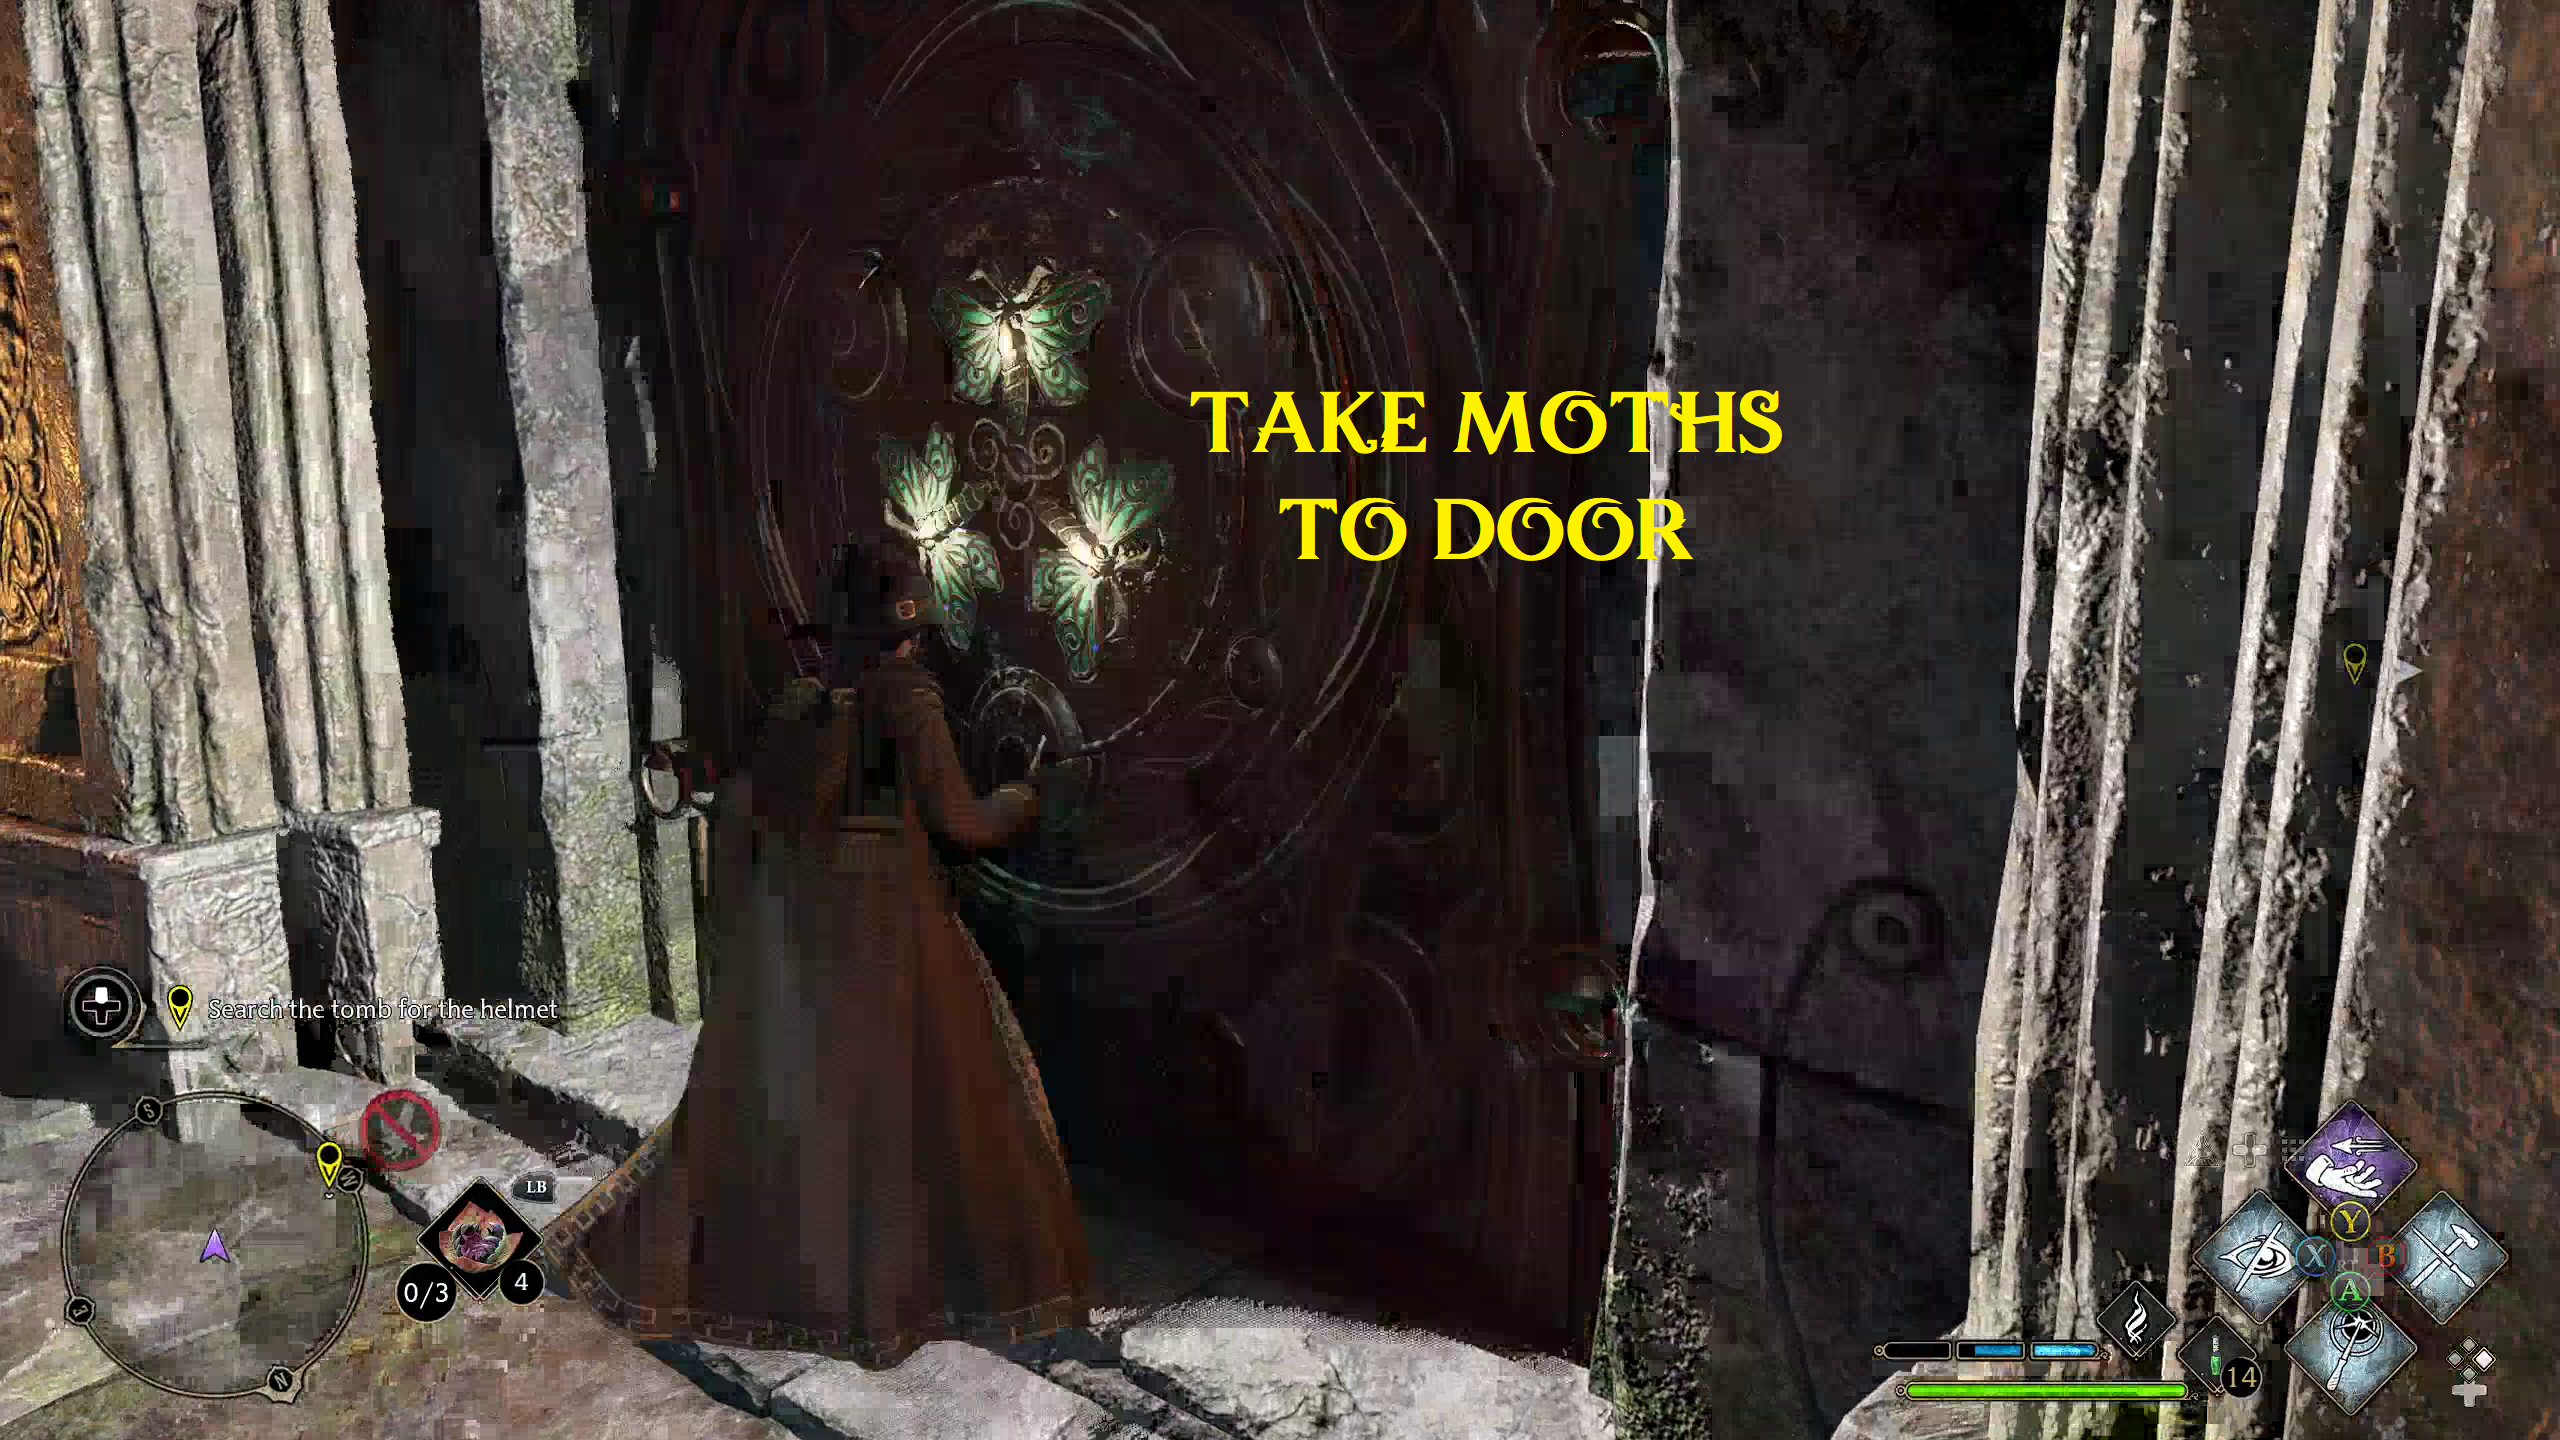
Shortly after entering the tomb, you’ll be introduced to it’s main mechanic. You’ll come across a door with three moth-shaped holes, two of which are filled (1). From here, turn left, then walk up to the moth on the pole (but not before grabbing the bag of gold next to it) and cast Lumos (2). This will cause the moth to circle your wand (3), at which point you can take it to the door and uncast Lumos to get it to to go into the door (4). The door will then open, and you can continue.
1234
Immediately after opening the door, head into the alcove to your left for a chest. Then, continue on.
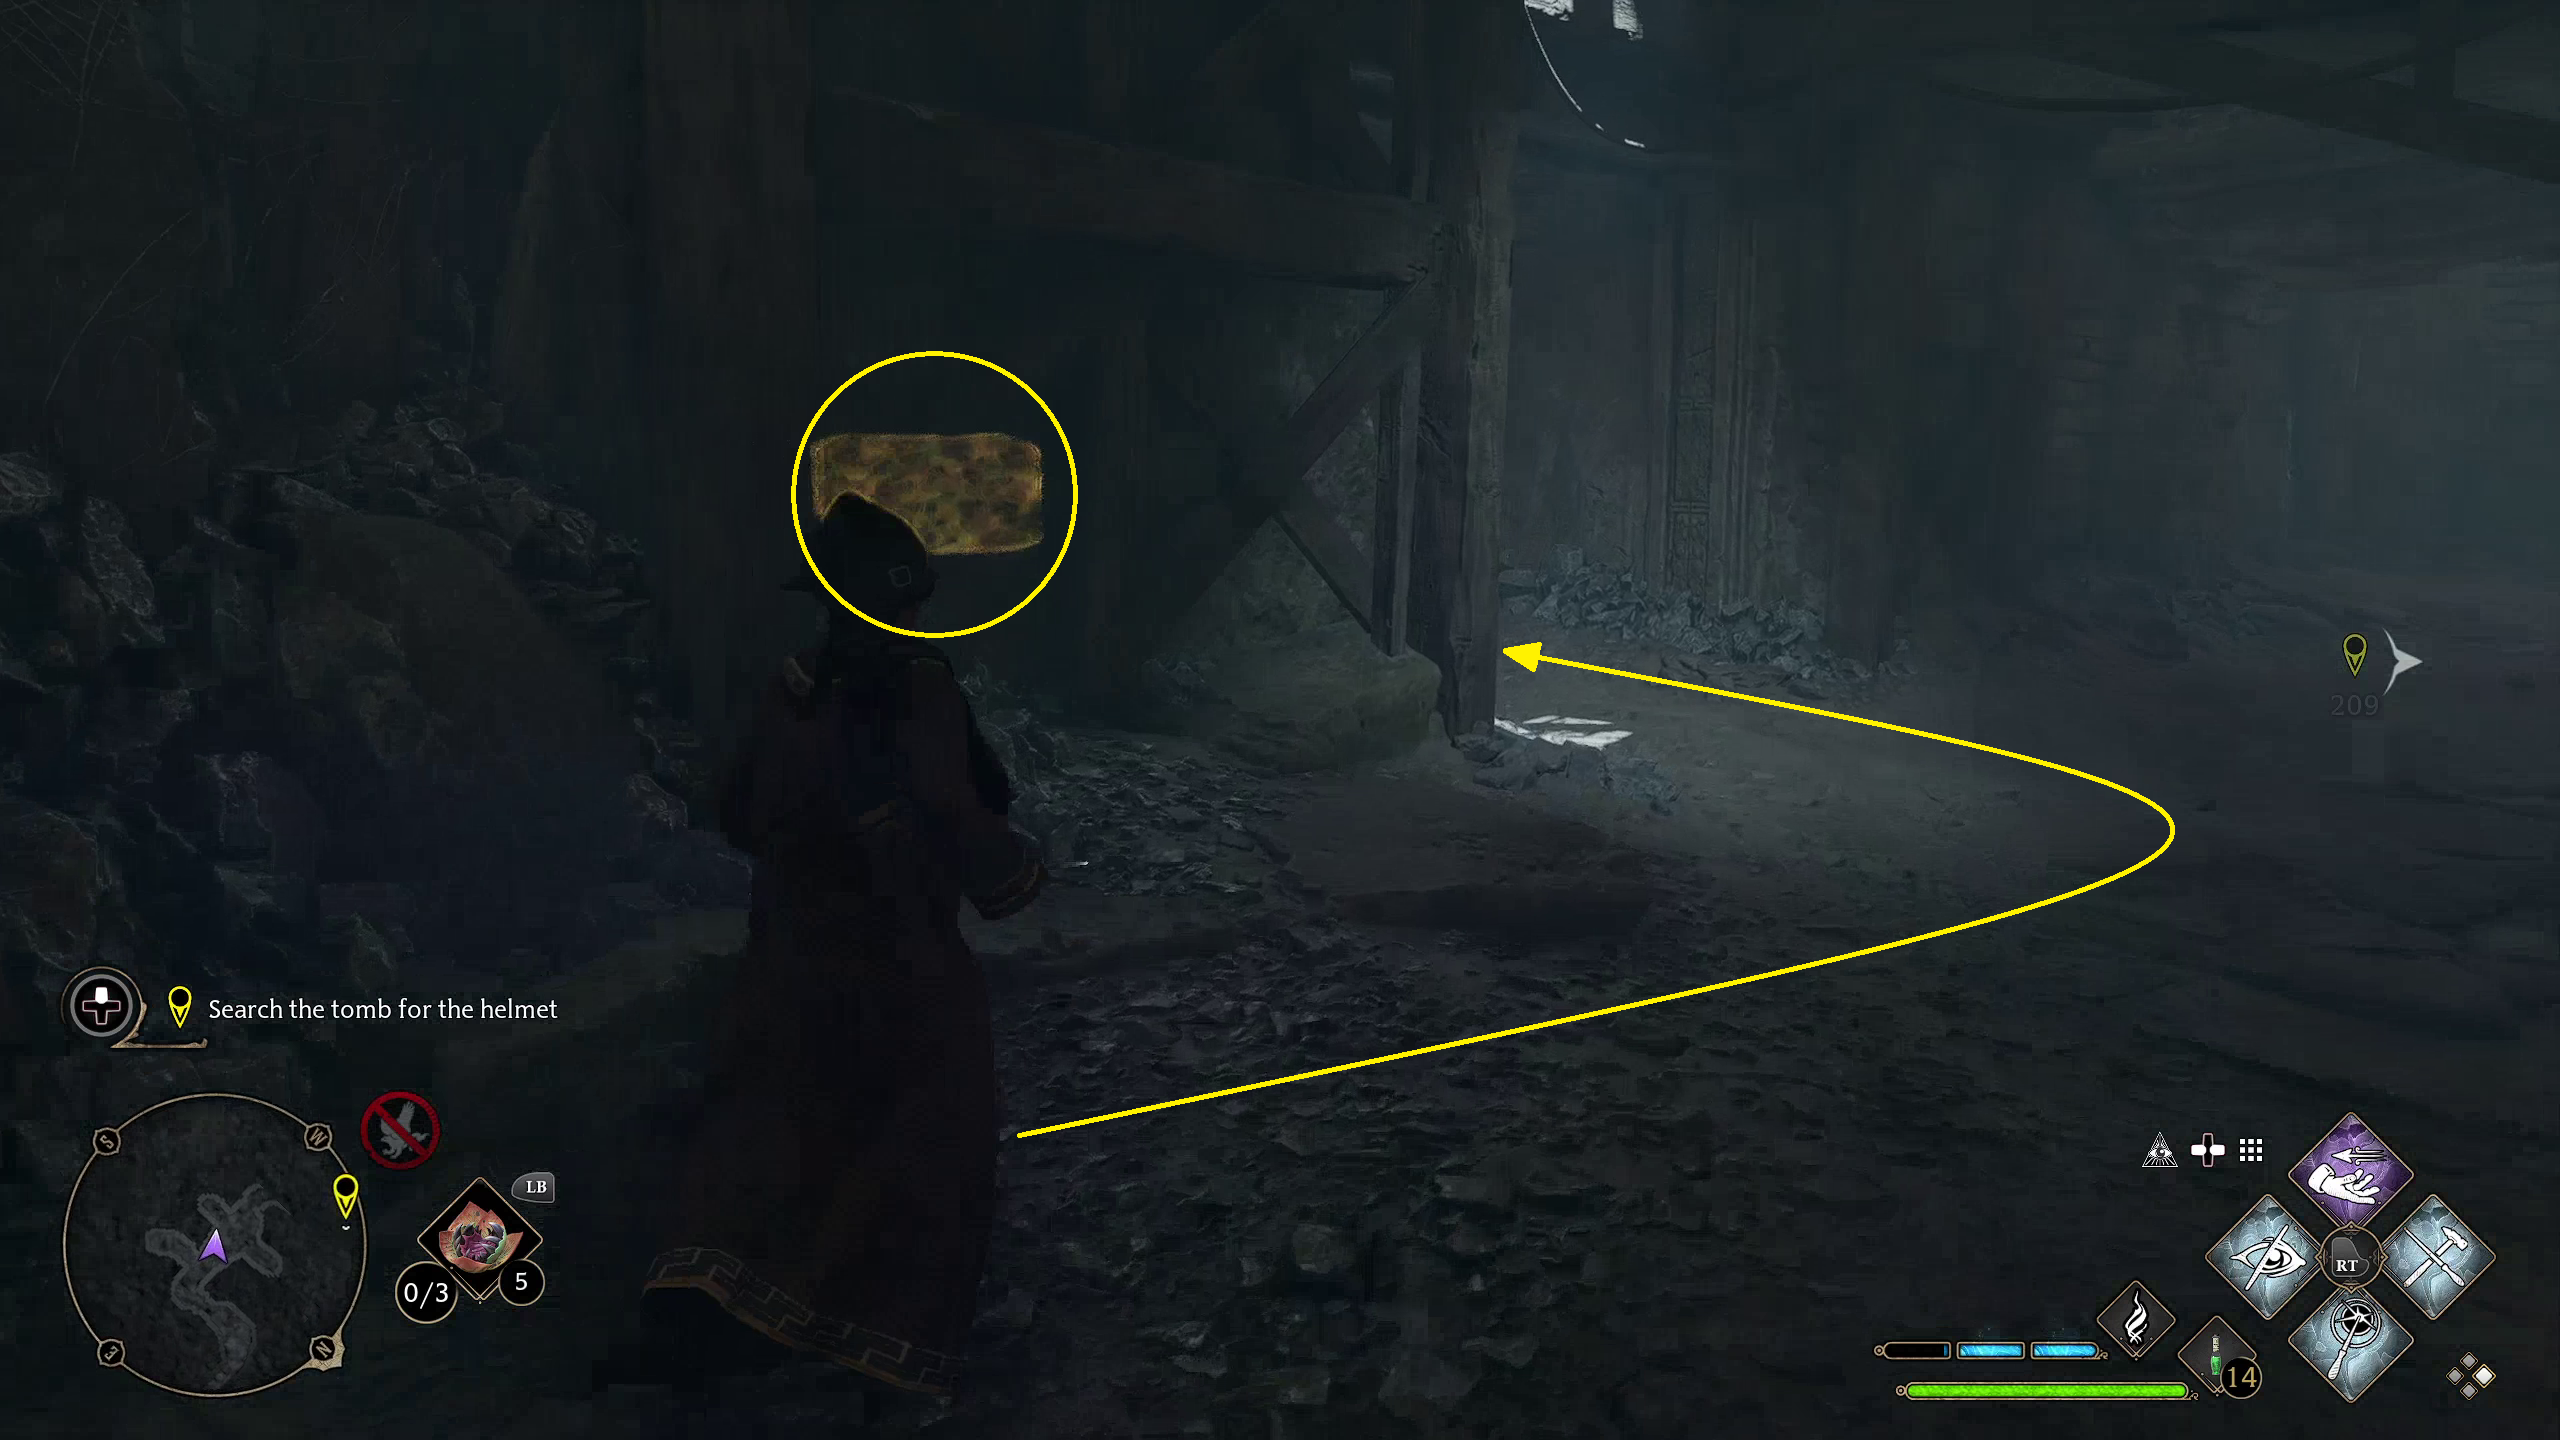
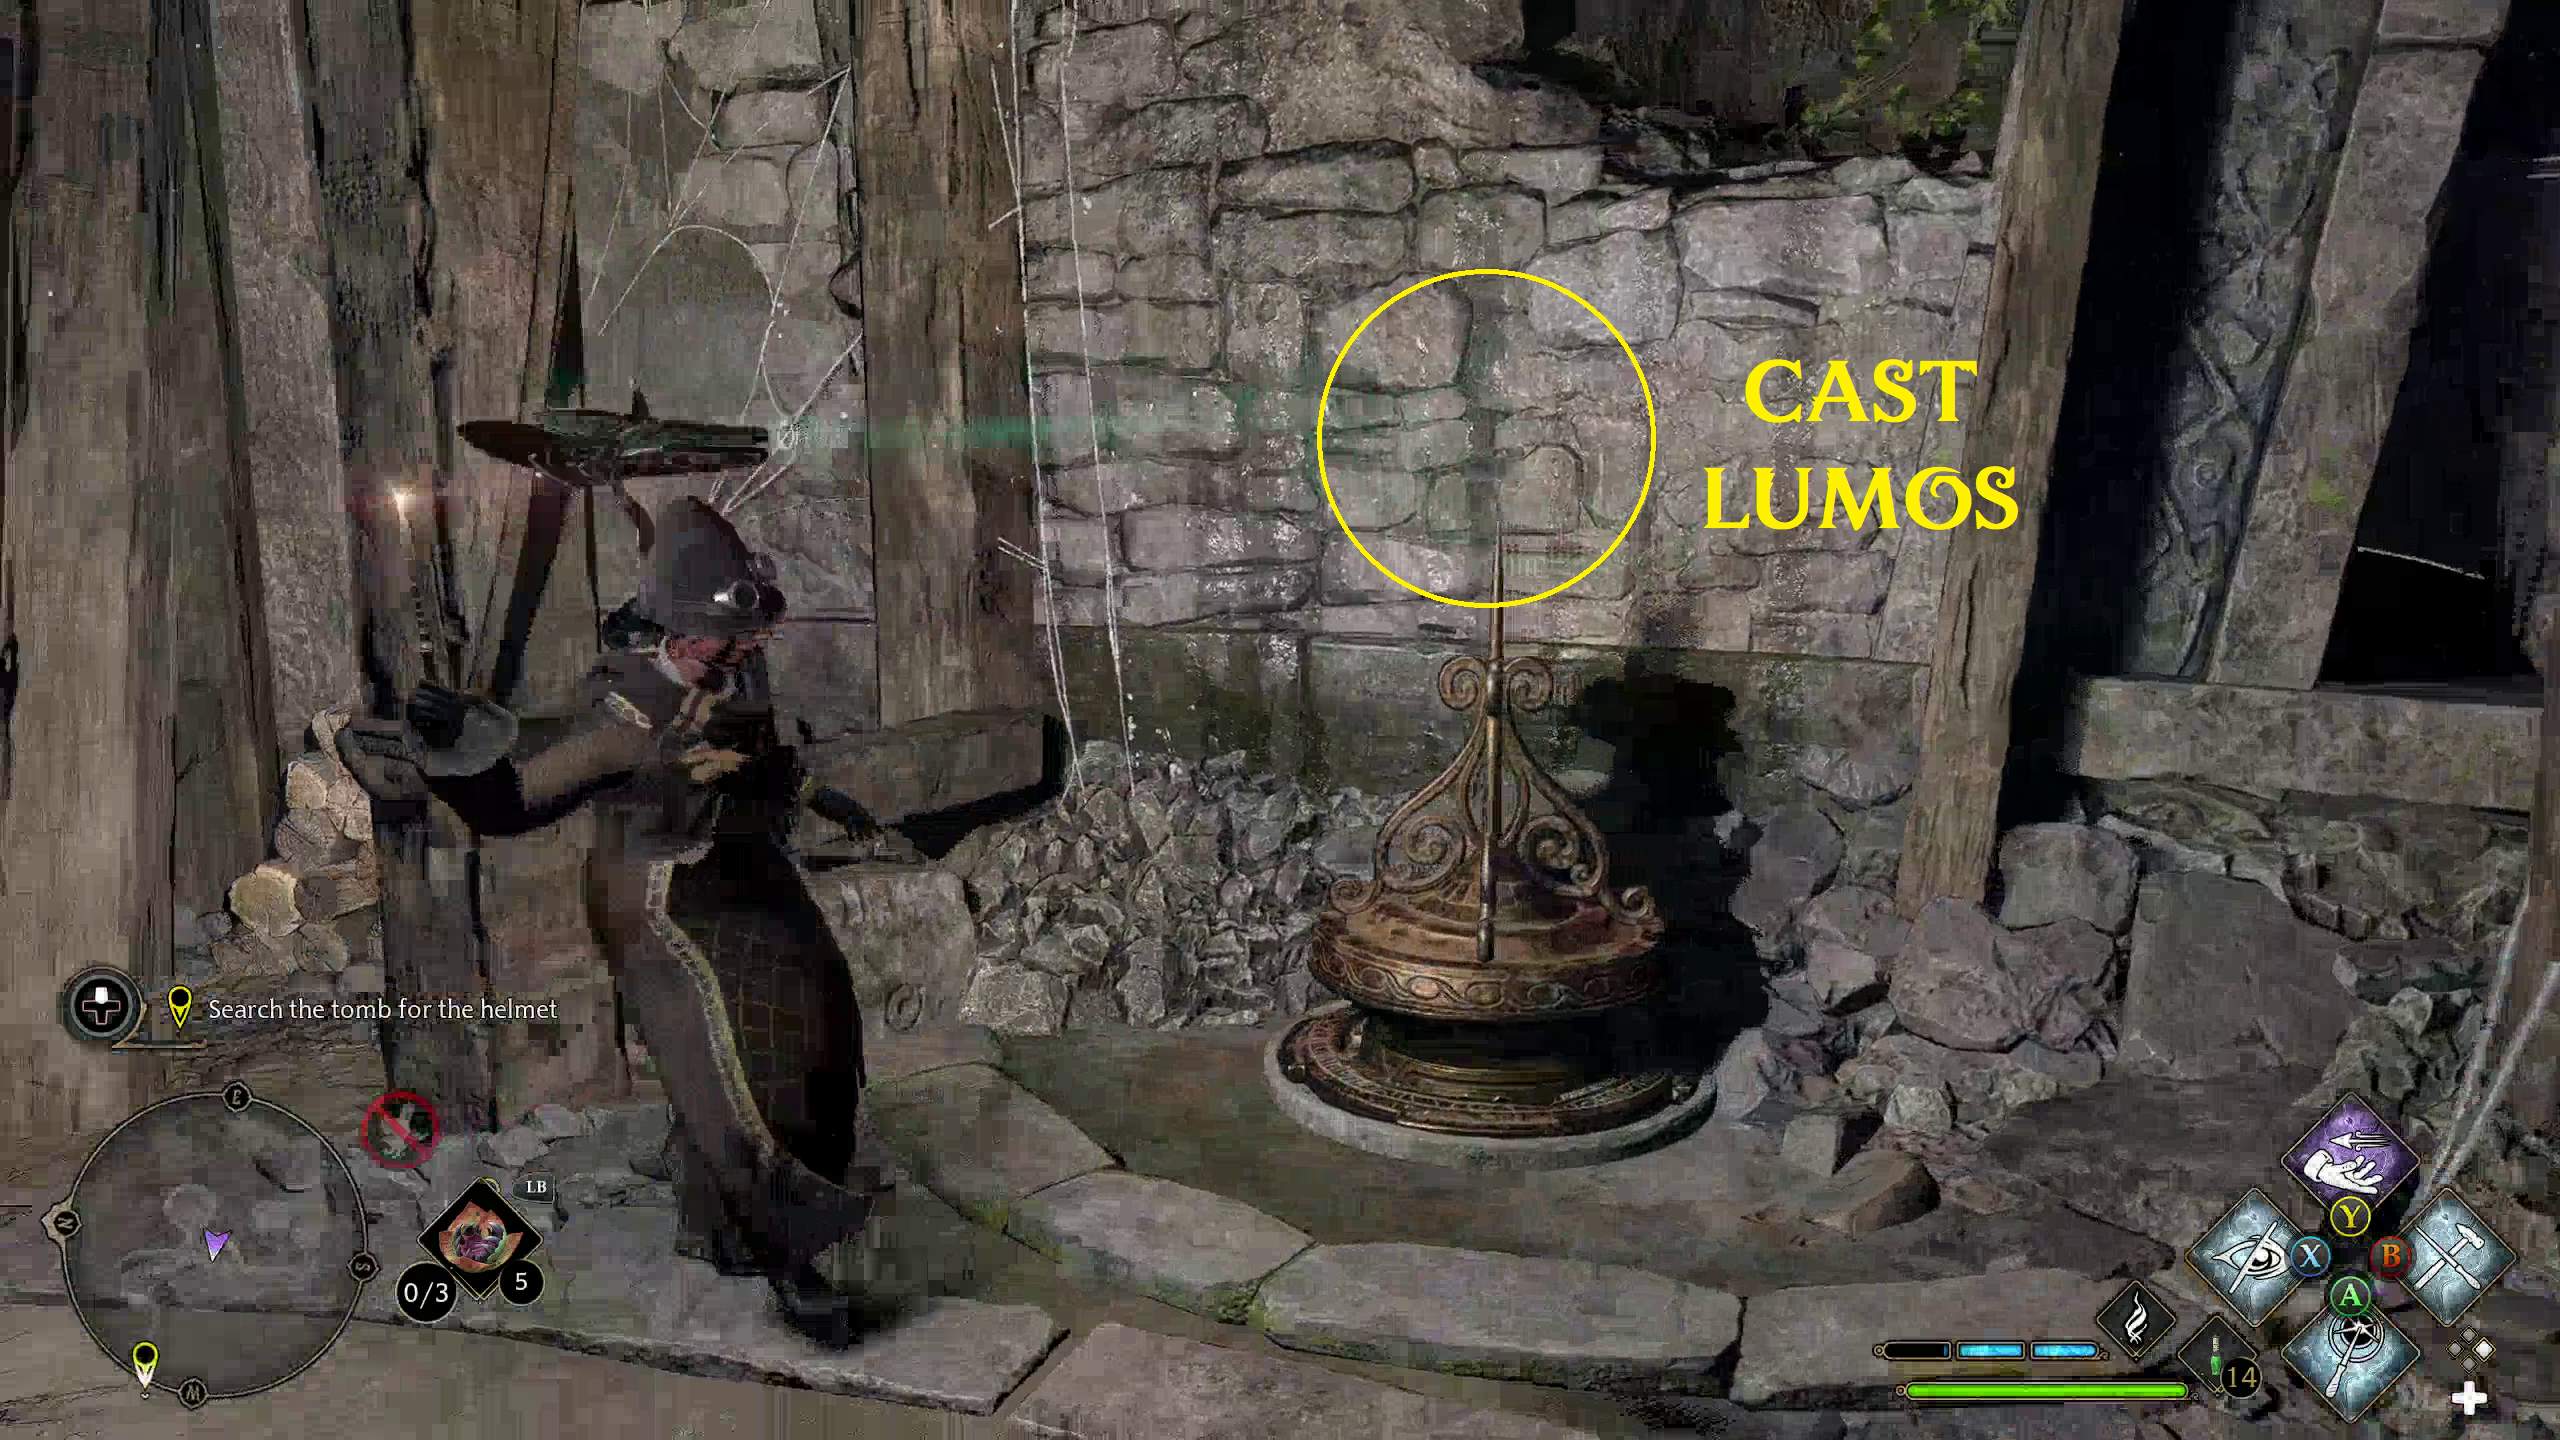
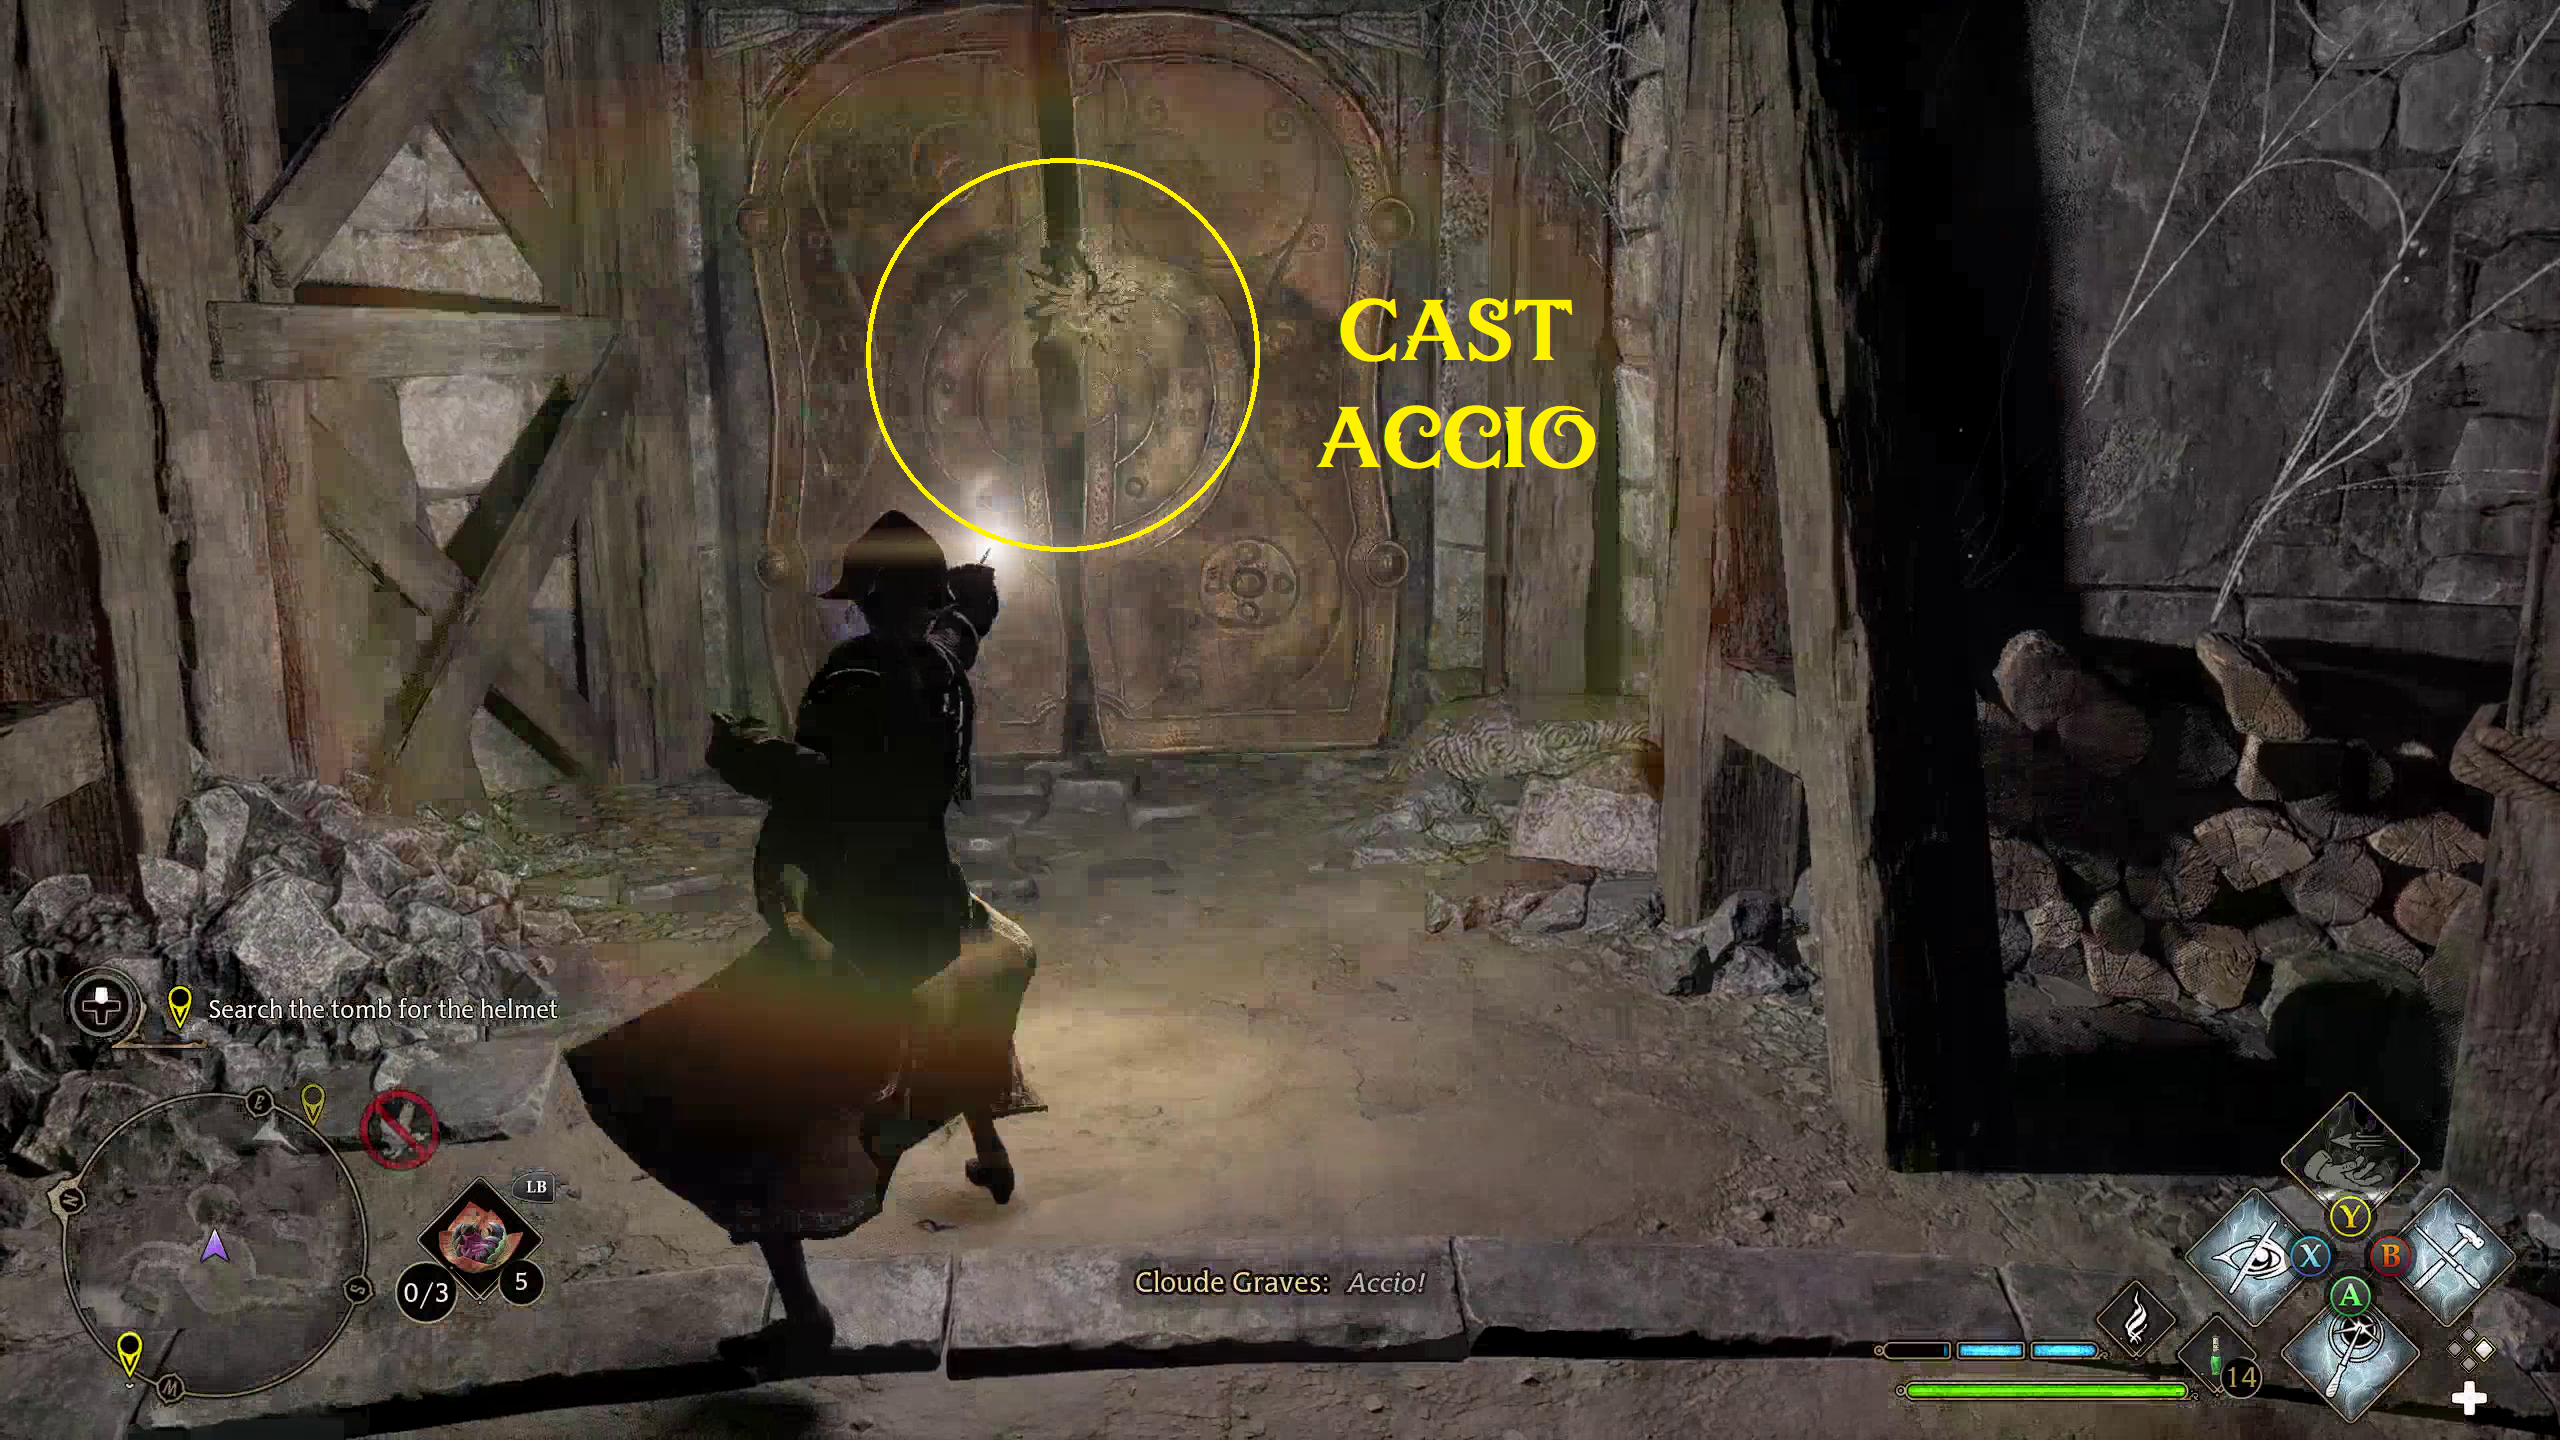
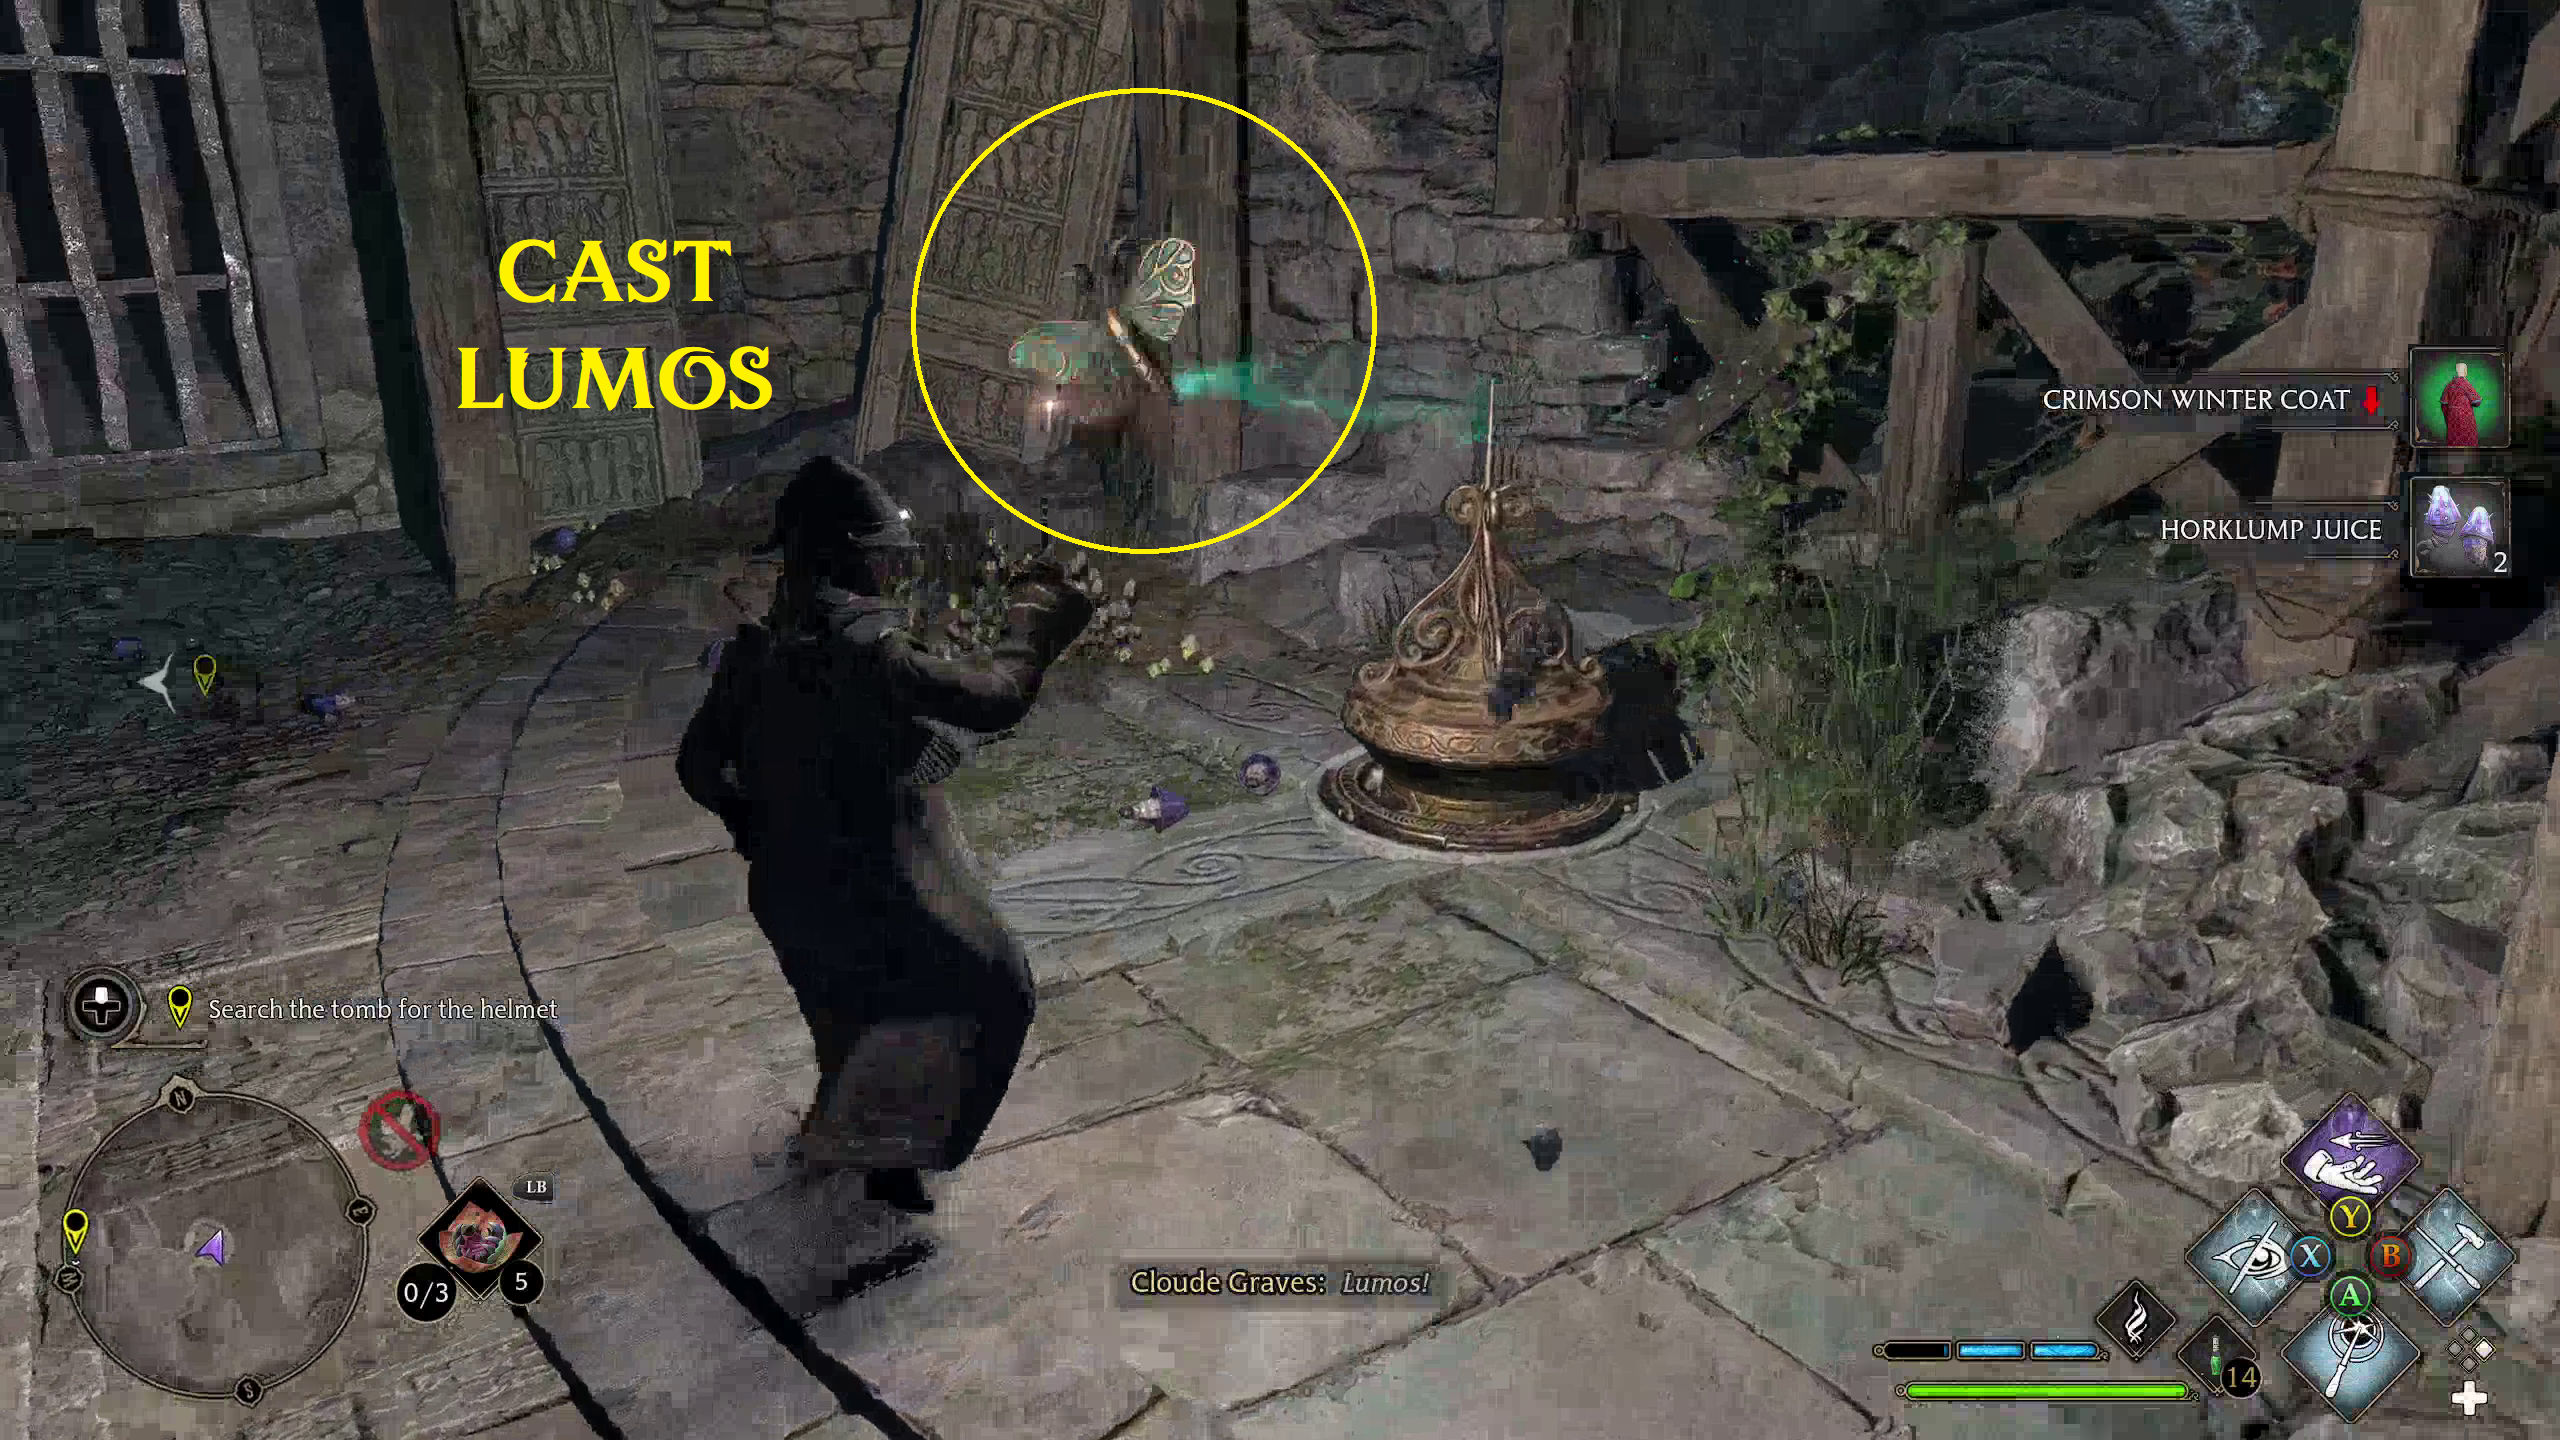
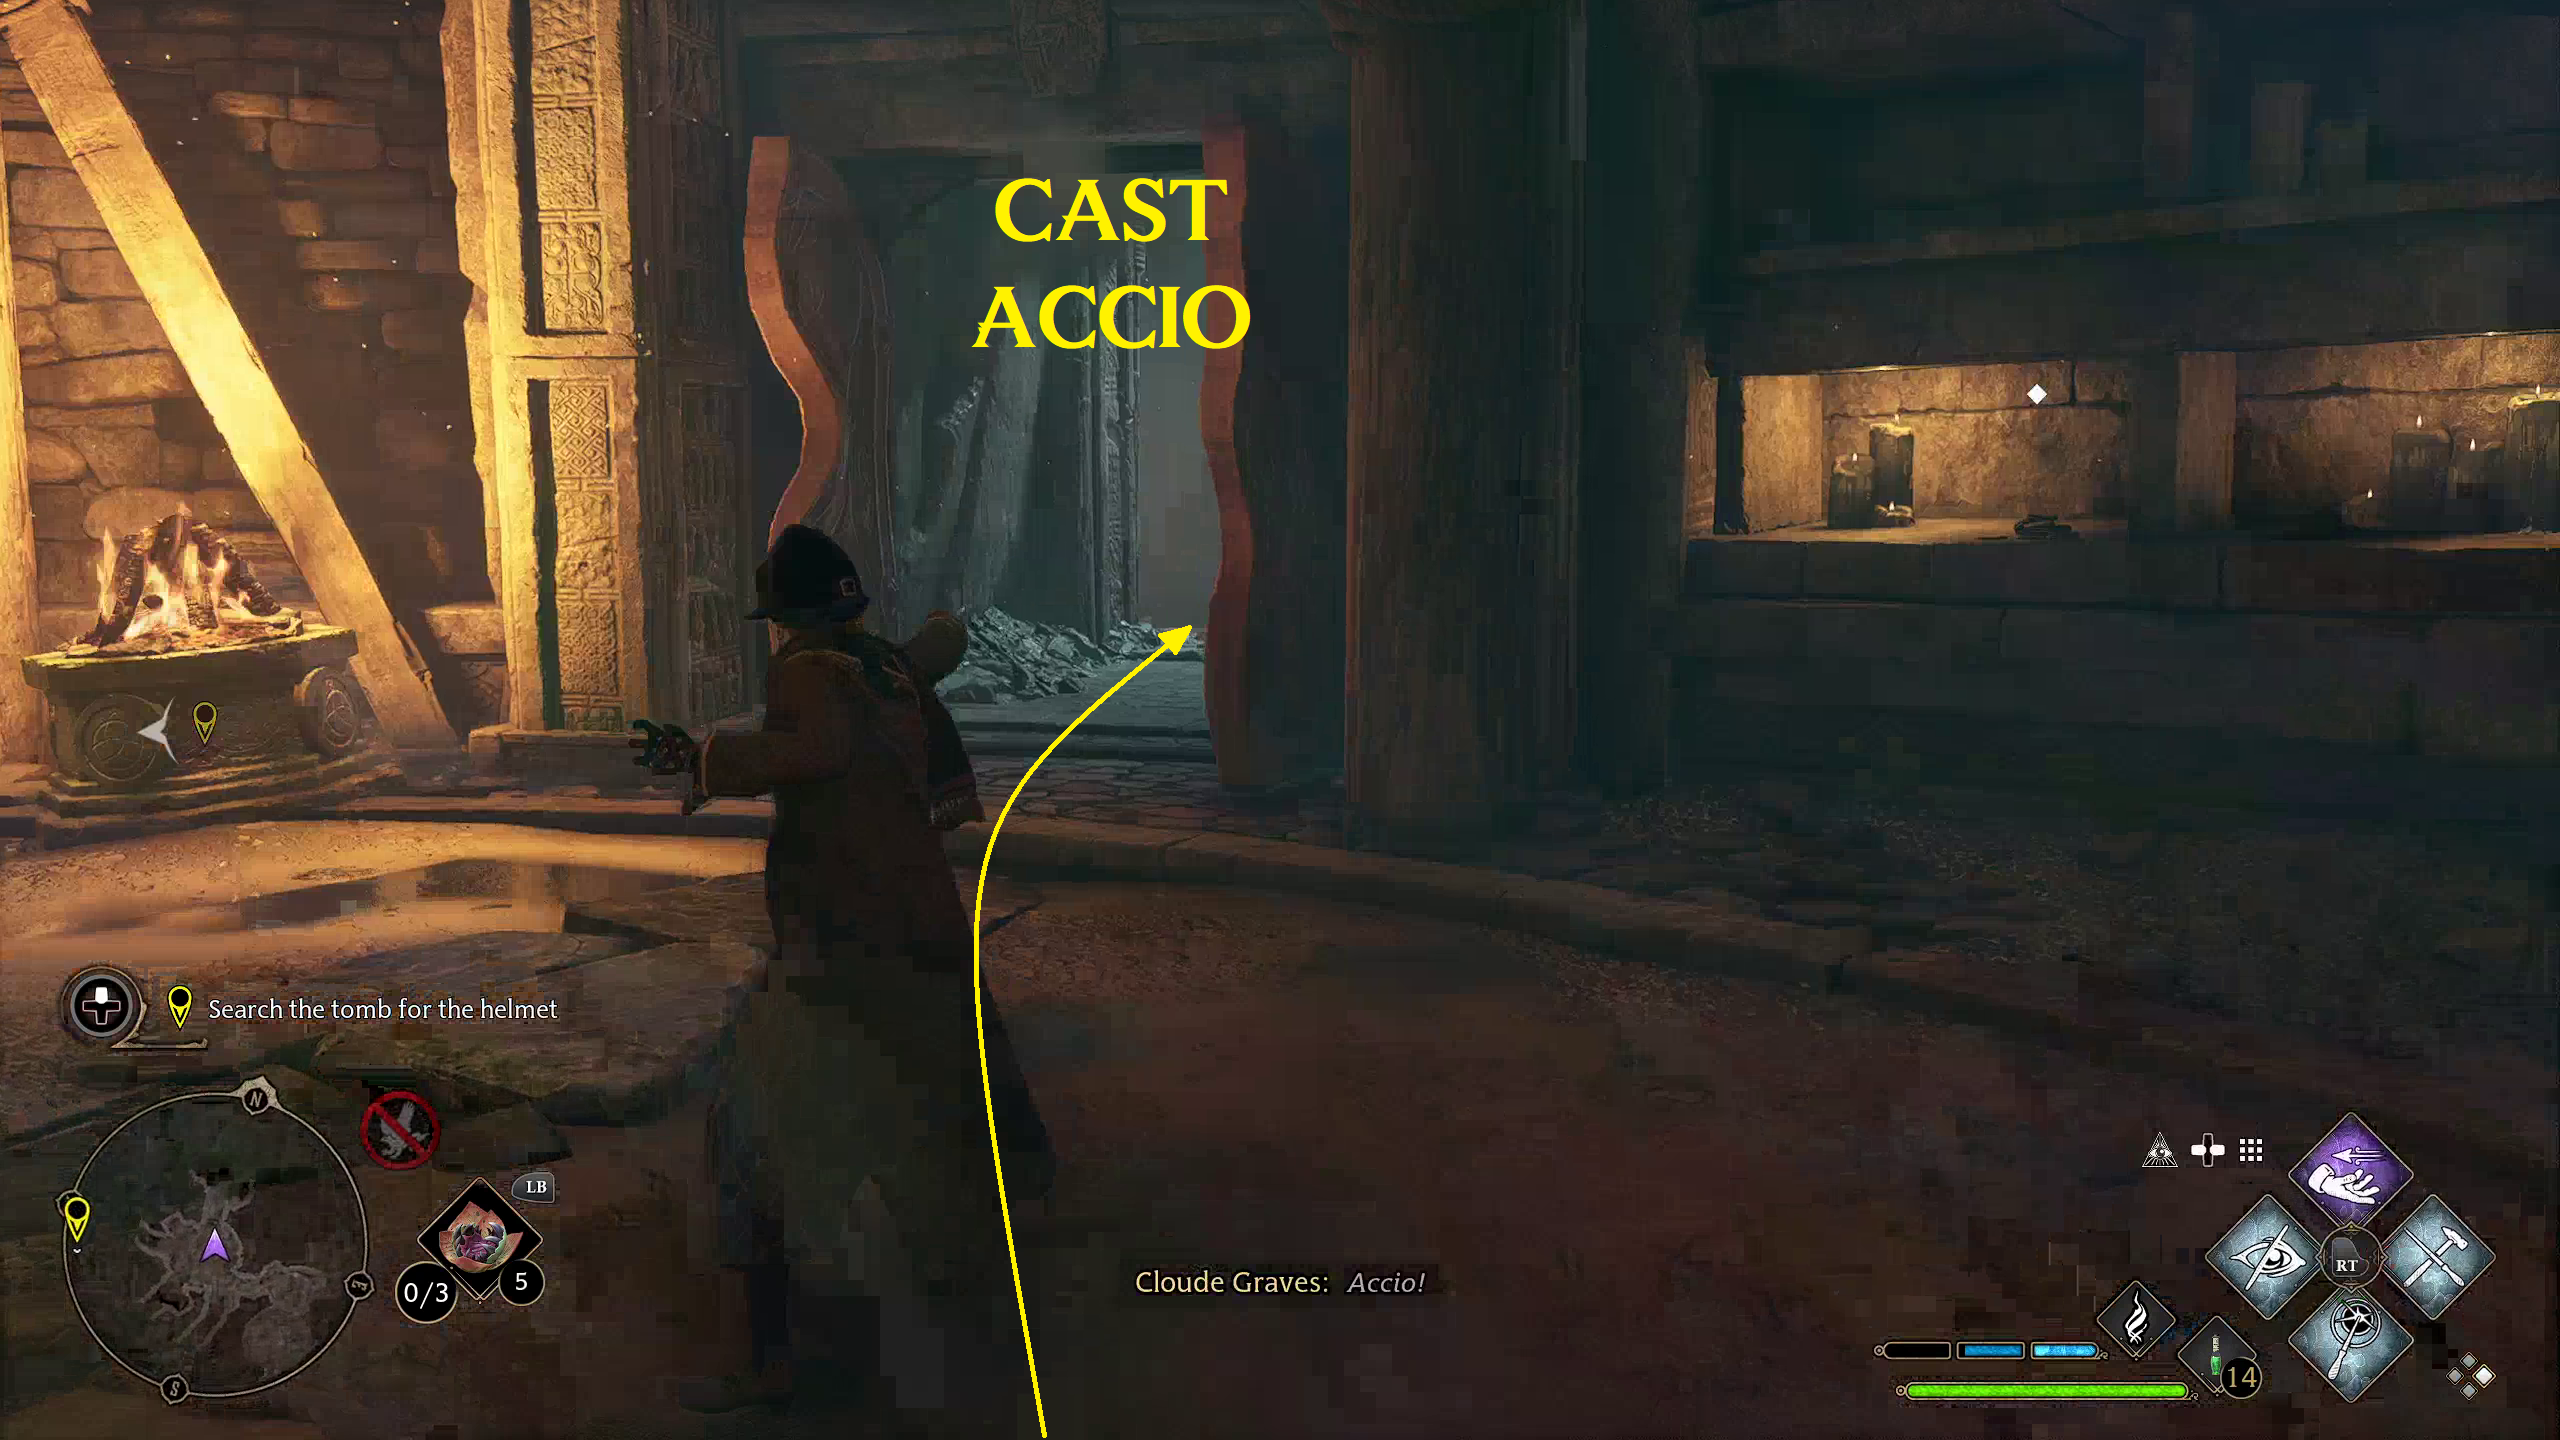
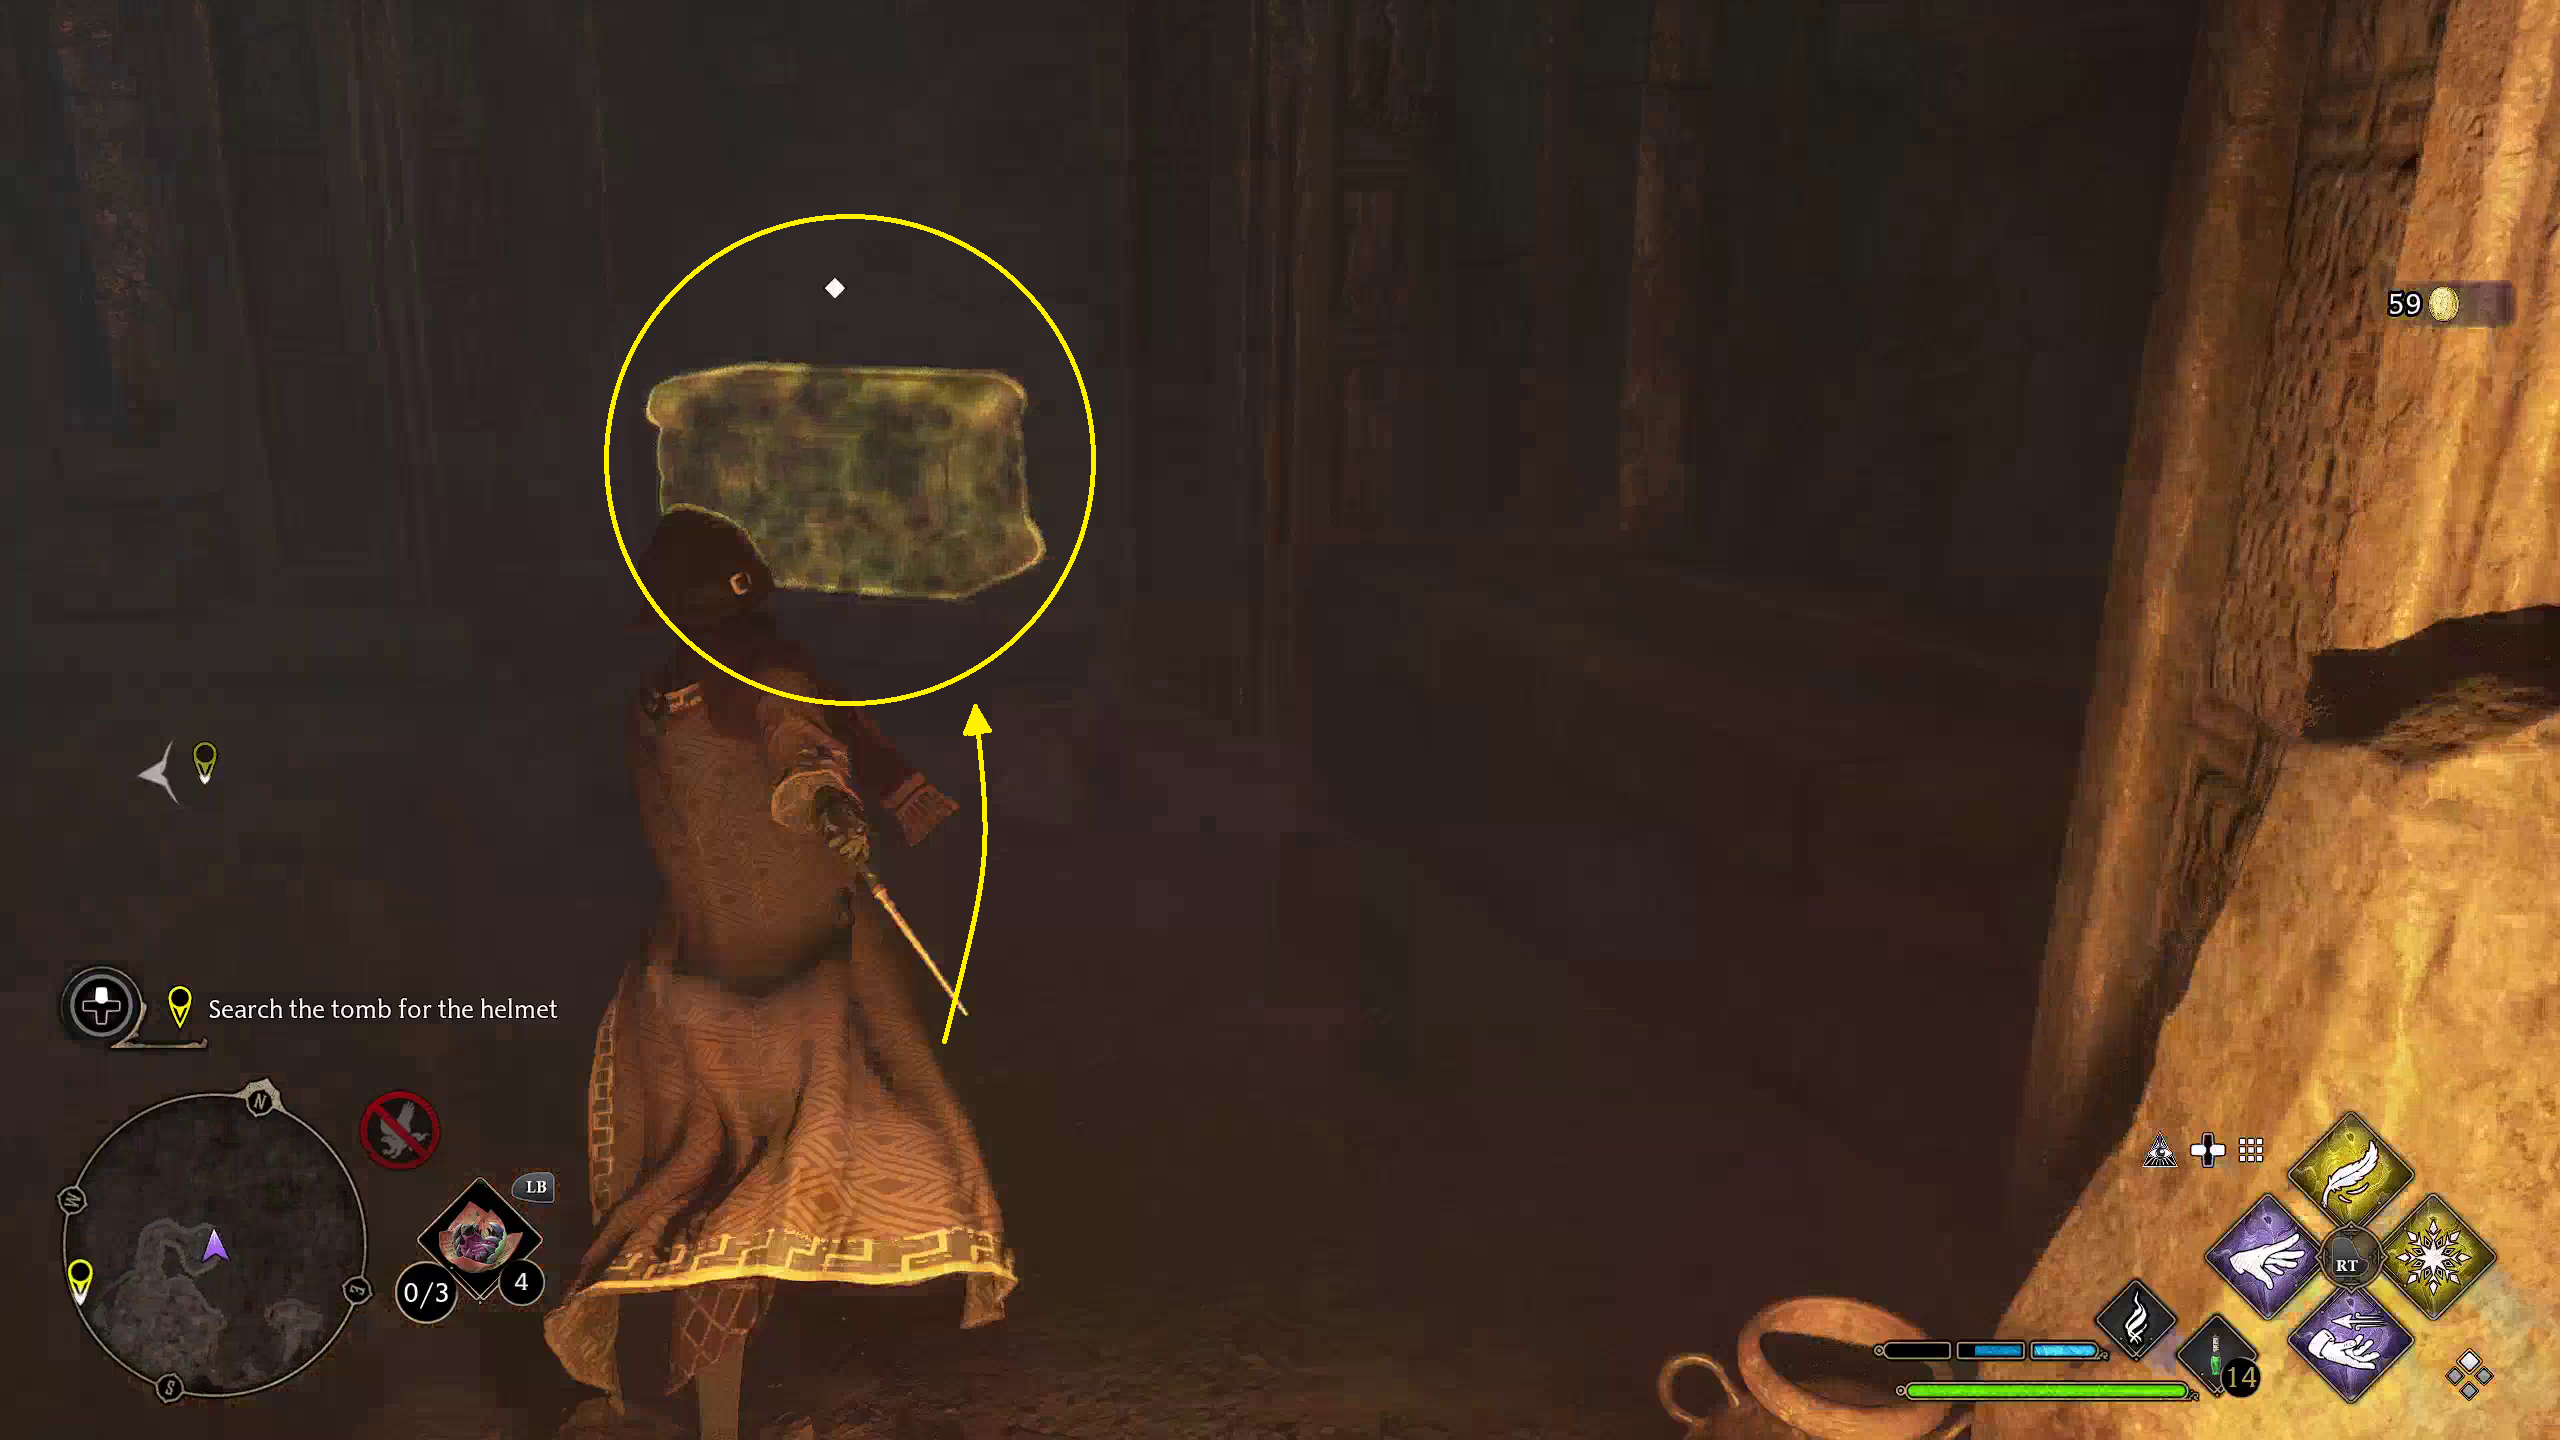
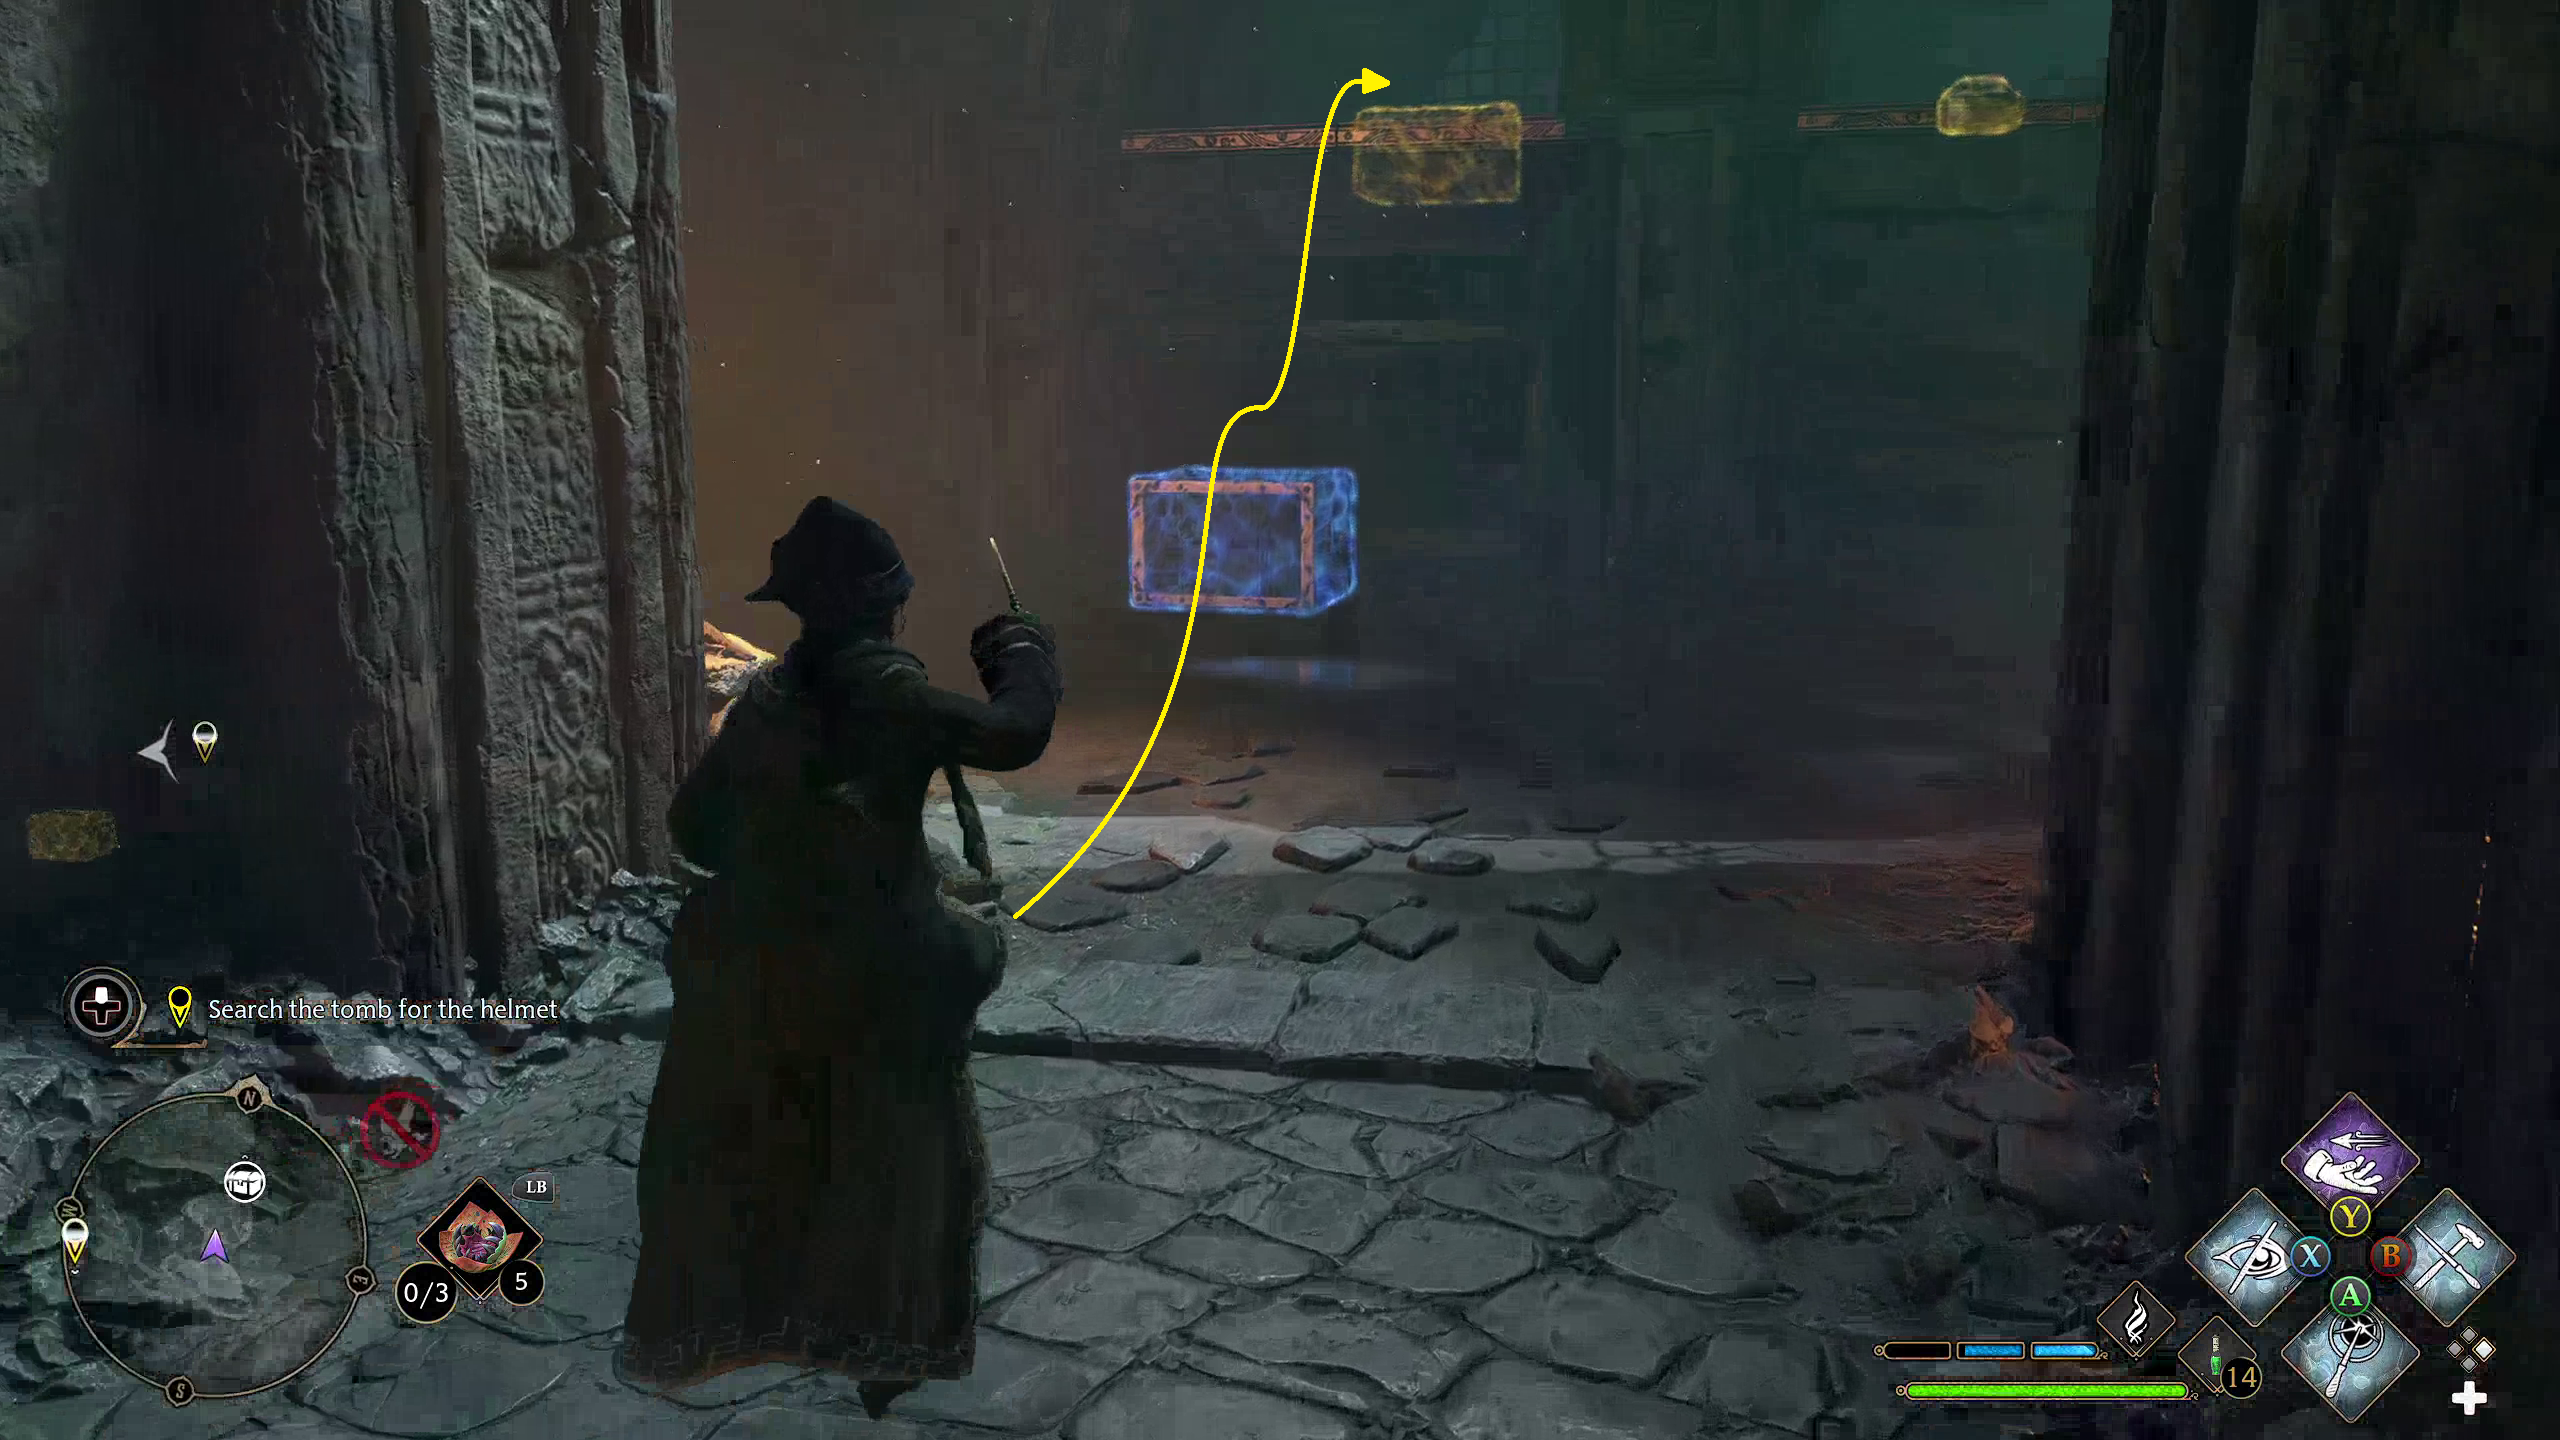
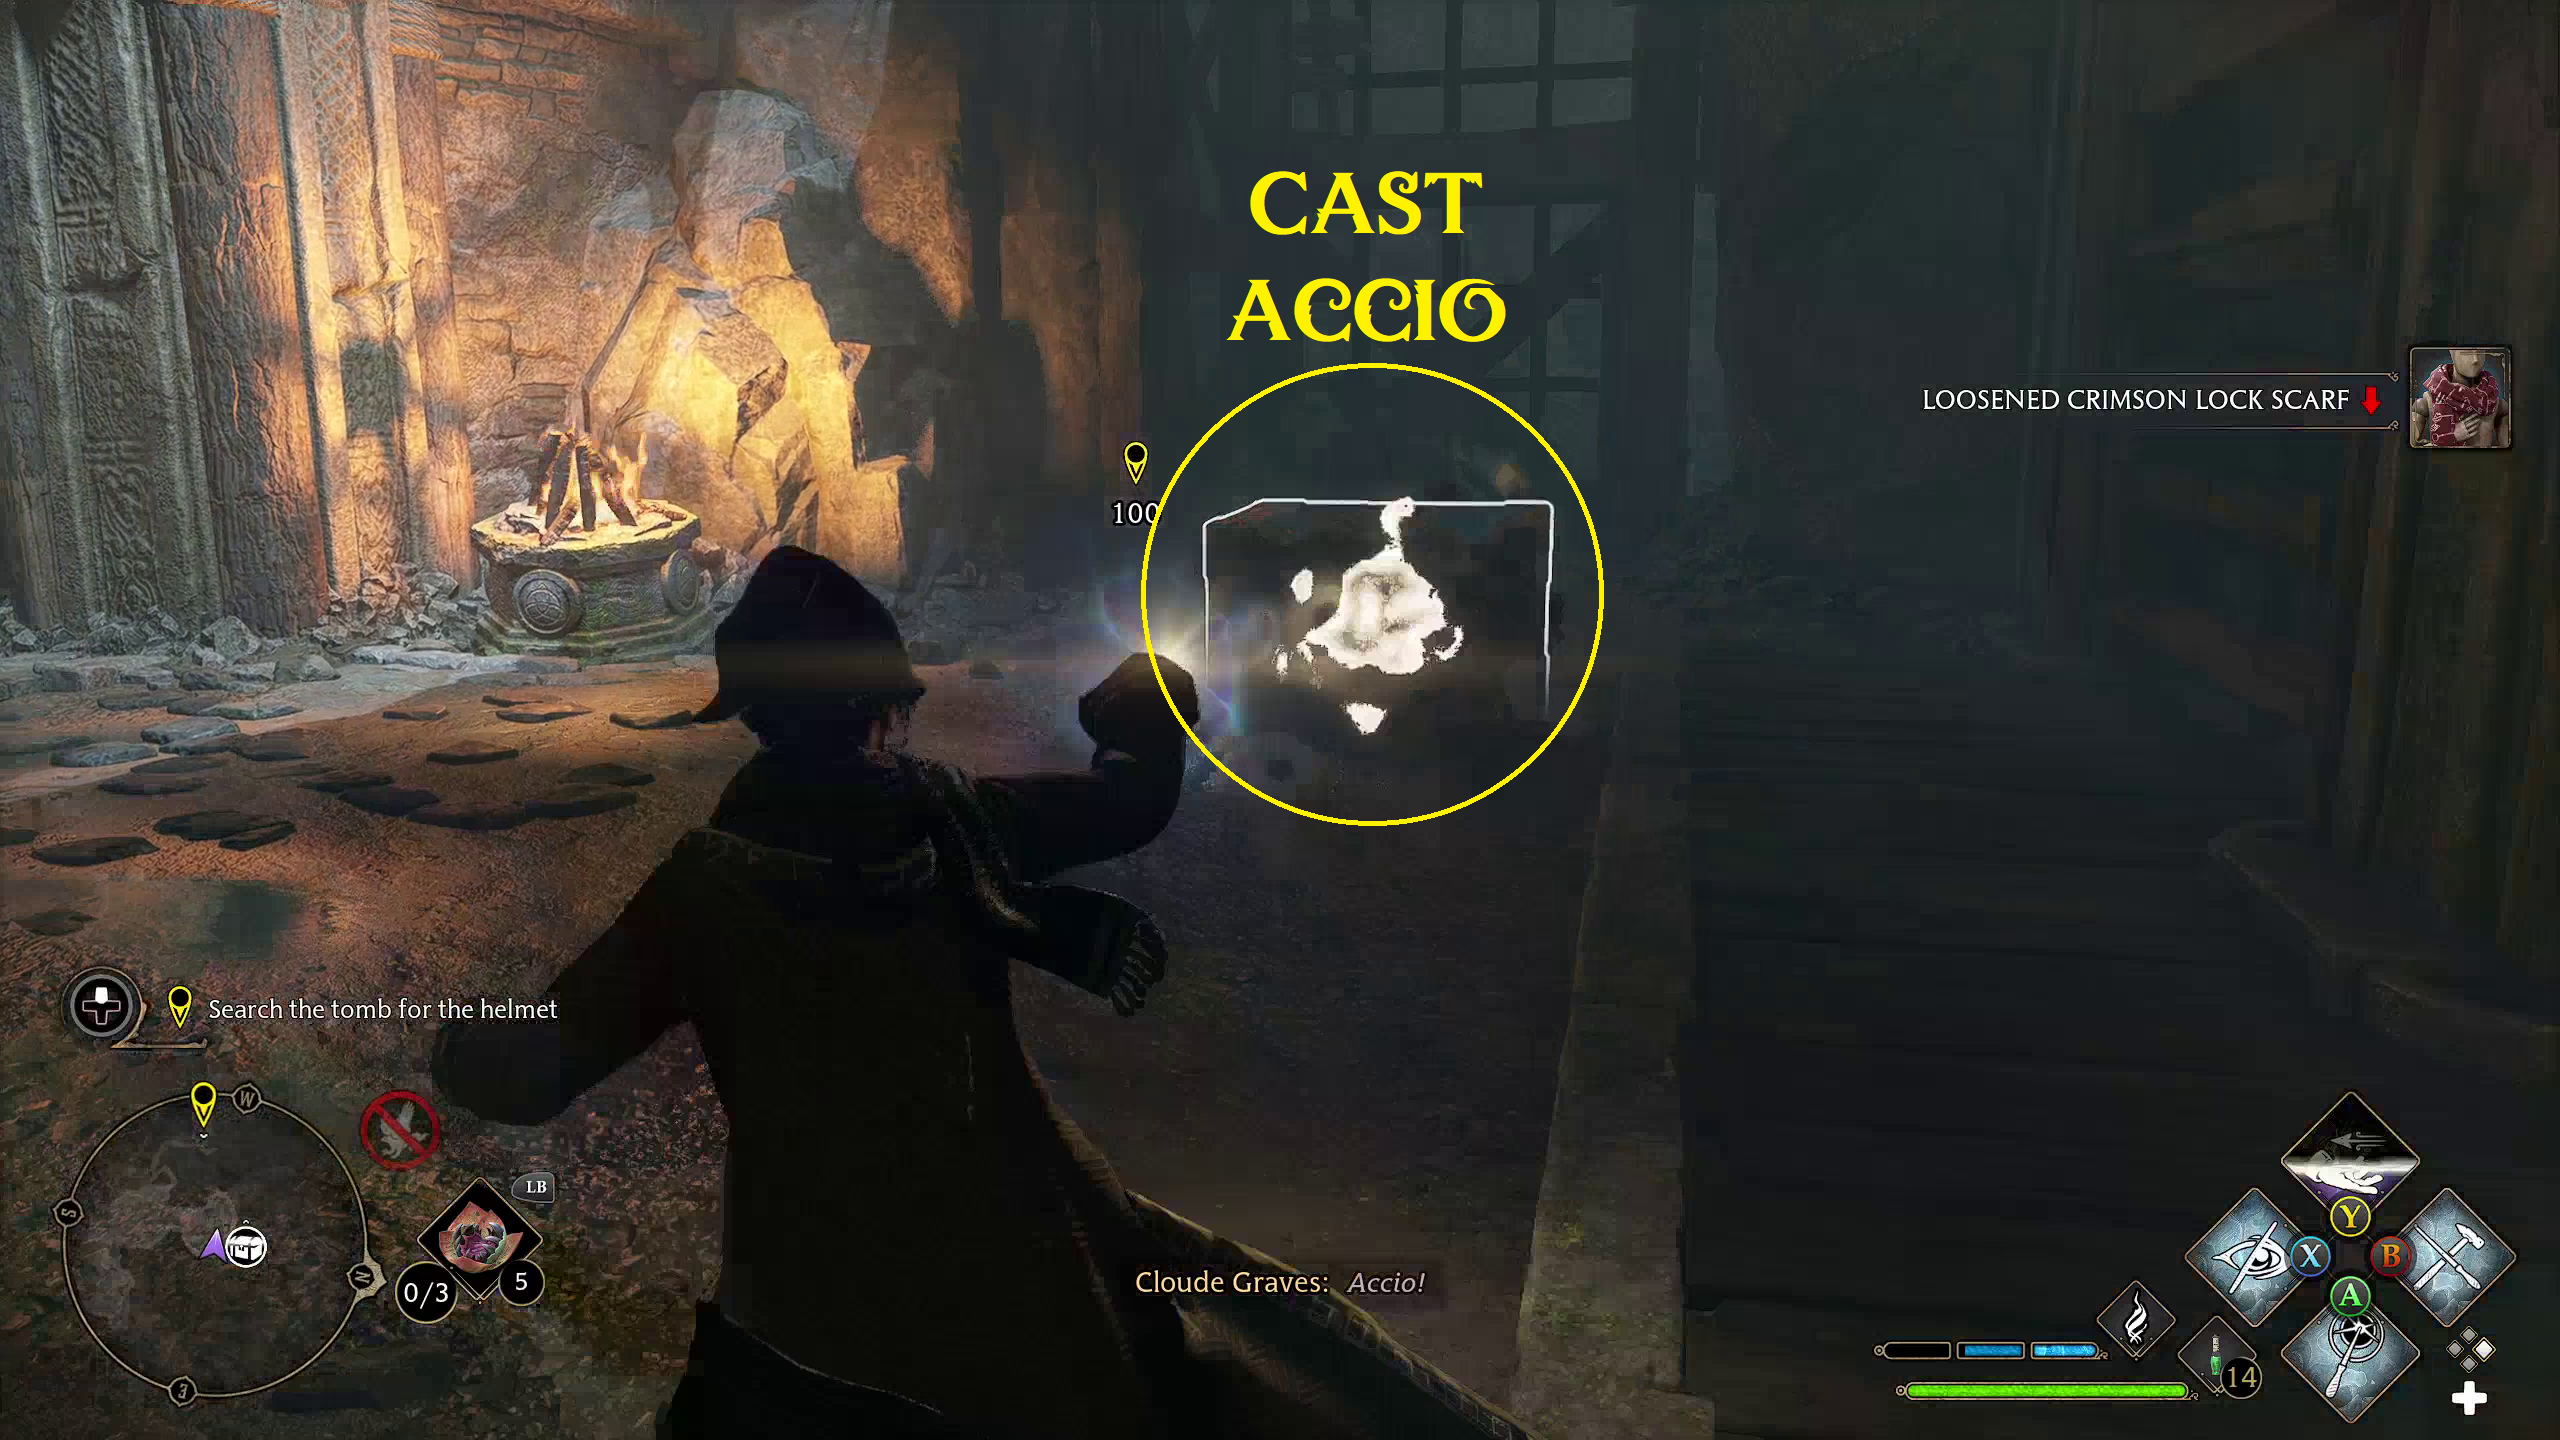
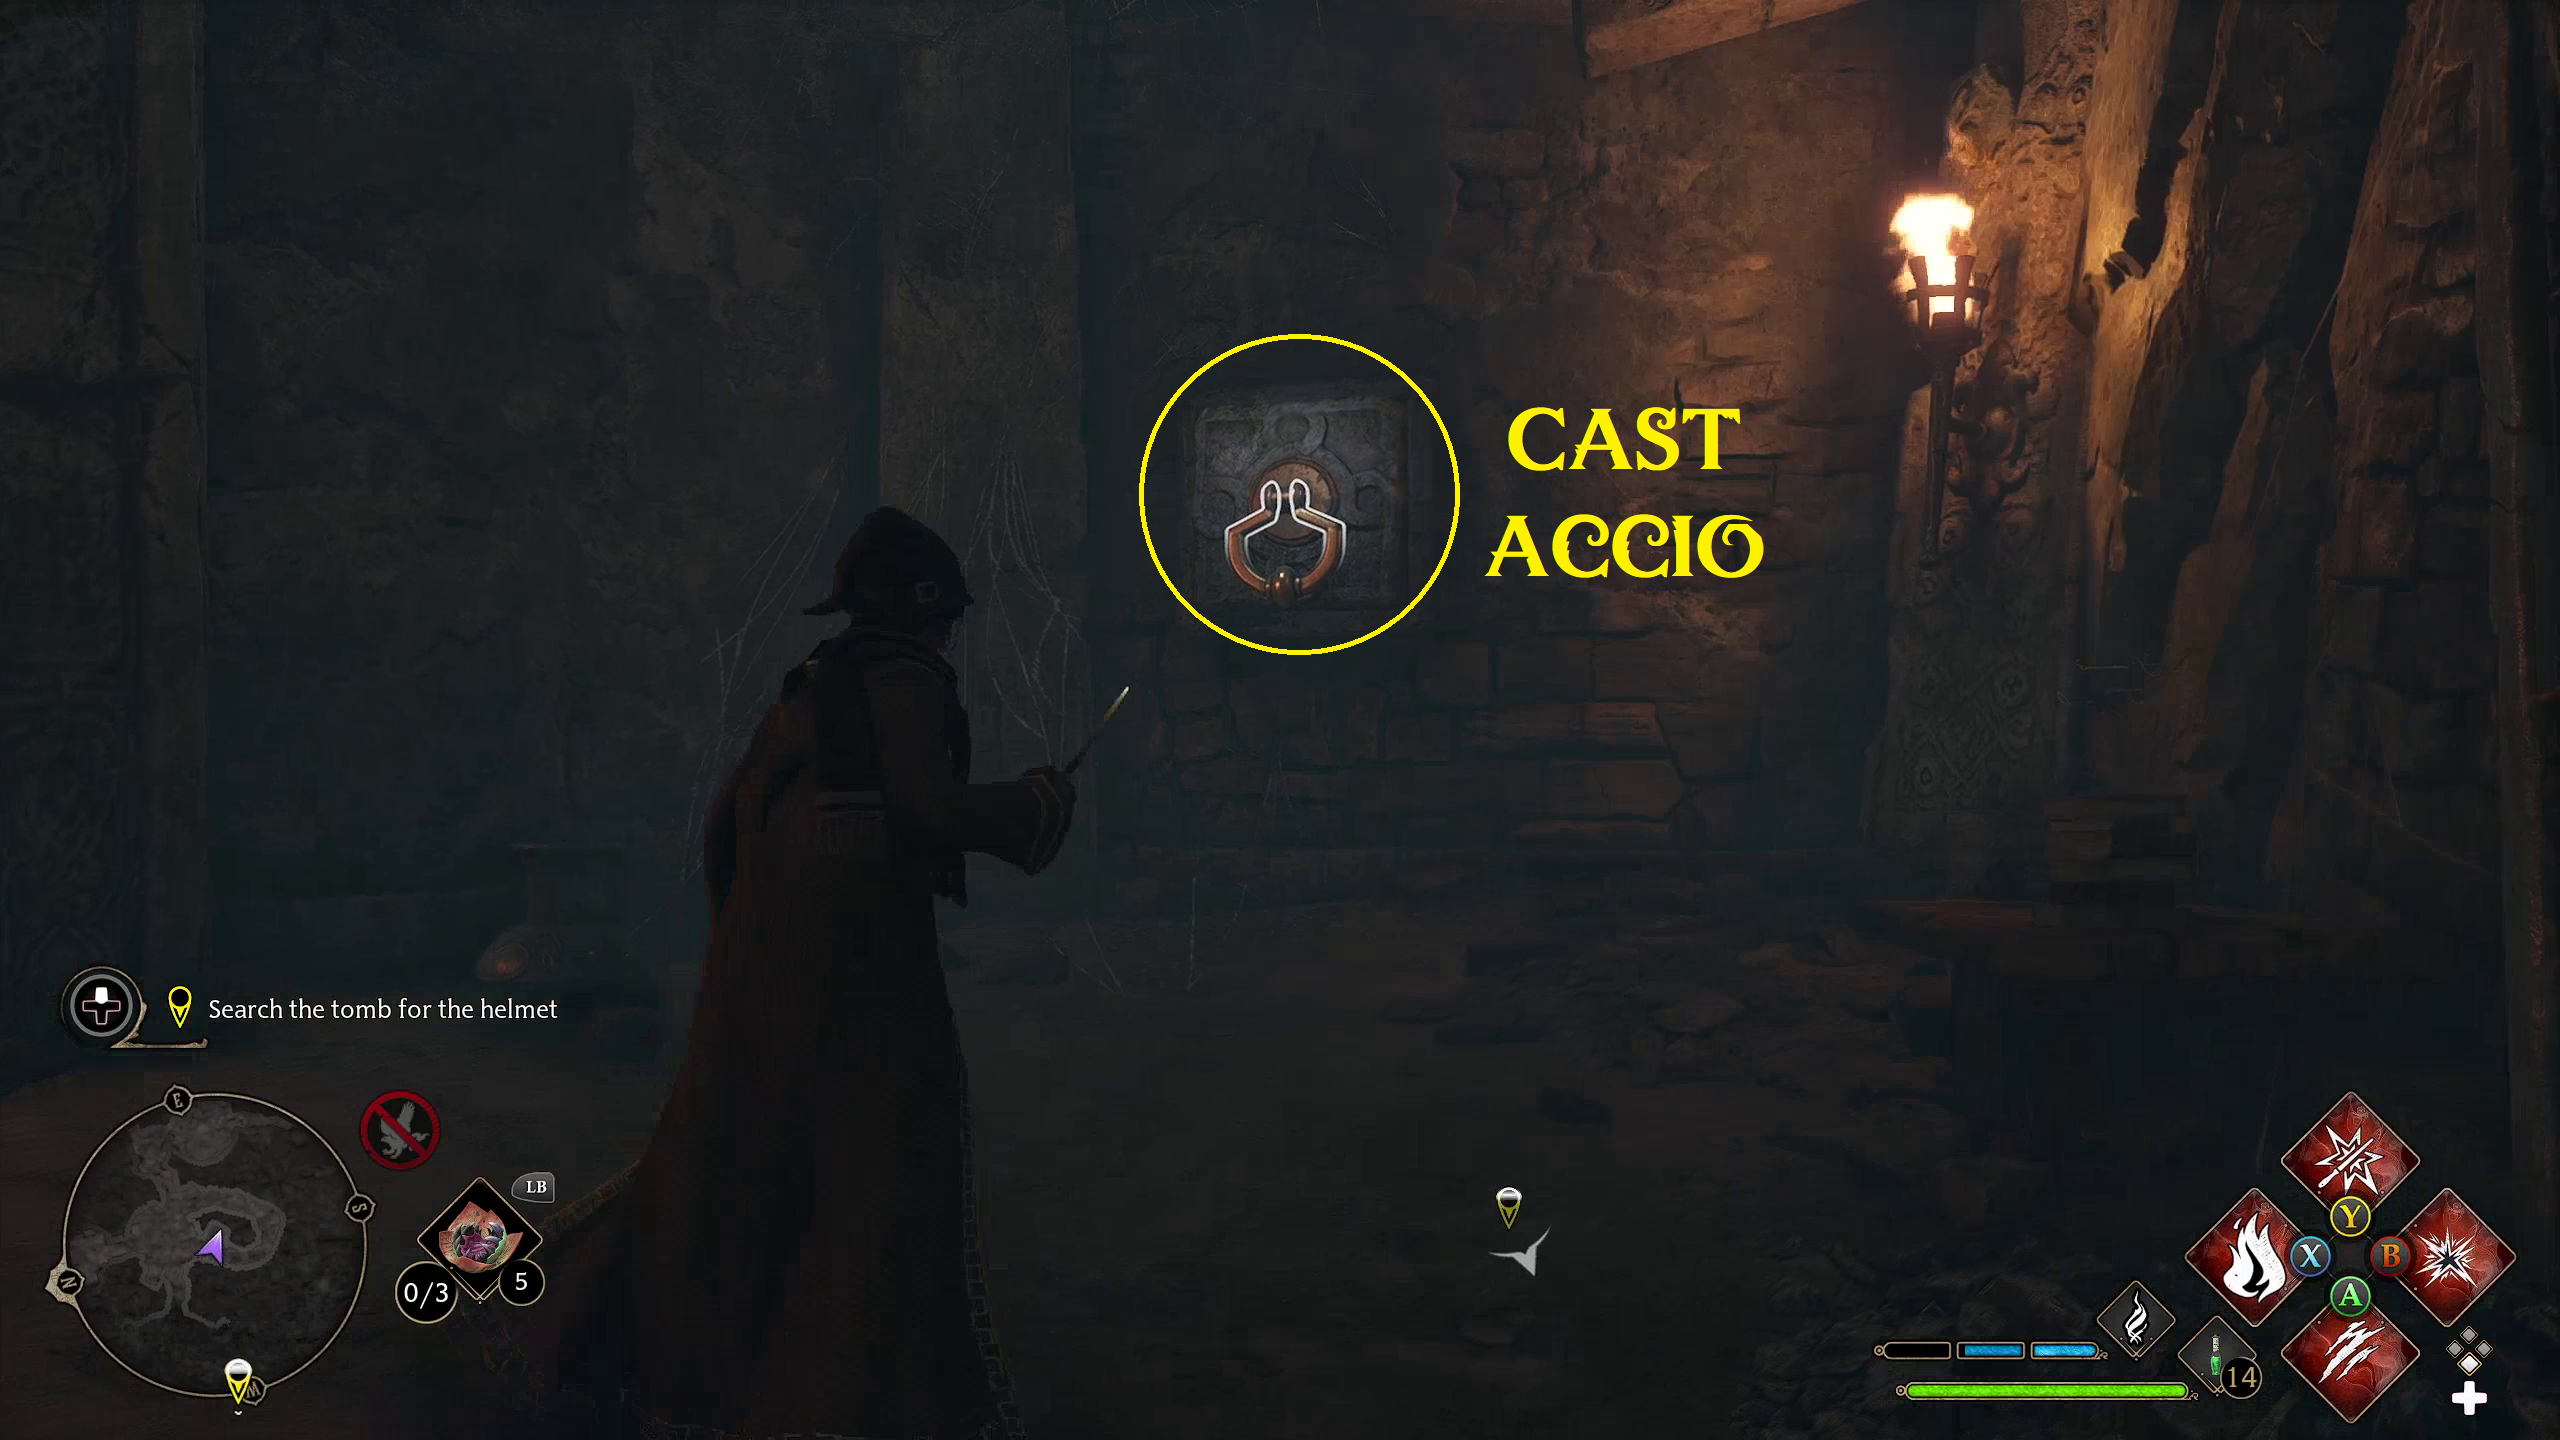
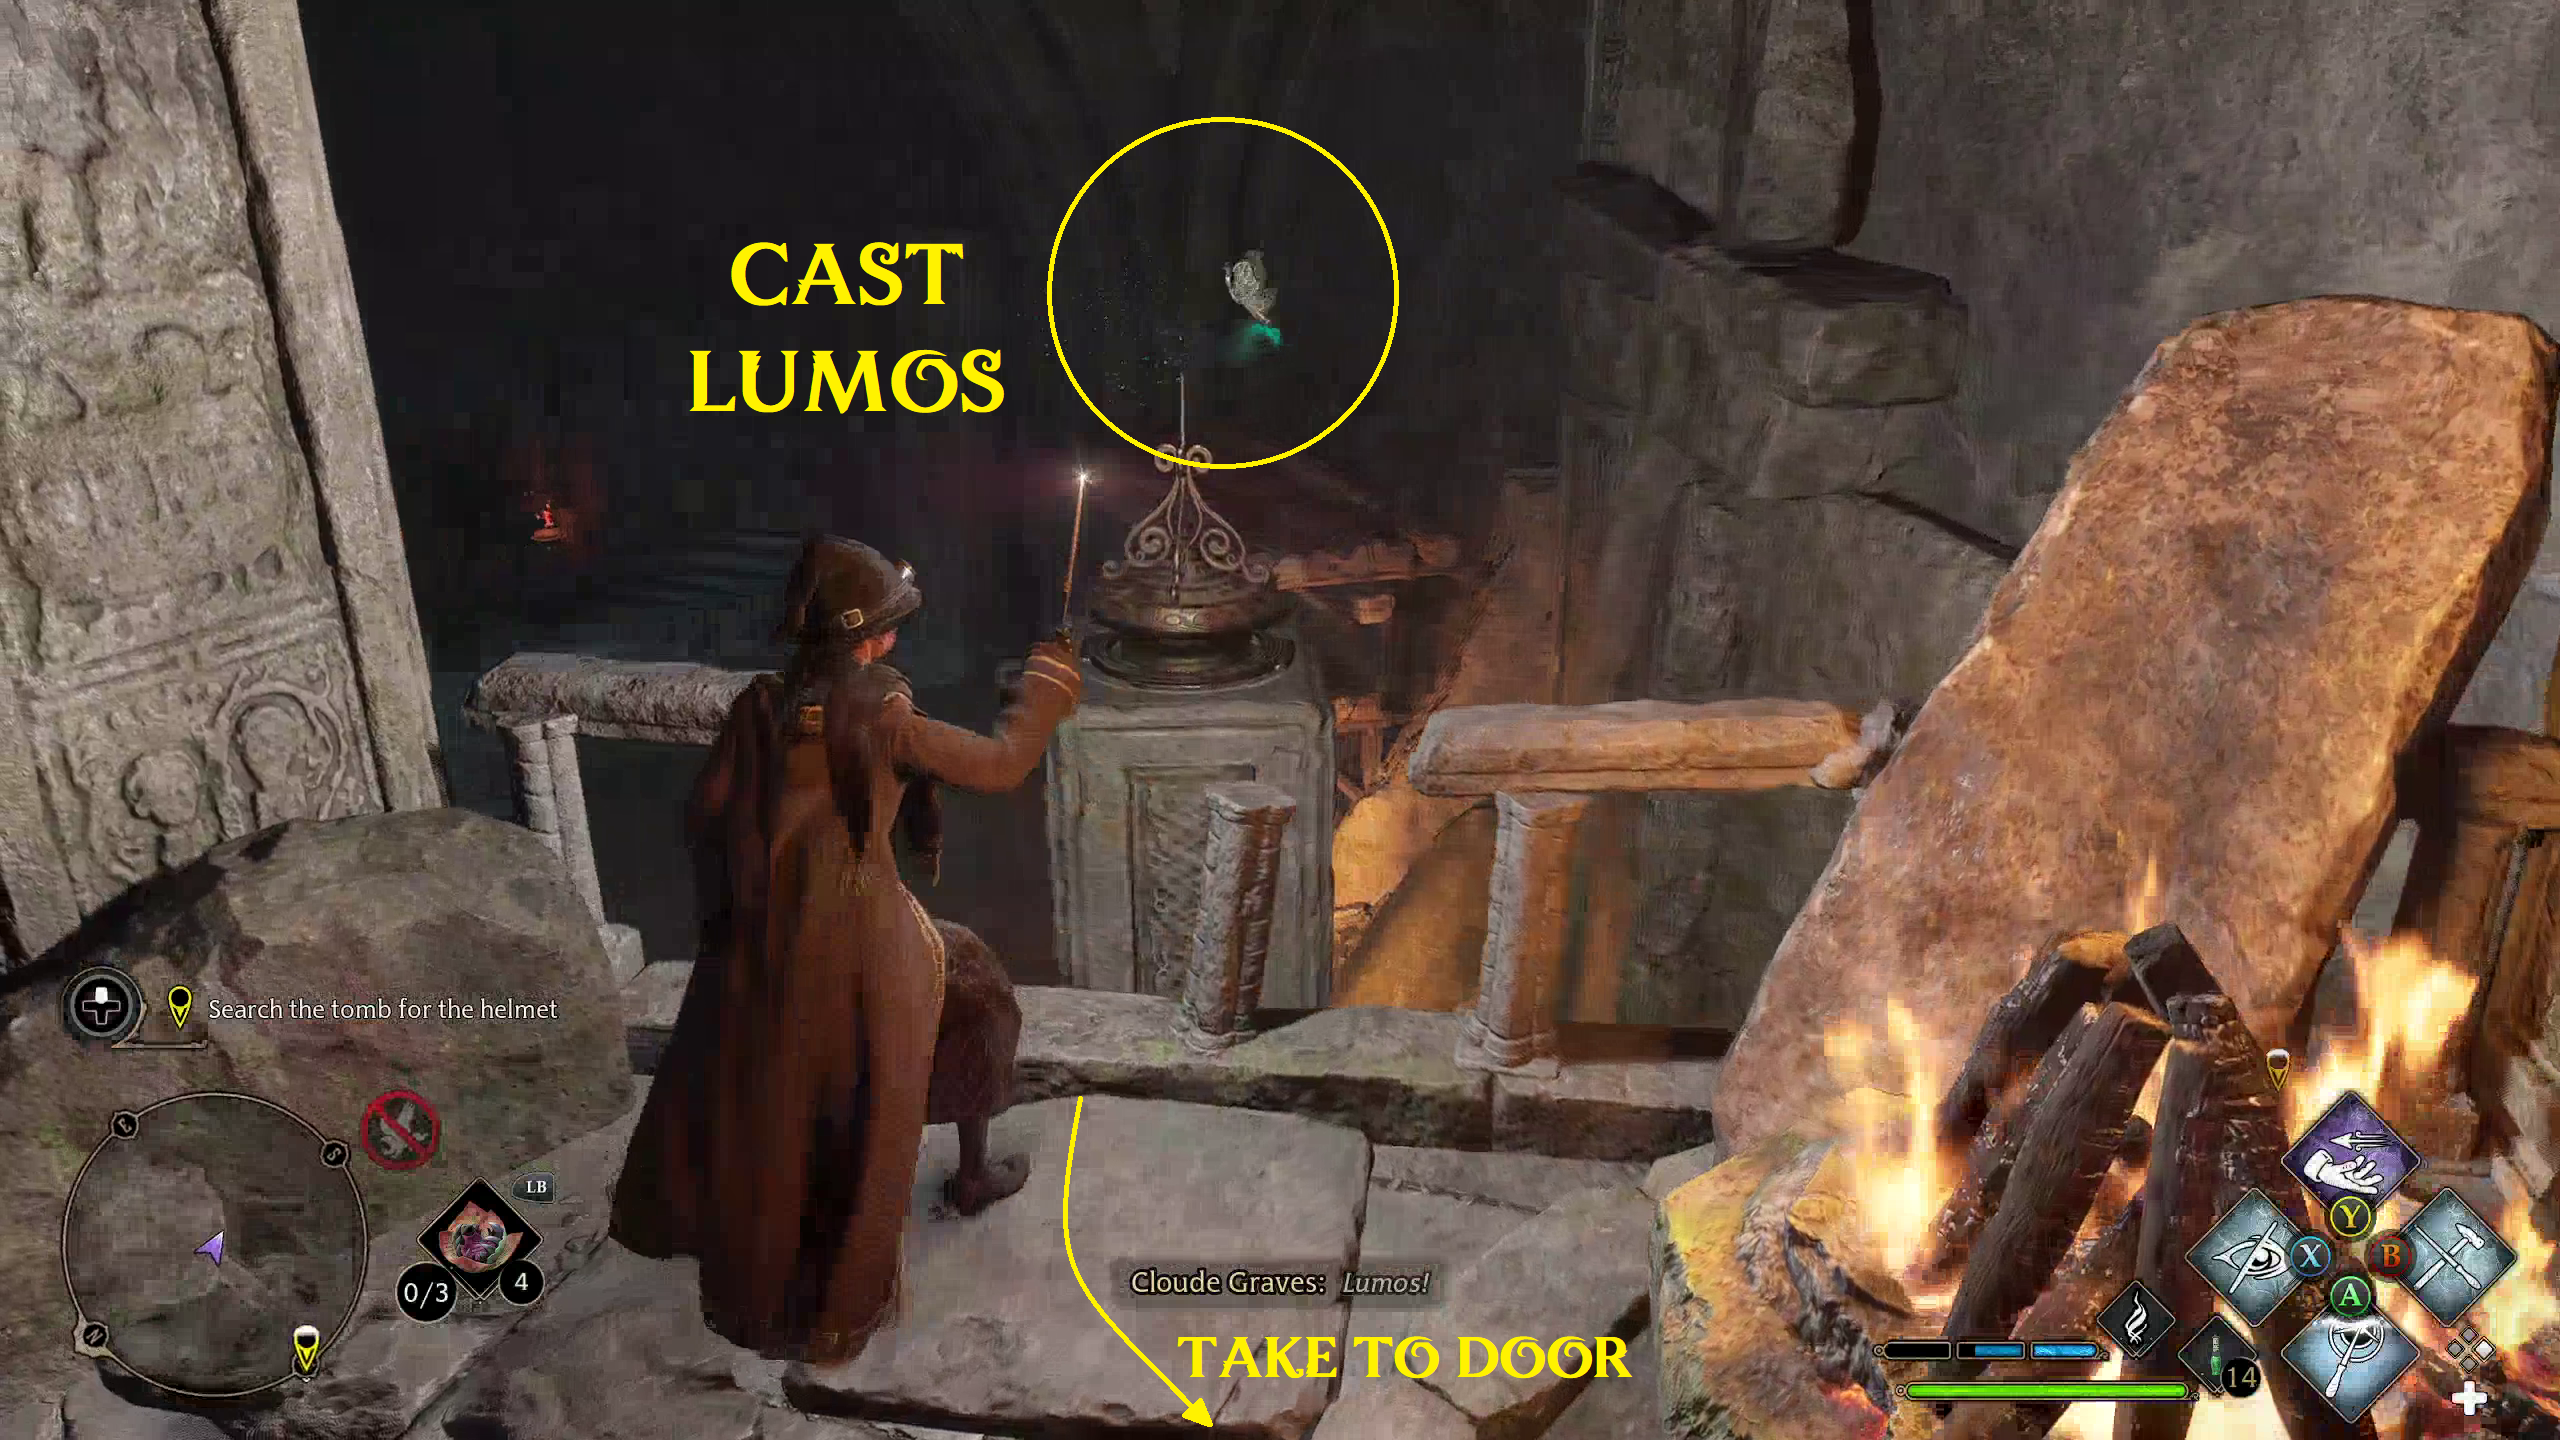
In the next room, you’ll find a door where all three of the holes in the door are empty, so you’ll need to find three moths. Before anything, cast Revelio to find the small bags of loot around the room. Then, it is time to gather some moths. Luckily, there are two in the room with you, which you can cast Lumos near (one at a time) and bring to the door (1 and 2). For the last moth, you’ll need to go up to the large, broken door and cast Accio (3). It will bust open, and you can head into the room to get the last moth with Lumos (4). Bring all three to the door, and it will open (5).
12345
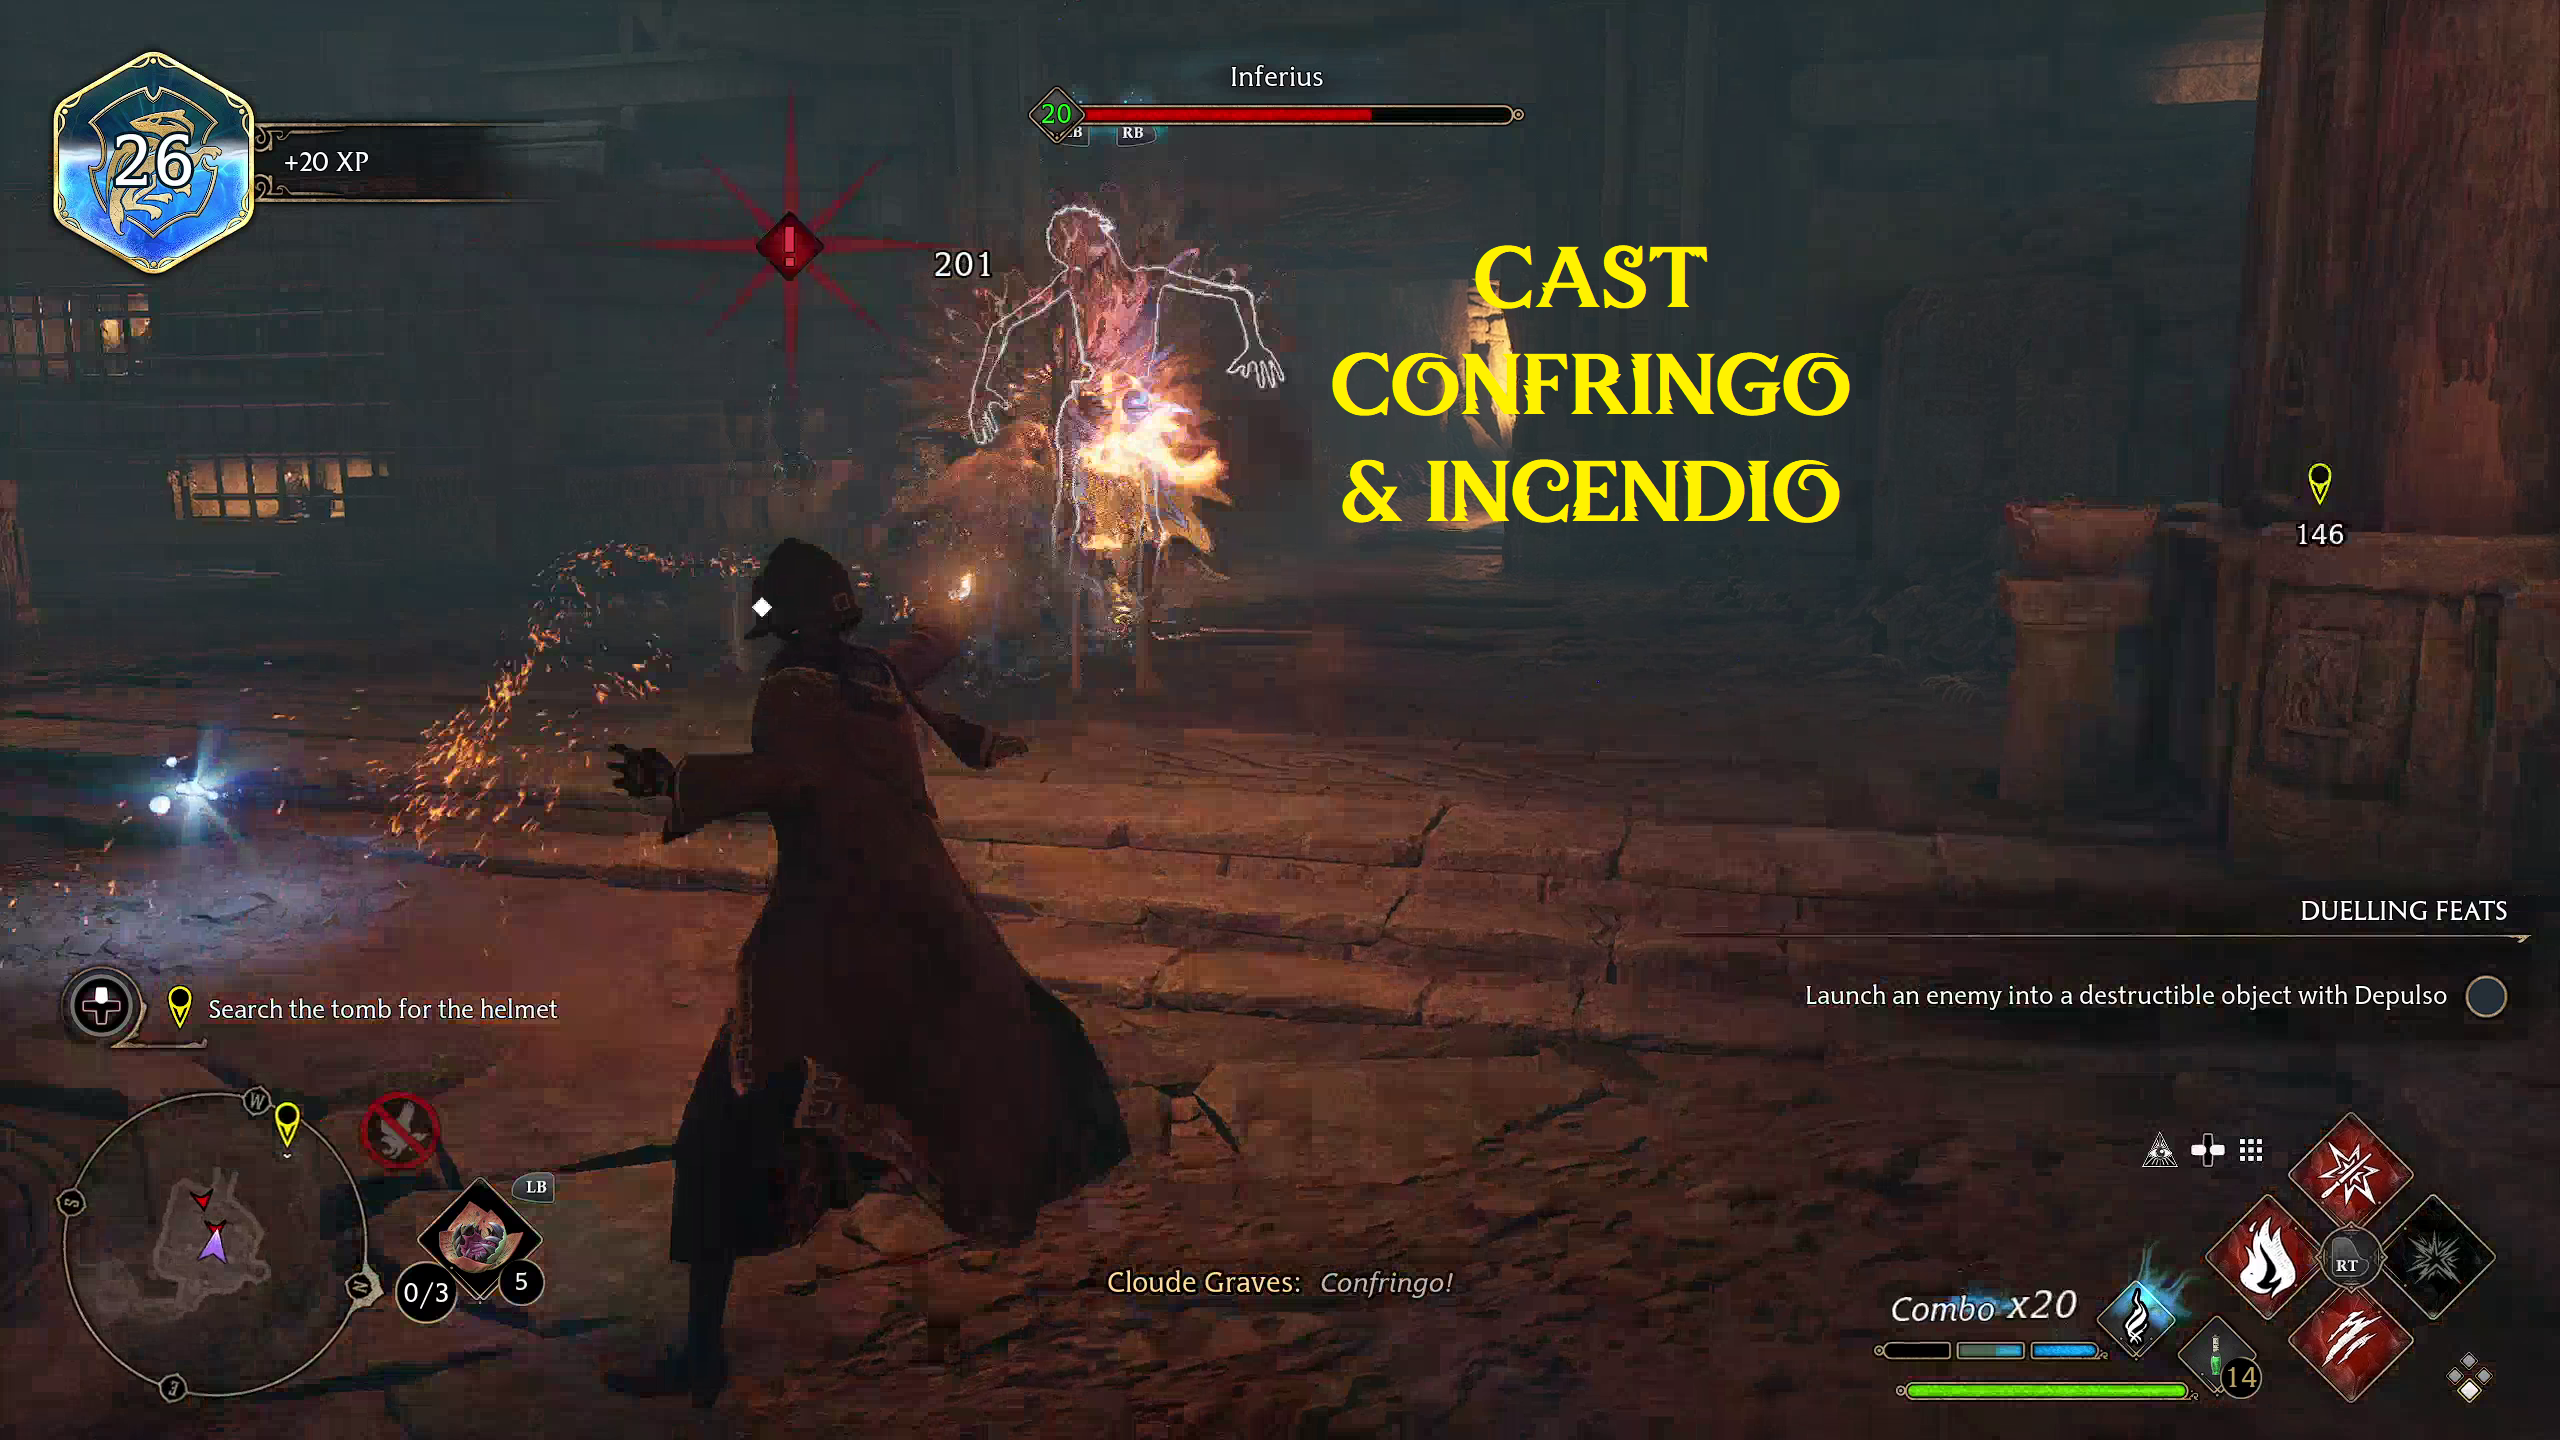
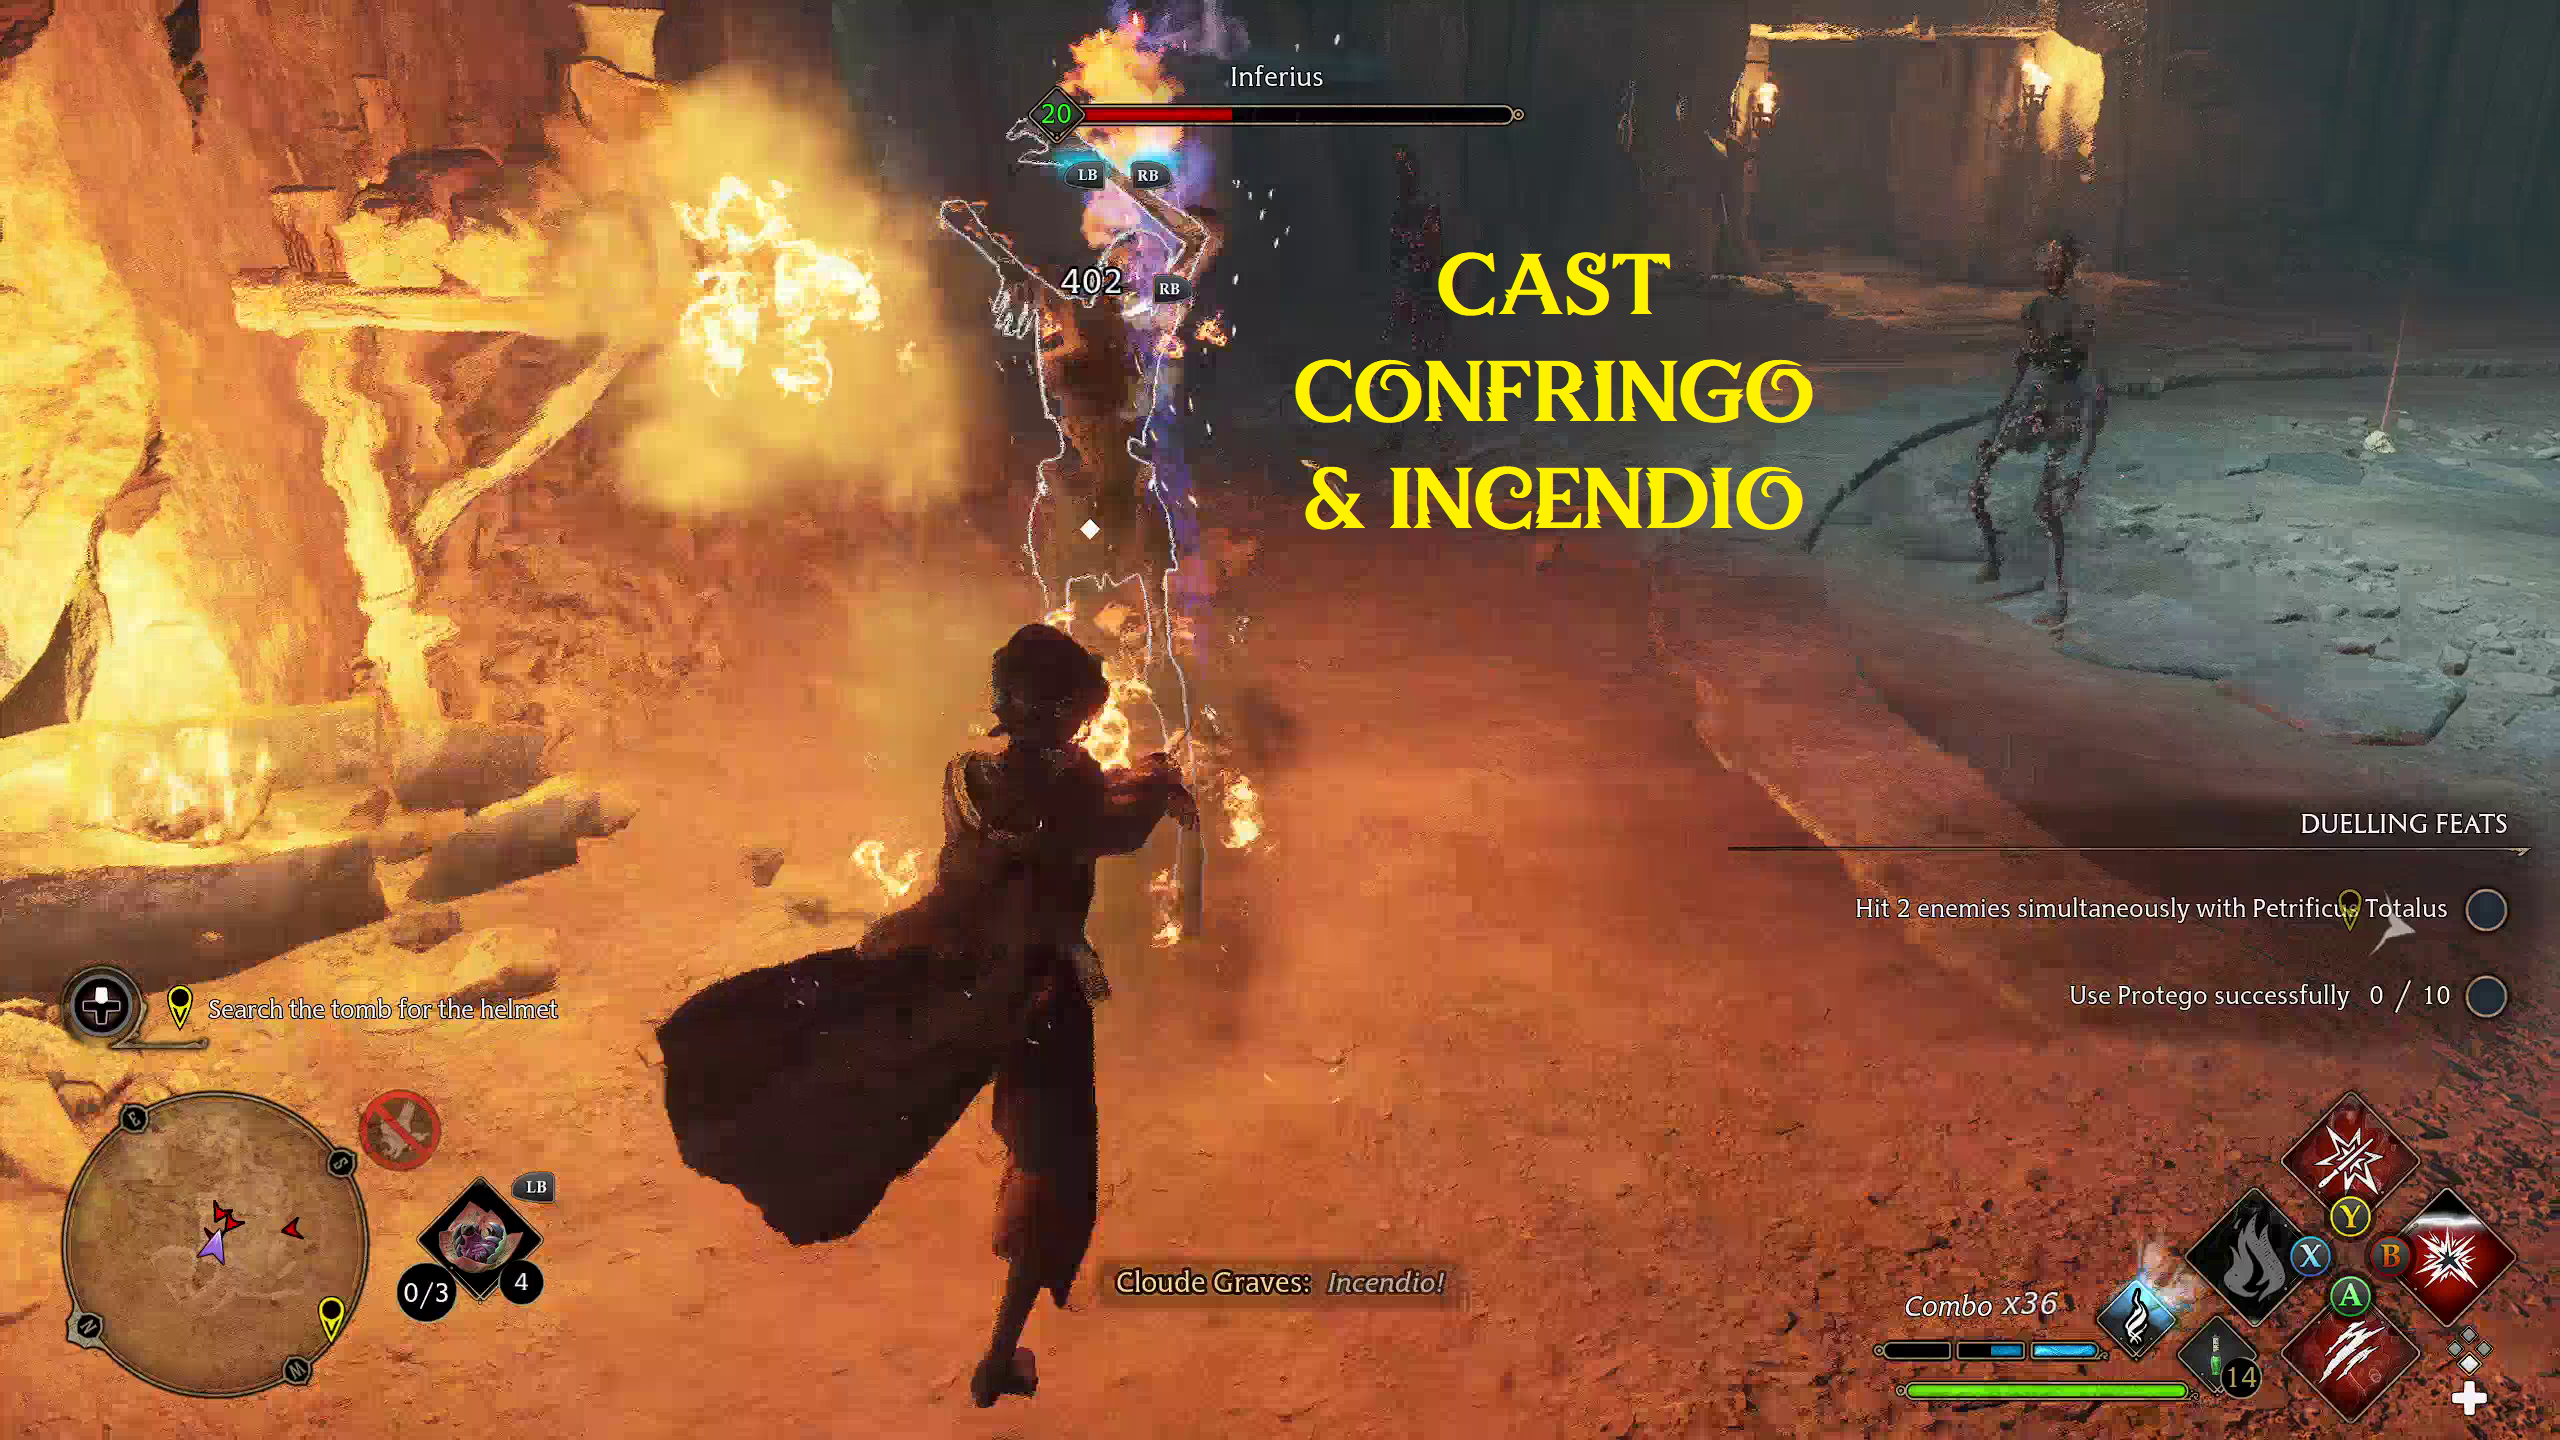
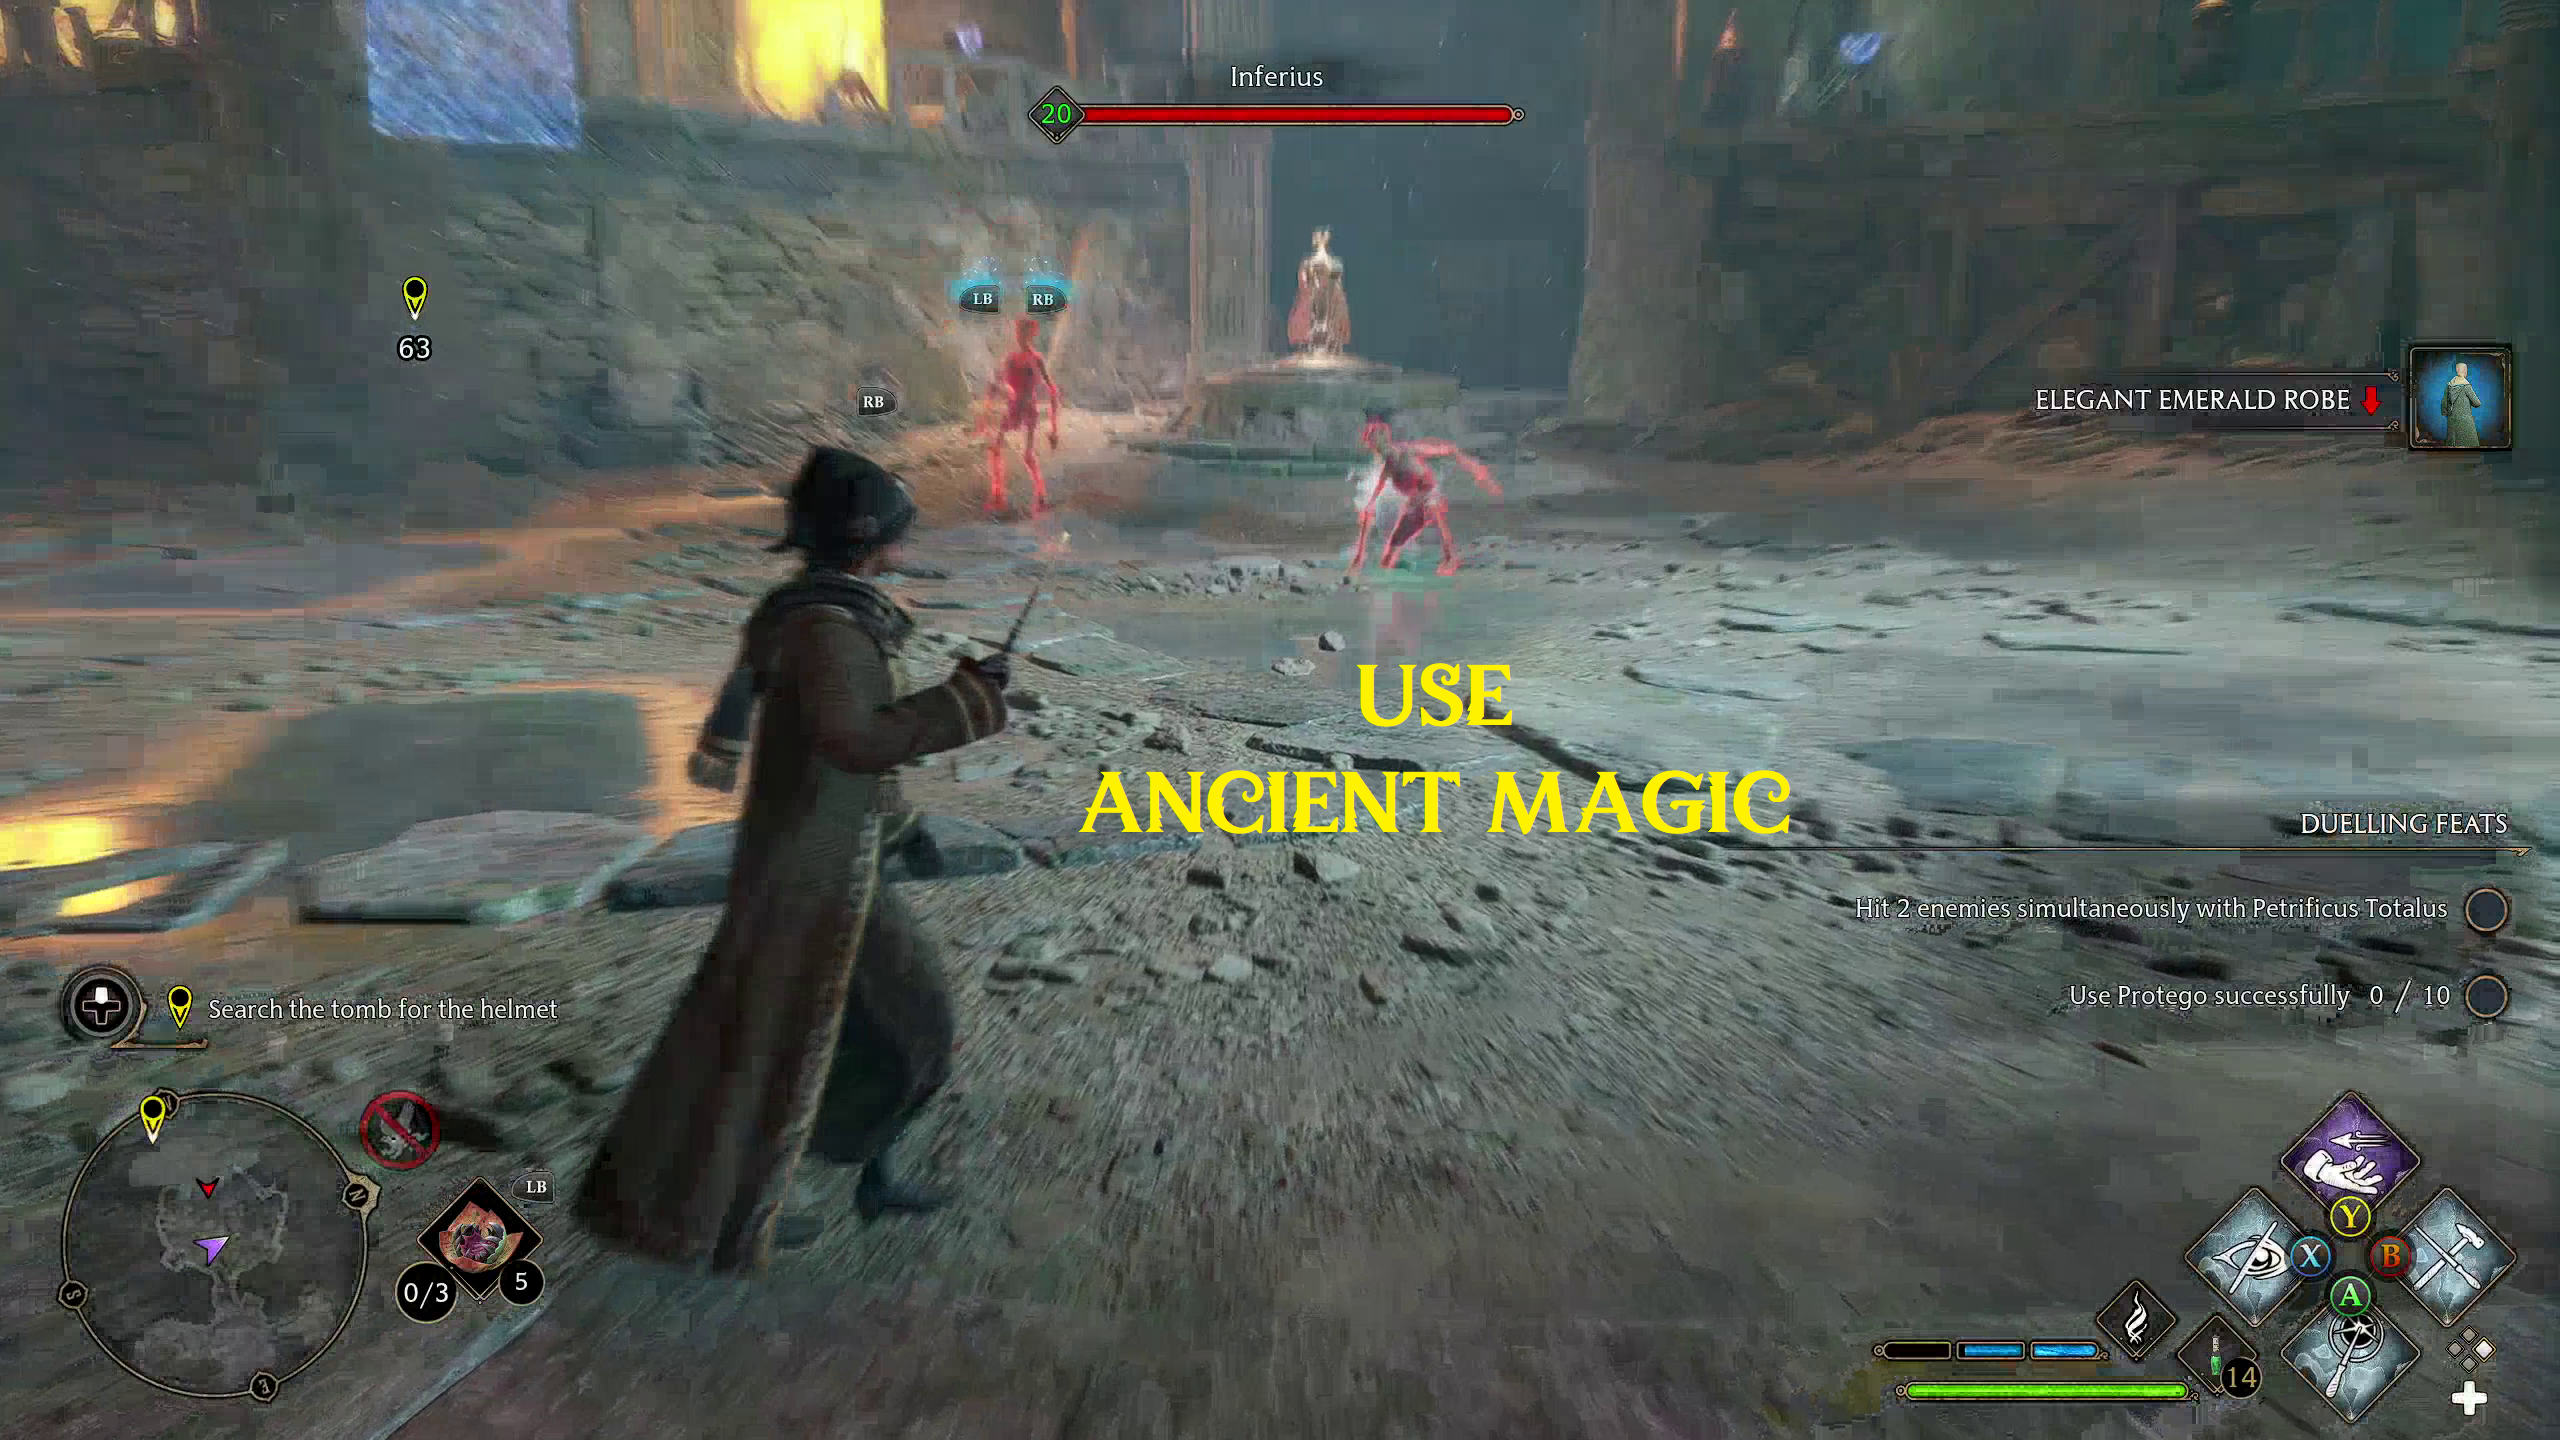
In the next room, you will be attacked by undead Inferni, the reanimated corpses of dead witches and wizards. These monsters can seem tough, if you don’t know their weakness: fire. That is because Inferni can only be damaged while on fire. Thankfully, dealing any fire damage to them will set them on fire, and they will stay on fire for the remainder of the fight.
So, when it comes to battling them, there are a few things to keep in mind:
Cast Confringo and Incendio: As your two “fire” spells, these spells can both make Inferni susceptible to damage, and can deal great damage on their own. When fighting Inferni, these spells will be your bread and butter.
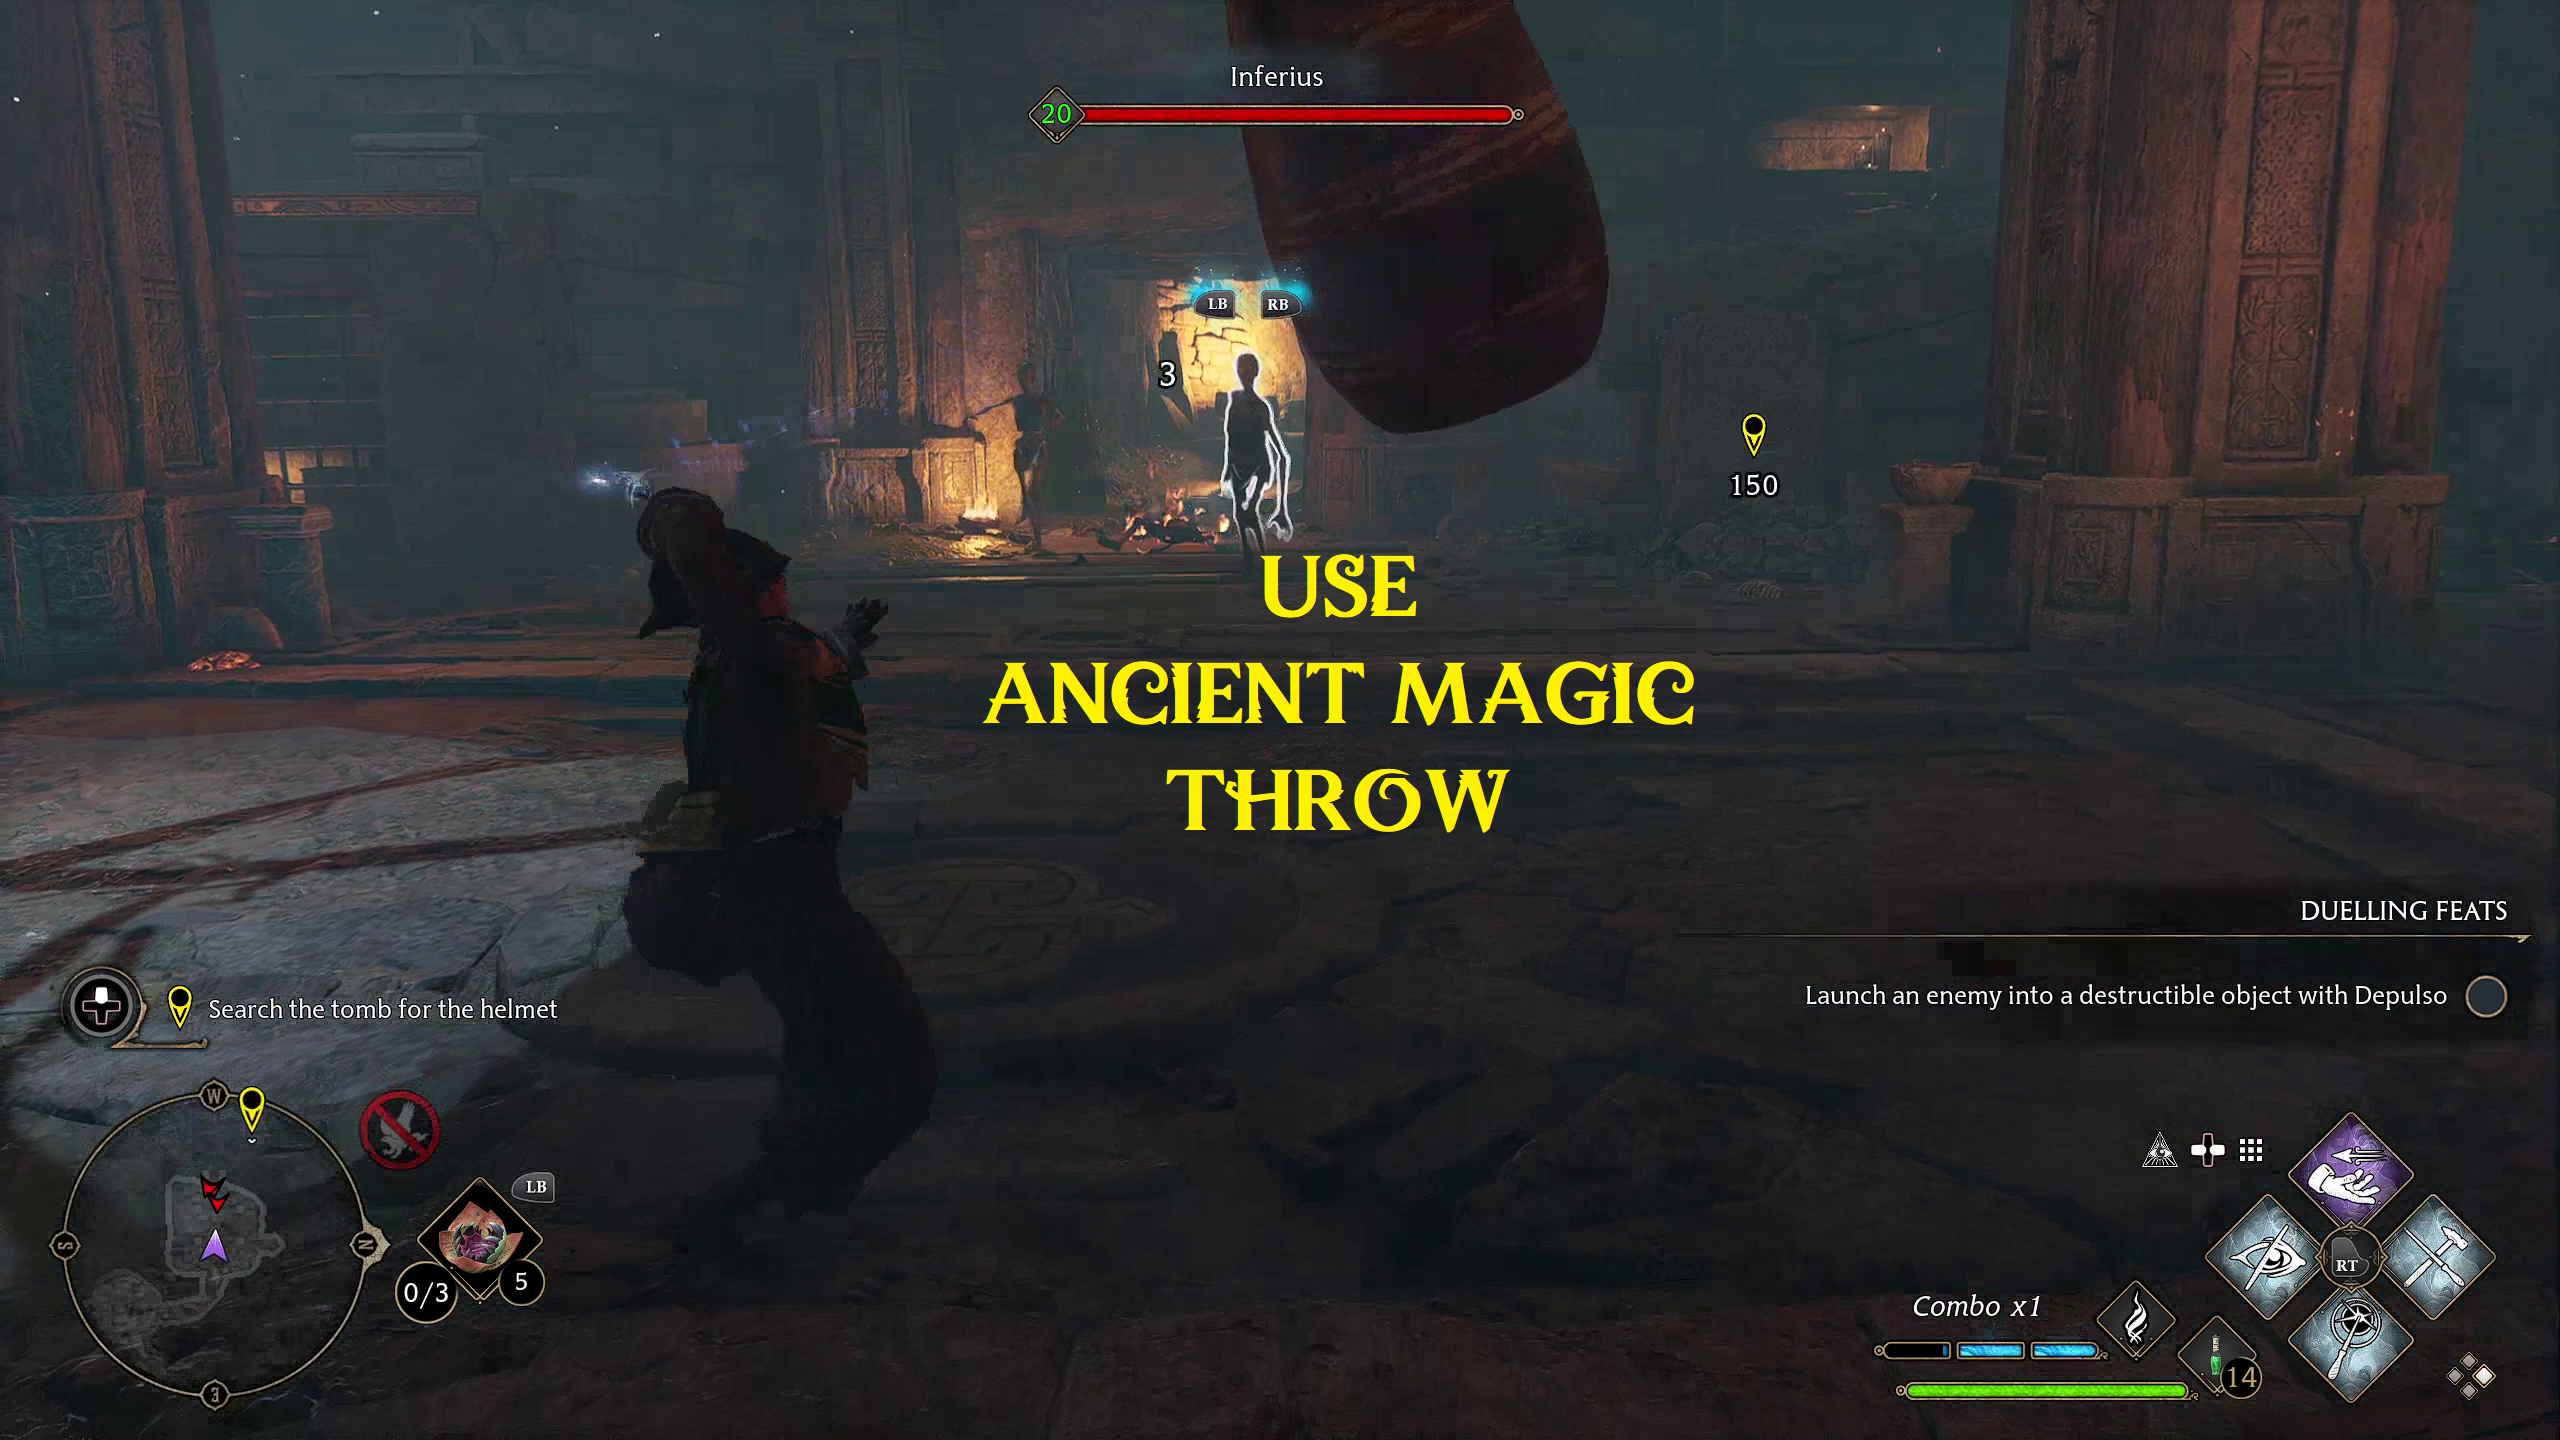
Use Ancient Magic Throw: In nearly all combat arenas for Inferni, including this one, the items that you can use Ancient Magic Throw on () explode, dealing massive damage and catching the Inferni caught in the blast on fire.
Use Ancient Magic: Ancient Magic is one of the only things that can damage Inferni without dealing fire damage to them first, so it can be a powerful way to clear them out.
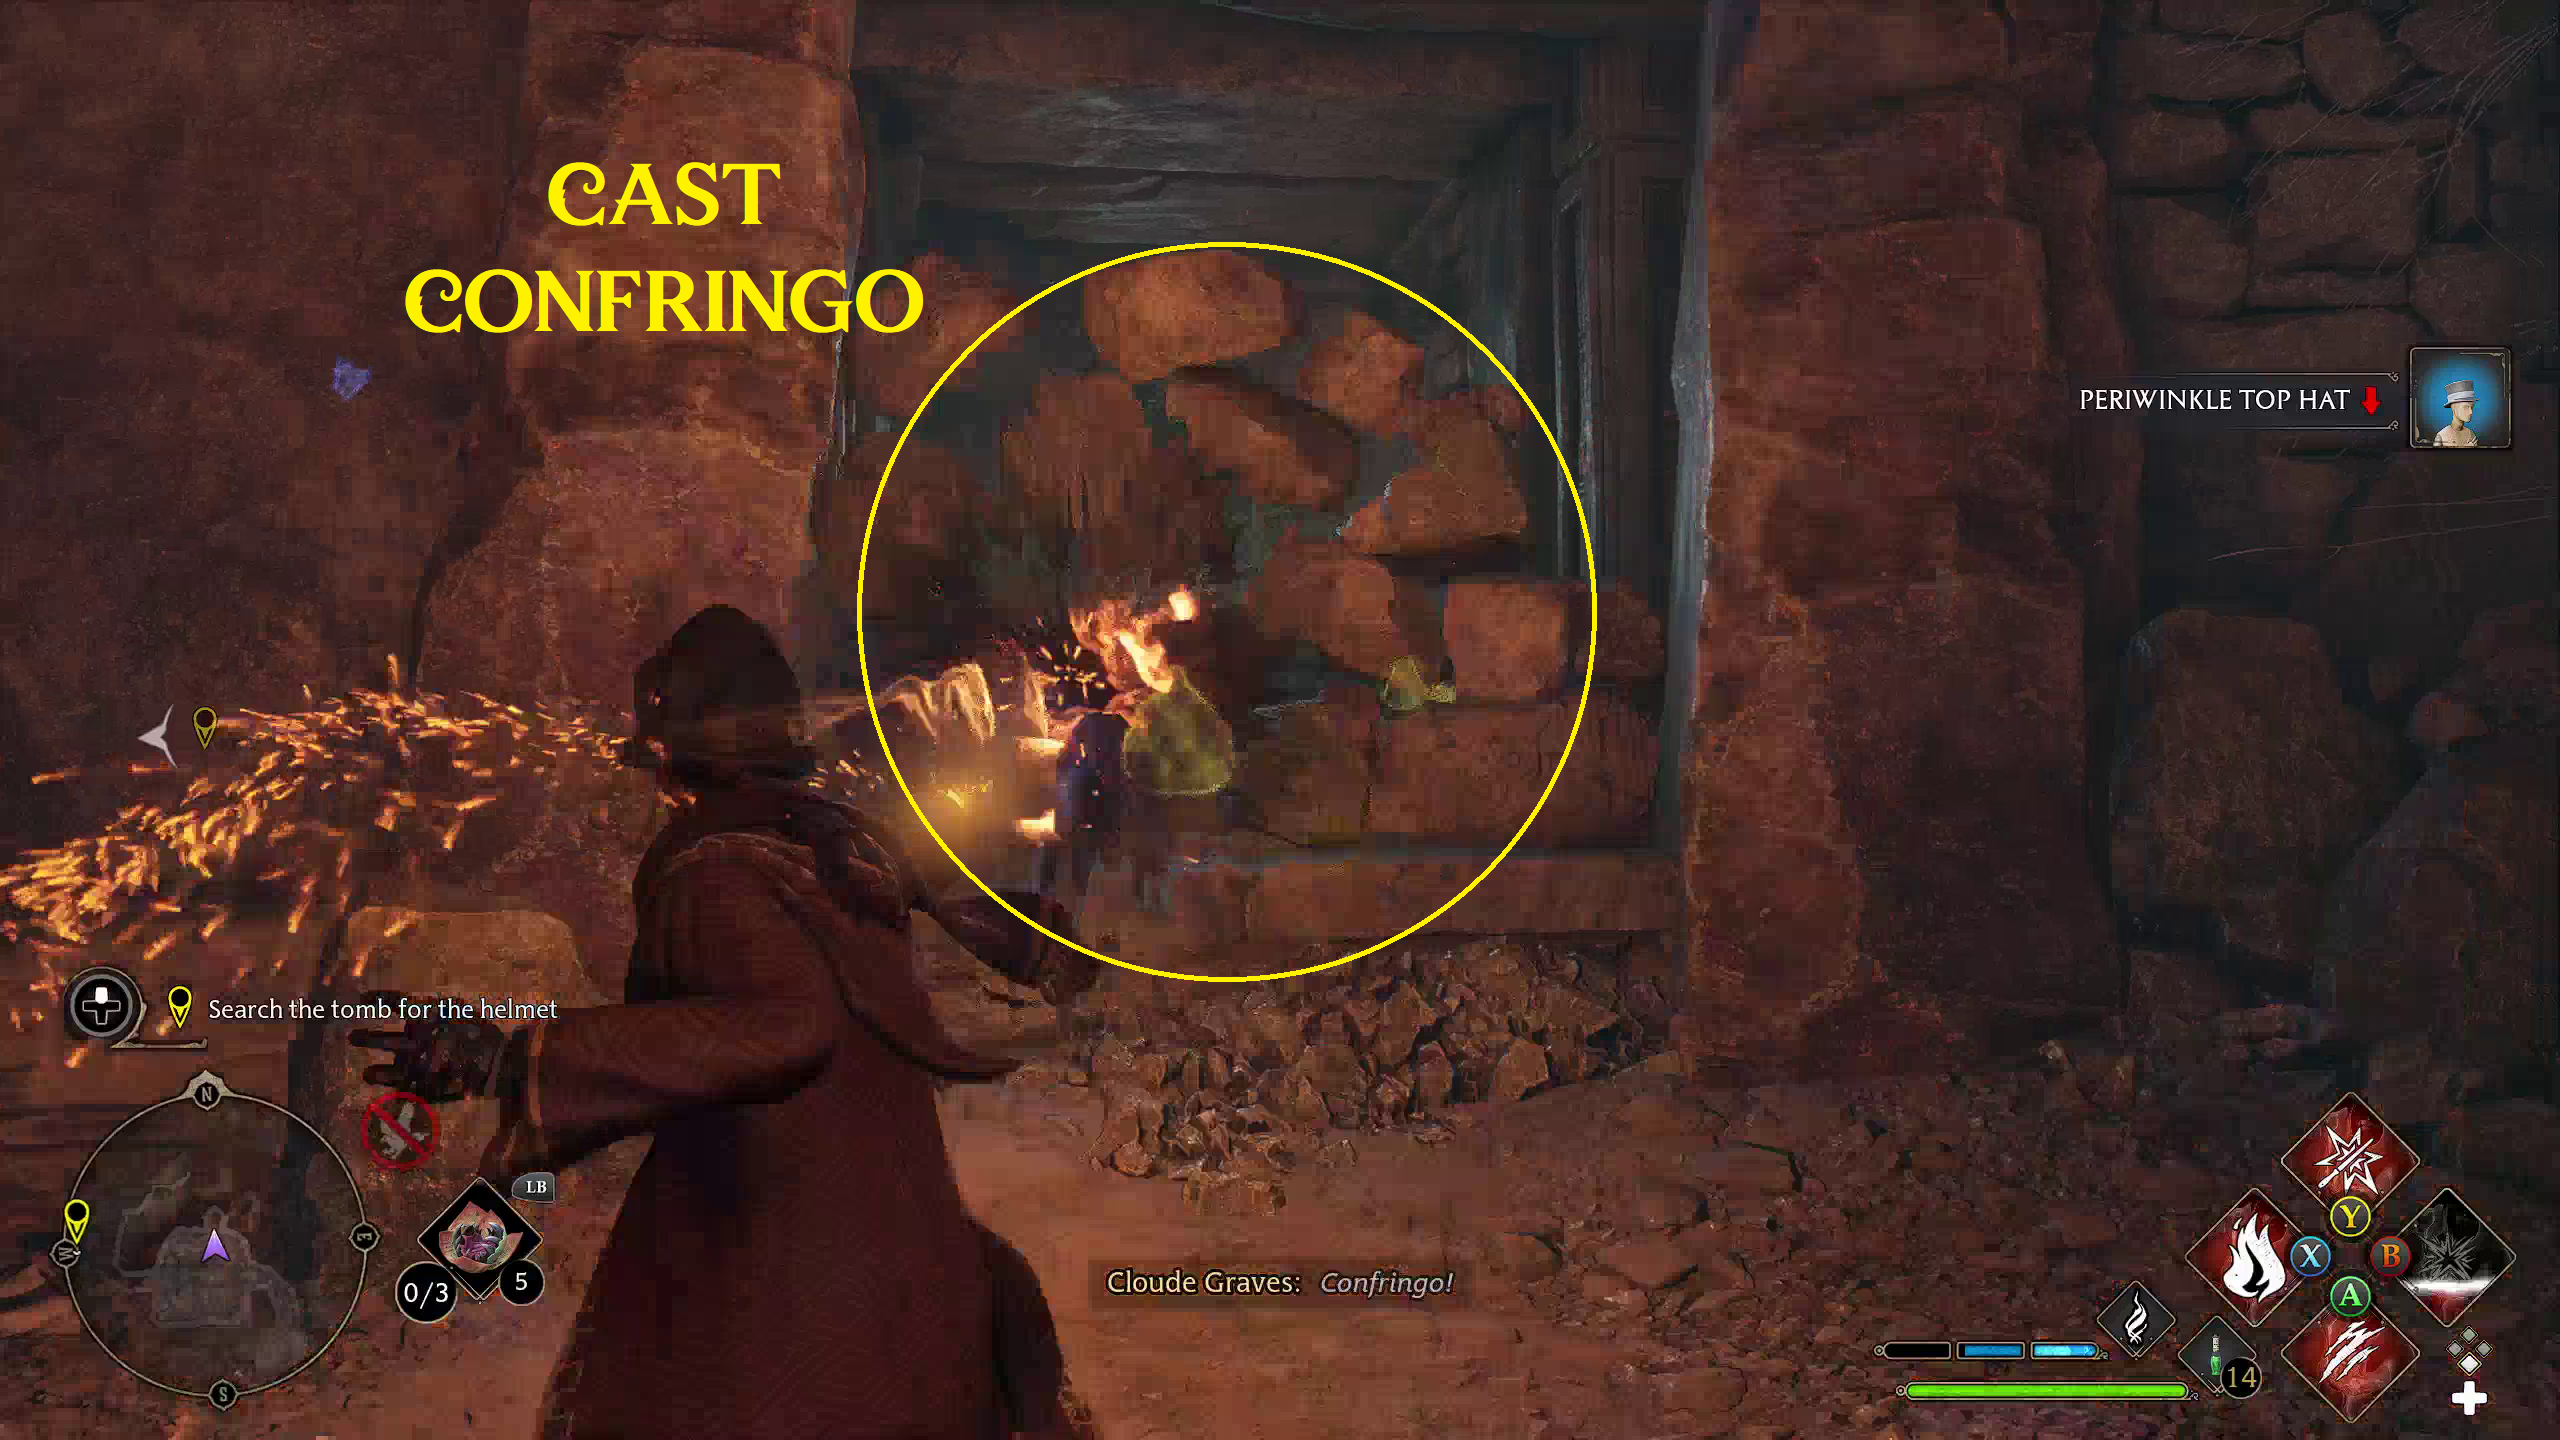
After you dispatch the Inferni, look to the left of the room. There is a chest on top of a platform, which you can jump up to with / (1). On the other side of the room (right from where you entered), there is a pile of rocks you can destroy with Confringo (2), behind which there are a couple of gold bags.
12
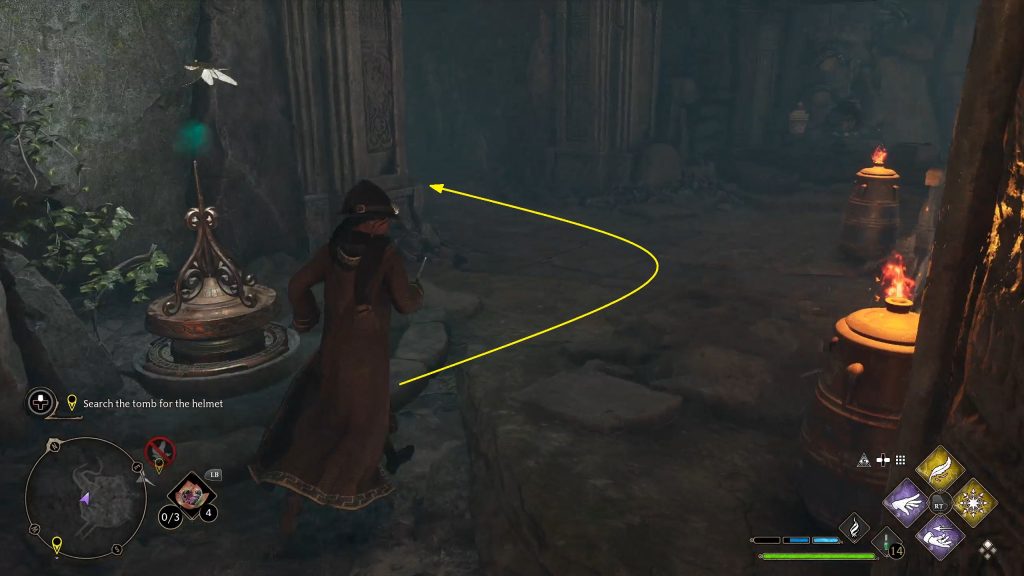
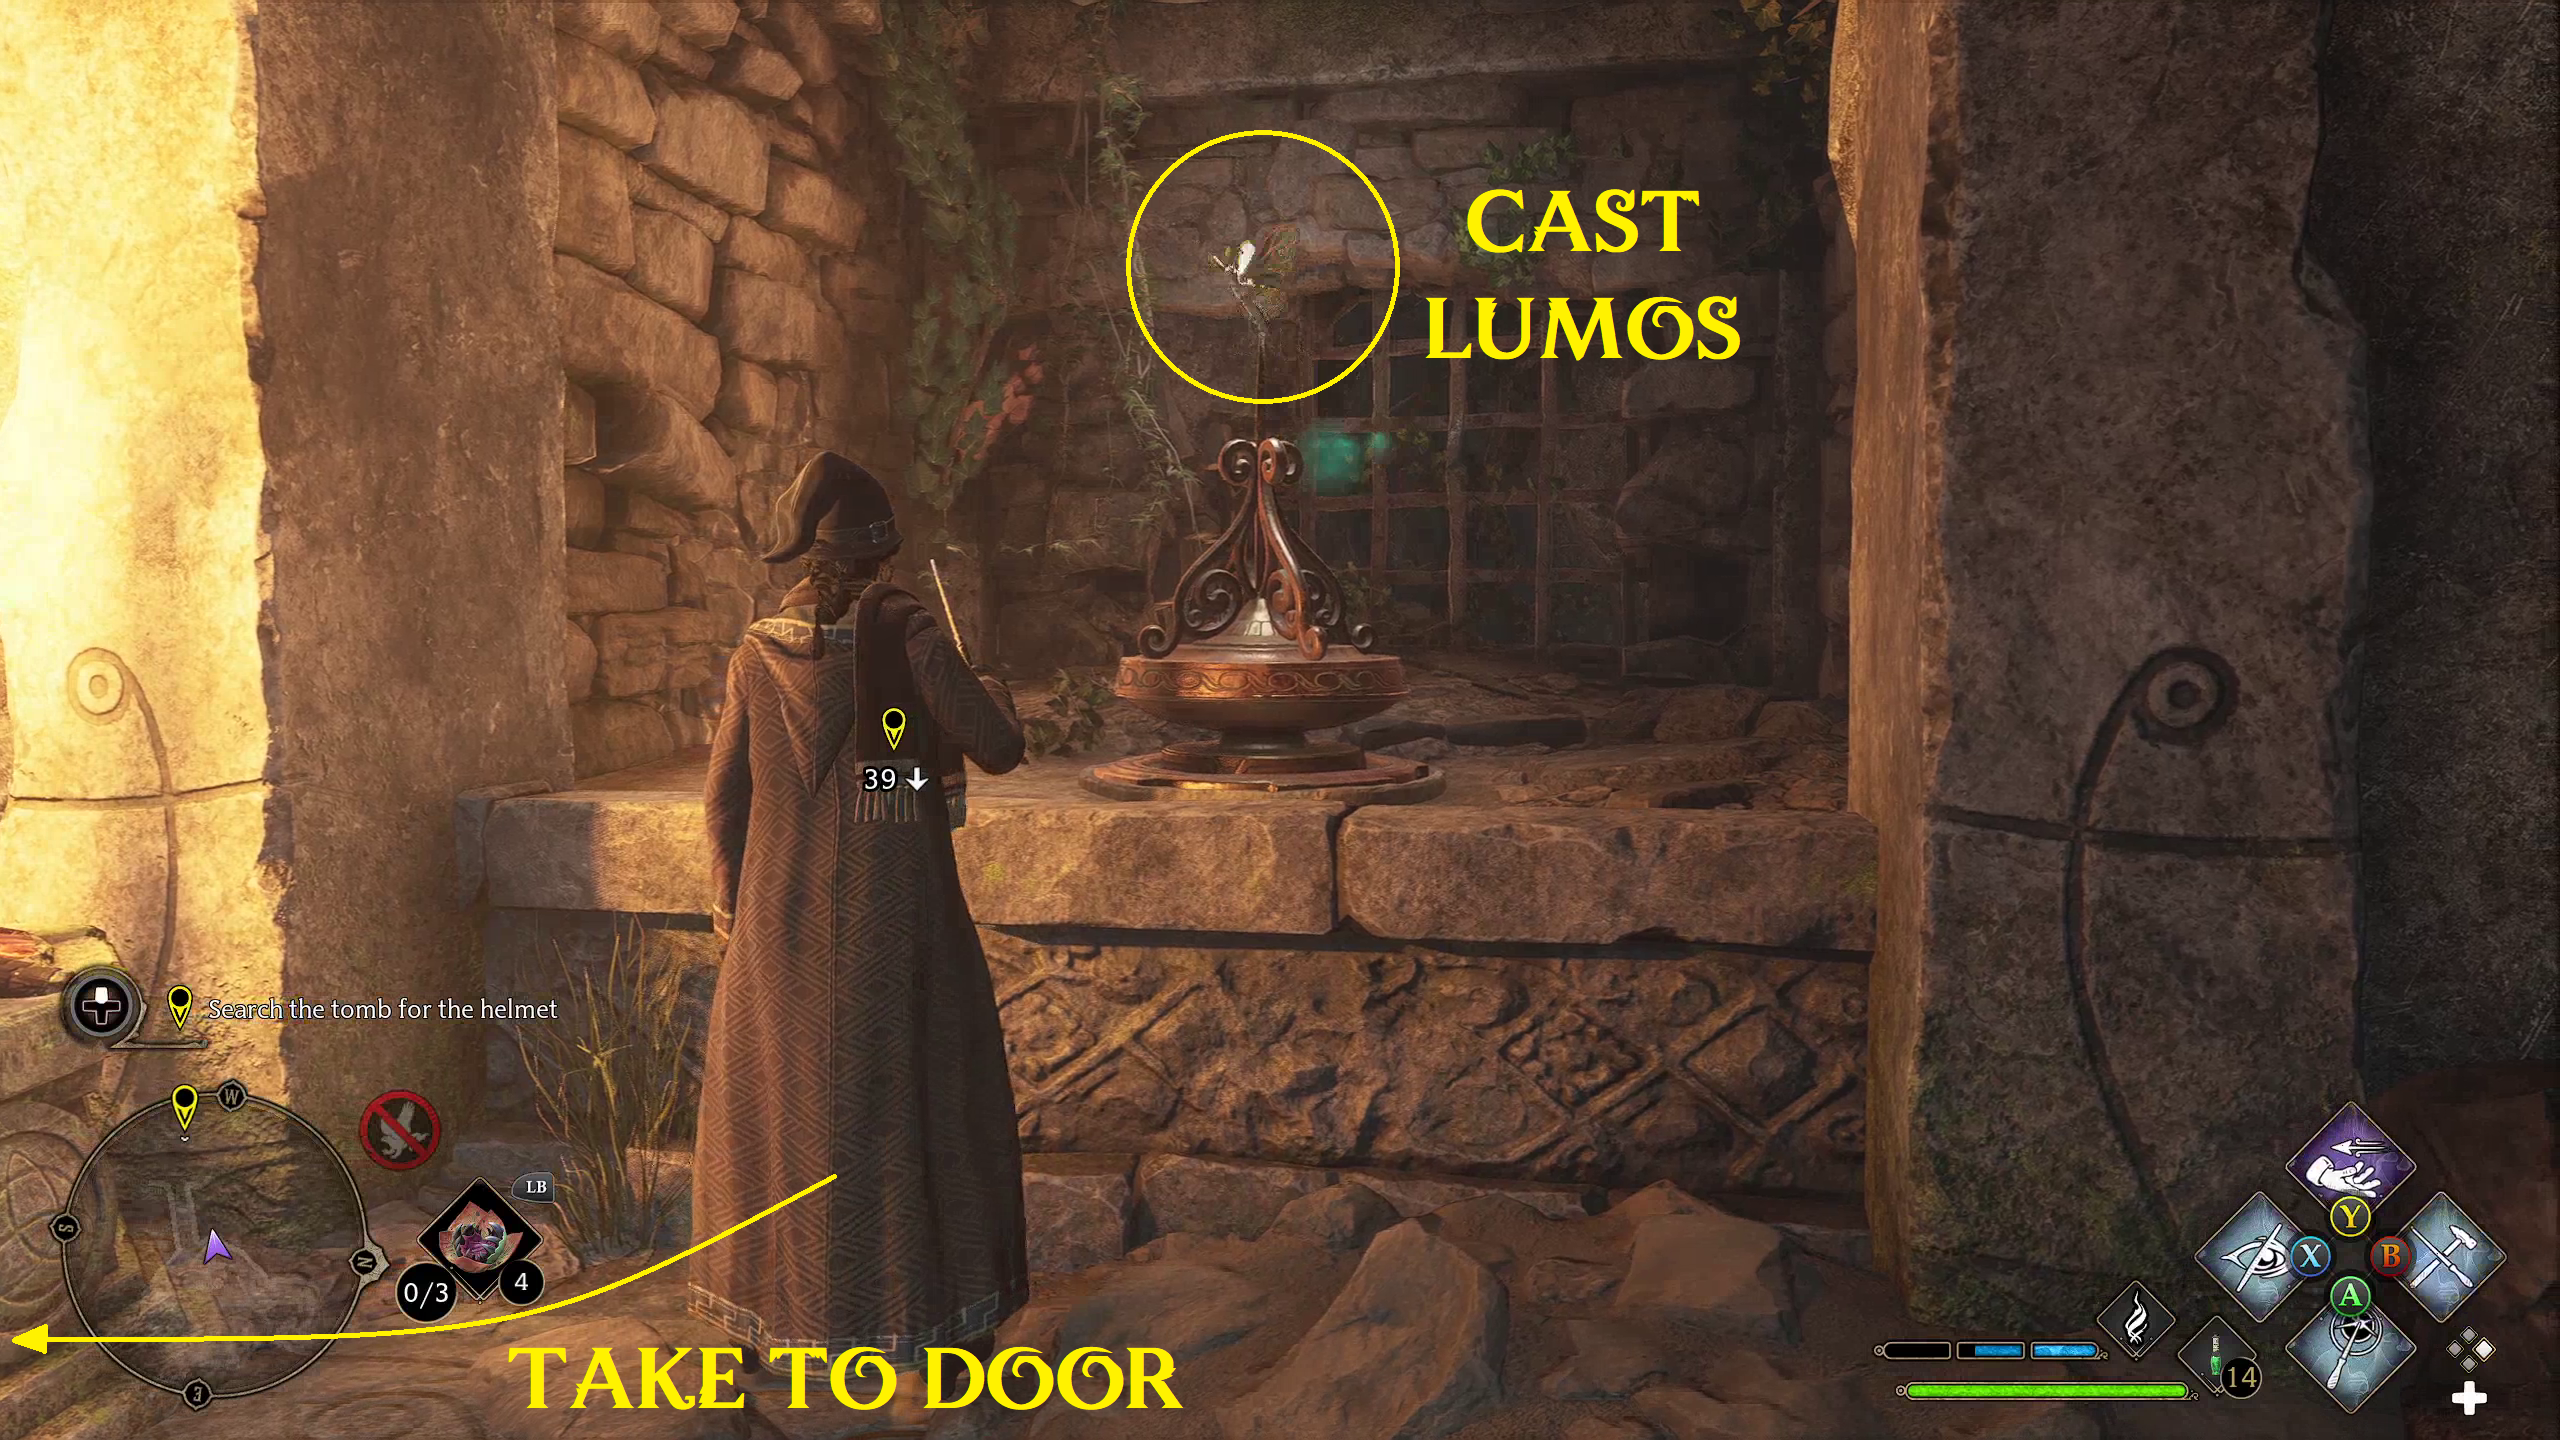
After clearing the Inferni room and continuing on, you’ll come across another moth puzzle. To start, you can grab one of the two moths that you can reach immediately with Lumos (1), and then bring it to the door (2).
12
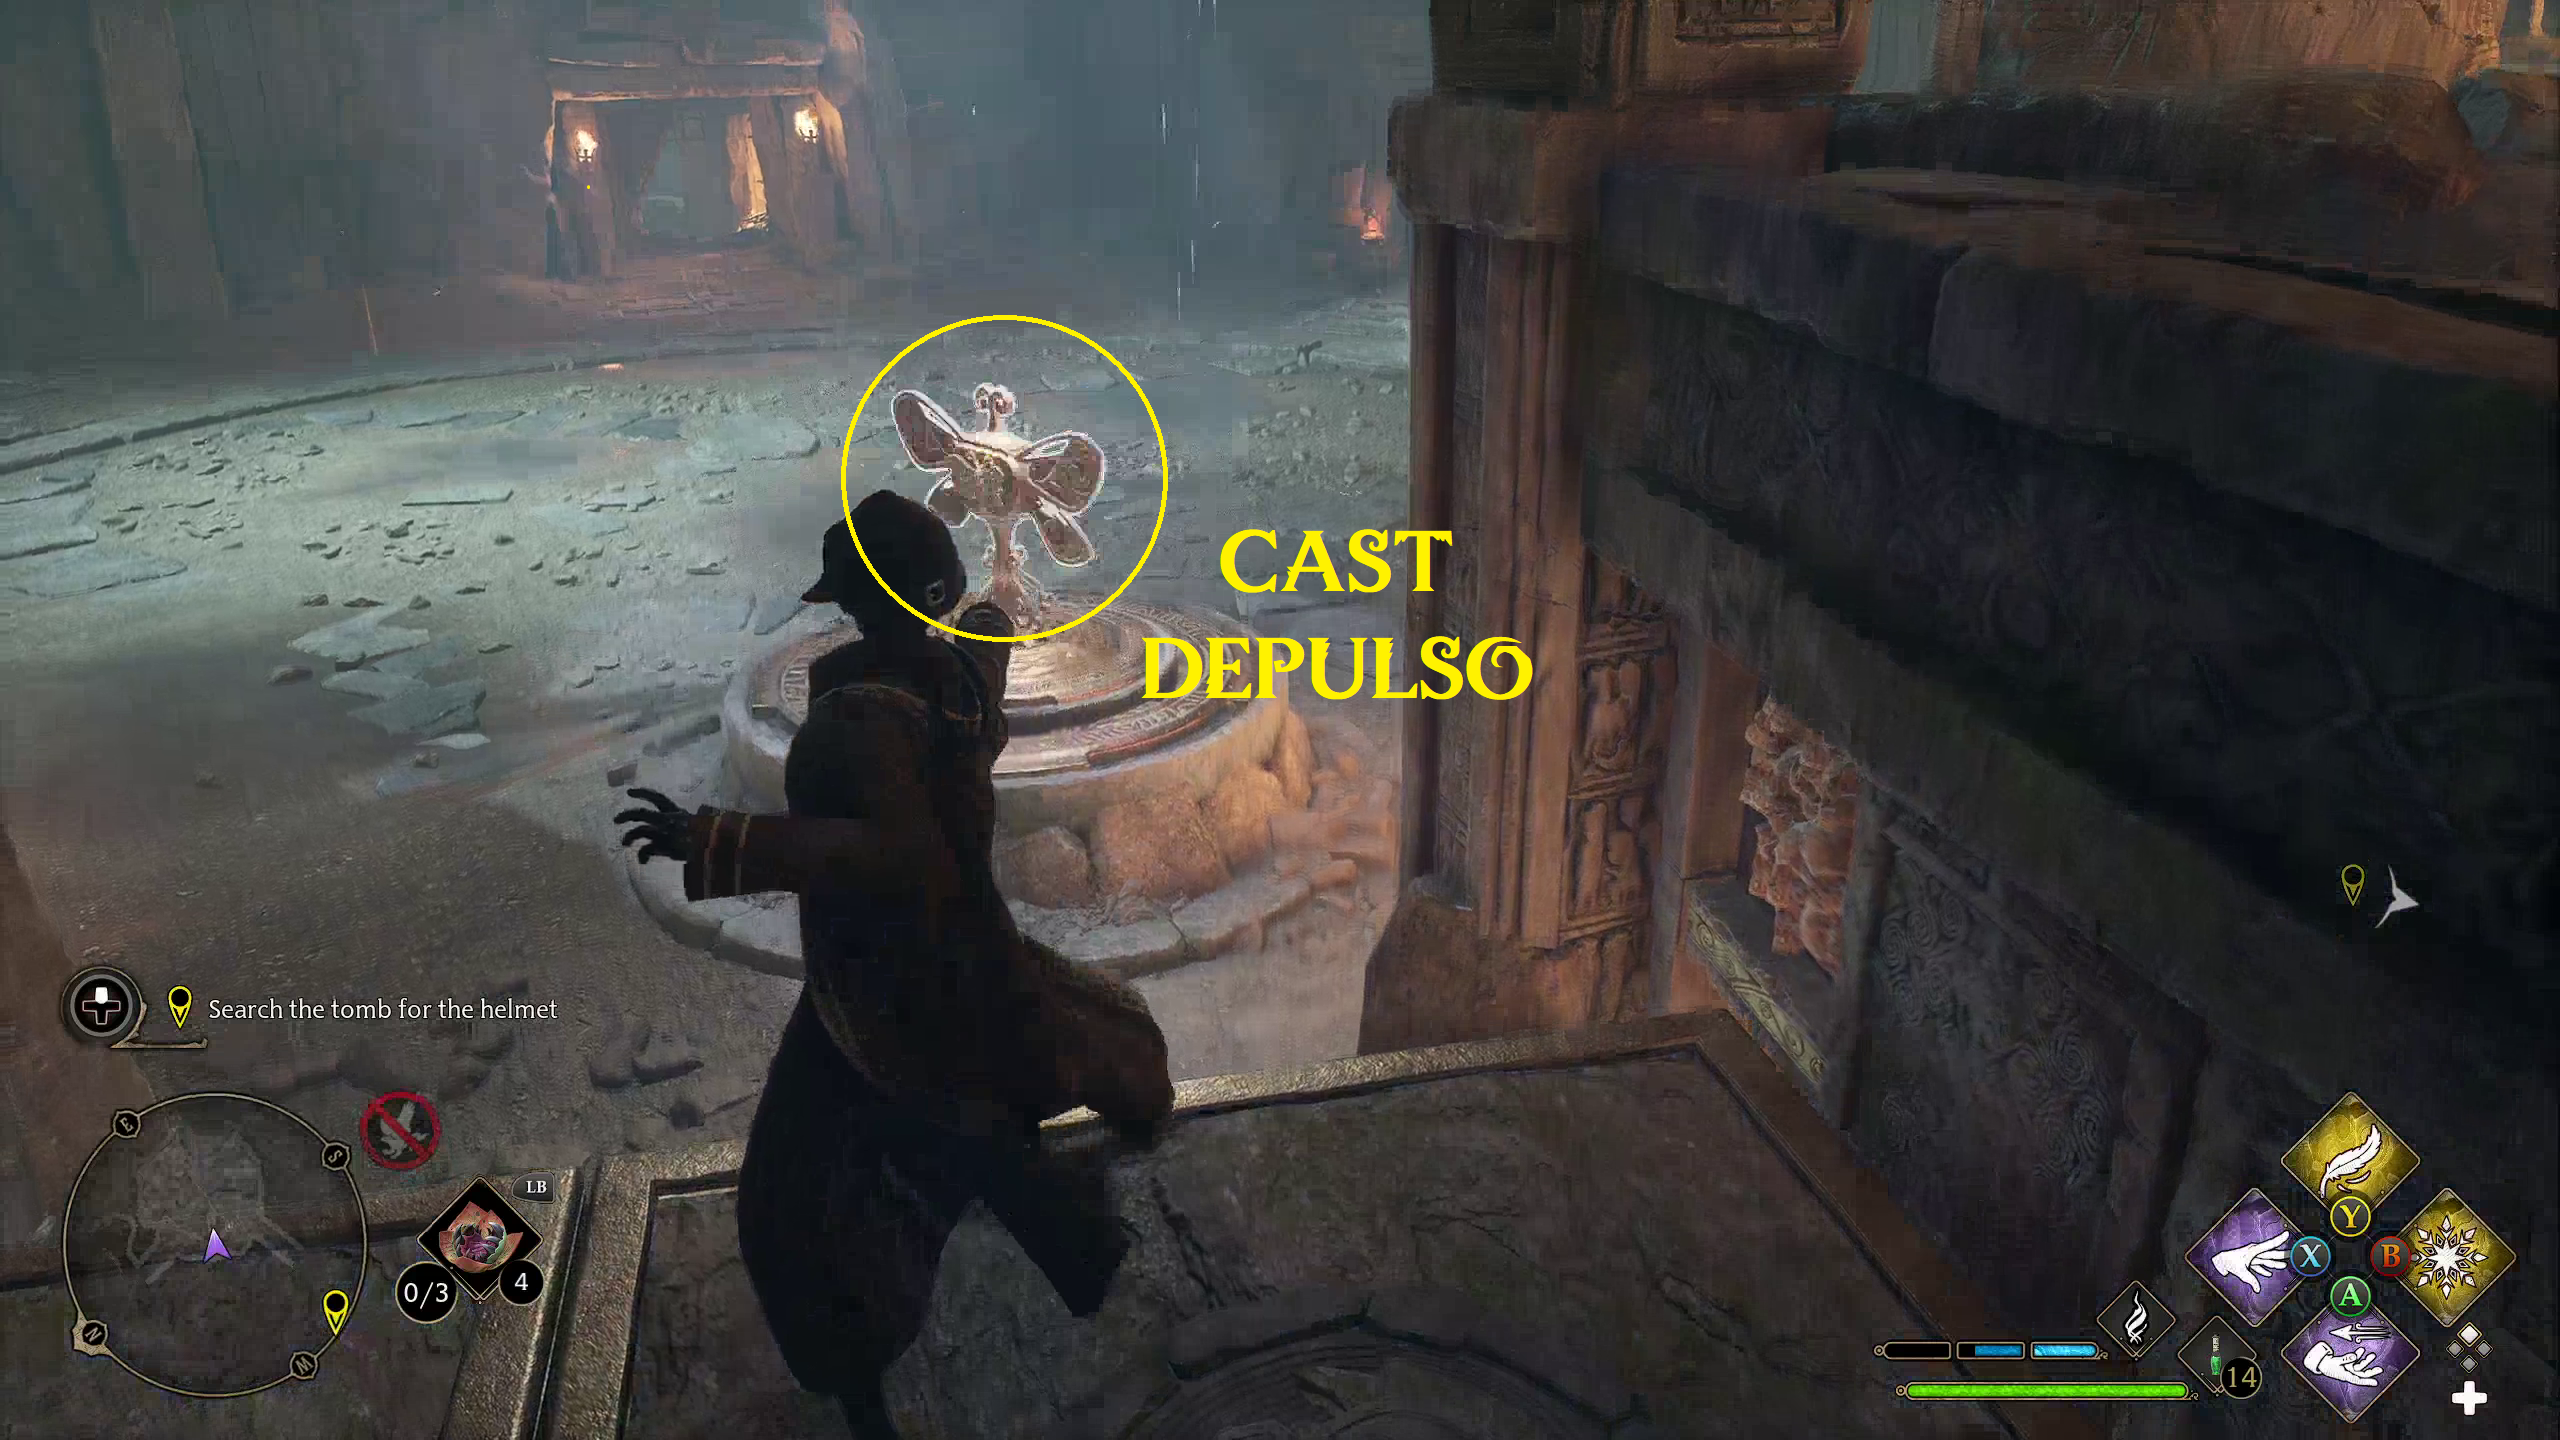
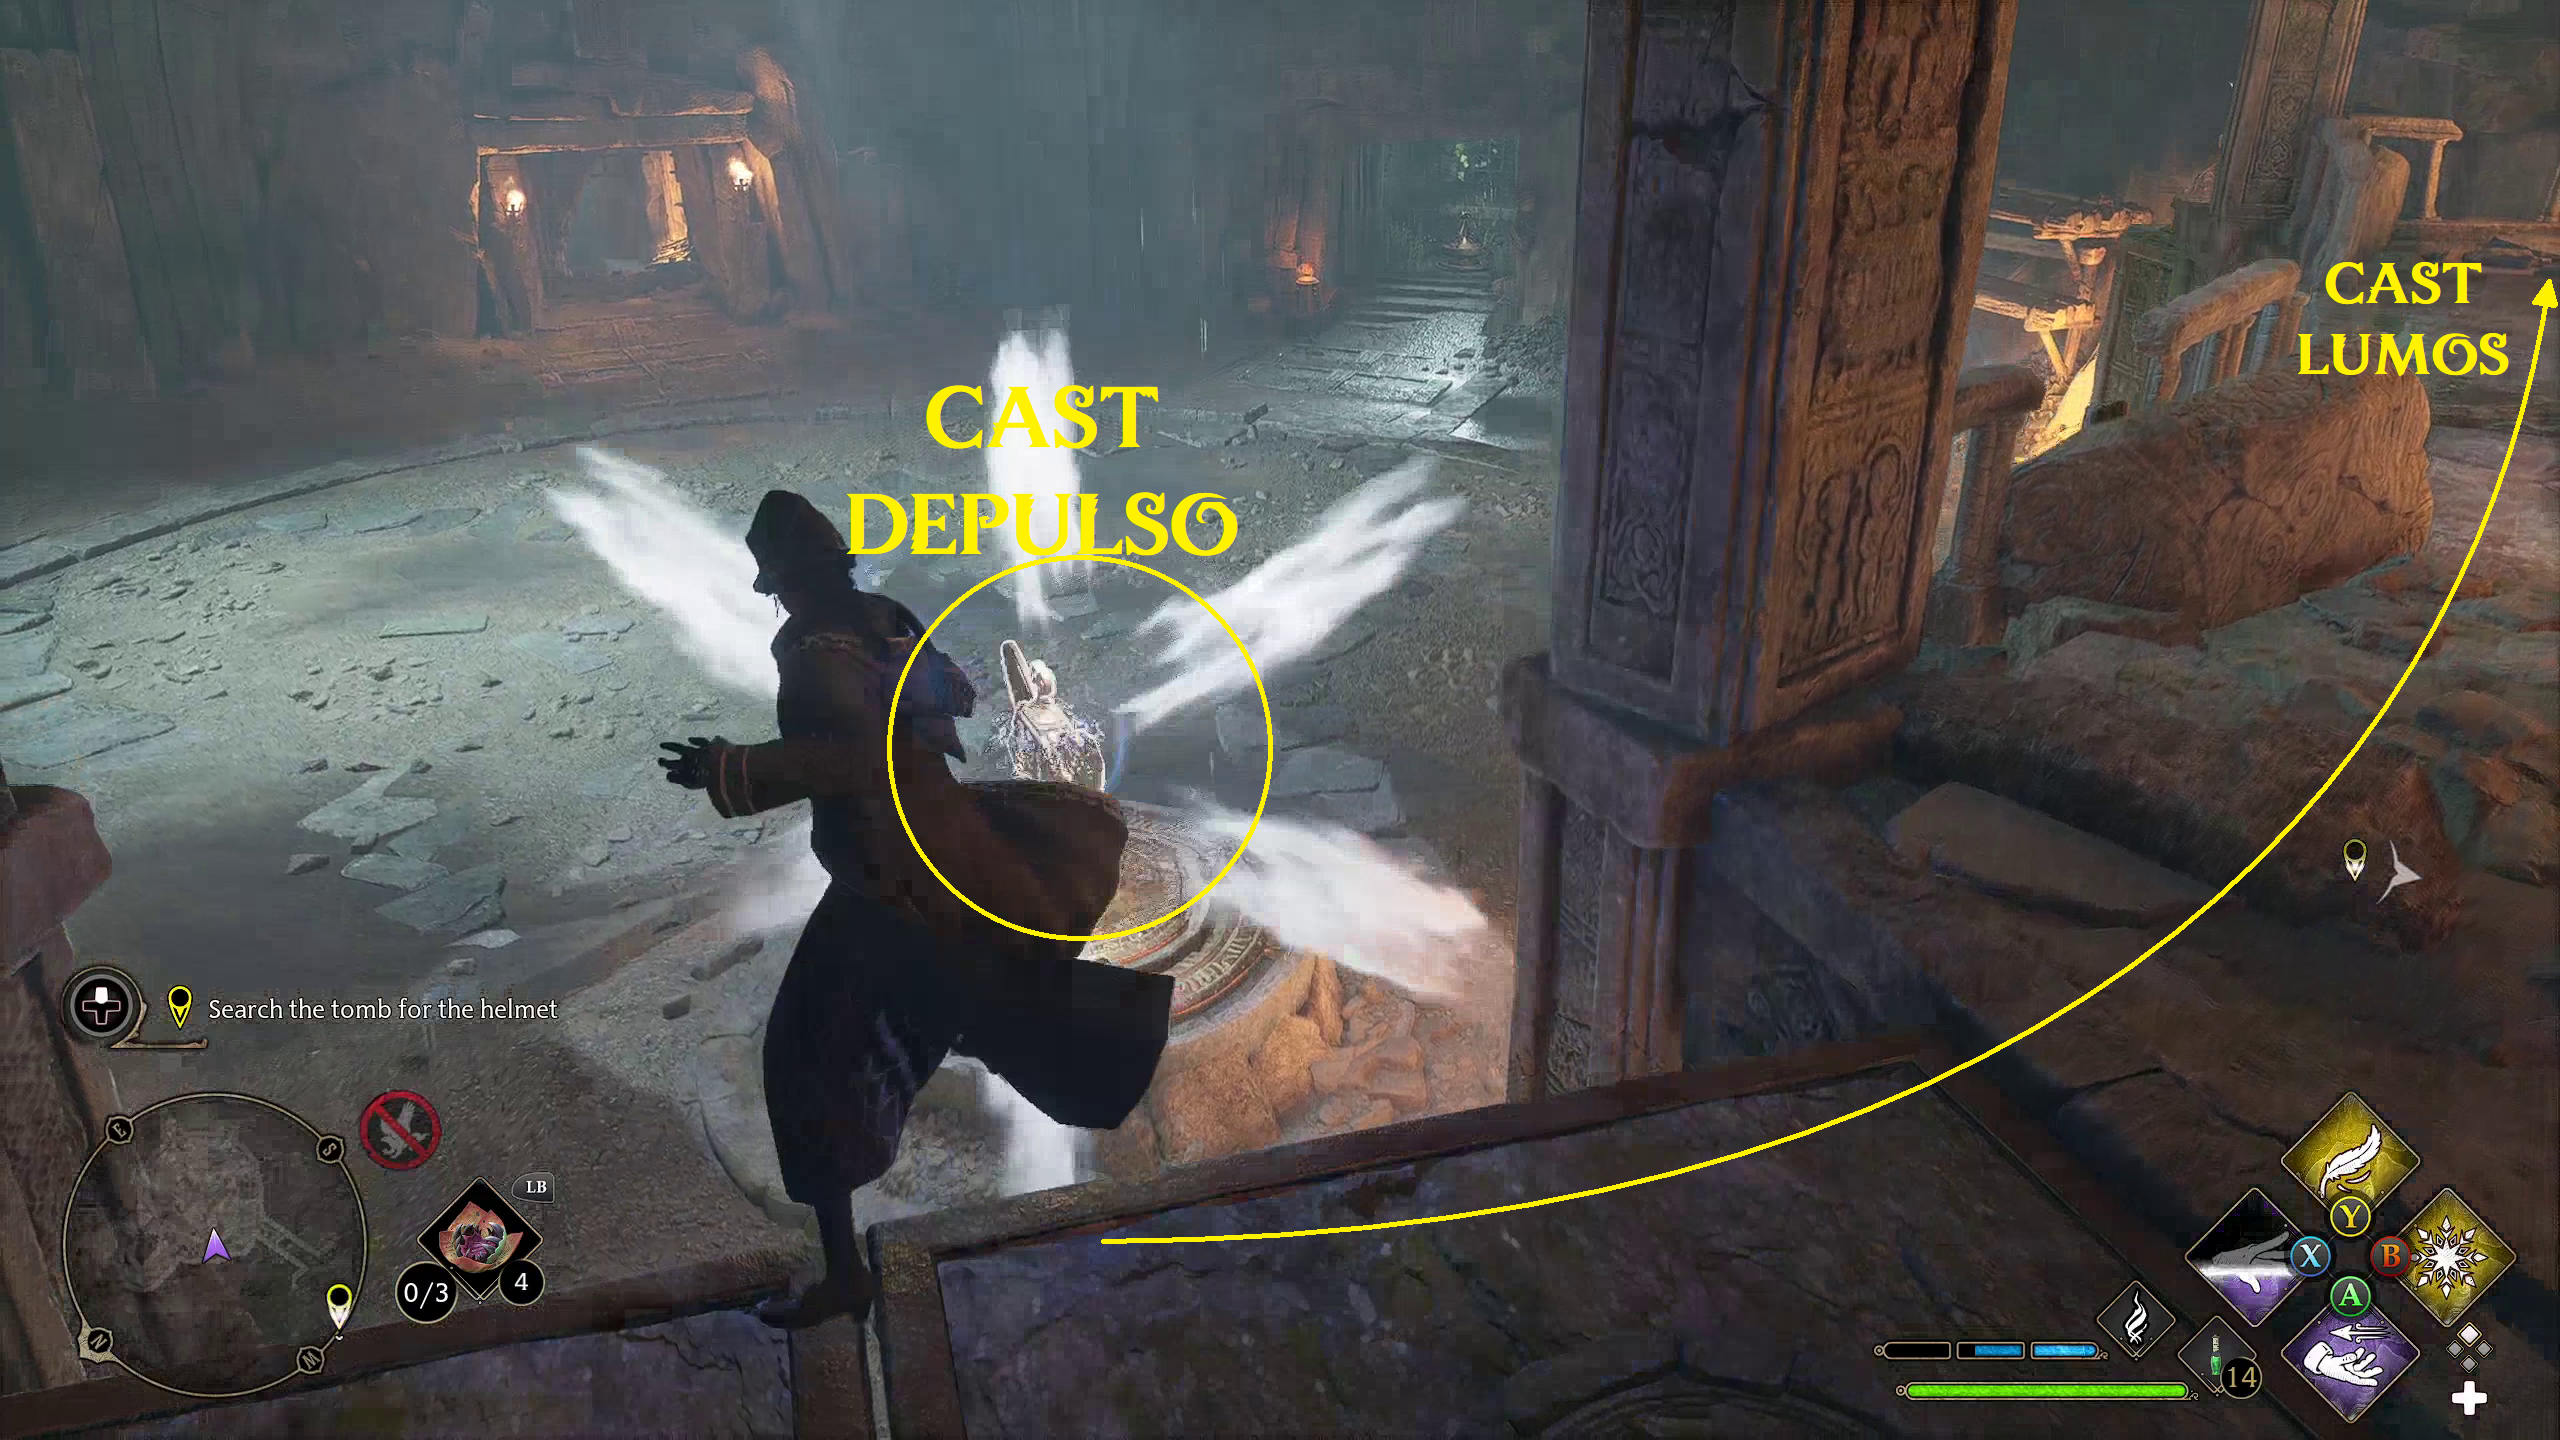
Now, the next part requires a bit more thought. To start, cast Lumos on the remaining moth in the room (1), and then bring it to the moth-wing dial in the center of the room (2). Then, cast Depulso on the now-powered dial (3), which will cause it to spin, raising a platform up to the final moth. You can either cast Depulso while already standing on the rising platform, or you can run to the platform after raising it up, giving you access to the moth. Once you’re on the higher platform, you can cast Lumos on the last moth (4). Bring it back to the door, then grab the moth you left in the dial (5) and bring it to the door to open it (6).
1234
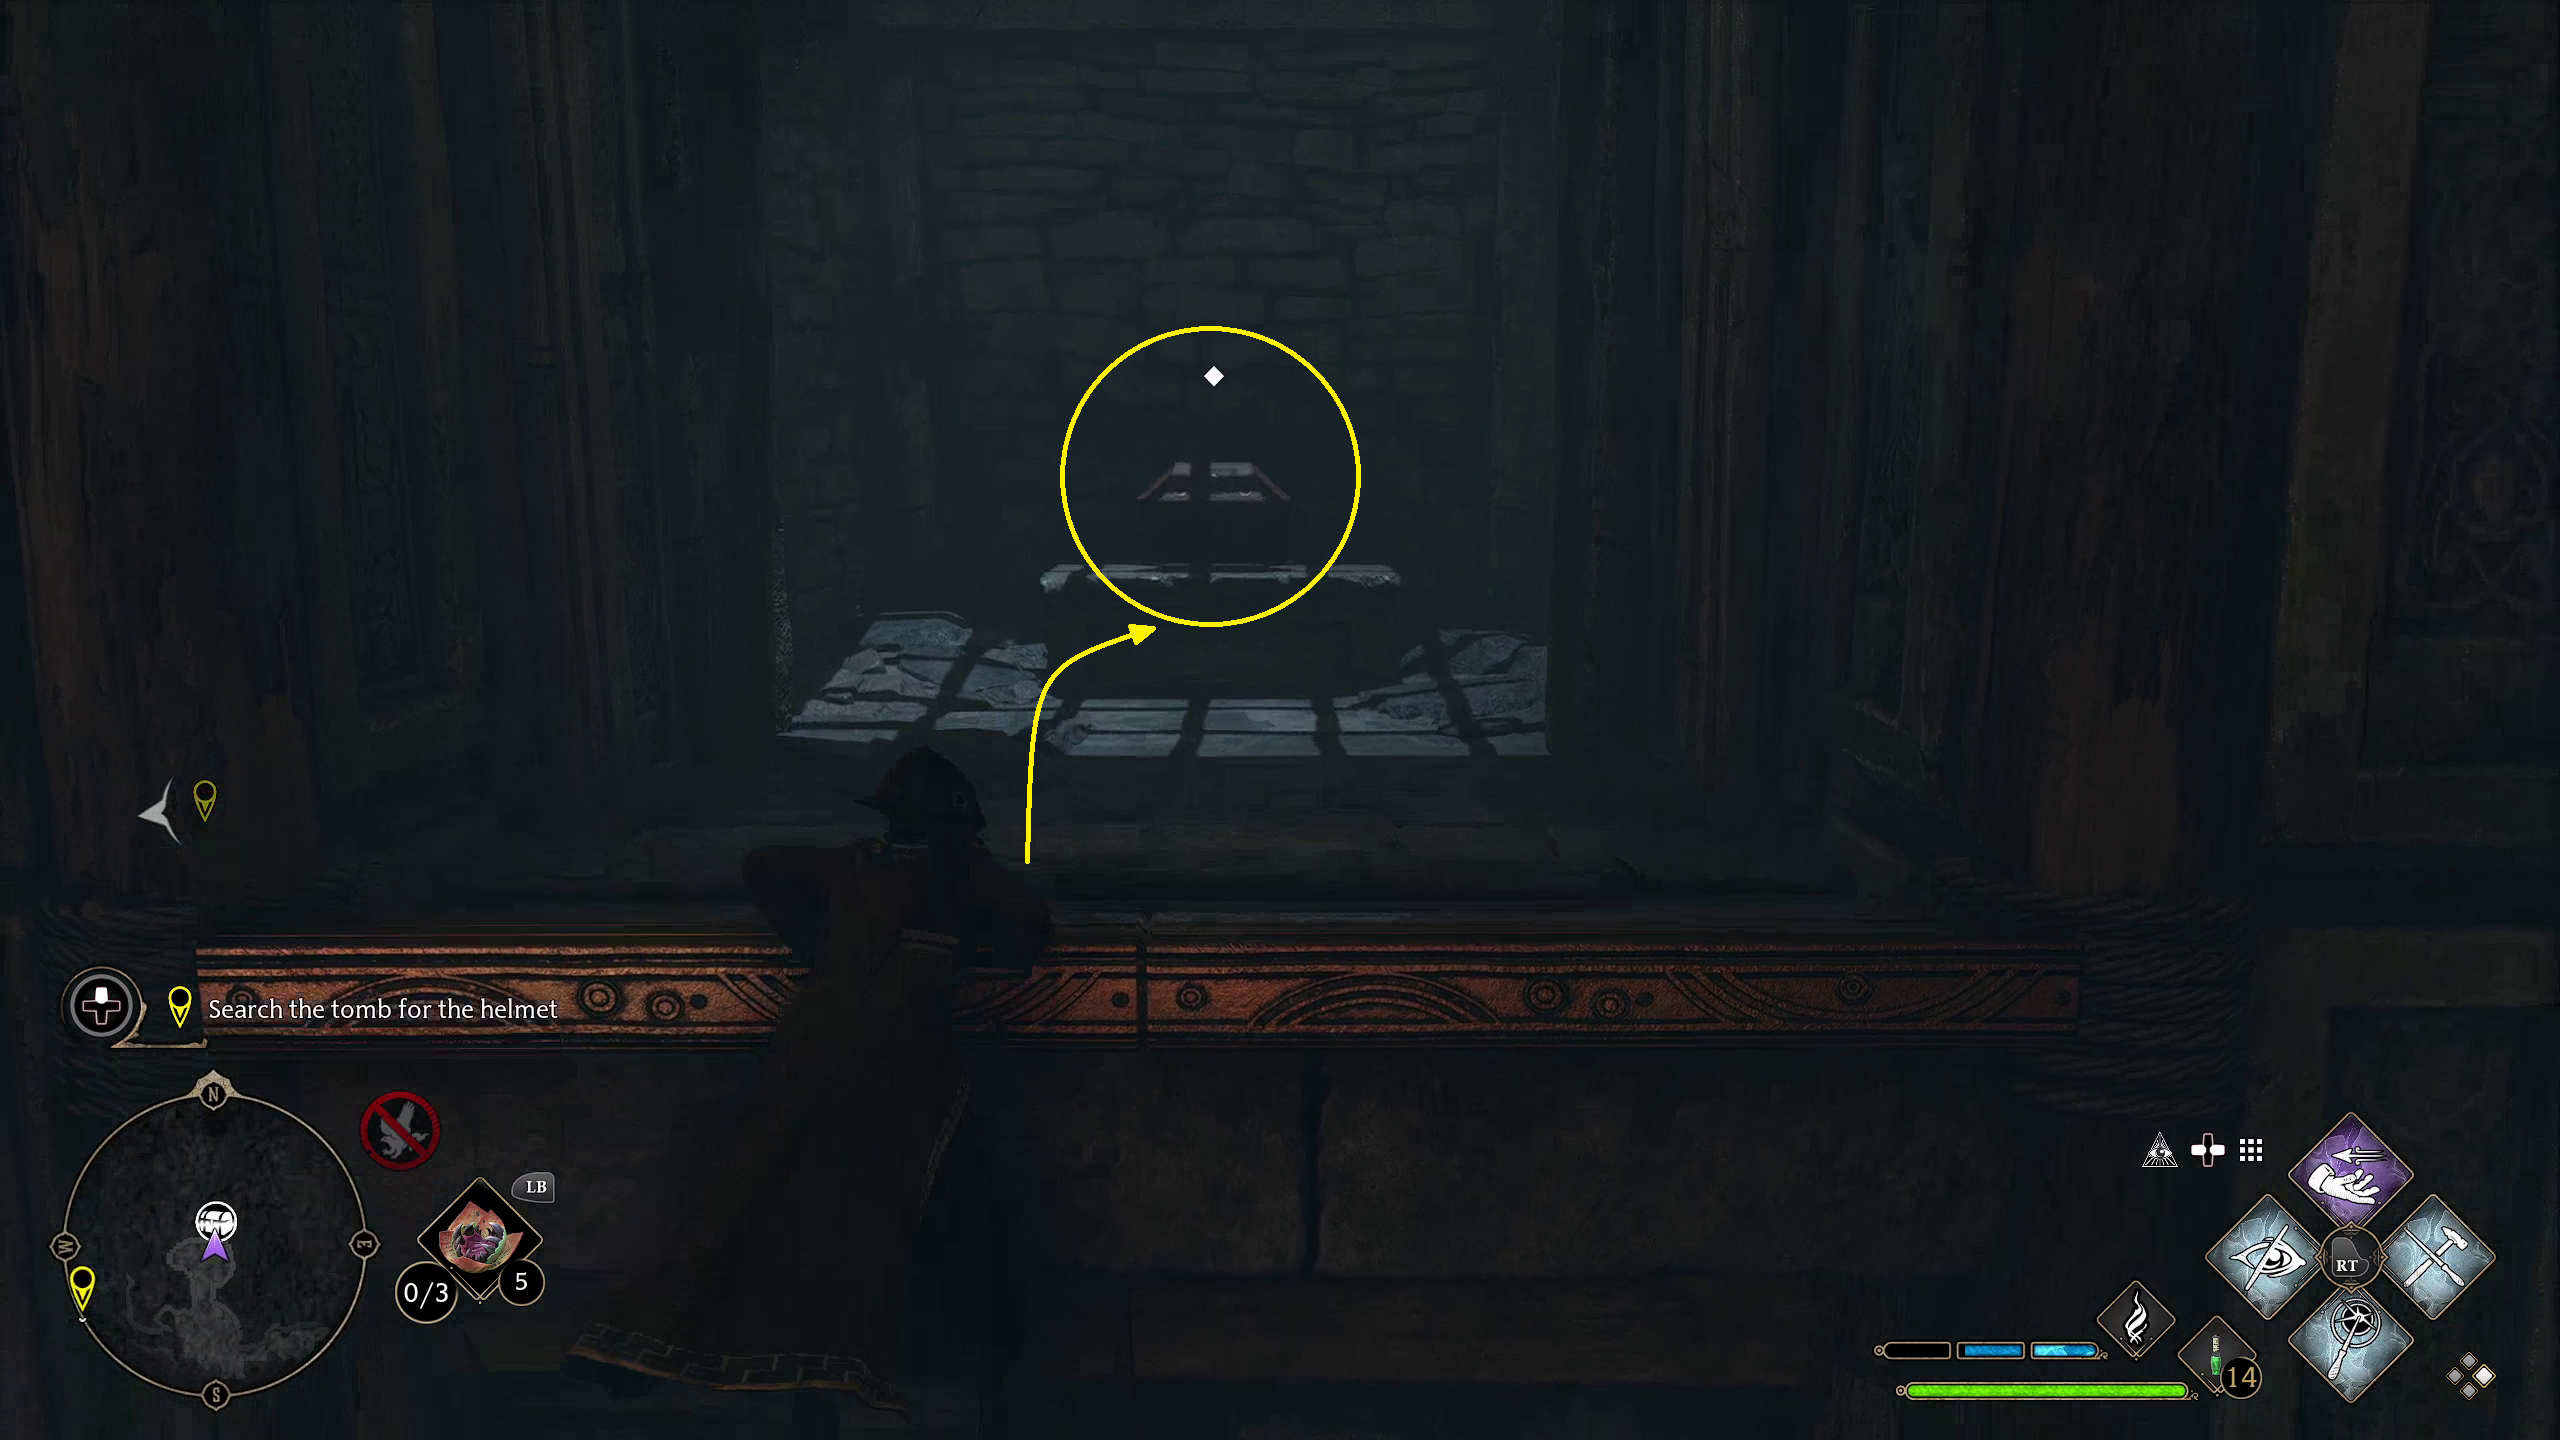
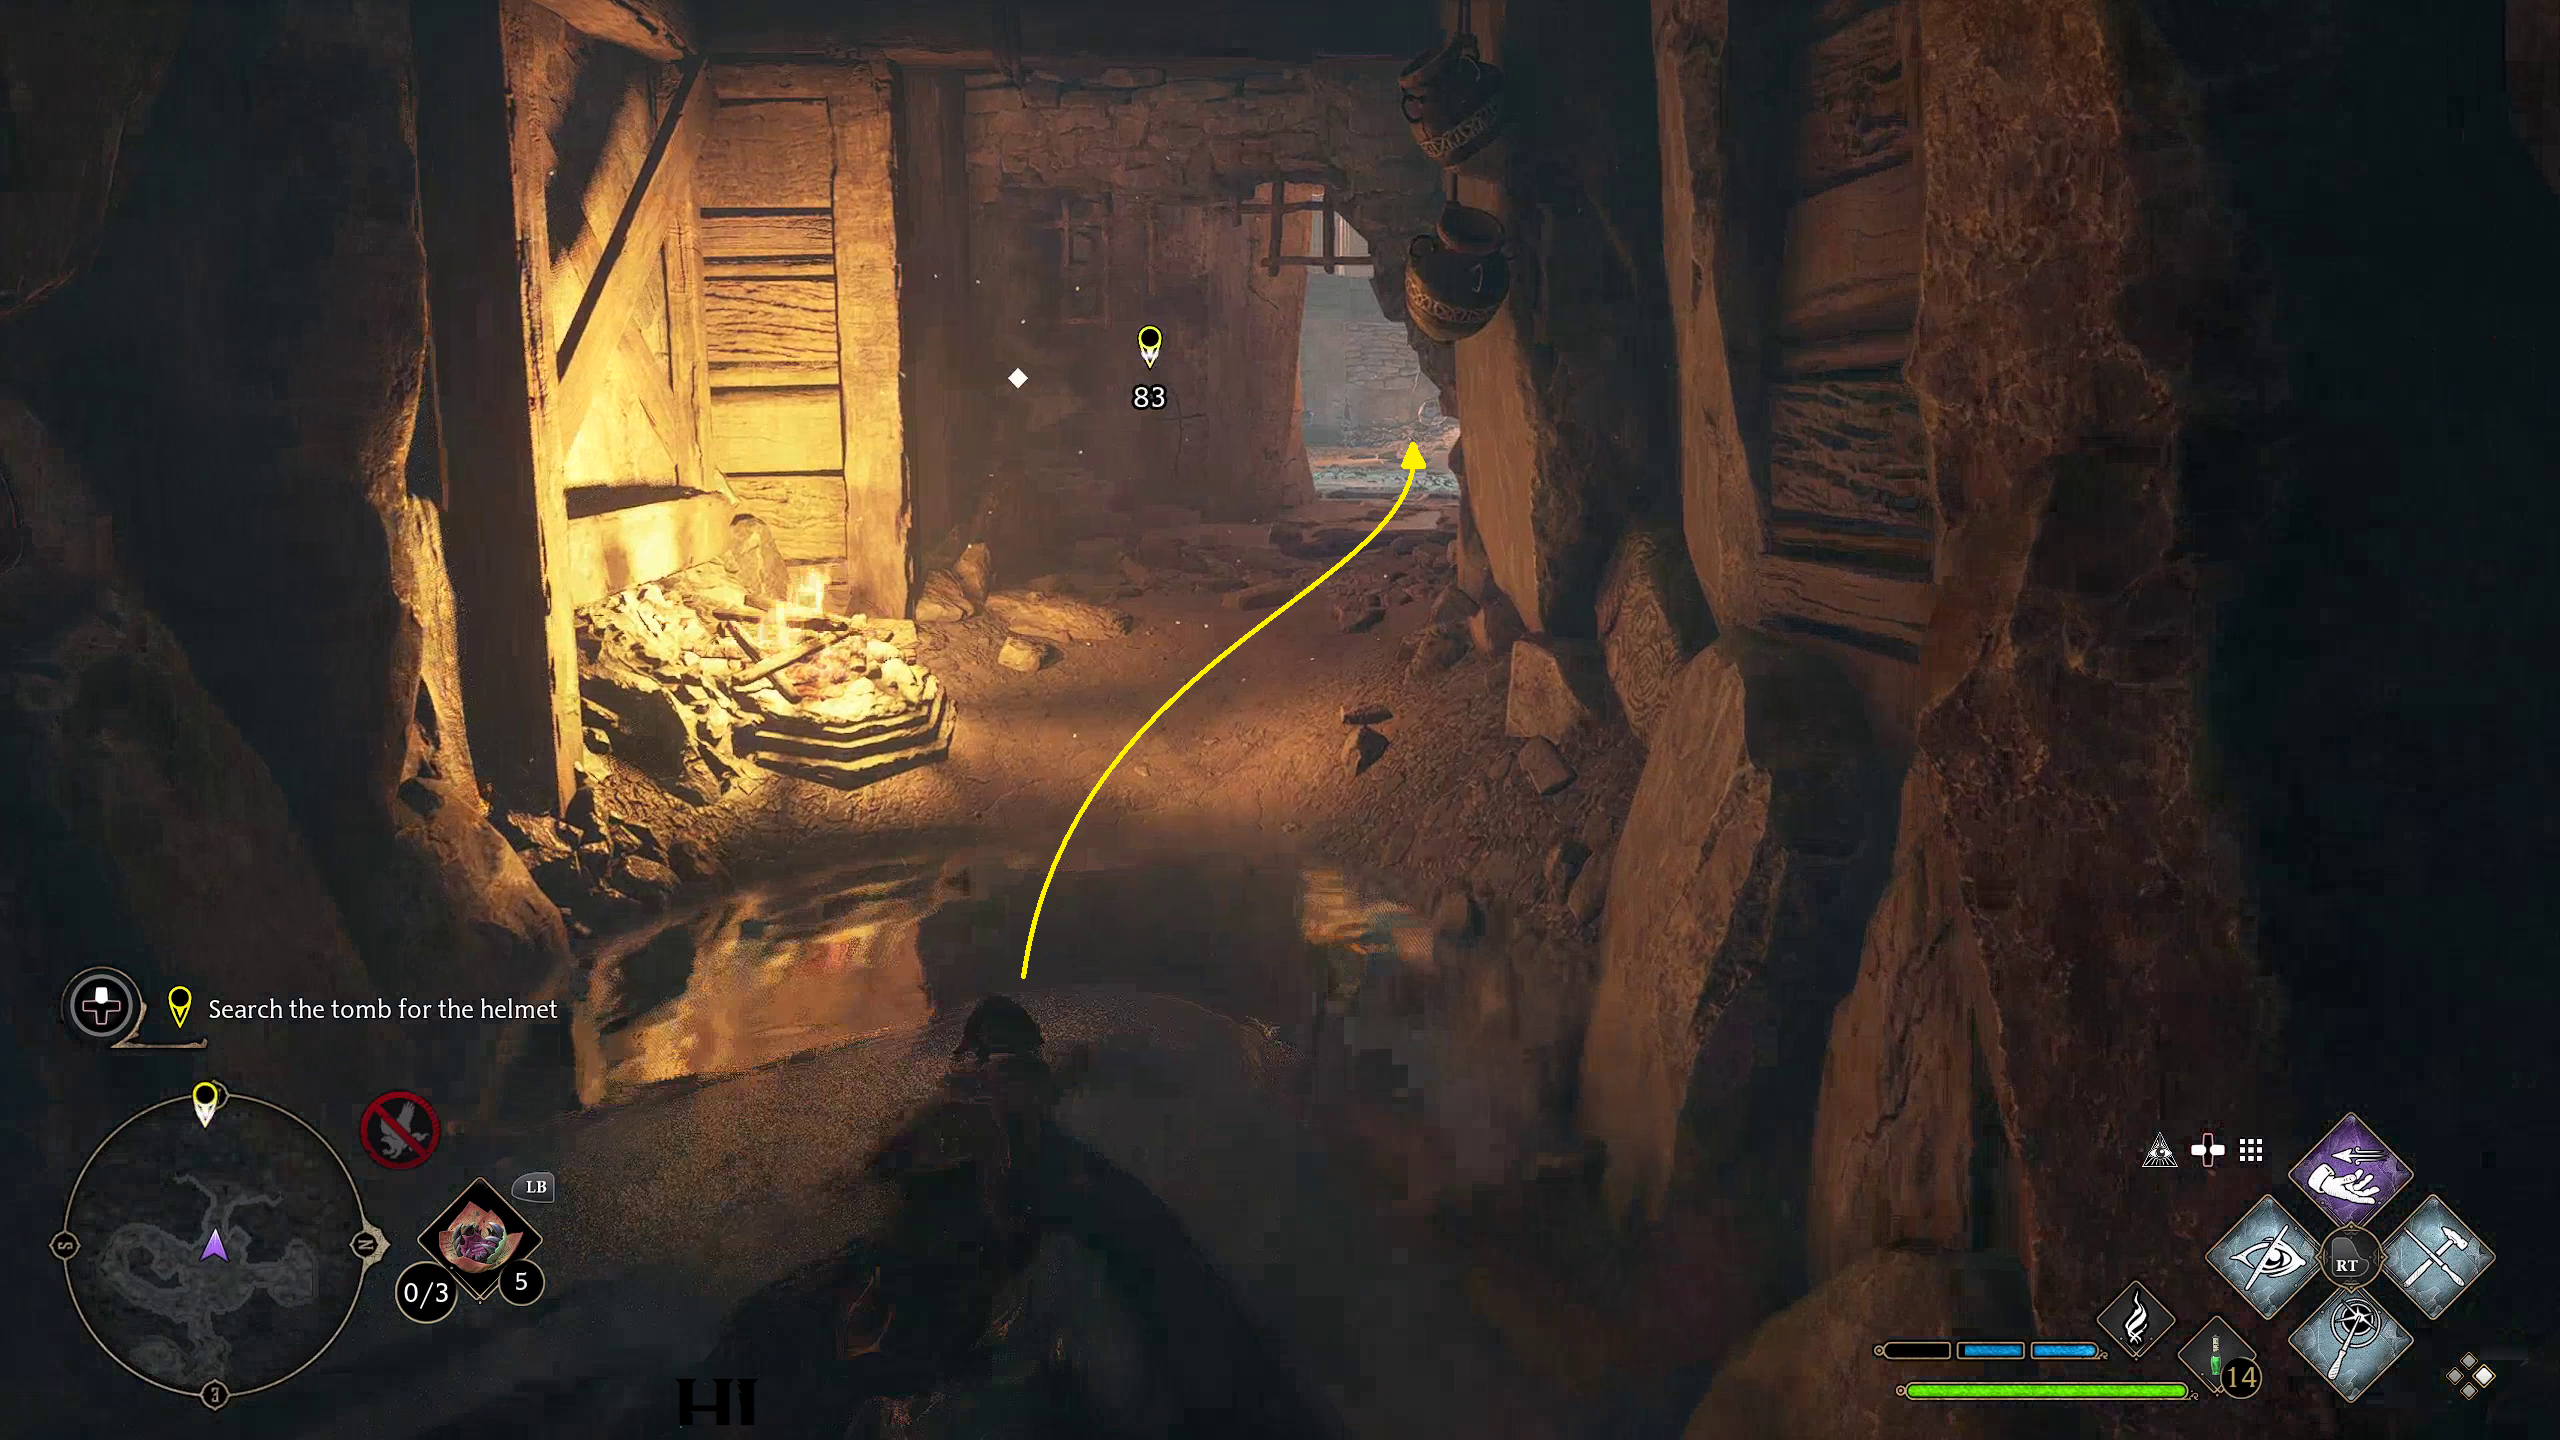
The next room has a tantalizing, dangling cage in the center of the room, over a very-breakable-looking grate. For now, however, ignore it, and open the door to your right with Accio (1). Follow the path and grab the chest at the end (2).
12
Make your way back into room grate room, and then go through the other open door. On the left side of the room, you will see a box that you can use to platform up to the chest above (1). After grabbing the chest, drop back down and move to below the adjacent platform. Cast Accio on the box to move it to you (2), then use it to jump up and grab the other chest in the room (3).
123
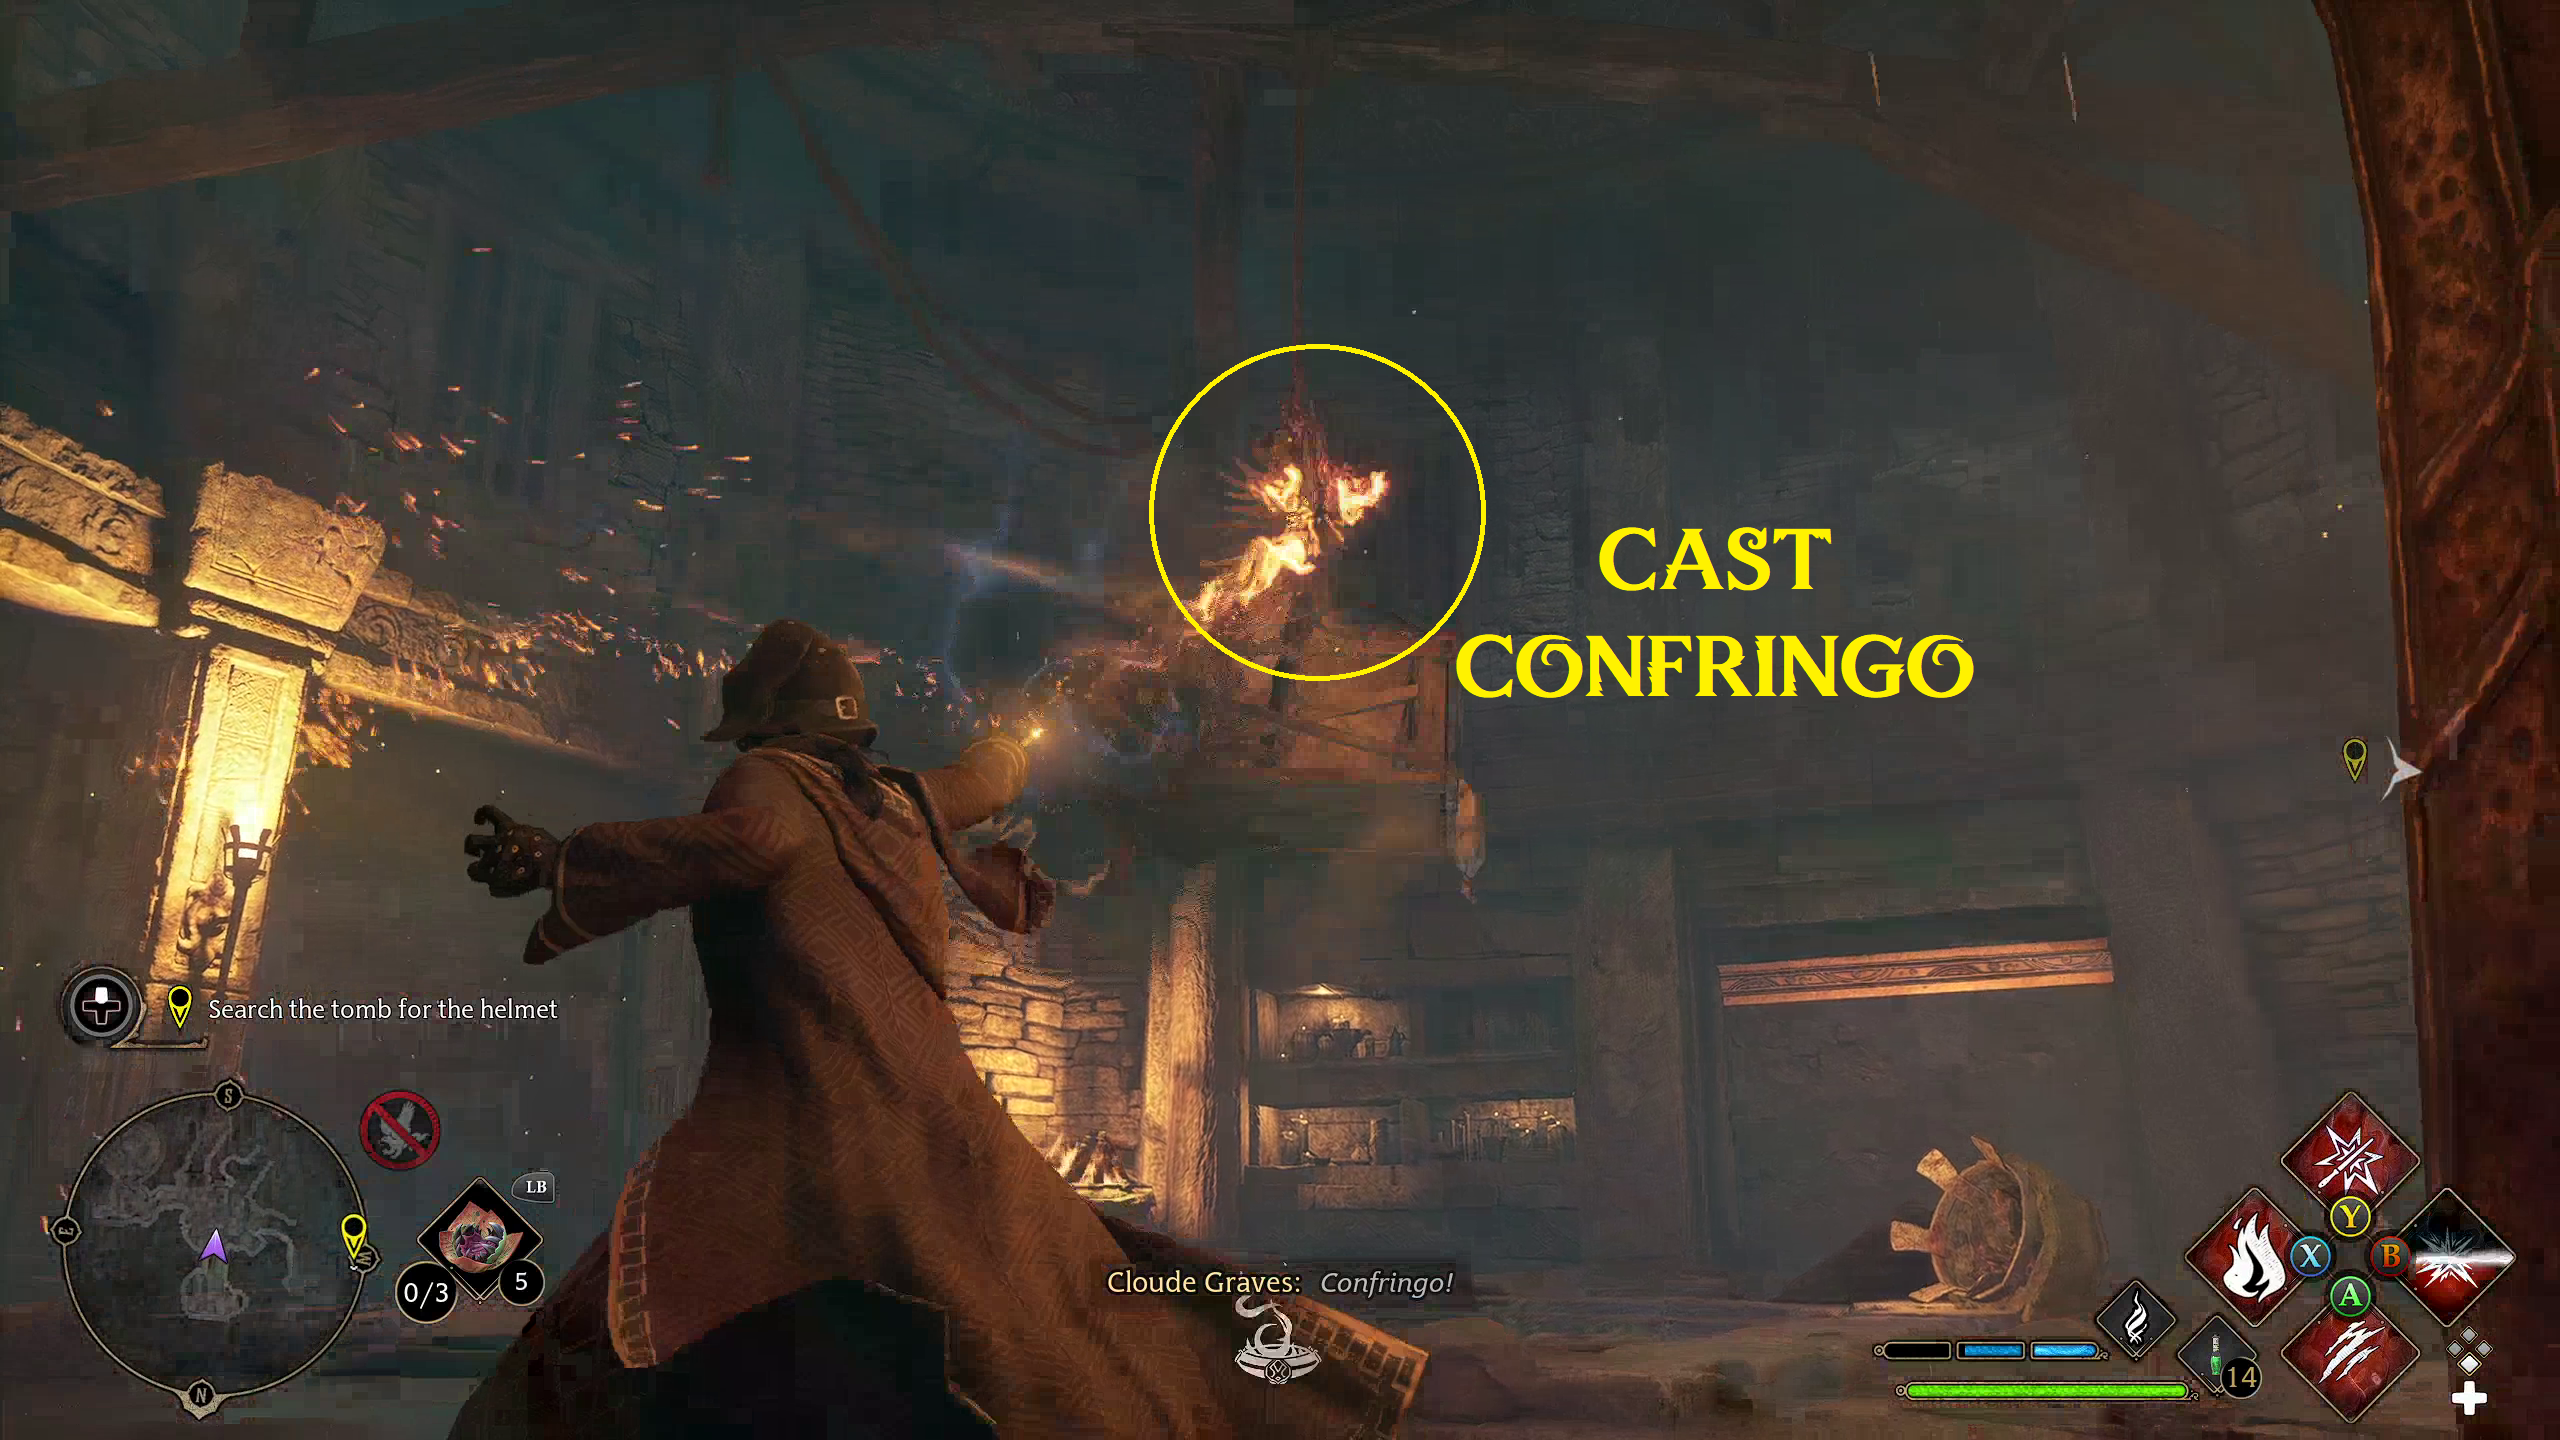
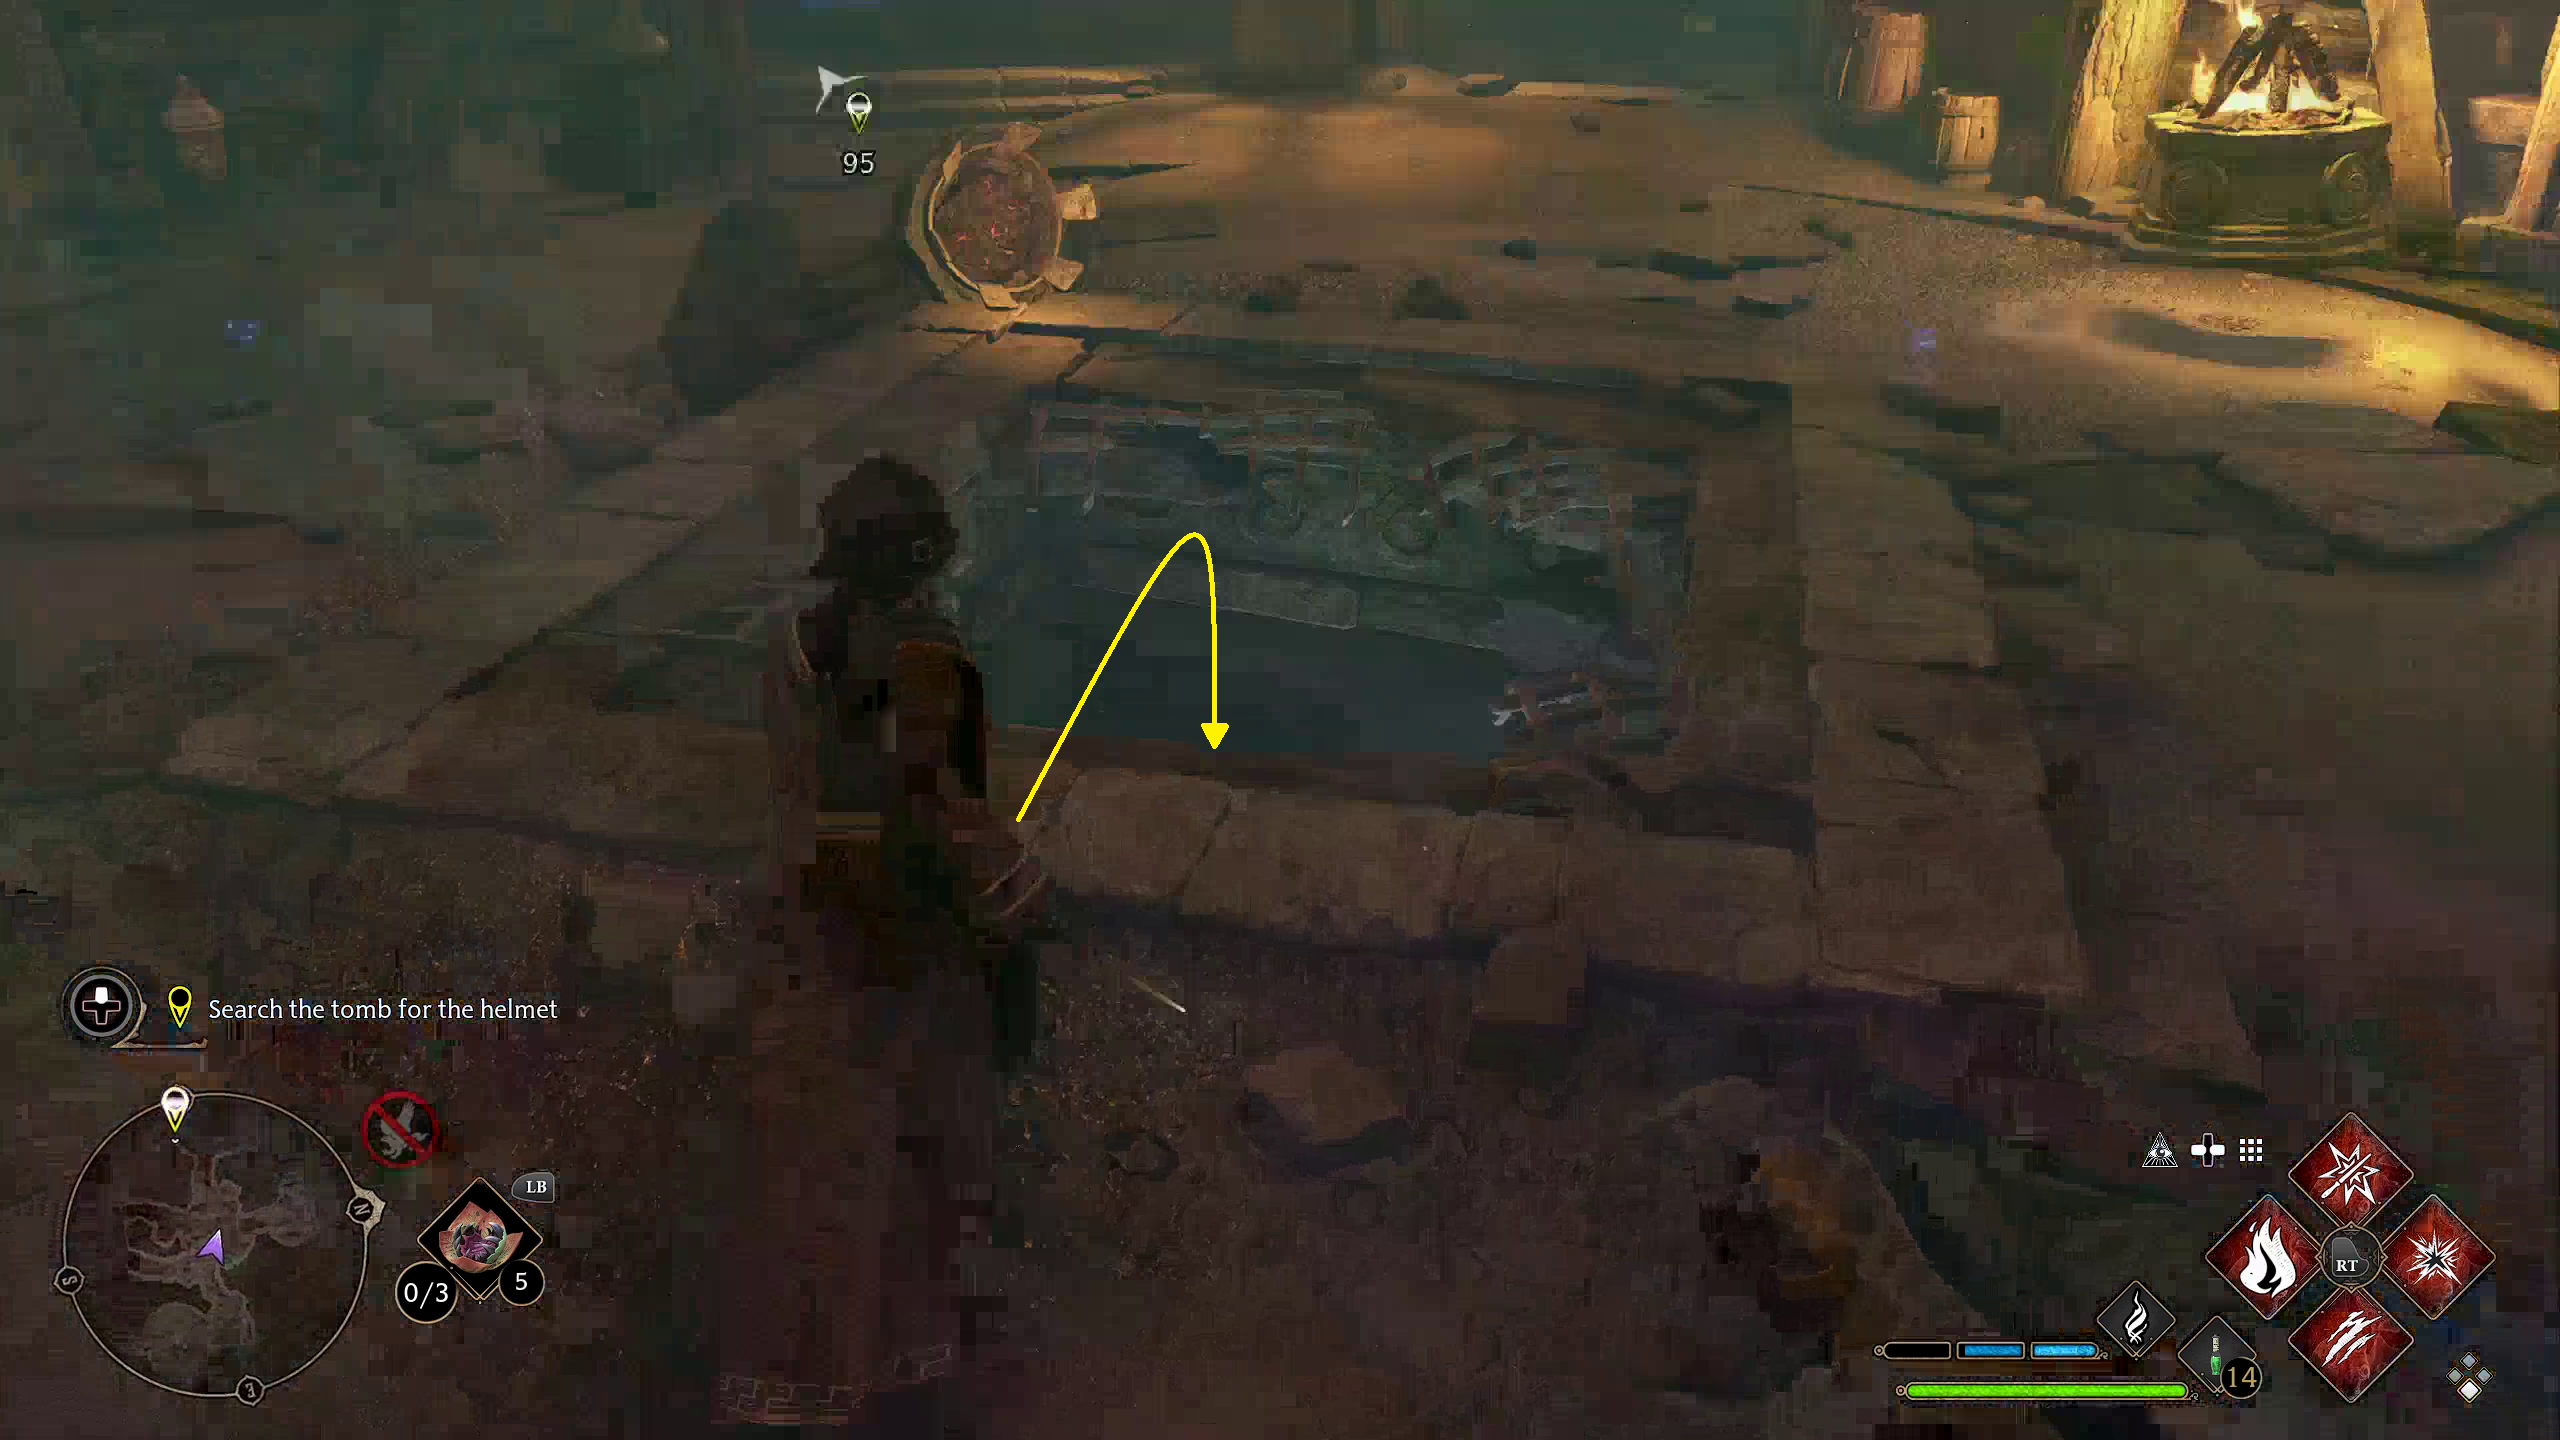
Now you can head back to the room with the hanging object, and cast Confringo on the winch holding it (1). After a few seconds, it will fall, breaking a hole in the grate below it, which you can jump down into (2).
12
Drop down. If you want to head back to the upper level of the dungeon for whatever reason, turn around (1) and follow the path up. You’ll come across a handle, which you can cast Accio on to open a door back to the room with the grate (2).
12
Once you are ready, go through the well-lit pathway and into the final puzzle-room of the dungeon.
Before you can complete the puzzle, you’ll be attacked by another group of Inferni, this one much larger than the last. Use the same tricks as before, including casting Confringo and Incendio, using Ancient Magic Throw to pummel the Inferni with fiery blasts, and Ancient Magic to clear out Inferni who aren’t yet on fire.
Once you’ve taken care of all the Inferni (and picked up their Stench of the Dead item drops), you can now complete the puzzle. This one is the hardest of all, so pay attention.
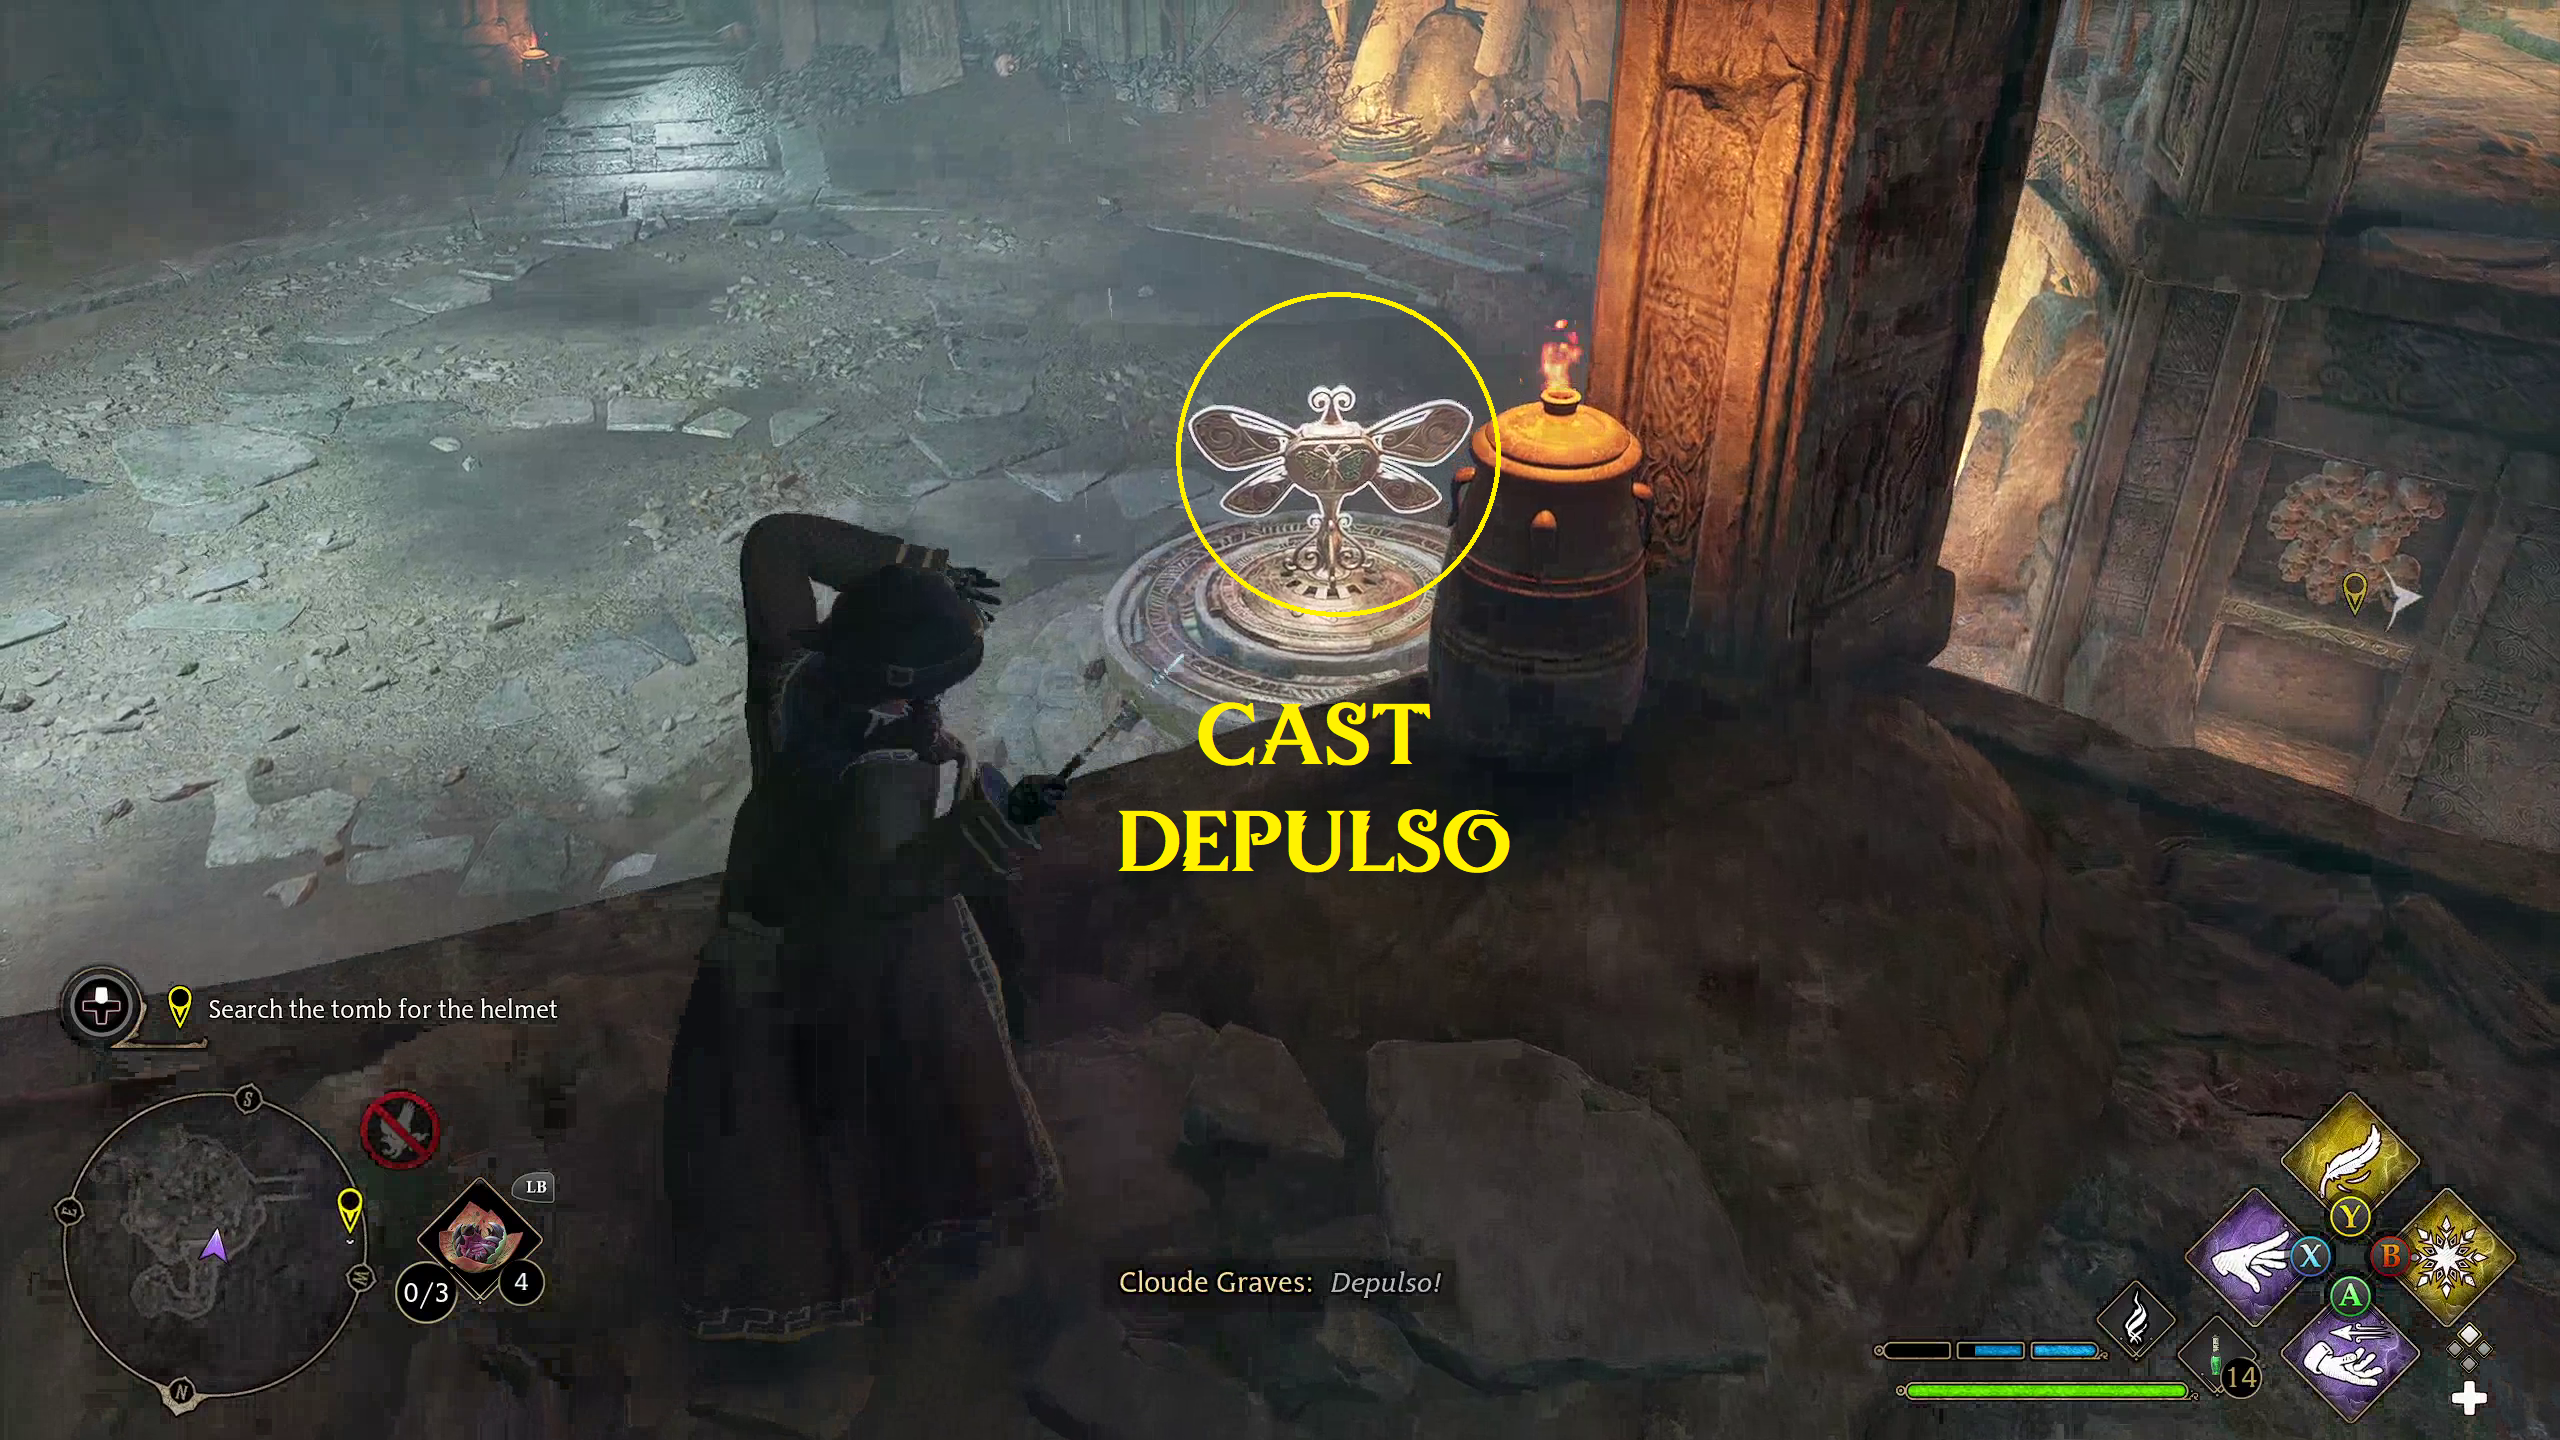
First, you’ll want to cast Lumos on one of the two moths accessible from the ground floor (1). Bring it over to the pole to the left side of the room (2). Then, go up to the other available moth and cast Lumos (3), depositing it into the moth-wing dial in the center of the room (4). This dial activates a spinning platform, which you can stand on and cast Depulso on the moth-wing dial (5) in order to rise up. Once at the top, go clockwise along the wall, past the moth, until you reach a side-path (6), at the end of which will be two chests.
123456
Now, return to the upper level. Cast Depulso on the dial below you to fully raise the platform (1), then quickly cast Lumos on the nearby moth and cross the platform, taking it to the door (2). Cast Depulso again on the dial (3), then go to the far right end and cast Lumos to grab the moth you put on the pole before (4), which you can then put in the door. Finally, grab the moth just barely to the right of the door with Lumos (5). Once all three moths are in the door (leaving the one in the dial behind), it will open (6).
123456
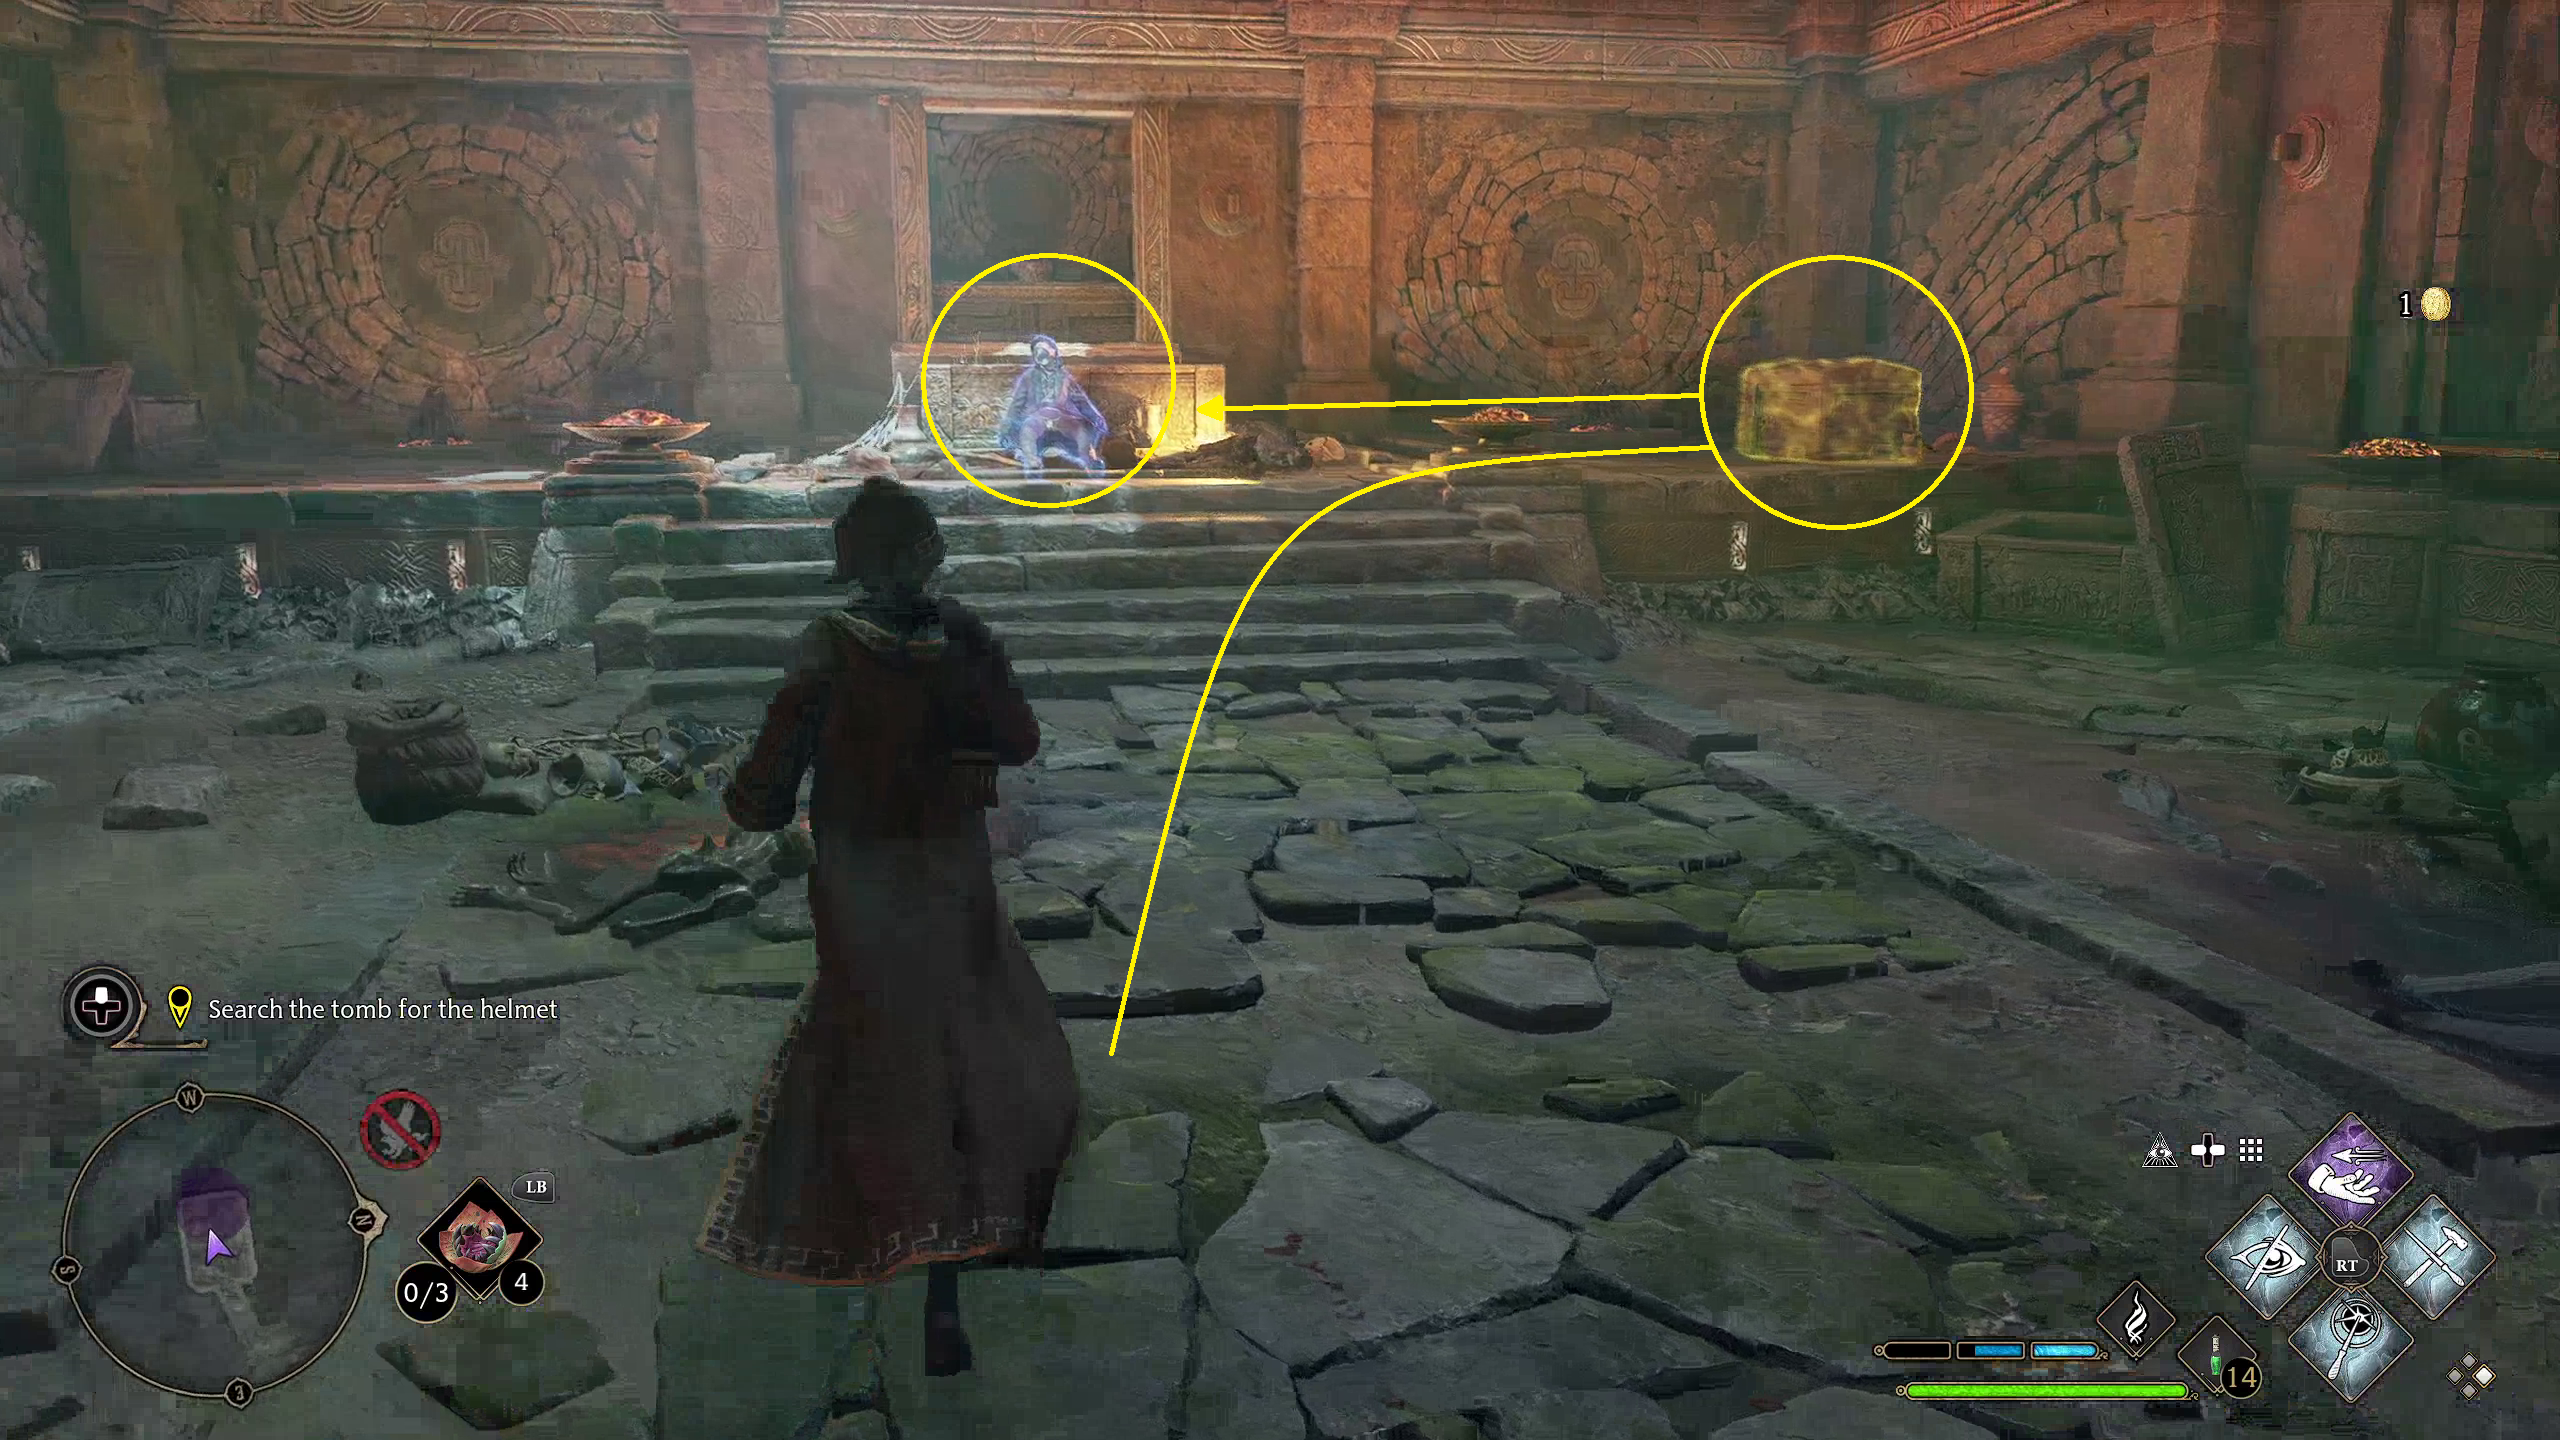
In the last room of the dungeon, you will come across a corpse. Before you can investigate it, though, make sure to grab the chest on the right side of the room. Then, return to the corpse and examine it. It will reveal that the Helm of Urtkot has already been stolen, but that it was done recently by poachers, giving you a target.
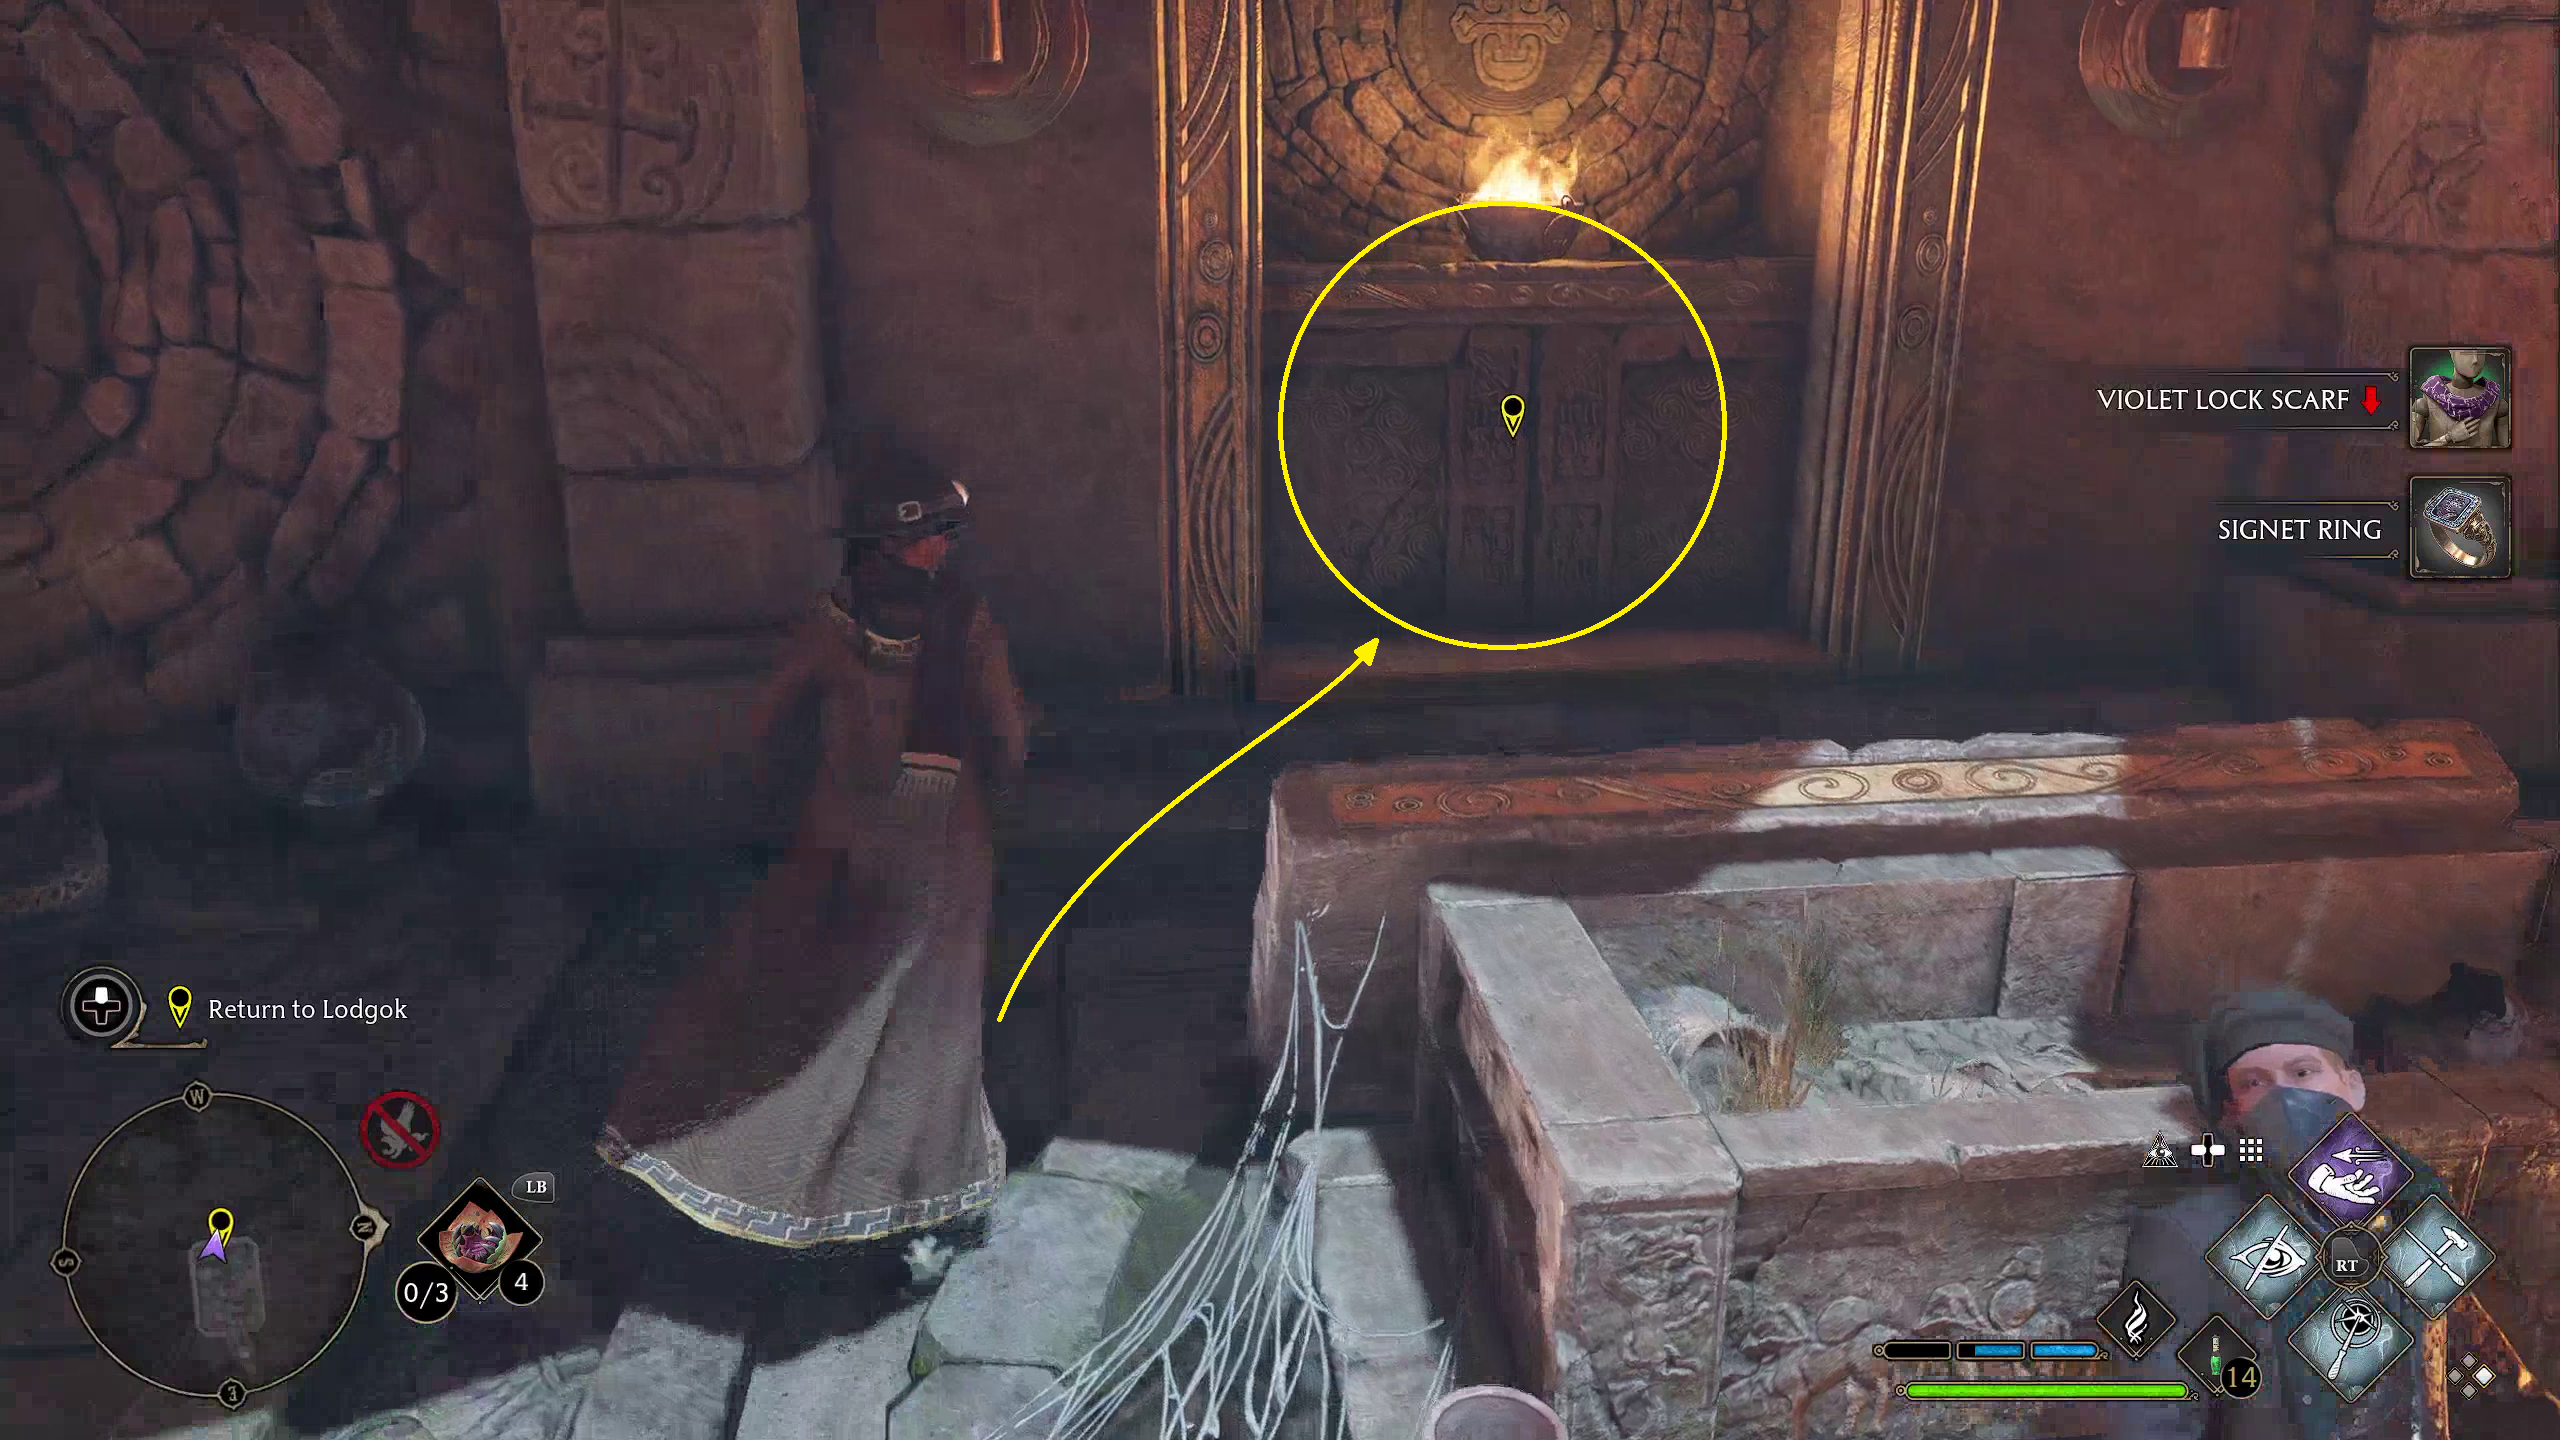
Leave out the exit behind the opened sarcophagus (1), then walk up to Lodgok (2) to let him know that the helmet wasn’t there, but that you know who took it. He will inform you of an Ashwinder encampment nearby which must have it.
Recover the Helmet from the Thieves
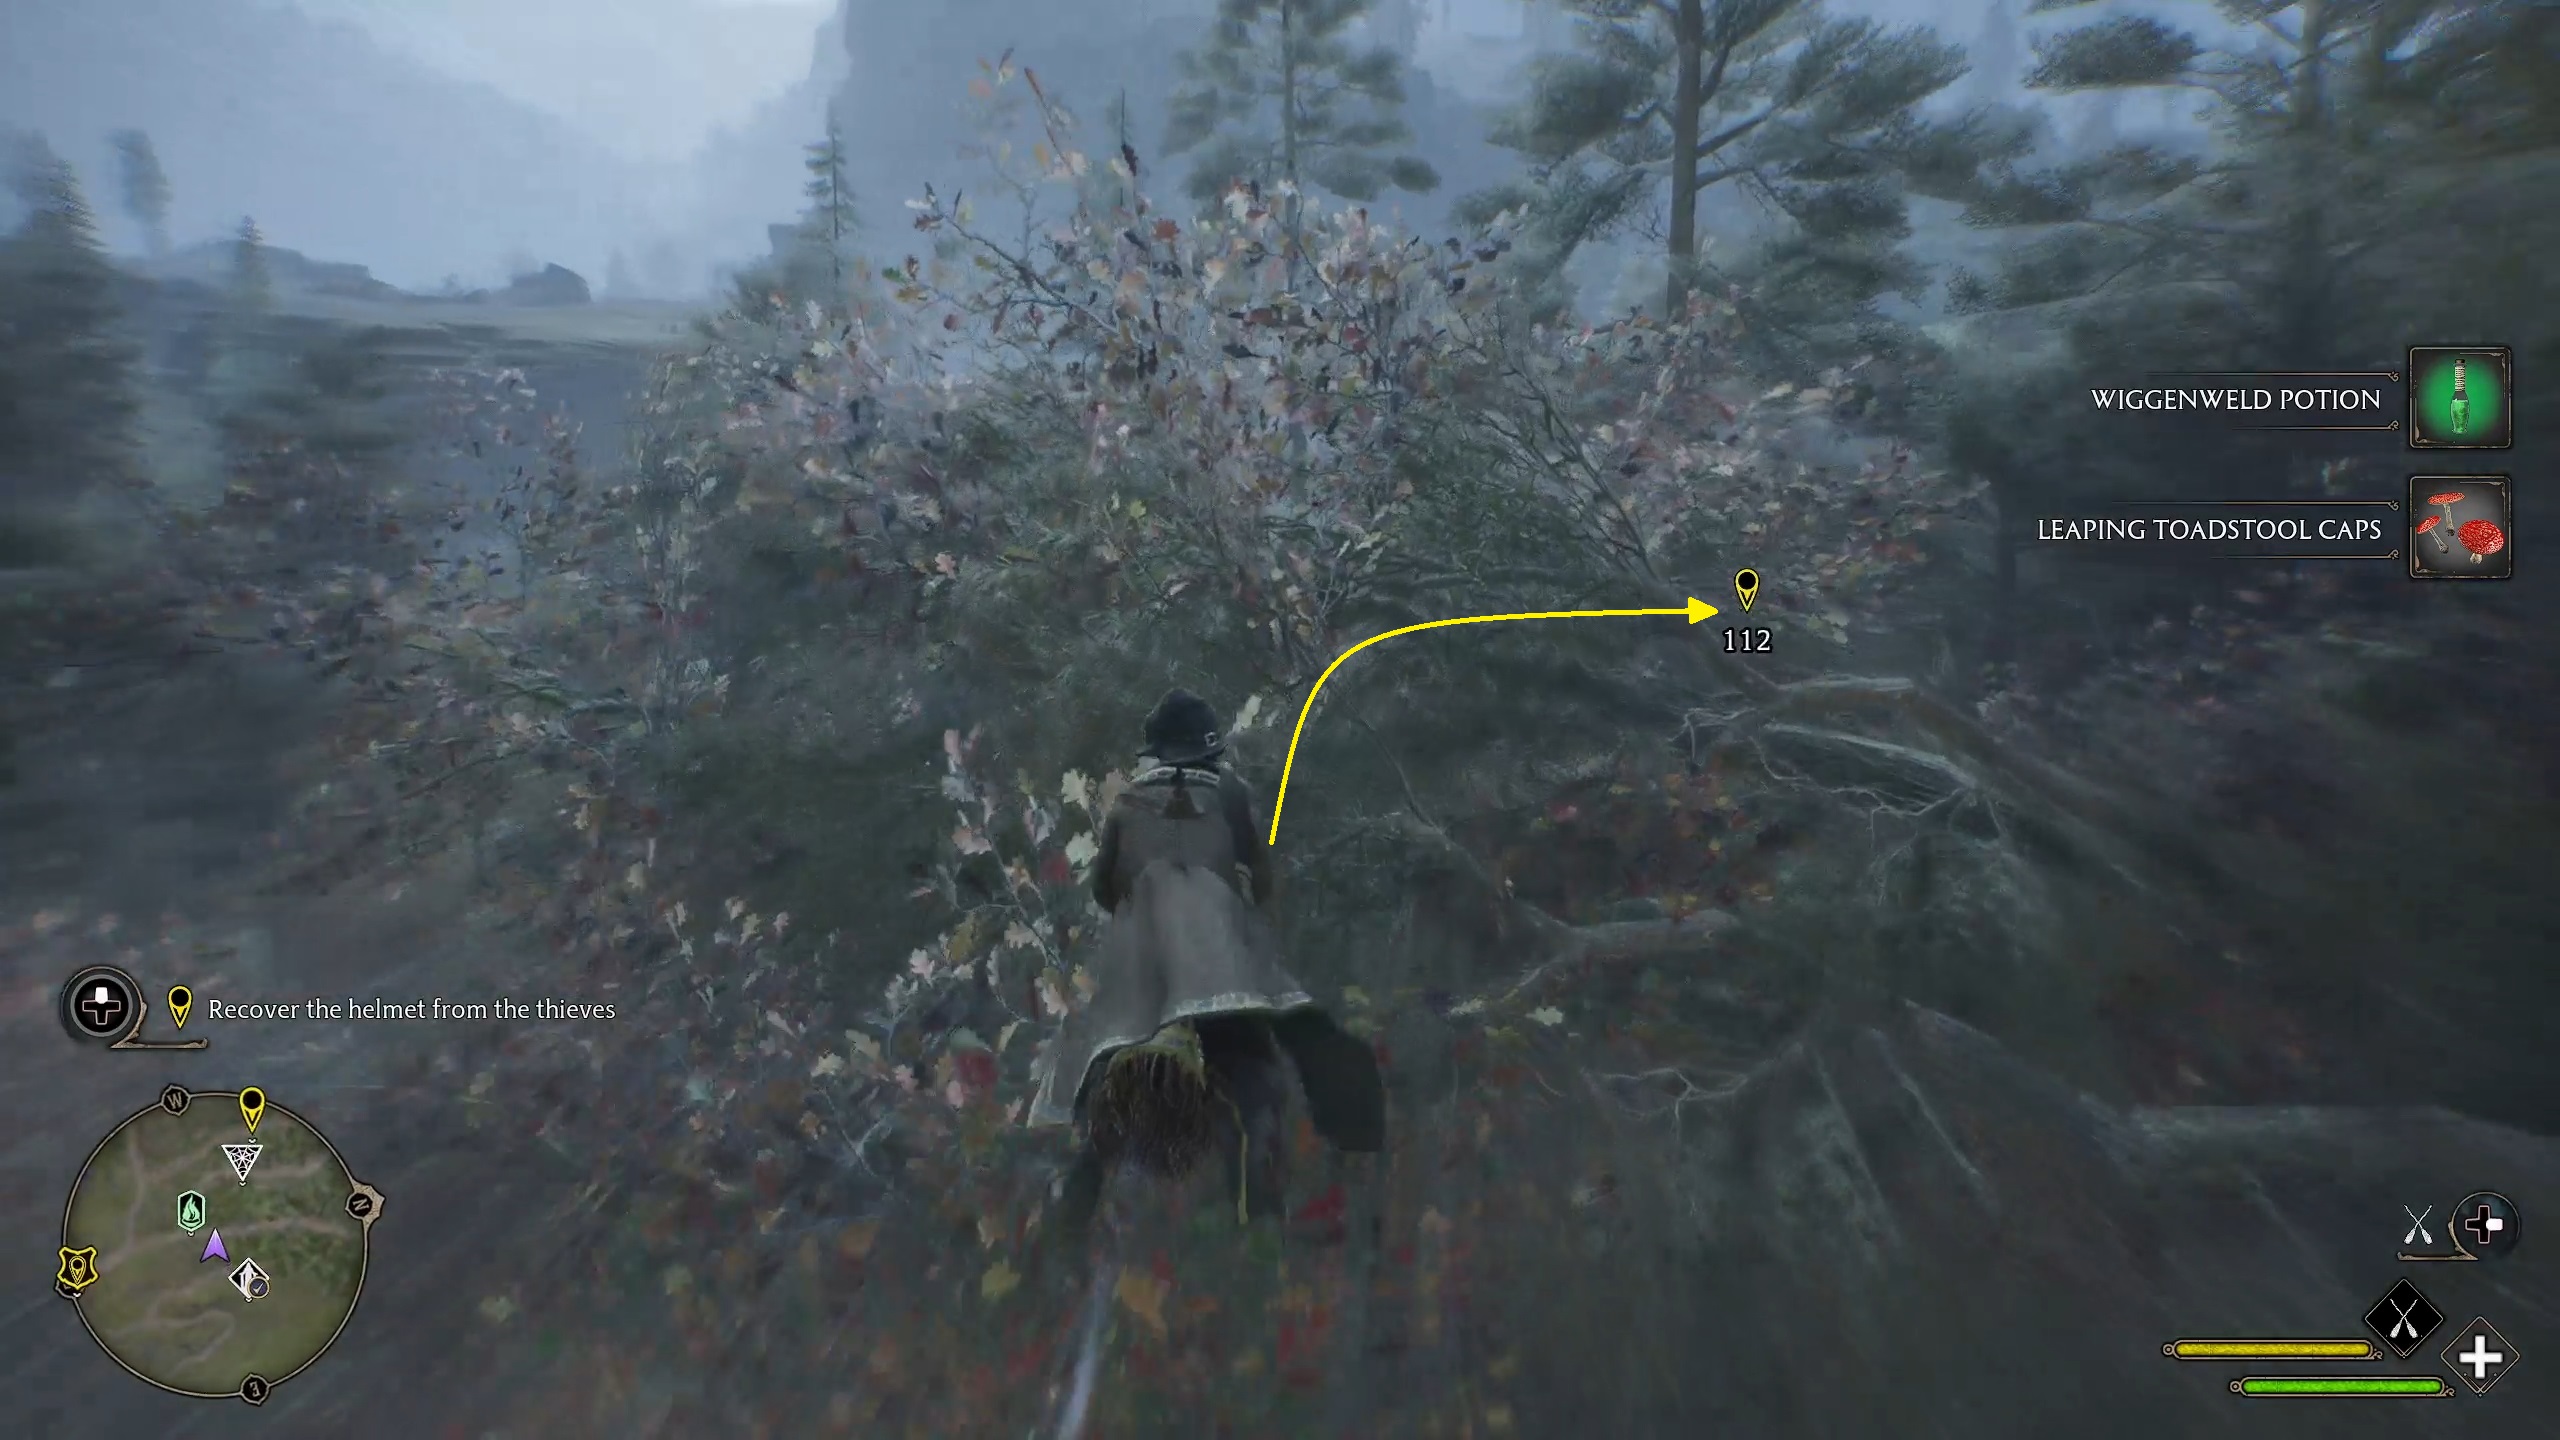
After speaking to Lodgok, a location will be marked on your minimap and HUD, where the Ashwinders who stole the helmet are. While you can walk, the fastest way to get there is by broom.
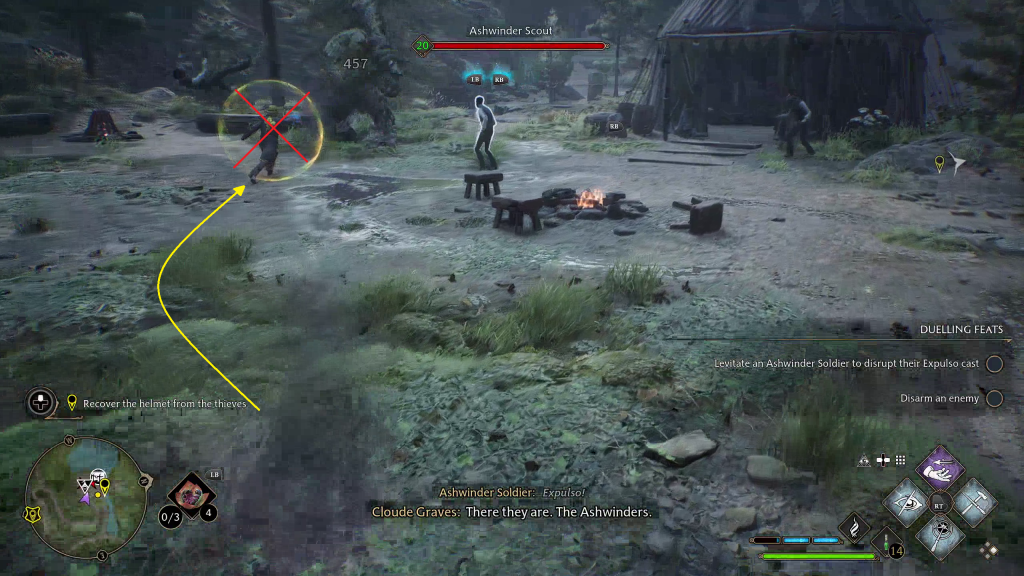
Once you arrive at the encampment, you’ll see that it is being attacked by a Forest Troll. This gives you a good potential opportunity to start the combat strong, if you cast Disillusionment and are able to use Petrificis Totalus on one of the Ashwinders before they notice you. After this, though, you’ll need to just deal with the enemies normally. We’d recommend starting with the Ashwinders, then turning your attention to the troll.
Note: It is also possible to land at the back of the camp (the opposite end from where the troll shows up) and simply sneak into the large tent after casting Disillusionment. You can then loot the helmet from the chest and leave. Of course, this means missing out on a fair bit of XP and loot.
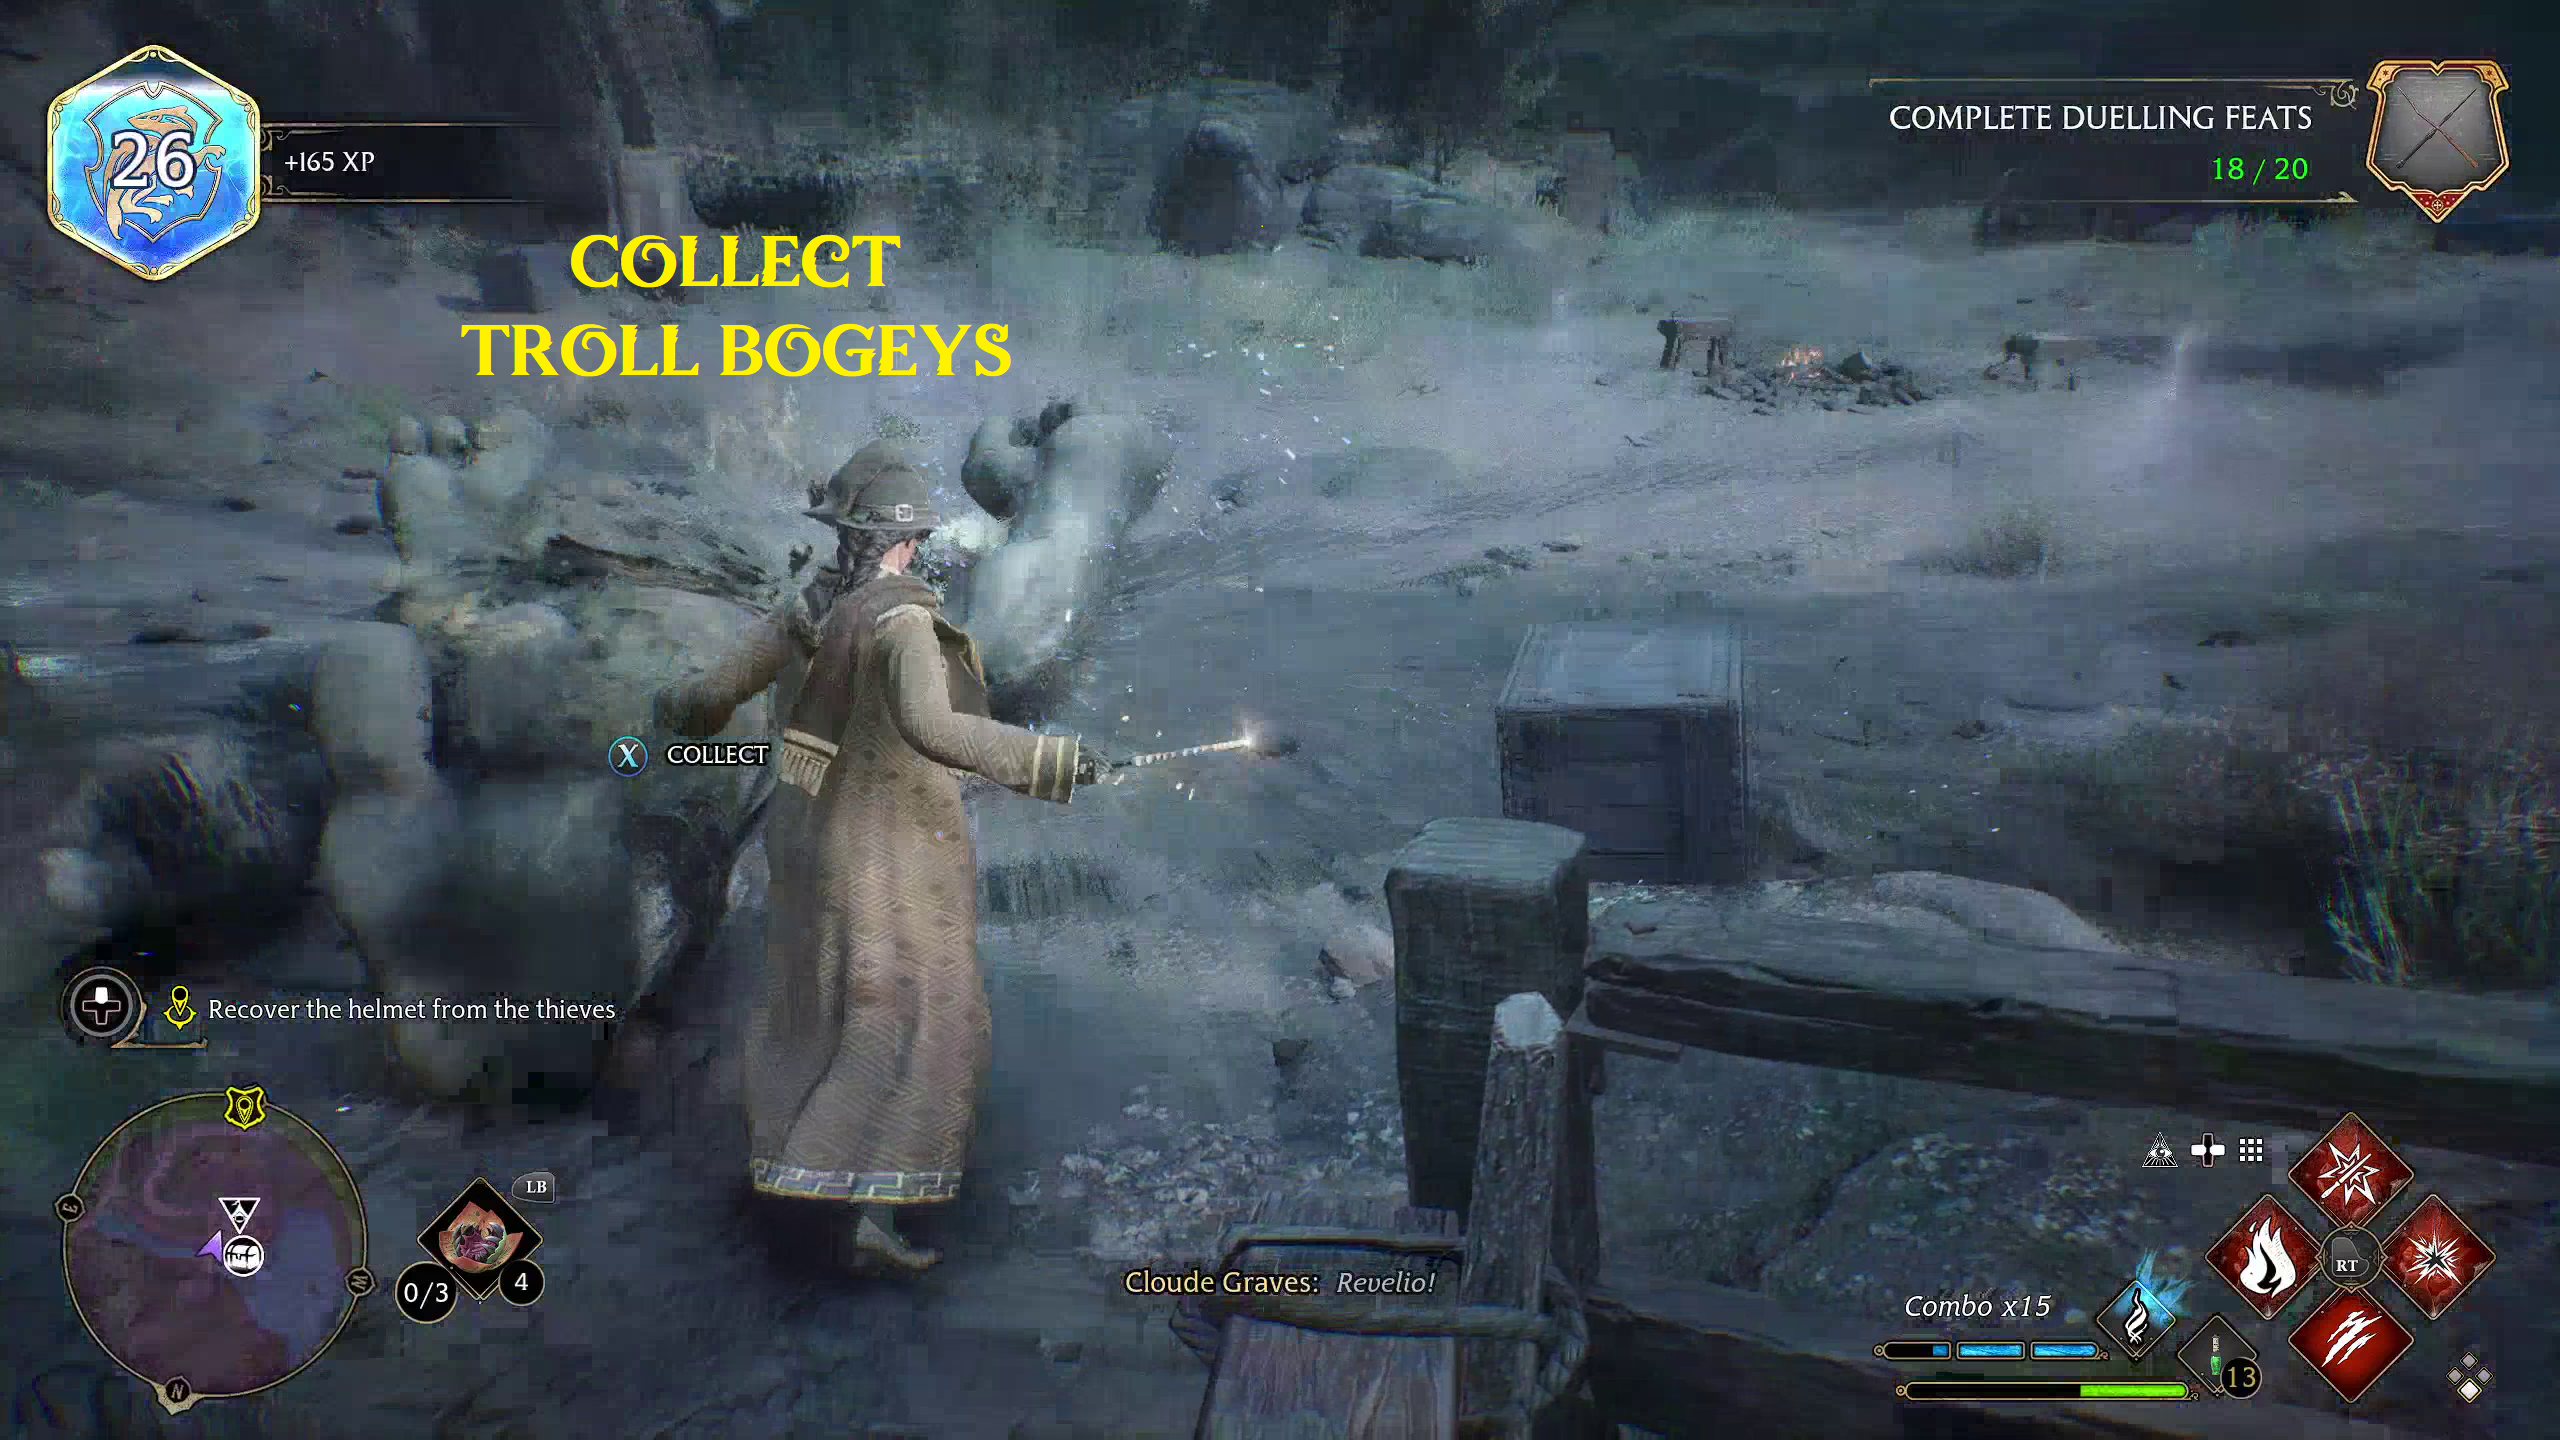
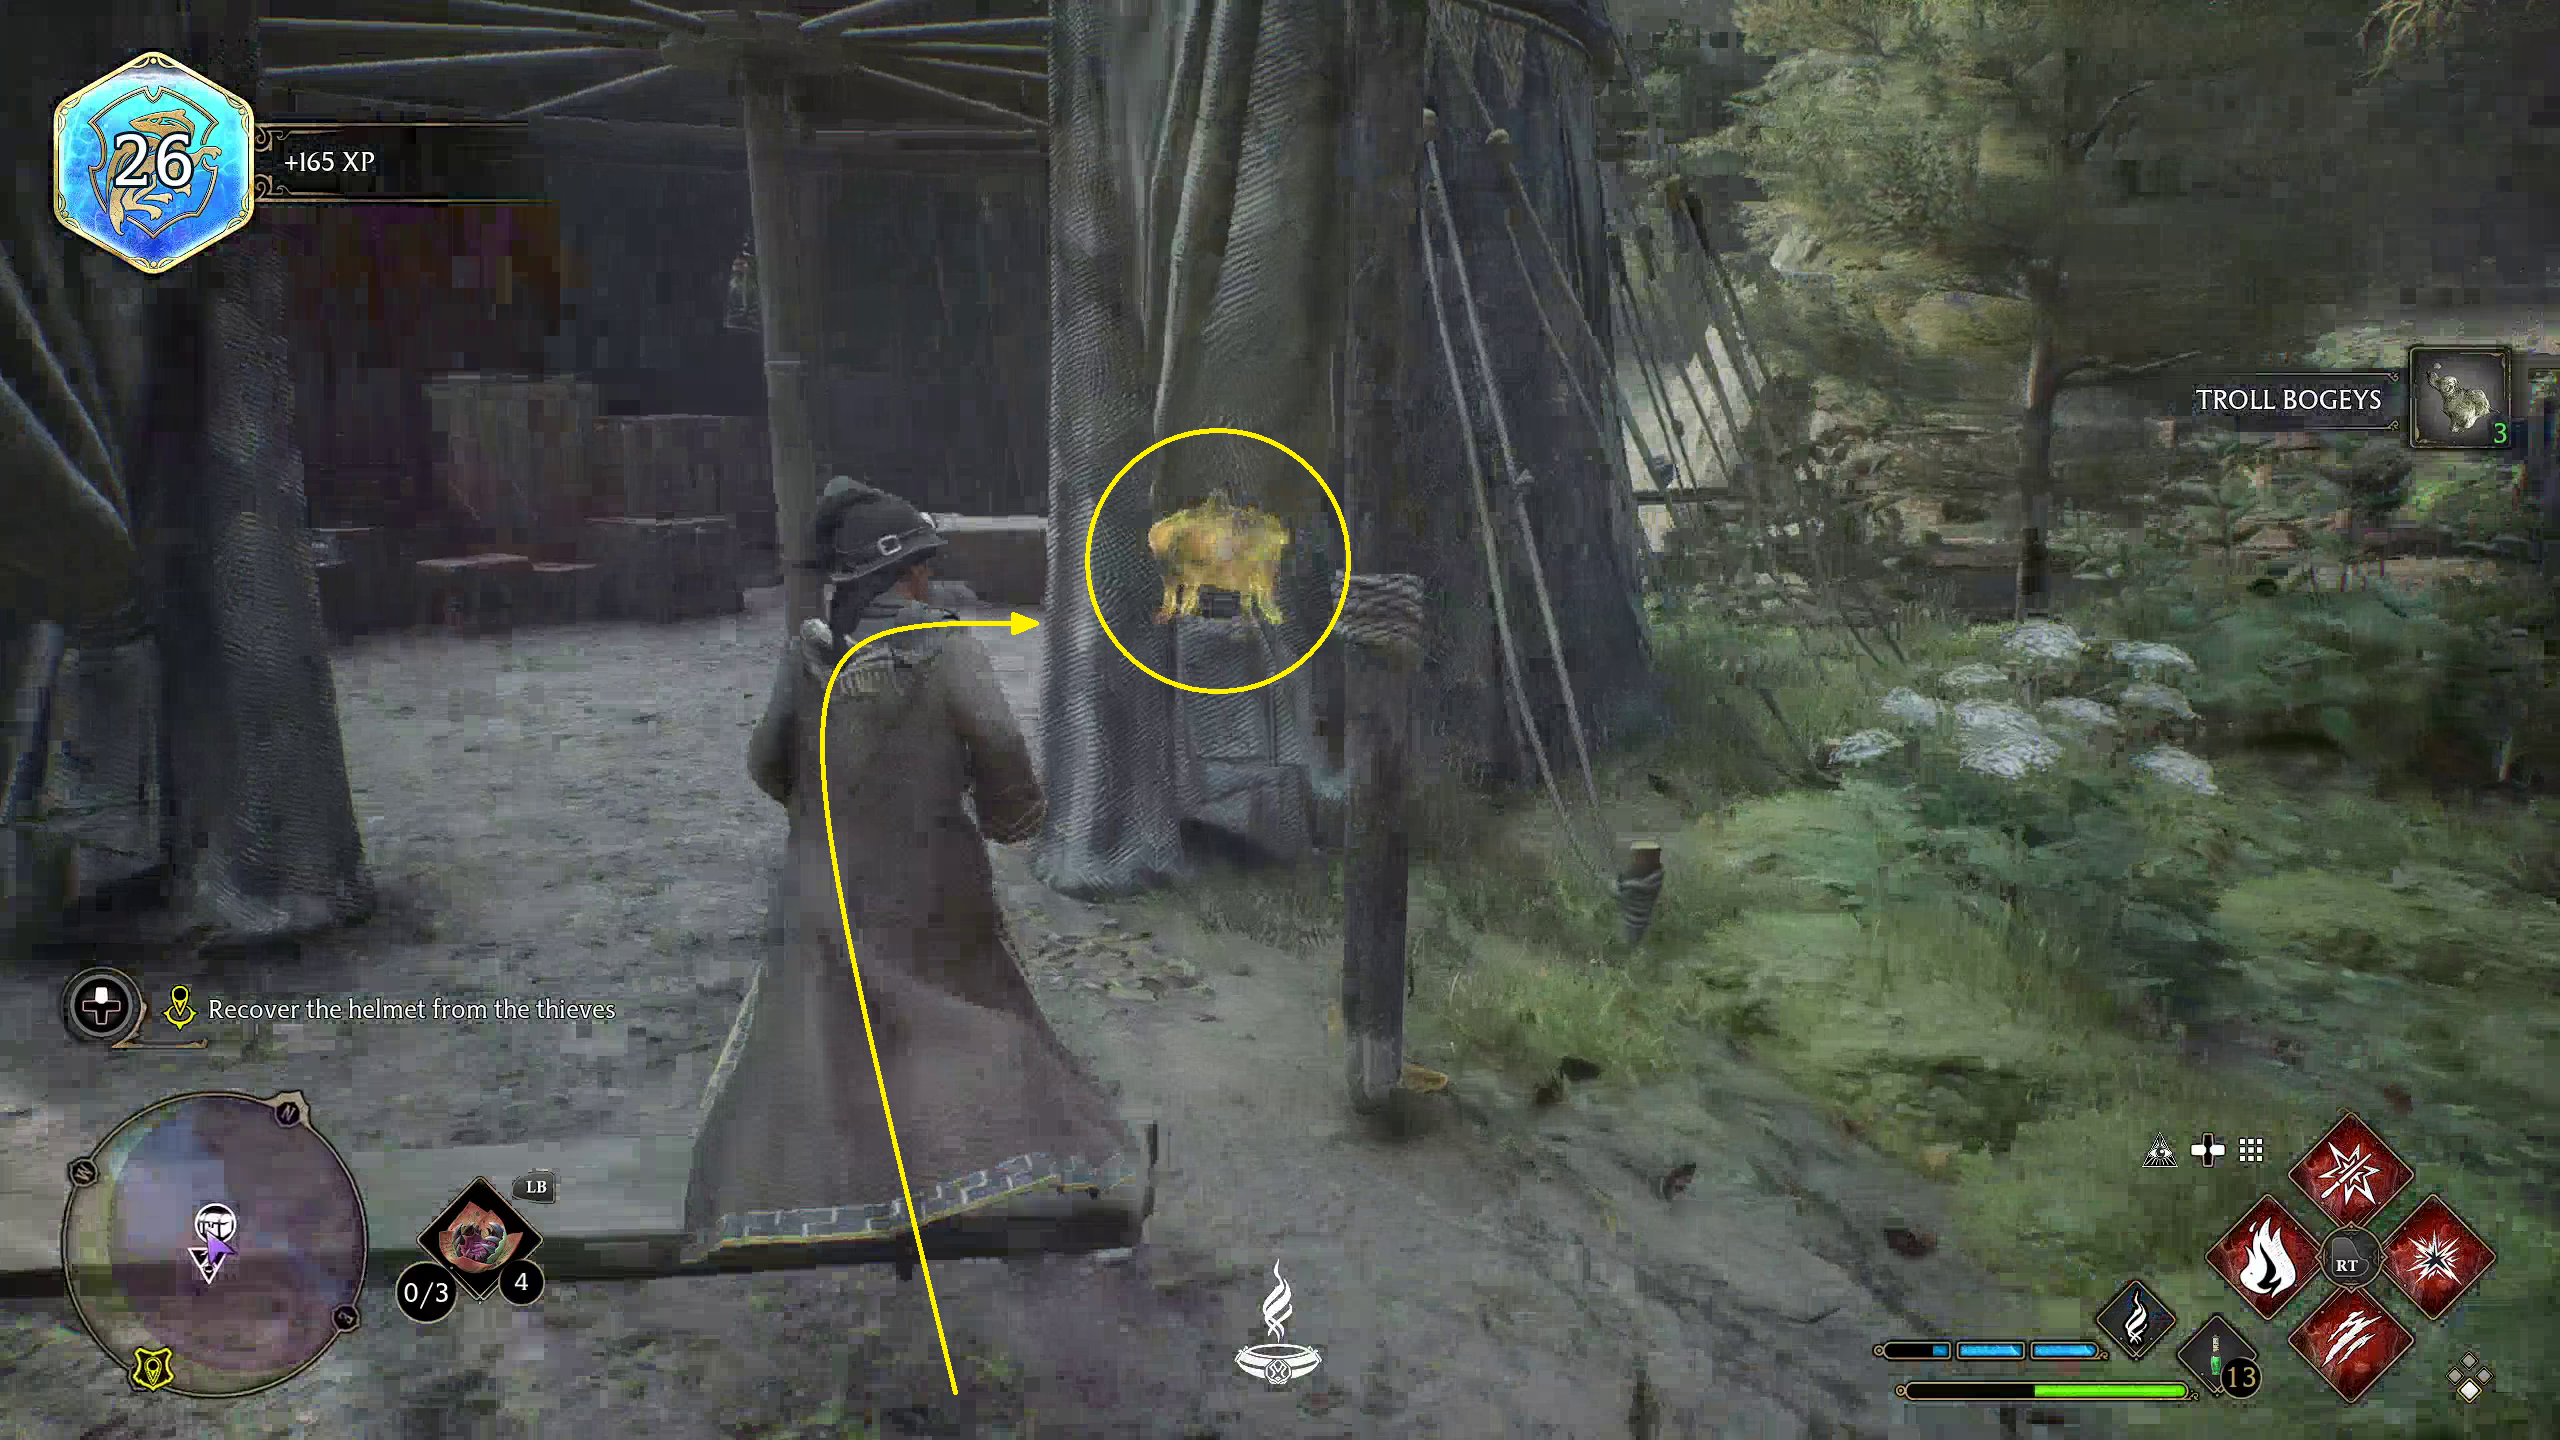
While the Ashwinders should be easy enough to deal with, the troll can cause trouble. Just remember to be ready to dodge melee attacks, but to block with Protego (/) against rock throws. If you use Protego against rock throws, then they will bounce off, giving you the chance to throw them back with your Ancient Magic Throw for high damage (much higher than casting Stupefy). This should enable you to make quick work of the troll. Just make sure to collect its bogeys!
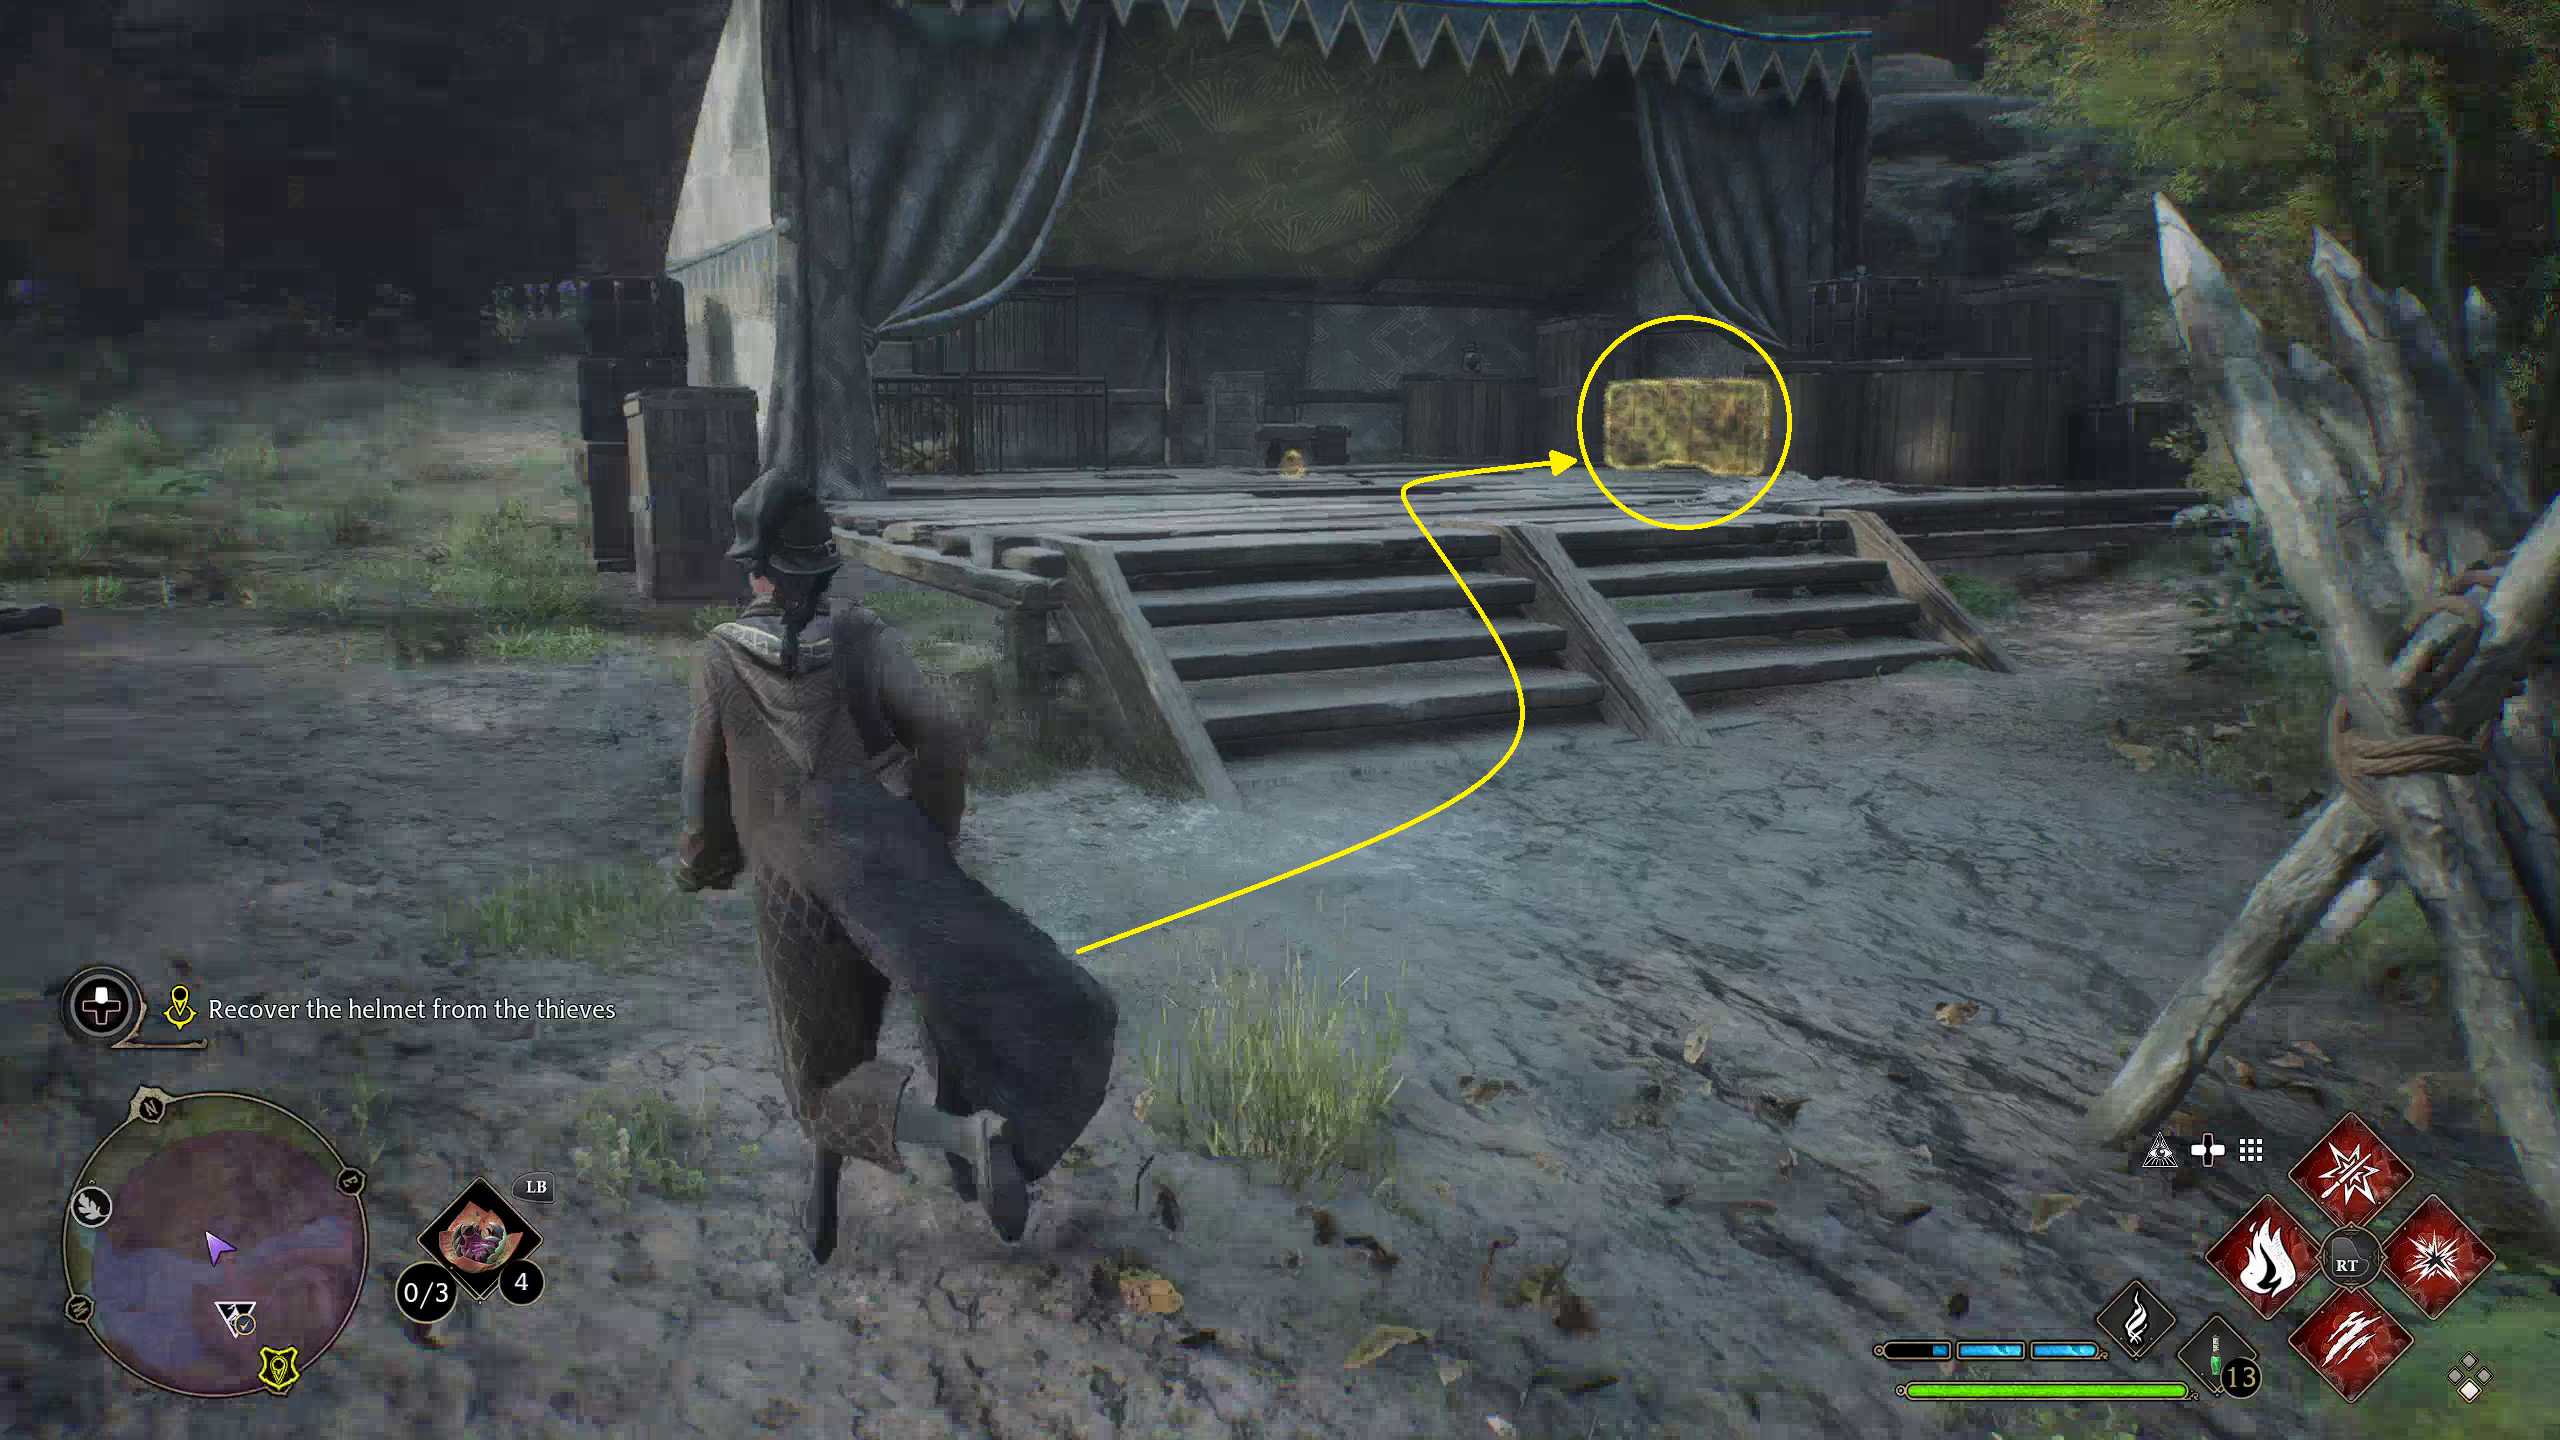
On the side of the encampment attacked by the troll, go into the tent nearby for a chest (1). Then, cross the bridge and head into the other tent to grab a small bag of coins and a chest — this one contains the Helm of Urtkot (2).
12
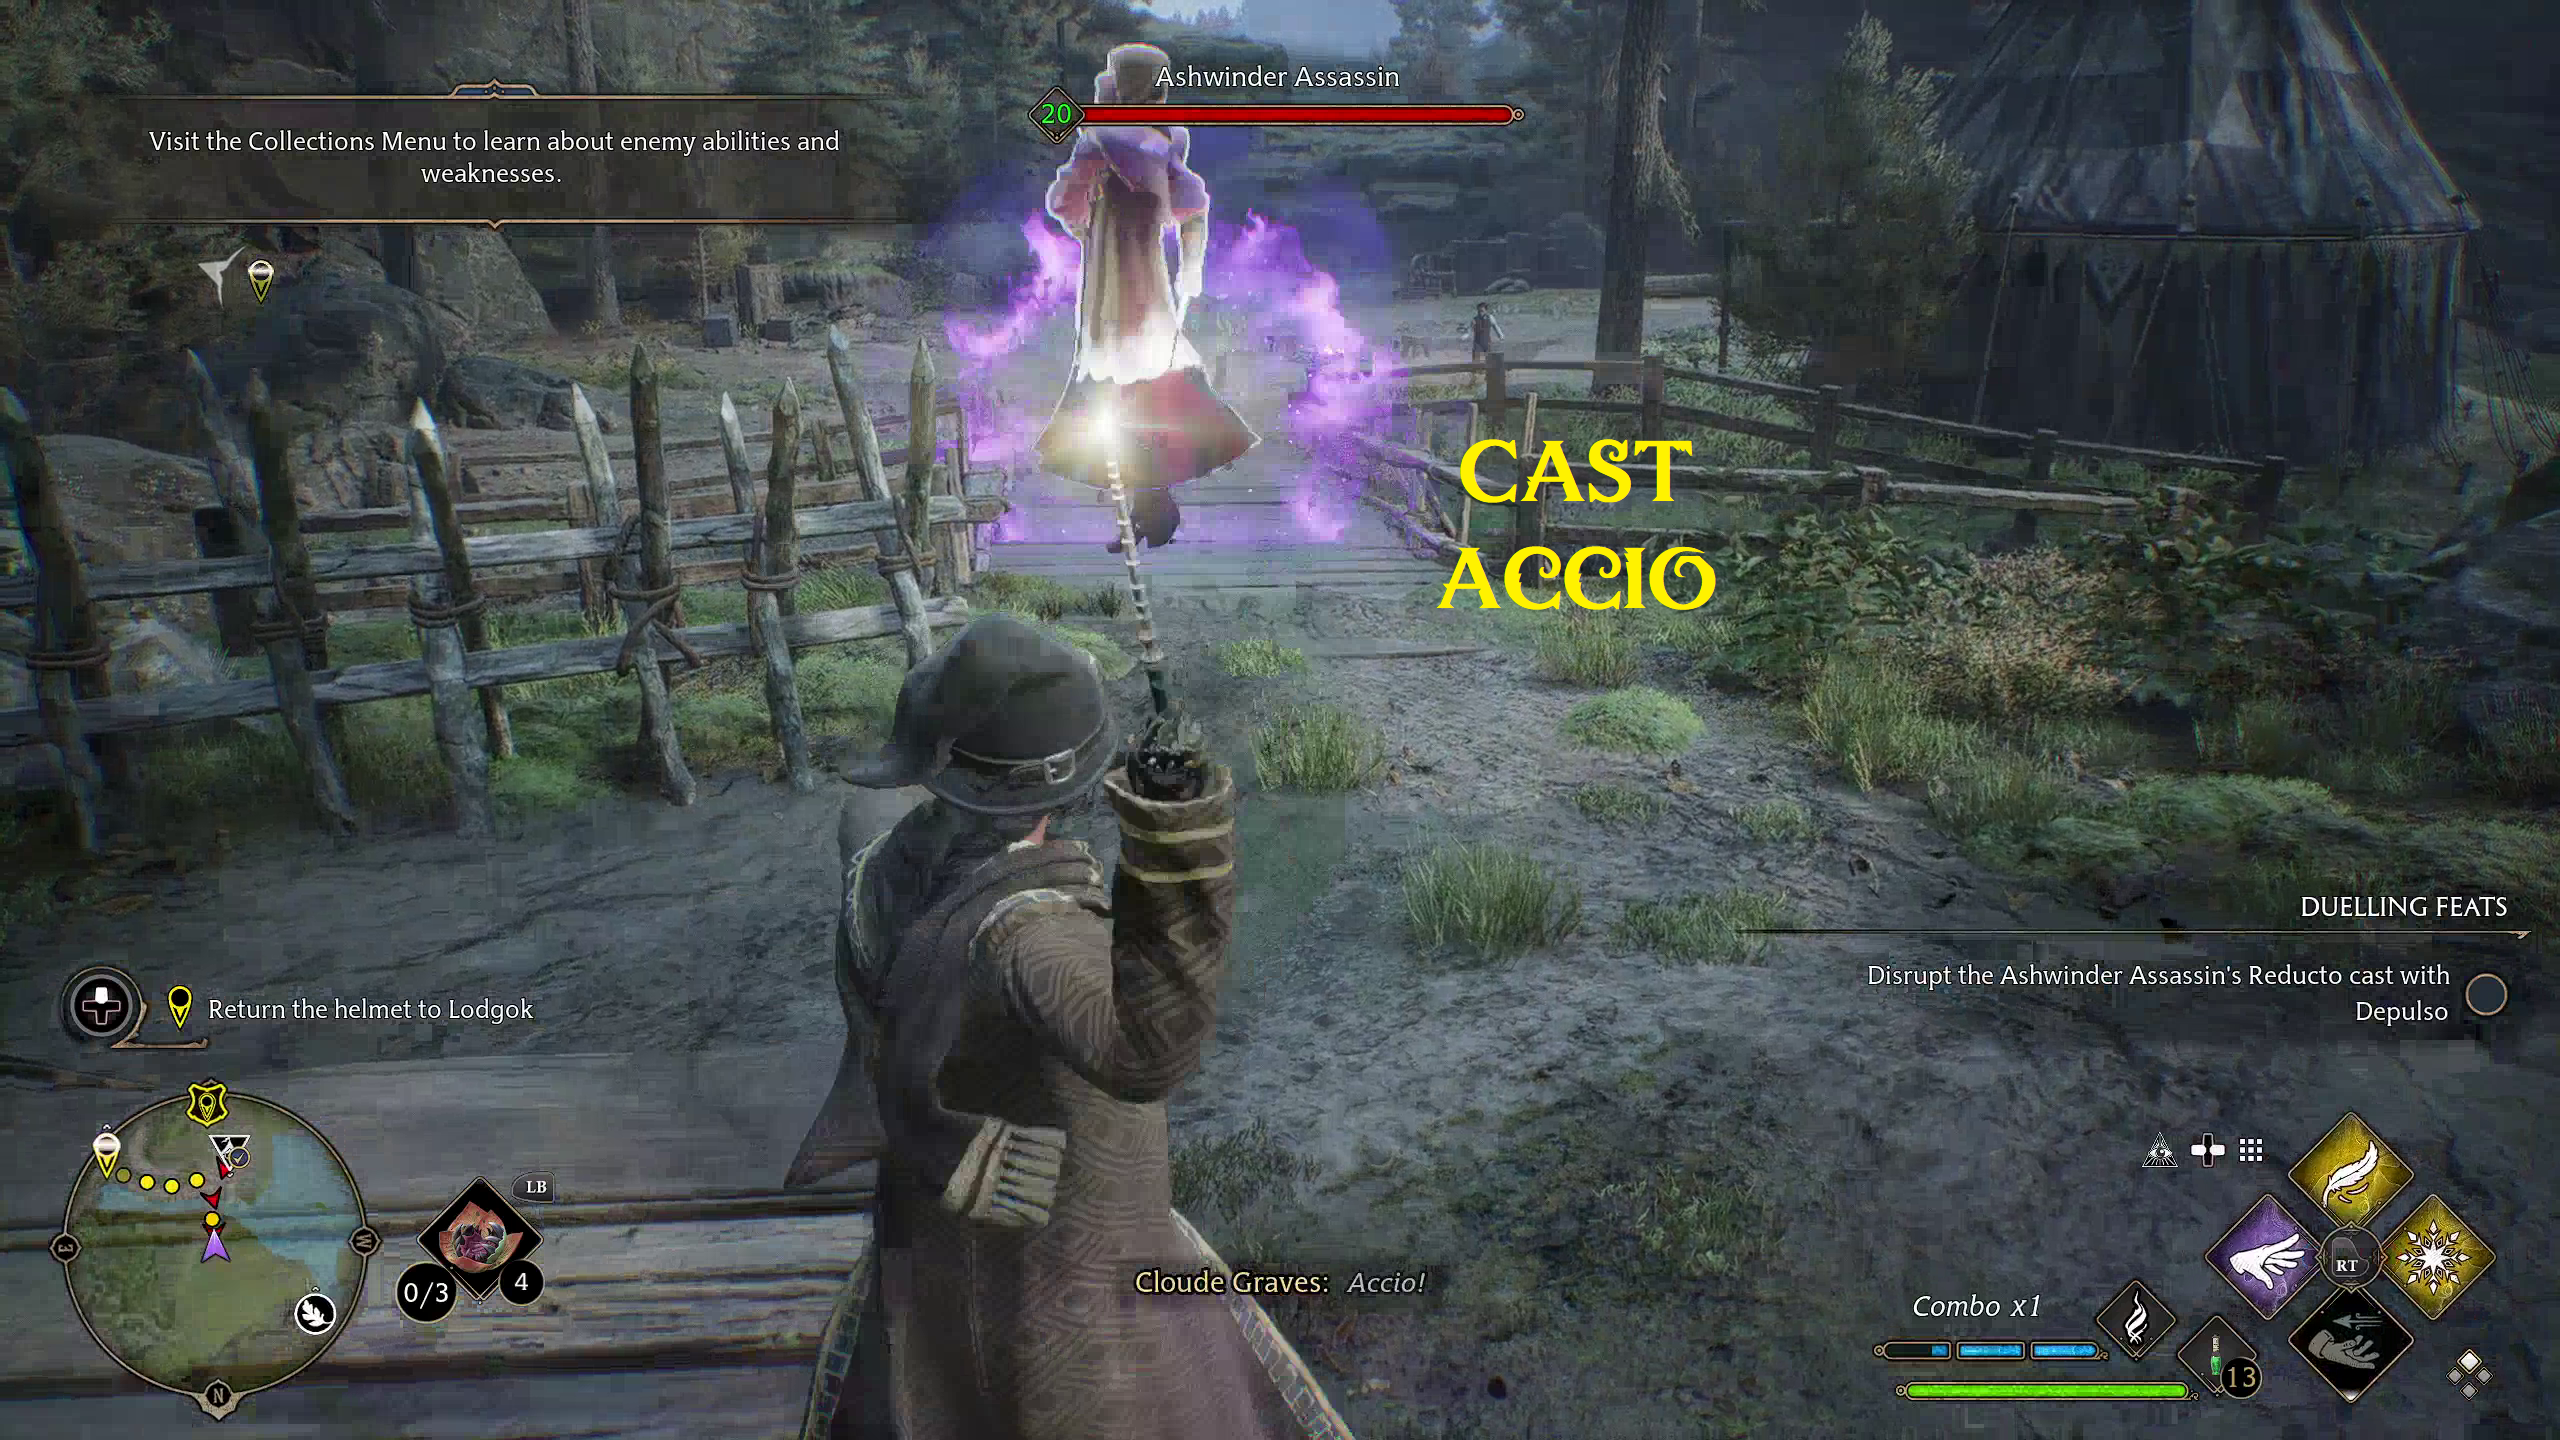
After you pick up the Helm, you’ll be ambushed by a few more Ashwinders, including an Ashwinder Assassin. Thankfully, Assassins guard themselves with purple shields, which can be broken with Control spells. This means that you can simply cast Accio on the Assassin and pummel him down, leaving his weak Scouts to be easily defeated.
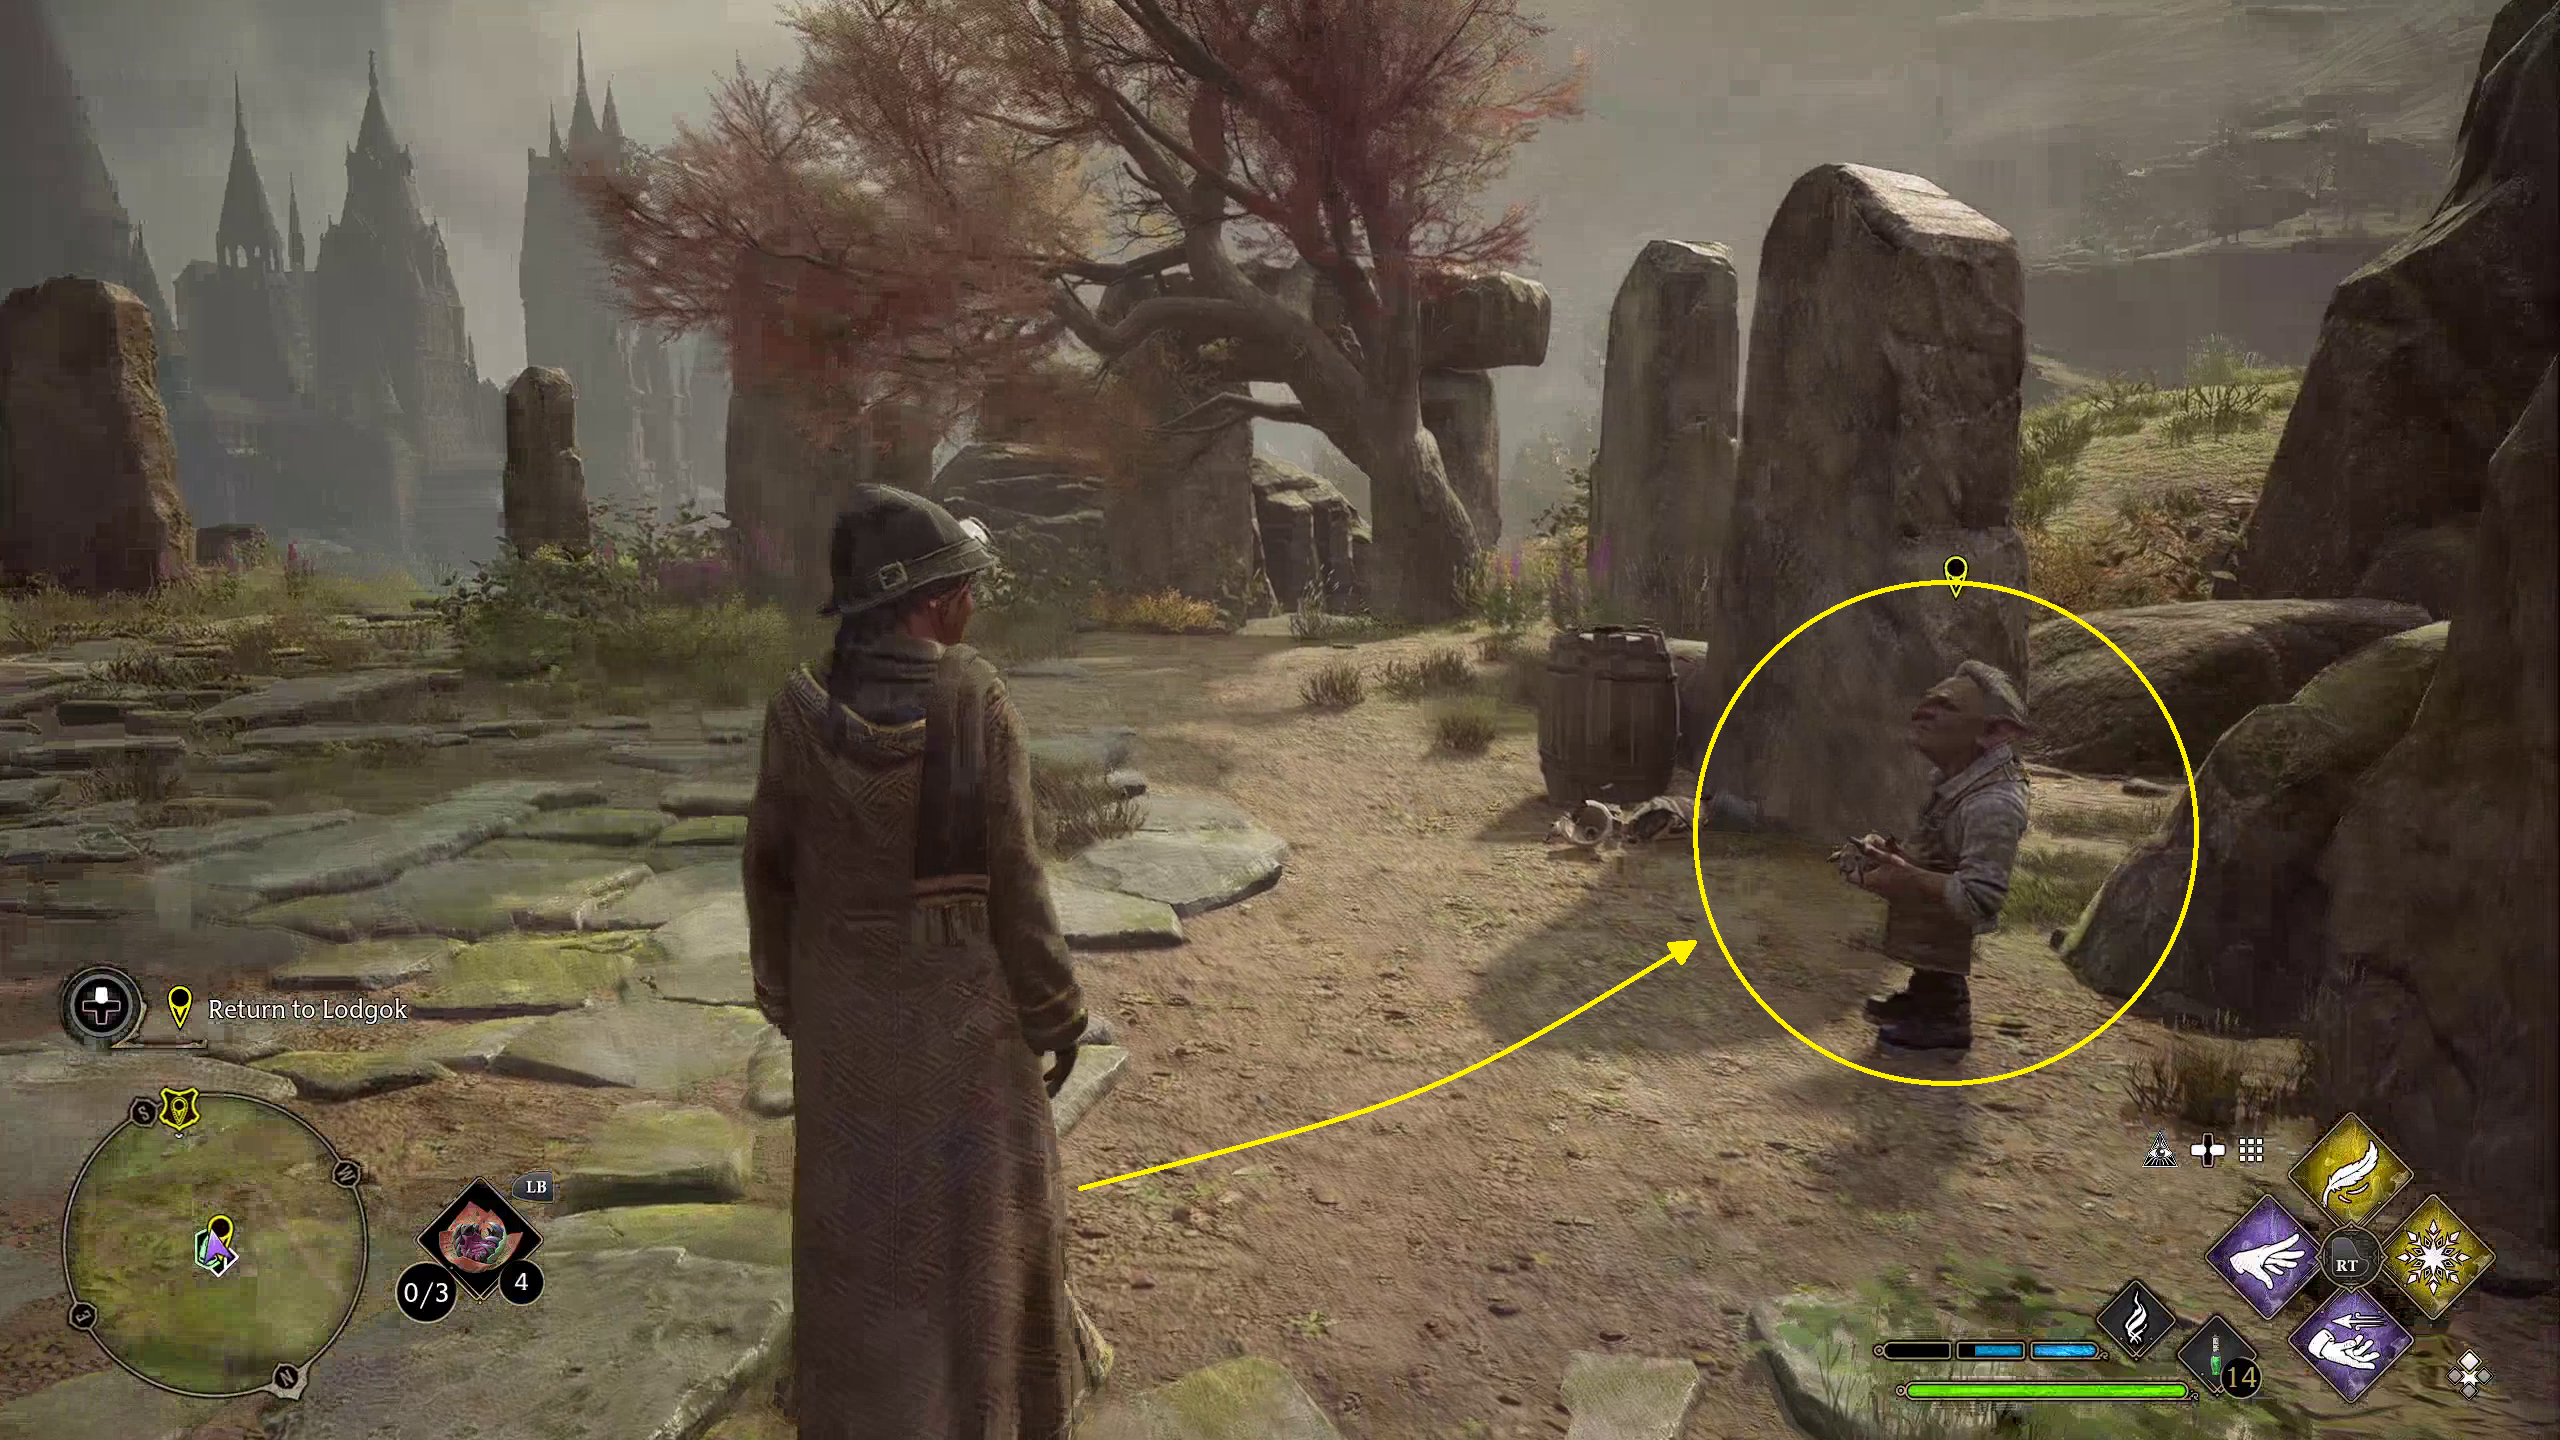
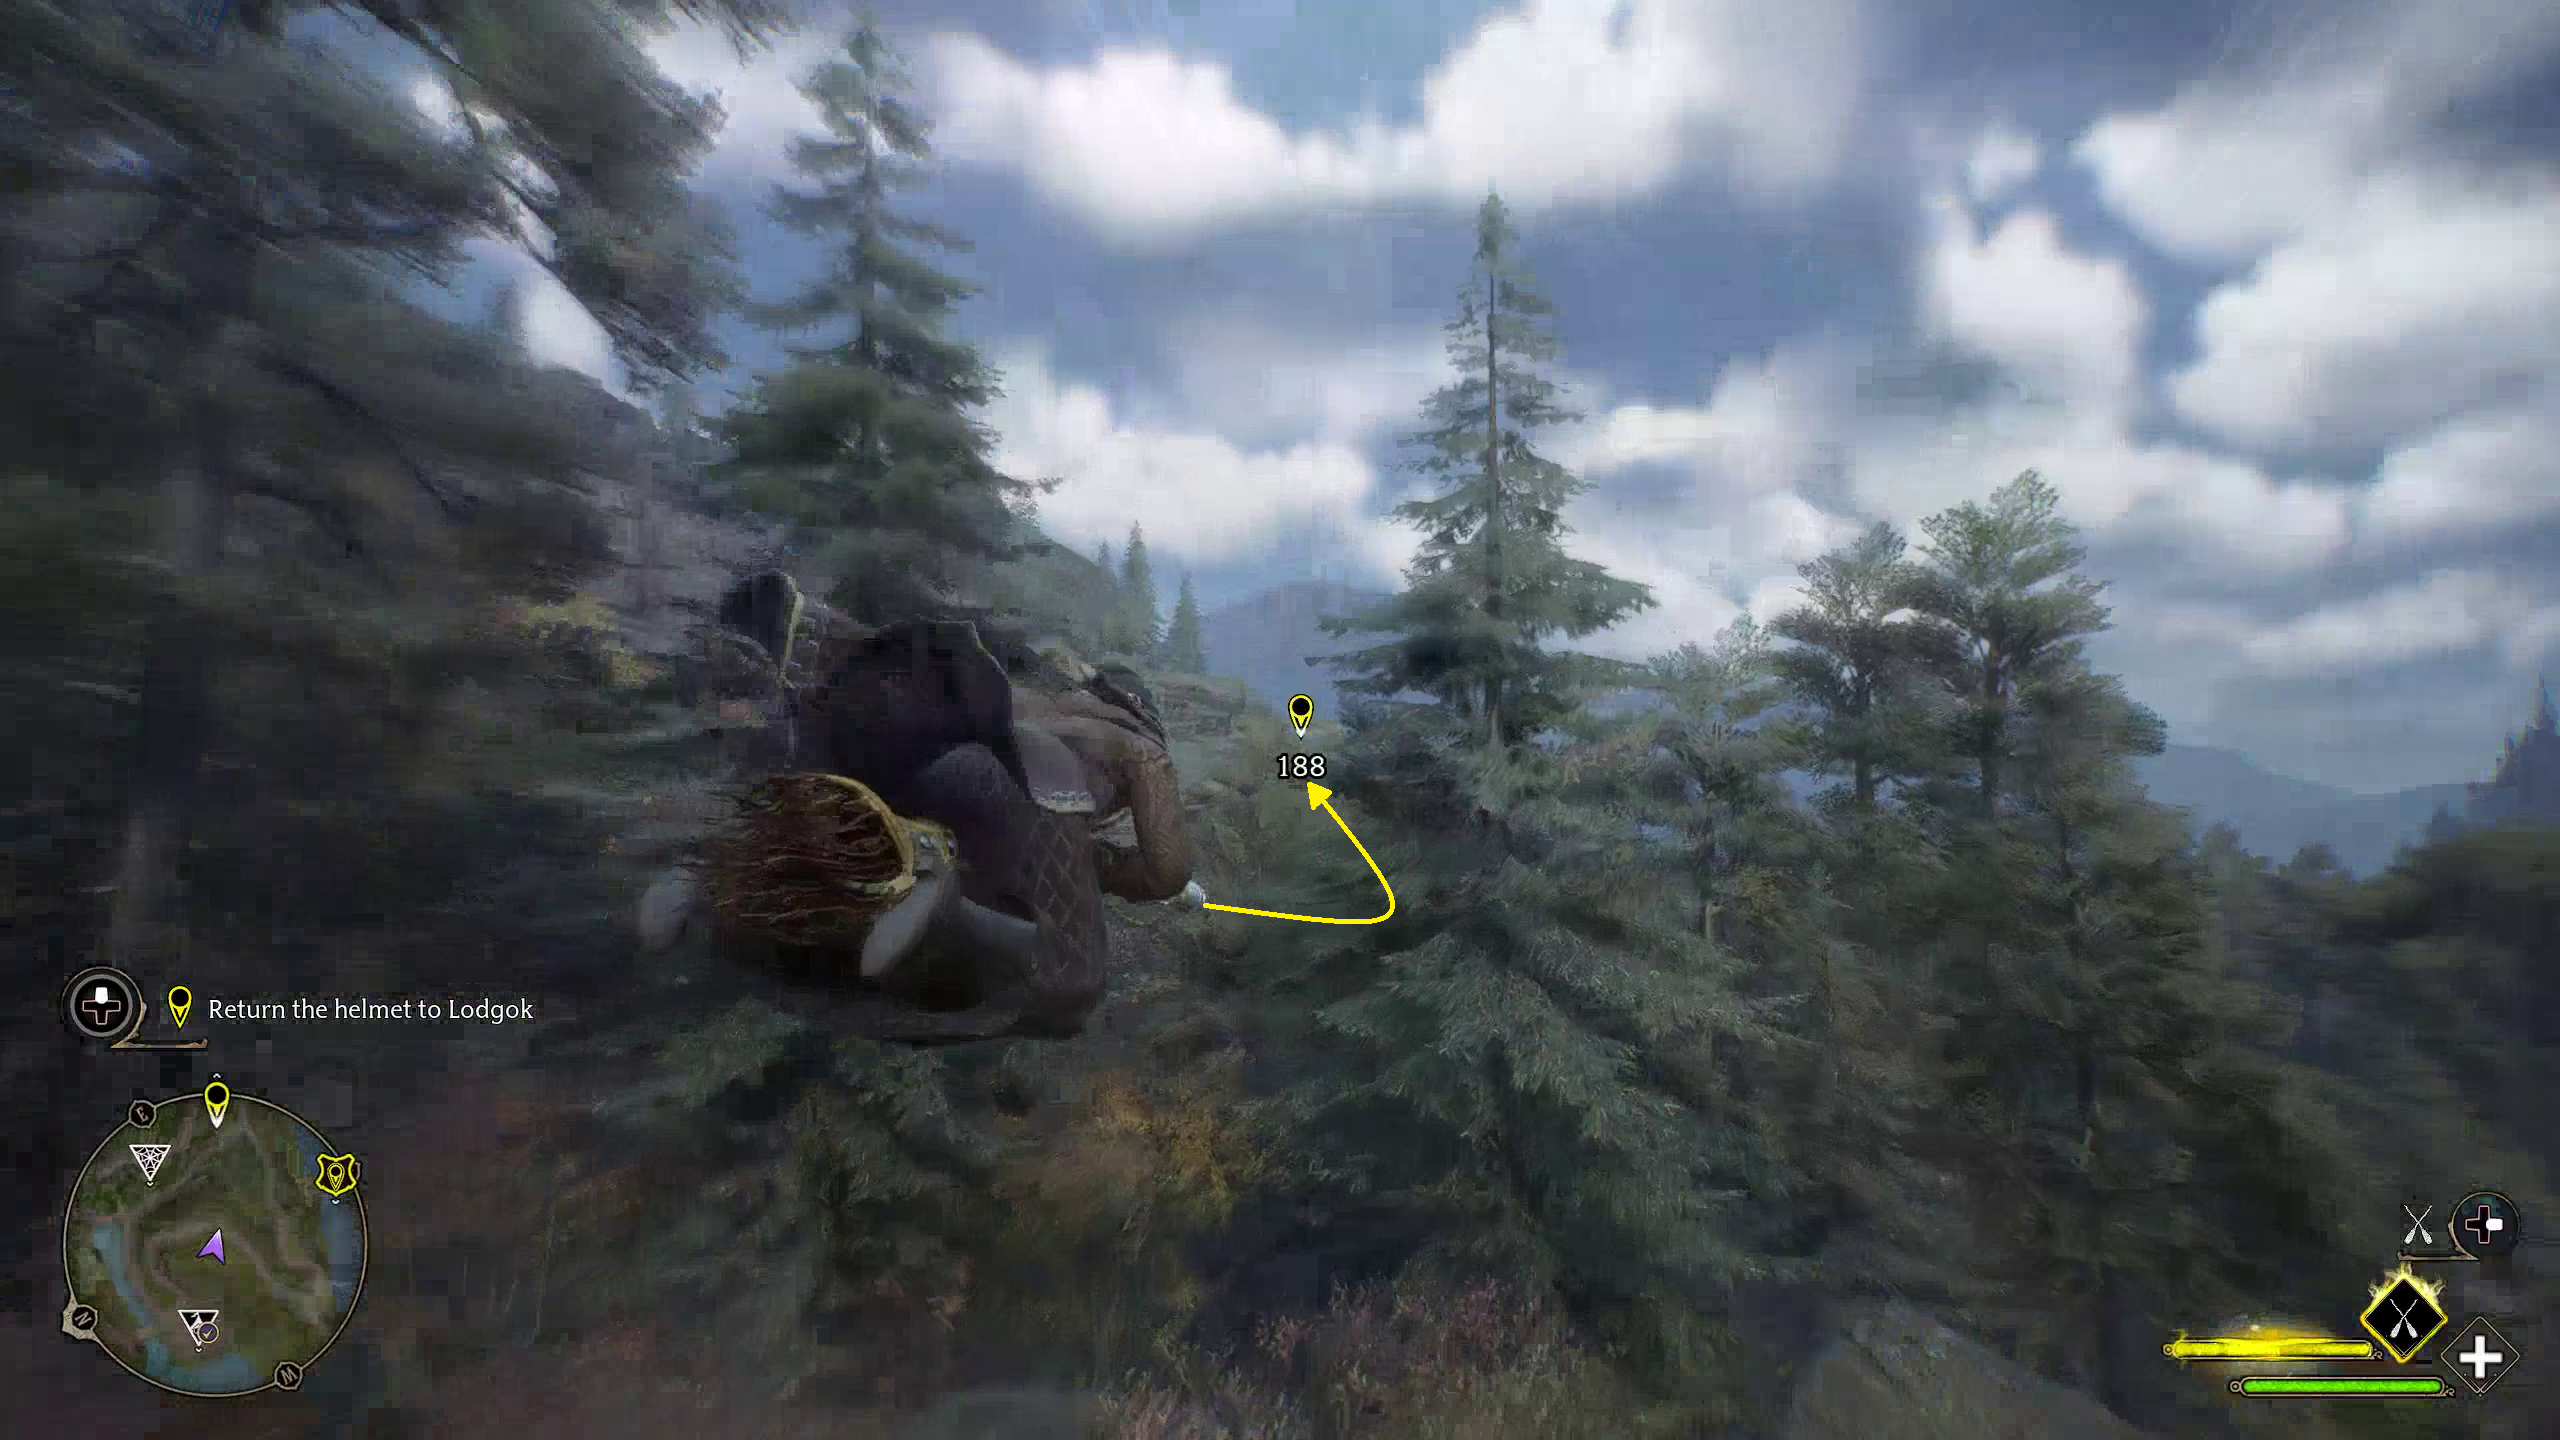
After defeating the Ashwinders, you can head back to Lodgok (either flying back to him or using the nearby Floo Flame). Walk up and speak to him, and he will thank you for retrieving the Helm.
With the Helm of Ortkot in his possession, he is confident that he can get back into Ranrok’s good graces, and therefor figure out his plan and let you know it. While this will take some time, it is an important step on unraveling the wicked plans of Ranrok and Rookwood.
Graves is an avid writer, web designer, and gamer, with more ideas than he could hope to achieve in a lifetime. But, armed with a mug of coffee and an overactive imagination, he'll try. When he isn't working on a creative project, he is painting miniatures, reading cheesy sci-fi novels, or making music.
I really like your walkthroughs. I can use as little or as much as I need to get through. Wish I had read a little further ahead on this one, though. I messed up the part where you drop the stuff on the pulley through the floor. I had the leviosa box in the way. Now it’s on the floor and I can’t get through to the next part of the quest. Any advice on how to reset the quest?


I really like your walkthroughs. I can use as little or as much as I need to get through. Wish I had read a little further ahead on this one, though. I messed up the part where you drop the stuff on the pulley through the floor. I had the leviosa box in the way. Now it’s on the floor and I can’t get through to the next part of the quest. Any advice on how to reset the quest?