Liurnia of the Lakes is found north of Limgrave, and is best done once you’ve cleared both Limgrave and the Weeping Peninsula. It is the biggest area of the game by a fair margin, with an incredible amount of things to do and see. In the center of the lake sits the magic academy of Raya Lucaria, where the areas Remembrance Boss awaits you.
Go through Stormveil Castle – This route requires that you defeat two bosses and fight your way through a legacy dungeon
Go around Stormveil Castle – All this route requires is that you drop off a ledge without sneezing and thereby accidentally falling to your death.
If you want to go through Stormveil, you’ll need to defeat Margit in order to enter the castle. At the end of Stormveil, you’ll then have to defeat Godrick as well. Stormveil Castle is found in the northwestern part of Limgrave, the starting area.
Going around is much easier, but obviously you miss out on a lot of useful loot — not to mention one of the most well-designed areas of the game. (You can always come back later, of course). To skip Stormveil, teleport to the Stormhill Shack site of grace, then follow the path (visible on the map) north-northwest under the large bridge. Continue onto the broken bridge with the Finger Reader Crone, then simply fall off the bridge onto the ground to the west. Follow the winding path up the slope and then north-northwest, and you’ll enter Liurnia!
How to Get to the Southwestern Area in Liurnia
You’ve probably wondered about that inaccessible section on your map — this is the Moonlight Altar, and is reached later in the game by following Ranni’s questline.
Walkthrough
Liurnia is large, and so for organization’s sake, this guide is split into sections: use the tabs below to navigate between the three portions of this walkthrough. Players should know that the Academy of Raya Lucaria (and indeed, most of Liurnia) is optional unless you want specific items or to complete NPC questlines (note that Ranni’s questline is required for one of the game’s endings).
If you completed Irina’s questline in the Weeping Peninsula, you will see Hyettanext to the Lake Facing Cliffs site of grace. Give her the Shabriri Grape you found at the end of Stormveil Castle to begin her questline, and exhaust her dialogue before moving on.
From the Lake Facing Cliffs site of grace, head southwest on the dirt road, then turn right when the path branches to head into the cemetery. Grab the Academy Scroll from the back of the cemetery, then ride back to the path and enter the nearby church. Inside, speak with Thops and give him a donation, then exhaust all of his dialog. Grab the Sacred Tear from the foot of the statue, then leave and continue west on the dirt path. You’ll exit the trees and spy an encampment — grab the Glintstone Craftsman’s Cookbook [1] and some Cuckoo Glintstone from the corpse in the camp, and find the Smoldering Butterflies in a tent on the western side of the camp then continue on the road, going down the hill heading north.
You’ll soon find the Liurnia Lake Shore site of grace. Grab it and speak with the merchant — this is a good chance to purchase a Lantern if you don’t have one yet — then remount and continue heading north. If you open your map now, you should see a little monument icon (see image on right) to the northwest — set a waypoint on it and then head that way on the “road”. There are a few enemies hiding in trees, but you can just ride quickly past them and grab the map fragment at the base of the monument.
Once you have the Map: Liurnia, East fragment, open your map and teleport back to the Lake Facing Cliffs site of grace — we’ll clear the middle area once we’re finished with the eastern portion of Liurnia.
From the Lake Facing Cliffs site of grace, head northeast towards the cliff edge, then look down. You should see tombstones sticking out from the cliff below — position carefully and then drop down to the closest one. turn left and drop down again, then drop once more to the right, and you should then be able to safely jump to the ground.
Head northeast to the road and turn right to go south, ignoring the enemies camped by the road. You’ll see a giant hanging out by a loot cart. Get close enough to aggro him, then lead him away from the cart a fair distance. Once you’re a good distance from the cart, ride past the giant and head towards the cart, hop on, and quickly grab the loot from the chest — the Treespear. Then remount Torrent and ride away north on the road before the giant can catch you. Look for a corpse on the road — next to it amongst the trees is a Golden Rune.
Continuing north, you’ll come across a well-hidden site of grace (Liurnia Highway South) behind two rocks on your left as you crest the hill.
The site of grace is behind the circled rocksMap location of site of grace
After grabbing the site of grace, look north on the road, and note the pile of rocks just to your right. There are two archer enemies here that will attack you when you pass them, so make your way up onto the rocks and take them out. Next, equip a ranged weapon or spell and take out the balloons to the south — they will disappear and give you a Golden Rune [6] if you hit them with any projectile. Go west and get back on the road to continue south. There are a few enemies guarding a corpse with x3 Stormhawk Feather — he sits just off the road on the left. You can simply ride past these foes if you like.
You’ll soon reach another site of grace on the right side of the road, Liurnia Highway North (if you run into some ghosts giants battling some other enemies, you went too far). Activate it and then look west and you’ll see the Purified Ruins — head into the main building that lies on the left-most side of the collection of ruined structures. There are a number of enemies here, so don’t forget to use Spirit Ashes to distract some of them — pay special attention to your surroundings so the dogs that hang out outside don’t ambush you (feel free to clear these first if you want to be extra careful). On the ground in the main building are some wooden planks — jumping or rolling into them will destroy them.
The boards you can break by rolling
Follow the stairs down (comically, you can ride Torrent down the stairs) and open the door; inside the small room, you’ll find a Shabriri Grape and the Two Fingers Heirloom (which is fantastic for Faith builds). West of the ruins is where you can have your second encounter with Hyetta, and she will once again ask you for a Shabriri Grape. Give her the Shabriri Grape that you just picked up, and exhaust her dialogue.
There’s nothing in the rest of the ruins but a sending gate to the center of the map, a Mushroom, and x3 Cuckoo Glintstones, so feel free to grab them or not — when ready, return to the Liurnia Highway North site of grace.
From there, go northwest and follow the road all the way to another site of grace: Gate Town Bridge. Here you will find Hyettaonce again, and while she will require another Shabriri Grape, this one can be found all the way in Western Liurnia which we have yet to explore. We’ll come back here later, so for now, travel back to the Liurnia Highway North site of grace.
Now go off the road heading northeast, towards the statue on the edge of the cliff. Examining it will create a stream of light that points you towards our next objective, the Cliffbottom Catacombs. The light kind of uselessly ends up in the ground, but keep heading that direction (south and slightly east) — it may not look like it, but there’s a path on the side of the cliff here.
The statueThis is the correct direction, we promise
Some enemies will appear in the darkened part of the path and throw fog at you — feel free to fight or flee, the lil’ fellas are hard to hit but not too tough. Keep going south until you reach the end of the path and a corpse in a chair — he’s holding a Somber Smithing Stone [2]. Now turn around and head back north, hugging the rock wall to your left. You’ll eventually reach a wooden door — head inside to enter the Cliffbottom Catacombs.
Once you’ve defeated the boss, you’re done with this dungeon, and you can use the glowing wisp in the boss room to teleport back to the entrance. Get far enough out of the dungeon that you can teleport and then do so, to Liurnia Highway North. There’s a semi-paved path to your left that heads north, but we’re going to turn right and head east, onto the dirt path that leads northeast. Follow the dirt path until you come across a crab — there, go left off the road and continue north along the cliffside, and you’ll soon come across a stone half-bowl; some Starlight Shards sit at the base of it.
Now head east back to the road and follow it a bit further north, where you’ll soon see some watery ruins. If you’ve picked up the Beast Eye, it will let you know Deathroot is near — just in front of you, in fact! A Tibia Mariner spawns in the ruins ahead, almost identical to the one in Limgrave. The only difference is that he summons some tougher enemies, and he now has an attack where he splashes spectral water on you like you’re playing swimming pool games or something (it hurts though).
He’s easy to defeat if you stay mounted — you can circle him and constantly attack, and if you’re moving quickly his splash should usually miss. Sometimes he’ll rise up in the air, in which case you should back off and wait for him to land before attacking again. The enemies he summons that hold scythes will cast spells, so you should try to take those down ASAP; the rest of the enemies can safely be ignored unless they’re in your way. Also note that sometimes he will teleport, and he can even end up outside of the ruins, on the grass — if you can’t find him in the water, expand your search radius.
Defeating him will net you a Deathroot as well as the Skeletal Bandit Ashes. In the center of the ruins, a corpse holds a Smithing Stone [3] you should grab as well. Continue following the path north, and look right as you pass the large tower. There’s a graveyard there, and at the foot of the large tombstone lies x5 Great Dragonfly Head. Ride away quickly to avoid being attacked by the skeletons that spawn, and continue north on the path.
Once you exit the trees, you should soon come across a Knight walking on the road. Stay on Torrent, and use the following pattern to take him down: ride towards him on horseback until he begins an attack, then ride out of range — once the attack is close to finishing, ride in and get an attack off, then ride away. Repeat until he dies, then snatch the Dragon Cult Prayerbook from his corpse like the bandit you are.
Continue north on the path and you’ll soon reach the Artist’s Shack, where you can grab the site of grace and inspect the “Resurrection” painting in the shack.
Now we’re going to backtrack a bit. Head south on the road to where you defeated the Tibia Mariner, then ride east to the edge of the cliffs and look for the tombstone sticking out a few feet below the drop.
Now, this isn’t a particularly easy set of drops — you can probably tell by the number of bloodstains on the tombstone. Once you’ve dropped onto the first tombstone, turn right and drop south-southeast twice. These first two don’t require a jump if you’re mounted — just walk off the tombstone to the next one. This next bit, where you need to get to the northern tombstone, can be trickier. You can either position on the tip of the tombstone and then walk to the next one (to the north) [1], or you can jump. I personally find the walking much easier to pull off, but your mileage may vary. Next, look down and to the south. It’s easier to skip the closer tombstone and drop straight to the one indicated, [2] although you will need to jump to this one.
12
With that done, it’s an easy drop to the north to the final tombstone, and then you can leap northeast onto the nearby roof to grab the x3 Smithing Stone [3] from the corpse. Hop down off the roof and in the front of the house you’ll find Jar Bairn — exhaust his dialog and then head southeast and grab the site of grace, then go around the house to the south to find a graveyard that for once doesn’t have any monsters coming out of the ground. Grab all the Golden Runes, ignore the messages on the nearby cliff telling you to jump, and go back into the village.
Head down the path and look to your right, where you’ll see a Cracked Pot. Then a bit further into the village on the right is a large pot with a Ritual Pot on top. Continue north through the village and you’ll see a broken house on your right that contains a Cracked Pot and a Living Jar Shard. Across the road from here is another corpse with another Cracked Pot. Finally, go back up to where you spoke with the little jar NPC and jump to the nearby roof to the northeast to grab the Ritual Pot there. With that done, you can teleport back to the Artist’s Shack site of grace if you grabbed it, or else back to the nearest grace south of the shack.
East of the shack, find the Smithing Stone [4] on the corpse who sits in the chair facing the Erdtree. Then turn around and head northwest, where you’ll see two columns of stone over a long drop — use these to continue further north.
On the other side of the ravine you’ll see a small encampment to the north, and just to the southwest of it is a flame sorcerer and a few fire slugs. This guy drops the Briars of Sin incantation, so take him out before continuing to the encampment.
Briars of Sin is found on the flame sorcerer at this location
Once you’ve got the incantation, you can head over to the nearby camp. You can choose to fight its occupants (in which case you may want to use Spirit Summons), doing so is easier on horseback but can be done on foot. On a corpse in the camp, you’ll find Flame, Cleanse Me, as well as x8 Smoldering Butterfly on a corpse hidden behind some boxes at the northern edge of the camp.
You don’t have to break the boxes (you could just go around) but what kind of monster doesn’t roll/ride into every destructible object?
Head northeast from the encampment and you’ll find the Eastern Tableland site of grace by the dirt path. Rest here, then take the dirt due west, and follow it as it curves around and up to the top of the small hill. You’ll find the Church of Vows — grab the site of grace and then head inside to talk with Miriel. He has some spells for sale, and he’s got quite a bit of info, so chat with him as much as you like. Then head to the chest on the opposite side of the church and open the chest containing the Gold Sewing Needle and Golden Tailoring Tools.
Note the statue in the back of the church — where you can come to atone for crimes like attacking NPCs.
Optionally, you can fight the Bell Bearing Hunter here. To get him to spawn, pass time until night, then rest again at the site of grace — then the boss will spawn where Miriel was. If this doesn’t work, you’ll need to teleport to a different site of grace, then teleport back and pass time until night
Teleport back to the Eastern Tableland site of grace, then head east on the road, and turn left to head north where the road forks. You’ll see a giant guarding the entrance to a building — you can easily ride past him and into the structure, the Ainsel River Well. Before you enter the building, however, you should go north around it to the left. You’ll come to a lake where a runebear sleeps — a mageface ball will come out of the lake, but you can go left around the lake to avoid both enemies and find a path through the rocks. In the next open area, a corpse sits in a chair with a Stonesword Key just for you.
Avoid the runebear (circled) and continue north to find a path that leads through the rocks
Grab it then retrace your steps to enter the building the giant guards and take the elevator down to Ainsel River.
From the East Tableland site of grace, head north on the road. You’ll soon enter the Uld Palace Ruins, where you’ll see a large statue of a bearded fellow. Take a right at this point (the road is hard to see but if you just heard northeast you should be fine) and follow the road northeast and then north. There are a few small bears on the road, and one large bear a bit past them, so either be ready for a fight or give them a wide berth. Stay on the road and it will take you all the way to the Black Knife Catacombs.
Note the right turn……this statue is where you’ll turn right
A headless, ghostly enemy stands guard outside — it’s best to lead him far away from the door on horseback, then ride past him and enter the catacombs to quickly tag the site of grace. You’re invulnerable during the door opening animation, so don’t be afraid! The headless knight will probably follow you inside, but this way if you die you won’t have to ride all the way back here.
From the entrance to Black Knife Catacombs, ride south and then southwest, sticking close to the right-hand cliffs rather than staying on the road. You’ll drop down eventually and be able to turn right, at which point you’ll see another bearded statue. Head past it and drop down near the Walking Mausoleum — grab the Miquella’s Lily from the base of the statue that sits in the northern end of this meadow, then head over to sit that mausoleum down.
You’ll want to be mounted for this part if you aren’t already; we’re going to ride up to the Walking Mausoleum and scrape the skull gunk off of its feet:
Finally, something that isn’t supposed to have skulls all over it
While this part isn’t dangerous if you’re careful, you can still die to the mausoleum. Every so often, it will leap in the air — run away whenever this hapens. It will also sometimes stomp its feet in sequence, so run away if the foot you’re cleaning lifts up. Once you’ve cleared the skulls off of a couple of feet, the mausoleum will settle down and you’ll be able to enter it. Inside, you can duplicate a remembrance (such as the Remembrance of the Grafted). Each Walking Mausoleum can only be used once, so keep that in mind.
From the mausoleum, head south and slightly west to find the Ruined Labyrinth site of grace. It’s a little hidden, so here’s how to get there from the (mausoleum location marked with an X):
Now go north, back the way you came, and ride west past the mausoleum into the lake. South of the lake you can find the Spiralhorn Shield on a nearby corpse, while to the northwest you’ll see a path that leads uphill — once you reach the top of the path, look west to find the Mausoleum Compound site of grace.
From the Mausoleum Compound site of grace, ride due north, where you’ll find another Walking Mausoleum. Feel free to set it down now if you like, or just keep moving. Ride east from the mausoleum towards a gap in the rocks (all the locals with the viking helmets are tromping towards it, so you can’t miss it) and you’ll find eastern Liurnia’s Minor Erdtree. Before you begin the boss fight with the Erdtree Avatar, ride around the left side of the area — this should help you avoid drawing all the nearby mobs into the fight.
If you’re patient and use Torrent and Spirit Ashes, these Erdtree Avatar fights are easy. All you need to do is the following:
Generally, wait for the Erdtree Avatar to finish attacking before riding in to attack. It has a limited number of combos, so you should be able to learn them easily.
If the avatar is running towards you, let it get close enough to start a combo, then ride out of range.
If it’s just hanging out, you can be the agressor — dash in on your horse and circle around the avatar’s back (you can get two light attacks in).
Once a combo is finishing, you can dash in and circle around its back, attacking twice.
If the avatar sticks its weapon into the ground and summons a bunch of yellow orbs, dash horizontally while facing the avatar to dodge the incoming projectiles.
Next, you’re going to first ride in a counter-clockwise loop around the nearby rocks to reach the Stalwart Horn Charm. Start by going north from the site of grace, and after a few meters turn left and head southwest towards the tall rock formation. Ride around it and turn southeast near the edge of the cliff to find a hole in the rocks. Head through the hole, drop down to the ledge below, and go north-northeast to find a corpse with the talisman.
Once you’ve got the talisman, ride southwest on the ledge and drop off of it, and continue southwest (you’ll need to go around some rocks) and drop down to the lush bush-and-tree covered section below. Ahead is a corpse with an Arteria Leaf, and there’s also a Golden Rune [1] further east against the hillside, but the area is guarded by a rune bear, so you may want to just grab the leaf and then ride away.
Path from the Mausoleum Compound site of grace to the Talisman and the Arteria Leaf
Now ride north, bearing left to ride along the edge of the cliff, until you come to the area pictured below [2] — you should see some tombstones that you can drop down on. There are a number of tombstones you can drop to, but the best choice is the one in the middle that’s a few tombstones down [2], easy to spot since it’s got a little tombstone attached on the left. Then drop to the right (north), then turn south and hop up on the ledge and jump to the tombstone to the south [3]. Then drop to the next tombstone below, just to the south again [4] — for this one, try and face the wall when you drop so you don’t go to far. Then it’s two more short drops to the north and you’re ready to hop down!
1234
Head west towards the large gate and grab the East Raya Lucaria Gate site of grace on the other side of the road. Note that there’s a Night’s Cavalry boss that spawns here at night; you can follow the road north from the site of grace to find it.
From the East Raya Lucaria Gate site of grace, go west and slightly north and find a small drop-off — below, you’ll find an Arteria Leaf. Continue northeast and you’ll follow a small path; there are two knights on the road that are hard to avoid, so you’ll likely have to face them (they’re spread out so you can fight them one at a time if you don’t run too far). Past the knights you’ll find the Bellum Church. Grab the site of grace, as well as the Sacred Tear by the statue.
You’ll find The Ravine site of grace by taking the stairs to the left of the statue in the church. Follow the path down past the Nomadic Merchant, a small camp with enemies, and a lone soldier on foot. Once you reach the river, follow it southwest navigating through the Giant Land Squirts until you find The Ravine grace site. Hug the western wall a bit further and you’ll see a figure slumped in a chair. They’re holding a Somber Smithing Stone [4]. Grab it and you can teleport back to Bellum Church. (At this point, you could instead choose to go ahead and head into the Ravine-Veiled Village by continuing northeast through the cleft in the cliffs — but we recommend clearing Liurnia first.)
Somber Smithing Stone [4] location just southwest of The Ravine site of grace
From Bellum Church head south and swing around the huge chunk of fallen tower. Ignore the enemies and grab the x3 Sanctuary Stone, then continue south until you’ve cleared the ruins, then swing around to the east (take a left) and head northeast up the gentle grassy slope. There are a couple of easy-avoided patrols, and eventually you’ll reach a cliff with a knight looking off into the distance. Sneak up on him and his buddy, backstabbing the knight and dispatching the other guy while the knight is still on the ground. Once they’re both taken care of, grab the x2 Slumbering Egg off the nearby corpse, then drop down via the fallen tower below, and continue up the right-hand path.
You’ll have to drop down another time, and you’ll find yourself on a ledge overlooking an enemy encampment. Drop down towards the catapults and sneak to your right, keeping close to the cliff. A couple of weak enemies will likely spot you, but don’t worry about them. You’ll soon reach a blue tent with a smaller structure next to it — wait for the knight to get close to the catapults, then go around to the front of the blue tent and open the chest to find the Great Mace.
Hop on torrent and head around the nearby fence heading northeast, towards the huge structure — it’s hard to miss. Grab the Dragonwound Grease from the corpse on the stairs, then continue up the first set of stairs, then up the next, and look right to find the Grand Lift of Dectus site of grace. Rest if you need to, then head back out and down both sets of stairs. Turn left to head southeast and follow the path that leads up the hill. You’re probably going to start getting some frenzy buildup — it’s that weird tower up on the rise that overlooks the path. Once you see the tower, get to the left side of the path and hug the cliff edge; you’re going to head towards a Spiritspring jump that lets you get up to the Frenzy-Flaming Tower:
If your meter starts to get filled, hug the cliff face closest to the tower and wait for it to diminish. You can also hear the tower doing its thing, so wait for it to do a round of weirdness, then continue to the Spiritspring jump. Use it to jump towards the tower, and quickly get to its base — be careful of the rats here! You can attempt to ignore them and climb the ladder, but the safer move is to fight them (just try to stay in the tower so you don’t get afflicted with Madness). Once the rats are no more, climb the series of ladders and take out the enemies at the top of the tower (they don’t respawn, and killing them prevents the tower from inflicting Madness), then go back down one level and open the chest containing the Howl of Shabriri.
From the Frenzy-Flaming Tower, head southeast and look for the site of grace that’s hidden behind a small drop.
Tap it, then look southwest, where you should see some low castle walls. Head that way and through the broken wall to enter the Frenzied Flame Village. Upon entering, go left to the side of the first house on the left and grab the Note: The Lord of Frenzied Flame, then go back to the entrance and look towards the center of the town — you should see a house on the left, and inside it a corpse holding the Frenzied’s Cookbook [1]:
Head further into town, and you’ll see a group of footknights sitting around a corpse. You can draw them away and then run back to grab it, or take them out — either way, grab Shabriri’s Woe from the corpse and then follow the path past where the footknights were chilling up the hill. Once you pass the small stone tower, turn southwest and ride that ways a bit — you should see a loot beetle in the grass ahead of you. Catch ‘n kill it to obtain the Frenzied Burst incantation, but be careful of the rats that will ambush you as you attack the beetle. Ignore those rats unless you want some runes, and keep riding southwest downhill. You’ll soon come across a graveyard infested with frenzied flowers. Grab all the golden runes (including some [6]s and [7]s), then go back up the hill.
Head to the closer of the two stone towers on your right, and stand on the right side of it. Look down and you’ll see a battlement you can jump to:
Jump to the battlements, then forward onto the battlements to grab the Stonesword Key from the corpse hanging off the edge. Then drop down to the outside of the walls (west) and look north to see a group of rats clustered around a corpse. Clear them out and grab the x3 Eye of Yelough, then make your way back into the town by following the wall counterclockwise around to the front entrance. Ride back through the town and up the hill again, but this time when you pass the tower at the top of the path, look northwest to see the church.
Head towards it, and you’ll soon be forced to dismount and continue uphill towards the church on foot. A tough NPC is going to invade you here, but we’re going to try and get past him for now. When he attacks, roll through his attack, roll once or twice more to make distance, and then sprint into the church he spawns in front of. Tag the site of grace as he follows you inside, then turn and fight him — this way, if you die, you’ll be right here when you respawn.
Many of Fingerprint Vyke’s attacks build up your frenzy meter, so back off if it gets to full and let it go back down. He has high damage, including a move that will likely 1-shot you, so respect him and always roll when his attacks are about to land. When he runs in at you, you can use charged or leaping attacks if you’re melee, but the timing can be tricky. Ranged characters will (as always) get him to begin an attack, then back off and fire away. Basically, be prepared to die a few times while fighting this NPC; luckily, you’re smart and got the site of grace nearby so it won’t matter. Once he goes down, you’ll get a Furlcalling Finger Remedy, a Fingerprint Grape, and Vyke’s War Spear. Additional treats are nearby — a Sacred Tear and the Finger Maiden Set.
You probably need to rest after battling Vyke, and you’ve got a bunch of new loot to check out! Once you’re ready, ride southeast from the church, taking a left around the tower and dropping instead of riding through it. You’re looking for an open spot of grass at the edge of the plateau you’re on where some corpses sit in a circle of chairs.
This area is something of a trap — you can grab the item on the sitting corpse (an Eye of Yelough), but the one on the corpse that’s lying down is impossible to pick up until you clear the area of enemies, which crawl out of the ground to surround you once you enter the circle of chairs. Stay mounted and try to focus down the spellcasters first; once everyone is dead except for you and Torrent, you can finally pick up the item, a Frenzyflame Stone.
With that done, you can open your map and teleport to the Liurnia Highway North site of grace (it’s on the north-south road in this area). Once there, ride west and slightly south — you’ll soon see a ruined building with a teleporter. Use the teleporter to travel to the entrance to the Raya Lucaria Academy, ending our time in Eastern Liurnia.
This walkthrough continues in the next tab, Central Liurnia!
You should have taken the teleporter in the Purified Ruins, and now be at the front gate of Raya Lucaria. Go north and grab the site of grace, and then pick up the Meeting Place Map from the corpse right in front of the gate — this will come in handy later. Now hop on Torrent and prepare for a wild ride — we’re going to head south over the bridge and through all the defenses. As long as you are dashing and zig-zagging a bit you shouldn’t take any damage.
You’ll pass the first few lines of defenses and enter a courtyard with a fountain. Grab the Smithing Stone [3] and then go around the fountain to the right. You find yourself on a broken bridge heading east — stop at the edge and look down to your left, and you’ll see an illusory tree with a Golden Seed at the bottom. Before you jump down, open your map: you should see the monument to the southeast on the road — set a waypoint so you don’t get lost on the way.
Then jump down (you can survive the fall, but it’s best to use the building to the east to go down safely), grab the Golden Seed, and head directly to the waypoint you set. Grab the Map: Liurnia, North from the base of the monument, and tap the site of grace nearby.
Now we’re going to get the final map fragment right away, to make it easier to navigate. Open your map and find the small dot of land to the north of your current position:
At the marked location you’ll find another teleporter — take it to be transported directly to the final map piece, Map: Liurnia West. Just southwest of you is a site of grace — grab it, then teleport all the way back to the Liurnia Lakeshore site of grace (which is on the southern end of the lake).
You should have a torch or a lantern by now, but if you don’t, purchase a Lantern from the nearby nomadic merchant. You should also put any Neutralizing Boluses you have into a Quick Item slot, and even consider going and purchasing the Armorer’s Cookbook [2] if you don’t already have it (since it lets you craft Neutralizing Boluses), or purchasing more Boluses from the merchant that sells the cookbook.
Once properly prepared for possible poison: from the Liurnia Lake Shore site of grace, head east-southeast through the water, all the way to the southernmost part of the lake. We’re looking for Stillwater Cave — the entrance is a little hard to spot, but there are a couple of floating jellyfish that hang out nearby, giving away where the entrance is.
Once out of the dungeon, teleport back to the Liurnia Lake Shore site of grace, and ride northwest, hugging the cliff on your left. You’ll soon reach a Spiritspring Jump — use it to get up on top of the cliff, then turn around and ride west to reach the Malefactor’s Evergaol. Enter the evergaol to battle Adan, Thief of Fire.
This is a pretty easy fight if you have ranged attacks or a heavy enough weapon. Adan often summons a giant ball of flame; it’s pretty slow, so just run away from it, as it has an initial explosion and then a second, larger one. Your best opportunity to punish is when Adan is summoning his giant ball of fire: you can run in and get a hit off as he’s casting, then run away and be out of range; make sure his hand is high and he isn’t casting his faster flame attack. After he does his leap attack to end his long, flail-swinging combo is another safe time to attack. If your weapon is heavy enough, you can also do leaping heavy attacks as he approaches and stagger him out of his own attacks.
Defeating Adan will earn you the Flame of the Fell God incantation. Next, head southeast to the edge of the cliff and look down — you should see an item on a corpse, sitting on a tombstone below. You can drop straight down onto it to grab the Sacrificial Twig, then drop down to find yourself back at the Nomad Merchant by the Lakeshore site of grace. Ride north on the road — it can be hard to tell where the road actually is, but you can use the small blue lamps and the broken arches to help keep you on the path.
See? It’s a road still, kind of
Lots of enemies will pop out of the trees and start casting spells at you, but ride fast and you should be fine. After riding a bit, you’ll see the Laskyar Ruins site of grace on your right — tag it and then rest there to reset all the enemies (and remove the spells likely flying your way). There’s a corpse just to your north in what’s left of the building you’re in; it holds the Glintstone Craftsman’s Cookbook [2] in its cold, dead hands. Head northwest through the ruins and on the western edge of the ruins, a “building’ holds two more items: the Ritual Pot is visible, then you can go around the wall to find a Golden Rune [3].
Note the unbroken building nearby that holds the teleporter has a Smithing Stone [3] at its base, but you’ll need to ride away further west immediately to avoid the revenant that spawns near the Golden Rune. Due west of the rune are stairs leading down beneath the ruins — follow them and open the door in the chamber beyond to find a chest containing the Wraith Calling Bell.
Map location of the stairs that lead below the ruinsShout out to EIP user Sarah for finding this location!
Now head southwest to the cliffs, and hug the cliffs as you continue west. You should soon find the mouth of a cave, which leads to the Lakeside Crystal Cave.
From the Lakeside Crystal Cave entrance, head north and you’ll come across a patch of dry land with a group of demi-humans guarding a Glass Shard — grab it and continue riding north. You should soon reach a hill — make your way around it to the right and you’ll be able to climb up, where you’ll find Patches and the Scenic Isle site of grace. Exhaust his dialog and purchase anything that interests you. Note that you can fight a Deathbird just northeast of this site of grace during the nighttime, and receive the Red-Feathered Branchsword and 6600 if you manage to defeat it.
When you’re ready, look due east from the top of the isle — you should see a small structure there (it’s the little dot just east of the telescope on your map). Head there and speak with the NPC there, Rya, and “Hear her Request”. She’ll tell you about how another Tarnished stole her necklace; when she’s done speaking, teleport back to the Scenic Isle.
From the site of grace, go to the northern edge of the isle and look north — you’ll see a house in the distance.
Head that direction to find the Boilprawn Shack. Grab the site of grace and speak with the NPC, Blackguard Big Boggart, who’s currently — you guessed it — boiling prawns. Tell him you want the necklace, and then select “Deal”. You’ll then be able to purchase Rya’s Necklace for 1000. End the conversation, then speak with him again, and he’ll offer to sell you some prawn. If you purchase a single Boiled Prawn (which can come in handy during boss fights where you’d otherwise get one-shot) and then end the conversation, he’ll give you the Spread Out gesture. Then you can head back to Rya (teleporting to the isle is the fastest way) and she’ll give you the Volcano Manor Invitation.
Now teleport once more to the Scenic Isle, and then open your map. Set a waypoint on the island indicated below, then head that way.
There are a few enemies guarding the Dexterity-knot Crystal Tear, which sits in a stone basin at the western-most edge of the small island. Grab it on the go and then immediately head south until you’re right where the two map pieces meet, in the middle of the cluster of trees. Then, head due west — you should enter a strangely-colored swamp area with some large crabs, and soon you’ll spot a loot beetle. Be careful not to chase it into the large crabs, and slay it to grab yourself the Ash of War: Vow of the Indomitable. Continue west and you’ll soon see dark — but dry — land, the Village of the Albinaurics.
Follow the dirt path up the hill west, and you’ll see Nepheli Louxunder a bridge (if you’ve been following her questline). Exhaust her dialog, then continue around the corner. On the right you should see some stone coffins, and amongst them a Larval Tear.
Now head west, further into the village, to find the site of grace. From the site of grace, look east and you’ll see a fairly steep incline. Head up the hill and you’ll see an enemy straight ahead by the tree — ranged attacks are best against this foe, because it has a very fast flame attack that does significant damage. Ignore the stone bridge on your left for now and head further east. Near the edge of the cliff on your right, you’ll see a pot in the corner — roll into it to reveal an albinauric.
You’ll need to speak with him multiple times before he’ll start talking to you, but eventually he’ll give you the Haligtree Secret Medallion (Right). Just a bit further east, a coffin holds the Ivory Sickle. Once you’ve grabbed both, head back the way you came, and this time head over the stone bridge that stretches northeast. There are a number of enemies on this bridge, and the one in the back may cast a glinstone spell at you, but you can jump to have it hit Torrent instead (sorry buddy). You can fight them, but the bridge is precarious and they won’t chase you into the next area, where you’ll find Omenkiller.
After you defeat Omenkiller, head downhill to the right of the houses you probably stood on to kill him, and you’ll find a Rune Arc. Then go back over the bridge, turn right and go down the hill. You could probably rest at the site of grace at this point unless you managed to do the whole village without taking any damage.
Once you’ve rested, cross the wooden bridge that leads north — the other side is has a single enemy, and three more are hidden around this little area. Around the tree to your left is an Albinauric Bloodclot, and further north, just to the right is a corpse holding the Crystal Sword. Drop down where you find the sword, then jump up the rocks to the north.
Continue north to the edge of this small plateau and you’ll find another loot beetle that drops a Somber Smithing Stone [2]. Then backtrack to where you jumped up the rocks and look west — you should see a tower in the distance. Drop down and head west, then go up the grassy slope and towards the tower (you can ride past all the enemies here). Grab the Converted Tower site of grace, then open your map and find the teeny bit of land to the east.
The next few steps, illustrated!
Head that direction (setting a waypoint is advisable) and grab the Folly on the Lake site of grace. Look south and slightly west from the site of grace and you’ll see a nearby tree: At its base lies x2 Smithing Stone [2], but you need to clear those pesky ‘lil crabs out of the way before you can grab them. Stones in hand, open your map again and set a new waypoint to the other little spot of land to the northeast. Approach this spot carefully, as there are a number of huge lobstrosities chilling around it. You’ll need to ride in, grab the x3 Smithing Stone [2], and then leap out the back of the structure and ride north, to the tower ruin directly ahead.
Go up the right side of the ruin to find the Fallen Ruins of the Lake site of grace. From the fallen ruin, ride due west, and you’ll soon reach the Rose Church. You should see White-Faced Varre here. Speak with him, and he’ll make some sly suggestions and give you x5 Festering Bloody Finger — feel free to try them out now, but be warned: many experienced players camp this area waiting for noobs to invade, so you’ll likely find yourself in a very unfair fight.
Enter the church, and on the left grab the Nomadic Warrior’s Cookbook [12] from the corpse. A tough enemy spawns out of the ground nearby — it doesn’t seem to drop any reward, so feel free to skip the fight. Open your map once more and find the small dot of land directly west of the church. There, you’ll find x3 Smithing Stone [2]. Just south of the small gazebo, there’s a balloon with enemies hanging from it — shoot it down with a projectile (you can use throwing knives if you don’t have a bow or spell) to earn yourself a Golden Rune [6], then leave before the enemies recover from their fall.
Now head north and slightly east, and you’ll soon reach the Temple Quarter. There’s a small tower-top-lookin’ building on the side you’re approaching — inside is a chest containing the Icerind Hatchet.
Now go back to the outer edge of the ruins, and circle the outer edge of the ruins going counter-clockwise. You should soon find the site of grace. In the center of the ruins is a corpse with x3 Rimed Crystal Bud, so if you’re the crafting sort you can ride through the enemies and grab that as well. Then open your map, find the next island to the northwest, and mosey on over.
Make your way up the hill, but hop off your horse partway up and look for the loot beetle chilling at the top of the island’s small cliff. This one’s tricksy: after being damaged, or if you get too close, it will teleport away. Fortunately, it doesn’t go far — it either goes to the right or left (relative to you facing the beetle after walking up the hill), down to the ground just a few feet away from the island. You can choose to use ranged attacks, or you can just let it teleport to one of the locations on the ground and then use a leaping attack. Note that sometimes it will also teleport back to its starting position, and will keep teleporting until you kill it. When you finally land the killing blow, you’ll earn yourself a Somber Smithing Stone [2].
Don’t forget to swing your sword before you land
Now you’re going to get yourself the key to the academy. Just northeast of the island you’re on, there’s a rock formation with a dragon sleeping in front of it, on the eastern side. Behind that dragon are 3 items — the furthest one back, on the corpse of the sorcerer is the Academy Glinstone Key you need to enter Raya Lucaria. The other two items back there are x1 Dragonwound Grease (which you could use to kill the dude you just rode past) and x6 Kukri.
You can fight this dragon if you want its heart — the battle is very similar to the fight against Agheel. As always, you can also choose to just ride away.
Note: Now that you have the Academy Glinstone Key, you can choose to begin the Raya Lucaria legacy dungeon at any point during this walkthrough.
Once you get the key, ride around the rock and head north — the next site of grace is just above the rocks northeast of where you grabbed the key:
From the site of grace, ride southeast and you should see a fog wall on your left, up against the cliffs to the east. It costs two Stonesword Keys to enter the Academy Crystal Cave, so if you aren’t interested in the magic-user-oriented rewards (Crystal Staff, Crystal Release, Terra Magicus, and a single Stonesword Key as a kind of refund), feel free to skip this dungeon.
From the Crystal Cave, head back to the site of grace, head north and you should see two spectral horsemen patrolling a stone gazebo that contains a Smithing Stone [3]. You can sneak in and out, or you can just ride Torrent in and then gallop away north. You should soon come across a cemetery full of stone coffins — careful of the enemies that come out of the ground, and grab all the Golden Runes. Then continue northwest with the cliff on your left, and you’ll come across a group of enemies digging around a broken cart.
Grab the x6 Throwing Daggers from the corpse, then turn around and head out into the lake. There are a number of balloons out over the lake, and you can use any projectile (including the daggers you just grabbed) to pop them. Each time you do so, you’ll receive a Golden Rune [6], so it’s definitely worth doing — just make sure you ride away before the guys that fall from the balloon recover and attack you. Before you start popping them, ride to the island east of your position and grab the Sorcerer’s Isle site of grace. On this island, you’ll need to find (and damage) three ghostly turtles in order to unlock the tower.
Head northeast from the site of grace to find the first turtle near the edge of the rocks. Then continue clockwise around the back of the tower — the next turtle is up in a tree, visible if you’re facing north-northwest. The final turtle is on the southern side of the island — you’ll need to look down over a small drop to find it. You can hit all three turtles with spells or a projectile like a throwing knife in order to dissipate them.
With all three turtles tagged, the tower will open — head to the top to find a Memory Stone. Once you’ve got your prize, you can head back out into the lake where the balloons are.
Start popping balloons and make your way northeast, towards the fallen tower ruins. Underneath the tower ruins, you’ll see a bunch of poison-spewing enemies surrounding an item. Make your way around to the north side of the ruins, then kill the enemy closest to the wall — this should allow you to grab the x2 Old Fang. From the tower ruins, turn around and ride north-northwest to the dry land there. Continue inland that direction, and follow the grassy path as it bends to the right[1] — there are little hands in the bushes here, so don’t stop to scratch you nose but keep riding. You’ll come to a fork where there’s a small dark rock — go left around the rock [2] and you’ll see some gross hands, and a stone basin that contains the Intelligence-knot Crystal Tear. Grab it and ride back the way you came.
12
From the dirt beach, look east, where you’ll see another bit of tower ruins. Ride through them and grab the Soporific Grease (do it quickly before the giant crab clacks you), then head south around the island. You’ll be heading towards the academy on the hill, and soon you’ll see another one of those stone gazebos. Its another one guarded by big ole lobsters, so be quick about snatching the Smithing Stone [2] inside. Ride east to escape lobster spittle, and head to the site of grace under the bridge:
From the site of grace, go east and then turn right once you’re out from under the bridge to head southwest. Ride up onto dry land bearing slightly left[1], then continue up towards the structure to the south[2]. You’ll see a gap in the support columns[3] — head through it and turn left. You’ll pass an opening on your left; keep going and turn left into the next opening, where you’ll see a corpse in a chair that holds a Stonesword Key.
1234
Turn around and go left to continue heading southeast, and keep going straight until you see a terrifying enemy — you’ll know what I’m talking about — at this point, you should be able to turn left and safely ride down a shallow incline into the water. Straight ahead of you should be ruins (the tops of some buildings in the water), and at the northern edge of these ruins is the Gate Town North site of grace. Rest here if you need to, and then there’s an optional boss you can fight: the Death Rite Bird.
To summon this boss, use the site of grace to pass the time until nightfall, then head due south from the site of grace to the edge of the ruins there and wait a moment for the big dead bird to arrive. This boss is challenging, especially if you don’t have access to Sacred or holy damage — it will definitely 1-shot you if you’re at 650 HP or less — but you’ll earn 7800 and the Ancient Death: Rancor sorcery if you manage to slay him.
Either way, once you’re done here, teleport back to the East Gate Trestle Bridge site of grace. Then head east and turn left around the corner of the support column. Go straight, keeping the support columns on your left, and you should spot a loot beetle that drops the Ash of War: Shield Bash. This one can also teleport away, but it’s easy to find where it’s gone if you don’t get it first try — use a spell or your horse to catch it. Next, go back to where you first spotted the beetle (assuming you didn’t get it first try), and continue following the path of the bridge northeast, staying on its right side. Once you get to the cliffs, turn right and head forward a bit to find a corpse in a chair holding a Somber Smithing Stone [3].
Further east is another walking mausoleum — unlike the previous ones, you’ll need to get on top of it to make it settle down. The skulls you need to destroy to open the mausoleum are on the grass around the mausoleum, rather than on its feet. There is a Spiritspring jump tucked up against the cliffs west of the mausoleum that you can use to get on top of it, but you’ll have to be patient and wait for it to get close enough. It can be hard to tell when it’s time to jump since you’re looking at the mausoleum through trees — if you have a near miss, dash back to the Spiritspring jump and try again. (Note that if you don’t have a boss remembrance you want to duplicate, you don’t need to bother with this.)
Location of Spiritspring jump
Continuing east past the mausoleum will take you to the entrance of the Raya Lucaria Crystal Tunnel. You can actually see it on your map:
The entrance to the Raya Lucaria Crystal Tunnel
This is a useful dungeon to do if you want to try out lots of different weapons, because defeating the boss earns you an item that lets you purchase infinite Smithing Stones [1] and [2] from the Maiden Husks in Roundtable Hold.
From the entrance to the Raya Lucaria Crystal Tunnel, head south, and you should come across some dry land with jellyfish hanging around. In the center of this dry area, on the high ground, there are x2 Arteria Leaf that you can grab.
Once clear of the jellies, open your map and teleport to the Academy Gate Town site of grace to the south. Ride southeast, and you should soon see another one of those now-familiar stone gazebos. Grab the x3 Smithing Stone [3] and continue east, where you’ll see a broken bridge leading up to the high ground. Ride up the bridge, leaping the gaps to reach the Gate Town Bridge site of grace. This is another spot where you can fight an optional boss at night: one of the Night’s Cavalry.
From the Gate Town Bridge site of grace, ride due east until you hit the cliff wall — follow the wall south and you’ll soon find a loot beetle that will drop a Somber Smithing Stone [2]. Then continue south on the road through the narrow gap. Just off the road on the right, past the low stone wall, is a corpse that holds x5 Crystal Dart. Grab them and back off a bit, then feel free to watch the action if you want.
When you’re ready, teleport back to the Gate Town Bridge and then ride northwest down the grassy slope. At the lake’s edge, you’ll see a small tent, beneath which are x3 Silver-Pickled Fowl Foot. Then ride west and you’ll see another broken segment of bridge. In the middle, across the small crack and guarded by some pretty gross-lookin’ dudes, is a Golden Rune [3]. North-northwest of that rune is another group of enemies guarding a Golden Rune [4]. From there, head northwest and you should come across a corpse slumped over a spire holding Magic Grease.
Location of the grease
From the Magic Grease, travel due west to find the NPC you likely spoke to in Roundtable Hold at some point, Diallos. Exhaust his dialog, then go northwest and you’ll soon spot another tower-top. Turn left in front of it to find a loot beetle that drops a Somber Smithing Stone [2].
Now teleport back to the Academy Gate Town. From the site of grace, go northwest and stand on the nearby roof. From there, look ahead to your next objective — the chest in a nearby tower.
You can fight the enemies guarding the chest (Spirit Summons are available here), or you can just ride close enough to aggro them all, draw them away, then ride torrent up and into the tower and open the chest, which contains the Glintstone Craftsman’s Cookbook [4]. On the rooftop just south of the chest you can also find x2 Arteria Leaf.
From the chest, ride due northwest. You should soon see a larger structure in the ruins[1], which will let you know you’re going in the right direction. Go left around the structure and continue northwest, and you’ll see another tower with a chest in it (though you’ll need to get on the nearby roof to see the chest). Get a running start on torrent and leap from the middle of the roof south of the tower — a double jump should easily land you in front of the chest. Open it to grab a Stonesword Key, then teleport once more to Academy Gate Town.
Ride west and slightly north, keeping the ruins on your right. Stay to the right of the broken bridge, and you’ll pass an enemy patrol. On your right will be an illusory tree — if you’ve been following this guide from the start of the zone, you already grabbed the Golden Seed there, but if you haven’t then you oughta! Continue past the tree through the gap between the bridge and the building:
In the area beyond, you’ll find a crab guarding x3 Smithing Stone [2]. Ride away from the crab, then look under the western section of the bridge, where you’ll see a loot beetle affixed to the ceiling above some poison puffers. To get it to drop, you’ll need to look at it through the Telescope and then use a projectile or other ranged attack. The beetle drops the Ash of War: Charge Forth.
Next, teleport to Laskyar Ruins at the southern end of the lake. From the Laskyar Ruins site of grace, ride due west out of the lake and you’ll see a small encampment with red tents. Inside are a handful of spellcasters and a tough fire monk. Summons are available here, so take advantage of them if you like. The fire monk is on the southwestern side of the camp, and it’s advisable to sneak around and backstab him to start off your fight in the camp.
It’s either this or letting him set Torrent on fire
At the three basins of fire in the center of camp, you can pick up the Fire Spur Me gesture, and the corpse nearby holds the Fire Monks’ Prayerbook. There’s also a Dappled Cured Meat hiding in the southeastern tent.
With that done, we’re finished with Central Liurnia! When you’re ready, you can teleport to the Converted Tower site of grace that we grabbed earlier in this section to begin your adventure in Western Liurnia.
This walkthrough continues in the next tab, Western Liurnia!
Teleport to the Converted Tower site of grace in the southwest, just north of the Albinaurics village on the map. From there, ride up the hill northwest to face this region’s Erdtree Avatar.
With the avatar dispatched and its tears claimed, ride back down the hill and turn left at the tower to head north on the hard-to-see dirt path. Follow the path until it forks, then look left and you should see another guiding statue to the west. You can activate it if you want, but the path is easy to follow — simply go due south from the base of the statue, following the path downwards (and riding quickly through the bats) to reach Road’s End Catacombs. On the path to the dungeon, you’ll see a loot beetle that drops the Ash of War: Sword Dance.
From the entrance to the catacombs, ride north the way you came in, then turn right as the dirt road curves — you’ll meet the north/south path again and turn left to continue north. Follow the road a bit further and you’ll find the Revenger’s Shack site of grace. Tap it ASAP, because if you completed Irina and Edgar‘s questlines in Weeping Peninsula, you’ll be invaded here by Edgar the Revenger. He’ll drop a Shabriri Grape upon being defeated, as well as the fairly powerful Banished Knight’s Halberd +8 and a few other minor goodies. Now that you’ve gotten the last Shabriri Grape, you can travel back to the Gate Town Bridge site of grace and speak to Hyetta. After feeding her the grape, tell her that she’s been chewing on eye balls, and rest at the nearby site of grace before speaking to her again. Now travel to Bellum Church, where you will be able to feed her the Fingerprint Grape that you acquired earlier. Having done so, you will meet Hyetta later in your playthrough. So for now, travel back to the Revenger’s Shack.
From the shack, head due north and drop down from the rocks to pick up the northern path again. Follow it a short ways and you’ll come across the Cuckoo’s Evergaol — enter it to face Bols, Carian Knight.
After defeating (or giving up on) Bols, hop back on your faithful steed and continue north once again. You’ll see a cluster of rocks off the road on your left — inside is a swarm of bats and a harpy. You can skip this if you like, but the harpy drops a Golden Rune [6], so it’s probably worth clearing out these enemies.
That marvelous melody you hear is coming from a nasty nestled in the circled rocks
Continue north on the road once more, and keep an eye on the left side of the road. You’ll go up a slight incline, and near some rocks on your left will be a site of grace, the Foot of the Four Belfries.
Looking north from the site of grace, you’ll notice that the path splits, going up the hill to the east, and continuing north. There’s a site of grace we need to grab at the top of the hill, so take the right turn to head east on the path. The road will fork again — note the path to the north, but continue east up the hill for now.
Ghostly giants will appear on the path — ride around them and continue up and around the hill. The path will wind past four inactive teleporters, which can all be activated with Imbued Sword Keys. This area will be useful later, but for now, just ride all the way to the top of the hill and grab the Four Belfries site of grace, get the Imbued Sword Key from the chest on the nearby shrine, then teleport back to the Foot of the Four Belfries site of grace.
Take the eastern path once more, but this time turn left when the path splits to head north into an enemy camp. Summons are available here, and you can ride Torrent as you tear up the place. There’s a knight at the edge of the cliff on the left as you enter the camp, and he’s pretty tough — try to avoid aggroing him as you clear the rest of the area. In the chests, you’ll find x6 Albinauric Bloodclot and a Smithing Stone [4]. Sneak up on the knight checking out the view now, as otherwise he’ll come down as you clear the rest of this fortified area.
Then find the path that leads down the hill (it’s on the southern edge of this little area that leads northwest down the hill), but don’t go down it yet! First, look to the right and take out this pesky sorcerer who will snipe you constantly while you’re fighting down below:
Now you can head down the hill and clear the rest of the camp. Note that the only loot is a Rune Arc on a corpse, and x10 Cuckoo Glinstone in the chest, so you might just want to grab the Rune Arc and ride out. There’s a Pumpkinhead who isn’t mad enough to kill the other mobs here, but his leash range is short, so you can safely clear the bottom edges of the camp and leave him for last, kite him up the hill to the area you clear, or completely ignore him.
Take the road south out of the camp (heading back towards the Foot of the Four Belfries site of grace and you’ll see some jellyfish glowing red surrounding two items: the Jellyfish Shield and x3 Blood Grease. Grab ’em both, then turn around and ride north through the camp on the road. Here you should see a caravan — the chest the cart carries contains the Carian Knight’s Sword, so if that weapon interests you, take down the caravan. You can engage the caravan’s rear guard first, and the giants should keep going for a bit. Then leave the rear guard behind and try to lose their aggro by riding far ahead of them, past the giants. Clear whatever enemies chase you, then take down the two giants (bait their stomps and then attack once the stomp lands).
Past the caravan, you’ll keep following the dirt road north. There will be nothing for a bit, so enjoy the scenery, and watch the left side of the road — you’ll come to the Northern Liurnia Lake Shore site of grace that we grabbed while getting all the map fragments (if you didn’t come here yet, tag the site of grace before moving on). Stay on the road heading north (it will branch at one point) and you’ll enter the Kingsrealm Ruins. Ride up the stone steps, ignoring the sorcerers that spawn. Continue through the broken gap in the wall to the north[1] and then go up the next set of stairs, where you’ll see a big stone wall[2]. Hit it to make it disappear, then grab the site of grace on the other side.
12
Rest if you need to, then go back the way you came (through where the illusory wall was) and then turn left to head southeast through the ruins. There’s a pack of wolves here on your left, so dispatch them before moving on. Then continue a bit further and you’ll see a sorcerer staring at the ground, giving you a hint that there’s an illusory floor here. Take him out and do a jumping attack on the spot circled below to reveal stairs that lead to the Royal Revenant boss.
Once done with the revenant, return to the site of grace north of the ruins and speak with the Blacksmith. He sells Somber Smithing Stones, so if you’ve got a special weapon you want to upgrade, this guy’s your guy. Once you’re done talking with him, all that’s left to do on this side of the map is to head north to the Caria Manor! Before you enter the manor proper, however, there are two things you can do. First, heading left (west) from the front of the manor — you can find a graveyard guarded by some rats and containing the usual plethora of Golden Runes.
Next, you can acquire the Ash of War: Hoarfrost Stomp in the lake east of the manor. Ride back around the front of the manor (making sure you sprint diagonally when you hear the magic lightning falling) but go east past its walls and continue east to the lake — there’s an invisible loot beetle leaving white tracks. Get in its path and swing at the right time to grab the Ash of War. Now head back west to the manor gate.
The lake where you can acquire the Ash of War: Hoarfrost Stomp
Once you’ve defeated the boss of the Caria Manor, leave via the doorway on the northern side of the boss arena to enter the Three Sisters area. Take a left and hug the cliff’s edge, and you’ll soon come across a Cerulean Tears loot beetle. Head towards it and chase it off the drop, then drop down again until you’re on the stone roof. Then go to the broken bit of rampart to the southwest indicated below.
Look before you leap!
You’ll drop down onto a wooden platform, then another to the southeast, and then southeast once more to the ground — well, roof, really — below. You’ll see a hole with a ladder, but ignore it for now and go up the stairs onto the nearby roof to the southeast. On the other side of the slanted roof, grab the x5 Old Fang from the corpse, then go back and take the ladder down. Head southeast from the bottom of the ladder to find a Spellproof Dried Liver, then turn around and speak with the NPC who is doing…. something on the ground.
Interestingly, you can’t engage in combat in this area with the NPC. Perhaps play-testers kept attacking him because he looks so much like the classic “scrabbling in the ruins” enemies found throughout the game.
This NPC sells a number of useful items, including a Ritual Pot, a Larval Tear, and the Glintstone Craftsman’s Cookbook [7]. He’s also got the weapon and shield of one of the albinauric enemies in the area. Since this guy’s not particularly easy to reach, it’s not a bad idea to grab whatever you think might want in the future now if you’ve got the runes.
When you’re done shopping, climb back up the ladder and go to the edge of the roof to the southwest. You’ll need to drop down onto the ramparts below [1] — it seems like a long drop, but you won’t take fall damage. Head southeast to continue forward, and where the path dead-ends, you’ll see another drop-down on your left, where you’ll land on a wooden platform [2]. Grab the x3 Slumbering Egg and cross the wooden platform until you can drop down onto the ramparts below. Continue southeast once more and you’ll encounter a final wooden platform above a giant crab — betwixt his powerful pinchers is a Stonesword Key. If you don’t want to fight him, you can grab the key and then drop down to the west, where you’ll be able to mount Torrent and ride away.
12
Either way, teleport back to the RoyalMoongazing Grounds site of grace when you’ve got the key. Once again, head out to the Three Sisters by way of the northern exit. You’ll see a tower straight ahead as you exit, but we can’t go in that one for a while yet. Instead, ride west-southwest towards the middle of the three towers, and you’ll soon see a dragon guarding the path.
You can easily avoid the dragon by riding around it to the north — if it aggros, just keep going and enter the tower
The fight is very similar to the other dragons (see Agheel guide), except that this one’s got more attacks, including a Sif-style attack where it spawns a sword in its mouth and flies it at you, and an AOE attack where he forms a crystal mass and it shoots crystals in a wide area. Because of these new attacks, the best strategy is actually to stay mounted and fight underneath the dragon, dodging his stomps and tail sweeps by running out of range and then back towards it and underneath.
Note that you don’t have to actually fight the dragon in order to access Ranni’s Rise, although if you want his drops later in the game (Adula’s Moonblade and x3 Dragon Heart) you need to get him to 1/2 health here — at that point the dragon will teleport to the Cathedral of Manus Celes, which is accessible later in the game.
Whether you chase it off or ignore it, make your way into Ranni’s Rise, the tower at the highest and westernmost section of this area. Head up the tower, grabbing the site of grace on your way up. You’ll find Ranni at the top — agree to enter her service and make sure you exhaust her dialog. If you gave the Black Knifeprint to Rogier, she won’t allow you to become her vassal yet — teleport to Roundtable Hold and speak with Rogier and then come back to enter her service. Then, go downstairs and exhaust the dialog of all three NPC’s ghostly images, then go back to the top of the tower and speak with Ranni once more.
Next, leave her tower and head southeast to Seluvis’s Rise, which should now be open. Agree to help him to receive Seluvis’s Potion. You can either bring this potion to Nepheli, causing her to become a puppet, or you can give it to her father Gideonin Roundtable Hold — this option allows you to advance both questlines and is the safe option. (Apparently it can also be given to the Dung Eater later in the game, although the outcome of this choice is unknown.)
Climb the ladder behind Seluvis after speaking with him, and then continue up the stairs to the top of the tower, where you’ll find a chest containing a Memory Stone. Then leave the tower and go back down the stairs to where you can re-enter the tower — instead of going inside, look southeast of the doorway, over the edge of the balcony. There, you’ll find a corpse holding the Black Wolf Mask.
We’re done with the Three Sisters, but before you leave, grab the Ash of War: Chilling Mist from the ruins northeast of Seluvis’s tower:
Continue east-northeast and you’ll hit a dirt path — follow it southeast and you’ll soon see a loot beetle in the road who’s rolling around the Frozen Armament sorcery. Careful, as it can lead you into a spot where some skellingtons pop out from the ground. Just a bit further down the road on the right you’ll find the Behind Caria Manor site of grace. Tap it and keep going on the road — you’ll soon enter a graveyard, and you’ll be able to take a right turn on the road. Spirit Summons are available here, and quite a few enemies are either already around or ready to crawl out of the dirt, so feel free to summon your fave.
The road will curve left, and then split again — go right when it splits and you’ll see some Albinaurics hanging around a corpse. You’ll need to fight here, since you can’t pick up the Albinauric Ashes here until the guy standing on top of it moves and we’ve got something else to do after picking up the ashes. Once the albinaurics are all dead, look northeast of where the ashes were and you’ll see a spirit in a chair.
Walk into it and it will disappear, leaving behind the Juvenile Scholar Cap and Robe, and a Larval Tear to boot. Look northeast and you’ll see a long rock that slants upwards away from you — ride up it and find Thawfrost Boluses at its tip. Look east to see the wolfpack — we’ll head there shortly. Continue off the rock northeast to reach the Royal Grave Evergaol, in which the Onyx Lord is imprisoned.
Once he’s down you’ll receive the Meteorite spell, you can head to the pack of wolves on the road nearby. There is a Golden Rune [3] in the middle of the wolves, but the big wolf doesn’t drop anything, so feel free to just ride through and grab it and then ride away. With this finished, you can teleport to the South Raya Lucaria gate and tackle Liurnia’s main attraction! Use the button below to continue to the Academy of Raya Lucaria.
Where to Go After Liurnia
Ideally, you’ll do the Academy of Raya Lucaria next. If you really don’t care about magical items and aren’t a completionist, you could also continue to either Siofra River, Caelid, or Altus Plateau. However, beating the boss of the Academy of Raya Lucaria allows you to respec your character. Siofra is probably the easiest next step after the boss. Caelidseems to be slightly easier than Altus as far as enemy HP values, but all the Scarlet Rot can make it a pain to get through, so it’s really personal preference where you head next.
Reaching Caelid – Caelid is easily accessed by riding east from Limgrave.
Reaching Altus Plateau – If you have both halves of the Dectus Medallion, you can head to the Dectus Lift in the northeast. However, you’ll miss a lot of useful items by going this way. Instead, consider heading to the Ravine-Veiled Village.
Unabashed FromSoftware fanboy still learning to take his time with games (and everything else, really). The time he doesn't spend on games is spent on music, books, or occasionally going outside.
It’s always nice to know these guides are a useful resource, so thanks for your comment Jdub! I’m planning to update this guide daily until it’s finished, so feel free to check back in every time you re-enter the Lands Between 🙂
Thanks Myrx! Comments like this make all the hard work worth it.
jarery
3 years ago
First time I’ve used your site, and im glad I found it. Just the right amount of description without all the BS fluff. Short, concise, and a tinge of sarcasm and humour, what more could one ask. Great job and my new “first place to check” for walkthroughs.
Thanks for the kind words jarery, glad you like our style.
McEverspell
3 years ago
Praise the sage!
and then
Behold, something incredible!
*reverential bow*
Thank you and your comrades for this amazing guide! It is very thorough, clear throughout, and EXTREMELY helpful!!! 10/10, I’ll be telling my friends about the amazing work here
Thanks Howard, always great to hear these guides are appreciated. We’ve been busy with getting our database updated so I haven’t had as much time to work on this guide, but rest assured we plan on doing walkthroughs for the entire game eventually!
Simeon
3 years ago
This is hands down the best, most detailed and easy to follow guide out there. Looking forward to the rest!
Thanks ziavrep — it might be taking us a while to get all the walkthroughs done, but it’s because we’re being thorough!
Mordenthral
3 years ago
If you ride west around the outside of Caria Manor (the side away from the pond with Hoarfrost Stomp), there’s a graveyard with tasty golden runes near the cliff edge.
A plethora is just a fancy word for “a lot of” something — usually used to mean an excessive amount. “There are a plethora of sorcerers in the Academy of Raya Lucaria”.
Sarah
2 years ago
I’m new to Elden Ring and have never played a FromSoftware game before and just wanted to say that your guides are the absolute best!! Can’t thank you enough. Not sure if you’re still updating this guide but wanted to mention a few things for Liurnia East. 1) When you head down the stairs from the Grand Lift of Dectus, before heading left to deal with the Frenzy-Flaming Tower, go right around to the side of the building. There are some bats and a scarab that drops a Somber Smithing Stone [3]. 2) North east of the Bellum Church, along the cliff edge, there is a body with a rune arc you can pick up. 3) I’m thinking you might have left this out on purpose, but north west of the Liurnia Highway North site of grace, you can snag the Carian Glitblade Staff and the Glintstone Craftsman Cookbook [3] at the Highway Lookout Tower. Thanks again for all the hard work you’ve put into these excellent guides!
Praise the Ring
3 years ago
Really appreciate this guide. One thing to add, in the purified ruins, you can roll over some wood planks that opens an area to “Shapiro Grape” and two finger heirloom
Sorry we’re holding your progress back! Updates will be daily until the guide is finished (with the possible exception of tomorrow, Monday 3/7). Usually, updates are completed by 8PM PST.
Josh
3 years ago
Good evening, after you defeat the boss in ansiel river south, the dragonskin guy, there’s a chest in the little building with a great ghost glovewort in it 😉
Thanks for being patient, we’ve had a lot of other work to do for this section and I haven’t had a lot of time to update this page these last few days. Today’s update is short (although it does include boss guide) but tomorrow’s should be beefier!
Last edited 3 years ago by DanielD
al north
3 years ago
great guide! One thing to add, on the way to the Artist Shack there is a walking Golden Knight who drops the Dragon Cult Prayerbook
Hey Nac, apologies for the delay in updates! I’ve had to spend a lot of time getting stuff done with our database — I hope to get at least a little bit of Western Liurnia done tomorrow, and I plan on continuing to update as often as possible until it’s finished.
Thanks for the update Dan, and really appreciate all of this.
Sarah
3 years ago
I just stumbled across a random basement in Layskar Ruins, just beyond where the Golden Rune [3] and Ritual pot are, no enemies but a chest with a Wraith Calling Bell, 1 in the pic is where the golden rune is, 2 is the entrance to the basement. There’s also some spooky wraith dude riding a horse ringing a bell, presumably the wraith calling bell 😀
Wow, great find Sarah! Can’t believe I missed such a useful item… I’ll add this to the guide, I’m sure everyone who reads the guide in the future will appreciate your contribution 🙂
Also, I’m glad you caught that Dark Tower reference, it’s one of my favorite book series ever so I couldn’t resist when I had the opportunity haha
Thanks for sharing! I didn’t recommend that path because it can be tough, and once you do Raya Lucaria you can get into the tower without risking death via fall damage, but some people may want to try it anyway.
Onireaper
3 years ago
To spawn the bellberring hunter you just pass time till night, exit the grace, then rest again. He will spawn after that. Save a loading screen.
Thanks Oni, I wasn’t able to get that to work when I tested it, but lots of other people seem to have had the same experience as you so I’ll adjust the guide accordingly.
Jayce
3 years ago
You indicate that competing Irena quest in Weeping Peninsula gets you your first grape “the grape you got on the way after you completed Irina” – at the very beginning of this Liurnia page. But, I don’t have it and I’m reading you have to kill Godrick first to get it. Is this an incorrect piece of info? Great guides, thank you so much for them!
We’ve edited that sentence to make it a bit more clear. You indeed have to kill Godrick to get the grape — it’s in the castle, in one of the rooms you go through after defeating Godrick. Check out this section of the Stormveil walkthrough for the location of the grape.
DemGingerBaws
3 years ago
Great guides these, very well written and I’m finding them most useful.
Right at the end of the Central Lakes guide at the Fire Monk camp there is a dappled flesh if you smash your way into one of the tents.
Love, love, love your guide! It is so thorough and easy to follow.
Just wanted to give a tip for anyone struggling with the Erdtree Avatar. It really does not like FIRE.
Happy hunting!
I’m so glad you mentioned that Brittany! I was seriously riding in a car the other day thinking about Elden Ring (don’t we all?) and realized we hadn’t noted that in our boss guide. Also, thanks so much for your kind words re: the guide  🙠
Ryan Aylesworth
2 years ago
Amazing guide, best on the web… Just gonna put something out to help you make it more complete. In the central tab almost to the bottom, you say to teleport back to the academy gate town site if grace, but you never said where that grace was when getting the map fragment.
Great point Ryan, we wouldn’t want anyone to miss out on that grace! I’ll update the guide accordingly.
knigget
3 years ago
A note: after getting treespear from the cart with the giant, on the road leading north there is a corpse, to the right of this corpse next to the trees there is a golden rune.
Thanks for confirming this… I got ripped off! I spoke with Spannah and he also had two balloons there, but I double-checked my footage and only one spawned for me.
Sorcerer/Greatsword lol it’s quite unique actually and I’ve been able to adapt to pretty much any situation thus far. I’m working on liurnia right along with you.
Nice! I’m also doing a hybrid build, the classic strength + faith. Spellcasting definitely feels like it can be combined with melee in a really effective way in this game.
Don’t worry Beton, we won’t go hollow (or whatever the Elden Ring equivalent is) until the walkthrough is complete.
martin
3 years ago
taking a left around the tower , which tower? southeast from church is where those acid throwing plants are. i can’t find the trap area with frenzyflame stone
Hi Martin, sorry that bit isn’t clear enough! I’ll add a screenshot with the map location in just a minute or two here.
Edit — OK, you have a map to work with now 🙂 Also, it sounds like you may have ridden southwest instead of southeast if you ended up near those poisonous plants.
There are a stonework key being guarded by a crab in the Manor. If you jump down off the roof near the ladder that leads to the merchant and follow it down a few ramparts to the south east you will find it 🙂
Thank you for the kind words — the first part of our Raya Lucaria walkthrough is up now! I’m hoping to have it done by the end of the week if nothing goes wrong.
Cipher508
3 years ago
You are incorrect about the nightrider glaive and giant ash dropping from the giant by the frenzy tower. It drops from night calvary in North Liurnia.
Hi Gabe! We haven’t gotten to that bit yet; I still haven’t decided if it’s going to be included in this guide or in a separate section, since
Spoiler’s for Ranni’s questline/mid-game
you can only get there after killing Radahn and entering the area opened up in Limgrave afterwards.
Nick
3 years ago
By the smithing stone being guarded by the giant crab near the academy there is a loot beatle that drops an ash of war clinging to the underside of the bridge
Whoops, forgot to put that in the directions, thank you!
Onireaper
3 years ago
Idk if anyone has mentioned this yet. There is a stonesward key behind the Ainsel river lift. Past the pond behind a rock wall on the far back right corner. Guy sitting in a chair by the cliff.
I appreciate all you do there. Makes it easy to get full completion on my ??? Play through lol lost count.
OniTheOG
3 years ago
I posted this on the walkthrough sub link but I don’t think it was seen lol.
in the carian study hall when it’s in the upright position, there is an archway above the elevator when facing it. Start the elevator and jump to it then get a running start and jump into the water. You will die but you will be rewarded with the lucidity sorcery. Alleviates sleep and madness.
Thanks Oni! Sorry we missed your previous comment, sometimes they just slip through the cracks (as in, I don’t see it or I forget it).
As for the Lucidity sorcery, that’s very interesting, thanks for sharing… usually, you get Lucidity by killing the version of Miriam the Preceptor that’s in the inverted version of the study hall, and you’d think she wouldn’t spawn at all in the regular version. I’ll have to see if I can replicate what you did, and if I can, I’ll put it in the guide!
OniTheOG
3 years ago
By the way, I haven’t mentioned this yet, but yours are by far the best guides out there lol. I feel privileged to have been able to contribute in my own small way. It’s always discordant when I hafto go somewhere else for a guide on something. Look forward to future content!!
 🙠Thank you! We always appreciate when people add tips and secrets, and discovering everything in FromSoft games has always been a community effort. We’re entering the home stretch here, so hopefully we’ll have the complete walkthrough done in not too much longer! Mountaintops and Gelmir shouldn’t take nearly as long as Caelid and Altus did.
Briars of sin sorcery should be added as loot from the sorcerer outside the camp where the flame cleanse me incantation is obtained.
Also I do enjoy these guides they are helpful and as you progress through them you can tell feedback and other things were applied and they get better. A couple comments though. Sometimes directions get a bit overkill. For instance in this segment when teleporting back to a site a grace a comment is made about a path the to right and then two more sentences are spent explaining that path and then how we aren’t going to take it at all and instead go this direction. If it’s not like a hard to see ladder or some route in planning for an escape shortly after taking the other route, cleaning up some of these pieces in the guides and maybe cutting and pasting them instead when they are used will make it flow better. I found it difficult to live read and play with this guide all the way through my first play through. Anyone finding difficulties with these guides they do get a lot cleaner. Also your jokes when placed are funny.
I appreciate the other feedback as well — it’s a discussion we’ve had internally, as the feedback we get is mixed on this topic. Ultimately, we’ve decided that more description is better than less; while you’re clearly someone who doesn’t need super detailed directions, there are plenty of players who do, and our goal is to make sure that even people who need step-by-step instructions can use our guides — there are already plenty of bullet-point style area guides out there for people who don’t need that kind of support.
Also, I couldn’t find the section you were talking about (with the teleporting back to a site of grace)! The closest thing was a description of a path not to take, but it was only part of one sentence.
lesskarr
2 years ago
hellos so im kinda having a little bit of trouble with this particular section this maybe an obvious thing where my brain is just not comprehending it properly if so i apologize in advance xD the section in question is this one
From the dirt beach, look east, where you’ll see another bit of tower ruins. Ride through them and grab the Soporific Grease (do it quickly before the giant crab clacks you), then head south around the island. You’ll be heading towards the academy on the hill, and soon you’ll see another one of those stone gazebos. Its another one guarded by big ole lobsters, so be quick about snatching the Smithing Stone [2] inside. Ride east to escape lobster spittle, and head to the site of grace under the bridge:
where it talks about grabbing the isoporfic grease item i got the item killed the crab but i cant figure out/understand where im going next with regards to this sentence
then head south around the island. You’ll be heading towards the academy on the hill, and soon you’ll see another one of those stone gazebos. Its another one guarded by big ole lobsters, so be quick about snatching the Smithing Stone [2] inside.
do i go directly south from where the grease item is using the compass direction south or basically im trying to figure out where to go for the next gazebo with the item in it and from there to the next site of grace can you elaborate on this ?? or name the site of lost grace that you poiinting us to go to in this section either way could use some help figuering this out of possible 🙂
This is the site of grace you’re looking for (sorry for the pic I’m on my phone)
Forkinator
1 year ago
Just wanted to add that there’s no mention of eastern liurnia lake shore site of grace. Also I can’t find anywhere in the liurnia guide that mentions carian study hall.
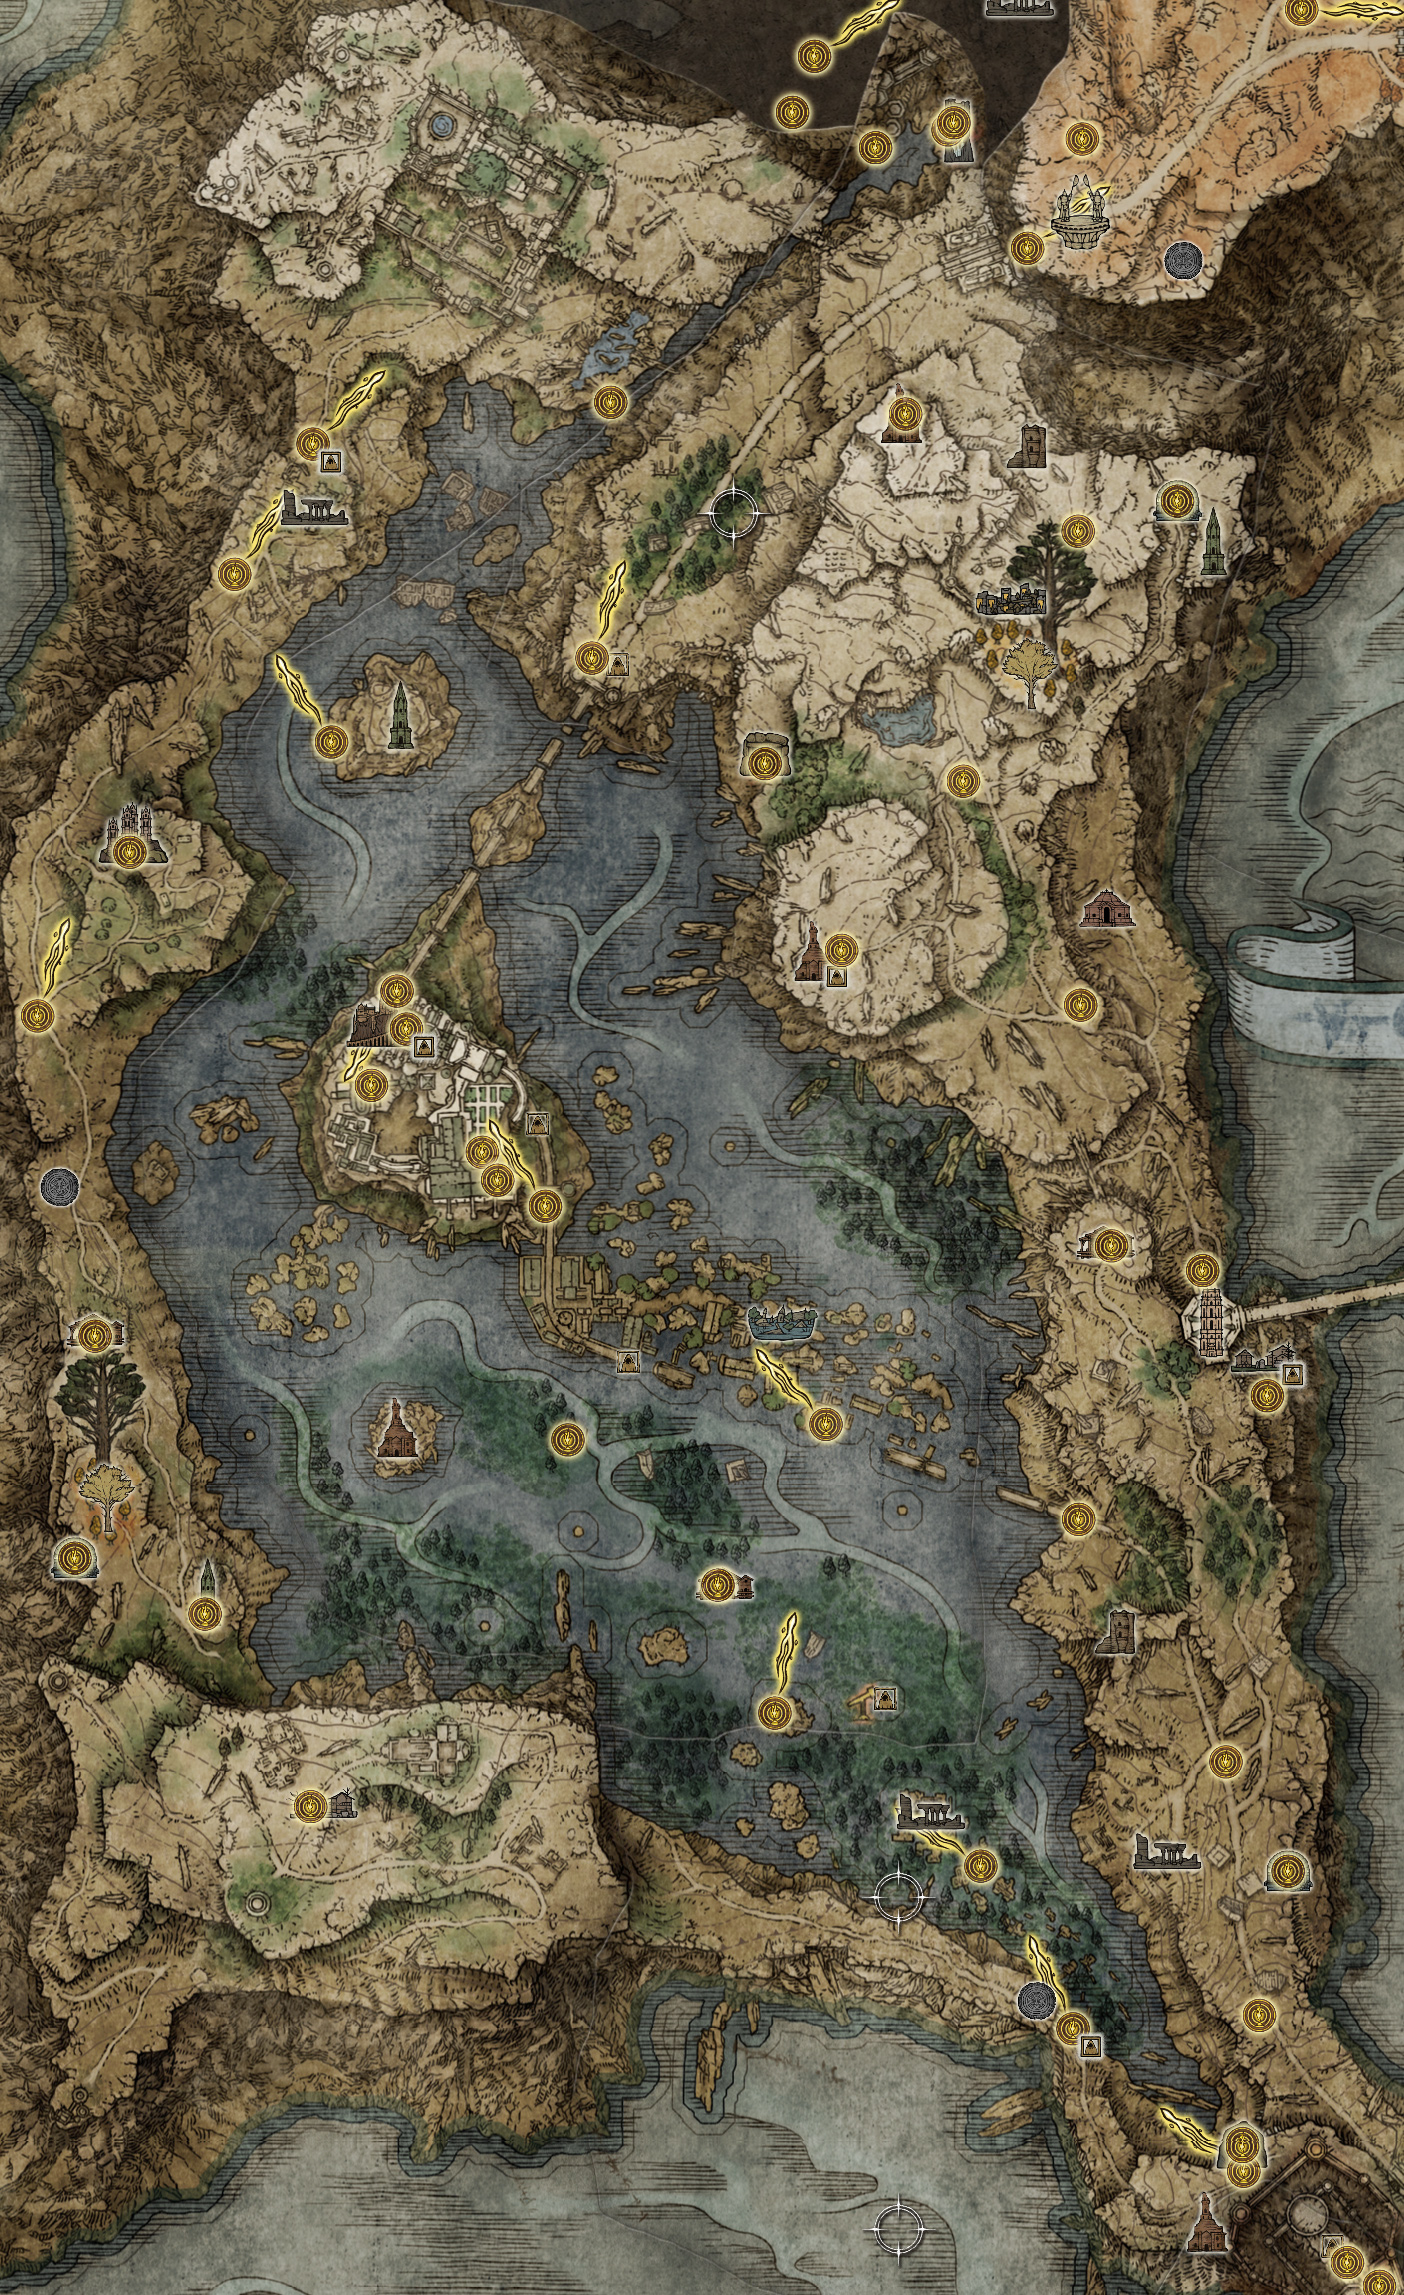


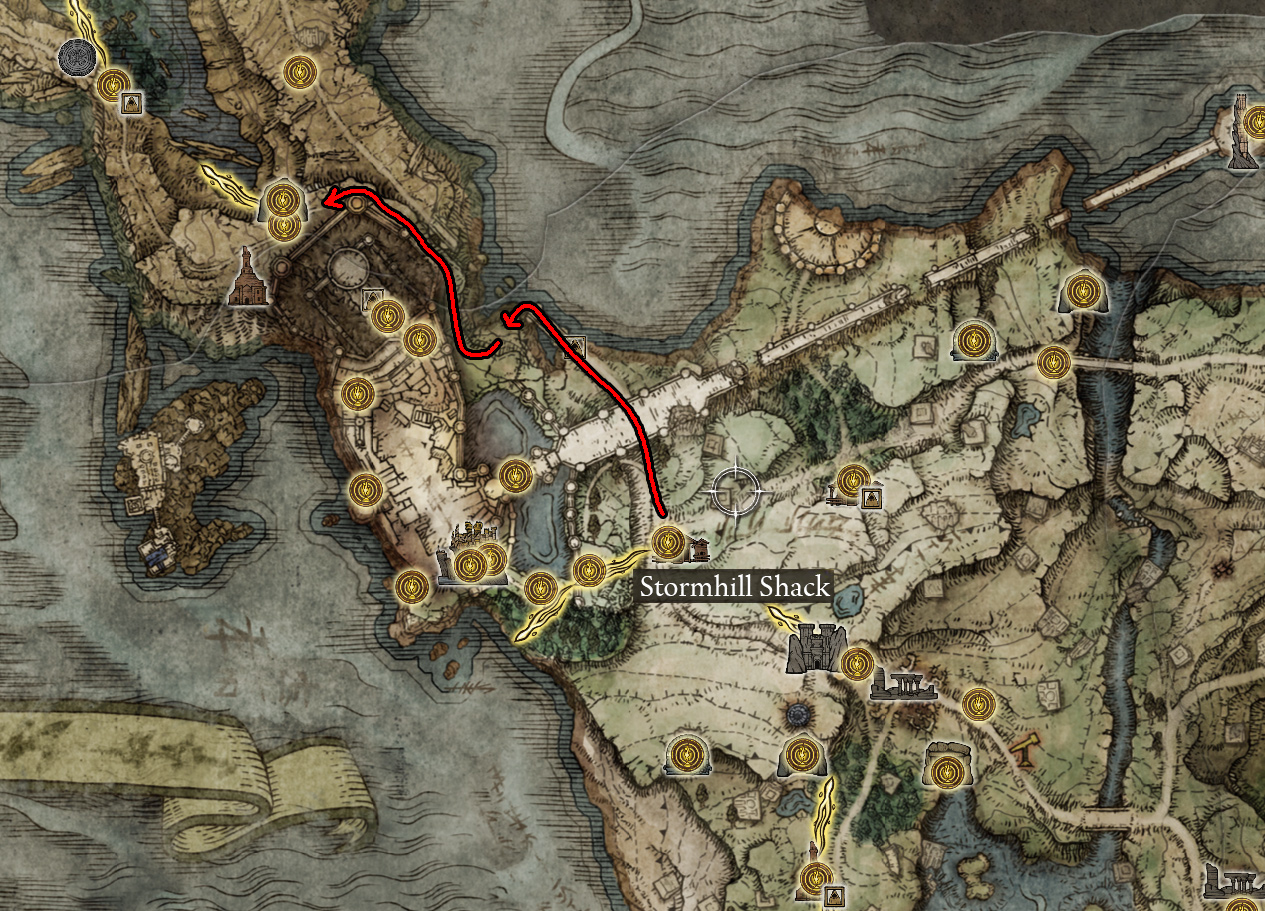
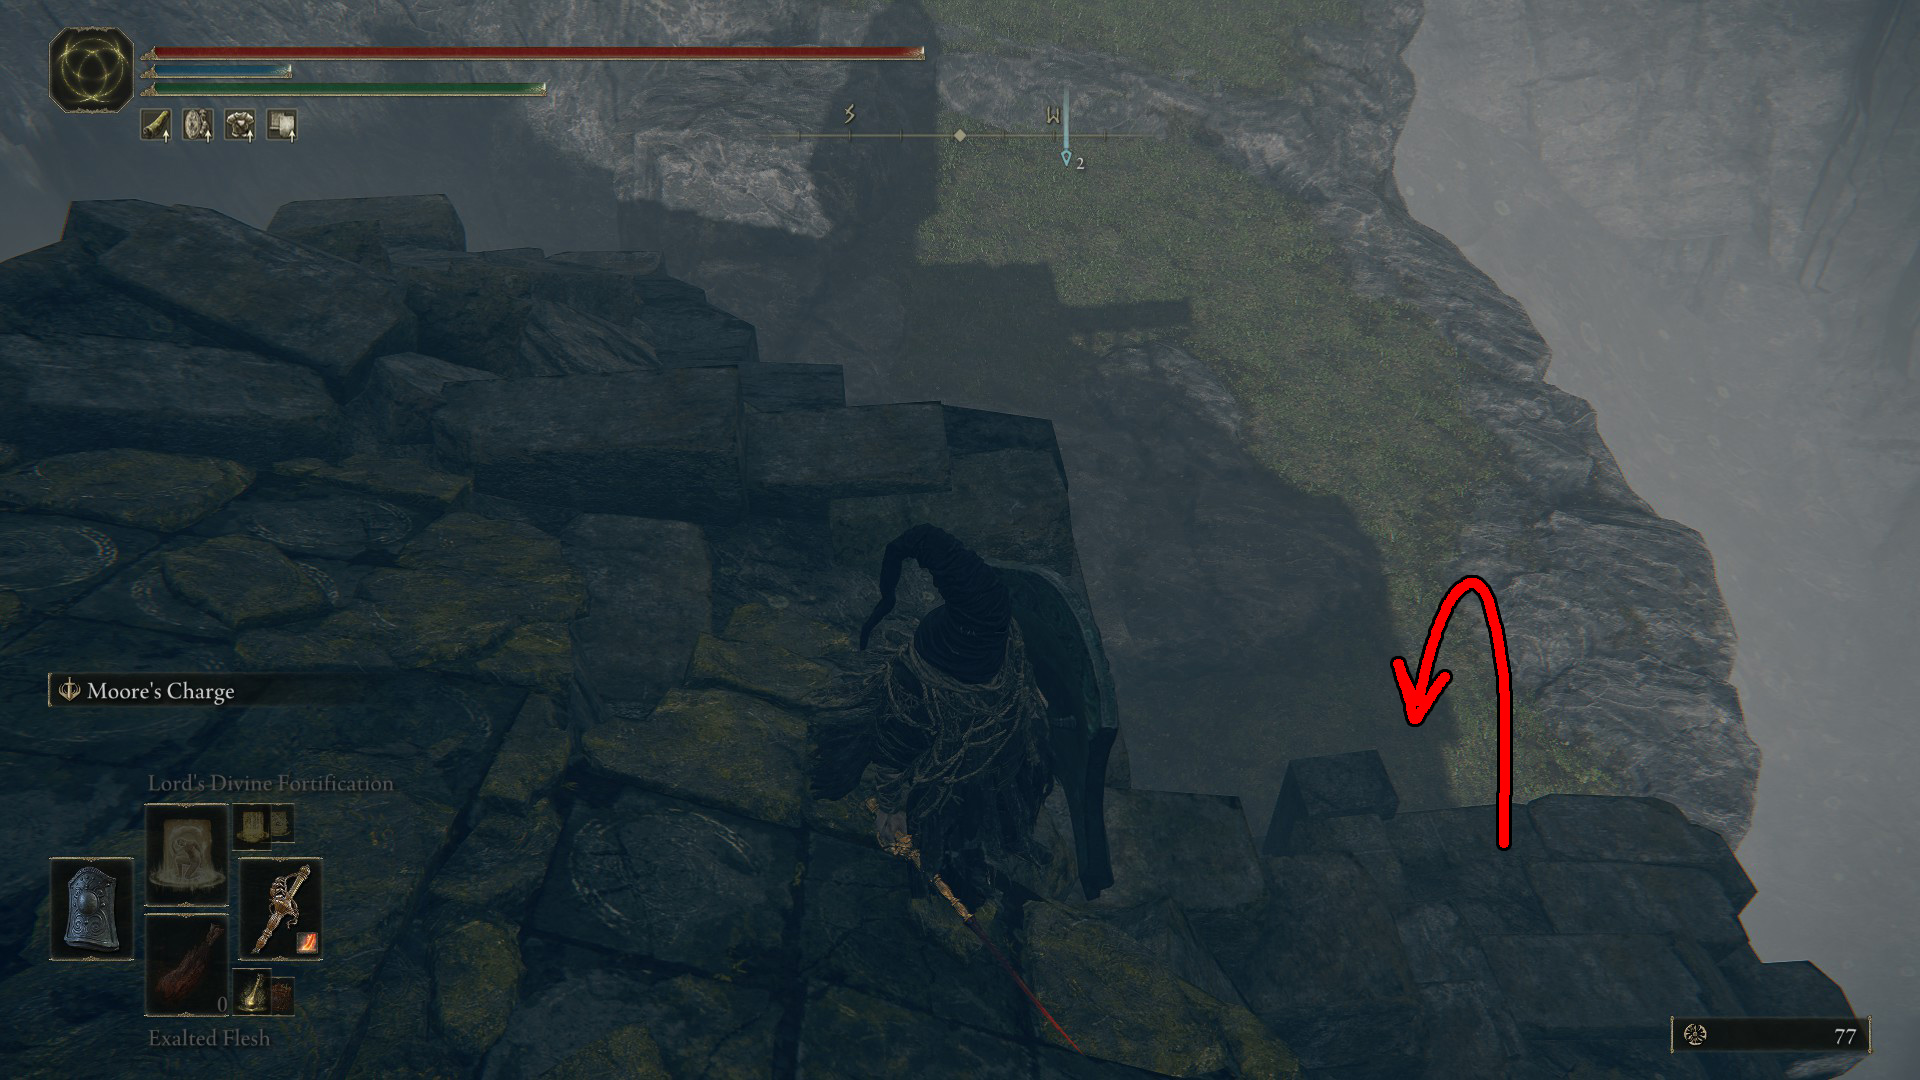

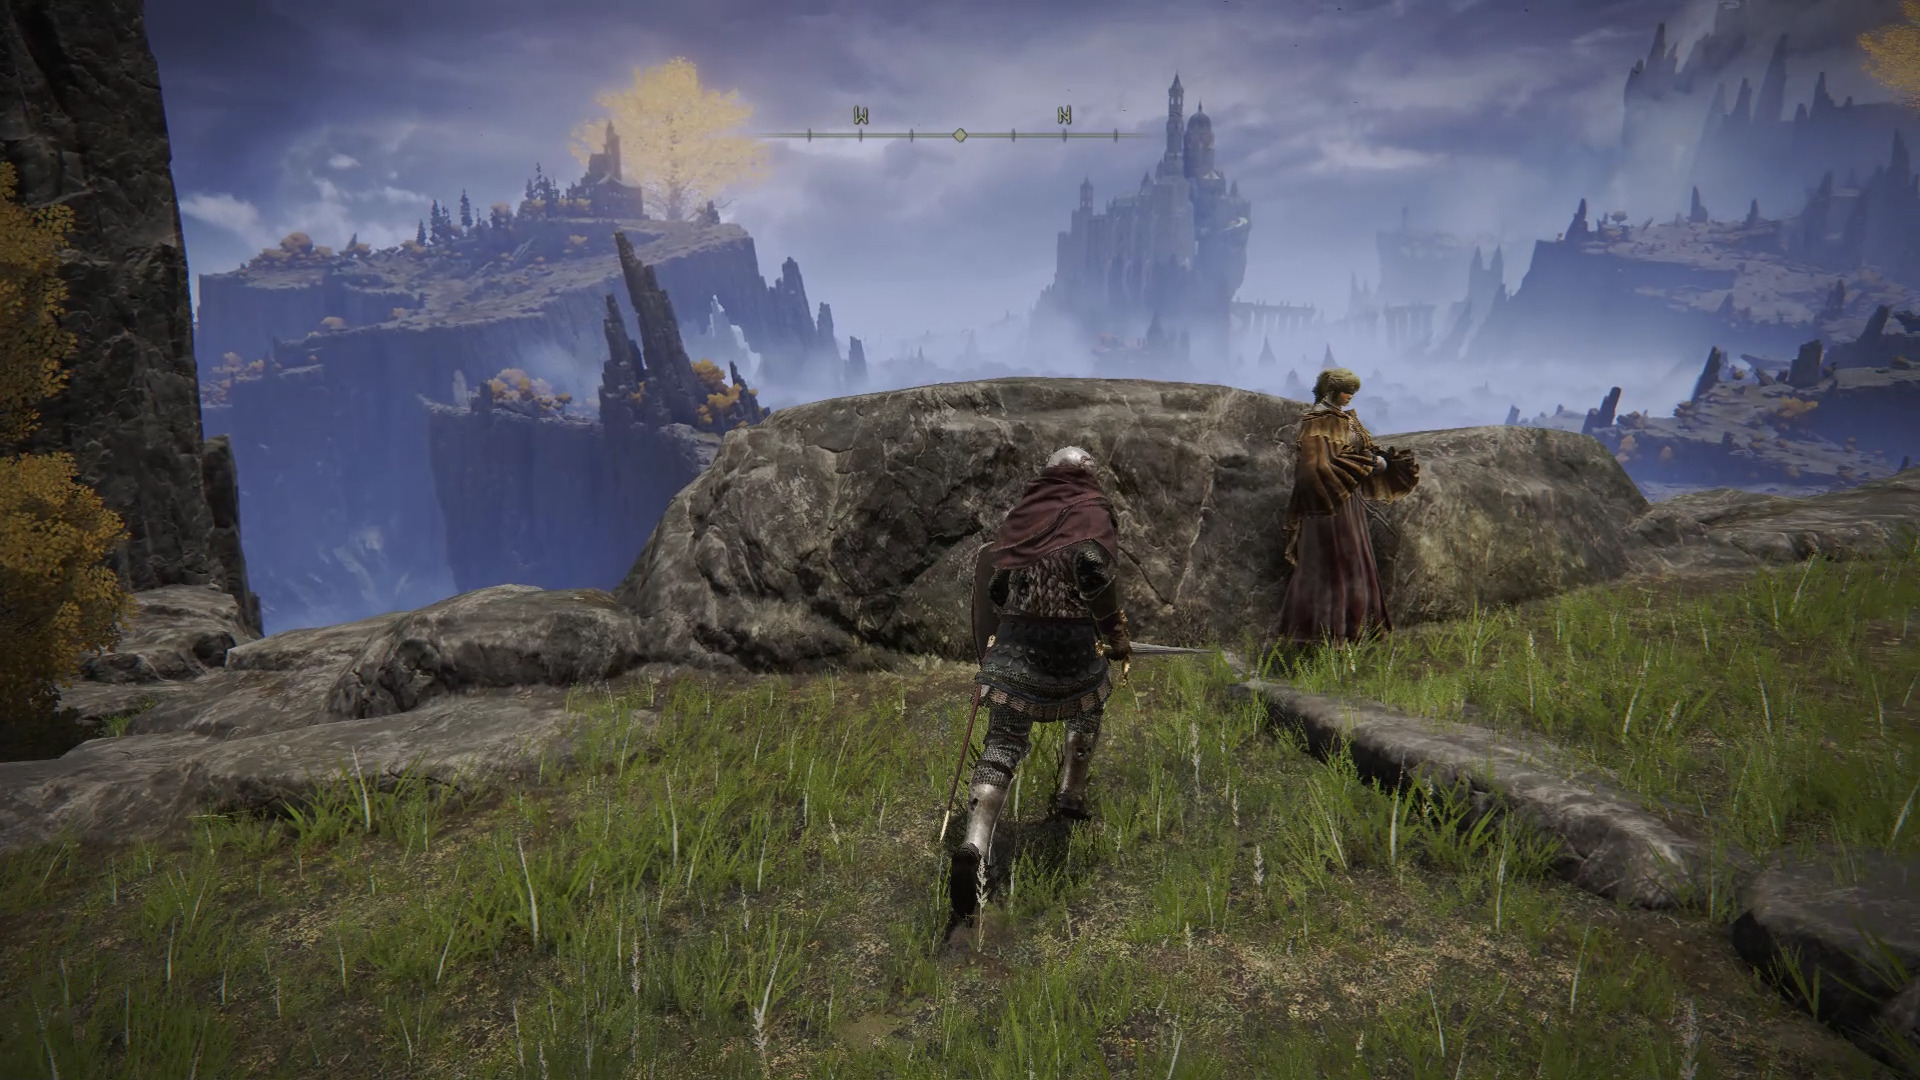
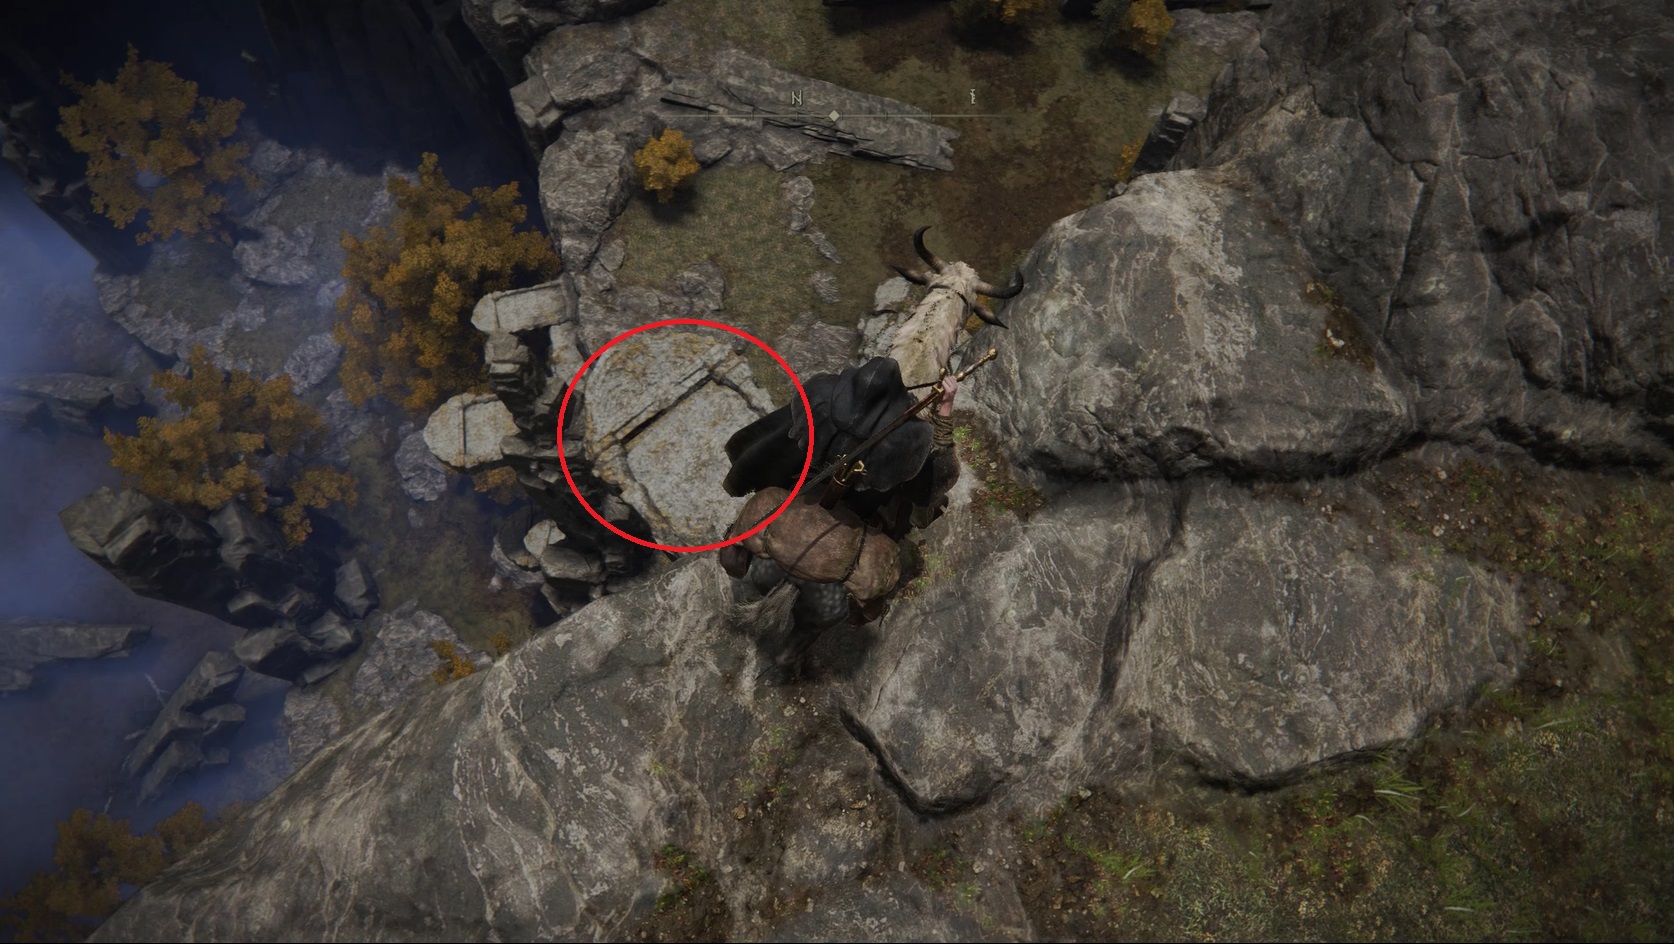

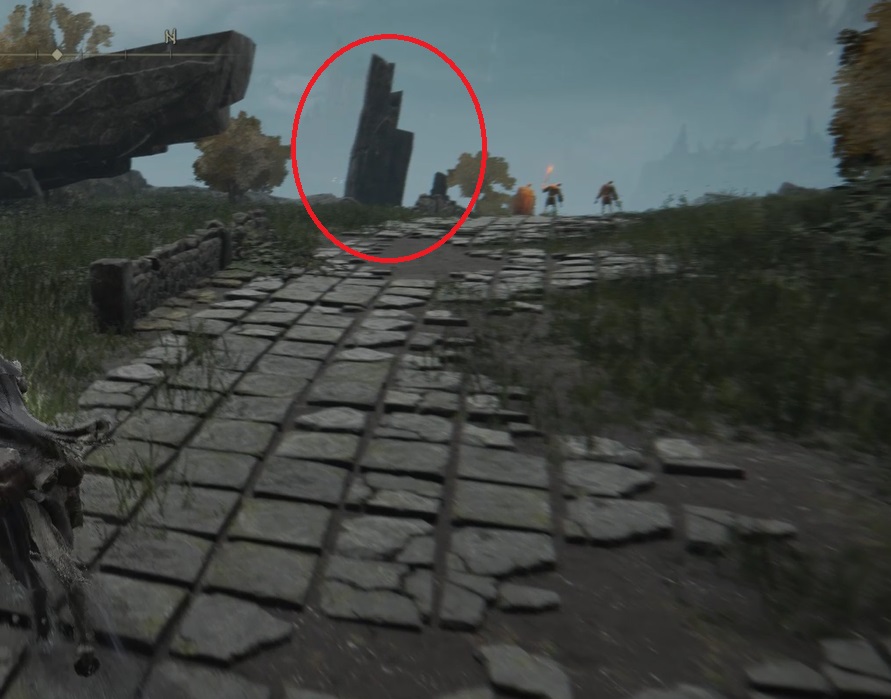

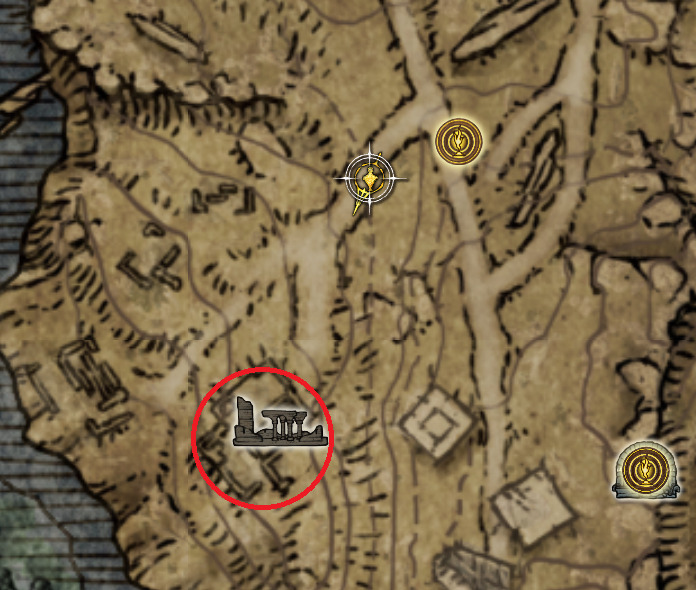
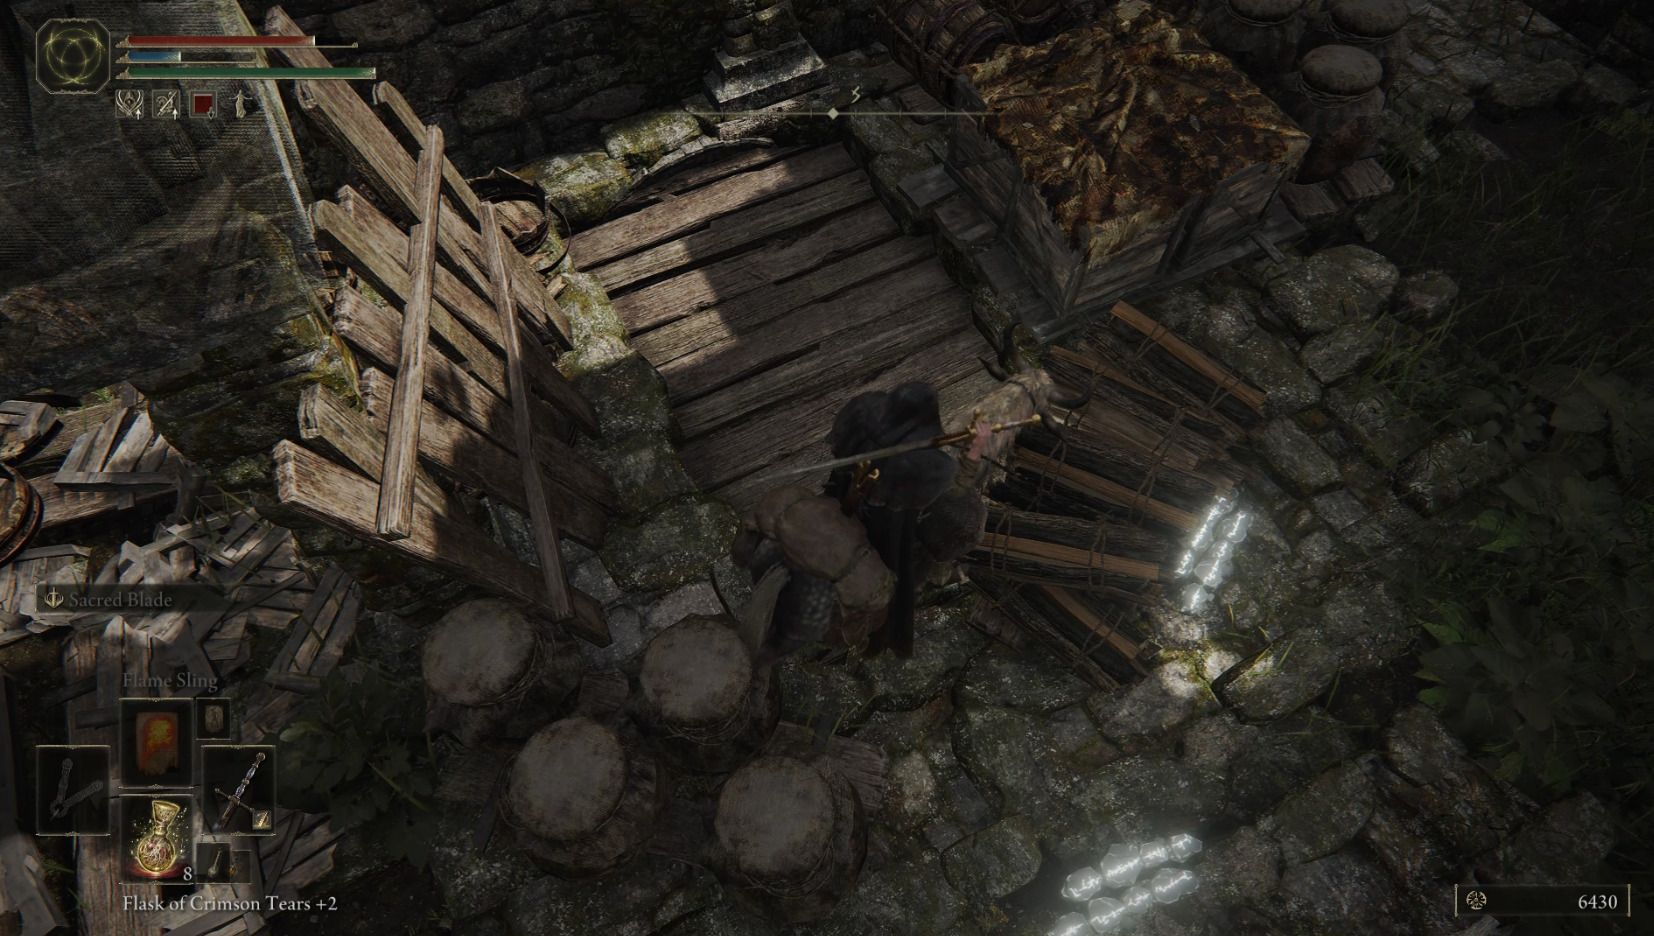
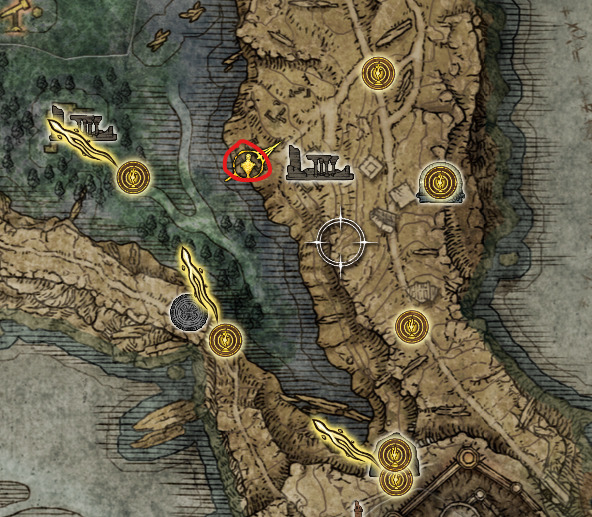
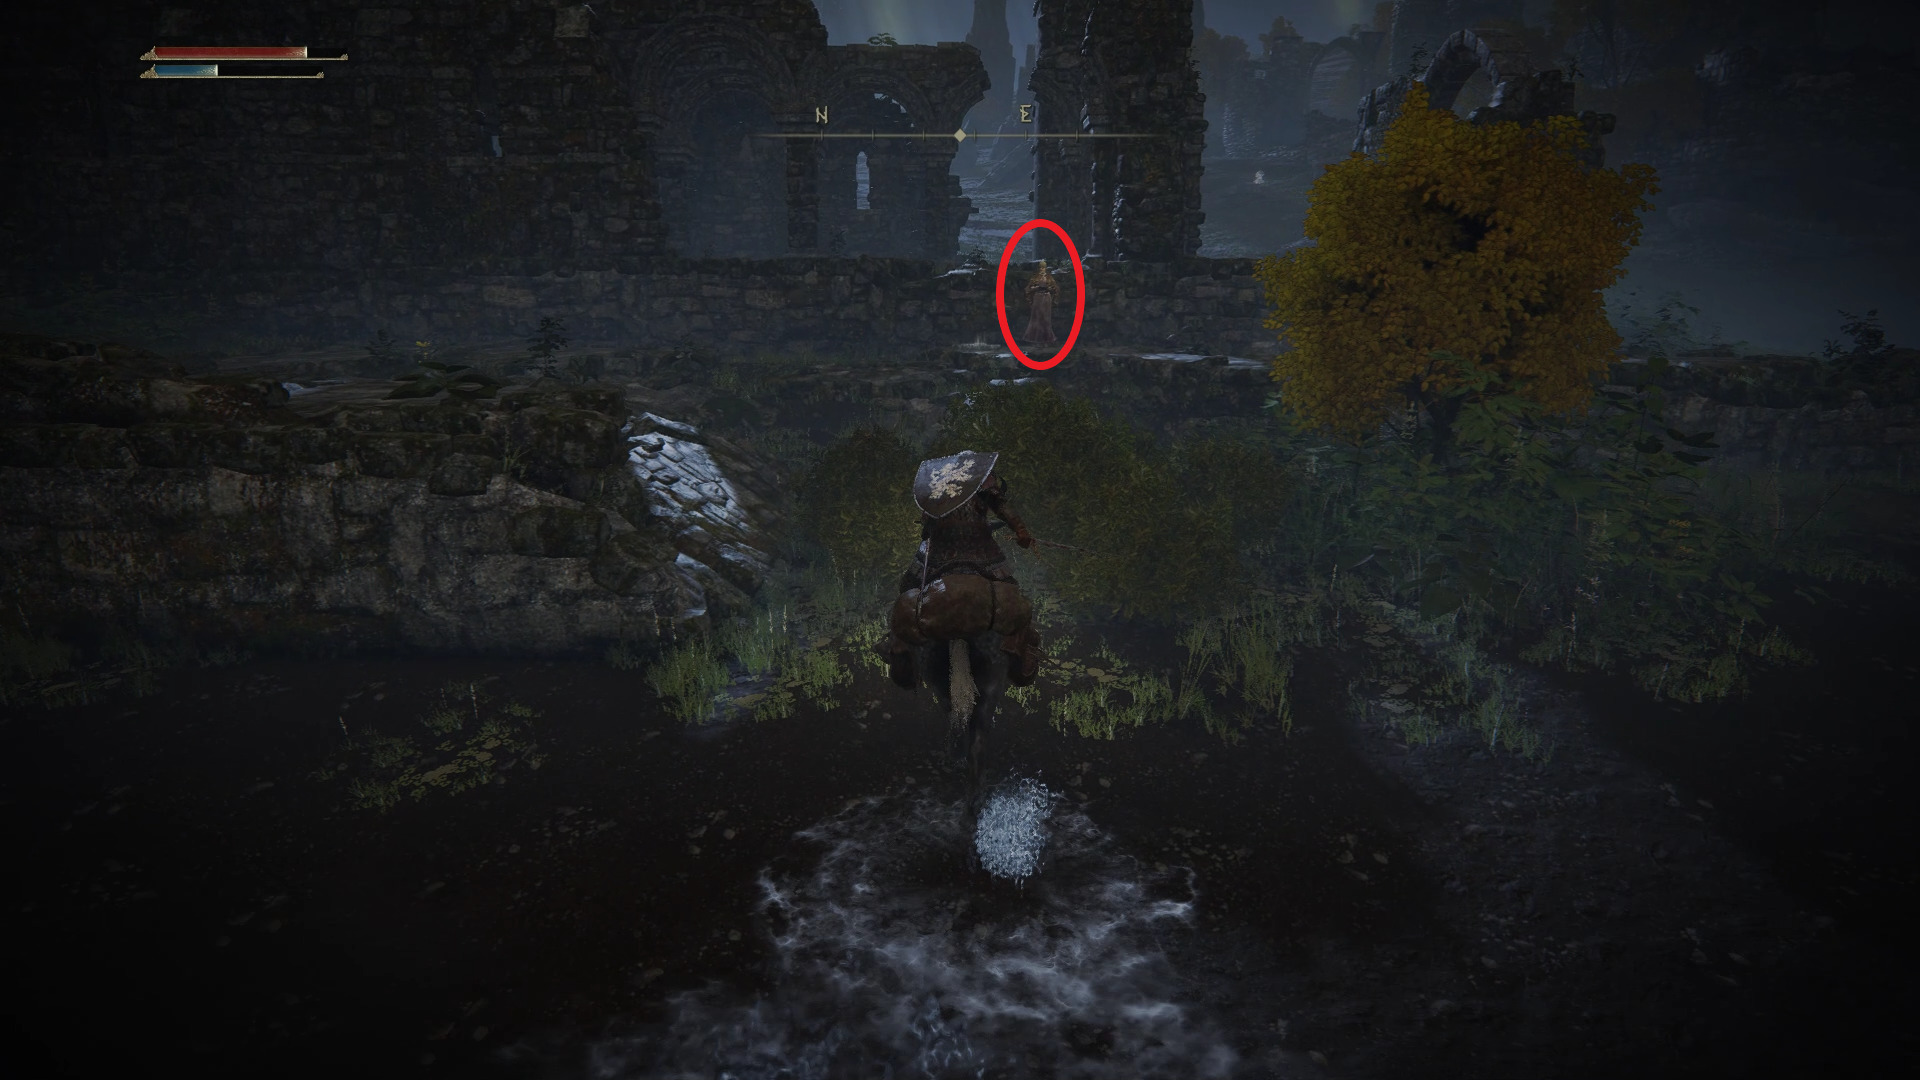
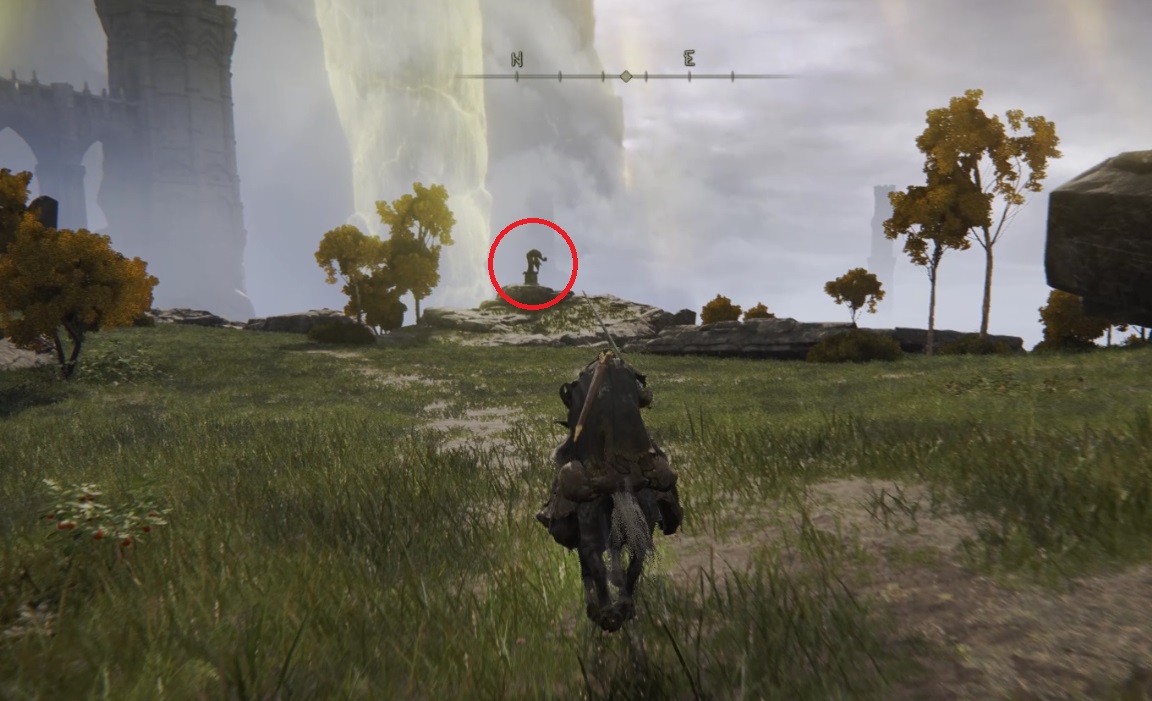

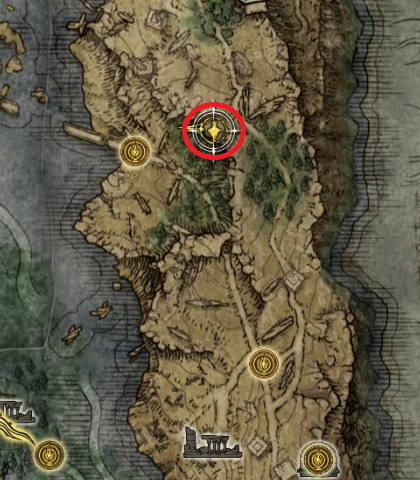
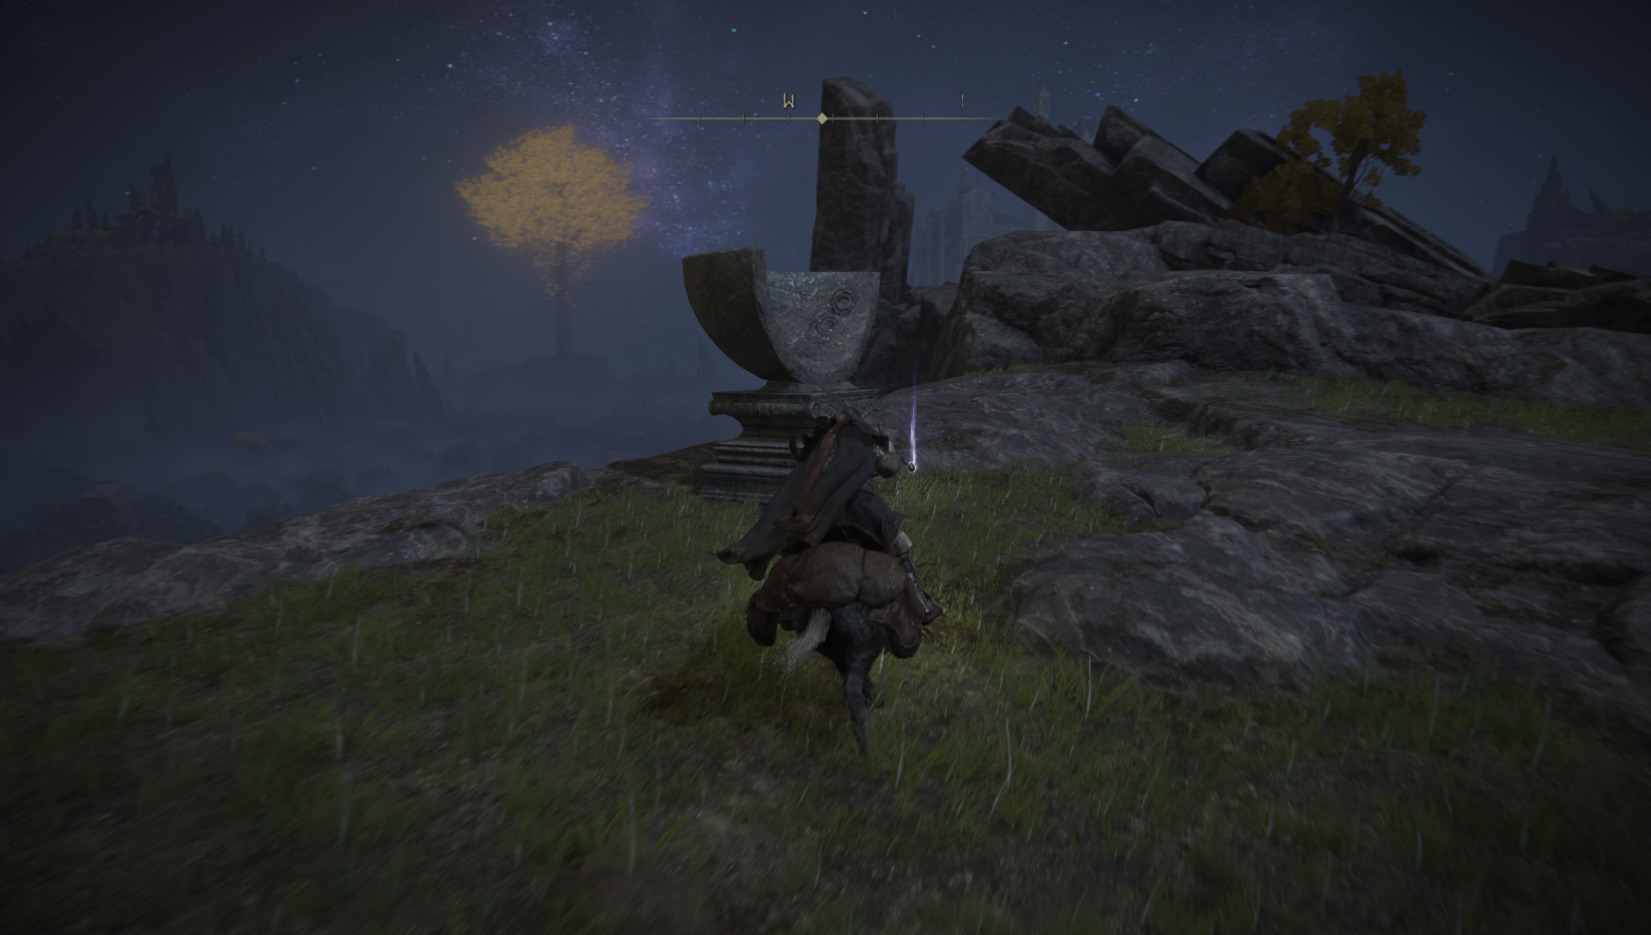

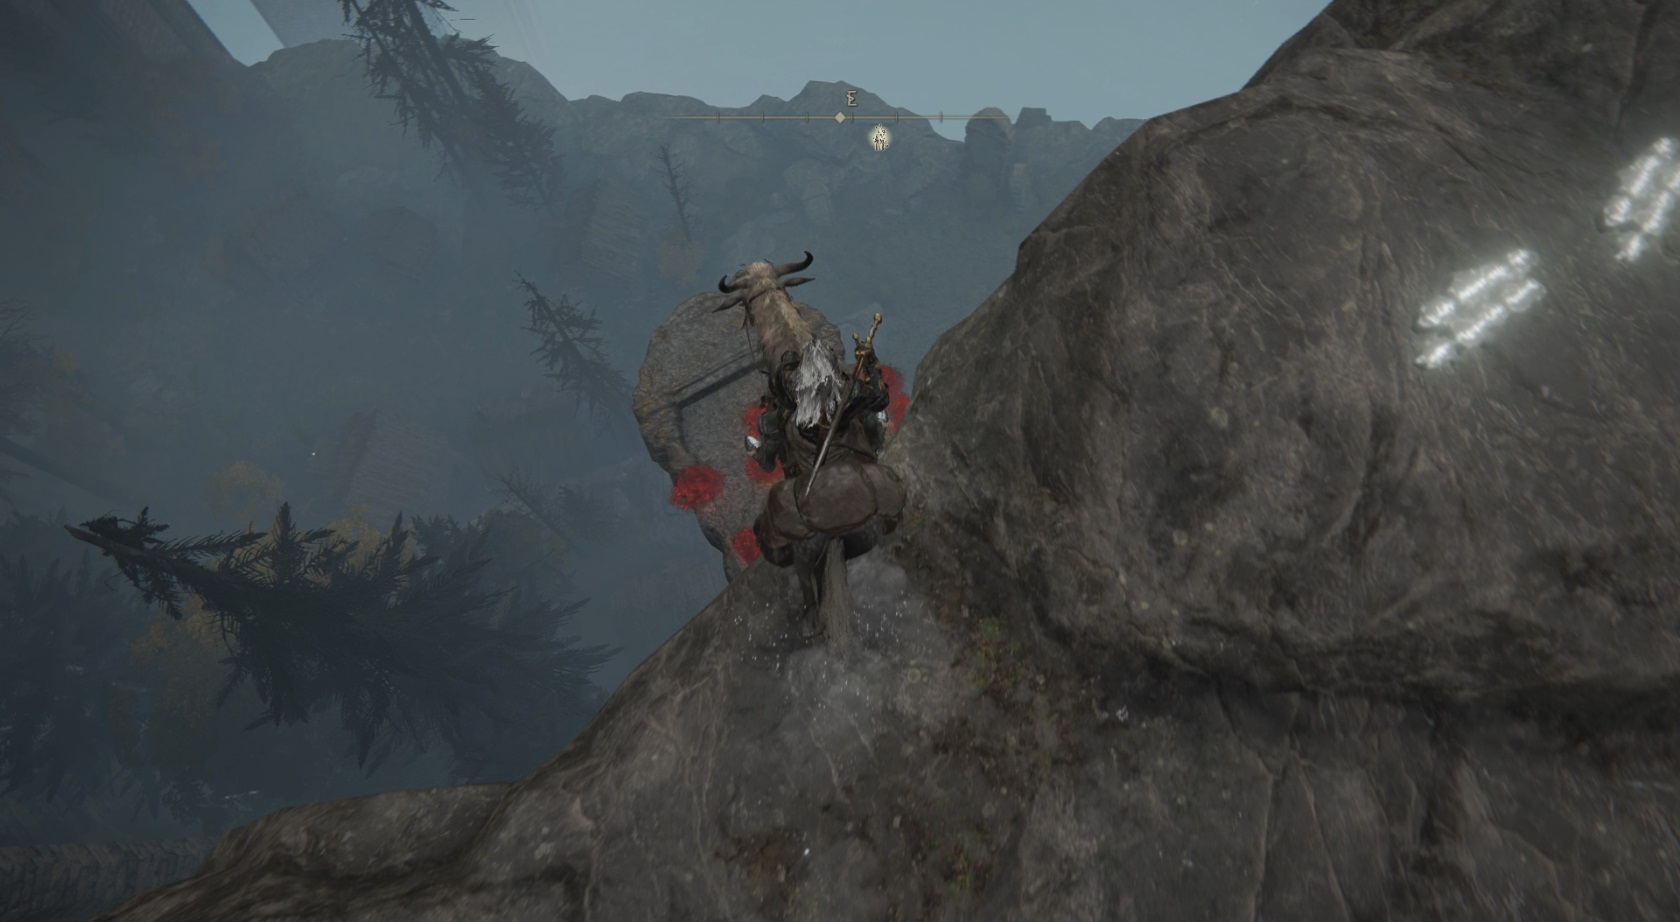

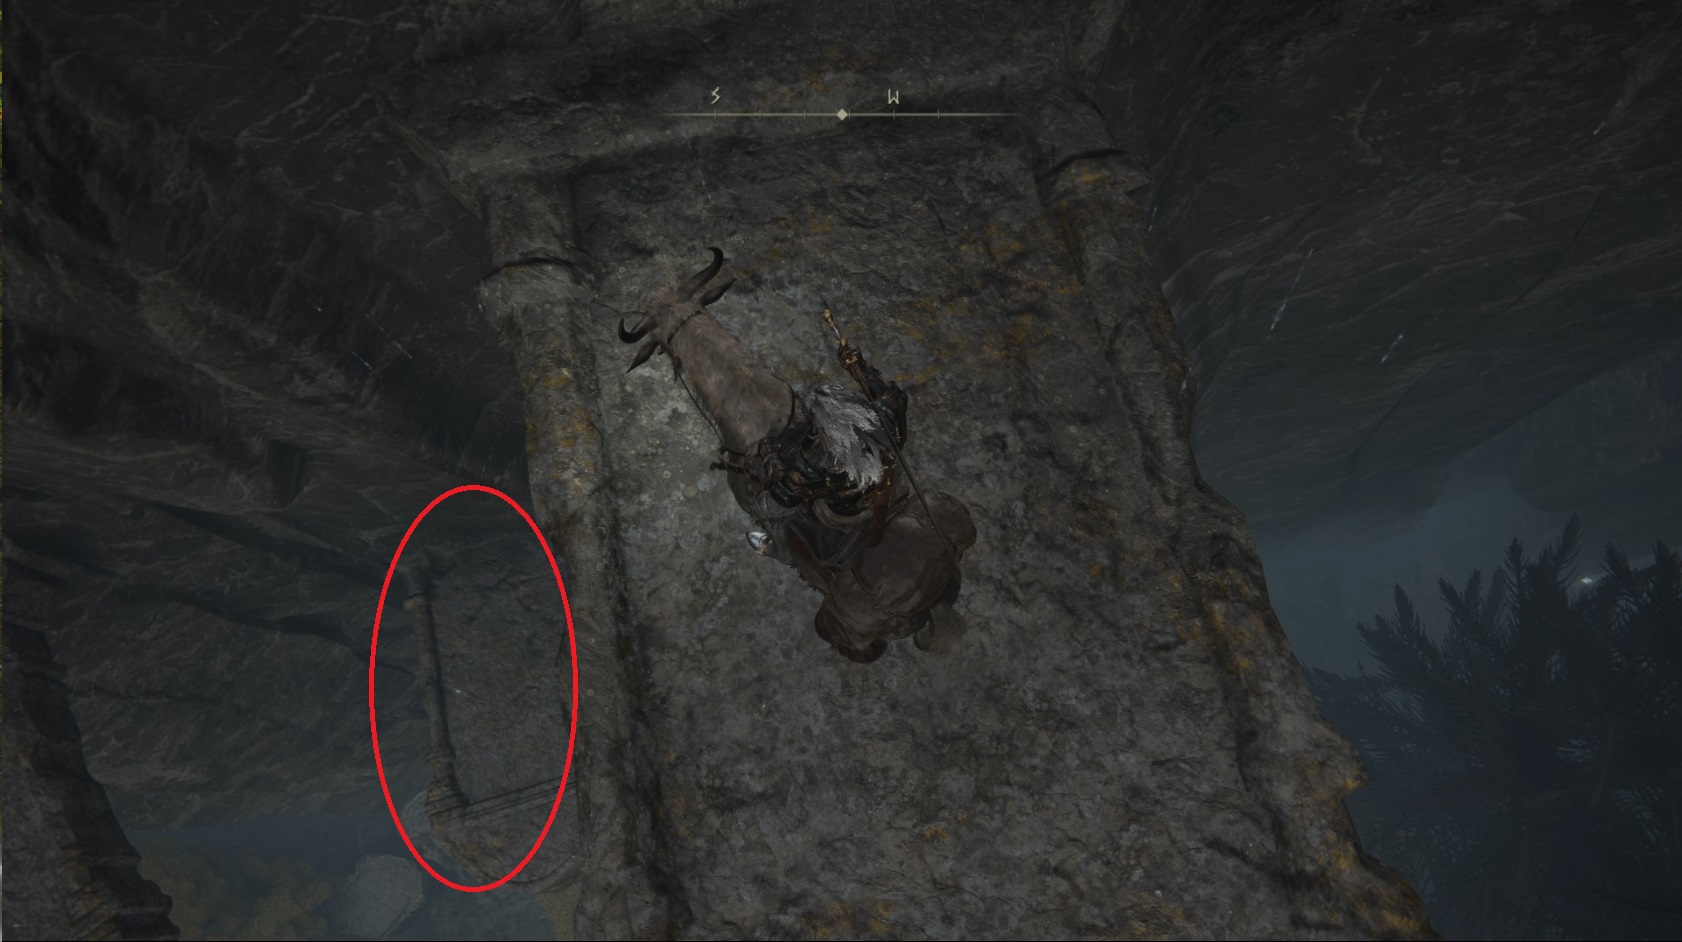
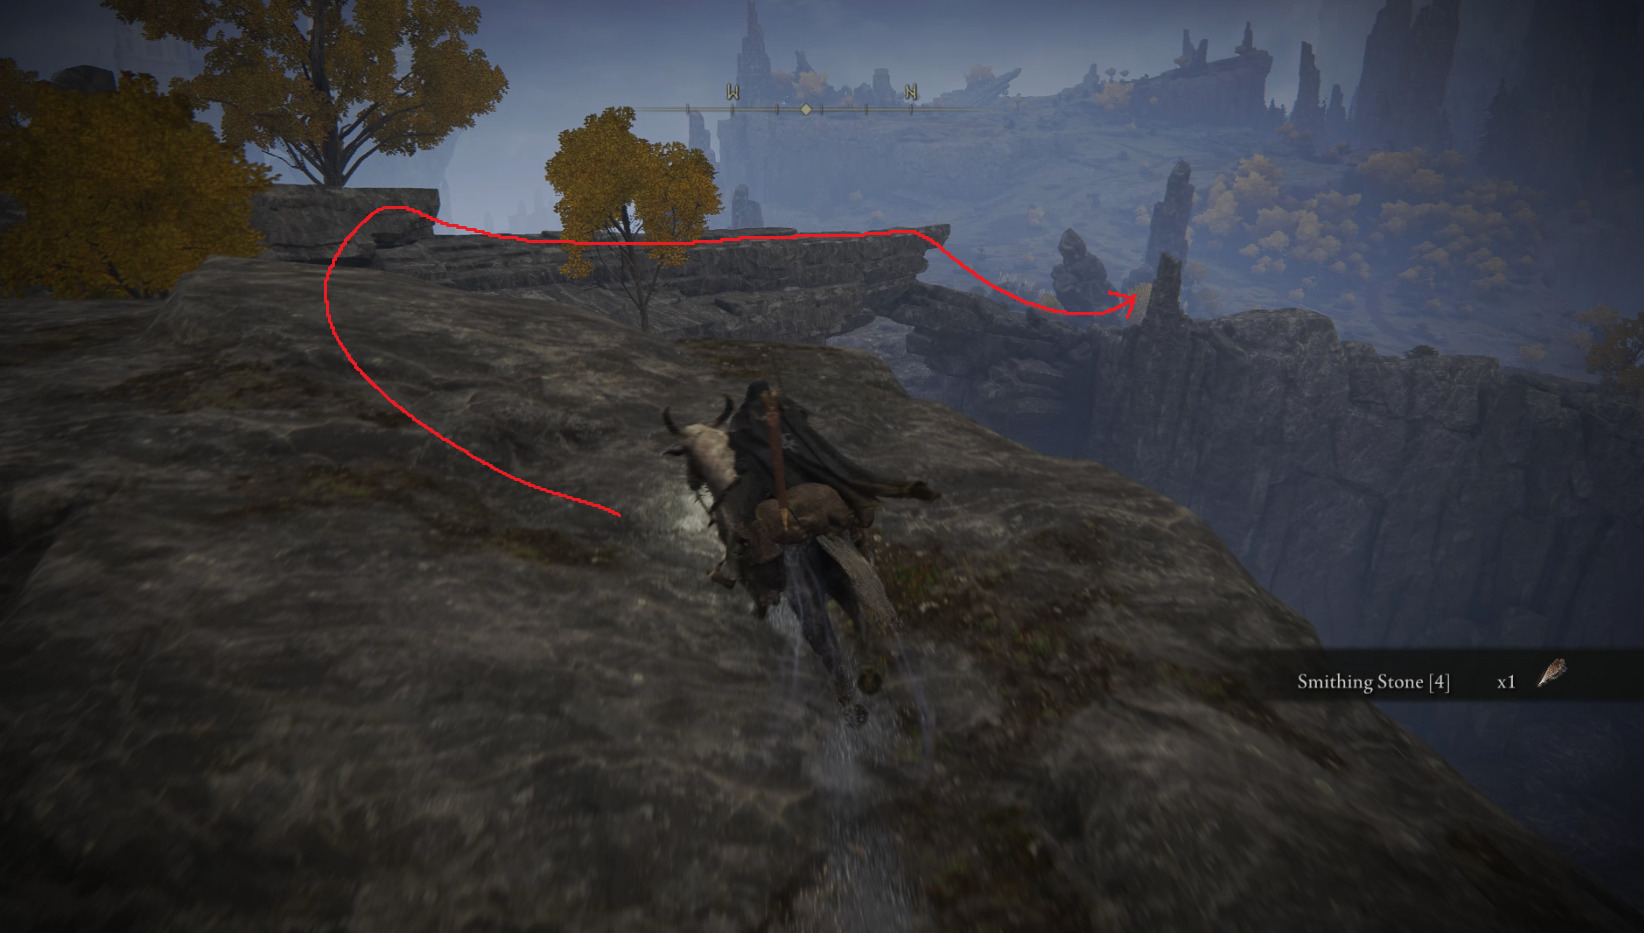
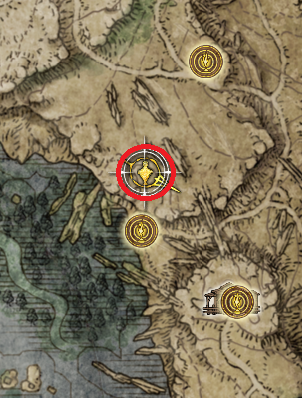
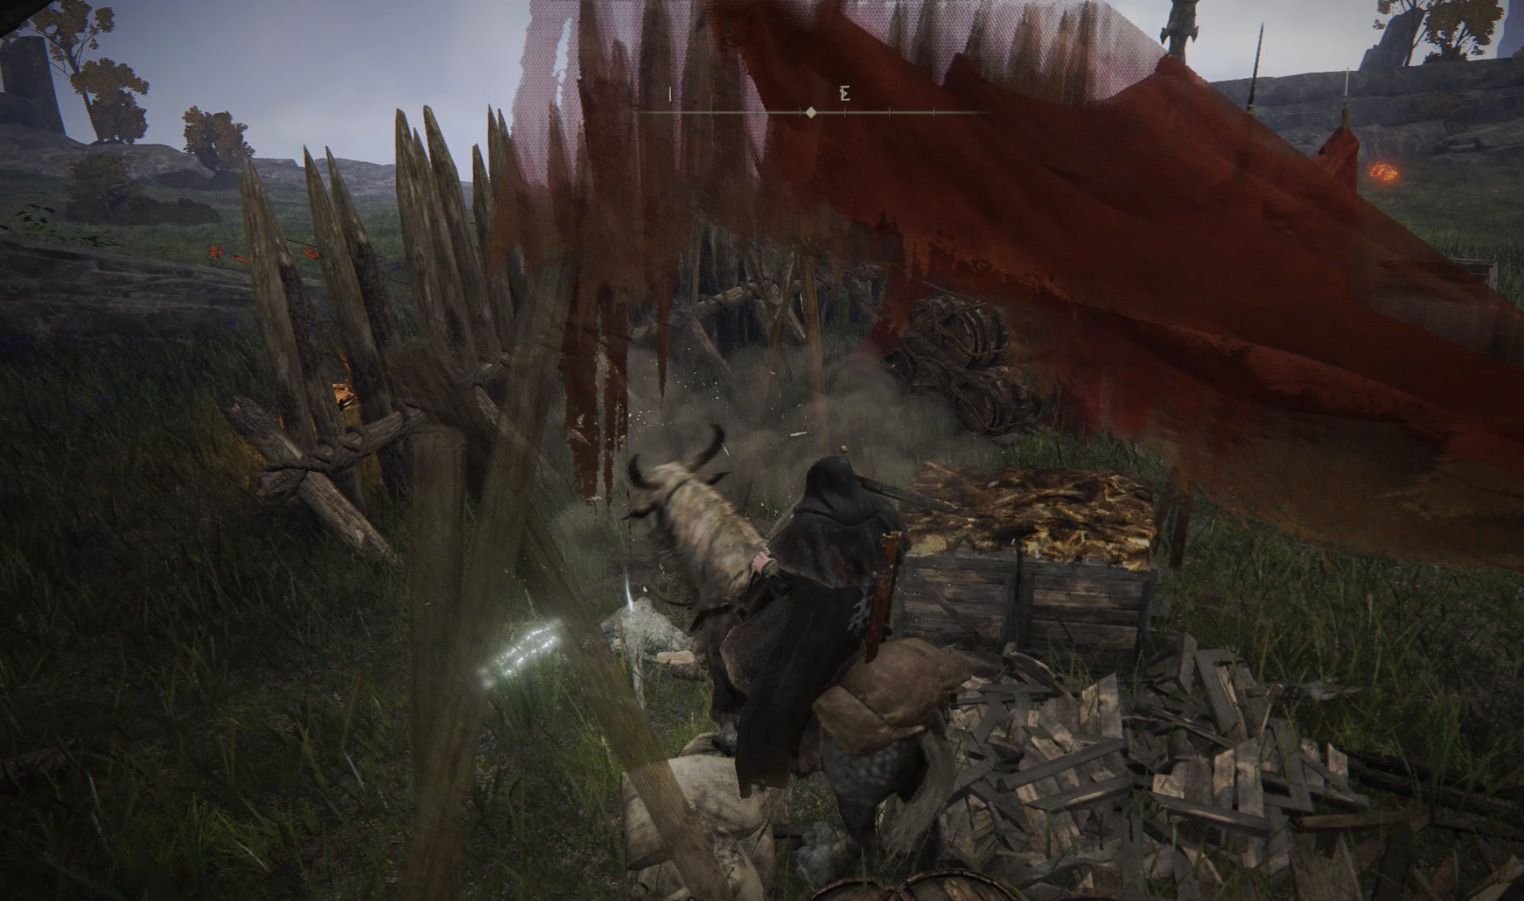
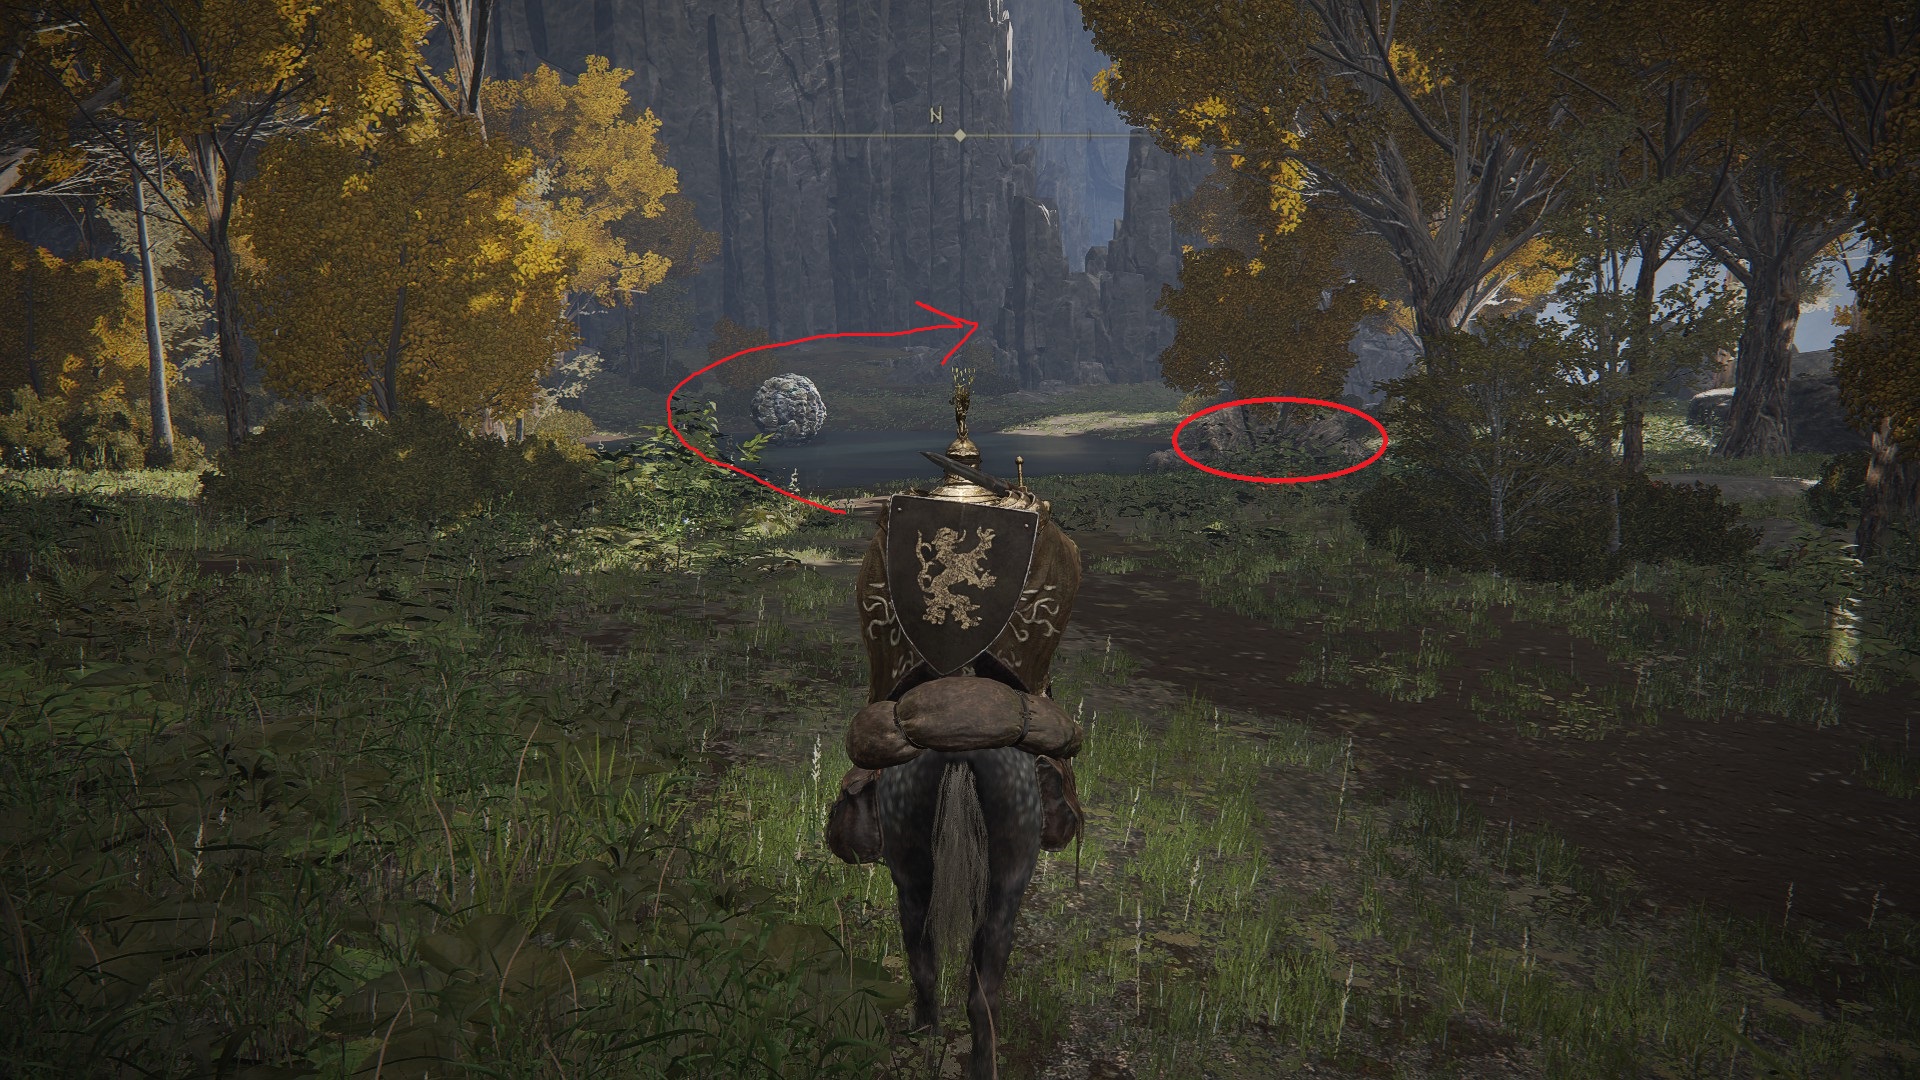
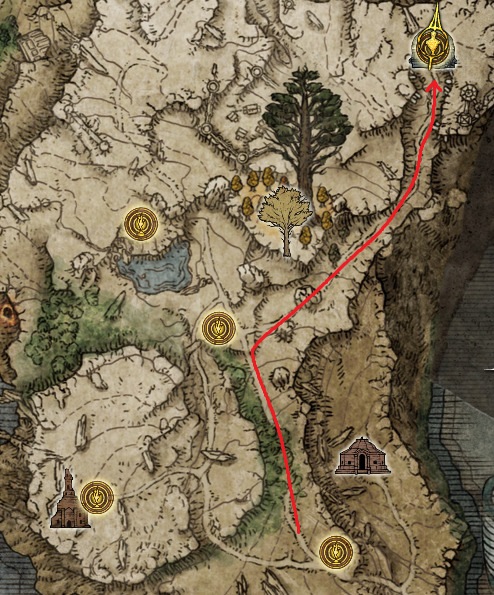
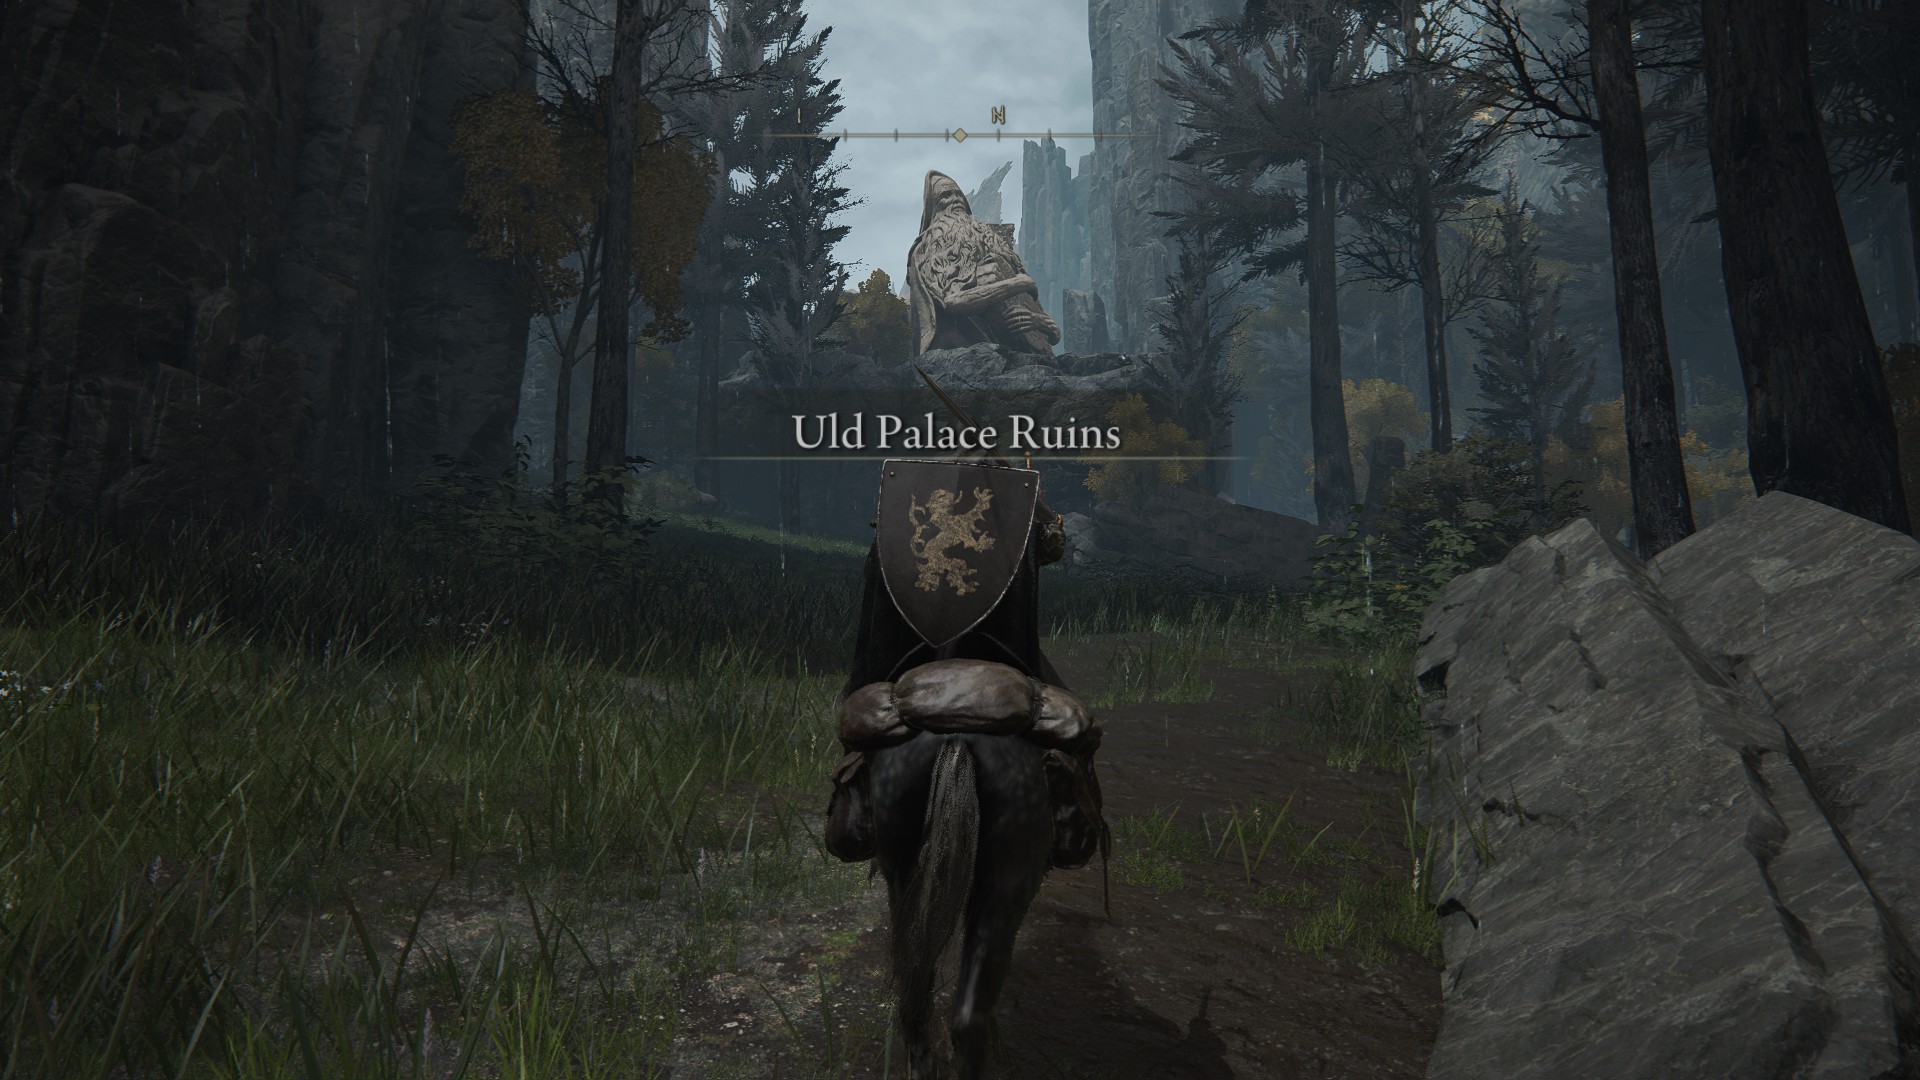
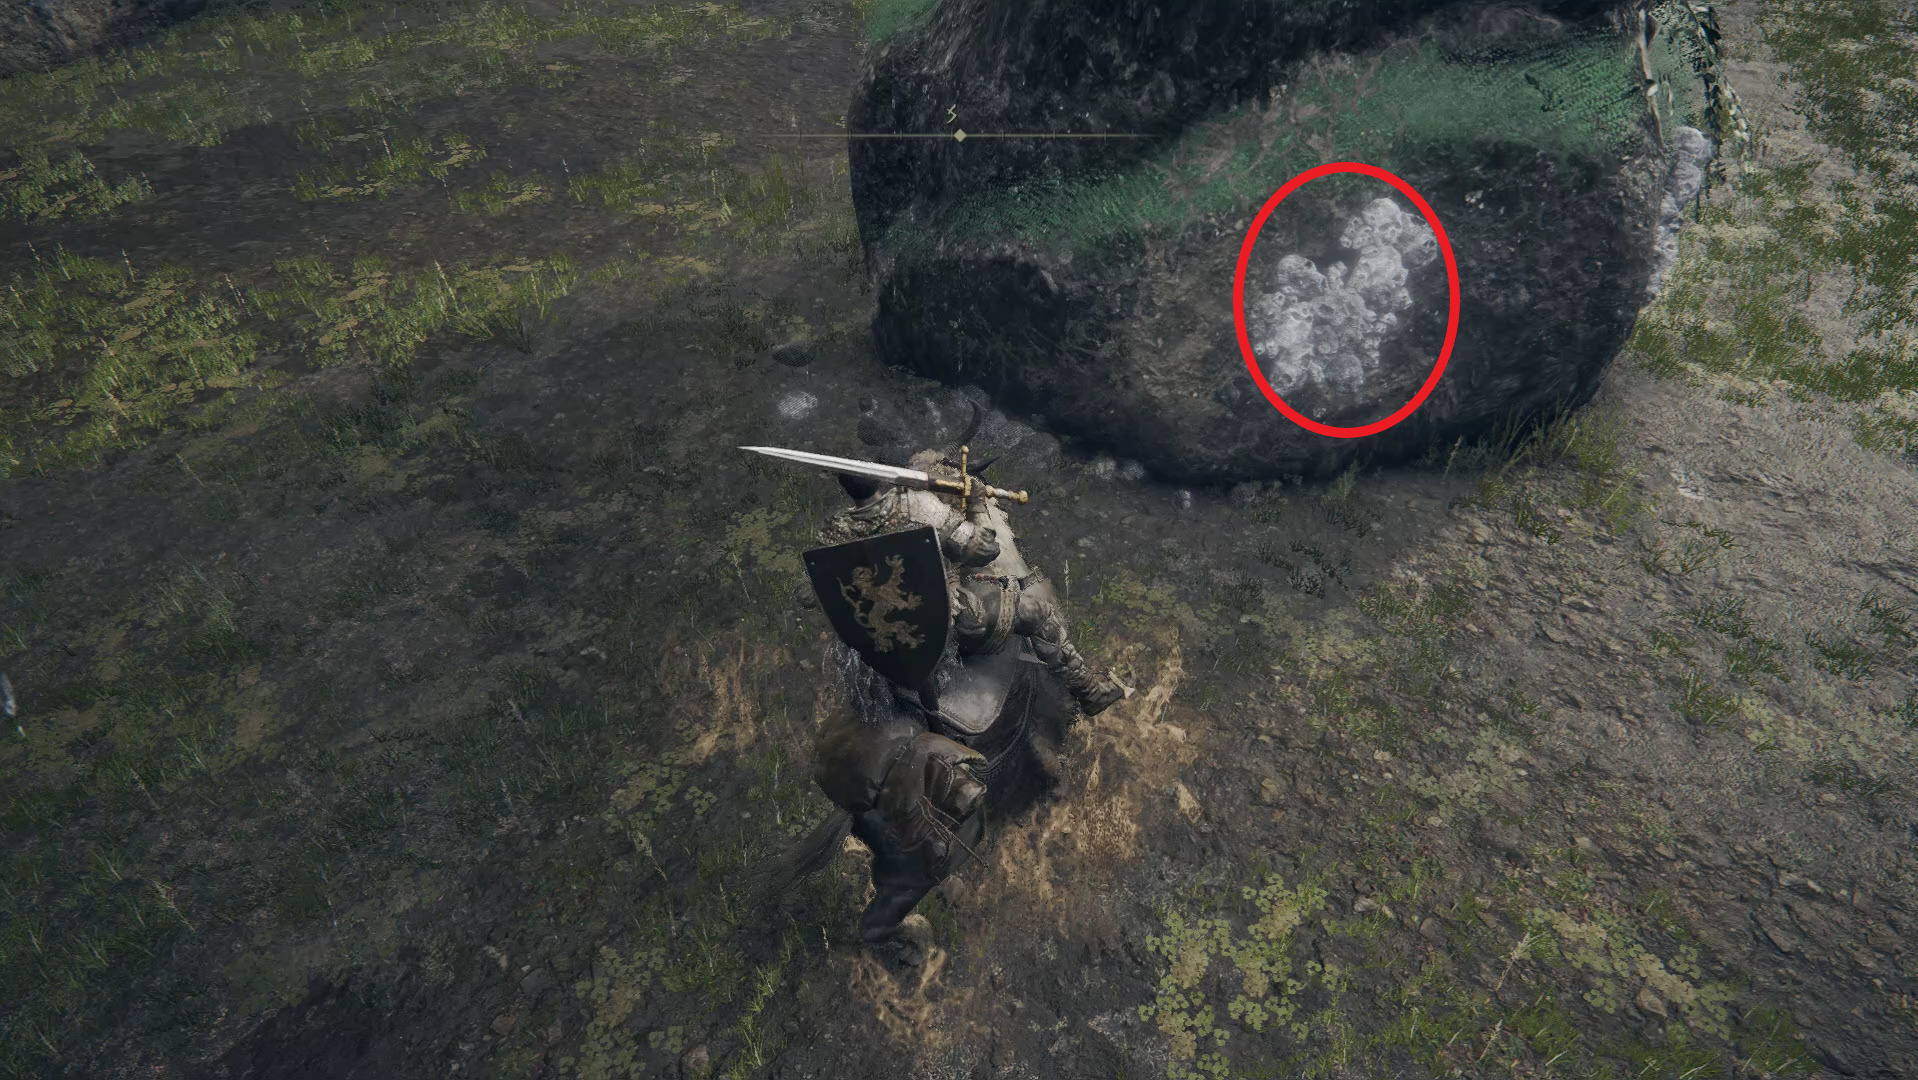
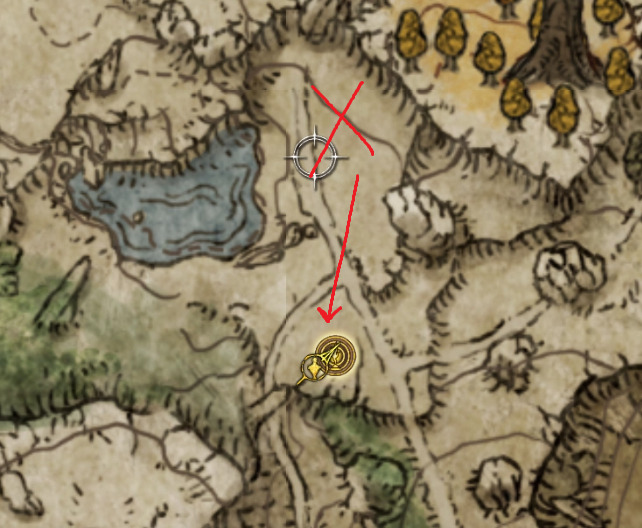

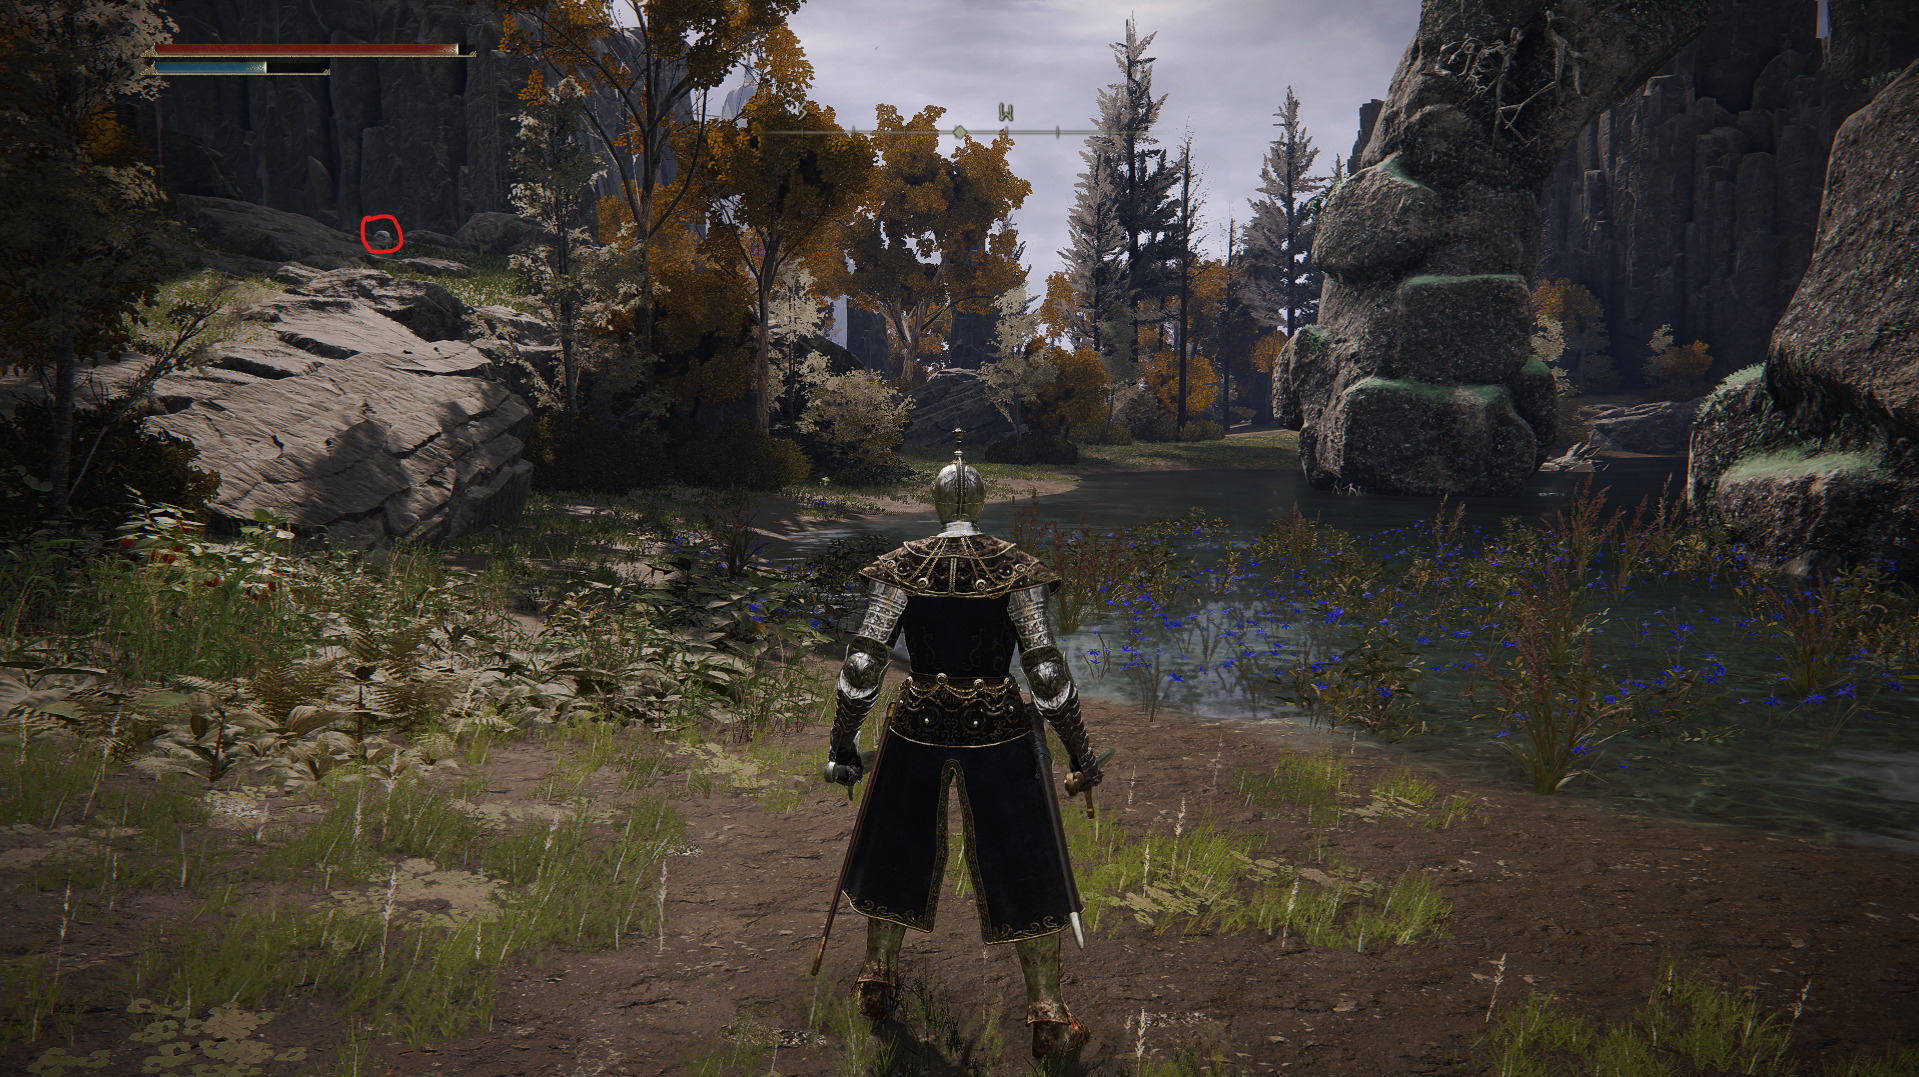
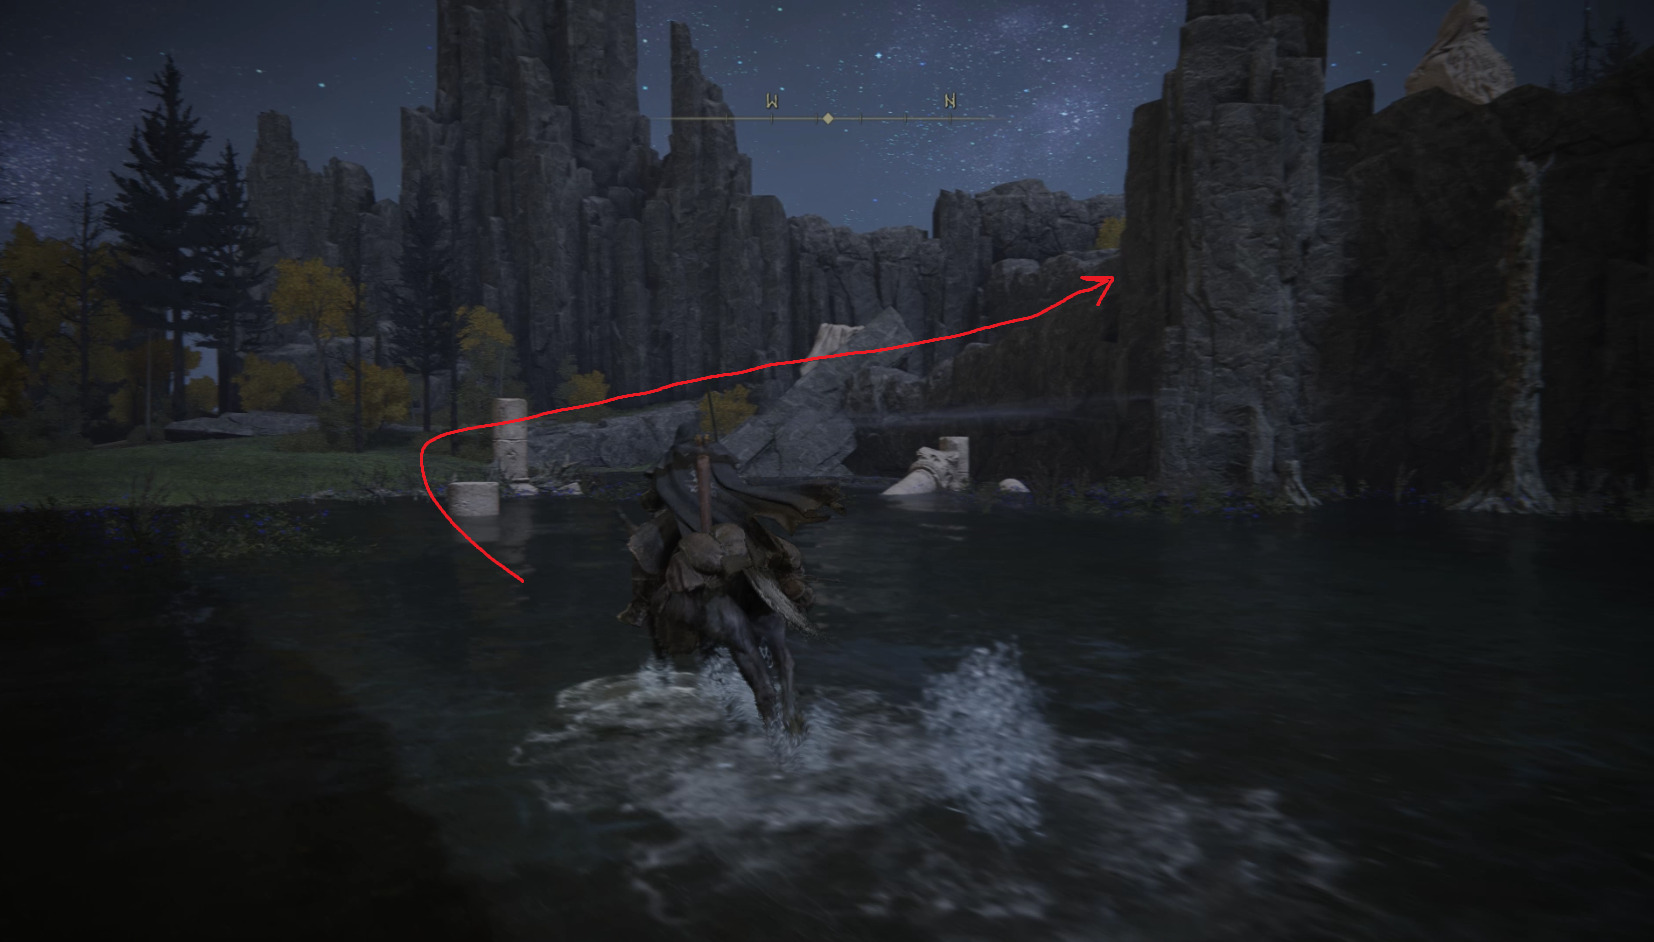
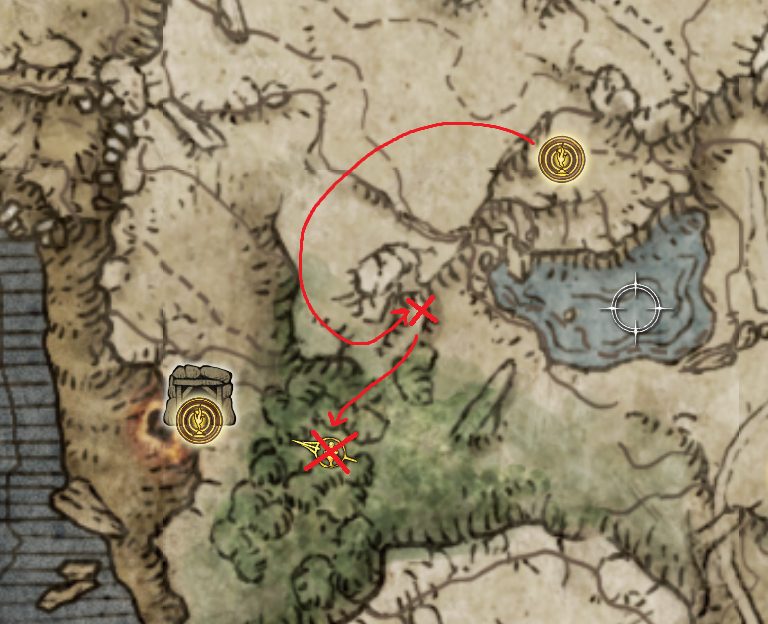
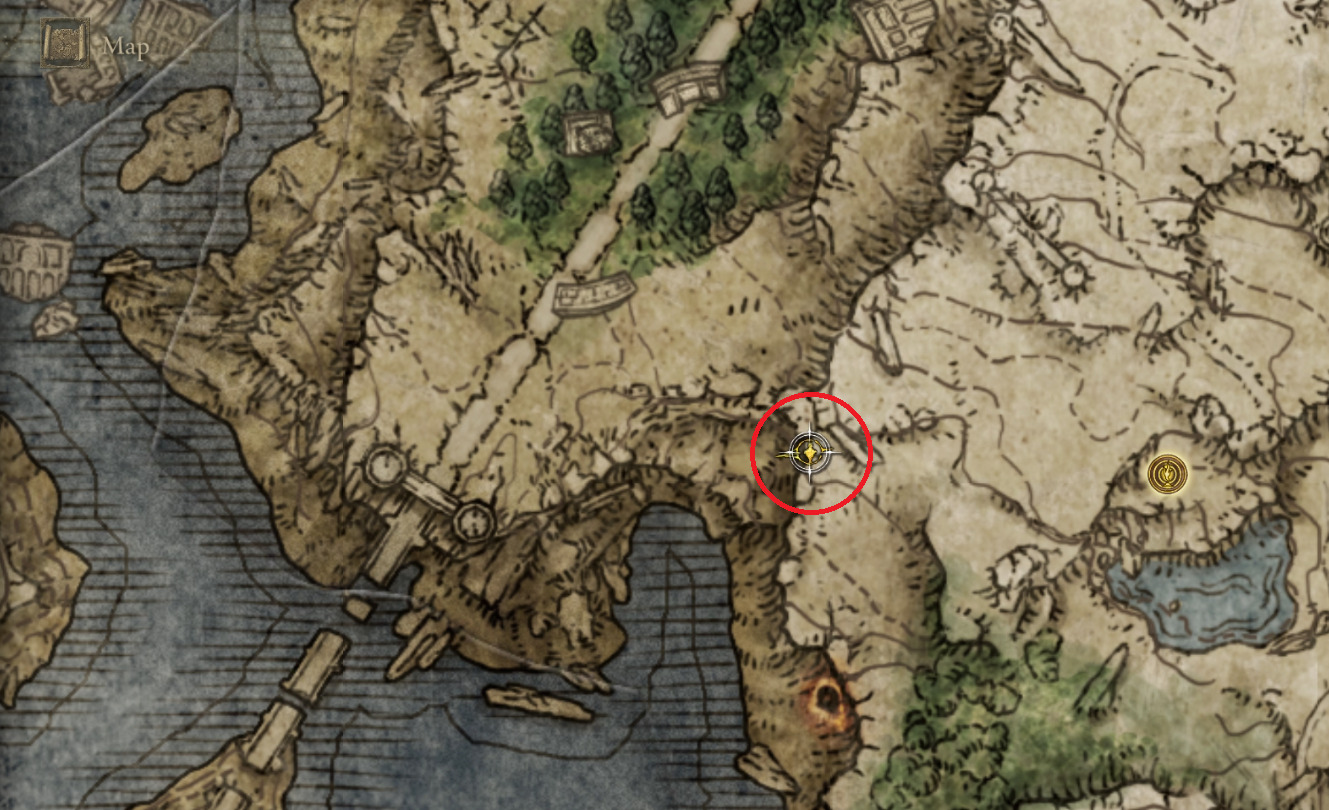


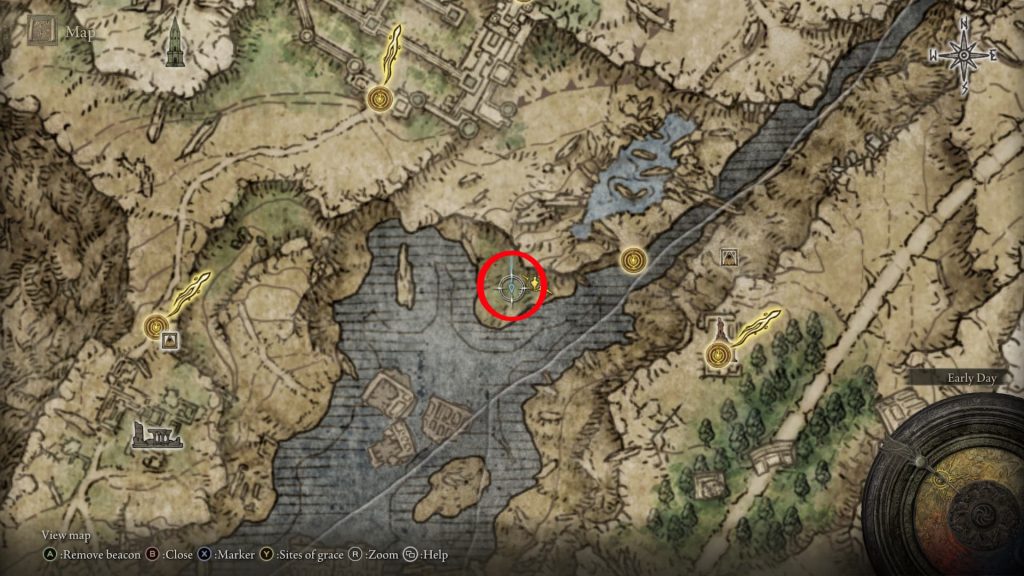


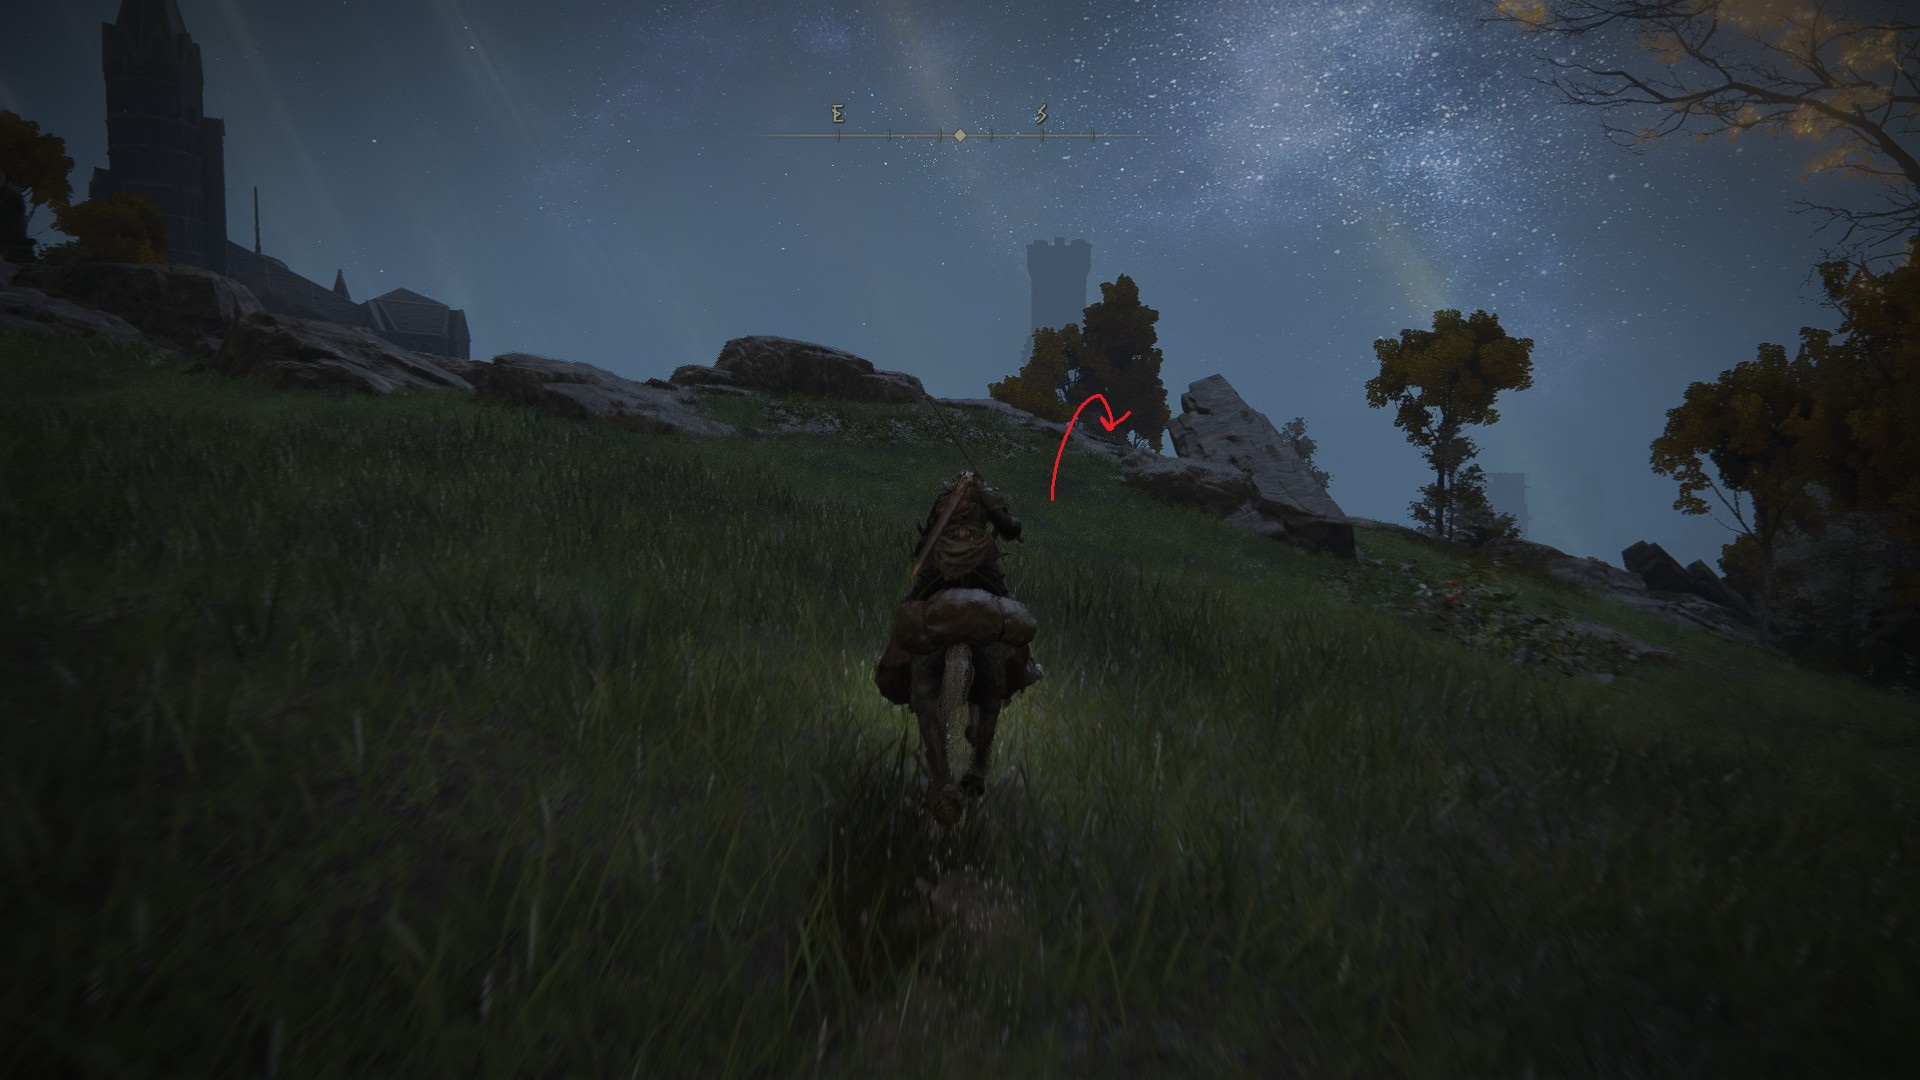
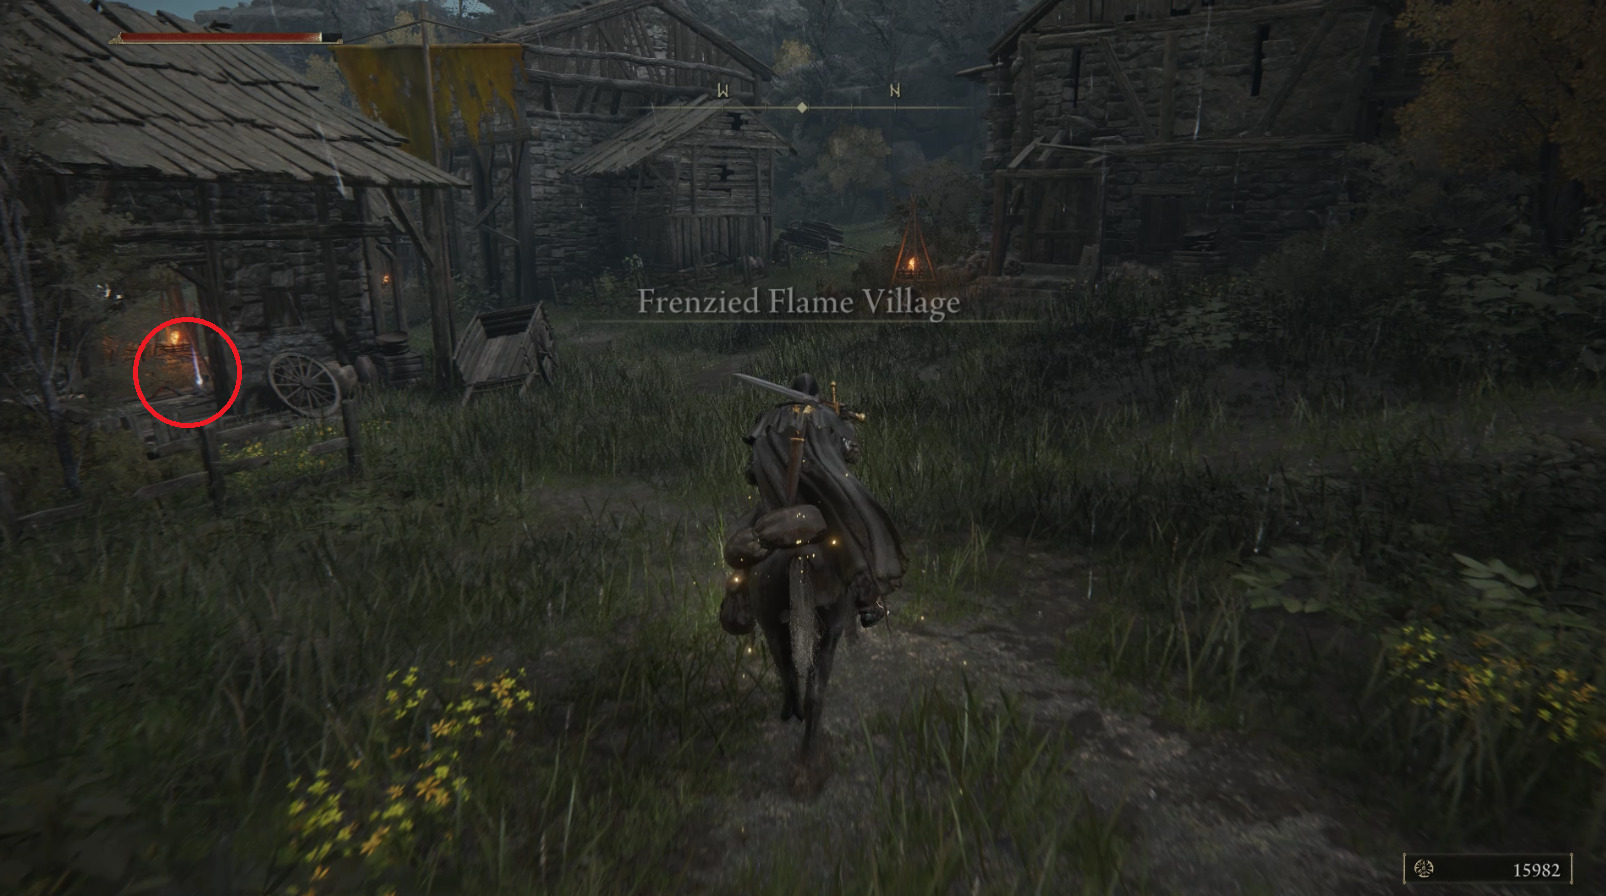

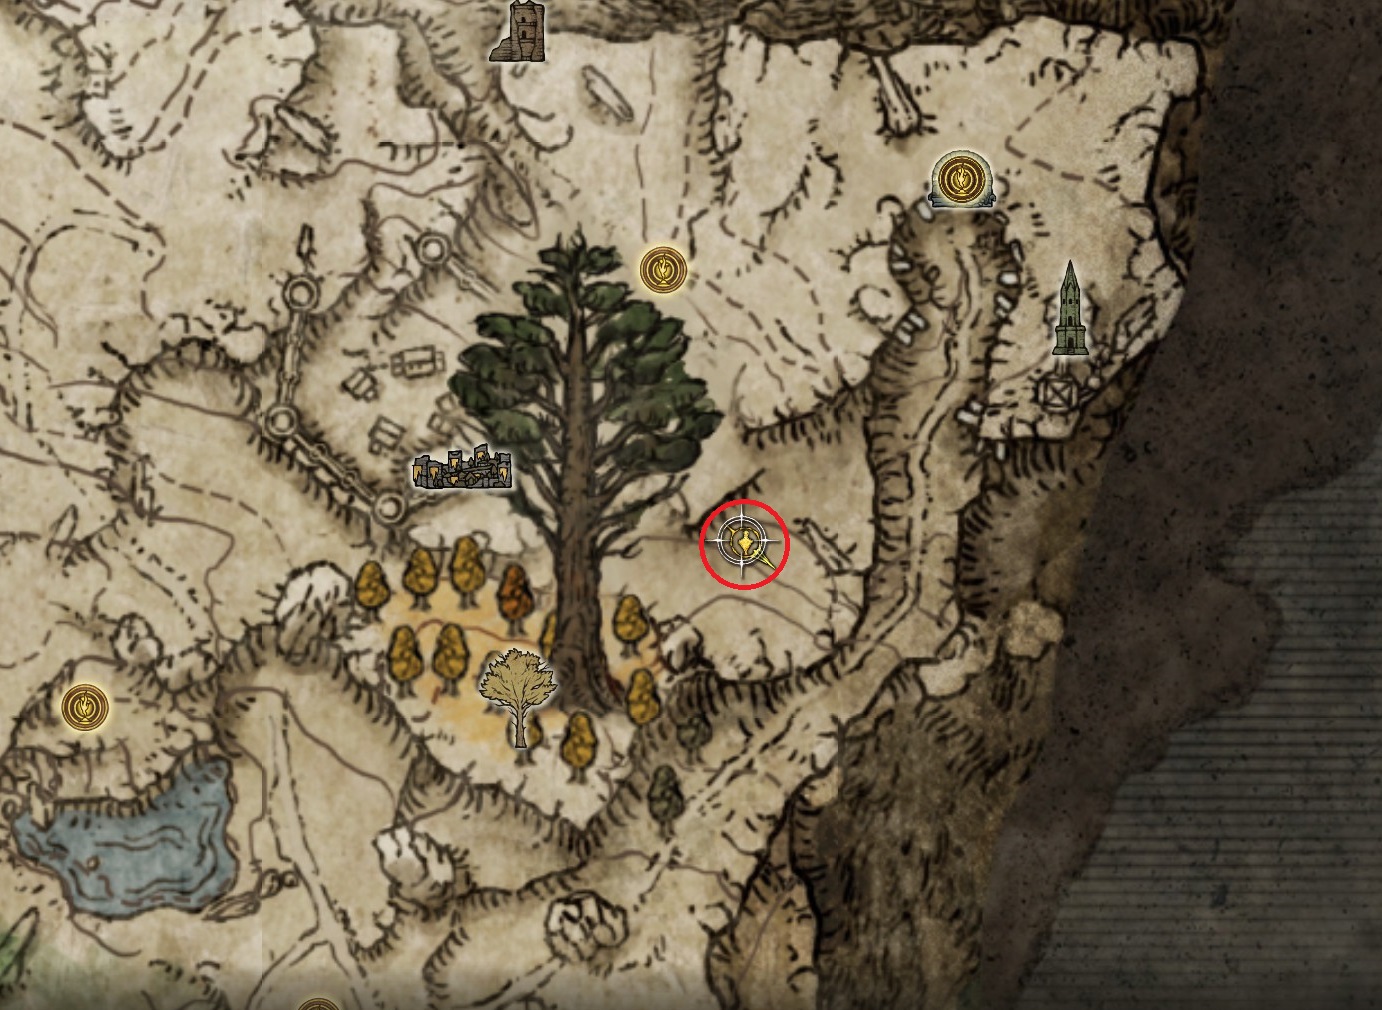

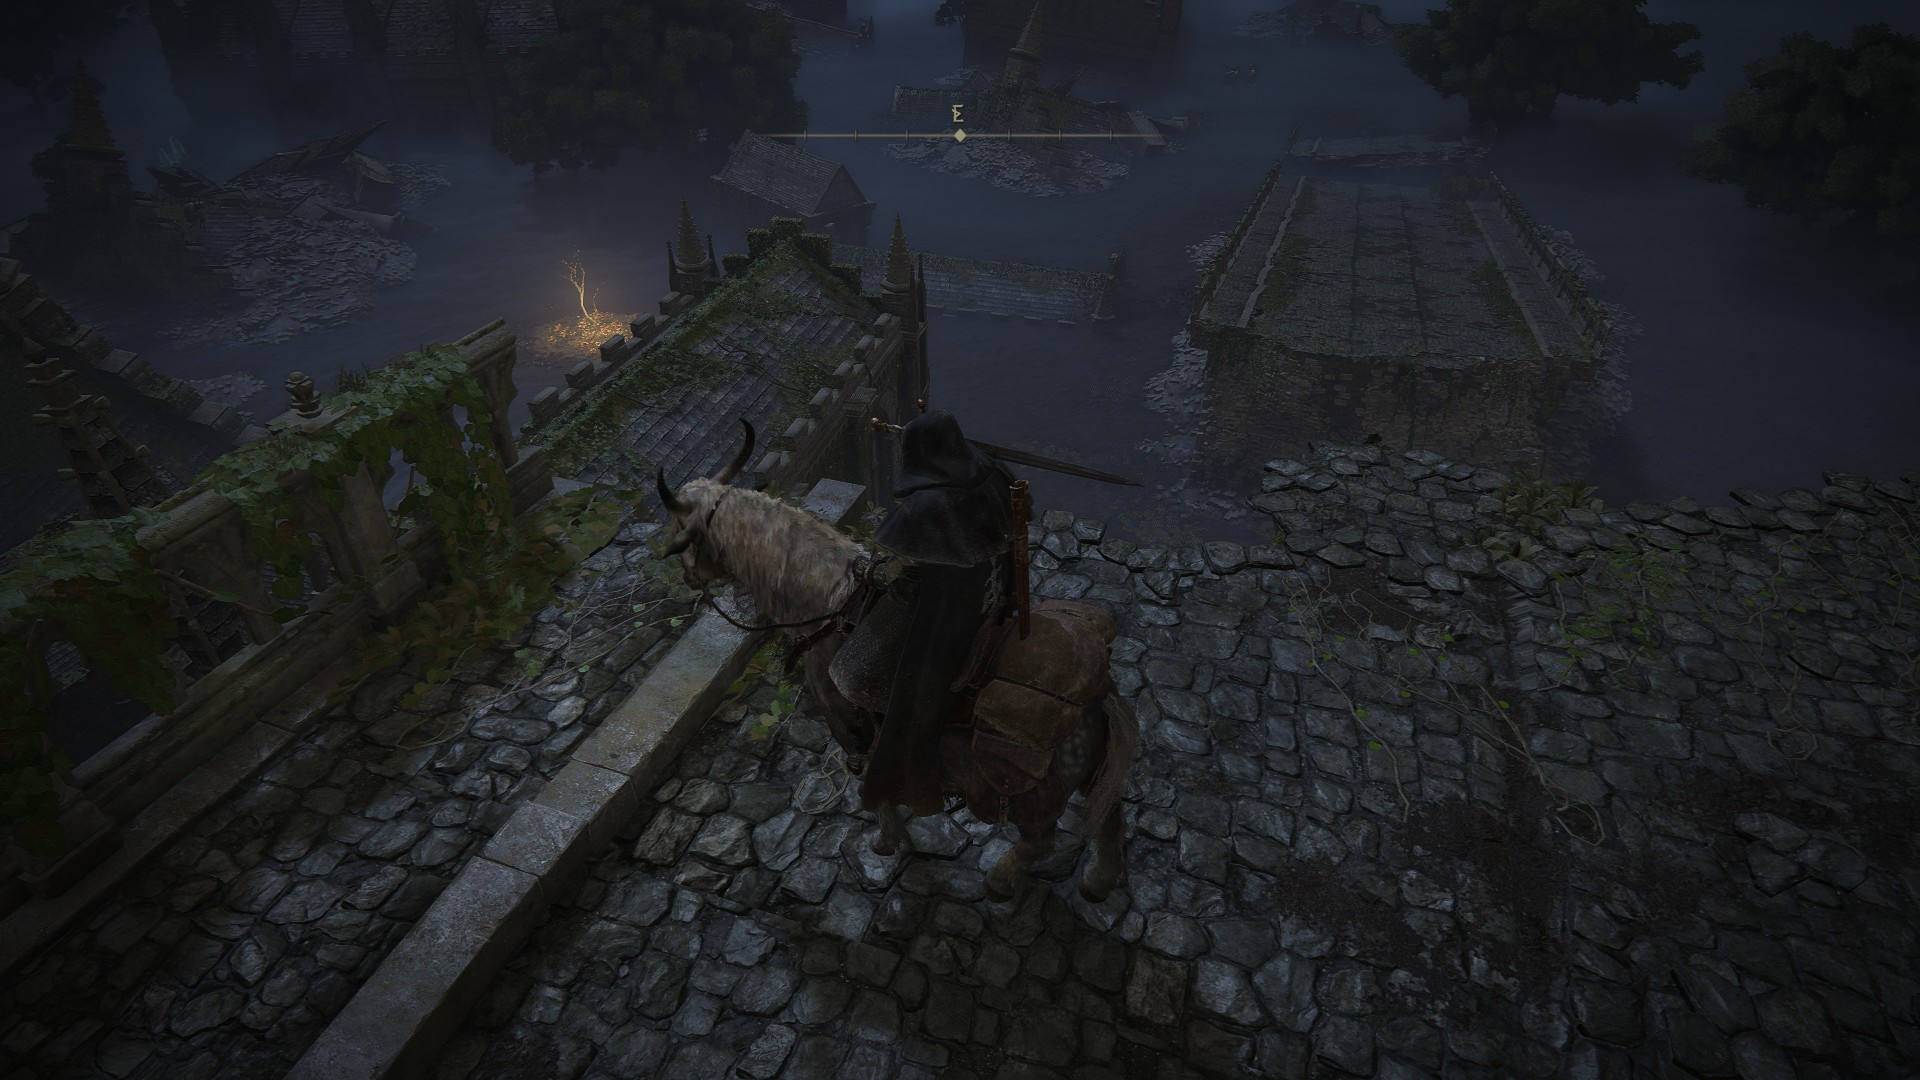
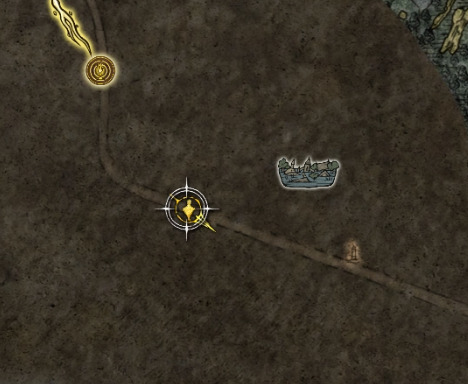
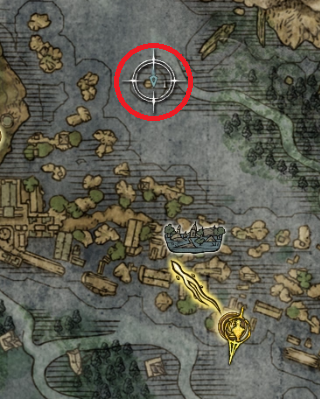
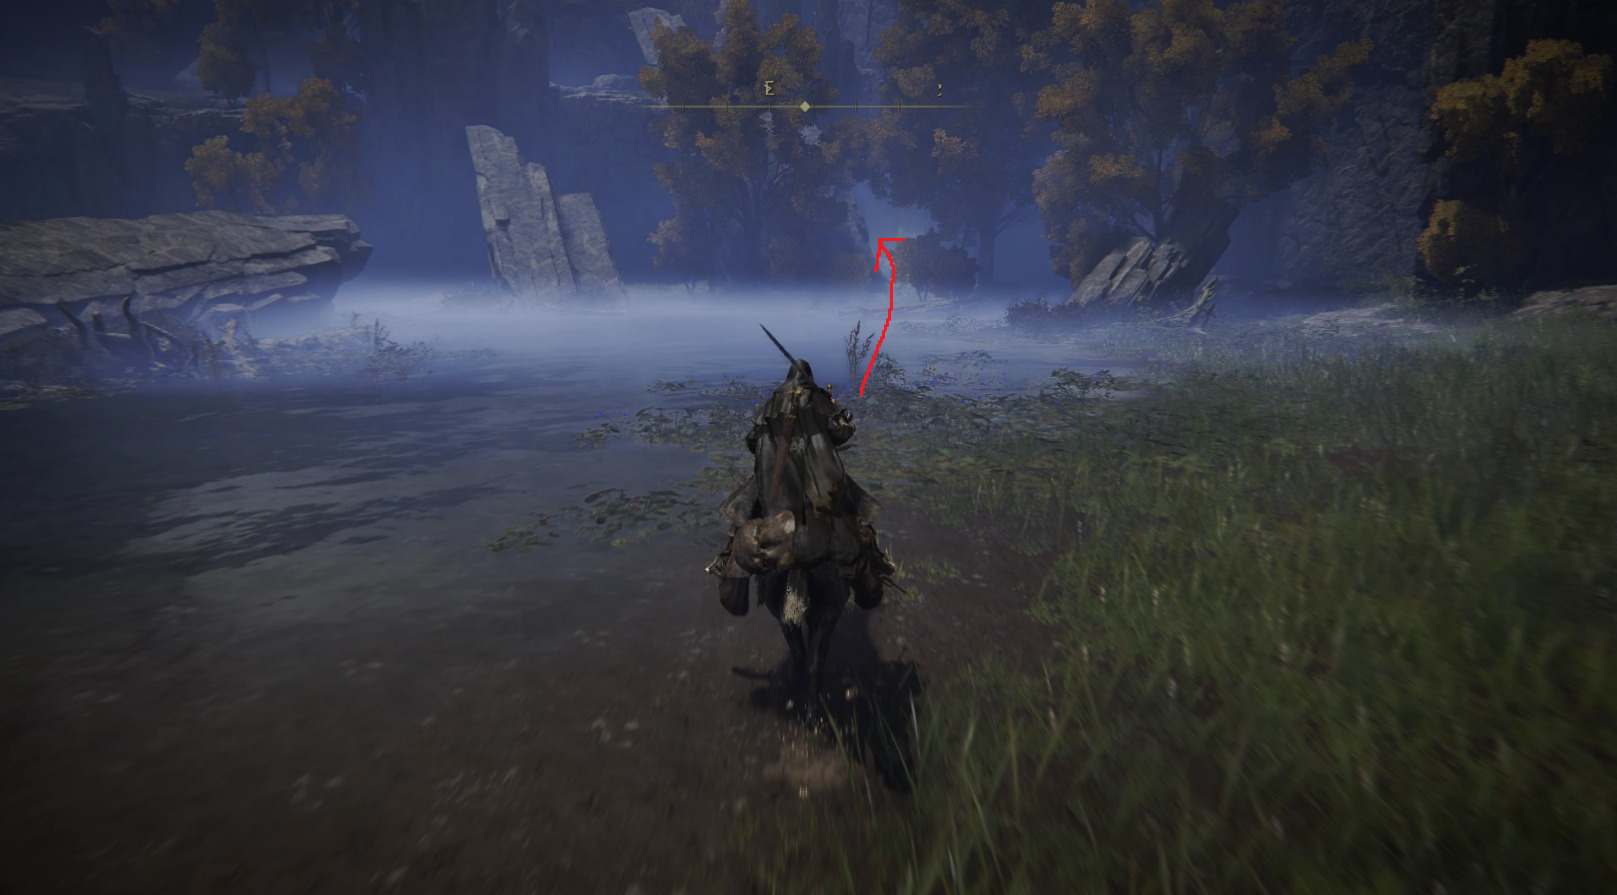
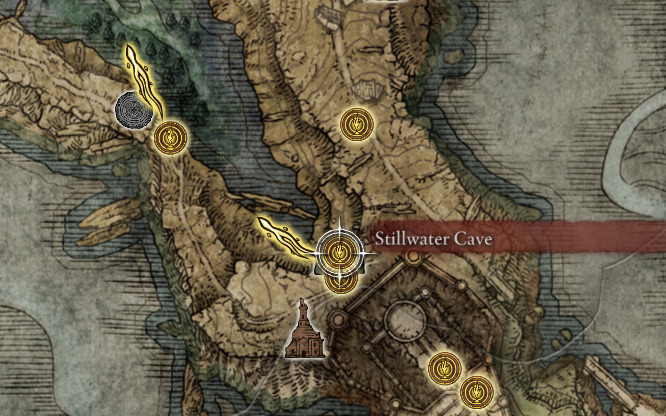
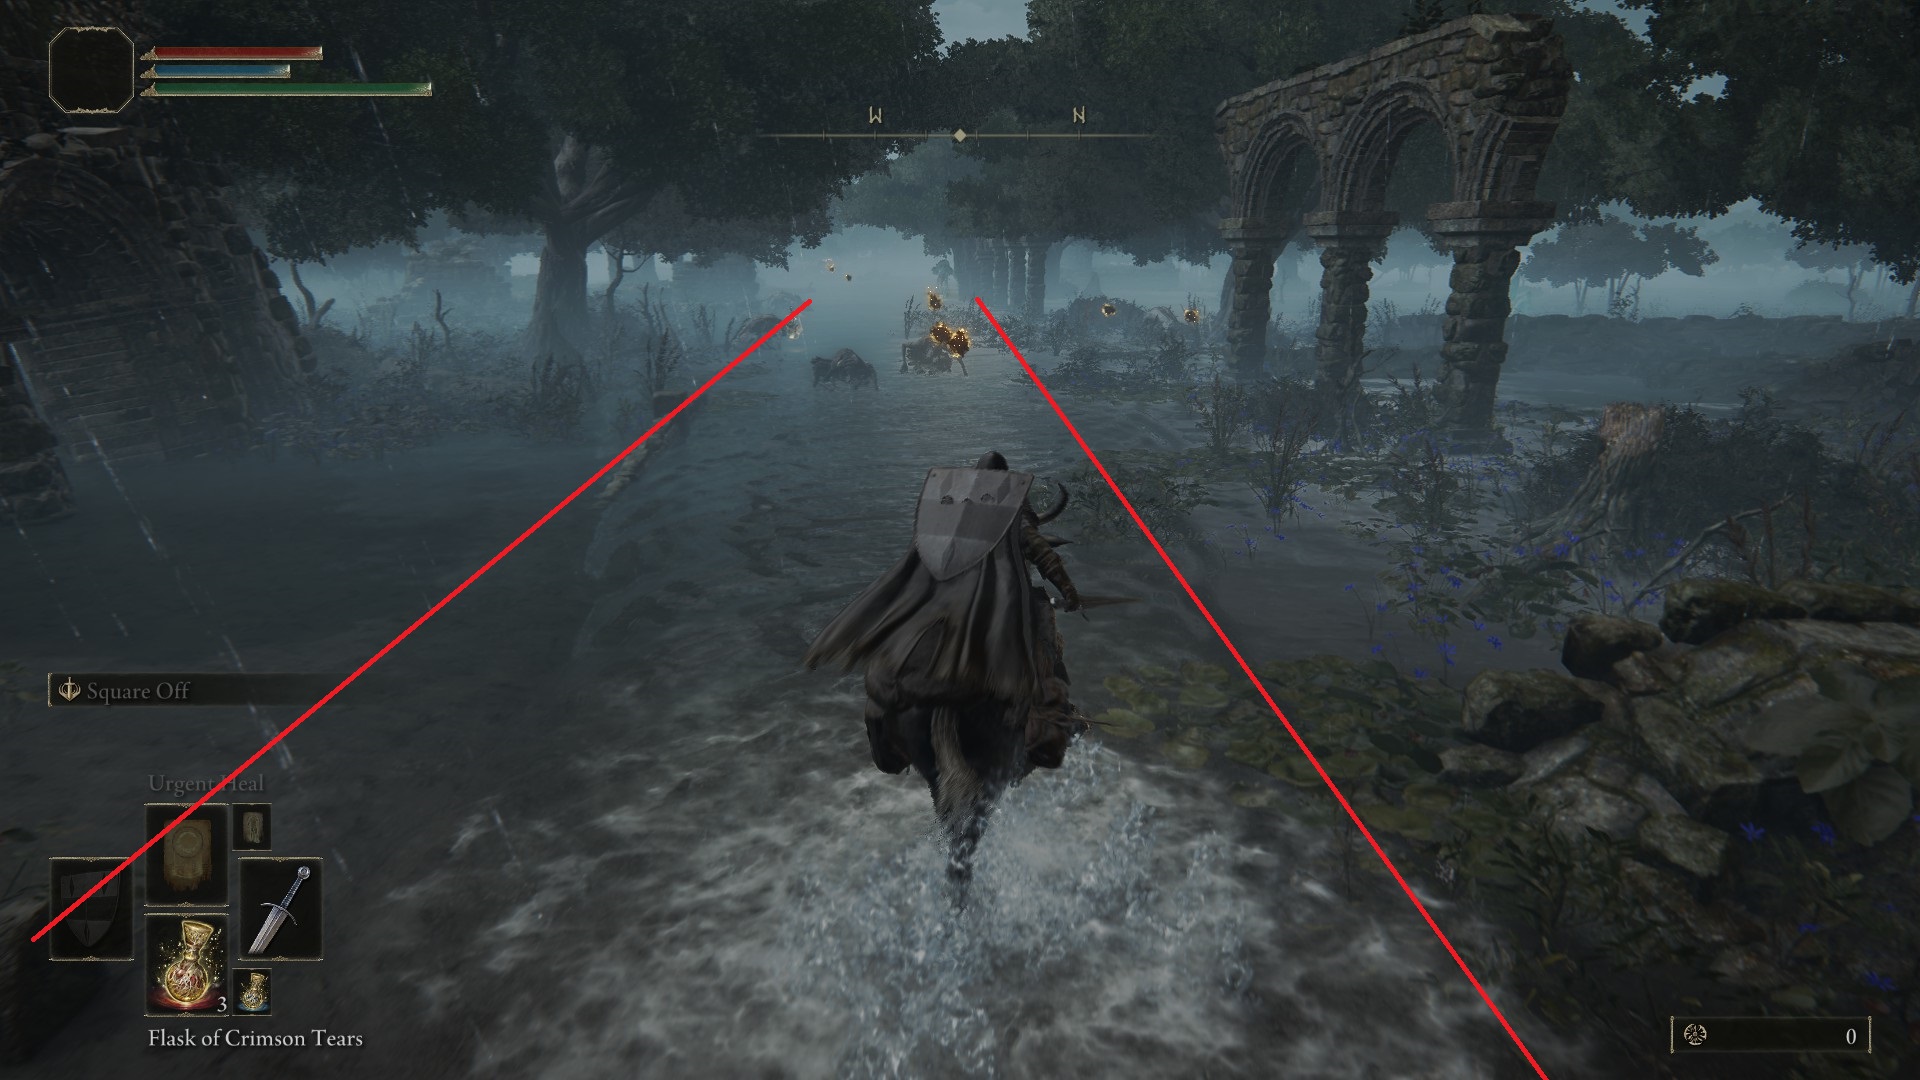
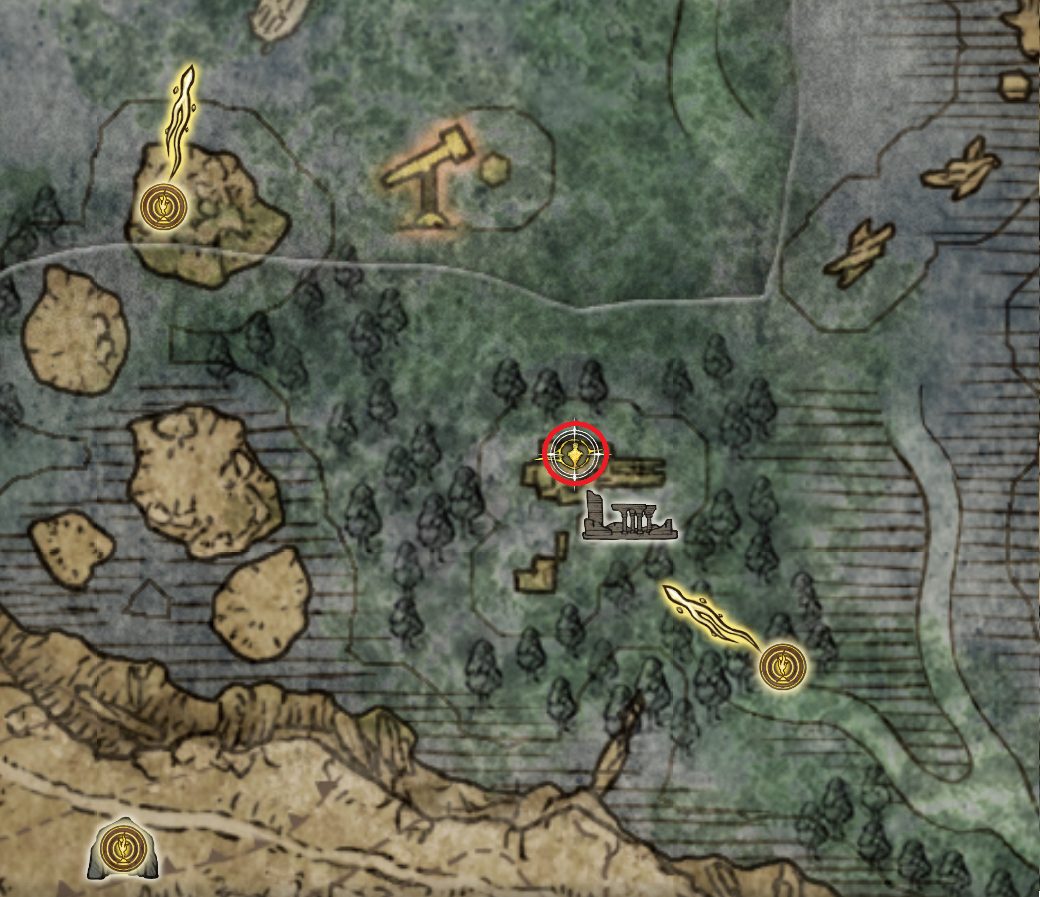
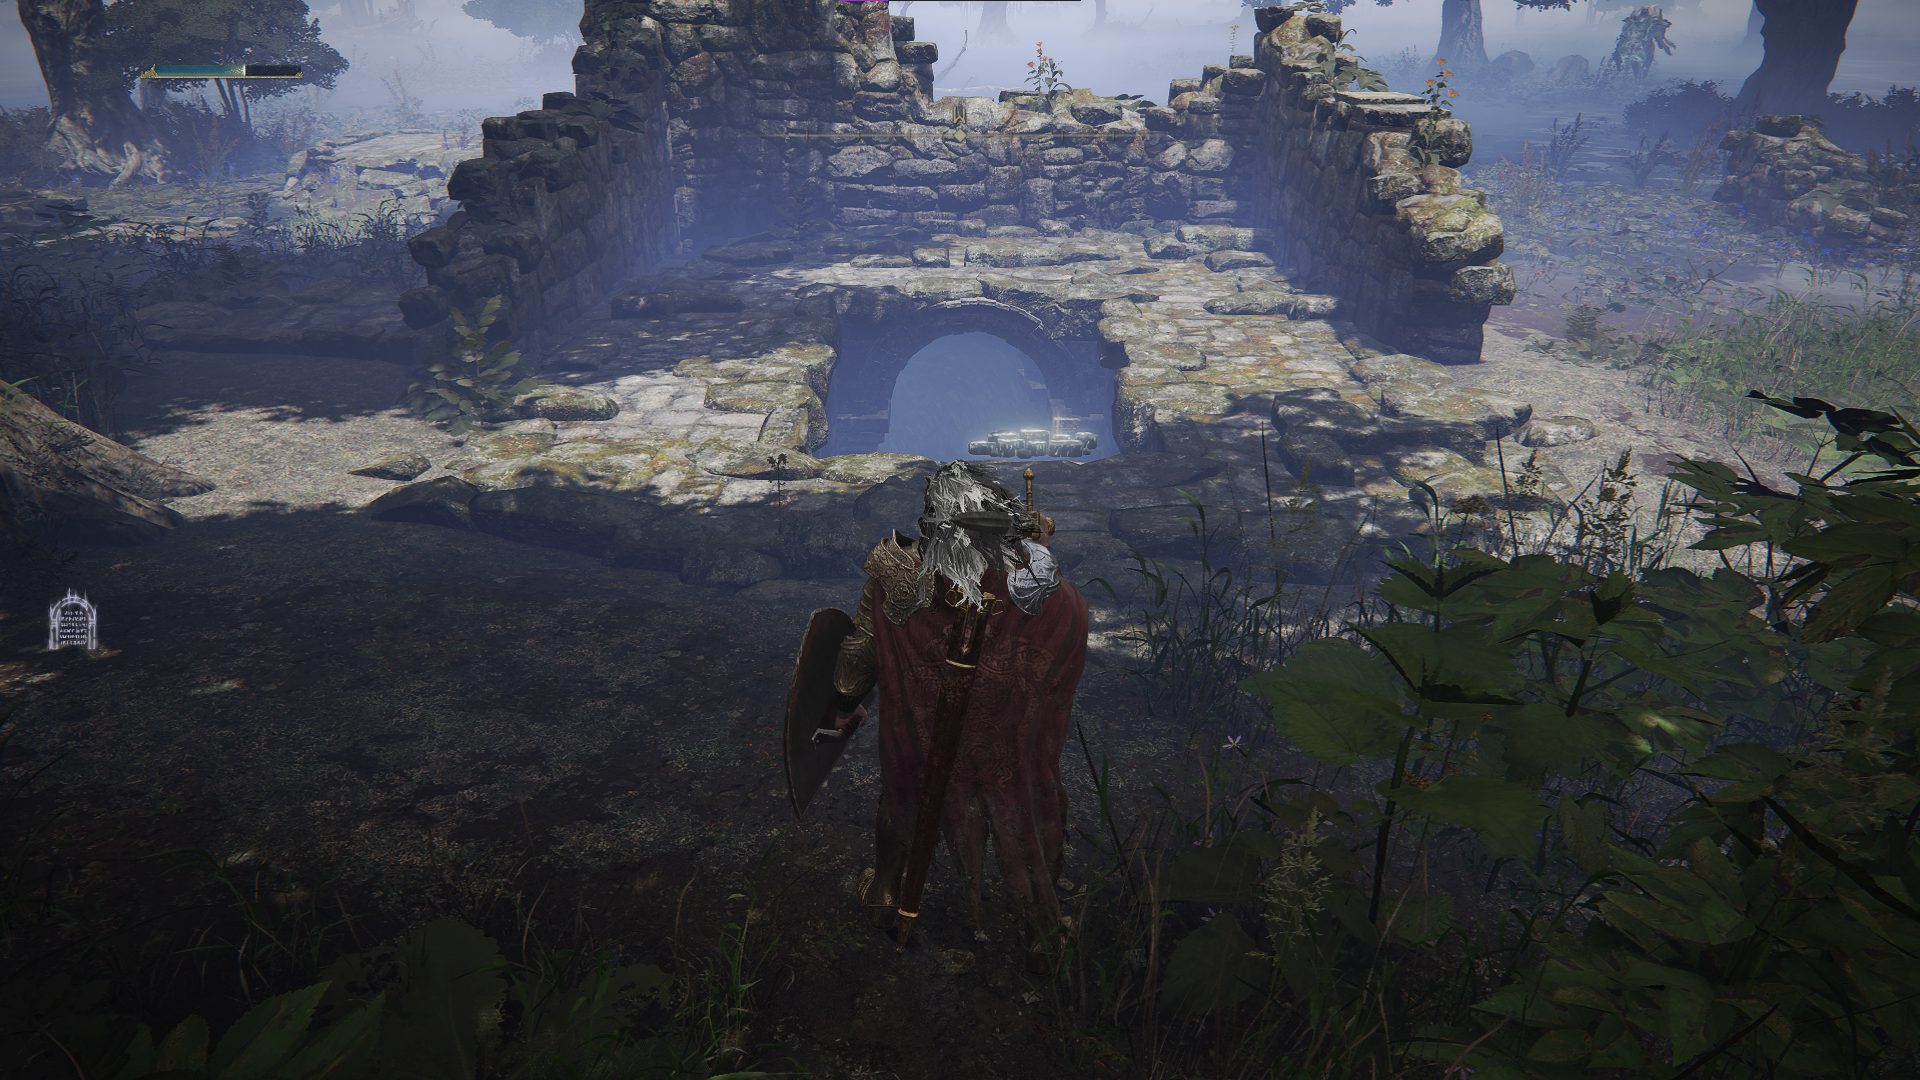
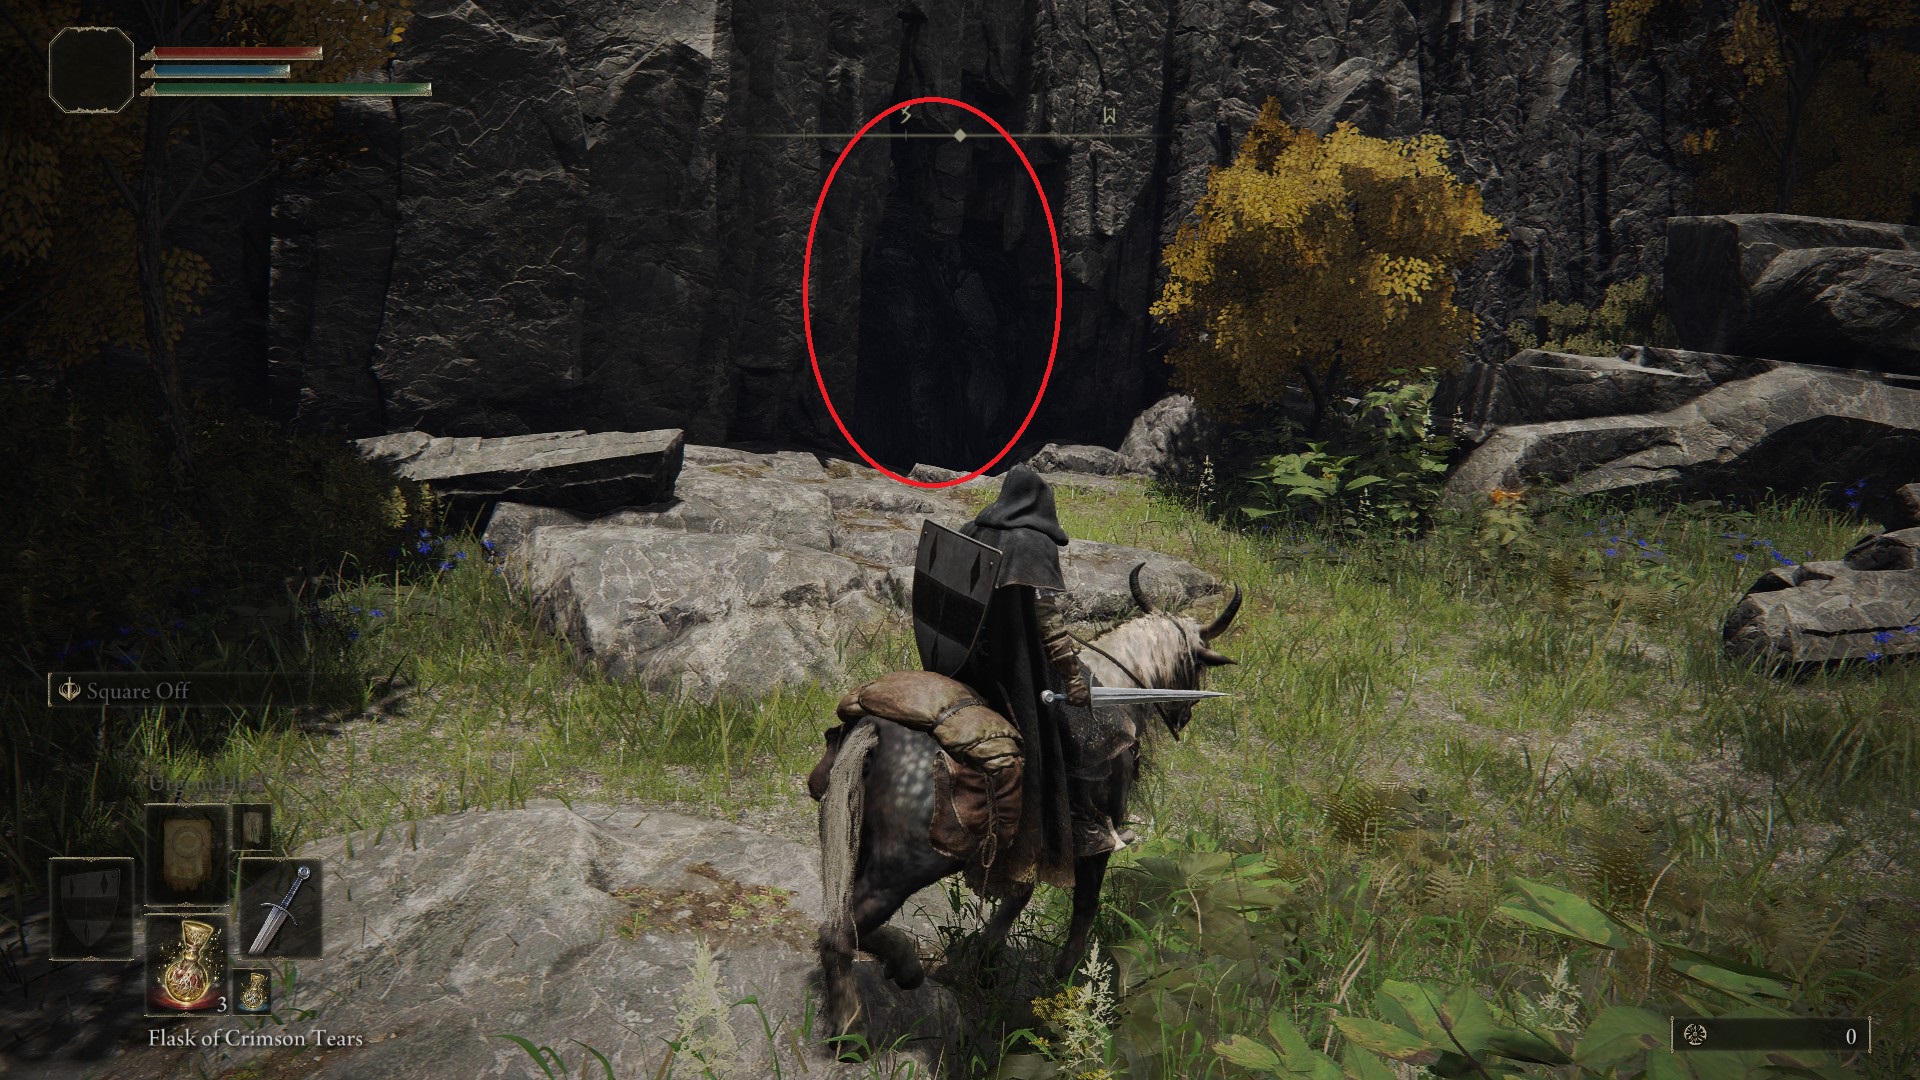
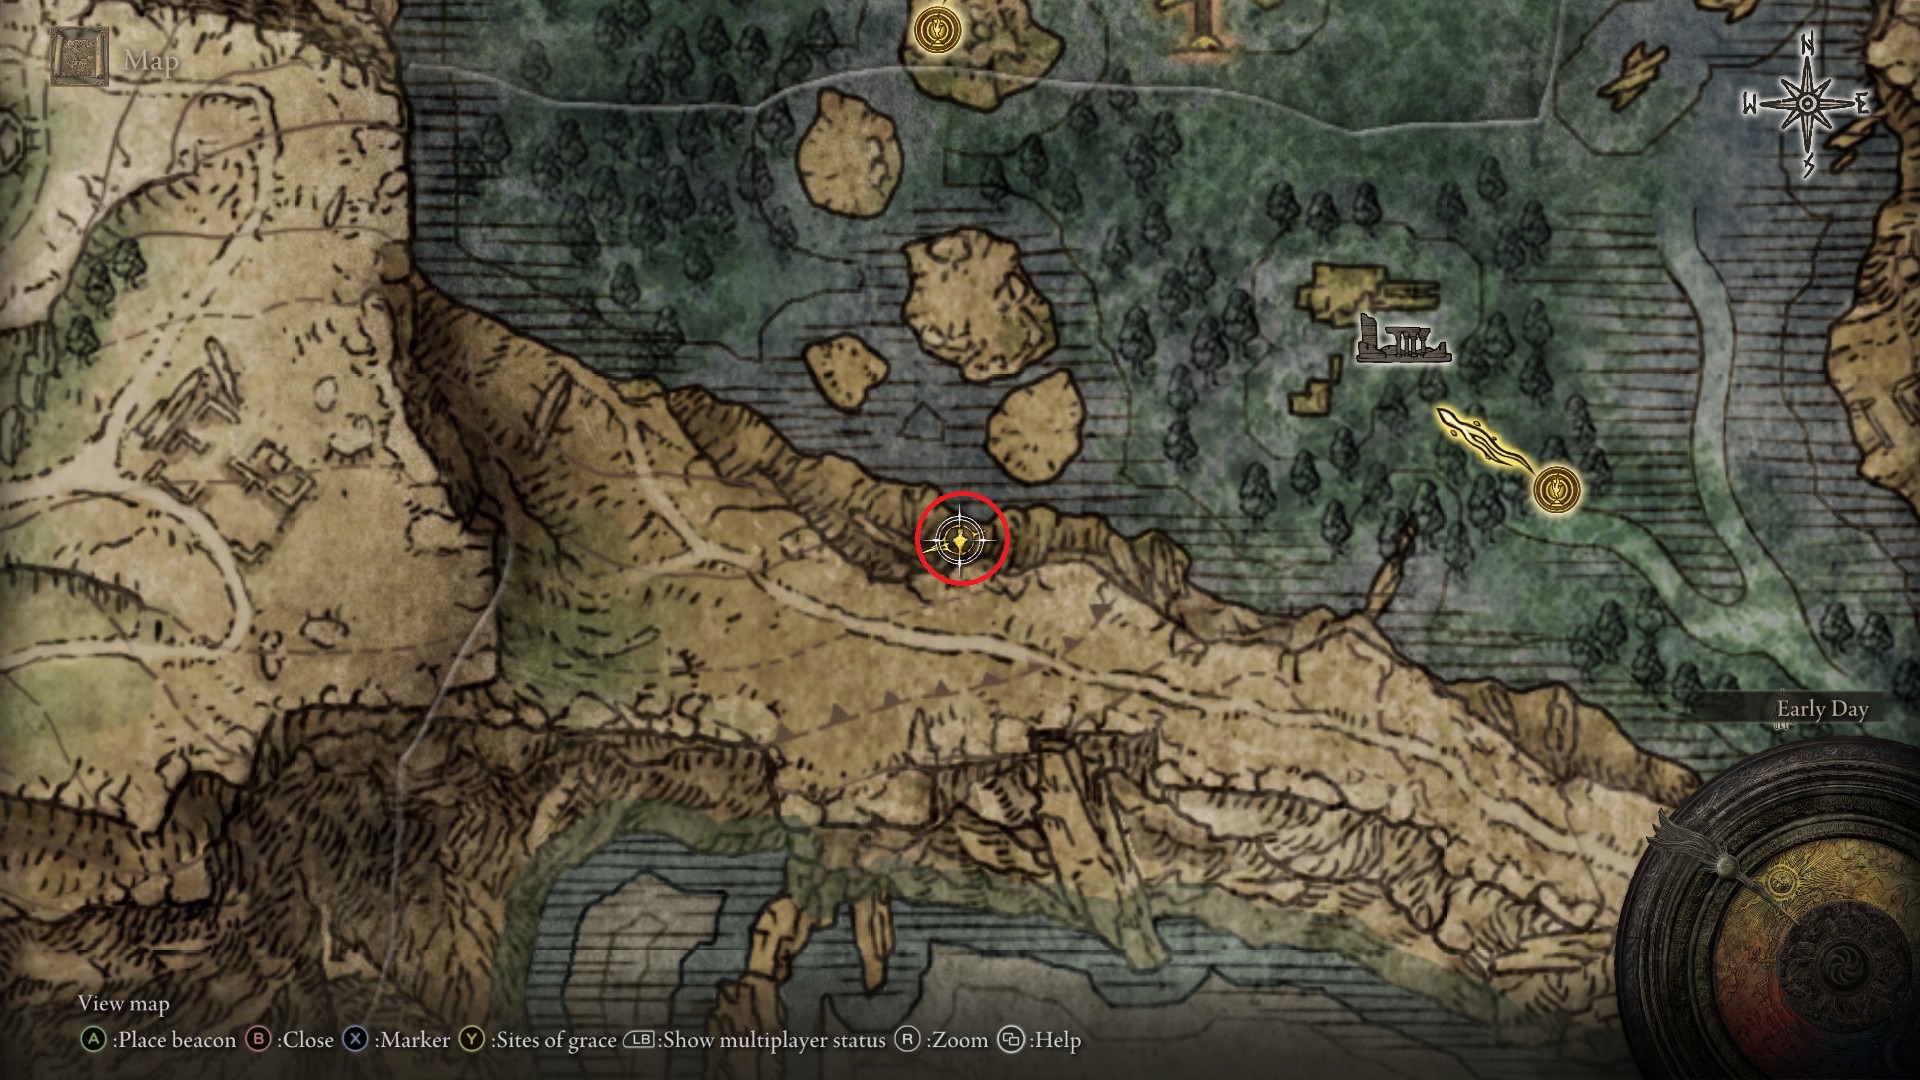


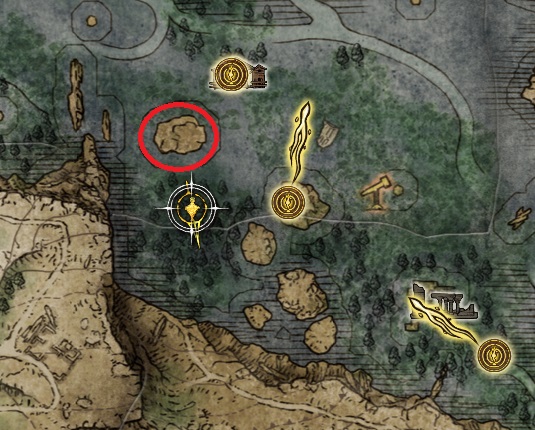


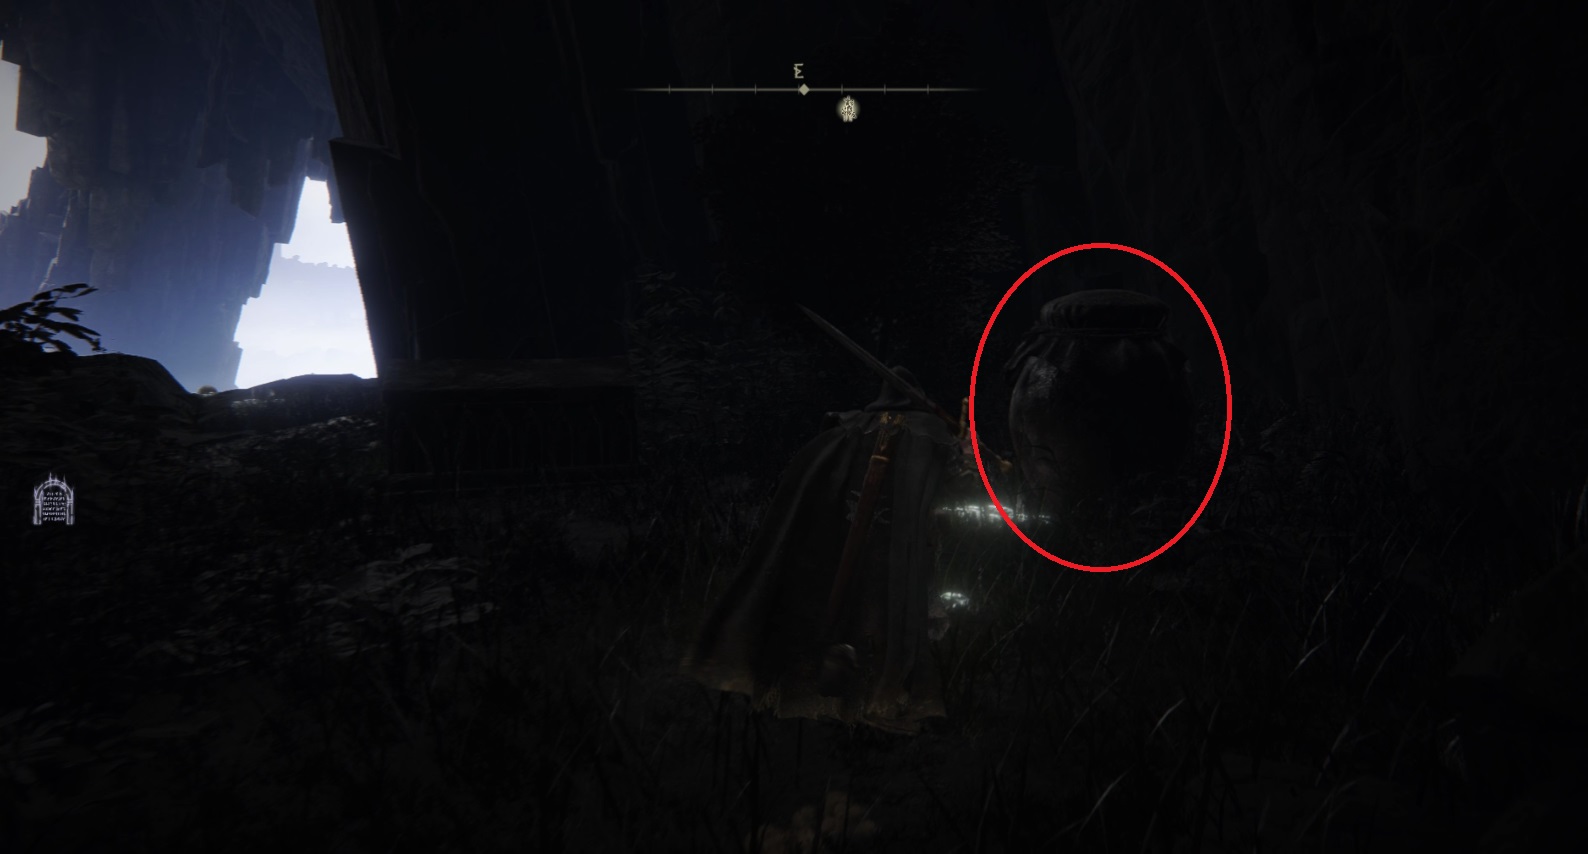


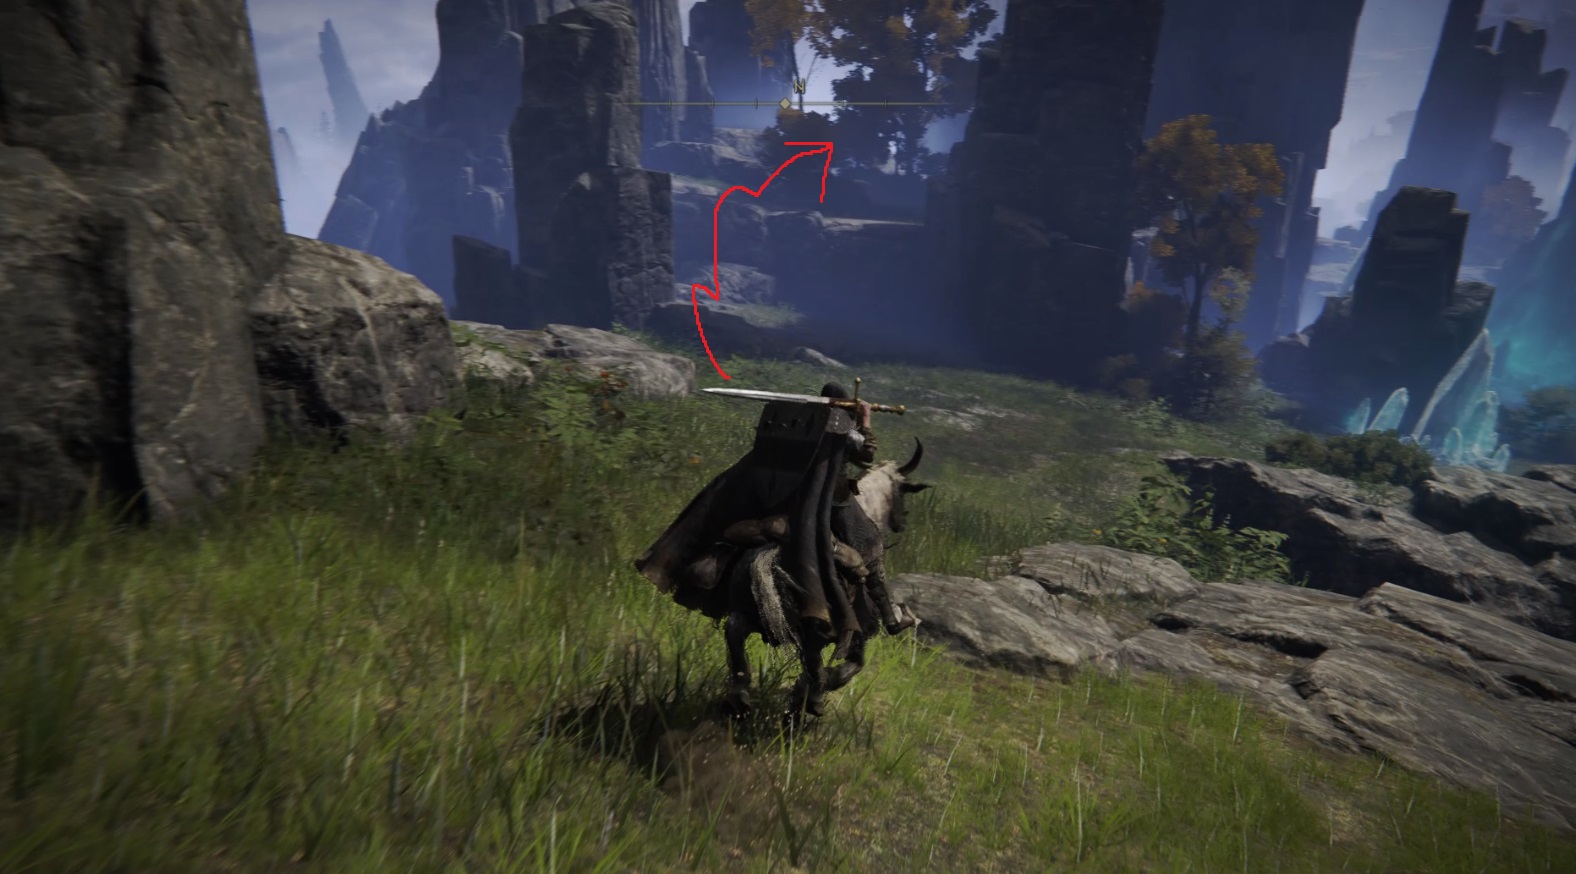
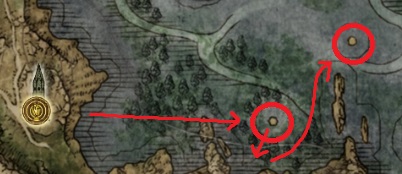
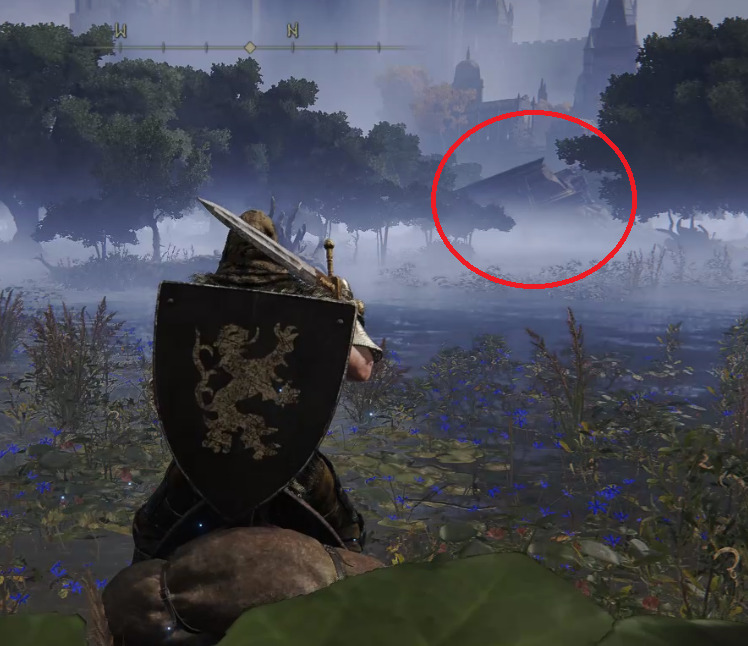


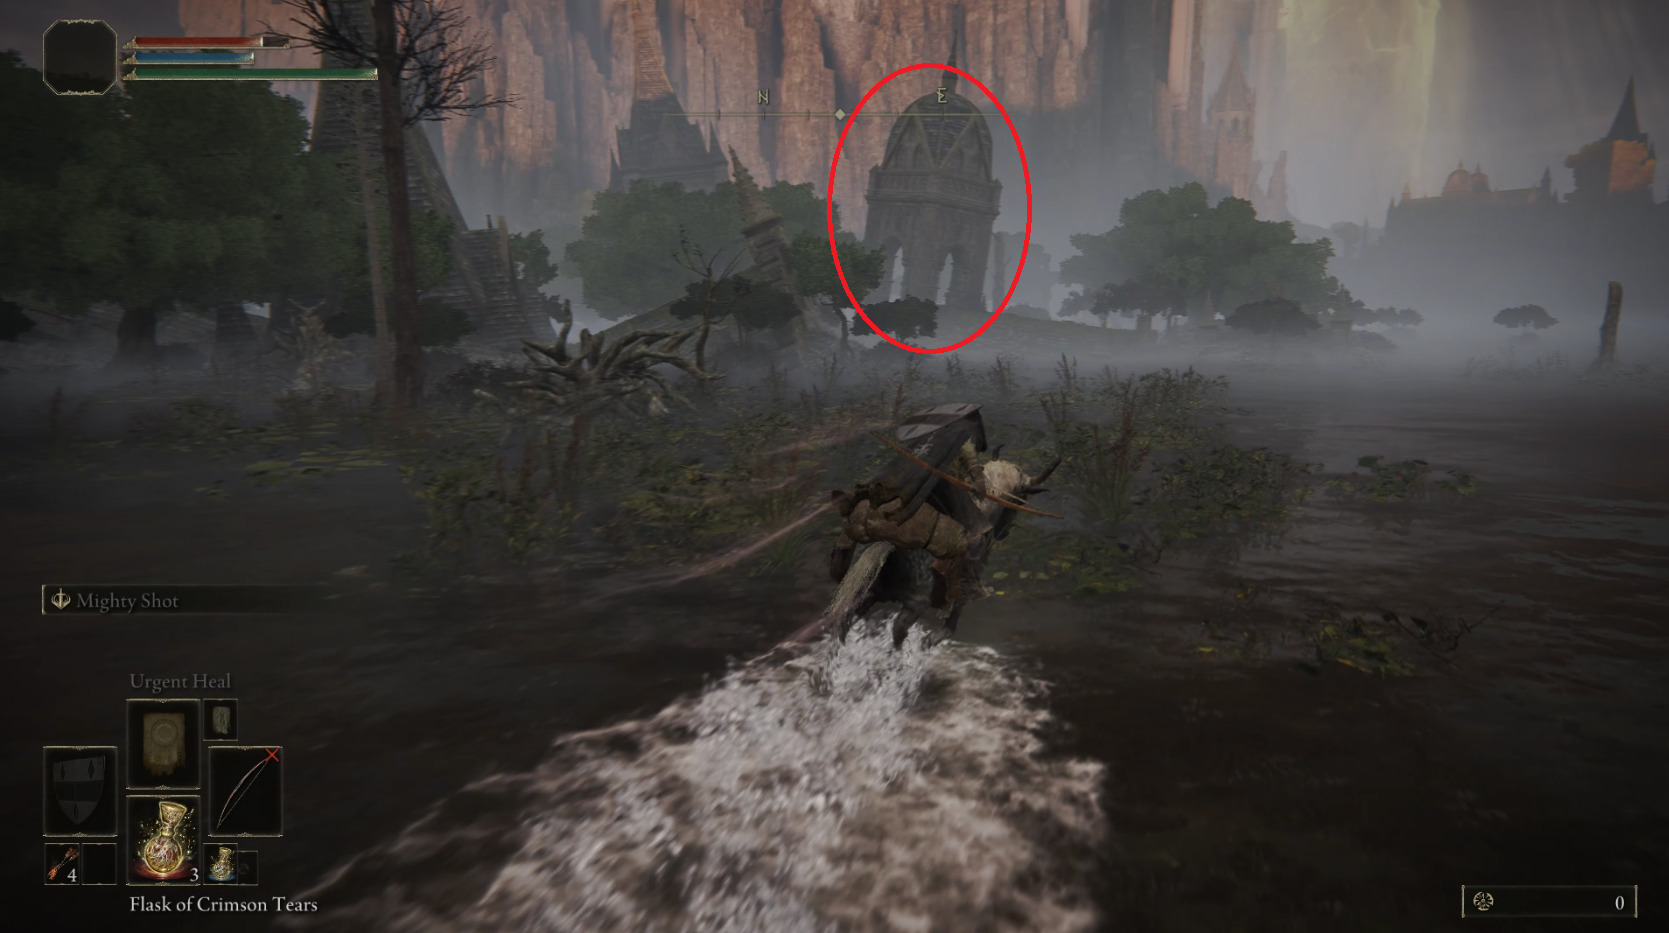
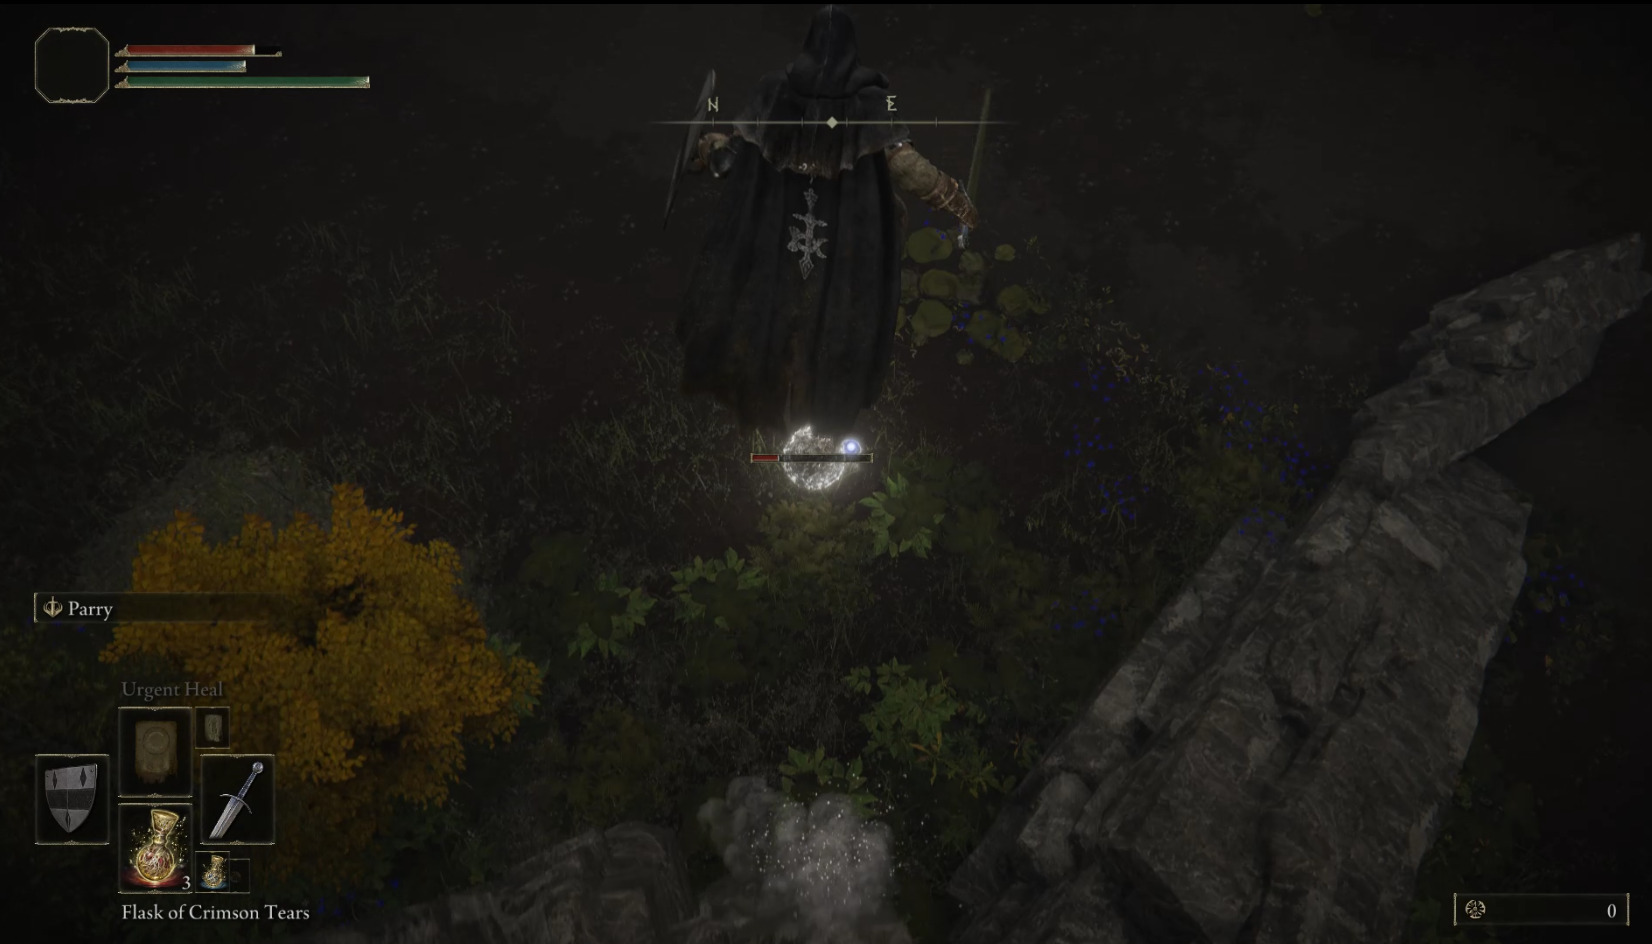
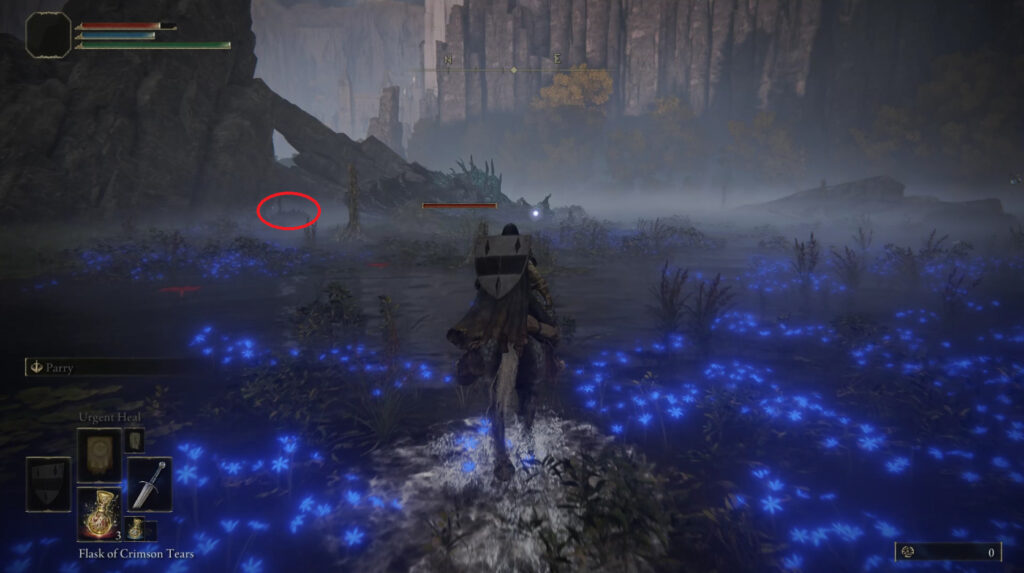
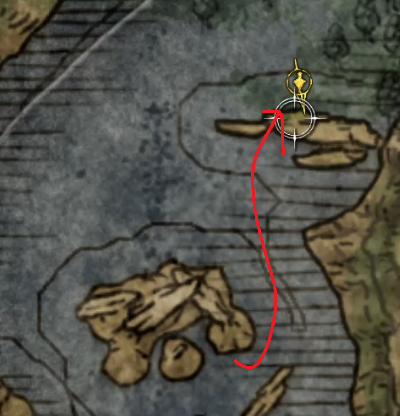

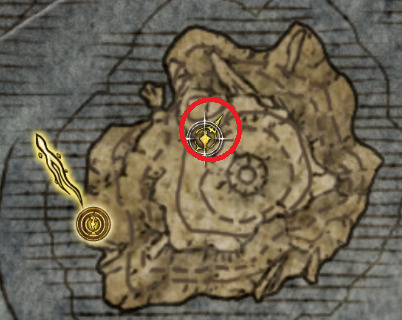
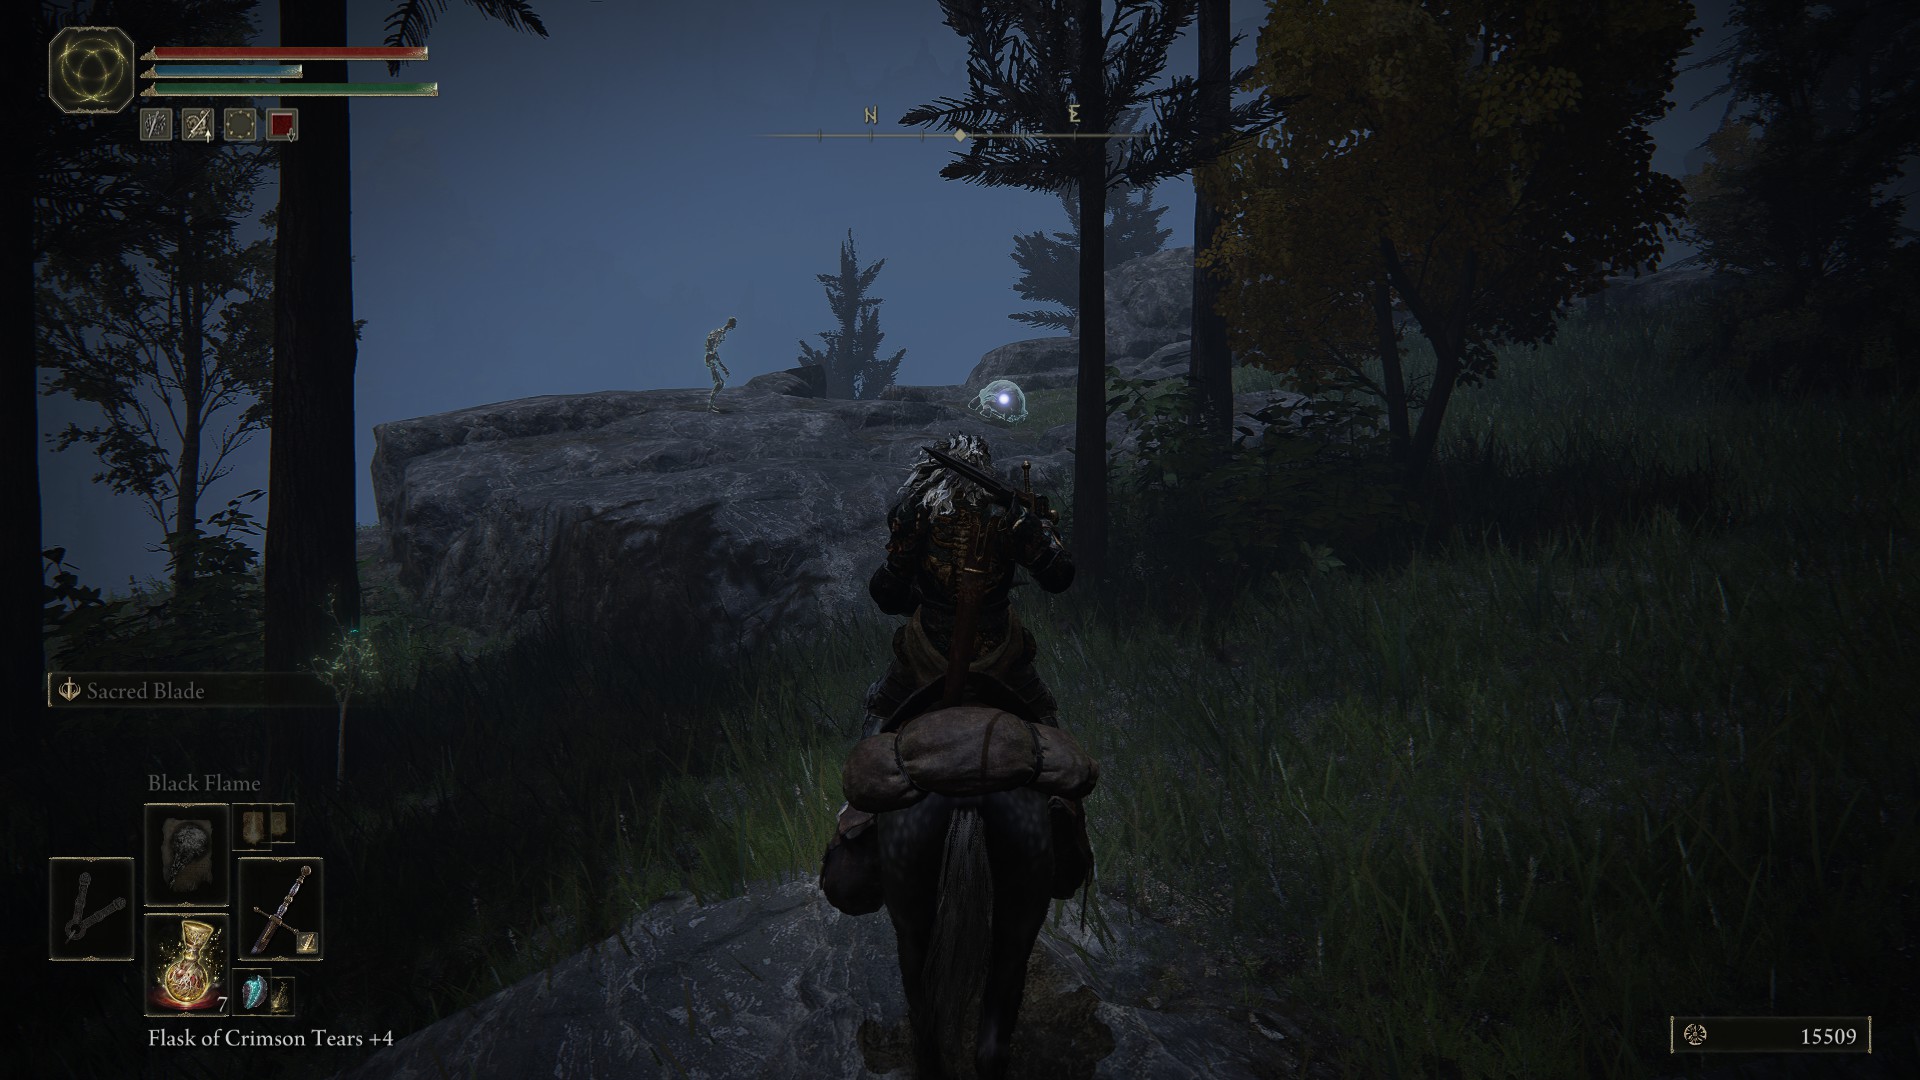
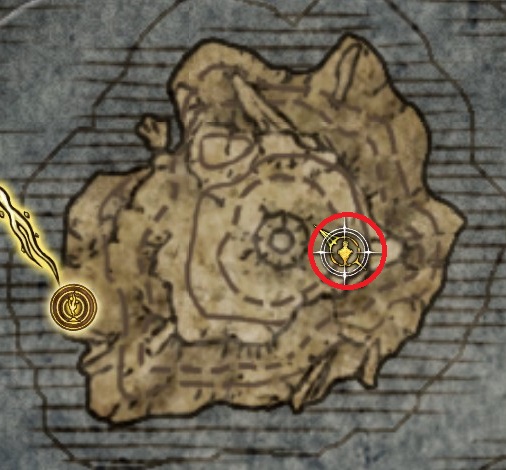
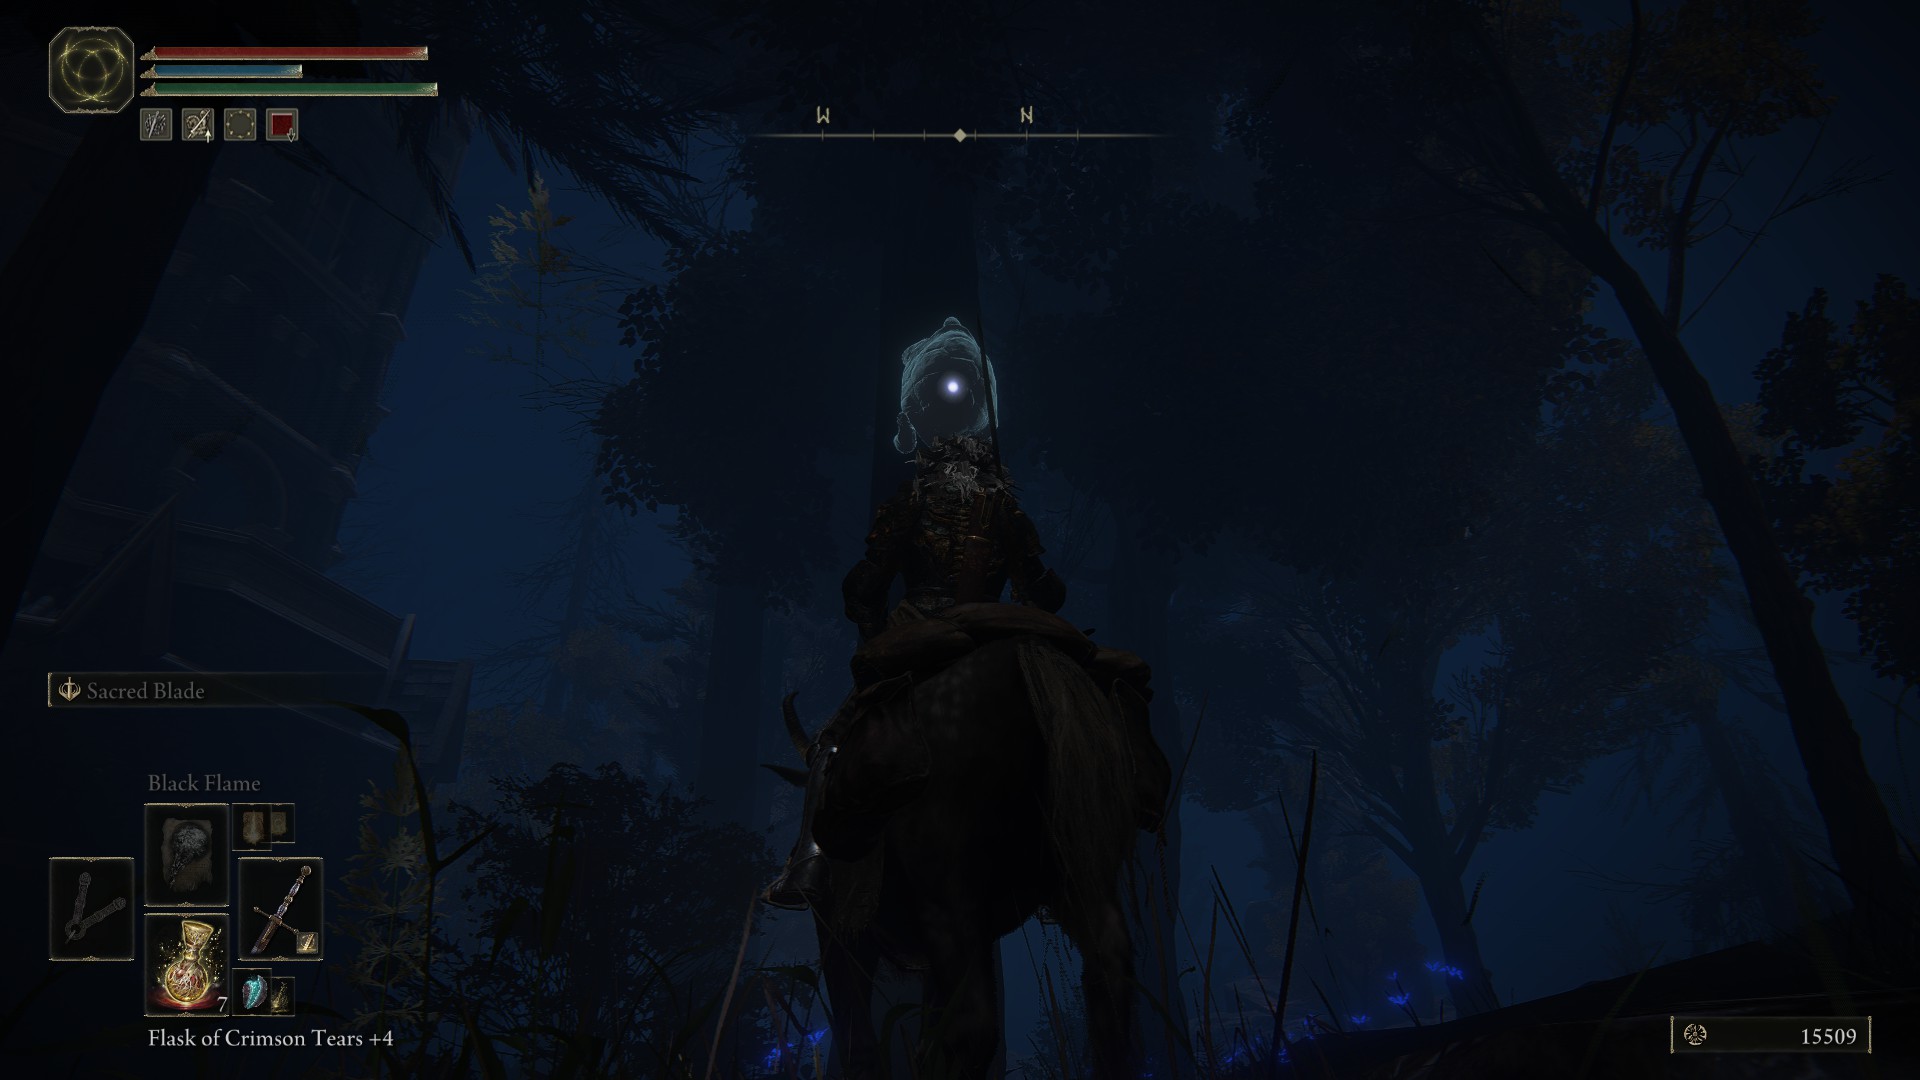
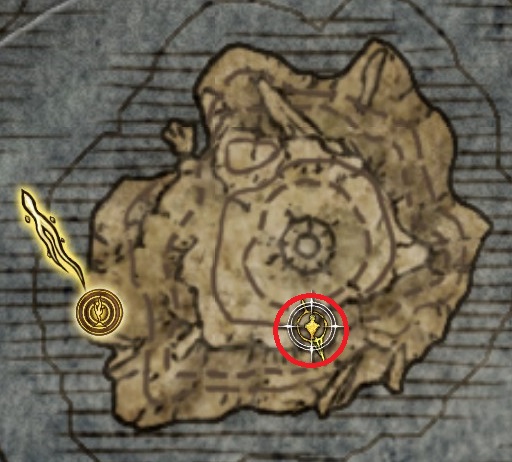
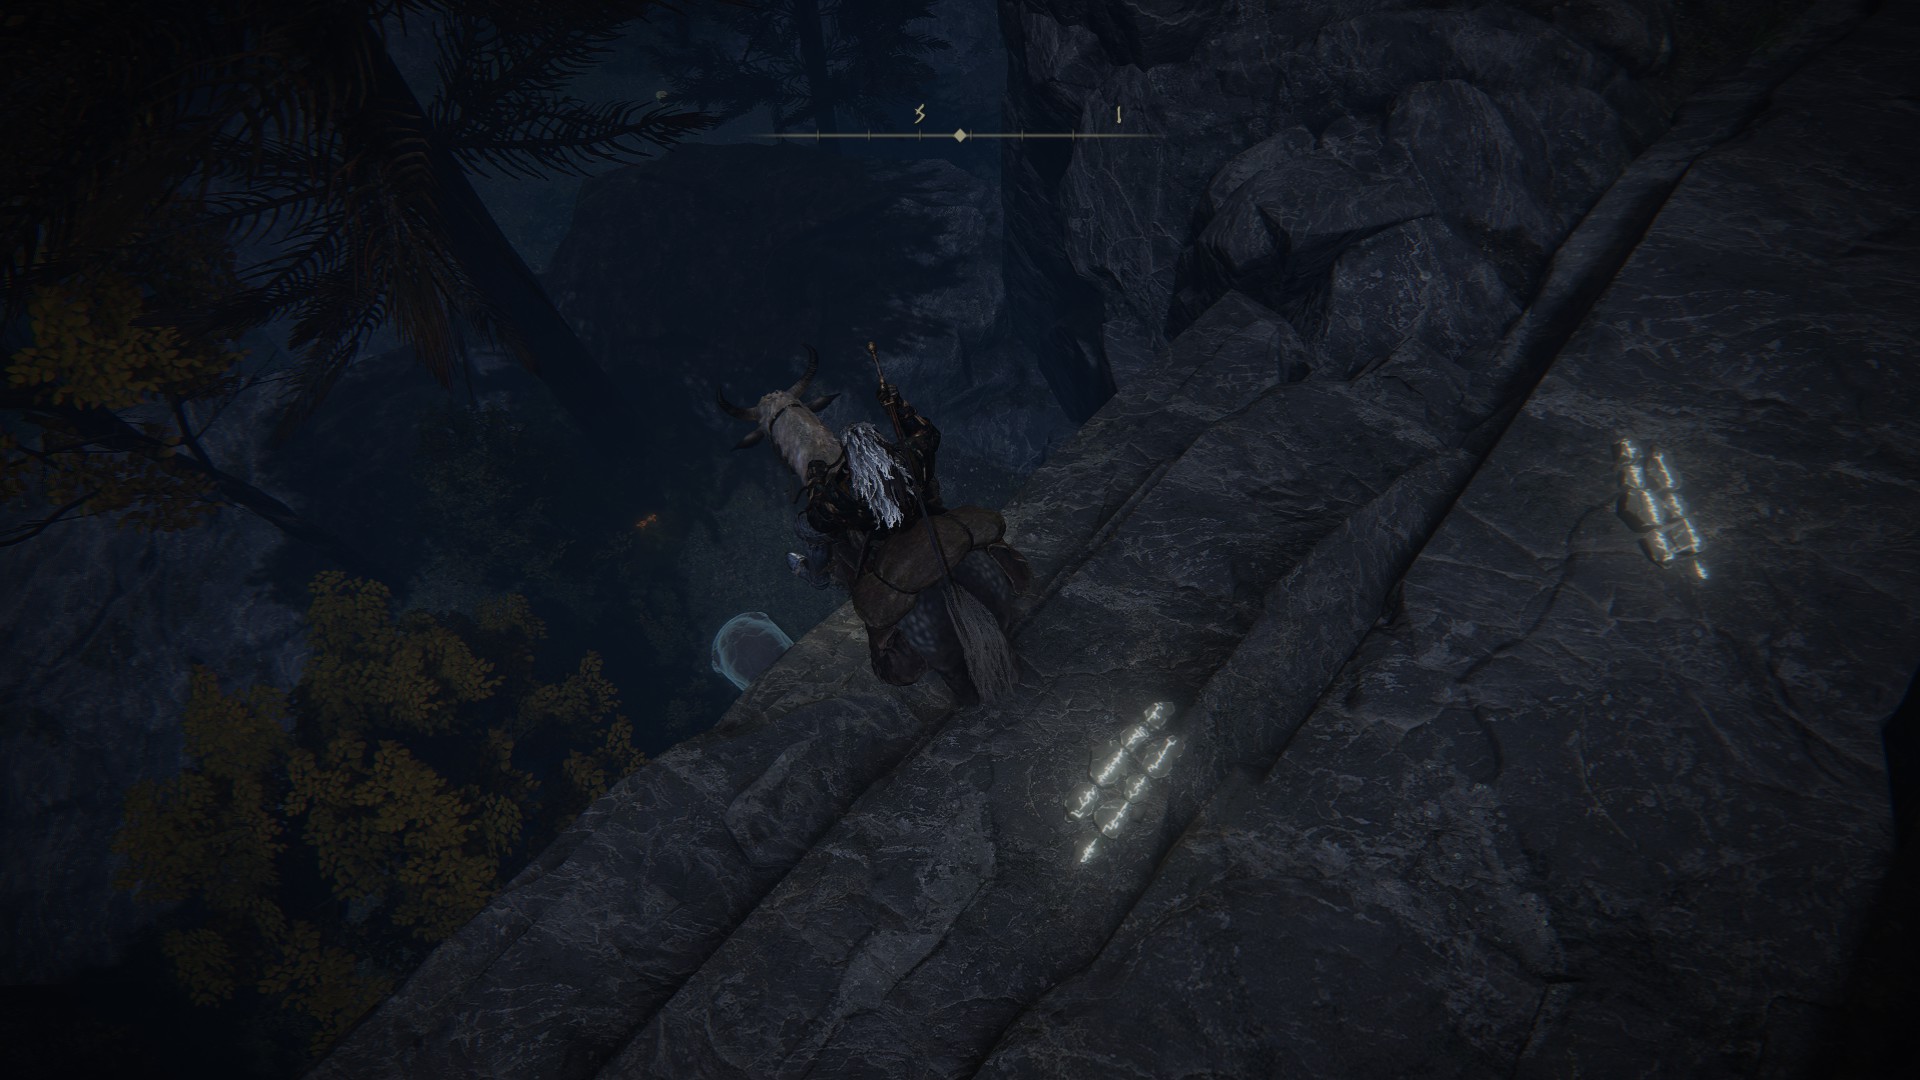

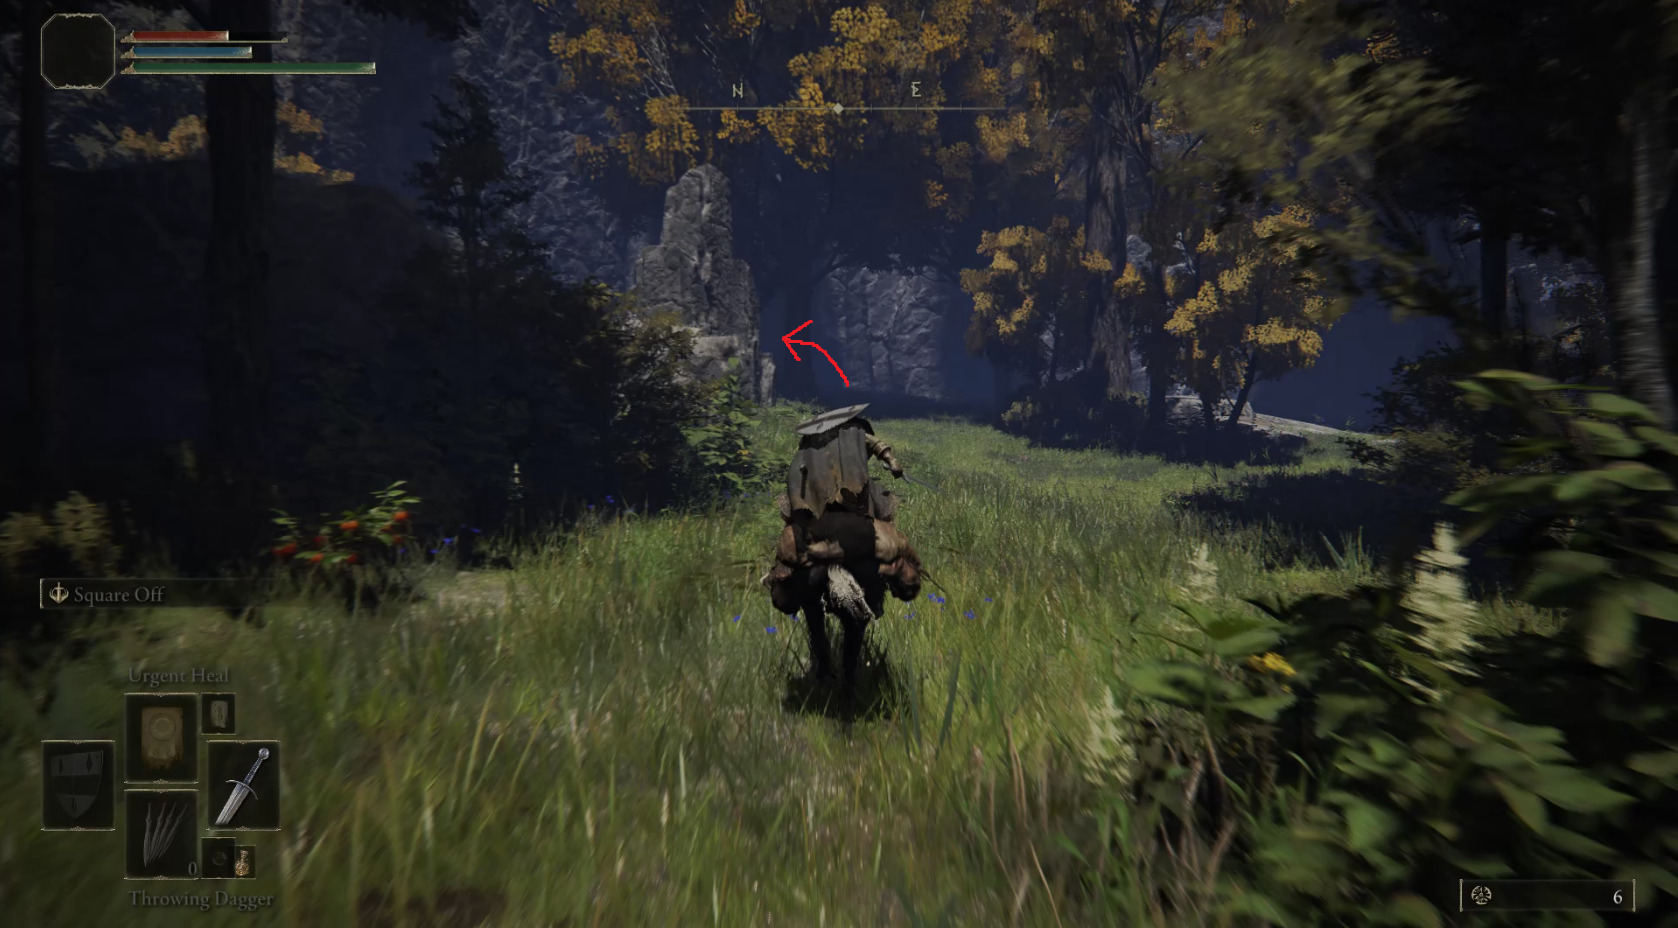
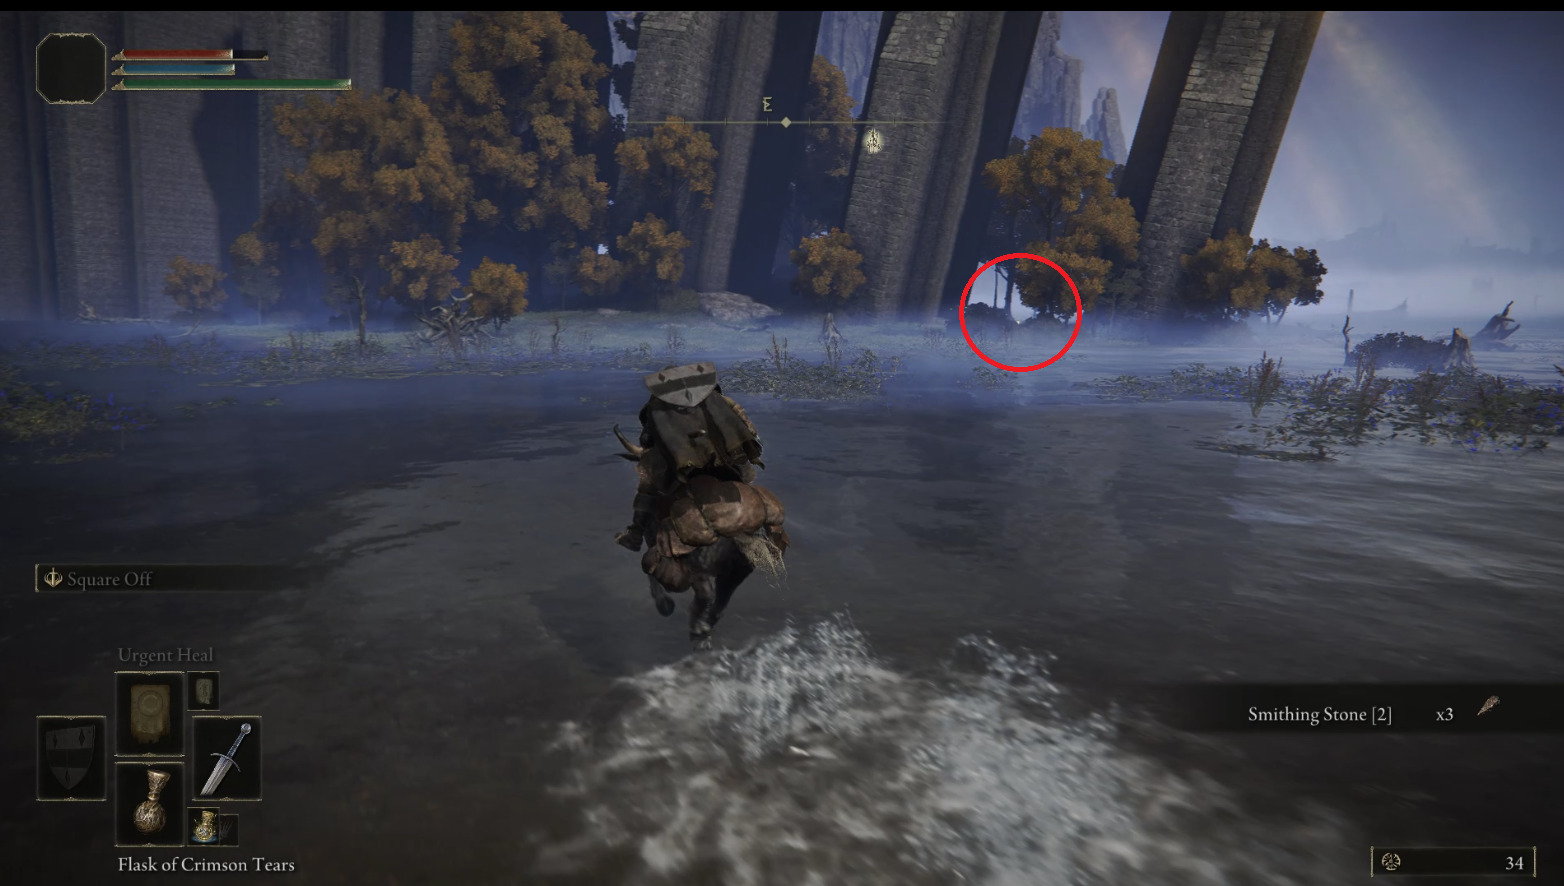
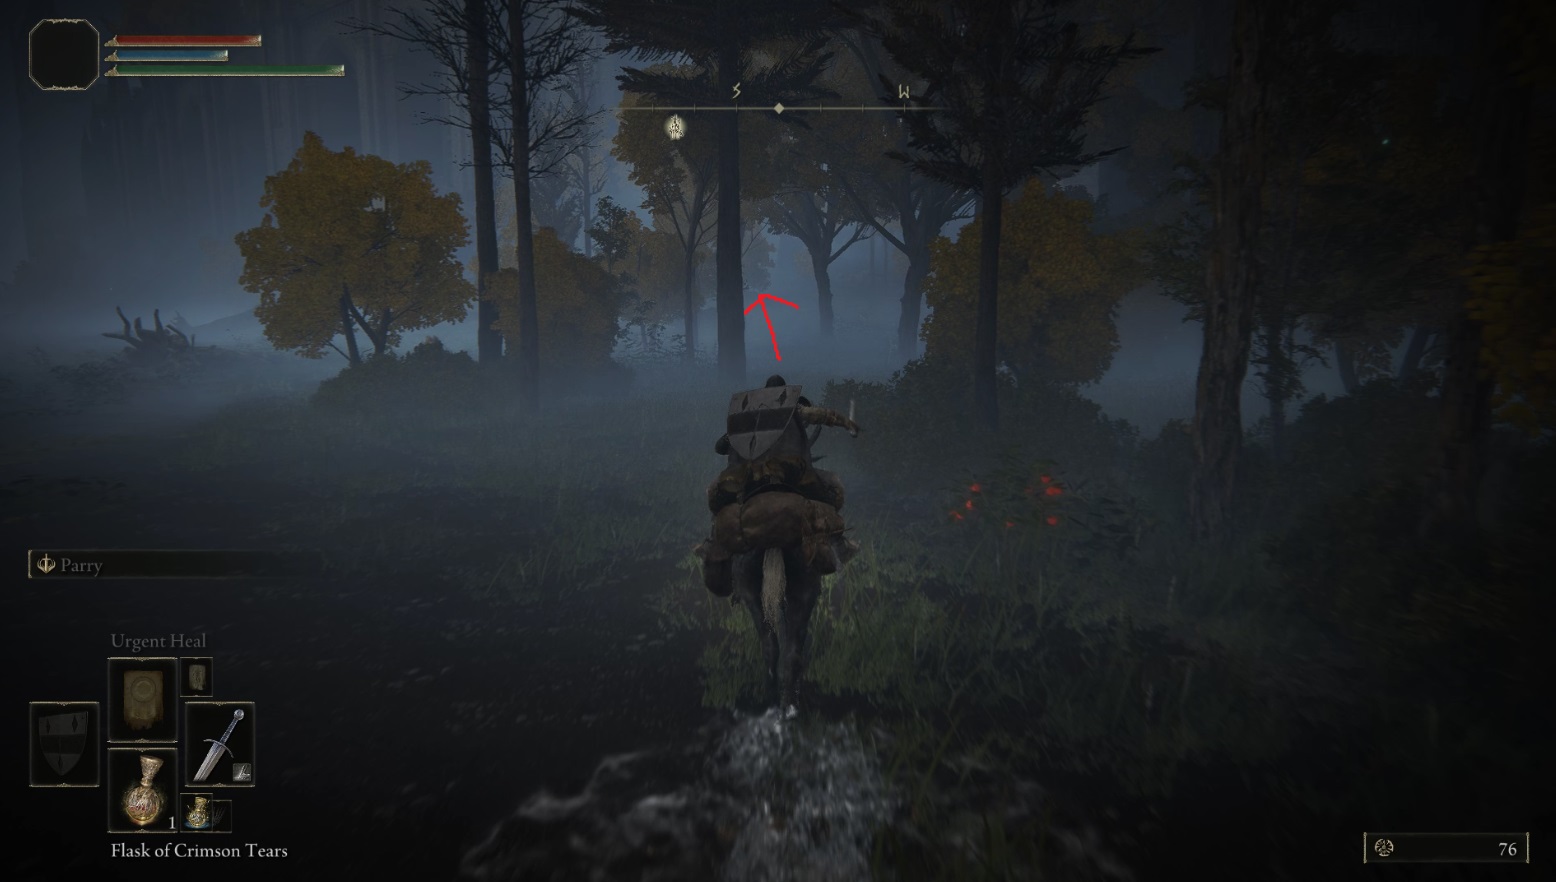
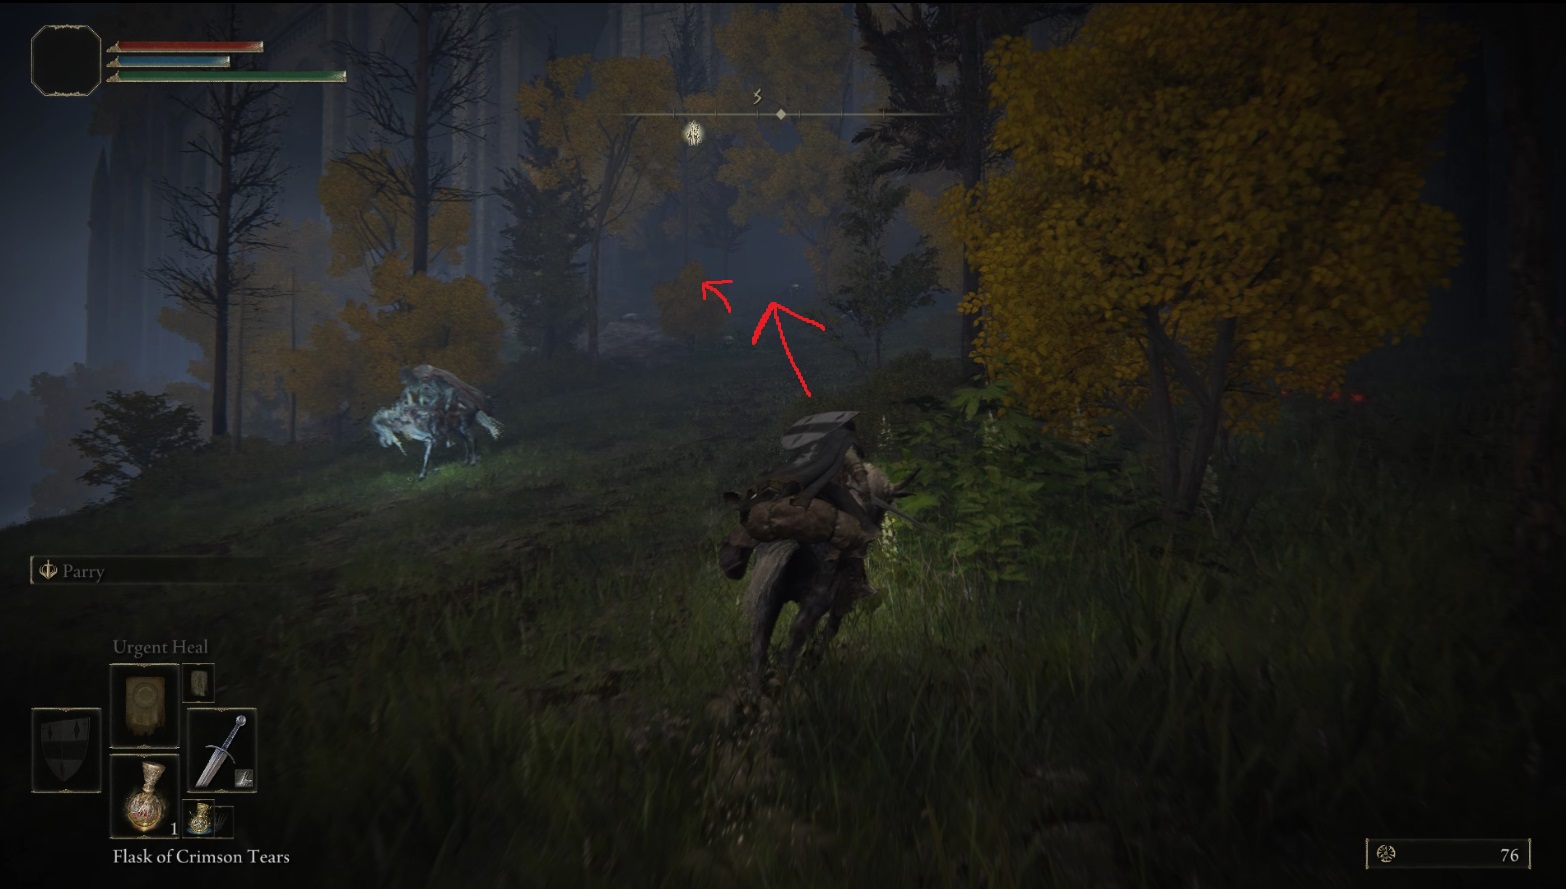

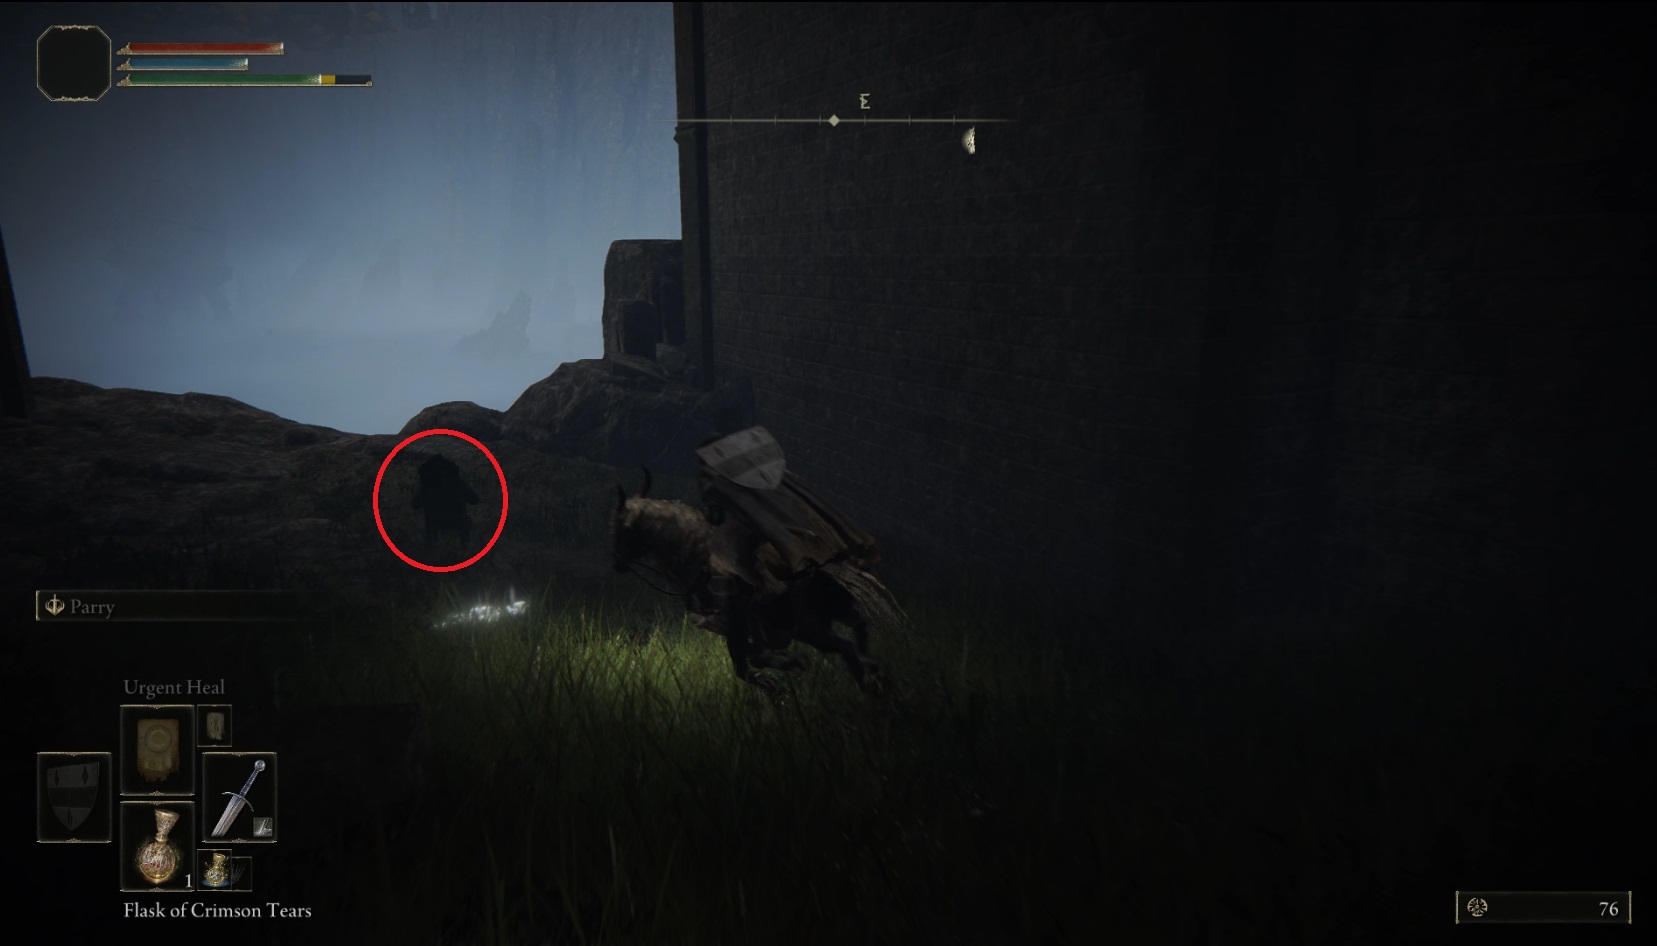

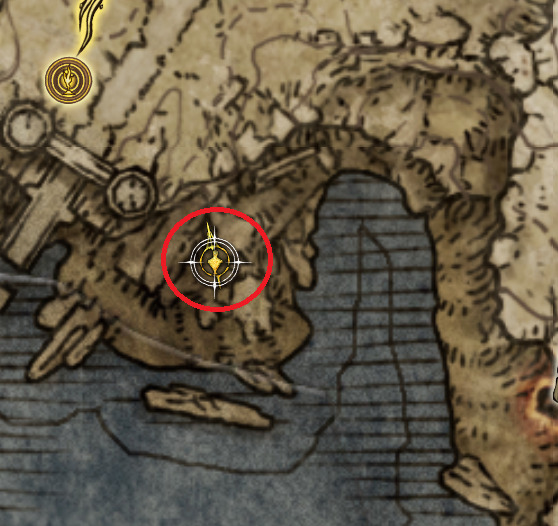
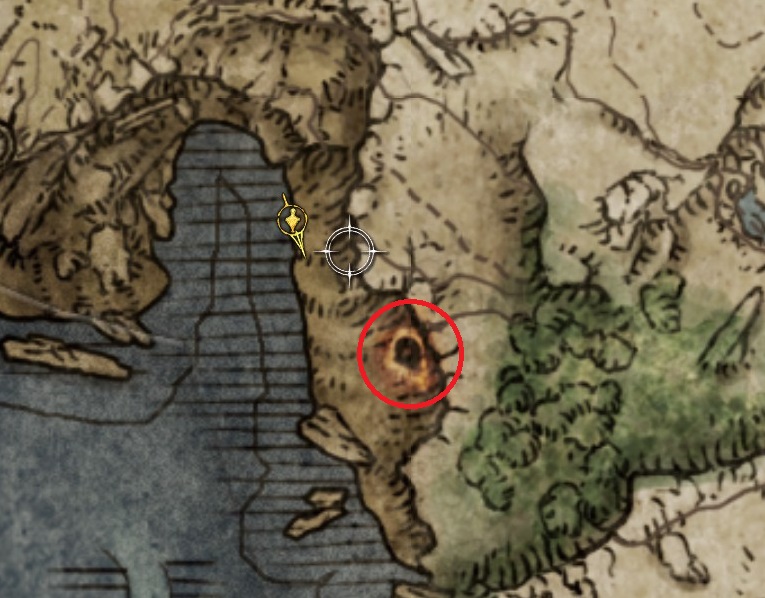
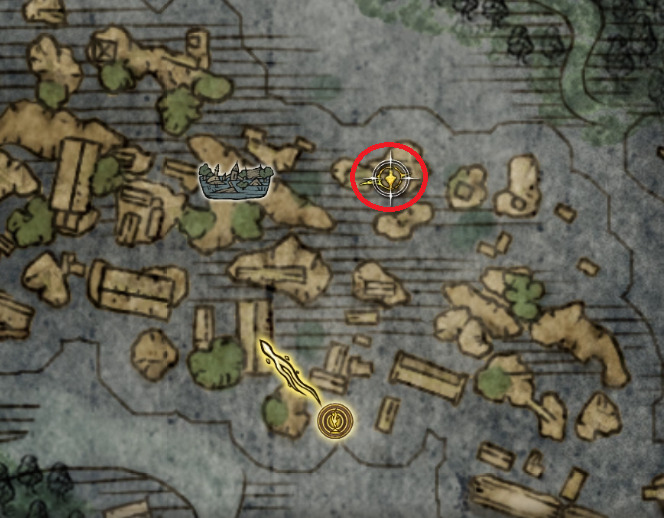
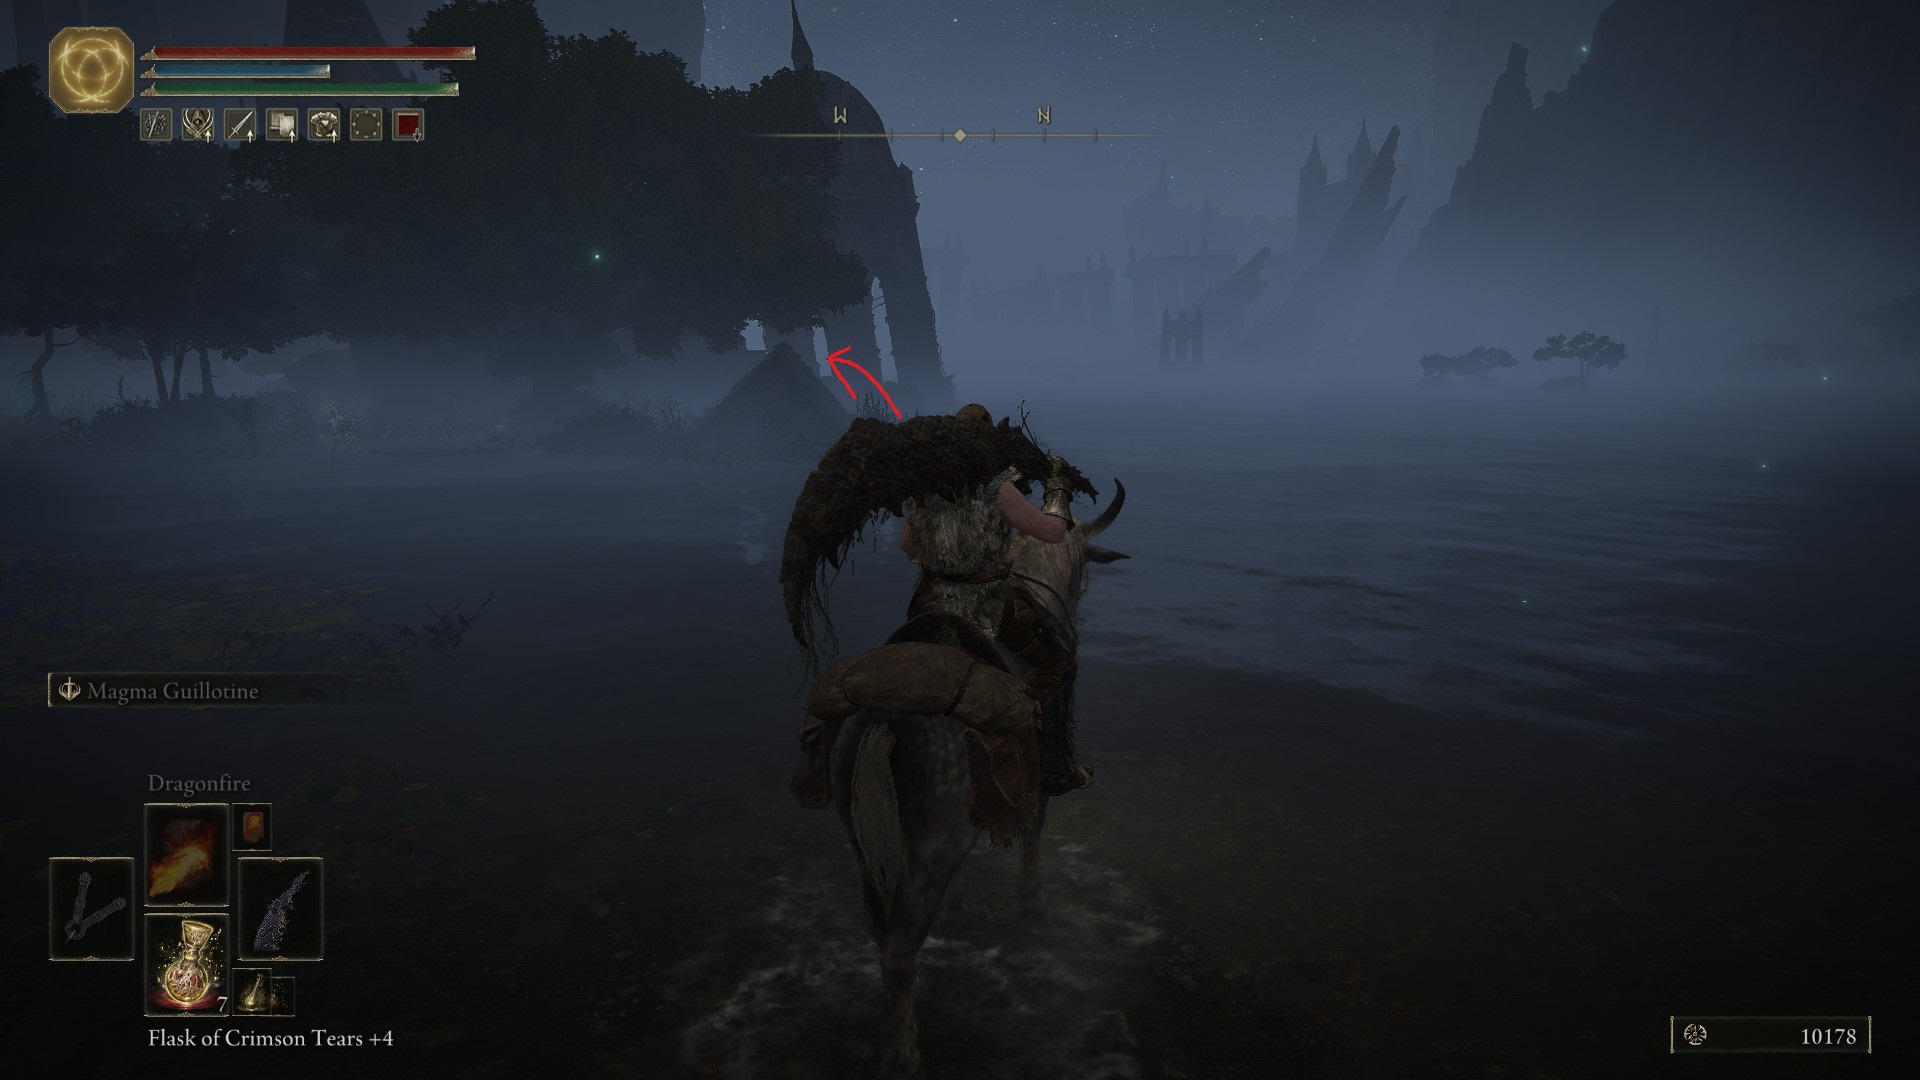
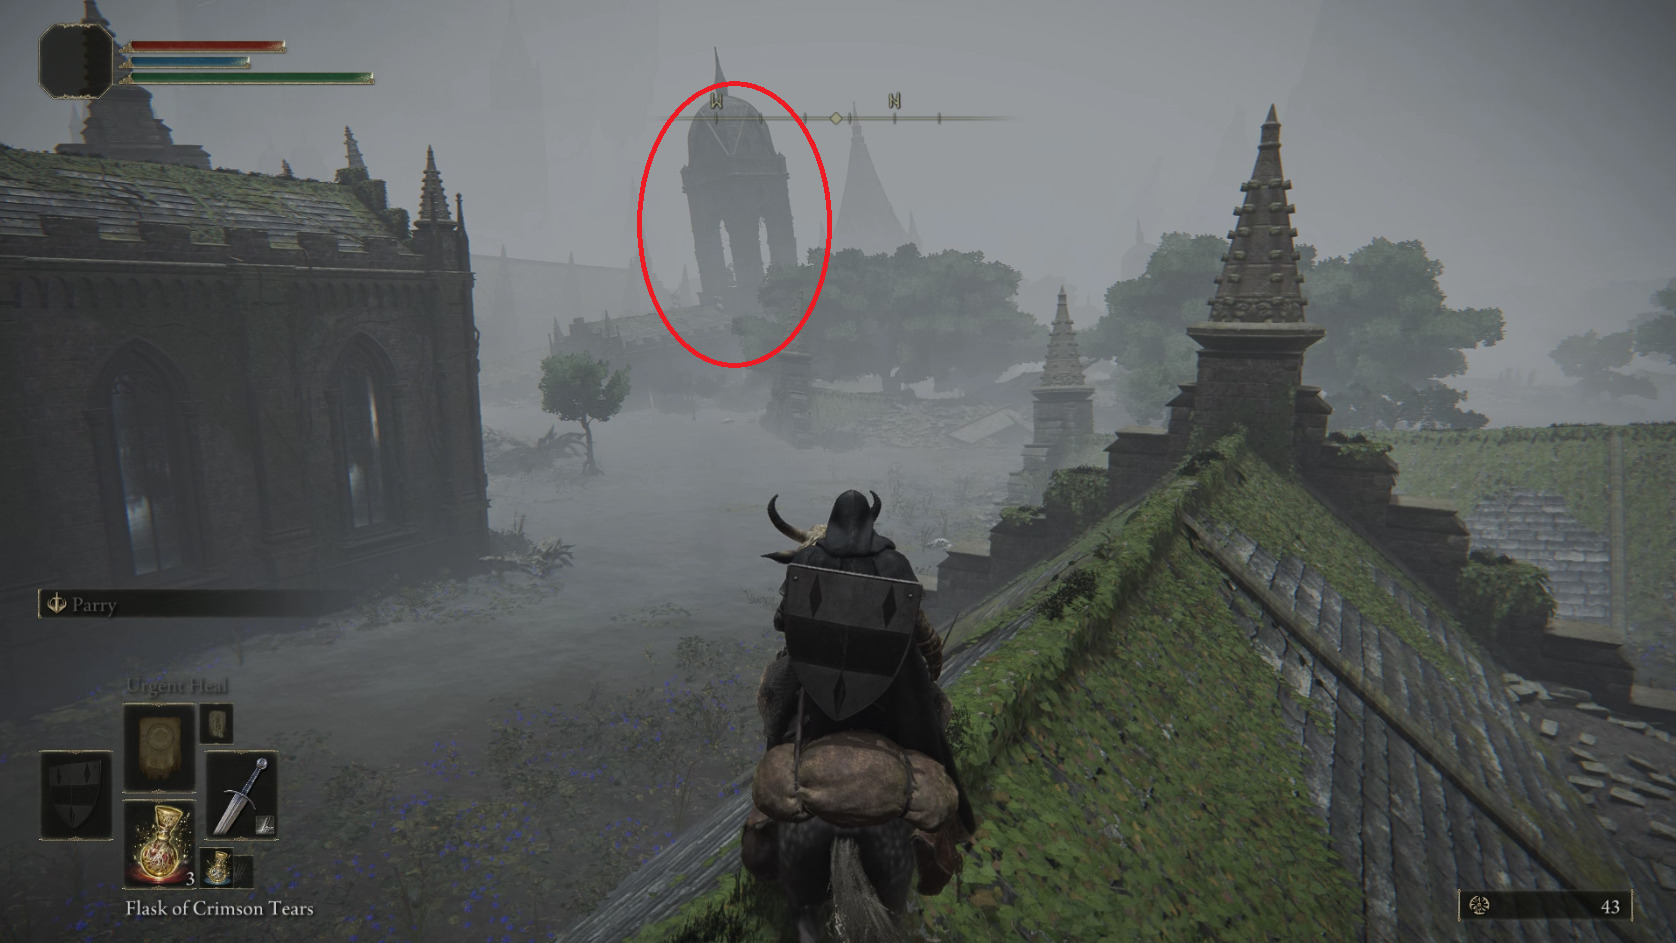

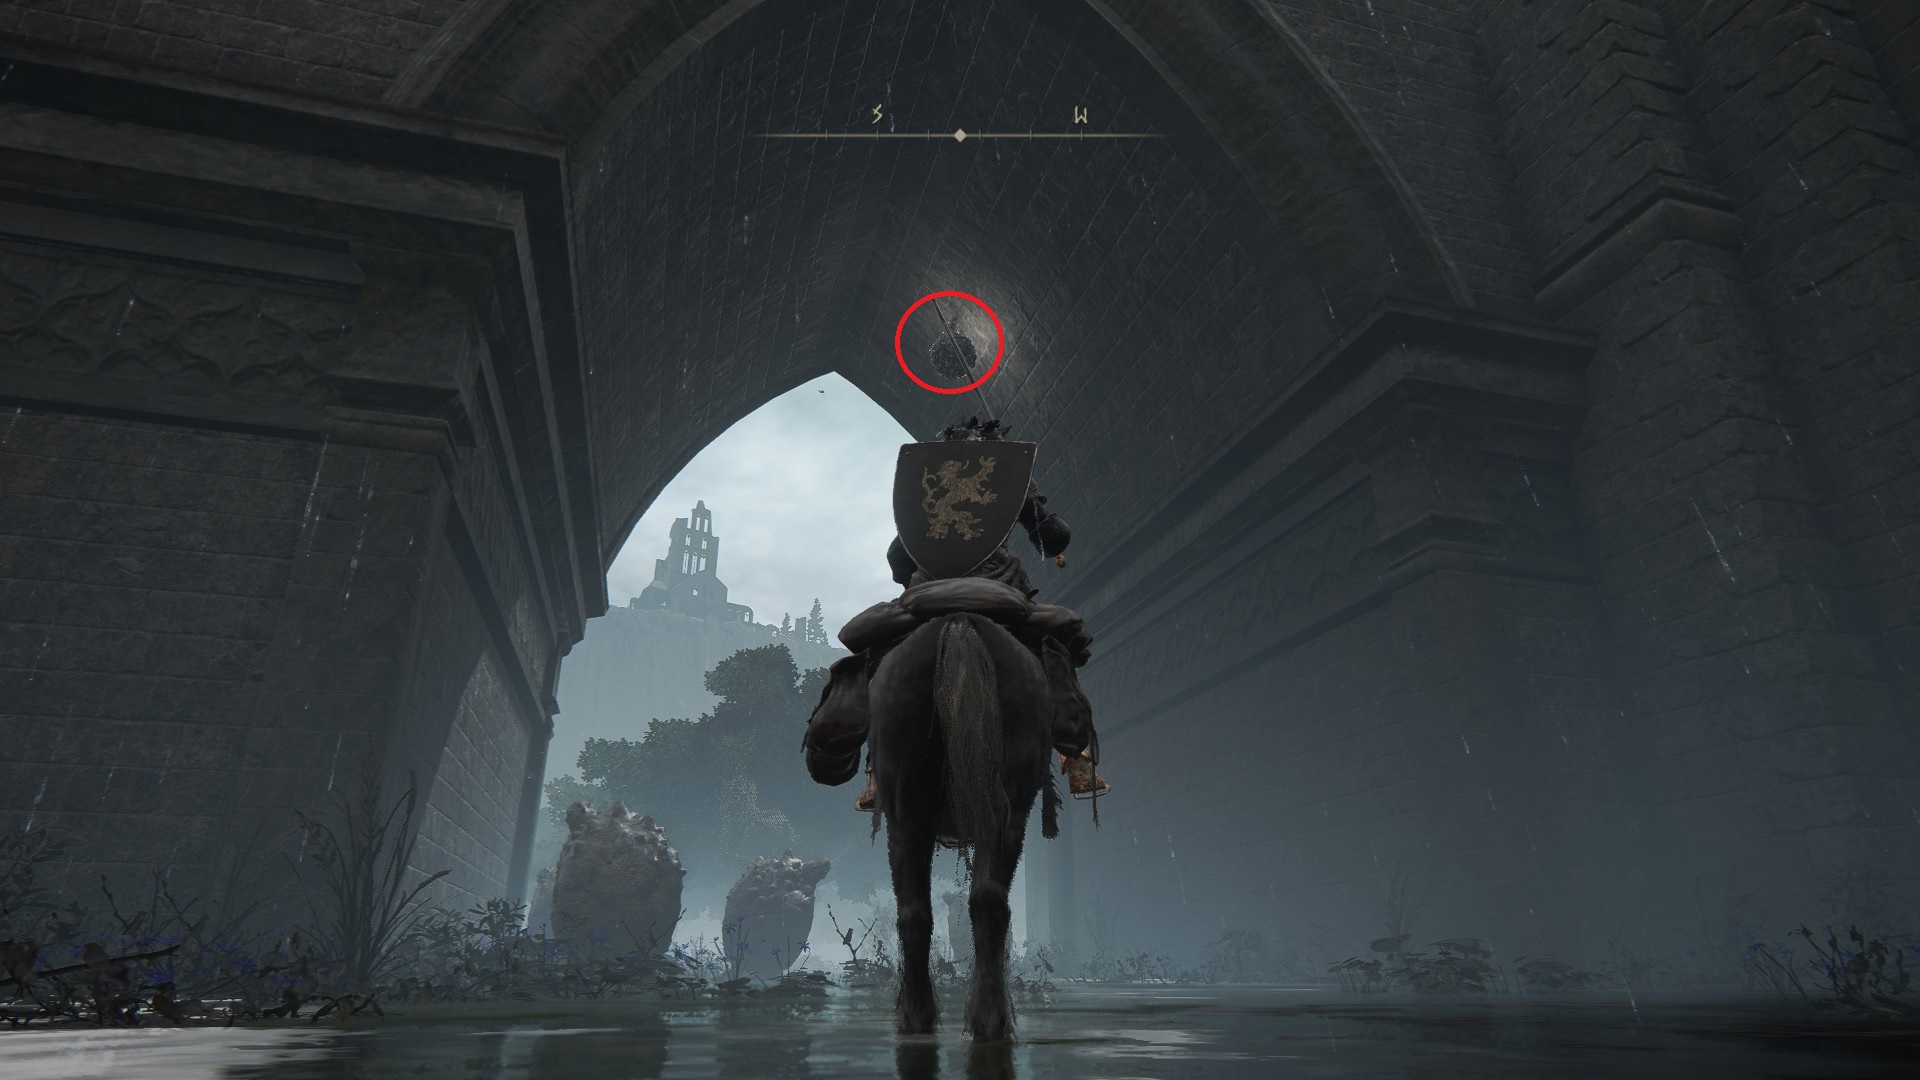


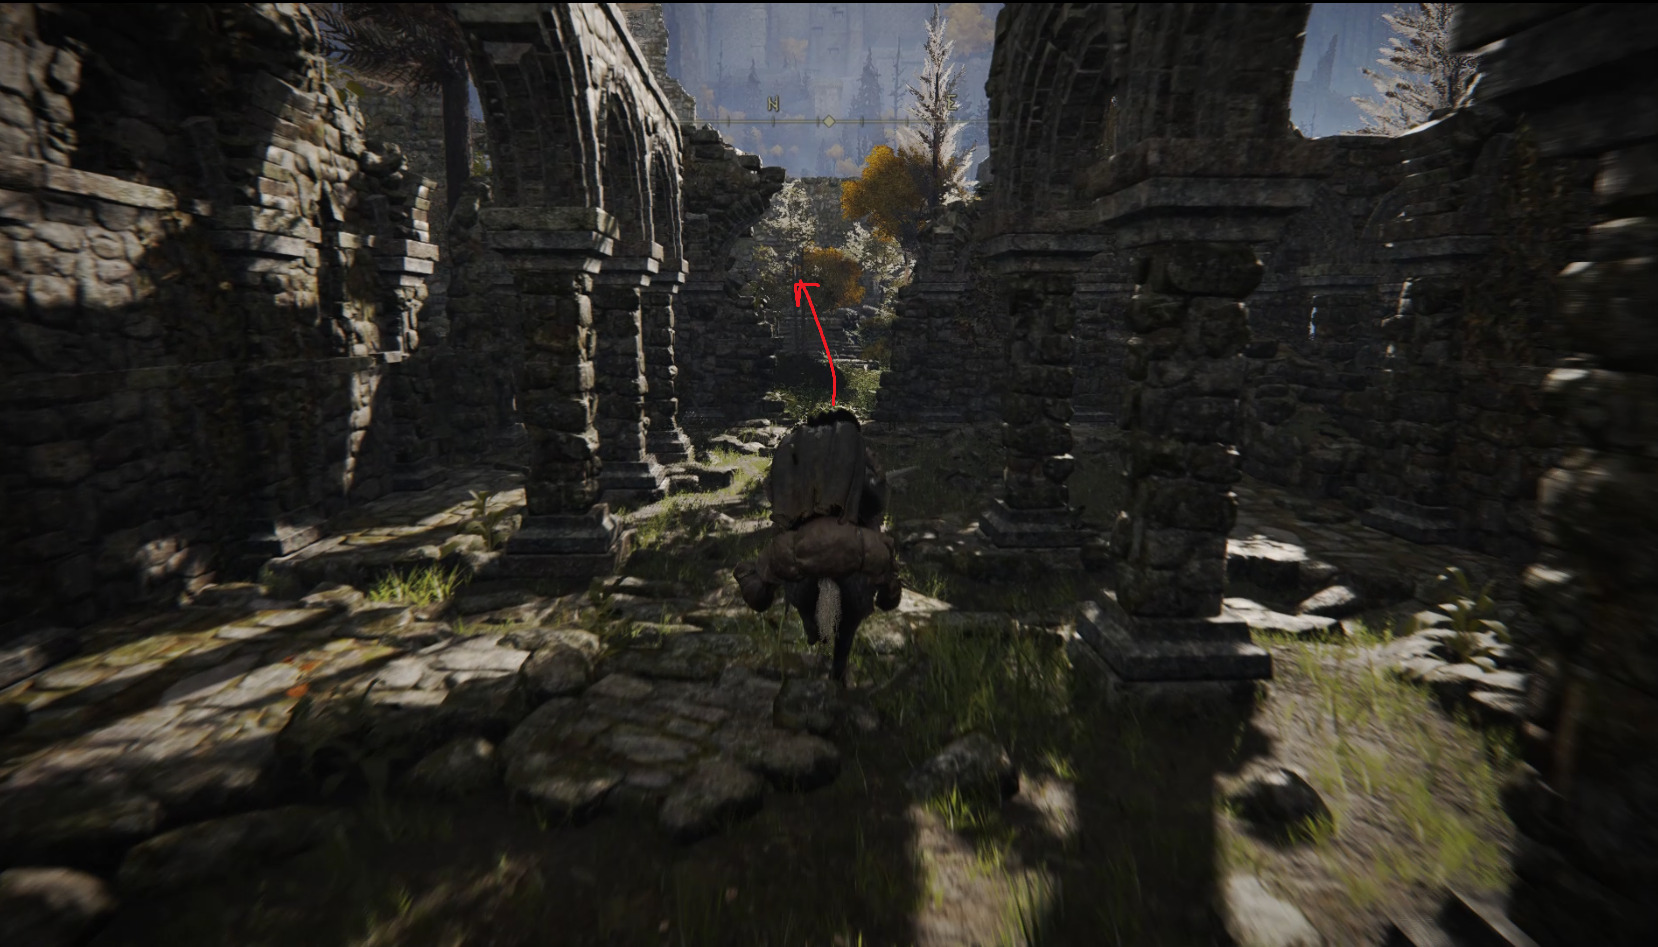
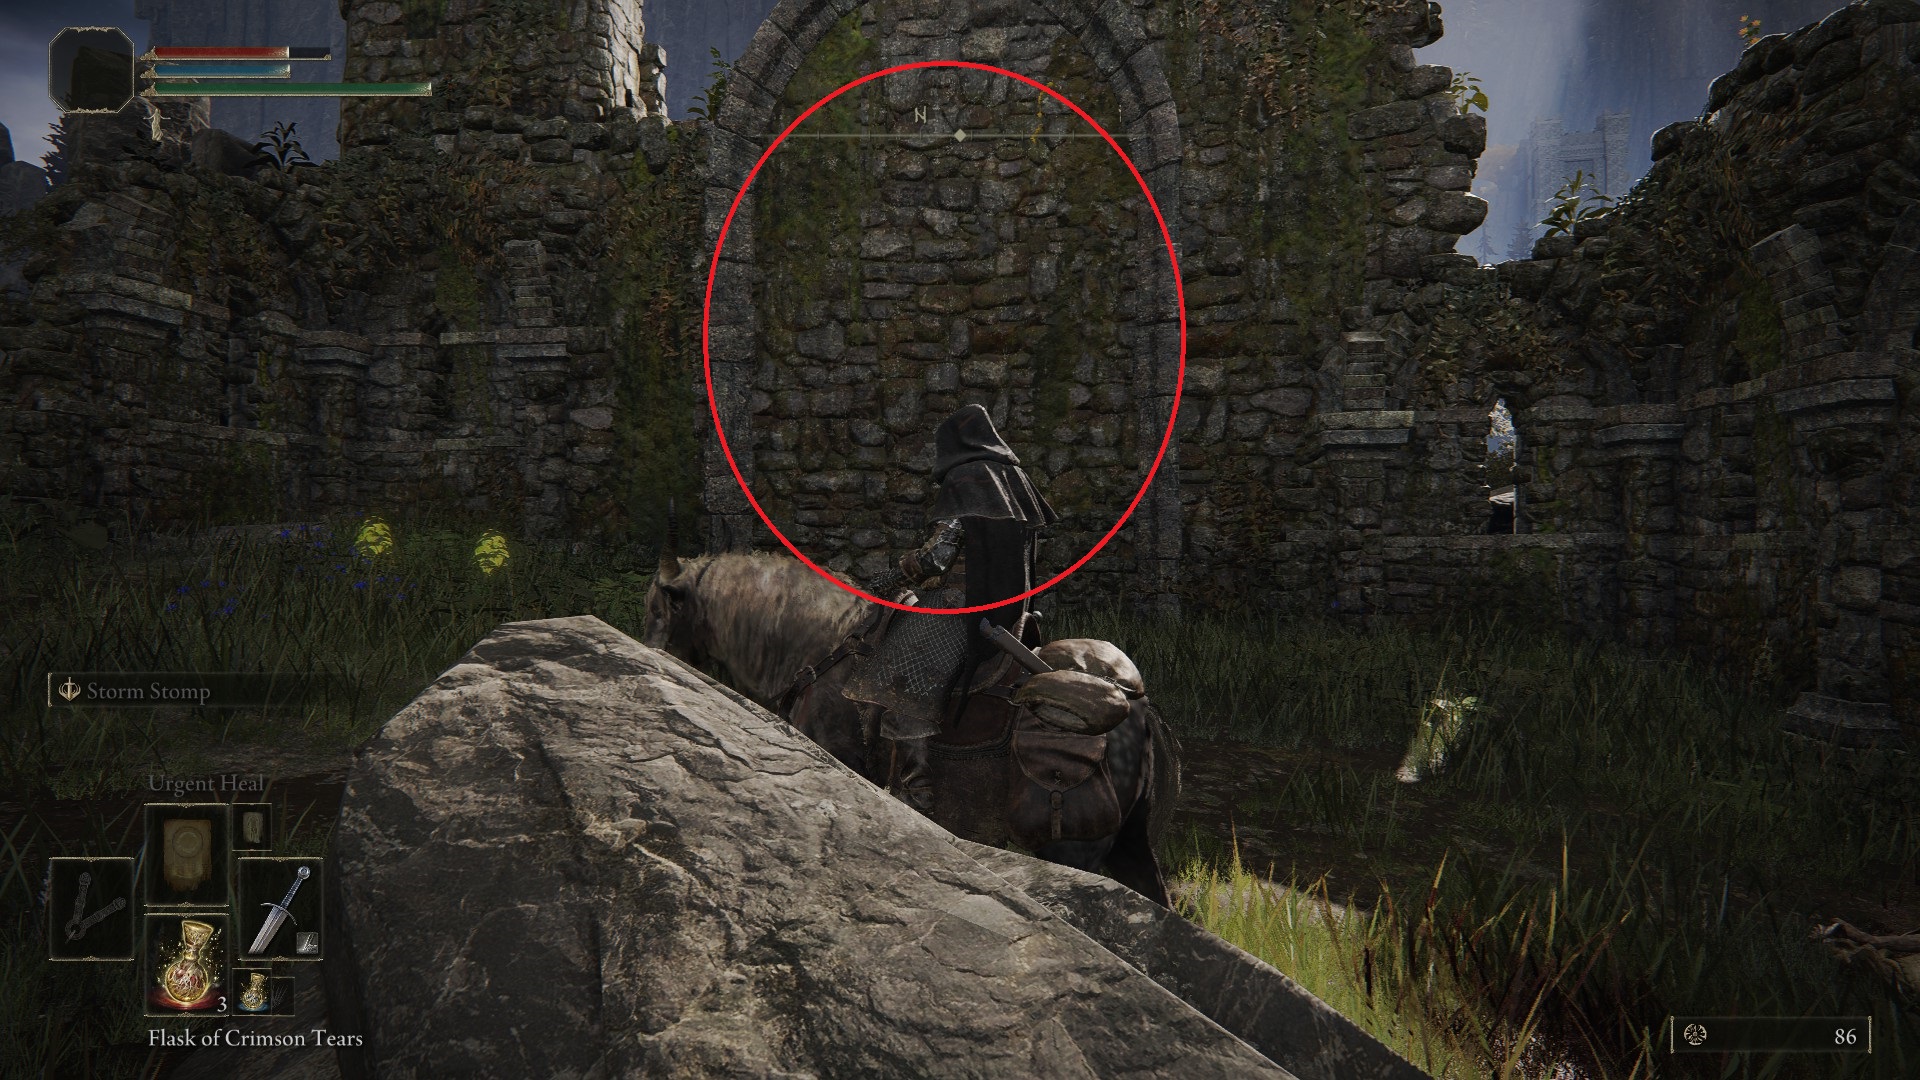


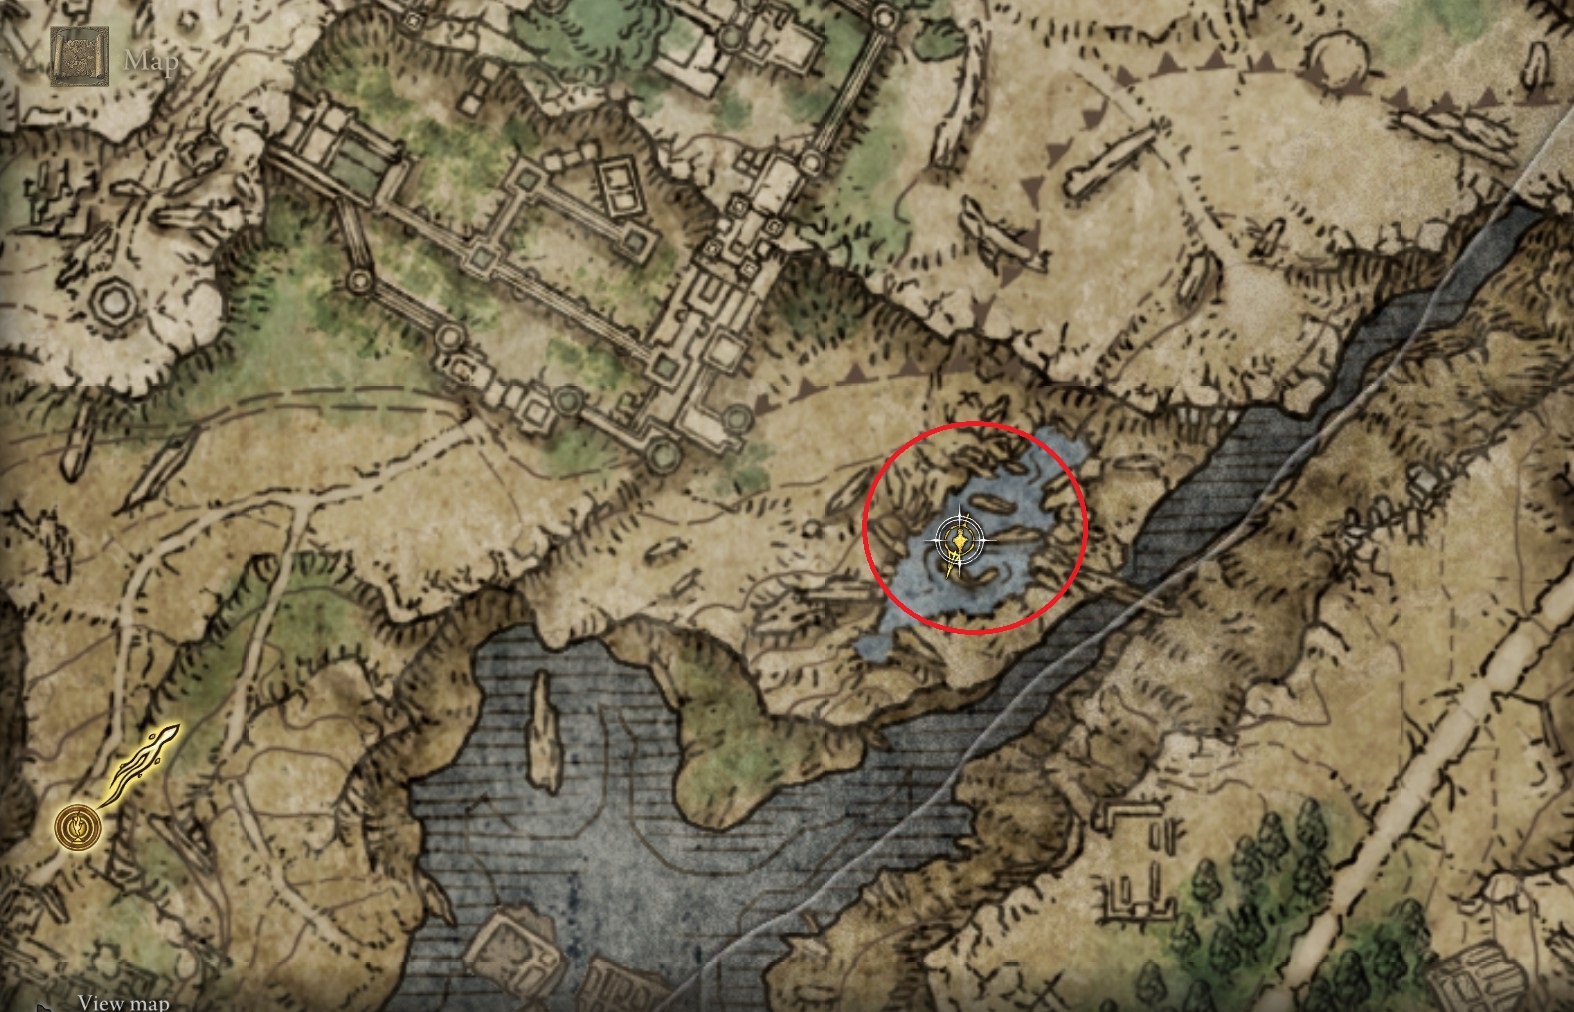

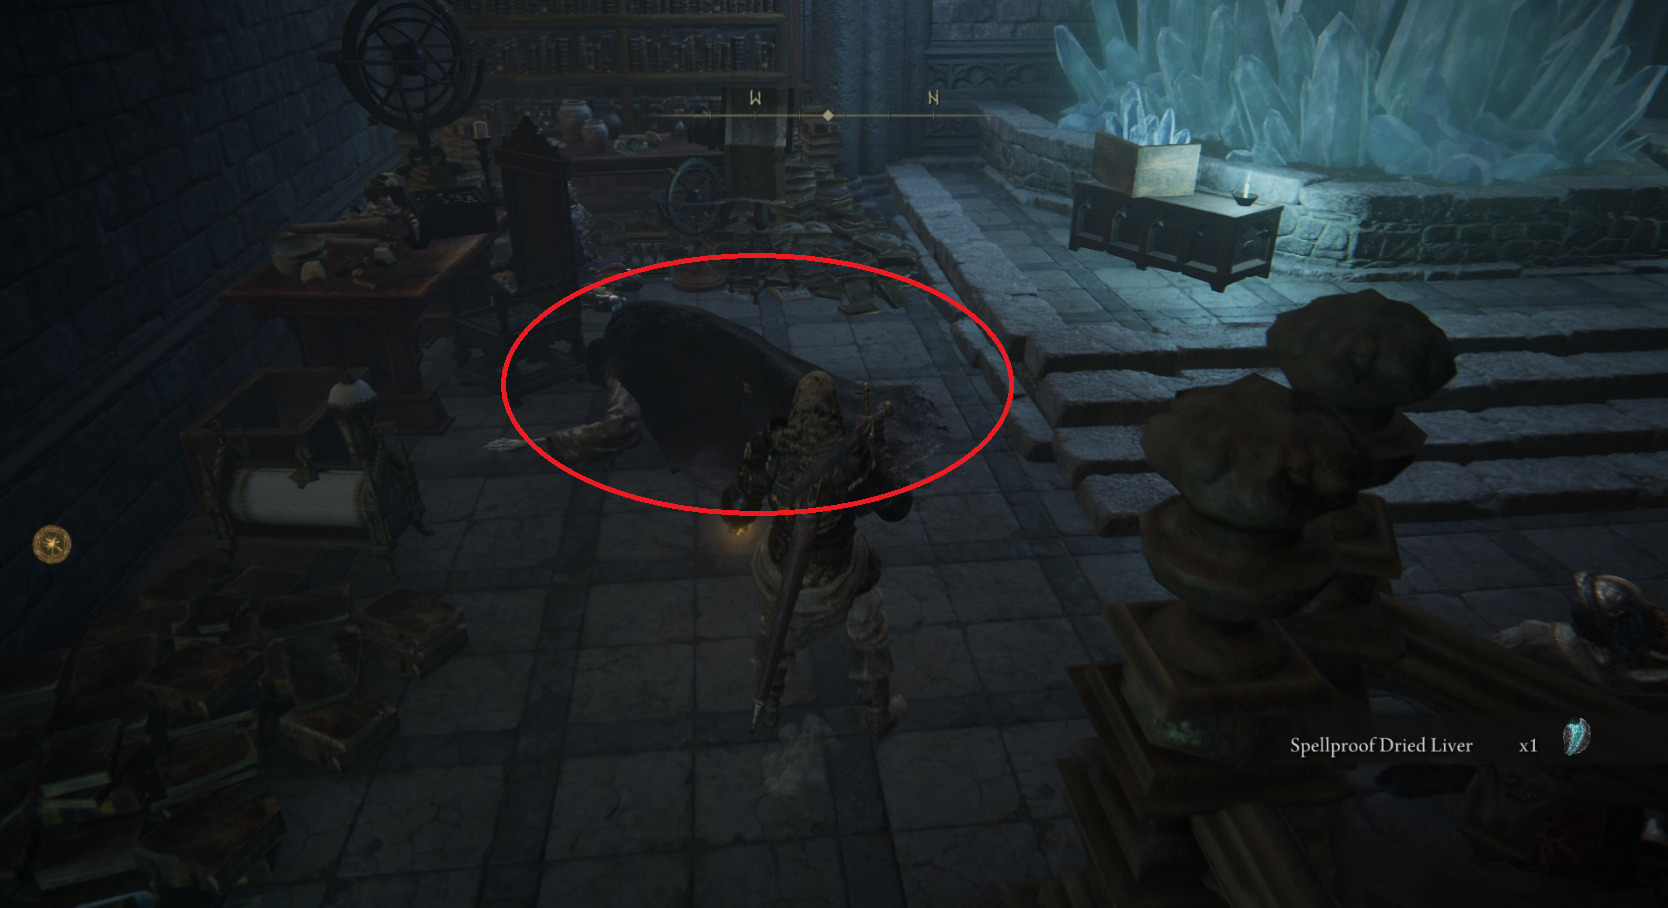
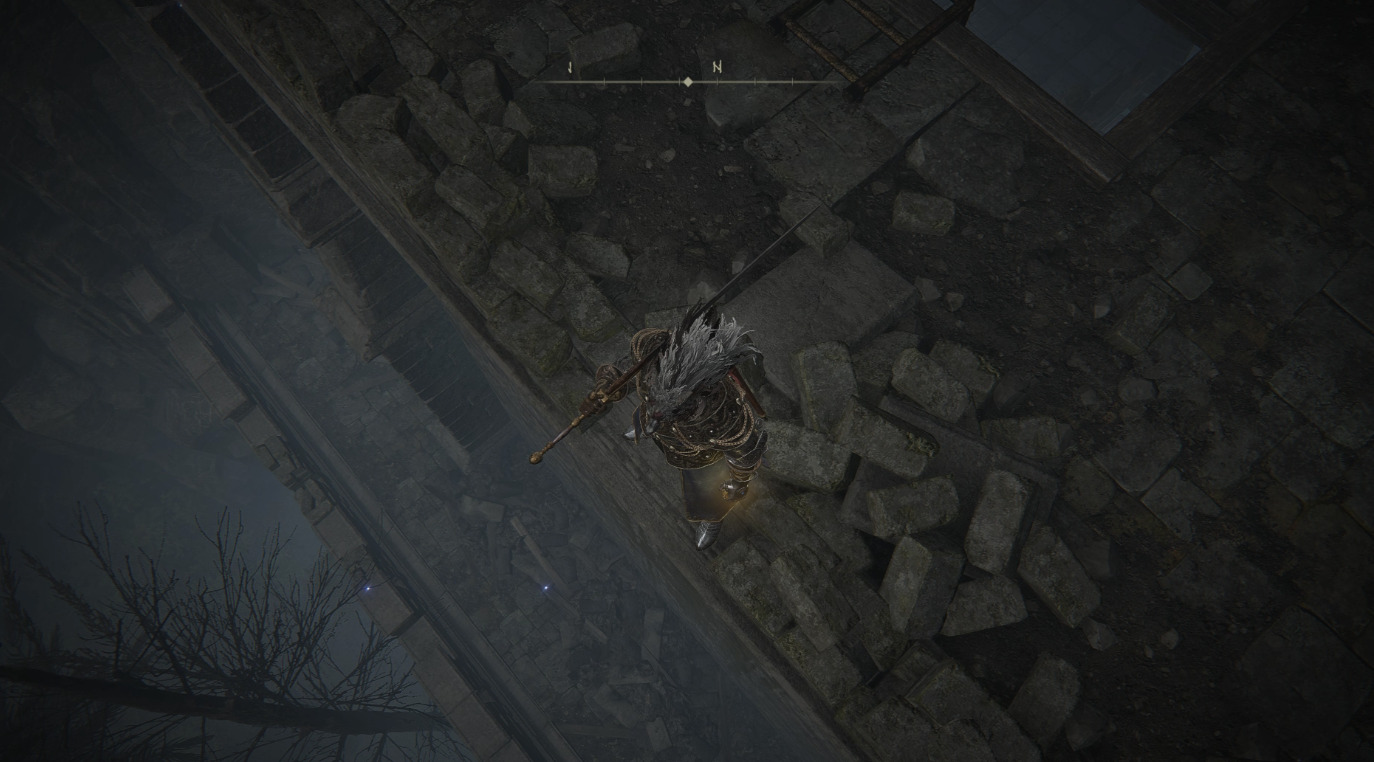
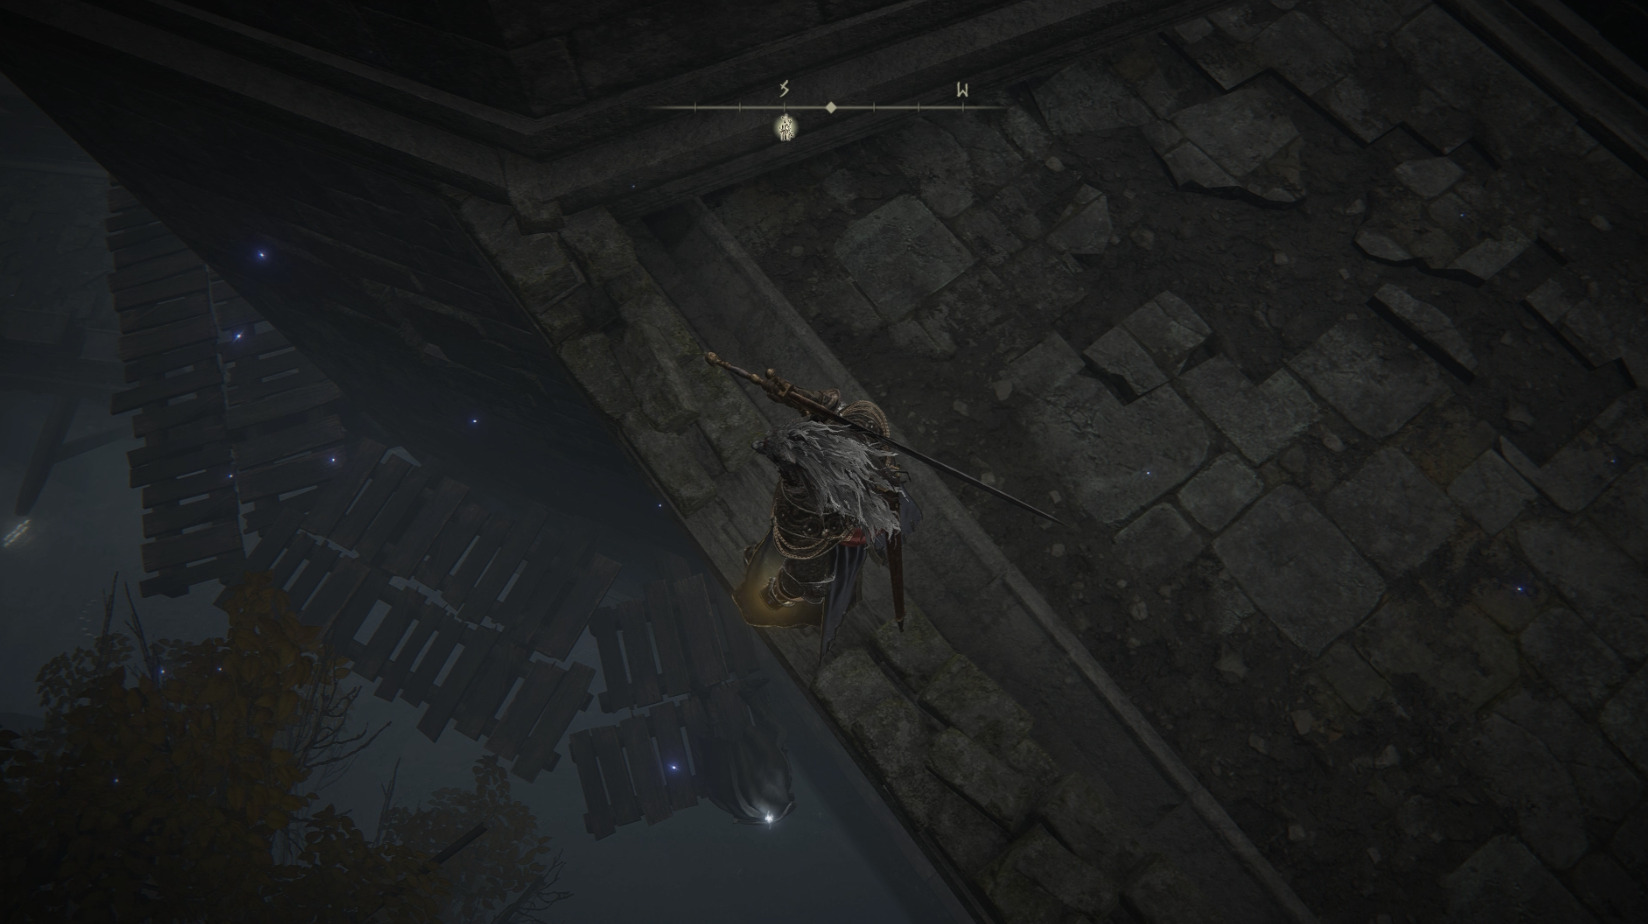
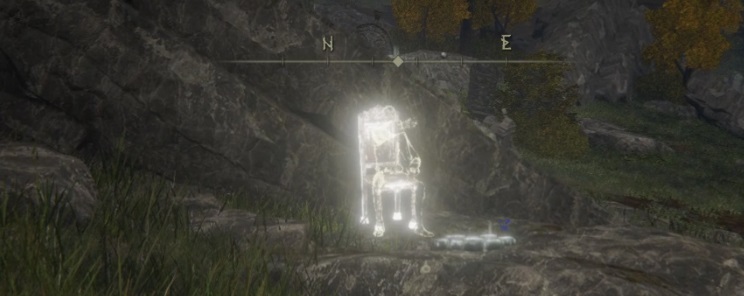


These help a ton. All caught up and looking forward to your next update!
It’s always nice to know these guides are a useful resource, so thanks for your comment Jdub! I’m planning to update this guide daily until it’s finished, so feel free to check back in every time you re-enter the Lands Between 🙂
Honestly, probably the best guide out there, much appreciated, thanks for putting in the time for this.
Thanks Myrx! Comments like this make all the hard work worth it.
First time I’ve used your site, and im glad I found it. Just the right amount of description without all the BS fluff. Short, concise, and a tinge of sarcasm and humour, what more could one ask. Great job and my new “first place to check” for walkthroughs.
Thanks for the kind words jarery, glad you like our style.
Praise the sage!
and then
Behold, something incredible!
*reverential bow*
Thank you and your comrades for this amazing guide! It is very thorough, clear throughout, and EXTREMELY helpful!!! 10/10, I’ll be telling my friends about the amazing work here
I applaud this message 😀
Ah! Great work. Read this from start to finish! Very clear, well written and easy to follow. Please keep up these guides! – They are brilliant!
Thanks Howard, always great to hear these guides are appreciated. We’ve been busy with getting our database updated so I haven’t had as much time to work on this guide, but rest assured we plan on doing walkthroughs for the entire game eventually!
This is hands down the best, most detailed and easy to follow guide out there. Looking forward to the rest!
Thanks Simeon — comments like this give me roughly the same amount of joy as beating a tough boss in a Fromsoft game 🙂
Thank you for this guide! Without a doubt the best one out there! Looking forward for Raya Lucaria with my tarnished spellblade!!!!
Just think of us as your guidance of grace, Gabriel!
Did you by chance ever read The Gunslinger? If so, I love the subtle reference “lobstrosities” XD
Best Elden Ring guide I’ve seen yet. Much better and accurate than other wikis I’ve seen.
Thanks ziavrep — it might be taking us a while to get all the walkthroughs done, but it’s because we’re being thorough!
If you ride west around the outside of Caria Manor (the side away from the pond with Hoarfrost Stomp), there’s a graveyard with tasty golden runes near the cliff edge.
Thanks Mordenthral, I’ll add that to the guide.
Nice addition! Can you tell me, what is a ‘plethora’? 😄
A plethora is just a fancy word for “a lot of” something — usually used to mean an excessive amount. “There are a plethora of sorcerers in the Academy of Raya Lucaria”.
I’m new to Elden Ring and have never played a FromSoftware game before and just wanted to say that your guides are the absolute best!! Can’t thank you enough. Not sure if you’re still updating this guide but wanted to mention a few things for Liurnia East. 1) When you head down the stairs from the Grand Lift of Dectus, before heading left to deal with the Frenzy-Flaming Tower, go right around to the side of the building. There are some bats and a scarab that drops a Somber Smithing Stone [3]. 2) North east of the Bellum Church, along the cliff edge, there is a body with a rune arc you can pick up. 3) I’m thinking you might have left this out on purpose, but north west of the Liurnia Highway North site of grace, you can snag the Carian Glitblade Staff and the Glintstone Craftsman Cookbook [3] at the Highway Lookout Tower. Thanks again for all the hard work you’ve put into these excellent guides!
Really appreciate this guide. One thing to add, in the purified ruins, you can roll over some wood planks that opens an area to “Shapiro Grape” and two finger heirloom
Praise you, Praise the Ring! I’ll go explore that area and add the info to the guide.
.. and also your guides are splendid. very precise and well written, thank you so much.
Thanks for your kind words (and help with finding items) on this and the other guides my friend!
Awesome work cant express it enough. Its helping me a Lot. Much appreciated. Cheers from brazil
Thanks Paulo, glad they’re helping you — Tarnished should always stick together 🙂
When are we getting the next update? I can’t progress without these guides  😀 
Sorry we’re holding your progress back! Updates will be daily until the guide is finished (with the possible exception of tomorrow, Monday 3/7). Usually, updates are completed by 8PM PST.
Good evening, after you defeat the boss in ansiel river south, the dragonskin guy, there’s a chest in the little building with a great ghost glovewort in it 😉
Thanks for the reminder Josh, I’ve edited the guide accordingly.
This is awesome man I’ve been playing all weekend thanks to your guide keep ’em coming!!
Isn’t this game the best?! We’ll do our best to get this walkthrough done soon 🙂
Patiently waiting for updates by cheesing the bird in Mohgwyn 🙈 I’m a bad tarnished 😅
Hey Josh, sorry about the delay on Central Liurnia. With any luck, the next update will be before 8PM EST.
Also, for the record, there’s no wrong way to Tarnished! We all do our best with the scraps of grace we’re given.
No need to apologise, great sounds like it will be ready for me when I wake up 2moro. Keep up the good work kind sir(s).
thanks for this guide it is amazing! Can’t wait for the next update.
Thanks for being patient, we’ve had a lot of other work to do for this section and I haven’t had a lot of time to update this page these last few days. Today’s update is short (although it does include boss guide) but tomorrow’s should be beefier!
great guide! One thing to add, on the way to the Artist Shack there is a walking Golden Knight who drops the Dragon Cult Prayerbook
Great catch al, really appreciate it! I’m so used to avoiding patrols on the roads that I missed that guy.
The walking mausoleum in this area requires you to land on top of it. The skulls aren’t on its feet
Thanks for the correction Kirian, we’ll update the guide.
Any idea when we’re gonna get western liurnia? Still loving the guide!
Hey Nac, apologies for the delay in updates! I’ve had to spend a lot of time getting stuff done with our database — I hope to get at least a little bit of Western Liurnia done tomorrow, and I plan on continuing to update as often as possible until it’s finished.
Thank you for remaining active! Great guide
Thanks for the update Dan, and really appreciate all of this.
I just stumbled across a random basement in Layskar Ruins, just beyond where the Golden Rune [3] and Ritual pot are, no enemies but a chest with a Wraith Calling Bell, 1 in the pic is where the golden rune is, 2 is the entrance to the basement. There’s also some spooky wraith dude riding a horse ringing a bell, presumably the wraith calling bell 😀
Wow, great find Sarah! Can’t believe I missed such a useful item… I’ll add this to the guide, I’m sure everyone who reads the guide in the future will appreciate your contribution 🙂
Also, I’m glad you caught that Dark Tower reference, it’s one of my favorite book series ever so I couldn’t resist when I had the opportunity haha
Brilliant!!! I was so hoping it was a reference and not just chance 😀 Great series for sure!
hi, when at the converted tower site some parkour can score you a memory stone 🙂
Thanks for sharing! I didn’t recommend that path because it can be tough, and once you do Raya Lucaria you can get into the tower without risking death via fall damage, but some people may want to try it anyway.
To spawn the bellberring hunter you just pass time till night, exit the grace, then rest again. He will spawn after that. Save a loading screen.
Thanks Oni, I wasn’t able to get that to work when I tested it, but lots of other people seem to have had the same experience as you so I’ll adjust the guide accordingly.
You indicate that competing Irena quest in Weeping Peninsula gets you your first grape “the grape you got on the way after you completed Irina” – at the very beginning of this Liurnia page. But, I don’t have it and I’m reading you have to kill Godrick first to get it. Is this an incorrect piece of info? Great guides, thank you so much for them!
We’ve edited that sentence to make it a bit more clear. You indeed have to kill Godrick to get the grape — it’s in the castle, in one of the rooms you go through after defeating Godrick. Check out this section of the Stormveil walkthrough for the location of the grape.
Great guides these, very well written and I’m finding them most useful.
Right at the end of the Central Lakes guide at the Fire Monk camp there is a dappled flesh if you smash your way into one of the tents.
Thanks, I’ll note that!
Thank you so much!! I’ve enjoyed so much playing this with your guide.
Glad to hear it Jorge!
Love, love, love your guide! It is so thorough and easy to follow.
Just wanted to give a tip for anyone struggling with the Erdtree Avatar. It really does not like FIRE.
Happy hunting!
I’m so glad you mentioned that Brittany! I was seriously riding in a car the other day thinking about Elden Ring (don’t we all?) and realized we hadn’t noted that in our boss guide. Also, thanks so much for your kind words re: the guide  🙠
Amazing guide, best on the web… Just gonna put something out to help you make it more complete. In the central tab almost to the bottom, you say to teleport back to the academy gate town site if grace, but you never said where that grace was when getting the map fragment.
Great point Ryan, we wouldn’t want anyone to miss out on that grace! I’ll update the guide accordingly.
A note: after getting treespear from the cart with the giant, on the road leading north there is a corpse, to the right of this corpse next to the trees there is a golden rune.
and there are two balloons dropping golden runes, not one 😉
Thanks for confirming this… I got ripped off! I spoke with Spannah and he also had two balloons there, but I double-checked my footage and only one spawned for me.
This was great!!
Thanks Kyru — safe to assume you’re rocking a sorcerer-style character?
Sorcerer/Greatsword lol it’s quite unique actually and I’ve been able to adapt to pretty much any situation thus far. I’m working on liurnia right along with you.
Nice! I’m also doing a hybrid build, the classic strength + faith. Spellcasting definitely feels like it can be combined with melee in a really effective way in this game.
Yea it’s very satisfying
Thank you for the walkthrough! Can’t wait till your next publish on central region of lake liurnia
Just a fyi the tower of frenzy if you climb to the top and kill all the worshippers it stops
Thanks Dmo, I definitely neglected to mention that, I’ll add it to the guide!
Great stuff. Keep it up please 🙂
Don’t worry Beton, we won’t go hollow (or whatever the Elden Ring equivalent is) until the walkthrough is complete.
taking a left around the tower , which tower? southeast from church is where those acid throwing plants are. i can’t find the trap area with frenzyflame stone
Hi Martin, sorry that bit isn’t clear enough! I’ll add a screenshot with the map location in just a minute or two here.
Edit — OK, you have a map to work with now 🙂 Also, it sounds like you may have ridden southwest instead of southeast if you ended up near those poisonous plants.
Thank you sir
There are a stonework key being guarded by a crab in the Manor. If you jump down off the roof near the ladder that leads to the merchant and follow it down a few ramparts to the south east you will find it 🙂
Thanks Michael, I’ll go take a look and add it to the guide!
thank you, this is great
Glad it was helpful 🙂
Great Job!!! Looking forward for the Raia Lucsris and next updates….
Thank you for the kind words — the first part of our Raya Lucaria walkthrough is up now! I’m hoping to have it done by the end of the week if nothing goes wrong.
You are incorrect about the nightrider glaive and giant ash dropping from the giant by the frenzy tower. It drops from night calvary in North Liurnia.
Thanks Cipher, I knew they’d patch that eventually — I’ll update the guide.
Hey! Was the south western part of liurnia covered somewhere? It’s the piece of land above
Hi Gabe! We haven’t gotten to that bit yet; I still haven’t decided if it’s going to be included in this guide or in a separate section, since
By the smithing stone being guarded by the giant crab near the academy there is a loot beatle that drops an ash of war clinging to the underside of the bridge
Nick with the eagle eye!
Please fix your compass directions. Saying look south and to your right when you meant to say look north and to your right. Thank you
Thanks Mark, I believe I’ve corrected the bit you’re talking about.
For Western Liurnia, the road down to Road’s End Catacombs has a loot beetle that drops Ash of War – Sword Dance.
Whoops, forgot to put that in the directions, thank you!
Idk if anyone has mentioned this yet. There is a stonesward key behind the Ainsel river lift. Past the pond behind a rock wall on the far back right corner. Guy sitting in a chair by the cliff.
Nice find — I wonder if we’ll ever stop updating these guides 😀
I appreciate all you do there. Makes it easy to get full completion on my ??? Play through lol lost count.
I posted this on the walkthrough sub link but I don’t think it was seen lol.
in the carian study hall when it’s in the upright position, there is an archway above the elevator when facing it. Start the elevator and jump to it then get a running start and jump into the water. You will die but you will be rewarded with the lucidity sorcery. Alleviates sleep and madness.
Thanks Oni! Sorry we missed your previous comment, sometimes they just slip through the cracks (as in, I don’t see it or I forget it).
As for the Lucidity sorcery, that’s very interesting, thanks for sharing… usually, you get Lucidity by killing the version of Miriam the Preceptor that’s in the inverted version of the study hall, and you’d think she wouldn’t spawn at all in the regular version. I’ll have to see if I can replicate what you did, and if I can, I’ll put it in the guide!
By the way, I haven’t mentioned this yet, but yours are by far the best guides out there lol. I feel privileged to have been able to contribute in my own small way. It’s always discordant when I hafto go somewhere else for a guide on something. Look forward to future content!!
 🙠Thank you! We always appreciate when people add tips and secrets, and discovering everything in FromSoft games has always been a community effort. We’re entering the home stretch here, so hopefully we’ll have the complete walkthrough done in not too much longer! Mountaintops and Gelmir shouldn’t take nearly as long as Caelid and Altus did.
Thank you for the guide! Thops barrier ash of war drop is different post 1.03 https://eldenring.wiki.fextralife.com/Ash+of+War:+Thops%27s+Barrier
Ah, thank you for the correction!
Briars of sin sorcery should be added as loot from the sorcerer outside the camp where the flame cleanse me incantation is obtained.
Also I do enjoy these guides they are helpful and as you progress through them you can tell feedback and other things were applied and they get better. A couple comments though. Sometimes directions get a bit overkill. For instance in this segment when teleporting back to a site a grace a comment is made about a path the to right and then two more sentences are spent explaining that path and then how we aren’t going to take it at all and instead go this direction. If it’s not like a hard to see ladder or some route in planning for an escape shortly after taking the other route, cleaning up some of these pieces in the guides and maybe cutting and pasting them instead when they are used will make it flow better. I found it difficult to live read and play with this guide all the way through my first play through. Anyone finding difficulties with these guides they do get a lot cleaner. Also your jokes when placed are funny.
Nice catch re: Briars of Sin, I’ll add that!
I appreciate the other feedback as well — it’s a discussion we’ve had internally, as the feedback we get is mixed on this topic. Ultimately, we’ve decided that more description is better than less; while you’re clearly someone who doesn’t need super detailed directions, there are plenty of players who do, and our goal is to make sure that even people who need step-by-step instructions can use our guides — there are already plenty of bullet-point style area guides out there for people who don’t need that kind of support.
Also, I couldn’t find the section you were talking about (with the teleporting back to a site of grace)! The closest thing was a description of a path not to take, but it was only part of one sentence.
hellos so im kinda having a little bit of trouble with this particular section this maybe an obvious thing where my brain is just not comprehending it properly if so i apologize in advance xD the section in question is this one
From the dirt beach, look east, where you’ll see another bit of tower ruins. Ride through them and grab the Soporific Grease (do it quickly before the giant crab clacks you), then head south around the island. You’ll be heading towards the academy on the hill, and soon you’ll see another one of those stone gazebos. Its another one guarded by big ole lobsters, so be quick about snatching the Smithing Stone [2] inside. Ride east to escape lobster spittle, and head to the site of grace under the bridge:
where it talks about grabbing the isoporfic grease item i got the item killed the crab but i cant figure out/understand where im going next with regards to this sentence
then head south around the island. You’ll be heading towards the academy on the hill, and soon you’ll see another one of those stone gazebos. Its another one guarded by big ole lobsters, so be quick about snatching the Smithing Stone [2] inside.
do i go directly south from where the grease item is using the compass direction south or basically im trying to figure out where to go for the next gazebo with the item in it and from there to the next site of grace can you elaborate on this ?? or name the site of lost grace that you poiinting us to go to in this section either way could use some help figuering this out of possible 🙂
This is the site of grace you’re looking for (sorry for the pic I’m on my phone)
Just wanted to add that there’s no mention of eastern liurnia lake shore site of grace. Also I can’t find anywhere in the liurnia guide that mentions carian study hall.
Hey Fork, the Lake Shore site of grace is near the start of the Eastern Liurnia tab. Here is our Carian Study Hall guide 🙂