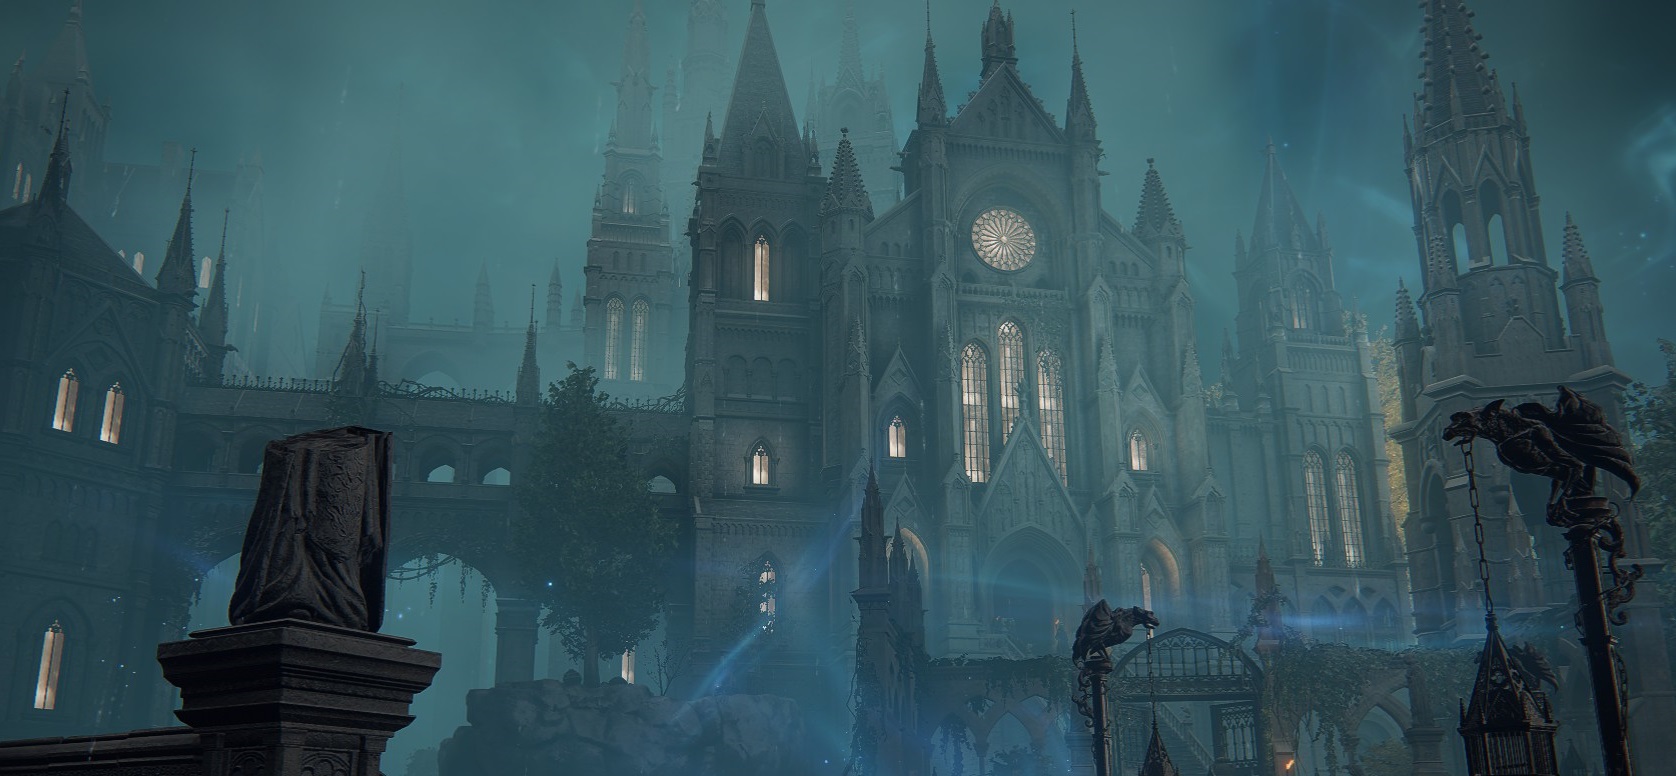
The Academy of Raya Lucaria is the second legacy dungeon in Elden Ring. Sitting in the middle of Liurnia of the Lakes, it’s visible from almost anywhere in the area, making it hard to miss. Getting inside, on the other hand, isn’t quite so simple. This guide will tell you how to get inside the academy, and what to do once you’re in.
NPCs & Quests
Renalla
Yura
As well, after progressing their quests, these NPCs will come to this area
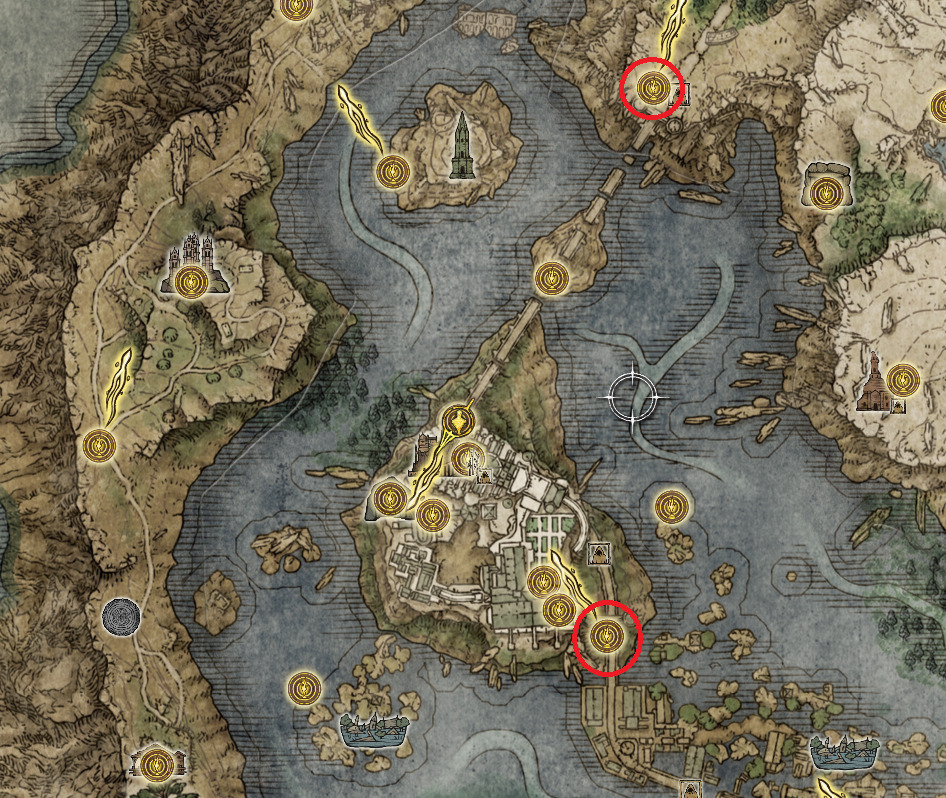
Before you can enter the Academy of Raya Lucaria, you’ll need to have obtained an Academy Glinstone Key. See here for more details, or use the Central portion of our Liurnia of the Lakes walkthrough for an even more detailed path to the key. Once you have the key, you can interact with the floating blue seals at the Southern or East Raya Lucaria Gates to be transported to the Main Academy Gate.
The locations of both seals are indicated in the map above — see Liurnia of the Lakes walkthrough for details on reaching both locations
Main Academy Gate
You should be at the Main Academy Gate site of grace. I’m sure you’re excited to start slaying some sorcerers, but we’ve got a couple of things to grab before we even enter the academy proper. First, mount Torrent and ride southeast past the seal, continuing down the ramp and into the trees. There are numerous wolves, but you can just ride past them. Soon you’ll encounter the Isolated Merchant, who sells a number of useful items, including two cookbooks.
Continue past the merchant and you’ll come to a dead-end — on a corpse against the gate is a Celestial Dew, which you can use at the Church of Vows to gain absolution (resetting NPC aggro and resurrecting NPCs you’ve slain). Careful — there’s a Bloodhound Knight hiding above the gate who will jump down (he doesn’t drop anything, so you can grab the item and ride back up the ramp). Once you’ve got the dew, teleport back to the Main Academy Gate.
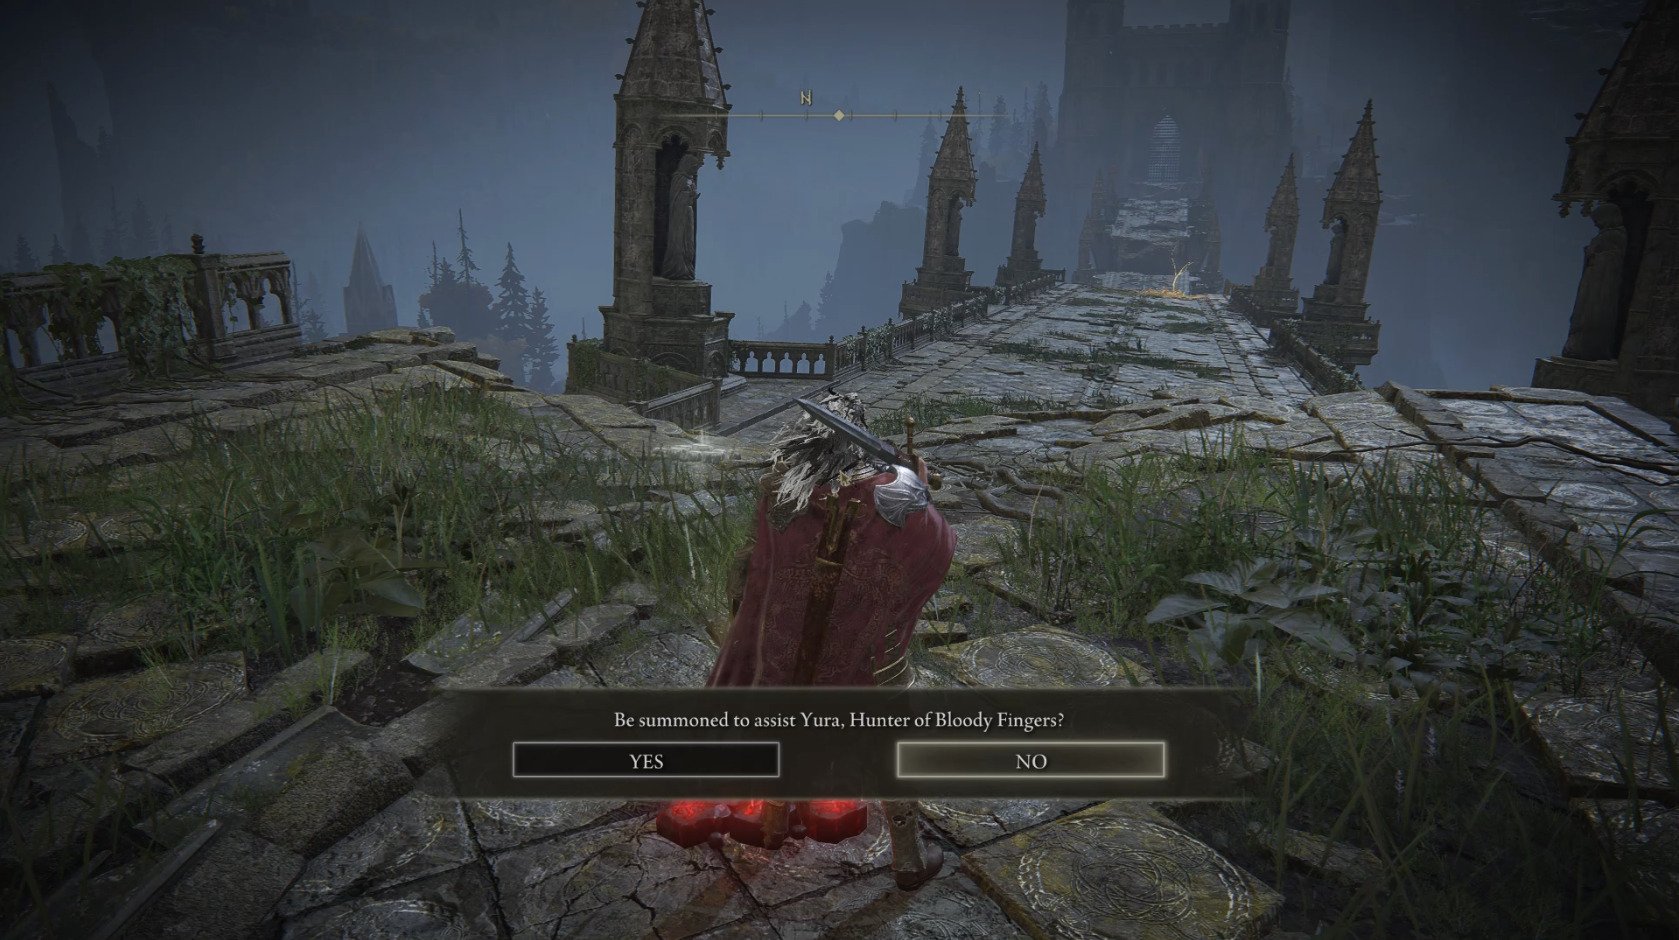
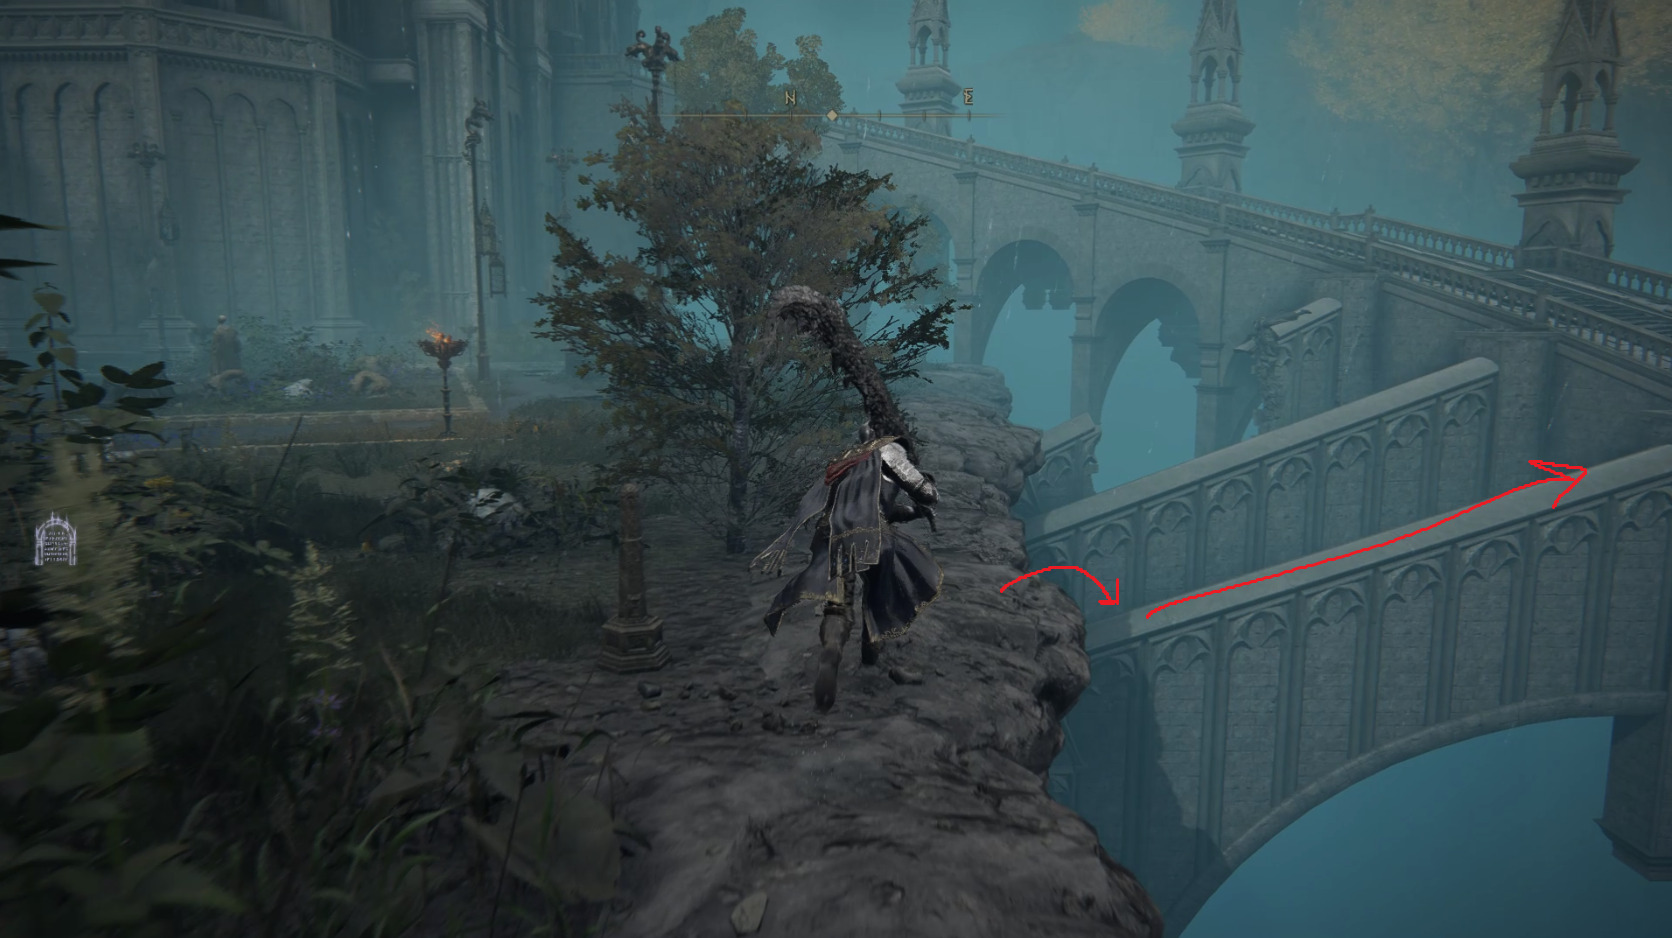
This time, ride northeast past the other seal, and just before the gap where the bridge is broken, look on the ground for a red summon sign. Interact with it and select Yes to help your buddy Yura, who as you might recall saved you from an invader way back in Limgrave.
You’ll find yourself in the same spot, but in Yura’s world — run southwest towards the Main Academy Gate to help Yura defeat the Ravenmount Assassin. This NPC can do some decent damage, so it’s best to let Yura take aggro before you engage — if Yura dies, you can try again.
Winning the fight nets you the standard rewards of a Rune Arc and Furcalling Finger Remedy, and you’ll be sent back to your world, where you’ll then receive the Ash of War: Raptor of the Mists (which was the Weapon Skill the Ravenmount Assassin was using). Find Yura nearby, leaning against the northwest side of the bridge. Exhaust his dialog and receive a Smithing Stone [5]. Remount Torrent and leap the gap to the northeast, and continue towards the Illusory Tree to grab the Golden Seed there. Then teleport back to the Main Academy Gate site of grace.
Now we’re finally ready to head into the academy! Head southwest into the room with the elevator and ride it up. Exit the elevator room and make your way onto the bridge, and continue across and up the stairs. At the fountain, turn right and go down the stairs there, then turn left to find some Magic Grease. Then go back the way you came and turn right (south) to go through the large iron gate and up the long set of stairs. There are two spellcasters guarding the door at the top, so run towards them and roll when their spells get close to you.
With the sorcerers dispatched, you can open the large door and go through. Inside, you’ll see a sorcerer on the other side of the room. Don’t just charge in at him — there are marionettes hiding in the rafters who will drop down. Instead, slowly advance until a couple of the marionettes fall, then back up and use the pillar to hide from the sorcerer while you fight the marionettes. If you have a ranged option, you can use it from behind the columns while clearing these mobs.
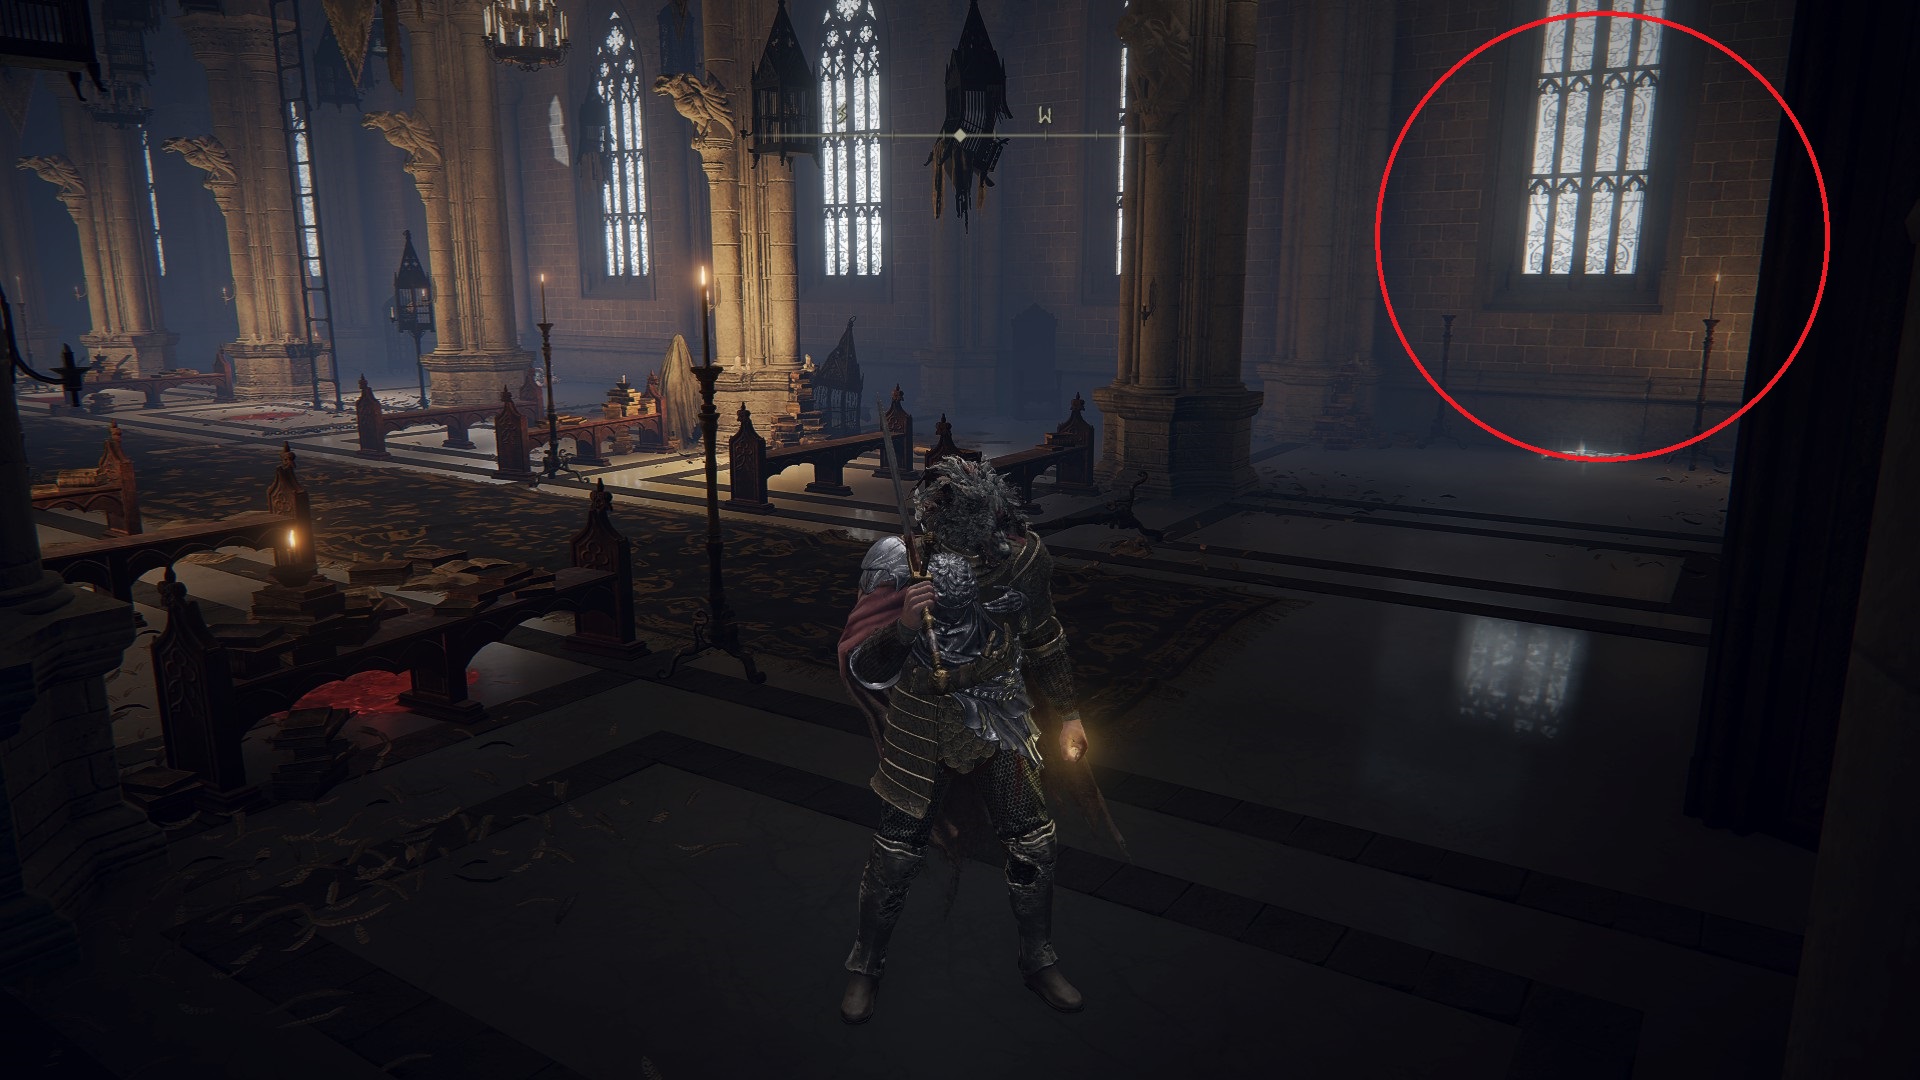
You can look up into the rafters and press the lock-on button to check for more enemies — there should be four in total that can fall from the ceiling. Once they and the sorcerer are all dead, head south across the room to the shrine there and then turn right — a corpse against the wall in an alcove holds a Golden Rune [2]. Behind the shrine is a wall, and behind that wall lies another corpse with a Somber Smithing Stone [3]. Finally, go back to the door you originally came through — on your left (your right if you were entering for the first time) in the corner is an illusory wall, and behind it a Rune Arc.
The illusory wall in the church
Once done here, head through the doorway on the wall east of the shrine and turn left to find the Church of the Cuckoo site of grace. From the site of grace, head south down the hallway and take a left down the stairs to go outside.
This next area has zombie-like enemies everywhere — they aren’t very tough, but they can come out of the ground, so listen carefully to avoid being ambushed. If you hear enemies but don’t see them, use the target-lock to help locate them. Note that they have a grab attack that drains a lot of FP.
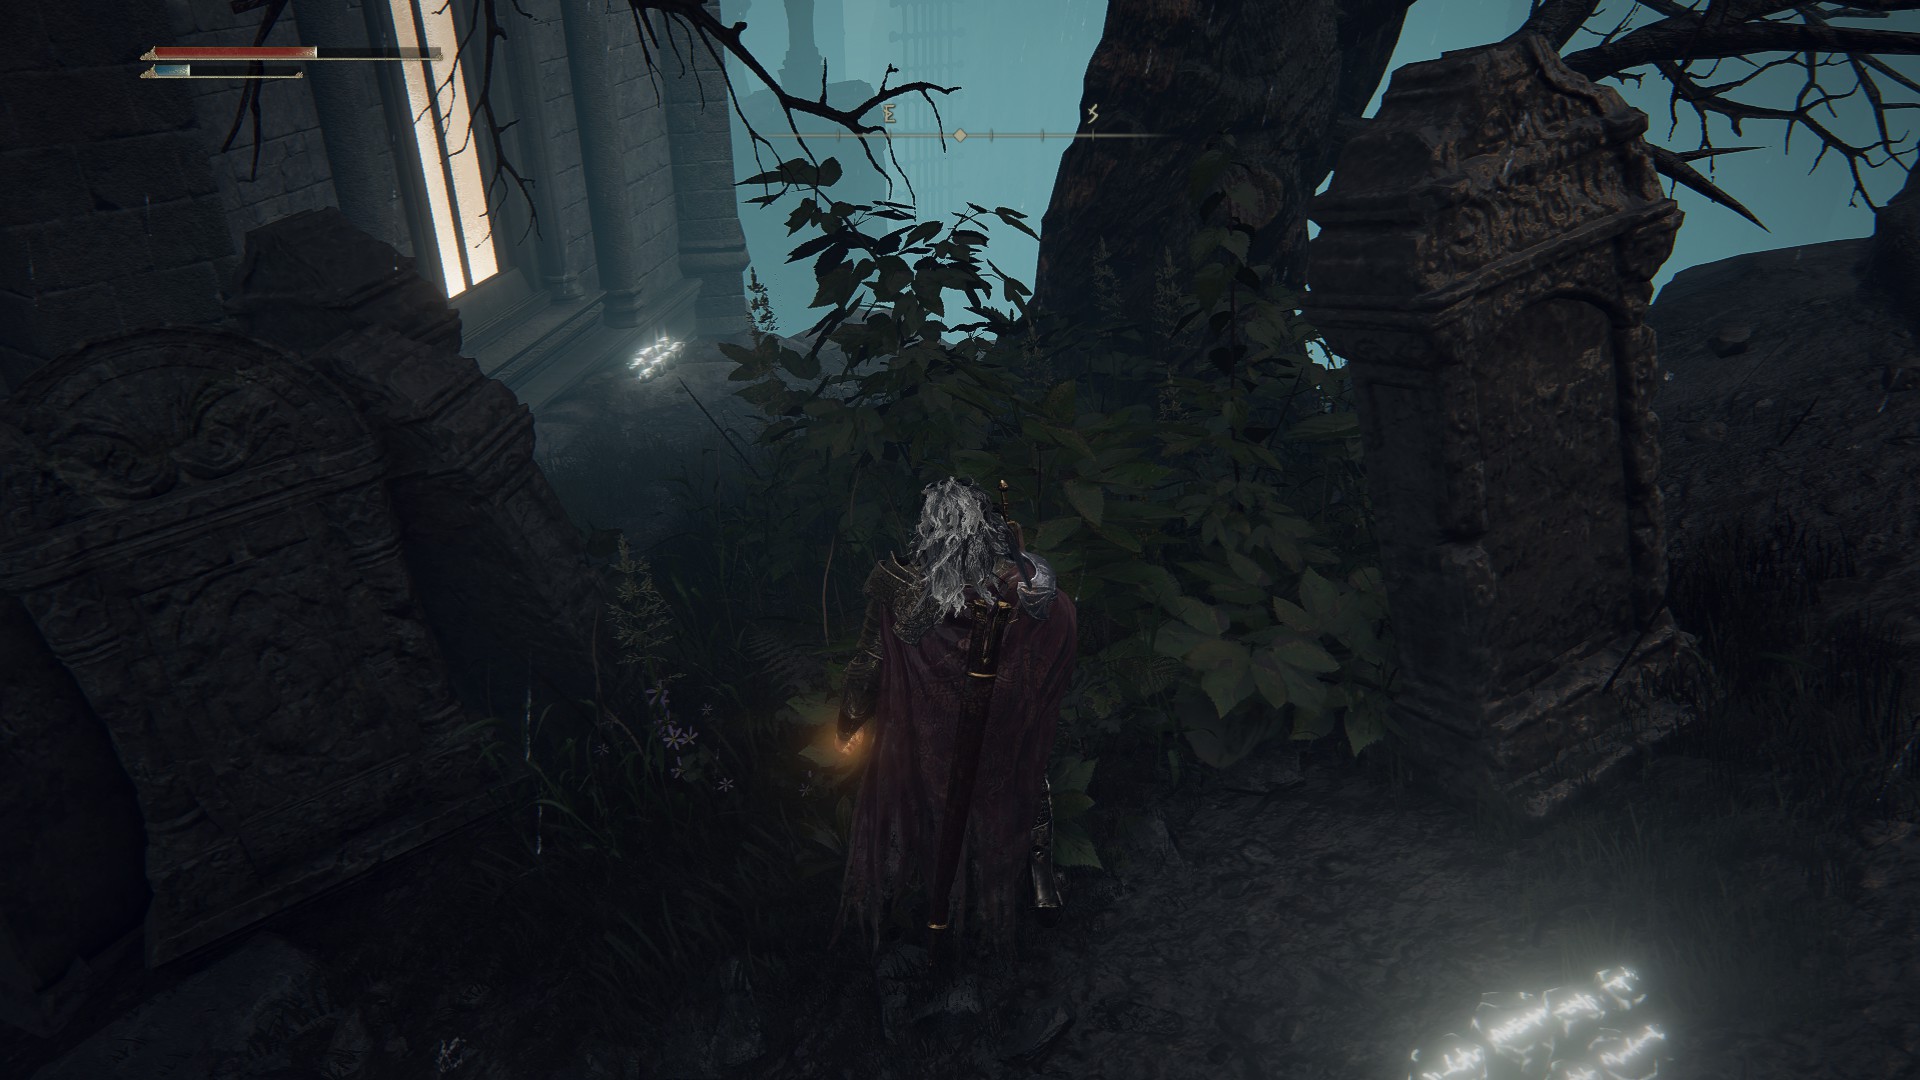
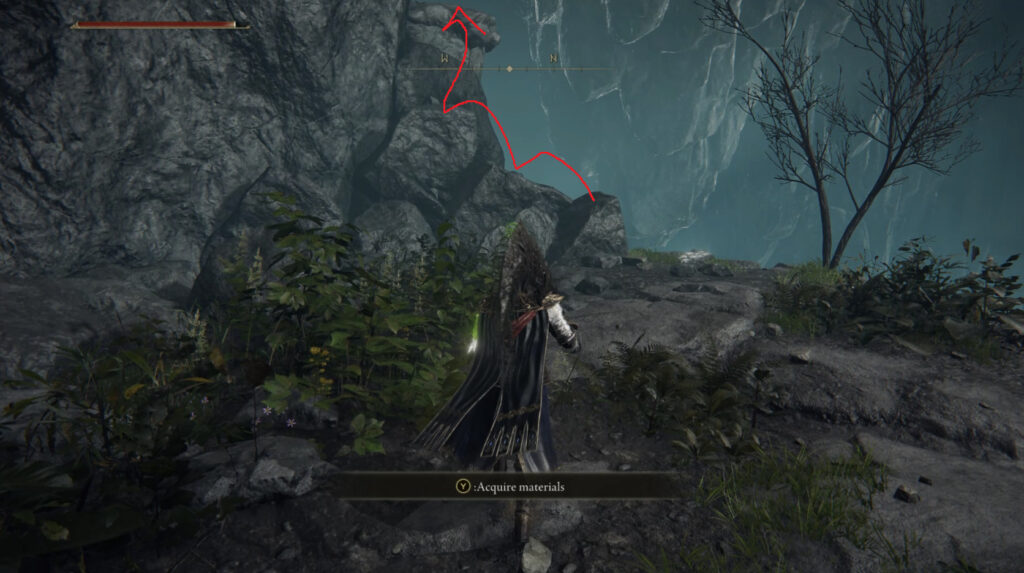
At the bottom of the stairs, turn left and head north (not going down the hill). Take out the enemy on your right, then look around the corner on your left to avoid being ambushed. Two more foes will come out of the ground, and then you can grab the x3 Grace Mimic from the corpse on the edge of the cliff. Turn around and head south, and this time follow the path down the hill. Go straight down the hill (northeast) and then when the path bears left, turn right and go around the tree to find a path along the cliffside. Follow it to the end to find a Smithing Stone [4], then go back the way you came.
Go past the tree and turn right to find the upgrade material
Head north-northwest and pick up the Spellproof Dried Liver — a ton of zombies will crawl out of the ground, so be ready to either fight them or run. Behind the tombstone where you picked up the liver is a path that leads downwards, so head around the tombstone to find the path, and follow it east. Another enemy waits just around the corner on the right, so watch out. You’ll come to a gap north of the path where you need to do a jump to cross it. Do so and continue upwards, turning right into the tunnel. You’ll find two marionette enemies up there, and just past them on the edge of the drop are the Marionette Soldier Ashes.
Drop down to the left, avoiding the area near the bridge; if you get too close, a bunch of zombies will spawn. There is a Silver-Pickled Fowl Foot at the base of the tree — a dog may attack you here, so be ready. Head uphill to the south, going slow and dealing with any enemy you come across (or that crawls out of the dirt). You’ll see a couple of enemies praying at a tomb — kill them and turn right past the tomb, and you’ll see an area below you with yet more praying foes.
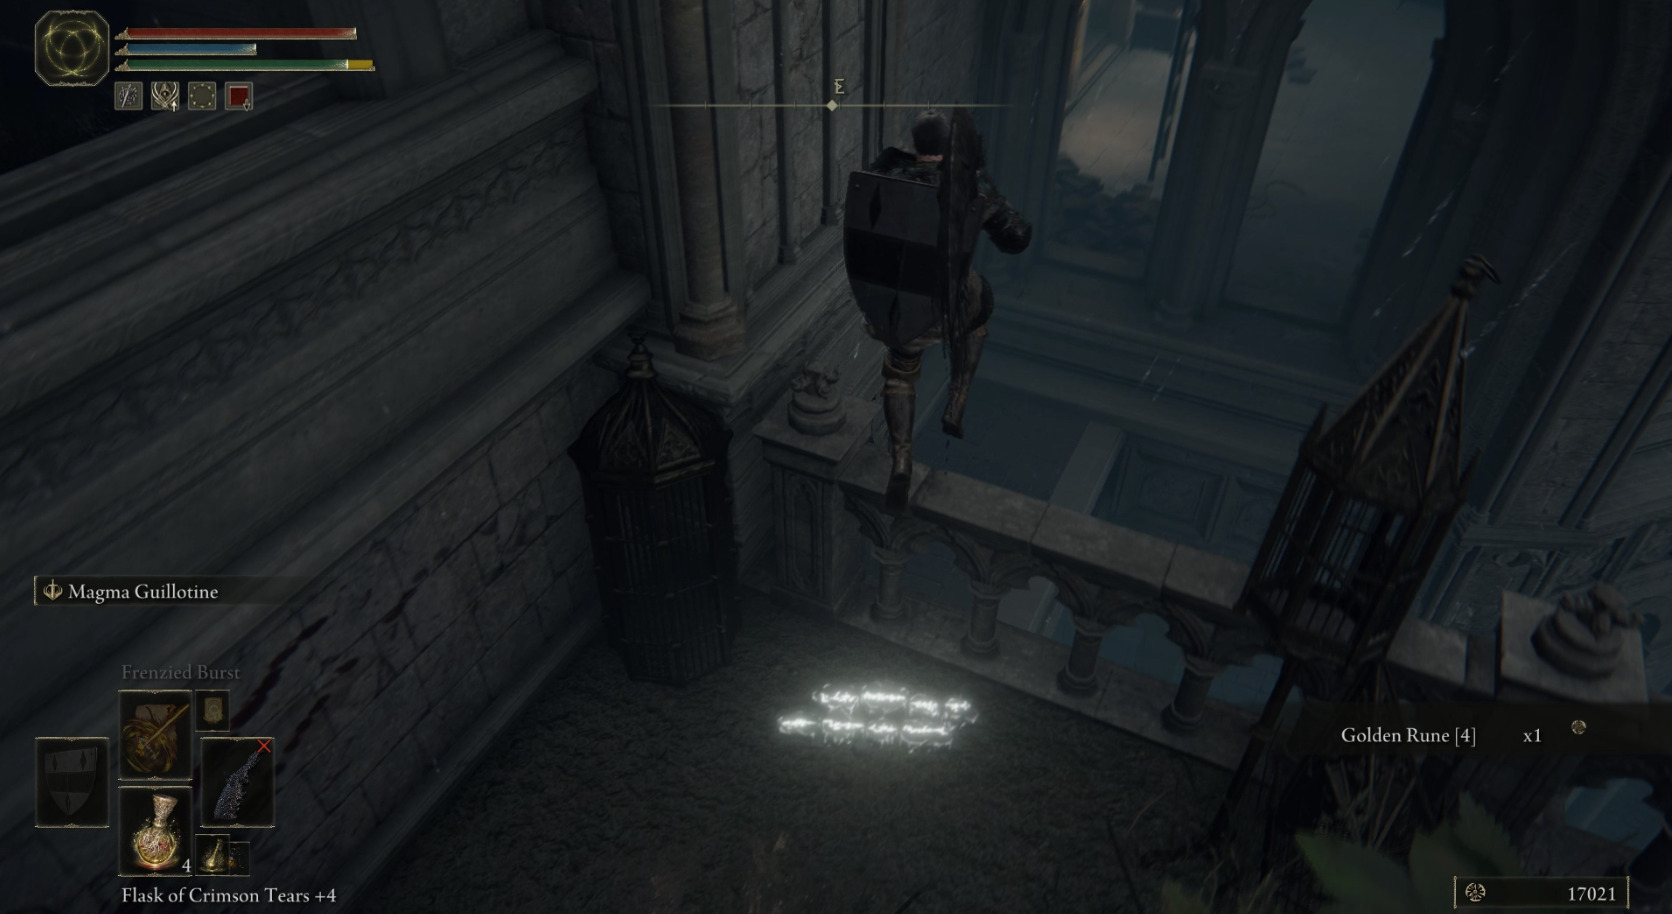
Jump down and kill them, then help yourself to the Carian Knight Set at the base of the grave they were praying to. (This set has good magic defense; wearing some or all of it in Raya Lucaria isn’t a bad idea). Then head up the path that leads south as it wraps around the cliff. You’ll pass a tunnel on your left, but keep going straight for now and drop down to the corpse with the Golden Rune [4]. Then jump back up and head into the dark tunnel, then drop down.
You’ll be able to use Spirit Summons once you drop — If you hate the dog enemies, it’s a good idea to spend the FP and summon your favorite spirit at this point, but do it quickly. Also, don’t miss the x2 Magic Grease on a corpse on the southeast side of this cemetery area. Once the enemies are gone, go north past the tree and look down onto the path below — you’ll see a loot beetle that drops the Ash of War: Spectral Lance. Continue south a bit to grab the Golden Rune [4], then turn around and head back up the path. At the top of the path, look left (east) and you’ll see a corpse with an item — it’s just x5 Mushroom, so don’t get excited.
Riding the Waterwheel
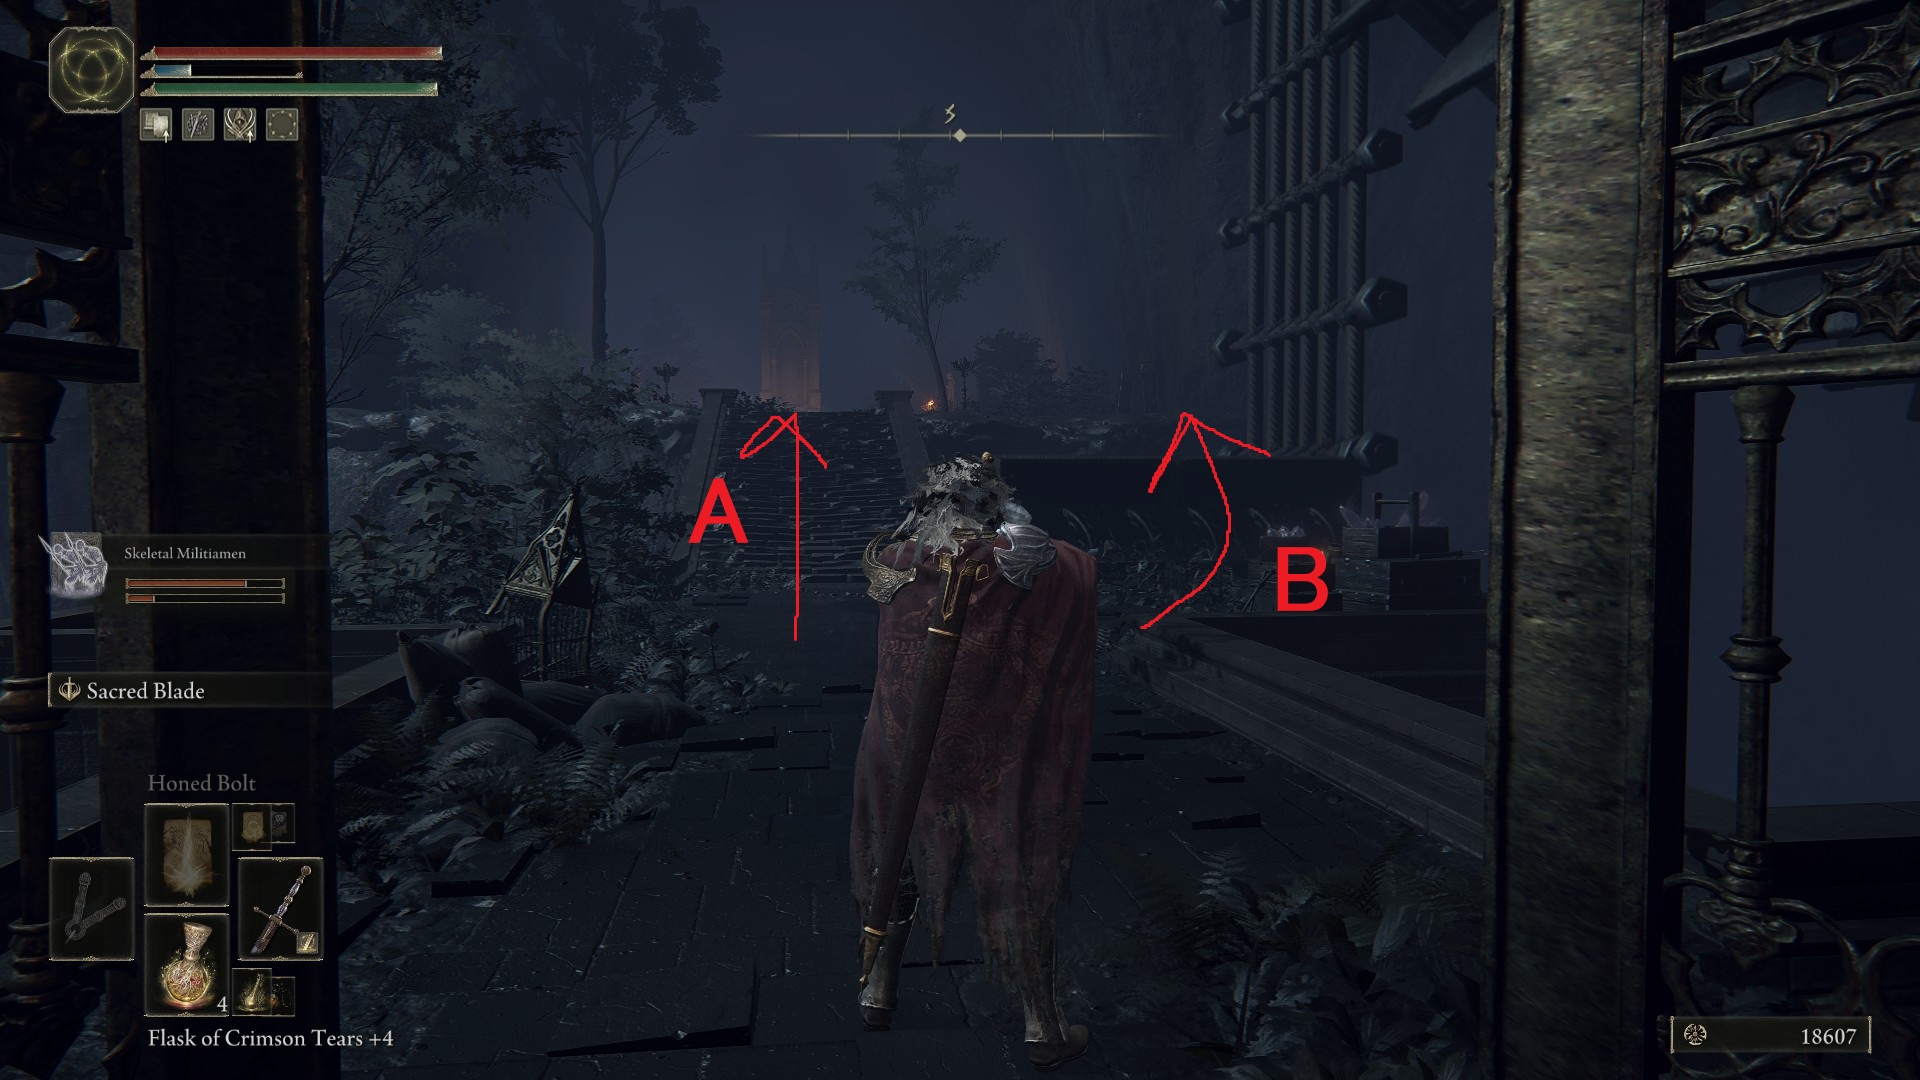
Head through the doorway flanked by lit torches and continue up the stairs. You’ll go through a gate and find the waterwheel — this is your path up and deeper into the academy, but there’s an optional foe you can fight first. He isn’t too tough, but dying here means running a fair distance, so consider continuing to the next site of grace first (by going up the waterwheel.
Path A leads to an enemy, while path B (riding the waterwheel platform will take you forward to the next site of grace
To fight the enemy here, go up the stairs past the waterwheel, and an Onyx Lord will come out of the shadows to the right of the large monument. He’s got very slow attacks, so roll through them and counterattack (or just roll away and cast spells if that’s your style. When he dies, you’ll receive the Gravity Well Sorcery. You can get the Somber Smithing Stone [3] from the base of the monument by going to the back right corner and then doing a running jump onto the monument.
Now go back to the waterwheel and slowly, carefully walk up to the edge of the stairs next to the waterwheel. Look down, and when there’s a paddle-platform not too far below you, drop off onto it. Ride it up and turn left (south) — you’ll soon reach a spot where you can jump off — do so before the wheel tosses you off. Ignore the enemies here and sprint southeast and up the stairs to enter the building and find the Schoolhouse Classroom site of grace.
Rest at the site of grace, then go back down the stairs and out the doorway, and continue west up the path to the high ground. After the path curves, look right to find a gap in the wall and a corpse with a Golden Rune [4]. Continue up the path and backstab the enemy watching the wheel turn, then wait for a platform to go by and jump onto the wheel. Go left and drop down onto the platform that just passed.
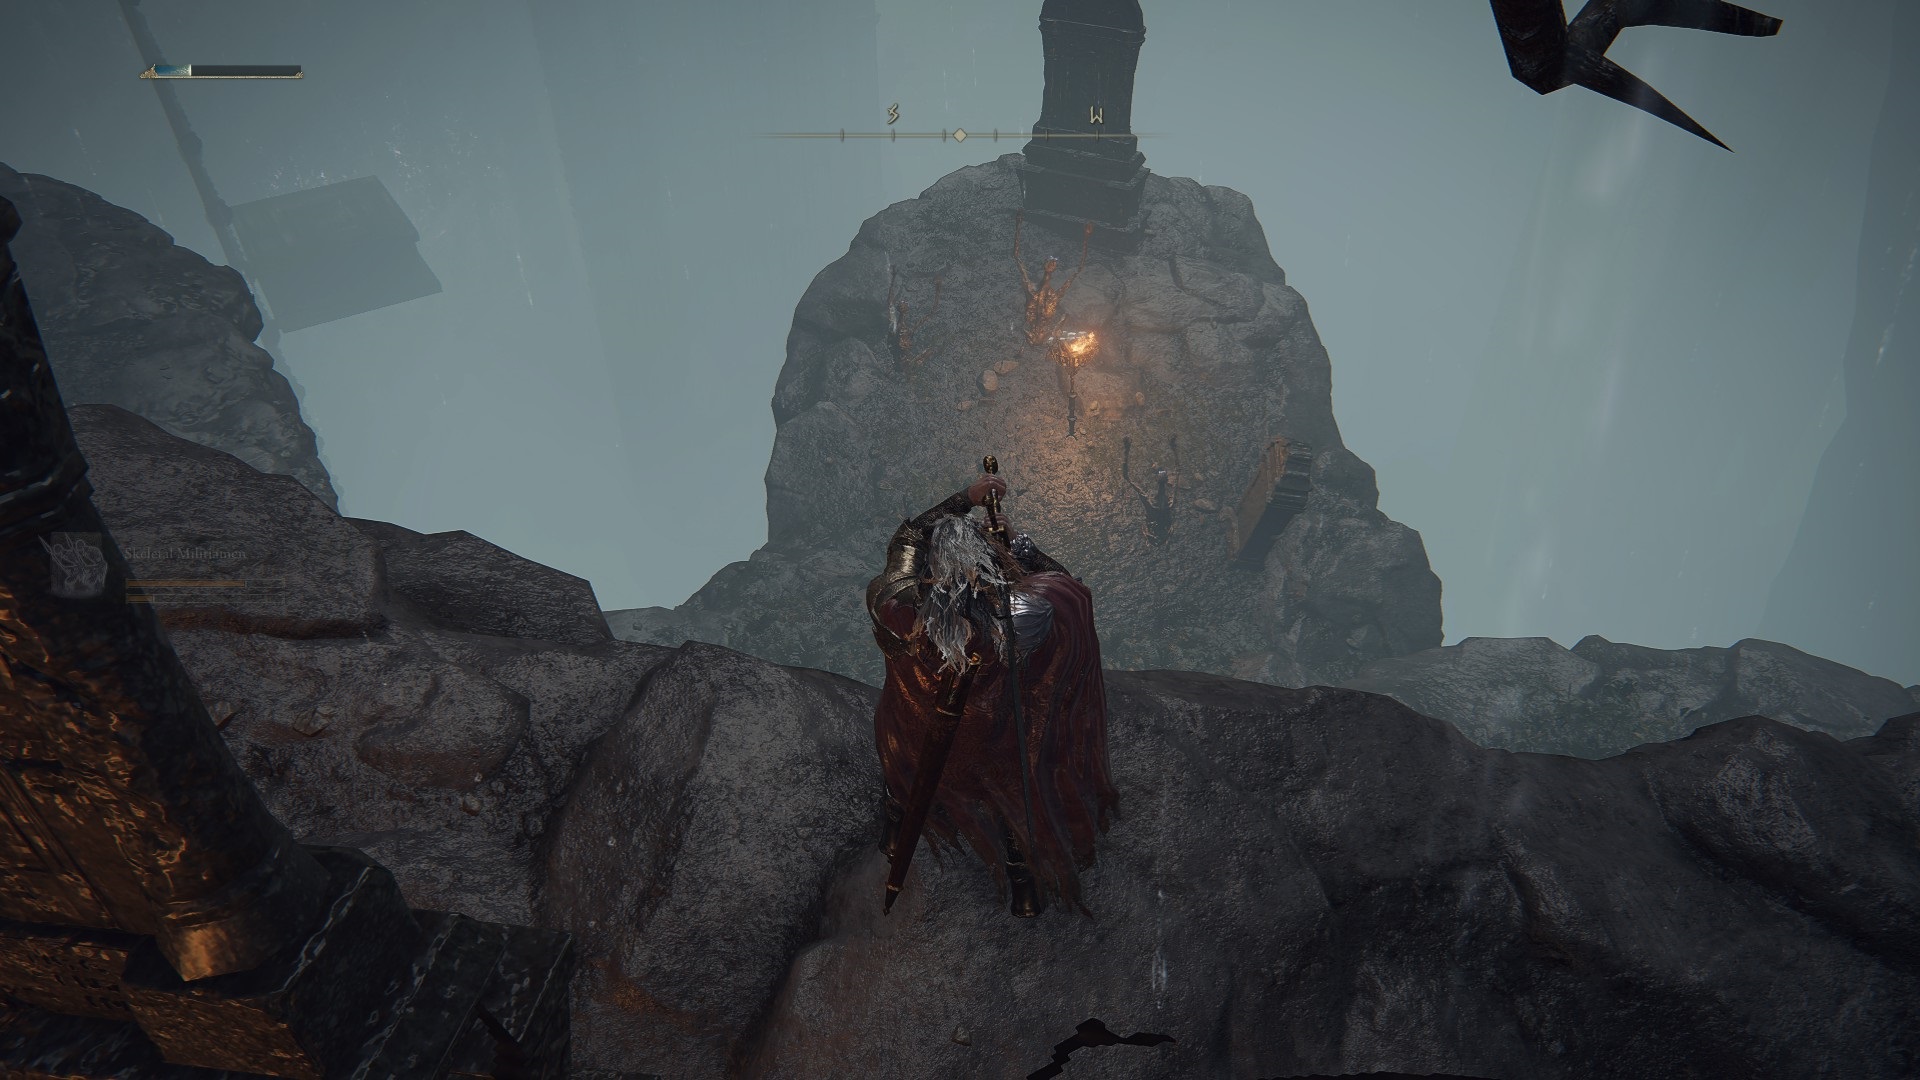
Ignore the enemy on the left, and instead walk to the northern edge of the platform and look down. You’ll soon see an area below you lit by a torch, and closer to the platform some dirt-covered stones that jut out right up to the platform.
Drop off the waterwheel onto the rocks and head left (west). Once you round the corner, use the target lock to find the numerous enemies hiding on the ground and in the bushes. If you have a ranged attack, use it to aggro the enemies in the bushes, but be careful of the enemy hiding in the corpse pile on your right — you can’t lock onto it until it stands up. Kite the enemies backwards the way you came, focusing on dealing with the flying marionette soldiers. Once you’ve eliminated your foes, loot the corpses they were guarding to acquire the Avionette Soldier Ashes and a Golden Rune [3].
Next, head back to where you hopped off the waterwheel, and this time ride it all the way down to the bottom. It will dump you off very close to an Iron Maiden enemy, so unless you want to be abducted, jump off early and to the south.
Of course, you may want to be abducted: letting this Iron Maiden scoop you into its belly while you’re low enough on HP will teleport you to a secret area outside of Volcano Manor (you have to be “killed” while inside of it to be teleported). It’s important to note that if you are abducted, it works like the chest traps — you won’t be able to teleport until you rest at another site of grace. While it isn’t a particularly difficult section, it can be frustrating to be stuck there until you make your way through the area to the site of grace.
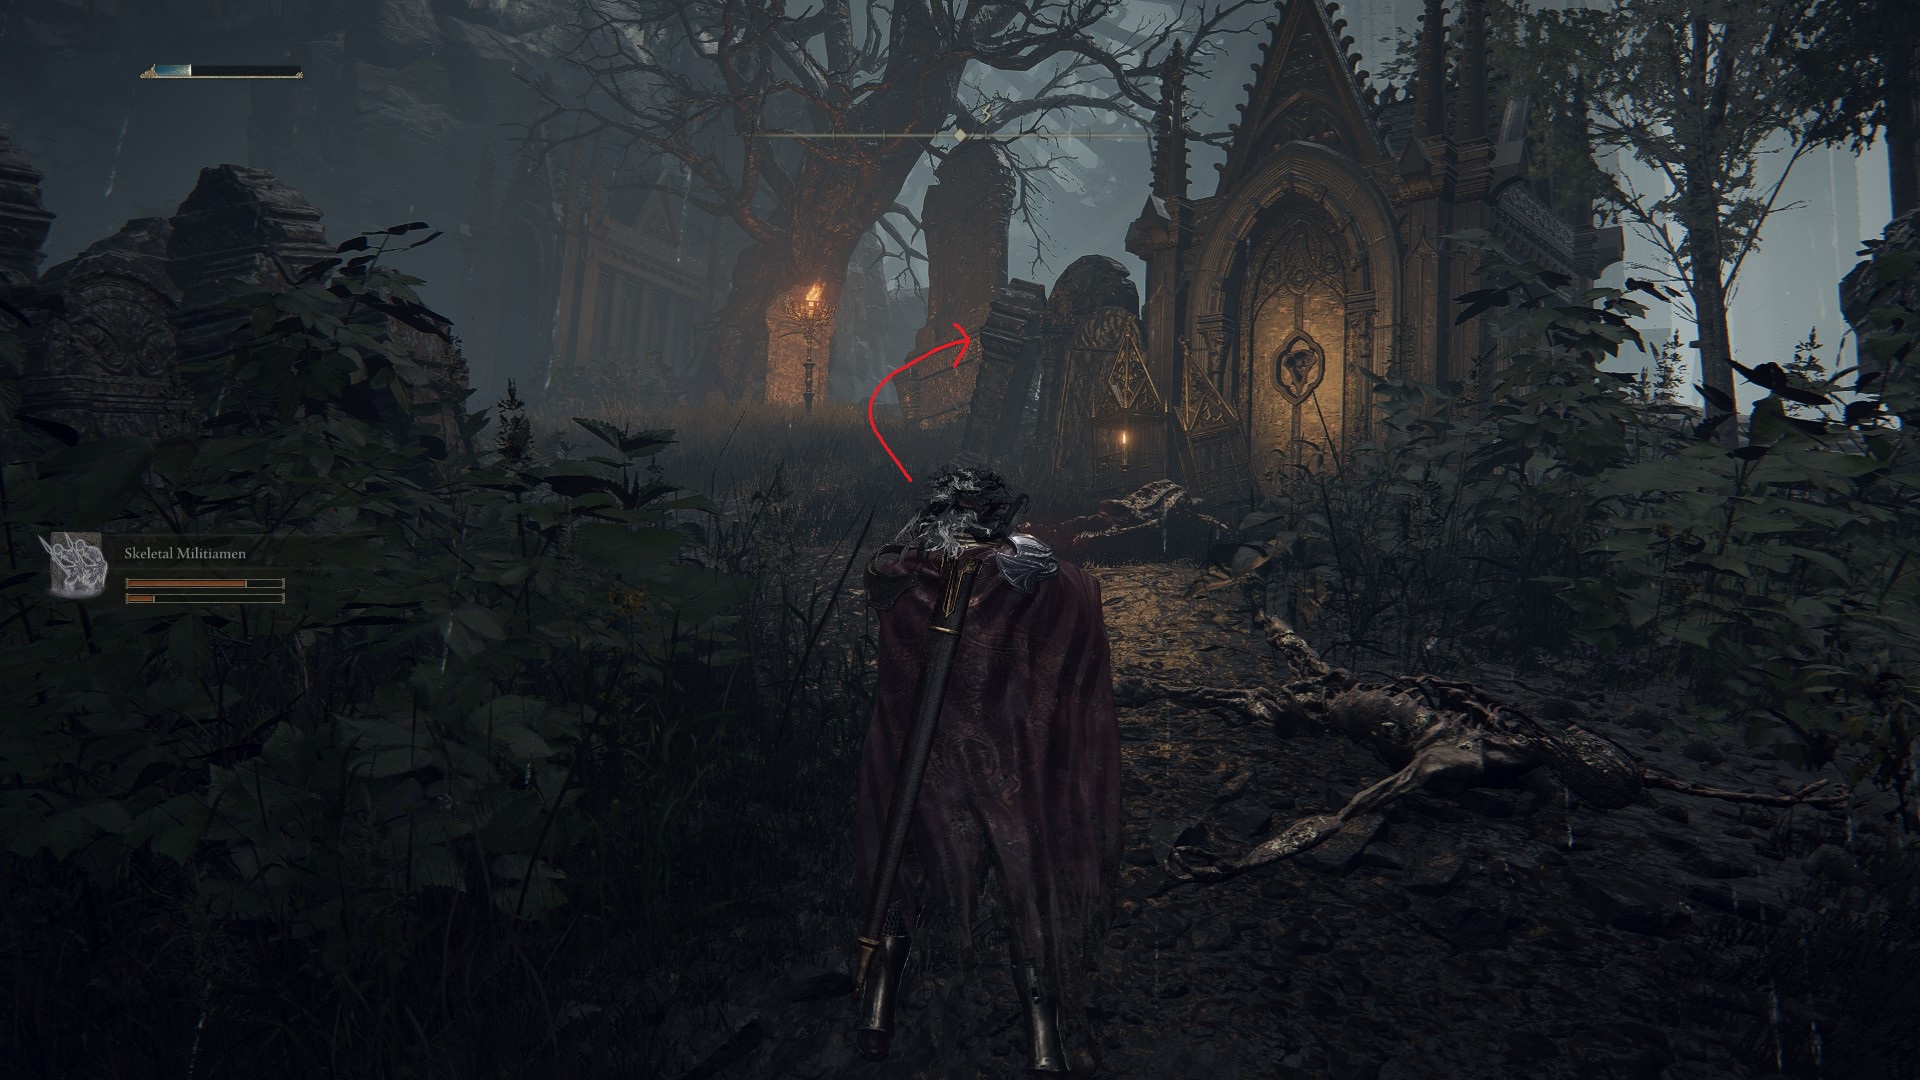
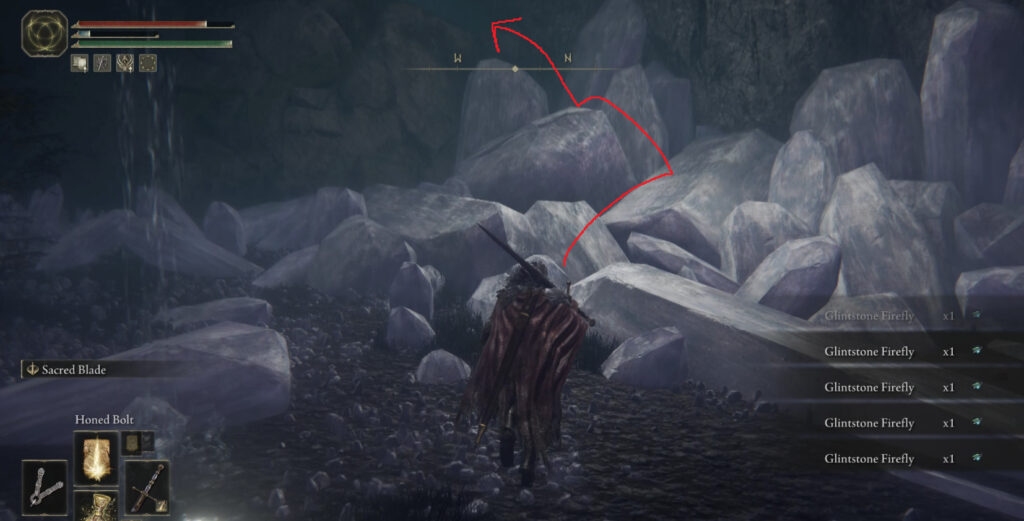
I recommend picking up the items in this area and then being abducted (assuming you’re interested in checking out the secret area), but you can always come back later. Either way, you don’t have to kill the iron maiden if you’d prefer to simply avoid her. Quickly grab the nearby Smithing Stone [5] from the corpse and then run to the northwest corner of the area and jump up the crystals there.
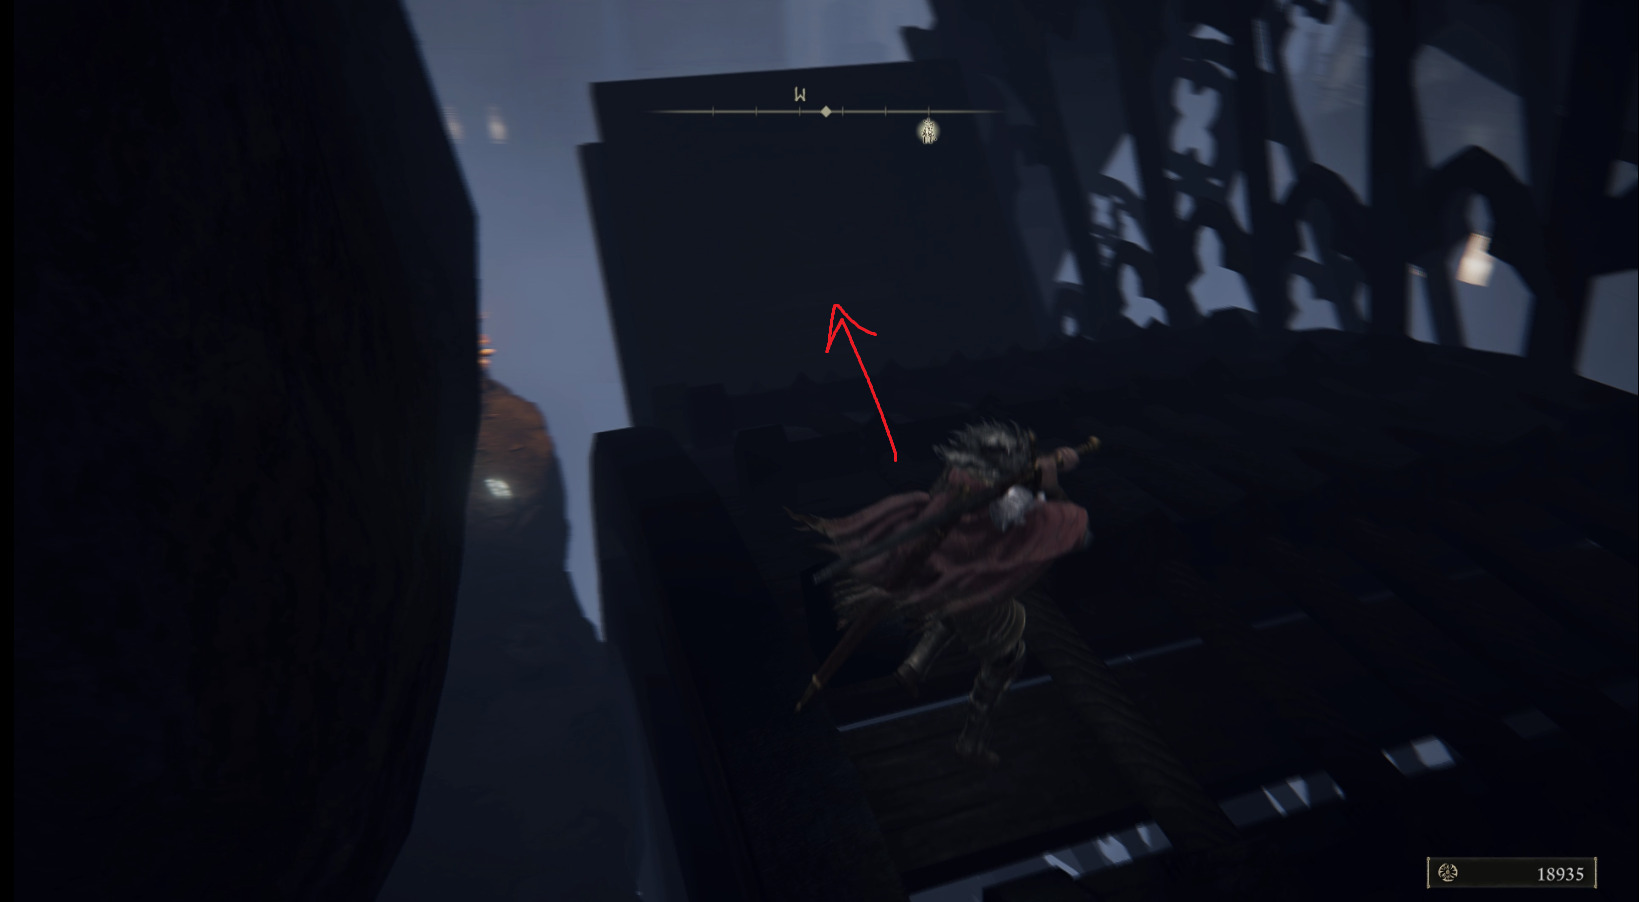
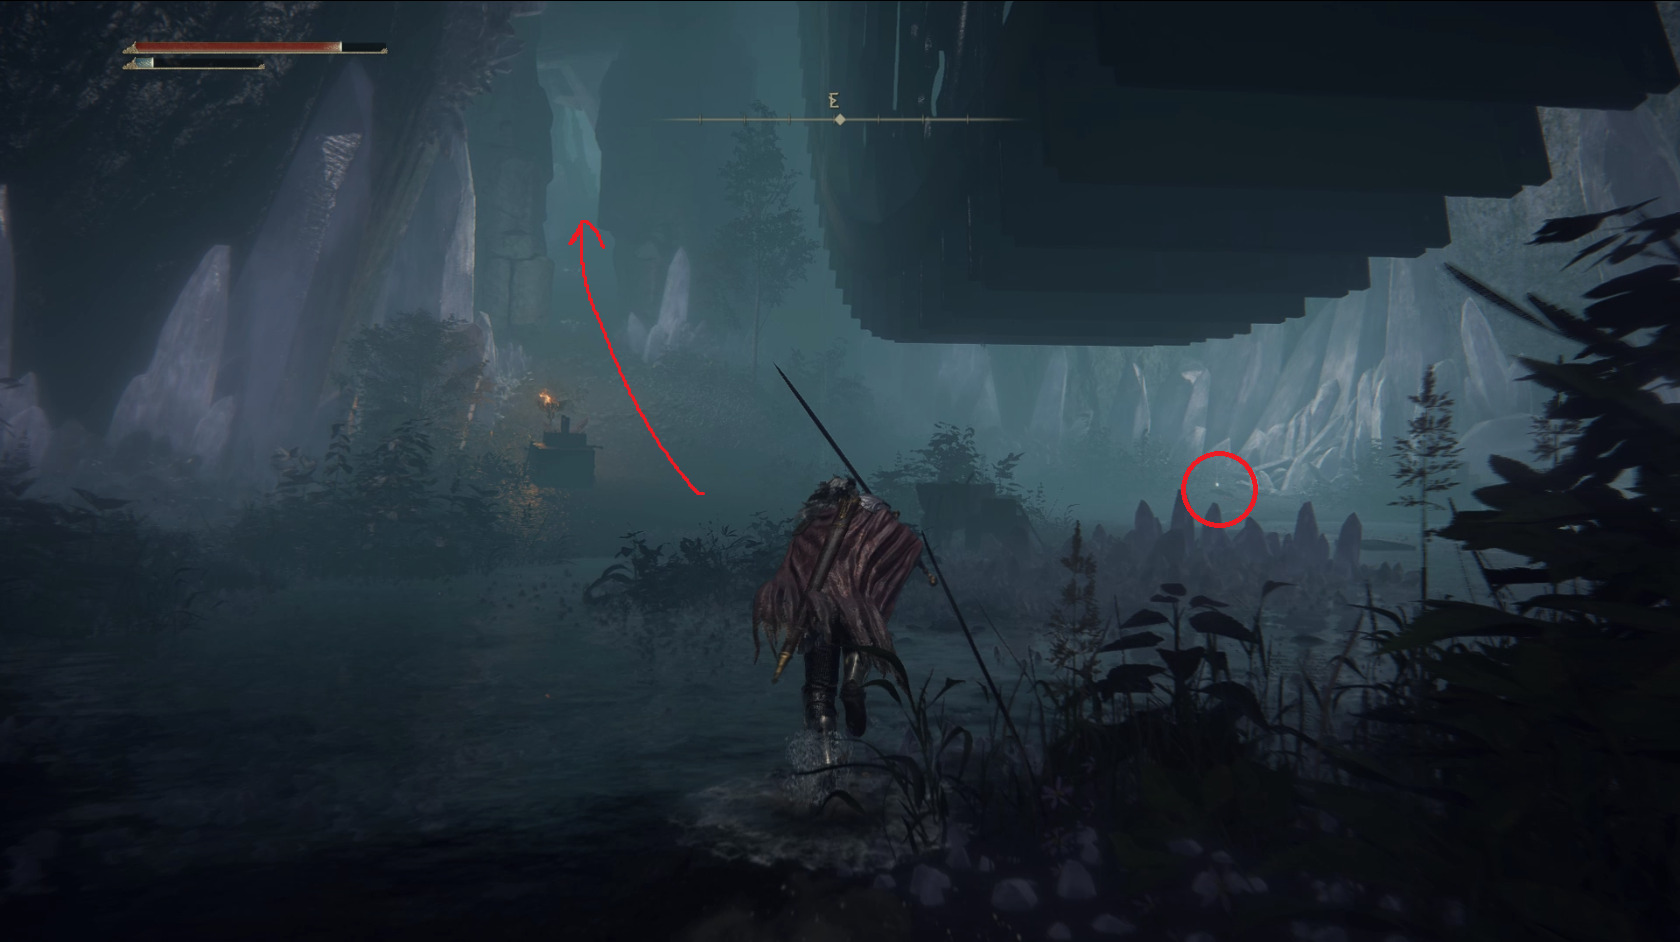
You’ll see yet another grave with yet another item ahead — this time it’s some Lost Ashes of War, which will let you duplicate an Ash of War (useful when duel-wielding). Now you’ll need to drop down and run past the Iron Maiden if you want to grab the (arguably useless) Longtail Cat Talisman, which lies in the eastern corner of the area. Then you can head up the ramp (see image below) and make your way back onto the waterwheel. To save time, you can either kill the maiden or loss aggro and then teleport back to the Schoolhouse Classroom site of grace instead of riding the waterwheel up.
Talisman circled, path back to waterwheel arrowed
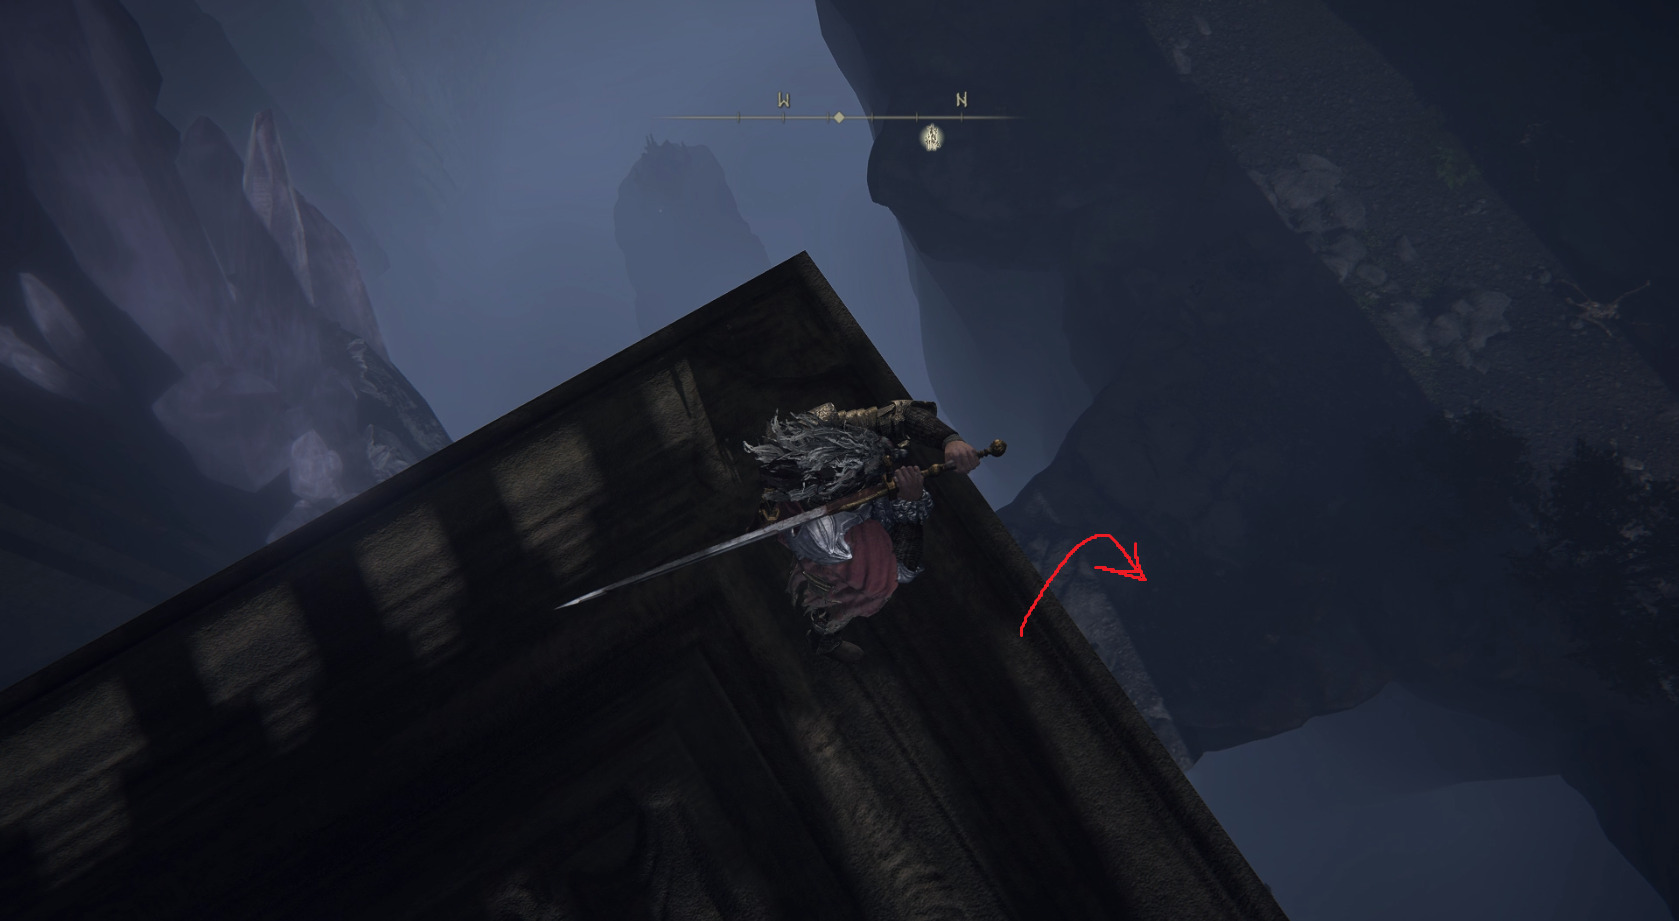
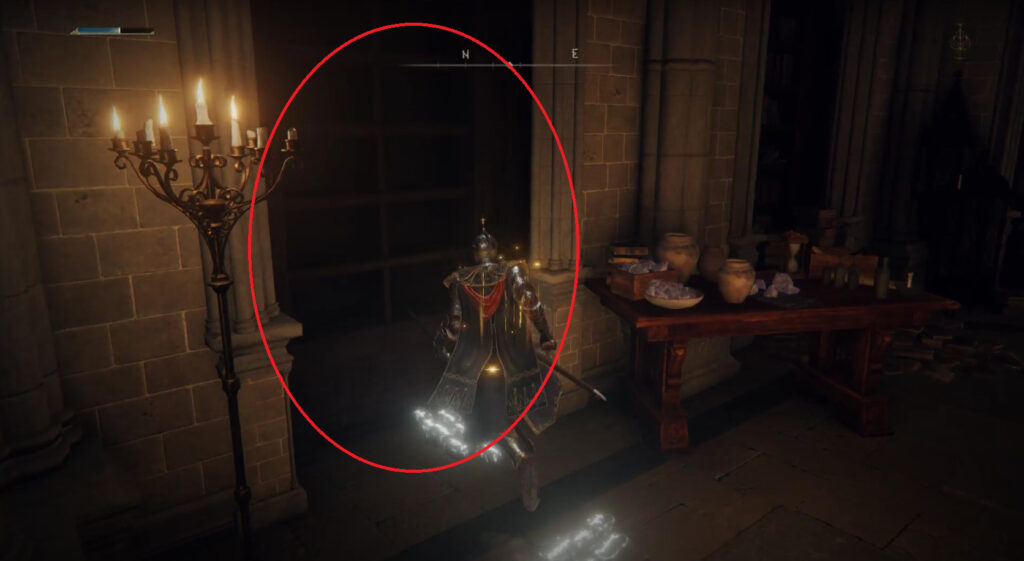
From the Schoolhouse Classroom site of grace, go up the stairs slowly — there should be an enemy patrolling coming from your right. You can wait for it to turn and sneak past it, or just kill it. Then go left (east) into the room there, and open the chest on your right to find the Glintstone Craftsman’s Cookbook [5]. Then grab the Conspectus Scroll from the corpse, and roll into the wall just behind the corpse to reveal an Illusory Wall. Head out onto the balcony and turn right to loot the corpse’s Smithing Stone [4], then go to the other end of the balcony (north) and jump down to the ledge below. Continue forward on the ledge and you’ll reach a rocky area — jump up the rocks at the end of the path to continue.
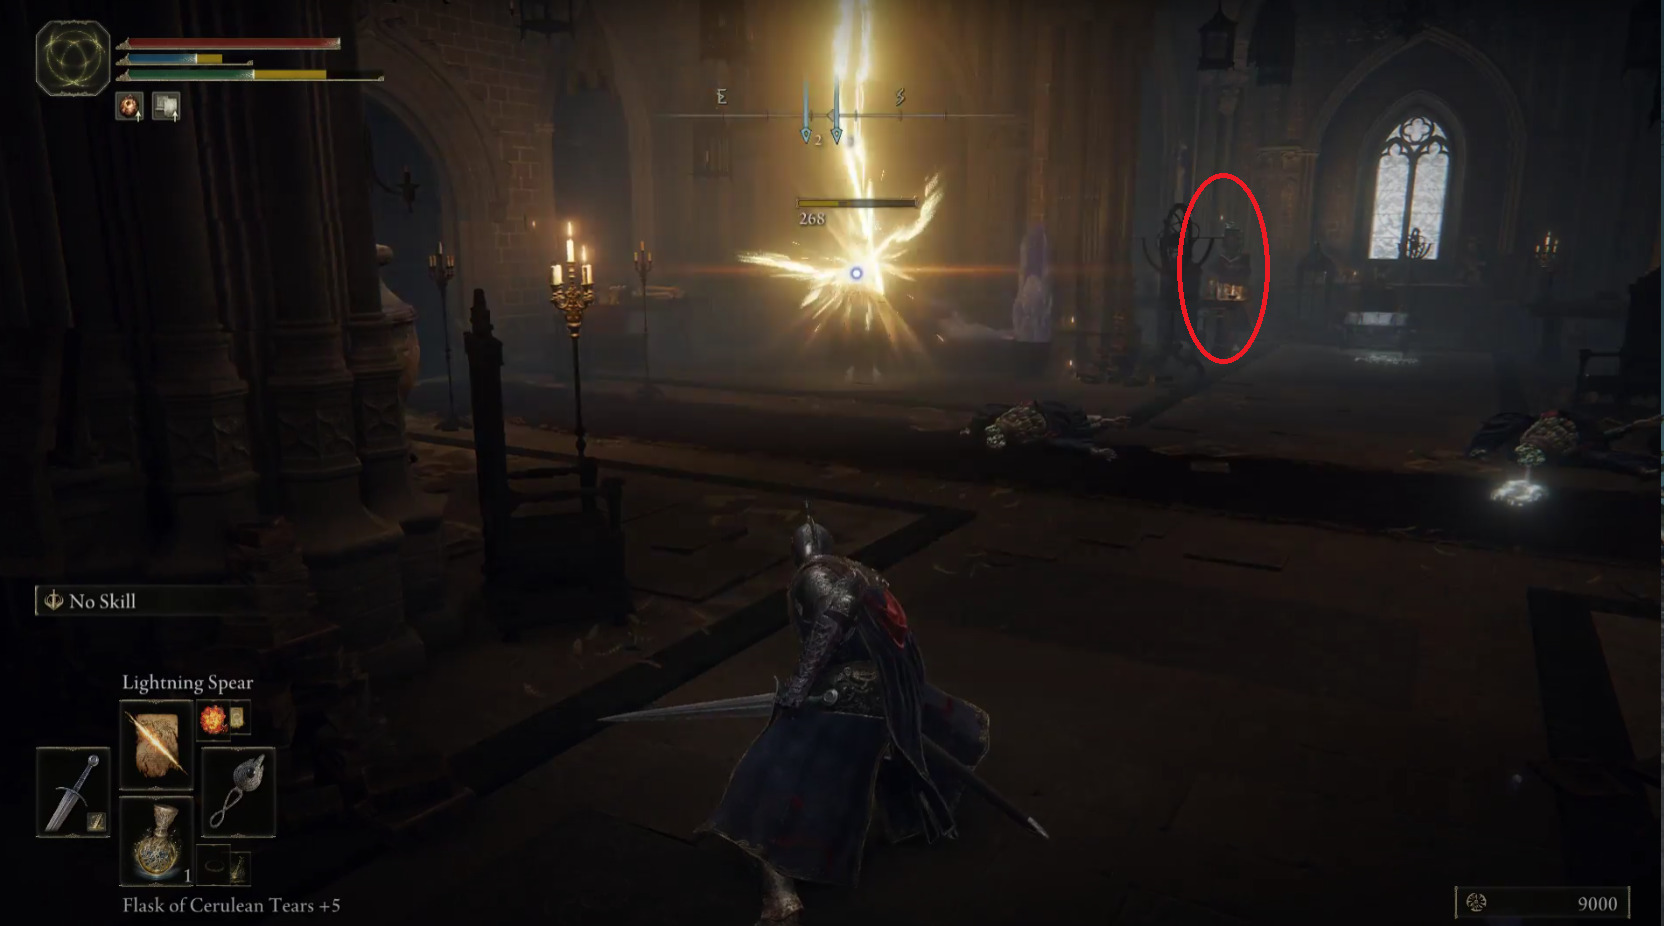
Go forward slowly and find the next gap, then jump it to reach the Olivinus Glintstone Crown. You can then drop down to the left, and you find yourself just outside of the classroom with the site of grace. Note the desk nearby — remember the sorcerer Thops you met in the church way back at the start of Liurnia? He’ll show up here if you give him the extra Glintstone Key we’ll find later on in this legacy dungeon, and you can reload the area he’s in once he leaves to receive the Ash of War: Thops’s Barrier.
Inside the Academy
Make your way back through the classroom and up the stairs again, this time turning right to head west down the hallway. Just past the melee enemy that you probably killed earlier, there are two sorcerers — both have their noses in their books and won’t aggro right away. Take advantage of their bookishness and eliminate one before they notice you’re there. Continue up the stairs, where you’ll see four more sorcerers (one is hiding behind an object way to the south end of this area), again with their backs to you.
This dude’s just waiting for you to aggro the pot so he can glintstone you in the back
There is also a large living pot around the corner to the left, so you can’t just sneak up to them. Ranged attacks don’t seem to alert them, so you can easily pick them off one by one if you have access to magic or a bow of some kind. Otherwise, you’ll want to go far enough in to aggro the pot, then run down the stairs — the pot will chase you faster than the sorcerers, and you can use the stairway walls to prevent the 1vX for a little while. The pot has a number of slow to start but dangerous attacks, so be patient, dodge its attacks, and then attack it after it finishes.
Once all the enemies here are done for, open the chest to the south where the 4th sorcerer was hiding to find a Ritual Pot, then head up the stairs to the west. The melee enemy with his back turned to you here is a trap — there are three sorcerers on their staircases to the left and right who you’ll want to eliminate first. Slay the mask-wearing freaks, then grab the Furlcalling Finger Remedy from the corpse that hangs over the railing of the balcony. Next, go up the left-hand staircase, and hit the wall on the left at the top of the stairs to open an Illusory Wall.
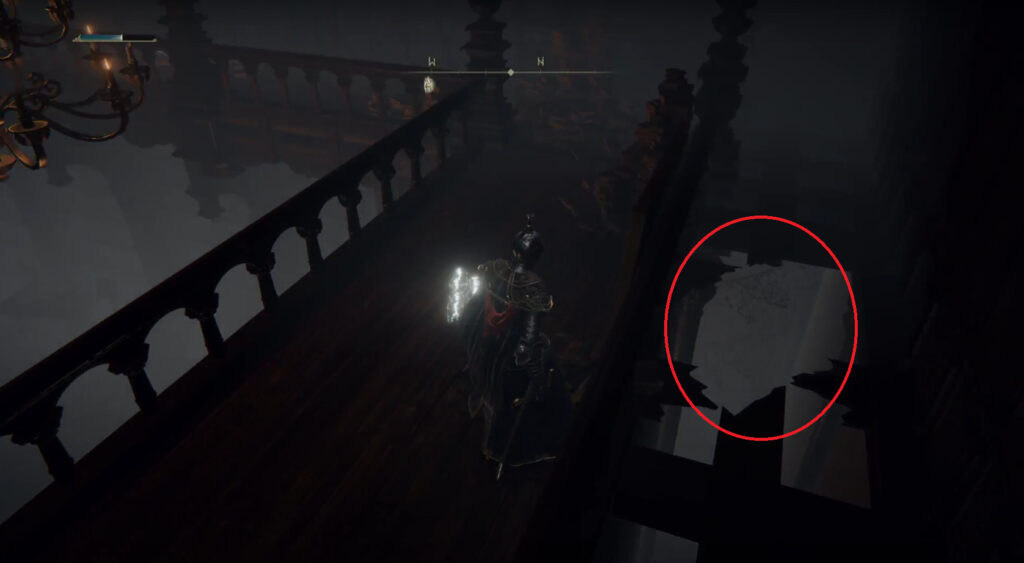
Head on through, and at the end of a narrow hallway you’ll find a room with a chest containing the Comet sorcery. Behind the desk you’ll also find a Stonesword Key. Then climb the ladder in the northwest corner of the room, and make your way to the eastern side of the balcony. You should see a broken part of wooden rafters.
Jump through and go south to find a hole in the ground, which you’ll also want to fall through. You’ll land in a room with small living pots on your right and left — take the poor lil’ guys out, then head towards the item a bit and kill the other two on your left. There’s one more behind the objects, again on the left, and another in the far right corner. Once they’re all dead, pick up the Graven-School Talisman and leave via the doorway on the western wall. You’ll find yourself in the room where there were 4 sorcerers and a large pot. Go back up the stairs, then up the next set of stairs and through the doorway to the east — through the fog gate is the Red Wolf of Radagon boss.
Once you’ve defeated the Red Wolf of Radagon, you’ll be able to rest at the Debate Parlor site of grace in the boss room and then head outside through the northern doorway. You’ll find yourself in a large courtyard with a fountain in the middle.
At this point, you can access the final boss of Raya Lucaria fairly easily, by going up the ramp on your right with the rolling ball, running past the knight, and going up the elevator. We’ll save that path for the last section, however — there’s lots of loot to find before we go see Renalla. That being said, we’ve got a guide on how to beat her if you’re in the mood to do so before completing the rest of the academy.
Once you go through the large metal gate, turn right and go towards the railing there, then turn right again and you should see a ladder.
Hop over the railing and climb the ladder, then jump down through one of the broken windows. Go left first and grab the x5 Crystal Bud from the corpse there, then go around the other way to find a chest containing Radagon Icon. Head out the nearby doorway and turn left to take out the melee enemy, then run up the stairs and dispatch the sorcerer. Go west from the caster to find a Golden Rune [4], then go back down the stairs and turn left to look over the balcony to the east. You’ll see sorceror chilling with a few living pots — hop onto the railing and jump down. Take out the sorcerer first, as he’s the real threat. Once the pots are also cleared, grab the Cracked Pot from the corner where the sorcerer was, as well as the x3 Living Jar Shard from the corpse left of the Cracked Pot.
Head down the nearby stairs, and head straight from the bottom of the stairs up the staircase-turned-dirt-pile that leads upwards and north. You’ll see a doorway straight ahead, and stairs to your left.
Immediately sprint up the stairs past the enemy with the sword and attack the two sorcerers on your right. Once they’re down, you can take out the enemy you ran past, and clear the lesser mobs down below. Through the doorway next to the staircase, you can find another sorcerer to kill, and the Glintstone Whetblade on a corpse hanging off of the balcony. Leave this room and go south up the other staircase, taking out the sorcerer there and grabbing the Golden Rune [2] from the corpse.
Now go back up the original stairs you ran up to kill the two sorcerers, and jump over the balcony to the left of the locked door.
Attack as you fall if you’re melee, as you’ll land right on top of a sorcerer. Once he’s down, go east down the stairs (ignore the other sorcerer who’s probably flinging spells at you) and open the door there to unlock a shortcut from the courtyard — you can use this to return this direction, which you’ll need to do many times to follow every possible route. Then go take out that pesky mage up the stairs, and continue up the stairs and turn left when you reach the top. Grab the Golden Rune [3] from the corpse, then jump over the railing it was draped across. Go to the northern edge of the roof you land on and look down — there’s a crystal crab that you can kill to receive the Karolos Glintstone Crown.
Drop down and kill poor Mr. Crystal Crab, then continue north and turn right to go east. You’ll find yourself on the western side of the courtyard — make sure the Iron Maiden doesn’t spot you — and to the north you’ll see an Illusory Tree with a Golden Seed at its base. Grab it and continue north to the item there, a Golden Rune [2]. A giant crab will come out of the ground, so if you don’t feel like fighting or running you can skip the item. Wait for the Iron Maiden to be far away, then run towards the fountain and turn right to go back through the shortcut door you opened a minute ago.
Rooftops
Once again go up the stairs and jump over the balcony with the corpse on it. This time, follow the rooftops south, where you’ll encounter two marionette soldiers. Wait for the one with spears to move away from the crossbow one, then rush the crossbow-wielding marionette and kill it first — then handle the spear one. The spear-carrying versions of these enemies can be very dangerous, so be patient and wait for an opening. Once both are down, head towards the ladder, but don’t climb it yet. Instead, go left from the ladder around the narrow ledge, where you’ll find a corpse with a Golden Rune [4] — now you can climb the ladder.
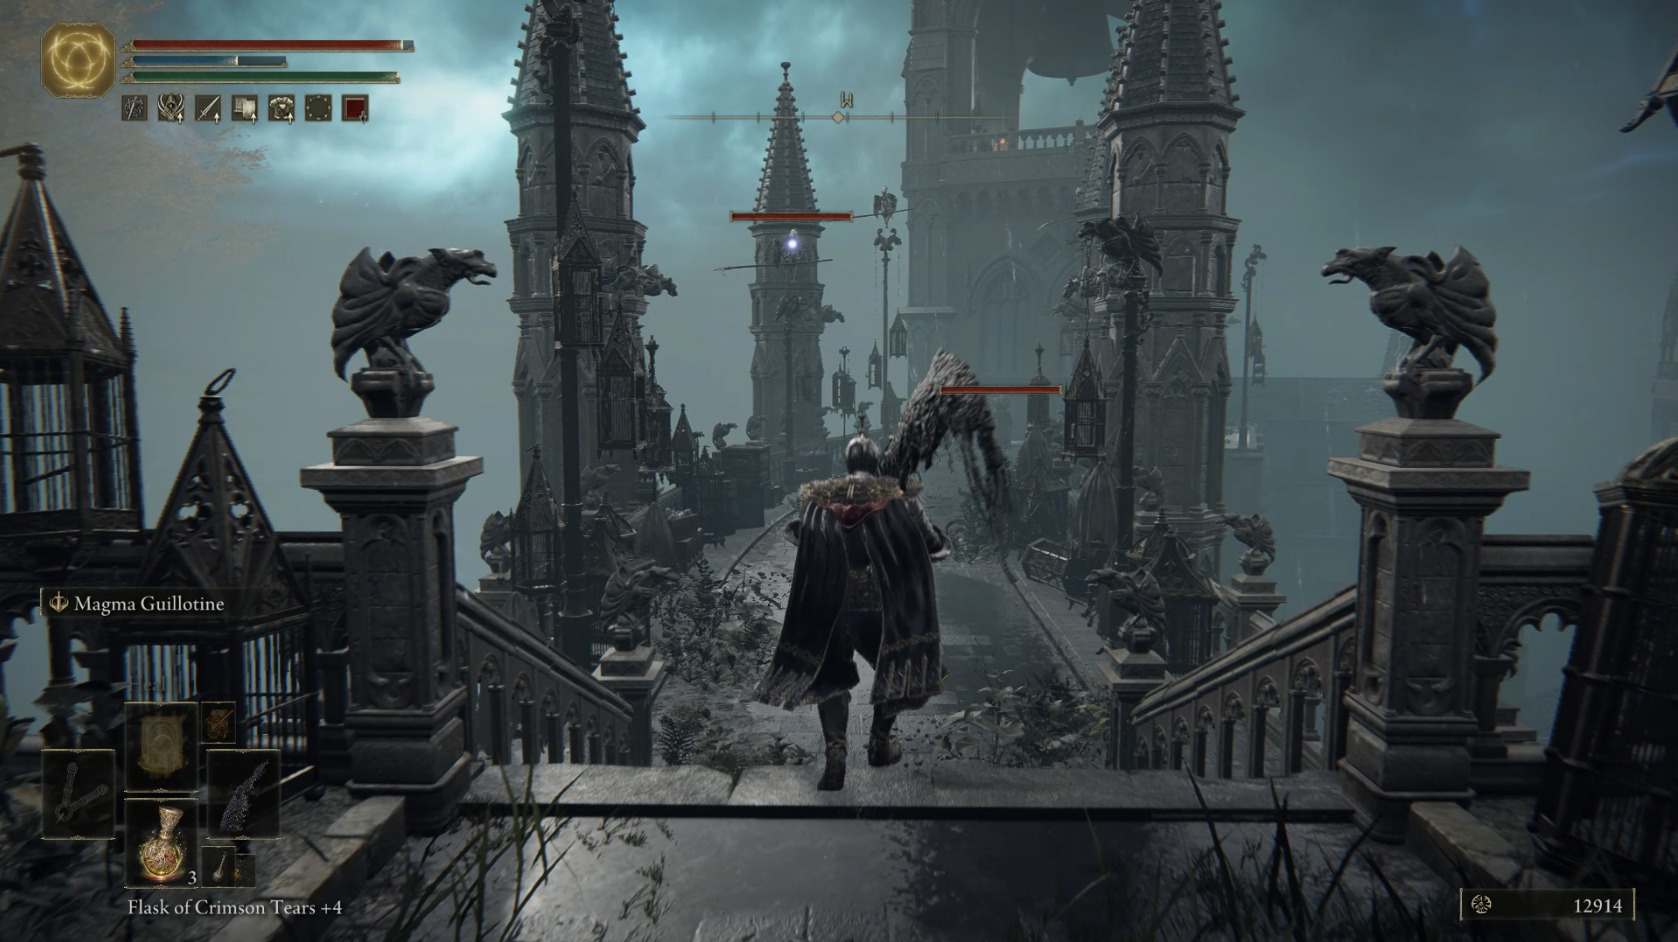
This next section can be a serious pain, especially if you don’t have strong ranged options. Even if you aren’t specced for ranged combat, it’s a good idea to use throwing knives or something similar to pull the first Avionette (seriously, that’s what they’re called). There are three in total, plus a sorcerer who will walk towards you once you target the first avionette. If you rush in at the sorcerer, the nearby avionettes will dive-bomb you, so you’ll need to go just far enough to pull them towards you (or target them with a ranged attack) and then run away. Kite far enough that the sorcerer has to close the distance — this will also make his spells easier to dodge (you can use the cages on the sides for cover as well).
If you’re confident in your ability to stay cool, it can actually be easier to simply sprint past all these enemies and go right around the corner and wait — they’ll politely follow you one-by-one, making them much easier to eliminate.
It’s not the silver archers from Anor Londo in DS1, but it’s one of my least favorite areas in Elden Ring
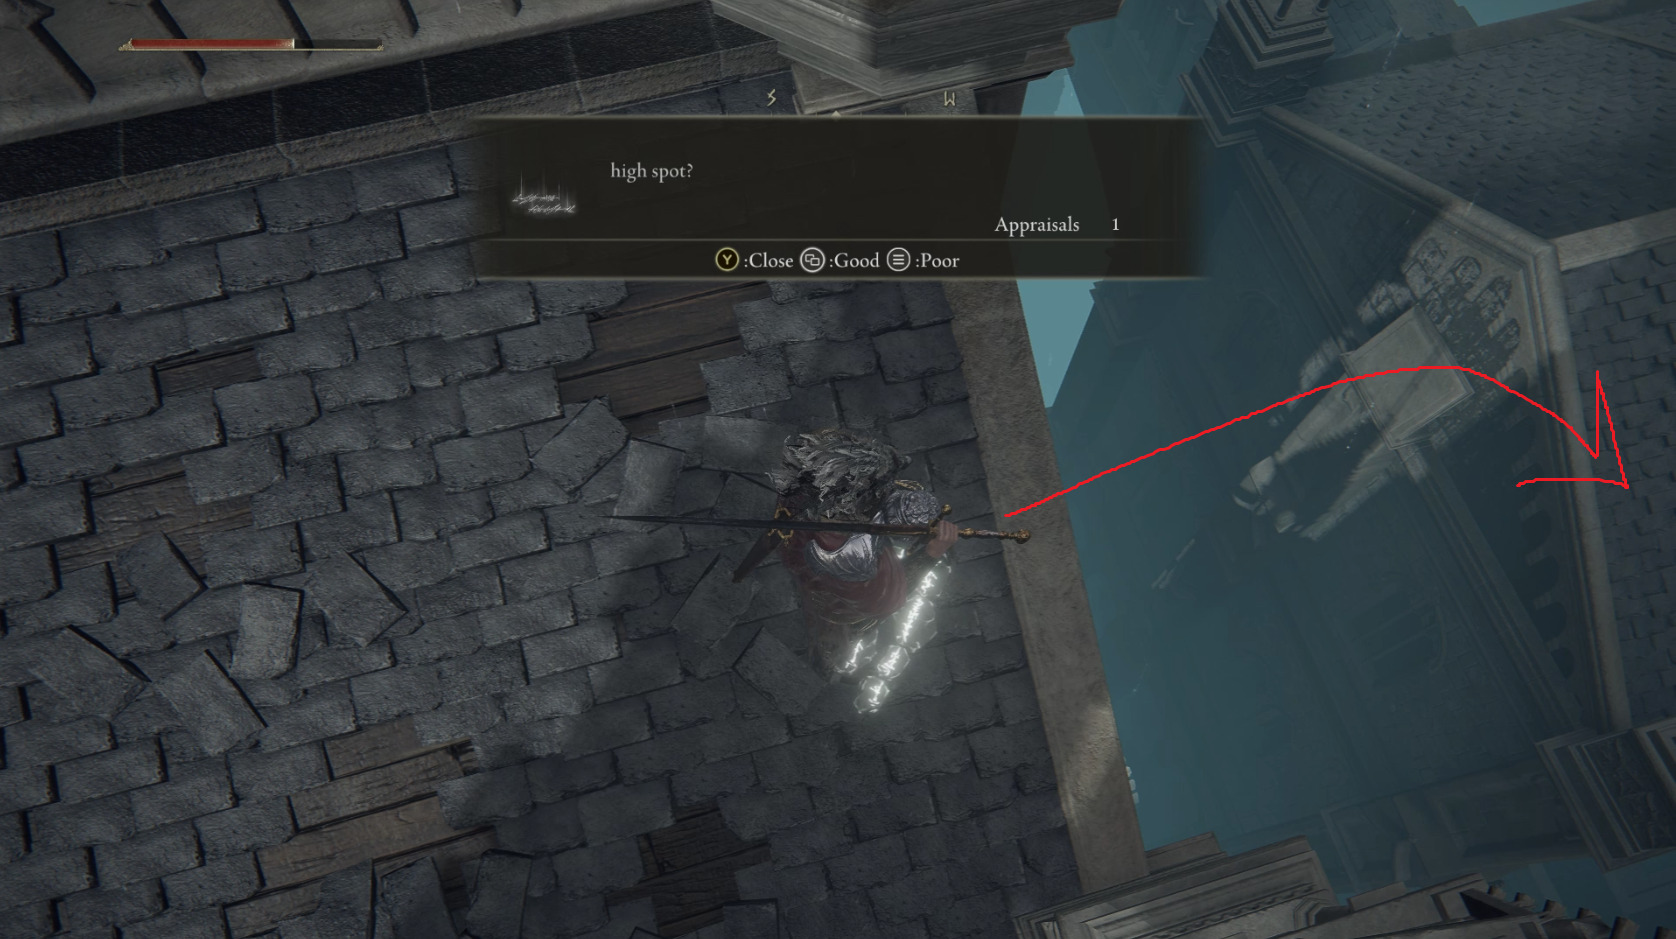
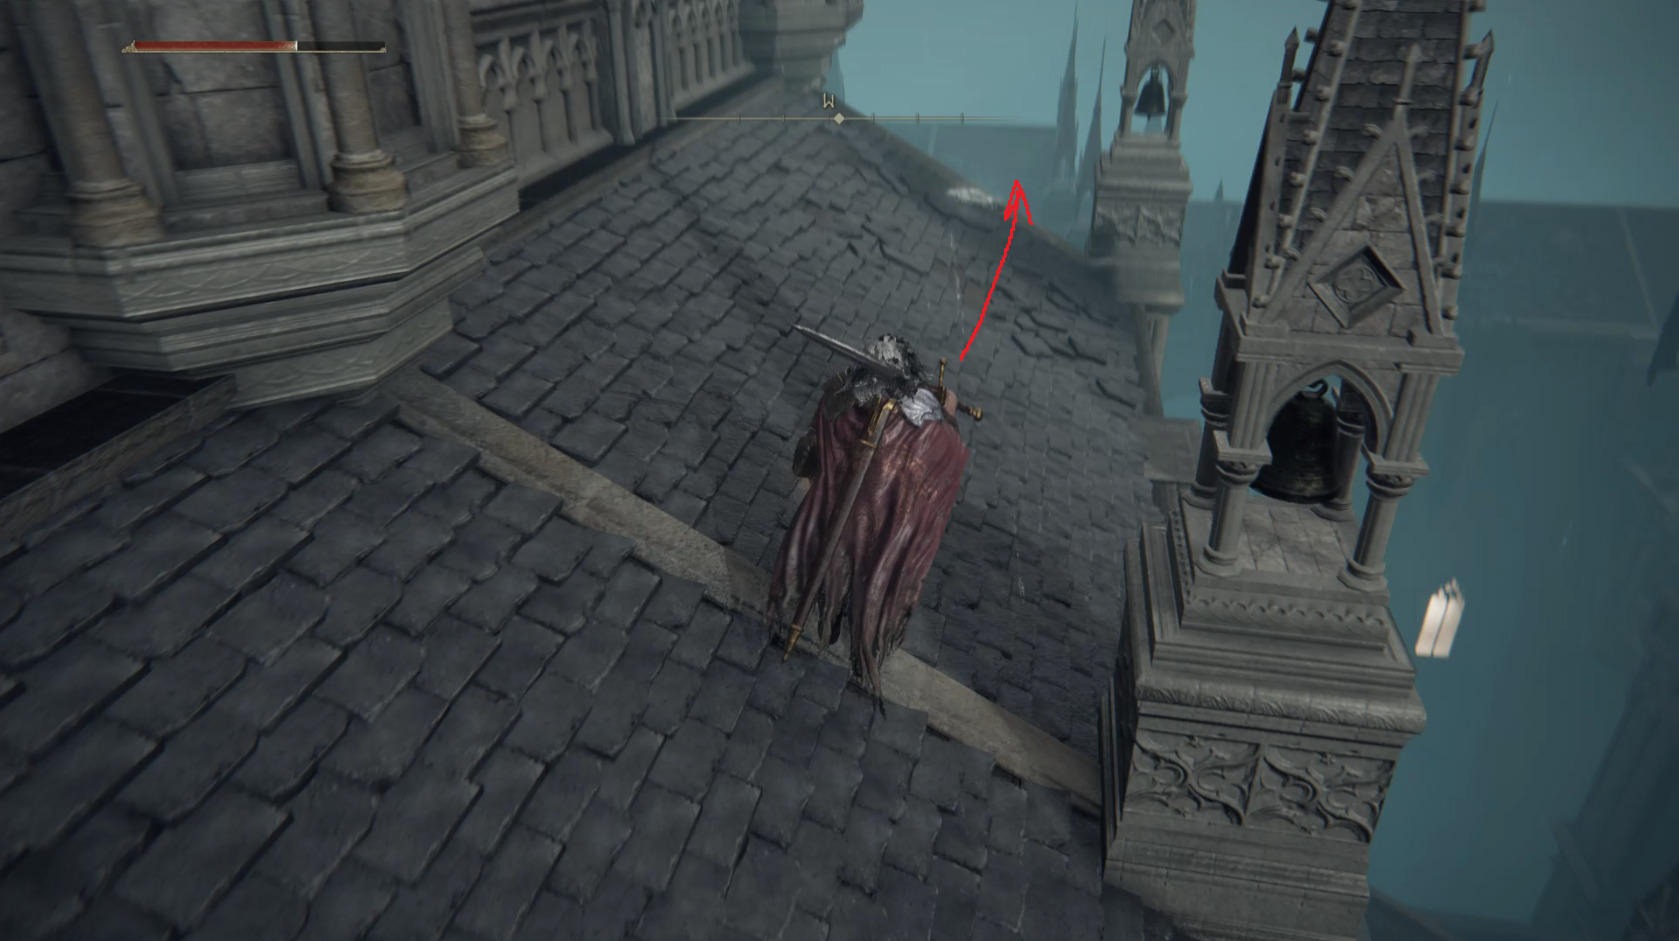
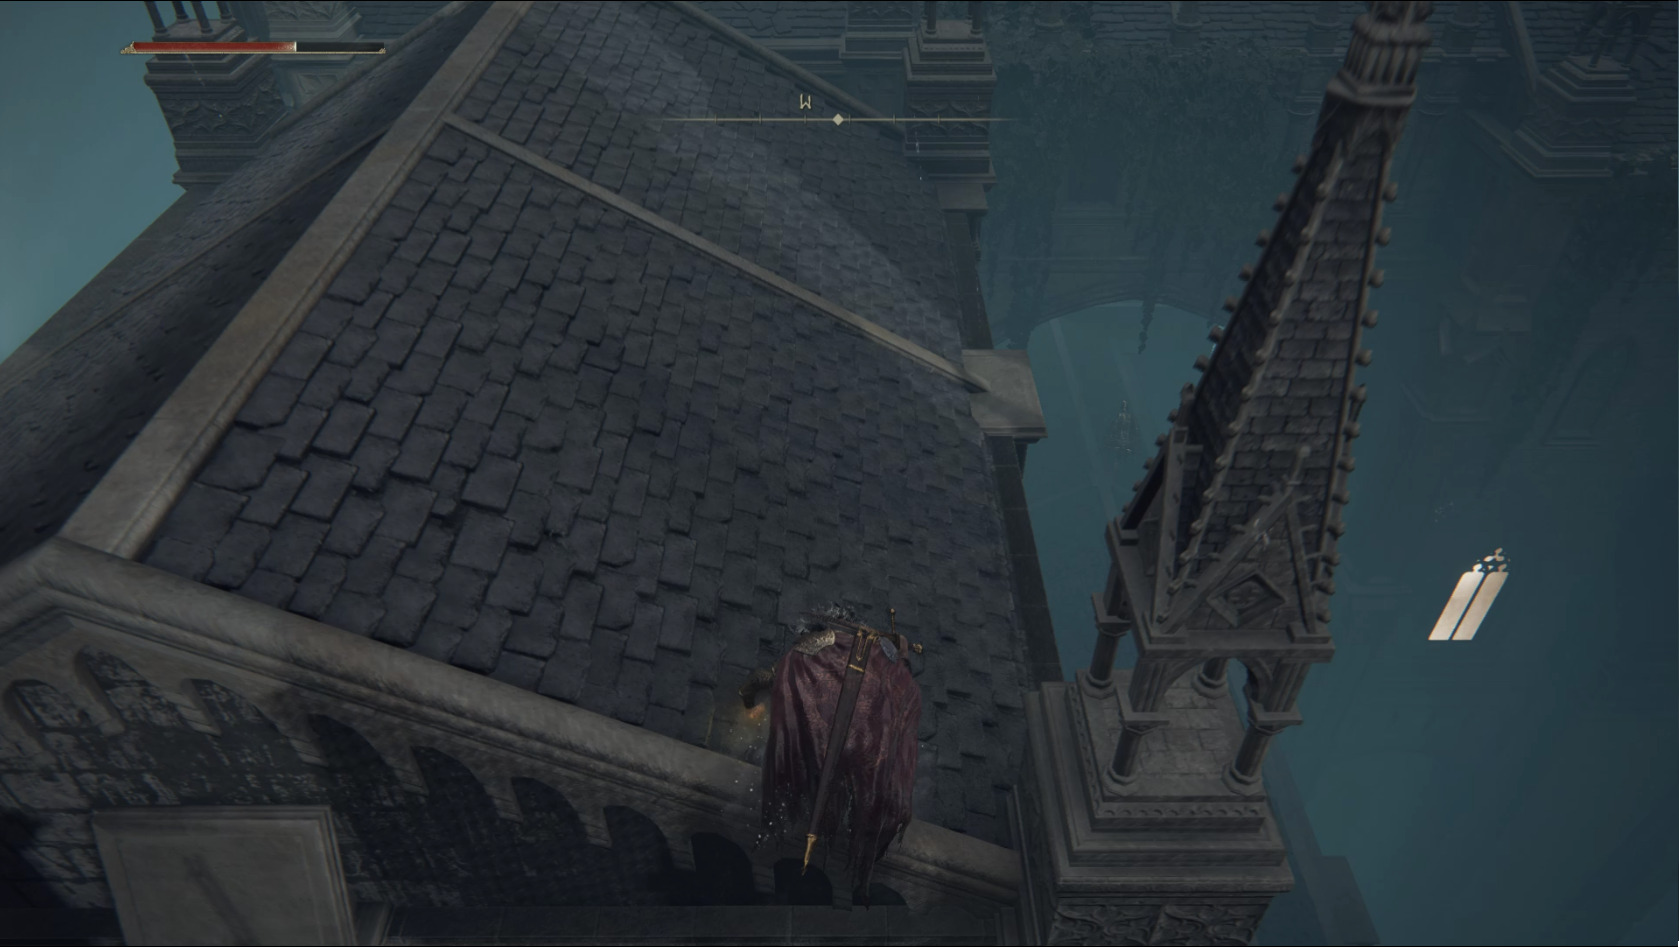
Breathe a sigh of relief once you take down the last enemy here, and grab the x5 Crystal Dart from the corpse near where the sorcerer was standing. On the other side of the bridge, go right around the ledge and when you reach the corner, look left into the space between buildings to find a corpse with x5 Meteor Bolt. Then go back to the corner and drop down onto the roof below to the west (please look before you leap so you don’t end up one of the many bloodstains on the rooftops). Drop down once more to the north, and then prepare for what may be the toughest jump in the game.
Go to the western edge of the roof you’re on, take a look at the building across the gap. It looks too far, but I promise, you can make the jump. Get a running start, run on the path indicated, and at the very last second, jump off to the west-northwest. Don’t be too hard on yourself if you mess it up, I watched fellow EIP writer Spannah fail this jump like 5 times.
It’s good to take a look so you can get the path rightA running start is requiredSee what I mean by last second?This image is just here to convince you it’s possible
Once you land, turn left (south) and take out the first marionette soldier there, then quickly sprint towards the other one, running at an angle to avoid its projectiles. Drop down to the next set of roofs to the east, and sneak up and backstab both marionette soldiers looking off into the distance (I wonder, do the marionette soldiers still have feelings?). Past the last soldier, you’ll have to jump to make the final gap east to the ledge below. Be careful when you head through the doorway, as an enemy will drop down on your left — take it out quickly, as another will drop down to your right soon after.
You can then climb the very, very long ladder. At the top, you’ll find the Full Moon Crossbow in a chest. You’ll then need to jump to the roof to the west of the tower you’re in — it’s best to get a running start and leap straight over the railing. Continue straight onto the next roof section and then turn right and drop down to the north to find a corpse with a Smithing Stone [4]. Drop onto the roof below, southeast of the corpse, then drop again to the north, and you’ll be back where you started, just before the difficult jump.
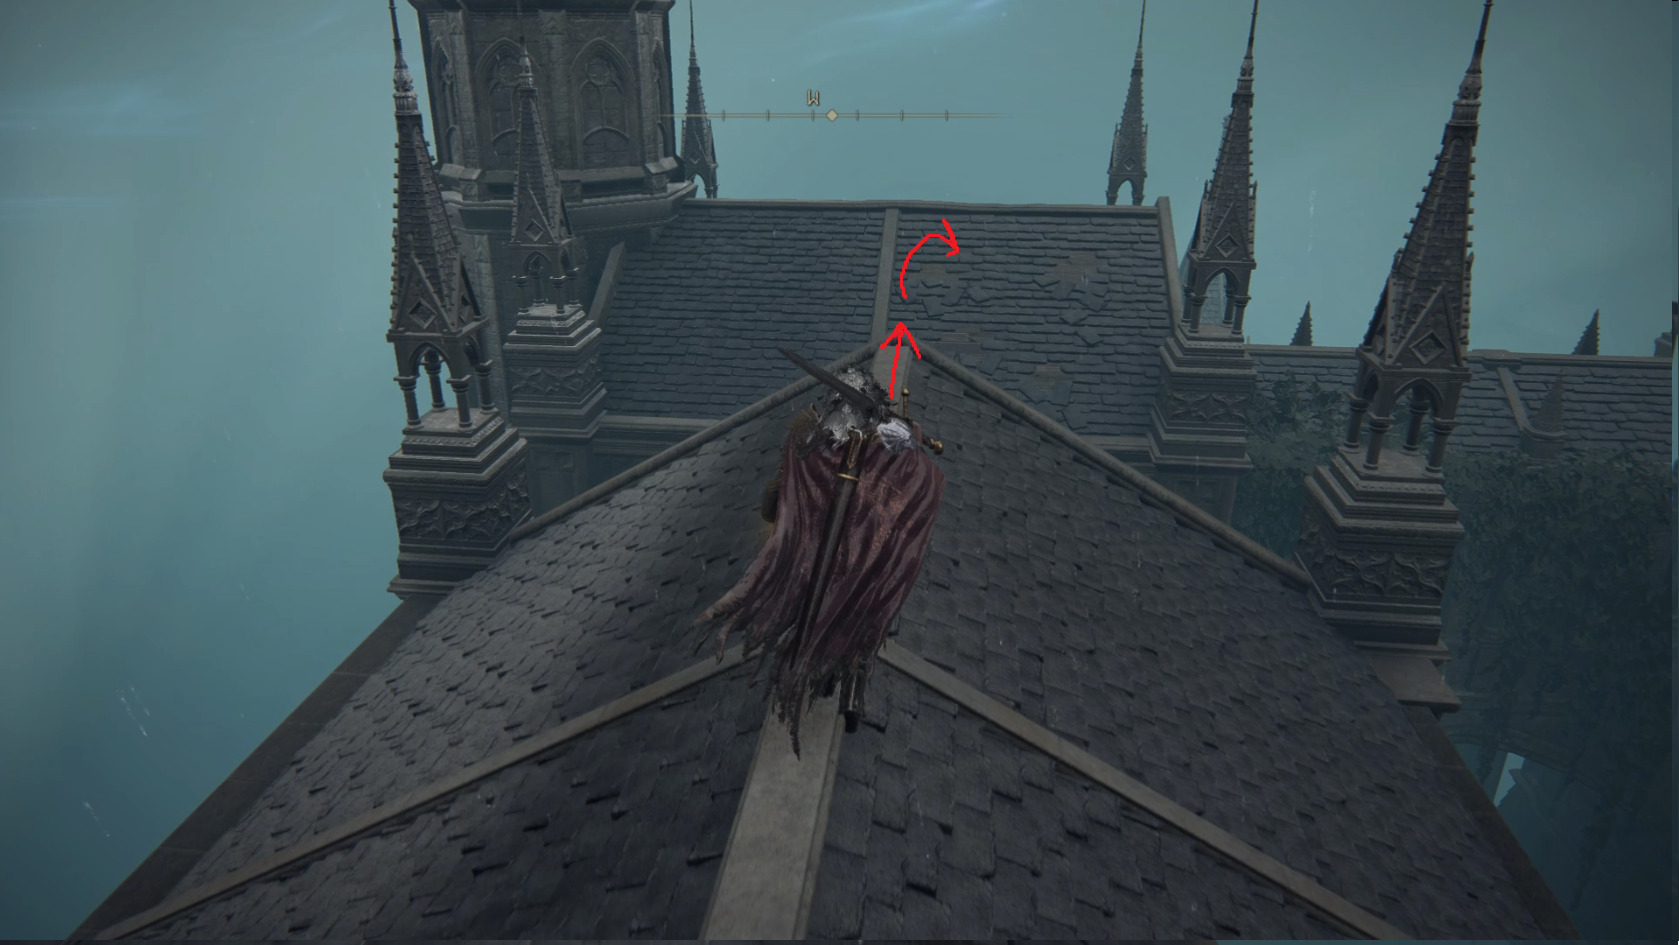
Do the difficult jump again, but this time go straight, and jump the gap to the west onto the next series of roofs.
An avionette will attack you here — you can fight it or keep running — after you land, you’ll turn right, drop down to the next set of roofs, then turn right again to drop down onto the narrow bit of roof and make your way into the tower with a hole in its wooden floor (be mindful of the second avionette that sits on top of the tower). Carefully drop to the closest wooden platform below, and repeat until you come to another crystal crab — this one drops the Lazuli Glintstone Crown. Continue dropping down, and at the bottom, you’ll find some defenseless crabs (don’t you dare) and a Somber Smithing Stone [4].
Leave the room with the crabs and turn left, then left at the corner to find a ladder. Climb up the ladder and go straight, then turn left onto the small narrow roof to reach the covered platform with a corpse in it. Get the Imbued Sword Key from the corpse, then jump the small gap to the northeast to land on the ledge there. Make your way around the corner of the ledge to find x2 Smithing Stone [3], then go back the way you came and jump the gap again. Continue back to the ladder, but don’t go down it — instead, go a bit further west to the middle of the ledge you’re on — you can then jump north onto the roof below.
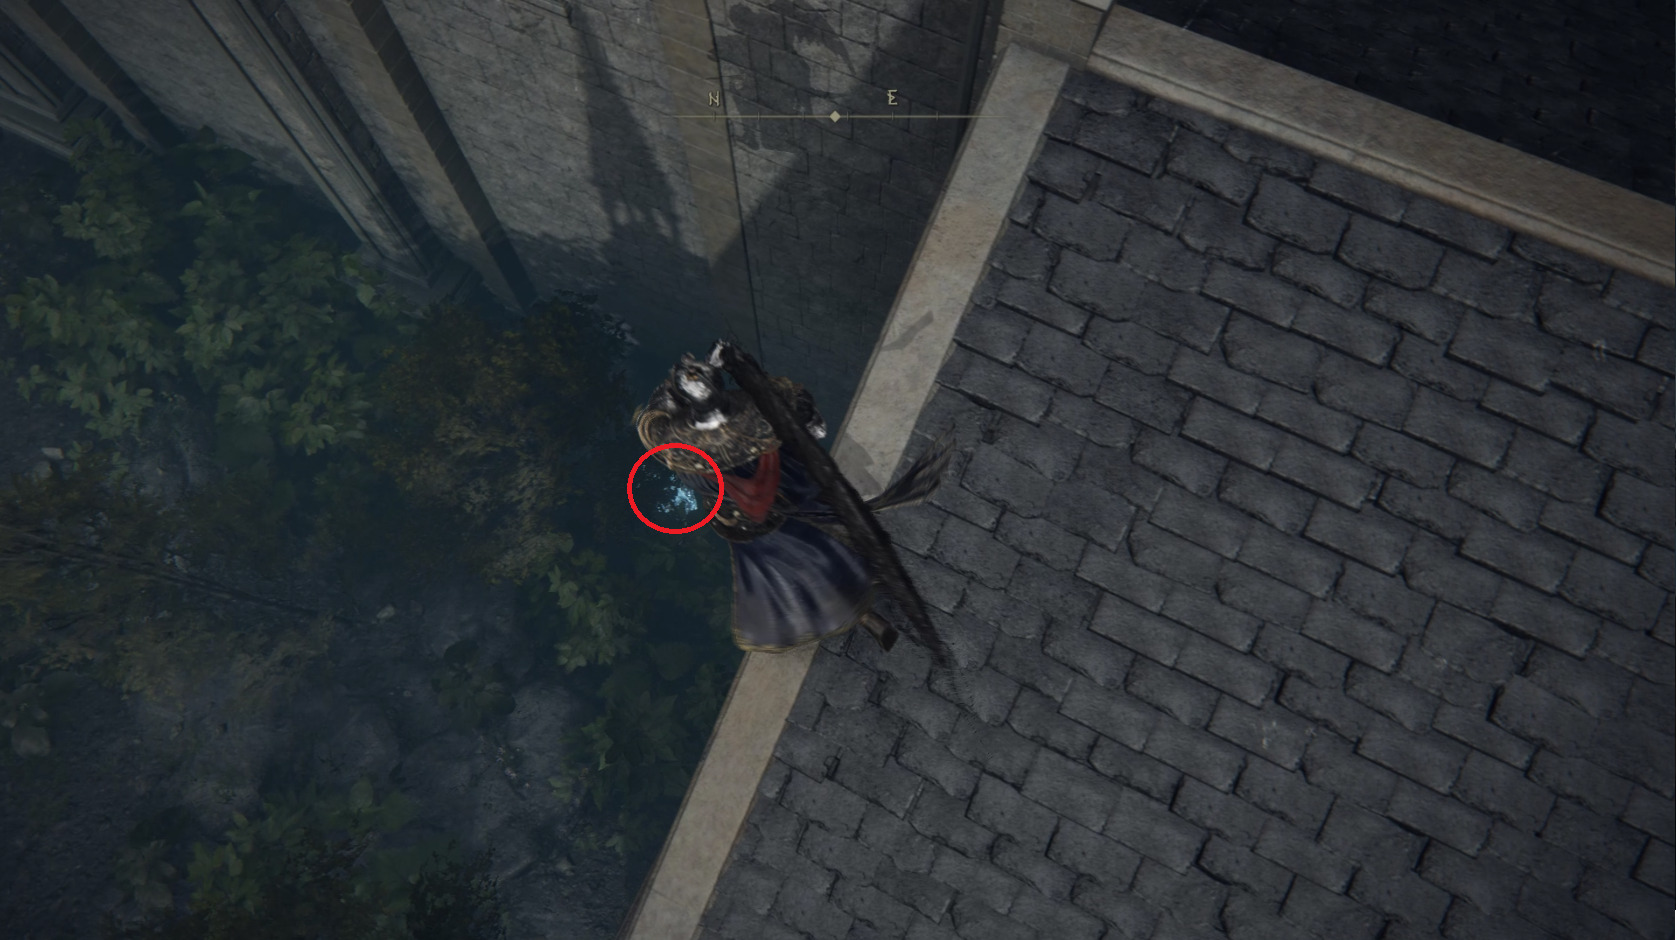
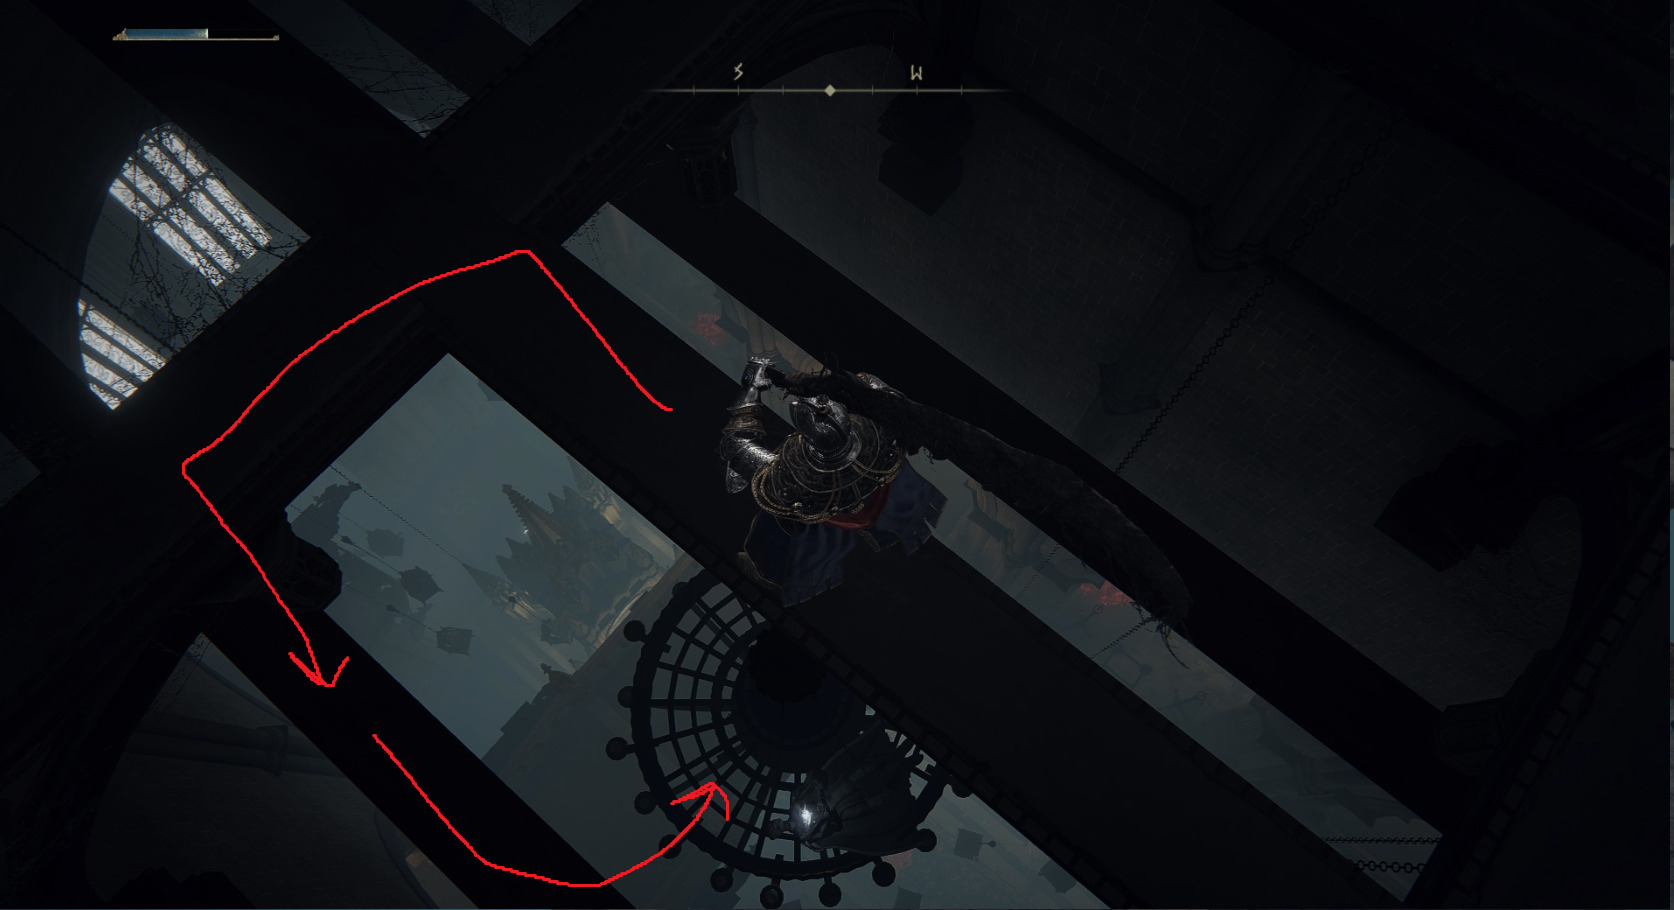
Go left once you land, and move forward slowly — two avionettes will fly down from the spire to the north. Deal with them and then look left — you should see a corpse at the base of a tower to the west that holds some Magic Grease. Then go back east and jump up into one of the open windows; inside you’ll find a series of rafters. Hop down onto them and make your way to the center of the rafters to find a Golden Rune [3] on a corpse. Then make your way south and look down — you should see an item on one of the chandeliers. You’ll need to drop first onto one of the lower rafters, and then down onto the spot with the item, which is an Academy Glintstone Key you can bring to Thops.
Thops is in the church just south of Lake Facing Cliffs way back at the start of Liurnia of the Lakes. After giving him the key (and receiving the emote you can use to access the loot of many of the game’s mage towers), you can return to the section of this level with the waterwheel — remember the desk near the mining enemies you find after first riding the water wheel up? Find Thops there for your other reward.
Additionally, once you give Thops the key, he’ll give you the Erudition gesture — use it while wearing one of the glinstone crowns to open many of the sealed towers throughout the Lands Between.
From the chandelier, drop down onto the walkway below, and then head east through the doorway to go outside. Around the corner on the right, hidden behind the wooden structure, is another Crystal Crab — this one drops the Twinsage Glintstone Crown. Go back inside the building and turn right. There will be a melee enemy in the hallway there, and a sorcerer on the walkway further to the northwest. Position yourself so that a column protects you from the sorcerer’s spells while you fight the melee enemy, then take down the mage. Cross the walkway he was on and turn left to face another melee enemy. Once he’s defeated, make sure you kick down the ladder just left of him — this will let you return to this area if you die (the ladder leads into the Church of the Cuckoo, which is attached to the site of grace of the same name).
After giving the ladder a good kick, turn north and find the Shattering Crystal sorcery on a corpse at the end of the hallway. Then go back towards the and turn left and cross the first walkway (heading east), then continue go into the hallway there. A tough NPC-style enemy waits for you at the end of a long hallway — it’s got a crossbow that can do serious damage, as well as some high-damage melee attacks. It’s best to draw the enemy out of the hallway and into the room with the walkways so that you have more room to maneuver. Defeating this foe allows you to continue down the hallway into the room it was guarding to find Azur’s Glintstone Staff.
Reaching the Boss
Teleport back to the Debate Parlor, and head out once more into the courtyard. Make sure the Iron Maiden isn’t nearby, and jump up onto the fountain and grab the item from the other side of it. Then head northeast and drop onto the right-hand flying buttress.
Walk up the buttress, and jump over the railing — then wait right where you jumped over for the big ball to pass. When it does, run down the stairs and grab the Smithing Stone [5], and run back up wait again in the same spot. When the ball passes again, run up the stairs and jump over the railing to the left to reach the corpse with x8 Crystal Dart. Go back towards the railing and wait again for the ball to pass, then hop over and run up to the corpse to grab the Furlcalling Finger Remedy. Move down a few feet from the corpse and hug the railing to the right — the ball will bounce off the wall ahead and miss you. Next time it passes, run up the stairs and enter the room there.
Continue forward and go outside again, where you’ll see Moongrum, Carian Knight. There are a few things to note about this enemy: Ranged attacks are great if you got ’em, otherwise make sure you use jumping attacks when he has his shield out, or he’ll parry you and probably one-shot you. Once he pulls out his staff, you can attack more freely, but be ready to roll his magic greatsword attacks. If you’re finding him really tough, feel free to just run past him for these next bits, although you’ll miss out on the Carian Knight’s Shield he drops upon death.
You can also do the next section, and once you kill the sorcerer above where the big iron ball drops, it will stop spawning forever — you can then kite Moongrum all the way back to the long stairs where the ball rolled down. He doesn’t like following you farther down the stairs, so you can use ranged attacks as he leashes back to his spawn.
In the courtyard where you find Moongrum, go left (southwest) and down the stairs. You can continue southwest and down the next set of stairs, then through the covered bridge, to open a shortcut, but it’s slower and riskier than the section with the ball and therefore useless. Instead, after going through the metal gate, turn left at the bottom of the stairs, grab the Golden Rune [4] from the corpse, then jump over the railing to the east onto the ledge below.
You’ll see a ladder, but go past it and turn left — up the stairs you can open a door to an actually useful shortcut that will let you skip Moongrum if you screw this next bit up. Then climb the ladder, and kill the nearby sorcerer with his back to you. In the next room, there’s a Pumpkin Head and two more sorcerers, although the second one often doesn’t get involved. This bit can be tricky — ideally, you’ll dodge the Pumpkin Head’s first few attacks and take out the sorcerer. You can also jump back down the hole w/ the ladder and wait a moment; often, the sorcerer will wait at the top of the ladder and the pumpkin fella will wander off, letting you kill the sorcerer quickly before Pumpkin Head can get to you.
Once you take both enemies out, continue forward deeper into the room to find the third sorcerer (assuming he didn’t find you already). This one doesn’t respawn once killed, and he’s the one creating the huge metal ball, so you can now run back up the staircase safely. In the northwest corner of this room, find the chest with the Glintstone Scarab, then head out onto the nearby balcony to the north and jump off onto the roof below — a corpse underneath the balcony holds a Golden Rune [7]. Drop down onto the large balcony with the teleporter below (ignore the teleporter as it only takes you to the Church of Vows), go back inside, then turn right and go back into the courtyard.
Head straight across the courtyard and into the elevator room, then ride it up to find the entrance to Raya Lucaria’s final boss: Rennala, the Full Moon Queen.
Note that if you never killed Moongrum, you can lead him away from the elevator and then run to it in order to face the boss without defeating him. Of course, if you can’t kill one knight, are you really ready for the challenge to come?
Where to Go After Rennala & Raya Lucaria
Once you defeat Rennala (and have started Ranni’s quest if you so choose) you should do the Siofra River dungeon. After that, you can head to either the Altus Plateauor Caelid. Caelid seems to be slightly easier as far as enemy HP values, but all the Scarlet Rot can make it a pain to get through, so it’s really personal preference where you head next.
Reaching Caelid – Caelid is easily accessed by riding east from Limgrave. Reaching Altus Peninsula – If you have both halves of the Dectus Medallion, you can head to the Dectus Lift in the northeast. However, you’ll miss a lot of useful items by going this way. Instead, consider heading to the Ravine-Veiled Village.
Unabashed FromSoftware fanboy still learning to take his time with games (and everything else, really). The time he doesn't spend on games is spent on music, books, or occasionally going outside.
Hey daniel just wanted to comment and say what excellent guides you have. Probally the most informative ive seen to date and ive seen a few. Thanks for the great info and i hope that you are planning on completing this for the entire game. Fingers crossed
How luck I was …LOL… One question… After Raia we go to Caelid or Altus? Some places said we should go to Caelid cus Nokron… Now I don’t know what we’re going to do… LOL
Honestly, I was in a rush to get the guide finished before I logged off last night and simply forgot to add that you can also go to Caelid. That being said, we plan on doing some testing as to whether Caelid or Altus might be considered easier — we’ll update the guide if we end up deciding that one route is optimal.
Noura
3 years ago
Hi Daniel,
Just wanted to say that you guys are doing an amazing job! It’s one of the best guides I have stumbled upon.. Can’t wait for the rest to be published. ðŸ˜ï»¿
Thanks for letting your friends know about us! I hope they also find the guide helpful 🙂
Gabe landry
3 years ago
Hey this guide is awesome, of course it takes time to publish new part of the guide but do you have a projection or rough idea for the date of the next section? Thanks a lot
Glad you like the guide Gabe, and thanks for being understanding about the delay with the next sections. We should have the first part of our Caelid walkthrough published tomorrow, and I anticipate finishing the dungeon walkthrough that leads to Altus in the next couple of days. By this time next week, both Caelid and Altus should have complete or near-complete walkthroughs.
Thanks a ton for the feedback Steve — I sometimes worry that the compass directions are redundant, or that people don’t care about the “why” behind some tactics, so it’s good to know that they’re indeed helpful.
The tip about Moongrum’s leash range is a good one, and I’ll add it to the guide!
I kited him into the elevator room, and he fell down the shaft and died.
Nick
3 years ago
The tower with the crabs in the bottom has another crystal crab with loot you can reach by dropping from the top. Access point is past the hard jump and straight instead of left to marionettes that lead to bow
Hi Brent, thanks for letting us know, and sorry about that, it’s my mistake — I didn’t realize that the page there wasn’t a unique enemy, and therefore me getting the hood when killing it was pretty rare. You can indeed get the hood from this foe, but you’ll probably need to try multiple times, resting at the site of grace and killing this foe again.
Hey don’t get me wrong. Your walk through is great. I’m on my second actual complete playtthrough. Did it on mY own the first time. I missed so much. This guide is definitely hands down the best I’ve found. Easy to follow and gets every needed component
Thanks Brent, these guides are a lot of work, but every time someone tells us the guides are helping them, it makes all the effort feel worthwhile 🙂
Brent
3 years ago
I will say though. For newcomers. Be wary of the iron maiden trap. It is just that. A trap. You cannot spawn out of volcano manor until you rest at sight of grace. But doing so will give you quick access to volcano manner when your ready to go there
Great point, I’ve updated the guide to make it more clear that it’s a trap like the chest traps.
Brian
2 years ago
Really like the way you put your guide together, seems quite thorough. Btw, that roof jump. I applaud you making it. I did find a much easier path going N. Would be a nice option you could layout for the non-jumpers, lol. Thanks again. Brian H
Will echo the sentiments of appreciation for a really terrific guide. And, Brian H., please tell us more of a viable alternate rooftop route! Jumps like this are the bane of the game for me!
Thanks Brian, and also thanks for the tip about the jump. Are you certain you’re able to get all the same items skipping the jump? If so, let me know and I’ll see if I can’t get this guide updated with your suggestion.
Truth be told i am following up your guide, so thanks for that haven’t done yet Raya Lucaria (starting it) still i wonder where you’d go after gonna be honest be it Caelid or Altus i don’t feel confident at all lol.
Hi Ero, glad the guide has been helpful! I’m leaning towards recommending Altus before Caelid, but I think it may depend on your playstyle and your build. All you can lose is a few runes, so don’t be afraid to explore both zones and see which one feels easier to you! Guides for both regions should have preliminary versions released soon, so keep an eye out for those.
Tried a bit both places and Caelid bosses are really weak compared to Altus, but damn the place is hell, those birds and dogs don’t let you breath at all plus with the rot everywhere:.so i am quite leaning toward Altus too, even if the bosses are harder:
I agree, I think in terms of enemy scaling, Caelid probably comes before Altus when asking “where to go next”… but the birds and dogs are such a pain that maybe it’s better to be over-leveled for Caelid 😀
Great point Fred  🙠 I’ll make note of that in the guide
Edit: I went and did some research and couldn’t find anything that confirmed this… you tested the jump with and without heavy armor? From what I can find (and what I’ve experienced myself) the lighter equip load improves rolls, but not jumps.
Last edited 2 years ago by DanielD
Forkinator
1 year ago
Hey just wanted to let anyone know that the part in raya Lucaria academy where the marionettes drop down in the beginning of the area has 4 marionettes total that can drop down. I am staring at 4 dead marionettes and each one was hanging above waiting to ambush me. I know the guide mentions 3 but it’s actually 4. Thanks for the guide!


Hey daniel just wanted to comment and say what excellent guides you have. Probally the most informative ive seen to date and ive seen a few. Thanks for the great info and i hope that you are planning on completing this for the entire game. Fingers crossed
Thank you Mark! We try to make ’em useful 🙂 The plan as of now is to do a complete walkthrough of Elden Ring.
Great work, Only a question, if I killed the Iron Maiden, it’s possible to respawn it?
You’re in luck — looks like she respawns! I’ll edit the guide accordingly.
How luck I was …LOL… One question… After Raia we go to Caelid or Altus? Some places said we should go to Caelid cus Nokron… Now I don’t know what we’re going to do… LOL
Honestly, I was in a rush to get the guide finished before I logged off last night and simply forgot to add that you can also go to Caelid. That being said, we plan on doing some testing as to whether Caelid or Altus might be considered easier — we’ll update the guide if we end up deciding that one route is optimal.
Hi Daniel,
Just wanted to say that you guys are doing an amazing job! It’s one of the best guides I have stumbled upon.. Can’t wait for the rest to be published. ðŸ˜ï»¿
We can’t wait to get ’em done so you can use ’em! Your kind words are the motivation we need to keep grinding away.
Best guide on the interwebs hands down, thanks all! I have shared your guide with all of my friends and they are using it too.
Thanks for letting your friends know about us! I hope they also find the guide helpful 🙂
Hey this guide is awesome, of course it takes time to publish new part of the guide but do you have a projection or rough idea for the date of the next section? Thanks a lot
Glad you like the guide Gabe, and thanks for being understanding about the delay with the next sections. We should have the first part of our Caelid walkthrough published tomorrow, and I anticipate finishing the dungeon walkthrough that leads to Altus in the next couple of days. By this time next week, both Caelid and Altus should have complete or near-complete walkthroughs.
Sounds good!
I really appreciate your clarity, like compass directions and explaining why to do certain things.
BTW, Moongrum was kicking my butt until I kited him back to the ball, where he was afraid to go too far and I could hit him with magic.
Thanks a ton for the feedback Steve — I sometimes worry that the compass directions are redundant, or that people don’t care about the “why” behind some tactics, so it’s good to know that they’re indeed helpful.
The tip about Moongrum’s leash range is a good one, and I’ll add it to the guide!
I kited him into the elevator room, and he fell down the shaft and died.
The tower with the crabs in the bottom has another crystal crab with loot you can reach by dropping from the top. Access point is past the hard jump and straight instead of left to marionettes that lead to bow
Thanks again Nick, if you keep finding extra secrets we’re gonna have to add you to the list of authors!
Followed every step to a t. Never got the high page hood. Arggggh. Did get the staff so I suppose checks amd balance
Hi Brent, thanks for letting us know, and sorry about that, it’s my mistake — I didn’t realize that the page there wasn’t a unique enemy, and therefore me getting the hood when killing it was pretty rare. You can indeed get the hood from this foe, but you’ll probably need to try multiple times, resting at the site of grace and killing this foe again.
Hey don’t get me wrong. Your walk through is great. I’m on my second actual complete playtthrough. Did it on mY own the first time. I missed so much. This guide is definitely hands down the best I’ve found. Easy to follow and gets every needed component
Thanks Brent, these guides are a lot of work, but every time someone tells us the guides are helping them, it makes all the effort feel worthwhile 🙂
I will say though. For newcomers. Be wary of the iron maiden trap. It is just that. A trap. You cannot spawn out of volcano manor until you rest at sight of grace. But doing so will give you quick access to volcano manner when your ready to go there
Great point, I’ve updated the guide to make it more clear that it’s a trap like the chest traps.
Really like the way you put your guide together, seems quite thorough. Btw, that roof jump. I applaud you making it. I did find a much easier path going N. Would be a nice option you could layout for the non-jumpers, lol. Thanks again. Brian H
Will echo the sentiments of appreciation for a really terrific guide. And, Brian H., please tell us more of a viable alternate rooftop route! Jumps like this are the bane of the game for me!
Thanks Brian, and also thanks for the tip about the jump. Are you certain you’re able to get all the same items skipping the jump? If so, let me know and I’ll see if I can’t get this guide updated with your suggestion.
It’s much easier if with a light load.
Truth be told i am following up your guide, so thanks for that haven’t done yet Raya Lucaria (starting it) still i wonder where you’d go after gonna be honest be it Caelid or Altus i don’t feel confident at all lol.
Hi Ero, glad the guide has been helpful! I’m leaning towards recommending Altus before Caelid, but I think it may depend on your playstyle and your build. All you can lose is a few runes, so don’t be afraid to explore both zones and see which one feels easier to you! Guides for both regions should have preliminary versions released soon, so keep an eye out for those.
Tried a bit both places and Caelid bosses are really weak compared to Altus, but damn the place is hell, those birds and dogs don’t let you breath at all plus with the rot everywhere:.so i am quite leaning toward Altus too, even if the bosses are harder:
I agree, I think in terms of enemy scaling, Caelid probably comes before Altus when asking “where to go next”… but the birds and dogs are such a pain that maybe it’s better to be over-leveled for Caelid 😀
The long jump is easier if you have a light load.
Great point Fred  🙠 I’ll make note of that in the guide
Edit: I went and did some research and couldn’t find anything that confirmed this… you tested the jump with and without heavy armor? From what I can find (and what I’ve experienced myself) the lighter equip load improves rolls, but not jumps.
Hey just wanted to let anyone know that the part in raya Lucaria academy where the marionettes drop down in the beginning of the area has 4 marionettes total that can drop down. I am staring at 4 dead marionettes and each one was hanging above waiting to ambush me. I know the guide mentions 3 but it’s actually 4. Thanks for the guide!
Thanks Forkinator, I’ll update the guide – nice catch!