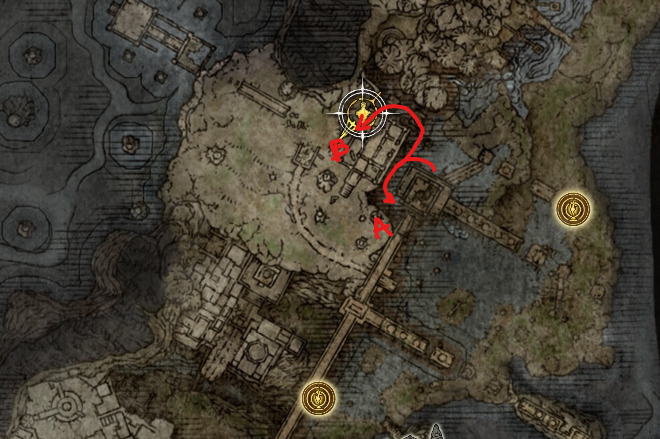
While this underground dungeon is quite vast and can be challenging to navigate, it contains several useful items and allows you to advance Ranni the Witch‘s questline.
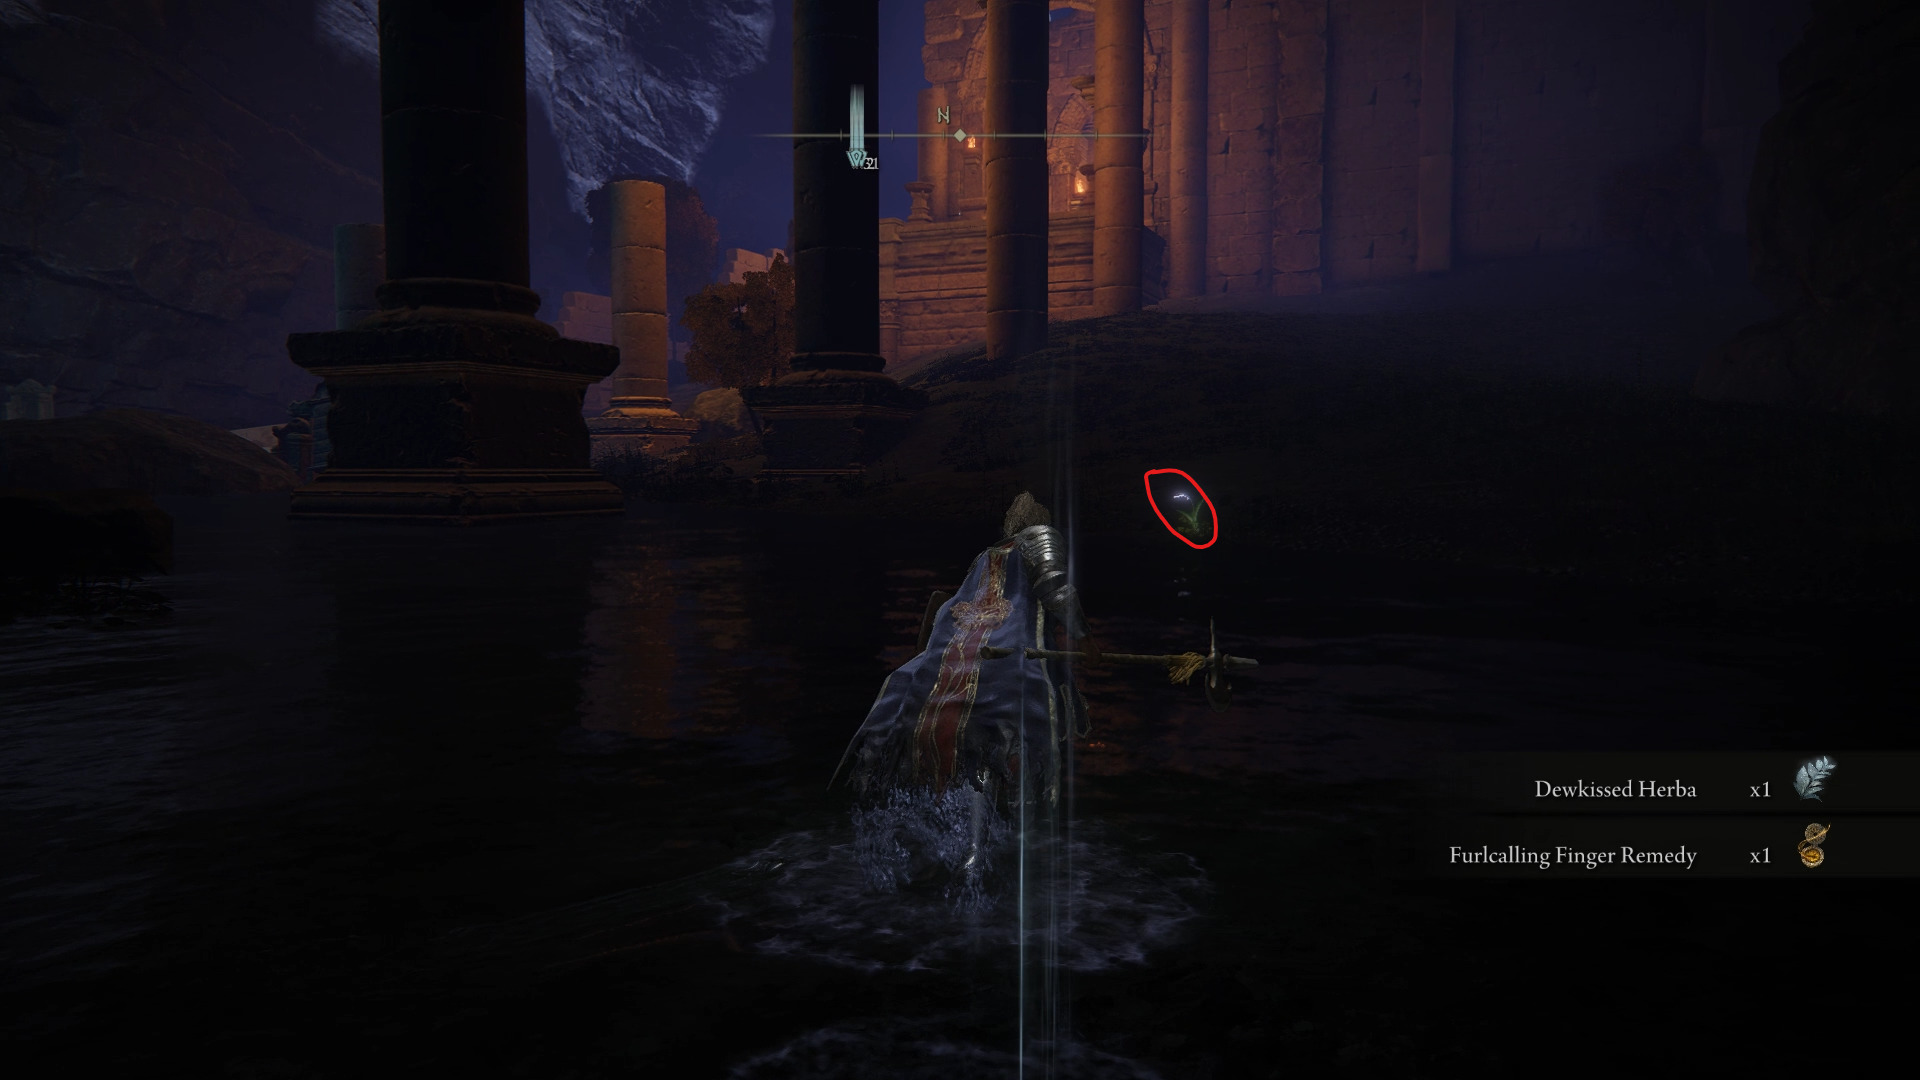
As you enter through the elevator in Limgrave, make sure to grab the Siofra River Well Depths site of grace before proceeding through the dungeon. While you won’t find much in the vicinity of this site of grace, you can get some crafting materials as well as a Ghost Glovewort [1] before entering the nearby ruins.
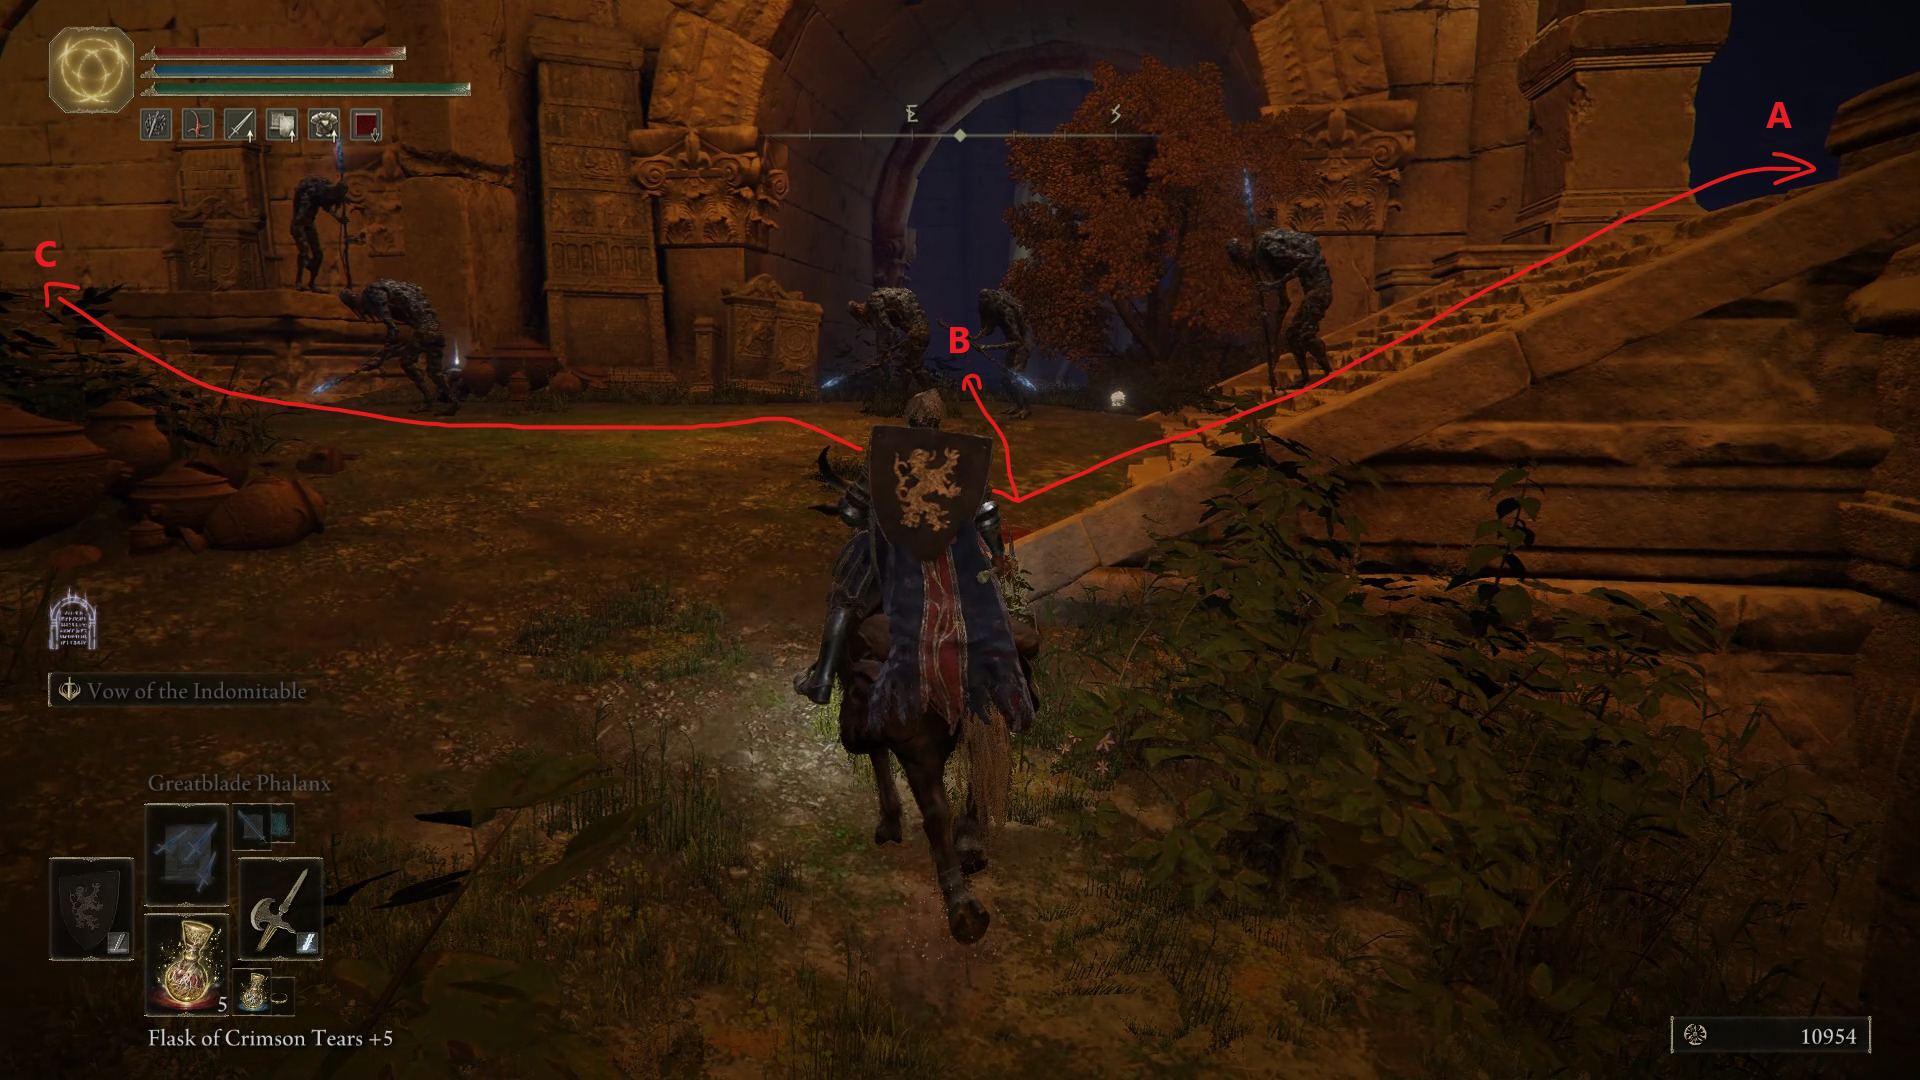
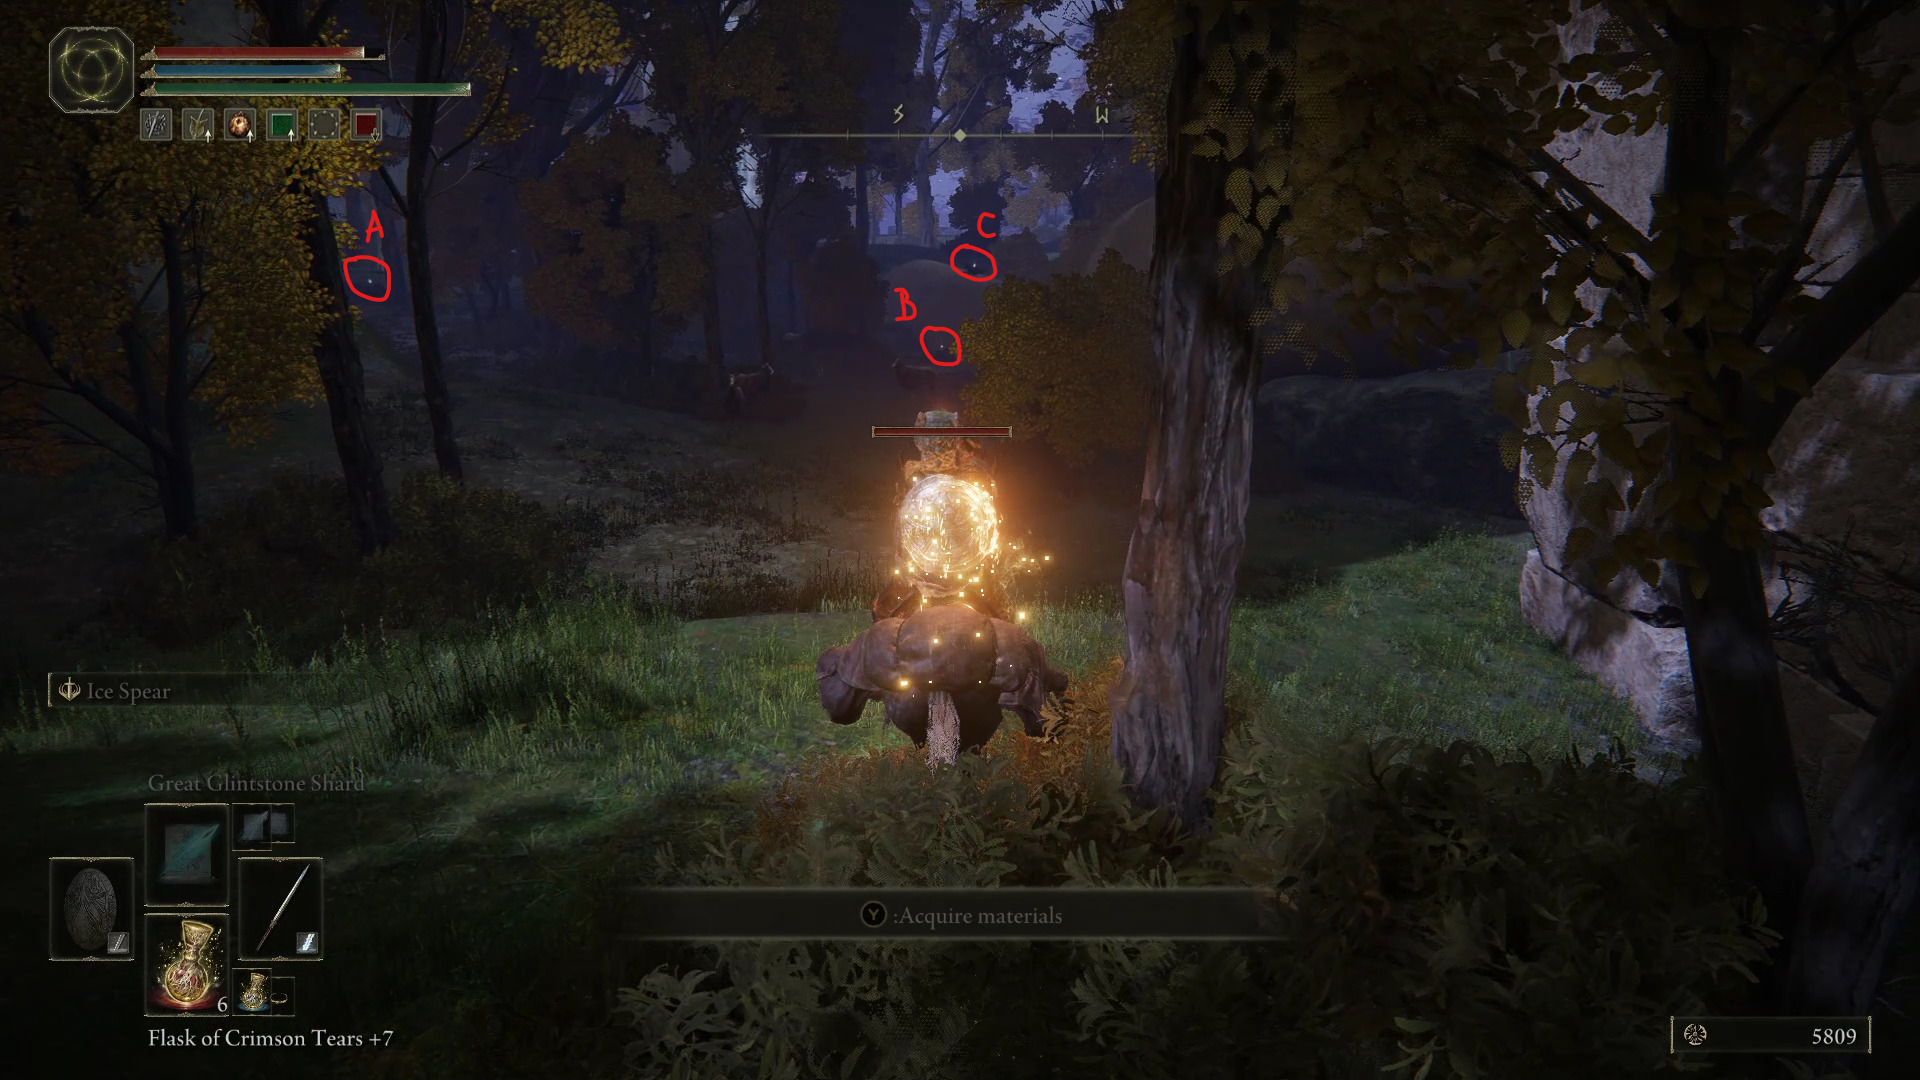
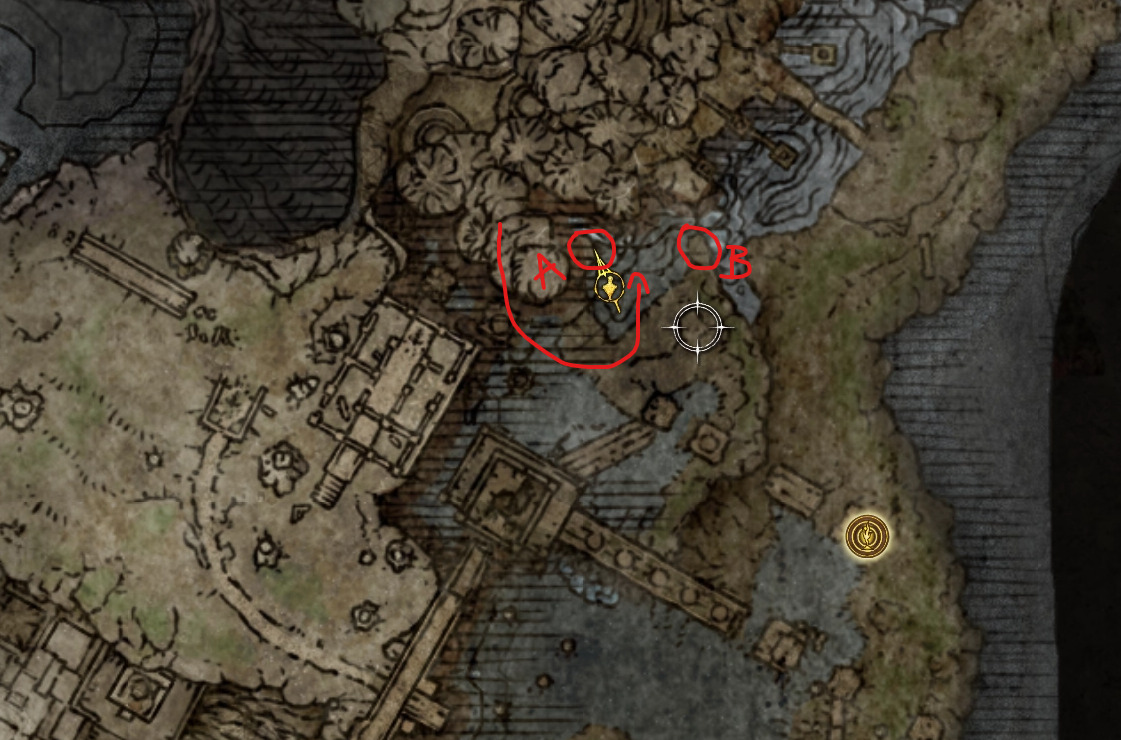
While you will find quite a lot of enemies in these ruins, they shouldn’t be much of a challenge with their slow movement/attack speed. Additionally you can just mount-up, which makes these enemies trivial as long as you’re patient. Once the enemies have been dealt with, make sure to pick up the Smithing Stone [4] up the stairs to the right (A) and the Golden Centipede in the room straight ahead of you (B), before going further through the dungeon (C).
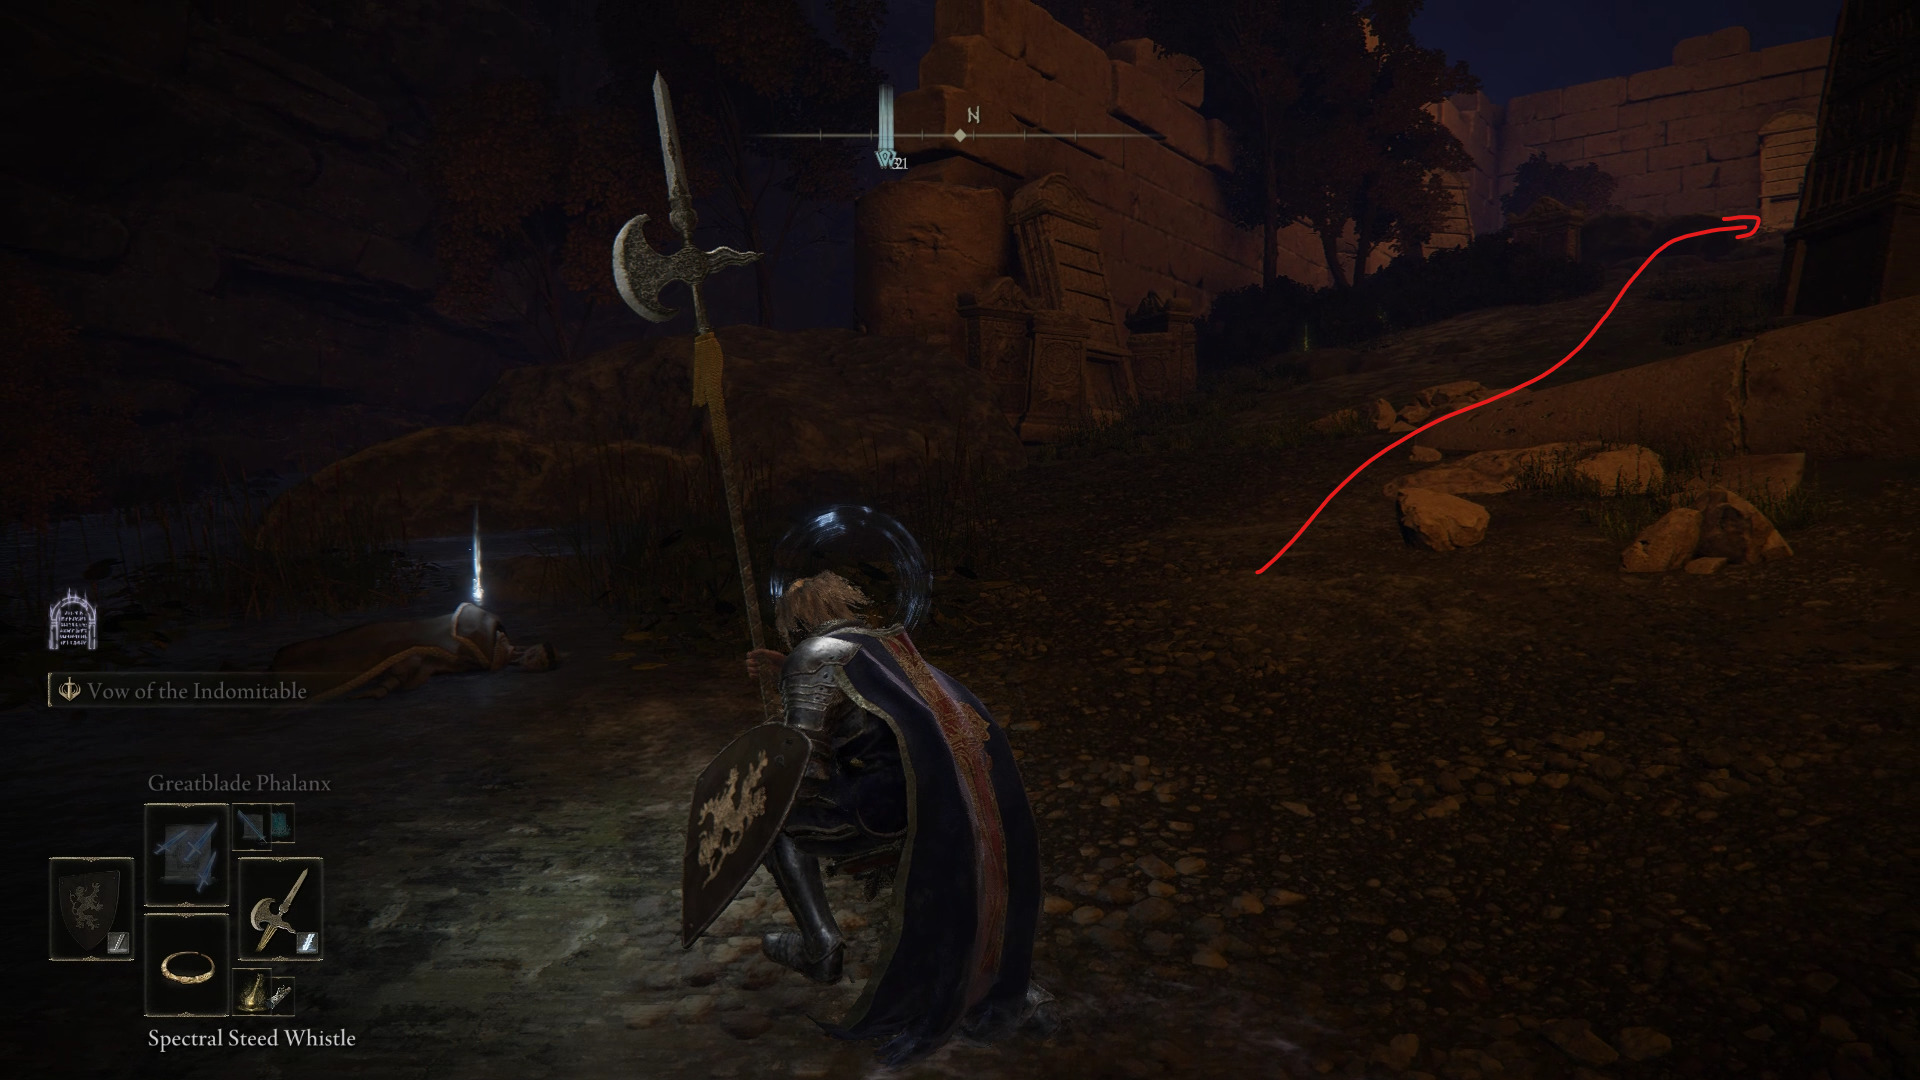
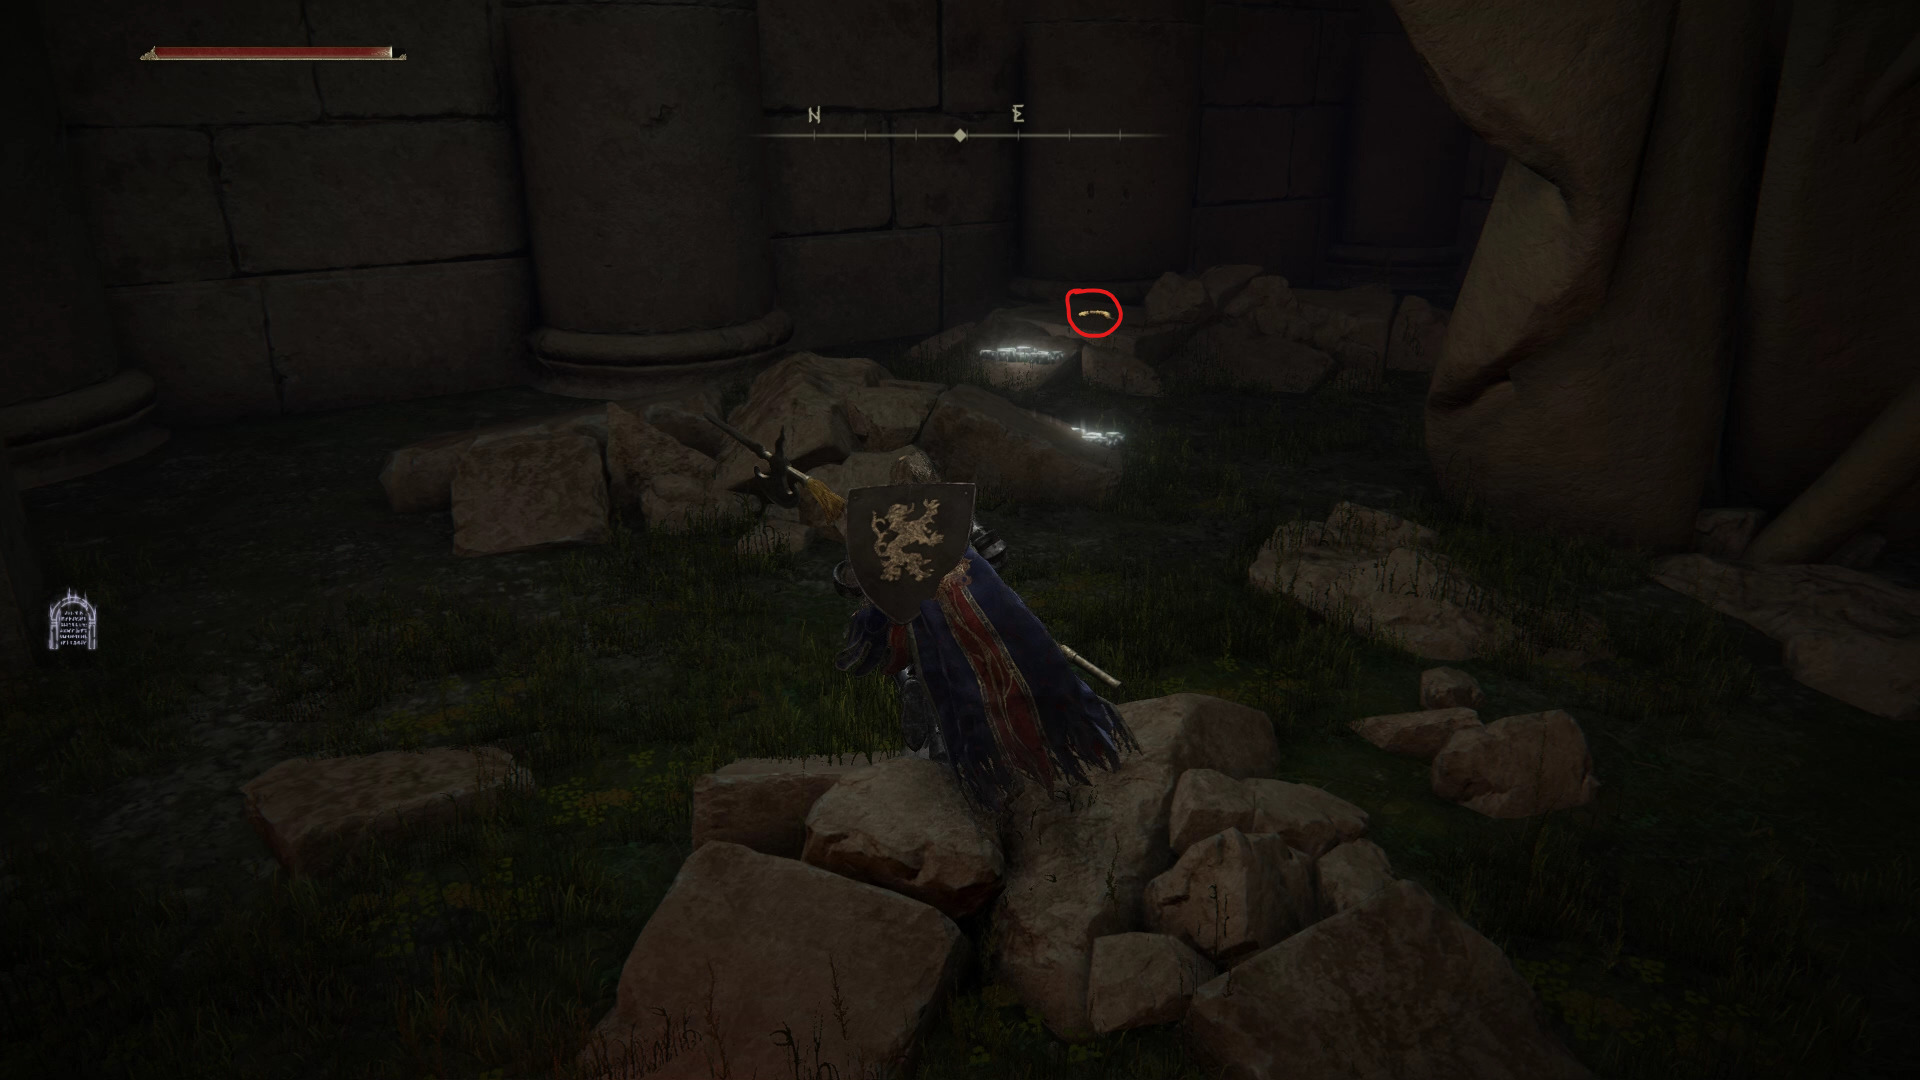
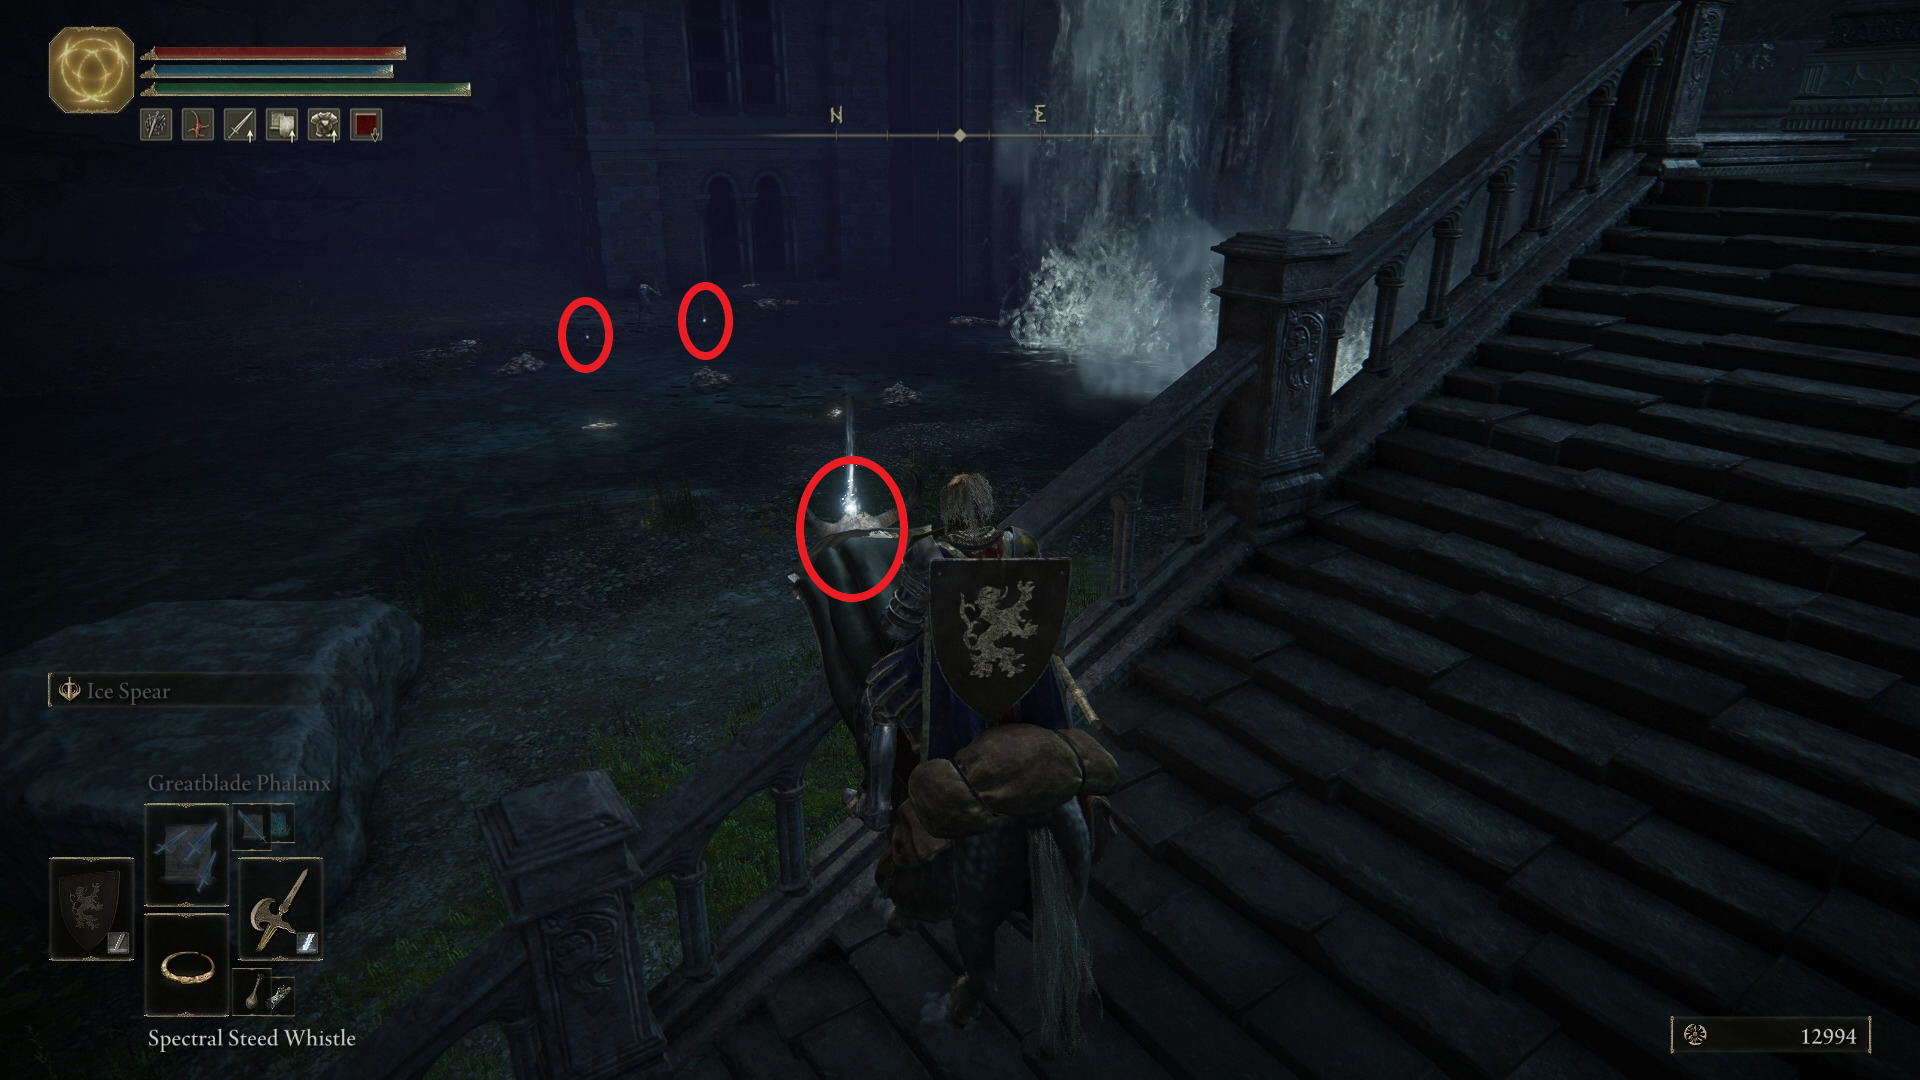
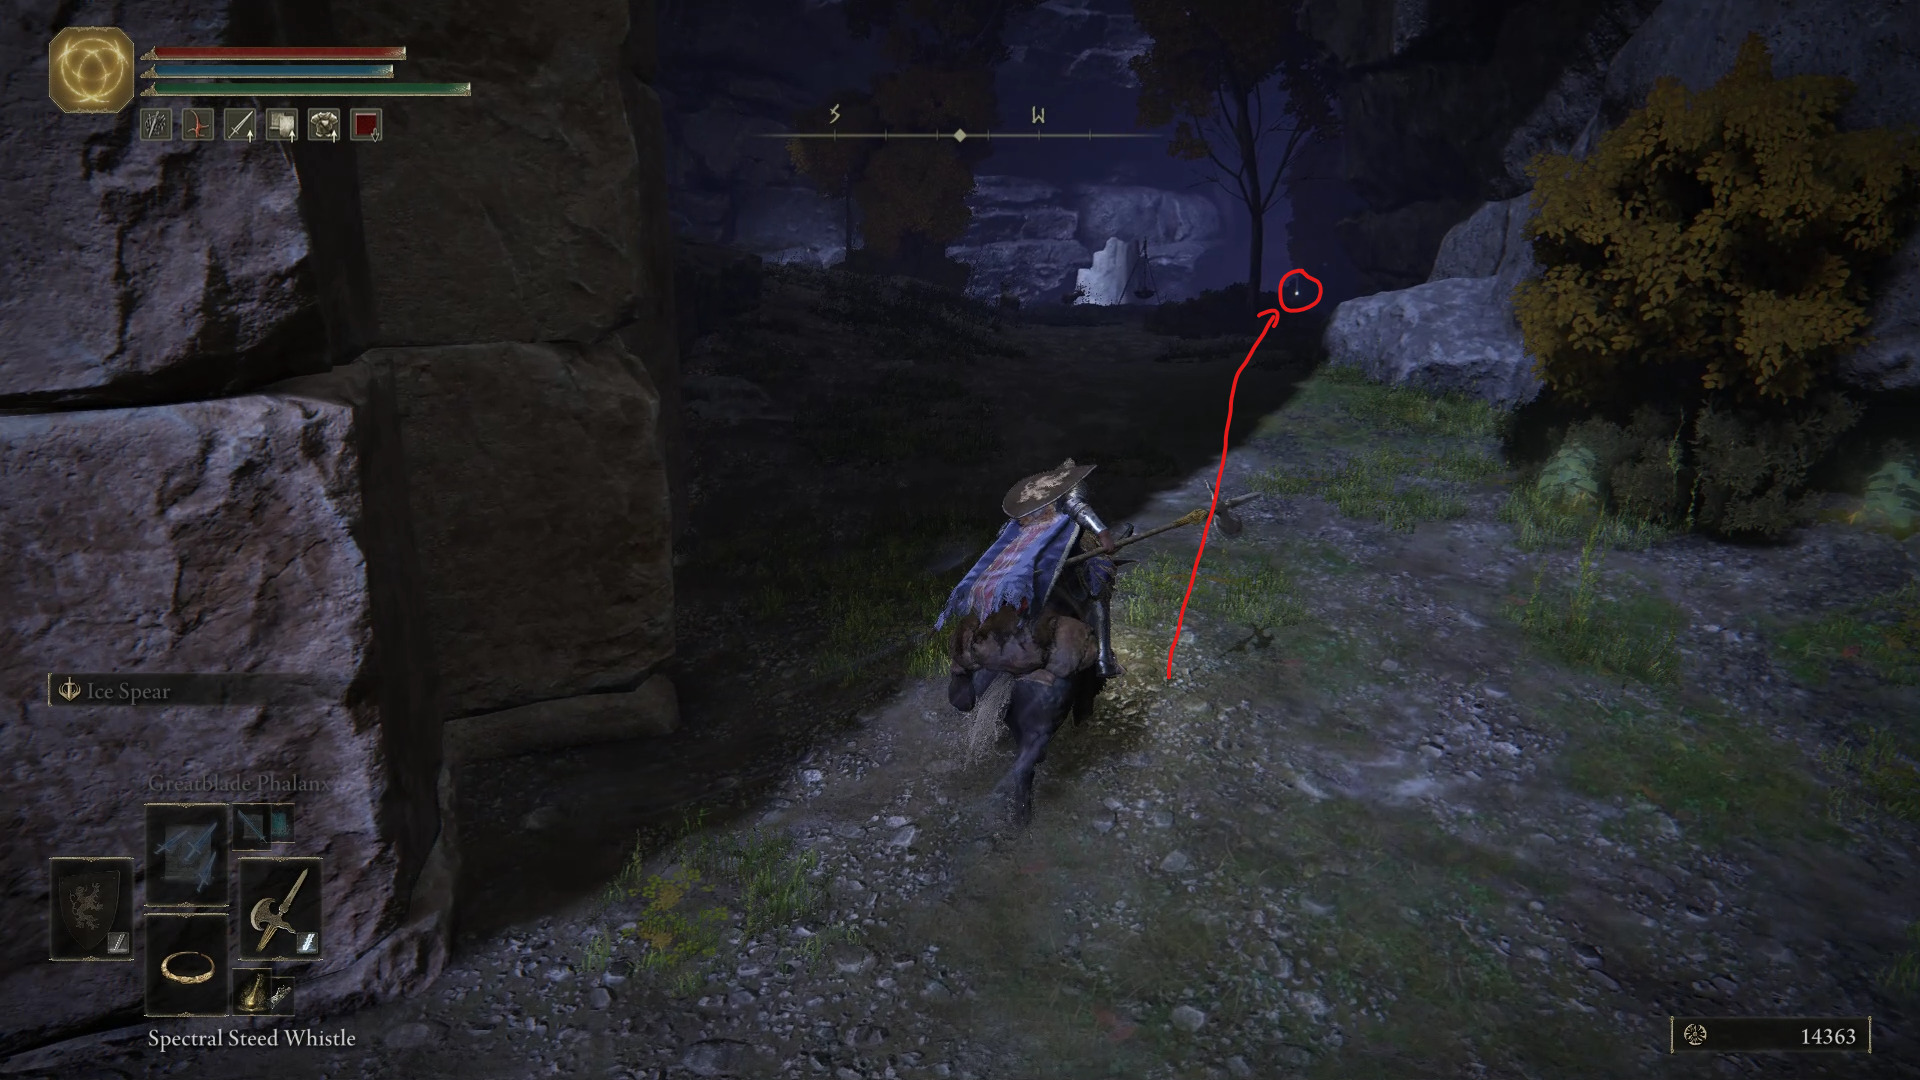
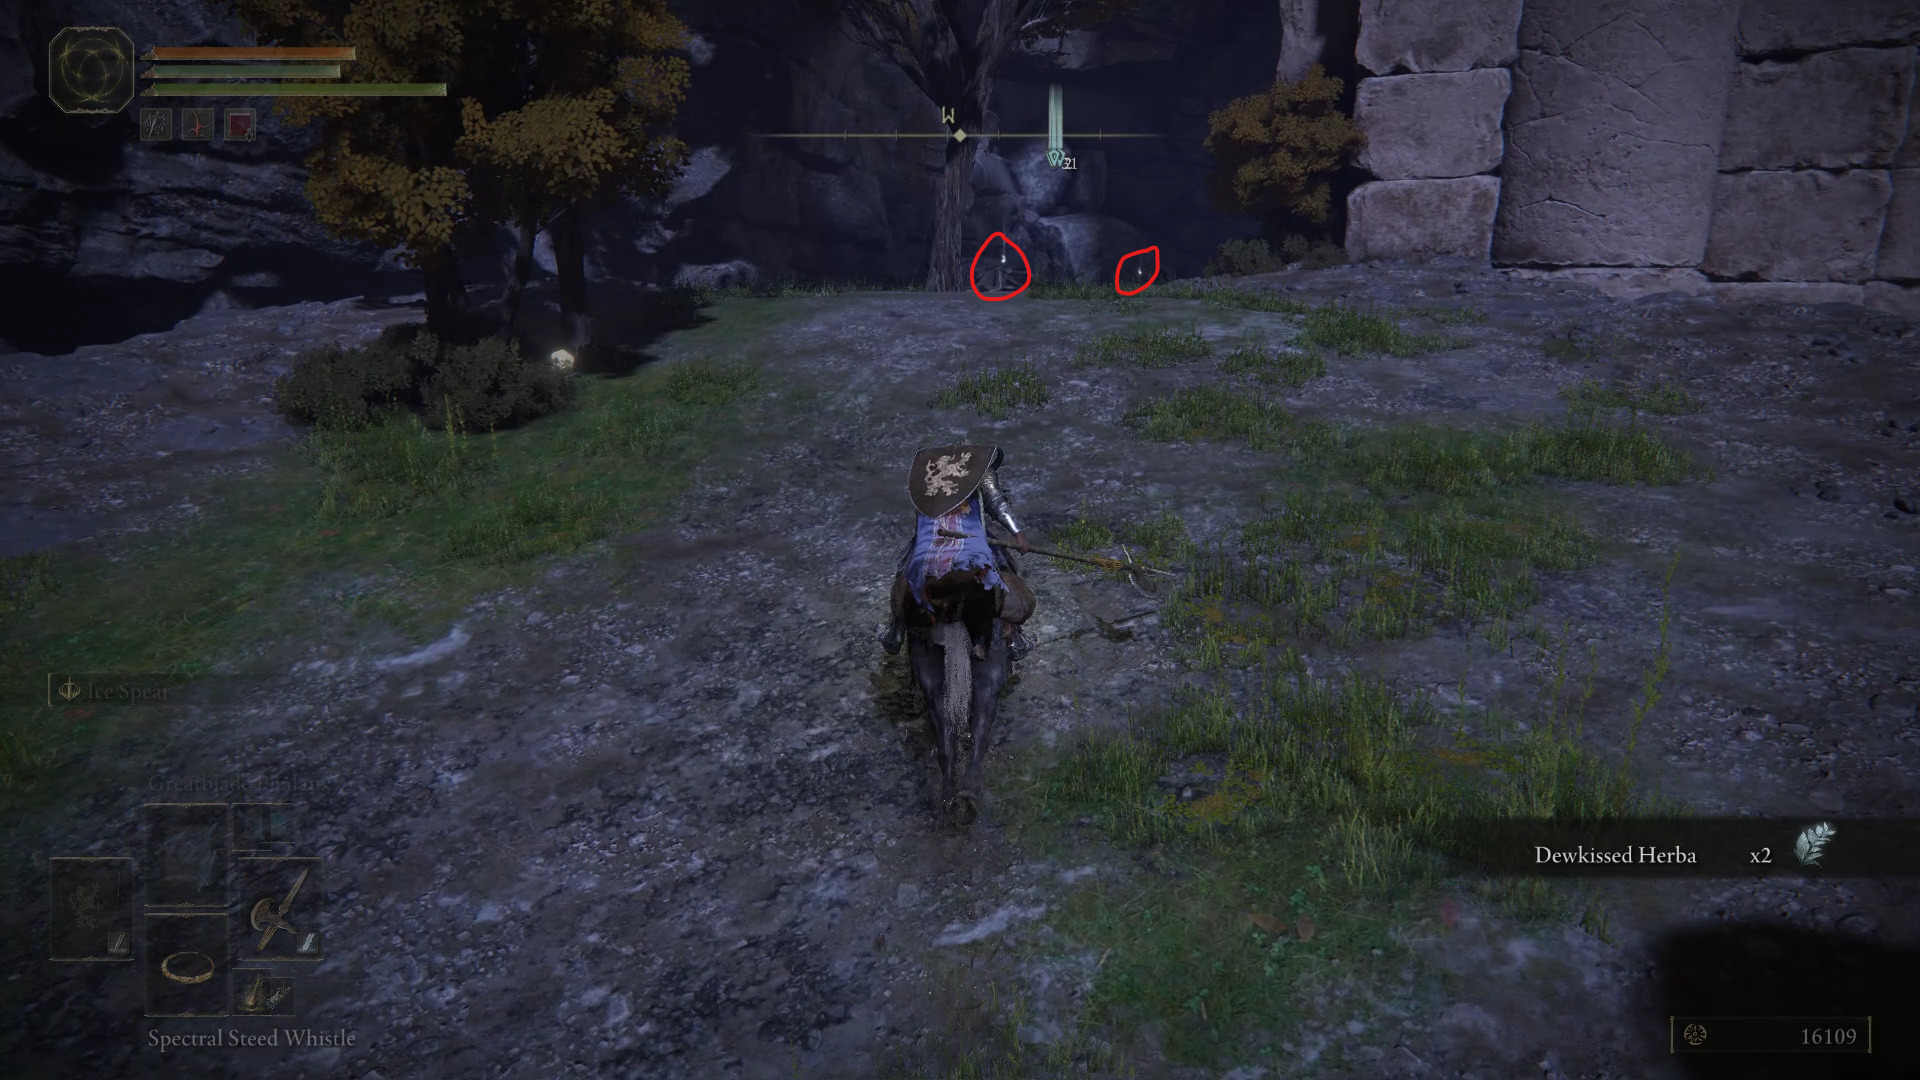
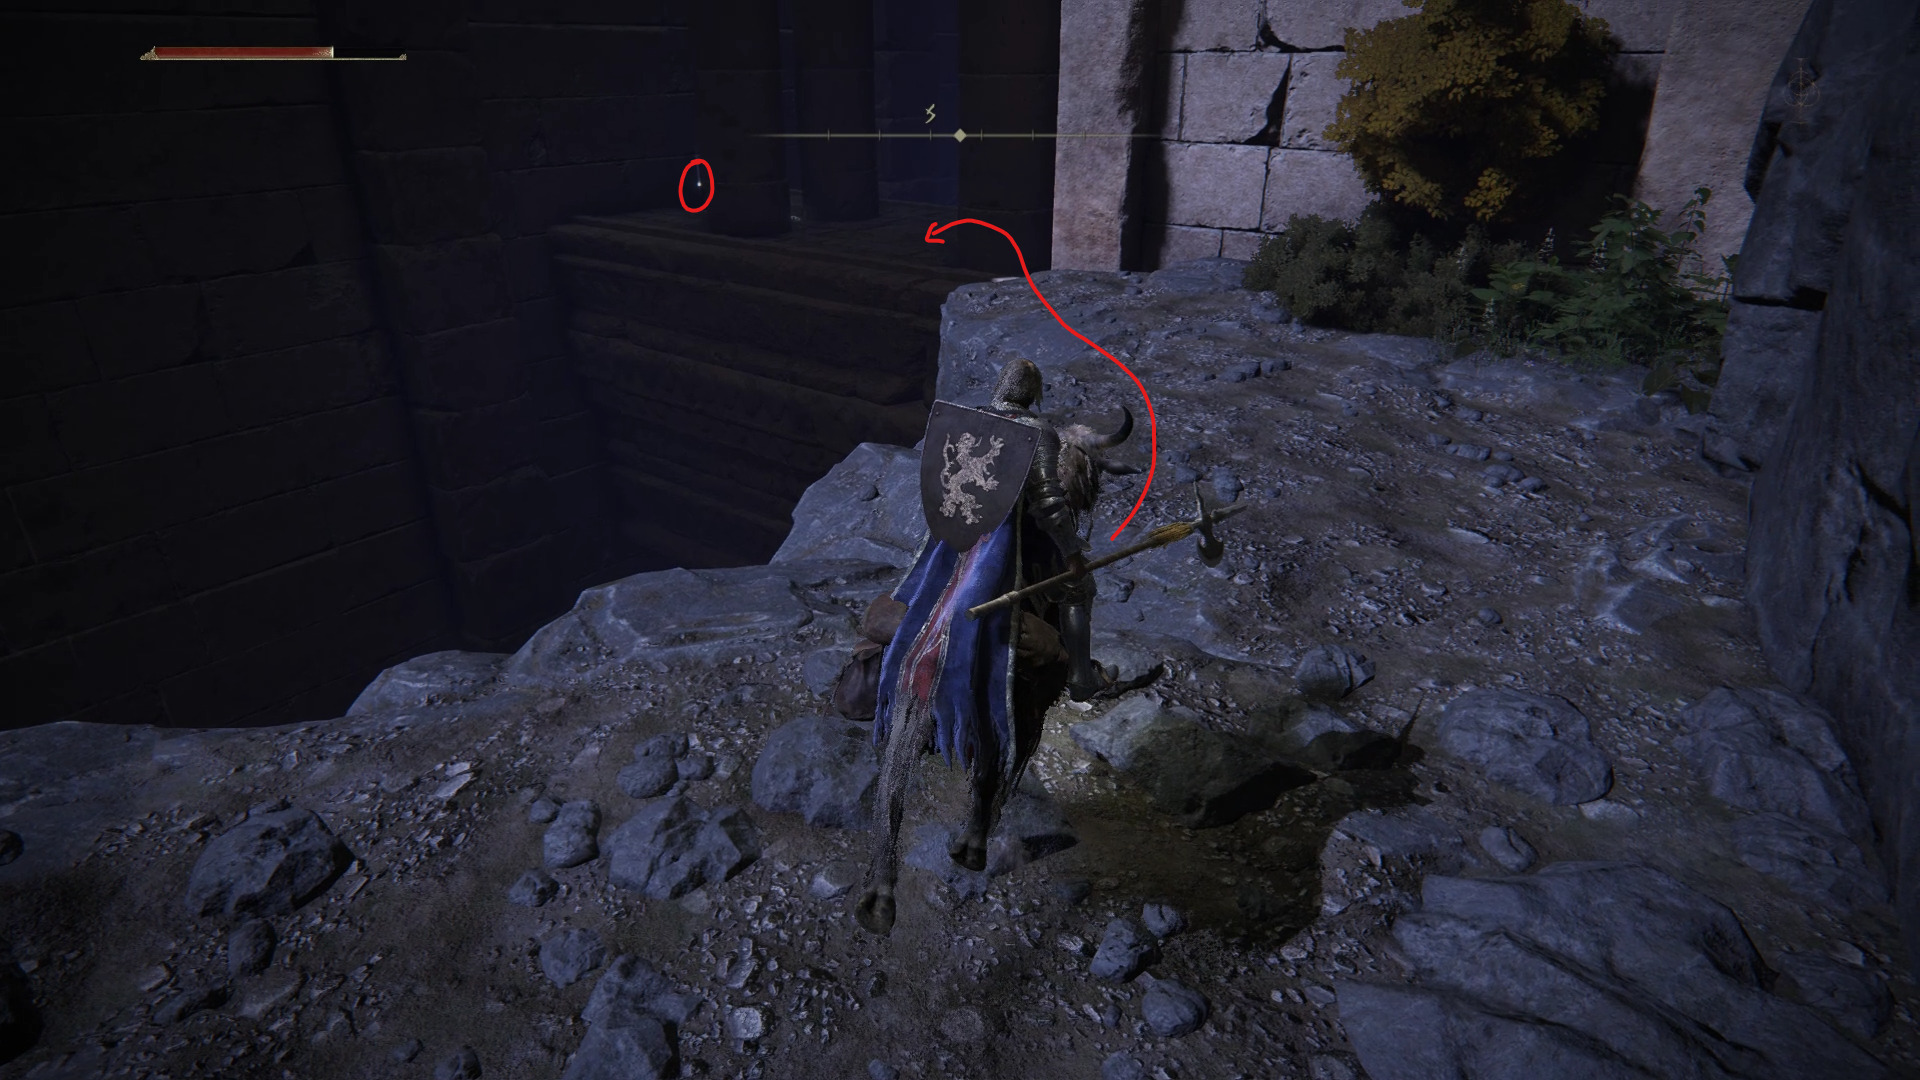
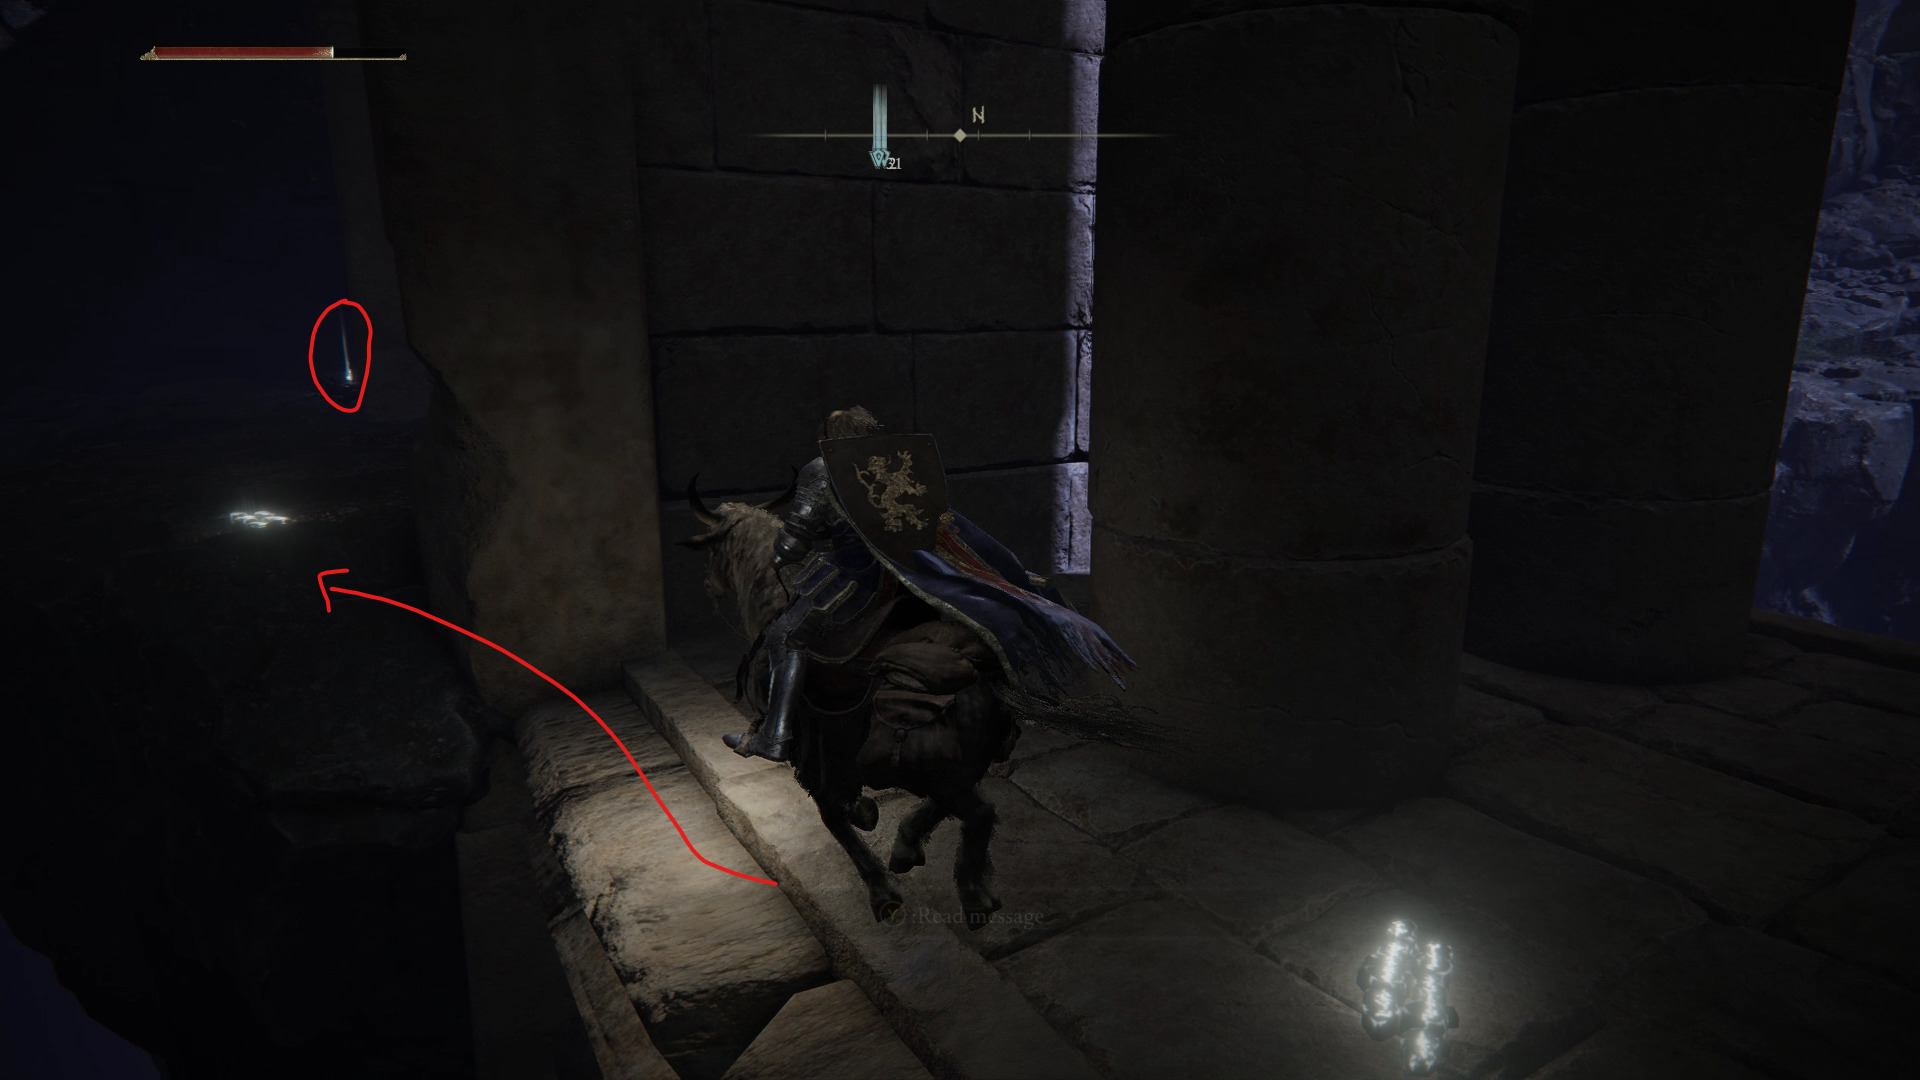
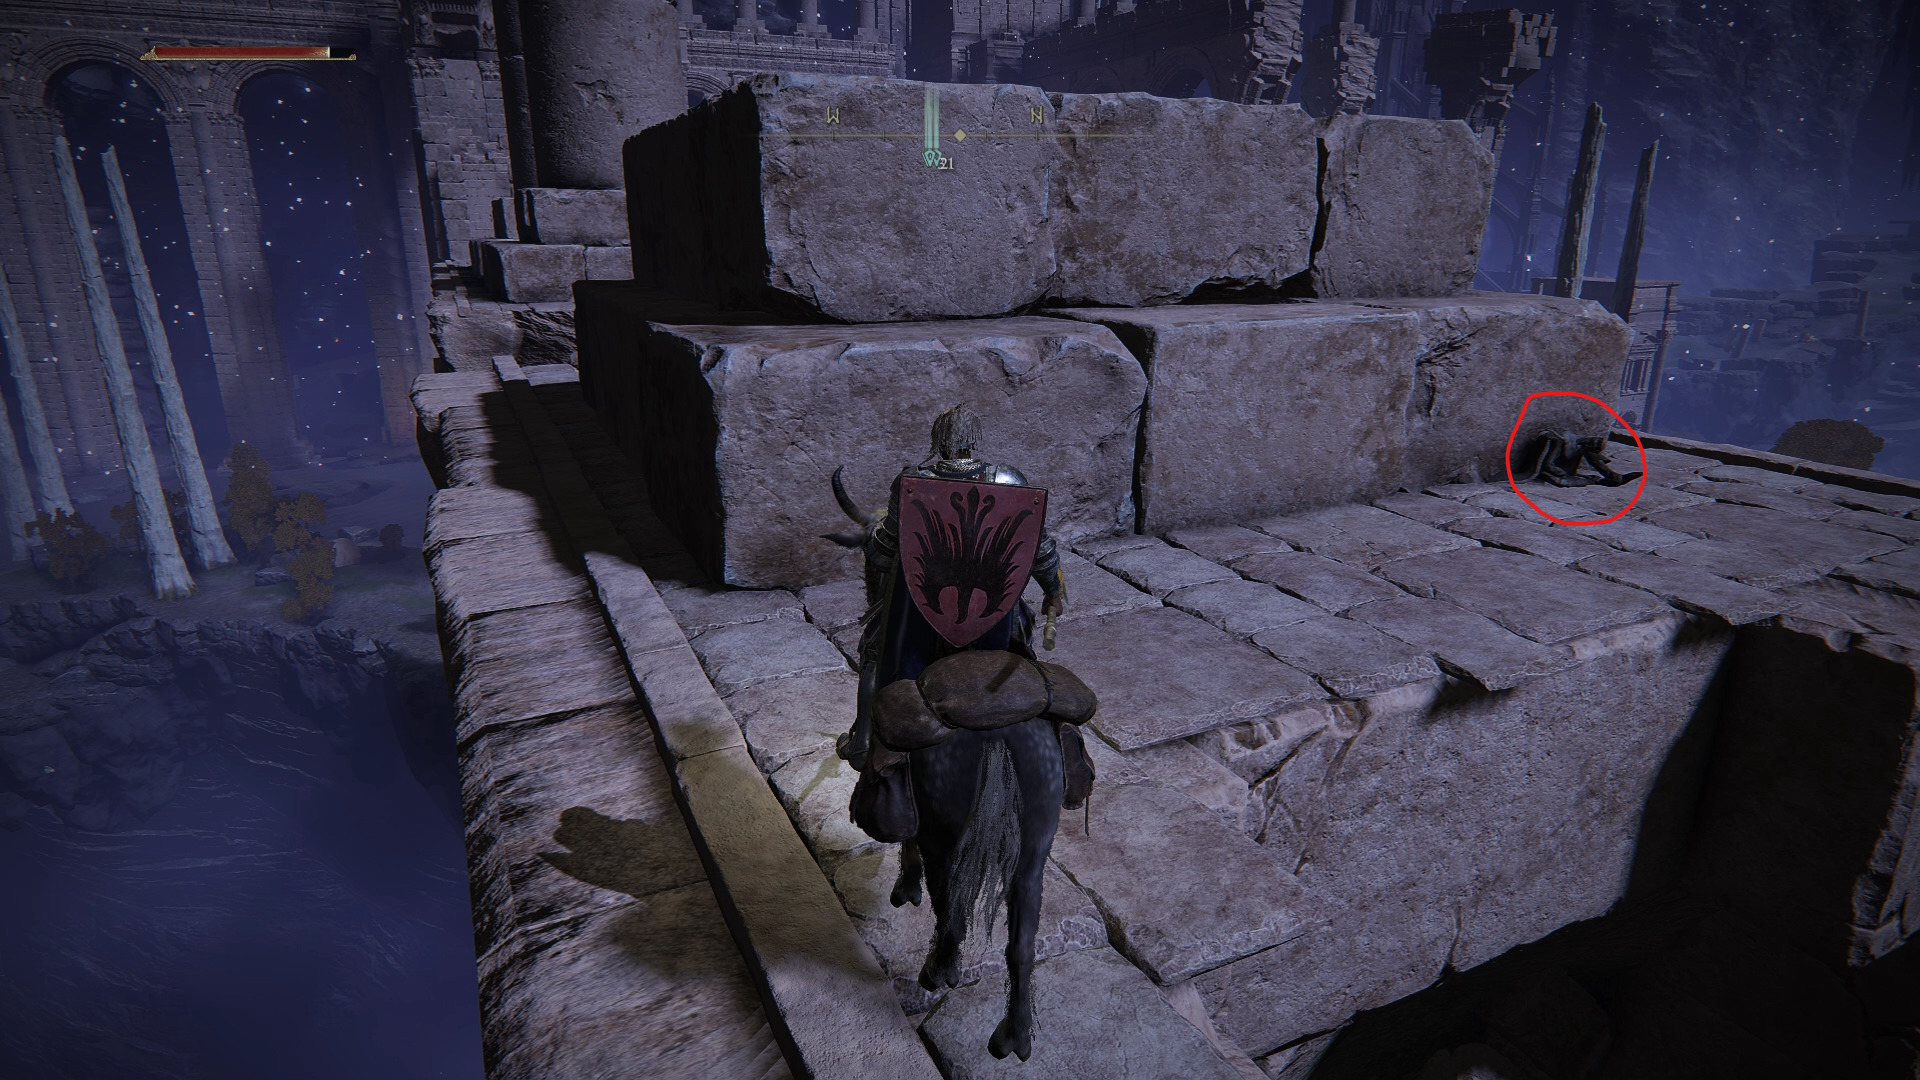
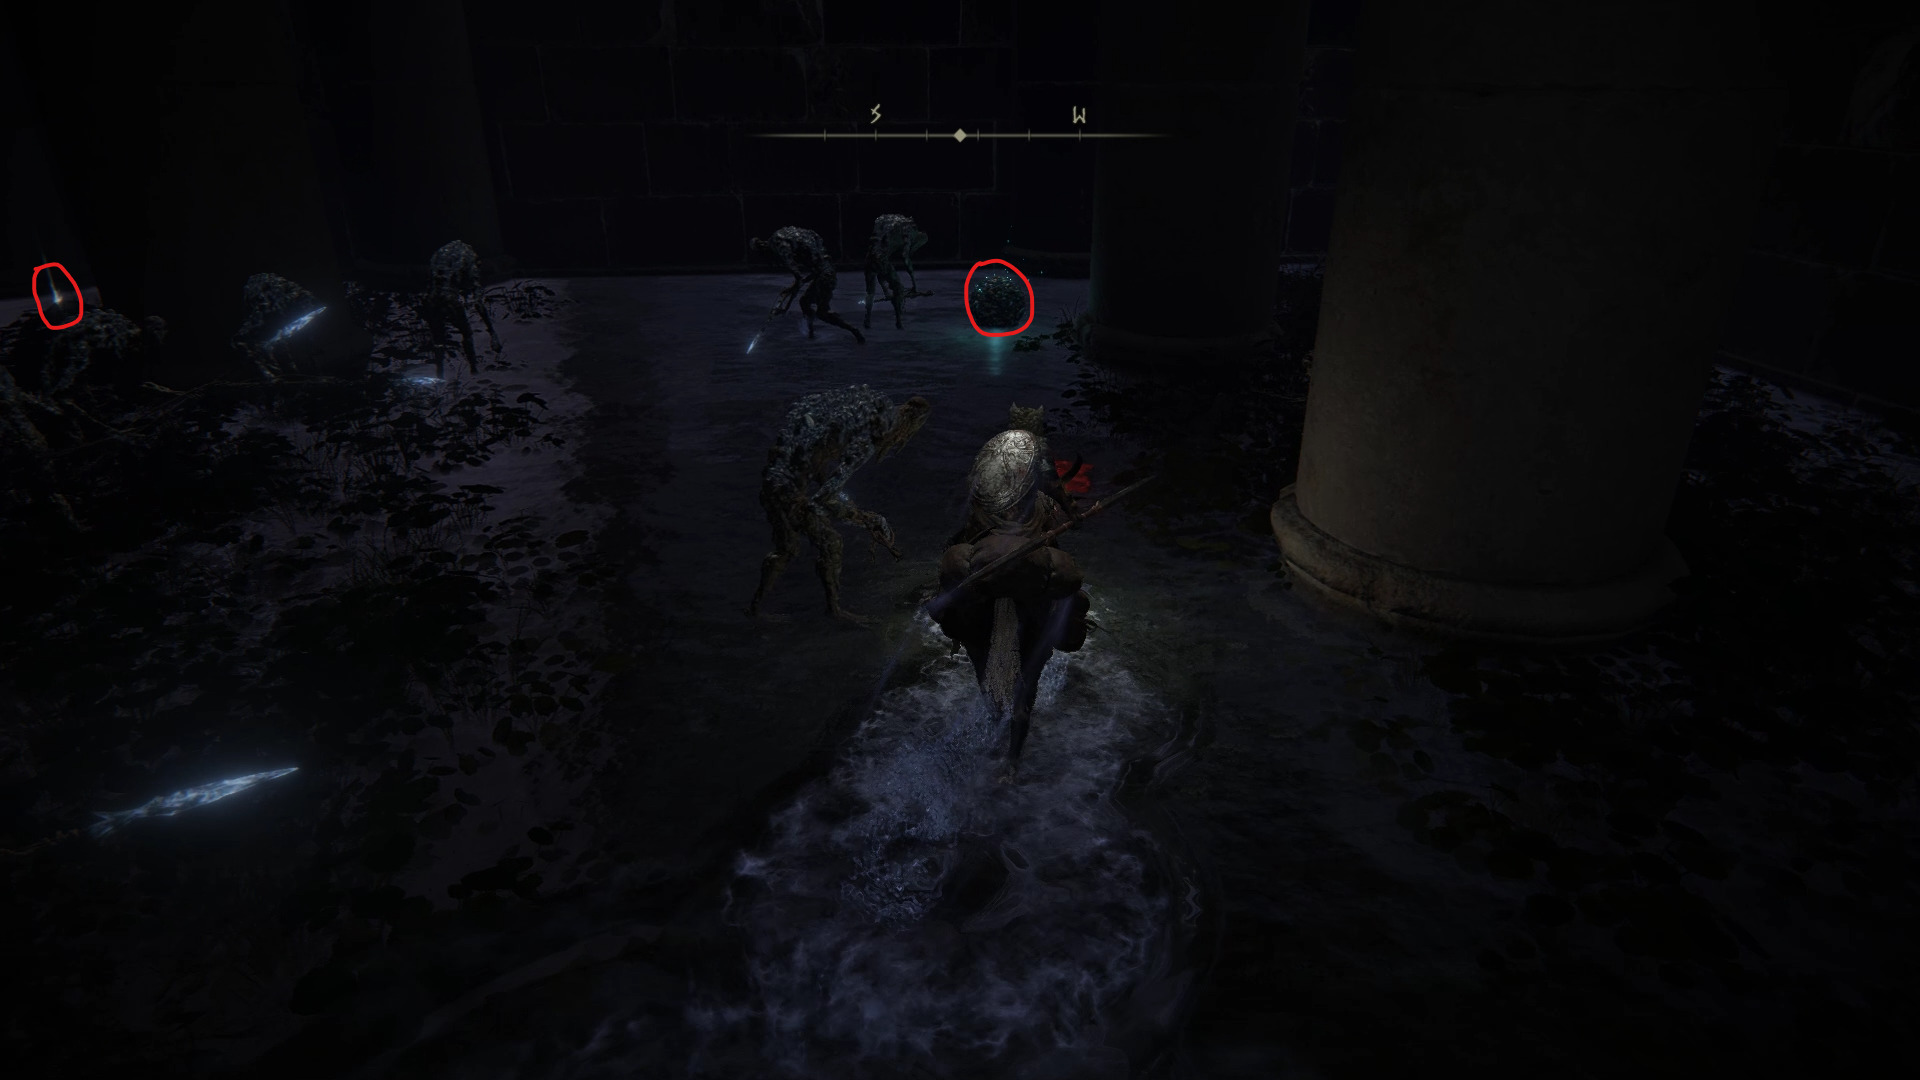
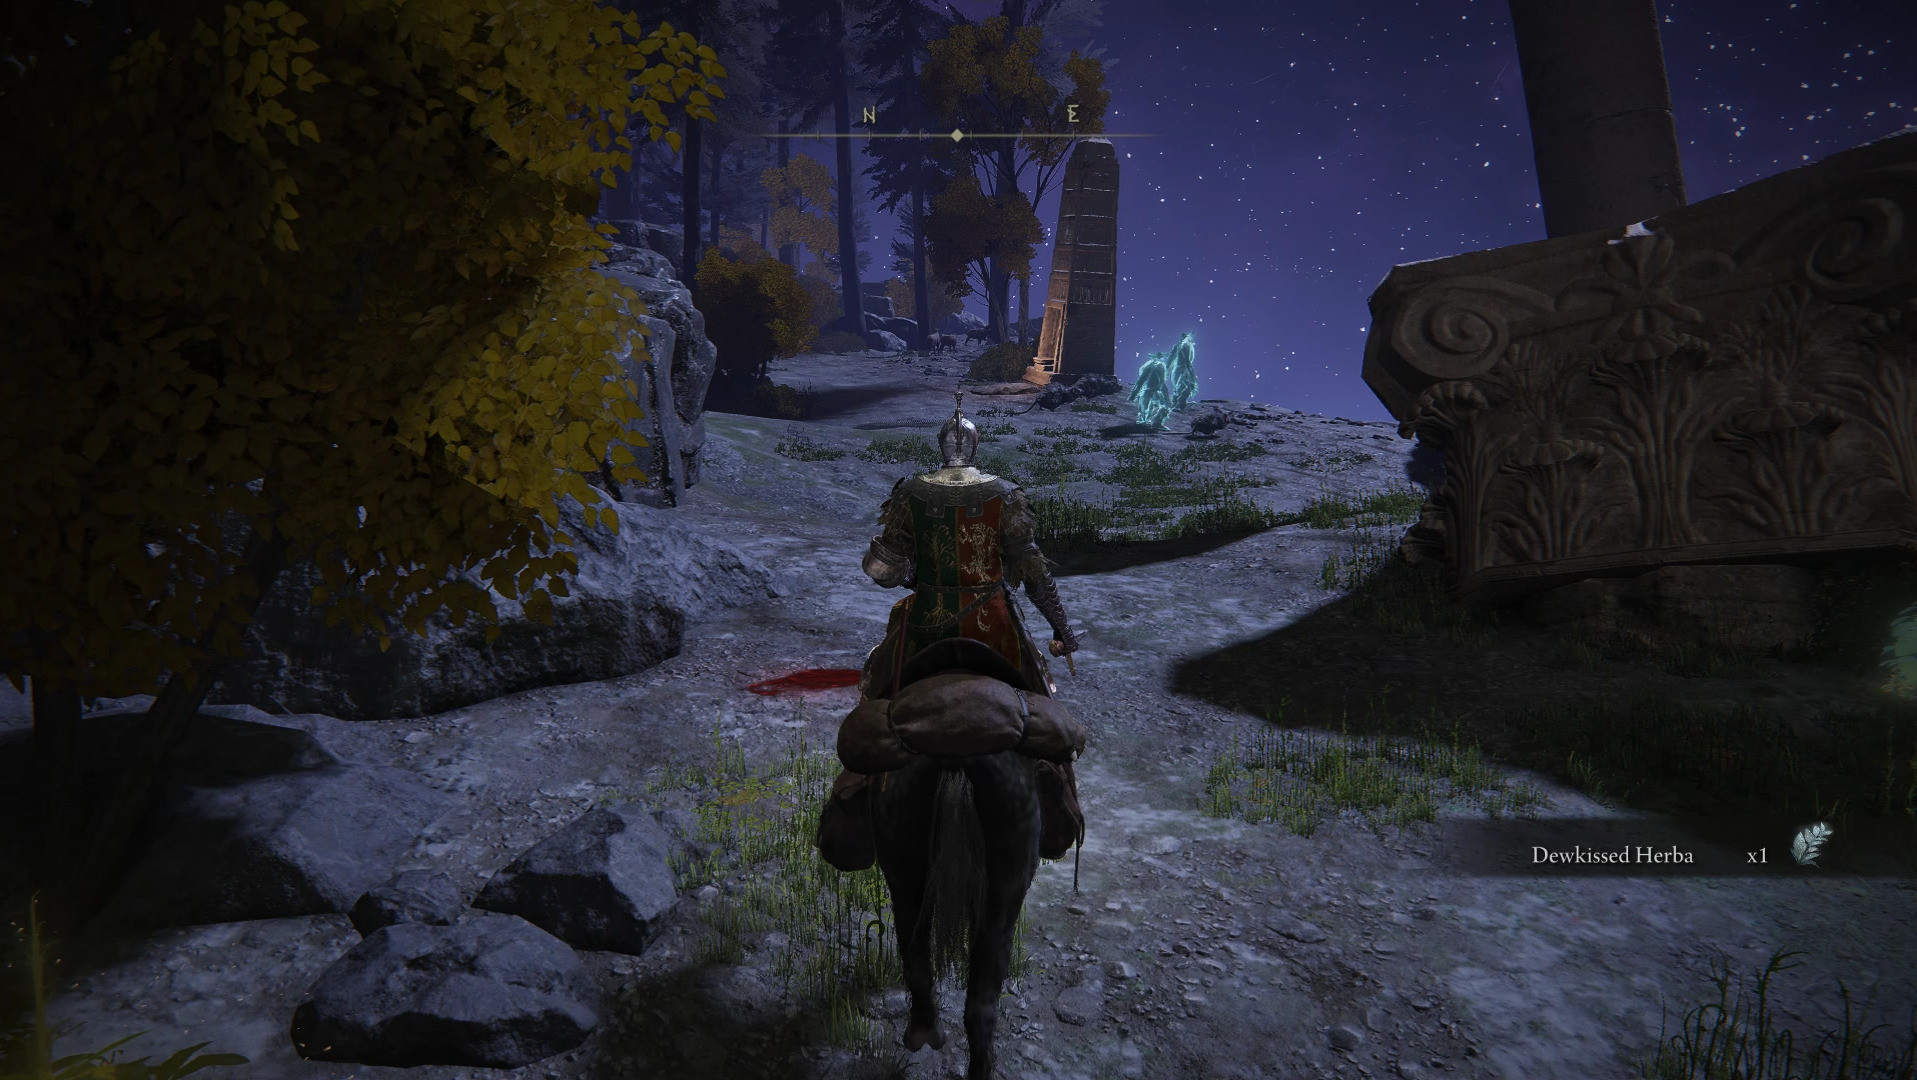
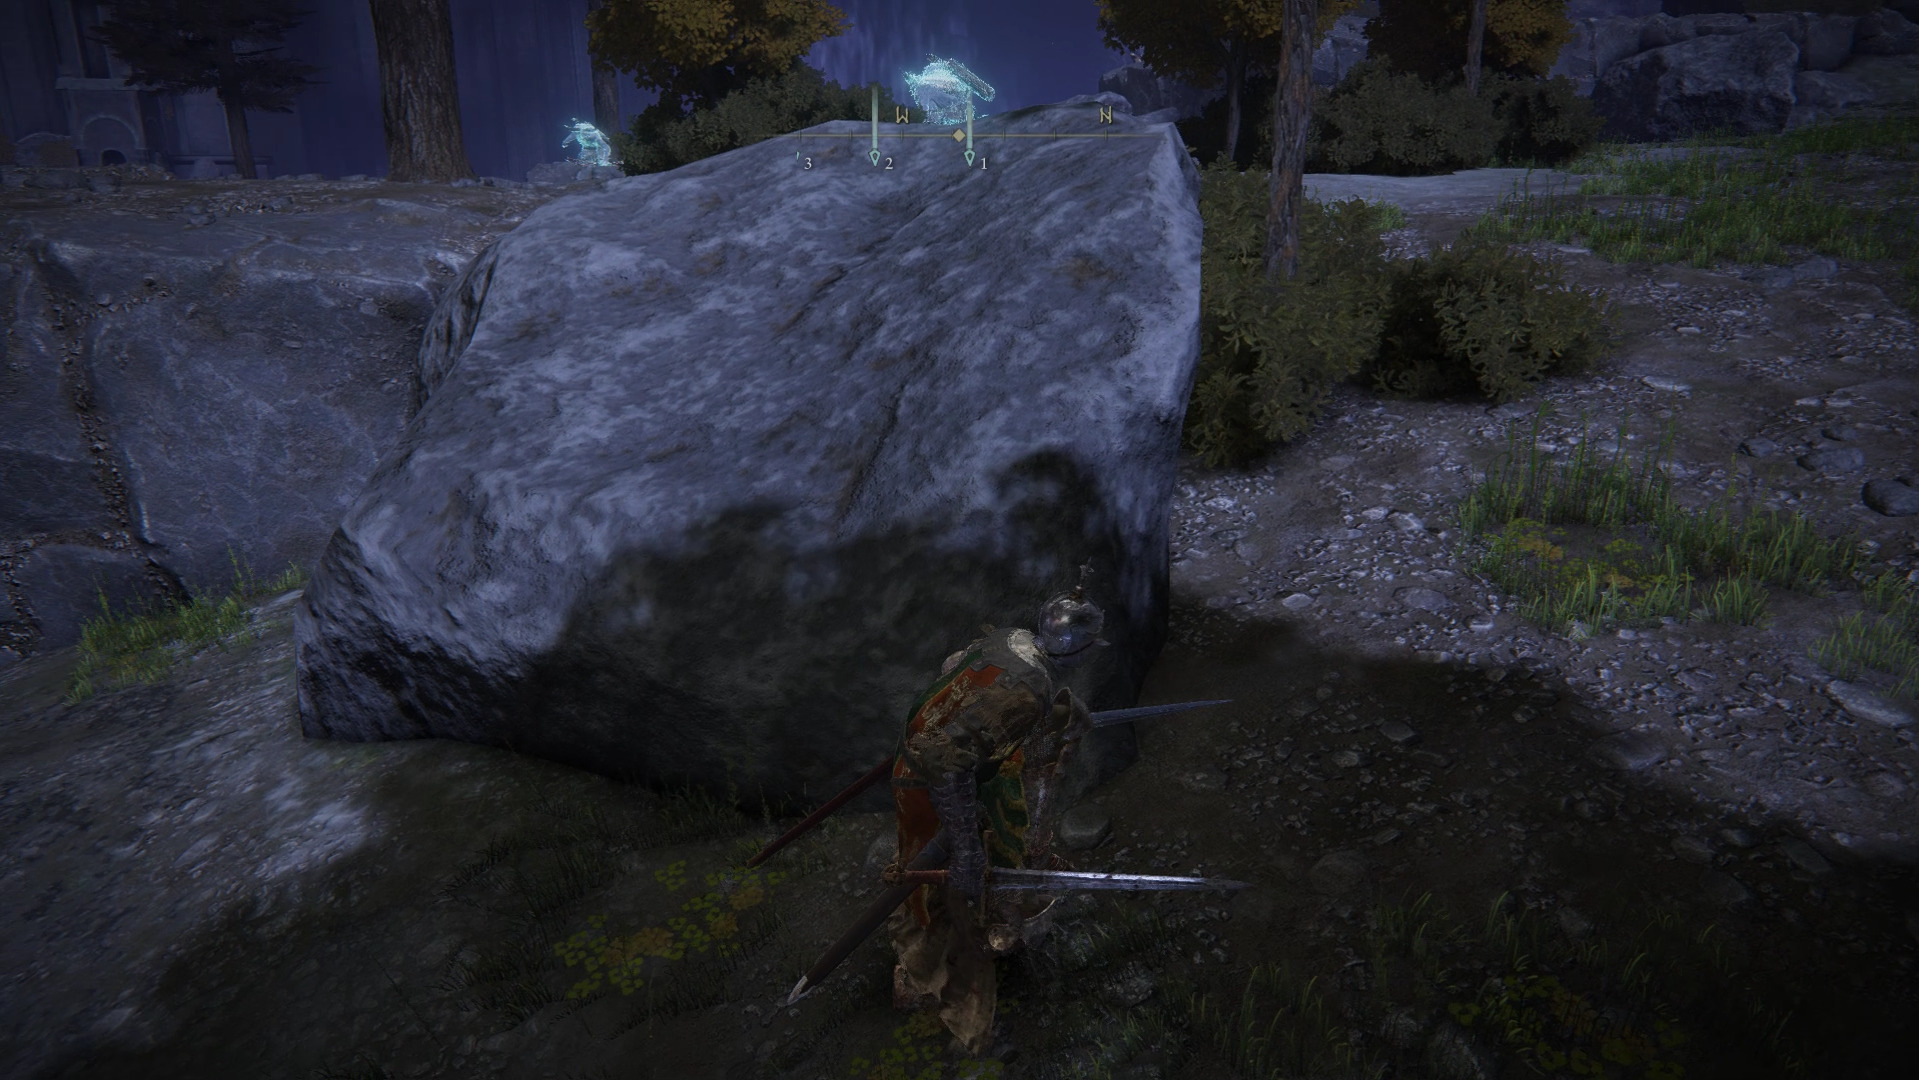
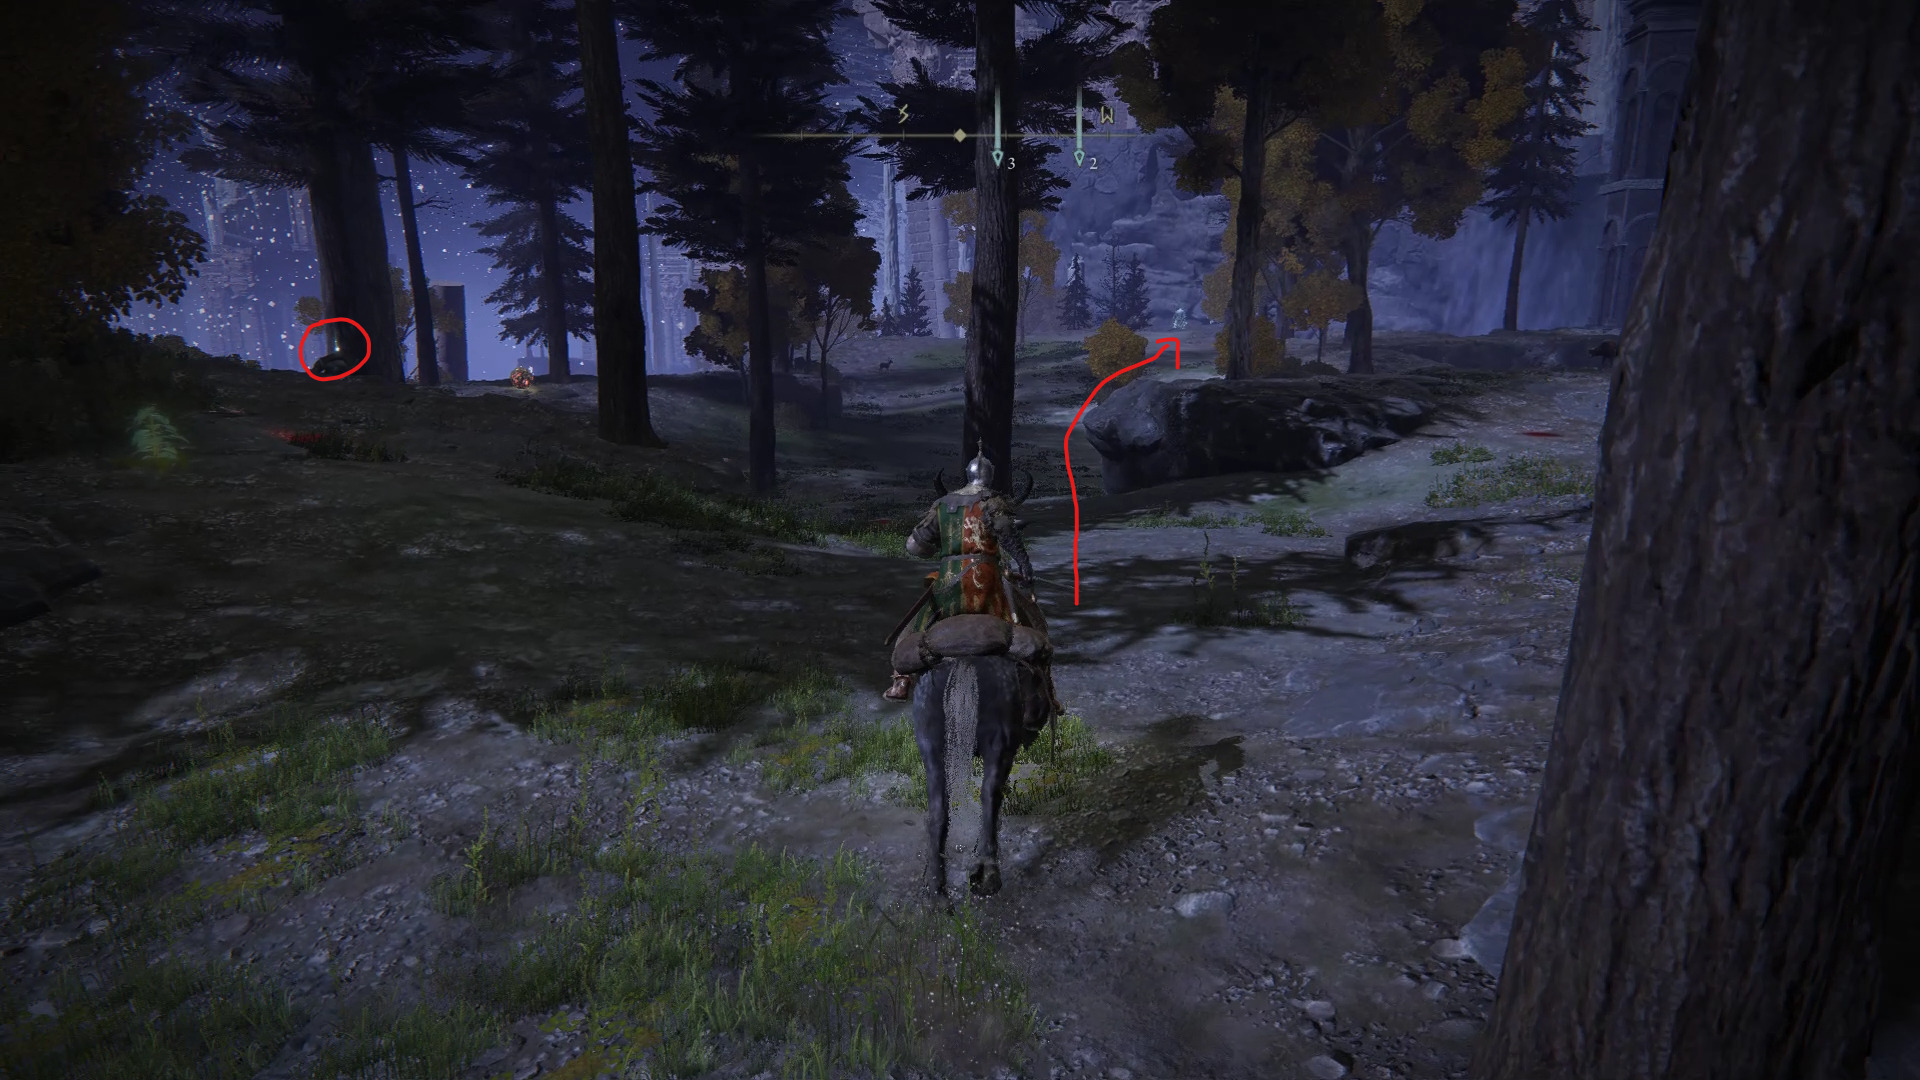
Once you grab these, you will almost be done with this section. All that remains is 2x Golden Rune [4] and a Smithing Stone [4]. You can find these by continuing towards the stairs that lead to another elevator, which is where you will find the first rune. If you look northeast from the rune on the stairs, you will be able to see a couple more items surrounded by a several corpses. Only those aren’t corpses.
You can either run through, grab the Smithing Stone [4] and the Golden Rune [4] and leave, or just fight these enemies if you really want to. Once you’re done, take the elevator, and you will arrive to Siofra River’s main area. At the end of your elevator trip, make sure to go left first and grab the Preserving Boluses in the small room at the end of the path, before going east and grabbing the second site of grace: Siofra River Bank.
Before starting the exploration of this main area, do a quick detour west of the site of grace, which is where you can find the Armorer’s Cookbook [6], as well as south, which is where you can grab the Inverted Hawk Heater Shield and 3x Arteria Leaf.
South of the site of grace
With the cookbook and the shield now in your possession, we can start going deeper through the dungeon. The goal here is as usual to grab a bunch of loot and eventually reach and defeat the area’s boss. To gain access to the boss room however, you will need to light several fires located all over the area.
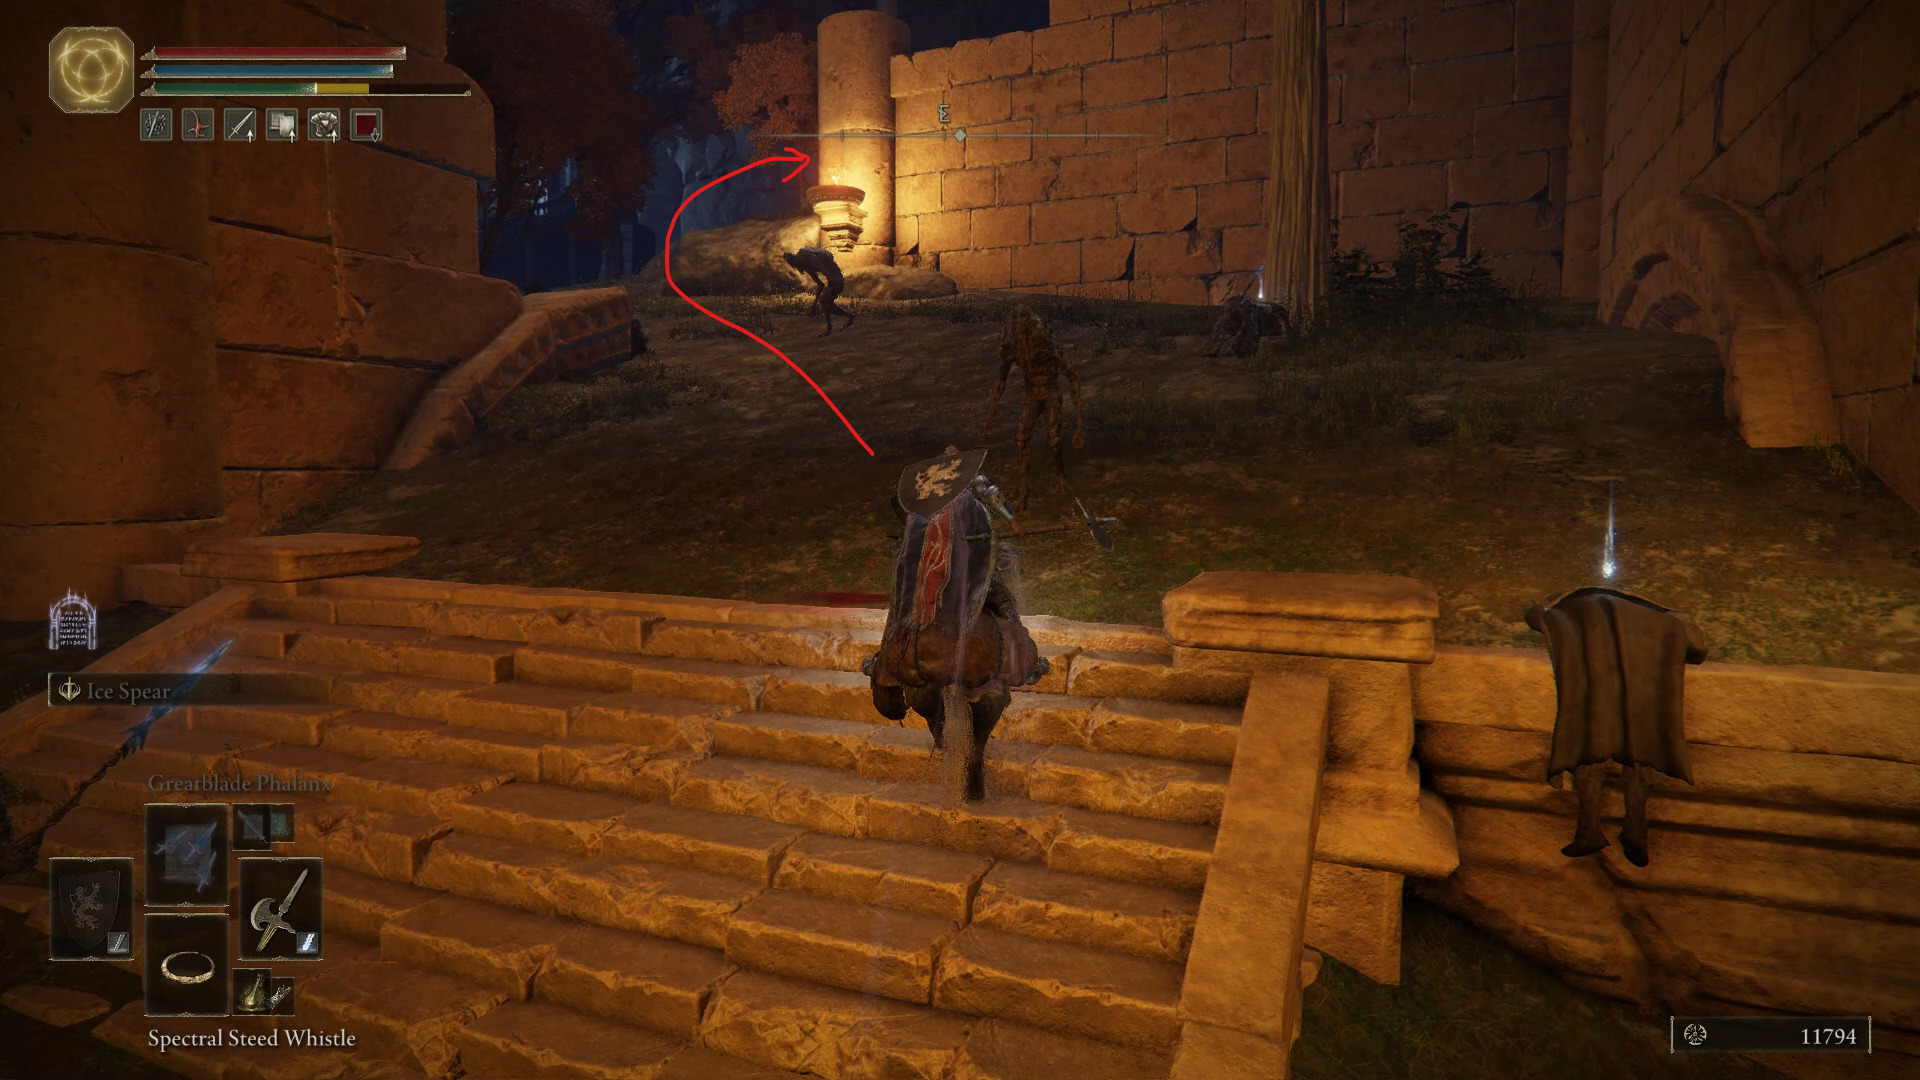
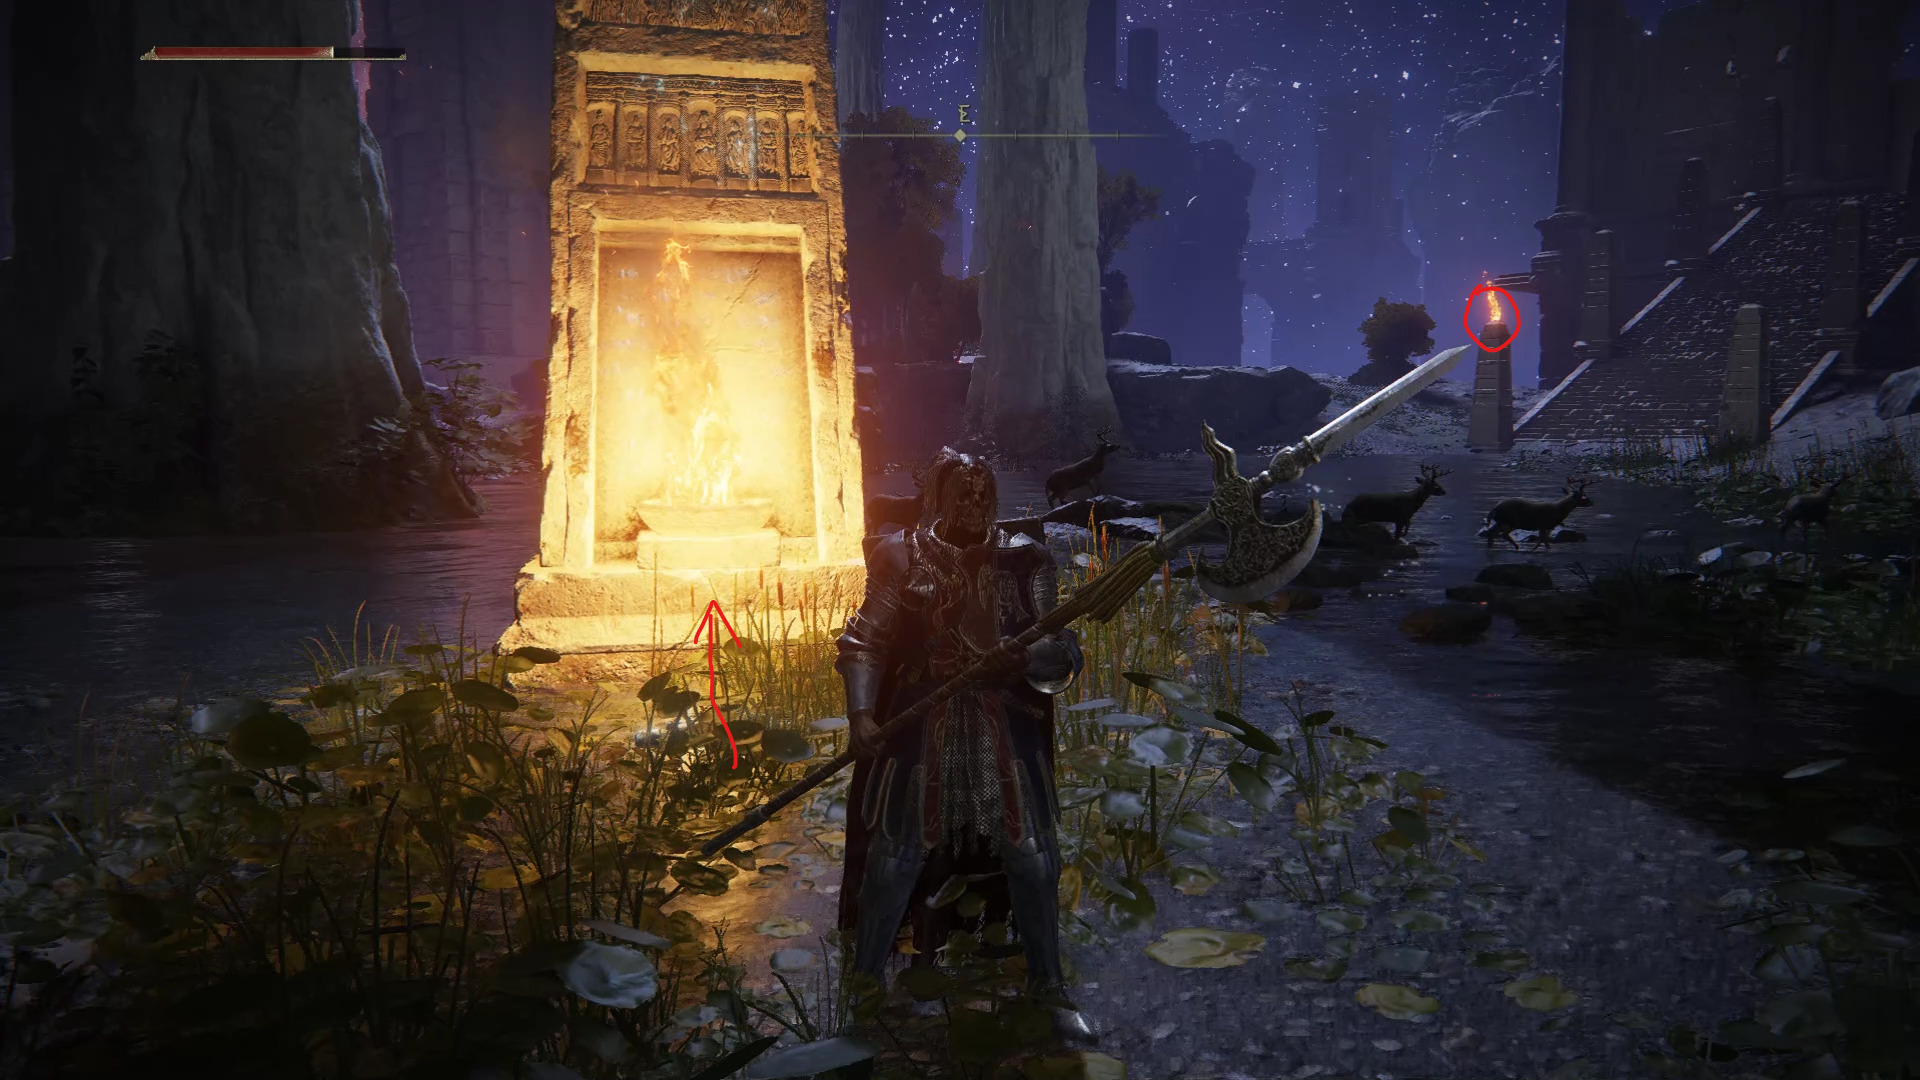
This first fire is located east of the Siofra River Bank site of grace. Once you light the flame inside this obelisk, a small flame will light-up along the nearby staircase. If you’re not sure how many fires you still need to activate, you can come back here to look at the amount of fires on the stairs.
While there isn’t much to do on top of the stairs for now, you can grab the Map: Siofra River at the bottom of these stairs. From there, head southeast behind the stairs to grab the Horn Bow nearby, as well as a Golden Rune [6] on a nearby ledge.
From there, climb back up to the main area and start heading northwest towards the next fire.
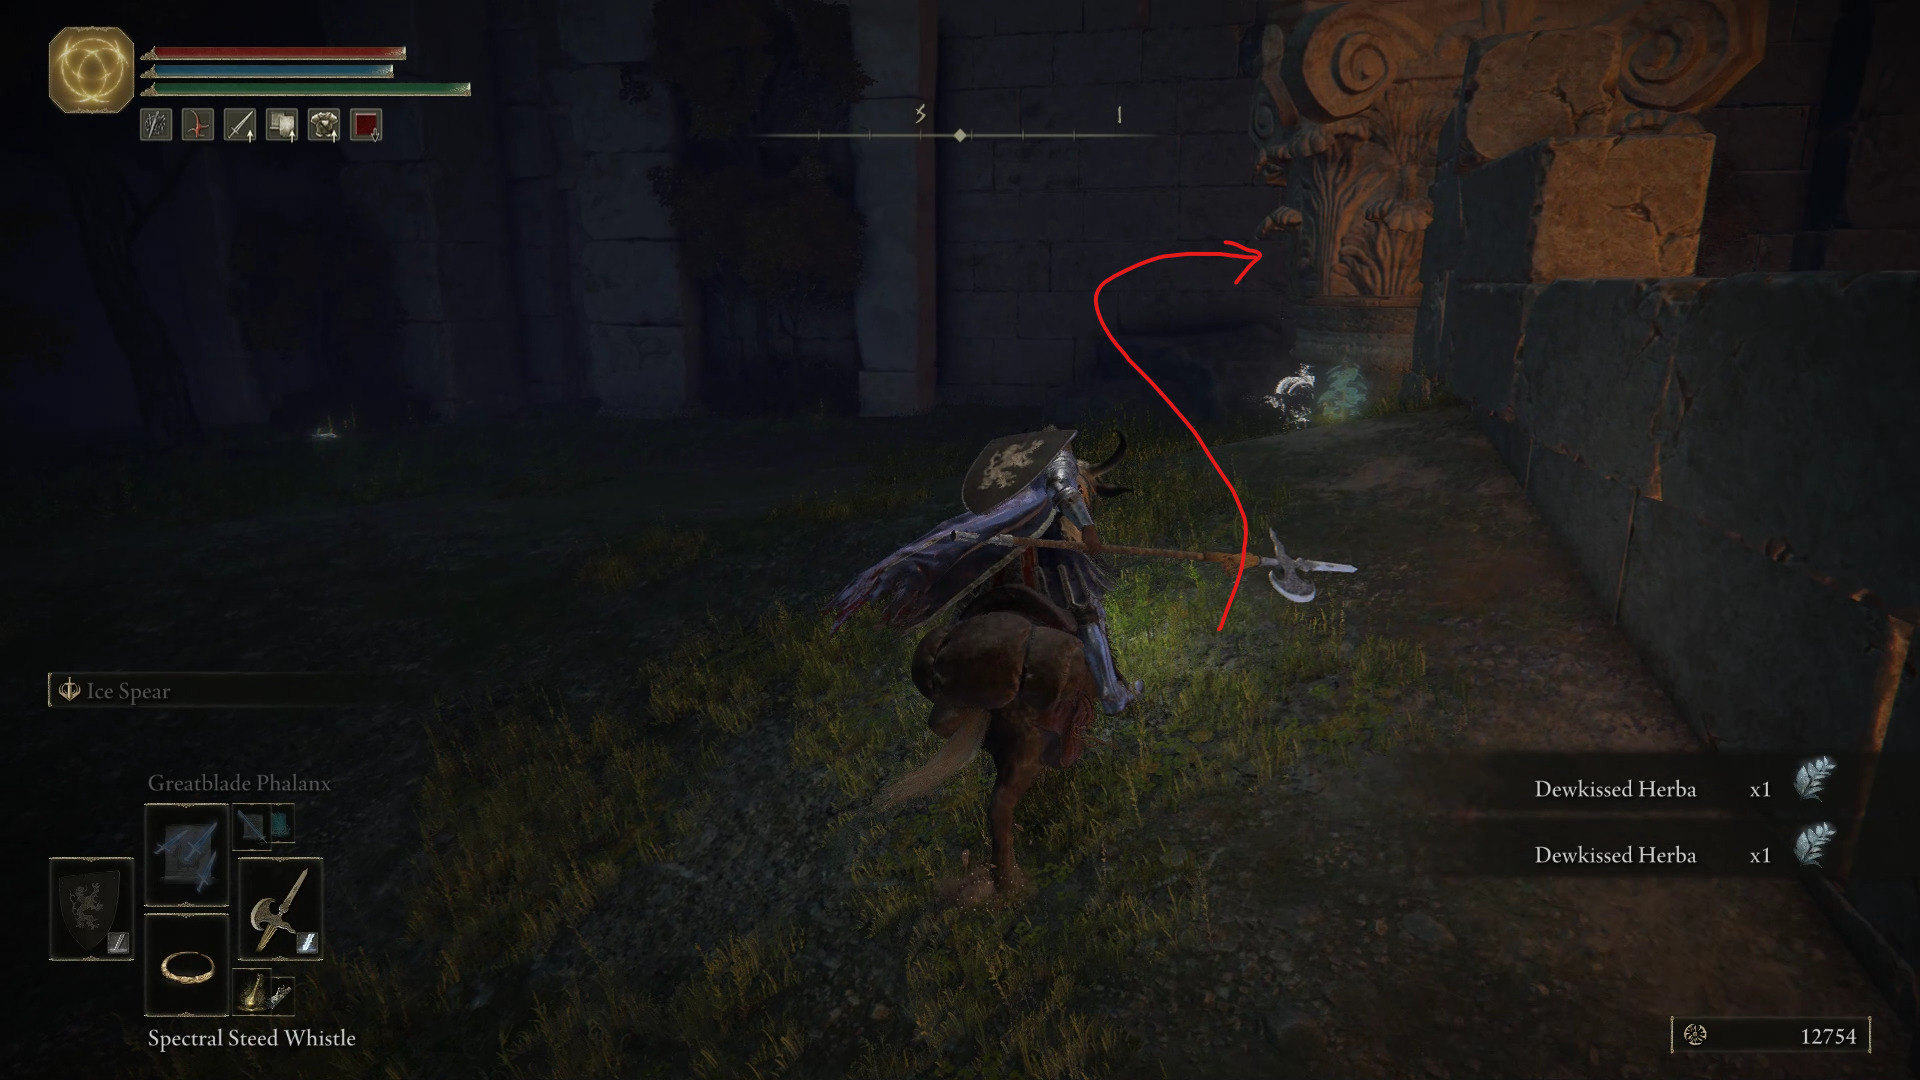
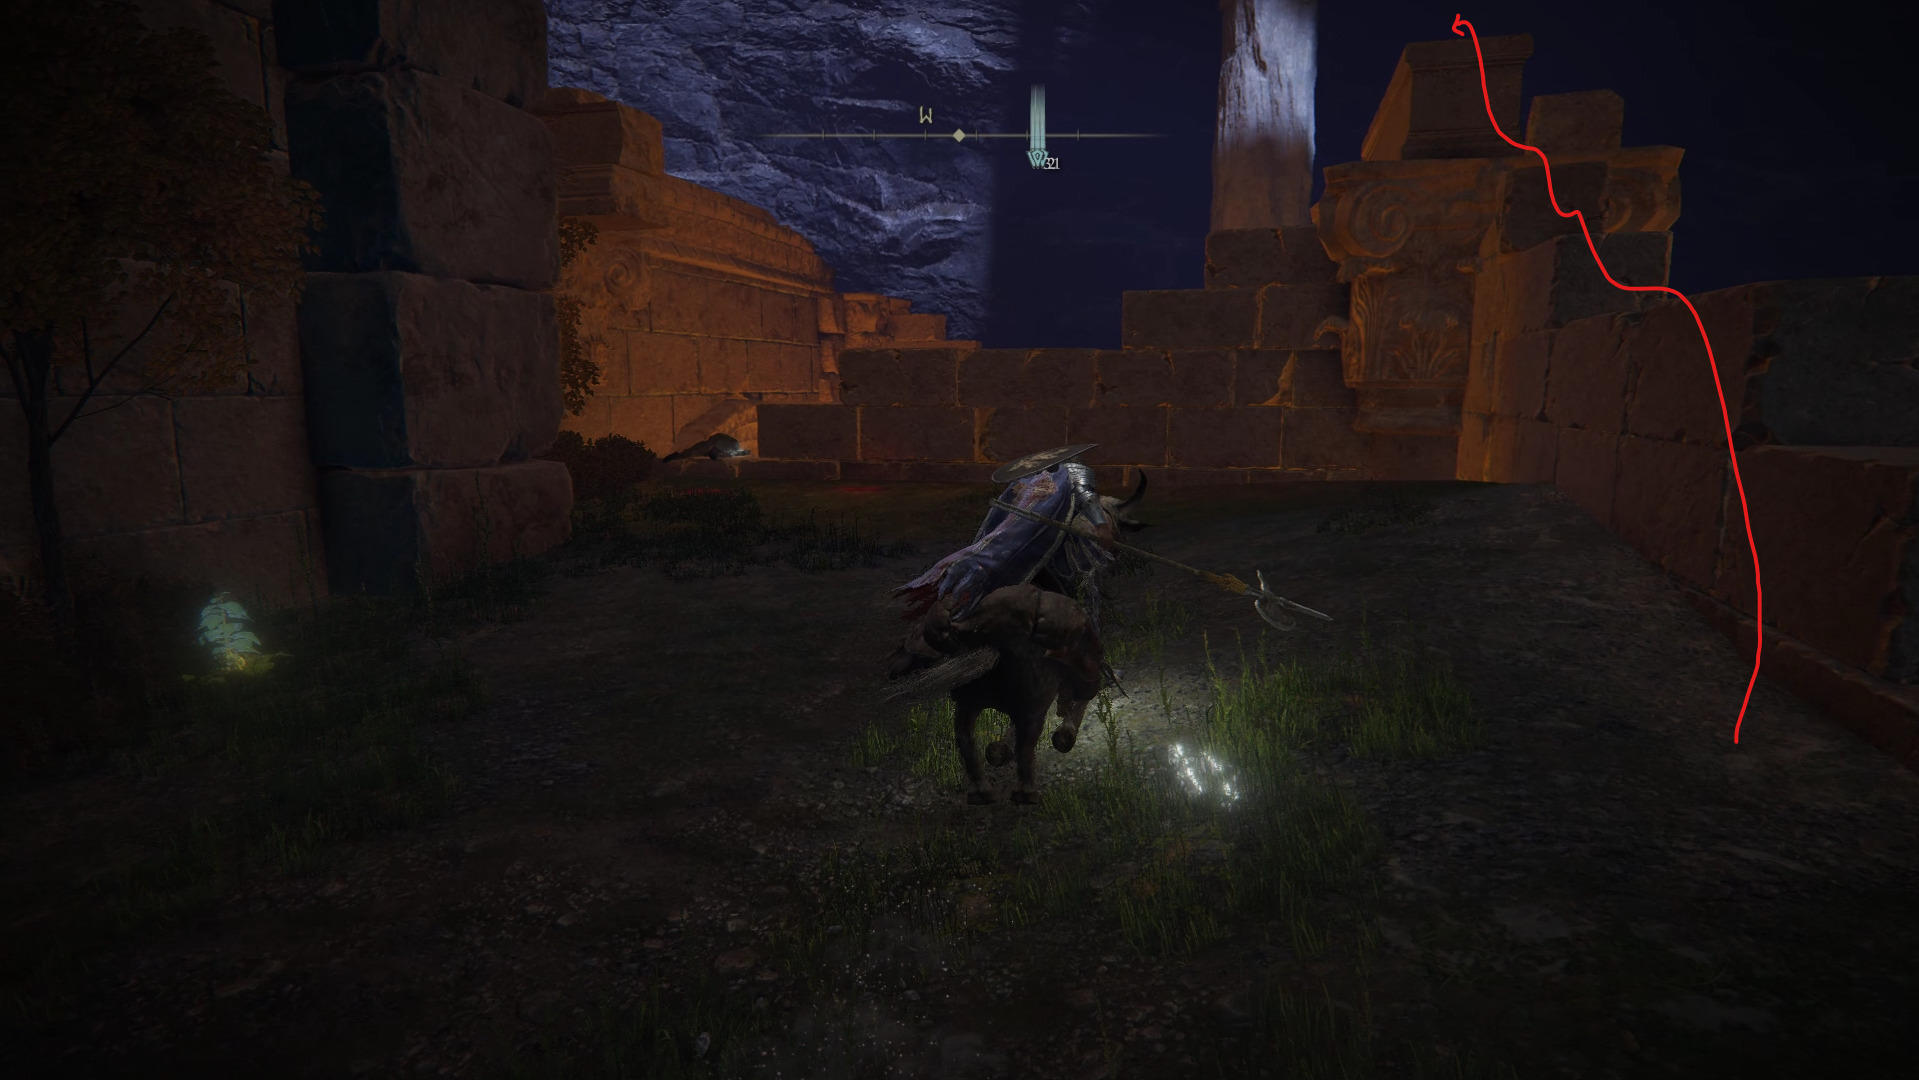
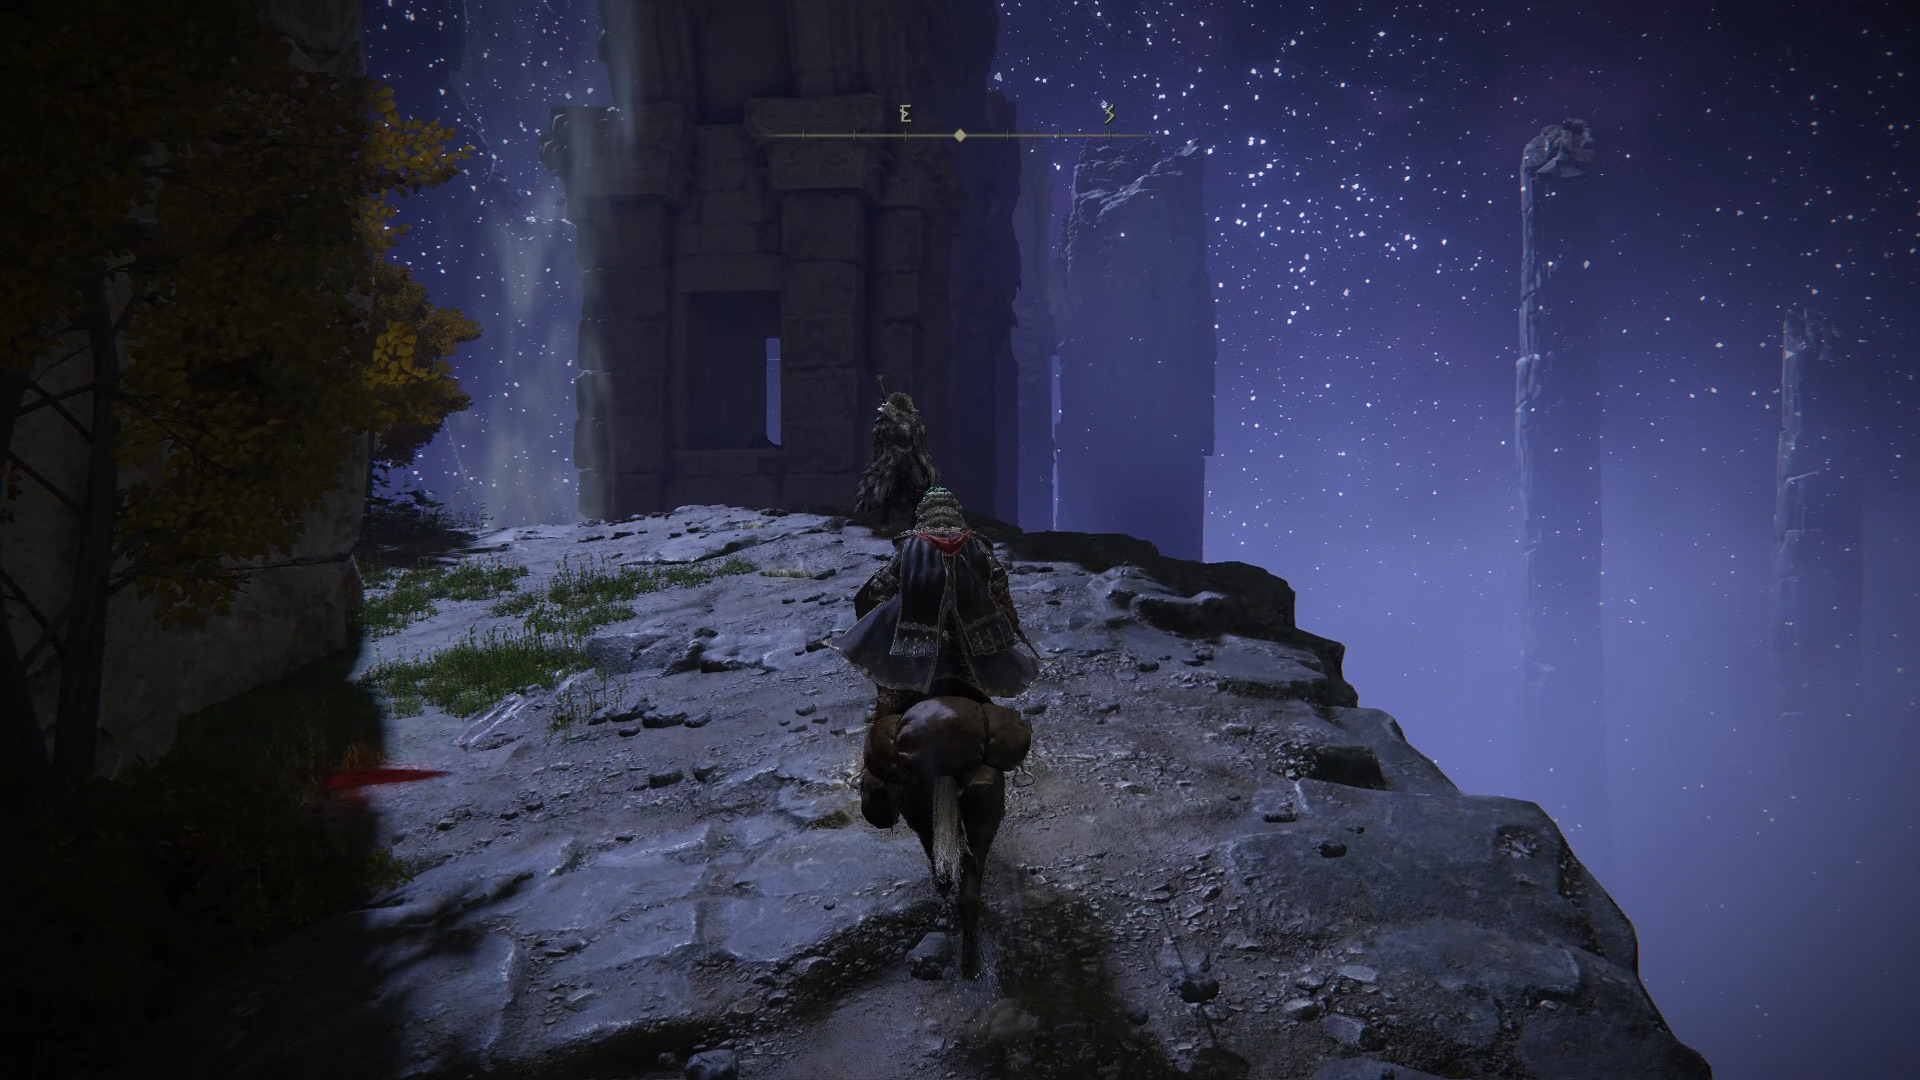
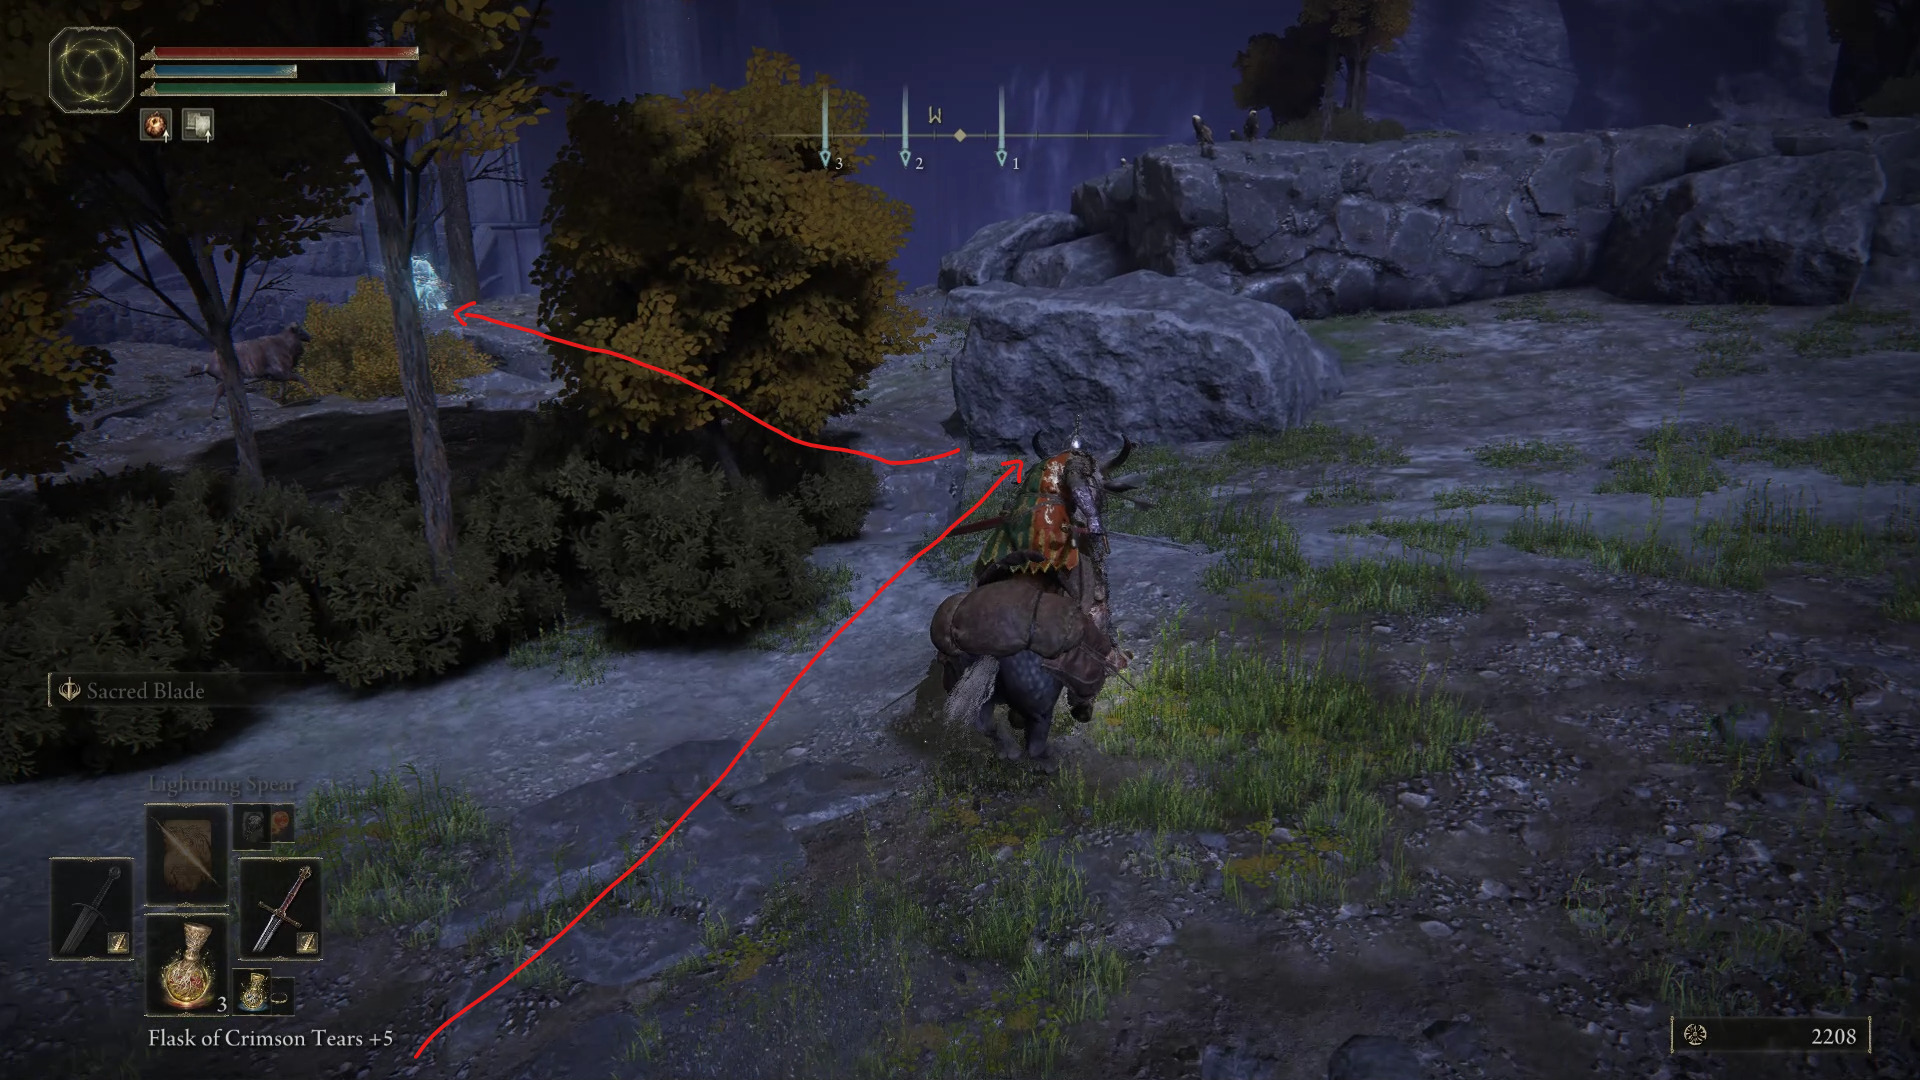
While there will be a few enemies protecting it, they shouldn’t be much of an issue on horseback. Once you’re done dealing with them and activating the fire, we’ll make a short detour before going to the next one. Start by heading east-southeast to a spiritspring that will take you all the way to the top of a broken down structure. Additionally, if you started Ranni the Witch‘s questline in Liurnia of the Lakes, you can find Blaidd next to the spiritspring.
By speaking to him, Blaidd will send you to Seluvis in Liurnia of the Lakes. After speaking to Seluvis, that then sends you to speak to Sorceress Selenn in Limgrave, you’ll need to speak to Blaidd in Siofra River once again, which will make him depart to Caelid.
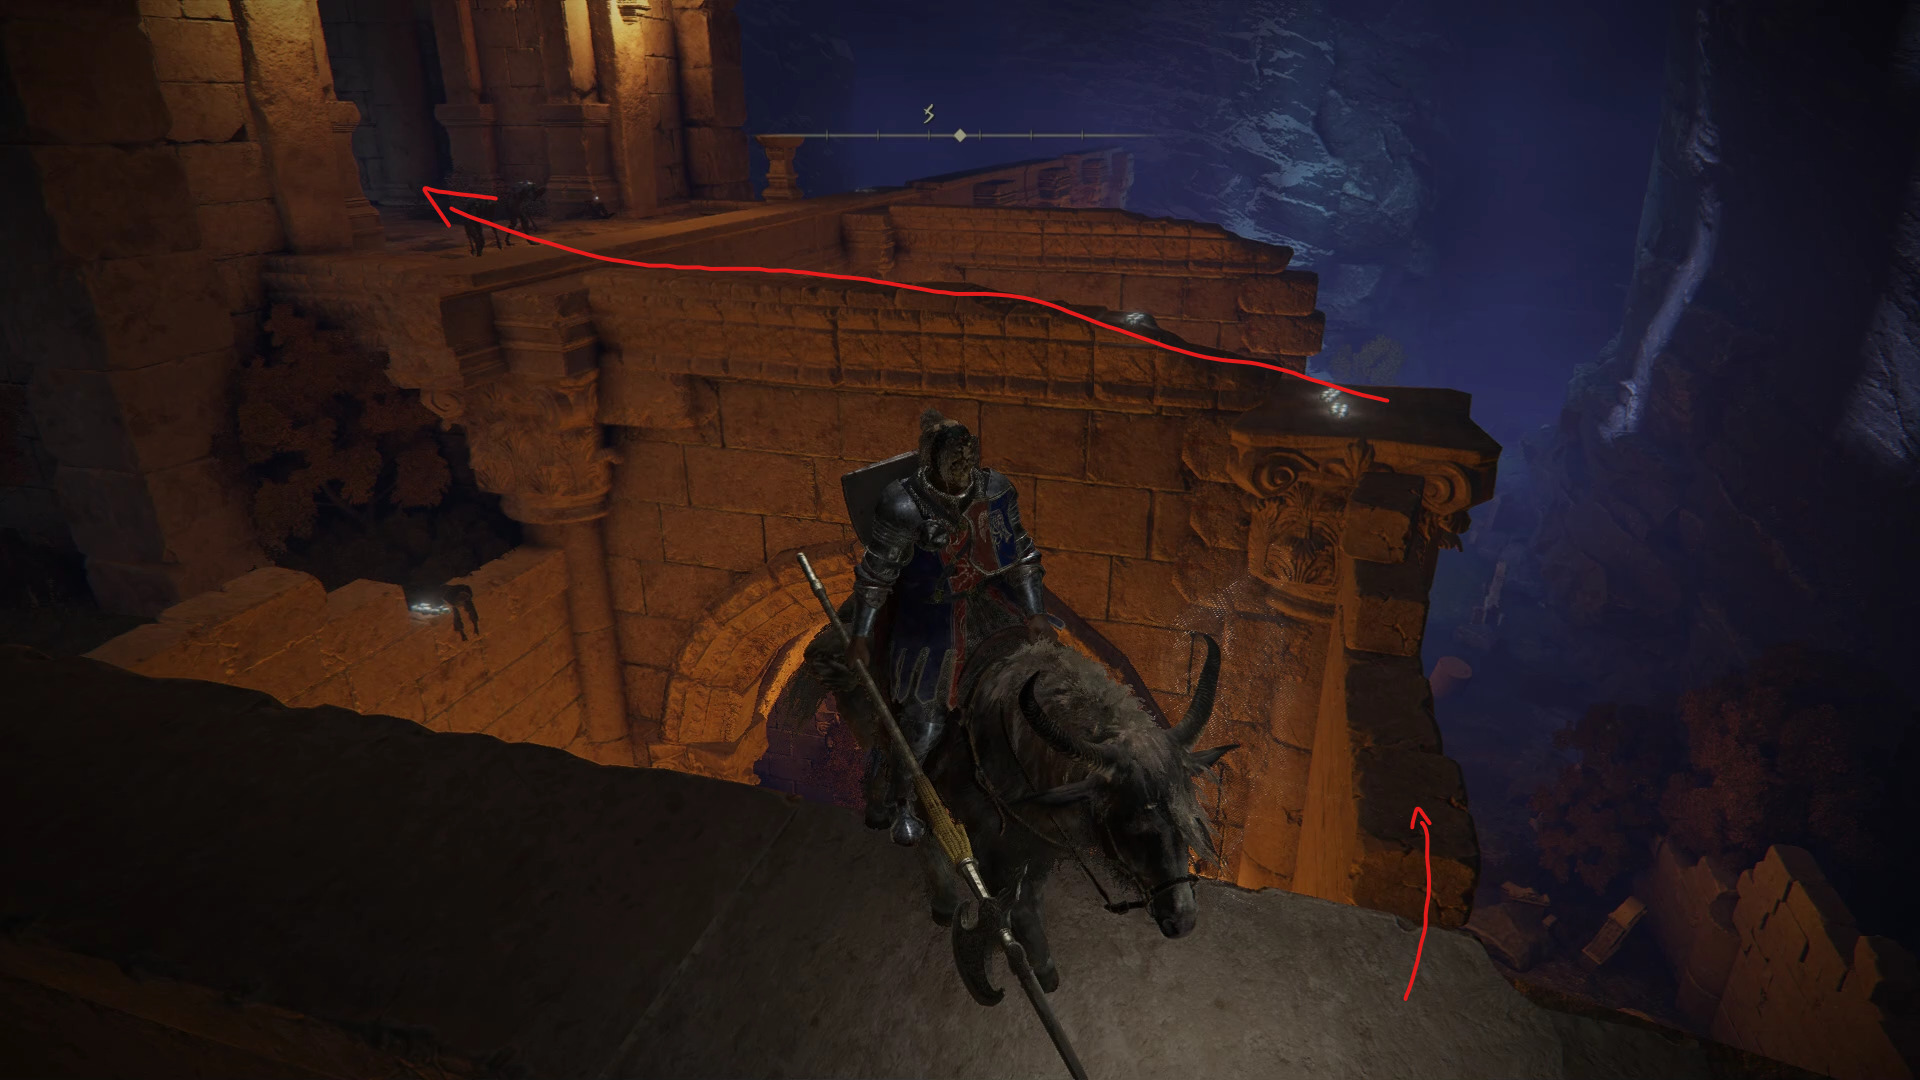
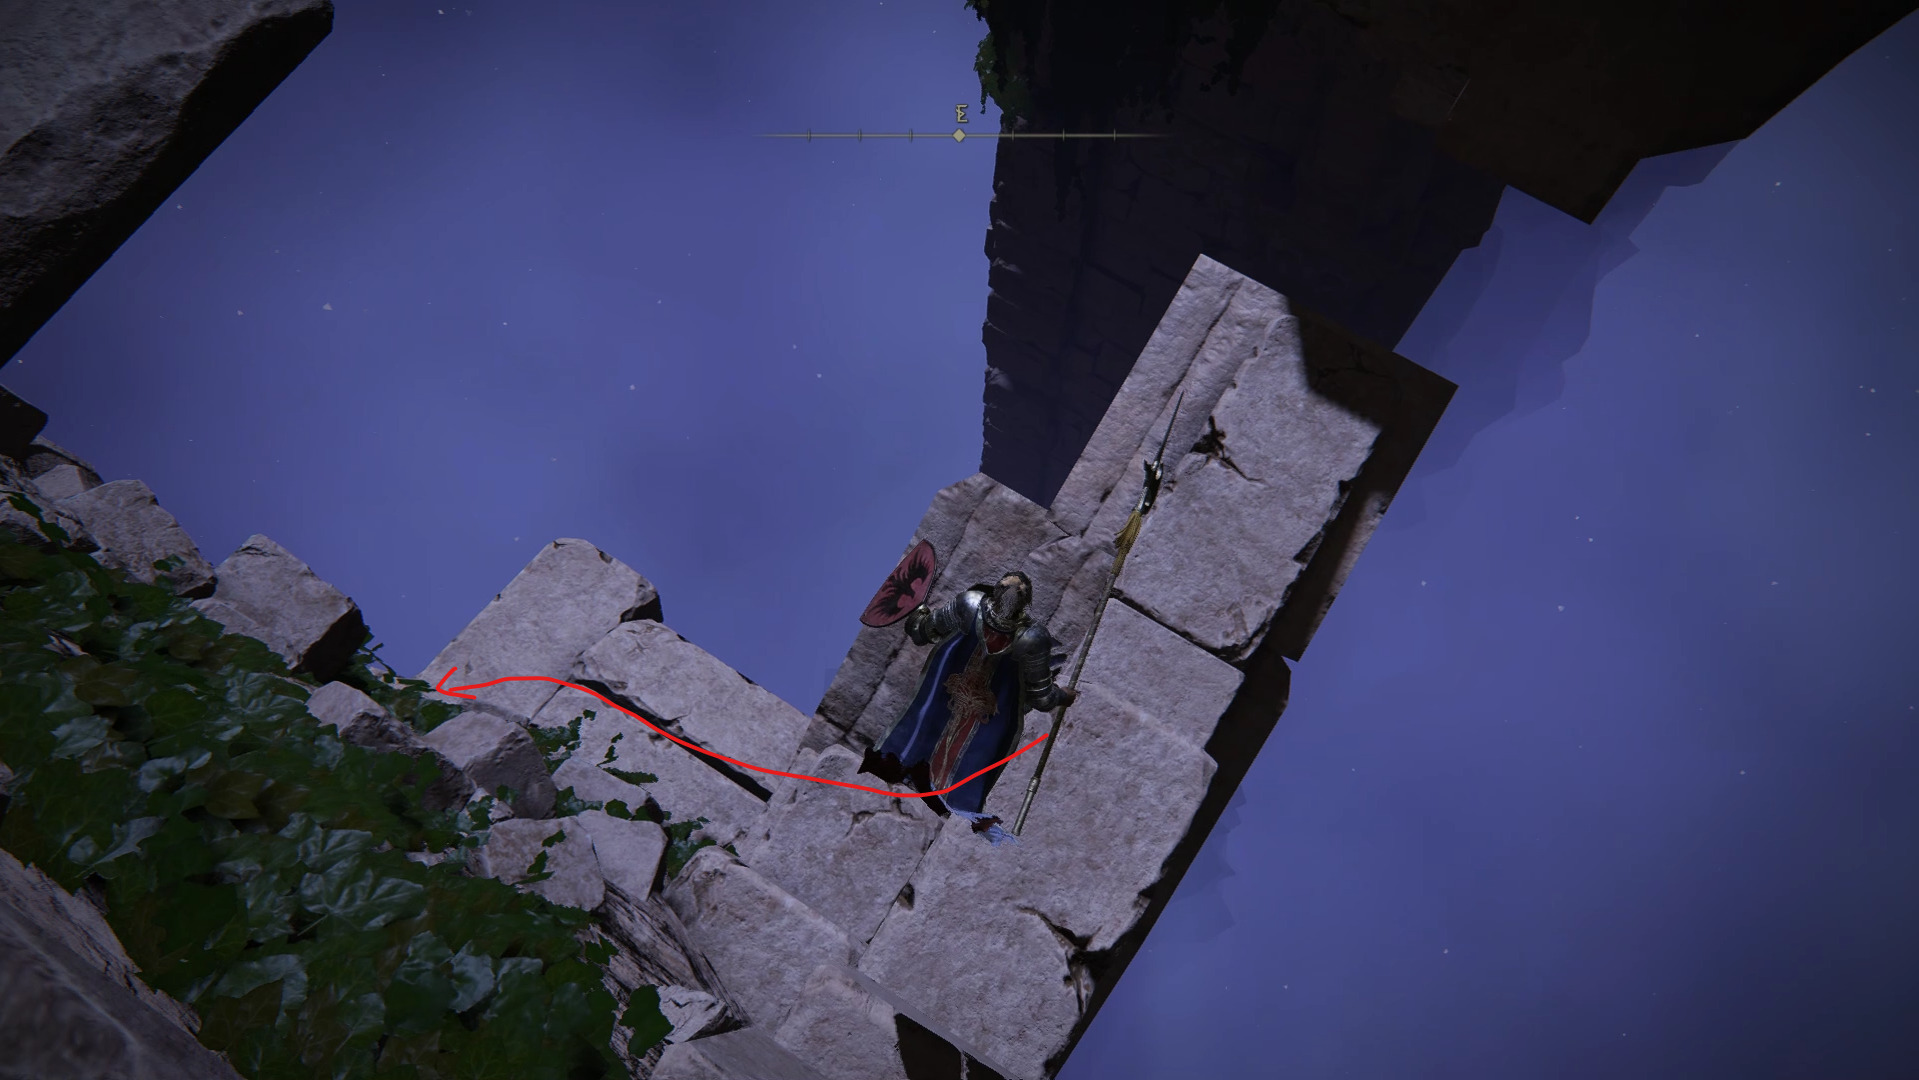
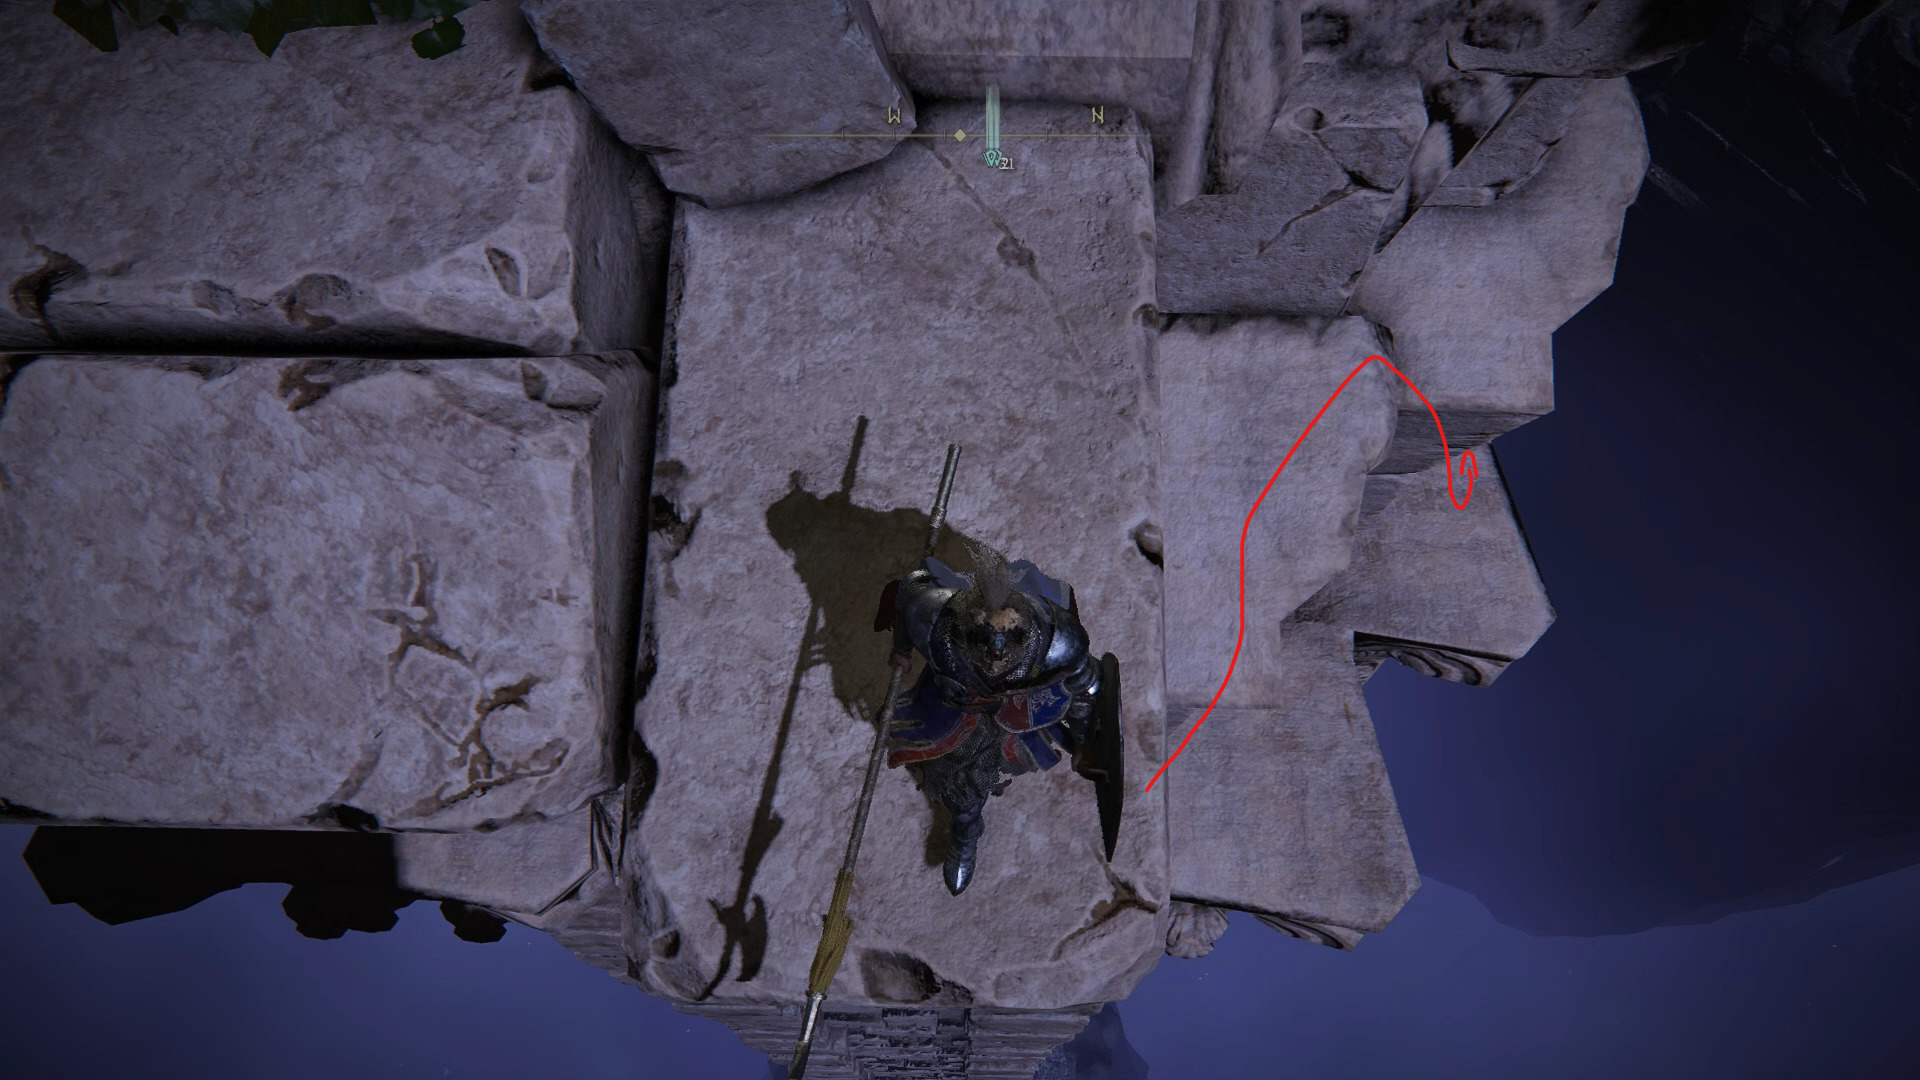
Once you have gotten to the spiritspring, jump all the way up, and go to the end of the upper section to grab the Stonesword Key from the nearby corpse.
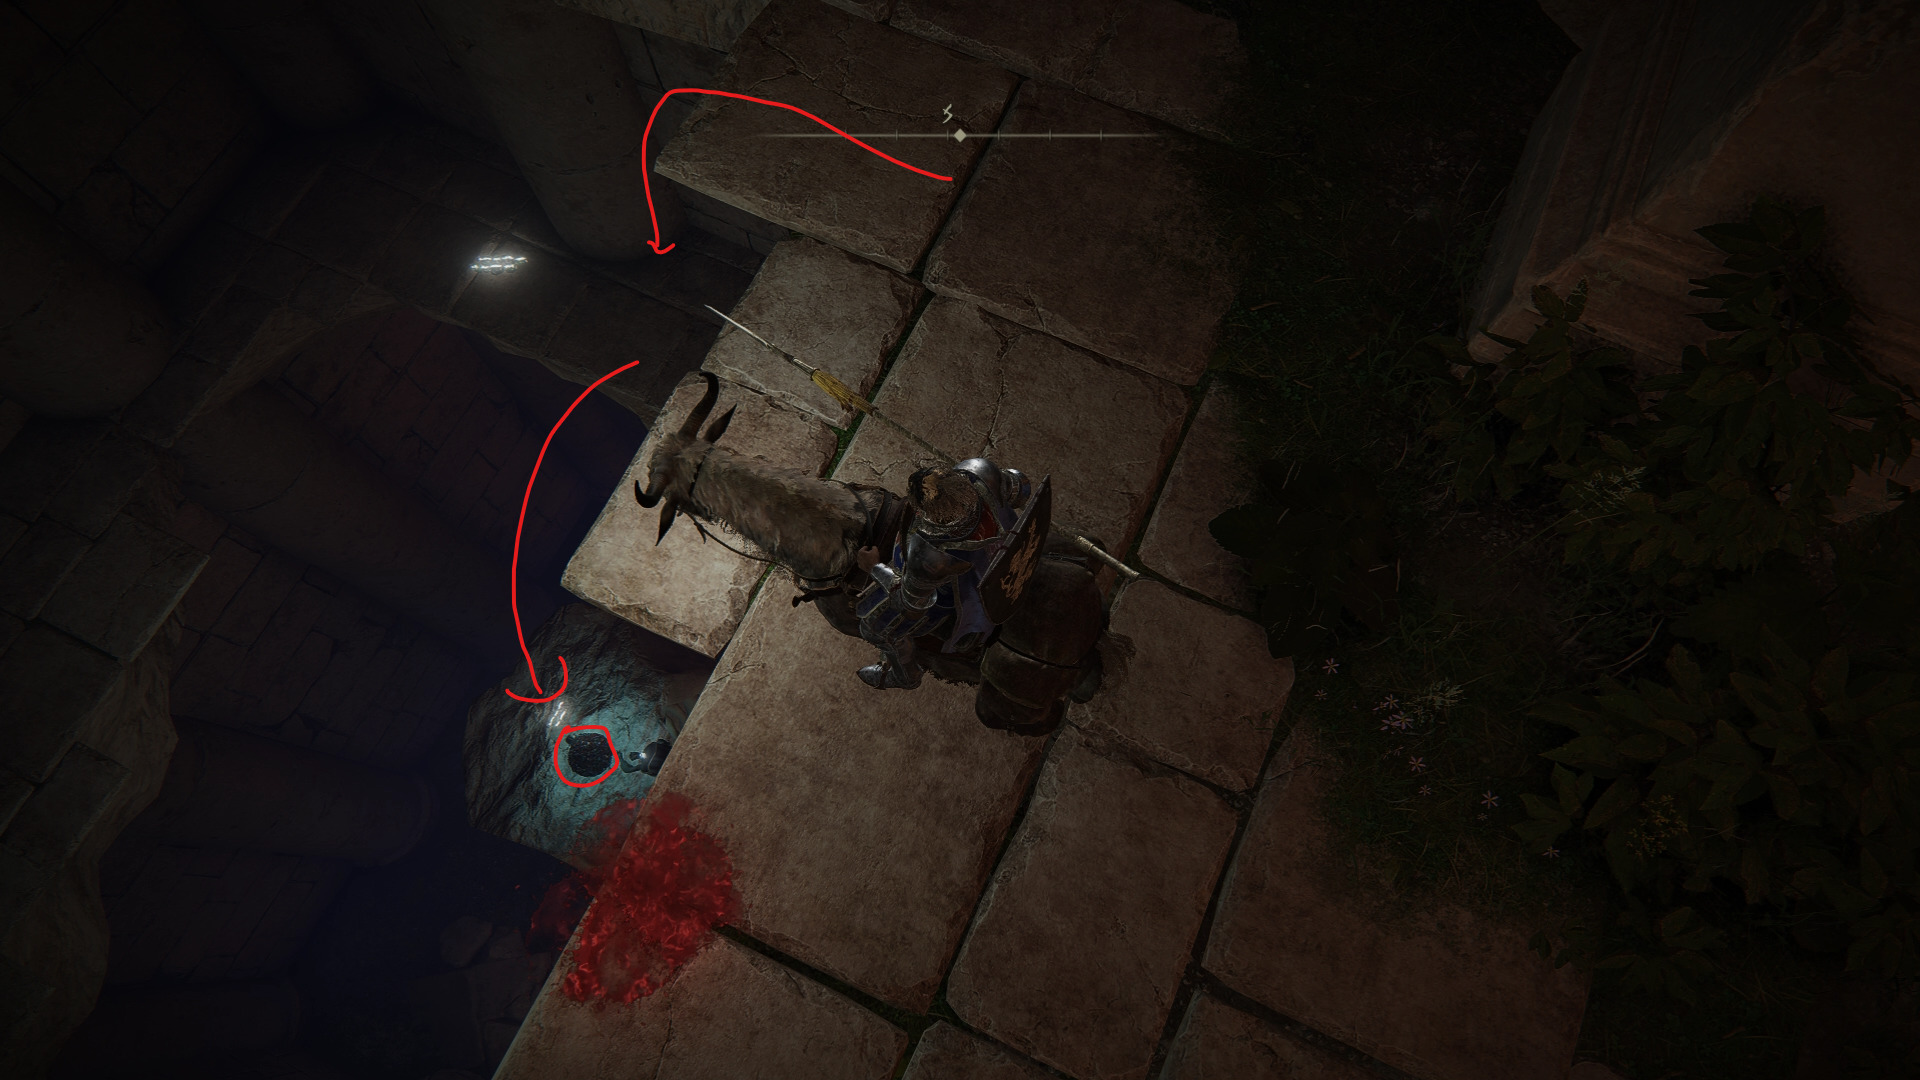
Now, while heading back, instead of jumping over to the previous part of this broken structure, jump down and follow the small ledge to the side to reach the lower level. Jump down to the grassy area below, and grab the 10x Dwelling Arrows.
Once you’re ready to move on, start heading northwest to the next fire’s location. Several spectral foes will appear to try and stop you, so remain mounted and fight the melee ones behind the nearby walls to take cover from the archer. After putting the ghosts to rest, light this fire before moving on.
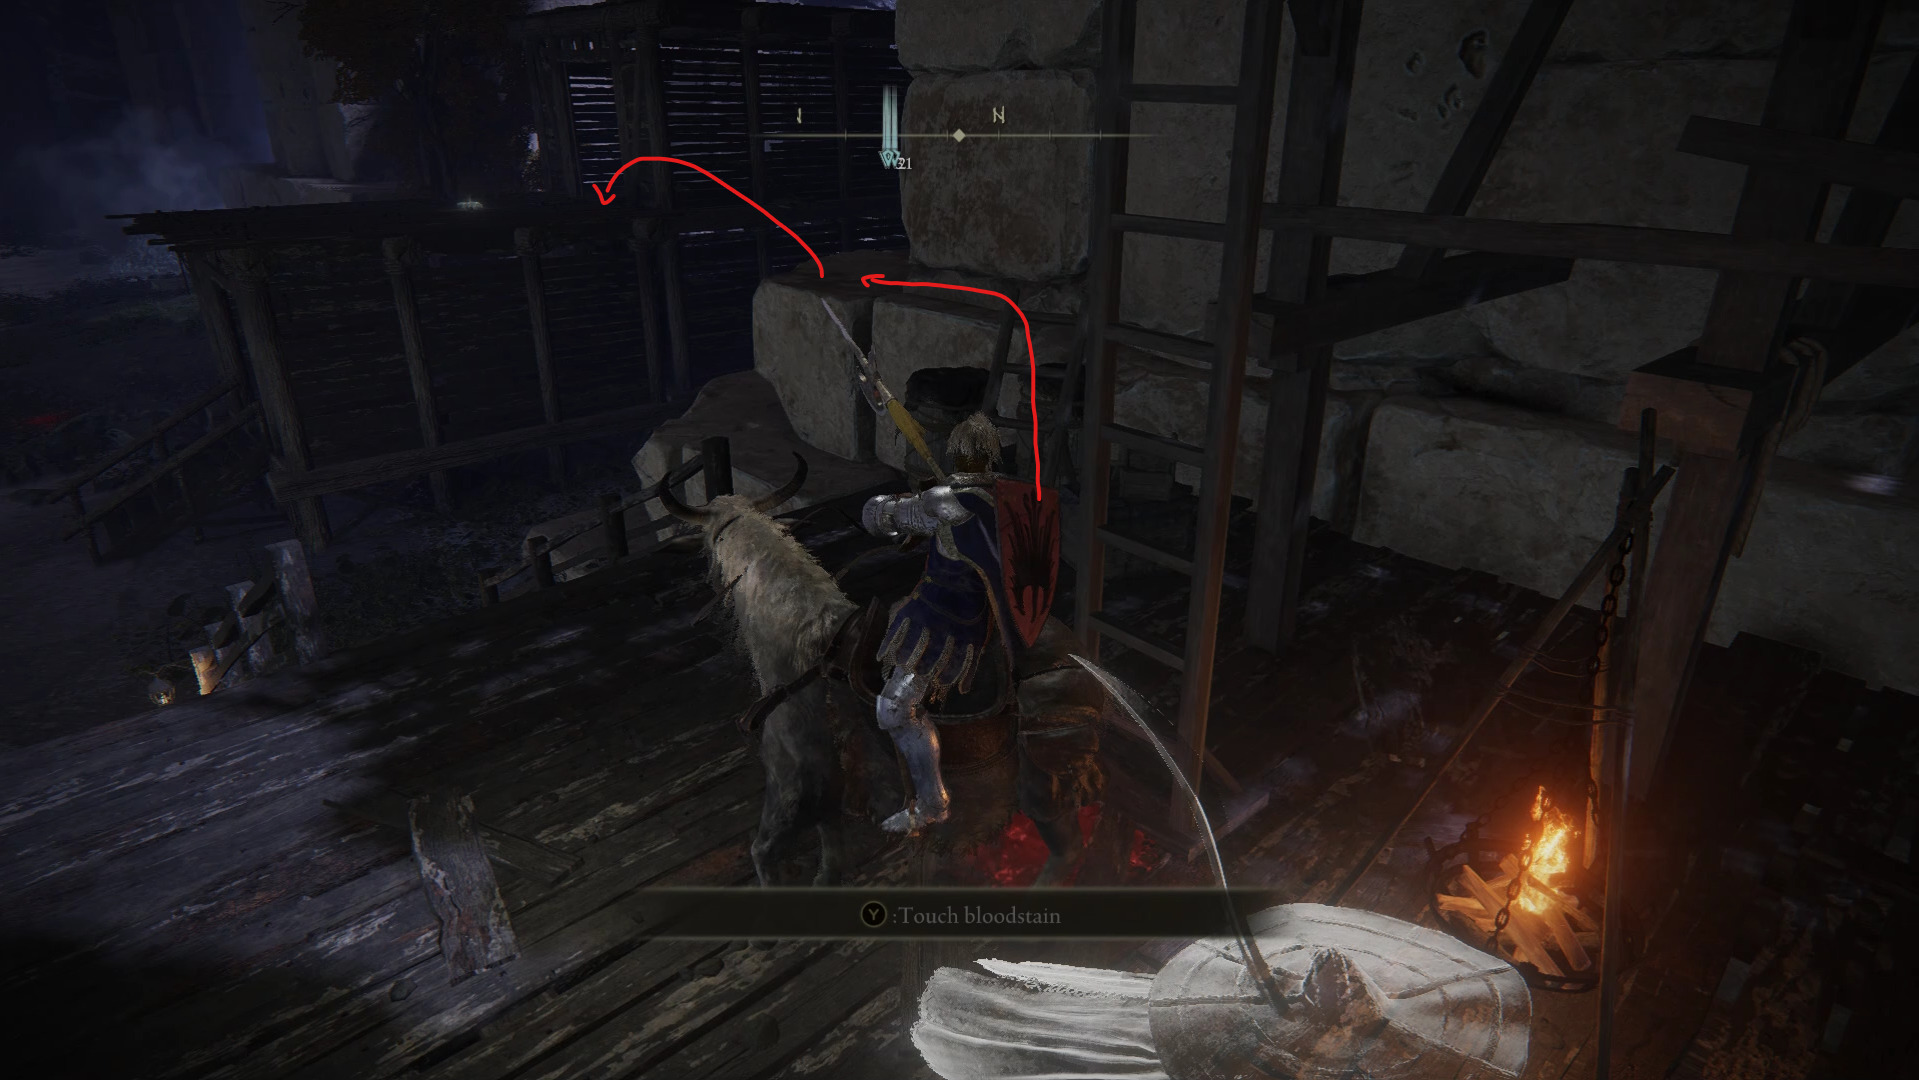
From there, there is a couple things to go and grab. First, you will want to grab the 2x Gold-Pickled Fowl Foot north of the fire and the Smithing Stone [3] in the cabin, before going up the wooden ladder nearby.
Up there, you’ll be able to jump down to a small wooden platform underneath, located northwest. If you follow this path, you will end up reaching a small cave from which you’ll be able to drop down to a small room with an Abandoned Merchant. On top of selling cheap Stonesword Keys, you will also be able to purchase a Shotel, a Nomadic Warrior’s Cookbook [17] and [18], and a Larval Tear.
Once you’re done shopping, jump down through the hole in the wall northwest, and grab the Smithing Stone [4] in the middle of the angry flowers. While you can choose to fight these, they do not drop any unique items. Whether you fight them or ignore them, start heading southeast to the location of the next fire.
On your way there, you will encounter quite a few spectral enemies. While the melee ones are relatively easy to deal with, the archers can be quite challenging if they shoot magic arrows at you. Not only do they inflict high amounts of damage, they also fly faster and further than regular arrows, which means that you won’t be able to dodge them by simply running in most cases. Luckily, while the fire is located at the edge of the cliff, the path to the fire is surrounded by trees. Use these trees as cover while you’re fighting the spectral enemies that want to bash your head in, before dealing with the archers and activating the fire.
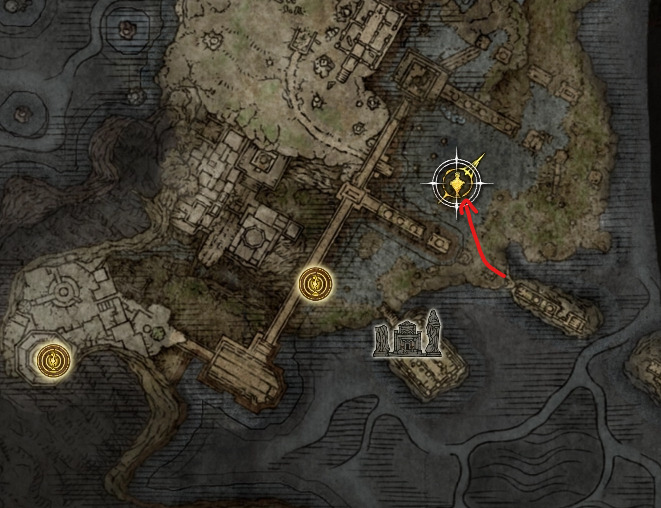
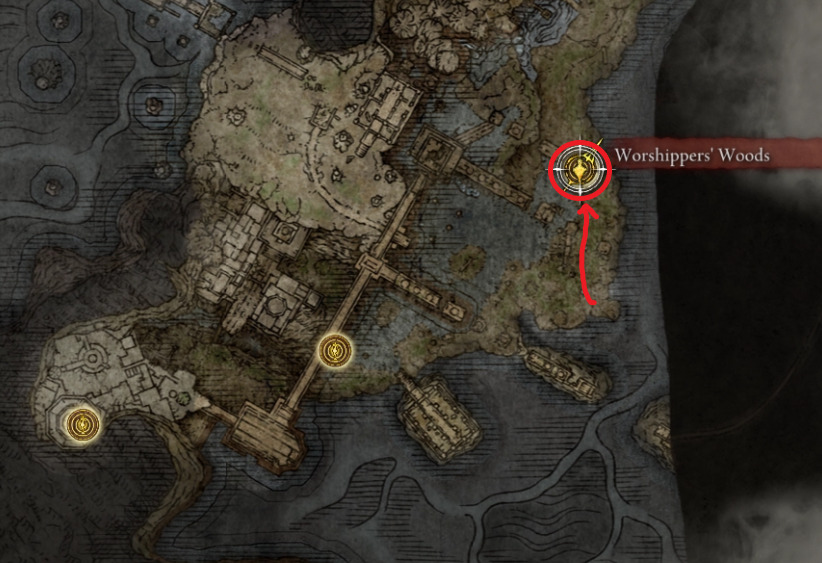
From there, instead of going towards towards the next fires, run north to grab the Worshippers’ Woods site of grace. While you can just ignore this step and continue exploring your surroundings, grabbing this site of grace will make it much easier to run back to your runes if you die.
From this site of grace, you’ll have two more fires nearby as well as a waygate that leads to an optional area housing an optional boss. For now however, we’ll be focusing on this area’s main objective, so head west to the nearby fire. While it may look safe to approach it, you will be ambushed by 3 spectral foes that will be appearing one after the other.
While these enemies are not too difficult to deal with while on horseback, they might charge you as you come closer to the fire. If they do, get close enough for them to appear before keeping your distance from them until they finish their attack. Take your time defeating these 1 by 1 before lighting the fire and moving on to our next objective.
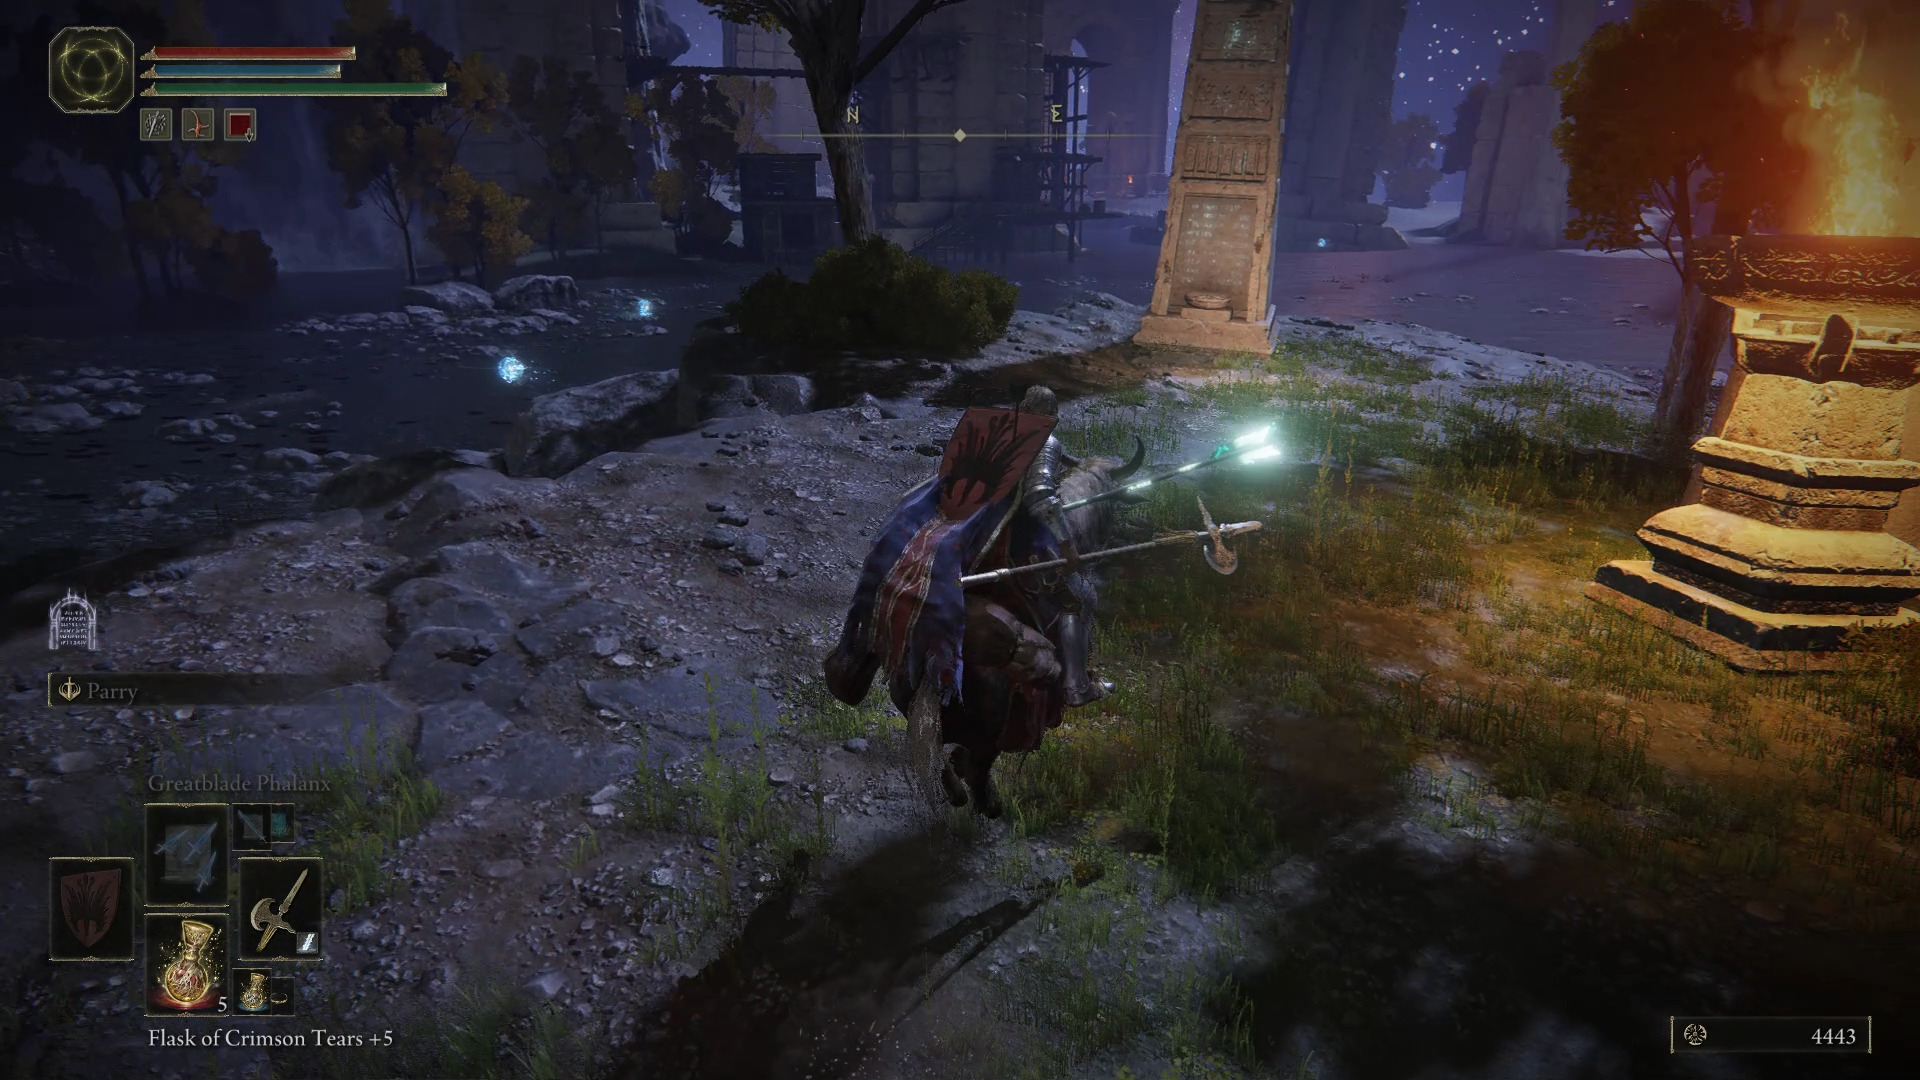
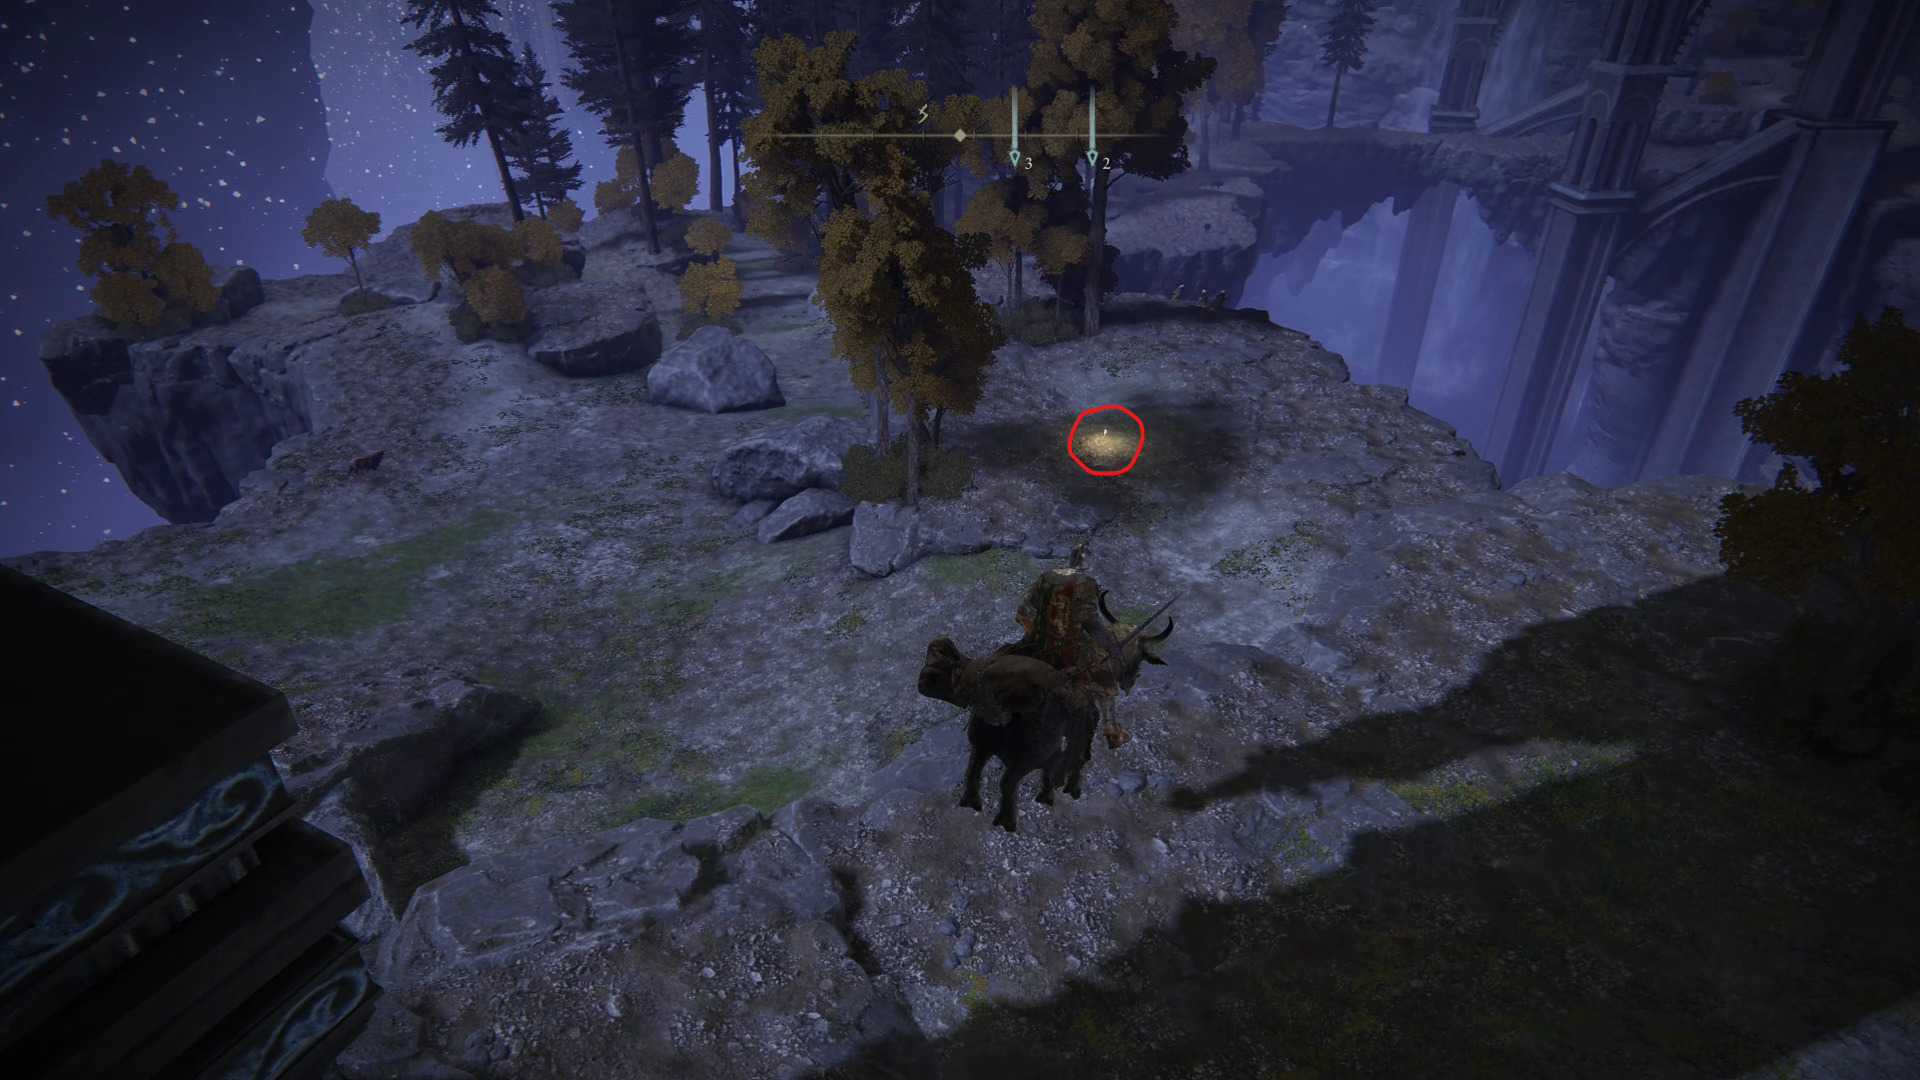
East-southeast from there, you’ll be able to see another fire nearby. This one is guarded by several wisps that will discharge electric projectiles as you come closer, as well as a couple spectral enemies nearby, that might notice you if you get too close to them. For the wisps, come close enough for them to notice you, and hide behind the obelisk until they finish firing, which will make them disappear on their own and allow you to activate the fire.
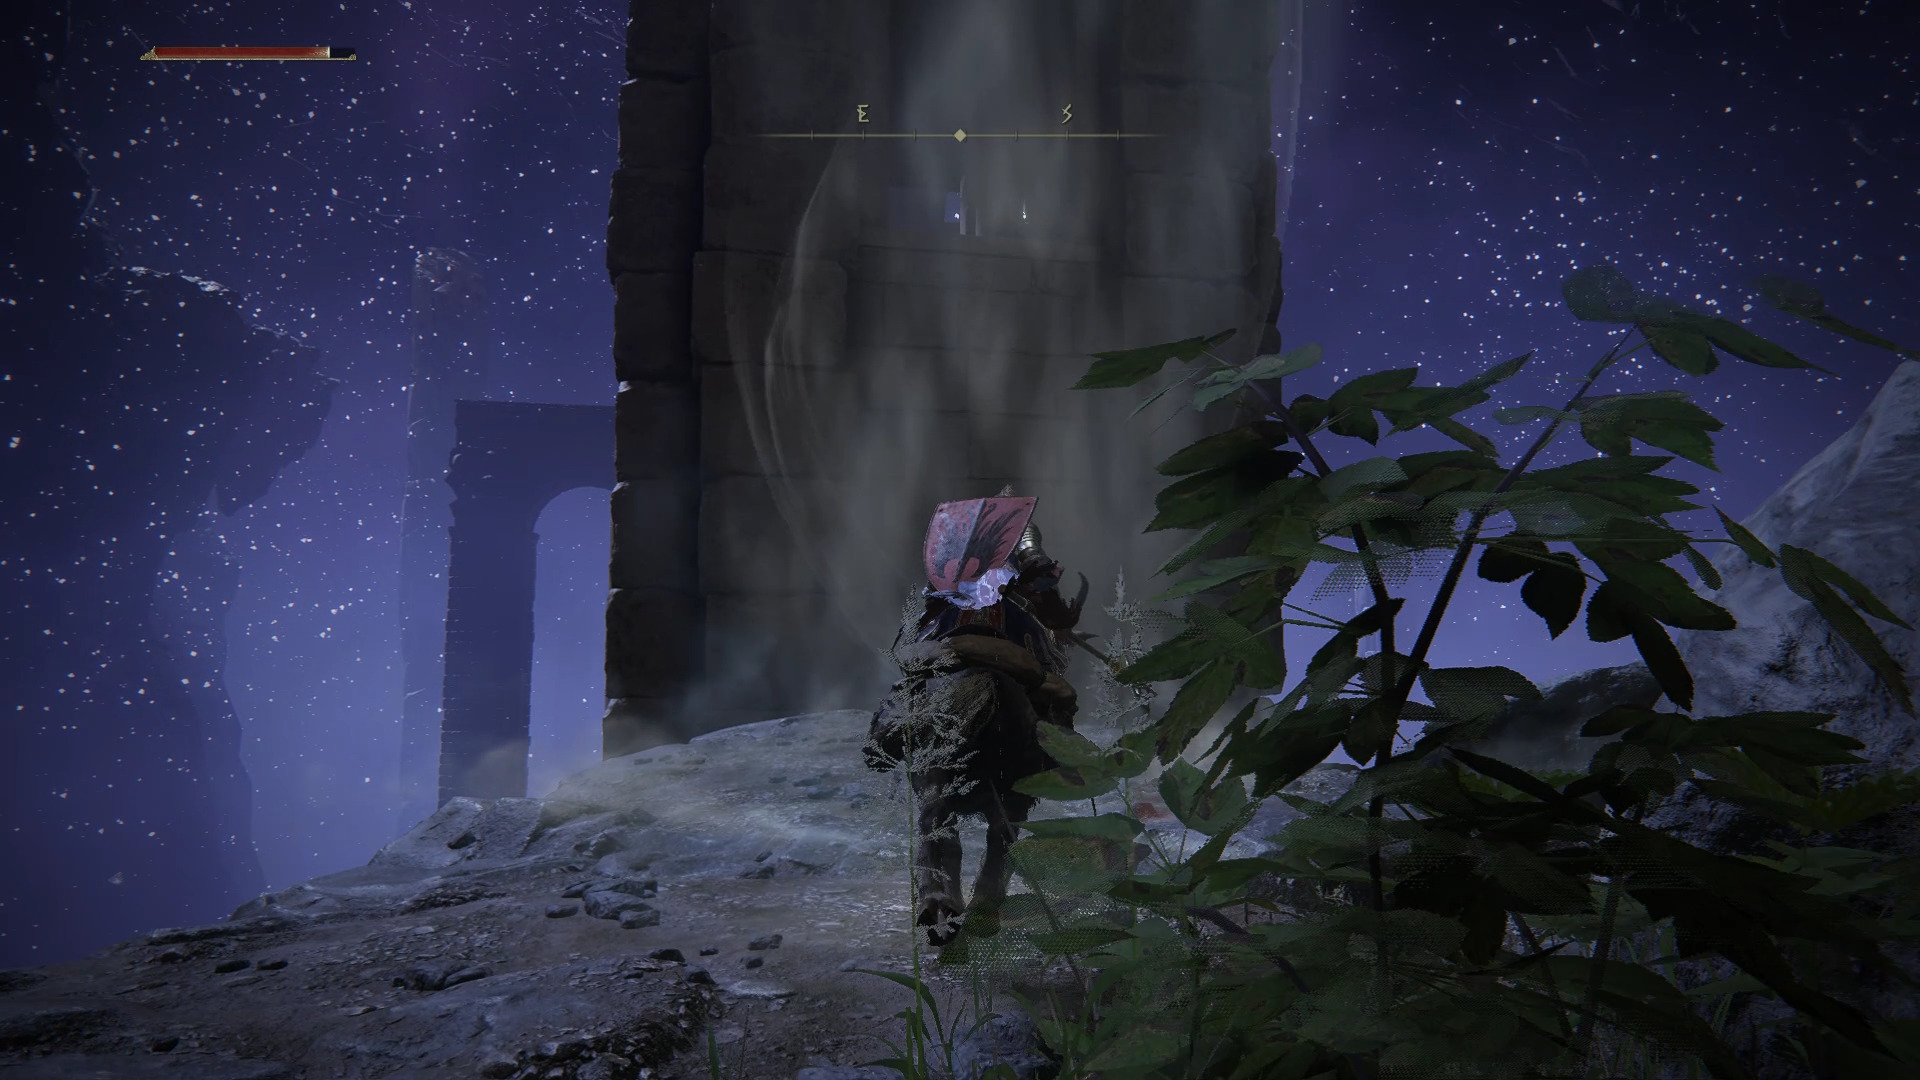
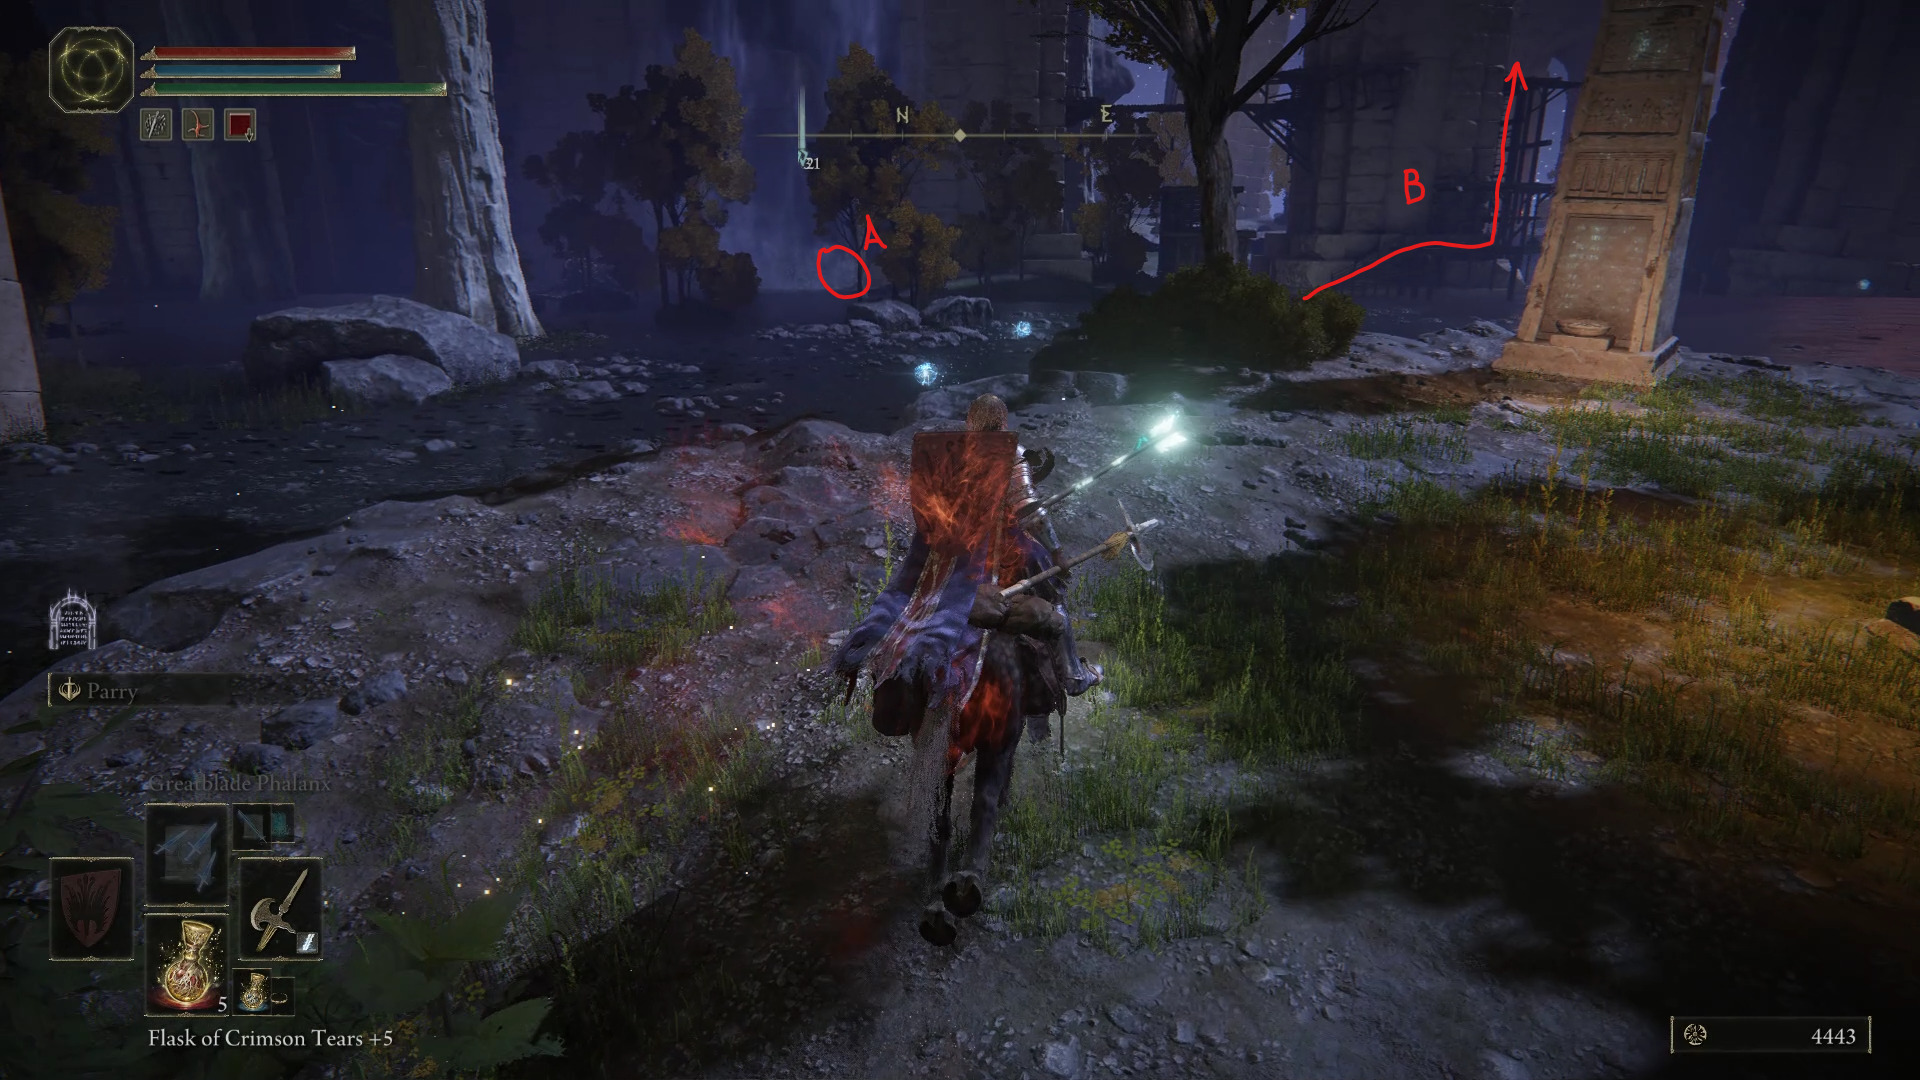
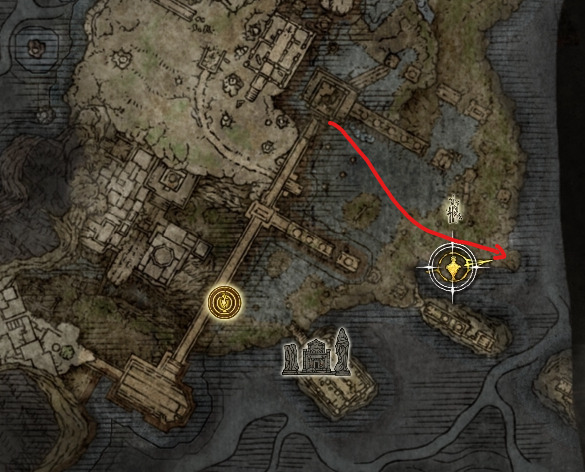
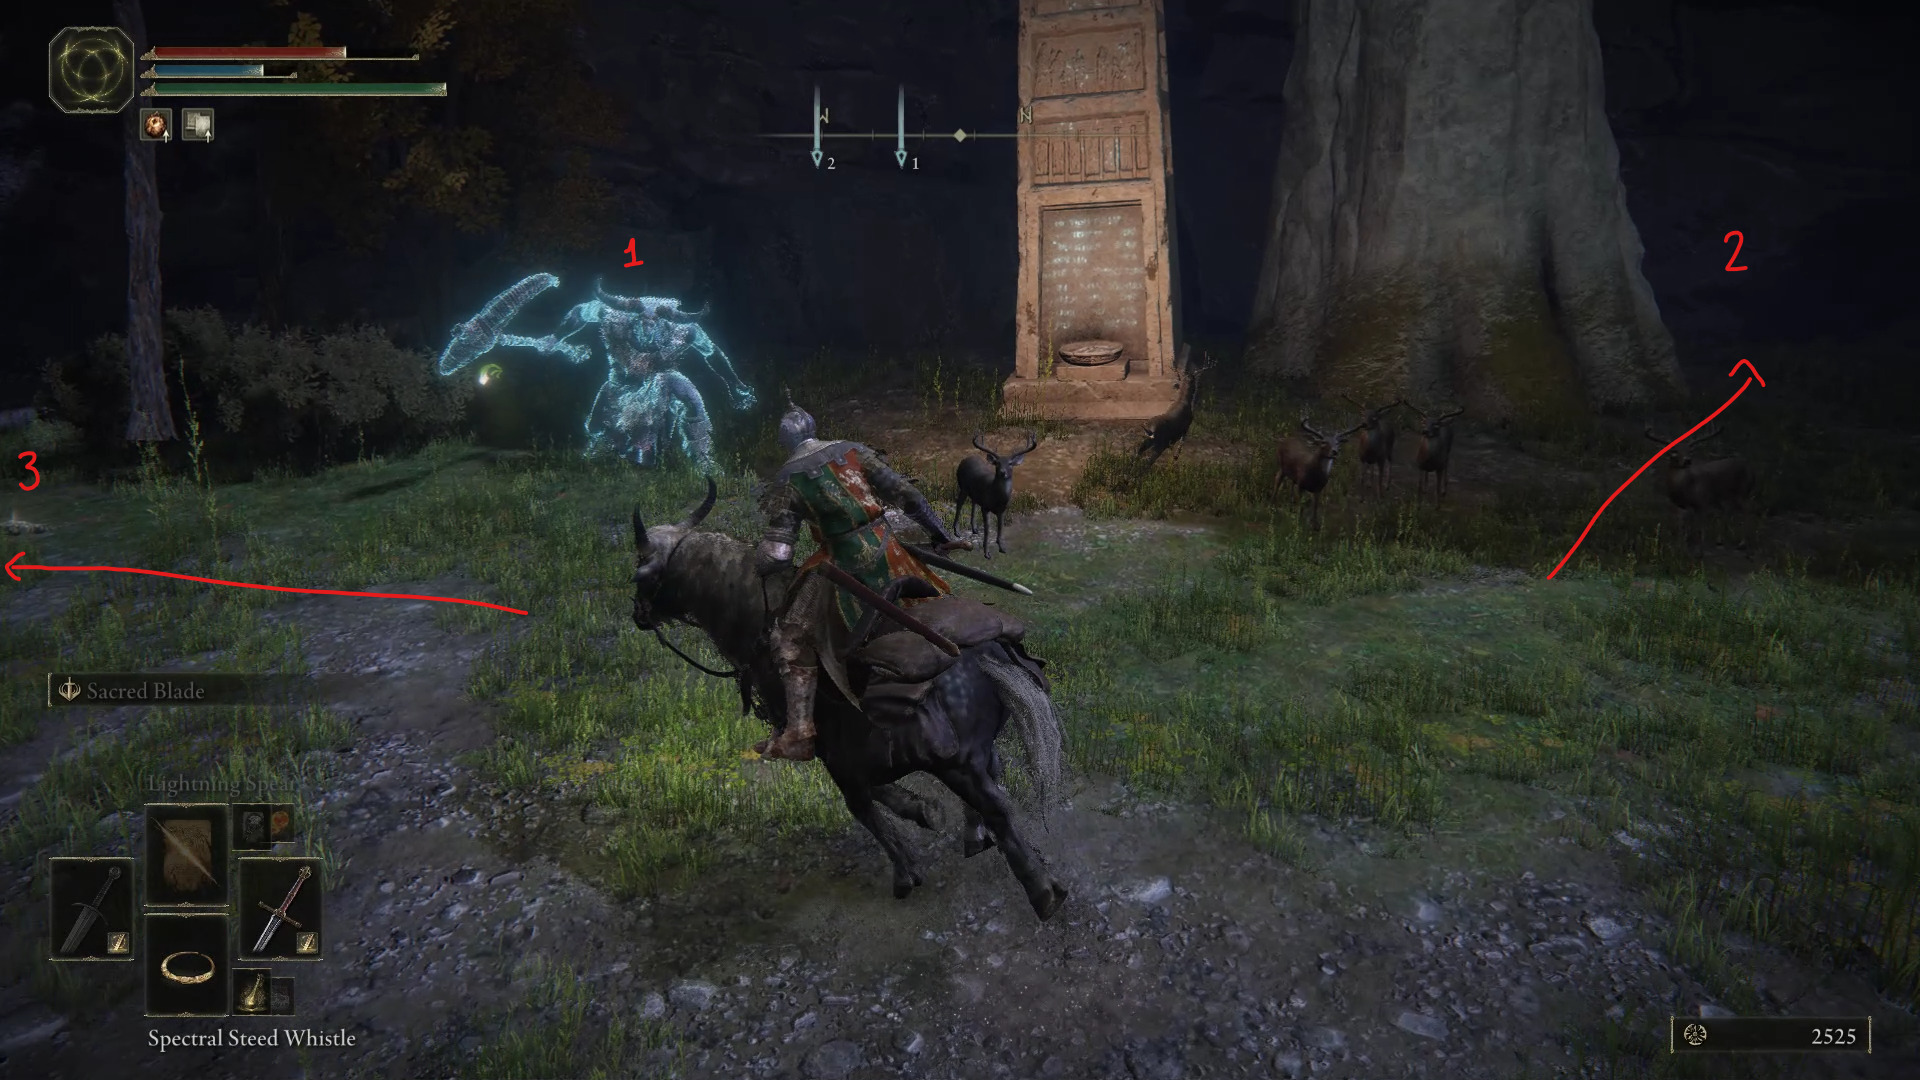
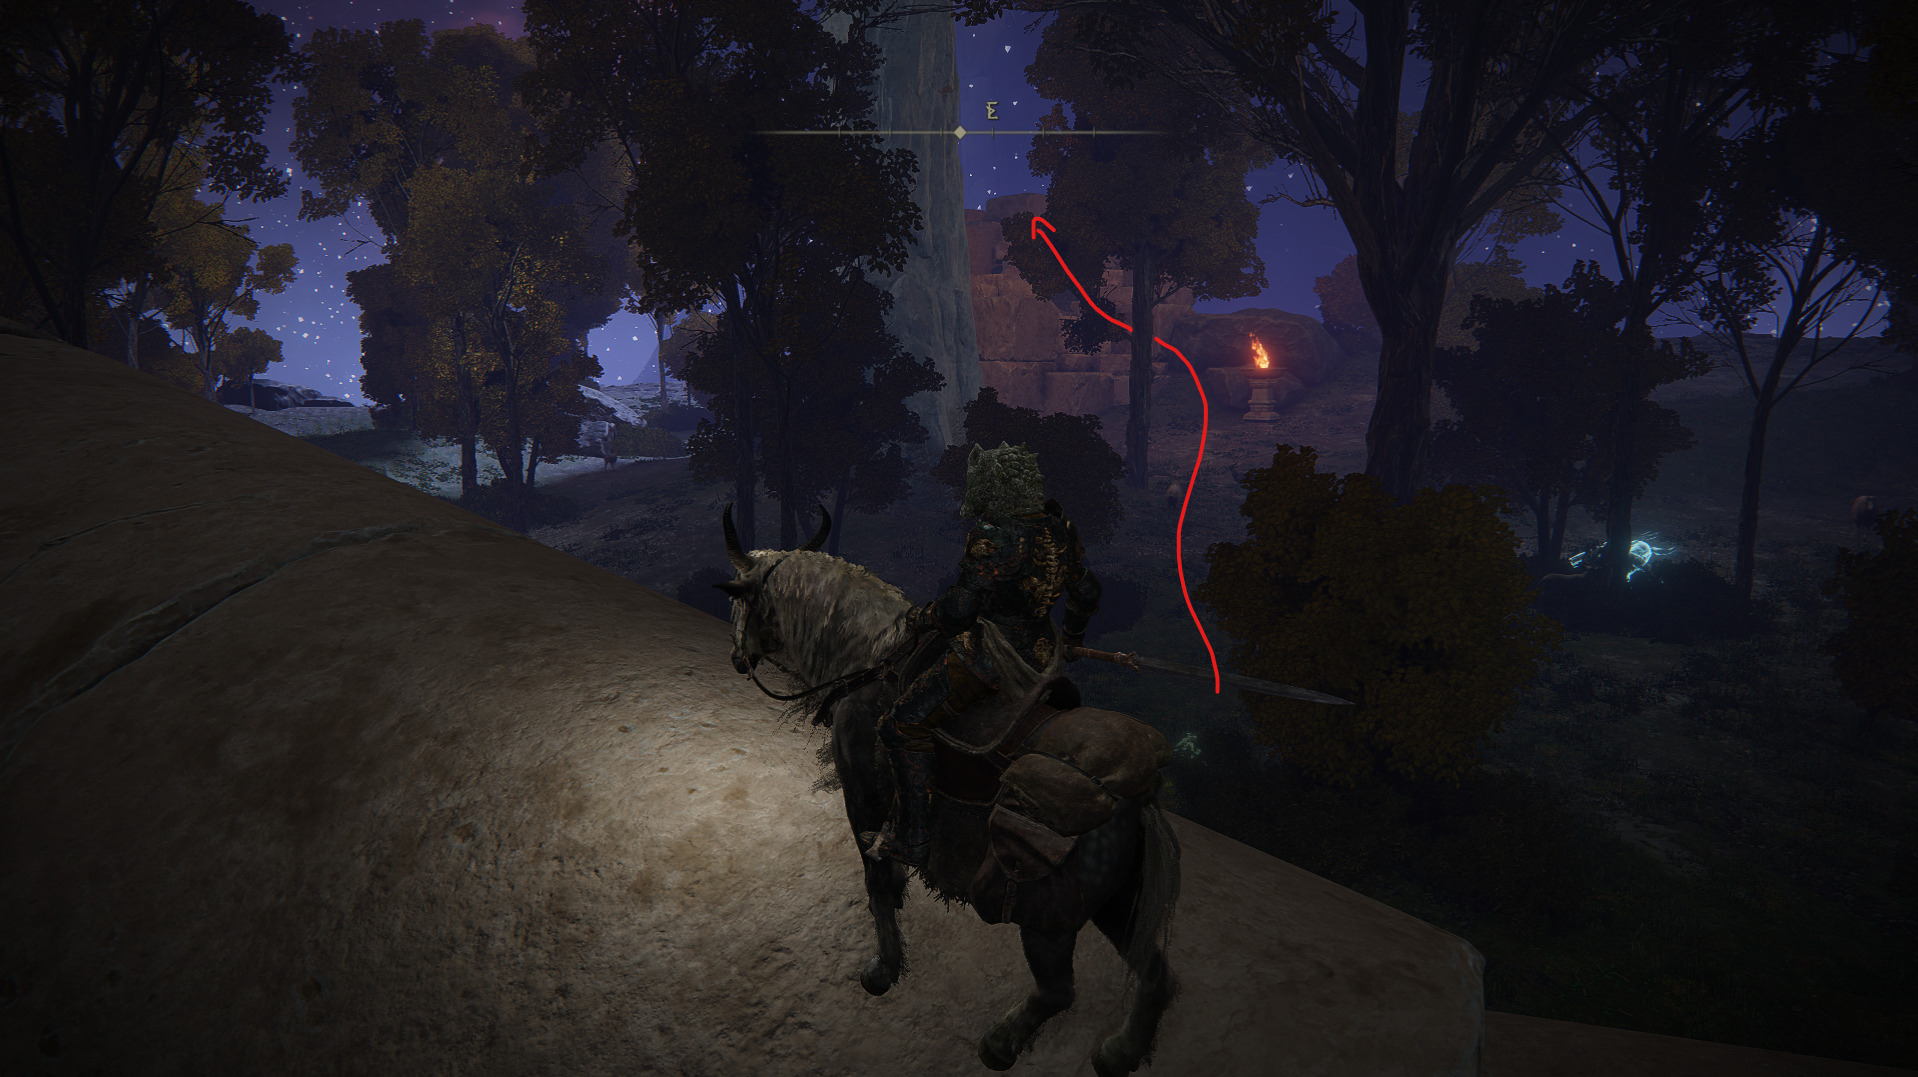
Once you approach that area, several spectral enemies will appear. While some of them are easy to deal with, there will be two archers with magic arrows: one on top of a nearby structure and another one in the woods at the bottom. Dealing with both at the same time will expose you to the other one’s attacks, but if you engage one of them in melee combat they will put away their bow and start following you. If you approach this ruined tower through the right side, as shown in the picture above, it will be far easier to deal with these enemies. Continue going this way until you reach the spot where the first enemy appears.
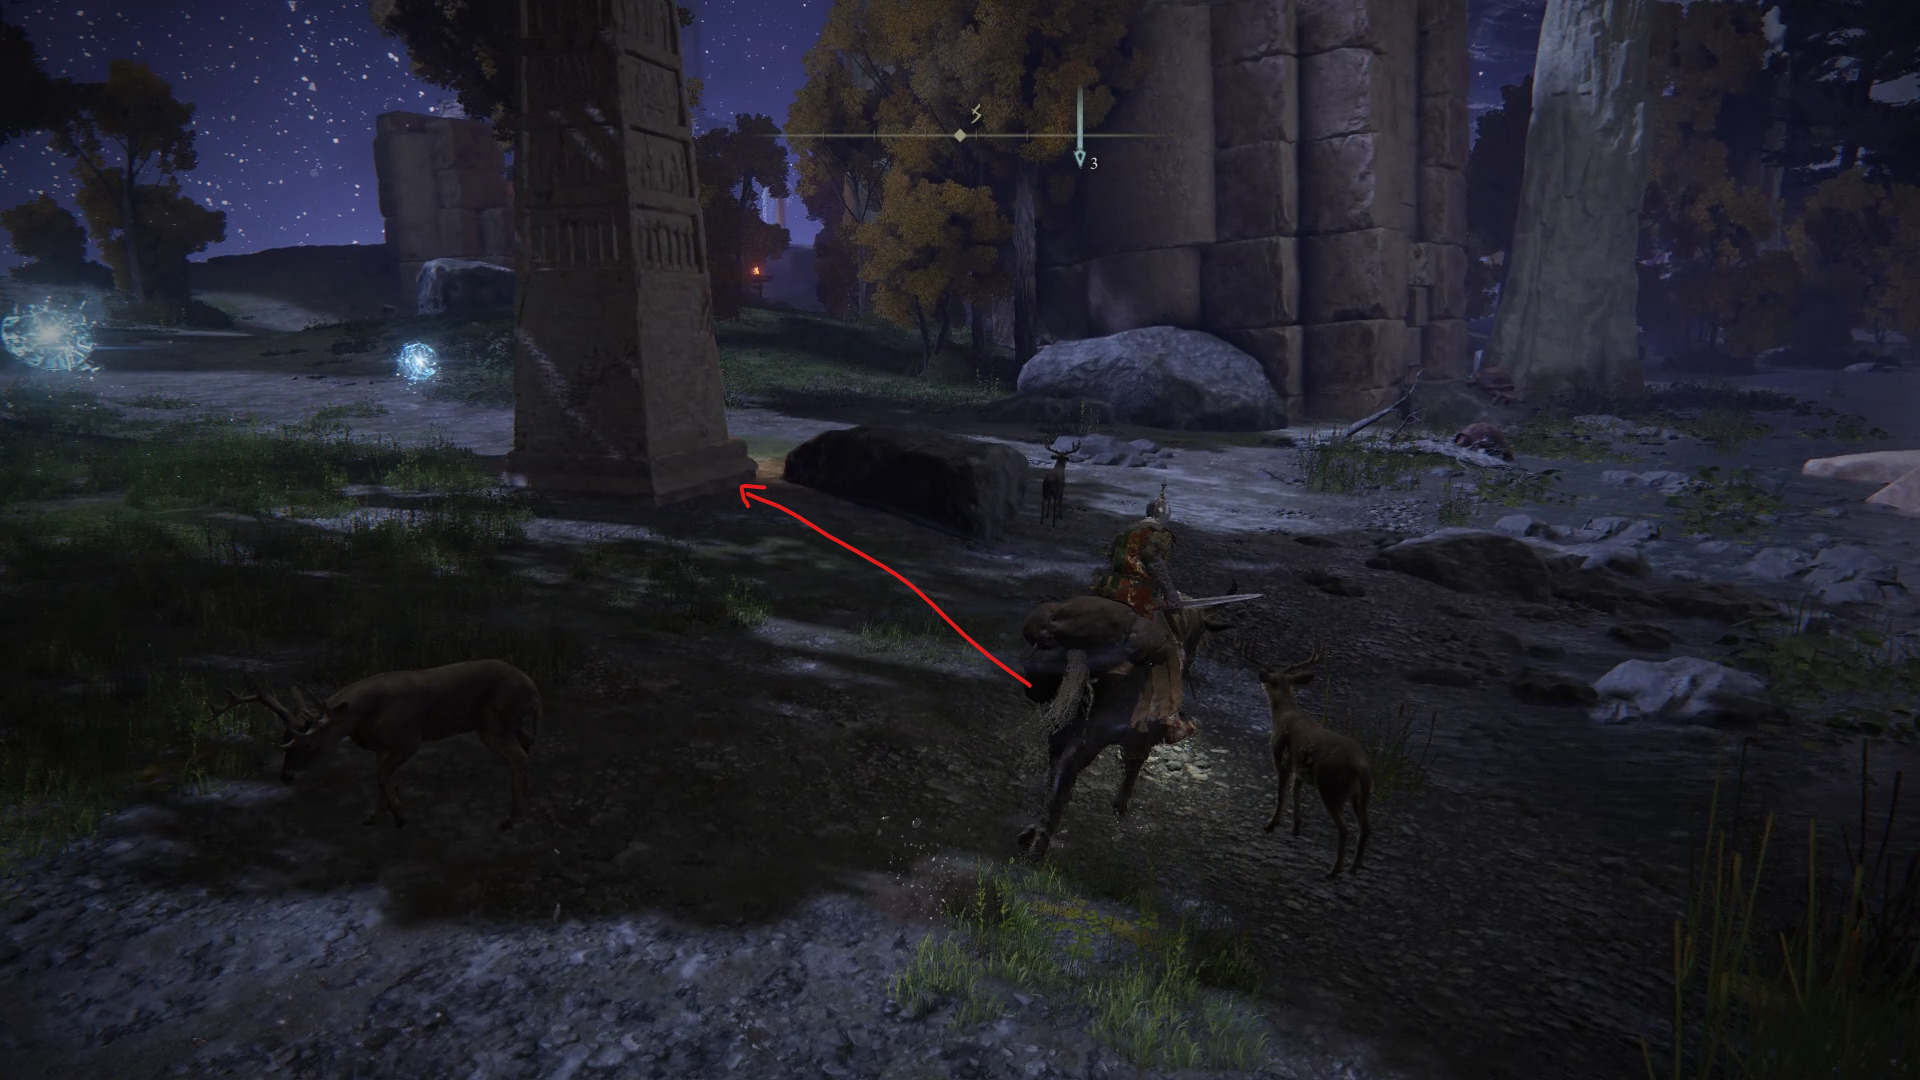
When you get close to that bush/tree combo, the first enemy will appear and you’ll be able to fight it without the rest of his buddies. Deal with him first before moving on, but don’t go further ahead while fighting him as more enemies might spawn. Once he’s dealt with, get closer to the fallen pillar to have the two archers appear. While it will be too risky to attack the one on top of the nearby structure, you will be right next to his archer buddy. Here, the goal is to attack him in melee and hide behind a nearby tree before fighting him.
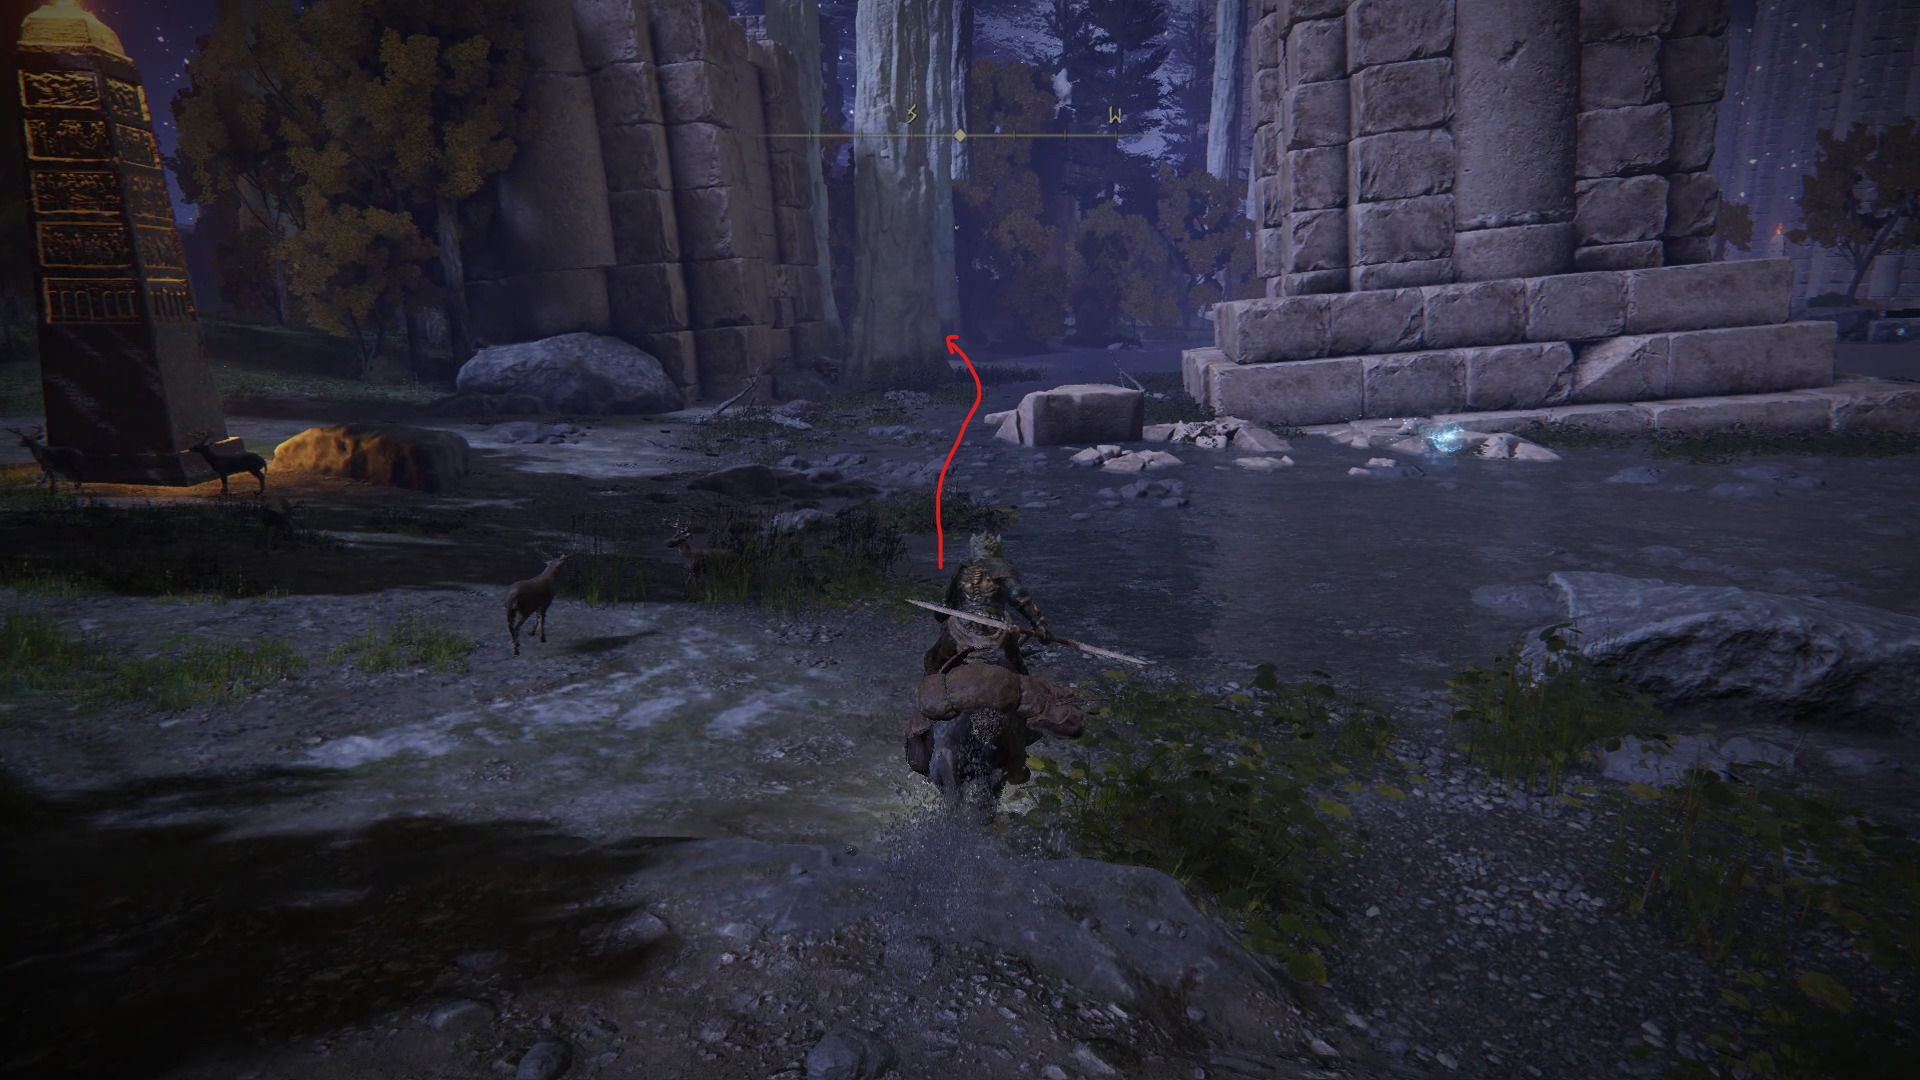
Now, all that’s left is the archer at the very top of the nearby structure. While you’re not able to flank him or take cover while getting closer, all you have to do is wait for him to shoot while you’re hidden behind a nearby tree, before just running up to him and defeating him.
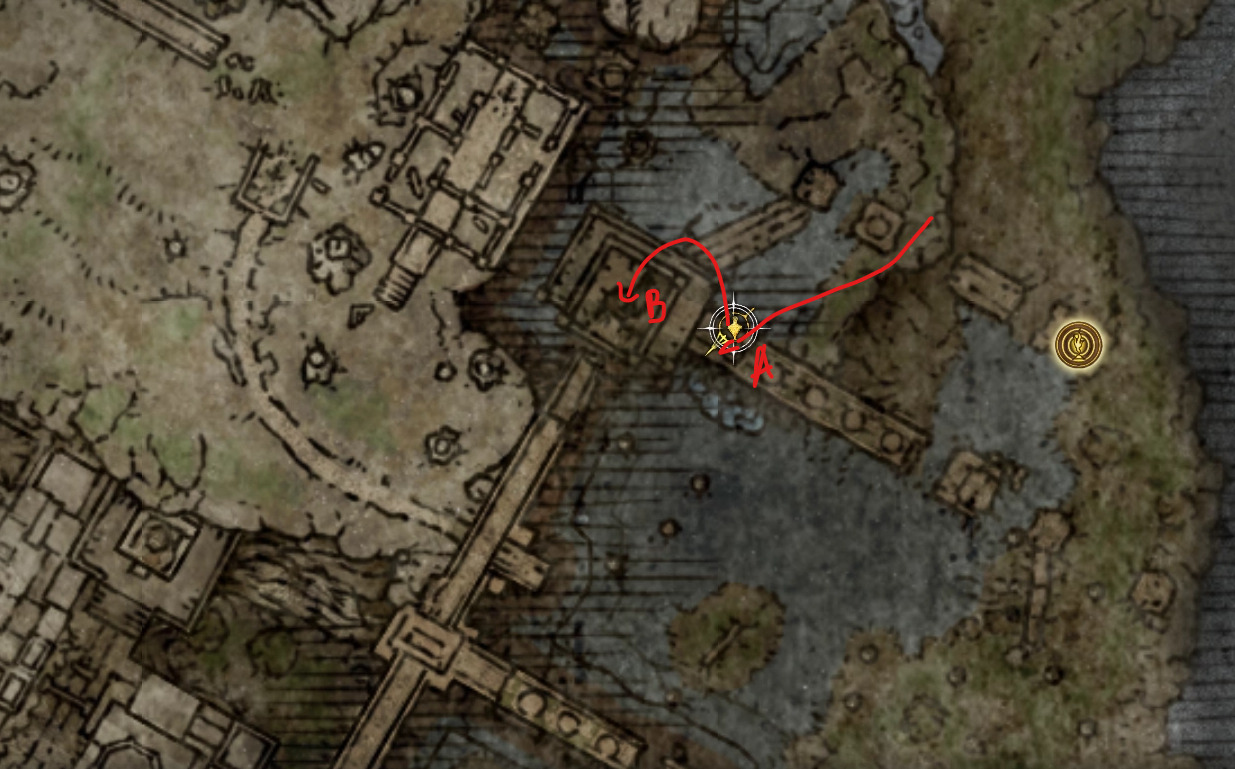
Now that the dangerous enemies are dealt with, do not take the way gate next to where that last archer was just yet, as there are a couple things that you may want to grab. Close to the collapsed pillar, you can find (A) 3x Smithing Stone [2], (B) 10x Dwelling Arrow, (C) 1x Dappled Cured Meat, and a Smithing Stone [3] on top of another ruined tower nearby.
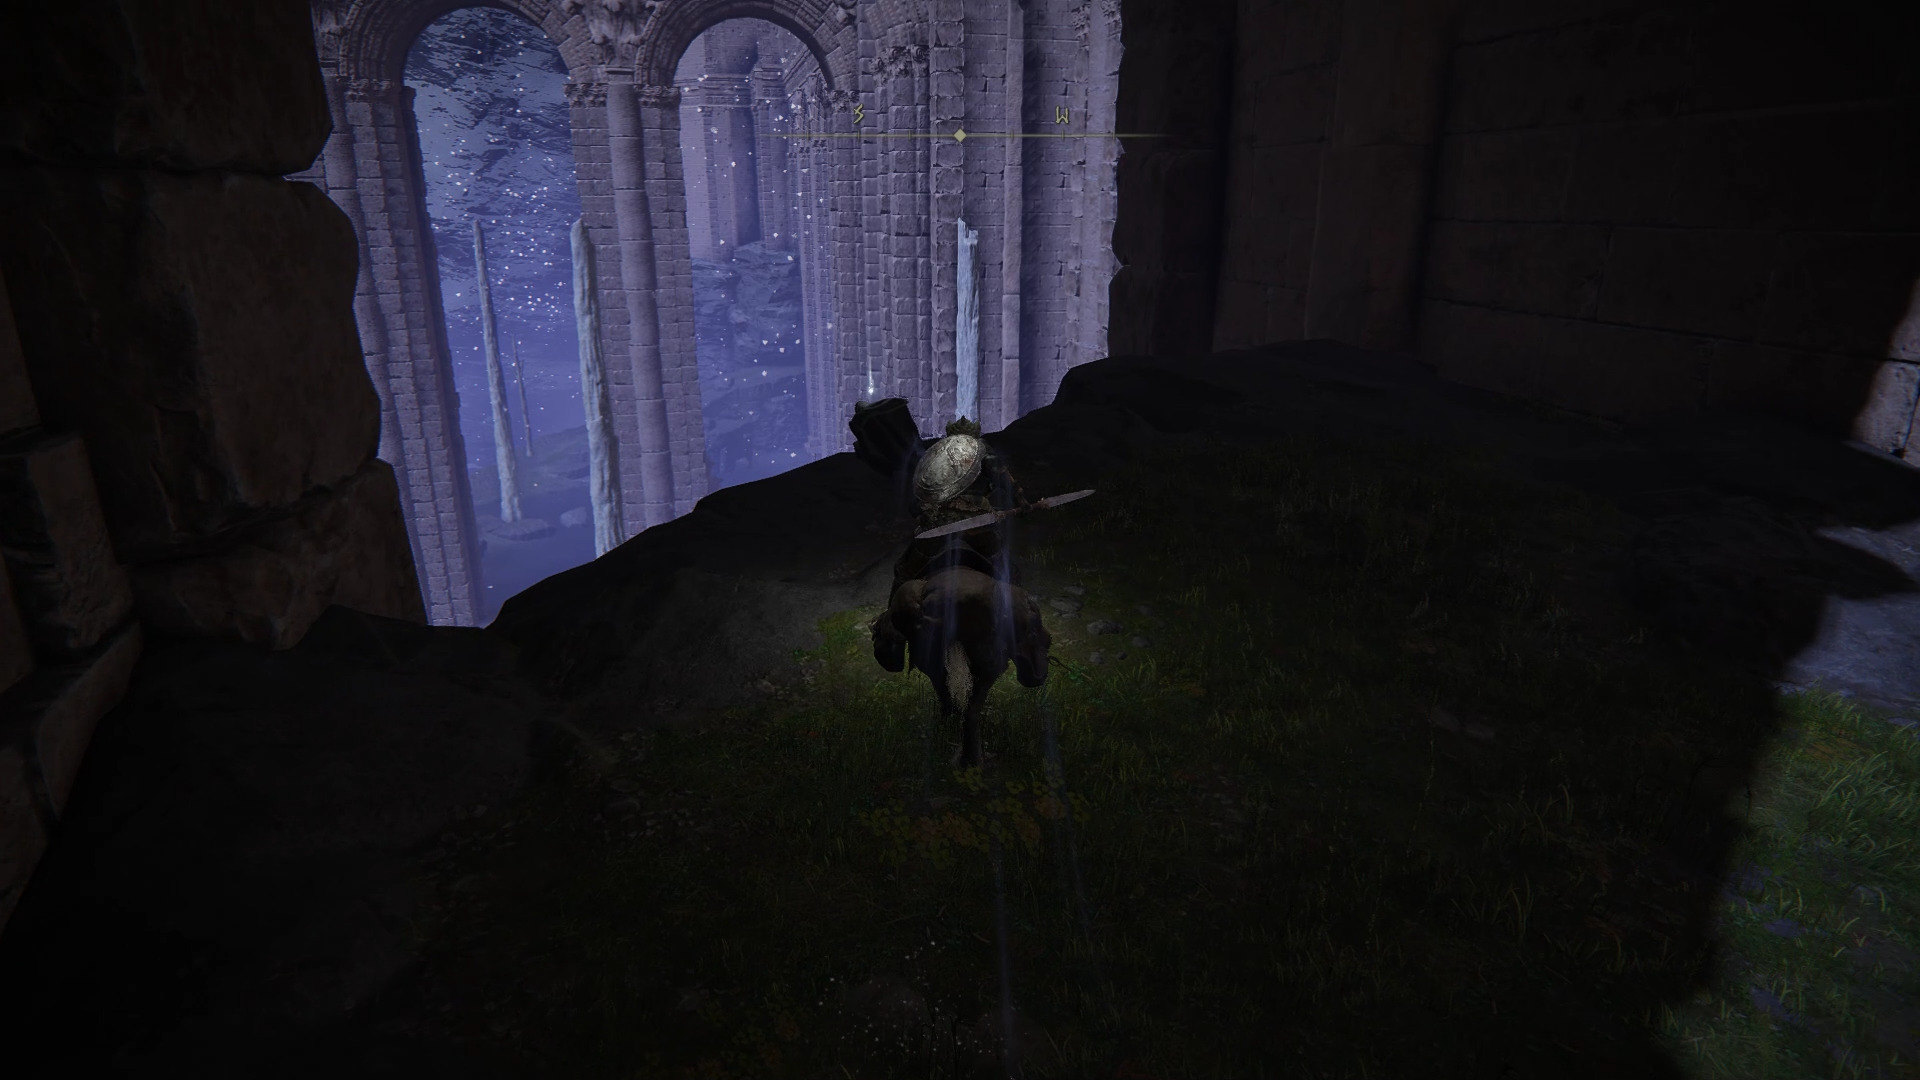
You can now climb the collapsed pillar where the last archer was, and grab the Somber Smithing Stone above the waygate before using it, which will transport you to an area that’s otherwise inaccessible.
While the sorcery and the bolstering materials will be in a room filled with enemies, you do not have to fight them if you don’t want to. You can simply run in and grab the loot before dashing out of there. If you find yourself stuck, you can try to double jump above the enemies as long as you remain mounted. When you grabbed everything, we can continue exploring this side of the area and grabbing the last bits of loot. Continue heading west, and take 2 more turns left to grab a (A) Golden Rune [7] as well as a Ghost Glovewort [5] nearby.
Golden Rune [7]Ghost Glovewort [5]
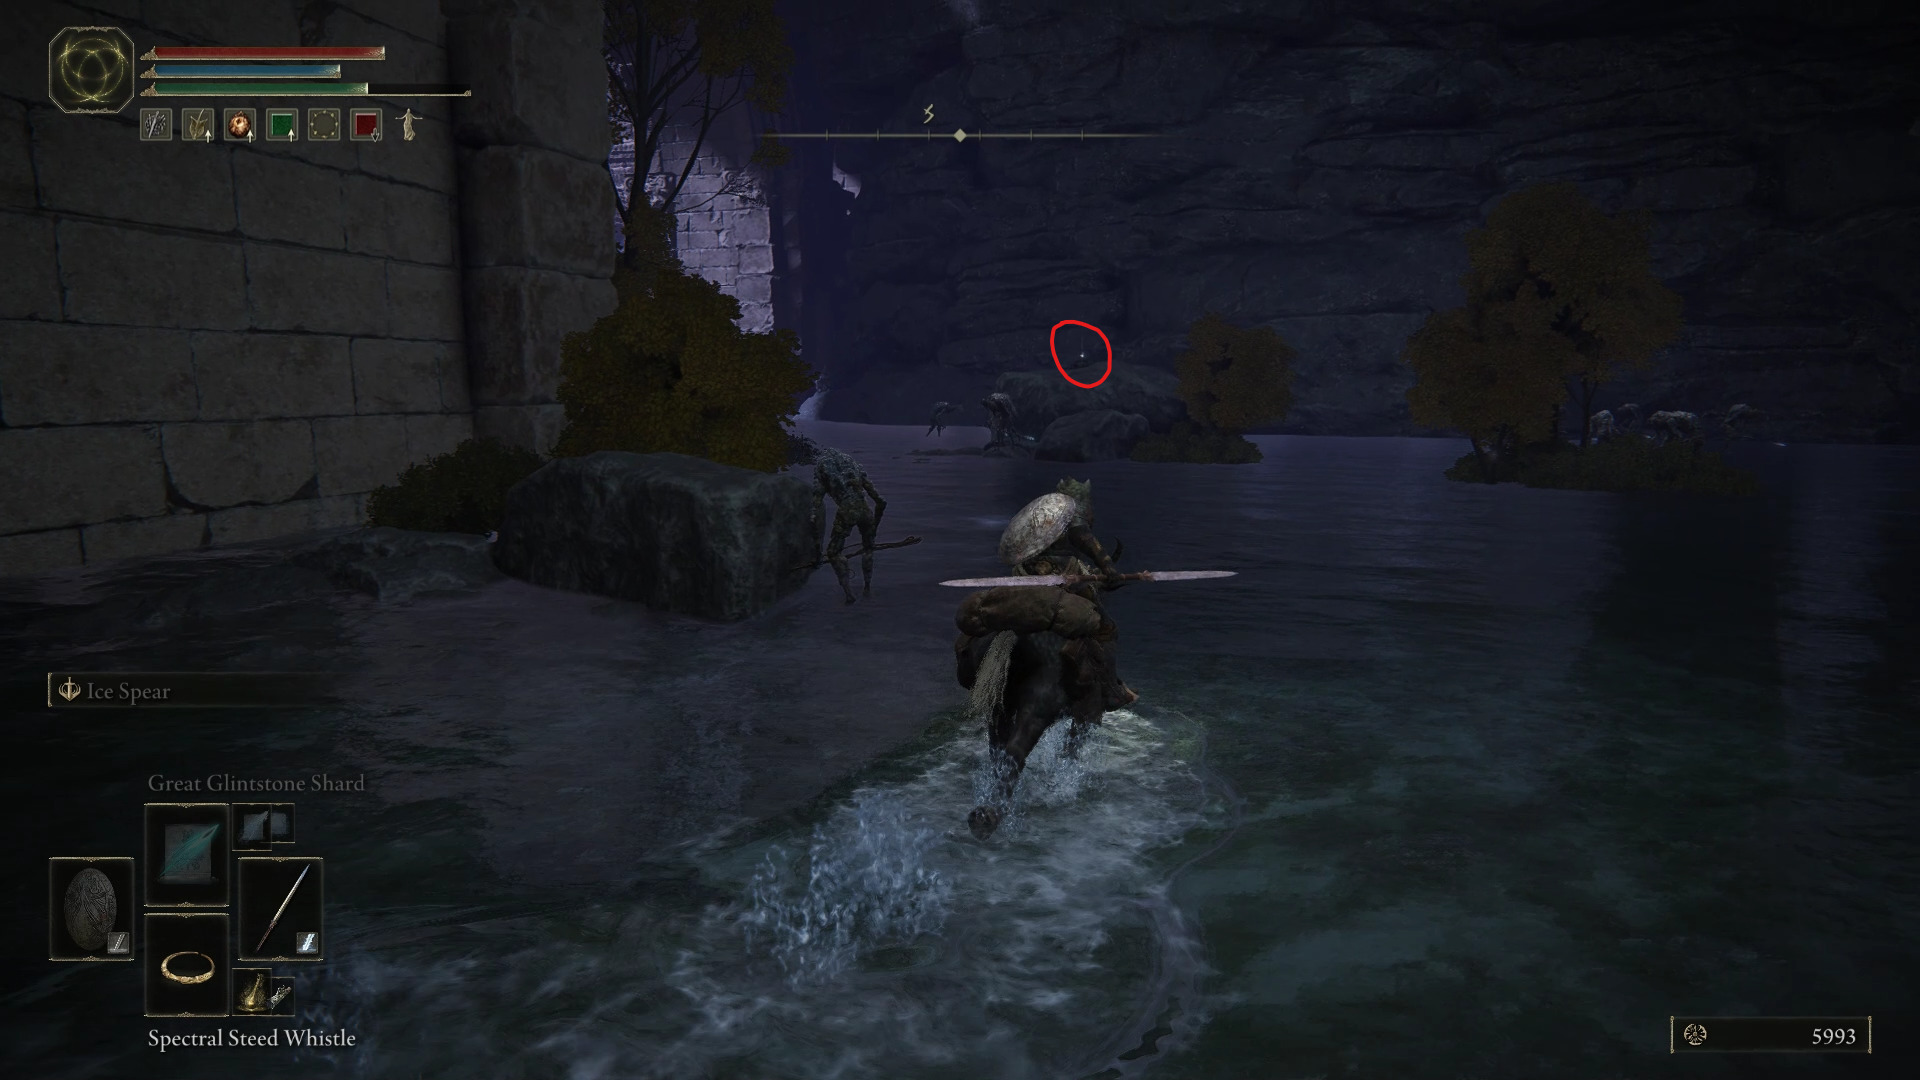
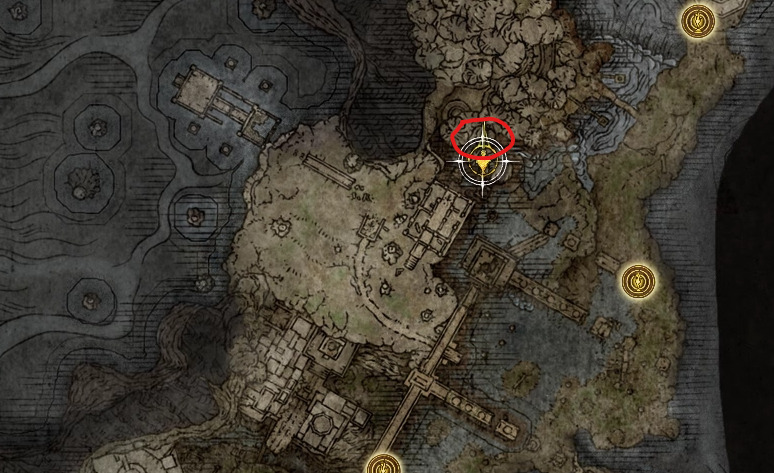
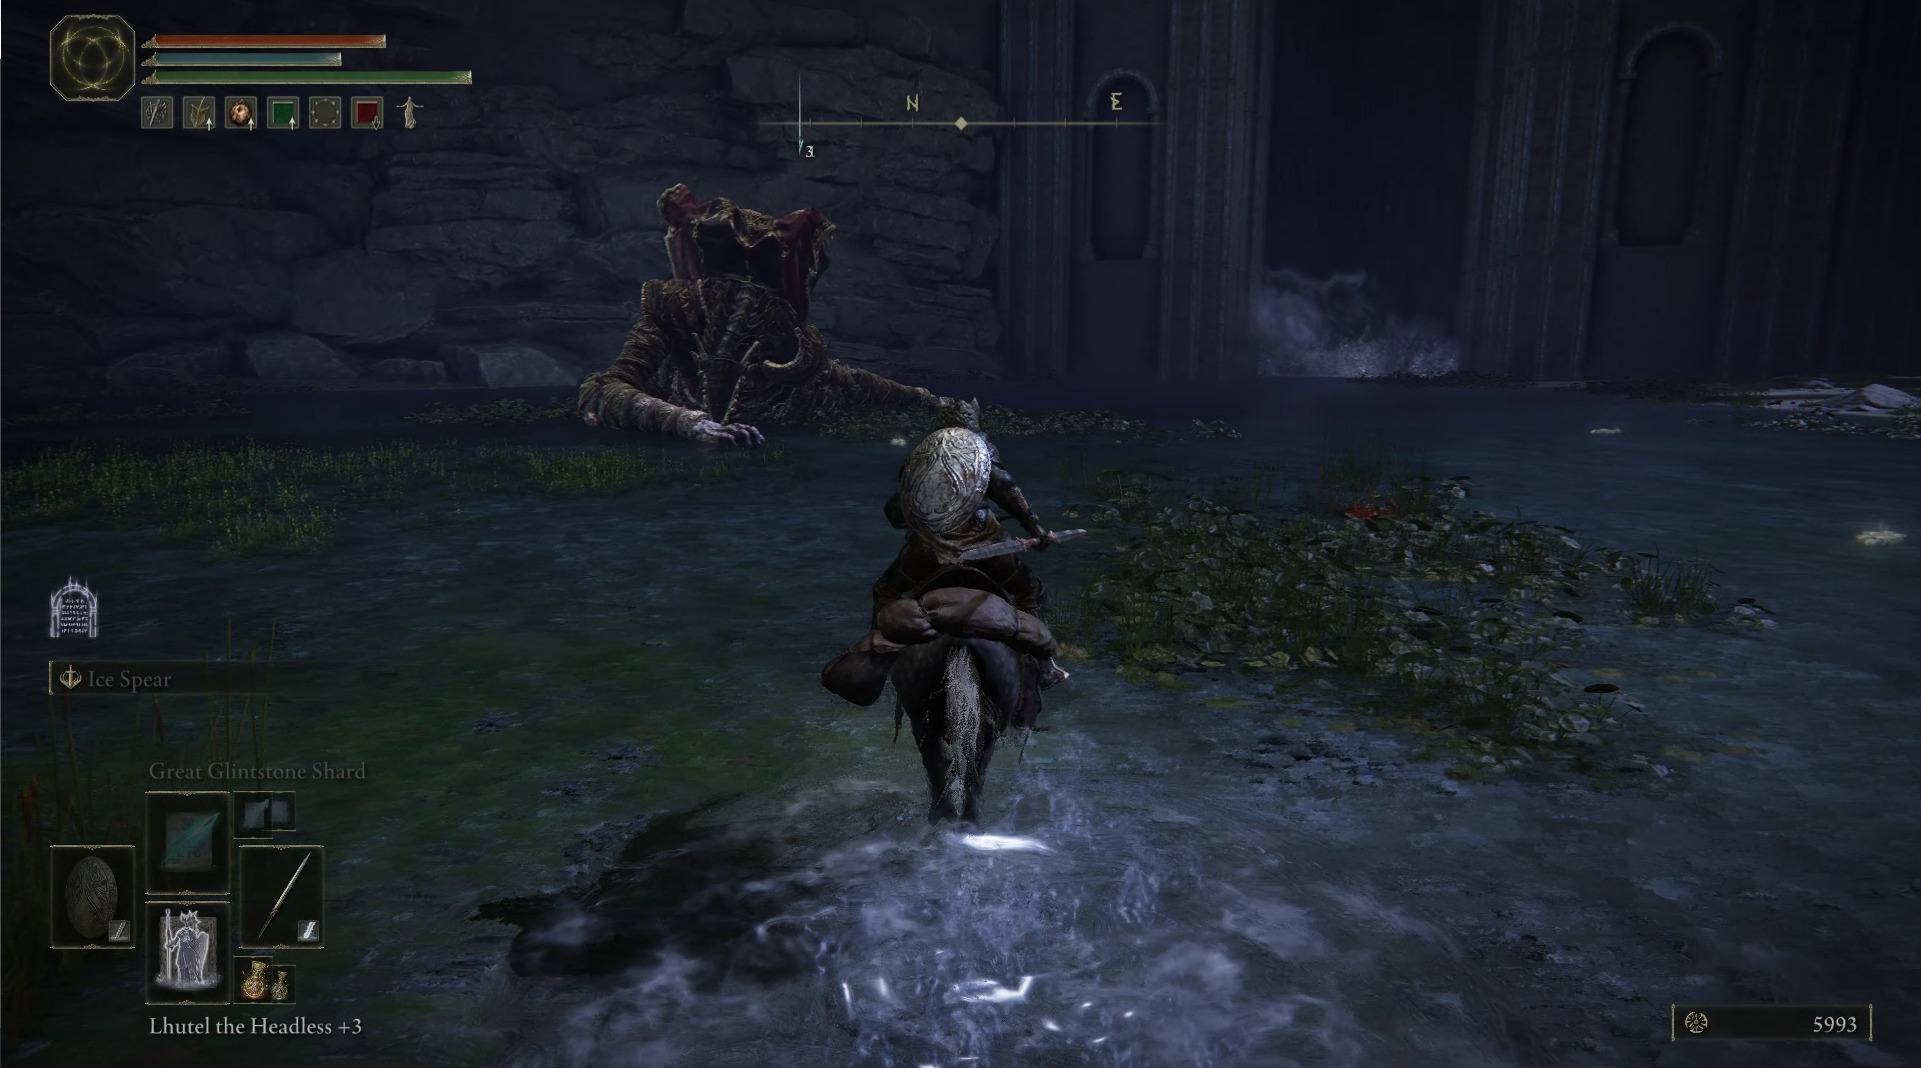
While there are a couple of things left to grab in this secluded area, with the boss being close by we might as well take care of it now. You will find the Dragonkin Soldier boss taking a nap in the water nearby.
This boss is an easier version of the Dragonkin Soldier of Nokstella boss fight. While you can use the Dragonkin Soldier of Nokstella’s boss guide for this encounter, we recommend not using your mount if you’re playing a melee oriented character, since being closer and under the boss ended up being much safer. While defeating this boss is optional, the reward for defeating it is a Dragon Halberd as well as 16 000.
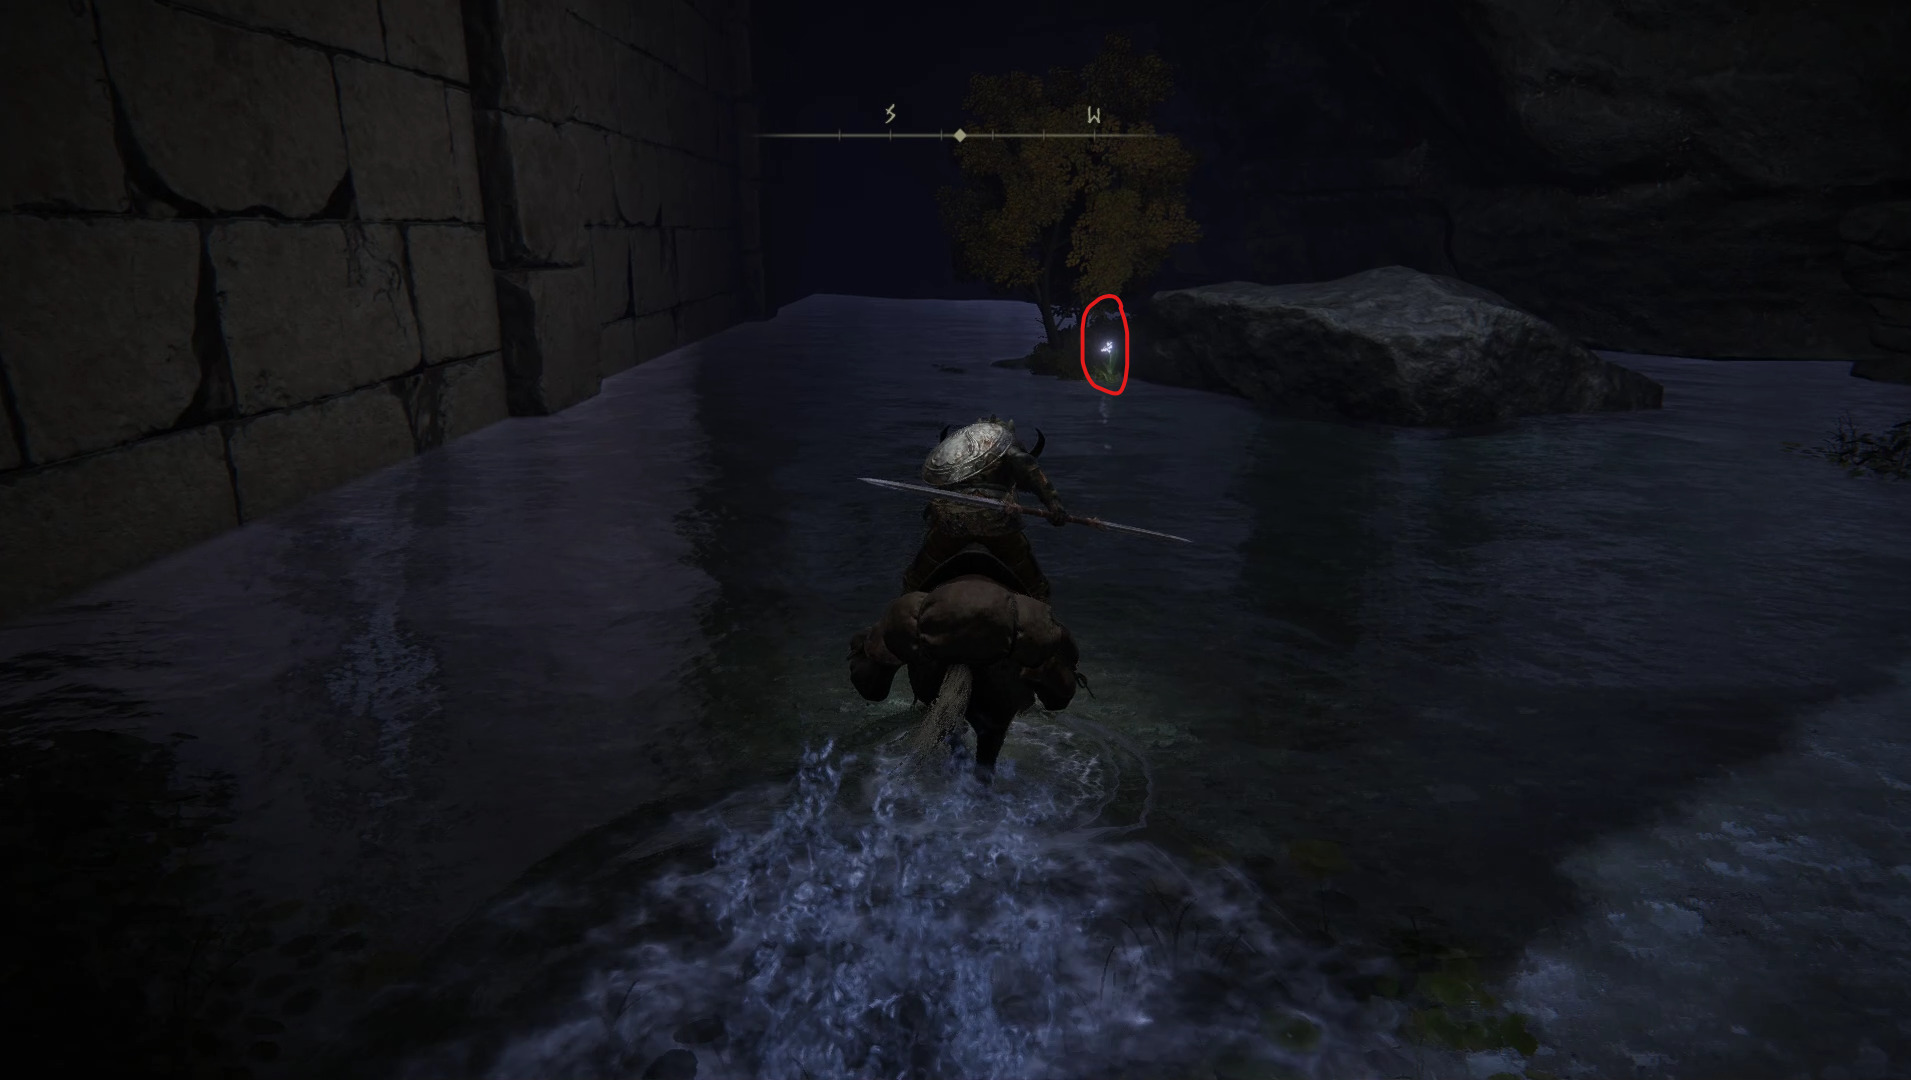
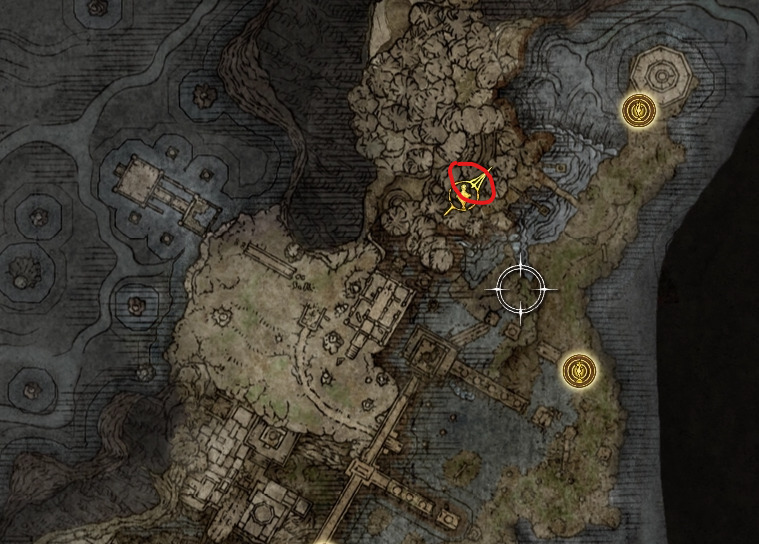
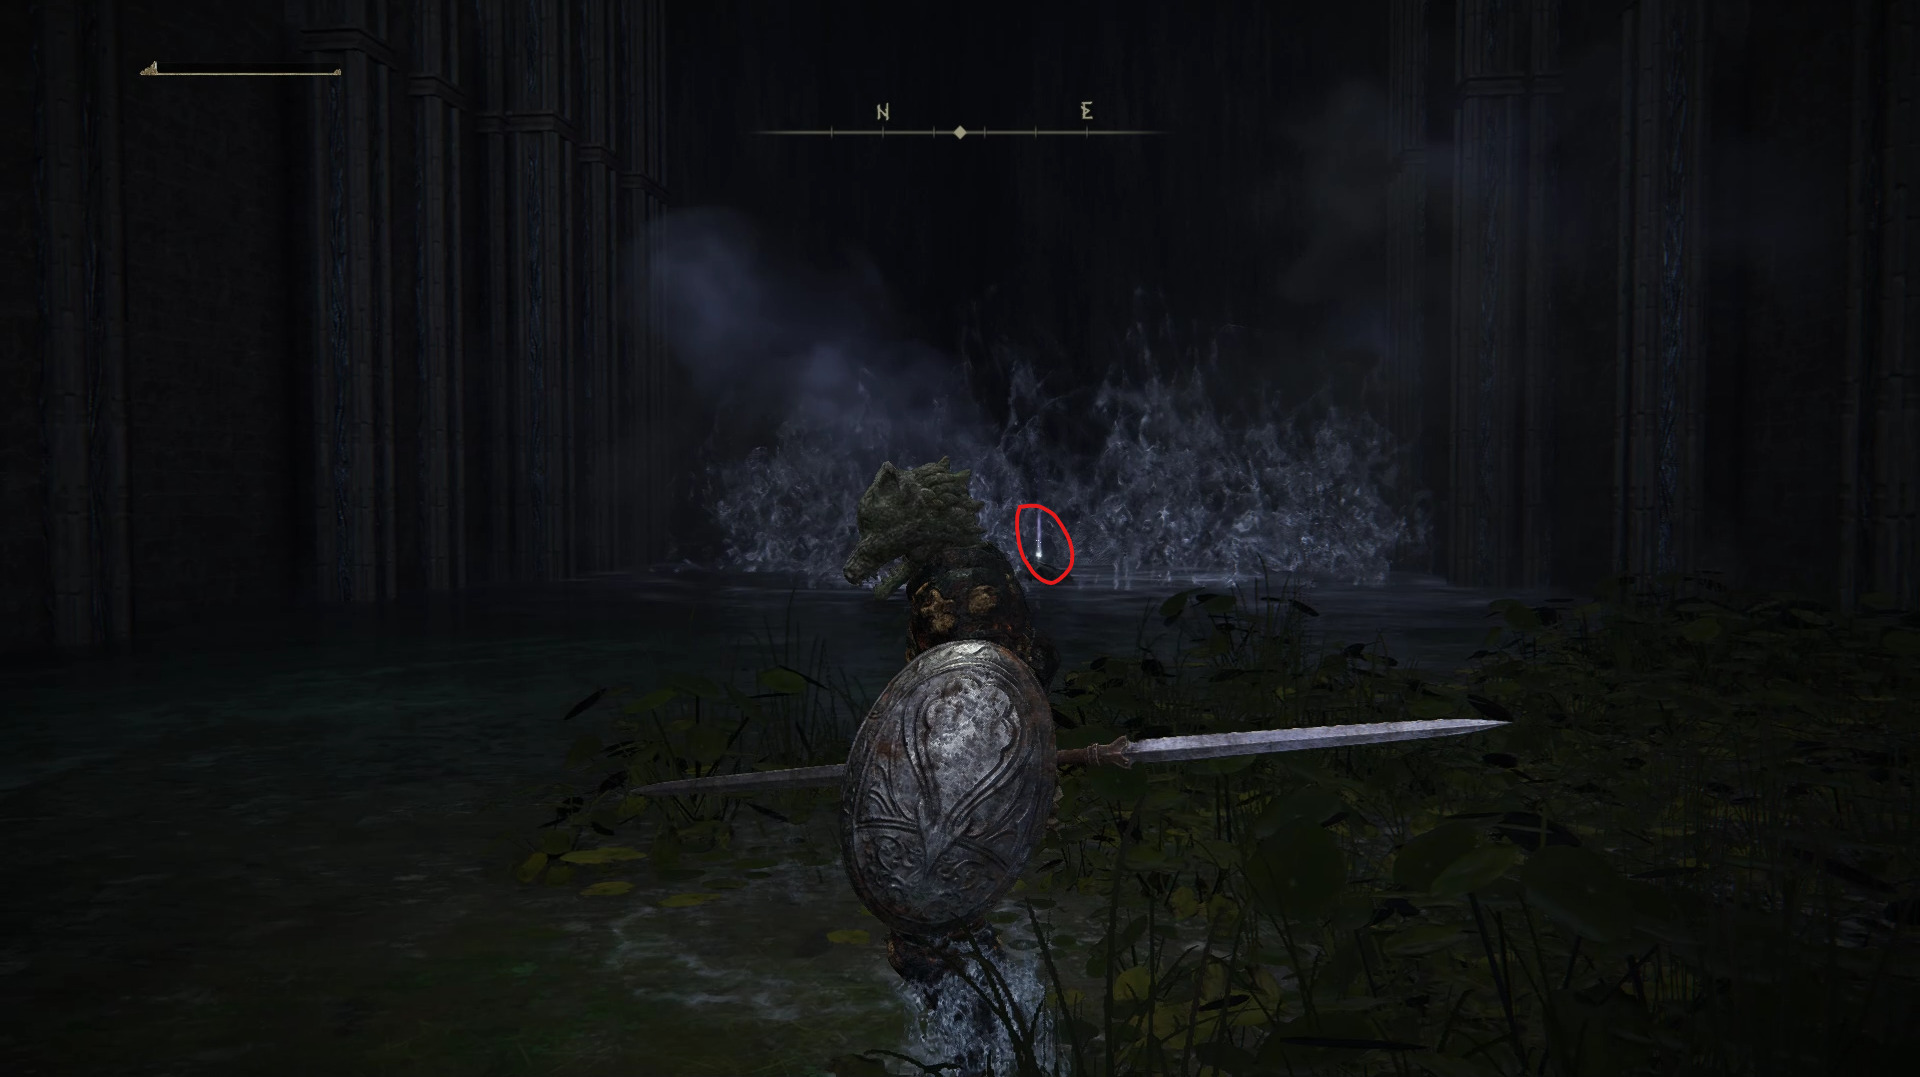
Now it’s time to collect the last few things before heading back and exploring the last section of the Siofra River dungeon. Next to where the boss was, behind a waterfall, make sure to grab Marika’s Scarseal.
All that’s left now is to grab the (A] Golden Rune [7] on a corpse next to another waterfall, and to pluck the (B) Ghost Glovewort [4] in the area southeast of the boss’s location.
Now that you’ve grabbed everything there was to grab, you can travel back to the Worshippers’ Woods site of grace that we discovered earlier. From there, start following the road going north through the nearby patch of trees. As you go further, several spectral enemies will appear, but they will be too distracted to notice you. This will allow you to deal with them individually and with ease, and maybe even sneak up for a cheeky backstab if you’re lucky. While going through the forest make sure to grab the (A) Golden Rune [4], (C) 3x Smithing Stone [2] as well as the (B) Ash of War: Square Off from the loot beetle at the edge of the cliff north-northwest from there.
Once you grabbed everything, you can finally go towards one of the last two fires that remain unlit. Both of these are close to one another, but we’ll be heading to the one northeast first.
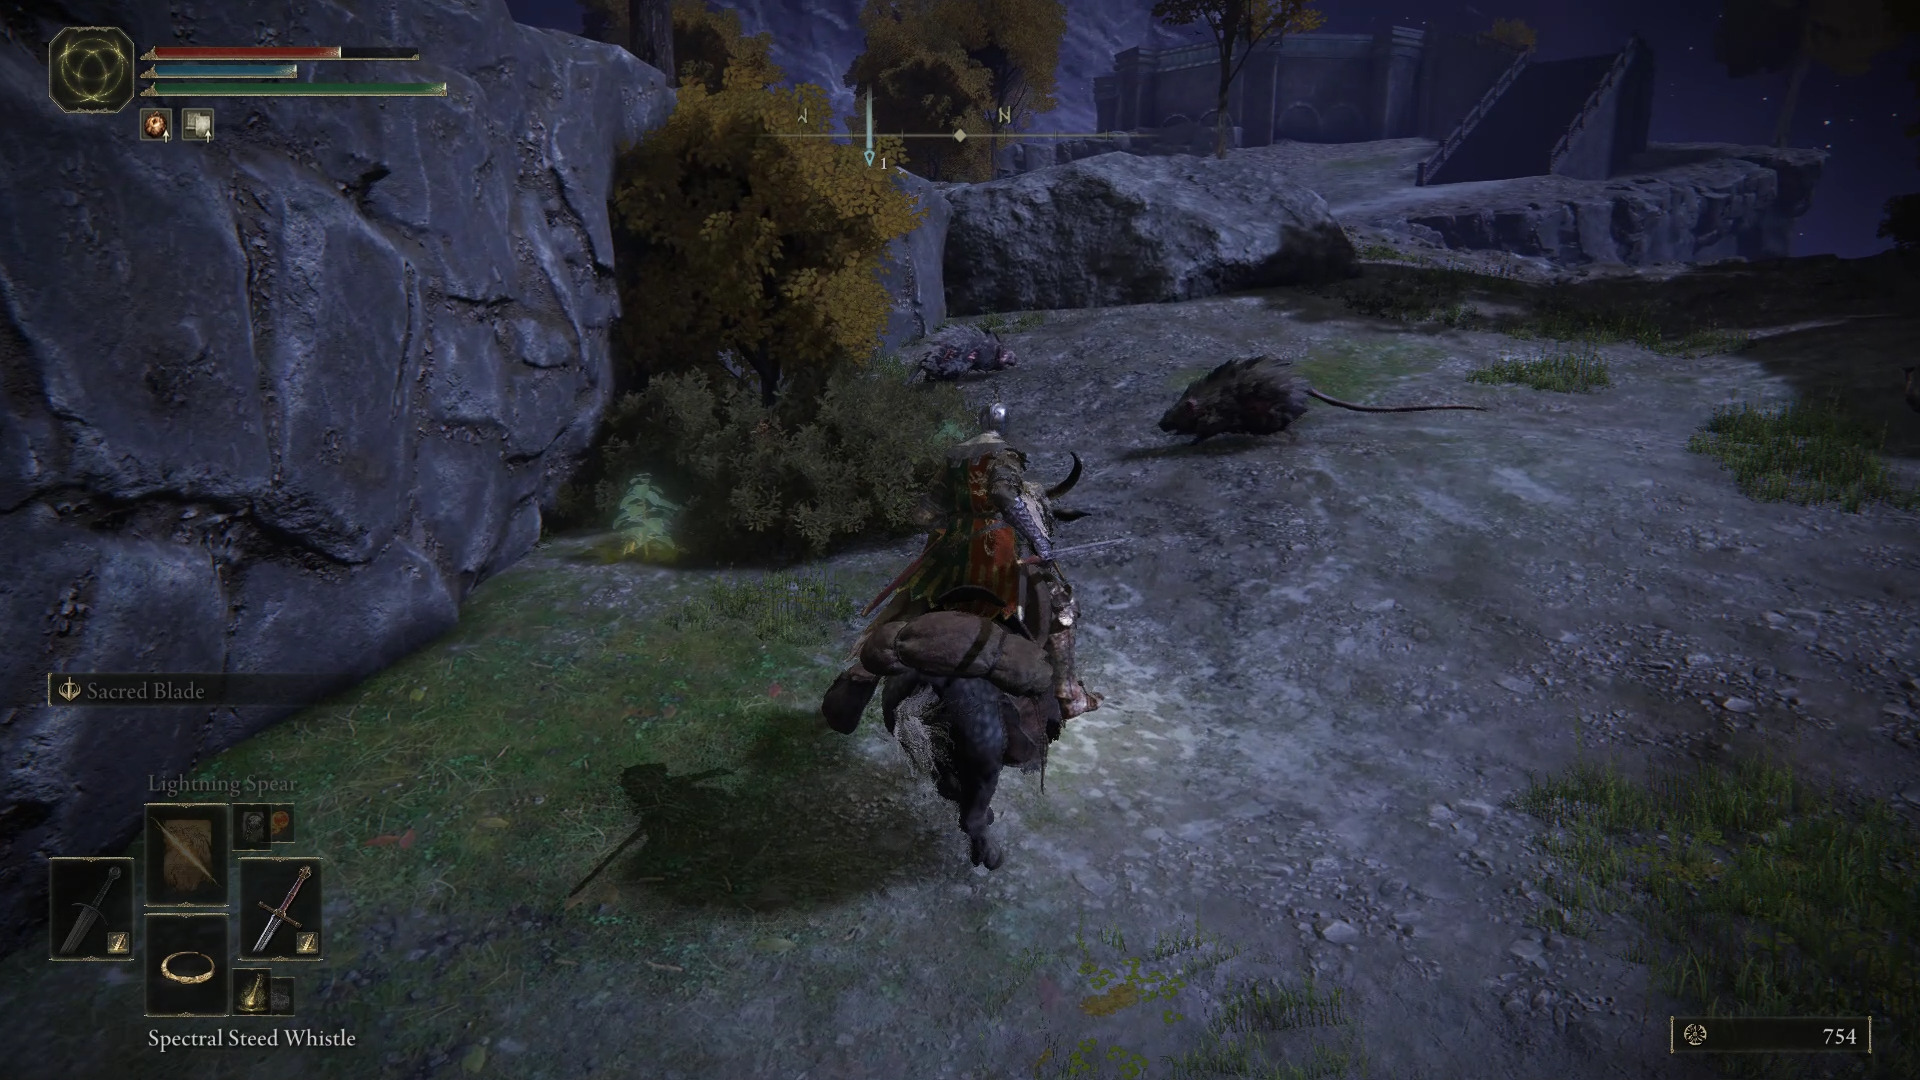
This time around, rats have joined paws with this dungeon’s spectral denizens to guard those obelisks. Luckily, they should not stand a chance while you remain mounted. Make sure to not over-commit, and instead run in and run out until they’re all defeated. Once you’ve activated the fire, it’s time to take care of the last fire in this dungeon.
While it’s just over the small cliff northwest of where you are, heading straight for it will make you vulnerable to the archers further north. With that in mind, we’ll be heading north for now to deal with them. There is one problem however, these archers will see you from very far away and will not hesitate to open fire. To deal with this issue, we’ll be heading north by sticking close to the eastern cliff. Doing so will allow us to get closer to the archers all while using the terrain as cover. Just mount-up and run until you reach a small area guarded by rats.
Once the rats are dealt with, you’ll be in a good position to flank those archers. If they are aware of where you are, you can simply wait behind the nearby rock until they lose interest which will allow you to come in for a backstab on the closest archer. If it doesn’t kill them outright, finish that archer off while either blocking and healing through the other one’s shots or rolling at the right time, before heading back to the rock you were hiding behind previously.
Additionally, there is a few melee enemies patrolling this section, and if they’re close enough while you attack the archers they might come for you. If that happens, just run back to that same spot behind the rock, and dispose of the enemies that followed you there.
All that’s left now is dealing with the last archer. Wait for him to lose interest again, and you can either ride up to him while using a shield to block his shots, or use a nearby rock to take cover on your way there.
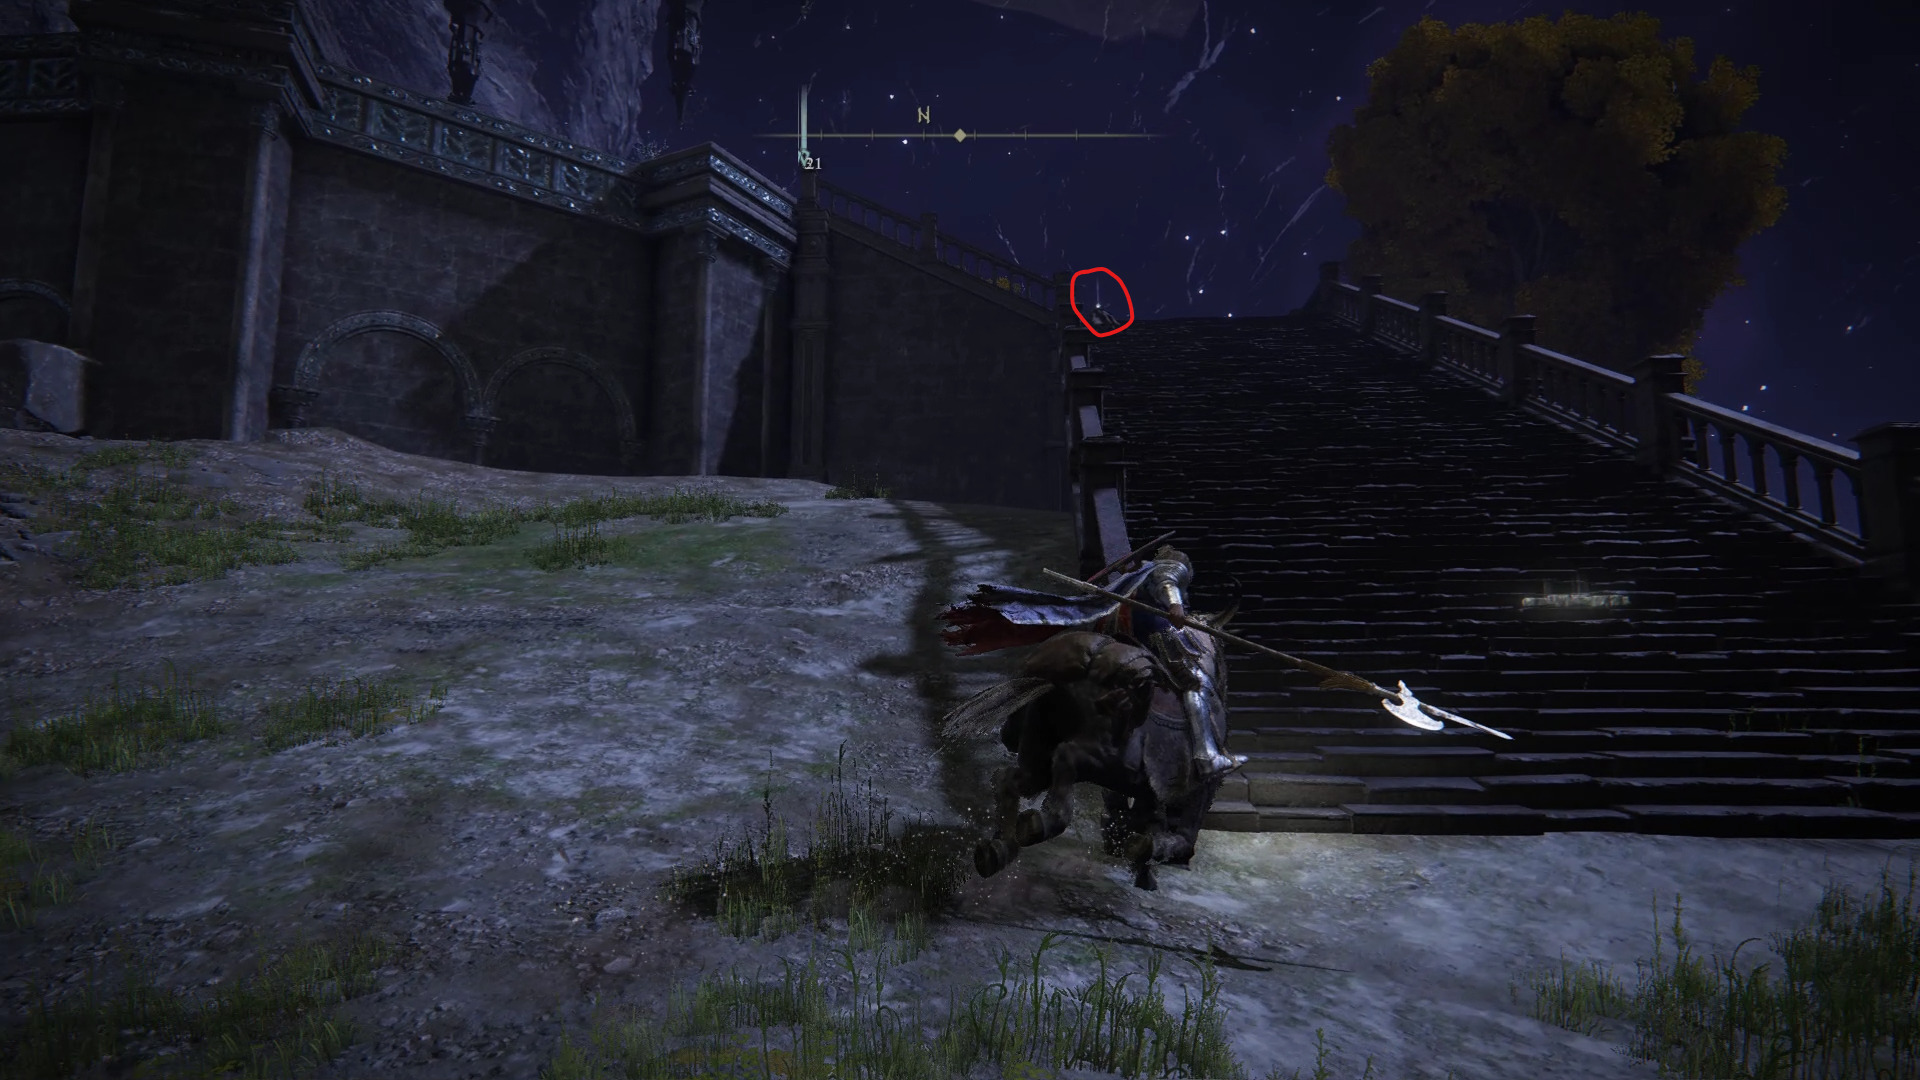
With both of those archers dealt with, make sure to grab the nearby site of grace as well as the Clarifying Horn Charm on the stairs leading up to the nearby elevator.
If you end up dying while trying to activate the last fire, this site of grace will allow you to respawn close to the archers, and avoid running all the way back from the Worshippers’ Woods site of grace. For now however, do not rest and head west-southwest towards the next fire, and grab the Golden Rune [4] on a corpse on your way there.
Next to this last obelisk, you will once again find several rats and spectral foes protecting it. While the idea of fighting a mischief of rats and their ghostly friends may not sound particularly reassuring, attacking the rats and running backwards will allow you to deal with the rats alone before disposing of the remaining enemies.
Once you’ve activated this last fire, if you didn’t miss any, a message will notify you that “Power gathers somewhere in horned remains“. However before heading towards this dungeon’s main boss, we have one small extra area to explore close by.
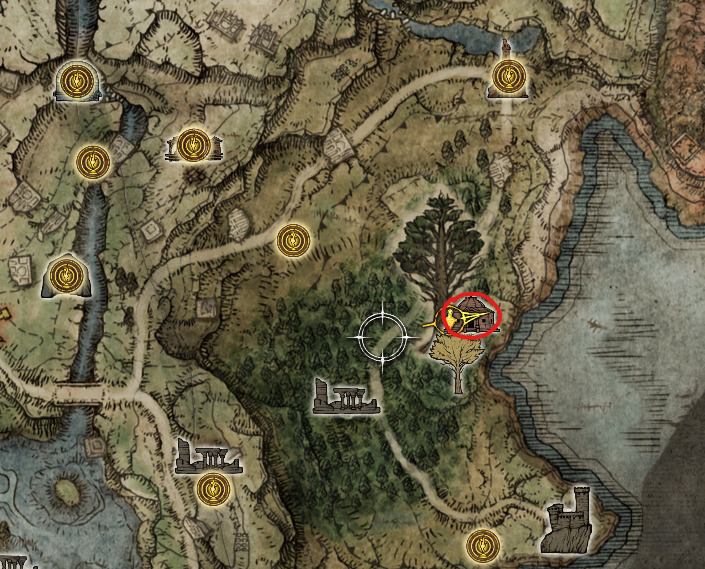
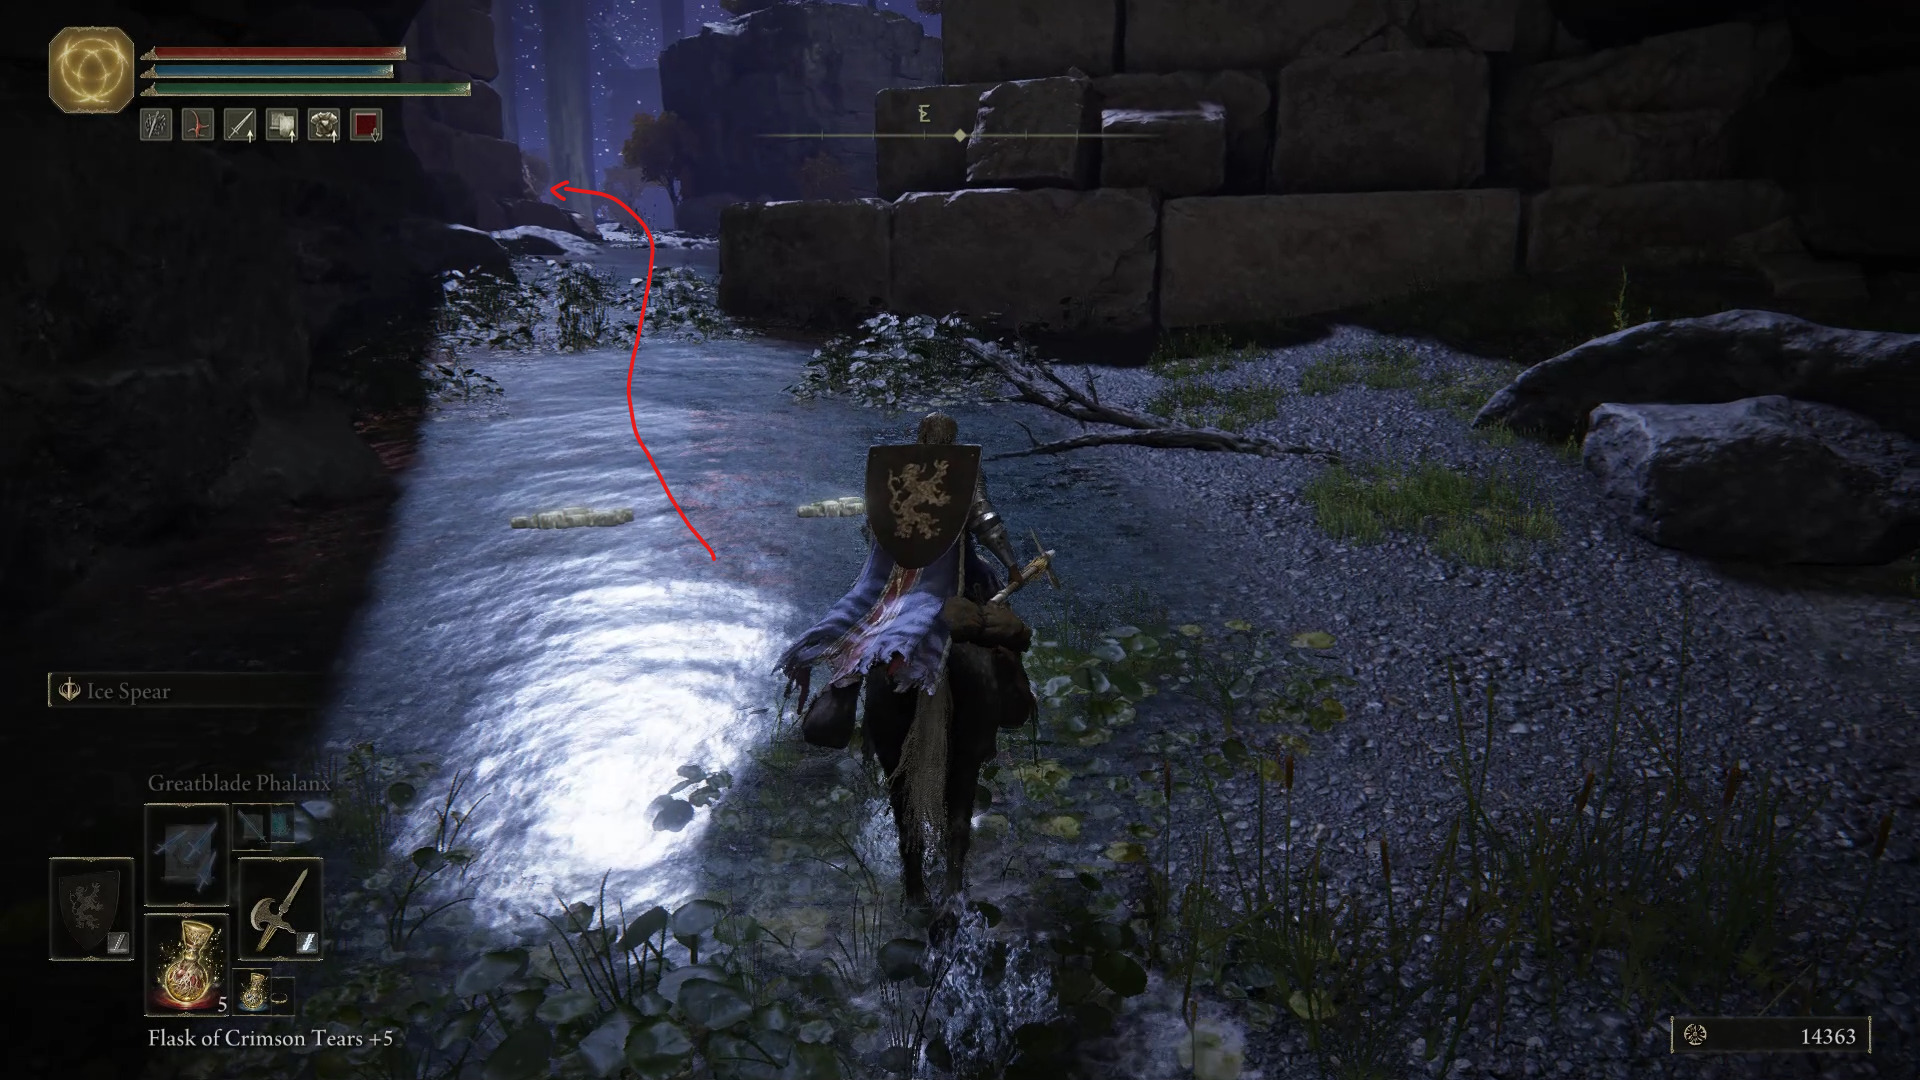
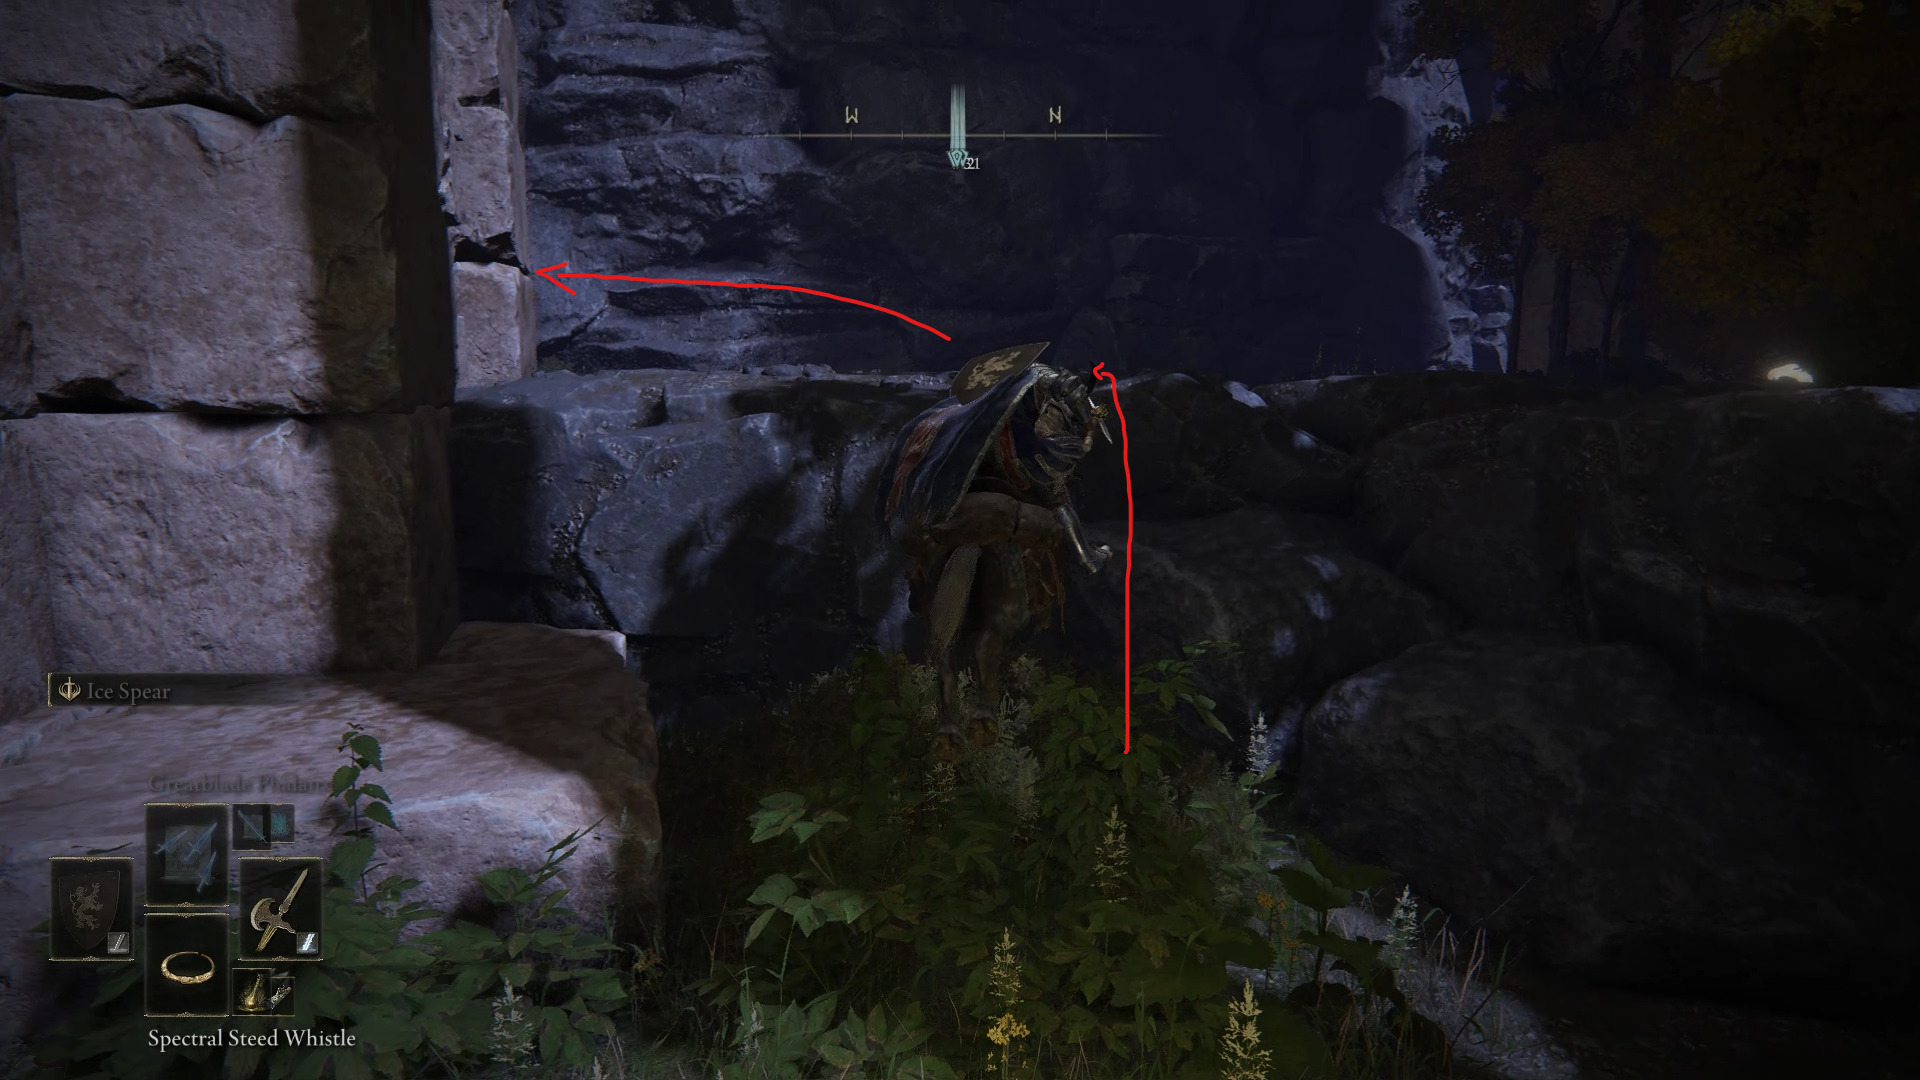
When you cross the narrow path to the nearby section, if you go right (A) and follow the path all the way, you’ll reach a small cave with a Rune Arc. Once that’s done, grab the (B) Golden Seed from the glowing sapling, and head towards the nearby structure. Follow the small path down and use your mount to jump up to the tower at the end, which is where you will find the (C) Stonesword Key.
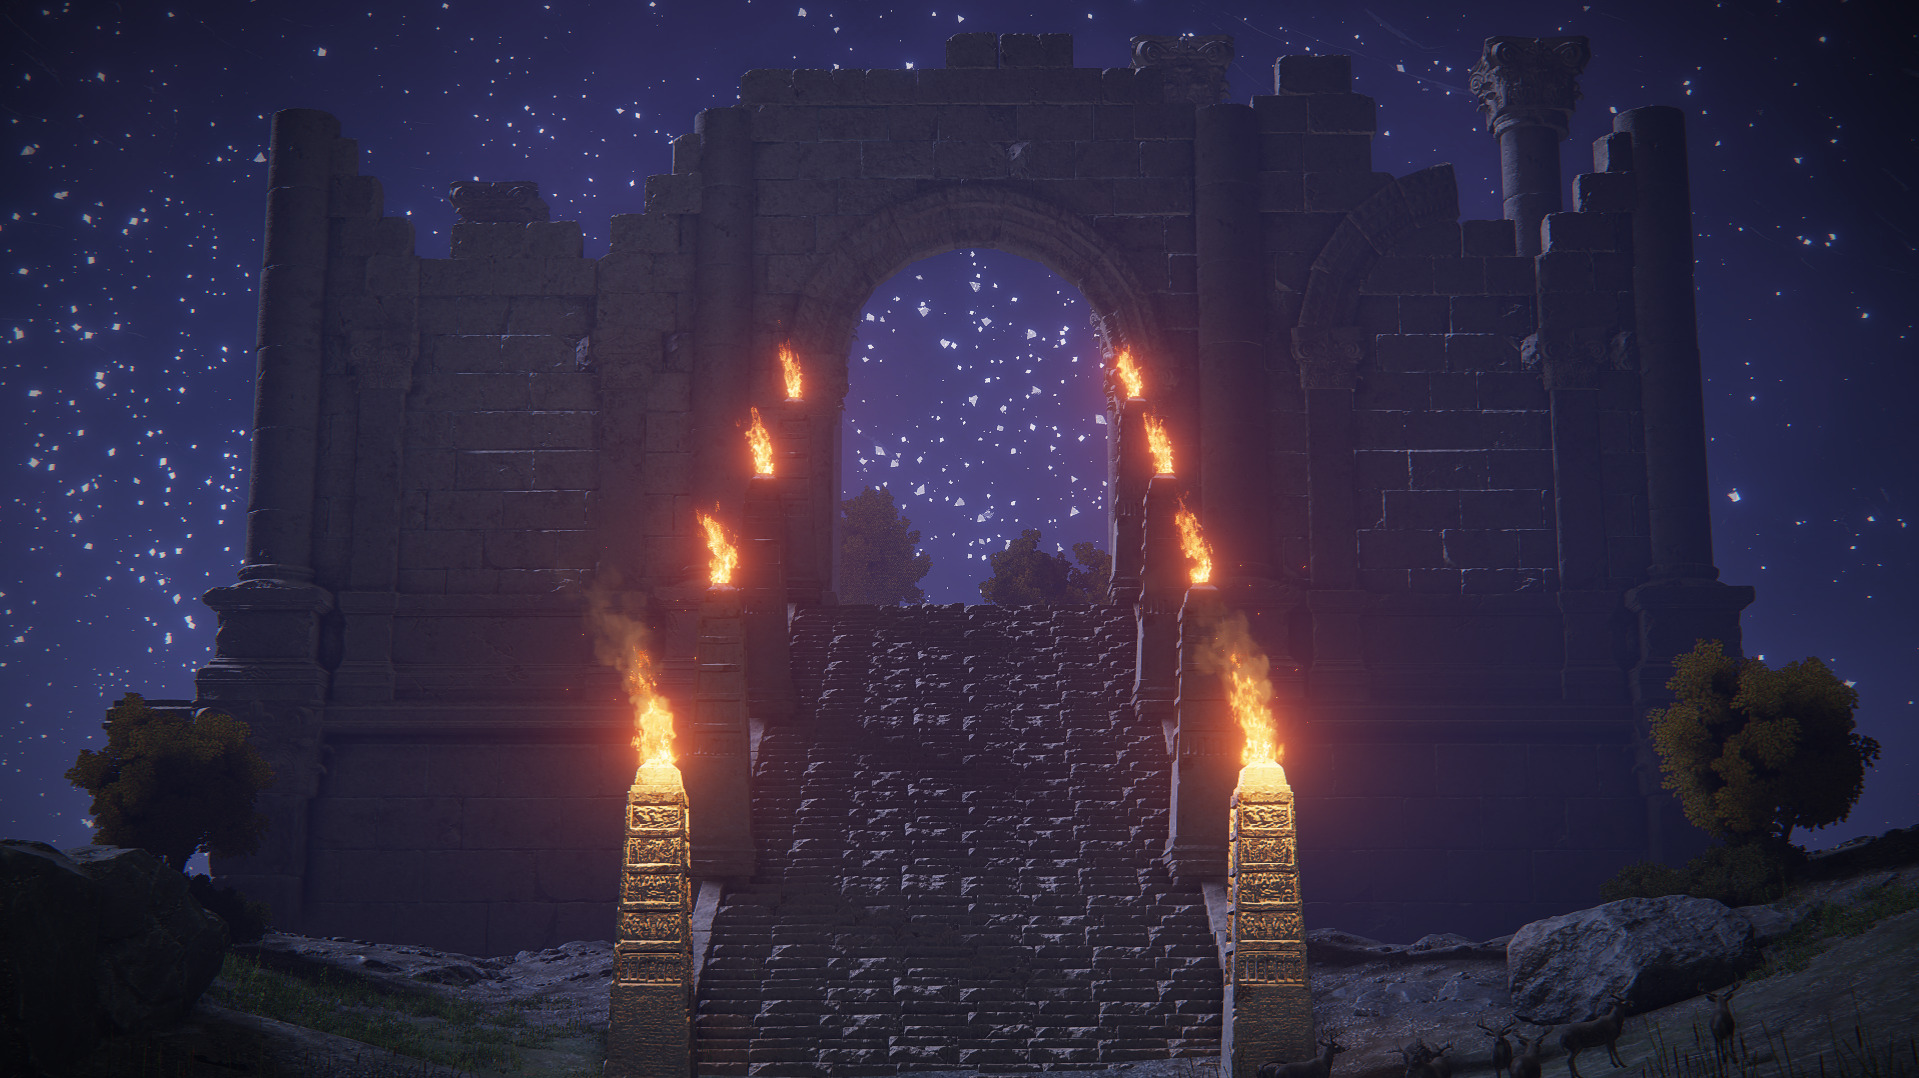
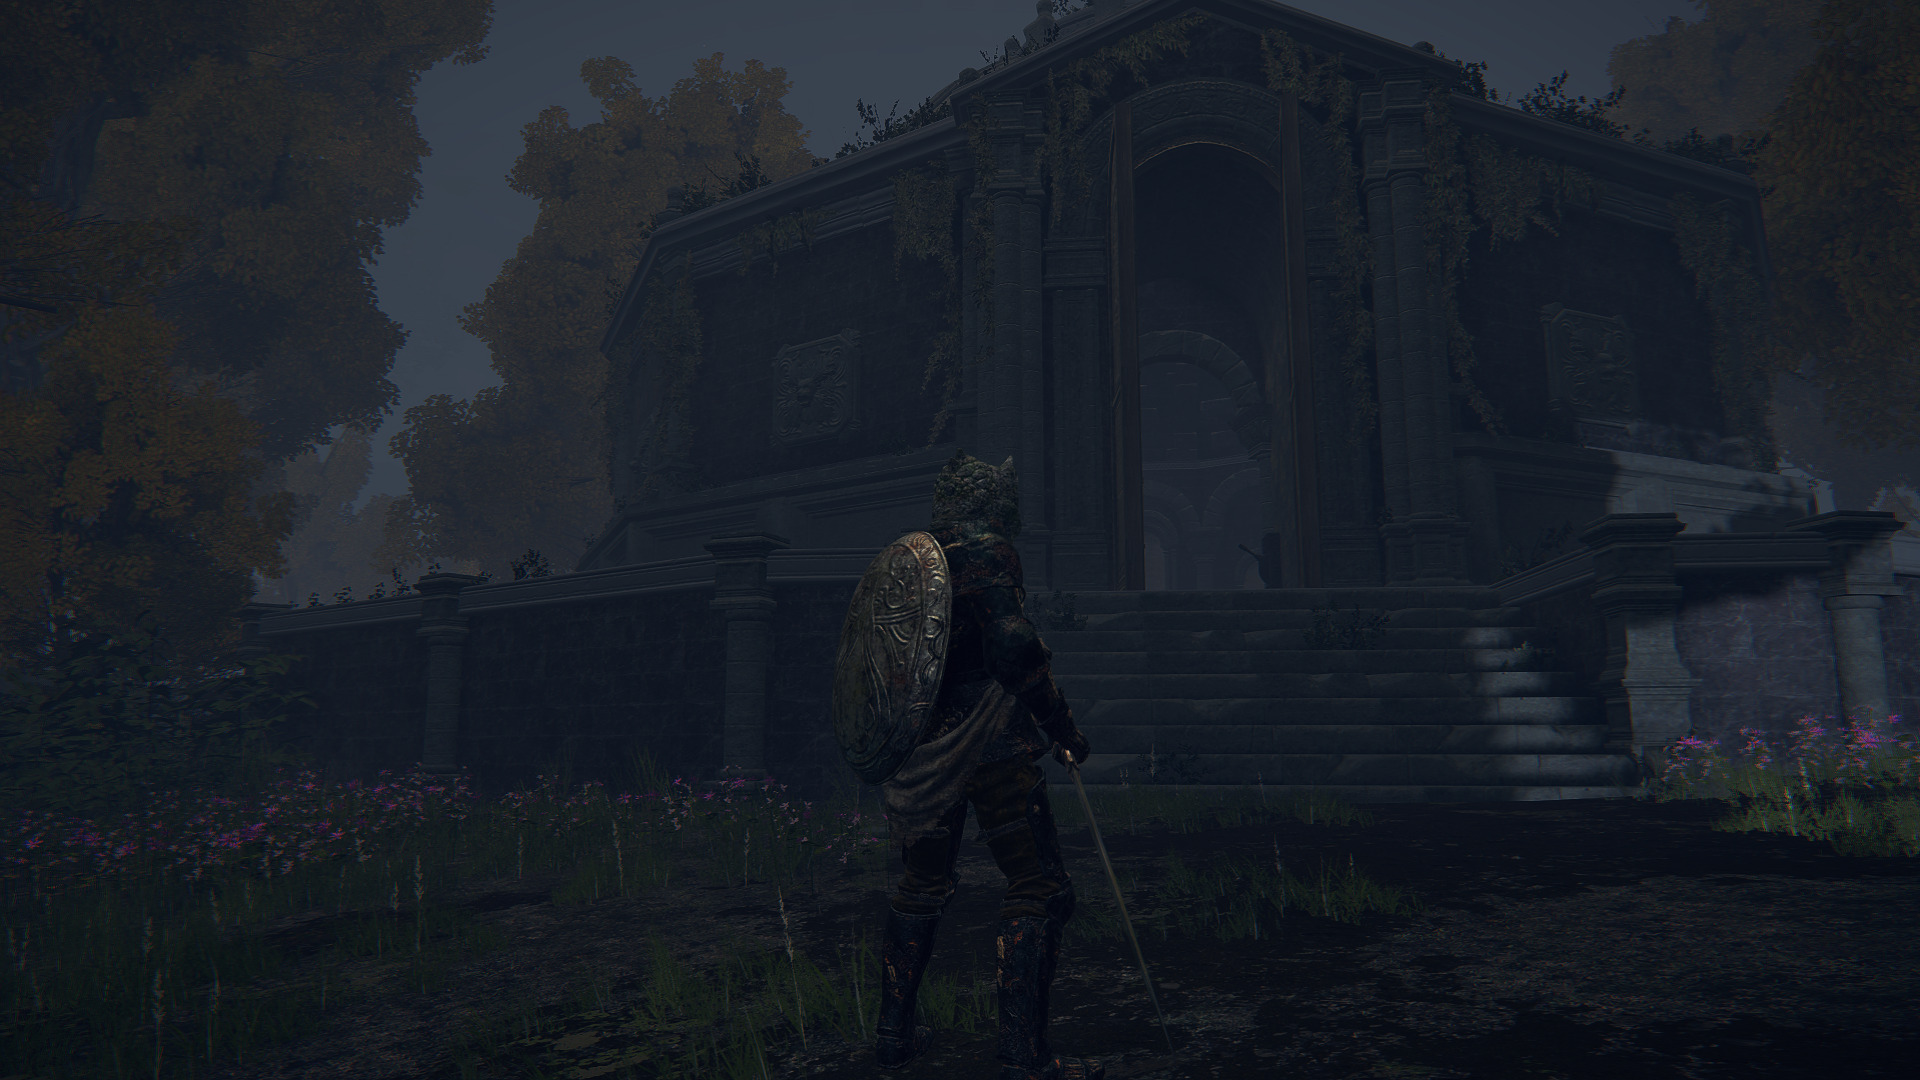
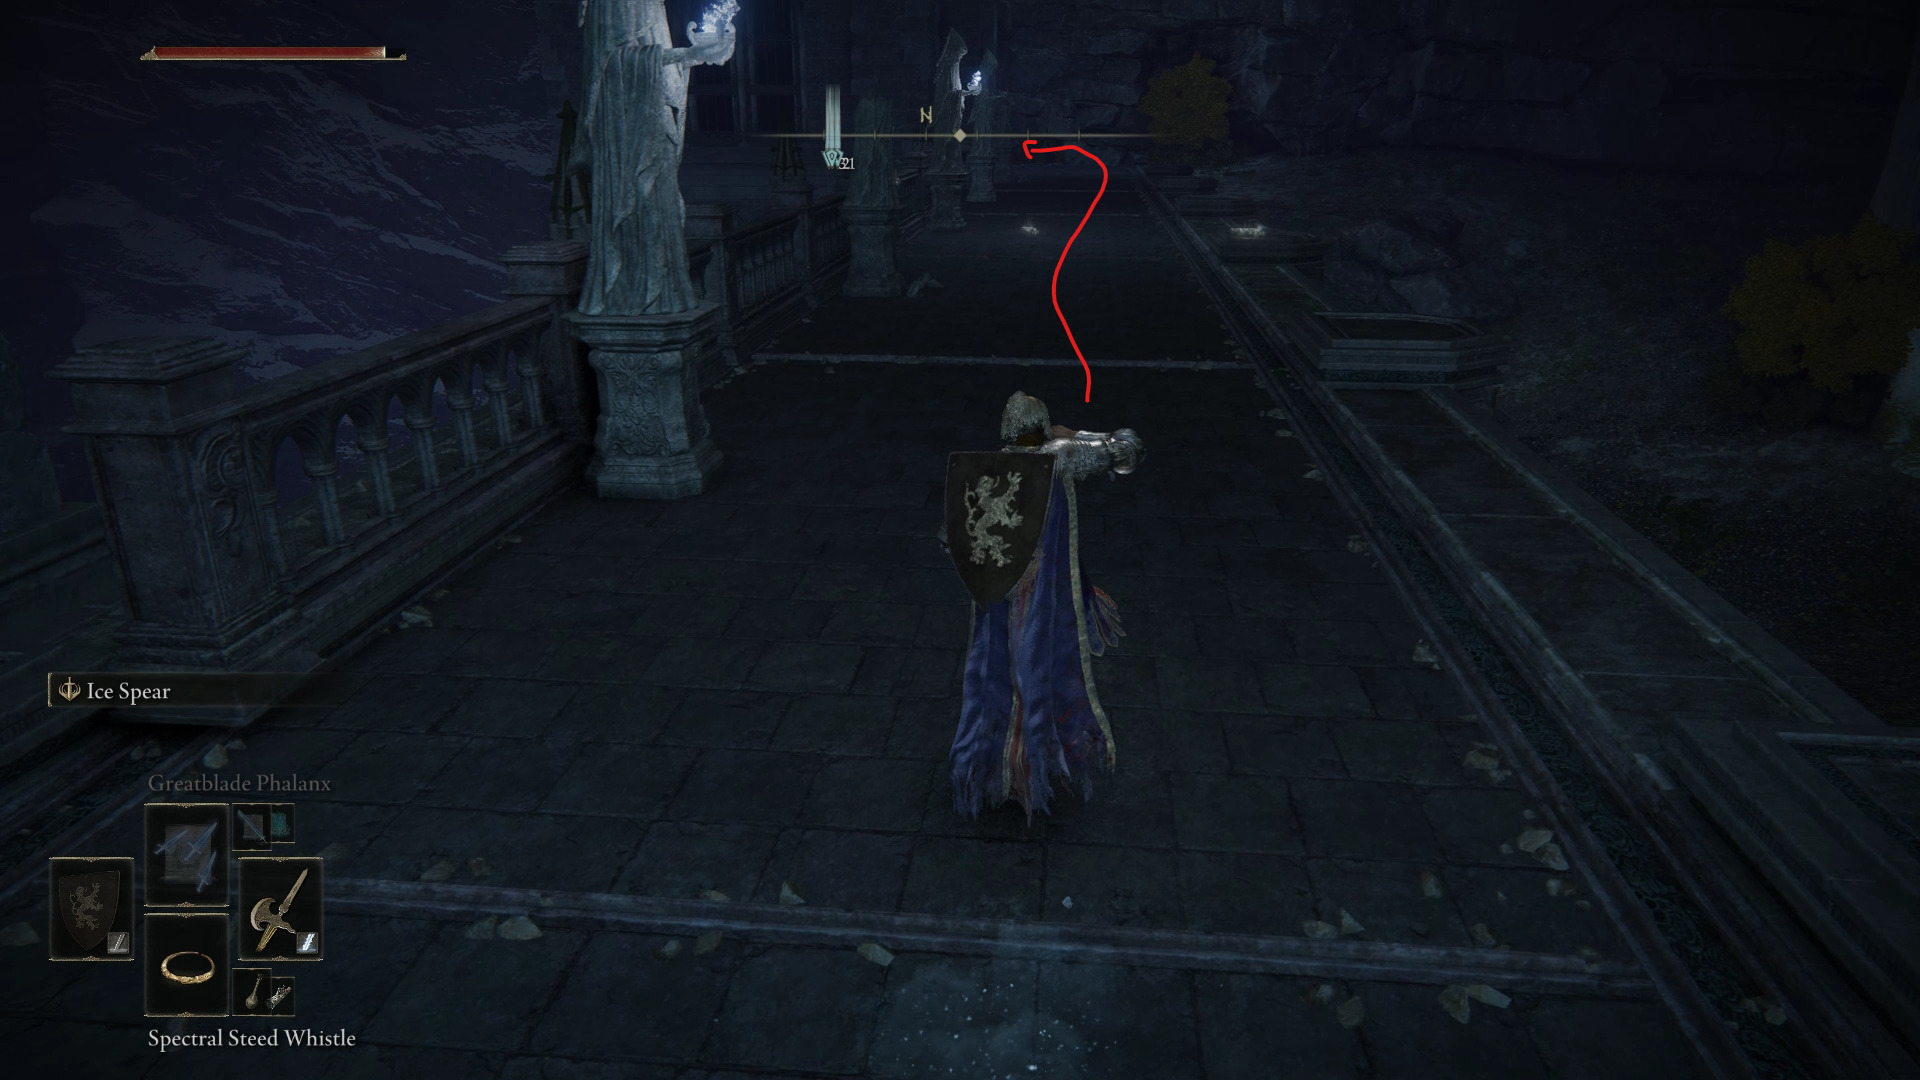
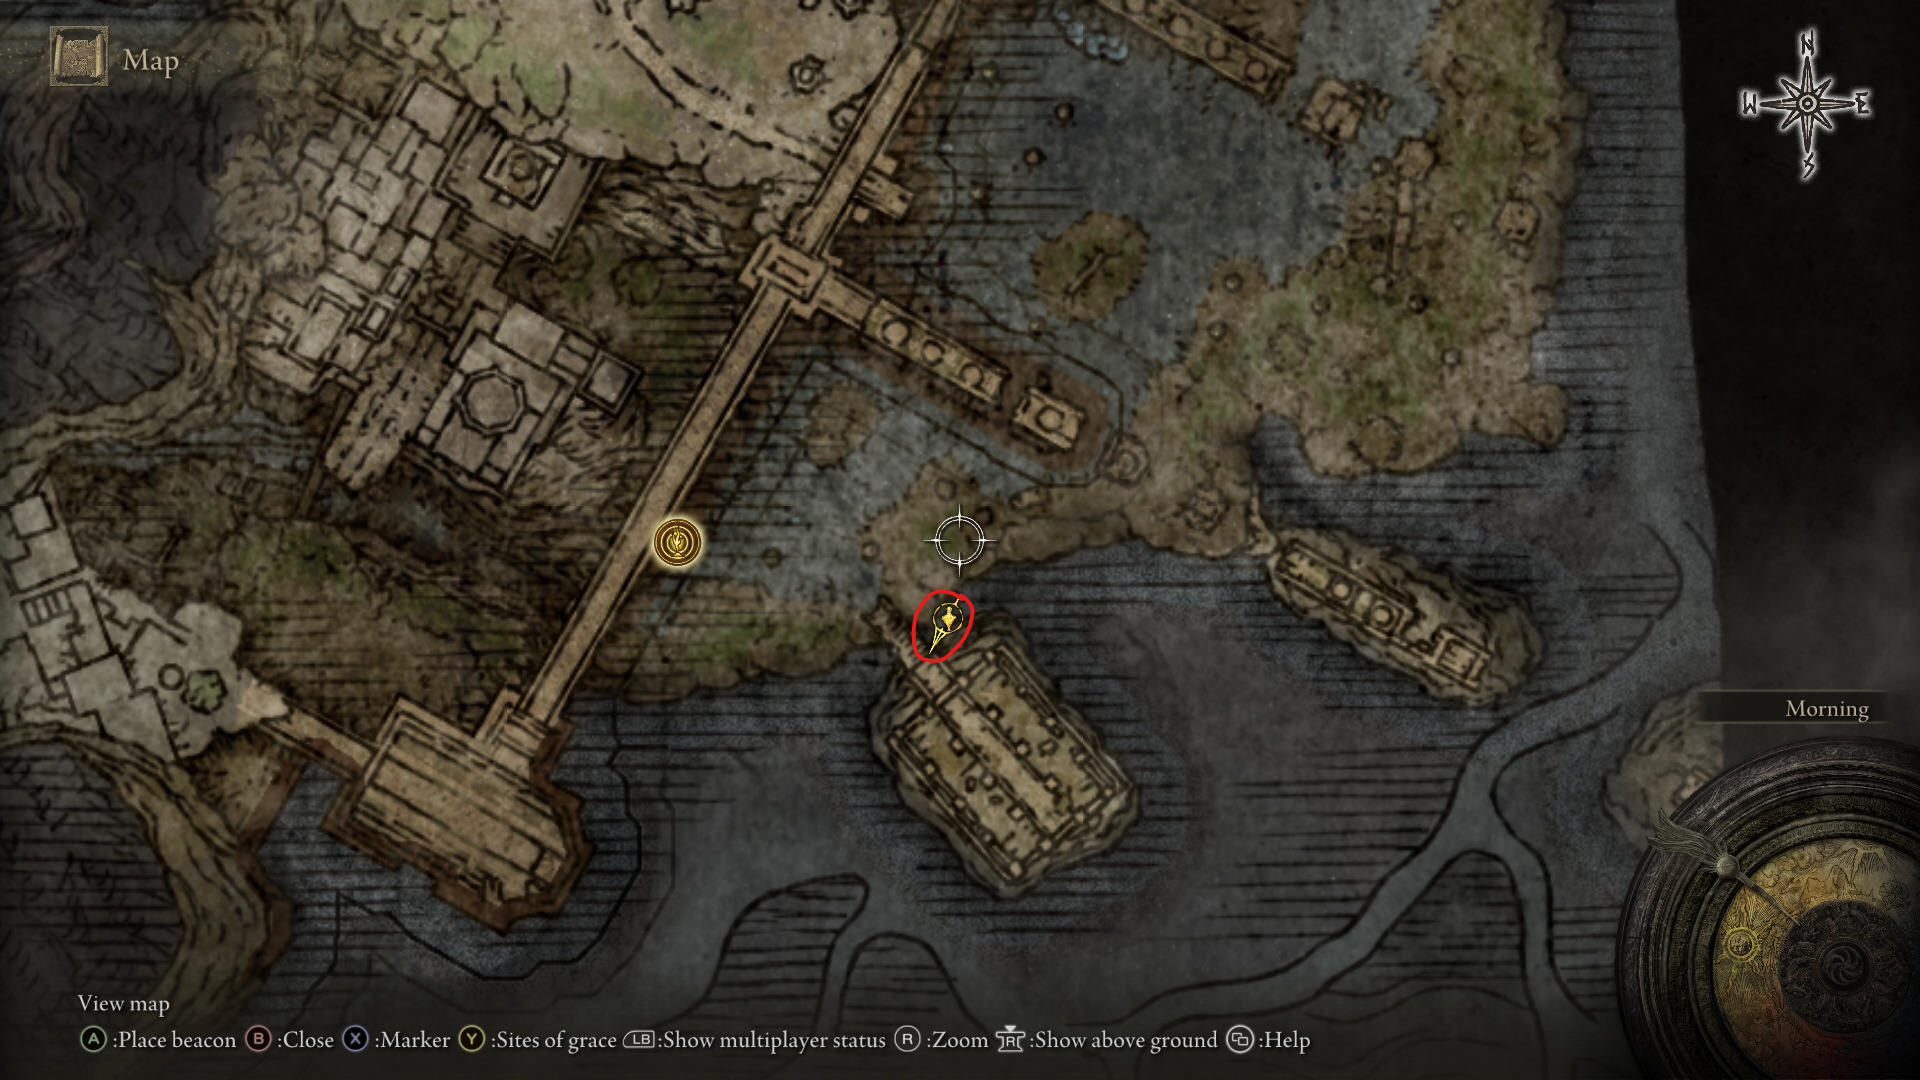
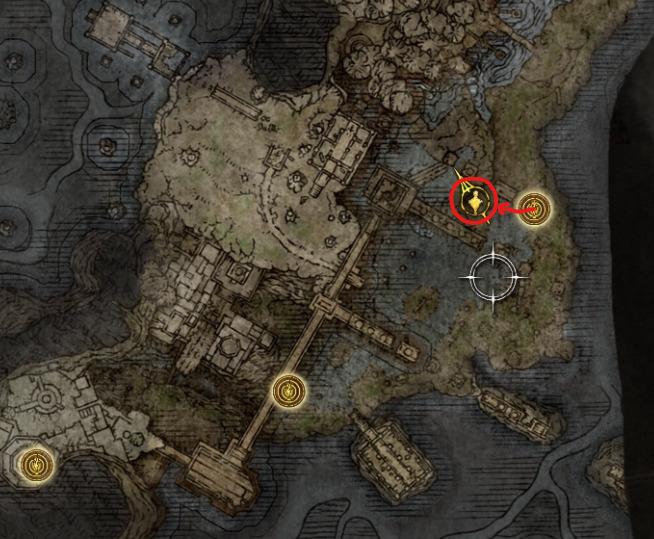
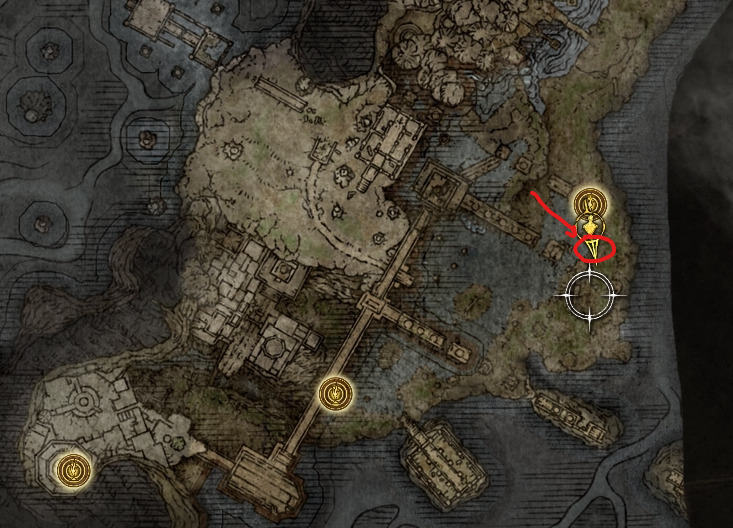
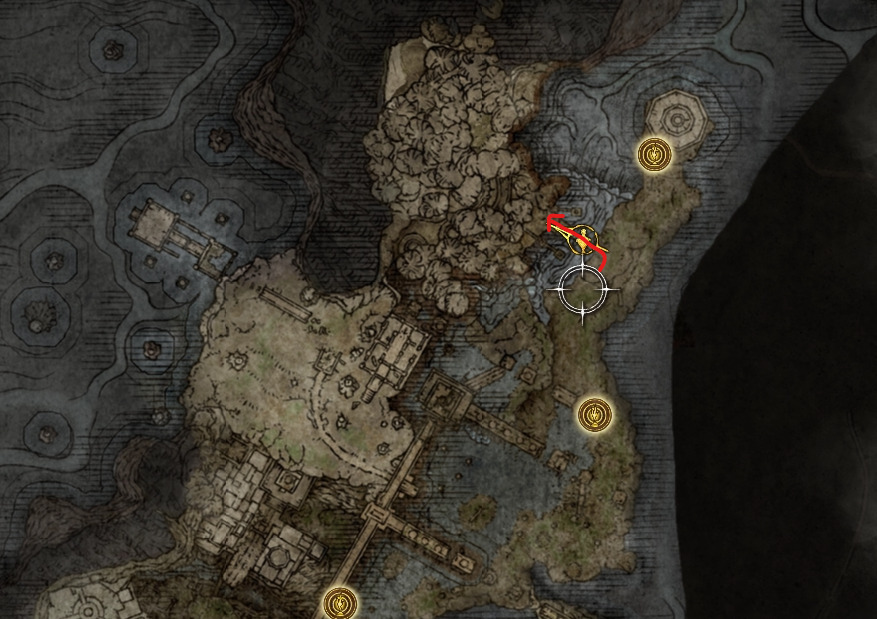
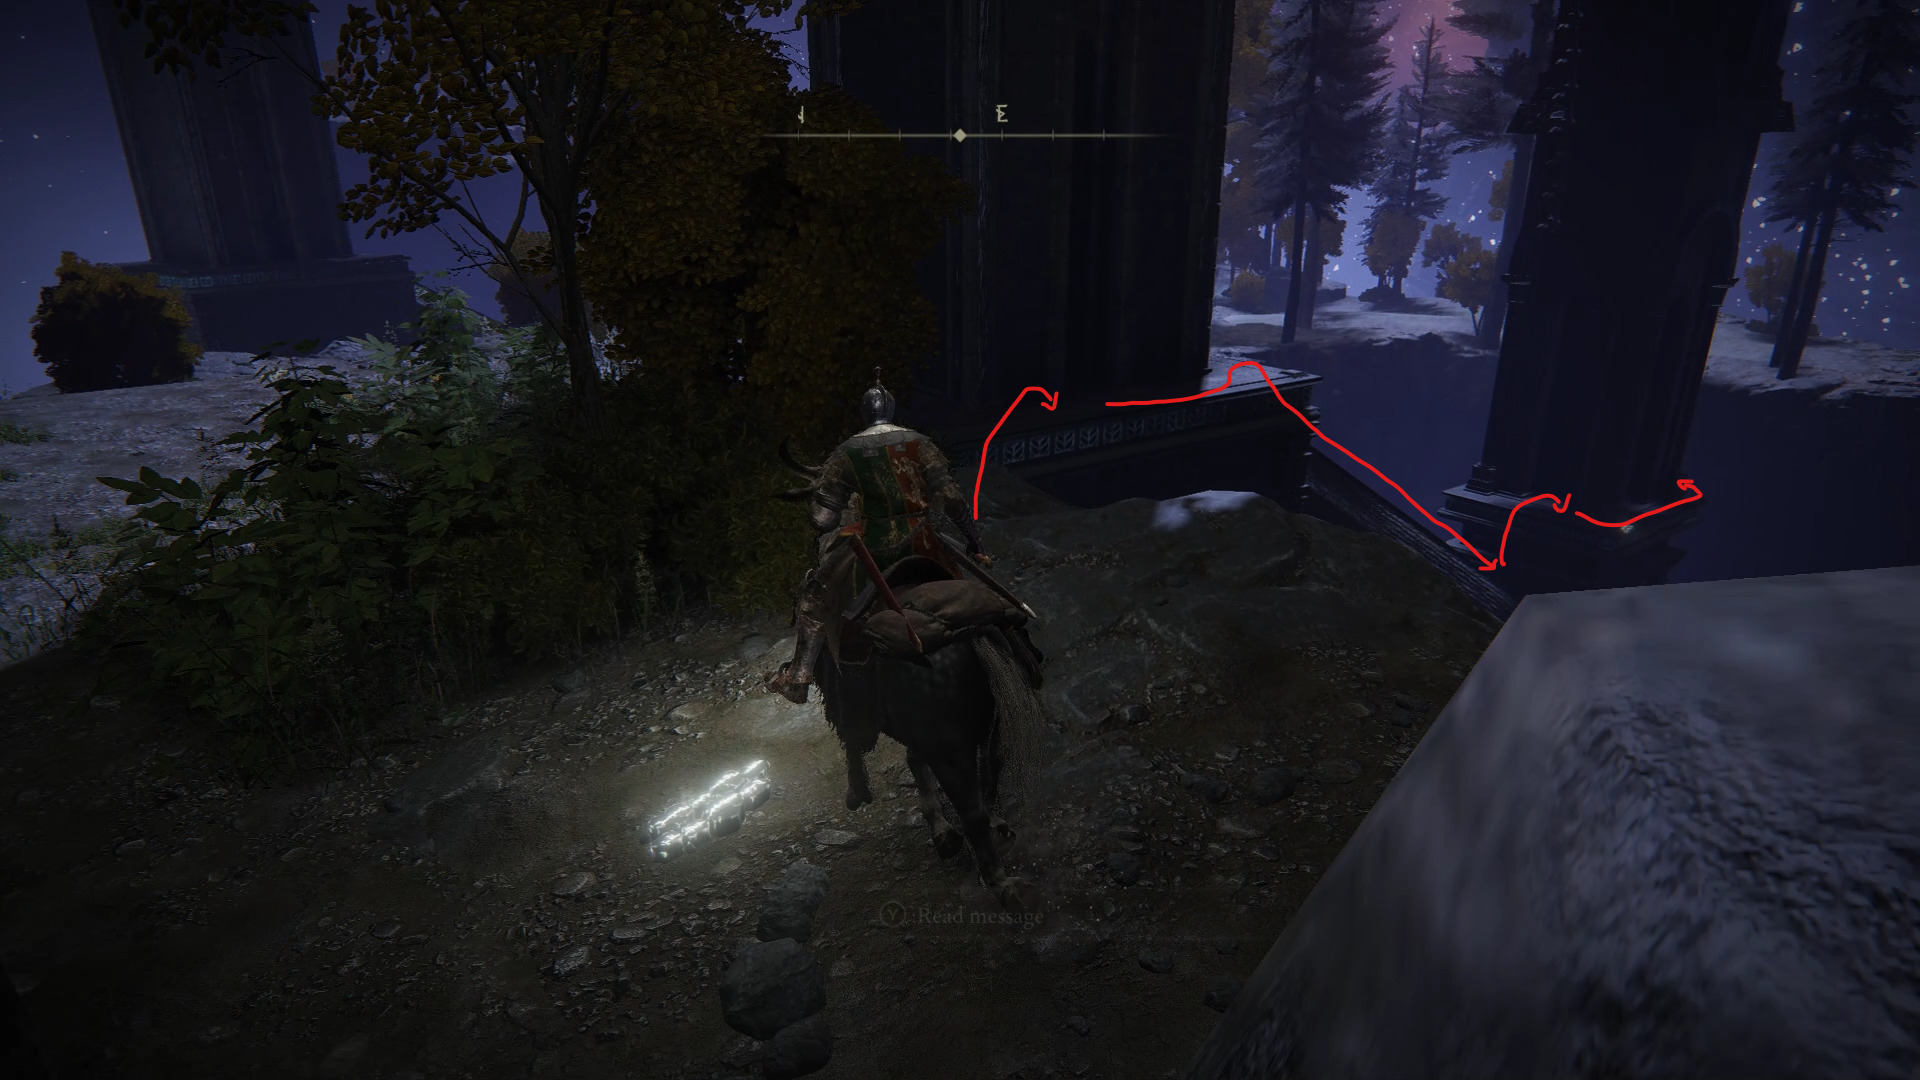
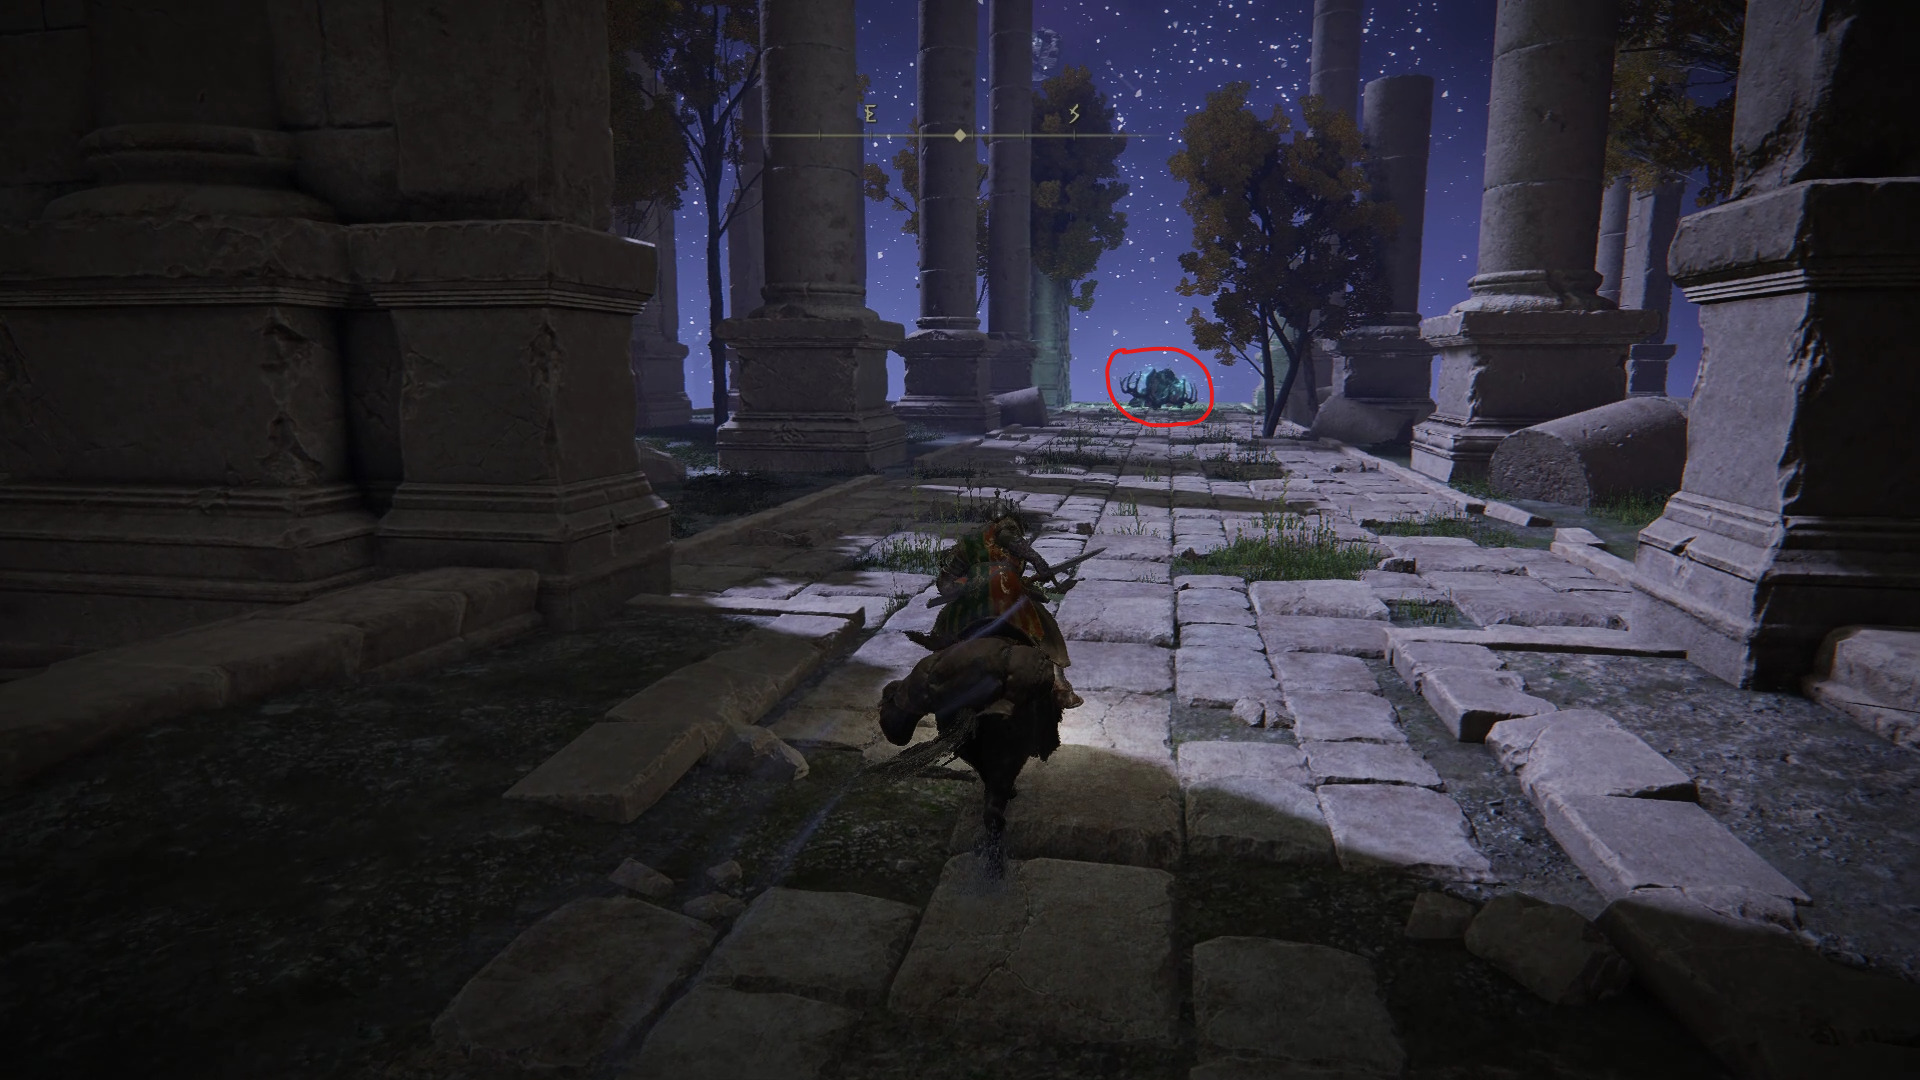
All that’s left now is to confront this dungeon’s main boss: the Ancestor Spirit. Travel back to the Siofra River Bank site of grace and head to the structure southeast of there, which is where you will find the Horned Remains.
Interacting with the Horned Remains will transport you to an area from which you’ll be able to access Ancestor Spirit‘s boss room.
Video game fan since TMNT: The Manhattan Project, I'm always on the lookout for games that could top Outer Wilds or Disco Elysium, or for new songs to listen to.
Up where the dragonkin soldier is, where you get the golden seed, if you continue north northwest along the clif there is a path around the building leading to a cave with a rune arc.


Up where the dragonkin soldier is, where you get the golden seed, if you continue north northwest along the clif there is a path around the building leading to a cave with a rune arc.
I just saw this at the bottom of the guide lol. Ignore.