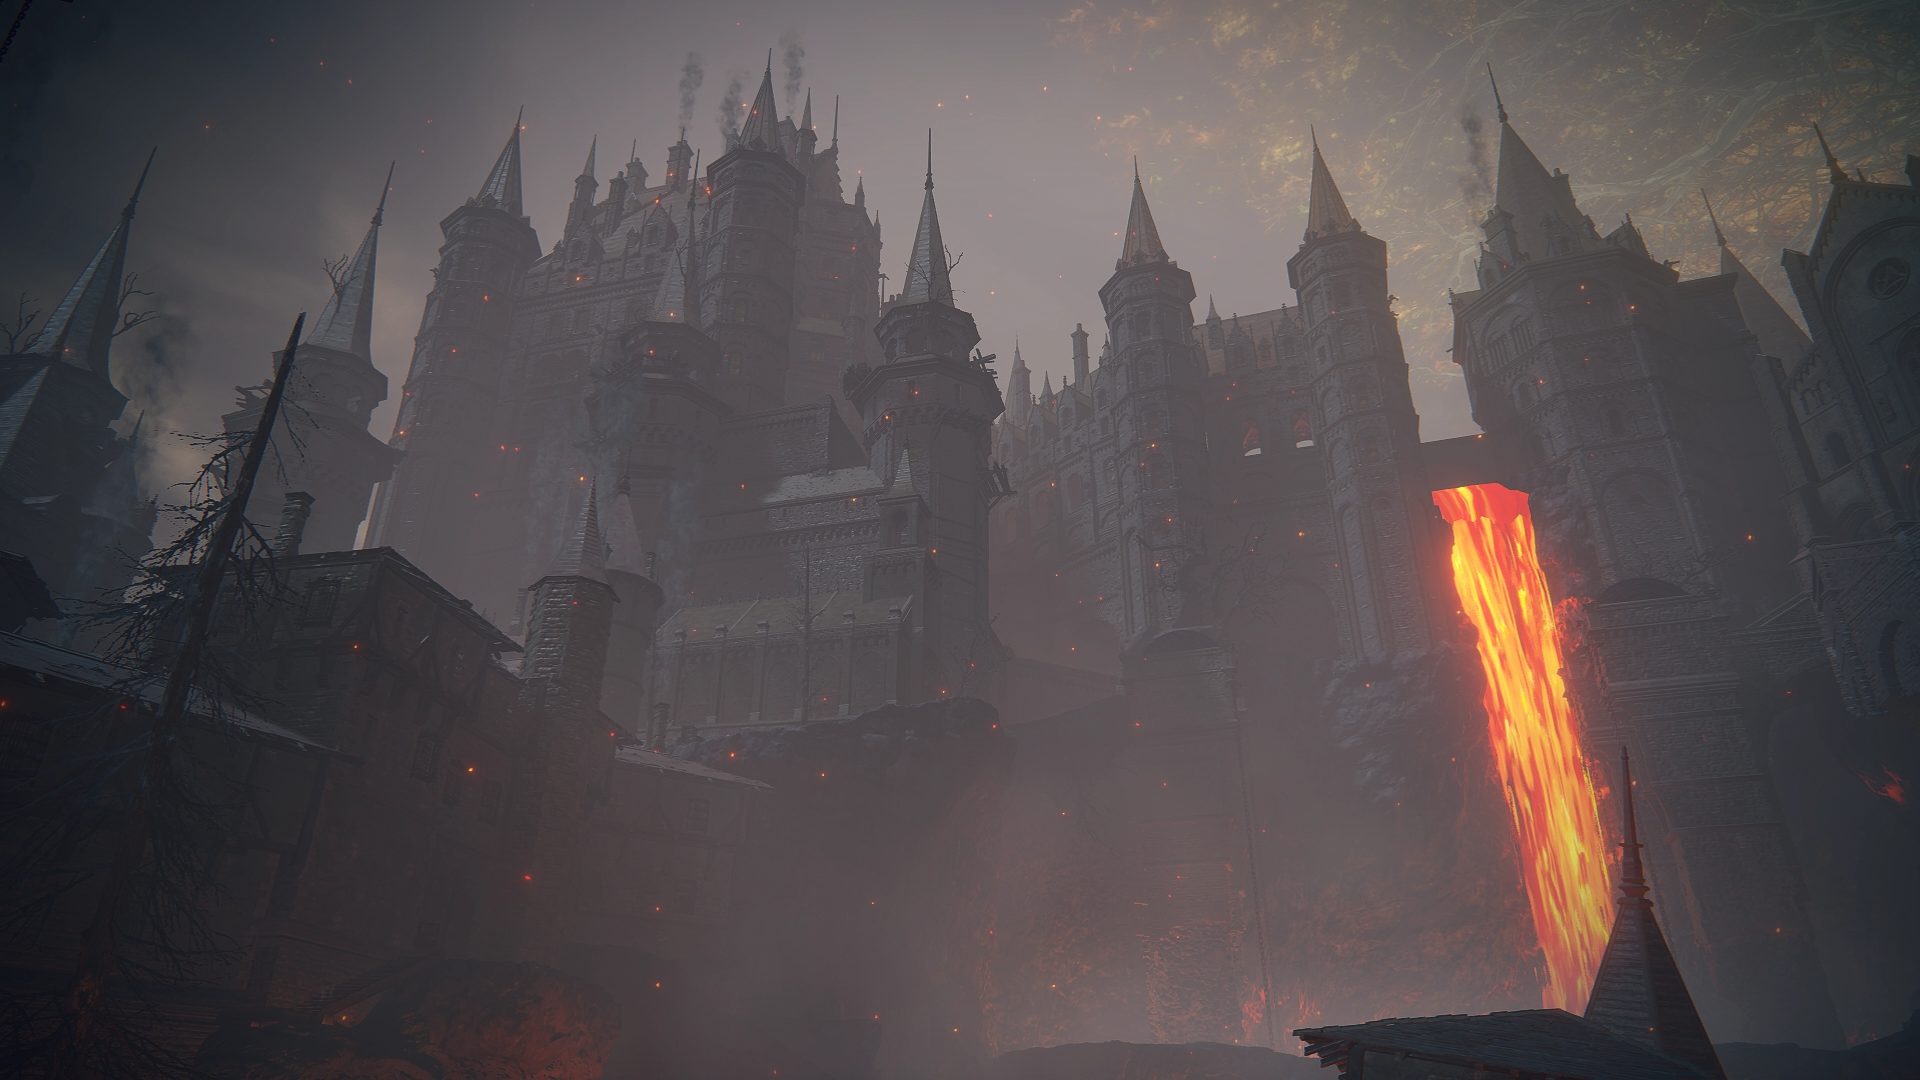
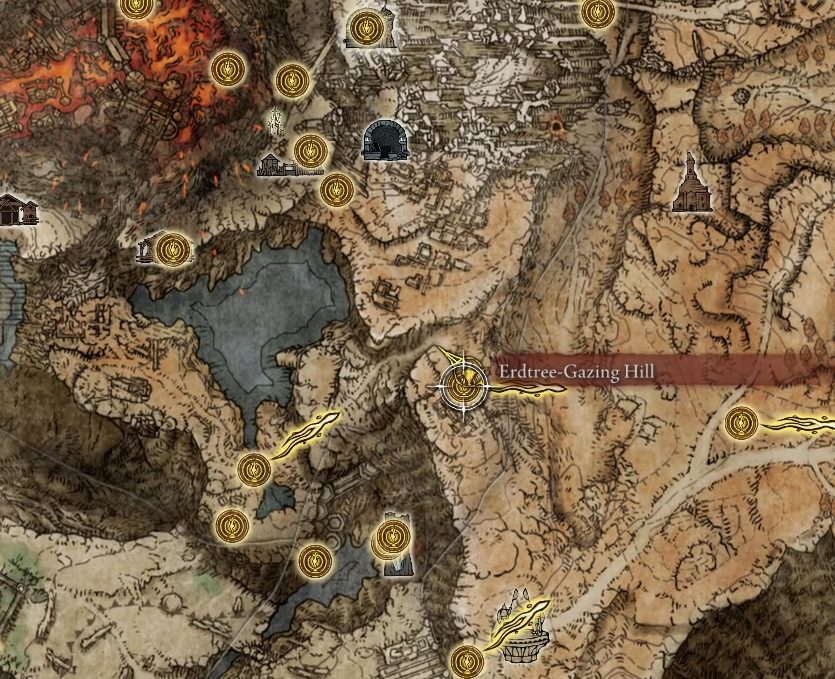
Before you dip our feet into literal fire, you’ll need to make your way to the Lux Ruins in the Altus Plateau. Thankfully the ruins are located just beside the Erdtree-Gazing Hill site of grace. To reach Volcano Manor early (and to avoid the grueling trudge through Mt. Gelmir) you’ll have to help a specific NPC in Liurnia of The Lakes. Her name is Rya and she is the most precious thing on the planet. If you managed to help her she’ll be waiting for you inside the Ruins. She’s standing near the front so finding her won’t be a difficult task. Accept her offer and on your way to the Manor you go!
You can actually reach the Manor early from Raya Lucaria Academy. Patches tells the player to reach the bottom of the school, where a lone Iron Maiden is patrolling. He tells you that, if you climb inside, you’ll be transported to the manor. Well, he was right. Go figure. From the Schoolhouse Classroom site of grace, exit the room by going west and take the path going up towards the waterwheel. Jump over to the waterwheel as soon as the platform attached to it goes past you, and you’ll be able to ride it all the way down towards the Iron Maiden.
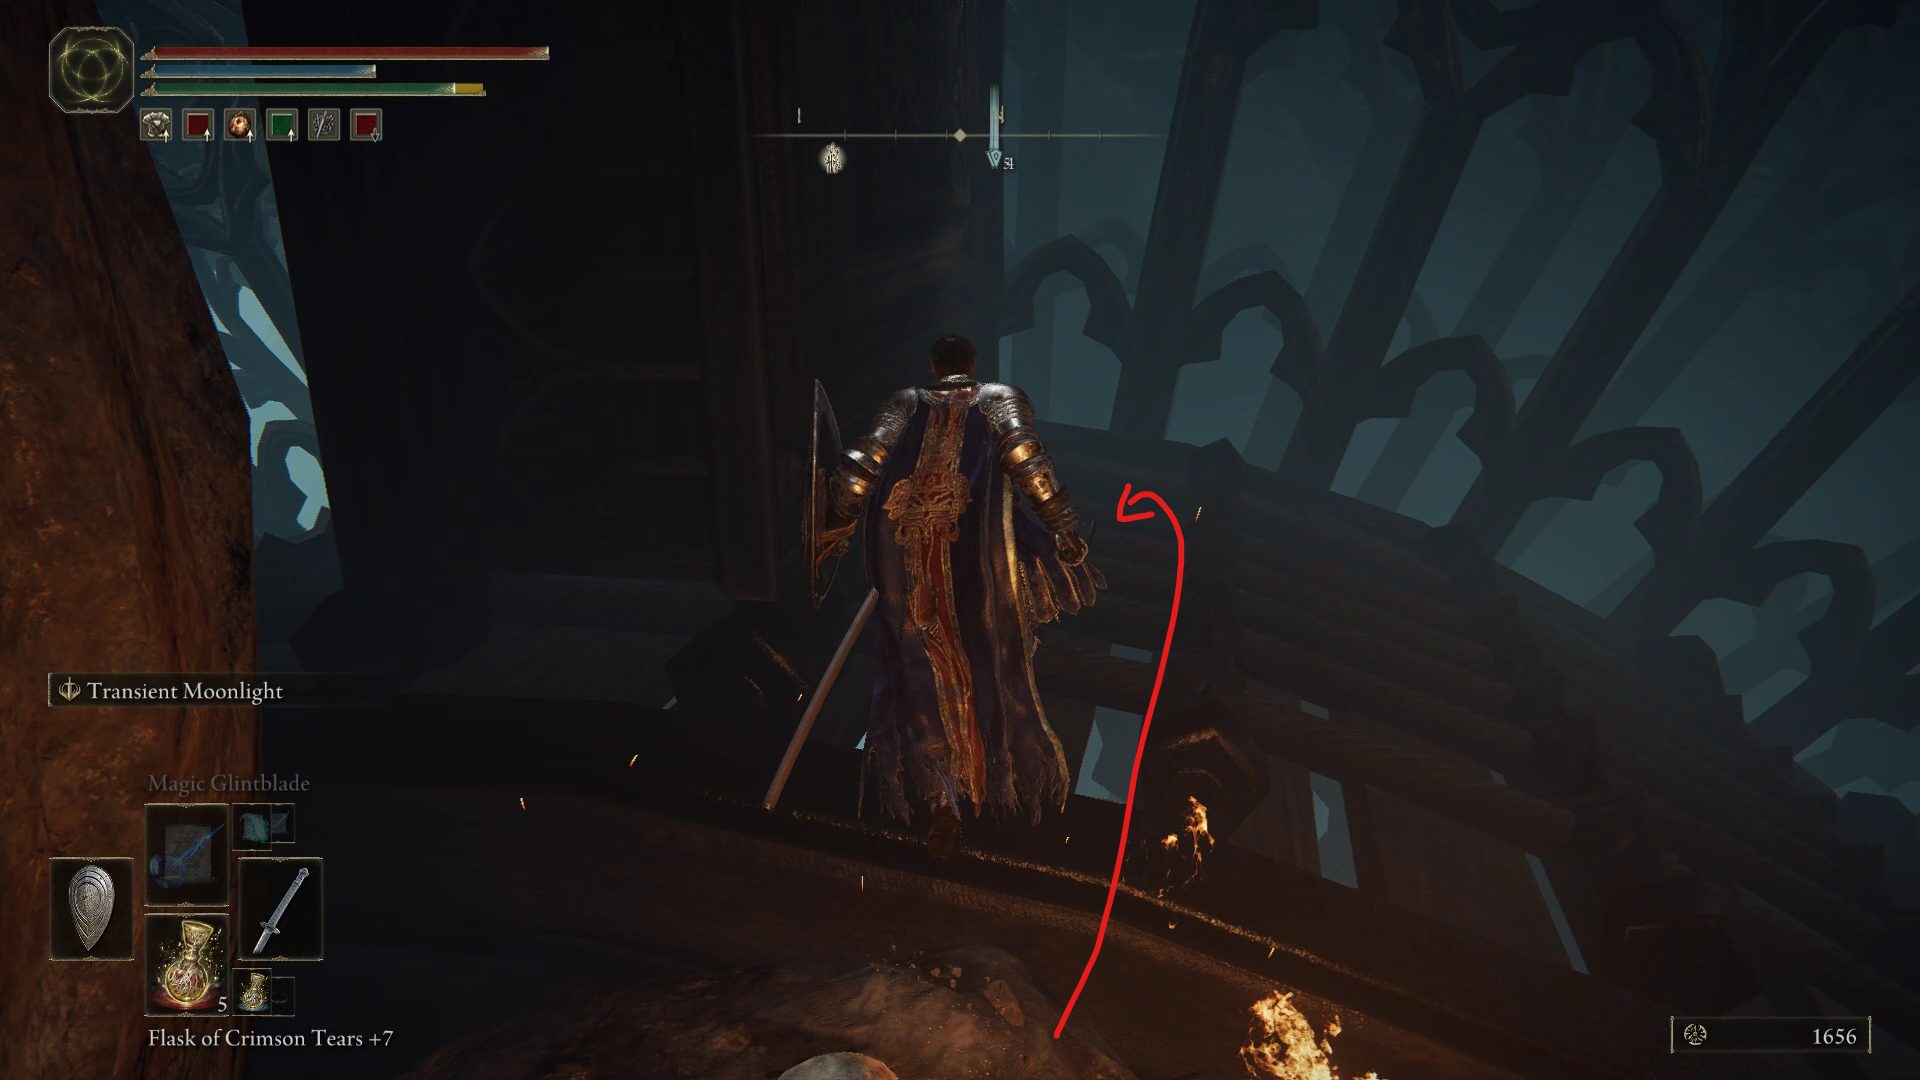
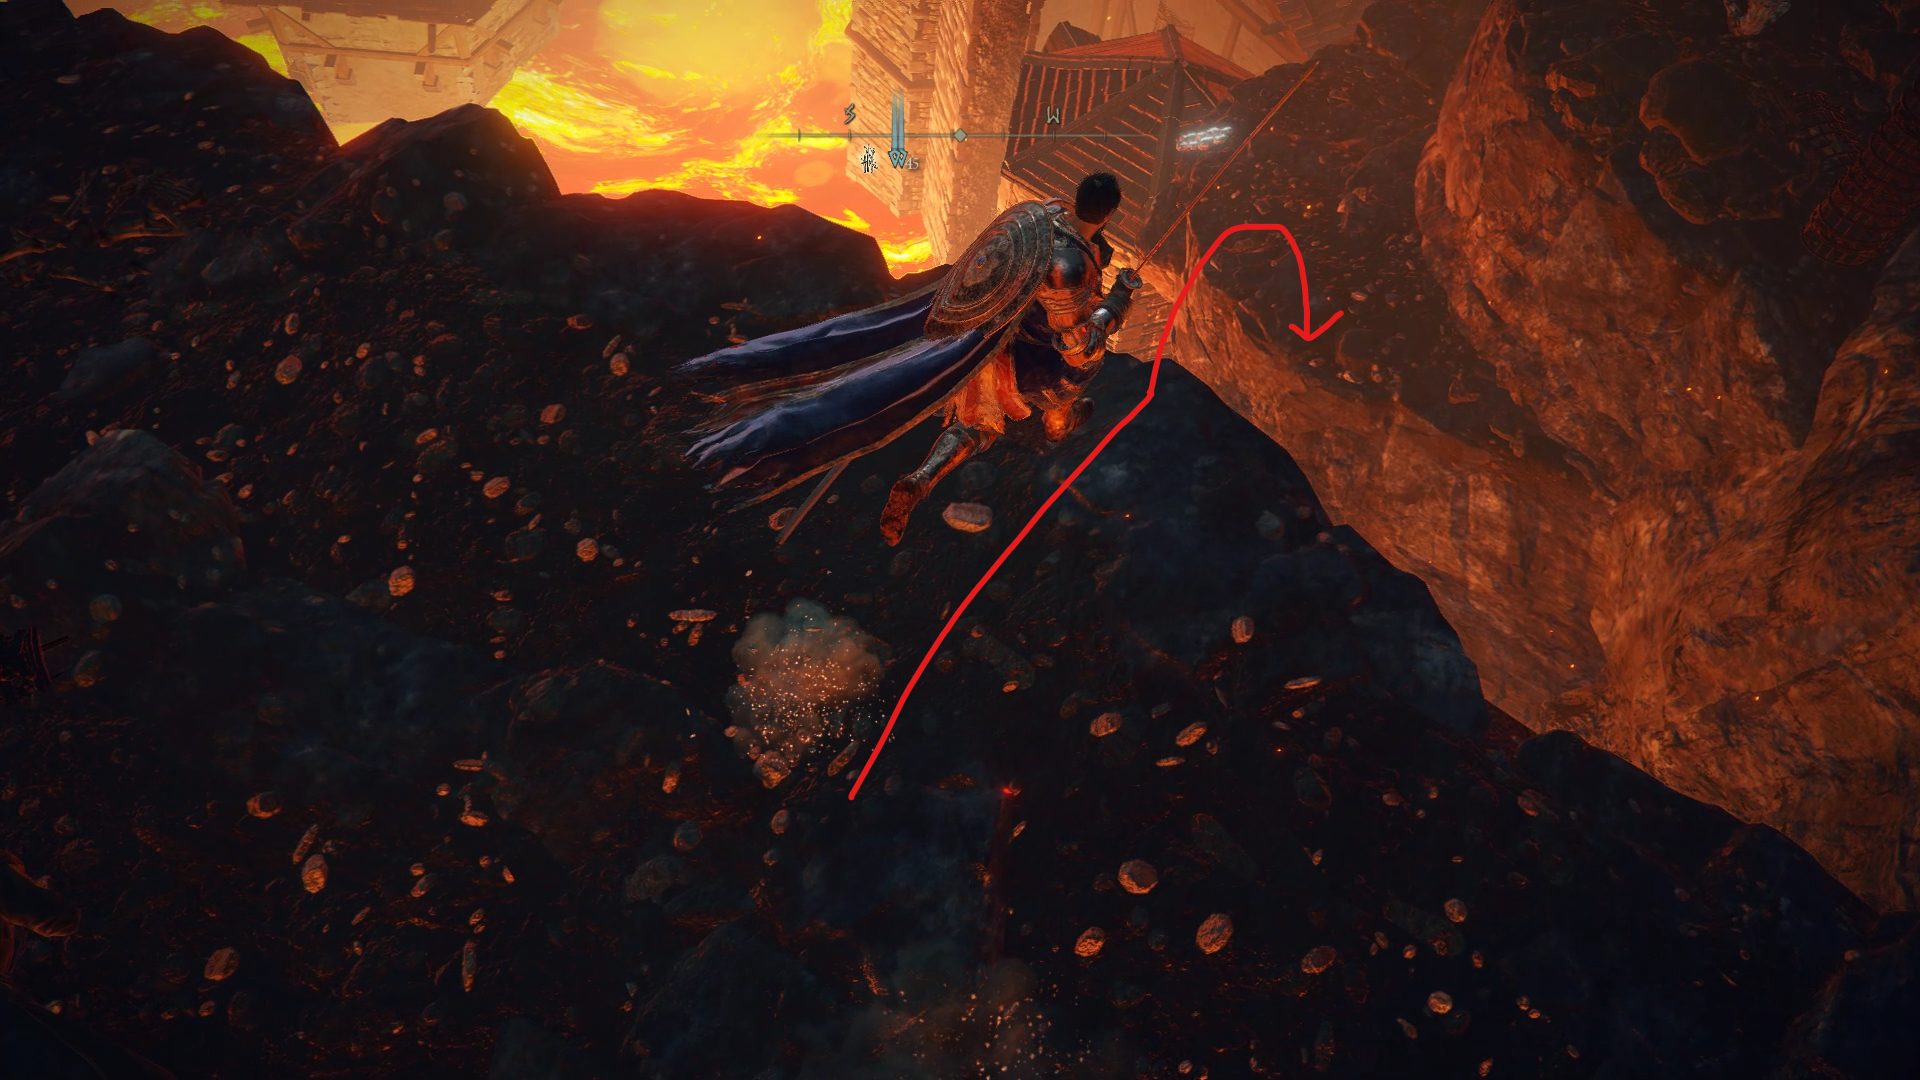
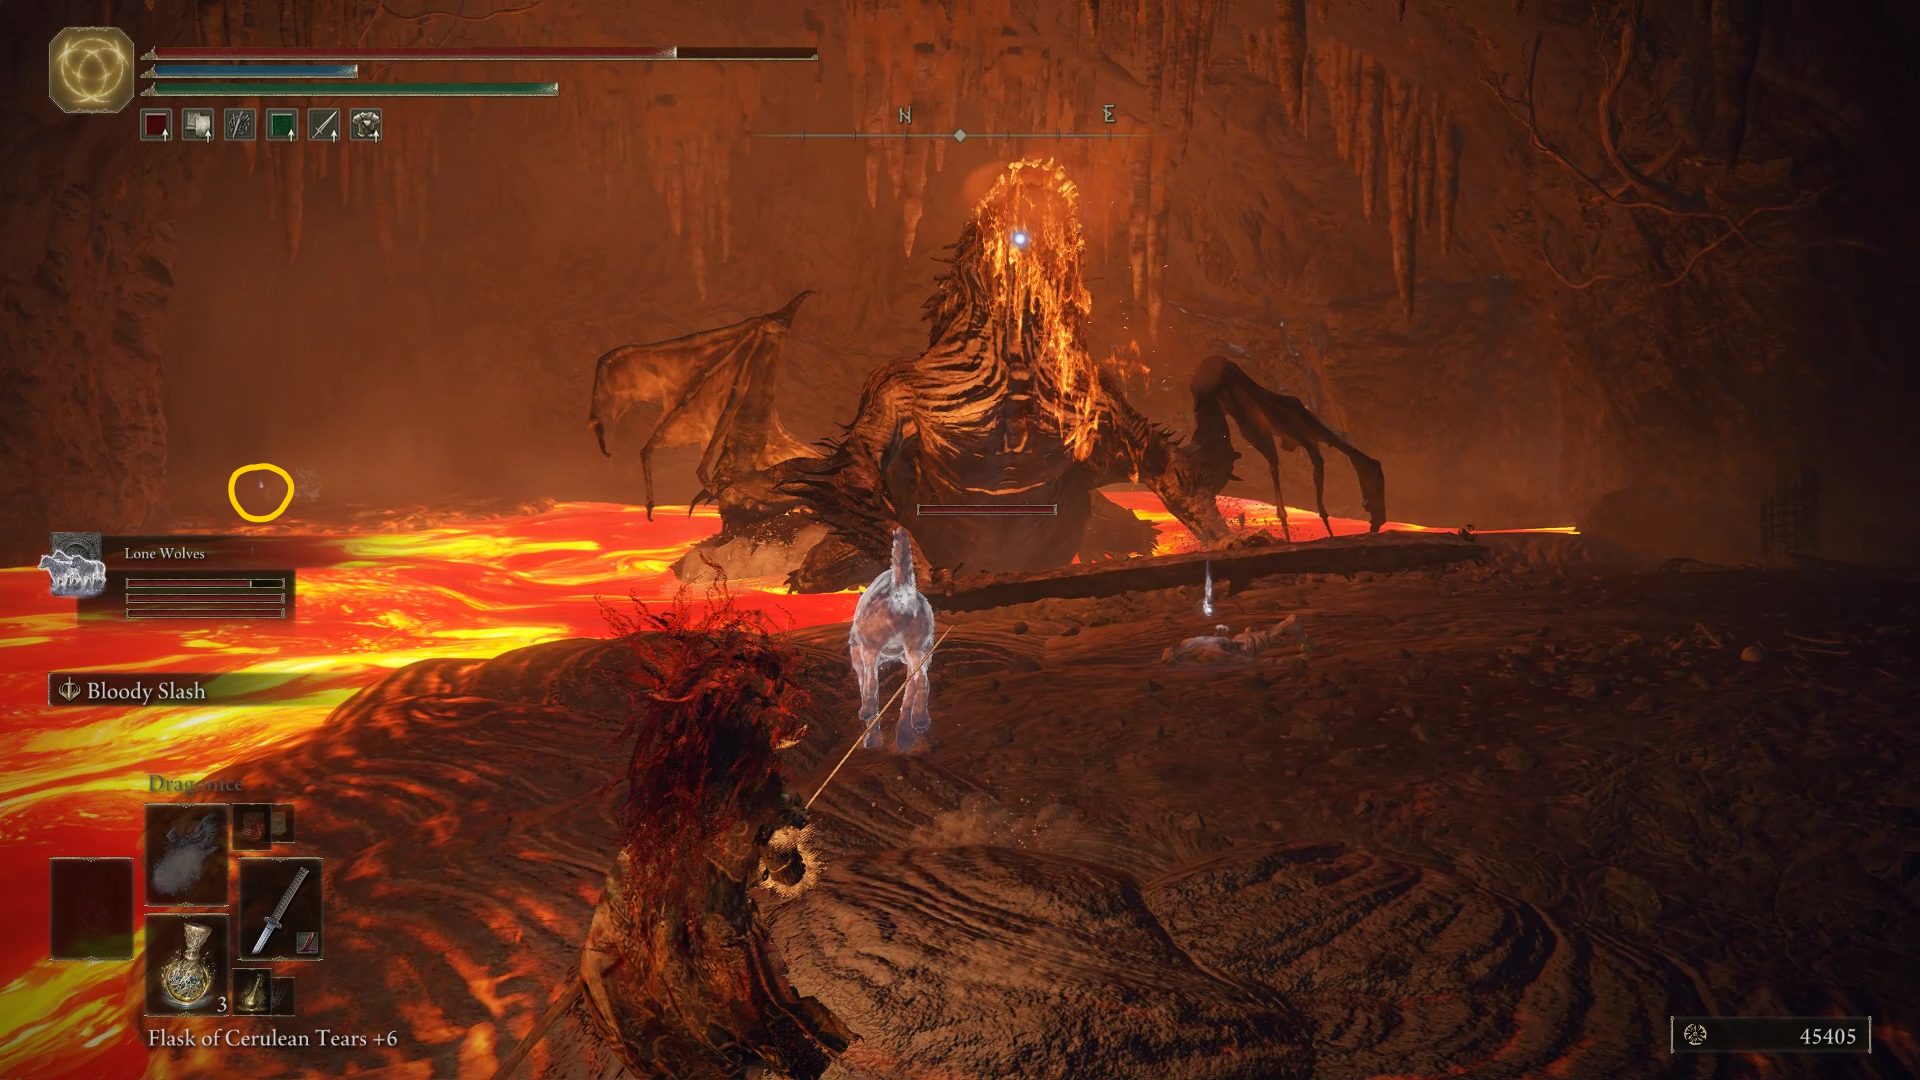
While simply getting killed or getting grabbed by her will not transport you to the manor, if you get grabbed by the maiden and die while you’re inside of her, you’ll be transported to the Volcano Manor. There, if you look northwest you’ll see a cliff that you can jump to, which is part of Volcano Manor itself.
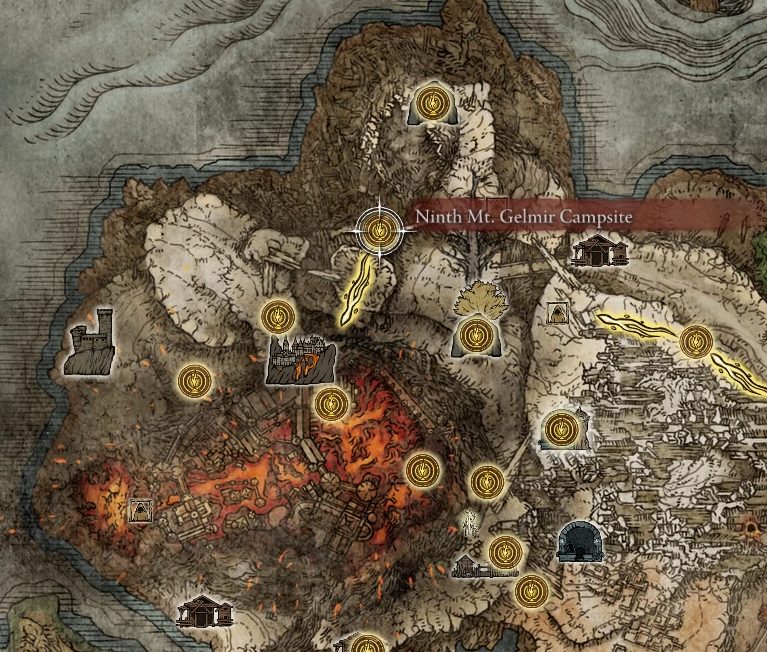
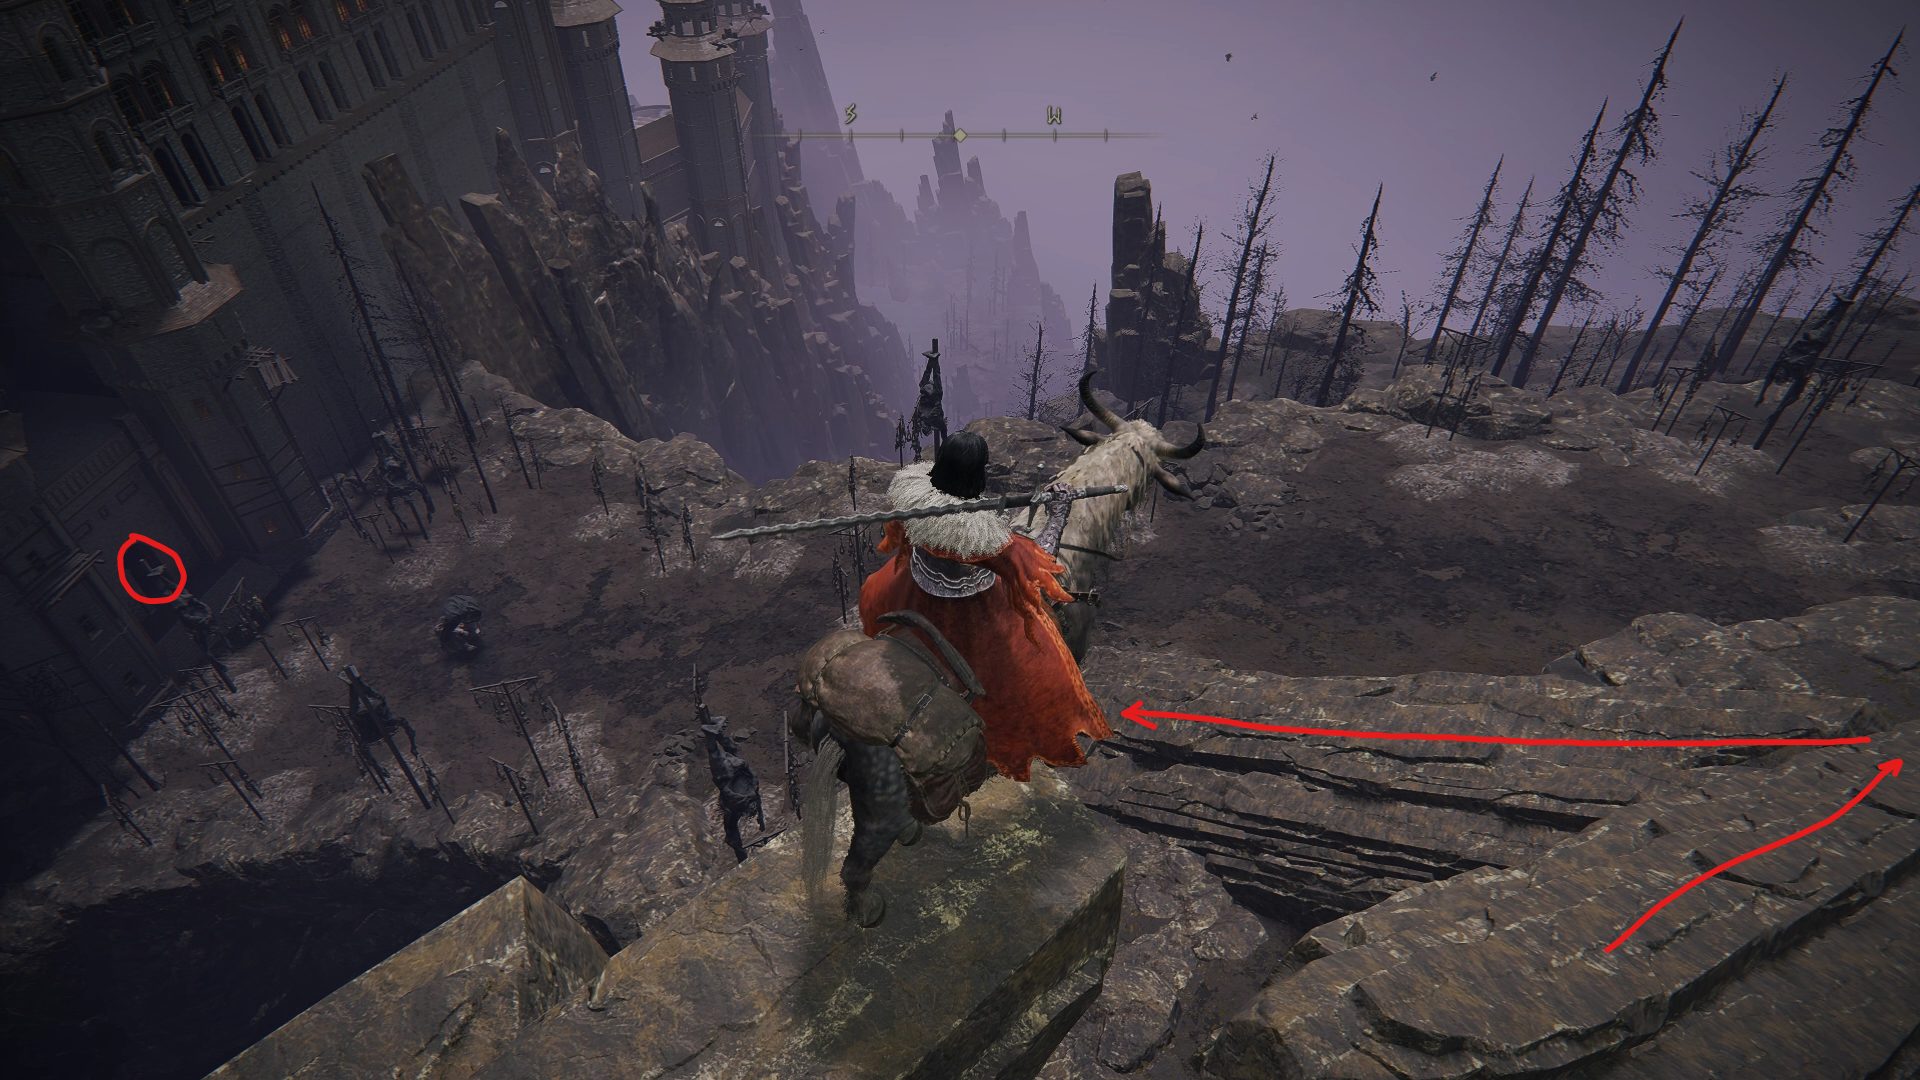
The manor’s main entrance is located at the top of Mt. Gelmir. From the Ninth Mt. Gelmir Campsite site of grace, take the Spiritspring all the way up the mountain. From there, you can go down the rock formation to the west to reach the manor’s entrance.
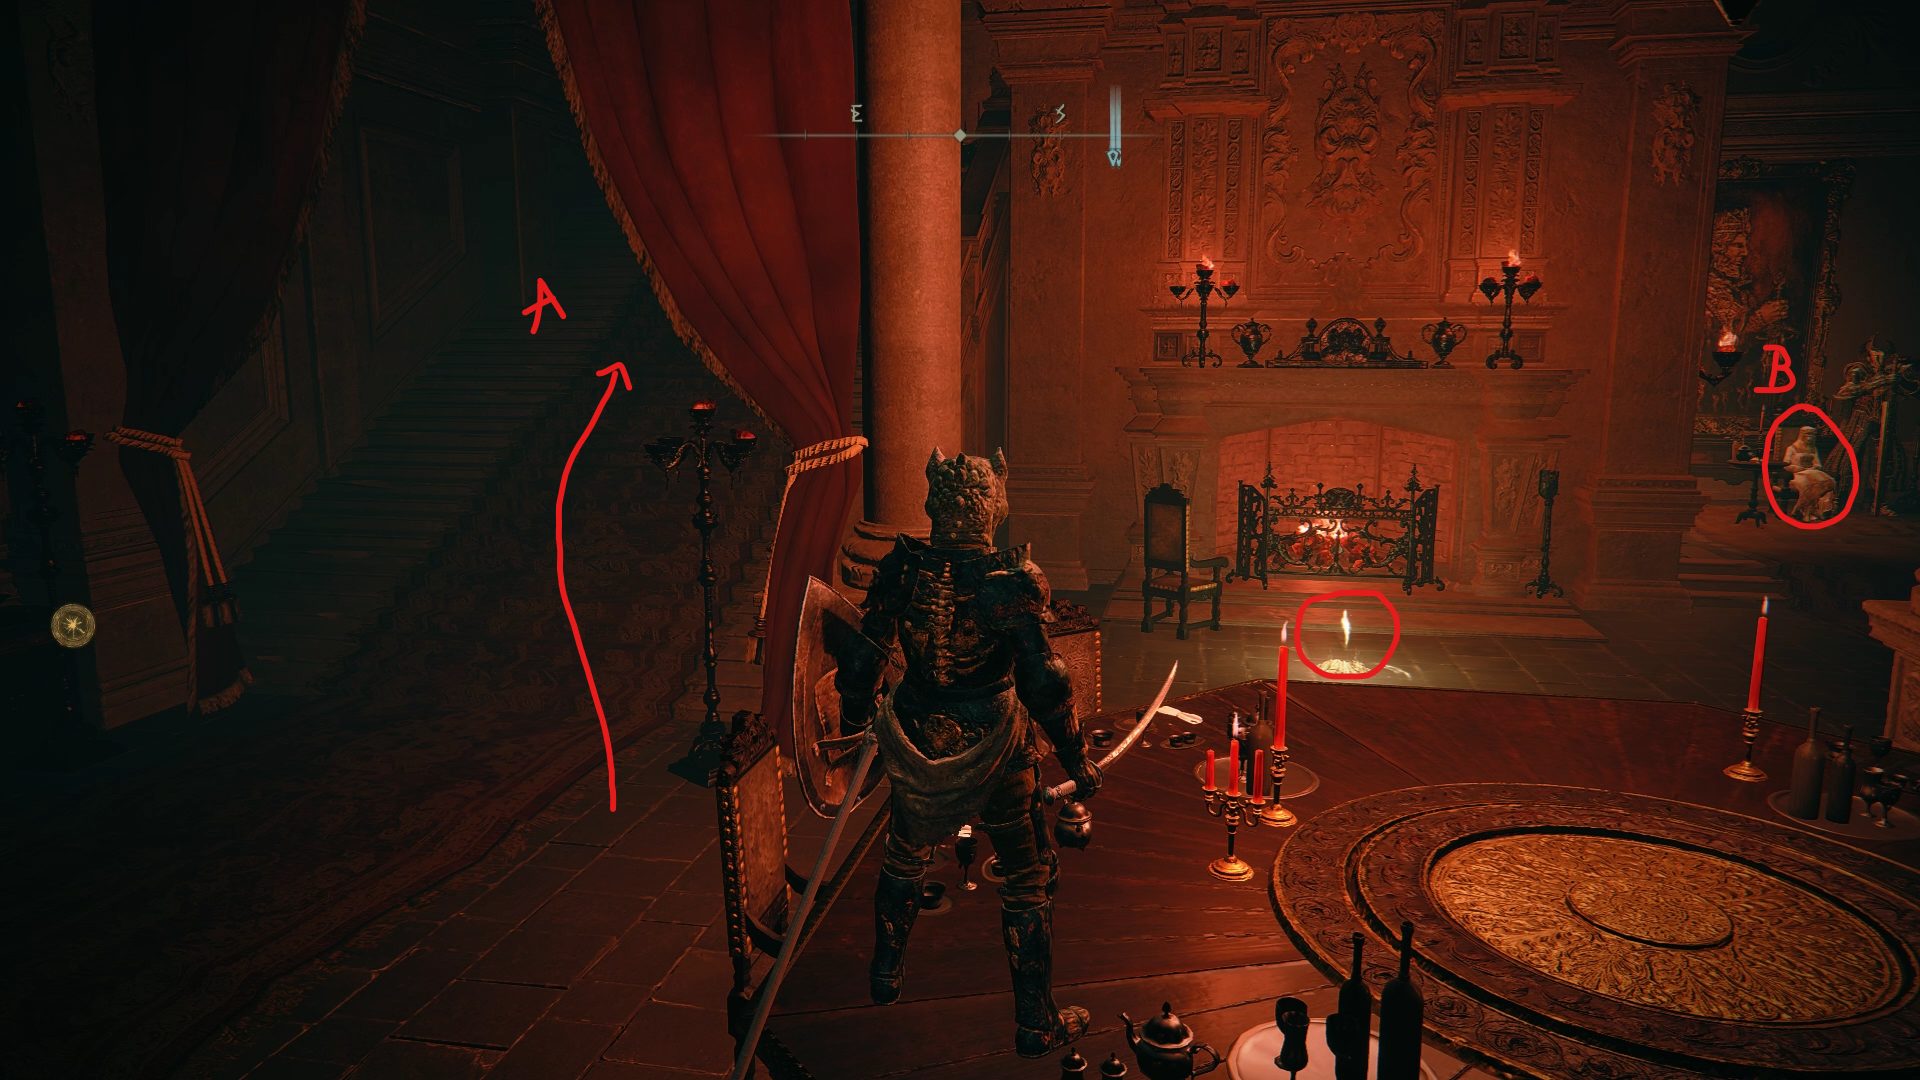
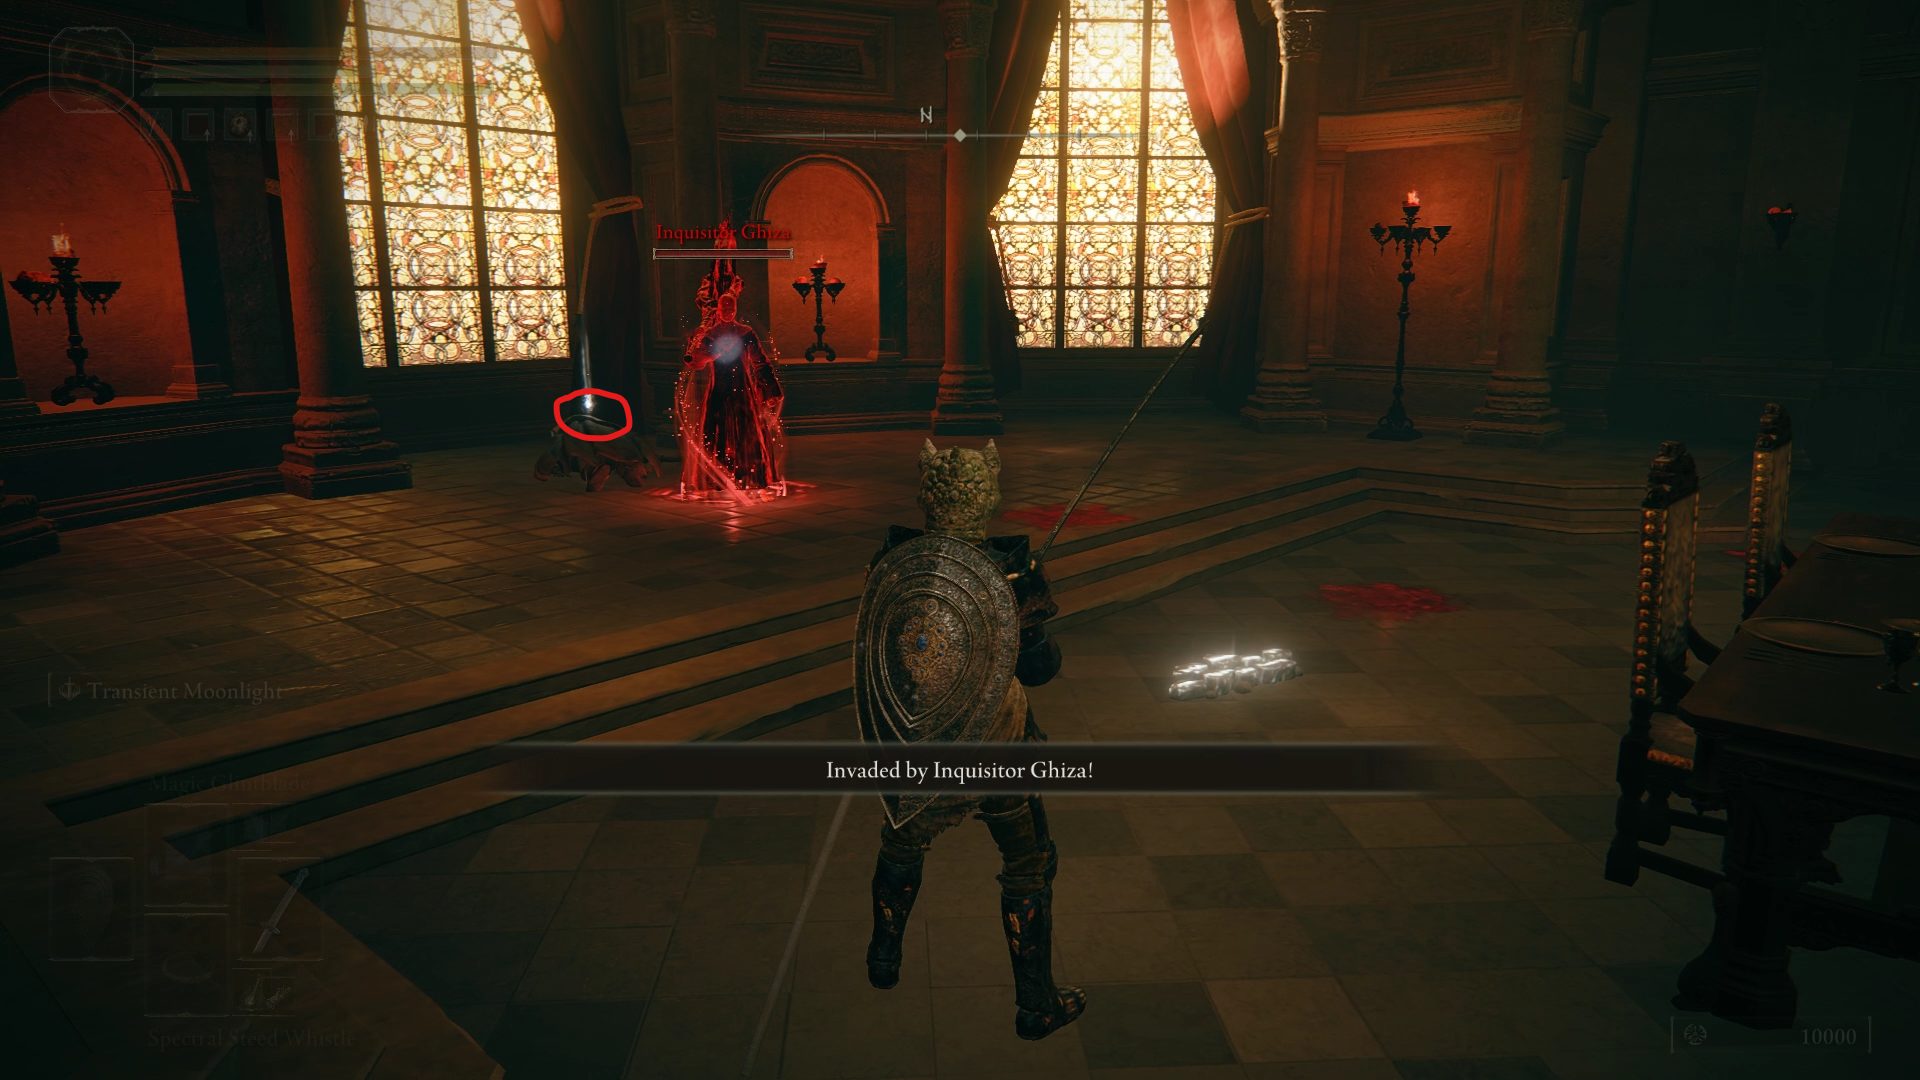
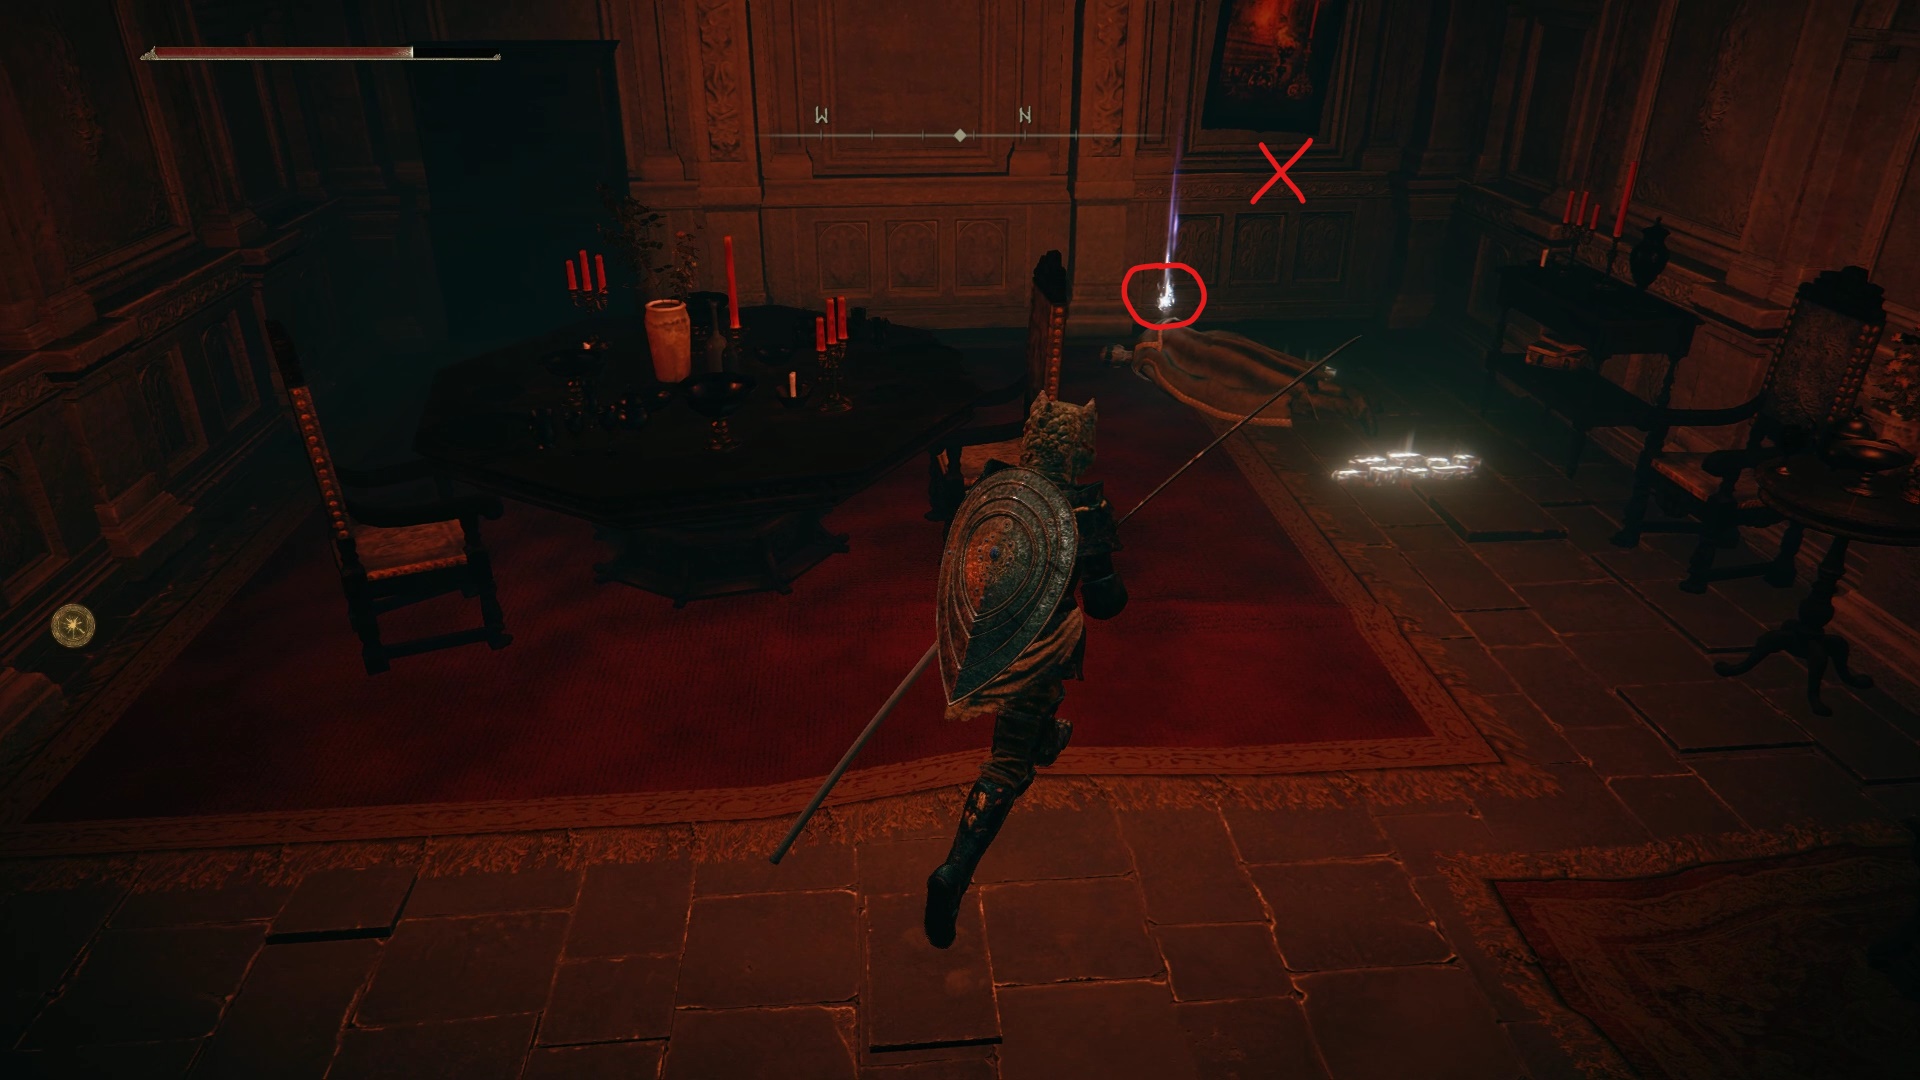
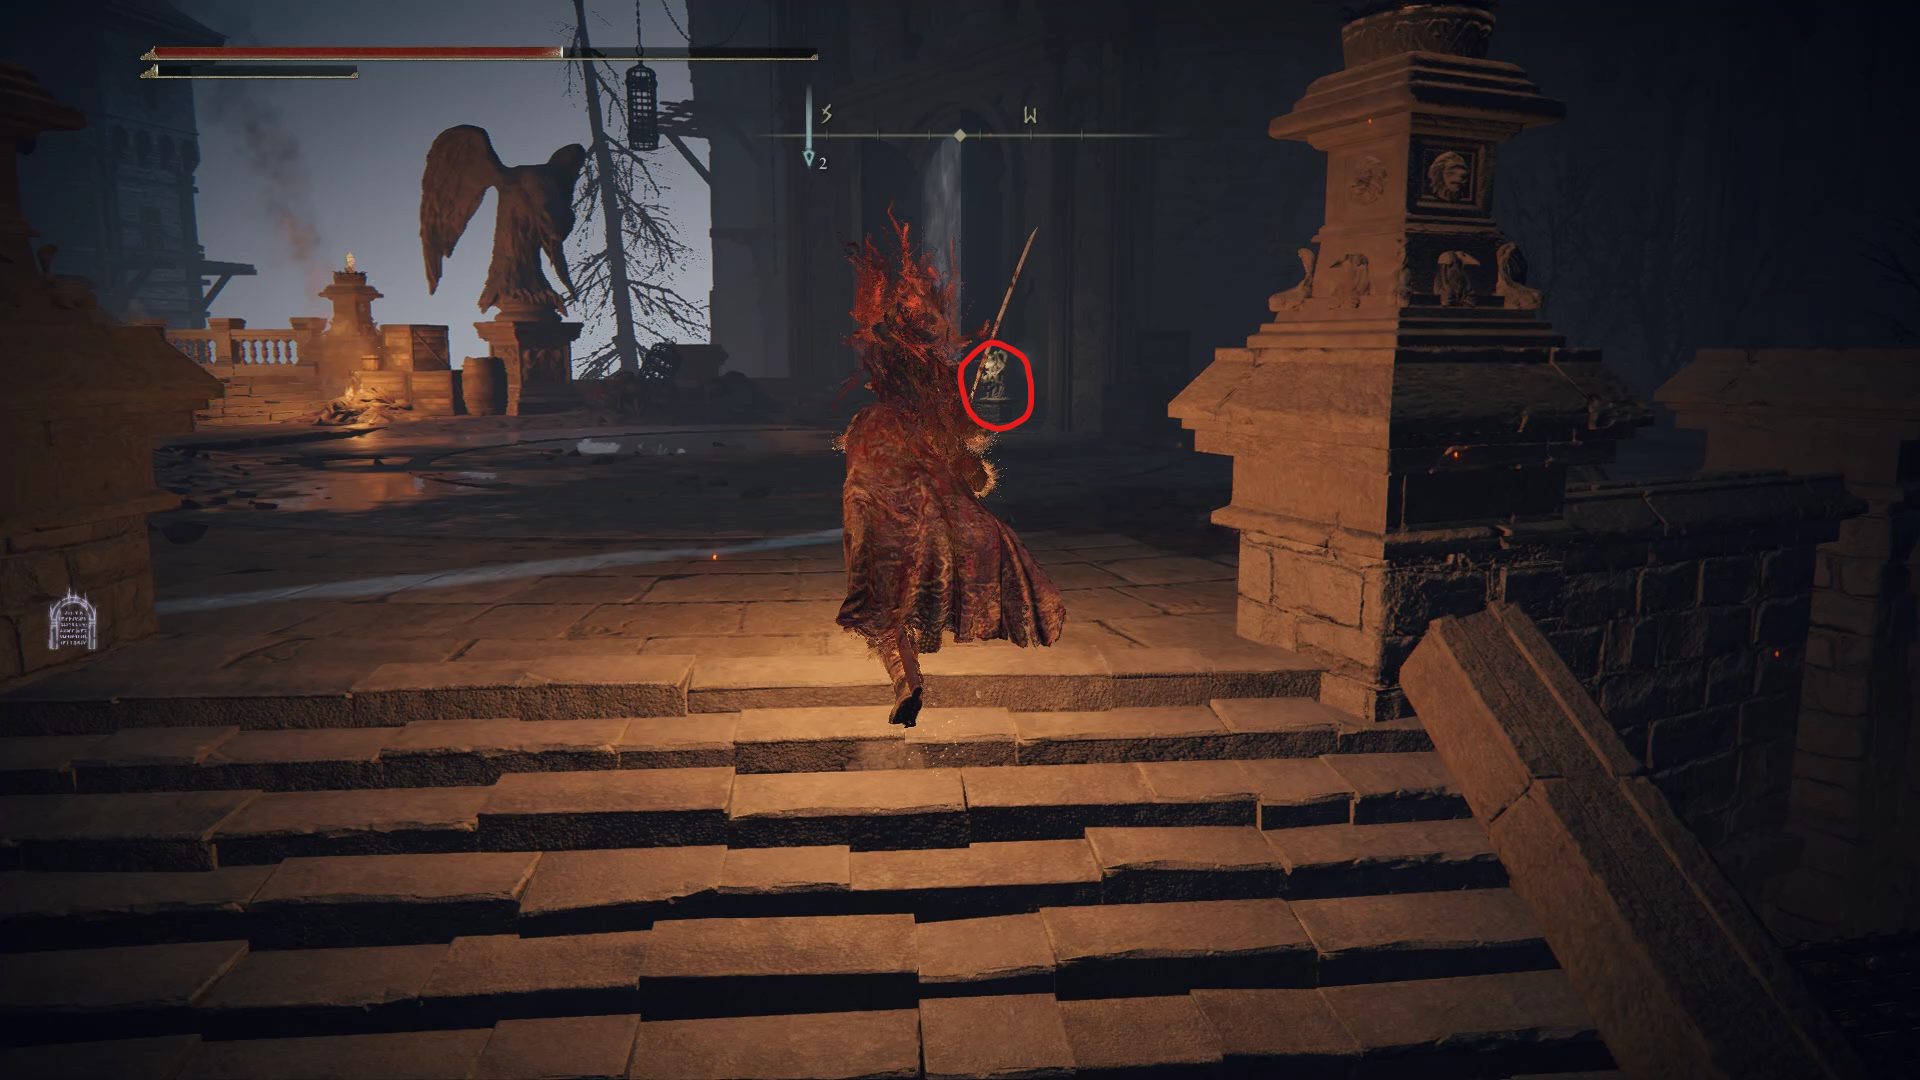
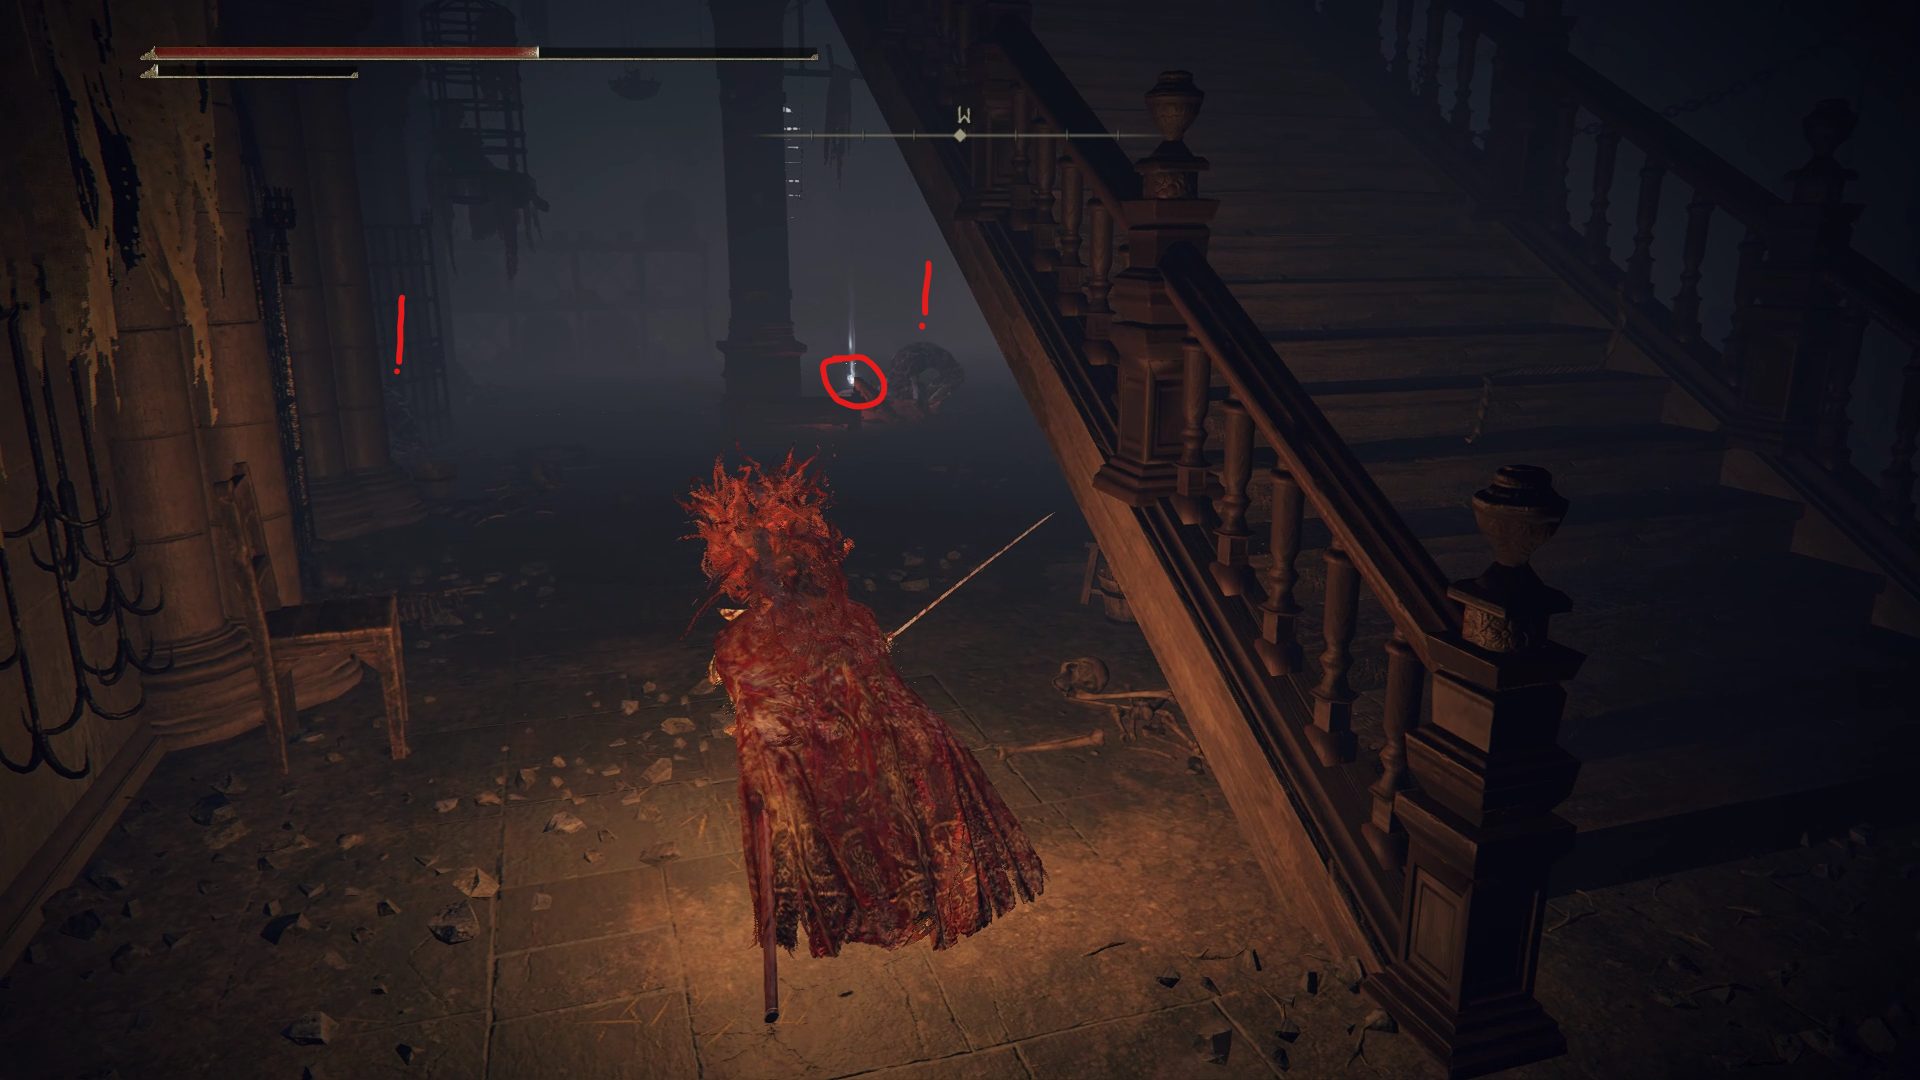
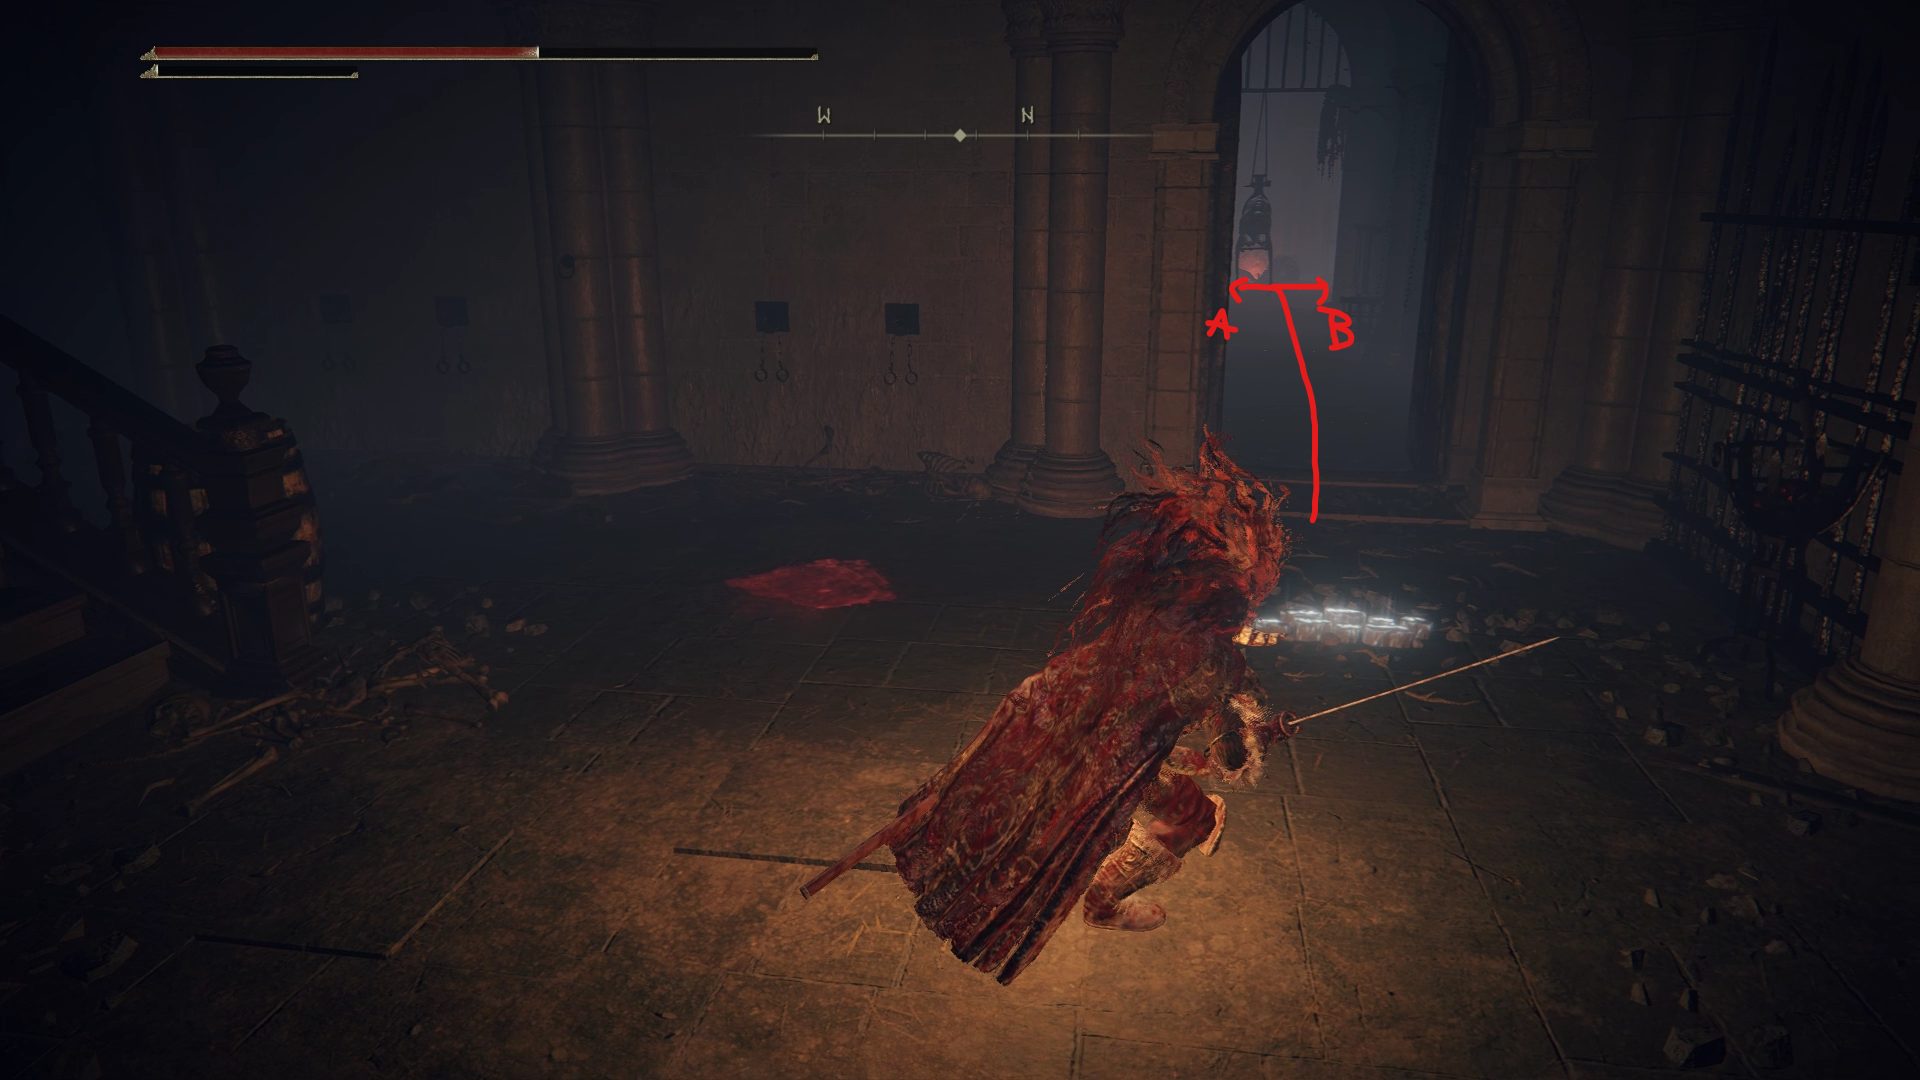
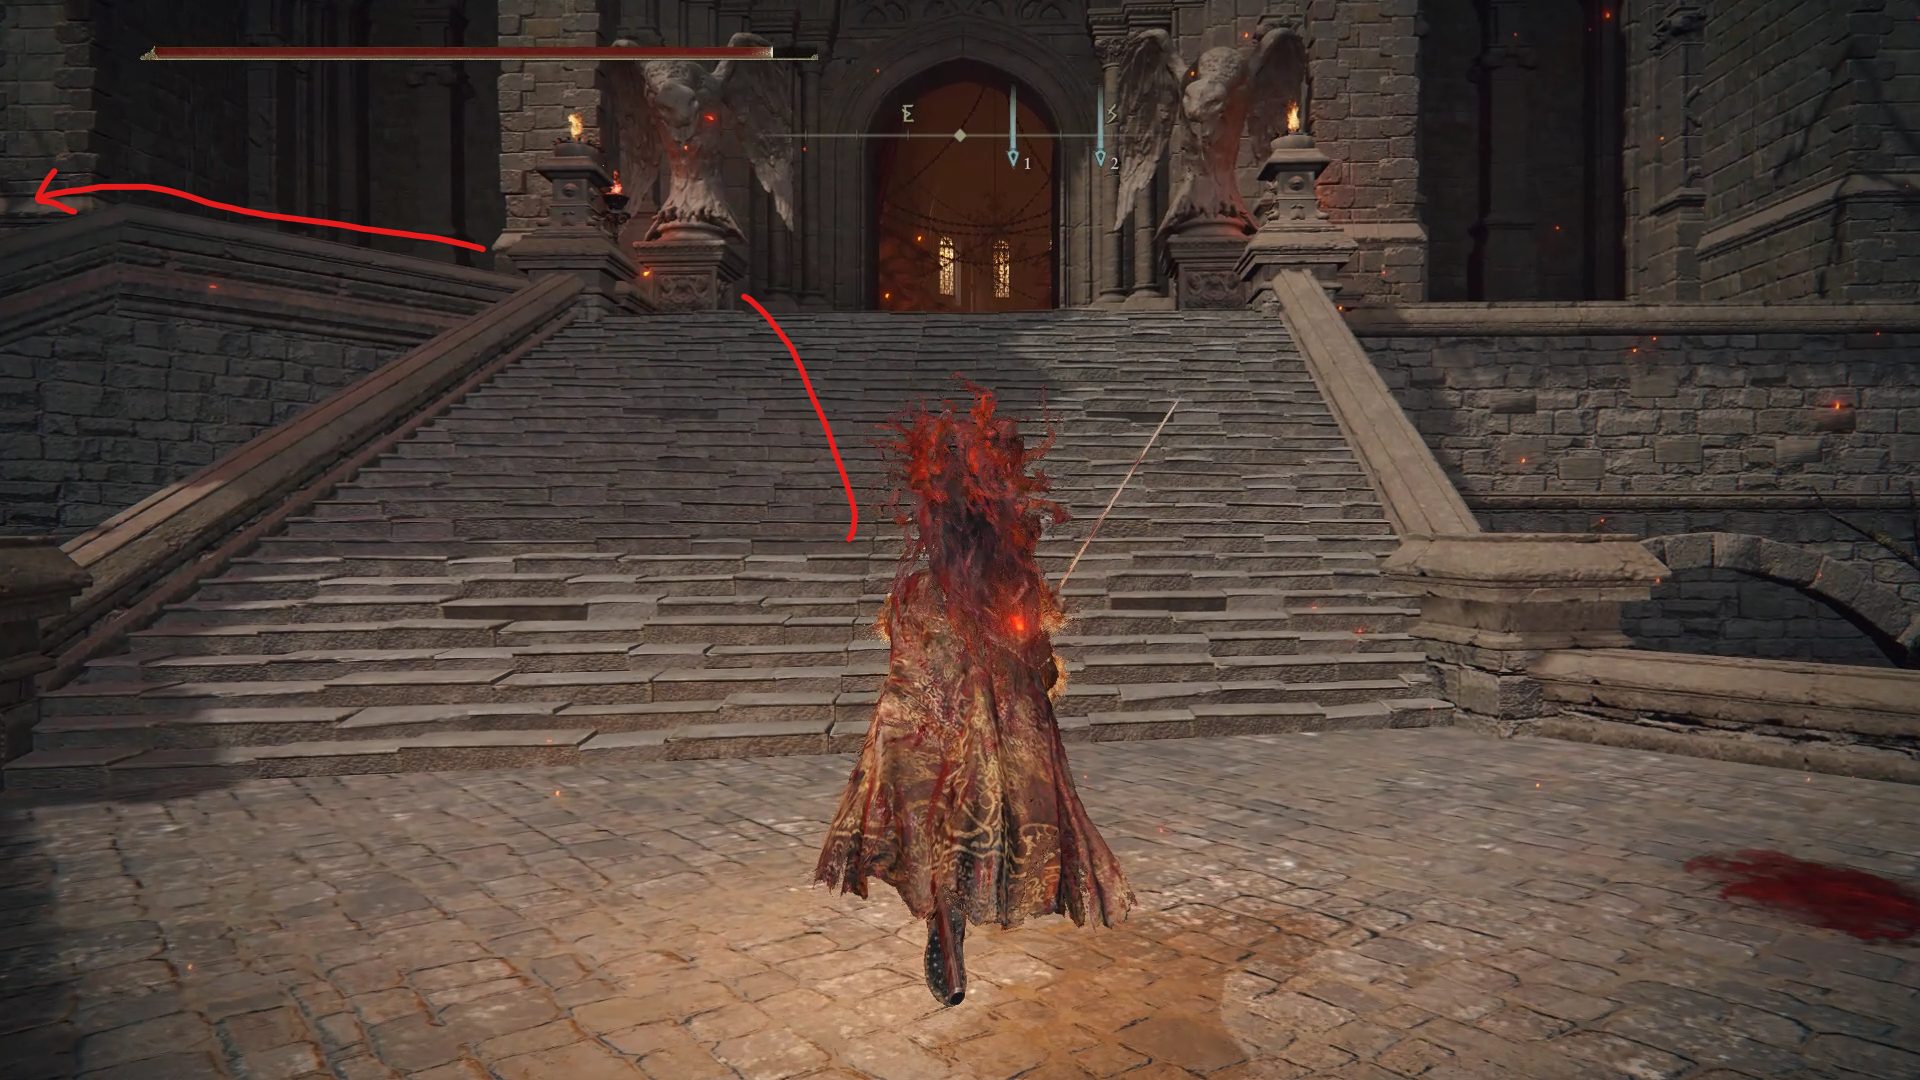
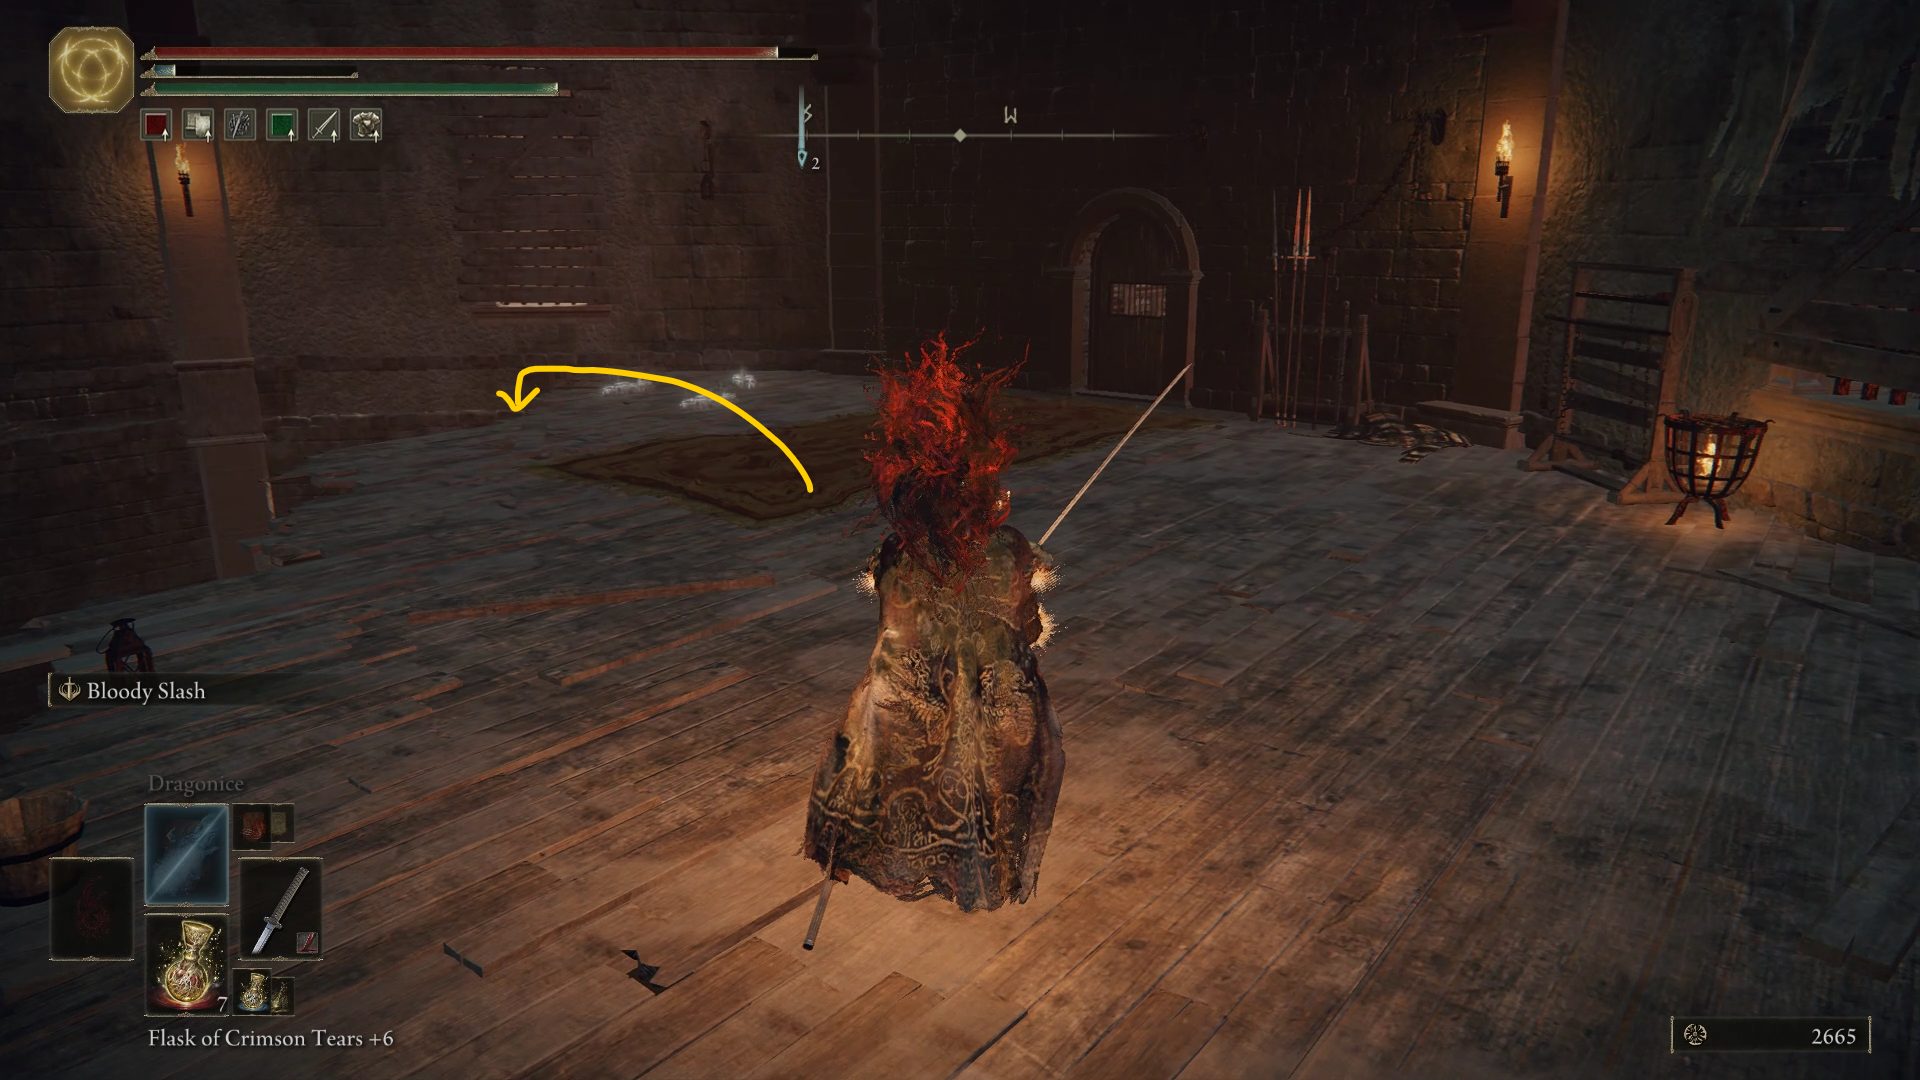
Once inside you’ll want to activate the site of grace and head upstairs before doing anything else. Up the stairs (A) you’ll find a large room with some tables and chairs. You’ll see an item on a corpse toward the back of the room below a window. You’ll be one more Smithing Stone [6] richer but there’s no time to celebrate; prepare yourself for battle because you’re about to be Invaded by Inquisitor Ghiza and his pizza cutter of death! Dispatch of him whichever way you please and take his pizza cutter for yourself. You’ll be awarded Ghiza’s Wheel upon defeating him. With that settled you can head back downstairs and talk to (B) Tanith, the proprietress of the Manor.
Smithing Stone [6] + Inquisitor Ghiza
Tanith will offer you to join her which opens up several Invader missions for you to do. Each Invasion grants you some decent armor and weapons. This is important – be sure to do all of the Invasion quests before defeating the boss of Volcano Manor. If you don’t, you’ll miss out on the armor and weapons from each successful Invasion. We’ll handle those missions at the end of the guide. For now, use the Drawing-Room Key she gives you and head down the hall. The key will open several doors down the hallway, but not all of them. Suspicious”¦
The first room you’ll want to open is the first one on your right. It’s a small room with a corpse inside. Grab the Perfume Bottle off of the corpse and roll into the wall behind it. A secret passage? Very sneaky, Miyazaki.
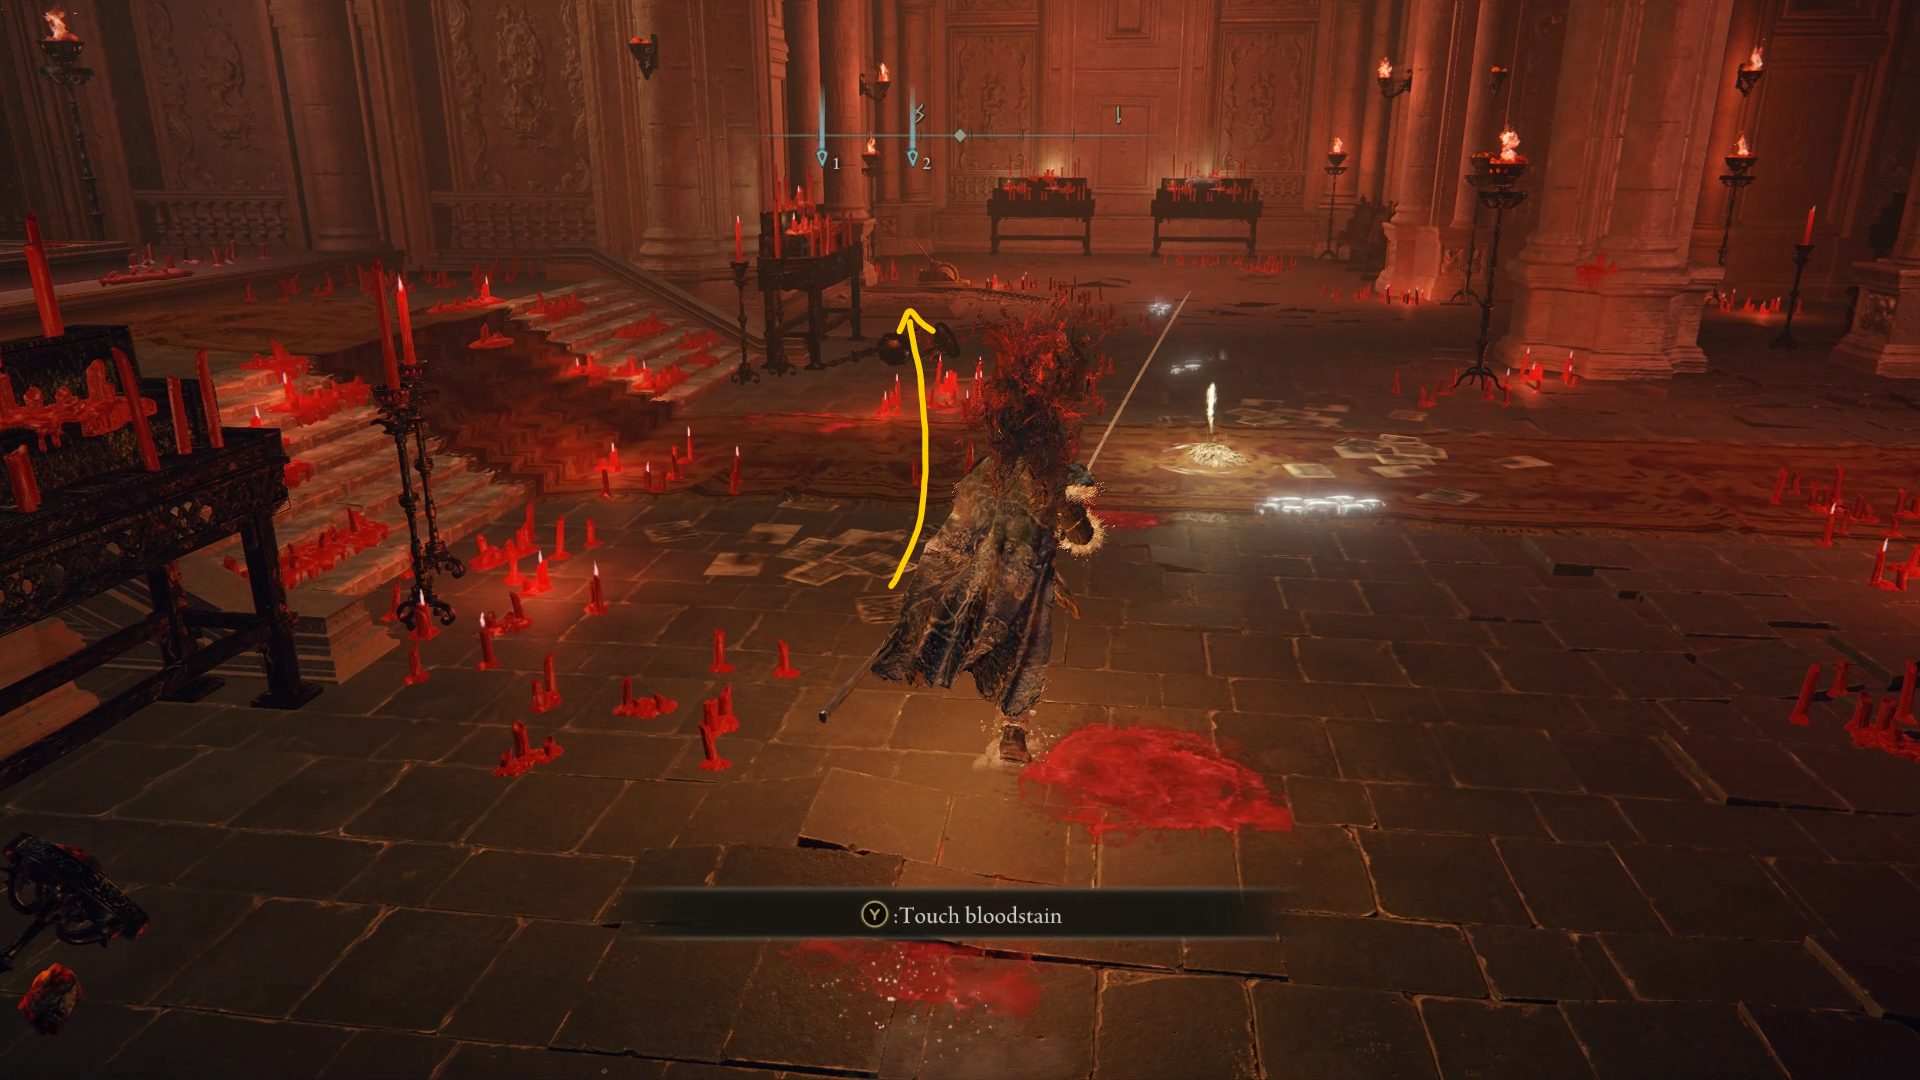
We’ll leave the room for now and continue back into the hallway. The next set of doors we’ll open will lead into the same room. Several NPCs are inside and on the table in the center of the room are a letter and the Recusant Finger item. The letter will show you on your map where your first Invasion quest will be. We’ll get to those at the end. For now, chat up the NPCs and then head back into the hallway. The last door we’ll open will lead into another small room. Although empty, this room will be important later on. It’s now time to see where that secret passage leads!
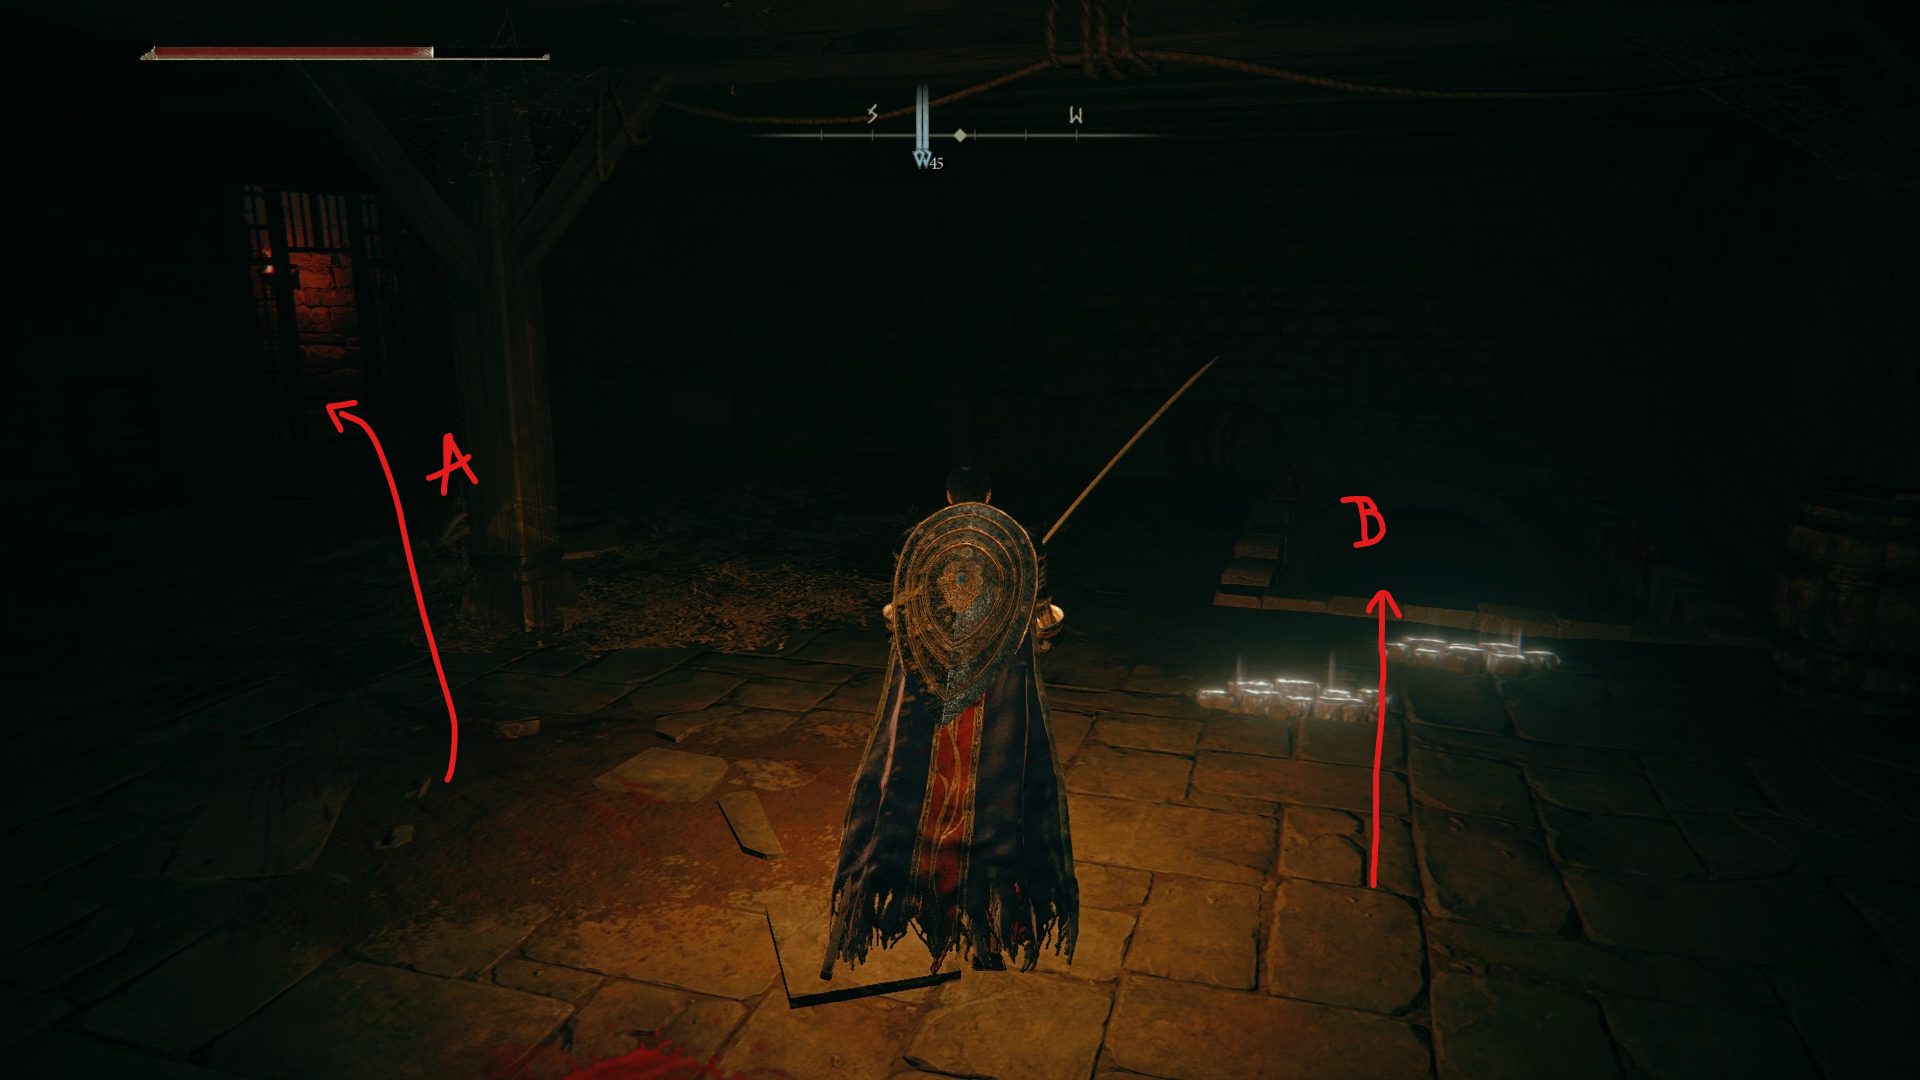
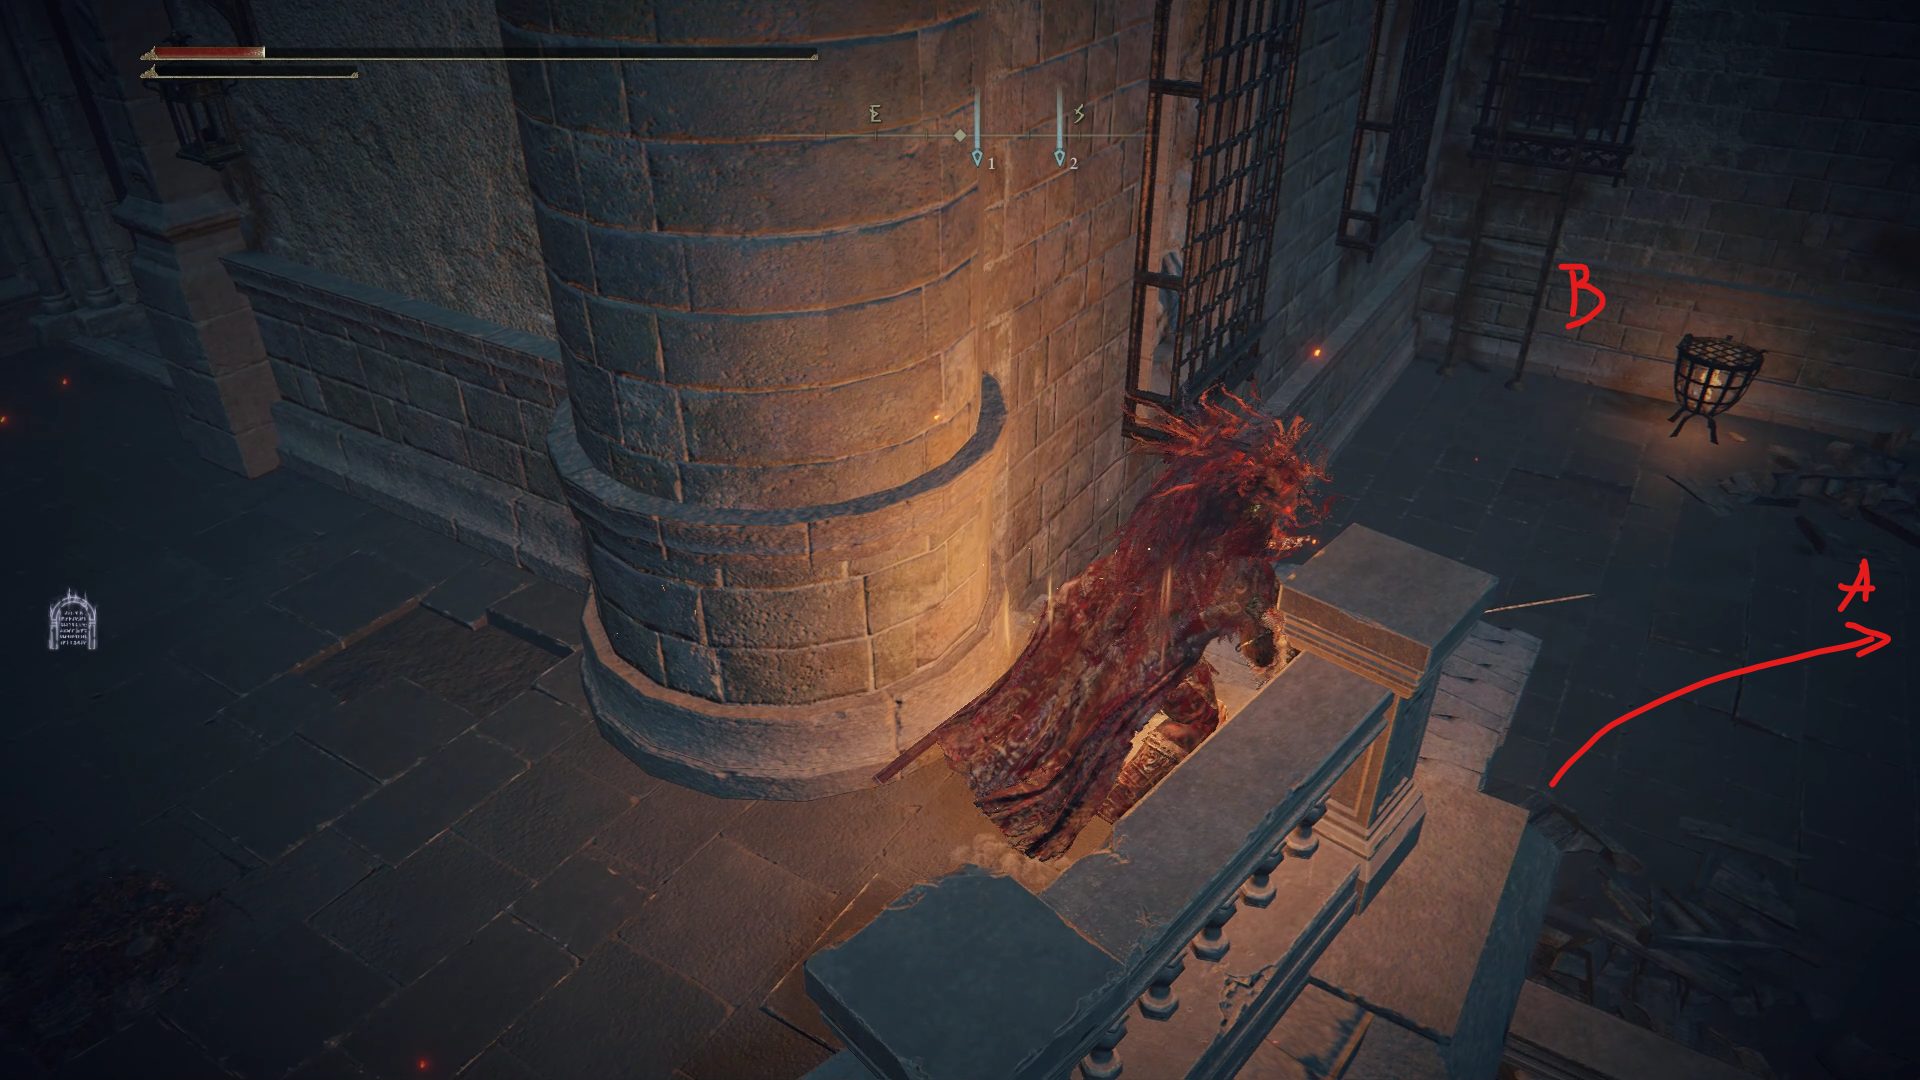
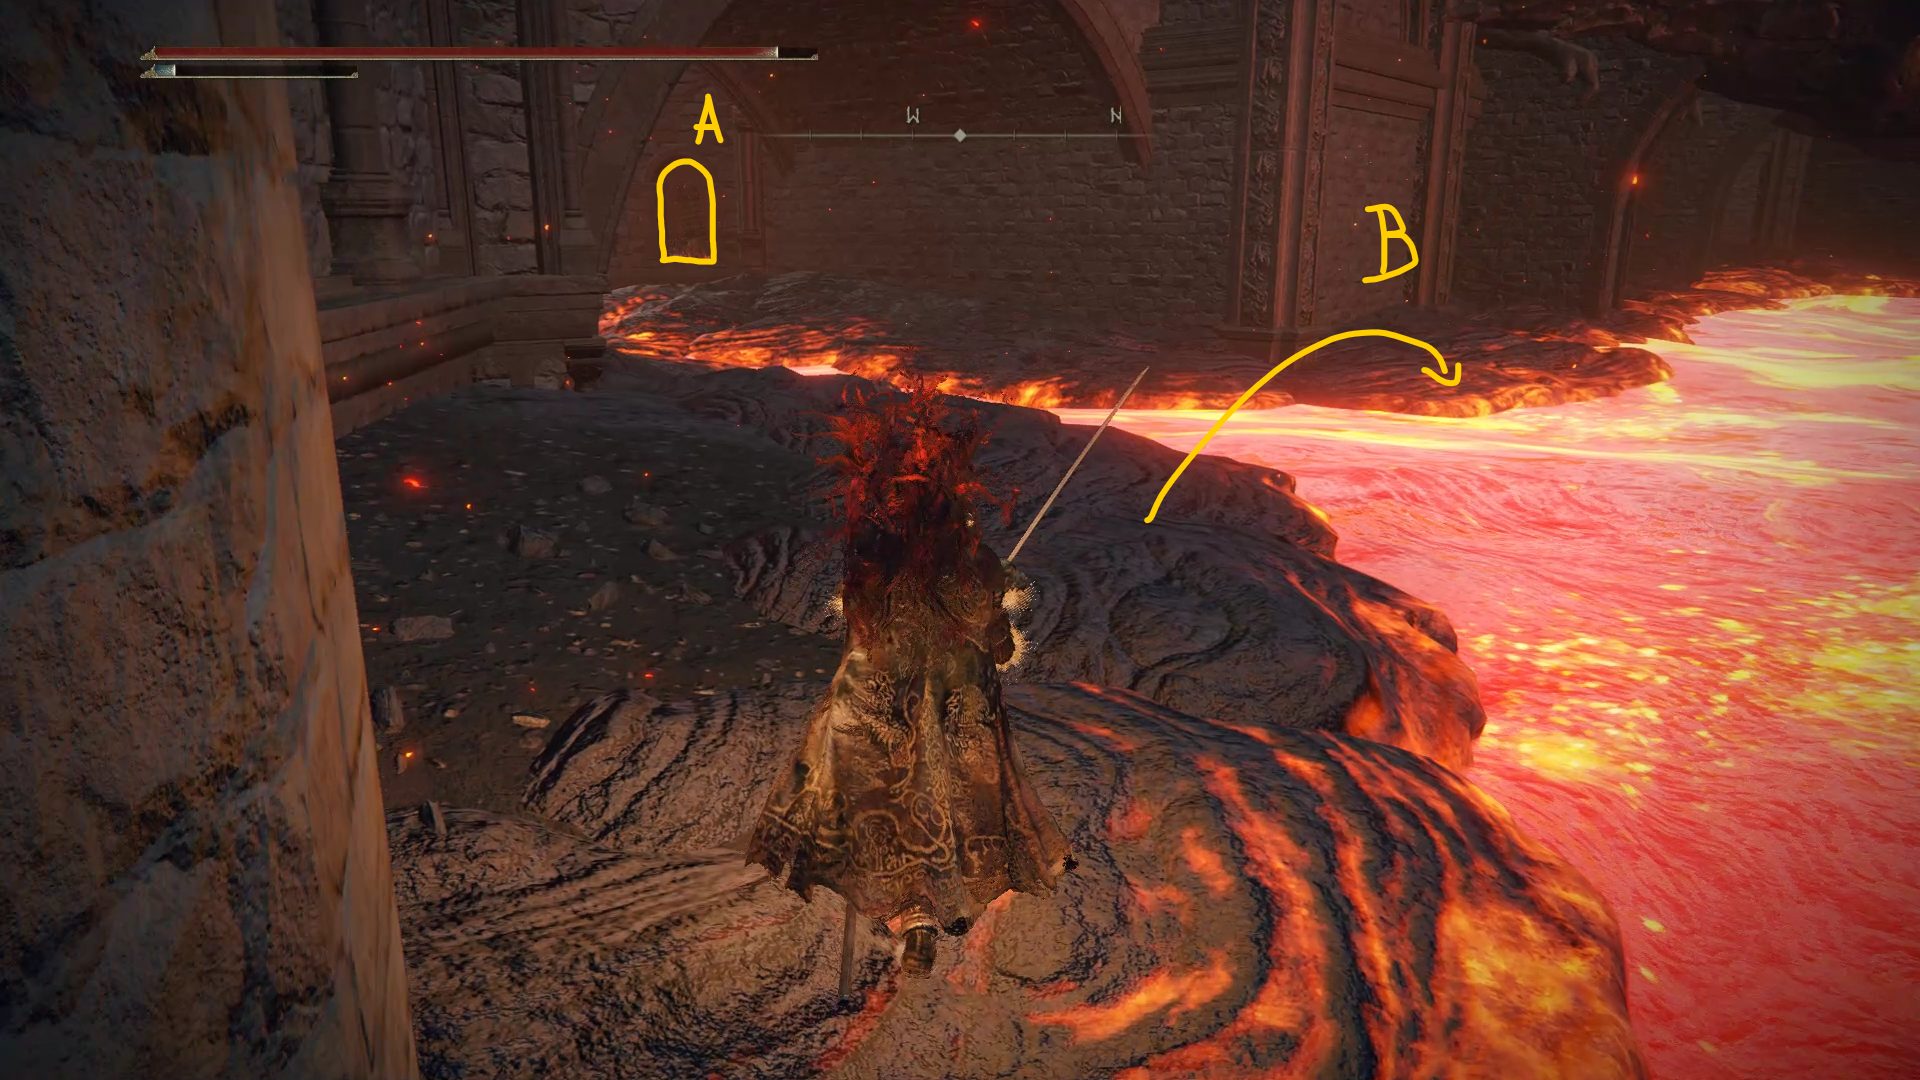
The area behind the room is incredibly dark. I’d recommend equipping either a Torch or a Lantern to help you navigate the darkness. Moving forward you’ll encounter a very angry snail. Dispatch it quickly. You’ll then enter a larger more spacious room with three more snails surrounding a lone pillar. Dispatch them and grab the Budding Horn from the corpse. You’re given a choice here. You can either continue through the door ahead (A) of you or go down below (B).
If you continue through the door ahead of you you’ll be in a narrow hallway. This place is littered with snails; some are even on the ceiling! Proceed with caution and dispatch them. You’ll be rewarded with the Nomadic Warrior’s Cookbook [21] from a corpse at the end, and another secret passage to your left! It leads back into one of the locked rooms from the Manor’s main hall. Grab the Depraved Perfumer Carmaan ashes from the corpse inside and be on your merry way.
The downward path (B) will lead to another room and a Bloodhound Knight. Defeating him will grant you the Bloodhound Claws weapon. If you’re having trouble defeating this enemy, you can back out of the room once you grabbed its attention, and it won’t be able to cross the doorway. From there, you can either use ranged attacks to safely deal with him, or come close enough to the door to get him to attack before dodging and retaliating at the end of its attacks.
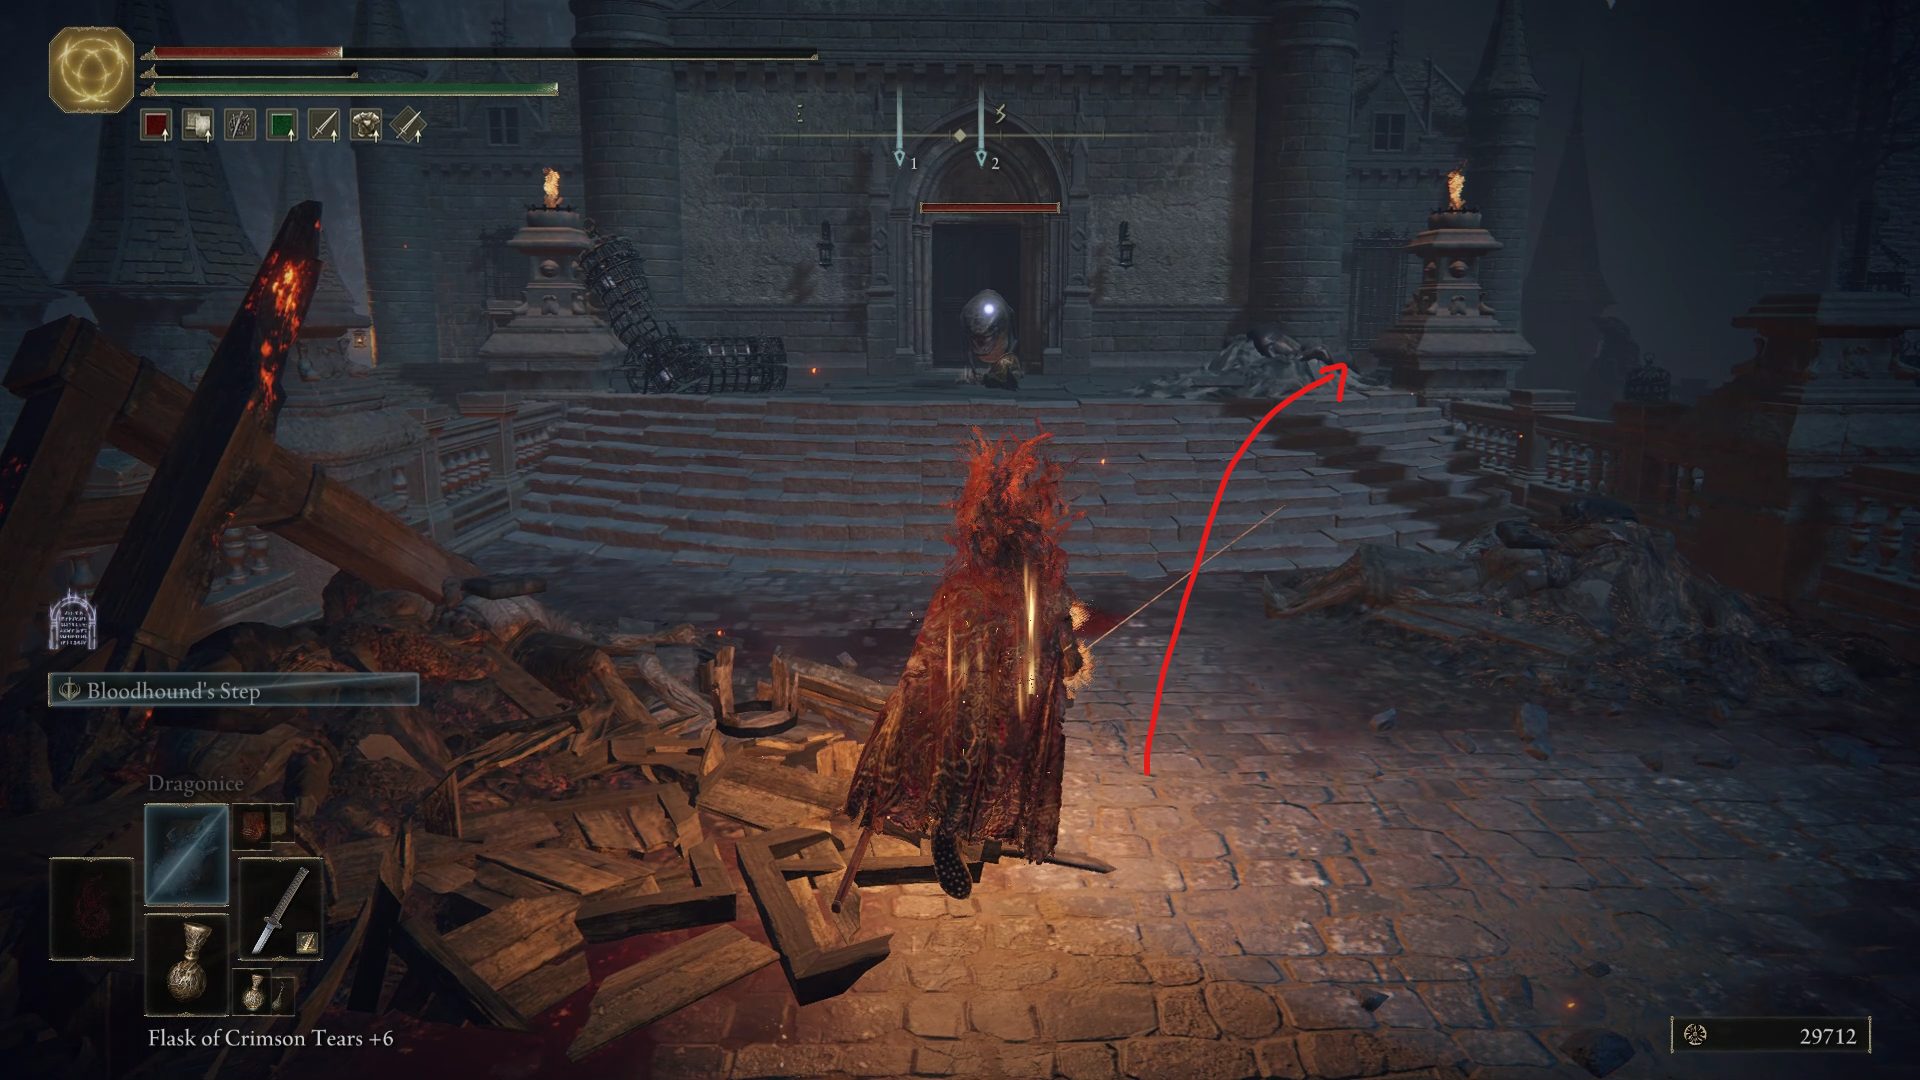
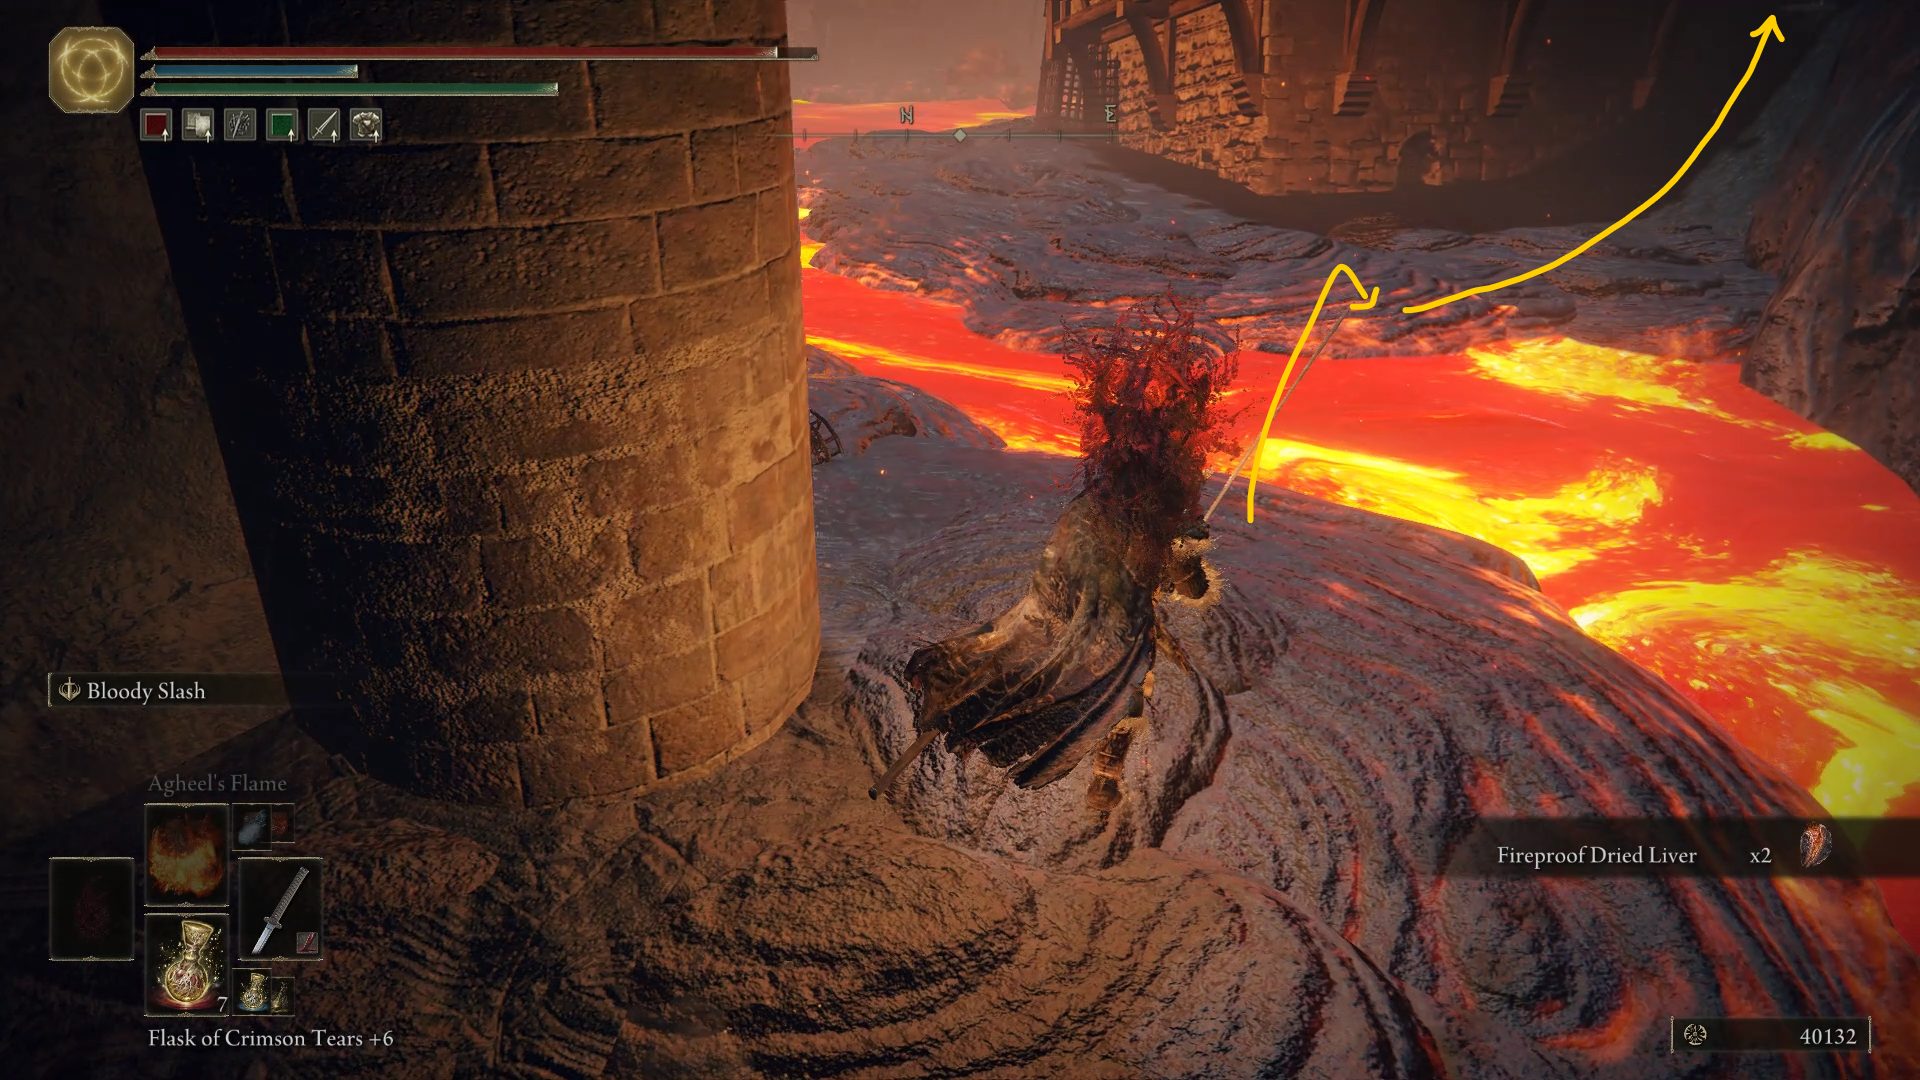
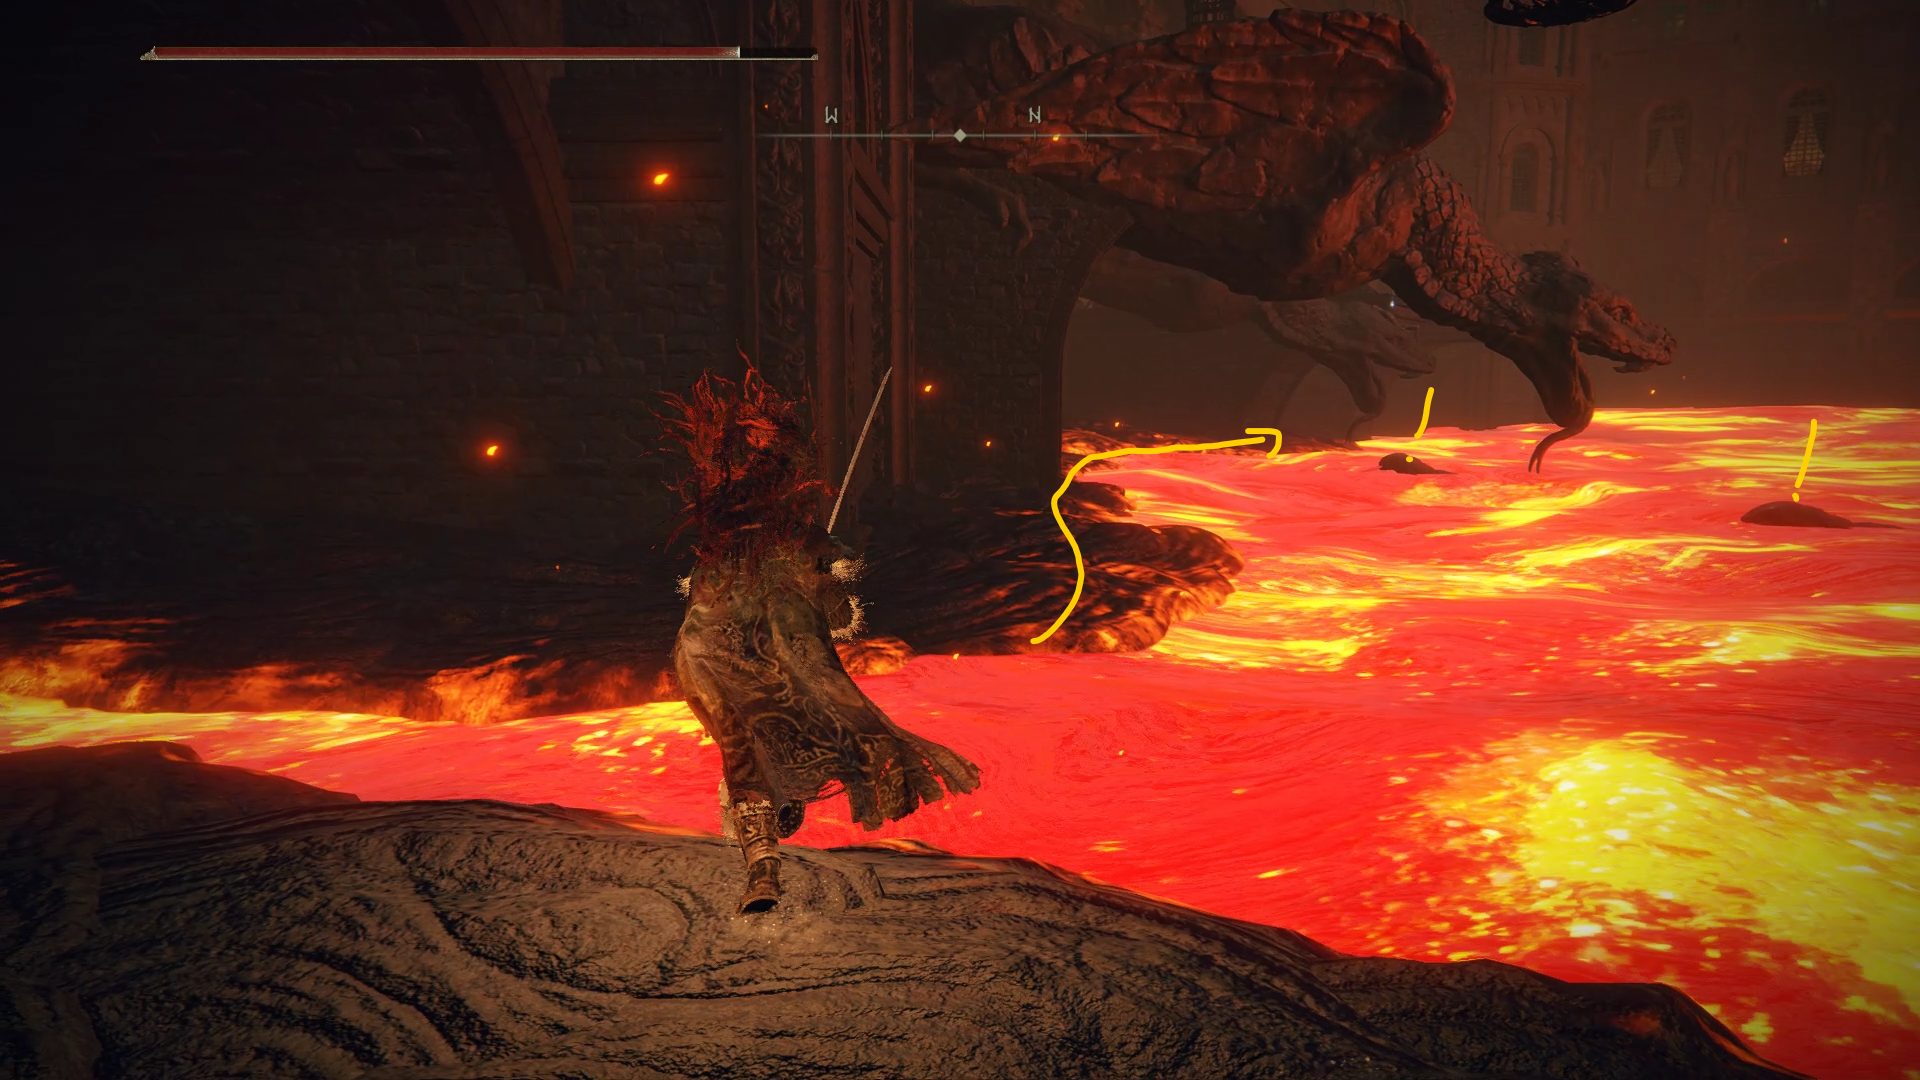
Grab the Fireproof Dried Liver off the corpse he was guarding and proceed onward. You’ll end up in a room with the Prison Town Church site of grace. Touch the grace and open the doors to reveal the beginning of the actual dungeon. Step outside and soak in the view. Ahh. Smell that? That’s the smell of brimstone and pain, my friend. Here you’re faced with two paths. One leads up to a bridge that you aren’t able to cross yet, and the other leads into the town area. You might notice an item above you on a ledge near the bridge. Don’t worry about that; we’ll grab it later.
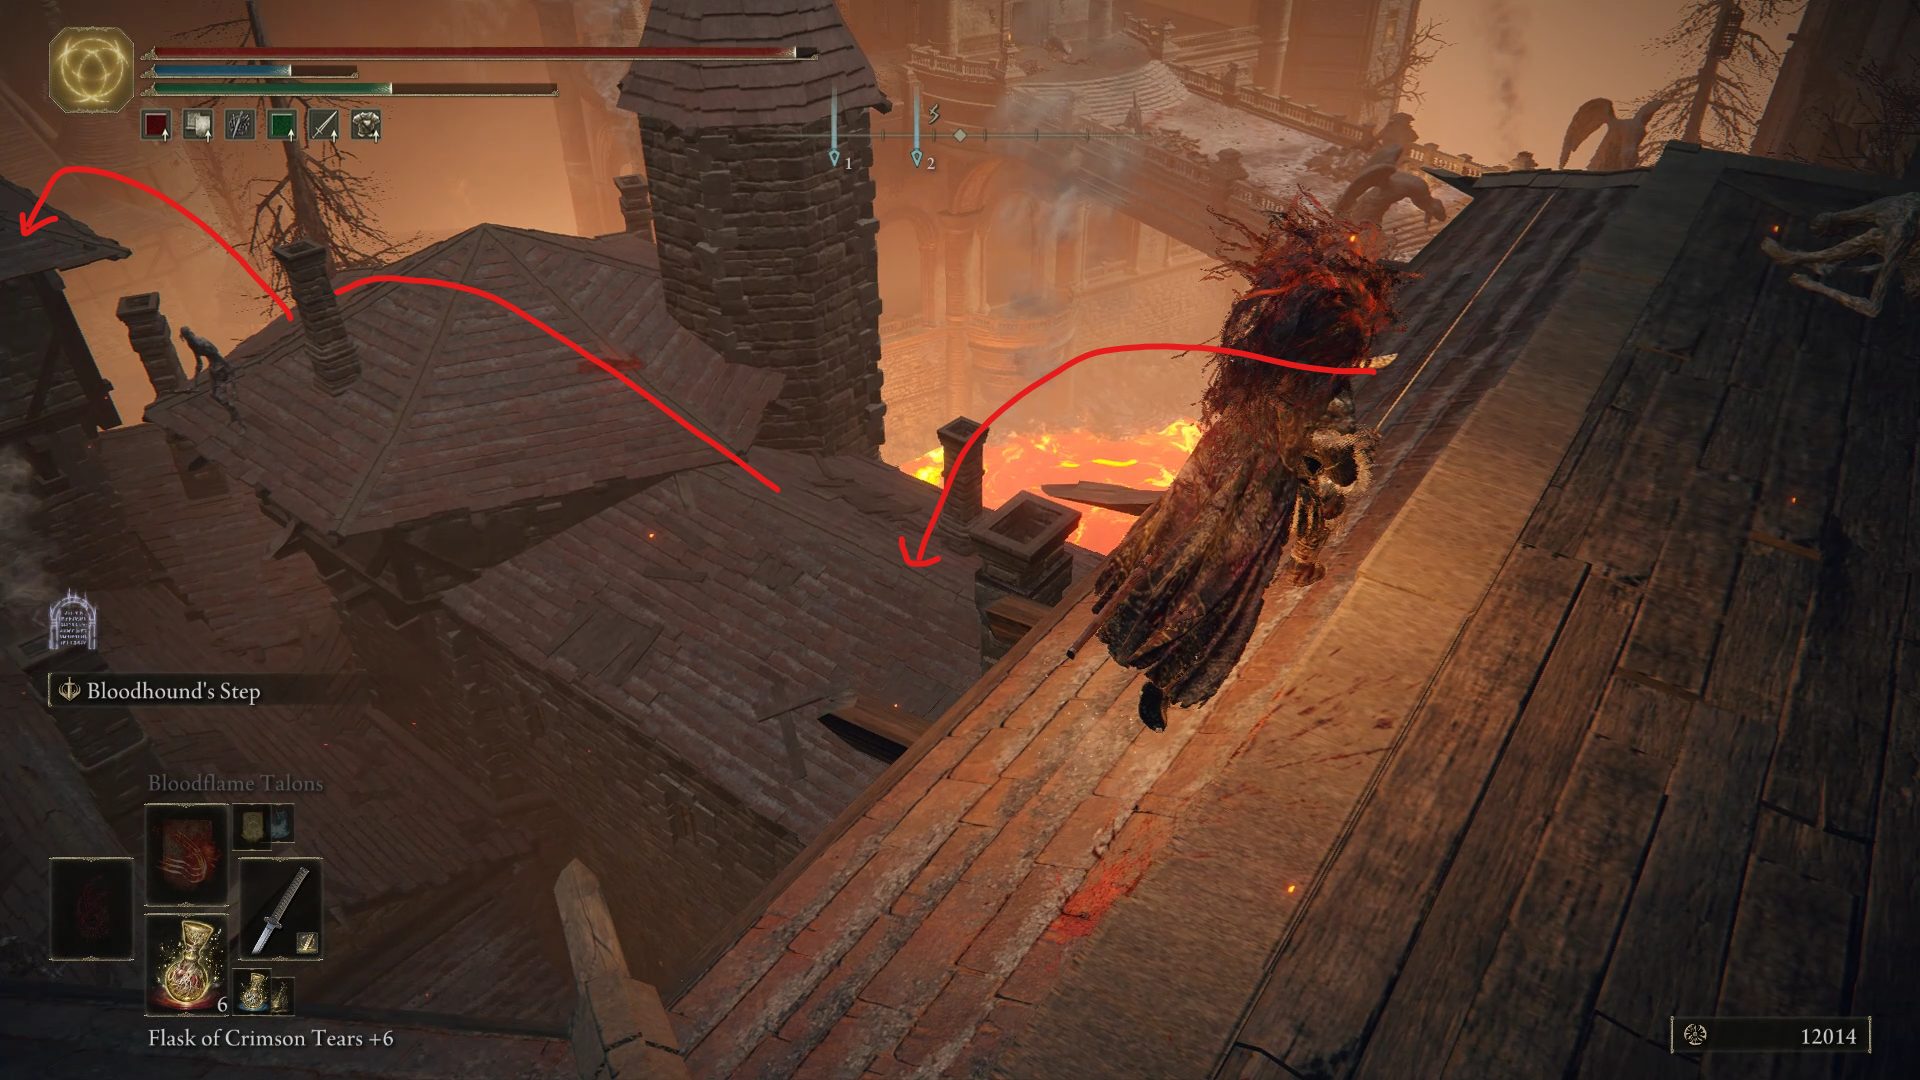
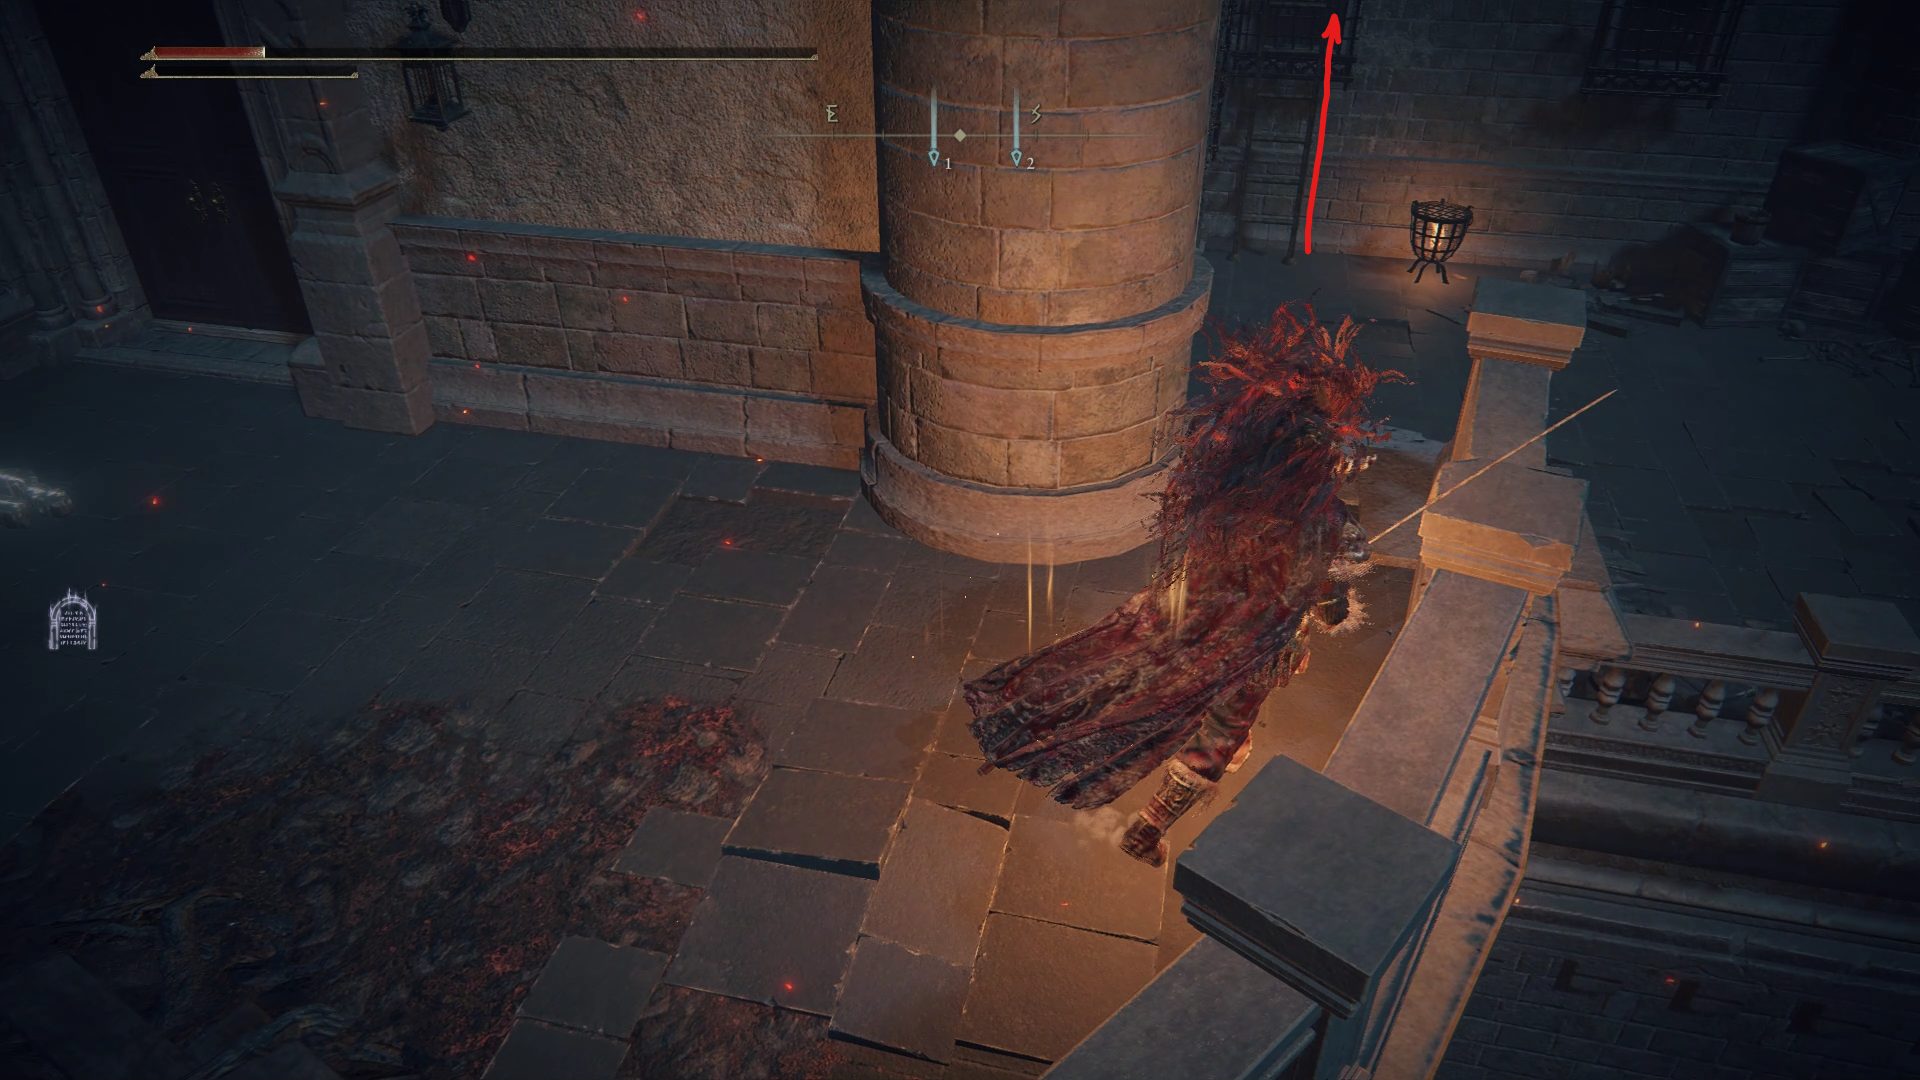
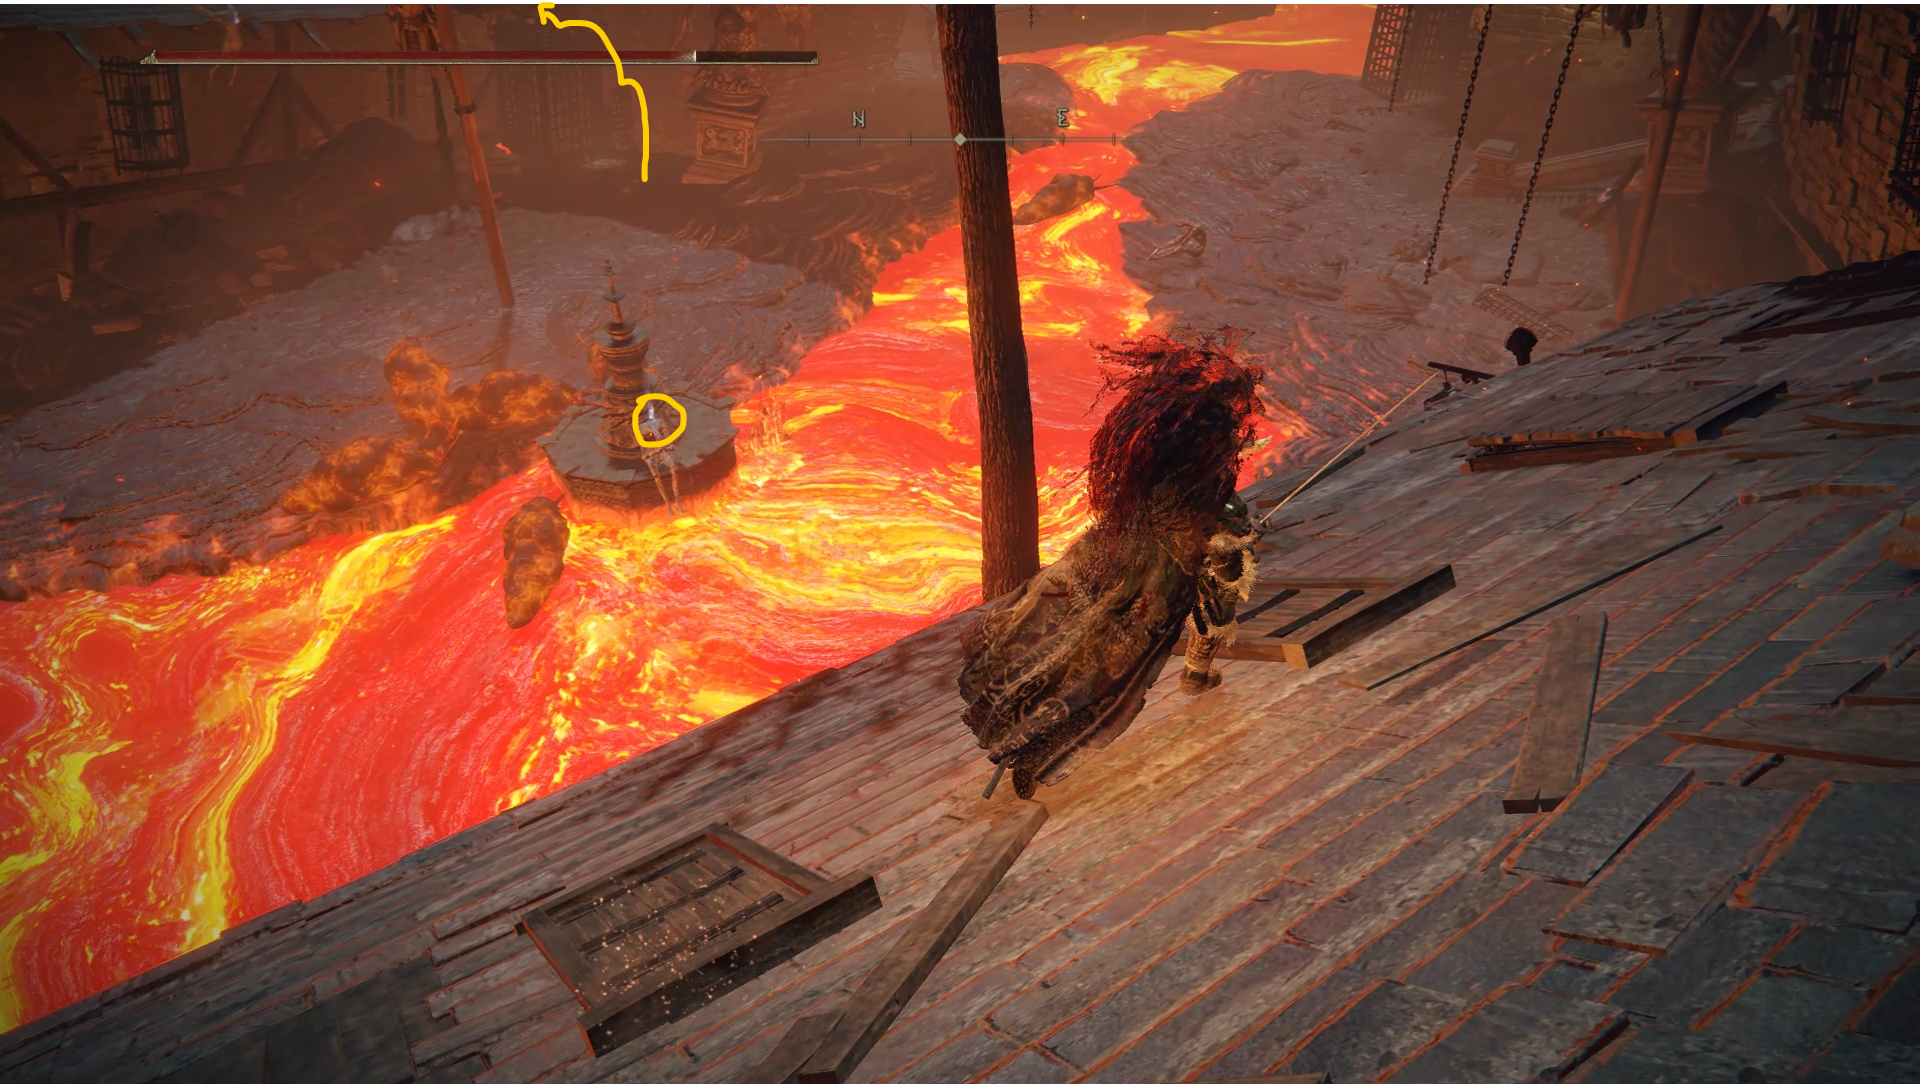
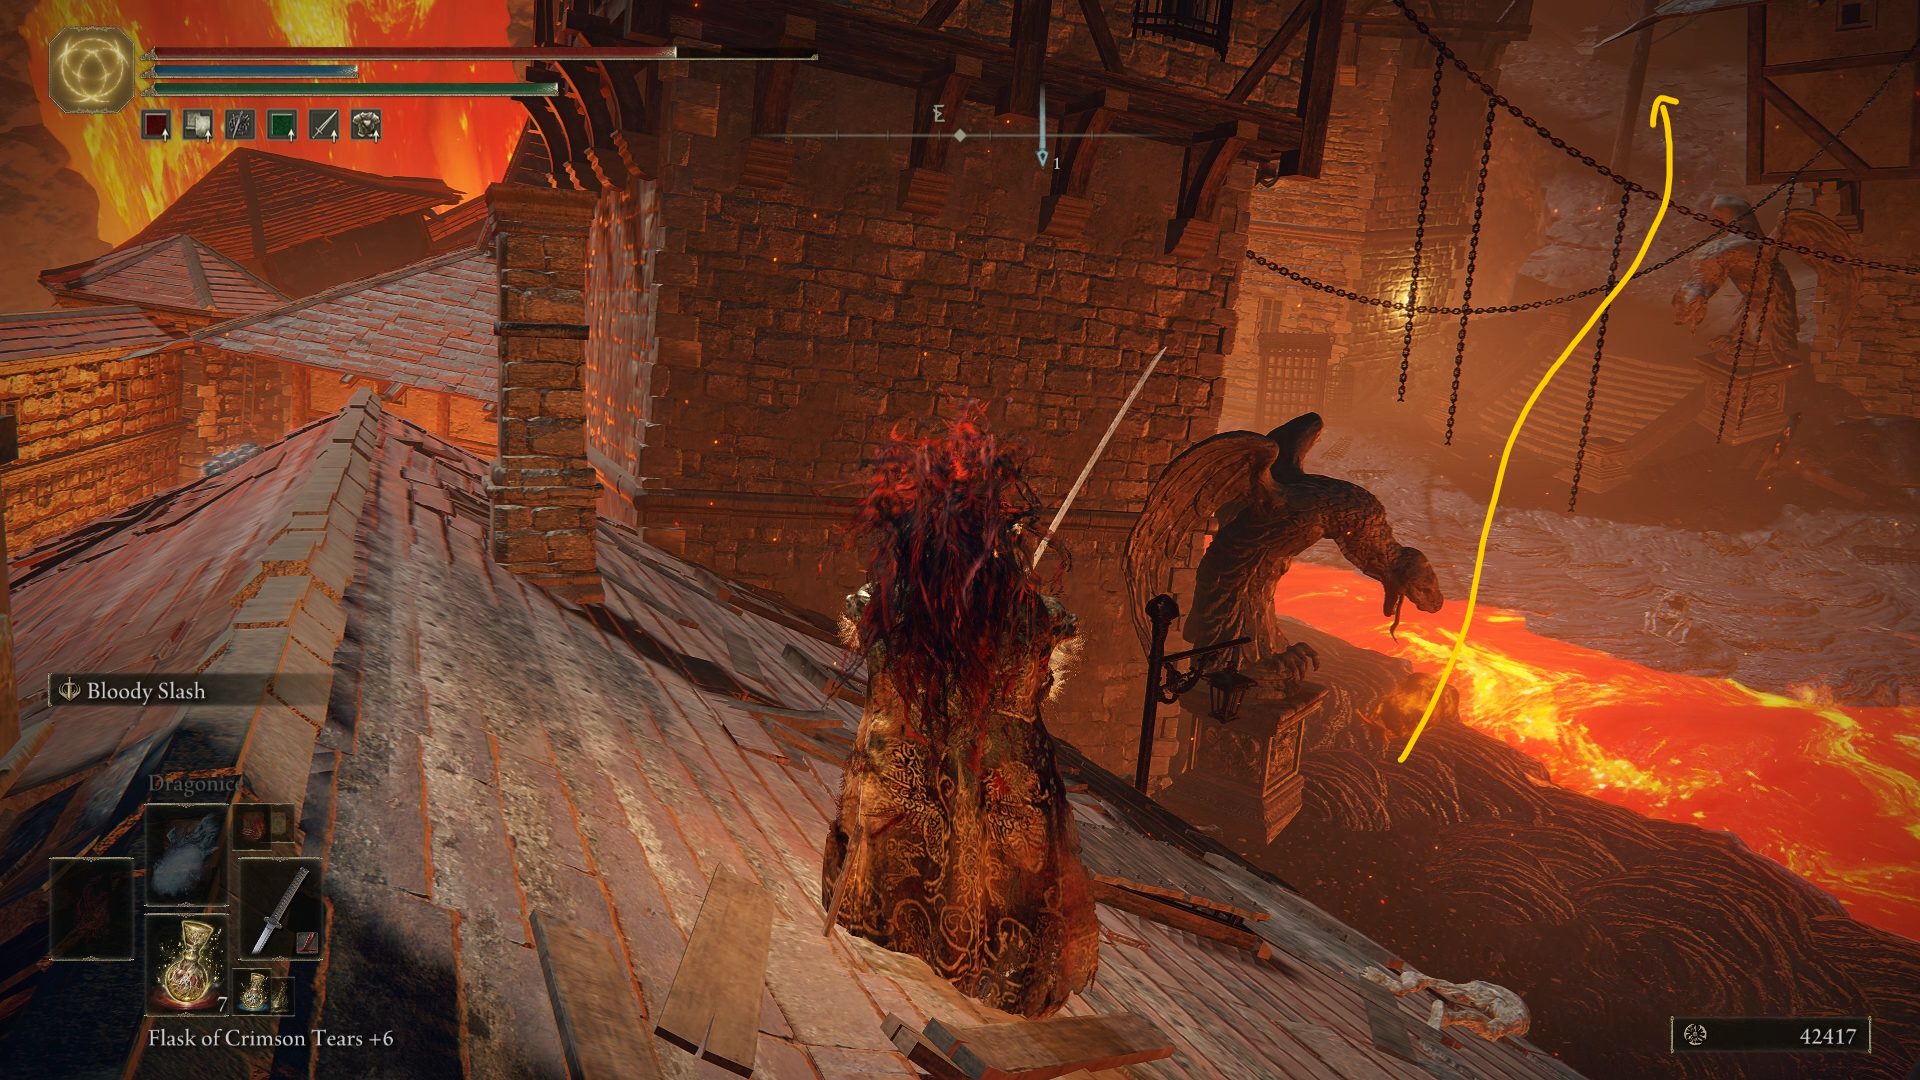
Before heading into the lower area be sure to activate the Summoning Statue on the wall to your right. There’s nothing wrong with a little bit of jolly cooperation! After that, proceed down the path. Now, there are several ways to cut through the town. The safest way is to make your way onto the rooftops. There are a lot of enemies up there who will throw poison pots at you from above while you’re strolling through the town below. Take your time here. The town area isn’t necessarily large but there are a few items you can miss if you aren’t careful and methodical with your exploring.
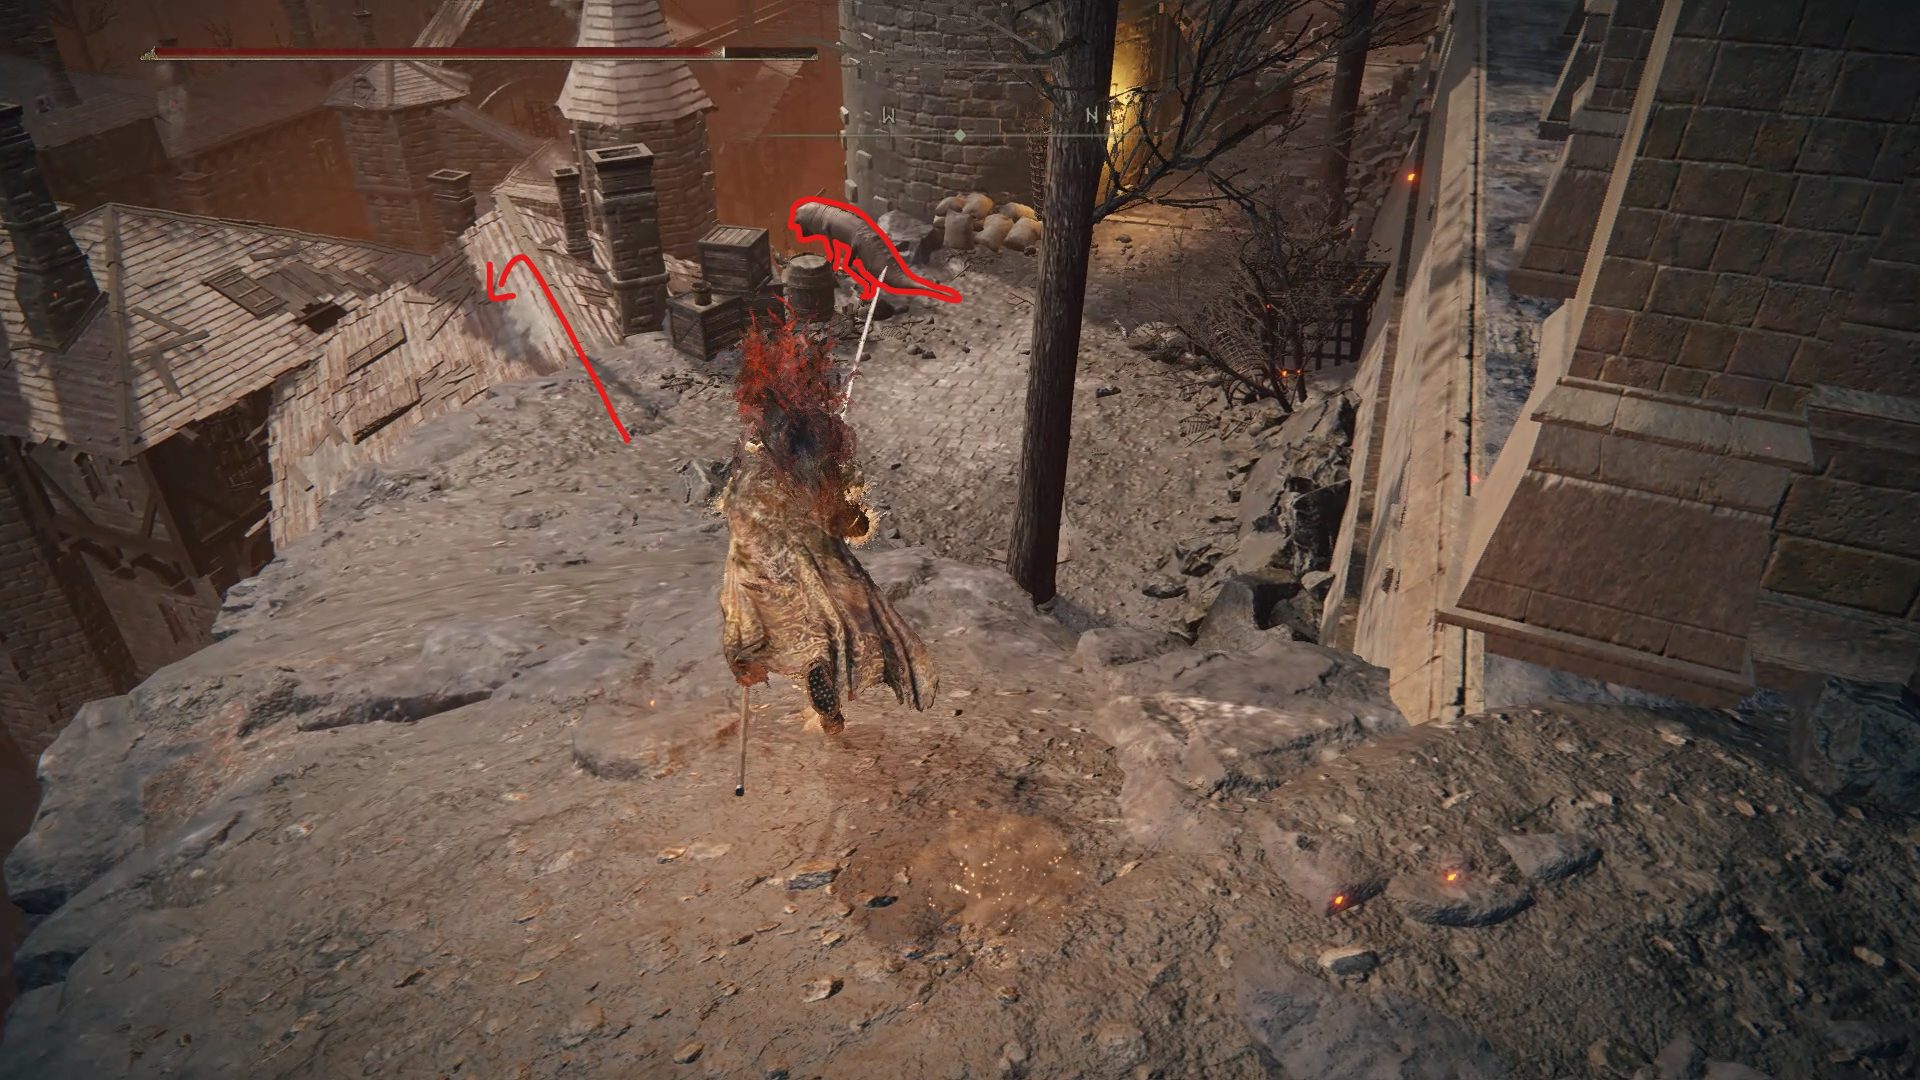
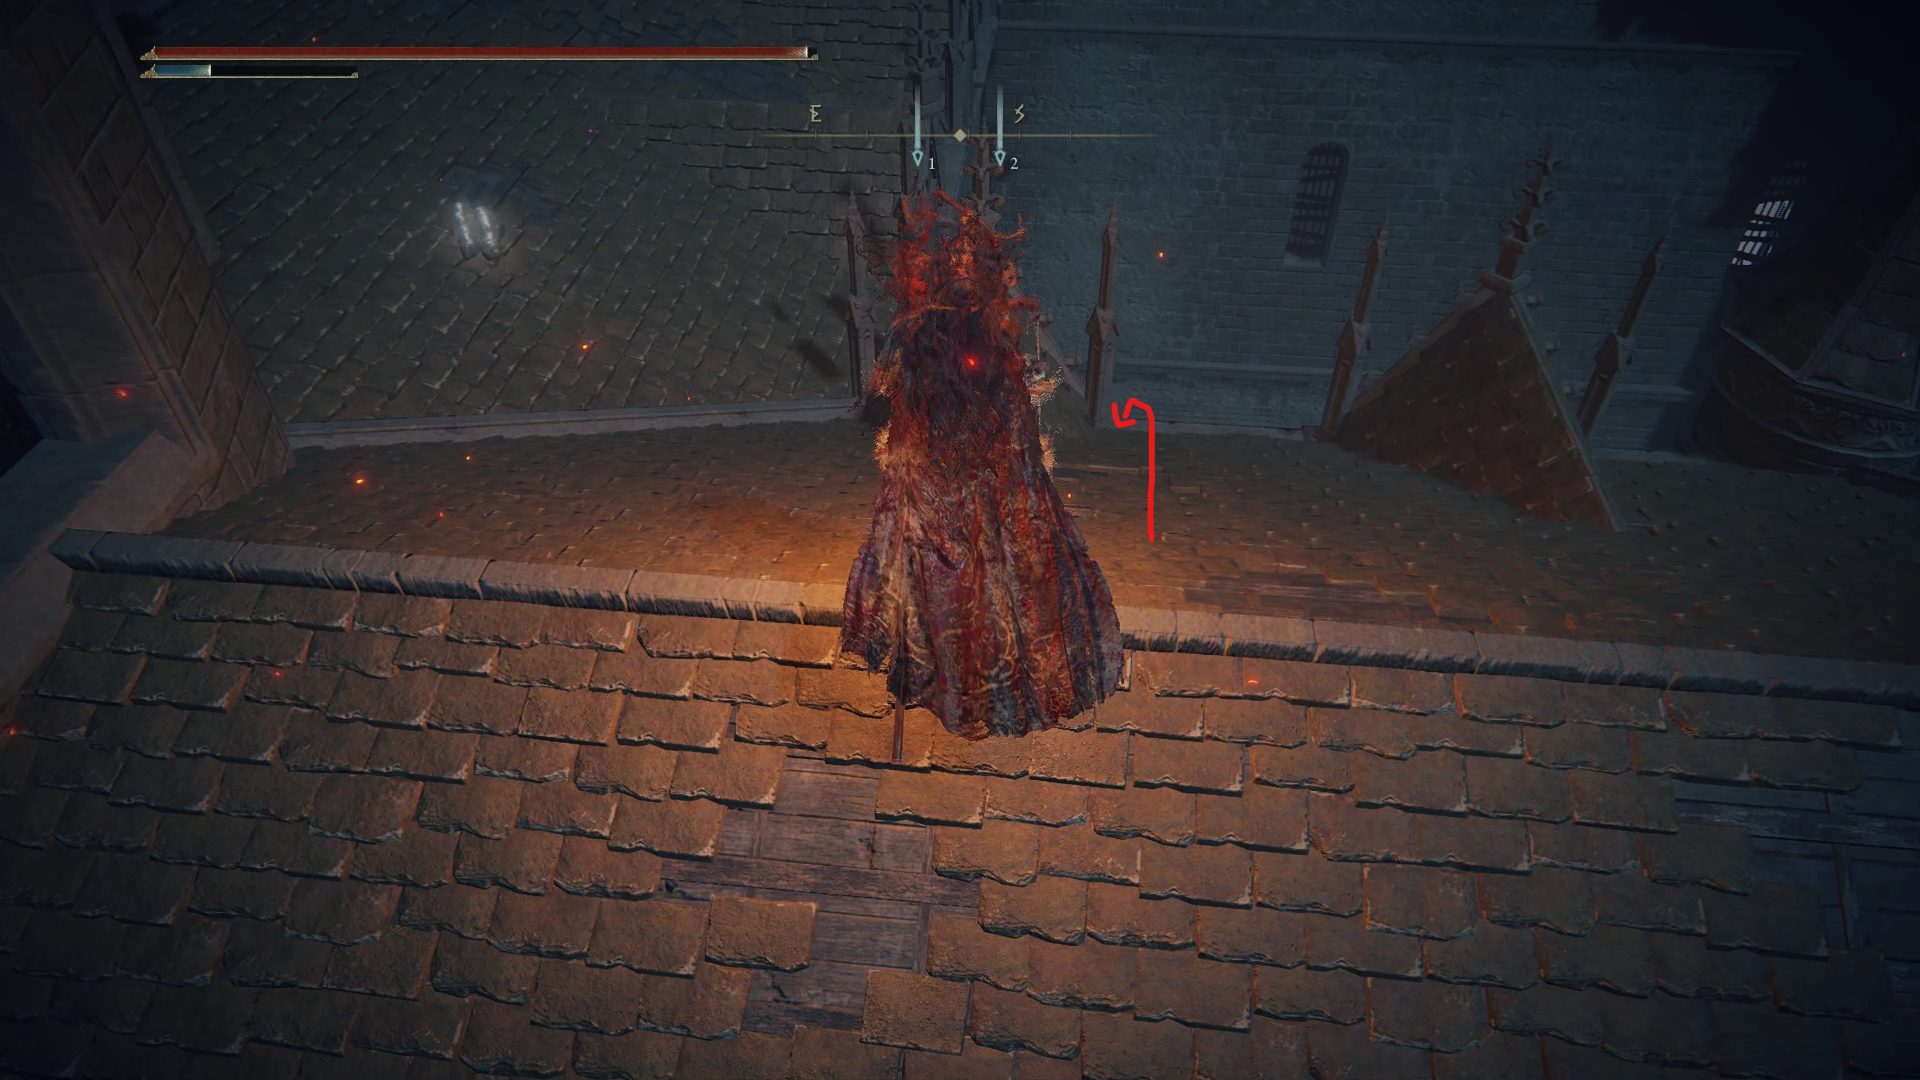
Before reaching the rooftops you’ll be faced with a Snake Warrior. After it’s dealt with the rooftops are yours to explore. Kind of. You’ll find two more Snake Warriors patrolling them and a handful of shambling corpses. On the lower set of rooftops there will be a bridge with a corpse hanging off the side of it. Grab the Golden Rune [5] and proceed back upward.
Golden Rune [5] locationWay further up the rooftops
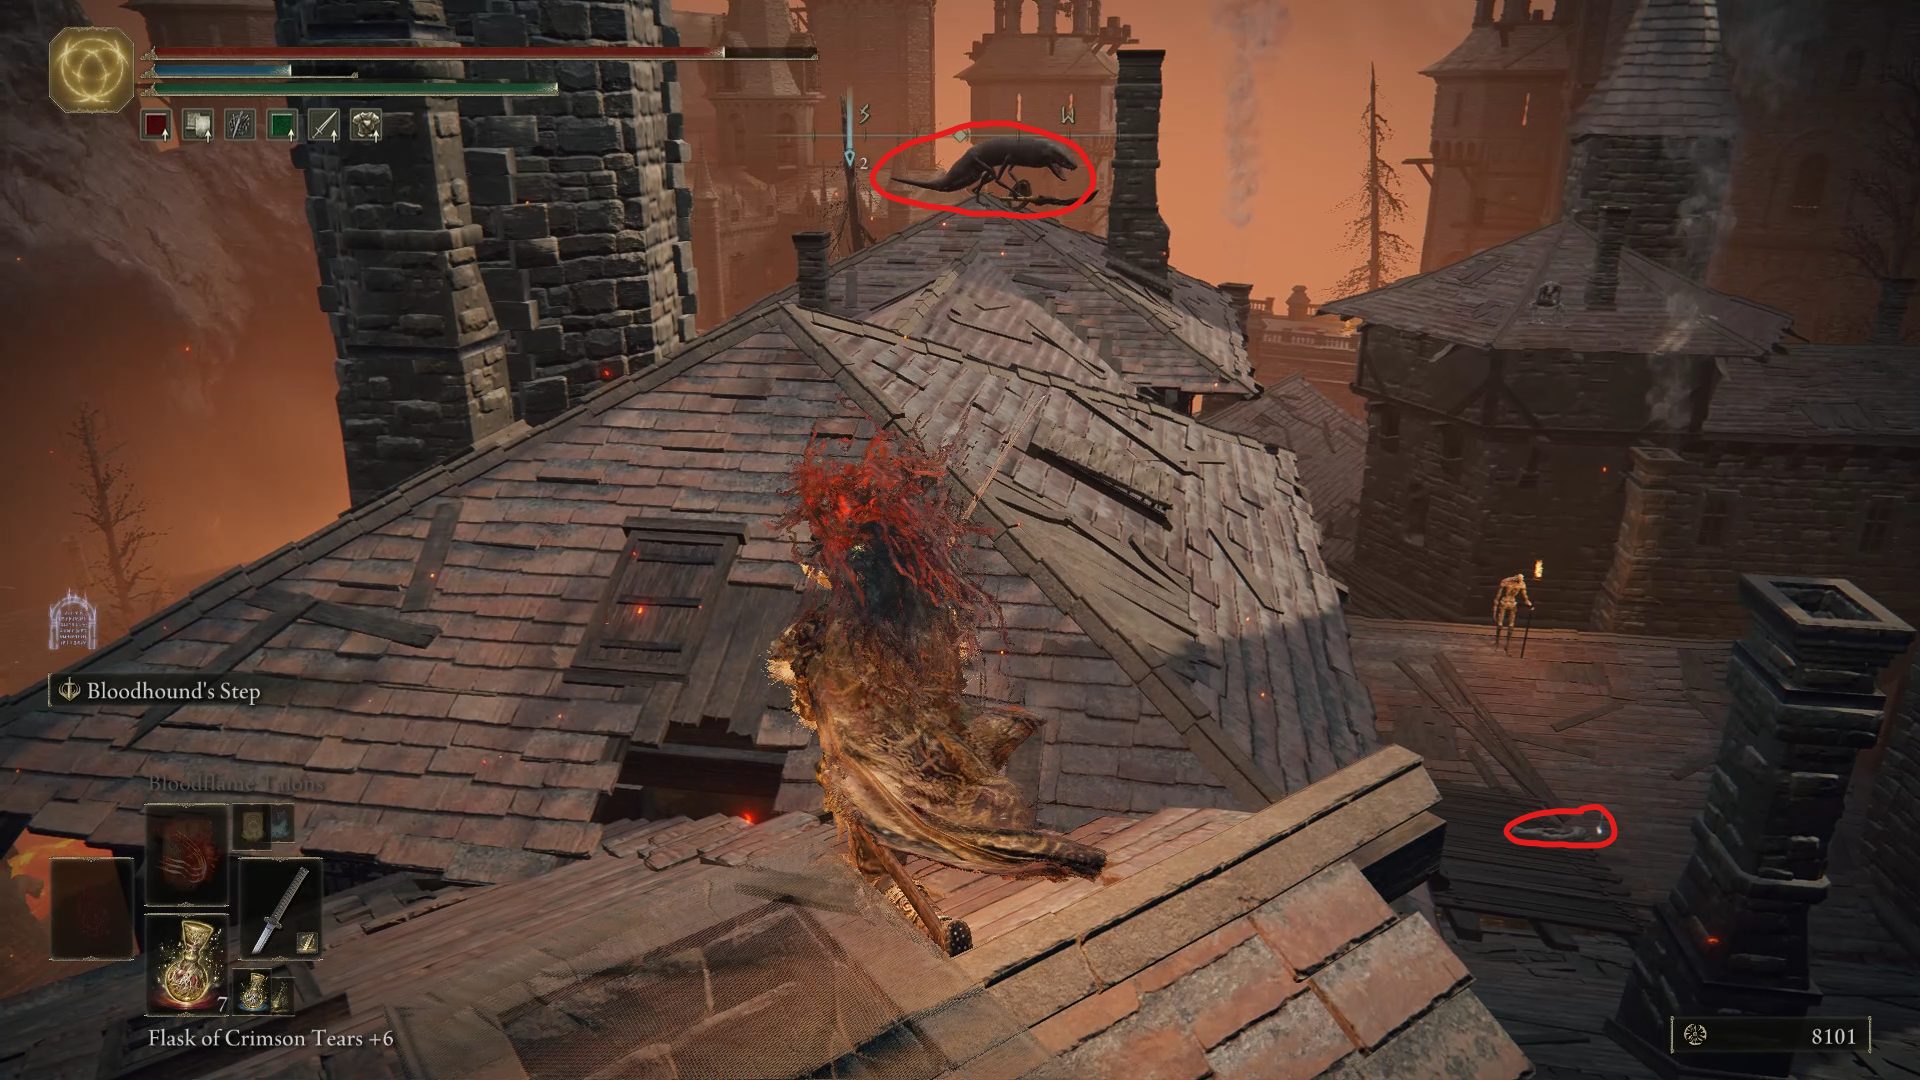
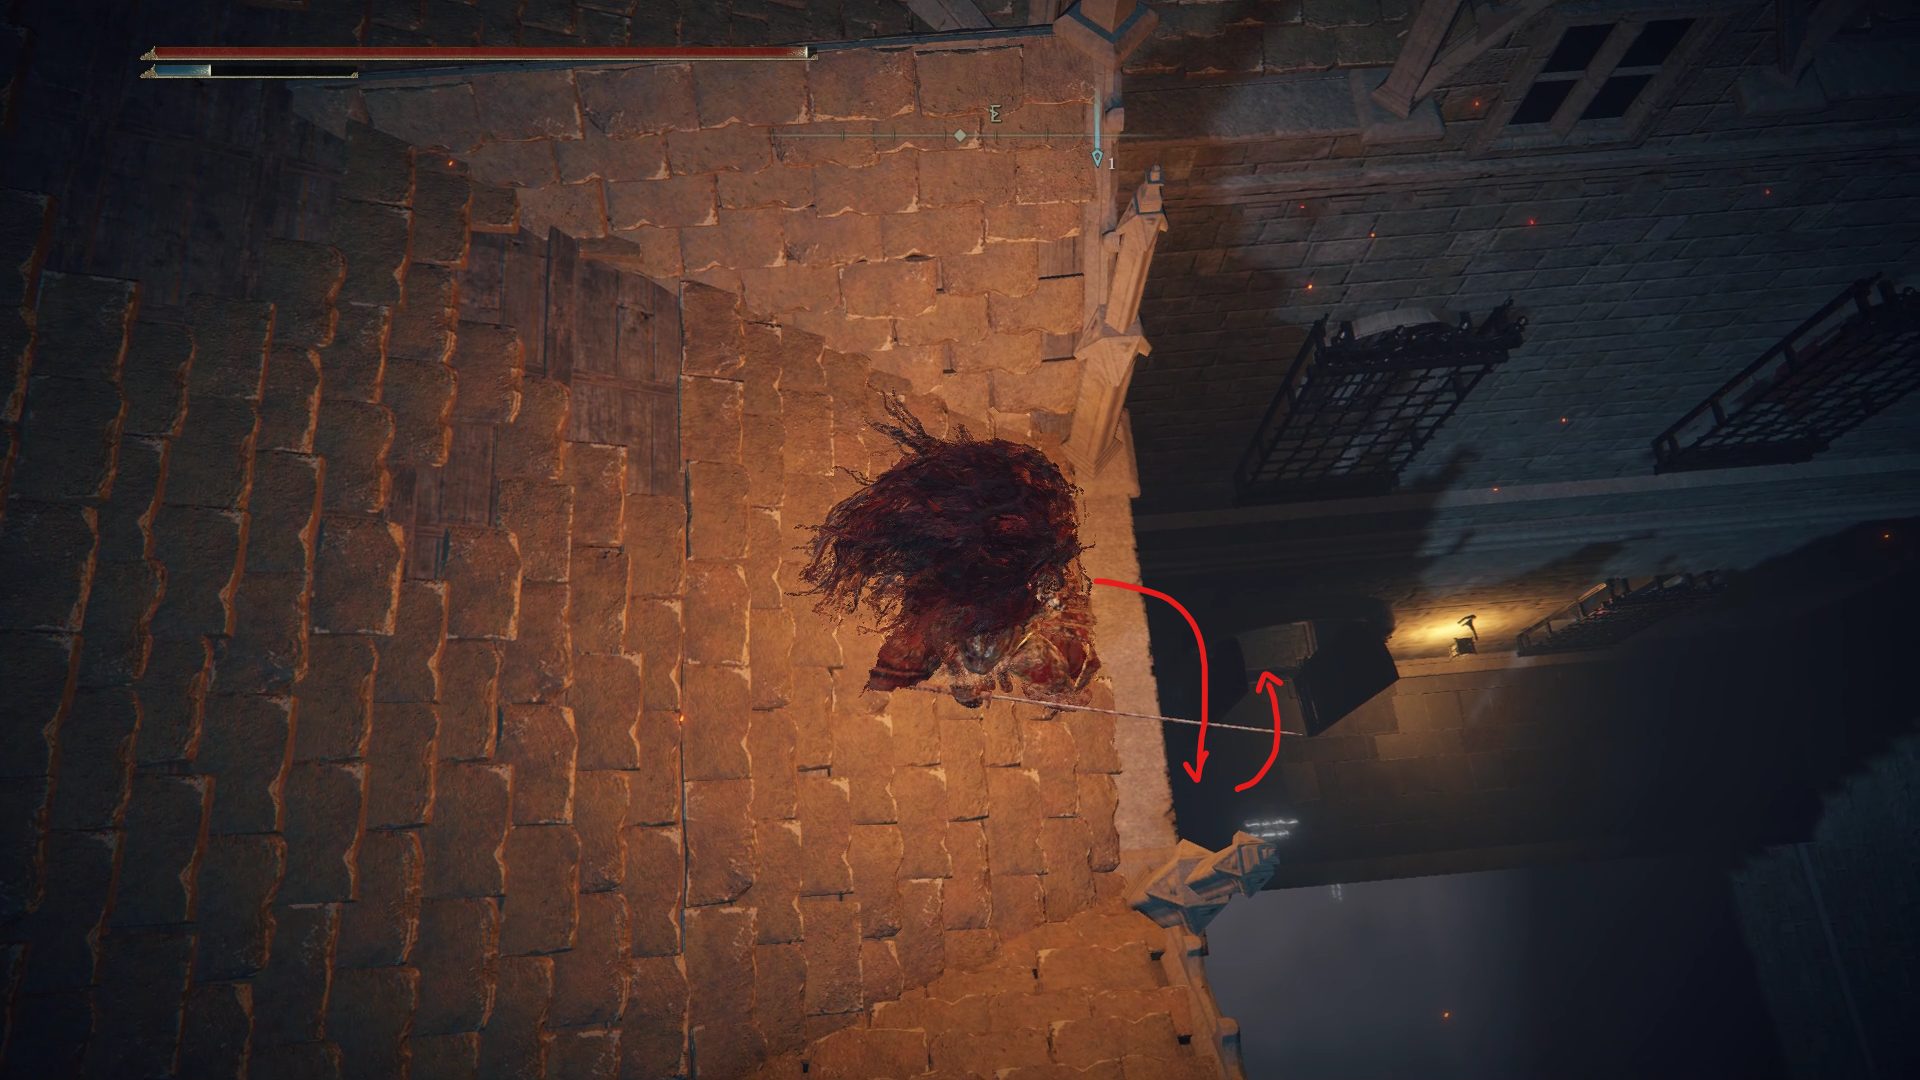
Make your way across the rooftops to a larger section where this is a Snake Warrior patrolling; it’ll be next to several shambling corpses, so be careful. To the left of where the snake was on a walkway will be a Golden Rune [9] on a corpse. With the rooftops now clear of enemies you can head back to the main pathway and enter the town.
Golden Rune [9] locationWay back to the main path
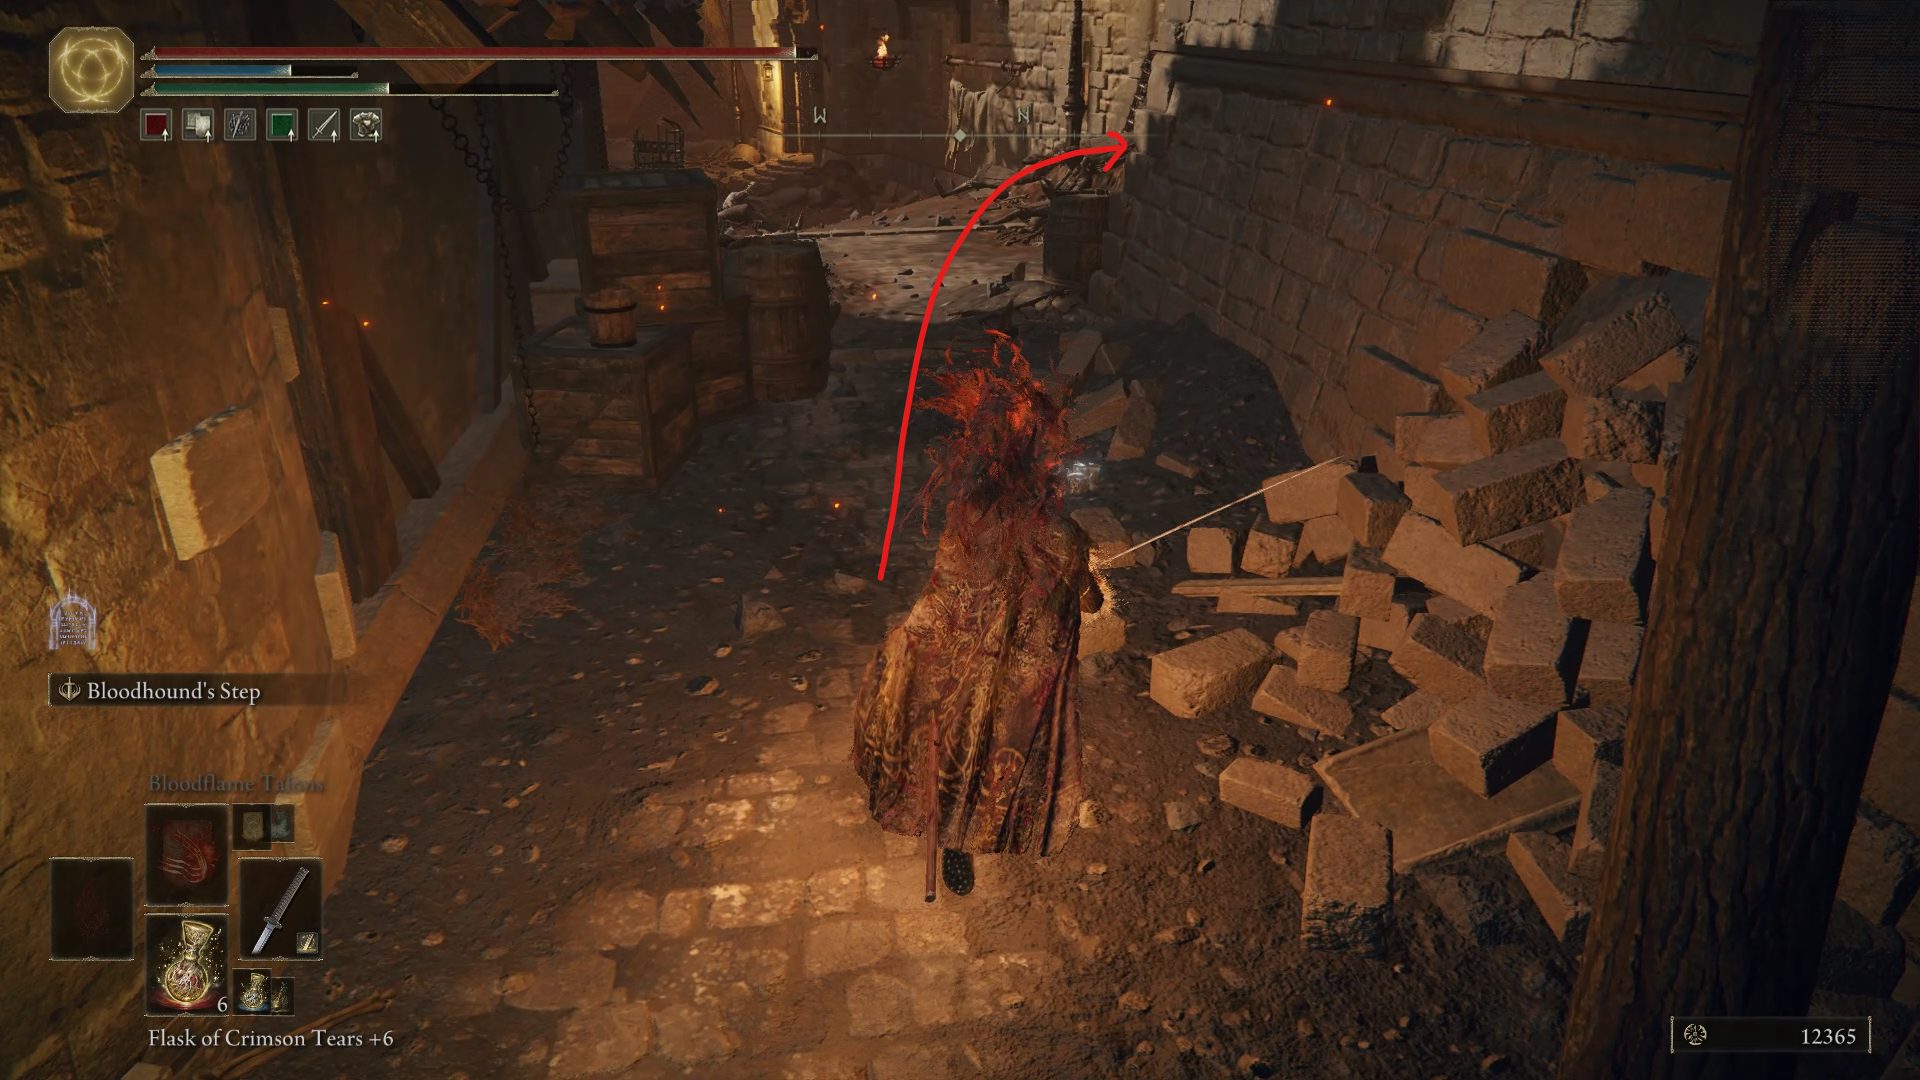
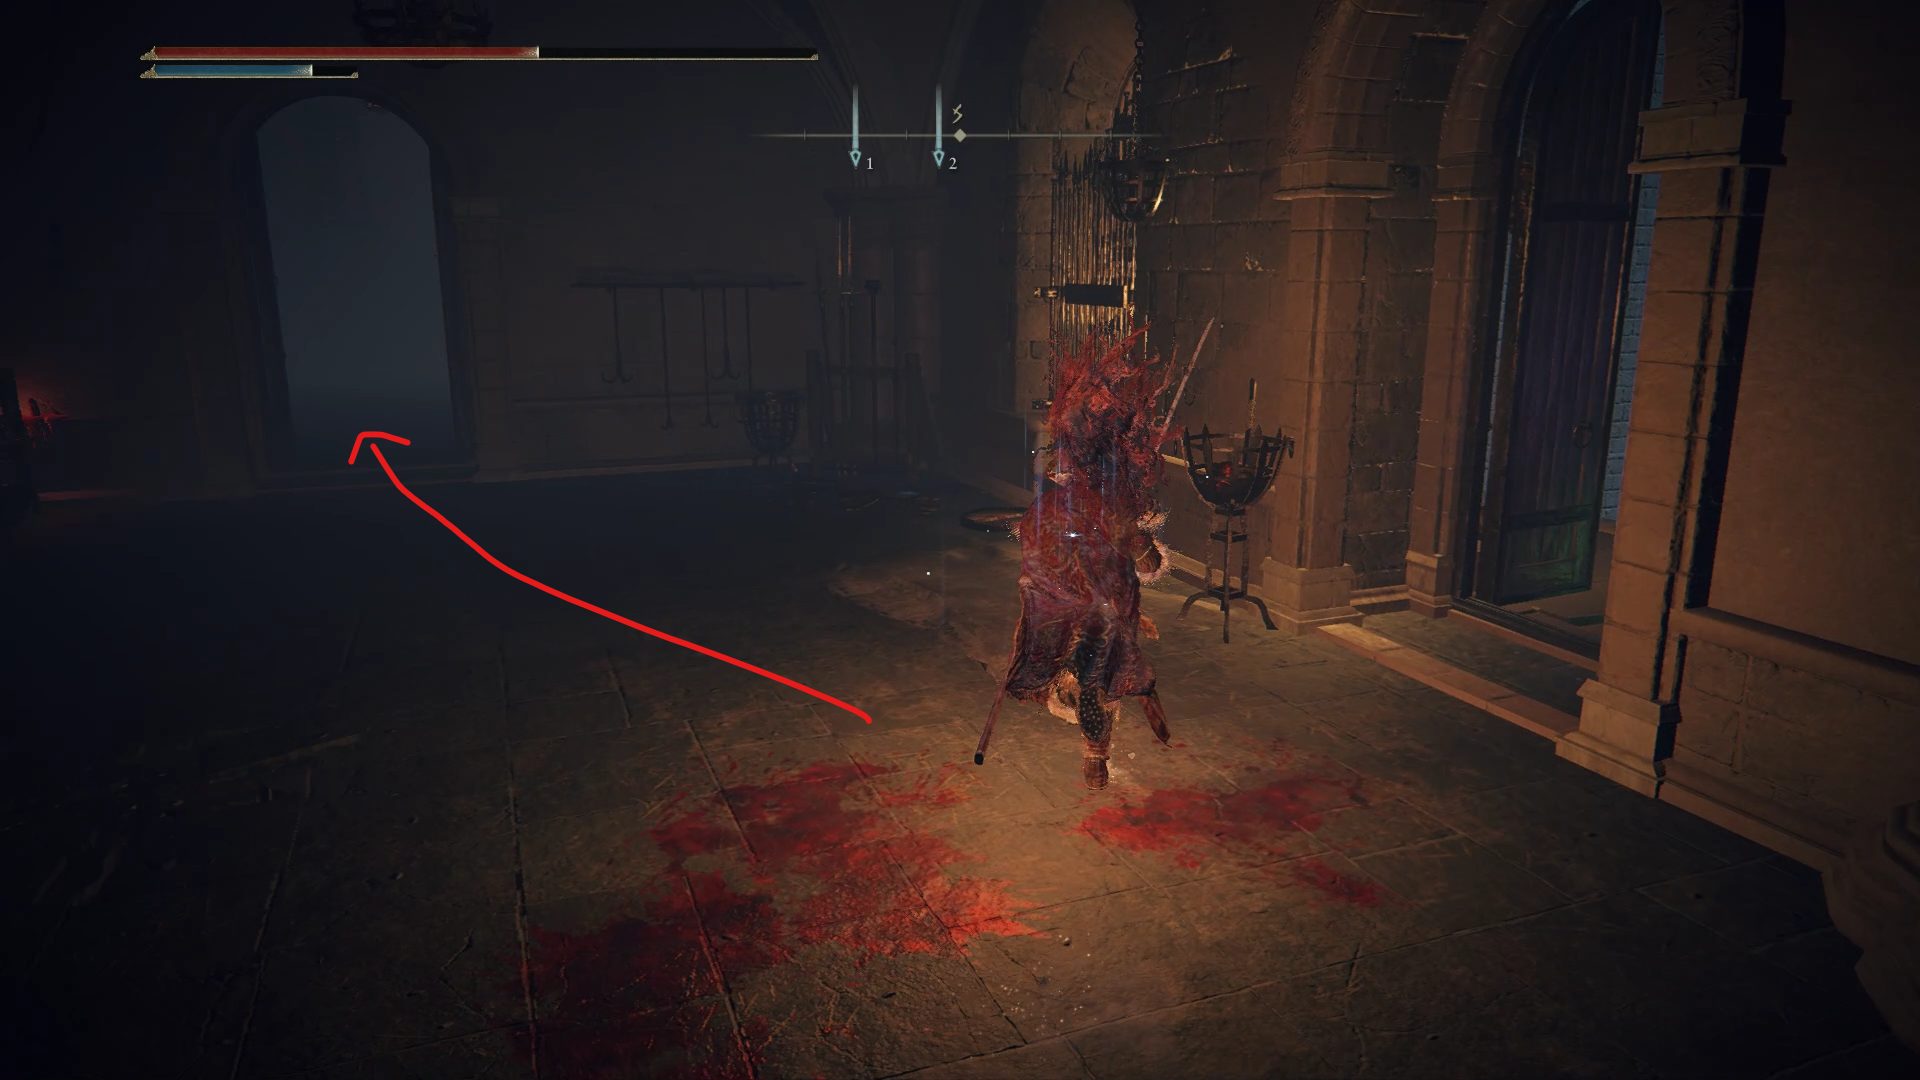
Ahead of you will be a shambling corpse and, on your right, will be an alcove with three dogs. The dogs are guarding a corpse with a Furlcalling Finger Remedy. If you proceed down the path you’ll be ambushed by an Iron Maiden.
Dog alcoveIron Maiden ambush
You can take it out however you like. Continuing on you can round the building to your left, reach the rooftops once more, and find a Smithing Stone [6] on a corpse. On the same series of rooftops, just below the one you should be currently on, you’ll see a Loot Beetle. When defeated it will drop a Somber Smithing Stone [5].
Path to the Smithing Stone [6]Somber Smithing Stone [5] loot beetle
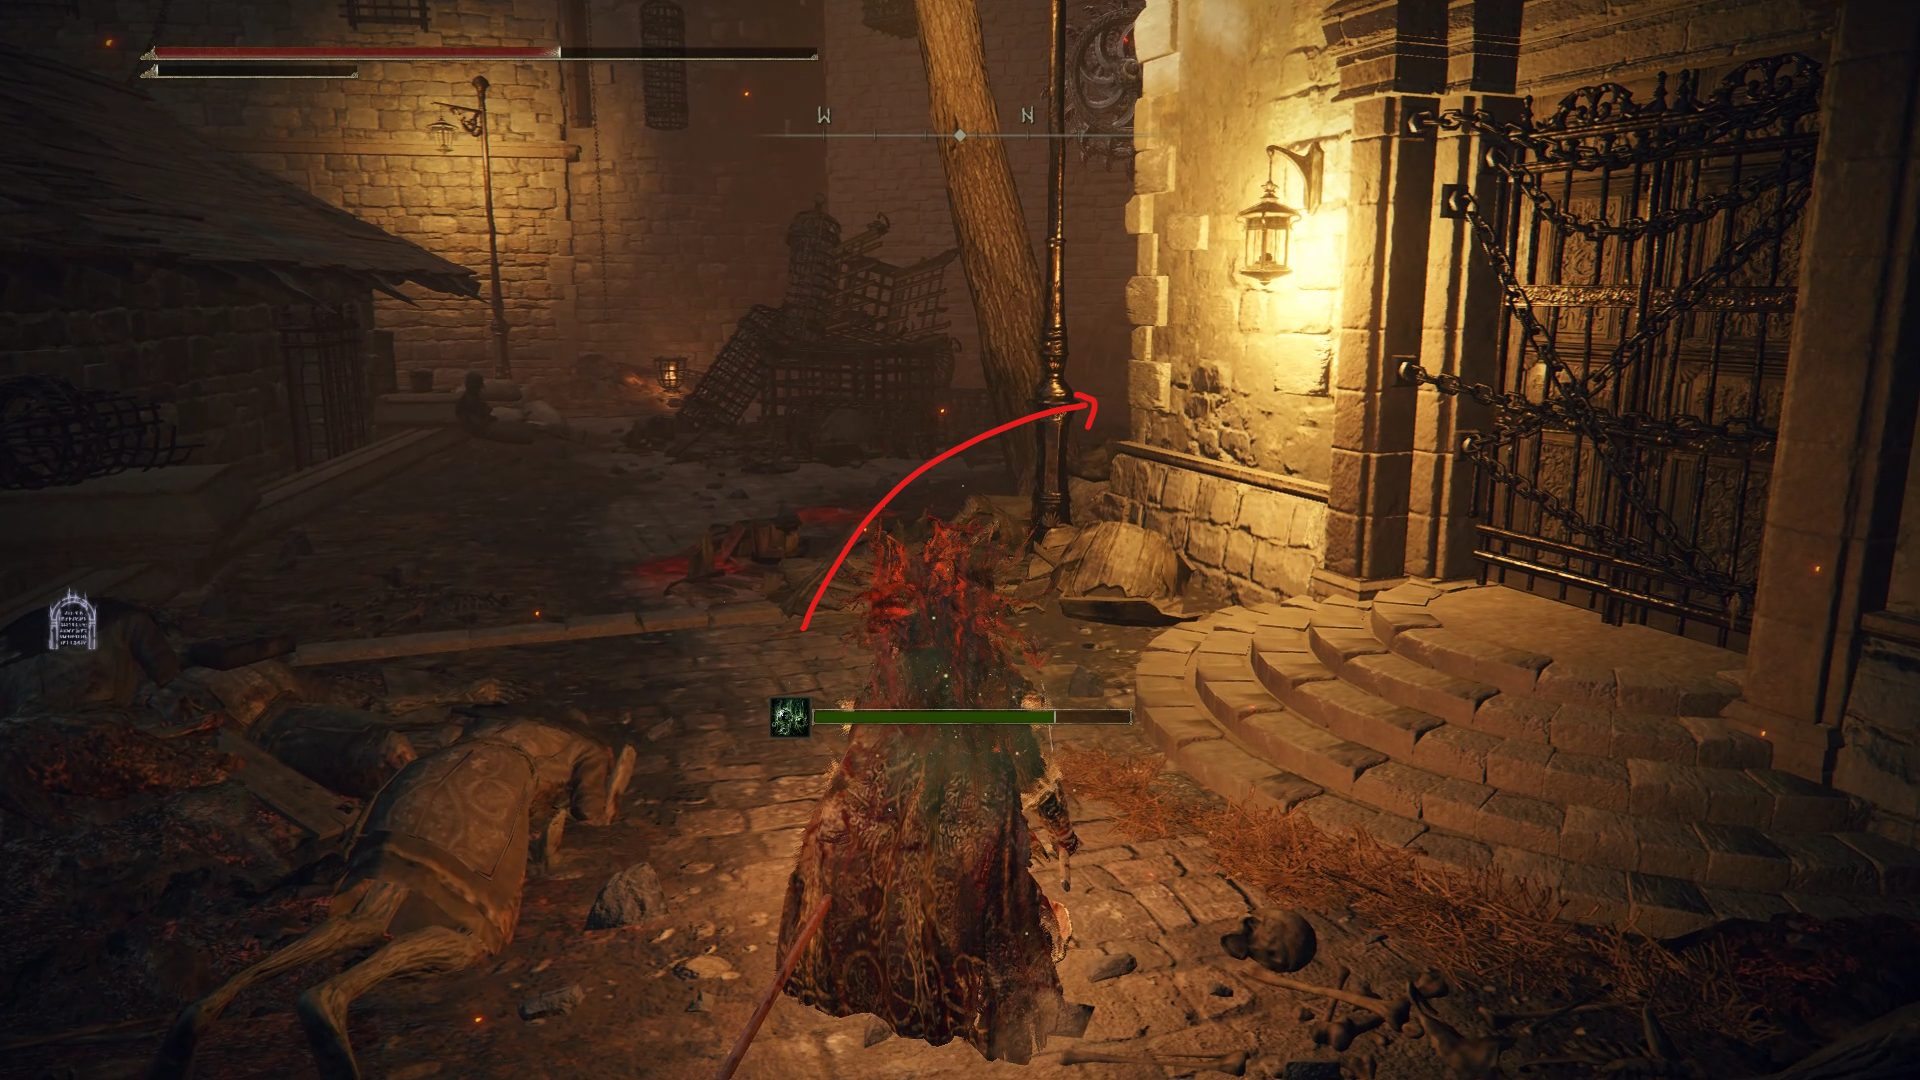
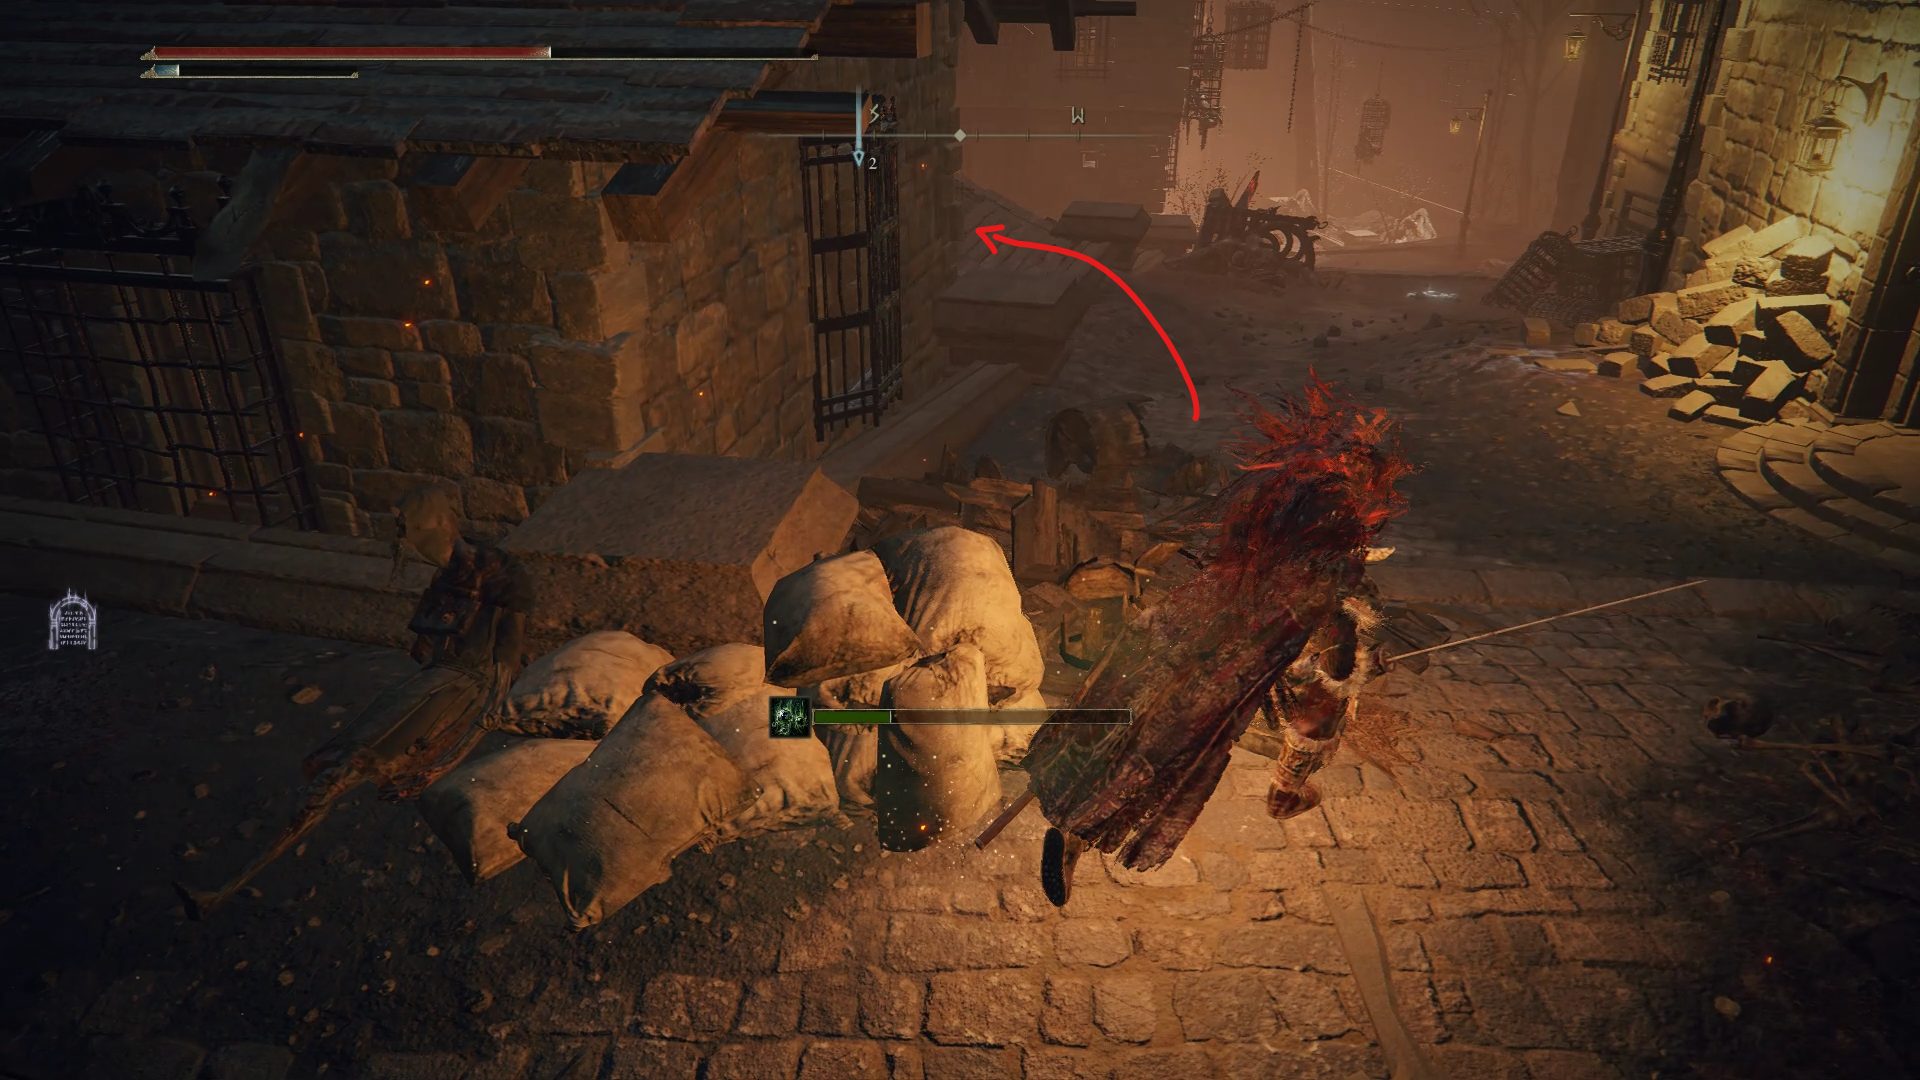
Now back on the path there will be two dogs. The second dog will be guarding a bundle of ten Fire Arrows. Beyond that is a more circular open area with three ways to go. One will lead deeper into the town, the second will head farther into the dungeon, and the third is a building requiring a Stonesword Key.
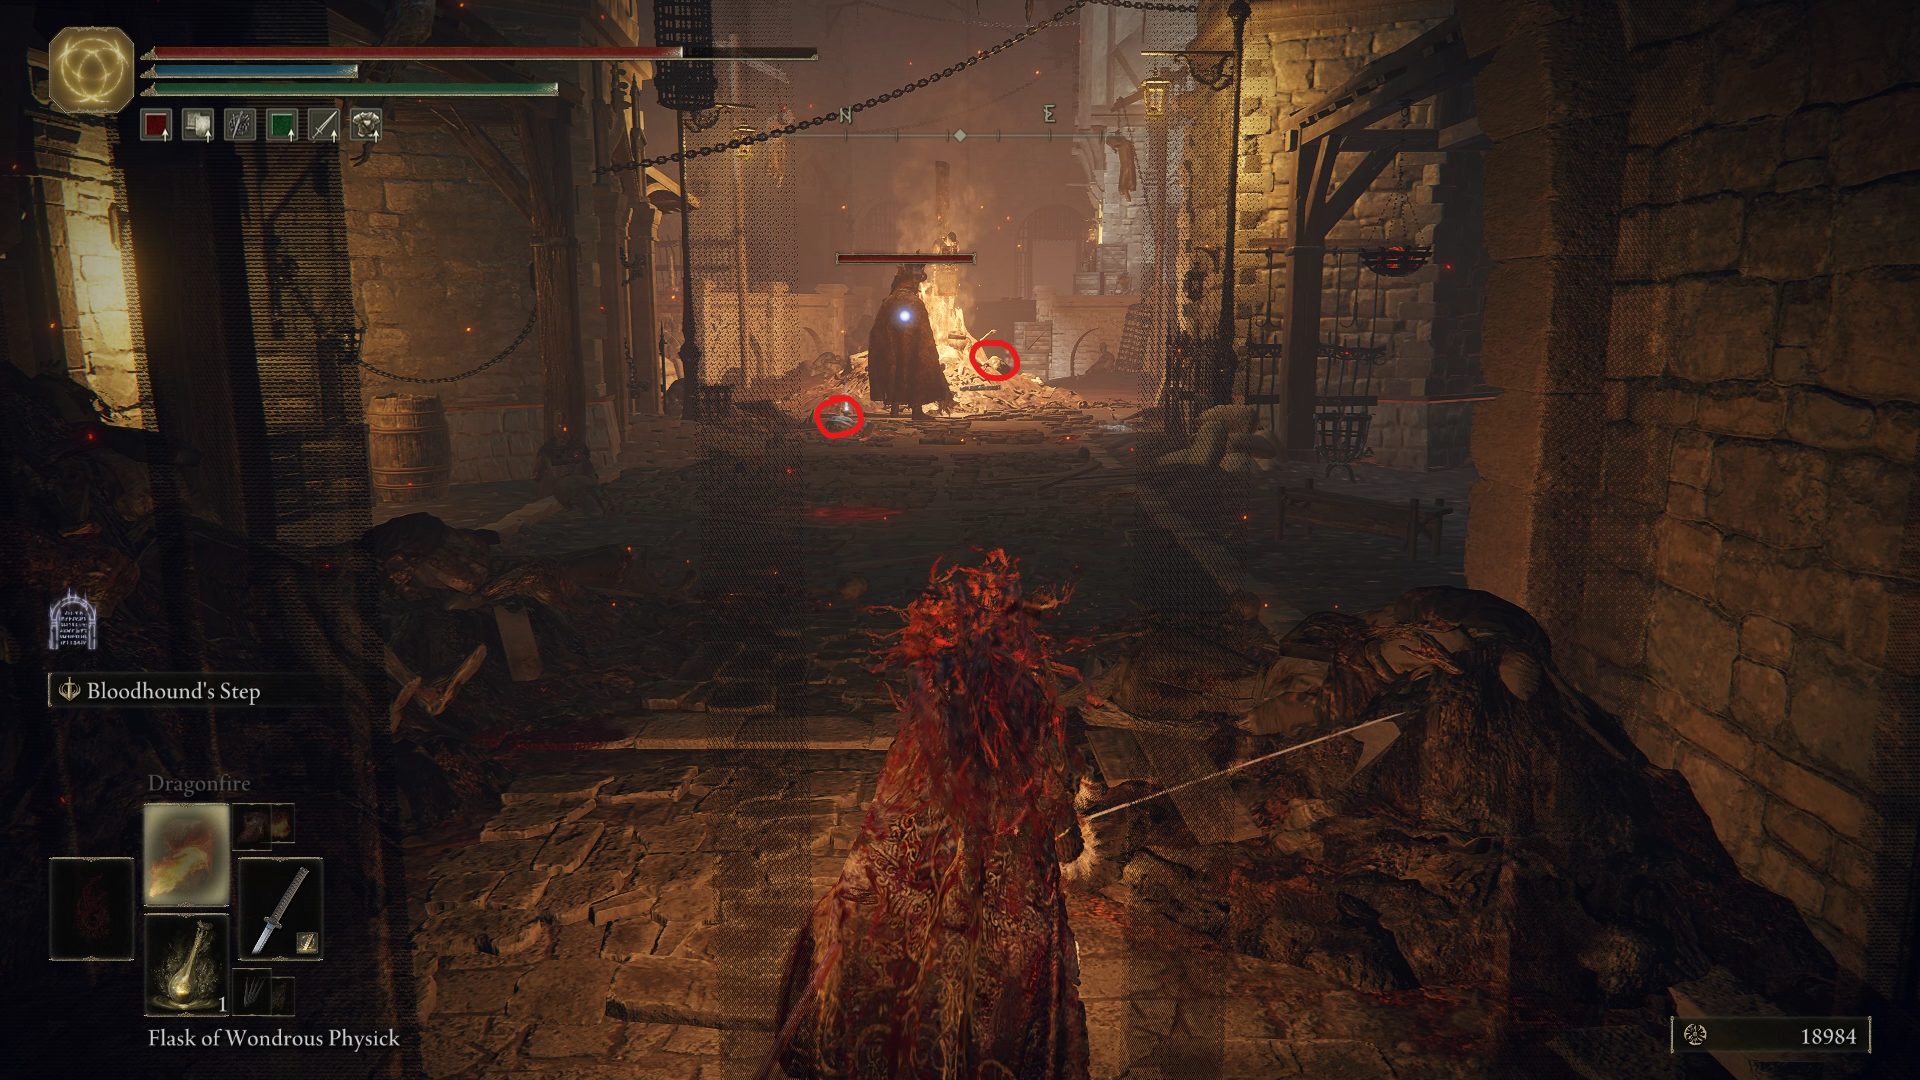
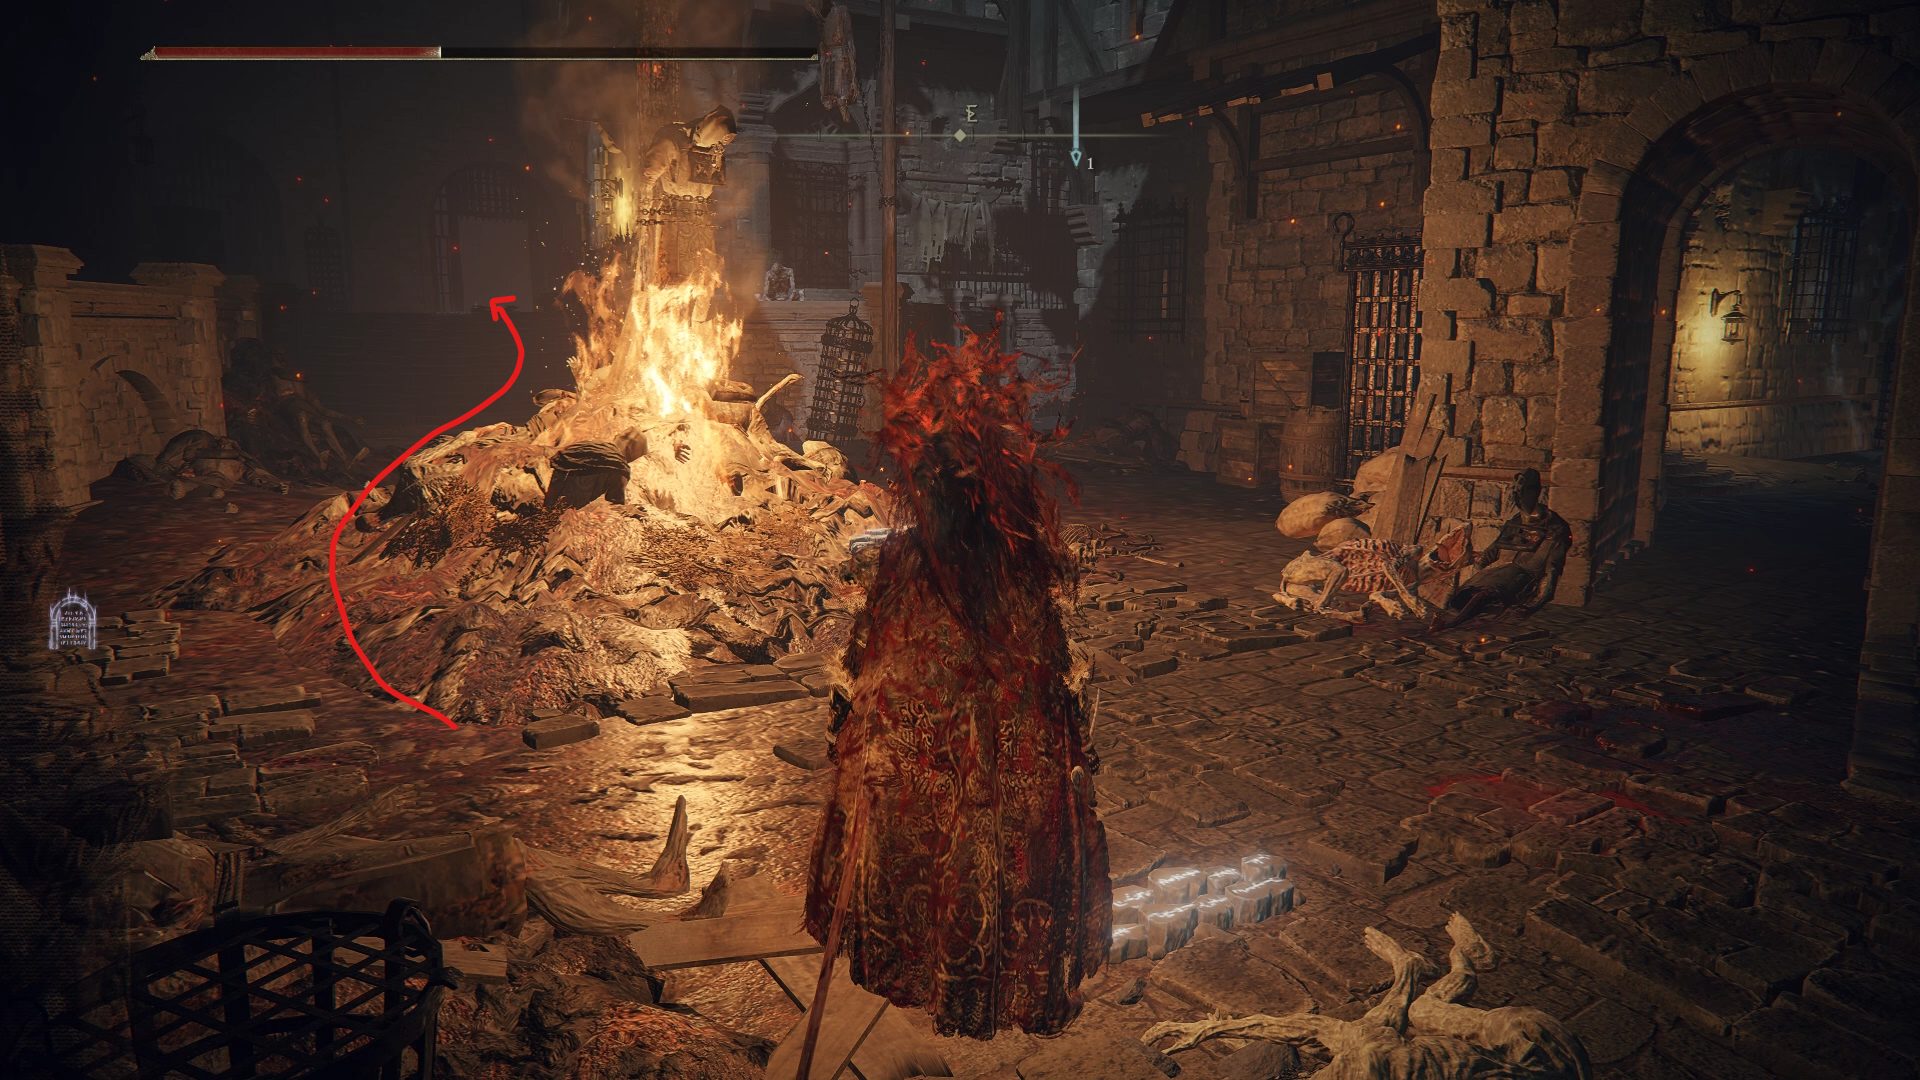
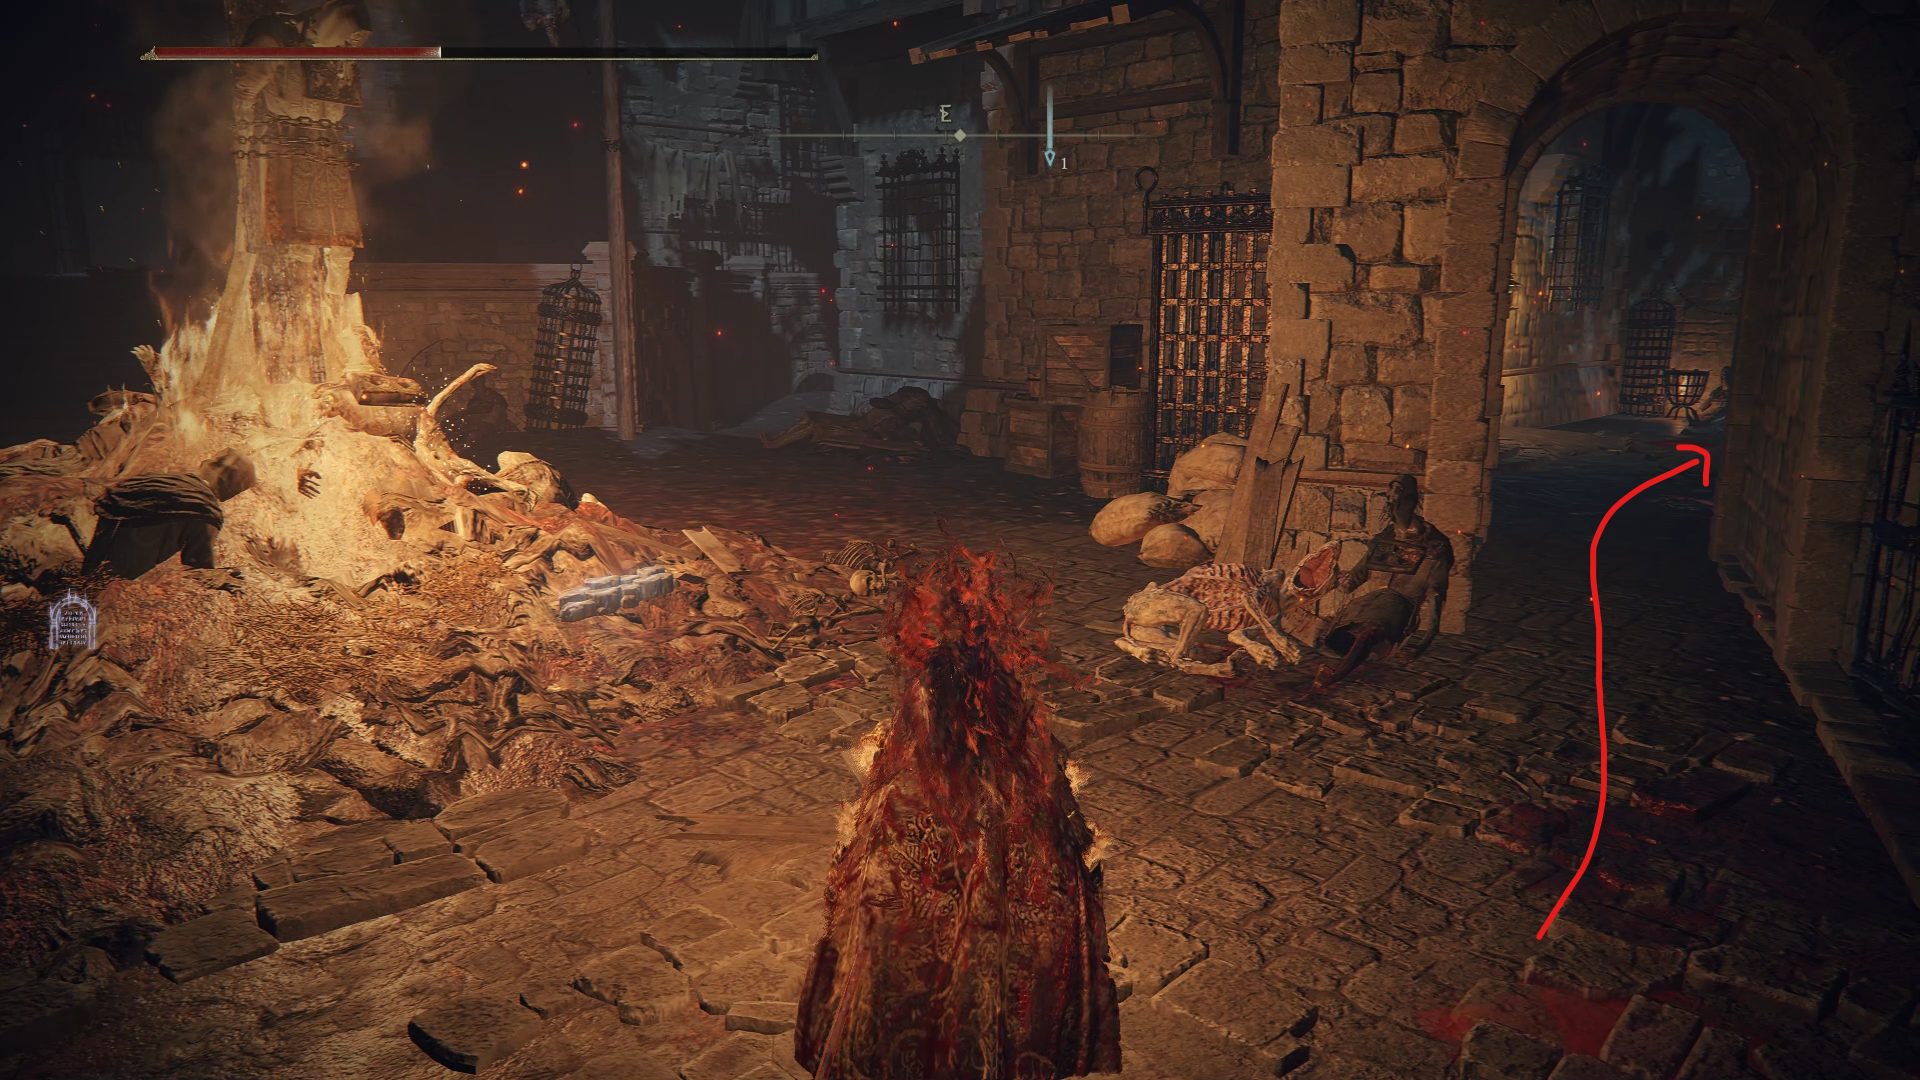
Taking the stairs down will lead into a small secluded area. There will be an Omenkiller enemy here, some shambling corpses, and a dog or two. The Omenkiller is guarding two items – one right beside him on a corpse, and the other buried in a pile of bodies in front of him. Once’s hes been dispatched, claim his Great Omenkiller Cleaver, grab the Drawstring Fire Grease from the corpse and the Golden Rune [6] from the pile. The real gem here is located in a cell toward the back of the area. Inside it you’ll find the Erdtree Seal – which is a great seal for Incantation users. On your way back out you’ll see above you on a ledge is a corpse with an item. You can reach this from the rooftops area, which will grant you another Smithing Stone [5].
Erdtree Seal locationSmithing Stone [5]
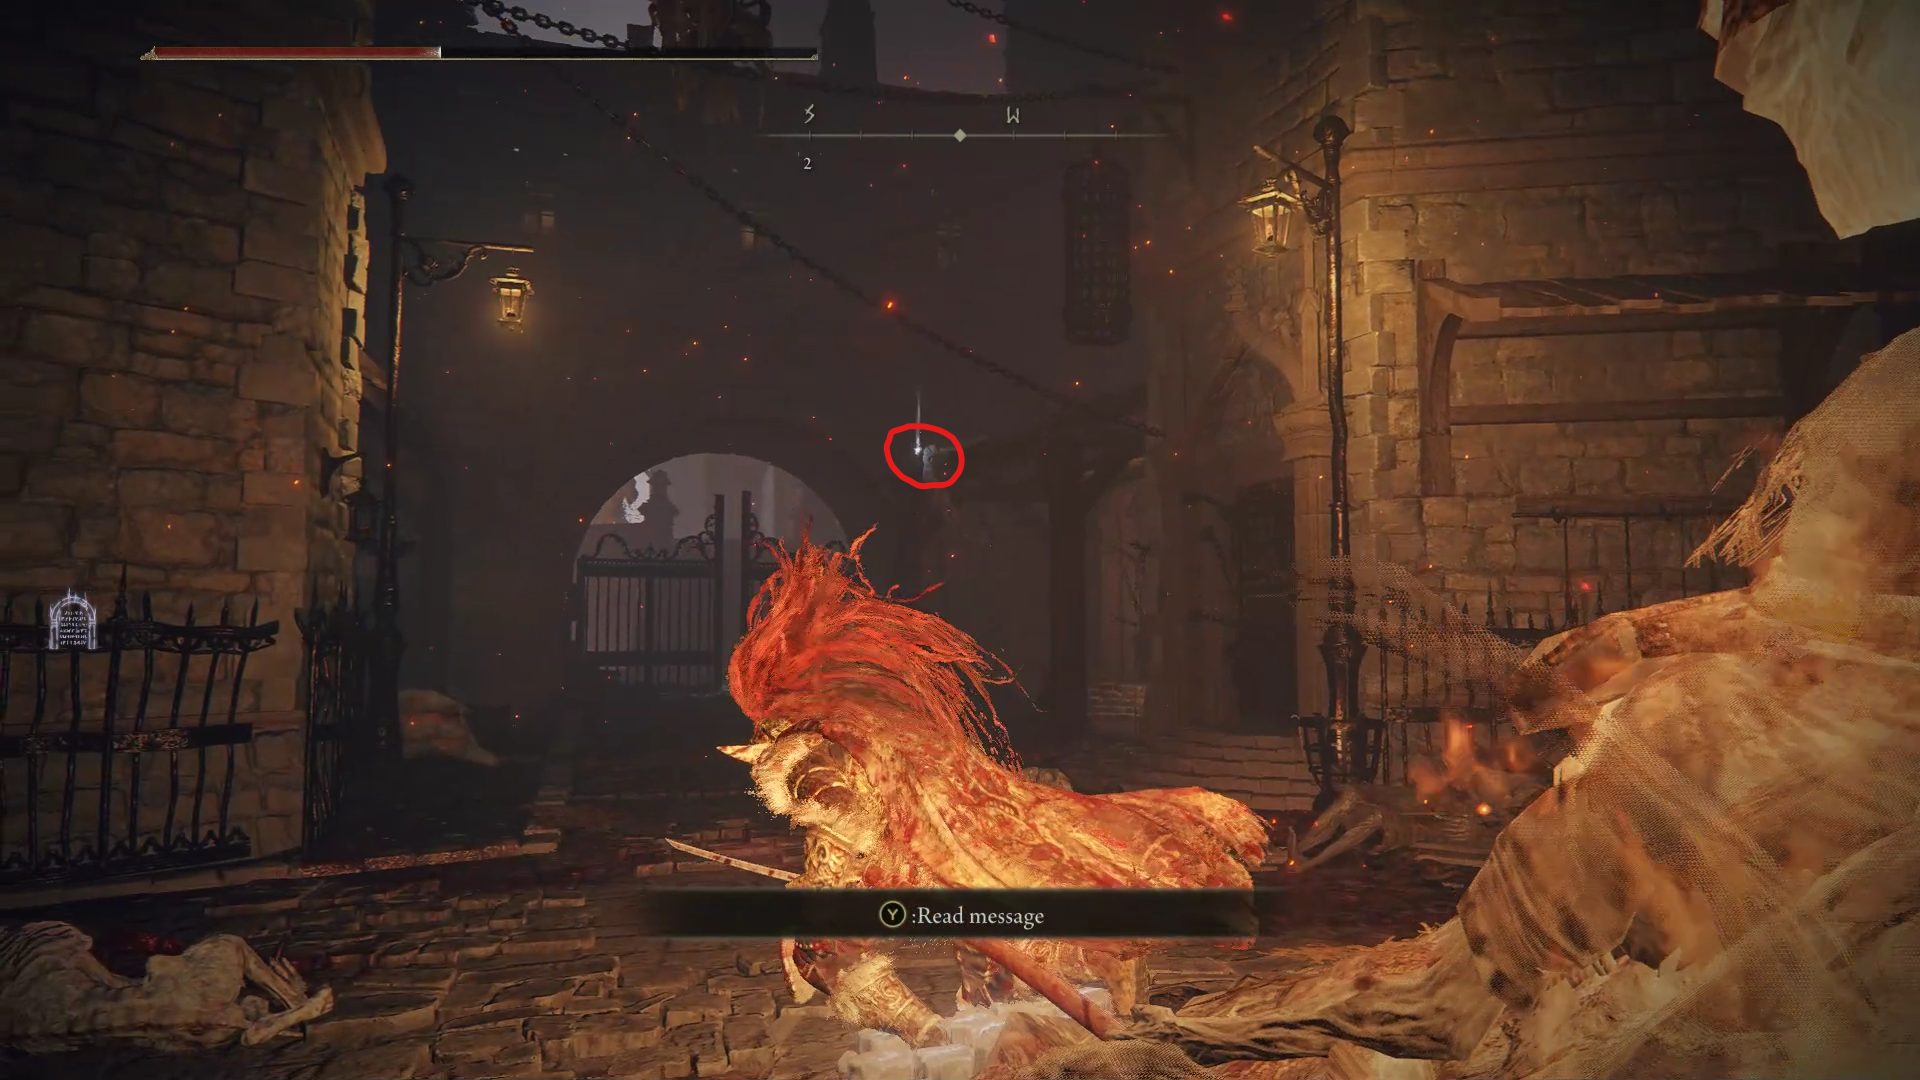
To the right of the pile of bodies is a doorway. It leads to a room with a dog at the end of it. Now on the cliff-side, there will be a shambling corpse just above you to your left. Wait for it to fall and dispatch of it, or take it out with a ranged weapon or spell. To your right will be a set of stairs that lead down and around a corner. You’ll see an item ahead of you on a portion of the bridge nearly out of your reach. If you can make the jump you’ll be rewarded with a Stonesword Key.
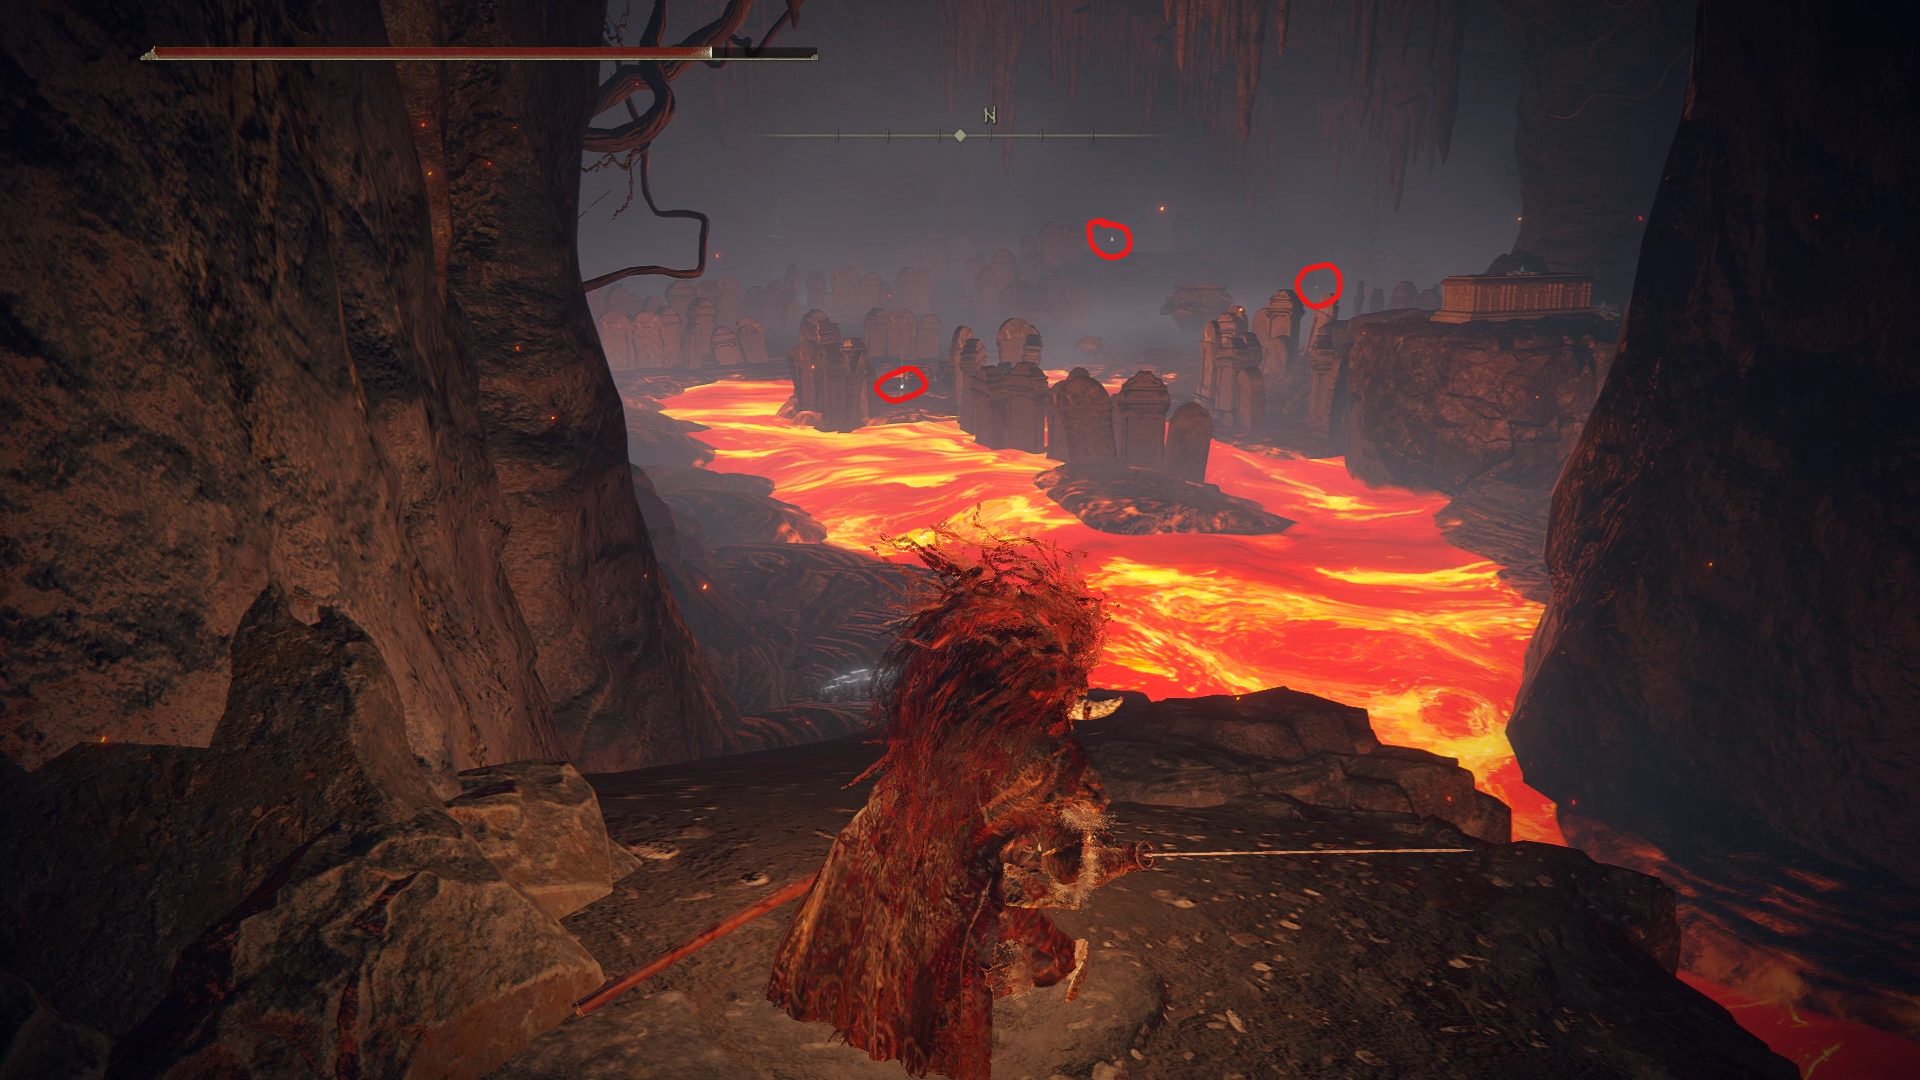
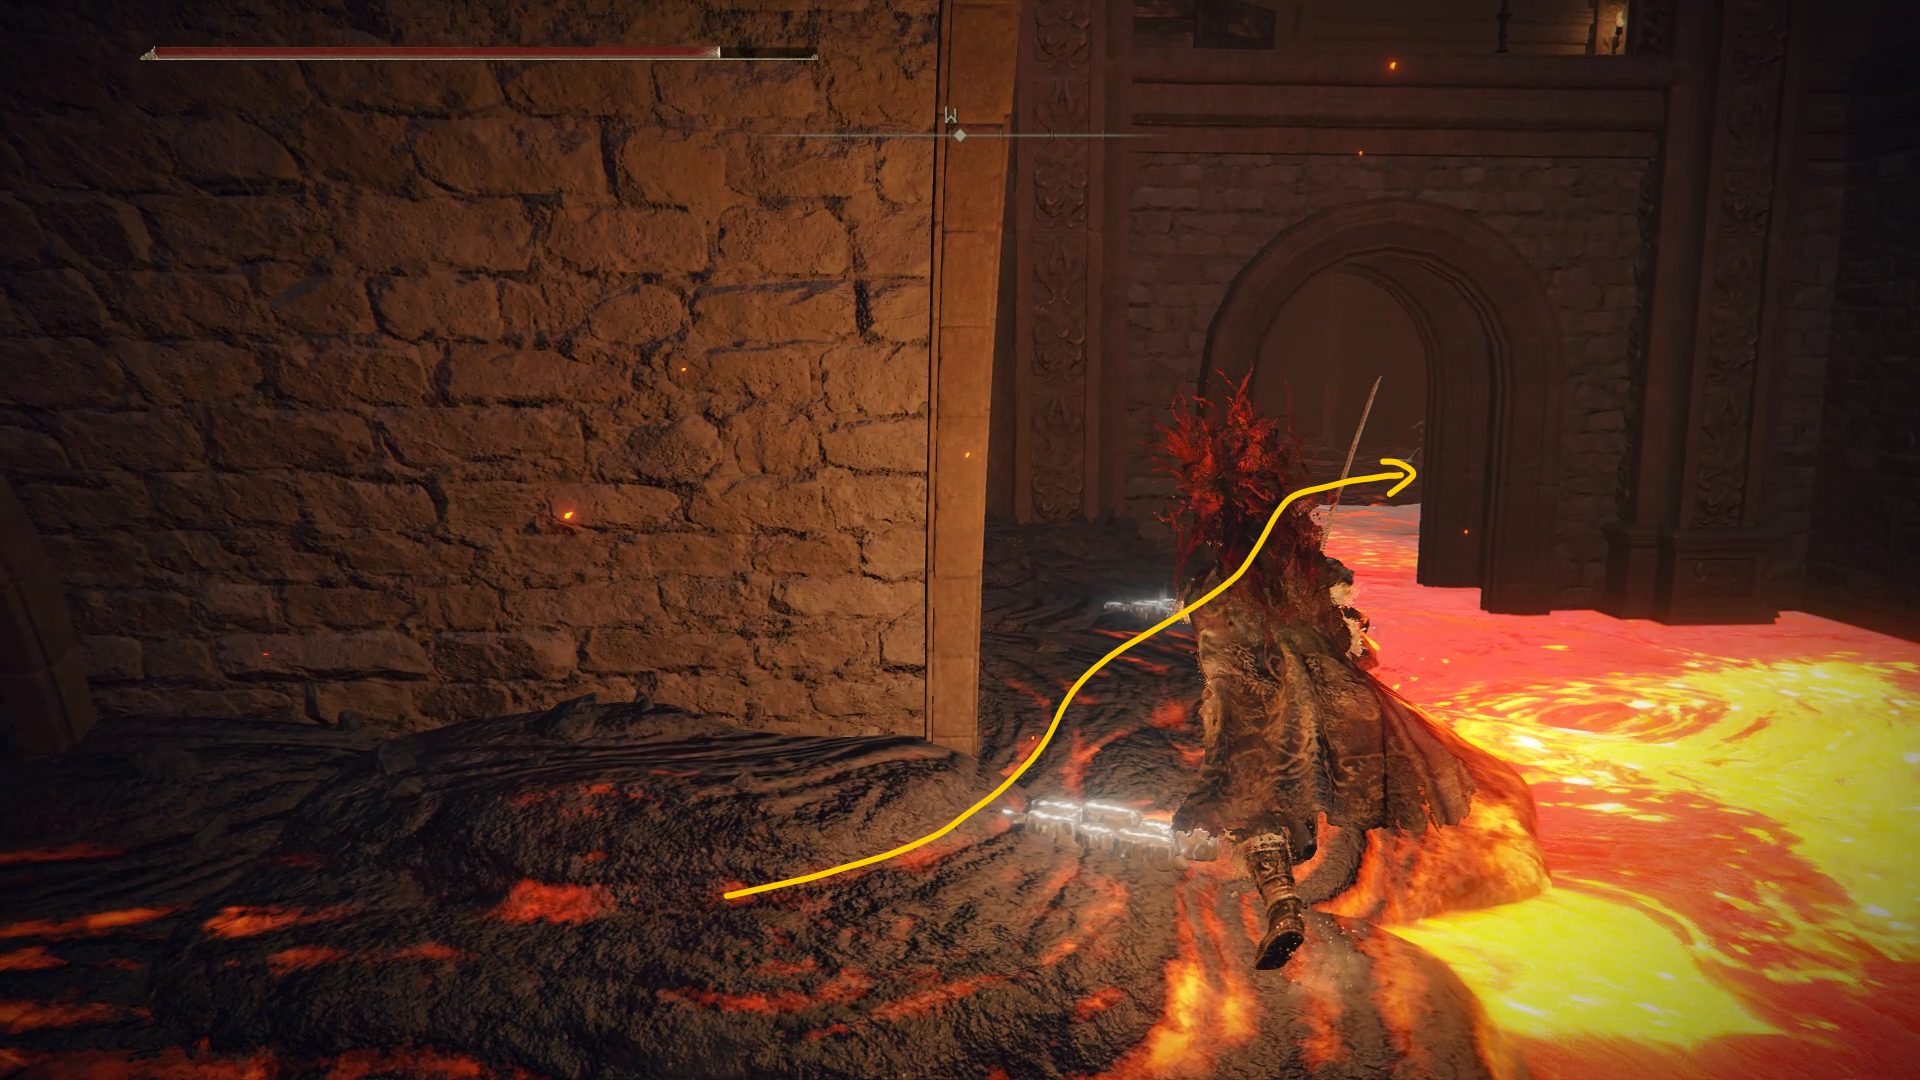
If you missed the jump don’t be too hard on yourself. You’ve actually stumbled onto another area of the dungeon! And if you haven’t missed the jump, it’s time to jump down. Head straight from where you fell and follow the bend near the lava. You should now be in a cave-like structure with tombstones. There are a lot of small Living Jars here. They’re harmless unless attacked. Follow the path through the tombstones and take out the larger Living Jar toward the end. Behind it on a corpse is the Smoldering Shield! To the left of that, above you, is a corpse with a Golden Rune [9]. The last item in this area is on the small patch of land guarded by smaller Living Jars. Ignore them and claim the Smithing Stone [6].
Smithing Stone [6], Golden Rune [9], Smoldering Shield
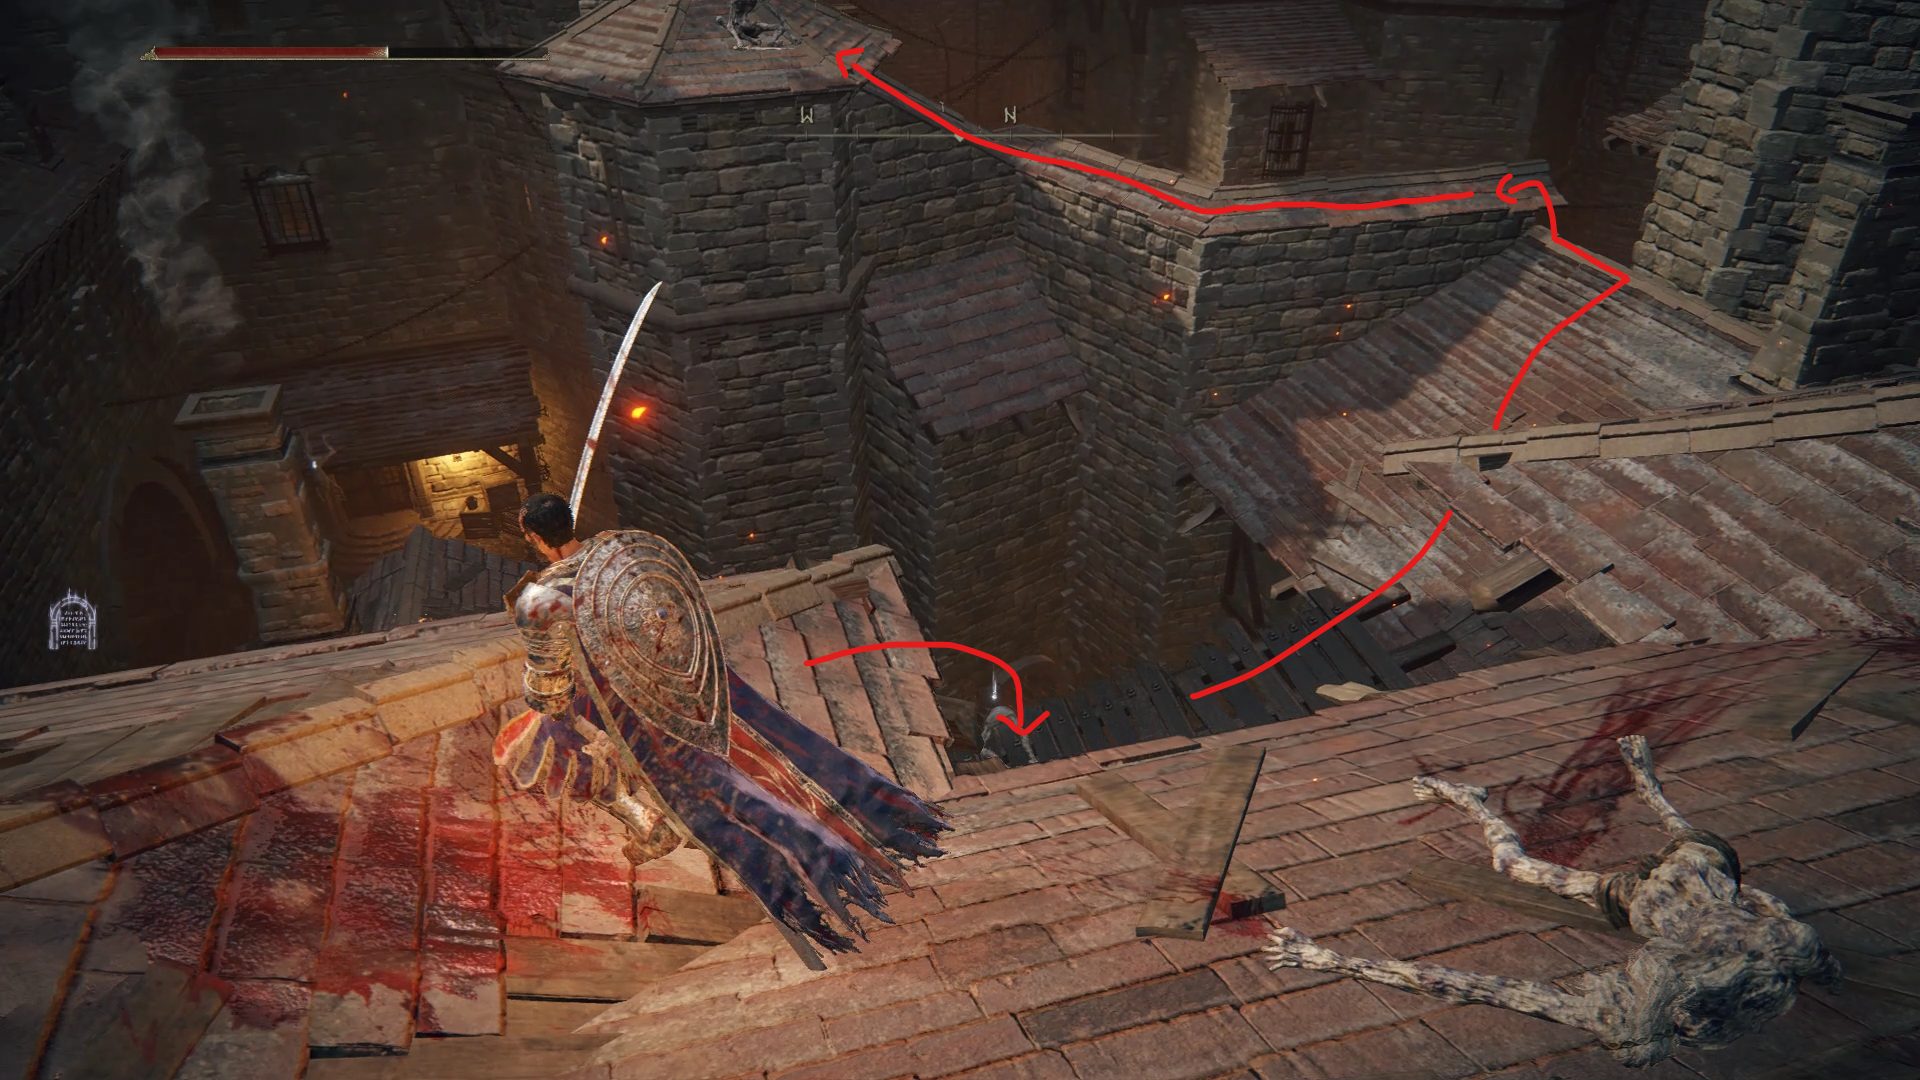
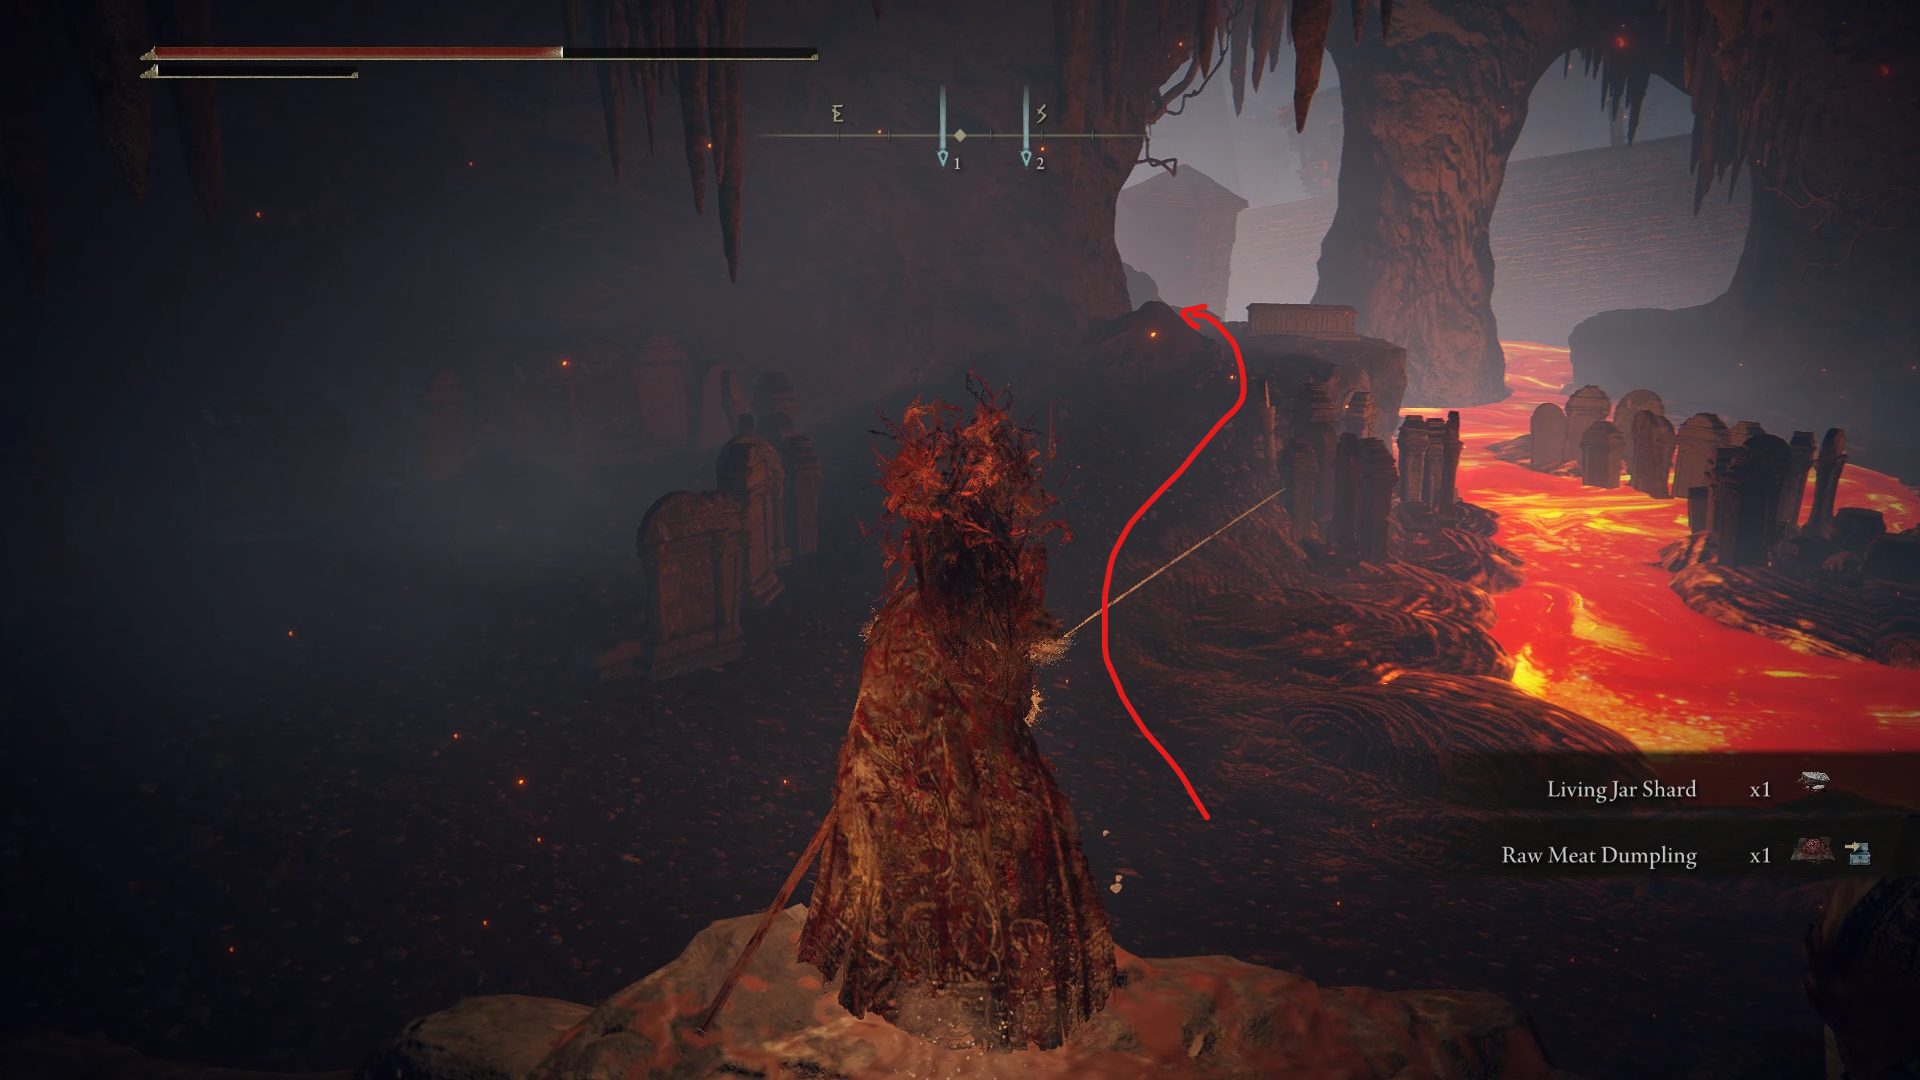
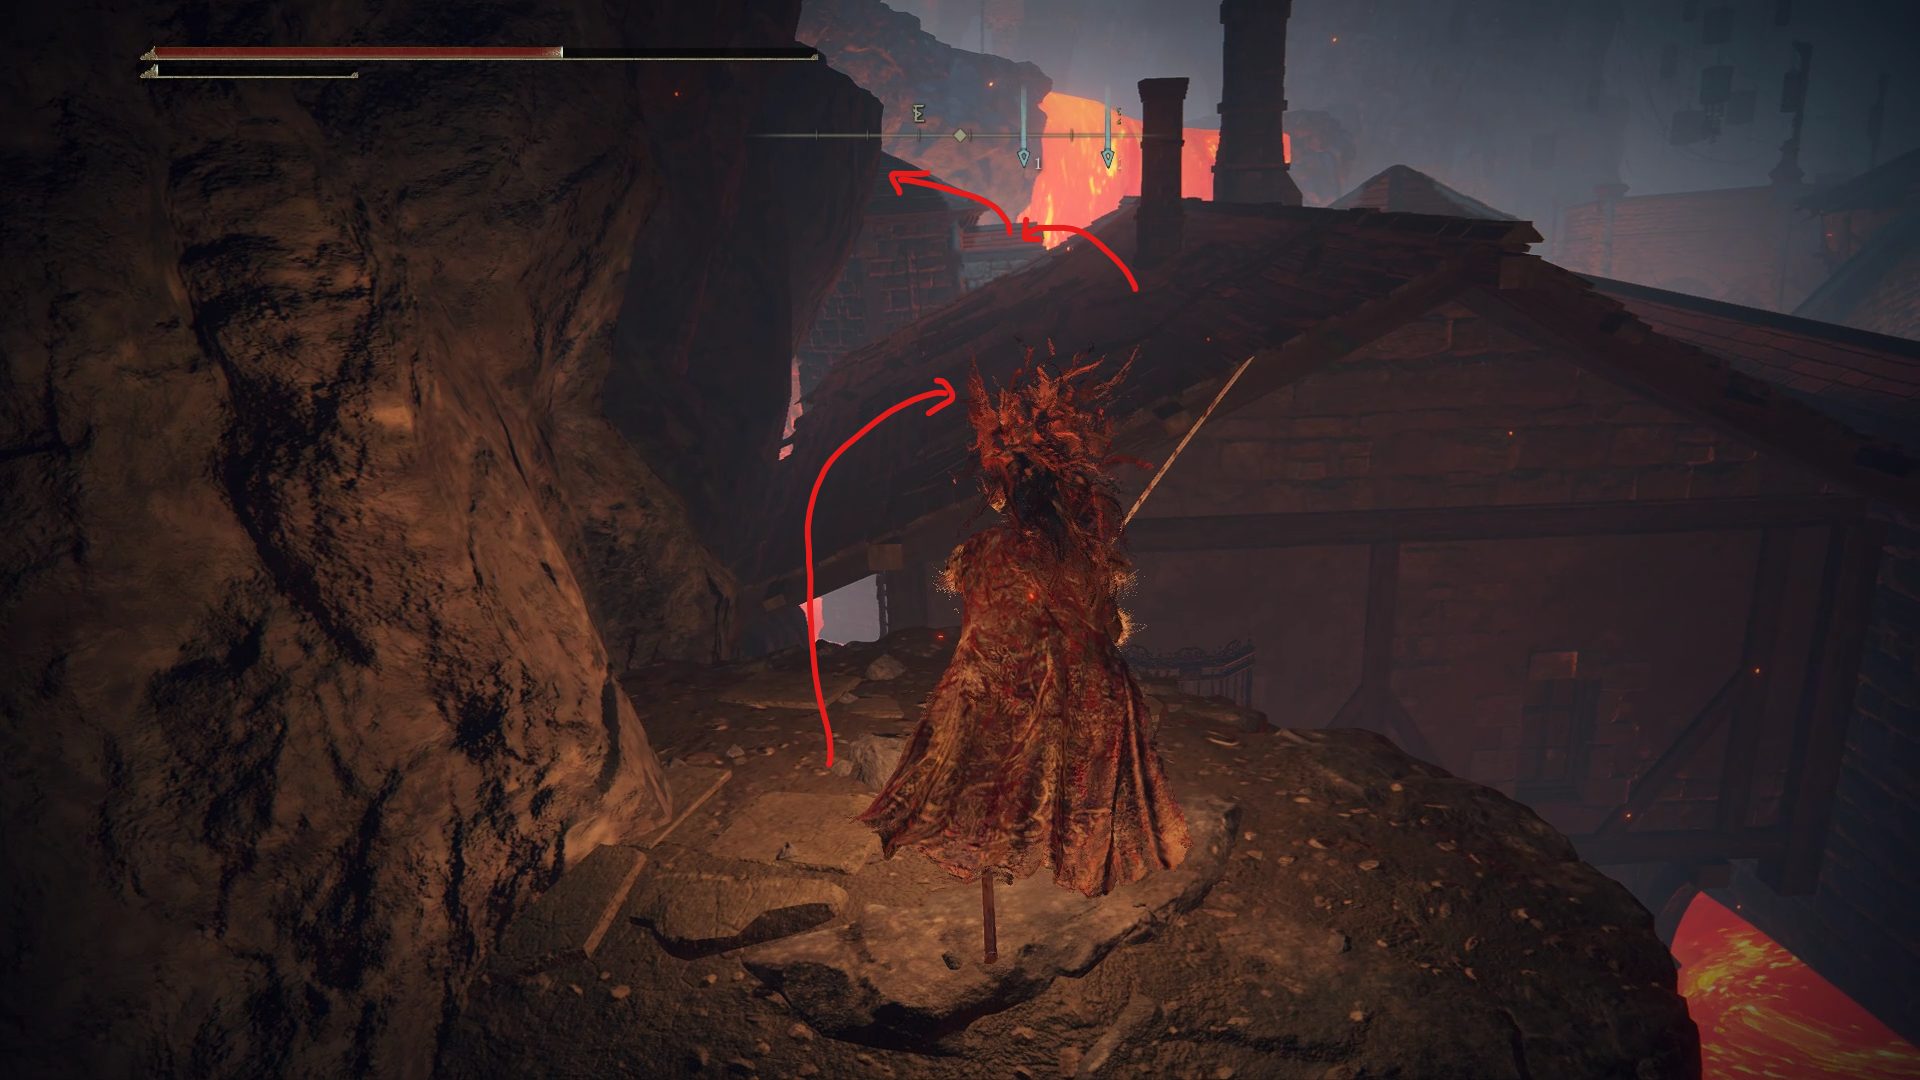
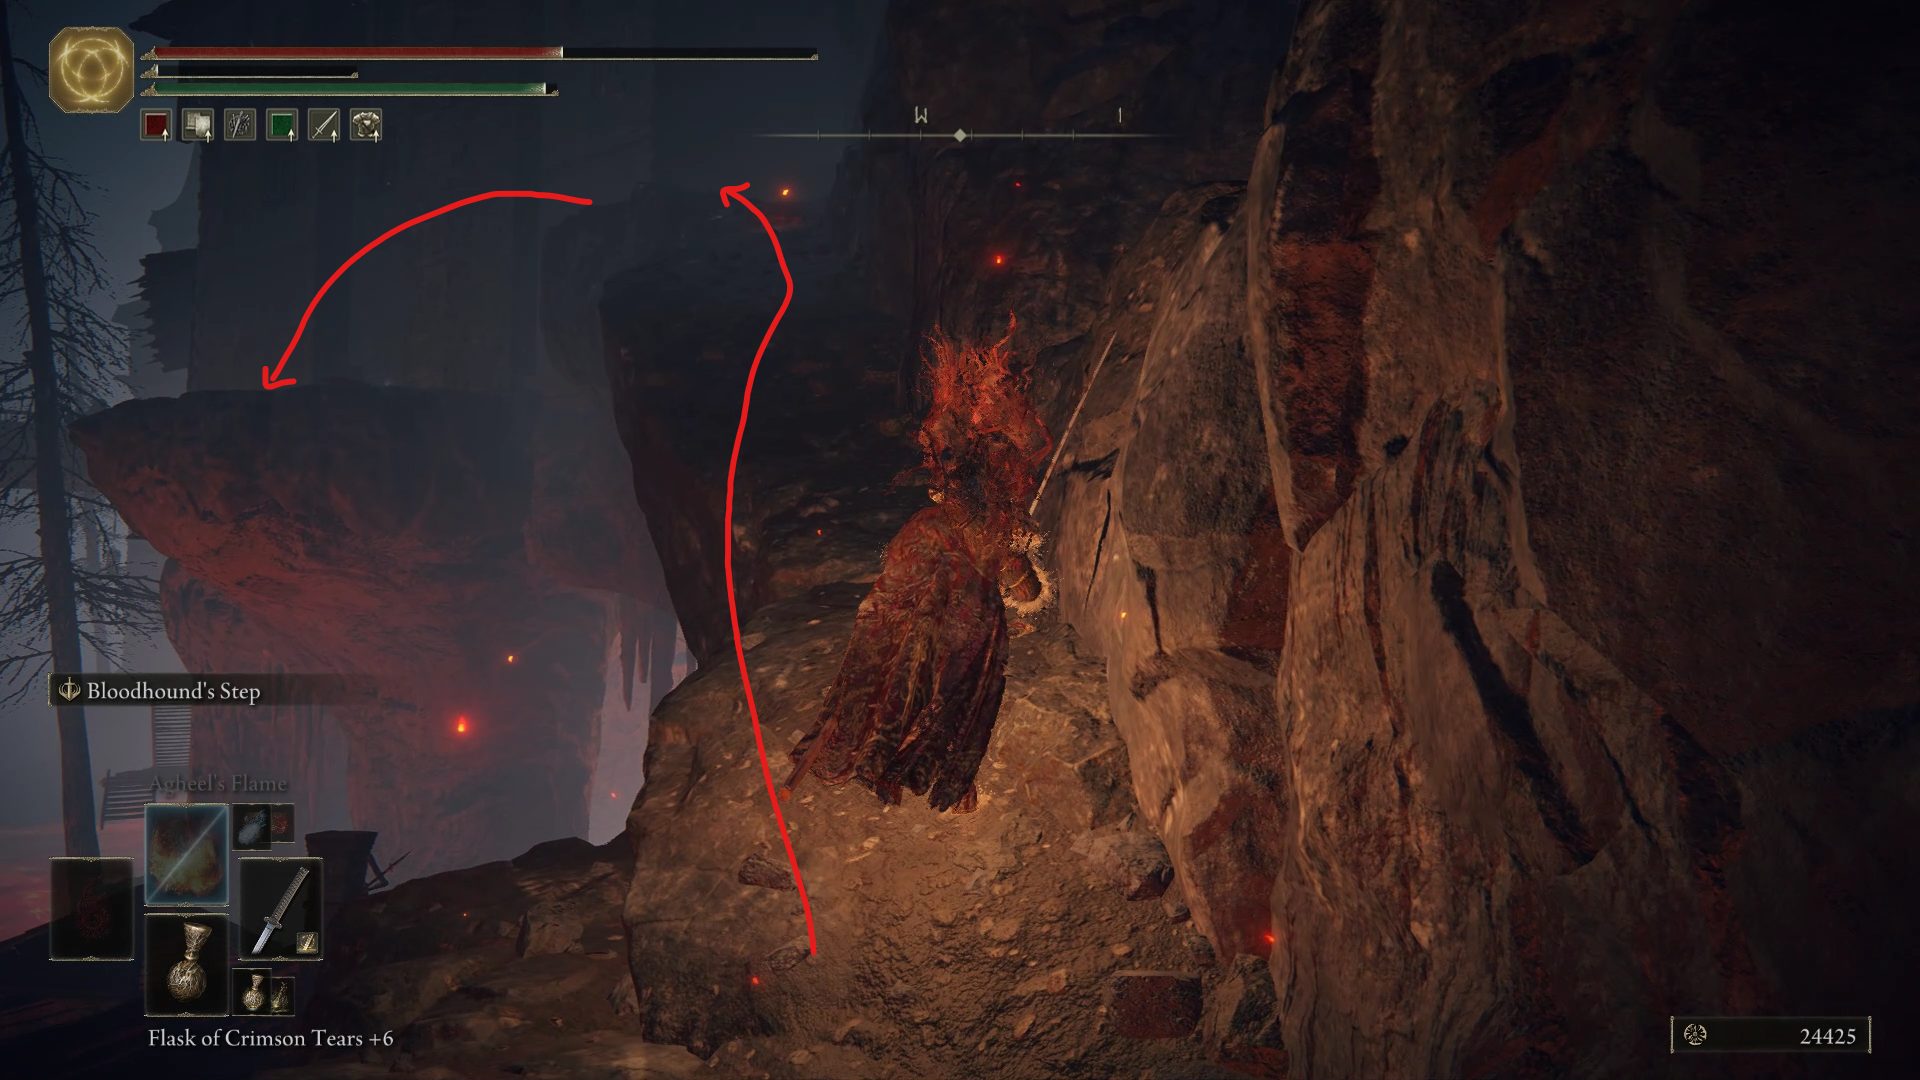
Once you’ve grabbed all of the sweet loot, it’s time to head back to the circular open area with the forking path from earlier. To do so, continue going through the cemetery and head southeast to jump over to a nearby rooftop. From there, head east and jump over to the tower by the cliff, and head all the way up to jump back to the area where you defeated the Omenkiller.
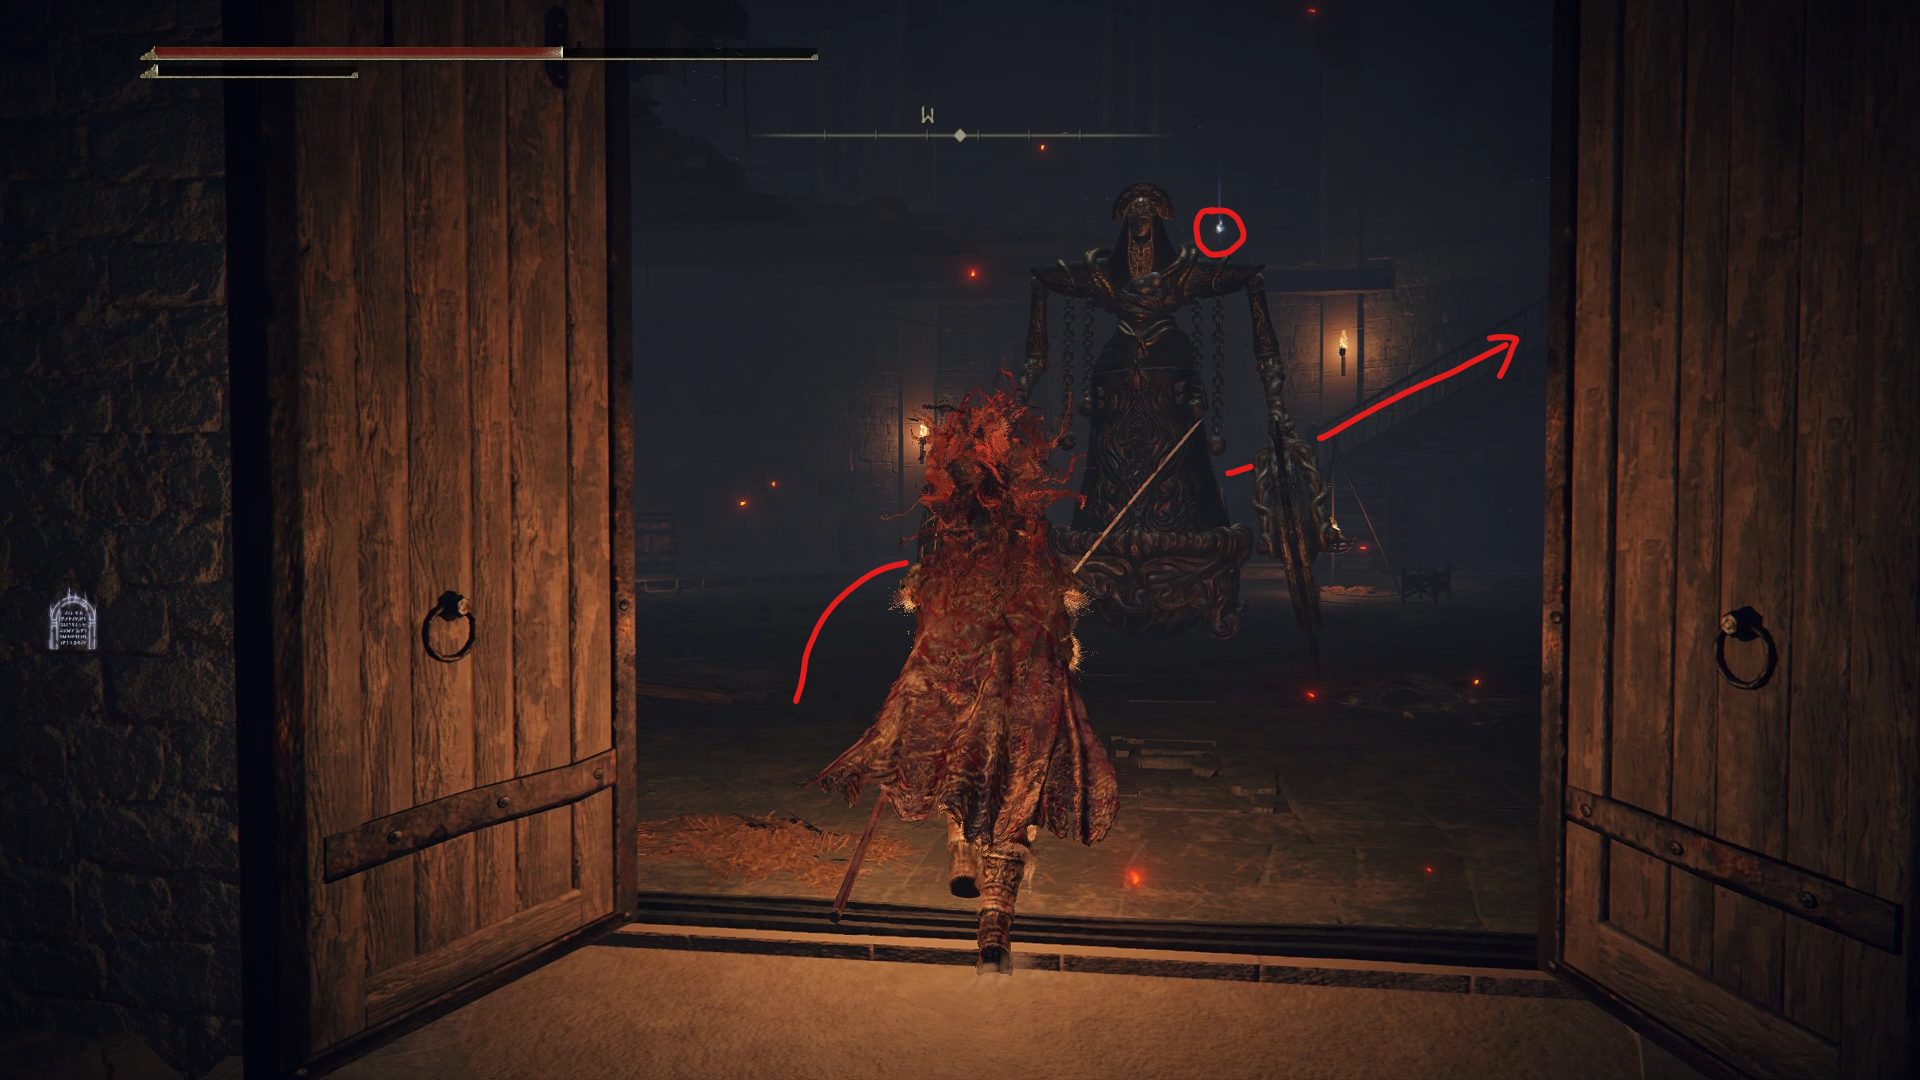
Make your way back to the larger circular area you’ll see a building entrance blocked by a fog gate. Use a Stonesword Key and step inside. You’ll immediately be faced with another Iron Maiden. It doesn’t attack so take the opportunity to circle around it and head up the stairs. You’ll be met with a decent number of shambling corpses guarding a corpse with the Crimson Amber Medallion +1.
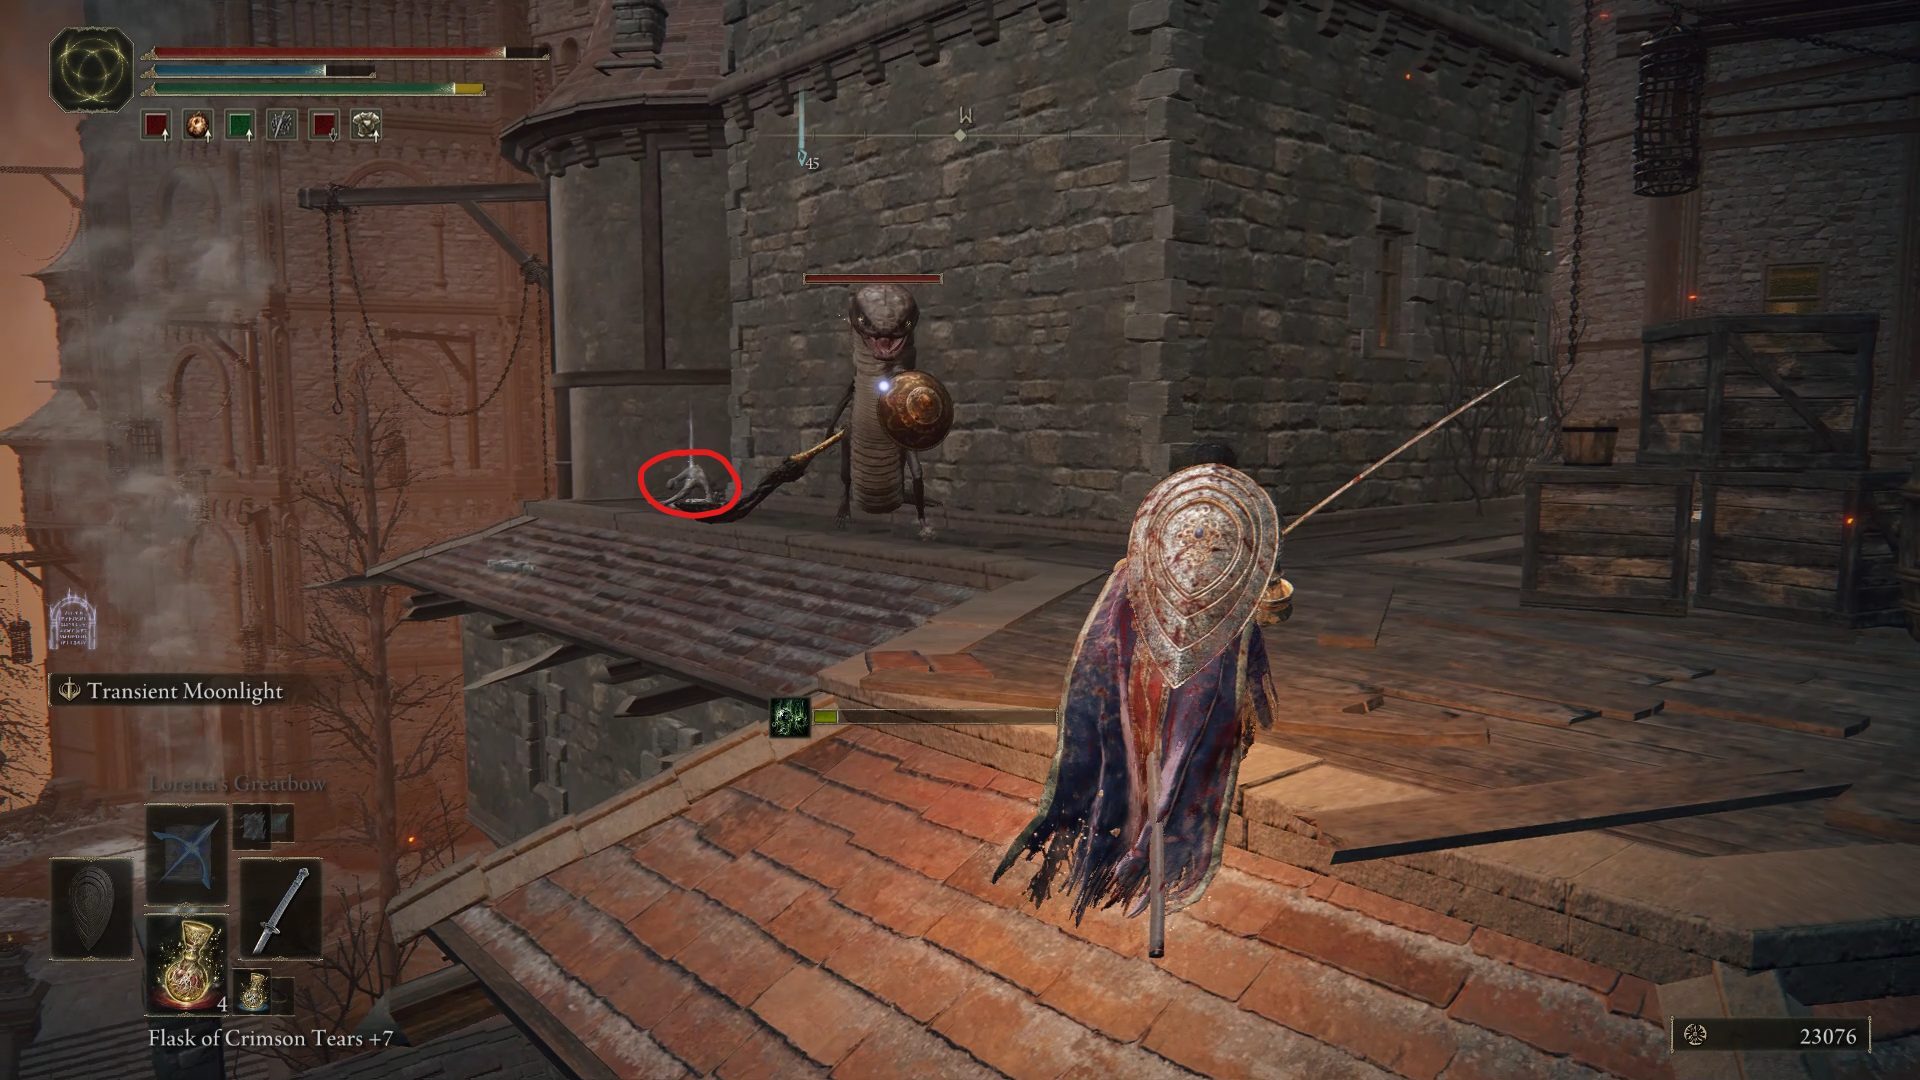
After defeating the Iron Maiden head back outside and proceed forward to the Snake Warrior across the bridge. The door behind it is locked so you’ll have to find another way inside. You can go either to your left or your right. Both ways lead into the building. If you go right from the locked door however, you’ll find a ladder (A) and another Snake Warrior (B) guarding a corpse with a Smithing Stone [4].
Climb the ladder (B) and head south-southeast until you reach the edge of the roof. If you look down you’ll see an area where you can drop down to. This will lead into a room where you can find the Albinauric Staff and the Albinauric Mask. There is another Omenkiller enemy inside, so be careful. Defeating him will give you another Great Omenkiller Cleaver.
Now go through the door southeast of the room and go up the ladder. There, you’ll find a corpse with a Golden Rune [10] hanging from the balcony, and a rooftop below that leads to another door that leads back inside of the building. Grab the Albinauric Bloodclot on the rooftop northwest of this door, and head inside.
Way to the ladderGolden Rune [10]
There will be some enemies inside hanging from the ceiling and loafing about on the floor. Range would be recommended here because of the serious amount of damage they can do if they grab you. Straight ahead from where you walked inside will be an item. There’s an enemy hiding behind the barrels just beside it so be careful before you grab the Beast Blood from the corpse.
To the right of the entrance is that locked door from earlier; open it for a nice shortcut back inside. With all that done you can continue on your way deeper inside the building. If you go south-southeast from the center of this room, you’ll step into a much larger area with a staircase leading down. There will be an enemy that will lunge at you just as you attempt to descend the stairs! Take it out quickly – these guys can do MAJOR damage if they manage to latch onto you with their jumping attack. Continue down the stairs to reach the ground floor. Four more of the enemies you just defeated will be down there. After defeating them be sure to grab the Golden Rune [9] off the corpse in the room.
Golden Rune [9] & the boys
The next room has, you guessed it, more of the same enemies. You’re given a choice here. You can either make a sharp left (A) to go outside – which will lead you to a Snake Warrior, a corpse with a bundle of 5x Explosive Greatbolt arrows, and another way back inside the room you were just in – or continue forward and make a right (B) into the nearest room for the Guest Hall site of grace. With the grace activated you can open that large door at the end of the room that will lead you onward!
From site of grace to “large door”
You’re back outside again! Did you miss that brimstone smell? Head down the ladder to your right and be careful not to step in any lava once you’re down there. This area is full of Fire Slugs and Shambling corpses so keep those peepers peeled for anything hanging out on the rooftops above you. I swear, those things love throwing stuff”¦ Honestly, I’d recommend just taking out all of the enemies before exploring the grounds – before heading up the large set of stairs toward the back.
If you go south after descending the ladder and jumping over some lava you’ll come to two small alcoves. The farthest from you will have a Fire Slug guarding a corpse with 2x Fireproof Dried Liver. From there, go east and climb on top of the building to grab a Somber Smithing Stone [6], grab the Golden Rune [9] from the fountain north of that rooftop, and climb onto some of the lower hanging roofs across from this building to find a corpse with 2x Smithing Stone [6].
Way to 2x Fireproof Dried LiverPath to Somber Smithing Stone [6]Golden Rune [9] + Jumps to 2x Smithing Stone [6] rooftop
From this last rooftop, jump down and head southeast, up the large stone steps that lead to a higher area with a Snake Warrior. This one wields a whip so plan for that accordingly while fighting it. After that you’ll see two hanging cages – one directly in front of you that leads up, and another to your right that leads down. Taking the downward cage will have you facing a Magma Wyrm enemy, with a moveset similar to the Magma Wyrm Makar boss in the Ruin-Strewn Precipice dungeon. When defeated you’ll receive a fresh (gross) Dragon Heart. The only other item here is near the back of the cave on a corpse – a Smithing Stone [7].
Smithing Stone [7] location
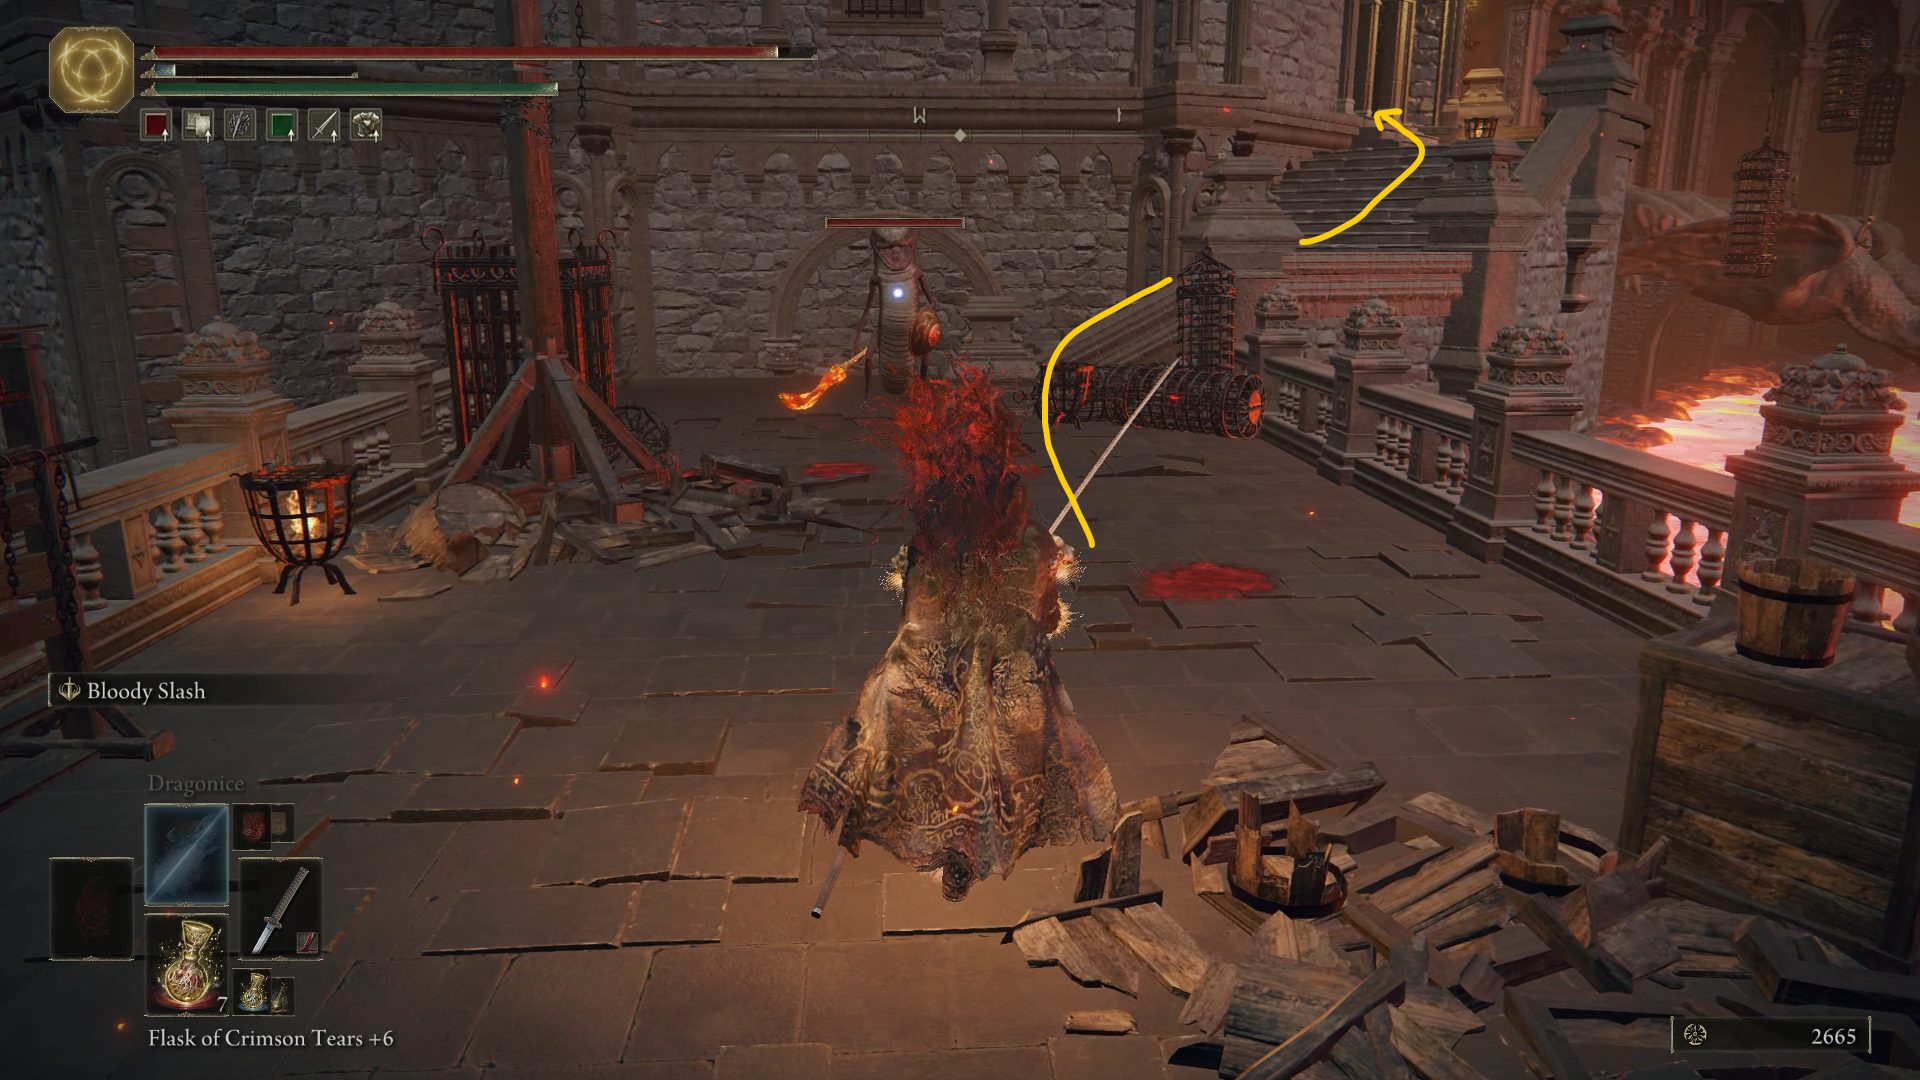
Make your way back up on the lift and step inside the other one just across from you. This will take you to the next area of the dungeon. You’ll be in a larger area now. You might notice the enemy on the stairwell. We’ll get to him in a moment. For now, take a right and follow the path around to a corpse with a Somber Smithing Stone [5] on it. You can head back to the stairs and take that enemy out from earlier now. At the top of the stairs you’ll be faced with the entrance to a temple. Ignore that for now. To your left and beyond is a very important lever. This lever will raise the bridge and grant you a MASSIVE shortcut from the beginning of the dungeon.
Once you feel prepared and you’ve got your Flasks all topped off, head back to the temple and go inside to take on the Godskin Noble boss.
Once he’s defeated, interact with the Temple of Eiglay site of grace here and head back toward the altar. You’ll find the Serpent’s Amnion (an important quest line item for the precious Rya) item there. You can take the door to the left of the site of grace, but it’ll lead to an elevator that you can only access by going farther into the dungeon. Instead, take the lift south of the altar to reach the second floor, turn southwest instead of going outside and just follow the path until you reach the Golden Rune [9] at the end of it. Continue going forward until you reach another door that leads outside.
Path to Golden Rune [9]
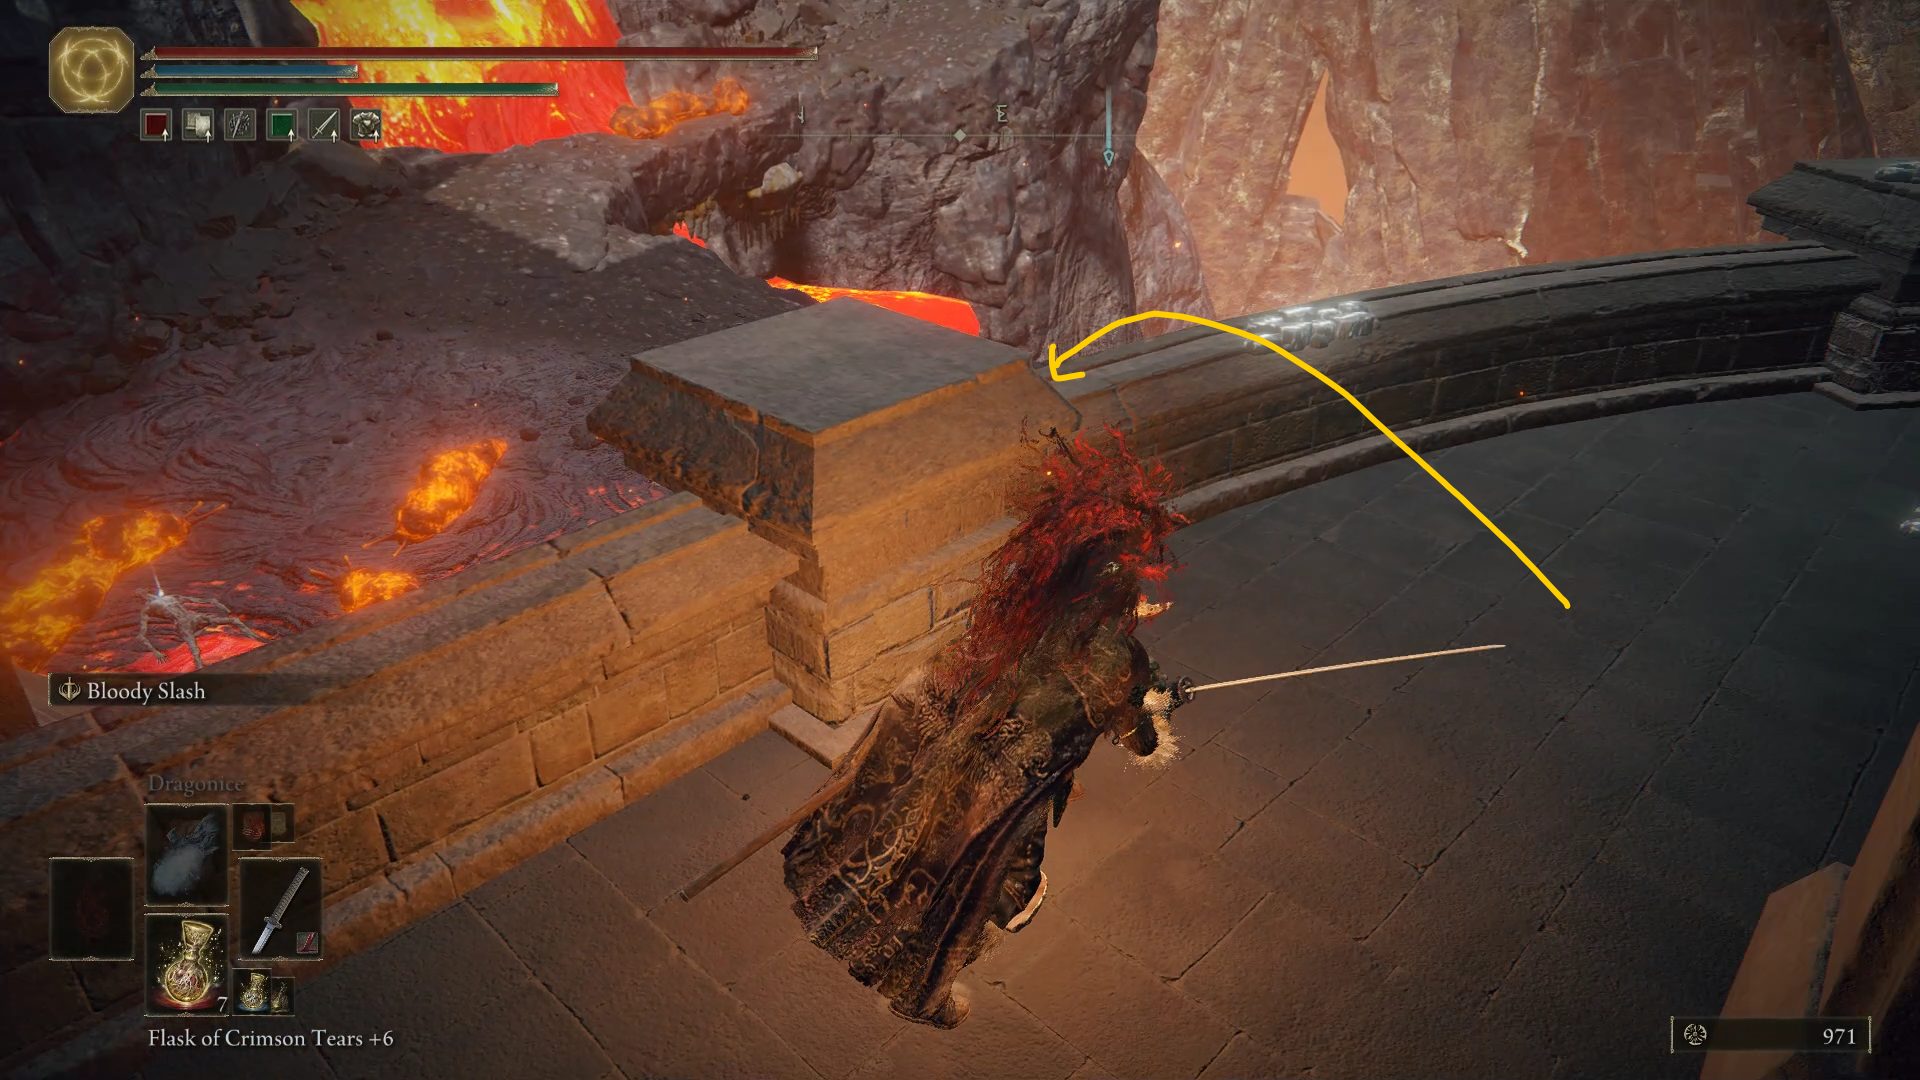
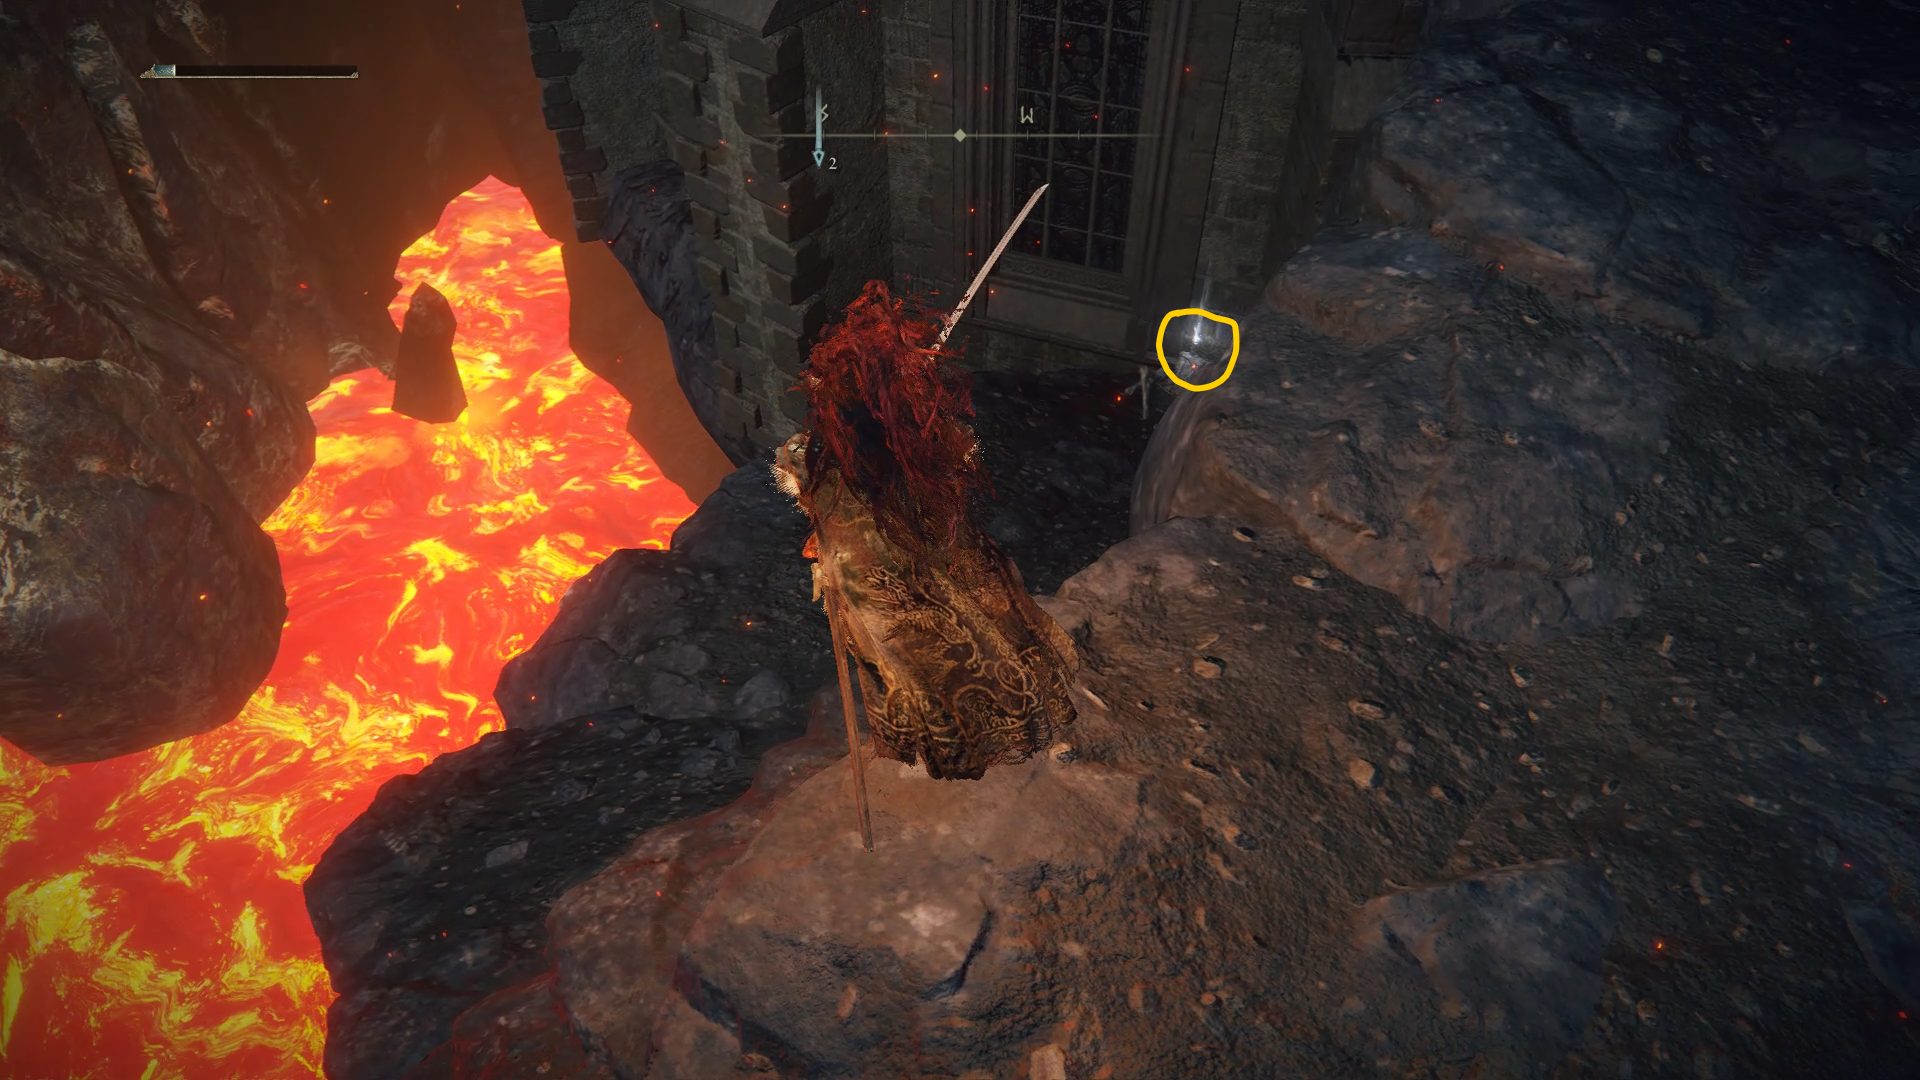
Once you’re outside, head to the balcony’s northeastern side and jump down to the cliff below. If you turn around and face southwest, you can find a corpse with a Golden Rune [12] nearby, and if you want to deal with the Fire Slugs next to the lava pool, you can grab 4x Smoldering Butterfly from another corpse by its shore.
Golden Rune [12]4x Smoldering Butterfly
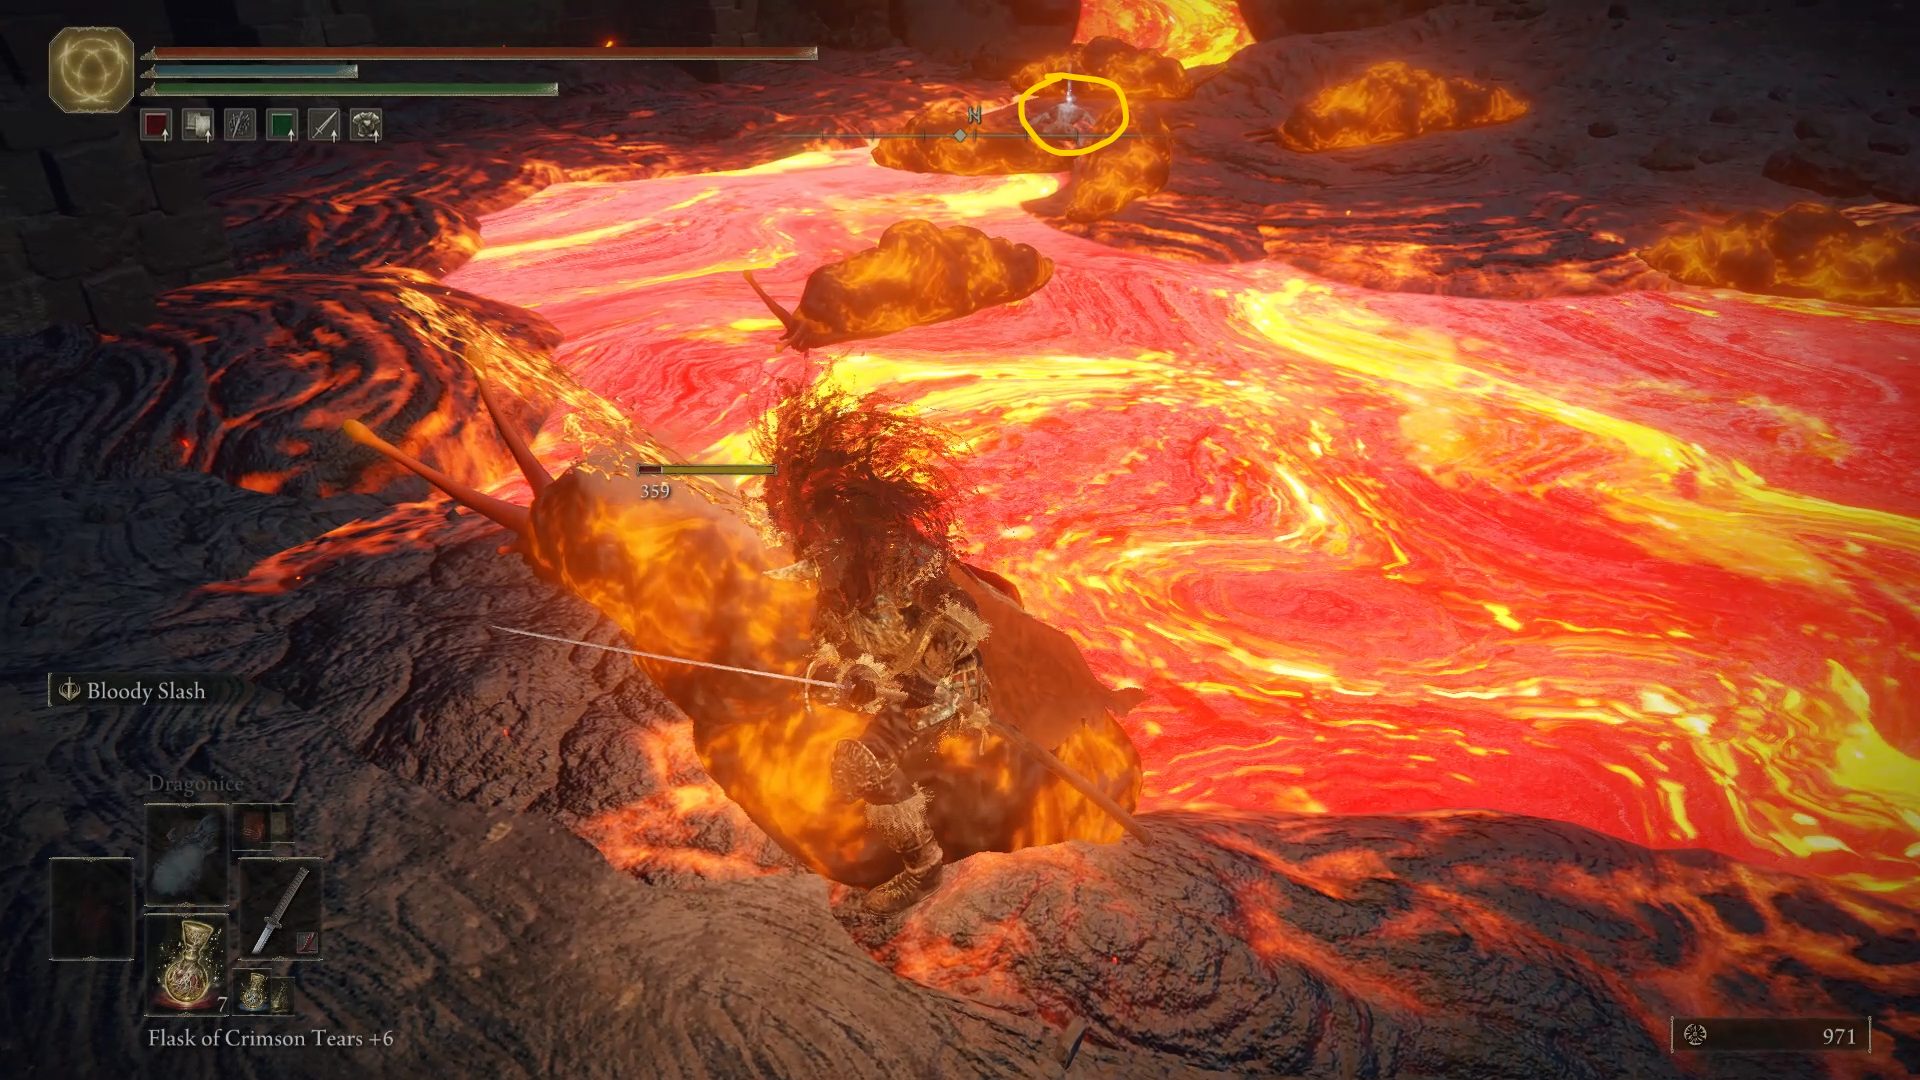
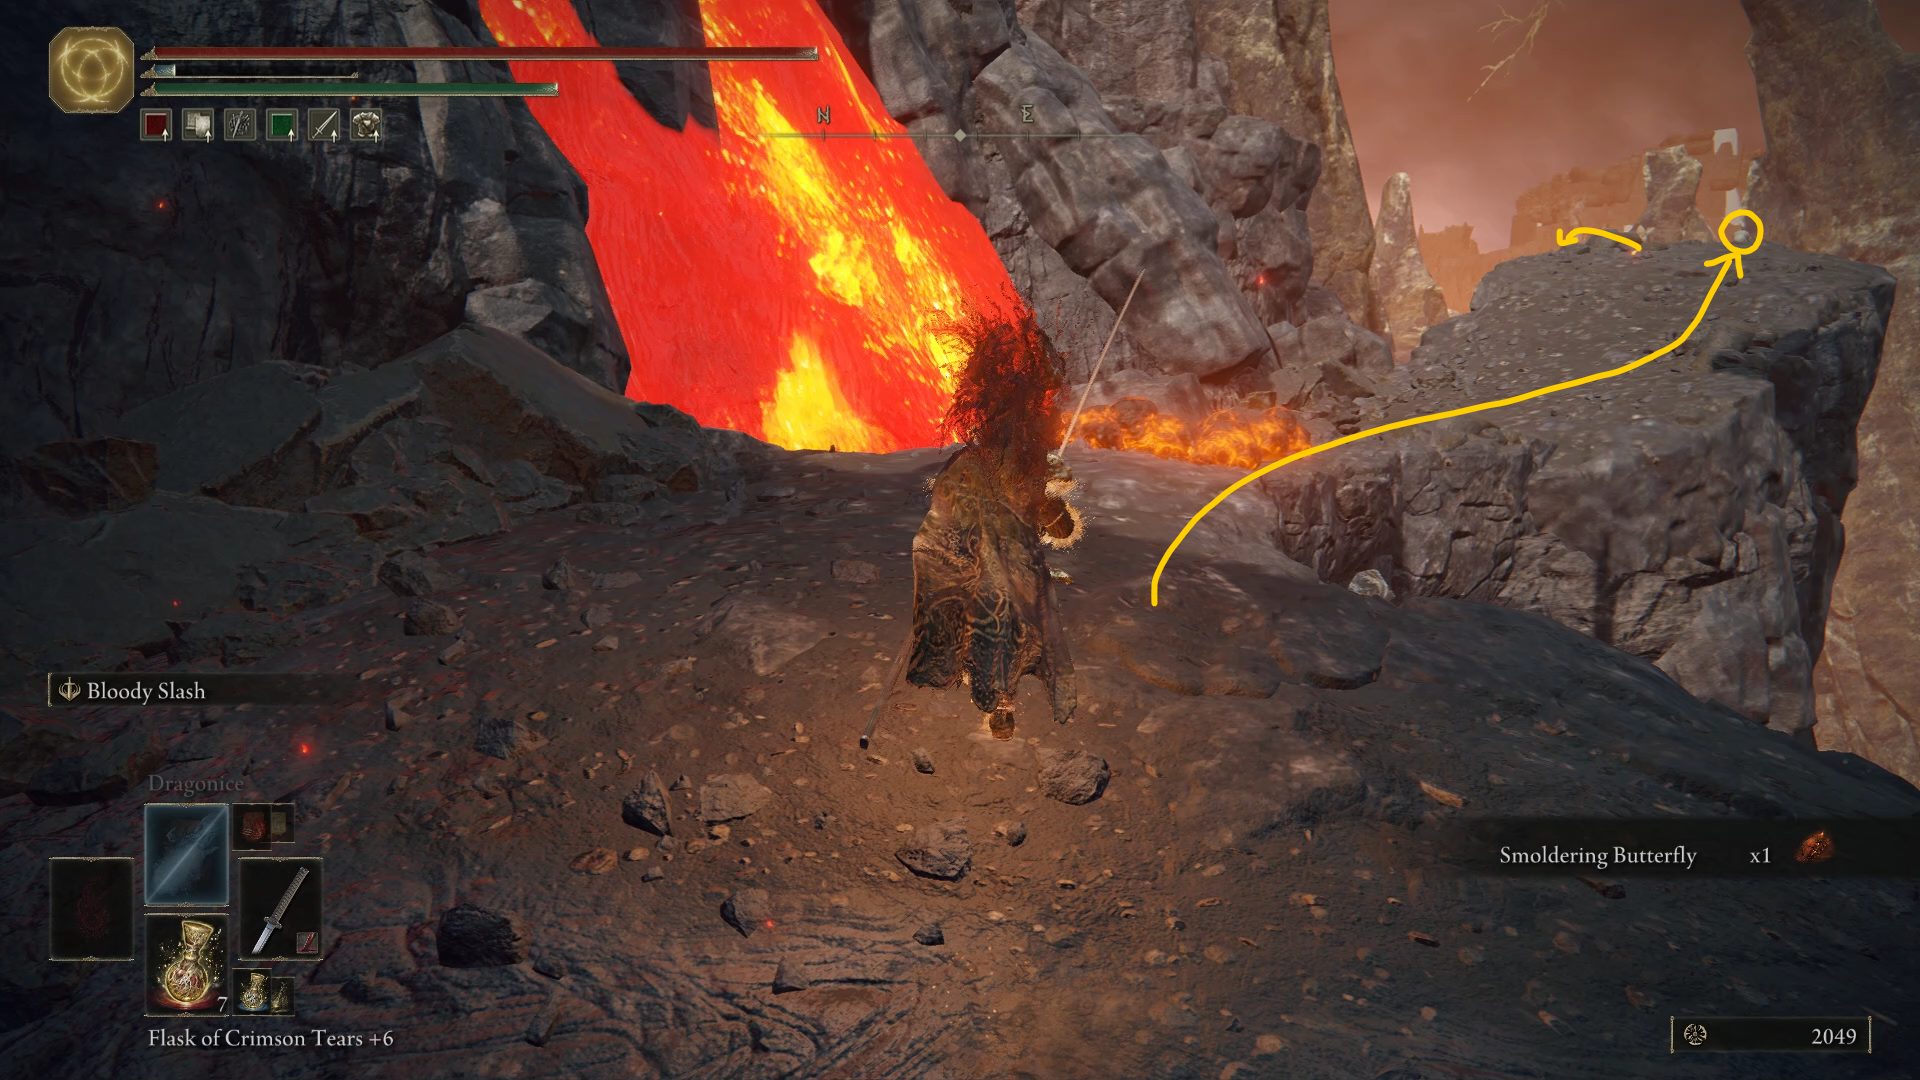
If you look east from the corpse next to the lava pool, you’ll see a path that leads to yet another corpse sitting by the edge of the cliff. Go up to this lonely fella, grab the Finger Furlcalling Remedy (he won’t be needing that) and jump down to the path north of there.
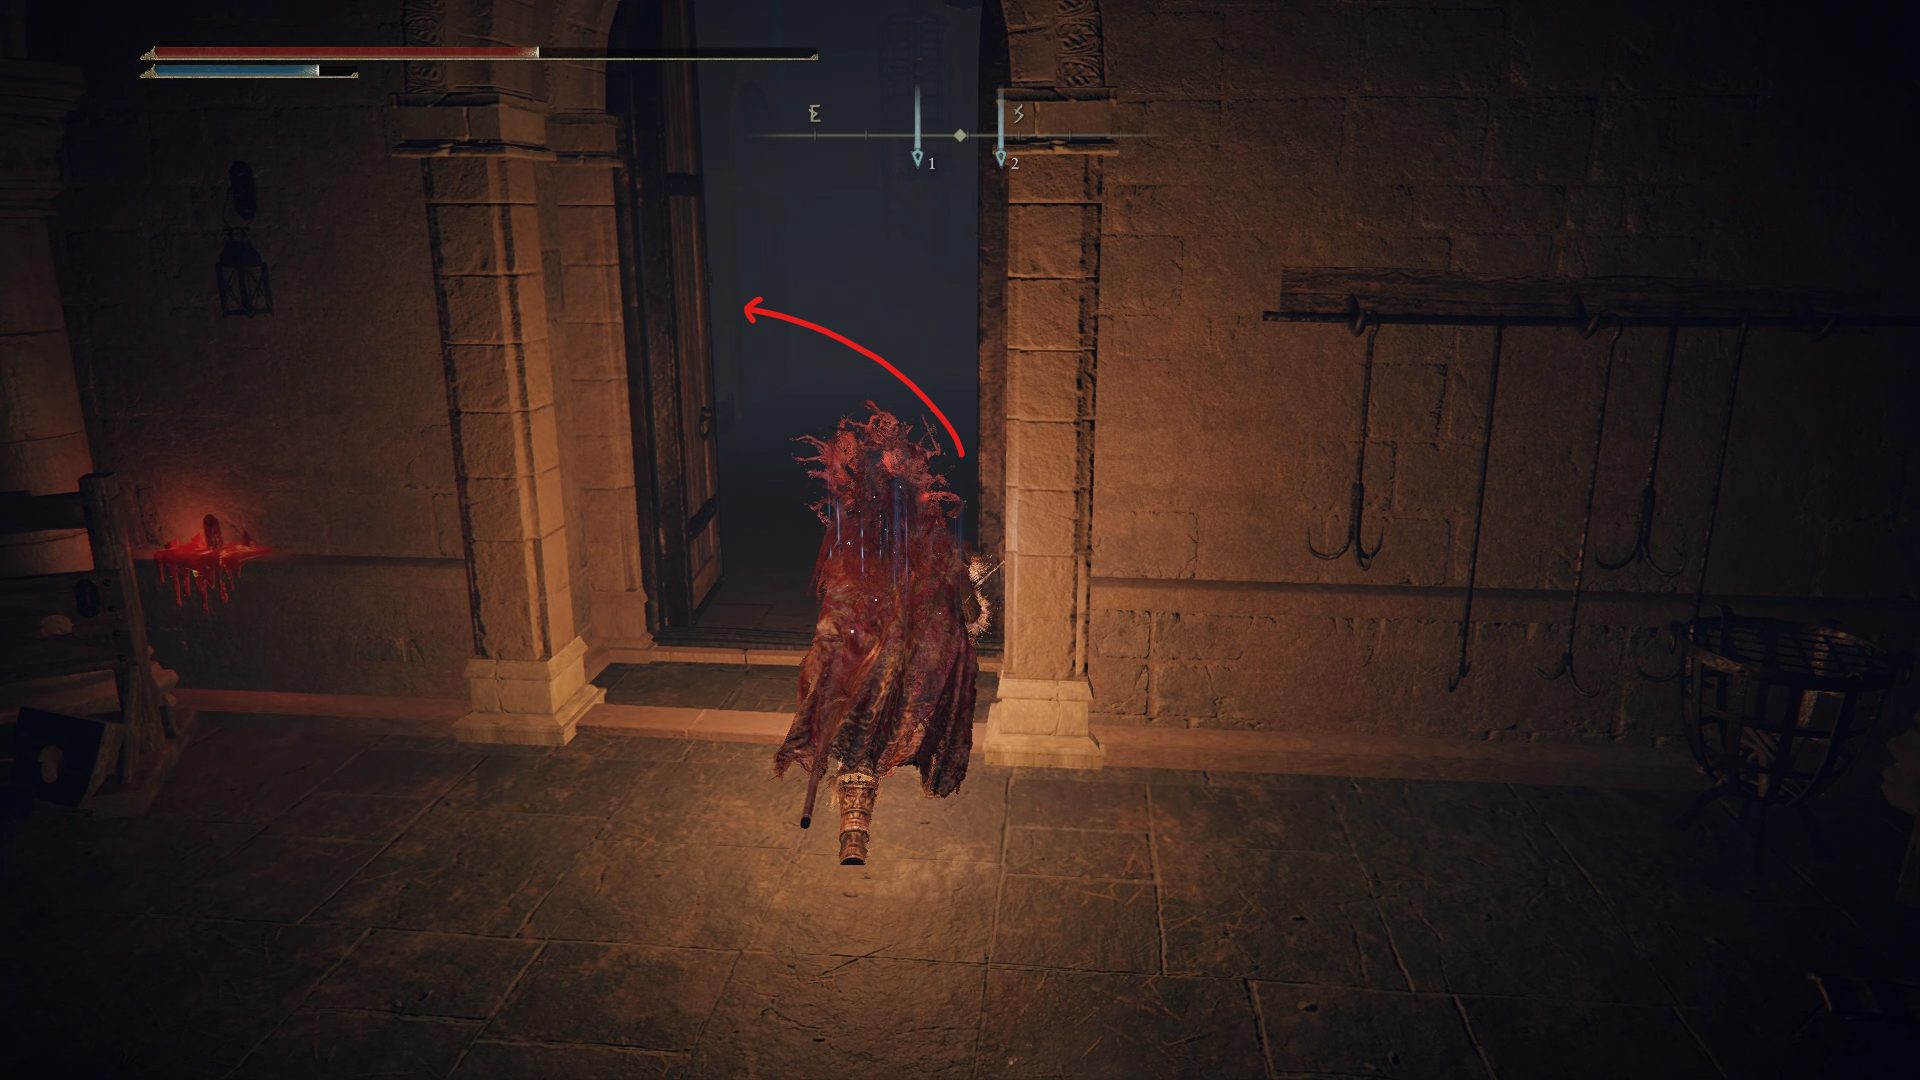
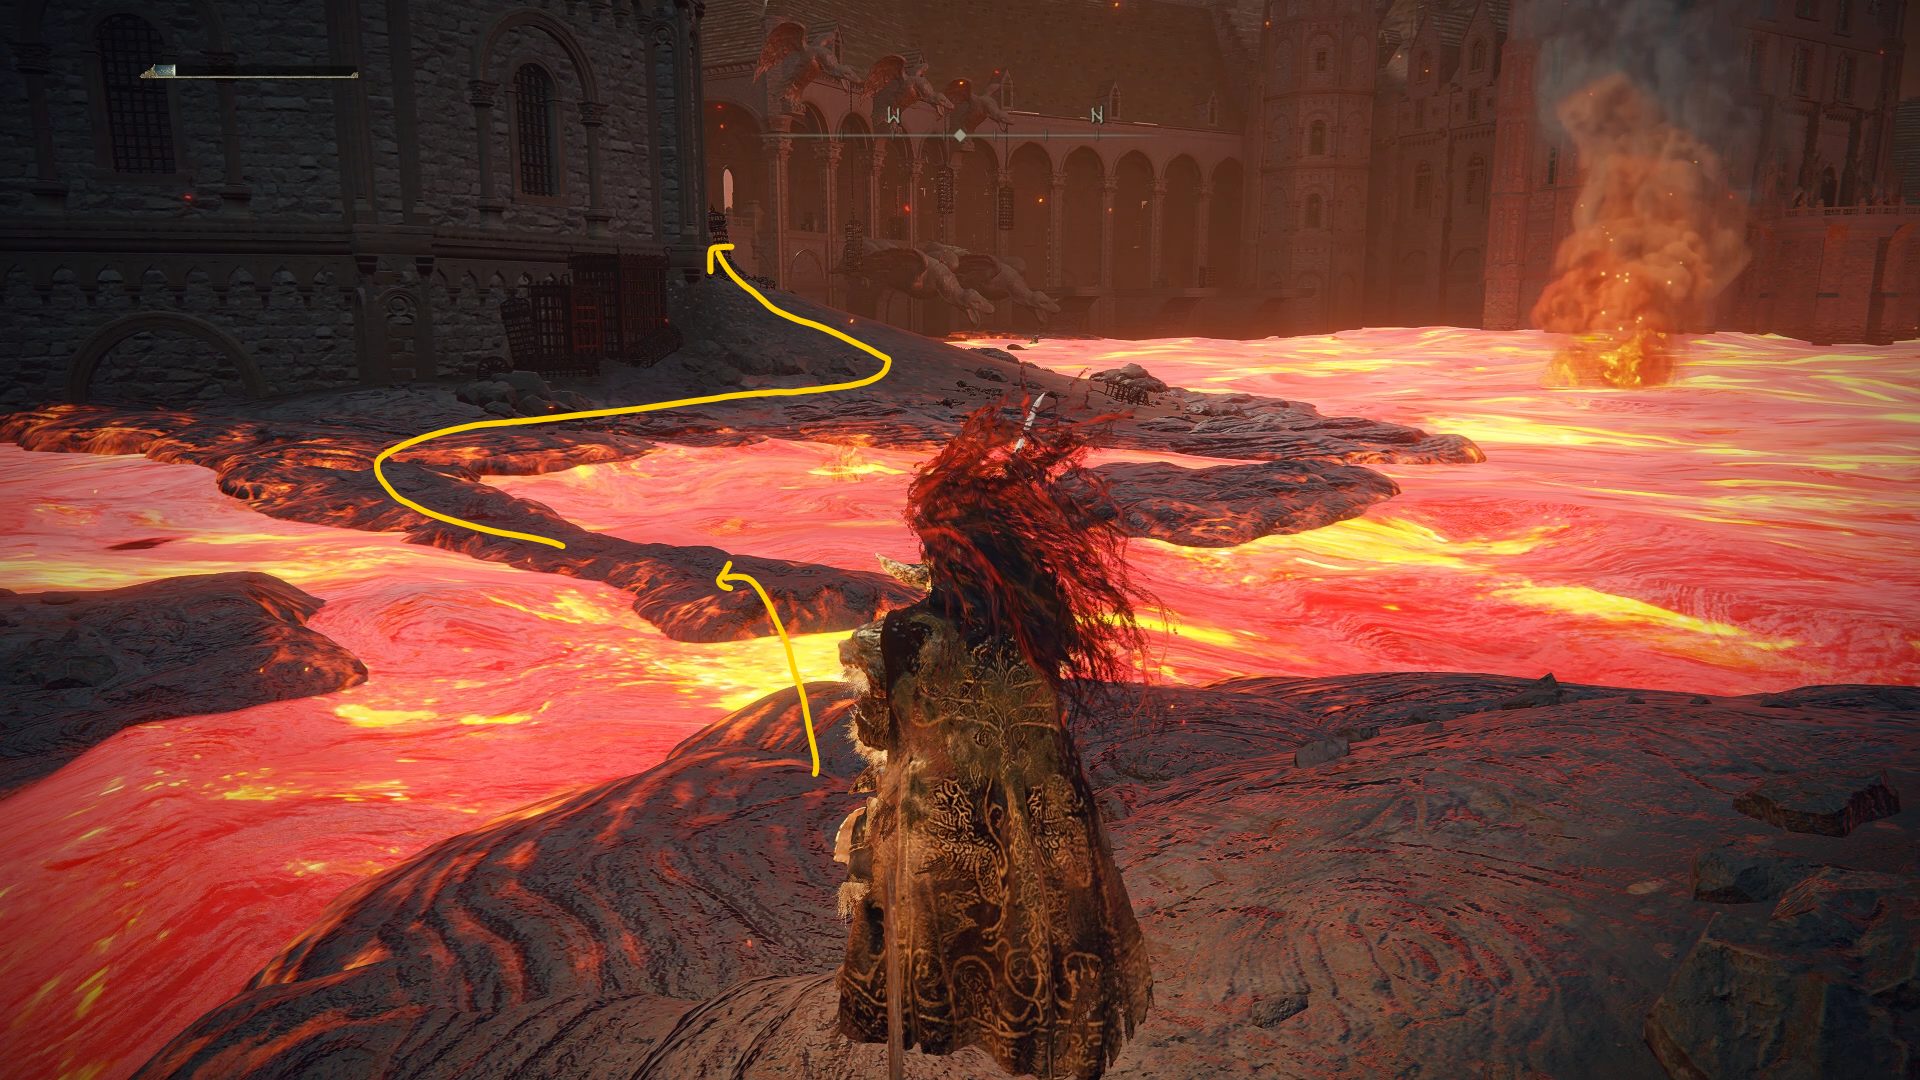
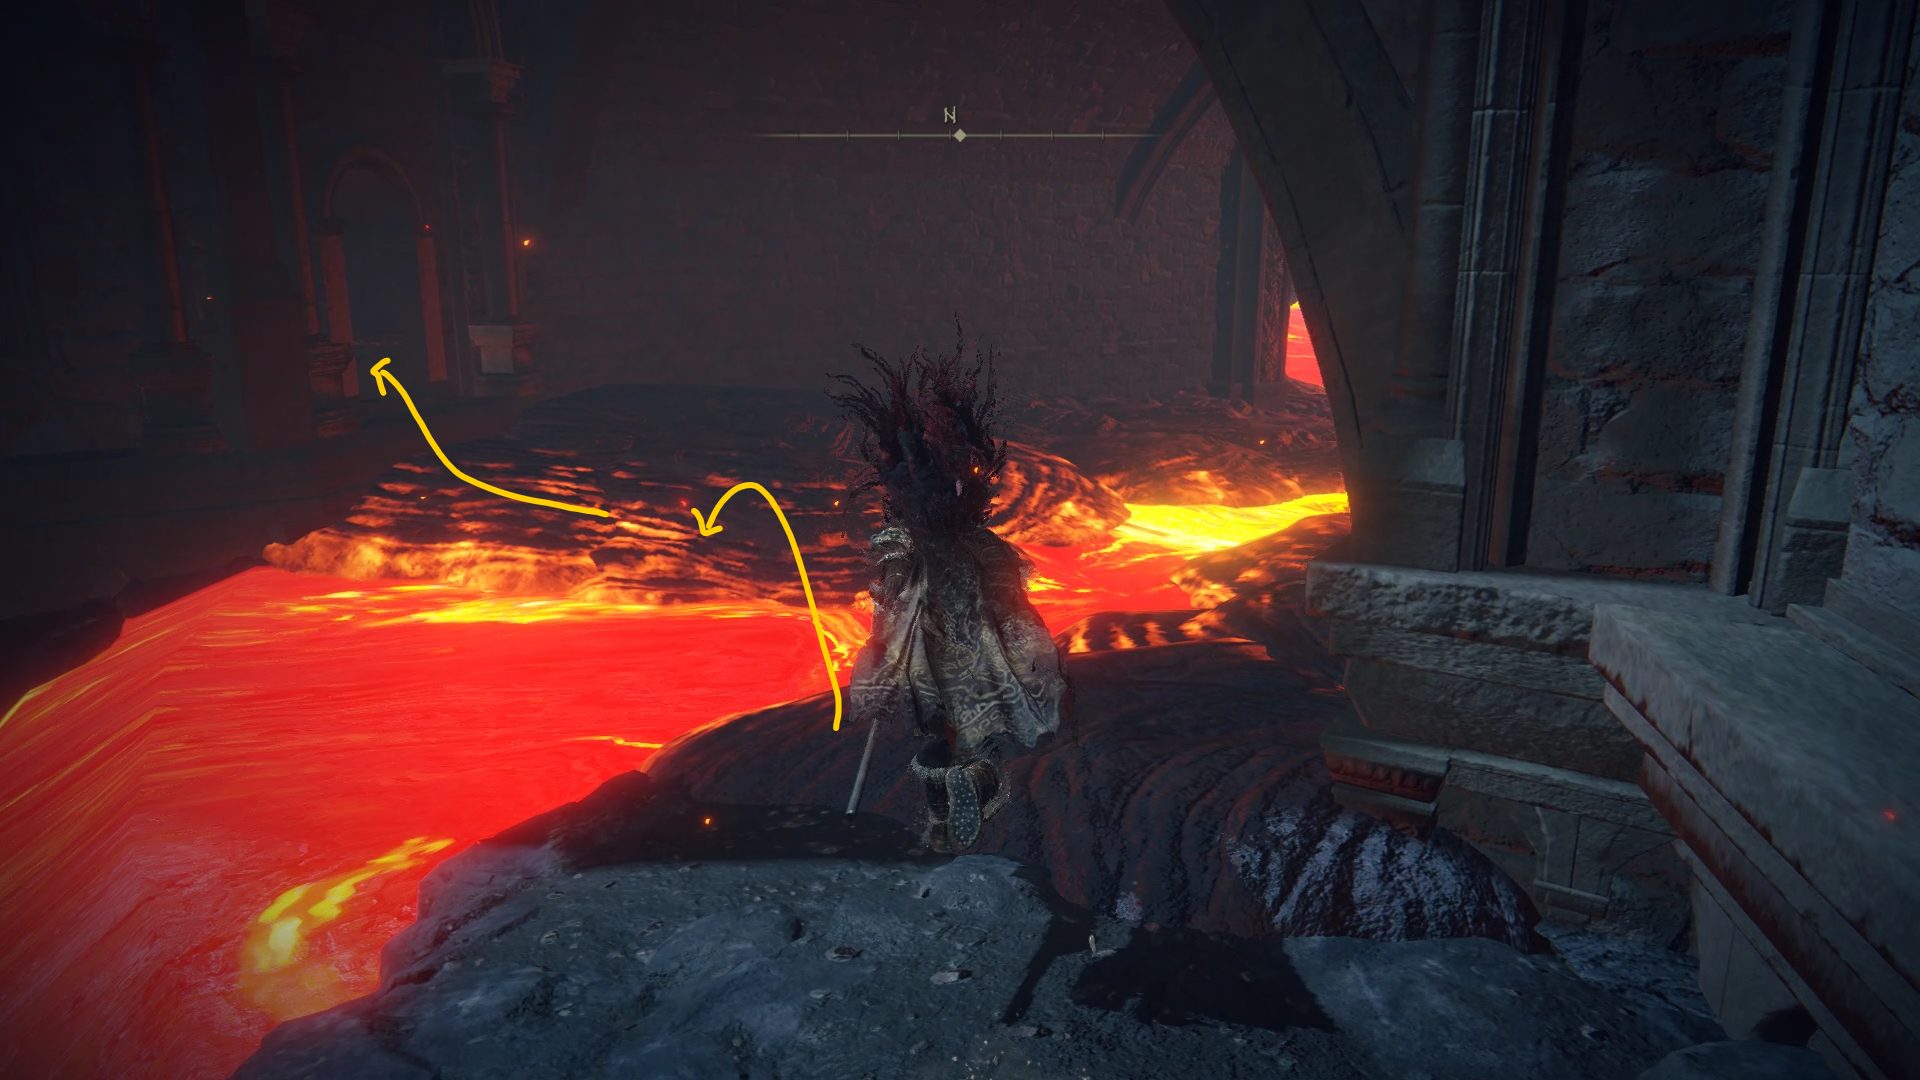
Following the path up and around will eventually lead you to a more open area with a large lake of lava. Carefully, jump towards the building to the west, and continue heading west until you can enter that building by climbing through the window. As you get closer to the building an angry Iron Maiden will greet you, though you can simply ignore her as she won’t be able to follow you inside.
There’s a door on your right, but first we’ll be climbing down the ladder to the left of the door. As you climb down, grab the 4x Drawstring Fire Grease and prepare to deal with several sorcerers and a couple of jumpy boys. If you’re having trouble, you can try dragging the ones that aren’t sorcerers all the way up the stairs by attacking them with a ranged weapon or a spell. Once this area is clear, open the cell south of the room, grab the Missionary’s Cookbook [6] and climb back up by using the same ladder.
Sneaky ladder
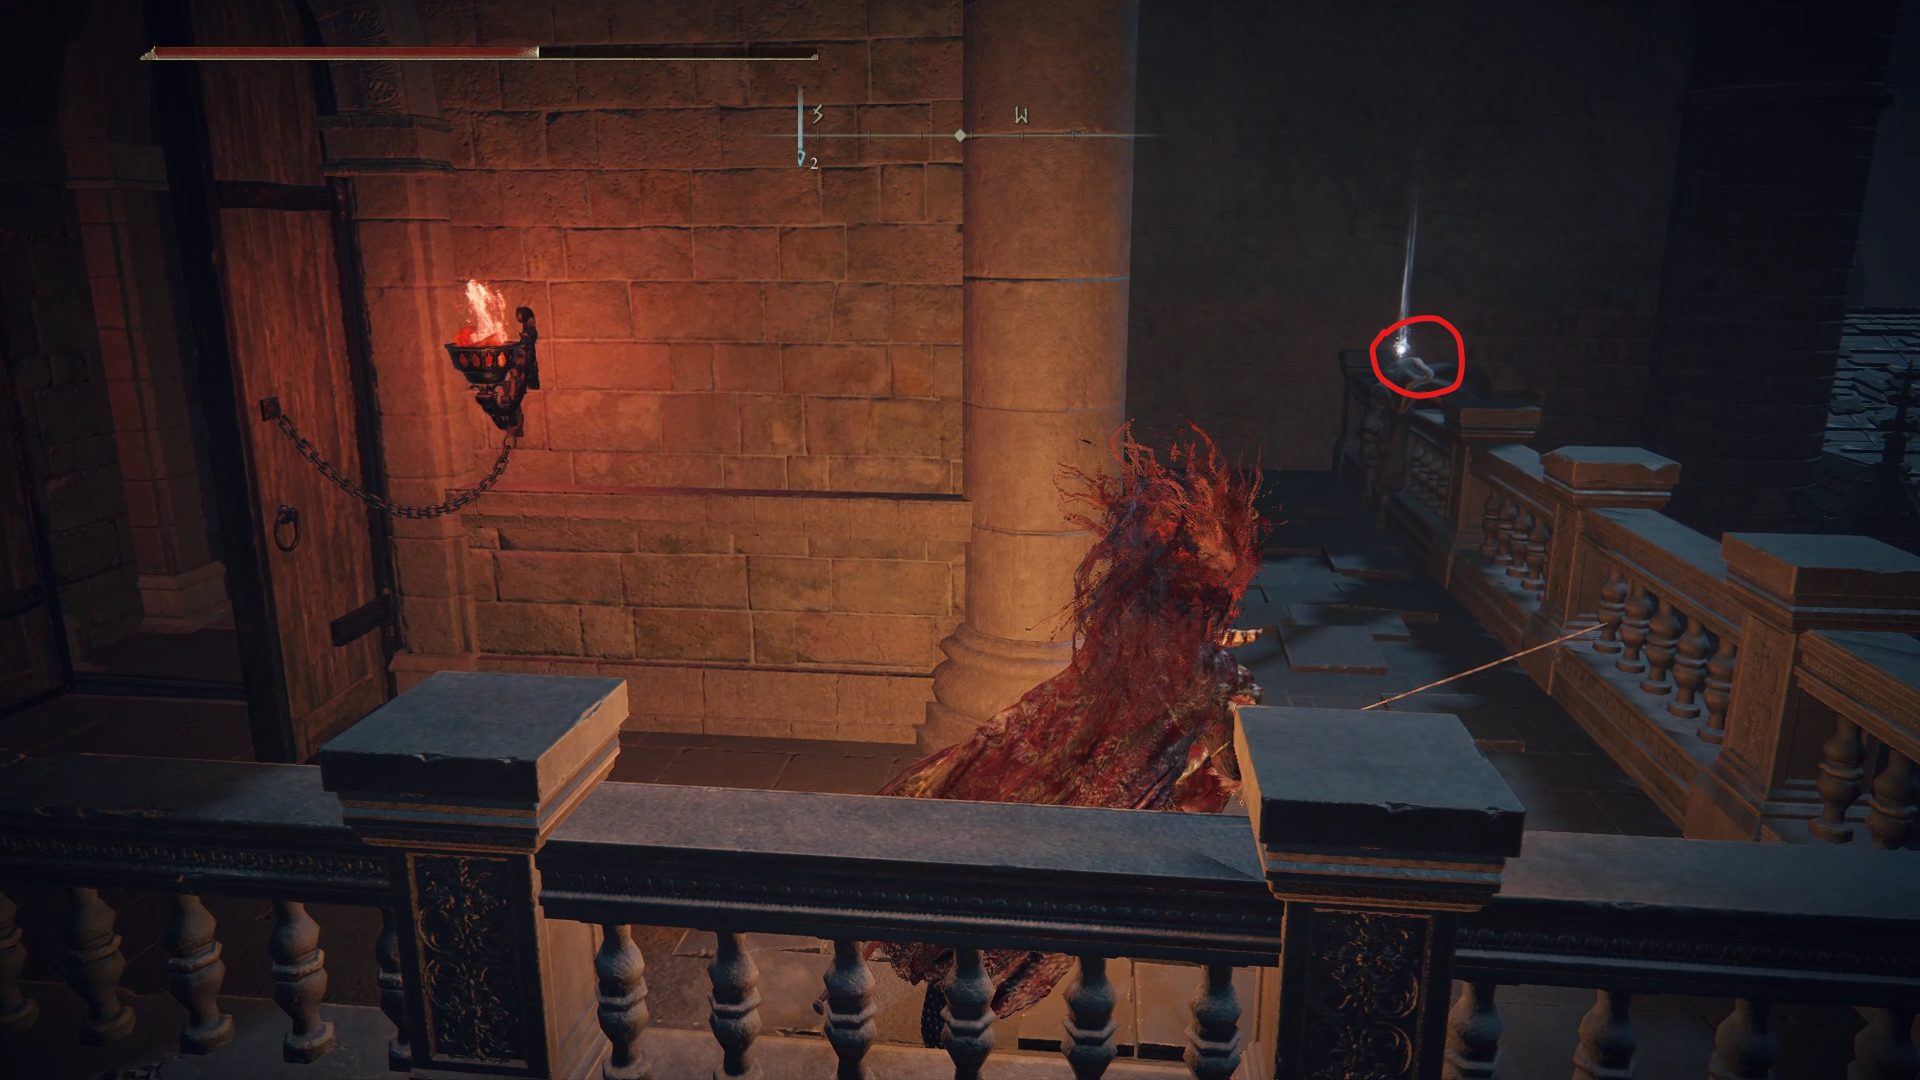
Once you’ve climbed back up, open the door and go up the stairs behind the Snake Warrior until you reach another room. Deal with the enemy in this room and go south towards the elevator. If you activate this elevator, it’ll unlock a shortcut back to the Temple of Eiglay site of grace. Activate the elevator, and instead of riding it all the way down, look northwest and jump inside the hidden room on your way down.
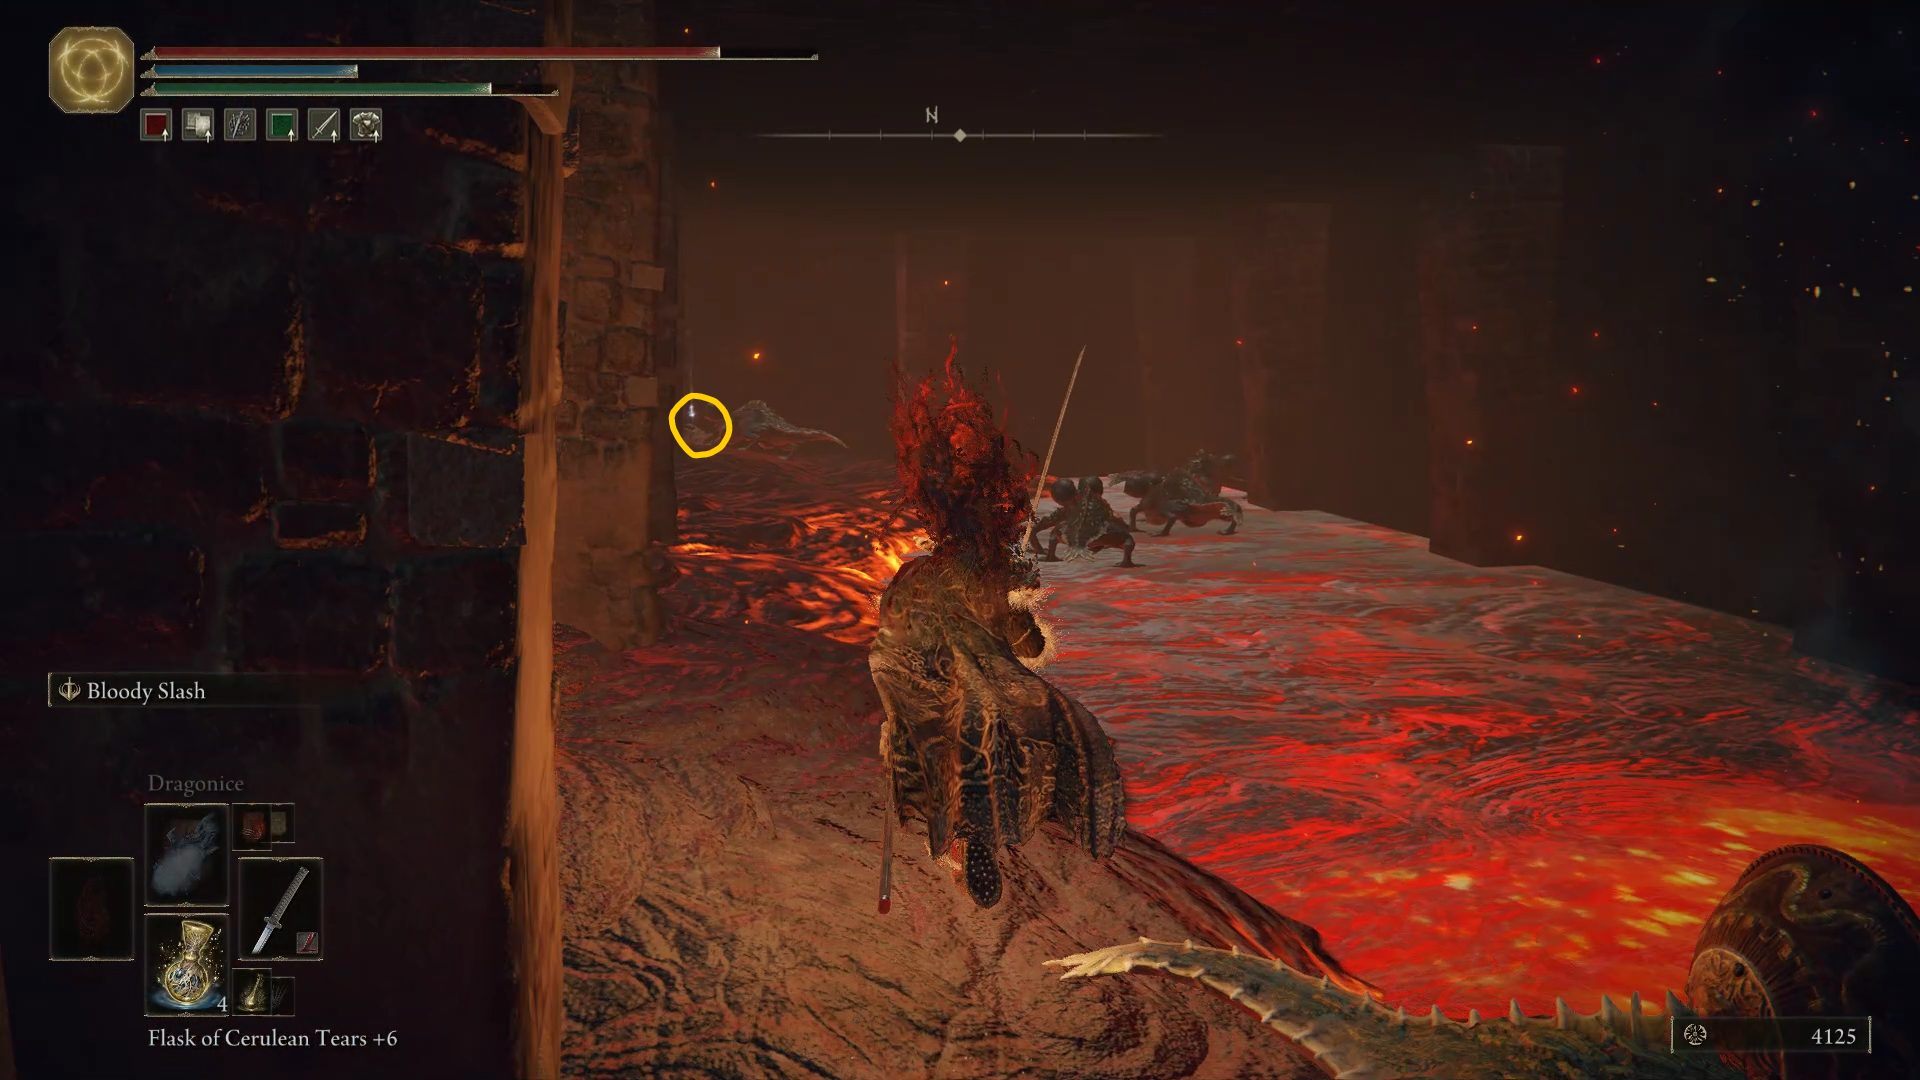
Grab the Stonesword Key in this room and jump out of the western window. If you follow the molten path to the east, you’ll quickly stumble upon a loot beetle that will drop a Somber Smithing Stone [5] once it’s defeated. You will now have 2 options: the window west of the where the beetle was (path A) will take you deeper through the dungeon, while following the path north will take you to a Somber Smithing Stone [6] and a dead end with several Basilisks and a couple of Snake Warriors (path B).
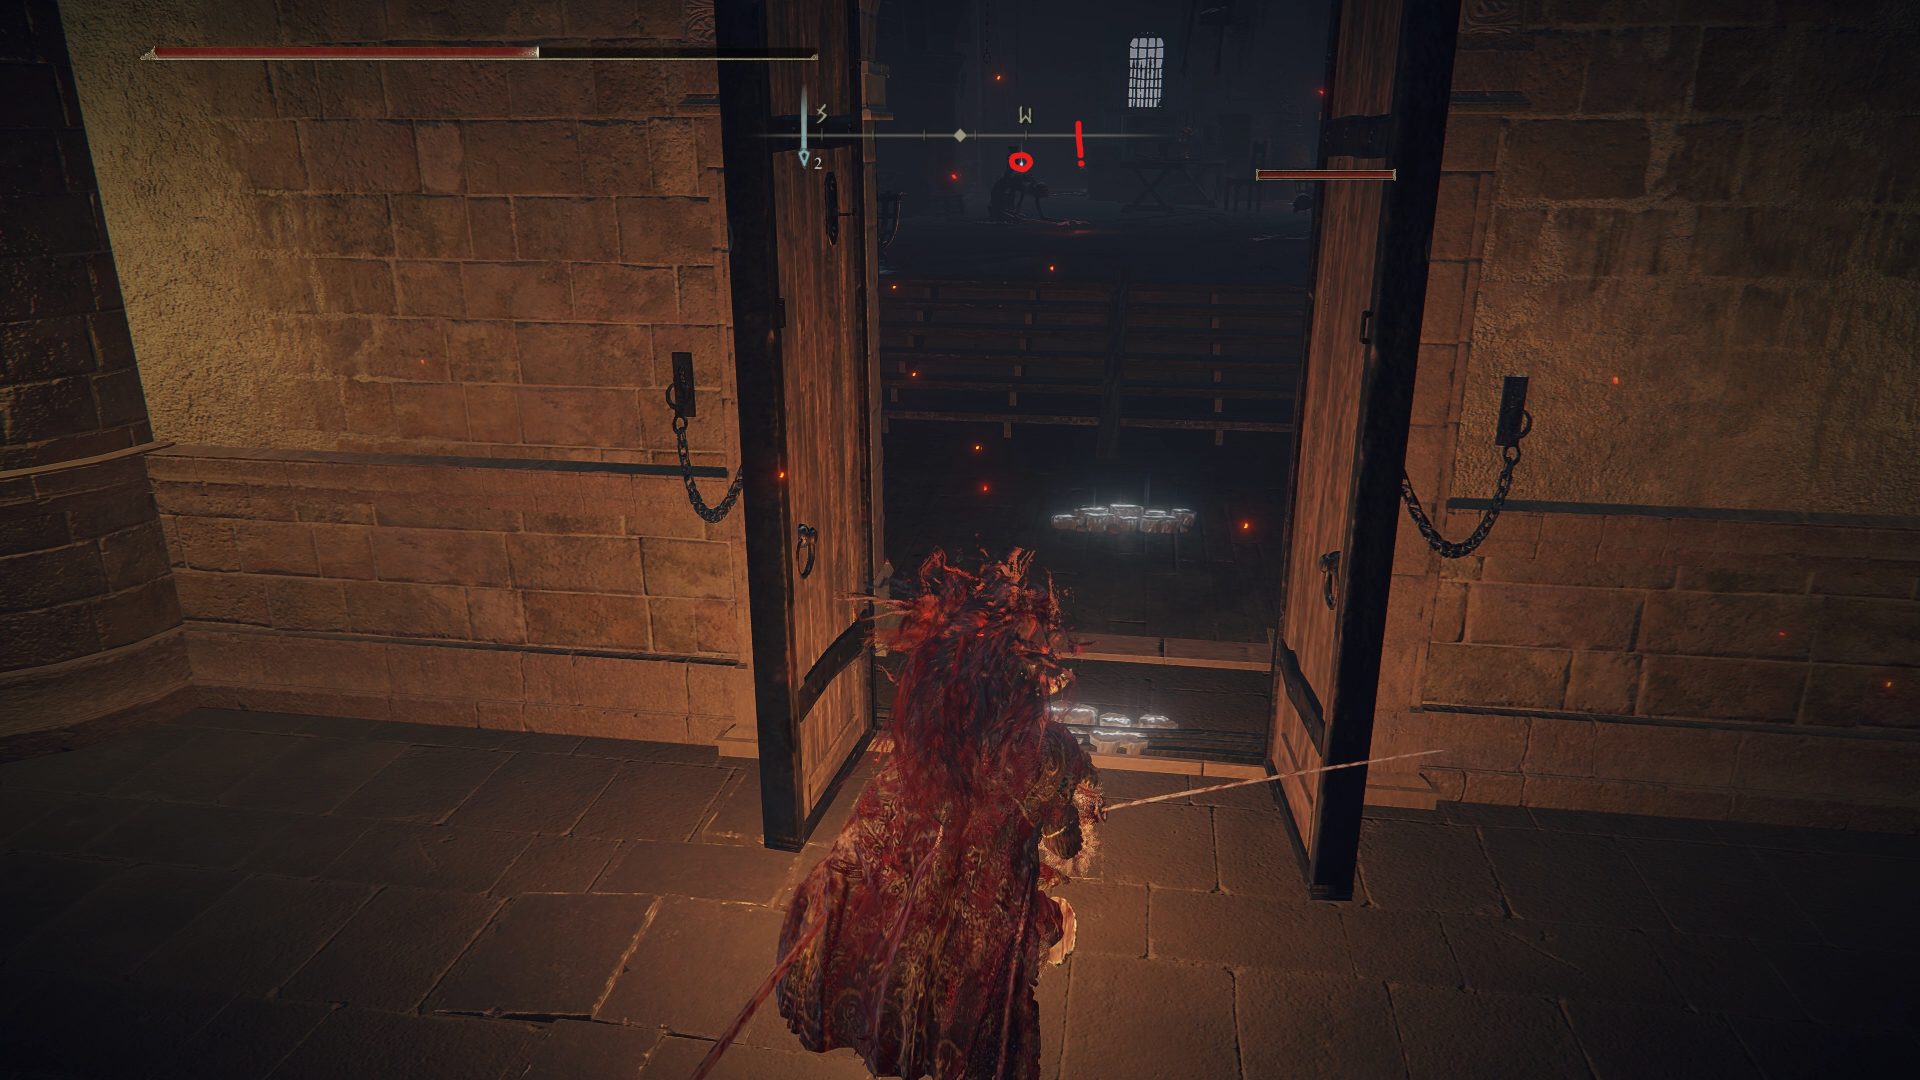
Once you’re ready, proceed through the window (A), continue through the room (keep this room in mind for Rya‘s questline later on) and climb the ladder at the end of this short path. Up in this section, while you will still have to contend with Snake people, you will also have to watch out for the weaker undead enemies as they will explode in a poisonous mist once they’re defeated. While it sounds troublesome, if you remember to roll away after landing the killing blow they will be no different from the ones at the start of the game. As you’re going north, keep an eye out on the statues to the east above the lava, as you can grab the Commoner’s Headband on top of one of them.
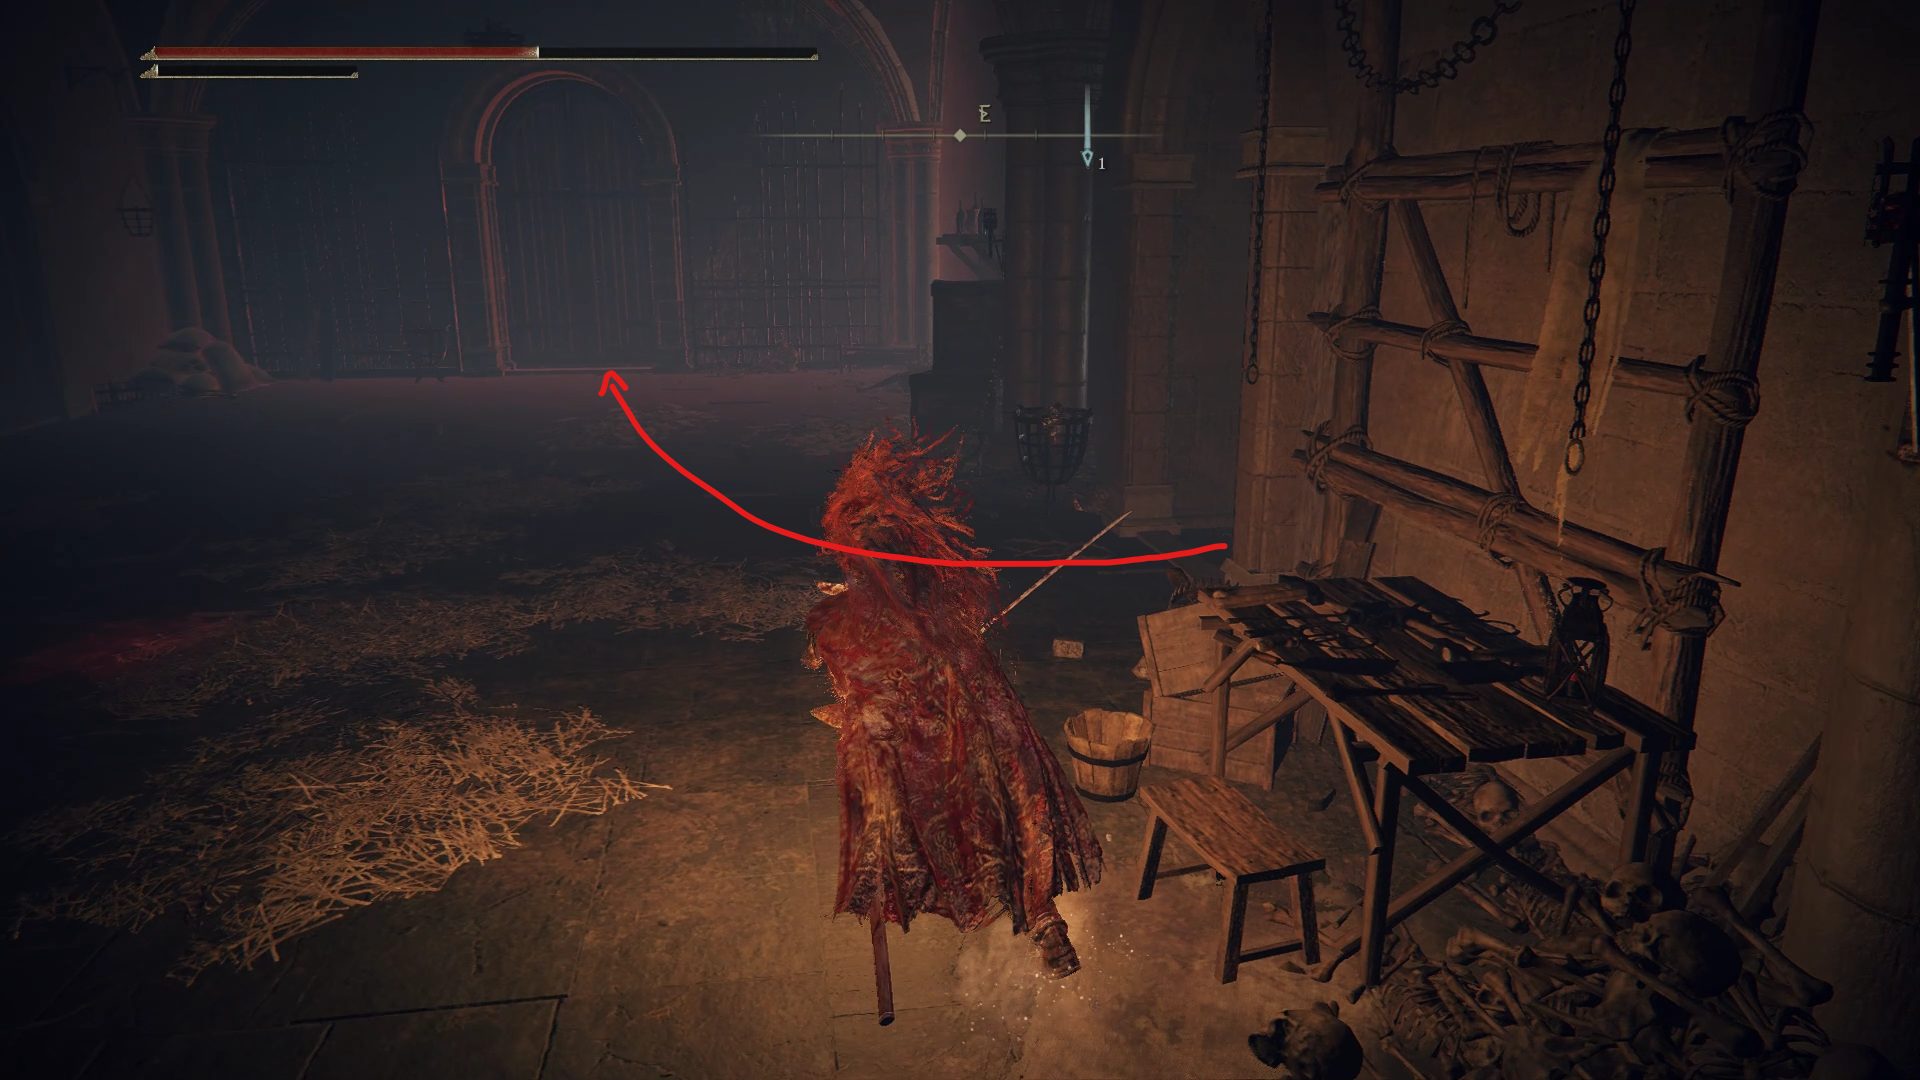
Down the stairs further north, you’ll be faced with a Snake Warrior wielding a fire whip – be careful for this lad has some range. After defeating it, head inside the room behind it and look for the door in the back of the room. This room is dangerous. You’ll have to deal with humanoid enemies and Snake Warriors. One specific Snake Warrior, at the top of the flight of stairs ahead of you, can cast magic. If you want to make it easier on yourself, you can use a ranged attack to have the melee enemies come to you, which will allow you to deal with them without being worried about the sorcerer. Once you’ve dealt with the snakes, grab the Man-Serpent Ashes in front of the entrance and start heading upstairs.
Man-Serpent Ashes location
In this area, if you climb the stairs to the east, they will lead you to an outside balcony with a Waygate – which will bring you to Rykard, Lord of Blasphemy (the dungeon boss). Defeating Rykard before completing all of the invasion quests found in the manor will make them unavailable. I recommend doing them all before facing him. So instead, take the stairs going west and you’ll reach yet another room with an Imp Statue that will require 2x Stonesword Keys to open the fog gate.
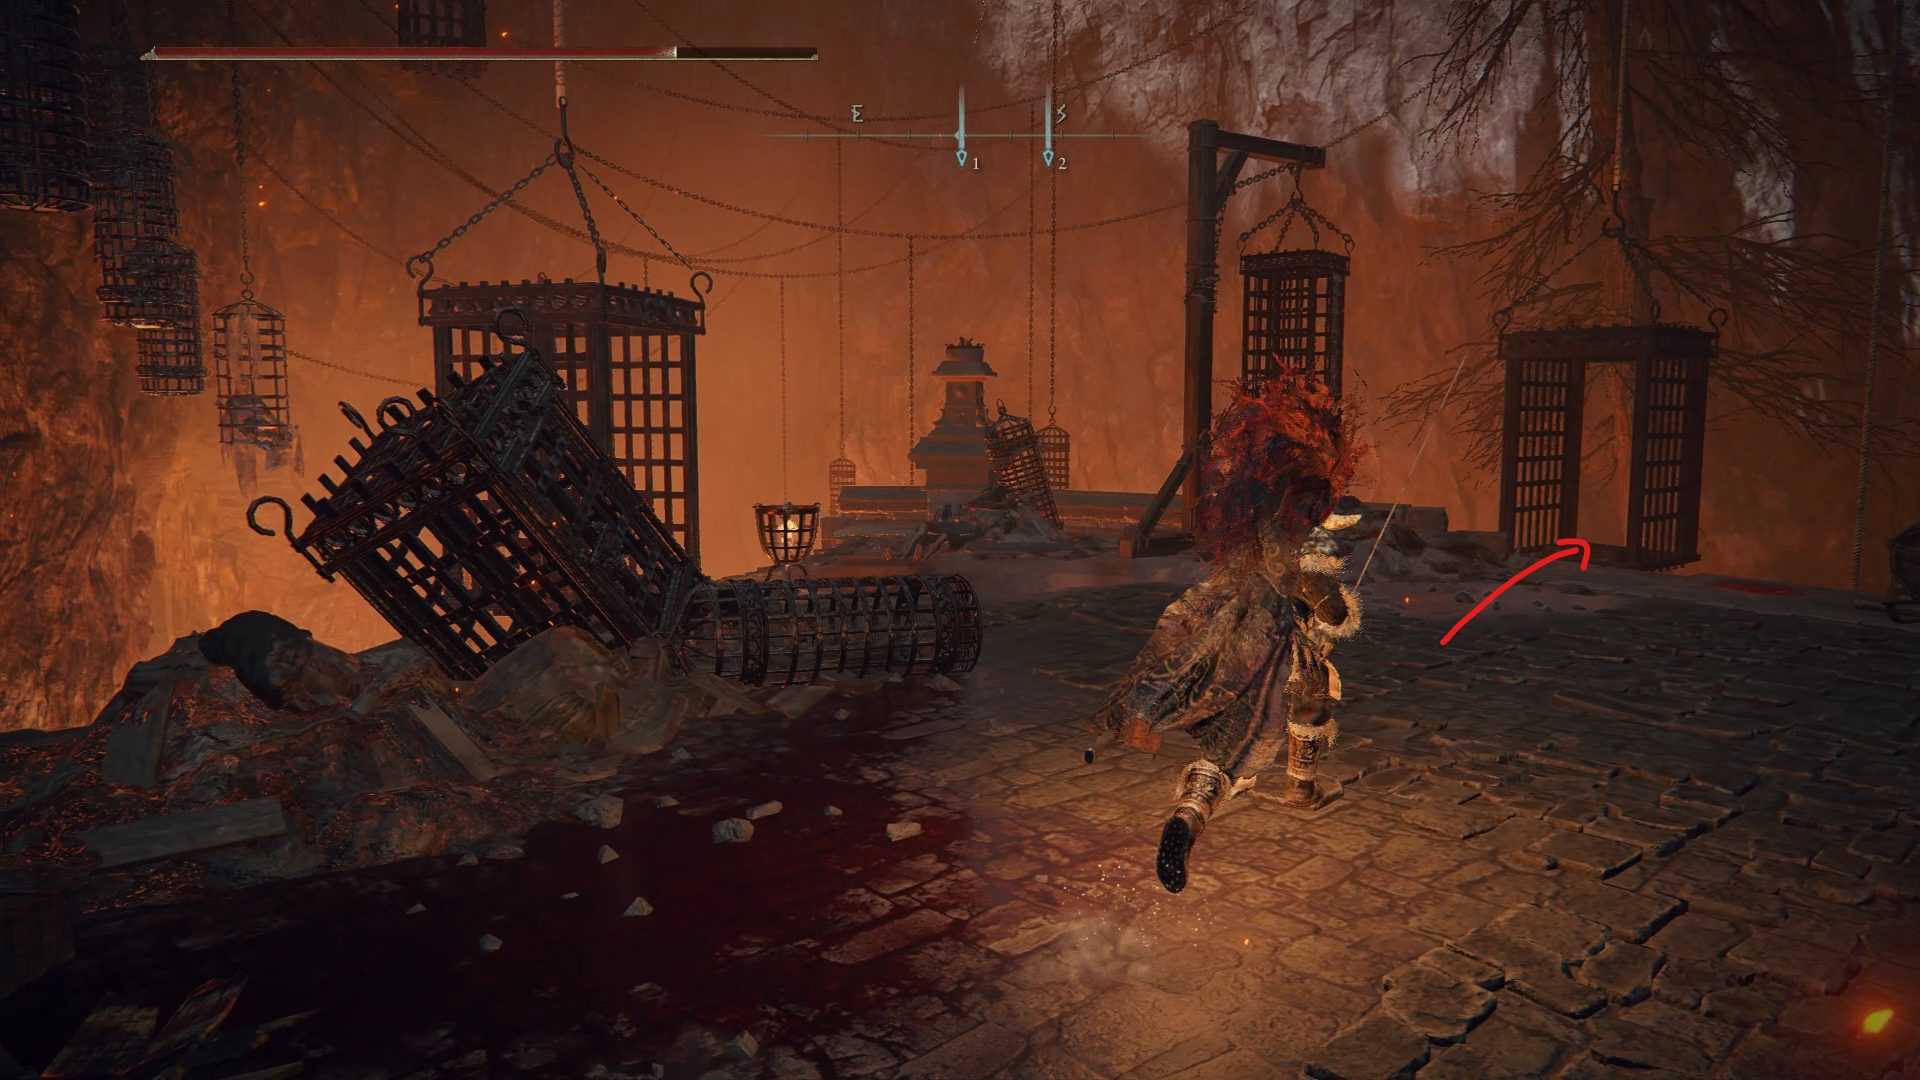
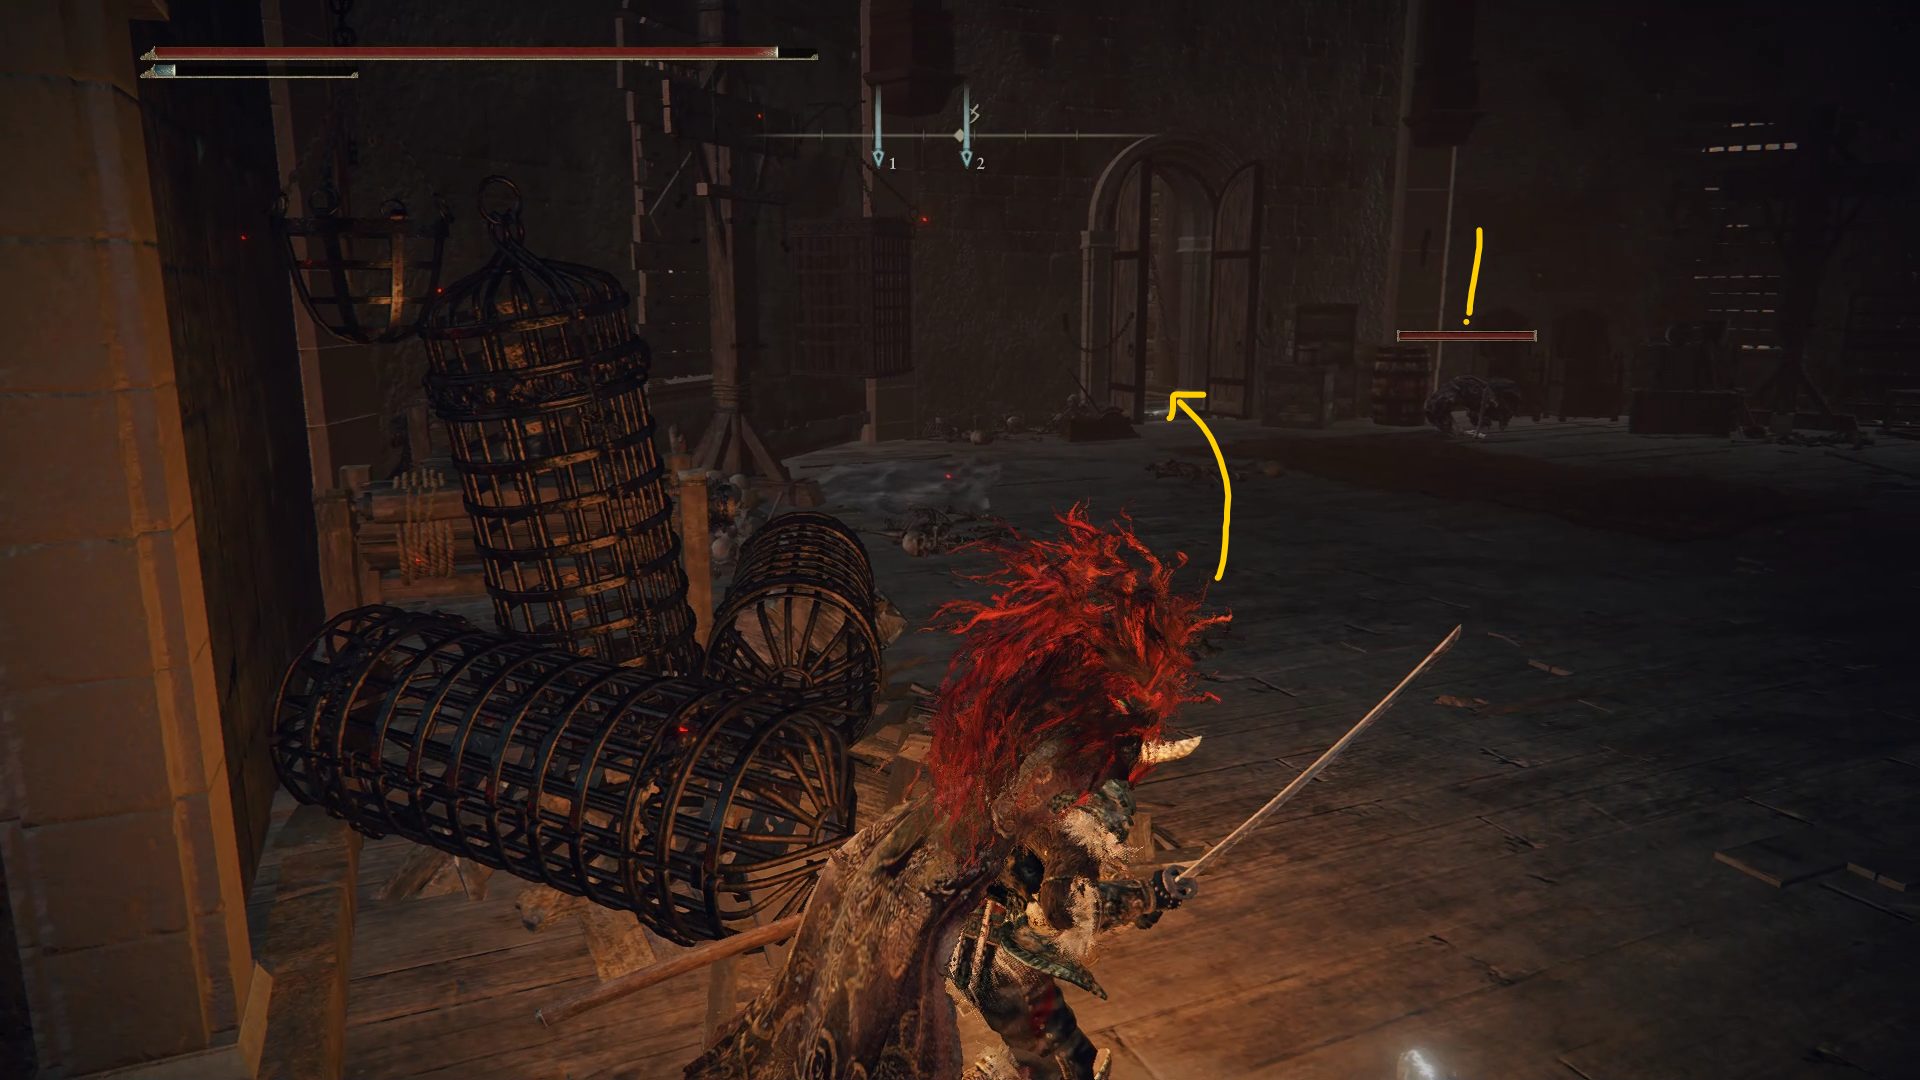
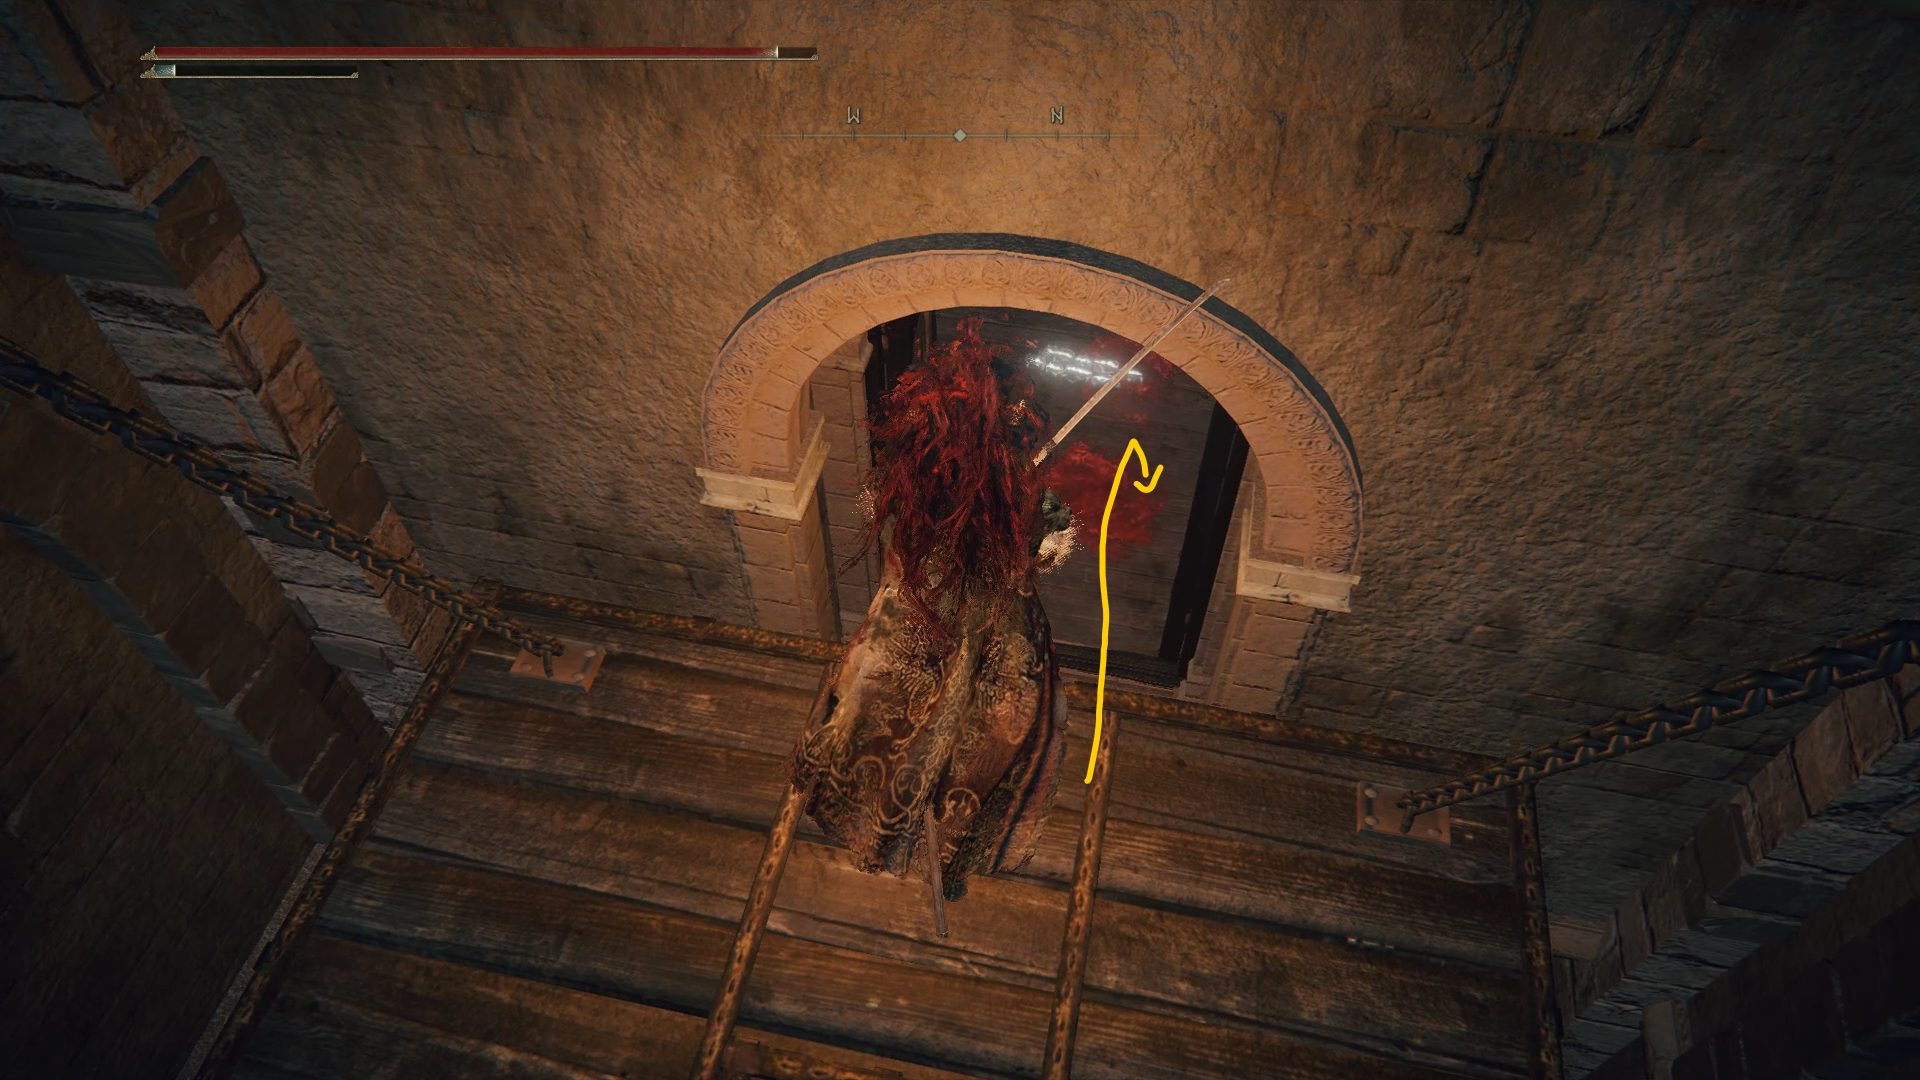
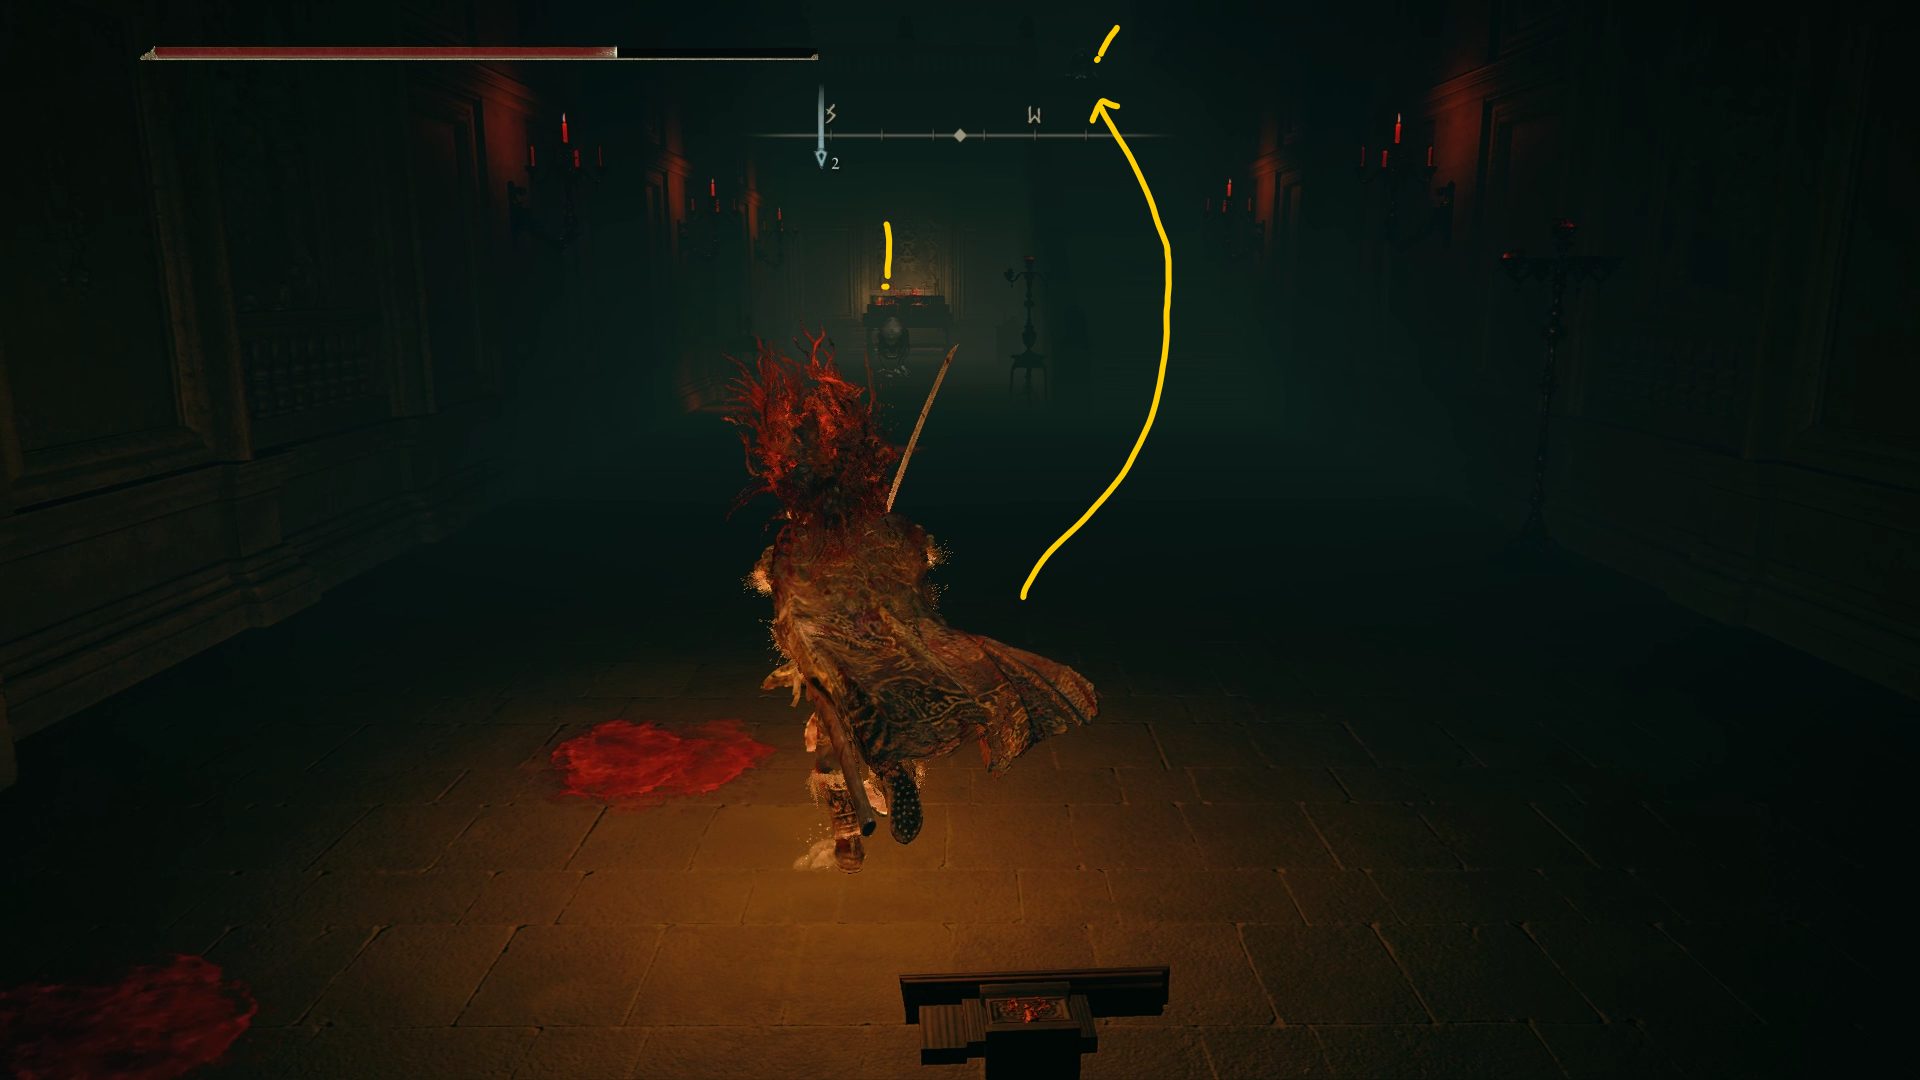
Inside will be a very open area with cages dangling from the ceiling. I hope you like platforming – because that’s exactly what you’ll have to do to reach the floor below. On your right side, right at the edge of the broken floor, fall down and land on the platform beneath you. Head inside the room and proceed onward.
Defeat the Snake Warrior toward the end of the room before heading up the stairs and dealing with the sorcerer. Proceed through the door up the stairs and you’ll end up back inside the area with the dangling cages – a corpse to the right will have the Dagger Talisman. Drop down onto the cage below, drop down again, and you’ll be on a platform with an enemy. Dispatch it quickly and reward yourself with a Rune Arc.
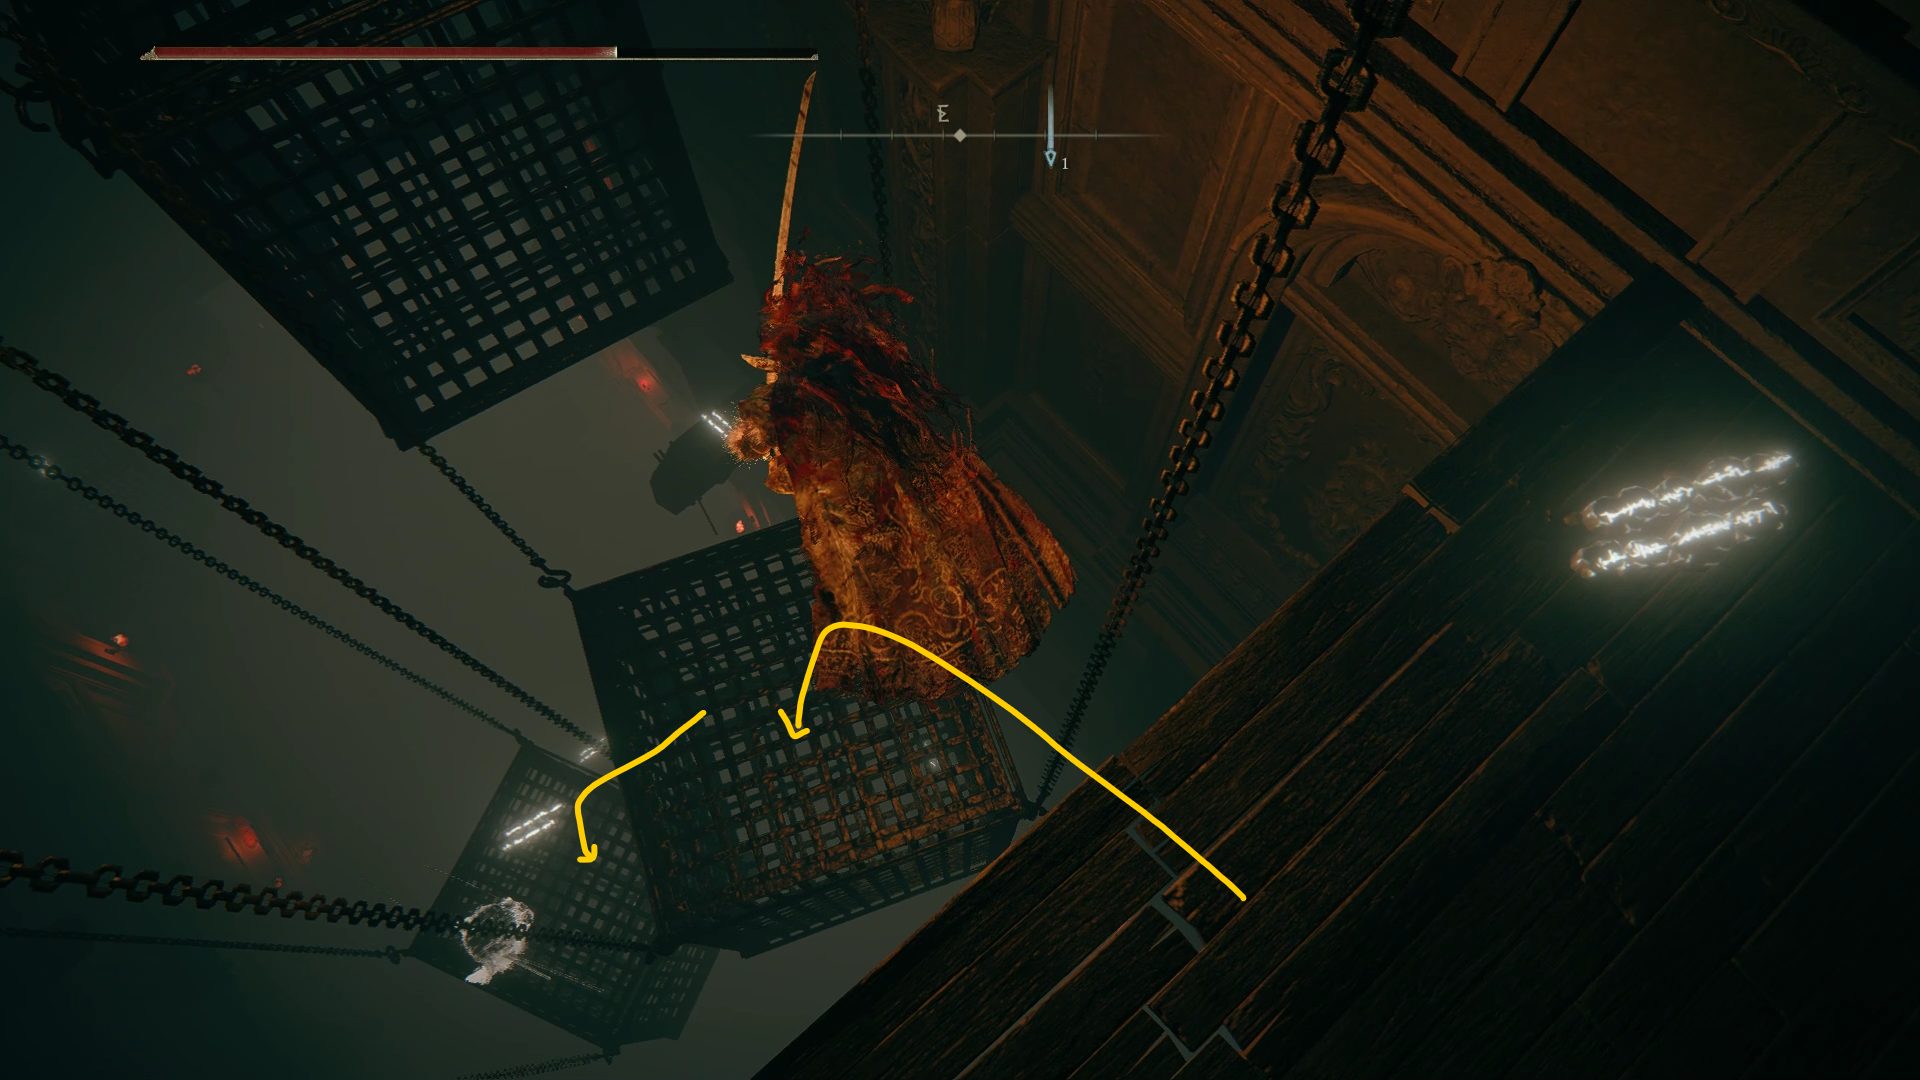
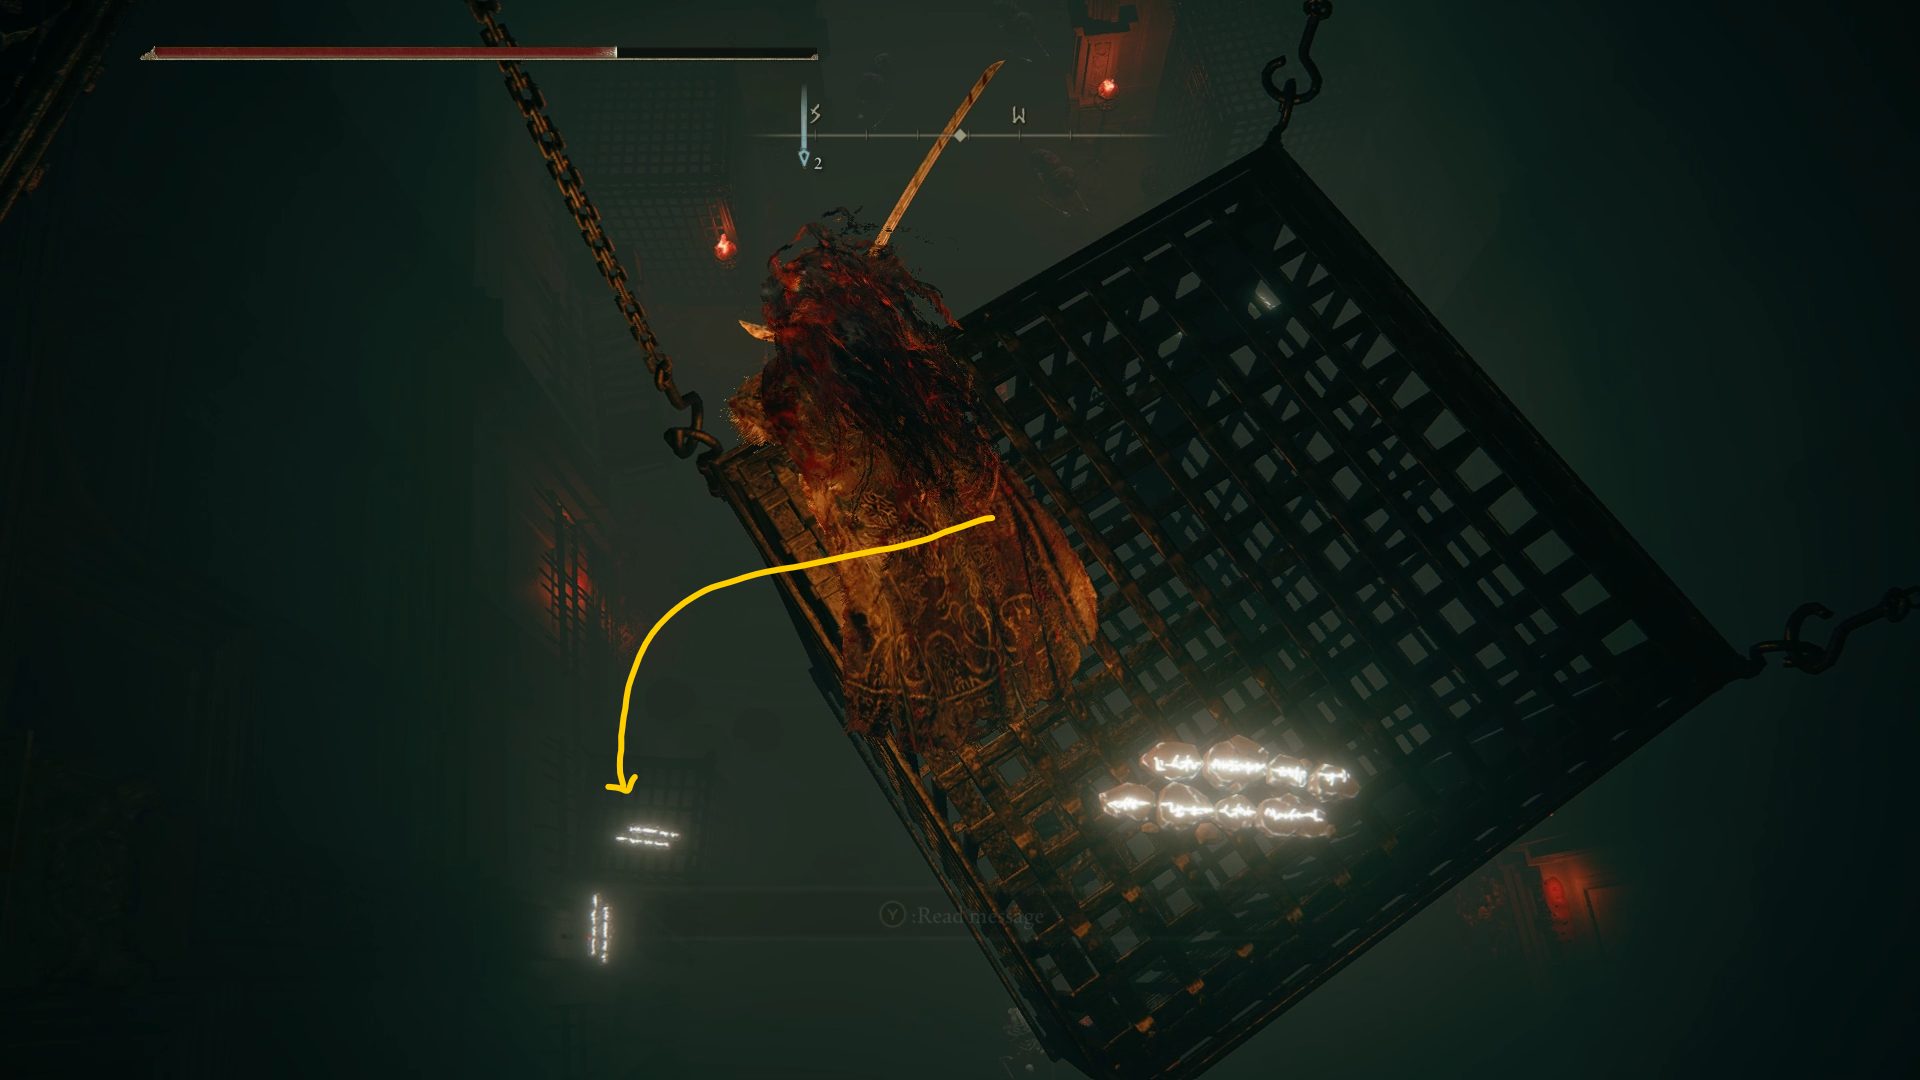
You can now proceed, very carefully, down the rest of the cages. Just take your time and you should reach the bottom with no problem. Of course, once you’re at the bottom, you’ll have even more enemies to deal with, but you can always use ranged attacks against them before going all the way down.
Sprint towards the cage below
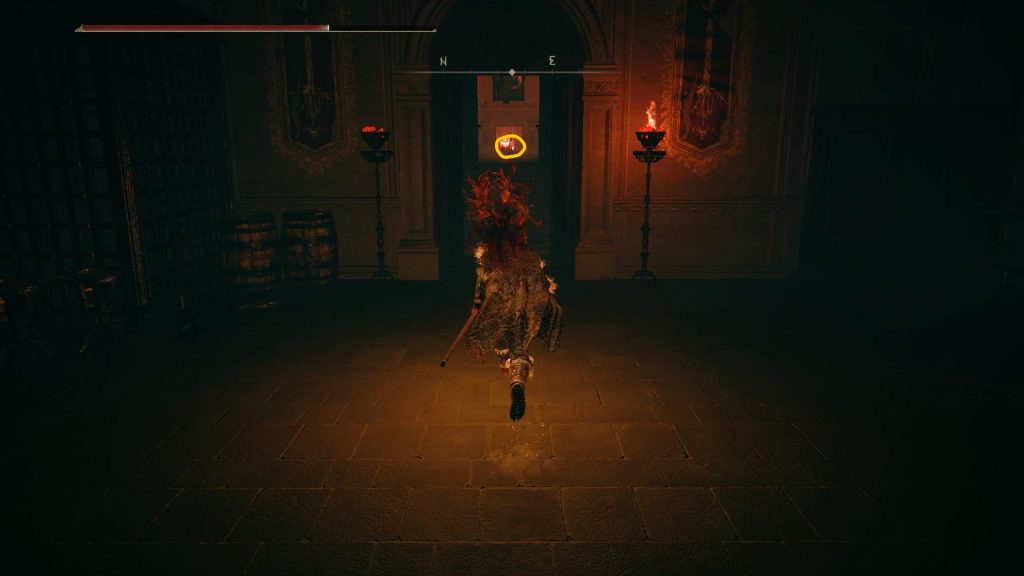
In this area, going northeast will bring you to a room with the Ash of War: Royal Knight’s Resolve, and a nice shortcut directly to the Manor. And if you go southwest instead, you’ll be able to grab the Seedbed Curse item, and you’ll reach a hallway leading up to an open balcony with an Iron Maiden. Near the edge of the balcony, by a busted portion of the railing, you’ll find a Somber Smithing Stone [7] on the corpse dangling over the edge.
Ashes of War: Royal Knight’s ResolveSeebed Curse + Path to Somber Smithing Stone [7]
All that remains now are the Volcano Manor invasions, Rya’s questline, and defeating Volcano Manor’s boss, which we should save for last.
Once you’ve joined the Volcano Manor by speaking to Tanith, you’ll be able to grab a Letter from Volcano Manor from the table in the room with several NPCs down the hall. Those letters will not only tell you the name of your target, but will also place a red marker on your map which will indicate the location of its red invasion sign. Every time you successfully assassinate your target, you’ll be able to return to Tanith for your reward, and a new letter will be available on the same table. It’s also highly recommended to speak to Diallos between each invasion to advance his questline. You can’t miss him, he’s in the same room as the table with the letters.
There is one exception however with the Letter to Bernahl that sends you to Leyndell, Royal Capital, which you’ll obtain after completing the two first invasions and speaking to Recusant Bernahlin that same room. Additionally, to receive your reward, you will have to speak to Bernahl instead of Tanith for this one.
As for the invasions themselves, the strategy will remain generally the same for each of them. Using ranged attacks might be tricky as the NPCs will dodge roll through most of them, though spells like Dragonfire will still remain highly effective. Otherwise, you can try sprinting in and out of melee range to bait one of their attacks, and if you’re lucky, you’ll be able to throw a quick ranged attack while they’re busy swinging. If you’re playing melee instead, jumping heavy attacks will be as reliable as ever. Wait for the enemy to be sprinting towards you, and use a jumping heavy attack, which will connect more often than not. Whether you managed to hit the enemy or not, just run out and repeat this process until they’re defeated.
As you complete the last invasion, Tanith will give you the option to teleport to the site of grace in front of Volcano Manor’s boss.
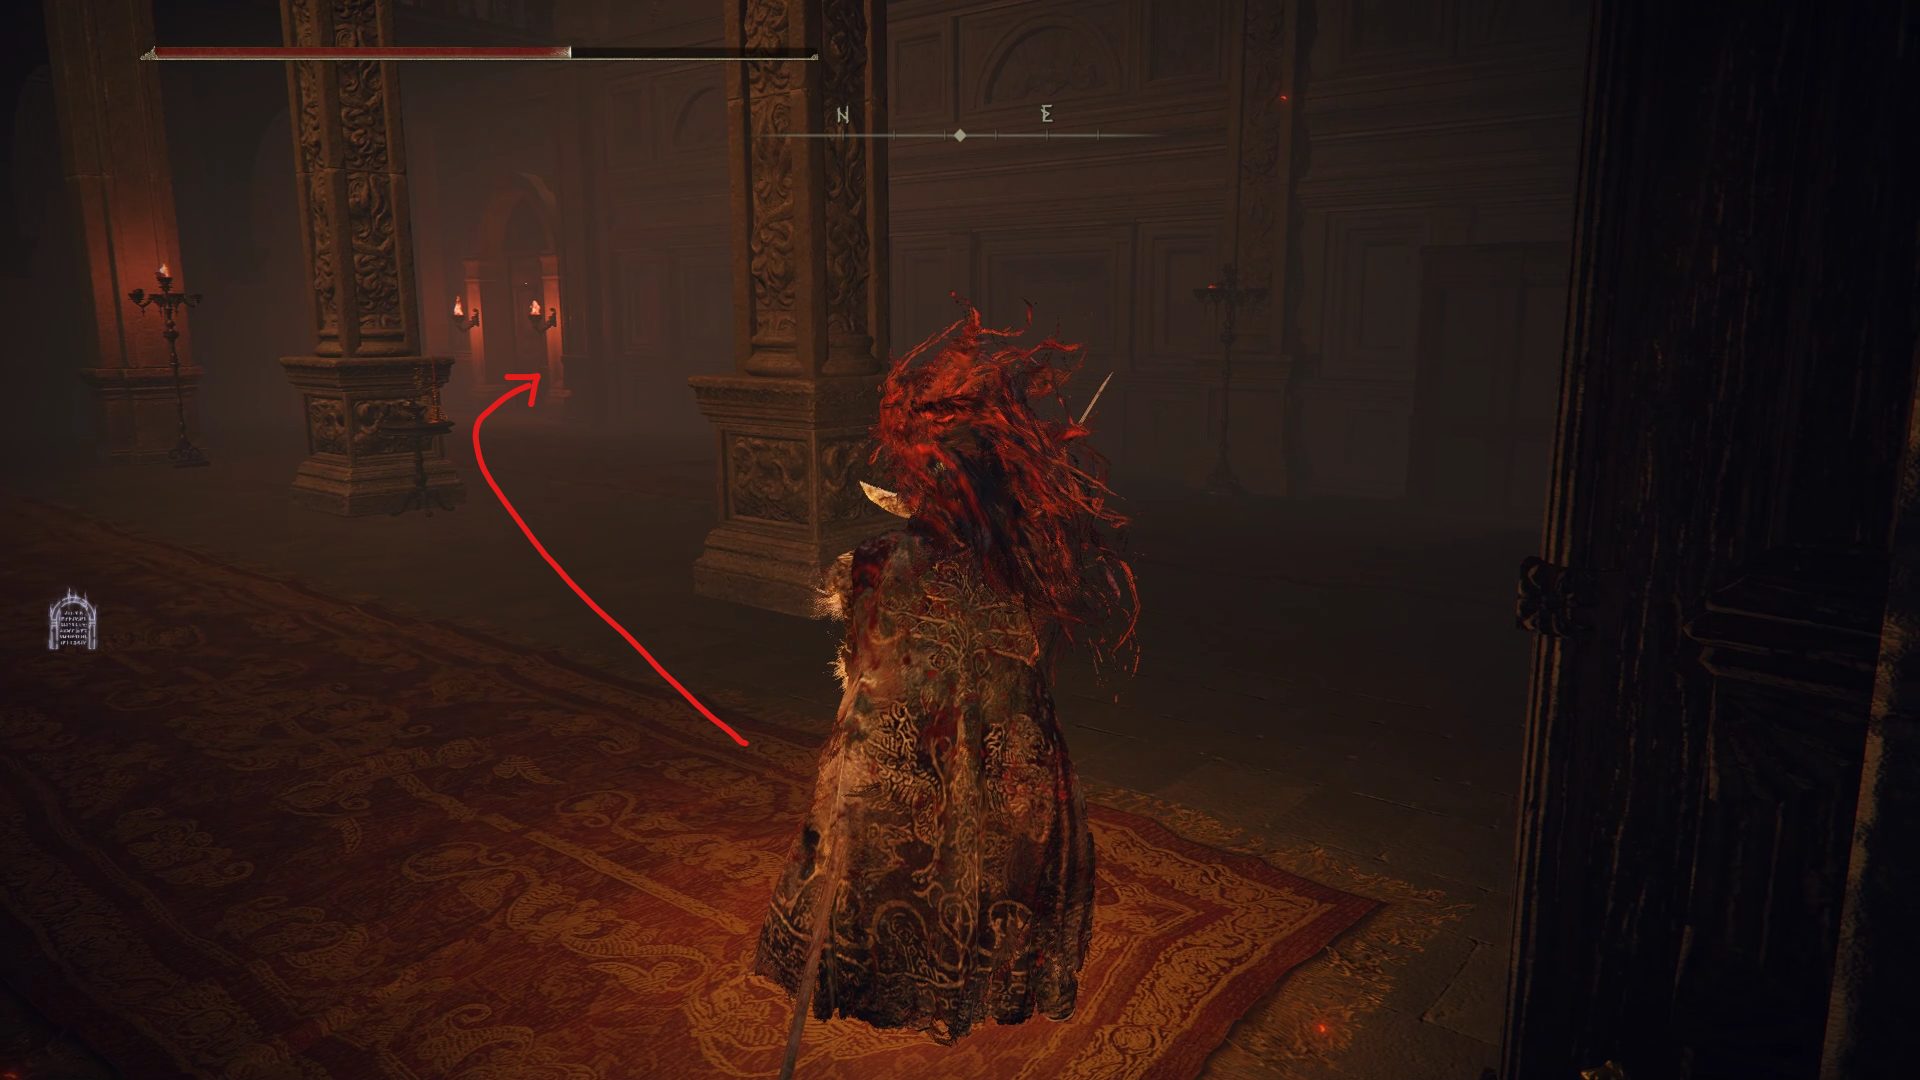
Now head back to the Volcano Manor site of grace and look for Rya in one of the rooms. If Rya hasn’t moved from her original location, either rest at a site of grace or quit to the main menu and reload your save. Don’t be afraid of her slightly different appearance and exhaust her dialogue. Go back to Tanith, speak to her about Rya‘s appearance and rest at the site of grace. Now go back to Rya and give her the Serpent’s Amnion, which will make her move to yet another location in the Volcano Manor. At this point, speak to Tanith once again and mention her disappearance, at which point she will ask you to find Rya and give her the Tonic of Forgetfulness to ease her suffering.
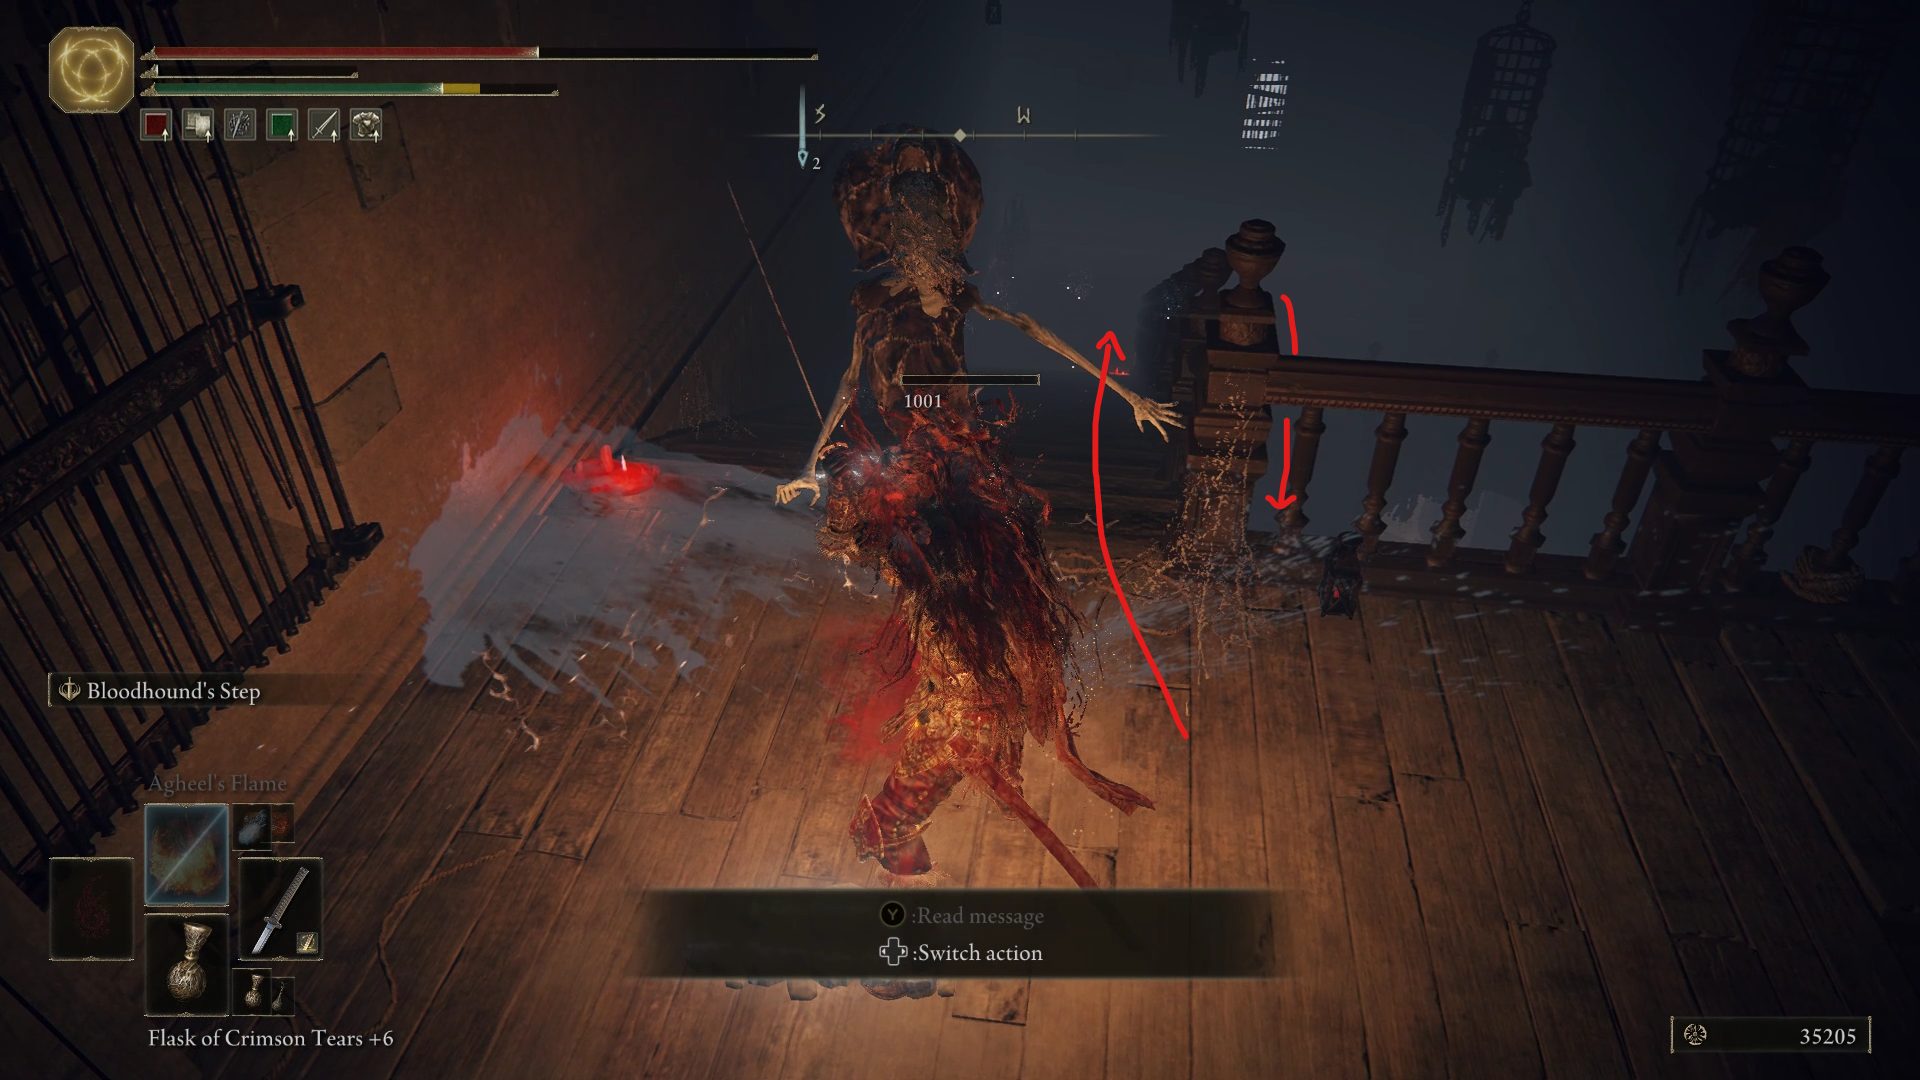
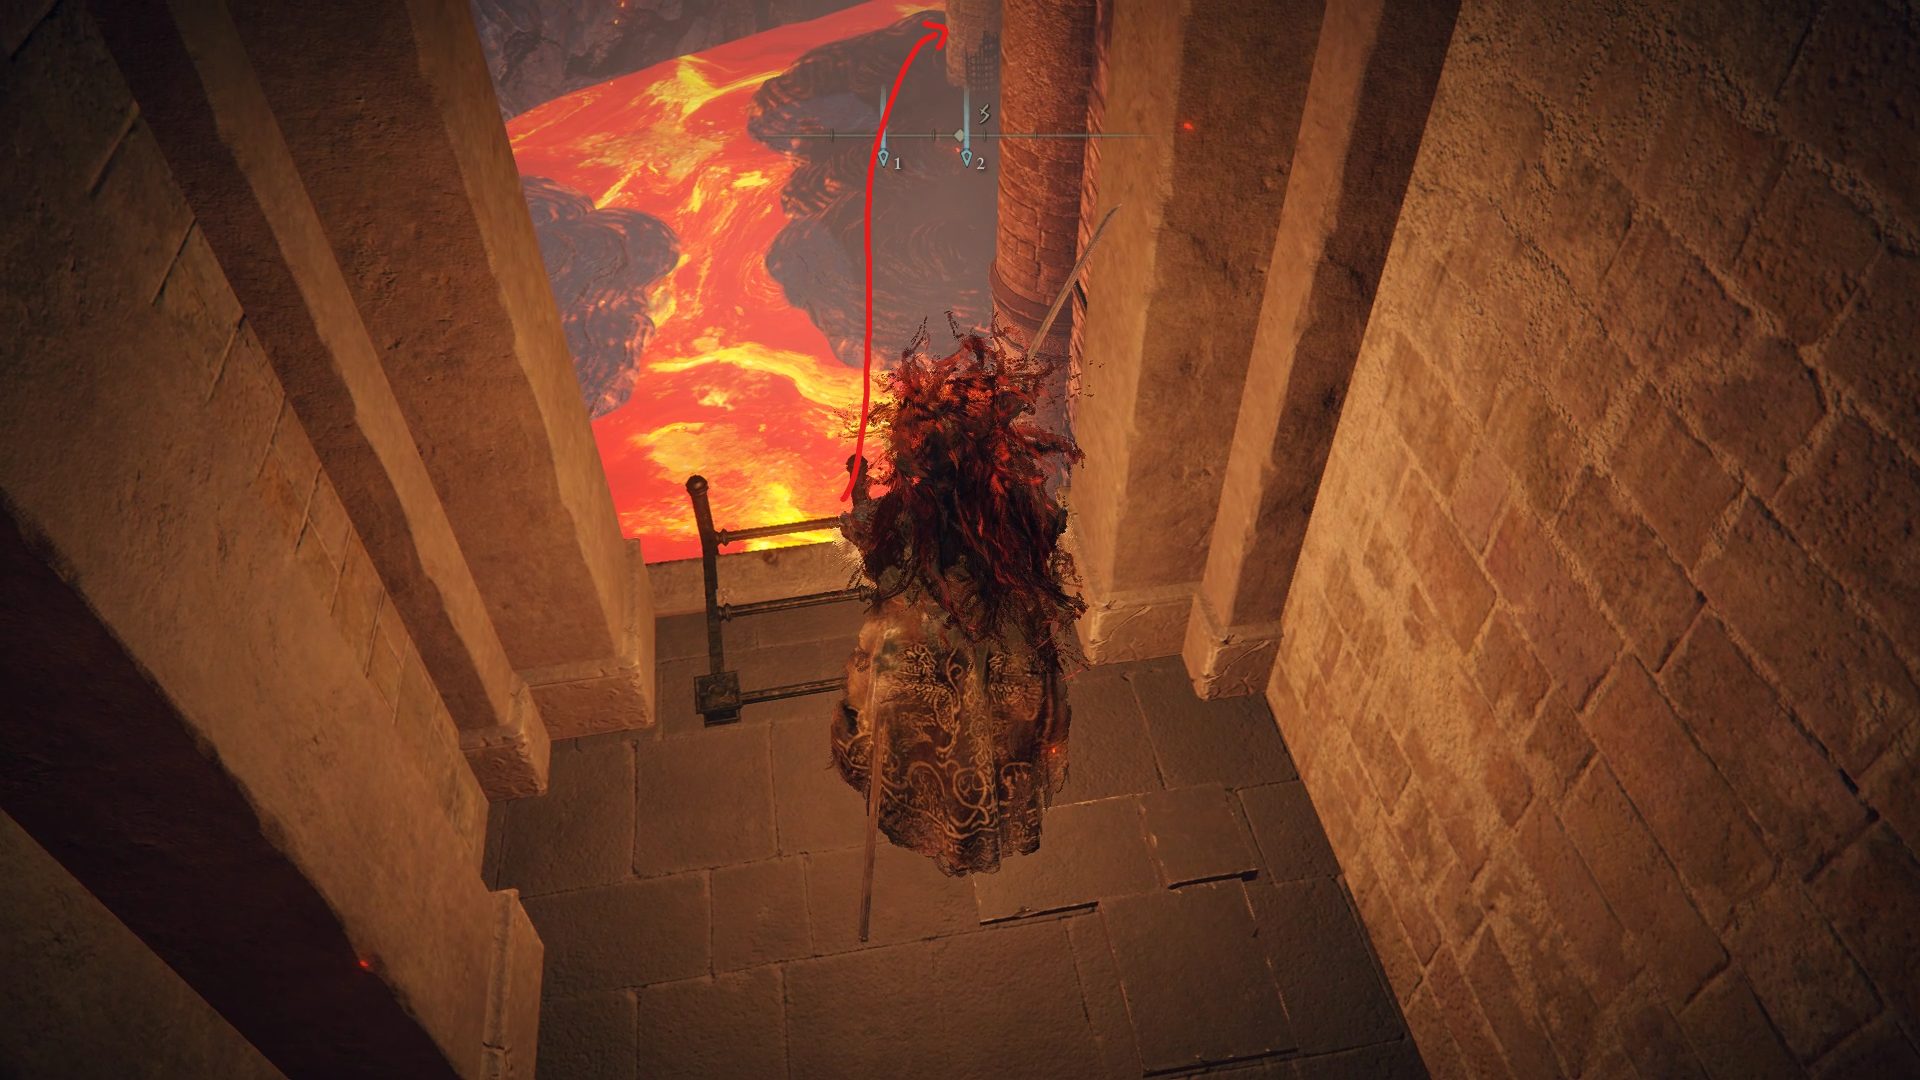
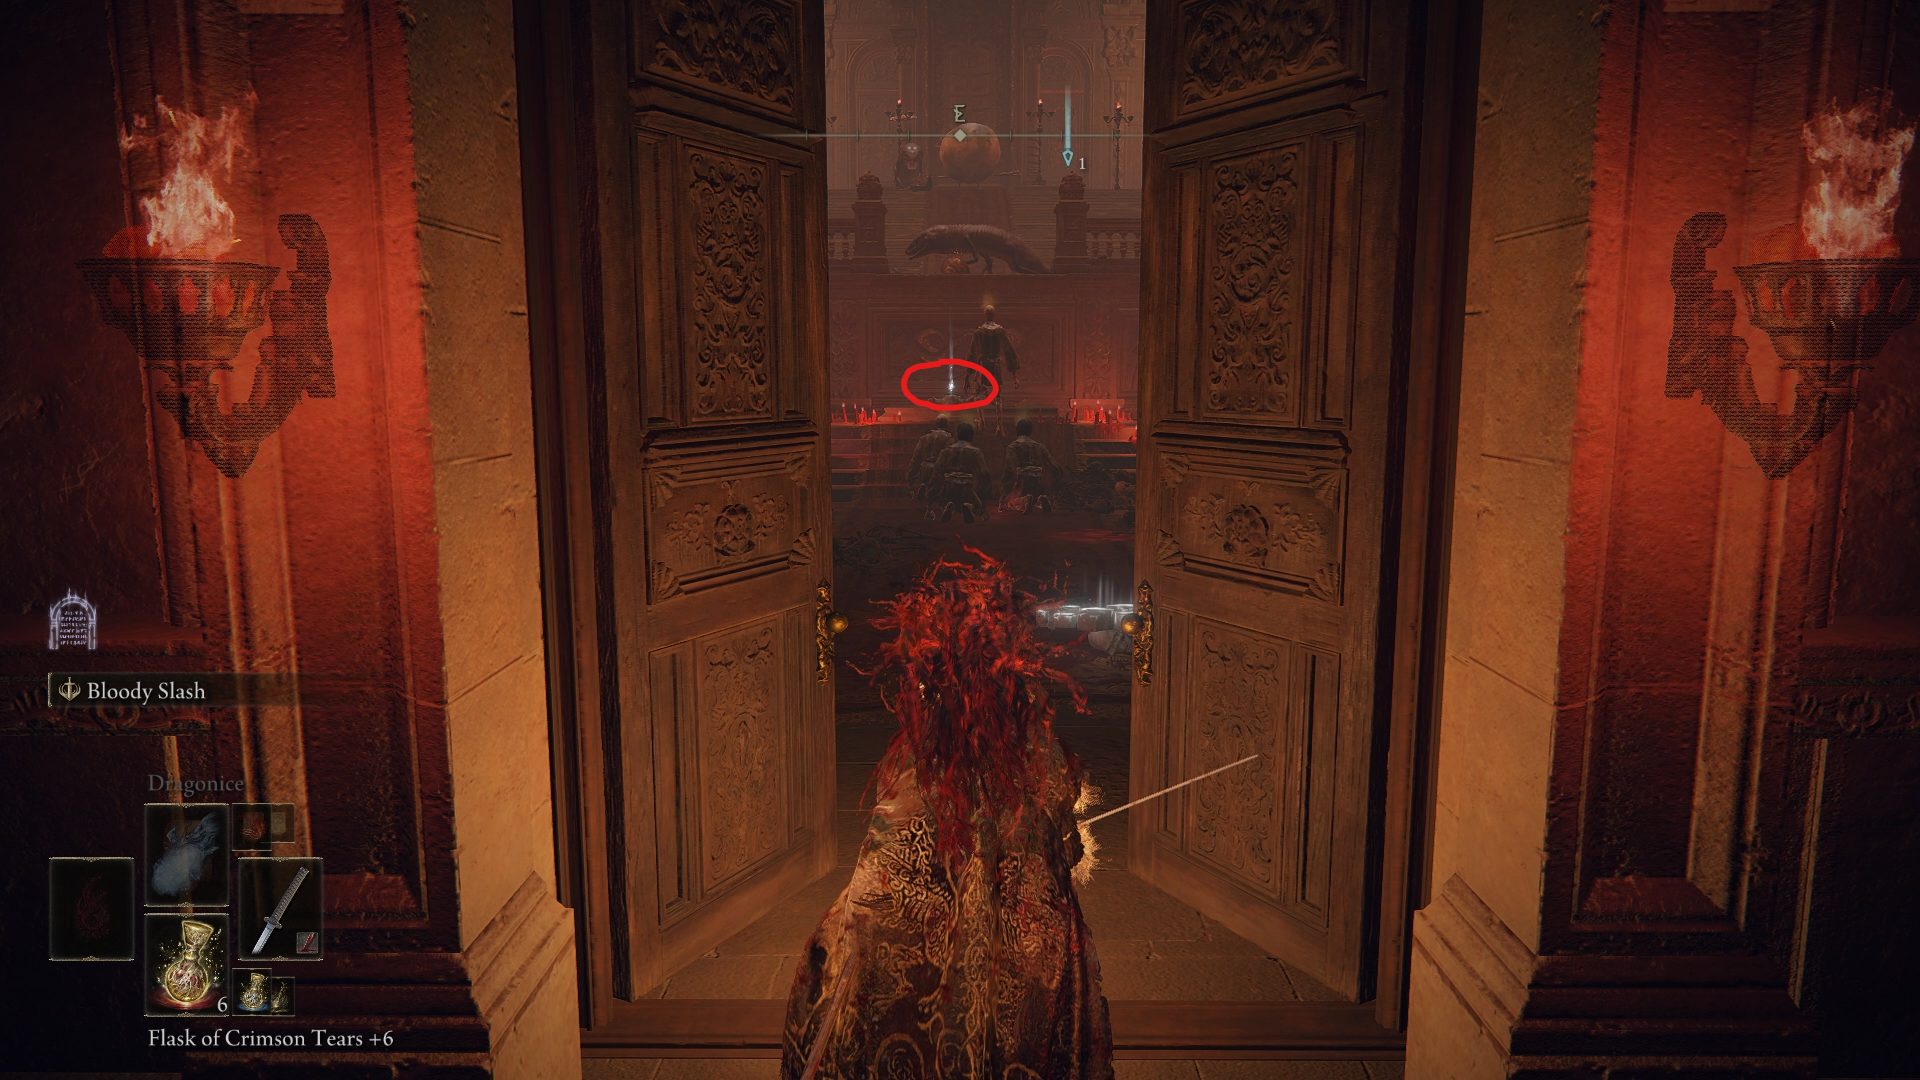
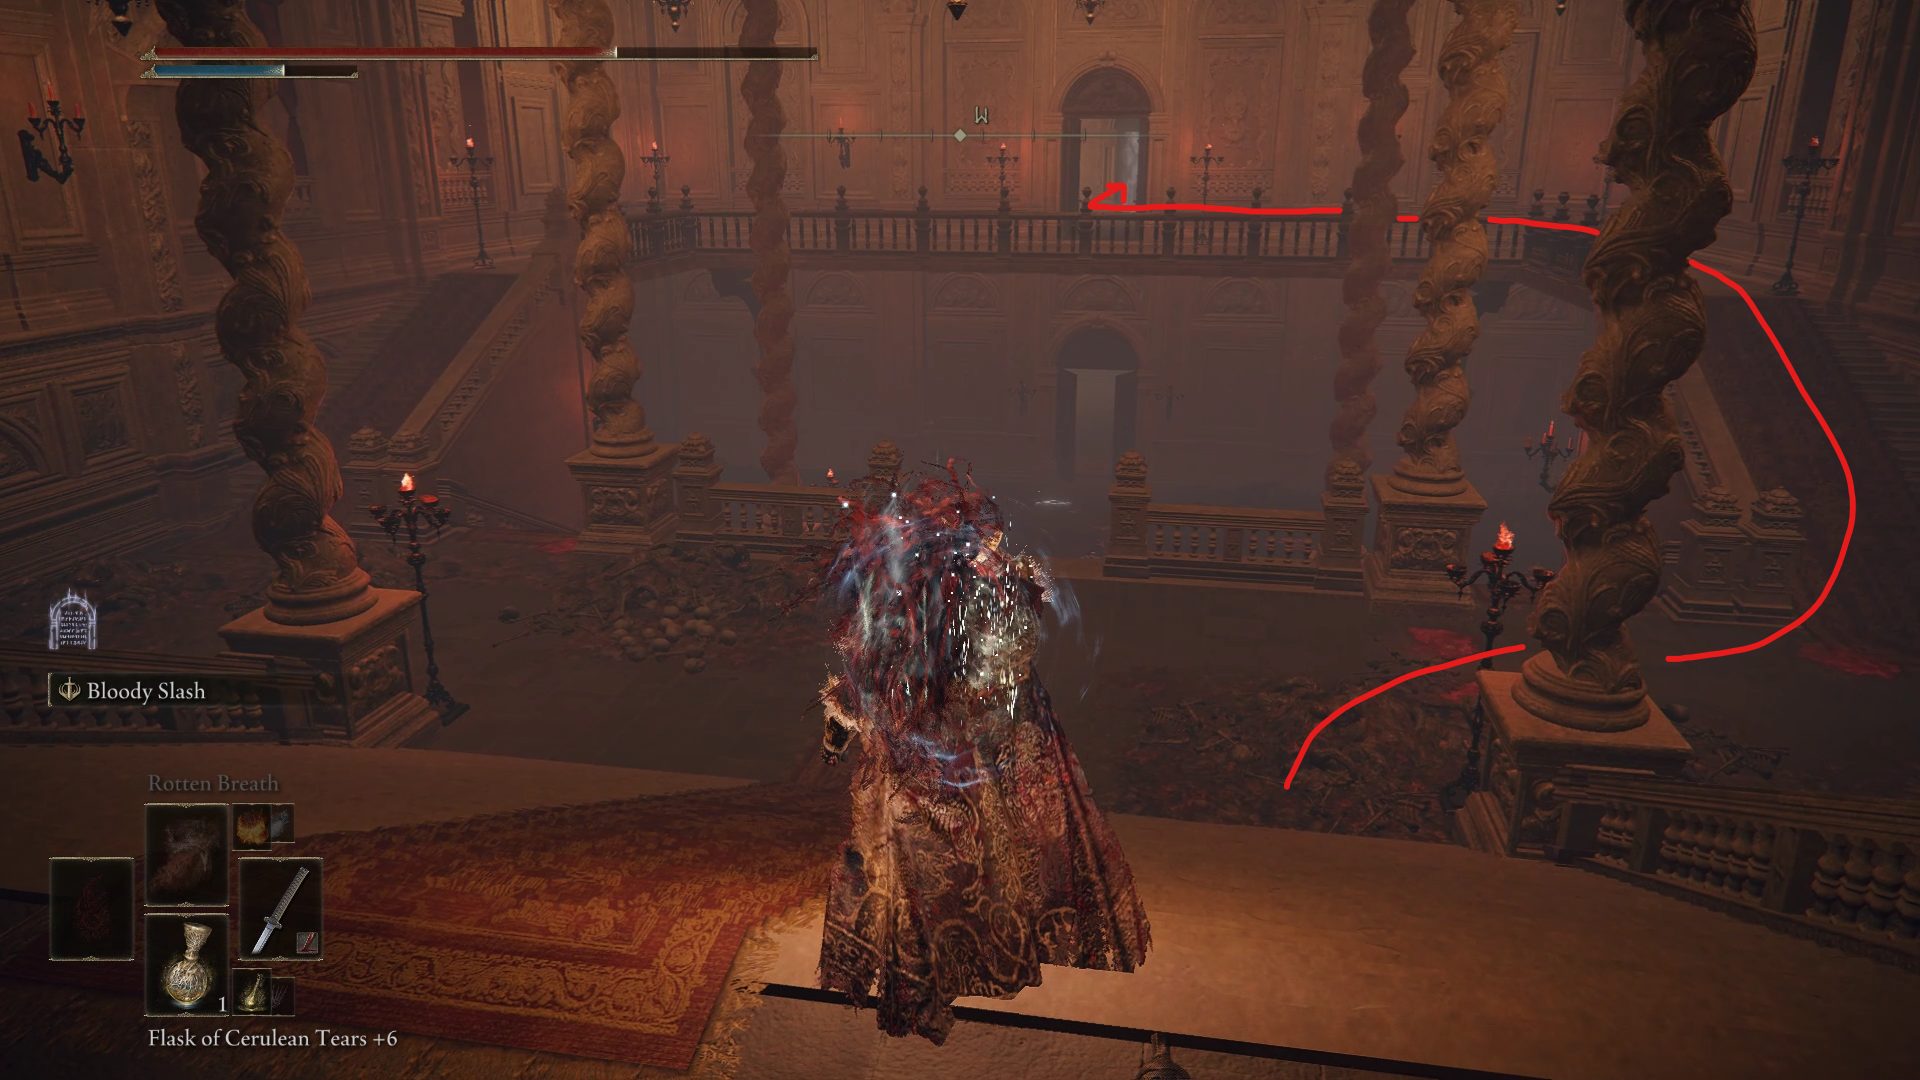
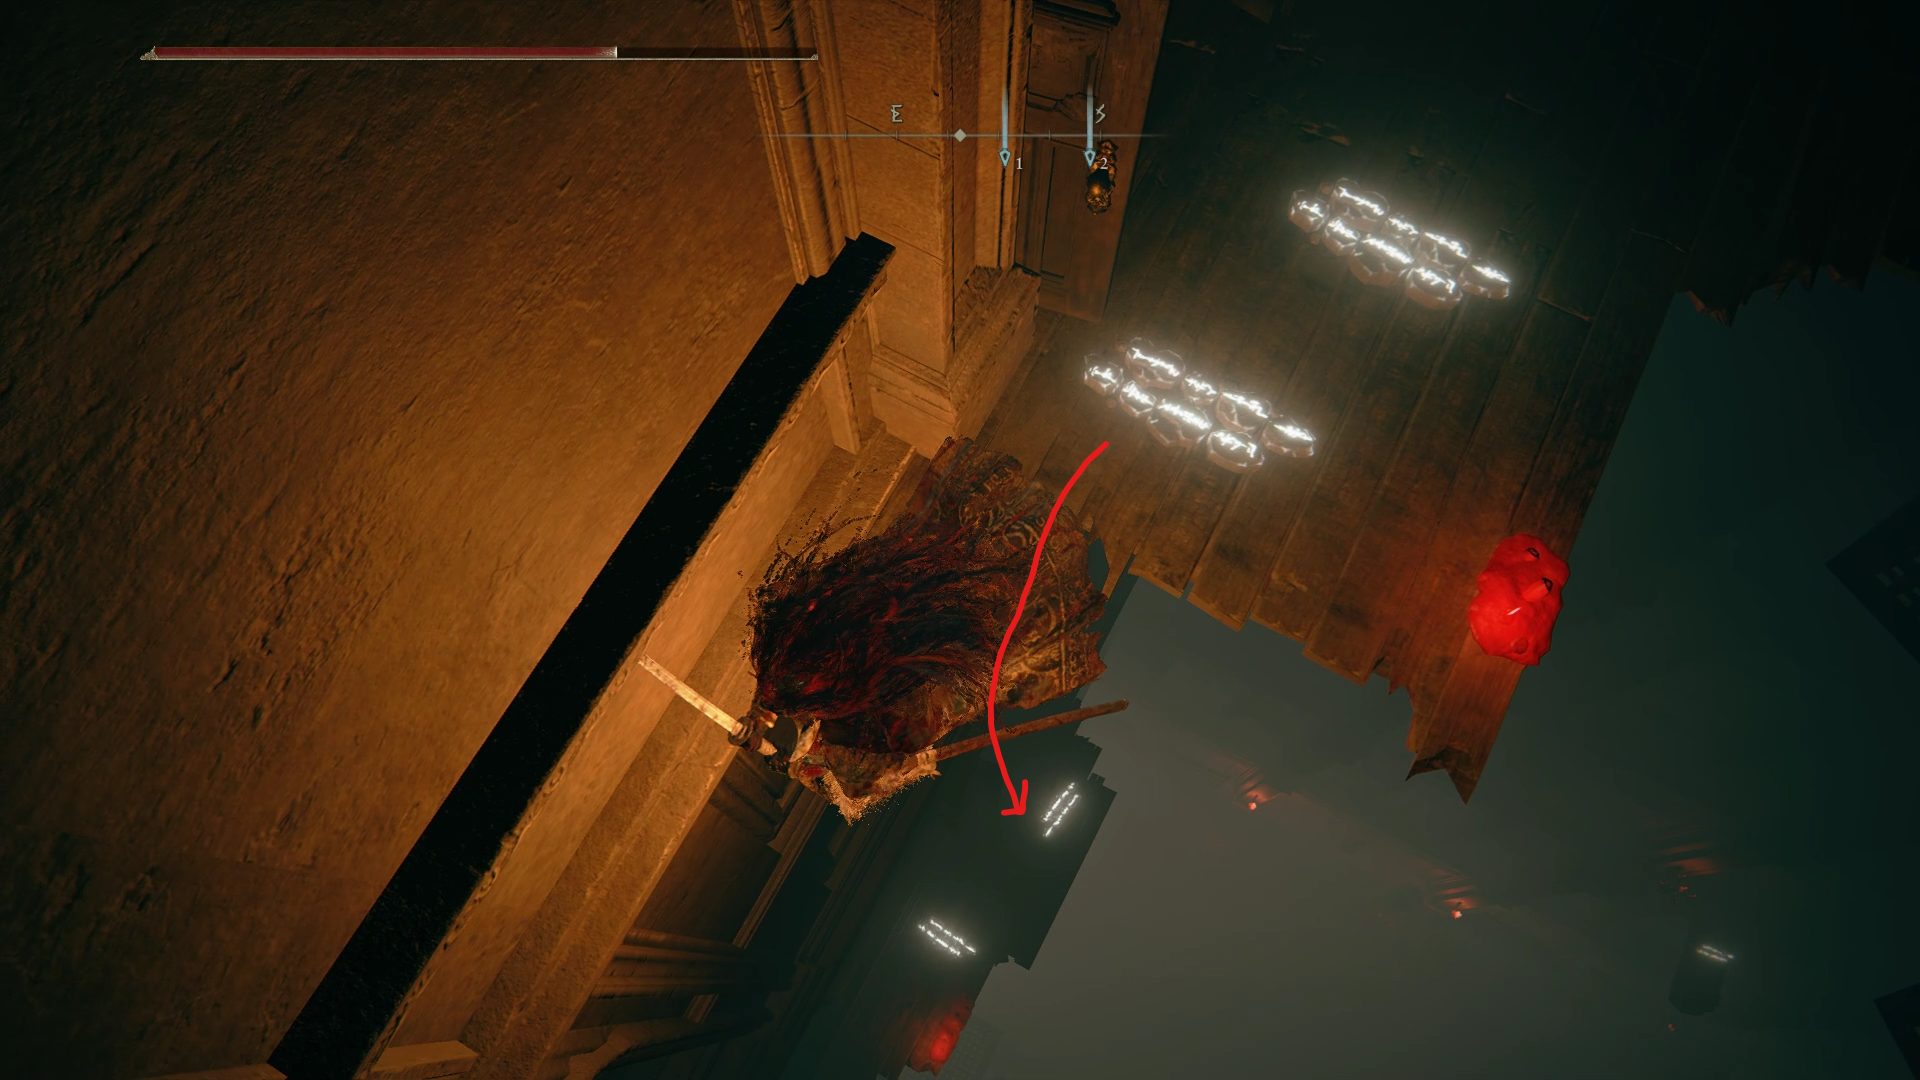
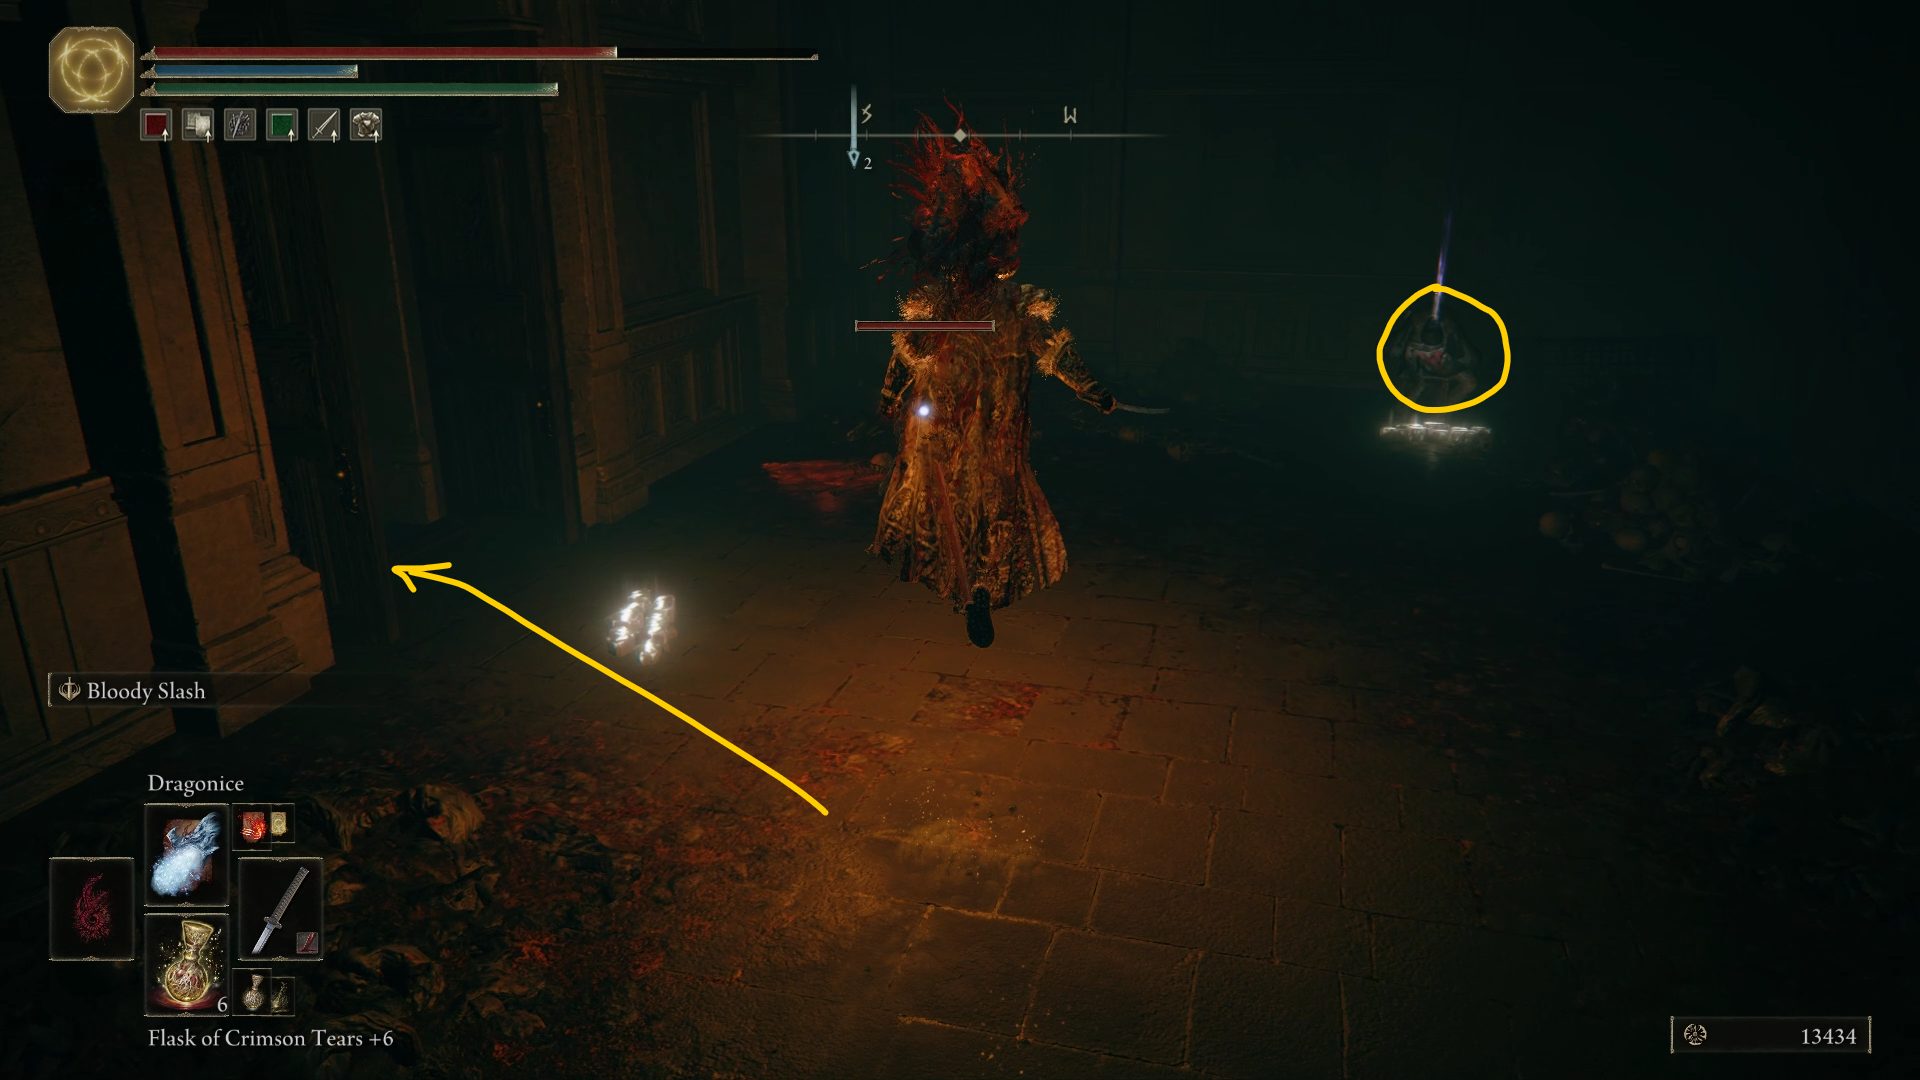
Now, travel to the Temple of Eiglay site of grace and take the elevator shortcut we unlocked earlier. As you did previously, jump inside of the hidden room northwest as you’re going up the elevator, and you will find Rya by jumping out of the window and jumping into the one across the lava.
Now speak to her, and you will have several options: killing her, giving her the tonic, or neither of those and killing Volcano Manor’s last boss instead. Of course, we will be taking option number 3, which not only gives us the regular reward but also keeps Rya happy (and alive). Once you’ve defeated Rykard, go back to Rya and speak to her. Now reload the game and you will find not only Daedicar’s Woe, but also Zoraya’s Letter where she stood.
And that’s it! All you have to do now is defeat Rykard, Lord of Blasphemy and complete Rya’s questline if you haven’t already.
Video game fan since TMNT: The Manhattan Project, I'm always on the lookout for games that could top Outer Wilds or Disco Elysium, or for new songs to listen to.
Just before the Godskin Noble fight where you mention a Somber Smithing Stone (5), if you carefully drop off the cliff right by it you end up next to where you get teleported to by the Abductor Virgin. (The one Patches tells you about at the bottom of the Raya Lucaria water wheel.) There’s a couple of graces, some goodies & a boss fight that rewards you with the “Inquisitor’s Girandole” weapon. I had completely forgotten about it, & this is just a good way to get there without dying. Love this guide, looking forward to the expansion!
Reuben
1 year ago
Something that is missing from this walkthrough:
After you come out of Temple of Eiglay, up past the iron maiden and into the window. When you come out of that room you can jump over the railing on the left and get the Crimson Tear Scarab.
Zatetra
2 years ago
When will the guide for Rykard be coming out? I am struggling lolll
Hi Zatetra, and sorry about that! The guide for Rykard is actually out, it just hadn’t been linked yet. Here’s the link — Rykard is a gimmick boss, so it’s no surprise you’re struggling without the guide.
CED
1 year ago
Patches has an assassination as well, he’s in the hall and triggers Tanith’s final drop.
Jason
4 months ago
Hey I just noticed that an area boss is completely missing in the guide. It’s the abductor virgin duo boss right by the subterranean inquisition chamber site of grace. You literally just go south of the grace and there’s a tunnel that leads to the boss there. I don’t even see this grace anywhere in the guide.
And after you beat the abductor duo, there’s another site of grace called “abductor virgin” which leads to another part of mt gelmir. I imagine most people would want to know this.


![missionary's cookbook [6] location elden ring](https://eip.gg/wp-content/uploads/2022/03/missionarys-cookbook-6-location-elden-ring.jpg)


Just before the Godskin Noble fight where you mention a Somber Smithing Stone (5), if you carefully drop off the cliff right by it you end up next to where you get teleported to by the Abductor Virgin. (The one Patches tells you about at the bottom of the Raya Lucaria water wheel.) There’s a couple of graces, some goodies & a boss fight that rewards you with the “Inquisitor’s Girandole” weapon. I had completely forgotten about it, & this is just a good way to get there without dying. Love this guide, looking forward to the expansion!
Something that is missing from this walkthrough:
After you come out of Temple of Eiglay, up past the iron maiden and into the window. When you come out of that room you can jump over the railing on the left and get the Crimson Tear Scarab.
When will the guide for Rykard be coming out? I am struggling lolll
Hi Zatetra, and sorry about that! The guide for Rykard is actually out, it just hadn’t been linked yet. Here’s the link — Rykard is a gimmick boss, so it’s no surprise you’re struggling without the guide.
Patches has an assassination as well, he’s in the hall and triggers Tanith’s final drop.
Hey I just noticed that an area boss is completely missing in the guide. It’s the abductor virgin duo boss right by the subterranean inquisition chamber site of grace. You literally just go south of the grace and there’s a tunnel that leads to the boss there. I don’t even see this grace anywhere in the guide.
And after you beat the abductor duo, there’s another site of grace called “abductor virgin” which leads to another part of mt gelmir. I imagine most people would want to know this.
Nice catch Jason, thank you. We’ll make sure this gets fixed before the DLC comes out.