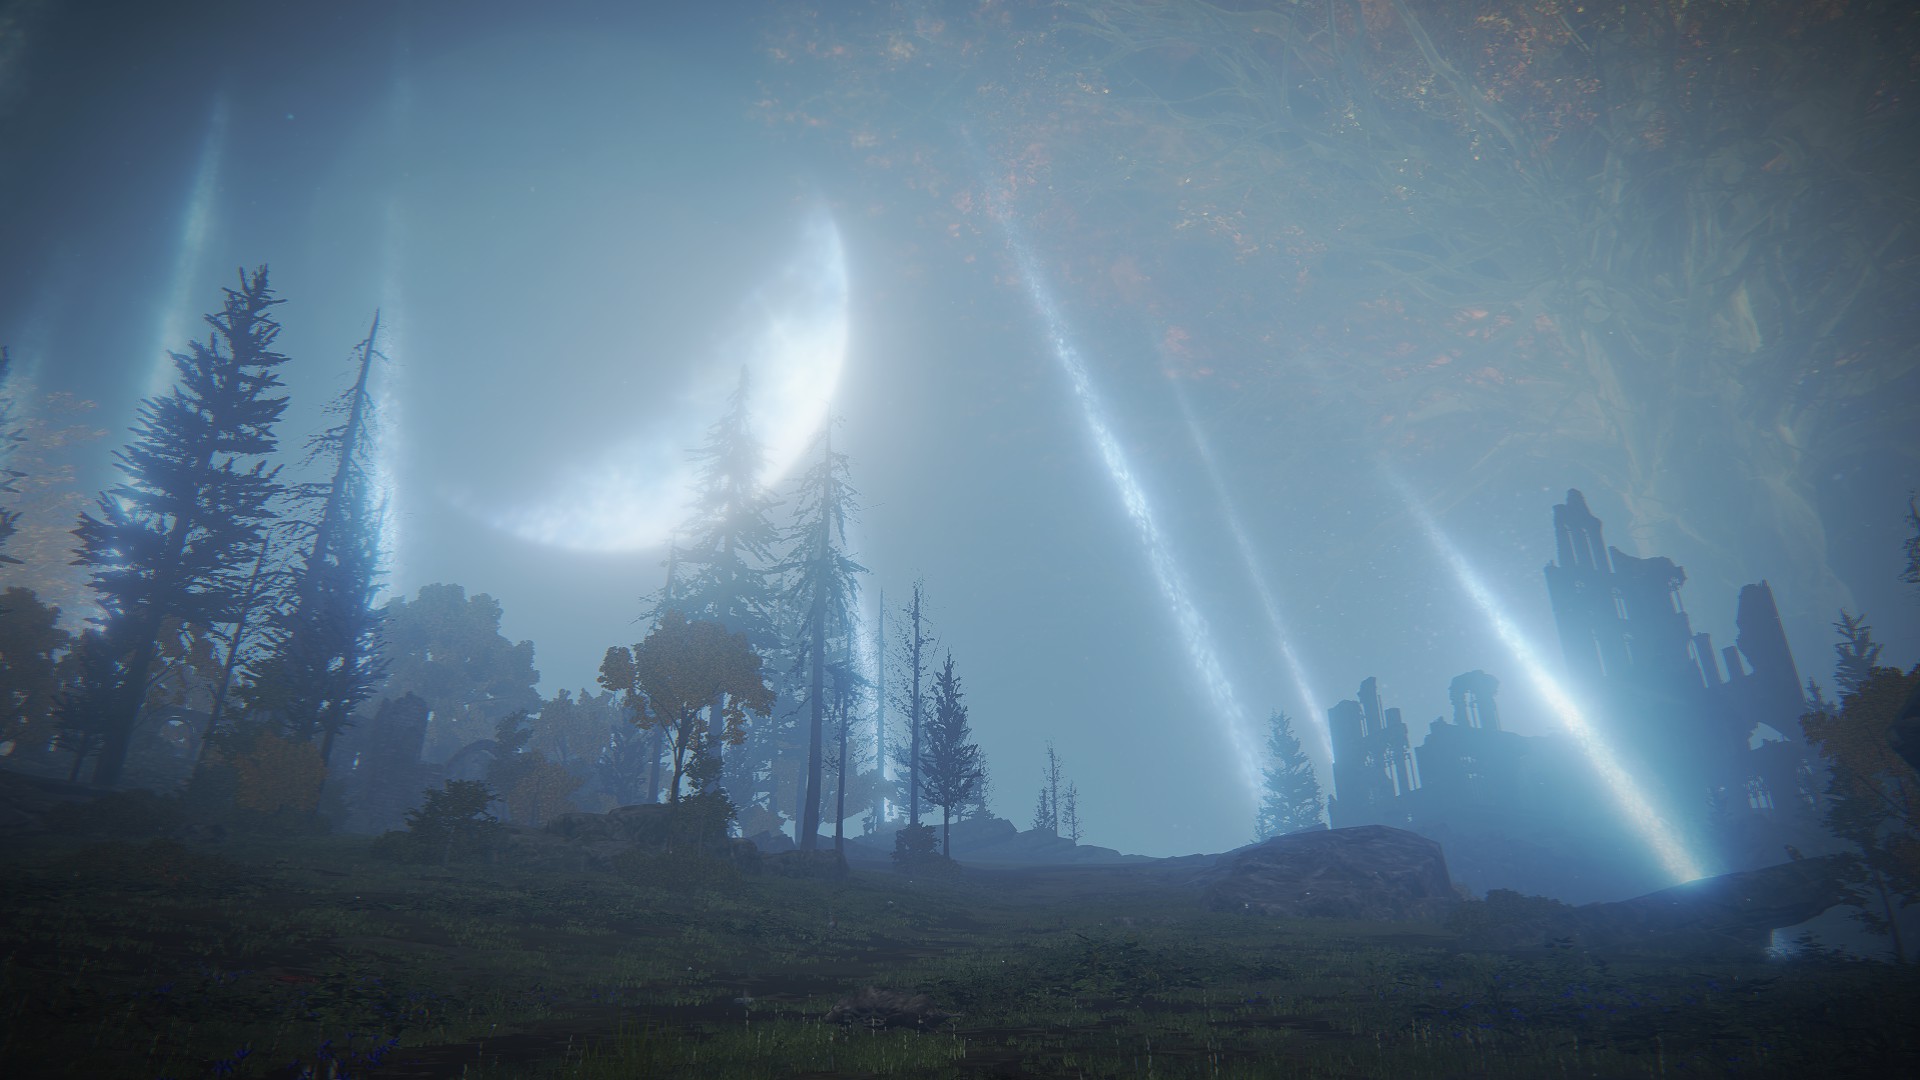
The Moonlight Altar sits on a plateau that overlooks Liurnia of the Lakes. There’s quite a bit to do on the plateau, including a tower puzzle, lots of loot to find — oh, and there are four dragons up here. You can collect a significant number of high-level smithing stones here, so this is a great place to go if you’re trying to get your weapon to +24. The Moonlight Altar is also where Ranni’s questline ends and you receive the iconic Dark Moon Greatsword, which has featured in almost every FromSoft game in one form or another.
To reach the Moonlight Altar, you’ll need to defeat Astel, Naturalborn of the Void, who is reached by going through the Lake of Rot. Getting to the lake is a little involved, as you’ll need to first reach Ainsel River (Main) by following Ranni’s quest.
Ranni’s Quest
Since lots of people may be here solely for the ending, we’re going to first go straight to Ranni to finish her quest, and then we’ll clear the rest of the plateau.
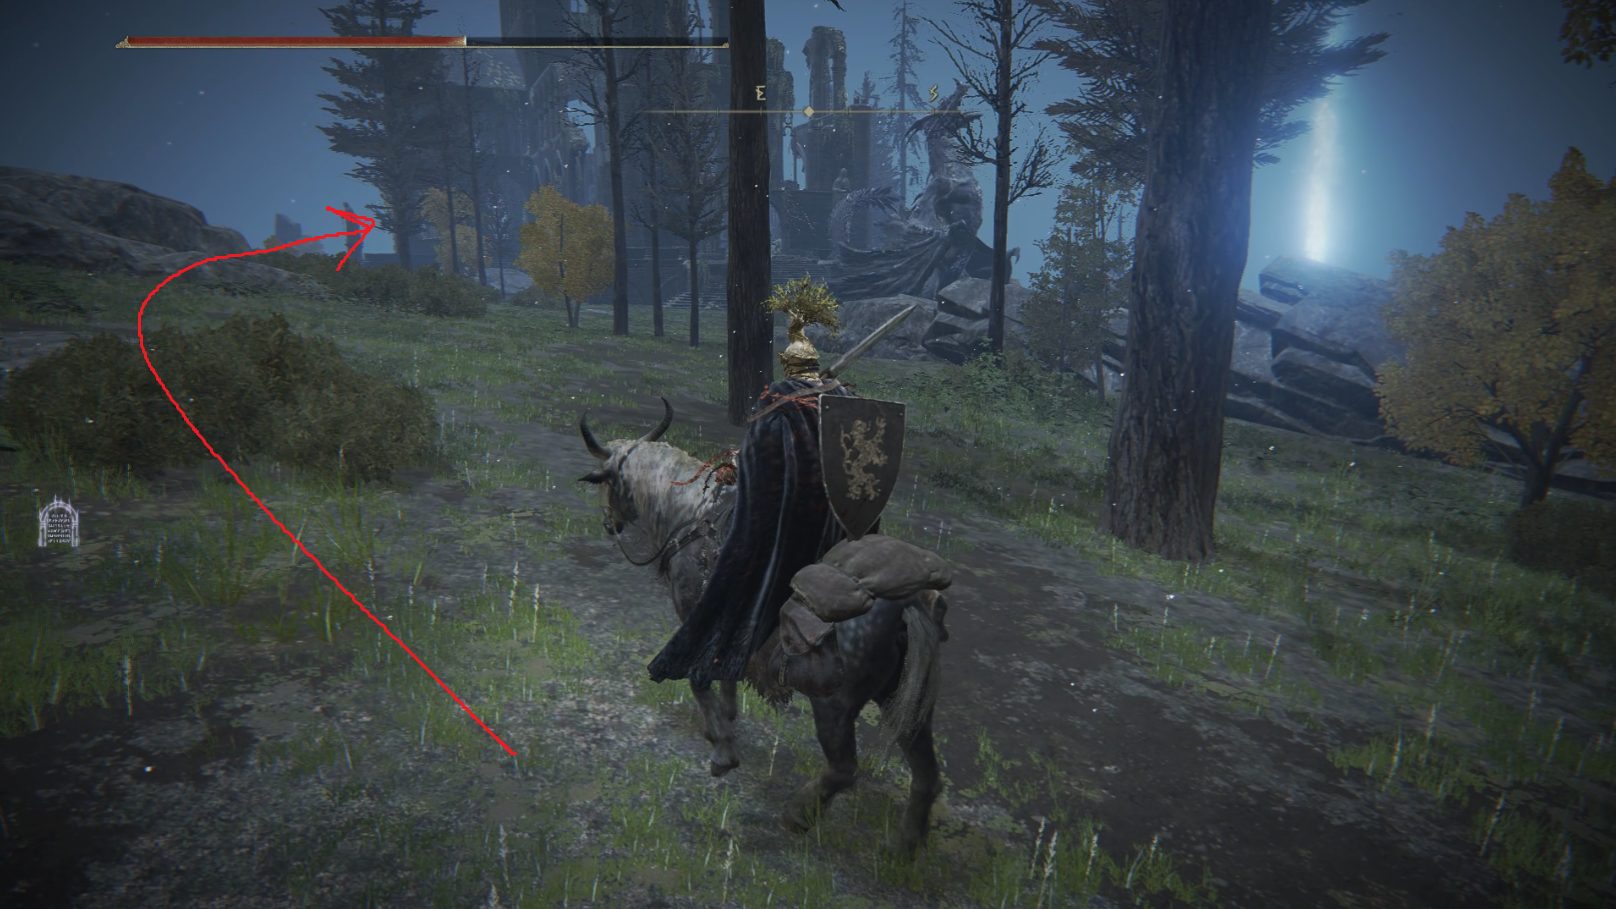
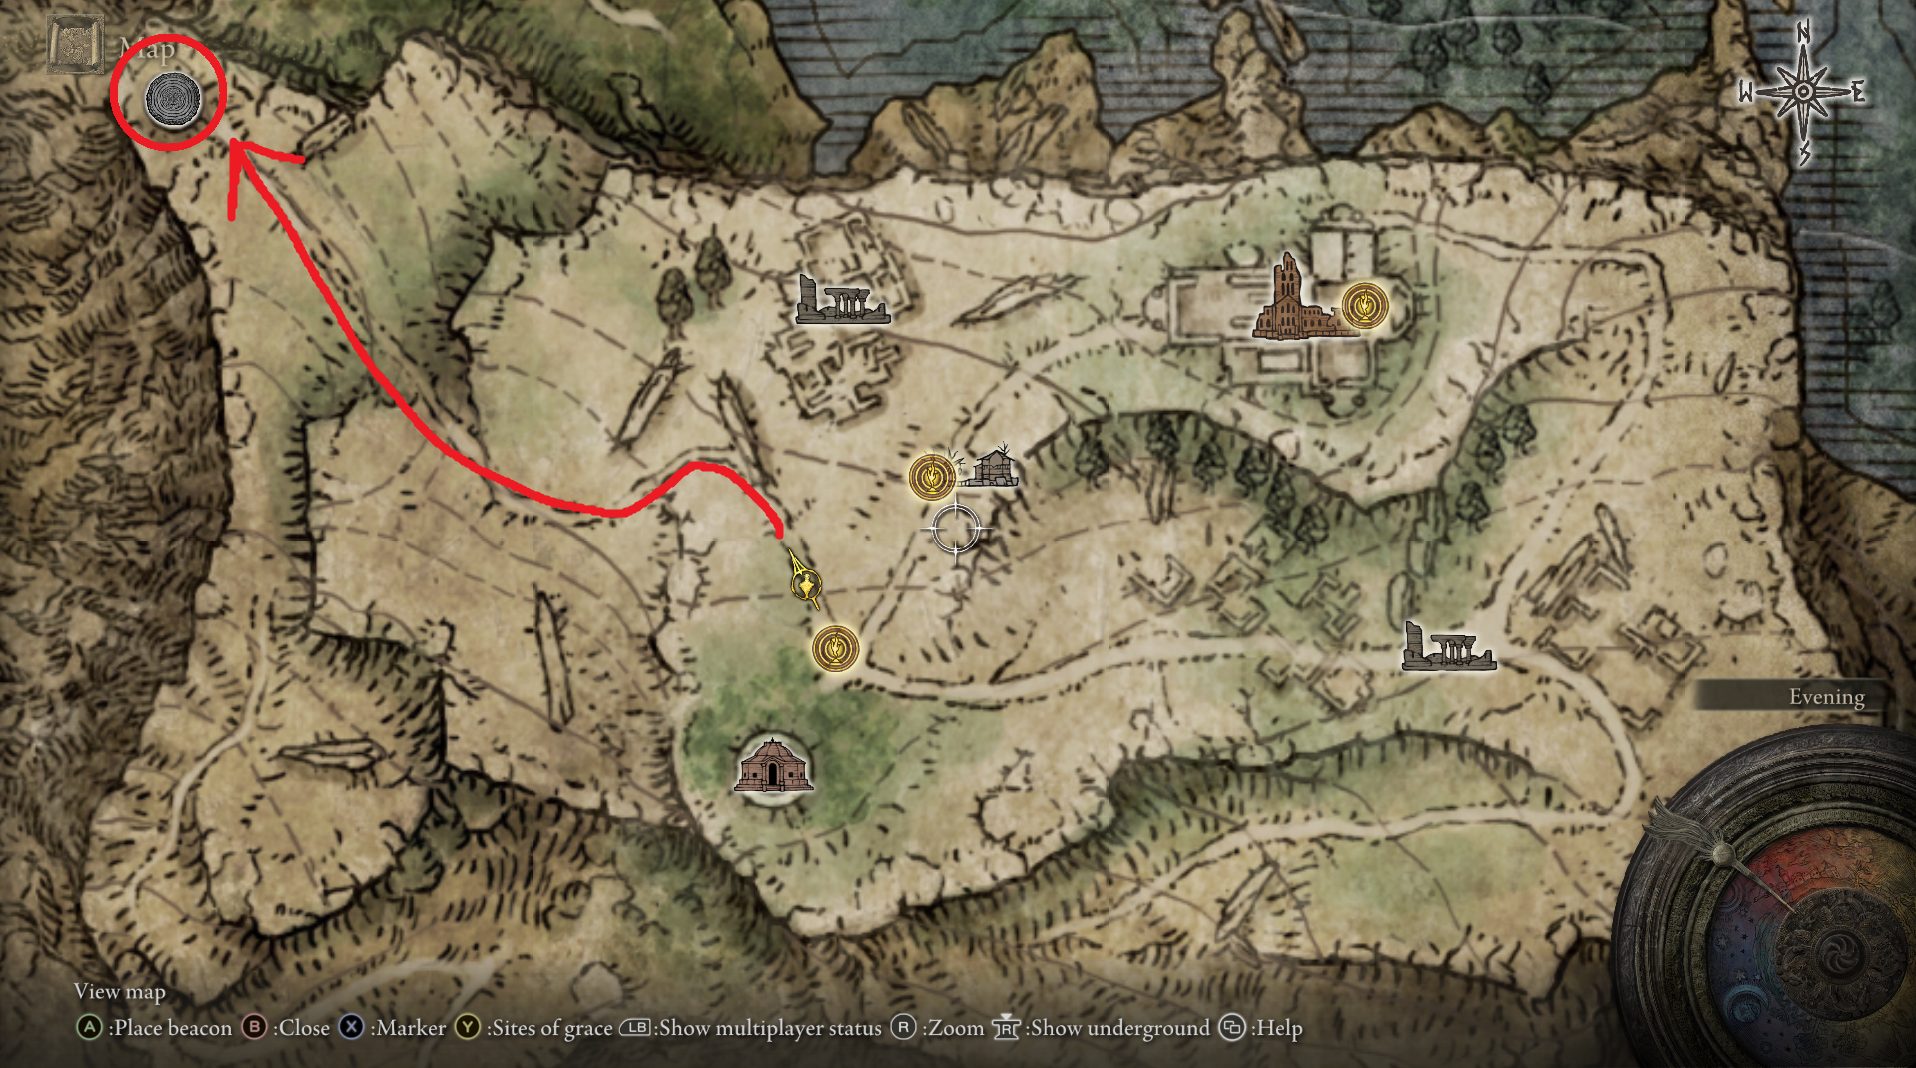
After defeating Astel, you’ll be able to leave his boss room via the northern passageway and take the Deep Ainsel Well lift up to the Moonlight Altar’s plateau — the area’s site of grace is just to the left off of the dirt path that leads north from the elevator. From the Moonlight Altar site of grace, follow the dirt path up the hill north-northeast. As you near the cathedral, you’ll want to go off the road and continue north to avoid Glintstone Dragon Adula, who appears in front of the cathedral — we don’t want to fight it just yet.
Swing wide to the north and enter the Cathedral of Manus Celes from the northern side, then grab the site of grace. There are a total of ten Starlight Shards scattered throughout the church, so feel free to snag them now (none are particularly hidden) — if you aggro the dragon, just go rest at the site of grace to reset it.
Once you’ve collected all the shards, return to the site of grace and go south, where you’ll find a hole in the ground. Drop down carefully to the next ledge — if you ride Torrent into the hole you’ll probably fall too far and die. After the first drop, you can safely fall the rest of the way down, then continue east through the tunnel. It will bend and curve, and you’ll drop a few more times, and then you’ll find Ranni sitting in the palm of some big ol’ fingers. You should have the Dark Moon Ring, and therefore you’ll be given the option of putting it on her finger when you approach her.
After a cutscene, Ranni will disappear and reappear in her more familiar form — speak with her and she’ll disappear and leave an item behind: the Dark Moon Greatsword. Claim your reward and then mount Torrent, turn around, and head south through the left-hand passage.
Clearing the Ruins
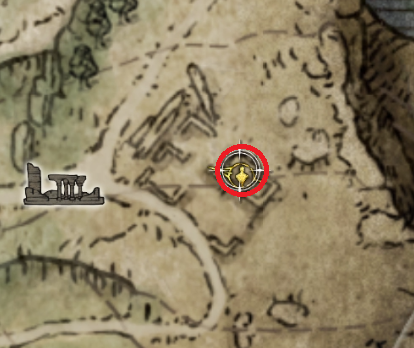
You’ll exit back onto the plateau — drop down to the grass below and head south-southeast to the nearby Lunar Estate Ruins. Spirit summons are available near the ruins, so go ahead and use them as soon as they become available.
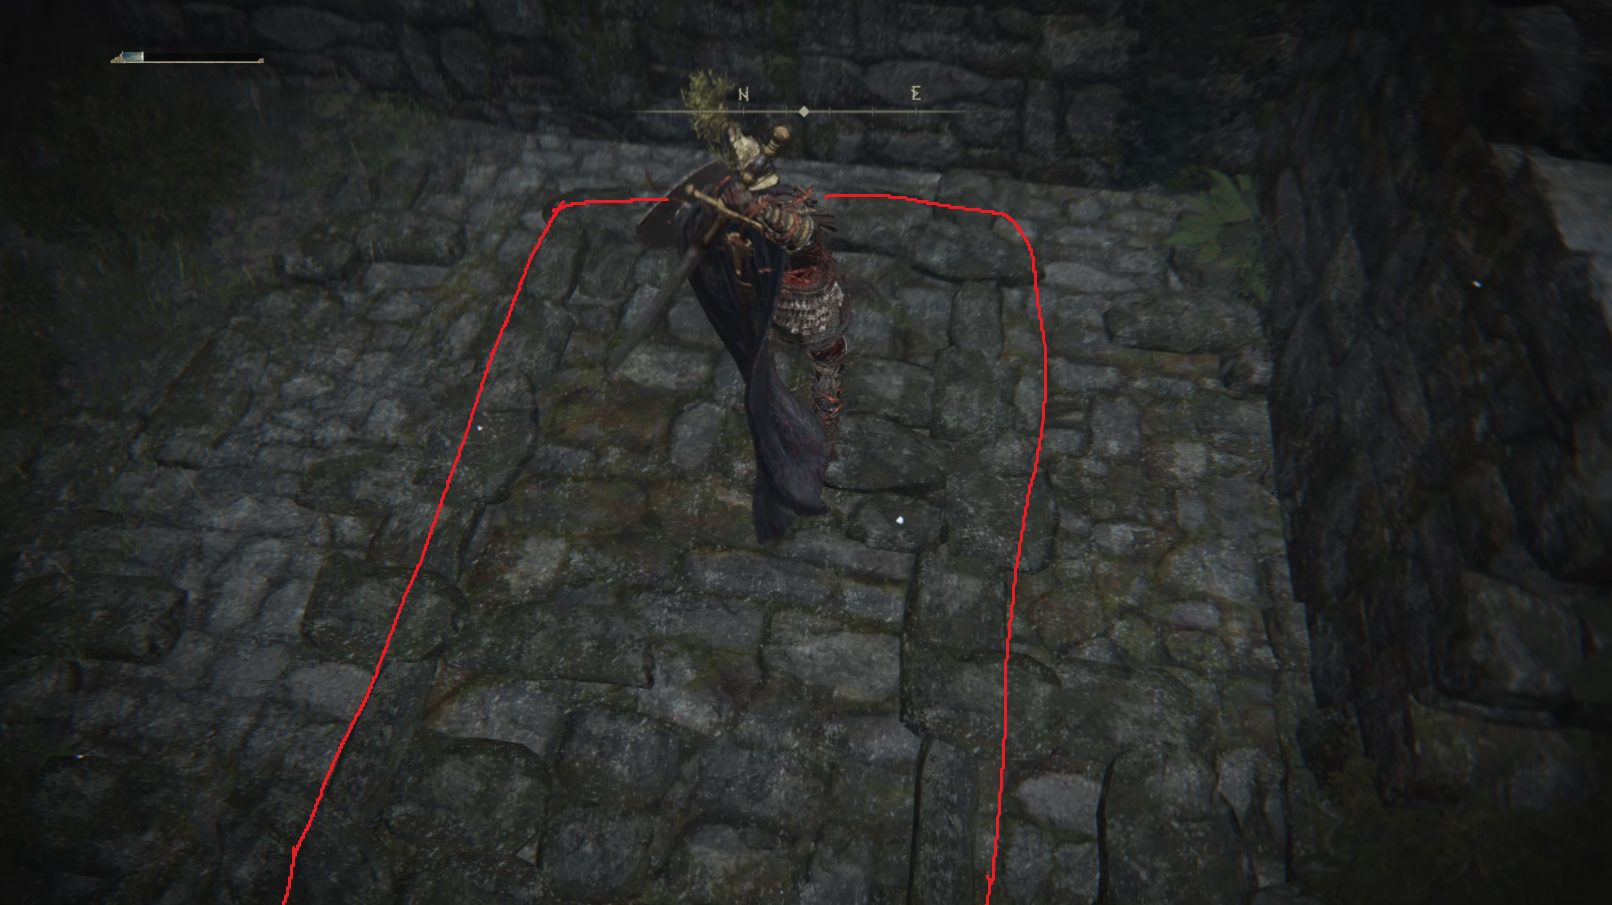
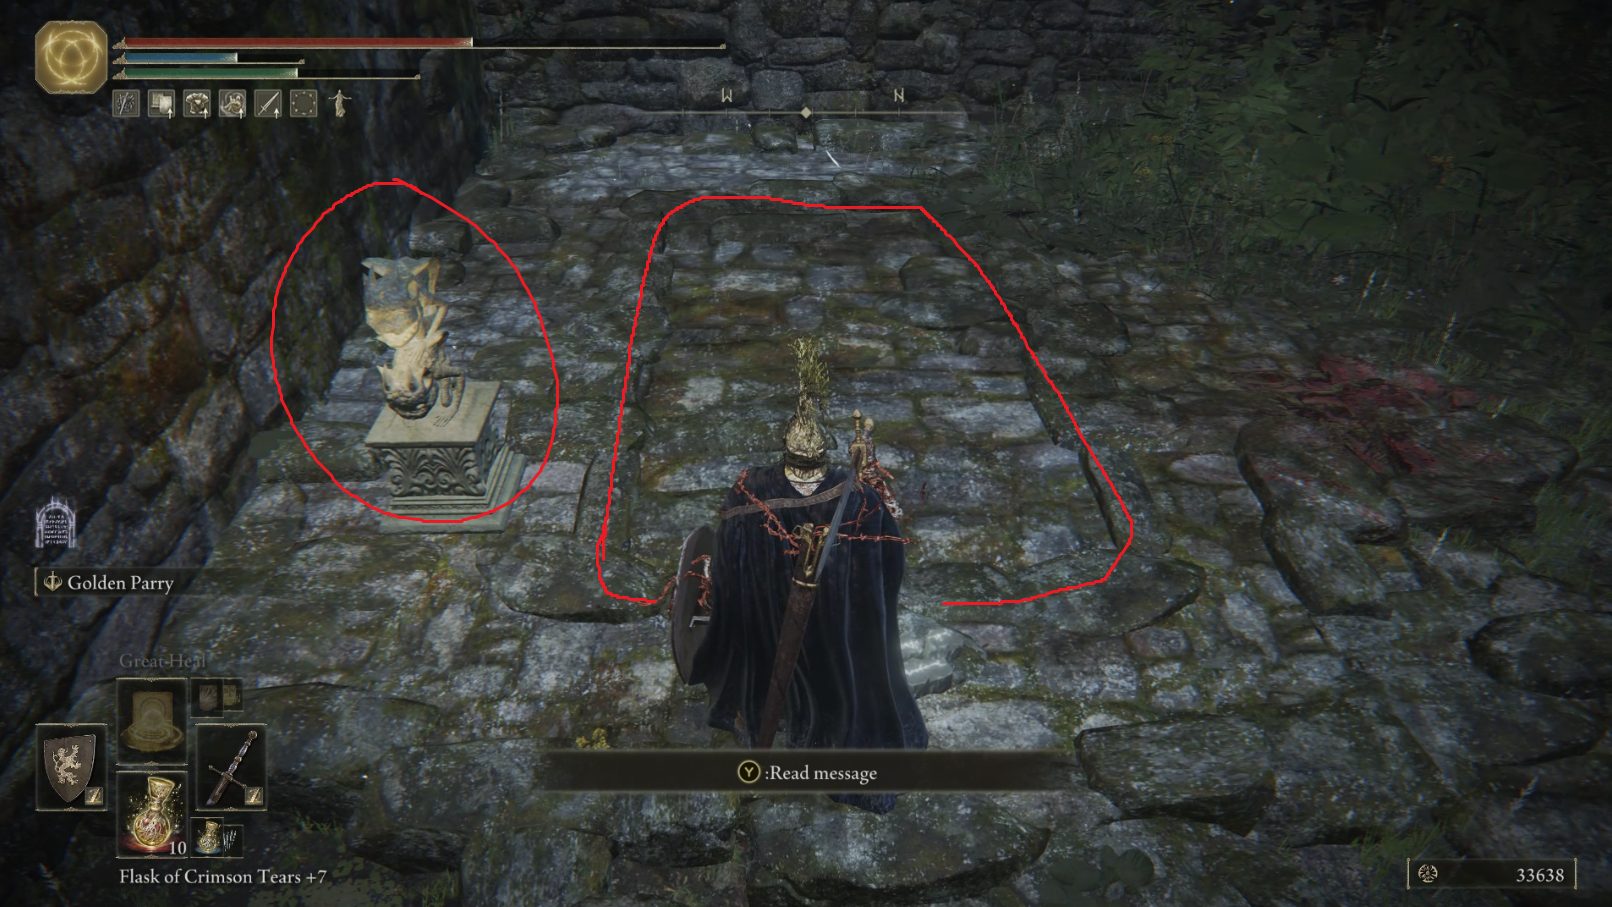
In the center of the ruins, a Royal Revenant will spawn. You should be strong enough by now that it isn’t too big of a challenge, but it does teleport directly overhead instead of rising out of the ground, which adds to the difficulty. Also know that it only drops a Ghost Glovewort [2], which kind of feels like a prank, honestly — you may just want to avoid the center of the ruins entirely. We’re really here for the hidden basement that’s on the eastern side of the ruins. Use a jumping attack to reveal the stairs:
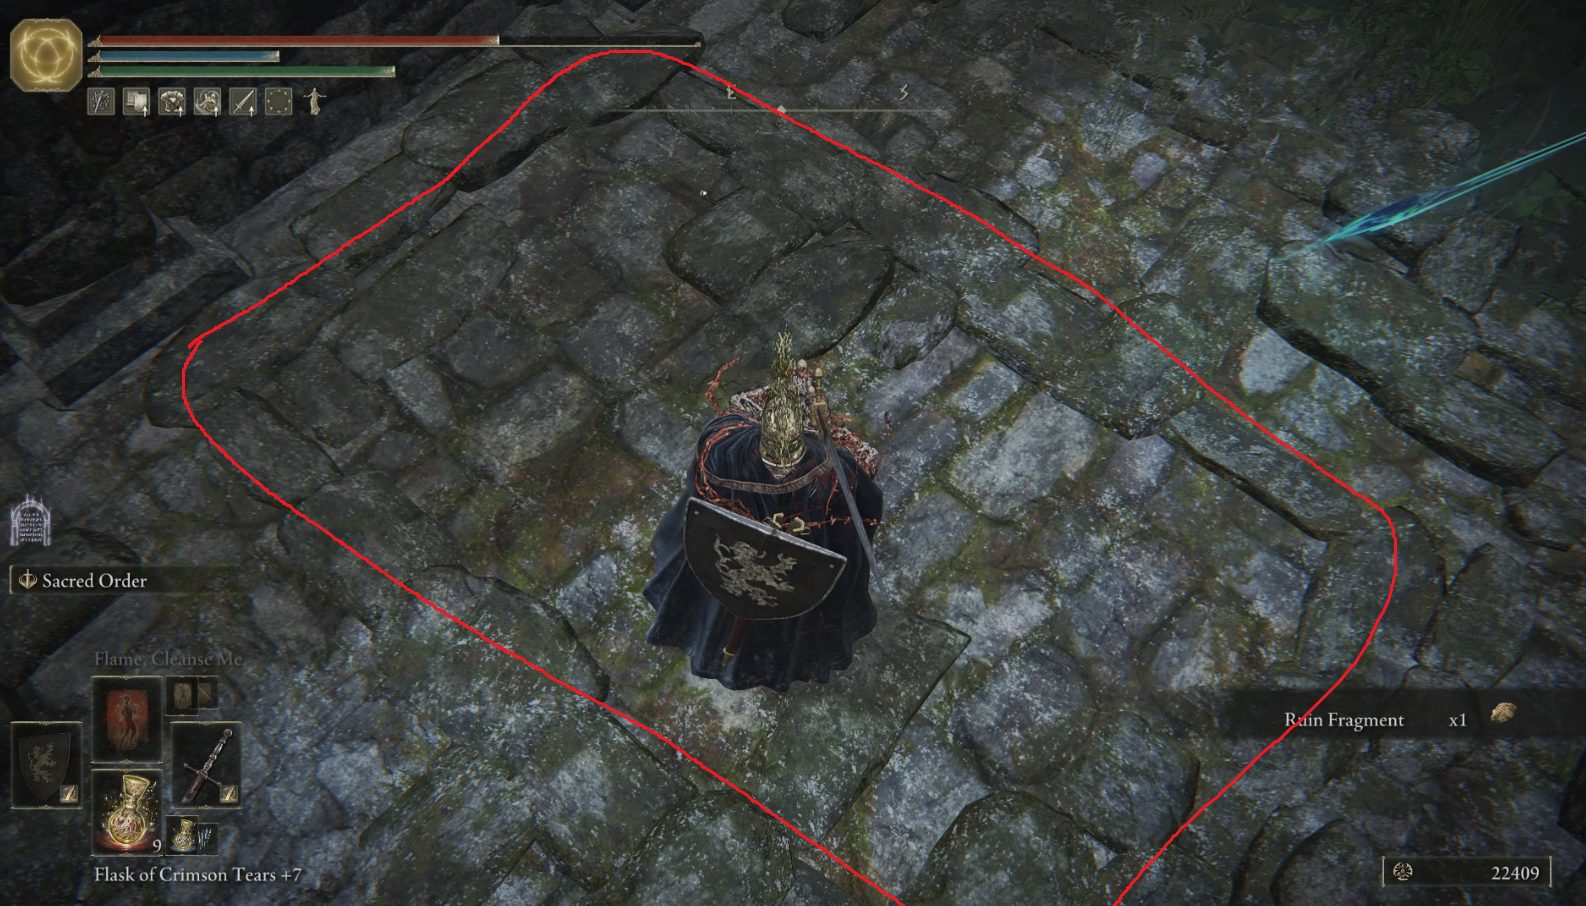
The stairs you’ll reveal by striking the illusory floor here lead to a chest that holds a whopping x3 Smithing Stone [8] (time to pay Warmaster Iji a visit!). Exit the basement and head west to the second section of these ruins. The first building on your right has another hidden basement, although you’ll need to also use a Stonesword Key to enter this one, and four albinauric sorcerers will spawn as you get near.
The chest down the stairs has the Cerulean Amber Medallion +2, which is quite nice for anyone who goes through FP too quickly. Leave the basement — at this point, if you are rocking a Faith build, you should get your strongest AOE heal spell ready. Then turn right to head into the open area in the center of the ruins, where another Royal Revenant will spawn. Unfortunately, this one also only drops a Ghost Glovewort [2].
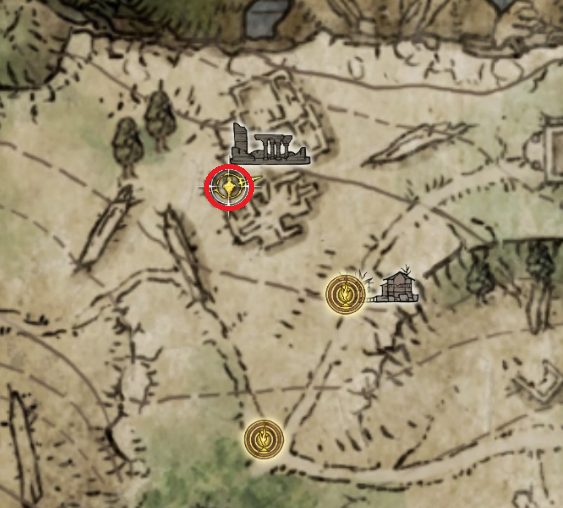
Look south from where the revenant spawned and you’ll see a corpse slumped against a low wall — he’s got a Golden Rune [10] with your (character’s) name on it. In the northwesternmost section of the ruins, you can find x5 Glintstone Firefly on a corpse — three more albinauric sorcerers will appear around the corpse when you get close enough.
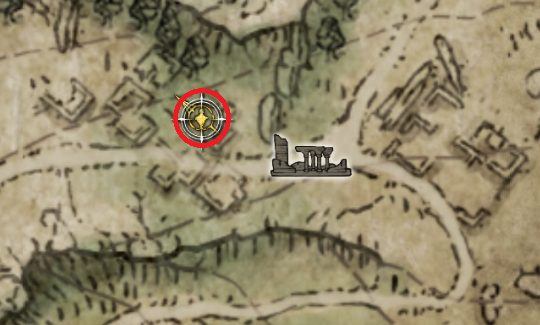
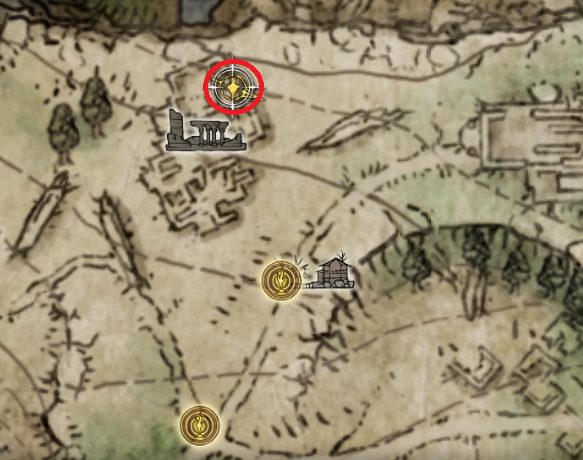
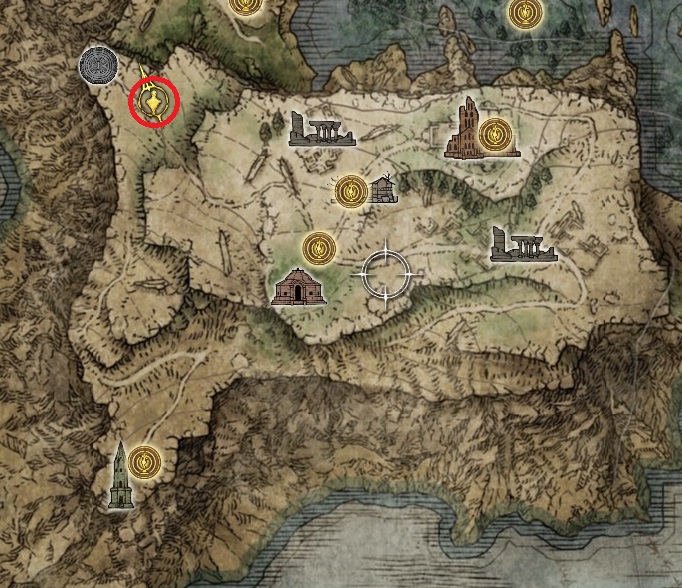
Now you can teleport back to the Moonlight Altar site of grace, and then head north to the Moonfolk Ruins. These ruins have the annoying teleporting sorcerer enemies you may remember from the Kingsrealm Ruins in eastern Liurnia, so stay on Torrent and try to hunt them down before you go scrounging around for the items here. In the northwestern corner of the lower set of structures, you can find a Rune Arc and a Golden Rune [9] (click for map). Further north in the next building, a corpse has some Magic Grease — in the building to the east of the grease, there’s yet another hidden basement with a chest containing a Somber Smithing Stone [8].
Boss Hunting
With both sets of ruins successfully looted, now’s a good time to head east to the cathedral and take on Glintstone Dragon Adula.
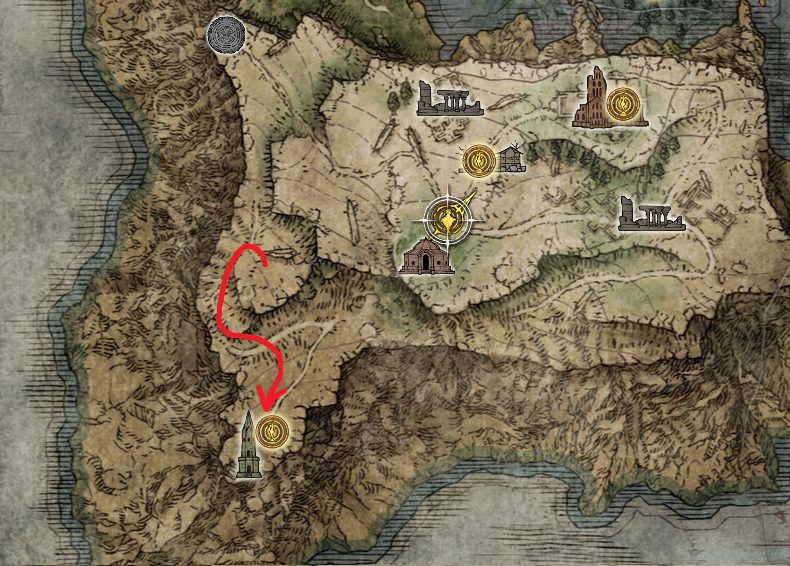
If you found yourself enjoying the fight with Adula, you’re in luck — there are plenty more dragons to slay up here! Teleport back to the Moonlight Altar site of grace, and start following the dirt path north-northwest. The path will curve west, and you’ll be confronted with a dragon lying in the path. Two more sleep further to the southwest, in something of a line. They don’t have Adula’s cool sword, but otherwise their movesets seem identical.
Each dragon will give you 6,776 and a Dragon Heart. If you don’t want to fight the dragons, just ride past them — the one in the road is slow to get up, and won’t chase you very far. Our next destination is the Ringleader’s Evergaol, which sits on the northwestern tip of the plateau.
Inside the evergaol is Alecto, Black Knife Ringleader. This is a similar fight to the other Black Knife Assassins, but Alecto has some unique moves and a whole heck of a lot more health.
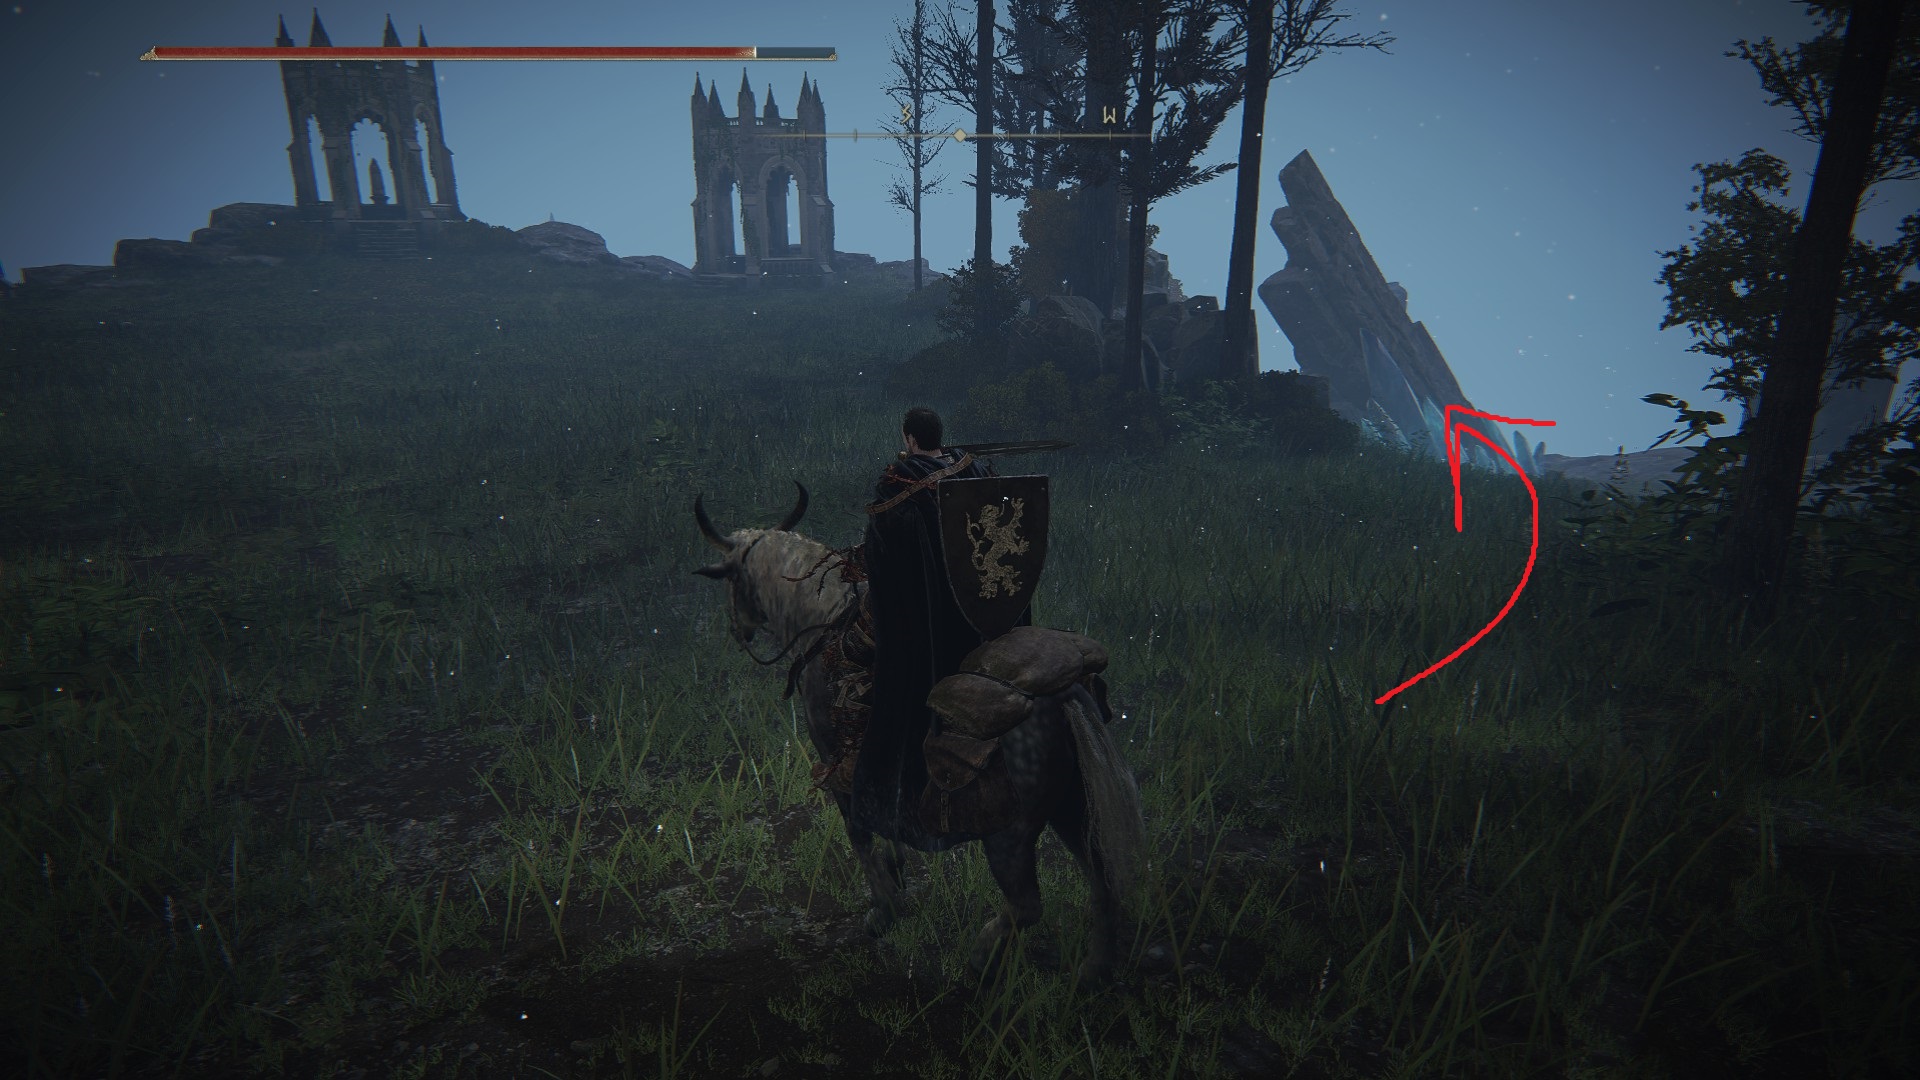
Next, ride south from the evergaol, and follow the path down through the crystals and crystalians. These are just like the bosses you’ve probably fought previously, but they don’t drop any unique loot, so ignore them and just tap sprint as you pass them. Soon, you’ll reach an open area with three gazebos — a Red Wolf will spawn as you approach them.
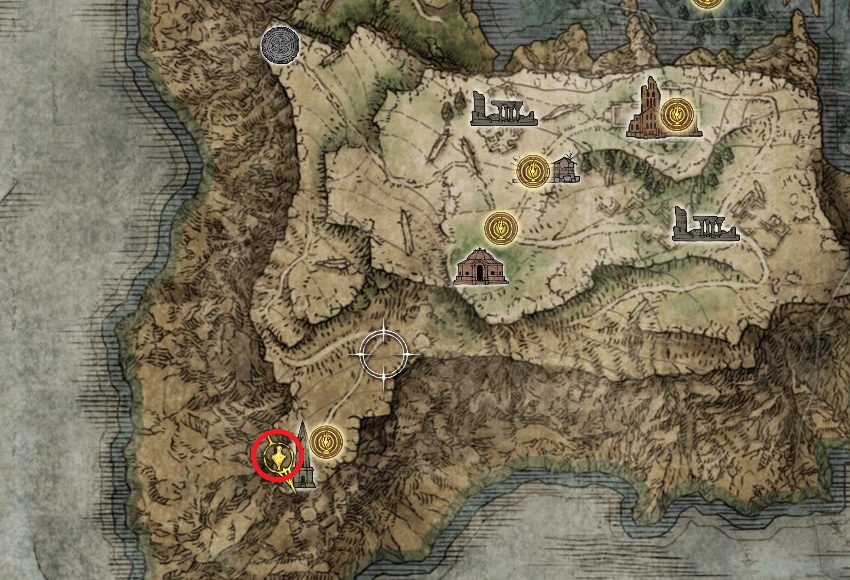
Just like the crystalians, this is a boss enemy that drops a paltry 4,158 and nothing else, so you may just want to ride past it and grab the items from the three gazebos: from left to right, these are x3 Smithing Stone [7], x3 Smithing Stone [8], and another x3 Smithing Stone [7]. Then ride back to where you entered the area with the gazebos and take the path further south:
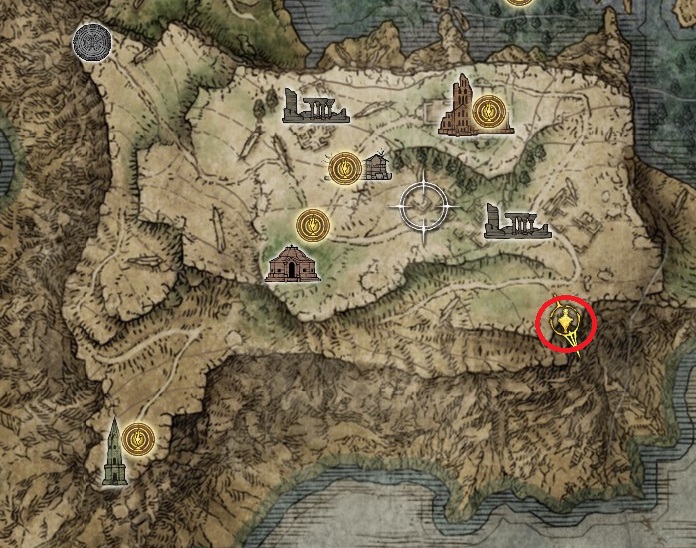
At the southwestern tip of the plateau, you’ll find Chelona’s Rise, which is sealed — interact with the imp statue to the left of the stairs, and it will start the puzzle and tell you to seek three great wise beasts. Note that you’re going to have to do a fair bit of riding to find all three, and if you die the puzzle resets, so try your best not to fall off any cliffs. In case you want to do this puzzle yourself, we’ve hidden the solution in the box below.
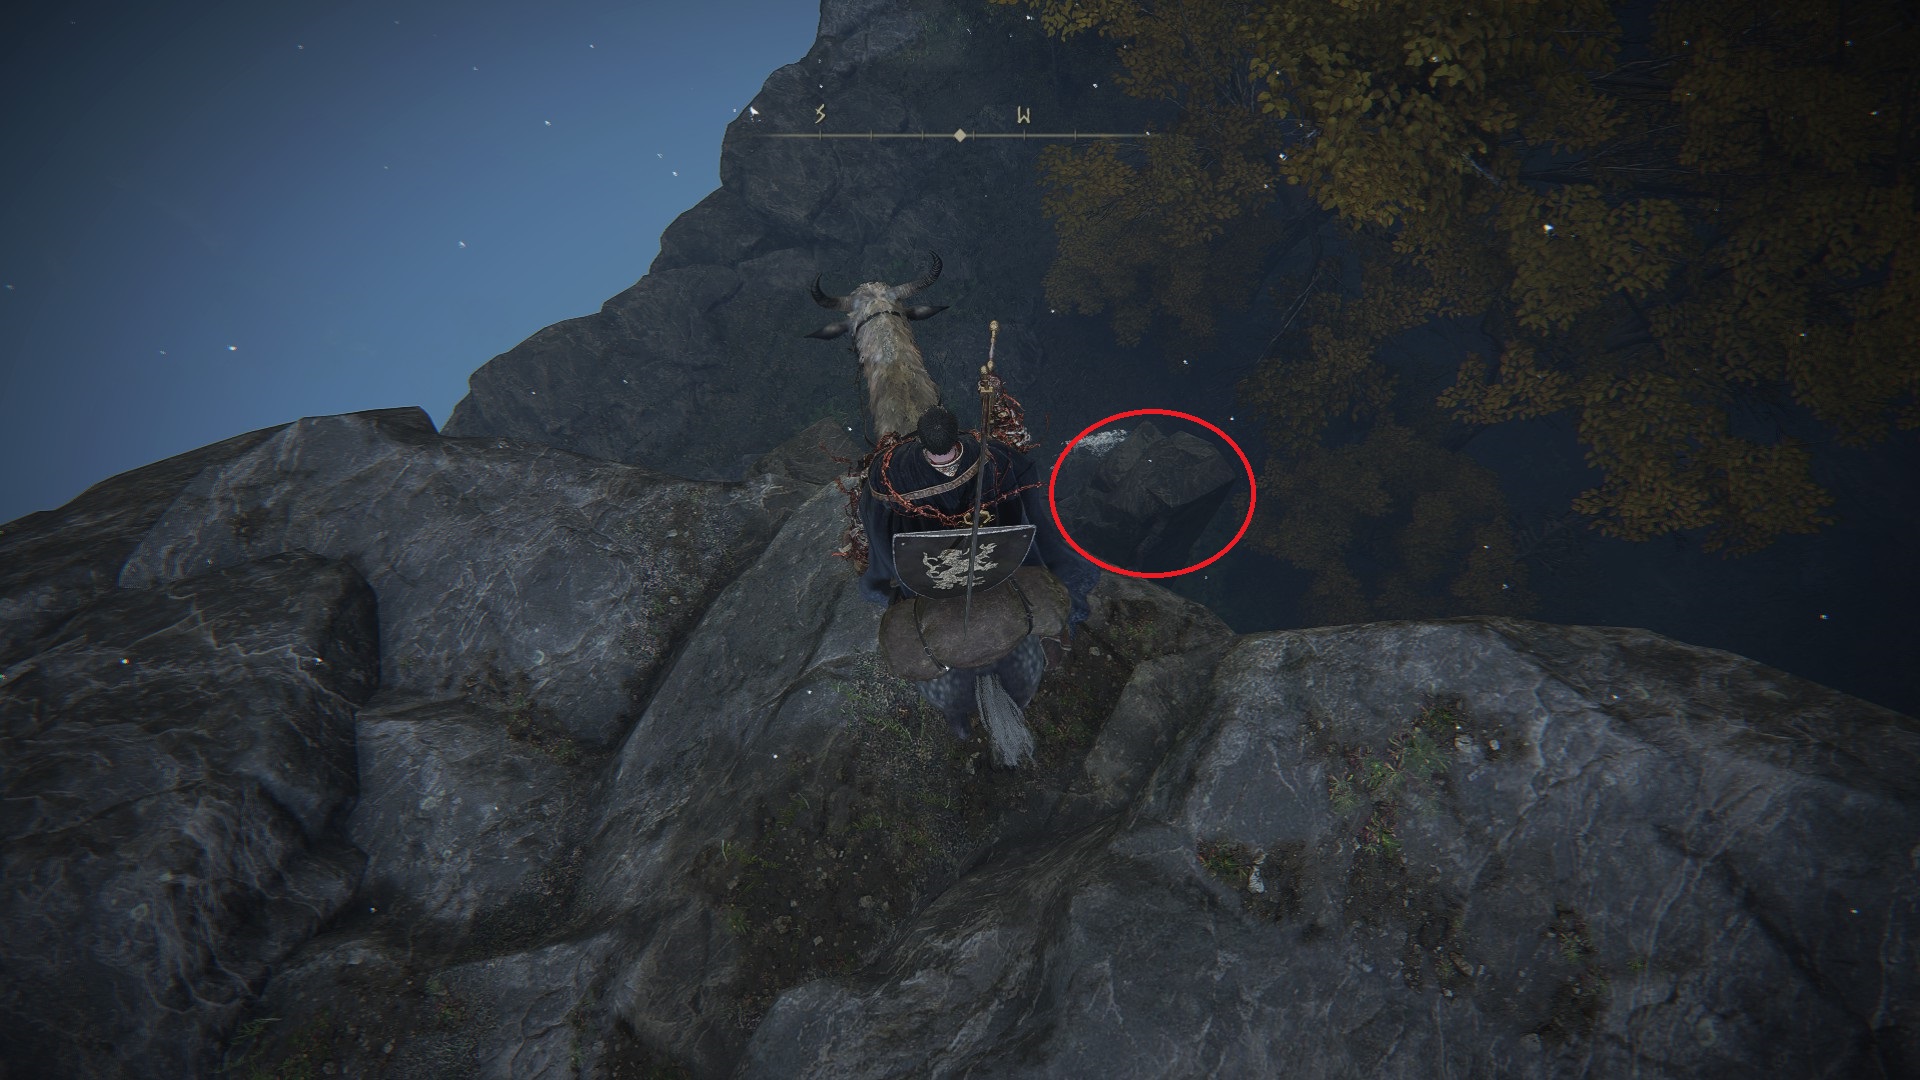
One of the large spirit turtles you need to find is west of the tower, hanging on the edge of the cliff. Use a throwing knife or a spell to hit it.
Another is only accessible by jumping on the Spiritspring Jump just down the road from the evergaol. Stand in the center of the Spiritspring jump and don’t move the left stick — jumping straight up will let you pass through the turtle, which counts as hitting it.
The final turtle is hiding on the edge of the plateau to the southeast — you’ll need to drop down onto a few ledges to reach it. Make sure you drop down onto the tall rock to the west or you’ll die trying to get to the low ground.
Once you’ve completed the puzzle, the tower will open. Make your way to the top to find Ranni’s Dark Moon, which is the final bit of loot in this area! If you went from Caelid to Nokron to Nokstella following Ranni’s questline, Altus Plateau is probably your next stop.
Unabashed FromSoftware fanboy still learning to take his time with games (and everything else, really). The time he doesn't spend on games is spent on music, books, or occasionally going outside.


You can die actually the game won’t let the turtle respawn so?
You’re saying you died and the turtles didn’t respawn? Interesting, that was not my experience — thanks for sharing!