This boss is found at the end of Miquella’s Haligtree, guarding the entrance to Elphael, Brace of the Haligtree. You’ve very likely faced Loretta before, as the spirit version of her serves as the boss of Caria Manor. This boss can be tough for some builds to deal with thanks to Loretta’s high magic resistances, but fear not! In this guide, we’ve got easy-to-execute strategies for both ranged and melee characters.
General Tips
Loretta is resistant to Magic and Fire damage, and somewhat resistant to Holy damage as well.
Since Loretta’s hardest-hitting attacks do magic damage, equipping the Pearldrake Talisman +2 (which you should have found in Haligtree Town) can mitigate a significant portion of her damage. Combine this with the Spelldrake Talisman +2 for 8% magic damage reduction — wearing your armor with the highest magic resistance is also helpful.
Incantation users can use Barrier of Gold to mitigate Loretta’s magic damage — cast it after going through the fog gate, and then again when Phase 2 begins (while Loretta is buffing herself)
First, we’ll cover tactics for both ranged and melee builds, and then we’ll discuss the best way to avoid Loretta’s magic attacks.
Ranged
Tanky spirit summons are helpful if you’re using a ranged strategy — Loretta doesn’t have a lot of AOE, so the Skeletal Militamen can often survive a long time. Otherwise, whatever summon you have that can survive the longest is probably your best choice.
Despite Loretta having a decent number of ranged attacks, it’s actually very easy to fight her with your own ranged attacks. This is because all of her ranged attacks can be avoided, most of them easily (see Avoiding Spells below). When she closes the distance and tries to use melee combos, you can usually just sprint away — if she gets too close, you’ll have to roll instead.
Loretta is resistant to Magic damage, so sorcery builds will have to bring a lot of Cerulean Flasks. Incantation builds should bring the Lightning Spear, as she isn’t resistant to Lightning.
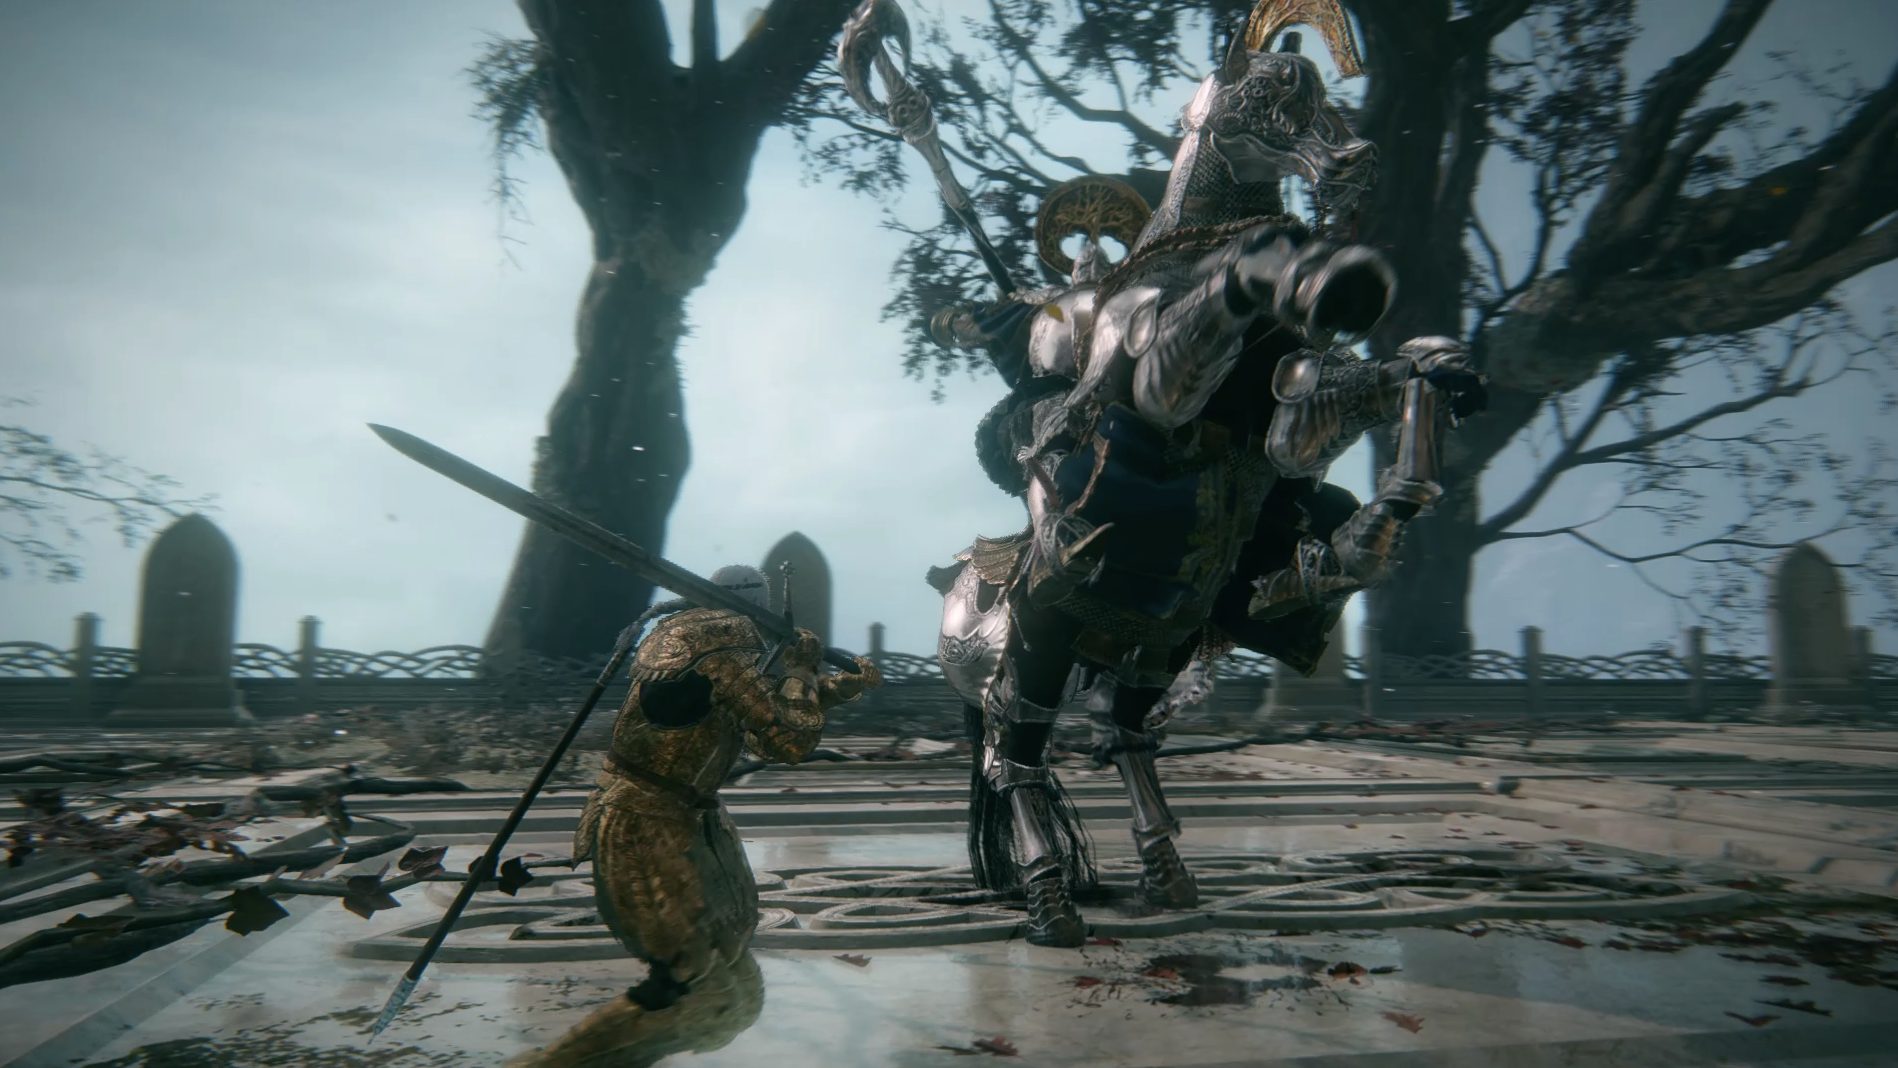
Melee
For melee builds, your choice in summon is very flexible — whatever spirit ash you have the most upgraded is probably your best bet.
Beating Loretta as a melee character requires learning her melee combos, as they all have different windows in which it is safe to attack. For all the combos, there is a place in the middle of the combo where you can do a jumping heavy attack without receiving return damage (see Melee Strategy GIFs below). Note that for this technique to work, you will need to be right in front of Loretta’s right leg. In addition to attacking her during the combo, you can also attack her when the combo ends, assuming you’ll have enough stamina left over to immediately roll afterwards.
Loretta has other combos she’ll do if you’re on her left side, but there’s no reason to double the combos you need to memorize — just stay on her right side. She’ll often back off and cast spells at you — avoid them and close the distance as per the techniques listed in the Avoiding Spellssection. If you manage to stagger Lorreta, you should charge up a heavy attack — this will stagger her once again, and you can follow it up with a jumping heavy attack.
The Backhand Combo (which starts from your right) allows you to do a jumping attack after avoiding the first attack in the combo. If you move towards the horse’s back legs, you can avoid the third strike, otherwise you’ll sometimes take damage if you can’t roll in time.
When the horse does its Rearing Strike, you can roll through it, and if you wind up by Loretta’s right leg, she’ll follow up with two more attacks — you can jumping heavy attack after dodging her first swing. This combo is sometimes chained into another series of attacks, but it’s best to just roll away and regain stamina.
The Forehand Combo (which starts from your left) consists of only two attacks — if you roll towards the horse’s rear legs, you can attackduring the downward strike Loretta does.
Loretta’s Magical Glaive Sweep does a lot of damage, but if you roll through the first attack and end up behind her, thesecond swing will miss and you can get your own attack off.
The Charged Glaive Combo is easy to see coming, as the horse rears up and there’s a long delay before the combo starts — just run away, out of range, and wait for the first two attacks. Then, run back towards Loretta and you’ll end up behind her during her final attack (you don’t always have to roll, but it’s best to anyway just in case).
Avoiding Spells
Loretta has three ranged spells, two of which change notably during Phase 2. Note that if you are close to her when you avoid the greatbow or the stars, you can attack her before she transitions to her next move.
Glintblade Phalanx – Loretta summons an arc of glintblades above her (the spellcast is often accompanied by a melee attack with her glaive). If you’re mid-range or closer, these will target you after a delay. You can roll through them, but even easier is simply running horizontally or diagonally. During phase 2, there are more glintblades, but the response remains the same
Loretta’s Greatbow – Loretta and her horse leap into the air and she charges her bow, then fires a magical arrow. During phase one, you can roll forwards the moment the arrow leaves the bow to avoid this. During phase 2, you’ll need to roll when the arrows are about to strike near you — roll right to avoid the splash damage. Additionally, if you stay in melee range of her, this attack will go over your head.
Glintstone Stars – A simple projectile fired from the butt of her polearm. During phase 1, you can roll or run horizontally or diagonally to avoid these — in phase 2, you’ll need to roll towards them instead. Sometimes Loretta will hop backwards on her horse and fire on of these as well — usually, rolling is the best way to dodge it, since you’ll likely be recovering from an attack.
Unabashed FromSoftware fanboy still learning to take his time with games (and everything else, really). The time he doesn't spend on games is spent on music, books, or occasionally going outside.