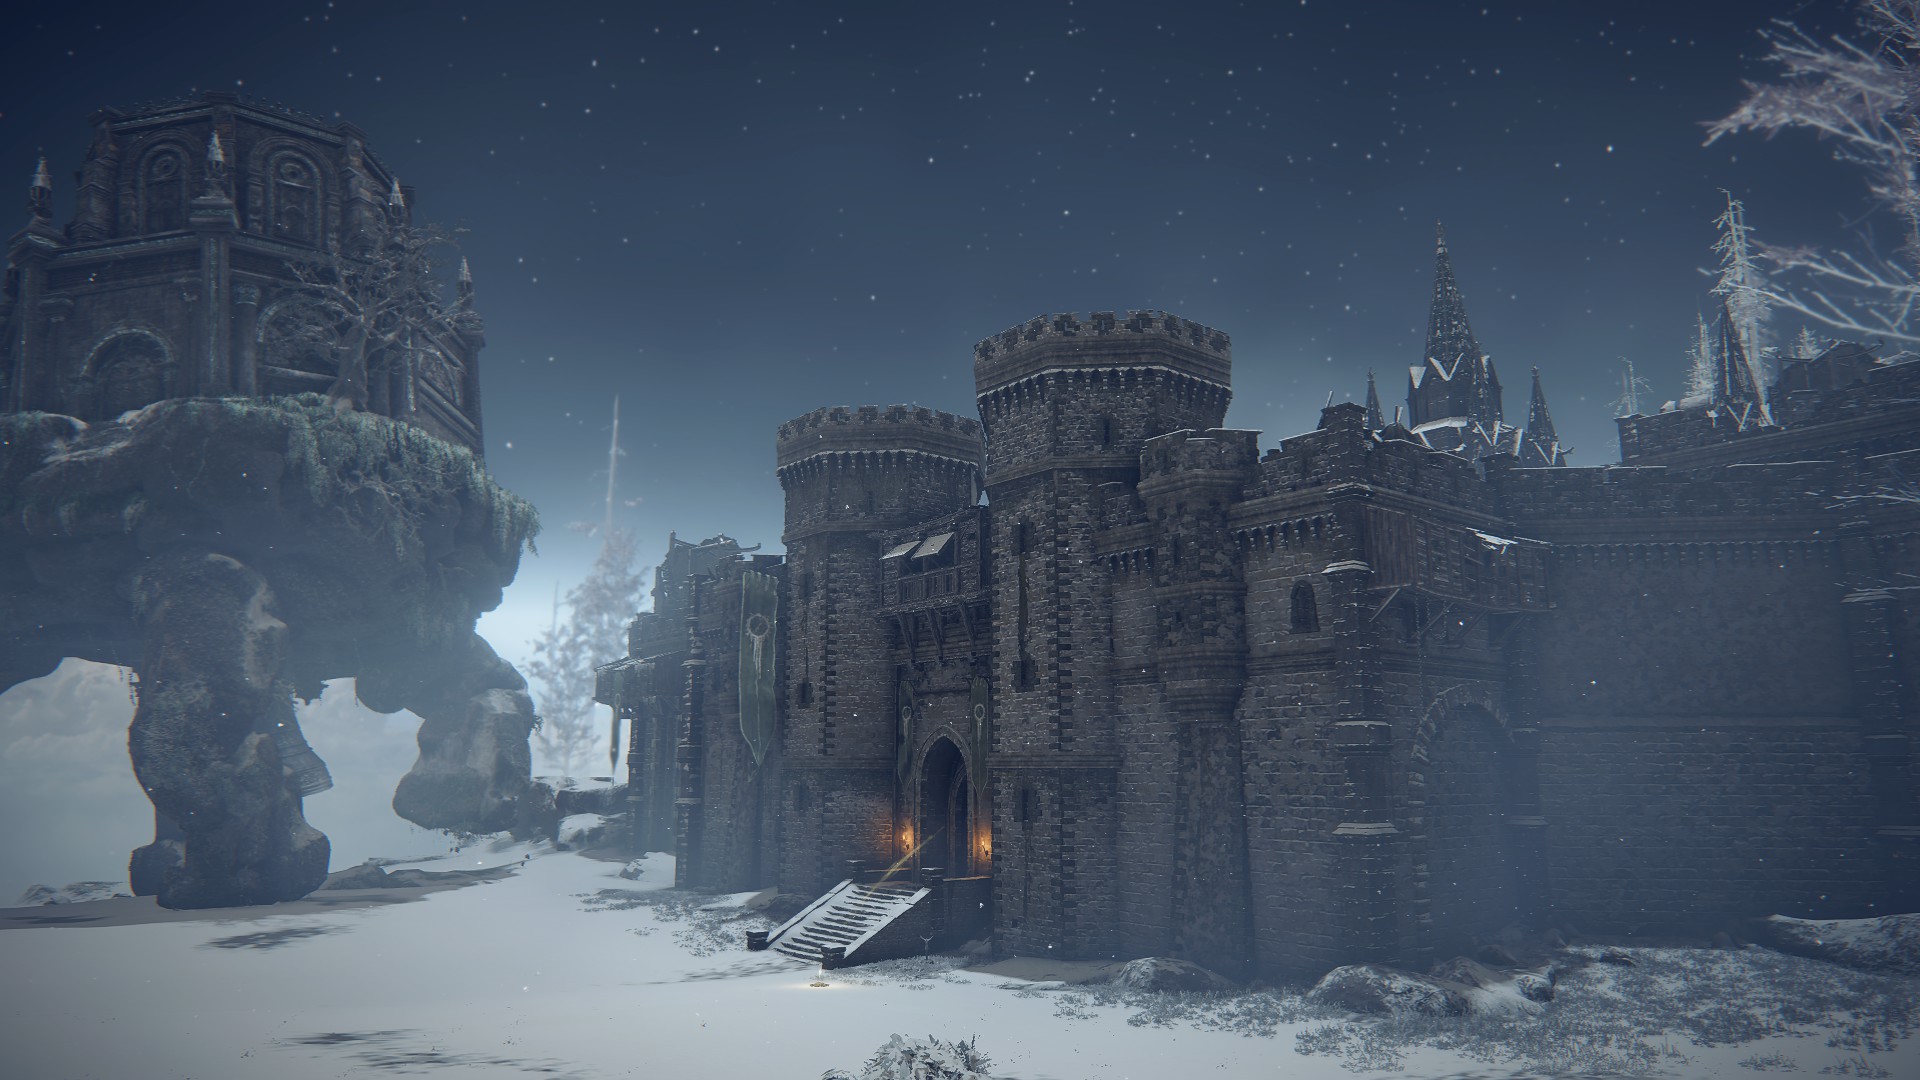
Castle Sol is nestled in the Mountaintops of the Giants, and its walls protect treasure both mundane and valuable (including the second half of a certain medallion). It’s relatively bereft of enemies, but the ones that are here can be deadly — except for the slugs… they aren’t deadly.
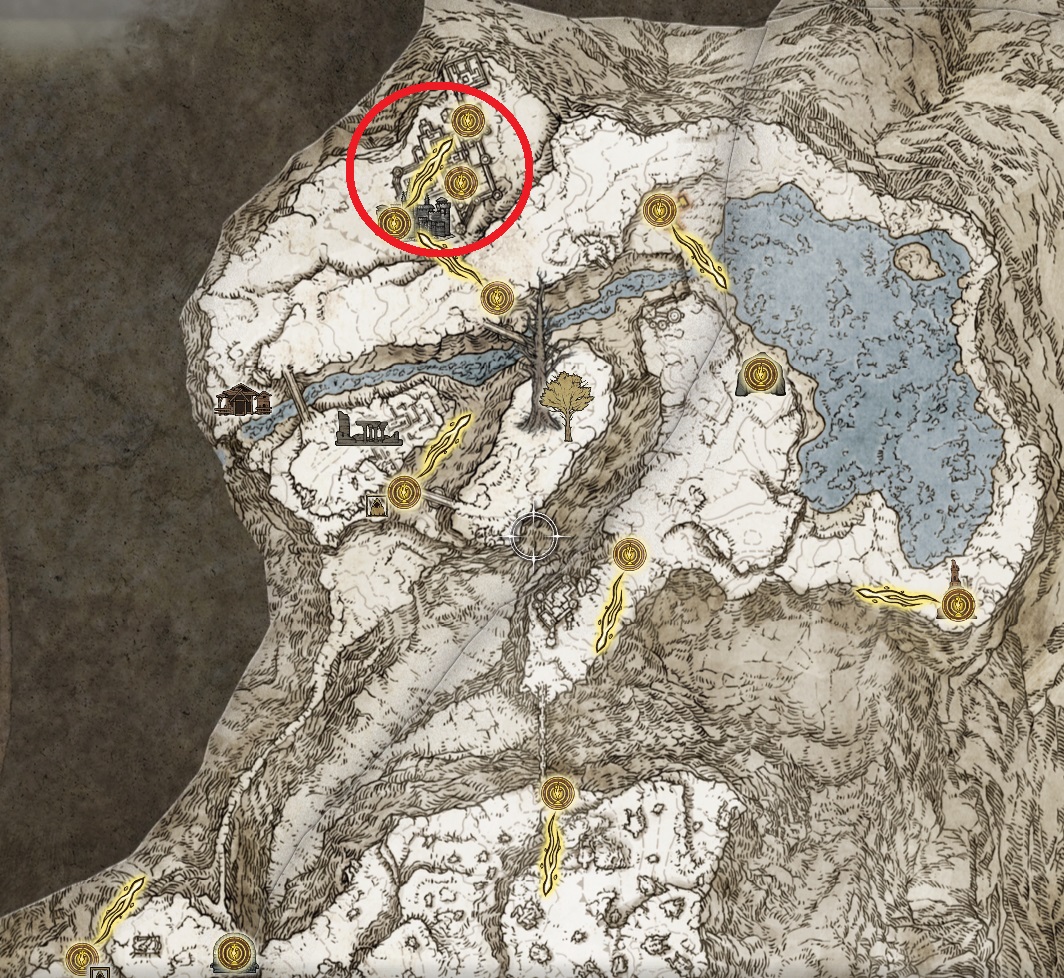
This large dungeon is one of the major points of interest in the Mountaintops of the Giants, and can be reached after passing through the Stargazer Ruins and the graveyard to the north. See our walkthrough of the Mountaintops if you’re having trouble reaching Castle Sol.
From the Castle Sol Main Gate site of grace, head northeast, up the stairs and into the castle courtyard. You’ll aggro a Lion Guardian almost immediately, but once you do so you can run back out the castle gate the way you came in, as the lion can’t fit through the doorway. Ranged characters will be able to easily kill the lion from the doorway, while melee characters will still need to be patient and wait for the lion to finish a move before counterattacking (and then retreating back through the doorway). There is a second lion on the right (southeast) just inside the courtyard, and it both guards and contains something valuable, so once the first lion is dead you should aggro the second and deal with it in the same fashion.
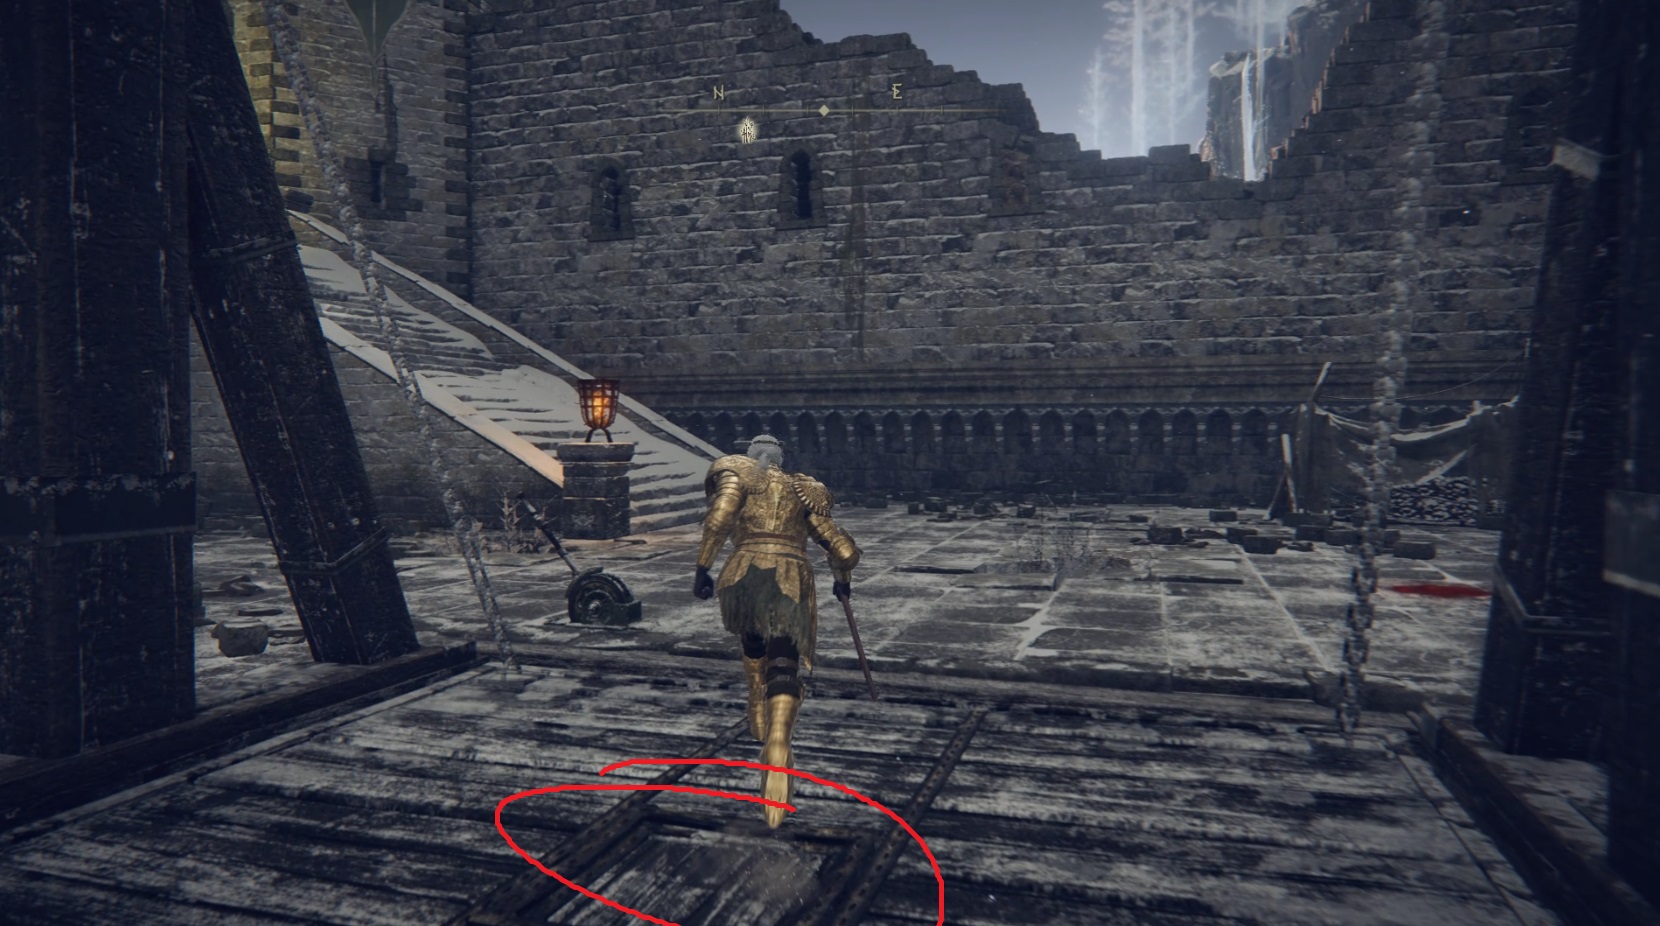
Both lions will drop a Somber Smithing Stone [7], Beast Blood, and x2 Old Fang, so they’re well worth killing — you may want to rest after fighting them, since the site of grace is so close. Then re-enter the courtyard and turn right (southeast), where you’ll find a Golden Rune [10] in the corner where the second lion was sleeping. Head towards the center of the courtyard and then turn east-northeast, towards the large wooden platform. Underneath the platform, against one of the far support beams, is a corpse with a Smithing Stone [5] — grab it and then head back west.
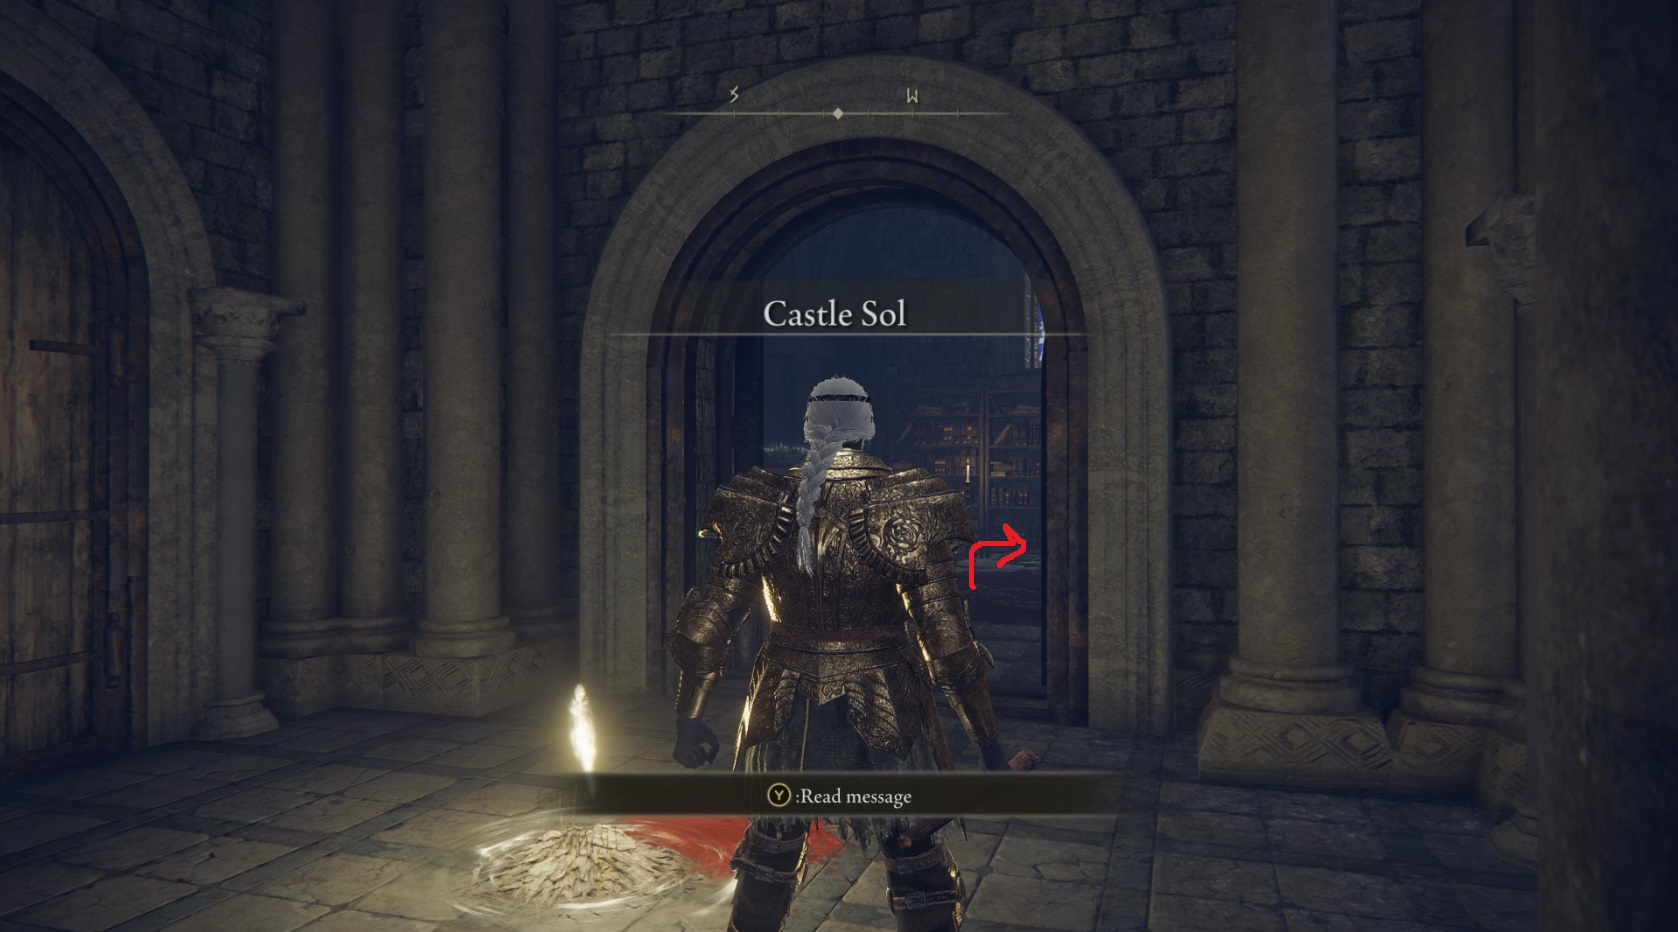
Turn right (north) near the entrance to the castle and make your way through the wooden palisades and up the stairs(1). At the top of the stairs, turn right, and then go left into the doorway lit by torches(2). If you want, you can go first go east past the doorway to find a Furlcalling Finger Remedy — this is also where you can send an elevator to get a shortcut to the boss later.
12
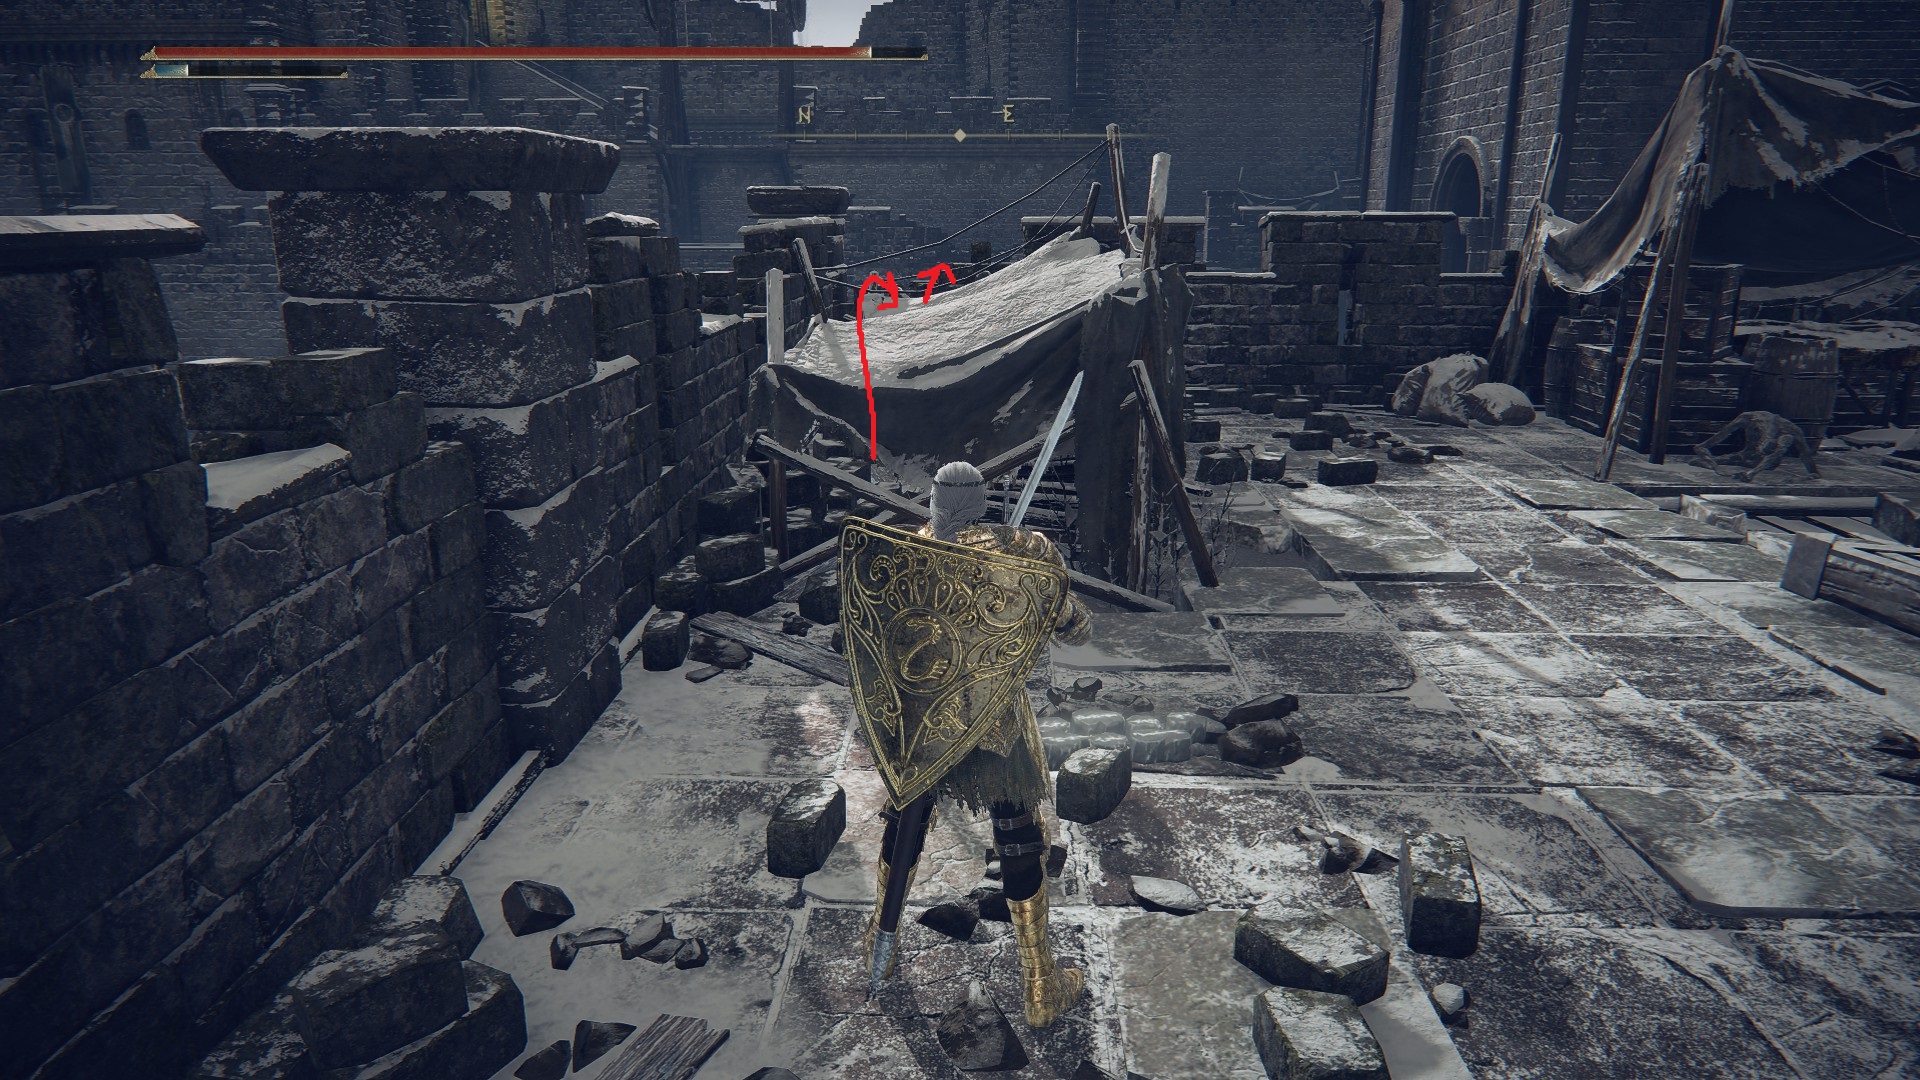
Once you head through the doorway, slugs will fall down from the ceiling, and there are more further inside — they aren’t very dangerous but can still stunlock you if you aren’t careful, so clear them slowly as you make your way through the room. Grab the Nascent Butterfly from the corpse and then climb the ladder up to the rampart. To the southeast is a broken section of crenelation, where a corpse with x5 Fan Daggers is draped over the ledge. Pick them up and then continue west-southwest along the rampart. When you get to the spot where the cover ends and a wooden walkway begins, hide behind the wall and read ahead — this next section is probably the toughest part of the castle (besides the boss).
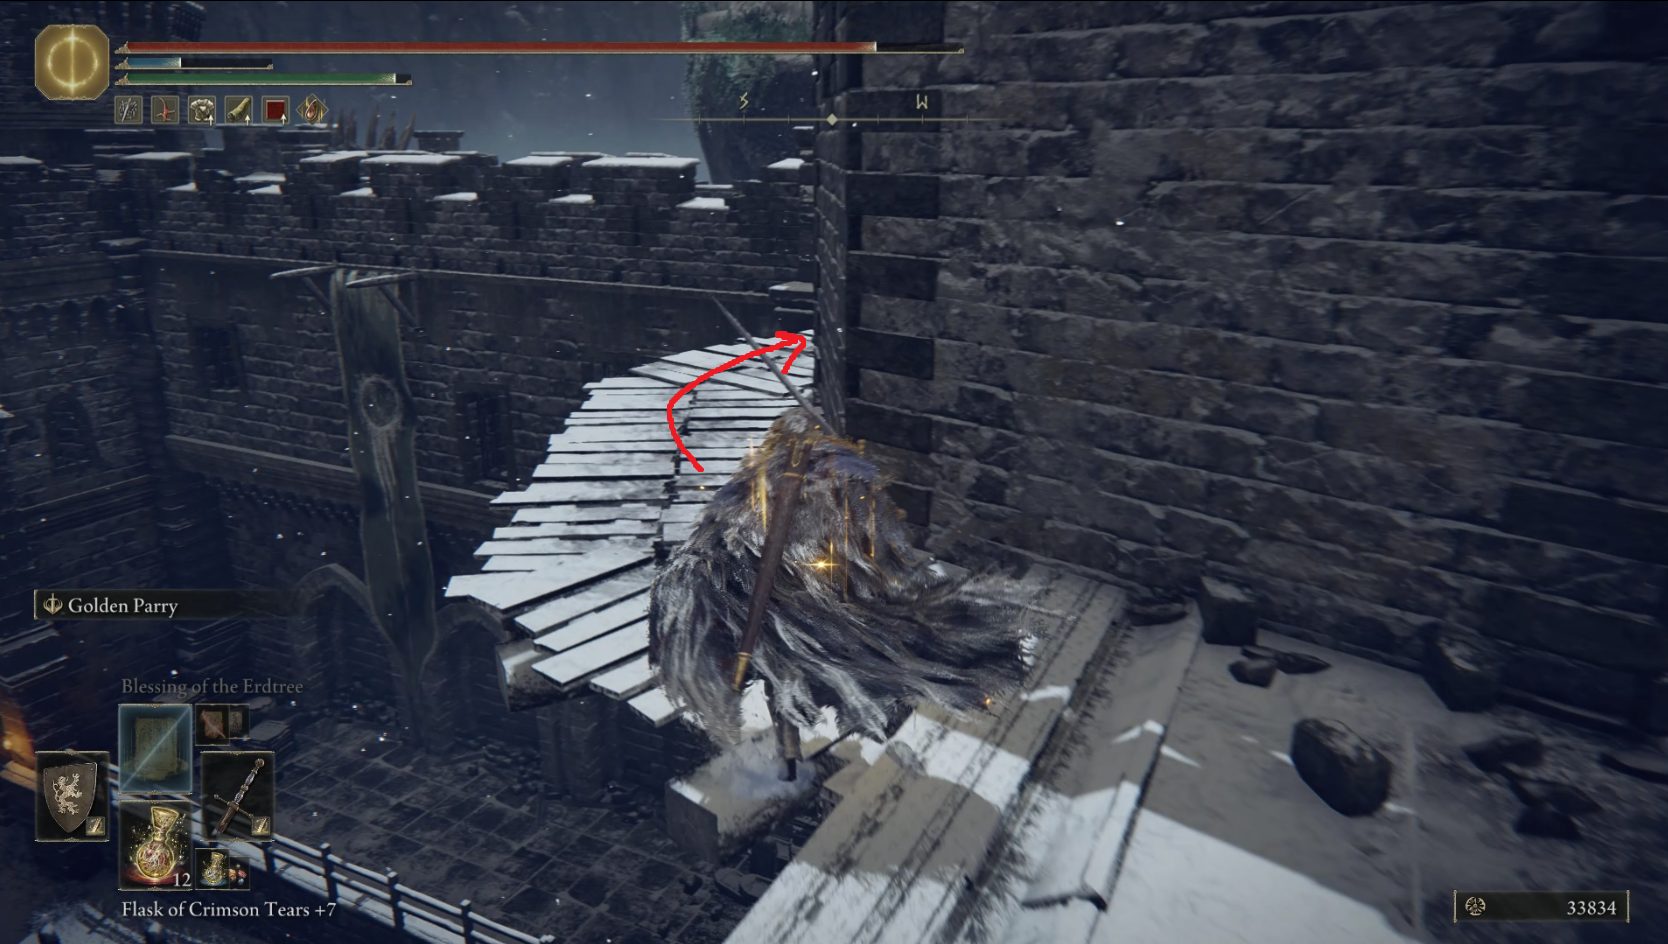
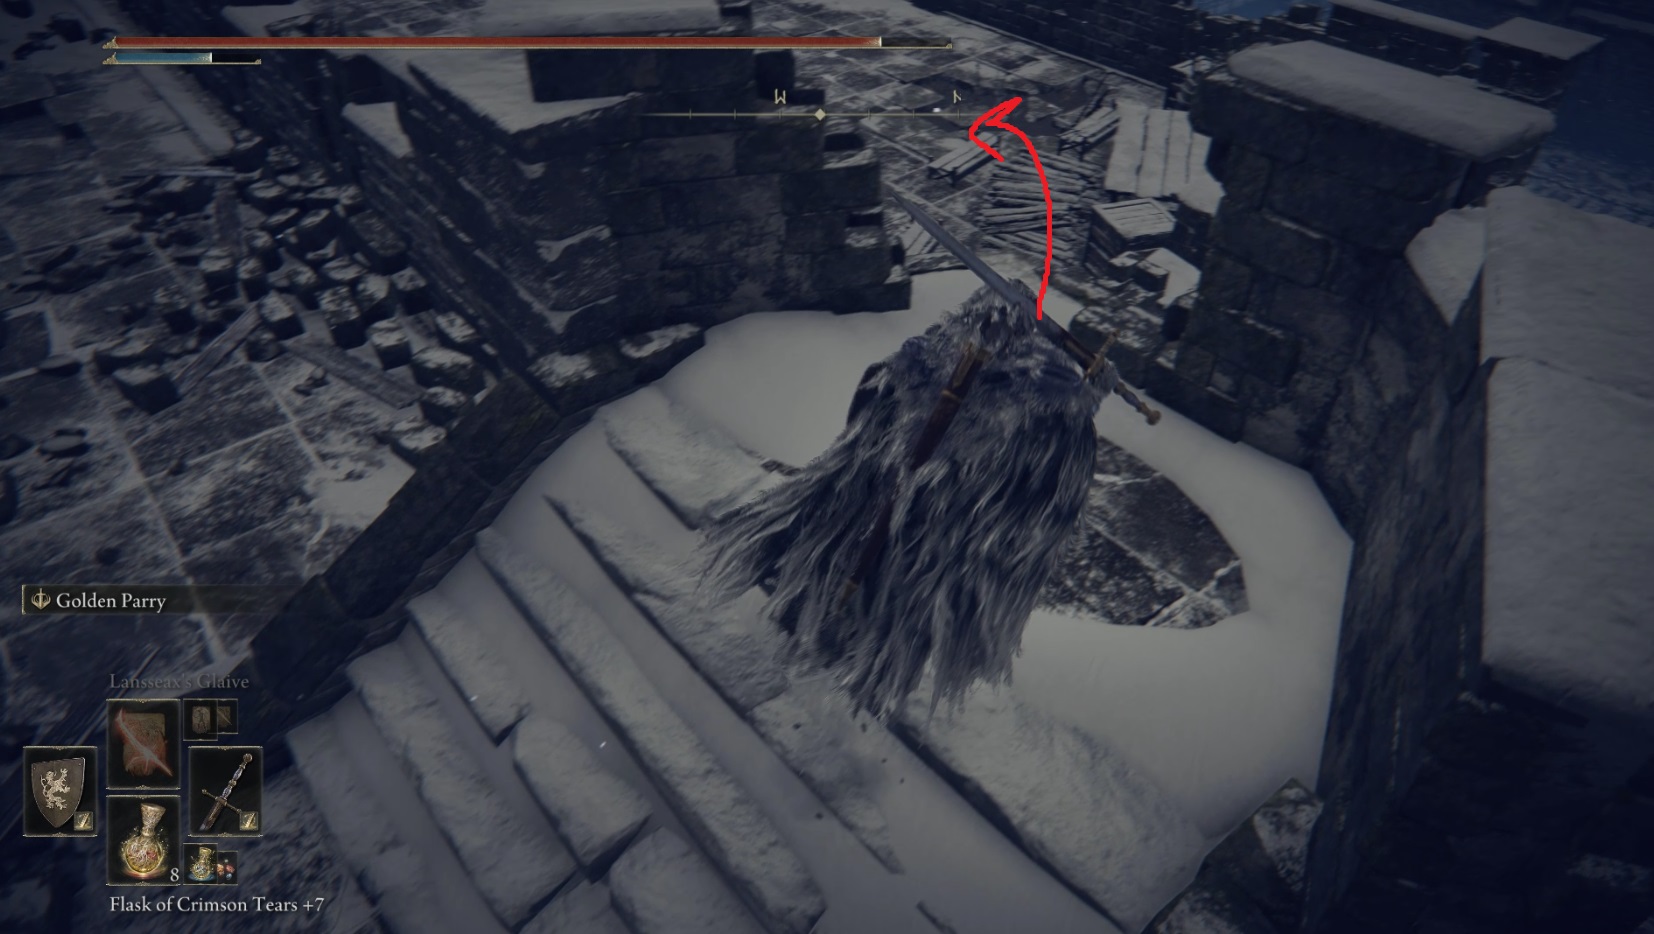
If you have access to long-ranged attacks of some kind, you can start by clearing the pot-throwing soldier on the building to the east (see here). Regardless, you’ll next need to make your way quickly out onto the wooden platform — just around the corner is a soldier who you’ll want to lead back the way you came, where you’re safe from the pot-thrower. You can’t see the soldier until you get close enough, as it won’t manifest until you’re in melee range. Once the soldier is dead, you’ll need to sprint across the wooden walkway, then turn left onto the next section of rampart — once you round the corner near the corpse (which you should ignore for now) you’ll come under fire from a ballista that shoots multiple exploding bolts.
After this left is where the real danger begins
If you struggle to get past the upcoming section with the ballistas, unequip or remove anything that lowers your HP (Scarseals, Soreseals, Baldachin’s Blessing) and consider equipping a Great Rune like Morgott’s or Radahn’s and popping a Rune Arc for more max HP.
If you’re very fast, you can zig-zag and potentially dodge the bolts, but it’s ideal to roll to dodge them — you can’t really reaction roll, so just spam roll if the ballista hasn’t fired recently. If they hit the ground/wall near you, you’re going to take damage unless you perfectly time a roll for when they explode. Shield-users can also hold block as they run forward — the bolts that land will probably stagger you, but the rest of them tend to explode behind you as long as you’re running the whole time. Once you get past the first ballista, don’t bother killing its operator, as you’re immediately going to come under fire from a second ballista. Instead, turn left (east-northeast) and head across the wooden bridge.
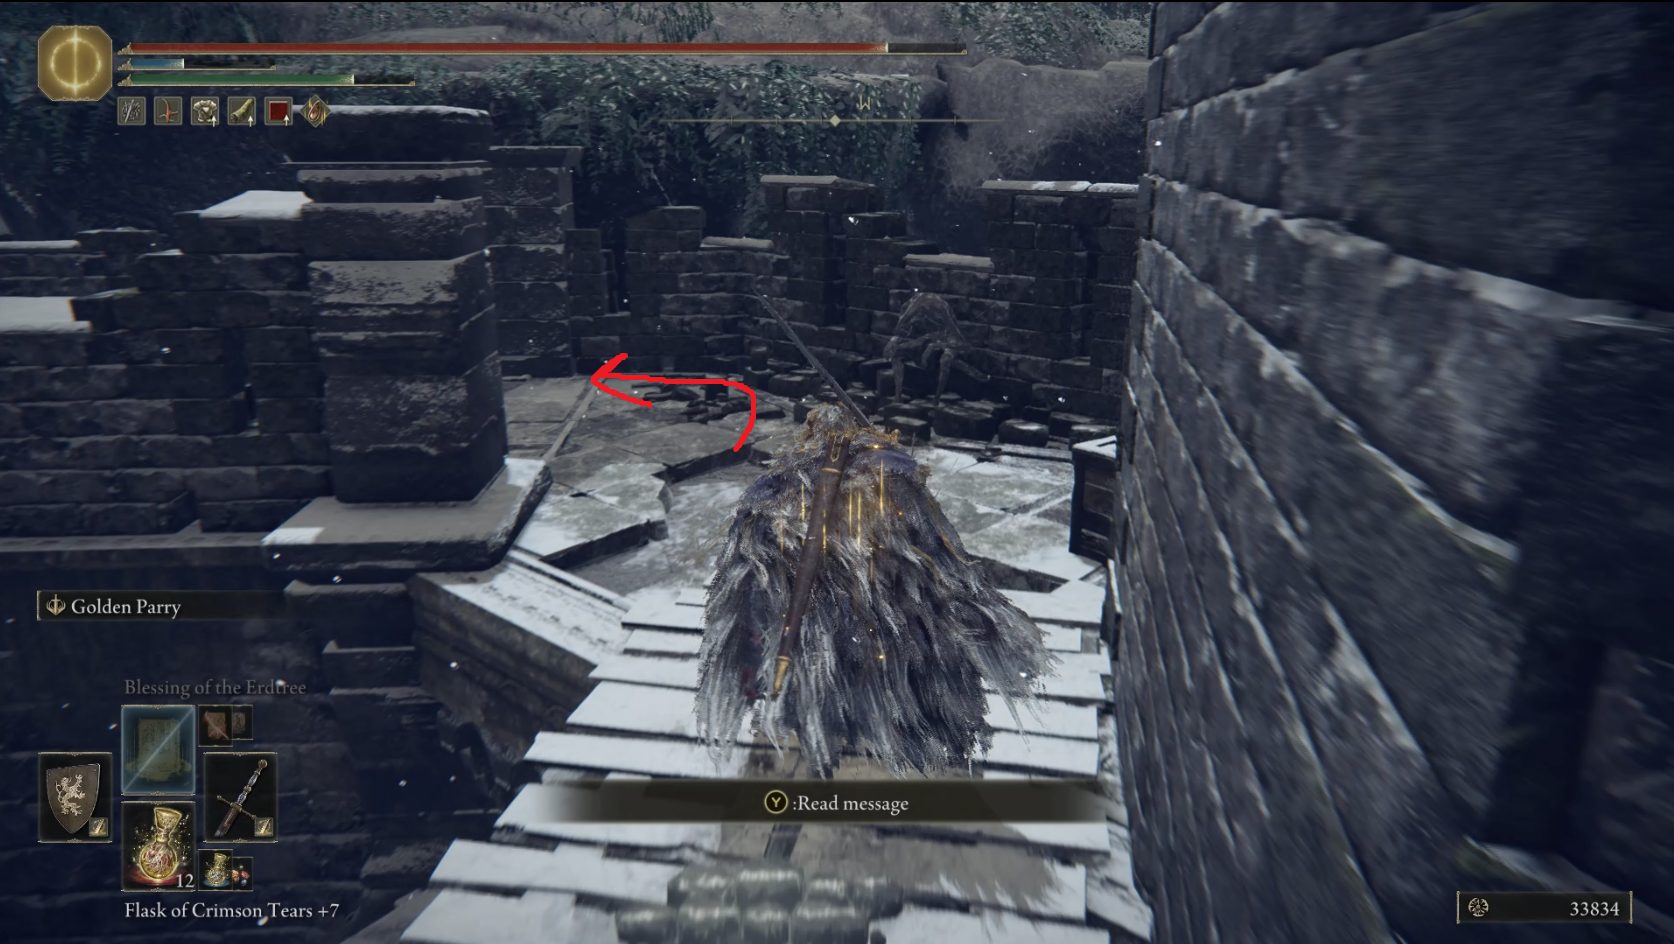
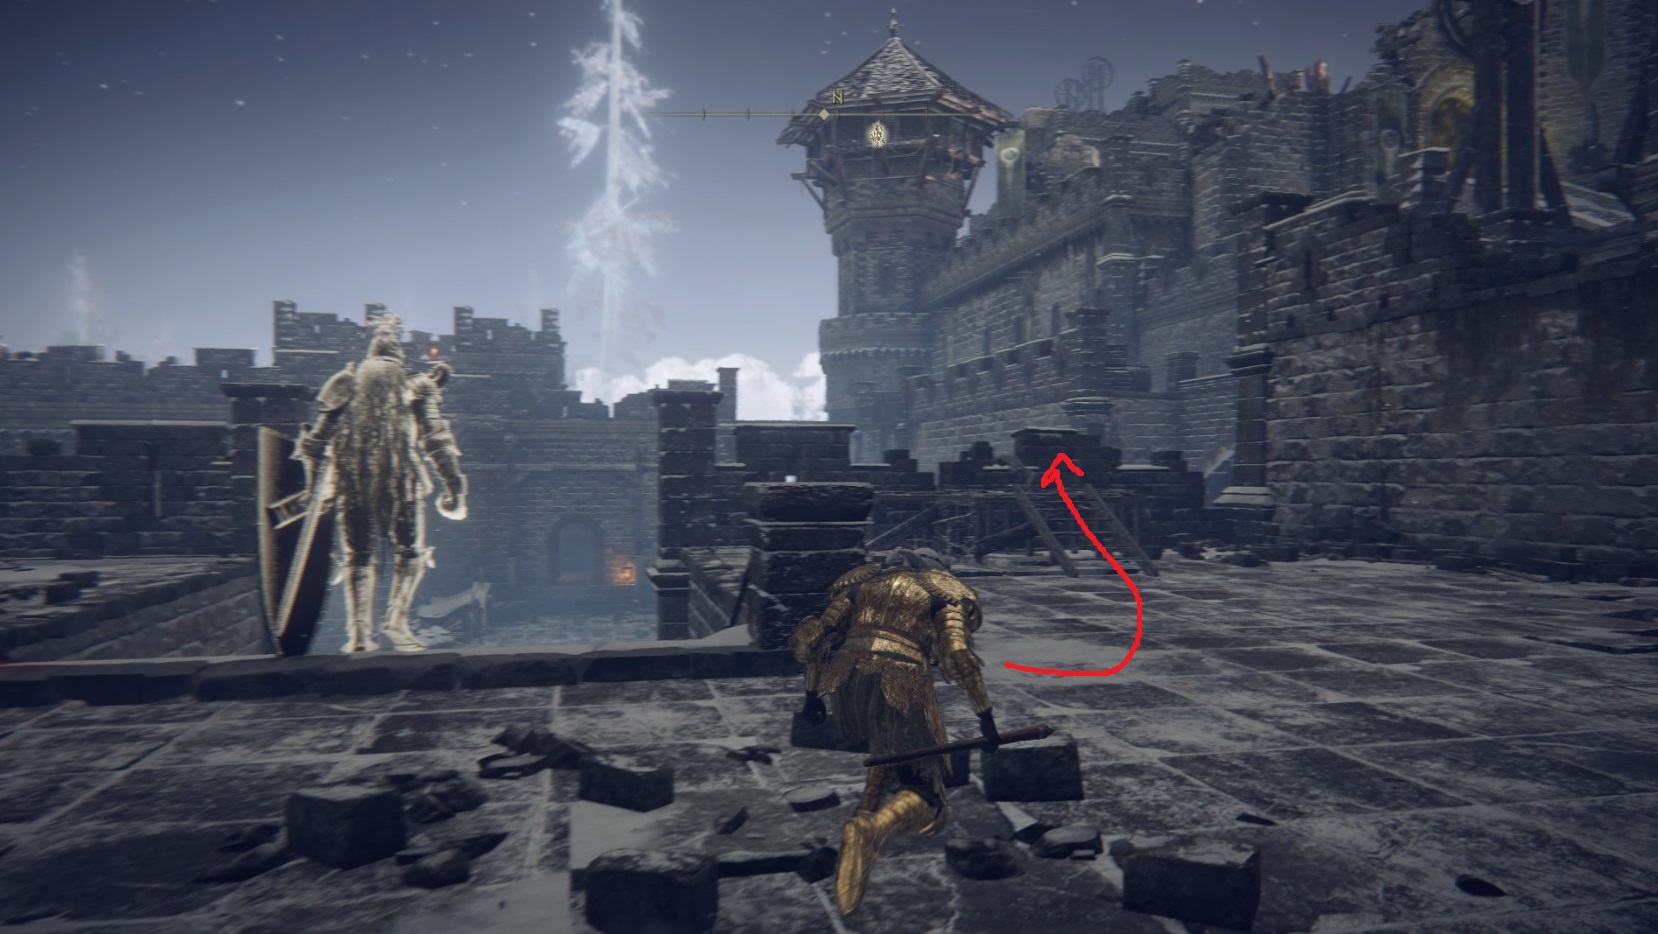
The pot-thrower will also be able to start attacking you again, but as soon as you’re across the bridge, the ballistas won’t be able to hit you, so take out the pot-thrower first, then make your way onto the platform and get some revenge on the ballista operator up here. Now backtrack to the first ballista and kill its operator too — this will allow you to go back a bit further and get the Golden Rune [10] from the corpse we ignored earlier. Then return to where the second ballista was, on top of the courtyard’s central building. Here you can loot a Smithing Stone [6] from a corpse on the eastern side of the roof, just past the ladder. Then take the ladder down, and inspect the Sorcerer Painting. Doing so will allow you to acquire the Greathood — see here for details.
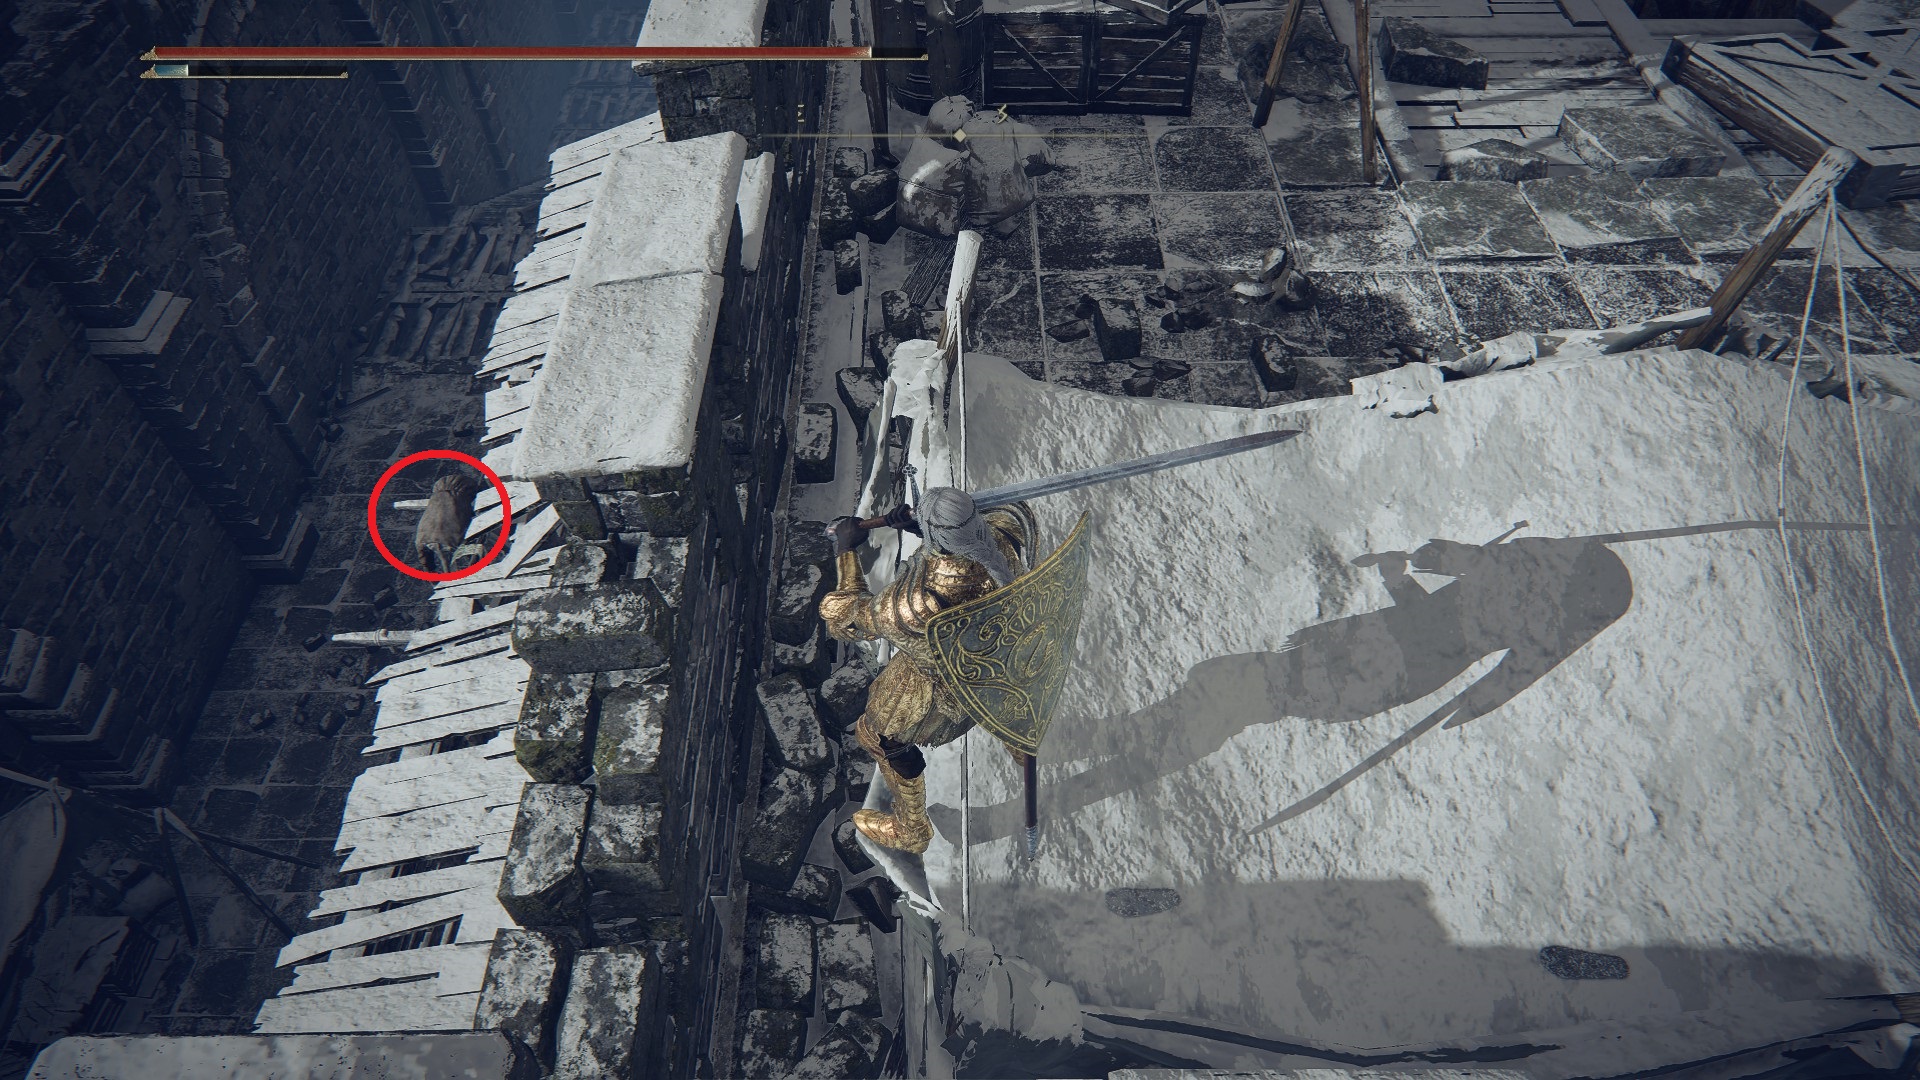
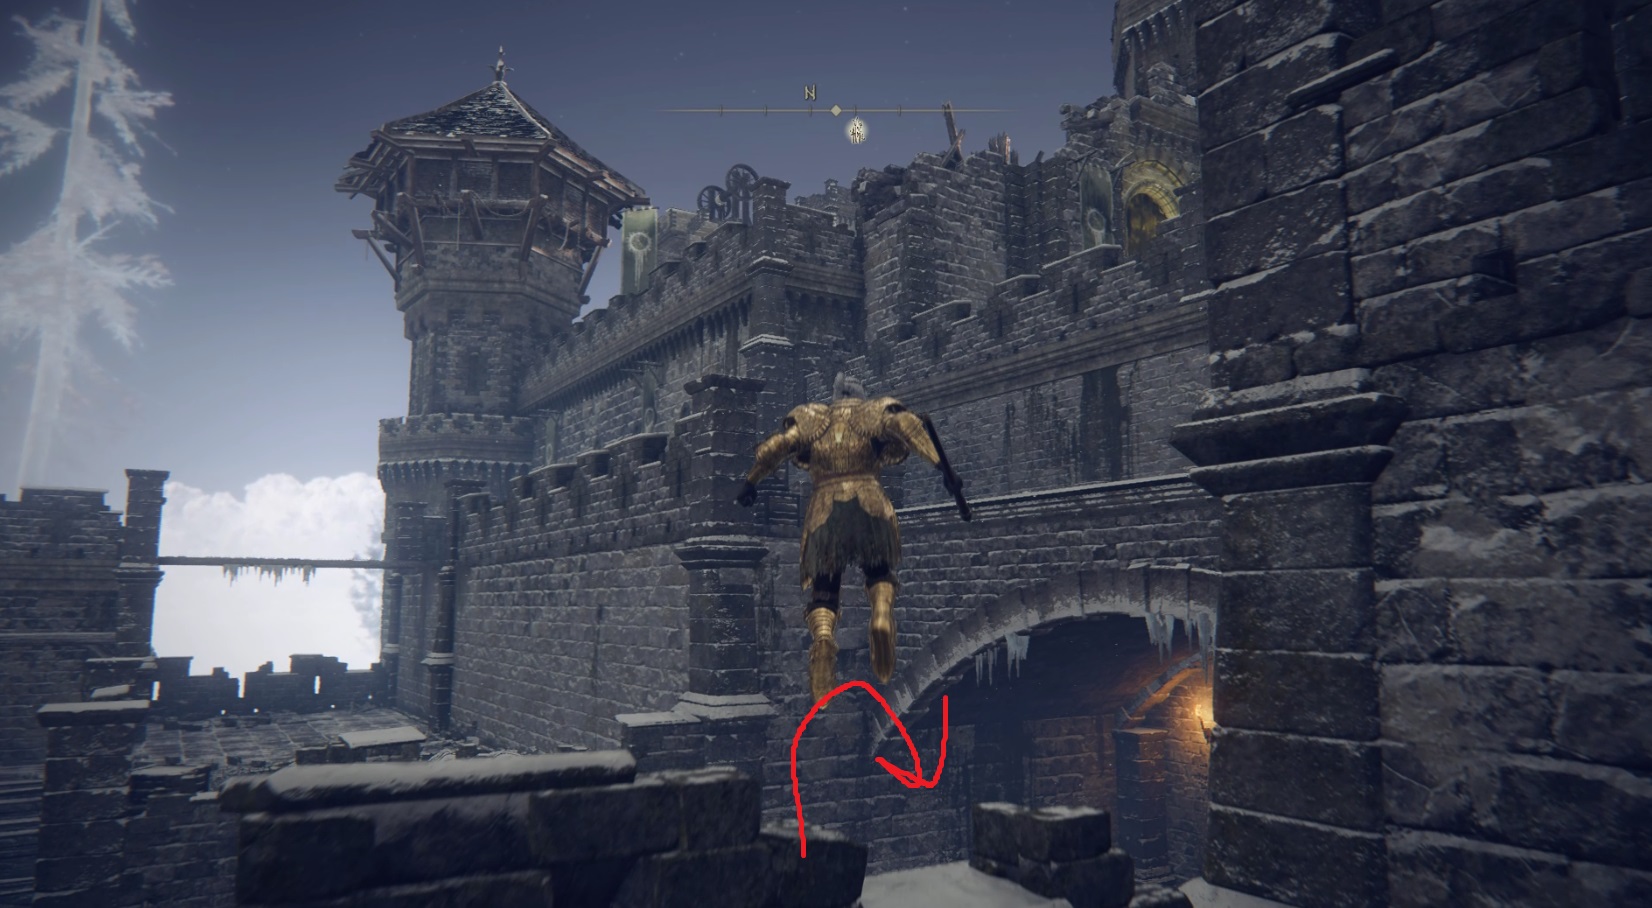
Then open the nearby door to unlock a shortcut that’s useless unless you fall early doing the next bit — but don’t head through the door yet! Instead, go back up the ladder, then head to the northwestern side of the roof and look east-northeast. Jump up on the canvas structure, then continue forward, and jump over the crenelation and onto the wooden awning to find what is very likely your second Stormhawk Axe. Watch out for the hawk that will probably aggro as you near the crenelation — it will struggle to get to you, but sometimes its attacks can clip through the wall, and it may attack you as you drop onto the awning.
Look down to the north from your perch atop the wooden awning — you’ll likely see a couple of dogs pacing while looking up at you hungrily. If you have ranged options, take the dogs and the hawk out before dropping down (it won’t hurt, I promise). Once the dogs are dealt with, you can pick up the nearby x3 Thawfrost Boluses and then head north-northwest through the doorway and into the castle.
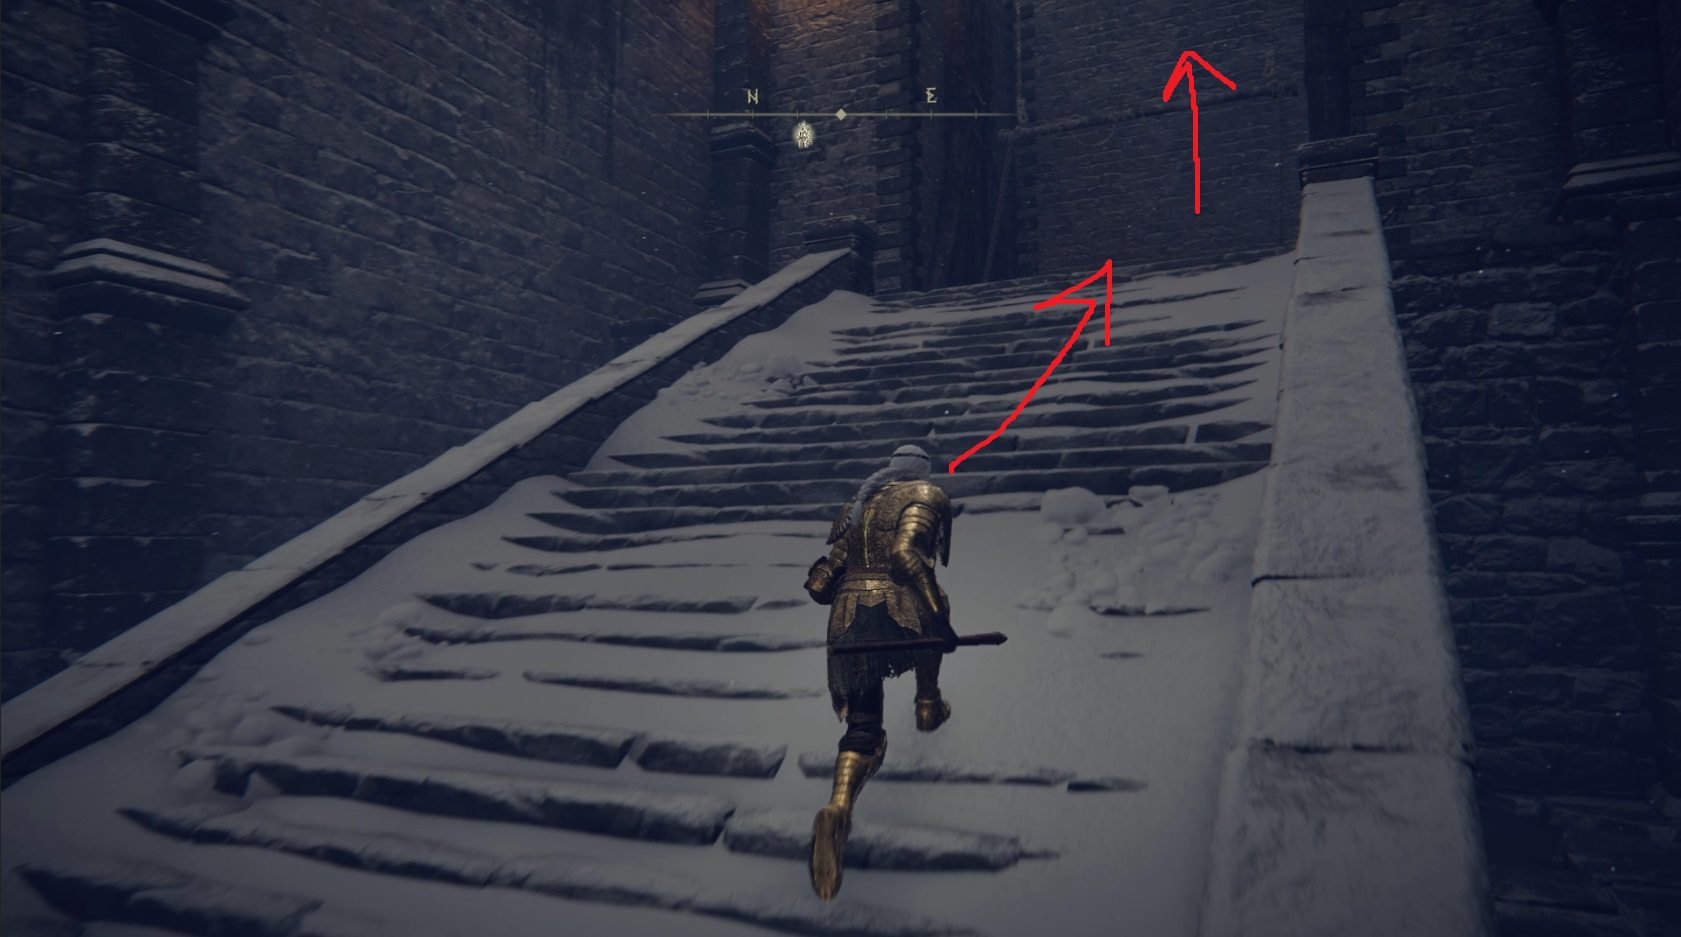
The room you’ll enter has nothing save a bunch of objects you can have some fun rolling into. When you’re done breaking stuff, head up the stairs on the far side of the room and continue south-southeast through the doorway, where you’ll find yourself outside once again. A couple of spectral soldiers will spawn, and they’ll both attack you at once — you can use the doorway you just came through to avoid being flanked. Once both soldiers are even deader than they started, head up the wooden stairs that are to your left as you exit the doorway — in the northeastern corner of this upper platform is a Golden Rune [10], but watch out for the two spectral soldiers that will spawn to the left and right as you approach it.
Once you’ve grabbed the golden rune, head back down the wooden stairs and go south across the small wooden platform that leads to some stairs. Head up the stairs — a spectral knight will spawn, but you should run past it into the doorway beyond, and turn left once inside to enter a small room. Tap the site of grace there, and then you can fight the knight knowing you’ll respawn nearby if you die.
Once you’re done with the knight, rest at the Church of the Eclipse site of grace you just unlocked, and then go back outside the way you came in (north-northwest). To the north is a small wooden platform with some stairs leading up it — you can find more Thawfrost Boluses here, then turn right (east) and go up the nearby ladder. At the top, go forward and then turn left to head north-northwest across a snow-covered bridge. A corpse on the other side of the bridge holds a Golden Rune [9]. Grab it and keep going forward, then start sneaking — you’ll soon find a smaller wooden bridge with two dogs and a knight on the other side.
The front wolf will howl if it sees you, alerting the knight and the other wolf, so unless you can 1-shot it from range, you’ll need to wait until it turns its back if you want to sneak past and up the stairs to the Stonesword Key. Otherwise, you’ll be fighting these three foes at once. You can either kite these enemies backwards to keep them separated, or you can fight on the bridge to narrow their approach. If you have the Rejection incantation available, you can also try knocking them off. You can try running past them for the key, but it’s actually kind of tough vs these foes. The key is up the stairs on the right (north-northwest) after you cross the bridge, in the northwestern corner of the little tower.
Now go back the way you came, all the way back to the ladder. Instead of going back down the ladder, however, head past it further south — there’s a corpse draped over the edge here with a Smithing Stone [5]. Grab it and then drop down and head inside the doorway to the southwest. In the church, you can speak with the spirit at the altar on your left, then pick up the Eclipse Shotel from the corpse. Then go back out the way you came in and immediately turn right to head south around the church. Around the corner, you’ll see a ladder — climb it and take out the spectral crossbowman at the top.
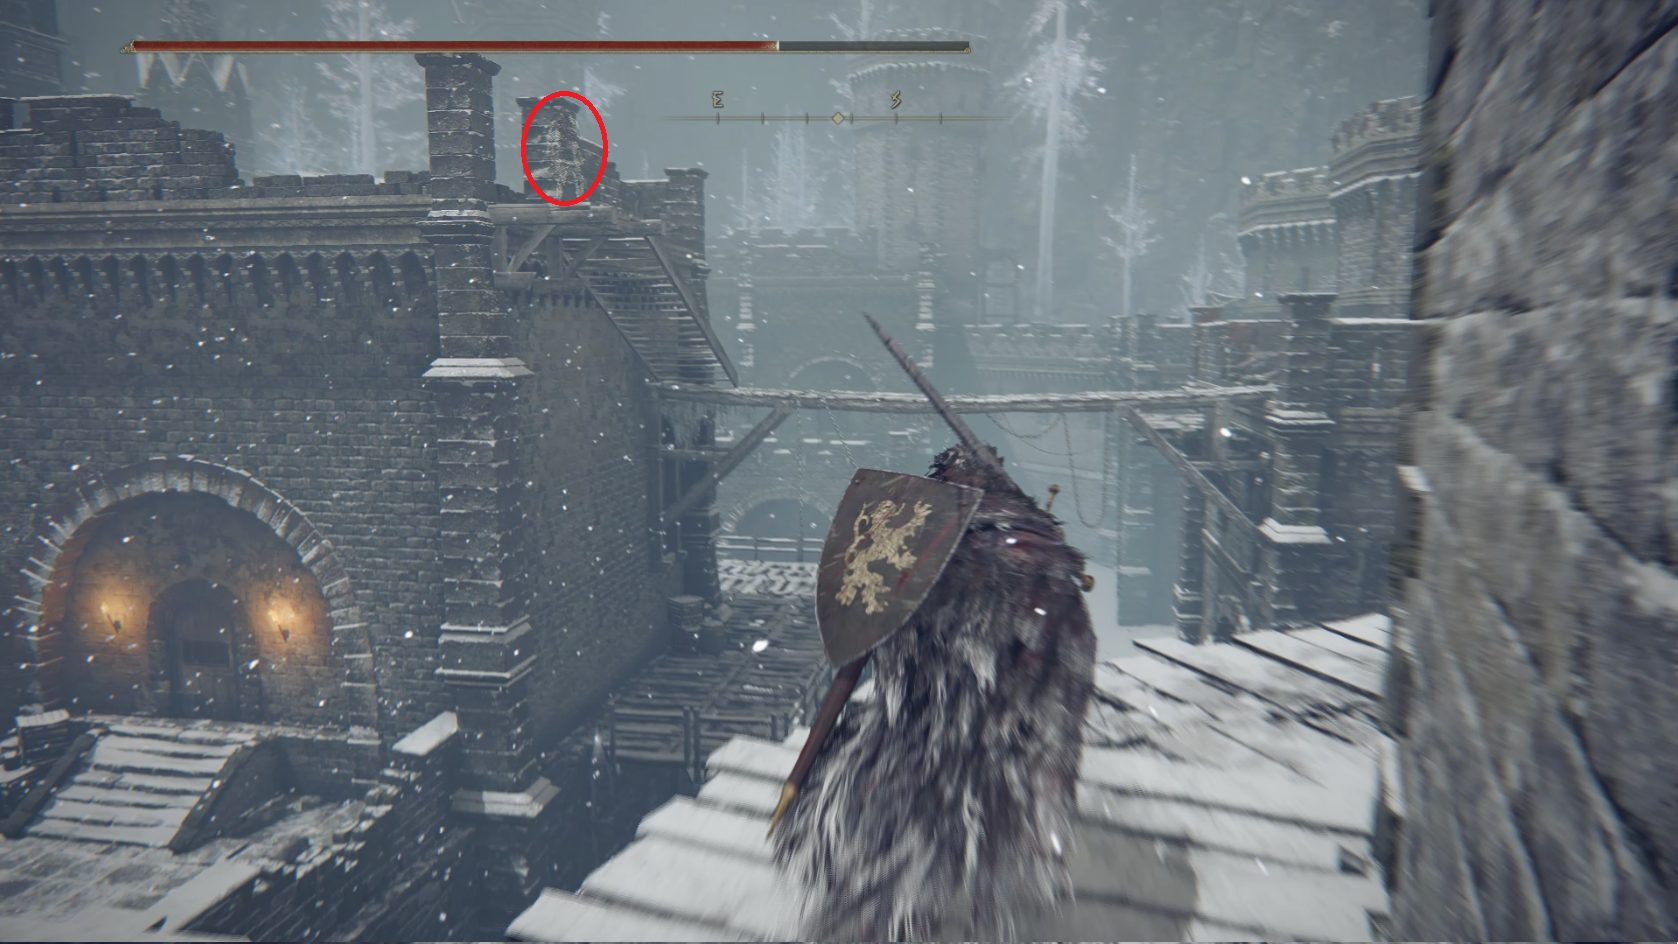
There’s another ranged enemy shooting at you from the north, so keep moving until you’re behind cover and continue southwest on the rampart. You’ll come to a wooden walkway — follow it around the tower to a ladder, then take the ladder down. Ahead is a very powerful spectral knight — fortunately, because he’s dual-wielding, he’s more easily staggered than his shield-bearing cousins. After defeating him (or deciding to run past him) go northwest on the rampart and then turn right to face northeast in the next area — the Cerulean Amber Medallion +1 is on the wooden platform that hangs over the courtyard.
If you decided to run past the knight, ideally you’ll now go back the way you came and up the ladder — otherwise, you can jump down into the courtyard below and then teleport back to the Church of the Eclipse site of grace. Either way, you’ll need to make your way back towards where you killed the first crossbowman after climbing the ladder. Go up the stairs here and then leap through the broken crenelation onto the roof to the northwest.
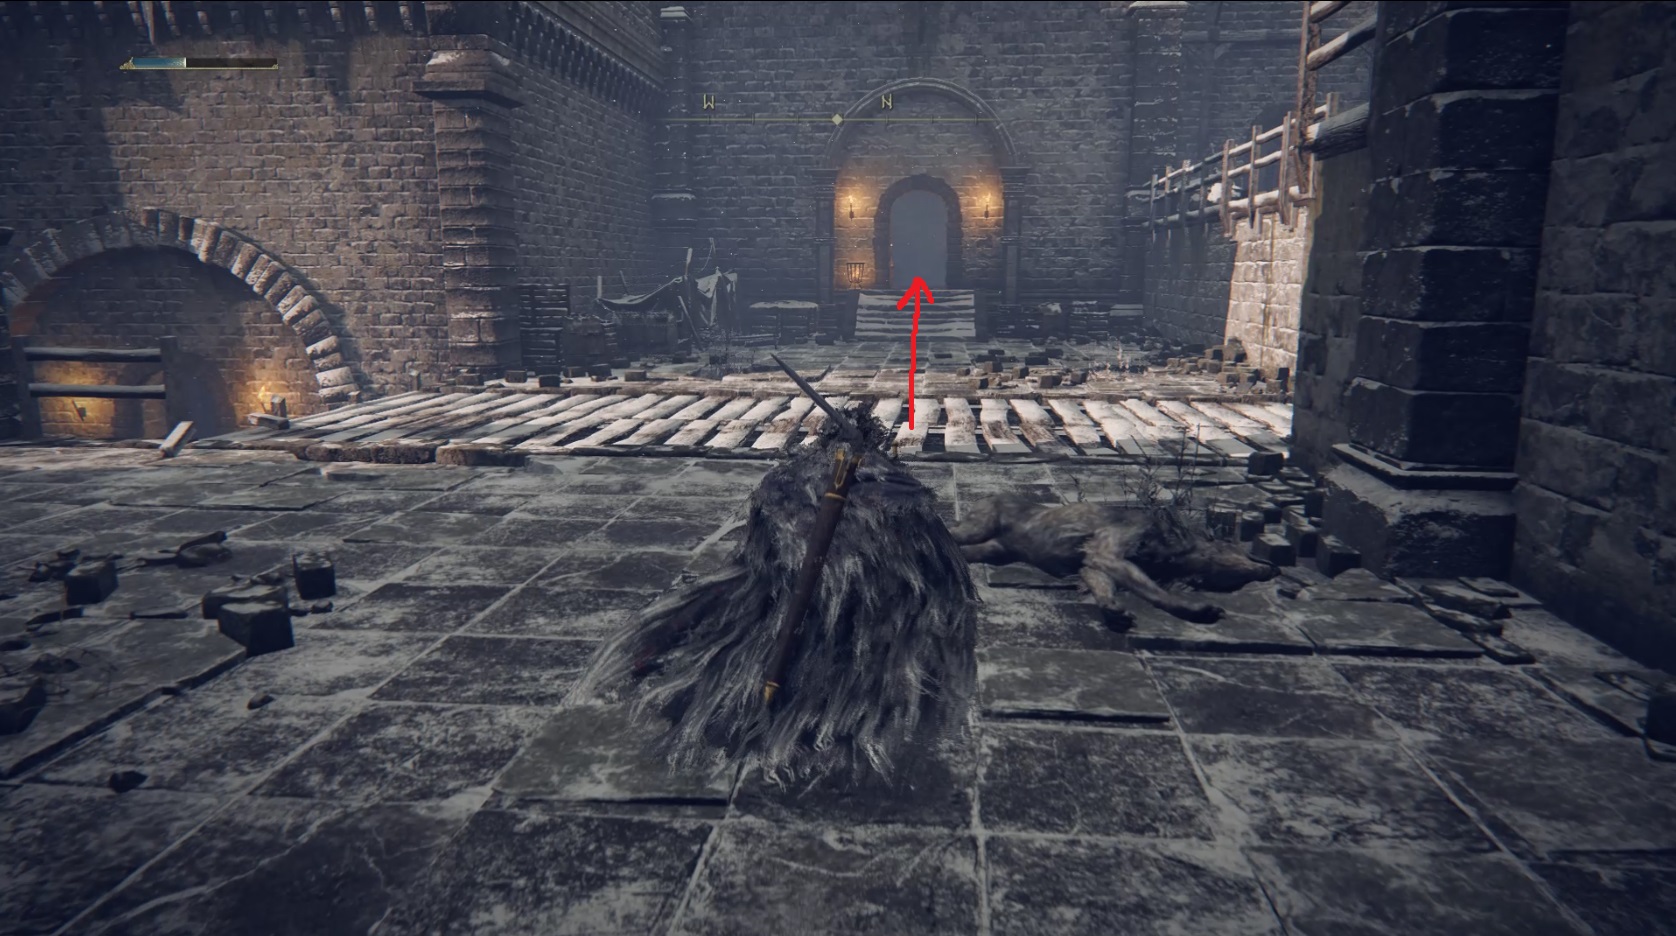
Take the nearby ladder down into the building, and kill the many rats you find down below. Then loot the corpse in the corner for x3 Smithing Stone [7], and head out through the doorway. Turn right and head east, and you’ll soon see a corpse on your right with a Rune Arc. Once you’ve snagged it, teleport back to the Church of the Eclipse site of grace. Go through the church, and once again go out the doorway, turn right to head south, and go back towards the ladder. We aren’t going to climb it this time, however.
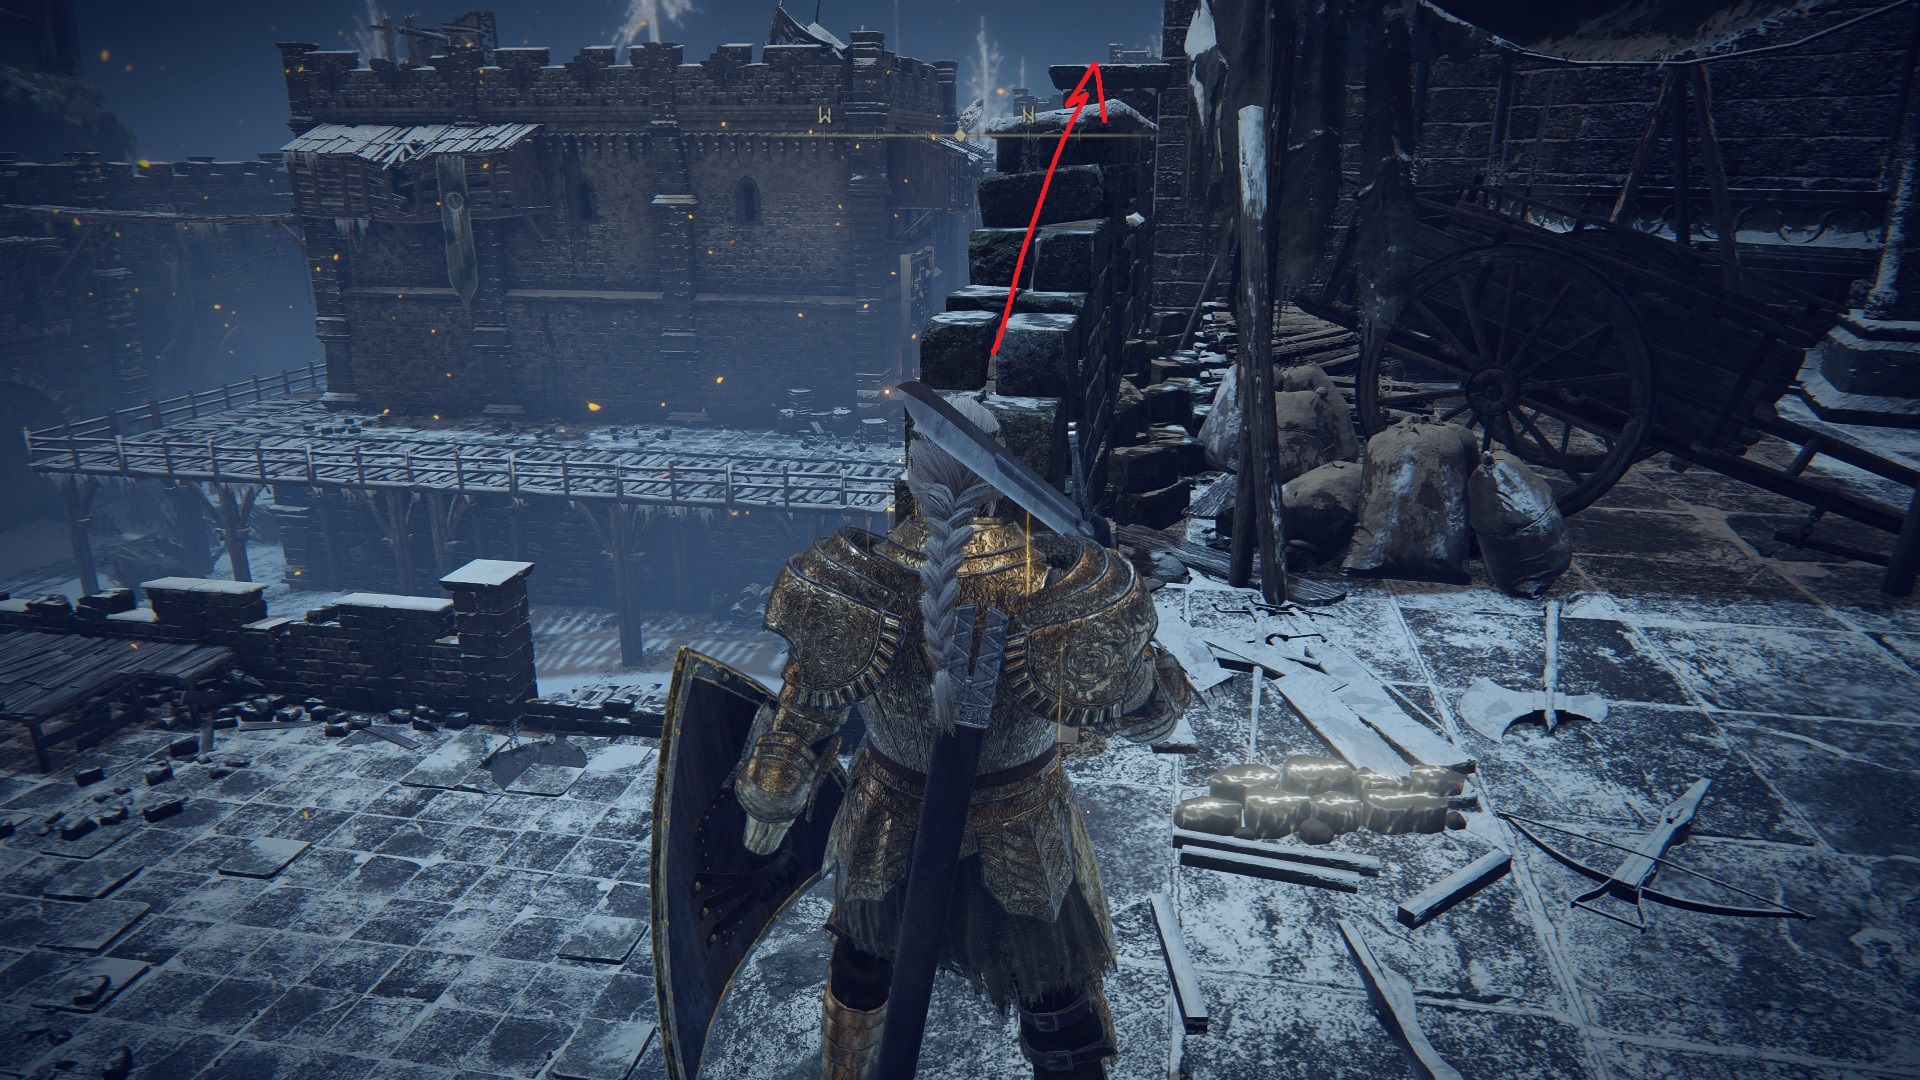
Instead, go to the low end of the broken wall ahead and jump up onto it, then continue forward (north). Hug the wall to your right and you’ll be able to drop down onto a ledge — keep going forward and you’ll find a corpse with a Somber Smithing Stone [8]. Once you grab it, you can again teleport back to the Church of the Eclipse site of grace.
The path to the smithing stoneFrom another angle
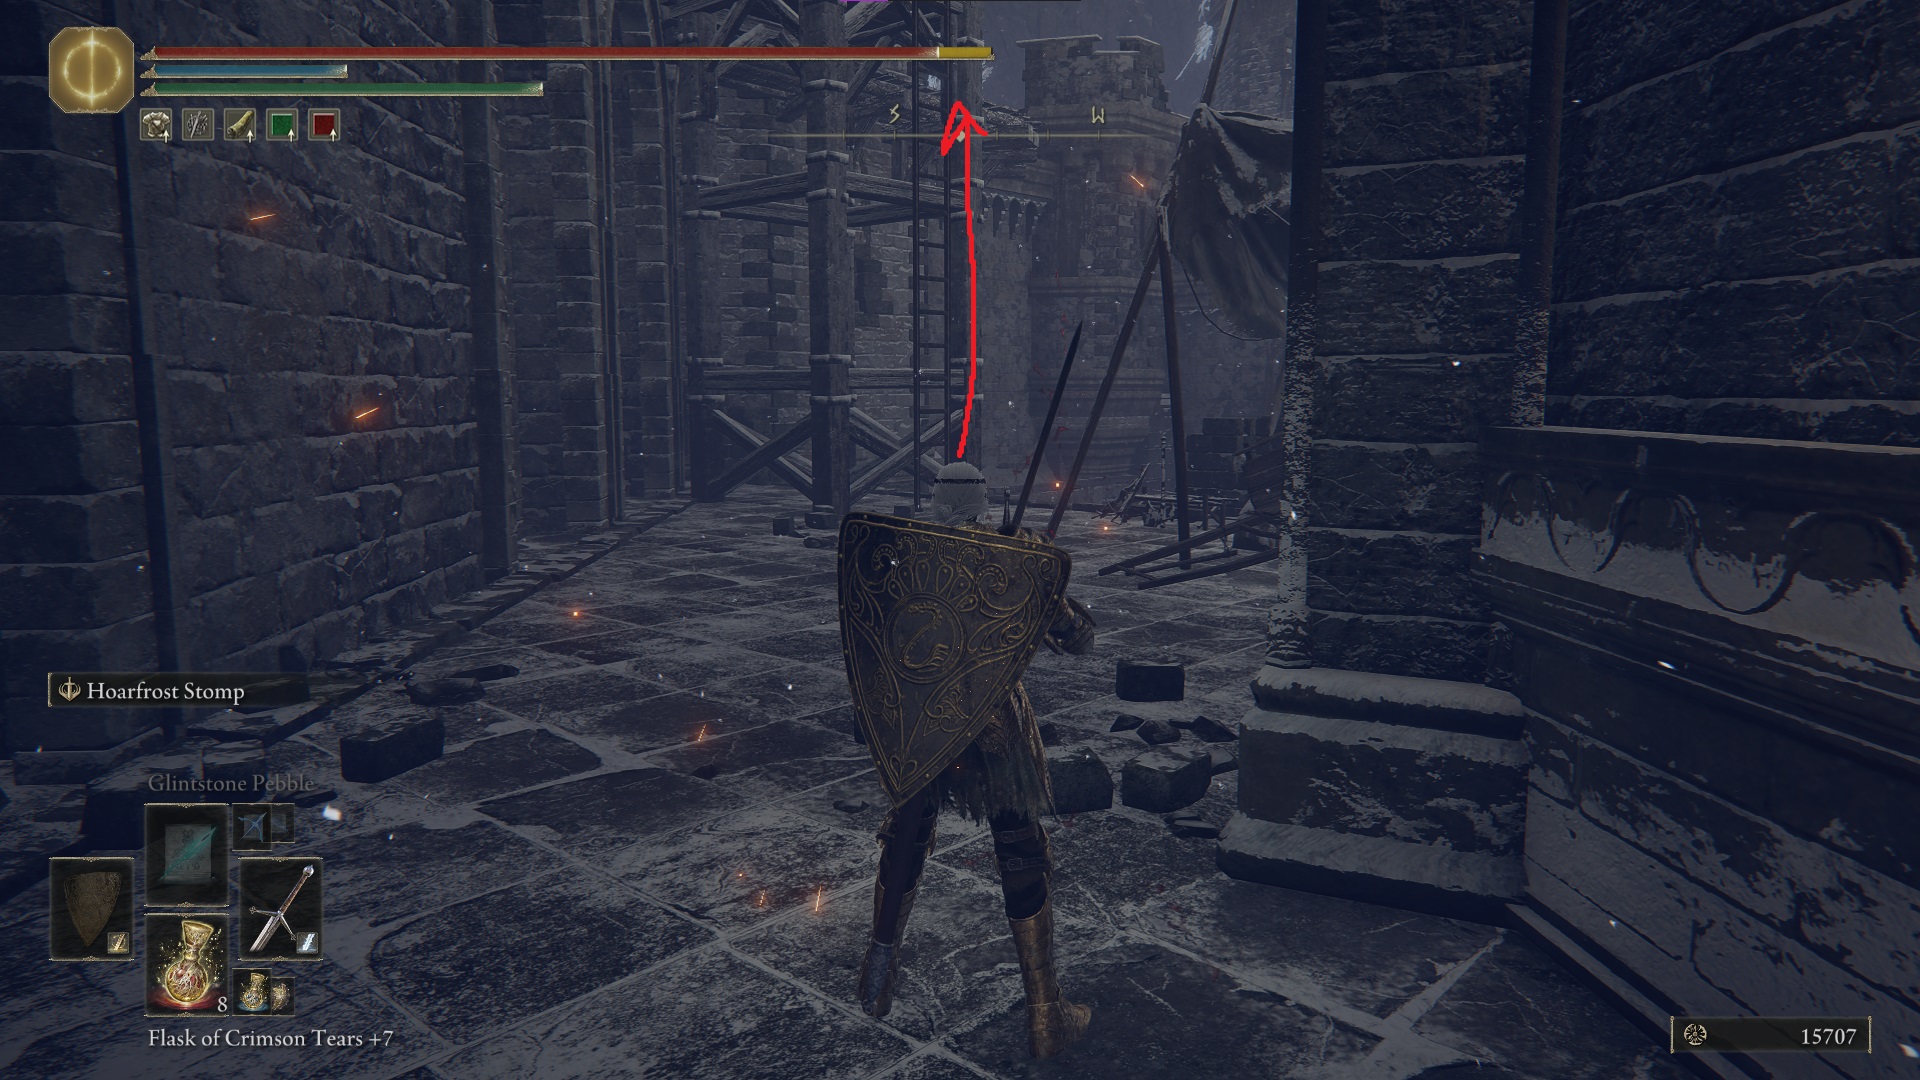
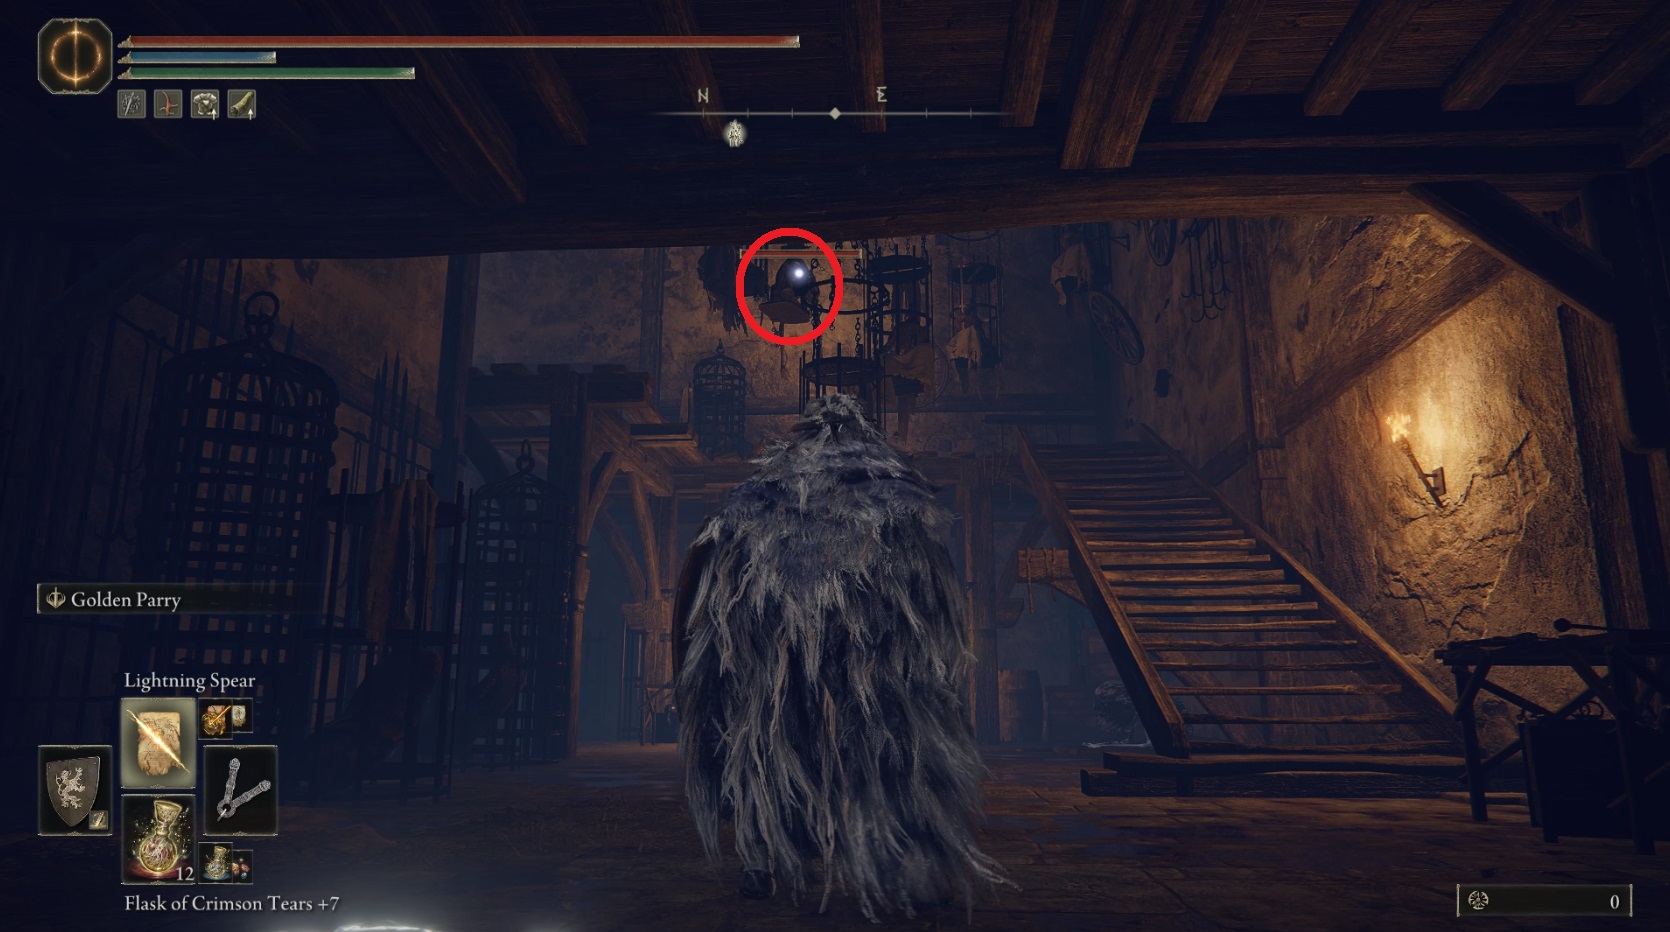
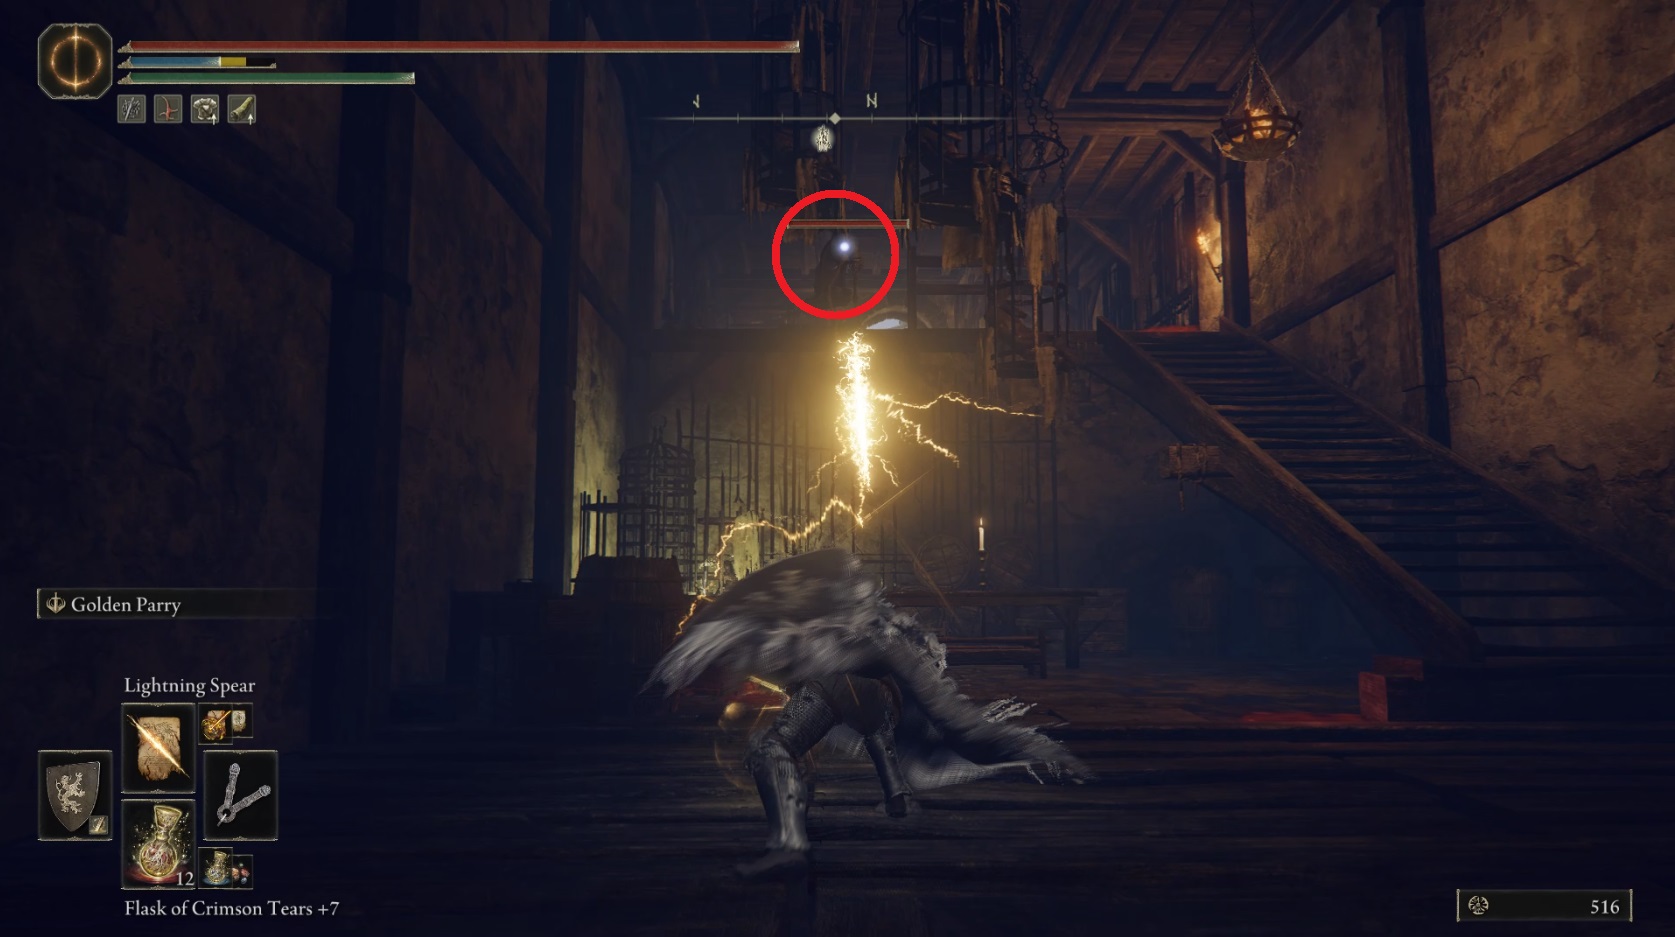
From the site of grace, go through the church again and leave through the doorway that leads outside. Continue east-northeast through the doorway up a small set of stairs. This next room has some strange enemies that scream and summon powerful knights, so equip something ranged and use target lock on the stuff hanging from the ceiling ahead to find the first screaming summoner (1). Go up the stairs to find a Smithing Stone [6] — there are enemies under the stairs but if you don’t go near them they’ll stay up — and then turn left to face the north-northwest and again use target-lock to find the second hanging summoner (2) and kill it from range as well. If you don’t have ranged attacks, you can just run through this area rather than trying to fight the summoned knights.
12
Go up the next set of stairs and then out through the doorway, and you’ll find yourself back outside. On the left is an elevator — you can send it down to unlock the elevator shortcut we noted at the start of the guide. This is useful because you can leave the church heading north and jump off the bridge and down to the elevator. Because you’ll probably have to try a few times vs this boss, here’s how to quickly get back to the boss fight:
From the site of grace, head into the hallway and turn right to go outsideSneak past the knight and go up onto the wooden platform……then jump over the crenelation to the ground belowGo up the stairs and ride the elevator upDon’t forget to send the elevator back down before you go fight the boss!
When you’re ready, you can head through the fog gate and challenge Commander Niall! It’s a tough fight, but we’ve got some solid strategies lined up for you.
After defeating Commander Niall, you’ll be able to rest at the Castle Sol Rooftop site of grace and spend your hard-earned runes. From the site of grace, head north-northwest through the doorway, over the bridge, and up the stairs. Turn right to go up another small set of stairs and then take the elevator up. At the top, head up the next set of stairs, and at the top continue straight (north-northwest) to find a spirit you can talk to, and the Haligtree Secret Medallion (Left) — once you’ve grabbed it, you’re all done with Castle Sol!
Unabashed FromSoftware fanboy still learning to take his time with games (and everything else, really). The time he doesn't spend on games is spent on music, books, or occasionally going outside.


