This dungeon is found in the Capital Outskirts on the Altus Plateau, and it’s got some familiar features: another hero’s grave, another set of obnoxious chariots. Fortunately, you can get your revenge on them near the end of the level, and there’s plenty of loot to make up for all the trouble.
Before you start this dungeon, it’s important to accept that you’ll probably die a few times here — whether from falls, chariots, or skeletons in the place you want to hide from the chariots. You can lower your chance of death by increasing your max HP as much as possible — if you have over 1450 HP (and/or high enough physical defense), you can survive getting hit by the chariot. It’s also a good idea to equip the Prince of Death’s Pustule, and any other ways you have to increase Vitality, to help avoid dying to the basilisks.
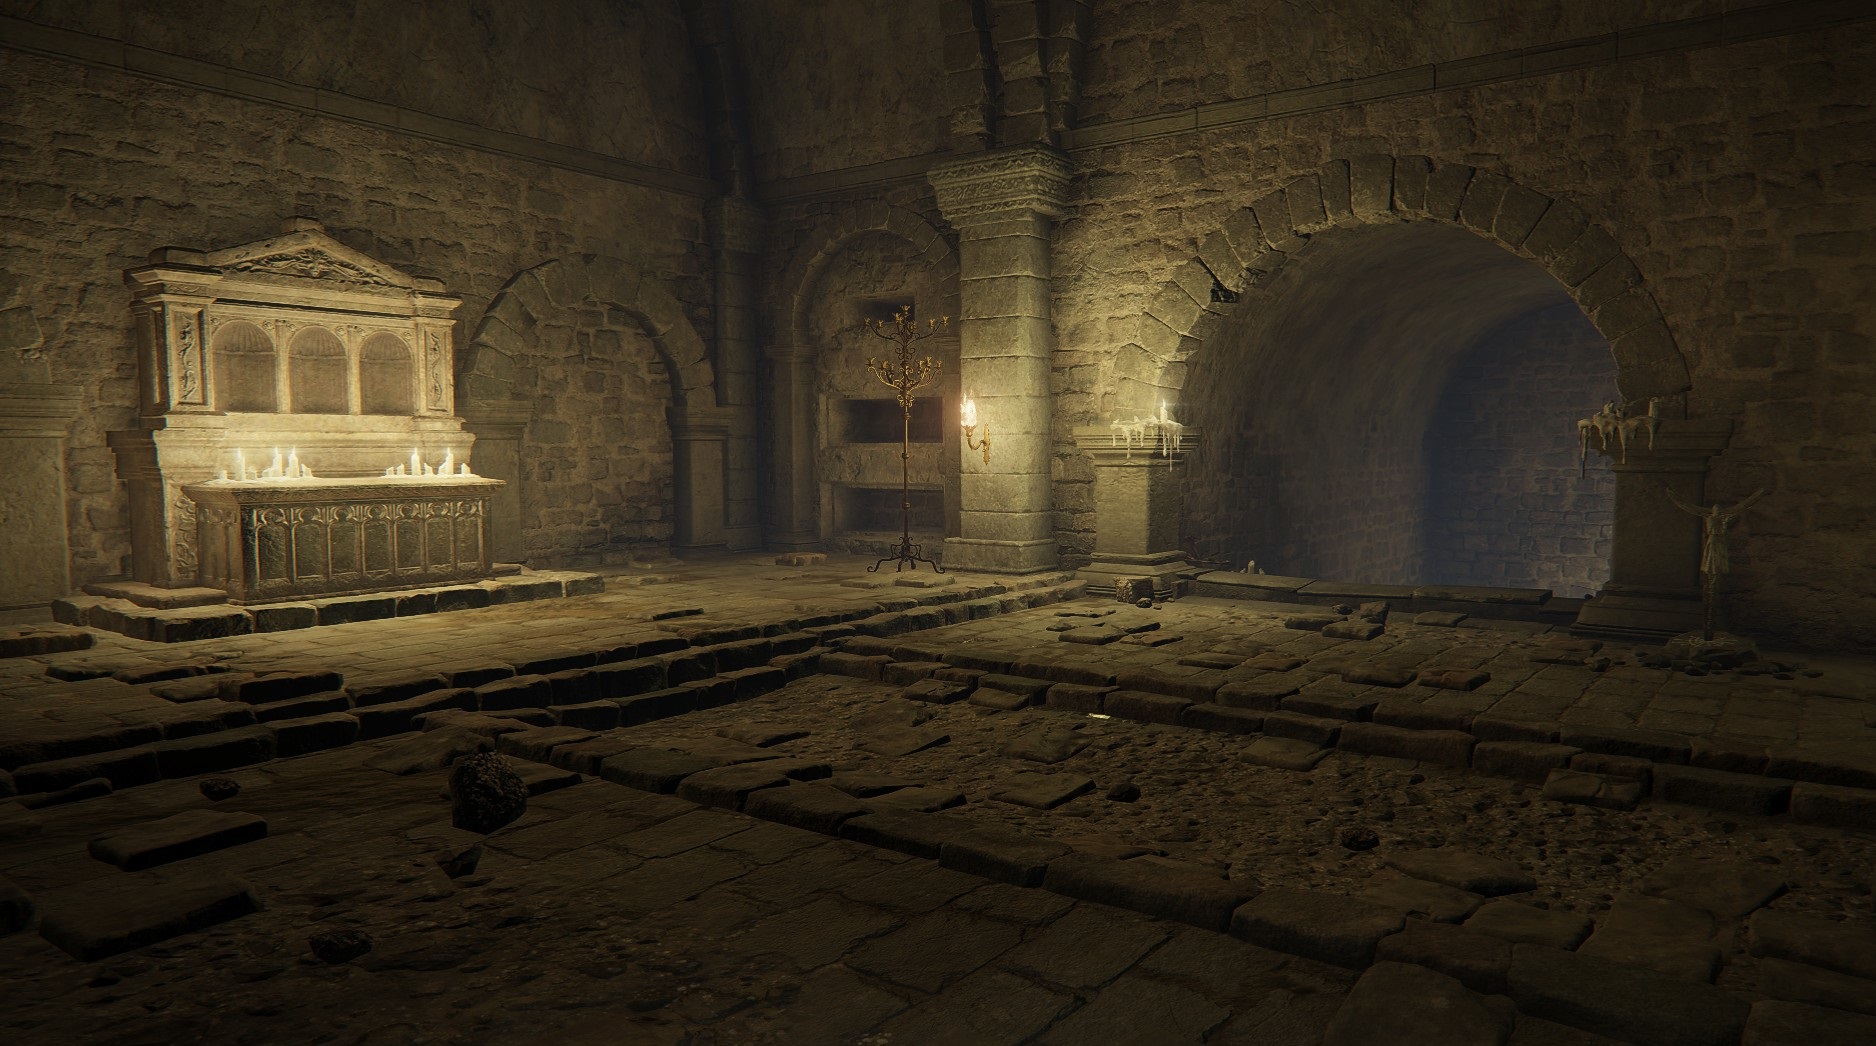
You’ll find the site of grace after riding the elevator down into the dungeon. Before heading deeper, you have the option of opening the stonesword imp fog gate on the south side of the room. Inside is the Golden Epitaph, along with two basilisks who want nothing more than to Death Blight you (pulling them out into the larger room is the safest way to deal with them). Then head through the doorway on the western wall to continue into the dungeon.
You’ll go down some stairs, and then enter a fairly open area. You’re going to have to avoid a chariot that spawns at the bottom of the nearby ramp. To do so, you’ll need to sprint down the ramp, then turn right into a safe spot halfway down (there are, of course, two skeletons who will assemble when you enter the safe spot). The safe spot is just after the third lantern, so count ’em as you go down the ramp.
Chariot spawn is circled, and note the three lanterns you’ll pass before turning right
Once you’re in the safe spot, kill both skeletons (and make sure they’re dead). Then wait for the chariot to pass you going uphill — once it passes, run to the bottom of the ramp, and stand in the middle of the small bridge between ramps:
Here, wait for the second chariot that’s to your west to come down and turn around. As it heads back up the ramp, you can run and grab the x5 Fan Daggers from the corpse to the northwest, draped over the edge. Then drop down to the ground below the corpse. On the eastern side of the room is a Grave Glovewort [6], but three basilisks will come out of the ground when you get close to it — it’s best to actually wait until you clear the chariots (which we’ll do later) before grabbing this item.
Instead, go west towards the stairs, where only one basilisk will pop out of the ground. Continue up the stairs, and immediately turn left in the next room to find another basilisk hiding there. Kill it and then deal with the one guarding the Ghost Glovewort [5] on the west side of the room. Then leave this room via the doorway on the northern wall and enter the hallway there — yet another basilisk waits for you in an alcove to the right. Make sure you don’t go further north while fighting this one unless you want to become roadkill.
Next, continue carefully north through the hallway, but don’t leave the hallway yet — it ends in the middle of another ramp, this one with two chariots on it. Wait for the closer chariot to pass you heading up the ramp, then sprint out of the tunnel and go north down the right side of the ramp. Keep an eye on the left side of the ramp — the chariot there should pass you, turn around, and head back up the ramp. When it does, switch to the left side of the ramp and keep running north. Then, when the right-hand chariot passes you, turns around, and heads back up the ramp, switch back to the right side of the ramp. You should then be able to reach the safe spot in between the pillars.
We realize the written directions might be confusing for visual learners, so here it is in GIF form.
Note that there are items up the ramp in this room, but as mentioned previously, we’ll clear all the chariots eventually — after doing so is when it’s safe to get the items we’re skipping for now.
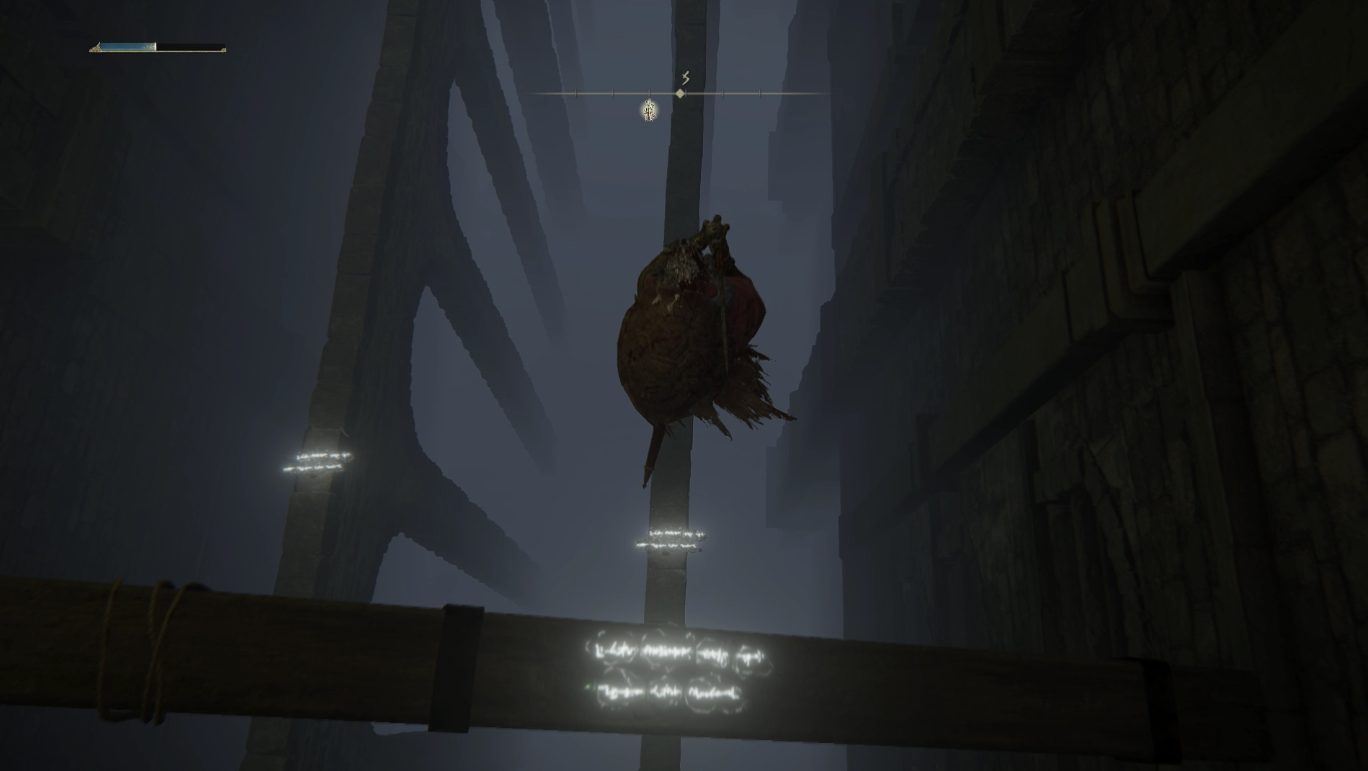
You’ll now be in between two chariot paths. You should see a corpse hanging off the edge just to the north with a Golden Rune [7]. Where the corpse lies is exactly where you want to drop off the ledge to the west. Wait until the chariot is heading up the ramp, then run to the corpse, grab the item, and drop down onto the rafters to the west. Then drop down once more to the west and get the x2 Holy Grease from the corpse. Walk back up the beam a bit until you’re positioned above the beam below, then drop once more, this time to the north. Continue north on this beam until you reach the one perpendicular that runs east-west and leads to another area.
Drop onto the lower beam and continue east off of the beam. A basilisk will be in the middle of the room here with its back to you, but when you attack it two more will come rushing out of the next room. Once you kill all three, head east through the left-hand doorway and turn left to kill the basilisk there. Then go south into the next room, where you’ll find the Vulgar Militia Ashes and another basilisk will come out of the ground in front of you.
Now go back the way you came, and then all the way west out onto the wooden beam. Look down and drop south onto the stone beam that runs perpendicular to the beam you’re on.
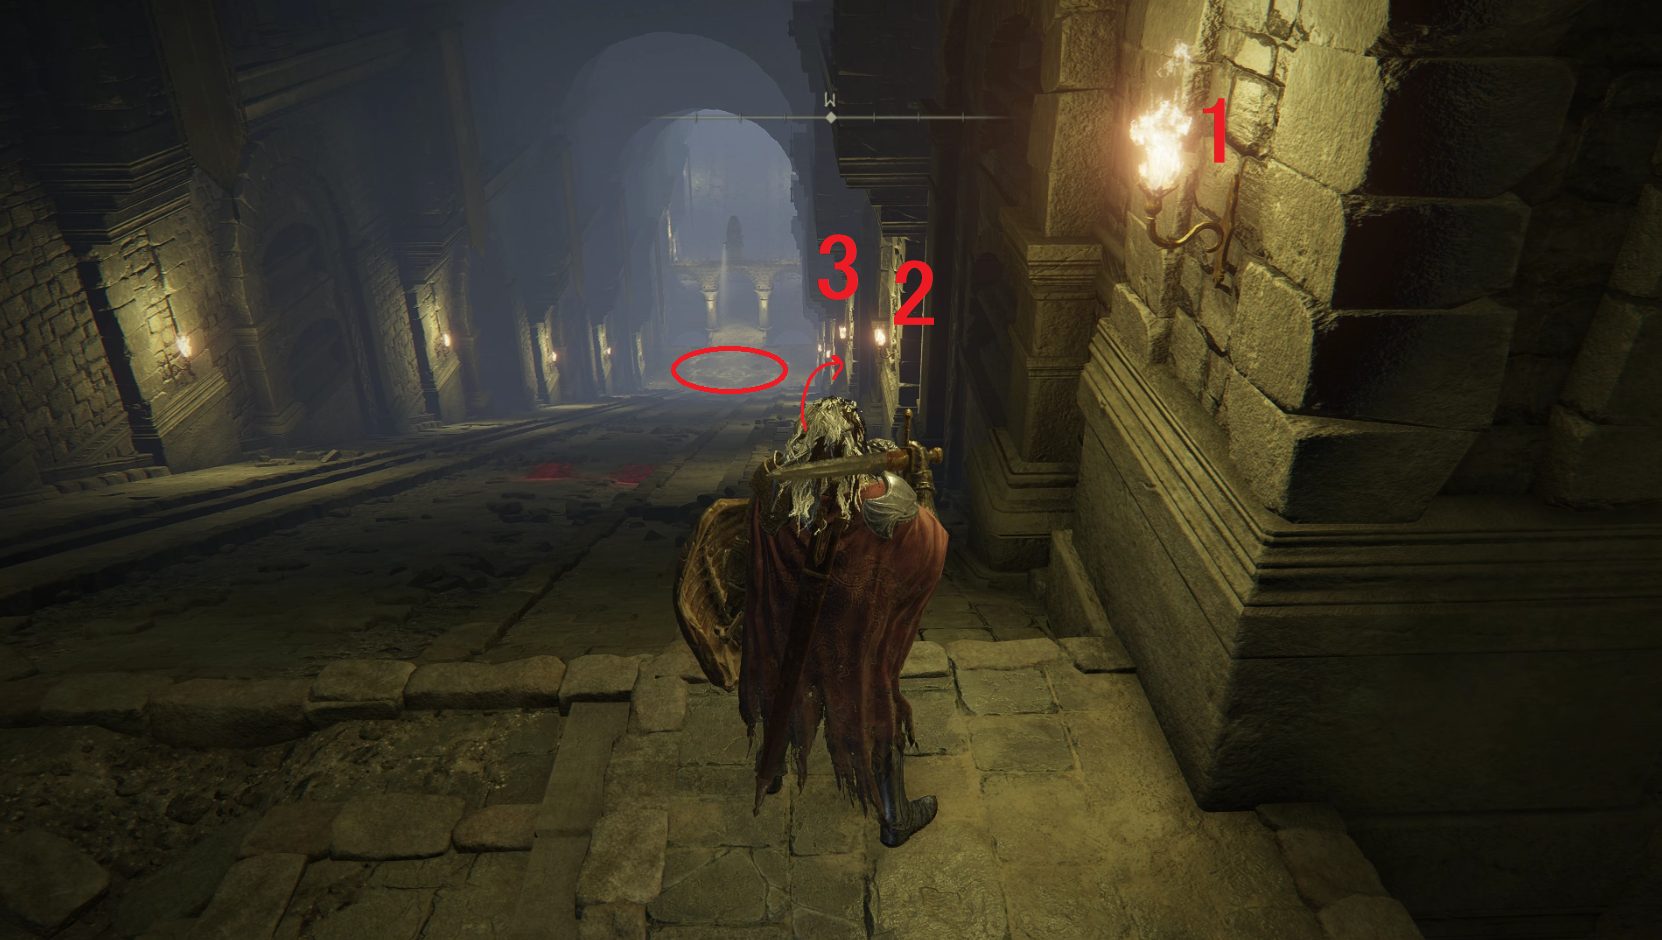
Continue south — you’ll see an area with a skeleton in front of an archway, but he’s pretty sick of doing his job, and will happily ignore you. Continue south through the arch and go up the ladder. You’ll find another tunnel that leads to the middle of a ramp. Again, go to the end of the tunnel but don’t exit it, and wait for the chariot to pass you going up the ramp. Instead of running down the ramp, run horizontally across it and into the alcove on the other side of the ramp. There’s a skeleton here you’ll have to kill — try to keep your back to the northern wall and don’t let the chariot hit you.
Once the skeleton is dead, wait for the chariot to pass you once more going up the ramp, then sprint down the ramp. You’ll pass three torches (including the one right in front of your little hiding spot), then duck into the alcove on the left. Hide there and wait for the chariot to head back up the ramp past you, then sprint down the ramp again and turn left into a hallway where you’ll face two skeletons. Turn them back into crypt litter, note the stairs down to the east (we’ll come back here later), and then turn left where the skeletons were to go north up the stairs.
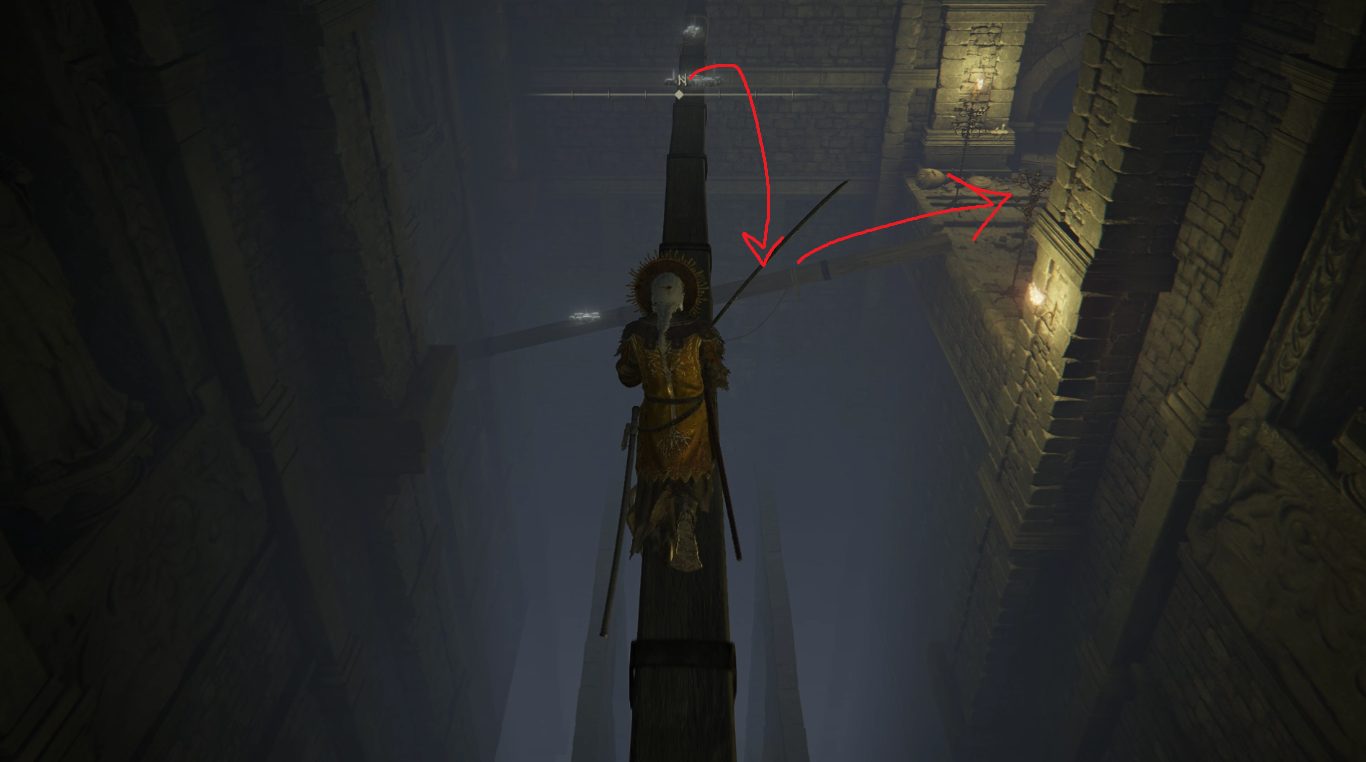
You’ll find an elevator — activate it and then stand on the southern edge of the elevator. When it reaches the top, a flame trap will be shooting flame at the elevator. Wait for it to end and then wait on one side of the doorway. Once the flames start and stop again, sprint down the hallway and past the flame trap. Once safely past it, look down the hallway to the north — this is the way you’ll head in a moment. When you’re ready, hit the flame trap pillar with your weapon, then sprint down the northern hallway and turn left at the end of it and stand on the stairs (the flame trap will begin firing down this hallway soon).
Hit the flame pillar to send it upwards
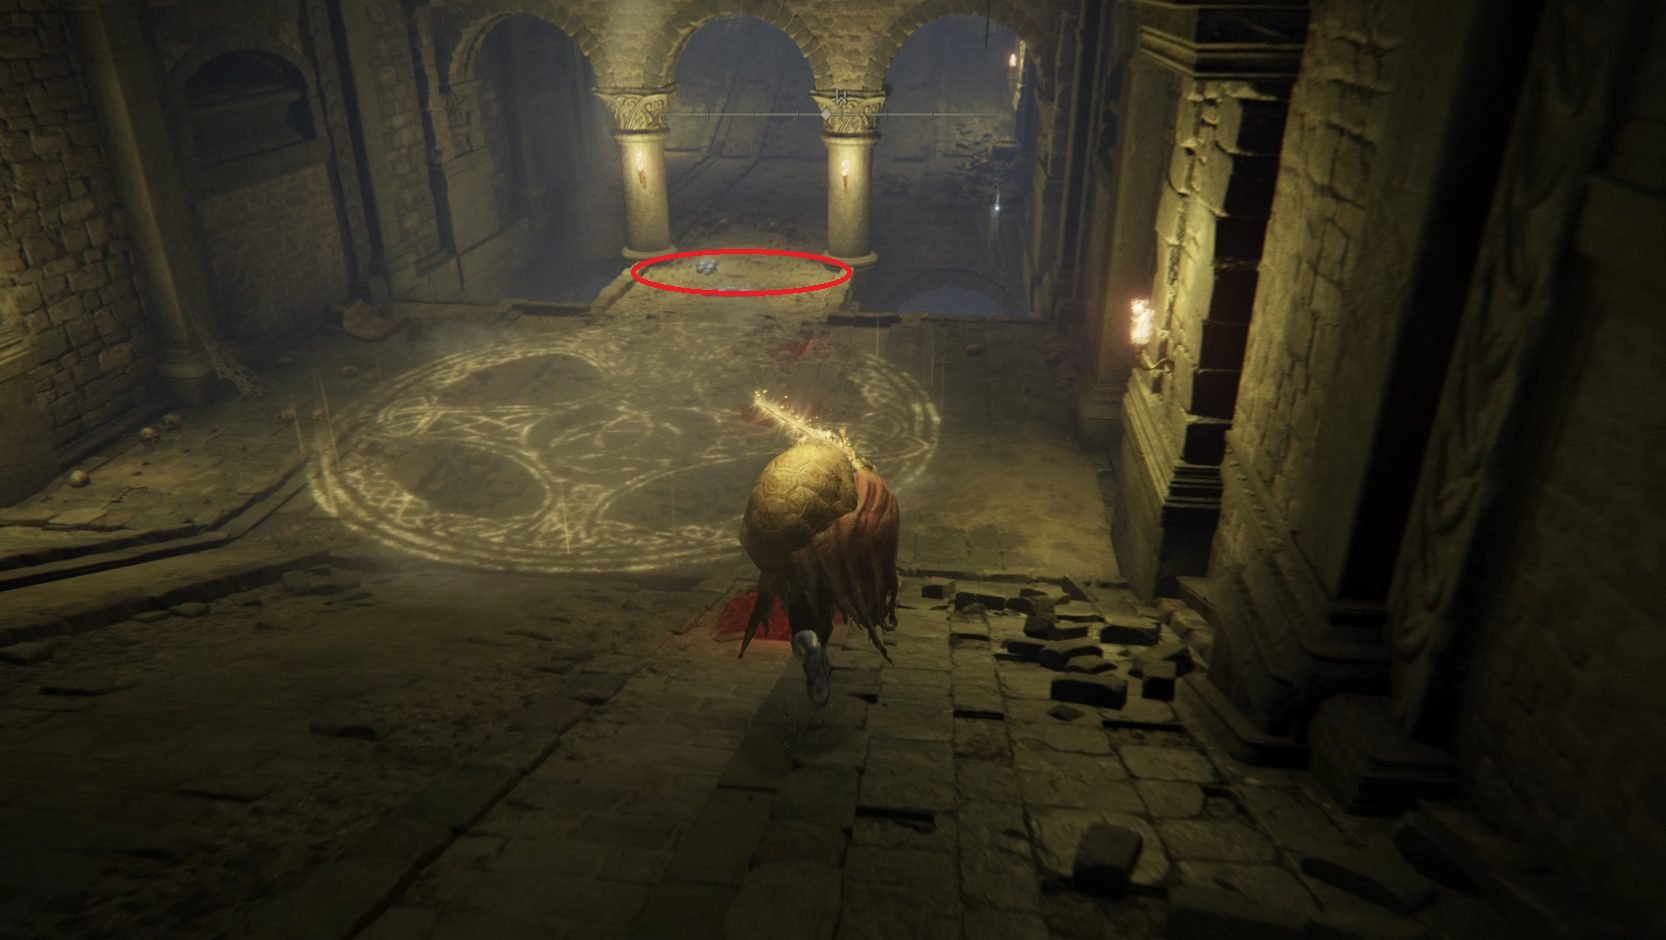
Grab the x3 Great Dragonfly Head and Grave Glovewort [6], then drop down into the little alcove below you. At this point, another chariot should spawn on the ramp and destroy the other chariots here, and you should receive the Tree Sentinel Set as well as the Ash of War: Holy Ground. At this point, you can run up the ramp you’re next to (heading south) to find a Stonesword Key in the middle of the ramp. In the short tunnel beyond is a Ghost Glovewort [6], but watch out for the skeleton that will assemble behind you as you pick your flower.
Head north down the ramp, and you’ll reach the spot where you first dropped down onto the beams. Look to the north up the next ramp — the boss doors are there. We skipped a few things while killing the chariots, however, so let’s grab them first. Drop down from the corpse onto the beam, then follow the same path you took to the fire trap (dropping down to the lowest, stone beam), past the sleepy skeleton, up the ladder, and through the tunnel to the next chariot ramp. Run north up the ramp and turn right, where you’ll see a hallway protected by a flame trap. Wait for it to stop, run around it, and grab the Grave Glovewort [6]. Then hit the flame pillar trap to raise it, and head back onto the ramp and down it (to the south).
Continue east into the tunnel that had the two skeletons, and go further east down the stairs we skipped earlier to find an ogre guarding the Crucible Feather Talisman. You can fight this guy or just run away — go west up the stairs and then take your first right to find the elevator you rode earlier. Pull the lever if it’s missing, then ride it up again. The trap should be shooting down the hallway to the north, but you can hit it to clear the path forward, then continue north through the tunnel, go left down the stairs, drop down and head north up the ramp to go through the boss doors.
You’ll see a skeleton down the stairs, but on either side of the first staircase, skeleton archers hide. Take them out first, then deal with the third skeleton who was trying to be bony bait. While you can also just run past all of these guys and go through the golden fog gate, you’ll probably want to go back to the start of the dungeon (the summoning pool is in the room with the site of grace) and summon help for this boss fight, since it’s two(!) Crucible Knights.
Unabashed FromSoftware fanboy still learning to take his time with games (and everything else, really). The time he doesn't spend on games is spent on music, books, or occasionally going outside.
After the first lot of basilisks, just before you slalom between the two chariots. If you use Margitt’s Shackle (or Mohg’s), it triggers the third chariot to spawn & crash into the other two giving you the freedom of the place & the Tree Sentinel Set etc. There was a delay of about 20 seconds & I don’t know if you can trigger it earlier in the dungeon or not.
Side note, the shackles are great for disabling any fire traps without having to put yourself in harms way. Also, the armour set you get is imo the best endgame set due to its high holy resistance, at least that’s what I finished the game wearing.