This underground area is extensive, and offers a more challenging boss fight than most dungeons. Fortunately, the regular enemies here are fairly easy to deal with, and sites of grace are plentiful.
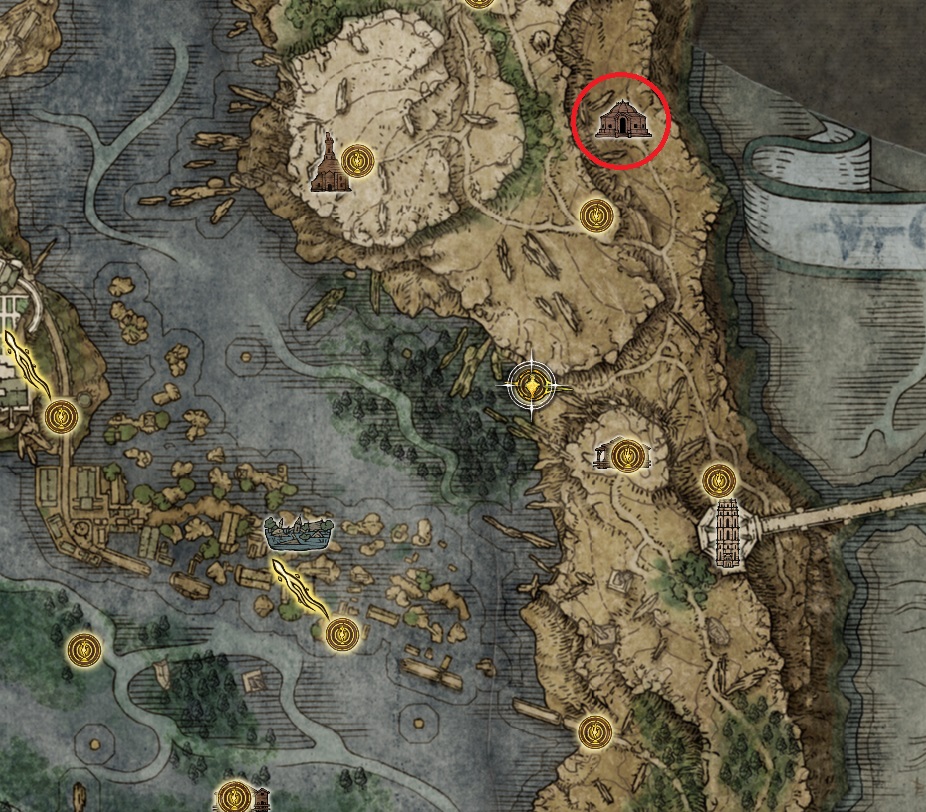
Ainsel River South entrance locationThe entrance as viewed from the south
Step on the elevator and ride it down, then grab the Ainsel River Well Depths site of grace on the right at the bottom of the stairs. Head down the ramp and go right, ignoring the ants for now. Grab the Golden Rune [3] from the corpse, and continue into the small tunnel. At the end by the waterfall, you’ll find some Magic Grease.
Now it’s time to squash some ants. Head back the way you came, and engage the ants. If you have a ranged weapon or spell, you can more easily pull/damage one or two at a time, but simply approaching slowly will cause a couple to come down without aggroing the rest — just back off after the first two begin to move. Staying at mid-range and using leaping attacks is effective as a melee character, and their attacks don’t stagger, so blocking also works — they have a heavy attack as well as a 4-attack combo. Sometimes they will also use a spit attack, which comes pretty quickly and can stagger you.
With the ants dispatched, continue through the tunnel they were guarding and grab the Grace Mimic, then continue forward — careful of the ambush on your right.
There is a dark niche just past the Grace Mimic on the right — an ambitious ant lurks in ambush there
At the fork in the tunnel, turn left, fight the ant there, then continue forward to grab the Smithing Stone [3]. Turn around and head back — an ant will crawl out of the ground, so watch out — this time take the other branch (turning left at the tunnel junction). Multiple ants will ambush you as you enter this next tunnel. The tunnel leads to a nasty lil’ burial pit — grab the x2 Silver Firefly and the Golden Rune [1] from the nearby corpses, then use a charged attack on the ant to the left with its back turned — it’s guarding a Smithing Stone [3].
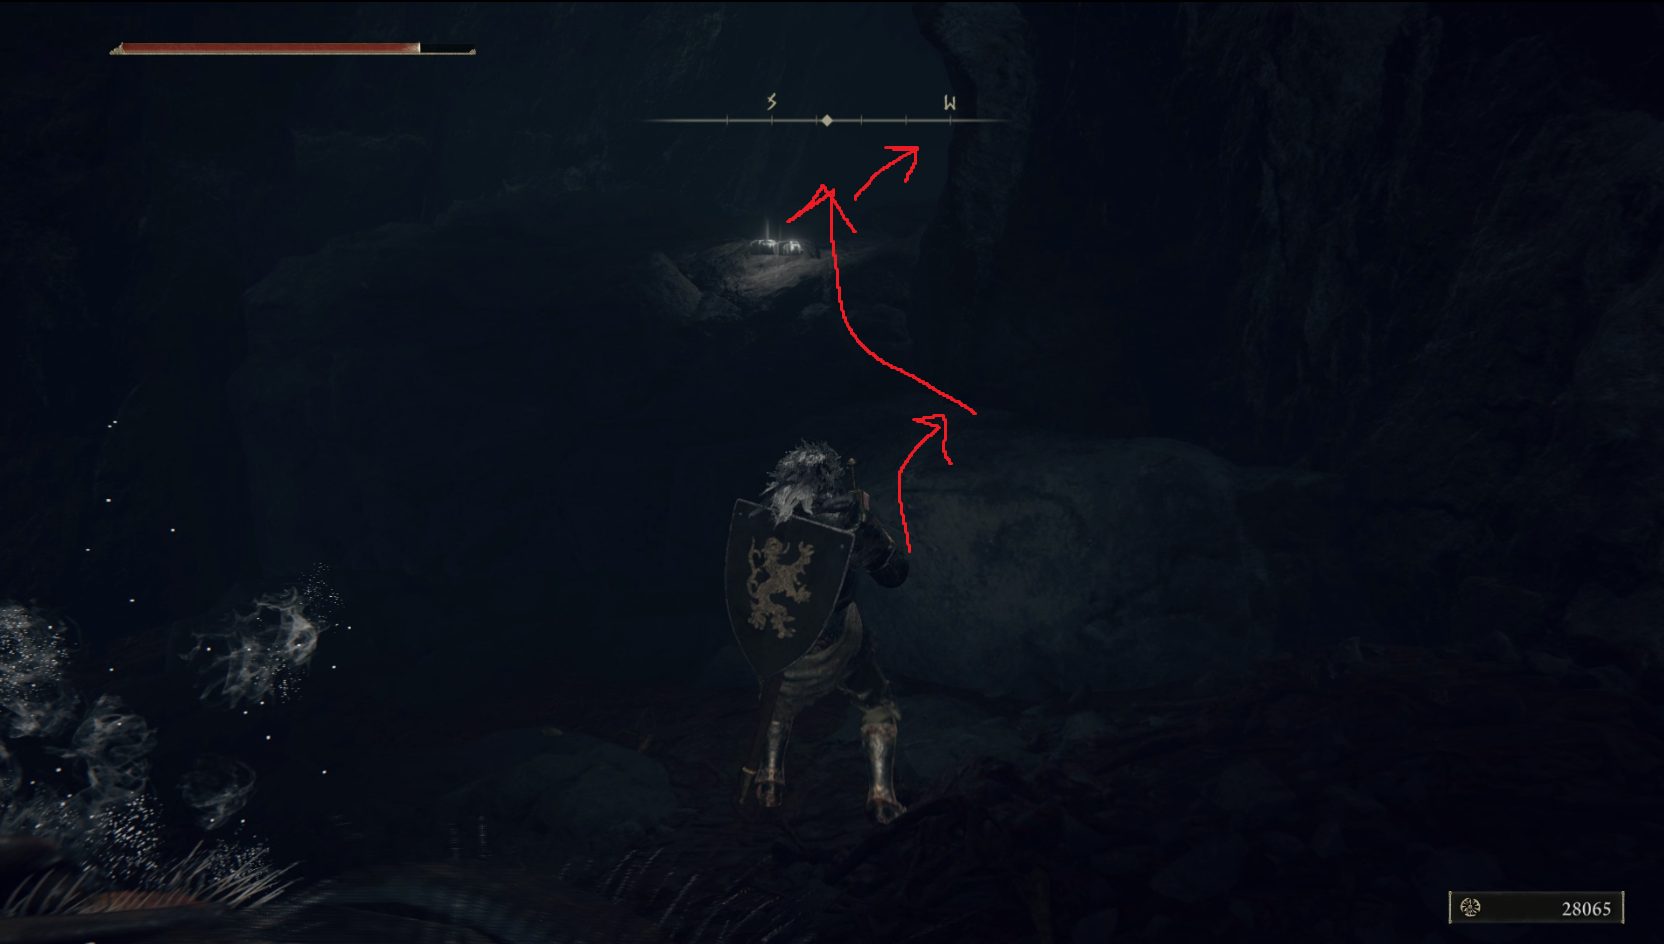
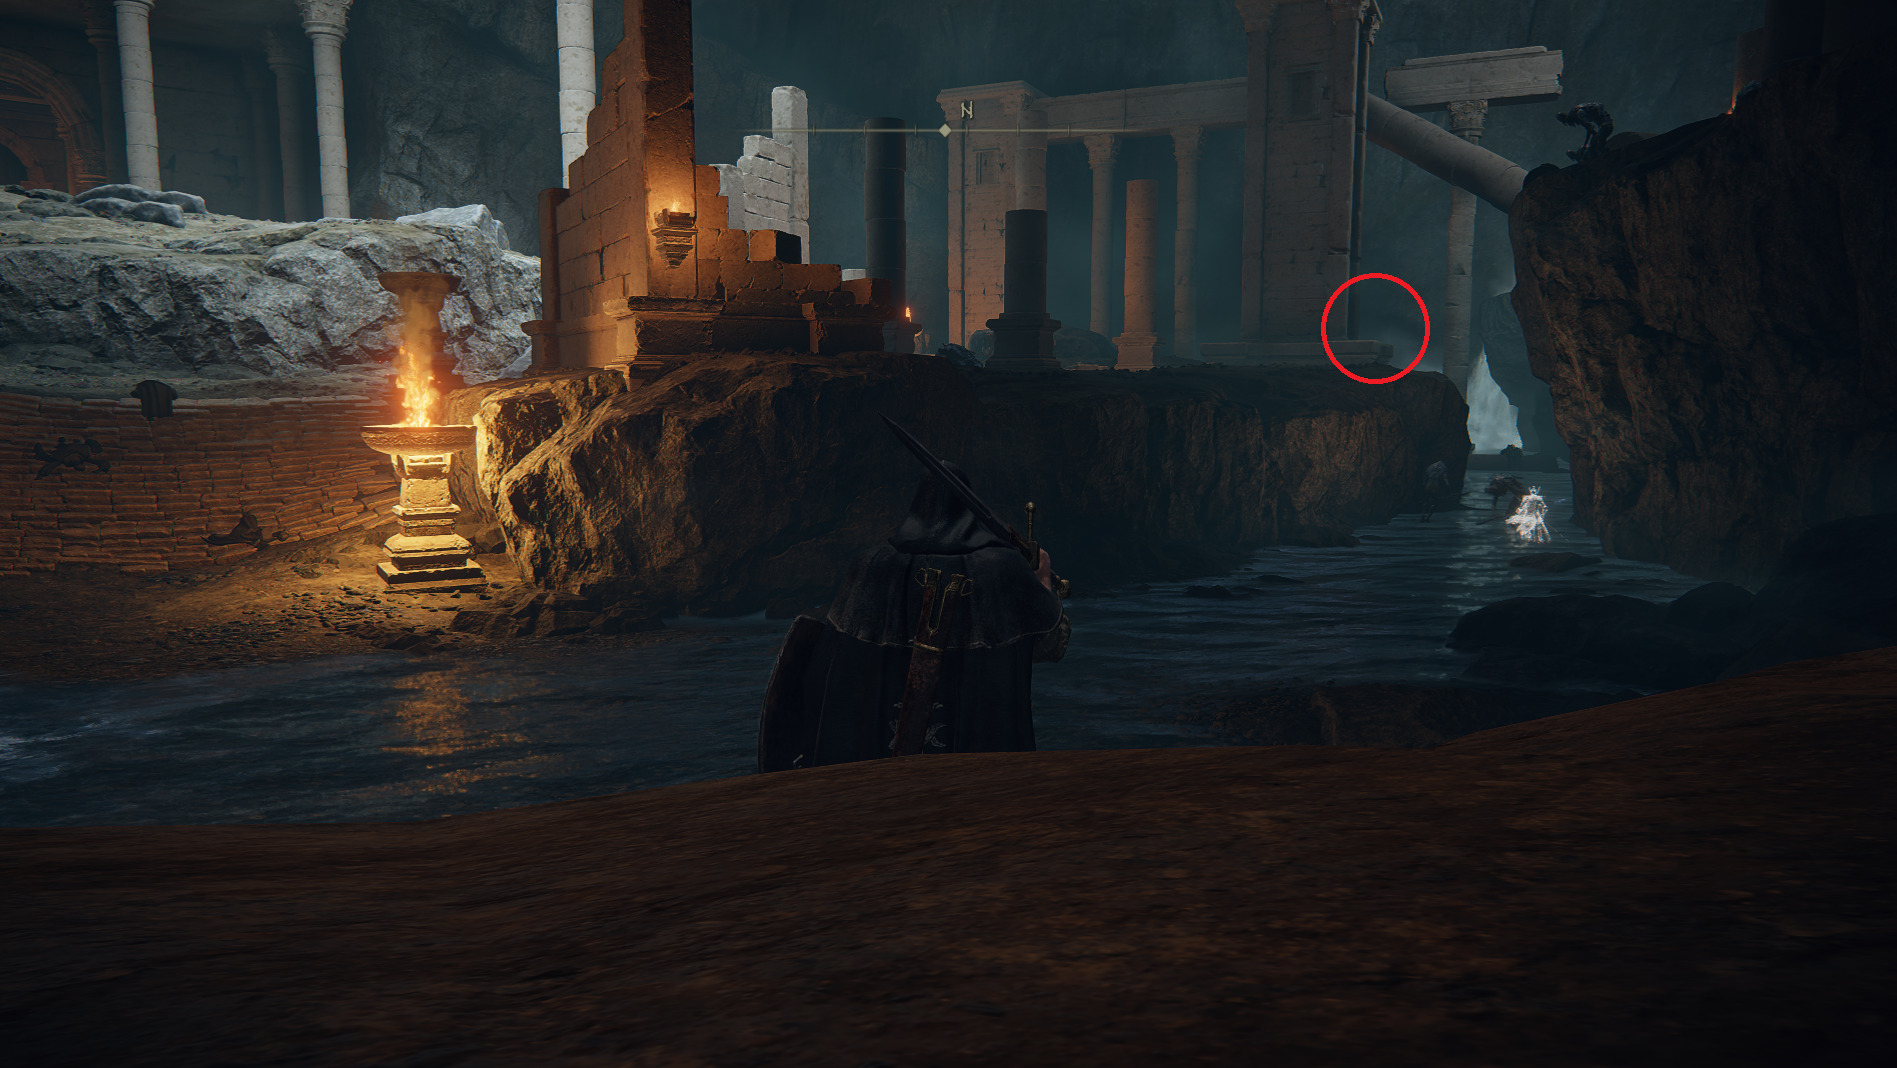
Leave this room via the western tunnel, and you’ll find yourself in a larger, open cavern. Collect the Ghost Glovewort in the water on your left, as well as the Shattershard Arrow [Fletched] in the far corner of the water, and the nearby Smithing Stone [3]. Now go up the stone ramp and through the arch. Ignore all the messages telling you to jump off the sluice gate, and head straight (south) to grab the Ainsel River Sluice Gate site of grace. Unless you’re low on healing, don’t rest here just yet.
We’re going to backtrack now, to the burial pit room with all the corpses. Head back the way you came into the room with the corpse piles, and turn right to head to the southern end of the room. There you can jump up onto the rocks and enter a tunnel.
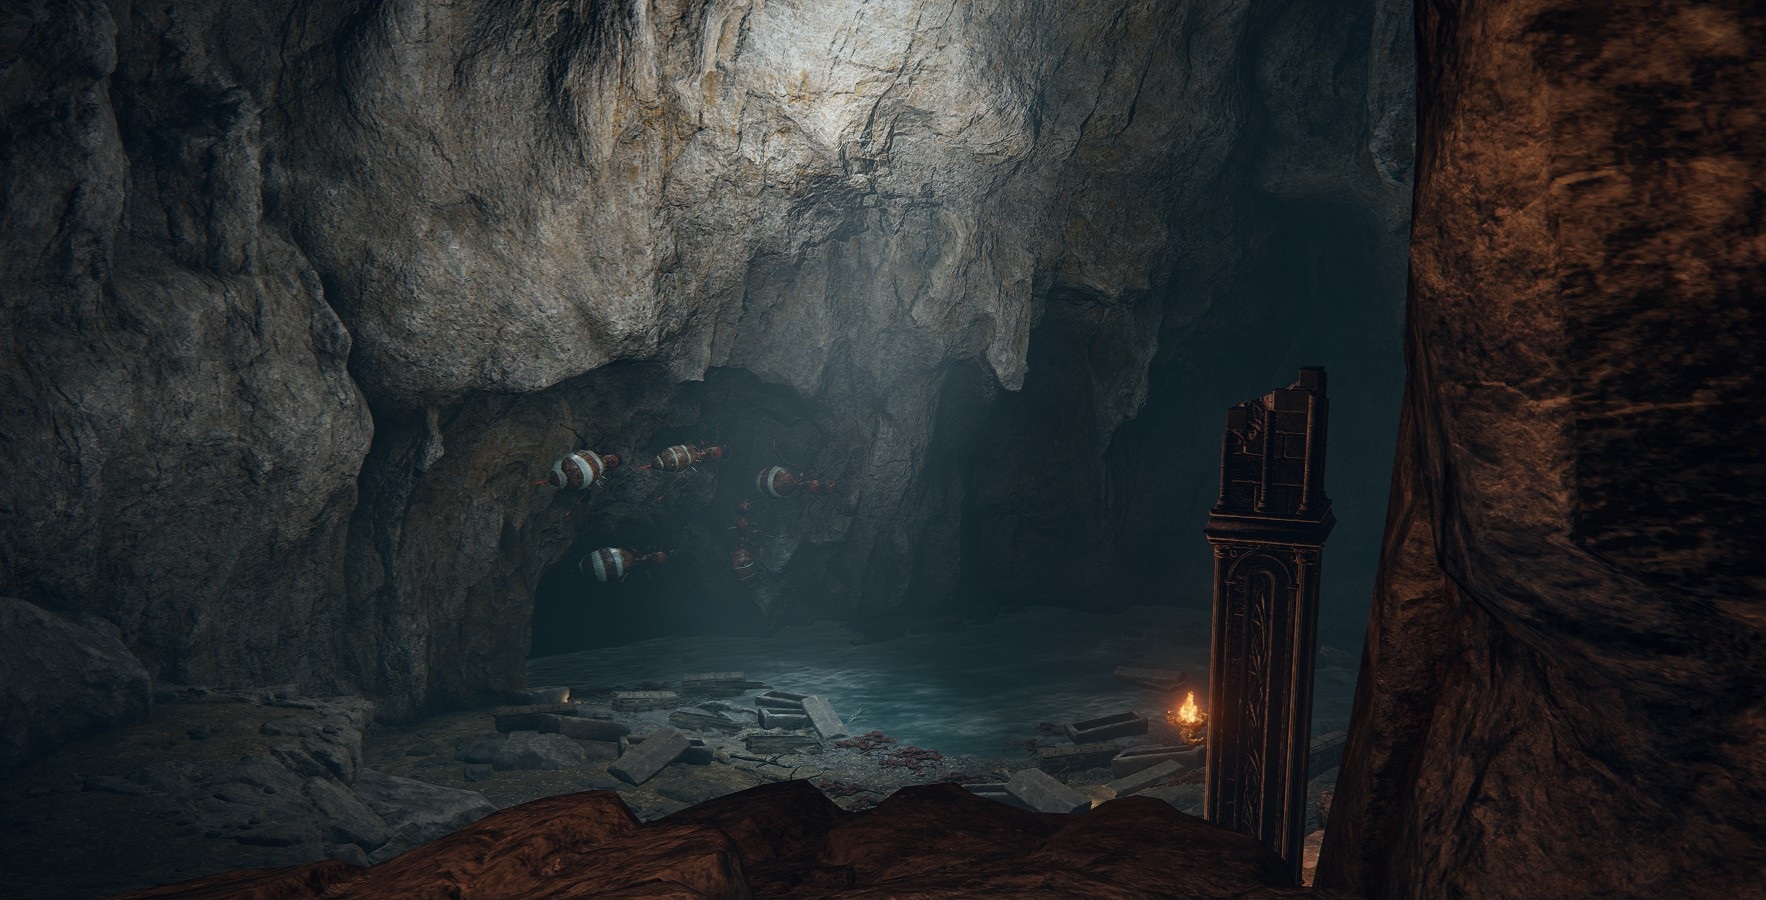
Continue forward into the tunnel and you’ll find a large chamber with a queen ant inside, plus a bunch of ants on the ceiling. You have two options: kill all her ant defenders, or just run in and whack her butt (she pops immediately and drops a Golden Rune [10] and a Rune Arc) and then run to the other side of the room and into the next tunnel (on the western side of the chamber). If you choose to fight the ants, walk slowly forward until just one or two drop from the ceiling, then back up into the tunnel. The rest will soon follow, but this way can sort of fight them 1 or 2 at a time, assuming you can kill them fairly quickly. You can also pull them with ranged attacks.
Either way, you’ll next head into the western tunnel on the other side of the chamber (make sure you run all the way through if you didn’t kill the ants). You’ll soon find yourself in an even larger chamber — continue west and jump down onto the stone ledge below, where you can find a corpse with a Smithing Stone [4].
Then go back east along the arch a little bit, and jump down to the south onto the rocky platform below, where another corpse has a Celestial Dew. Then head east and drop down, and sprint east towards the open doorway. Pull the lever on the right and wait impatiently while the elevator takes its sweet time coming down and all the room’s enemies slowly make their way towards you. Get on the elevator before they reach you and ride it up — outside the elevator room you’ll find the site of grace, where you can finally rest.
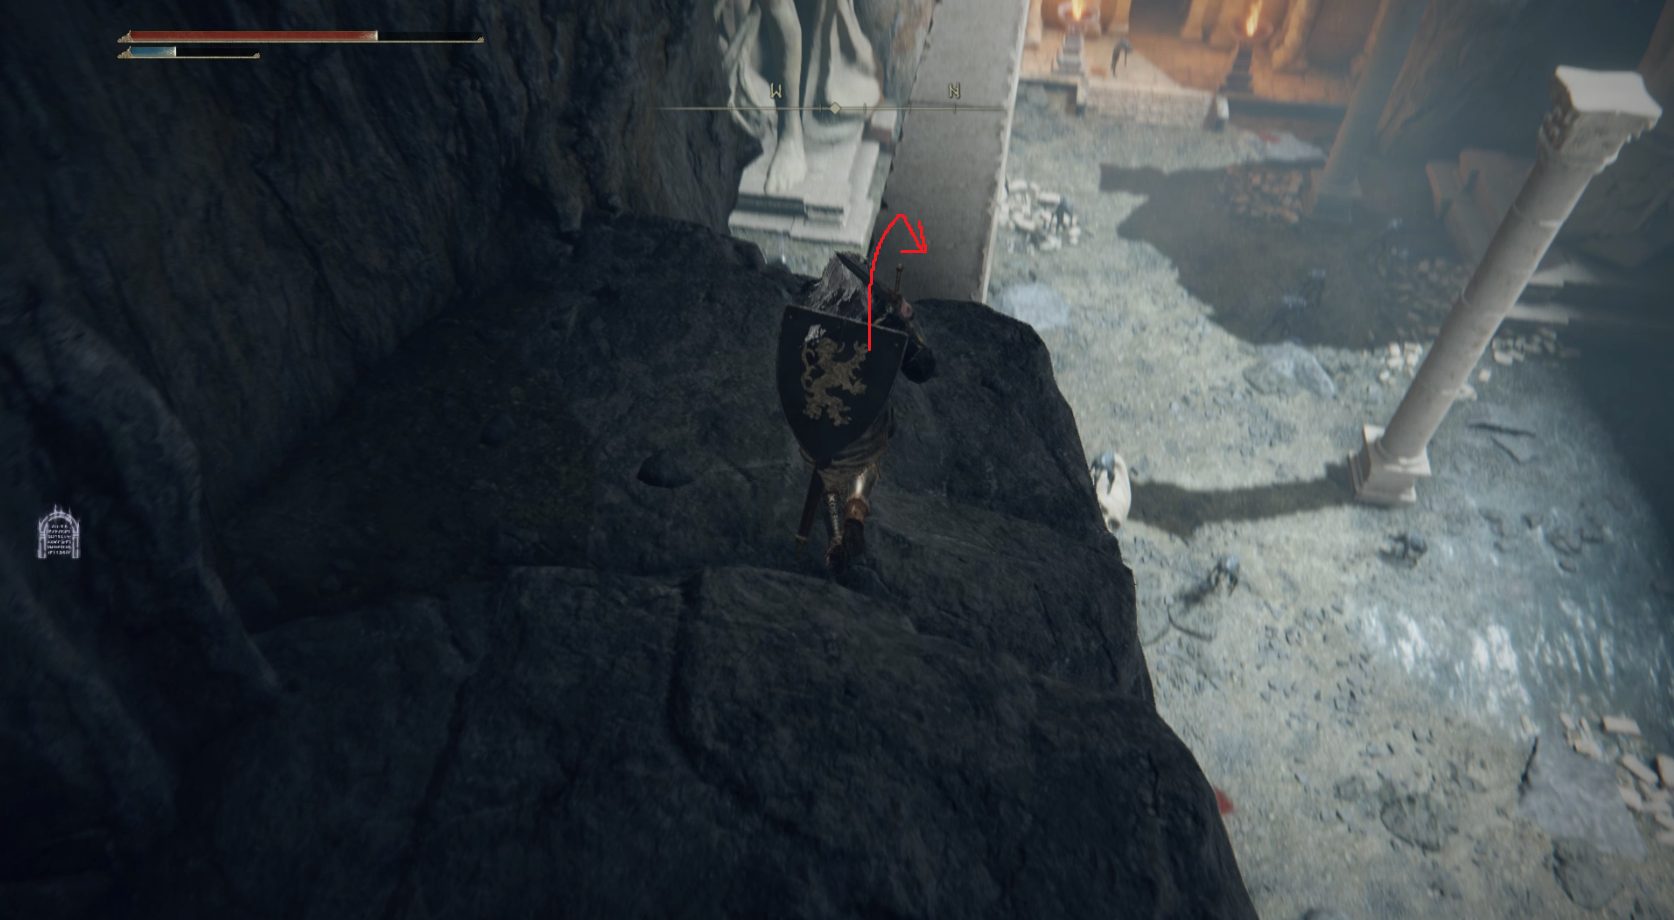
Now leave the elevator chamber. Don’t rush ahead, but instead look right — you should see a big group of enemies patrolling, and an item in the water. (Note that there’s a Smithing Stone [1] on a corpse straight ahead if you want it). Head right into the water and grab the item (a Golden Rune [1]) and then sprint through the water past the mob of cave-dwellers, keeping the rock wall on your right. Turn the corner and you’ll see a huge statue — go to the right of it and jump up the rocks there.
From the elevator, go right into the water and grab the item, then continue forward in the waterRun past the big statue that sits half in the water, and go up the rocks to the right
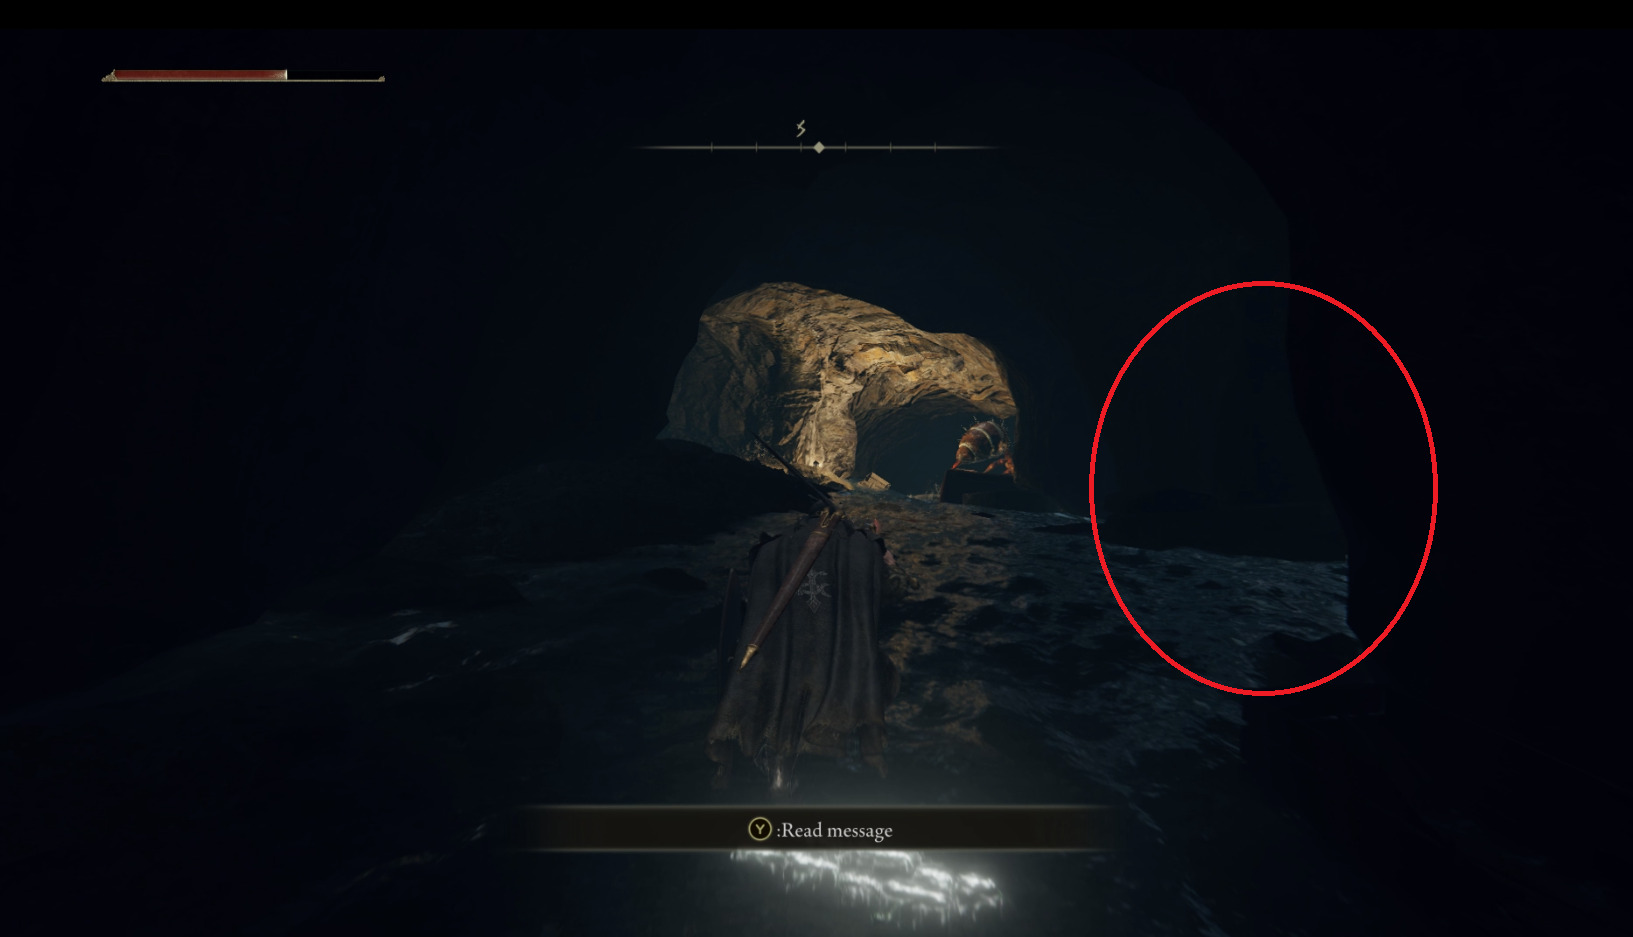
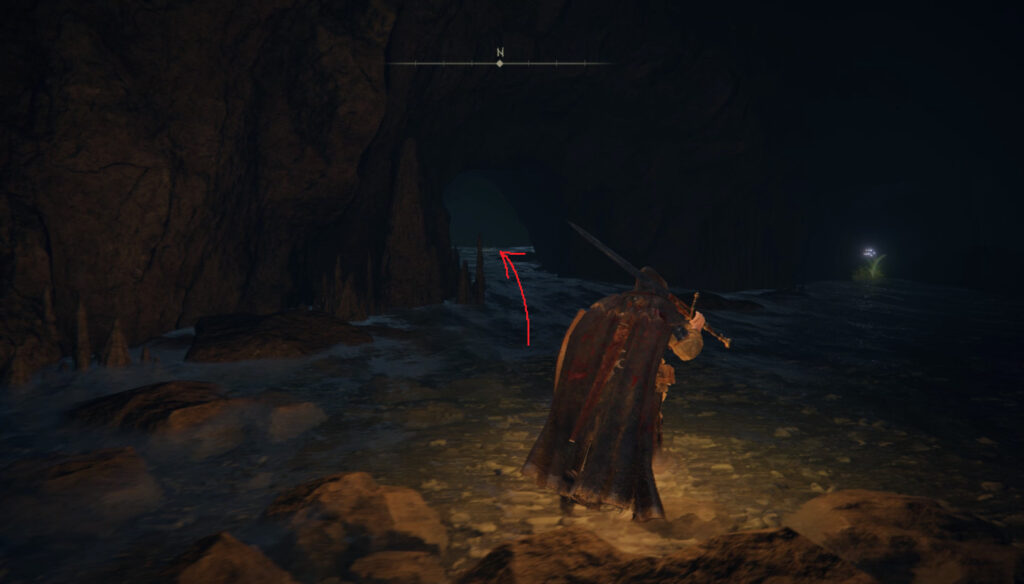
You’ll see a tunnel after you jump up onto the rocks — head through it, and then run to the nearby pillar and wait behind it [1]. There’s a huge magic ant-monster hanging out above the crypt in this room, and it periodically throws rocks at you while you’re in here. Wait for a rock barrage to finish hitting your position, then run and jump onto the leaning pillar, stopping after you cross the second segment on the pillar ([2], stand at the circled location). Wait for the next barrage, then continue up the pillar and sprint towards the rock path [3], crouching as soon as you hear the next rock barrage start.
Stay crouched as much as possible as you approach the magic ant’s position. Once you’re near the highest point of the rock path, wait for a barrage (if it’s still targeting you), and note the two columns and the large open doorway — either the column or the doorway can provide cover. Sprint to one of them, then plan your next move. If you’re a spellcaster or ranged specialist, use the columns or the doorway and attack between barrages. Melee characters can simply rush the ant’s head after a barrage and use jumping attacks. It has a bite attack of its own, but if you move forward (under its head) between your attacks it should miss. It also seems to stop using ranged attacks once you enter melee range.
Once the big ant is dispatched, your only foes in this room are the super-slow cave-dwellers, and you can pick up all the loot at your leisure. There’s nothing cool near the ant, but there is an item you missed while getting up here — go back the way you came and you’ll see an item across a small gap — you should get a running start both when you leap towards the item (a Smithing Stone [3]) and on your way back.
Most of the loot in here is pretty visible, so we won’t list every last item, but there’s an easy-to-miss Golden Centipede hiding on the backside of the column you hid behind while climbing up to the ant. It’s on the corner opposite where the ant was, and isn’t visible — look for the “Acquire materials” prompt in order to find it.
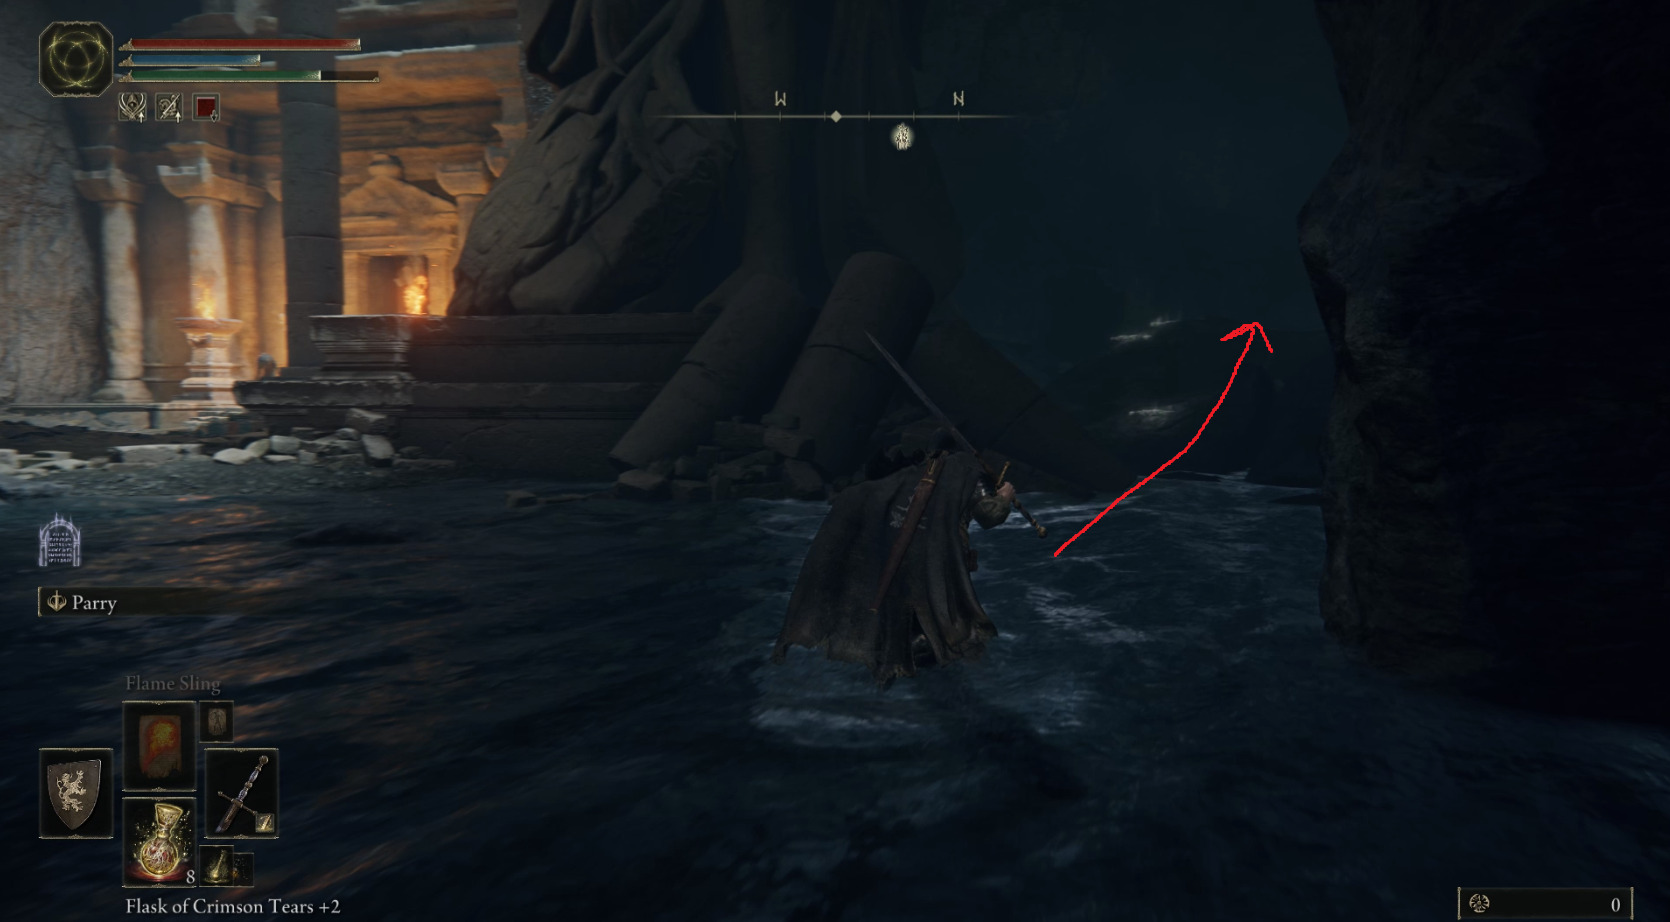
Once you’re done collecting all the loot in this chamber (there’s a lot, but it’s all consumables, nothing unique), get back in the water and continue west. You’ll round a corner and find some rocks you can jump up on — these lead to your next site of grace, Ainsel River Downstream.
Jump up these rocks to the right to find the site of grace
Rest here, then continue down the tunnel heading west. You’ll find another room full of ants feasting on corpses. The ants are so focused on eating you can sneak up to the closer ones and do a charged attack on the first ant on the left. After you kill the second one on the left, the other 2 ants nearby will aggro, so be ready. Grab the loot from this first corpse pile, which includes the Immunizing Horn Charm, a Formic Rock, and x5 Crystal Darts just across the room.
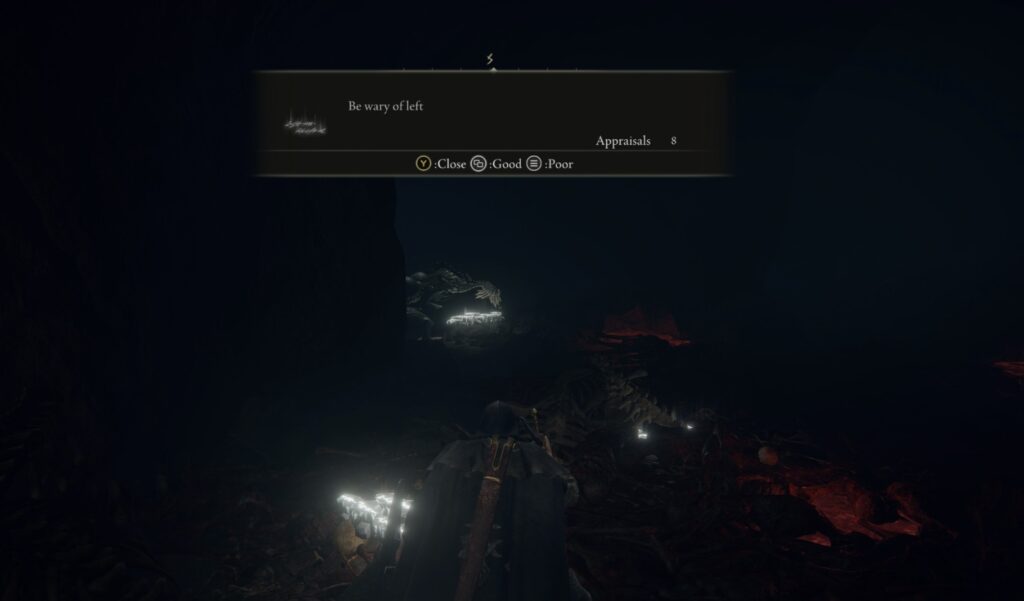
There’s one more ant, but lets let him feast a bit more and head through the tunnel that leads west and slightly south. Go very slowly and look for the first alcove on your left (this is a good place to turn on your Lantern if you have it). NOTE: With the following basilisk (and the rest in this area) you should make sure you’re consistently damaging them — if they’re damaged, they can’t cast their disgusting curse on you.
Crouch and move slowly forward, and you should be able to see the first basilisks without aggroing them.
You’ll likely find some helpful messages to remind you to look in the correct direction
Get both basilisks in sight, then do your strongest attack on one, hopefully killing it in one blow. Keep attacking them (switching targets after each attack if they’re both alive) — if they manage to get their cloud of curse off, roll out of it, ideally towards a position that lets you keep attacking. Be ready for a third basilisk to approach from further down the tunnel, if you spend a long time on the first two he can ambush you.
After the first basilisk alcove, continue west. You’ll pass another alcove on the right (empty) and then one more on the left, which will have another basilisk. After this one, there’s another alcove very close, this time on the right (while continuing west). With this one dispatched, you can grab the Soap that it was probably licking, then breathe a sigh of relief — no more basilisk! The tunnel opens up into a large, pinkish-red area. You can collect a bunch of Aeonian Butterflies from the air here, and then grab the Somber Smithing Stone [3] from the corpse.
Head back the way you came, and re-enter the ant’s feeding ground. Don’t miss the Ghost Glovewort [1] near the pillar in the center, then turn left and eliminate the final ant so you can safely grab the Ghost Glovewort [2] that’s to its left. A couple more ants will come from the north — handle them and continue north through the water. You’ll reach a junction that turns left and right — go left first and get the Melted Mushroom, then head east to find another Ghost Glovewort [2]. Now all that’s left is to head through the nearby tunnel — the next area’s got the boss of this section: the Dragonkin Soldier of Nokstella.
Once you’ve defeated the boss, you can grab the Dragonkin Soldier of Nokstella site of grace, and get the Great Ghost Glovewort from the chest in the nearby structure. Then teleport to the Eastern Tableland site of grace (press in on the right stick to switch between above-ground and below-ground maps).
Unabashed FromSoftware fanboy still learning to take his time with games (and everything else, really). The time he doesn't spend on games is spent on music, books, or occasionally going outside.
You missed a tunnel in the room with the bones past the ant that leads to an ant queen who dropped a rune arc and gold rune 10 for me as well as two more items at the end of the tunnel


You missed a tunnel in the room with the bones past the ant that leads to an ant queen who dropped a rune arc and gold rune 10 for me as well as two more items at the end of the tunnel
Thanks for letting me know Nick! I’ll go take a look and then add that section to the guide.