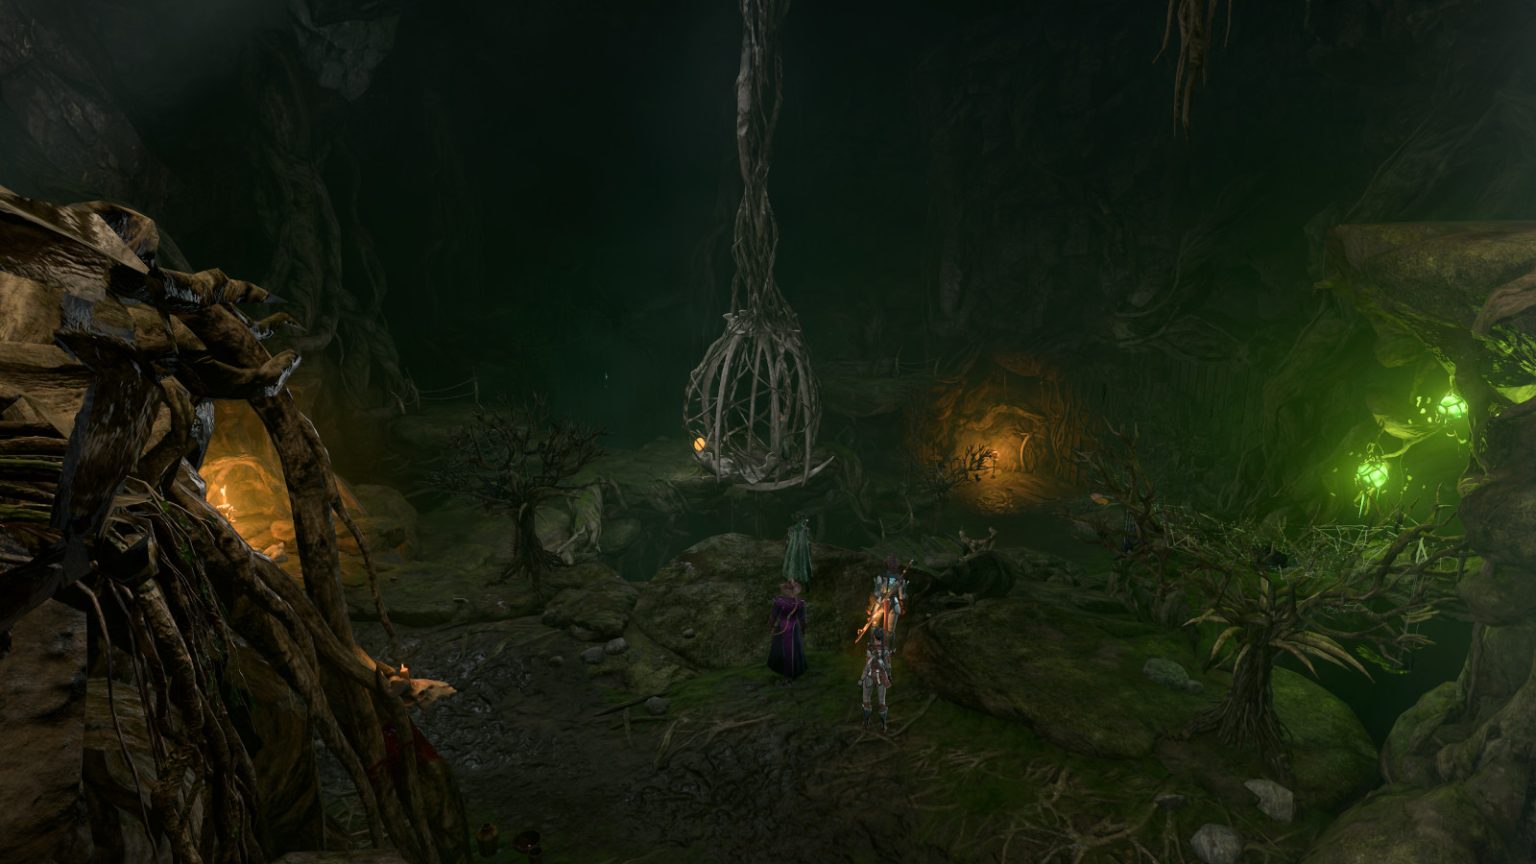
The Teahouse seems like a friendly place, with a nice witch named Auntie Ethel who lives inside. Sure, she likes Treacle Tarts, but how bad could she be? In this guide, we’ll show you how to get under the surface of the matter and eventually confront an evil entity.
Note: The original version of this guide was written by Luxrah, and much of its information was sourced by her initially.
Exits A – Sunlit Wetlands / Putrid Bog B – Wooden Stairs C – Mushroom Circle D – Mushroom Circle to Underdark
Area Notes
Depending on where and when you look, this location is sometimes called the Teahouse, the Riverside Teahouse, or the Gnarled Teahouse. So we’re just calling it the Teahouse.
Before confronting Auntie Ethel, you won’t be able to teleport to your camp or a waypoint while you’re inside the Overgrown Tunnel, but you can always just run back to the Teahouse and teleport from there. After defeating Auntie Ethel, the Overgrown Tunnel will lose its restrictions.
Points of Interest
1 – Auntie Ethel and Mayrina
Enemies
2x Red Cap Sages – Lv. 4
2x Red Caps – Lv. 4
The first time you enter the Teahouse, you’ll meet Auntie Ethel and Mayrina inside. Ethel will welcome you no matter what you might have said to her before, while Mayrina will complain about Ethel forcing her to eat so many Treacle Tarts. Three things can happen during this encounter:
You can ask Auntie Ethel to remove the parasite from your brain. In exchange, Ethel will want to borrow one of your “pretty little peepers” — that is, an eye. If you go through with the deal, then you’ll gain the condition Paid the Price (+1 to Intimidation checks, disadvantage on Perception checks and Hag attacks), plus receive Auntie Ethel’s Charm, but Ethel will fail to remove the parasite, and you’ll learn that someone or something tainted it with Netherese shadow magic. Ethel will transform into her true hag form when consummating the deal, which will remove the illusion from the area if it’s still active. Afterwards, Ethel will turn invisible and head down into the Overgrown Tunnel (via Exit B).
You can tell Mayrina that her brothers are dead, or you can keep prodding Ethel about what Mayrina is doing in the Teahouse. This will irritate Ethel. She’ll teleport Mayrina away, and then she’ll transform into her true hag form, removing the illusion from the area and starting a fight. Ethel won’t participate in the fight herself — she’ll turn invisible and retreat into the Overgrown Tunnel — but the Redcaps and Redcap Sages who were pretending to be sheep outside the Teahouse will rush inside and attack you. If you already killed the Redcaps, then the battle will only last until Ethel escapes, which means you should just skip your turns to help it along.
You can remain polite but talk about other things. This will allow you to use Ethel as a shopkeeper, although she’ll still have the same stock she had in the Emerald Grove. After ending the conversation, Ethel will just wander around the house until you detect the illusion in the fireplace (#2) and head into the Overgrown Tunnel. If Ethel sees you enter the fireplace, then she’ll start combat, but she’ll retreat into the Overgrown Tunnel while the Redcaps from outside rush into the Teahouse and attack you. If Ethel doesn’t see you enter the fireplace, then she’ll merely confront you in the Overgrown Tunnel and allow you to continue exploring.
Regardless of your choice, Ethel will always teleport Mayrina to her cage (#17), thus keeping her away from you. You’ll need to rescue Mayrina for the quest Save Mayrina. Ethel will also always head into the Overgrown Tunnel. That will leave the house empty, making it easy for you to loot anything you want. So don’t bother sneaking around and stealing things. Just wait for everyone to depart and then loot to your heart’s content. You’ll find lots of potions (including Potions of Greater Healing), ingredients, and food in the house.
If you can beat a passive DC-10 Investigation check here, then you’ll detect that the stone wall behind the fireplace is an illusion. This will allow you to walk through it. If Auntie Ethel retreats through the fireplace, then she’ll remove the illusion on her way out, and you won’t need to detect anything.
This door will start out locked. To open it, you’ll need to pass a DC-2 Sleight of Hand check to pick its lock, or you’ll need the Teahouse Key (#3).
5 – Connor’s Coffin
“Here lies Connor — beloved husband, and a tasty little morsel to boot.”
This coffin is a part of the quest Save Mayrina. You won’t be able to open it until the end of that quest. Before then it’ll be protected by an Arcane Barrier. If you touch the barrier, then you’ll take 2d4 psychic damage, and you’ll gain the condition Hands Off, Petal (disadvantage on Wisdom checks) for ten turns.
“My sweet Calim, whose beloved asked that his beauty never fade.”
In this alcove, you’ll find a skull pointed at a mirror. You’ll trigger a passive DC-5 Perception check when you approach the mirror, but it won’t change anything. When you look at the mirror, you’ll see somebody stuck inside — but is it Calim or his beloved? To help the person in the mirror, you’ll just need to attack and destroy the mirror. However, doing so will give the attacker the condition Bane (1d4 penalty to Attack Rolls and Saving Throws) until their next Long Rest. Still, that’s better than seven years’ bad luck, right?
7 – Magron
“My darling Magron. She wished for the mind of a genius, but the silly head crossed me.”
In this alcove, you’ll find Magron — in stasis — holding her own head. To end Magron’s suffering, you’ll just need to take the head away from her, which will cause her to collapse and die (rather graphically).
Note: Magron’s Head can be used later in the game — but only as an alternative to the much more common Hearts for entering Balthazar’s secret room in the Moonrise Towers. So there isn’t any reason to keep the head or carry it around with you.
8 – Blinded Elf
“This poor dear wished never to lay eyes on her family again.”
There isn’t anything you can do here, other than loot the corpse for a Gold Ring and a bit of gold.
“My dearest Efrin. He begged me to halt the deadly disease that ravaged him.”
You’ll find Efrin standing here petrified. If you use Basilisk Oil or Greater Restoration on him, then you’ll free him from his condition, but you’ll learn that the petrification was the only thing preventing him from succumbing to the deadly disease Laduguer’s Bite, and he’ll die almost immediately. So don’t do that.
To save Efrin, you’ll just need to kill Auntie Ethel. When you return to him afterwards, he won’t be petrified, and he won’t be dead. If you can beat a DC-15 Arcana or Medicine check, or if you’re playing the right class, then you’ll figure out that Auntie Ethel gave him the “disease” and the “cure,” and so when she died, they both went away. Efrin will thank you for your help and then he’ll leave. You won’t see him again.
You’ll find four Whispering Masks on the table here. If Auntie Ethel is still alive, then equipping a mask will give the wearer the condition Ephemeral Whispers, which means every turn they’ll have to beat a DC-13 Wisdom check or become a Hag’s Pawn — which will turn them hostile. There isn’t any way to cure being a Hag’s Pawn other than death.
Luckily, you can protect yourself from Auntie Ethel’s machinations by using the spell Protection from Evil and Good (which is available to Gale and Shadowheart). If it is cast on a character before they put on a Whispering Mask, then they’ll never turn into a Hag’s Pawn, even if they fail their Wisdom check. Unfortunately, Protection from Evil and Good requires Concentration, so you can only cast it on one character at a time, not your entire party.
The reason you might want to wear a mask is to avoid the remaining threats in the Overgrown Tunnel. Since wearing a mask will put you on Team Hag, the Mask Wearers (#13) will ignore you, and the exploding flower traps and poisonous vents (#15) will reveal themselves to you and / or deactivate. So you can cast Protection from Evil on Good on one character, have them wear a Whispering Mask and walk to Mayrina’s cage (#17), and then have them remove the mask. You can then repeat the process on your other three characters and completely skip the middle part of the Overgrown Tunnel. Just don’t walk too close to Mayrina’s cage, or else you’ll start the battle against Auntie Ethel with your party divided, which is probably a bad idea.
“My gentle Lorin. He wished to know what was to come.”
Lorin will see his futures in the mirrors next to him — with all of the outcomes being bad — and so he’ll try not to look at anything. There isn’t any way to break him out of his torment, even if you beat the passive DC-12 Arcana check or speak to him as a fellow Elf. Breaking the mirror next to him also won’t help, but at least in this case you won’t gain Bane or anything.
If you talk to Lorin after killing Auntie Ethel, and if he didn’t see you as a mind flayer, then he’ll still have his wits about him, and he’ll successfully flee from the Overgrown Tunnel and get away.
“A thief who tried to steal from Auntie. Now the good little pet guards my home.”
When you approach the door, you’ll start a conversation with it, and you’ll quickly realize that it’s another one of Auntie Ethel’s victims. It will refuse to open, but if you beat a passive DC-15 Arcana check, or an active DC-10 check on Intimidation or Persuasion, then you’ll realize that the door is yet another illusion, and you can walk right through it. Beating the checks isn’t even necessary. You can walk through the door even if you fail them.
Note: Putting on one of the nearby Whispering Masks will also show that the door is an illusion, but the masks are dangerous, and we wouldn’t recommend wearing them unless you can cast Protection from Evil and Good first (see #10).
To move through the door, zoom in on it, then rotate the camera, and then click on the ground.
The easiest way to walk through the door is to take control of the camera, move it up to the door, and then rotate it so you’re looking at the door from the other side. Then clicking on the (black) ground in front of the door will cause you to move through it.
The door will disappear if Auntie Ethel dies.
13 – Mask Wearers
Enemies
Mask of Regret – Lv. 4
Mask of Servitude – Lv. 4
Mask of Terror – Lv. 4
Mask of Vengeance – Lv. 4
In this part of the Overgrown Tunnel, you’ll encounter four mask wearers — Mask of Regret, Mask of Servitude, Mask of Terror, and Mask of Vengeance. They’re more of Auntie Ethel’s victims, just wearing Whispering Masks (#10) rather than being tormented in other ways. If you’re wearing a Whispering Mask as well, then they’ll ignore you. Otherwise they’ll attack.
If you sneak past the mask wearers, or if you wear your own Whispering Mask to just stroll past them, then they’ll teleport to Auntie Ethel when you finally confront her (#17). So don’t do that. Instead, if you want to keep the mask wearers alive, then you should use non-lethal damage (available in the Passives part of the Hotbar) against them. Unfortunately, after defeating Auntie Ethel, you’ll discover that most of the mask wearers are beyond help, but the Mask of Regret (aka Hydrangea Wubb) will come out of the ordeal in good shape. She’ll tell you her story and show up again in Act 3 during the quest Help the Hag Survivors.
Note: Knocked out characters won’t wake up until you take a Long Rest.
If you decide to kill the mask wearers, then focus on them one at a time, and use the high ground to your advantage. The mask wearers will get Wisdom checks to save against being a Hag’s Pawn, and if they pass, then they won’t attack during their current turn. That should give you a pretty good (but random) advantage against them, making the battle straightforward.
14 – Waterfall
You’ll need to jump through the waterfall here to continue past it. If you didn’t kill the mask wearers (#13), and if you have a Charlatan in your party, then moving through the waterfall will give you the “One of Us” inspiration.
This part of the Overgrown Tunnel is heavily trapped. There are two types of traps:
Peculiar Flower traps will explode and deal fire damage. If they’re in noxious fumes, then they’ll ignite the fumes, causing a bigger explosion and damaging everybody nearby. Peculiar Flowers require a DC-15 Perception check to detect and a DC-10 Sleight of Hand check to disarm.
Vent traps will continuously release noxious fumes. They require a DC-15 Perception check to detect and a DC-30 (!) Sleight of Hand check to disarm. Since you probably won’t be able to disarm the traps normally, the only way to stop them is to toss something on top of them to block the fumes. Lots of moderately-sized items will work for this, including ingots, Ropes, Skulls, and books.
To stop the noxious fumes, just toss an item onto the vent.
If you’re wearing a Whispering Mask (#10), then you’ll automatically detect the Peculiar Flowers (so you can disarm them), and the Vents will show themselves and deactivate when you get close enough to them (so you can drop something on them). This will allow you to breeze through the traps with no issue, and potentially neuter them so nobody else in your party will have a problem with them, either.
If you’re not wearing a Whispering Mask, then the traps are much more annoying. The DC-15 Perception checks mean you’re not likely to detect all of them, which means you’ll probably take some damage. If you keep your party together, then you’re more likely to detect the traps, but also more likely to have somebody stumble into them. For best results, pick a character with a high Perception as your trap spotter, and cast Enhance Ability (Wisdom) on them — and then hope for the best, or make use of saving and loading to guarantee good results.
16 – Illusory Door
This door won’t talk to you when you approach it. The only way to detect that it’s an illusion — and walk through it — is to wear a Whispering Mask (#10). If it’s not safe for you to do so before Auntie Ethel dies, then you’ll have to wait until after you confront her (#17). The only reason to go through the door is to reach a mushroom circle leading to the Underdark (Exit D).
Note: You’ll have to make a long jump to reach the ledge with the door. All characters should be able to make the jump, but finding the right landing spot can be difficult. The image above shows the right spot.
You’ll find Mayrina in the cage here, but when you get close enough to it, Auntie Ethel will appear and attack you. If the mask wearers (#13) are still alive and conscious, then Auntie Ethel will summon them to the fight, and they’ll assist her.
Auntie Ethel will use lots of trickery in the battle. Among other things, she’ll turn invisible and summon mirror images, she’ll hit you with Vicious Mockery, and she’ll disguise herself as Mayrina. For strategy advice on how to defeat Auntie Ethel, please refer to our guide The Hag Boss Battle.
Note: If you’re not sure which enemy is the real Auntie Ethel, then look at the combat order at the top of the screen. The real Ethel will never change her position — likely the first portrait in the list. If you move your mouse over her portrait, then you’ll highlight her on the battlefield (assuming she’s not invisible).
At the start of the fight, Auntie Ethel will throw a Flammable Slime Bomb at Mayrina’s cage and set it on fire. This will give you a limited amount of time rescue Mayrina before her cage plummets into the chasm and she dies. You’ll have a few options here: you can cast Create Water on the cage or throw Water at it to put out the fire, you can interact with the control orb on the western side of the chasm to lower the cage to its docked position, or you can just whack away at Auntie Ethel. When you defeat Ethel, or she disguises herself as Mayrina, Mayrina will automatically leave the cage.
When you knock Auntie Ethel down to under 20% of her maximum hit points, she’ll try to make a deal with you. She’ll offer to let you have Mayrina or a lock of her hair (which will give you a permanent +1 to an ability score) if you let her live. But note: she’ll only make this deal when her turn starts, so if you get her under 20%, stop attacking her if you want to negotiate, or else you might finish her off before you get the chance. If you pass a DC-20 Intimidation or Deception check, then you’ll be able to demand both Mayrina and Auntie Ethel’s Hair. If you fail the check, then you’ll still be able to select one or the other. You can also decline Auntie Ethel’s offer at any time. For that case you’ll find a Tarnished Charm on her corpse.
After defeating Auntie Ethel or making a deal with her, if Mayrina is still around, then when you talk to her she’ll get mad at you. She’ll blame you for messing up her deal with Auntie Ethel, where she would have given up her unborn child for Ethel bringing her dead husband Connor back to life. Afterwards, Mayrina will head to Connor’s grave (#5). Talking to her there will complete the quest Save Mayrina.
Regardless of how your encounter with Auntie Ethel ends, you’ll see her again in Act 3.
18 – Acrid Workshop
You’ll find a bunch of things inside Auntie Ethel’s workshop: The Ever-Seeing Eye, the Staff of Crones, a wand called Bitter Divorce, several regular potions, and more. Bitter Divorce won’t have an orange highlight around it indicating that it’s a quest item, but it is. You’ll need it at the end of the quest Save Mayrina.
You’ll also find some of Auntie Ethel’s… unusual potions in the workshop. Their description won’t tell you what they do, but we’ve listed their effects below. For the most part, the best thing you can do with the potions is ignore them, or perhaps sell them.
Broken Promises:Strength is increased by 2 until the next Long Rest. Upon resting, Strength is indefinitely reduced by 1. The latter effect is permanent. Cursed.
Butterflies in the Stomach: Bleeding from the inside. Suffers 1-6 Piercing damage at end of turn. Lasts 5 turns.
Faltering Will: Disadvantage on Wisdom Saving Throws until next Long Rest. Cursed.
Heart of Stone: Resistant to poison damage until next Long Rest.
Insanity’s Kiss: Hostile to all other creatures for the condition’s duration. Lasts 5 turns. Cursed.
Lost Time: Armour Class is reduced by 2. Can’t take reactions. Lasts 50 turns. Cursed.
Lover’s Avarice:Wisdom is reduced by 1 until Long Rest. Cursed.
Missing Pets: Illusory spiders run up and down the creature’s body, imposing Disadvantage on Ability Checks and Attack Rolls. Frightened. Lasts 3 turns.
A Mother’s Loathing: Gains Bite until next Long Rest. Bite is a melee attack that does 2d4 Piercing damage.
Wilted Dreams: Something waits for the creature to sleep. It takes 3-18 Psychic damage during its next Long Rest. Cursed.
You won’t see the mushroom circle to the south of the Teahouse until you’ve used its partner to exit from the Overgrown Tunnel.
If you have an Outlander (like Karlach) in your party when you use a mushroom circle (including Exit D), then you’ll gain the “Walking on Air” inspiration.
Starting with cassette tape games on the TRS-80, Steven has been playing, creating, and writing about games for a long, long time. This makes him experienced, not old. Lately, Steven has been focusing on walkthroughs, making sure everybody knows how to solve Towers of Hanoi puzzles.