Mayrina’s brothers are looking for her, and Auntie Ethel seems to be involved, but what’s really going on? In this guide we’ll lead you through some of the less sunny parts of the Sunlit Wetlands as you search for Mayrina and save her from an evil fate.
Exits A – Wooden Steps B – Mushroom Circle W – Waypoint
Background
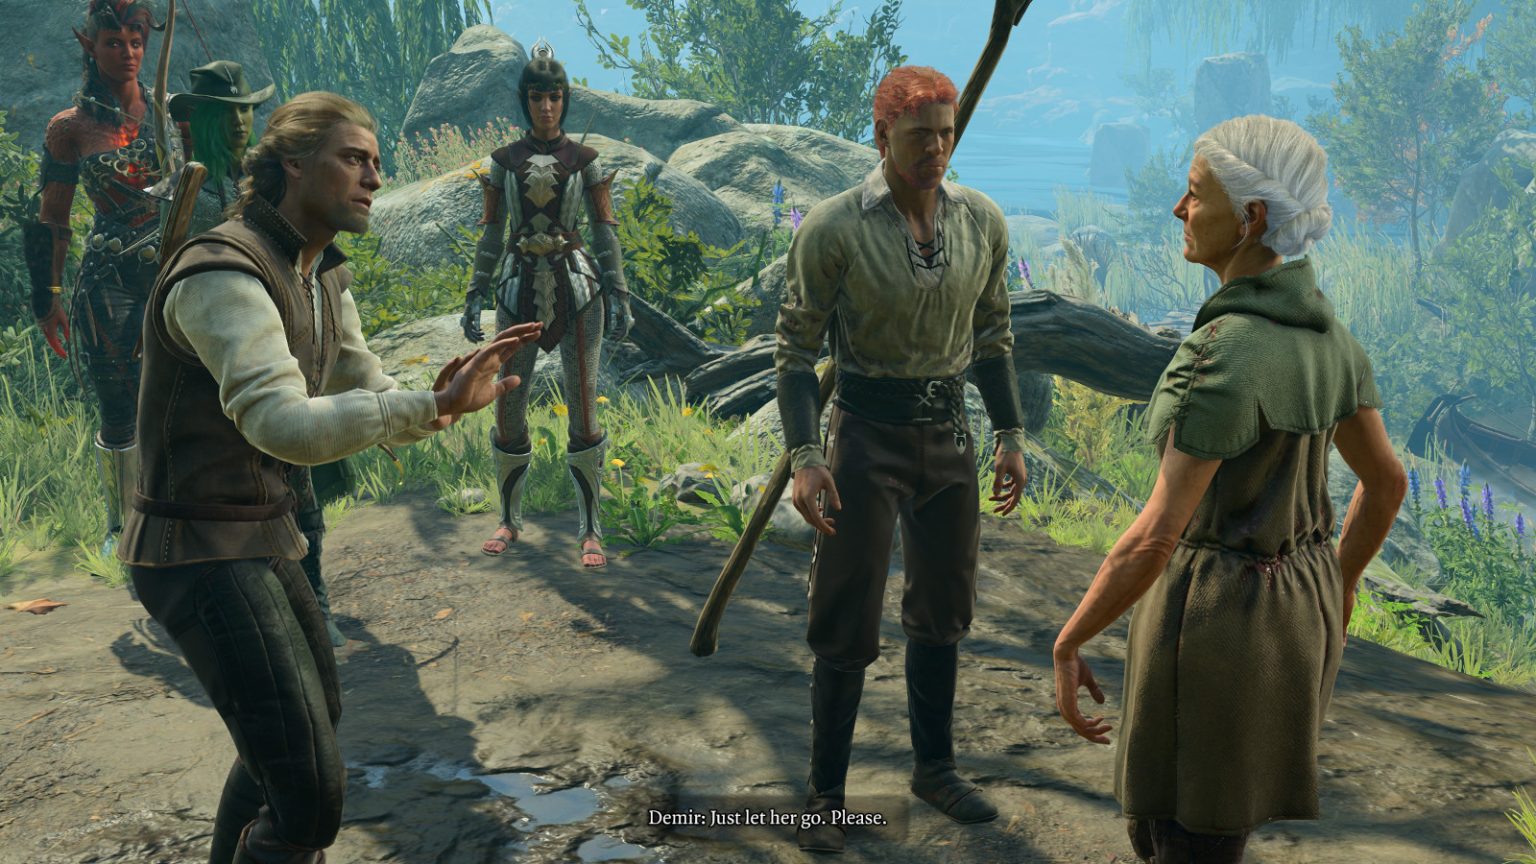
When you enter the Sunlit Wetlands, you’ll witness an argument between Auntie Ethel (whom you might have met previously in the Emerald Grove) and the brothers Johl and Demir (#1). The brothers will demand that Ethel release their sister Mayrina. Ethel will claim that she doesn’t know what they’re talking about. If you pass a DC-19 Insight check, then you’ll realize that Ethel is lying.
This encounter can go one of three ways:
If you support Auntie Ethel, then the brothers will attack you — and probably die pretty quickly given that they’re both Level 1. Afterwards, Ethel will admit that Mayrina is staying with her, but she’ll claim that Mayrina asked her not to reveal her whereabouts to her brothers, which is why she lied to them. Ethel will then invite you to her house (#2), and she’ll disappear.
If you try to stay out of the matter, then Ethel will kill the brothers and disappear.
If you support the brothers, then Ethel will disappear. The brothers will proceed to tell you a little more about the situation — how Mayrina sought out Ethel for a way to bring her dead husband Connor back to life — but they’ll refuse your help. They’ll then rush into the wetlands looking for Mayrina, but they’ll die before they can find her. You’ll find their corpses (or perhaps just the blood pools where their corpses should be) by the Waypoint (Exit W) in the area.
If you support the brothers, then you’ll trigger this quest after talking to them. Otherwise, you won’t trigger it until you reach the Teahouse (#2) and either tell Mayrina that her brothers are dead, or find her locked in a cage (#8).
Walkthrough
When you reach the Teahouse (#2), you’ll find Auntie Ethel there with Mayrina. Ethel will invite you in regardless of how your previous encounter went. Meanwhile, Mayrina will complain about the food Ethel is forcing her to eat. What you say will determine what happens next:
If you repeatedly question Ethel about Mayrina, or if you tell Mayrina that her brothers are dead, then Ethel will teleport Mayrina away, and she’ll transform into a hag and turn hostile. Ethel won’t fight you at this point — she’ll simply retreat into her lair — but any Redcaps still alive in the wetlands will rush into the house and attack you. This will open the way into the Overgrown Tunnel (Exit B).
If you make a deal with Auntie Ethel about your parasite, then she’ll teleport Mayrina away and transform into a hag, but she won’t be able to get the parasite out. Afterwards, she’ll head into her lair. This will also open the way into the Overgrown Tunnel.
If you talk about other things, then nothing will happen. Auntie Ethel will teleport Mayrina away, but otherwise she’ll just putter around inside the Teahouse. To advance the quest, you’ll need to head over to the fireplace (#3) and beat a passive DC-10 Investigation check to detect that the wall behind the fireplace is an illusion. If Ethel detects you going through the fireplace, then she’ll turn hostile and summon the Redcaps, just like in the first option above.
Regardless, you should now be able to head through the fireplace (#3) and down into the Overgrown Tunnel (Exit B). While you’re there, you’ll meet several of Auntie Ethel’s other victims, some of whom it’s possible to save. You’ll also have to deal with a gnarled door (#5), pass by or defeat some mask wearers (#6), and dodge some traps (#7). For details about these things, please refer to our location guide for the Teahouse.
Eventually, you’ll arrive at Mayrina’s cage (#8). When you get close enough to it, Auntie Ethel will appear and attack you. Since Ethel is a hag, she’ll do tricksy things during the battle — like summon mirror images of herself so you can’t tell which enemy is which, cast Vicious Mockery on you giving you disadvantage on attacks, and even disguise herself as Mayrina. For strategy advice on defeating Auntie Ethel, please refer to our guide The Hag Boss Battle.
When you get Auntie Ethel down to under 20% of her maximum hit points, she’ll stop the fight and try to make a deal with you. She’ll offer you Mayrina or a lock of her hair (which will give you a permanent +1 to an ability score) if you let her go. If you beat a DC-20 Deception or Intimidation check, then you’ll be able to demand both bribes. For this quest, you’ll need to at least receive Mayrina. Of course, you can also refuse the deal and kill Auntie Ethel. That will free Mayrina as well. If Mayrina dies in the fighting, or if Auntie Ethel escapes with her, then you’ll fail the quest.
Note: It’s possible to get both rewards from Auntie Ethel, plus kill her. We describe how to do this in hag boss battle guide referenced above.
After the battle, Mayrina will chastise you for ruining her deal with Auntie Ethel, and she’ll reveal that she had agreed to give up her unborn child for her husband Connor back. Mayrina will then head up to the surface map and stand next to Connor’s coffin (#4).
To help Mayrina, you’ll need to search Auntie Ethel’s workshop (#9) and find the wand Bitter Divorce. It won’t be highlighted orange like other quest items, but it’s required for this quest. It’ll have the name “Connor” scratched on it. Then to return to Mayrina, you should use the mushroom circle in the northern part of the workshop (Exit B). It’ll take you to the beach south of the Teahouse.
When you talk to Mayrina at Connor’s coffin (#4), she’ll be distraught. You’ll have to make a decision at this point:
You can break the wand. Mayrina will get mad at you and run off, and the quest will end.
You can use the wand on Connor. He’ll wake up as a zombie.
If you wake up Connor, then Mayrina will freak out, but she’ll decide that somewhere out there she might find someone who can fix him. This will leave you with another choice to make:
You can attack Connor. Mayrina will turn hostile to defend him, and you’ll have to kill them both. You’ll find Mayrina’s Locket on her corpse.
You can let Mayrina have Connor. You’ll give her Bitter Divorce, and then she and her husband will wander off.
You can keep Connor for yourself. Bitter Divorce will turn into Second Marriage, which will allow you to summon him as a follower. Mayrina will get angry and leave.
You won’t receive a reward at the end of the quest. Your reward was whatever you got from defeating Auntie Ethel.
Share this article:
Steven Carter
Starting with cassette tape games on the TRS-80, Steven has been playing, creating, and writing about games for a long, long time. This makes him experienced, not old. Lately, Steven has been focusing on walkthroughs, making sure everybody knows how to solve Towers of Hanoi puzzles.