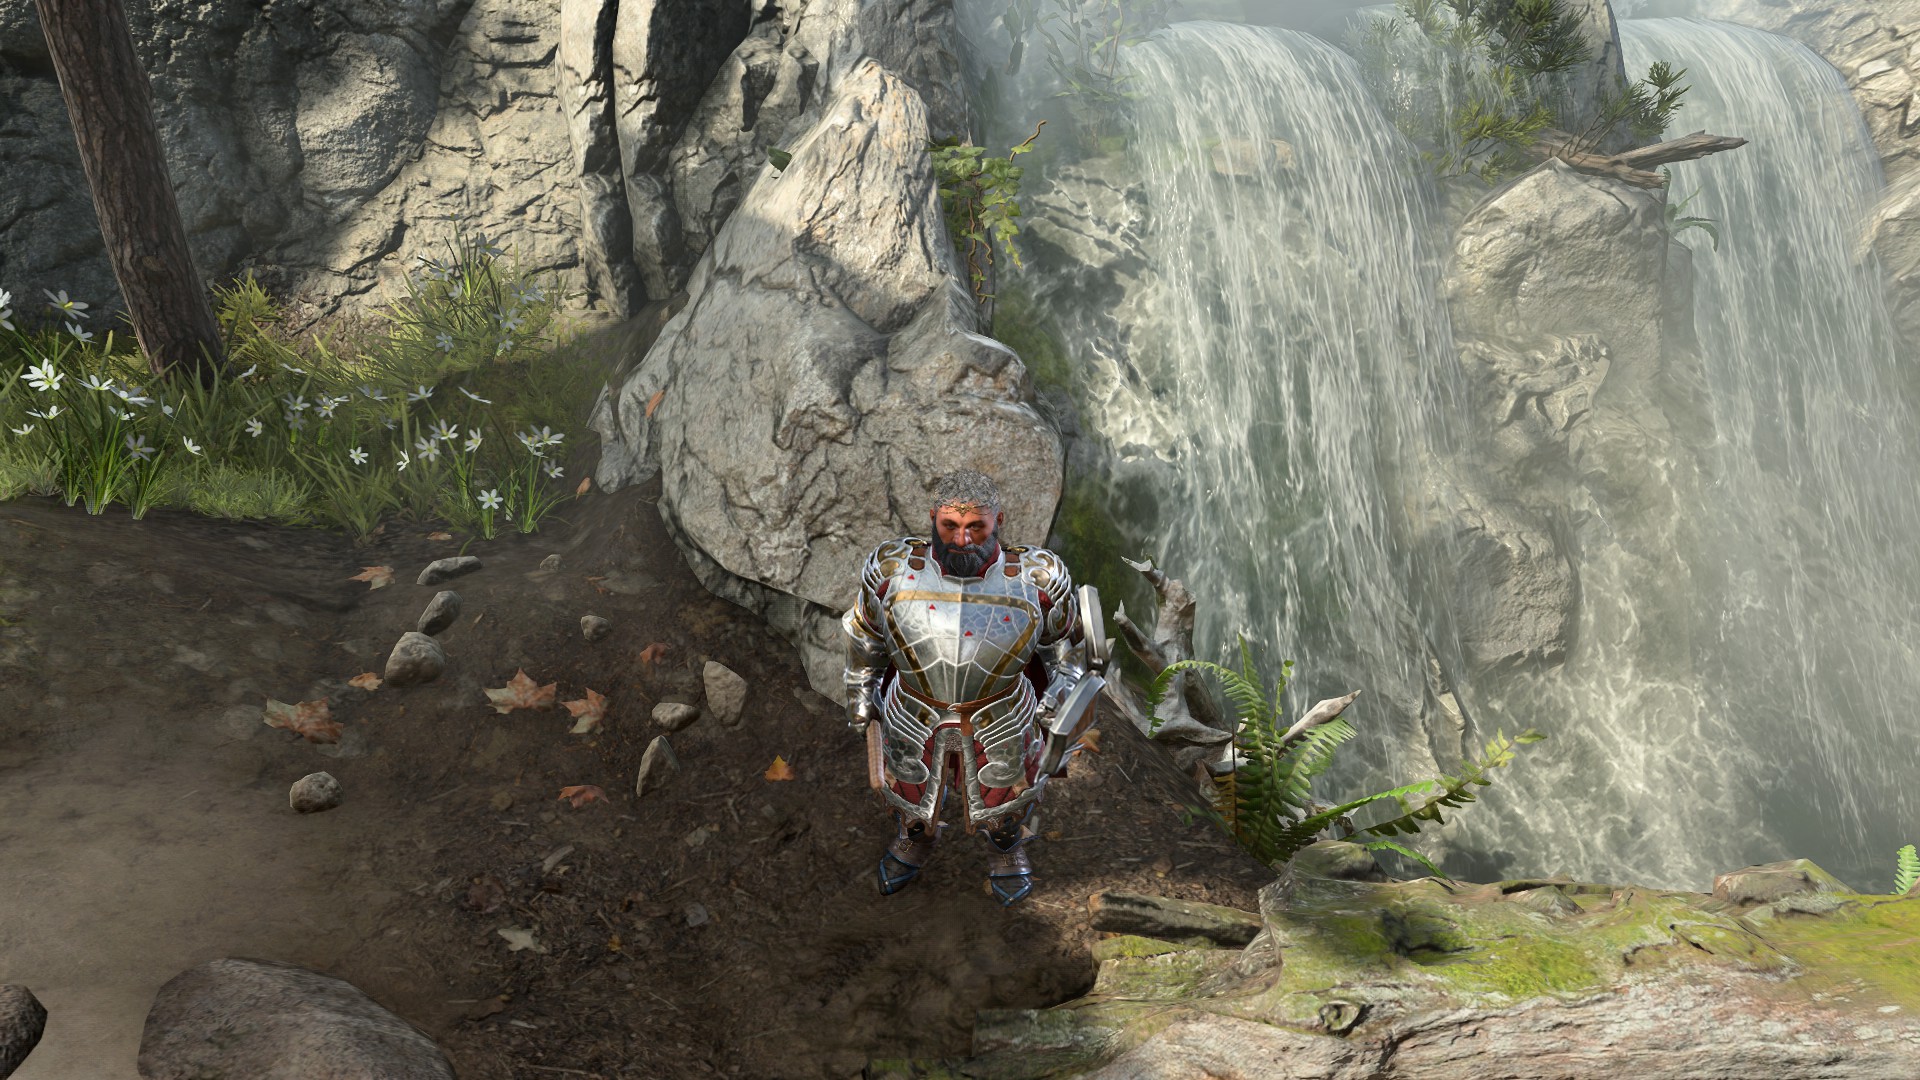
Ever since Larian Studios made a point of announcing that you’ll be able to wield a stick of salami as an actual weapon, it became apparent that Baldur’s Gate 3 was to be a game more concerned with the could and not the should. Armed with that knowledge (and a stick of salami) we decided to play along and turn this idea into an actual viable build. And because we’re not mere jokesters here, we thought we might as well connect this build to some Forgotten Realms lore.
When it comes to Dungeons & Dragons, R.A. Salvatore is of course most famous for creating the Drow outcast Drizzt Do’Urden. But he’s not just the Drizzt guy. The Cleric Quintet, a lesser-known series of his, features a character by the name of Pikel Bouldershoulder – a dwarven cook who believed he was a  Druid so hard, he actually became one. Who better to wield the fearsome salami than the resident chef? And so, our character for this build will be based on good old Pikel – his signature weapon in the stories was a
  Shillelagh. And it just so happens that having access to this Druid cantrip, without actually being a Druid, is a crucial part of the build.
Build Summary
This guide will explain what makes the build work and why it’s so strong. But here are just the raw facts of it:
- Class
- Subclass
- Fighting Style
- Feats
- Key Spells
- Important Gear
- Salami
- Diadem of Arcane Synergy
- The Whispering Promise
- Ring of Free Action
- Callous Glow Ring
- Luminous Armour/Luminous Gloves
Strictly speaking, this doesn’t need to be a salami build. You can use any club or quarterstaff in the game to make it even stronger. But since salami is classified as a club, it can be buffed by Shillelagh, so we might as well indulge a little. After all, when turned into a Shillelagh, the difference between a stick of salami and the strongest staff in the game is a mere +2 Enchantment bonus.
Whether you’ll be using a salami or a staff with some nice properties, the idea of this build is to create a  Paladin (a slight departure from Pikel’s
  Fighter, but what can you do) who uses Charisma as their primary combat ability. This will let us dump everything else without sacrificing anything. And thanks to the Diadem of Arcane Synergy, we’ll even be adding our Charisma bonus to our damage twice.
Applying the Shillelagh cantrip to your weapon is a Bonus Action that raises the basic damage of whatever we’re holding to a respectable 1d8, and lets us use our spellcasting ability modifier for Attack and Damage rolls. As a Paladin, our spellcasting ability is Charisma. When we grab Shillelagh through the  Magic Initiate feat instead of a Druid level, that’s what it’s going to use instead of the usual Wisdom.
Being able to go all in on Charisma while completely dumping Strength will also make us the perfect “face” for our party and greatly improve certain Paladin abilities.
The Paladin subclass  Oath of the Ancients is the perfect fit for someone who dreams of being a Druid. But beyond just adding to the build’s flavour, it will also make us, and our entire party for that matter, nigh unkillable. Because we’ll be using heavy armour, a shield, some AC gear, the
  Defence Fighting Style, Radiating Orbs, and various defensive buffs, most enemies apart from bosses won’t be able to hit us by rolling anything other than a natural 20. Our Aura of Protection will give us a bonus to all Saving Throws equal to our Charisma modifier – this will make us greatly resistant to spells as well. And the Aura of Warding we get from our oath will make it so whenever a spell does hit us, we’ll only be taking half damage. The ability to
  Speak with Animals also fits thematically and is nice to have in any party.
NOTE: When Larian released their big Patch #5, one of the key items for this build – Diadem of Arcane Synergy – got changed so that it only activates when you apply a condition to an enemy and not yourself or your allies. Luckily, with some adjustments, this build can still work and be quite strong. It will just require a few additional specific pieces of gear and a more active playstyle where you’ll be applying the Radiating Orb debuff on your foes.
Character Creation
Because we’ll be using Charisma for our Attack and Damage rolls, but won’t be able to start doing so until we hit level 4, you might want to consider respeccing then. Otherwise, you’ll need to get carried by your party mates until you get your first feat. If you don’t want to bother with a respec, this is how your character should look at level 1:
We’ll be playing as a  Dwarf as a nod to Pikel. But the extra Hit Points
  Gold Dwarf will give us may come in handy too. The
  Guild Artisan background – a fitting choice for a Dwarf – plays into our theme as well. And since none of the companions have it, it will provide us with some exclusive roleplaying opportunities.
Our abilities assume we’ll be getting Auntie Ethel‘s boon and putting that extra point into Charisma to get it to 18 early. Since we’re a Paladin, this might cause us to break our oath. To avoid this, when Auntie Ethel surrenders, you should speak to her with another character. But even if you do manage to break the oath, because Baldur’s Gate 3 is a game that’s big on choices but not so big on consequences, you can always restore your oath by paying a small sum of gold to a special NPC that will appear after you stray from your path.
Should you go the respec route, here’s how you might want to set your ability scores when creating your character:
Spells and Abilities
This section is dedicated to all the stuff you’ll be grabbing as you advance through the levels.
Oath
Oath of the Ancients will be our first big choice. It will make our entire party extremely sturdy when dealing with spellcasters. Its main Channel Oath ability – Healing Radiance – shouldn’t be overlooked either. It’s a fairly powerful AoE heal that takes a Bonus Action to use and lasts two turns. Thanks to an item we’ll have, whenever we heal someone (ourselves included), we’ll be granting the effects of the  Bless spell. For a single Bonus Action – this is fantastic value.
The extra spells our oath provides become interesting at level 5 when we get  Misty Step. This spell solves all our potential mobility issues. It also opens up some neat avenues during exploration. And then at level 9, we’ll also get
  Plant Growth. Without requiring Concentration, this spell covers a large chunk of ground in living vines that quarter the movement speed of anyone trying to move through it, without even giving them a Saving Throw. And thanks to a special ring we’ll have, we’ll become one with nature and be immune to the Difficult Terrain created by this spell.
Fighting Style
With how Baldur’s Gate 3 calculates damage, it’s entirely possible to grab the  Duelling Fighting Style to deal 2 extra damage with all our attacks. But since this isn’t a build that maximizes its number of attacks, we’ll be grabbing Defence instead. A solid choice for a sensible Dwarf. The extra point of AC will come in handy in the early game, and will contribute to our ridiculous survivability later on.
Feats
Here’s where this build comes together. Getting access to a Druid-exclusive cantrip allows us to turn a stick of salami into a fearsome weapon, and just be a better all-around Paladin than one who needs to worry about having a respectable Strength or Dexterity score. So, this is what our feat selection will look like:
- Magic Initiate: Druid
- Getting Shillelagh when we reach level 4 is non-negotiable. Without it, the build doesn’t work. The other cantrip is more flexible, but since they will all use Wisdom for their spellcasting ability, the damaging ones won’t do that much for us. We’ll also be getting
 Resistance later on from a different source. This leaves us with
  Guidance as an easy choice. As for the level 1 spell,
  Longstrider is really nice. Not every spellcaster gets access to it, and having it on our PC will save our
  Wizard a spell slot. Plus, it makes up for the inherent movement speed penalty all Dwarves get.
 Ability Improvement
- Upon hitting level 8 we’ll simply maximize our Charisma score by putting two points into it for a total of 20.
 Savage Attacker
- There’s some flexibility with the level 12 feat. But because we’ll have all these potential sources of high damage, rolling 1s on them will feel really lousy. That’s why Savage Attacker is our go-to here.
Spells
Paladins don’t get a lot of spells, but whatever spells they do get, tend to be quite useful. Below, we’ll list some spells from each level you definitely should have prepared at all times. But the ones you should really focus on are  Shield of Faith and
  Magic Weapon. Shield of Faith will provide you with 2 extra AC, which will make you much harder to hit. Later on, Magic Weapon will turn your salami stick into a magical weapon and add an extra point of enchantment to your staff, should you decide to use one for a more serious playthrough.
If you really want to become unstoppable, you should get into the habit of hoarding scrolls of  Mirror Image early. Since everyone can use scrolls in Baldur’s Gate 3, these will push your AC into ludicrous territory.
- 1st Level
- 2nd Level
- 3rd Level
Equipment
This build has several pieces of gear that really make it pop. Luckily, none of them are particularly hard to find. You also won’t have to wait until Act 3 for the build to come together. In fact, you’ll already be entering Act 2 with your most crucial item.
Following Patch #5, you’ll need to be constantly applying the Radiating Orb debuff in order to activate the Diadem of Arcane Synergy. To do so, you’ll want to wear either a pair of Luminous Gloves or a suit of Luminous Armour. It’s up to you which of these you want to use.
Swapping out the original armour choice for this build will make you considerably less tanky in Act 3, while dropping the original gloves will take away some of your damage and 2 points worth of Attack Bonus. If you’re using a stick of salami as your weapon – our advice is to drop the armour. And if you’re running a more serious weapon, like an enchanted staff, then you should feel free to drop the gloves.
Once you have one of those, all you’ll need is a source of radiant damage. Being a Paladin, your Divine Smite is an easy way to deal a lot of it. If, however, you want to apply those juicy orbs with every attack, you’ll need some reliable source of extra radiant damage, like the Callous Glow Ring. If you decide to use it, you should drop the Ring of Free Action for it.
- Weapon – Salami
- Because Shillelagh sets the base damage of any club or quarterstaff it enhances to 1d8, we can use a stick of salami as a real and very much dangerous weapon. You can find plenty of them just lying around. The unsuspecting denizens of the Forgotten Realms use them as food and camp supplies. Just keep in mind that when you pick up salami, it tends to go into your camp supplies bag and not your main inventory.
- Weapon Option – Any Good Quarterstaff or Club
- While Baldur’s Game 3 doesn’t have a lot of clubs worthy of becoming a main weapon, it has plenty of nice quarterstaves. If you won’t be using a salami, you should grab the best staff you can find and use that. Your best option in theory would be the famous Staff of the Ram you can find in Jaheira’s Hideout Basement in Act 3. But for it to become usable, Larian would first have to fix the bug that currently makes it so the staff tries to stun your allies and you whenever you try to cast anything. It would also be nice if they raised the stun DC to a number that can actually stun anything in Act 3.
- Shield – Sentinel Shield
- Sold by Lann Tarv in Moonrise Towers, this shield gives you Advantage on Perception checks and +3 to your Initiative rolls. Since we won’t have a lot of Dexterity, this shield will be fantastic for us.
- Ranged Weapon – The Dead Shot
- We won’t be doing a lot of shooting, but just having this bow will lower our crit range by 1. Get it from Fytz the Firecracker in Act 3.
- Handwear – Gloves of the Duellist/Legacy of the Masters
- Because of how the game treats duelling, Gloves of the Duellist will grant us a permanent +2 to our Attack Rolls whenever we’re wielding a salami or a quarterstaff together with a shield. Get them from Lann Tarv in Moonrise Towers.
- Later on, you can swap them for Legacy of the Masters, a pair of gloves that unconditionally gives us a +2 to our weapon Attack and Damage Rolls. Get them from Dammon in Act 3.
- Handwear Option – Luminous Gloves
- You may want to use these gloves past patch #5 to activate the Diadem of Arcane Synergy and also lower your targets’ Attack Bonus through the Radiating Orb debuff. You can find them in the Potter’s Chest on the Ruined Battlefield in Act 2.
- Armour – Dwarven Splintmail/Armour of Persistence
- Since we are a Dwarf (and we may or may not be digging a hole), Dwarven Splintmail just makes sense as a relatively easy to get suit of heavy armour. Our good friend Lann Tarv has it.
- Our other good friend Dammon will have Armour of Persistence for us in Act 3. Forget Helldusk Armour. This here is the real deal. 20 AC, all incoming damage reduced by 2, and permanent Resistance and
 Blade Ward. When wearing this armour with our build, we’ll rarely get hit. And when we do, it won’t even hurt that much. With how good this armour is, you better make sure Dammon survives the journey to Baldur’s Gate.
- Armour Option – Luminous Armour
- You may want to use this armour past patch #5 to activate the Diadem of Arcane Synergy and also lower your targets’ Attack Bonus through the Radiating Orb debuff. You can find it inside the Opulent Chest hidden behind a secret door in the Selûnite Outpost part of the Underdark.
- Headwear – Diadem of Arcane Synergy
- This is the other thing, apart from Shillelagh, that makes this build so strong. Loot it from Ardent Jhe’rezath in the Inquisitor’s Chamber of Crèche Y’llek.
- Cloak – Cloak of Protection
- Sold by Quartermaster Talli at the Last Light Inn, this cloak gives us +1 AC and +1 Saving Throws. If you’re still failing your Saving Throws at this point, you should make sure you’re not sitting under a ladder occupied by a clowder of black cats.
- Footwear – Evasive Shoes
- How can you say no to more AC? Get them from Mattis at the Last Light Inn.
- Amulet – Pearl of Power Amulet/Amulet of Greater Health
- As a Paladin, we won’t get that many spell slots, so being able to restore them is nice. This is where the Pearl of Power Amulet comes in. Get it from Omeluum in the Myconid Colony.
- After you get through the House of Hope in Act 3, you’ll have access to the Amulet of Greater Health that sets your Constitution to 23 and gives you Advantage on Constitution Saving Throws.
- Ring – The Whispering Promise
- Purchased from Volo or Grat the Trader in the Goblin Camp, this ring provides the effects of the Bless spell to anyone you heal. Works really well together with our Channel Oath ability.
- Ring – Ring of Free Action
- Difficult Terrain? Entangling or paralyzing attacks? This ring makes those a thing of the past. And since you’ll be applying plenty of Difficult Terrain yourself, it’s really nice to have. Get it from Araj Oblodra in Moonrise Towers.
- Ring Option – Callous Glow Ring
- This ring will let you deal 2 points of radiant damage with each attack. Just don’t forget to first illuminate your targets with something like the
 Light cantrip. You can find it inside Balthazar’s vault in the Gauntlet of Shar in Act 2.
The Gameplan
The main challenge of this build lies in getting to level 4. Once you do, you basically become a better Paladin. And the regular Paladin is already plenty good. You’ll get great damage from the combination of Shillelagh, Diadem of Arcane Synergy and Divine Smite. Having a shield together with that will add an extra layer of survivability. And all our Paladin abilities will be happy because we’ll be treating Charisma as our primary ability score instead of an afterthought. That considerable Charisma score will also help us with the social parts of the game. The fact that we can do all this, while slapping demons with a stick of salami, is just the icing on the cake.
Prior to patch #5, the game used to be very generous with what it considered a condition capable of activating the Diadem of Arcane Synergy. Casting Shillelagh on your weapon? That’s a condition. Using Healing Radiance? It lasts for two turns, which means it’s a condition as well. An ally walks into the range of your aura? Believe it or not – a condition. You basically had to try to not apply any conditions on your turns. After patch #5, only debuffs you apply to your enemies work. But you’ll still need to apply one every two turns to activate your diadem. For the purposes of this build we chose to go with the Radiating Orb debuff as it doesn’t have a Saving Throw associated with it and is generally easy for a Paladin to apply. In order to have easy access to this debuff we’ll have to sacrifice either some of our original survivability or damage, but in the end it’s worth it to make a build like this work. And the Radiating Orb debuff itself is nothing to scoff at.
When you get the Amulet of Greater Health, don’t just chuck your Pearl of Power Amulet away. Nothing’s stopping you from completing a fight, equipping our trusty old pendant, restoring an expended spell slot, then putting your shiny new amulet back on.
And finally, as a Paladin, you should always remember that missing a target when you call for a Divine Smite doesn’t waste a spell slot. So even if your chance to hit something isn’t great, don’t hesitate to call for a Smite – it literally costs you nothing on a miss.