Beneath Ketheric Thorm’s lair, the Moonrise Towers, lies a secret far more sinister than he is alone. You can get a hint of this secret by exploring the Prison, where you’ll find corpses piled high and fleshy walls, all serving an unknown purpose. Later, after defeating Ketheric in a first battle, he will retreat, and then you will be able to follow him down and into the Mind Flayer Colony, where some of the darkest secrets will be revealed.
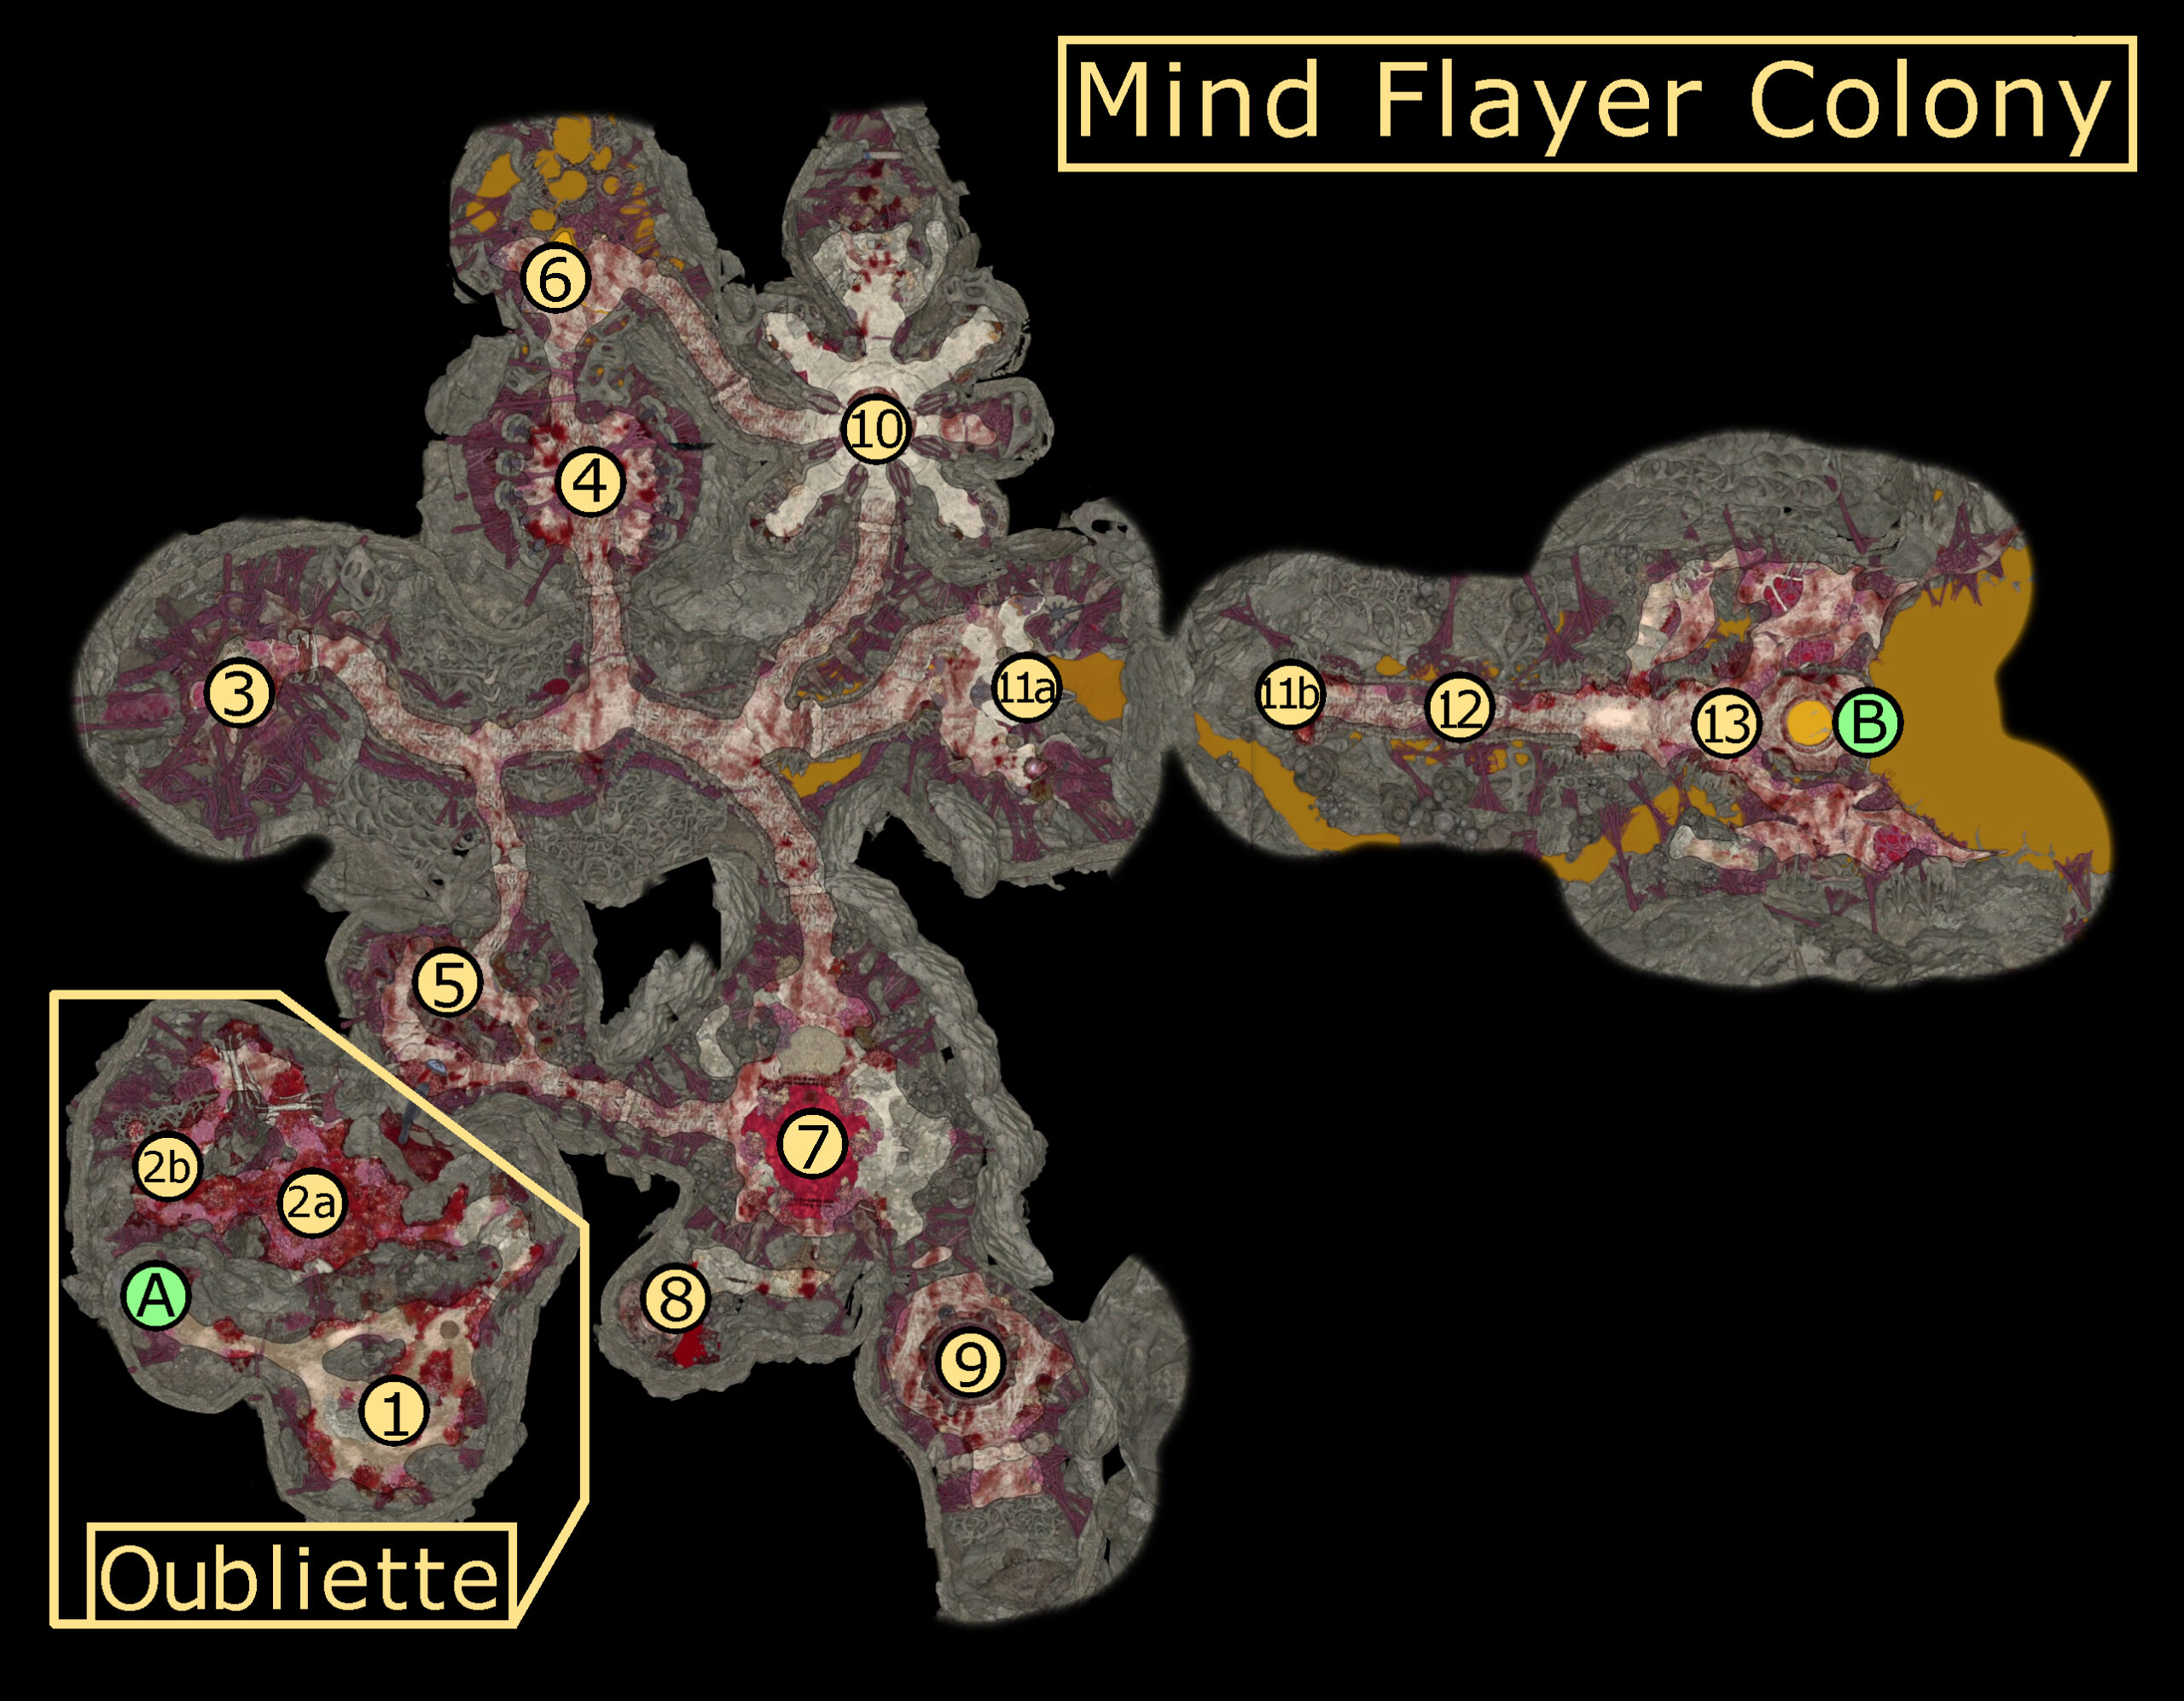
Map
Points of Interest 1 – Hook Horrors 2 – Oubliette Drops 3 – Landing Point 4 – Illithid Pods 5 – Chop and Us 6 – Mizora 7 – Death Shepherd’s Circle 8 – Slack-Skinned Head 9 – Mind Puzzle 10 – Barracks 11 – Elevator 12 – Warning Door 13 – Ketheric and Apostle
Exits A – Moonrise Towers Prison B – Moonrise Towers
Points of Interest
NOTE: Once you have entered the Mind Flayer Colony (other than the Oubliette sub-area), you will be unable to fast travel out of the Colony, including to Long Rest. However, a Restoration Station near the Elevator (11a) can full heal you and recharge your spell slots, and can be relied on in place of rests (long or short).
Since you will be unable to change followers out after entering, we highly recommend entering the Mind Flayer Colony with Wyll, if you are interested in his personal story, as several characters important to it are found within.
If you enter the Oubliette from anywhere other than the crag (A), or if you decide to explore the Oubliette after using the crag, then you will find yourself having to contend with 2 Hook Horrors. These are deceptively tricky enemies to fight, with a tendency to jump to your weaker party members and to knock back your stronger ones, so positioning and area control is key for dealing with them.
This section is part of the “Oubliette”, a side area of the Mind Flayer Colony accessible earlier than the rest, but which does not connect to it.
From the Moonrise Towers Prison, there are two places you can drop down in order to reach the Oubliette in the Mind Flayer Colony. There are two possible landing points in the Oubliette:
2a: Dropping into the large, glowing hole by going through the back door of the Warden’s Office in the Prison will lead to a large mound of flesh (how metal).
2b: Dropping into the hole that is in an empty cell of the prison (the same one you will be thrown into if caught in Act 2), you will land near the body of Zealot Krizt, where you will be able to acquire a Mind Flayer Parasite Specimen.
This section is part of the “Oubliette”, a side area of the Mind Flayer Colony accessible earlier than the rest, but which does not connect to it.
The first area of the Mind Flayer Colony proper, this is the area that you will fall into after jumping into the broken tower after fighting Ketheric Thorm on top of Moonrise Towers. After he flees from the fight, it is here where you will begin to pursue him.
Once you have entered this area, you will not be able to Fast Travel out of the Mind Flayer Colony, trapping you within it until you defeat the Ketheric and the Apostle of Myrkul (#13) deeper within and can take the portal from its arena back to Moonrise Towers. This also means that you will be unable to long rest, and so will need to rely on the Restoration Station near the Elevator (#11a) to heal and recharge spell slots. This also means that whatever party members you have with you when you enter will be the party members you’ll stick with.
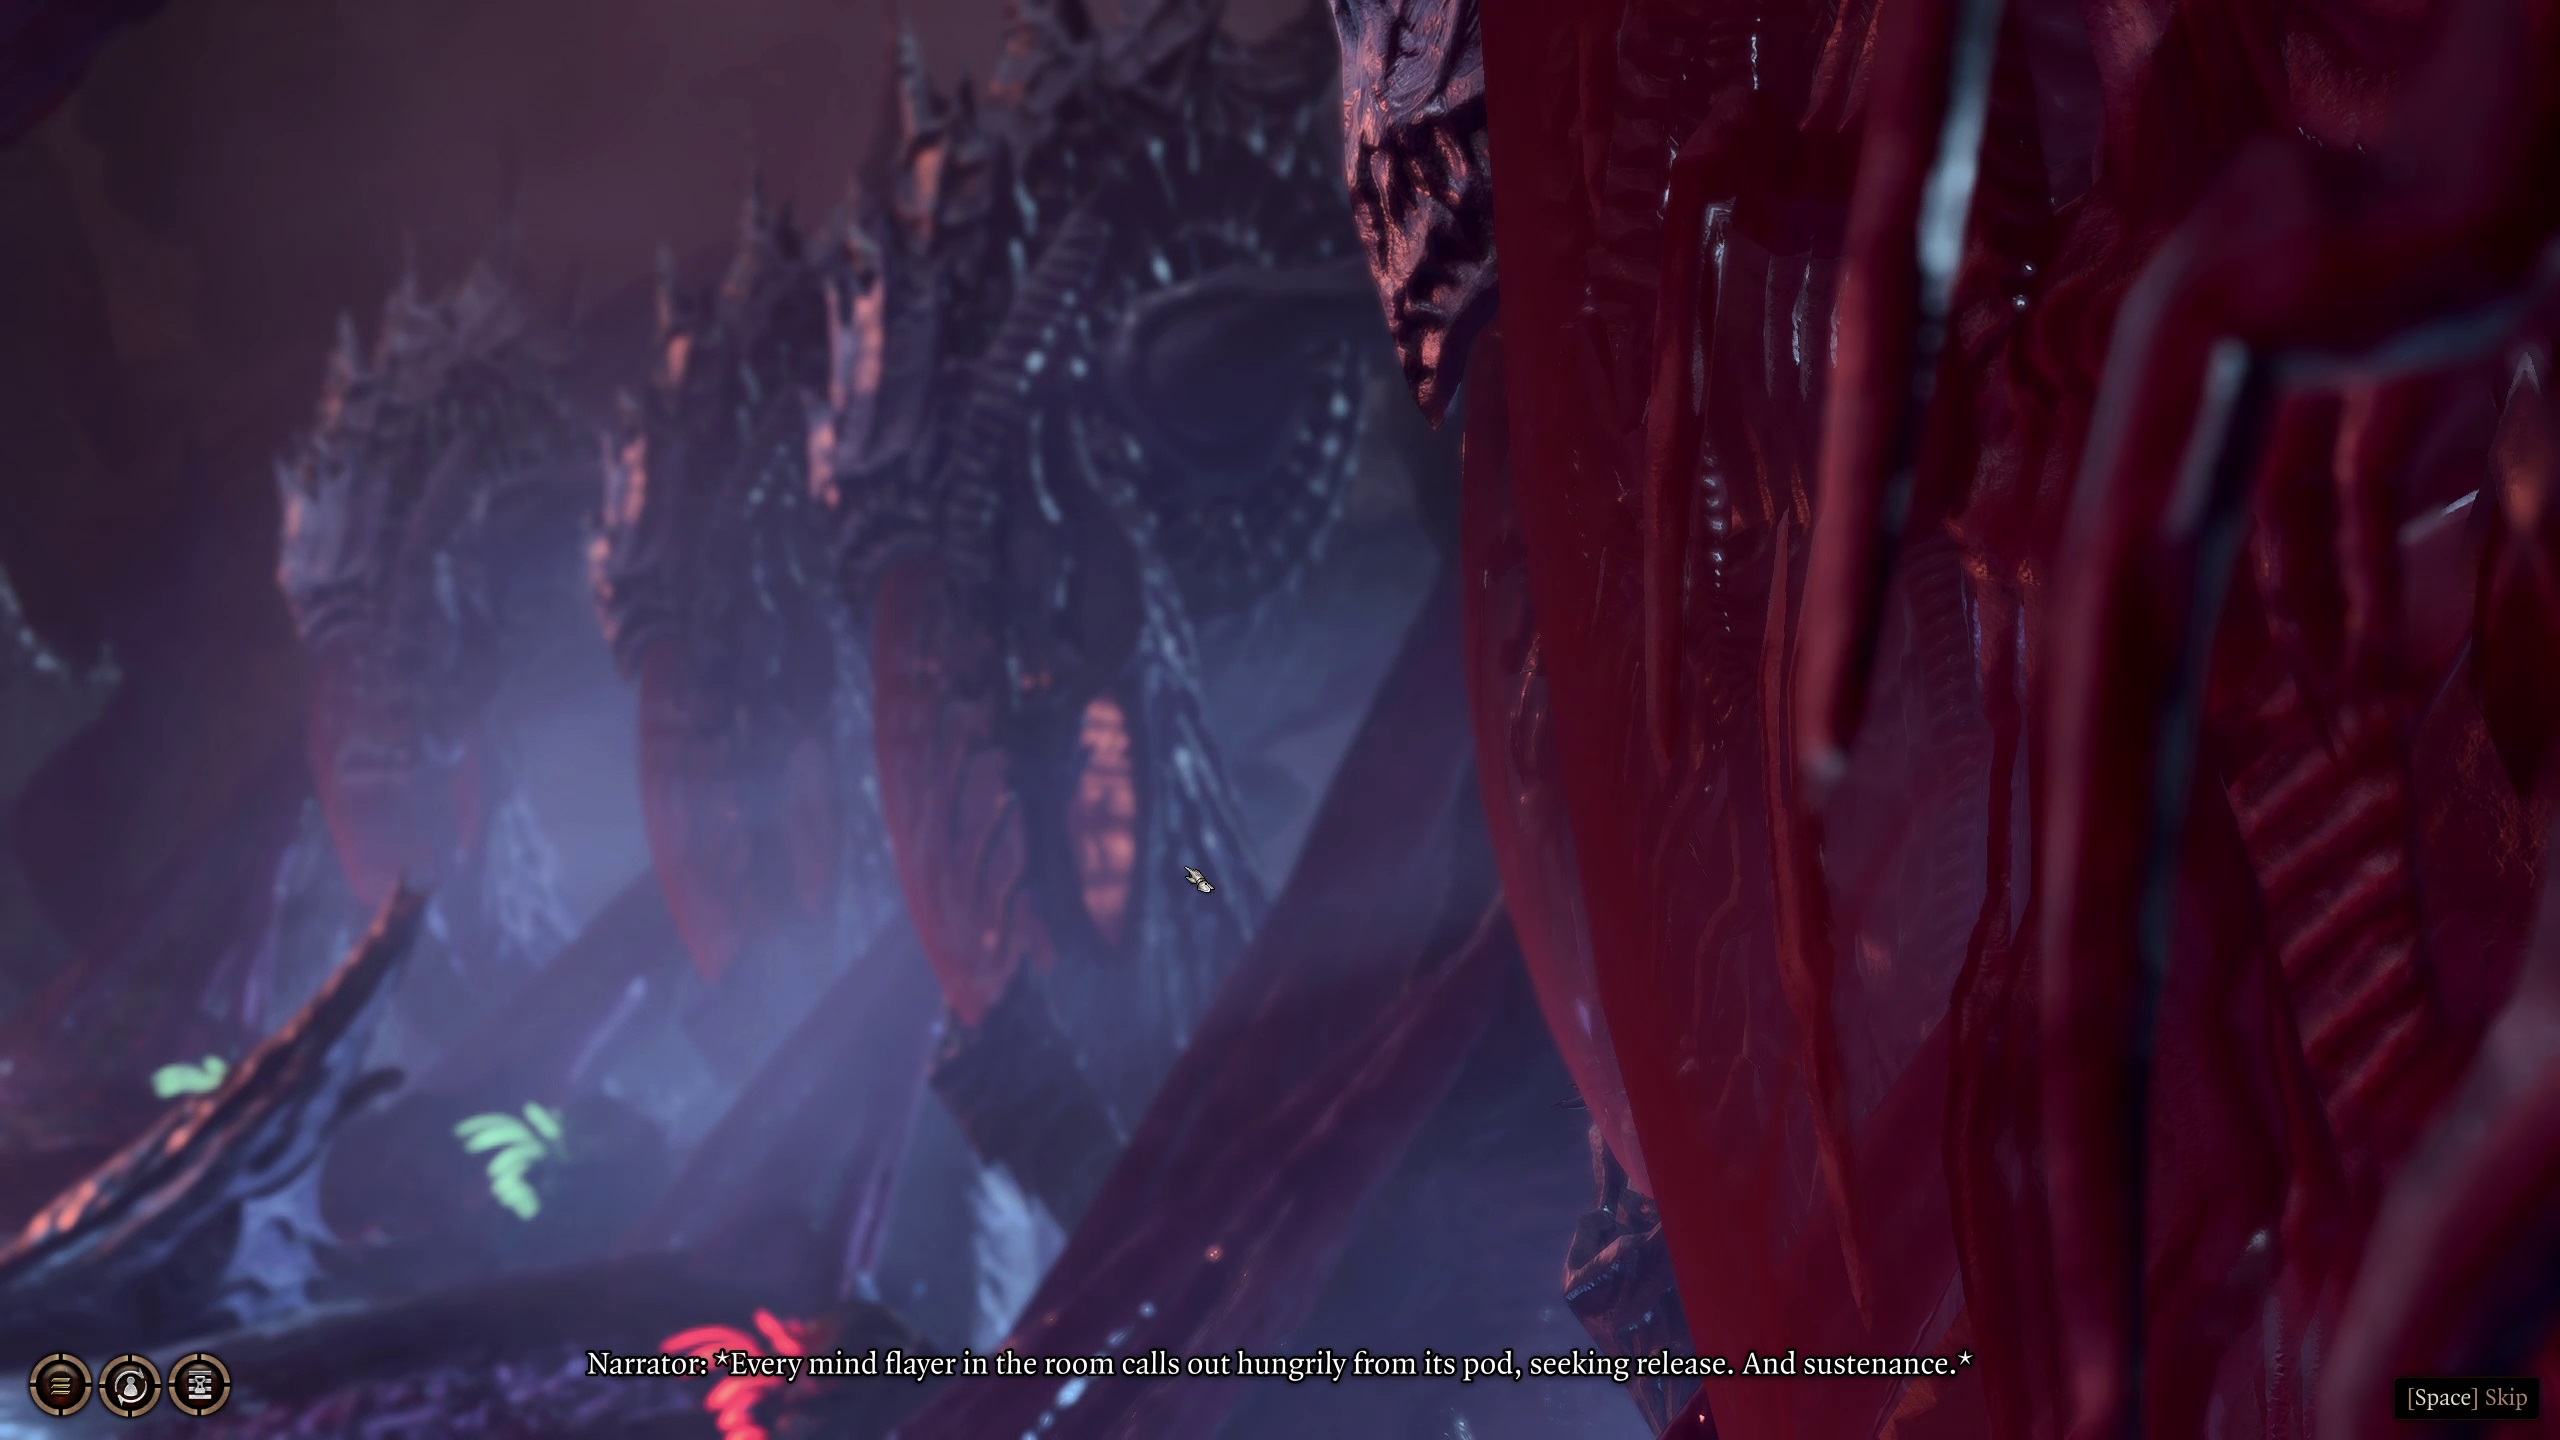
In this room, you will encounter an area lined with 10 Illithid Pods (7 of which are occupied), each with a neural apparatus that you can interact with to learn about the creature inside.
When you are ready, you can then interact with the larger Neural Appartus at the end of the room, where you will be given a choice: you can either purge the Illithid Pods, killing all of those encaged within, or you can release them, initiating combat with those who have already become Mind Flayers in order to save those that haven’t.
If you opt to release the pods, you will be faced with four Mind Flayers, as well as any Intellect Devourers in the area. Mind Flayers are formidable foes, but lack mobility, so good positioning will help avoid the worst of their attacks. On the bright side, Zevlor, Flaming Fist Manip, and Gauntlet Yeva will all still be humanoids, and so will be ready to leap to your aid: they are all front-line fighters, and so they can be extremely useful in tanking blows from the Mind Flayers.
Once you’ve cleared out the Mind Flayers and their minions, you will have an opportunity to speak with the survivors. Zevlor is the survivor most worth talking to, as you can question him about what happened that lead the Tieflings to their dire position. If Zevlor dies, it can still be worthwhile to speak to him with Speak With Dead as well.
Somewhere, the bodies tossed into the Oubliette must taken into the actual Colony to be prepared: this is that location. Here, you will meet Chop, a mind-erased bugbear butcher overseeing the operation here. If Lae’zel is here, she will advocate killing Chop, something you may want or need to do anyway, though he will not attack you unless you free Us.
Speaking of Us: yes, your favorite Intellect Devourer from way back in the Prologue’s Nautiloid will be here, provided Us survived the Nautiloid. If they did, you will be able to speak to them in a cage, and can learn from them and Chop that they are being kept due to “singing” differently than the other devourers.
You can free Us with a DC-14 Sleight of Hand check, or if you get the key from Chop. He will surrender it to you with a DC-14 Persuasion check, a DC-18 Intimidation check, or by using your Illithid powers and passing a DC-14 Wisdom check. Or you can simply pickpocket him or kill him to take it. If you are caught freeing Us without Chop’s permission, you will be given a chance to make the same checks, otherwise he will become hostile and attack.
Once you’ve freed Us, then you will permanently gain the “Summon Us” ability, allowing you to summon Us at any point. They will reveal that, in doing so, they will look to everyone else just like a cat. Isn’t Us great?
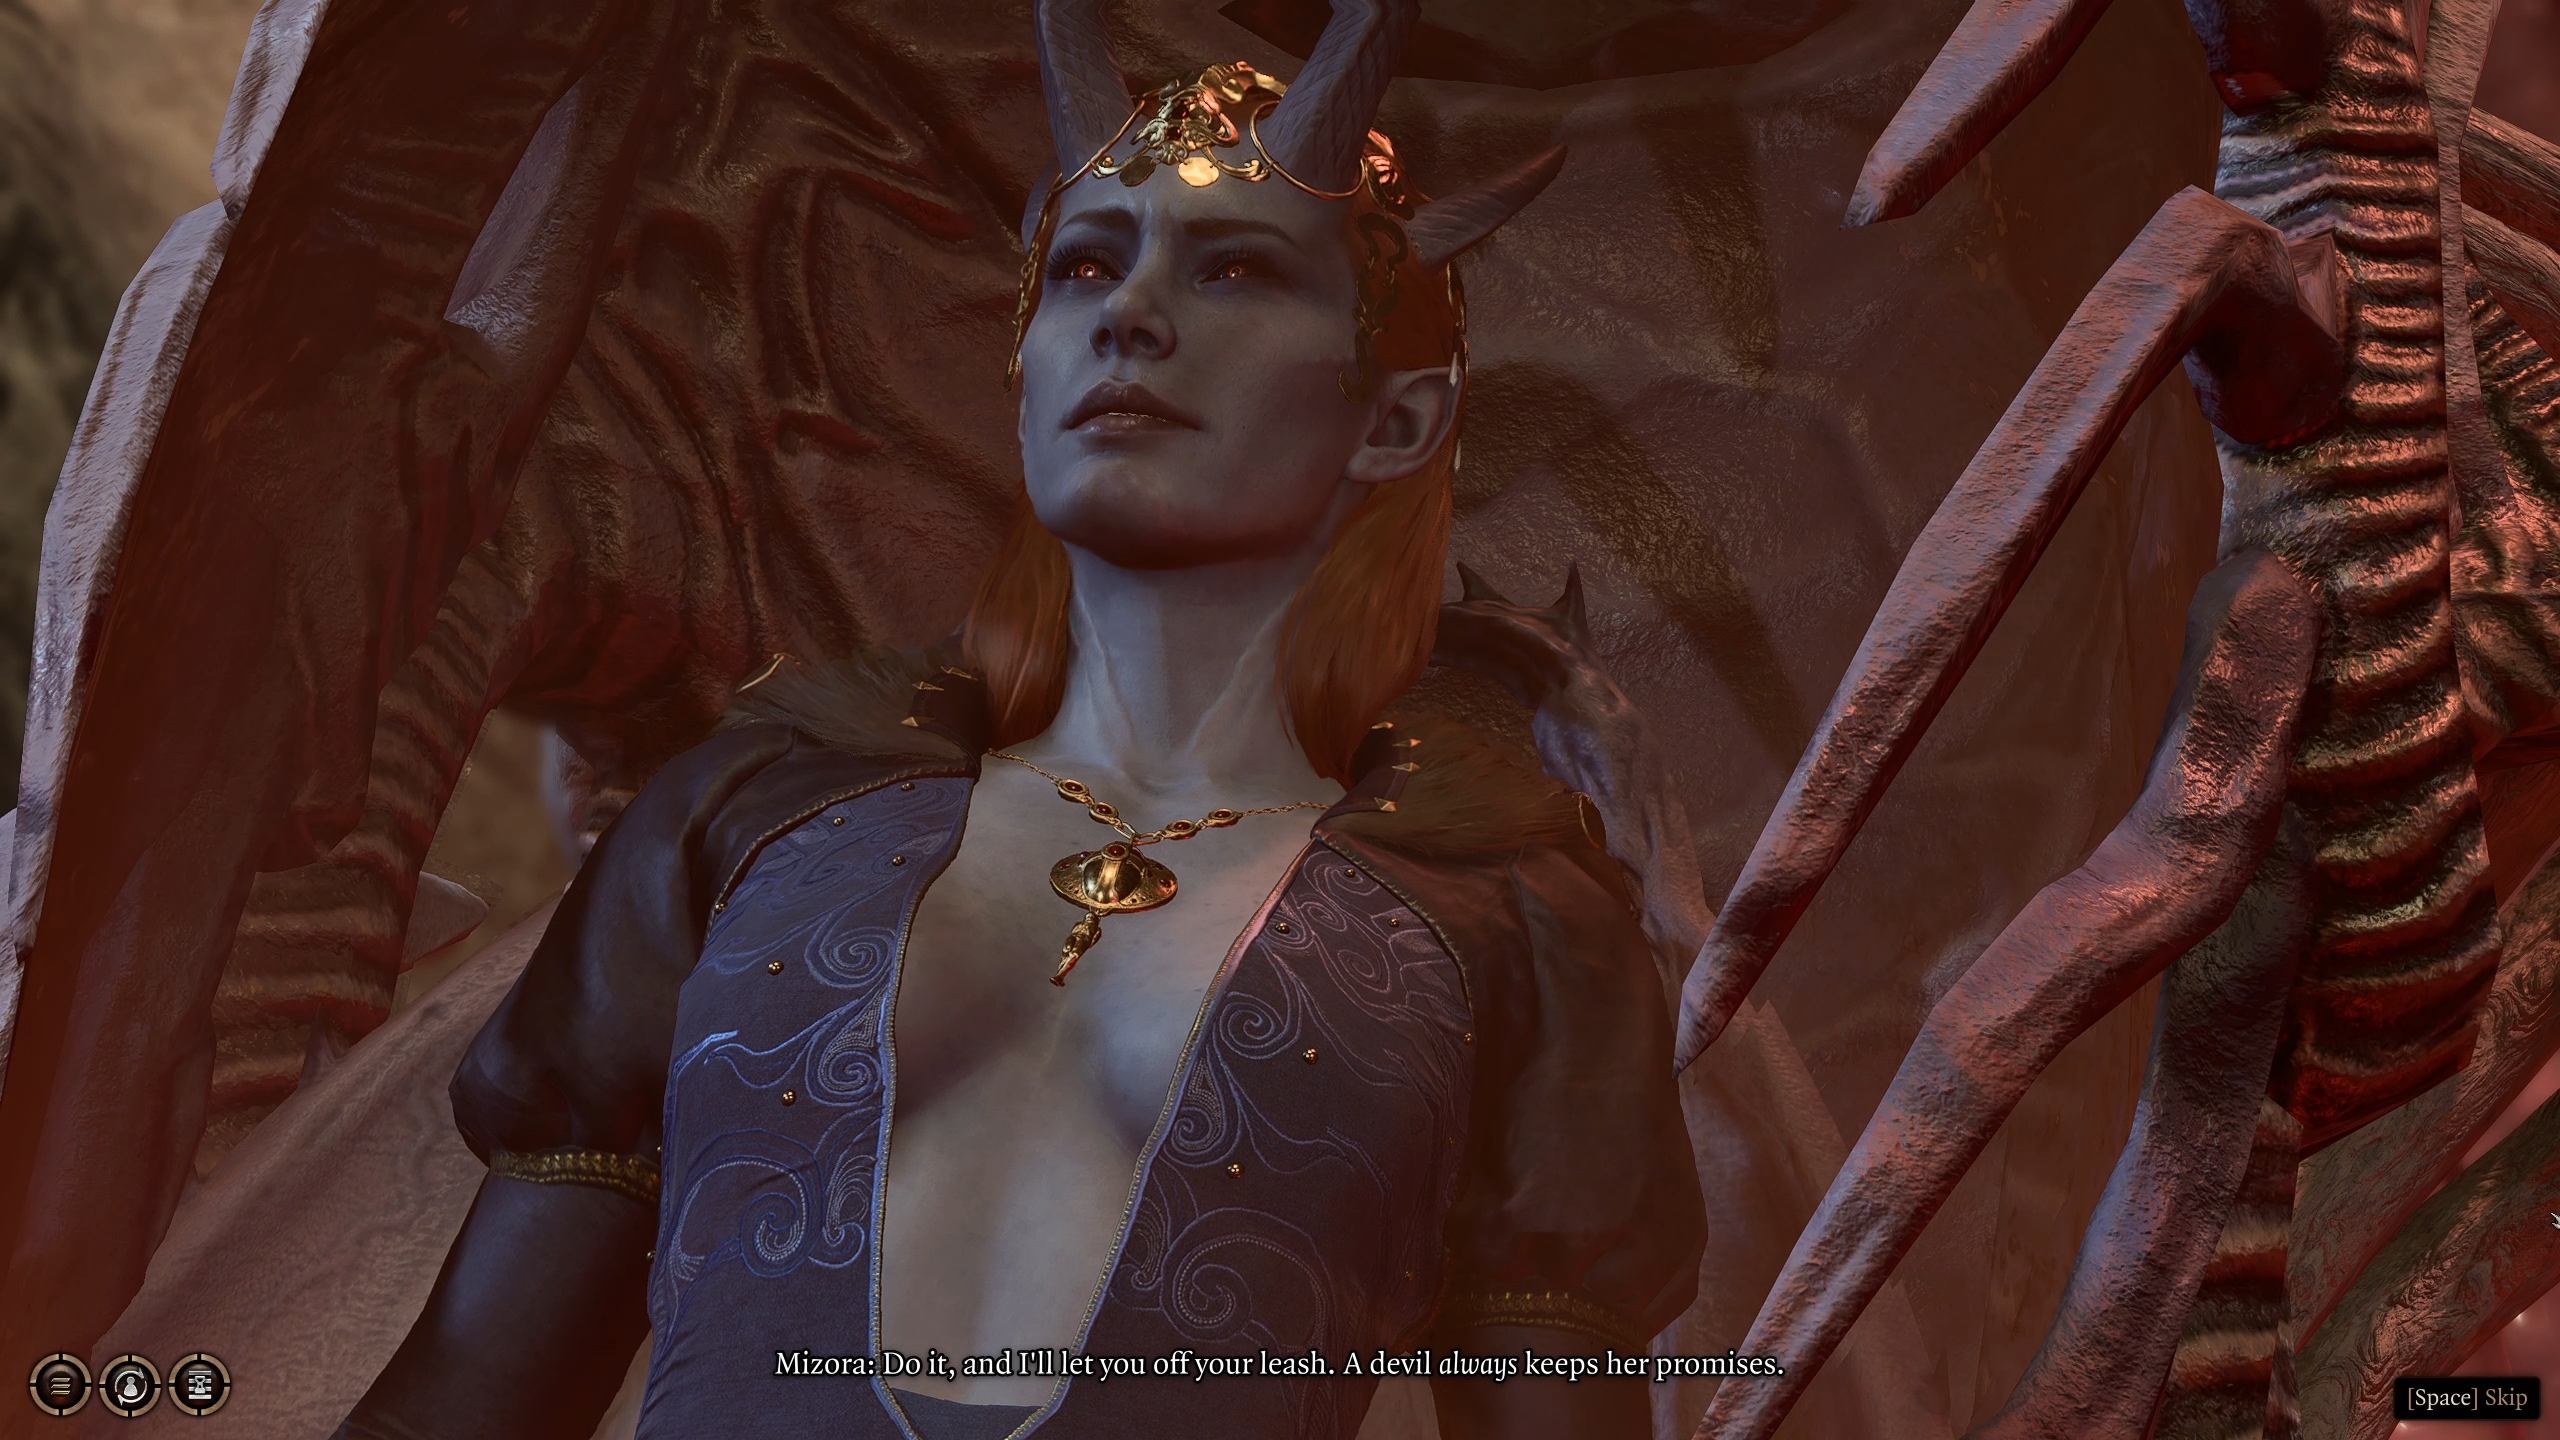
Just beyond the other Mind Flayer Pods (#4), you will find a perculiar prisoner in an isolated Mind Flayer Pod: Mizora, Wyll‘s Patron. When you find her, you will be given the option to either release here, as Wyll has been tasked to do, or to kill her then and there.
This choice, however, is a false one: should you kill Mizora, Wyll will instantly and permanently be killed, having been pulled to the Nine Hells due to his breach of contract. And Mizora, being a devil, will still be alive — albeit furious — due to the nature of the deal. In almost all cases, you should probably free Mizora. If Wyll is in your party when you do so, you can even pass a DC-16 Persuasion check in order to obtain the very good Infernal Rapier.
Once the party once again has the chance to Long Rest after rescuing Mizora, she will show up in camp that night in order to discuss the fine print of Wyll‘s contract.
Also worth noting for Dark Urge characters that you can reveal more about your backstory by interacting with the Pod next to Mizora’s for more context on how you came to be.
Here you will find the originating point for all of Moonrise Towers/Balthazar’s necrotic experimentation. And you’d better be ready, because this is a huge combat filled with aggressive, mobbing enemies. As soon as you enter the area, you will enter a combat with the following:
1 Death Shepherd
4 Winged Horrors
4 Greater Zombies
6 Regular Zombies
In addition, the Death Shepherd can ressurect Reconstituted allies.
This combat can be an absolute nightmare to get through if you don’t have a good party composition, and you can’t go back to change it while in the Mind Flayer Colony. The trick is to notice that nearly every enemy here is a melee bruiser that will try to get in your face, but only the fairly-weak Winged Horrors can get past your front lines, so making sure to have a powerful front-line character blocking the zombies and keeping them alive is the most important thing.
Once you have finished the combat, make sure to look around the area, where you will be able to find an eyepatch belonging to Mol, which will progress her questline (to be finished in Act 3).
Near the Necromantic Lab, you will find the Mind-Archive, and the Slack-Skinned Head through which it interfaces. By interacting with the pedestal near the strange head, you will be able to insert any brains you find, allowing you to speak to the head to learn from them.
There are 6 brains found in the Mind Flayer Colony, as well as 2 that could’ve been found way back in the Nautiloid during the prologue of the game. Each of these has different insights, and one can even give you a permanent buff:
The True Mind can be found right next to the Interface.
The Willing Mind can also be found next to the Interface.
The Butchered Mind can be found on a shelf near Chop (#5).
The Fresh Mind can be found near the upper floor of the Elevator (#11).
The Closed Mind can be found in one of the rooms bordering the Barracks (#10).
The Waking Mind can be found after completing the Mind Puzzle (#9) and taking it from the vault. It will ask that you destroy it, and if you do so than it will give you a permament Advantage on Intelligence saving throws.
The Dark Mind could’ve been found on the Nautiloid in the same room as Shadowheart was first encountered.
The Slave Mind could’ve been found in the room where you met Us aboard the Nautiloid.
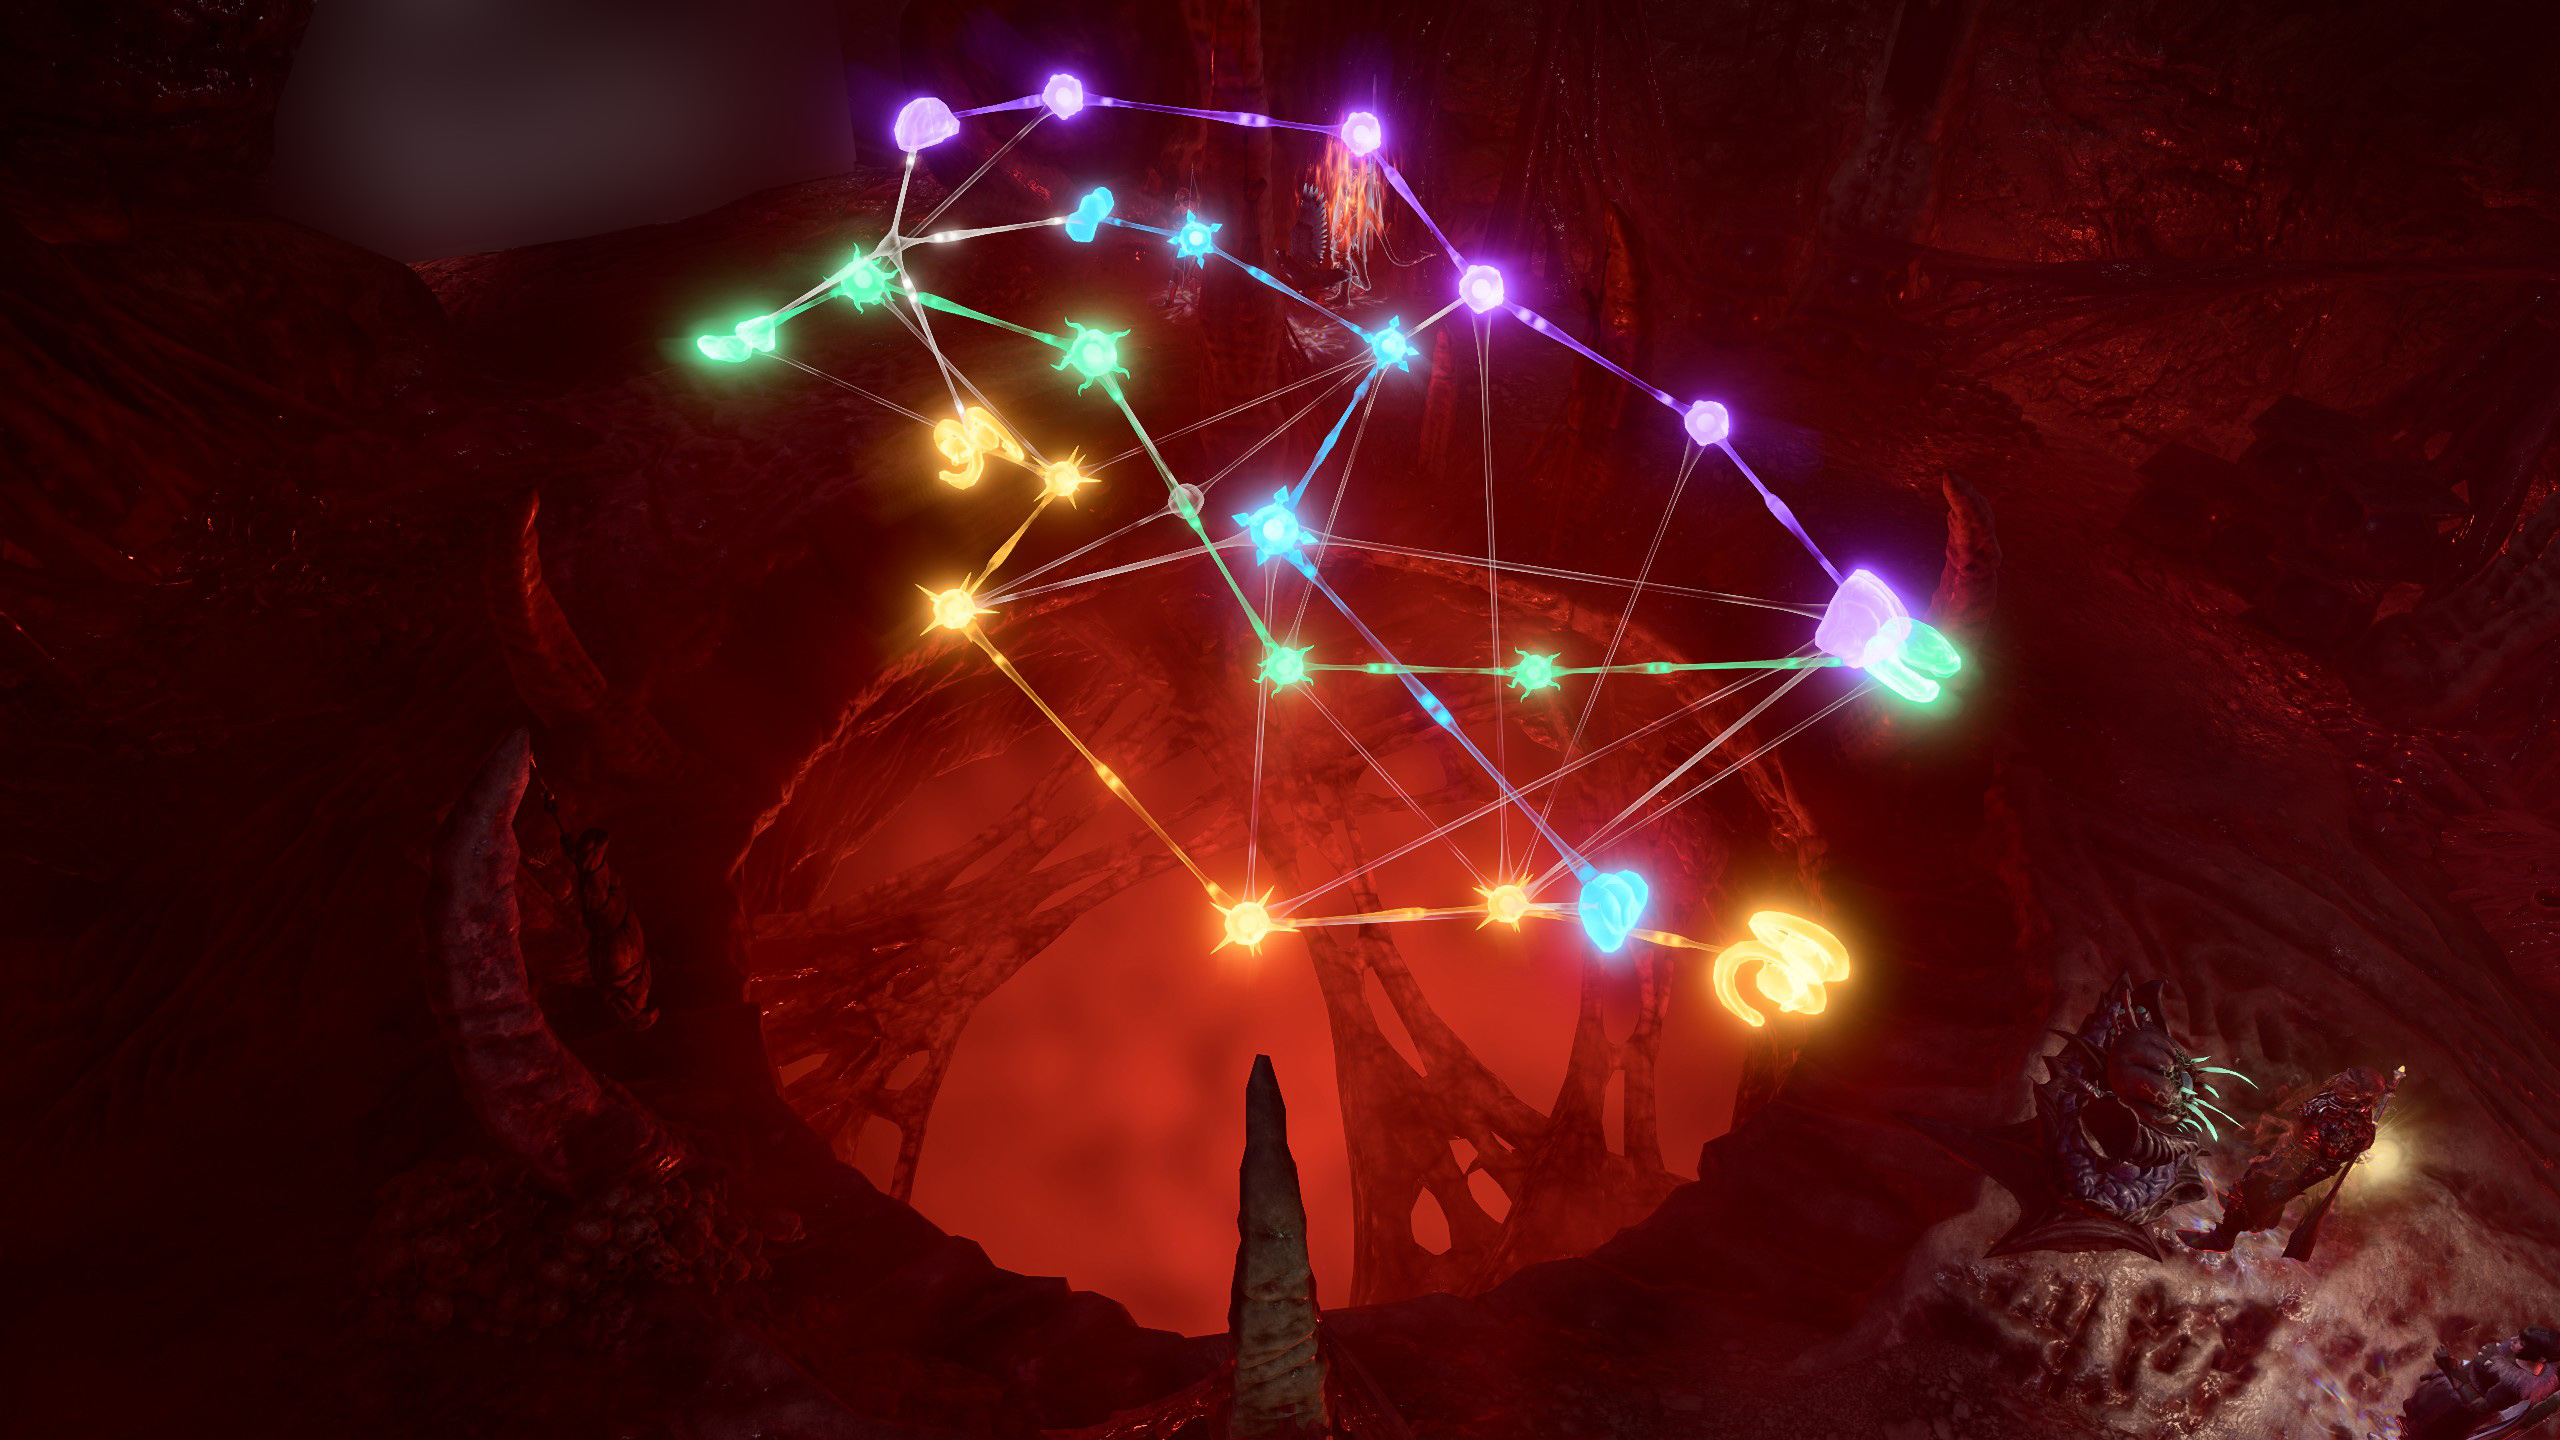
This Mind Puzzle will activate once you approach the interface in front of it, and is locking you out of a vault. In order to open the vault, you’ll need to solve the puzzle, which requires you to connect each emotion from one side of the puzzle to the other, drawing 4 non-overlapping paths from each.
The way to solve the puzzle is shown below.
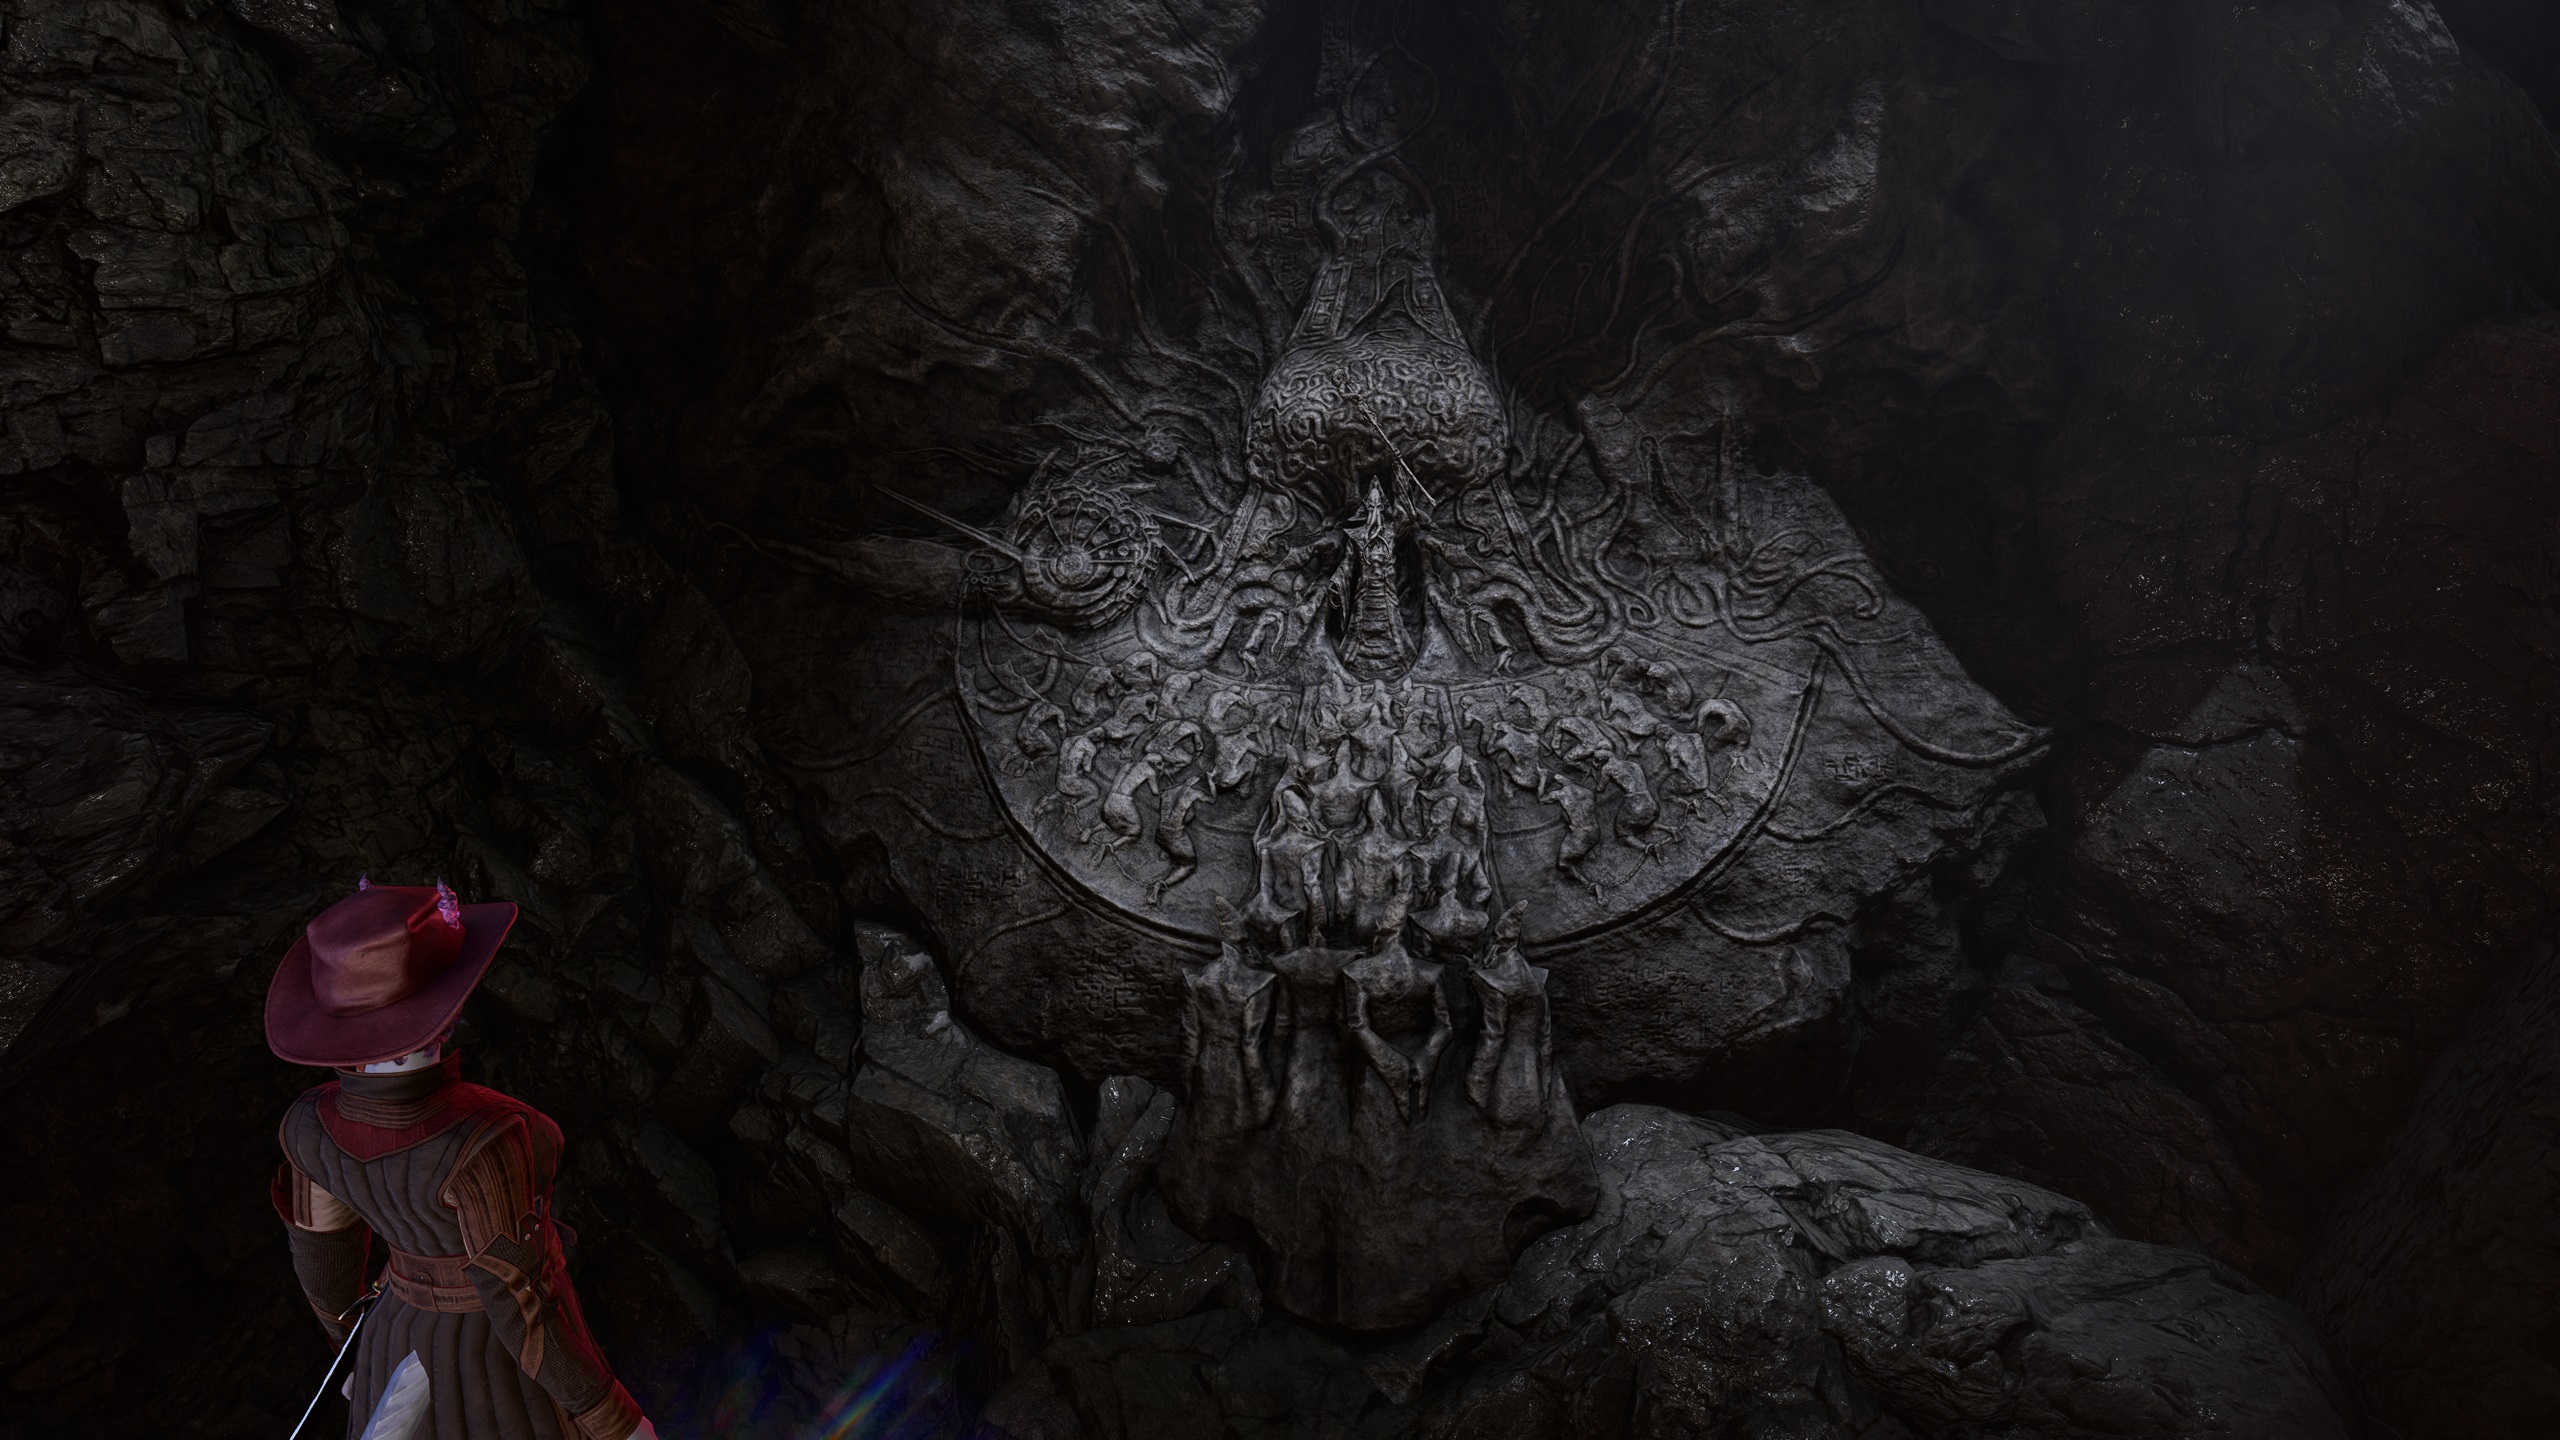
Once you’ve completed the puzzle, the Flesh-Wrought Door behind it will unlock, allowing you to access the (most important) Waking Mind for the Slack-Skinned Head (#8) as well as a relief that will reveal more to you about the Illithid’s plan.
It will unlock the map for the area as well as the relief behind a flesh-wrought door.
The Barracks is a room with several offshoots, each with their own treasures. As well as the four vestibules in the corner with randomizes chests and various notes, you can also locate the Closed Mind to be used in the Slack-Skinned Head (#8).
More interesting, or perhaps more concerning, will be the Mistress of Souls: Kressa Bonedaughter. When you come across her, she will be blessing her comrades. Interrupting this ritual, even if you sided with Ketheric, will force you to reveal that you are a True Soul or pass a DC-18 Deception check to get her to let you leave.
Otherwise, if you wait for the ritual to finish and speak to her, two things could happen. If you fought Ketheric on the Moonrise Towers rooftop and he fled, then she will be on alert, and you will need to convince her that you are on Ketheric’s side with a DC-21 Deception check.
If you somehow found your way here without fighting Ketheric, however, then you will be able to speak to her and, by citing your True Soul status or passing a DC-16 Persuasion check, get her to bless you with the Myrkul’s Gift blessing, giving you temporary Hit Points and damaging melee attackers until your next long rest. It is also worth noting that Kressa Bonedaughter is obsessed with the Dark Urge, and so will have unique dialogue and be uniquely forthright to Dark Urge characters.
Failing any checks or revealing in any way that you were resposible for Ketheric’s fleeing into the Colony will cause Kressa and her allies to attack you, forcing you to dispatch them. Compared to the other fights in this area, they should pose little threat.
Here, you will be able to find the Elevator that can lead down to the final boss of Act 2 (#13). Before descending, you will want to make sure that you’ve, at minimum, rescued Mizora (#6), as the Warning Door (#12) will make clear you should do.
Near the top of the elevator is one of the most important things in the Mind Flayer Colony: a Restoration Station. This station can be interacted with to fully recharge your party, as though you’d take a Long Rest, allowing you to recover before the final boss or before any of the fights in the Colony.
Serving as a final check to make sure you’ve done everything you need to in the Mind Flayer Colony before facing off against the final boss of the Act (#13), this door will give you the chance to turn back should you need to. Most especially, it will impress on you whether Wyll‘s patron Mizora (#6) is still imprisoned, in which case she ought to be found first. In addition, if Gale is present than he will be given a choice that can result in achieving a very early (but also largely unsatisfying) game ending.
After confirming at the Warning Door (#12) that you want to continue, you will enter a cutscene. Here, you will be introduce to the Chosen Three and the Netherbrain, the group behind the soon-to-come Illithid invasion of Baldur’s Gate. Ketheric is one of the Chosen Three, as is Enver Gortash (who has history with Karlach), but the third member, Orin the Red, will be a mystery to all. It is here when Gale will be given the choice to activate the orb in his chest, destroying everything here and providing the game with its earliest possible full ending.
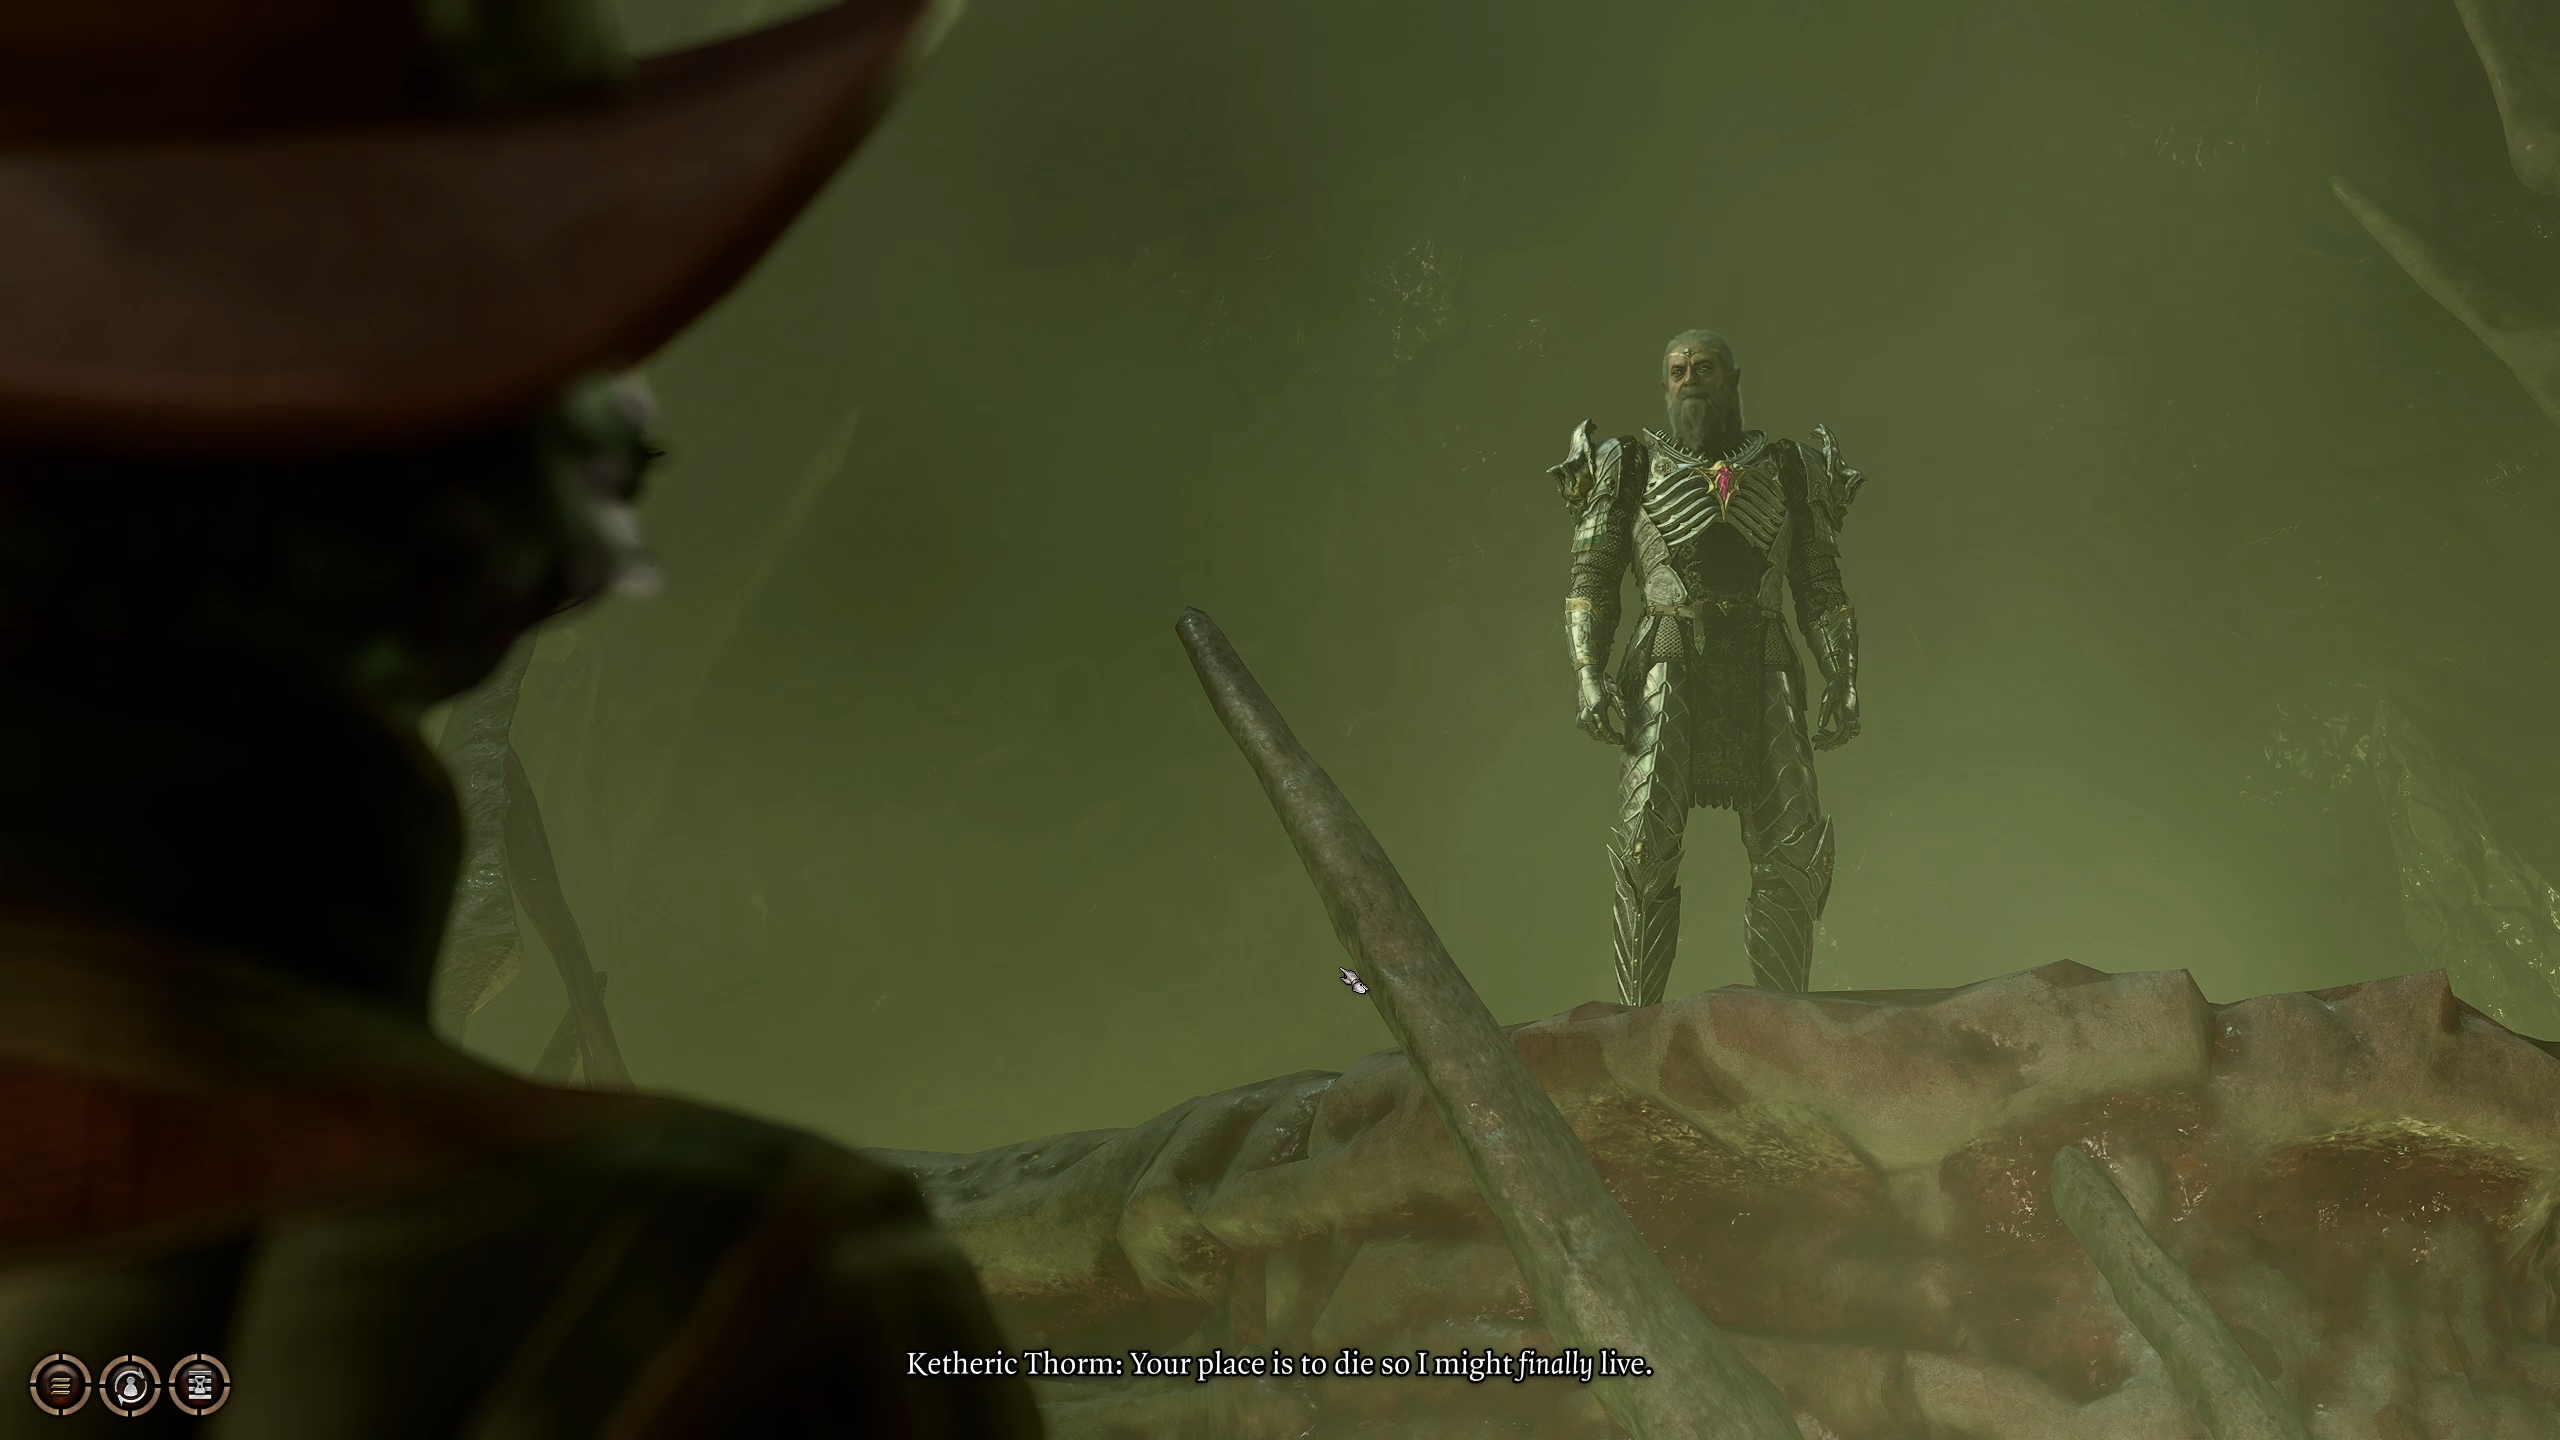
Ketheric Thorm
Provided Gale doesn’t nuke the place, Ketheric will eventually be left alone in this room. When you approach him though, he will reintroduce himself. The Nightsong will be present, caged by Ketheric. Isobel will also be imprisoned if she was kidnapped earlier (you monster). Once the dialogue is finished, you will usually end up in combat with Ketheric.
If you opt to offer Ketheric mercy, you can convince him to accept it with a DC-18 Persuasion check, letting you skip this phase of the fight and move on to the Apostle of Myrkul right away. This may not be the best choice, however, as it does not let you use the easier Ketheric fight to prepare to fight the much more difficult Apostle of Myrkul, which requires much more careful positioning.
Should you end up fighting Ketheric, there are some things to keep in mind. It should be noted that, though Ketheric will begin the fight invincible, he is actually not that deadly of a foe himself, being a relatively low-damage spellcaster. Because of this, you should be wary of how many spell slots and consumables you use. There is a second, much-harder phase of the fight after this one, and you will want to have as many resources as possible for that, so try to take on Ketheric as conservatively as possible.
In order to knock him out of invincibility, all you need to do is go to Dame Aylin, who is chained on the right side of the arena, and use a Help action to free her. Immediately, she will attack Ketheric, who will no longer be invincible.
As you go through this phase, you should use it as an opportunity to kill the Mind Flayer and other enemies, as well as to position your toughest fighter on the central platform by the time Ketheric dies so that you can be ready for the next stage of the fight.
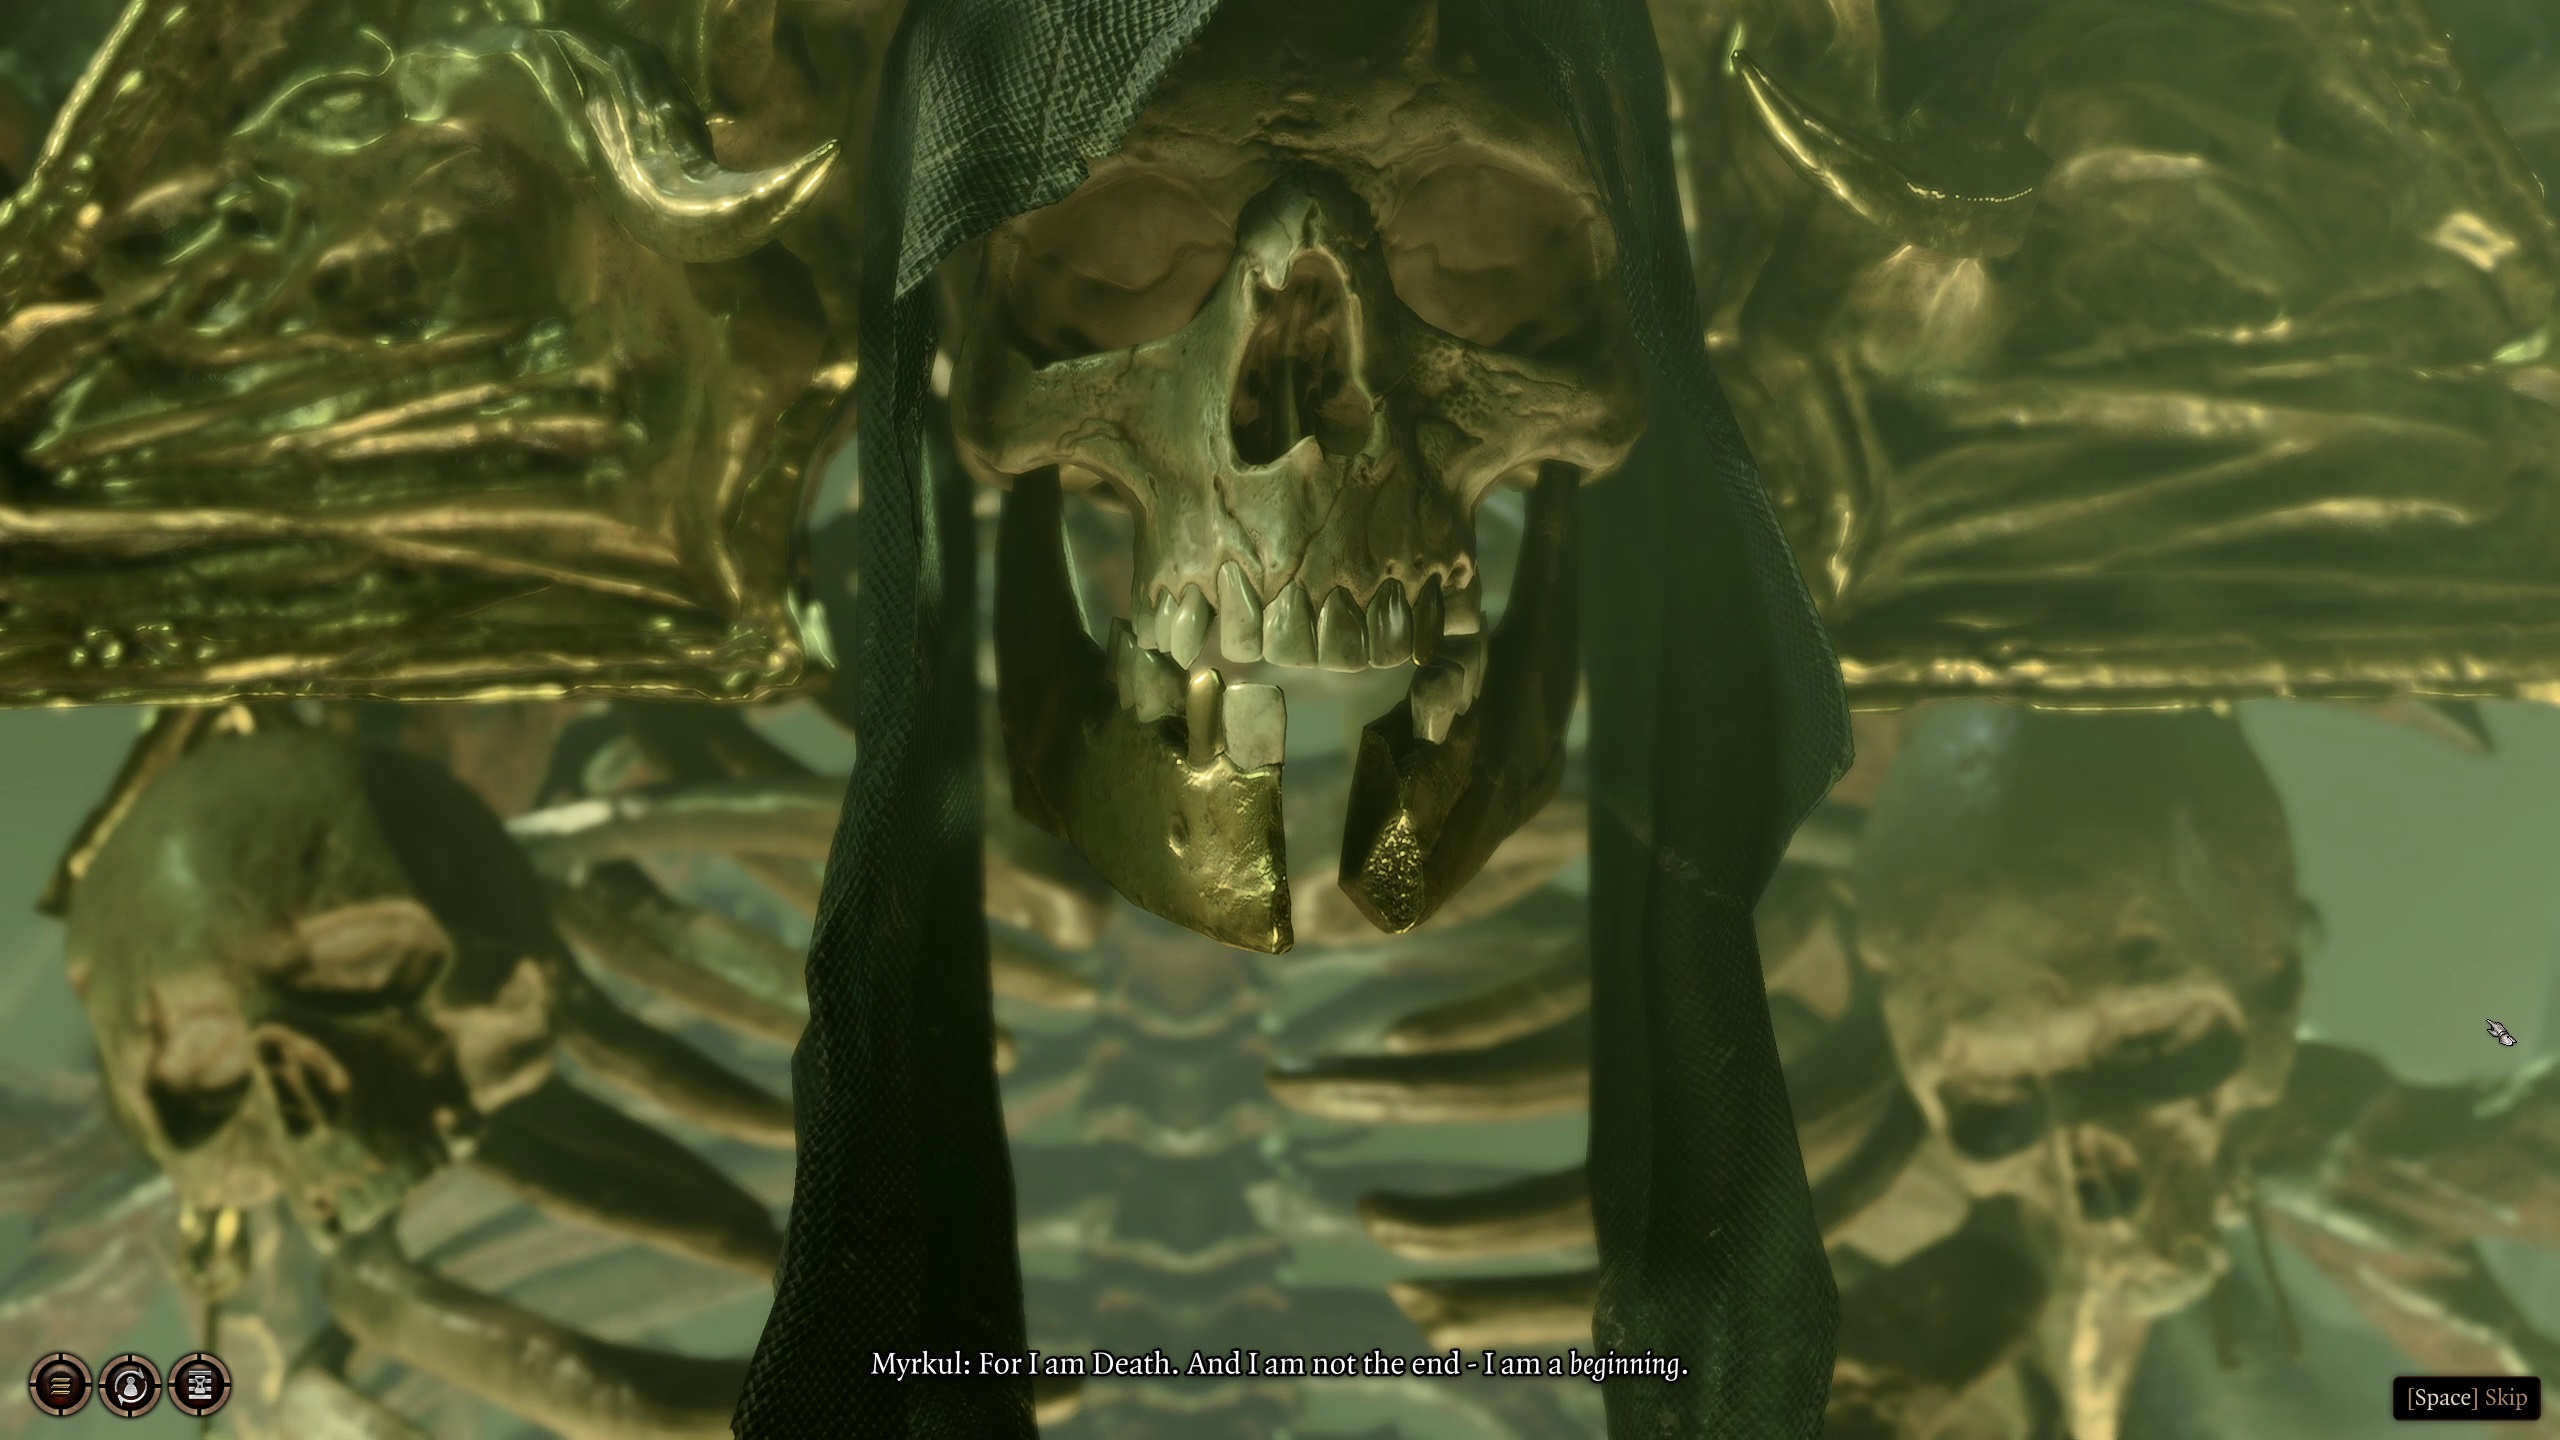
Apostle of Myrkul
After you kill Ketheric or convince him to consider mercy, he will fall into the pit in the center of the boss fight, where he will be replaced by the gigantic, skeletal Apostle of Myrkul, a true avatar of the god of death. Naturally, this means that this skeleton is one of the most dangerous fights in the entire game, so get ready to face down death.
After the intro cutscene, you will want to act quickly. If you skipped Phase 1, you will want to get to Dame Aylin as quickly as possible so she can join you in this fight.
As well, if you didn’t already have your toughtest fighter on the central platform where the Apostle is, you should get them there as soon as possible. That is because, primarily, this fight is primarily about preventing the Apostle and his allies from using their deadliest attacks.
So long as there the Apostle is engaged in melee, the Apostle will not use Call of the Damned, which deals lots of damage and pulls all creatures in range toward him (disrupting positioning). If the Apostle uses his scythe to knock the melee fighter back, they should move back in. They will not be able to heal while this is happening, thanks to the Apostle’s Bone Chill effect, and so you will want to take this fight on as quickly as possible, before the Apostle kills your fighter and can target your other party members.
Thankfully, Dame Aylin will engage the Apostle as soon as she can as well, which can also prevent his attacks, though if she dies you will be on your own (though she will be resurrected automatically after the fight).
Also for the sake of avoiding the Apostles worst attacks, you will want to keep an eye out anywhere in the arena for Incubate Death eggs, which will hatch into Necromites. Should one of these Necromites spawn, the Apostle will be able to consume it, allowing it to use its deadliest attack: Finger of Death, which can take out party members in one or two hits. Other remaining enemies in the arena can largely be ignored — they will perish if you defeat the Apostle — but Incubate Death eggs and the Necromites that hatch from them must be destroyed.
Aside from that, play aggressively. Any action not taken to delay the Acolyte’s worst attacks should be spent maximizing damage on him. Healing will be limited, and the Acolyte’s attacks can easily ramp in deadliness after even one of your party members fall, and so you want to get through it as quickly as possible.
Once the Acolyte of Myrkul is defeated, Dame Aylin will revive if she was killed and comment on Ketheric’s final defeat. You will be able to interact with Ketheric’s body, which will trigger a message from the Dream Visitor indicating what your next steps should be: to go to Baldur’s Gate itself, where you will need to find the other two of the Chosen Three — Enver Gortash and Orin the Red — in order to ultimately stop the Netherbrain’s plans.
After that, you can loot the body and leave out of the new portal (B) to return to Moonrise Towers, where you will be given a long cutscene summarizing the result of many of your actions in Act 2, primarily focusing on Isobel and Nightsong, should either or both live. Once it finishes, you will be able to explore the areas in Act 2 freely again, though you now have a calling to move on from this shadow-cursed place.
A climbable cragged wall in the Oubliette will put you back in the Moonrise Towers Prison, in the area behind the cells themselves and near the boat that can be used to enable a prison break.
After defeating the Apostle of Myrkul (#13), a portal will appear near where it was. You will be able to take it to return to Moonrise Towers, giving you a long cutscene to wrap up Act 2. Once it is done, a certain voice in your head will push you to finally go to the Road to Baldur’s Gate.
Where To Go Next
There is only 1 location you can go to from the Mind Flayer Colony. However, after completion, it is very likely that you will want to go to the Road to Baldur’s Gate to complete Act 2.
Moonrise Towers: Whether you are climbing out of the Oubliette and back into the prison of the Moonrise Towers, or teleporting out at the end of the Colony proper.
Road to Baldur’s Gate: After returning to the Moonrise Towers, having dealt with the Colony, it will likely finally be time to head to Baldur’s Gate itself.
Graves is an avid writer, web designer, and gamer, with more ideas than he could hope to achieve in a lifetime. But, armed with a mug of coffee and an overactive imagination, he'll try. When he isn't working on a creative project, he is painting miniatures, reading cheesy sci-fi novels, or making music.