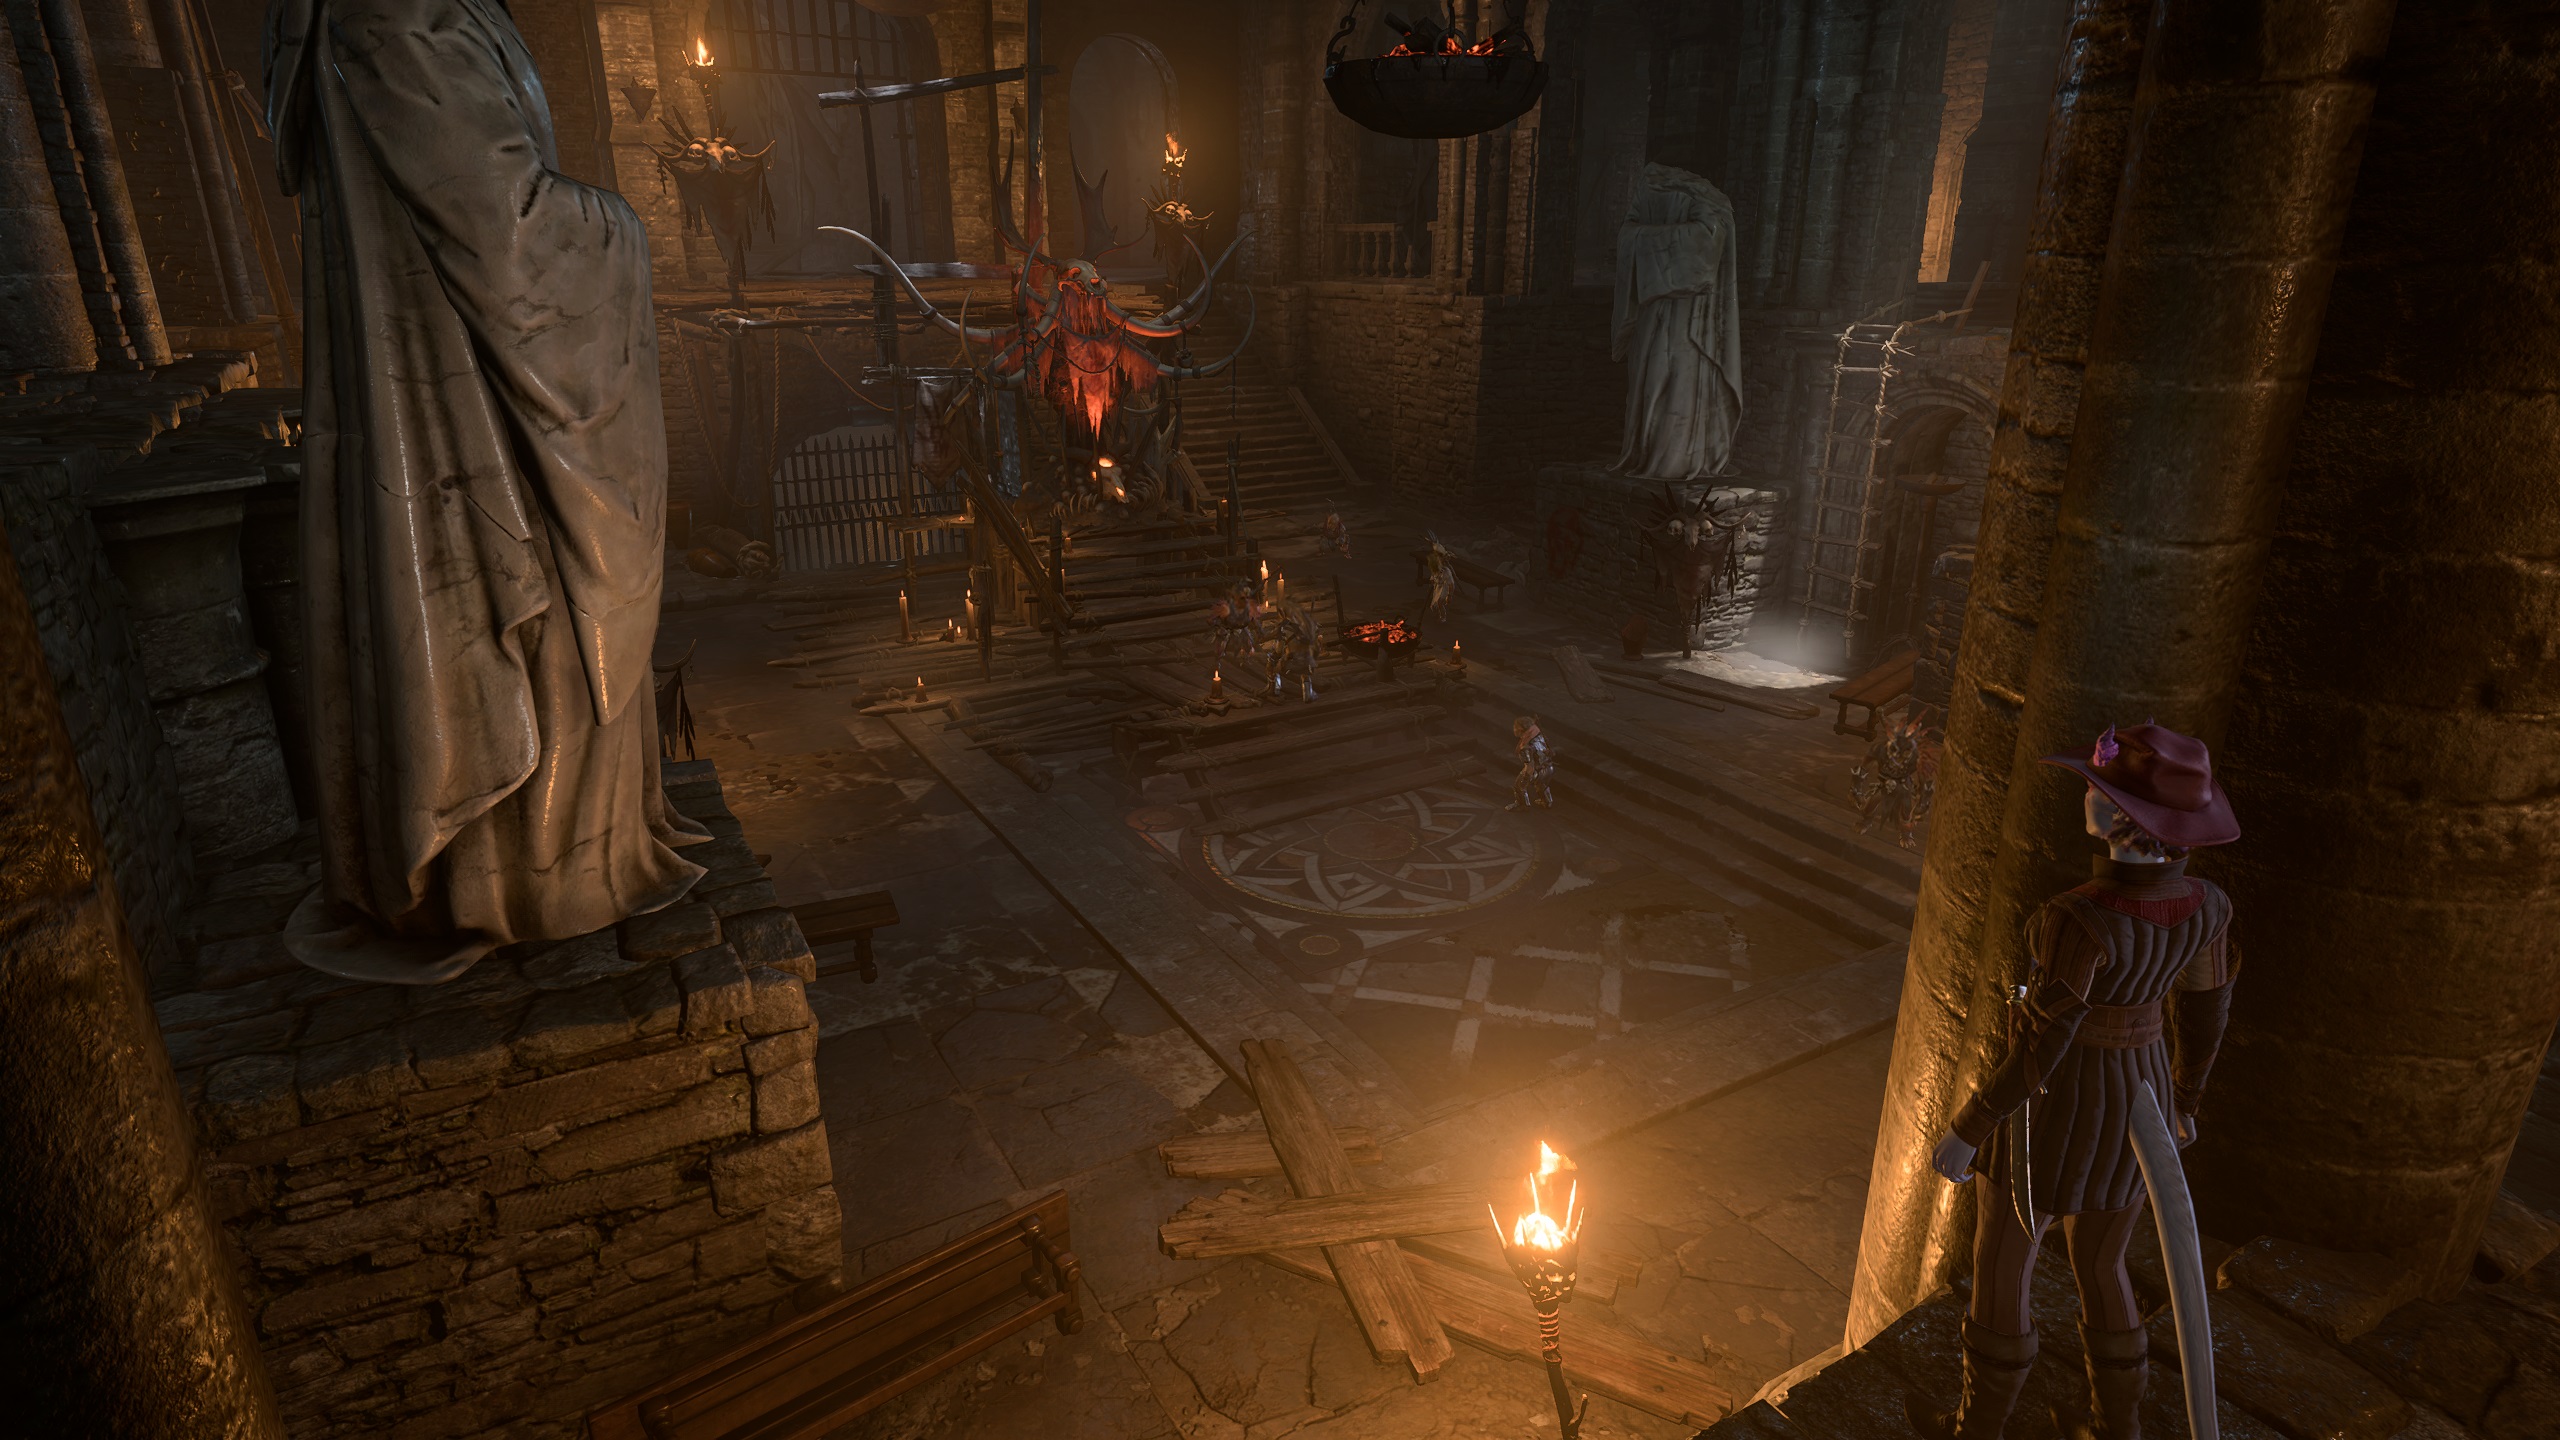
This walkthrough will guide you through the Shattered Sanctum, a once-holy site that has been overrun (and run-down) by a huge Goblin army. The massive structure has tons of things to do and secrets to find, and is the location of not one, but two (mutually exclusive) companions, Halsin and Minthara.
When you first come in, you will be greeted by several Goblins guarding the entrance to the Shattered Sanctum. If you freed Sazza earlier (as part of the Rescue the Goblin Sazza quest), then she will be here to vouch for you. Alternatively, you can pass a DC-15 Intimidation or Deception check to get through. Drow characters, however, can enter without trouble.
Alternatively, if you choose to fight the Goblins, there will be 6 of them, include 2 snipers. But, taking them out will not automatically make the rest of the Goblins hostile, allowing you to take them out if need be and still explore the Sanctum unbothered.
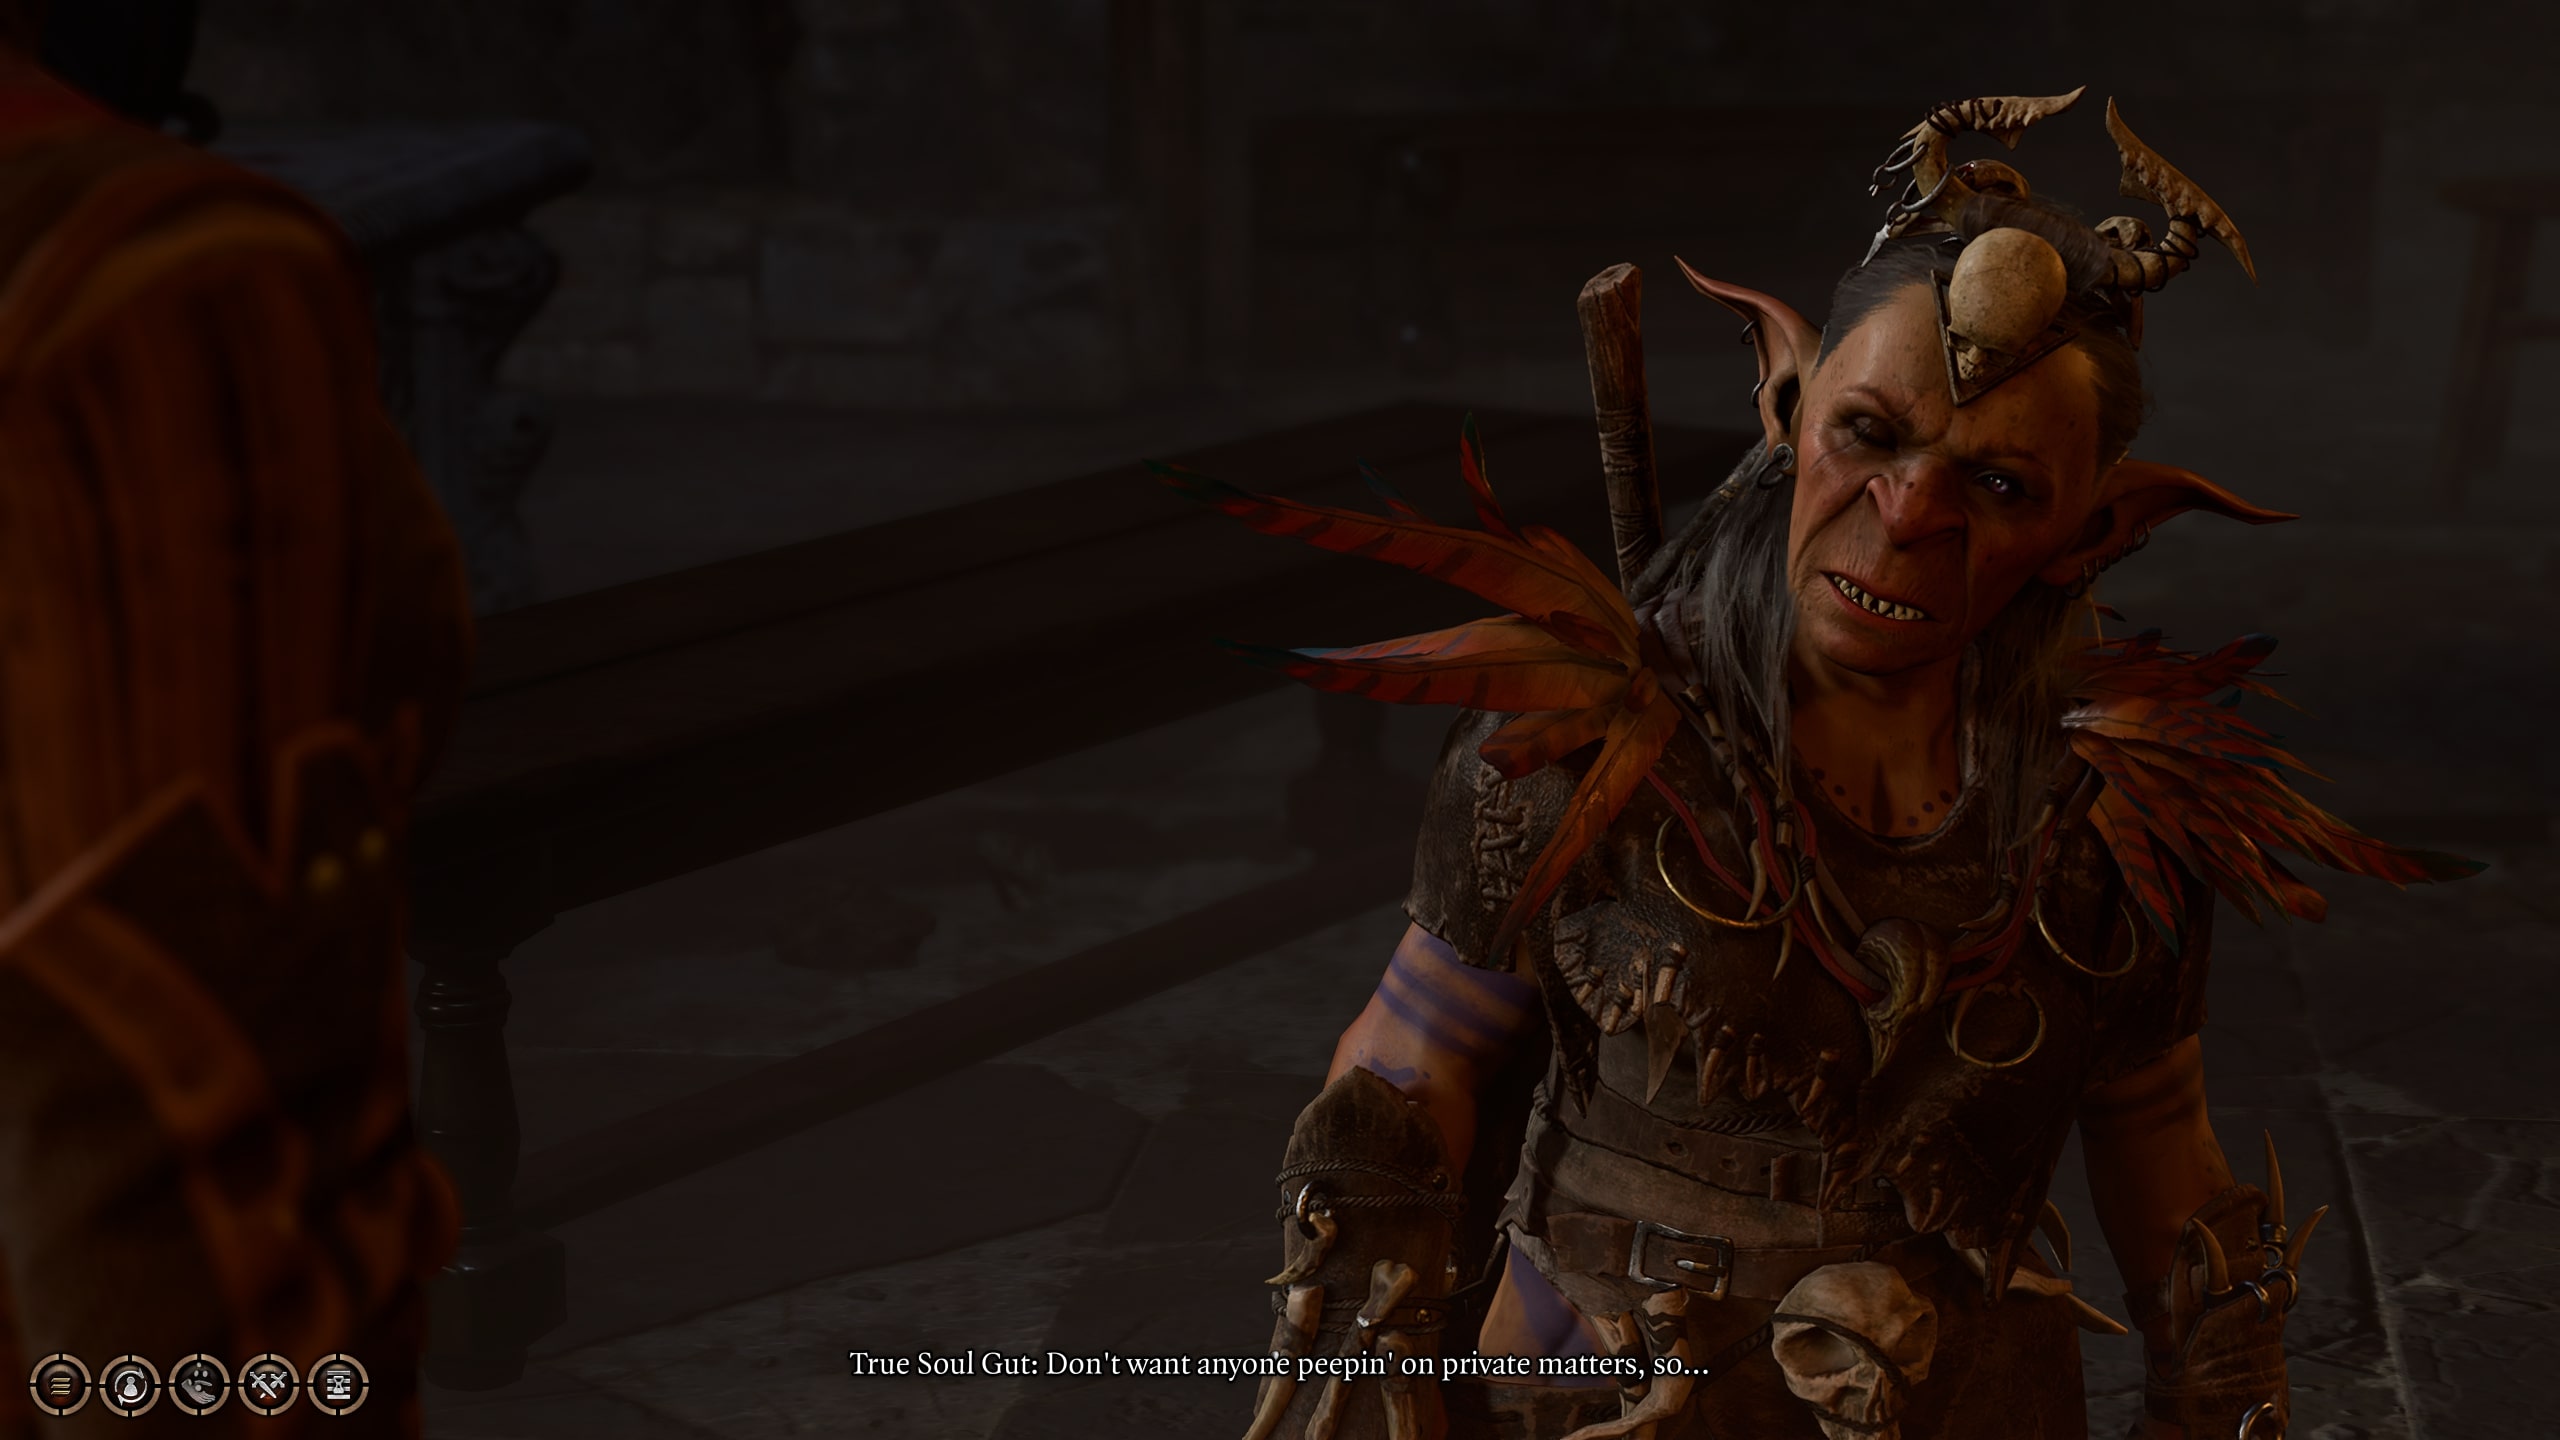
One of the first sites you will see after coming in either entrance is Priestess Gut, at her Altar. You can speak to her, where she will offer you a brand. Accepting this brand allows you to become, well, Branded, which can open up a few unique dialogue options in the Shattered Sanctum.
Regardless of whether or not you accept Gut’s brand, you’ll receive a vision. After which, provided you don’t start a fight with her, she will invite you into her room in order to conduct a procedure to help “cure” you. Naturally, you should be wary of her “generosity”.
Also worth noting is that killing her is one of the earlier opportunities you have to take a Mind Flayer Parasite Specimen, as well as a decent talisman and shield.
Roah Moonglow is a gnome who has decided doing business (including, perhaps, slave-trading) with the goblins is the best course of action. But, regardless of your opinions of her involvement, you might just be interested in her storeroom. The guards won’t let you in, but by entering via the rafters or by going through the mysterious hole in Priestess Gut’s back room (#6), you can access it in secret. You can also use that same Mysterious Hole to enter her back room, bypassing the ogre Polma and giving you straight access to the puzzle leading to the Underdark.
The room is filled with 5 Smokepowder barrels, which are supremely useful explosives that deal tons of damage and can be used in a variety of ways, if you can tolerate their high weight (perhaps by giving the barrels to a Fighter or Barbarian). Of particular note: if you plan on going to the Underdark after, these barrels can be extremely useful when you reach the Grymforge, in a certain location where explosives may be required.
Also worth noting is a chest filled with gold requiring a DC-18 Sleight of Hand check to open.
Once you’ve spoken to Priestess Gut in the entrance hall (#2), she will meet you here, in what appears to be a starkly-adorned room, where she will attempt to “help” you. The nature of her help is more than a little suspicious, though. Firstly, she will force your party to split, and you will have to direct the other 3 members out of the door before she will continue dialog with you. Then, she will probe your mind and offer you a concoction to drink.
If you try to block her out of your mind, refuse the drink (which a successful passive Arcana check can identify as Werejackal Blood, a sleeping potion), or drink it while having elvish ancestry that makes you immune to sleep effects, Gut will take offense and attack. Otherwise, if you let her into your mind, drink the potion, and it takes effect, you will find yourself cuffed in a call in her back room (#7).
This is the door to the Defiled Temple, which Priestess Gut has made her home (and which leads on to the Underdark). It can be picked with a DC-10 Sleight of Hand check (using Thieves’ Tools), or can be opened with her key, which she carries on her.
You can notice this mysterious hole from either side with a successful passive Perception check. One side is within Roah’s Storage (#3), near the locked chest. The other is in the hallway between Polma and Gut’s Altar (#8) and the Stone Discs Puzzle (#9) in the Defiled Temple.
Leads to a passageway in the Defiled Temple, letting you get behind Gut and Polma, and can lead you to a puzzle opening up the Underdark.
Priestess Gut’s Cell is a dilapidated room where Gut will attempt to hold you, if things go her way (they won’t for long). If you agreed to drink what Priestess Gut offered you in her room (#4), and you aren’t of elven lineage, than you will be knocked unconscious and wake up bound within this cell. You can escape the shackles with a successful DC-12 Acrobatics or DC-20 Strength check (with Barbarians having the option to do the latter in front of Gut, rather than waiting for her to leave).
Once you are free, or if you enter the cell without having been knocked out first, you can destroy the floor by either hitting it directly, or by hitting the cage above it, which will open up an entrance to the Spider Pit (#10).
Also worth noting is the Scroll of Hold Person in the cell, which can prove incredibly useful in escaping Gut and Polma, if you are trapped.
The Altar is the centerpiece of the Defiled Temple. It will be guarded by the ogre Polma, and High Priestess Gut will join her if she was able to knock you out with the werejackal blood in her room (#4). In Gut’s bedroom near the altar, you can find an Amulet of Misty step in a chest. The hallway leading off the altar leads to the Stone Discs Puzzle (#9), a potential path into the Underdark.
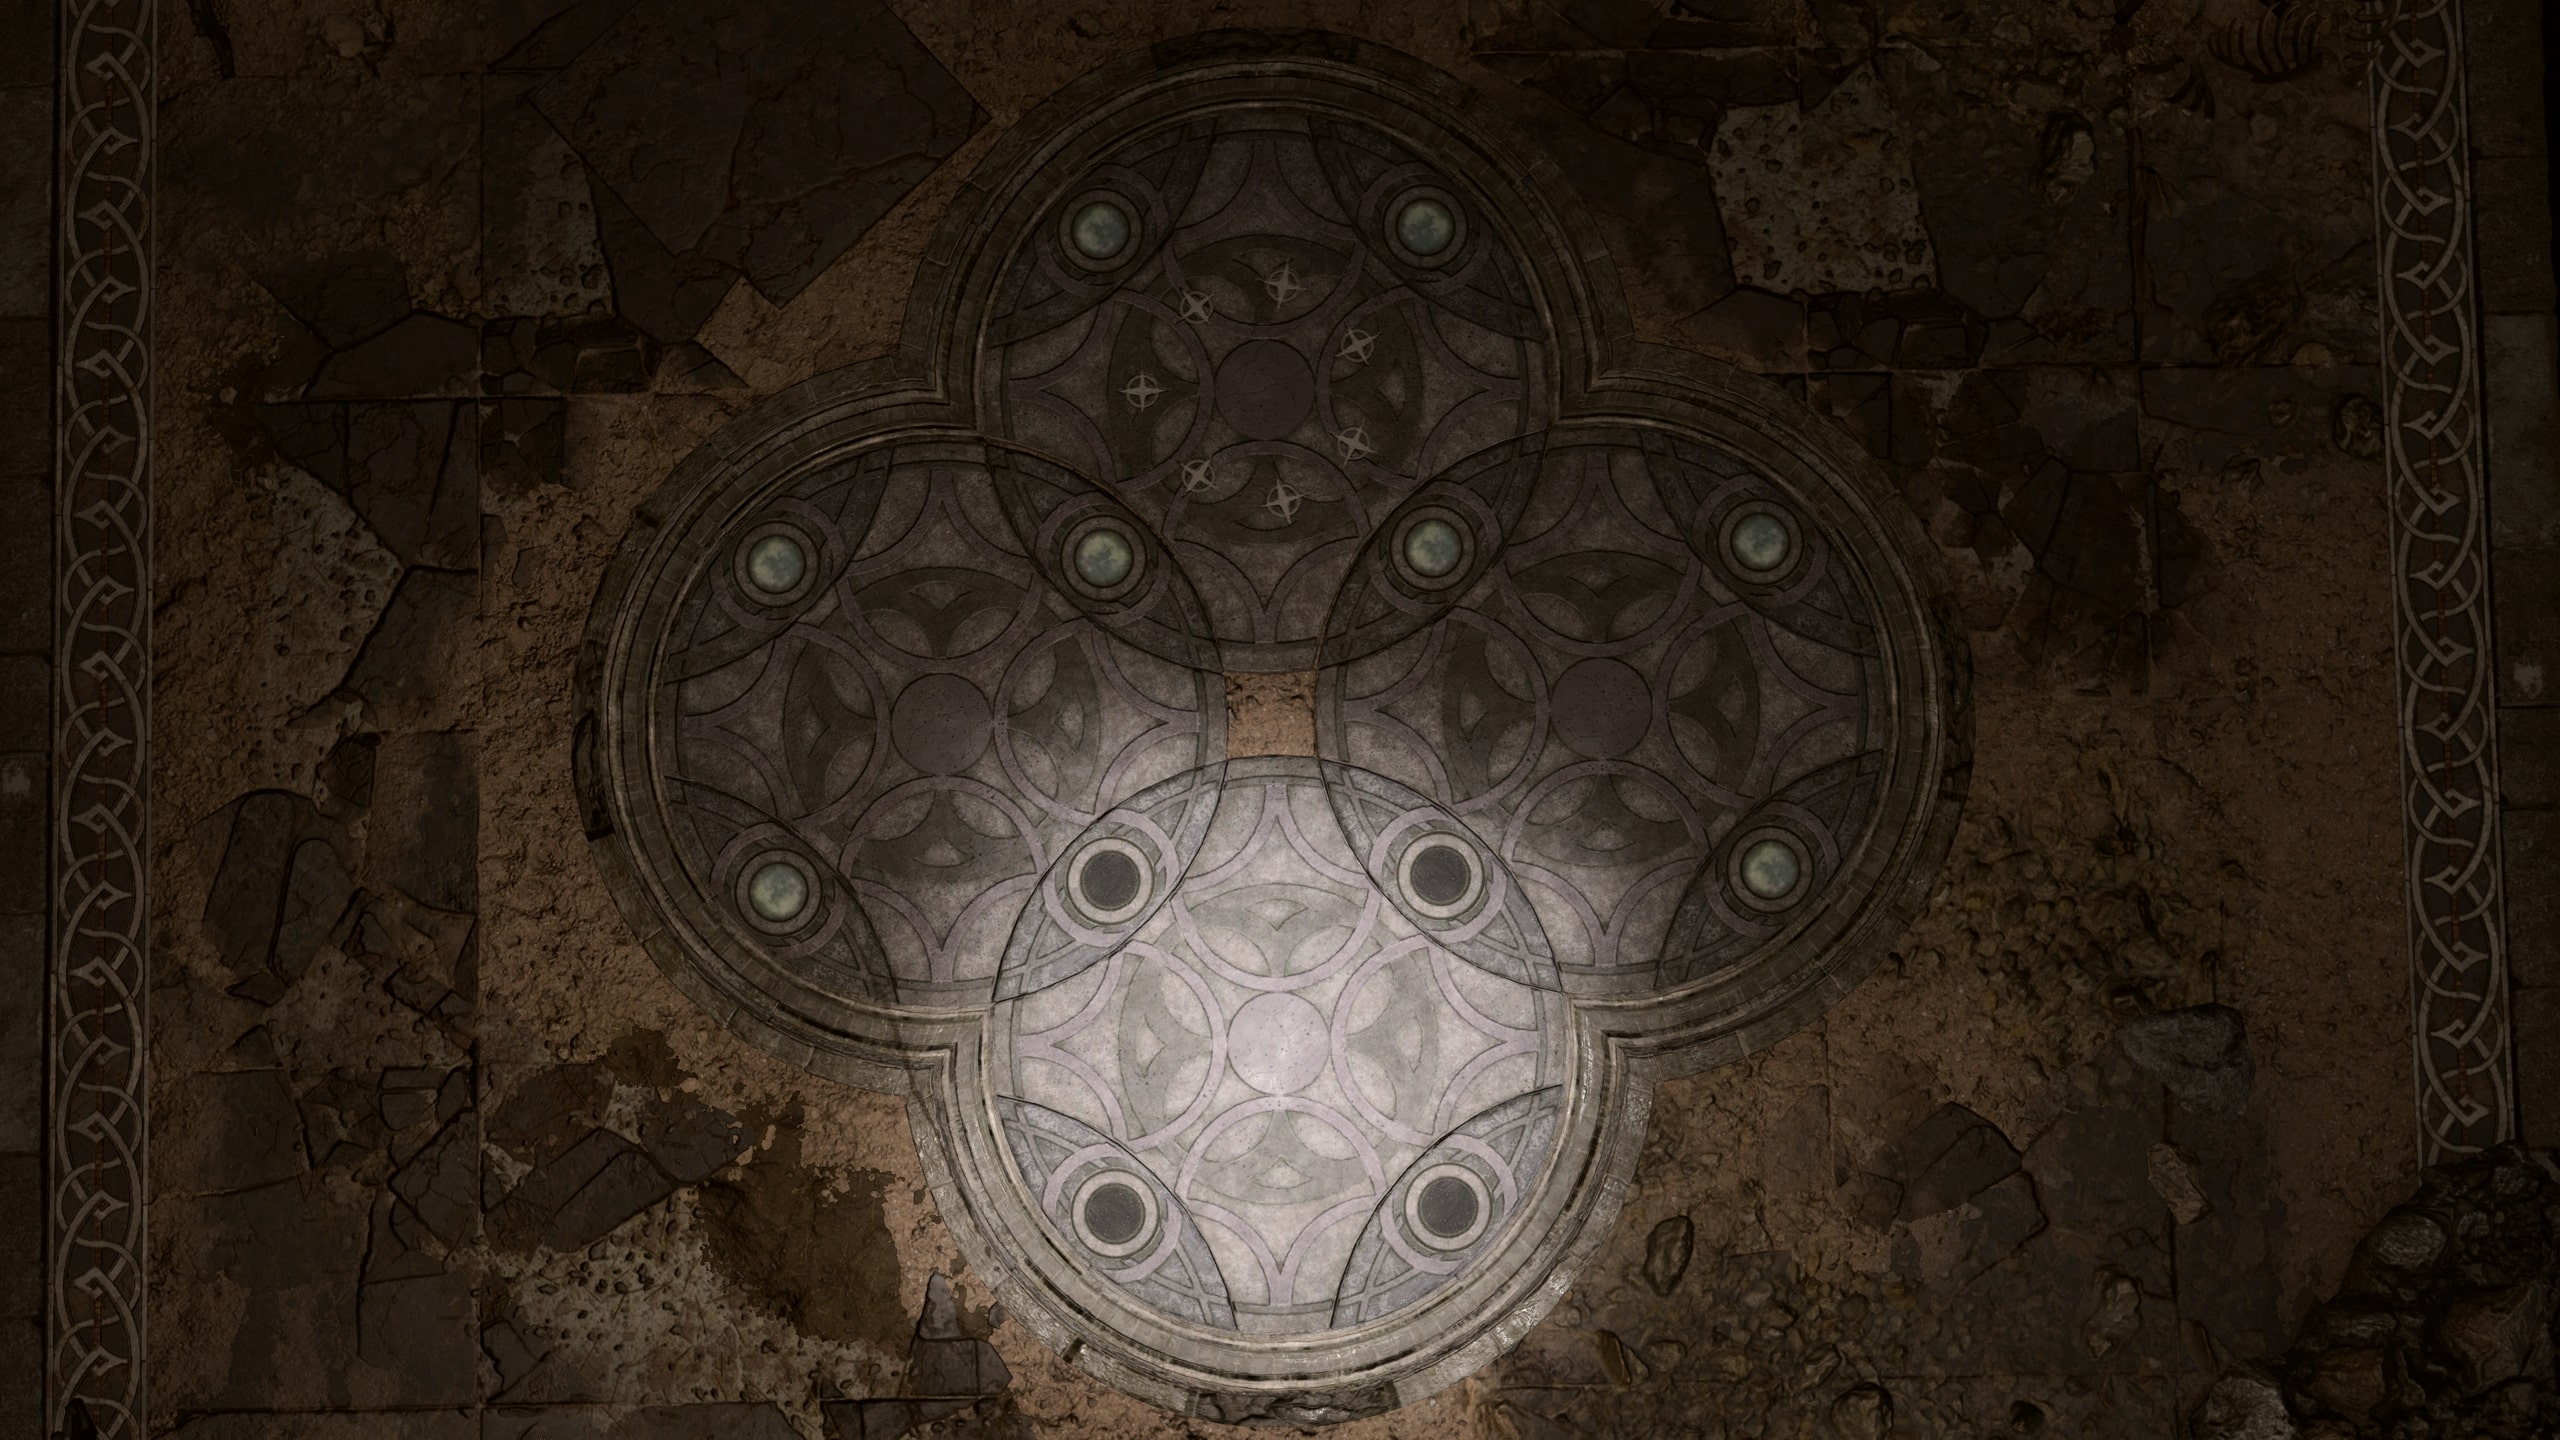
You may not realize right away, but this Stone Disc puzzle is one of the main ways to enter the Underdark, a huge subterranean ecosystem. All you have to do is solve it (or break it).
When you approach the puzzle, a successful passive Investigation check will confirm that the discs do, indeed, move. The puzzle is the key to unlocking the secret door to the Selûnite Temple in the Underdark, and given that she is the goddess of the the moon, it only stands to reason that the glowing disc would be the key to solving her puzzle.
In order to solve the puzzle, you will want to spin the discs such that the one fully illuminated by the glow has all the empty/black slots. Once you have done so, a secret door will open to the North, leading to the Underdark.
If the puzzle seems too daunting, a small icon to the North can be revealed to be a hidden switch with a successful passive Perception check. By performing a DC-15 Sleight of Hand check on the switch (with Thieves’ Tools), you can unlock the mechanism, giving you an alternate means to entry to the Underdark.
This cave connects the Spider Pit to the Defiled Temple. It can be accessed from the former simply by entering the Spider Pit (which may not be the wisest choice) (#14), and from the latter by breaking the floor in the Defiled Temple’s Cell (#7).
After encountering him near the entrance to the Goblin Camp, you will find Volo once again locked in a cage by Gribbo, who is very proud of her… uh… ‘pidgeon’. Now, Gribbo isn’t exactly the sharpest tool in the shed, leading to a wealthy of options for freeing Volo.
You can either convince Gribbo using your Illithid Powers, use Deception or Intimidation (with a DC of 10), detect her thoughts using the Detect Thoughts spell (requiring a DC-9 Intelligence check) and play into her fears, steal her key or unlock the cage yourself with a DC-10 Sleight of Hand check, trick her with a fake bag of gold if you are a Rogue, spend 250 gold to buy him outright, or just flat-out kill Gribbo and take her key.
All this to say: Volo is very easy to free. Good thing, too, since he can find his way back to your camp, if you tell him to, making for a… uh… very “knowledgeable” camp companion.
Next door to Volo, you can meet Abdirak, follower of Loviathar, Goddess of Pain. And he certainly lives his faith. After a brief conversation, Abdirak will offer the player a chance to partake in a ritual of pain. Which might be a bit more than a purely spiritual experience for him (and you).
Provided you have enough health (since he needs a “fresh canvas”), you can agree to partake in the ritual, at which point he will ask you to “face the wall”, requiring you to look to the east against the wall and wait for a moment. At this point, Abdirak will hit you with a mace, and you’ll enter dialog to see how you resist (or whether you give up). Consistently passing DC-10 Constitution checks to hold in your pain, or selecting the Monk-specific options, will let you continue, but will not grant you the boon Abdirak provides at the end. However, succeeding DC-5 Performance checks or DC-10 Intimidation checks, or using Bard dialog options, will be exactly what he wants to see.
This process will repeat 3 times, with a similar dialog choice after each. If you want Loviatar’s Love — a very powerful consistent buff — you will need to continue selecting the Performance, Intimidation, or Bard-exclusive dialog.
After the third time, Abdirak will give you a break. If you did well during the trial — as in, loudly and happily accepting punishment — he will reward you by blessing you with Loviatar’s Love, which gives you +2 to Attack Rolls and Wisdom Saving Throws for 3 turns when you go below 30% hit points. If you resisted using Constitution or Monk-specific dialog, he will be disappointed and give you nothing (except, maybe, some lasting scars).
Abdirak’s mace, Loviatar’s Scourge, is also available for the taking if you are willing to kill or pickpocket the pain enthusiast.
In the room next to Abdirak, you will come across a scene of torture. Liam, from the Emerald Grove, has been tied up to a torture machine and is being “worked on” by Torturer Spike, who is trying to get information about where the Grove is.
When you come upon the scene, you will be given several options for how to proceed. Firstly, you can convince Spike to leave with a successful DC-20 Deception check, or by using your Illithid Powers. More indirectly, you can also convince him to let you torture Liam in private with a successful DC-15 Performance, DC-10 Insight, or Detect Thoughts (DC-9 Intelligence) check, which gives you room to operate outside of the Spike’s view and free Liam. You are also given the option of actually Torturing Liam first in several dialog paths, letting you do a variety of things to him before, eventually, Spike will walk away, still giving you room to free Liam.
If you did torture Liam, you will need to give him a healing potion to fix him up before doing anything else. After that, Liam can be freed either by unlocking the torture device with the key (on Spike) or with a DC-12 Sleight of Hand check (DC-7 for Rogues), or you can convince him with a DC-5 Persuasion check to let you break his thumb so that his hand can squeeze out of the chains. Throughout this whole process, and after you free him, you will be able to glean information about both the Druid Halsin, and the mysterious Nightsong artifact from him. After freeing him, he will jump across a small gap and find his way back to the Emerald Grove without issue.
Also worth noting is the magic “Jagged Spear” lying in the room, and the fact that you can speak to the rats using Speak with Animals, though they have little to say.
You can enter the Giant Spider Pit either by going through Priestess Gut’s Cell in the Defiled Temple (#7 and #10), or by lockpicking the door (DC-10 Sleight of Hand) behind Priestess Gut’s Altar (#2). In the cave, you will find two Giant Spiders, who will be hostile unless you had previously cast Speak with Animals. If you can understand them, then you can convince them to leave you alone with a successful DC-10 Deception or Persuasion check, causing them to go after the Goblins. If you do this, than try to stay away from them until they initiate combat with the Goblins, otherwise they will still view you as potential pray.
Locked in a dingy cage, you can find Brakkal, a Goblin who has remained loyal to Maglubiyet, the traditional Goblin deity, rather than the Absolute that all the other Goblins have taken up.
If you opt to free this alleged heretic, you will need to take out the other nearby Goblins, at which point you can head to his cage. Be careful, though! As a passive Perception check will demonstrate, the cage is trapped, requiring a DC-15 Sleight of Hand check with a Disarm Kit (or the key) in order to disarm, to keep Brakkal alive. After that, another DC-10 Sleight of Hand check with Thieves’ Tools will set him free, which he will thank you for before heading off.
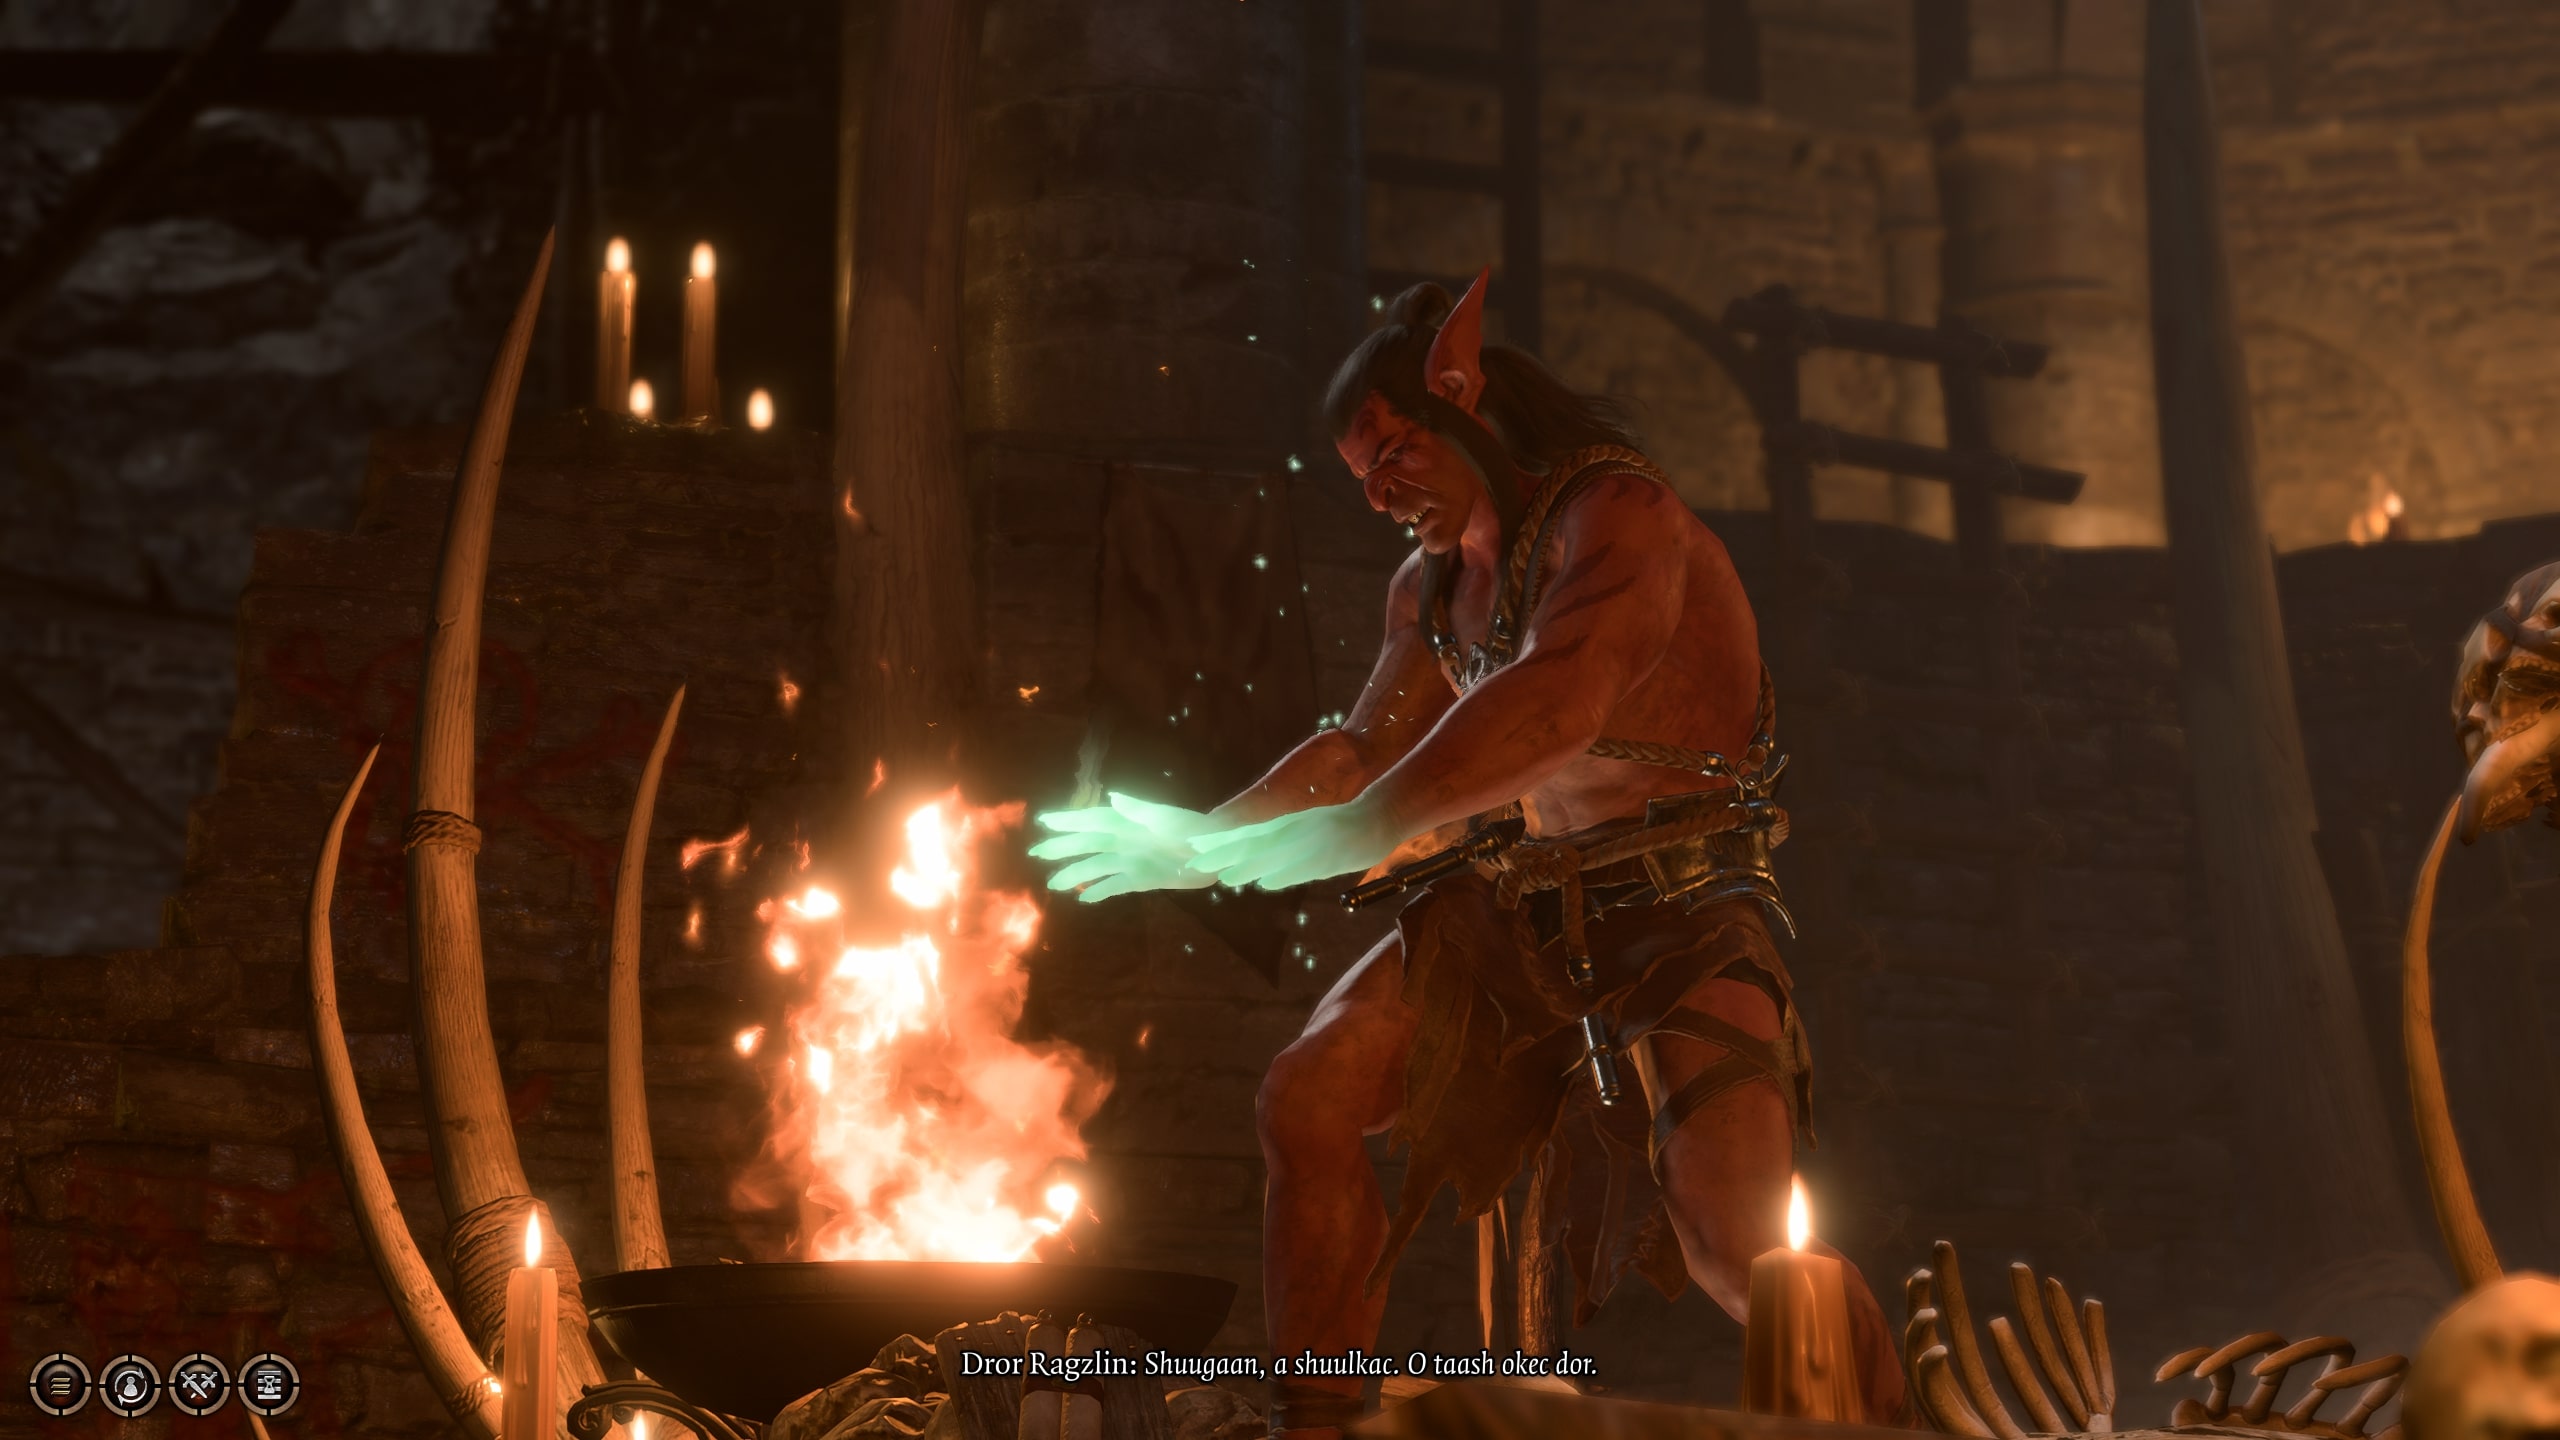
Coming into a large chamber, you will find Dror Ragzlin about to perform a ritual. Evidently, from what you can tell, to perform Speak with Dead on a mind flayer corpse — seemingly one from the same ship that you were imprisoned upon. And you are sure it will recognize you.
He will quickly realize that you are a “True Soul”, as he is one as well, and this will open up several options for you. Firstly, you can simply sit in and watch, letting Dror Ragzlin do the ritual himself, getting a few answers. Or, you can overpower him, using your connection as a True Soul, in order to cause him to speak how you want, asking questions you want answered. It will be about the same if you ask to be the one to speak with the Mind Flayer as well. Finally, of course, you can always simply attack him, spoiling his ritual entirely.
If you let Ragzlin go through with the ritual without violence, then he will accuse you of not being a True Soul after the ritual ends. A successful DC-10 Persuasion or Intimidation check will remove that suspicion, and he will ask you to speak with Minthara, but failing a check or refusing will initiate combat. This one can be pretty tricky, although can be made easier if you remember you can push enemies into abysses or down into the spider hole.
After the fight, you can loot Faithbreaker, Dror Ragzlin’s Key (which opens the door to a huge loot pile (#17)), and a Mind Flayer Parasite Specimen off his corpse. If you initiated combat before he started the ritual, you can also perform it yourself, casting Speak with Dead on the Mind Flayer corpse to get some information for yourself.
Behind and above Dror Ragzlin’s throne is a quite impressive loot pile, behind a locked door. The key is on Ragzlin himself, which you can attain via murder or pickpocketing, or you can enter open the lock with a DC-20 Sleight of Hand check.
Within the pile is an amulet which grants a sleep-imposing healing spell, the Gloves of the Growling Underdog, the Springstep Boots, and a piece of Infernal Iron, which can be used to assist Karlach in her quest to cool her heart down.
Minthara is a potential Companion you can recruit to your party, if you are willing to do some pretty heinous stuff to get her. When you speak with her the first time, she will ask you some questions: most notably, she wants to know where the Emerald Grove, where the Tieflings and Druids are, is located. You can tell her, deceive her with a DC-5 Deception check, or simply refuse, but it makes little difference.
She will then entreat you to join her on assaulting the Grove, the only way to get her as a Companion, which you can either agree to or not. If you do, you can take a long rest, and then head to the Grove, where you can decide what to tell Zavlor, either betraying him and the Tieflings and Druids, or betraying Minthara and putting an end to her goblin assault. Only by wiping out the Tieflings and Druids can you get Minthara on-side, but it Wyll and Karlach will leave your party. Welcome to an evil playthrough.
Alternatively, you can put a stop to her in the Shattered Sanctum, which is almost certainly a safer option for the Grove. Combat with her can be tricky, as she has many abilities to prevent action and a few minions to help her, but ultimately will reward you with quite a few magic items and useful supplies.
Worth noting is that if you saved the Goblin Sazza from the Emerald Grove earlier, she will be here. Without your intervention, she will be sentenced to death by Spider Pit (#14), but if you vouch for her she will be thankful, and may even take your side against Minthara if you choose to fight her (not that she can contribute much).
This is the door to the Worg Pits, and it is guarded by 4 Goblins. On the other side of the door, you will be able to find the Druid Halsin imprisoned, currently in the form of a bear.
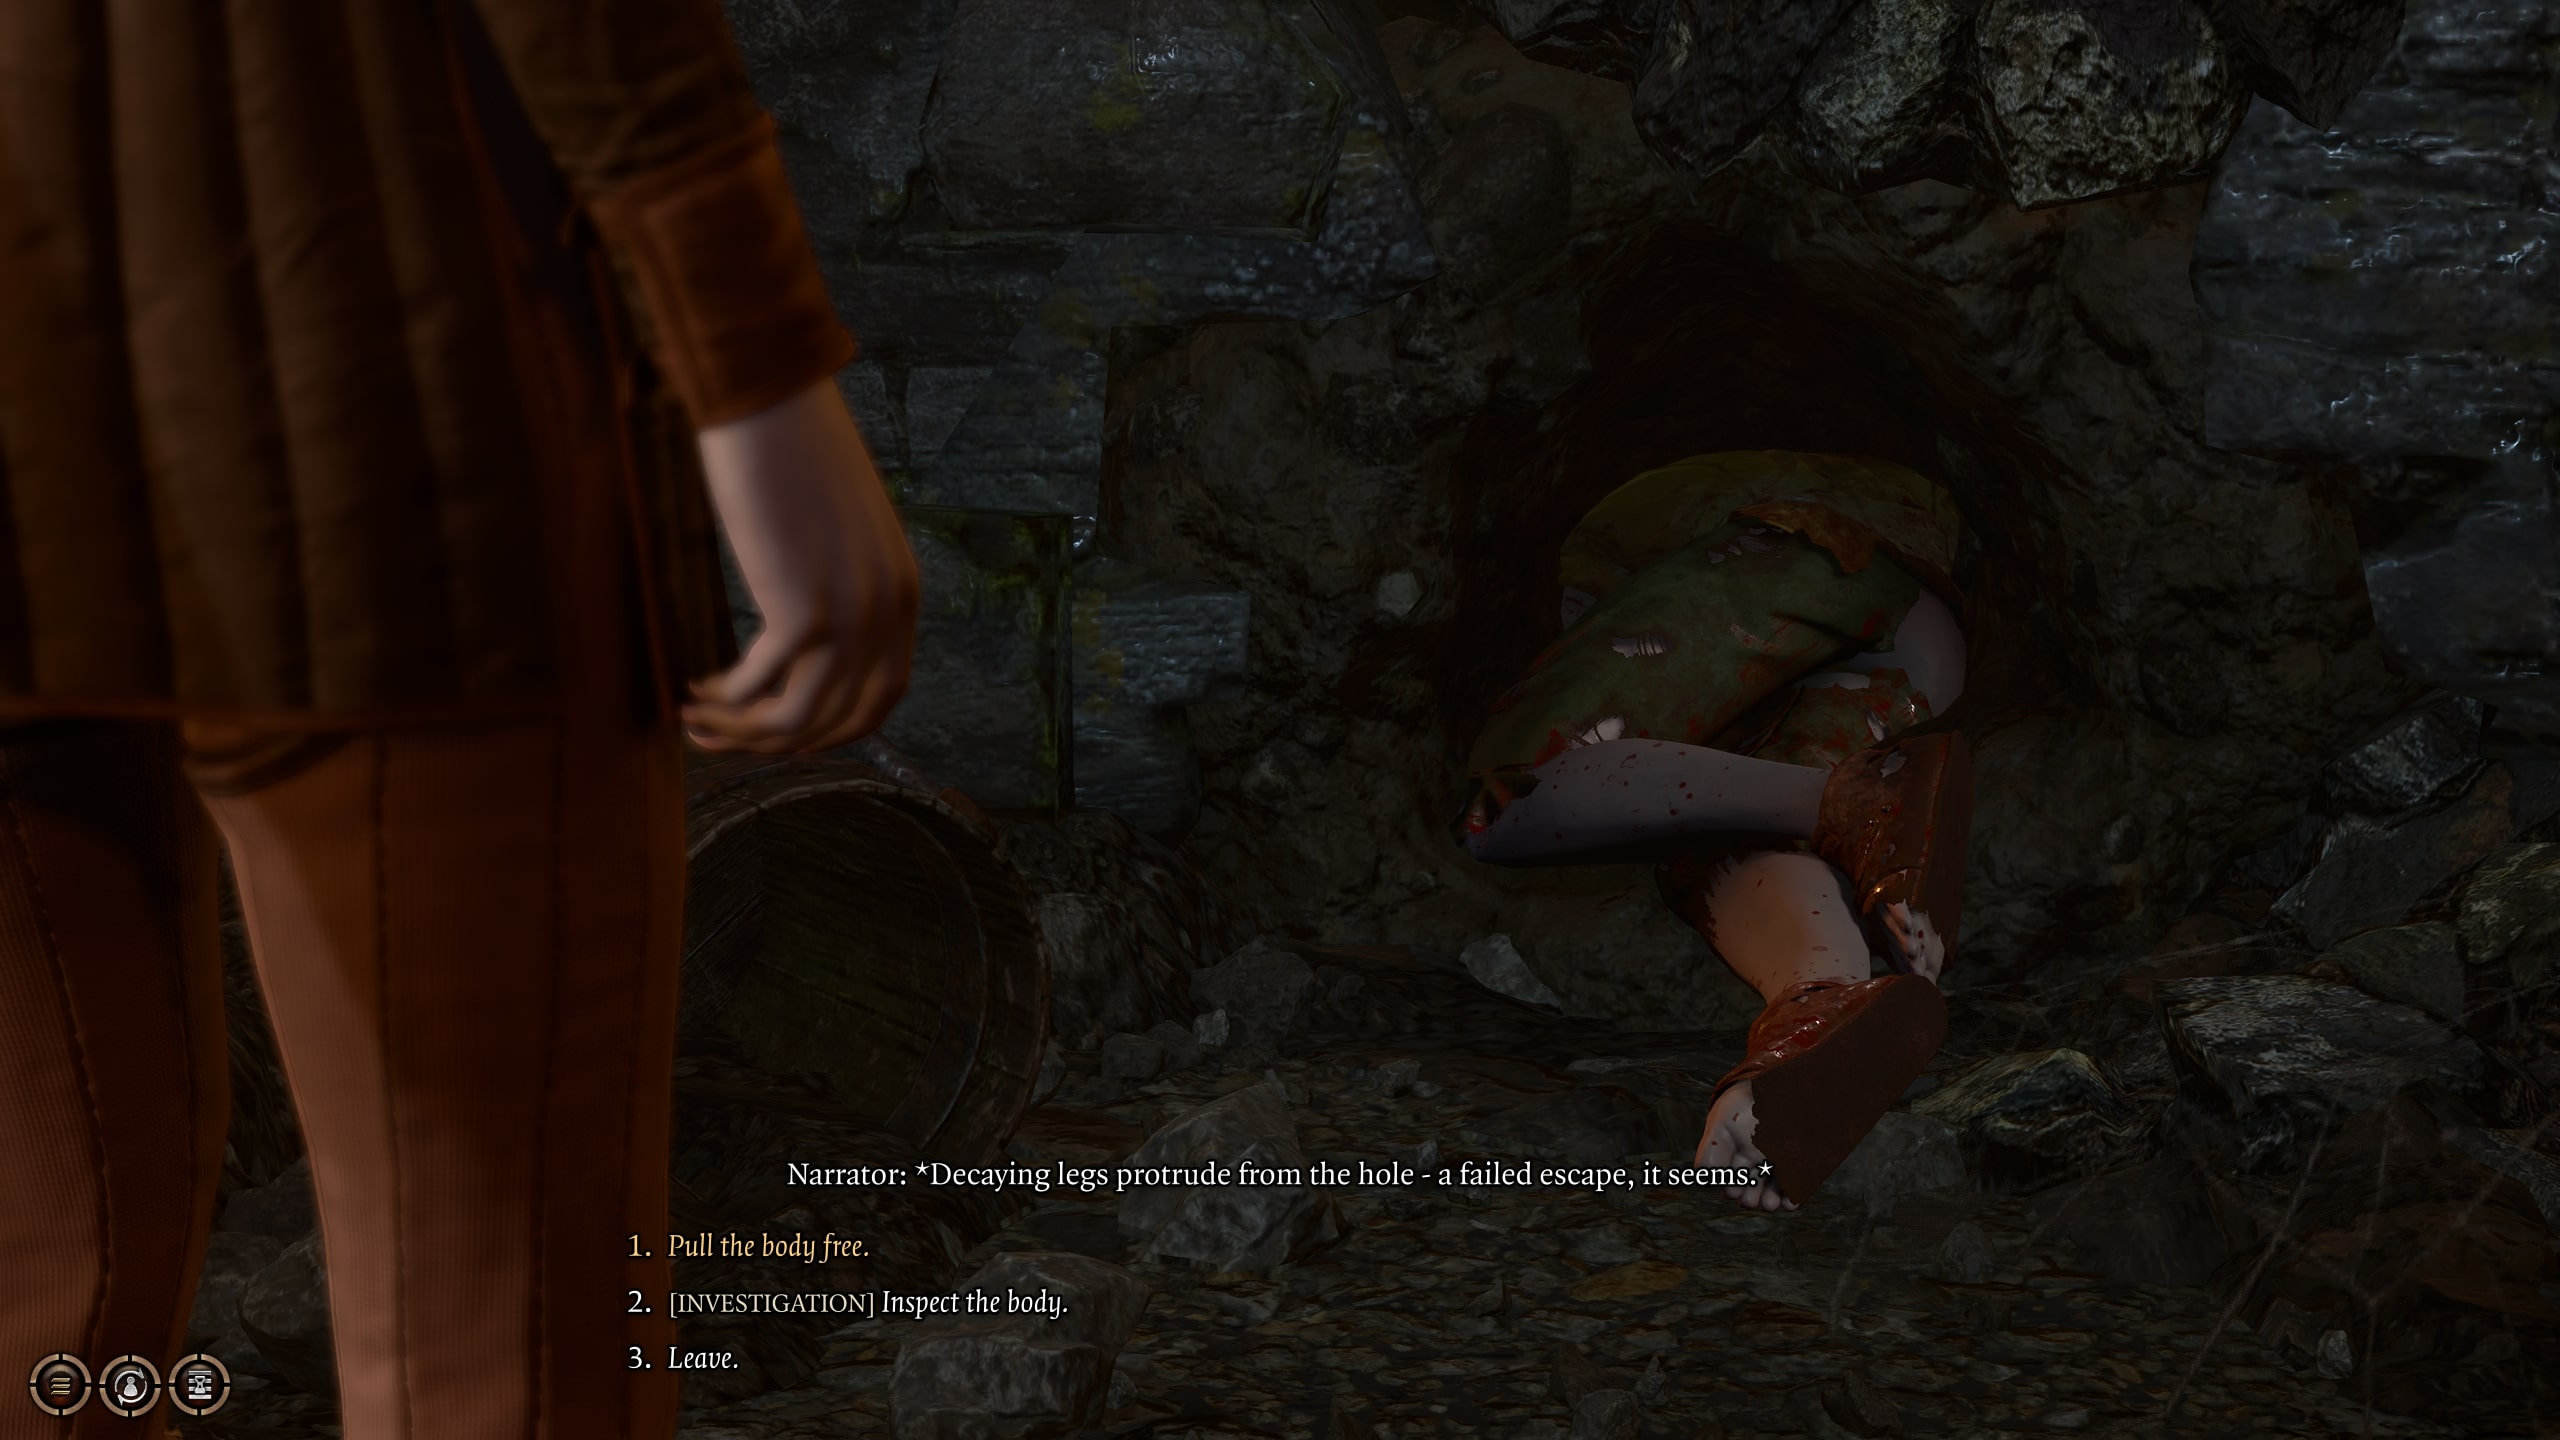
You can only enter this hole the first time through the side in the Worg Pens, behind a locked door (with a DC-15 Sleight of Hand lock). This is because the tiny passageway is blocked by the corpse of a former prisoners, who was caved-in on when they tried to escape through it. A successful DC-5 Investigation check will reveal more information, but so long as you pull the body free, the passageway will be open to small or gaseous characters.
You will come across a bear locked behind some bars (and being tormented by a group of Goblin children). Astute players will realize immediately that this bear is more than meets the eye — it is actually the Druid Halsin, in wild form. Halsin is a potential companion, should you help him here.
For this encounter, Speak with Animals is useful, as it will allow you to understand Halsin even in his bear form, but regardless, the calculation is simple: if you try to defend the bear/Halsin, he will be on your side when he, shortly after the dialog ends, breaks out of his cell. If you antagonize the bear/Halsin, he will target you as an enemy.
Should you side with the bear, he will help you clear out the goblins and worgs in the room, and then he will transform back into his human form. He will tell you that he can help you on your quest, if you can do something for him first: he wants all three Goblin leaders dead: Priestess Gut (#2), Dror Ragzlin (#16), and Minthara (#18). You will be able to do this on your own, or with him (in bear form) by your side, but until you do, he will insist that you must. If they are all killed, though, he will be ready to join your party (after a celebration and some errands back at the Emerald Grove).
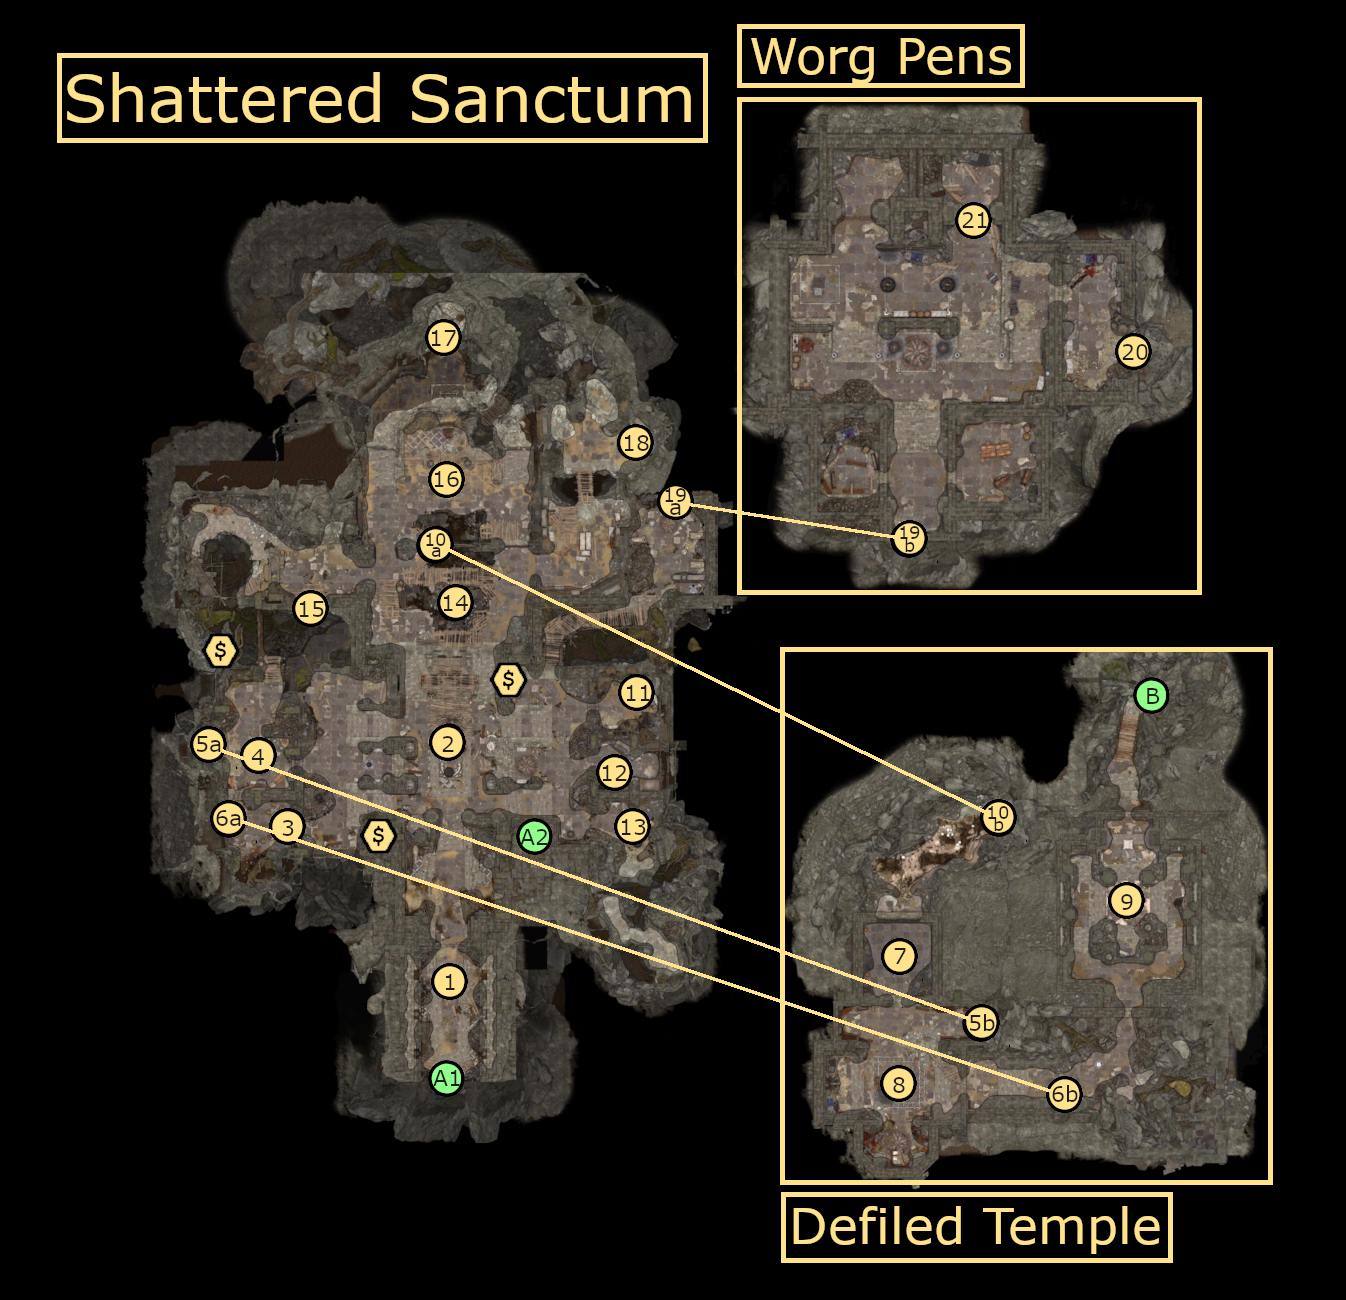
Aside from the Treasure Pile (#17), there are several chests dotted around, sometimes in hard to reach areas. All three of the chests marked on the map are accessible from the rafters, requiring you to enter from entrance A2 or climb up to the rafters from a ladder near near Priestess Gut’s initial location (#2).
After solving or lockpicking the Stone Disc Puzzle (#9), a path will open leading to the Selûnite Temple in the Underdark.
Where to go Next
After you are done with the Shattered Sanctum, you can go to the following places:
The Underdark: By getting through the Stone Disc Puzzle in the Defiled Temple, you will be able to continue forth into the Underdark, a huge subterranean cave system with lots to explore, and a meaningful path of progression.
The Goblin Camp: You can head back where you came from and use the Goblin camp to progressing through the Mountain Path, if you wish. Useful if you’ve decided to turn the Sanctum into a Goblin burial ground and want to finish the job.
Graves is an avid writer, web designer, and gamer, with more ideas than he could hope to achieve in a lifetime. But, armed with a mug of coffee and an overactive imagination, he'll try. When he isn't working on a creative project, he is painting miniatures, reading cheesy sci-fi novels, or making music.