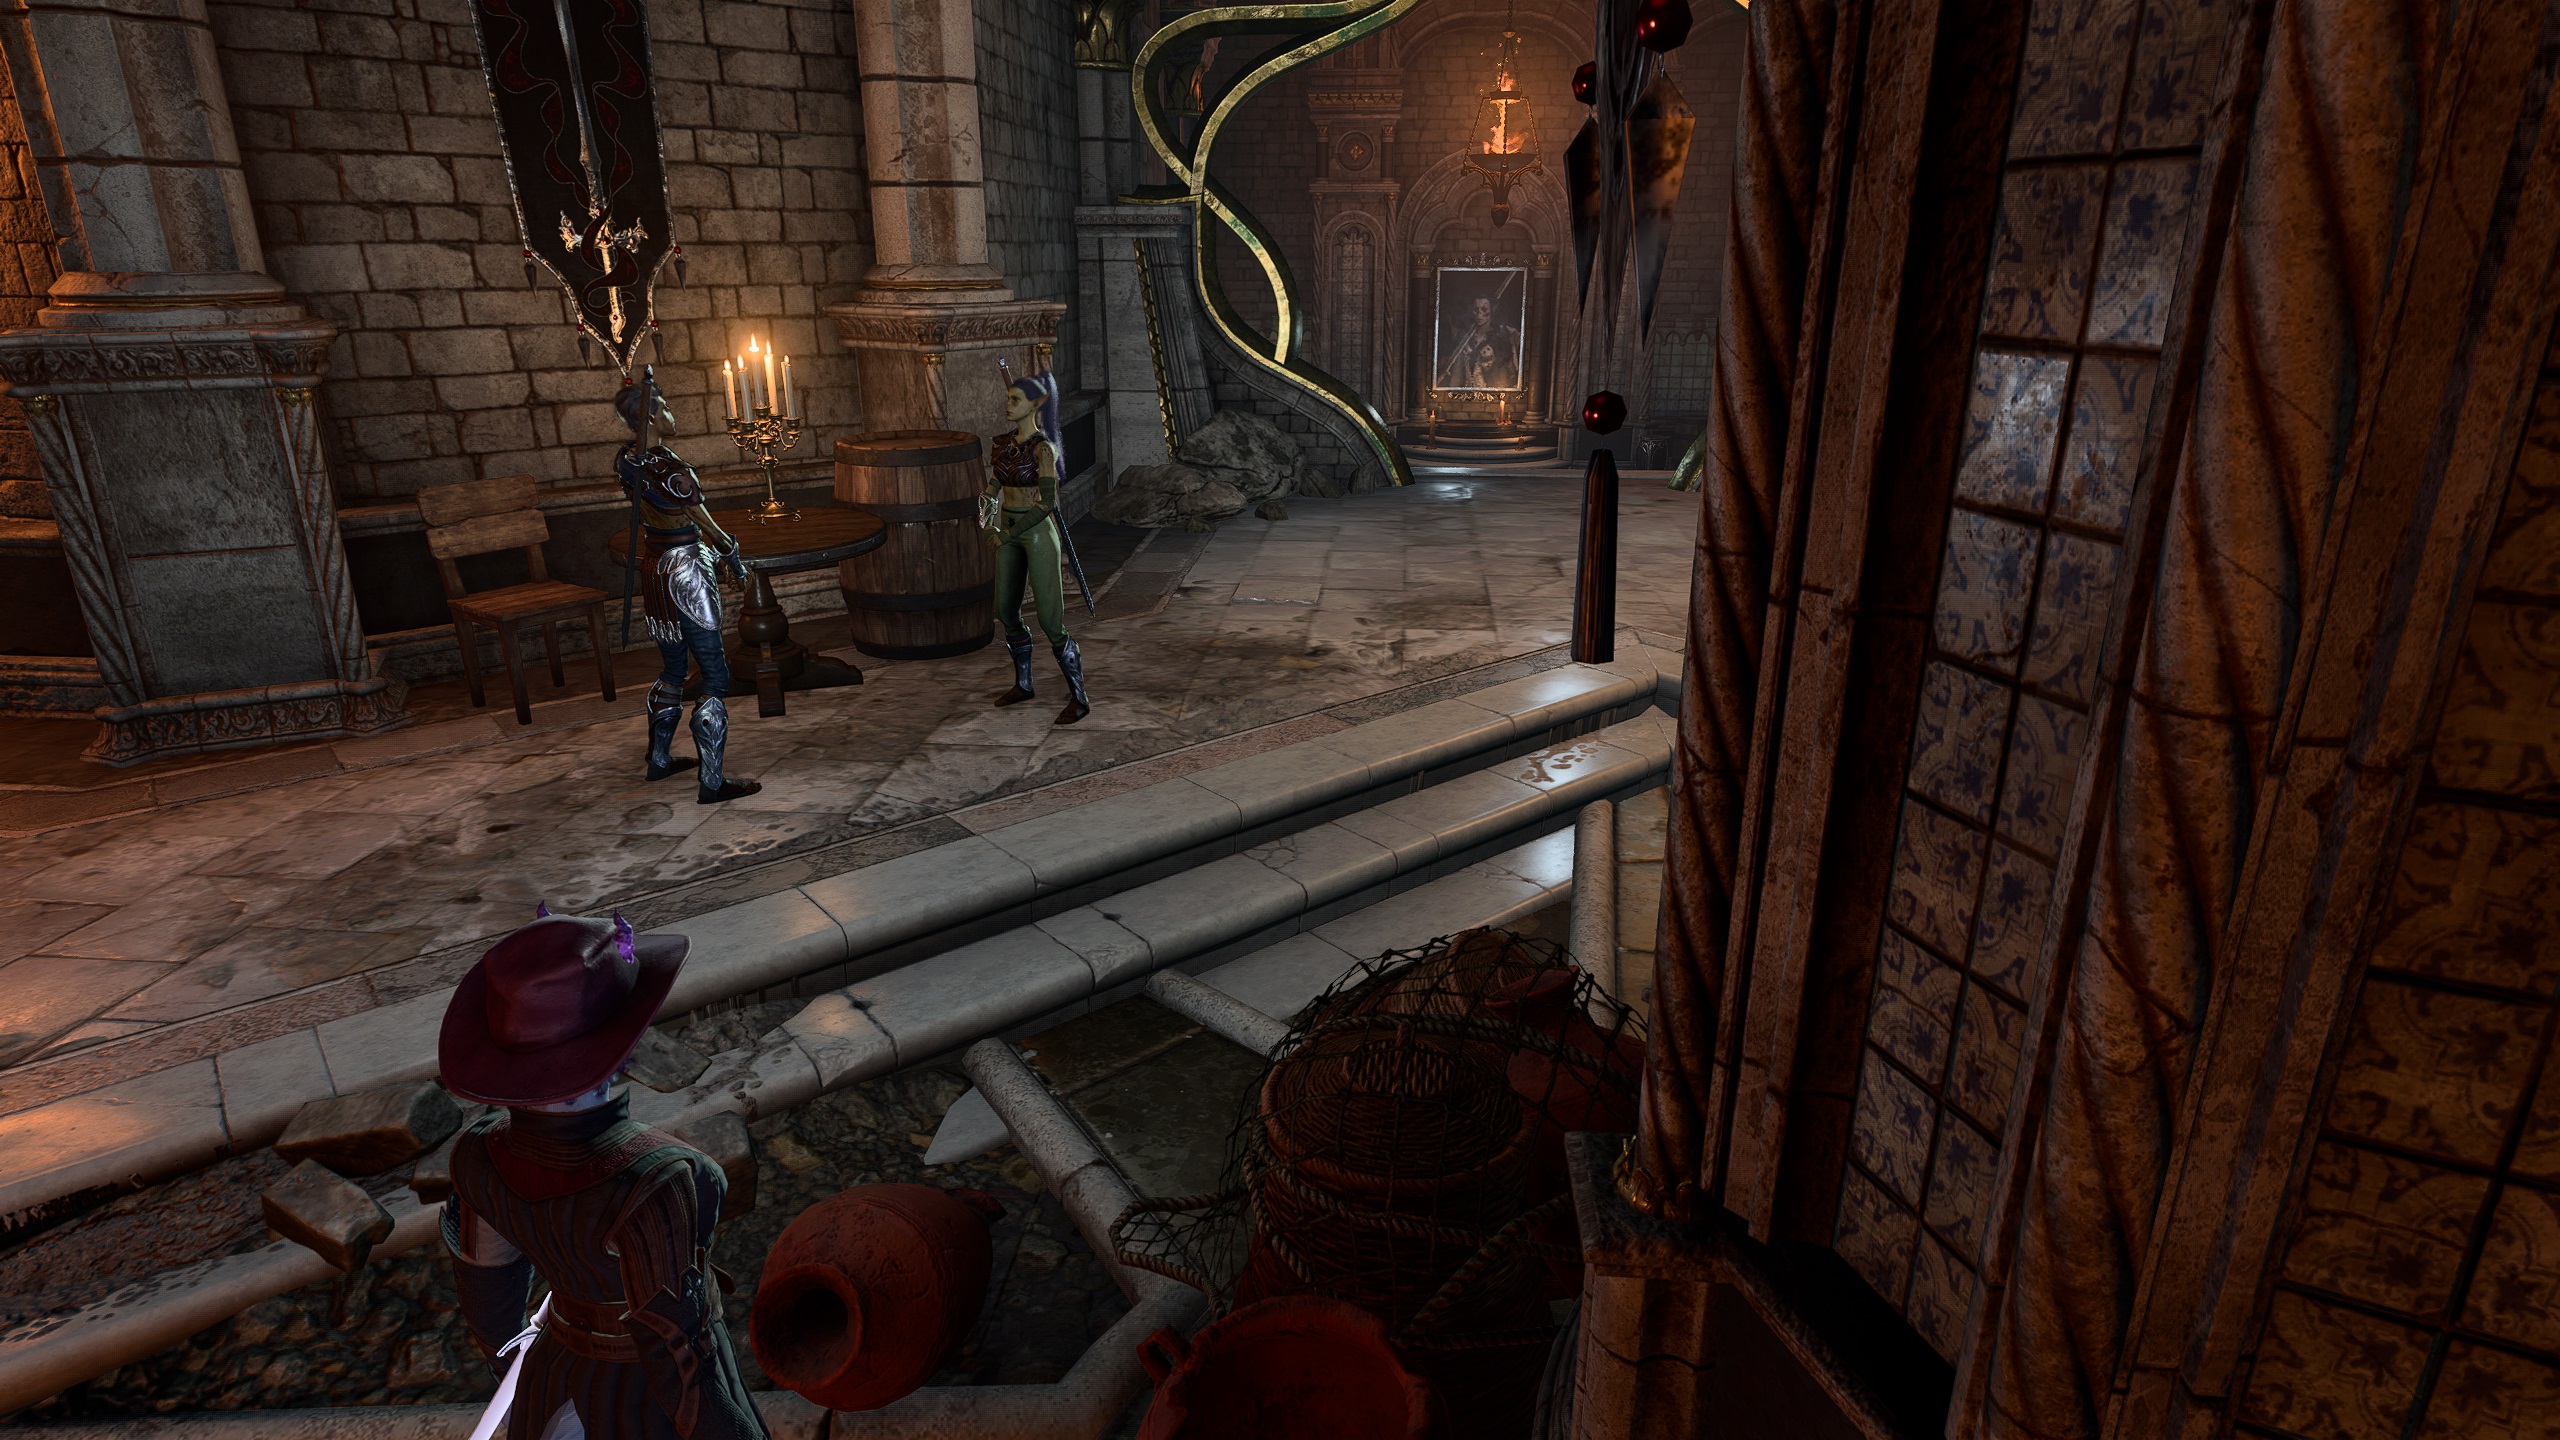
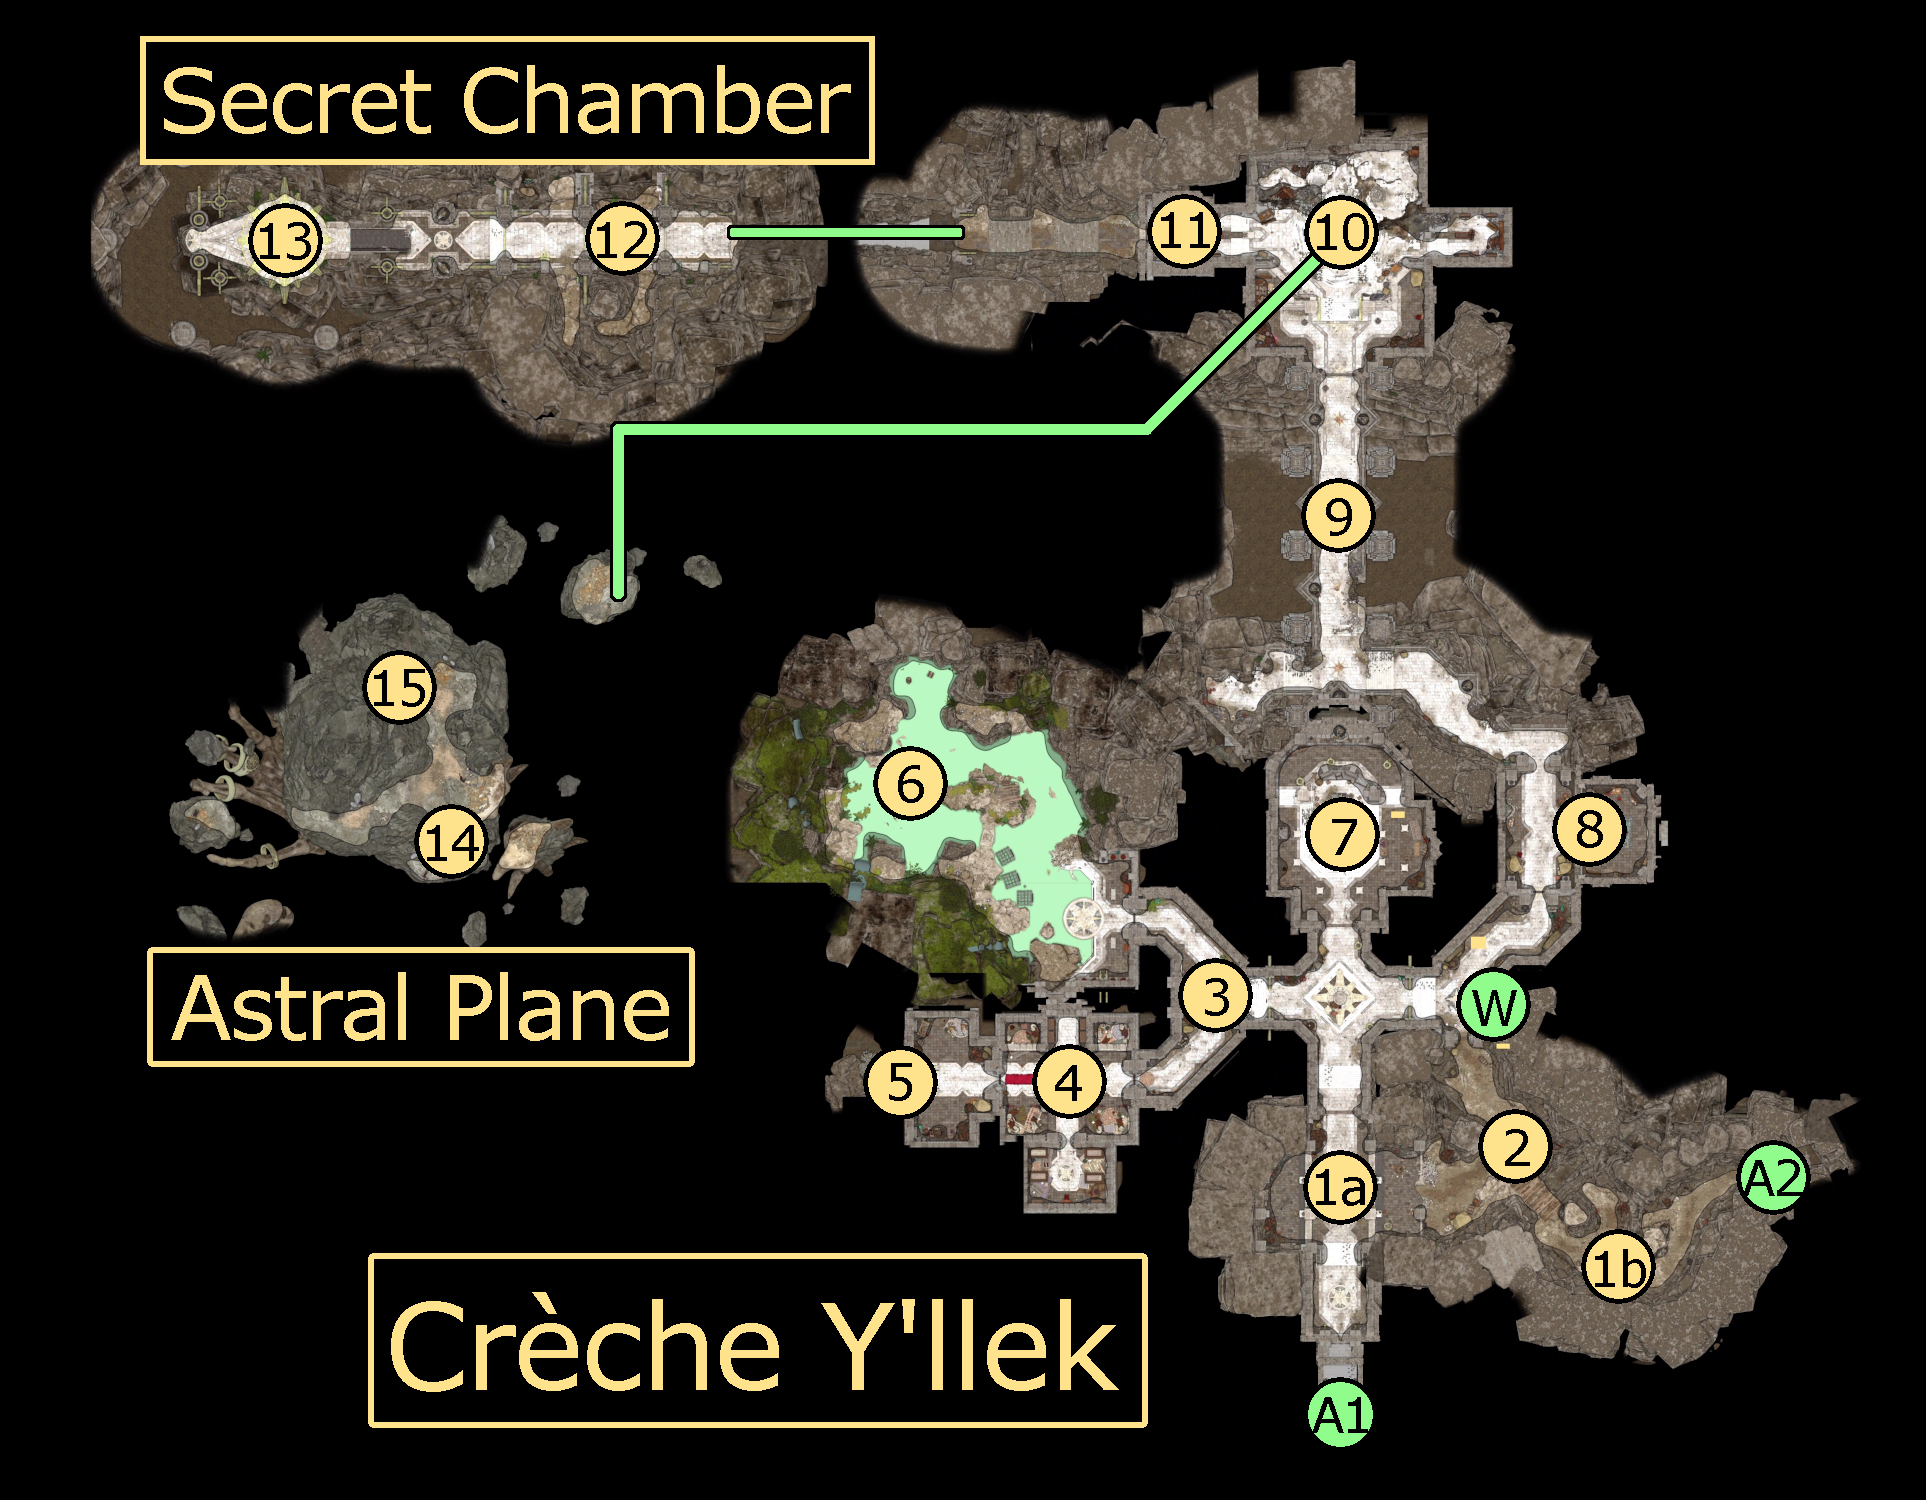
In this walkthrough we will go through the Githyanki Crèche Y’llek, which is rumored to have a method to extract the parasite in your head. What’s more, Lae’zel has much that she will want to do in the Crèche, and there are many nooks and crannies where the Gith here are hiding their goodies (or leftover from the previous occupants). This guide will help you find all that and more.
At either entrance you use, the main behind the Monastery or the hidden one in front, you will quickly come across several guards at the entrance. They will be happy to gut you, so you’ll need to answer their questions carefully. Githyanki are given free passage, but if you aren’t one (and can’t transform into one), then you’ll need to talk your way through. Telling either set of guards that are you infected with a ghaik parasite and require assistance will get you through, as will producing the Artefact that you’ve had since Act 1. However, you can also pass a DC-18 or -21 Persuasion or Deception check (depending on a few circumstances) in order to pass unbothered.
If you fail these checks, or say something to make the guards turn hostile, then you will quickly find yourself in combat with not just the entrance guards, but the entire Crèche. No matter what you do, you’ll end up hostile to the Crèche anyway, so that might not be for the worst.
By the hidden entrance to Crèche Y’llek, you’ll find A’kaj’nir, a githyanki quartermaster who will be more than happy to sell some of her store, if you aren’t hostile with the Githyanki. She has many valuable things, many of which will be lost if she is killed, so is best talked to before upsetting the Gith.
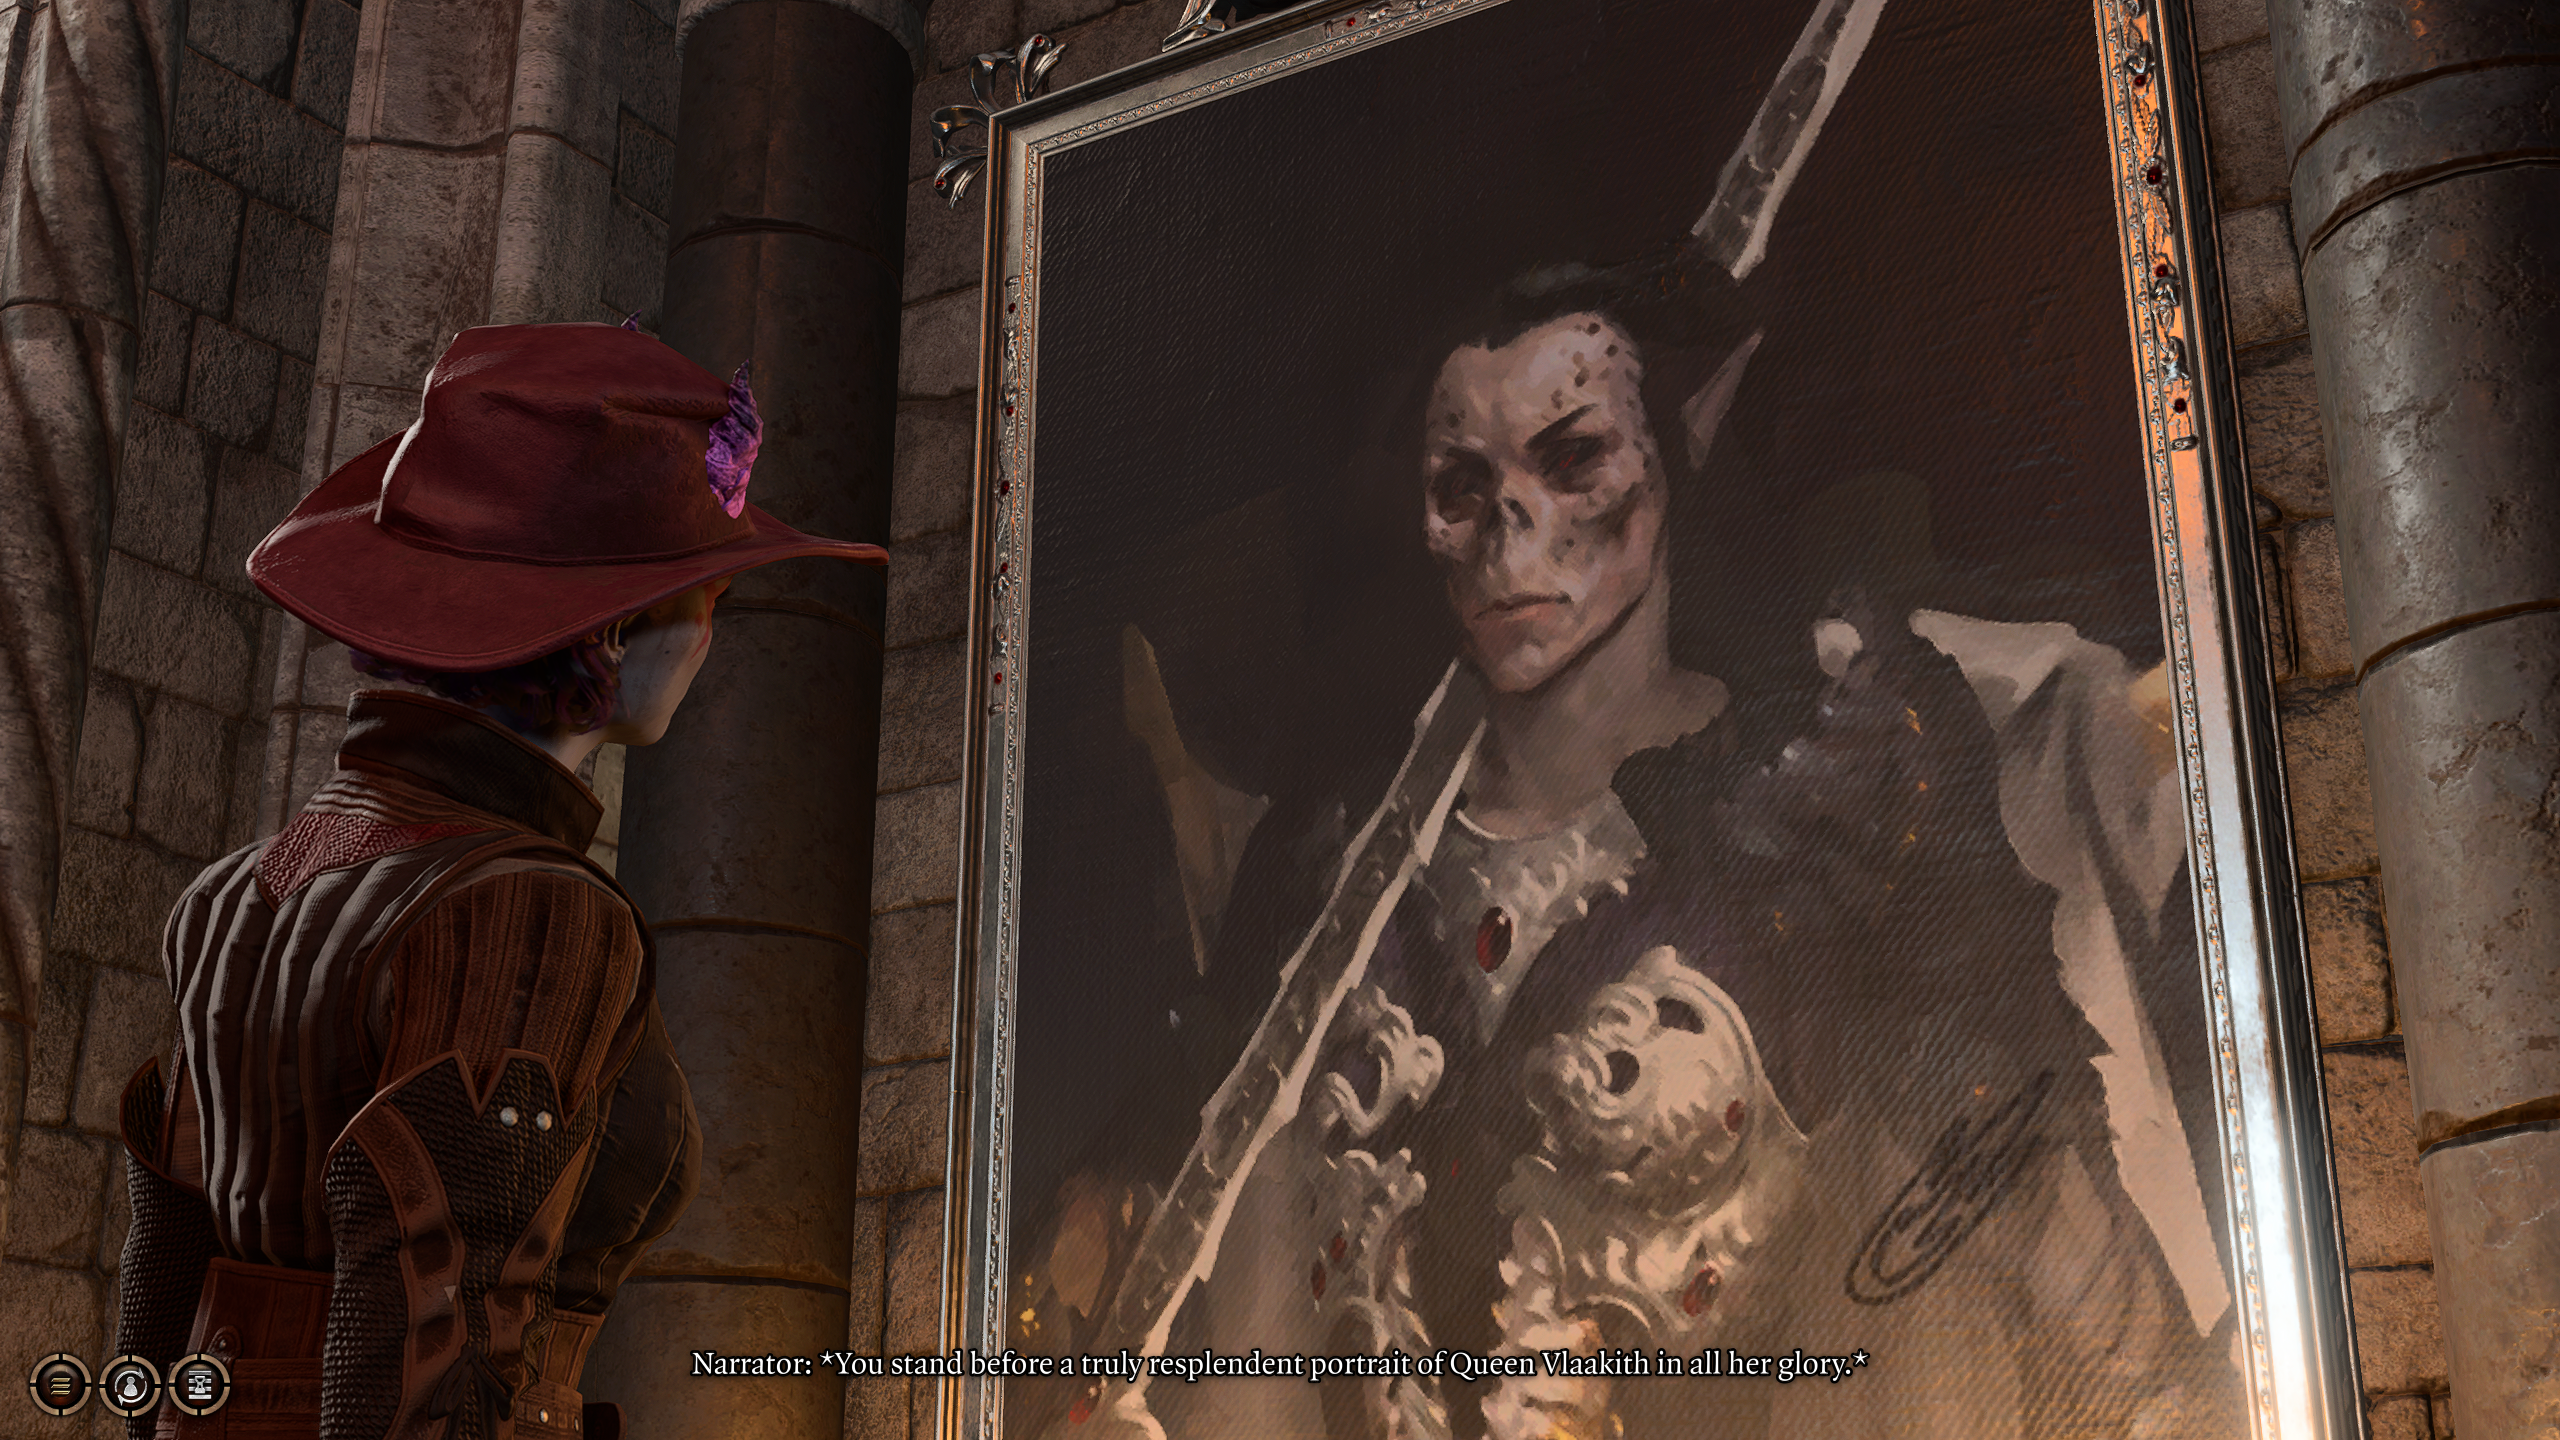
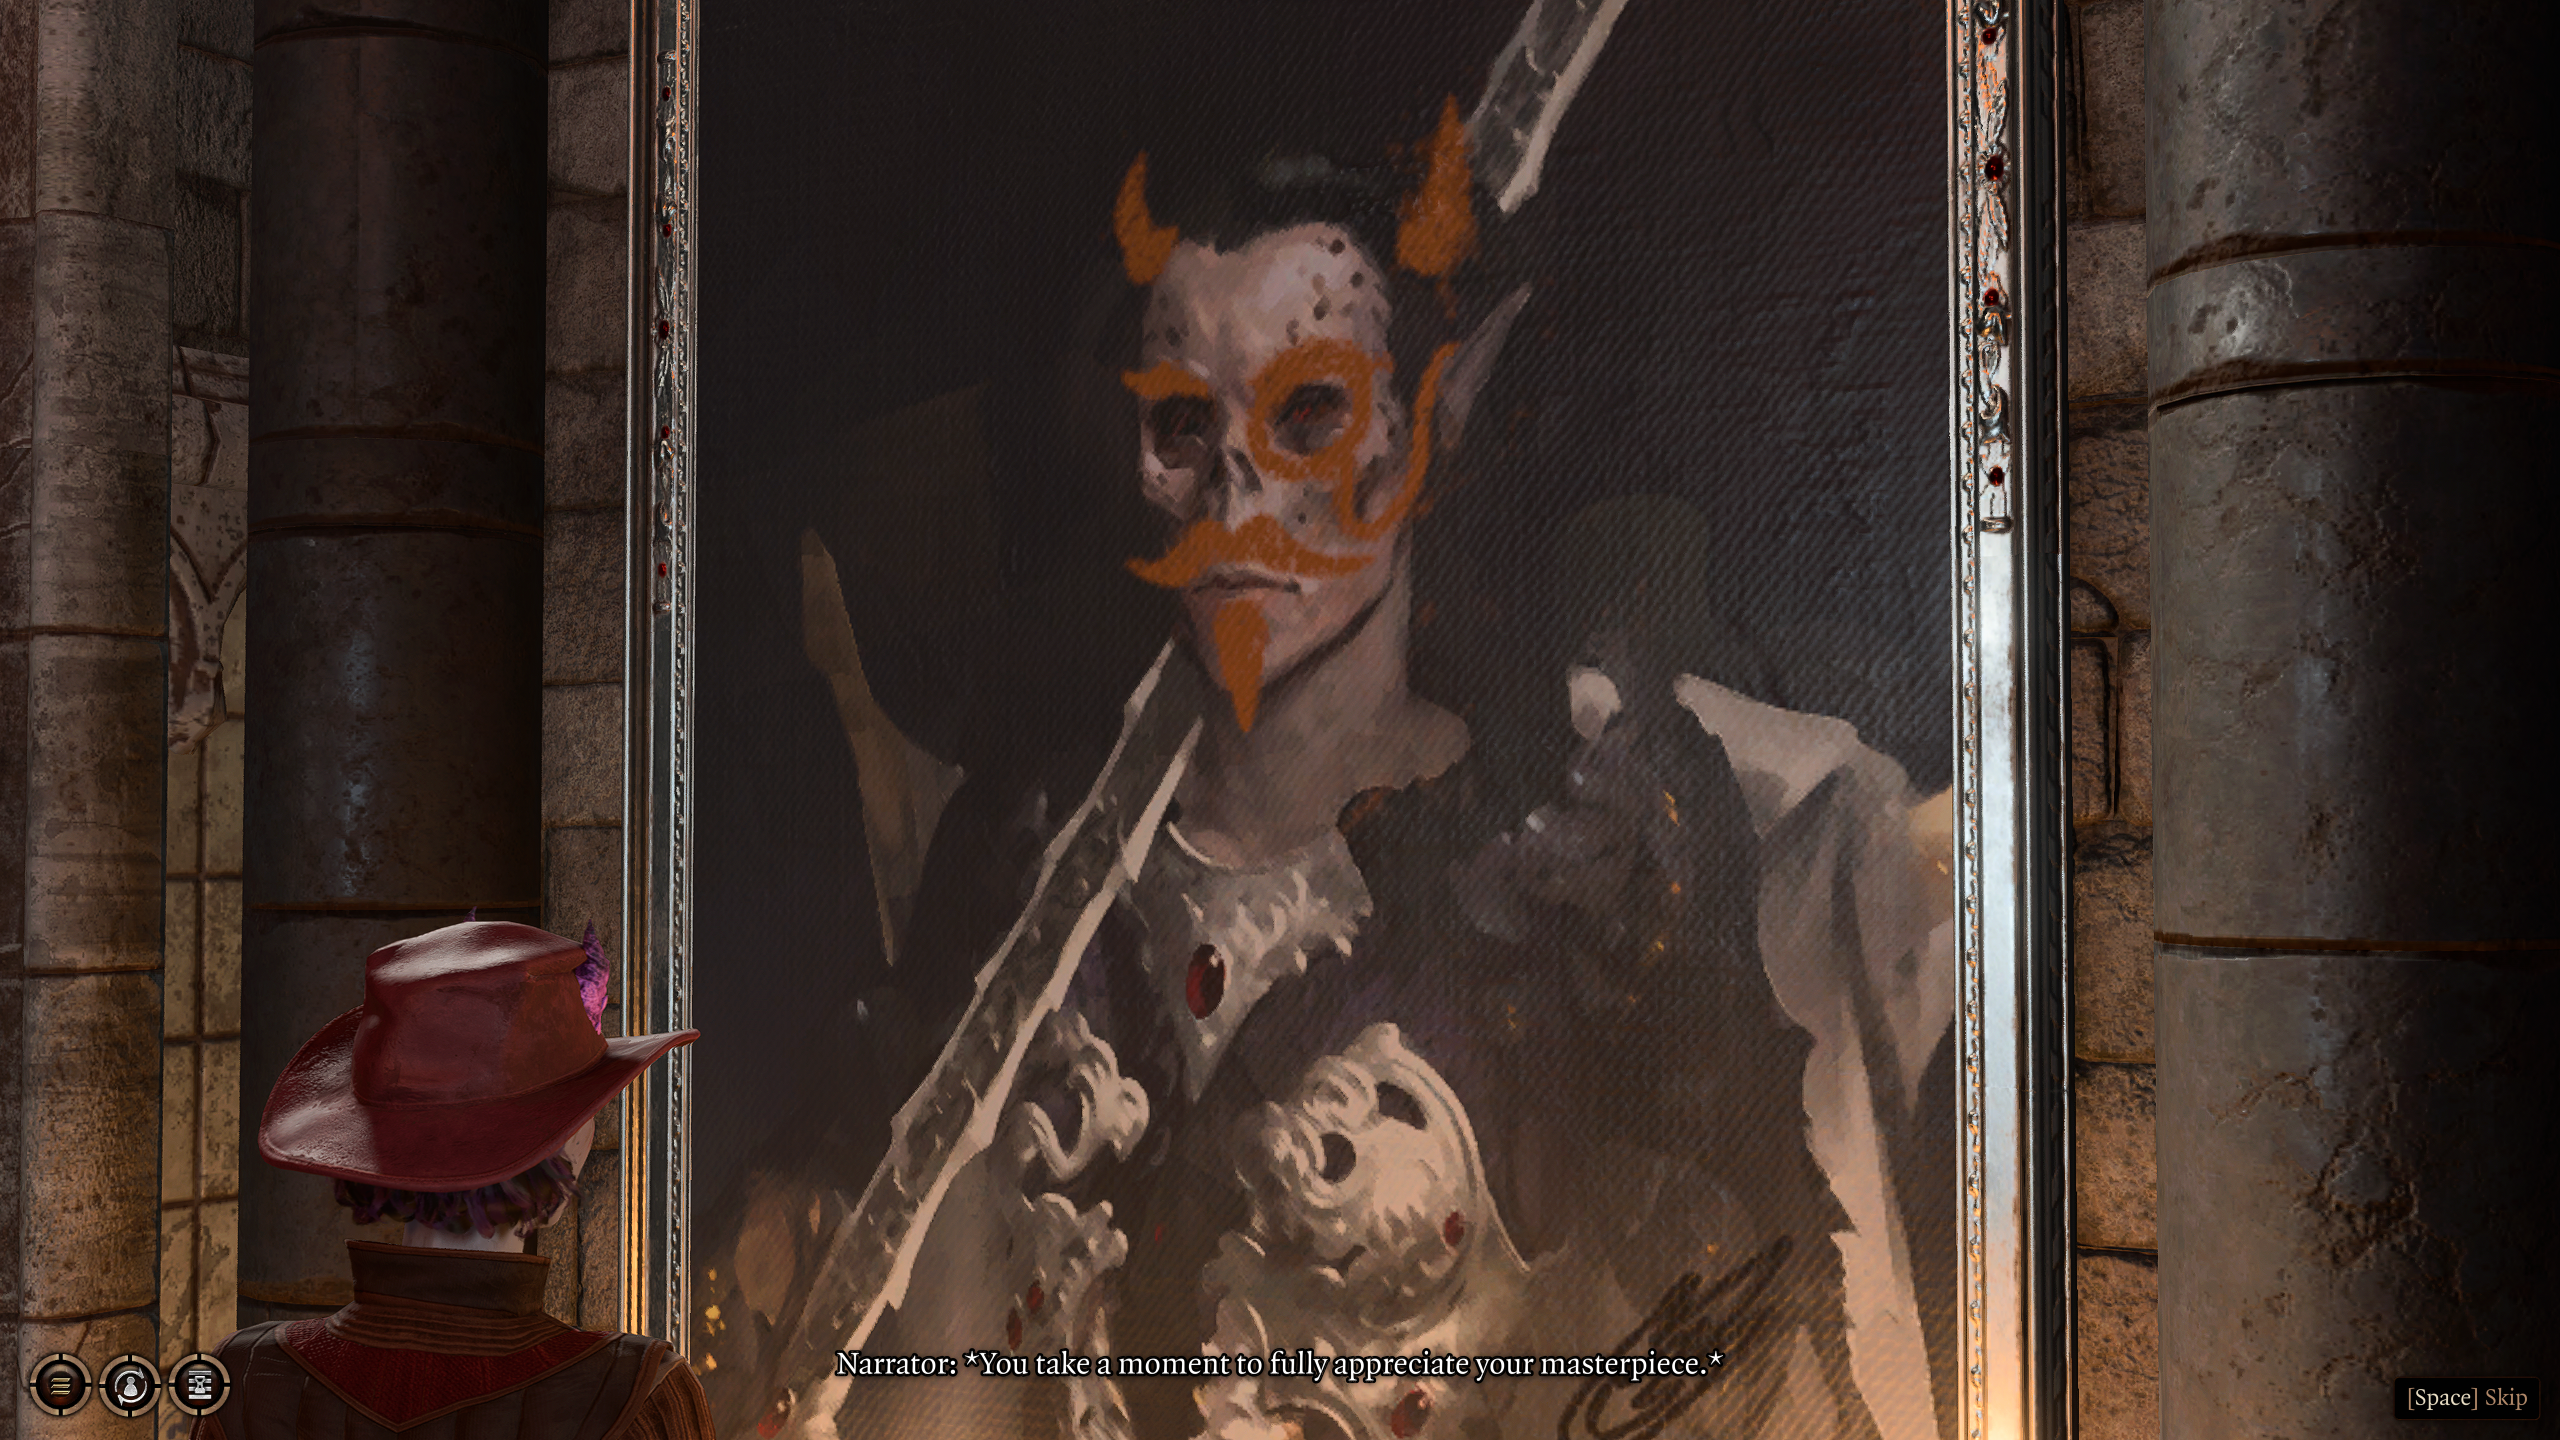
At a fork in the hallway, you will be able to find a portrait to the queen of the Githyanki, Vlaakith. While you are here, you will have the chance to study the portrait with a DC-21 History check. But, more fun, you’ll also have the chance to attempt to vandalize the portrait with a DC-16 Dexterity check.
The Infirmary is filled with recovering Githyanki warriors (who are all at full health when you meet them, so how much recovery do they need, anyway?), including two youths who have decided to use their mage hand to push a box back and forth… Although, what’s in the box? If you break if open, you’ll find a Gremishka inside, which will be immediately hostile — it seems that the cruel kids have taken it from the Monastery above and are tormenting it. Before you break it open, you’ll have the opportunity to talk some sense into the kids — a DC-10 Intimidation check will do it — but there is, unfortunately, no way to save the bullied Gremishka.
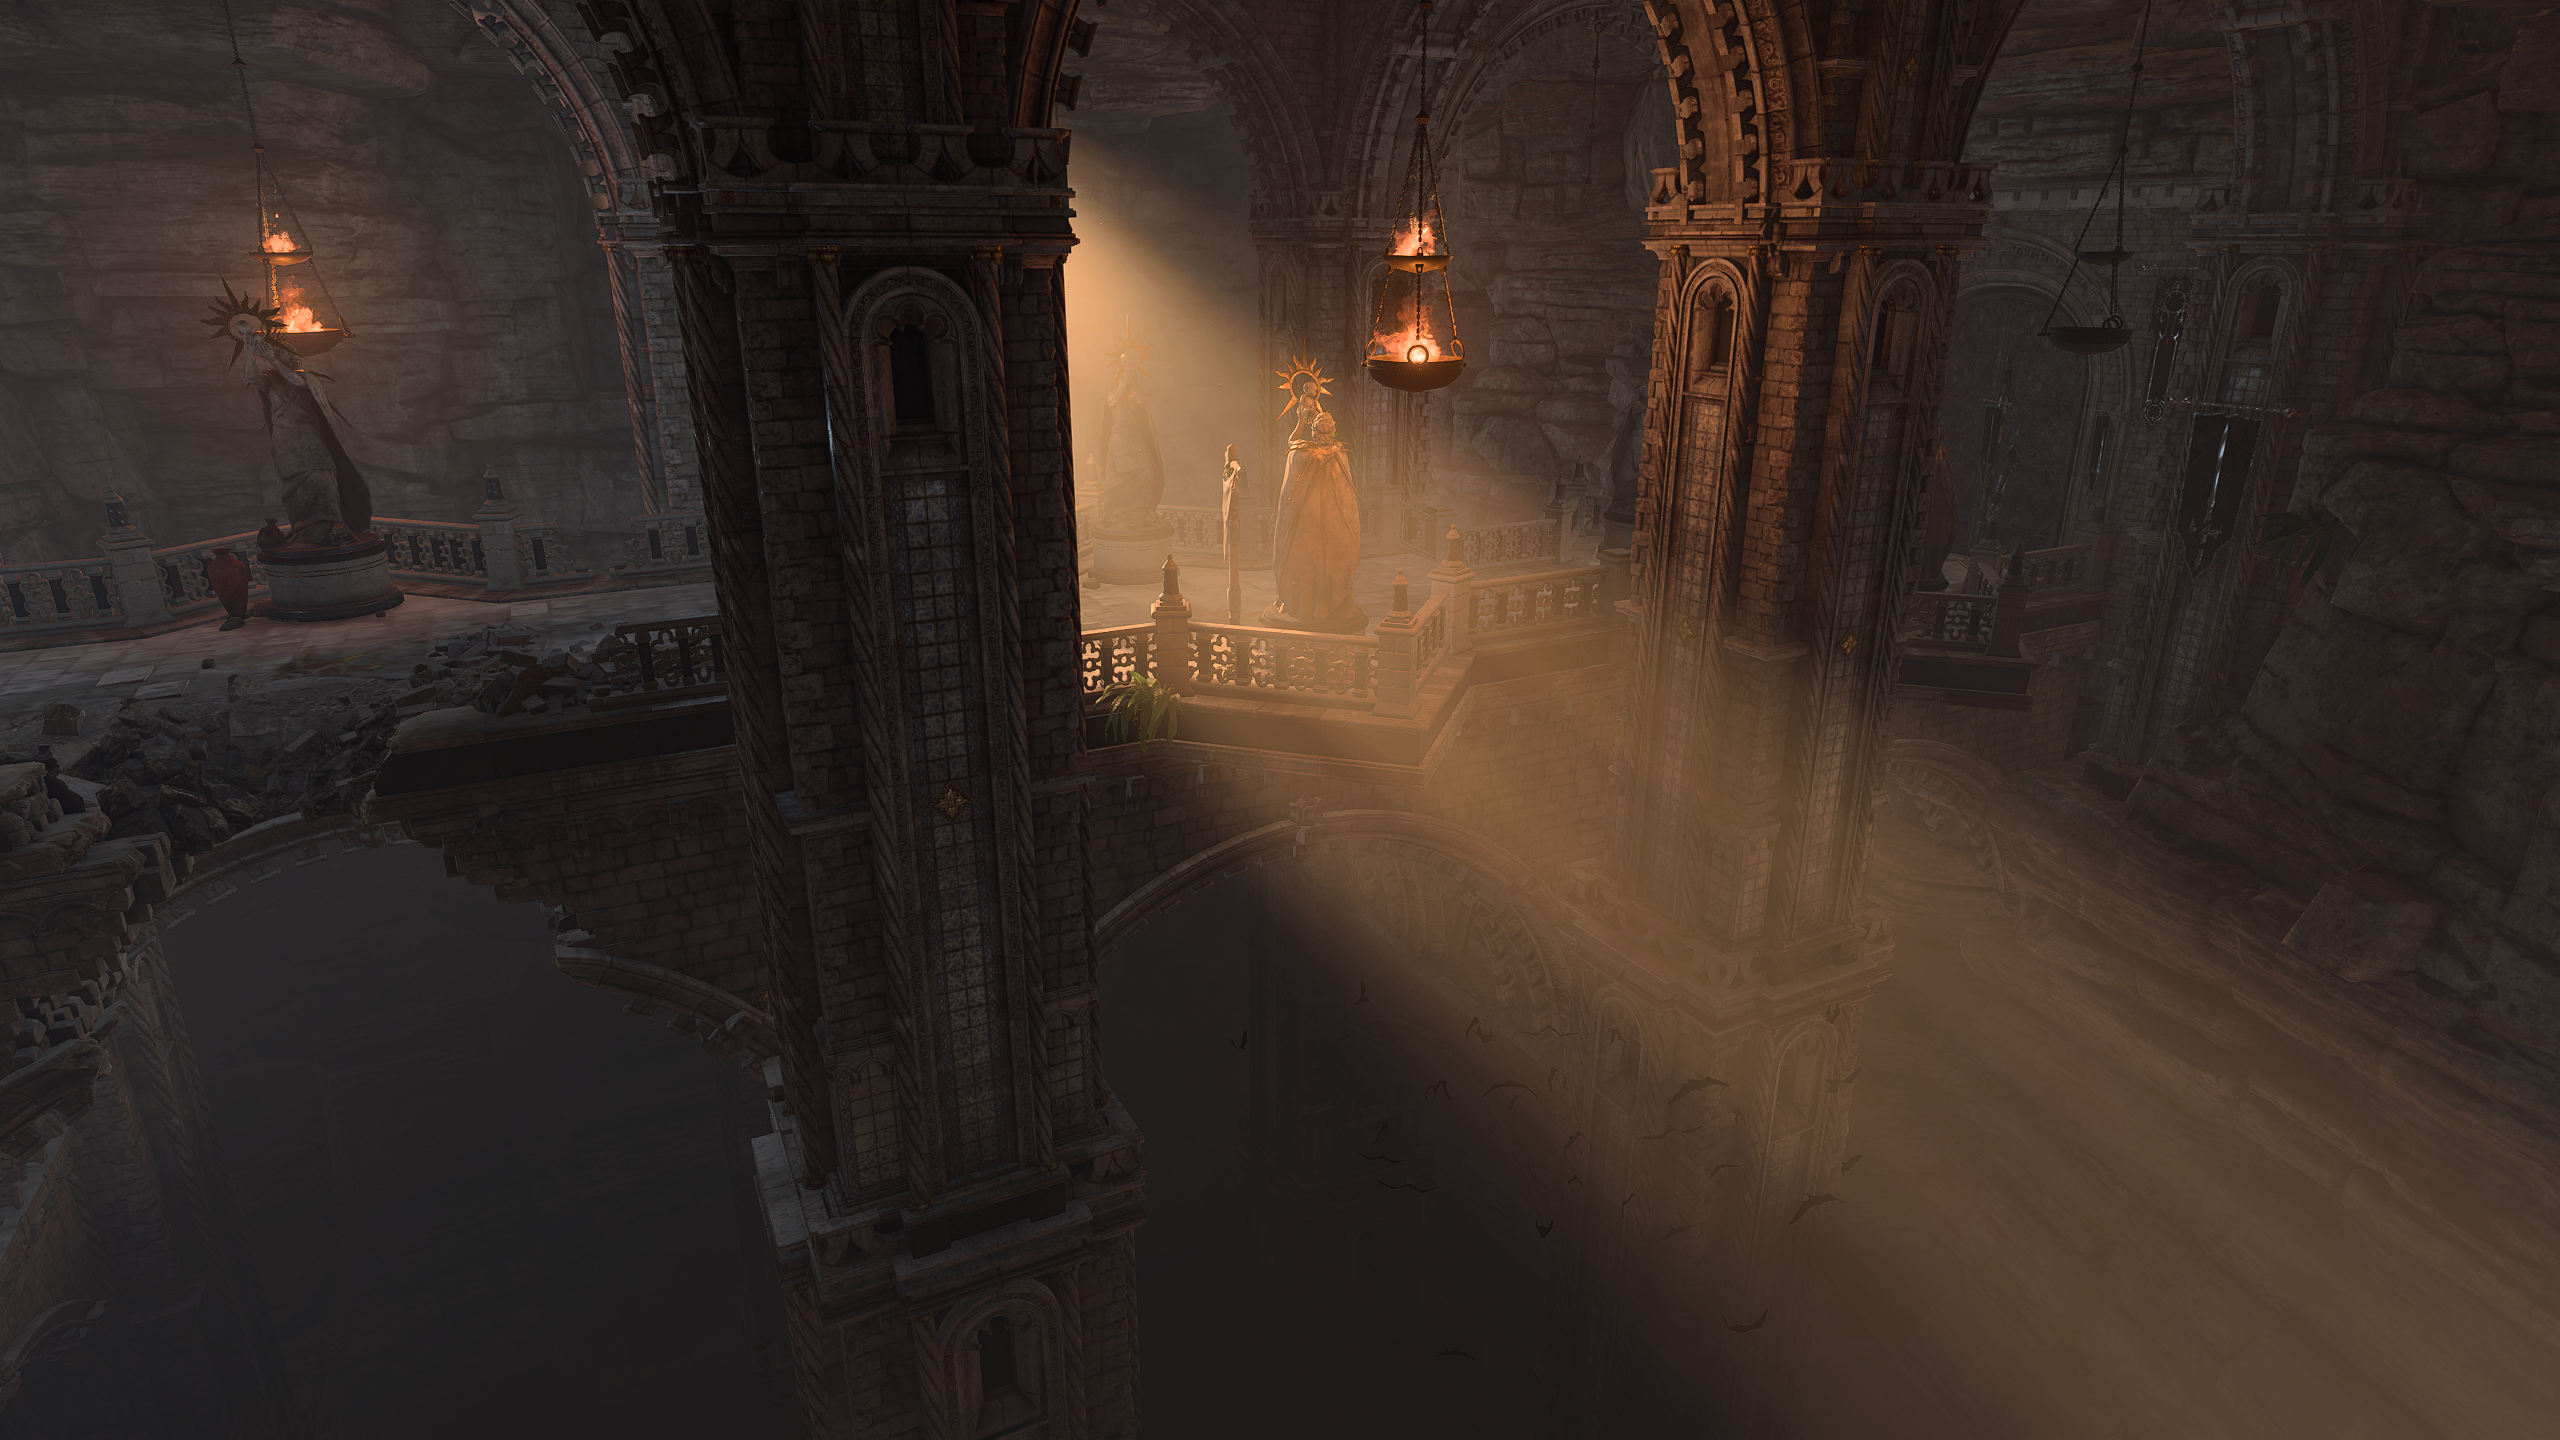
The Infirmary is also where you’ll meet Ghustil Stornugoss the first time, if you haven’t made enemies of the Githyanki yet, but we will go over her interactions in the room she brings you to, containing a Zaith’isk (#5). When the Crèche inevitably goes hostile to you, the Infirmary is one of the deadlier locations (apart from the Inquisitors (#10)), so beware traversing this area once the Gith have been made hostile.
Ghustil Stornugoss is the doctor for the Crèche, and will be the one to interact with when it is time to talk about the removal of your parasite. You will meet her first in the Infirmary (#4), but she will quickly take you to the backroom of it, where she has a Zaith’isk machine — a machine specifically designed for removing mindflayer parasites. There are a number of ways you can get her to tell you more with a successful DC-14 Deception or Persuasion check, but no matter what, she will be willing to ‘treat’ your parasite problem.
Once you’ve convinced her to help you, she will take you back and strap you (or Lae’zel, if you brought her) to the Zaith’isk machine in the back room. This will never go well. The dialogue here is complex, and contingent on many factors. You will be able to first explore the machine with successful DC-12 Intelligence and DC-15 Wisdom checks, and then realize that it is dangerous and be forced to try to survive with successful DC-18 Constitution or Charisma checks. The machine will eventually be destroyed — the work of your friend, the Dream Visitor (#15) — leaving you to answer for that and your still living parasite.
After the machine is destroyed, you can try to read Stornugoss’s intentions with a passive Insight roll. On a success, you’ll be given a slim chance to resolve the situation without Stornugoss calling the gaurds: with a successful DC-15 Deception or Performance check, you can convince her that the parasite is no longer any threat. If you do not do this, then the doctor will leave curtly and make the entire crèche hostile to you.
Within a acid-filled room, you will find the Githyanki‘s most prized possession: an egg of their species, late to hatch. Two Githyanki guard this room carefully, and there are mines places around the acid-filled pool to prevent interlopers from taking the precious child. Talking to the caretaker, Varsh Ko’kuu, will yield some interesting dialogue. After an initial DC-10 Persuasion check to learn more about the egg, a follow up with a DC-18 Persuasion or Intimidation check or a DC-10 Deception check will convince Varsh Ko’kuu to let you have the egg.
This egg can then be brought back to Lady Esther in the Mountain Pass for a reward and some praise, though it may not be the best way to end things… That is up to you, however.
Attempting to take the egg in any other fashion, or failing certain rolls above, will turn the Crèche hostile to you.
A number of Githyanki youth are hard at work, training within this classroom. One of the youth, however, has been injured, and yet the teacher of the class sees fit to put him into a battle to the death with his classmate. One he will surely lose. You can opt to intervene, either passing a DC-21 Persuasion check to stop the battle, or taking the other student’s place and passing a DC-16 Dexterity check to fight the youth non-lethally (or lethally, if you want). The Dark Urge has some very interesting dialogue in this scene in particular.
Speaking to the boy afterward or looting his body will enable you to find that he has been reading about Orpheus, a mindflayer and natural enemy of the Githyanki. If he lives, a successful DC-14 Persuasion check can get the youth to reveal this, and a successful DC-18 Deception, Intimidation, or Persuasion check can get the boy to give you the book he’s been reading from. I wonder who this Orpheus fellow is… Hmm…
Kith’rak Therezzyn is the head of the Crèche, and has ties to the hidden Inquisition within it. If they player enters the Crèche by mentioning the Artefact, she will want to see you personally — it is that very Artefact that she has been looking for, in order to access the Astral Plane using the Planecaster (#10). With the artifact in your possession, Kith’rak Therezzyn will inevitably ask about it, though you can hide that you have it with a DC-16 Deception check if you didn’t the guards at the entrance (#1) about it, though she will simply task you with going to find it, should that be the case.
If you do reveal the Artefact to her, despite the protests of your Dream Visitor, she will be happy to use her key to open the way across the bridge (#9) and to the Inquisitors and their Planecaster beyond (#10) — this is, after all, the exact Artefact that the Inquistion was formed to locate.
Alternatively, you can fight Kith’rak Therezzyn and her wolves here (or you might need to, if the Gith are already hostile), which can spare you a brutal fight on the bridge (#9) later, if you make enemies of the Gith. She will drop the key to unlock the door in her room.
This precarious bridge connects Kith’yak Therezzyn’s chambers to the hidden Inquisition chambers beyond, and will be the site of a dangerous encounter involving Kith’rak Therezzyn and her wolves if the Githyanki are made hostile and she is not already dealt with, most notably if things go wrong with the Inquisition (#10).
When you step into the Inquisitors’ chambers, if you aren’t already hostile to the Githyanki, Ch’r’ai W’wargaz will address the player, giving you the chance to speak to him. He will know that you have the Artefact, and demand that you produce it. Being cagey with a DC-16 Deception check and failing will cause him to become instantly hostile, but he will also eventually become hostile if you do not give him the Artefact — no rolls can prevent this, and you will not be able to extort him for a reward.
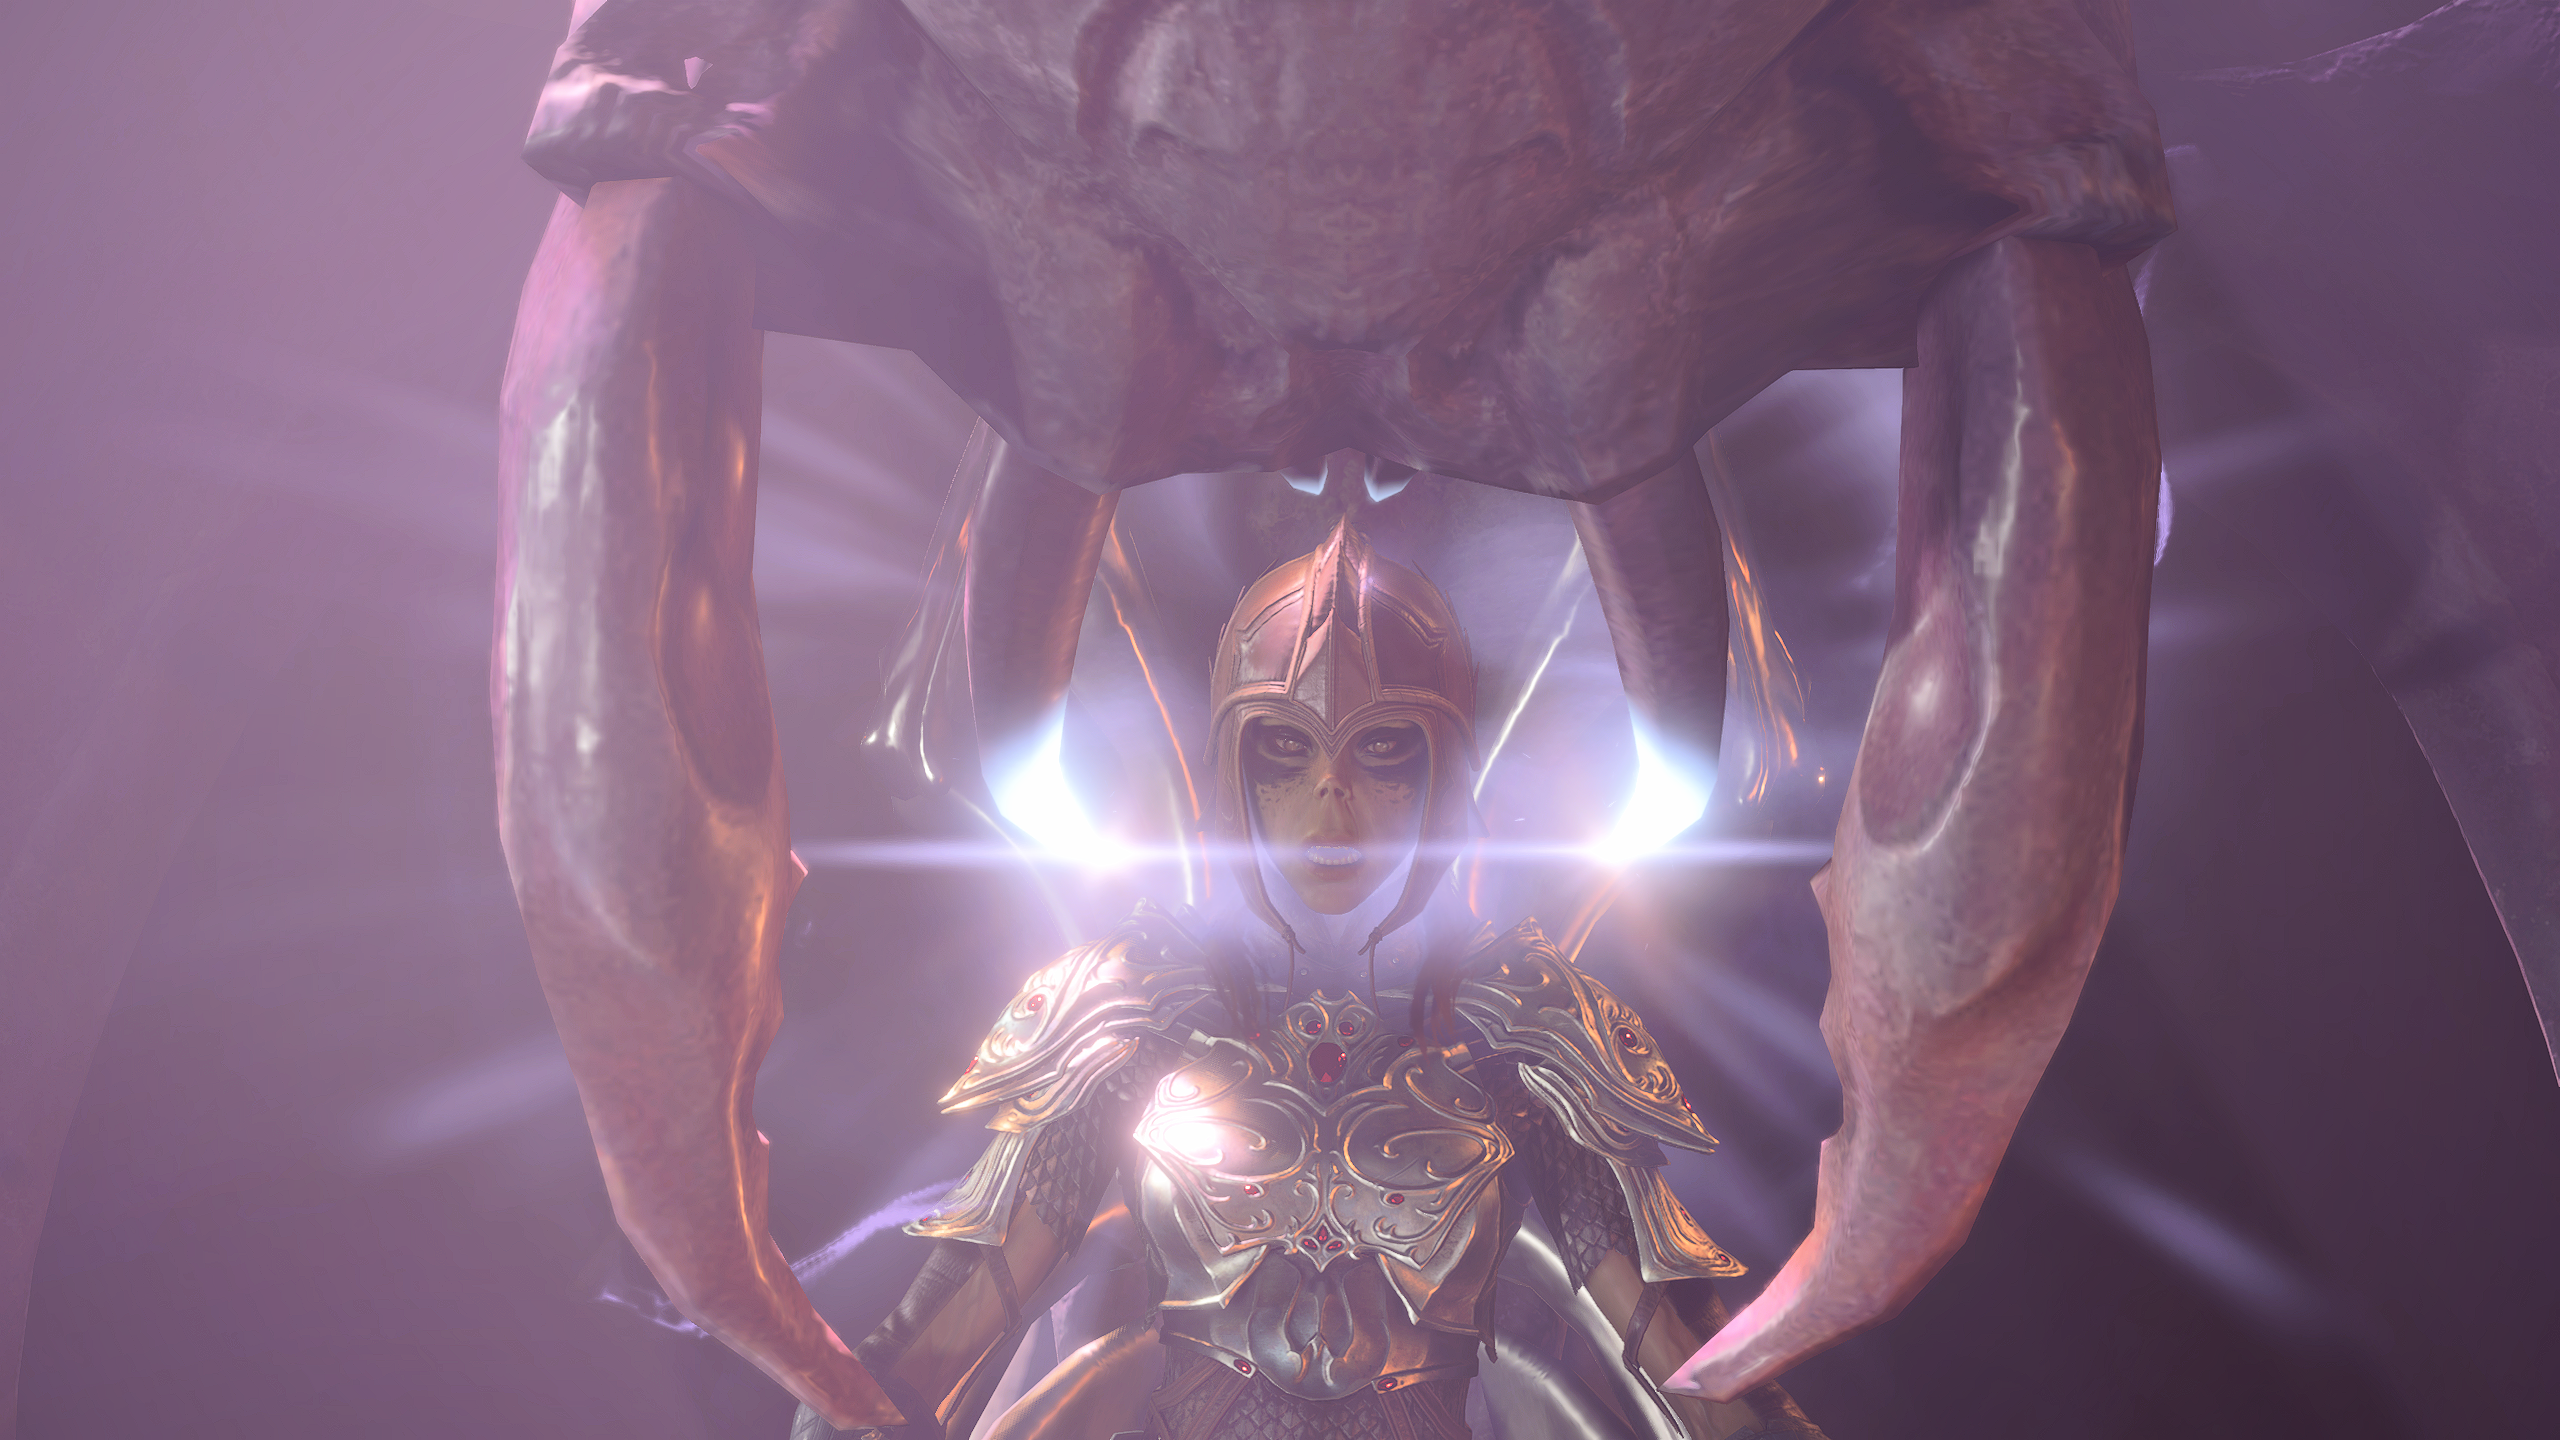
If you produce the Artefact, he will use it to power the Planecaster and give you the chance to use it to enter the Astral Plane (see map). If you don’t, though, or if you are already hostile to the Crèche, then you will need to fight the Inquisitors — a notably tough fight. Once you have defeated the Inquisitors, then you can still activate the Planecaster yourself using your Artefact.
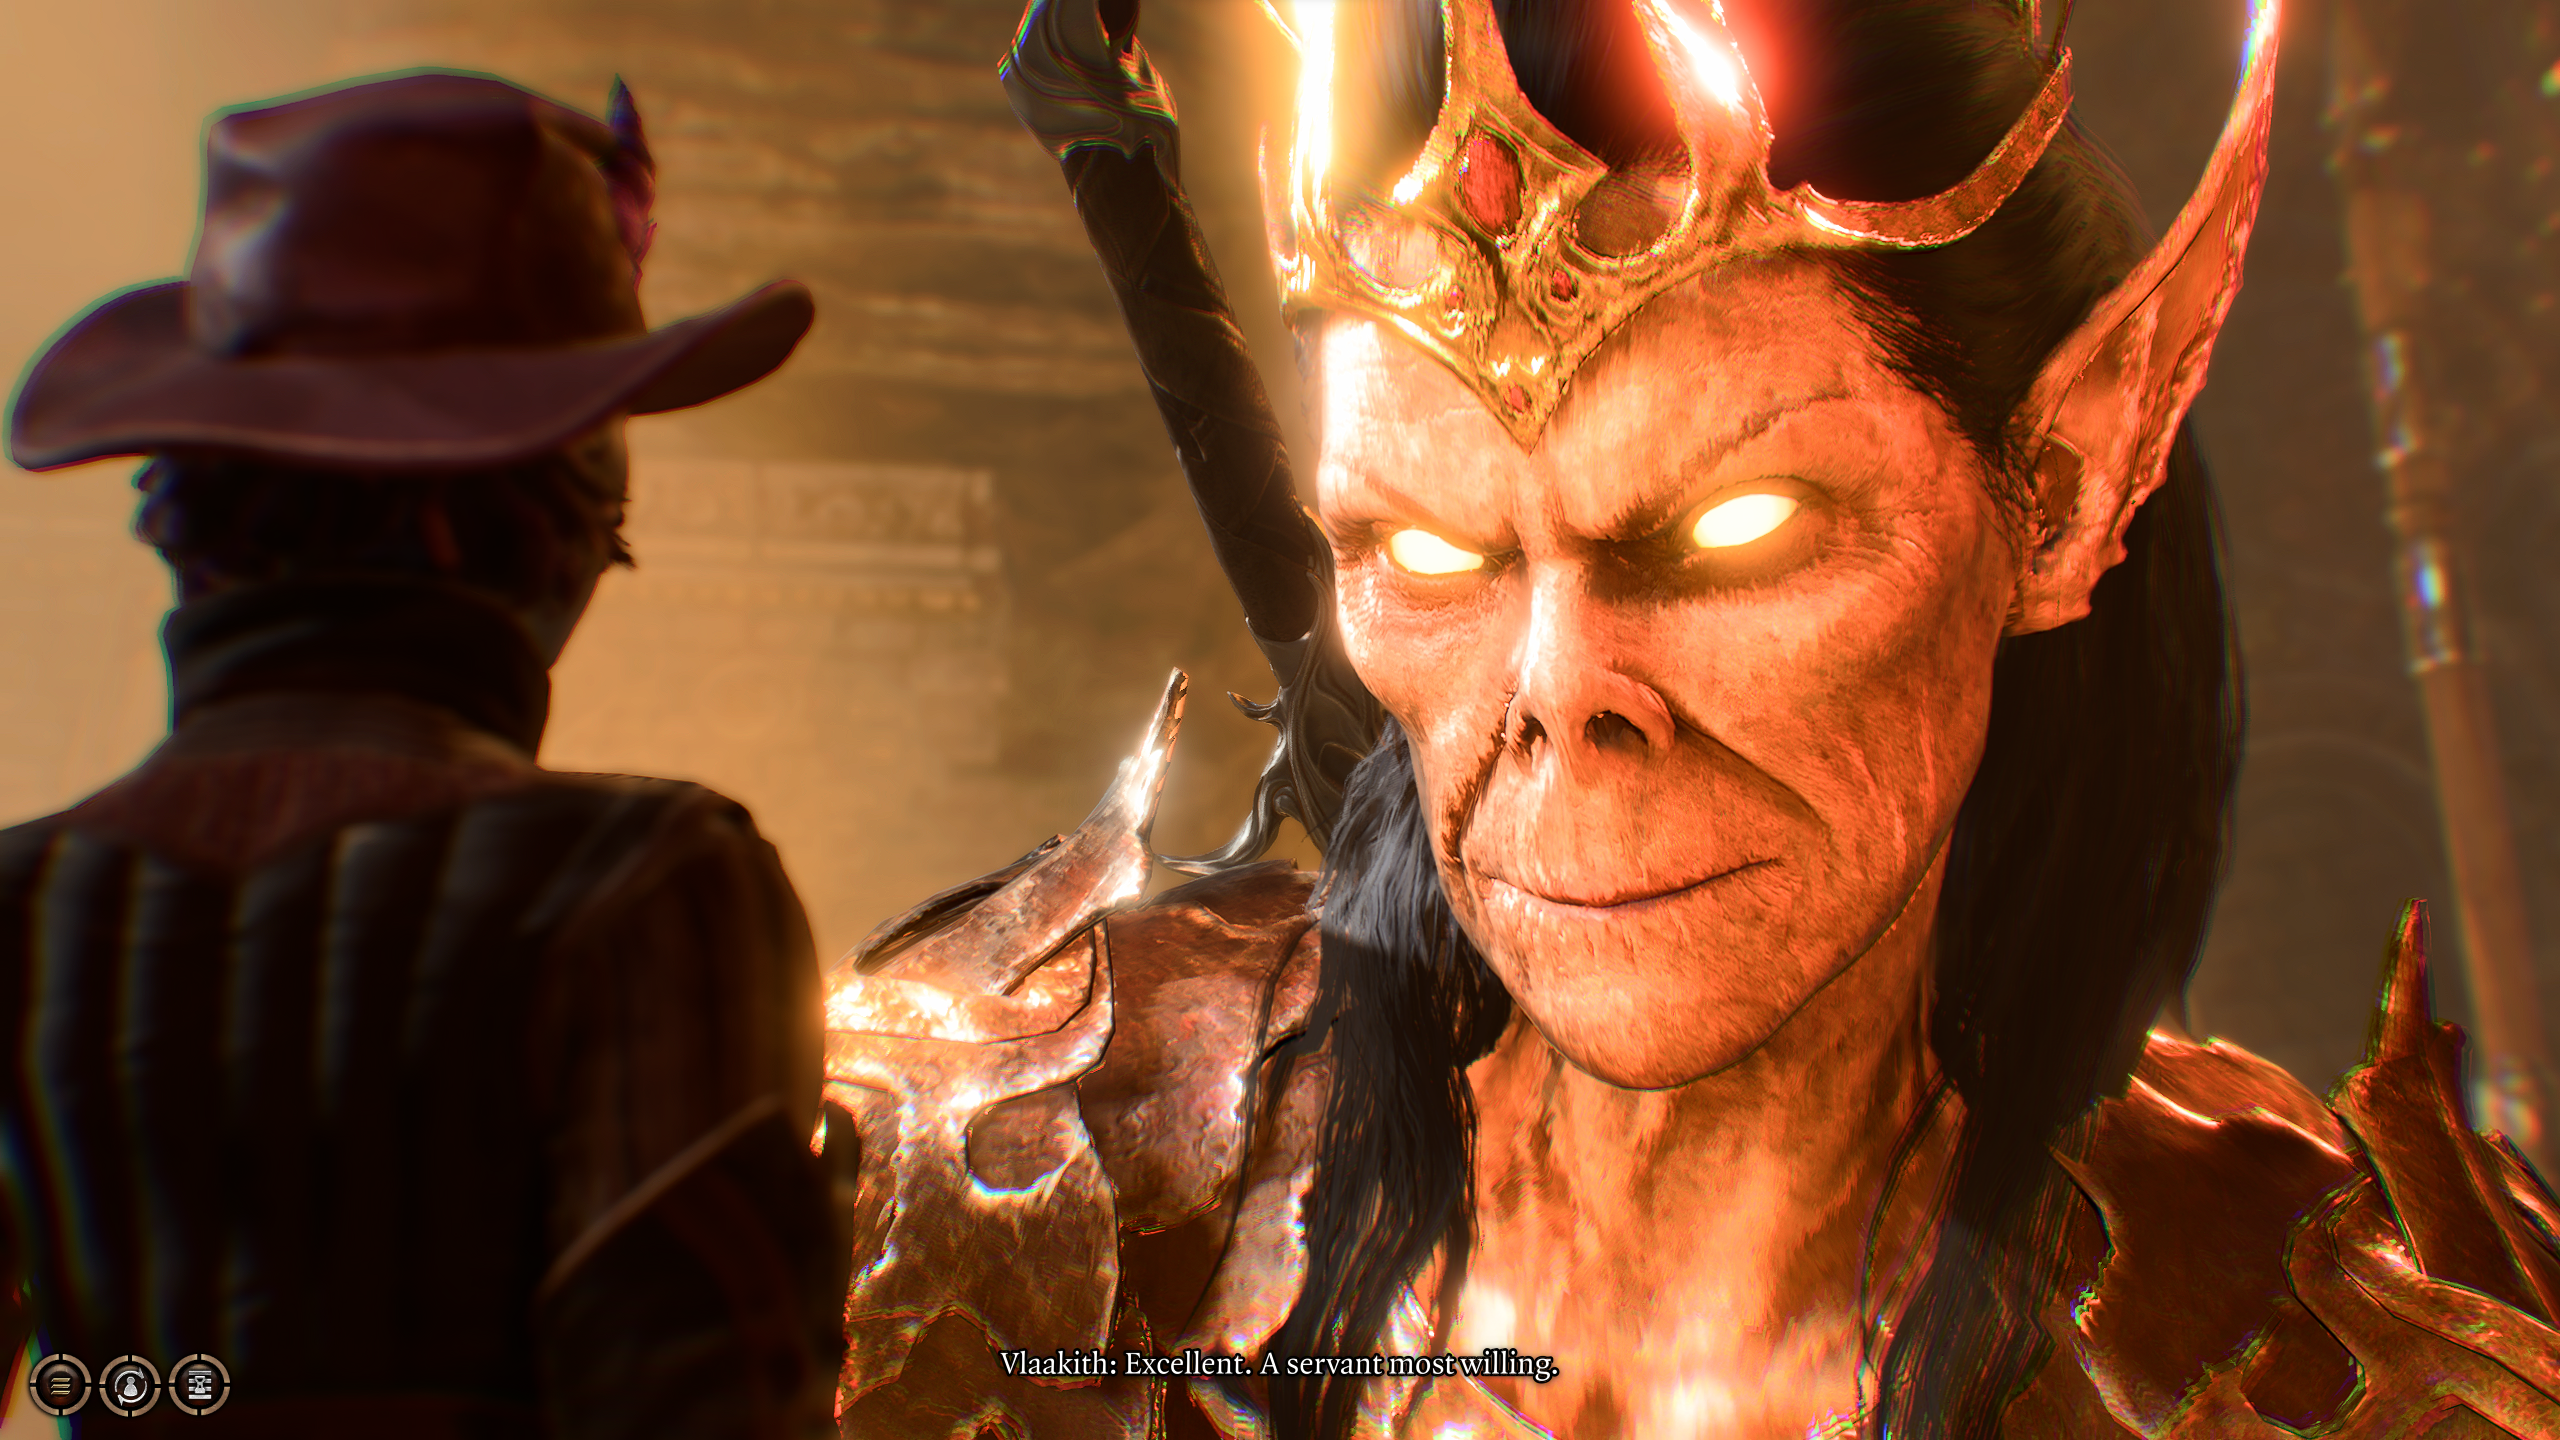
When you activate the Planecaster, even if you kill the Inquisitors, the Githyanki Queen Vlaakith will appear before you as a spectral hologram, much larger than you, to make some demands of you. While you will get some insights from this, ultimately the only thing you’ll have to decide is whether to accept or reject her order to kill what you find in the Astral Plane (who will be the Dream Visitor (#15)). If you reject the Queen’s orders outright, Lae’zel will leave your party and become hostile, so it is usually best to side with her… For now.
After your dialogue with Queen Vlaakith, the Planecaster will active the Artefact. Interacting with it will take you to the Astral Plane (#14 and #15). It should be noted that when you return, the Inquisitors, knowing of your failure to kill the Dream Visitor, will be hostile.
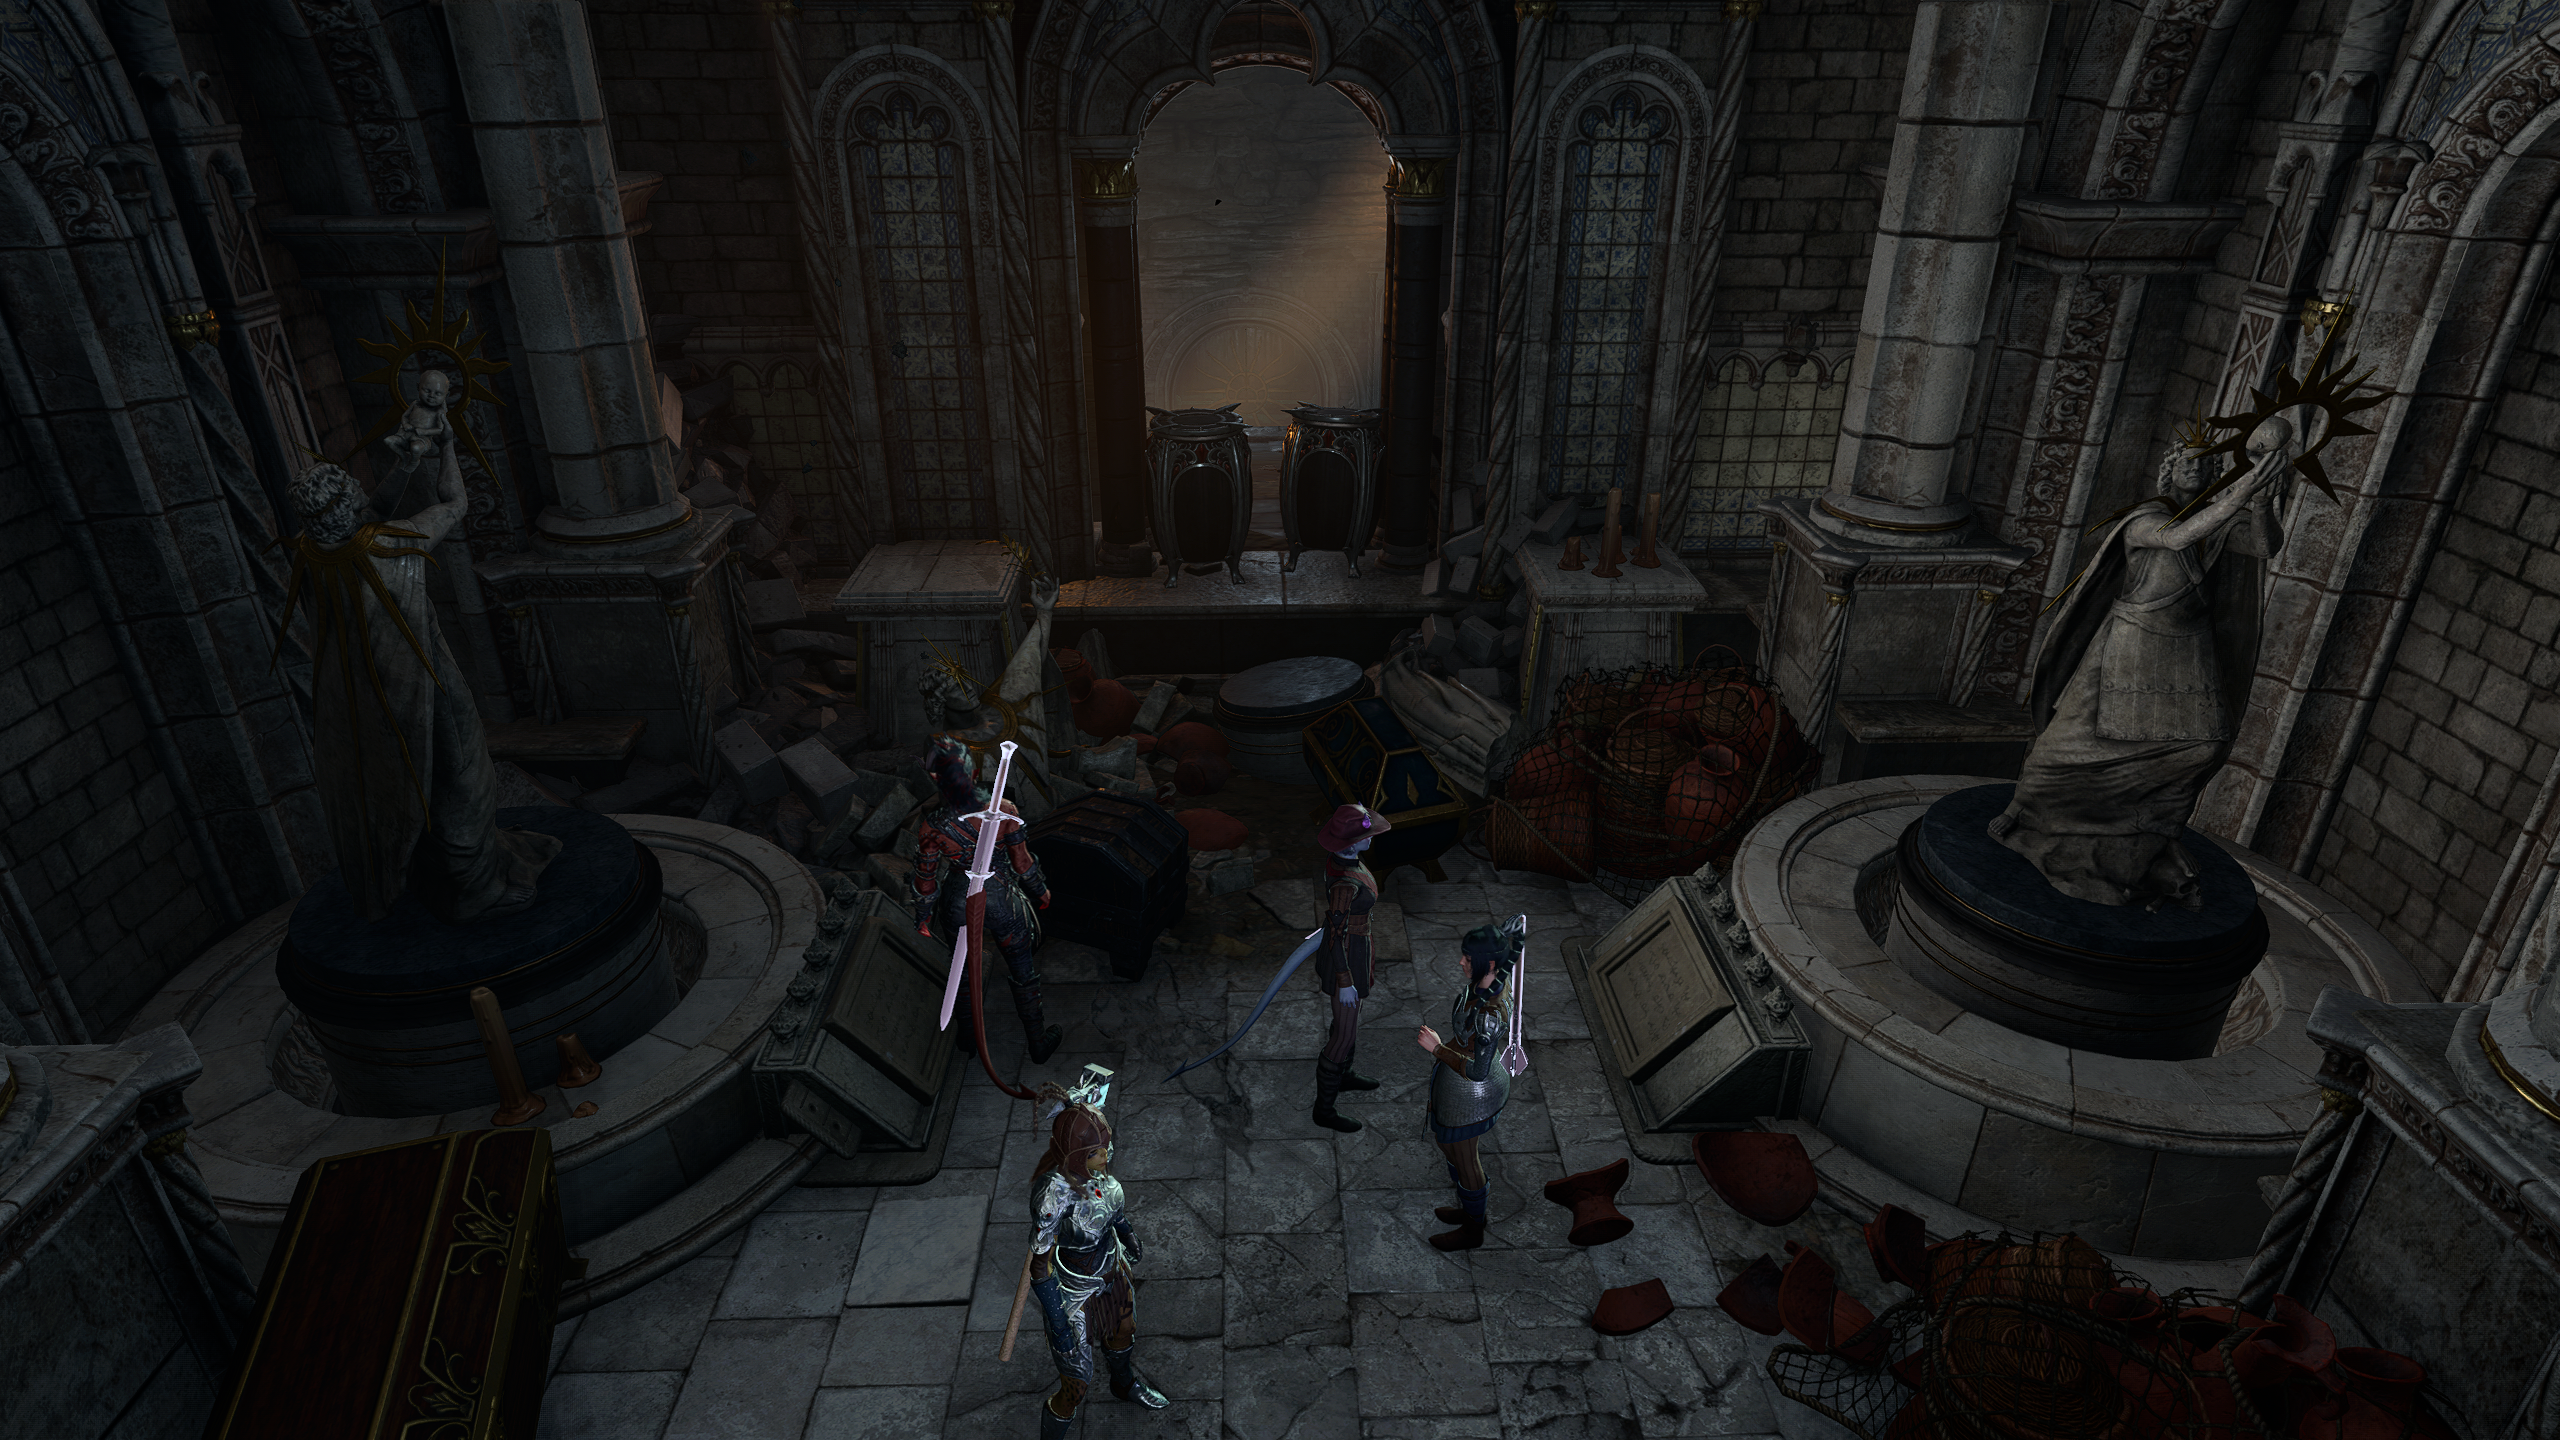
This room is also filled with loot on either side, including the Skinburster and the Hoarfrost Boots, as well as all the loot on the Inquisitors themselves.
To the west of the Inquisitor’s chambers are two statues of Lathander. They are actually guarding a secret door, should you turn them the correct direction. In order to unlock the secret passage that will, eventually, lead to the Blood of Lathander legendary mace, you will need to turn both Lathander statues. The one on the left will require a Strength check or a bottle of Grease to be thrown at it in order to turn.
To complete the puzzle, the Lathander statue to your left, with the placard that indicates it should face the dawn, should face toward the wall, where the Blood of Lathander (#12) is being kept. The other statue should face the opposite way, back toward the Inquisitors and Planecaster. Once you’ve done this, a secret door will unlock, opening the path to the Blood of Lathander.
Once you enter this hidden passageway, you will be met with a set of locked, golden gates and deadly repulsion traps. To deal with the gates, you will need to destroy three blue crystals to break the gates, while disarming the repulsion traps to keep you from getting pushed to your death. The first blue crystal is just in front of the first gate, the second is through a passageway that leads behind the repulsion trap, and the last is hanging over the edge near the bottomless pit. Alternatively, you could cast Grant Flight to bypass all of this.
As for the repulsion traps, they are plainly visible, but being caught in front of one will cause it to activate and throw you, likely to your doom over the side and into the bottomless pit in this room. You should disable these as you walk past them, requiring just a DC-10 Sleight of Hand check for each.
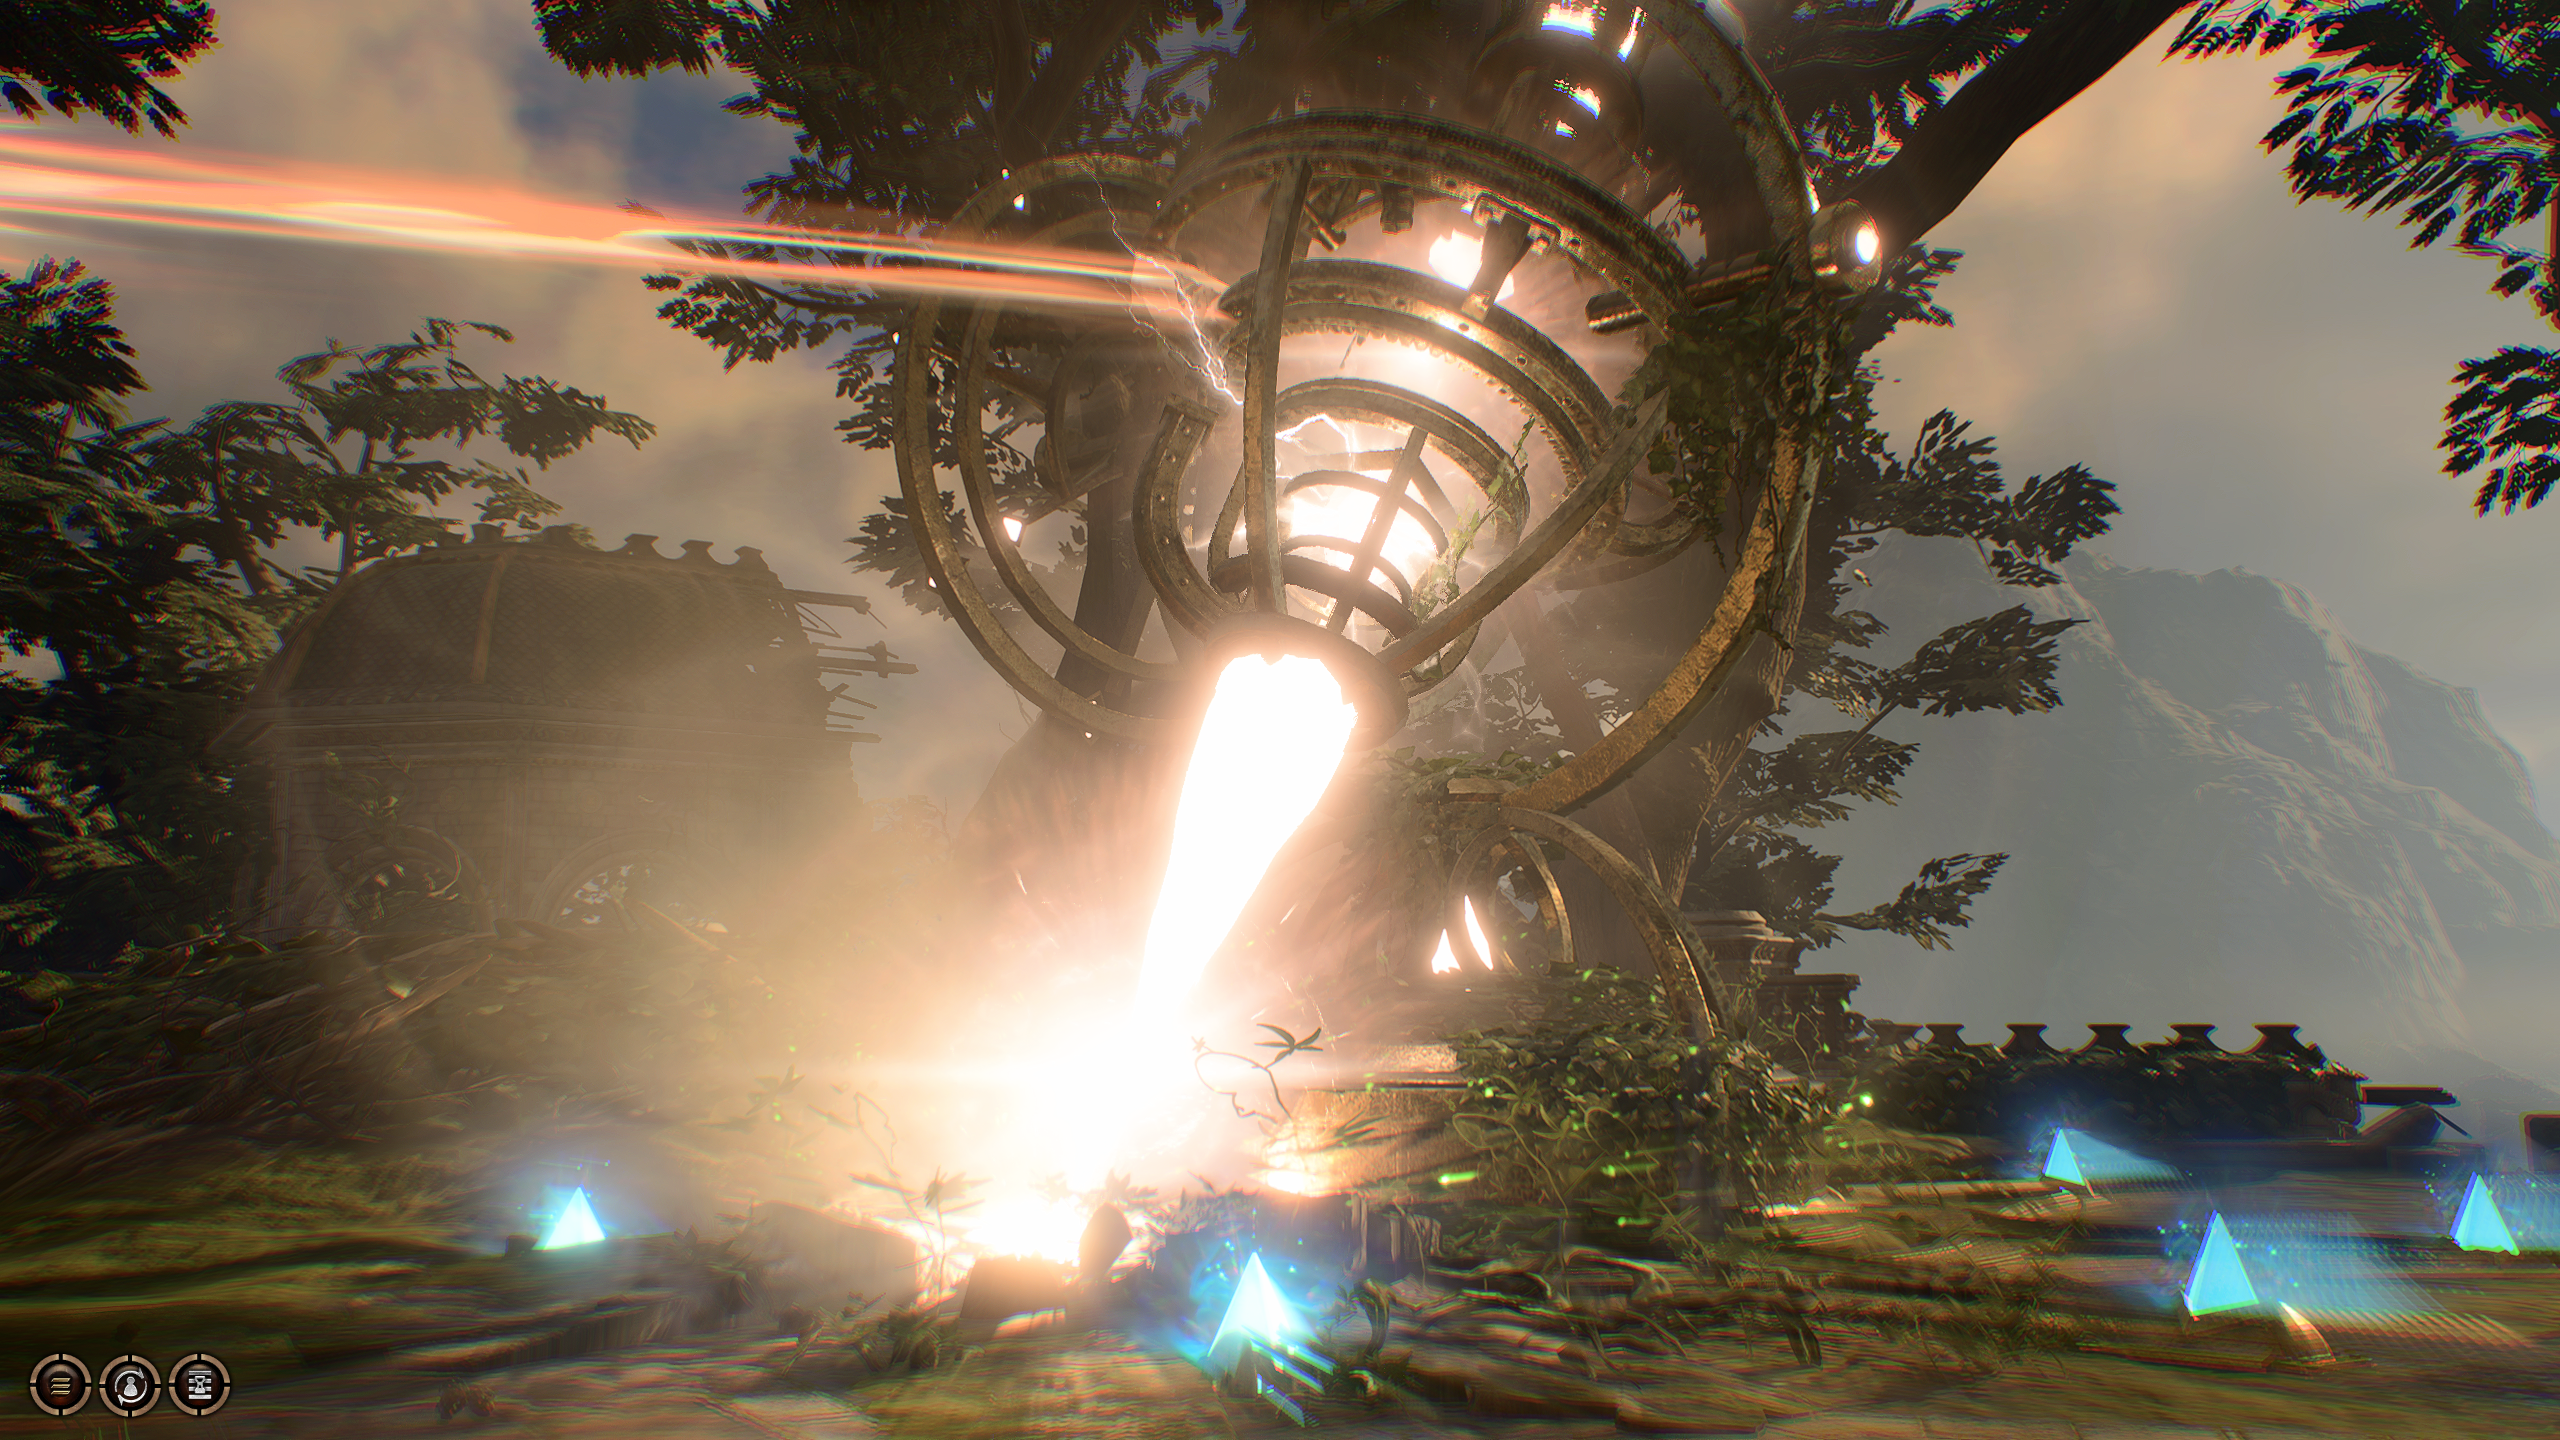
In the most hidden and secure chamber of the Monastery, you will find the Blood of Lathander — a legendary Mace dedicated to the Dawnmaster himself. But reaching the mace is only half the puzzle — acquiring it is another. If you have not obtained the Dawnmaster’s Crest from the Rosymorn Monastery‘s puzzle above, then taking the mace (after a warning from the narrator, no less) will cause the laser atop the Monastery to begin powering up, giving you only 5 turns to escape the Monastery before it (and the Crèche below) is destroyed. If this should be activated, a portal will open behind the Blood of Lathander, allowing your companions to flee, but you will be trapped within an impenetrable light wall.
However, if you have the Dawnmaster’s Crest, then simply inserting it into the slot on the front of the pedestal will be enough to grant you the mace, letting you leave without total destruction and the Blood of Lathander in tow.
In the Astral Plane, you will finally come face-to-face with someone you’ve met in your dreams before: the Dream Visitor. There are many revelations to be had with this, both about the nature of the Visitor and of Vlaakith, but ultimately you will not be given much choice: whether or not you try to kill the Dream Visitor, you will not be able to, and will end up back outside of the Planecaster after the conversation and be viewed as a “failure” by Vlaakith and her inquisitors. You will, however, have some very interesting information about Vlaakith — namely, that she was planning on killing you back at your camp that night regardless.
There is 1 waypoint, called Creché Y’llek, within this area.
Where To Go Next
Creché Y’llek is a dead end, and so you will need to go back the way you came, to the Rosymorn Monastery, if you are leaving by foot. Typically, you would go from there, to the Mountain Pass, and then to the Shadow-Cursed Lands to continue the main story.
Rosymorn Monastery: Technically, the only region you can reach by walking from Crèche Y’llek is the Rosymorn Monastery, though you might want to use a Waypoint to get where you want to go.
Graves is an avid writer, web designer, and gamer, with more ideas than he could hope to achieve in a lifetime. But, armed with a mug of coffee and an overactive imagination, he'll try. When he isn't working on a creative project, he is painting miniatures, reading cheesy sci-fi novels, or making music.