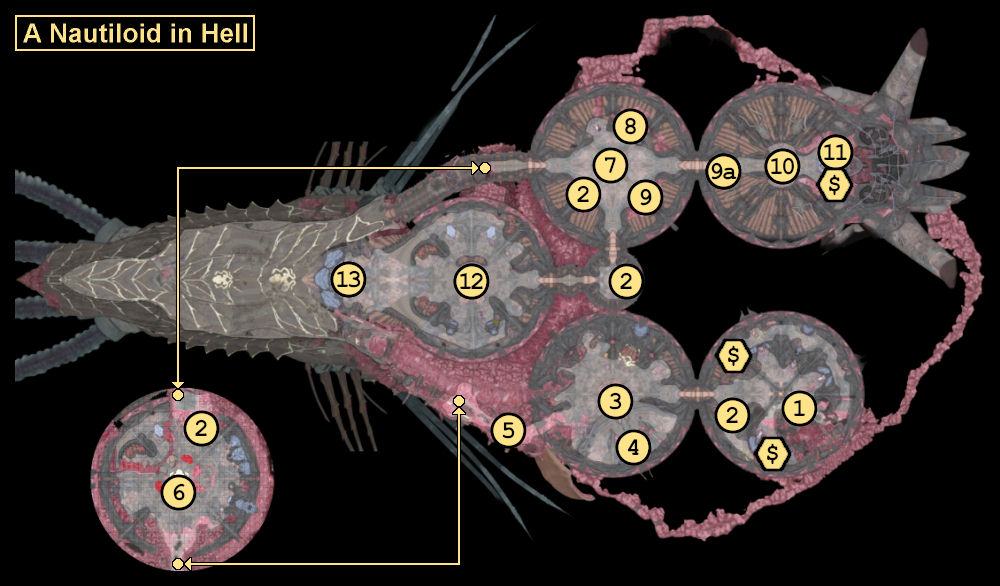
The Nautiloid is where you’ll begin in Baldur’s Gate 3. Your primary goal in the area is to escape. See the quest entry for Escape the Nautiloid for more information.
Near this spot you’ll find a damaged nursery—the home of the parasites like the one inside your head. With enough Investigation, you’ll determine that touching the nursery will cause it to “crumble.” In actuality, the nursery will explode, causing minor damage, so it’s best not to touch it at all. But if you do touch the nursery and get hurt, you can always head over to the nearby restoration shell (#2) and heal yourself.
When you touch the filaments inside these shells, you and your entire party will get healed. You can use the restoration shells as many times as you’d like.
When you interact with the remains of Myrnath here, you’ll discover that his brain has been taken over by an intellect devourer—a minion of the mind flayers. With enough Strength, Dexterity or Investigation followed by Medicine, you can extract the devourer, whom you’ll learn is named Us. Us will then start following you around, and it’ll help you during the remainder of your stay on board the nautiloid. If you destroy the devourer or fail to extract it, then you’ll lose it as a helper.
After extracting Us, you’ll be given the opportunity to “mutilate” it. This will require you to pass a DC-15 Dexterity check. If you’re successful, then you’ll lobotomize the poor creature, which will reduce its maximum health by 6 and its Intelligence and Wisdom by 4—but not give it any bonuses. If you fail, then Us will screech at you and run away, and it’ll disappear from the ship.
As long as Us joins you—mutilated or not—then you’ll meet it again later in the game, and it’ll become a summonable familiar. Rescuing Us will also allow you to talk to it. It’ll call the parasite in your head a “gift,” and it’ll let you know that you’re currently in Avernus, the first of the Nine Hells.
It’s always important to make a good first impression.
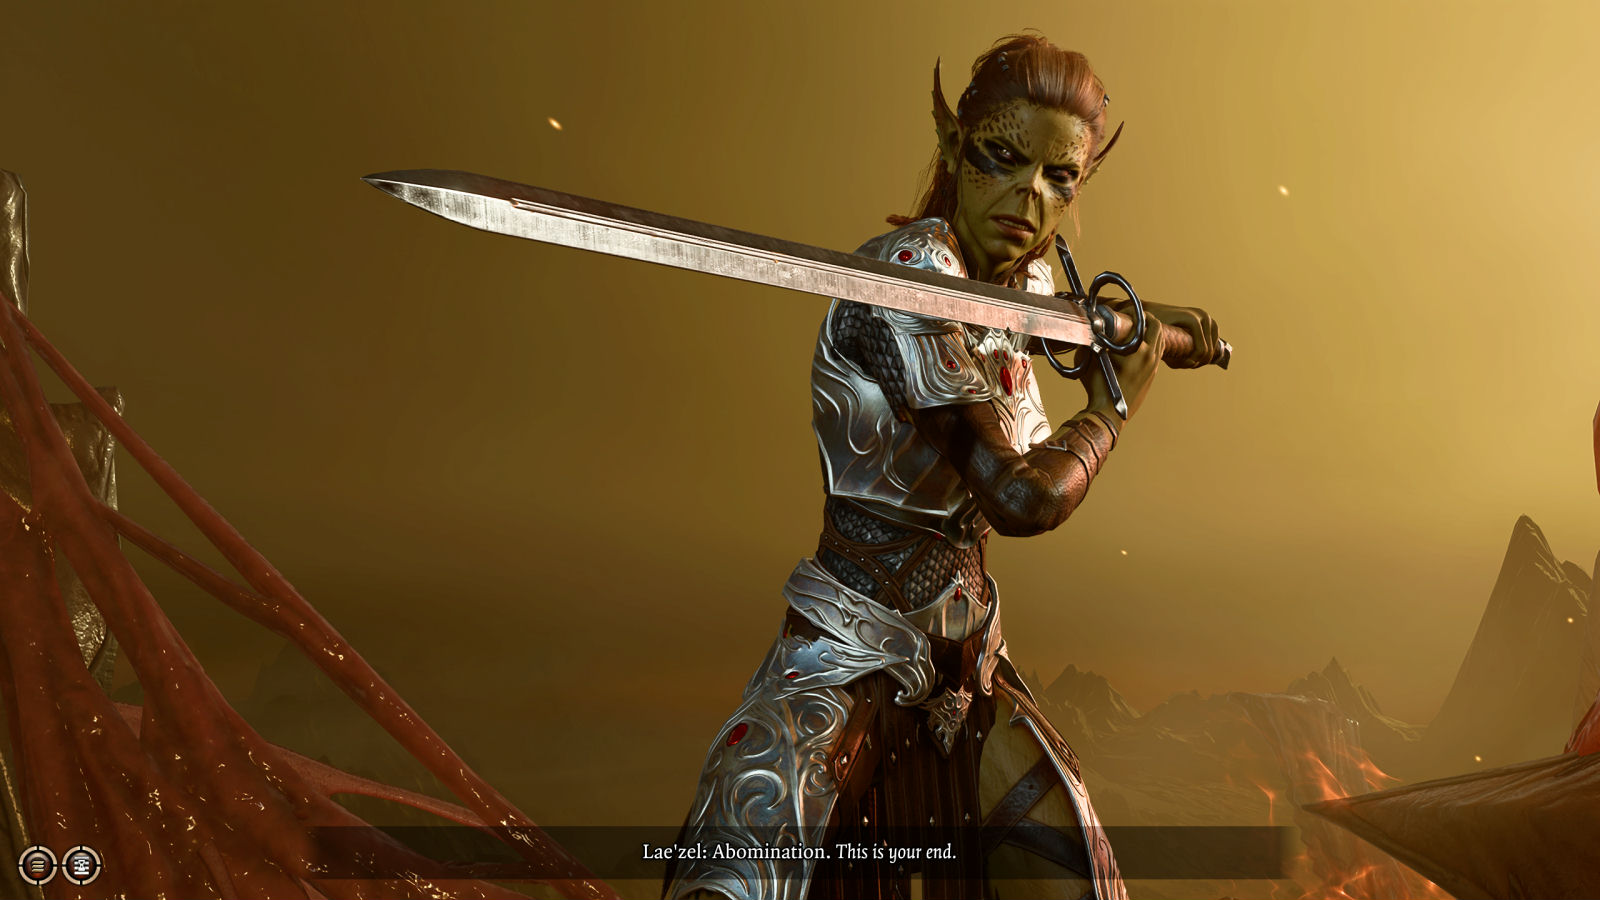
When you reach this spot, you’ll meet a Githyanki Fighter named Lae’zel. She’ll at first mistake you for a thrall, but then she’ll join your party. After talking to Lae’zel, you’ll automatically move forward and confront a nearby trio of imps (#6). Lae’zel will stay with you for your trip through the nautiloid, and then you’ll be able to recruit her as a companion later.
You’ll encounter thee imps here. They’re weak creatures that only have 6 hit points, so you shouldn’t have too much trouble defeating them. After the battle, loot all of the corpses in the room. You’ll find some bombs and basic weapons.
“You prove surprisingly adequate in battle.”—Lae’zel
The console here is connected to two nearby “sacrificed cultists.” With enough Arcana, you’ll decipher that the three buttons on the console are labeled (from left to right) “Unleash,” “Aggression,” and “Annihilate.” The first button won’t do anything, the second button will turn the cultists hostile and start a fight, and the third button will kill the cultists. If you defeat the cultists in battle, then you’ll earn 10xp each. If the cultists die, then you’ll be able to grab some minor loot from their corpses.
Note: If you want to kill the cultists in combat, then the easiest way is to attack them while they’re still connected to the console. They won’t fight back this way, and you’ll still earn 10xp and be able to loot them. Similarly, you can force attack the intellect devourer wandering around in the room. It’ll give you another 10xp, and Us won’t mind.
Inside the mind flayer pod here, you’ll meet a Half-Elf Cleric named Shadowheart. She’s involved in the quest Rescue the Illithid’s Captive. If you complete that quest, then Shadowheart will join you. Regardless of whether you free Shadowheart from the pod or not, she’ll be available as a companion later in the game.
Next to Shadowheart’s pod, you’ll find a backpack containing some minor loot, plus a nautiloid tank that you might find useful in the helm (#12).
The reliquary here (#9) will start out locked. Since you can’t pick it open without Thieves’ Tools, then you’ll need to loot the Gold Key from the nearby dead thrall (#9a) or take the whole chest to unlock it later. Inside the reliquary, you’ll find Onyx and gold.
You’ll discover a woman inside the mind flayer pod here. If you interact with the console behind the pod to the east, then the woman will transform into a ceremorph—which won’t excite you at all given your current predicament. At one point during Early Access, it was possible to kill the ceremorph, but that is no longer the case.
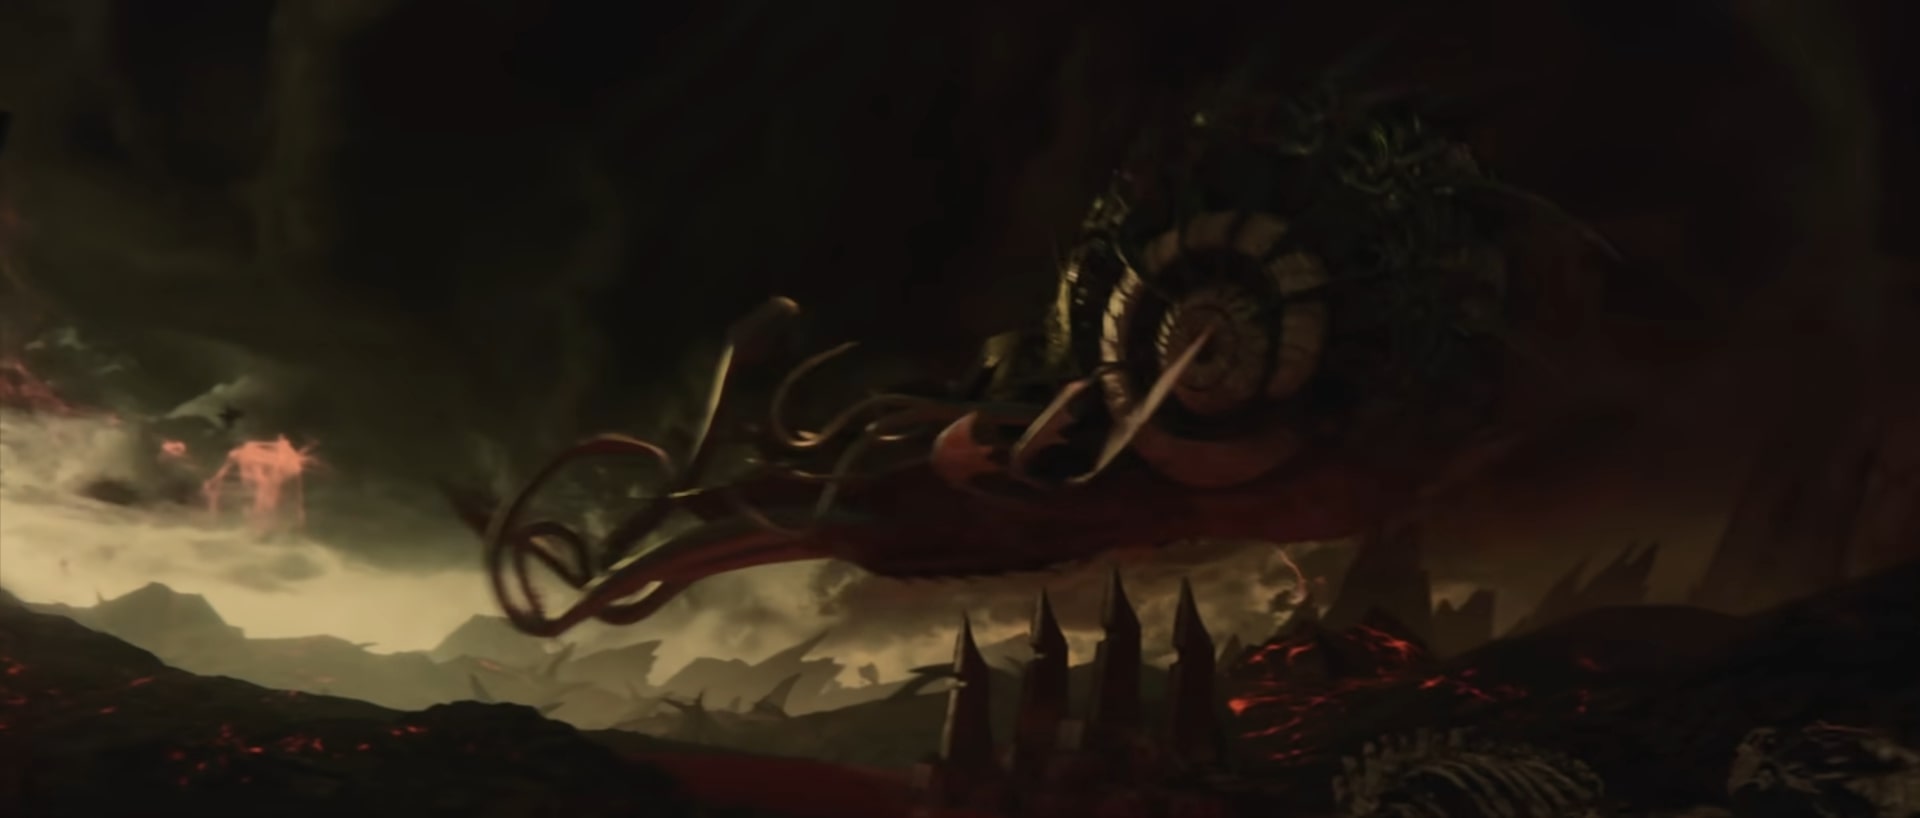
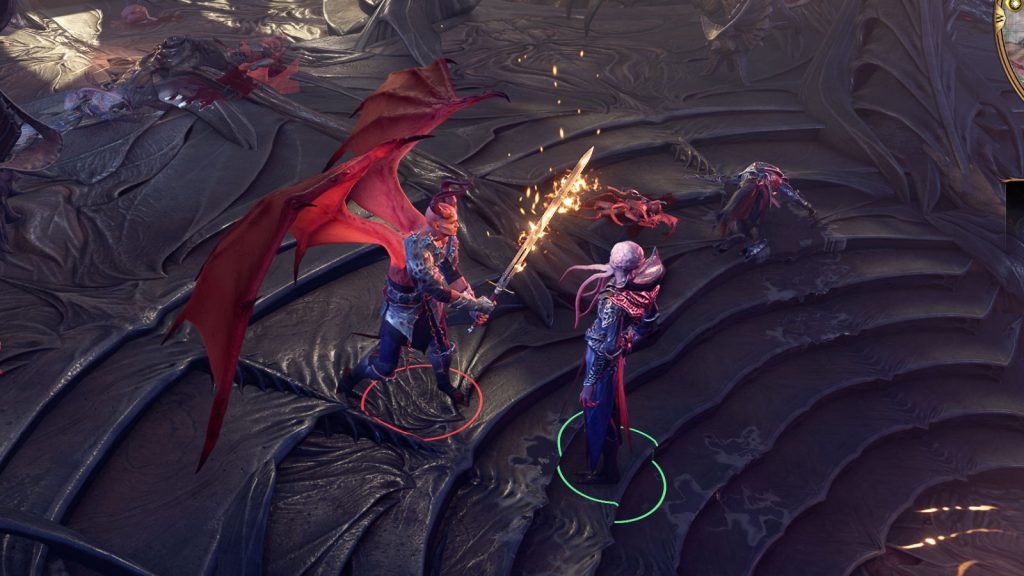
When you enter the helm, you’ll witness a battle between mind flayers and the forces of Hell. When the cut scene ends, the lone remaining mind flayer will start dueling Commander Zhalk, and it’ll command you to “connect the nerves of the transponder” so you can escape to another plane. This is the main part of the quest Escape the Nautiloid.
Along with reaching the transponder (#13), you might also want to try your luck killing Commander Zhalk—so you can claim his weapon, the Everburn Blade. See our guide Commander Zhalk & the Everburn Blade for some tips about how to do this.
At the front of the bridge is the Transponder, which is the final objective of the area and the quest Escape the Nautiloid. Once you interact with the Transponder, a cutscene will play and you will complete the quest. Note that this interrupts all other actions, and that you will not be able to come back to the Nautiloid after interacting with the transponder.
Graves is an avid writer, web designer, and gamer, with more ideas than he could hope to achieve in a lifetime. But, armed with a mug of coffee and an overactive imagination, he'll try. When he isn't working on a creative project, he is painting miniatures, reading cheesy sci-fi novels, or making music.