Alluring music is wafting in from the beach. It’s definitely not coming from Alfira, so what could be causing it? In this guide, we’ll show you how to solve the mystery.
Map
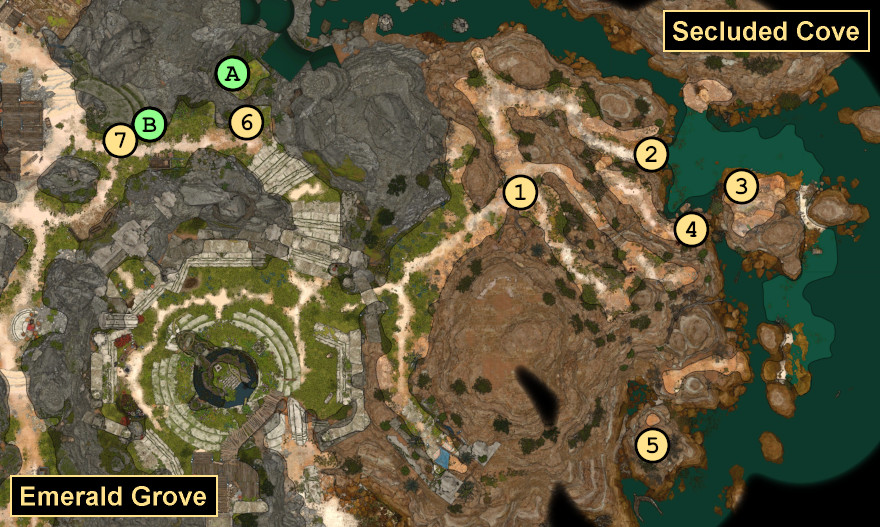
Points of Interest 1 – Strange Music 2 – Mirkon 3 – Harpies 4 – Elevated Perch 5 – Harpy Nest 6 – Mattis 7 – Doni
Exits A – Hole B – Concealed Hatch
Background
When you approach the Secluded Cove located east of the Sacred Pool in the Emerald Grove (#1), you’ll hear strange music coming from the beach to the east. Hearing the music will trigger this quest.
Walkthrough
When you continue down the path to investigate the music, you’ll meet the tiefling boy Mirkon (#2). He’ll be entranced by the music, and his eyes will glow purple. If you listen closely, and if you pass a DC-10 Nature check, then you’ll recognize that the music is a harpy lure — something to be avoided. If you fight against the music and pass a DC-5 Wisdom check (with advantage if you passed the Nature check earlier), then you’ll avoid being entranced like Mirkon, at least for the time being. If you fail the Wisdom check, or if you don’t fight against the music at all, then you’ll become “lured,” which means you’ll walk towards the harpies on your turn until you break free.
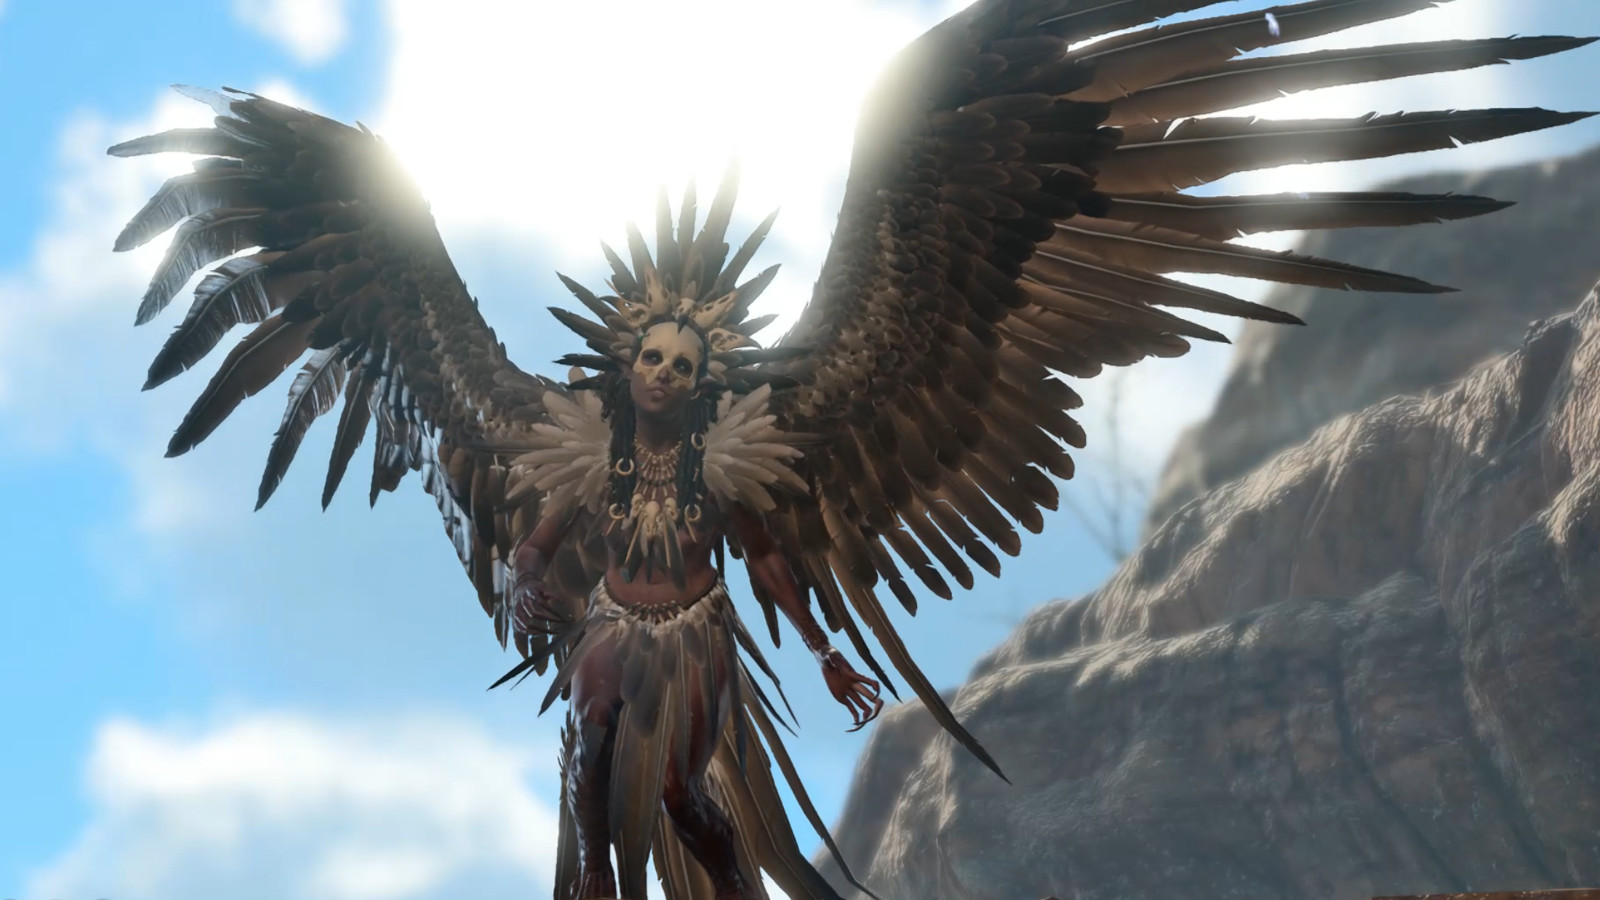
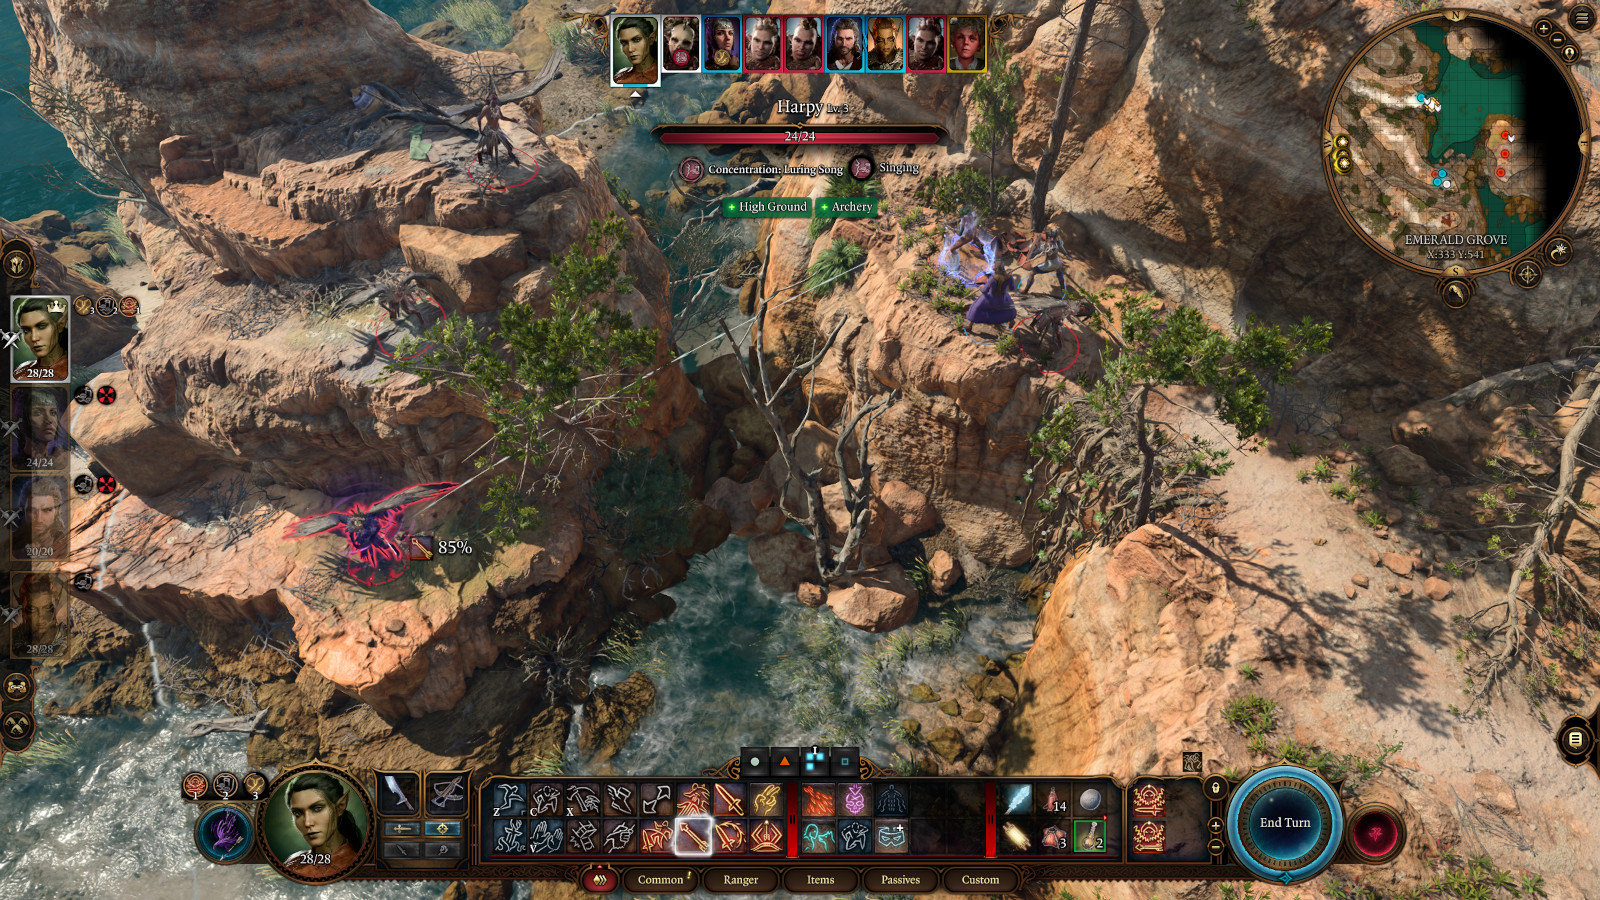
No matter how you handle the music, your encounter with Mirkon will lead to a fight. Four level 3 harpies will start to the east (#3). Three of them will fly over and attack you while the fourth continues singing the alluring song. Your party will have to resist the music on their turn. If they beat a DC-13 Wisdom check, then they’ll gain the “resisted the song” condition, which will protect them from the music for two turns. Otherwise, they’ll become lured, and they’ll simply walk towards the singing harpy until they manage to beat the Wisdom check.
A good perch for your ranged attacks.
To make the battle easier, you should set up your party before talking to Mirkon. Put your ranged attackers on the lowest elevated path to the south (#4) so they have a height advantage — or at worst an equal advantage — against the harpies (if you ascend to the higher paths, then you’ll get a better height advantage, but you’ll also probably take a range penalty, negating the benefit). Leave your best melee attacker next to Mirkon. That character should start the encounter and also protect Mirkon if necessary. You might also want to use the Resistance spell (or something similar) to give one or more of your characters better odds against the Wisdom checks.
When the battle starts up, direct all of your attacks on the singing harpy (#3). Killing it or breaking its concentration will interrupt the song and return any lured characters (including Mirkon) back to normal. Another harpy might then start singing, so you won’t be out of the woods yet. You’ll just need to focus your attacks where necessary. The more you can stop the singing, the easier the battle will be. Also, be sure to switch each character to their melee weapon at the end of their turn. The harpies will frequently fly at you, attack, and then fly away — making them vulnerable to opportunity attacks, provided you have your melee weapon active.
After the battle, you should talk to Mirkon. He might run up to you and initiate the conversation himself, or you might need to find him on the path leading back to the Emerald Grove. If you’re nice to Mirkon, then he’ll mention that someone named Mol sent him out to rob the harpy nest, and he’ll recommend that you speak to her. To that end, he’ll tell you to talk to Doni and ask him to show you the “Dragon’s Lair.” But if you’re mean to Miikon and tell him to stop sniveling, then he’ll run away, and he won’t give you the hint about Doni.
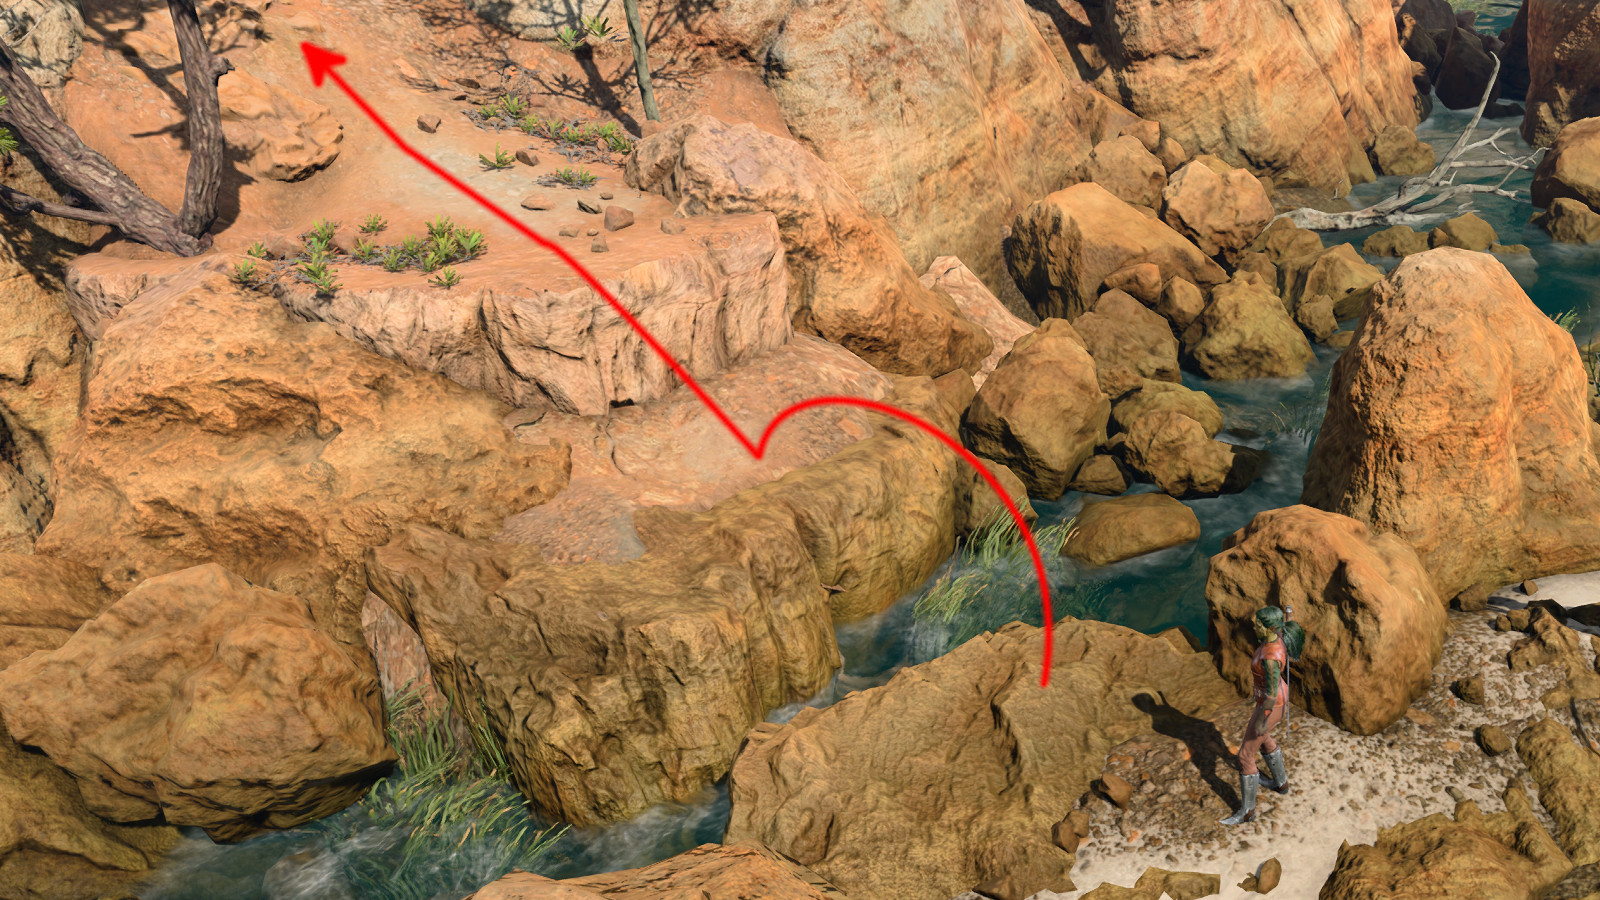
The harpy nest is just a hop, skip and a jump — well, three jumps — away.
Before returning to the Emerald Grove, you should look for the harpy nest yourself. You’ll find it to the south (#5). You’ll have to do some jumping and climbing to get to it, but inside you’ll find a Ring of Colour Spray.
To talk to Mol, you’ll need to enter the Tiefling Hideout. There are two entrances to it: a hole that only small creatures can enter (Exit A) and a concealed hatch (Exit B). You’ll need to detect both entrances, but if you talk to Doni (#7) and use the “Dragon’s Lair” line, then he’ll show you the hatch. If you didn’t receive Mirkon’s hint about the Dragon’s Lair, then please refer to our Emerald Grove guide for other ways to detect the entrances. If Doni isn’t at his station next to the hatch, then taking a Long Rest at your camp should cause him to come back.
Inside the Tiefling Hideout, you’ll meet Mol, the leader of the tiefling children. Rescuing Mirkon is one of the ways to get on her good side (the other two are rescuing Arabella during the quest Save Arabella and being nice to Silfy if you catch her trying to rob you at Mattis’ shop, #6). As long as Mol likes you, she’ll act as a shopkeeper and give you the quest Steal the Sacred Idol.
Share this article:
Steven Carter
Starting with cassette tape games on the TRS-80, Steven has been playing, creating, and writing about games for a long, long time. This makes him experienced, not old. Lately, Steven has been focusing on walkthroughs, making sure everybody knows how to solve Towers of Hanoi puzzles.