This area walkthrough will guide you and your party from the crash site of the Nautiloid to the gates of the Emerald Grove. Along the way, we’ll pick up a few companions, and find a key NPC. This guide should help you find everything there is to find in Baldur’s Gate 3’s first open-world area.
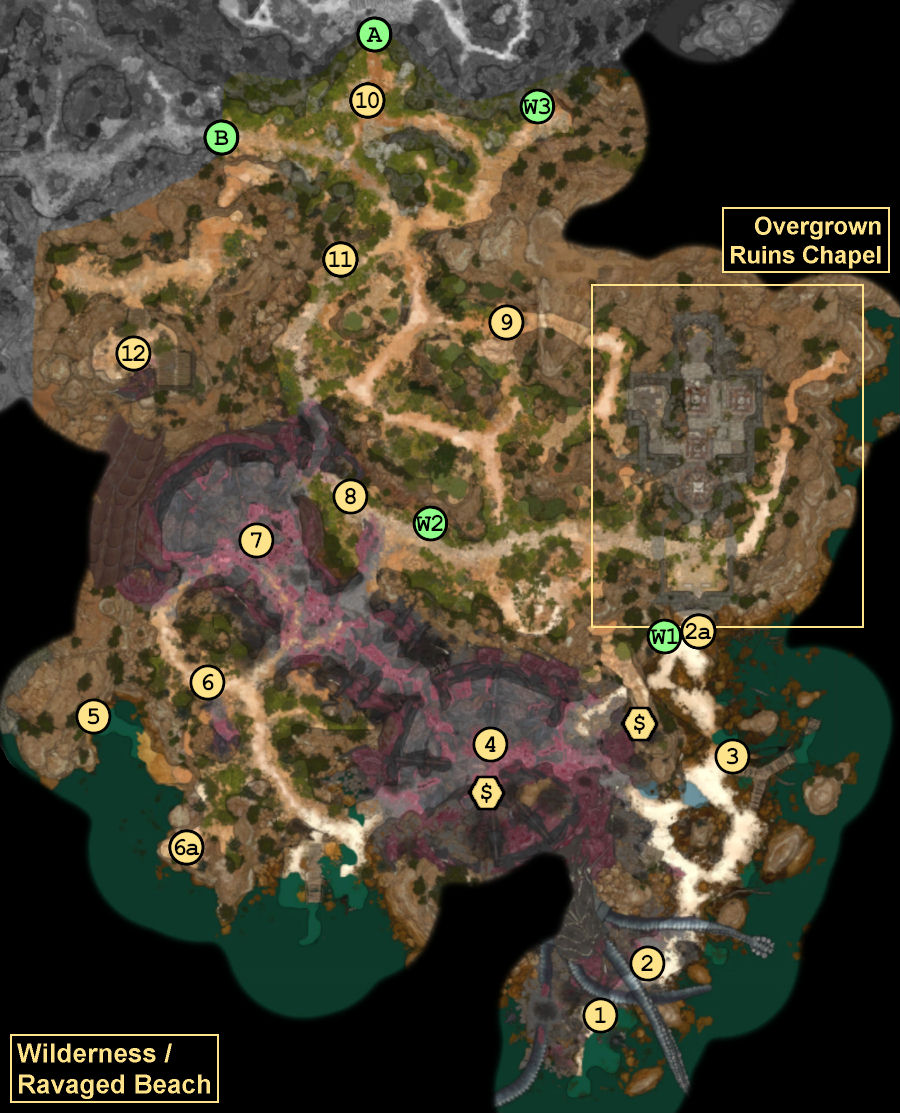
Exits / Waypoints A – Entrance to Emerald Grove B – Path to the Forest W1 – Overgrown Ruins Waypoint W2 – Roadside Cliffs Waypoint W3 – Emerald Grove Environs Waypoint
Walkthrough
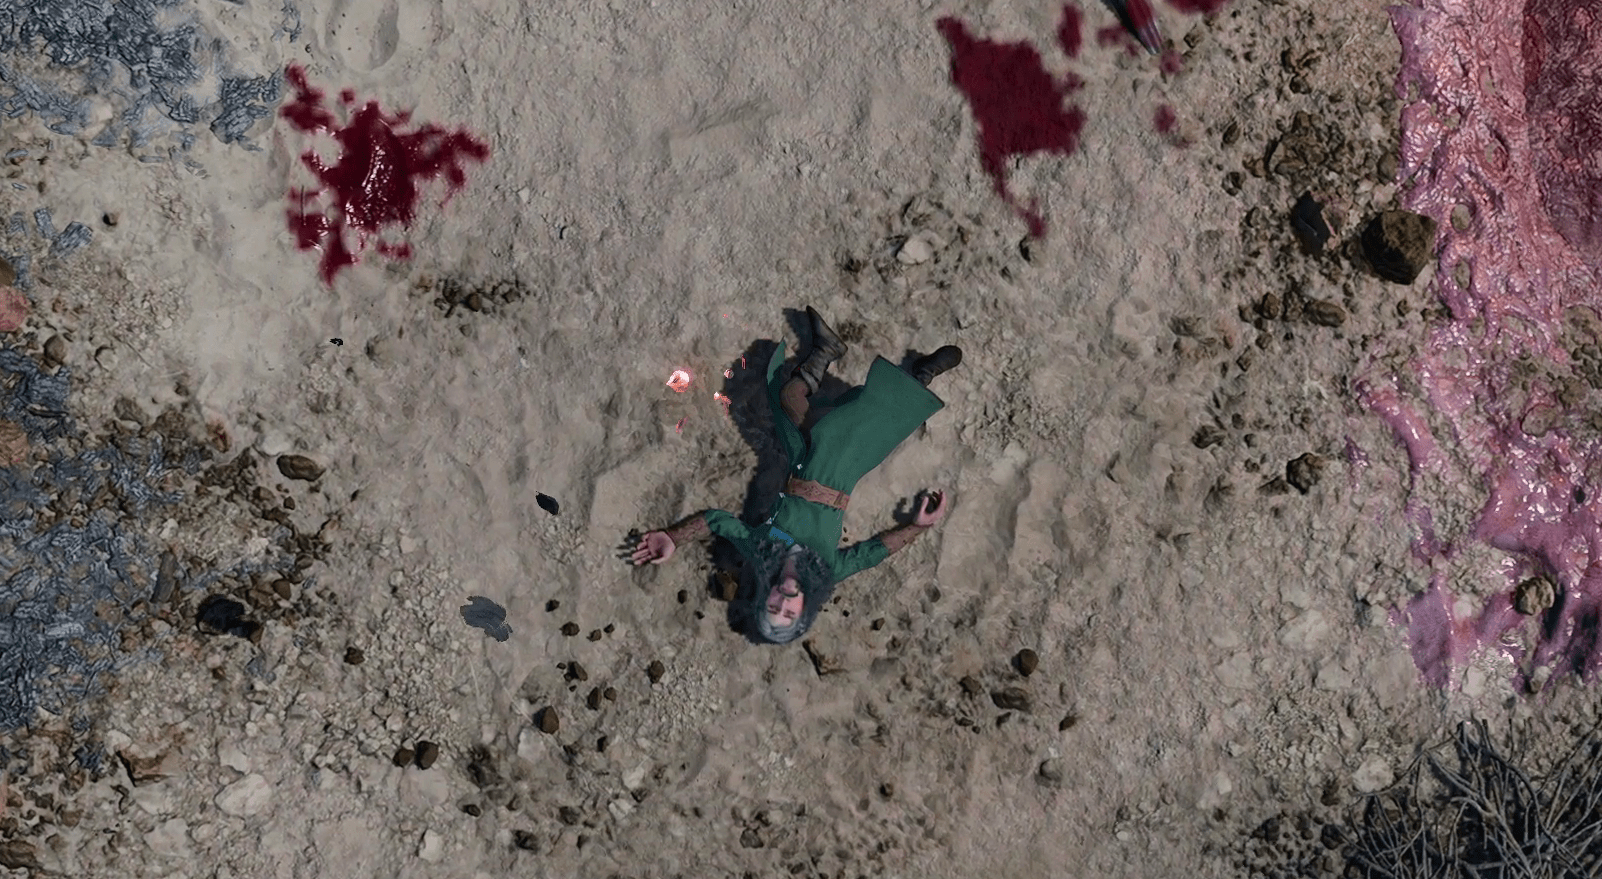
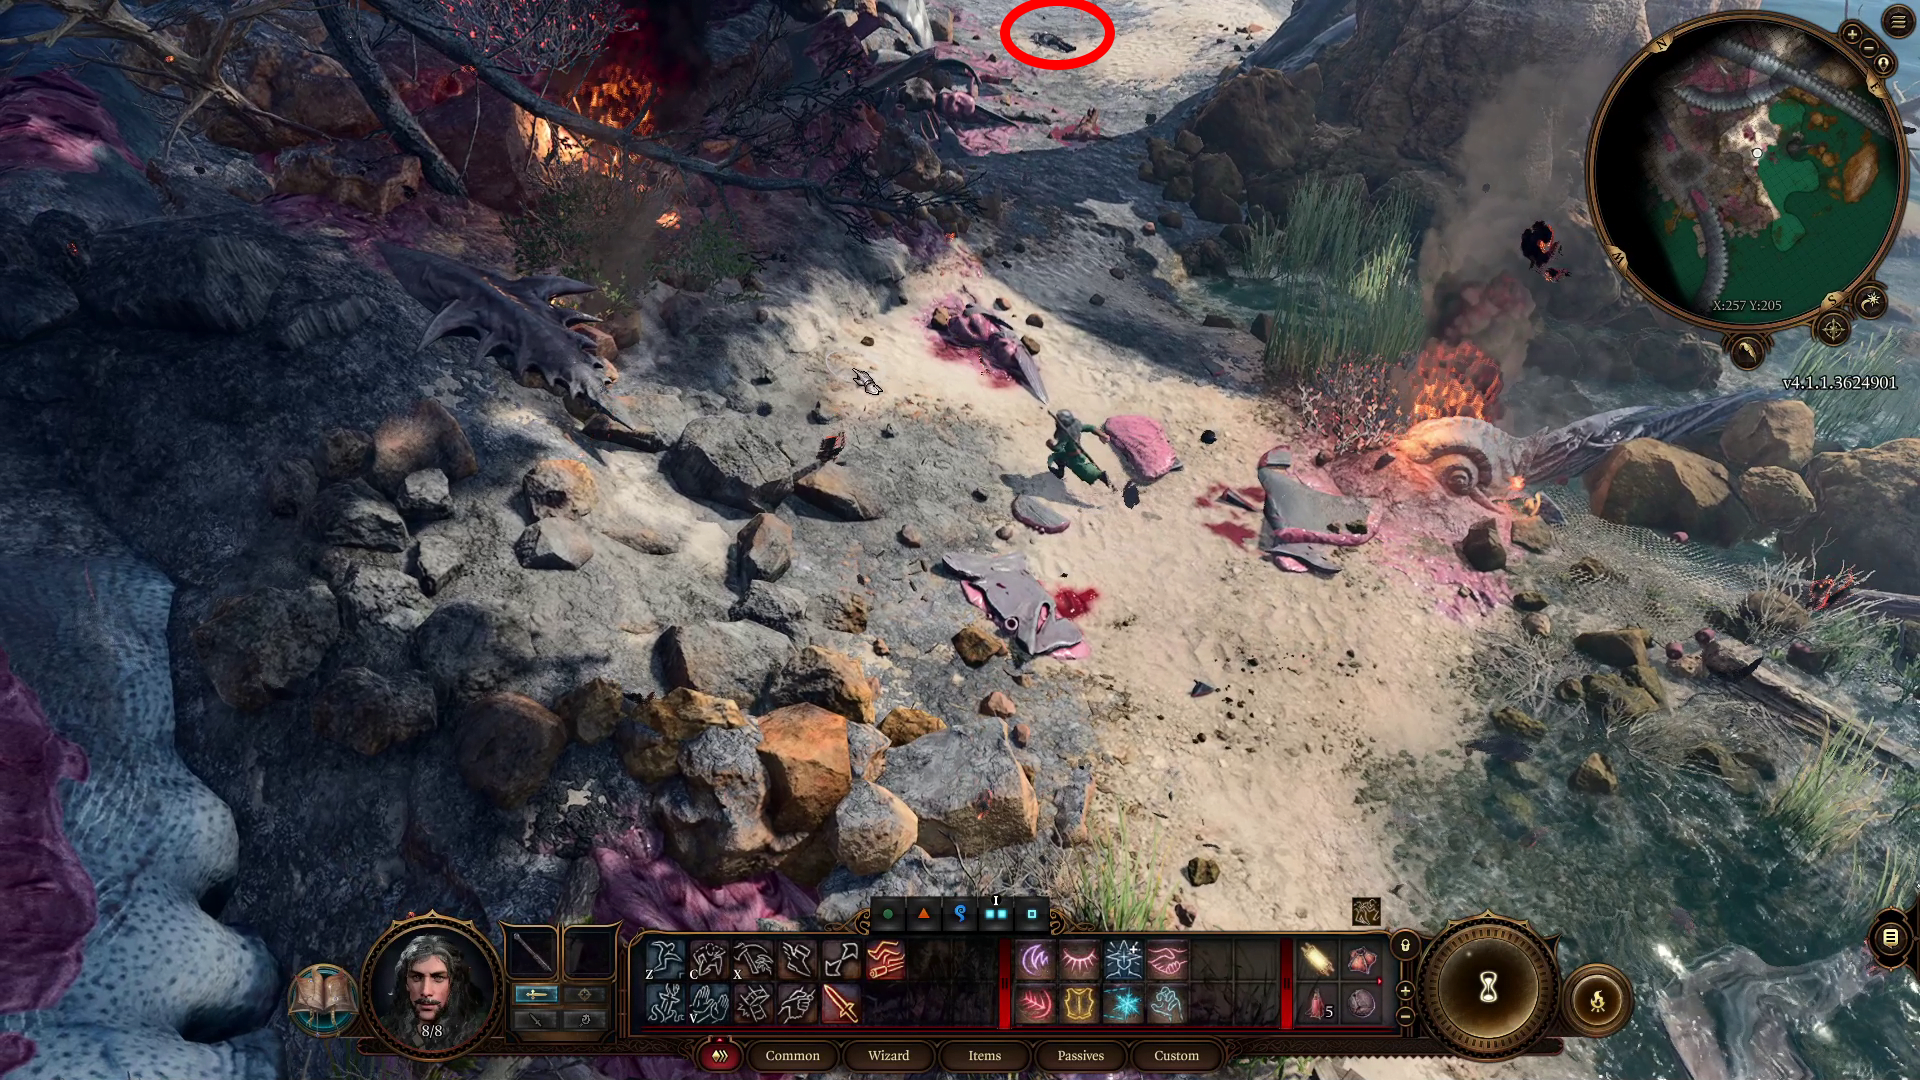
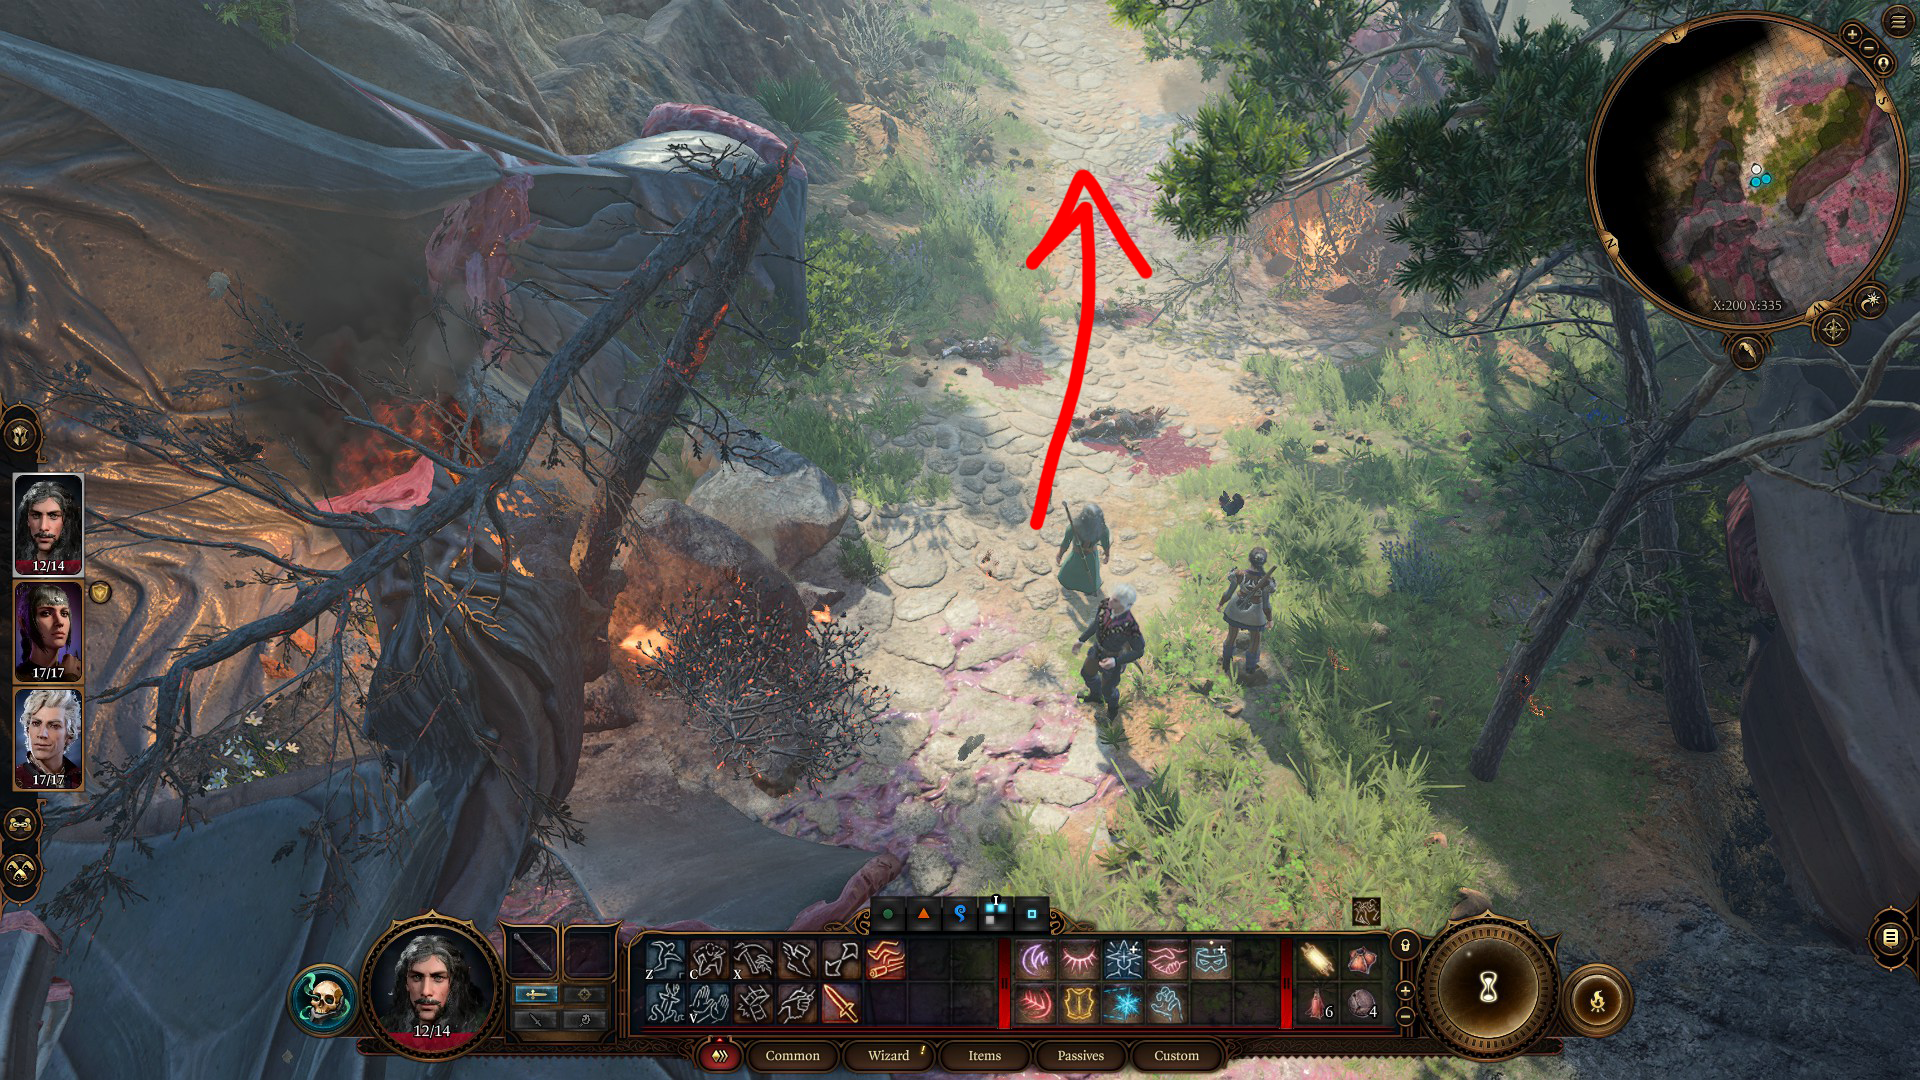
After escaping the Nautiloid, you’ll awaken on a debris-strewn beach near the wreck of the mind flayer ship. After a brief conversation with yourself, loot the nearby bodies (highlight them to make it easier) and then go interact with Shadowheart. Assuming you rescued her while you were on board the Nautiloid, she should be just a little ways up the beach to the northeast (Image 1, Map 2). Otherwise, she’ll be farther up the beach to the north (Map 2a). Either way, pick the conversation options so you agree to stay together. You’ll want Shadowheart’s help in the combat encounters to come.
As you continue along the beach to the north, you’ll pass by several bodies and containers. Loot them for camping supplies (which you’ll need for long rests), Thieves’ Tools, and a Perfumed Letter (Map 3). If you read the letter, then you’ll learn that Anna and Sy were planning to run away together — only that’s not going to happen now, given that you looted the letter from Sy’s corpse. You won’t ever meet Anna — on the hill mentioned in the letter (Map 12) or anywhere else — so you won’t be able to tell her the bad news.
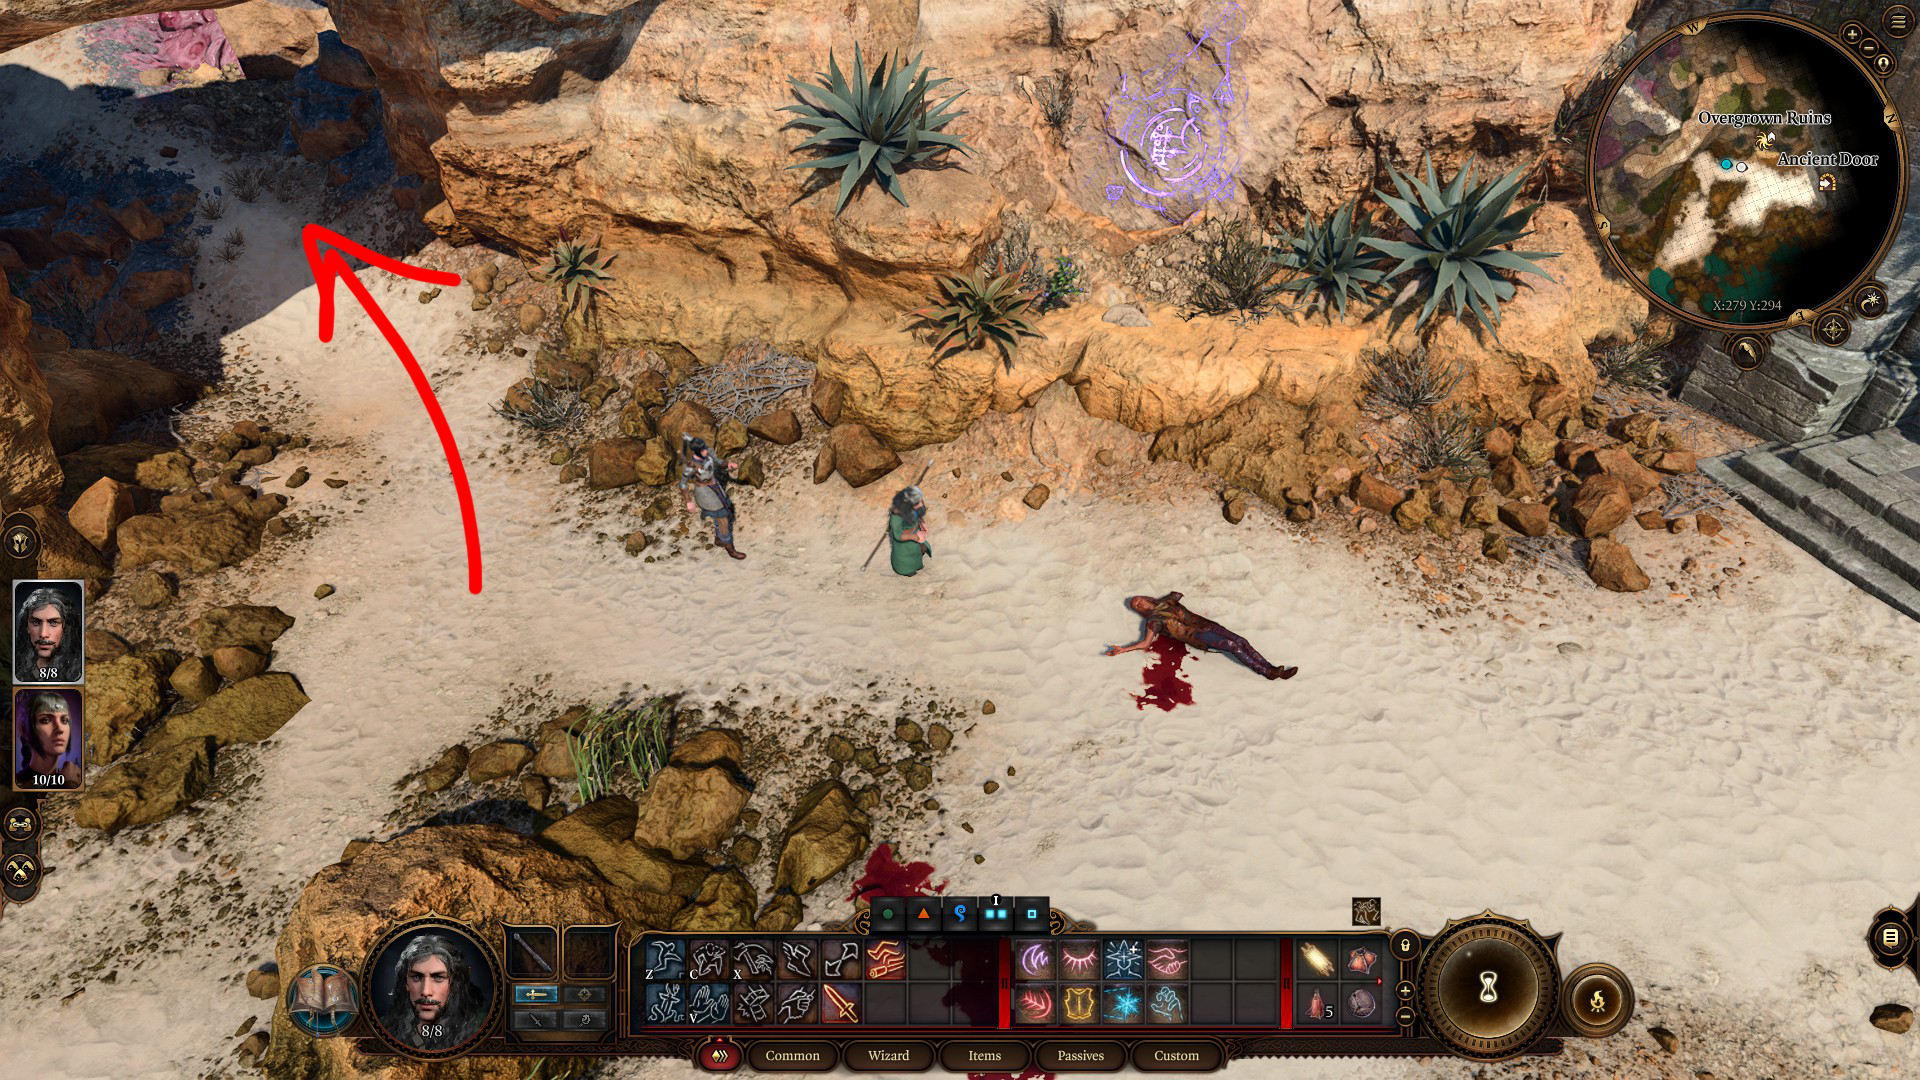
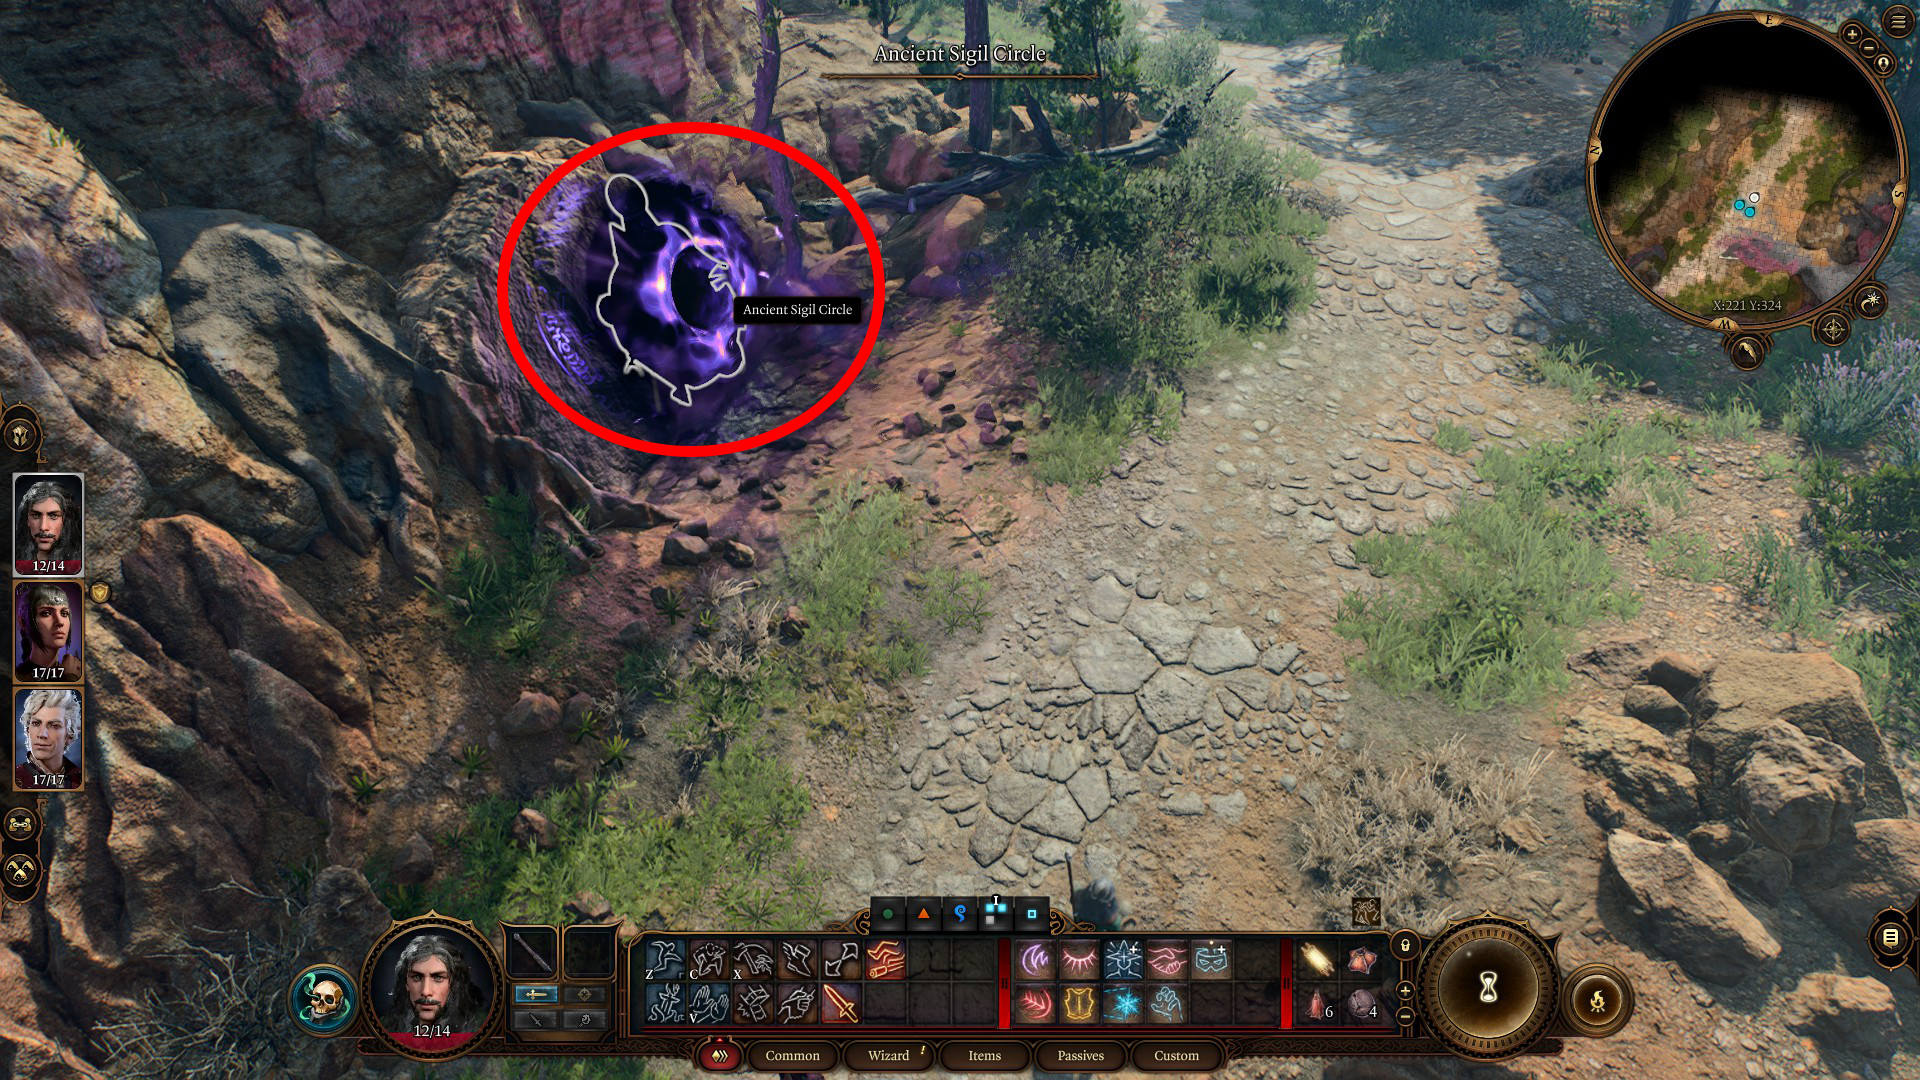
At the end of the beach, you’ll reach an Ancient Door and an Ancient Sigil Seal — also known as a waypoint or fast travel point — for the Overgrown Ruins (Map W1). The Ancient Door leads to the Overgrown Ruins Chapel, and while you could enter that site now, you’re better off waiting until you have a full party, so instead follow the path that leads southwest, back into the nautiloid wreckage (Image 2).
Image 1Image 2
Once you get far enough into the nautiloid, you’ll enter combat with three intellect devourers (Map 4), so it’s best to start sneaking before you get too close to them. You should be able to get an attack off on one of them with advantage – you’ll also get a free round, as they’ll be surprised. If you aren’t playing a melee character, utilize Shadowheart as your frontline tank when dealing with these foes – on higher difficulties, casting Shield of Faith may be necessary to keep her alive. After cleaning up the lil’ brains, loot all the corpses in the area, plus the chest on the high ground near the mind flayer.
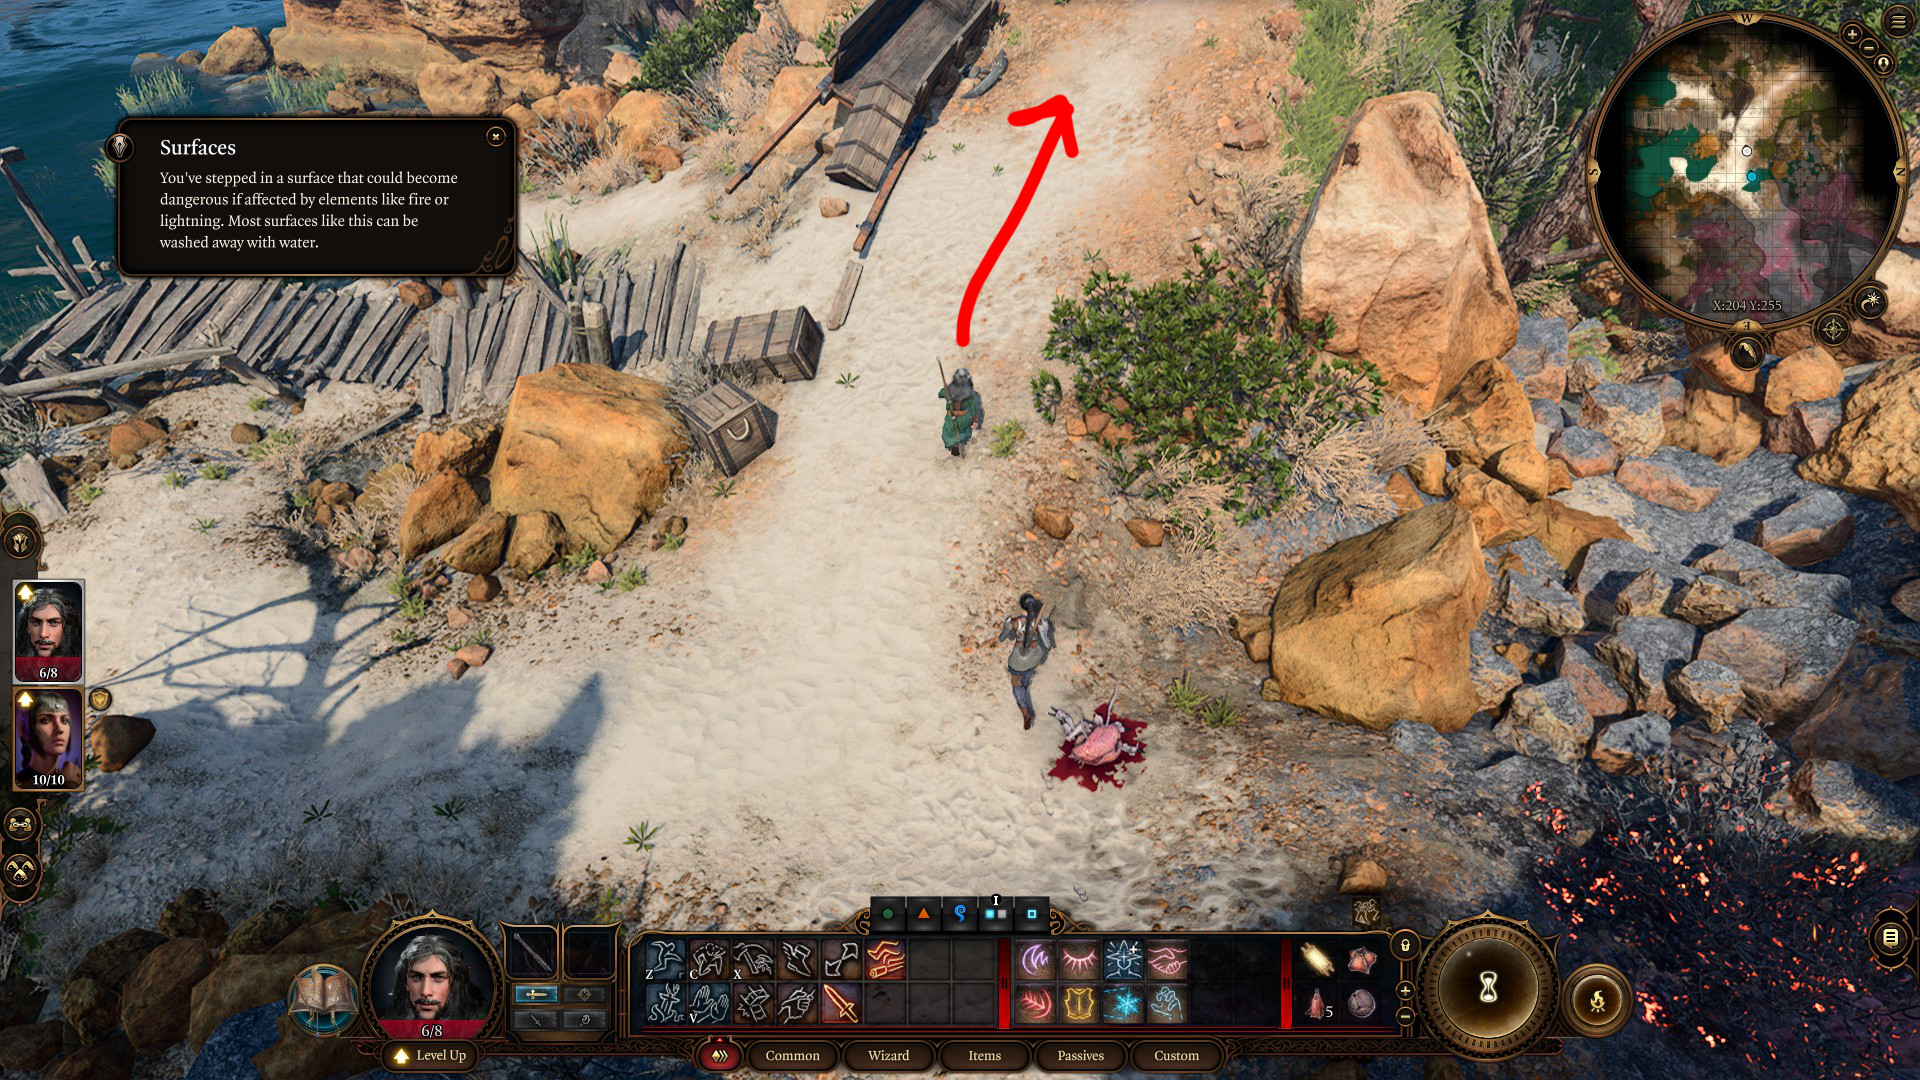
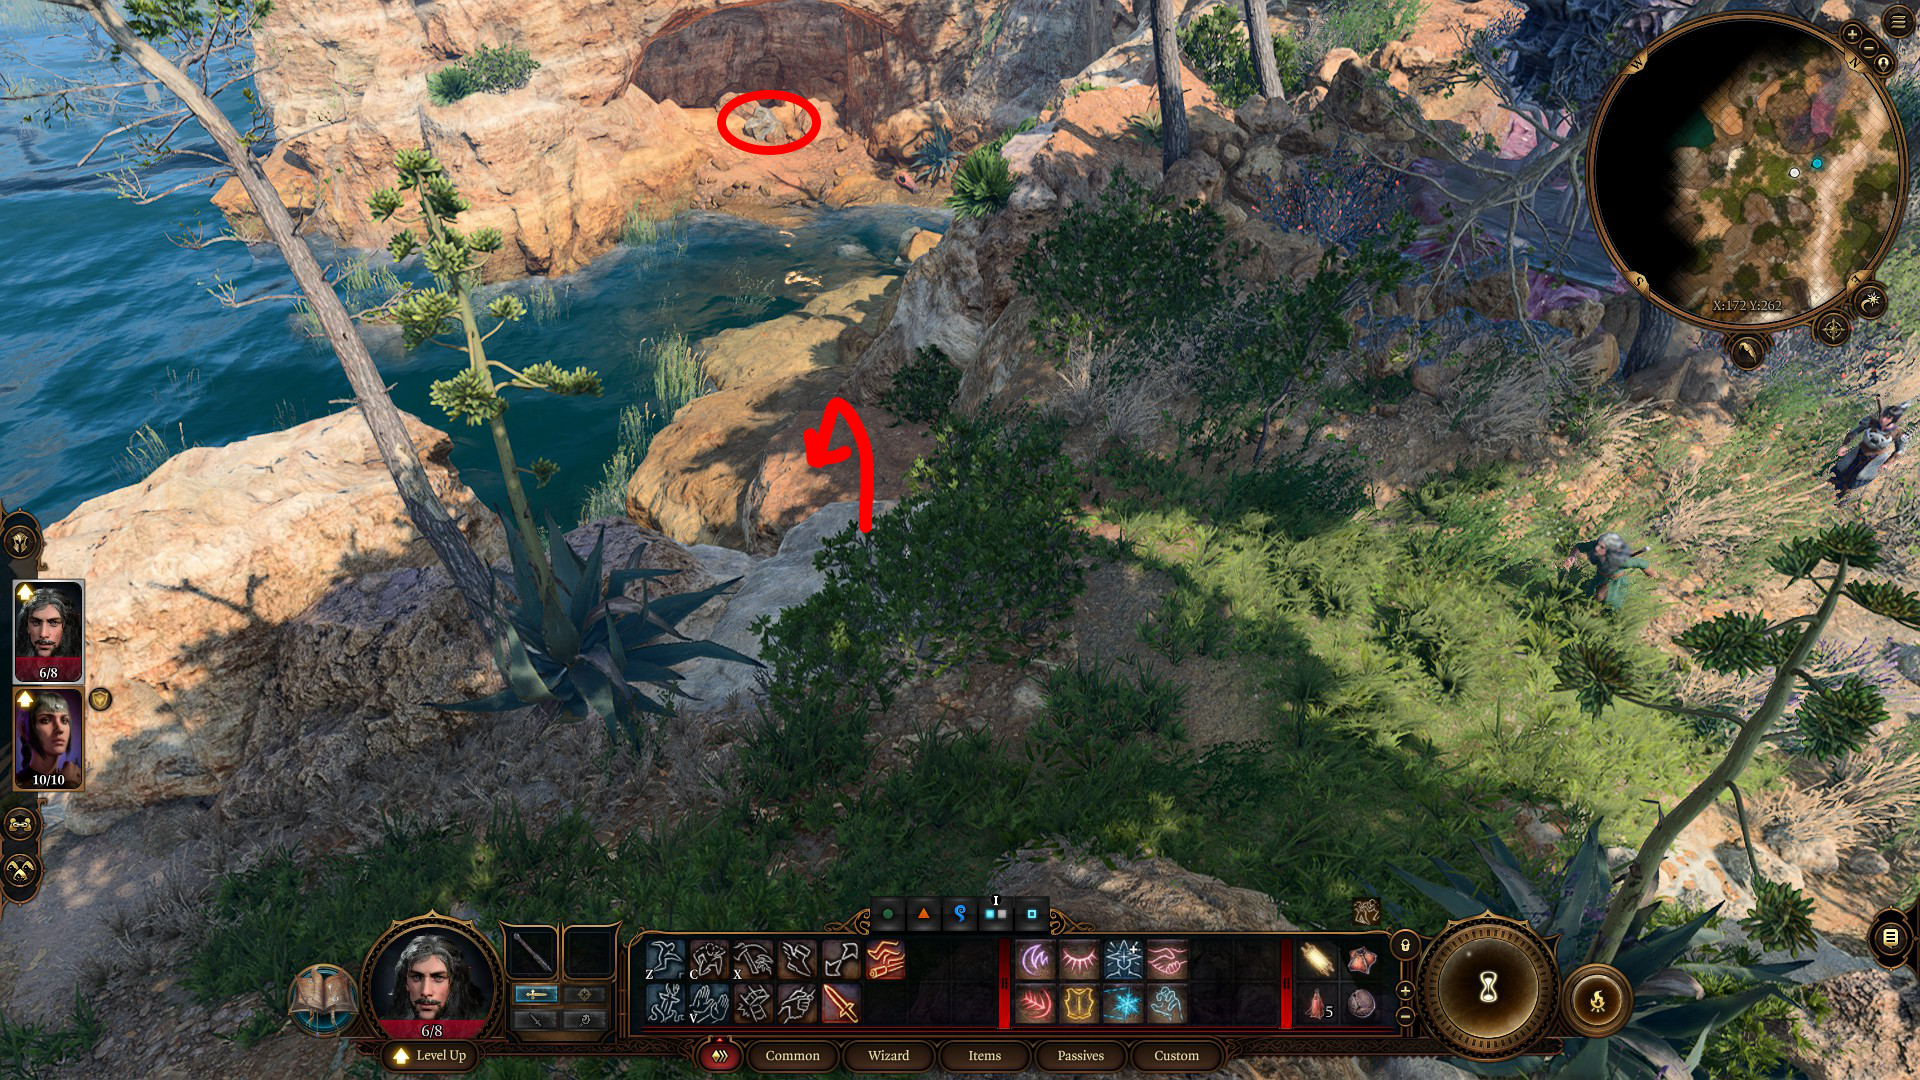
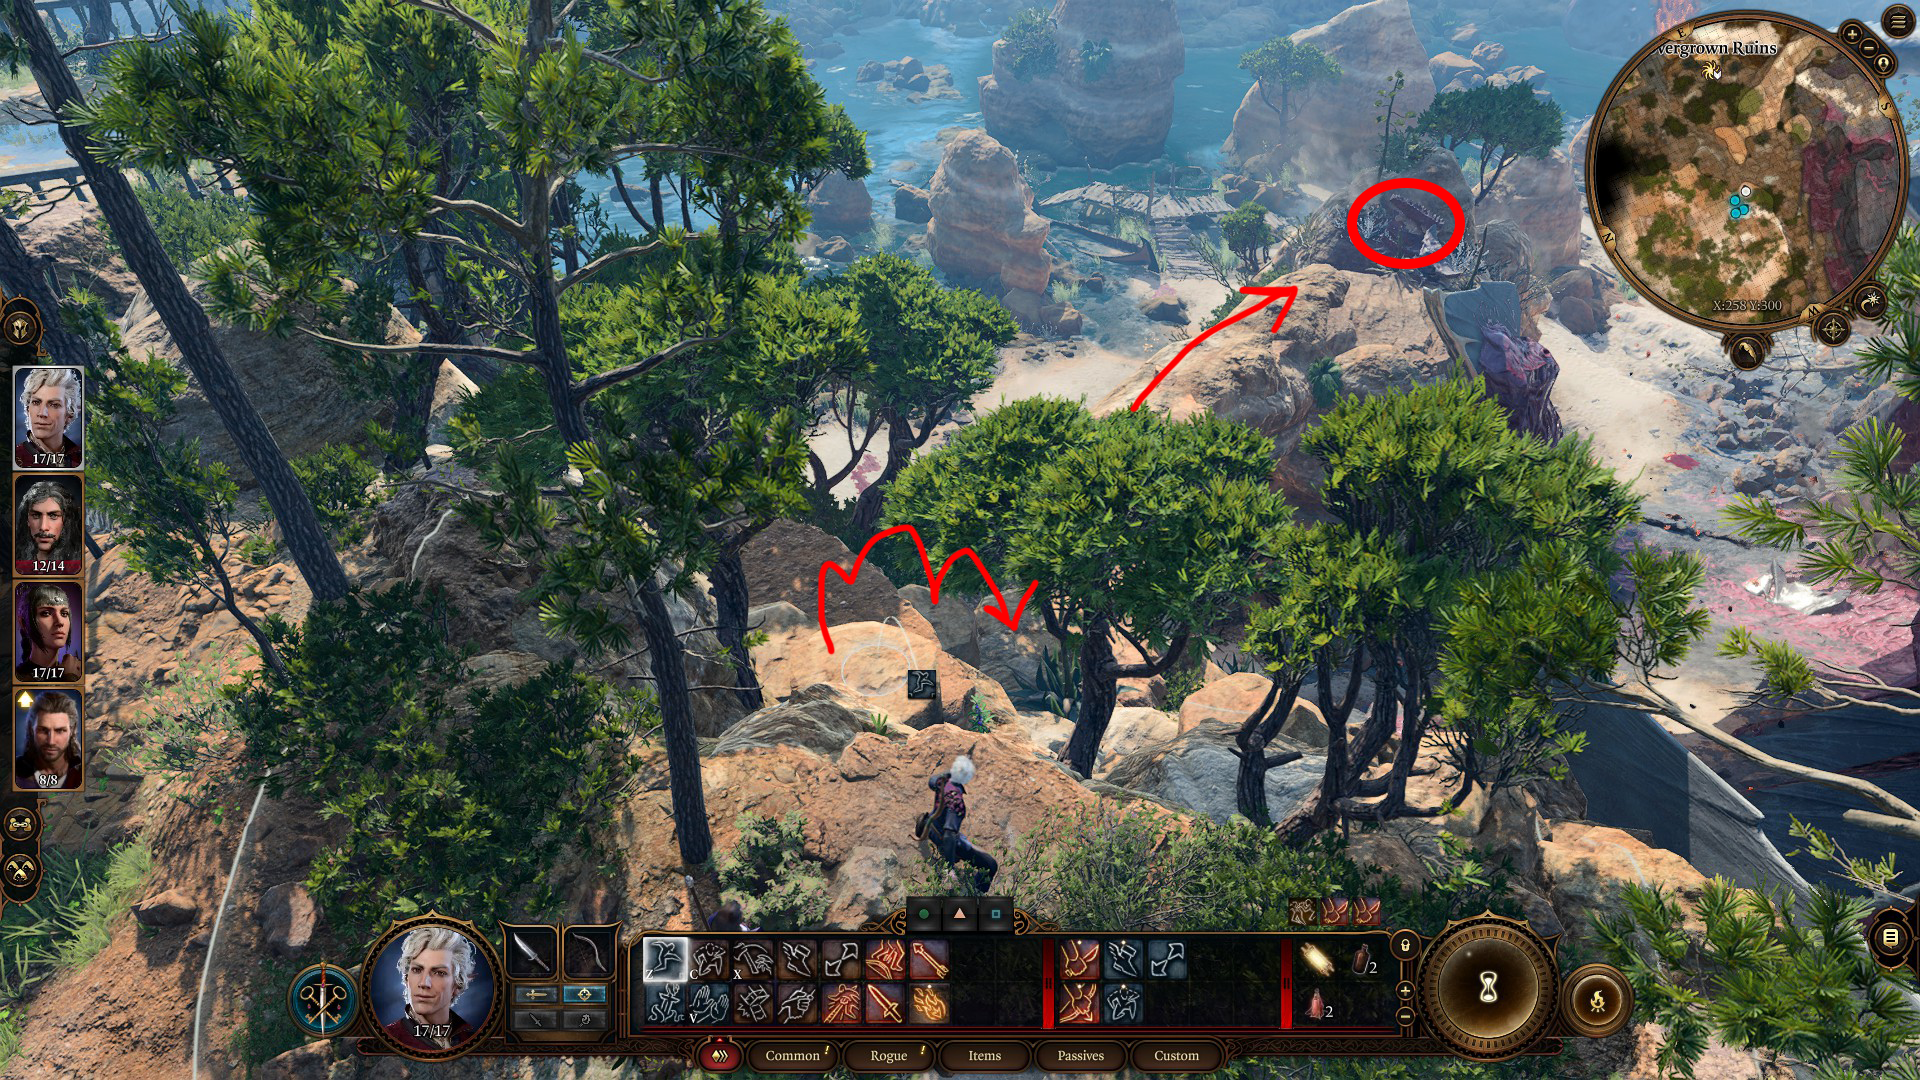
Continue west back out of the ship, loot the nearby crates and the locked trunk (which you can smash open with a main hand attack), and then continue up the path (Image 3). Look to your left (west) and you’ll see a small cove you can jump down to. Get close to the indicated rock (Image 4, Map 5) and – assuming you pass a DC-10 Nature check – you’ll notice there are grooves in the mud next to it. This will allow you to move the scuffed rock out of the way, provided you have enough Strength. Beneath the rock, you’ll find an ornate chest containing a Harper’s Map, a Harper’s Notebook, and more. Reading the map will cause a “hidden cache” marker to appear on your world map (Map 12). When you eventually go that location, you’ll find a skeleton with a Silver Pendant.
Image 3Image 4
Then get back on the path and continue heading north to find the High ElfRogue Astarion (Map 6), one of the game’s companions. He’ll try to convince you that he has an intellect devourer trapped in the bushes nearby, when really it’s a boar. Whether you believe Astarion’s ruse or not, you’ll end up in a scuffle, but regardless of what you say or do, your Illithid tadpoles will connect you, and Astarion will realize that you’re not working for the mind flayers. This will allow you to add him as a companion — and you should do so, especially if you don’t already have a Rogue in your squad.
Note: During the scuffle, the scared boar will run away, and you’ll find it to the south (Map 6a). If you interact with the boar there, then it will run away again — and disappear from the game this time — even if you use the Speak with Animals spell. Possibly this is supposed to be the same boar as the exsanguinated boar that you can randomly find in the Forest area, but that other boar will appear even if you kill this one.
With Astarion in tow, head east from where you found him, back into the mind flayer ship. Loot the mind flayer corpse, and then head northwest deeper into the ship, where you’ll find a dying mind flayer – the very one who abducted you, in fact (Map 7). You can interact with the creature for a fun little scene where you’ll try and resist its powers (potentially risking character death), or you can kill it, either through dialogue or by attacking it later, for 35 xp and some minor loot.
Go east from the most-likely-dead mind flayer, towards the goblin corpses (Map 8) and back outside and onto a cobbled path (Image 5). Loot the goblin corpses, and then continue forward a bit and you’ll see an Ancient Sigil Circle with something amiss (Image 6, Map W2).
Image 5Image 6
If you touch the Ancient Sigil Circle, then a hand will reach out of it. This hand belongs to Gale, a HumanWizard and a potential companion. To save Gale, you’ll have at most two options:
All classes get a pair of Strength checks at DC-7 and DC-12. If you pass either check, then you’ll pull Gale from the circle.
The main spellcasting classes — Bard, Cleric, Druid, Sorcerer, Warlock, and Wizard — also get a DC-7 check based on their primary ability score. If you’re successful with this check, then you’ll save Gale. If you’re unsuccessful, then you’ll still be able to try the Strength checks. That means, depending on your main character’s stats and class, you might be better off having Shadowheart interact with the circle.
If you fail all of your available checks, or if you leave Gale to his fate, then he’ll die and disappear from the game. If you save him, then you should invite him into your party, as doing so will make subsequent encounters (combat or otherwise) easier. Recruiting Gale will also trigger the quest The Wizard of Waterdeep.
Note: After saving Gale, if you decide that you don’t trust him, and you kill him, then his corpse will begin emitting a necrotic aura, and a spectral version of Gale will appear and give you a convoluted set of instructions for how to resurrect him. If you follow these instructions correctly, then Gale will come back to life and stop emitting the aura, and he won’t hold it against you that you killed him, which means you’ll still be able to add him as a companion. The spectral Gale encounter will occur the first time Gale dies, here or elsewhere, so if you use Gale as a companion, then you’ll probably see it sooner or later.
You’ll now have the Roadside Cliffs waypoint (Map W2) available to you. From the waypoint, head due southeast to the edge of the cliff, and you’ll see a path you can jump down to reach a chest (Image 7). After looting the chest, head back up to the path. Amusingly, smaller characters can’t make the jump back up, but luckily you can just teleport to the nearby waypoint.
Image 7
From here you could head towards the Emerald Grove (Map A) and continue the main storyline. However, it’s best to first enter the nearby Overgrown Ruins Chapel, where you can meet Withers. He’s a very useful NPC who revives dead companions, allows you to respec, and offers hireable NPCs. There are a few ways into the chapel, all fairly close by – see the guide below for detailed instructions on all of the ways you can reach Withers.
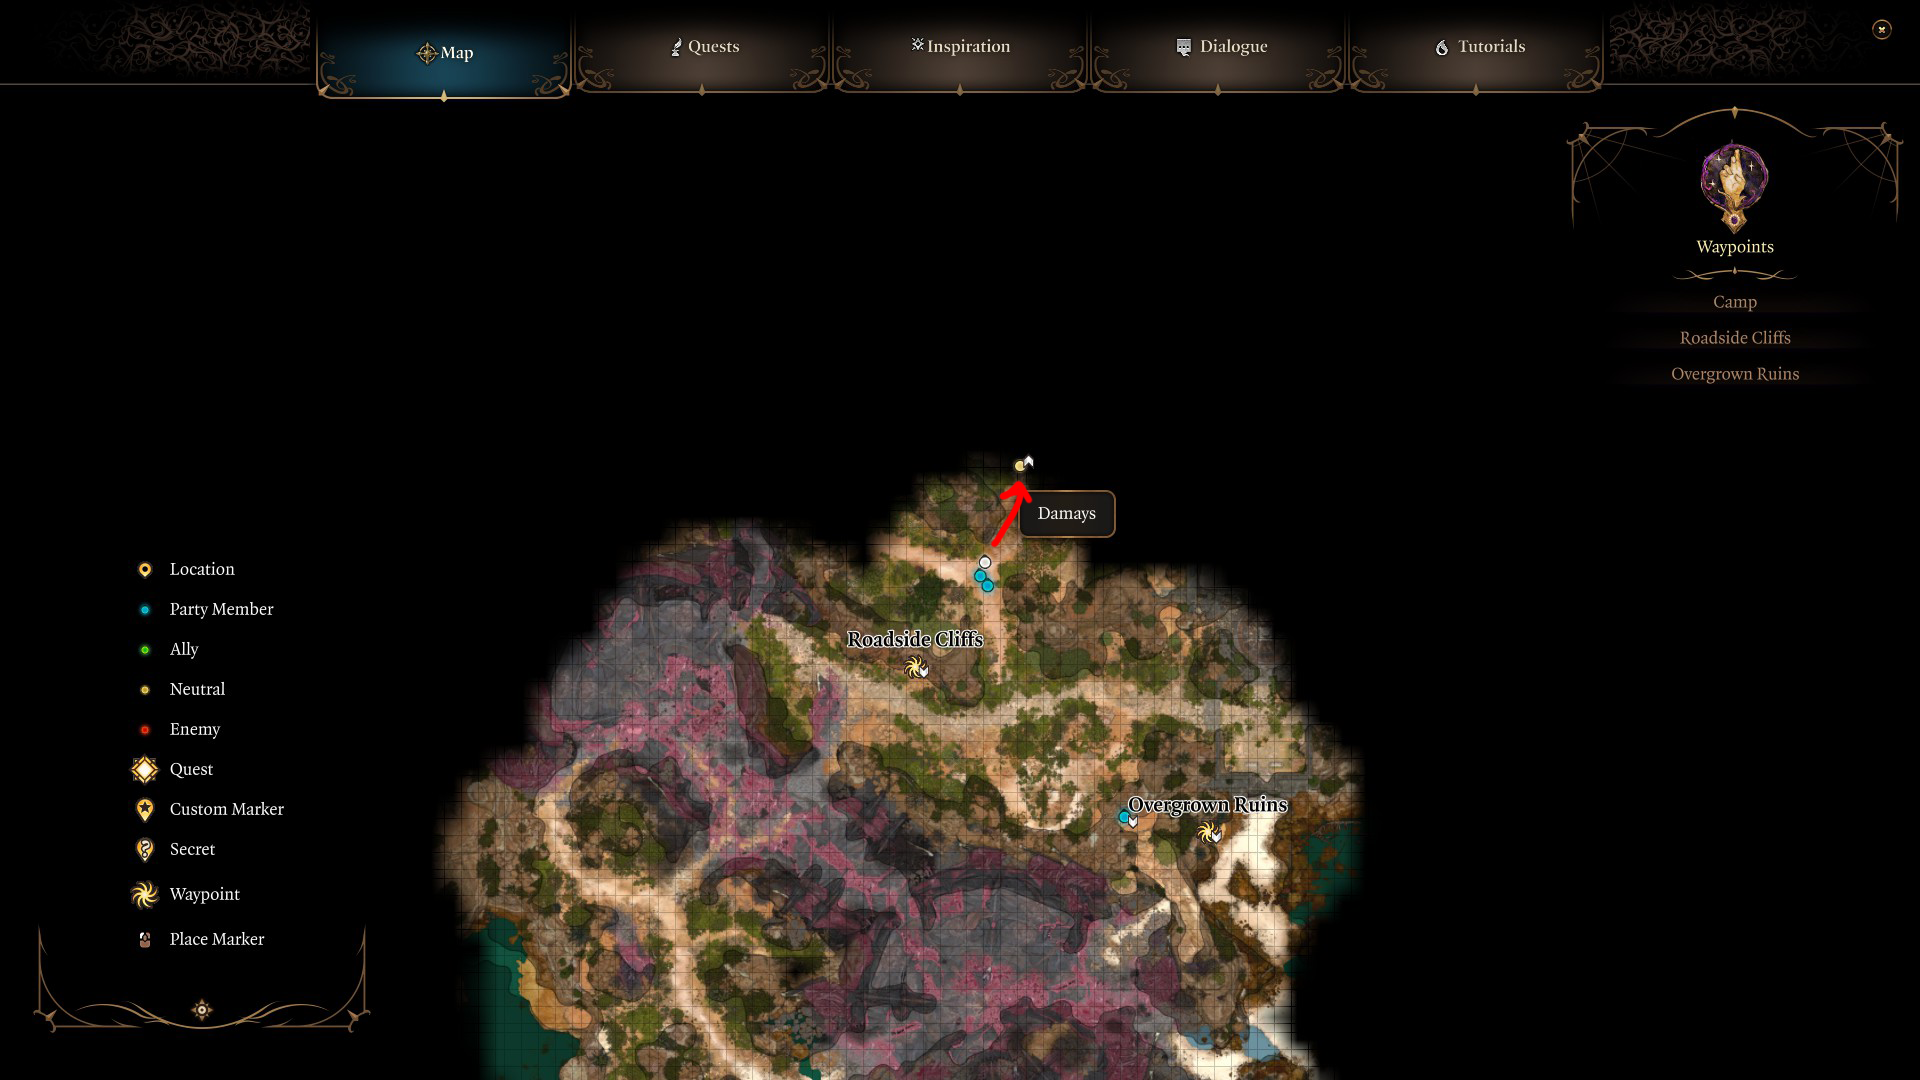
You can now head towards the Emerald Grove, although there’s one more important encounter before you get there! Head north on the path found just east of the Roadside Cliffs waypoint (Map W2), and the path will quickly split. Go straight-ish north and you’ll come across the tieflings Damays and Nymessa, who will have Lae’zel trapped in a cage (Map 9) – you’ll see one of them on the minimap as you reach the point the path splits (Image 8). Walk up to the tieflings to start a conversation, beginning the quest Free Lae’zel.
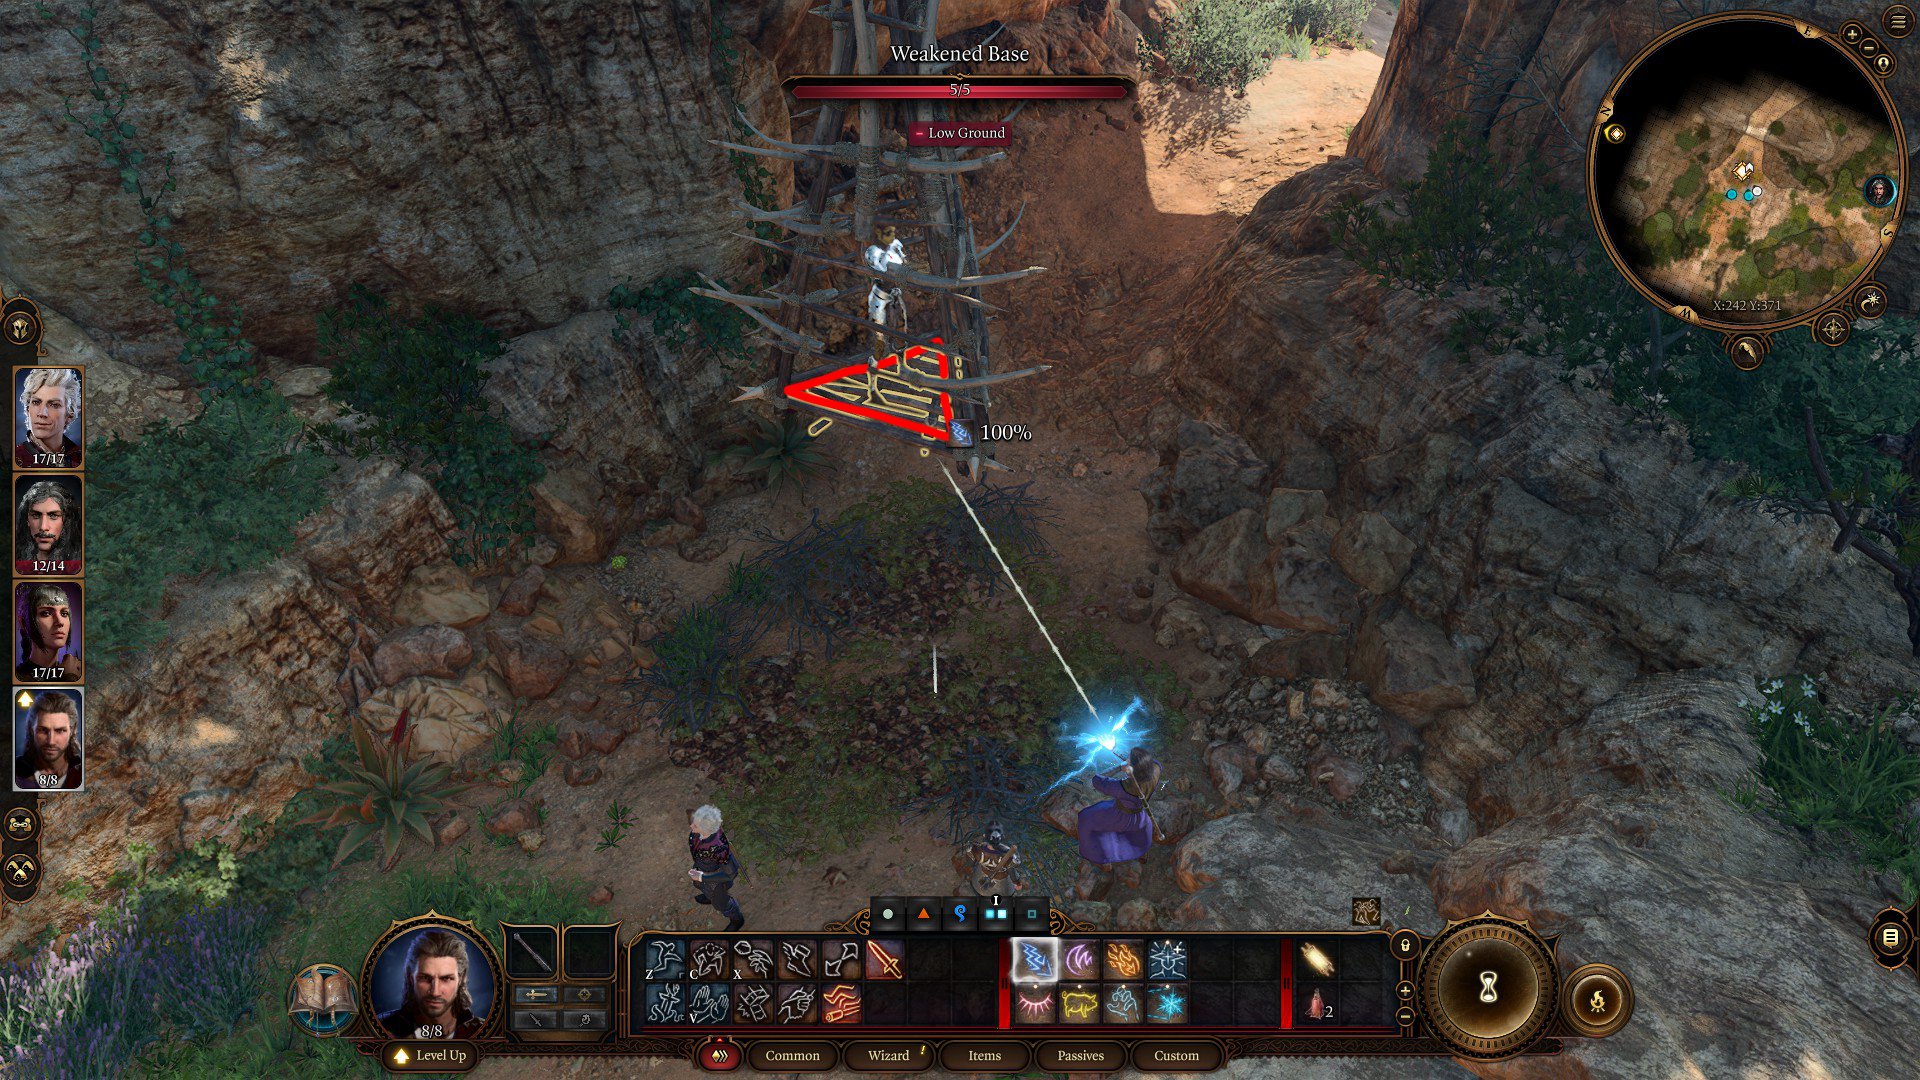
You’ll have a few options during this encounter. The simplest one is to attempt to pass a Deception check, and convince the tieflings to leave. Otherwise, you’ll need to either shoot the bottom of the cage out (Image 9), or convince the tieflings to open up the cage. Siding with Lae’zel at this point (which you’ll have to do if you want her as a companion) means fighting the tieflings – a simple task with Lae’zel in the mix. It will also allow you to complete the quest Free Lae’zel, which will earn you 10 xp.
Note: If you need to shoot Lae’zel down, but you somehow don’t have a ranged weapon, you’ll find a Shortbow on the ground right next to the cage.
Image 8Image 9
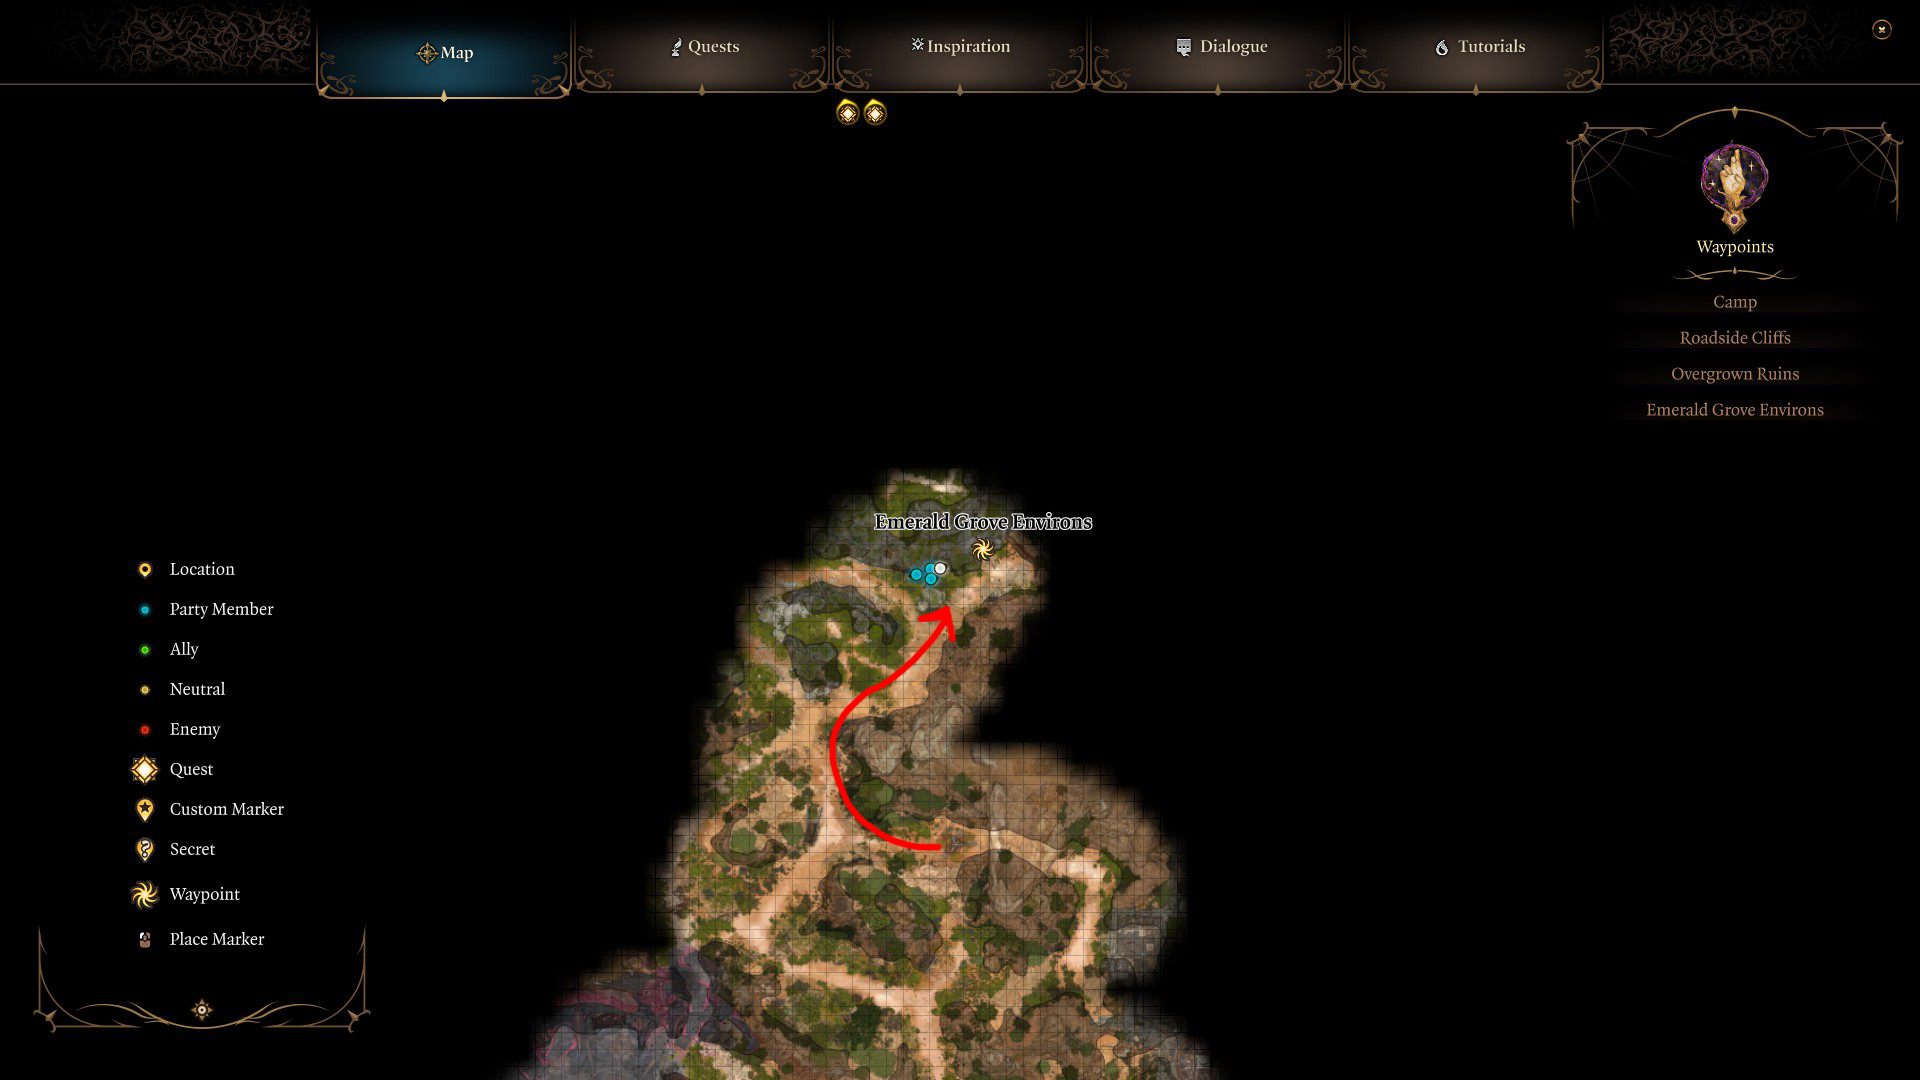
That done, you’ll need to head west and then take your first right to continue north. Keep the cliff on your right and you’ll come to a dead end, unlocking the Emerald Grove Environs waypoint (Image 10, Map W3).
Image 10
From there, head west, and you’ll soon come to a group of warriors led by Aradin asking to be let into the Emerald Grove. They won’t make it inside before a group of goblins arrives, and you’ll get pulled into the battle at the gate (Map 10). Luckily, between the warriors and the gate’s defenders — including the Warlock Wyll, whom you’ll be able to add as a companion when you eventually make it into the grove — you’ll have plenty of help, and so the battle shouldn’t be too bad.
The goblin party is being led by a boss named Za’krug. It’ll also have a bugbear, a worg, and assorted others. The safest place for you to fight them is on the hill to the south of the battle. If you dispatch the two goblin trackers there, then the hill’s high ground will give you an advantage over the goblins below, and you’ll be able to pelt them with arrows and spells while the NPCs by the gate take the brunt of the damage. Afterwards when you loot the corpses, you’ll find Gloves of Power on Za’krug’s remains.
Note: If you keep all of the gate’s defenders alive, then Lae’zel will gain the inspiration No One Left Behind.
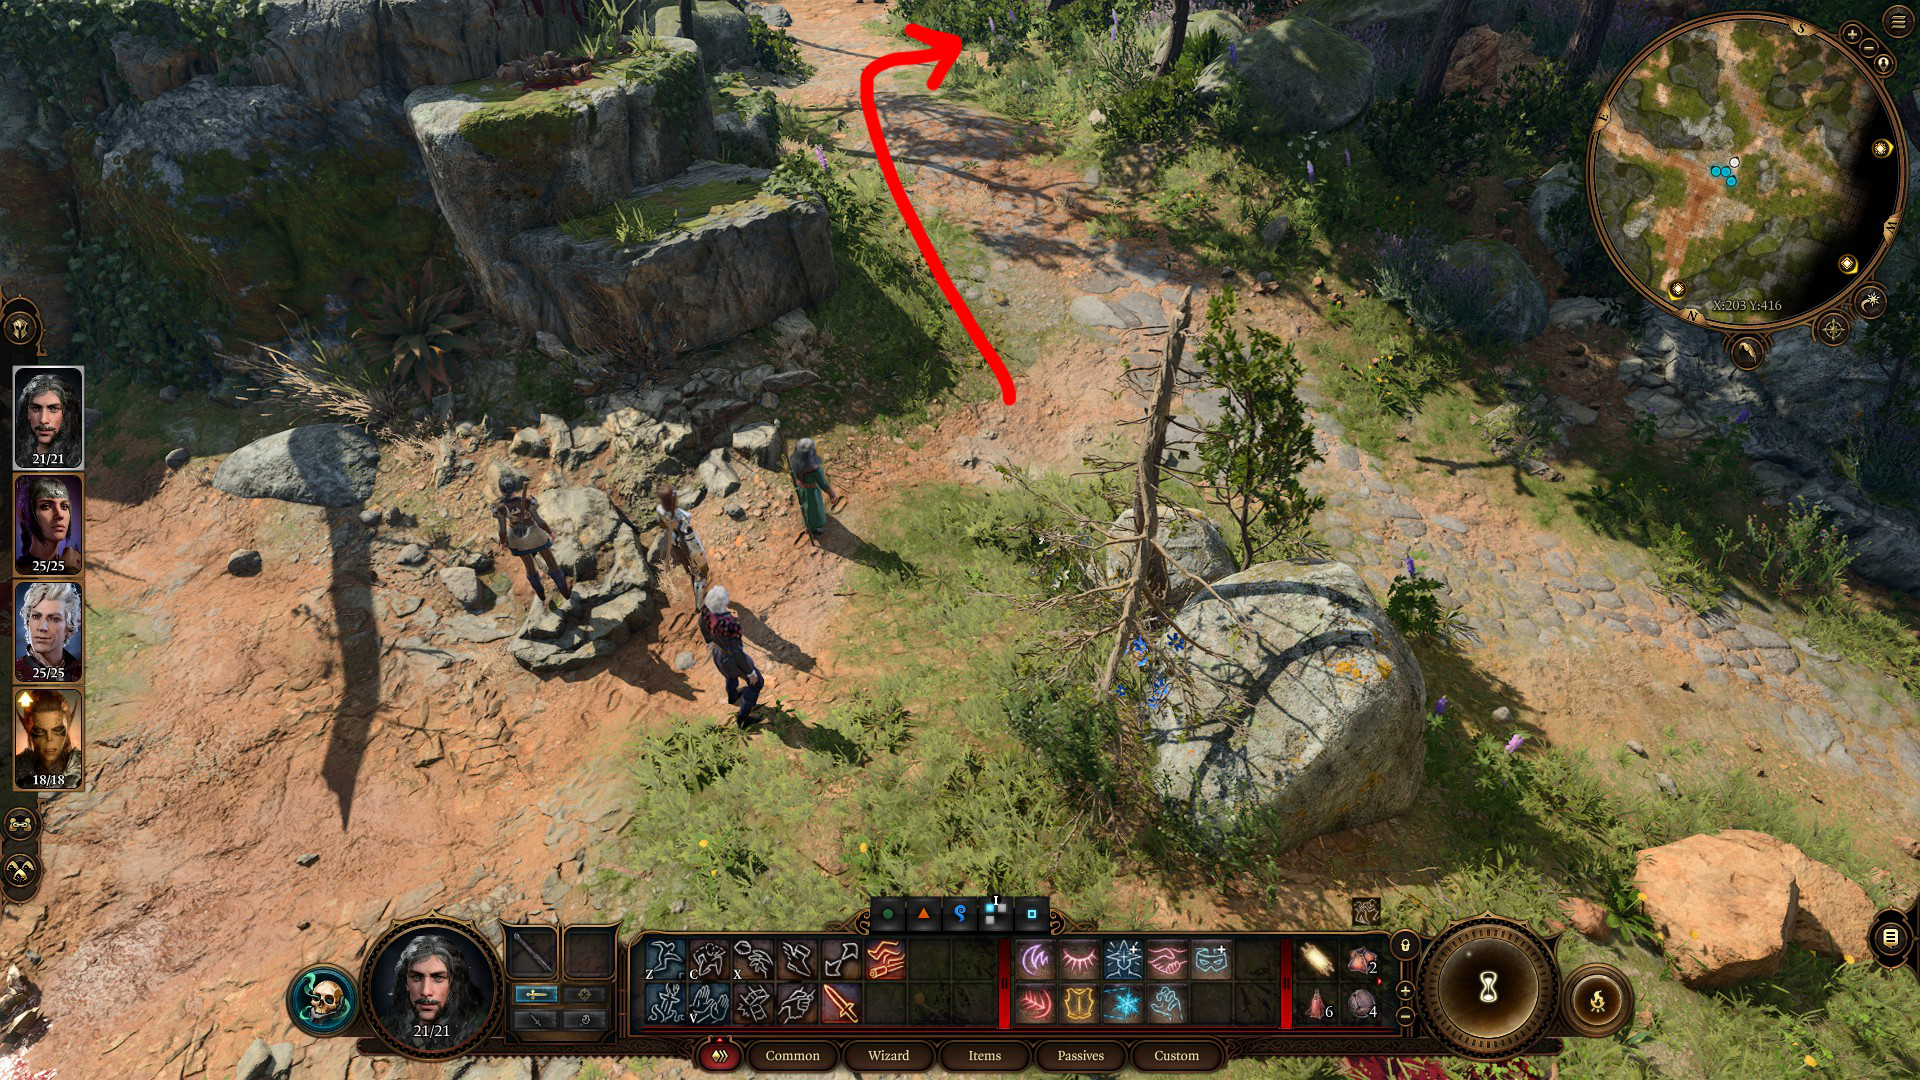
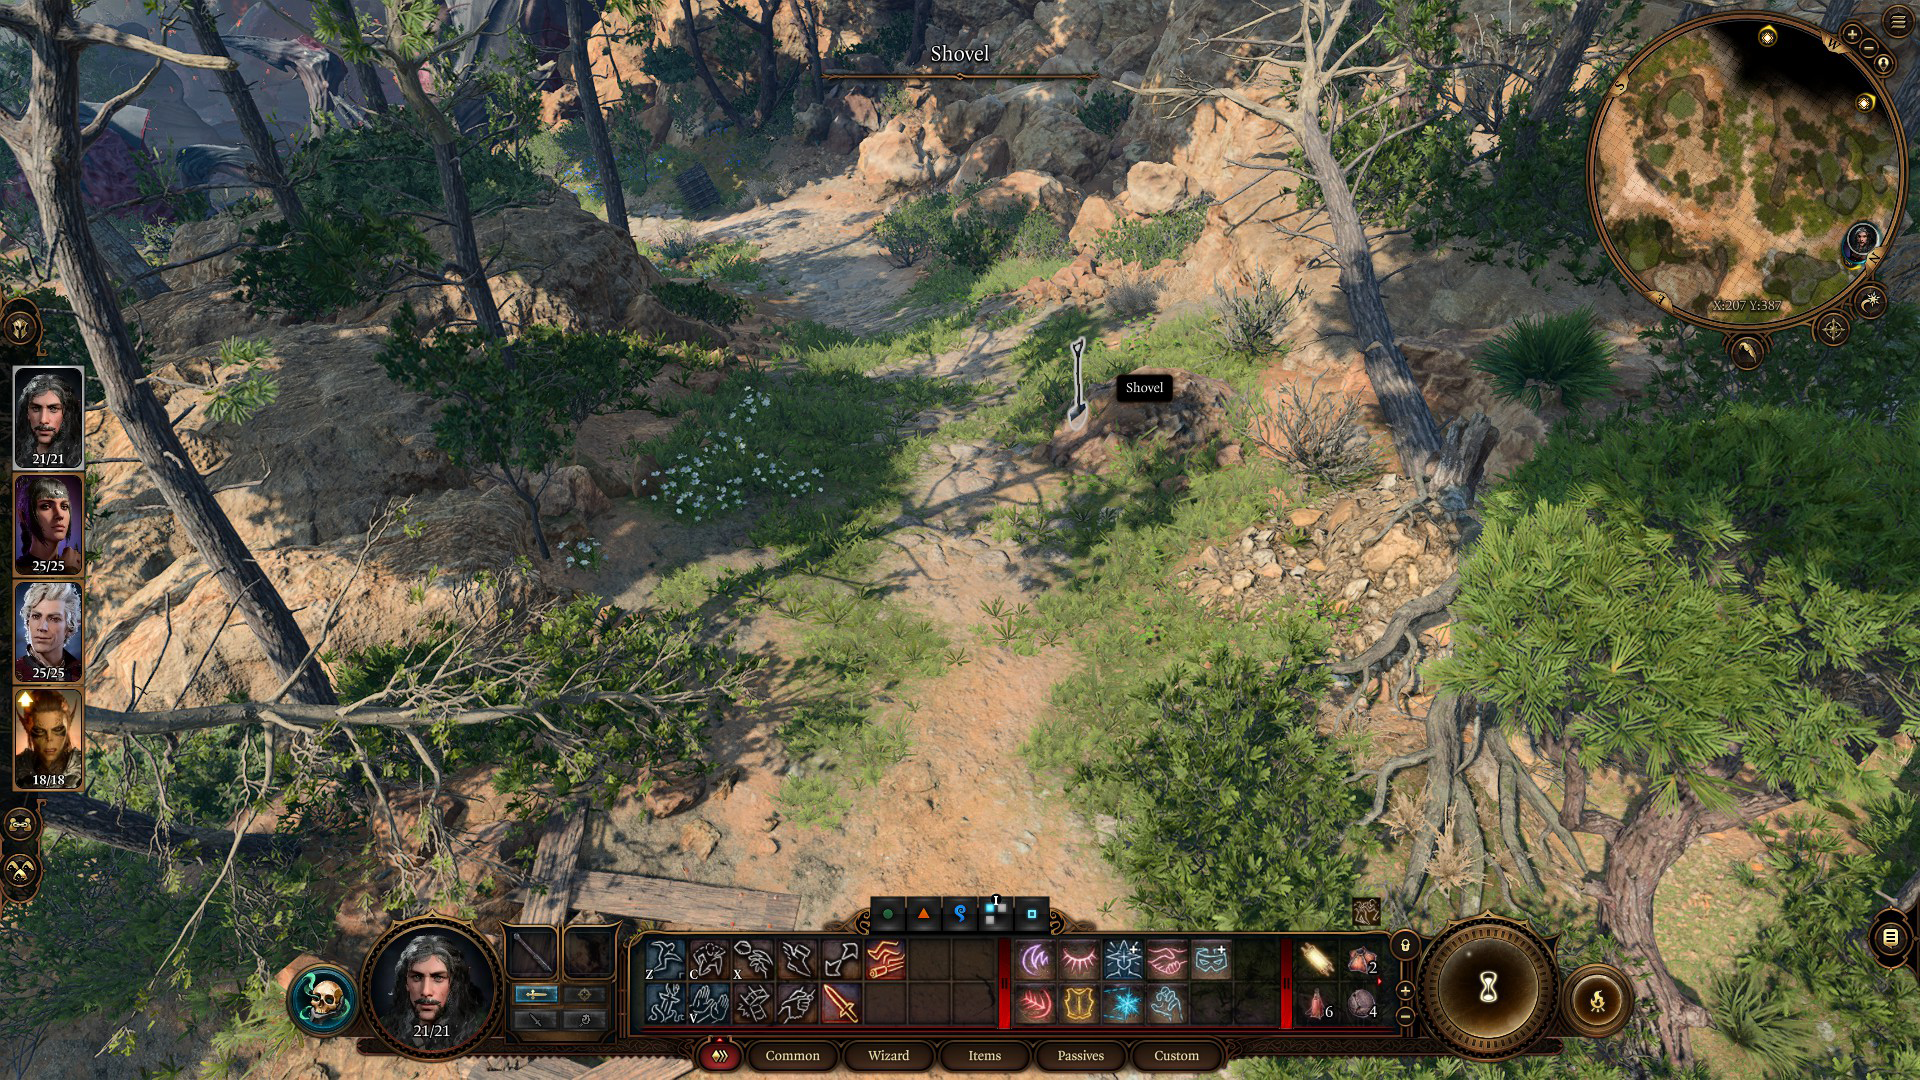
Before heading into the Emerald Grove (Map A), there are a couple more things you can do in the Wilderness. Go south from where the goblin fight occurred, and then take your first right (Image 11) – just ahead you’ll see a dirt mound and a Shovel (Image 12, Map 11). Pick up the Shovel, and then you’ll be able to interact with the dirt to dig up a chest containing a Trap Disarm Toolkit and some gold.
Image 11Image 12
Next, you can head back north and then west, where you’ll find some rocks and a ladder that you can jump on and climb. They’ll take you up to an abandoned Harper camp (Map 12). This is the site pointed to by the Harper Map you might have found earlier (Map 5). Inside the camp, you’ll discover a skeleton carrying a Silver Pendant. Also, on the western side of the camp, if you pass a DC-10 Perception check, then you’ll notice a rocky crevice inhabited by spiders. If you interact with the crevice and pass a DC-15 Animal Handling check (only DC-10 for Rangers) or a DC-15 Sleight of Hand check, then you’ll be able to grab a pouch away from the spiders. Inside it, you’ll find a Spider Egg Sac and some gold.
With your explorations complete, you can head back to the entrance of the Emerald Grove and enter via the fairly-well-camouflaged gate – simply get close enough, and the gate will open (Image 13).
Unabashed FromSoftware fanboy still learning to take his time with games (and everything else, really). The time he doesn't spend on games is spent on music, books, or occasionally going outside.