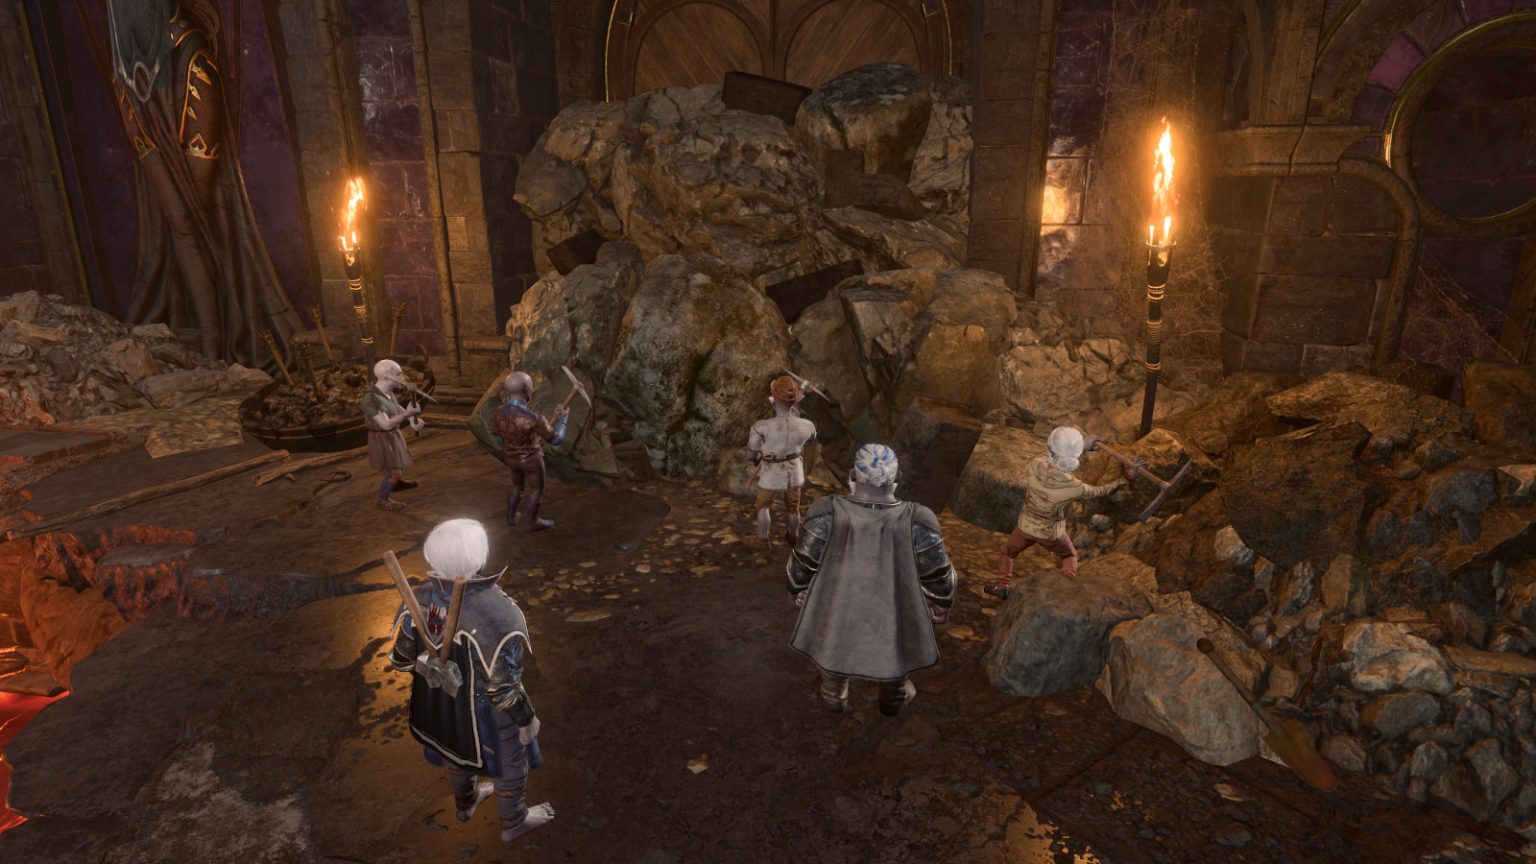
A True Soul drow named Nere is trapped in a collapsed tunnel in Grymforge. Can you save him — and the deep gnome slaves trying to dig him out — before time expires? In this guide we’ll show you how.
The first time you arrive at Grymforge, you’ll meet the duergar guards Morghal and Orgarth (#1). They’ll give you a short introduction to the area, letting you know that a True Soul drow named Nere is stuck in a collapsed tunnel, and that he’s delinquent in paying the duergar what he owes them — meaning the duergar aren’t currently big fans of True Souls or drow right now. Morghal will then try to collect some money from you, but you can simply decline without the need of passing any checks.
You’ll find the collapsed tunnel to the south (#3). You’ll meet Sergeant Thrinn there. She’ll be “encouraging” some deep gnome slaves to dig through the rubble blocking the tunnel as quickly as possible. When you talk to Thrinn, she’ll repeat what Morghal and Orgrath told you, but she’ll add that there is also poison gas in the tunnel. Learning about the poison (from Thrinn or Nere) will trigger the quest.
Walkthrough
If you click on the rubble blocking the tunnel (#3), then your parasite will allow you to mind-meld with Nere. He’ll demand that you hurry, and he’ll mention that the poison gas is becoming a problem. If you pass a DC-10 Perception check, then you’ll sense that there are two deep gnomes trapped with Nere in the tunnel.
But be aware — communicating with Nere will start a time limit on the quest. The first time you Long Rest or fast travel away from Grymforge after talking to him, he’ll again demand that you hurry, and he’ll warn you that the poison is spreading. The second time you do this, everybody in the tunnel will die, and you’ll fail the quest. Plus, Thrinn and the deep gnome slaves will also disappear, meaning you might also fail Find the Missing Boots and Save the Grymforge Gnomes. But Nere’s corpse will be at the tunnel site, so you’ll still be able to complete the quest Deliver Nere’s Head — and in fact, letting him die in the tunnel is the easiest way to kill him. Still, it’s best to keep your resting and fast traveling to a minimum after talking to Nere.
The key to the quest is the pile of rubble blocking the tunnel. It has Medium Toughness, which means any damage against it is reduced by 22, and it is immune or resistant to everything except for Bludgeoning and Force damage. Conceivably, you might have a character who can deal damage against the rubble, but chances are you’ll need some sort of explosives, like Smokepowder Bombs or Somepowder Satchels, which deal Force damage. Luckily, if you don’t have anything like this with you from earlier in the game, you can find some in Grymforge.
Explosives
To learn about the explosives, you should talk to Laridda and Lunkbug, two of the deep gnomes attempting to dig through the rubble. If Thulla gave you the quest Save the Grymforge Gnomes, then using her name will convince them to talk to you. Otherwise, you’ll have to pass a DC-10 Perception check to eavesdrop on them, and then pass a DC-5 check on Intimidation or Persuasion to convince them to talk. If you’re successful, then Lunkbug will tell you about a sapper named Philomeen, who recently escaped and might have enough explosives to blow through the rubble. He’ll even mark her location on your map.
Philomeen is hiding in the Contemplation Chamber, which is in the northeastern part of Grymforge (#6). To reach her, you’ll have to pick some locks (DC-10 and DC-14 Sleight of Hand), detect some hidden buttons (DC-5 Perception), do some jumping, and defeat a trio of Ochre Jellies. Starting at the locked kitchen door (#5), there’s basically only one way to go, so even with the multitude of hurdles, it should be straightforward to make your way to Philomeen.
When you reach Philomeen, she’ll be standing next to a Runepowder Barrel, and she’ll assume you were sent by Nere to bring her back — a bad combination. If you beat a passive DC-15 Perception check, then you’ll realize that runepowder is a concentrated and much more powerful form of smokepowder, so whatever you do, don’t tell Philomeen, “Go on, blow us up.” That will cause her to ignite the runepowder, which has a pretty good chance of killing everyone in the room and forcing you to load your game.
To convince Philomeen to talk to you, you’ll need to pass a DC-15 Intimidation or Persuasion check, or beat a DC-12 Intelligence check to detect her thoughts. If you spoke to Laridda and Lunkbug earlier, then you’ll only have to beat a DC-10 Persuasion check when mentioning them. If calm the situation, then Philomeen will give you a Runepowder Vial before racing off to Baldur’s Gate with the rest of the barrel. You’ll see her again in Act 3.
If your encounter with Philomeen goes poorly, and if you survive, then you’ll find a Hand-Drawn Map in the backpack next to her campfire. When you read it, a location labeled Smokepowder Reserve will get marked on your map (#4). This reserve is in a secret room (DC-10 Perception to detect) attached to the room next to the kitchen (#5). Inside, you’ll find two Smokepowder Satchels, plus a heavy chest containing some random loot.
Mutiny
Before heading back to the rubble, it’s a good idea to visit with some of the other duergar to learn more about the animosity between them and Nere. In particular, you should talk to Elder Brithvar and Stone Guard Kur near the cave-in (#2). Brithvar will detect that you’re a True Soul, so he’ll assume that you’re with Nere. To disabuse him of this notion, you’ll need to beat a DC-10 Deception check to lie to him convincingly or a DC-11 Intelligence check to detect his thoughts.
If you convince Brithvar that you’re not with the Absolute, then he’ll ask if you want to make some gold. If you sound agreeable, then he’ll tell you his plan: you free Nere from the tunnel cave-in, and then all of you gang up on him and split his gold. Brithvar will promise you a “fat cut” of the proceeds, but if you beat a DC-10 Persuasion check, then he’ll increase that amount to half. However, if you threaten to tell Sergeant Thrinn (#3) what he’s up to, or if you brag about how much gold you have already, then Brithvar and Kur will attack you.
Note: If you do tell Sergeant Thrinn about Brithvar and Kur, she won’t care. She’ll call them “dumb and dumber.”
If you agree to take part in the mutiny, then Brithvar will have a task for you. He’ll ask you to kill the Scrying Eye in the area — without being detected. This is pretty easy. Once the Eye spots you, it will follow you around. So you can just lead it somewhere quiet and then kill it. The Eye has lots of resistances but only 8 hit points, so it’ll go down quickly. If you fail to kill the Eye, then Brithvar won’t pay you anything after defeating Nere.
Free Nere
When you’re ready to free Nere, head back to the tunnel (#3). To destroy the rubble blocking it, you should drop your explosive of choice next to it, and then drag it even closer if necessary. The duergar and gnomes in the area will see this and retreat out of the way. Then you’ll just need to shoot the explosive to set it off. If you use the Runepowder Vial, then one explosion should do the trick. If you’re using Smokepowder, then you might need two explosions.
When the rubble is gone, Nere will make his grand entrance. He’ll immediately kill Meerna, one of the deep gnomes who was in the tunnel with him, and then he’ll prepare to kill the other deep gnomes. This scene will always lead to a fight, but your choices here and earlier will determine whom you’re fighting:
If you tell Nere to spare the deep gnomes, then he’ll name you a traitor, and he’ll decide you should die. However, if you made a pact with Brithvar, then either he’ll step forward and announce the mutiny (if you killed the Scrying Eye) or Nere will already know about it (if you didn’t). At this point Nere will decide that the rebels are worse than you are, and he’ll order you to kill them. You can either comply (and attack the rebels with the loyal duergar and Nere helping you), or you can keep your word to Brithvar (and attack Nere and the loyal duergar with the rebels). If you didn’t make a pact with Brithvar, then you won’t get to make a choice — Nere and all of the duergar will attack you.
If you don’t try to save the deep gnomes, then Nere will turn against Sergeant Thrinn, and no matter what you say, he’ll kill her. At this point, the encounter will go roughly the same as with the save-the-gnomes option above. If you made a pact with Brithvar, then Nere will order you to kill the rebels, and you can either comply or not. But if you didn’t make a pact with Brithvar, then Nere will order you to kill all the duergar. You’ll have to fight the duergar no matter what you say, but if you agree to Nere’s order then he will help you, and if you refuse then he will help the duergar.
After the battle, you’ll be able to talk to some people and loot some corpses, depending on how the fight above played out.
Conclusion: Nere
If Nere survives along with the deep gnomes, then he’ll still want to kill them, but you can prevent this by passing a DC-15 Wisdom check (this might be for an illithid power, but our dialogue text was “not found”). Afterwards, Nere will start complaining about how his “simple operation” went wrong, and he’ll order you to report its failure to the General at Moonrise Towers. Next, Nere will warn you that Moonrise Towers is surrounded by a deadly curse, and he’ll recommend that you rely on one of the Absolute’s allies to guide you there. He’ll then give you a Spider’s Lyre to summon that ally.
If you agree to complete Nere’s order, then he’ll give you a Gift from the Absolute (essentially a Mind Flayer Parasite Specimen) before heading out on his own mission. But if you refuse, then Nere will suddenly notice that he can no longer hear the Absolute. If you tell him that you can’t hear her either, then he’ll blame you for the problem, and he and any remaining duergar will attack you. If you tell Nere that you can hear the Absolute just fine, then he’ll be troubled, but he’ll repeat his order about the General, and he’ll give you the Gift from the Absolute. Finally, if you tell Nere that the Absolute is “a front for mind flayers,” then pass a DC-10 Deception or Persuasion check, and then pass a DC-11 Intelligence check (to Detect Thoughts) or a DC-10 History or Persuasion check, then he’ll abandon the Absolute and give you a Dagger +1.
If Nere dies, then when you click on his corpse, you’ll get a DC-10 Strength check for cutting off his head (for the quest Deliver Nere’s Head). You’ll end up with Nere’s Head either way, but if you pass the check then you’ll cut off the head cleanly rather than having to work at it.
When you loot Nere’s corpse, you’ll find a Broken Moonlantern, a Dagger +1, Disintegrating Night Walkers, a Mind Flayer Parasite Specimen, a Spider’s Lyre, and the Sword of Screams. There isn’t any way to fix the moonlantern, but when you pick it up, if you pass DC-10 checks for Arcana and Investigation, then you’ll learn that it’s a magical item powered by pixie dust. The Spider’s Lyre can help you during the quest Travel to Moonrise Towers.
Conclusion: Duergar
If Sergeant Thrinn and the loyalists survive, then they’ll head to Moonrise Towers, but you won’t see them again. If Sergeant Thrinn dies, then you’ll find the Boots of Speed (if you completed the quest Find the Missing Boots) and a Ring of Absolute Force on her corpse.
If Brithvar and the rebels survive, and if you didn’t kill the Scrying Eye, then instead of paying you, Brithvar will demand that you pay him 500 gold. You can avoid this by beating a DC-10 Intimidation or Persuasion check, or by beating a DC-11 Intelligence check to detect his thoughts. If you killed the Scrying Eye, then Brithvar will pay you what he owes — 400 gold if you didn’t negotiate a better deal, or 500 if you did.
Brithvar will also claim that the deep gnome slaves belong to his clan. To free them, you’ll need to beat DC-10 Intimidation or Persuasion check — or kill the remaining rebels.
Conclusion: Deep Gnomes
If the deep gnomes survive and are free, then when you talk to Beldron — one of the gnomes who was stuck inside the tunnel with Nere — he’ll thank you for your help, but while his dialogue and animation will make it look like he’s giving you a reward, you won’t actually receive anything. The gnomes will then start talking about their leader Wulbren, who was taken to Moonrise Towers. This will trigger the quest Rescue Wulbren.
If you beat a DC-15 Intimidation or Persuasion check, then you’ll learn that Wulbren came to Grymforge looking for the recipe of Runepowder — and found it — but then had to destroy it when he was captured. So the only copy left is in his head, which is why the deep gnomes want you to rescue him. The deep gnomes will then head to Baldur’s Gate, where you’ll see at least some of them again in Act 3.
Share this article:
Steven Carter
Starting with cassette tape games on the TRS-80, Steven has been playing, creating, and writing about games for a long, long time. This makes him experienced, not old. Lately, Steven has been focusing on walkthroughs, making sure everybody knows how to solve Towers of Hanoi puzzles.