The Mountaintops of the Giants, a frozen and desolate land high above the world, is one of Elden Ring’s most unforgiving regions. Its bosses, from ancient titans to relentless warriors, push Tarnished to their limits as they near the end of their journey. Below, you can find the full list of bosses in the region, and the strategies to defeat them. If you’re looking for a complete walkthrough of Mountaintops of the Giants, head here.
Mountaintops of the Giants
The Ulcerated Tree Spirit is a massive, chaotic boss found throughout the Lands Between. While it moves erratically and its arena is often cramped, the best way to fight it is to stay close to its side, avoiding its sweeping attacks. Melee players should use jumping heavy attacks to stagger it while being mindful of tail swipes and hand strikes. When the boss glows yellow, immediately run away to avoid the Holy Explosion. If struggling with dodging, blocking first before rolling can help mitigate damage. Despite its intimidating size, many of its body attacks won’t connect if you stick close.
Ranged players have a tougher time since distance increases the risk of being charged or grabbed. The best opportunity to cast is during the boss’s Breath Attack, where proper positioning allows for multiple safe spells. However, fast-casting magic or weapon skills are preferable, as the boss rarely allows time for long incantations. In Phase 2, the Holy Explosion buffs its attacks, making staying close even riskier. If the boss rampages around the arena, follow it carefully, as this often leads into another Breath Attack, which presents a prime counterattack window.
- Summons: Yes
- Location: South of Snow Valley Ruins Overlook
- Rewards:
The Erdtree Avatar Duo fight starts with a single Avatar, but splits into two shortly after the battle begins. To avoid being overwhelmed, summon a strong Spirit Ash to distract one while you focus on the other. Fire damage is highly effective, and staying mounted on  Torrent makes dodging easier. Bait an attack, ride in to strike, then quickly retreat to avoid counterattacks.
If you’re on foot, use obstacles to block projectiles and punish slow attacks like the Overhand Slam or Butt Slam. Since both Avatars share health, hitting one damages both, so use wide-hitting weapons or spells to maximize damage. Keep moving to avoid being cornered, and if needed, reposition to reset enemy aggro before
- Summons: Yes
- Location: West of Snow Valley Ruins Overlook
- Rewards:
This final version of the Death Rite Bird is the only one in the base game that can appear during daytime, and is one of the most intimidating versions of the boss. Like all Death Rite Birds, it wields black flame magic and devastating melee attacks. Holy damage is highly effective, with  Sacred Blade or
  Holy Water Pots significantly weakening it.
The key to survival is staying behind its legs, avoiding its front-facing attacks while keeping pressure on. It frequently moves away, so be ready to roll through its attacks to reposition. Ranged players should adopt a similar approach, casting spells after dodging extended combos. In Phase 2, its black flame and spear attacks become more dangerous, requiring careful dodging and patience.
Commander Niall, found in Castle Sol, guards the  Haligtree Secret Medallion (Left) and is a formidable opponent, summoning two knights at the start of the fight. The dual-wielding knight is aggressive and should be eliminated first, while the shield knight can be left alive to delay Phase 2. Niall is weak to stagger damage, making jumping attacks effective, and Frost and Lightning resistance will help mitigate his strongest attacks.
Once Niall enters Phase 2 (~50% HP or when both knights die), he gains frost-infused lightning attacks, including his deadly Leaping Leg Strike. Baiting this move with ranged attacks or throwing knives makes his pattern predictable—dodge his leap, roll through follow-ups, and counterattack. If you prefer a safe approach, you can cheese him from outside the arena using a bow.
- Summons: Yes
- Location: Lord Contendor’s Evergaol
- Rewards:
Roundtable Knight Vyke is an aggressive, lightning-wielding opponent who excels at dodging projectiles and chaining spear attacks to punish reckless movement. He is immune to status effects, but after buffing himself with Vyke’s Dragonbolt, he takes increased lightning damage—making Lightning Spear and similar Faith spells highly effective. Equip gear that resists Lightning damage, and avoid rolling backward while close to him, as he frequently follows up with rapid thrusts.
For melee characters, using jumping heavy attacks after dodging or blocking his spear combos is a reliable way to break his stance. A high Lightning-resistance shield can help mitigate chip damage, but rolling toward or past him is often safer than blocking. Intelligence builds should use  Carian Piercer to out-range him, as it knocks him down when fully charged. Faith users can exploit his Lightning vulnerability after his buff activates. Stay patient, capitalize on his Whirlwind Leap’s long recovery, and punish his buff animation for an easier fight.
- Summons: Yes
- Location: Freezing Lake
- Rewards:
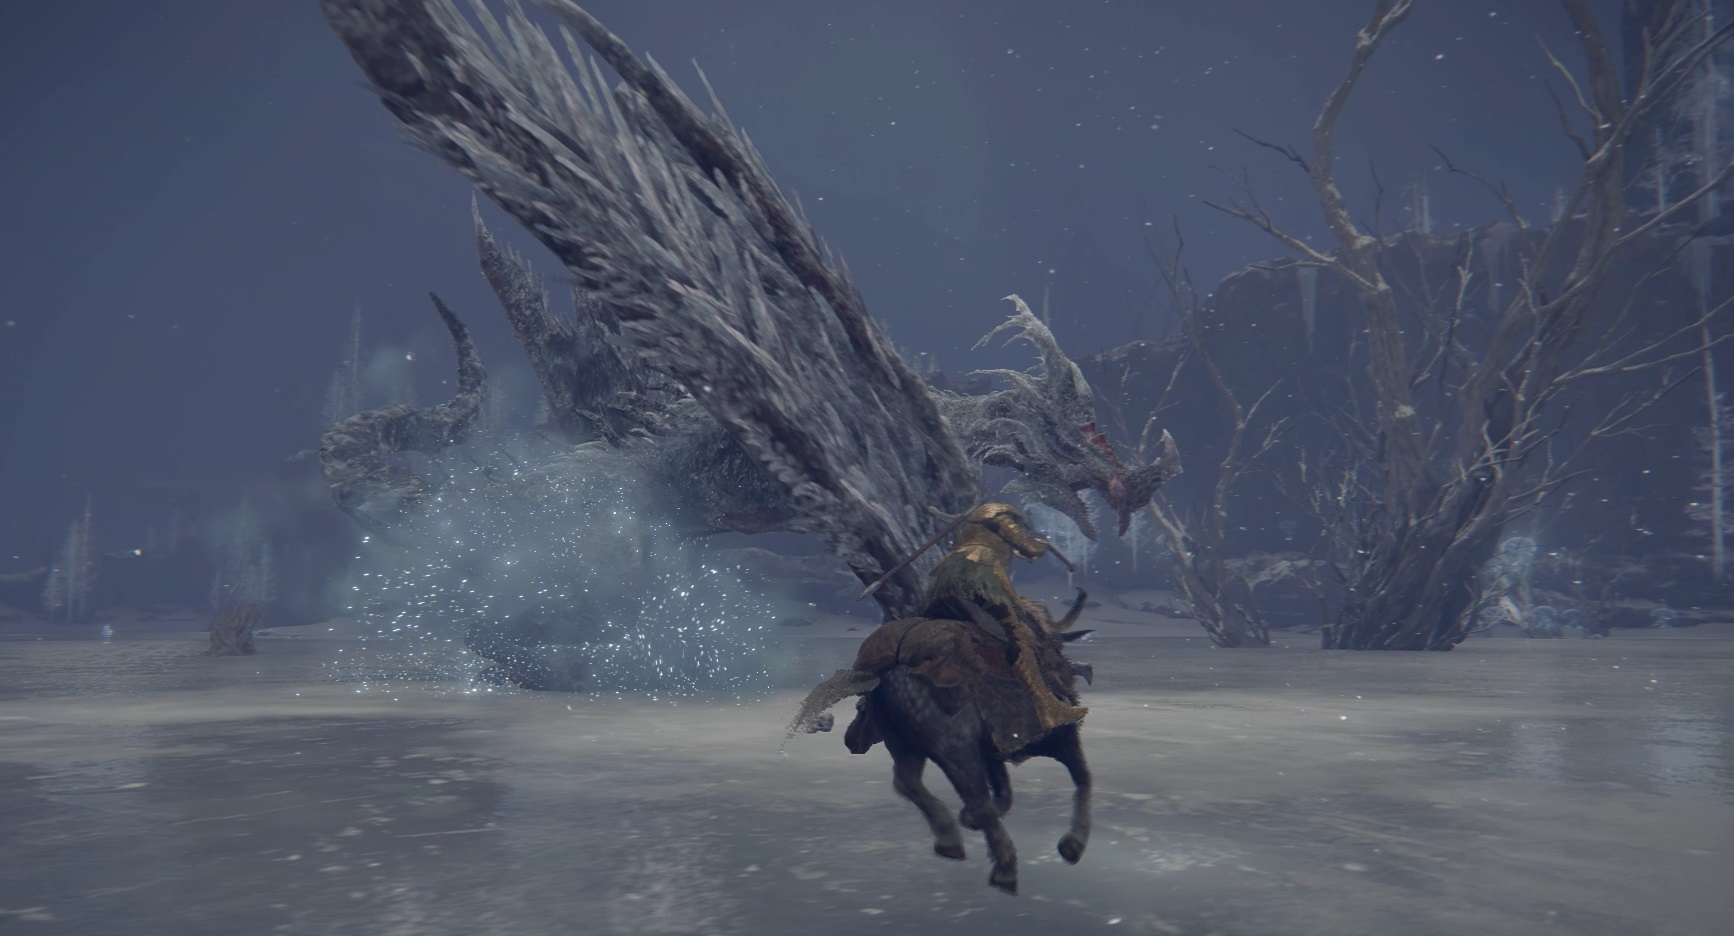
Borealis, the Freezing Fog is a frost-wielding dragon found on the frozen lake in the Mountaintops of the Giants. While resistant to slashing and thrusting attacks, it is not immune to status effects, making Bleed, Scarlet Rot, and other afflictions viable options. If you’ve fought dragons before, Borealis behaves similarly, with the main threat being its Frost Breath and Frost Roar, which can quickly inflict Frostbite in a wide area. A handy trick is to bait Borealis toward the lake’s Jellyfish, as their deaths replenish your flasks.
For a cheese strategy, summon  Latenna the Albinauric on a high rock east of Spiritcaller Cave, then aggro Borealis and lure it into her line of fire—Latenna can attack freely while remaining completely safe. If you prefer mounted combat, use the standard dragon tactic: dash under its legs, attack a few times, and then ride away to avoid retaliation. Avoid the Frost Roar and Flying Frost Breath by keeping your distance until Borealis is idle, then re-engage. If your damage is low, you can mix cheese tactics with mounted attacks for an easier fight.
The Ancient Hero of Zamor is an optional boss found in the Giant-Conquering Hero’s Grave, and is the most difficult version of the boss. This boss is highly mobile, using rapid spinning slashes and frost attacks, and enters an aggressive second phase at 60% HP, where it gains even faster combos and larger frost AOE attacks. Jumping heavy attacks are extremely effective, quickly staggering the boss and setting up critical strikes. Staying close to the boss and rolling into its spinning attacks makes them easier to dodge.
For ranged characters, Phase 1 is safer—the boss moves slowly when at a distance, giving time for spellcasting. However, in Phase 2, it becomes much harder to cast safely. The best openings are after Frost Breath (jump over it and attack) and Frost Tempest (start casting as soon as the boss begins the animation). If you struggle to find spell windows in Phase 2, switch to melee and look for small gaps to burn your remaining FP. Against this hardest version of Zamor, learning when to dodge and counterattack is crucial.
- Summons: Yes, and Alexander, Warrior Jar
- Location: Foot of the Forge
- Rewards:
The Fire Giant is the final boss of the Mountaintops of the Giants and one of the game’s largest (and tankiest) foes, making visibility a challenge. Phase 1 revolves around attacking his left leg, which is his weakest point. Staying behind him near this leg avoids most of his attacks. Watch out for his rolling attack and stomp attacks, and sprint away if he turns to face you. His Fireballs track slowly and can be triggered early to neutralize them. If he slams his dish, sprint perpendicular to dodge. Stick to Torrent for mobility, and use Bleed weapons or jumping attacks to stagger him.
In Phase 2, he loses his dish and becomes more stationary, but gains massive AOE fire attacks. His new weak points are his wrists and the eye in his chest, though the latter is rarely exposed. His Fire Spew can be avoided by running behind him, while Firestorm and Eruption require retreating to avoid damage. Continue circling his heel or wrists while watching for fire attacks. This fight can be long and punishing, so bring Torrent-healing items, stay patient, and respec to higher Vigor if needed.