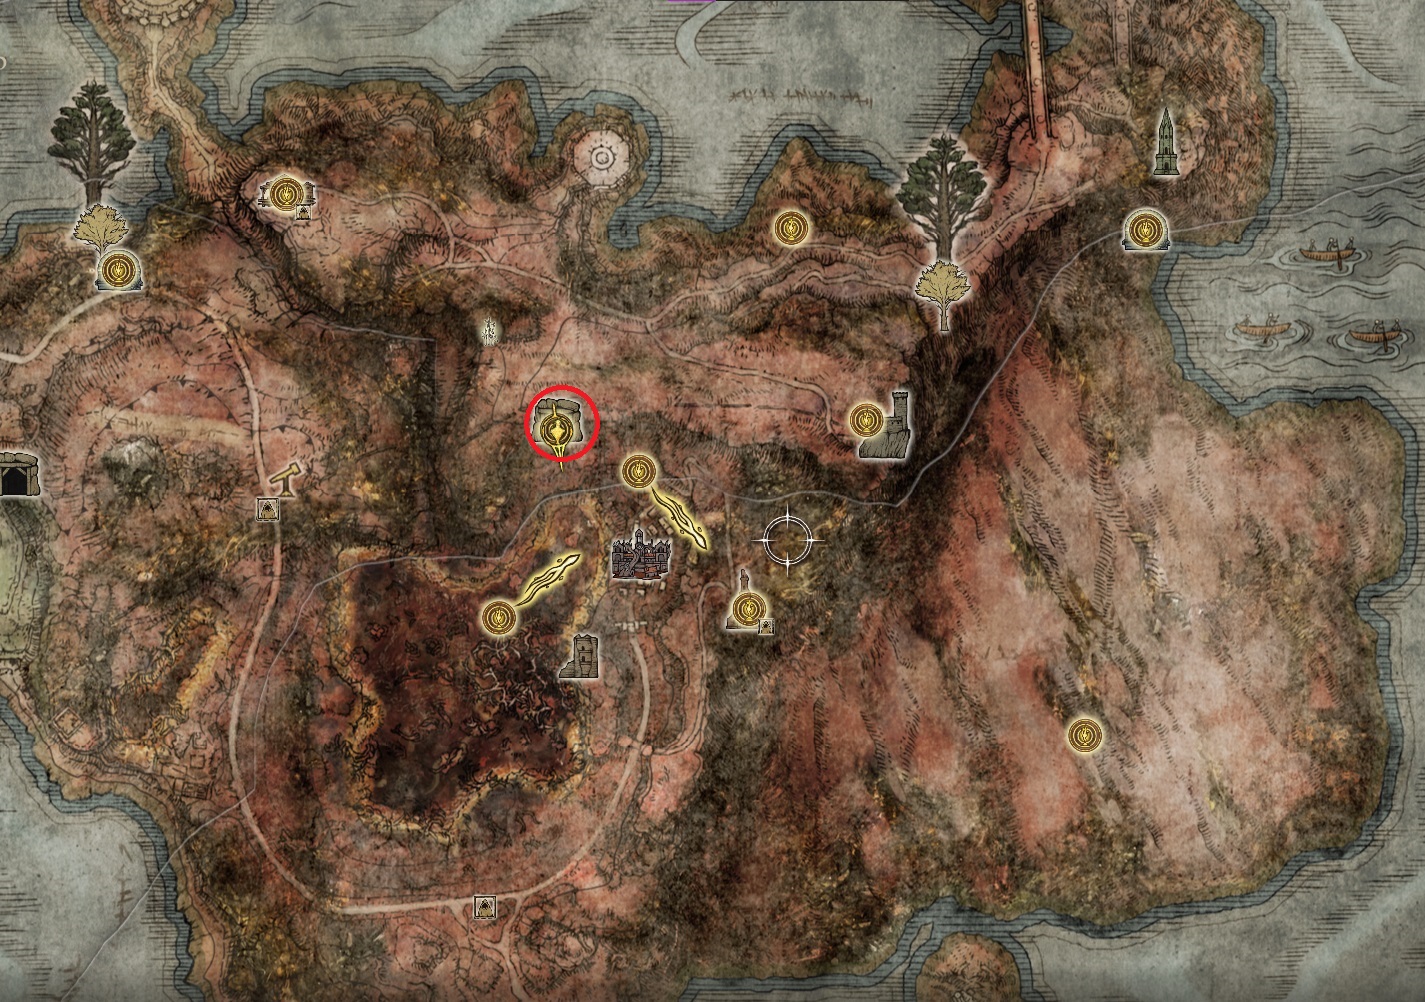
This crystal tunnel is found on the northern end of the Swamp of Aeonia,in Caelid. It’s got one of the more frustrating mob types (the Lesser Kindred of Rot), plus there’s no Stake of Marika outside the boss arena. However, it offers a lot of Smithing Stone [5]s and [7], Somber Smithing Stone [4]s, as well as the ability to purchase infinite Somber Smithing Stone [1] and [2], so if you want any of those things, this dungeon is still worth venturing into.
This dungeon is home to a few Lesser Kindred of Rot — these enemies are agile, do decent melee damage, and have a ranged attack that is very hard to dodge. However, if you roll right as the projectiles are about to reach you, they’ll miss. Since the projectiles are physical damage, you can also block them with a shield.
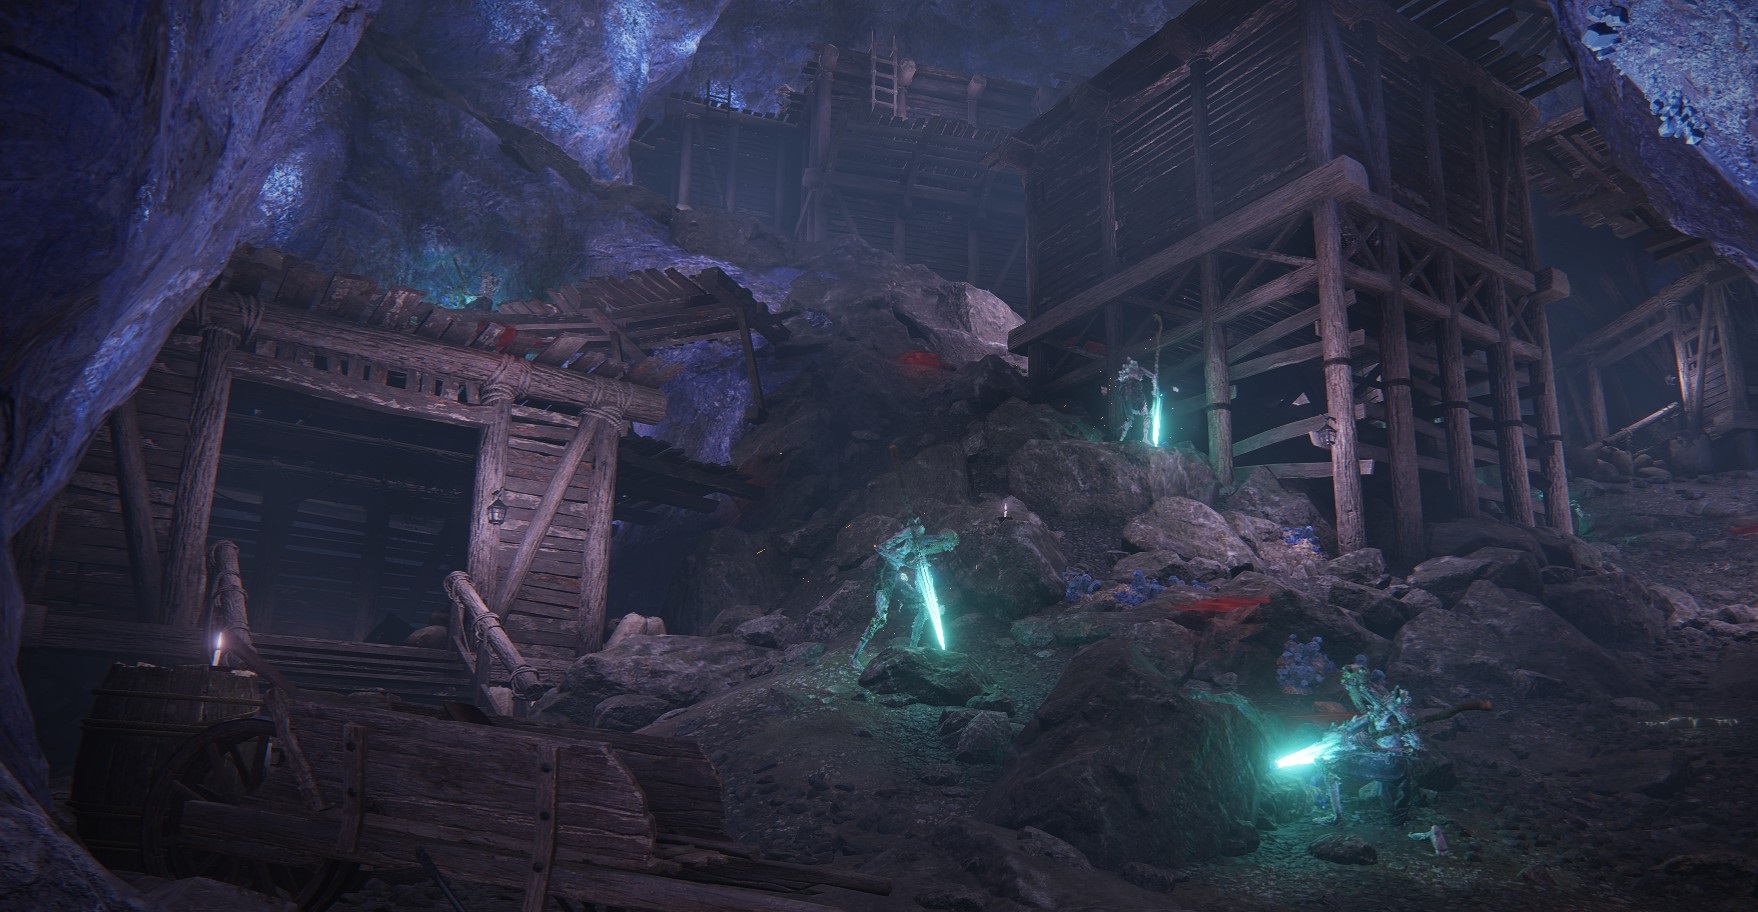
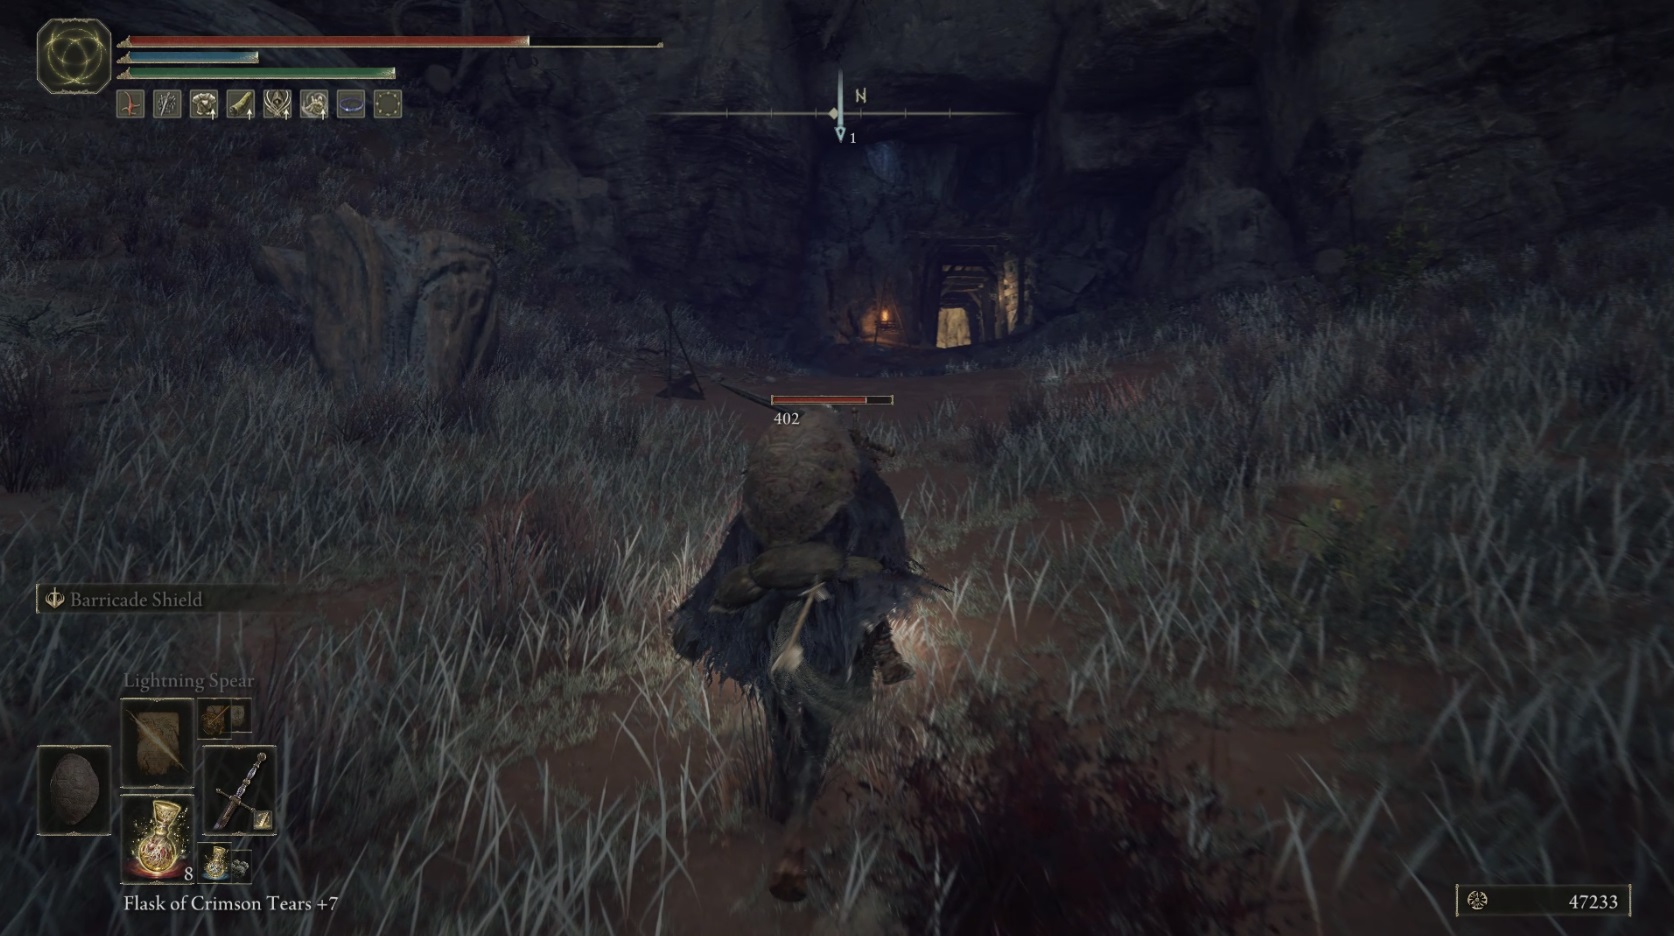
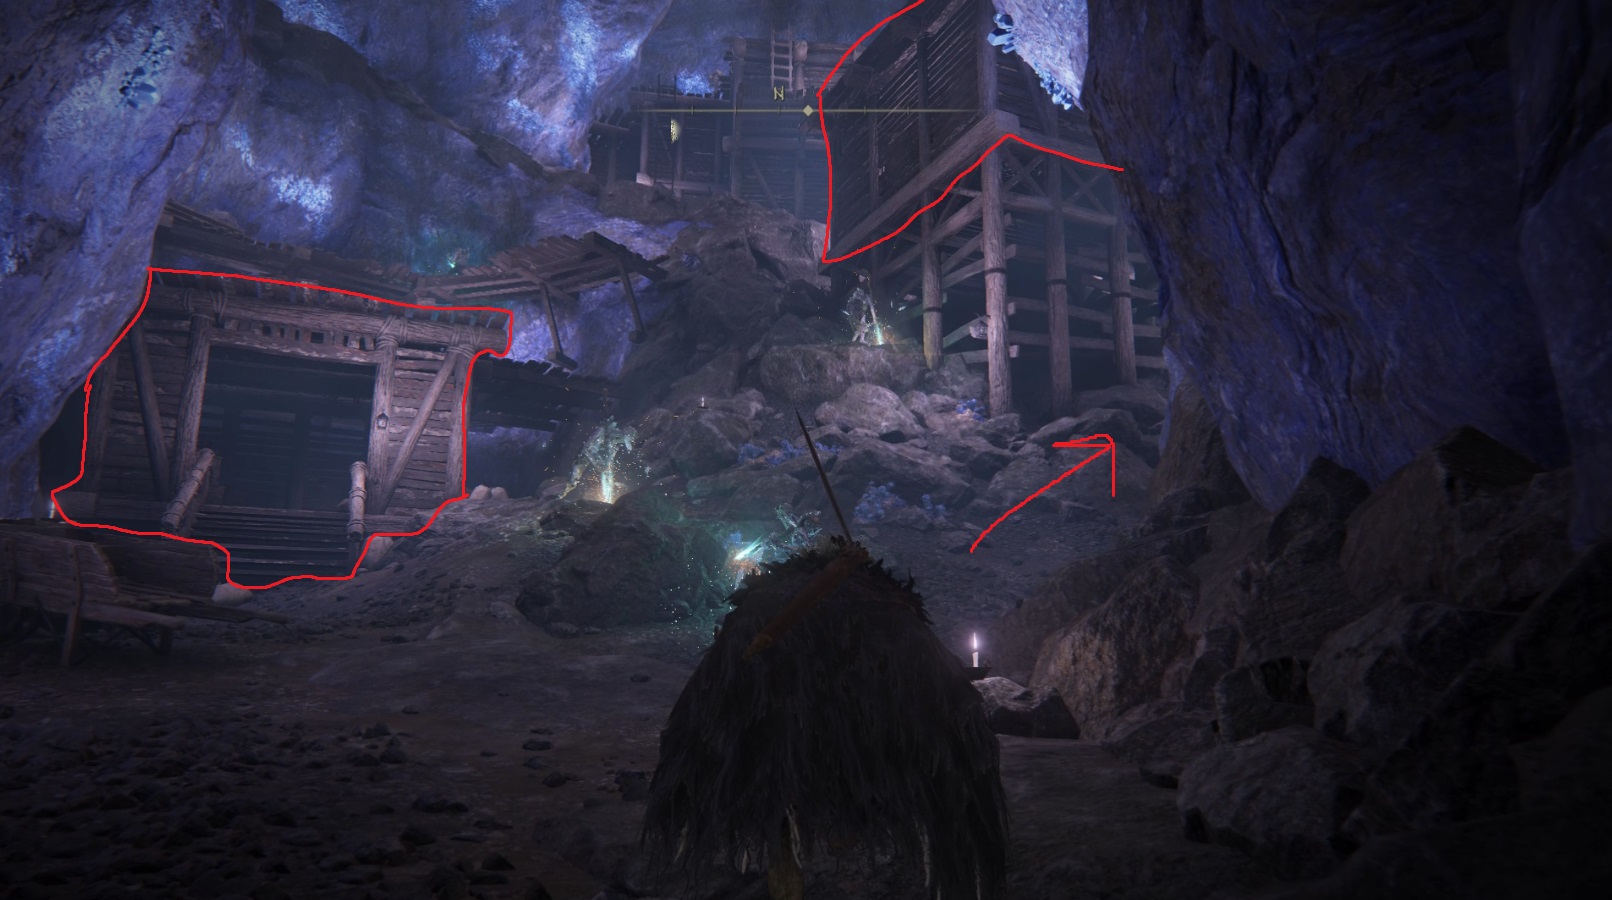
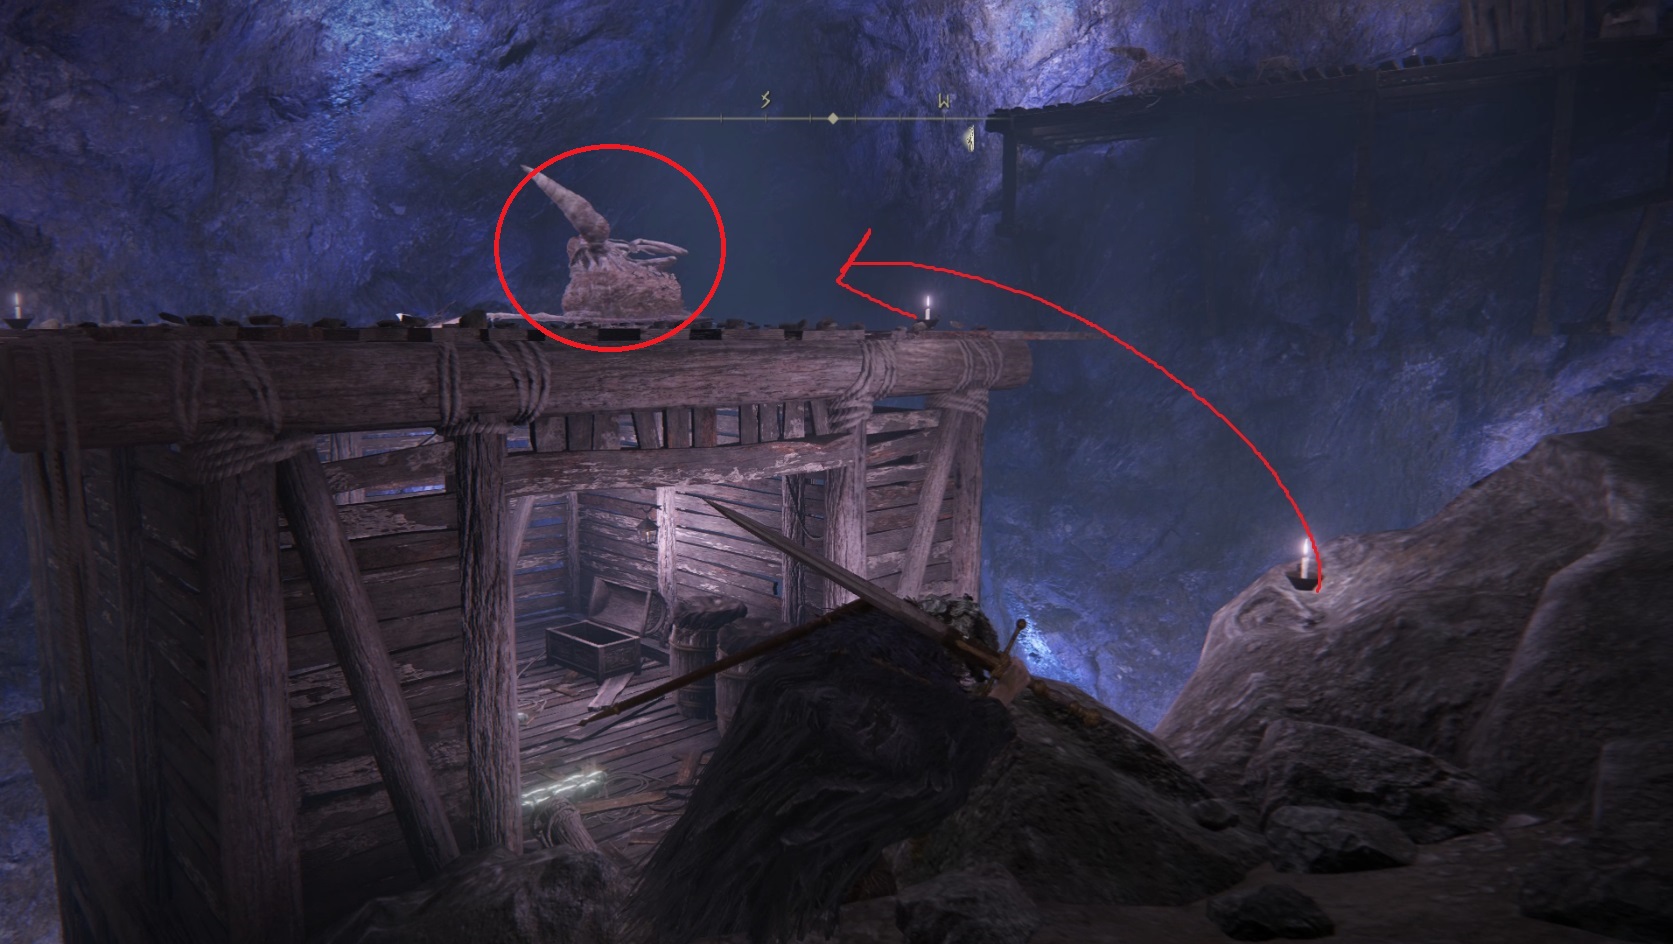
From the site of grace, head into the dark corner to the northwest to find a corpse holding some Rot Grease. Then head back to the site of grace and turn left, where you’ll see a ladder. Climb up and continue straight to find the summoning pool, then go north up the tunnel to enter the dungeon’s main chamber. Because the pests guarding the miners here are so dangerous, we’re going to sneak up to and kill them before we kill the miners or try to collect any of the items. The closest two pests are on top of the two small wooden structures indicated below, and there’s a third further up.
To reach the first pest, start sneaking and go right (northeast) up the path. You’ll soon find a broken structure blocking the way forward — turn left and continue up the path going northwest. If you find you can’t sneak forward up the path, move left or right while also trying to move upward and you should be able to find a spot that lets you sneak up. Once you draw level with the first guard, it will start to get up.
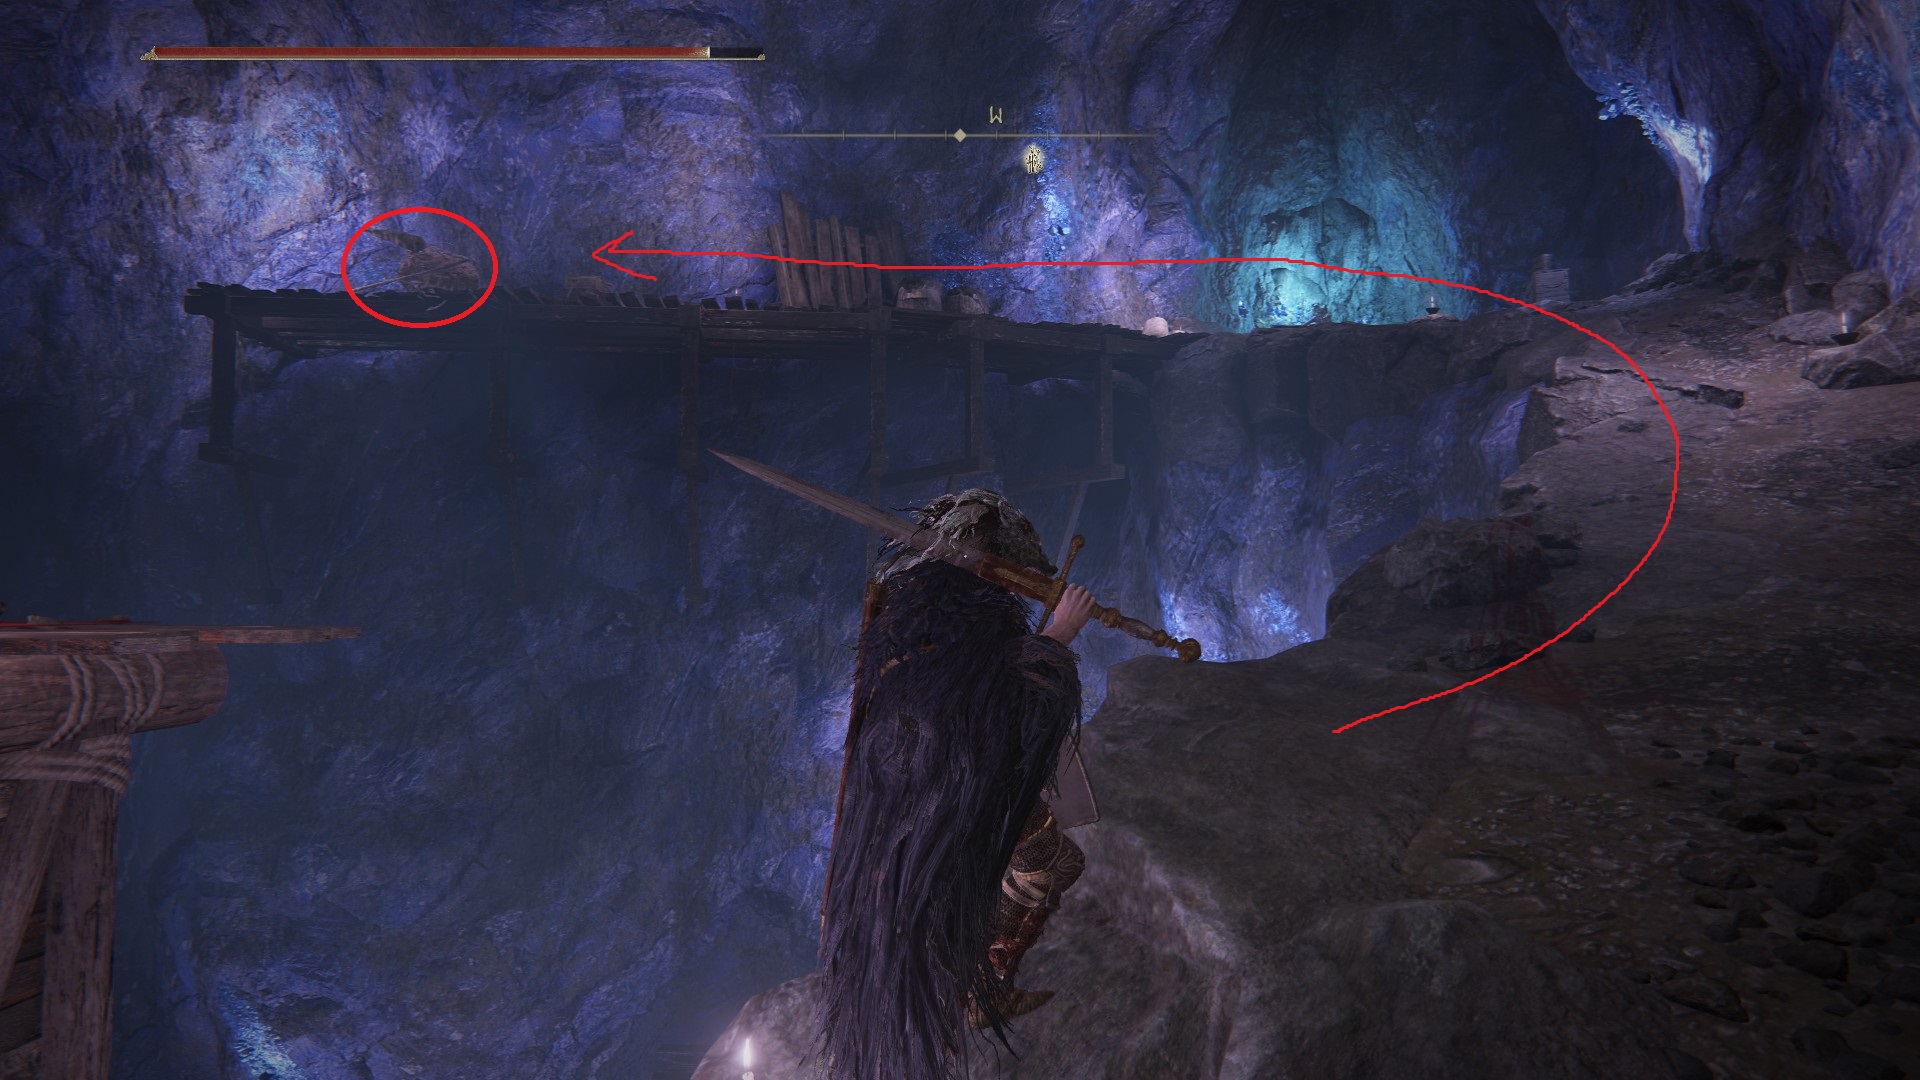
Jump from the candle on your side to the candle on the structure’s roof and take out the first pest [1]. Then jump back onto the path and continue west to reach the second pest guard [2] (you’ll pass a miner, but ignore it and rush the pest instead). Grab the Rune Arc from the corpse behind the pest, then backtrack to kill the miner and get the nearby Smithing Stone [5] embedded in between the ground and wall. Then go back to where you killed the second guard and look down — the third and final pest is below [3]. Drop down and kill it quickly, before it can attack you.
23
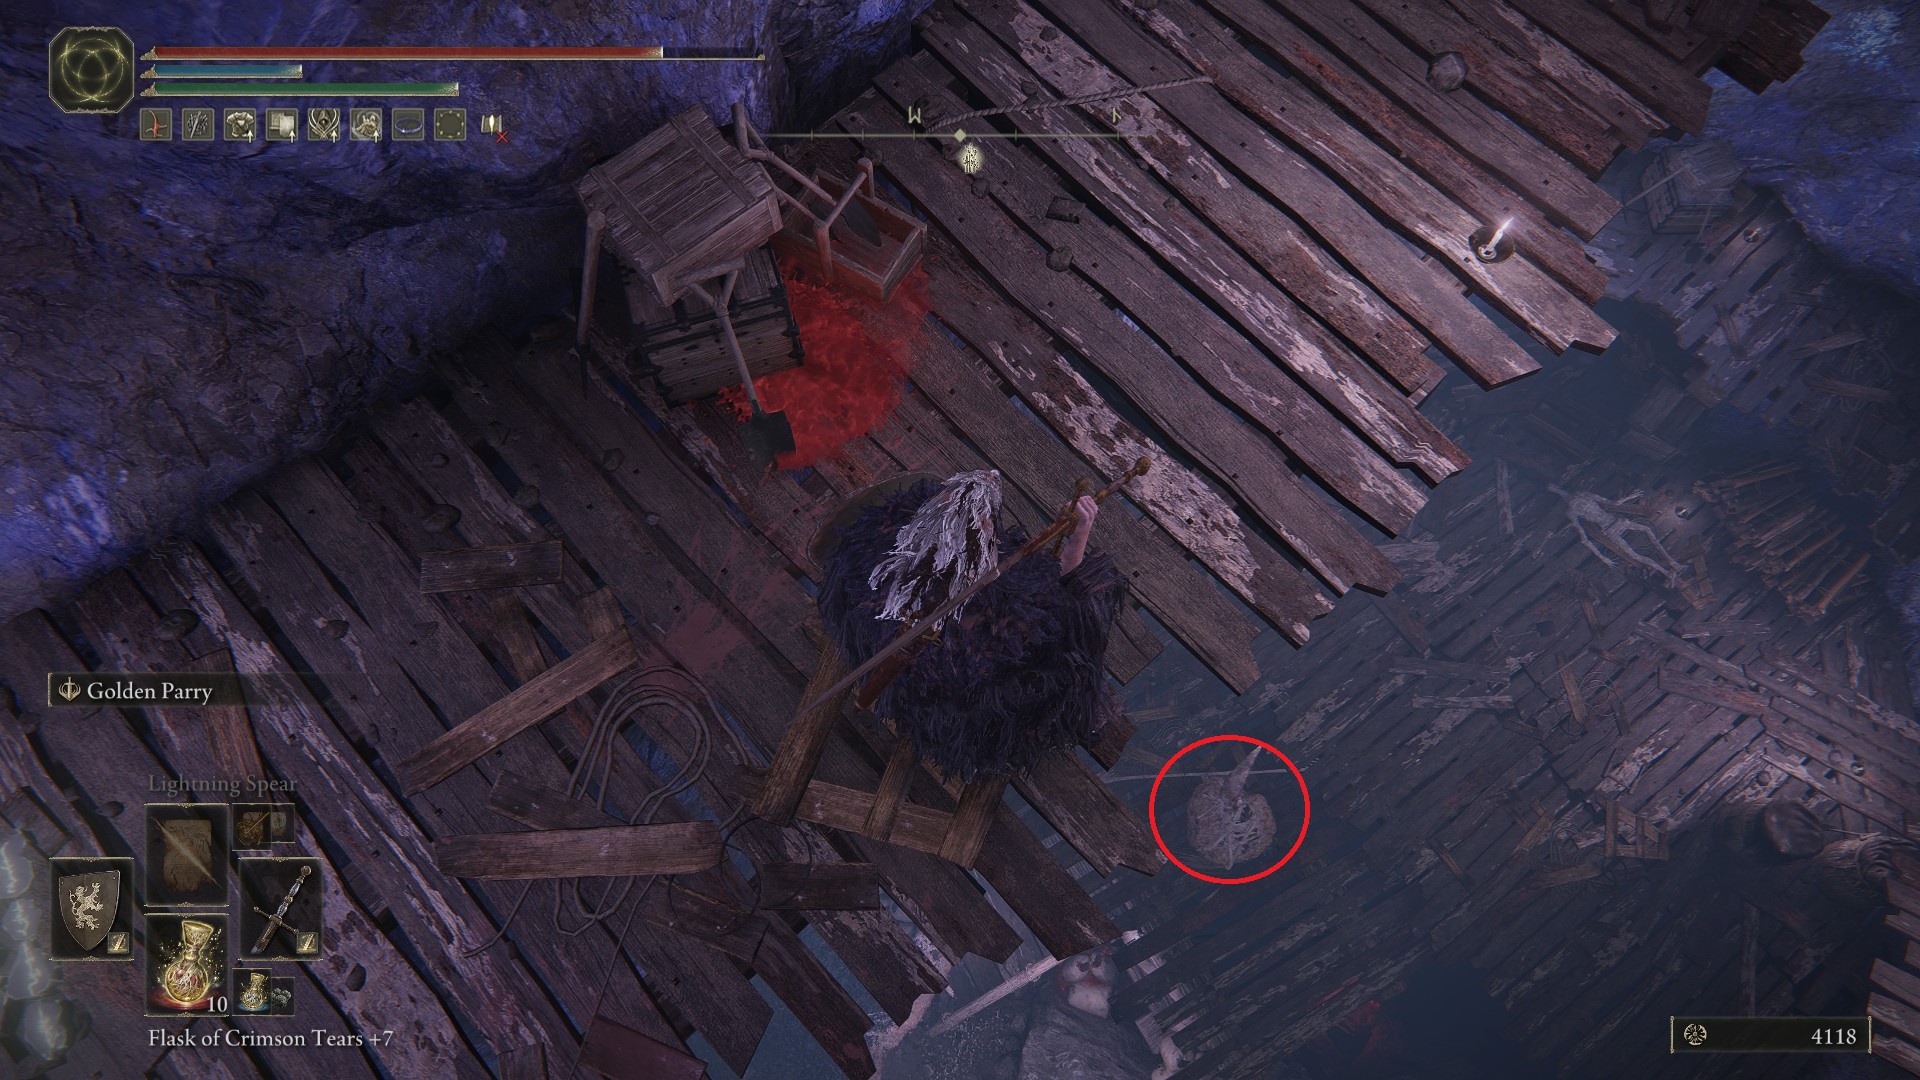
With all three guards down, you can now collect the loot on the low ground. Hop down to the south from the final guard’s roof and enter the structure to find a Golden Rune [5]. Then go out of the structure and face it — to the right of the building, up a little bit on the rocks, are two Smithing Stone [5]. Continue behind the structure to find another, then walk back up the wall that had the two smithing stones and jump onto the platform to the northwest, where a corpse holds x6 Glintstone Scrap.
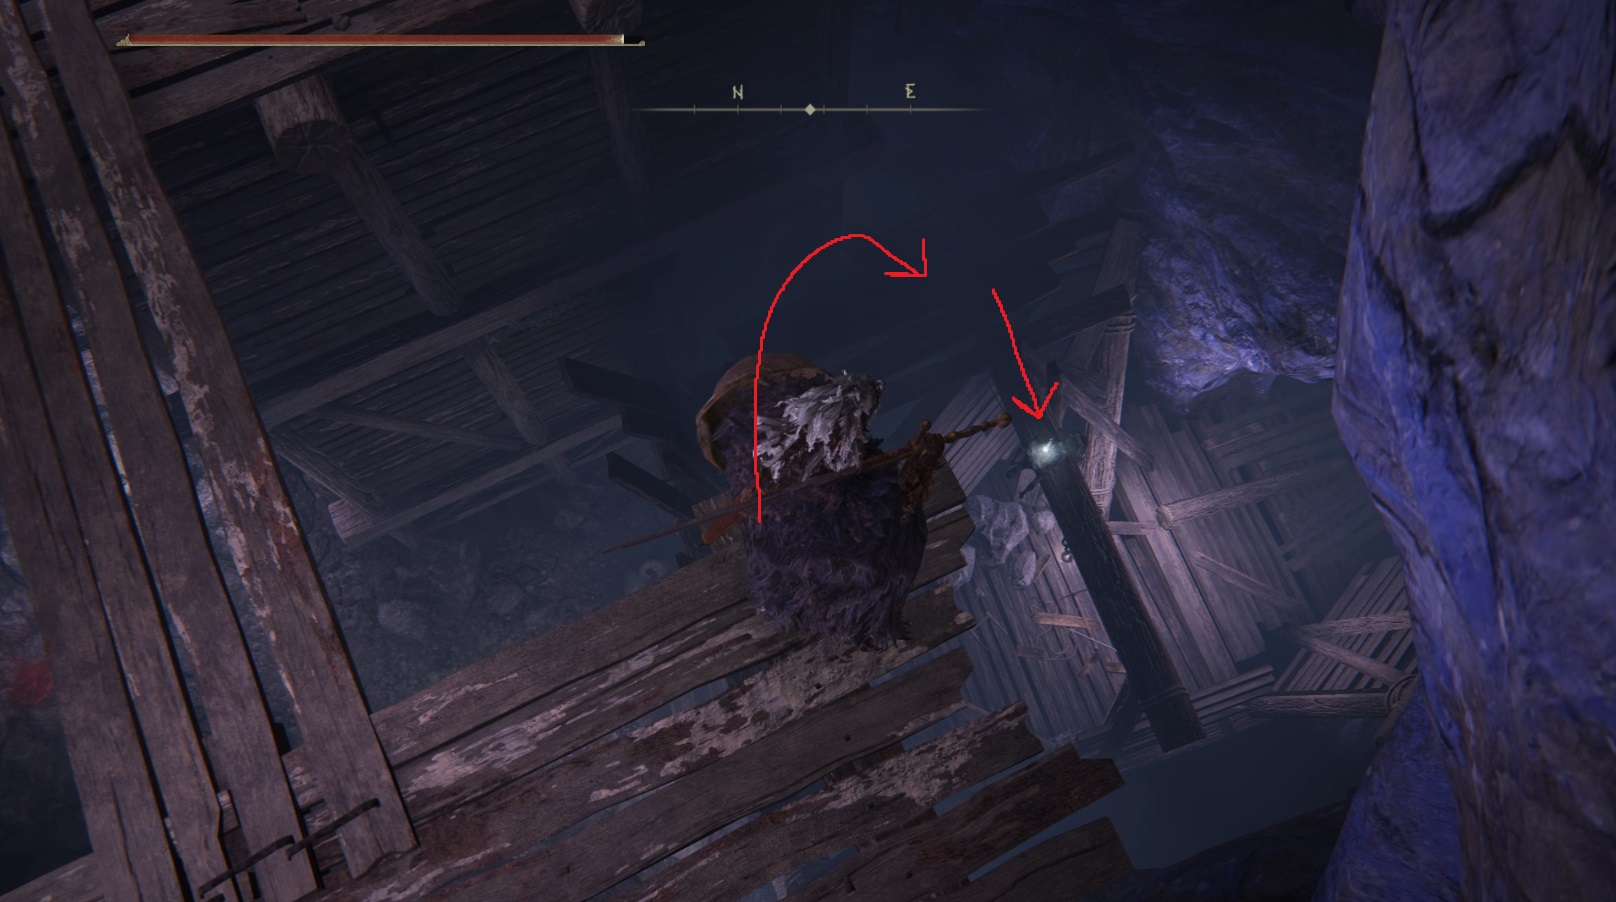
Drop back down to the front of the structure and go back up the path. The second (undestroyed) structure (where you killed the first pest) has a chest inside containing x6 Gravity Stone Fan and x3 Gravity Stone Chunk. Loot the stones and leave the structure to go up the path a bit, then jump onto the roof of the structure. Look east — you’ll see a wooden platform. Jump to it, then try to jump from the platform onto the beam with the item.
If you missed it, don’t worry, we can grab it soon. Continue east into the tunnel, but be ready for the miner that will rush around the corner and attack you. The tunnel will bend sharply — look on the ground to the left and you should see another Smithing Stone [5]. Continue through the tunnel and climb the ladder in the next room. Make your way around to the southern side of the wooden platform and grab the Somber Smithing Stone [4], then head back around and north back into the main chamber.
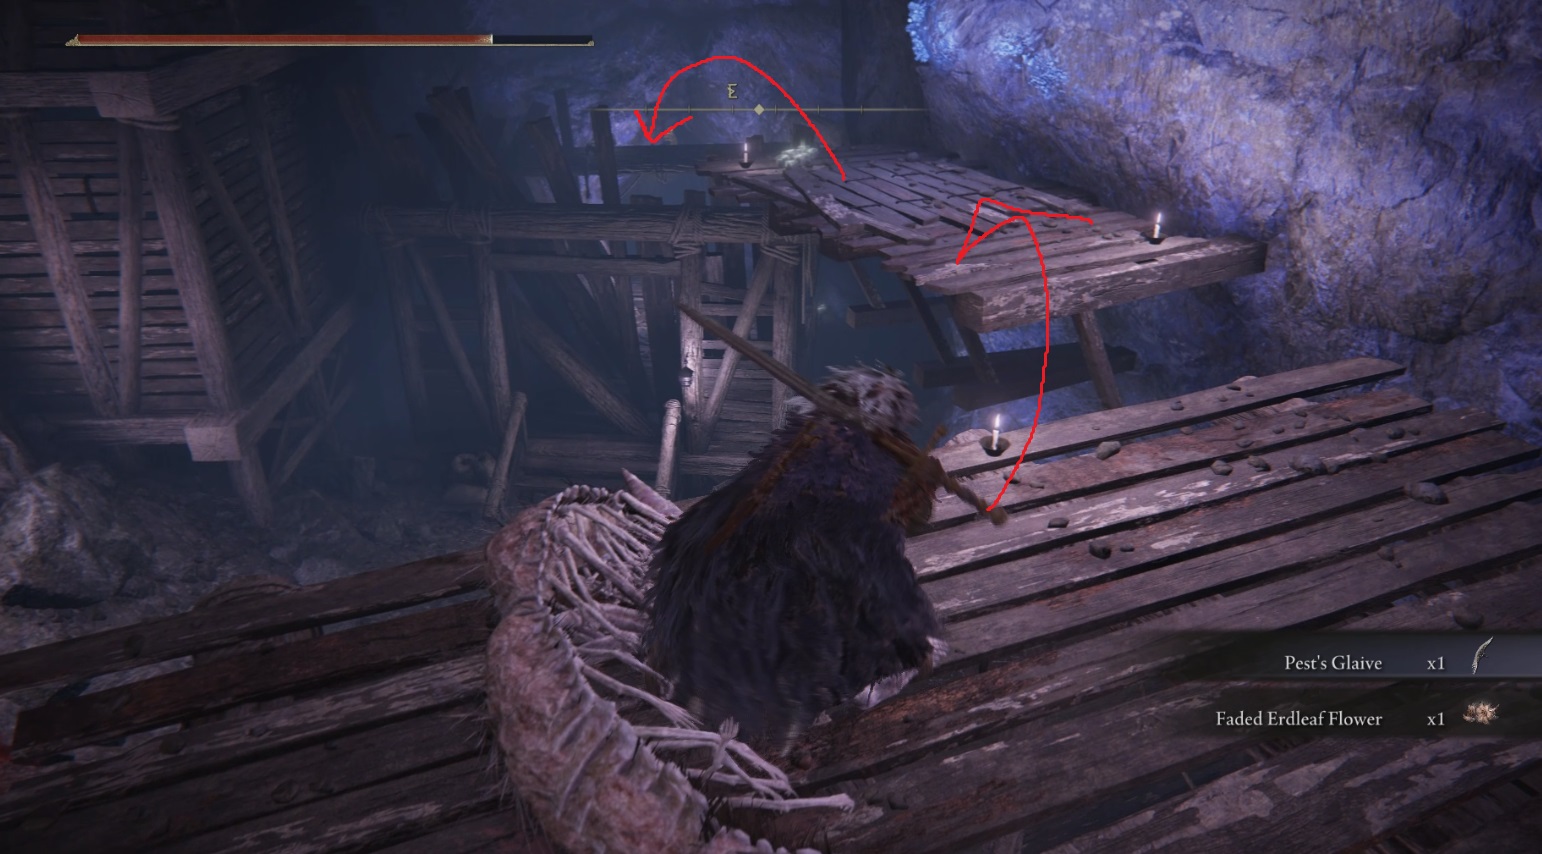
You’ll walk out onto another wooden platform with a plank bridge leading further north. If you didn’t land on the beam with the item earlier, turn right once you’re on the platform and walk to the edge, then look down. You’ll see the item on the top rafter of the broken structure — to reach it (x6 Cuckoo Glintstone) more easily, jump not to the beam, but to the planks north of the item.
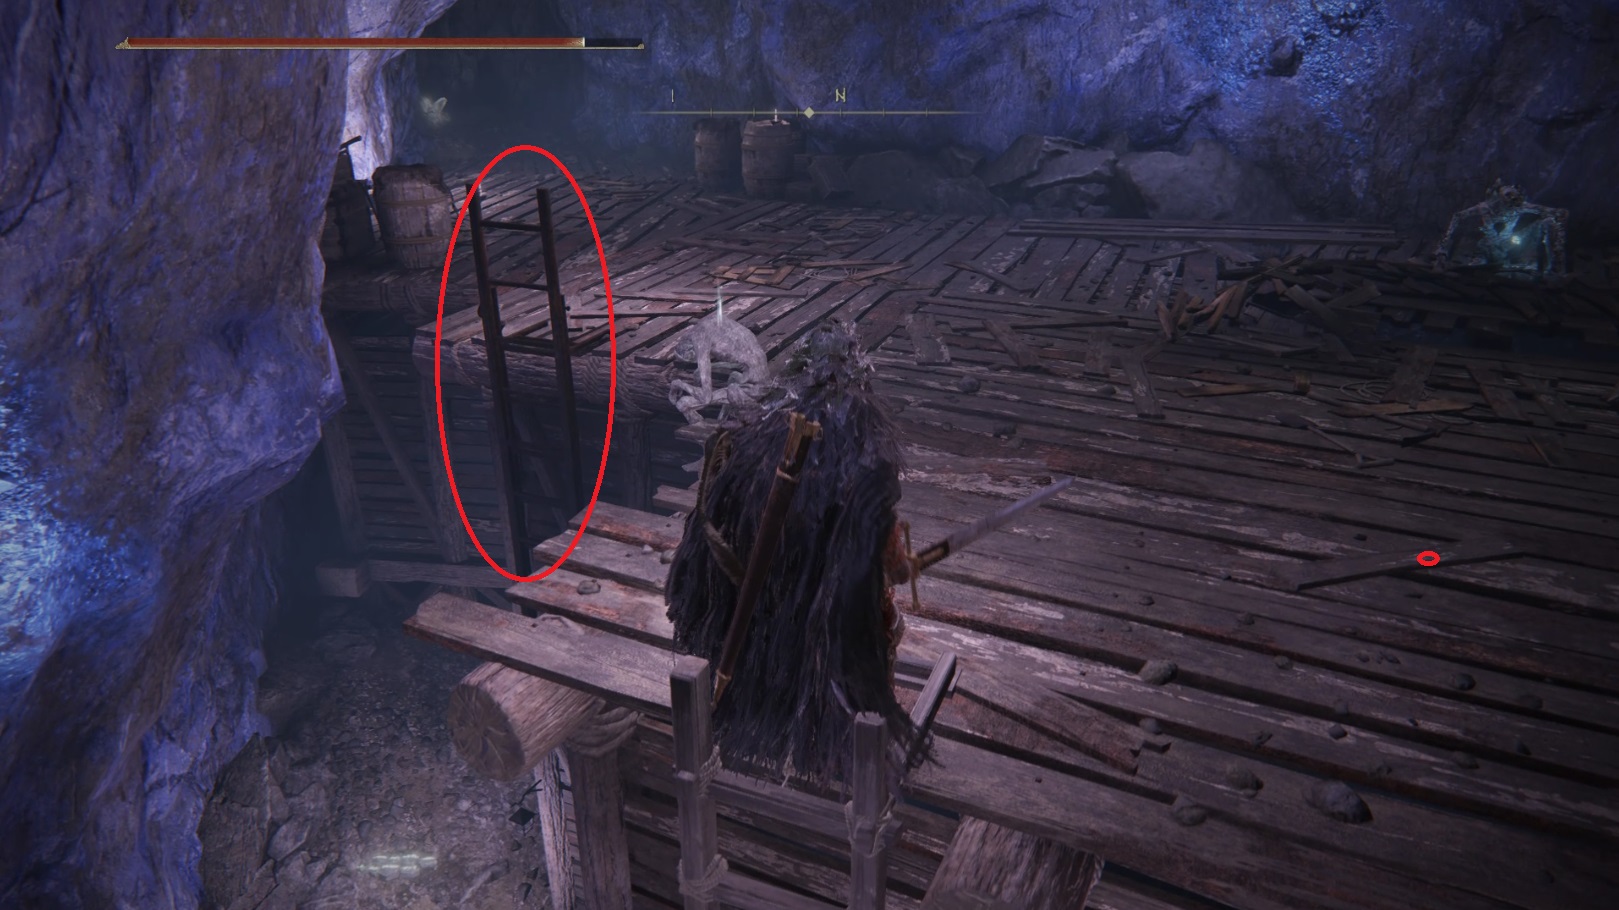
If you get the item now, just make your way back up and around after doing so. Then run across the plank bridge and turn left to reach the ladder that leads to the top of another small structure — there are two miners up here and another pest, who you’ll want to take out first. (Sometimes the pest will fall off the building, which can actually be helpful.)
Hop off the structure from the northeastern edge, then go inside — there’s a miner ready to attack you, and in the chest is the Rock Blaster sorcery. Northeast of the structure’s entrance is a dead-end with two Smithing Stone [5] on the ground. Grab them and return to the ladder. Climb it, and grab the Golden Rune [4] from the corpse next to the top of the ladder. Just to the west is a ladder you can kick — this is your shortcut back up here from the site of grace. The tunnel to the west is the way forward, but before you head through, look northwest — in the corner is a Somber Smithing Stone [4].
You’ll still have to kill the first pest to make it safely up the ladder, but this shortcut will save you a bit of time if you die to the boss
Continue forward, and you’ll pass through a large wooden arch and see an item. There is a pest hiding around the corner to the left of the item. If you run onto the corpse and then roll/run back the way you came, the pest will come charging out of the room (and its attack should miss). Take it down and grab the Dragonwound Grease from the corpse. Then sneak up the wooden stairs to the northeast and ambush the two pests with their backs to you. Pick up the Faithful’s Canvas Talisman, then turn left to find another Smithing Stone [5] on the ground by the wall.
Now head into the room the ambushing pest was in — there’s a Somber Smithing Stone [4] in the back corner. Leave the room and turn left to head into the tunnel that leads west — here you’ll find a wooden gate that leads to the boss of this dungeon, the Fallingstar Beast.
Unabashed FromSoftware fanboy still learning to take his time with games (and everything else, really). The time he doesn't spend on games is spent on music, books, or occasionally going outside.