There’s stiff competition, but Mohg, Lord of Blood may be the grossest demi-god (sorry, Godrick). In an attempt to ascend to godhood, Mohg kidnapped his half-brother Miquella from the Haligtree, and is apparently living in Miquella’s cocoon while feeding his half-brother his cursed blood. Yeesh. This two-phase fight starts off easy enough, but phase 2 sees Mohg flying all over the place spewing bloody flame willy nilly — this guide will help you stay flame-free and defeat Mohg.
General Tips
If you put the Purifying Crystal Tear in your Flask of Wondrous Physick and drink it before the transition to phase 2, you will not take damage during Mohg’sBlood Curse (although he’ll still heal).
Ironically, Mohg is weaker to Bleed than to other status effects.
Mohg is fairly resistant to all elemental damage, and particularly resistant to Fire damage. However, he takes almost full damage from all physical attacks.
Mohg does primarily physical damage and bleed, so armor up accordingly. Talismans that give Robustness (Stalwart Horn, Mottled Necklace) and armor with higher Robustness can help prevent Bleed buildup during this fight — you can also bring Stanching Boluses to remove bleed buildup.
Strategy
As always, summons are a big help in this fight. The tips below are focused on when you have aggro and/or when your summon is dead — while your summon is alive, do your best to play passively and let the summon take aggro, and then attack Mohg while his back is turned. The usual go-to spirit ashes (Black Knife Tiche and Mimic Tear) are both effective here, but Latenna can be particularly useful in Phase 2, since Mohg moves around so much and becomes difficult to hit.
If you’ve picked up Mohg’s Shackle in the Subterranean Shunning-Grounds, you can use it twice in this fight, although only during Phase 1. After using the shackle, you can get a lot of free damage in on the boss before he gets back up.
Phase 1
Melee
As always, a shield is very helpful to learn the boss’s moveset, but unless you have a ton of stamina, you won’t be able to counterattack effectively after blocking a full combo. However, a shield can allow you to block the first move of the combo, giving you time to identify it and roll through the rest of it (or you can just block combos/attacks you have trouble dodging). Bleed is very effective against Mohg — even if you don’t have an Arcane build, you can still do a lot of damage to him by putting the Blood affinity on your weapon. Alternatively, you can use Flame of the Redmanes to stagger him — it takes three casts to do so.
Make sure you’re dodging towards the boss and to the right to avoid his melee attacks. That way, you can get damage in at the end of combos where the boss sticks his weapon into the ground, and yanks it out after a delay (if you’re on his left side, the backswing will hit you when he pulls his weapon upwards, and if you’re in front, the AOE will hit you). The best attacks to punish are the Charge, Overhead Slam, and any combo that end with him stabbing his weapon into the ground and then pulling it out.
A slightly more difficult-to-punish attack will be the Slow Bloodflame Talons. The boss will first put his staff down, before unleashing a wide Bloodflame Talons attack, followed up by a slightly delayed swing. You can dodge by either rolling or circling around the boss, and then dodging through the delayed follow-up swing to create a very generous opening.
Additionally, you can get free damage on the boss anytime he counts in latin and casts the next phase of his curse on you — just make sure you stand behind his left shoulder, opposite his weapon, as he swings it while he casts his curse.
Ranged
The ranged strategy here is very straightforward. Start by using summons and Mohg’s Shackle to create windows of opportunity for you to freely attack from range. Remember that you can only use Mohg’s Shackle in Phase 1, so use both charges to inflict heavy damage. Once your summons are gone, all you have to do is run away from the boss to create some distance, and then use a spell or two, depending on the distance between you and the boss. While the boss isn’t particularly fast, you may still have to spend a decent amount of time running away from him if he decides to try and catch up to you. Additionally, you can always get close enough for the boss to try and use an attack, and just start sprinting away from the boss while he’s busy to create some distance.
By far, the safest places to attack the boss from will be the entrance, and the top of the stairs. Once the boss gets close enough, stick to the side of the room as you try to run past the boss, while dodging through his attacks. Attacking from the top of the stairs has the added benefit of making it harder for the boss to land his Bloodflame Wave, and several horizontal swipes.
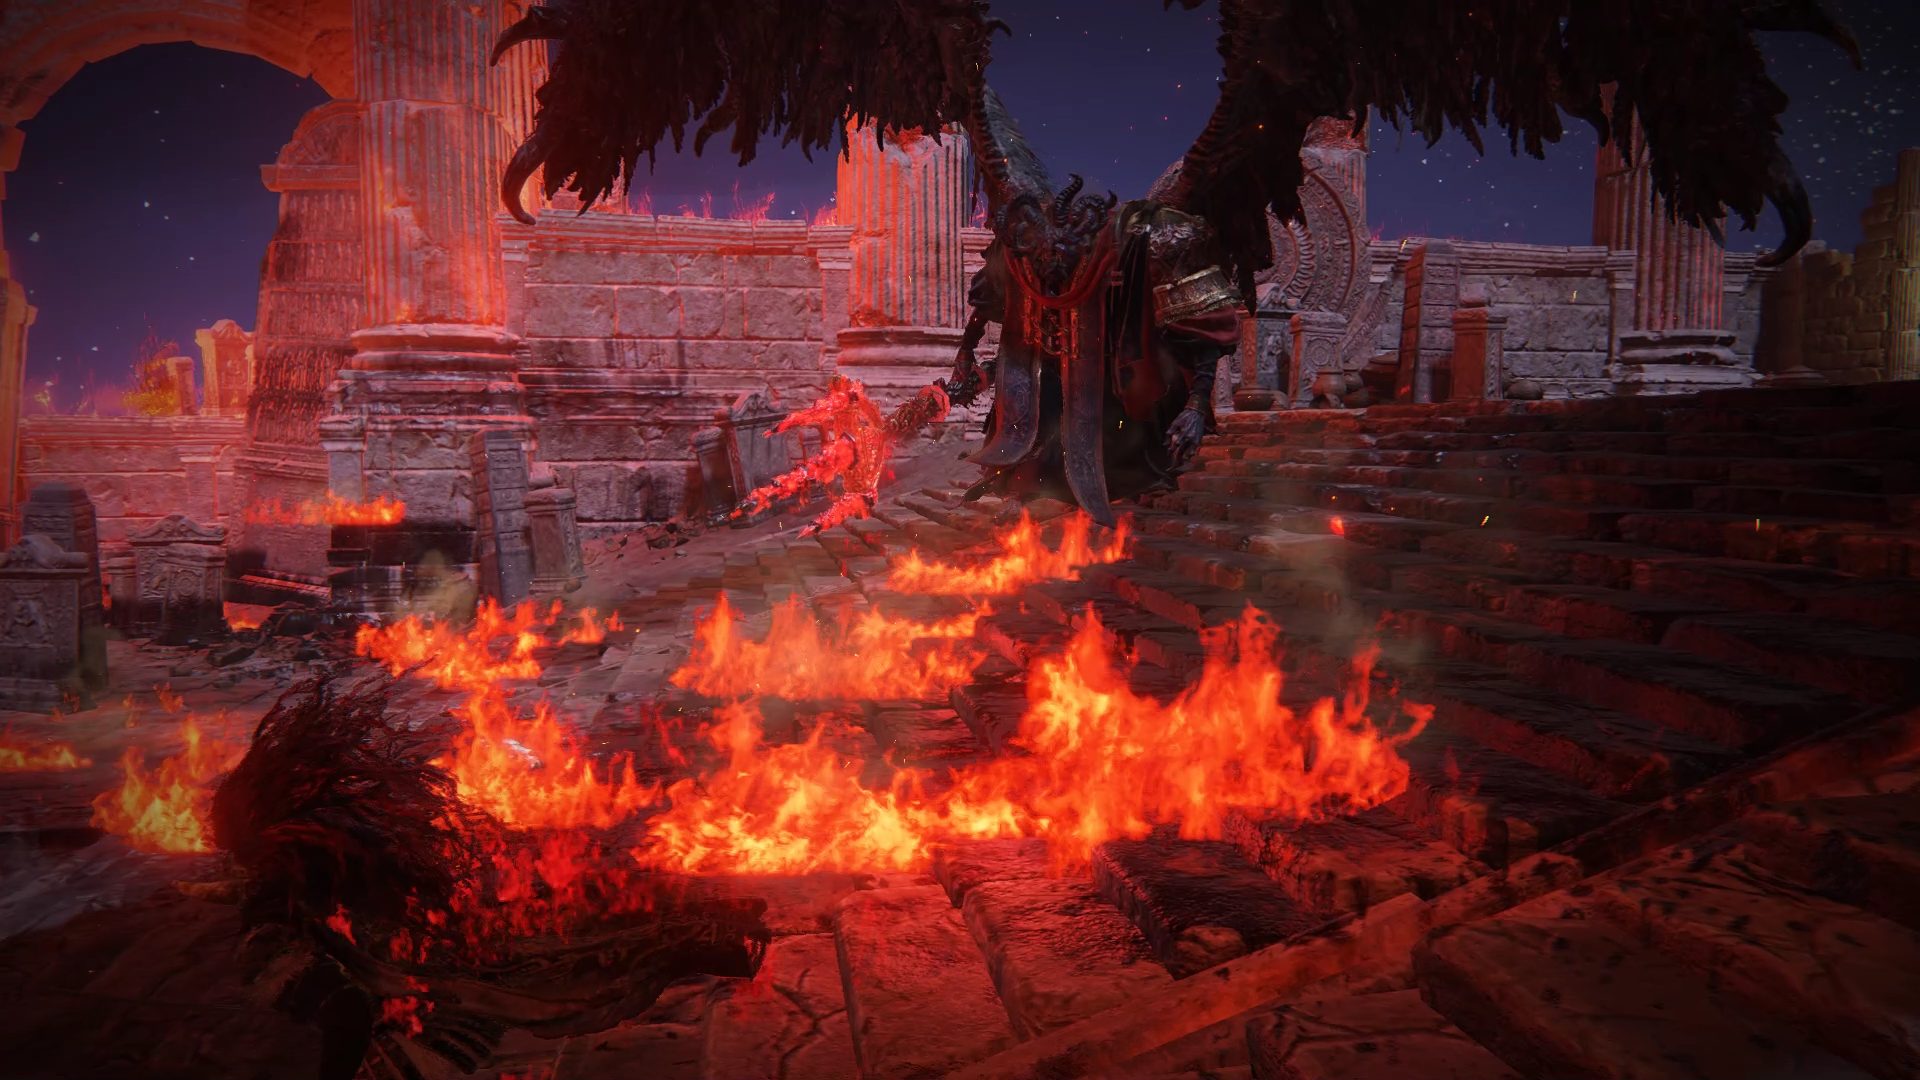
Phase 2
Once Mohg says “Unus”, Phase 2 is starting — drink your Wondrous Flask that contains the Purifying Crystal Tear ASAP, as he’s about to cast his blood curse and try to steal your HP. The tear will protect you from the curse, and you can take advantage of the window his curse provides you to get a lot of damage in on the boss. Make sure his initial slashing attack in Phase 2 doesn’t hit you — he’ll swing his weapon downwards in front of him shortly after saying “Nihil” for the third time.
Mohg becomes a lot more mobile in phase 2, and his melee attacks will leave trails of bloodflame on the ground. This makes it difficult to do damage to him, since you’ll have to reposition often.
Melee
In Phase 2, the main difference will be that the boss’s swings will be squirting blood in an arc, and leaving a bloodflame trail that will inflict Hemorrhage build up. With that in mind, you’ll want to dodge diagonally towards the boss to avoid getting hit by the squirts of blood, or stepping into bloodflame trails as you’re dodging. However, even if you’re doing a good job dodging his attacks, you will eventually run out of room to dodge all of the fiery trails. Luckily, the boss room is very large, so you should reposition by leading the boss to another, untainted area of the room.
The boss will also gain a few more attacks in Phase 2, while retaining most of his moveset from Phase 1 on top of that. You will have several additional safe windows to punish the boss in this phase:
Leaping Overhead Slam: After jumping a short distance forward, the boss will slam his weapon down towards you. If you dodge towards the boss, similarly to the regular Overhead Slam, you’ll be able to get a few attacks in.
Triple Attack Chain: Fairly straightforward triple horizontal attack chain. If you manage to dodge these, you’ll have time to land a couple of attacks at the end.
The Overhead Slam, the Charge and the Slow Bloodflame Talons from Phase 1 will remain good opportunities to attack the boss in Phase 2. The boss will however get a second, slightly different charge attack that is followed by a slam forward.
If you keep circling the boss by running towards your left (his right), you’ll be able to dodge this attack with ease, all while finding yourself in the perfect position to retaliate.
Lastly, in Phase 2, whenever the boss stabs his weapon into the ground, he will always follow it up with an explosion that will hit you even if you’re standing to the side. Thus, you will no longer be able to punish the boss after this attack.
Ranged
Very similarly to Phase 1, you will want to continue kiting backwards while using your attacks/spells once you’ve created enough distance between you and the boss. This time however, even if an attack doesn’t reach you, the blood squirting out of it might. So if the boss uses a vertical swing, make sure to dodge backwards and slightly to the side.
Avoiding Damage
In Phase 1, Mohg will primarily use slow melee attacks when you’re close to him — roll towards the side without a weapon to avoid. When you’re out of melee range away, he’ll sometimes cast Bloodflame Wave, which creates a horizontal pool of blood oriented at 0-degrees or 90-degrees — to make sure you dodge either version, roll forward diagonally to the left. You can also jump over the 90-degree one, as it’s thrown very low.
He will cast Bloodflame Shower when you’re close to him, which is a similar move, but has bloodflame coming from above him and landing in a pool — vacate the area when he begins calling blood from above and it’s easy to avoid taking damage.
Bloodflame Talons has two versions: for the fast one, roll backwards; for the slower version where he puts his staff down first, you can roll/circle around to his back instead.
Phase 2 is a lot scarier, as his melee combos often leave pools of bloodflame as they pass the ground — keep an eye on your bleed meter and make sure you aren’t accidentally standing in one of these pools. If you’re melee, prioritize dodging towards the boss rather than away from him to avoid rolling into bloodflame puddles. And while he will be leaving a lof of those puddles during Phase 2, don’t hesitate to relocate to another part of the room if you’re running out of room to dodge.
While most of his attacks will be straightforward, there is a particularly deadly one. The horizontal swing followed by the boss flying into the air and slamming his weapon downward has a nasty delay to it, and will also end with a fiery explosion, which can outright kill you if you get hit by both. The boss will also be able to track your movements with ease, so you will have to rely on dodging instead of just sprinting around him.
Lastly, whenever the boss flies up into the air, throws a handful of blood and comes down with a horizontal swing, dodging forward will make it very easy to avoid. However, watch out for the rare occasions where Mohg will decide to come down with a shorter lunge forward instead, as you will have to carefully time your dodge here.
As for the rest, a lot of Mohg’s attacks will be straightforward swings. And while they will get deadlier during Phase 2, if you keep in mind that horizontal and vertical swings will squirt bloodflame in a similar pattern, you should be able to avoid most of the Hemorrhage build up.
Unabashed FromSoftware fanboy still learning to take his time with games (and everything else, really). The time he doesn't spend on games is spent on music, books, or occasionally going outside.