So, you want to revisit Elden Ring. Whether it’s because you’re looking to get a character ready for the DLC, or because it’s just fun to experiment with new builds in FromSoftware games, you’ve come to the right place.
If you’re planning to do a fresh run of Elden Ring, chances are you have some build idea in mind. Maybe a weapon you want to wield, or some particular playstyle you want to try. But with the way the game is structured, it might take you dozens of hours to even find what you need to make your build tick.
This guide will help you avoid this problem. It will let you unlock the majority of Elden Ring without actually beating anything. You will then have a lot of freedom to go wherever you want to pick up that weapon, talisman, or spell you need. Then, you’ll be free to go back to Limgrave and start playing the game properly, but now using a playstyle of your choosing.
Along the way, we’ll direct you to all the easy-to-grab flask and weapon upgrades, helpful items like the Whetstone Knife and Lantern, and more. The entire process shouldn’t take you more than 2 hours and by the end of it, here’s what you’ll have:
Golden Seeds enough to have 11 charges of your flask
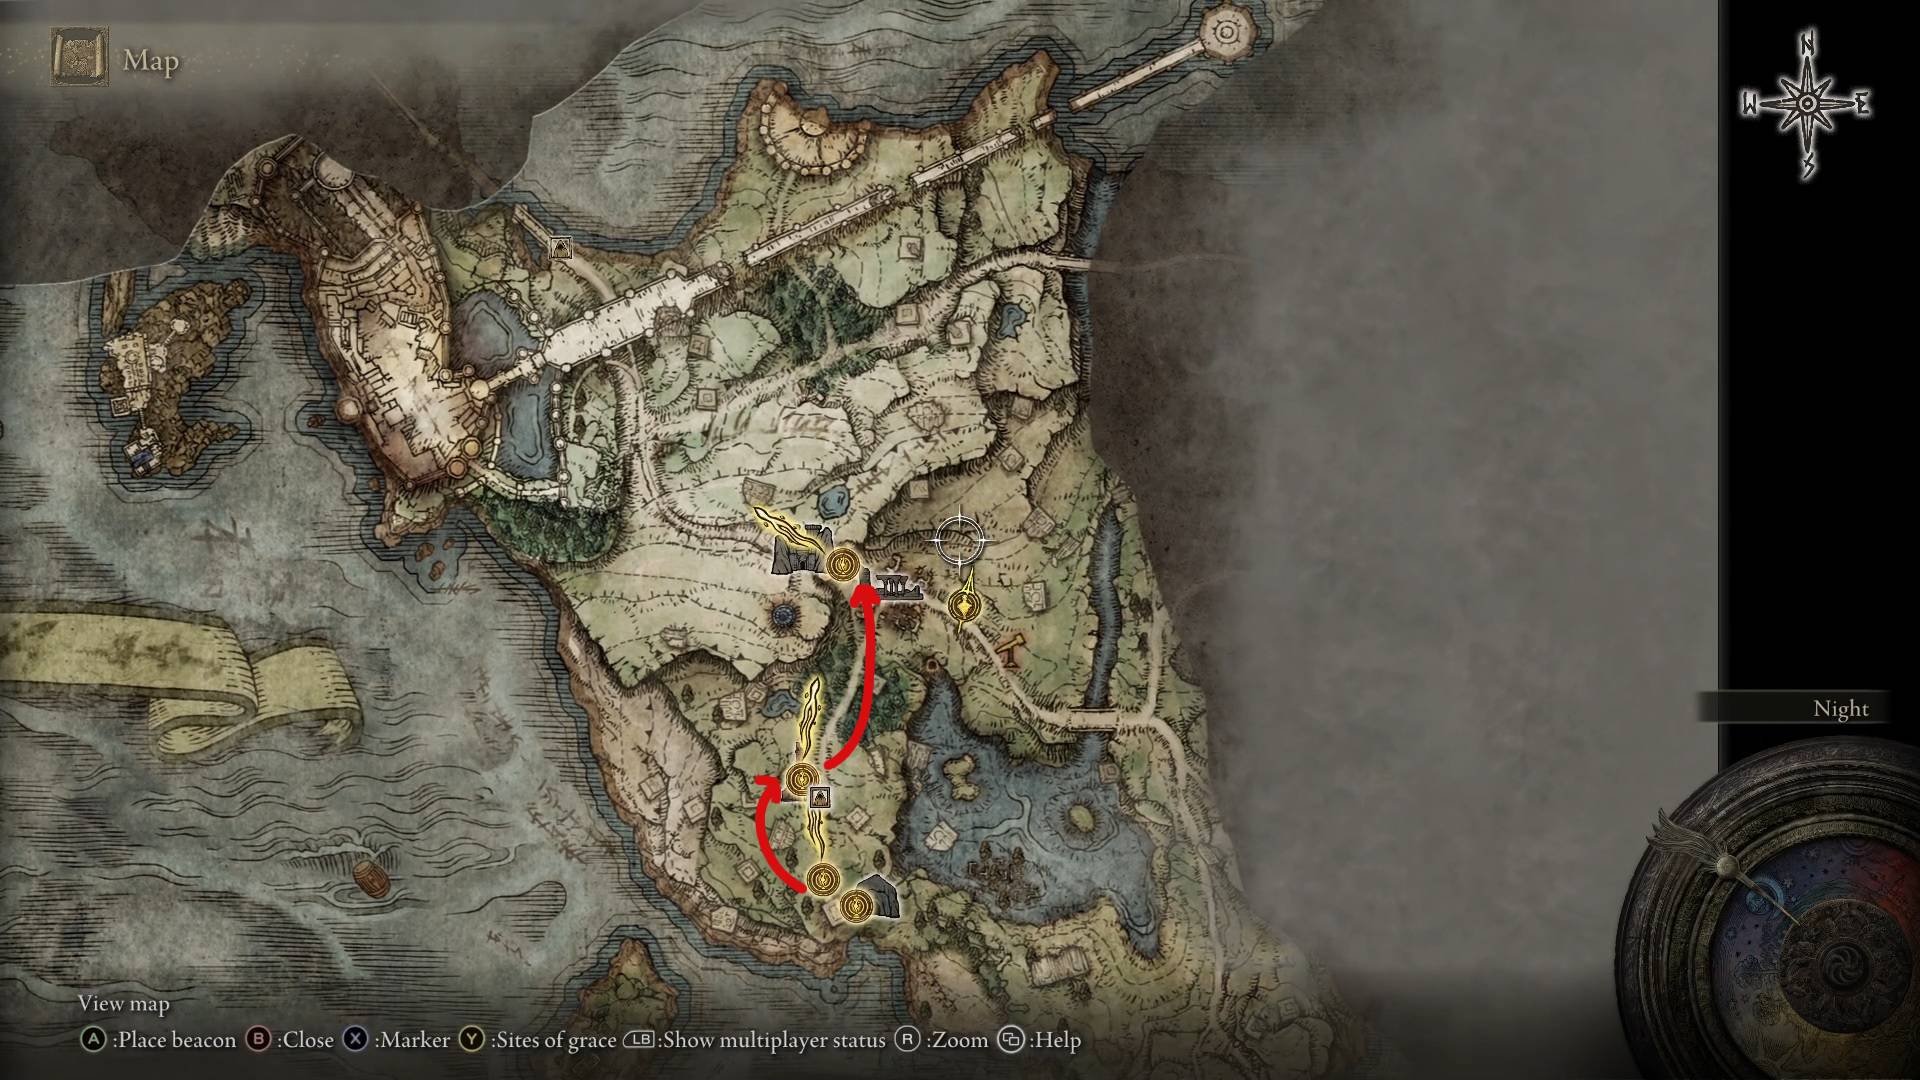
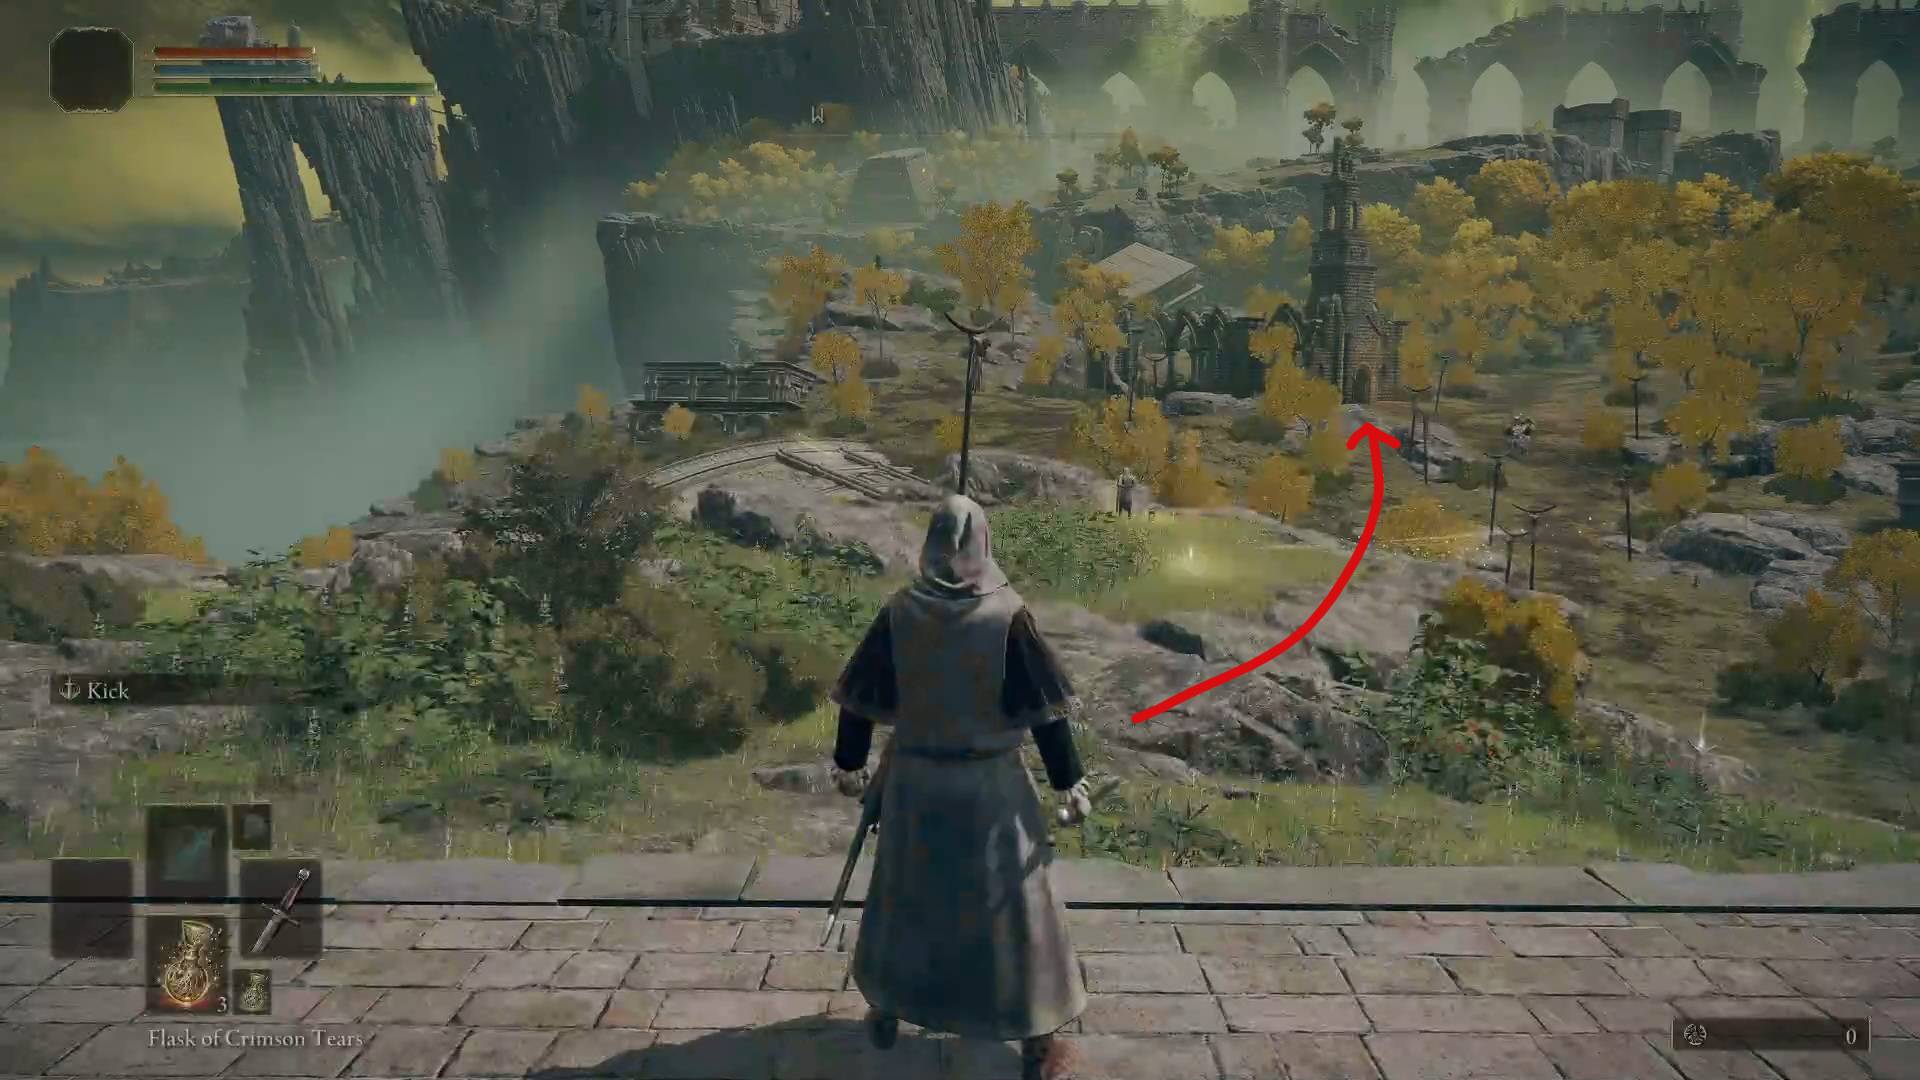
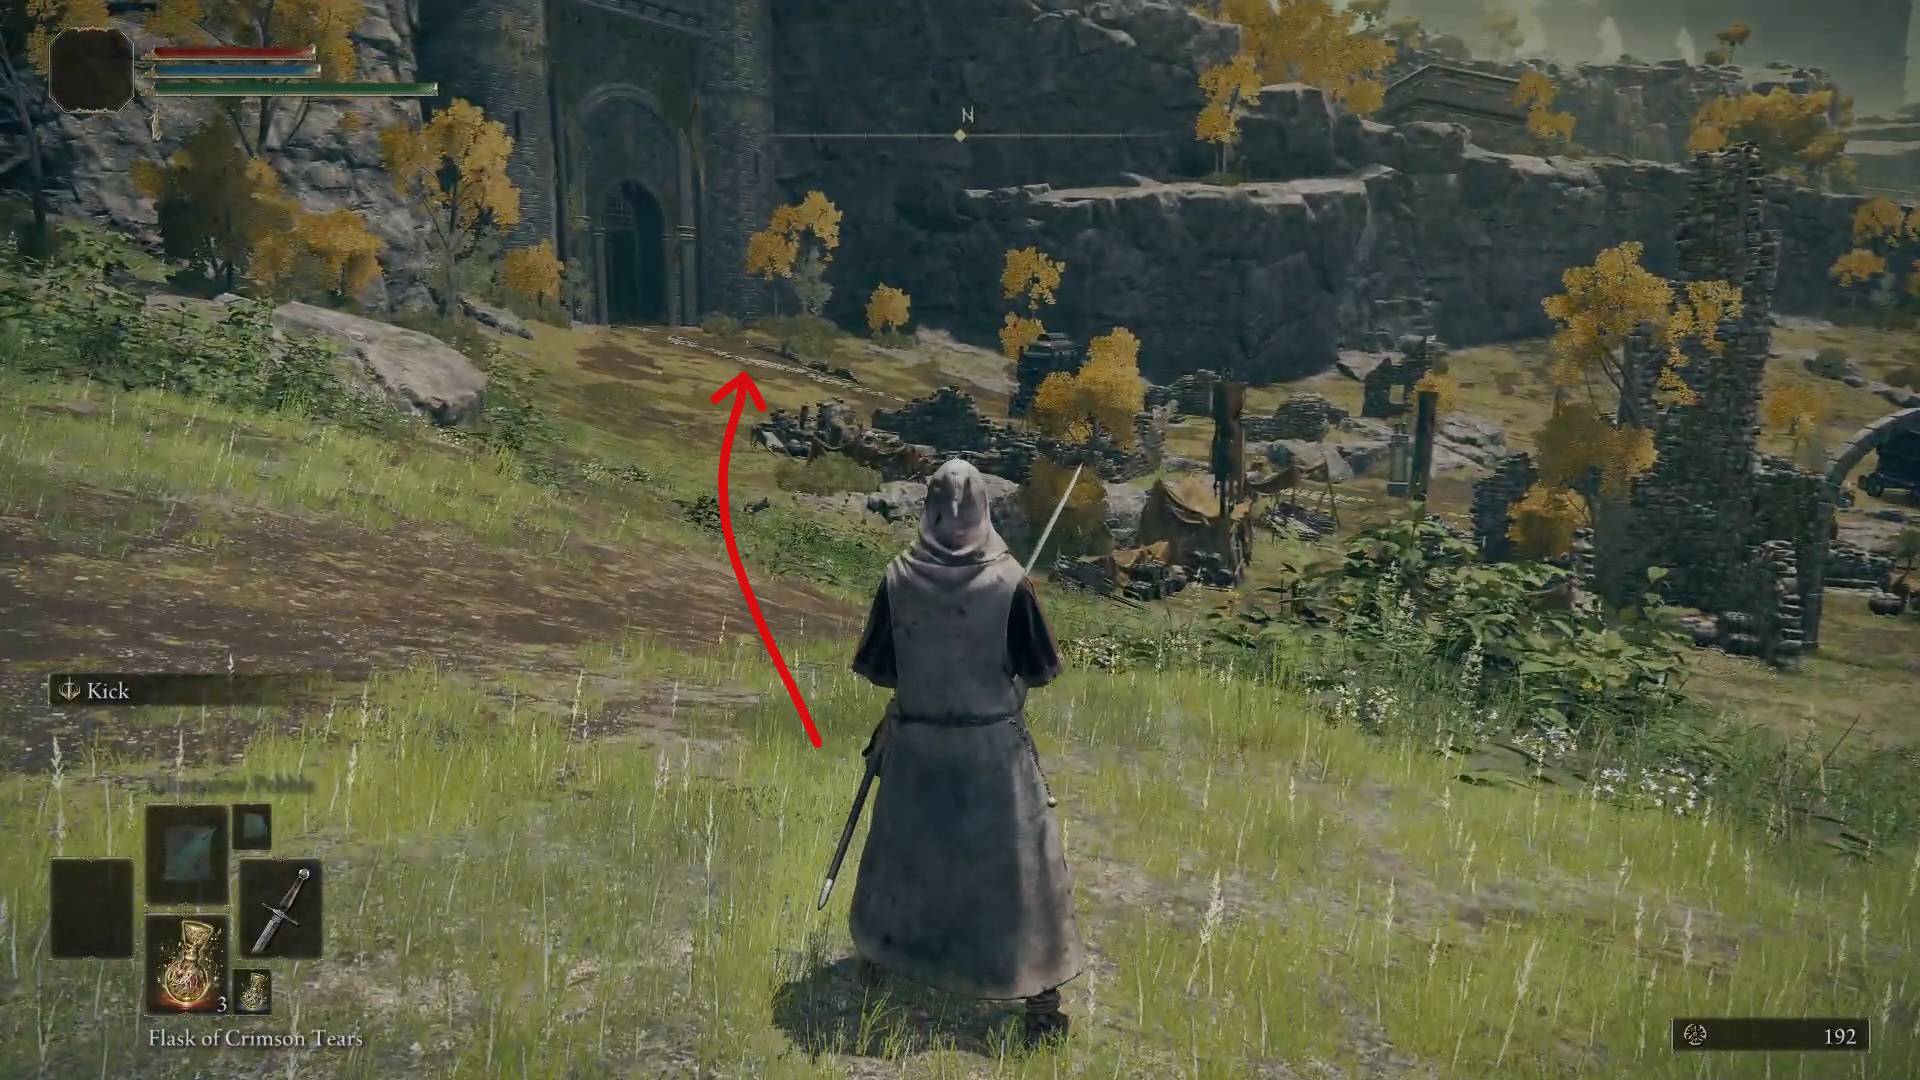
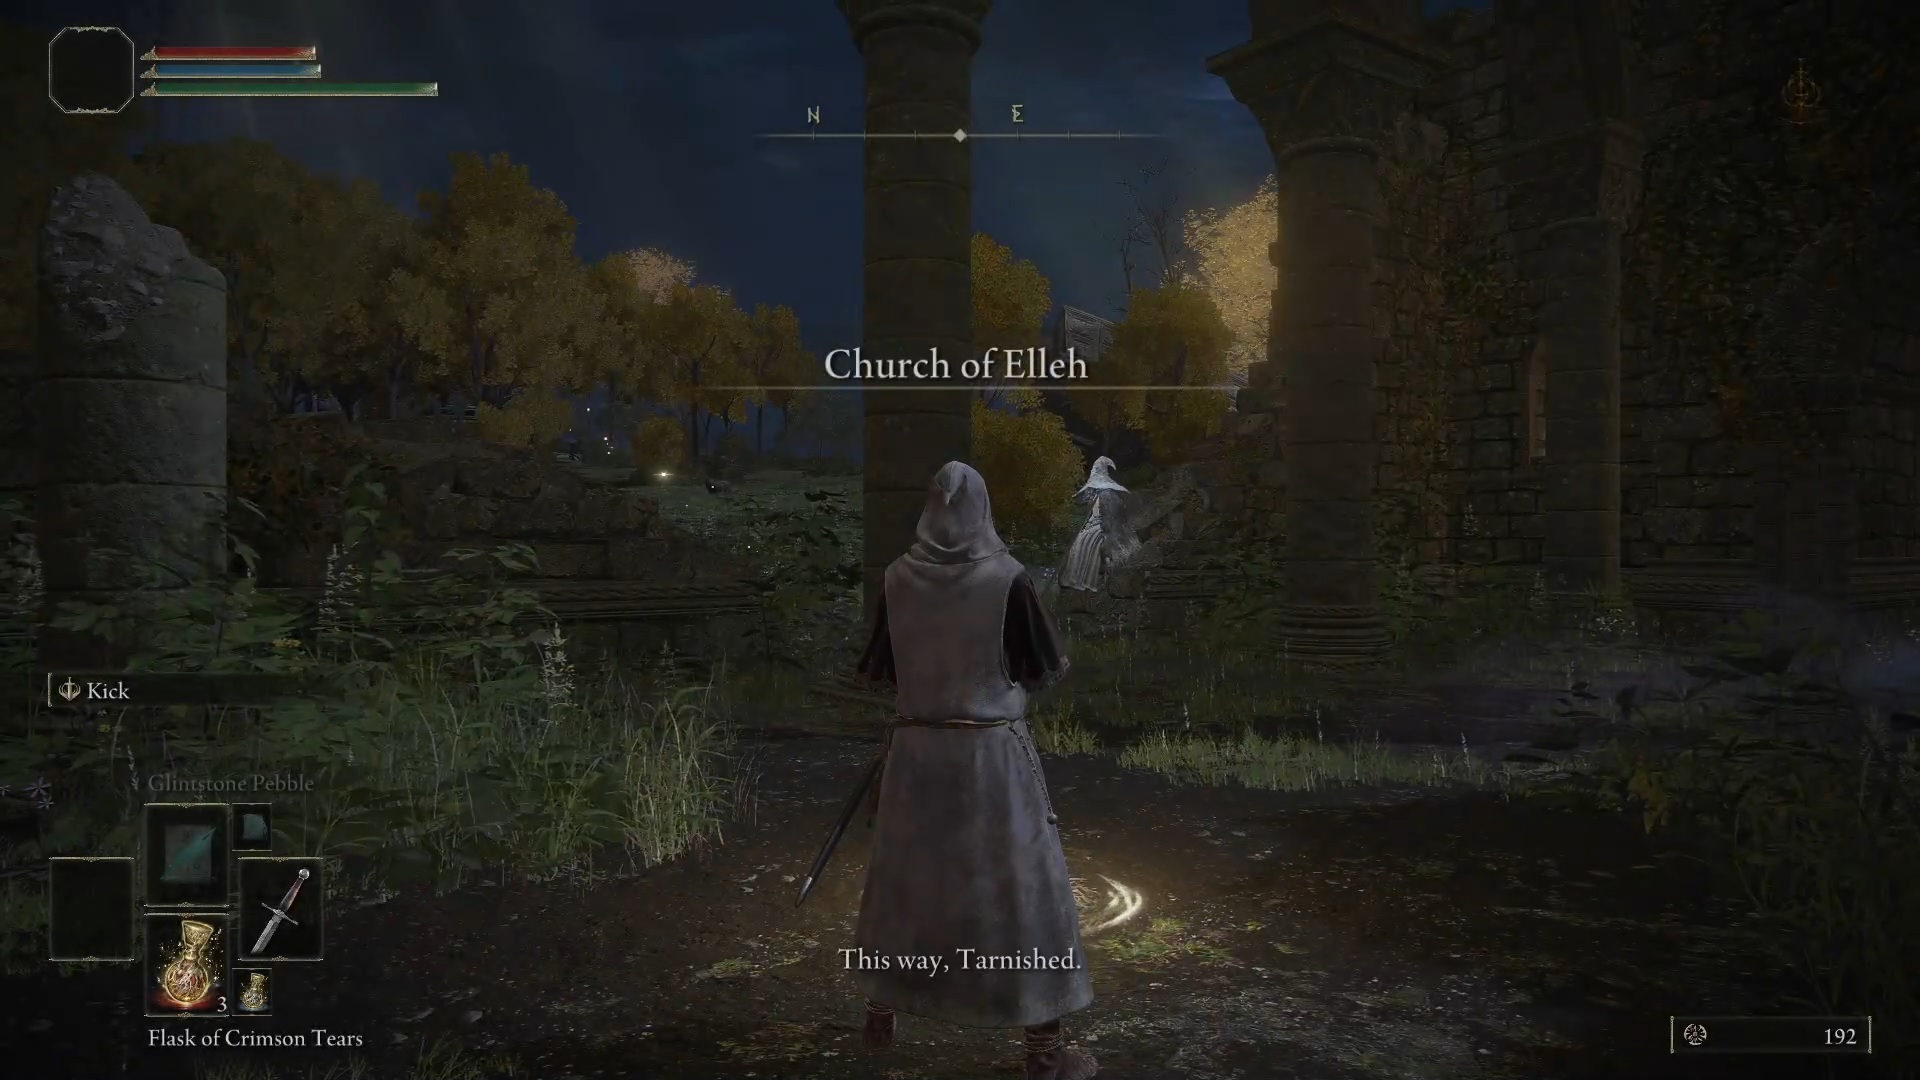
Once you leave the tutorial and emerge into the open world of the Lands Between, our first order of business will be to unlock the ability to level up and visit the Roundtable Hold. To do so, you should start moving north while unlocking all the sites of grace along the way. First, visit the Church of Elleh you can see from the cliff near the aptly named The First Step grace, then keep moving north until you reach the Gatefront Ruins grace.
Path to levelingChurch of EllehGatefront Ruins
Note: while running around the Lands Between, you’ll find numerous Golden Seeds and Sacred Tears you need to upgrade your flask. Feel free to pick them up as you see them. But just so you don’t miss any, we’ll have a separate section listing all these upgrades.
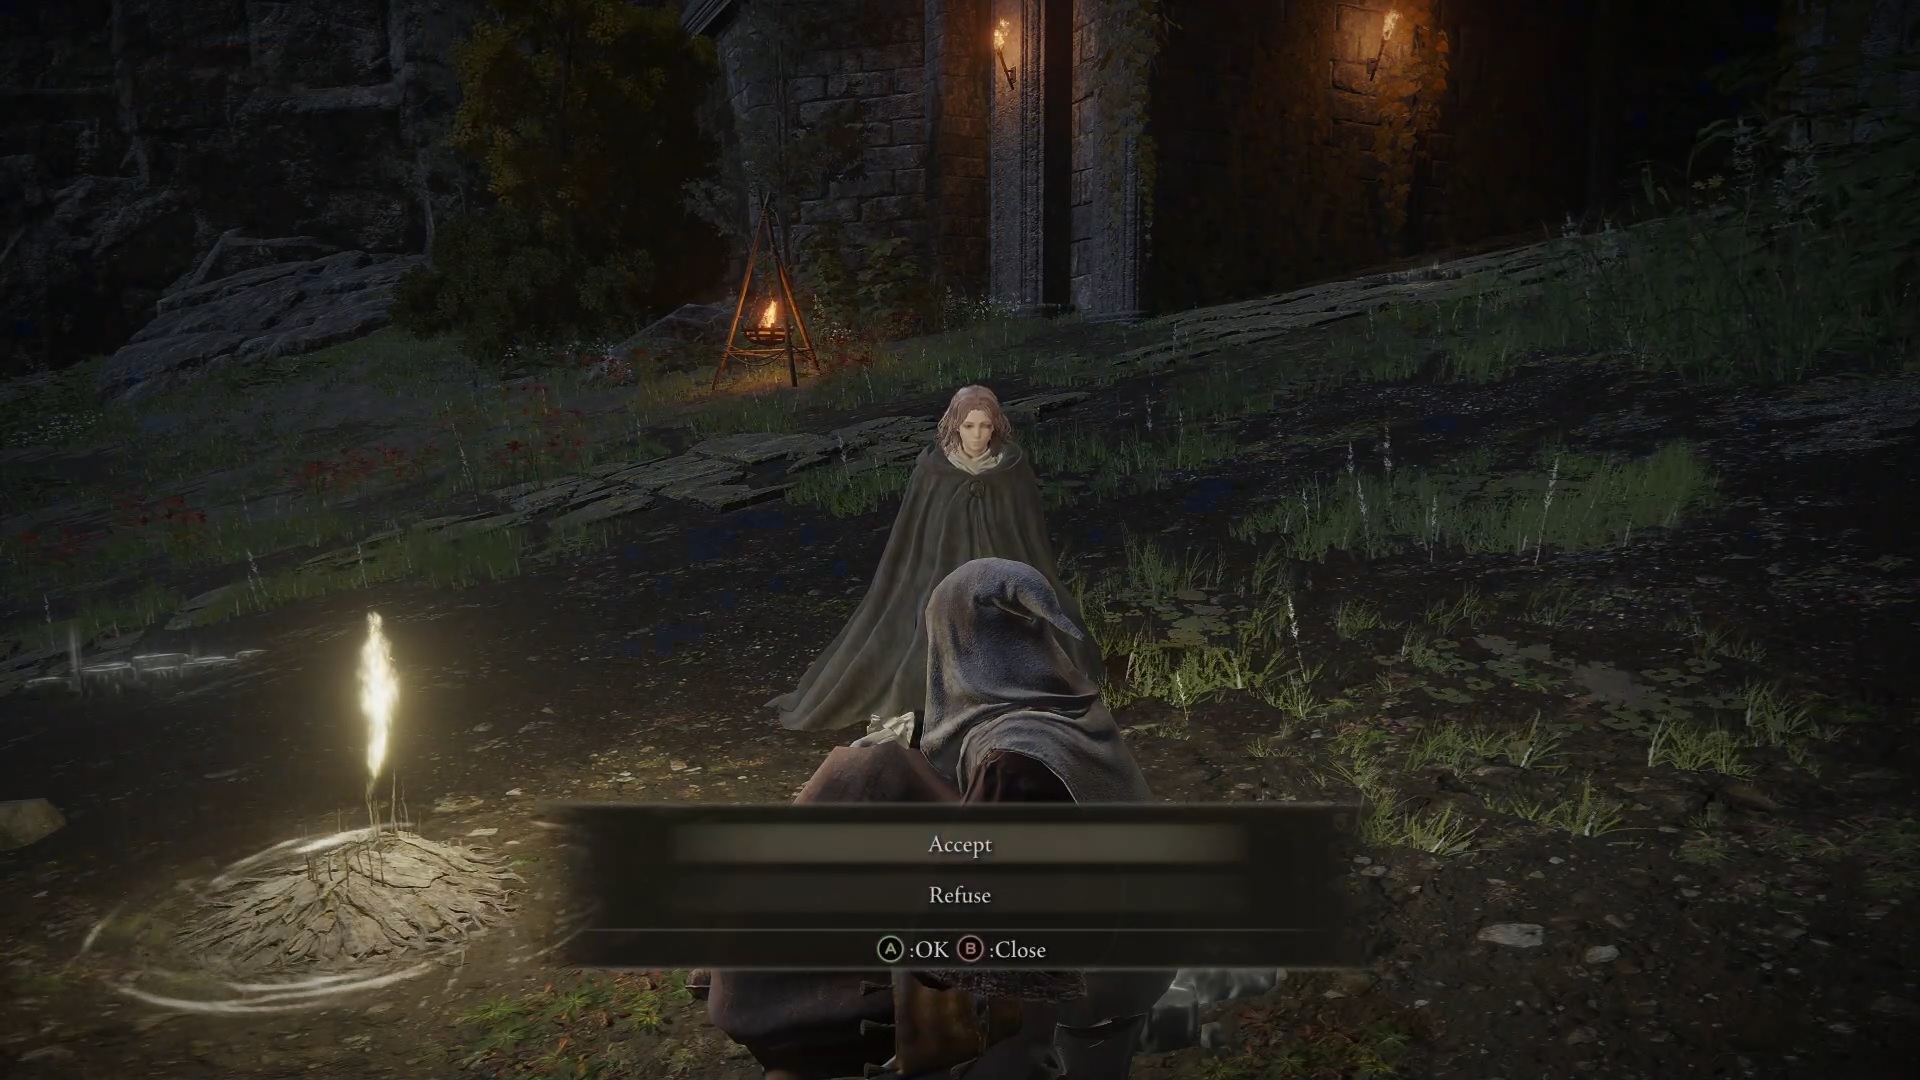
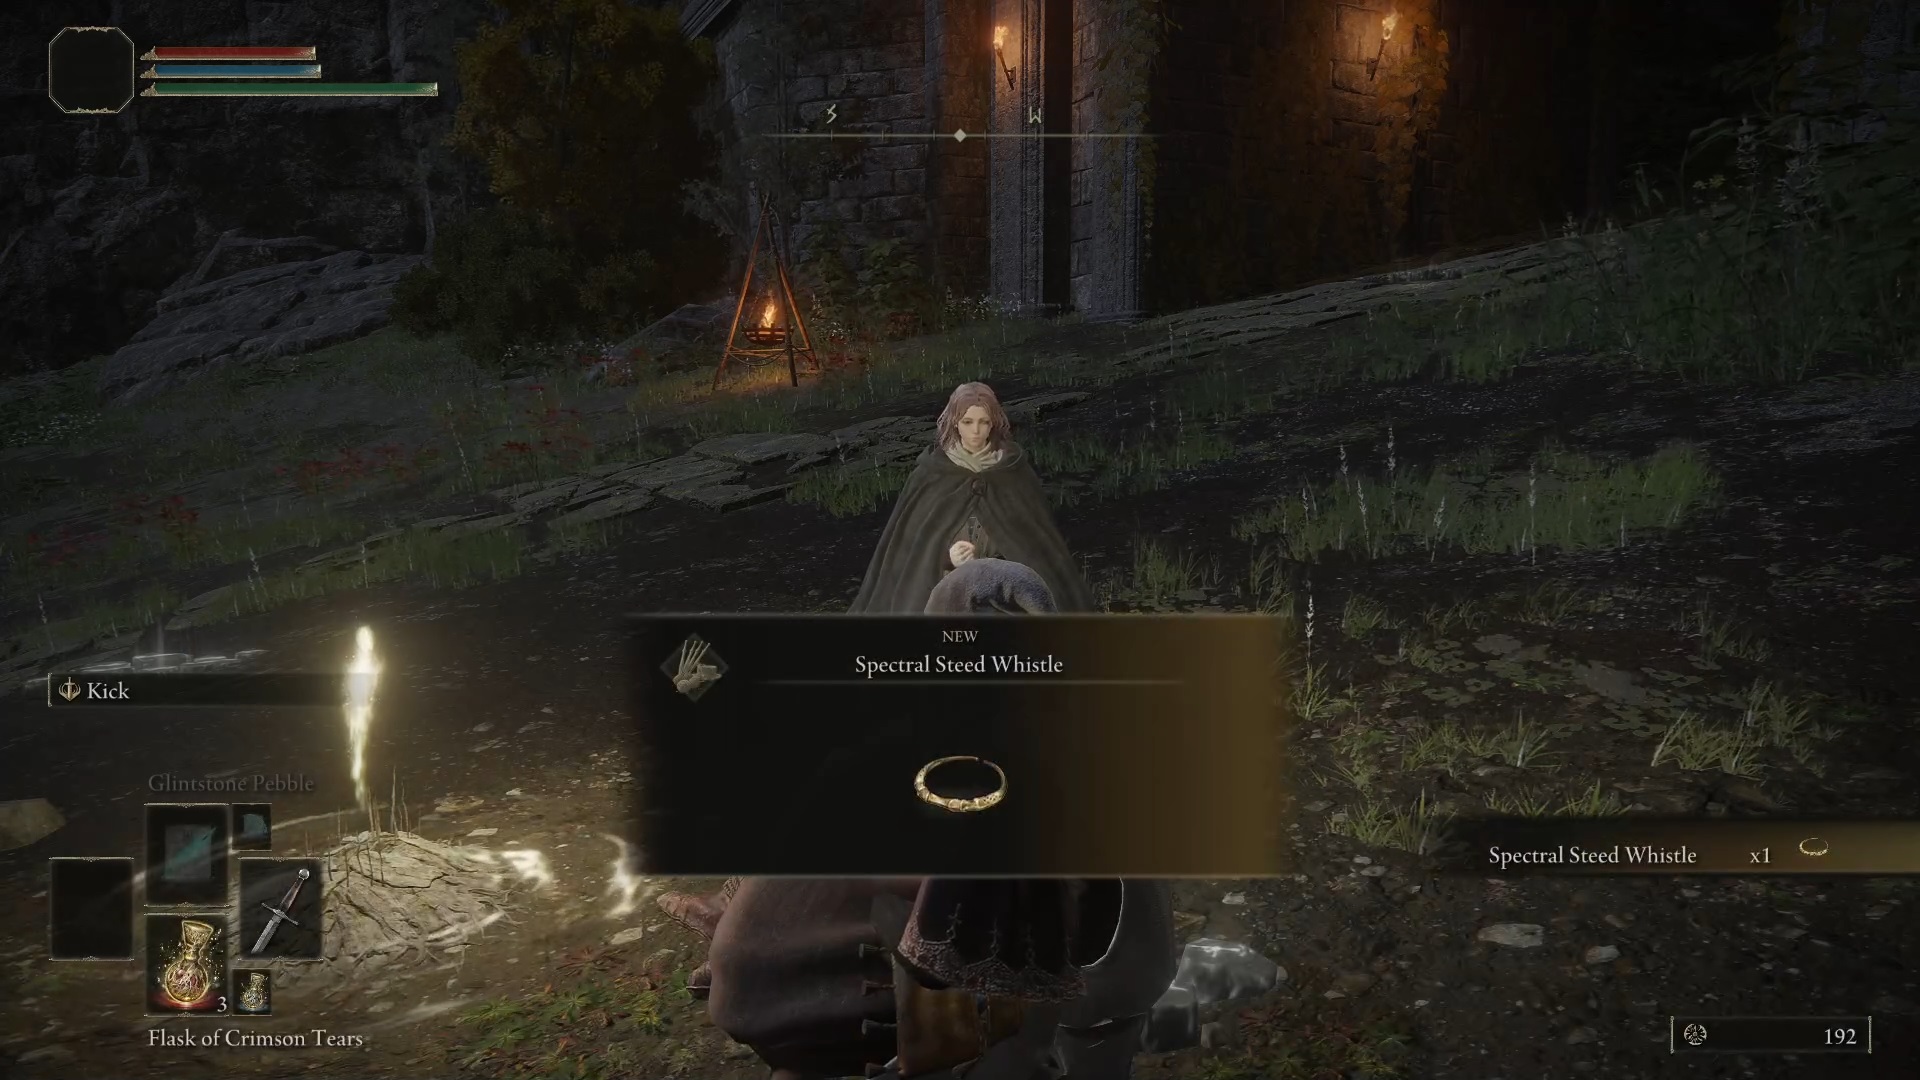
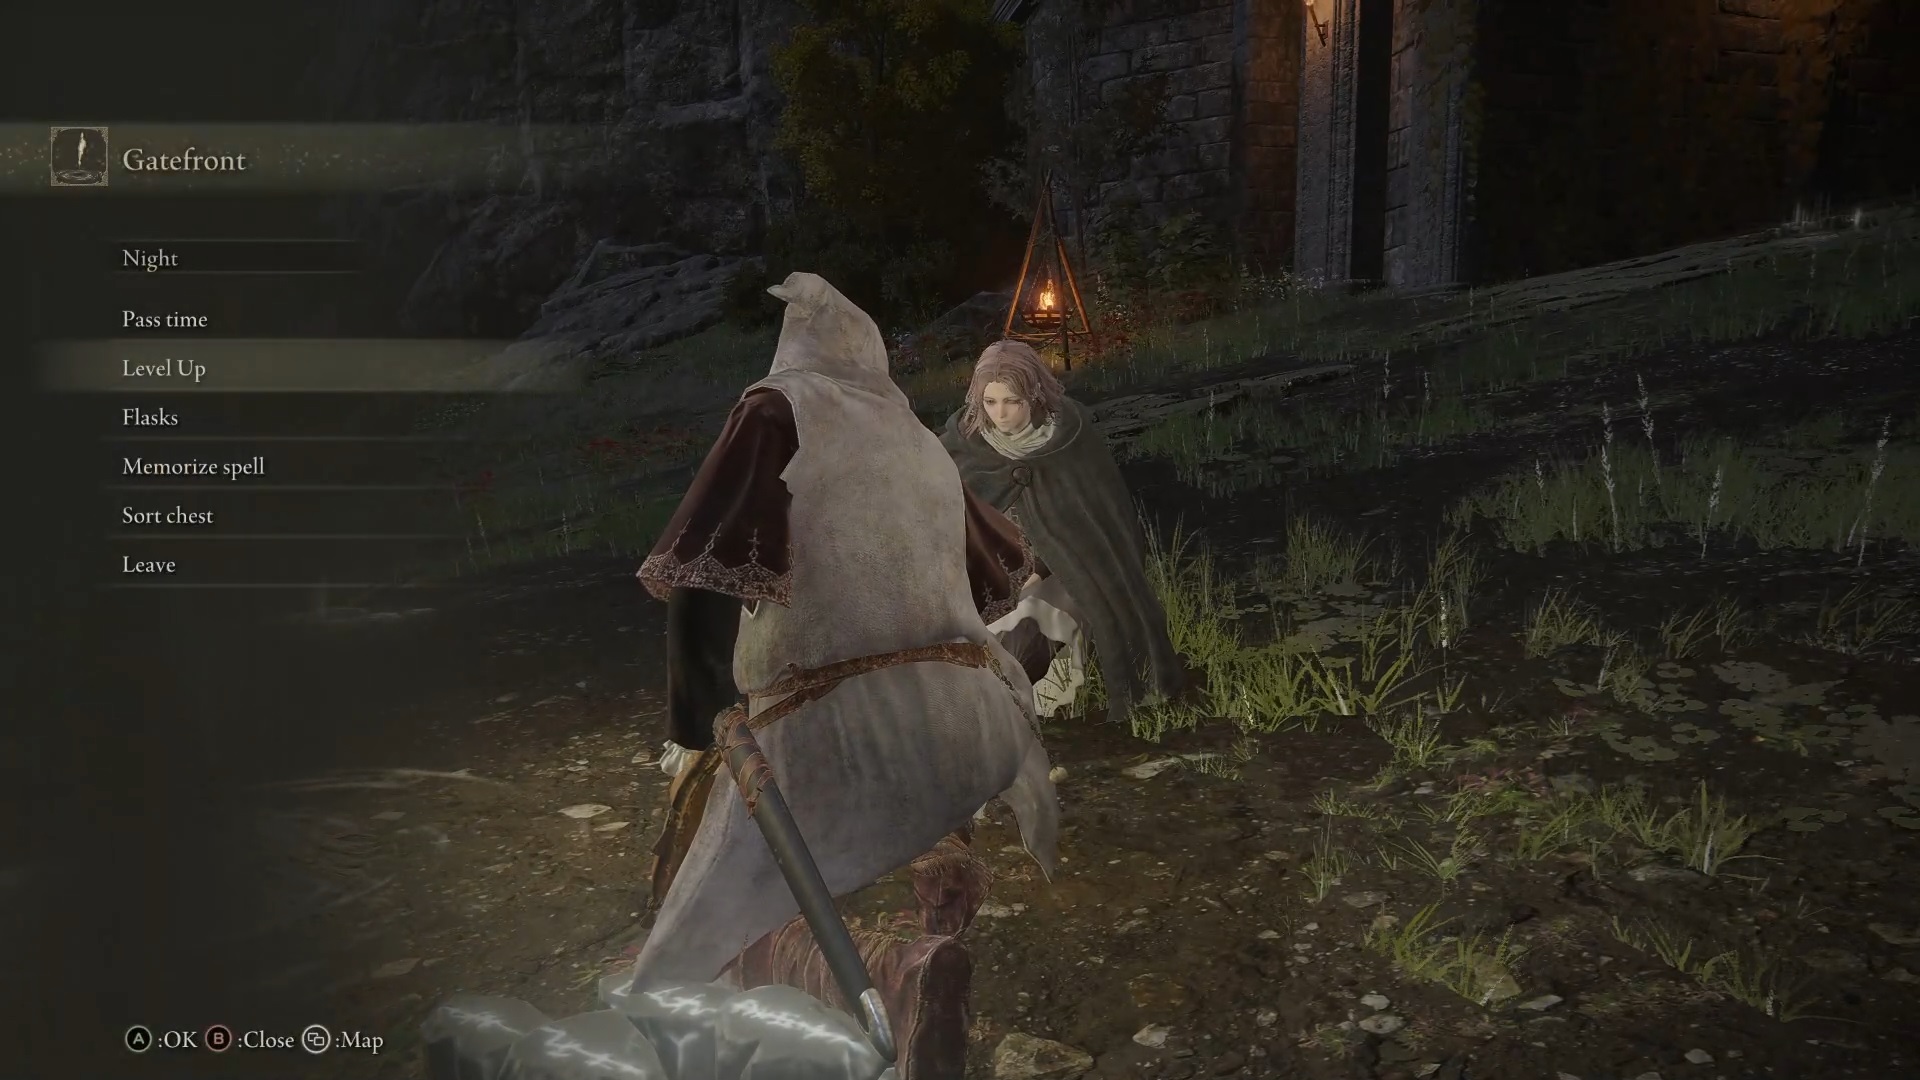
Once you sit down at that grace, you’ll be visited by Melina who will offer you a deal that you should accept and in return allow you to level up and give you the Spectral Steed Whistle. The whistle will let you summon Torrent, the spectral steed that will help us run past most enemies on our quest to unlock the game’s areas.
Accept the dealTorrent’s whistleLeveling up
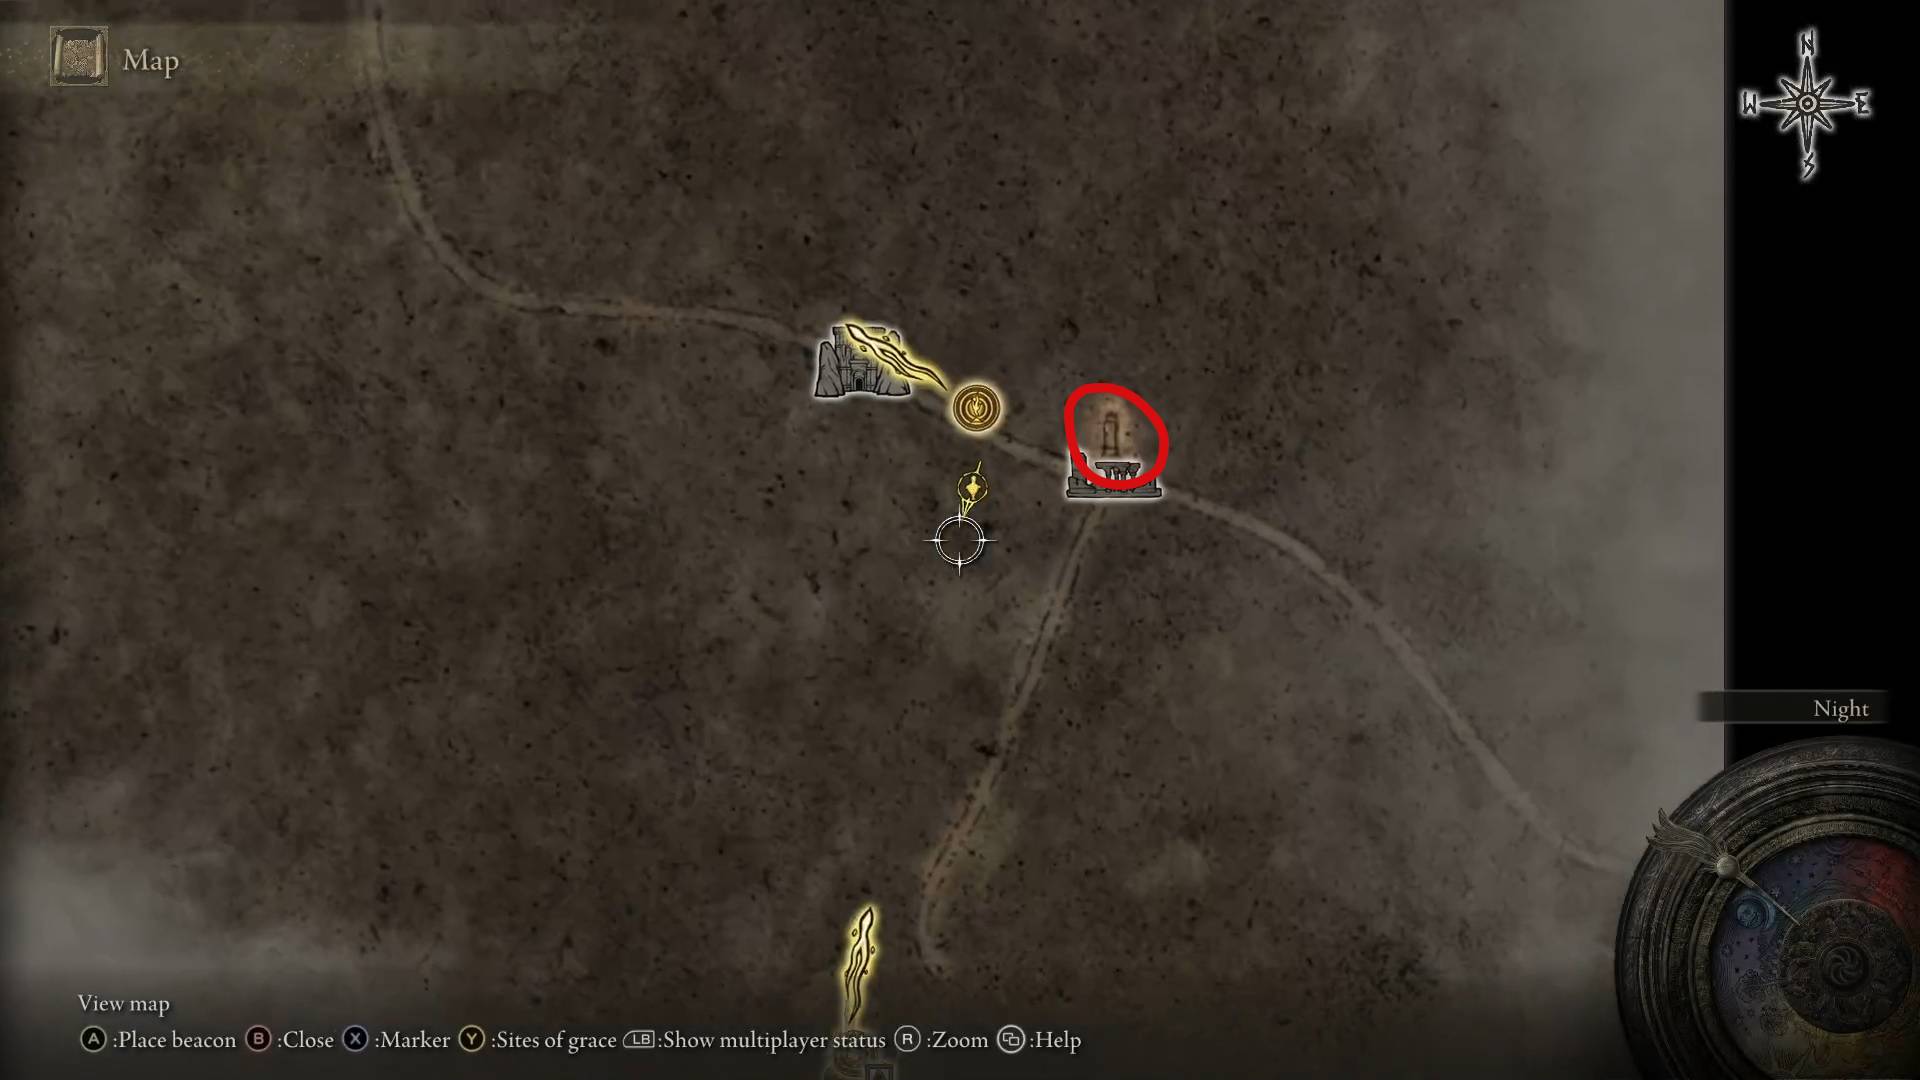
Before we move on to the next stage of our plan, you should stick around the Gatefront Ruins area and grab a map of Limgrave. When you don’t have a map of an area, map pieces will be indicated by small pillar symbols on the empty map. You should pick up any map piece you see along the way.
An undiscovered map pieceA map piece in the world
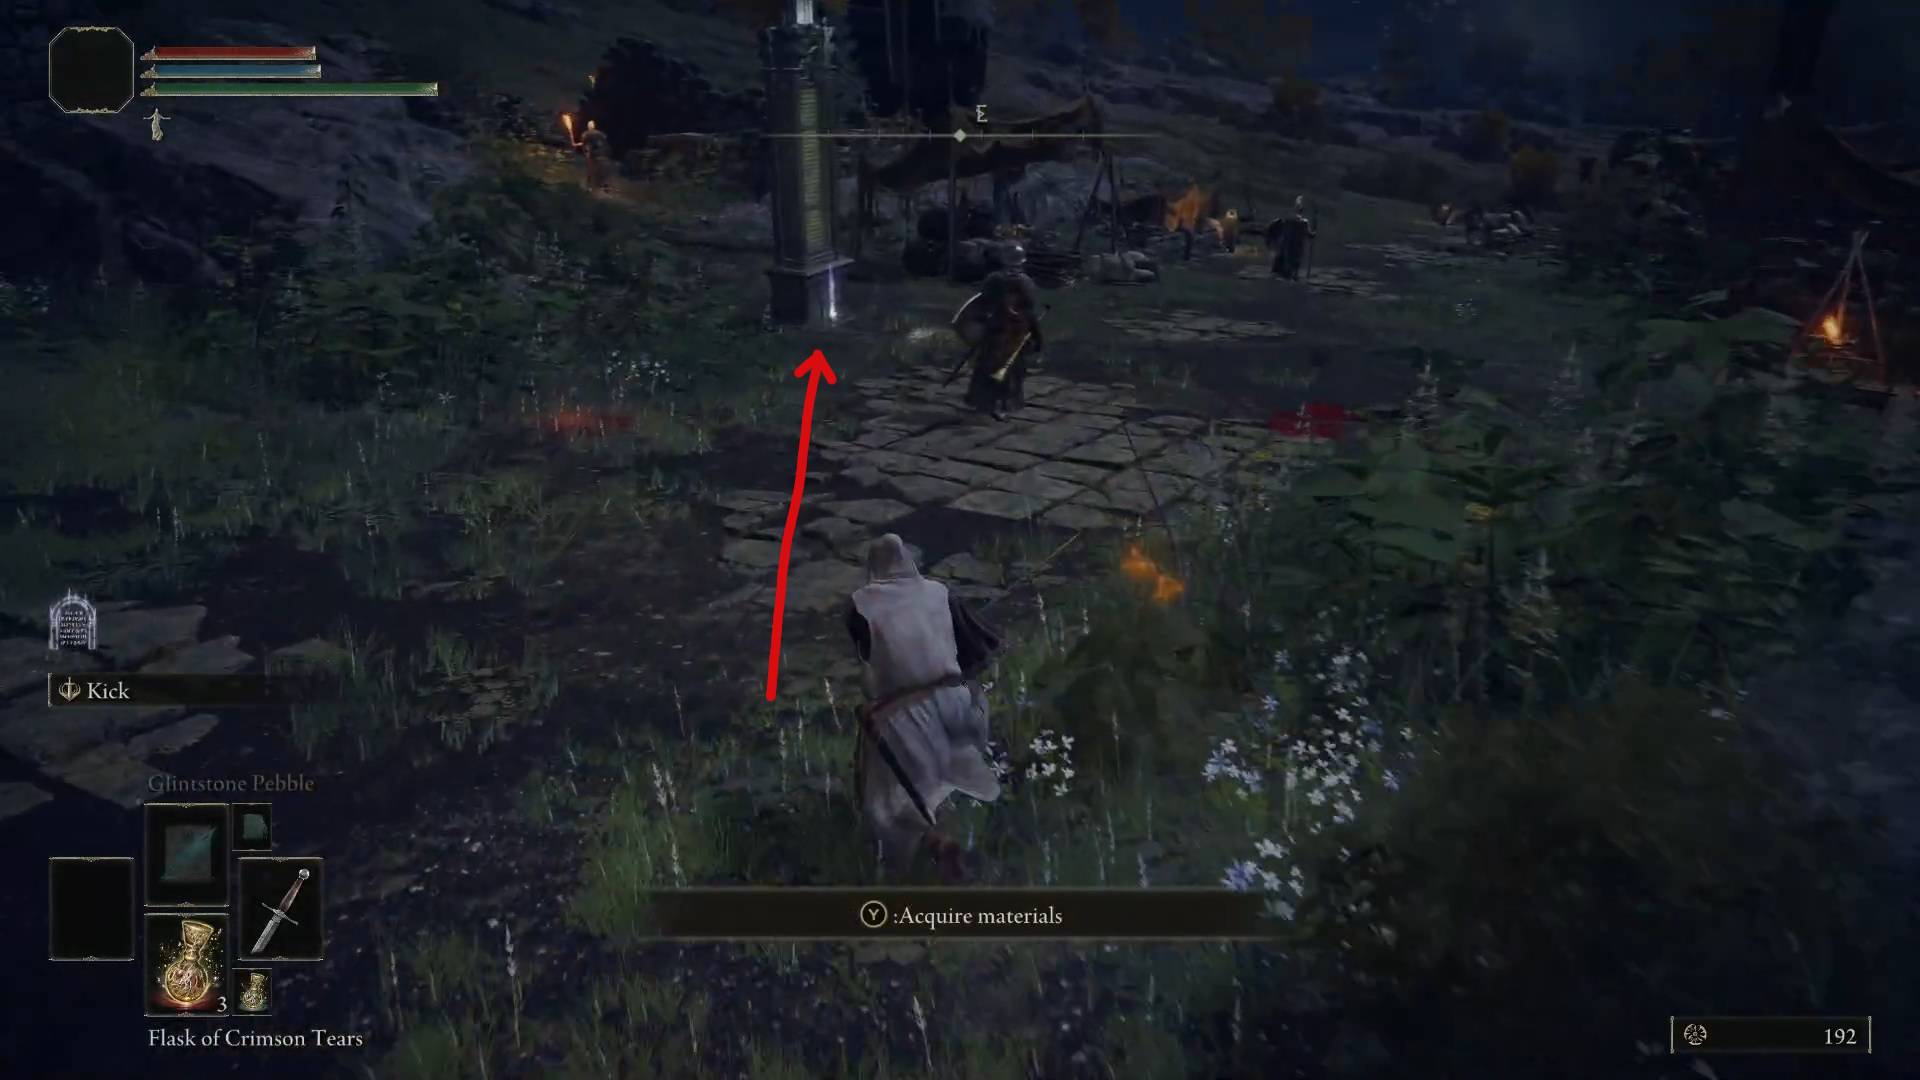
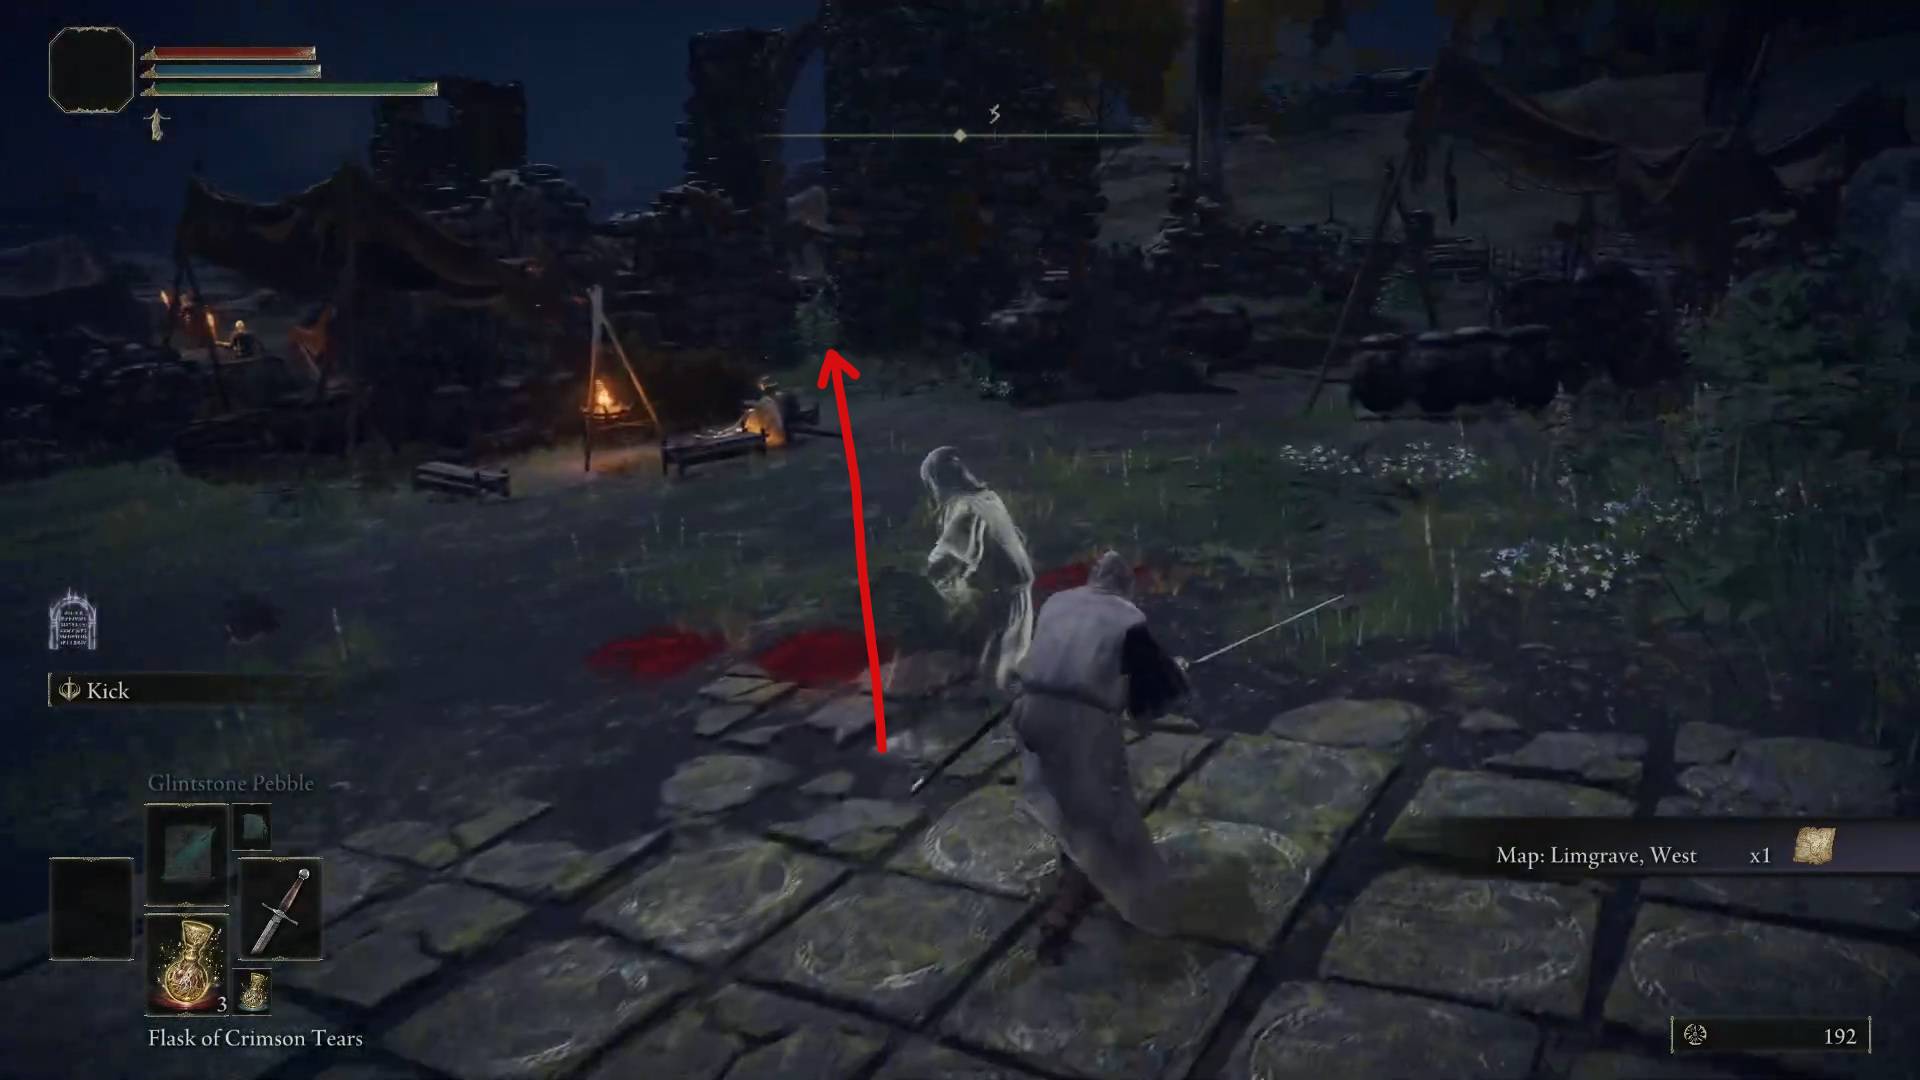
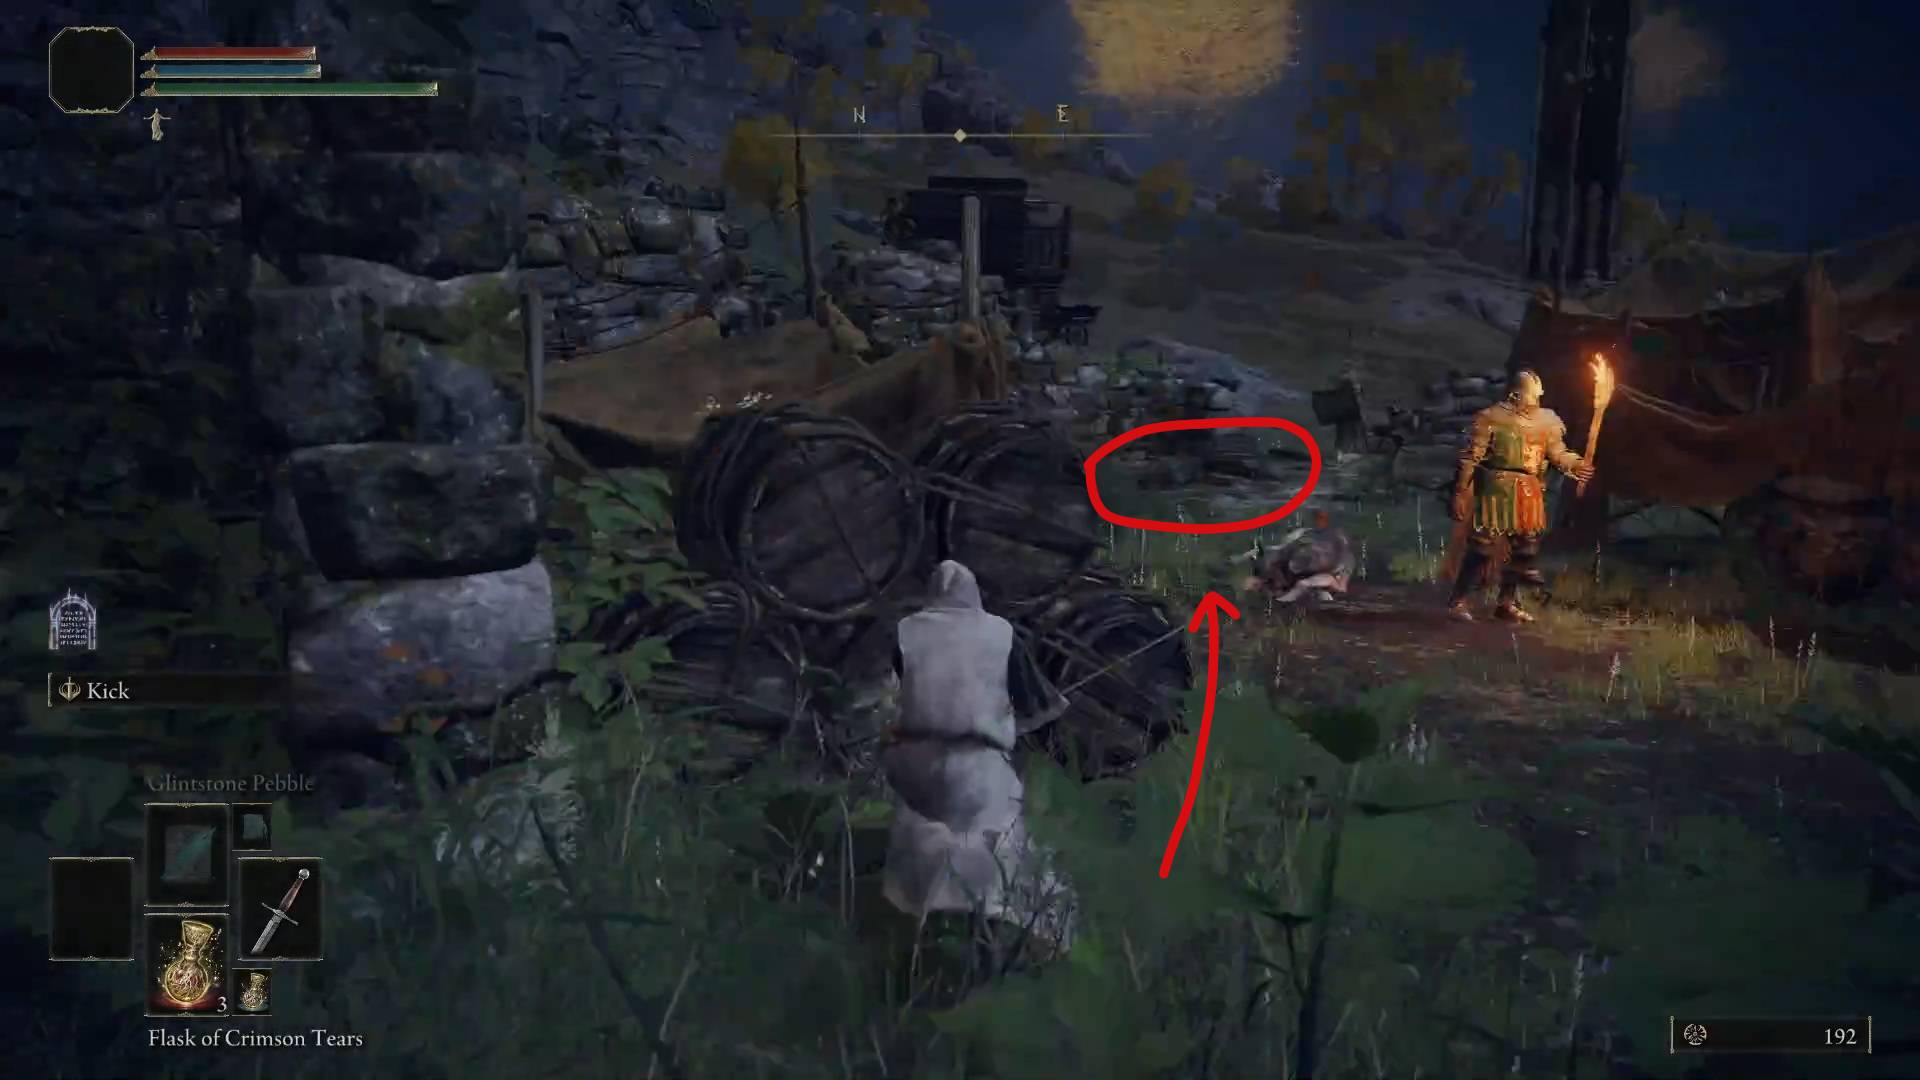
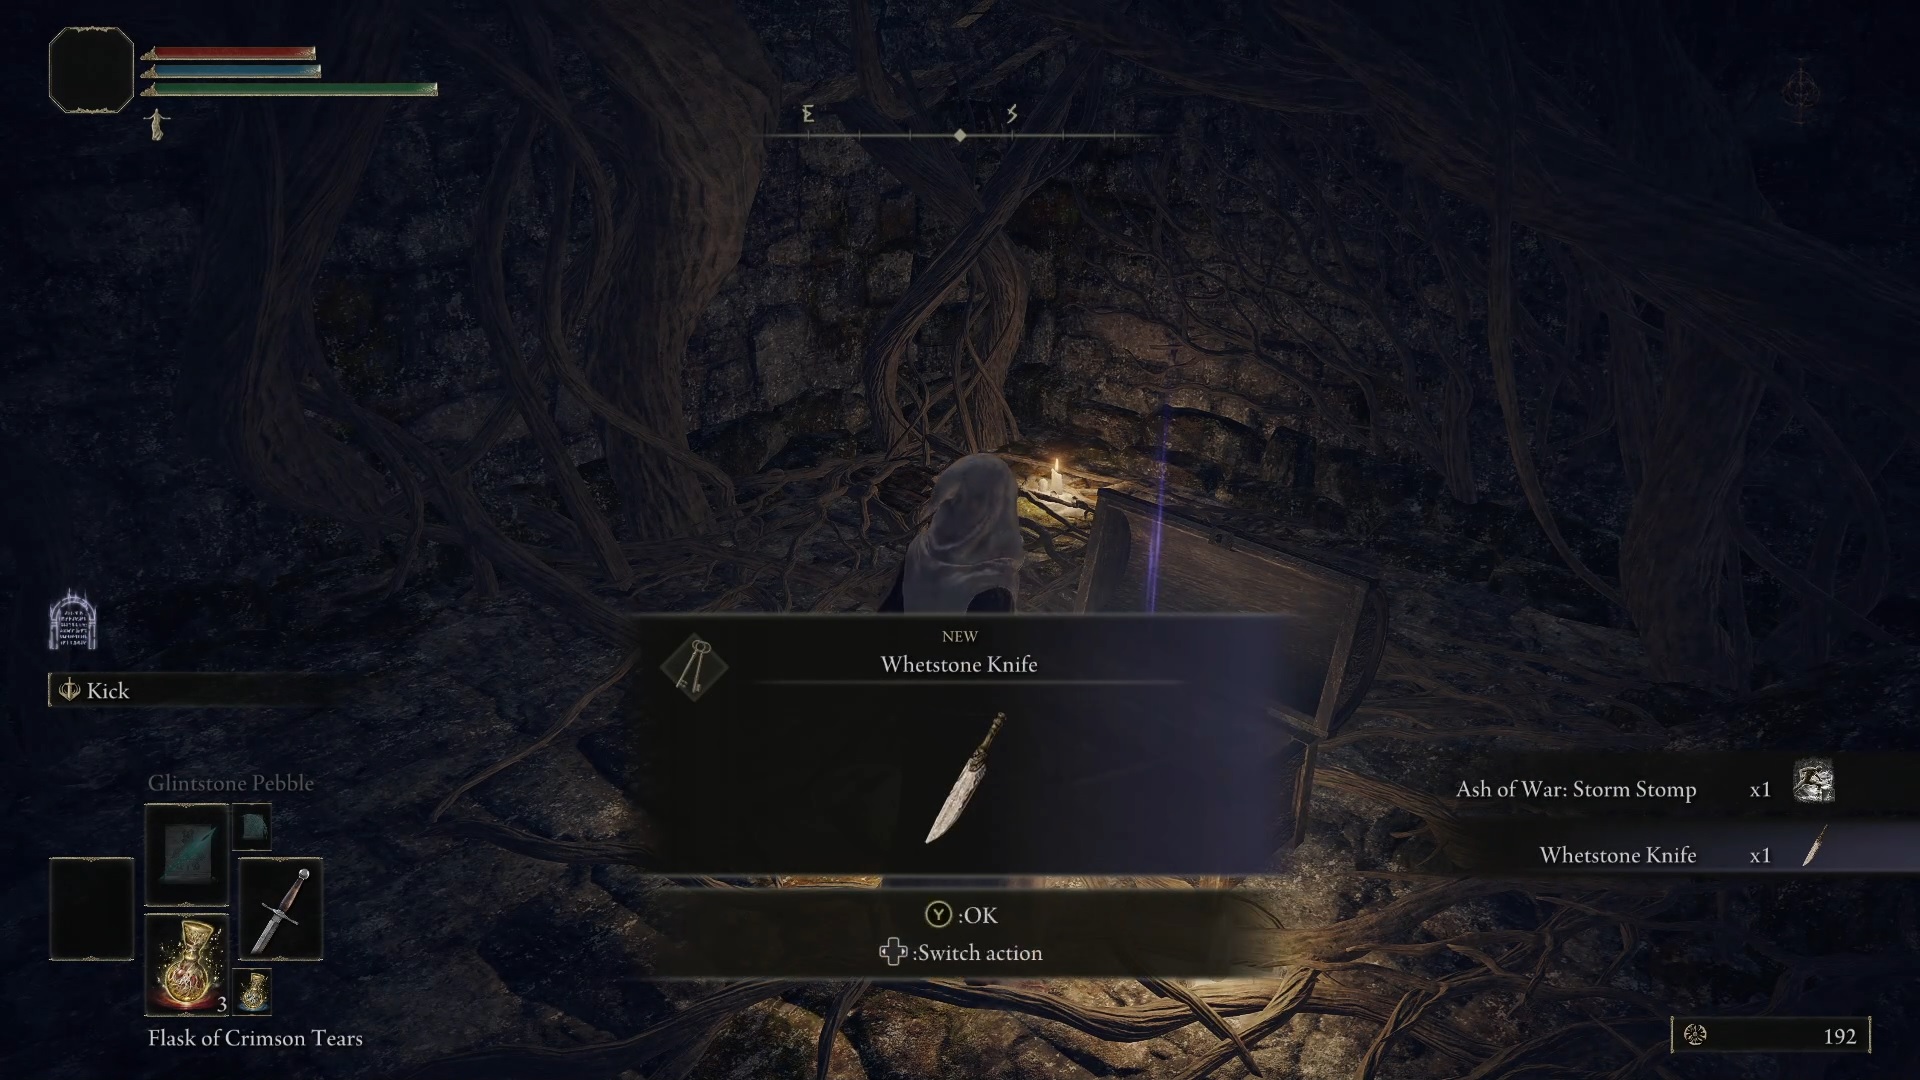
Another thing of interest in Gatefront Ruins is the Whetstone Knife, an item that will let you change weapon affinities and Ashes of War at sites of grace. Sneak past the ruins guards and go down a cellar there. The chest downstairs has the Whetstone Knife and the Storm Stomp Ash of War.
Sneak behind the campfire……and down into the cellarYour reward
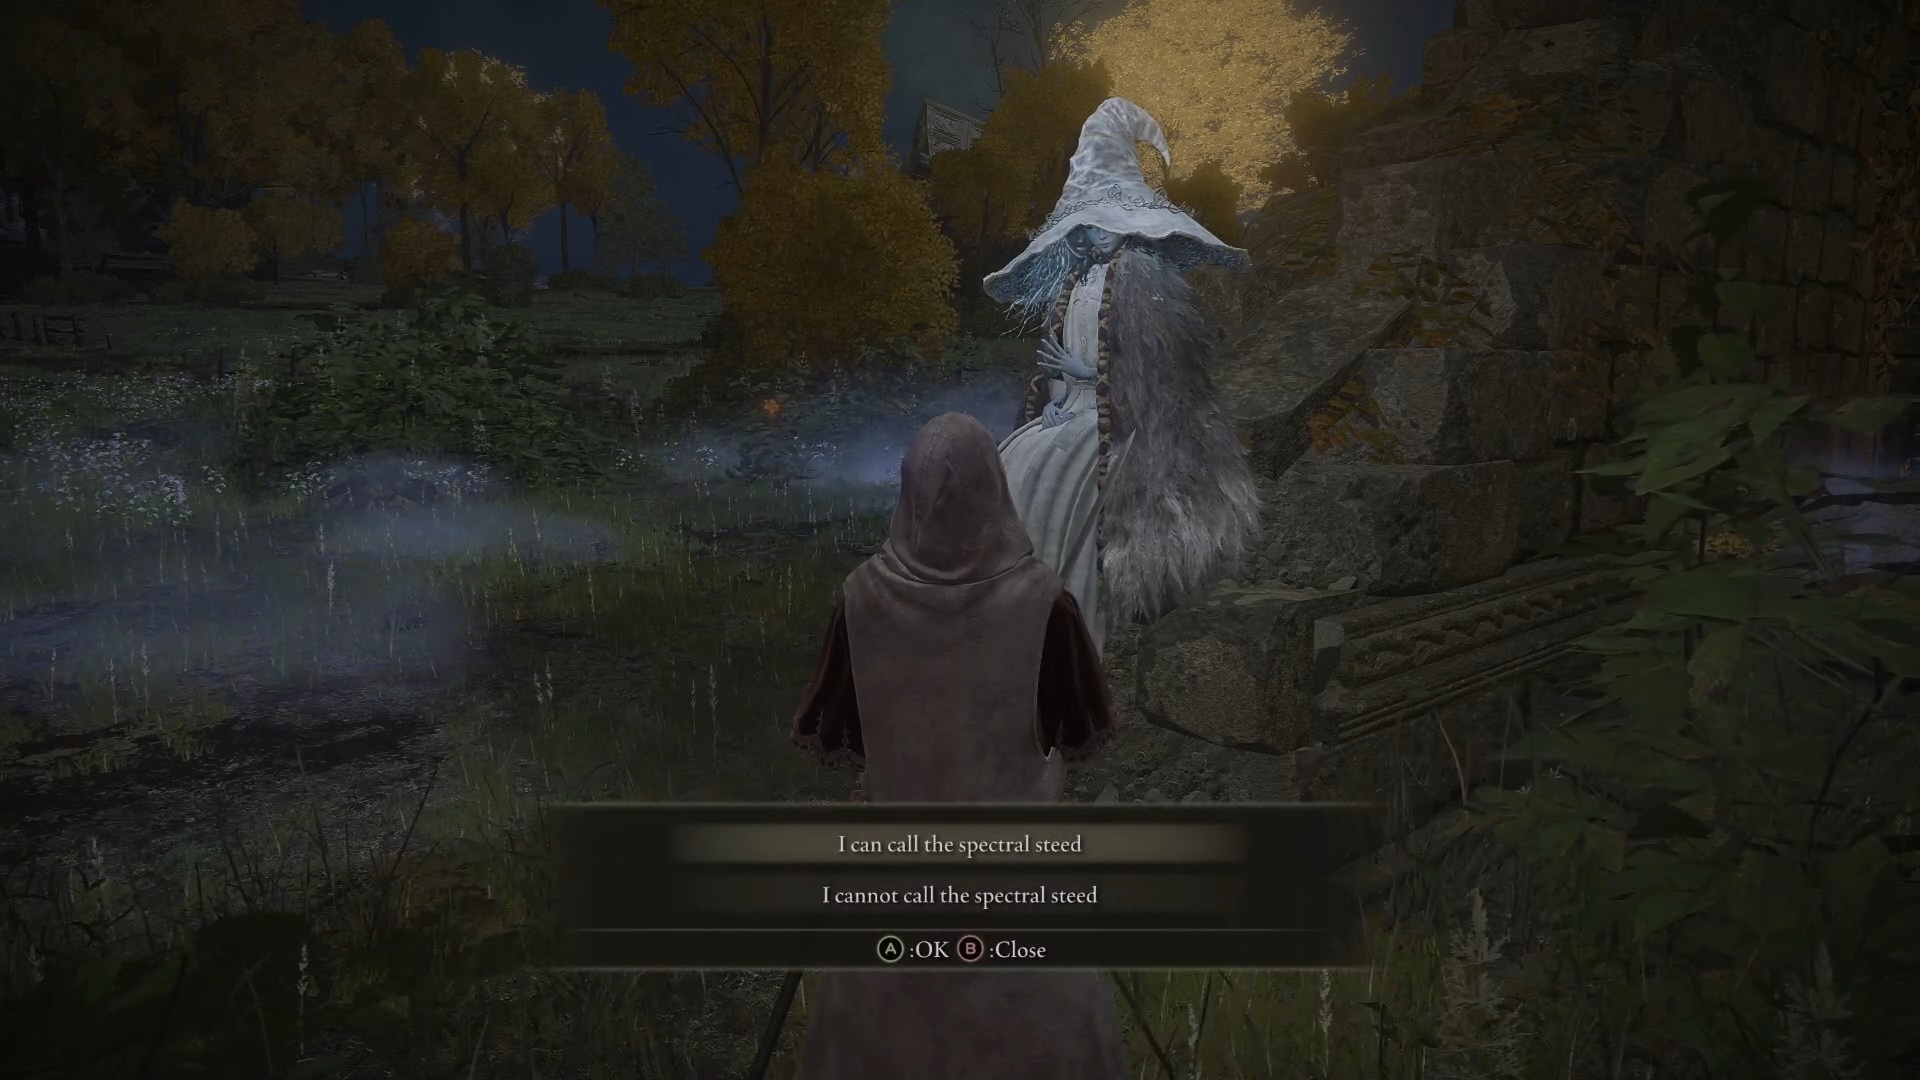
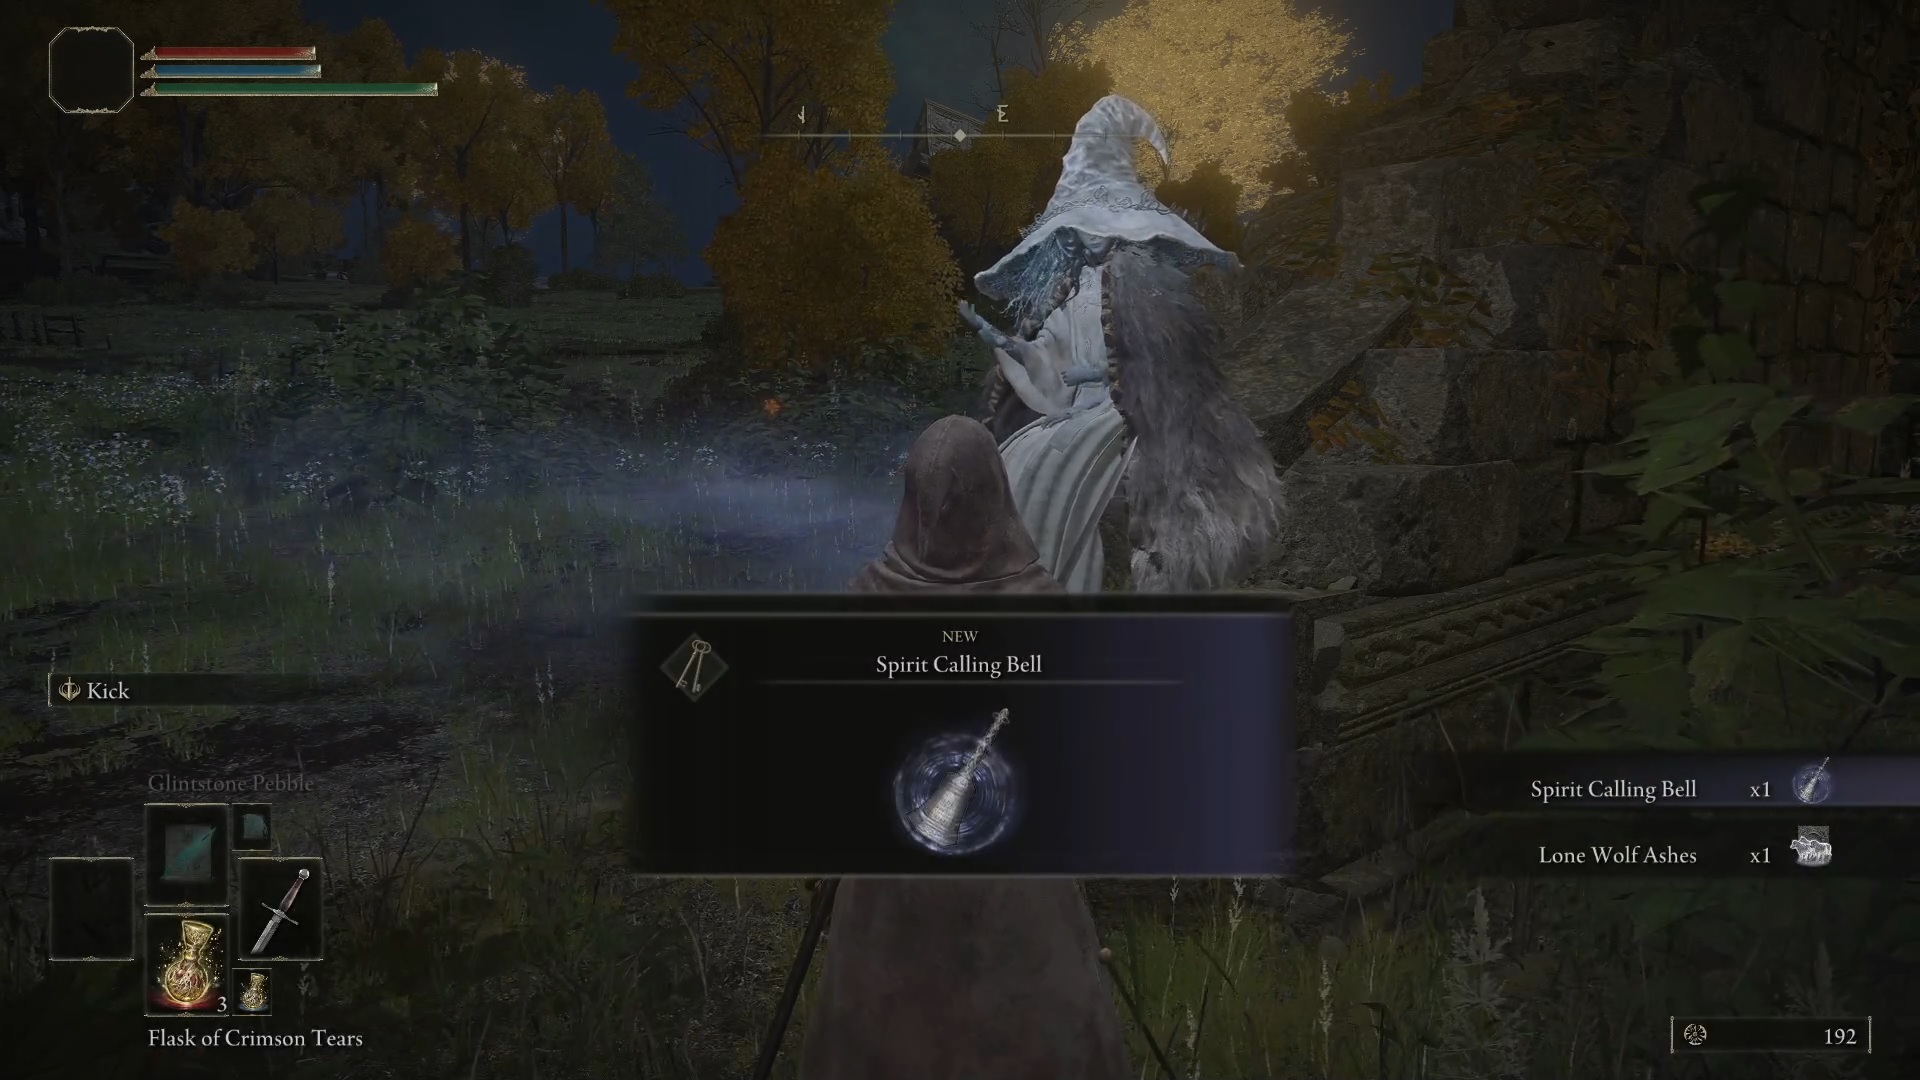
Next, make sure it’s nighttime and teleport back to the Church of Elleh. Right in front of you, you’ll see a witch presently known as Renna. Talk to her, admit that you can call the spectral steed, and she’ll give you the Spirit Calling Bell and the Lone Wolf Ashes.
Here’s RennaTell the truthYour reward for honesty
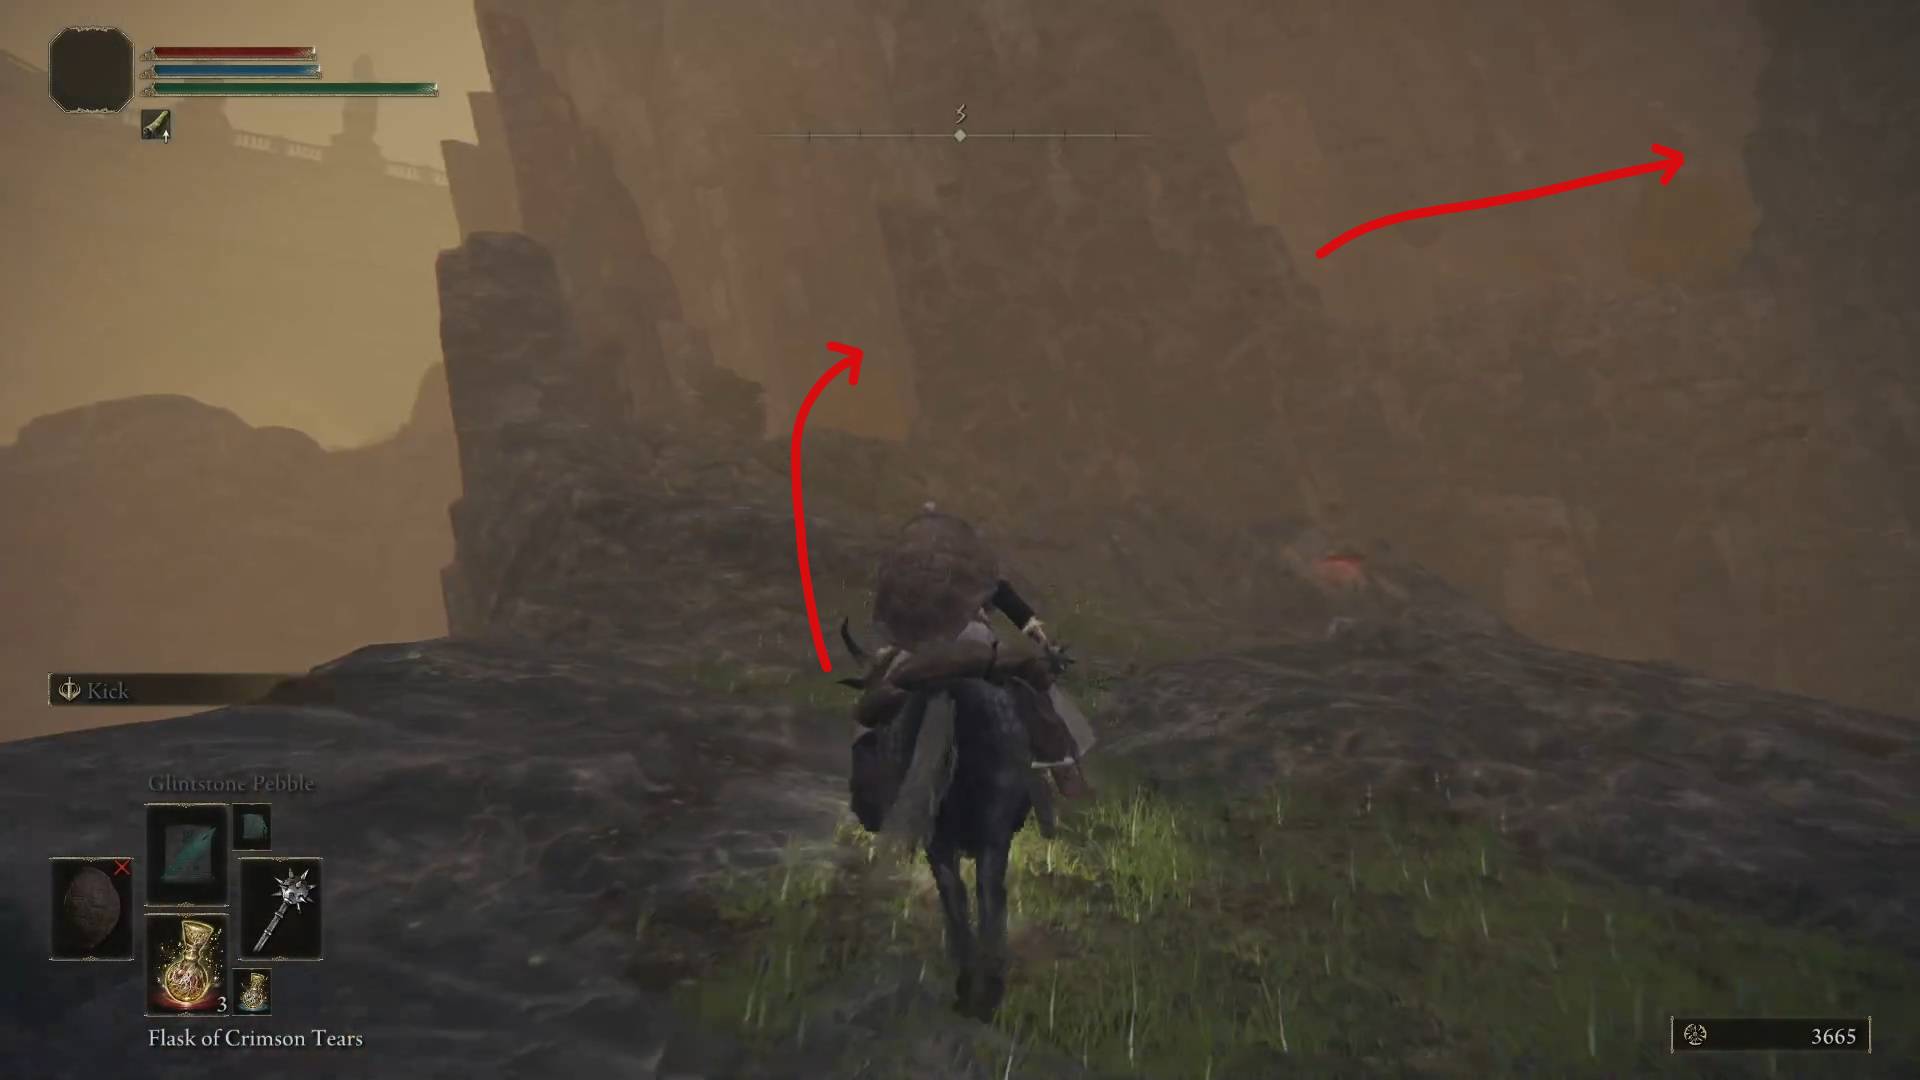
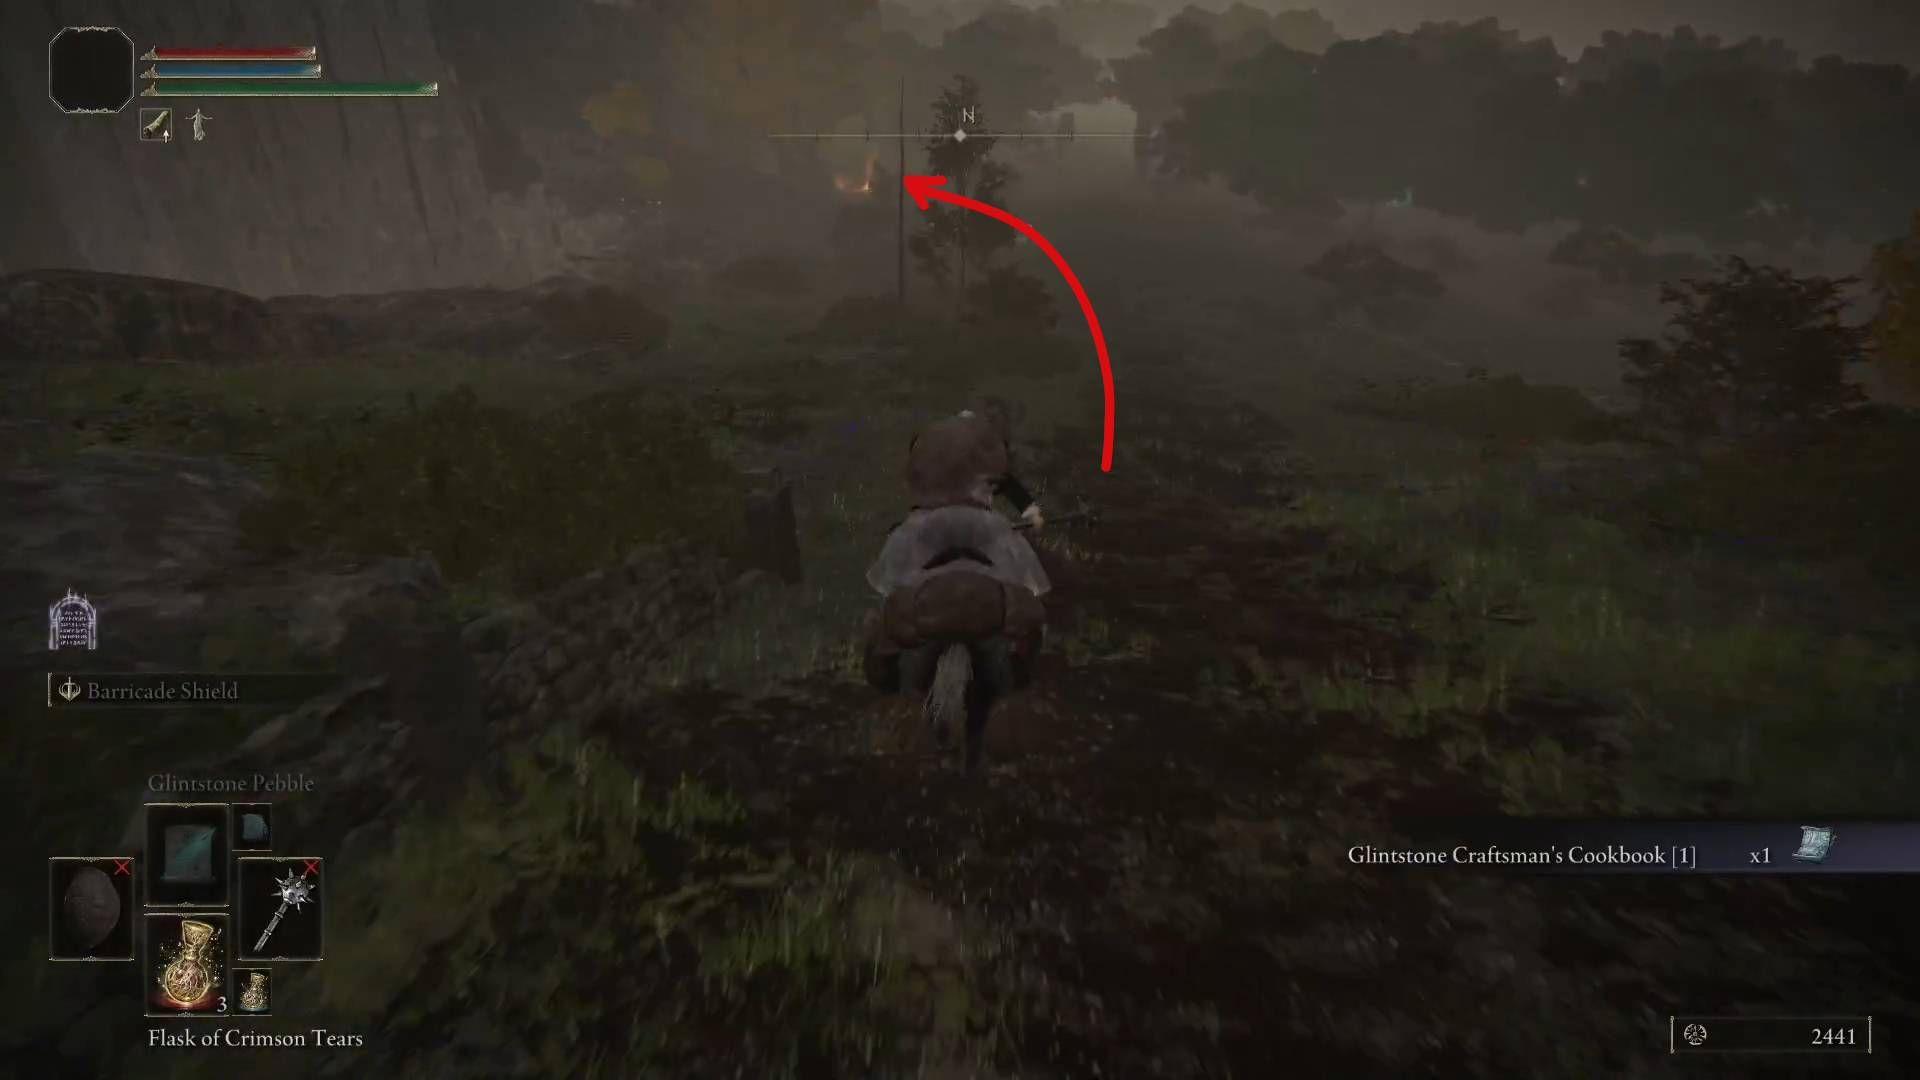
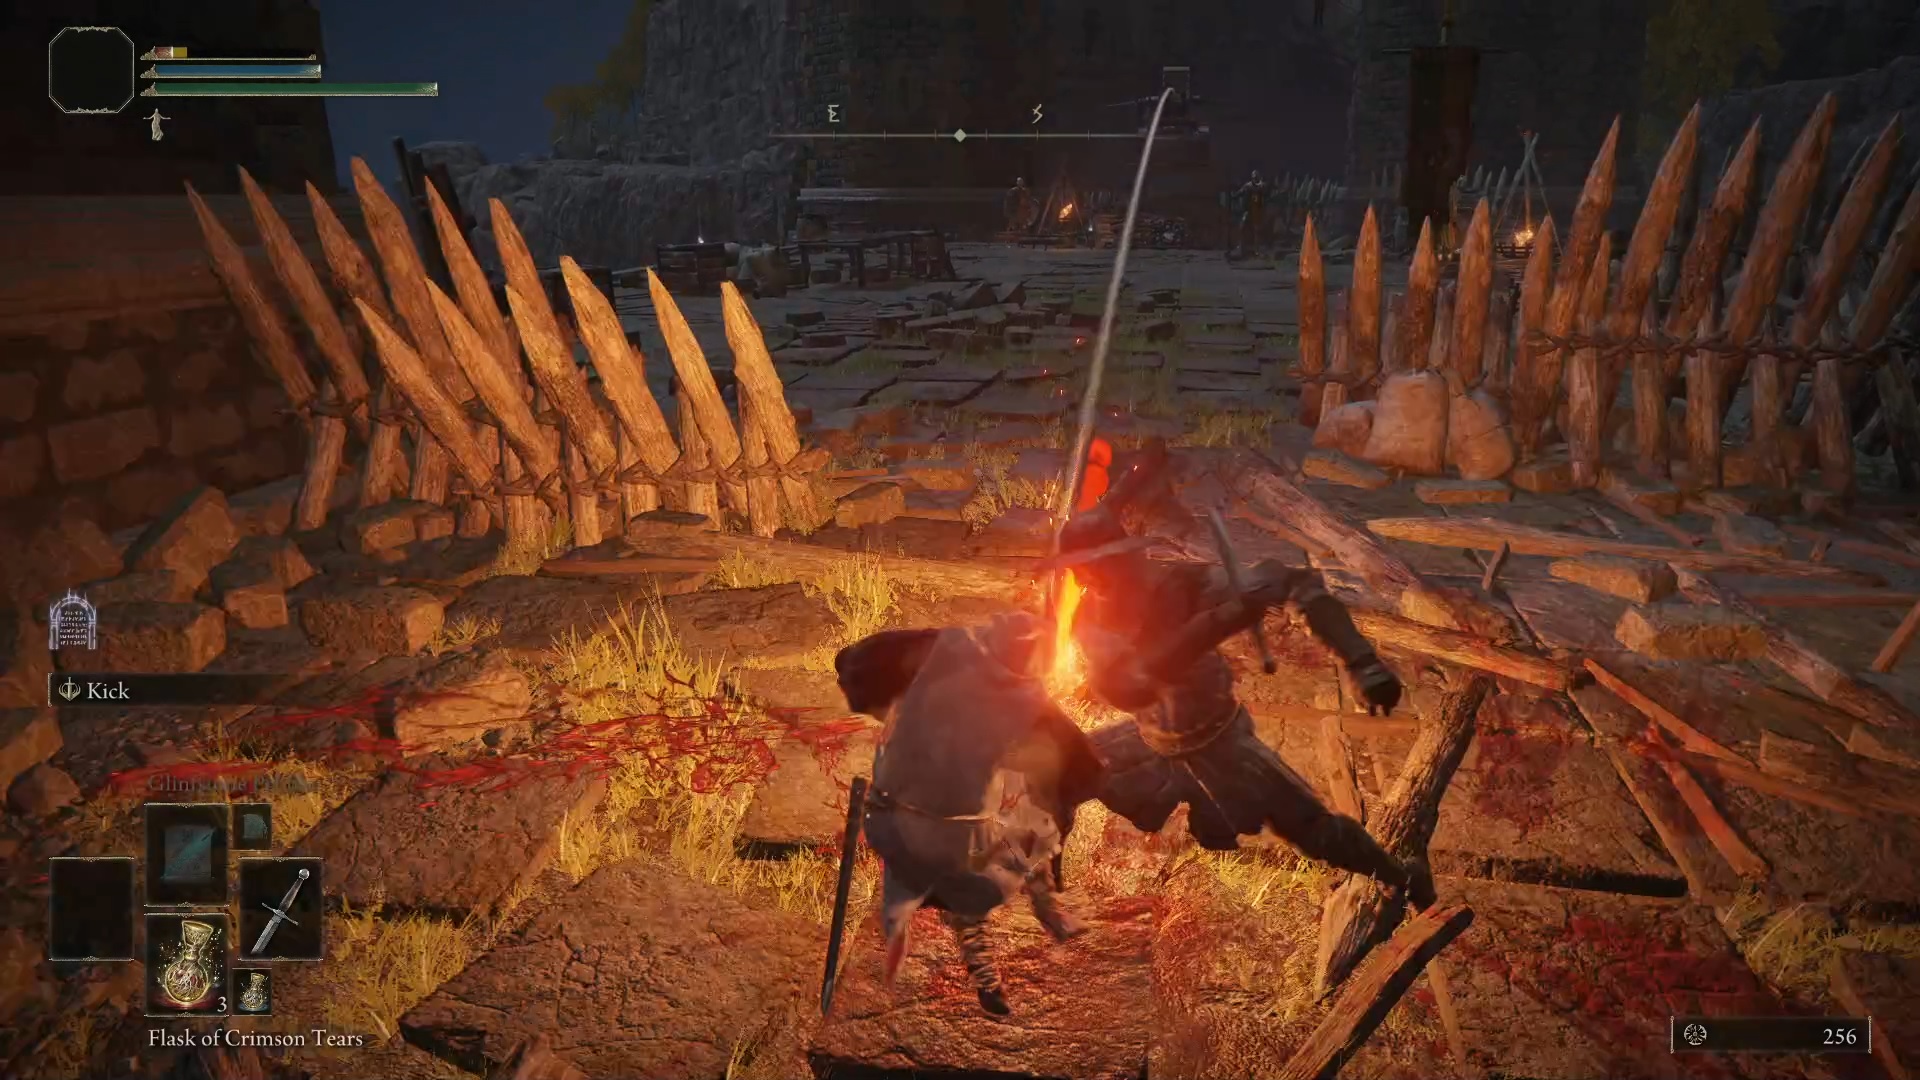
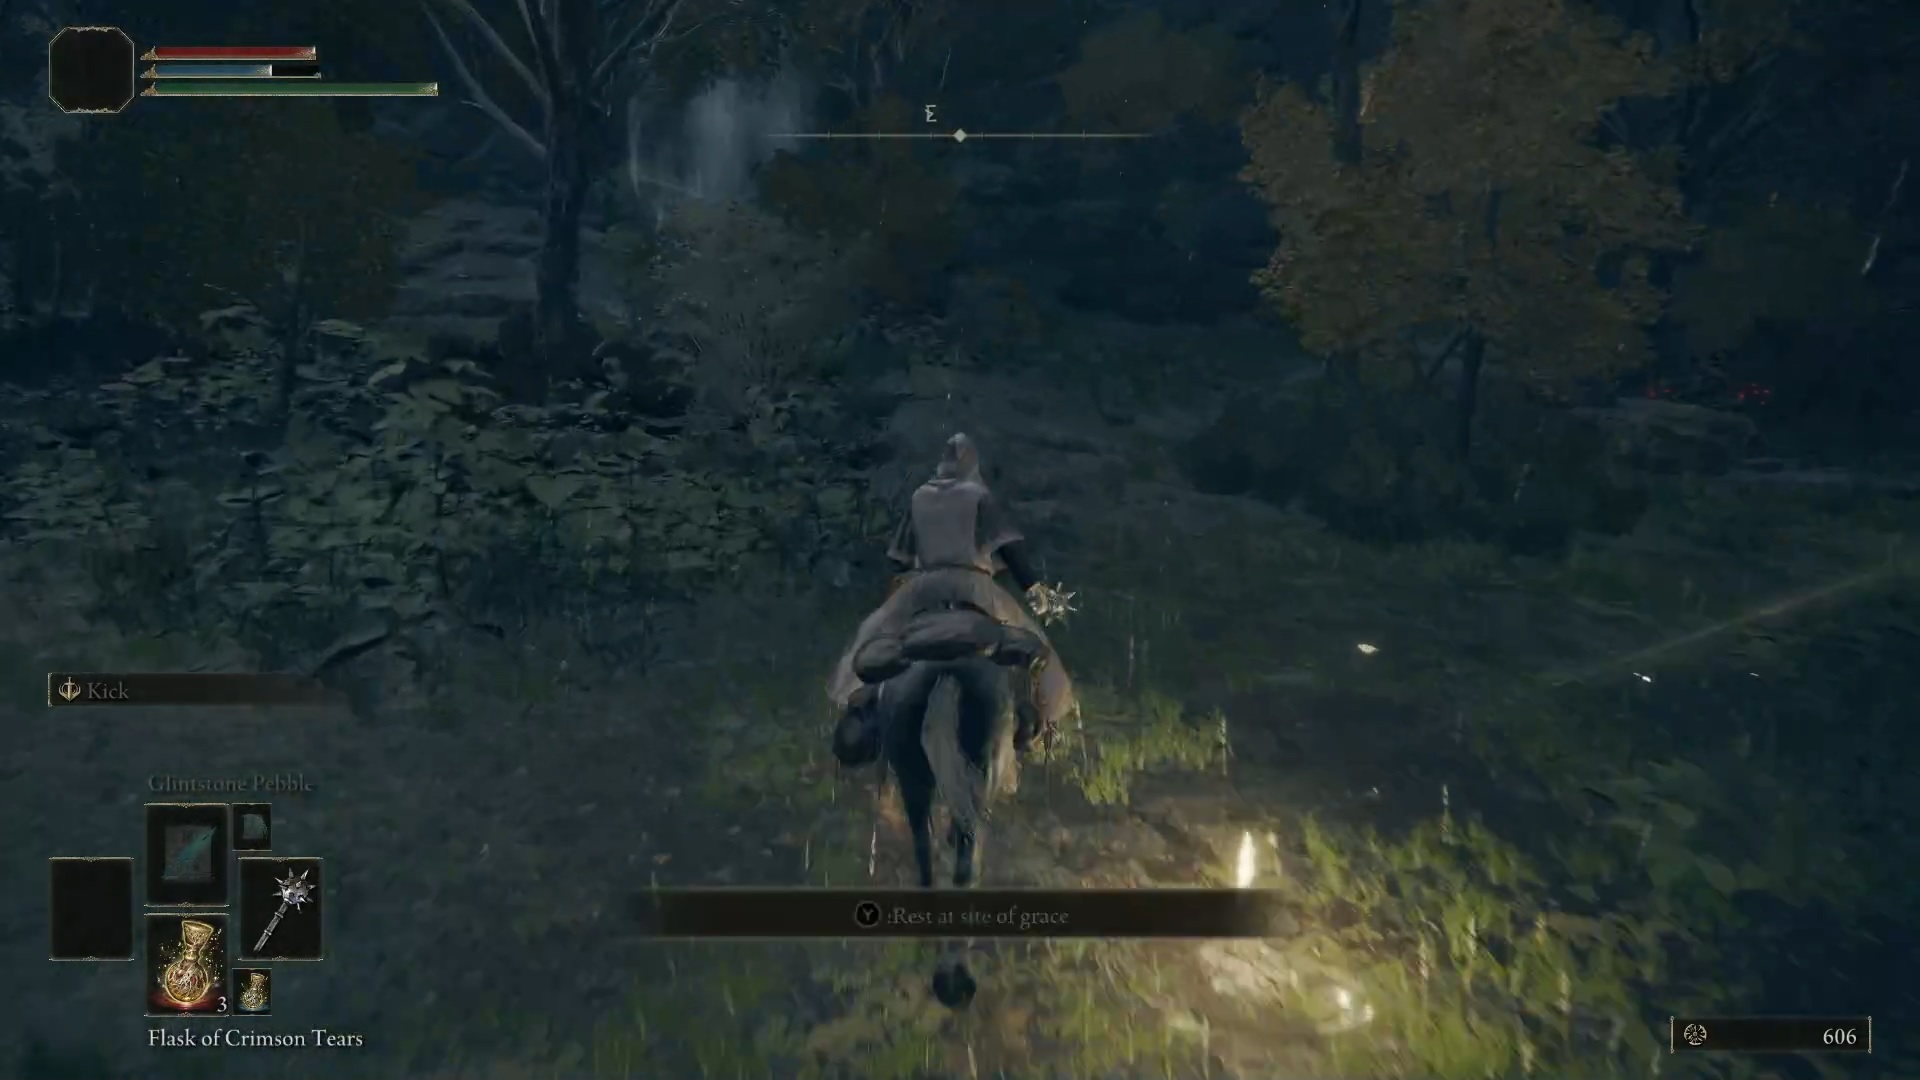
Now, go back to the Gatefront Ruins grace and hop on Torrent. Run through the gate while ignoring all the enemies and jumping over and through their barricades. Follow the road until you reach the Stormhill Shack grace. From there, going west will lead you to Stormveil Castle, but we don’t want to go there just yet. Keep moving north along an overgrown path until you reach a broken bridge.
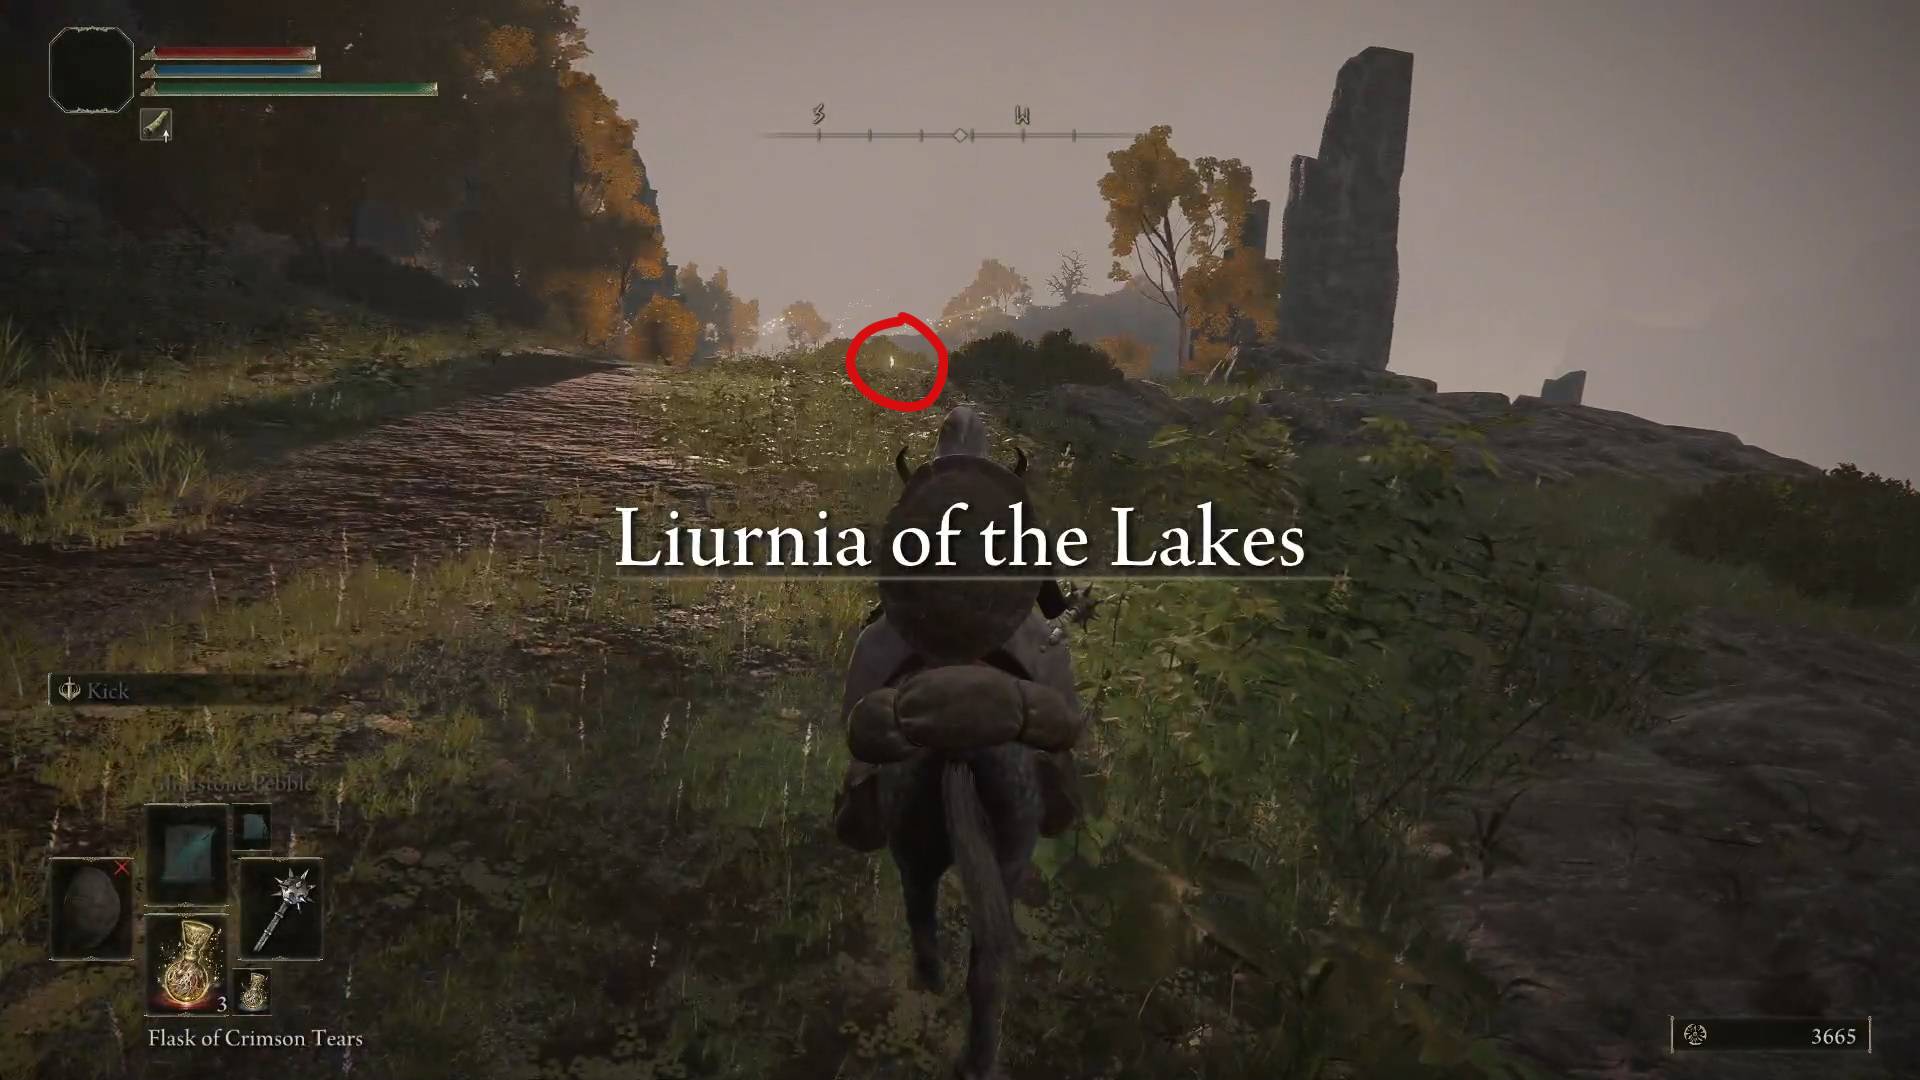
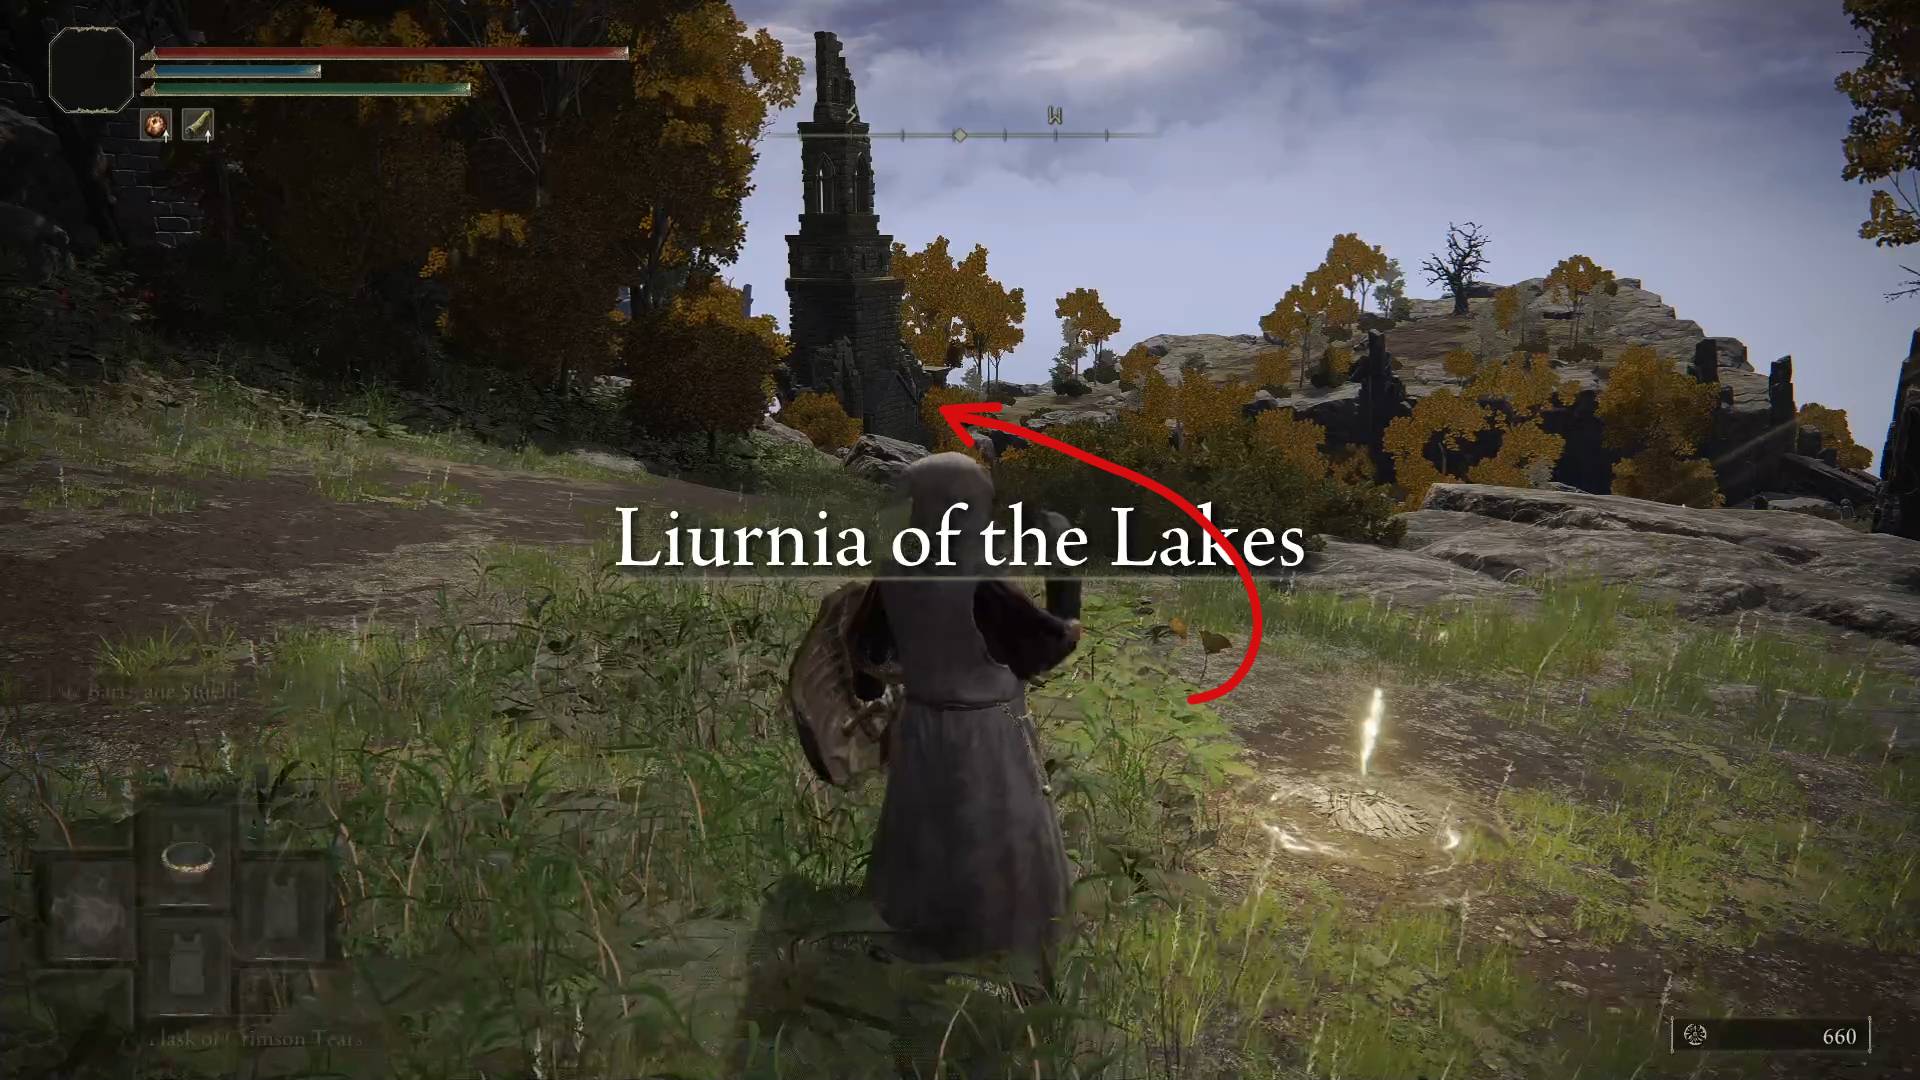
From there, face southwest and go down the crumbled stones. Keep moving forward until you find a narrow path between the natural rocks and follow it while ignoring the wolves that will try to stop you. On the other side is Liurnia of the Lakes and the Lake-Facing Cliffs grace. Once you sit down there, Melina will offer to take you to the Roundtable Hold – the game’s main hub.
Jump down hereFollow the narrow pathYour destination
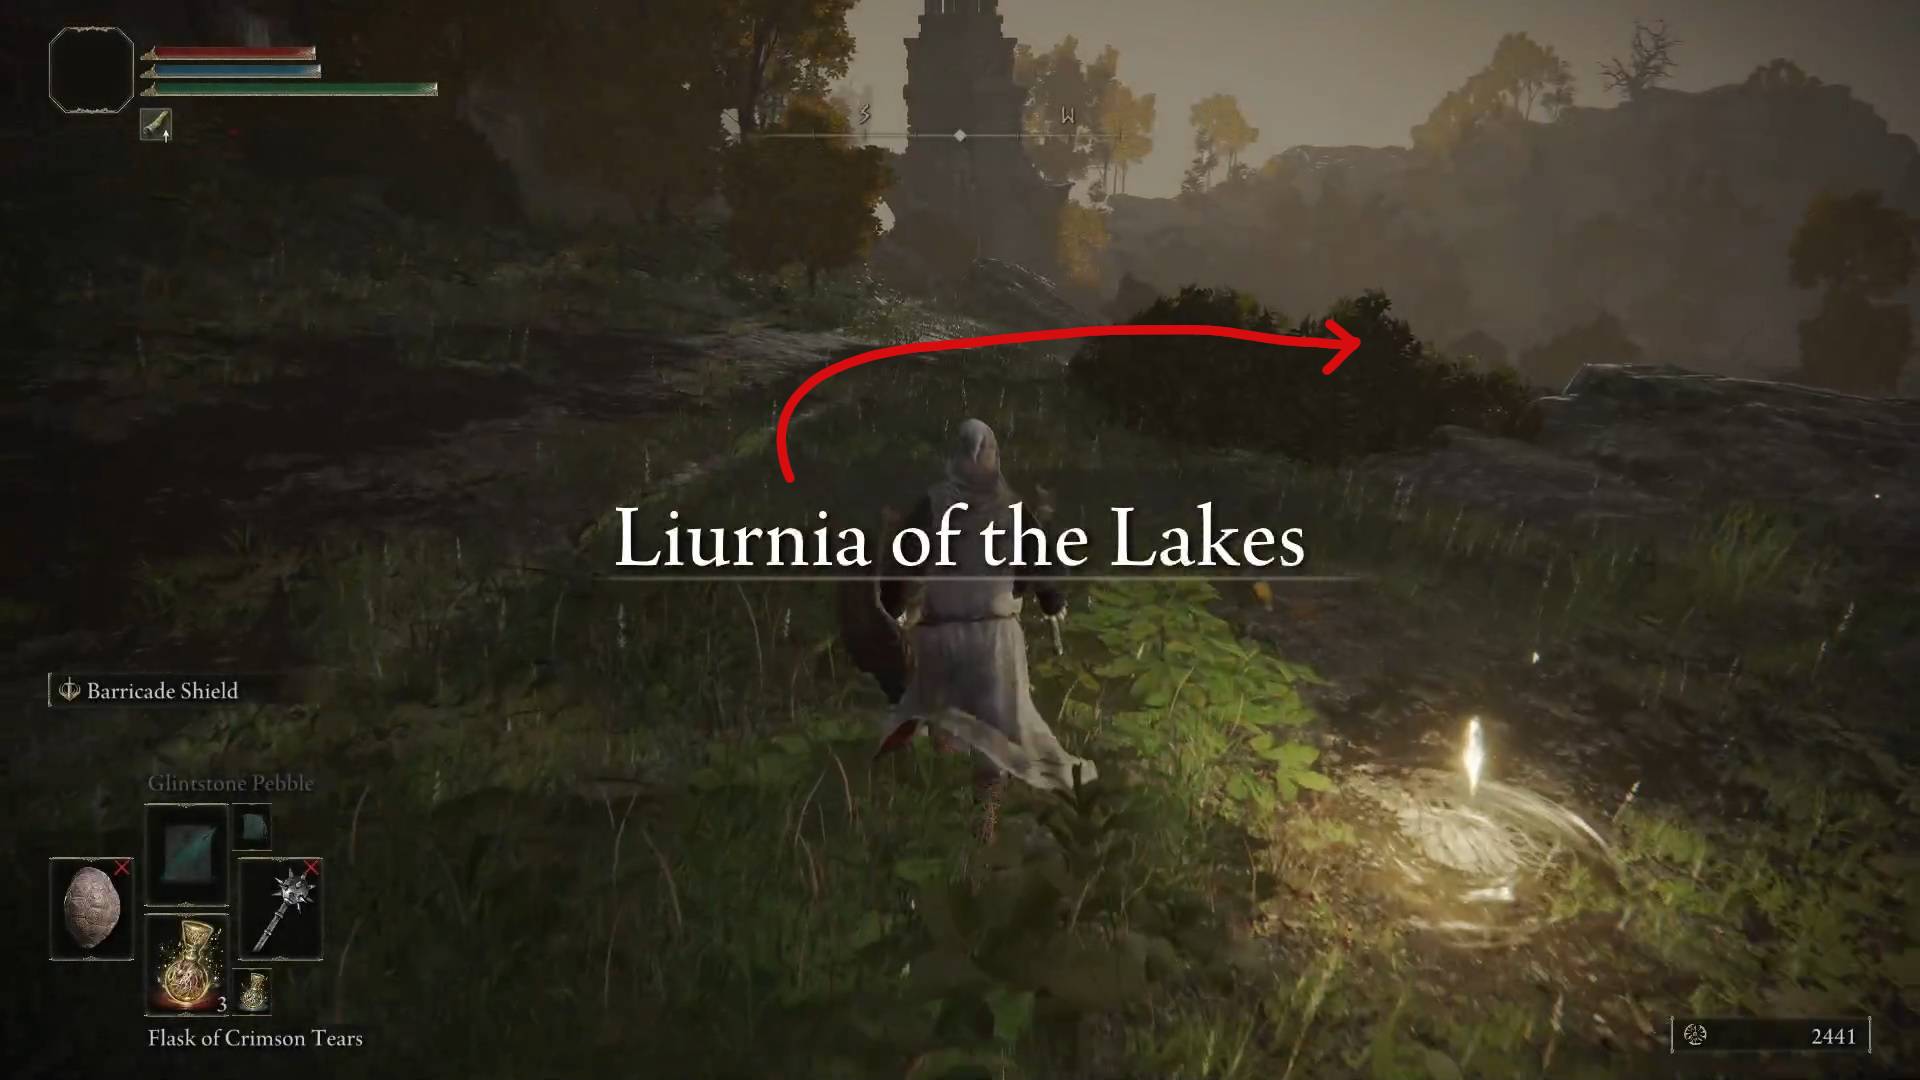
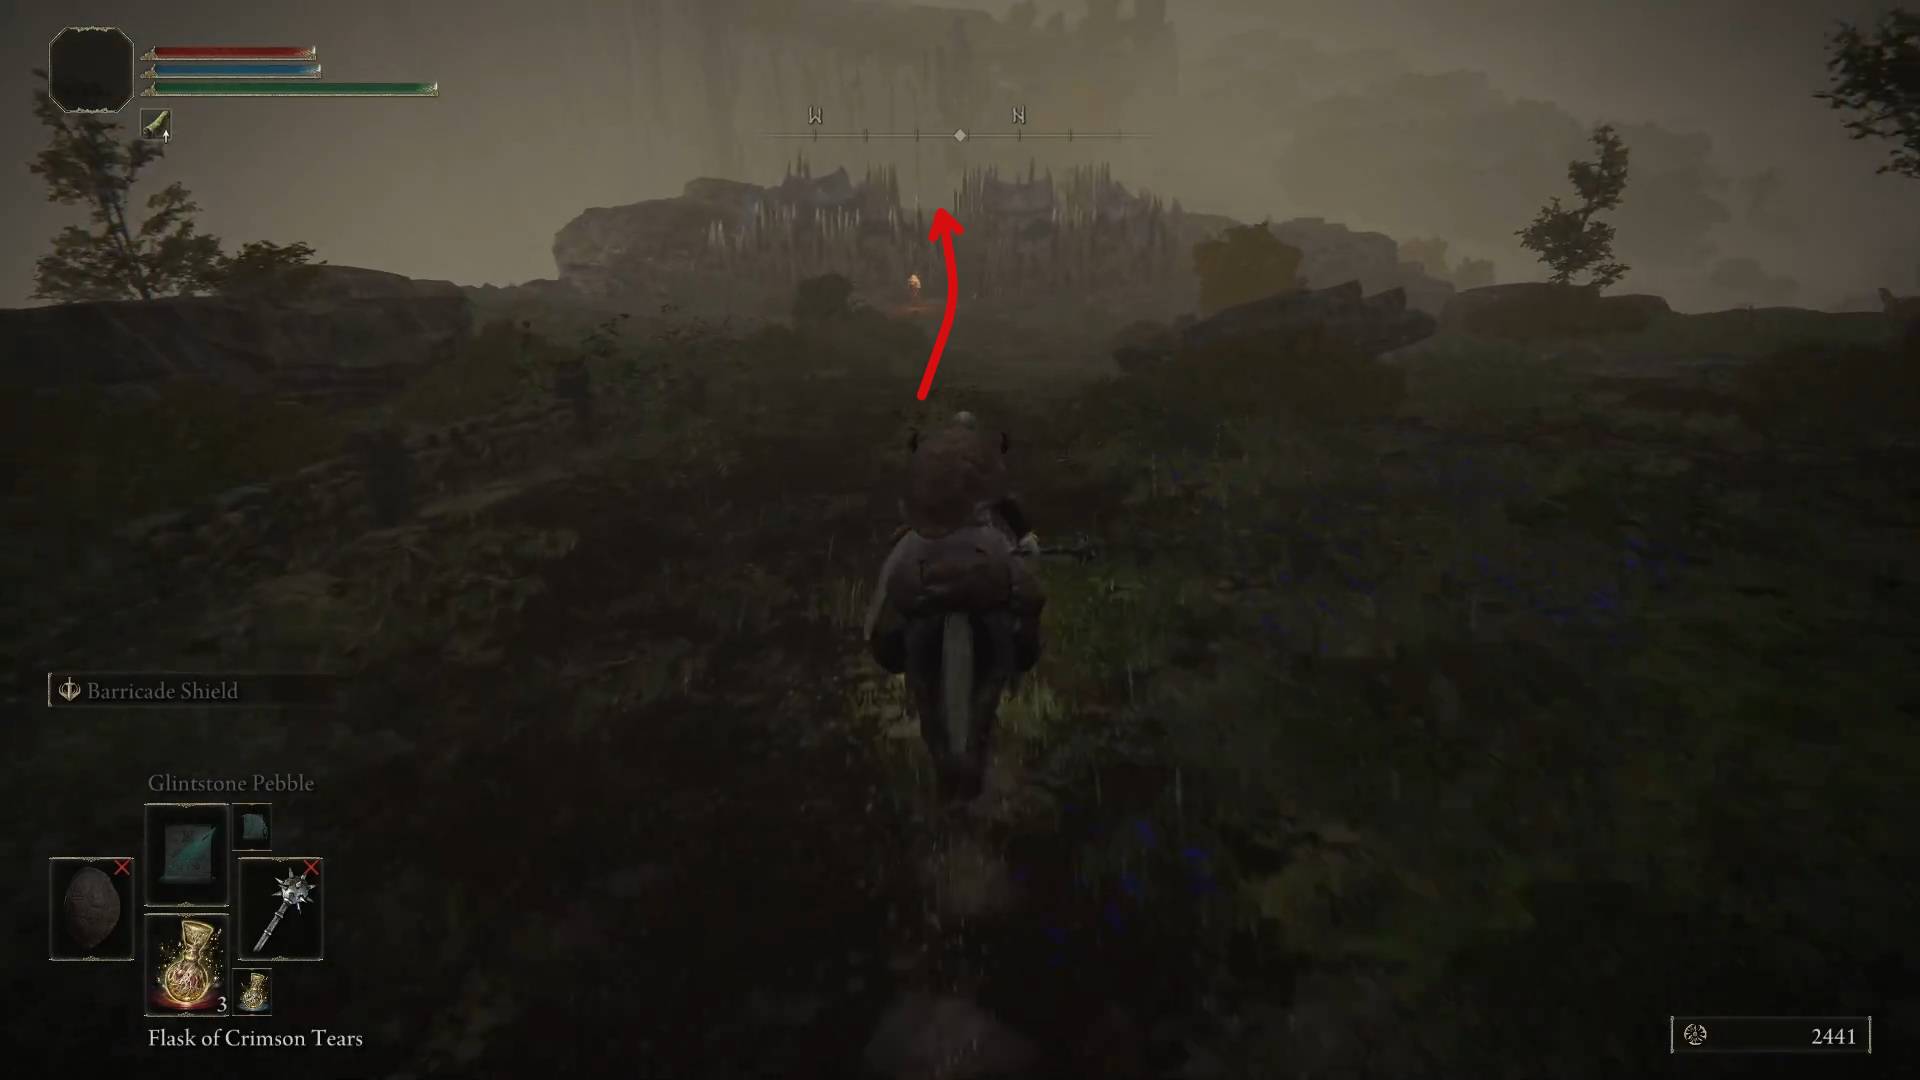
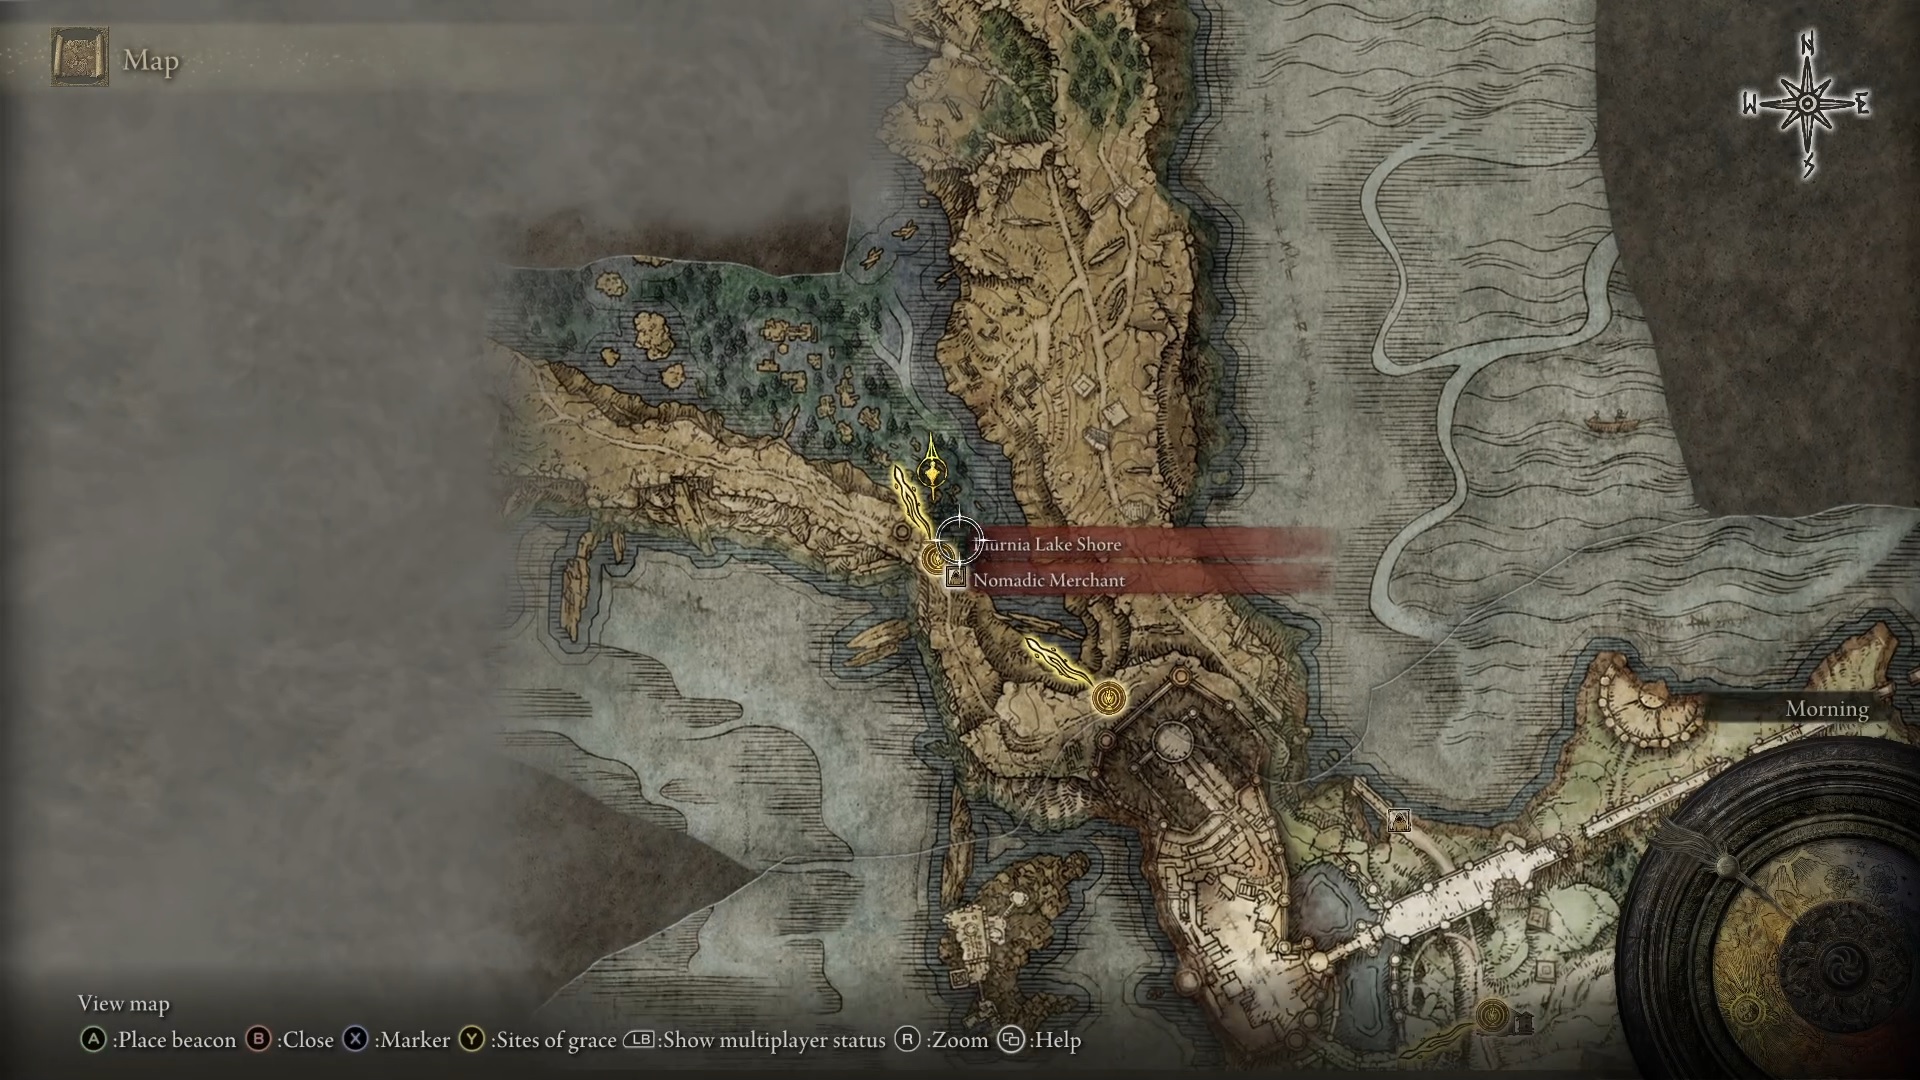
Before we move on, we have another quick stop to make. Once you’re back at the Lake-Facing Cliffs grace, follow the road further into Liurnia, down into a valley and past an enemy camp, until you find yourself at the Liurnia Lake Shore grace. The merchant there sells a Lantern for 1800 runes. The Lantern is a convenient light source, and you definitely want to have it.
Go down the hillThrough the campAnd towards the campfireLantern location
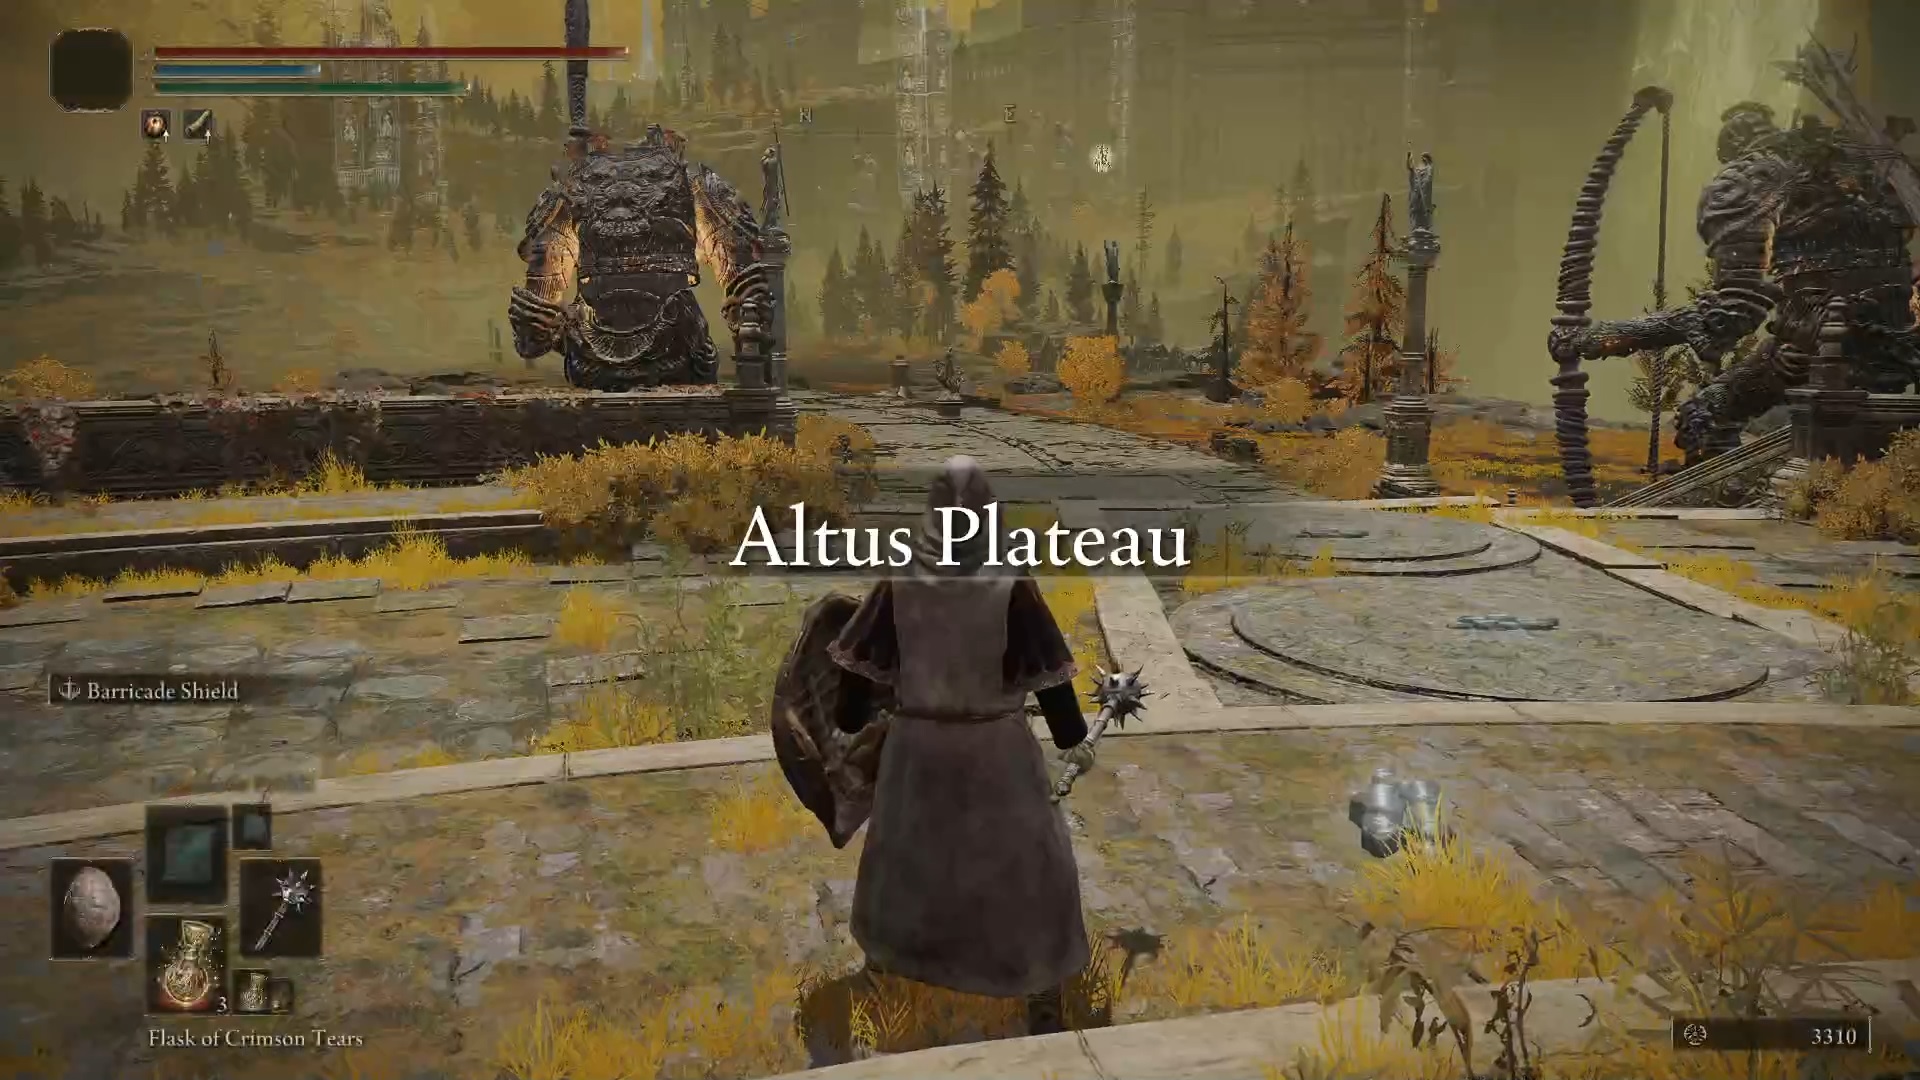
Reaching Altus Plateau
With the basics sorted out, go back to the Gatefront Ruins grace and start heading east. You’ll soon discover the Agheel Lake North grace and a bridge right past it. Crossing the bridge will put you at a fork in the road. While our goal is to the north, we’ll first be making a quick detour south, towards the Weeping Peninsula.
Preparation
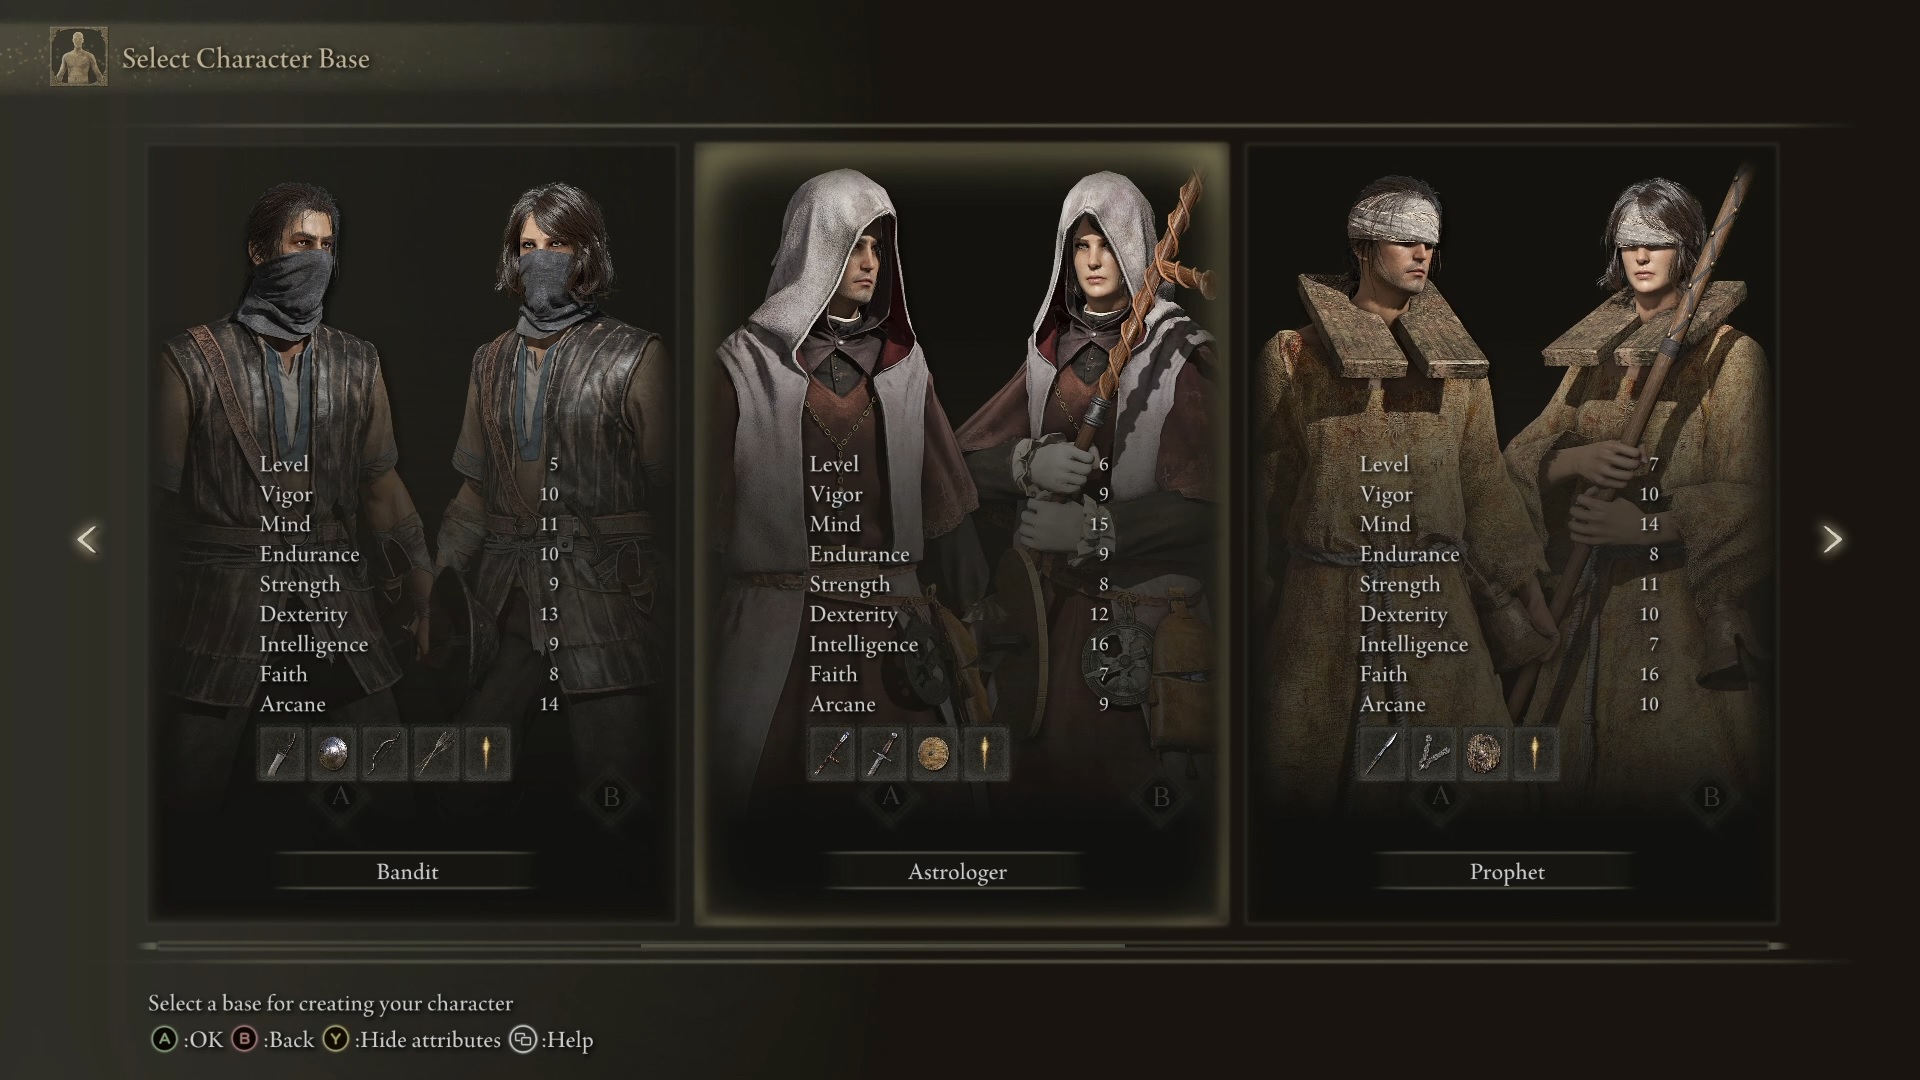
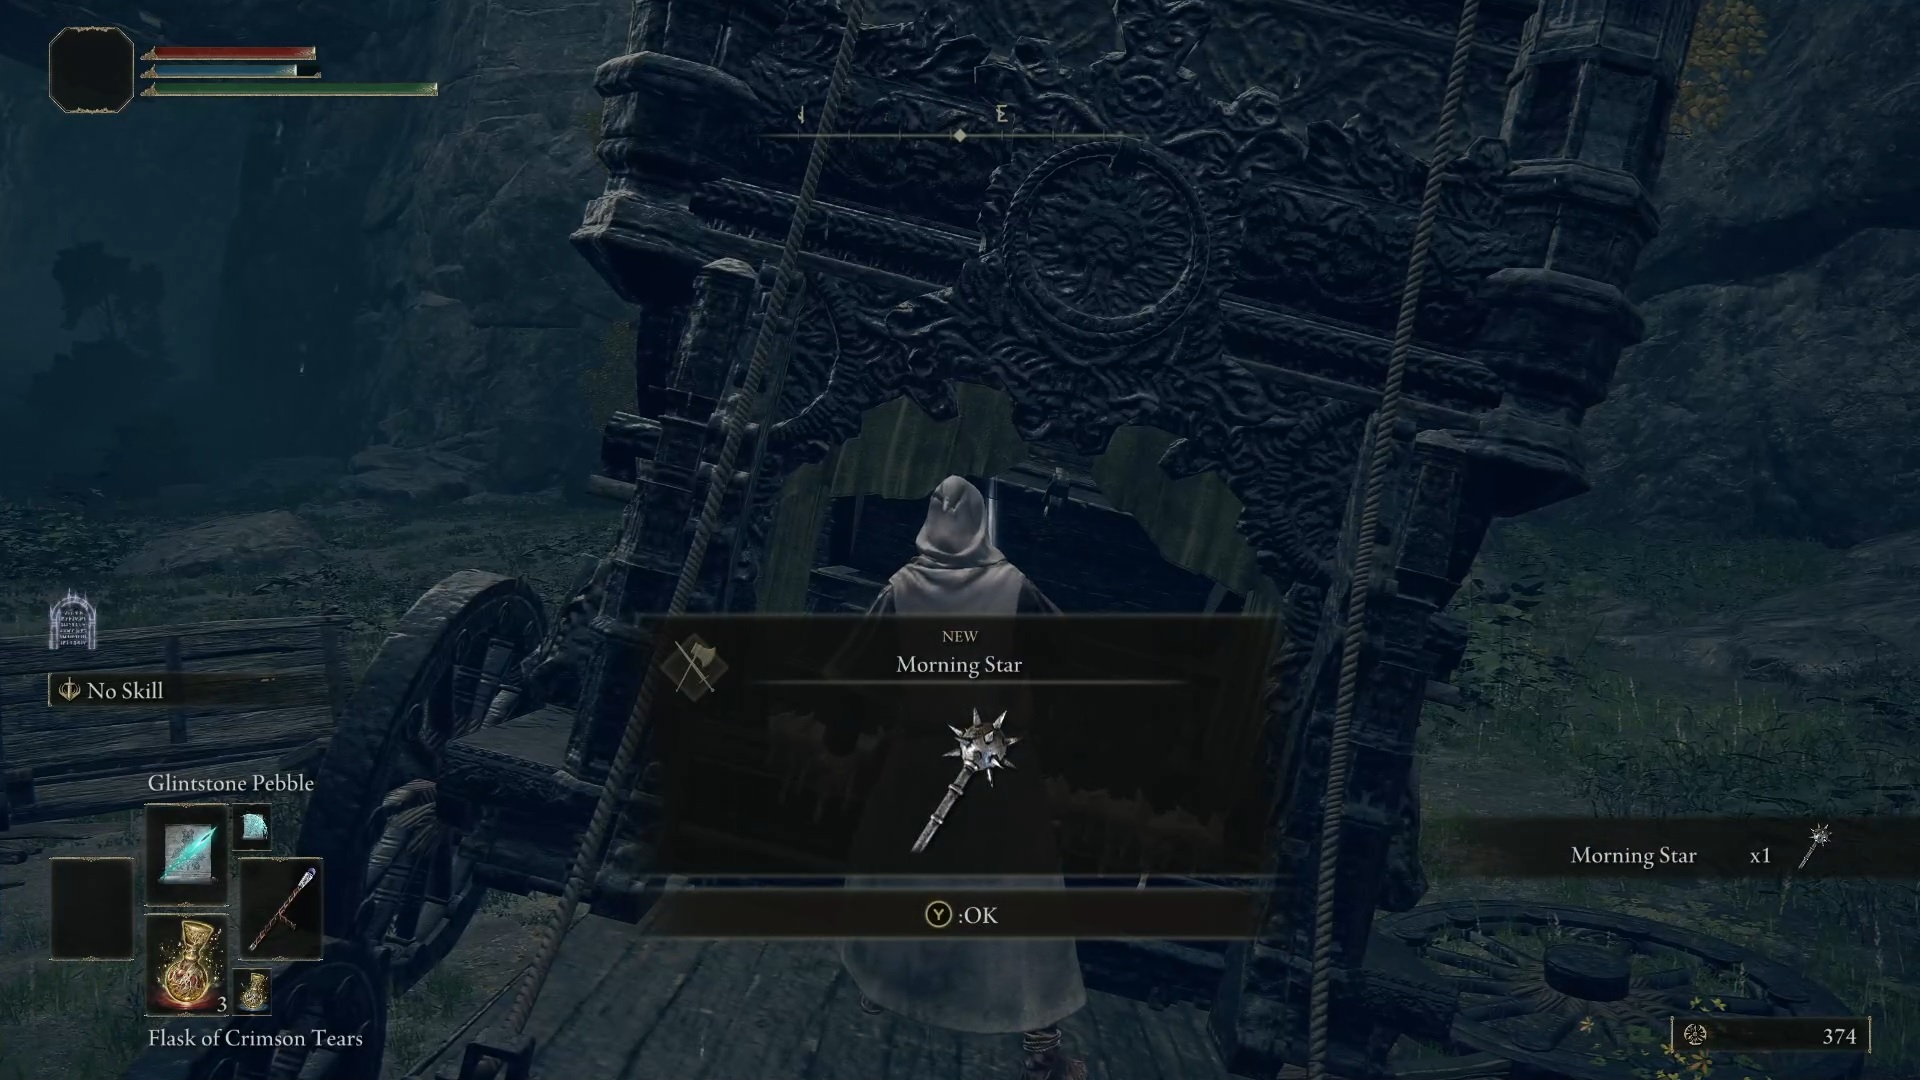
Certain parts of our grand plan require us to have a weapon that deals strike damage and a weapon that can bleed your enemies. The Morning Star is perfect for this, as it does both and only requires your character to have 12 Strength and 8 Dexterity. This means that even the weakest starting class – the Astrologer, who starts the game with 8 Strength, can effectively wield the Morning Star in two hands without any rune investment.
To get your hands on the Morning Star, head south at the fork while running past all the enemies you see. When you reach a large bridge with a gate, be careful as the enemies there will be shooting ballista bolts at you. Engage in some evasive maneuvers until you reach the safety of the Bridge of Sacrifice grace on the peninsula.
Head further south through a natural tunnel and you’ll see a site of some recent battle and an overturned cart. At the back of the cart is an open chest with the Morning Star inside.
Follow the roadTry dodgingYour targetYour reward
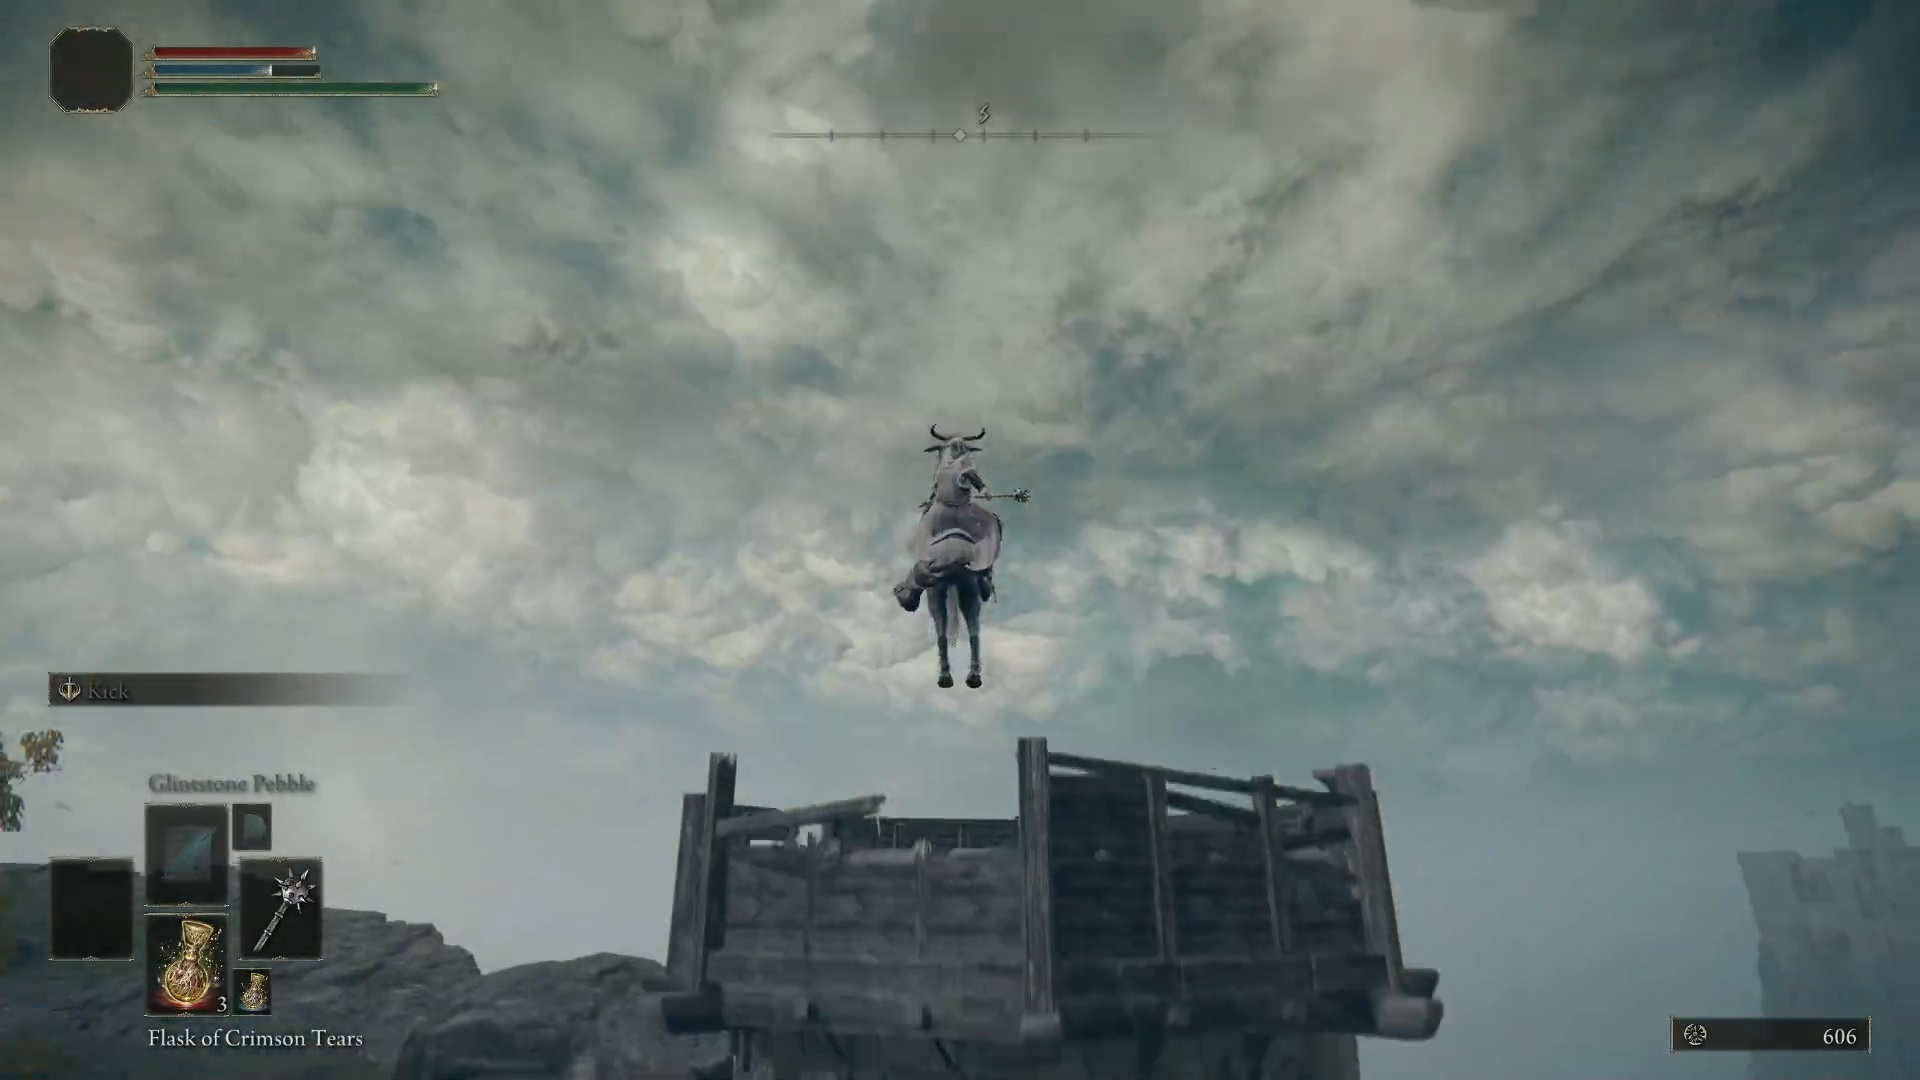
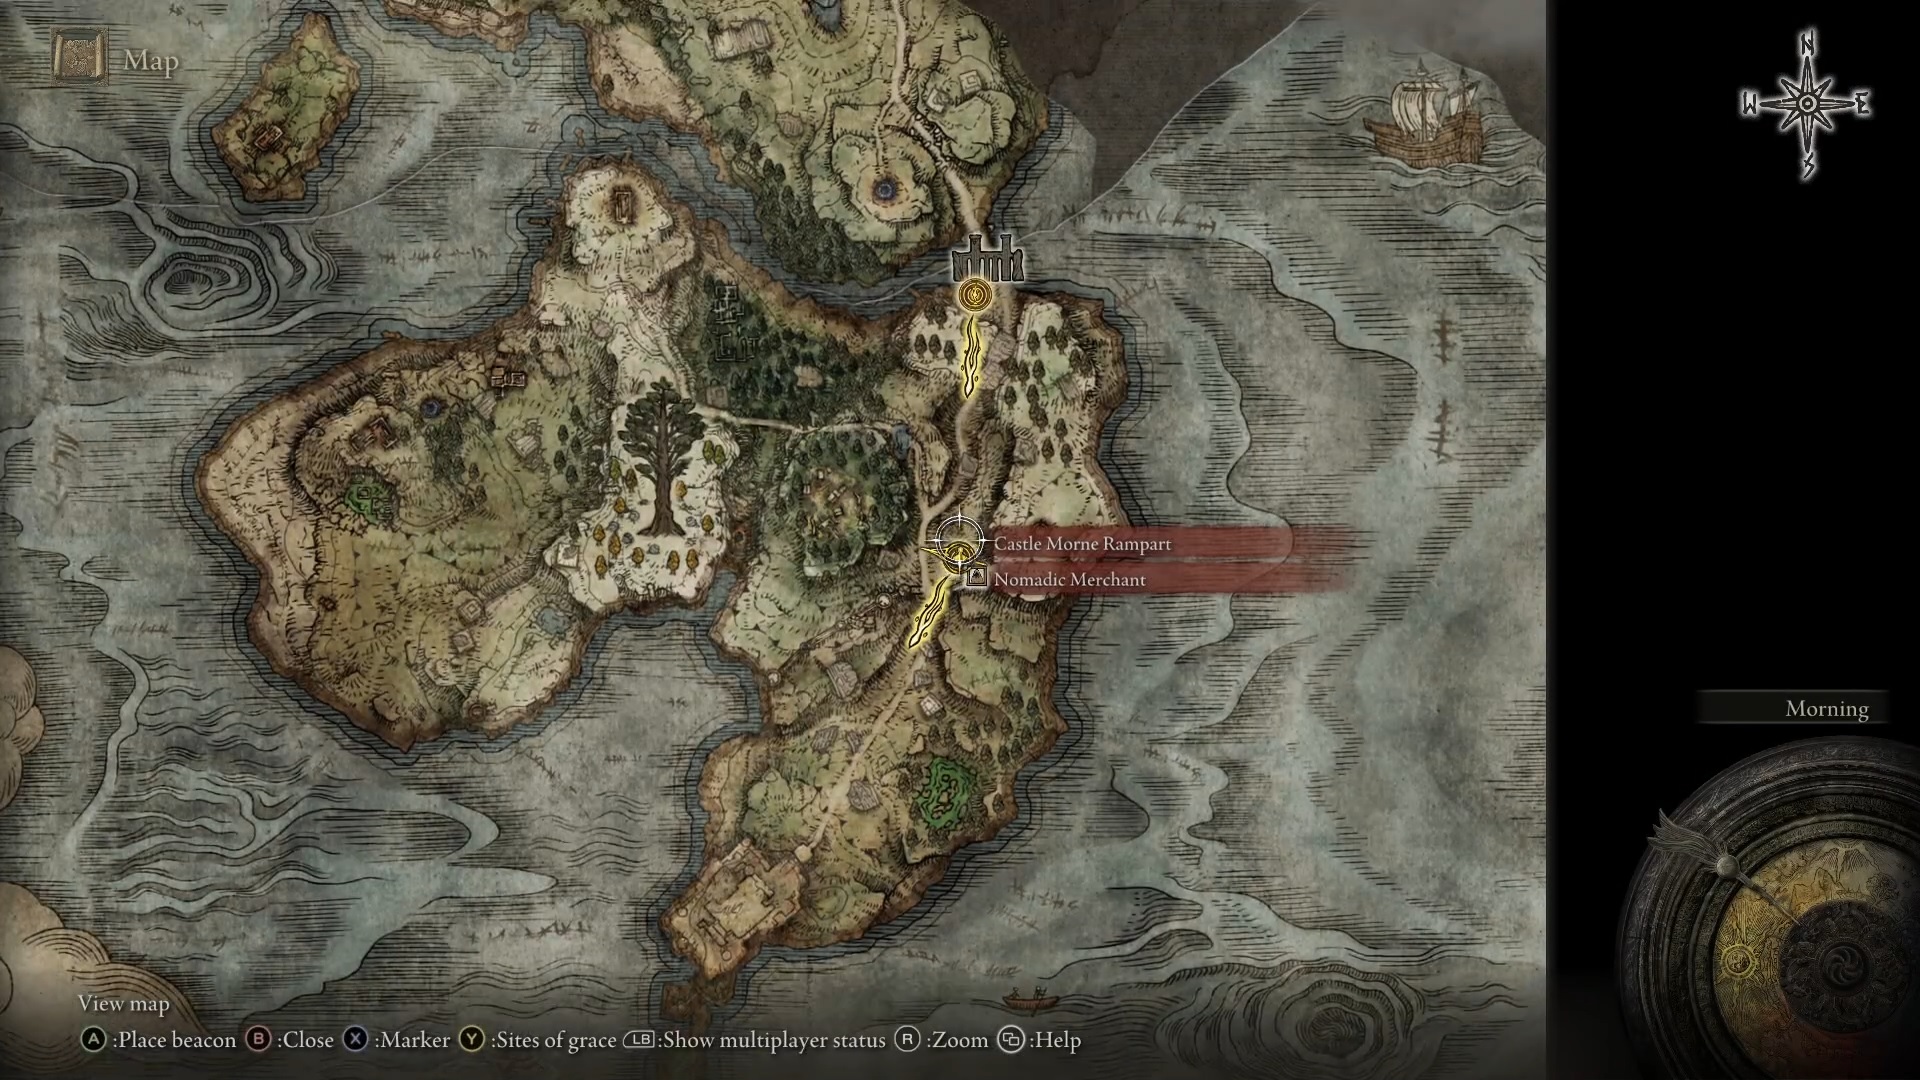
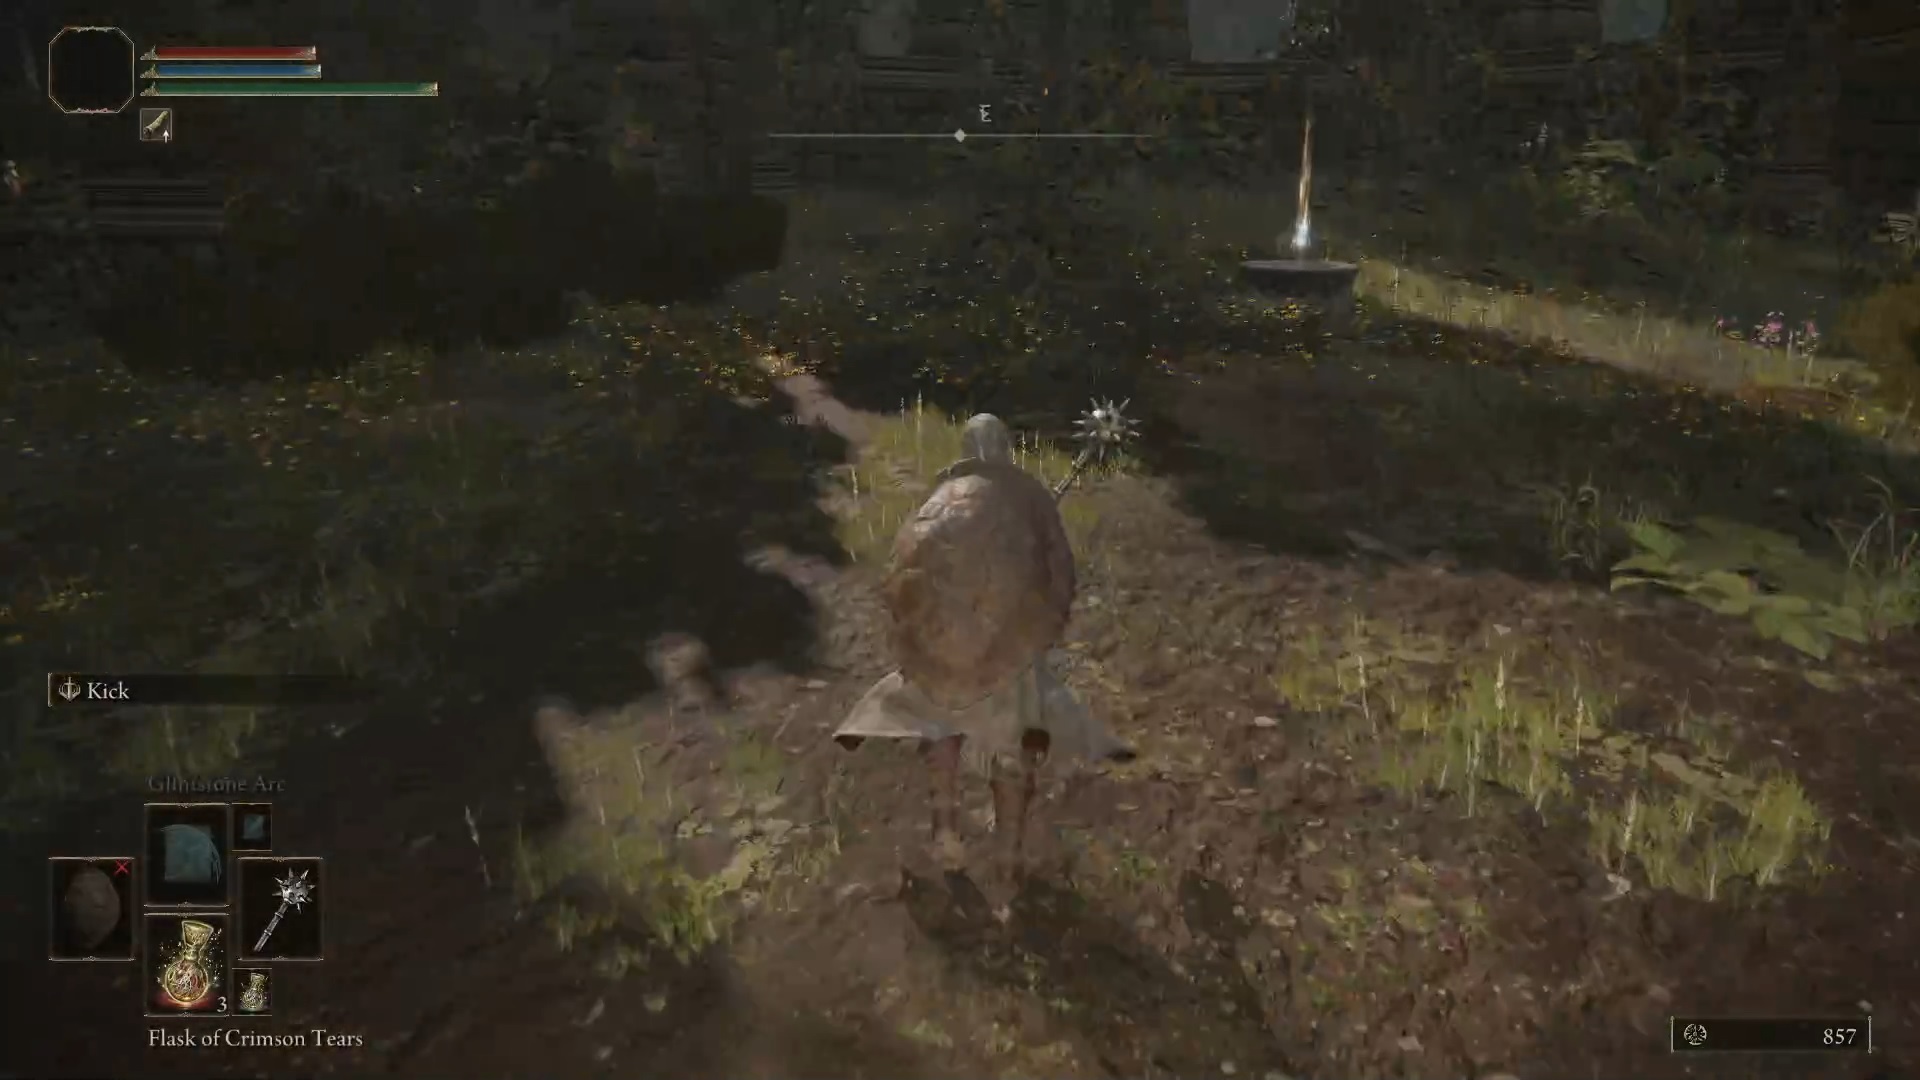
While this is the only item we really need there, keep going south along the road until you reach the Castle Morne Rampart grace. You’ll see a merchant around there, but instead of talking to him, use the Spiritspring stream behind the site of grace, and jump up towards the tower. Up there you’ll find the Great Turtle Shell, a shield that passively raises your stamina regeneration even if you just have it on your back while two-handing your weapon.
Spiritspring behind the graceSpiritspring jumpGreat Turtle ShellGreat Turtle Shell location
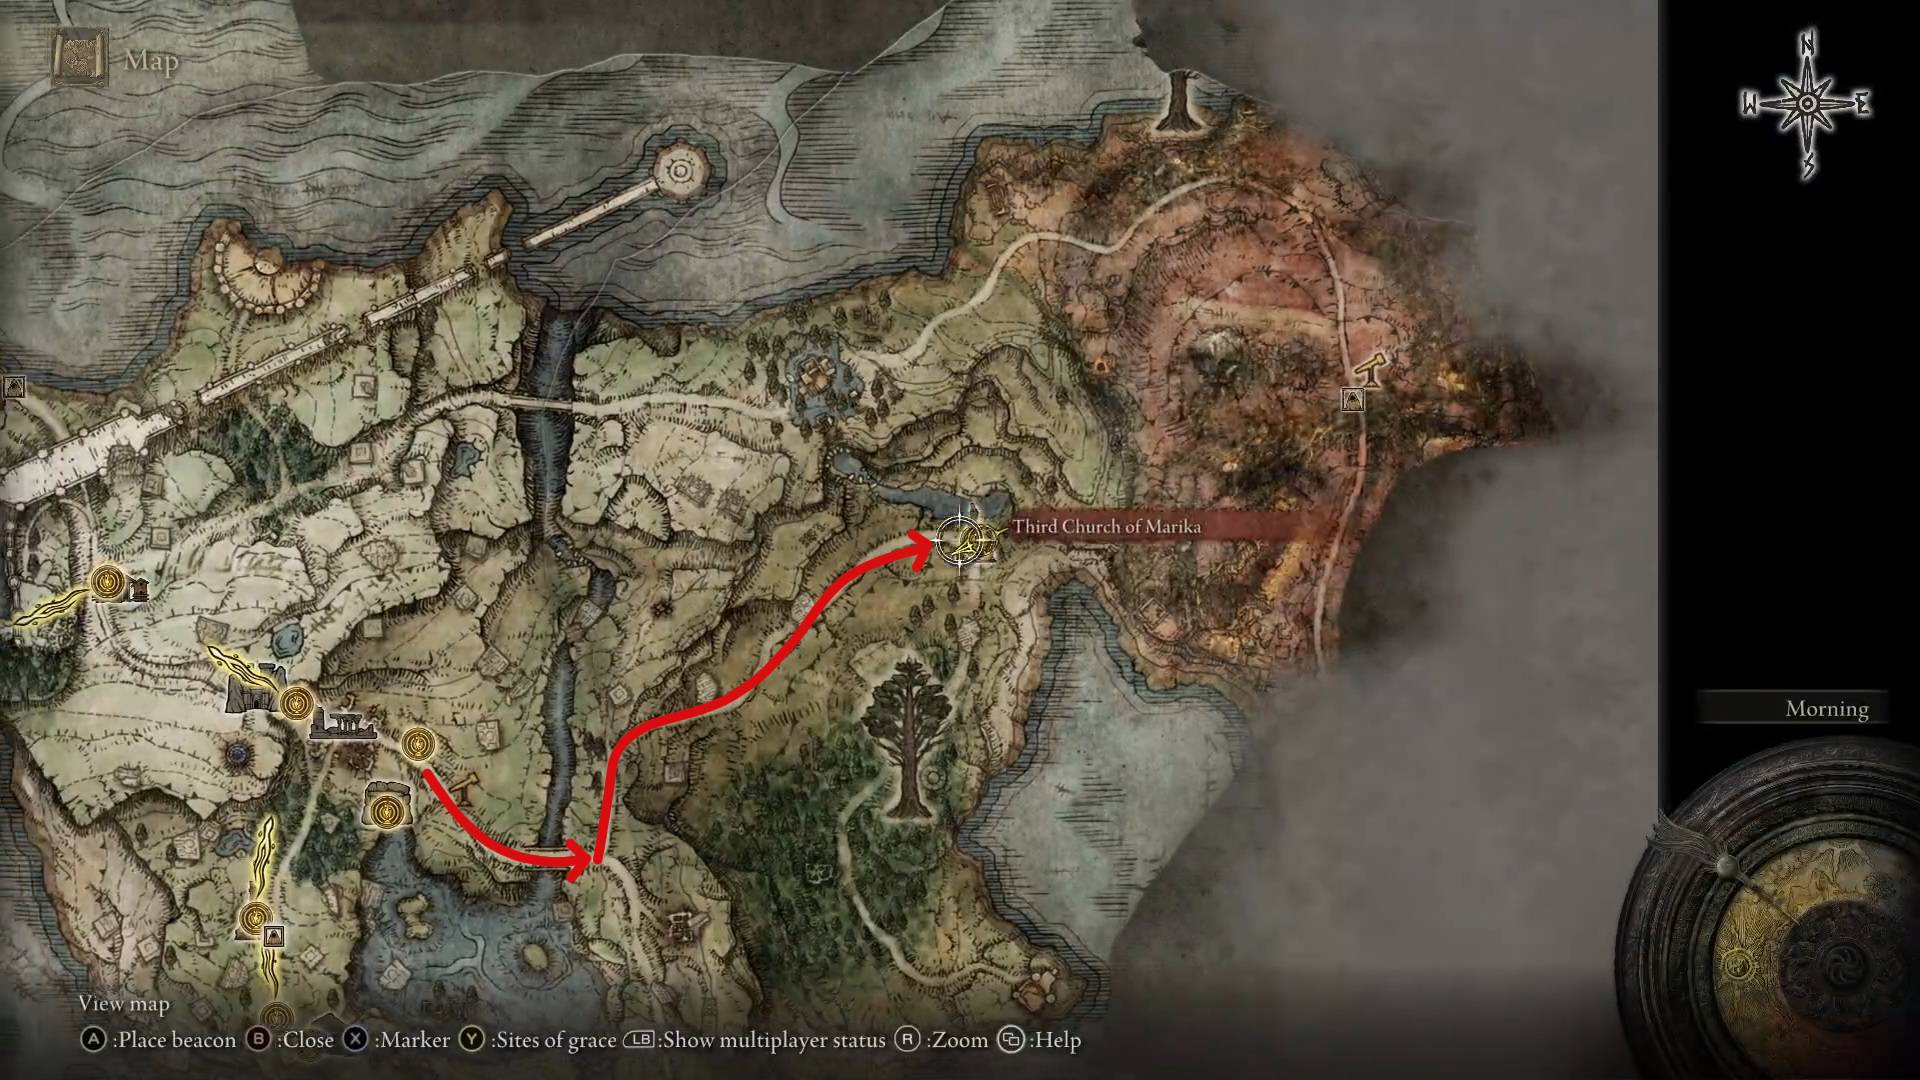
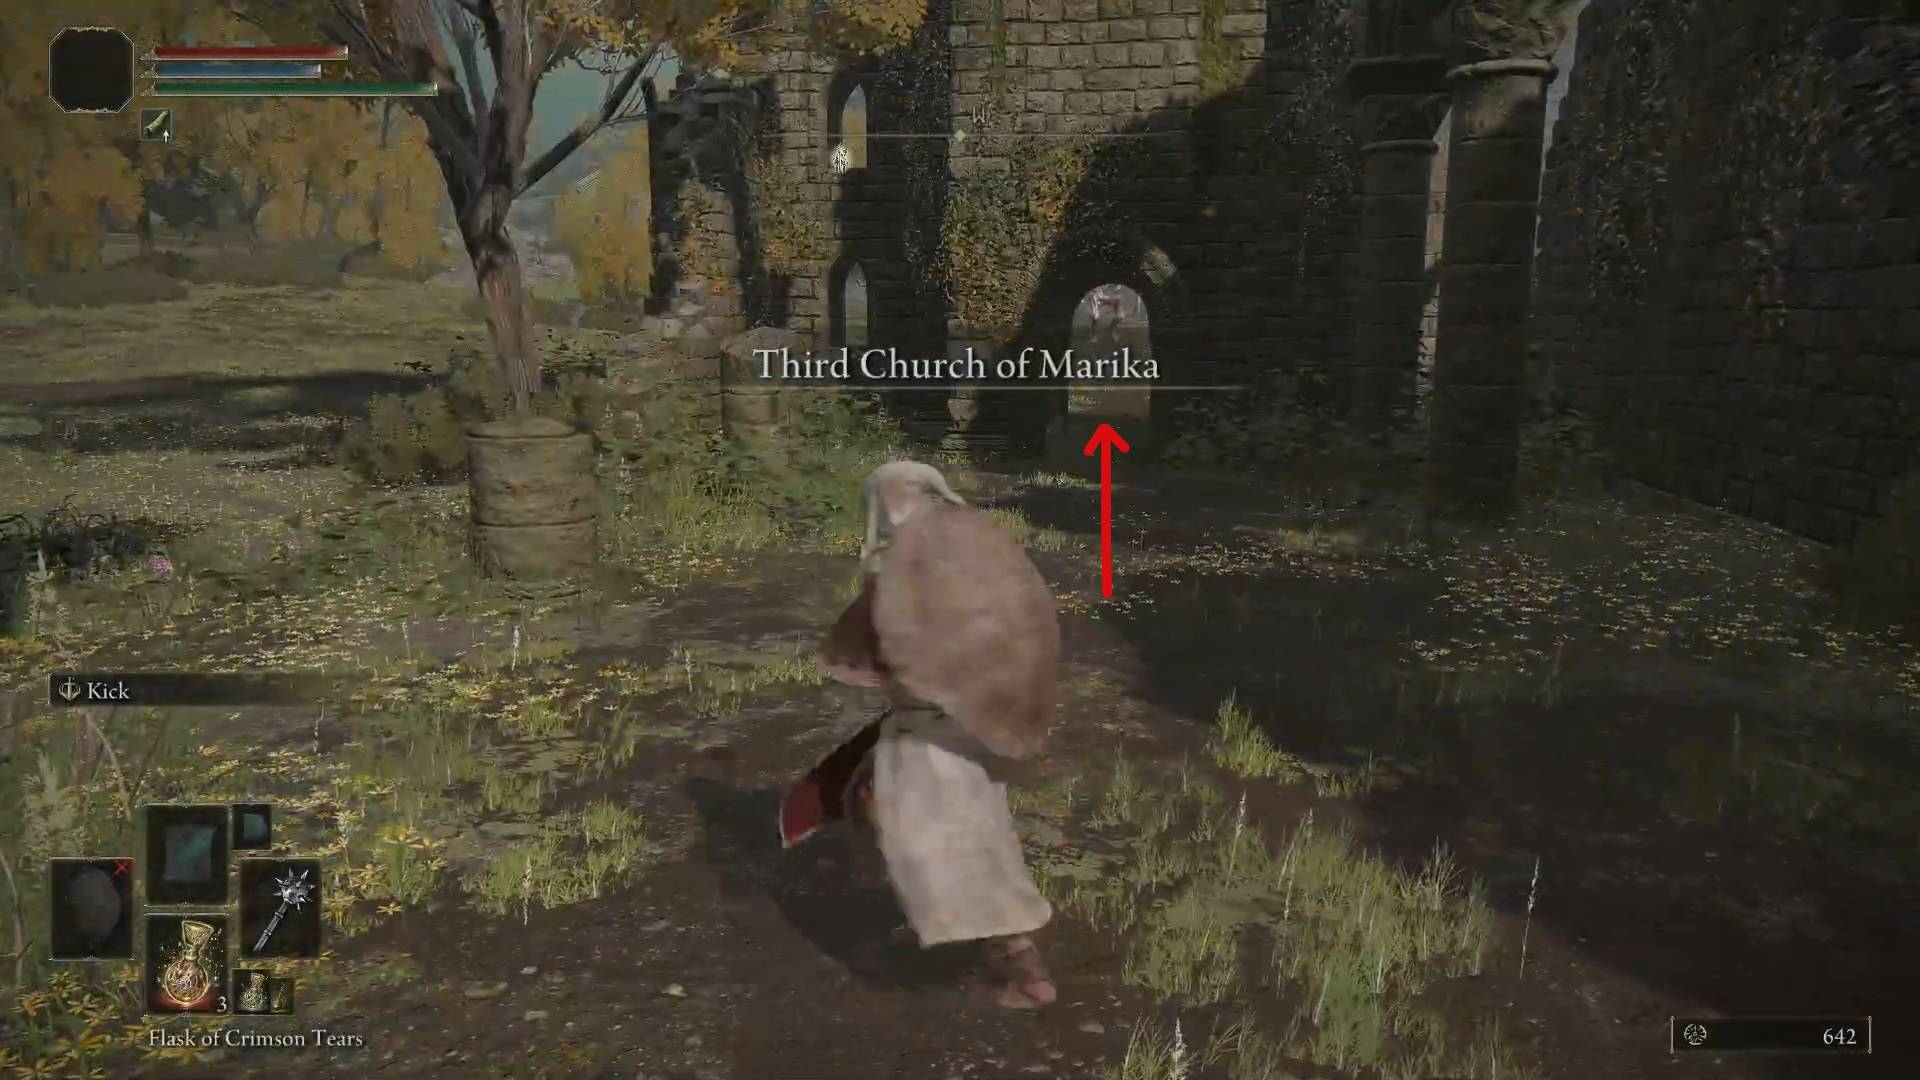
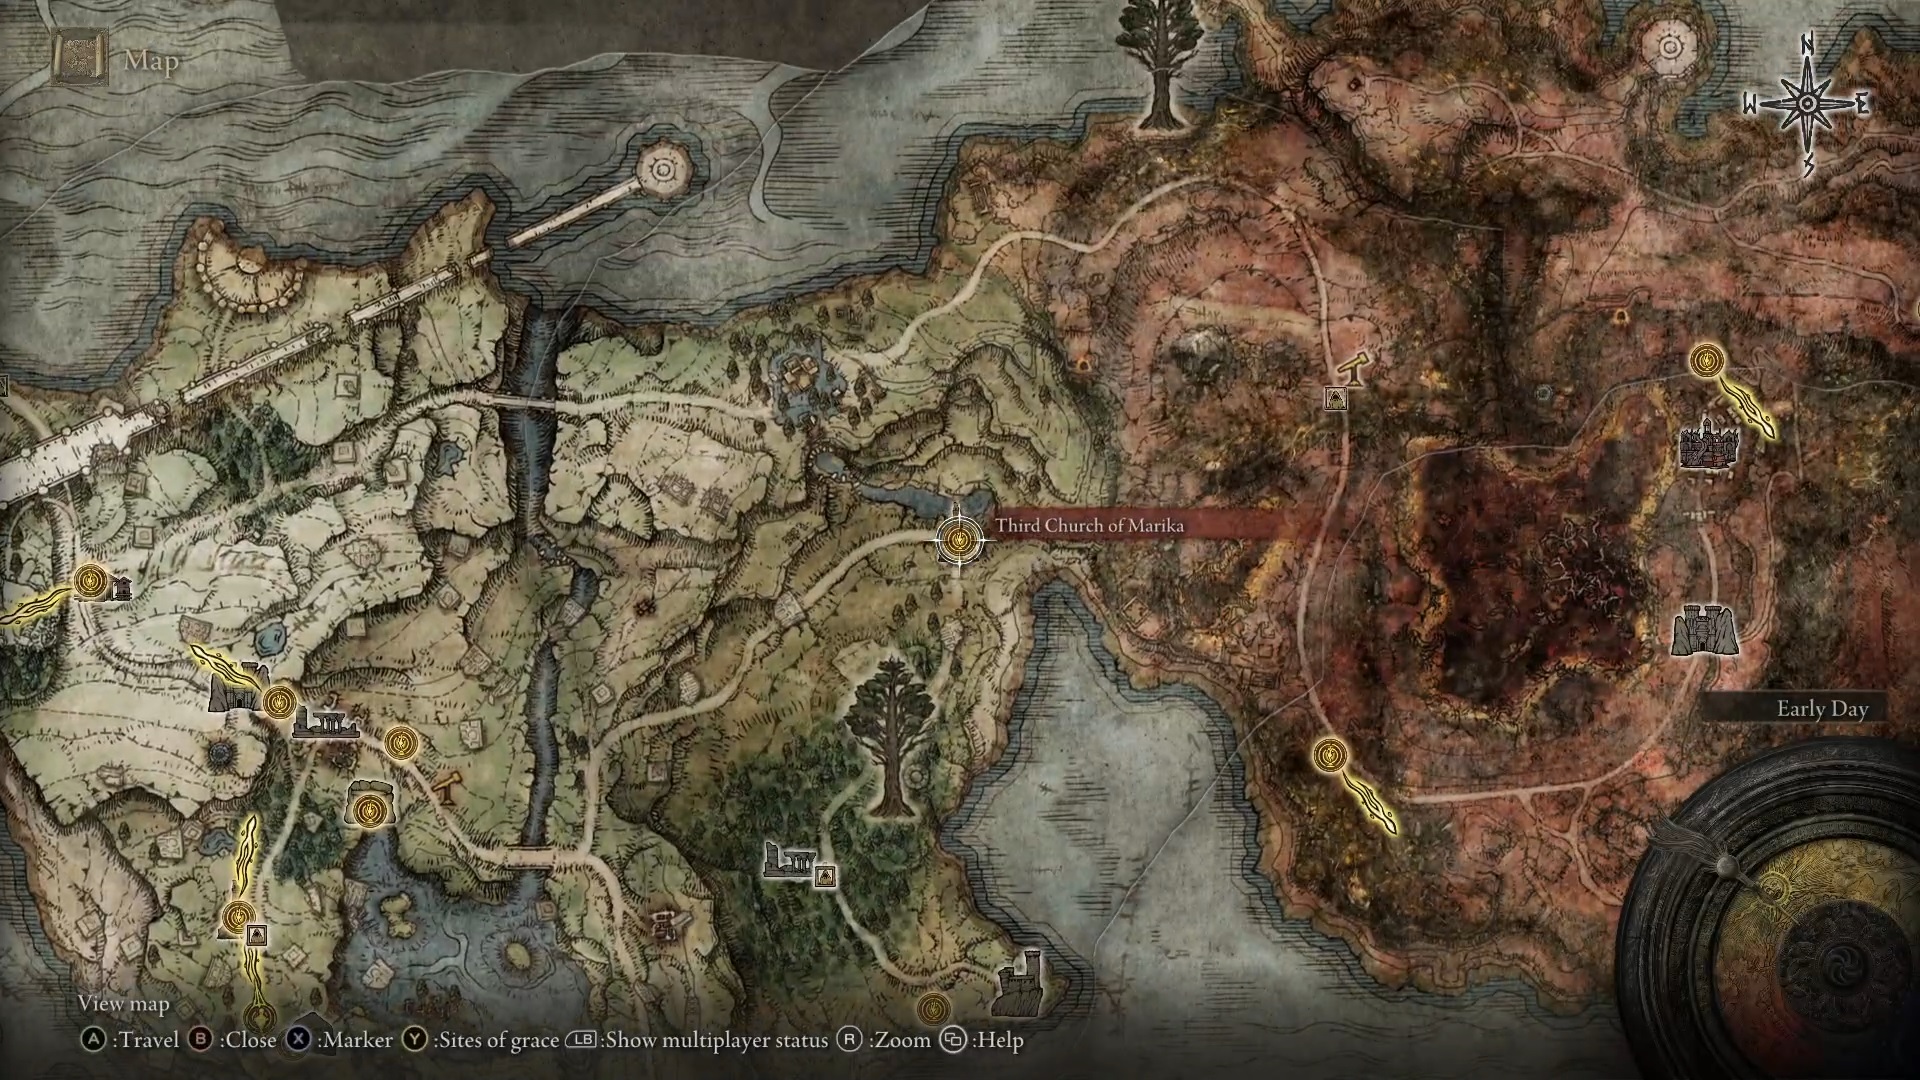
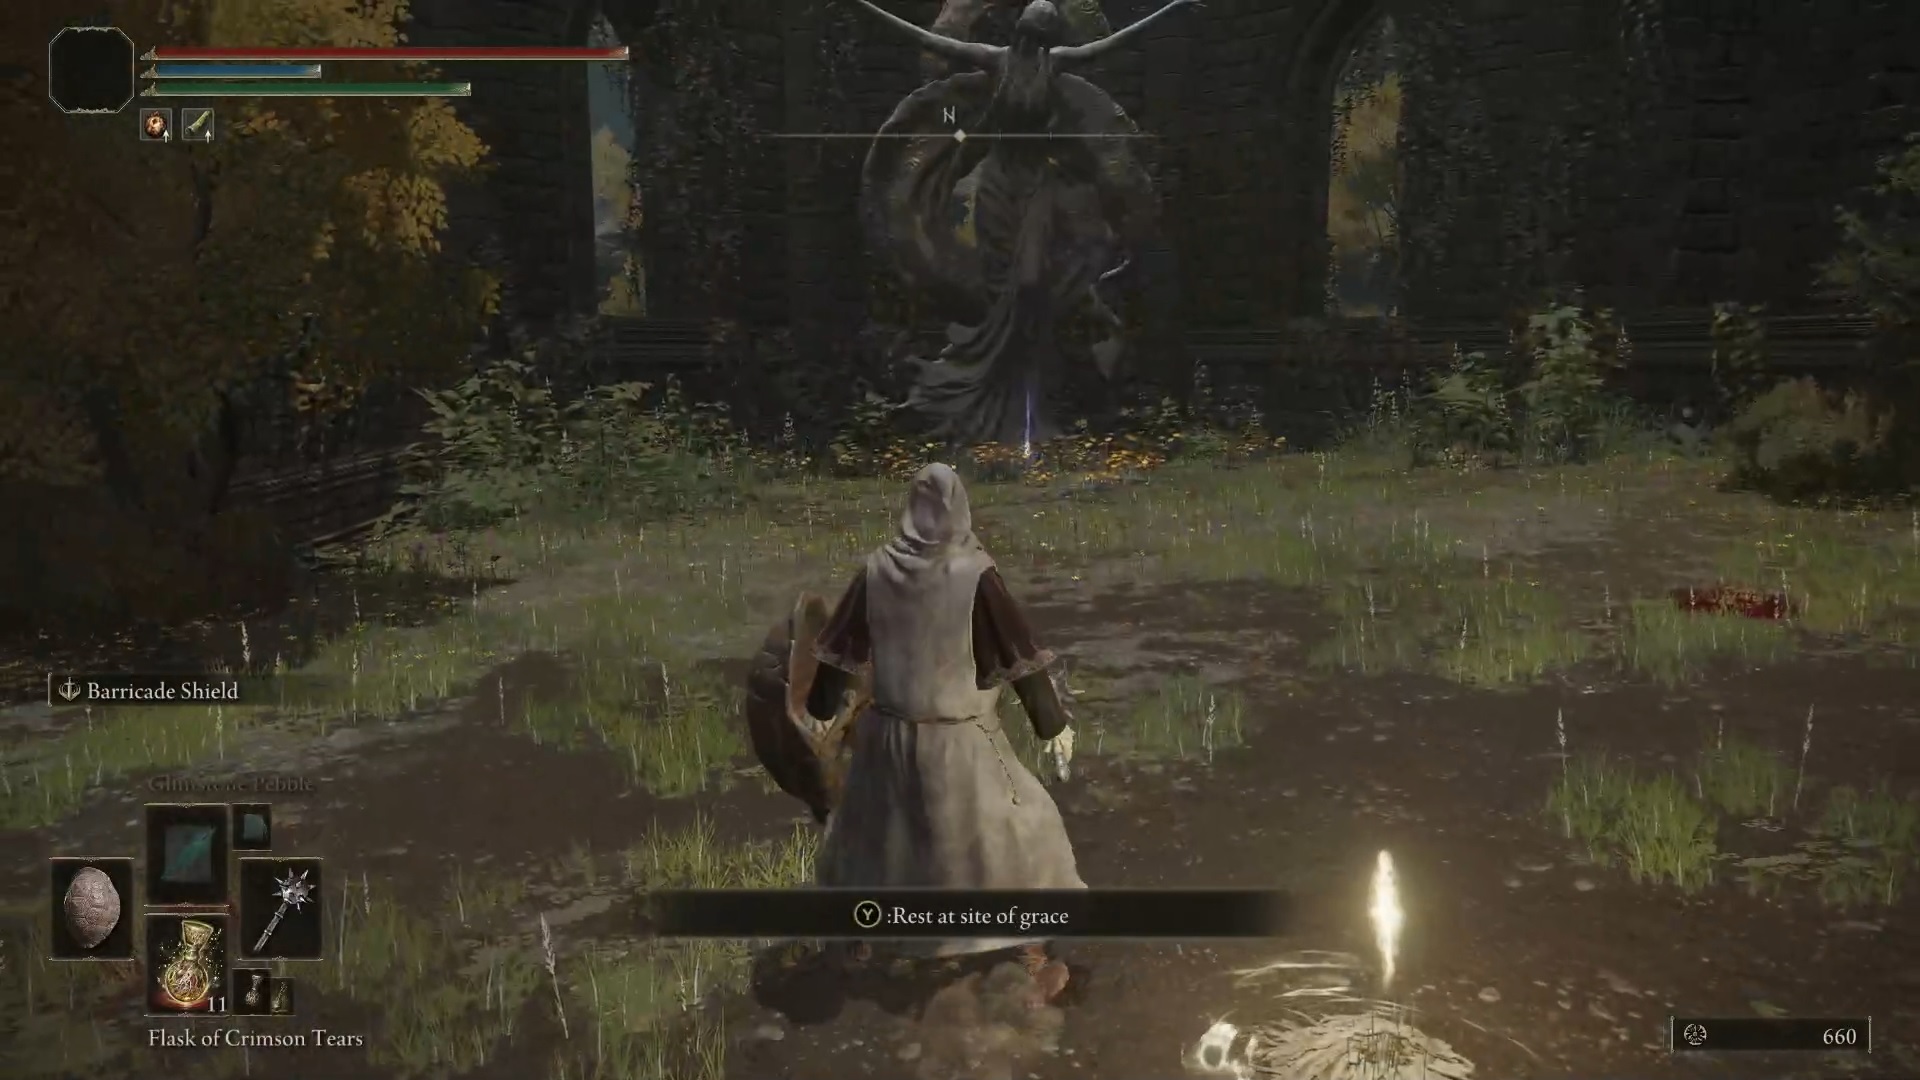
With that taken care of, go back to the fork in the road following the Agheel Lake North grace. This time follow the road north until you reach the Third Church of Marika. Sitting in a basin inside is the Flask of Wondrous Physick – a customizable potion you’ll be able to mix to your liking.
Follow the road to the churchFlask of Wondrous Physick location
The Third Church of Marika will serve as a central location for what we need to do next. Which is finding the two halves of the Dectus Medallion.
Left Half of the Dectus Medallion
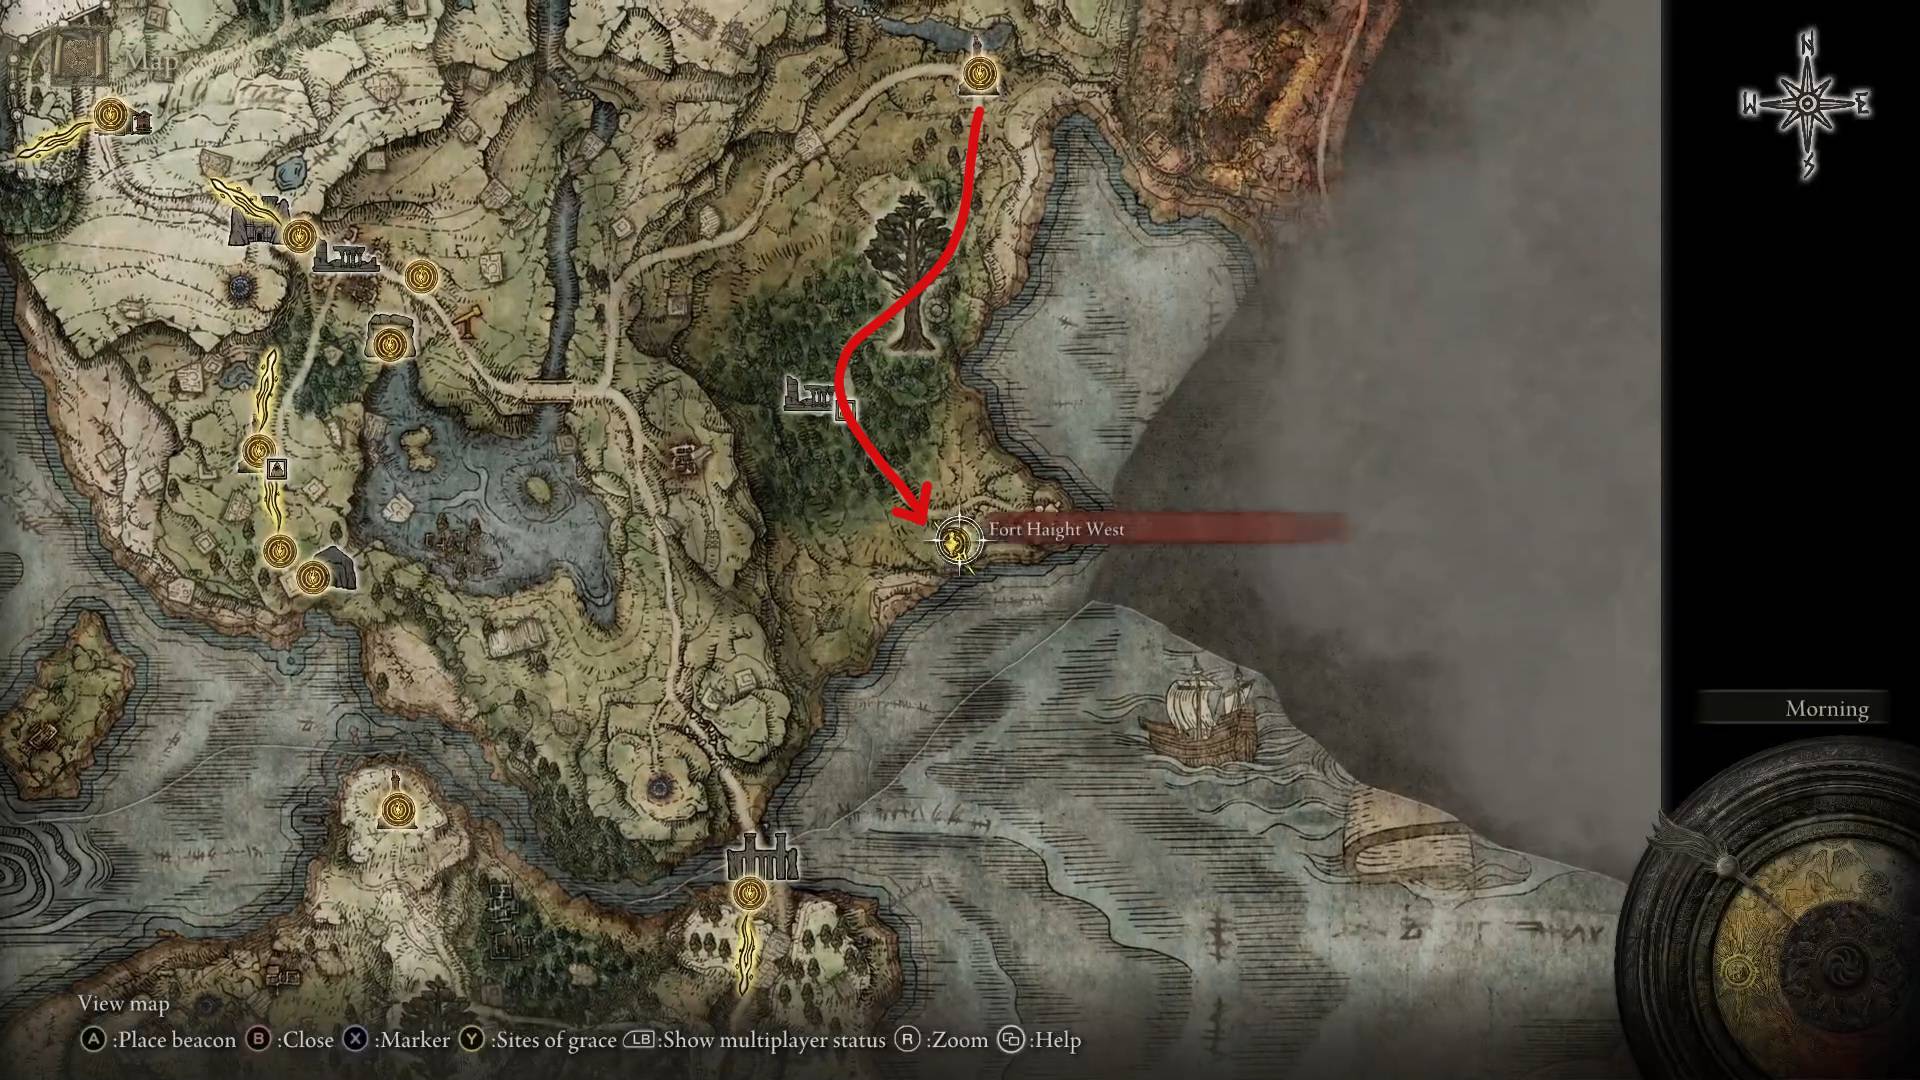
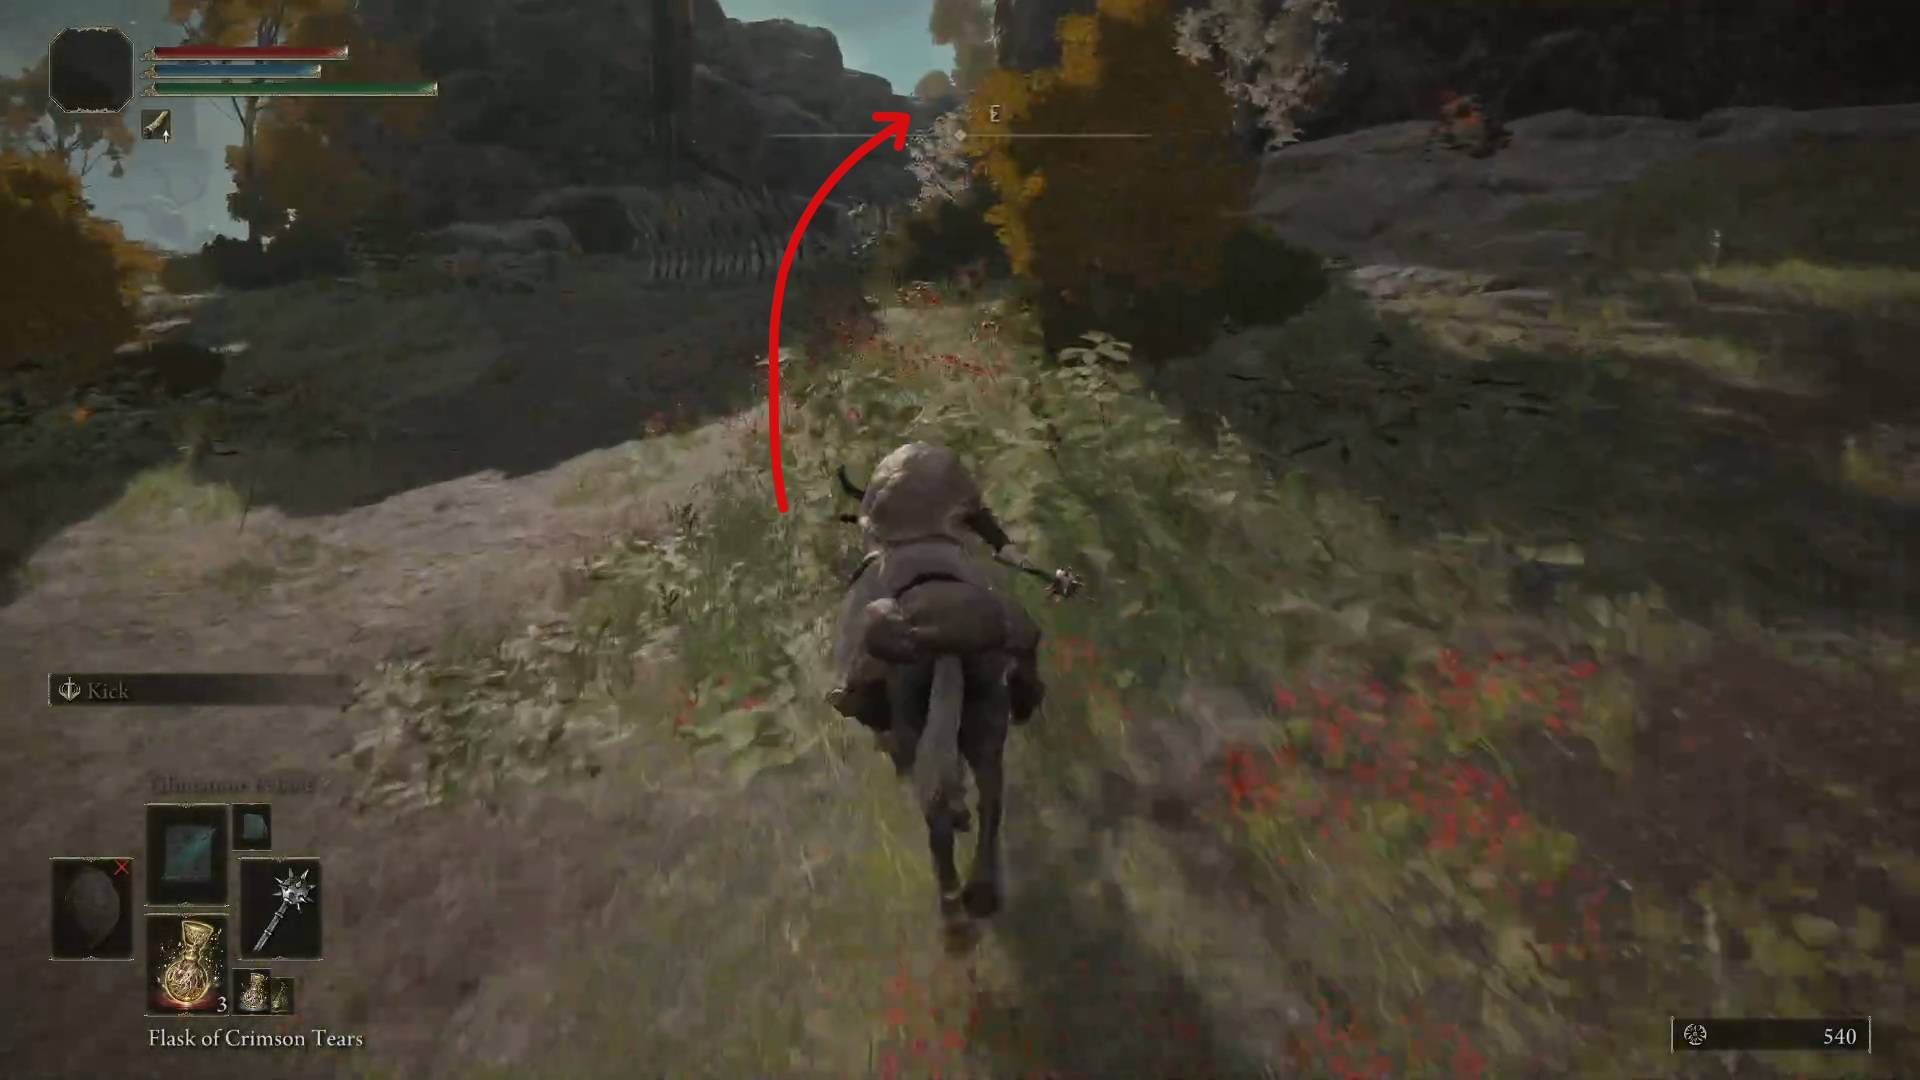
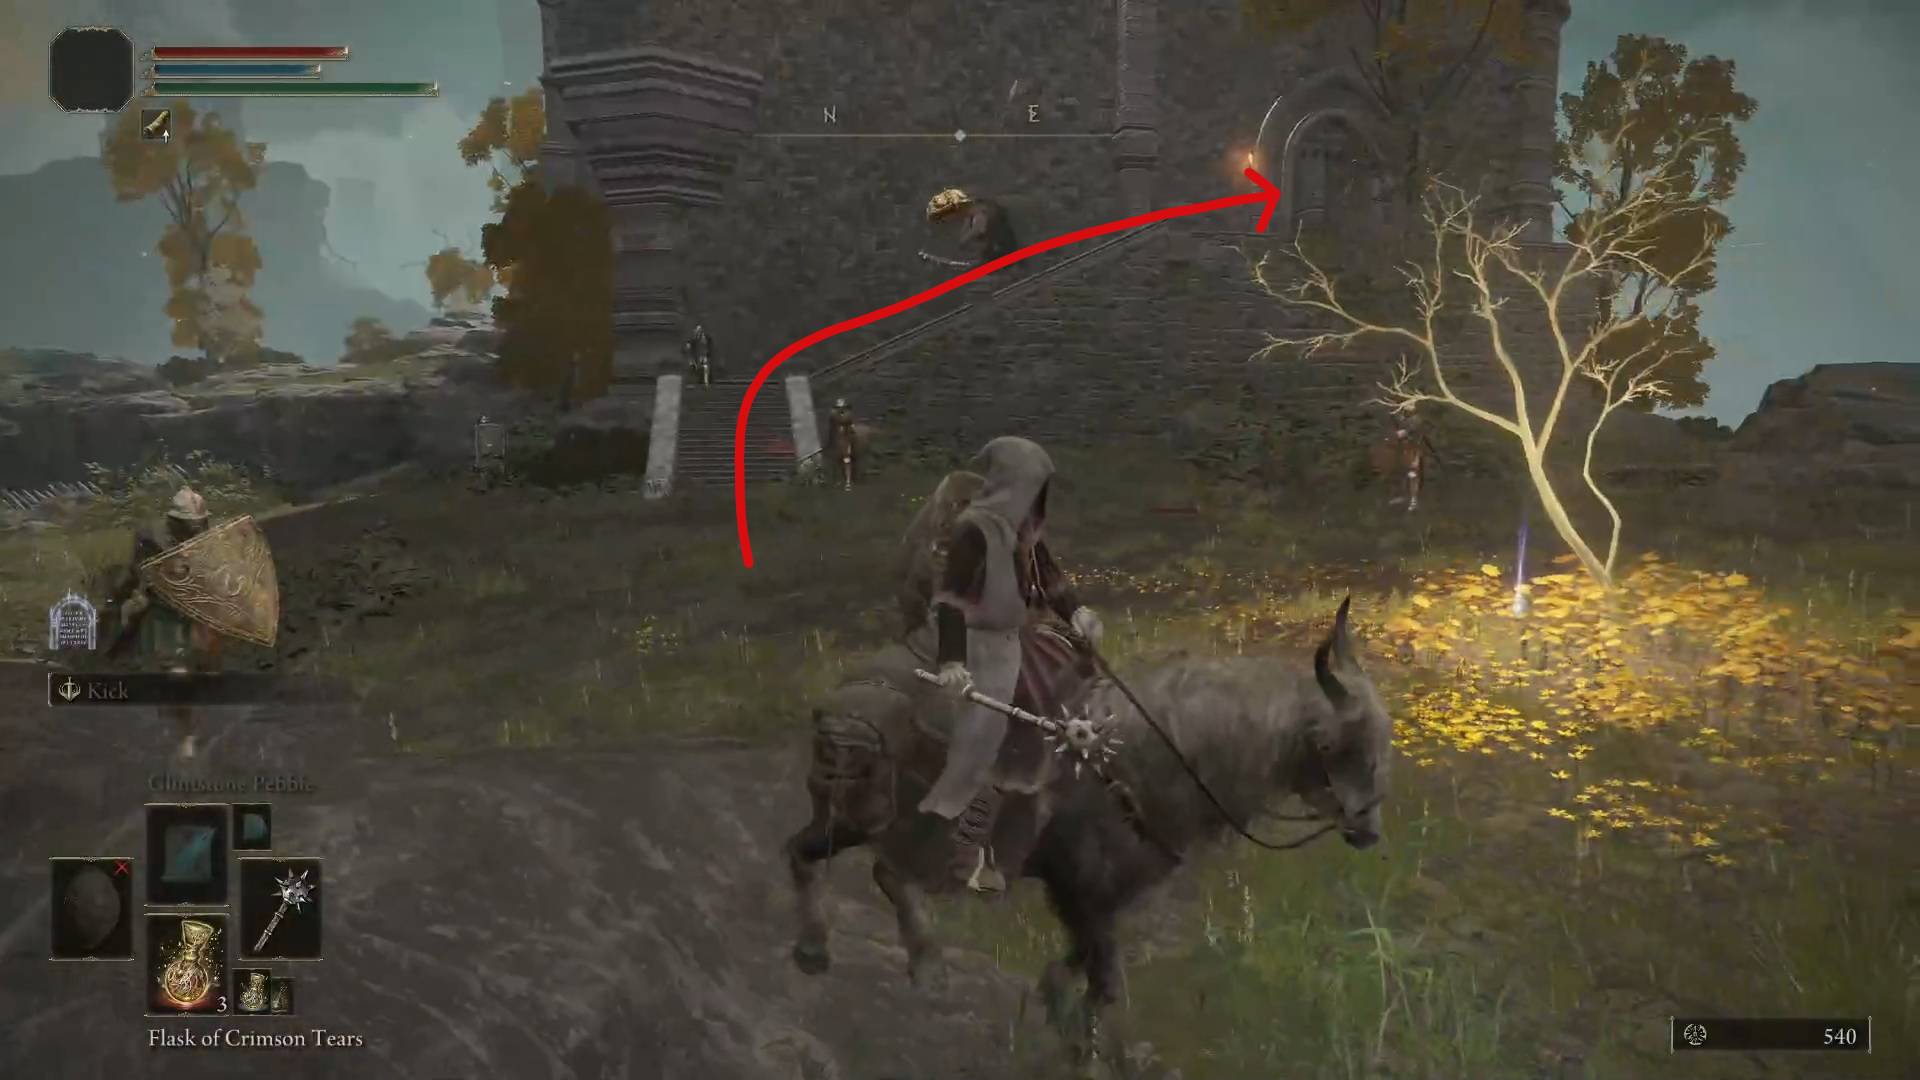
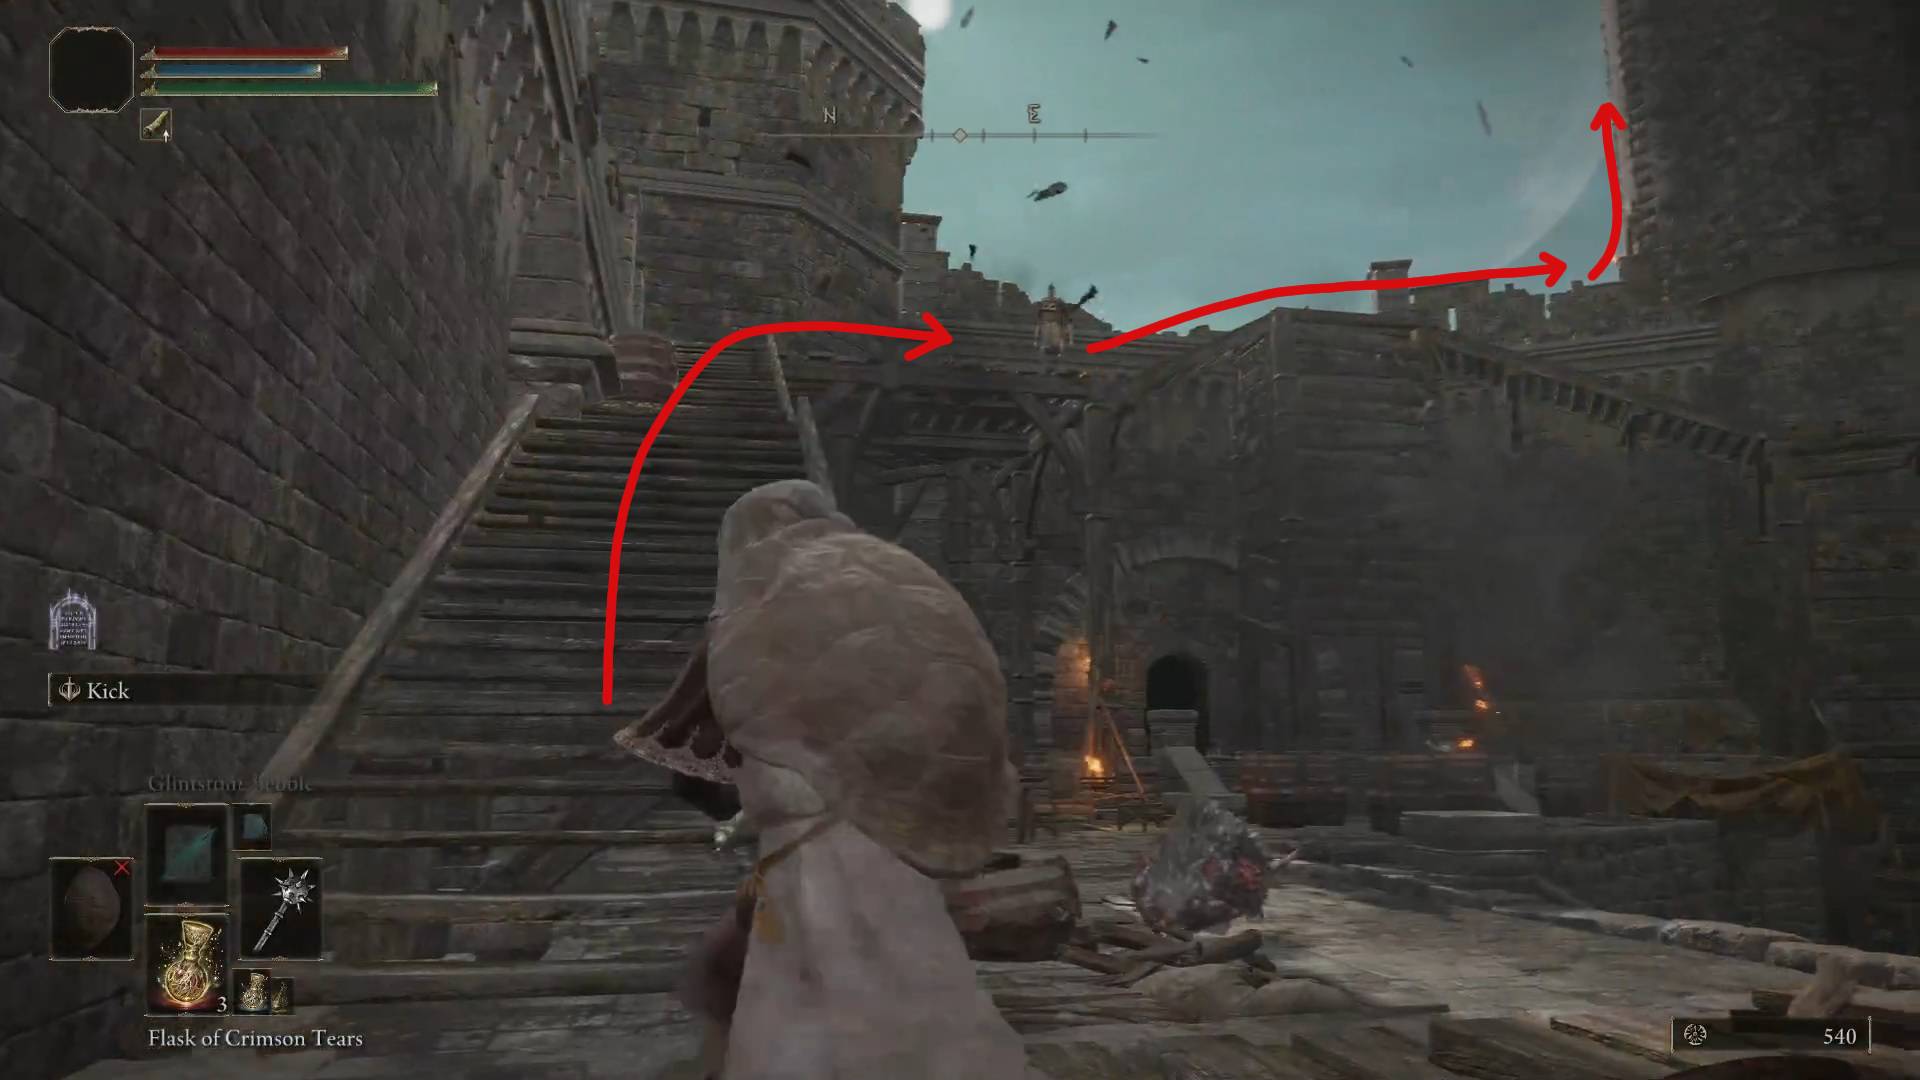
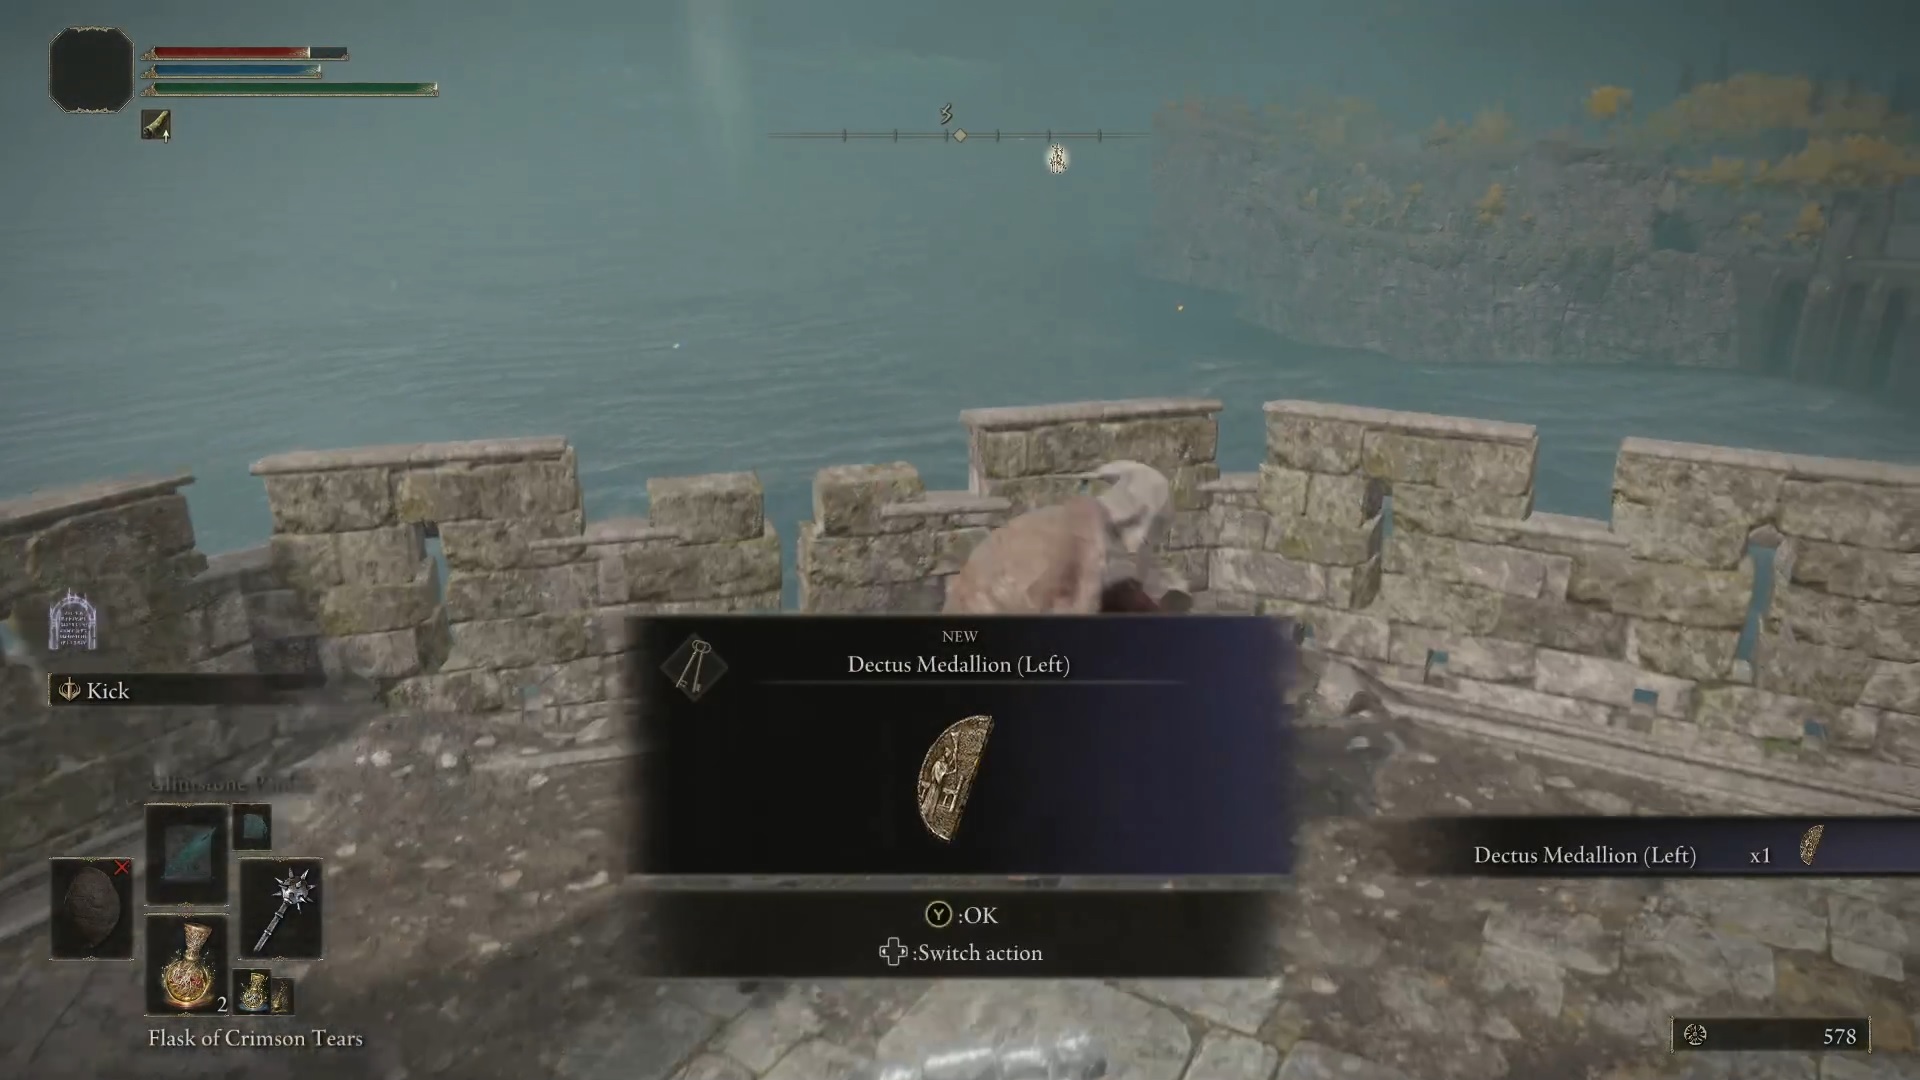
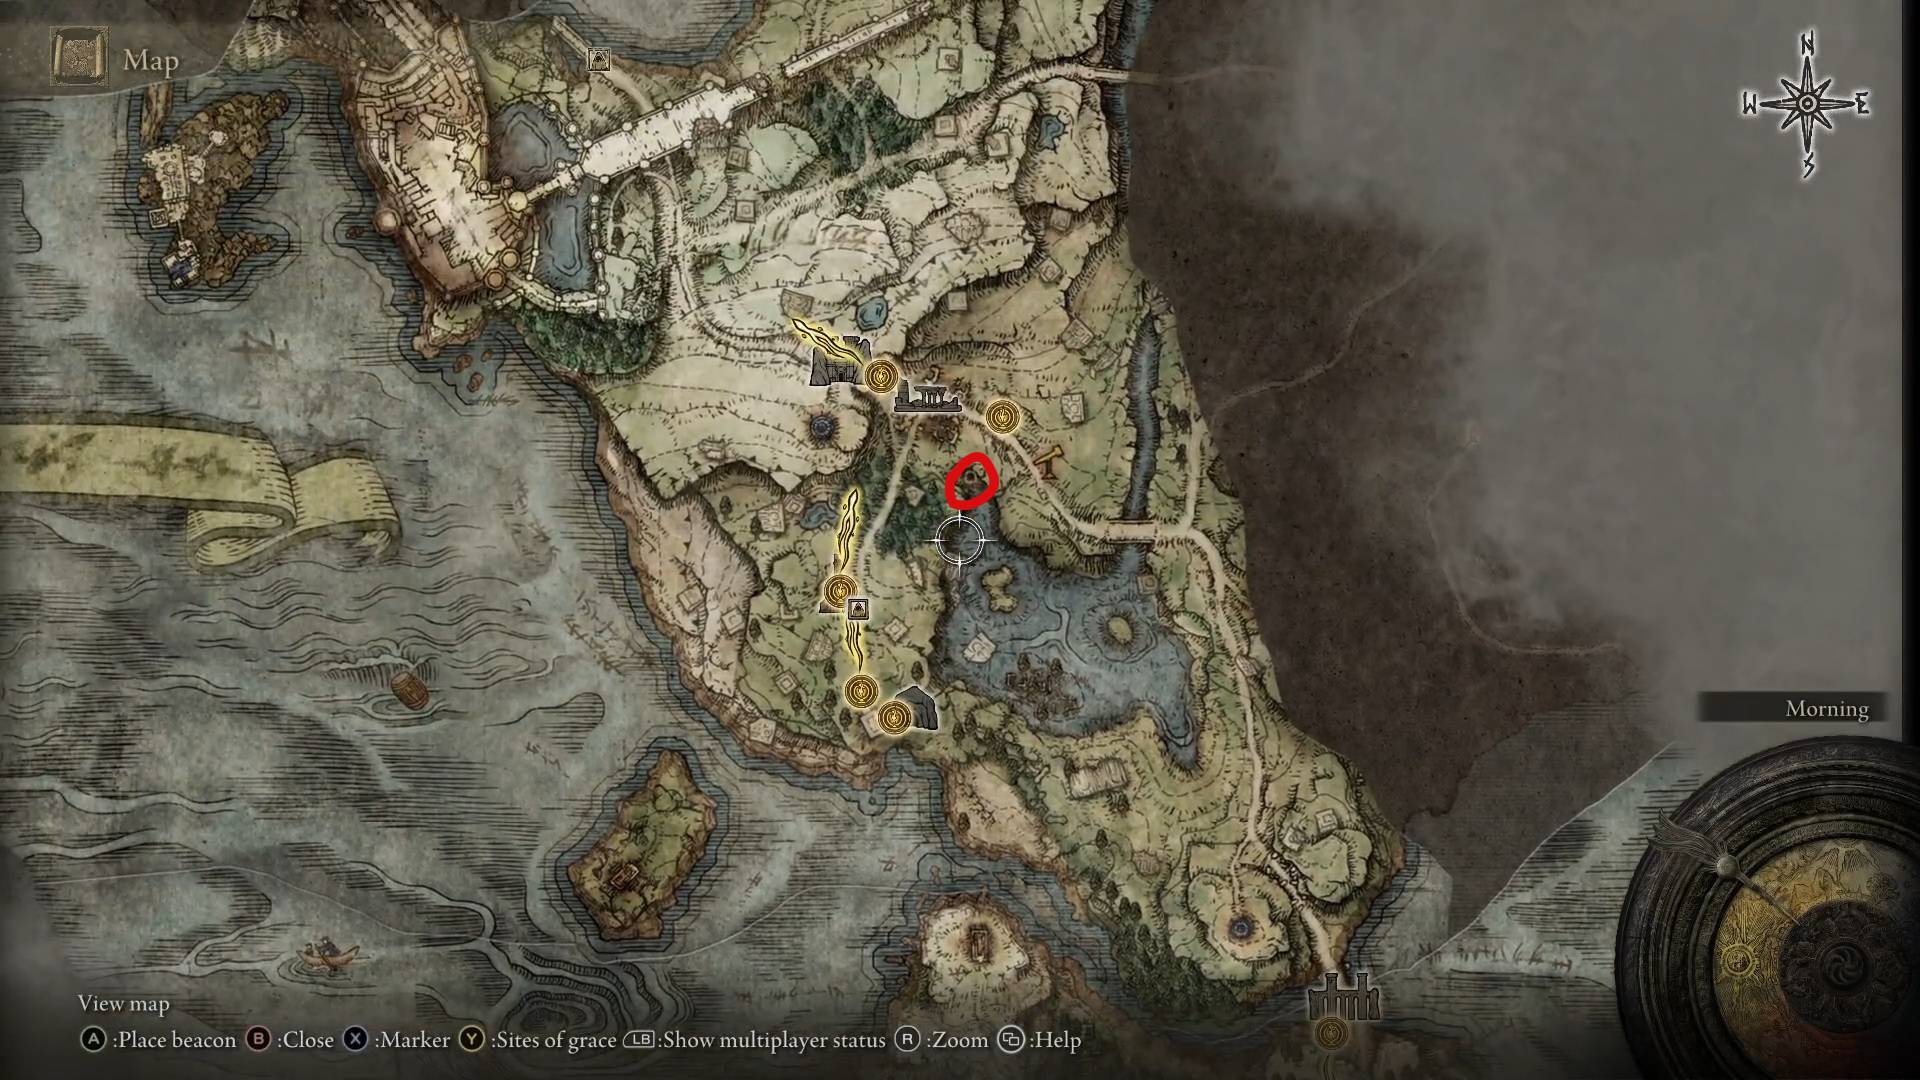
To get the left half of the Dectus Medallion, head south from the church, along the road through Mistwood. Eventually, after dodging some bears, you’ll find yourself at the Fort Haight West grace. The medallion is inside the fort. Make your way past the barricades while letting the NPCs fight each other. Pull the big Pumpkin Head away from the entrance, then sneak in and head up the stairs, then up the ladder towards the very top of the fort’s tower. Along the way, you’ll have to dodge rats, exploding barrels, enemies throwing fire bombs, and an angry knight, but if you keep moving, you should be good.
Reaching Fort HaightPast the barricadeInto the fortUp the stairs, then up the towerYour reward
With the medallion half in hand, go back to the Third Church of Marika.
Right Half of the Dectus Medallion
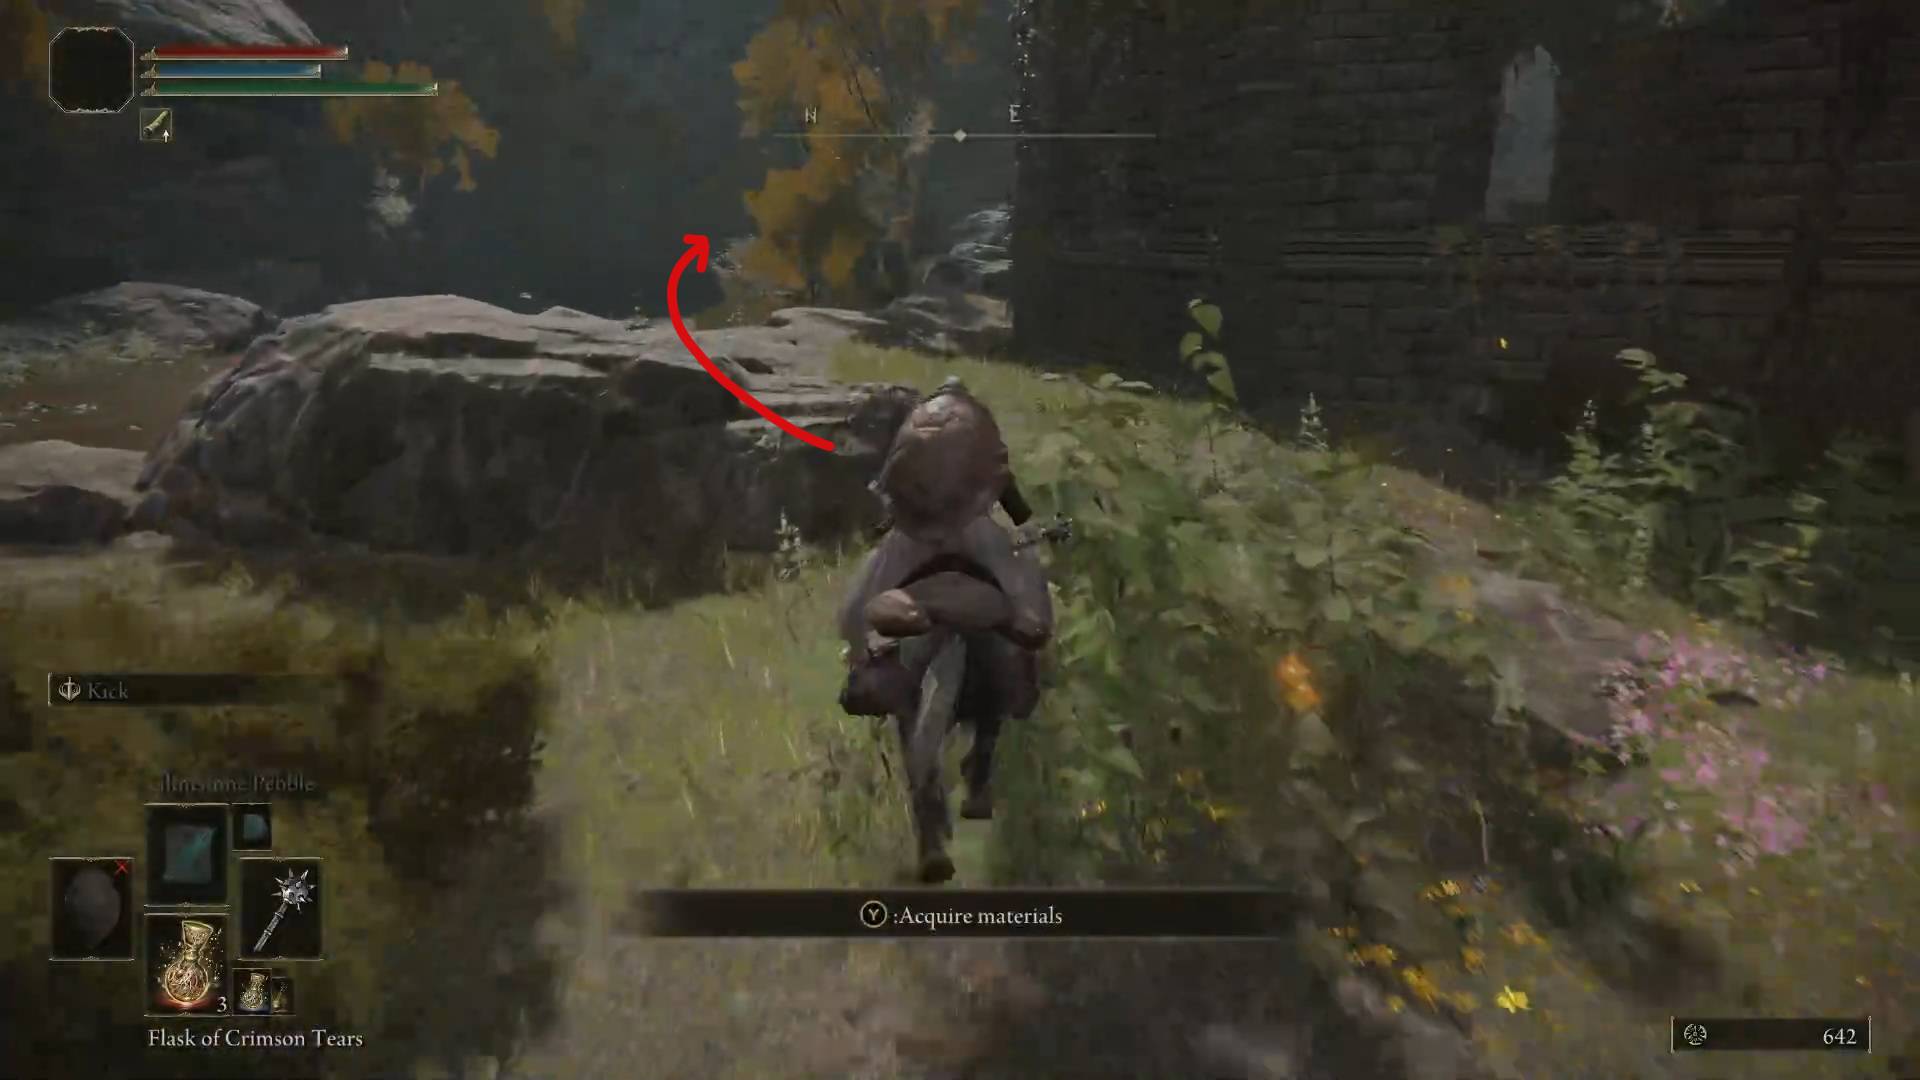
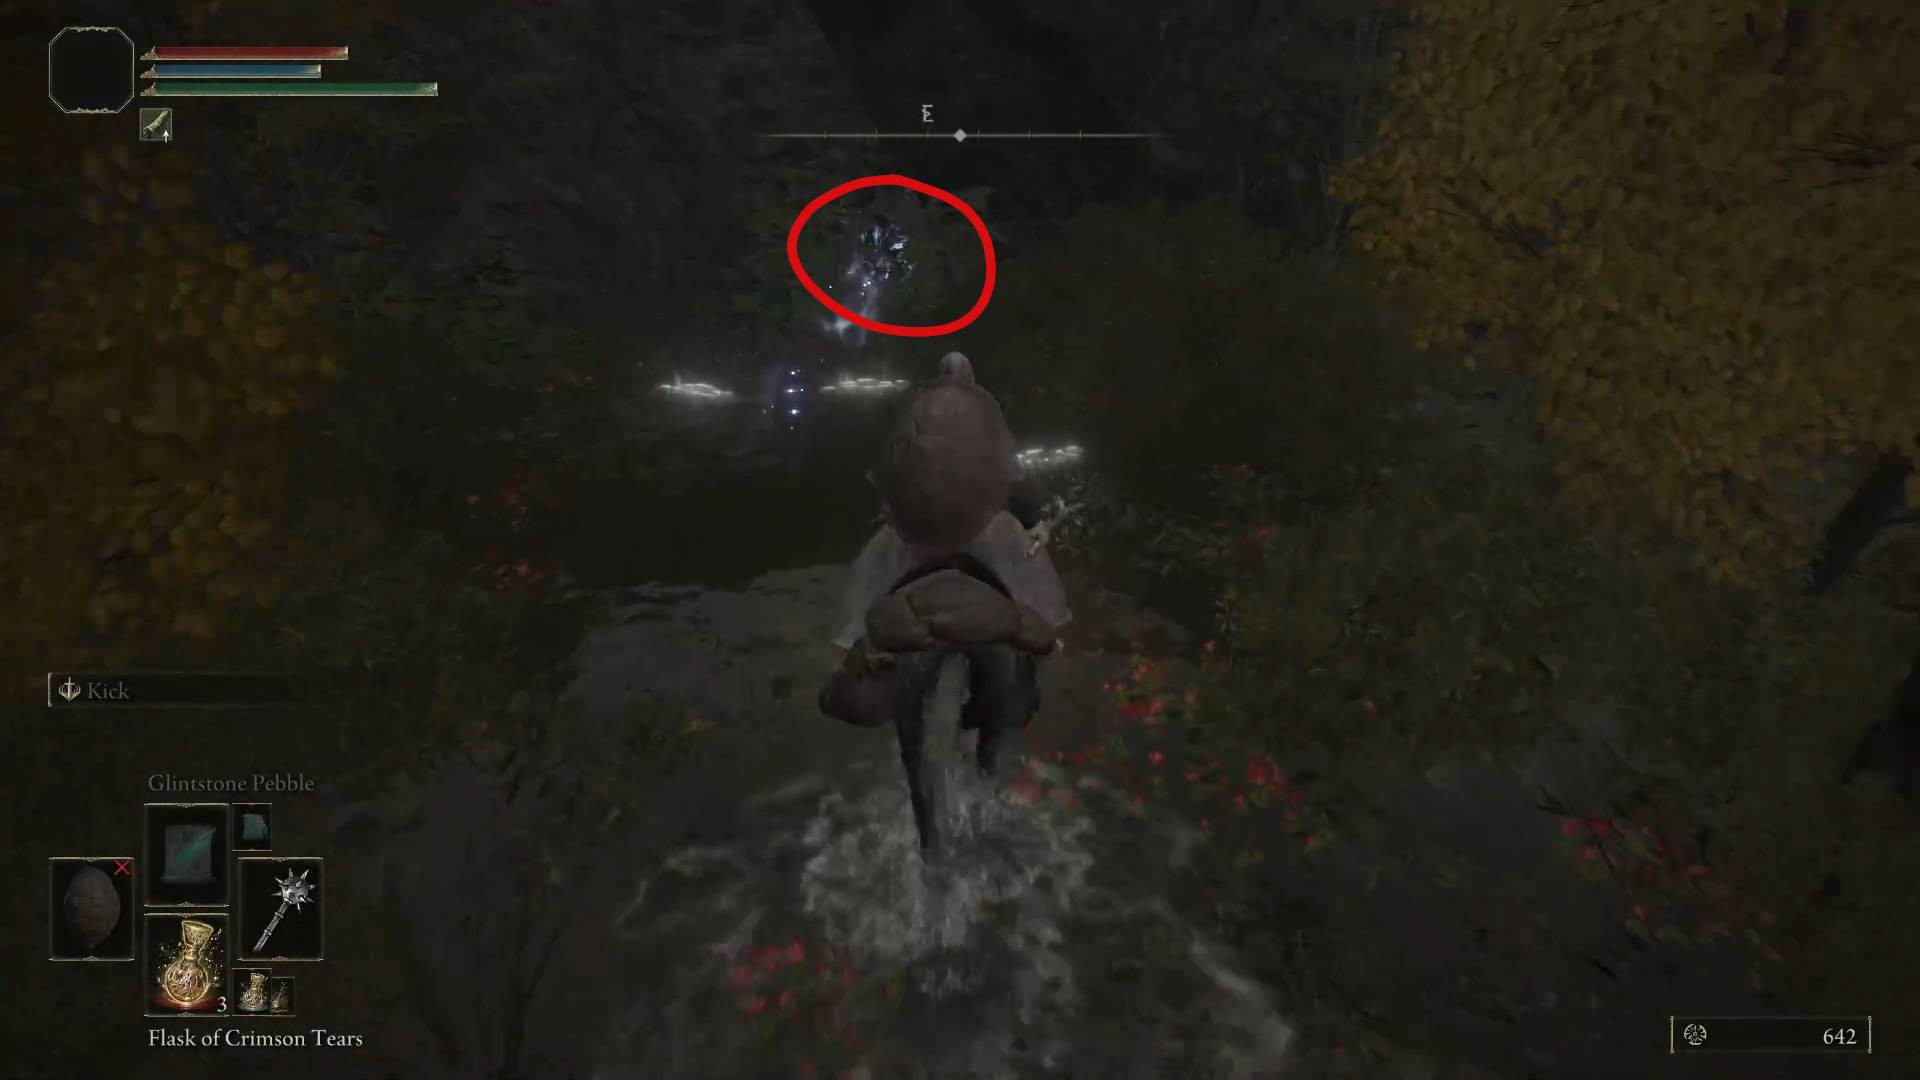
Now, leave the church and circle around it until you find yourself in a shallow stream. In the bushes there is a teleporter that will take you to the Bestial Sanctum in the Dragonbarrow.
Leaving the churchCircle around the churchBehold, magic
In general, the Dragonbarrow is a scary place, but if you ever need some quick runes, the Vulgar Militia patrolling the grounds there are very susceptible to backstabs and are a great source of runes. Just make sure to not get hit by them.
Don’t mess with the guard for nowVulgar Militia farming
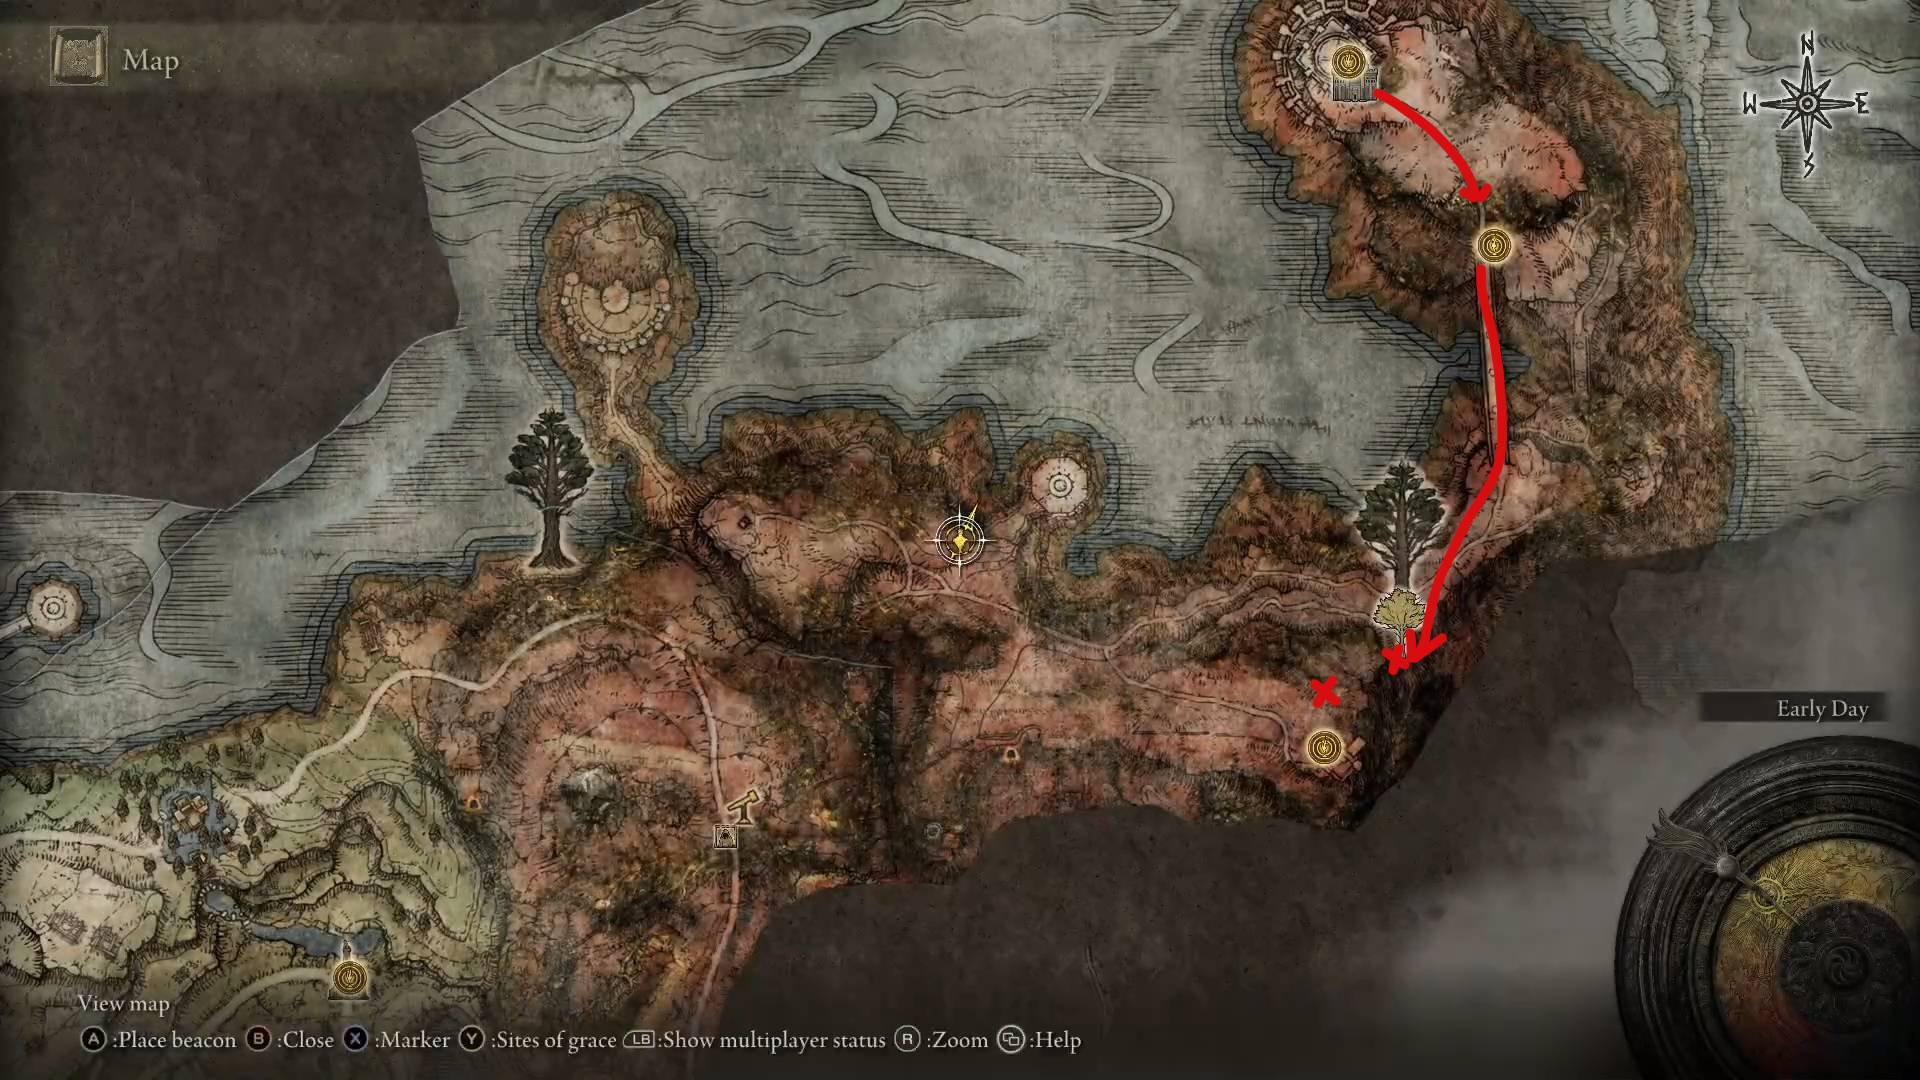
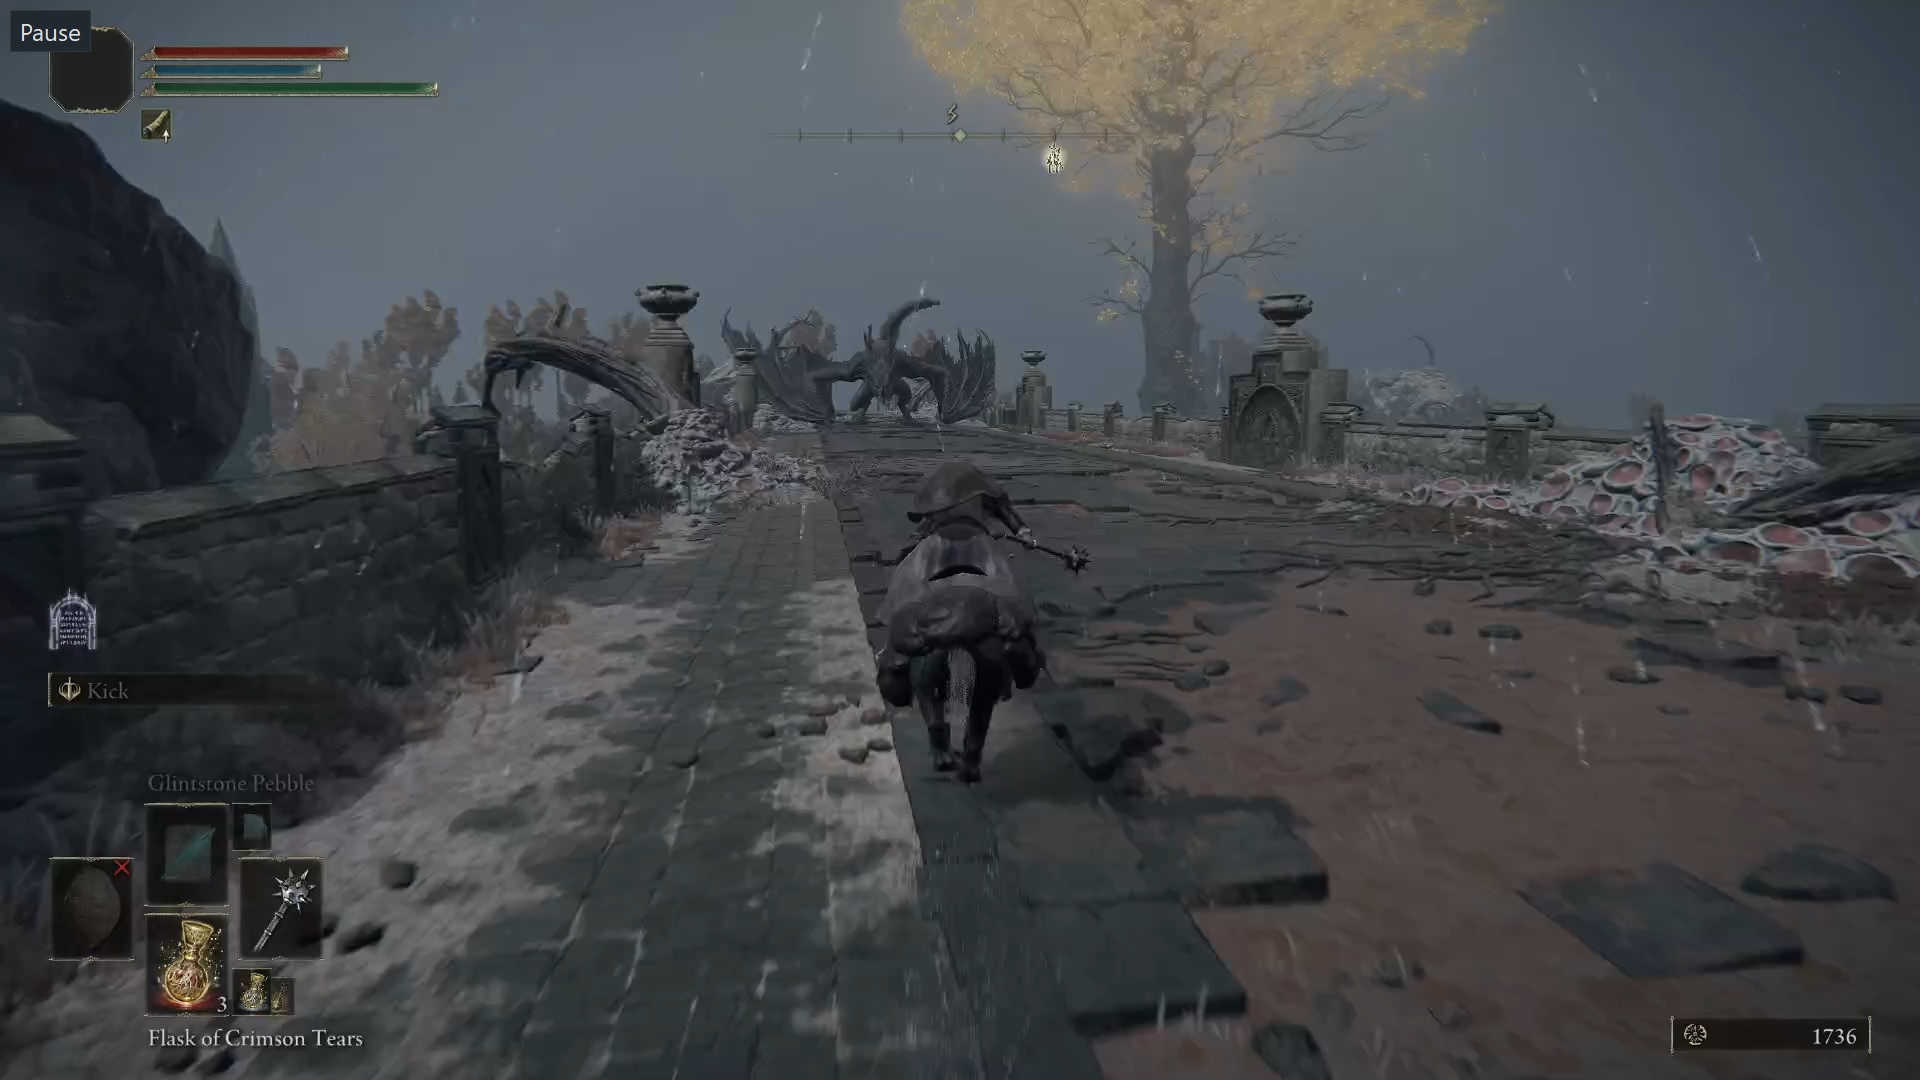
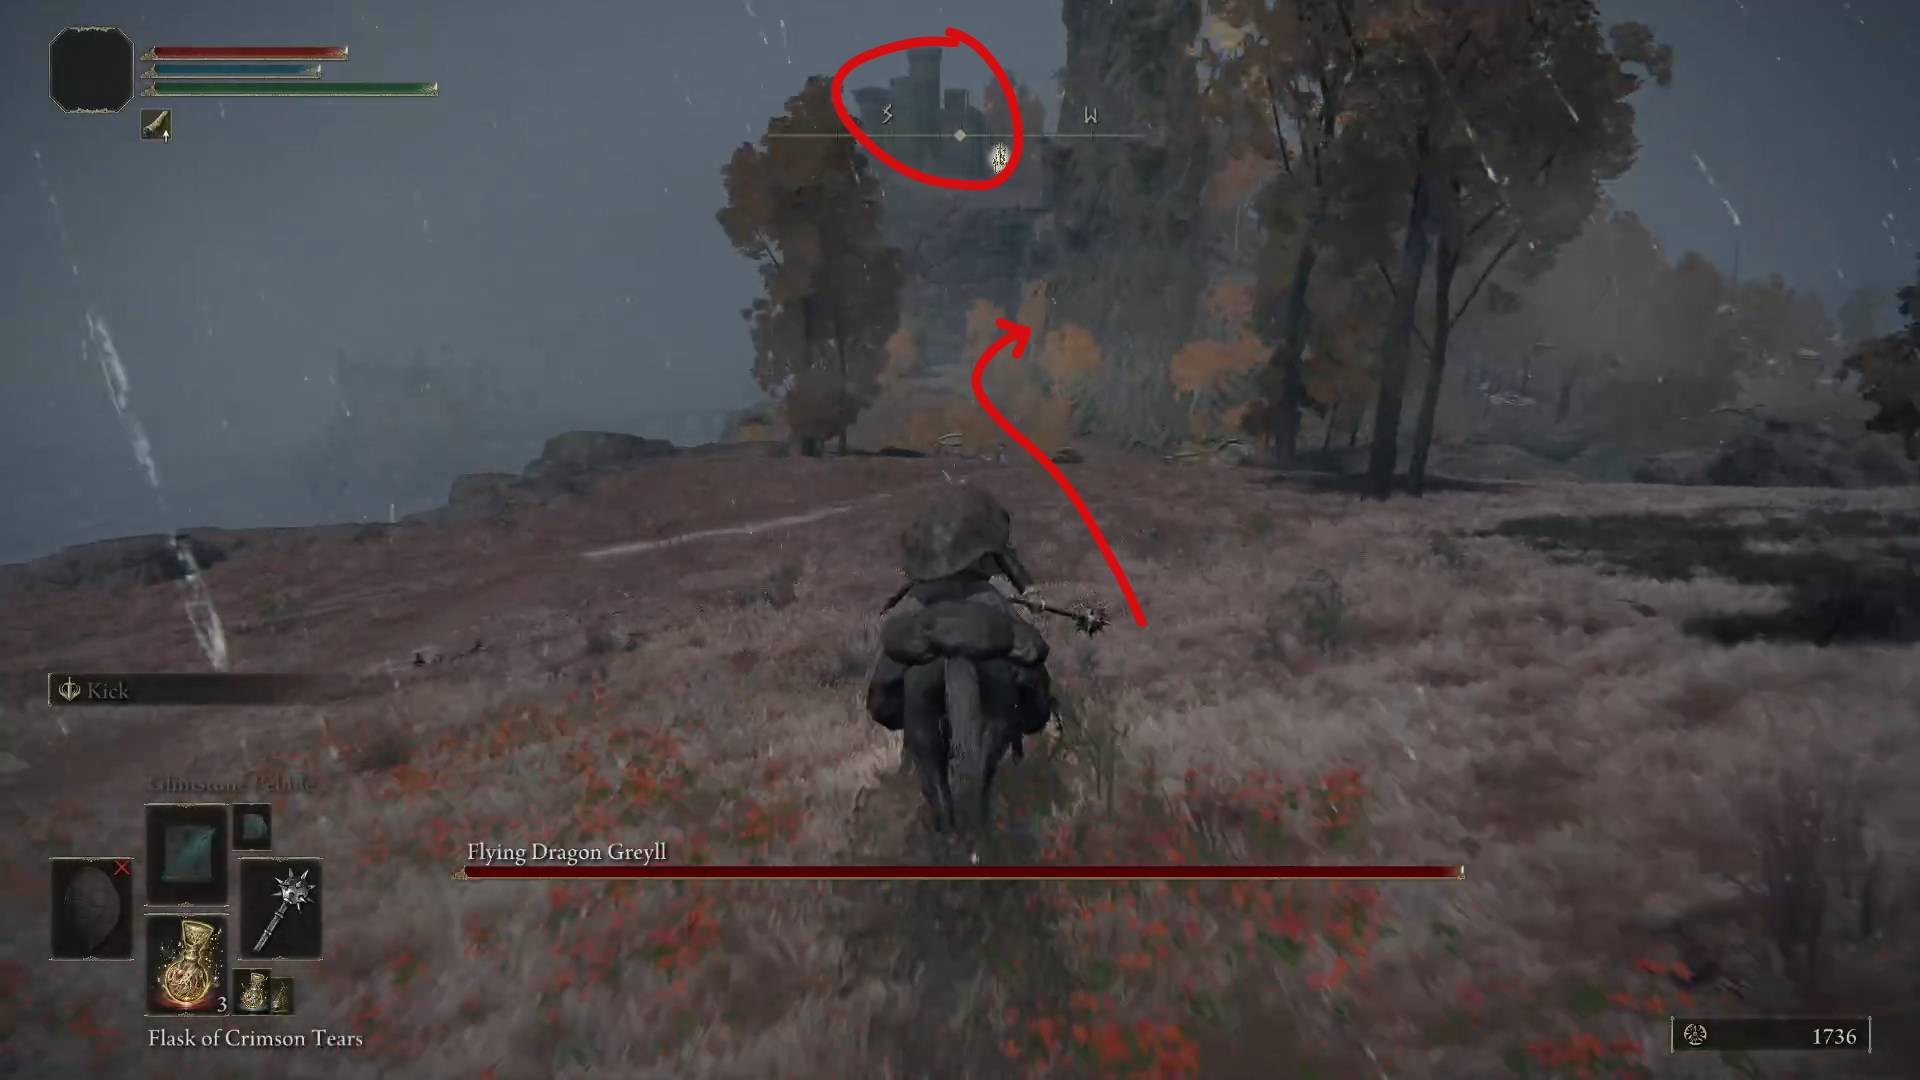
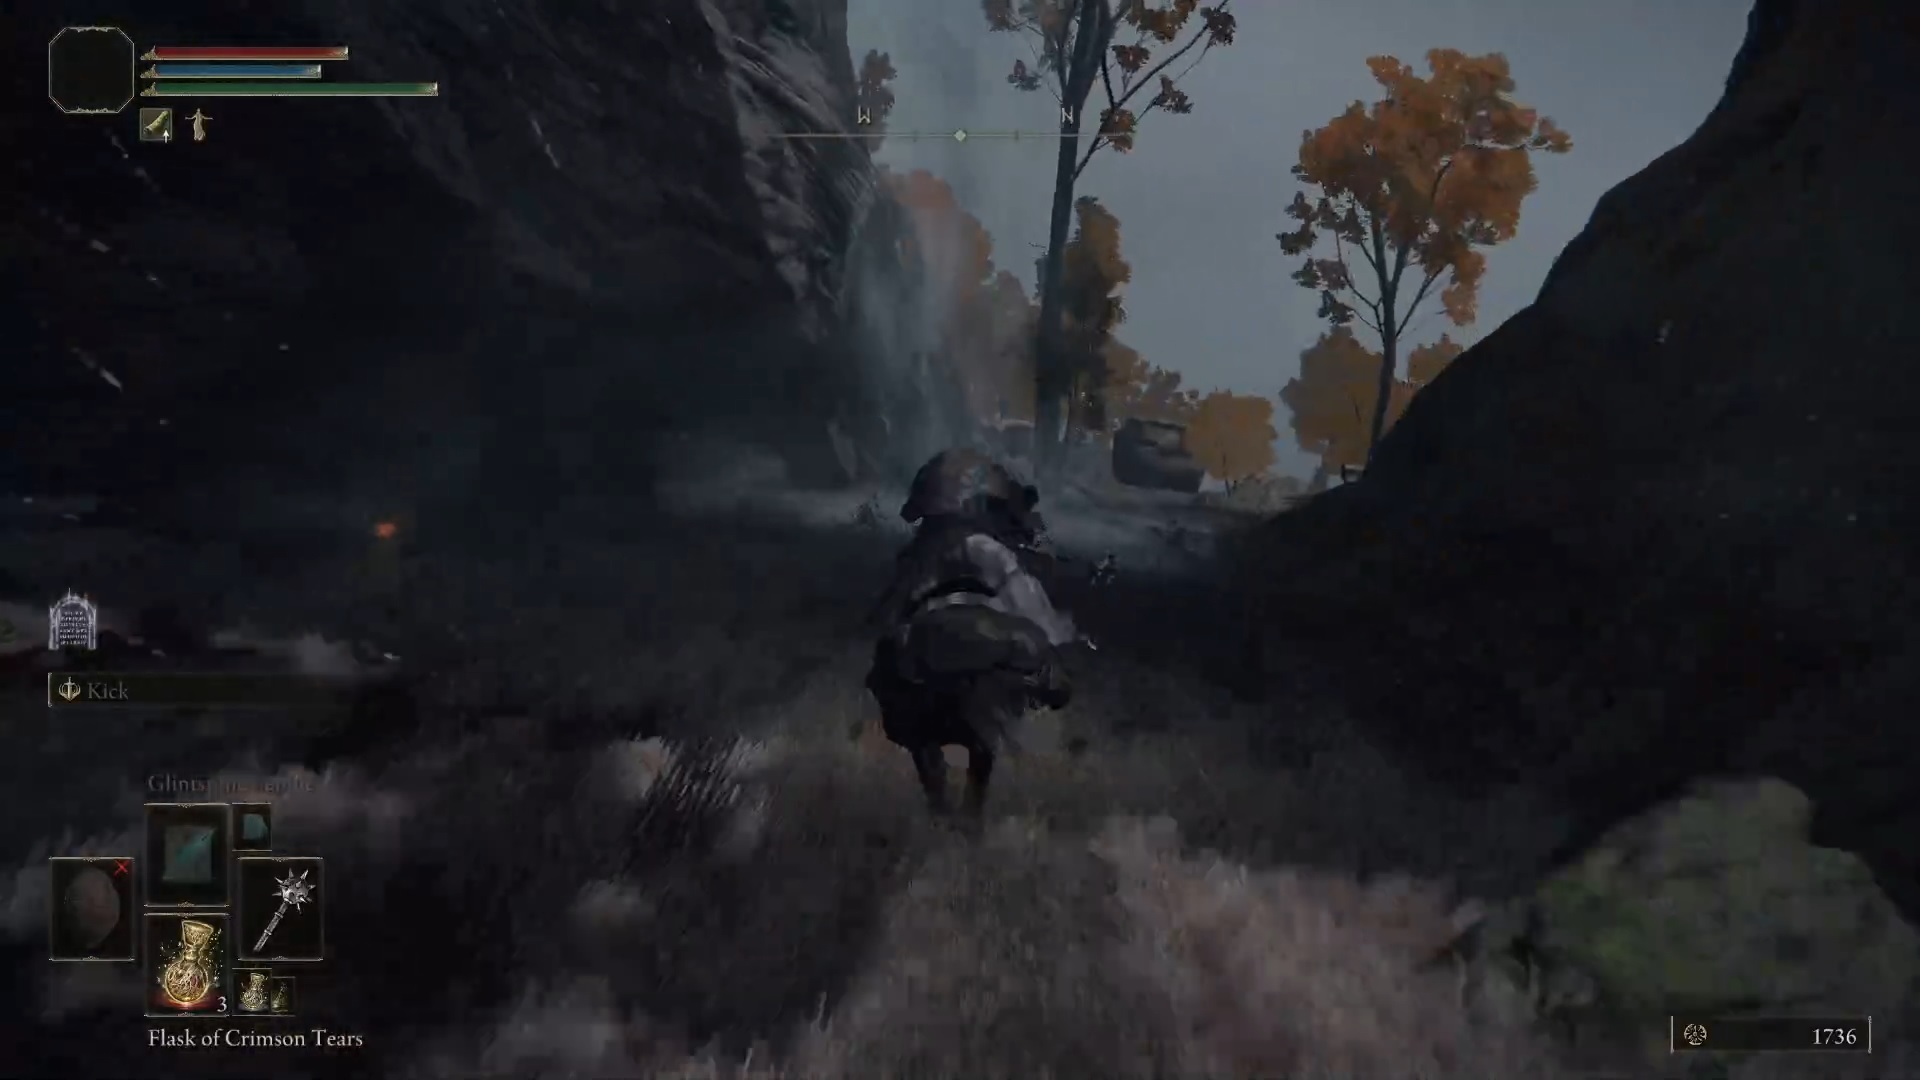
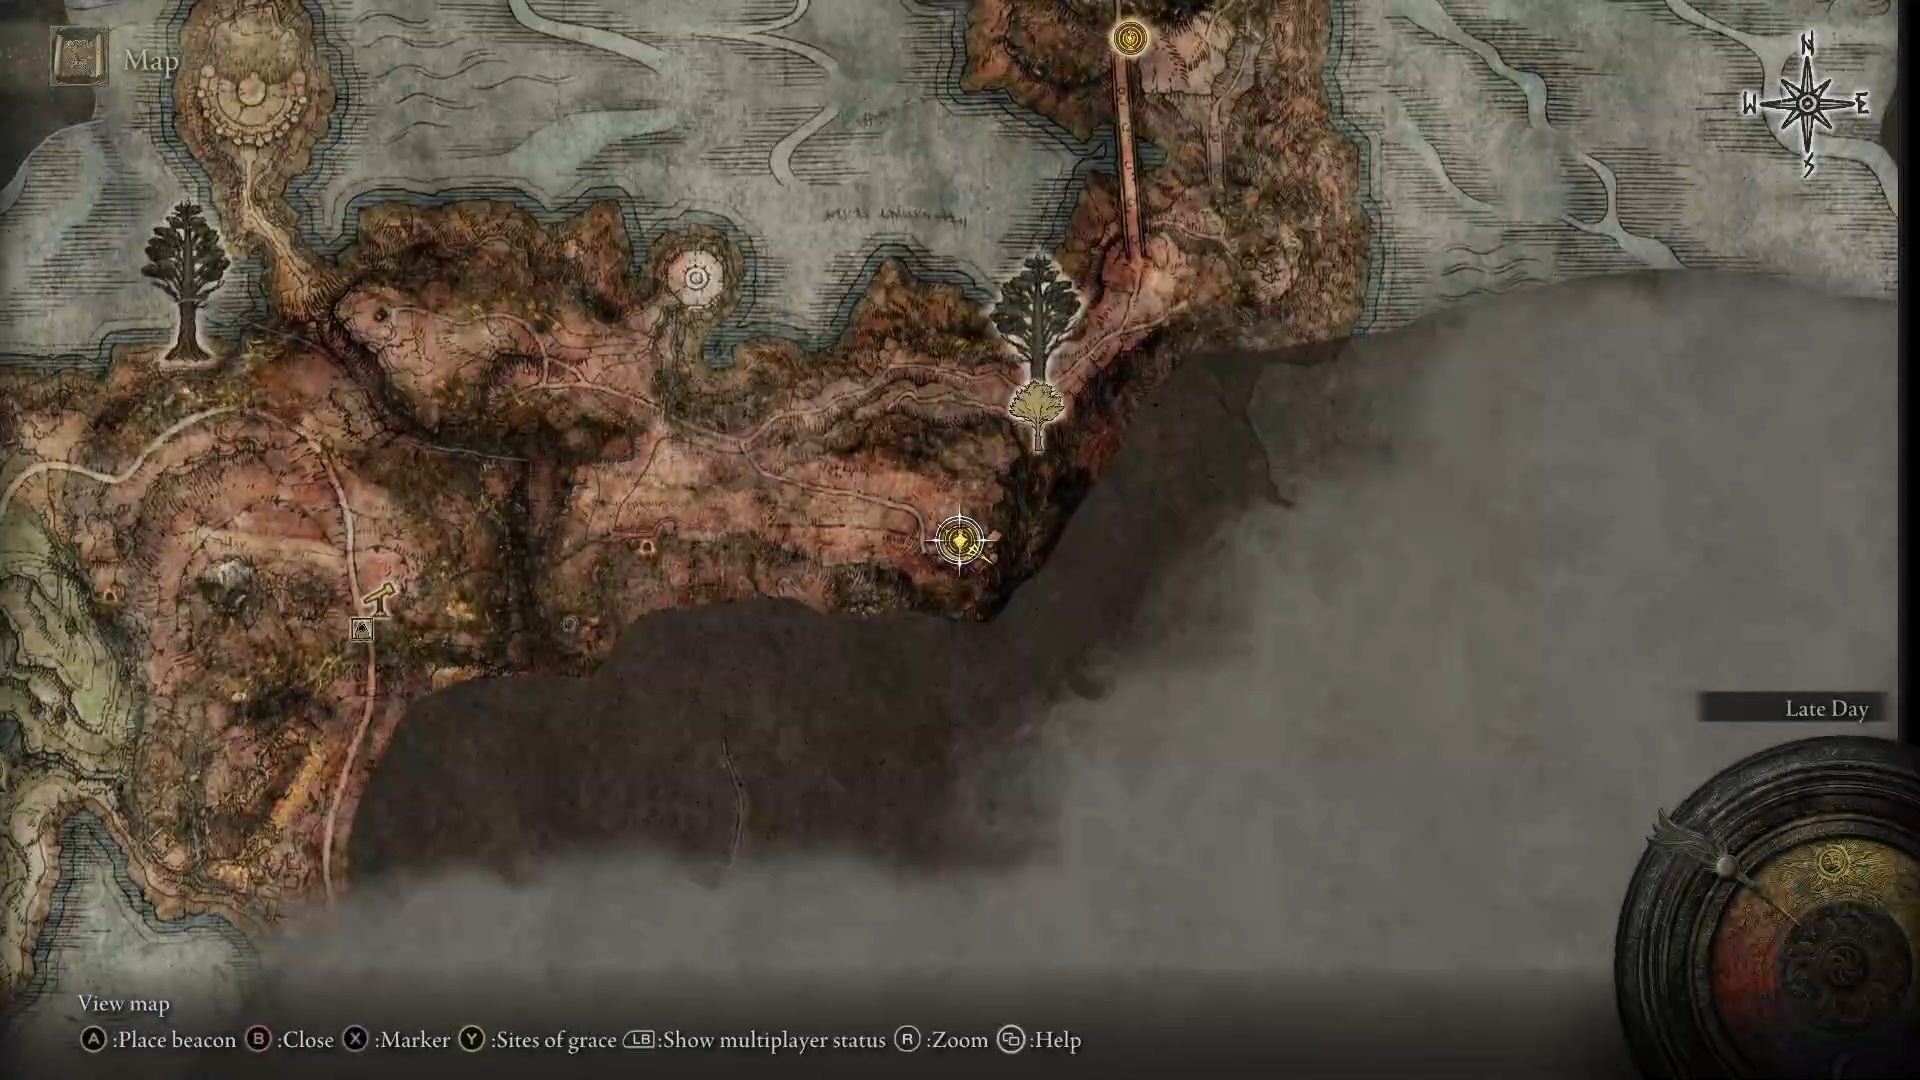
In any case, for the time being, just leave the sanctum and go down the hill towards the big bridge guarded by Flying Dragon Greyll. While you would expect a dragon whose only title is “flying” to be a complete pushover, seeing how flying is a very basic skill if you’re a dragon, this particular one is actually one of the strongest dragons in the game. So do the usual by this point thing and just run past him. Keep running until you reach a Minor Erdtree, go around it, and jump into the Spiritspring behind it. From up there you can see your goal – Fort Faroth.
Bestial Sanctum – Forth FarothNot-really-flying Dragon GreyllAfter the bridgeSpiritspring to Forth Faroth
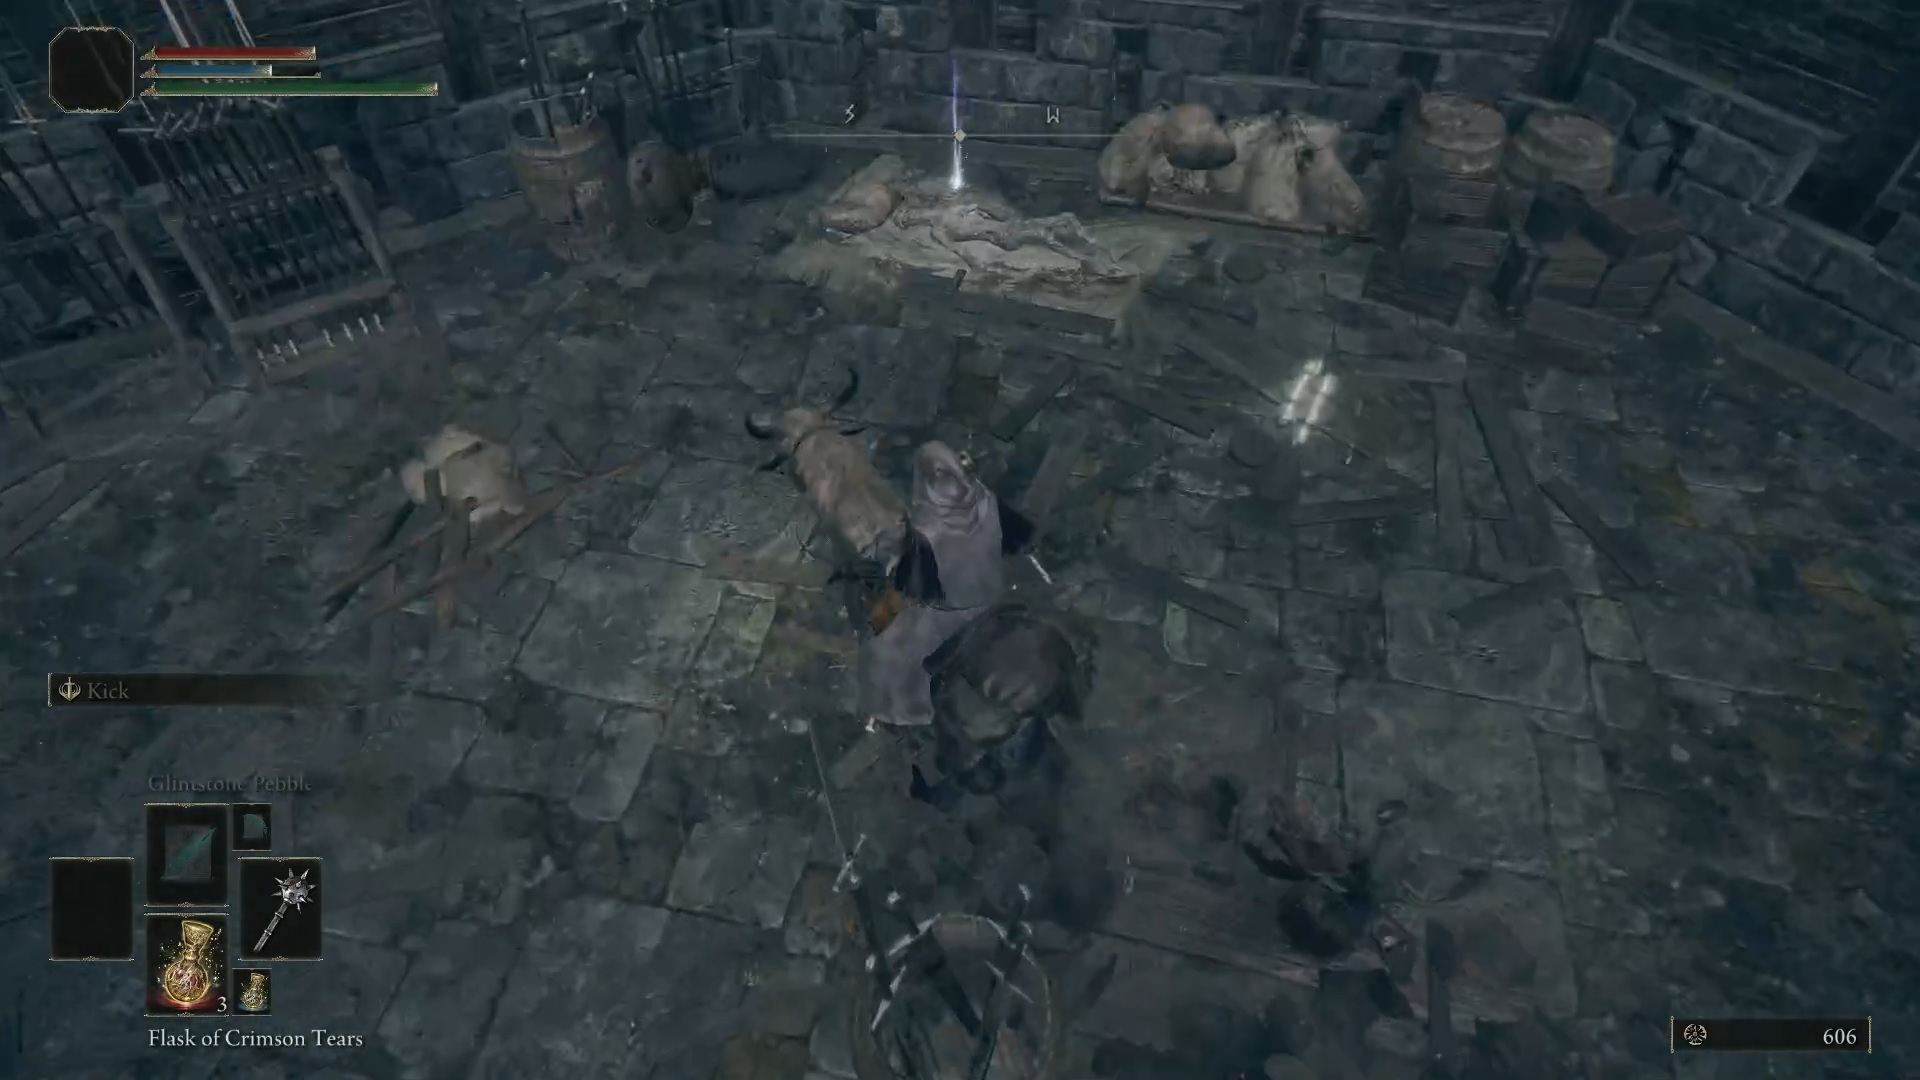
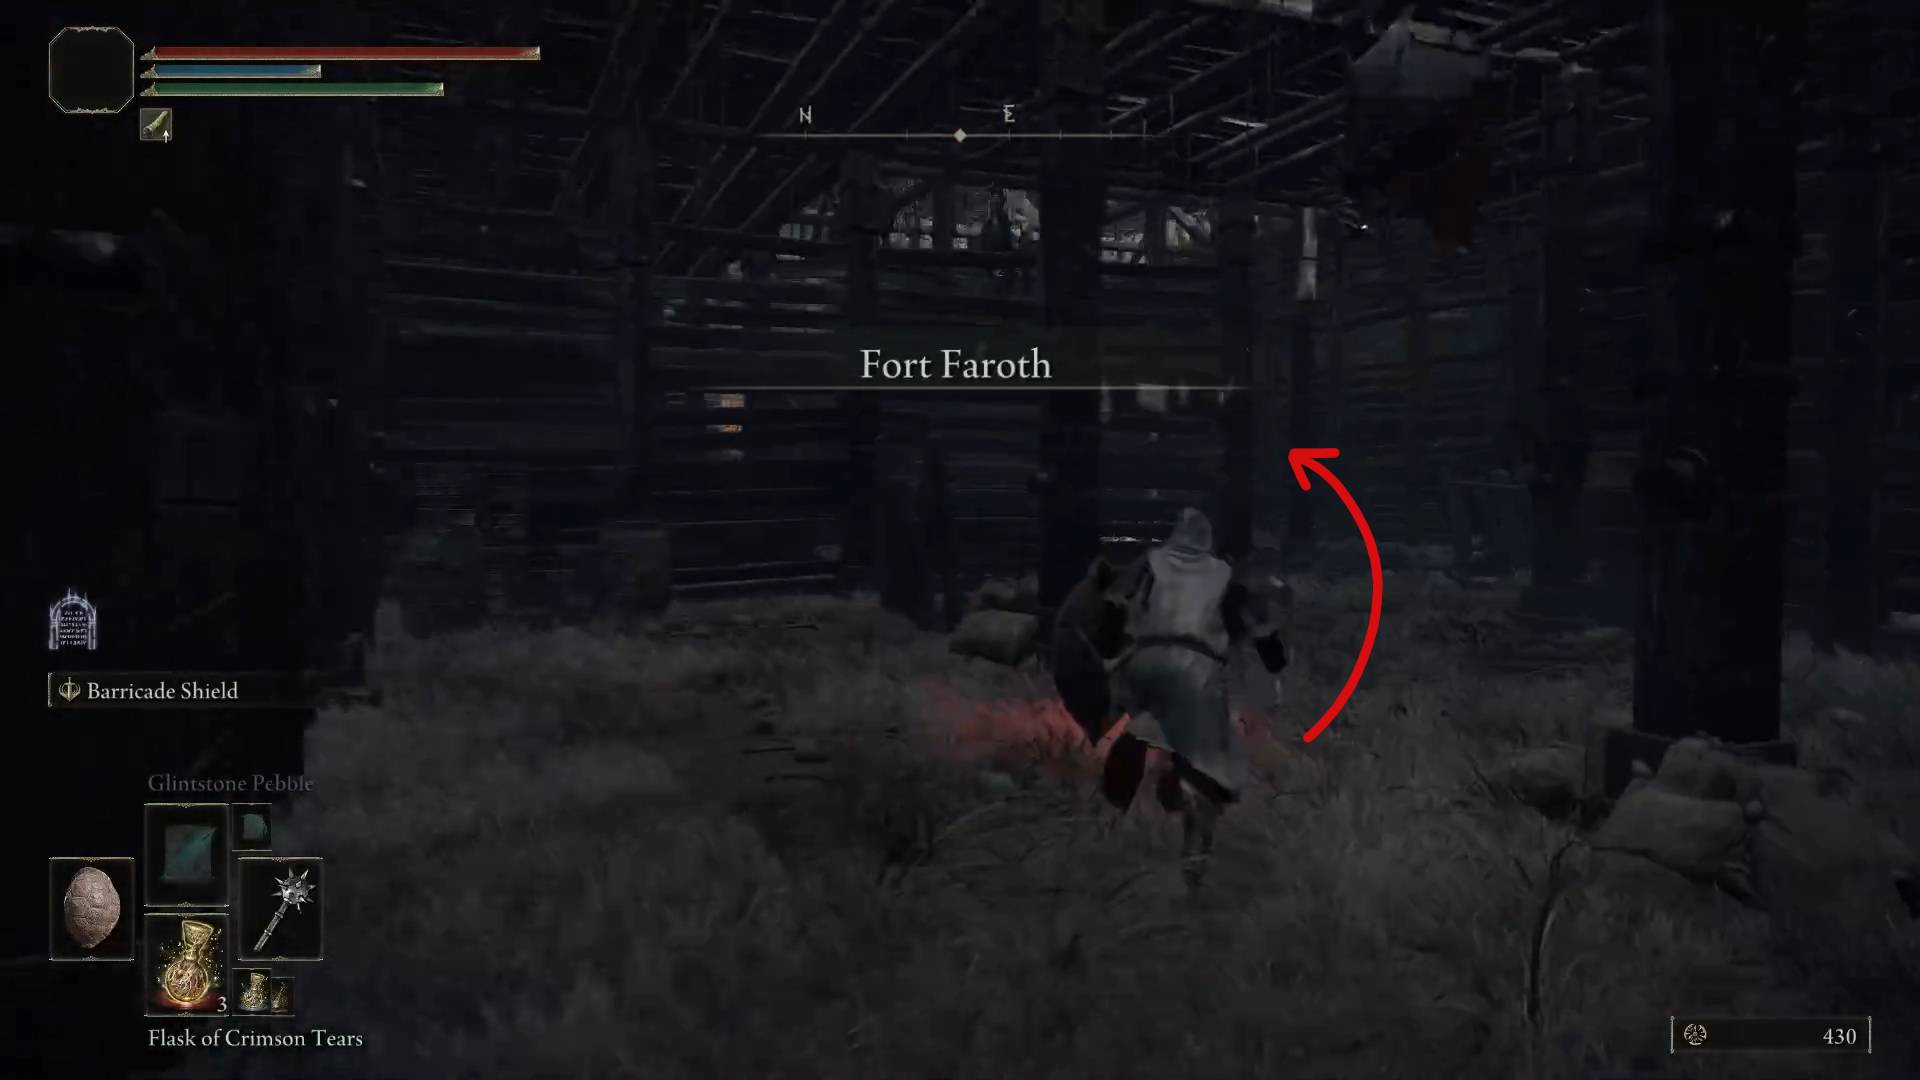
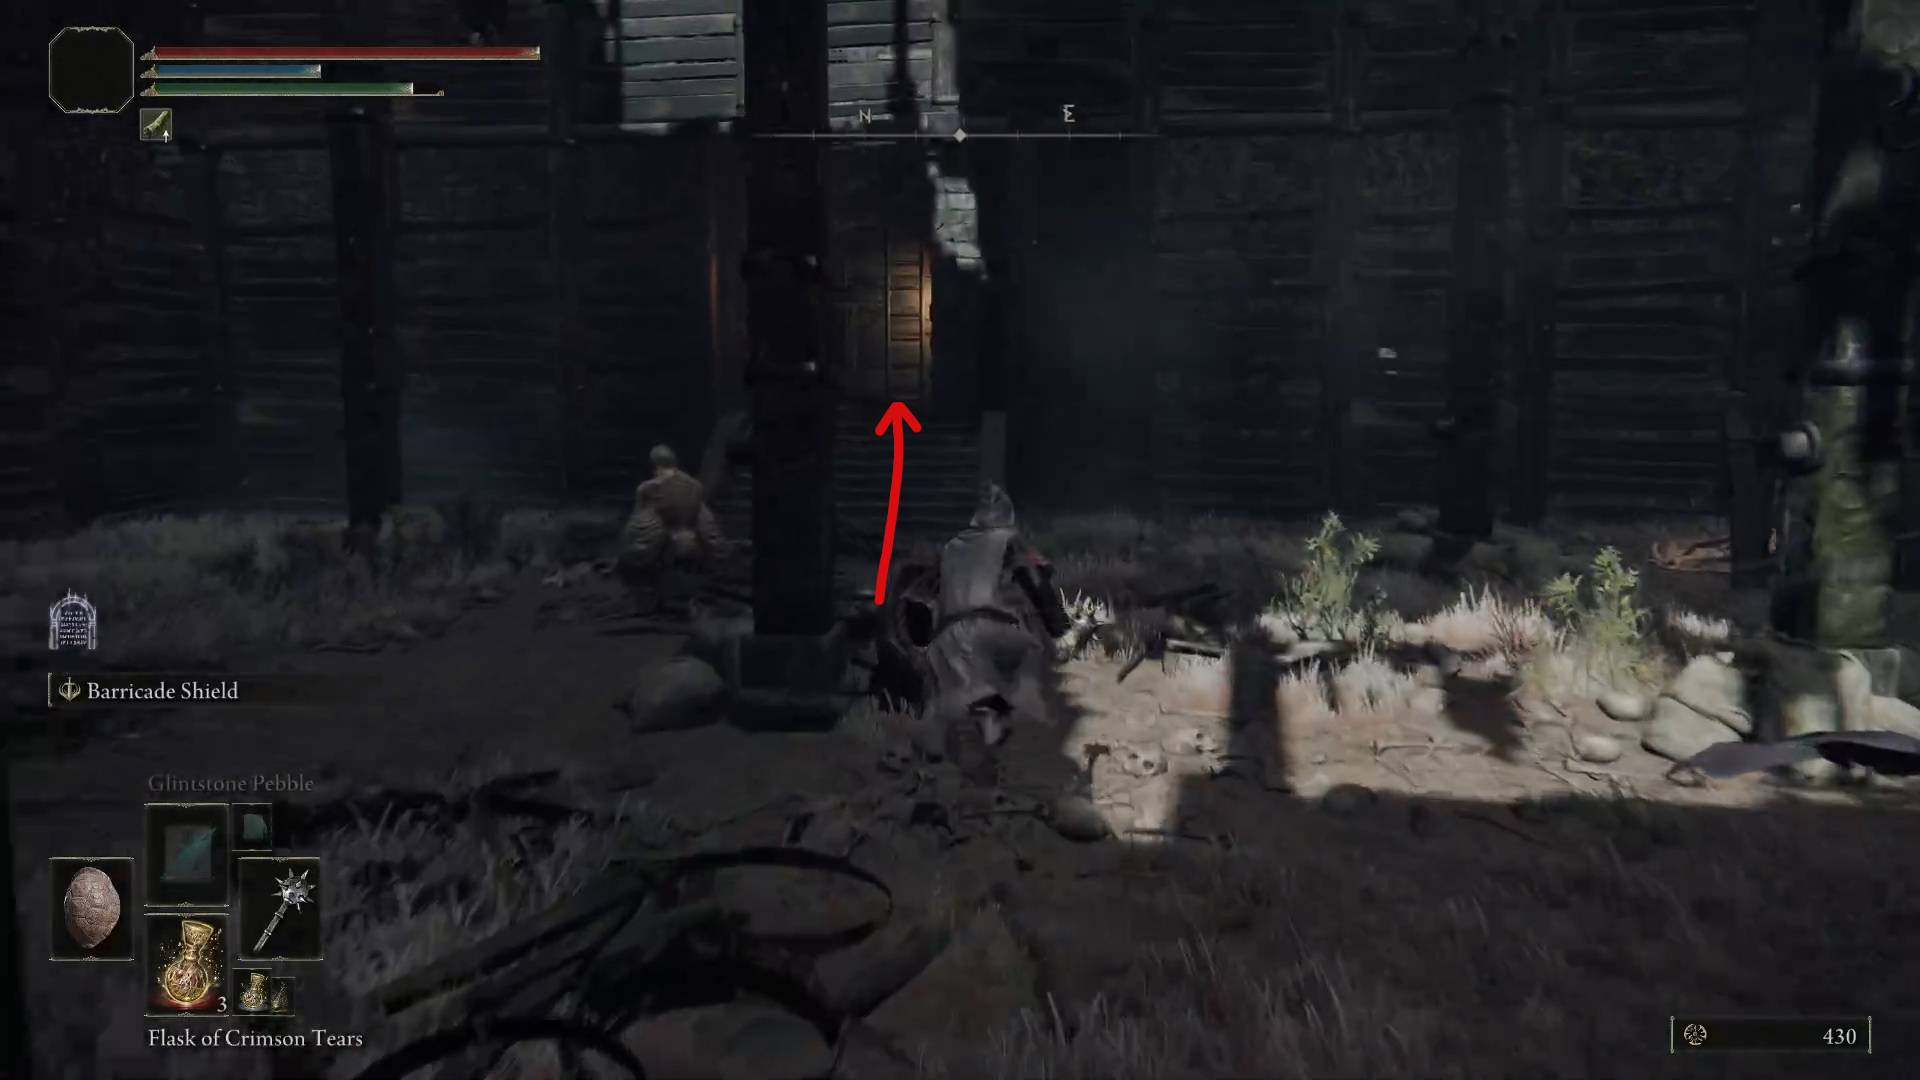
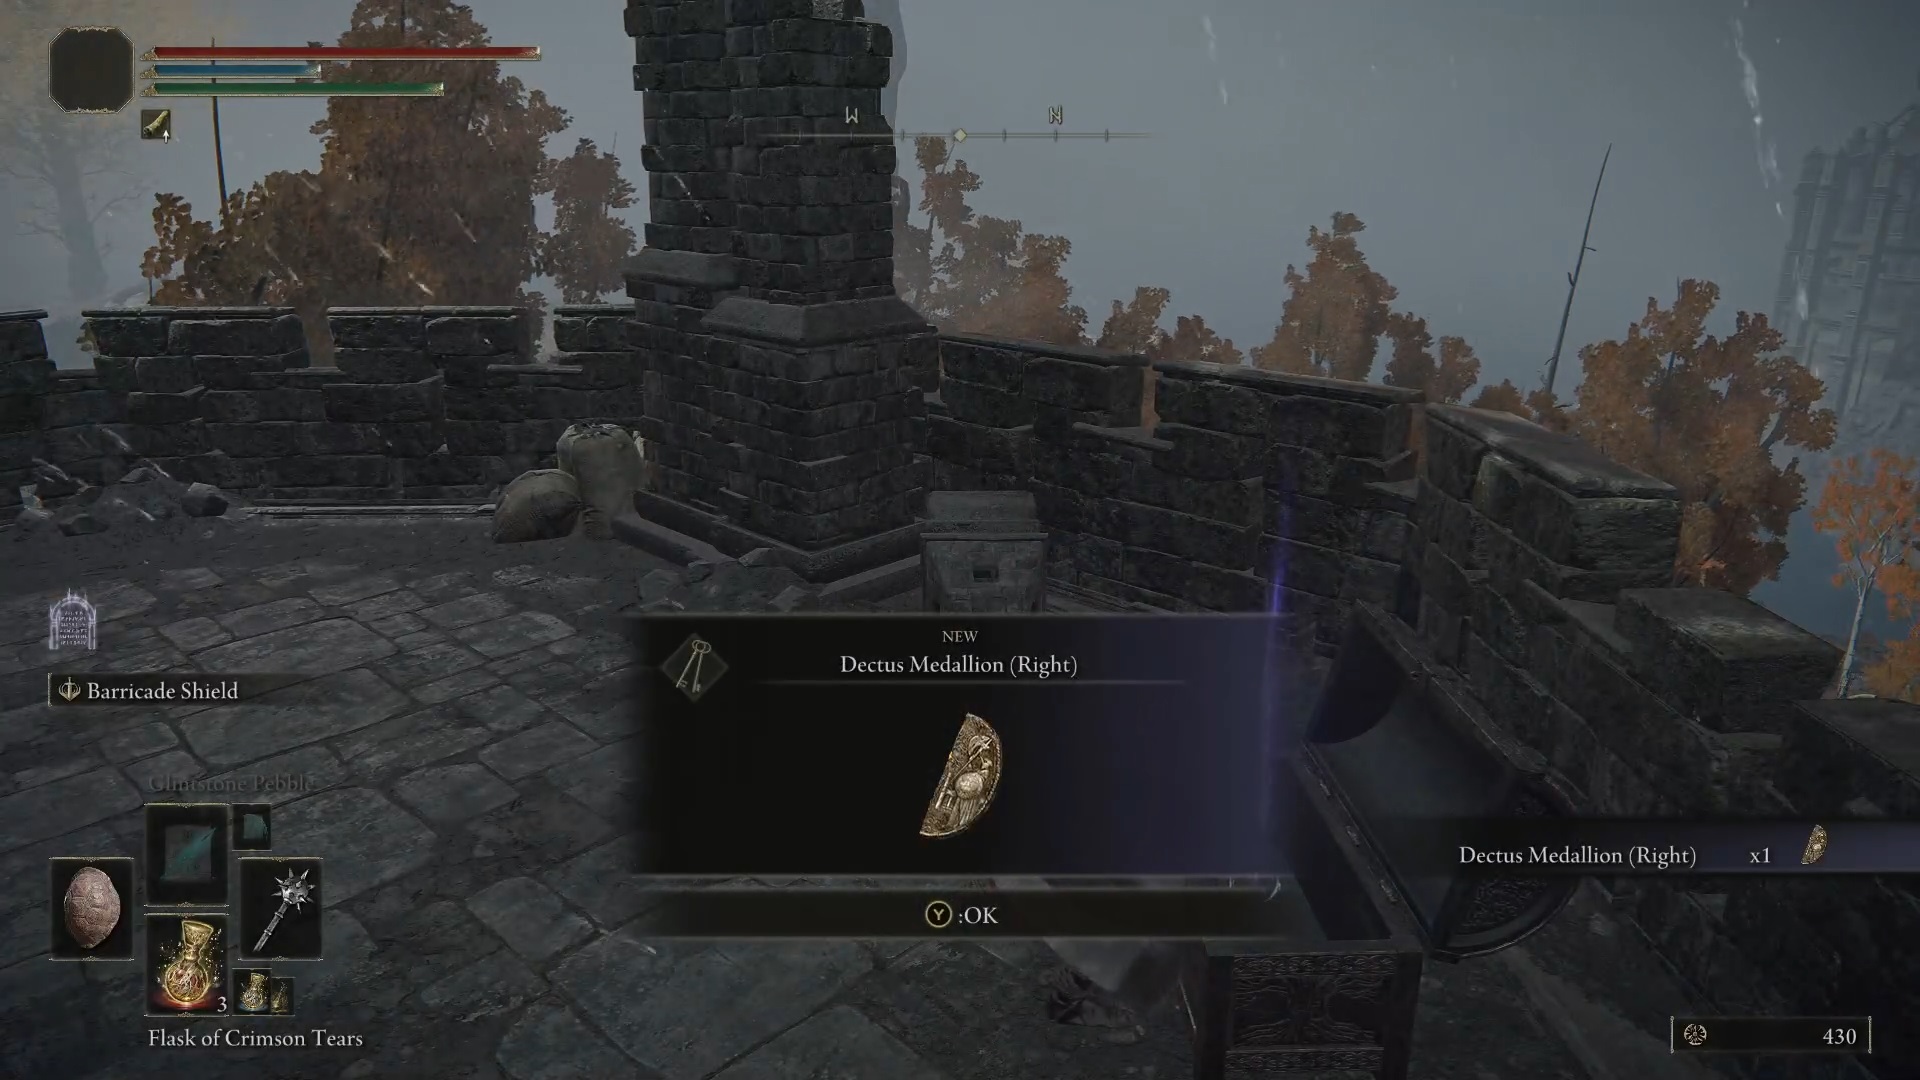
The enemies inside the fort are very strong, so make sure to avoid them. Luckily you don’t have to go far. Just go inside the fort, climb the ladder, and open the chest right in front of you. This gets you the right half of the Dectus Medallion.
Fort Faroth locationRun through the fortAnd up the ladderYour reward
Fort Faroth Surroundings
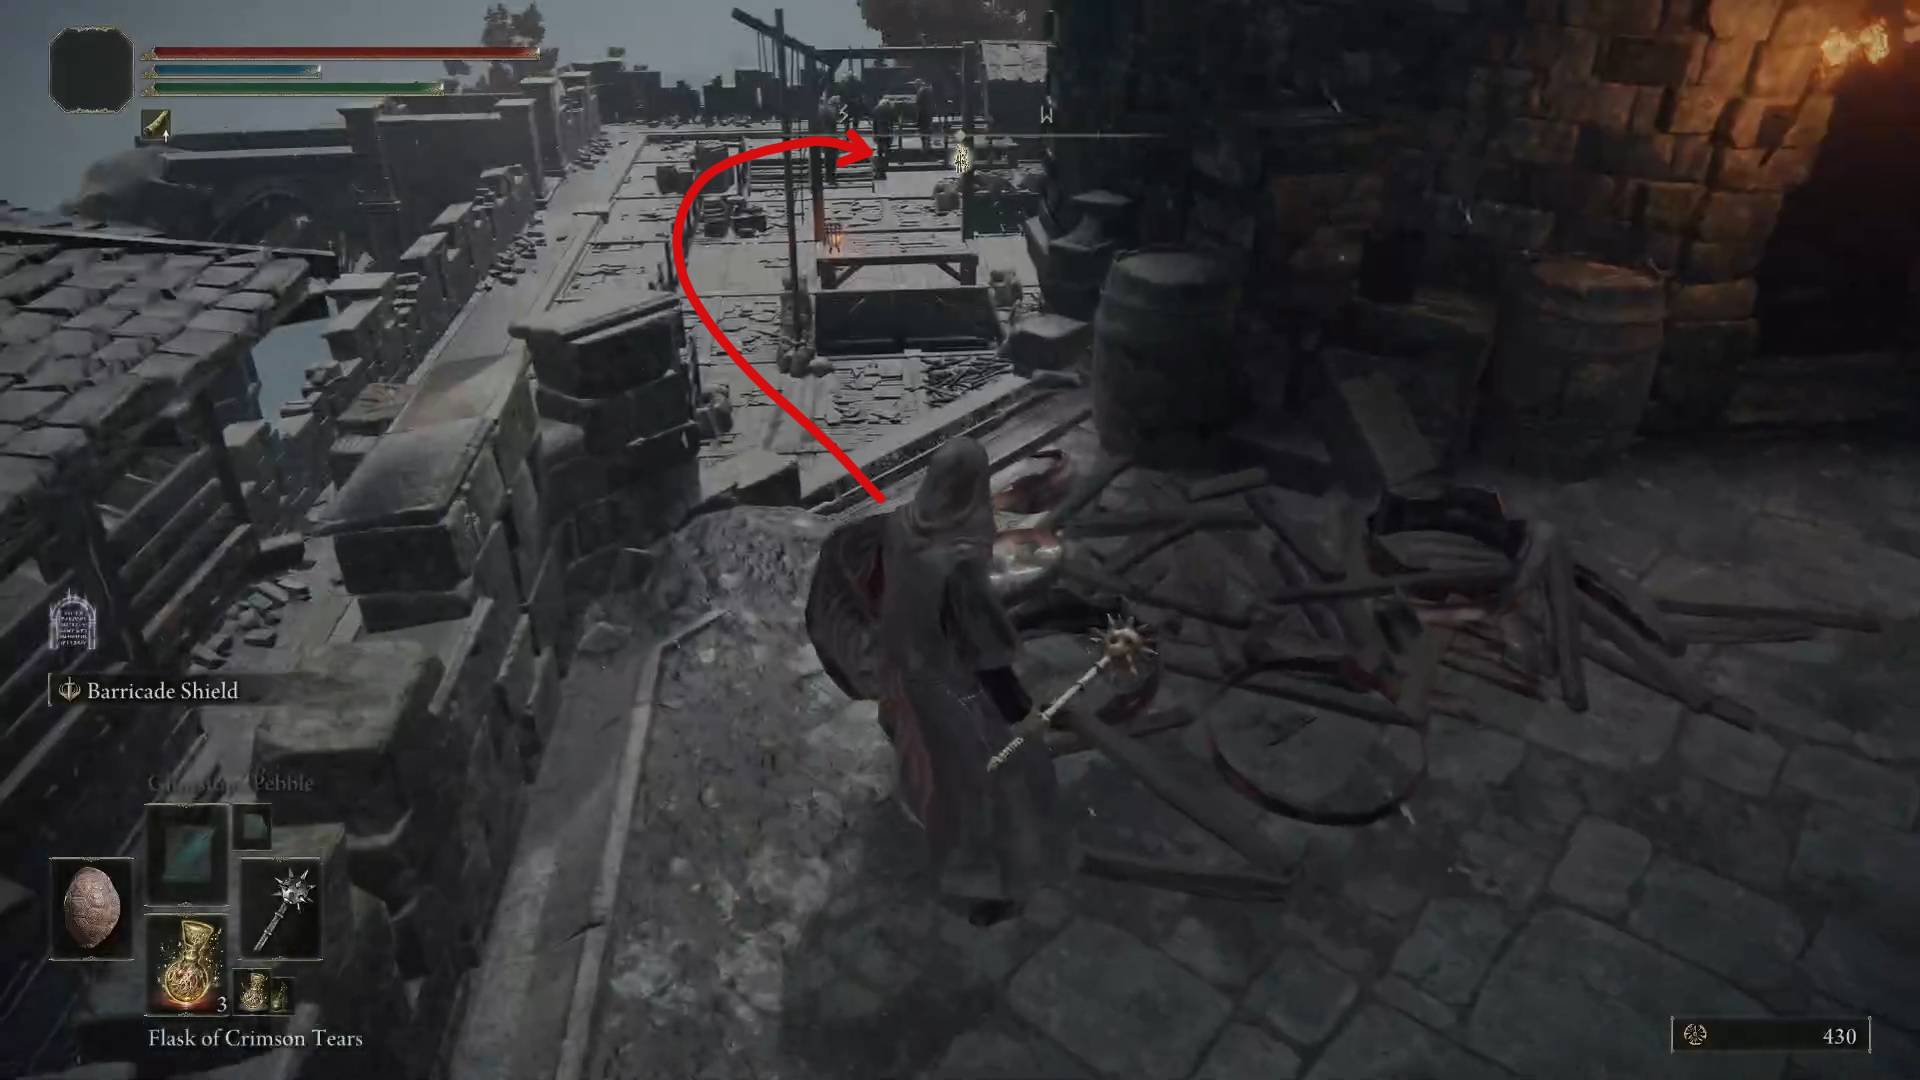
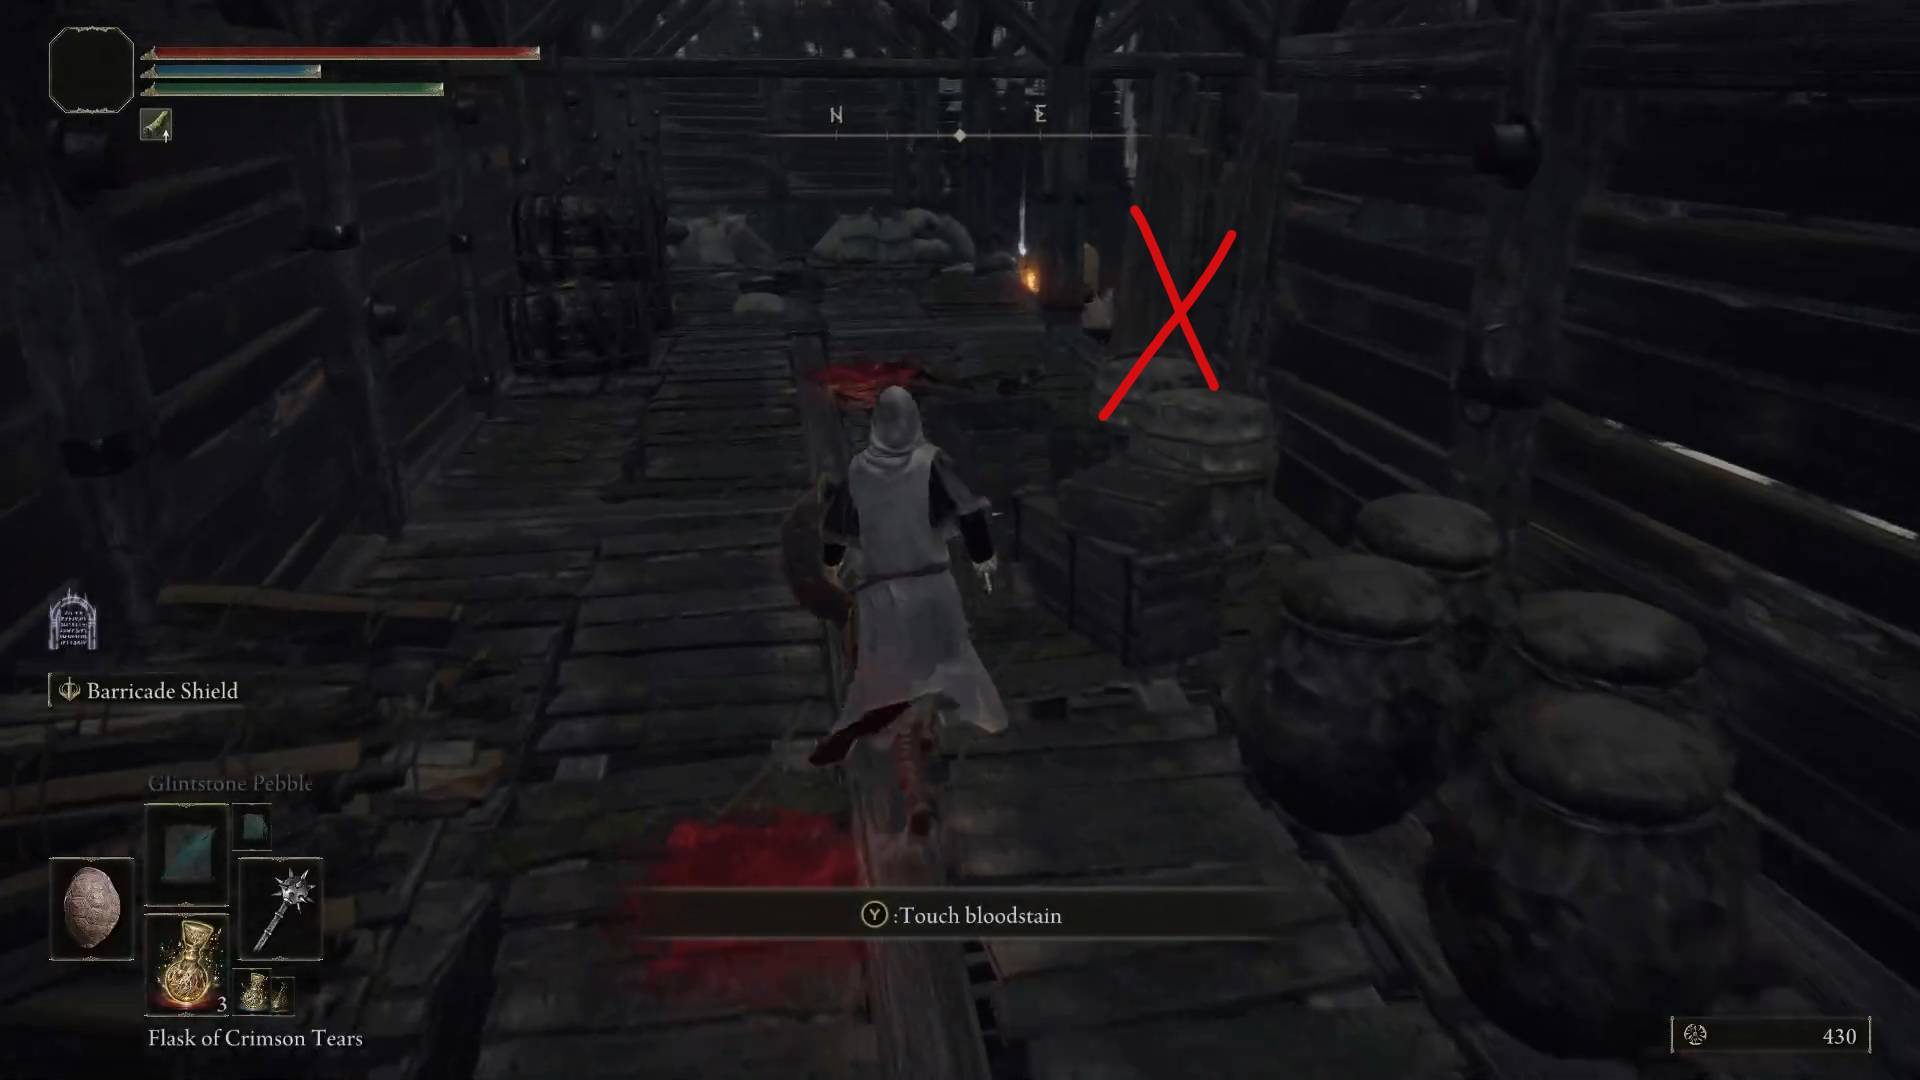
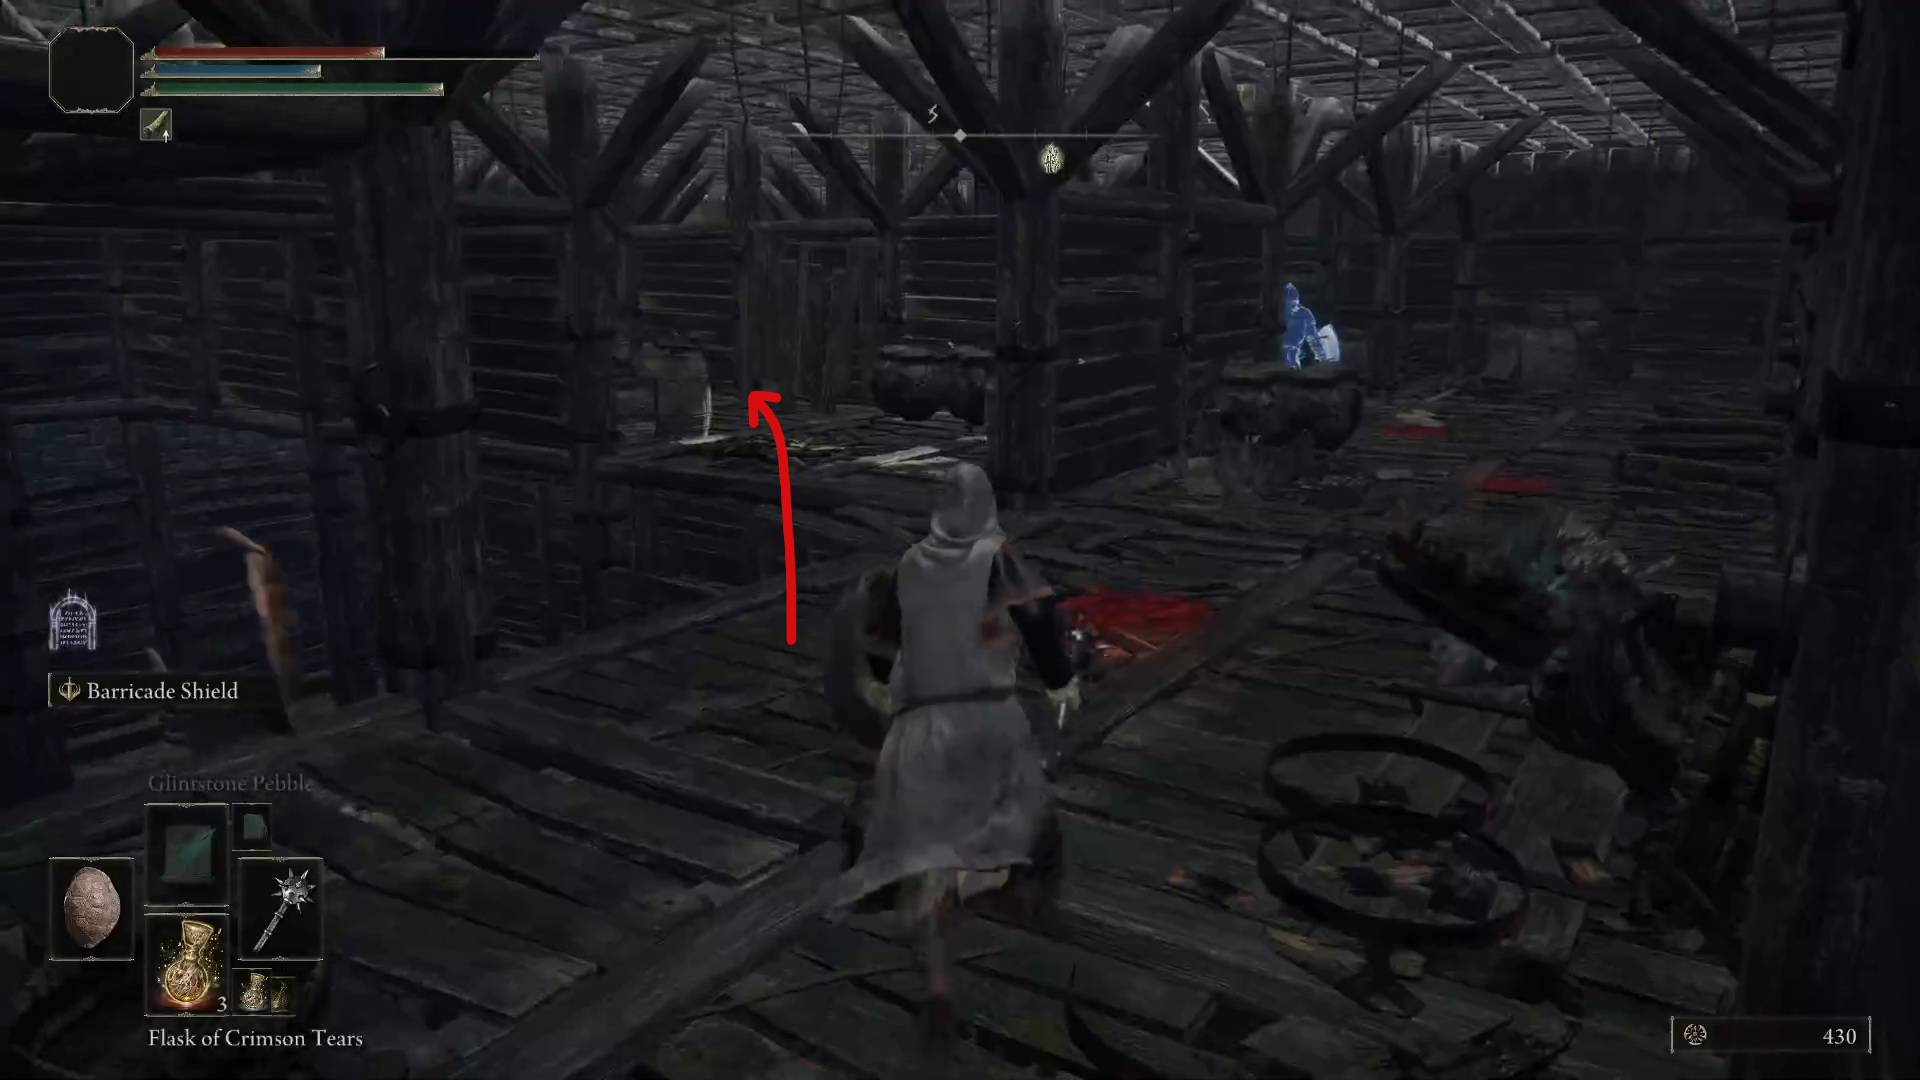
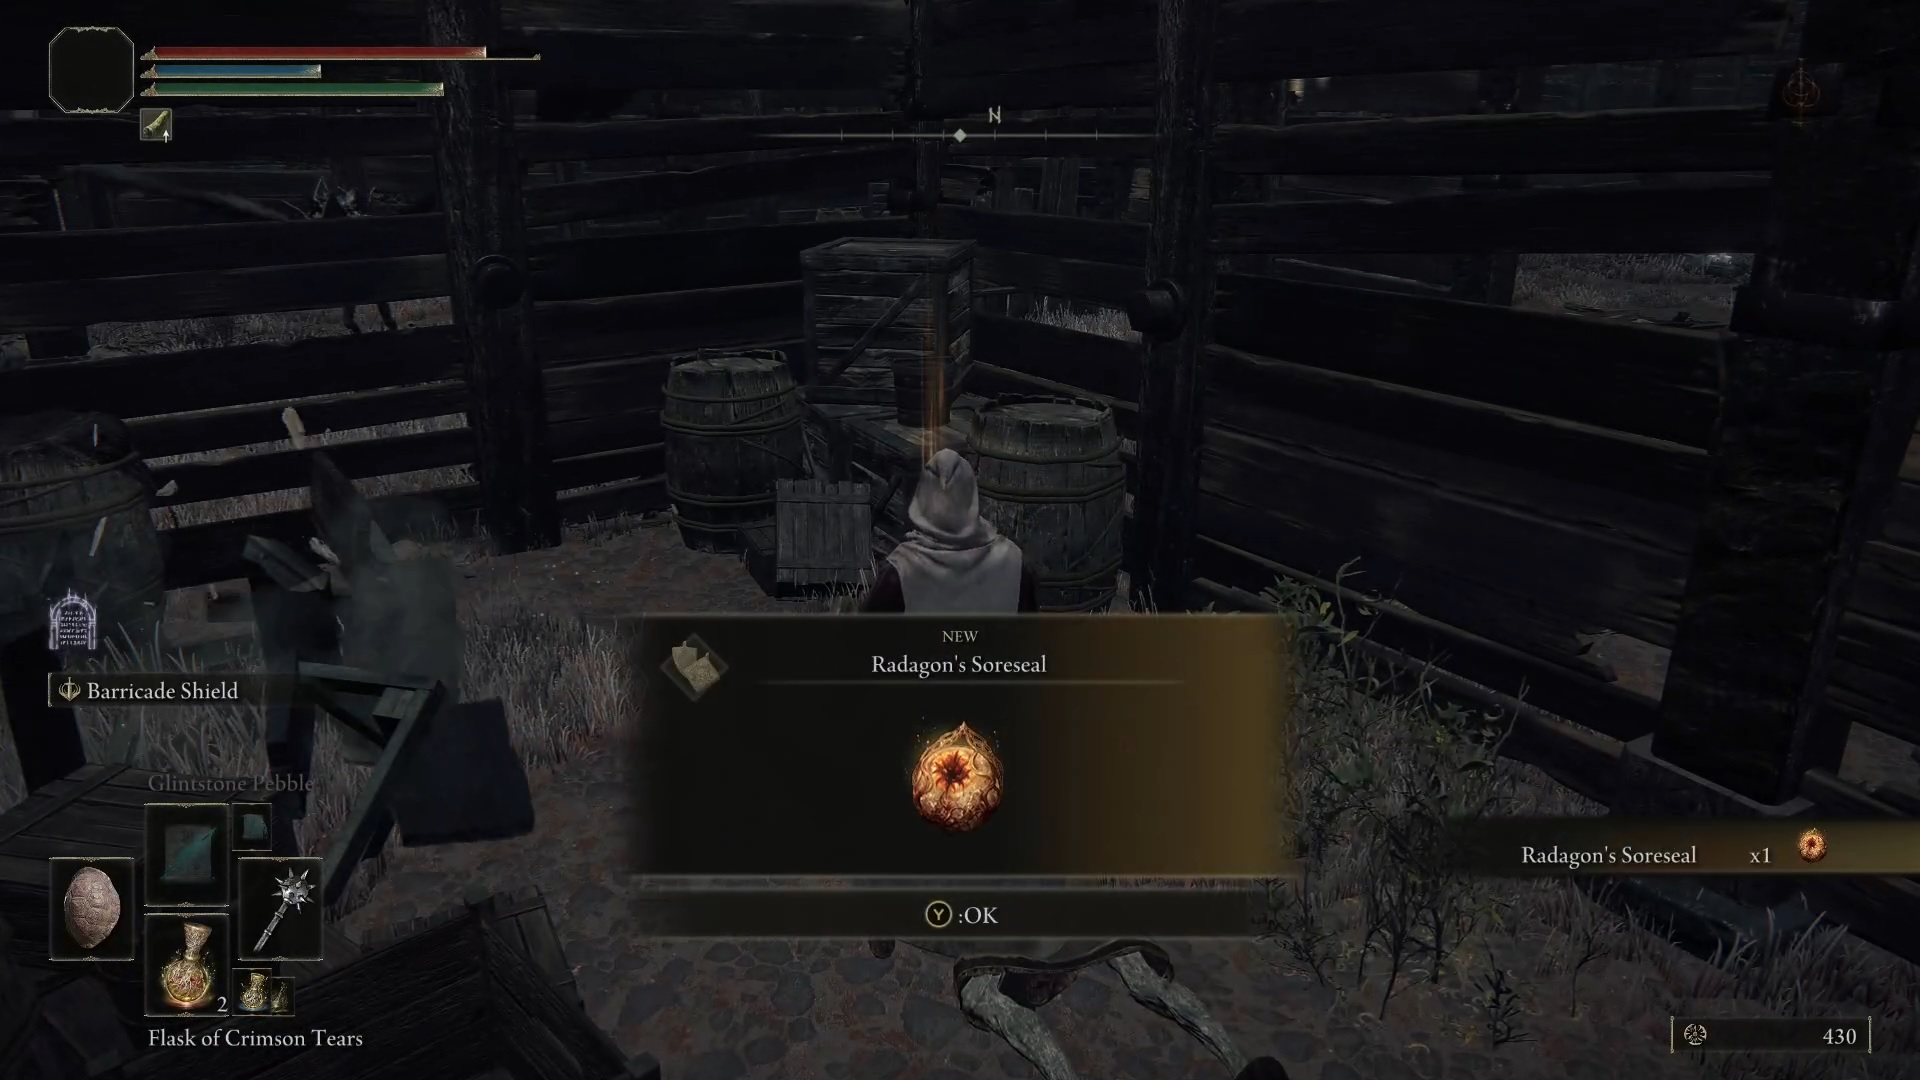
Before we move on from Fort Farroth, there are still some points of interest nearby. Once you have the medallion, you can keep exploring the fort. Run across its roof, and drop down into the hole on the far end. You’ll get attacked by some very strong rats and spectral warriors there, so keep moving, and roll through some debris to open up a path for jumping to an otherwise inaccessible part of the fort. More rats await you there, but just keep moving, then drop down a hole in the floor and soon enough you’ll find Radagon’s Soreseal – a very good talisman for most builds that intend to deal physical damage.
Run across and jump downTry rollingGo ahead and jumpYour reward
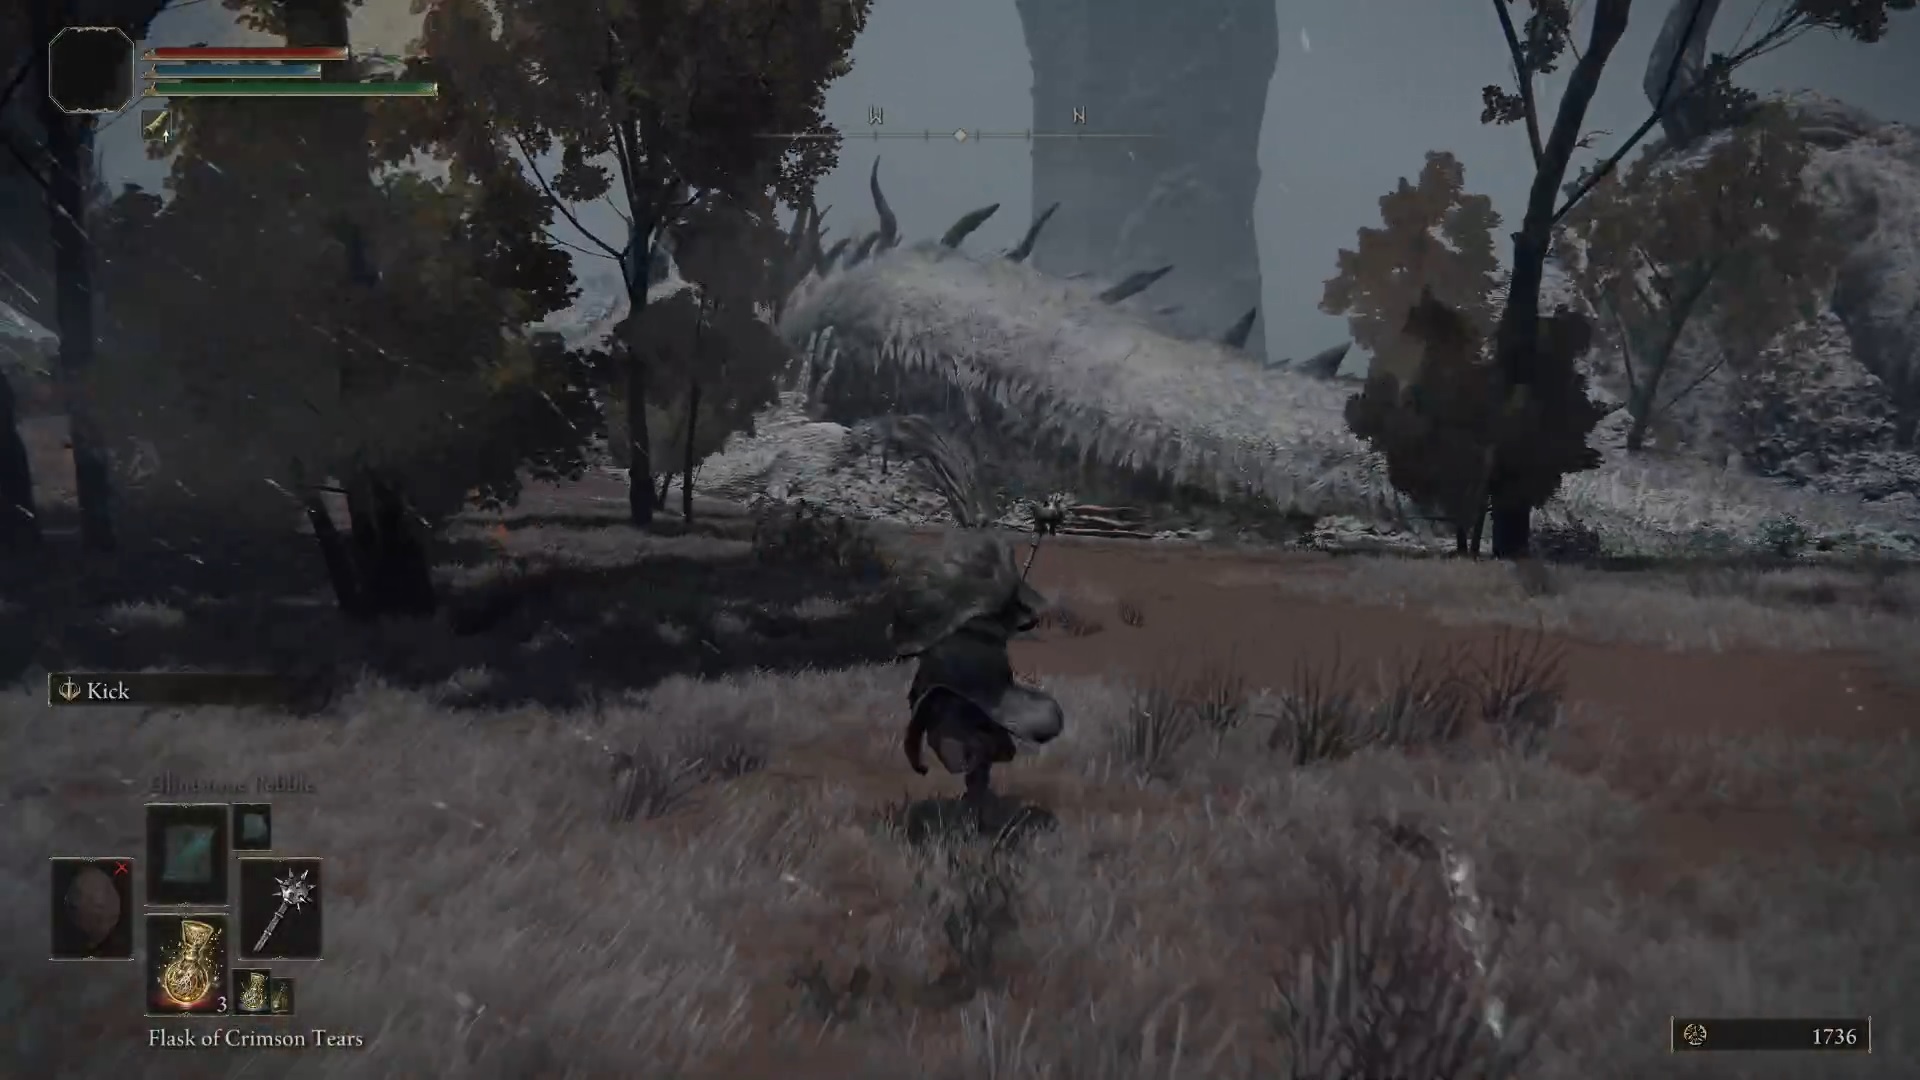
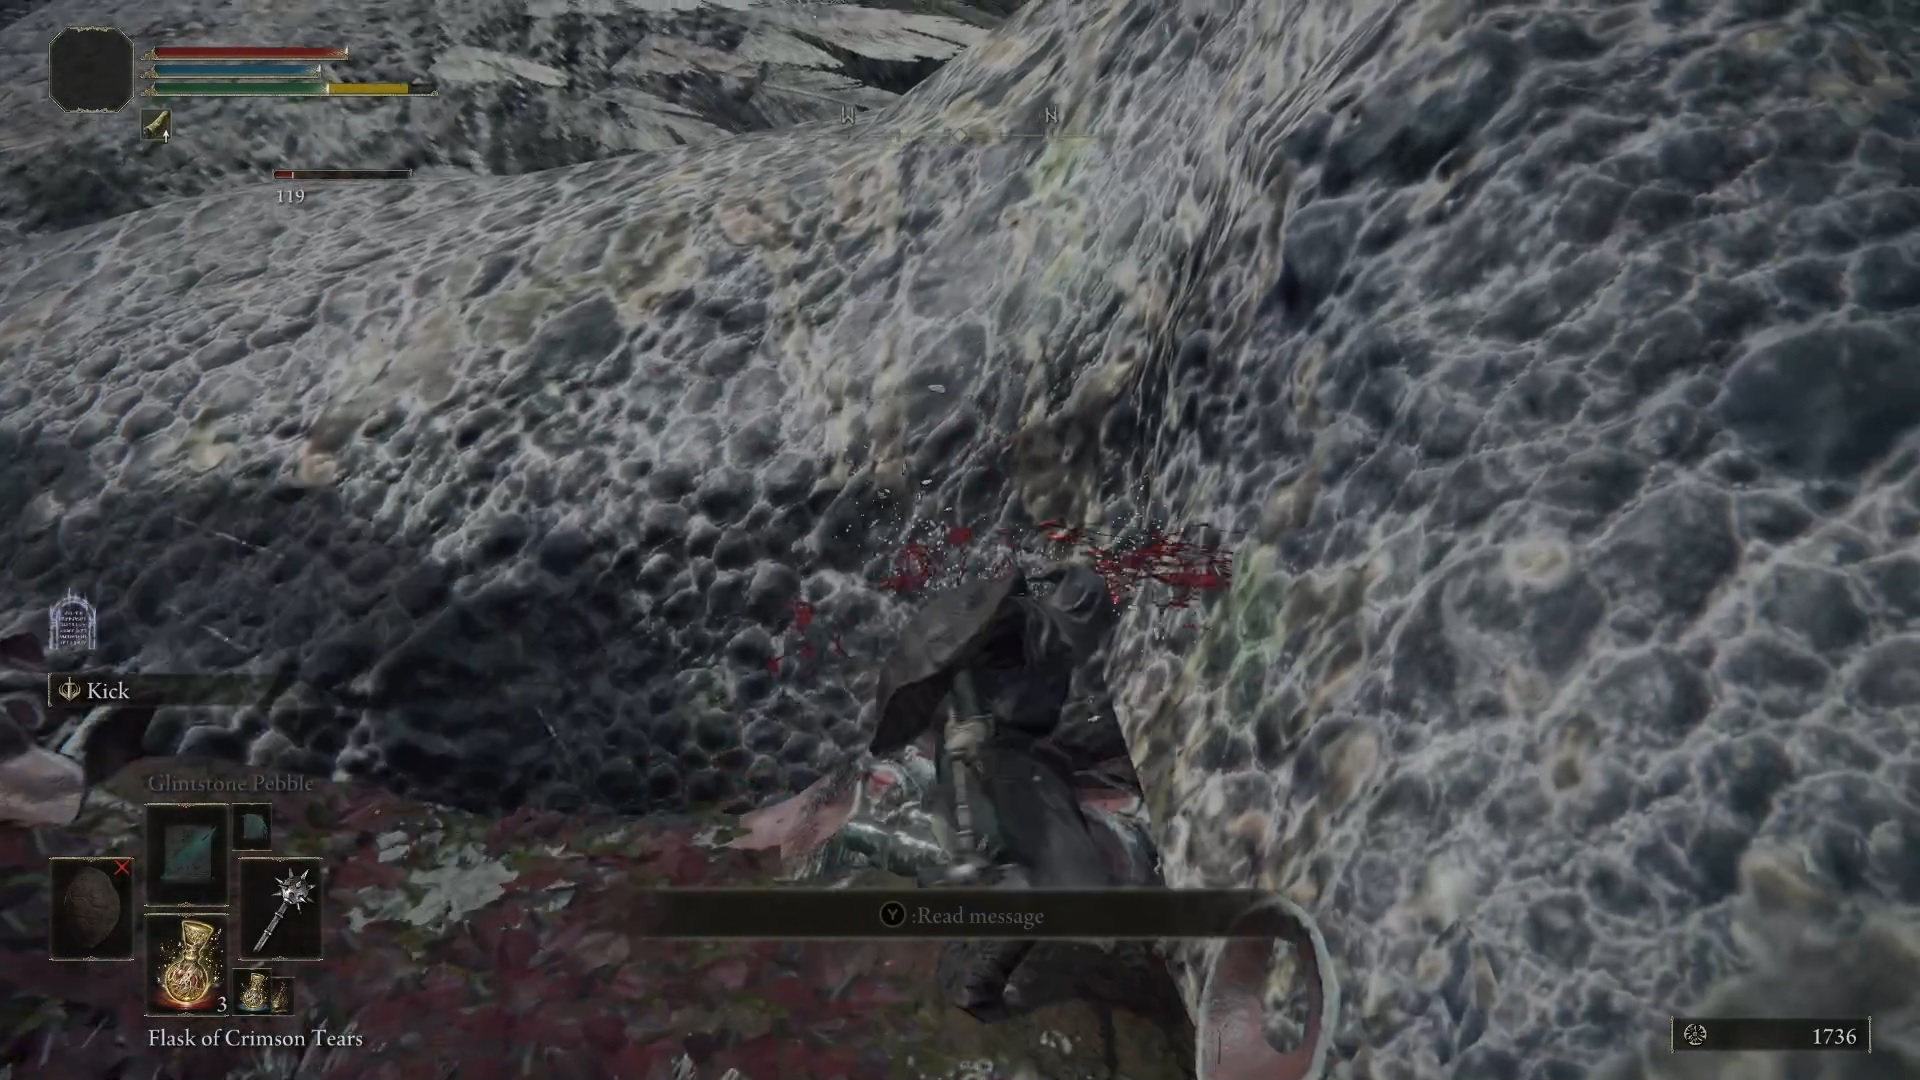
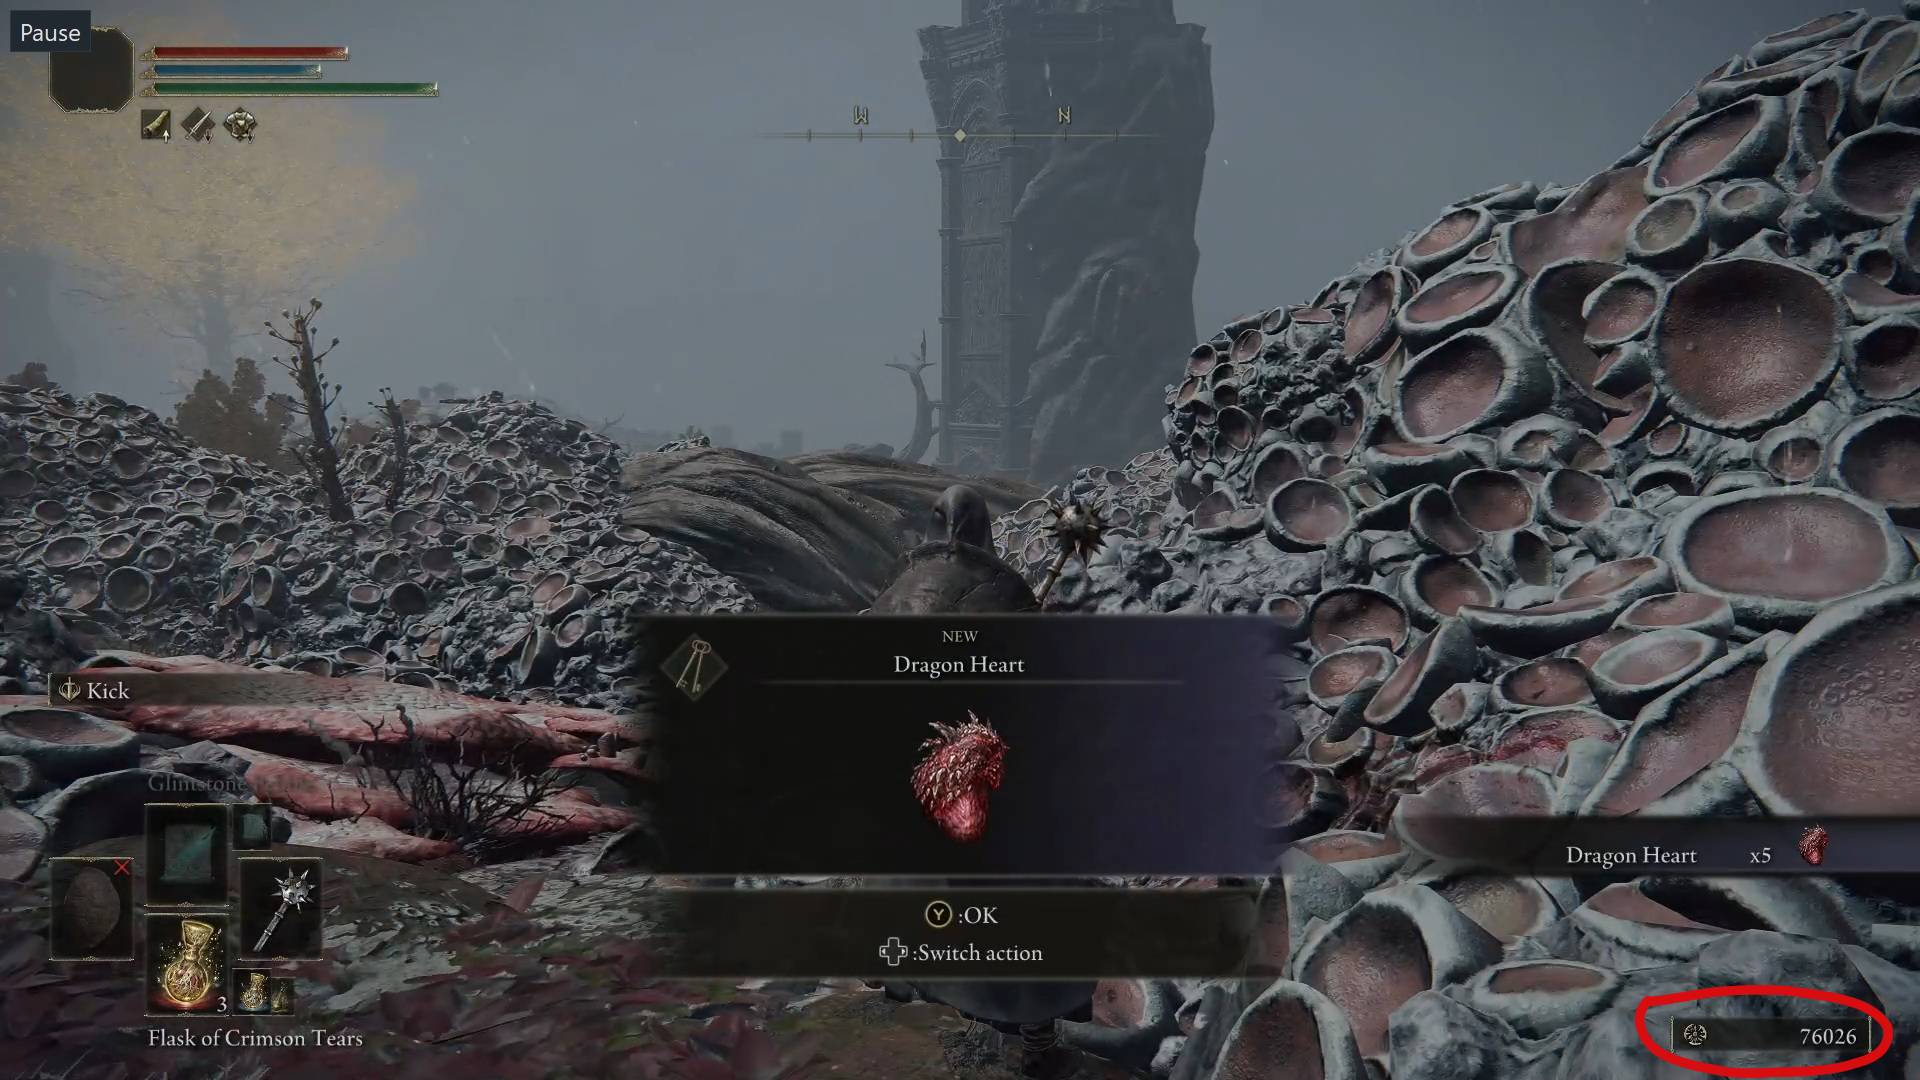
Back at the site of grace, you’ll be able to see an absolutely massive dragon. This dragon does absolutely nothing and just sits there. Which isn’t that bad of a strategy considering its ridiculous health pool. However, thanks to our trusty Morning Star, we can bleed the beast, dealing damage based on the percentage of its maximum health. So, just walk up to the dragon from behind and start whacking. It will take you a couple minutes, but you won’t be in any danger, and the reward will be somewhere in the vicinity of 80,000 runes – a great boon in the early game.
The beast sleepsIf it bleeds, we can kill itA nice reward
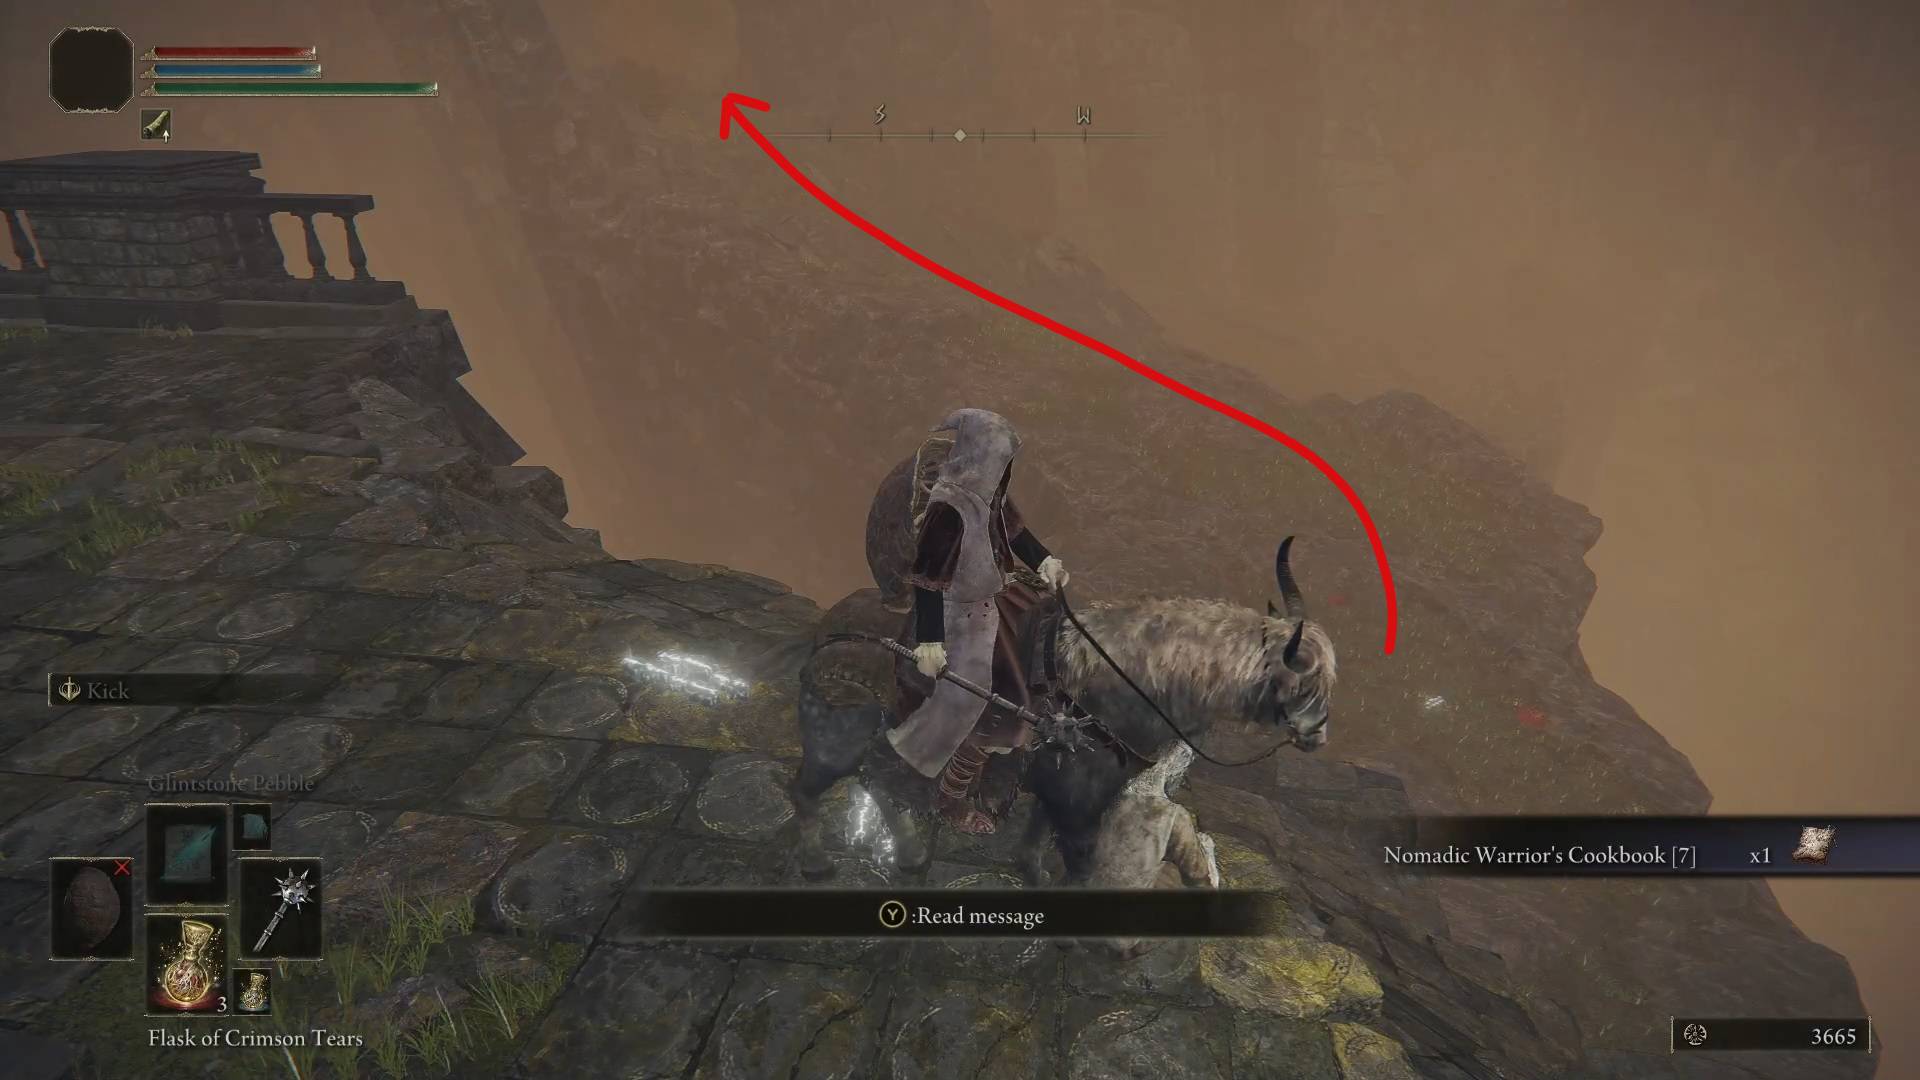
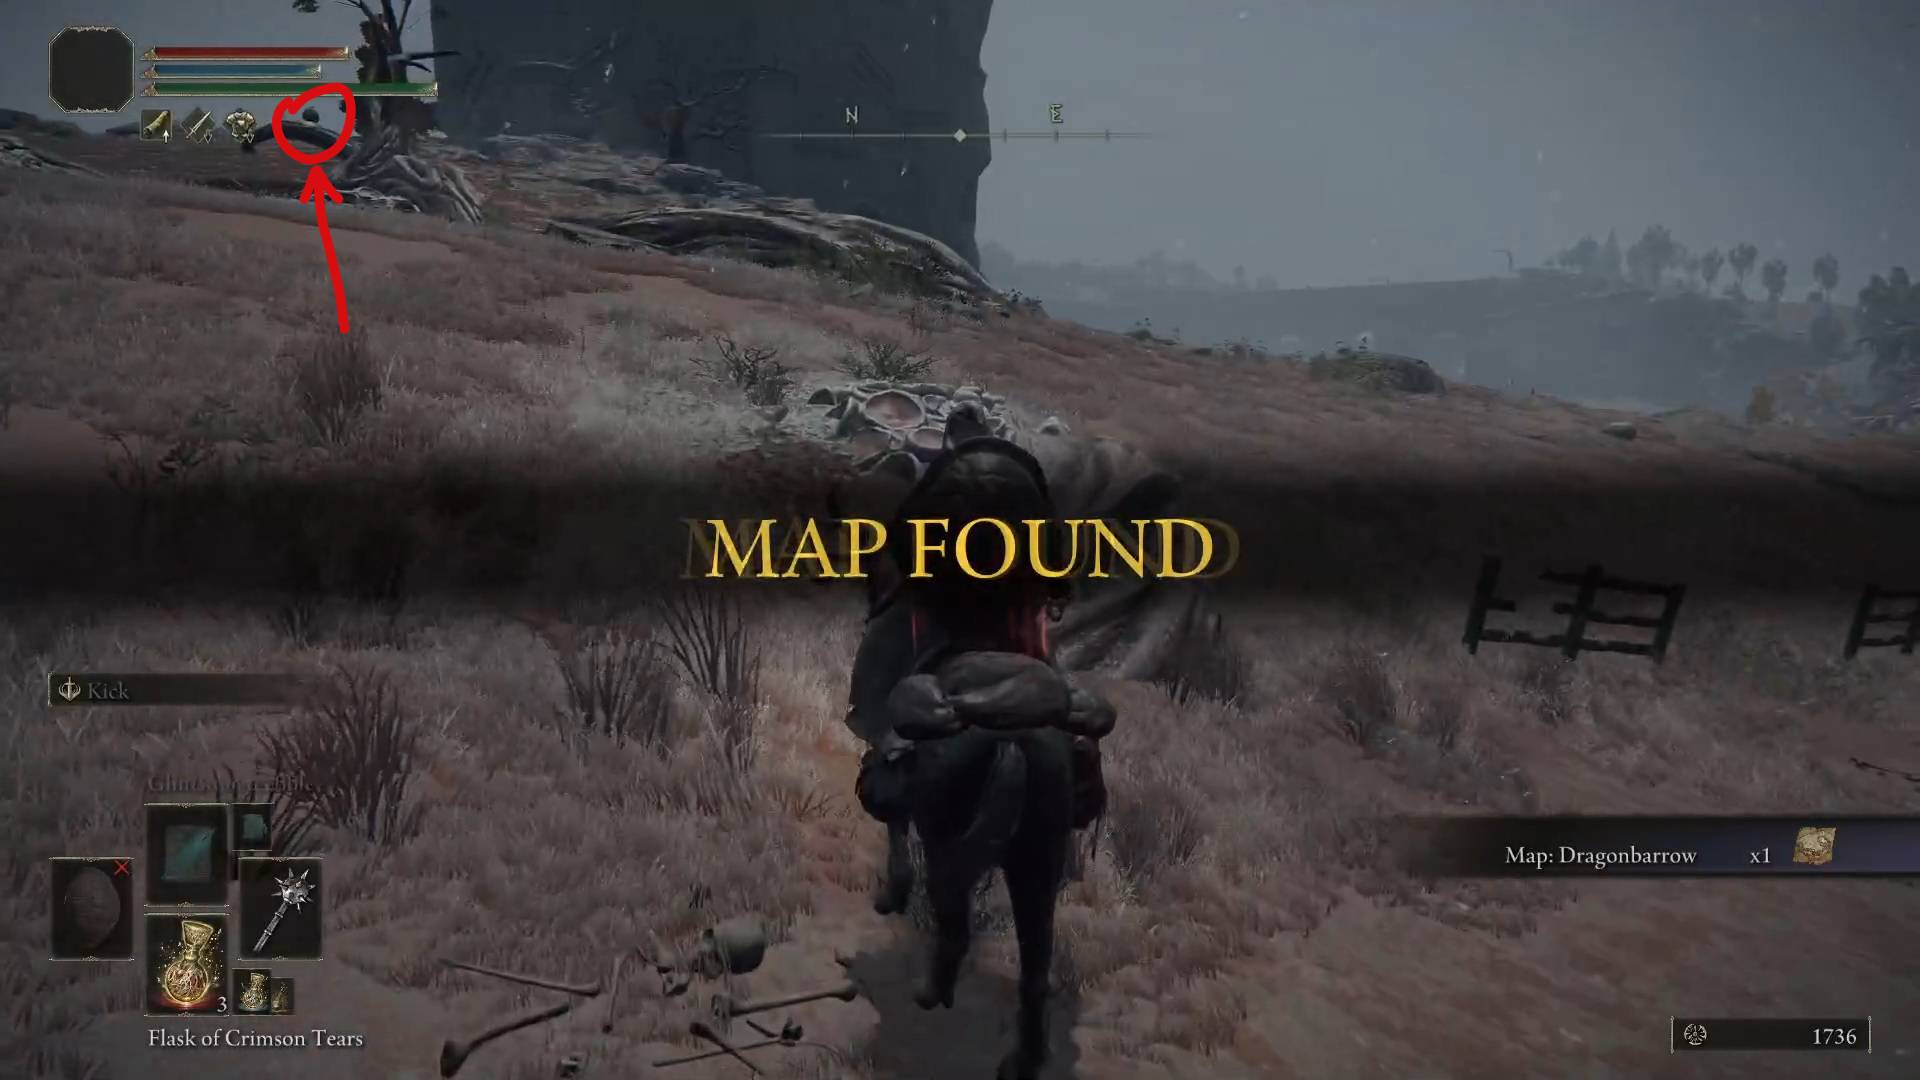
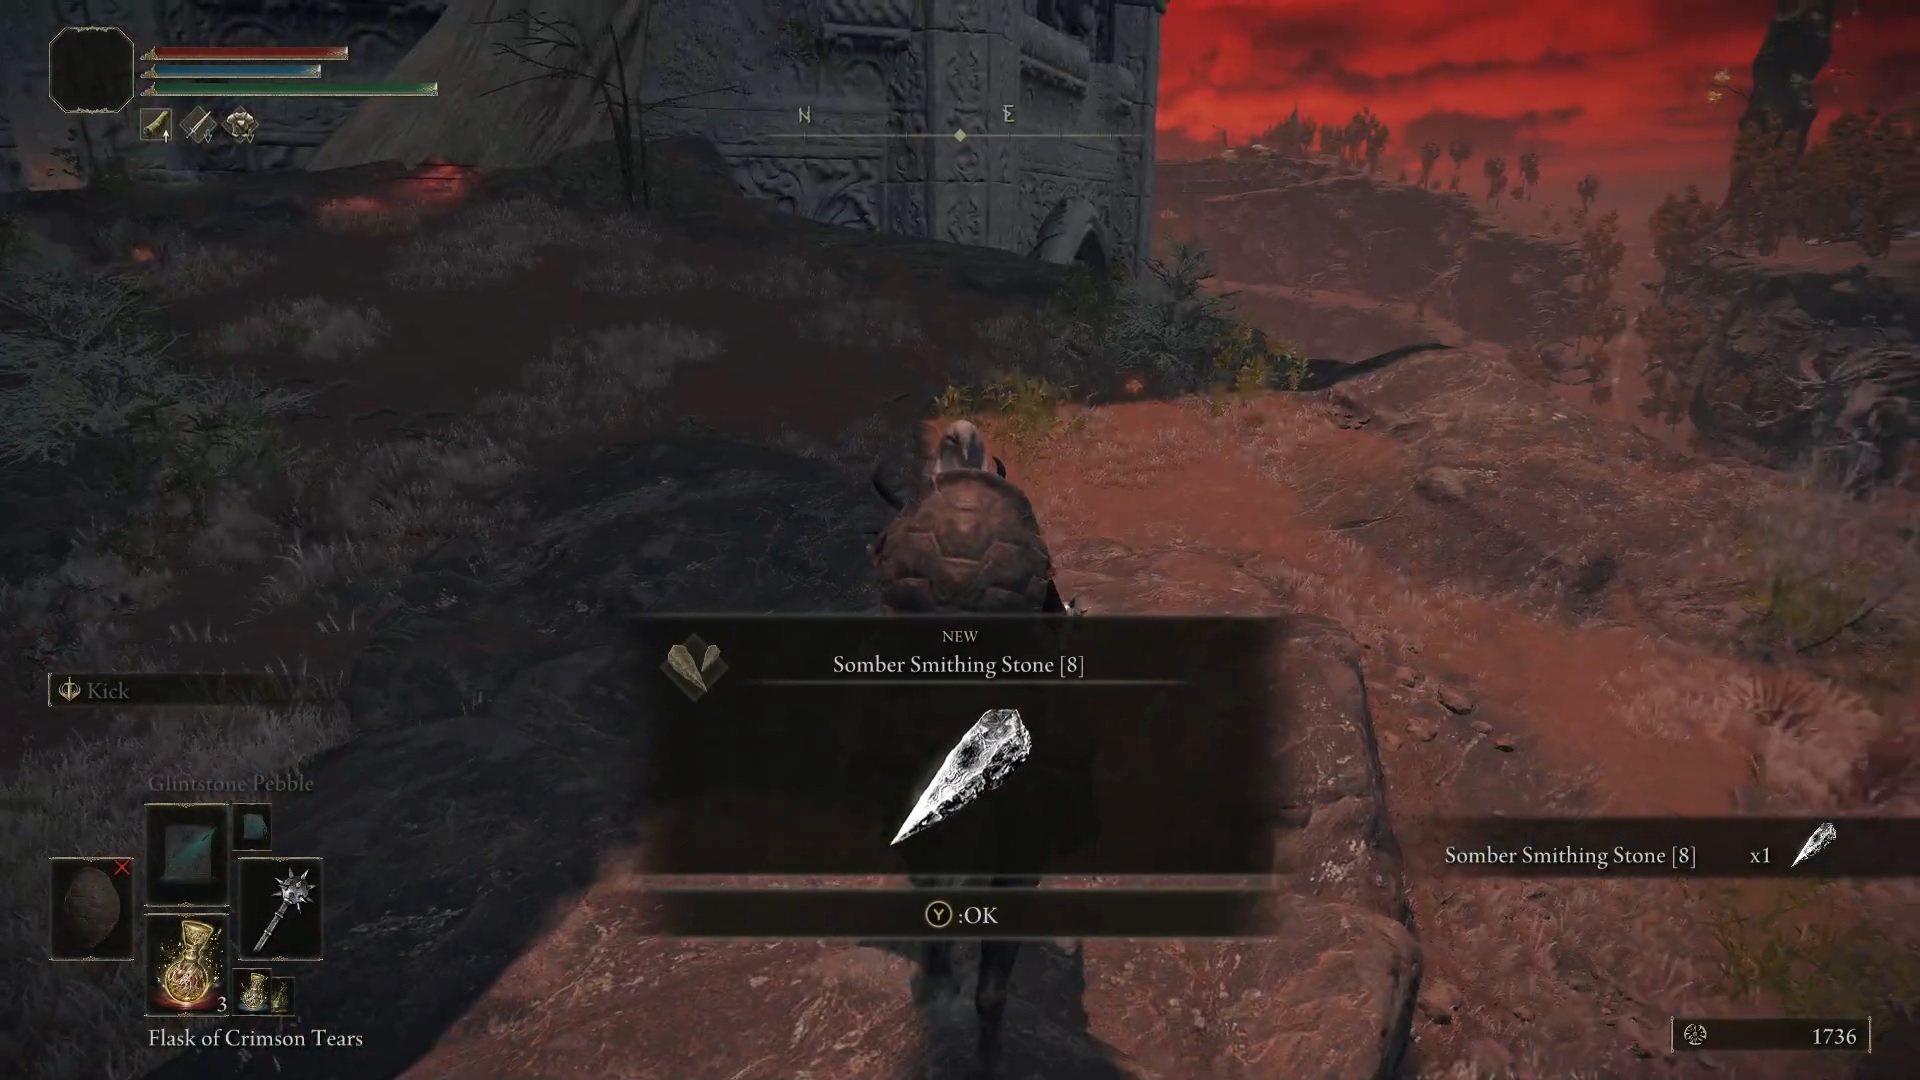
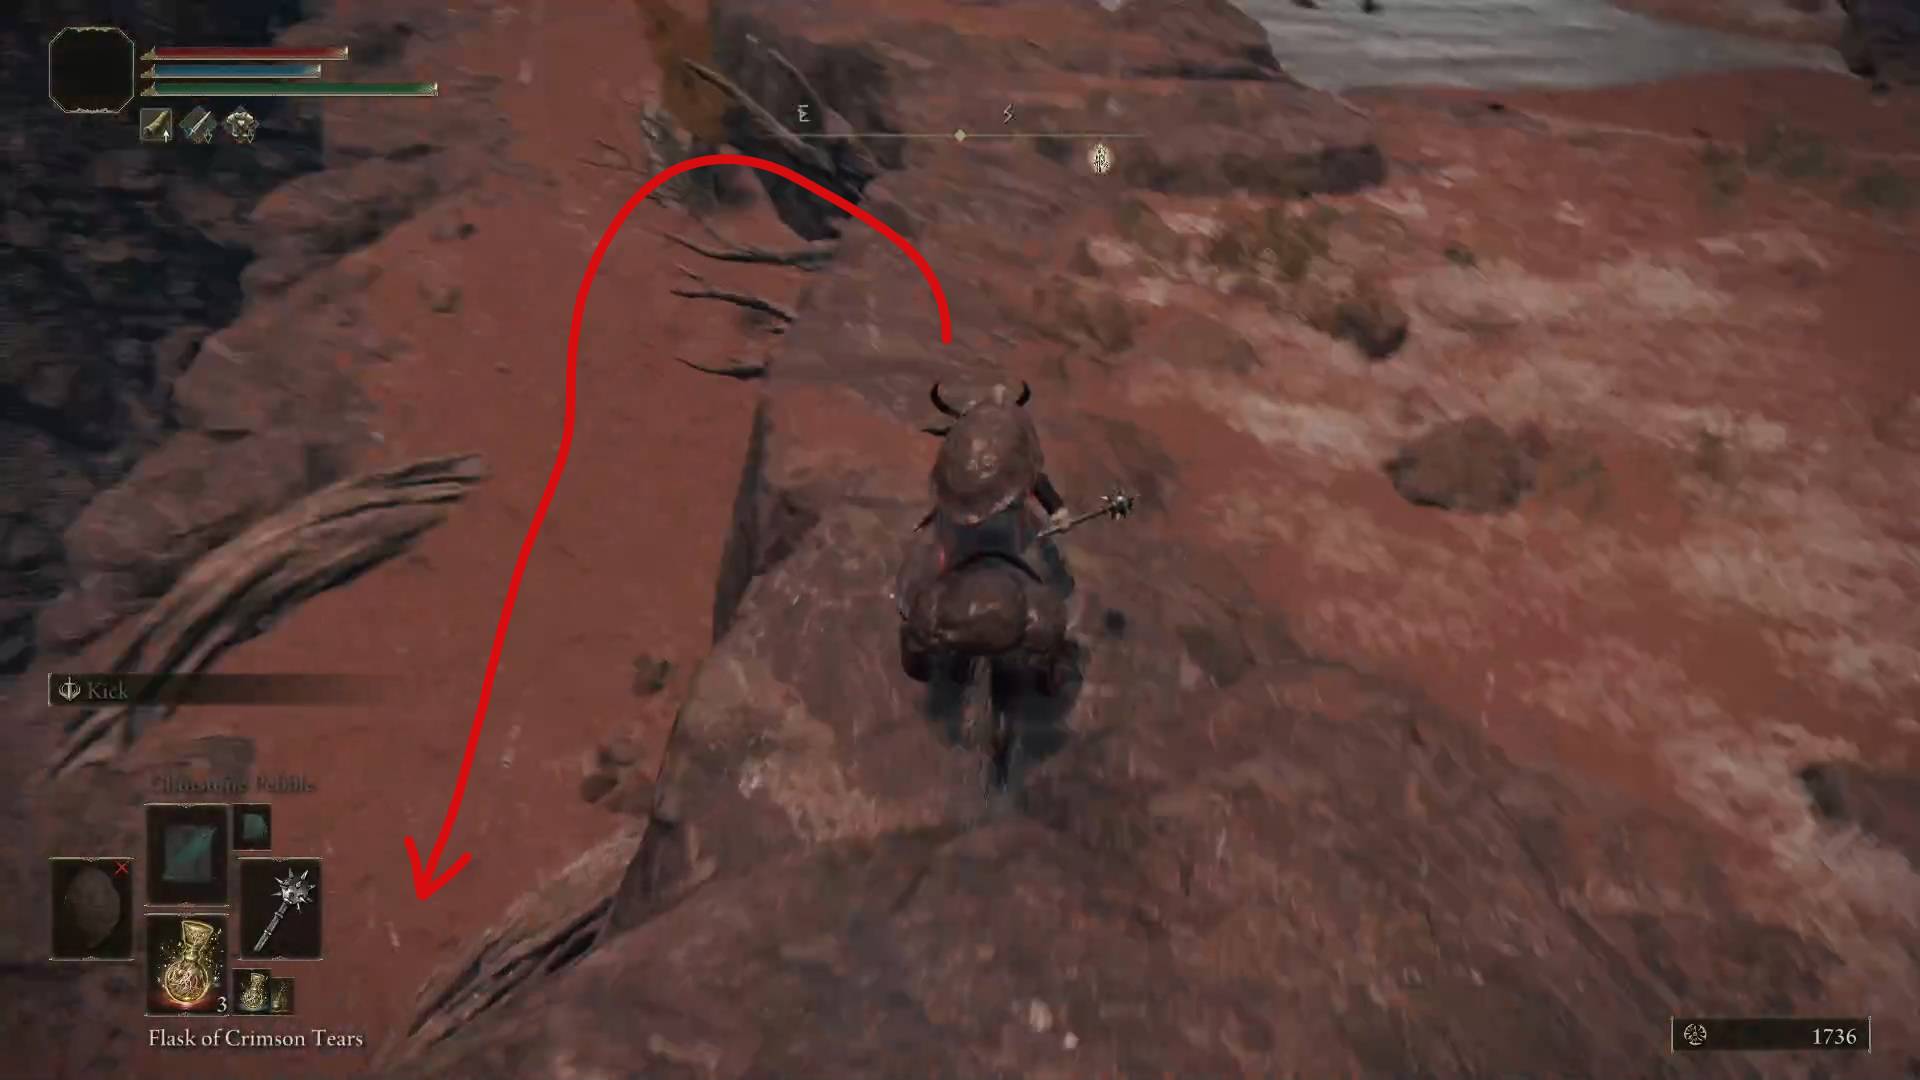
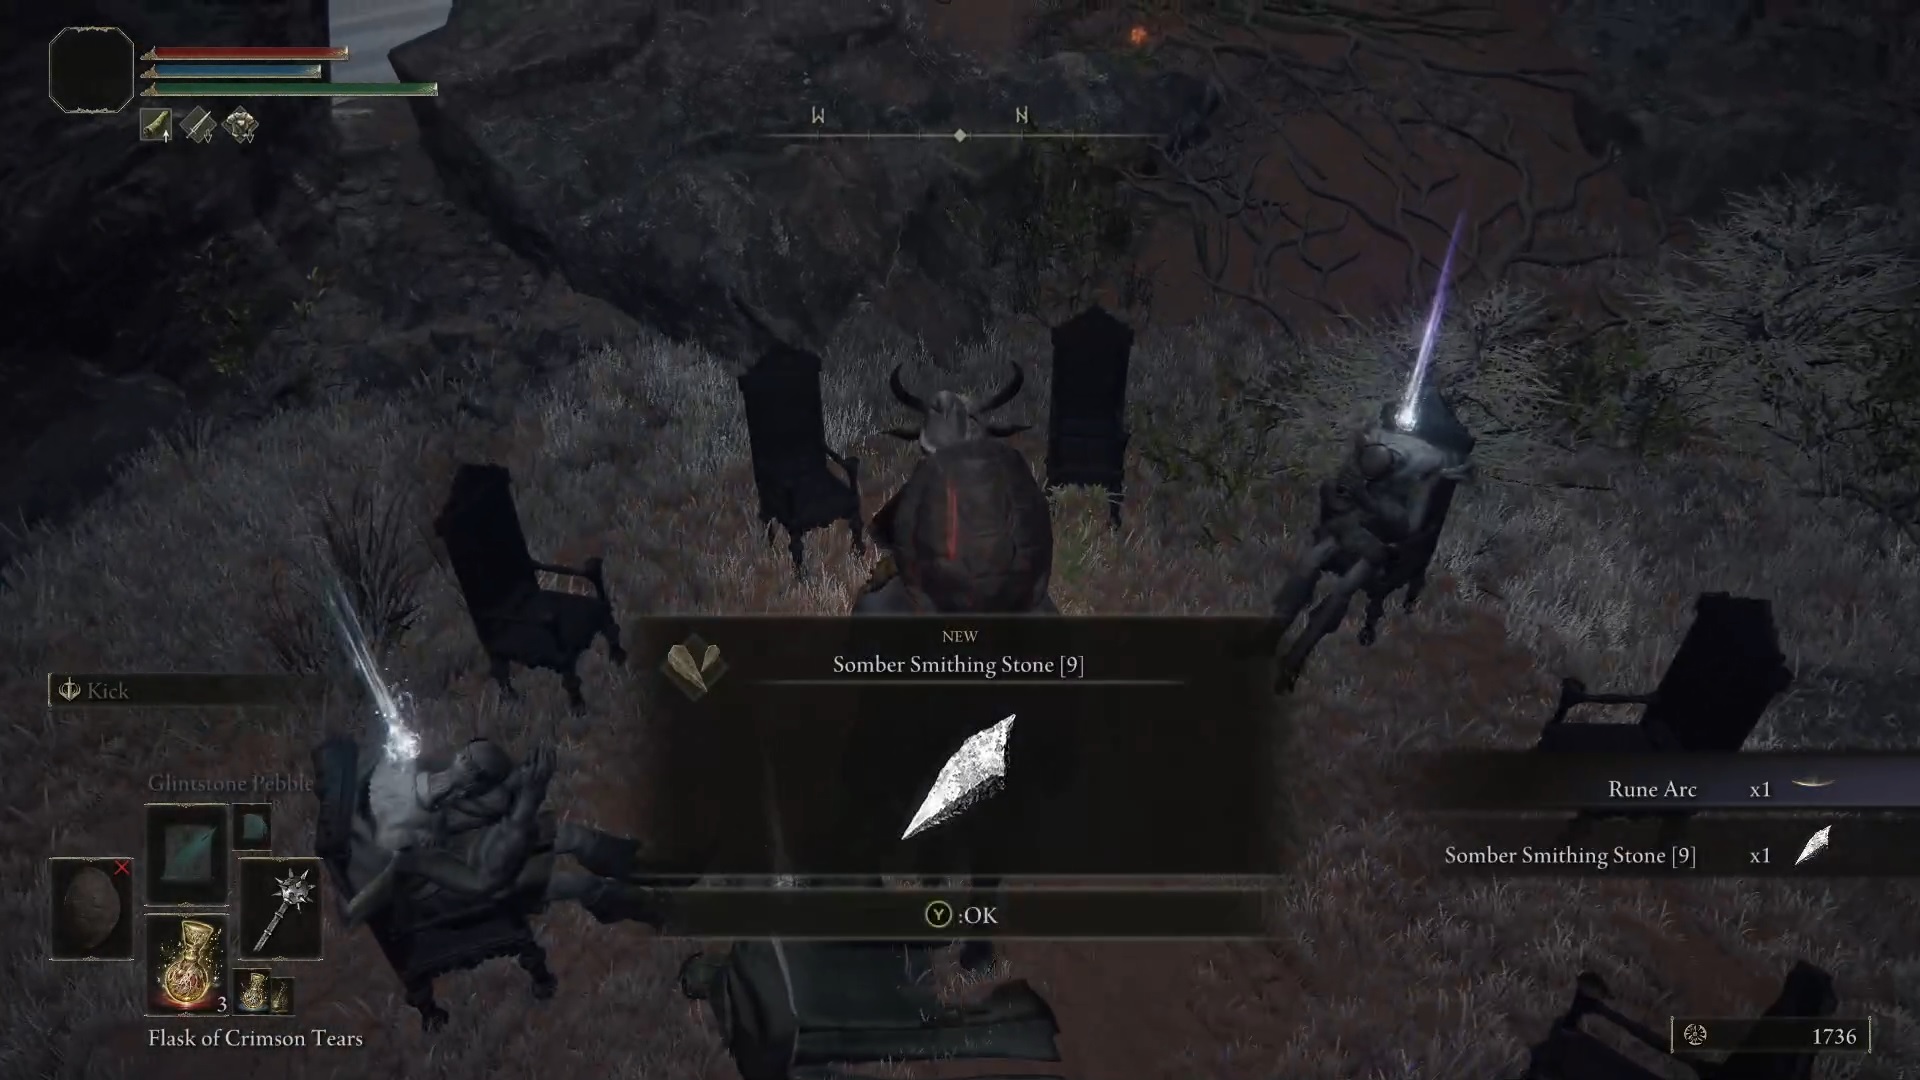
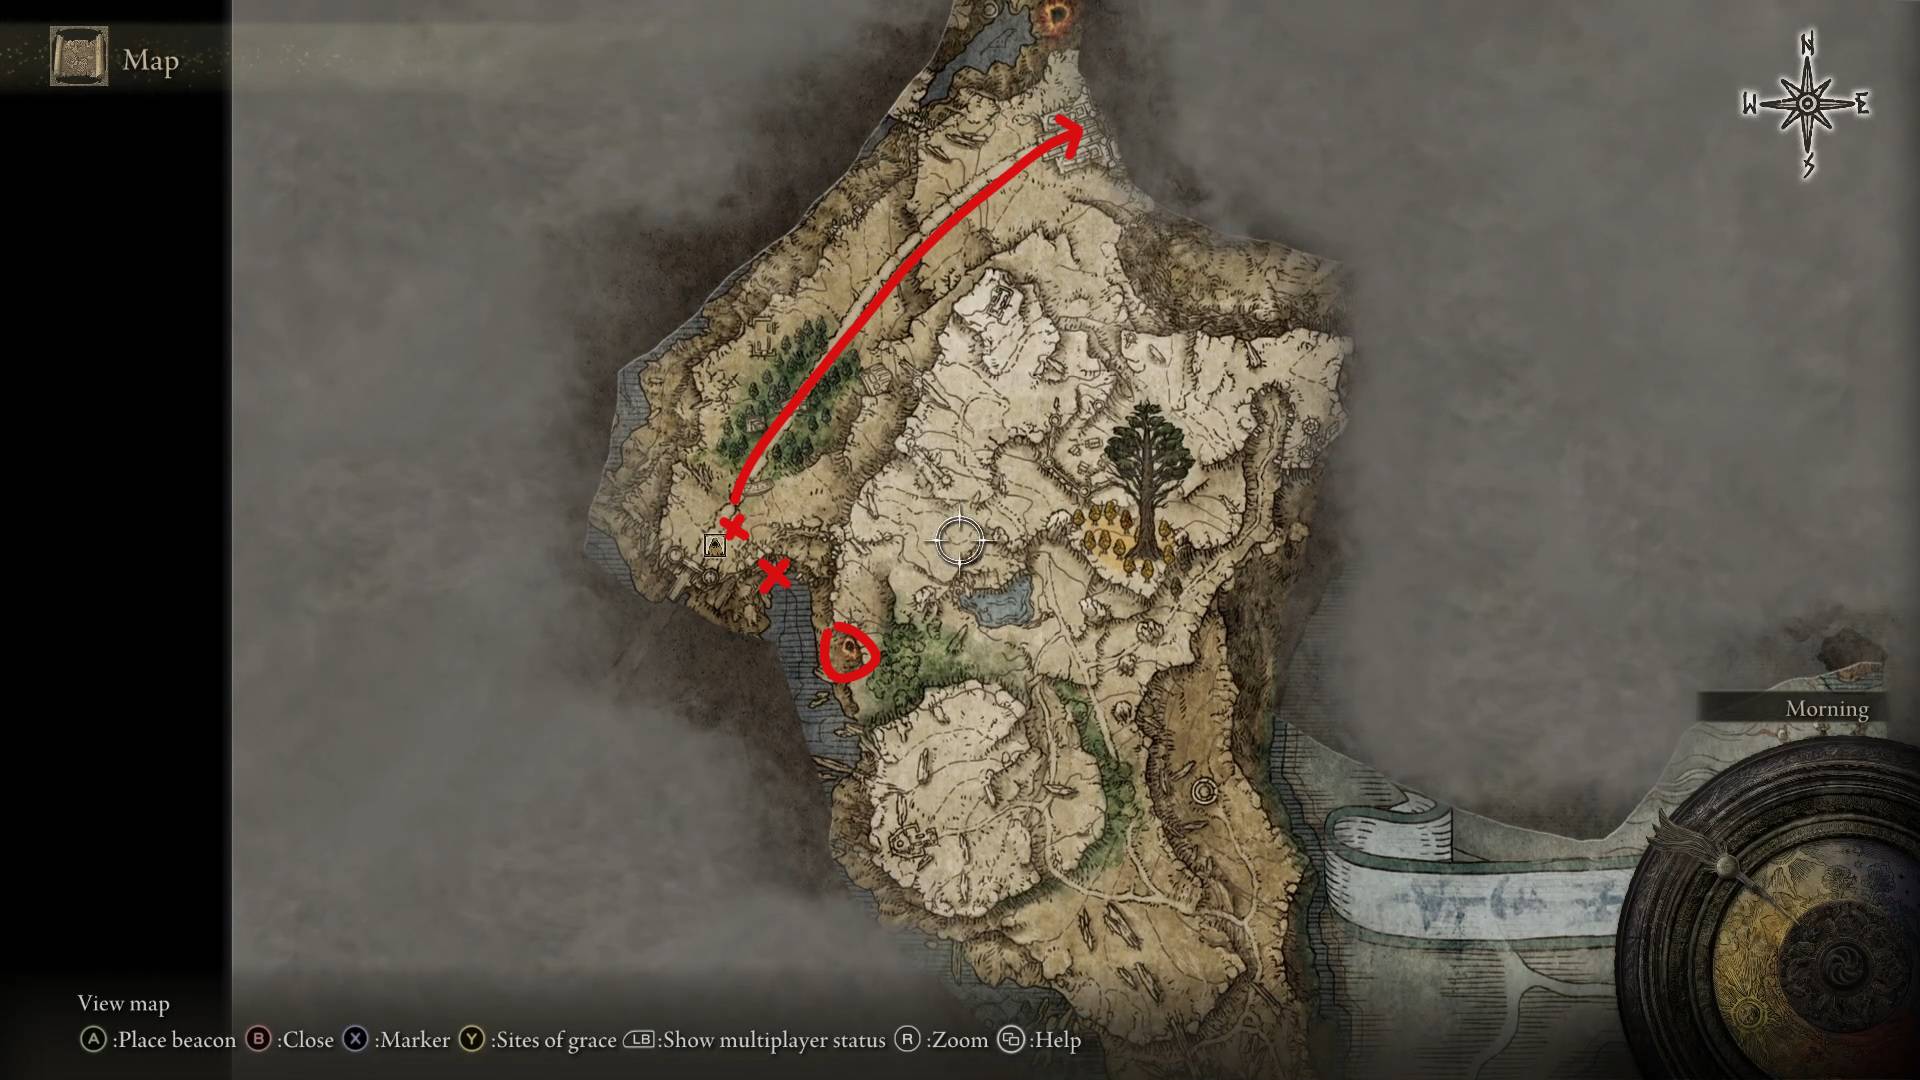
The following items won’t be immediately useful, but they’re nice to grab while we’re here. From where we fought the dragon head west towards where the map for the Dragonbarrow is. You’ll see a natural ramp leading towards the Divine Tower of Caelid there. On top the ramp you’ll see a scarab sitting on a root. This particular scarab explodes when you kill it, but then it gives you a Somber Smithing Stone [8]. If instead of going on top of the ramp, you ride under it, you’ll see some corpses sitting in chairs. One of them has a Somber Smithing Stone [9]. This guide will lead you to Somber Smithing Stones up to [6], while all the [7] ones are relatively hard to get and require you to actually play the game and engage with its content. But once you get it, you’ll have [8] and [9] already.
There’s the scarabYour reward for crushing the scarabJump down and ride aroundYour reward
Using the Grand Lift of Dectus
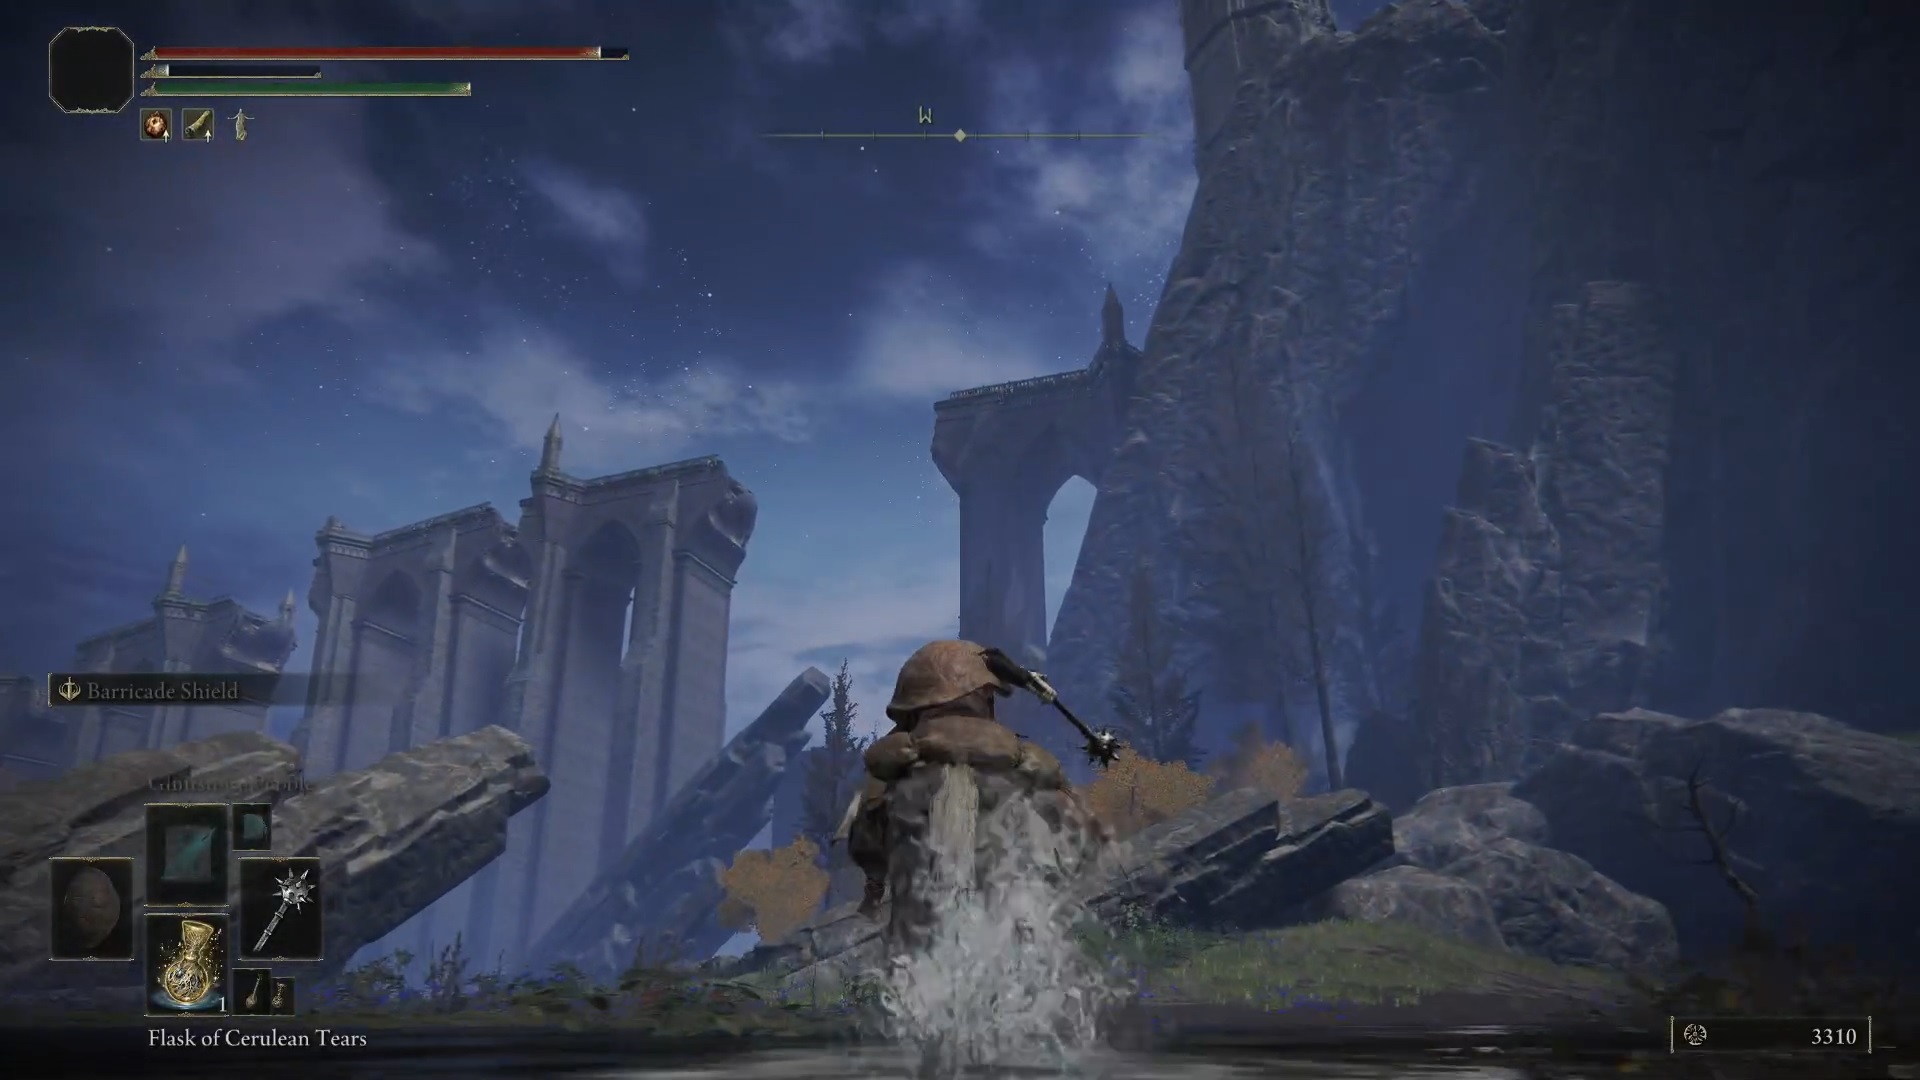
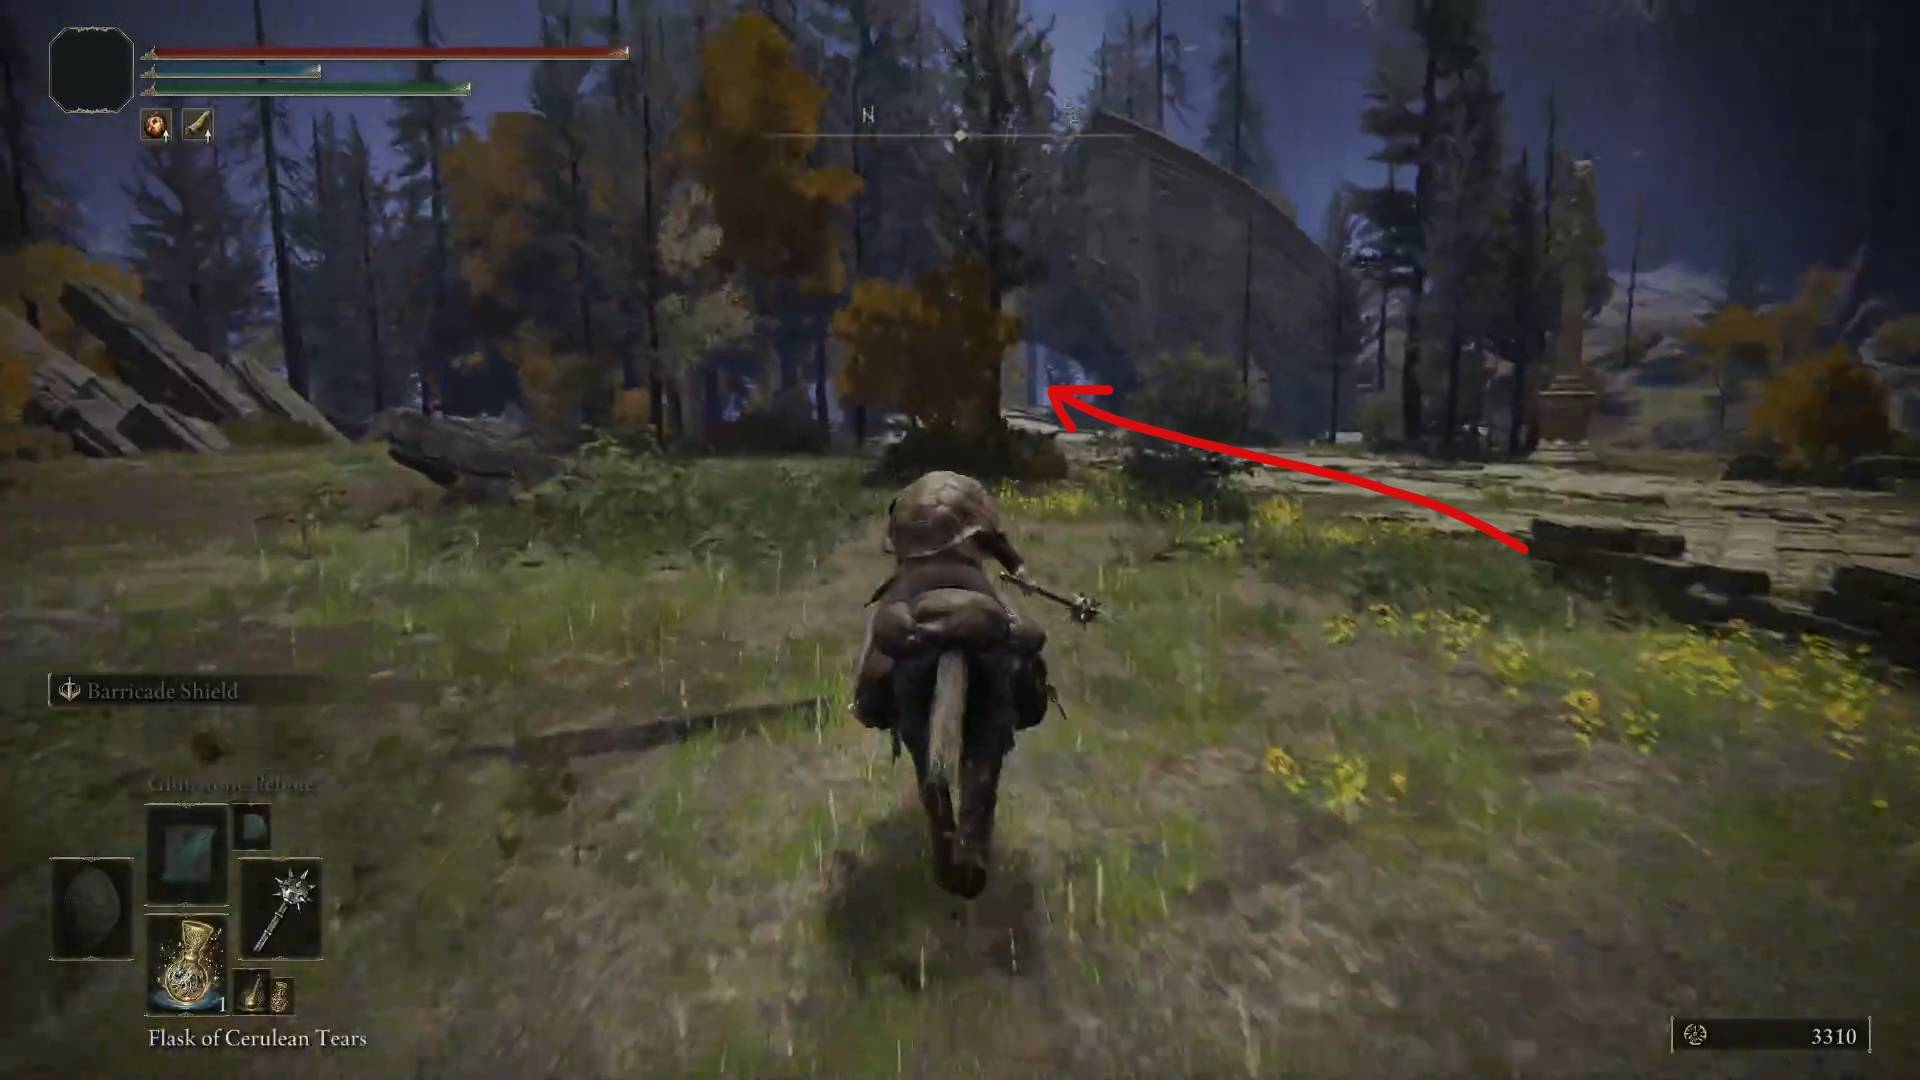
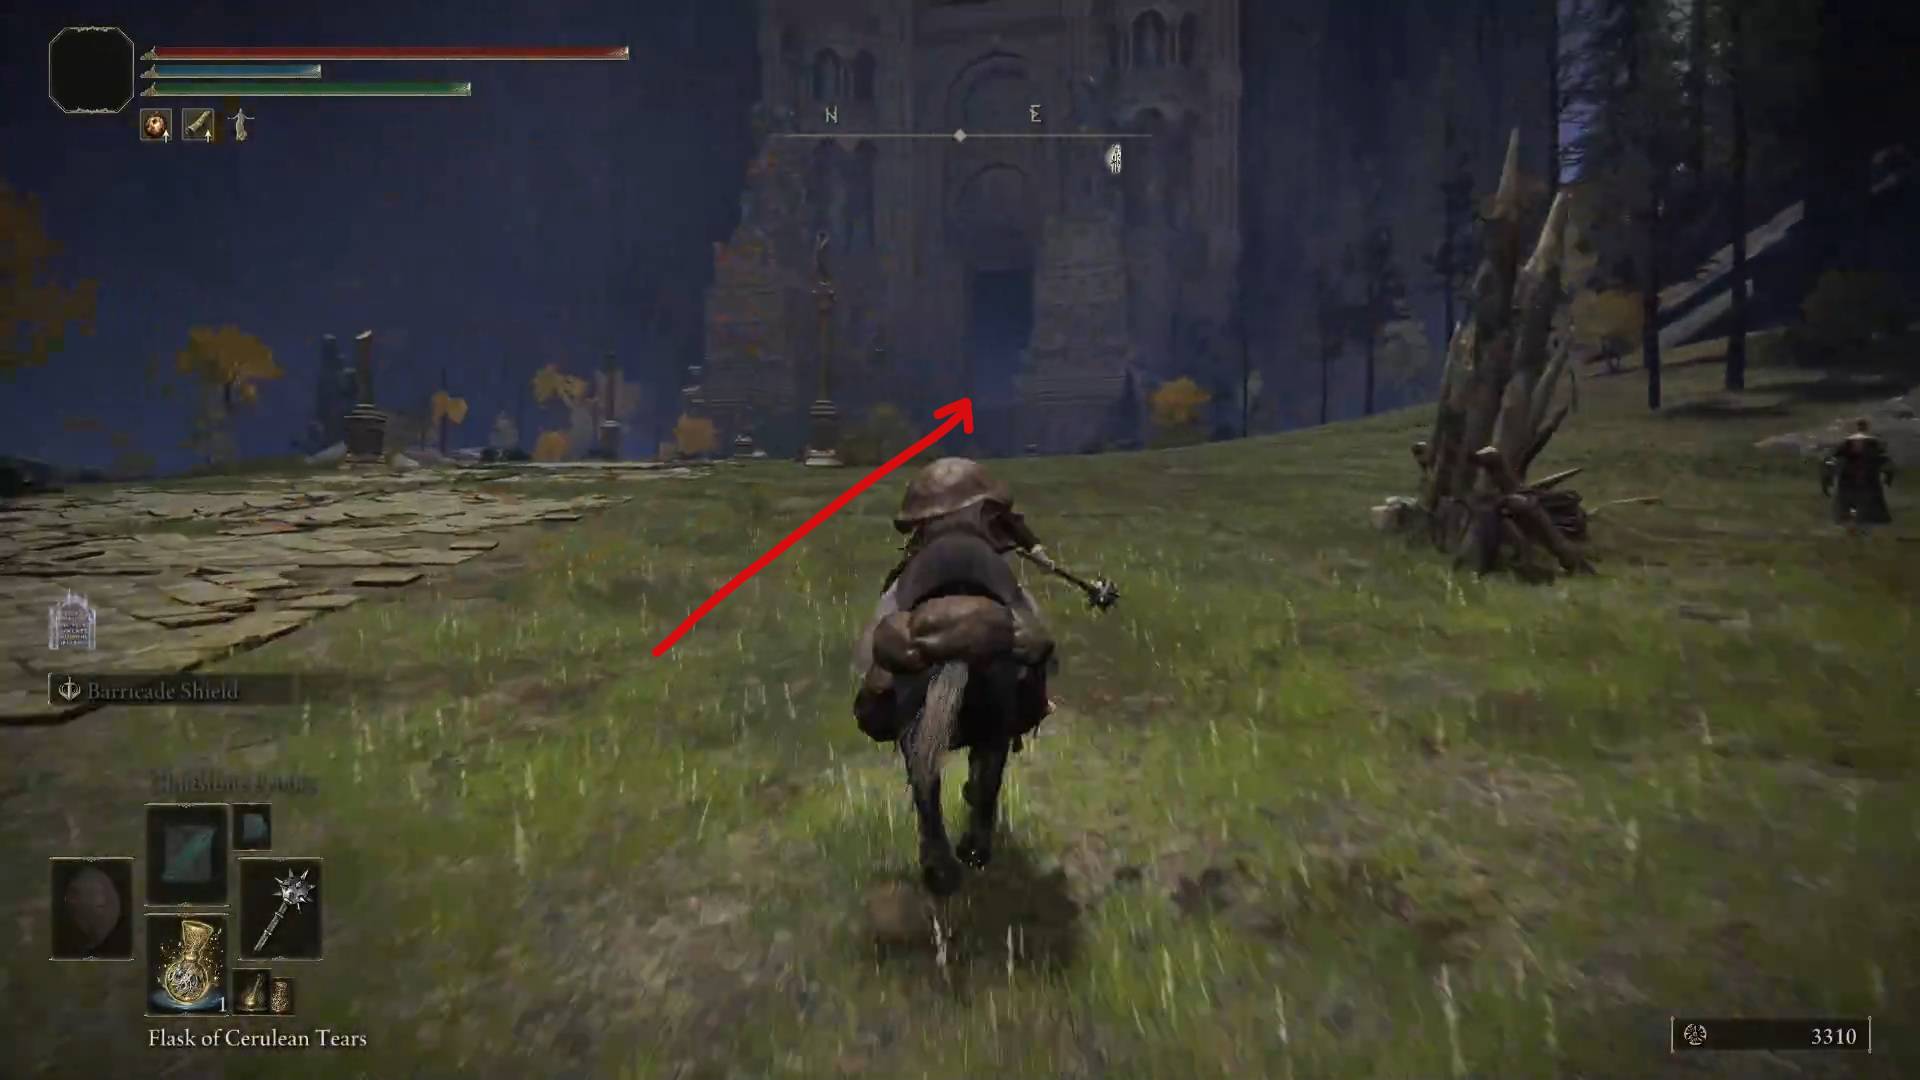
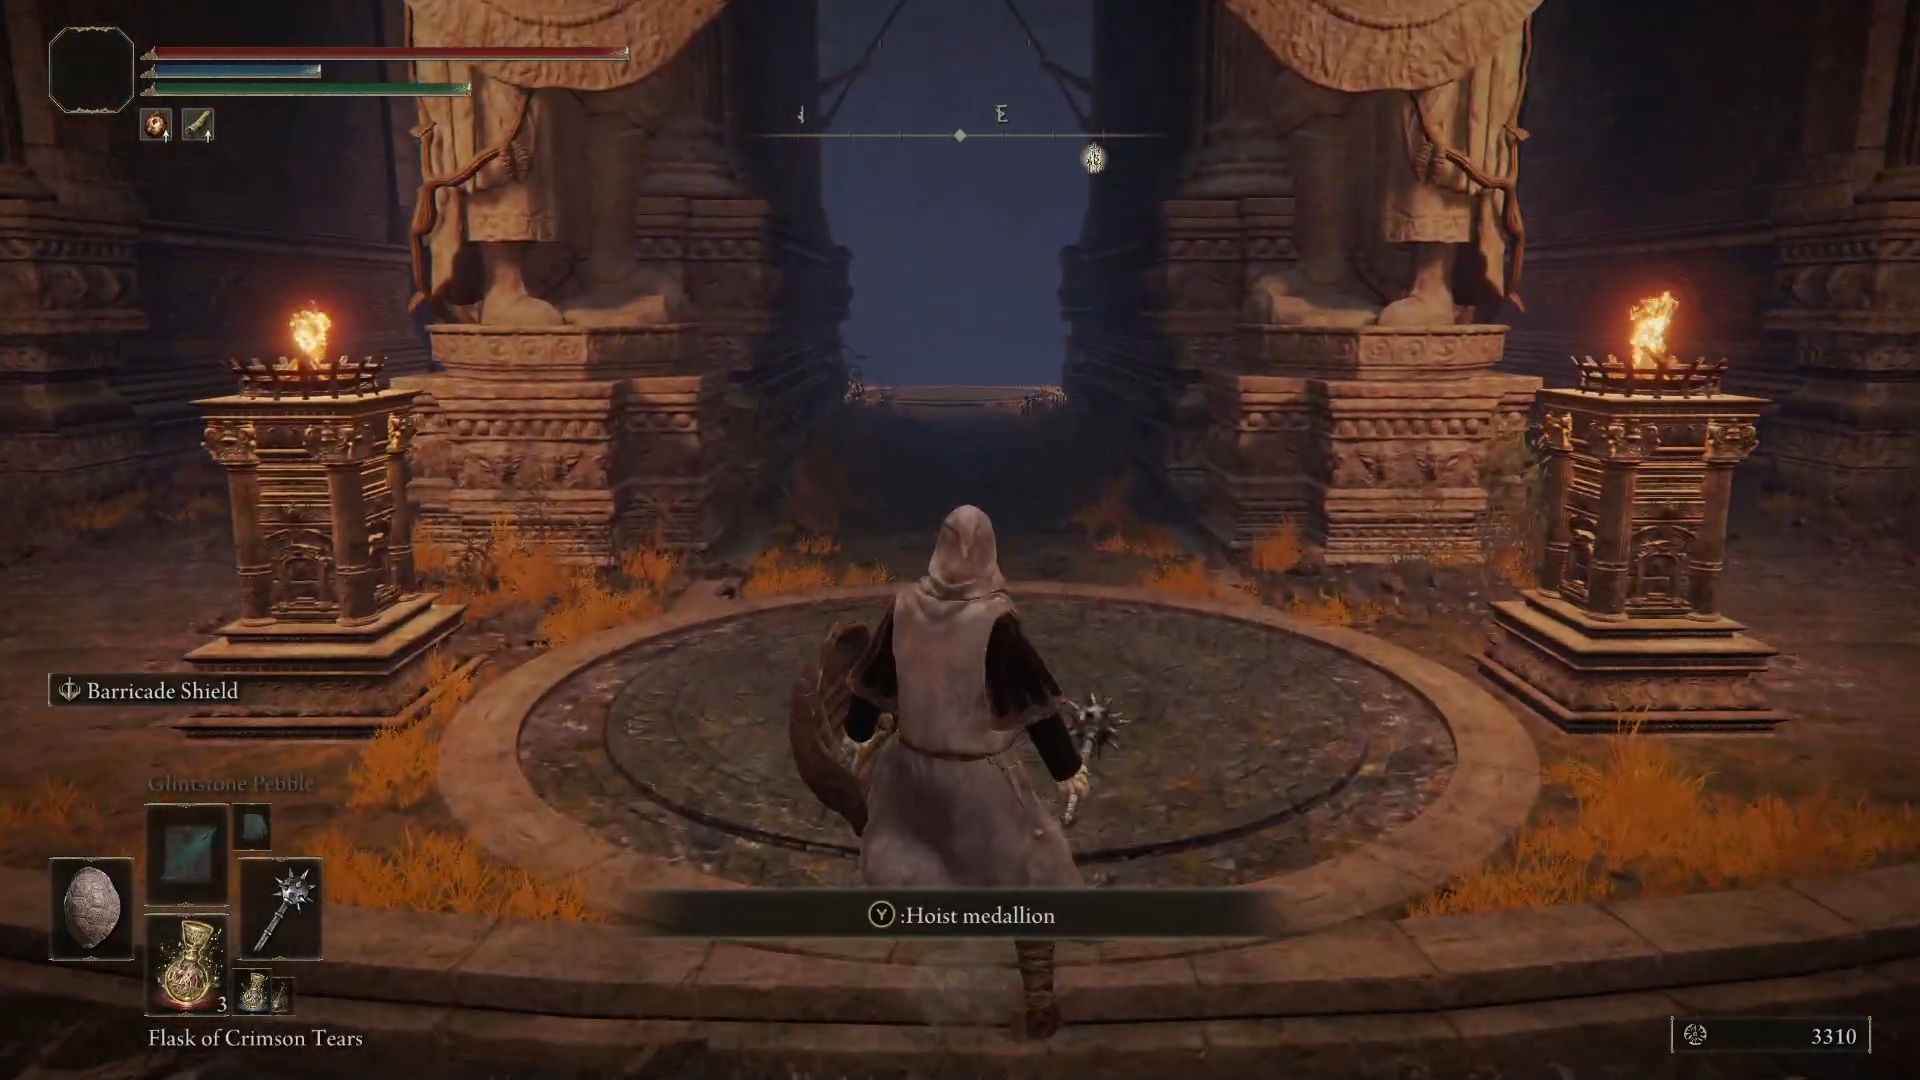
With both halves of the Dectus Medallion, head back to Liurnia of the Lakes and make your way through the entire location, keeping to its eastern side down in the water. Eventually, slightly north of the Raya Lucaria Crystal Tunnel, you’ll see a Spiritspring taking you up to the East Raya Lucaria Gate grace. Head along the road northeast from there, ignoring the enemies shooting their siege engines at you. Eventually, you’ll arrive at a majestic gate where you’ll be able to use the Dectus Medallion to go up into the Altus Plateau.
O – Crystal Tunnel, X – SpiritspringThere’s the SpiritspringHead down the roadAnd up the stairsHere’s where you use the medallionWelcome to Altus Plateau
Congratulations, you’ve now unlocked the bigger part of the game and can now explore it in whichever order you choose.
Weapon Upgrades
If you want to experiment with different weapons or just want to become strong fast, you’ll need plenty of upgrade materials. This guide will tell you how to quickly unlock the ability to upgrade regular weapons to +12 and one special weapon to +6.
The following section will take you into some dangerous caves and will tell you to defeat a (very easy) boss. To feel comfortable doing all this preliminary fighting, you’ll want to have a weapon that deals strike damage, which is where the Morning Star comes in handy again. But before we get down to business, you might want to upgrade it to at least +3 or +4. To do so, you should explore a mine or two in Limgrave and the Weeping Peninsula. Mines are marked on your map as these red-black circles. Inside them, you’ll usually find plenty of smithing stones and some angry miners that are very weak to the Morning Star. Once you feel you have enough smithing stones, head to the Roundtable Hold, upgrade the Morning Star, and proceed with the plan.
Limgrave MineWeeping Peninsula Mine
Smithing Stones
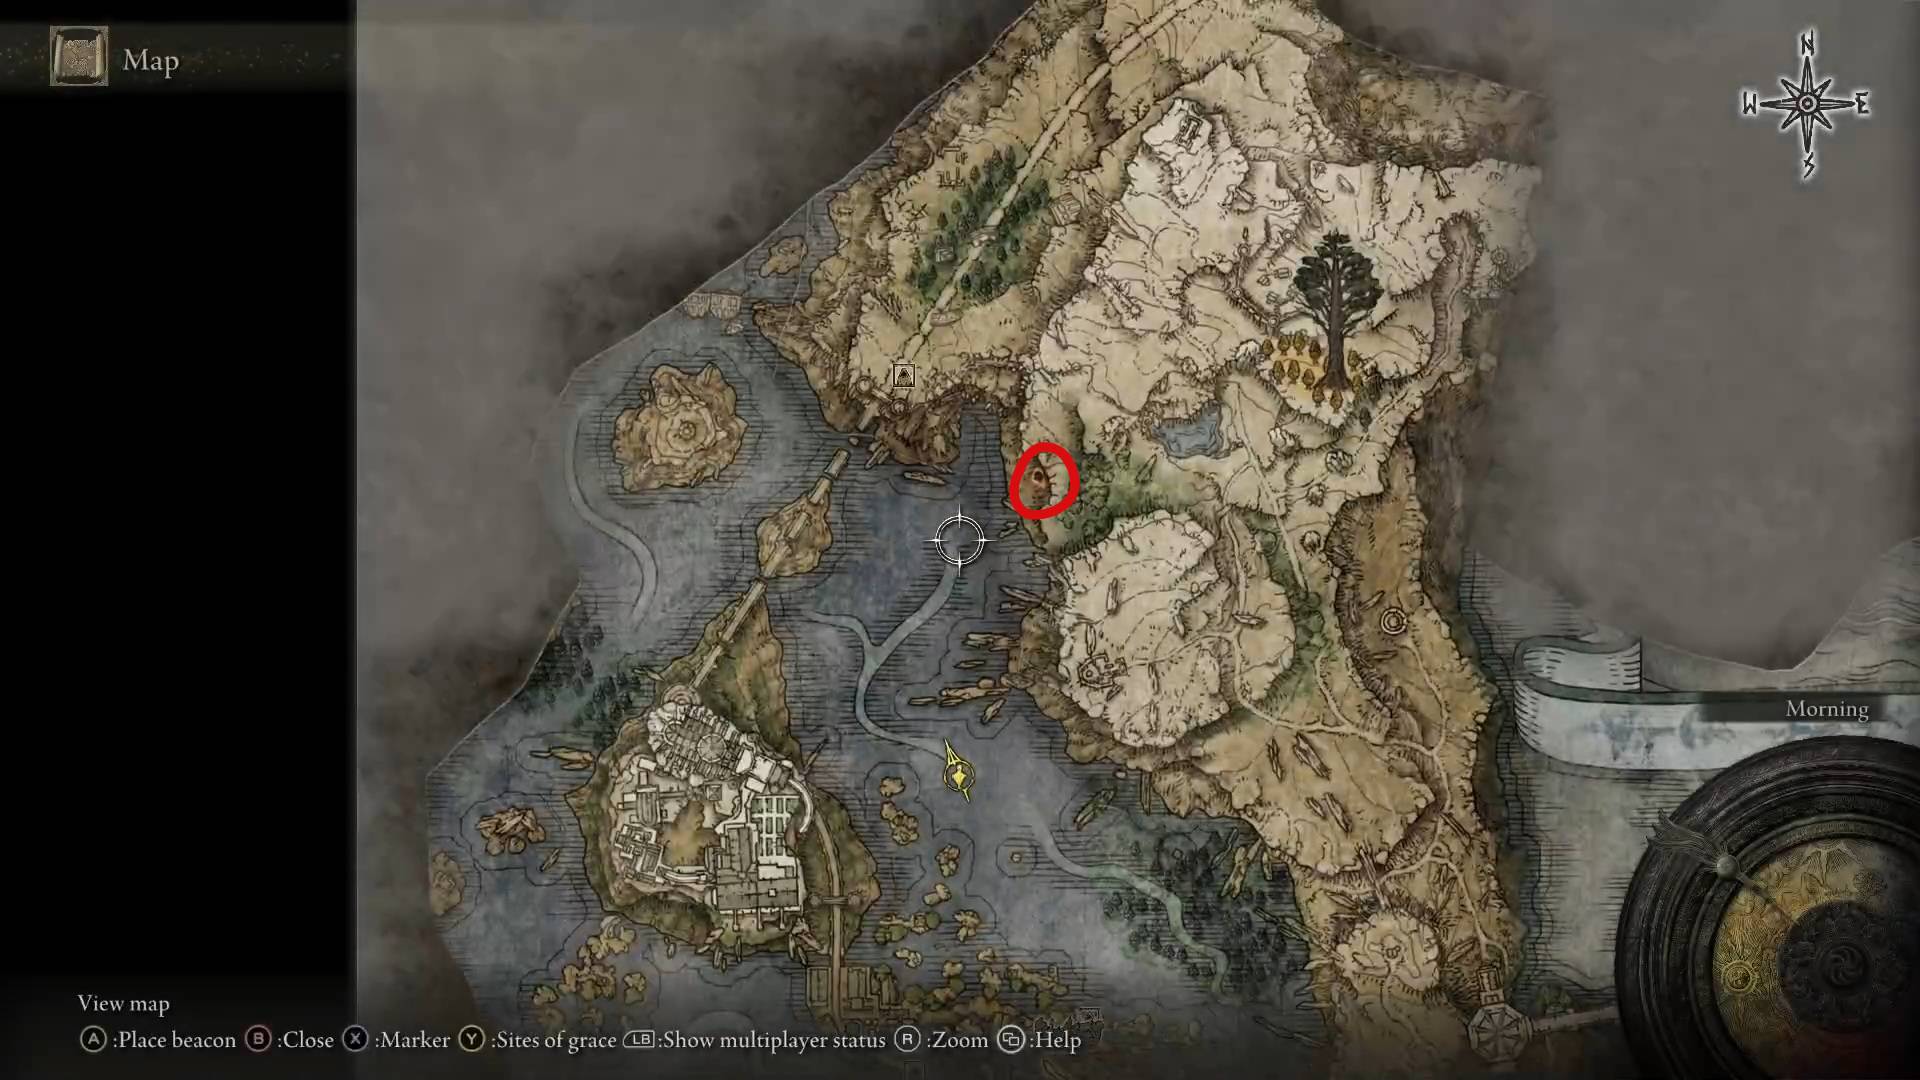
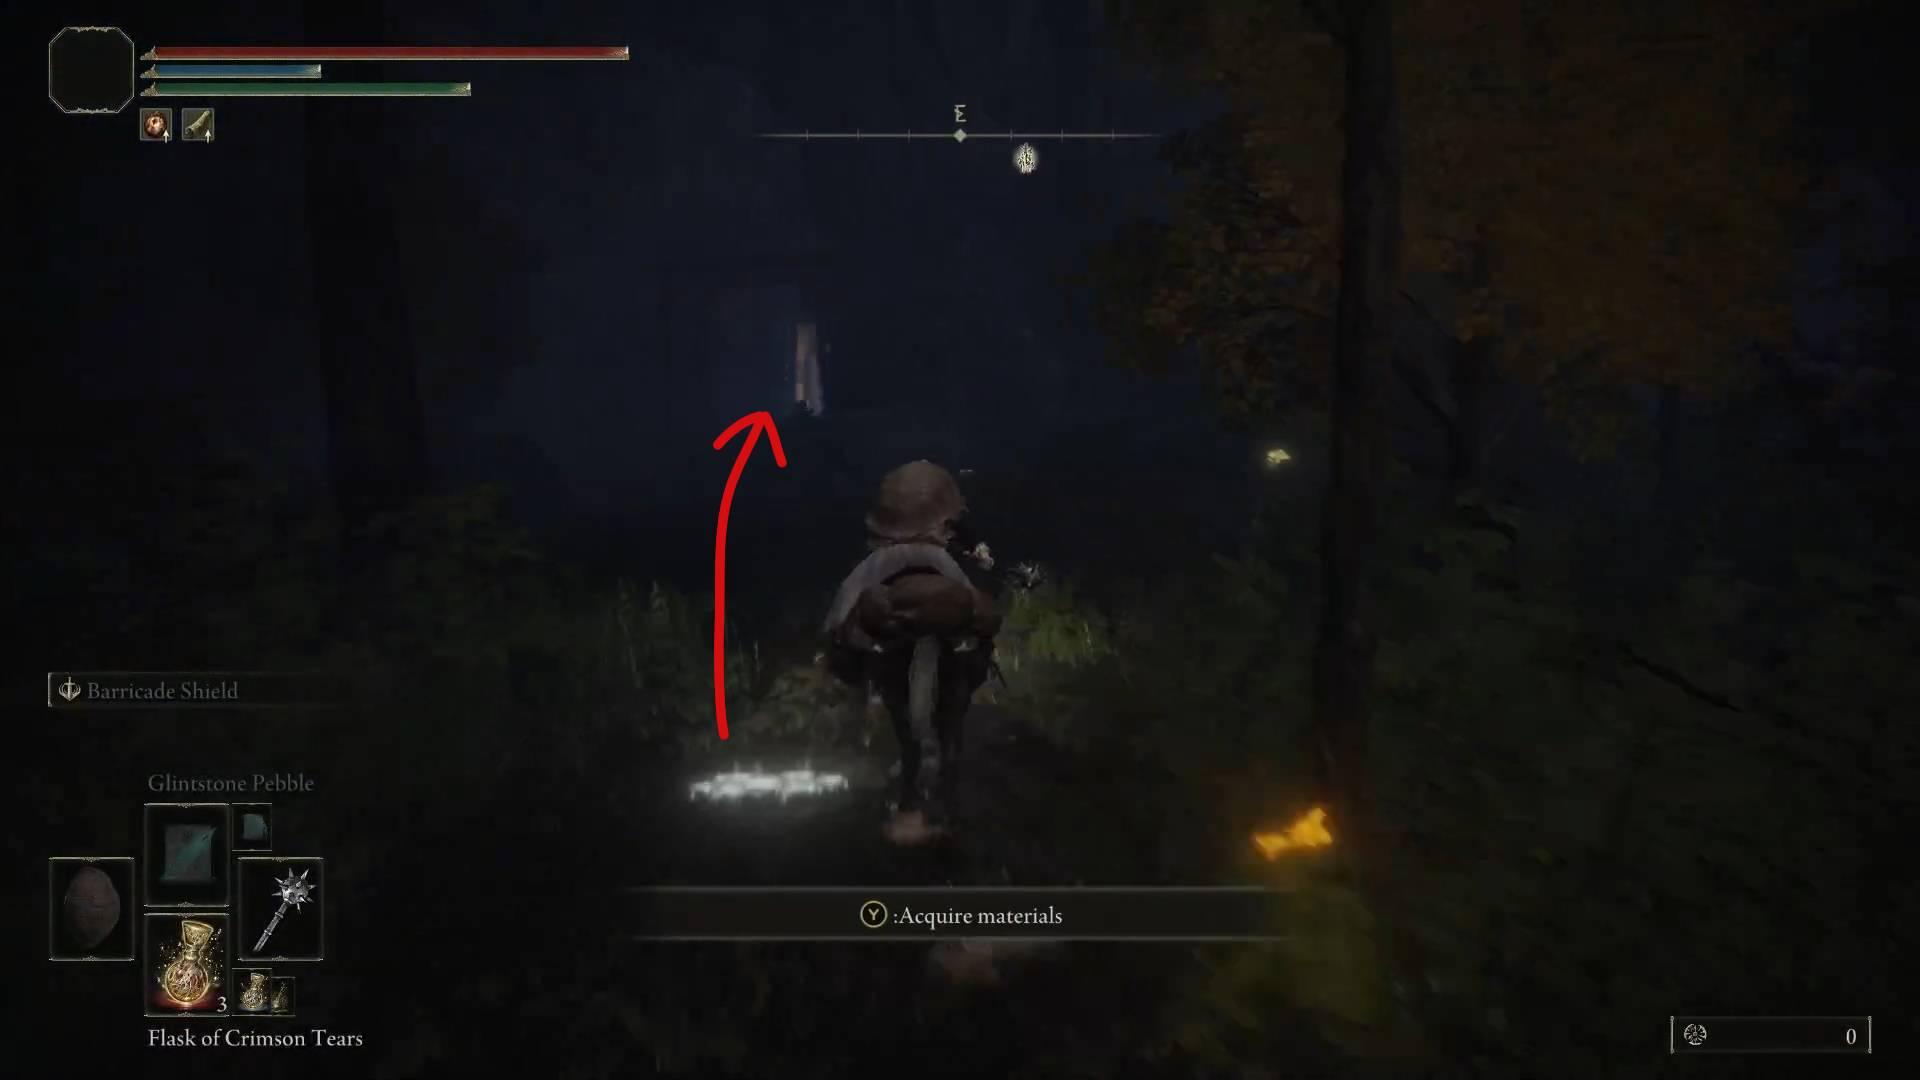
Our first stop is the Raya Lucaria Crystal Tunnel that we’ve mentioned earlier. It’s located in the northeastern part of Liurnia of the Lakes, down in the water.
Raya Lucaria Crystal TunnelTunnel Entrance
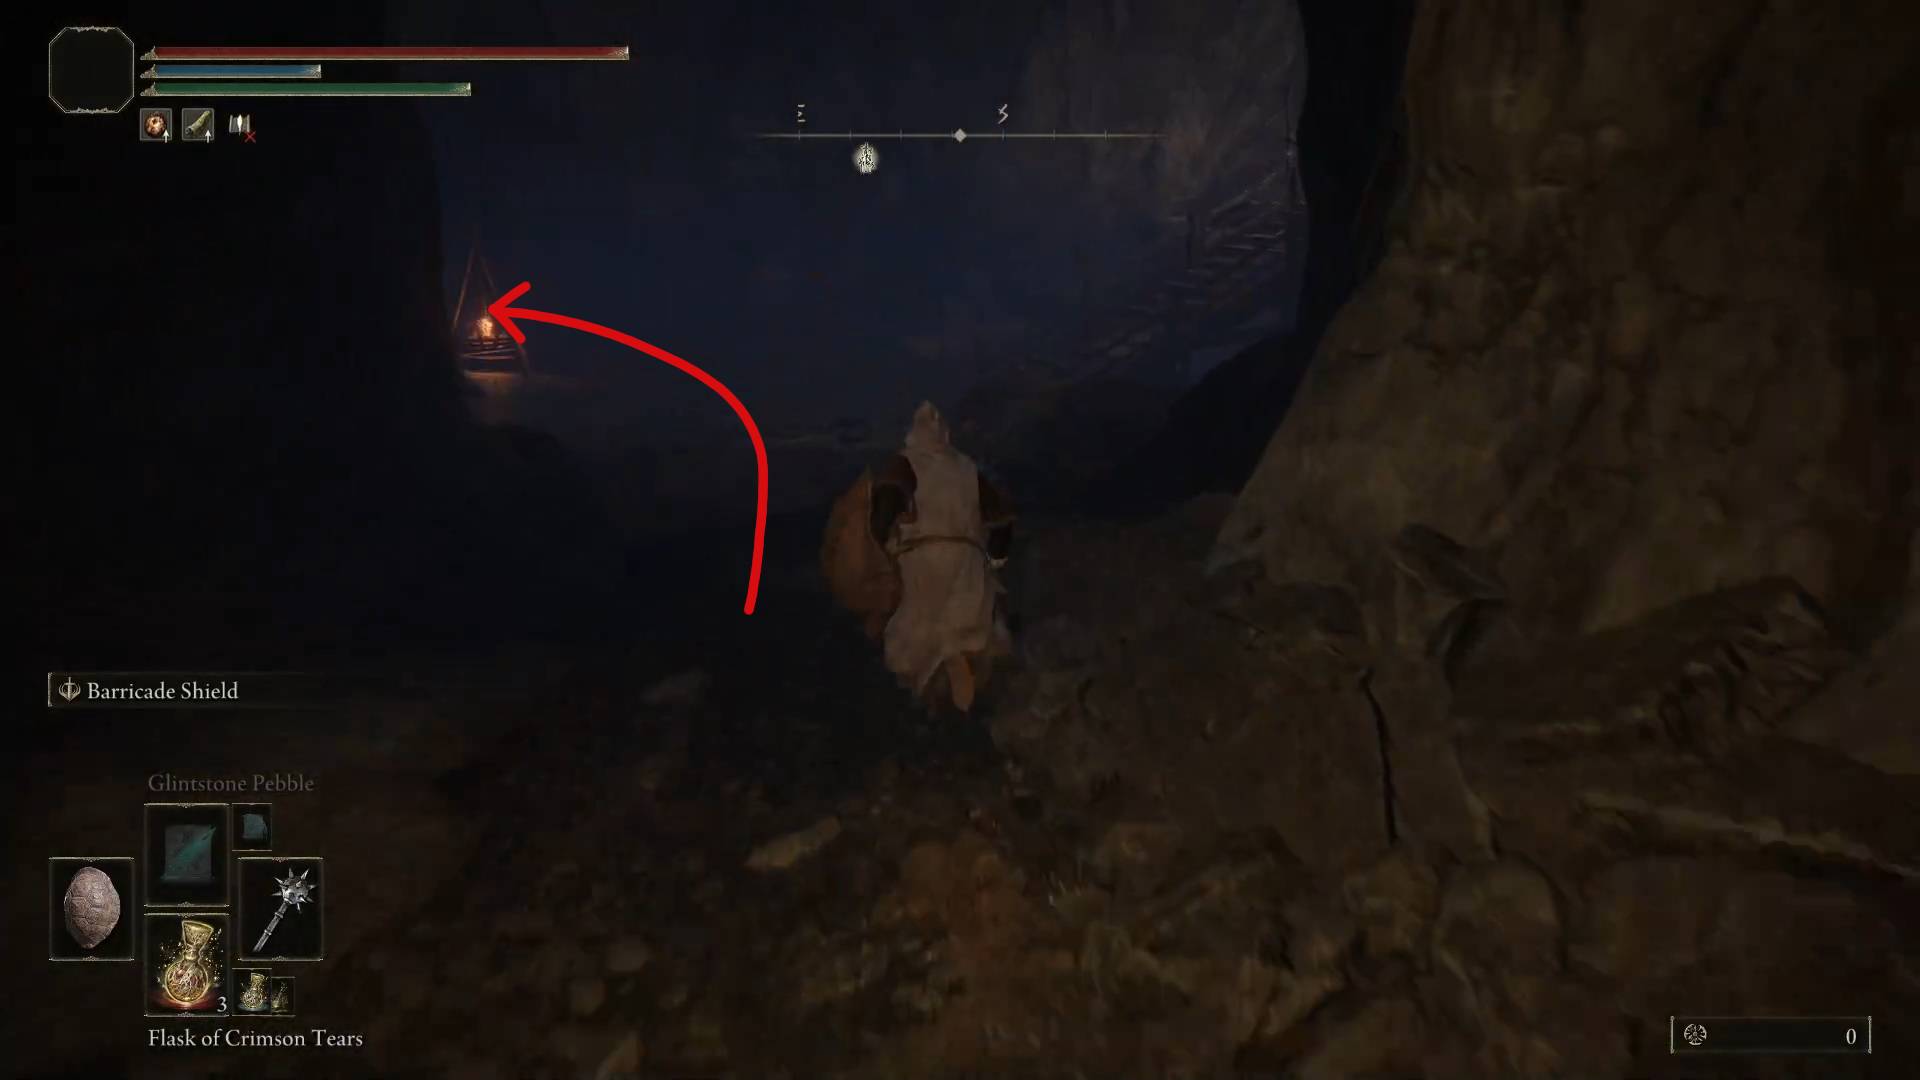
Once you’re inside, head down the elevator and take the first left past the site of grace. Then, in the chamber with all the miners go right and into the tunnel. In the next chamber, head left and go down the elevator.
First leftThen rightThen left and down
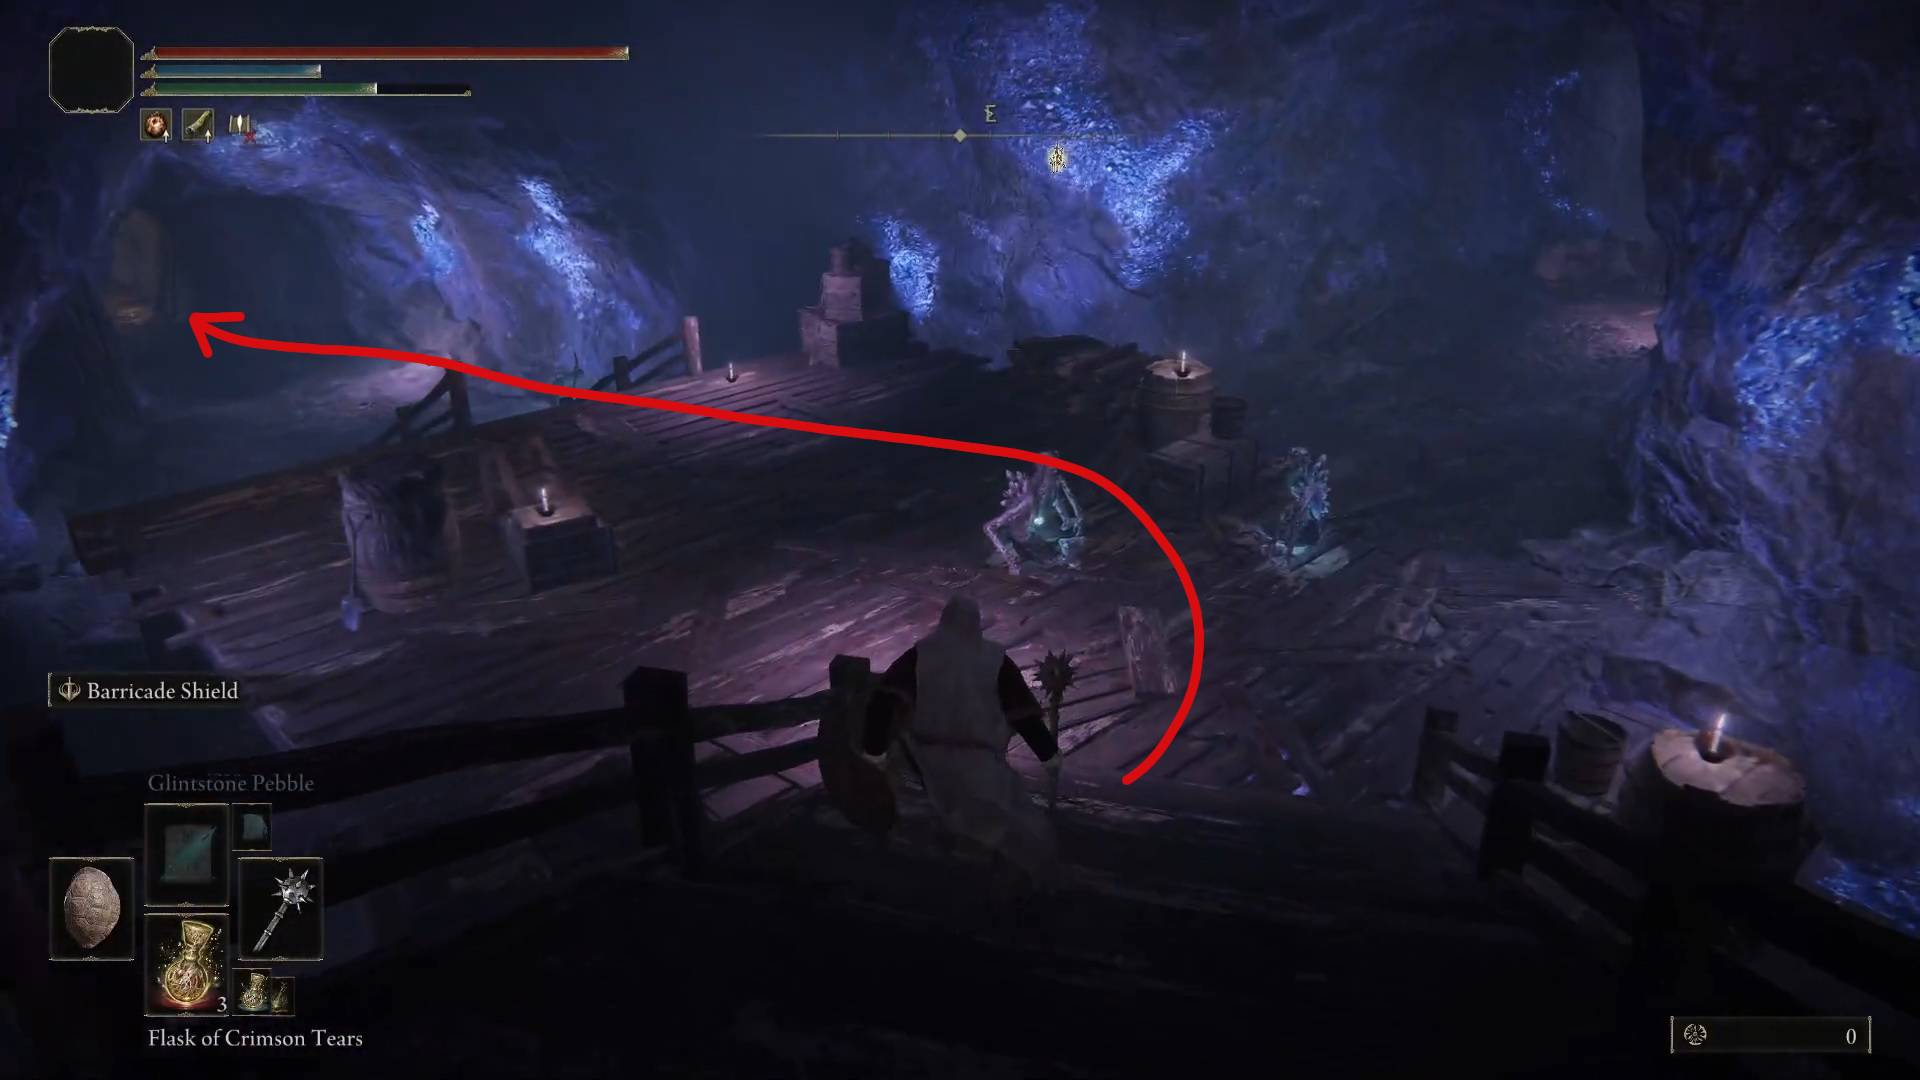
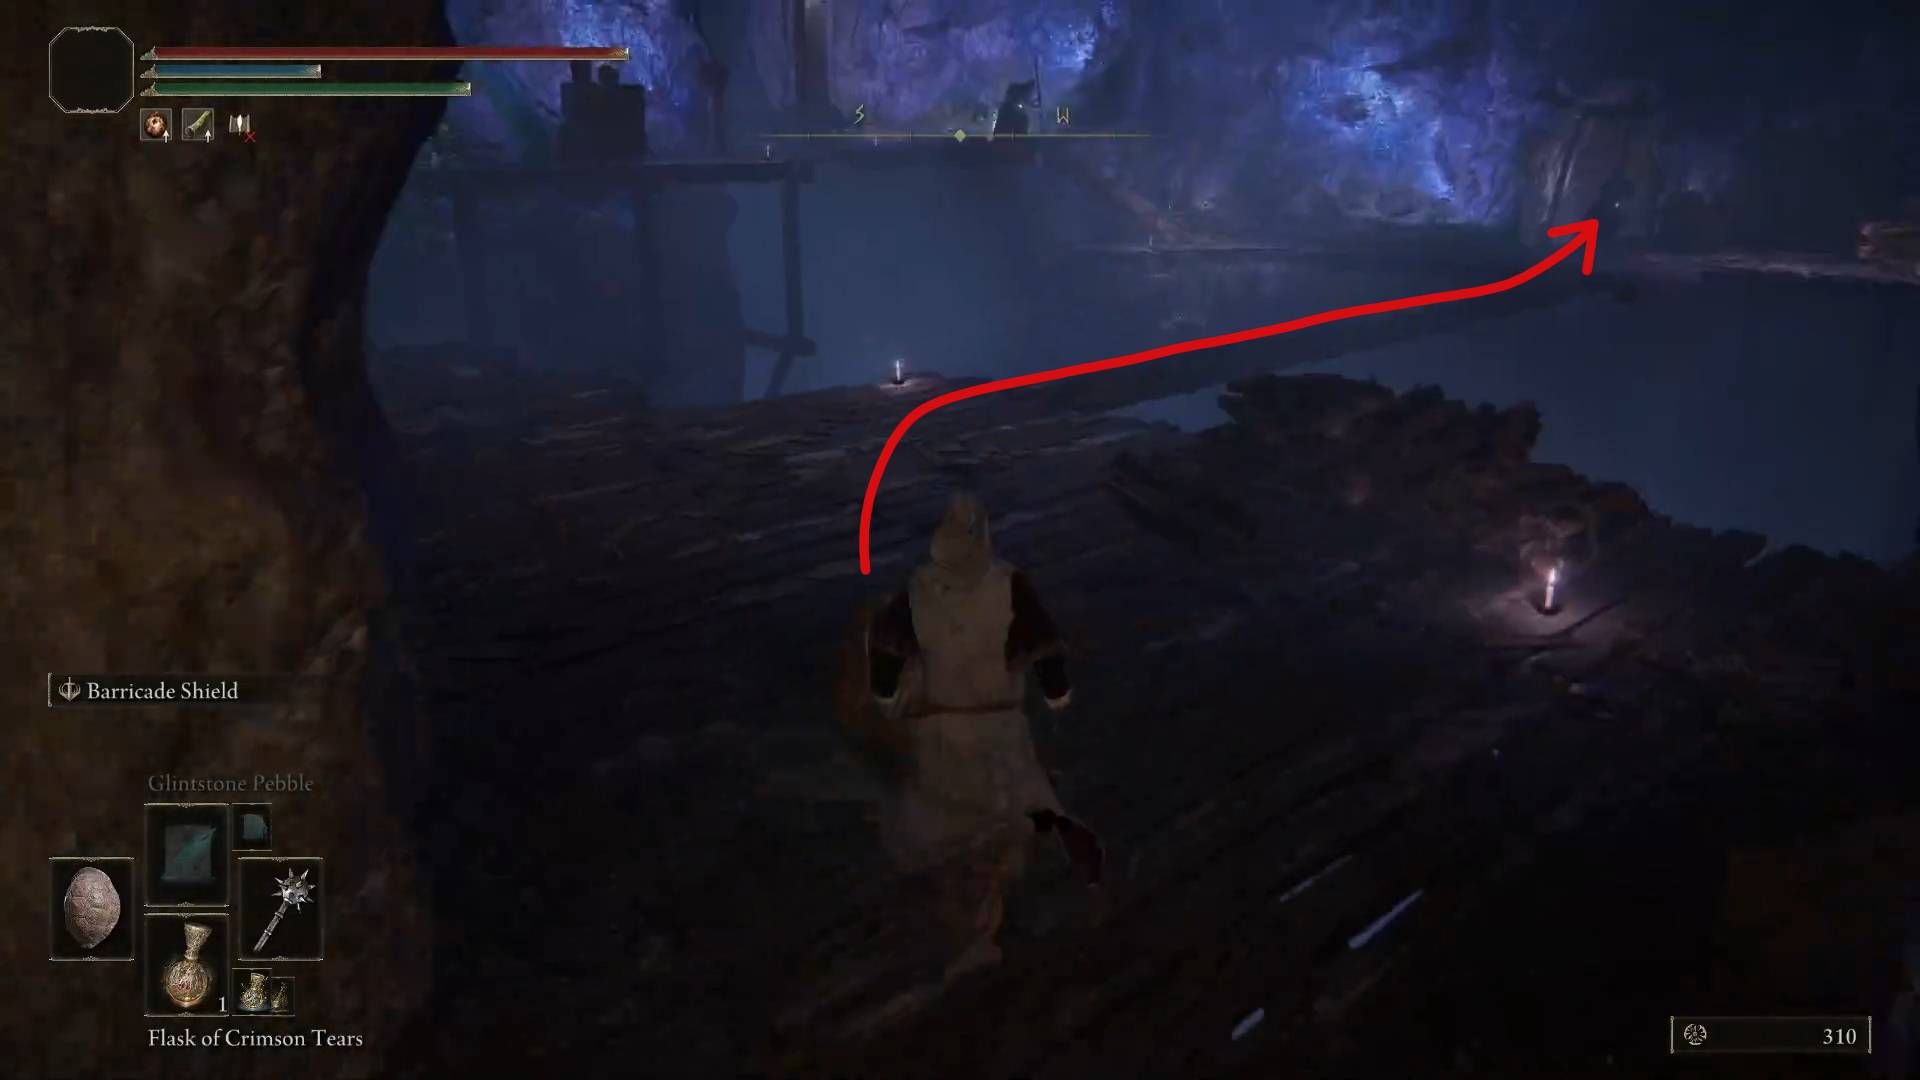
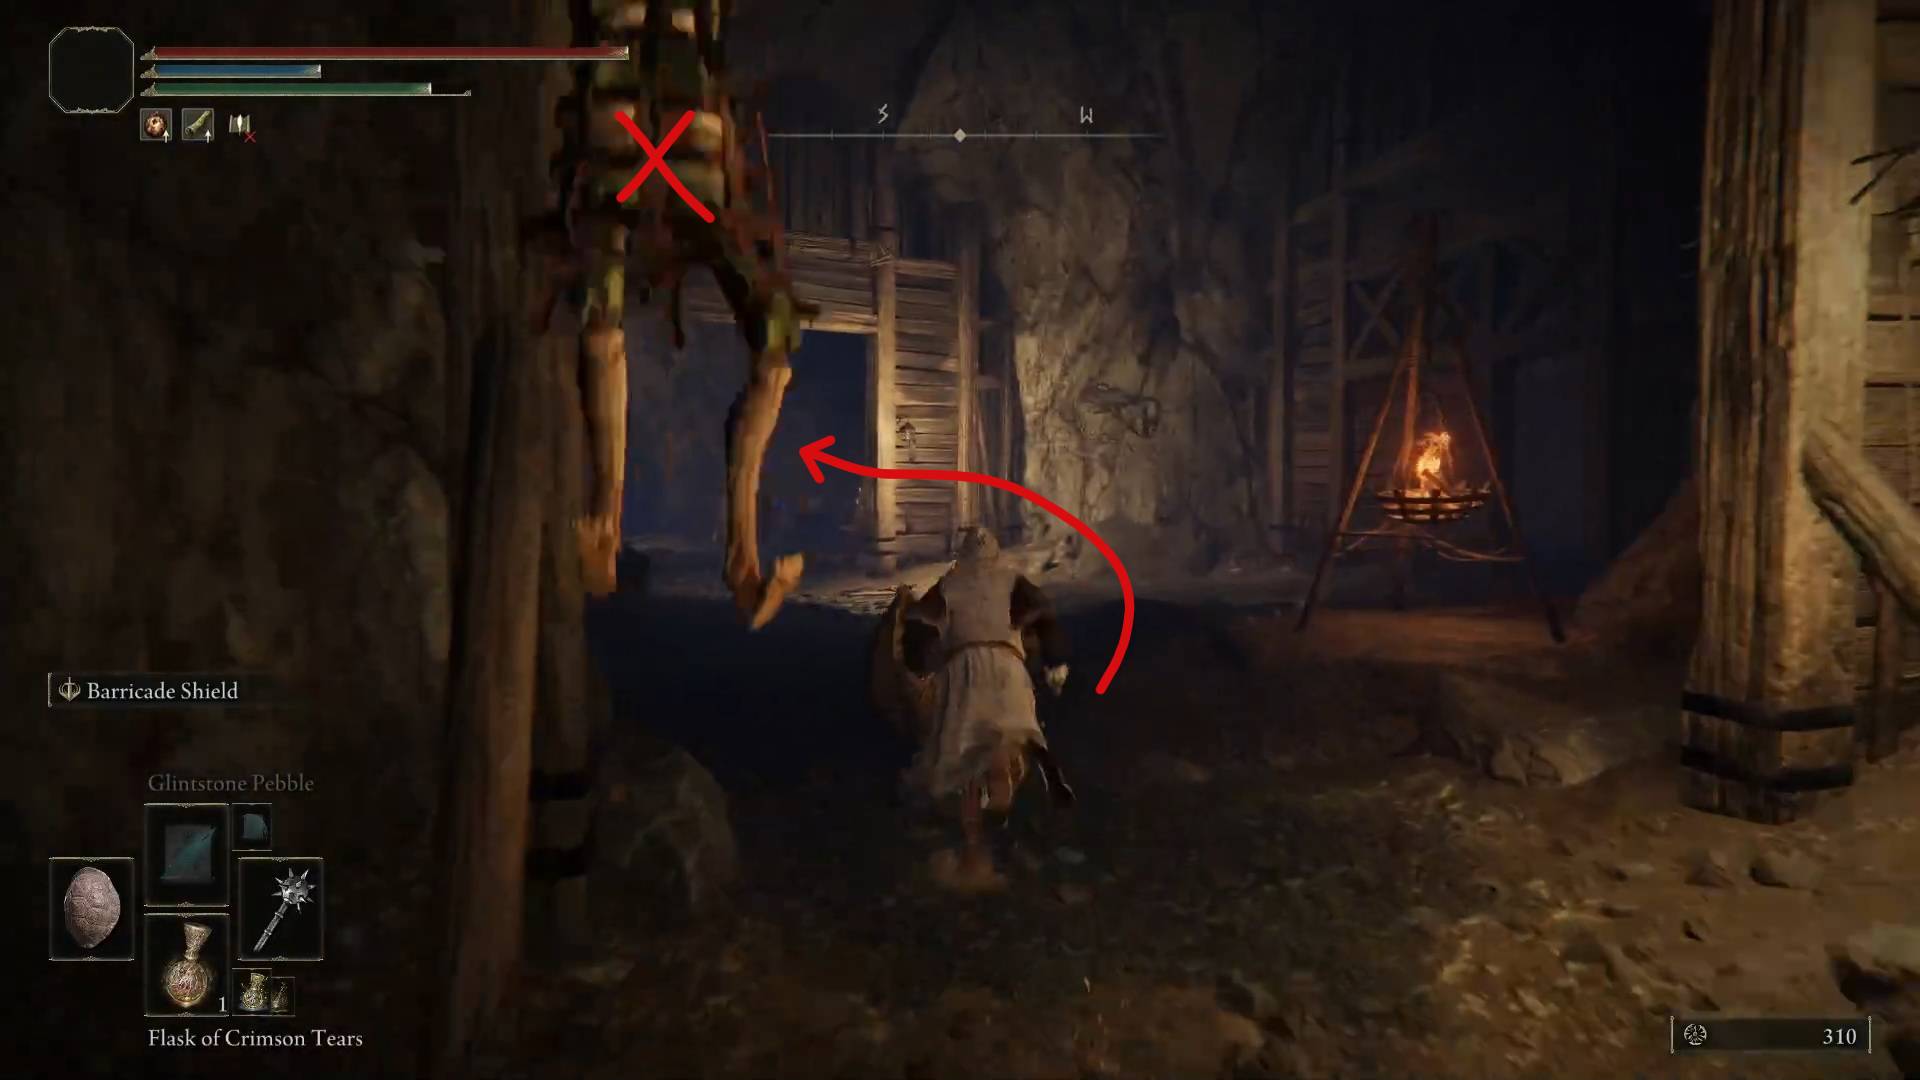
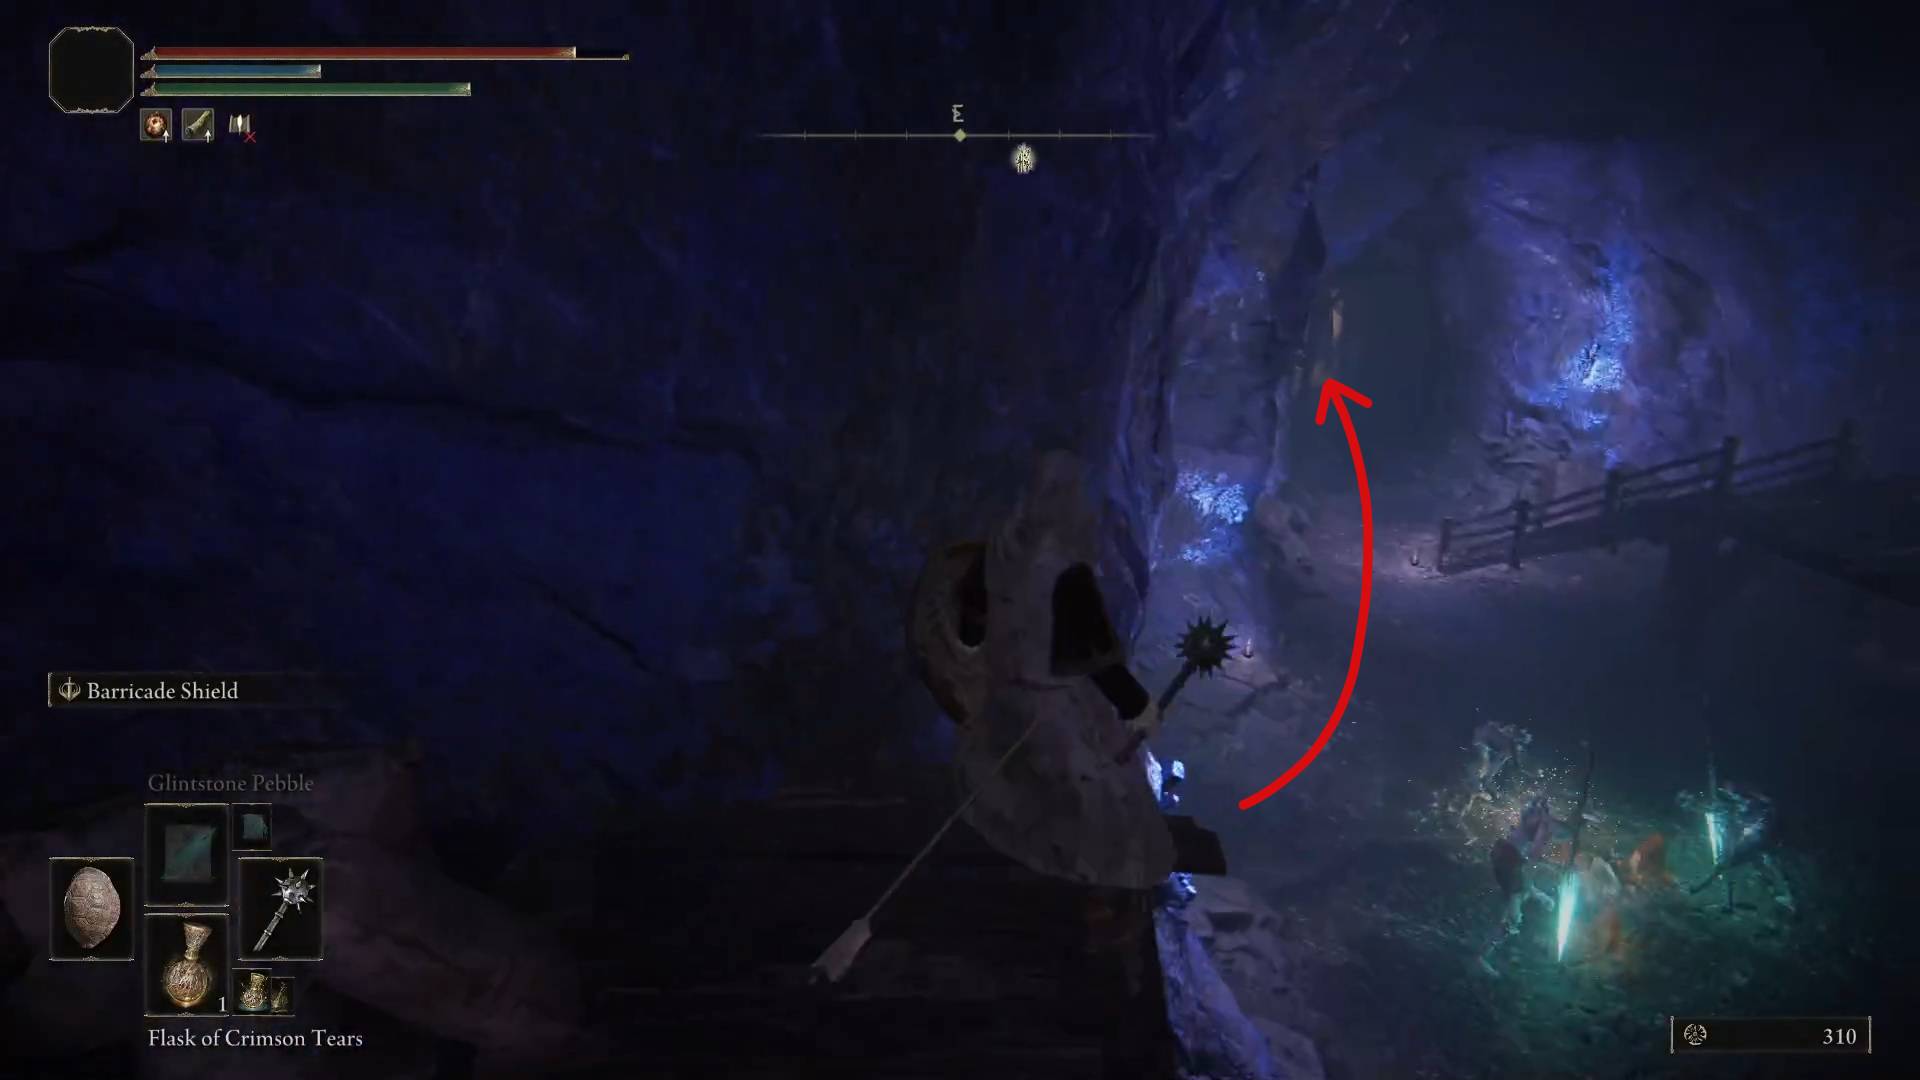
Once you emerge from the next tunnel, cross the narrow beam and keep going straight ahead while being wary of enemies that drop down on you as you run past them. Ignore the side passages in the next chamber and go into the lighted tunnel, then head down another elevator. The boss fight awaits you there.
Watch your stepDon’t worry about the enemiesPath to the boss
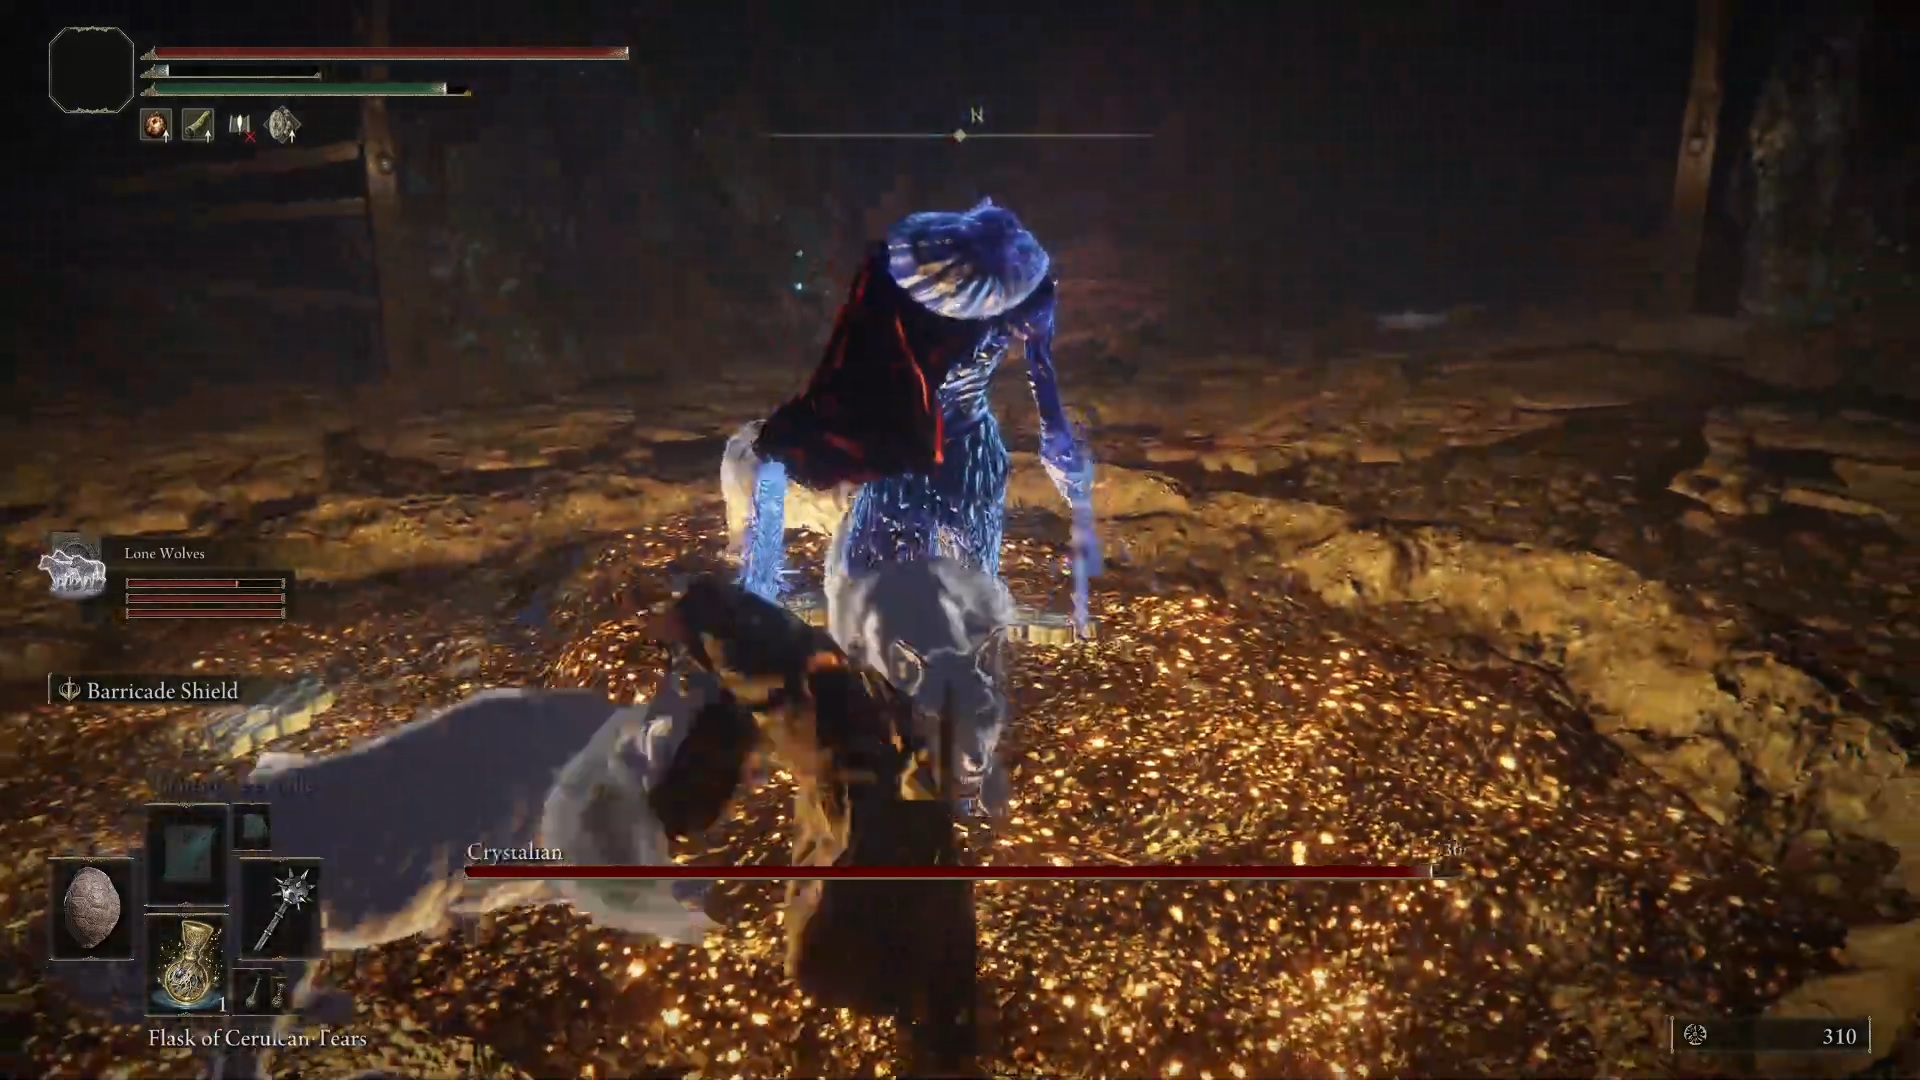
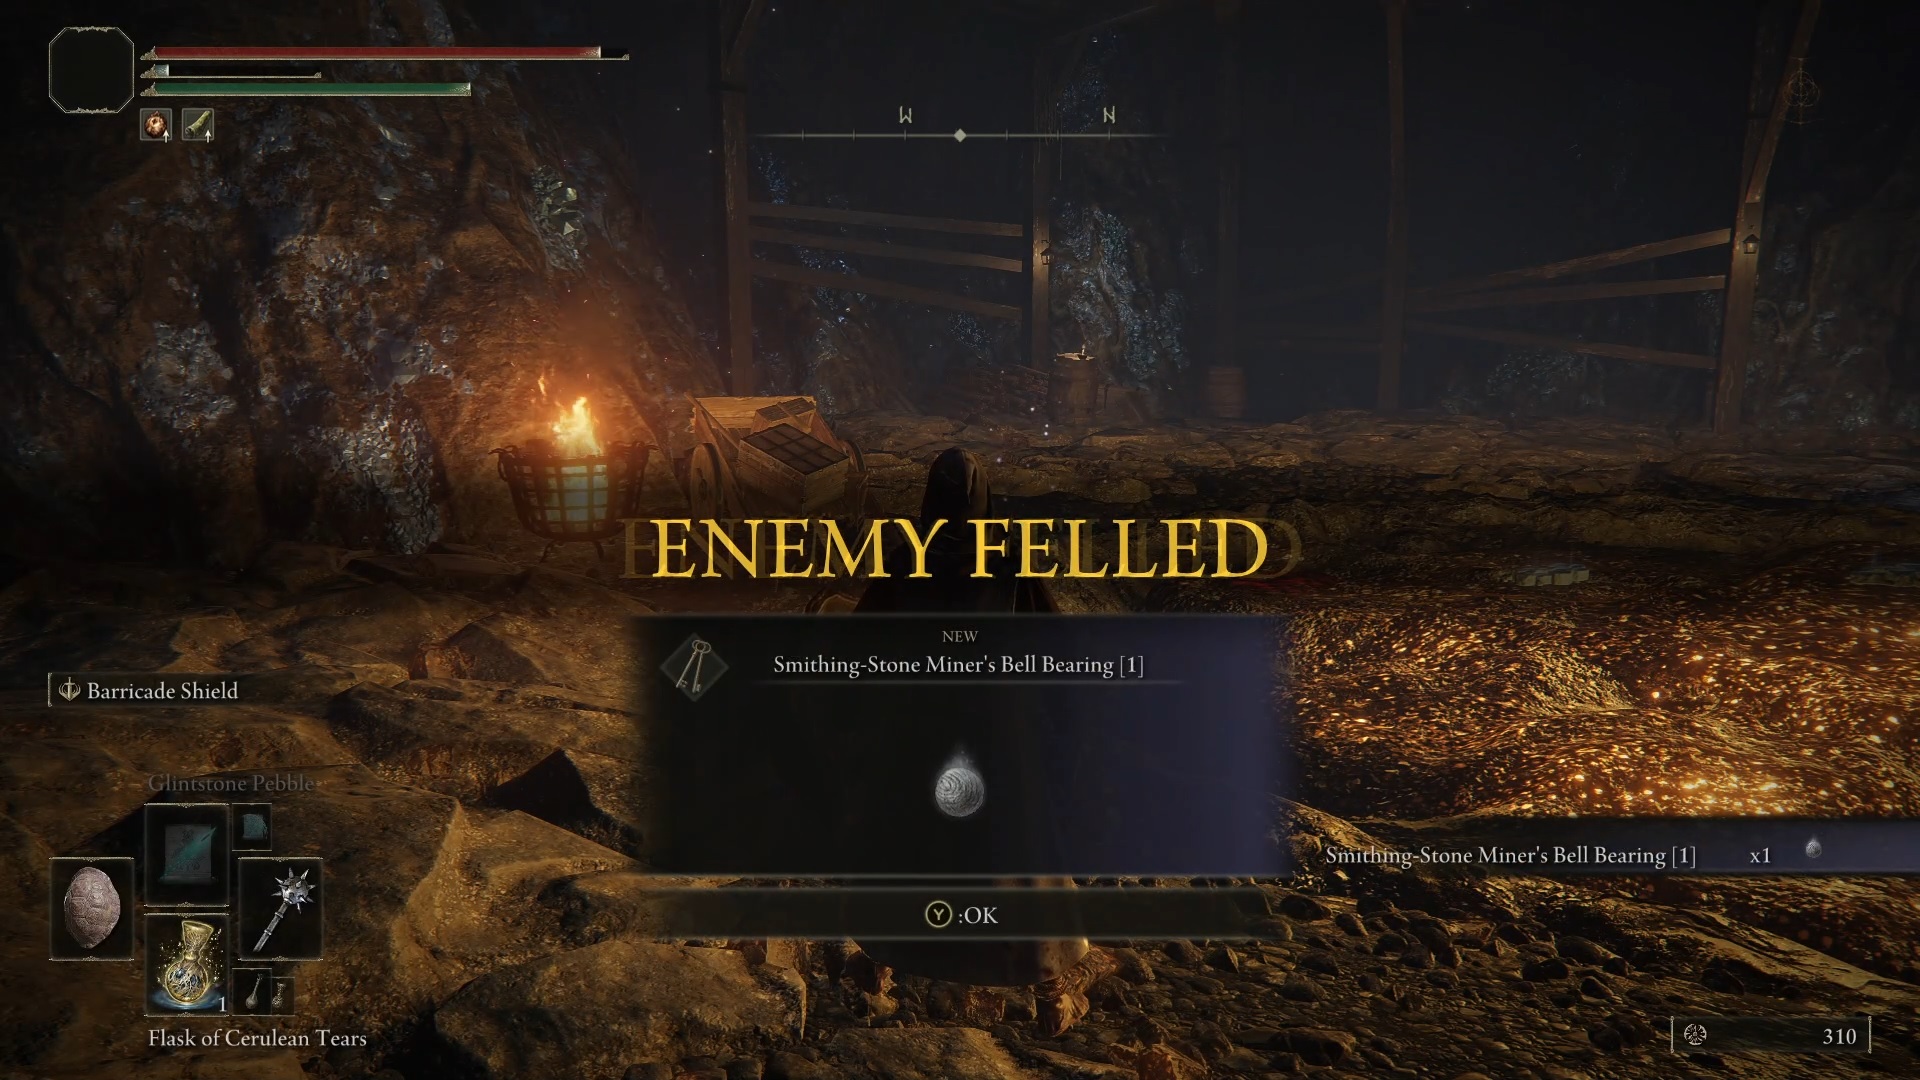
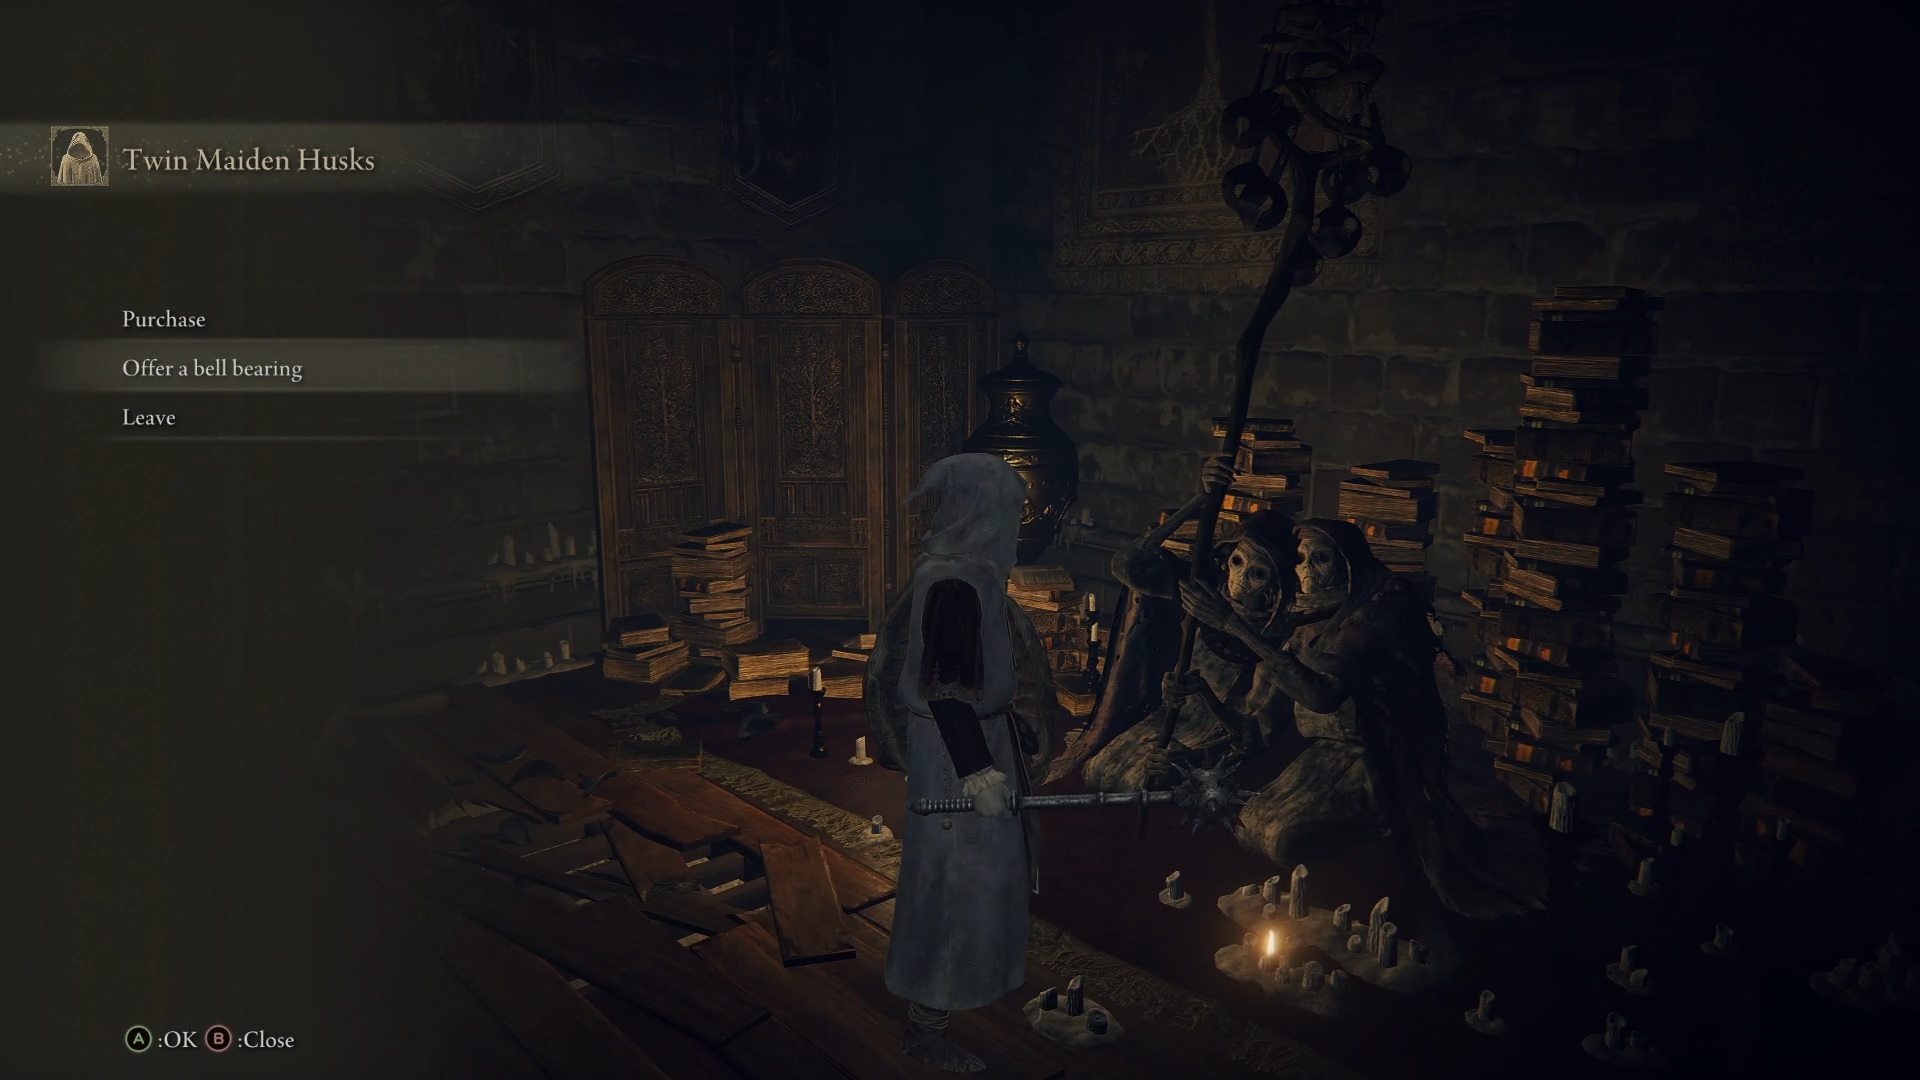
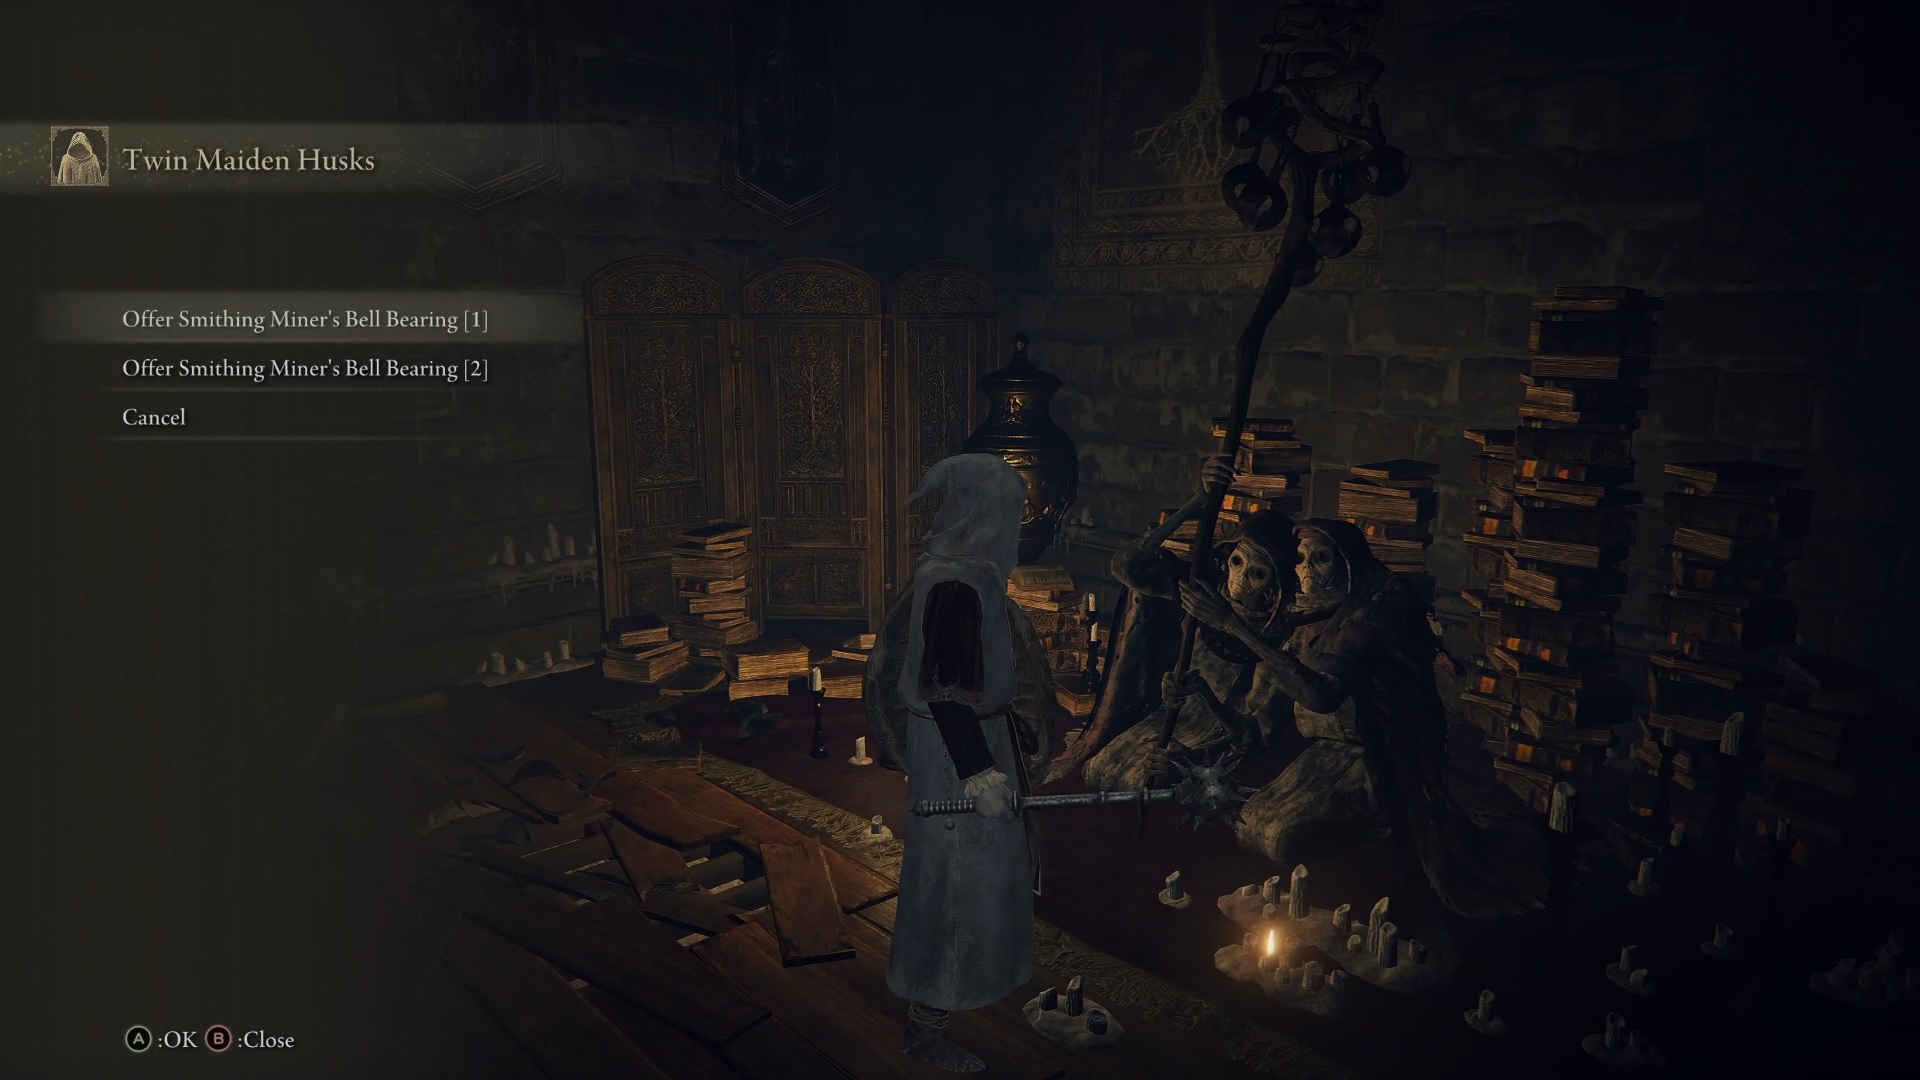
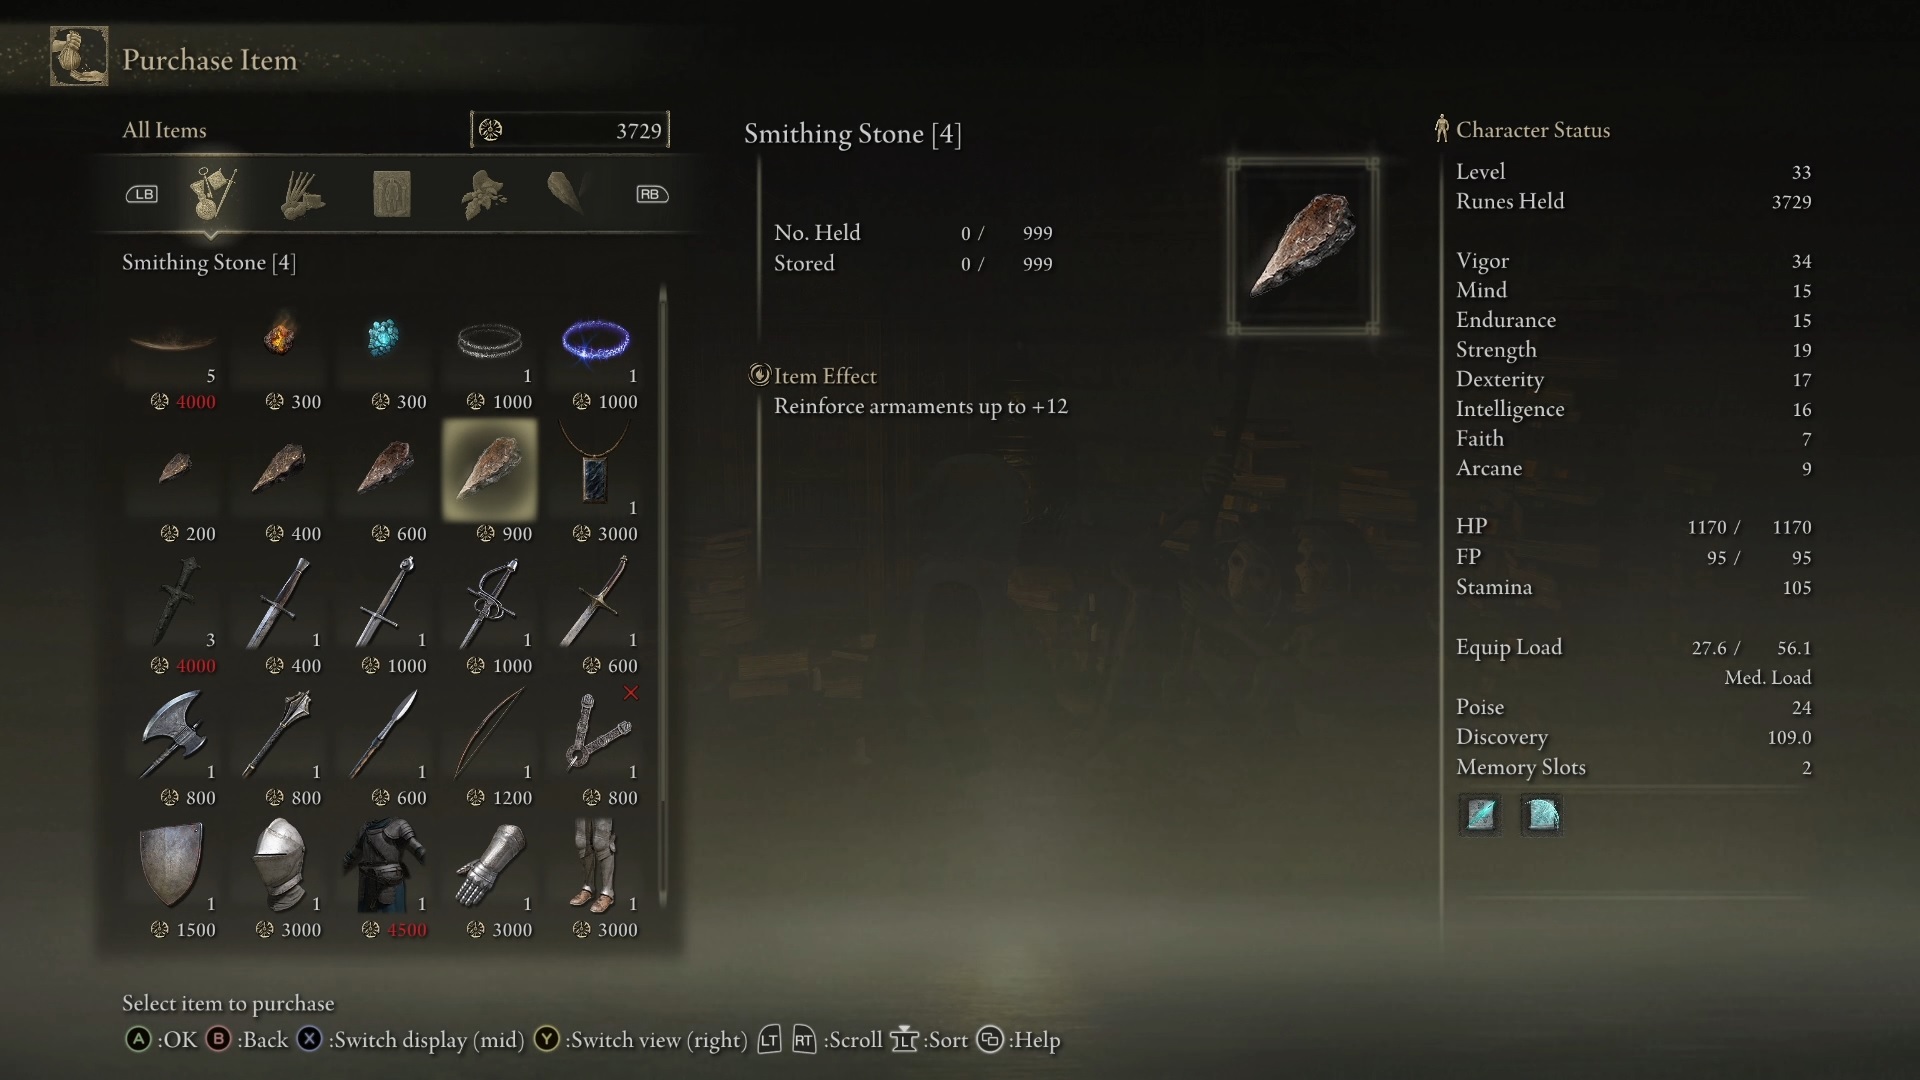
You’ll be fighting a lone Crystalian enemy. These can be annoying if you have a weapon that doesn’t deal strike damage. Ours does. Besides that, Crystalians are susceptible to backstabs. So if you want to have a super easy time even on a character that didn’t do any leveling, you can just summon the wolves that come with the Spirit Calling Bell and let them distract the boss as you circle around for a backstab. It will go down in no time, rewarding you with the Smithing-Stone Miner’s Bell Bearing 1. Return this to the Twin Maiden Husks at the Roundtable Hold, and you’ll be able to buy an infinite amount of smithing stones 1 and 2 there, letting you upgrade your regular weapons to +6.
Backstab fishing. A souls game classicYour reward
Now make your way to Altus Plateau. From the Grand Lift of Dectus, head along the road towards the huge staircase while dodging enemies and eventually two Tree Sentinels. Go through the open door behind the sentinels and rest at the site of grace there.
Your next goal is in the Sealed Tunnel mine down in the water-filled ravine nearby. Head past the wolves from the Outer Wall Phantom Tree grace and, into the ravine and enter the tunnel.
Road to the Sealed TunnelAvoid the wolvesGo down the slopeEnter the tunnel
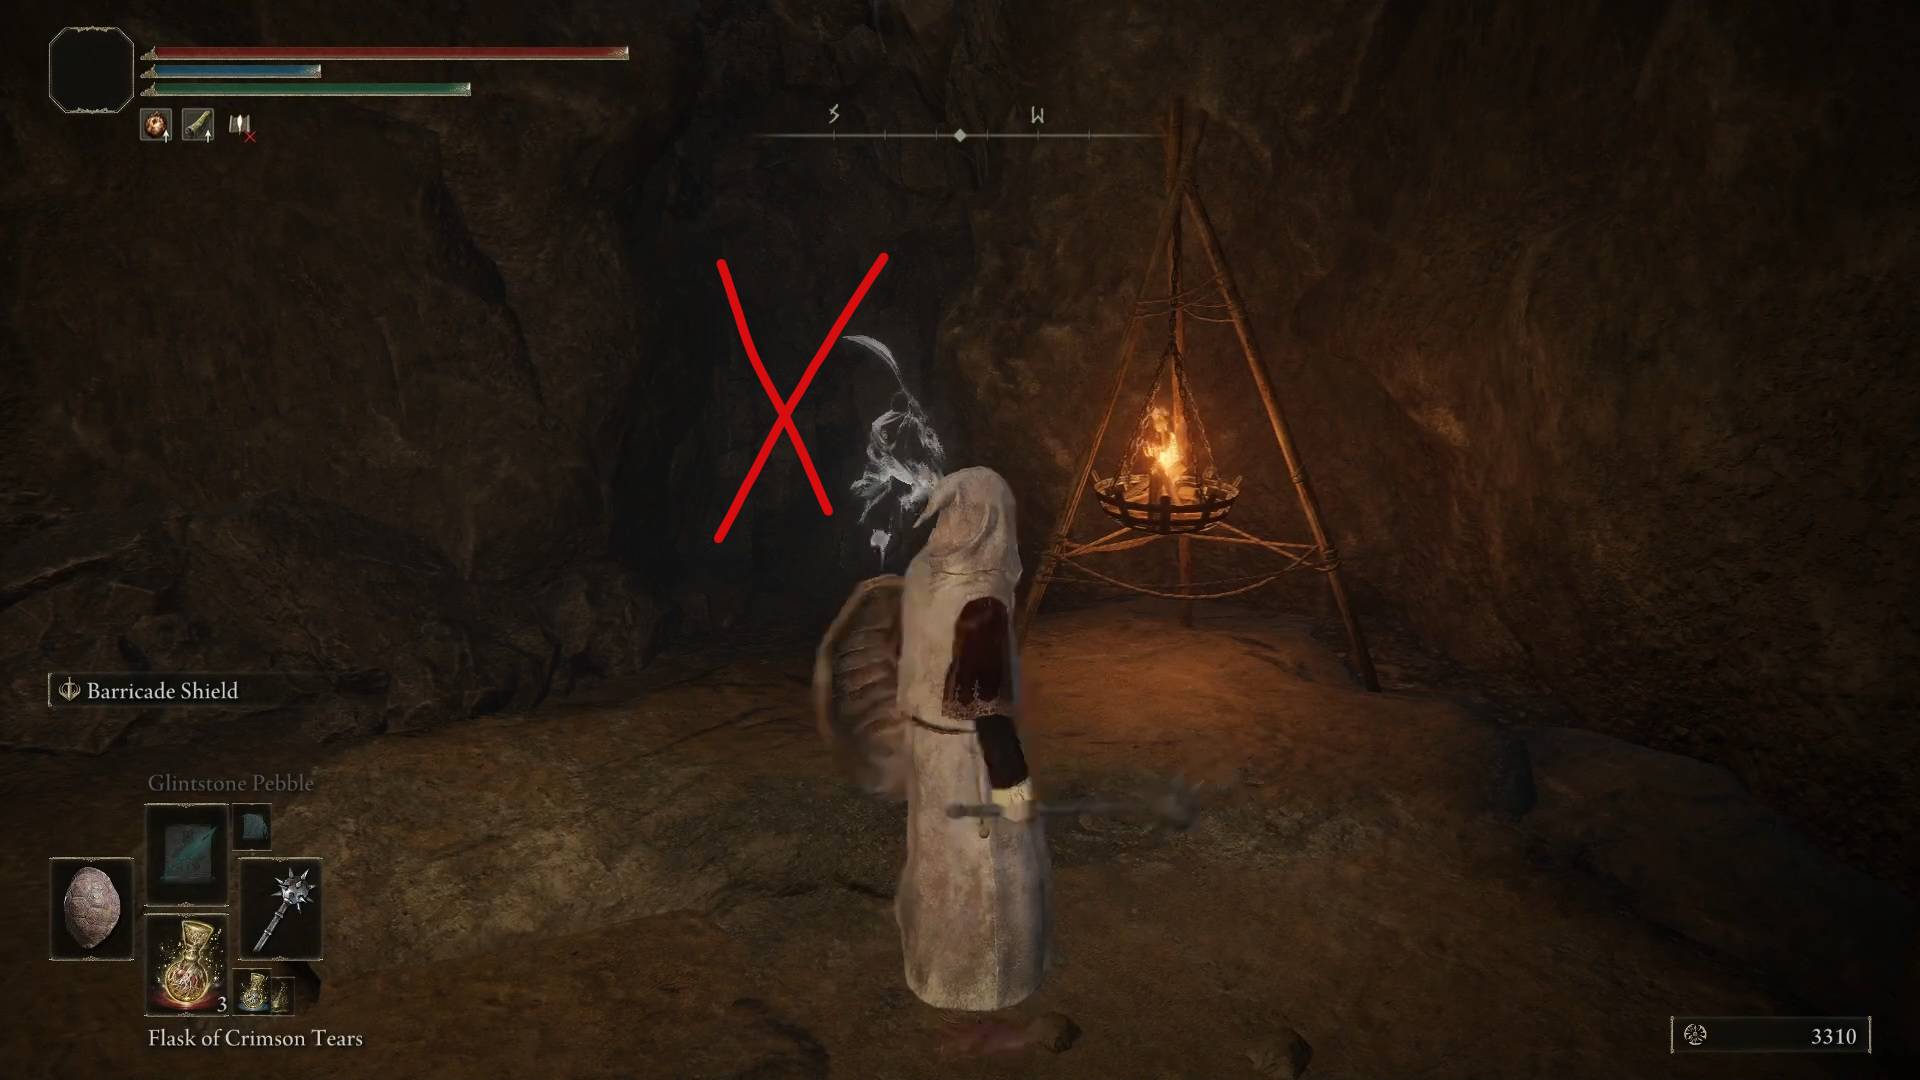
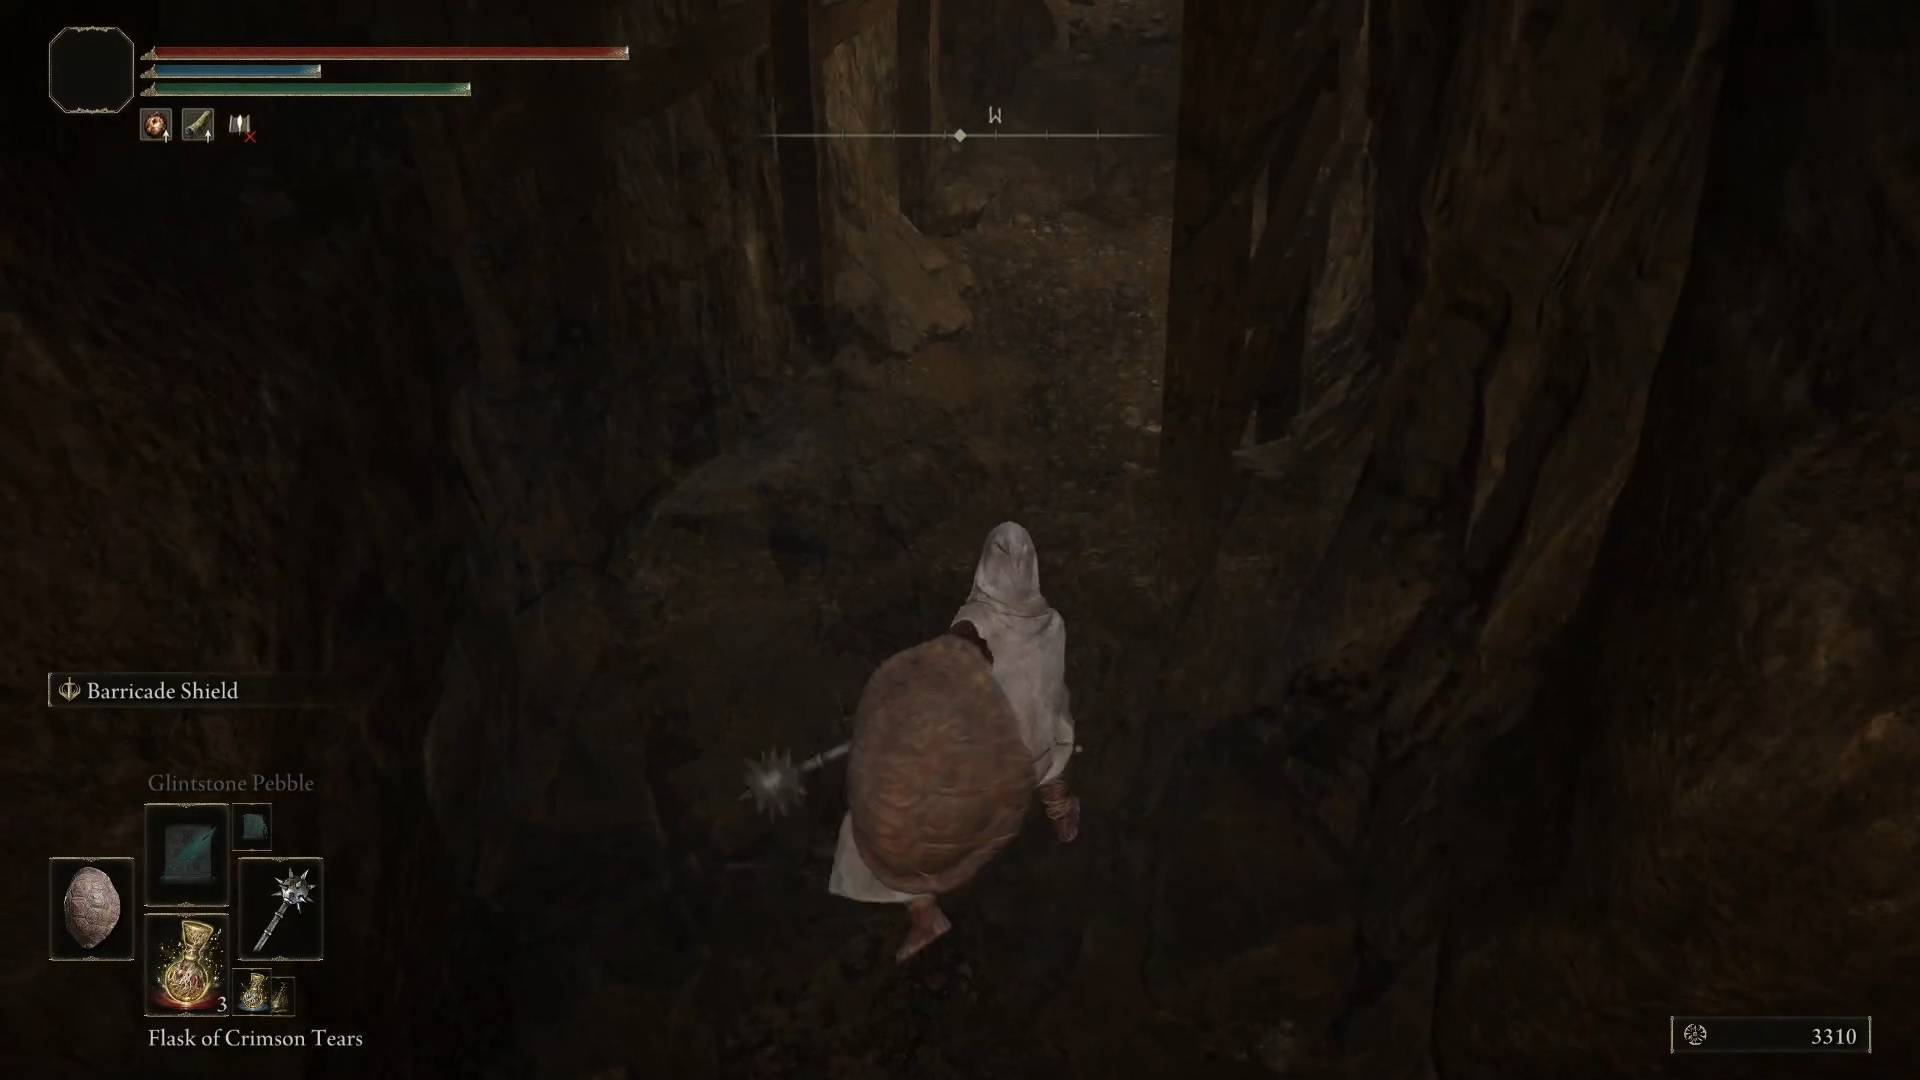
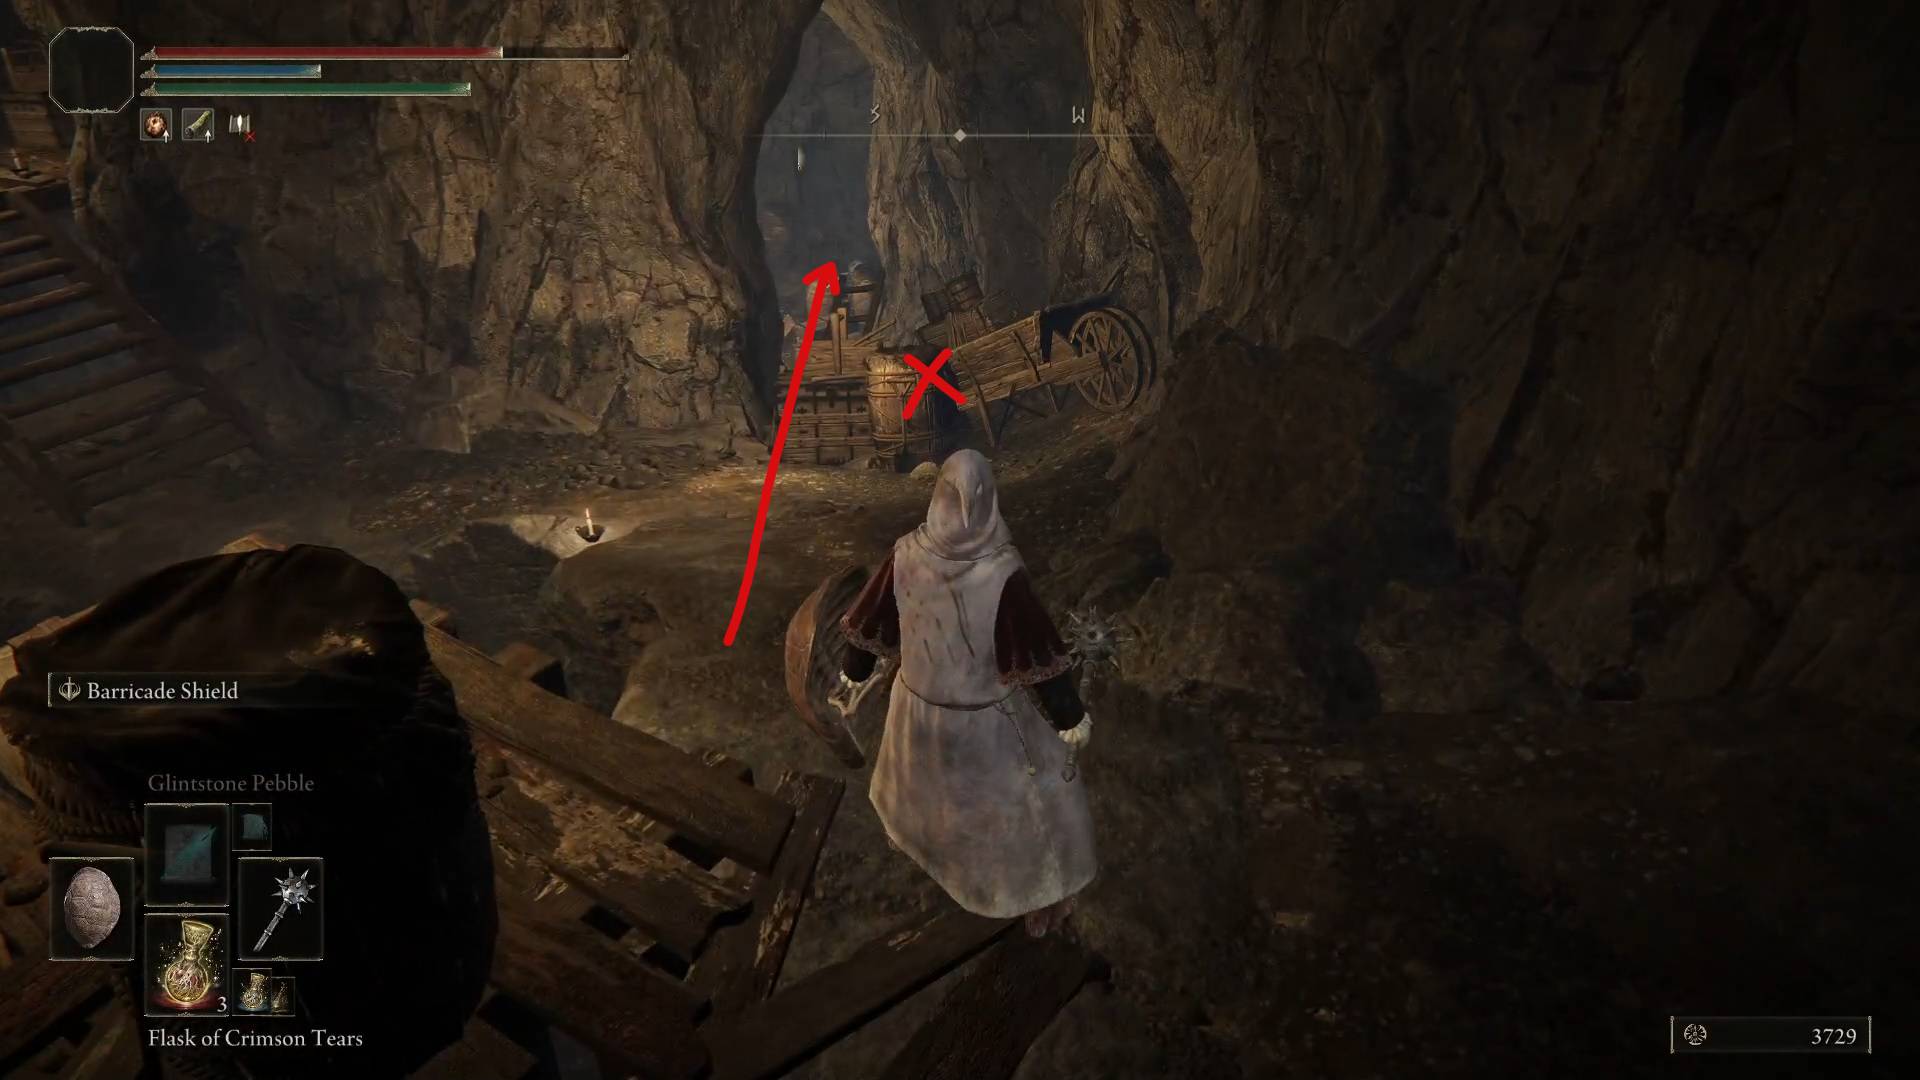
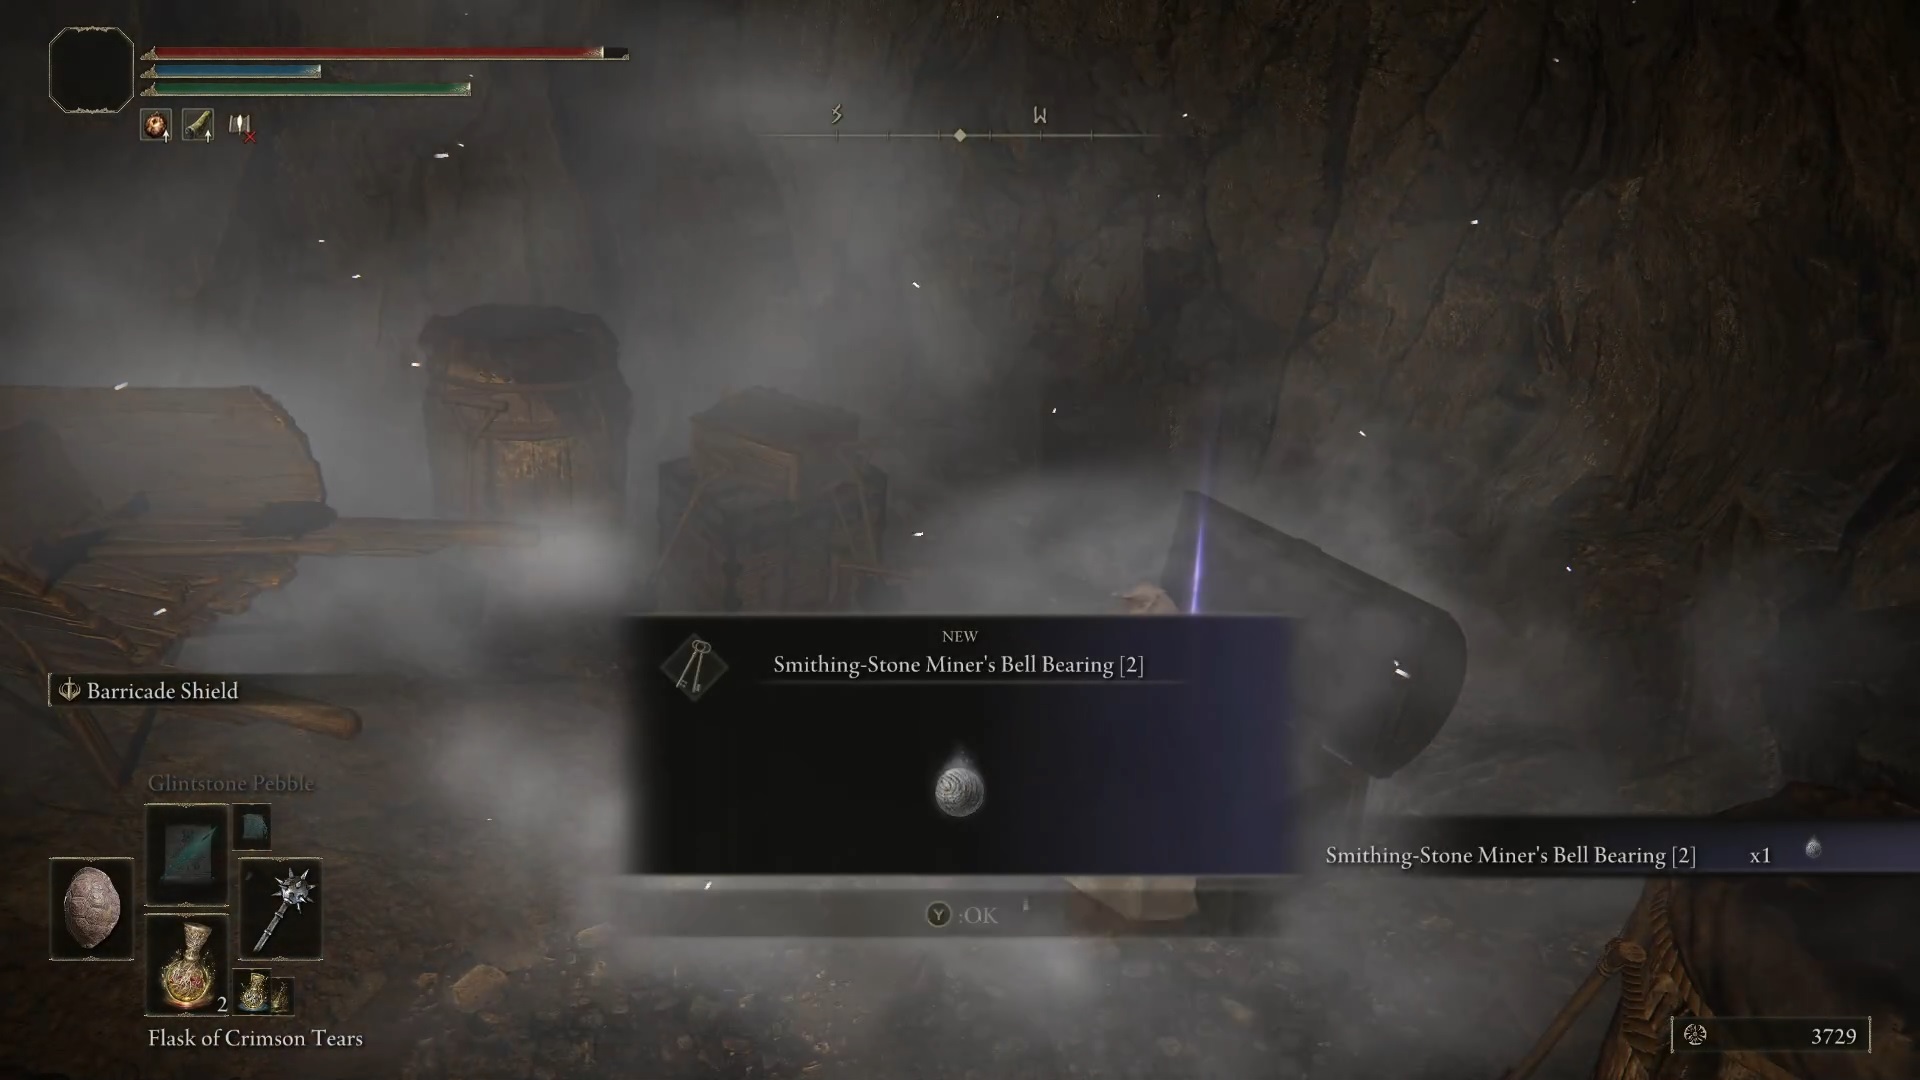
The tunnel is aptly named, as initially it seems like a dead end. Attack the suspicious far wall by the brazier there to reveal a secret passage. Head through and go past some rubble stacked to the right until you reach a chest. Inside it is the Smithing-Stone Miner’s Bell Bearing 2. And you don’t even have to fight a boss for it. Just take care not to get ambushed by Vulgar Militia when you pick up the bell bearing.
Attack this wall……it disappearsRoll down through the rubbleYour reward
Return it to the Twin Maiden Husks and you’ll be able to purchase smithing stones 3 and 4 from them.
Somber Smithing Stones
If you’re more interested in a special weapon that takes somber smithing stones, then the first 4 levels of upgrades are very easy.
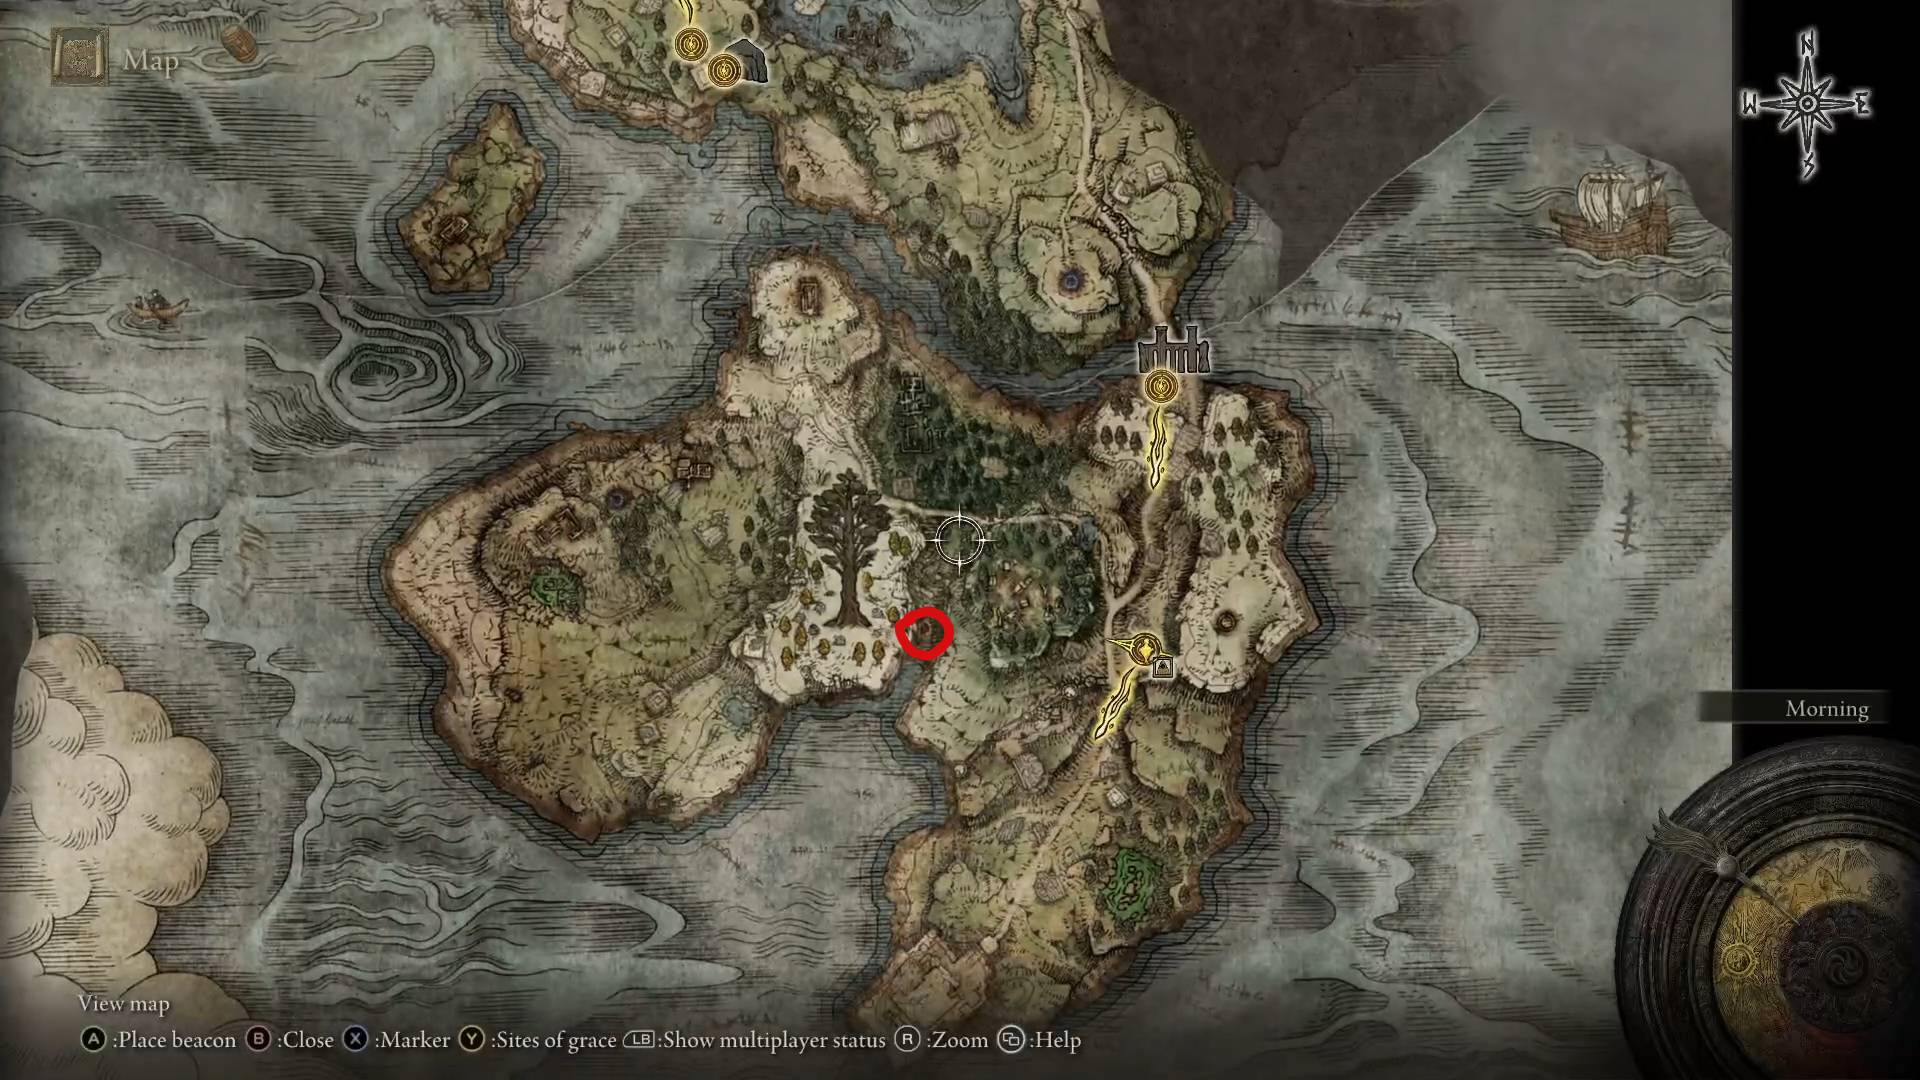
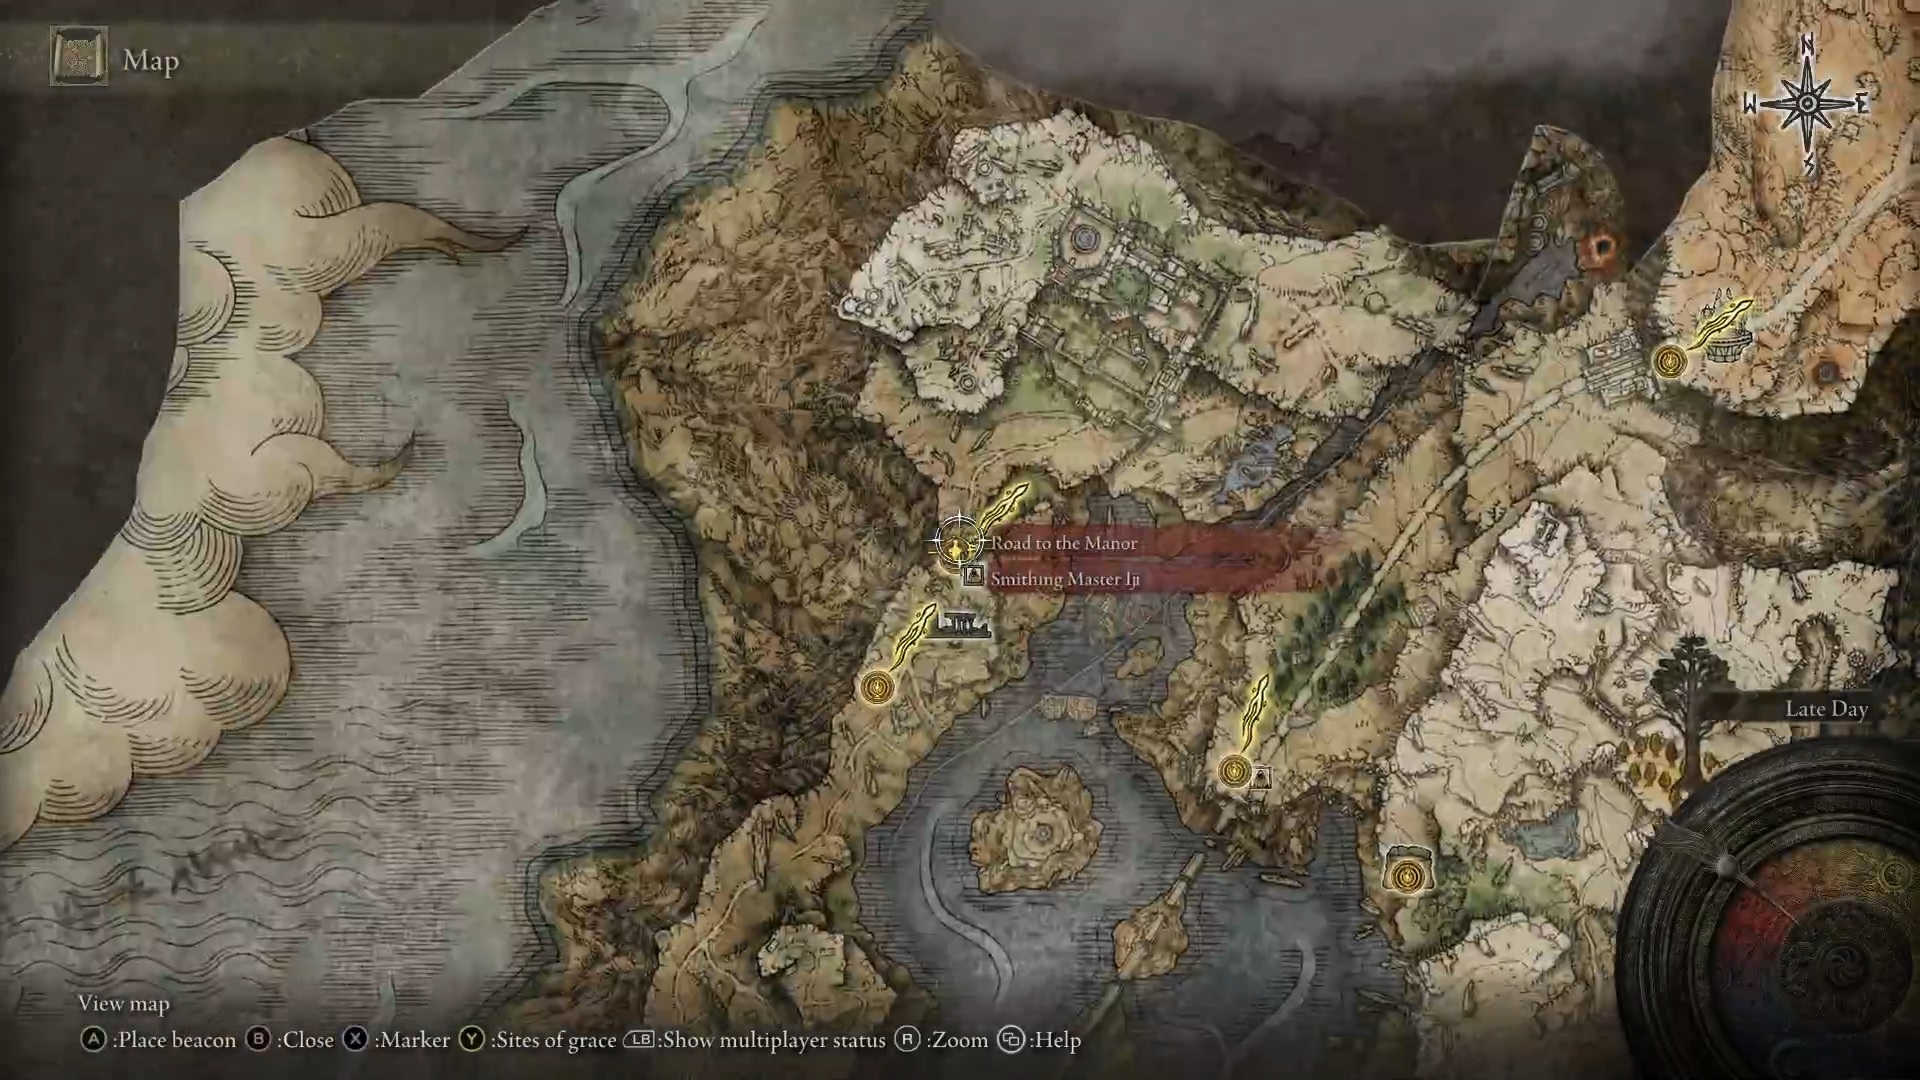
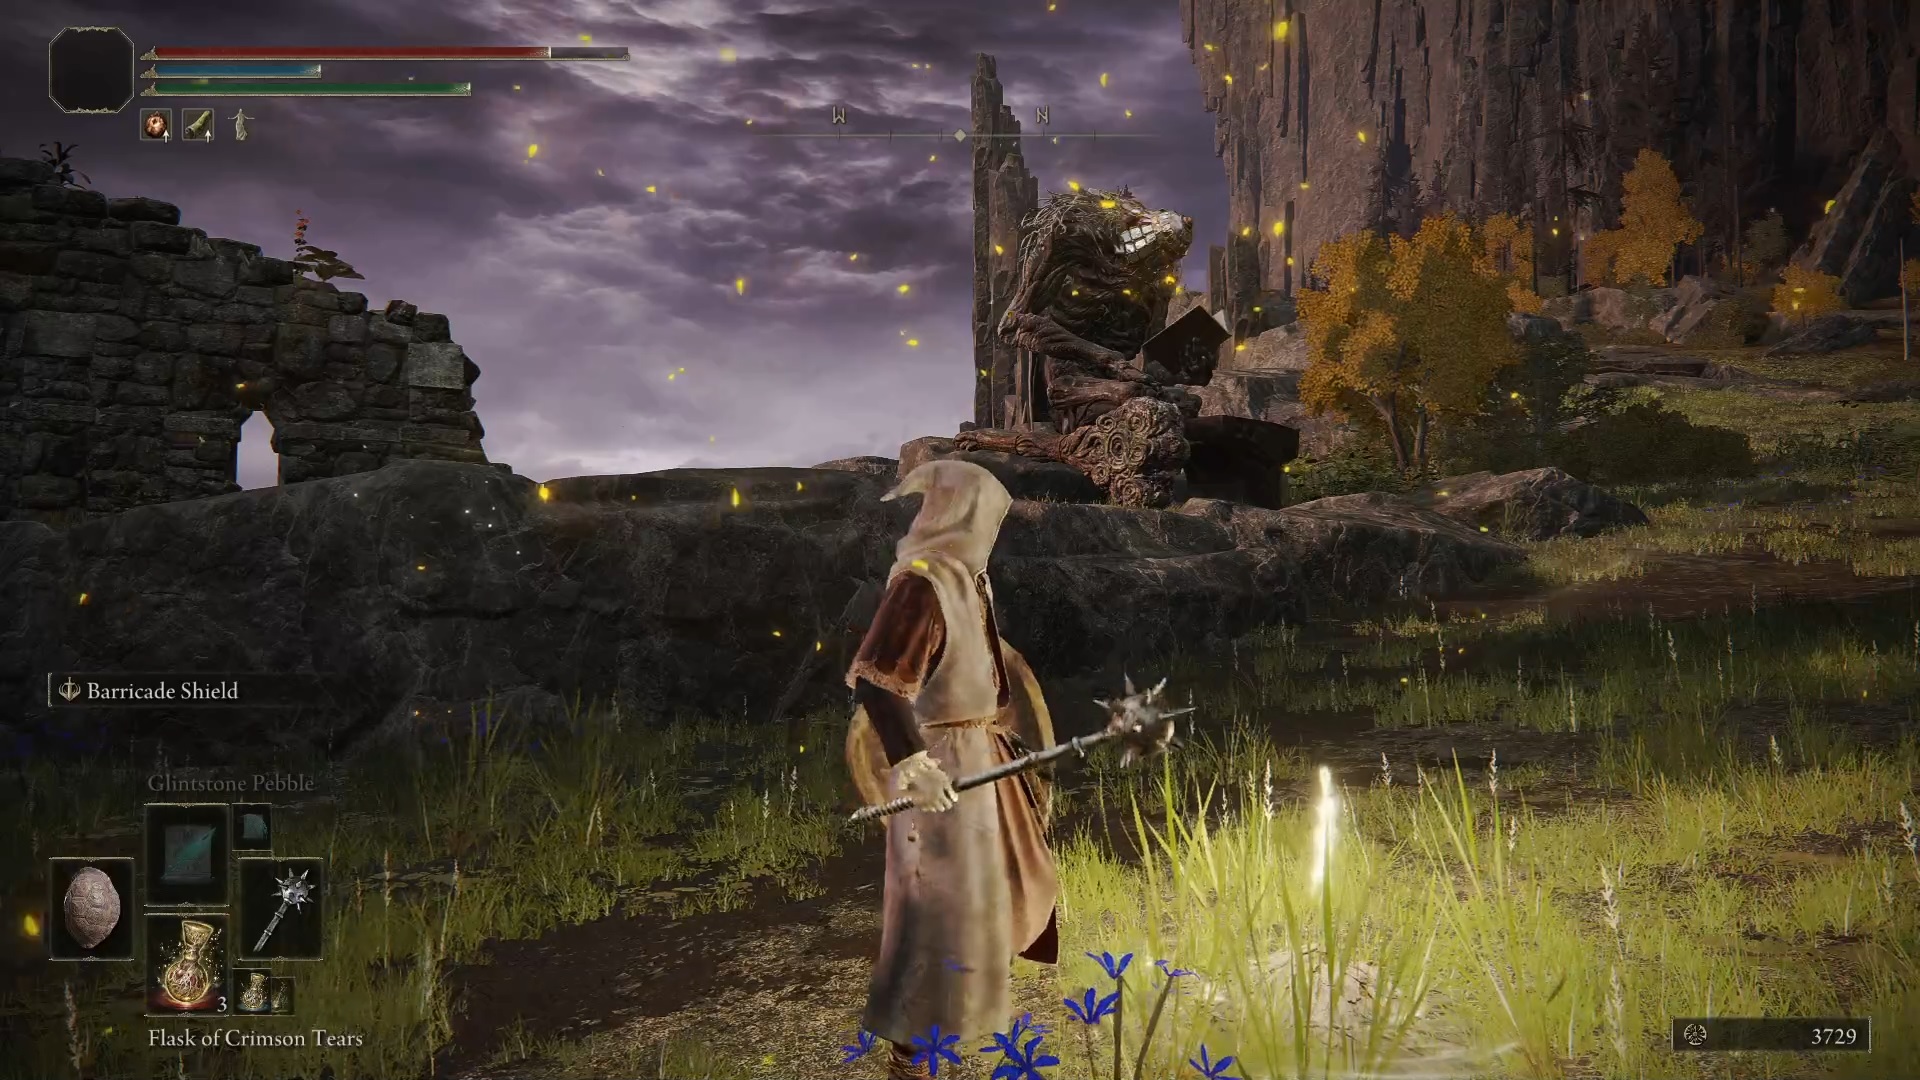
Head north along the western edge of Liurnia’s waters until you can transition to dry land around the Northern Liurnia Lake Shore grace. Keep going north from there and you’ll soon find yourself inside the Kingsrealm Ruins. On the far end of them, you have to attack a suspiciously blank wall to reveal it as an illusion. Doing so will place you at the Road to the Manor grace. Right by it is a giant blacksmith reading a book. Talk to him and you’ll be able to purchase somber smithing stones 1 through 4 from him.
Giant blacksmith’s locationHead through the ruinsAttack this fake wallHere’s the blacksmithGiant blacksmith’s wares
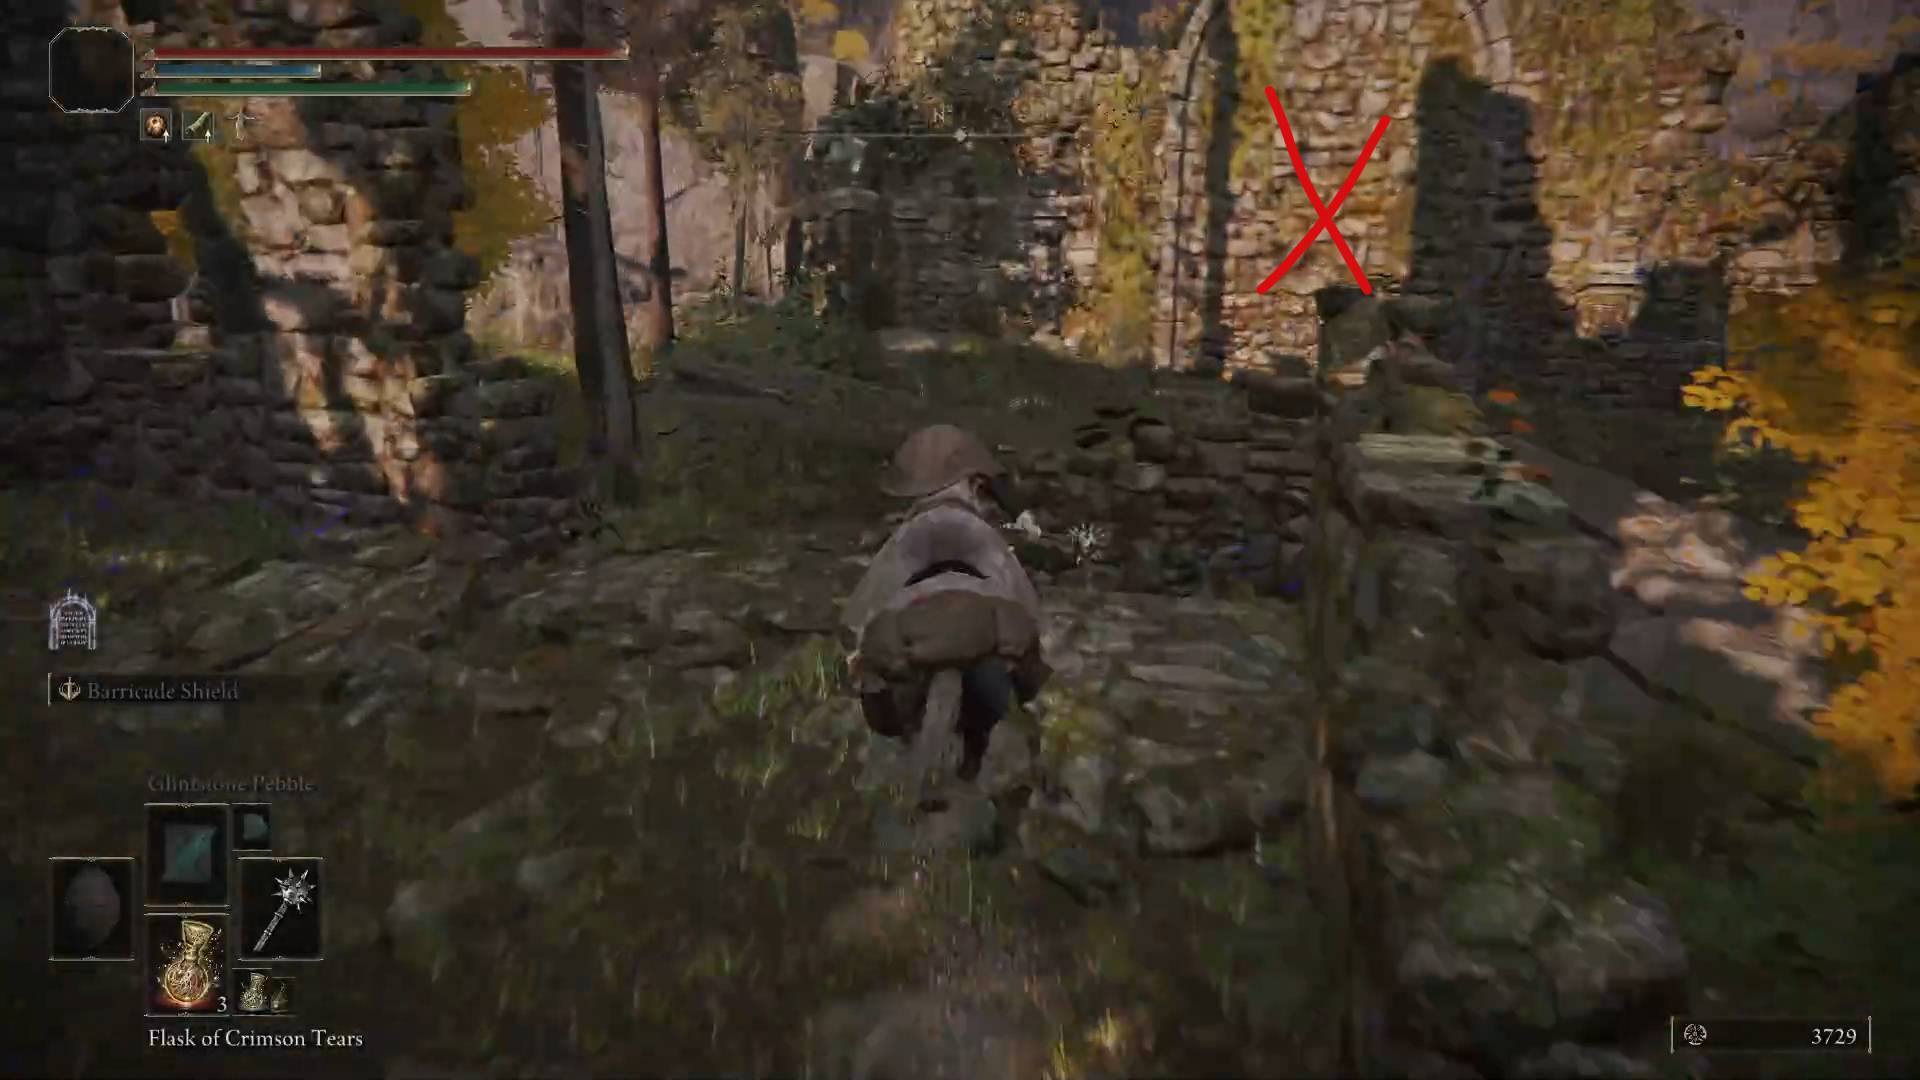
To get your hands on a Somber Smithing Stone [5], start at the Outer Wall Phantom Tree grace in Altus Plateau. Head north until the Outer Wall Battleground grace while ignoring the big gargoyle that jumps you halfway there. Once you reach the site of grace, go through the huge open gate to the west, then take a sharp turn to the southwest until you reach some ruins. There, overlooking the local minor Erdtree is a chair with a corpse that has a Somber Smithing Stone [5] on it.
Follow this pathYour reward
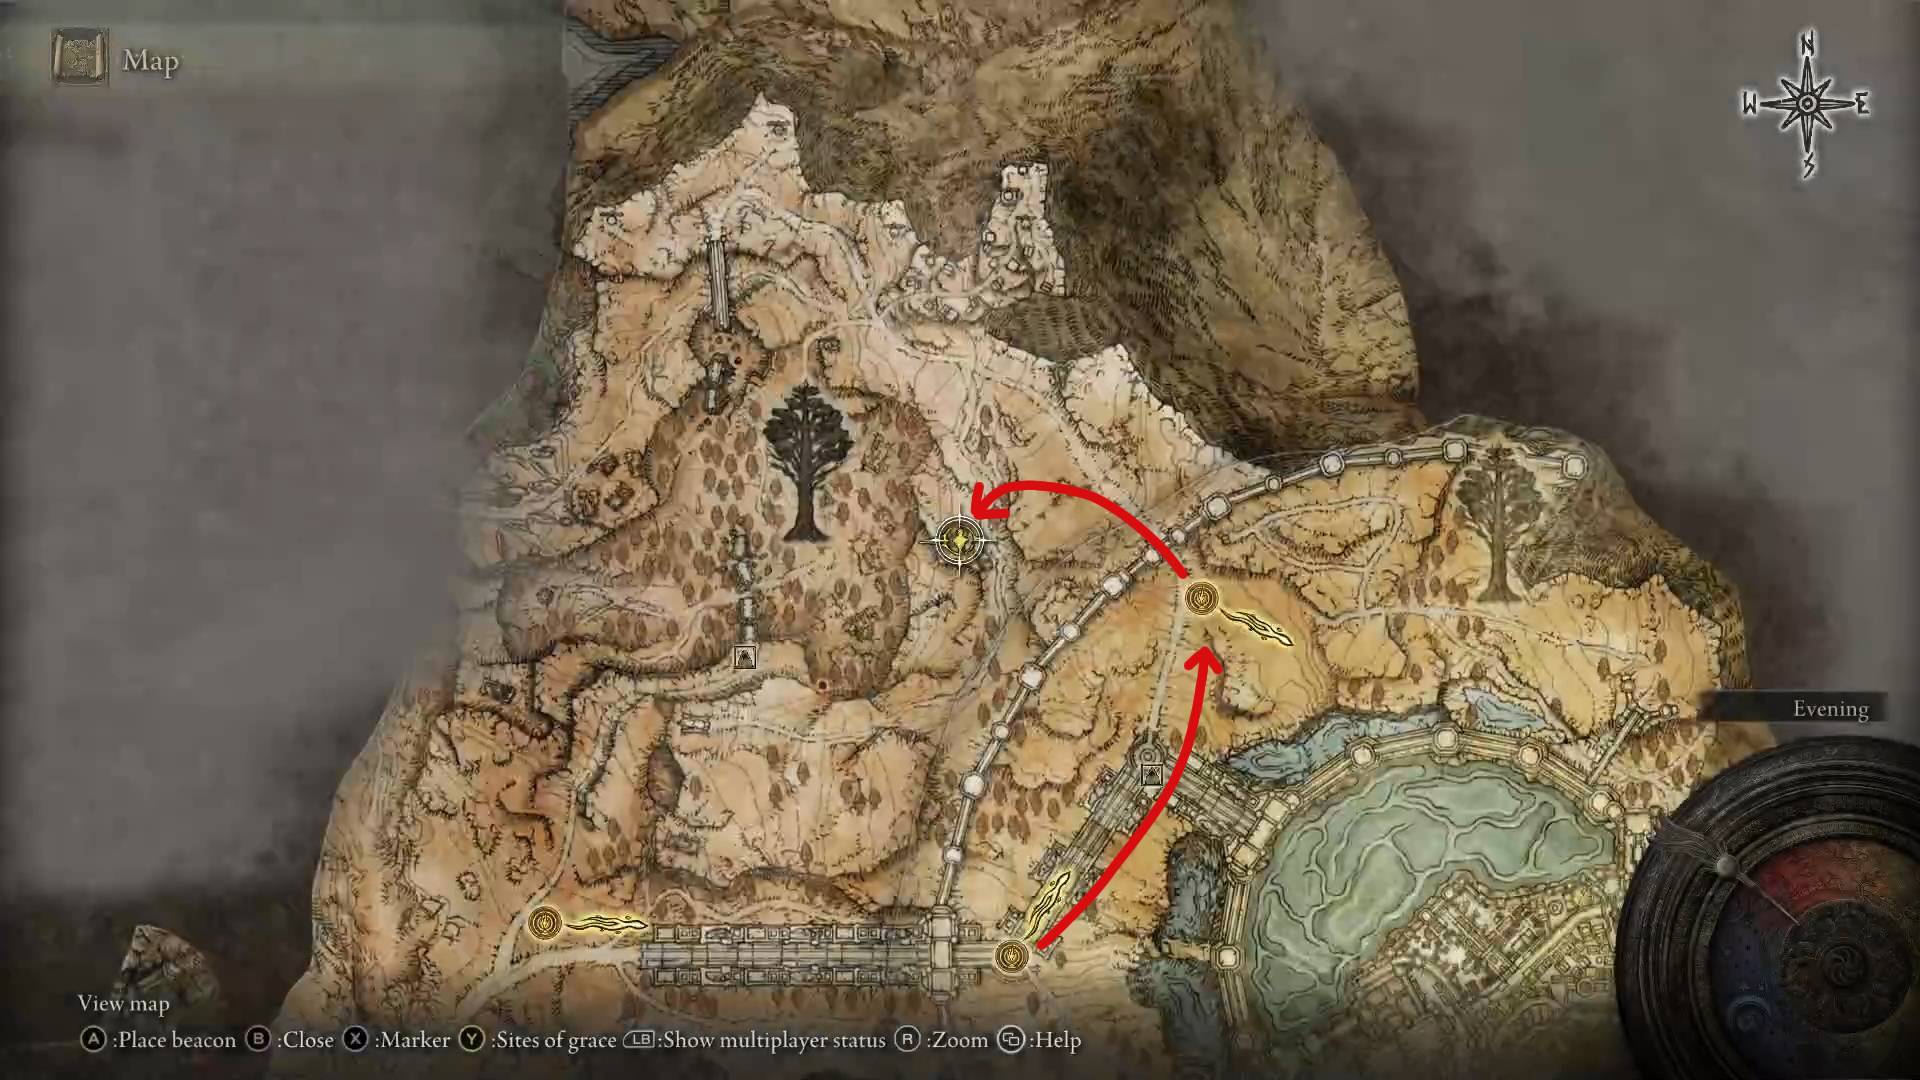
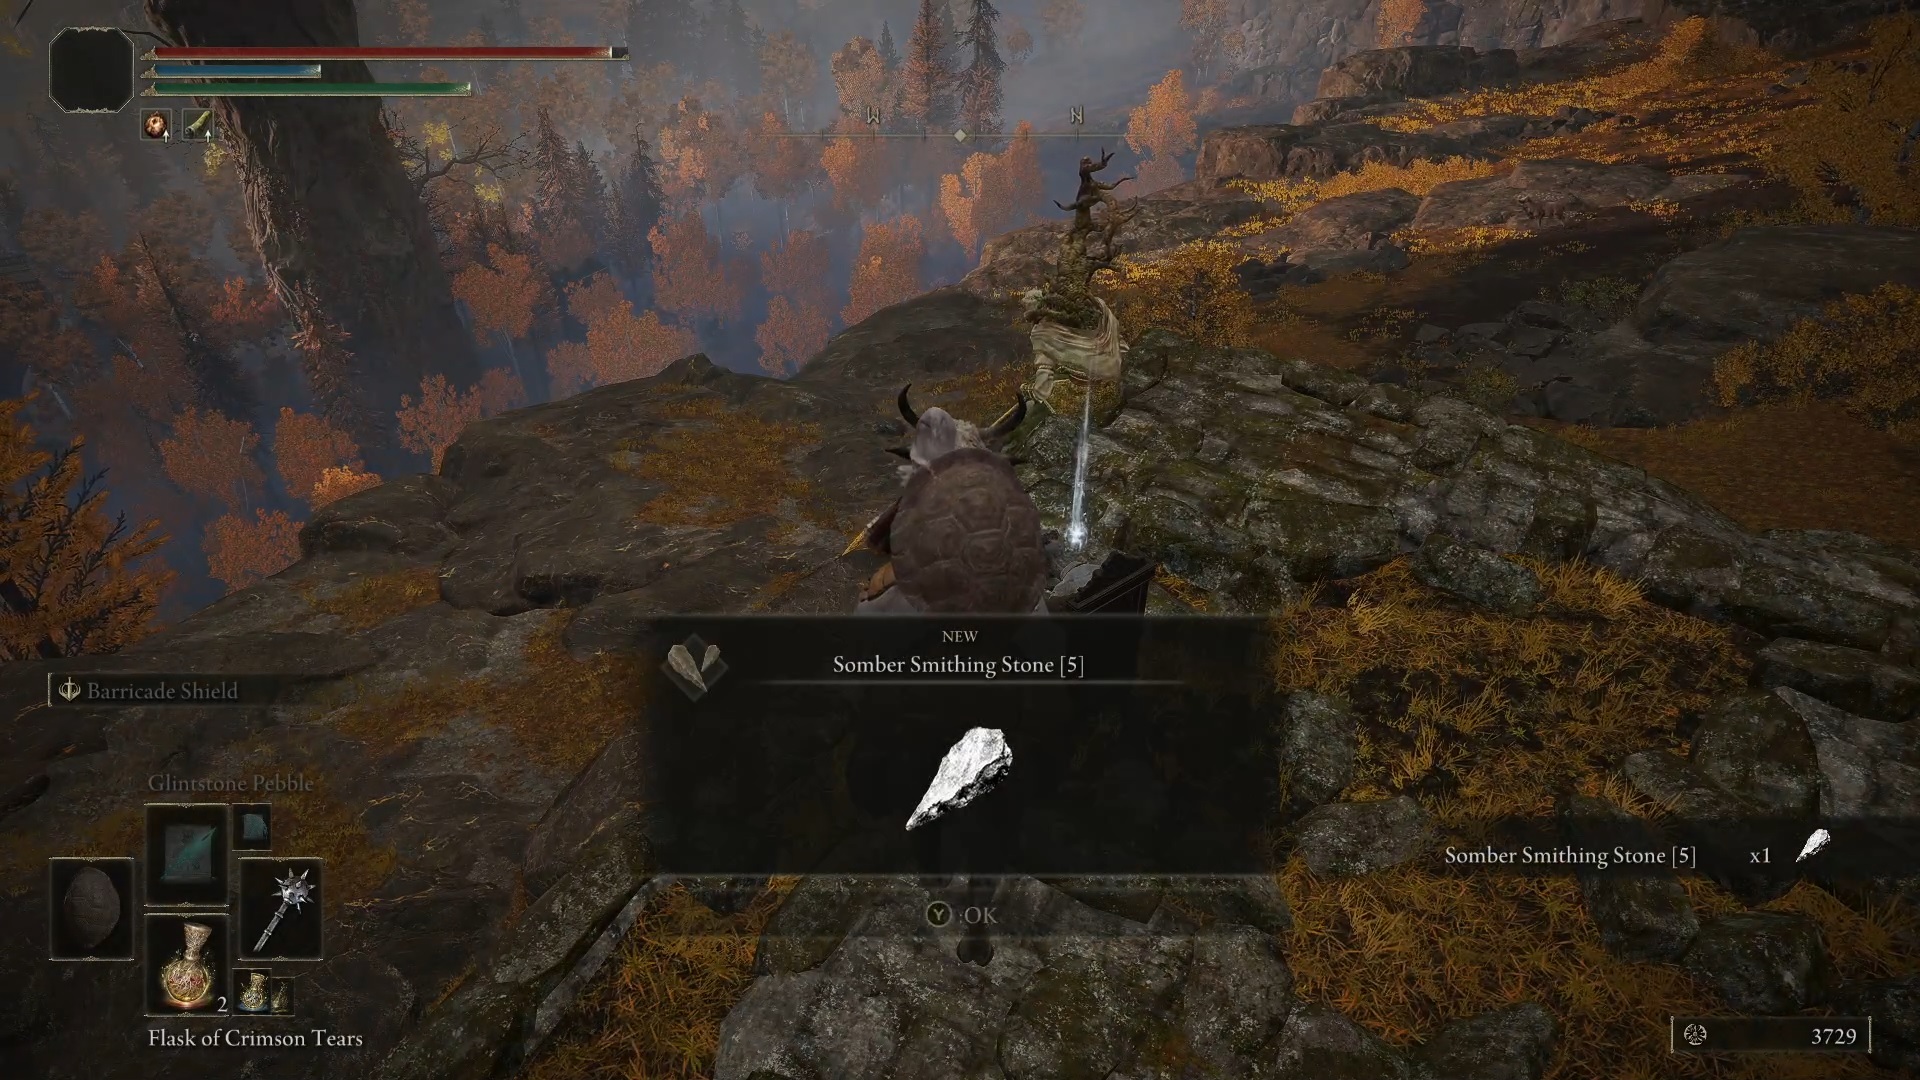
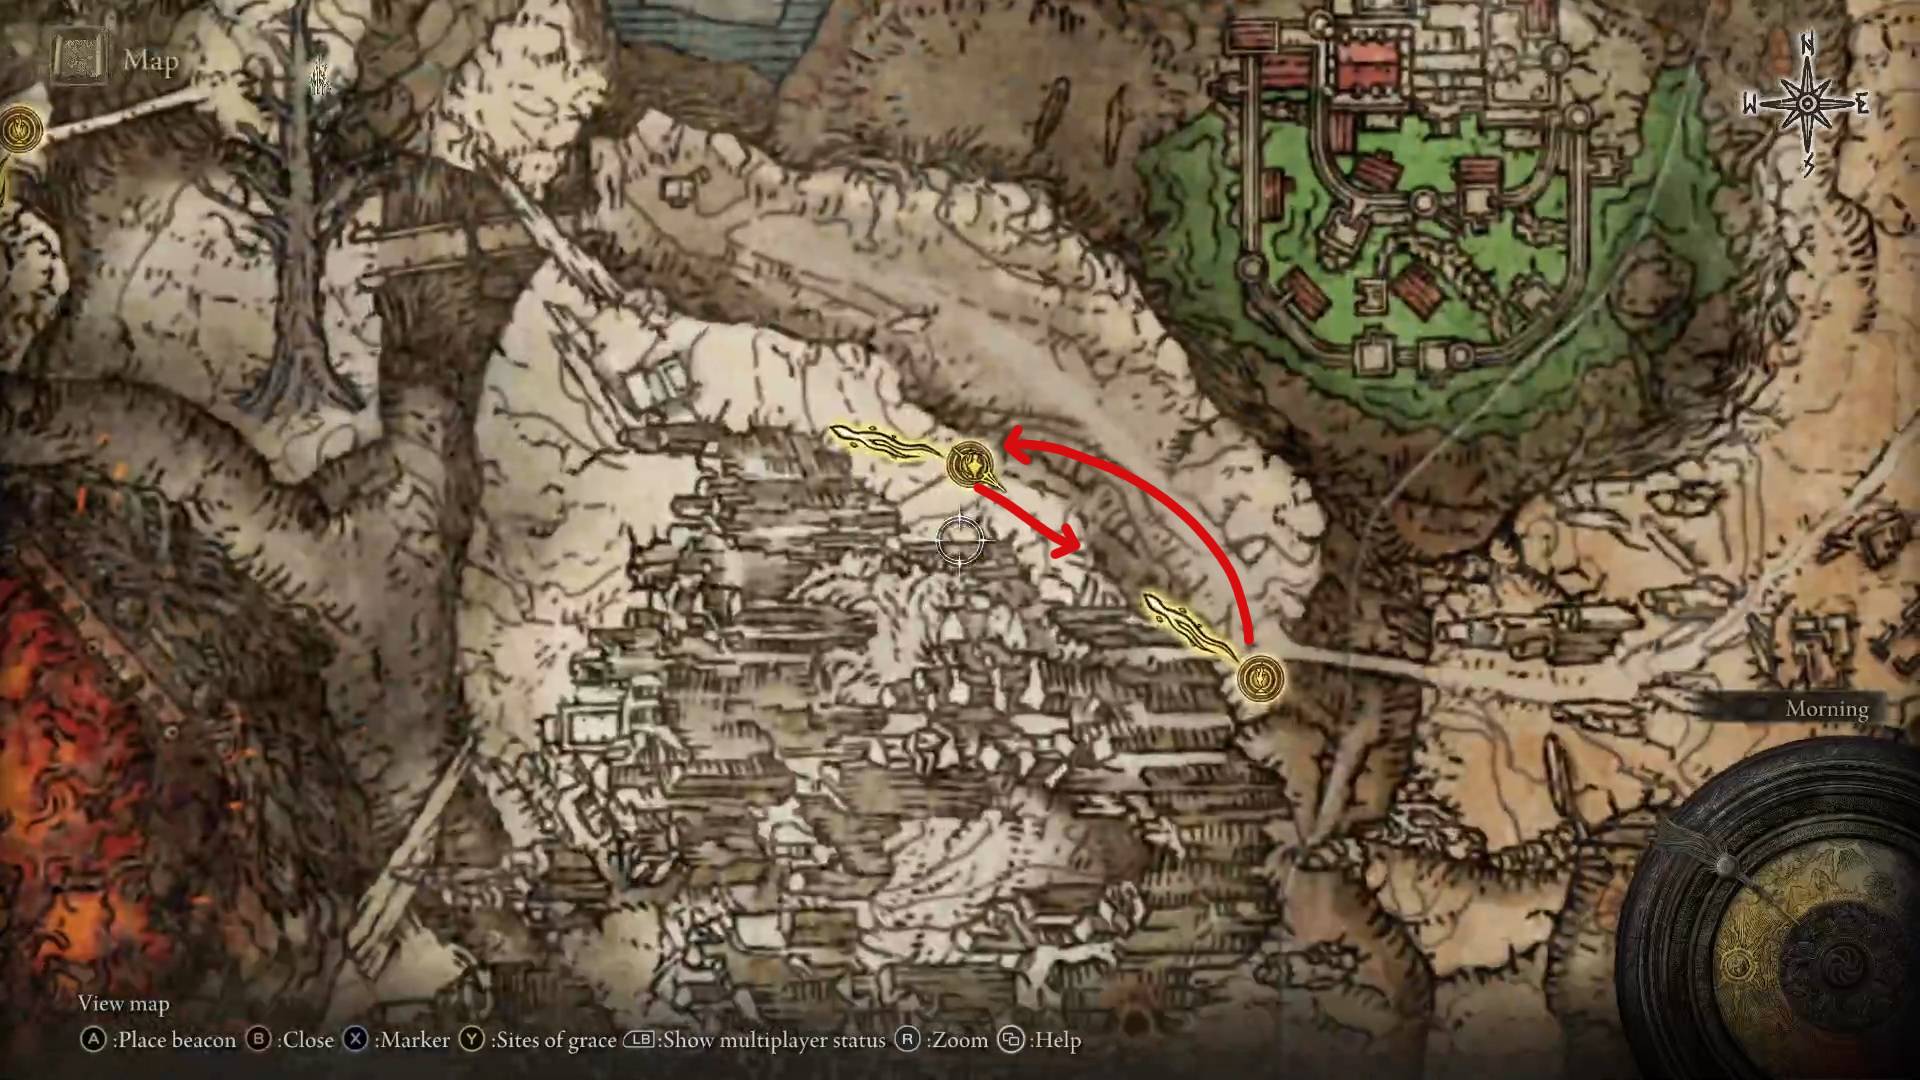
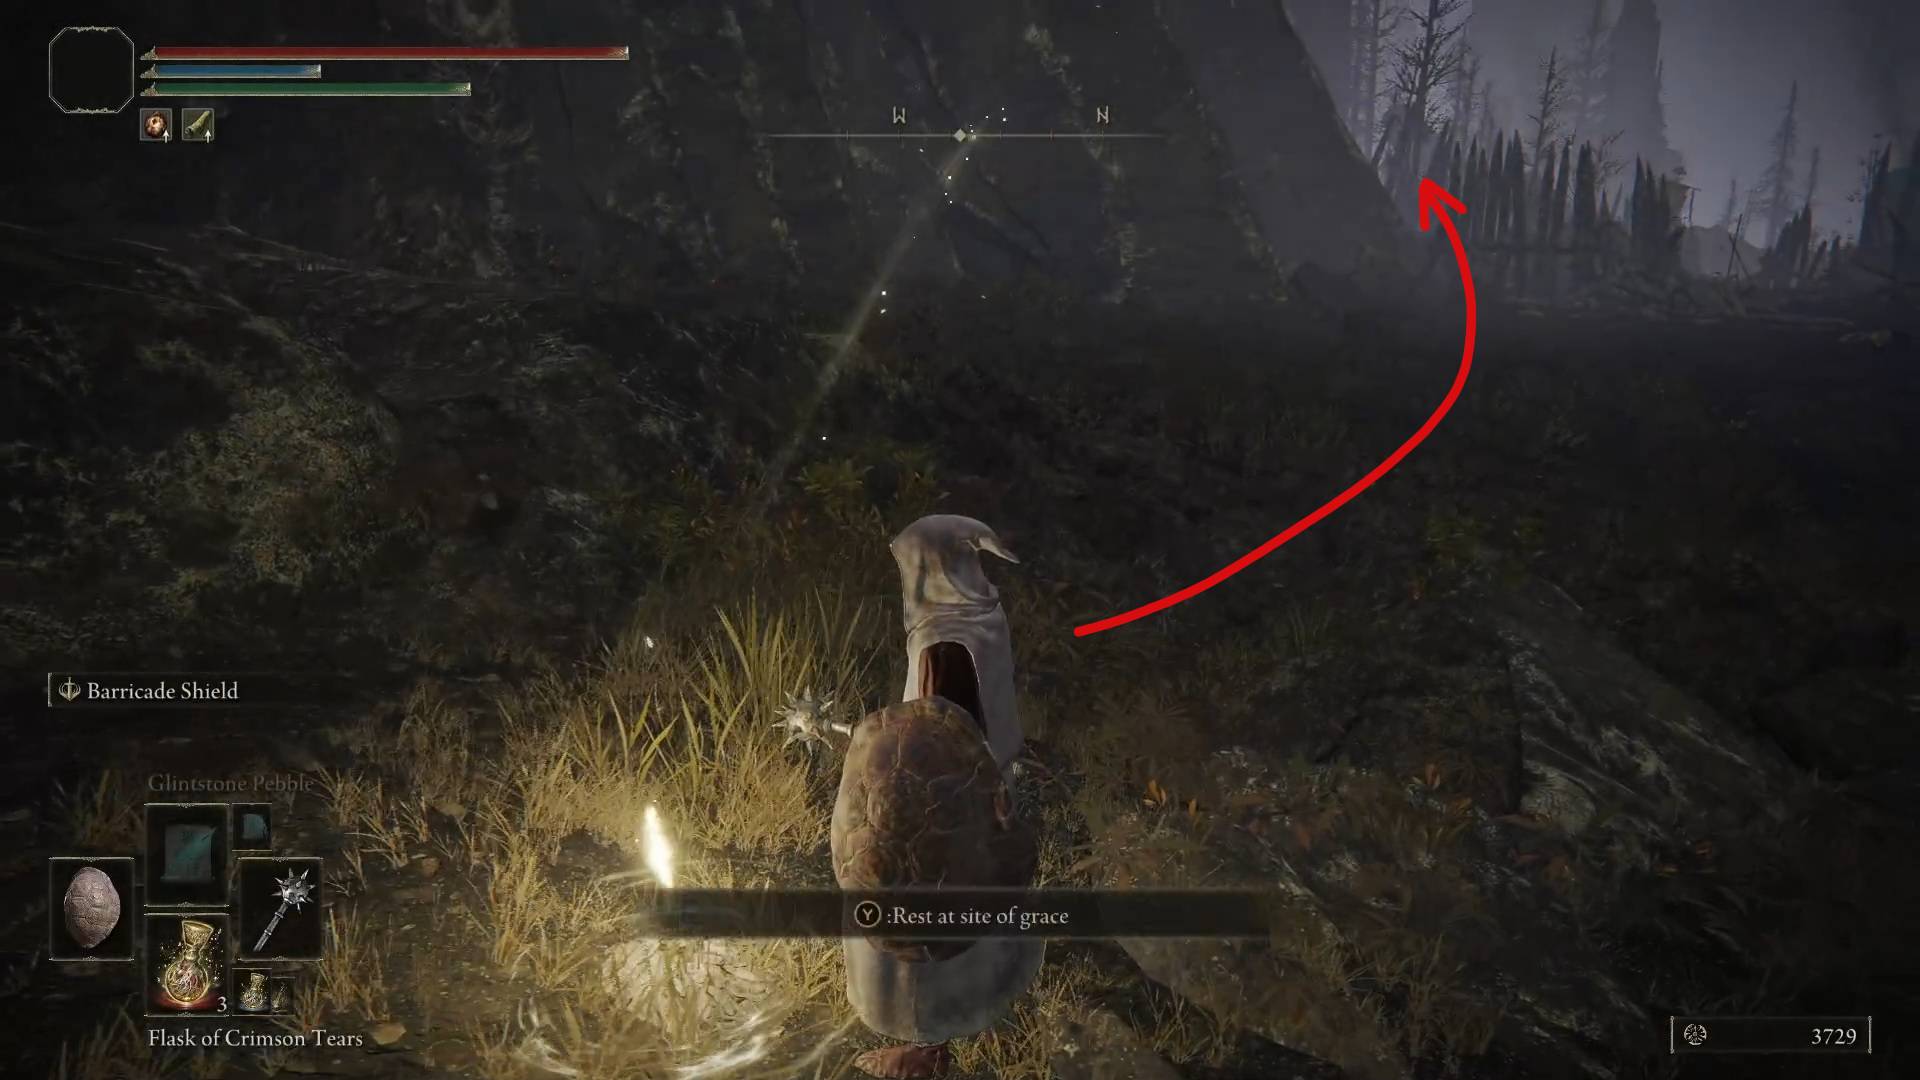
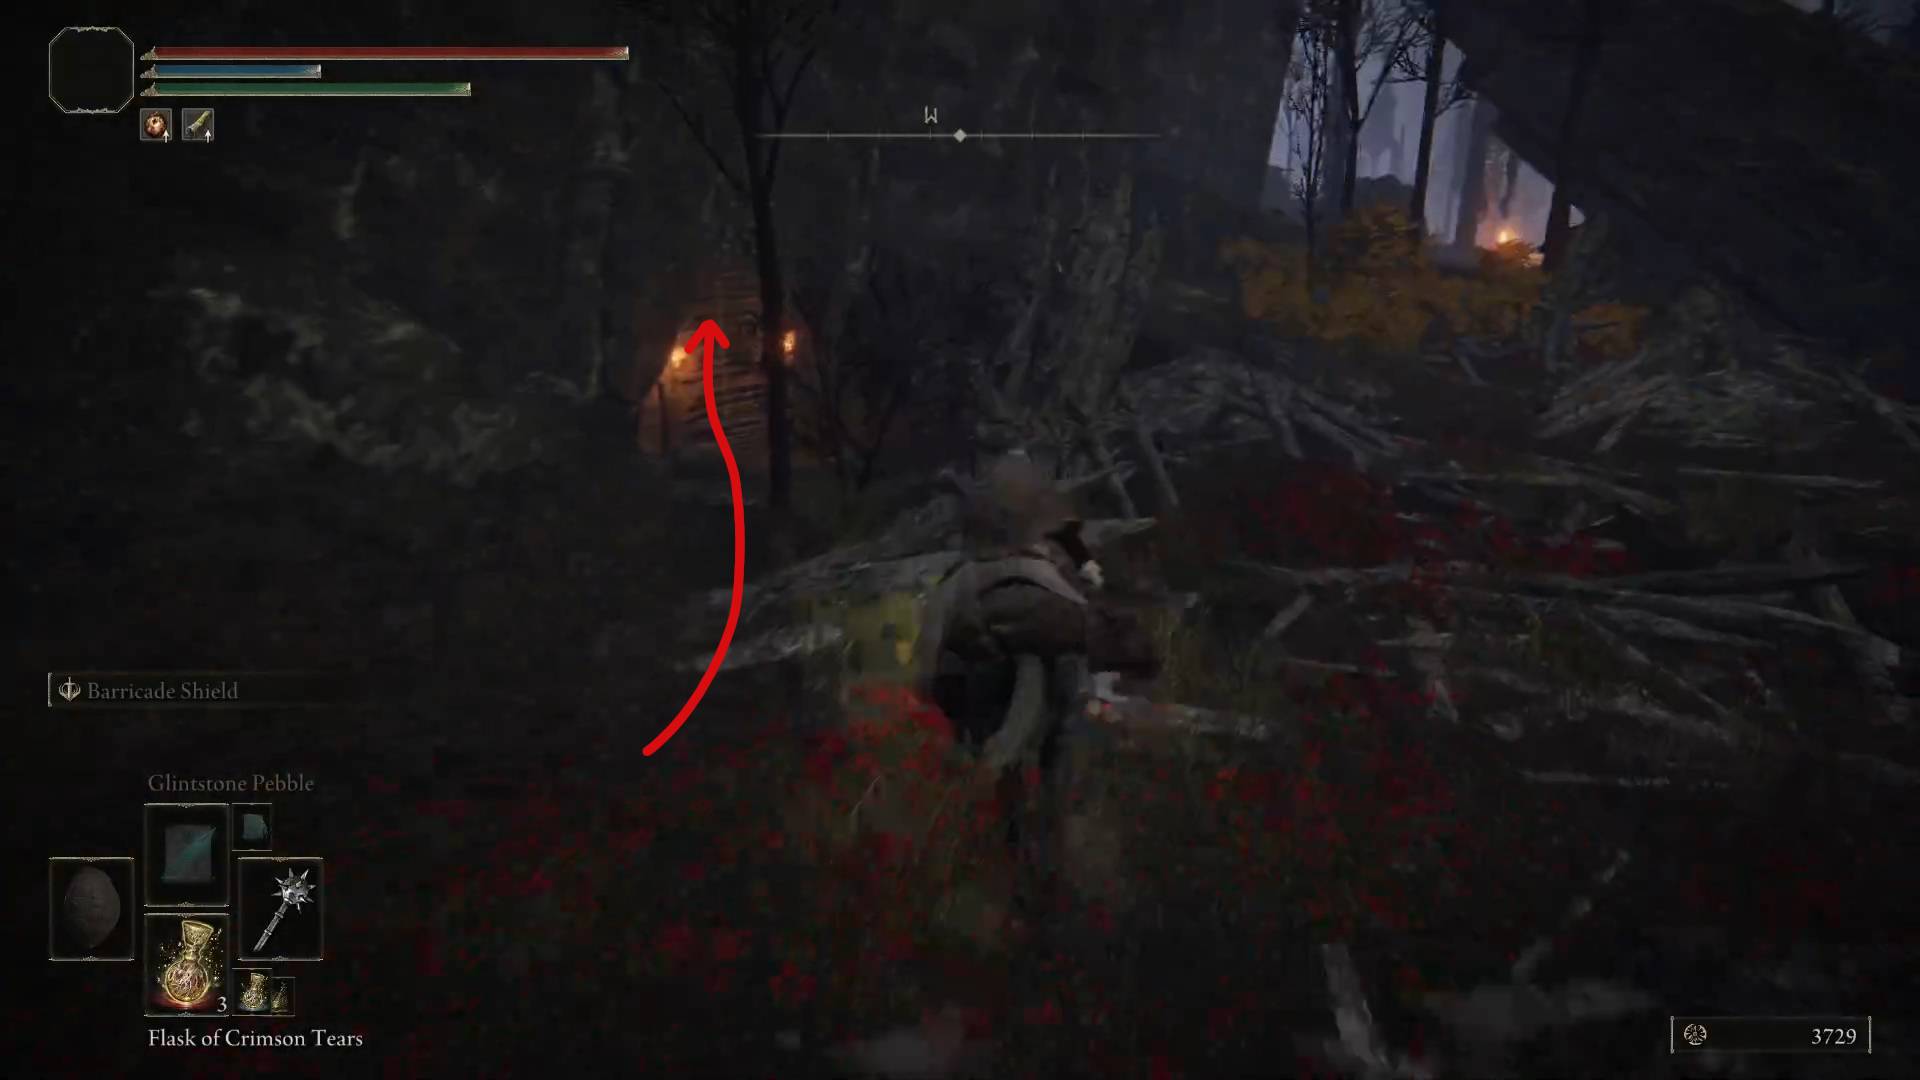
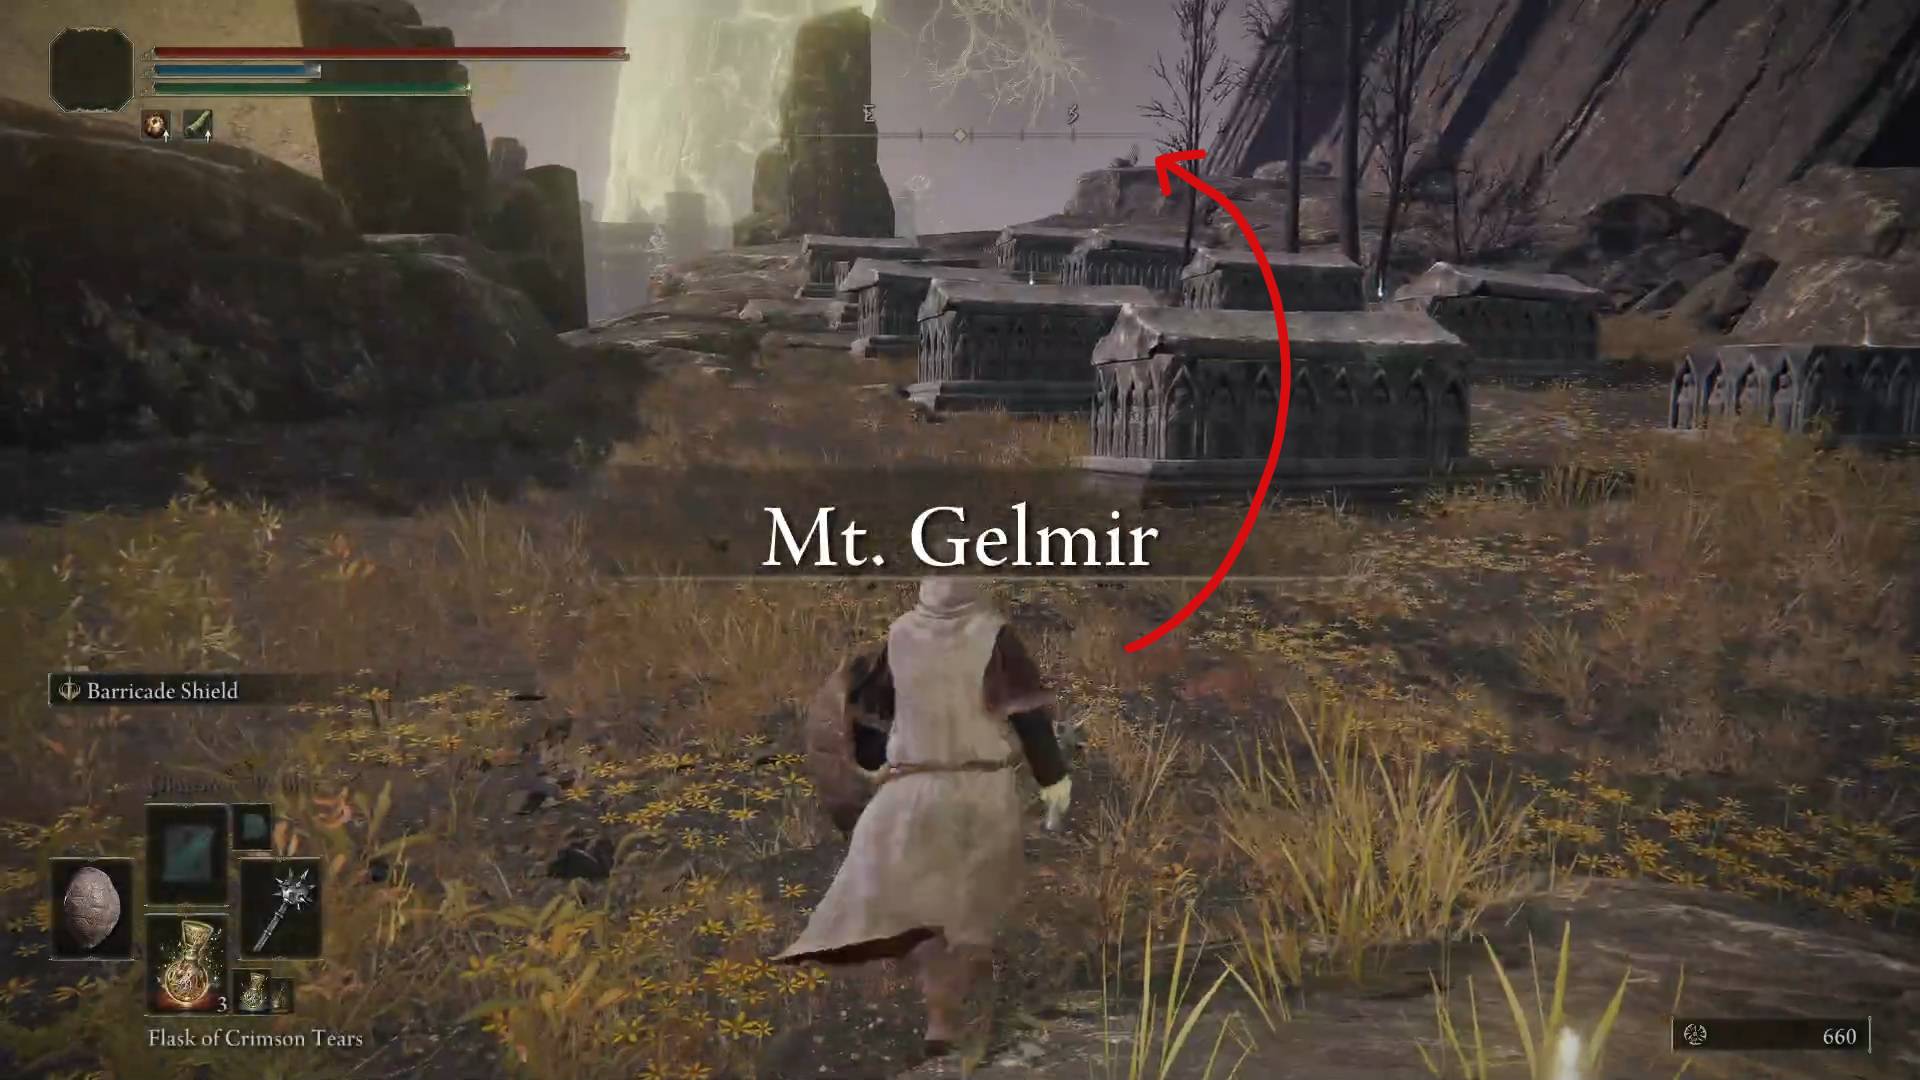
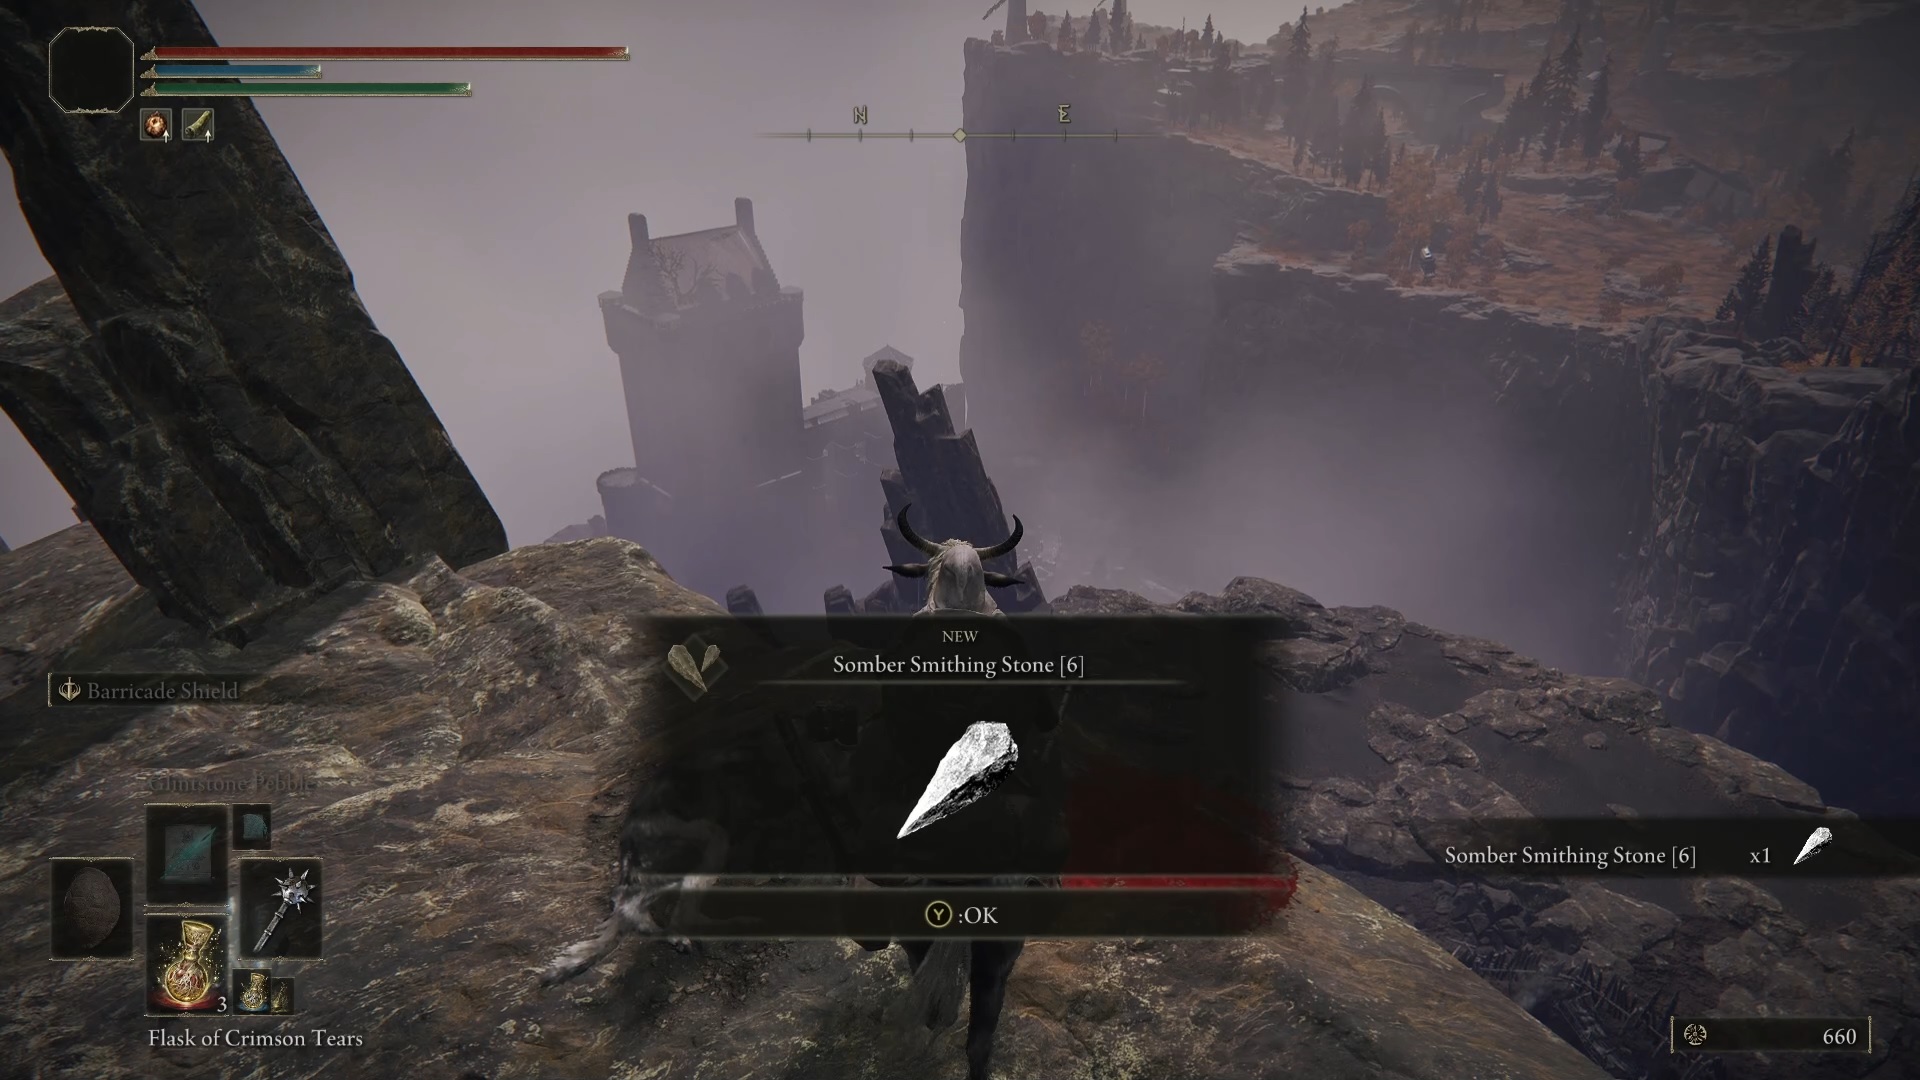
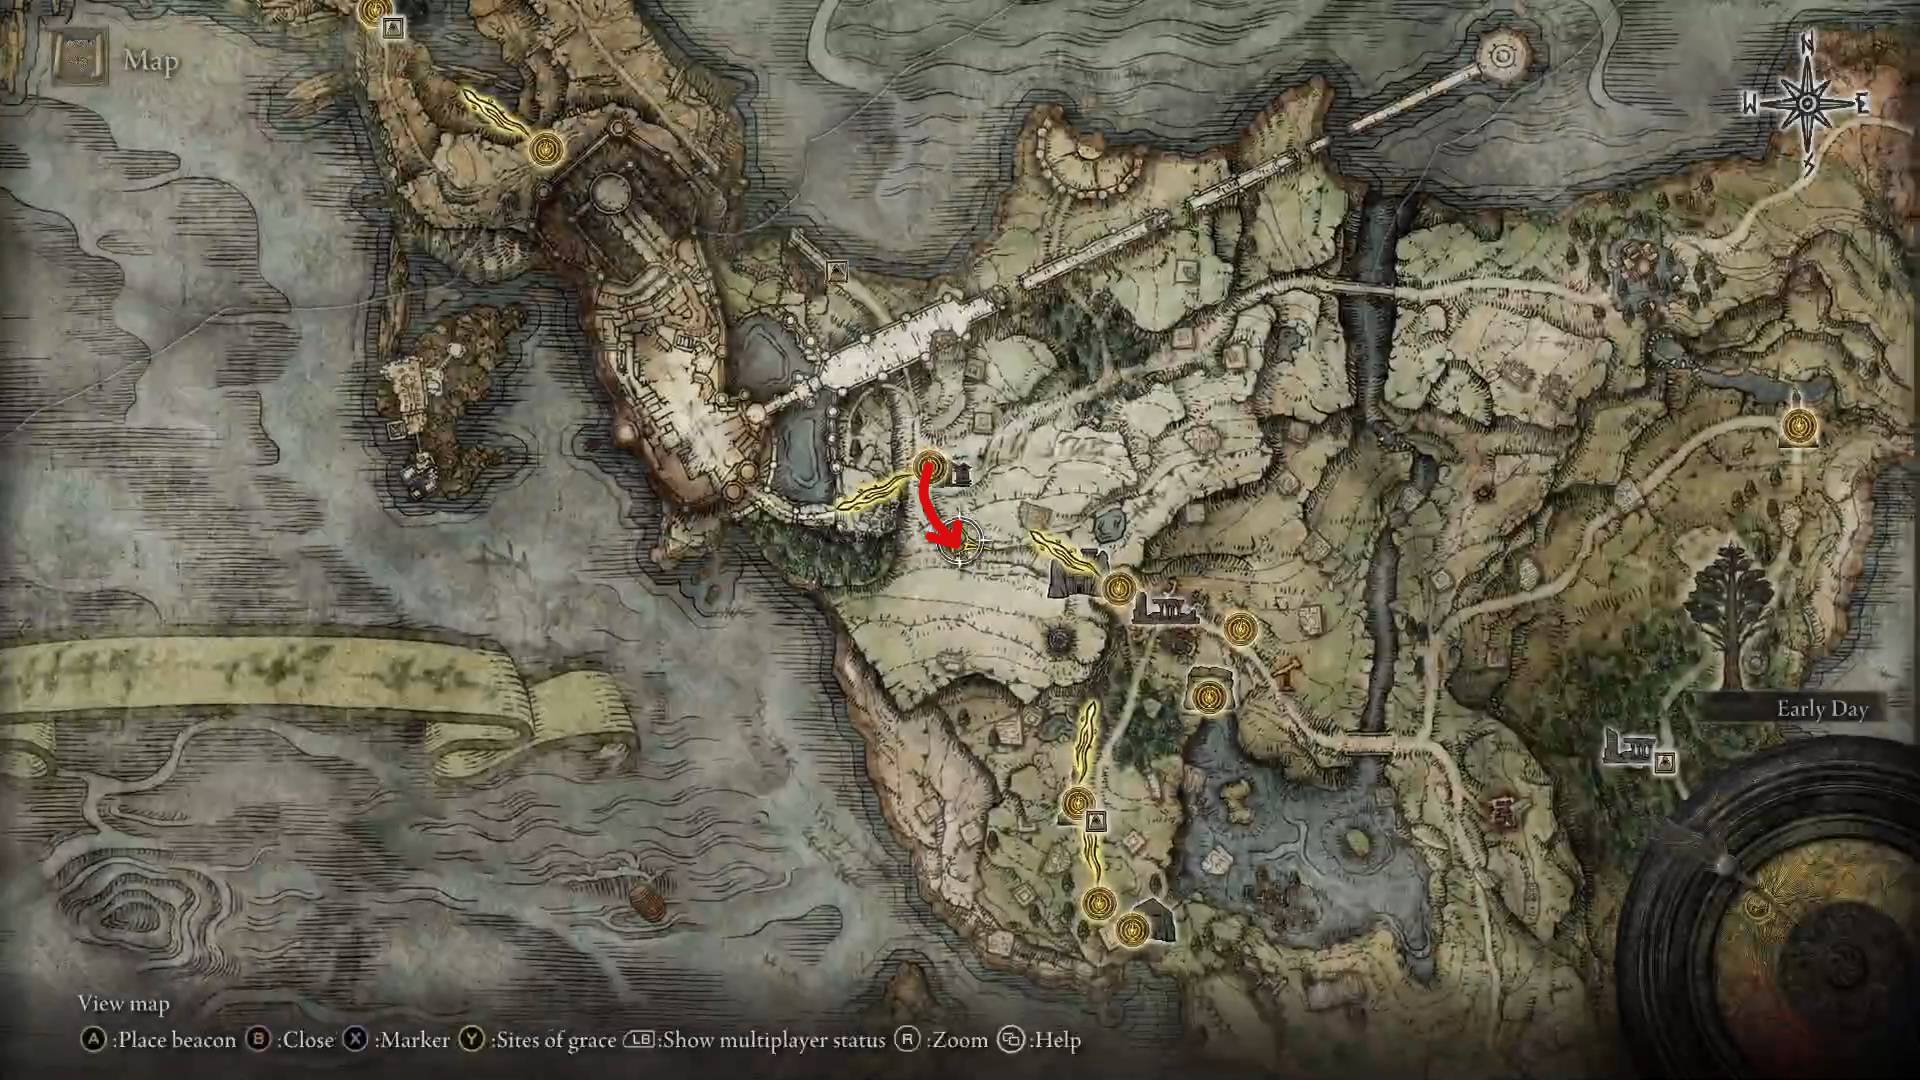
To find a Somber Smithing Stone [6], go back to the road leading west from the Outer Wall Battleground grace and get ready for quite a ride. Stick to the road all the way across the northern part of the Altus Plateau until you reach the Bridge of Iniquity grace acting as a gateway to Mt. Gelmir. From that grace stick to the wall on your left until you see a ladder going up the cliff. When you get up, to your left will be the First Mt. Gelmir Campsite grace. Go east from there and on the edge of the mountain past some graves you’ll see a chair with a corpse and a Somber Smithing Stone [6].
Follow this pathStick to the wallGo up the ladderHead towards the cliffYour reward
Flask Upgrades
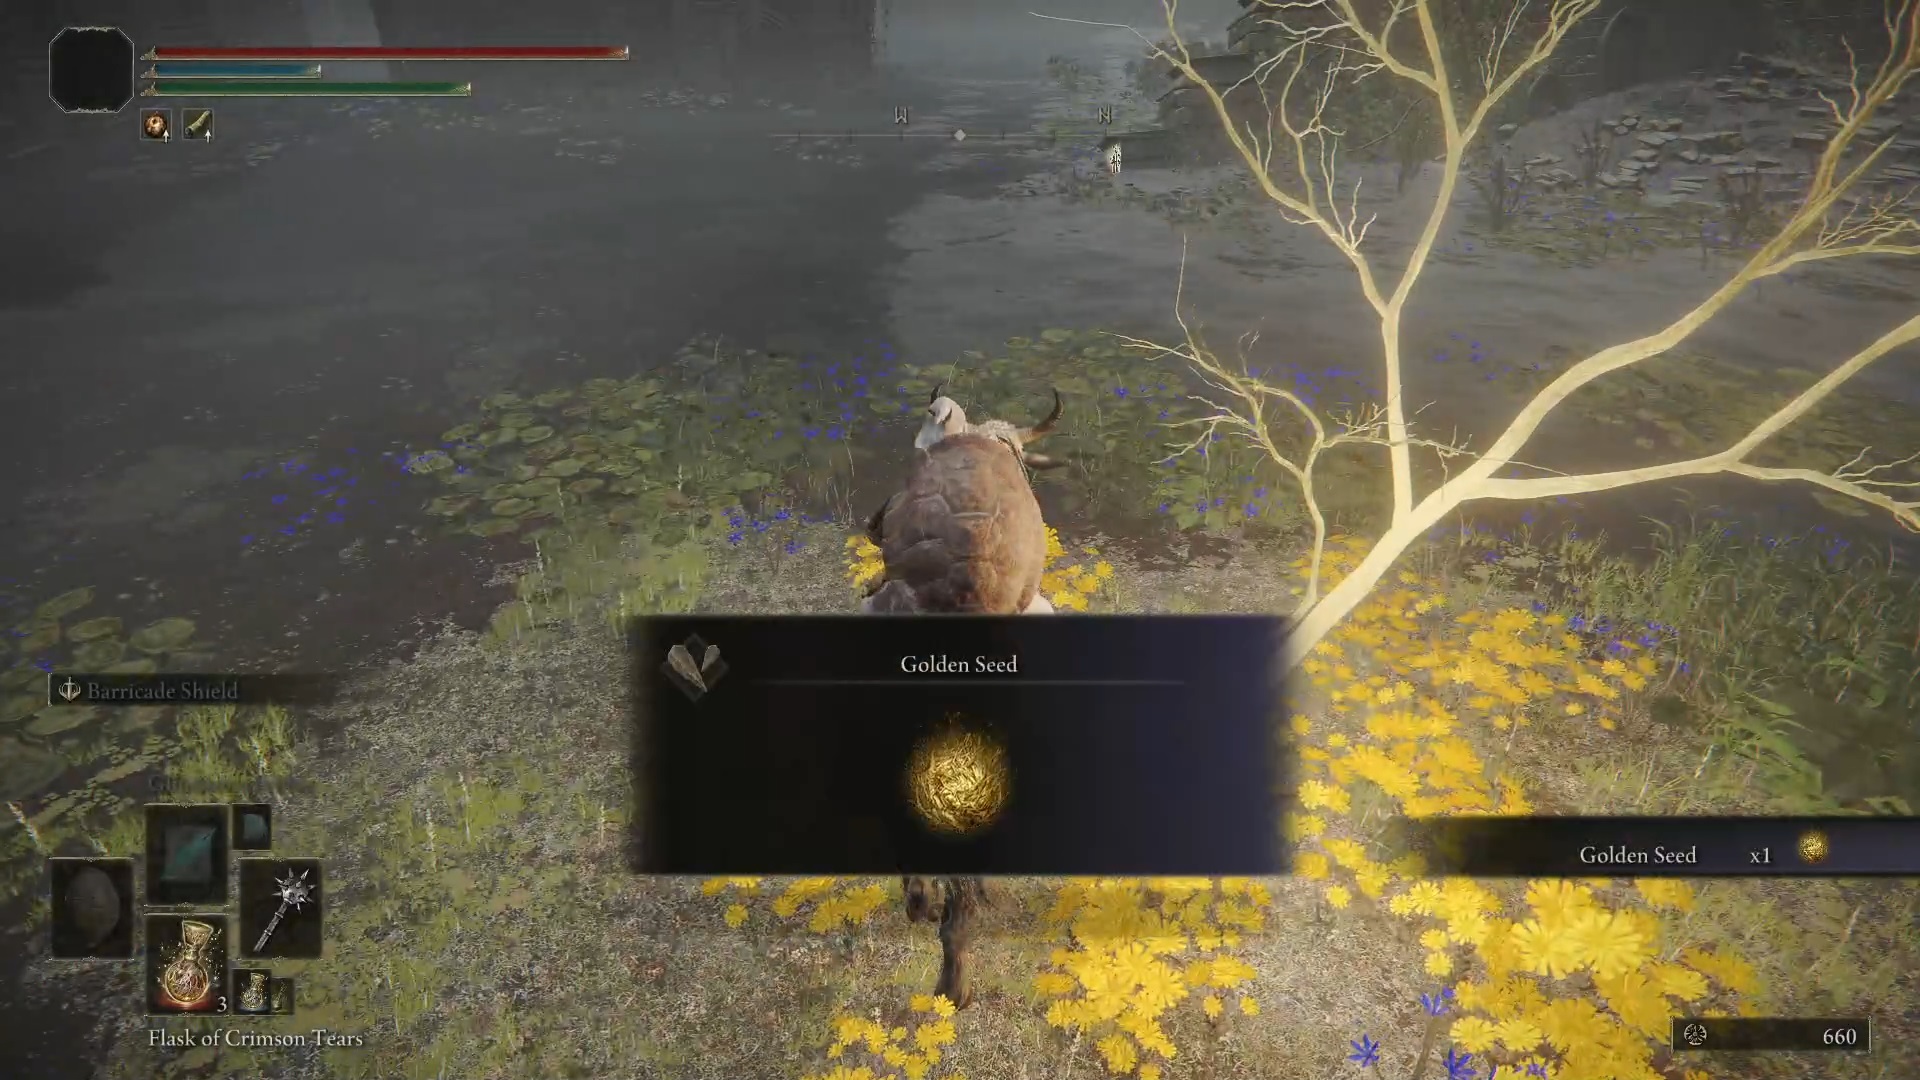
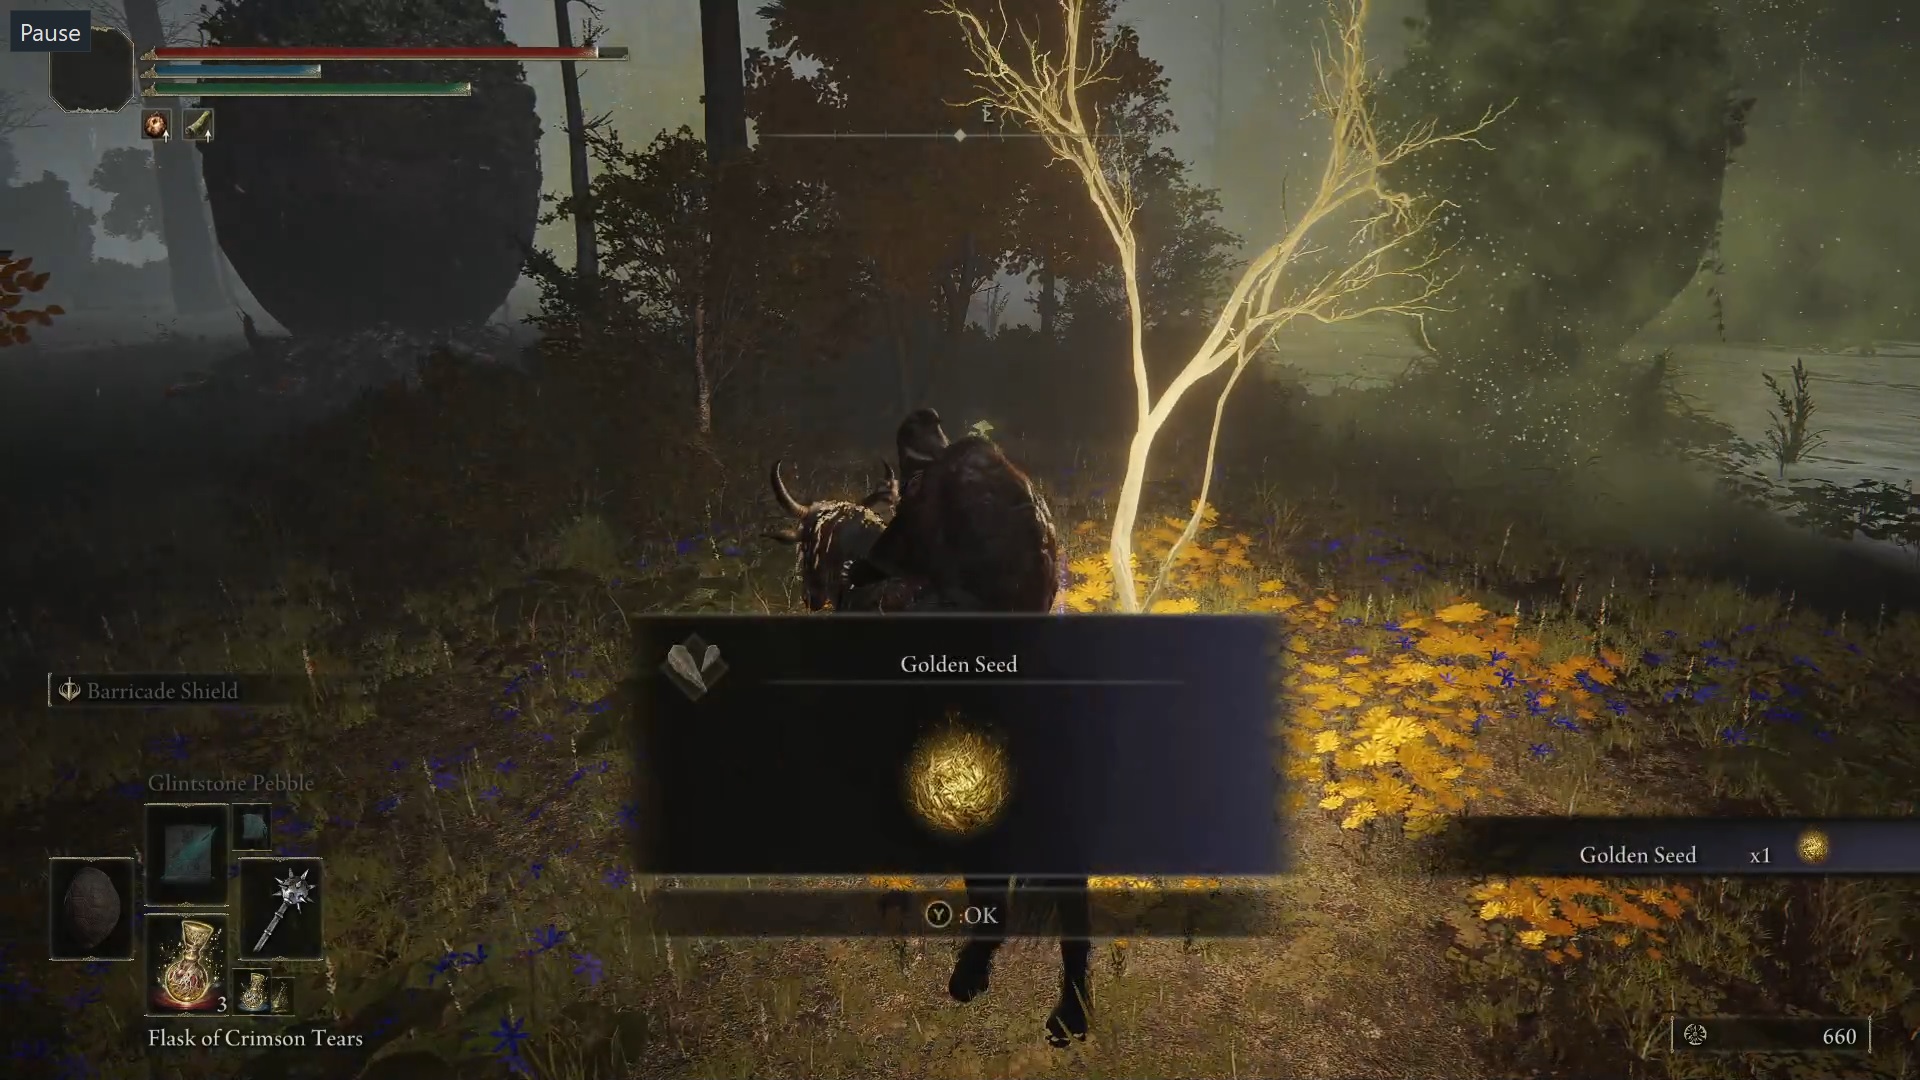
When riding around the Lands Between, always be on the lookout for the glowing gold phantom trees. These always have Golden Seeds around them that increase the number of charges of your flask. Also, keep your eye out on churches, as they often have Sacred Tears inside. Sacred Tears increase the amount restored by your flask.
If you collect all the seeds and tears listed in this guide, you’ll end up with 11 flask charges of +10 potency. Mind you, this isn’t an exhaustive list of flask upgrades in the early-mid game, just the ones you can easily get riding around on your horse without fighting anything or going into any dungeons.
Golden Seeds
Stormhill Shack
Starting at the Stormhill Shack grace, head south along the road, and before long you’ll find a seed.
Fort Haight West
From the Fort Haight West grace make your way towards Fort Haight proper, avoid all the fighting, and to the side you’ll find a seed.
Weeping Peninsula
Starting at the Castle Morne Rampart grace, head south towards Castle Morne, but instead of following the road, stick to the rocks on your right. On a cliff there you’ll find a seed. Just be careful not to get sniped by the giant archer while you’re picking it up.
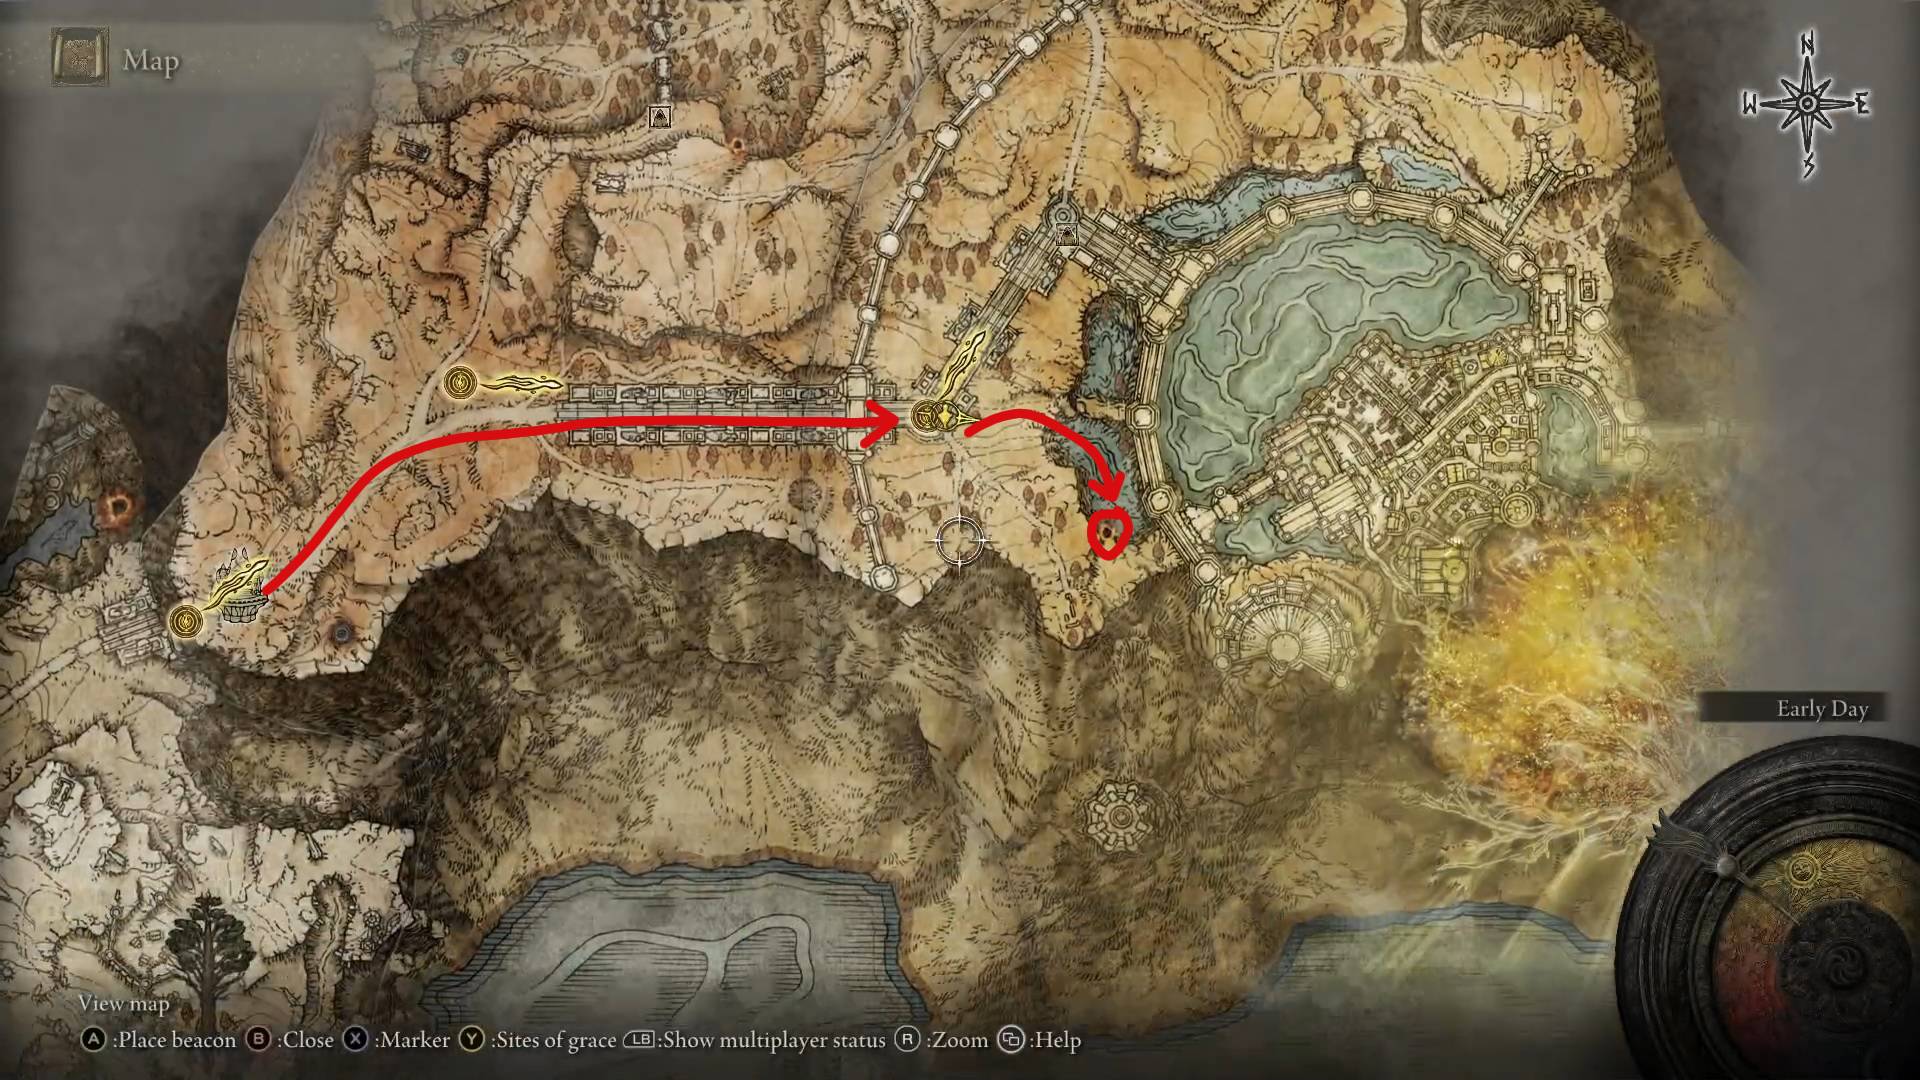
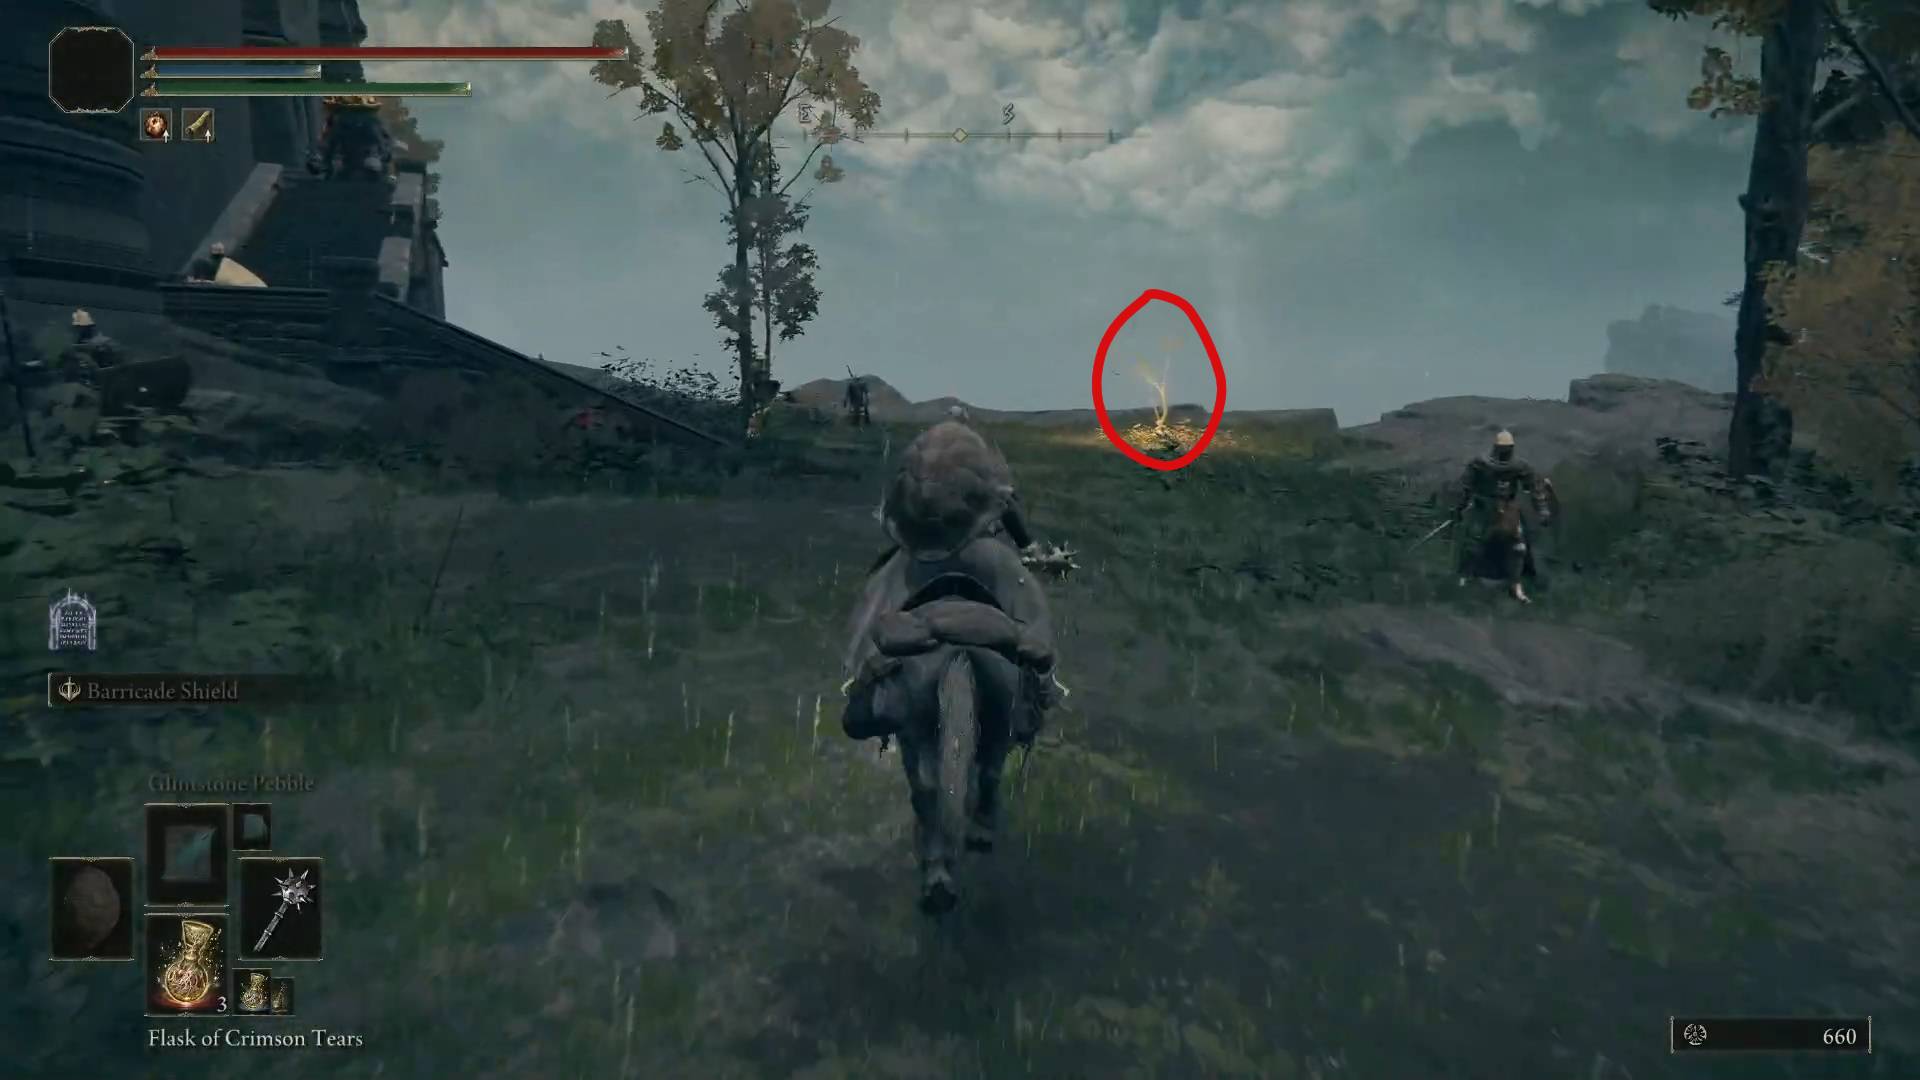
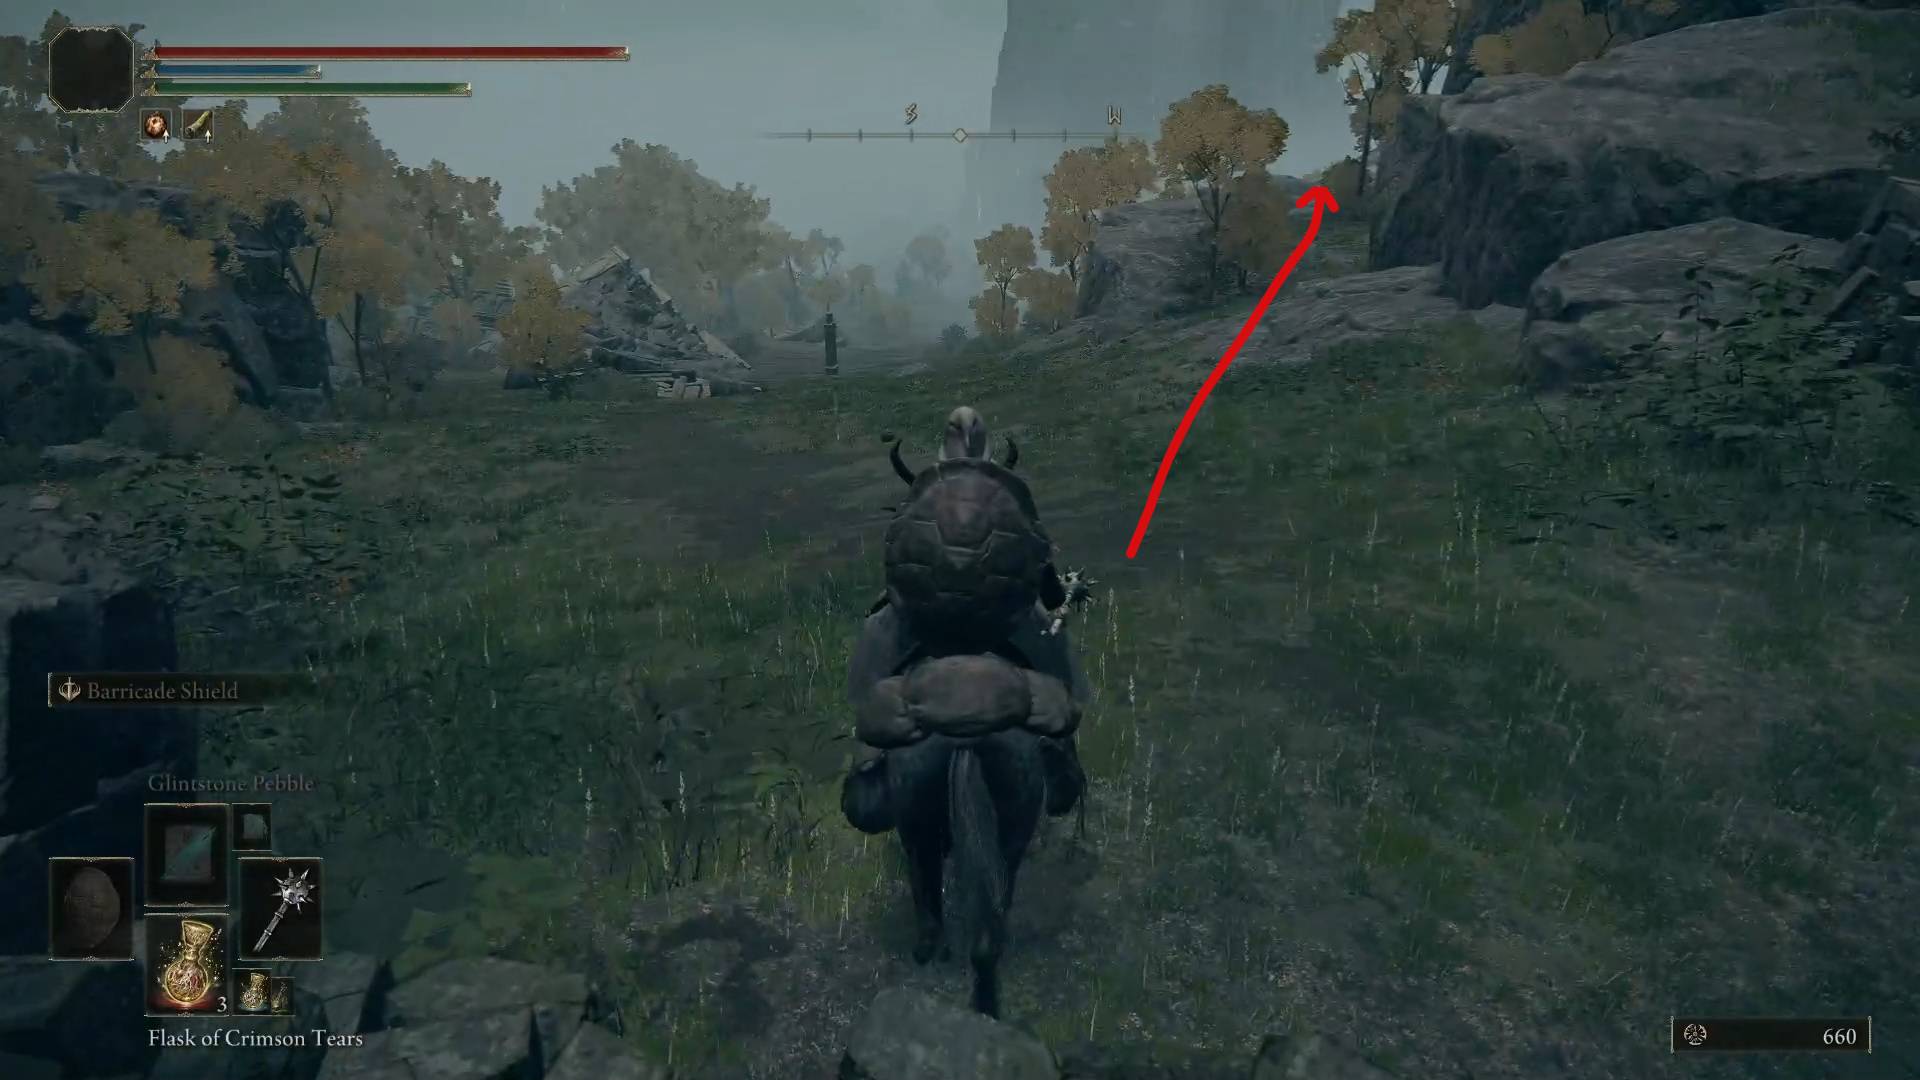
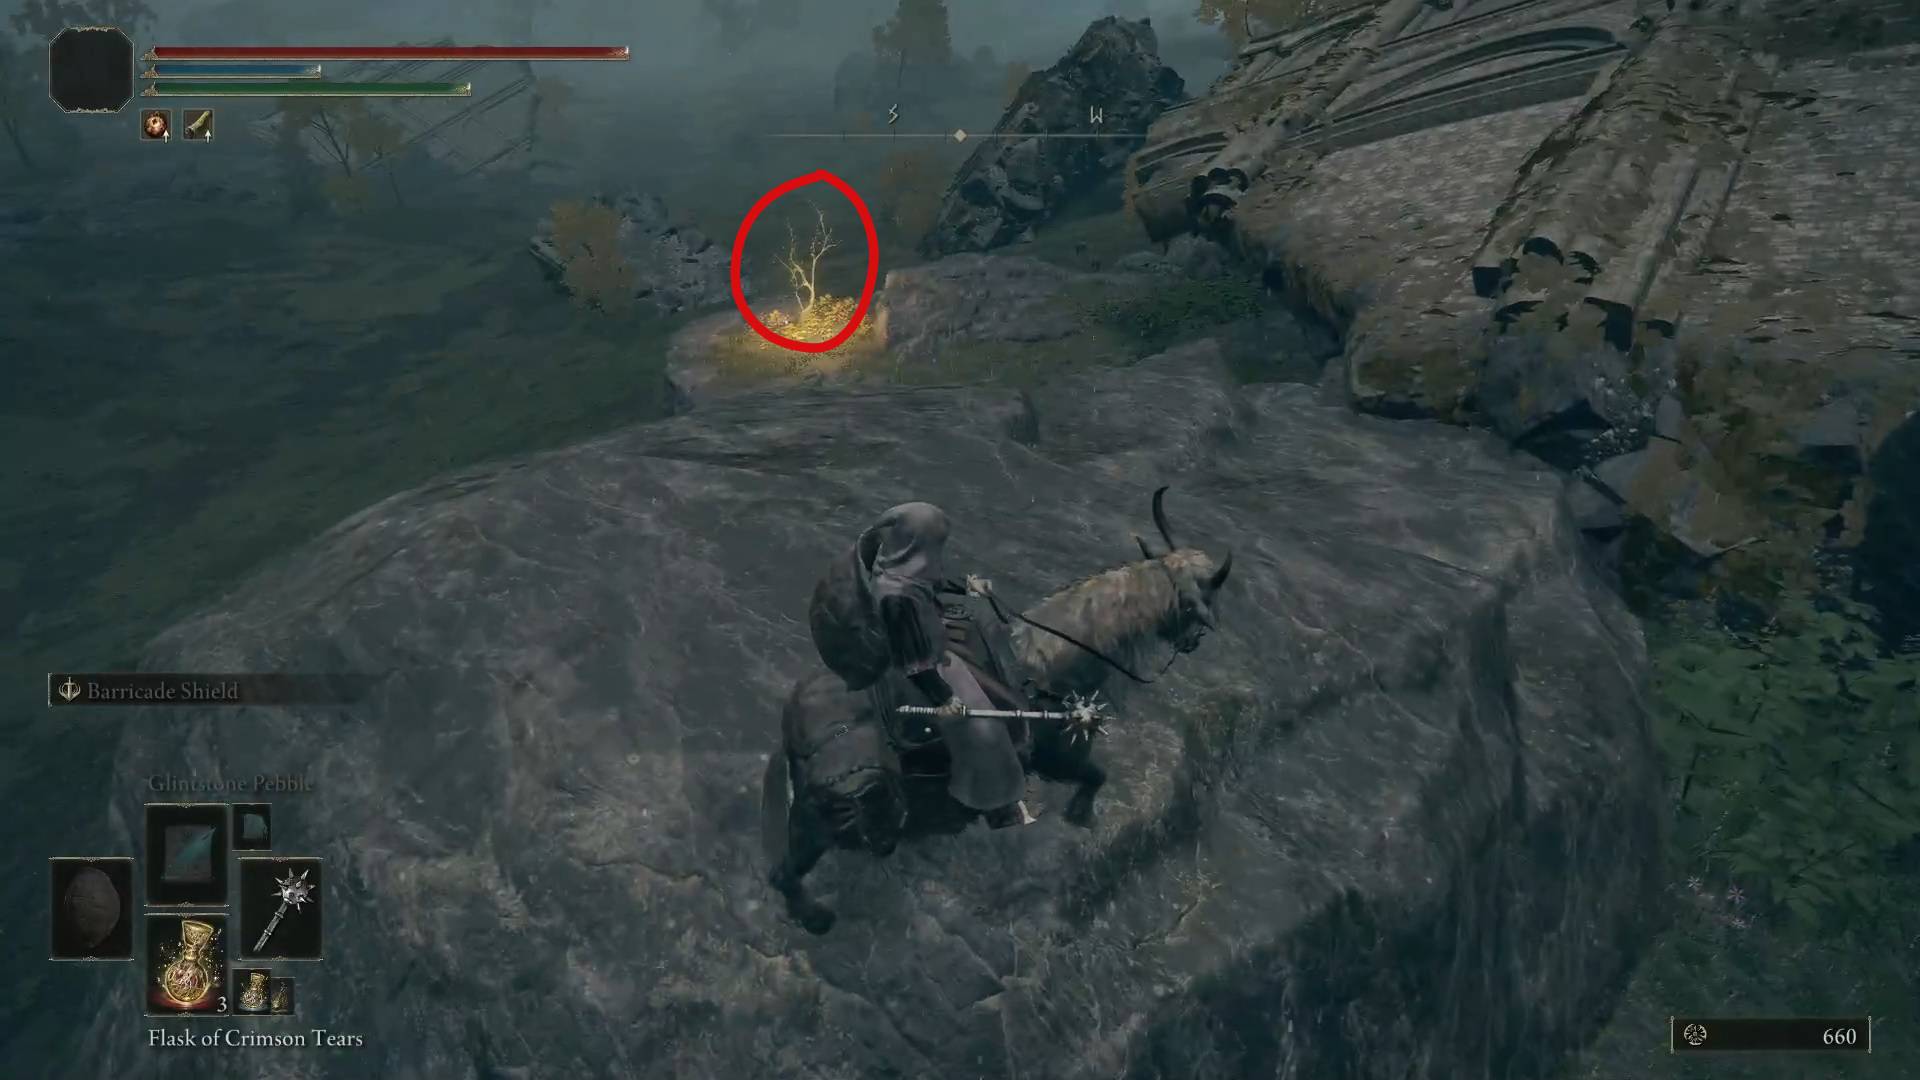
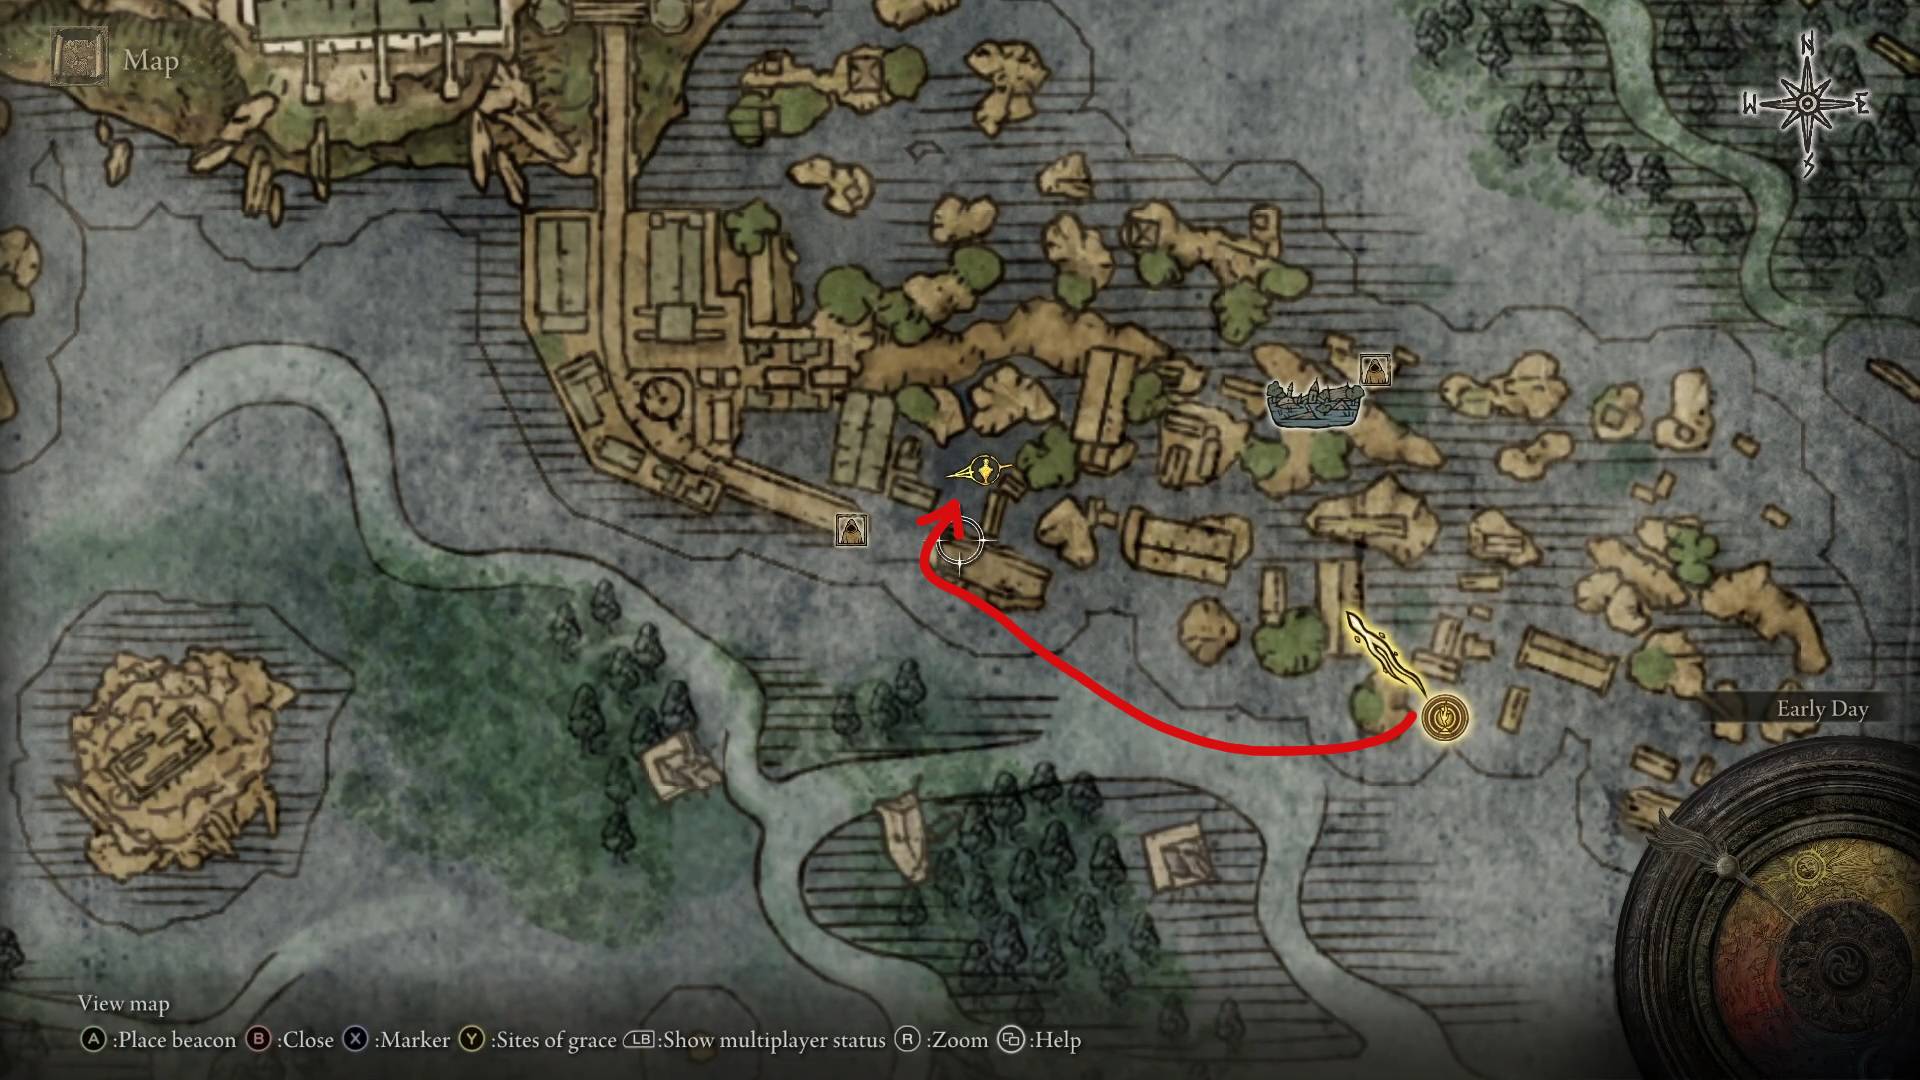
Academy Gate Town
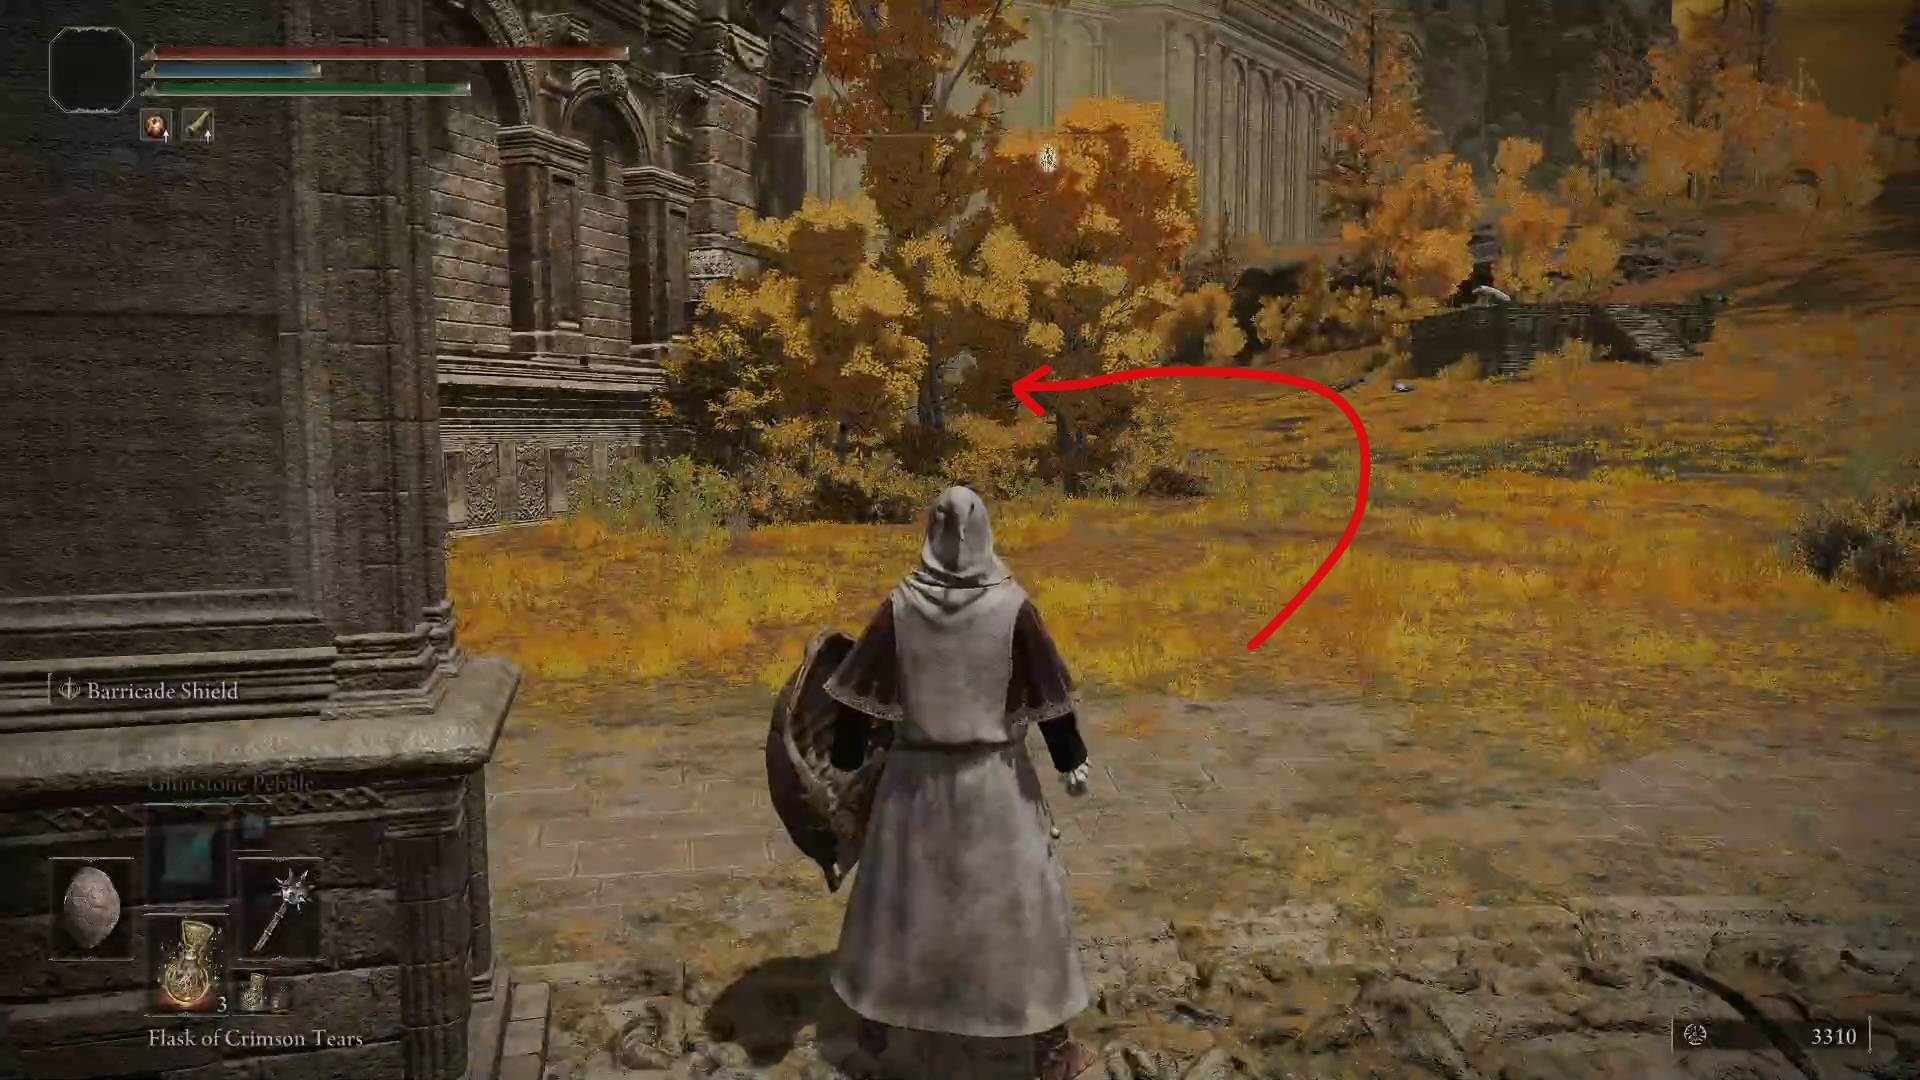
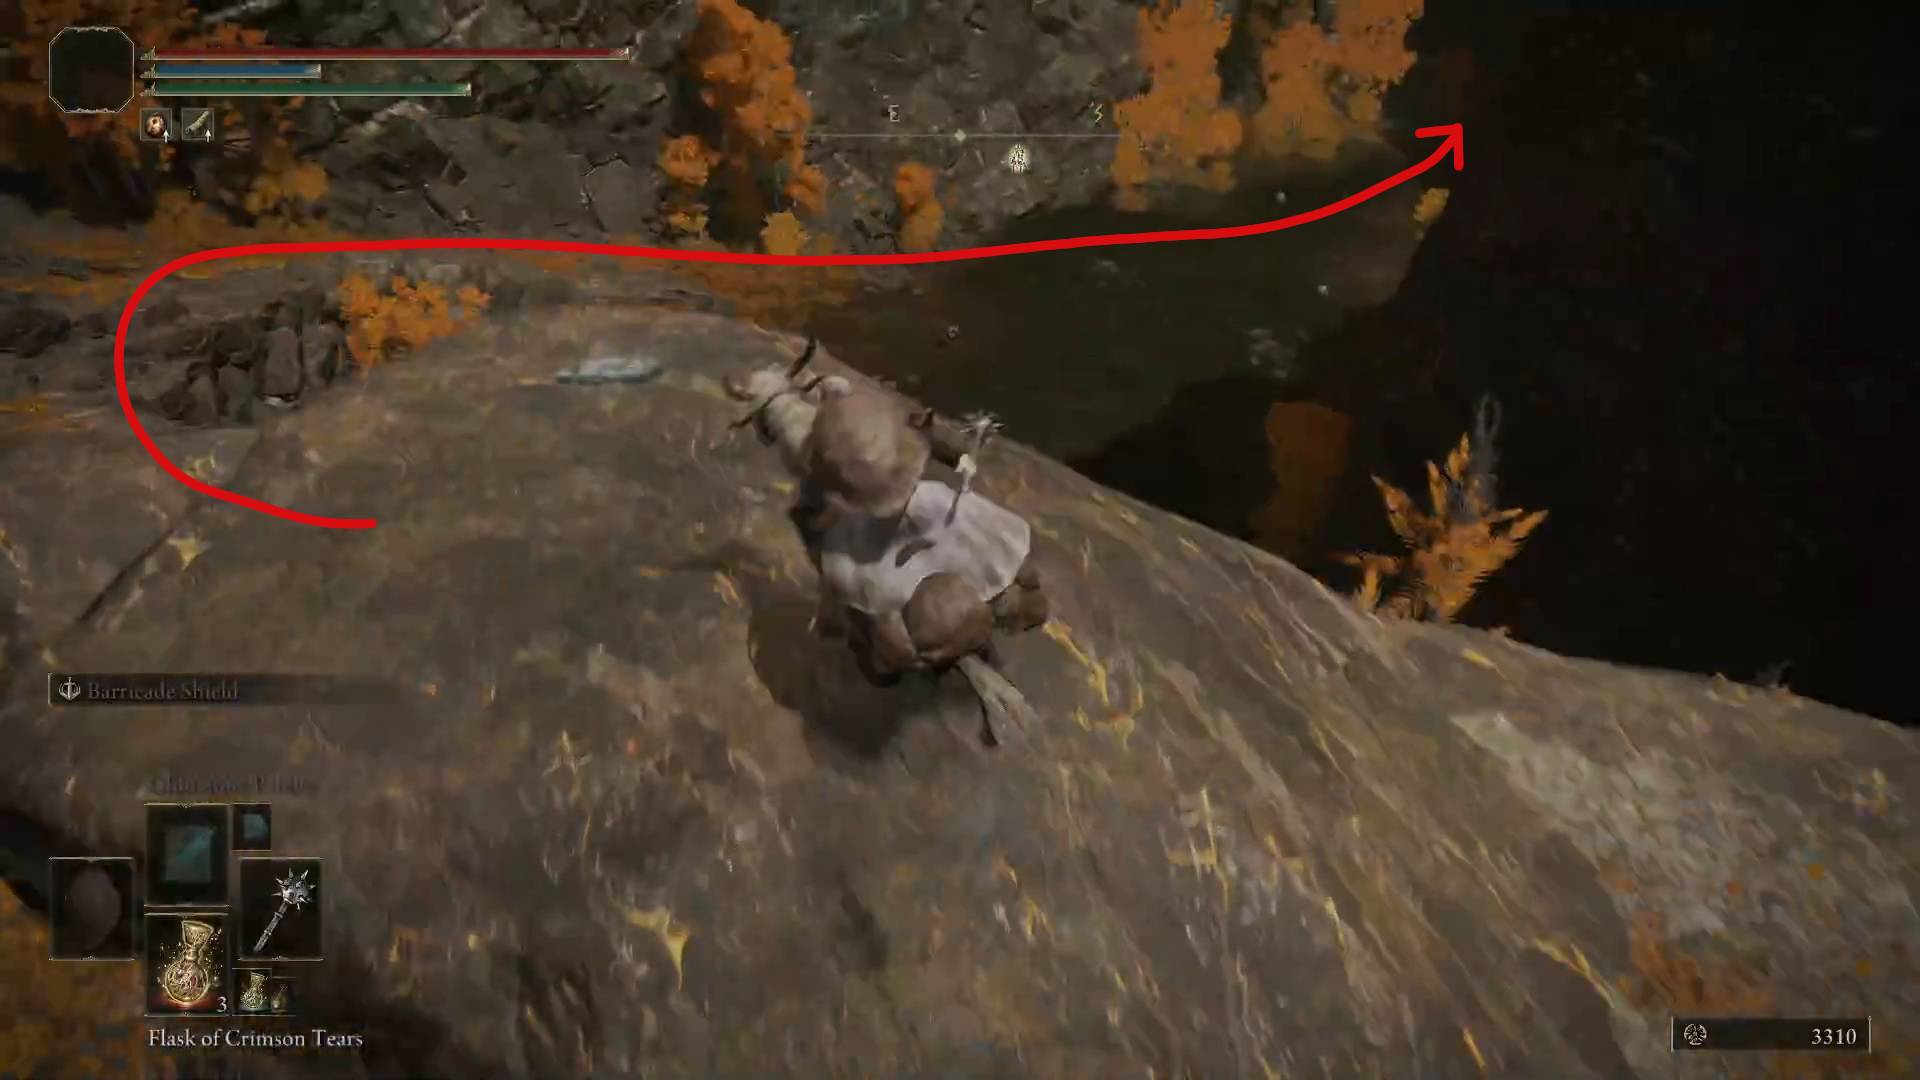
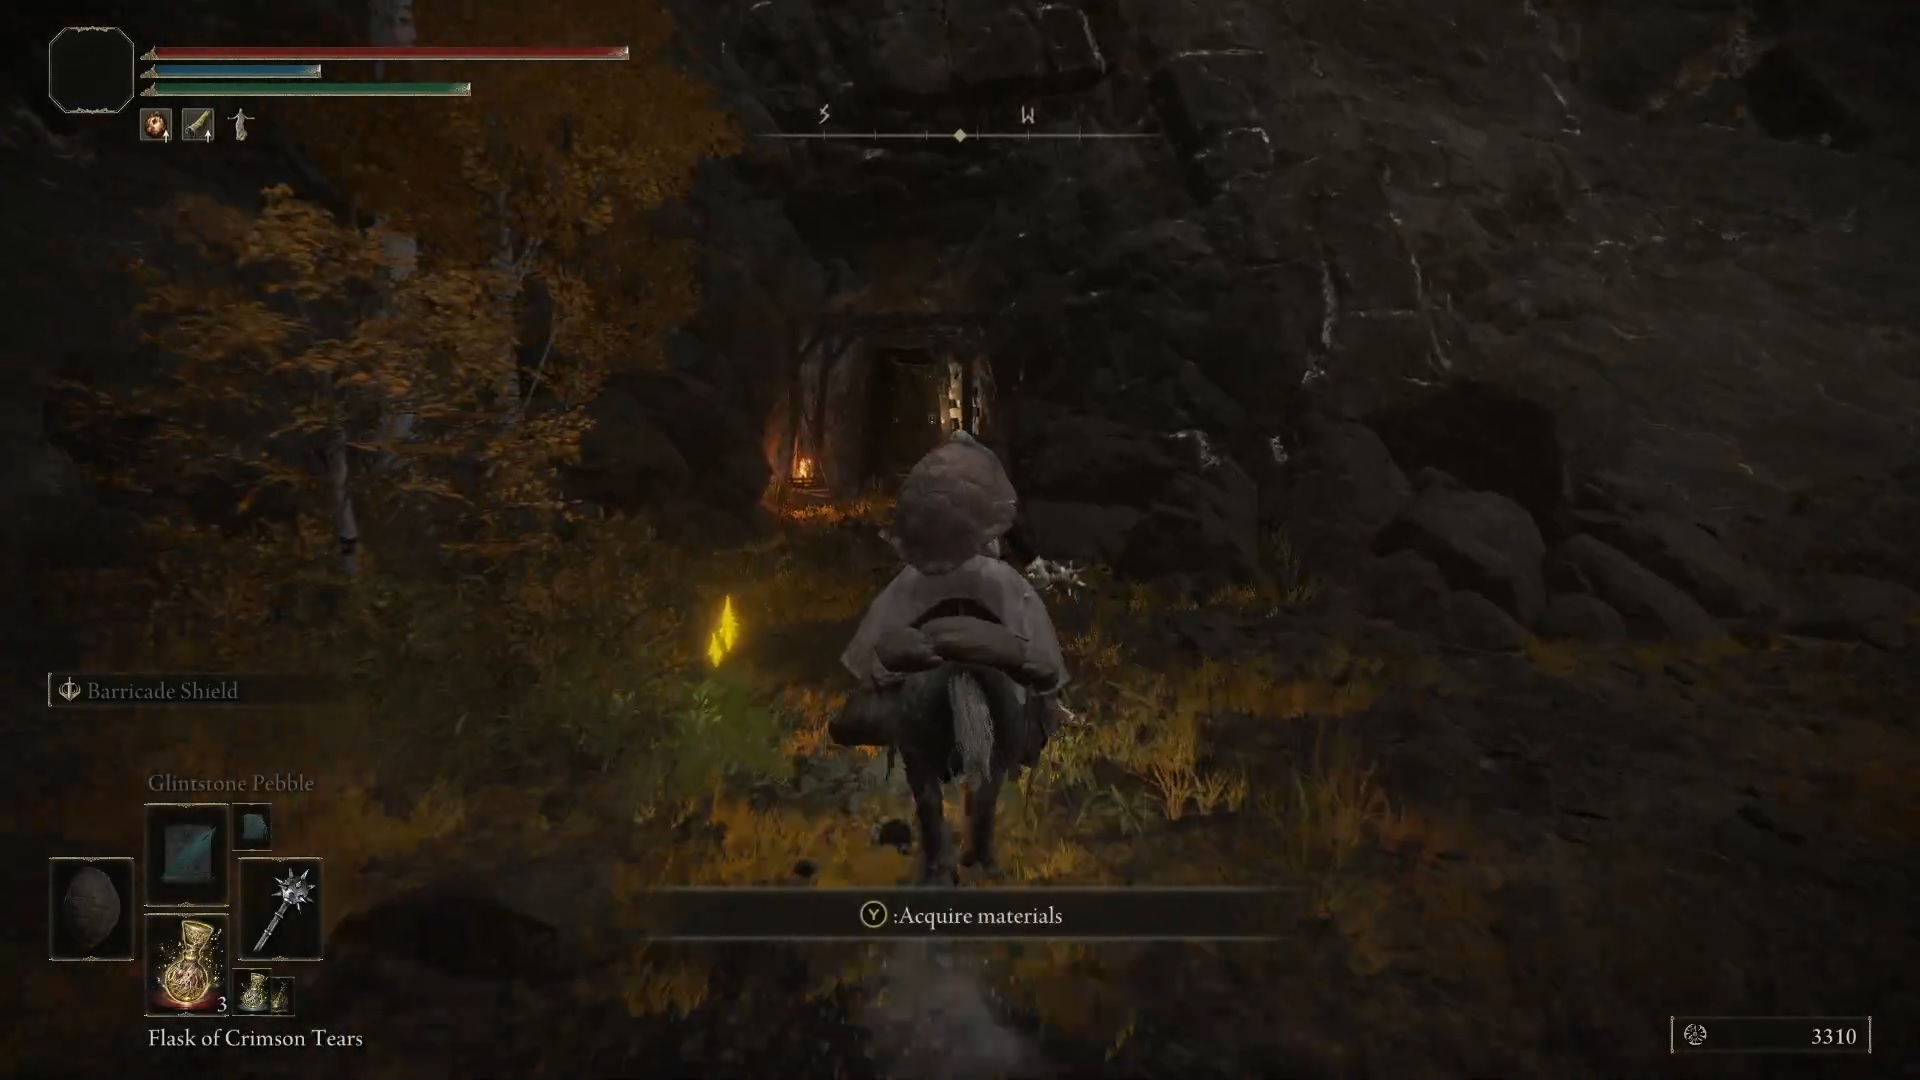
This one’s a bit tricky to find. From the Academy Gate Town grace, make your way through the ruins heading northeast until you find a seed. It can be very easy to get turned around there, so just use our map for guidance as to where you need to end up.
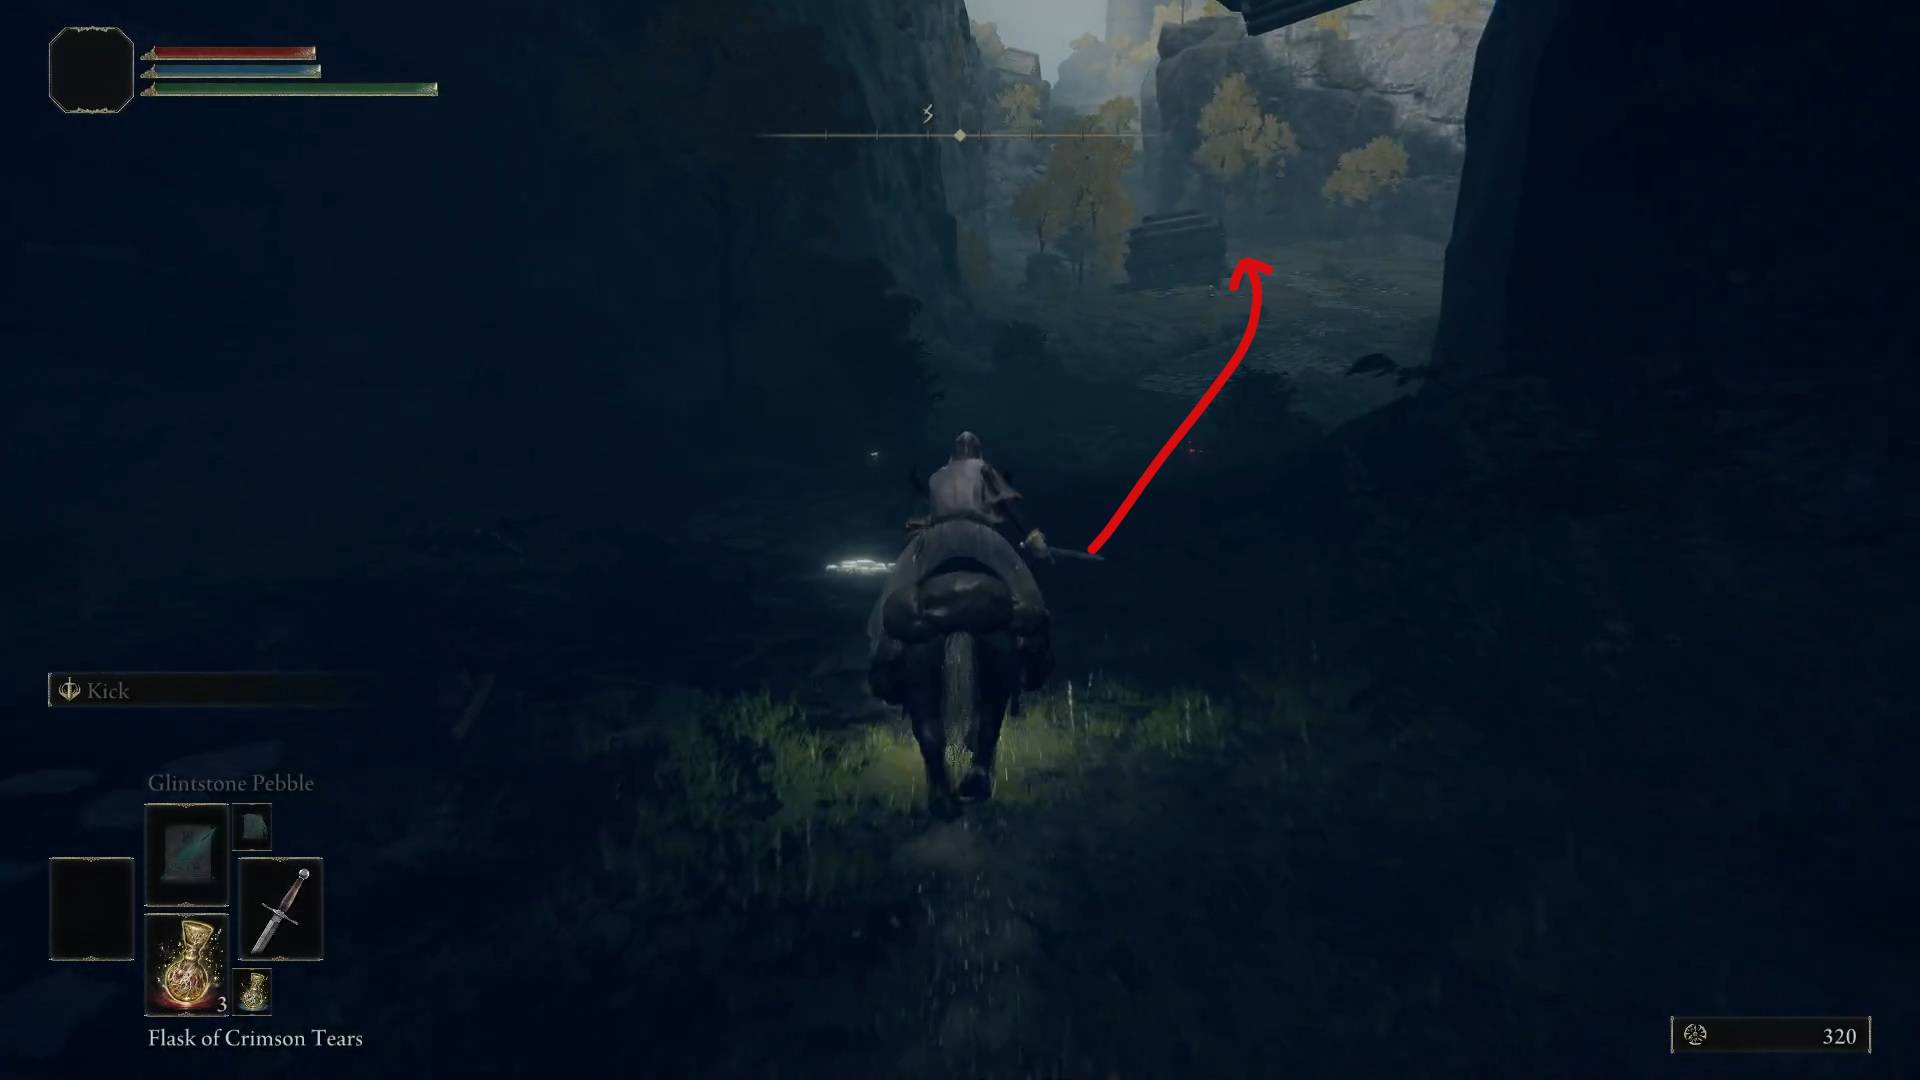
The Ravine
To get to this seed, you’ll need to head into the Ravine in the northern Liurnia of the Lakes. Starting at The Ravine grace, keep riding north and you can’t miss it. Or if you’ve already been there, start at the Ravine-Veiled Village grace and move east.
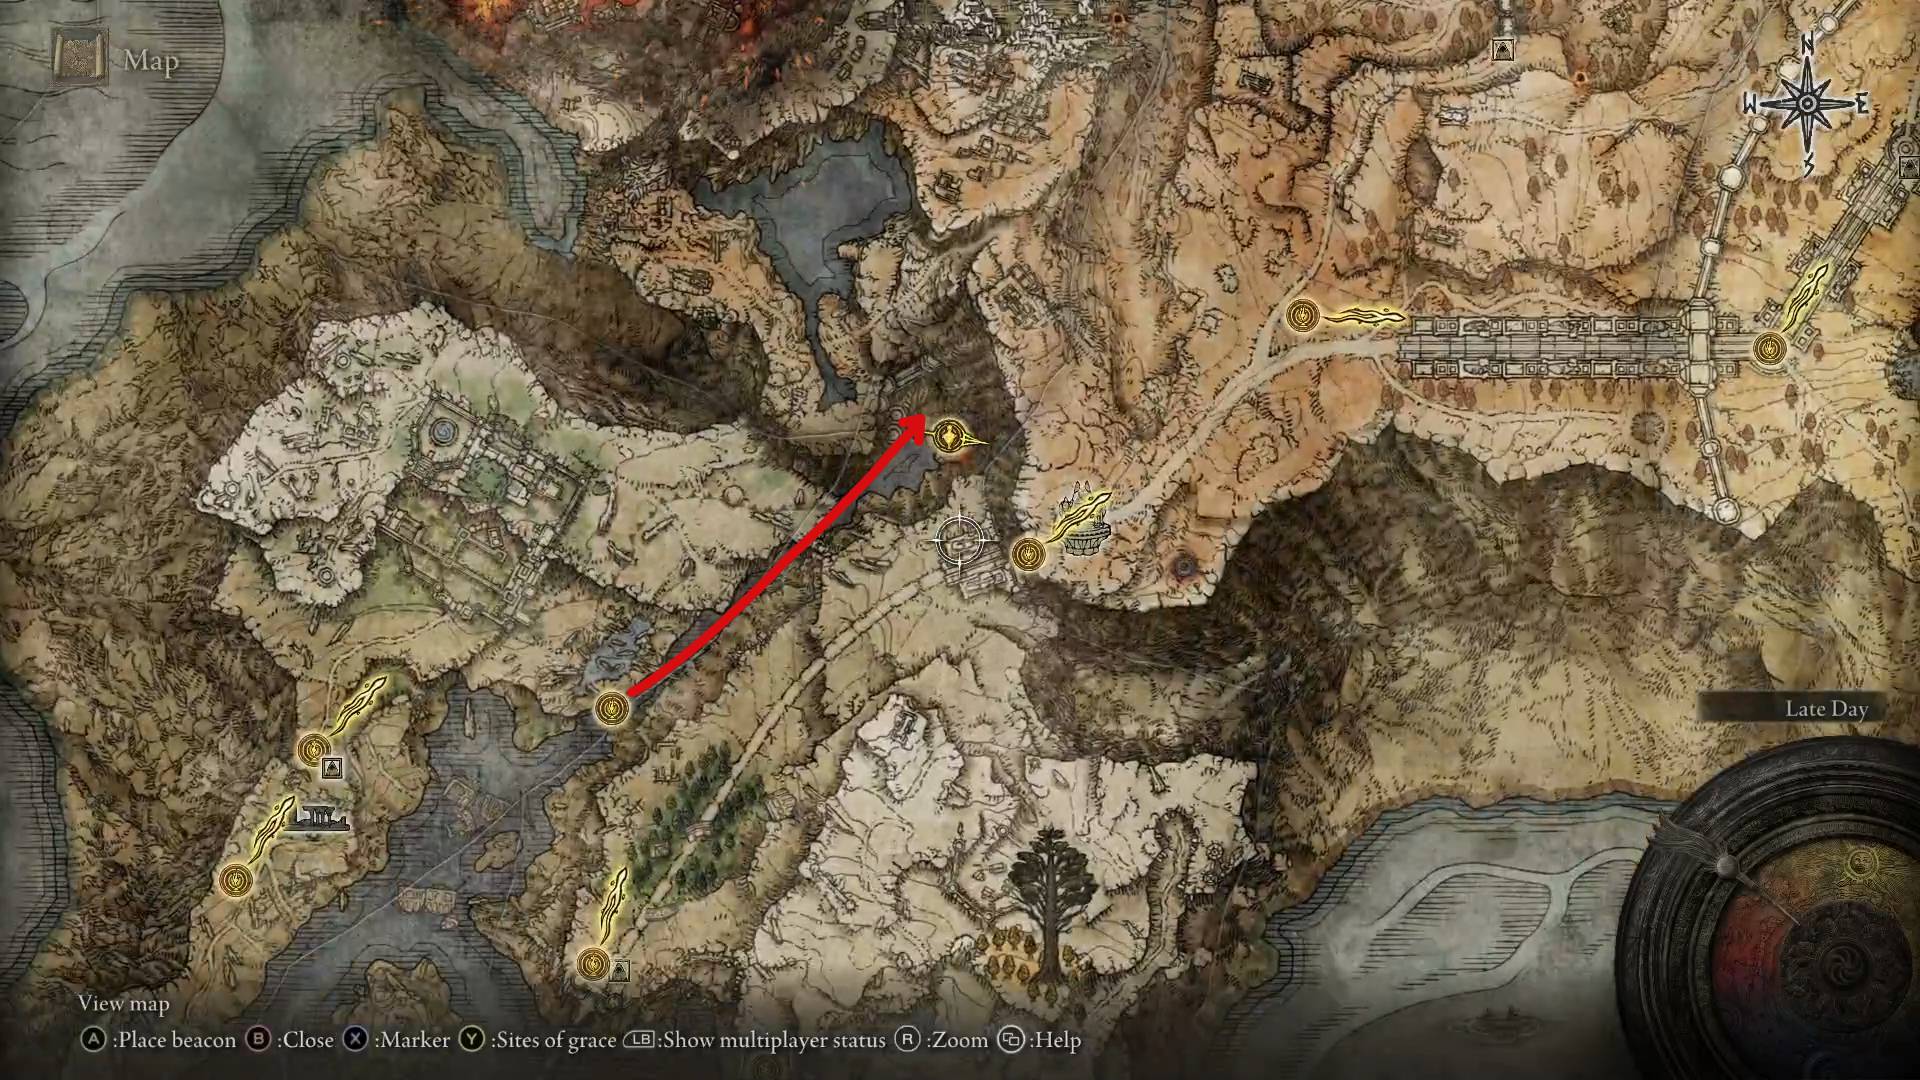
Road to Redmane
Starting at the Caelid Highway South grace, ride along the road past the angry dragon, then turn south towards Redmane Castle roughly halfway there, you’ll find a golden seed.
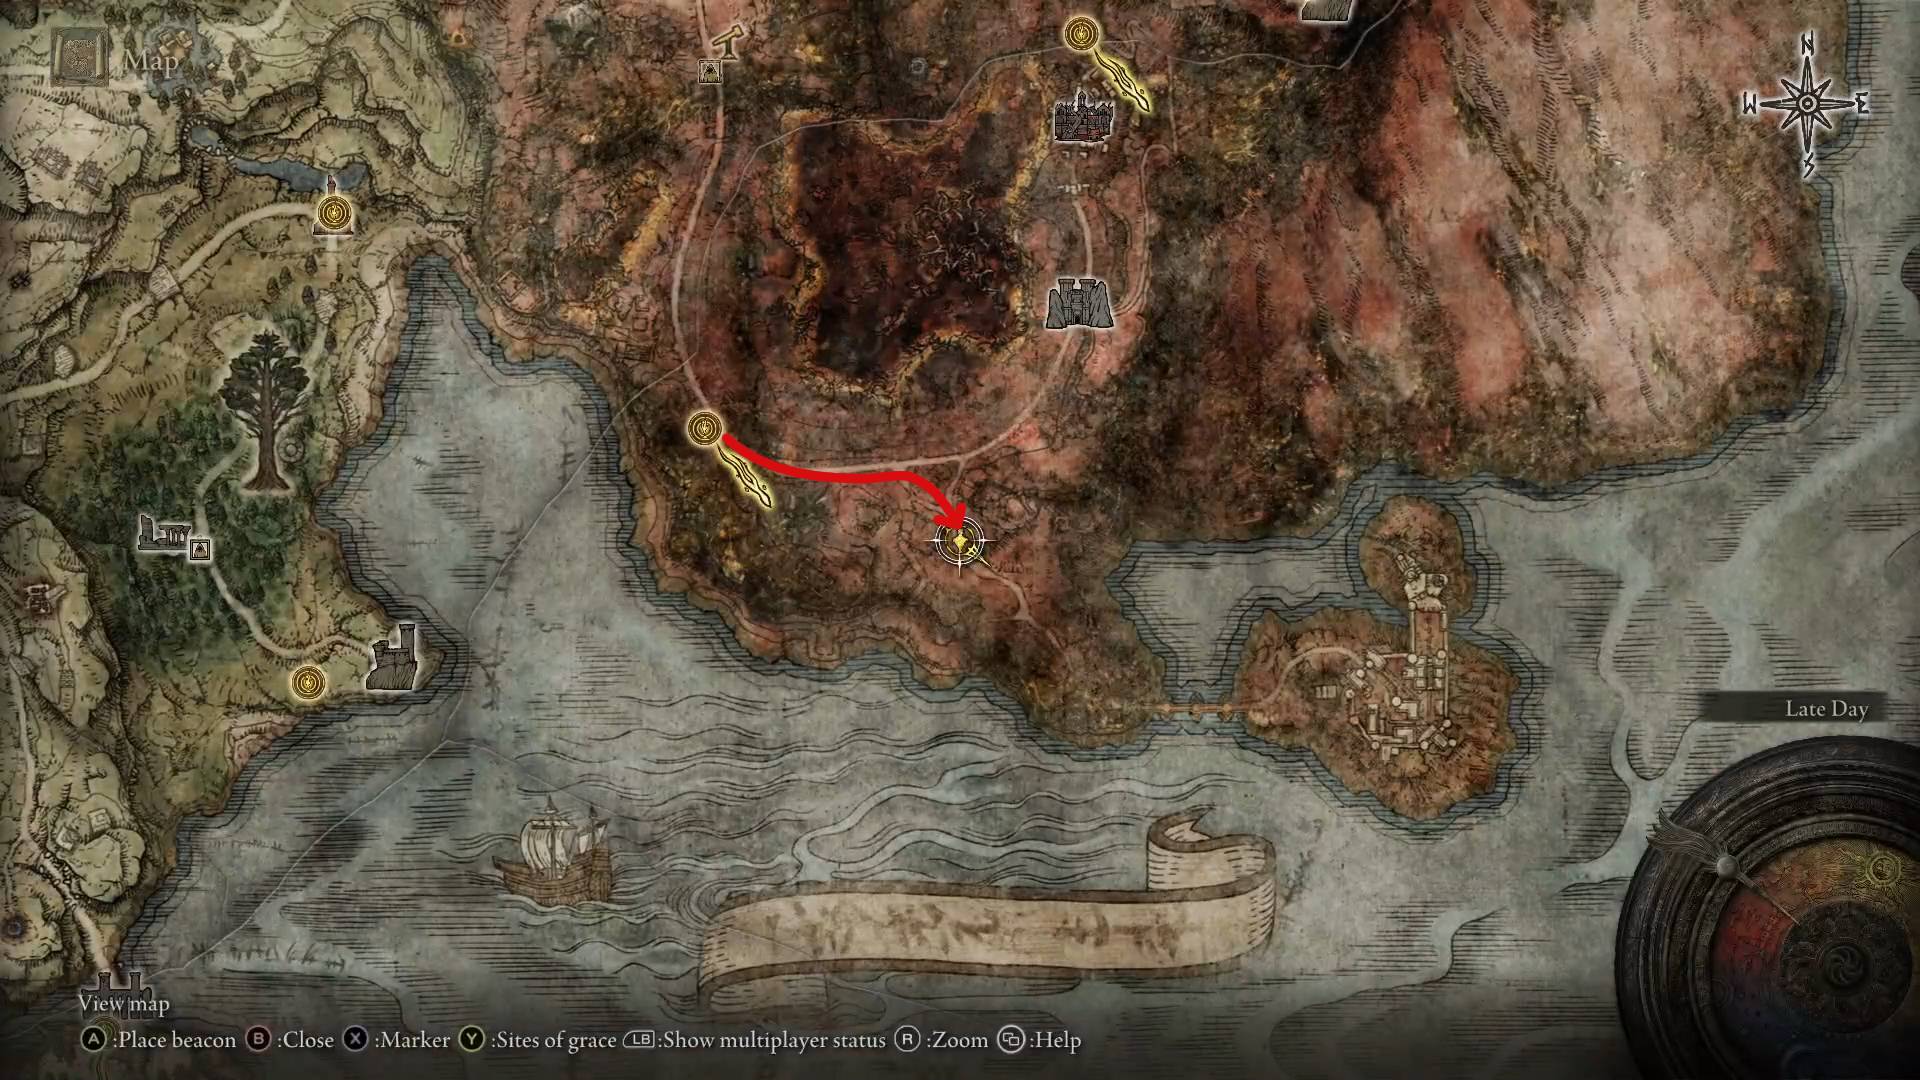
Sellia, Town of Sorcery
Starting at the Sellia Backstreets grace, walk through the gate south, or jump over it if you’ve not lifted the seal yet, and you’ll find a seed there.
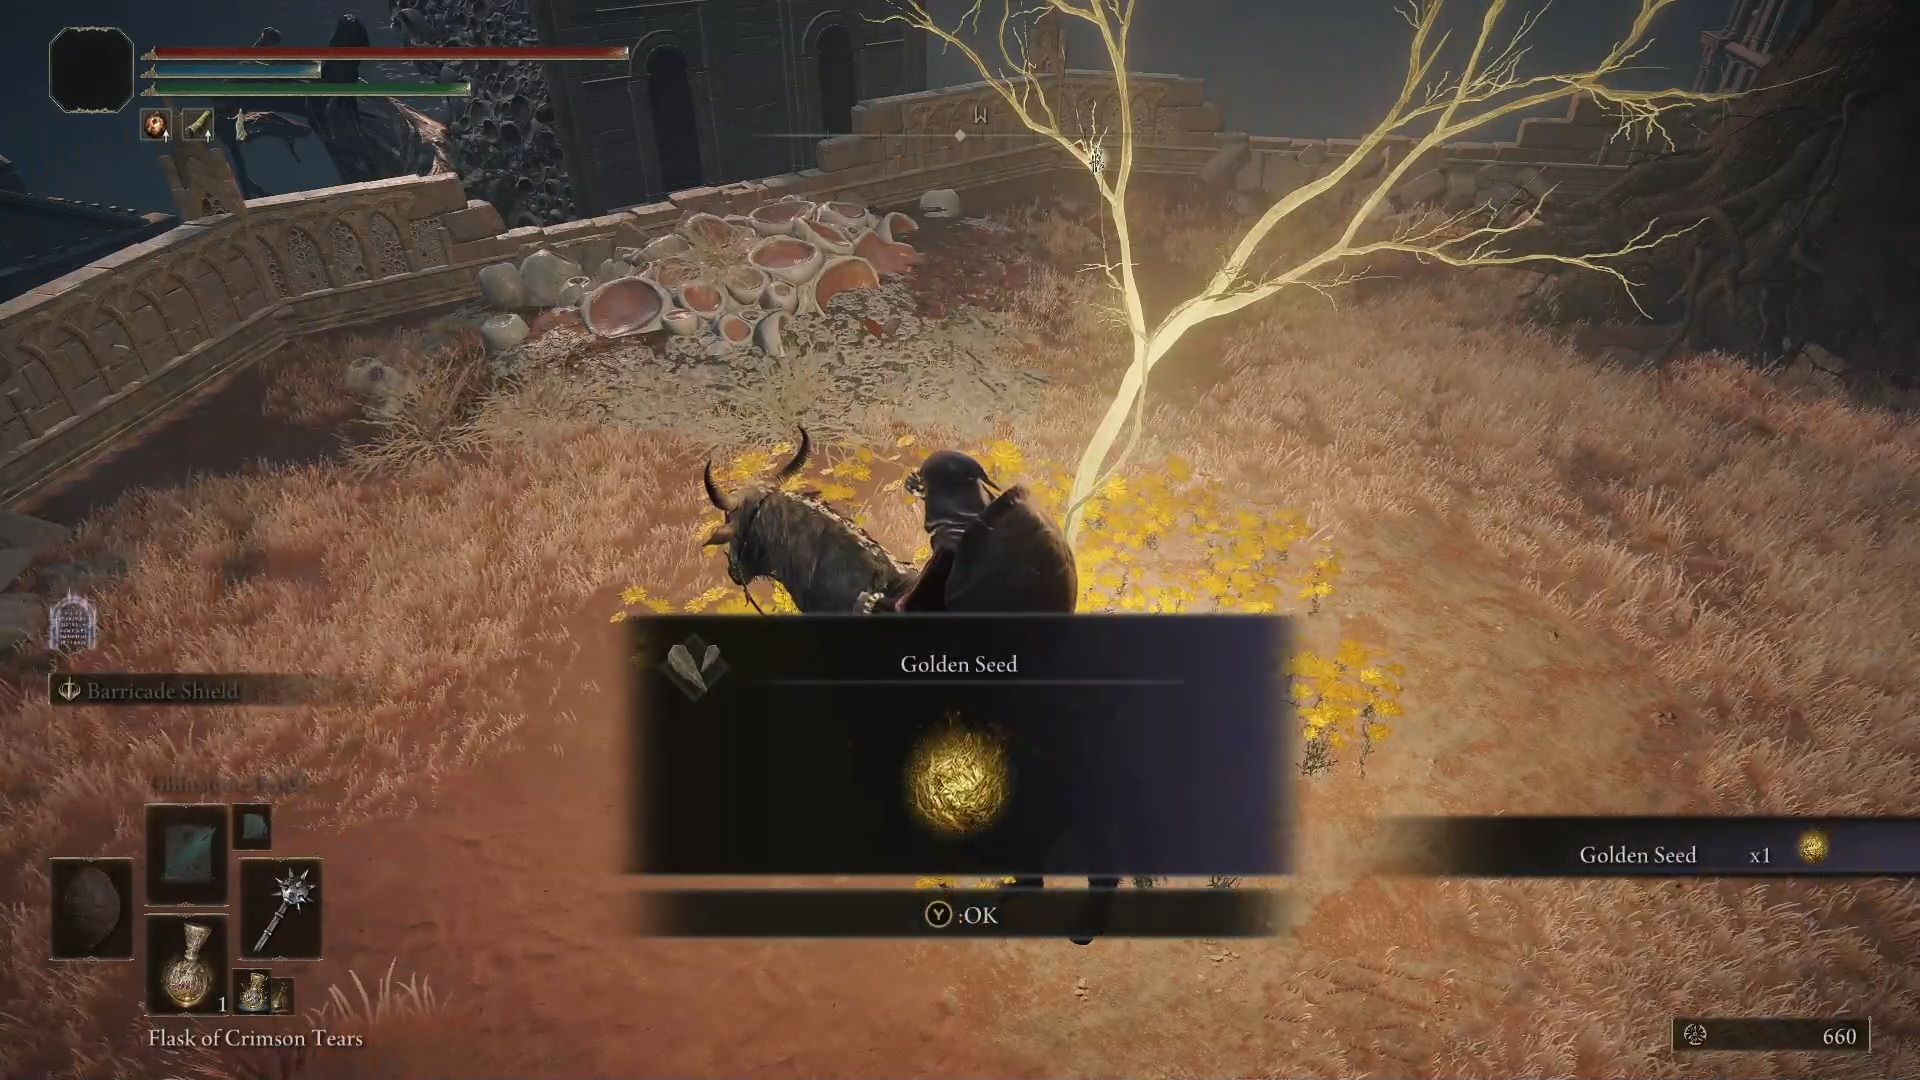
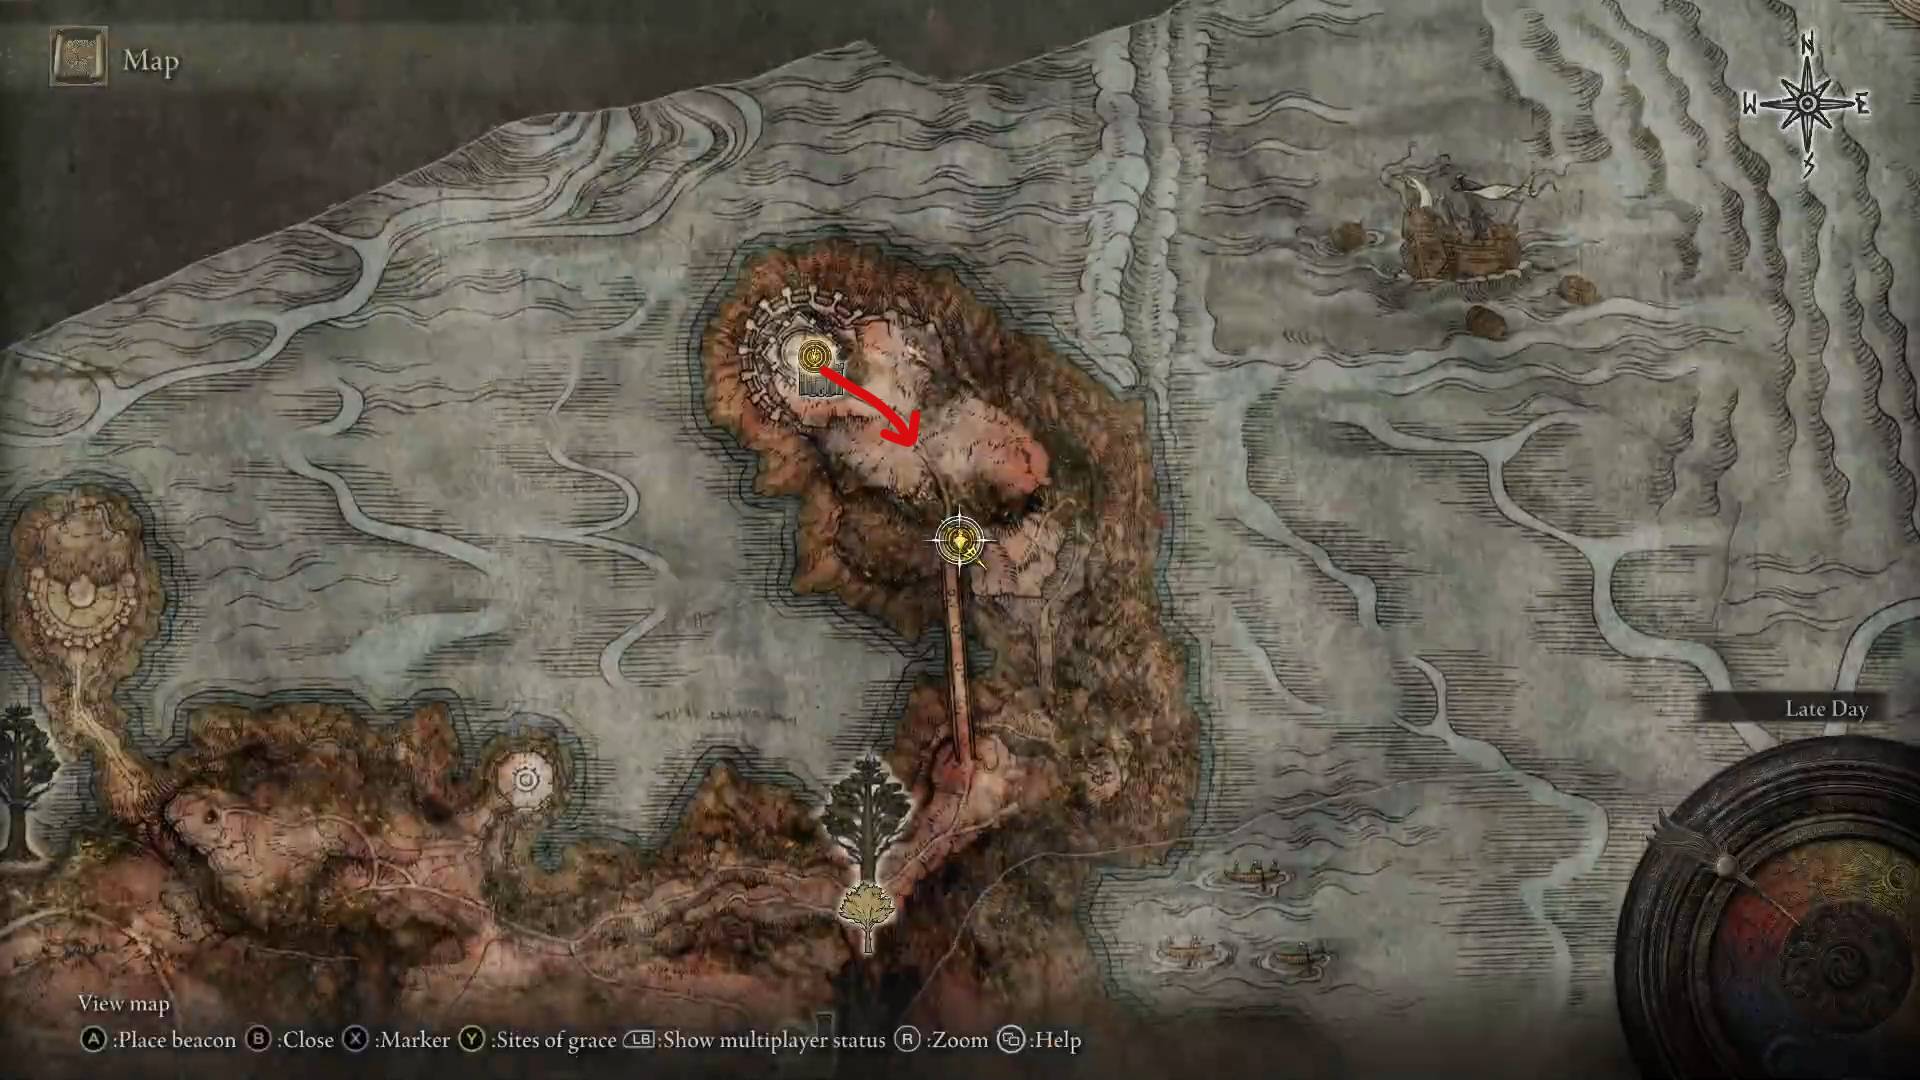
Bestial Sanctum
From the Bestial Sanctum grace, simply walk outside while avoiding the big gargoyle guarding the doors, and head down the hill to find a seed. Just be careful not to get jumped by the Vulgar Militia patrolling the grounds.
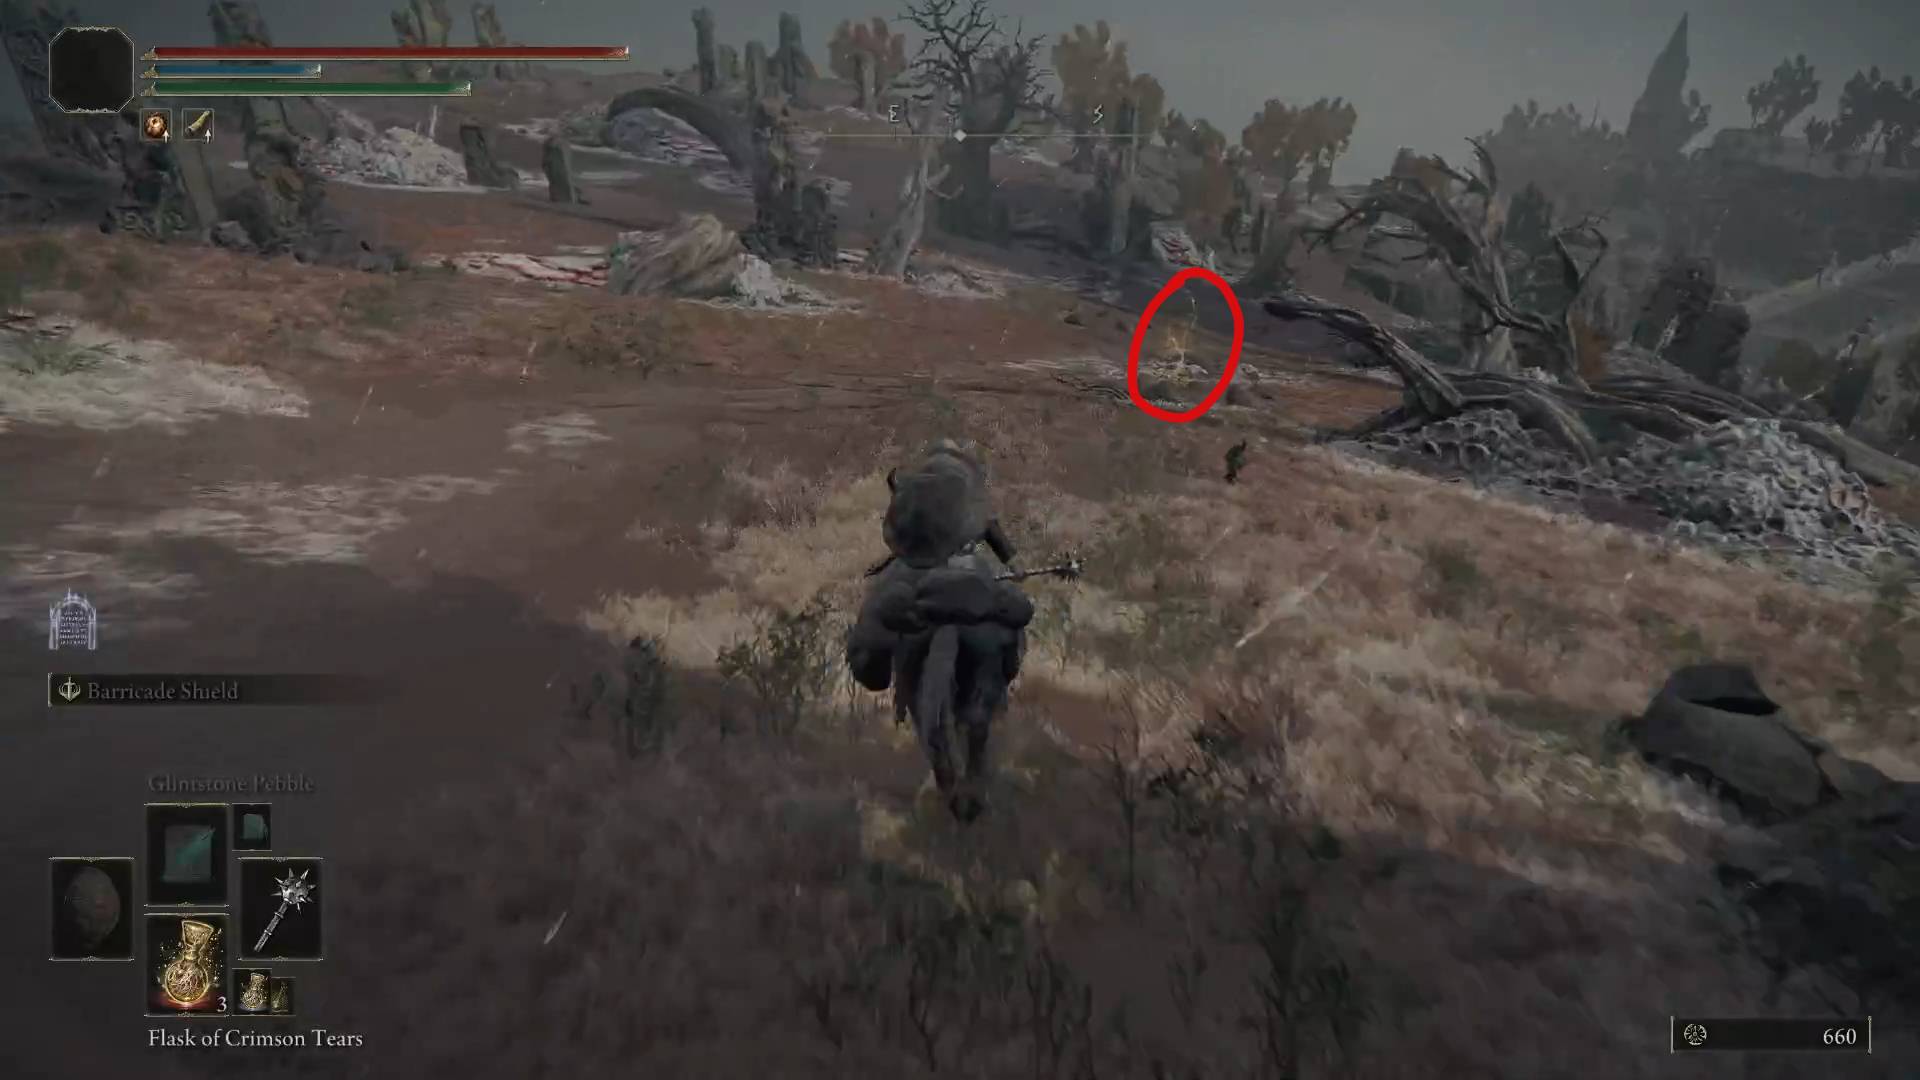
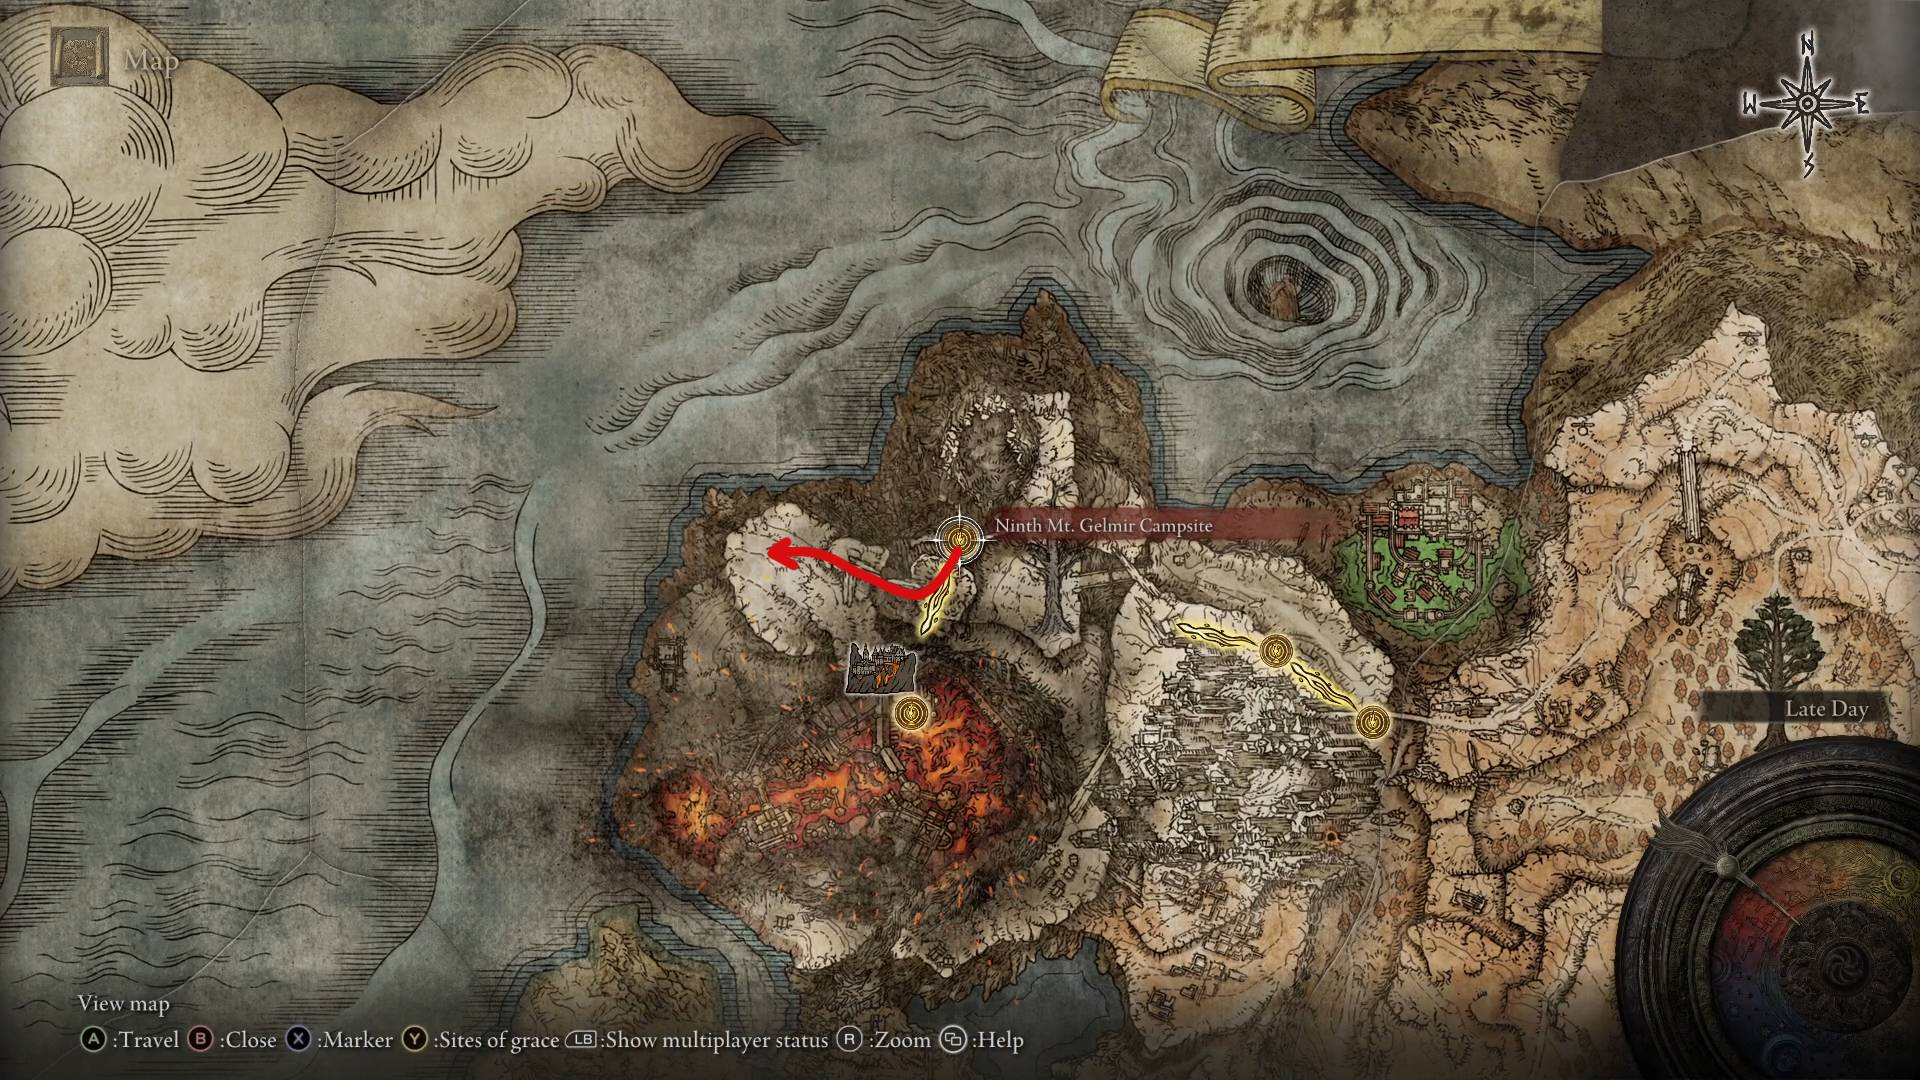
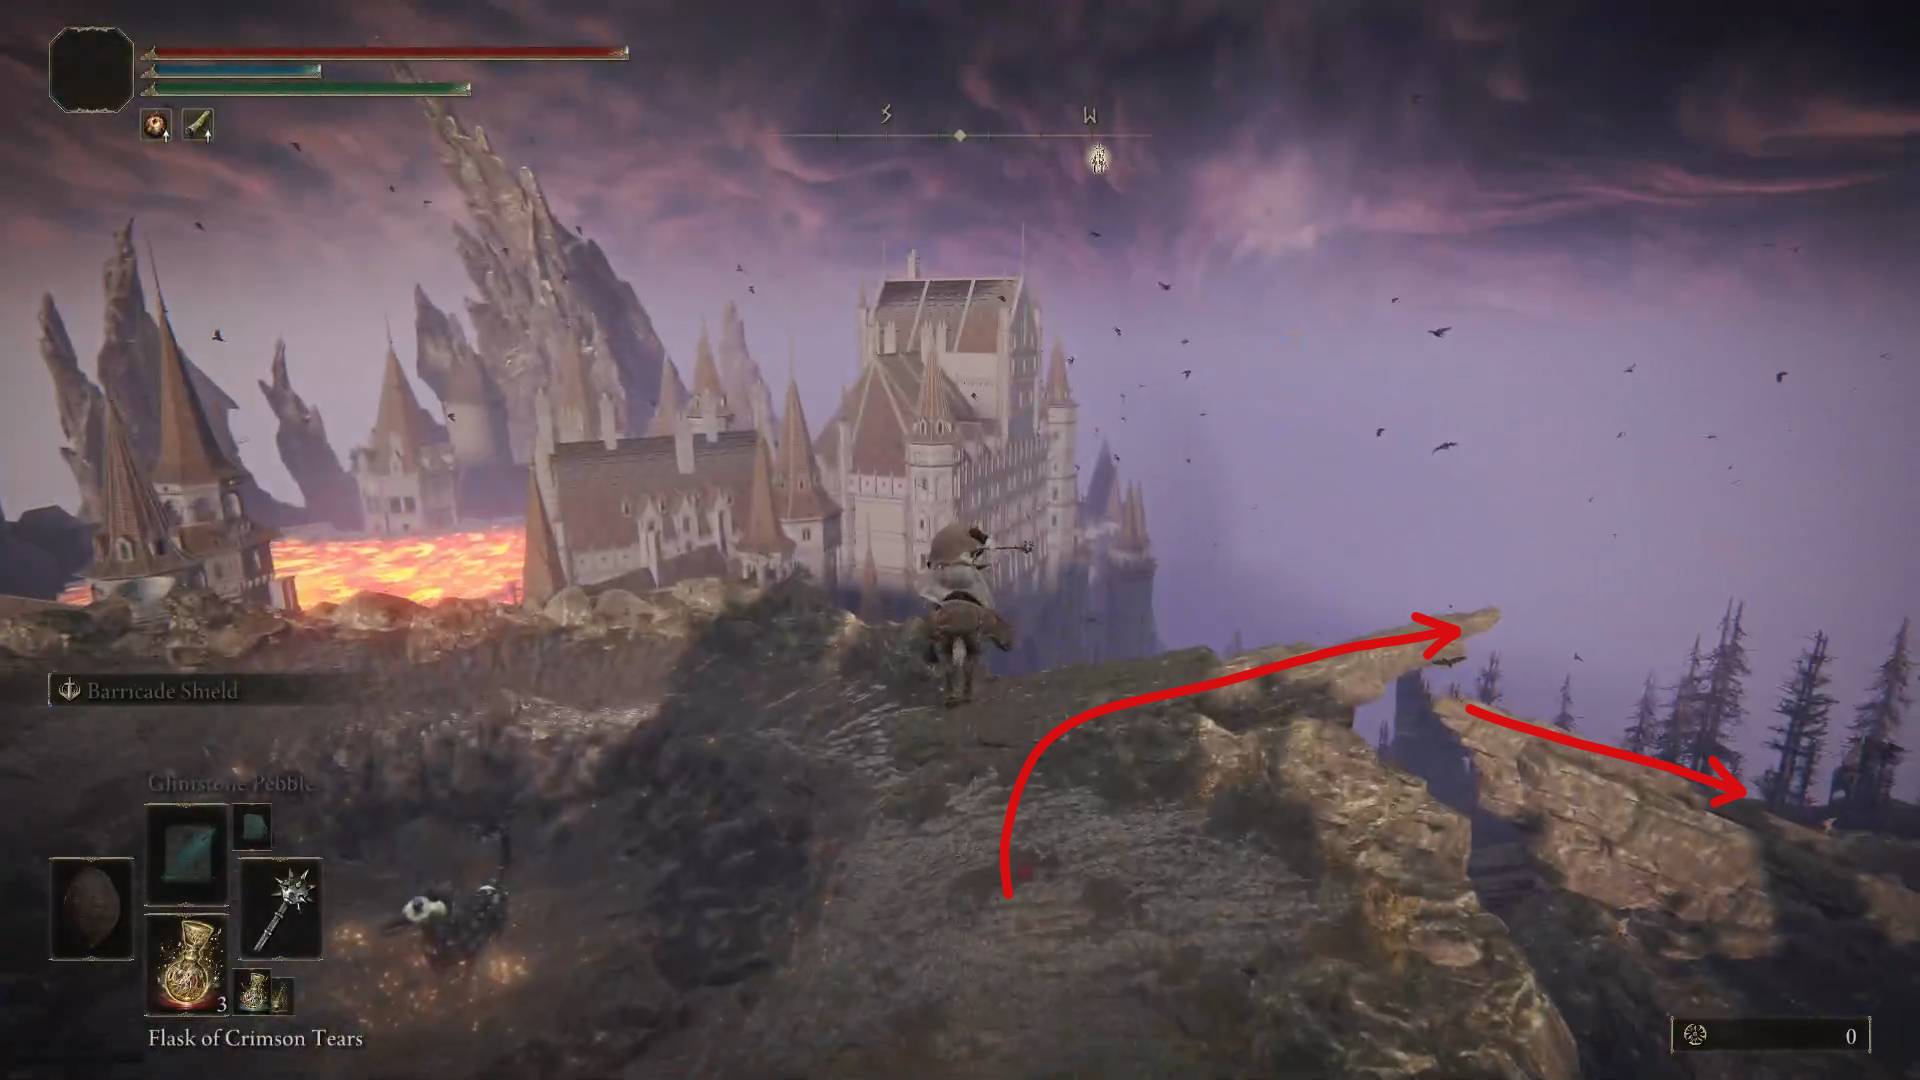
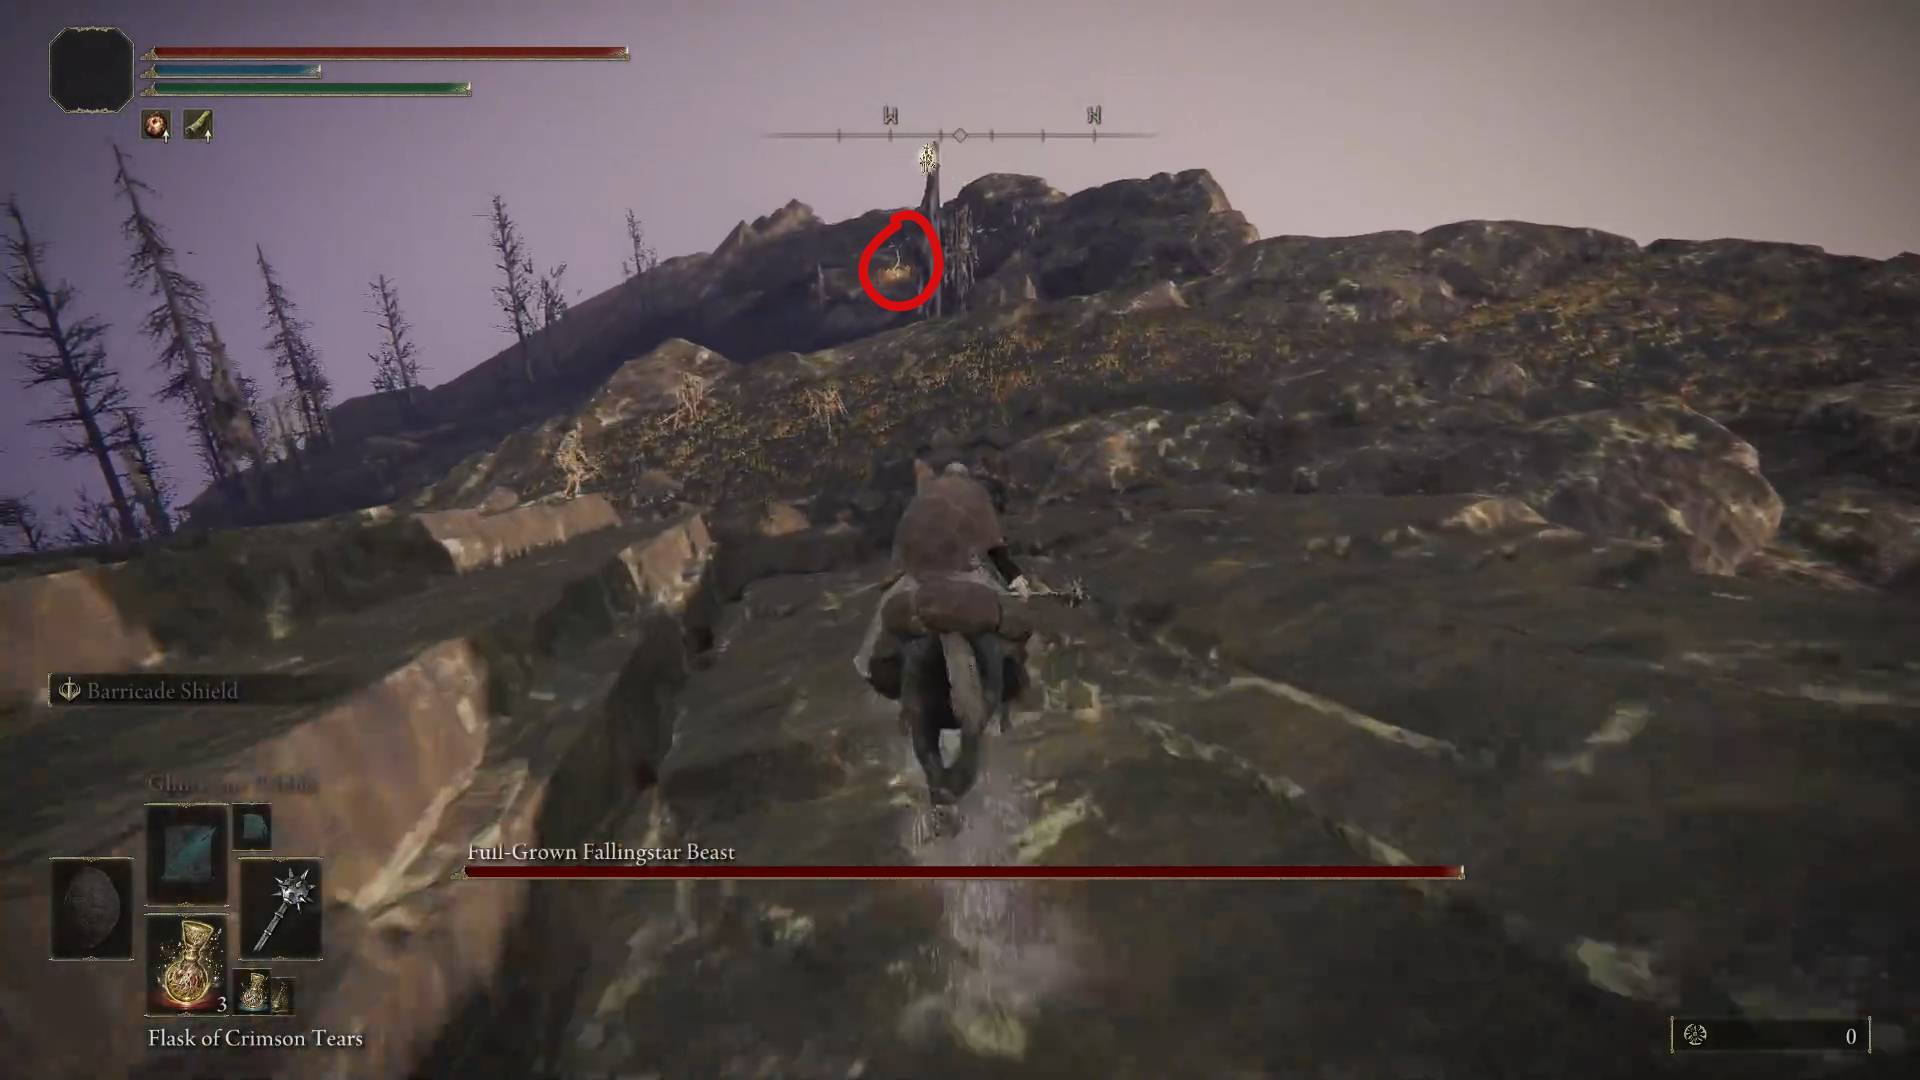
Mt. Gelmir
This seed is a bit tricky and will require you to run for it. Starting at the Ninth Mt. Gelmir Campsite grace, jump into the Spiritspring that takes you to the Fallingstar Beast fight. Ignore the beast and just head towards the broken rock taking you towards the Volcano Manor. As you ride down, you’ll be attacked by various monsters, but just keep riding west, and soon you’ll arrive at the seed location.
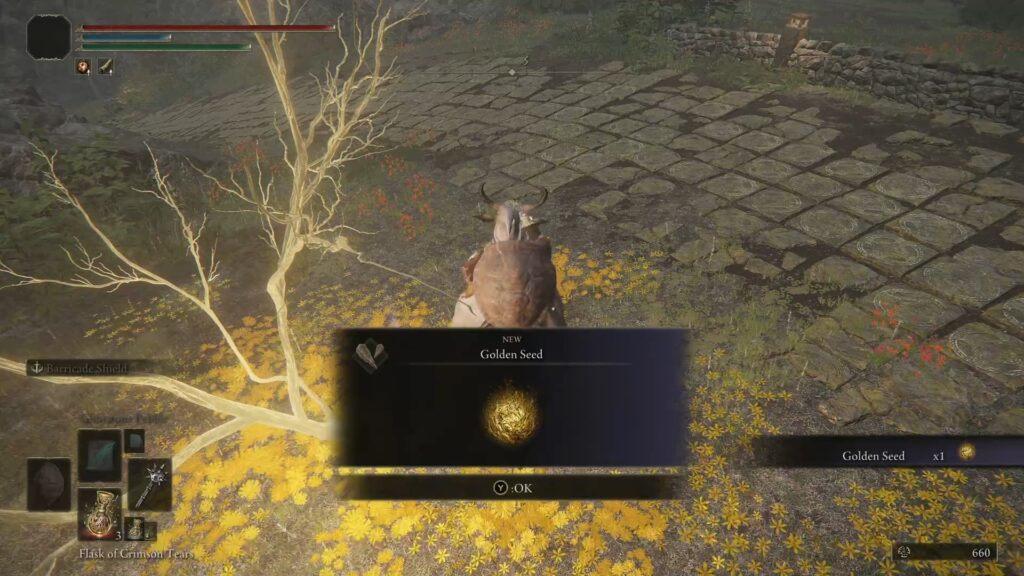
Altus Highway Junction
From the Altus Highway Junction grace, turn north and a seed will be waiting for you right there.
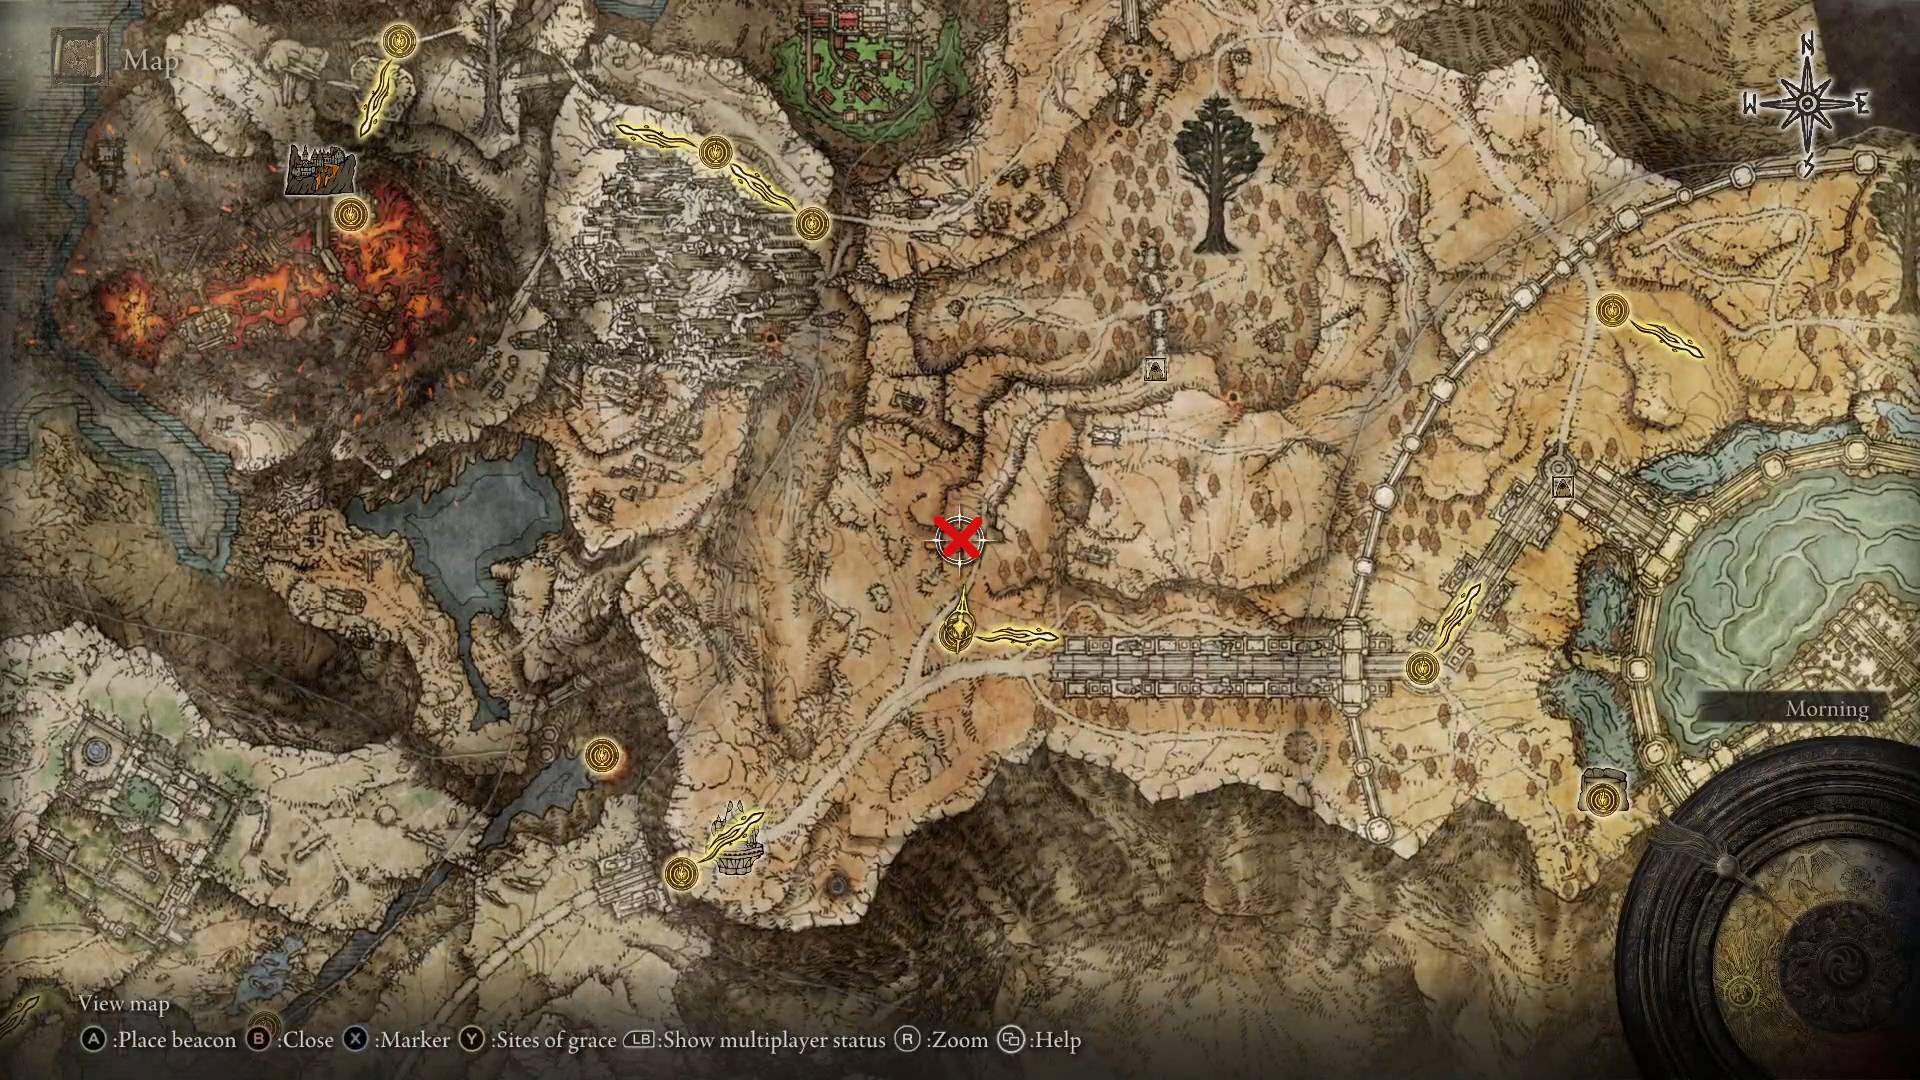
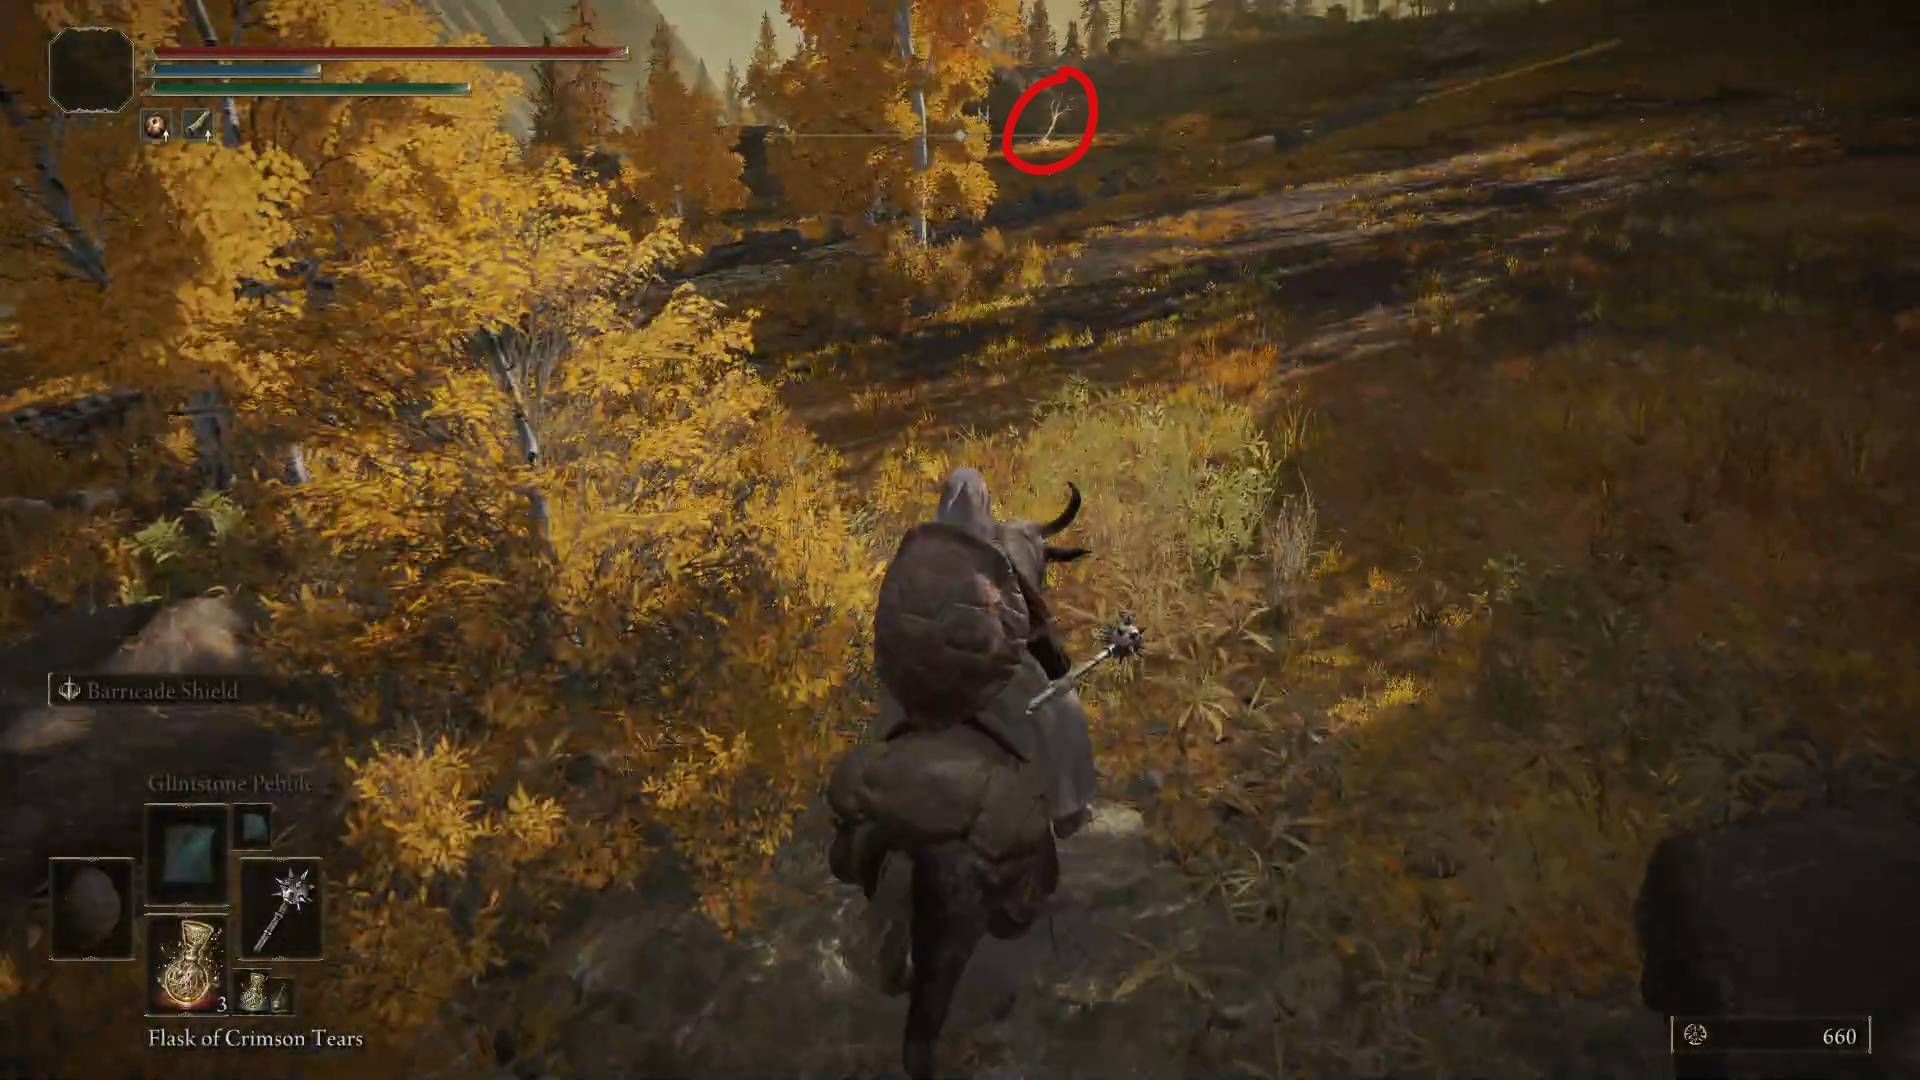
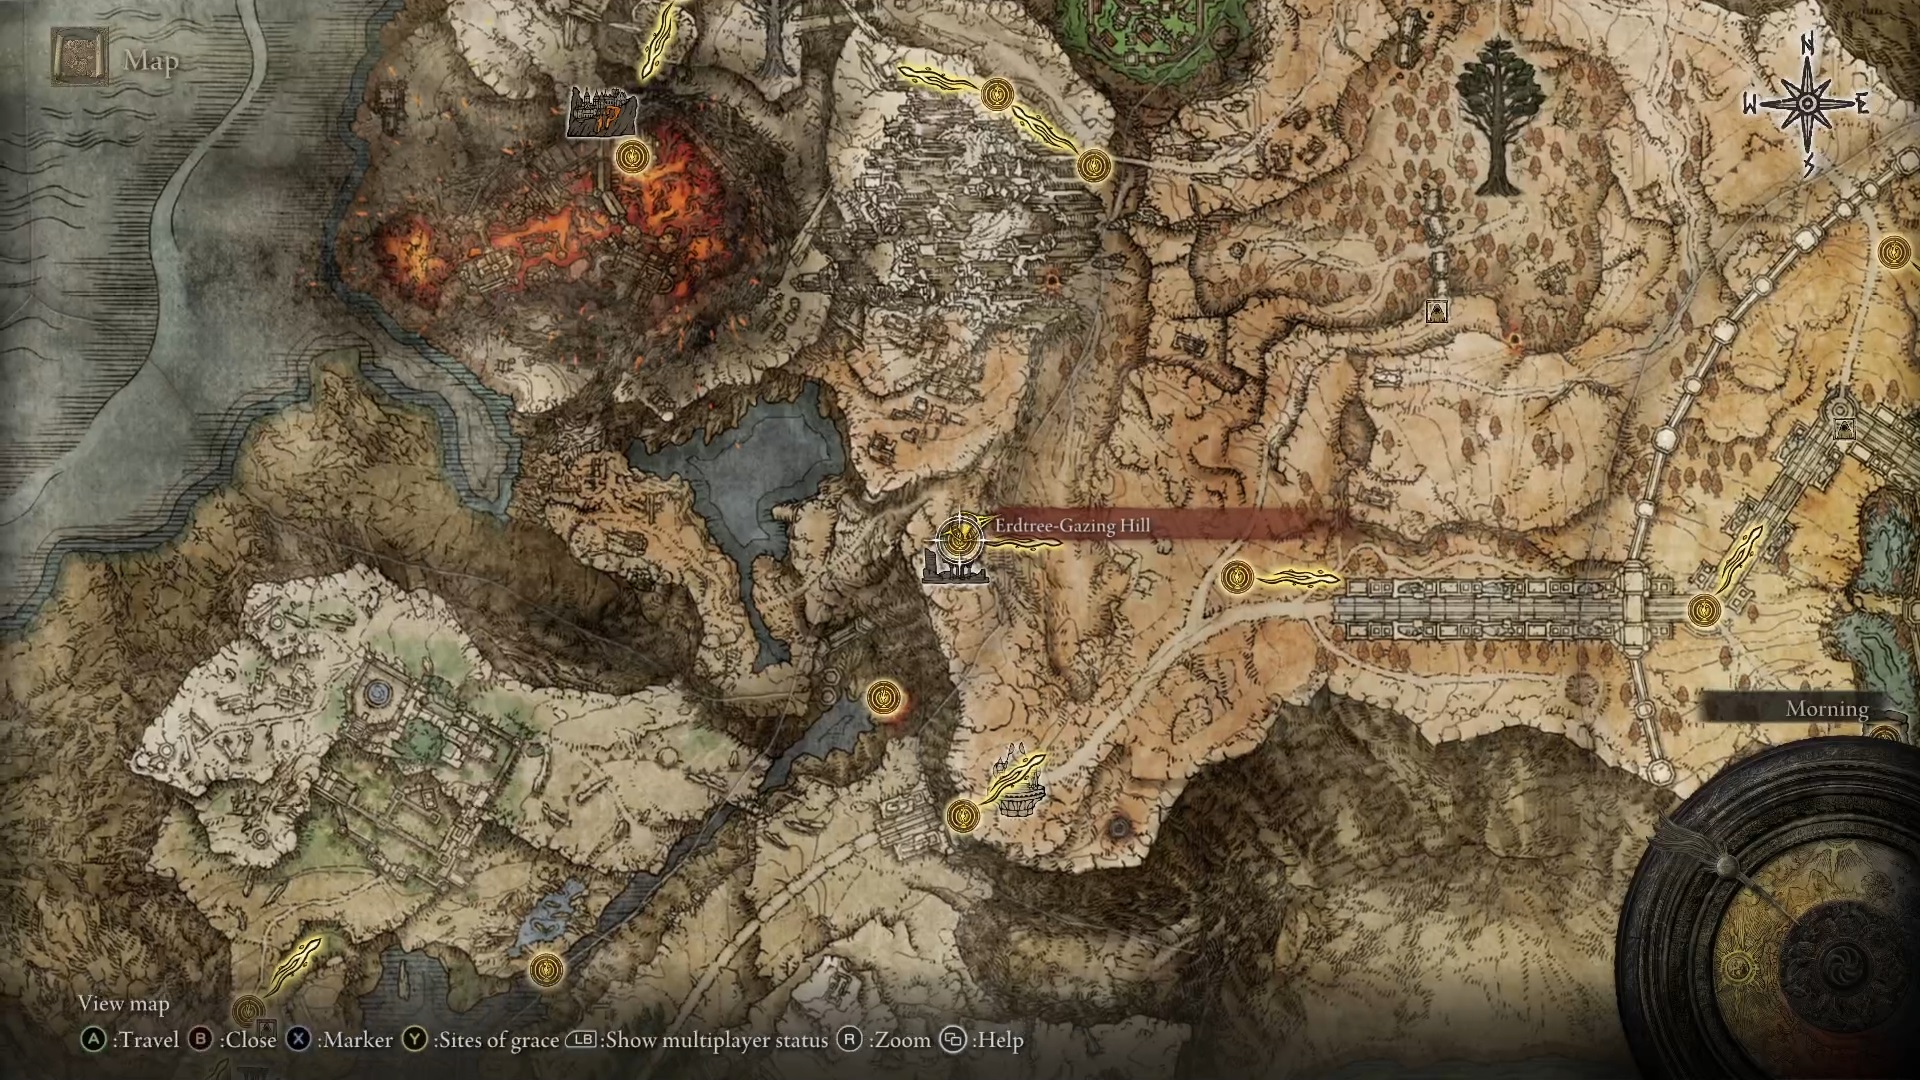
Erdtree-Gazing Hill
If you look towards the east from the Erdtree Gazing Hill grace, you won’t be able to miss a seed there.
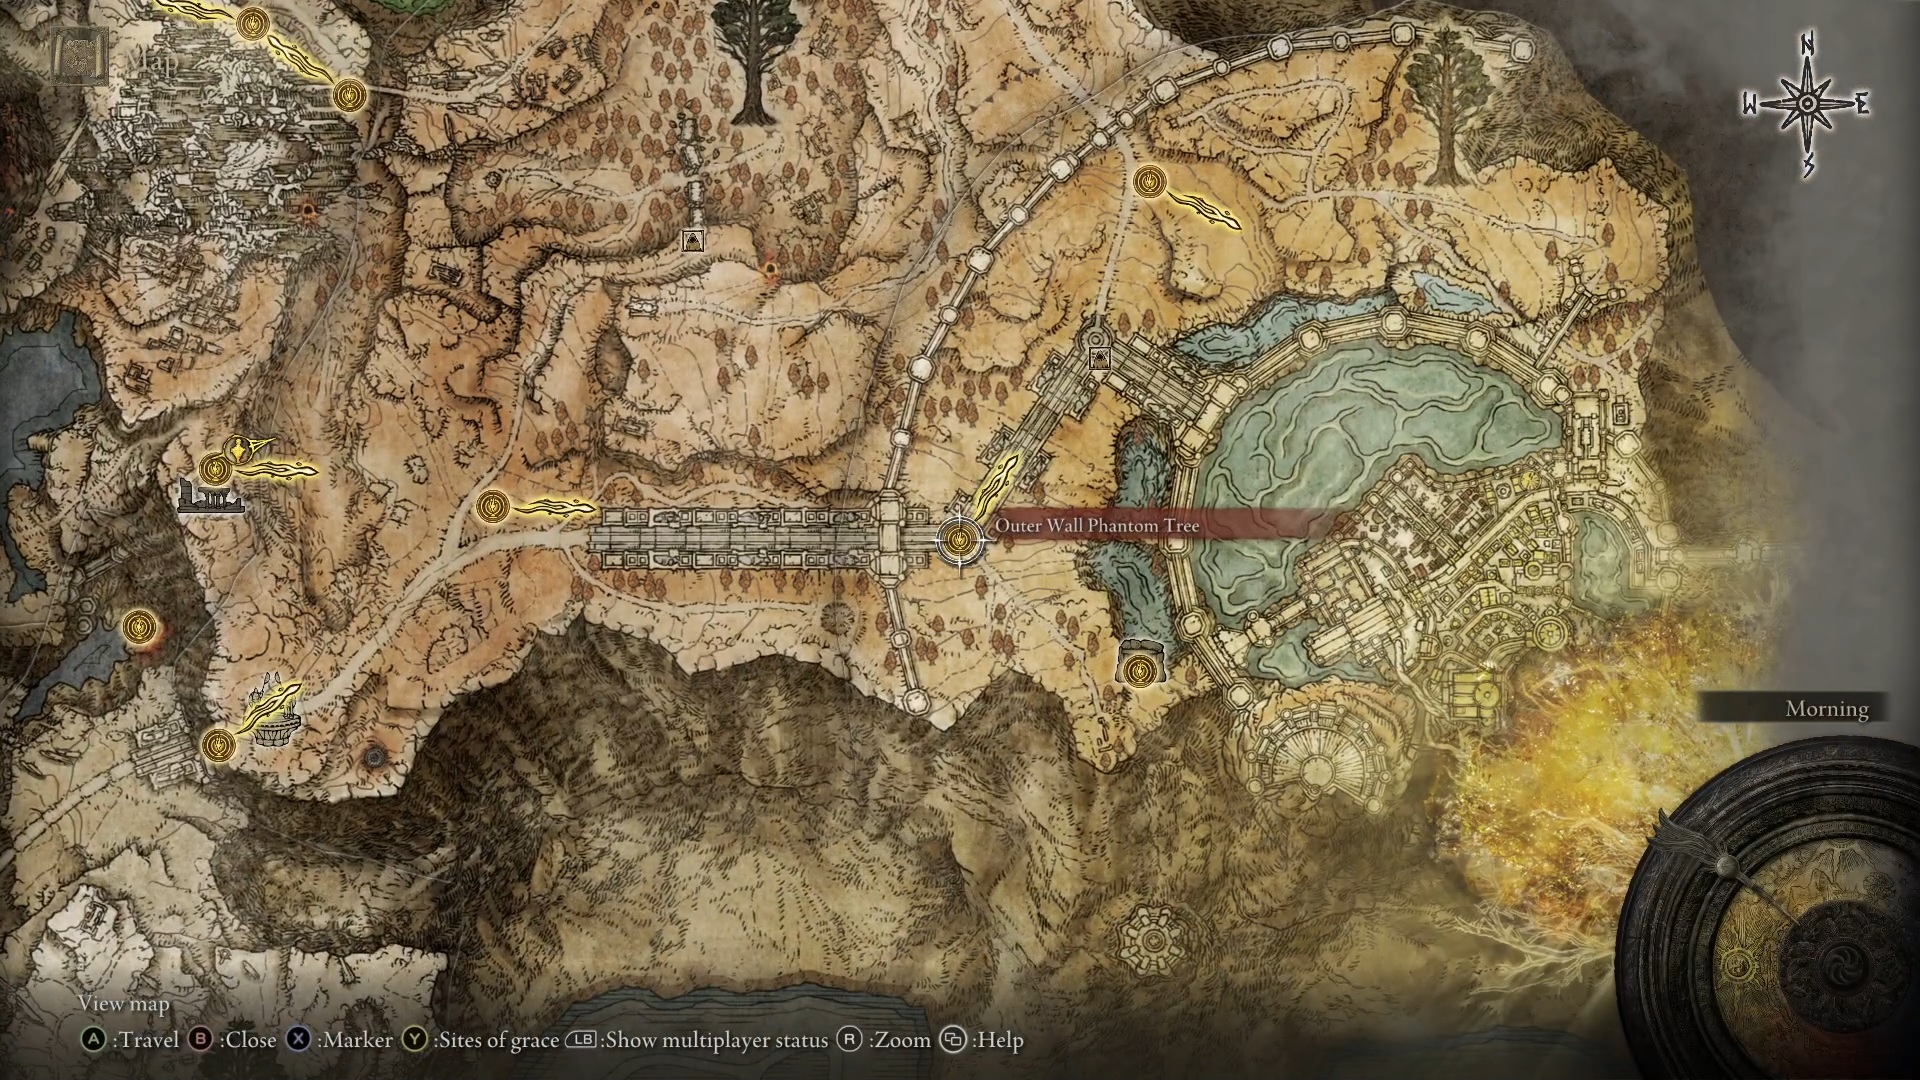
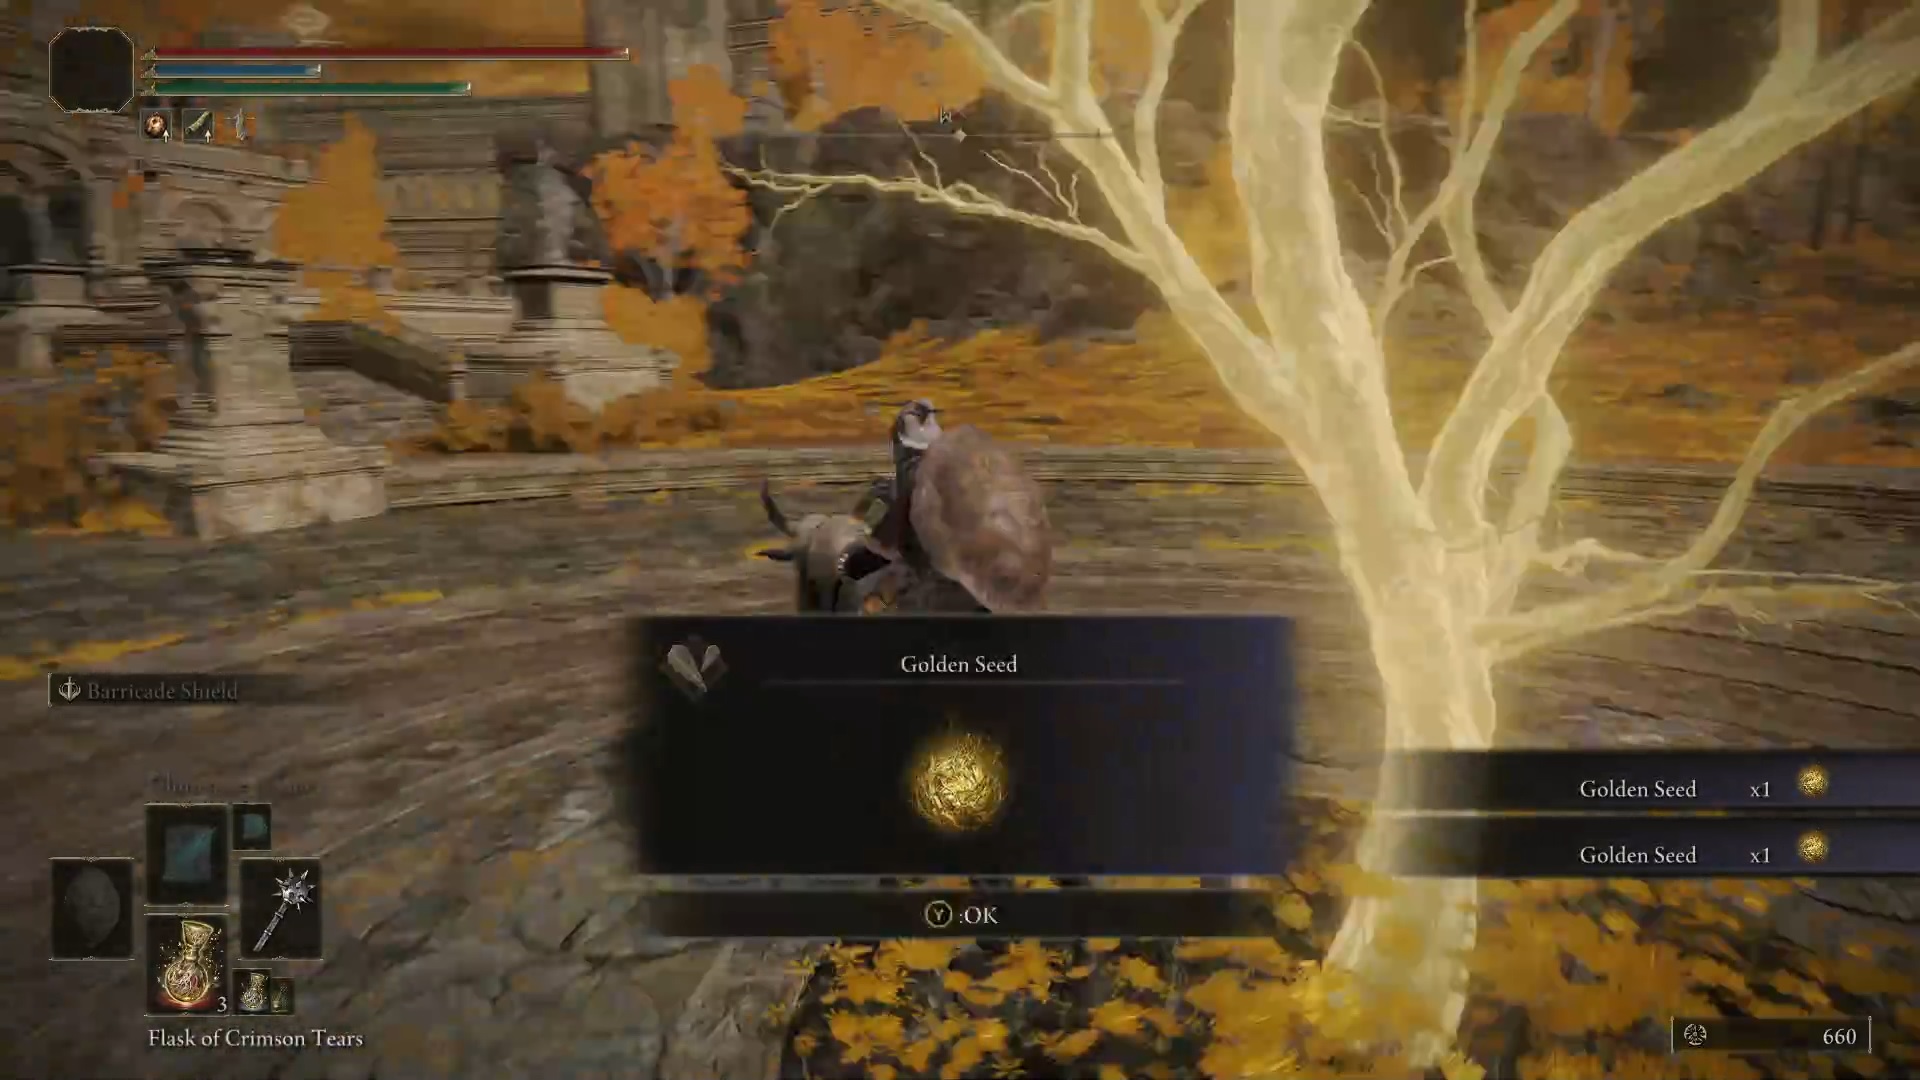
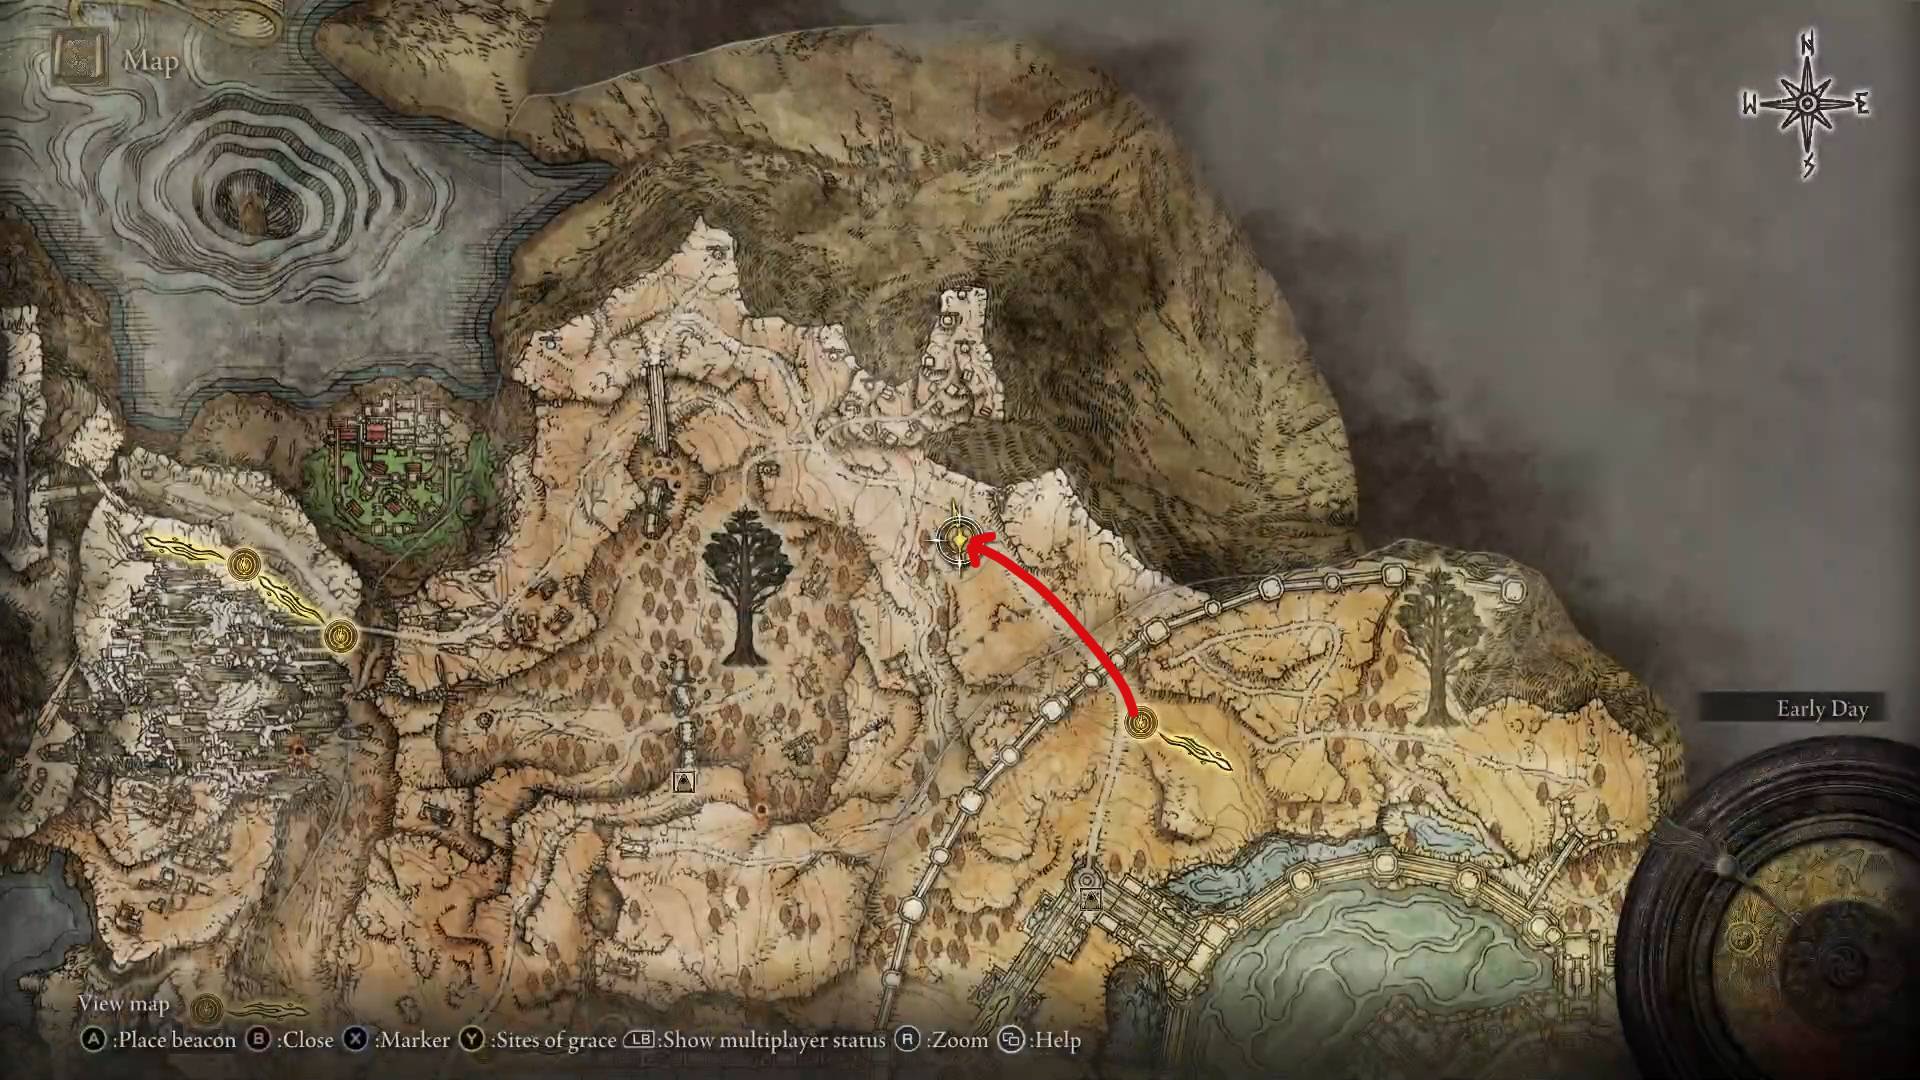
Outer Wall Phantom Tree
Once you get past the Tree Sentinels guarding the road towards Leyndell, you’ll end up at the Outer Wall Phantom Tree grace. You’ll be able to pick up two seeds right there.
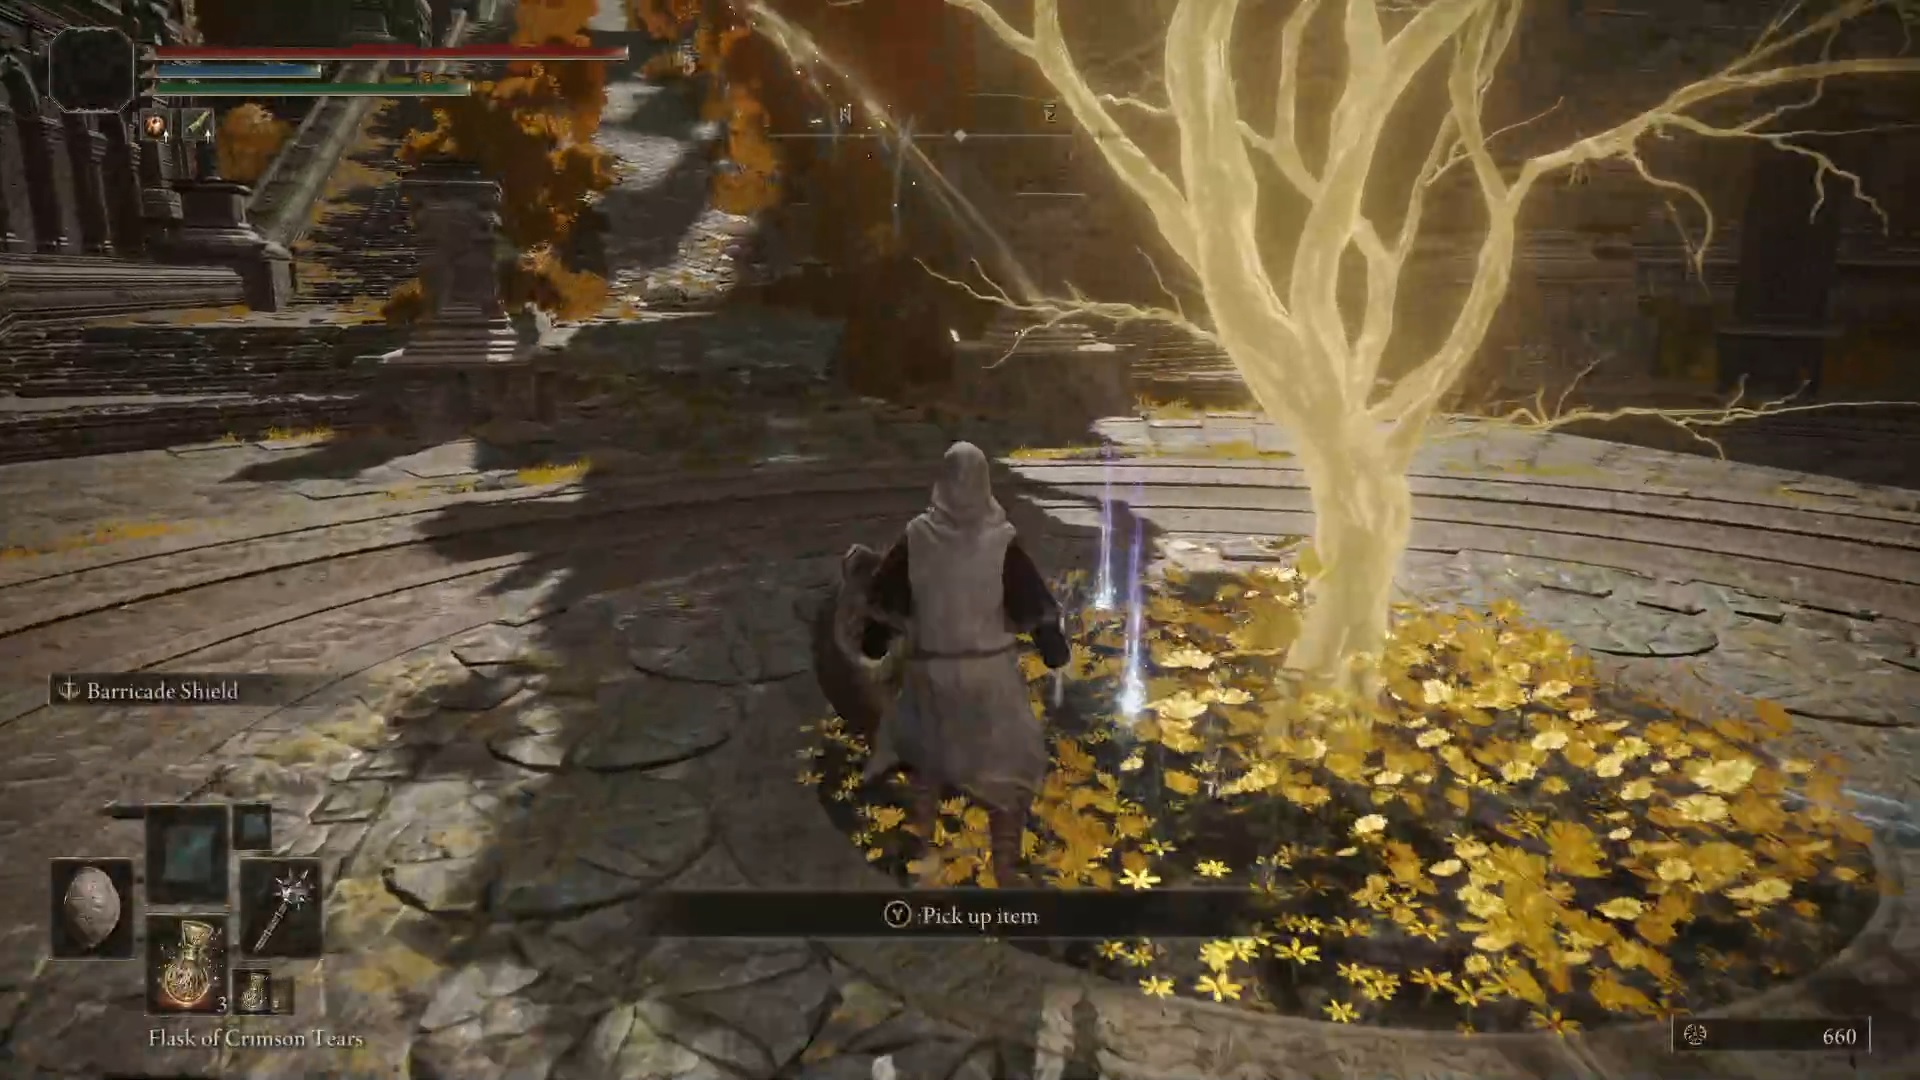
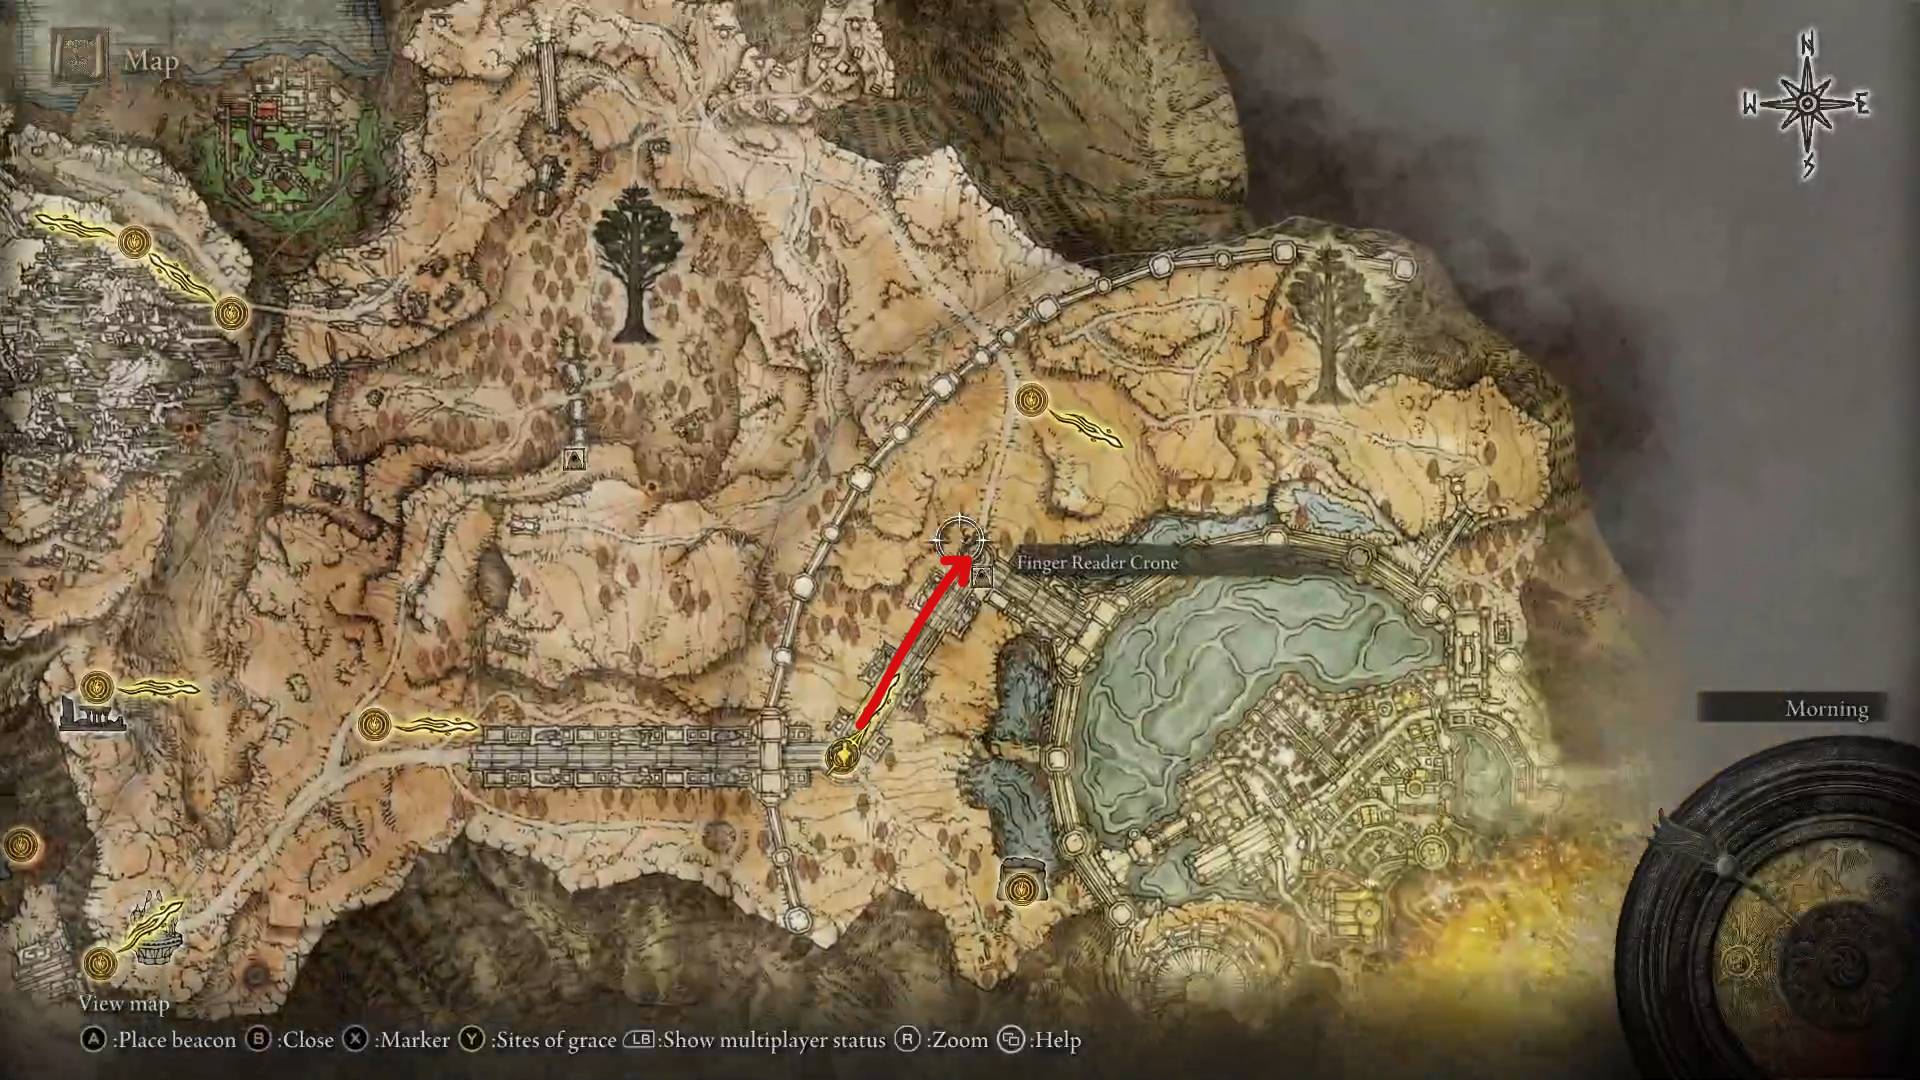
Outer Wall North
Keep moving north from the Outer Wall Phantom Tree grace, past the angry gargoyle, and when you reach a clearing with a Finger Reader Crone, you’ll find two more seeds.
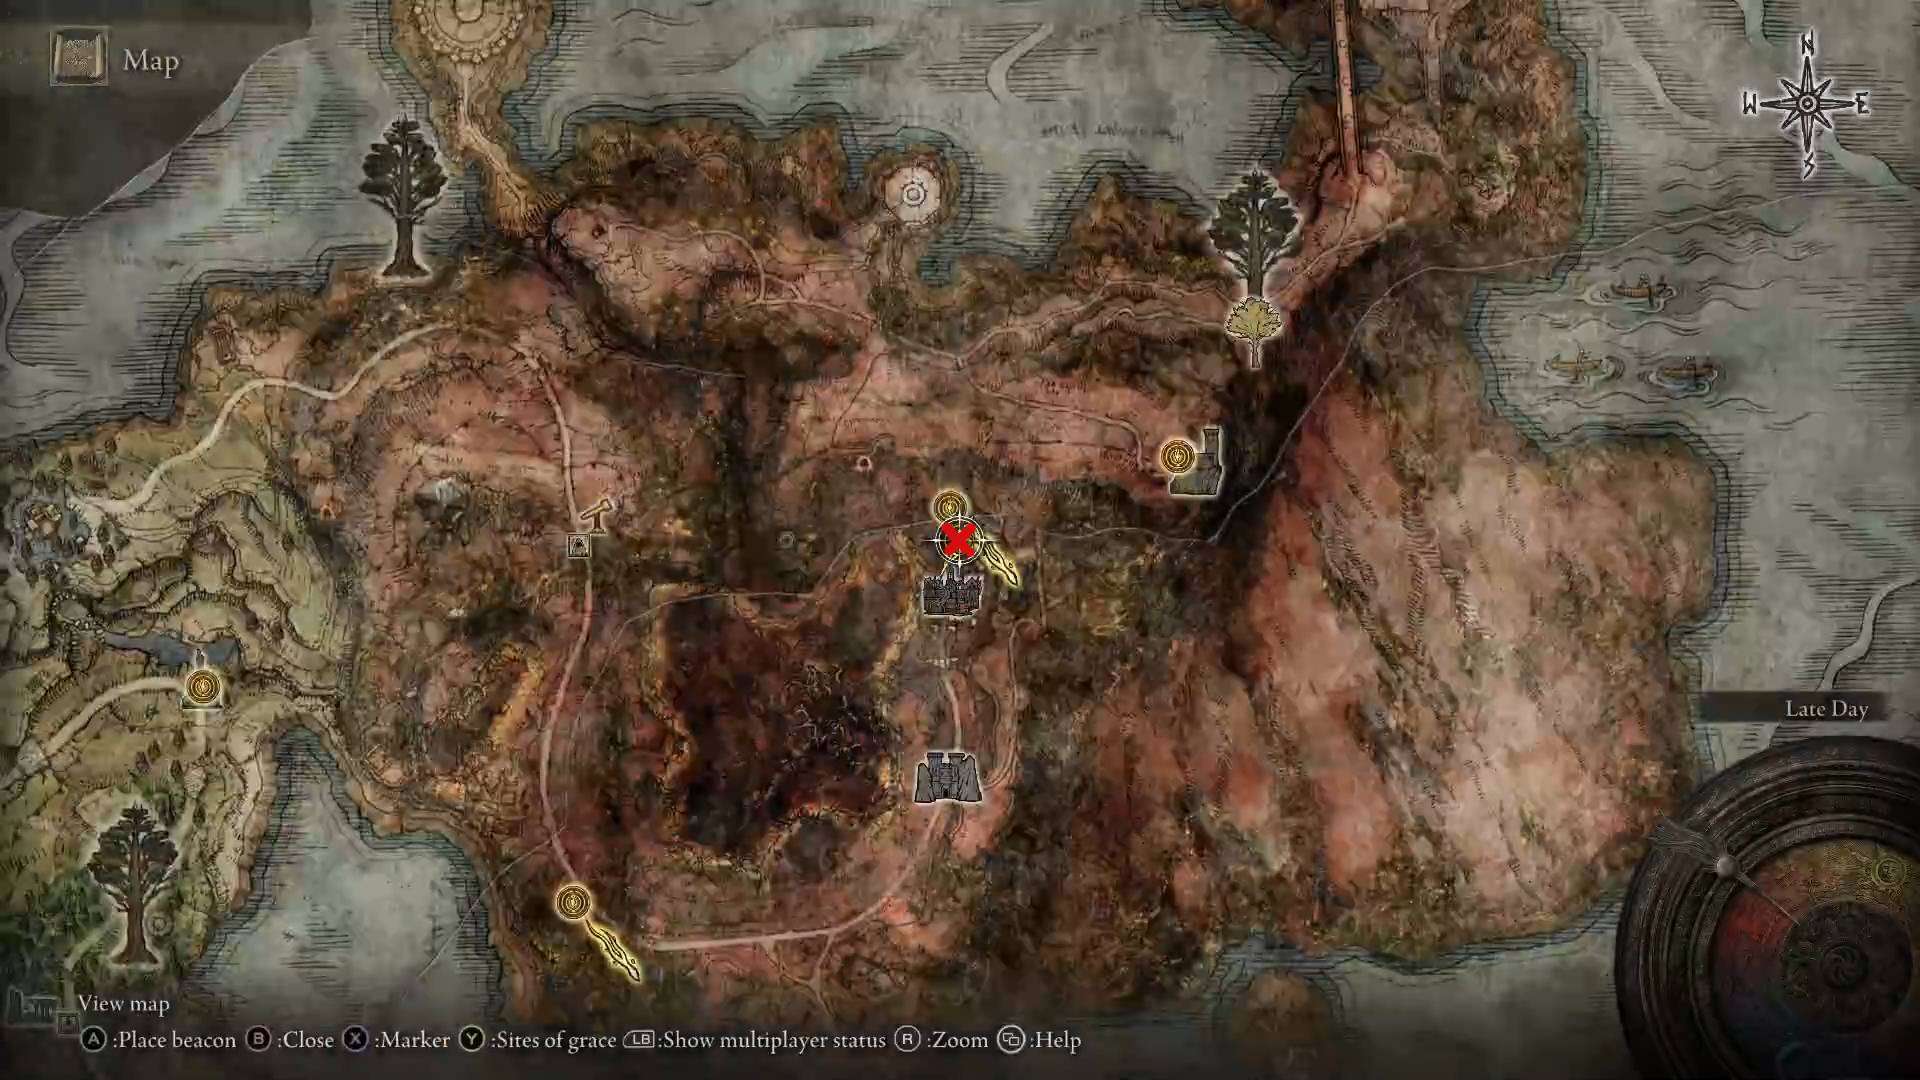
Outer Wall Battleground
Starting at the Outer Wall Battleground grace, exit the huge gate to the northwest and keep moving down the road while trying to dodge the siege engines attacking you from behind. If you manage to do it, you’ll be rewarded with a golden seed.
Sacred Tears
Third Church of Marika
Likely the first Sacred Tear you find will be inside the Third Church of Marika in Limgrave.
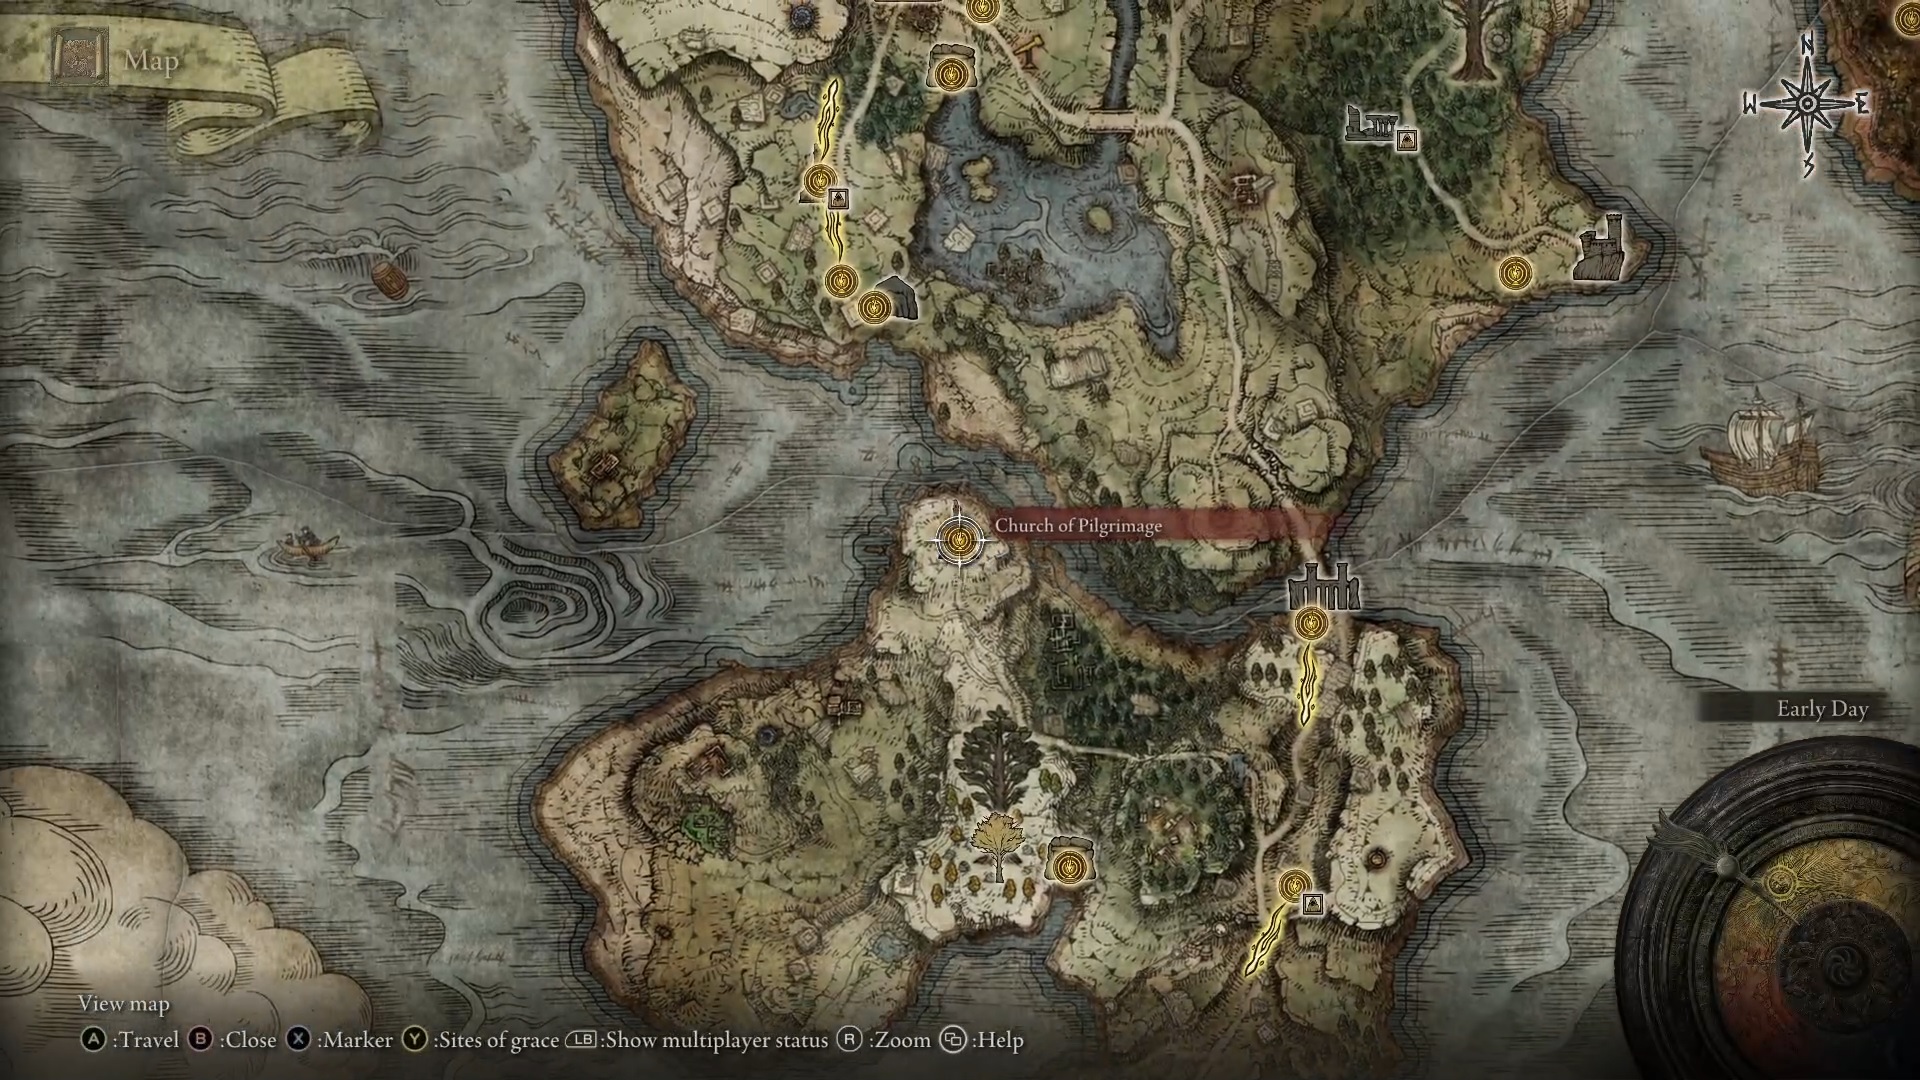
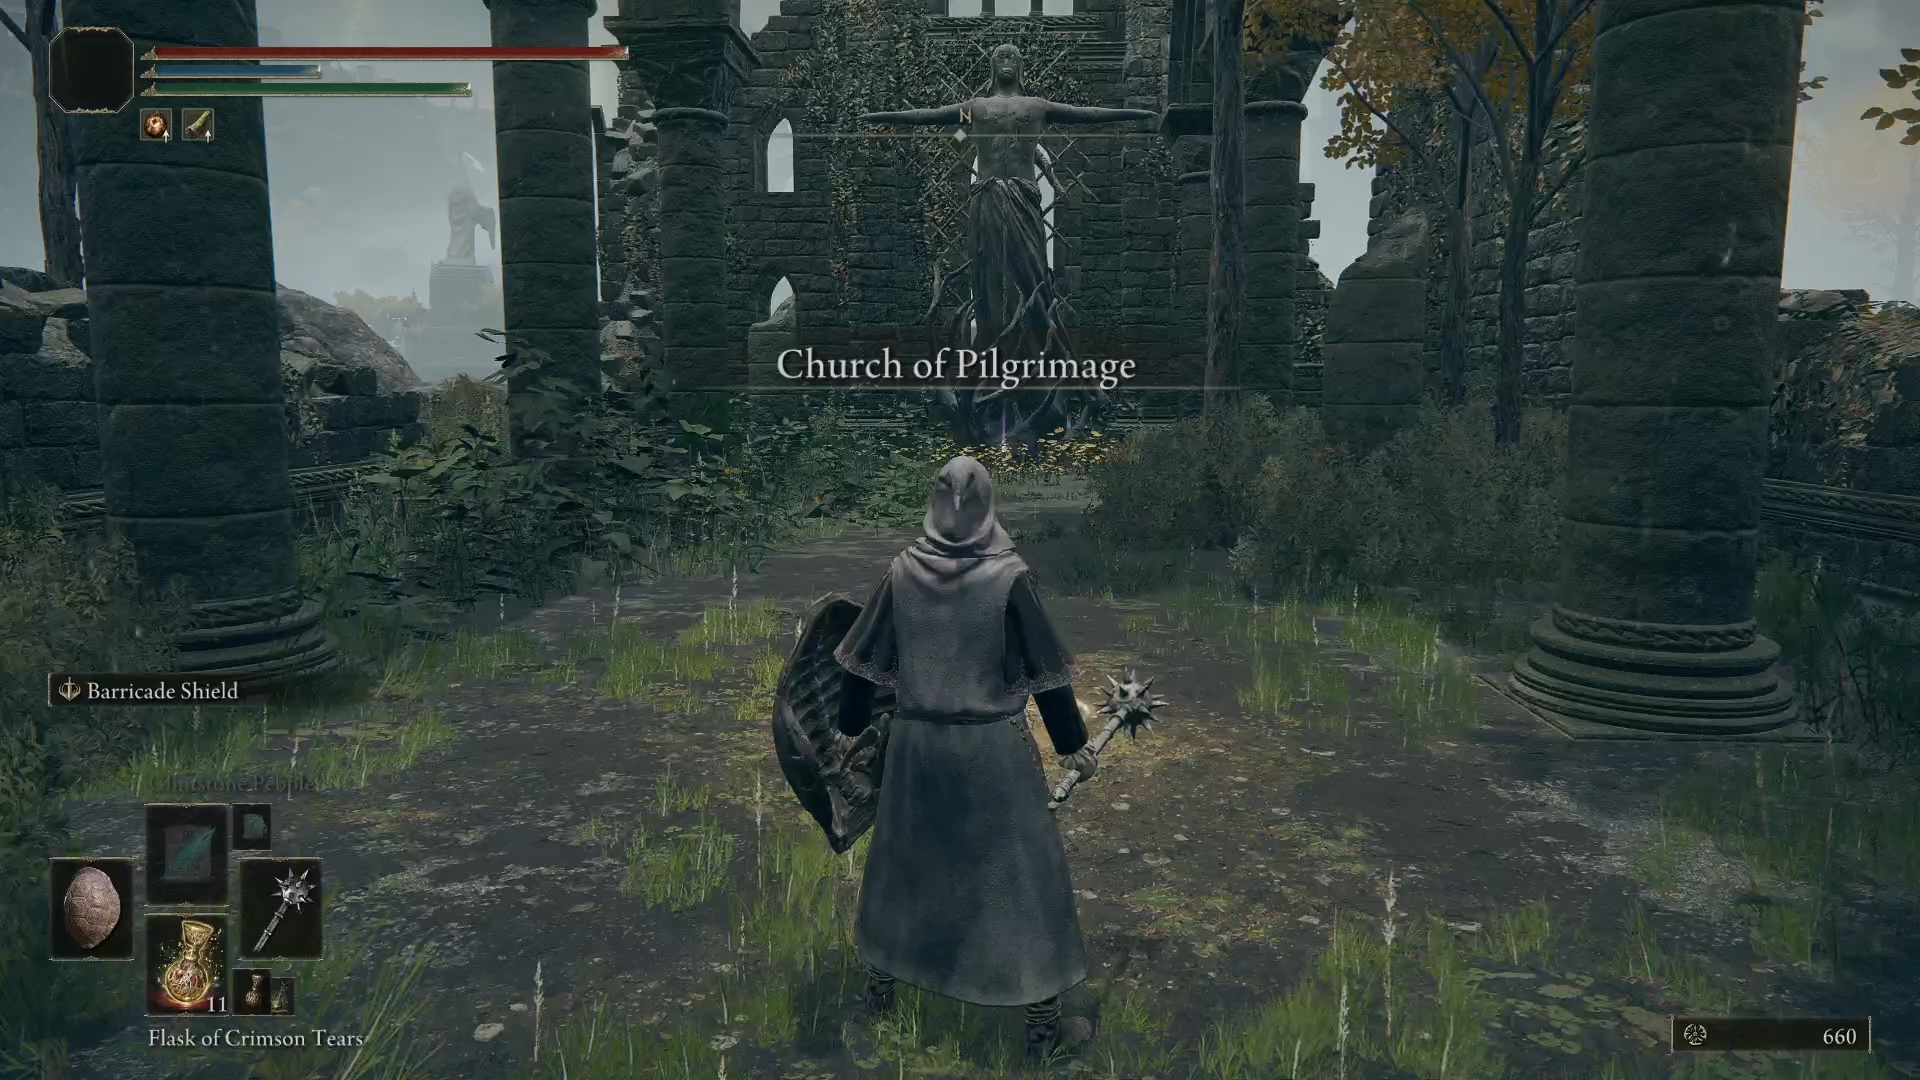
Church of Pilgrimage
The Weeping Peninsula has quite a few tears, which is quite appropriate considering its name. One of them is inside the Church of Pilgrimage to the north.
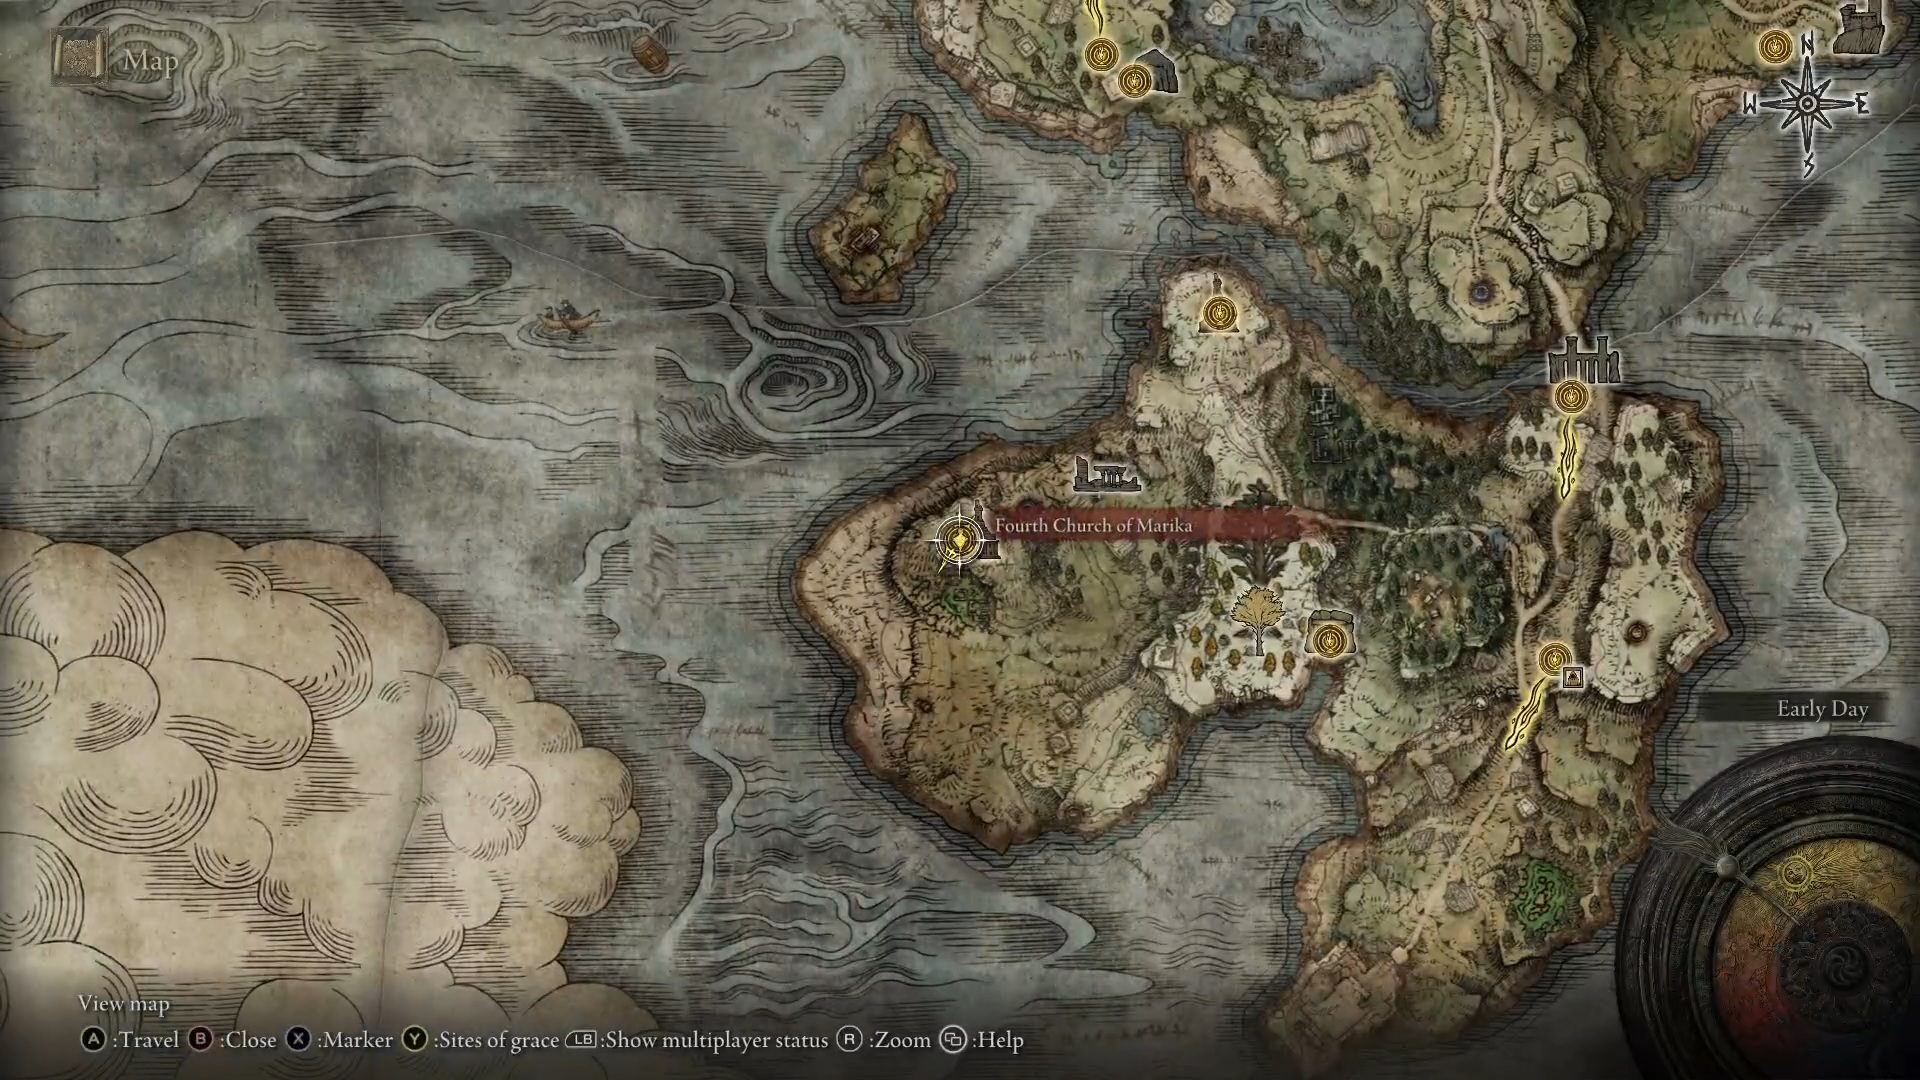
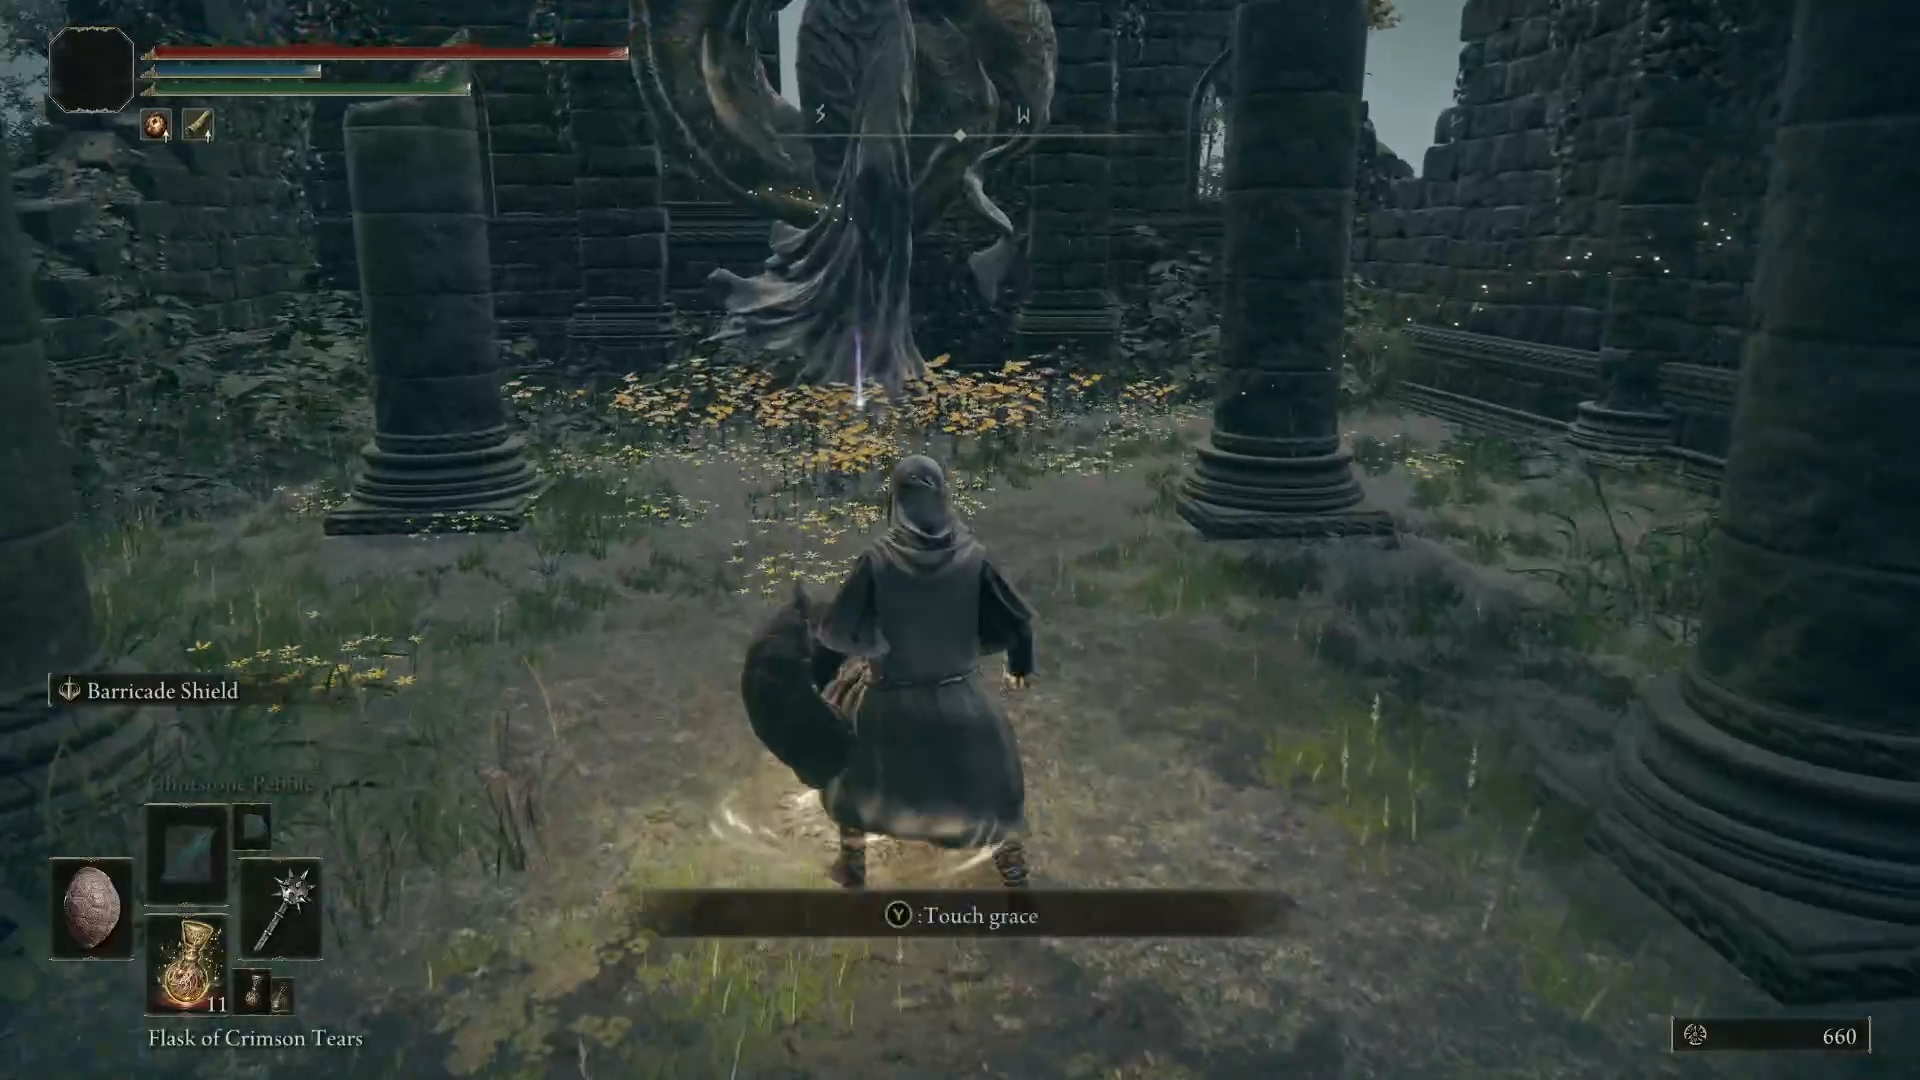
Fourth Church of Marika
The Fourth Church of Marika to the west of the Weeping Peninsula hides another Sacred Tear.
Callu Baptismal Church
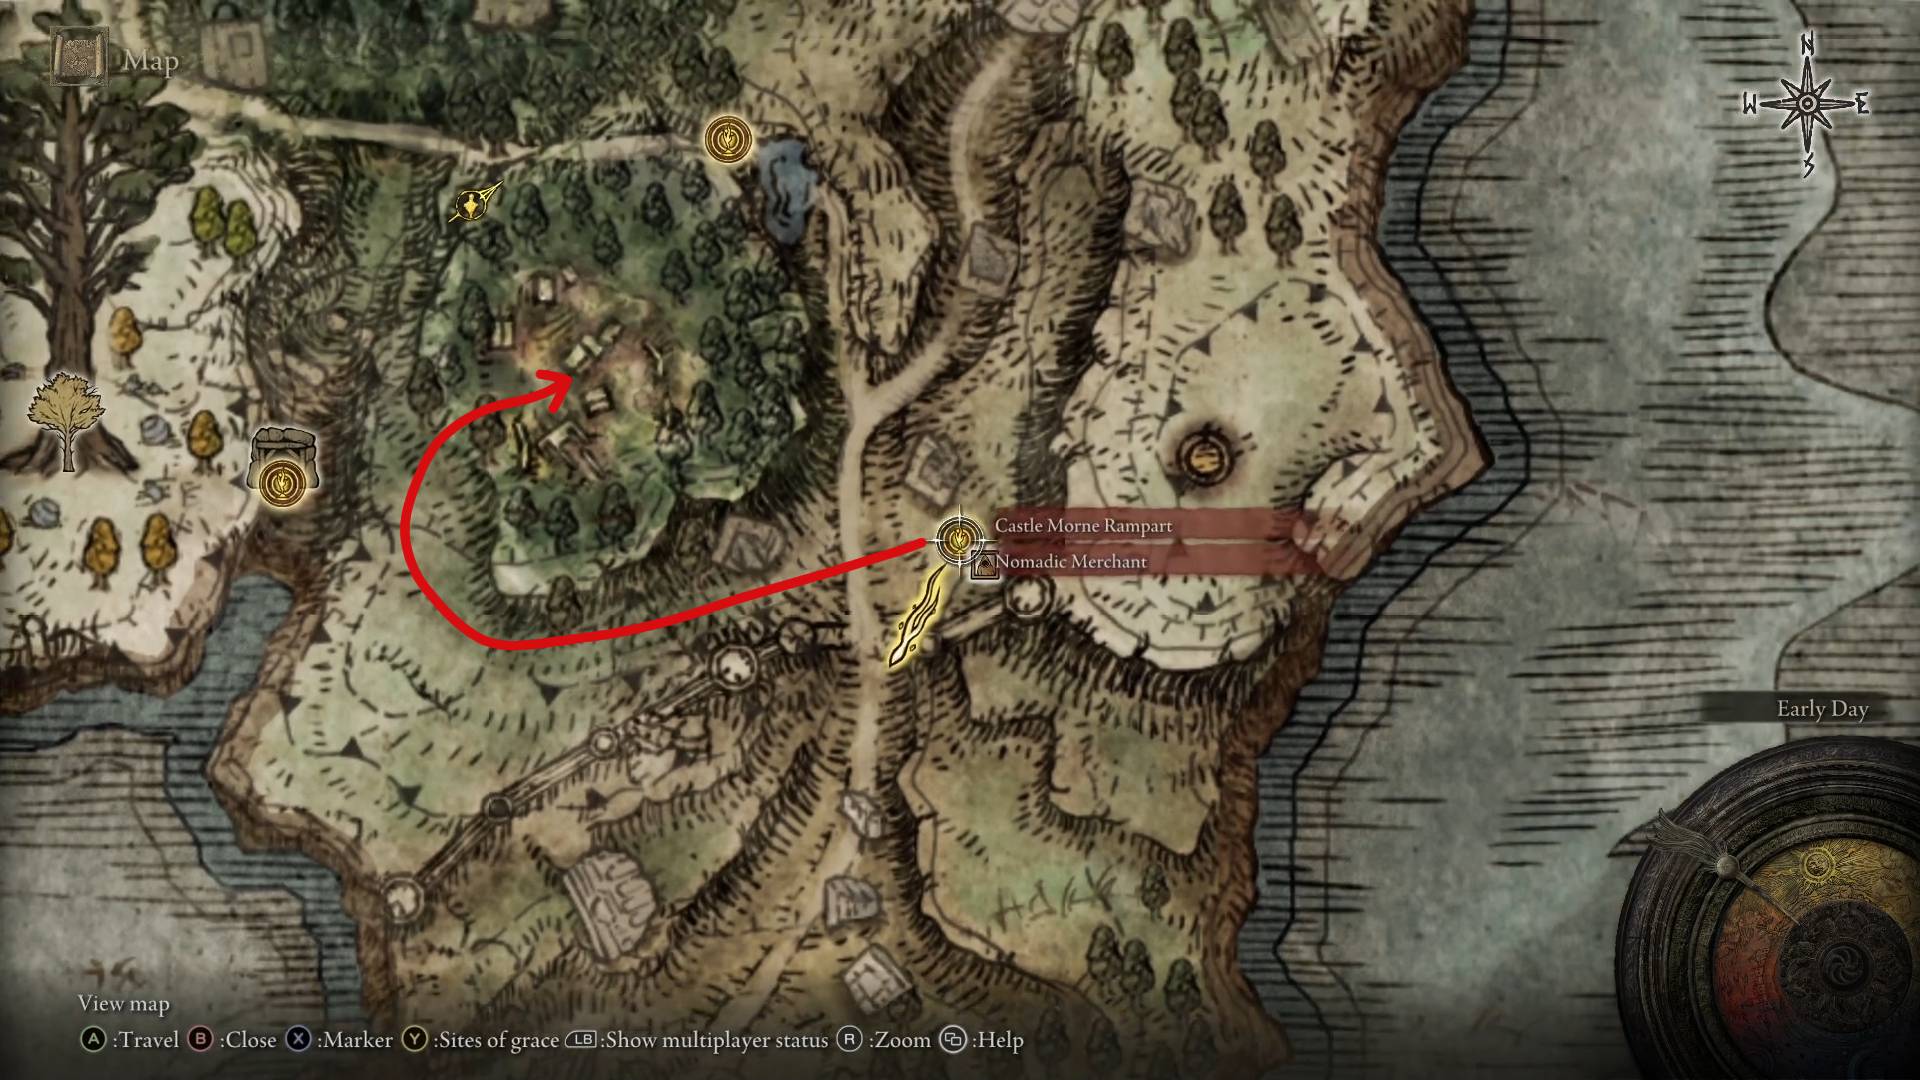
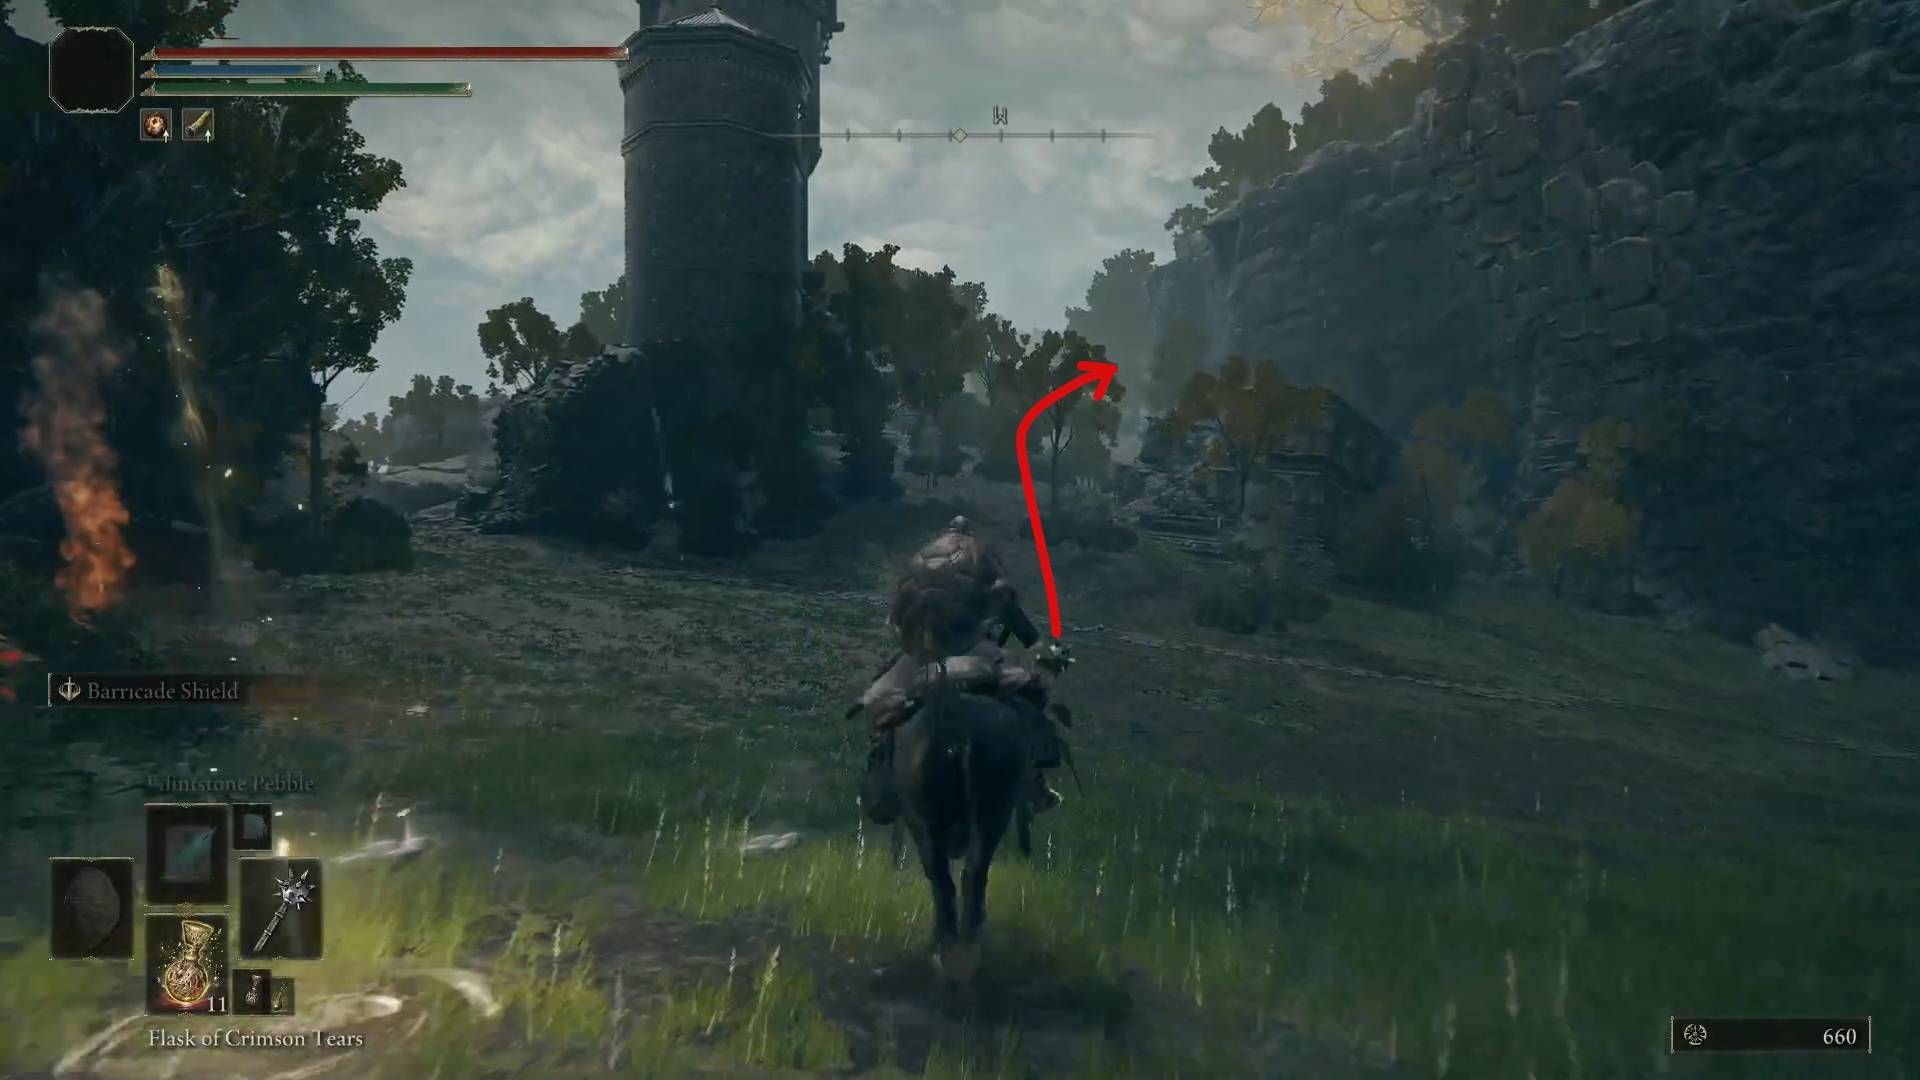
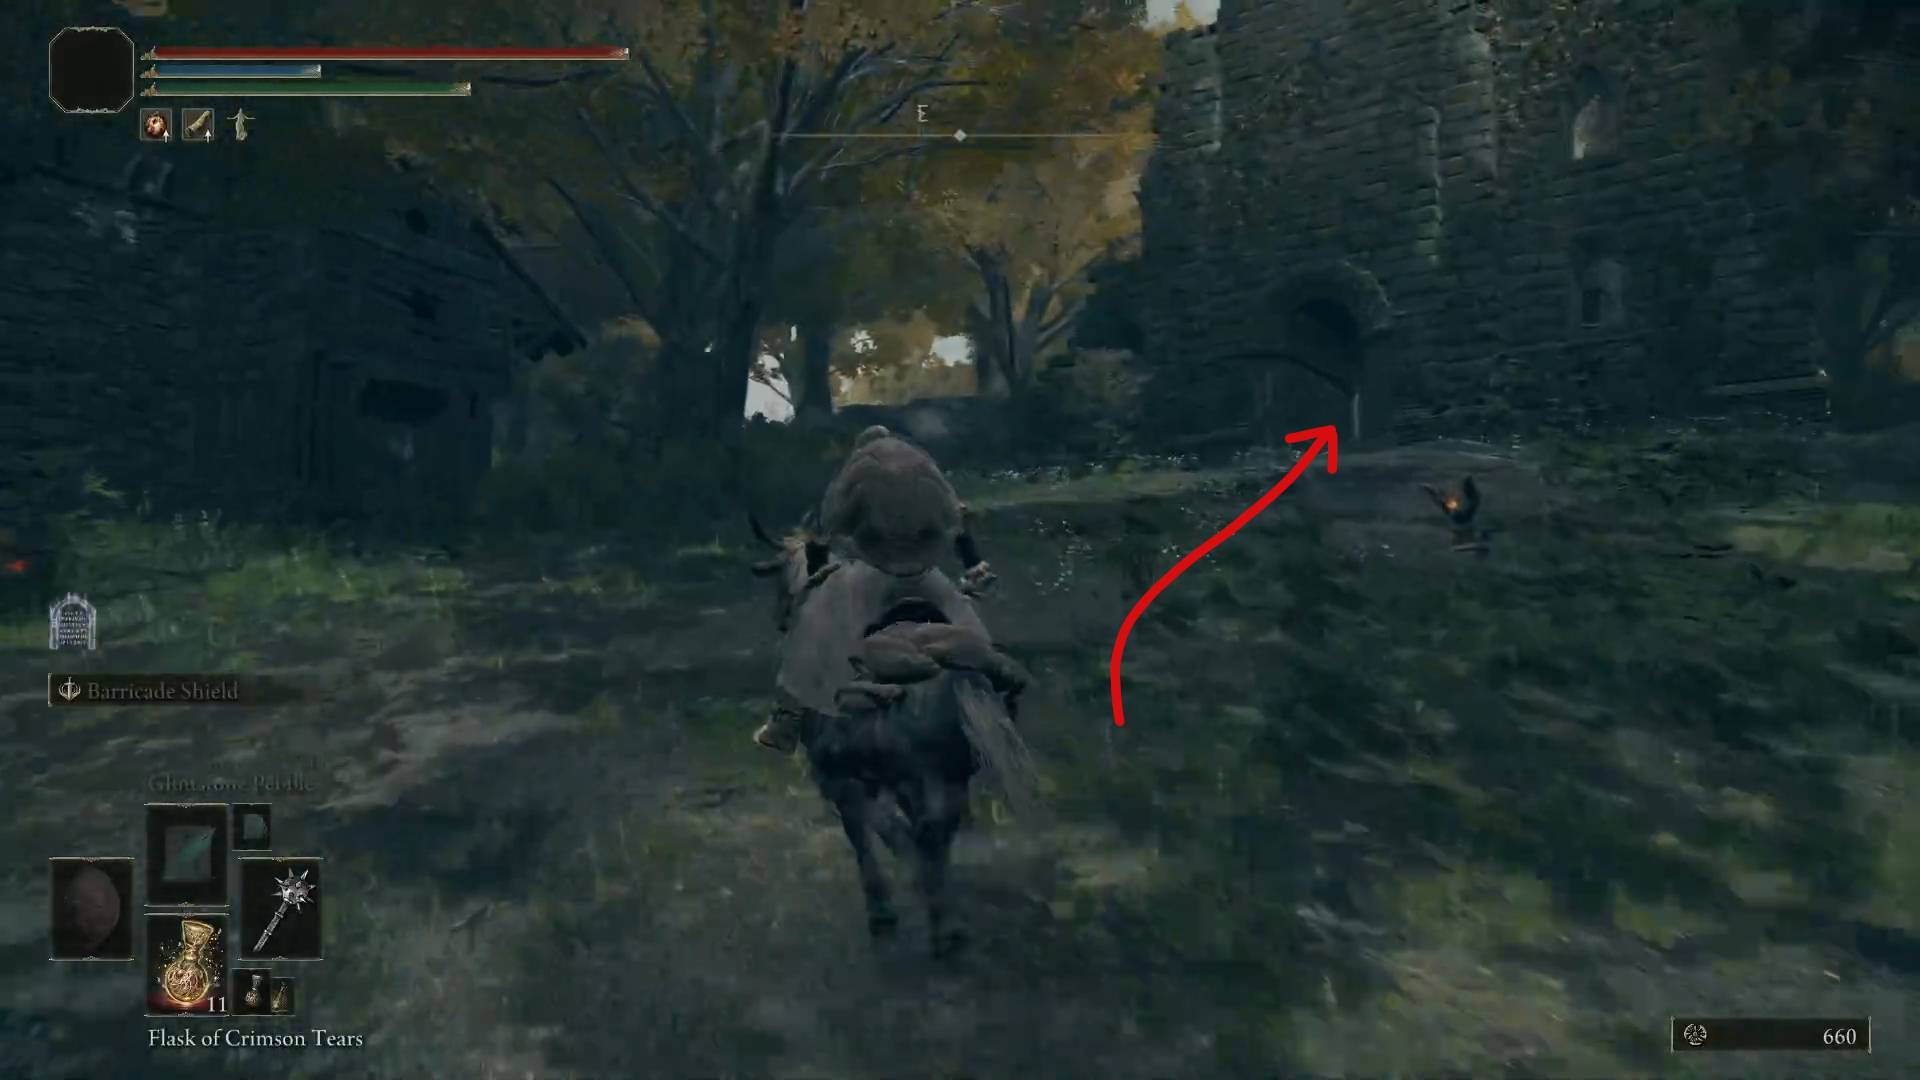
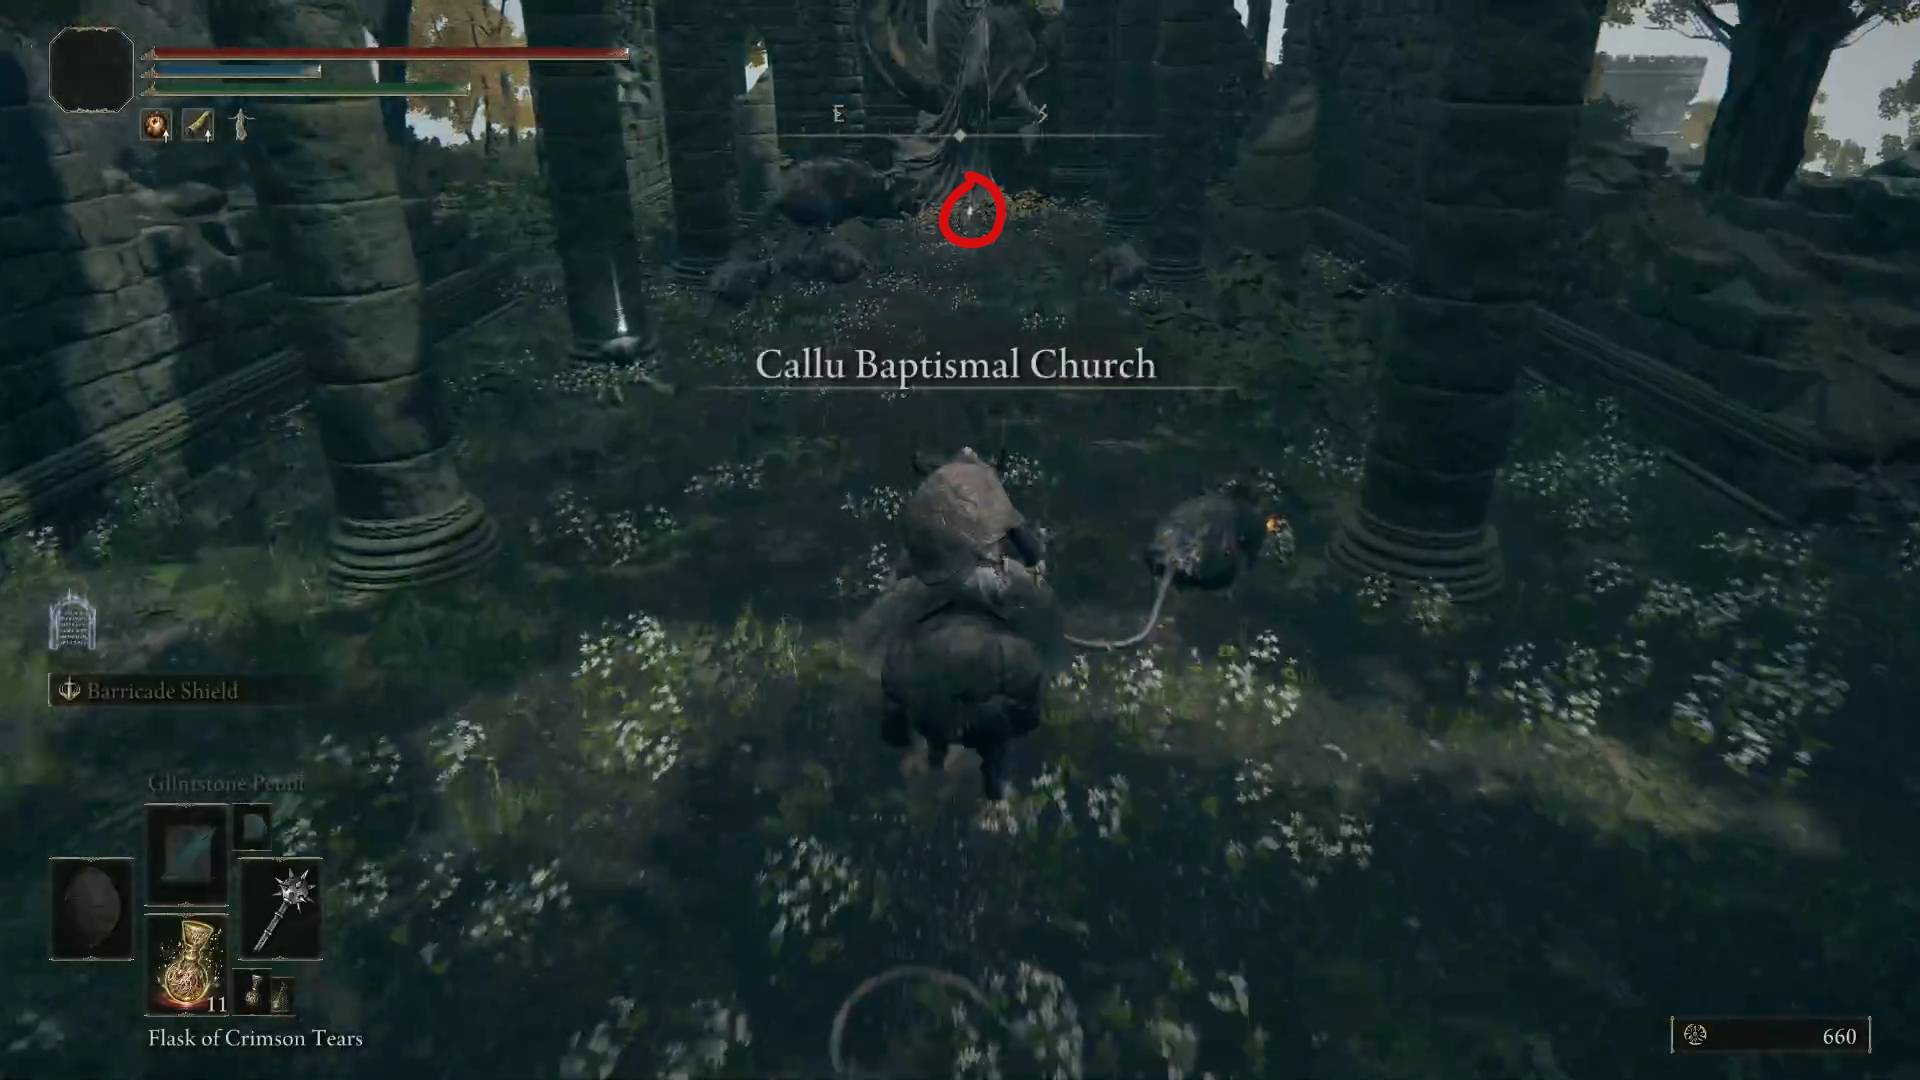
The final Sacred Tear of the Weeping Peninsula is inside the Callu Baptismal Church that’s been overrun by the Frenzied Flame and so there’s no convenient grace nearby. So, you’ll need to start at the Castle Morne Rampart grace and head into the woods to the west of it, circle around a hill and get inside the church. There, you’ll be dodging some frenzied rats to grab the tear and get out.
Church of Irith
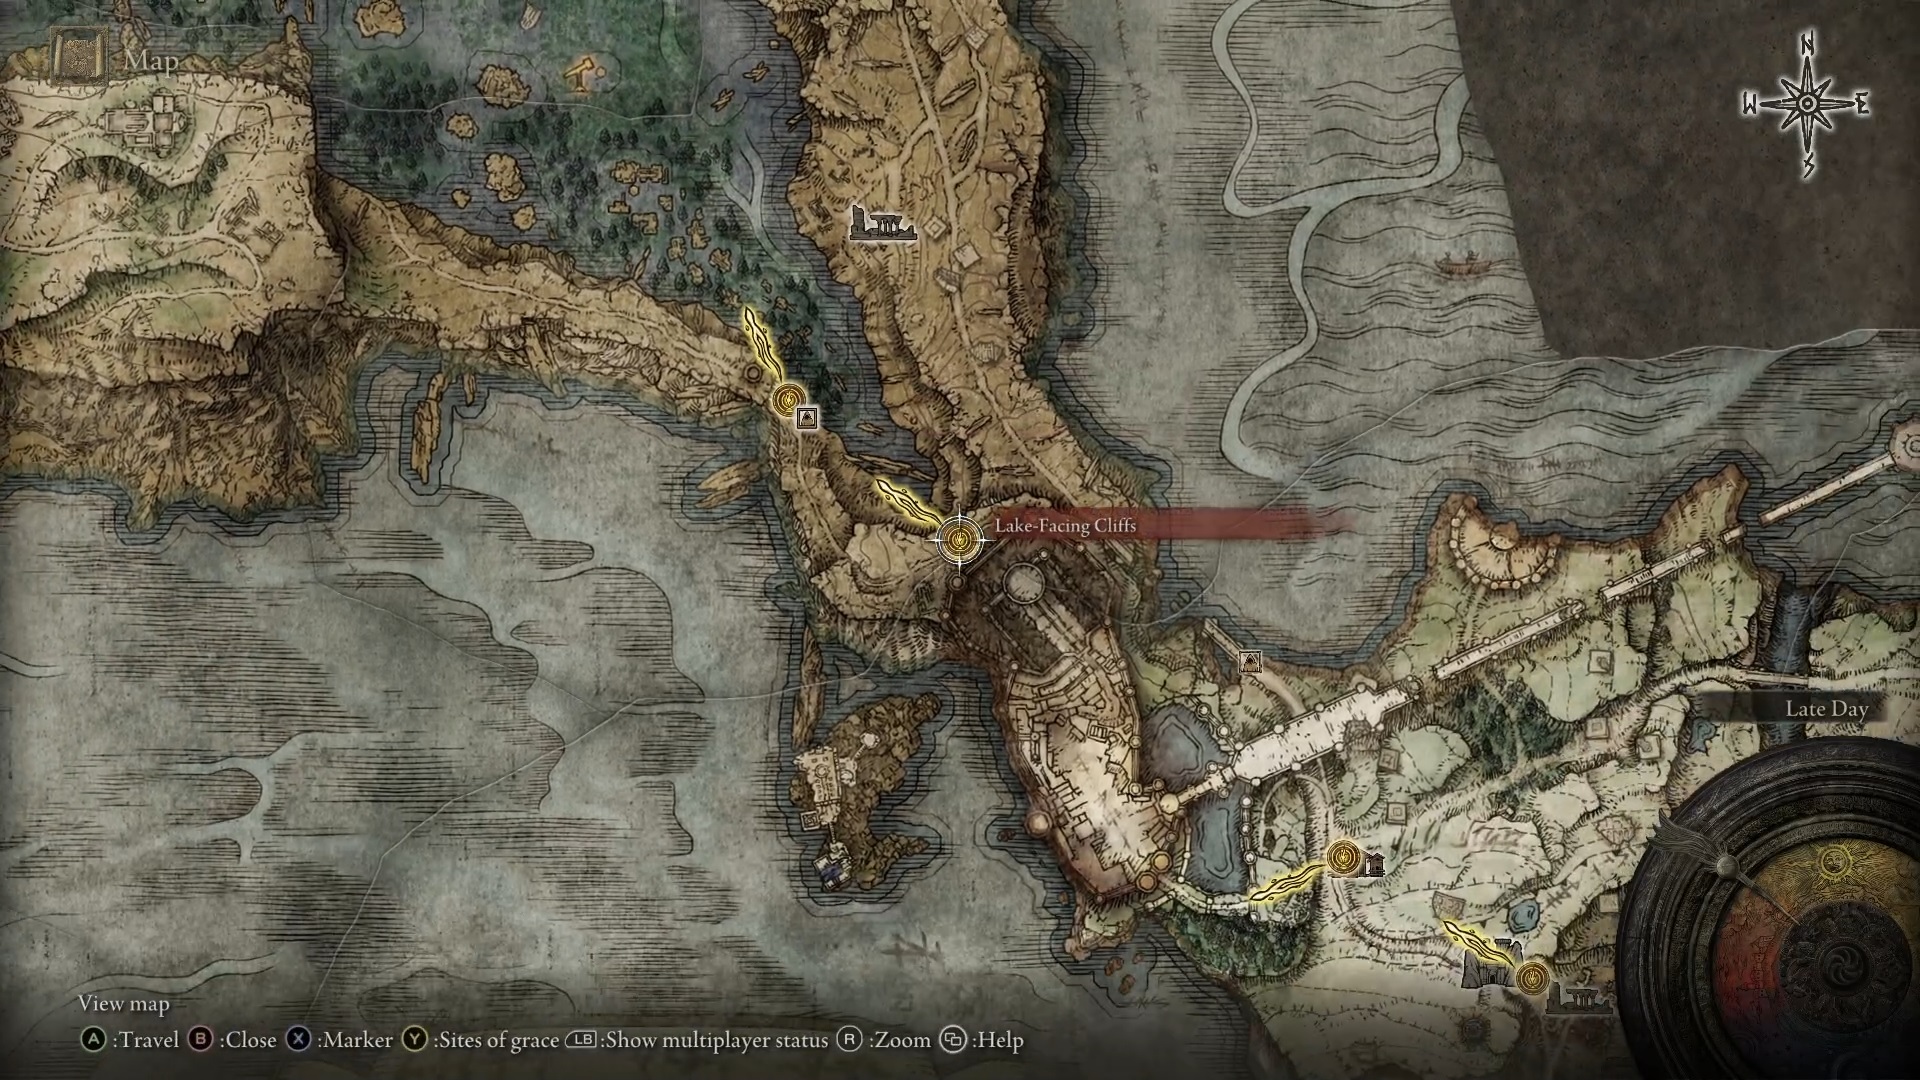
From the Lake-Facing Cliffs grace you’ll be able to see the Church of Irith to the southwest. Head inside and grab a tear there.
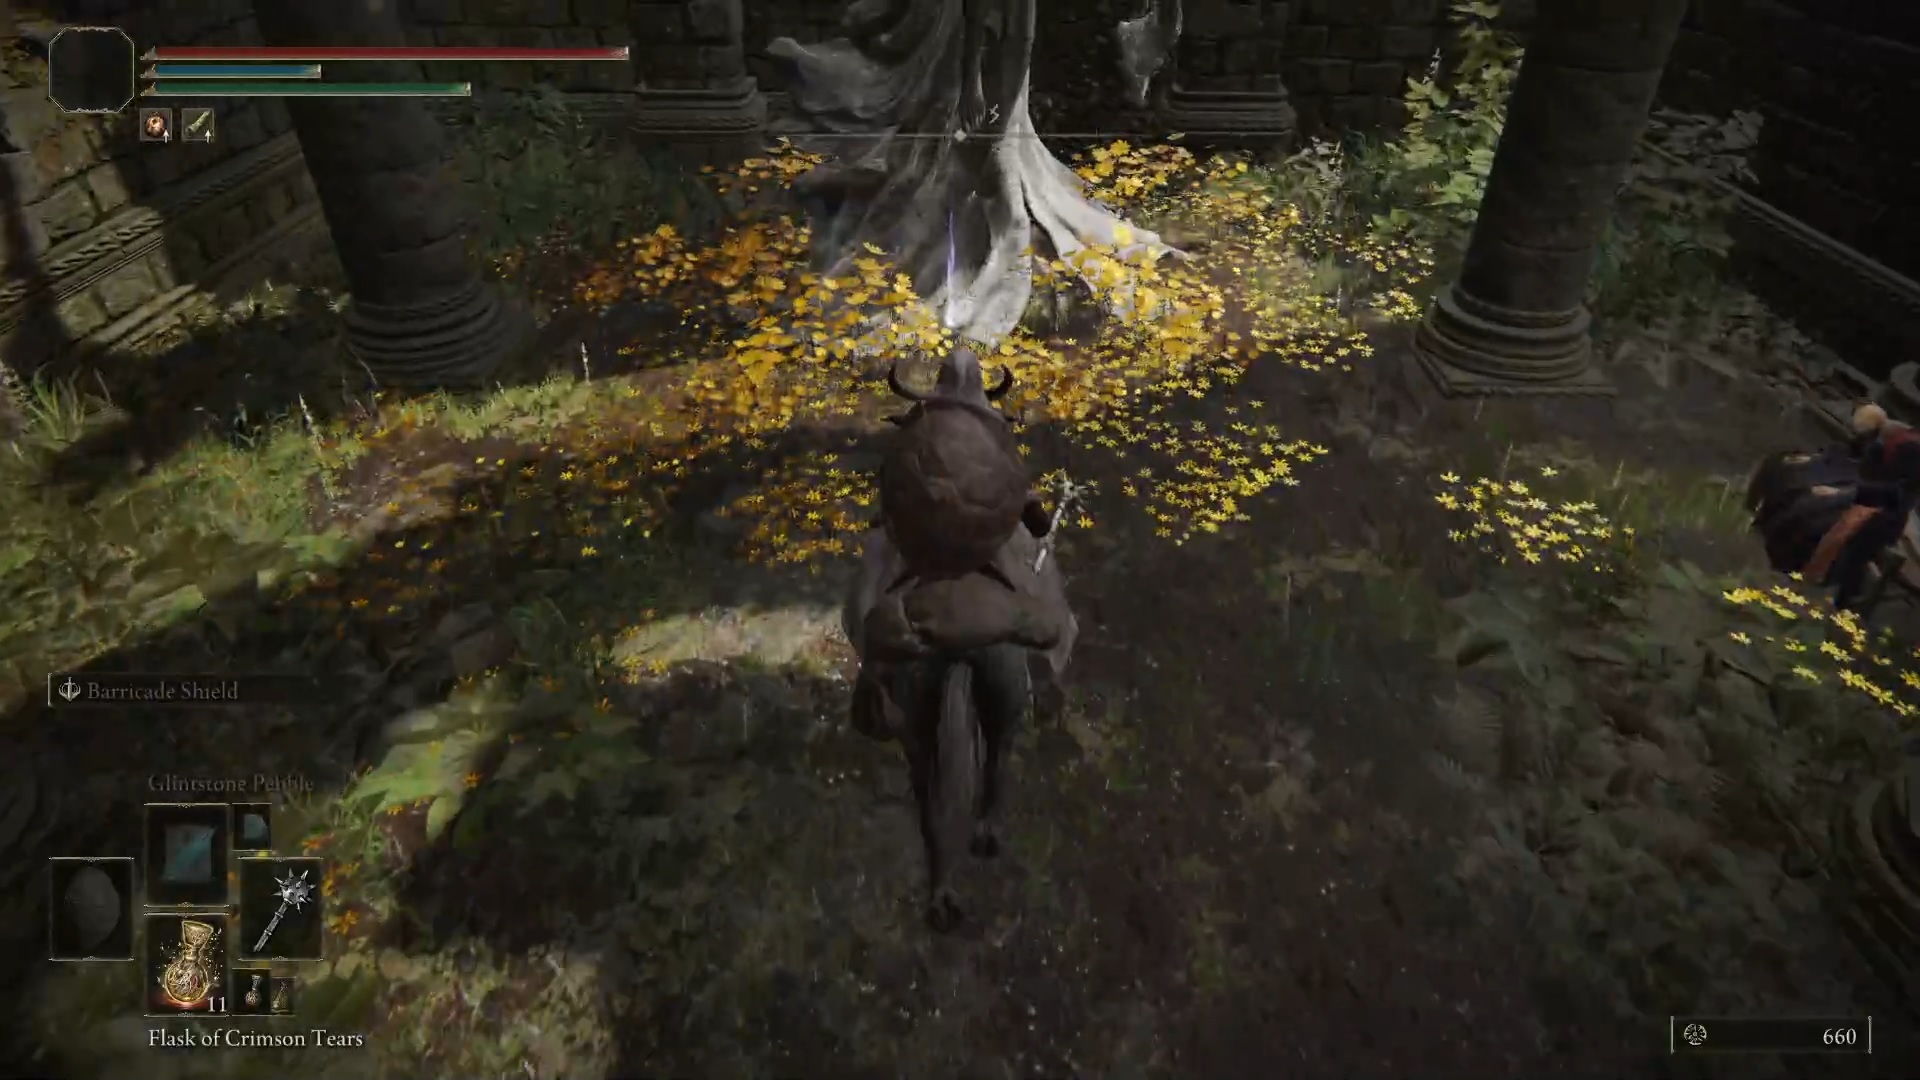
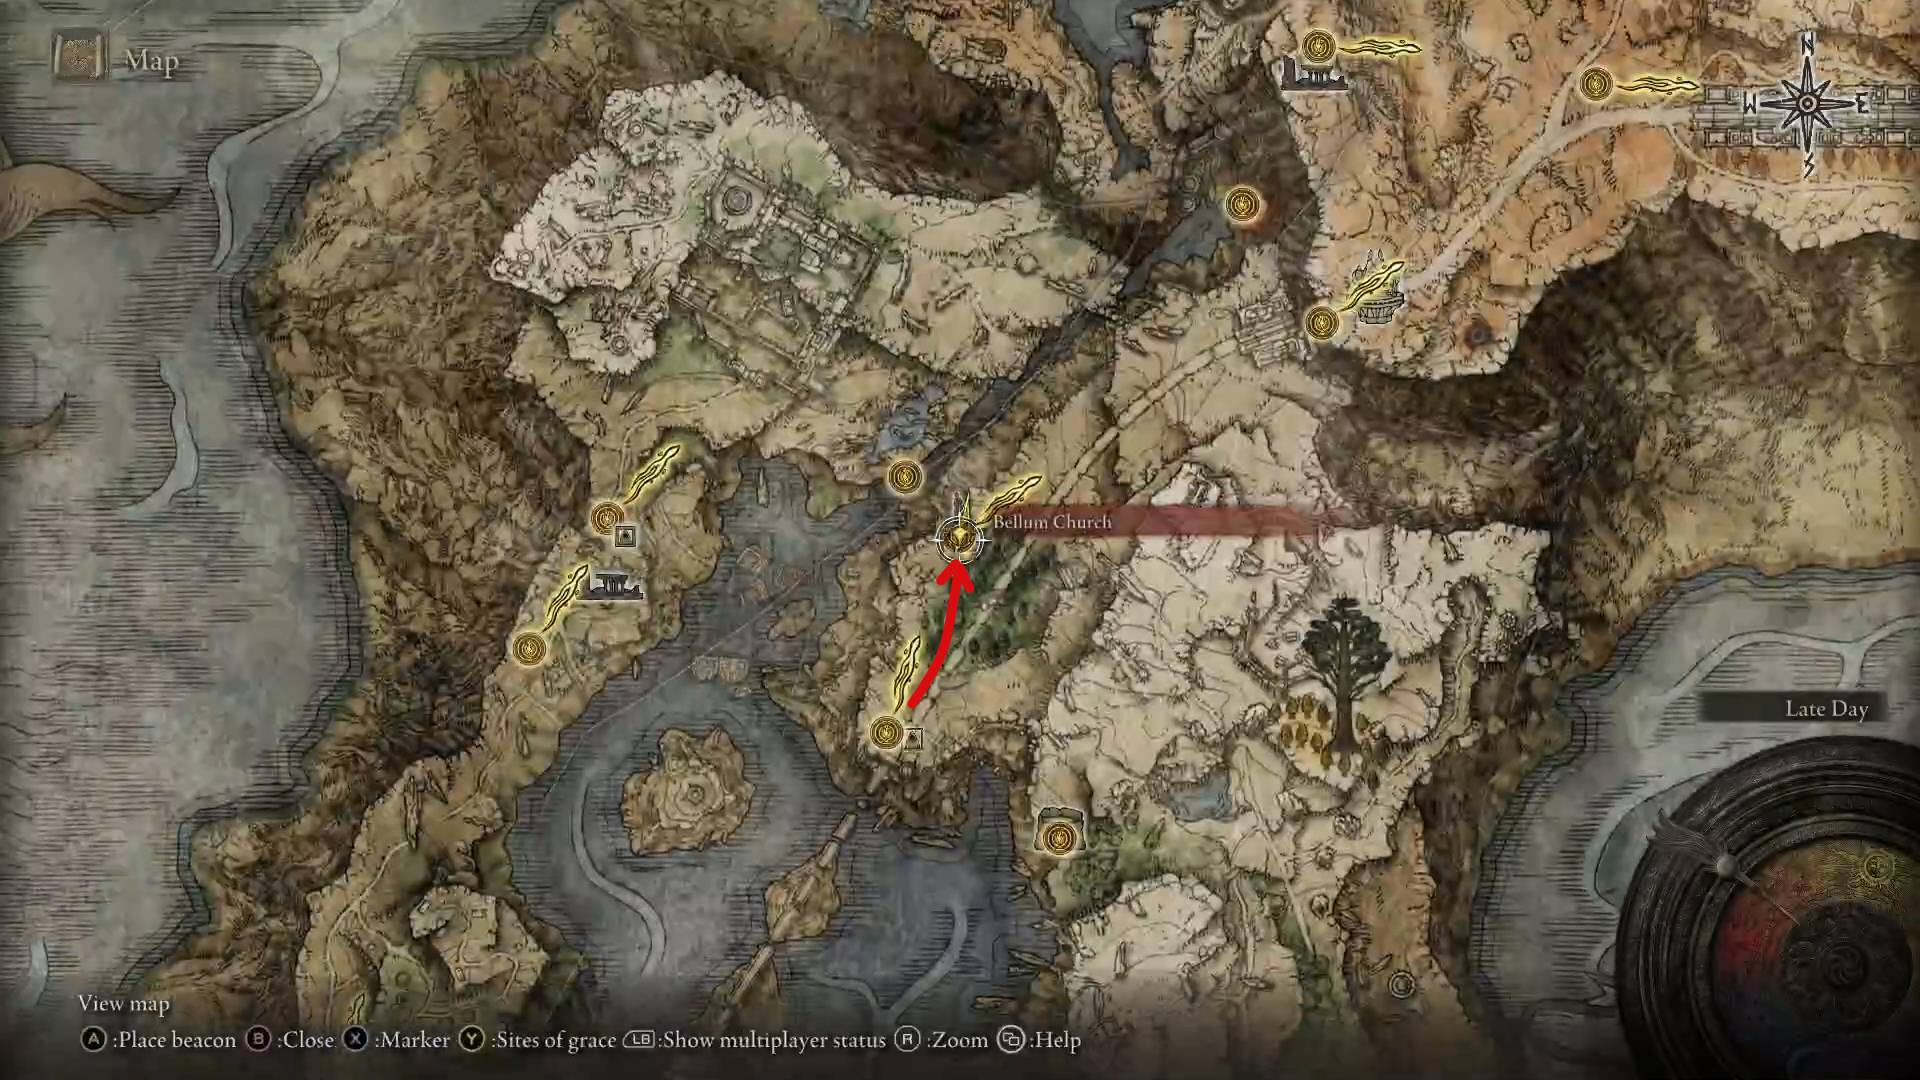
Bellum Church
The Bellum Church is hidden in the small forest right next to the East Raya Lucaria Gate grace.
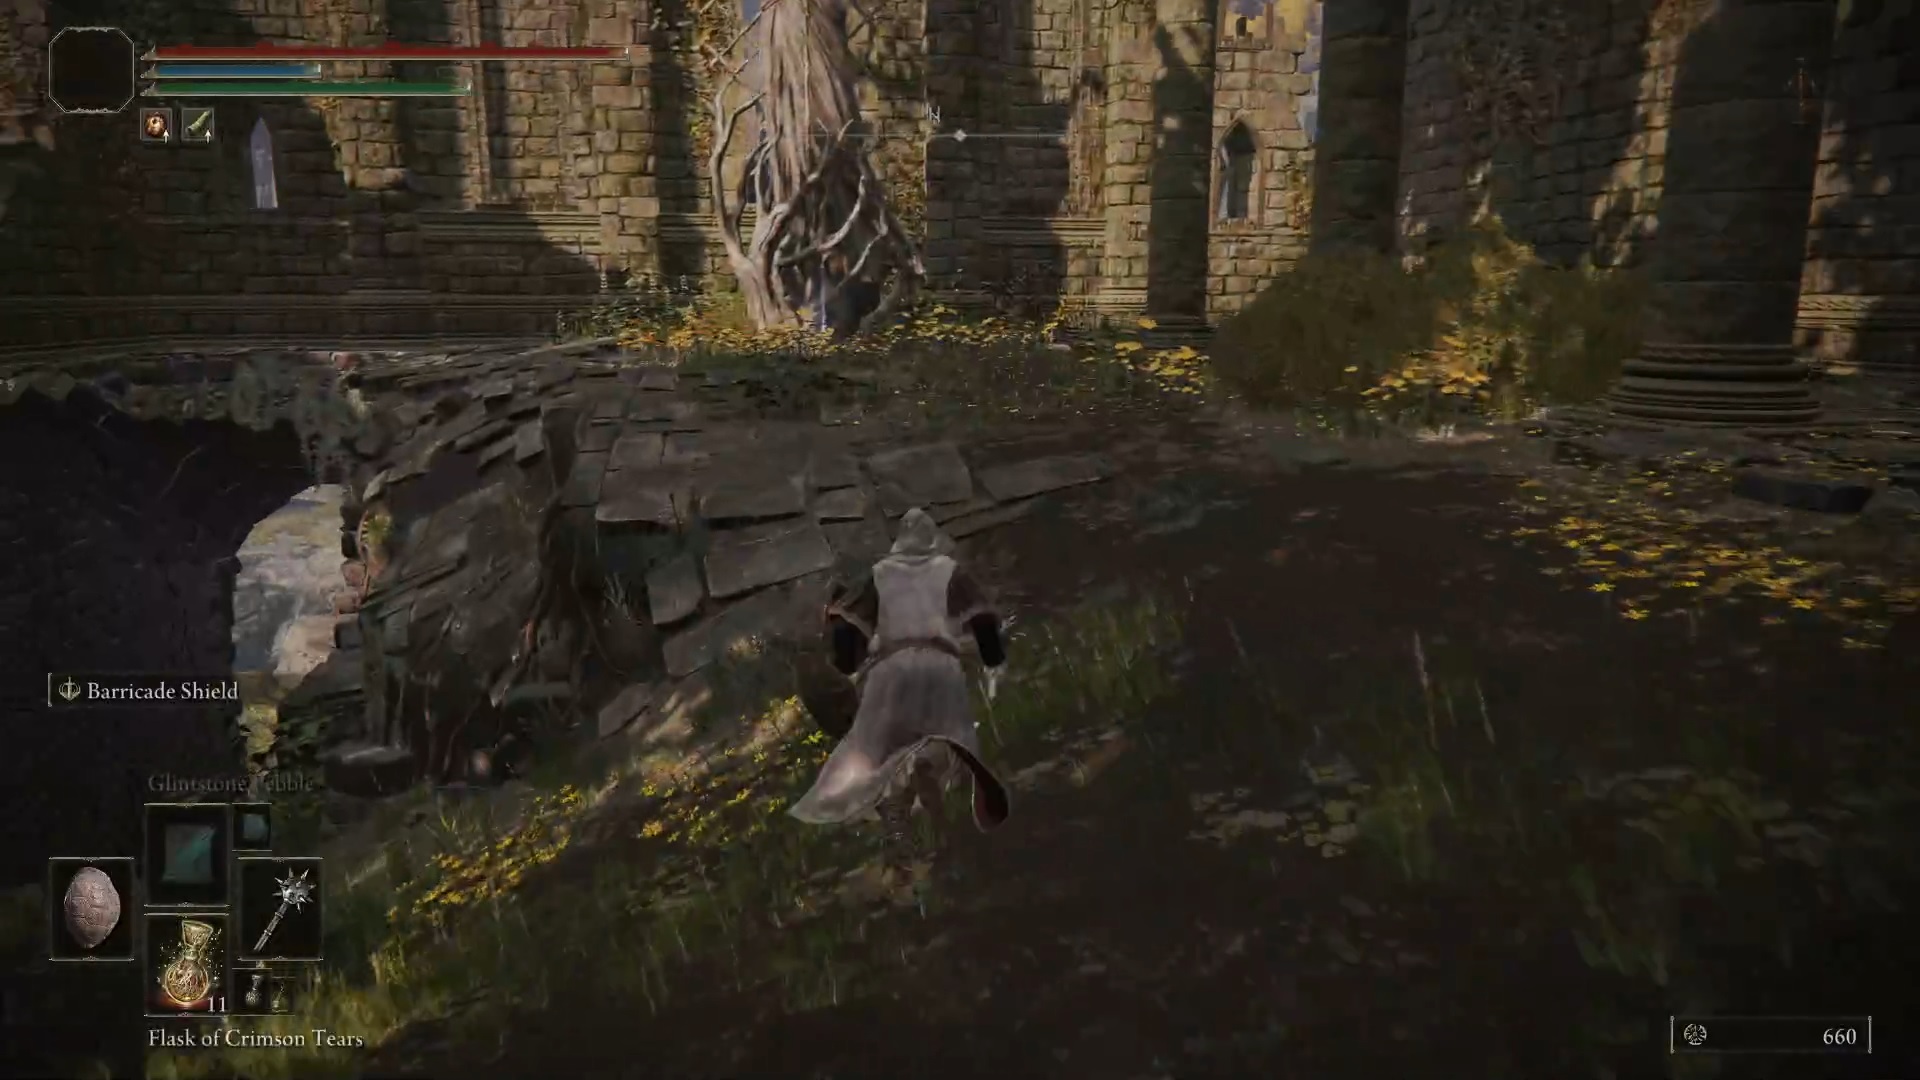
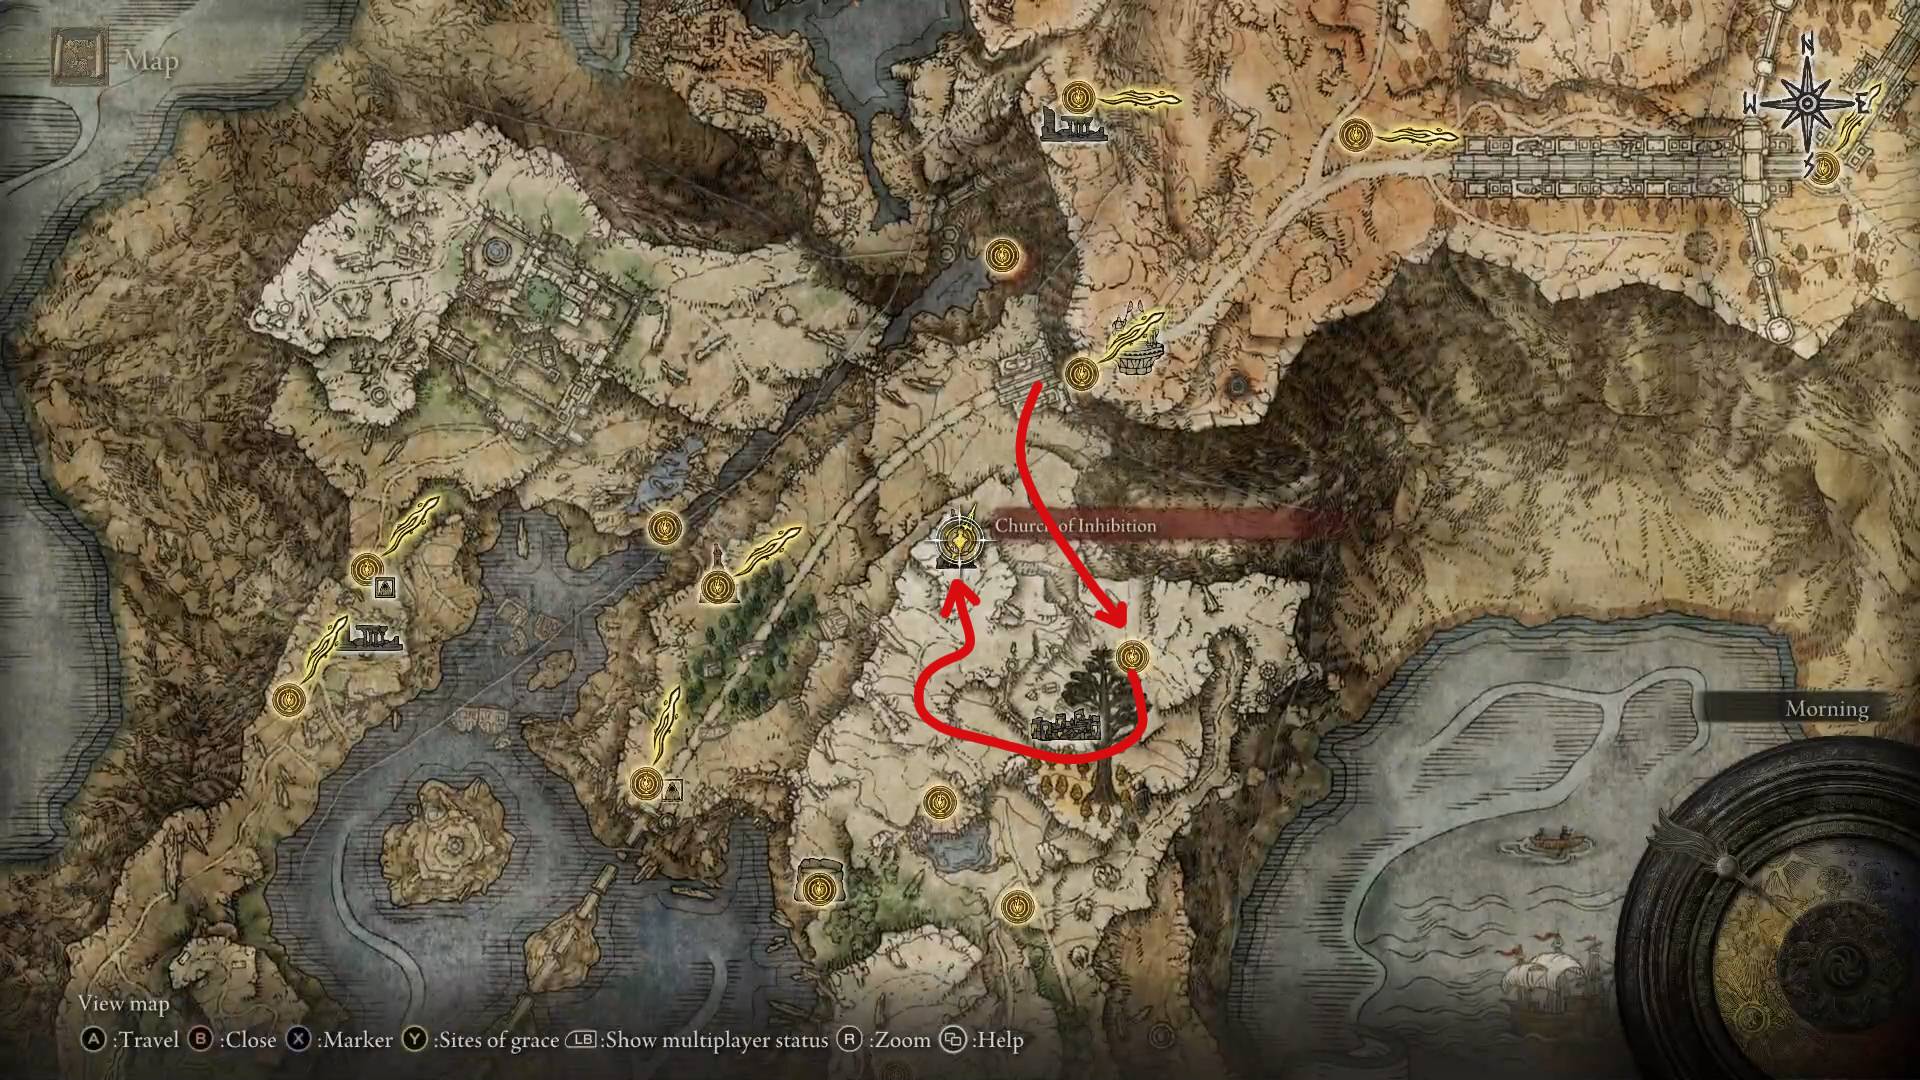
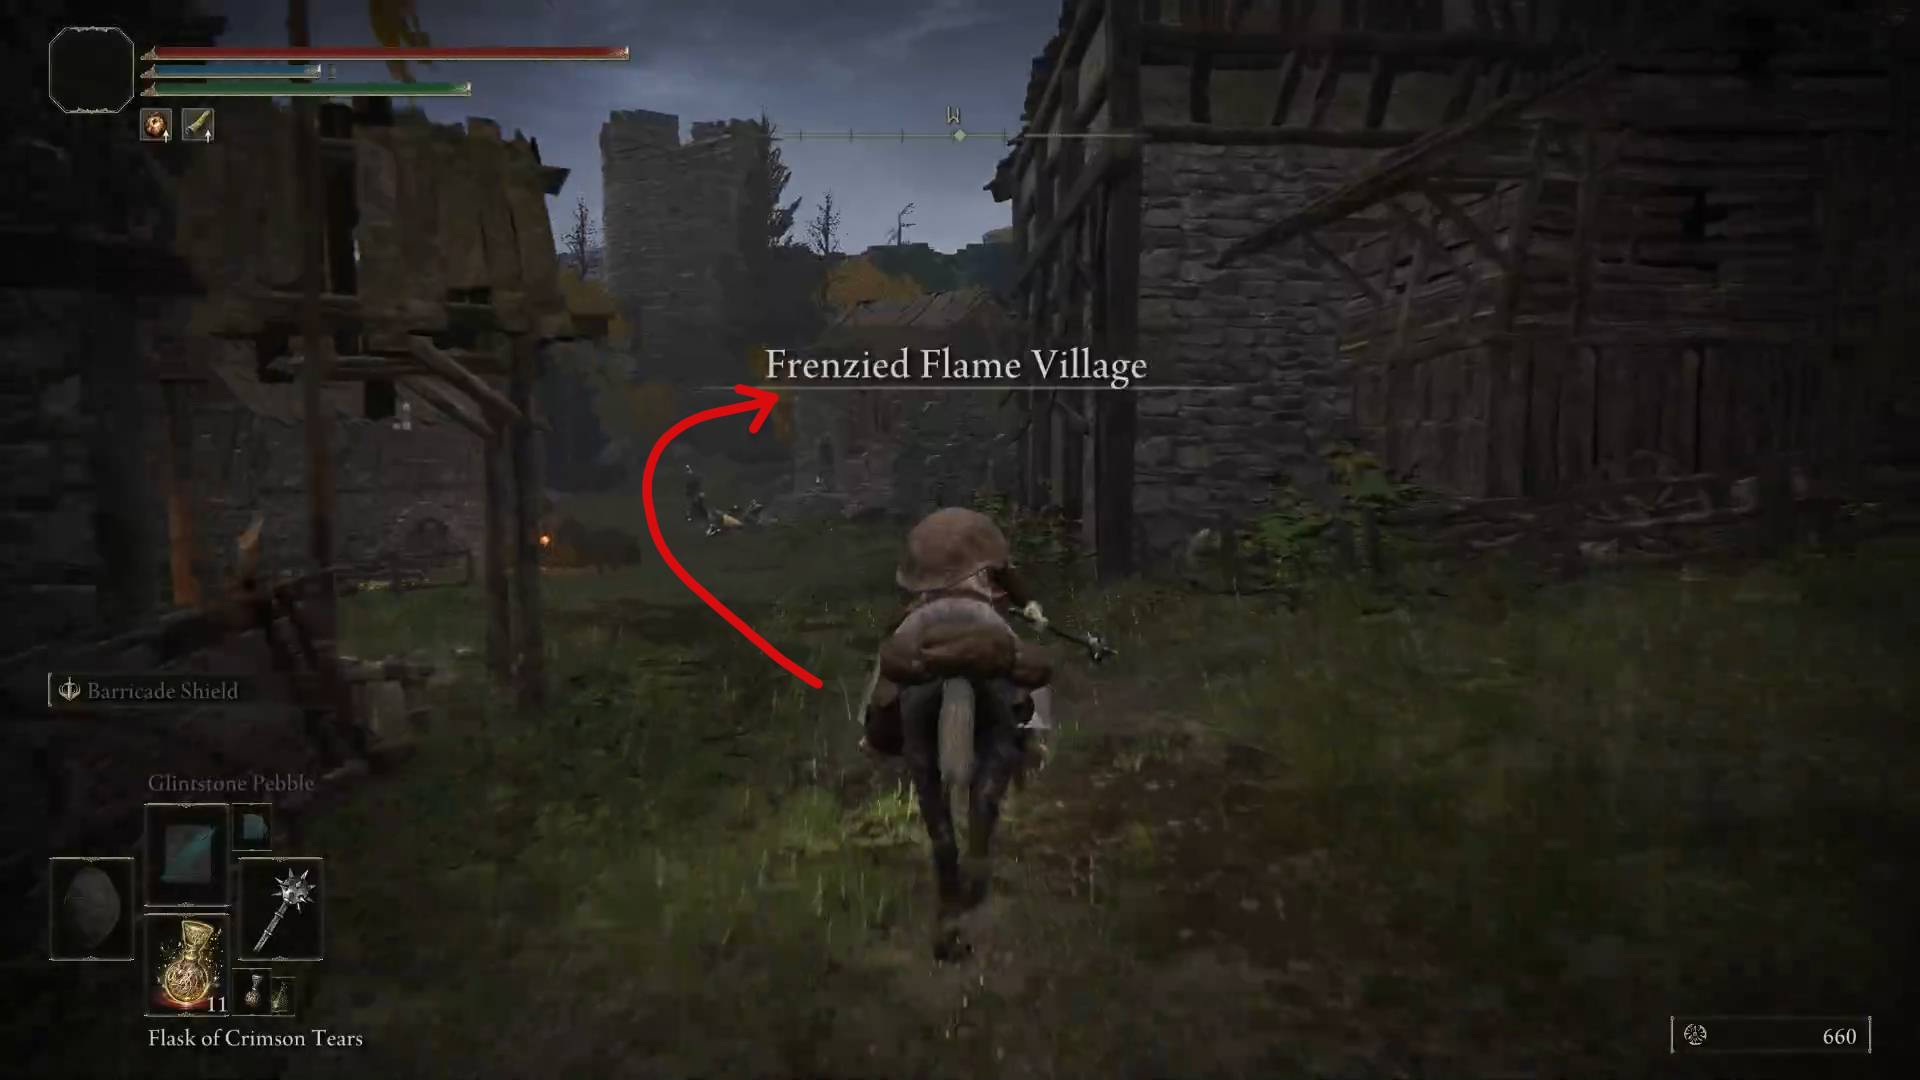
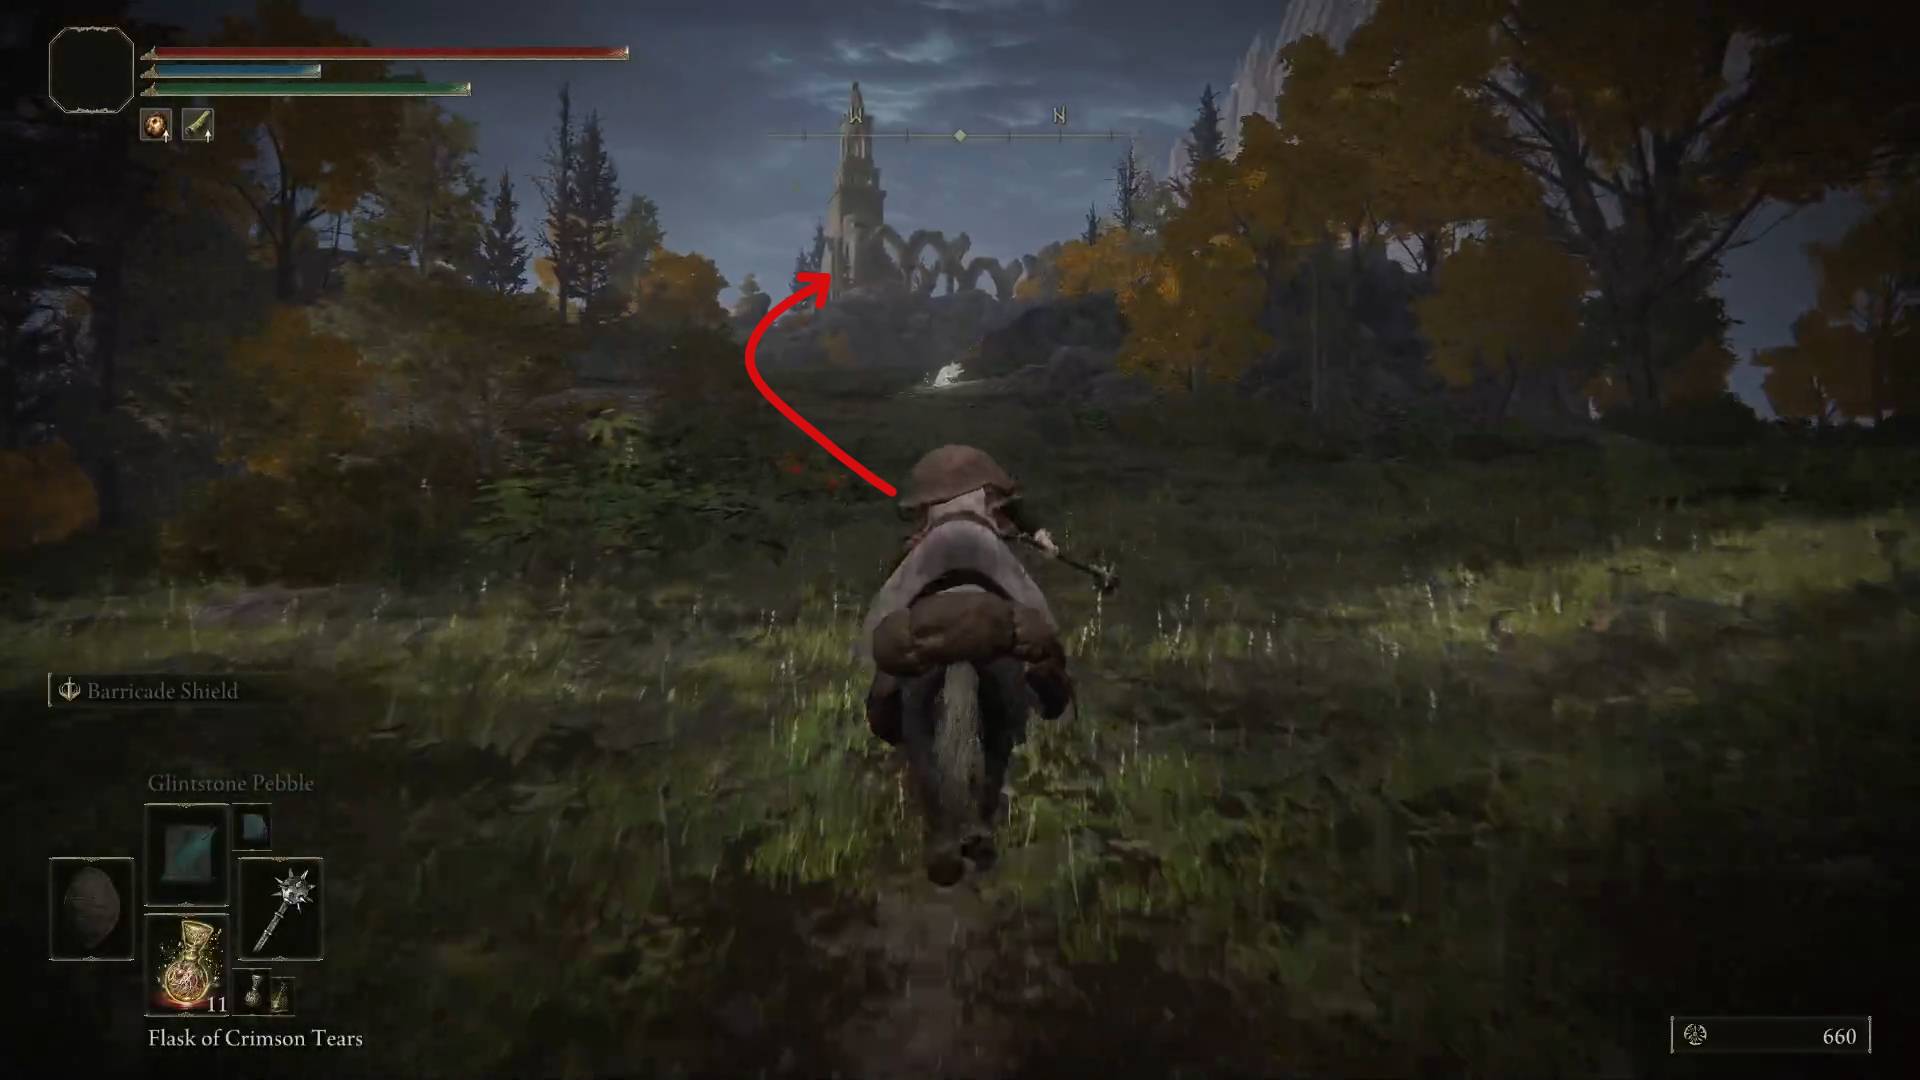
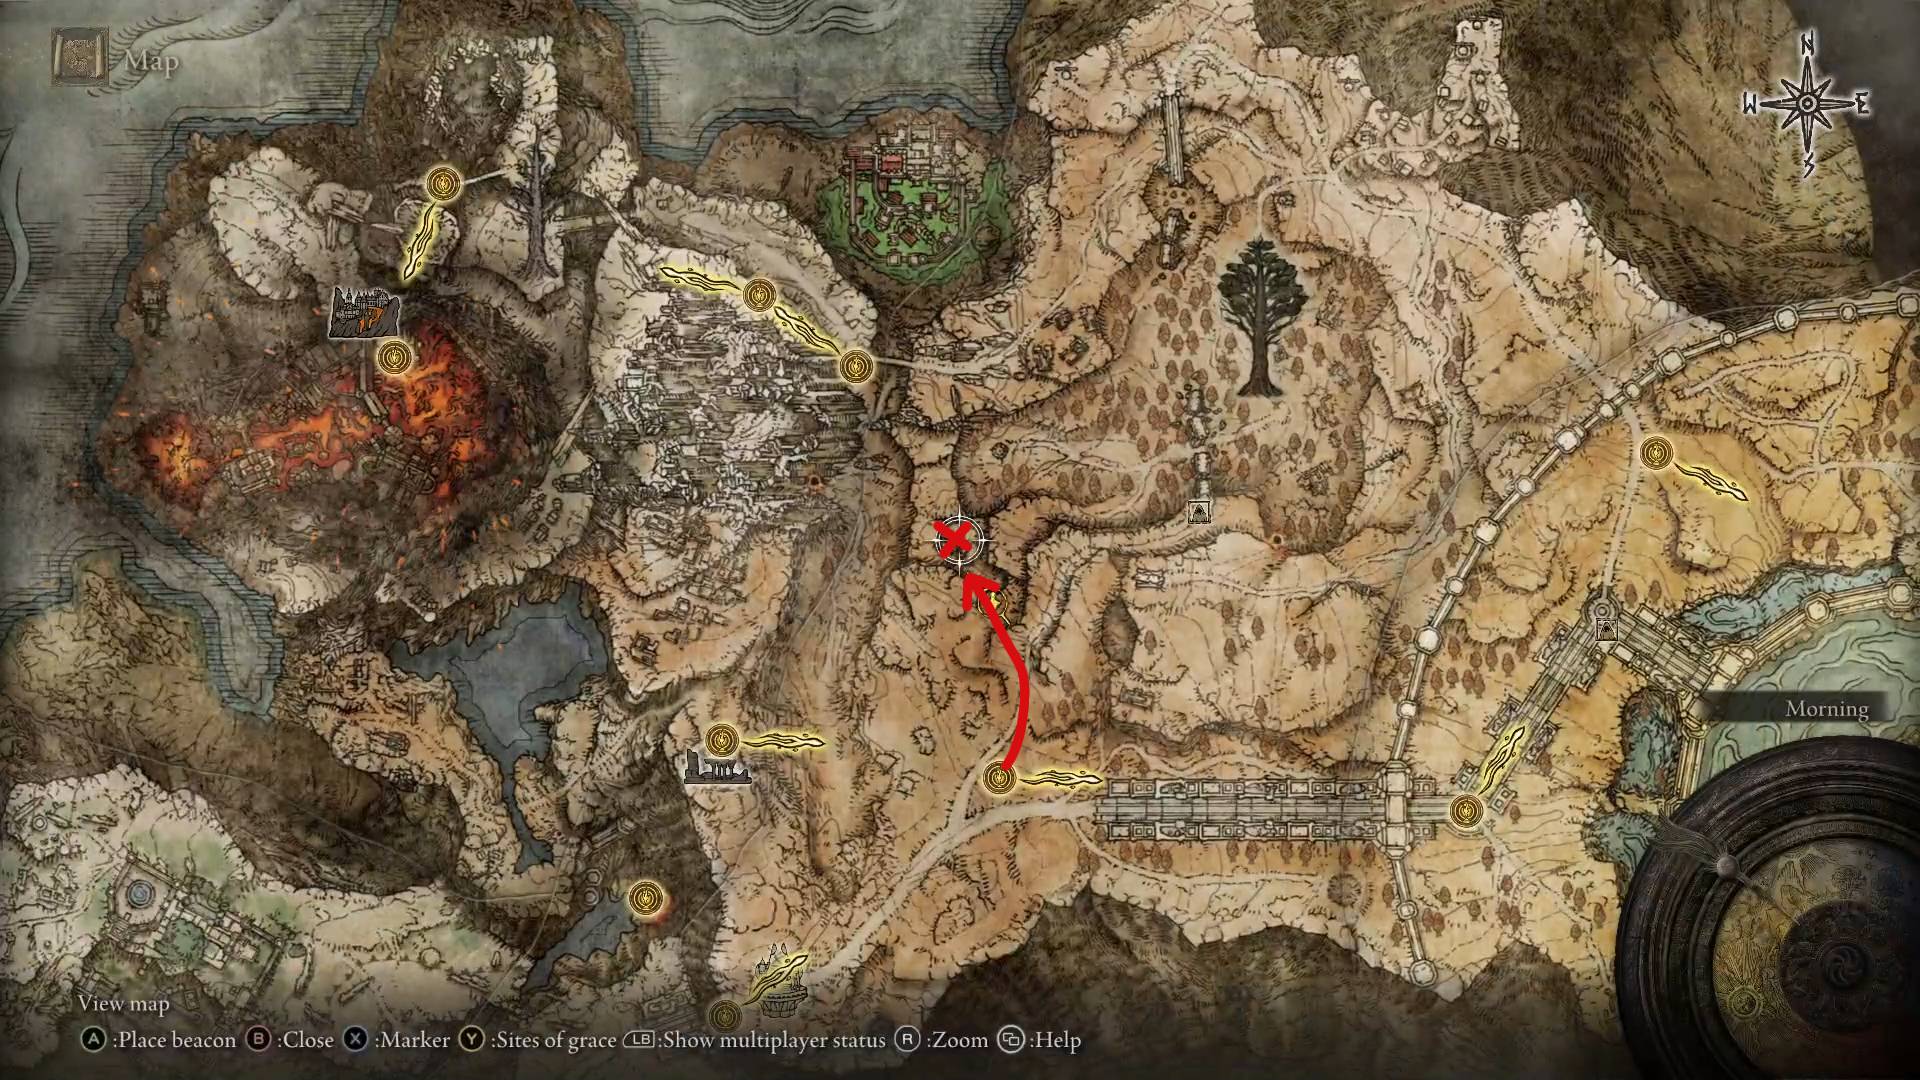
Church of Inhibition
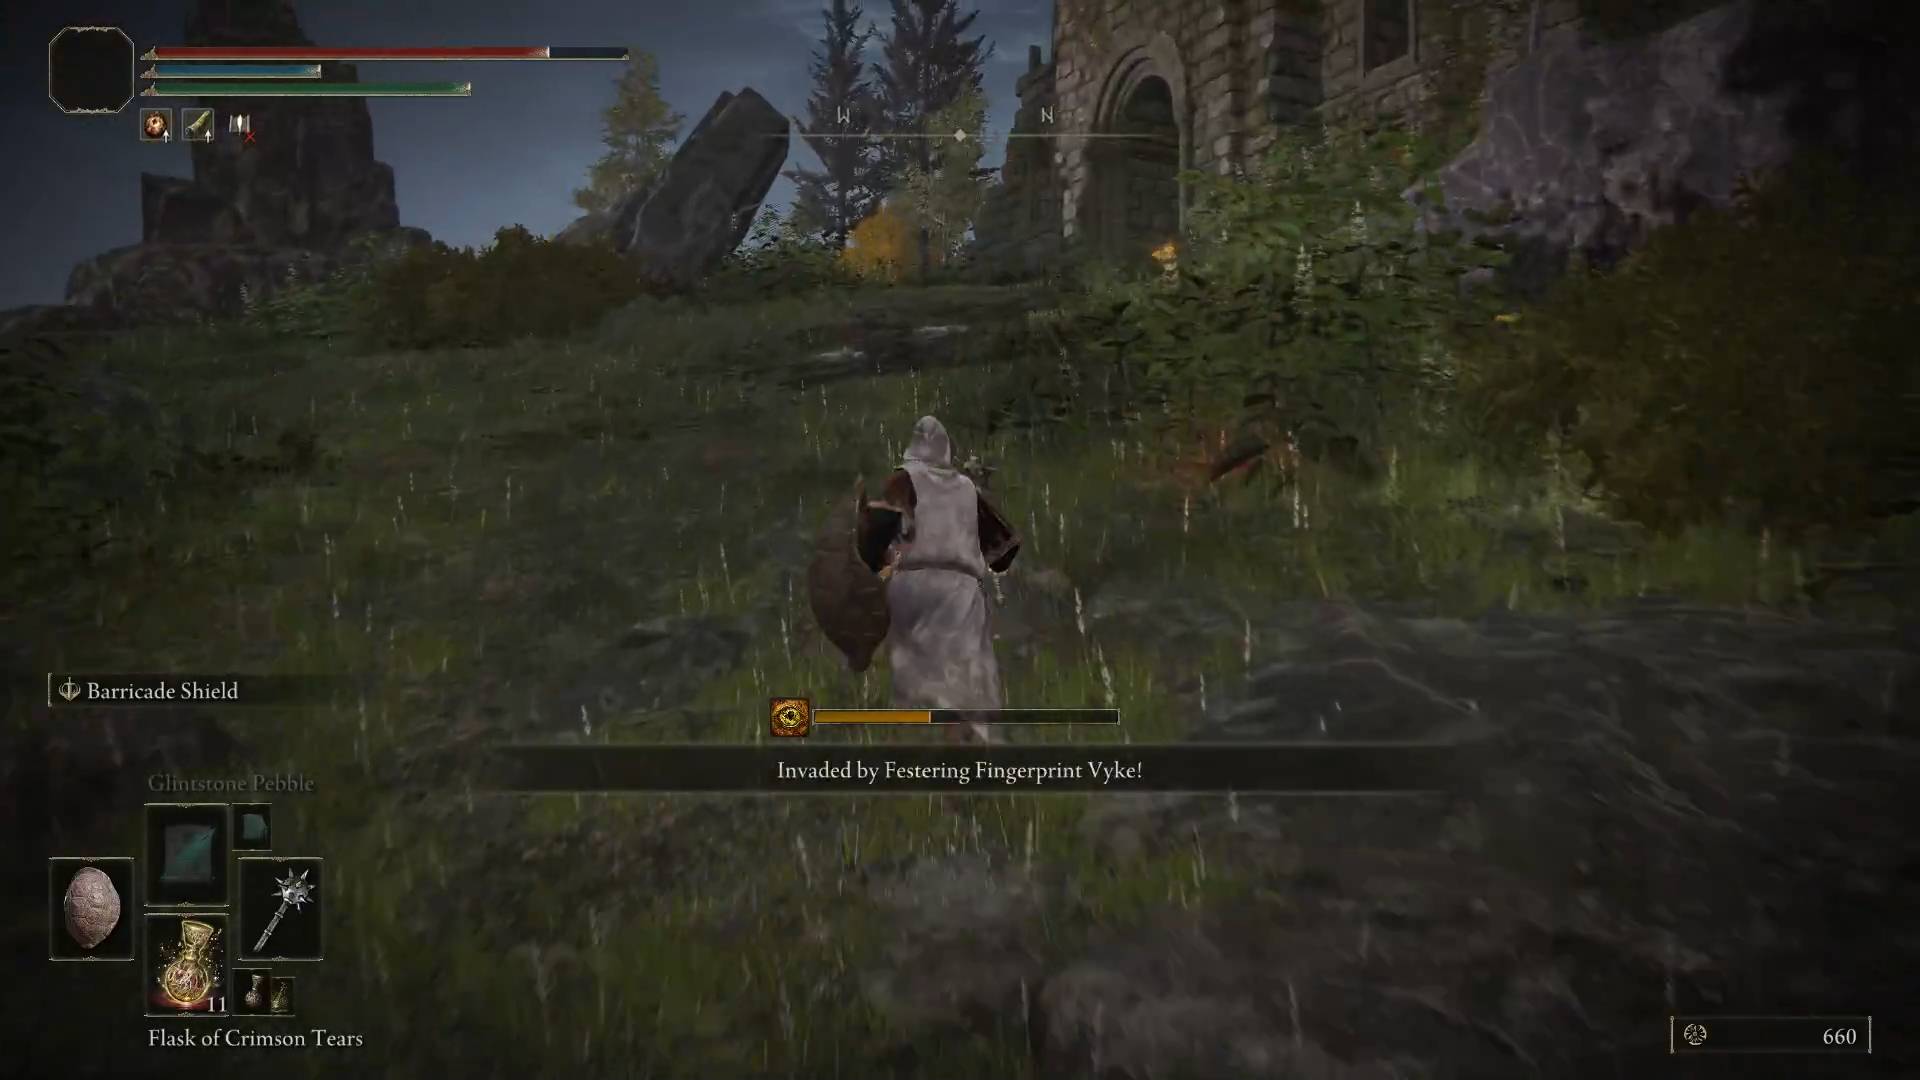
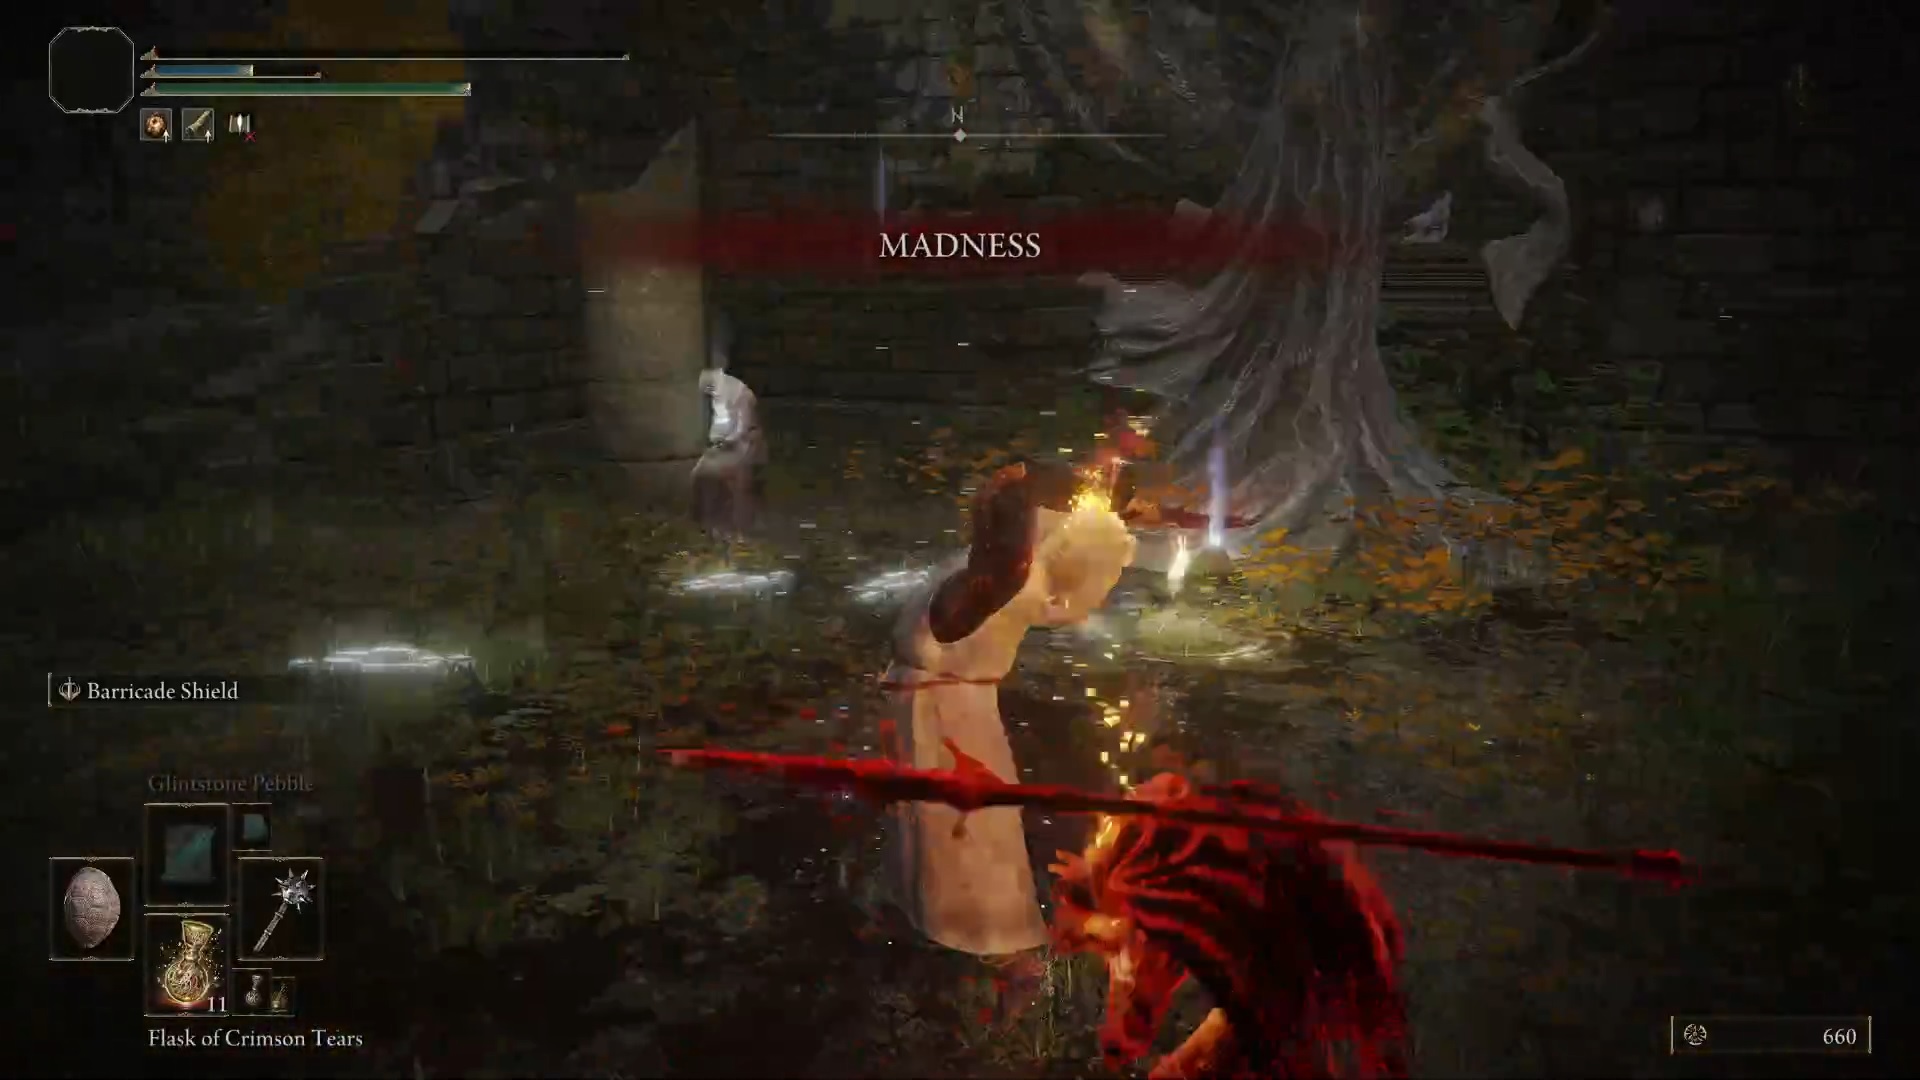
To get to the Church of Inhibition and the tear inside it, you’ll have to go through the Frenzied Flame Village found to the east of the Grand Lift of Dectus. Go through the village starting at the Frenzied Flame Village Outskirts grace and head up the hill. With the church in sight, you’ll be dismounted and invaded by a pretty strong NPC. If you don’t want to fight him, run inside the church and touch the grace there. You’ll probably die right after, but then you’ll respawn and be able to pick up the tear and teleport out.
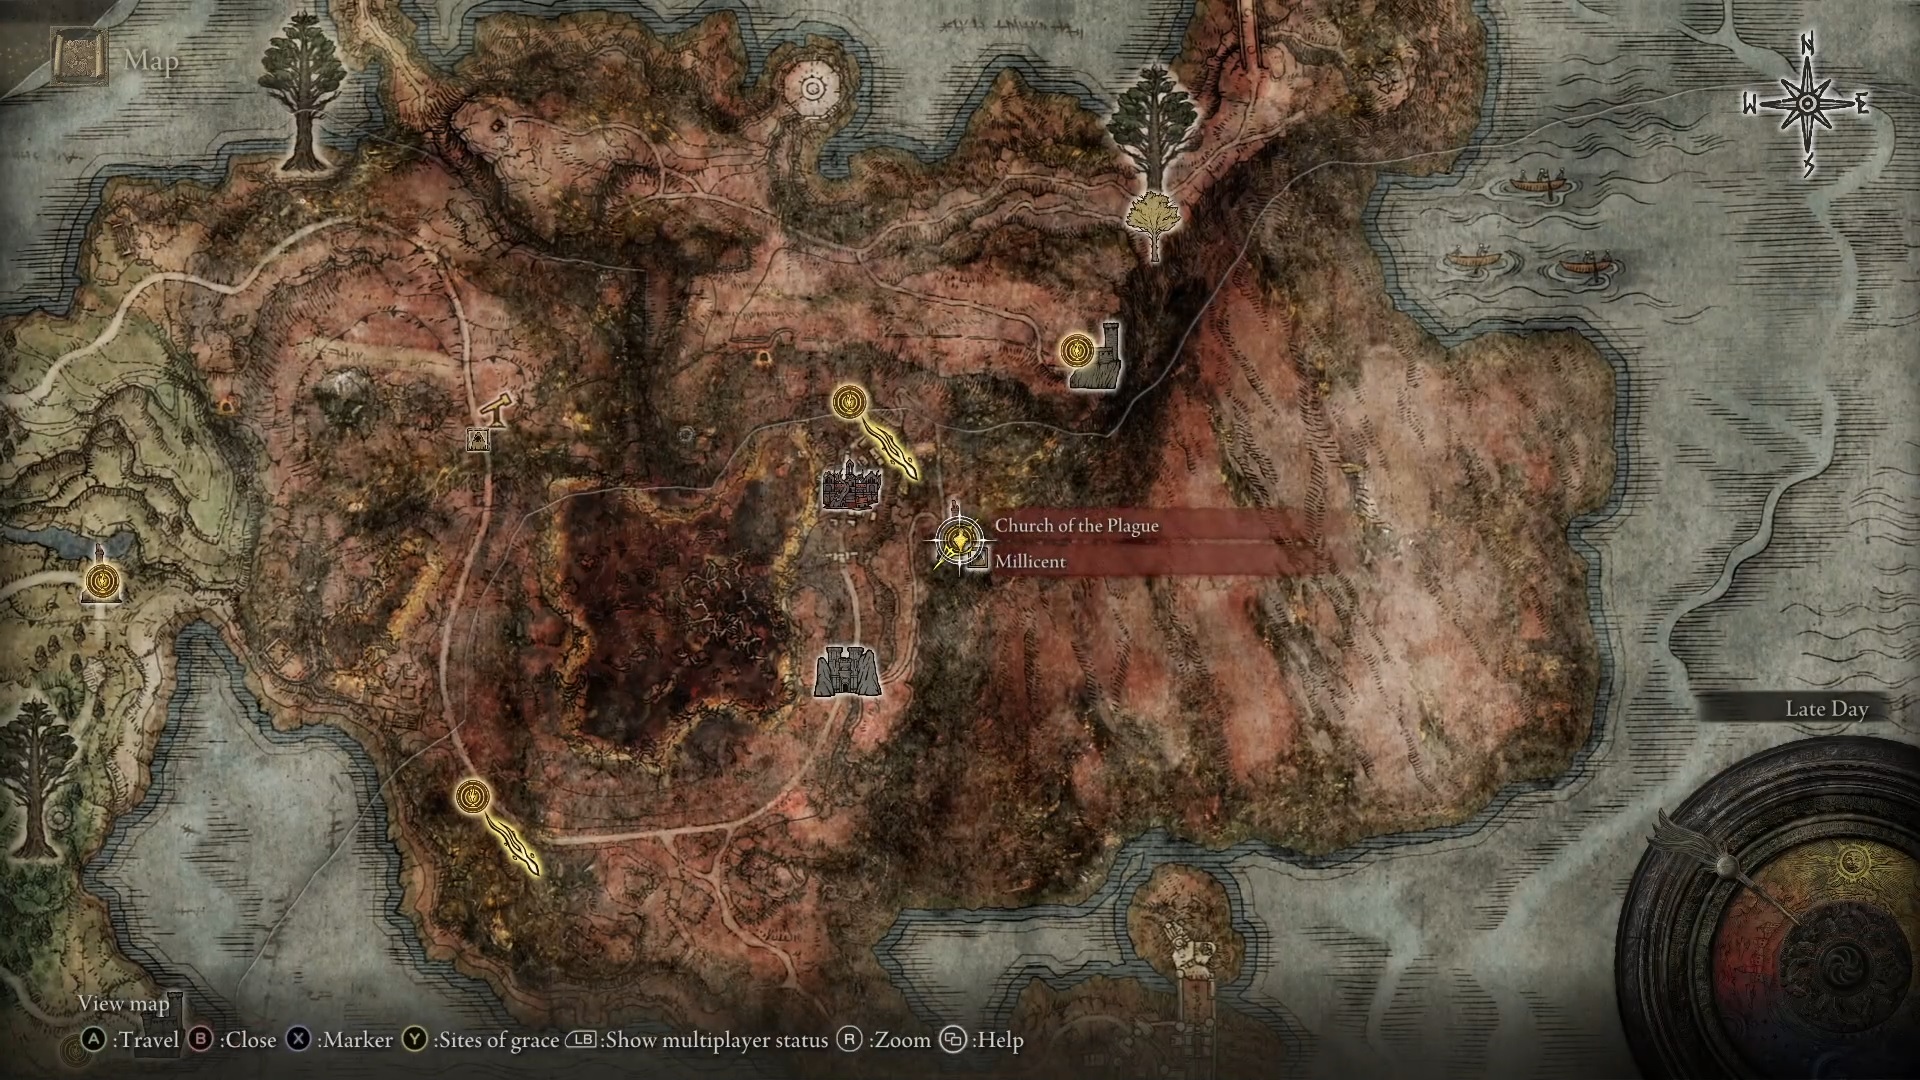
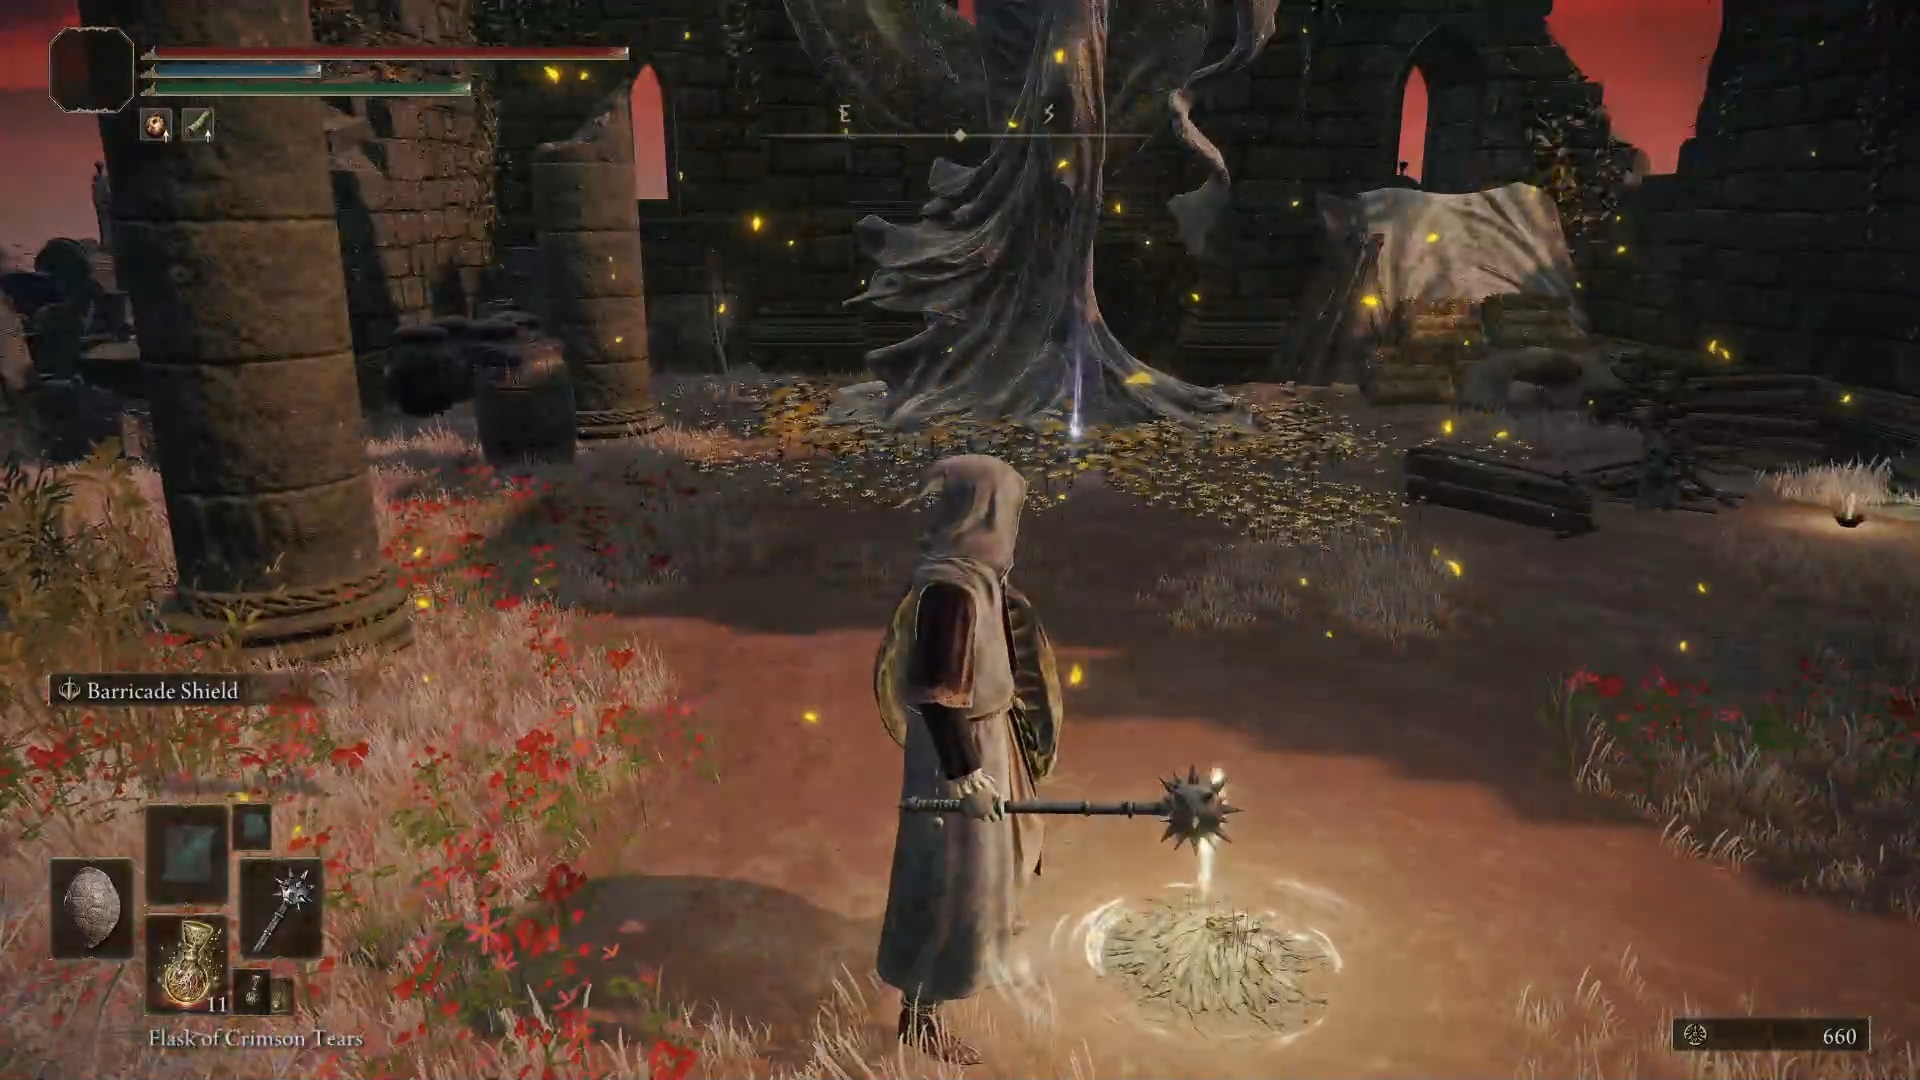
Church of the Plague
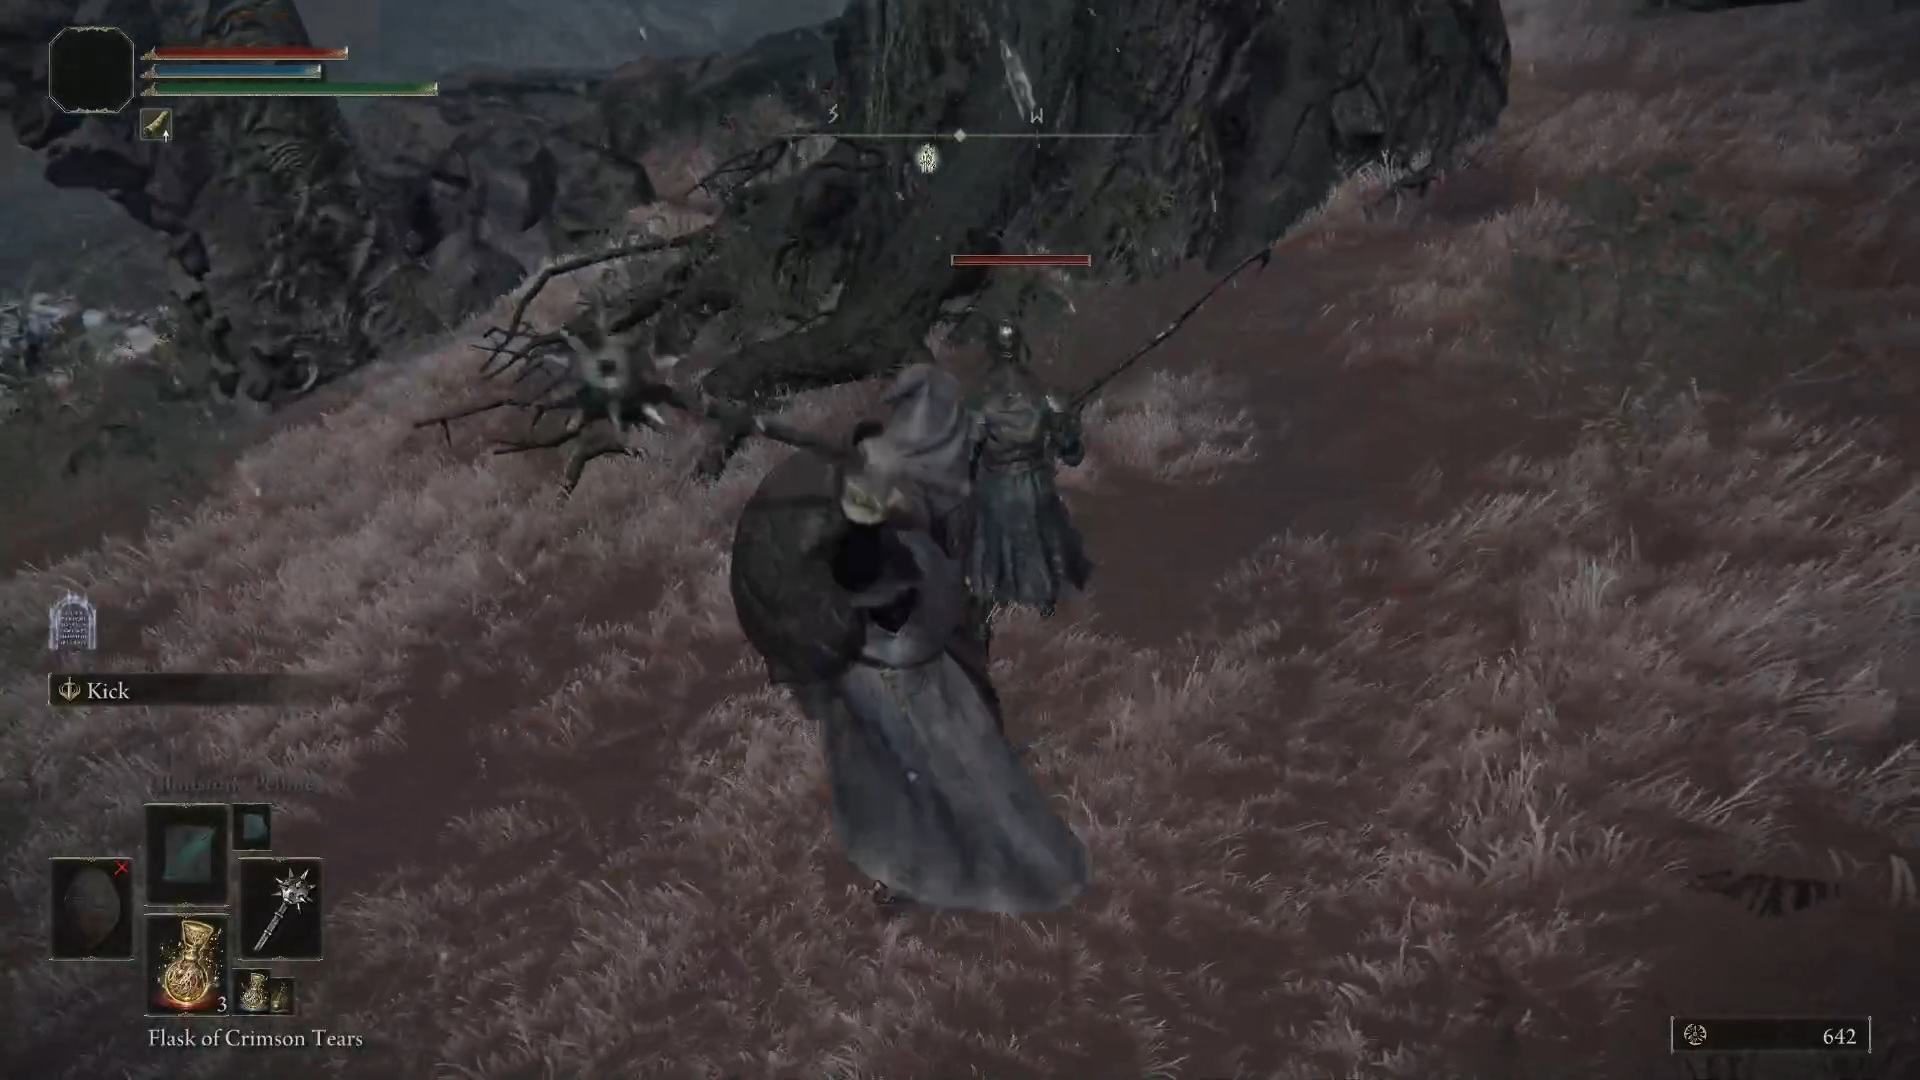
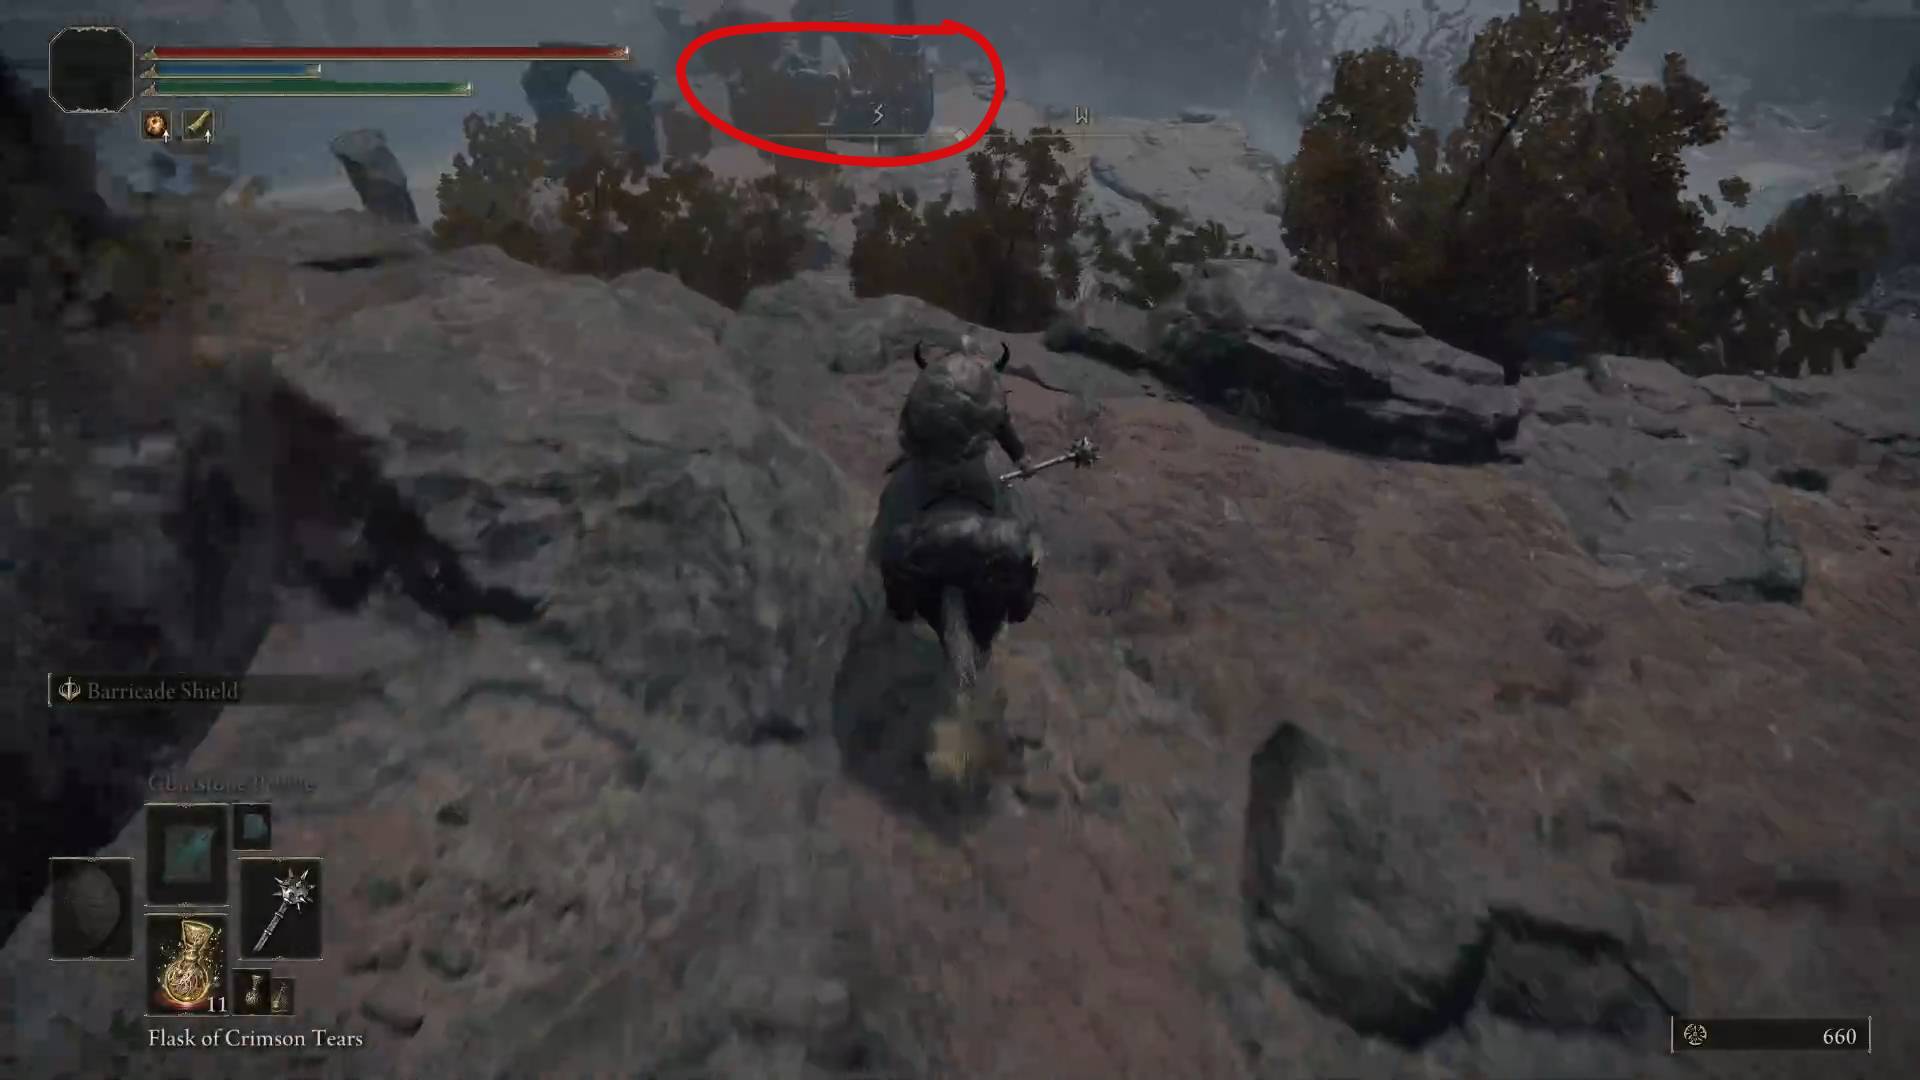
Caelid’s Church of the Plague holds another tear. You can get there by lifting the seals from Sellia or by jumping down and heading southwest from Fort Faroth.
View from around Fort Faroth
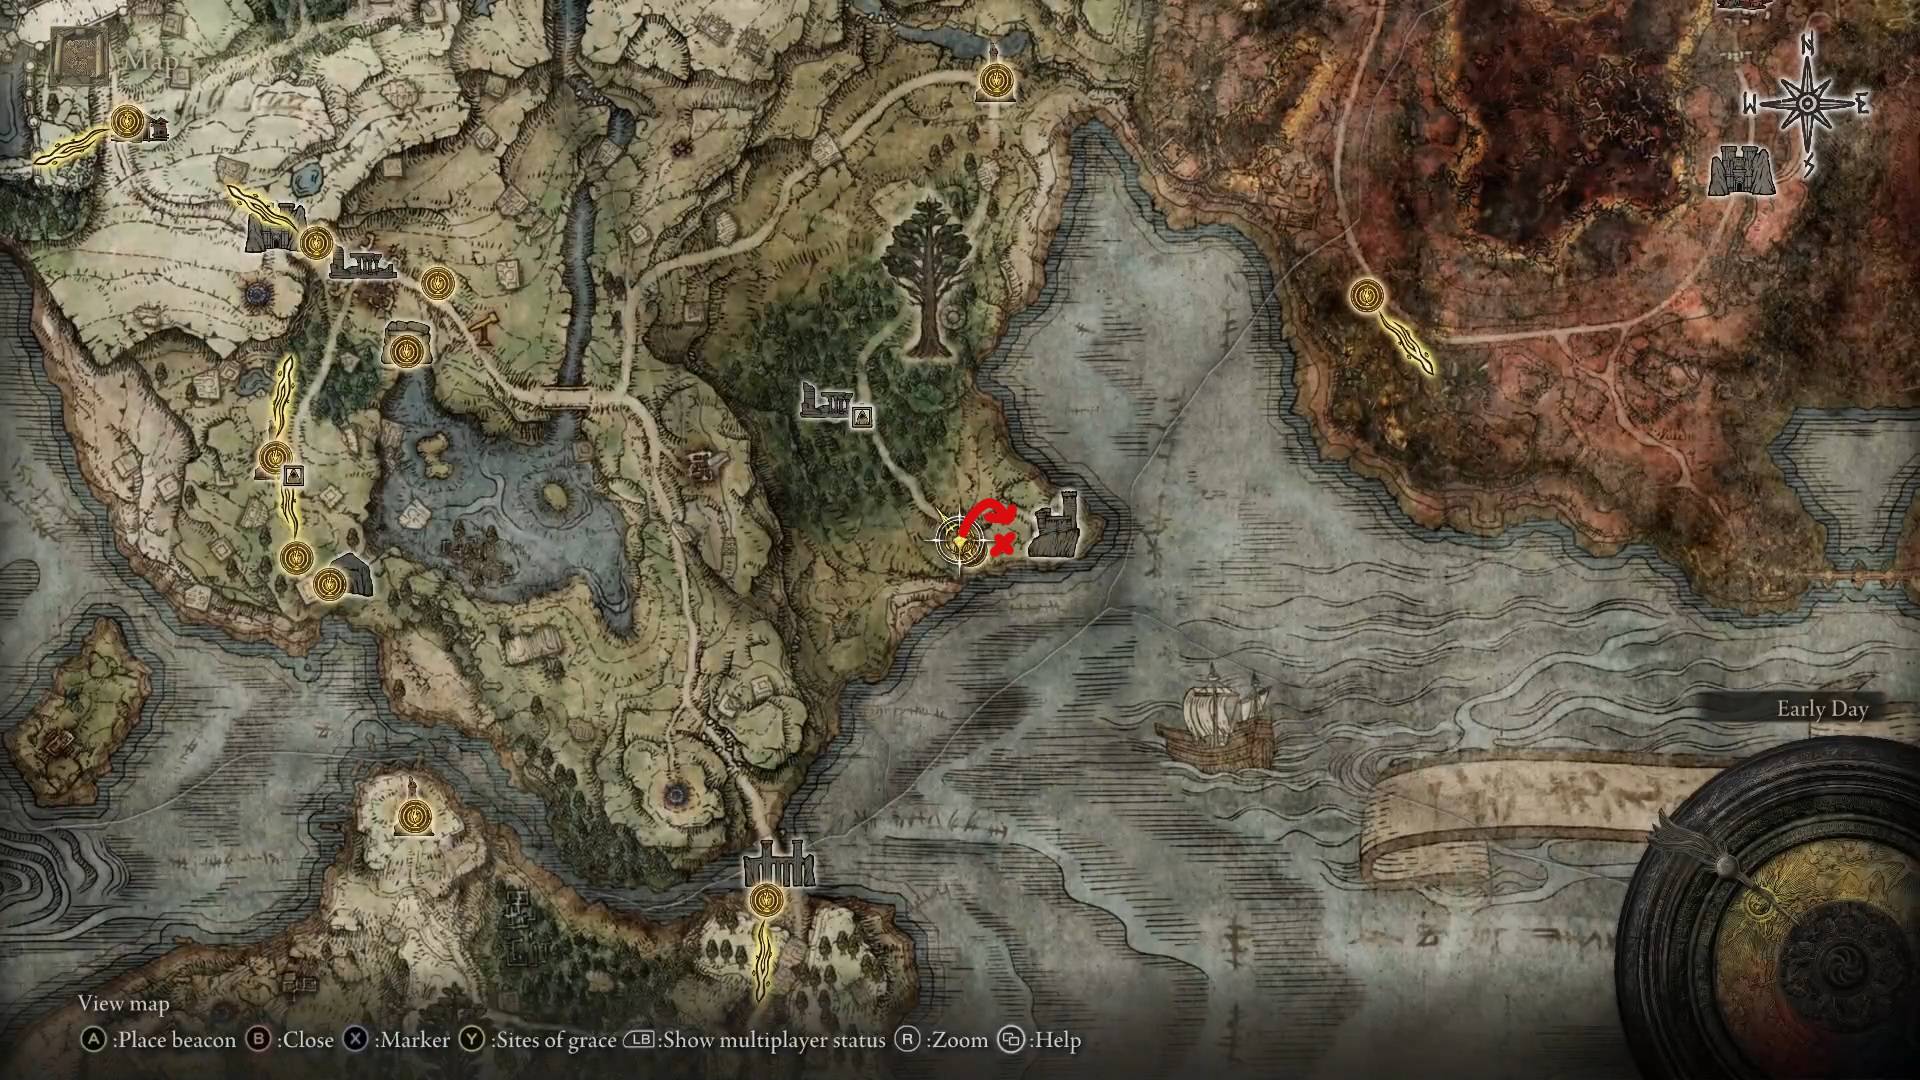
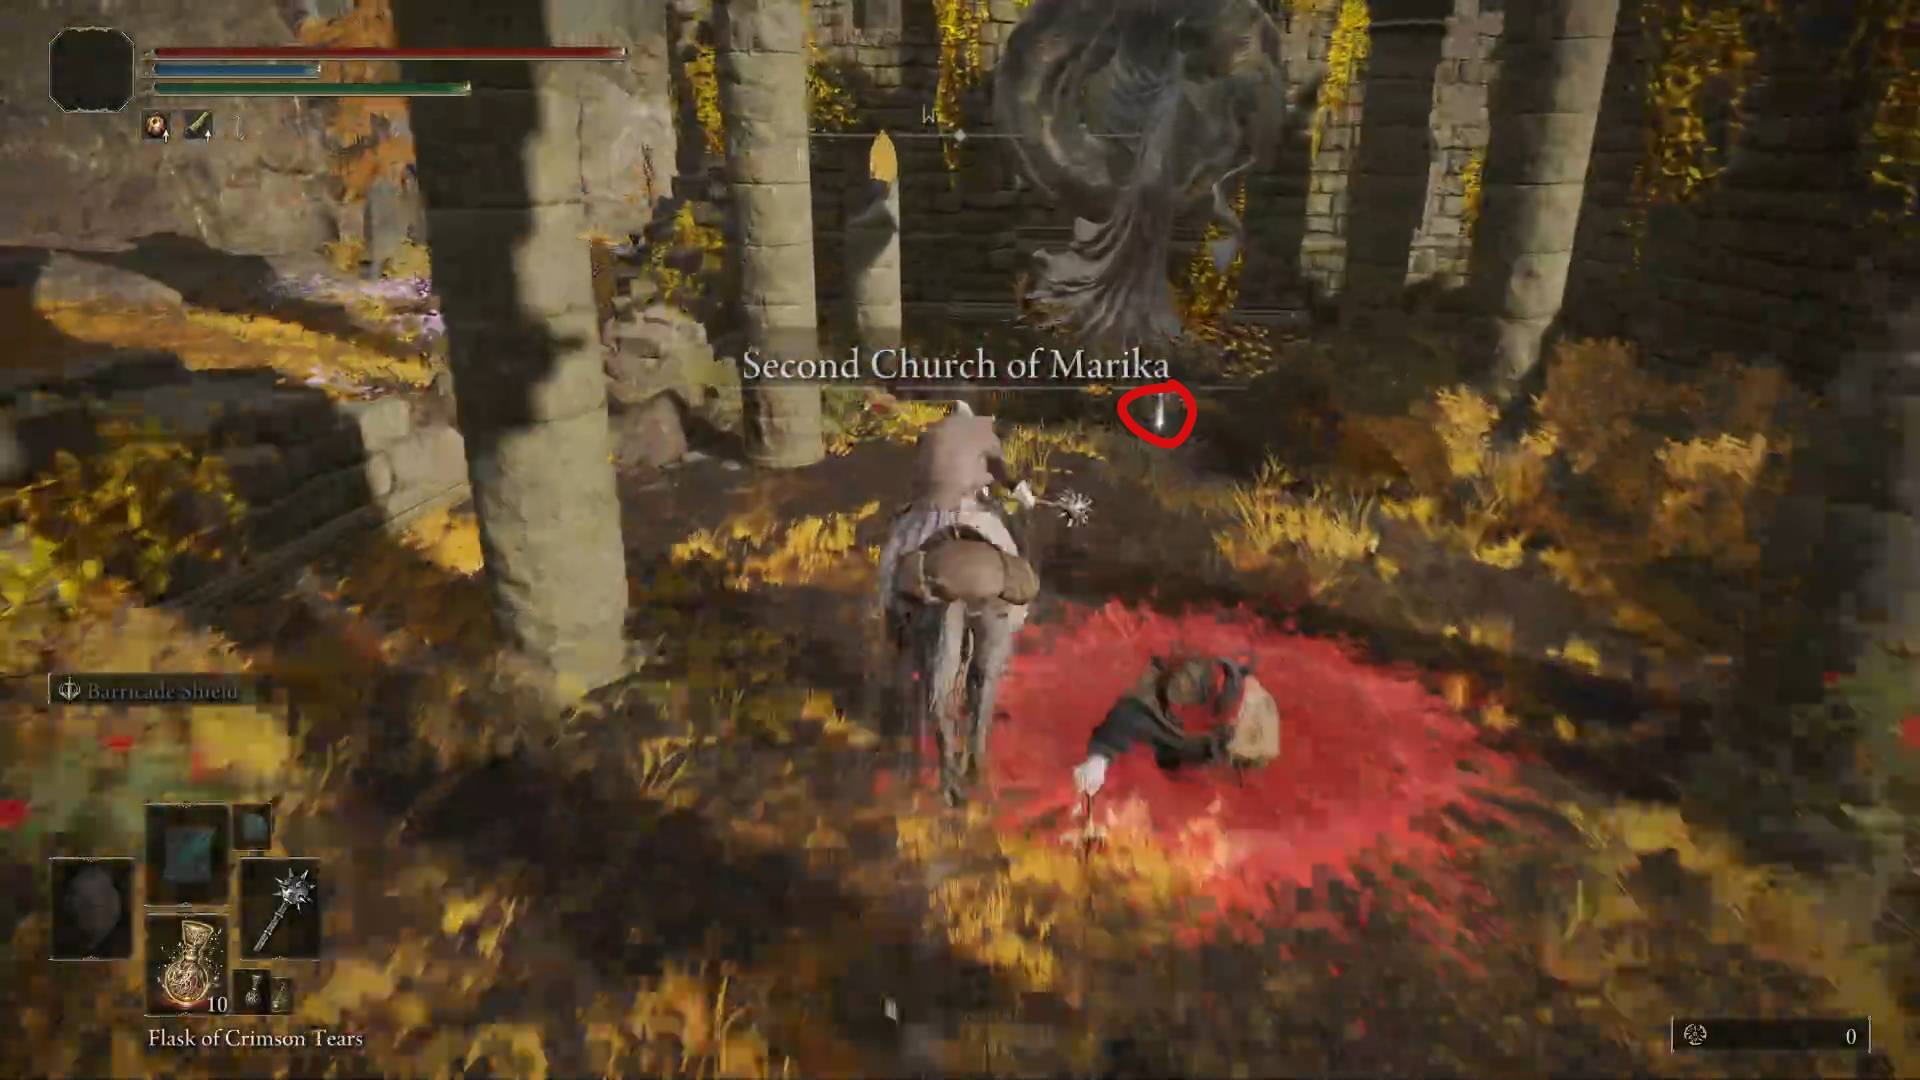
Second Church of Marika
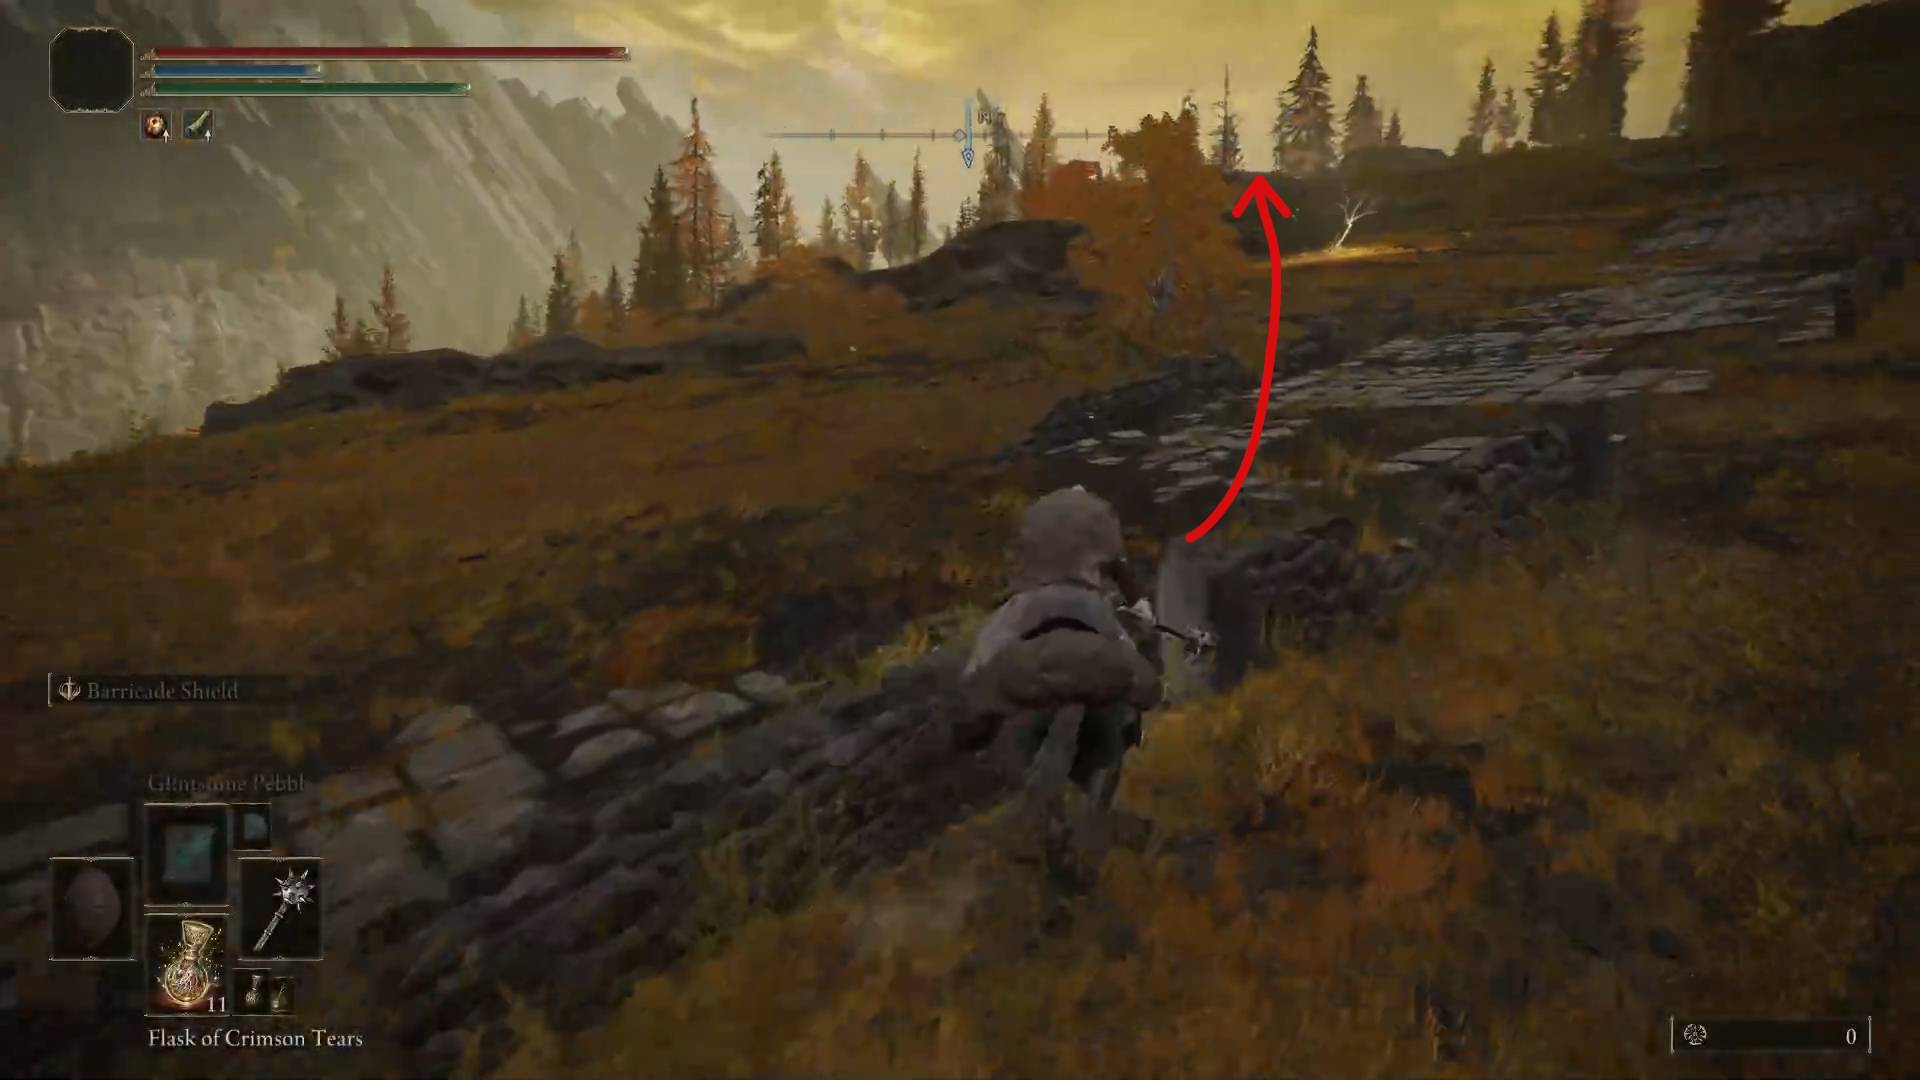
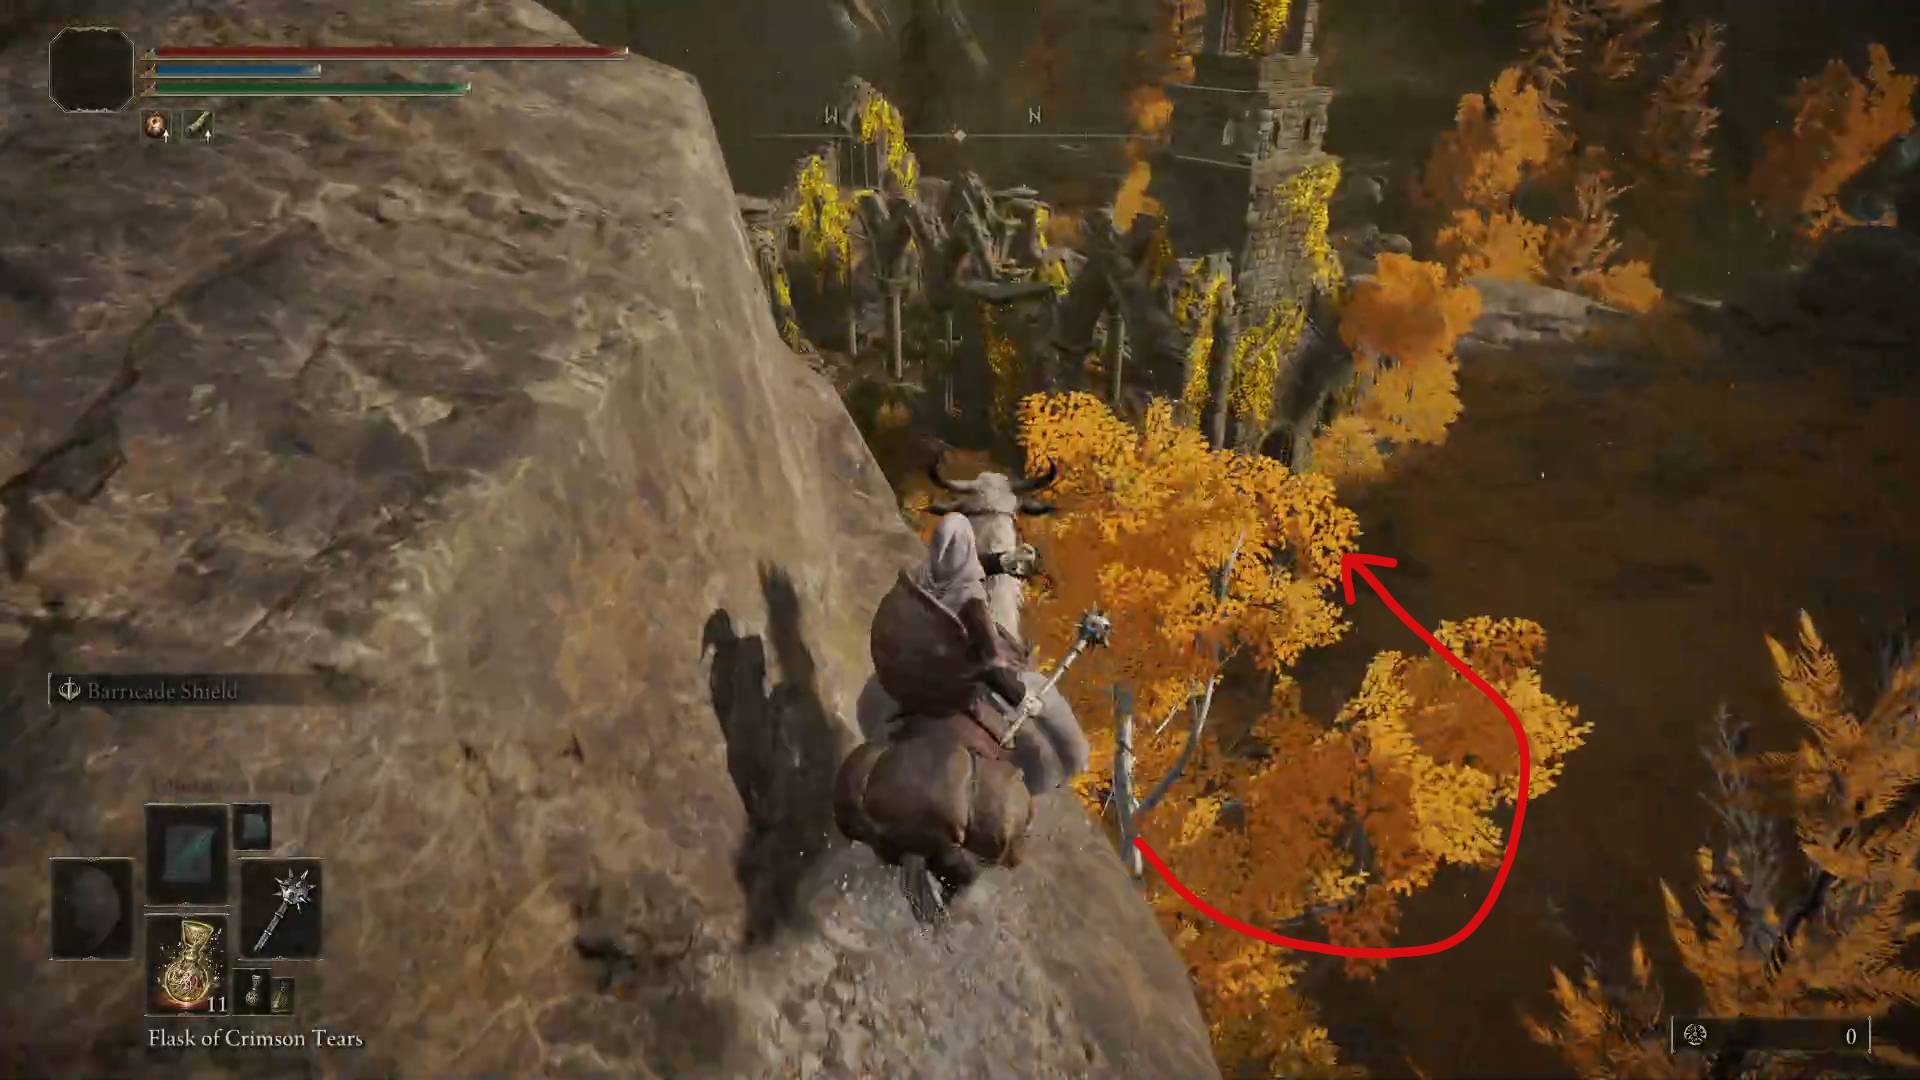
Much like the Callu Baptismal Church, the Second Church of Marika has been overrun. Only here it’s the bleeding enthusiasts that’s causing the problems and denying you a convenient grace location. So, start at the Altus Highway Junction grace and head north, but off the beaten path. Jump down a couple cliffs and you’ll be there. Just be careful not to fall prey to the NPC invader and all the dogs roaming the premises.
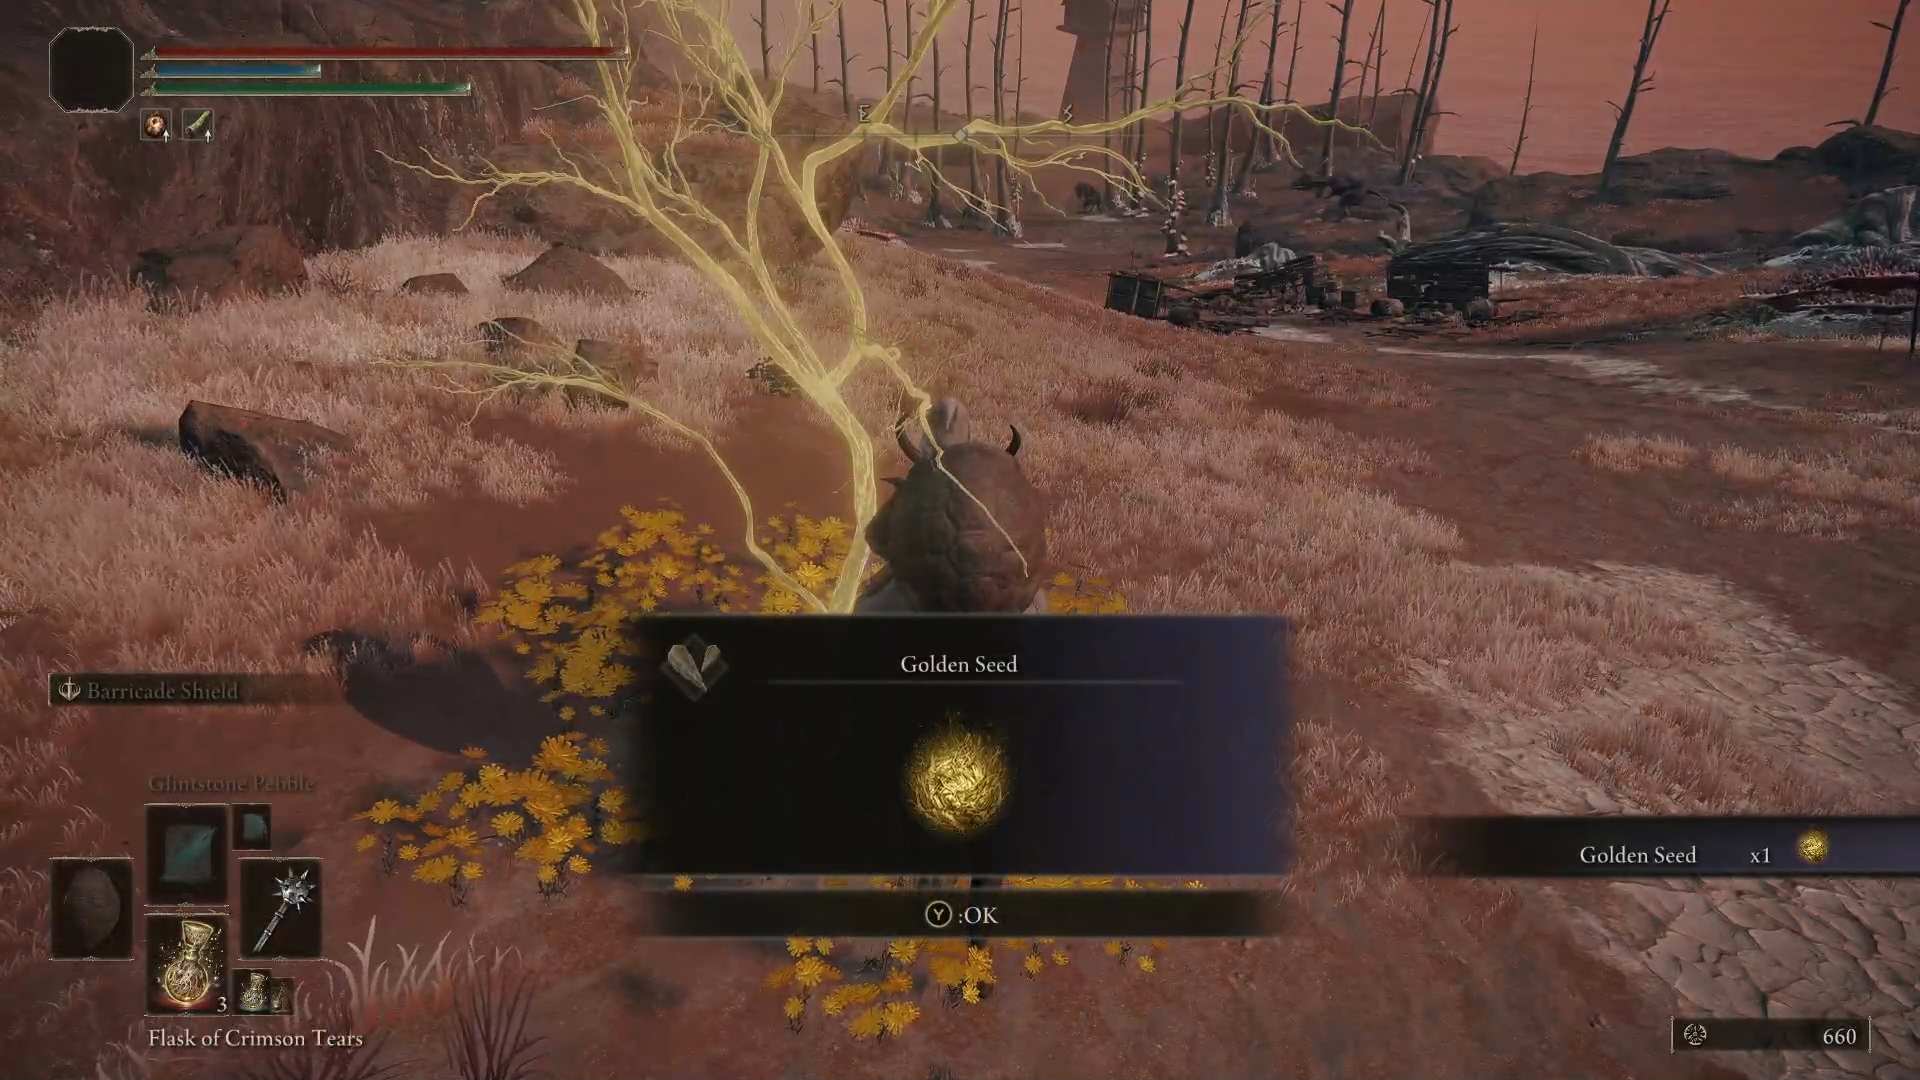
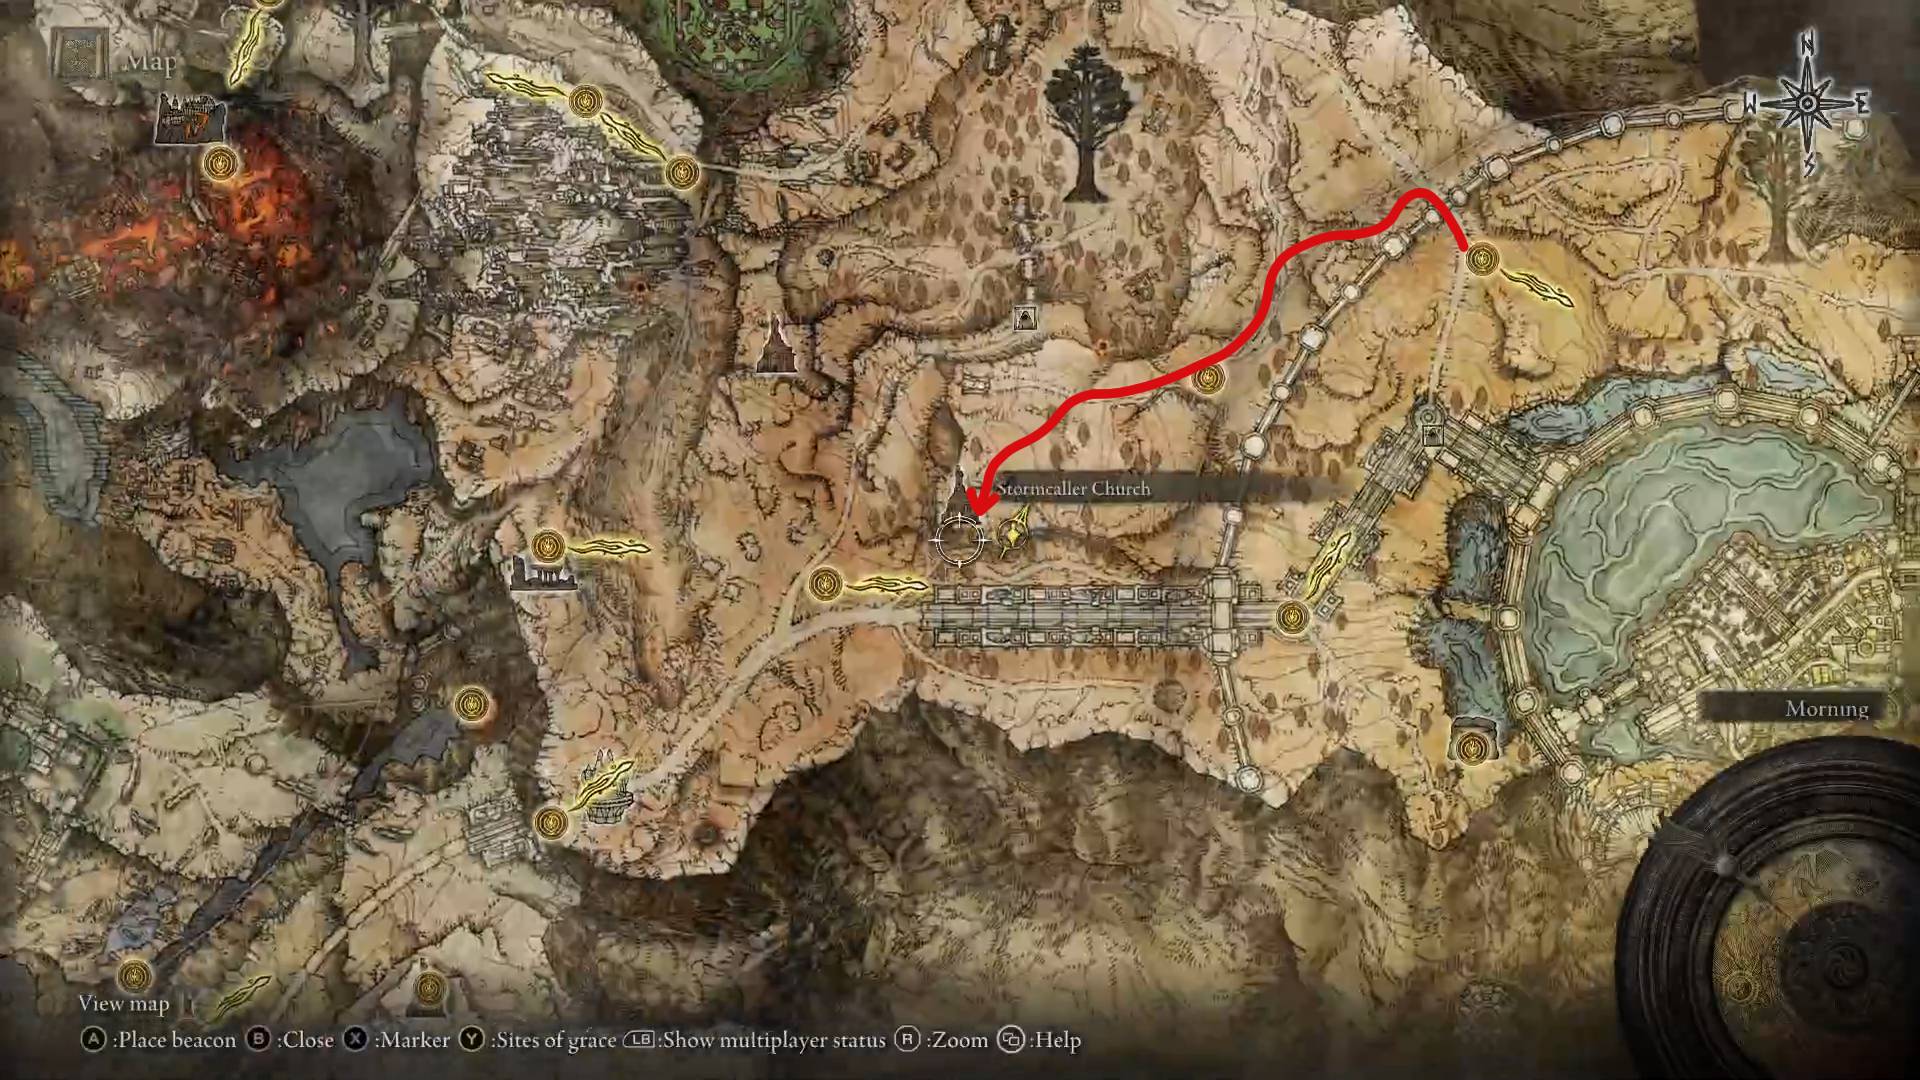
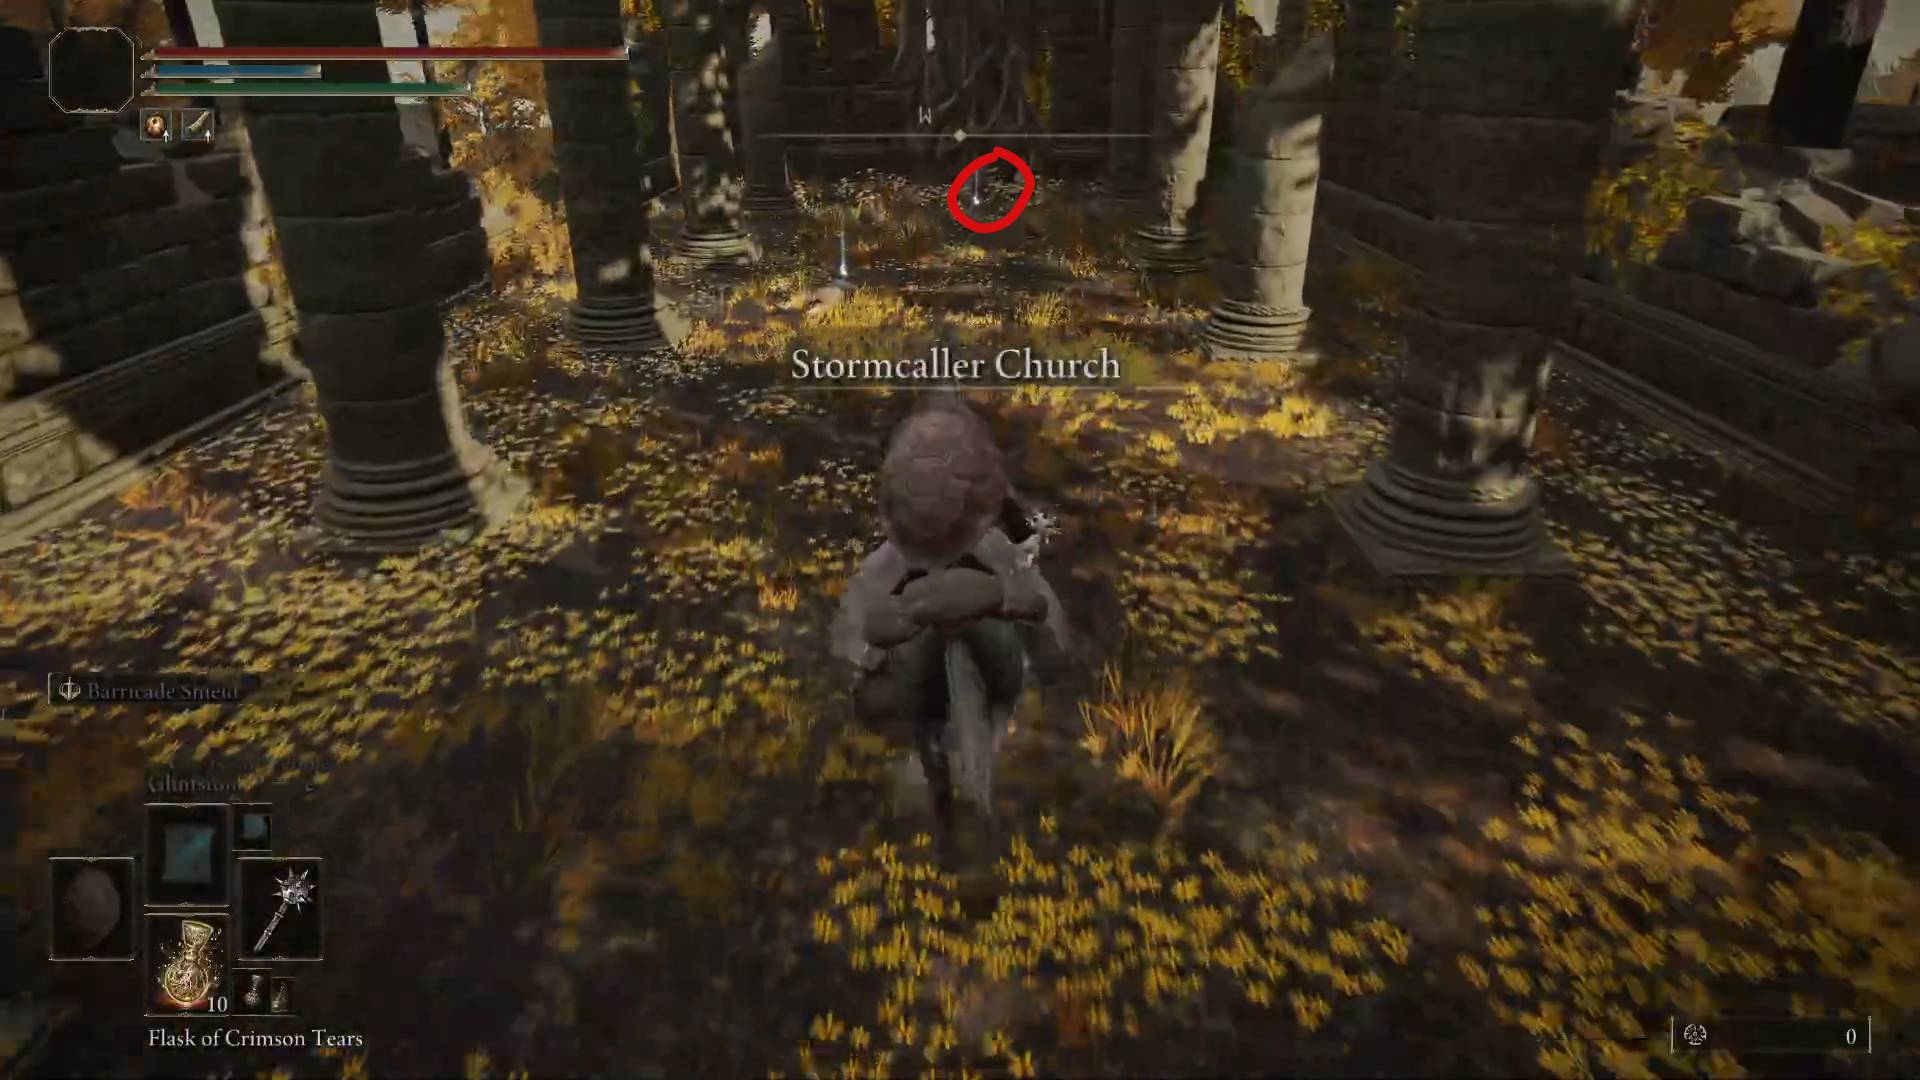
Stormcaller Church
Another church without a grace. To get to it, you’ll probably be starting at the Outer Wall Battleground grace. Move out the gate and follow the narrow path leading to the Sainted Hero’s Grave. Before reaching the grave, turn south, and you’ll find the Stormcaller Church. You’ll recognize it by all the lightning bolts around it.
We hope this guide was helpful, and will allow you to enjoy your return to Elden Ring that much more.
Share this article:
Val Hull
Resident role-playing RPG game expert. Knows where trolls and paladins come from. You must fight for your right to gather your party before venturing forth.