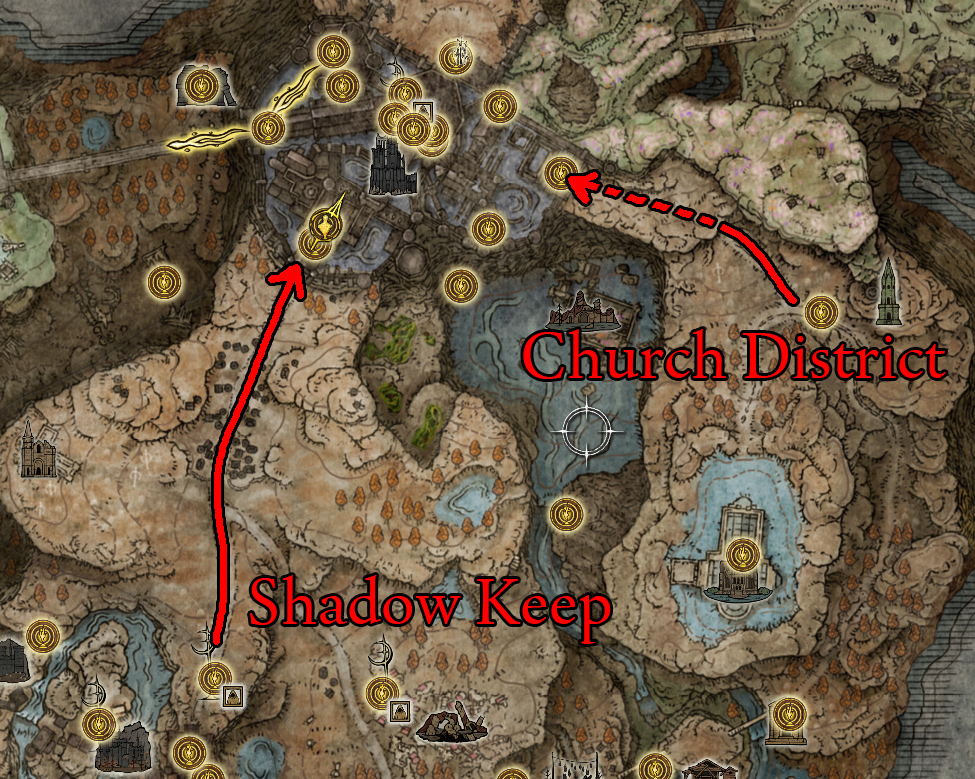
The Shadow Keep dominates the Land of Shadow, serving as a menacing landmark no matter where you. Home to one of the game’s toughest bosses, you’ll have to brave its walls and make your way to the top in order to complete the DLC’s main story.
How to Get to the Shadow Keep & Church District
The Shadow Keep is relatively simple to enter, although it’s worth noting there are two entrances, one for each of the two distinct parts of the keep. You need to approach the keep from both directions in order to access the two areas:
You can enter the main section of the keep from Scadu Altus as soon as you enter the region — the keep is just up the road north from the Highroad Cross site of grace. Open the front gate, go up the elevator, and you’ll find the Shadow Keep Main Gate site of grace.
The Church District of the keep is reached from Scadu Altus as well, but you’ll have to reach the far eastern portion of the region first. Follow the road that leads northwest from the Church District Highroad site of grace, and you’ll go through a tunnel. Beyond that is Church District of Shadow Keep, where you’ll immediately find the Church District Entrance site of grace.
This walkthrough will be divided into sections, based on the location as indicated in-game. Subsections are based on the last site of grace, generally speaking. Just to make it more confusing, both the Shadow Keep and Church District lead to different parts of the Specimen Storehouse — we’ll try to keep things simple by doing each part of the Specimen Storehouse as you access it.
Shadow Keep
Main Gate
Boss Drops
Aspect of the Crucible: Thorns
x2 Scadutree Fragment
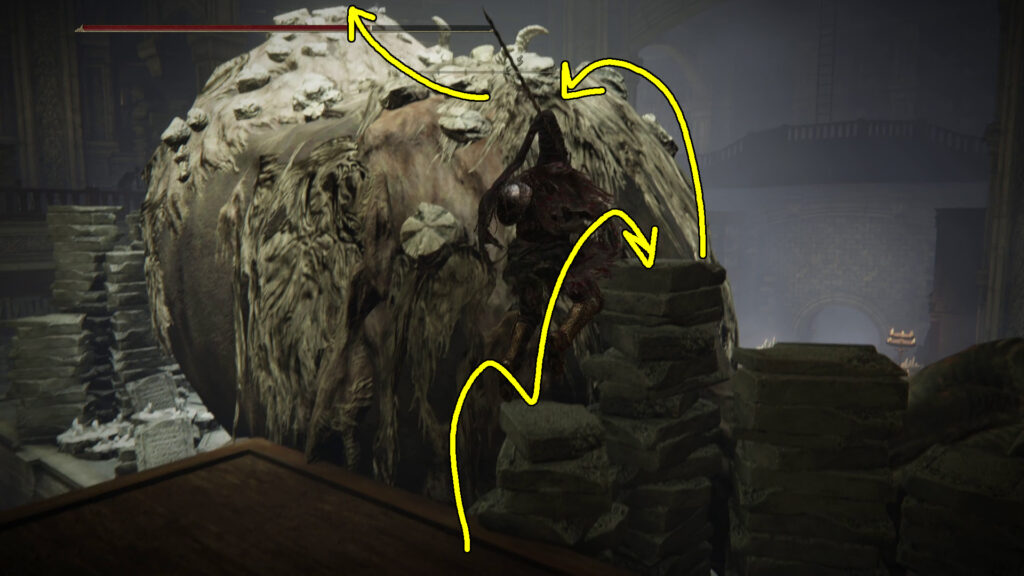
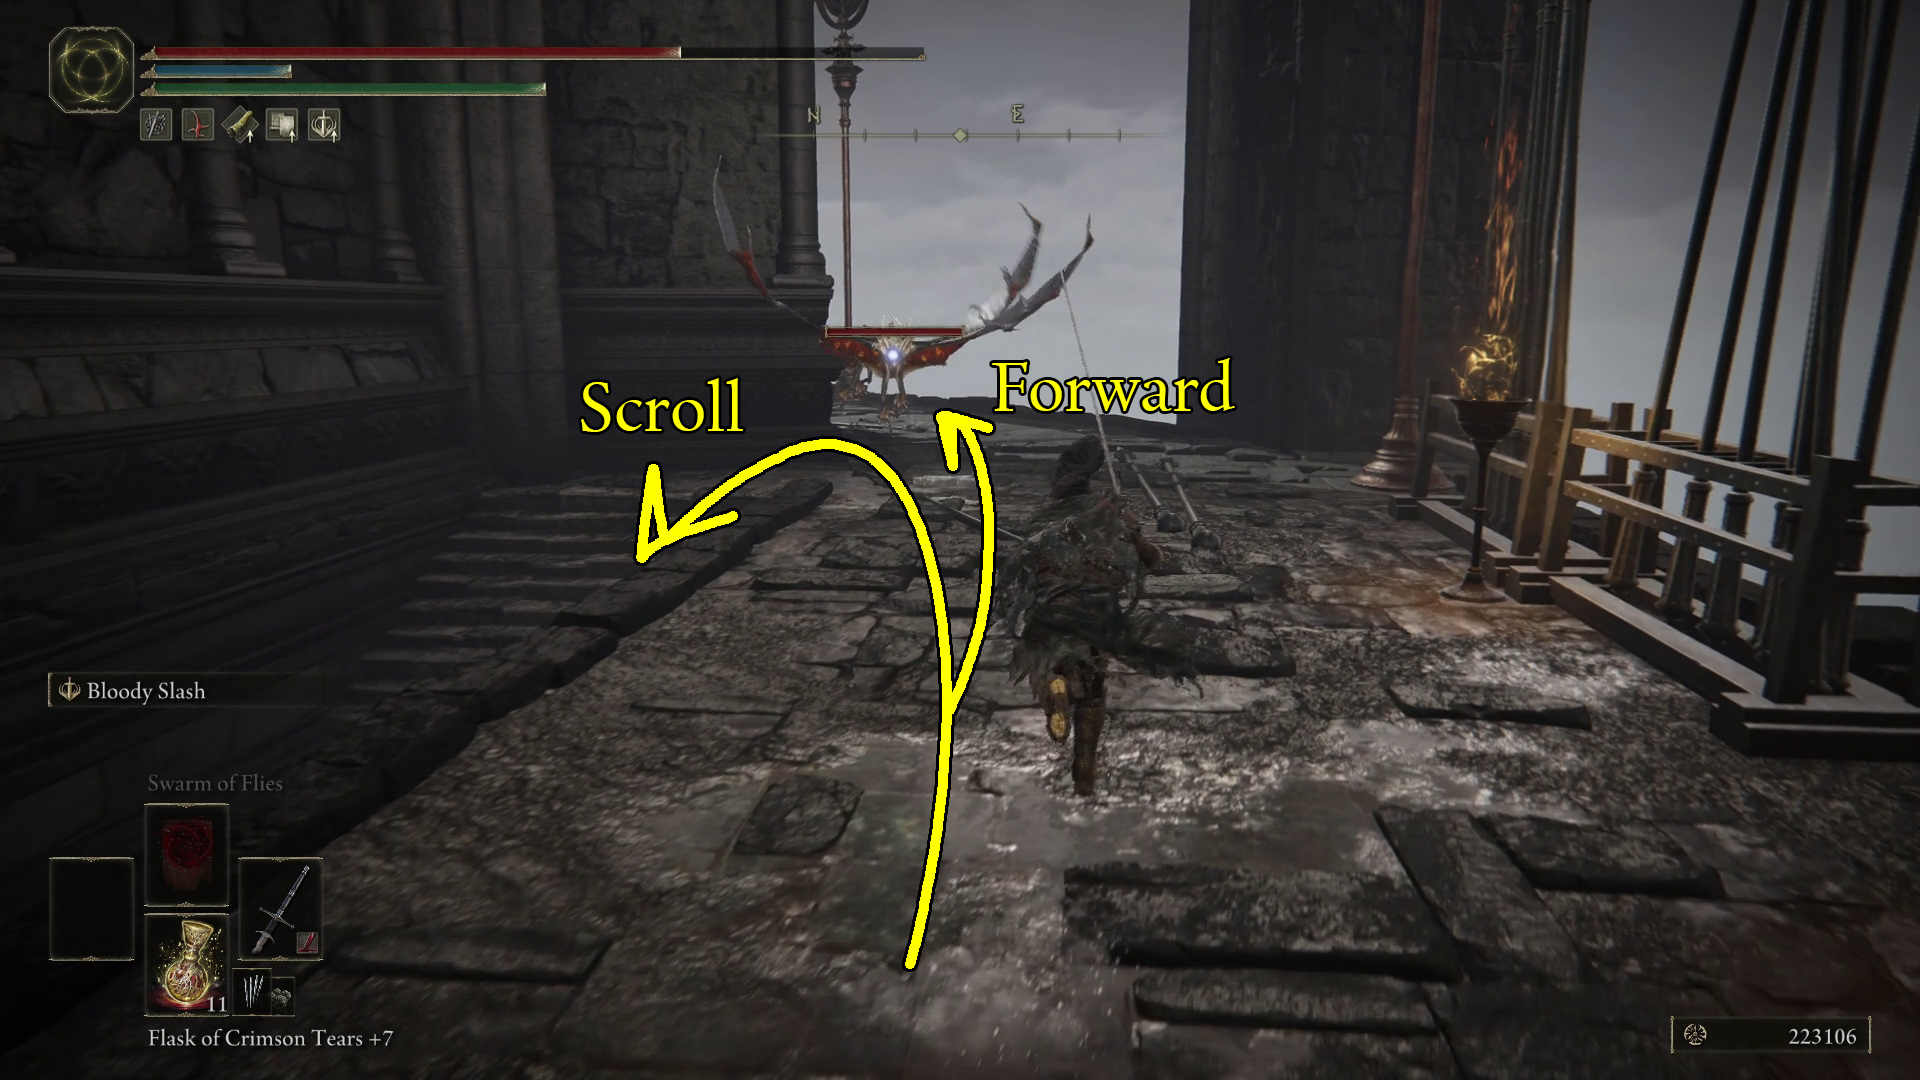
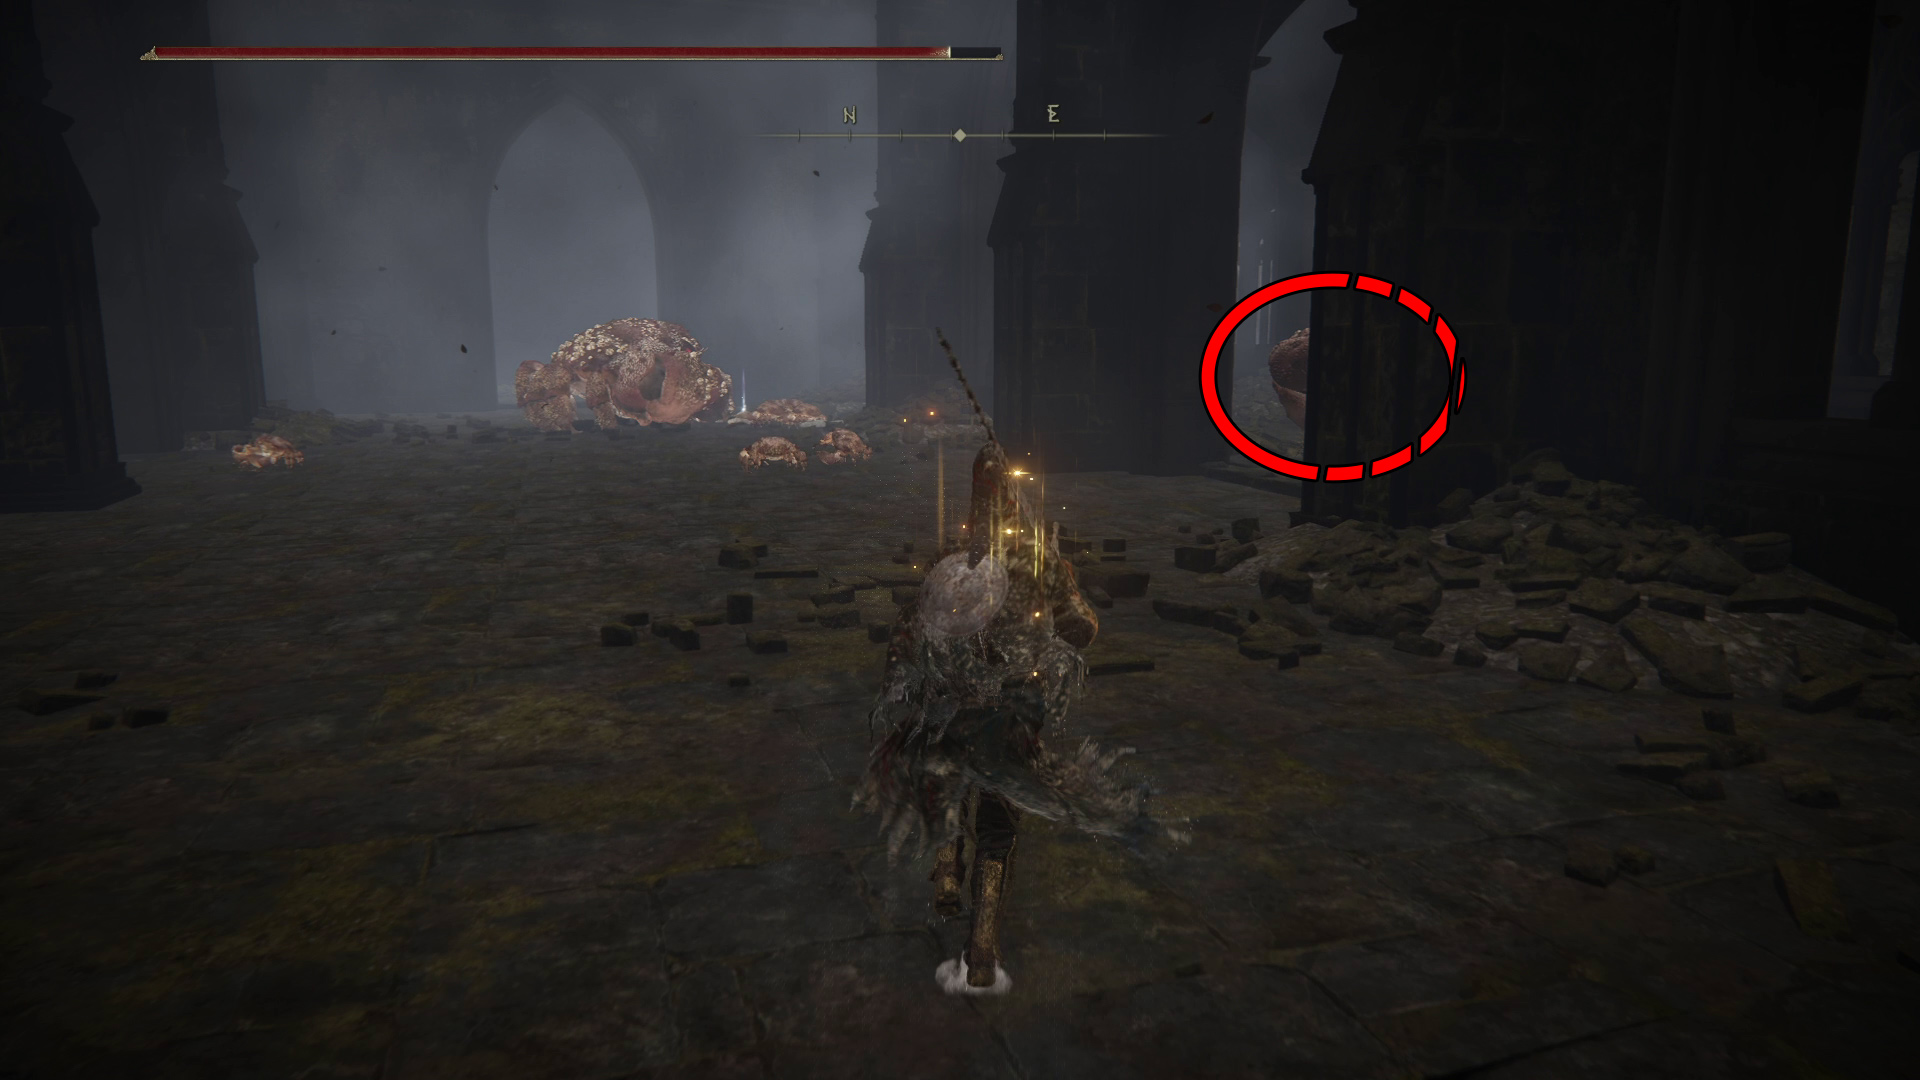
From the Shadow Keep Main Gate site of grace, you can walk northeast into the main gate plaza — doing so will begin a boss fight with the Golden Hippopotamus. You can summon the NPC Hornsent just to the right of the entrance to the plaza if you want help with the hippo.
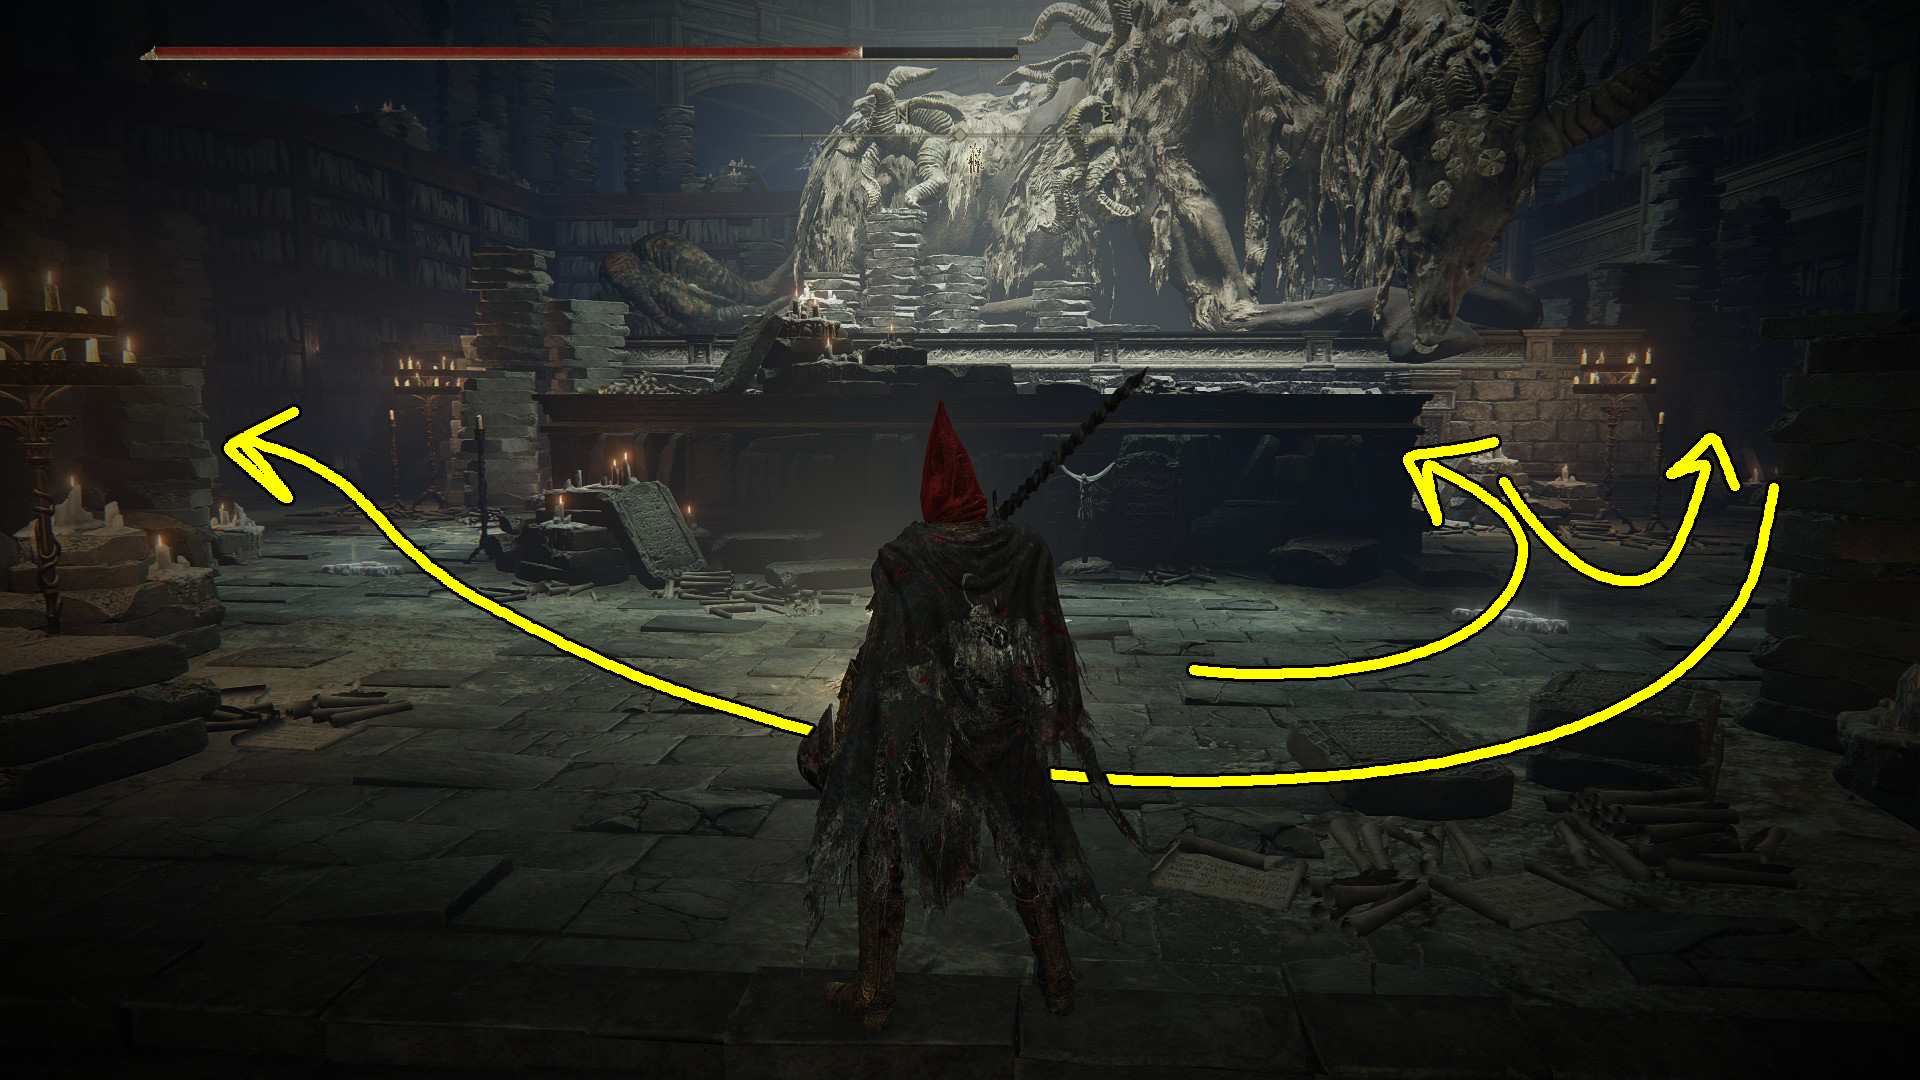
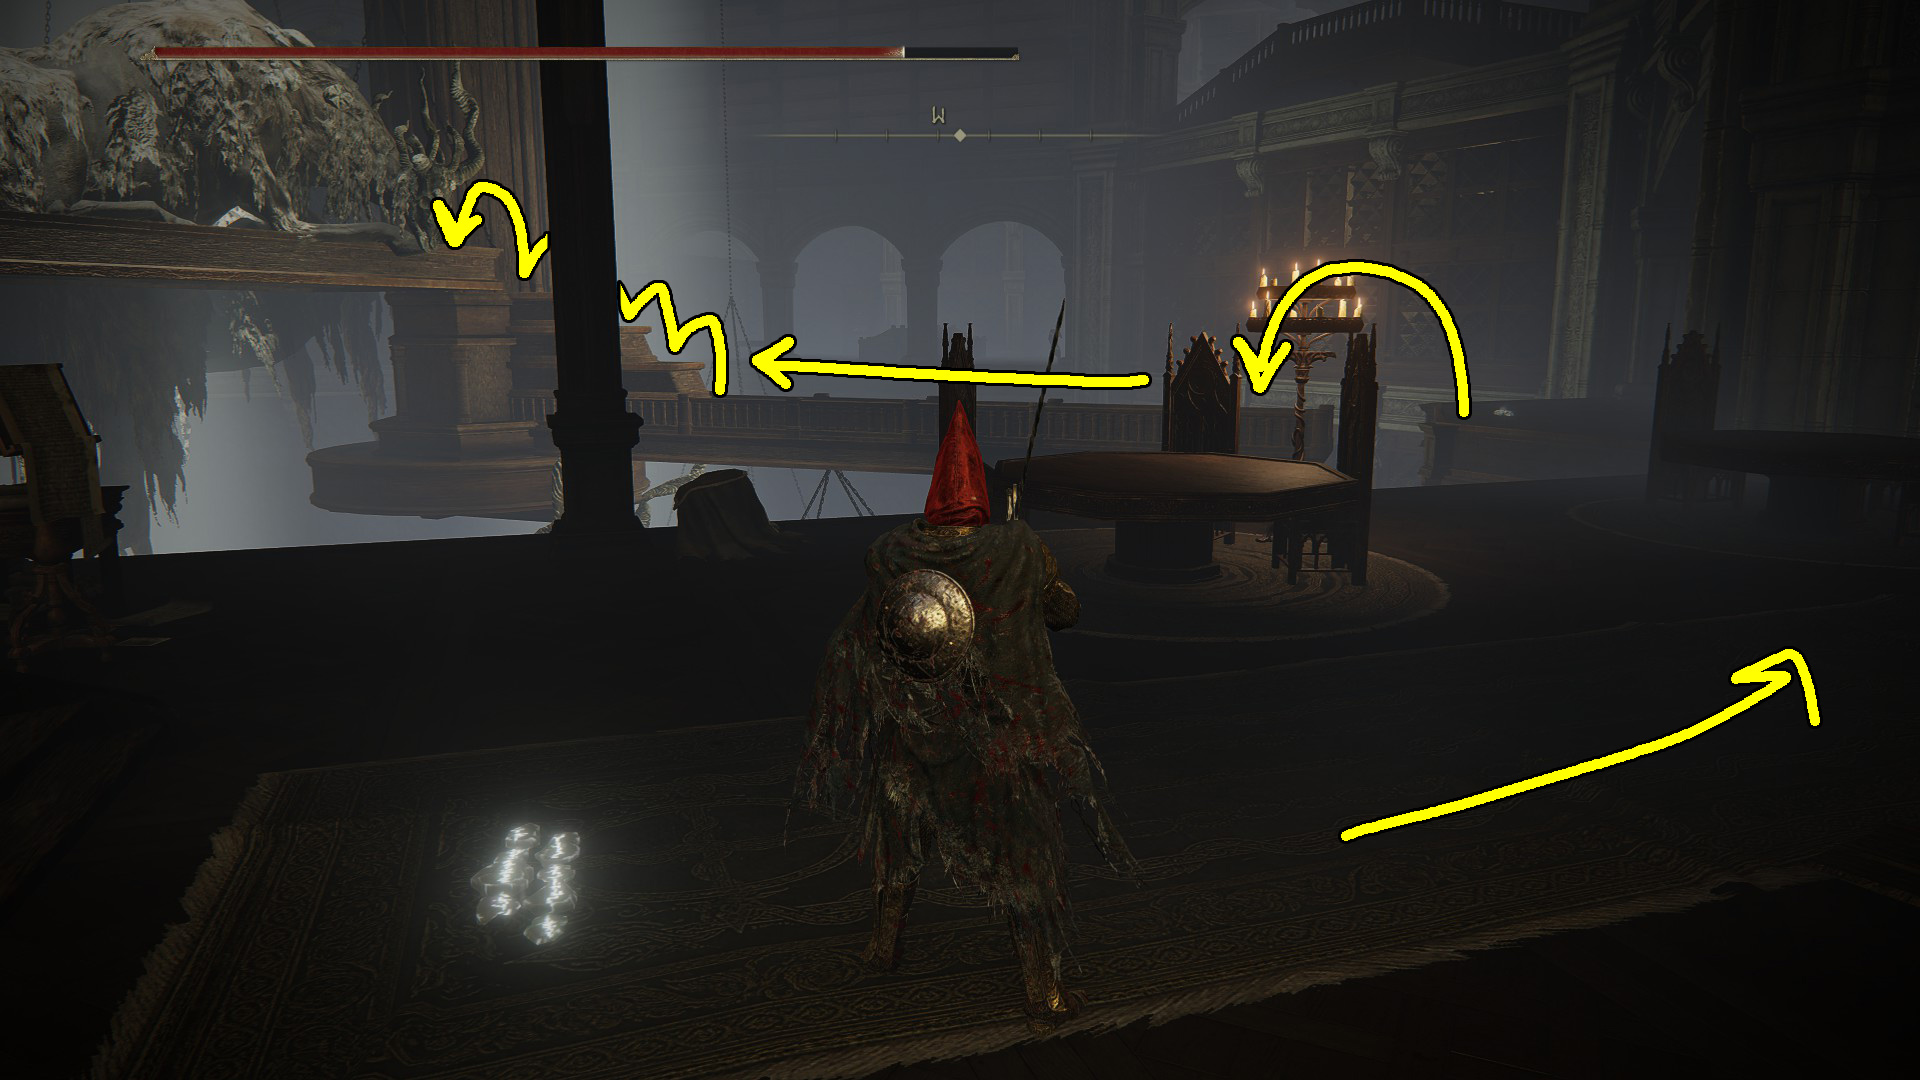
Once you take out the big hippo, you’ll unlock the Main Gate Plaza site of grace. Activate it, rest, then head west-northwest through the doorway. You’ll find a ghost here you can speak to, and then you can continue through the room and up the next set of stairs. There are two enemies on the left, and another that will come down the stairs on your right with a spear. If you’re quick, you can knock both enemies off of the ledge and then turn around to deal with the spearman — the easiest way to do this is to backstab the standing one into the sitting one, then hit both with an attack.
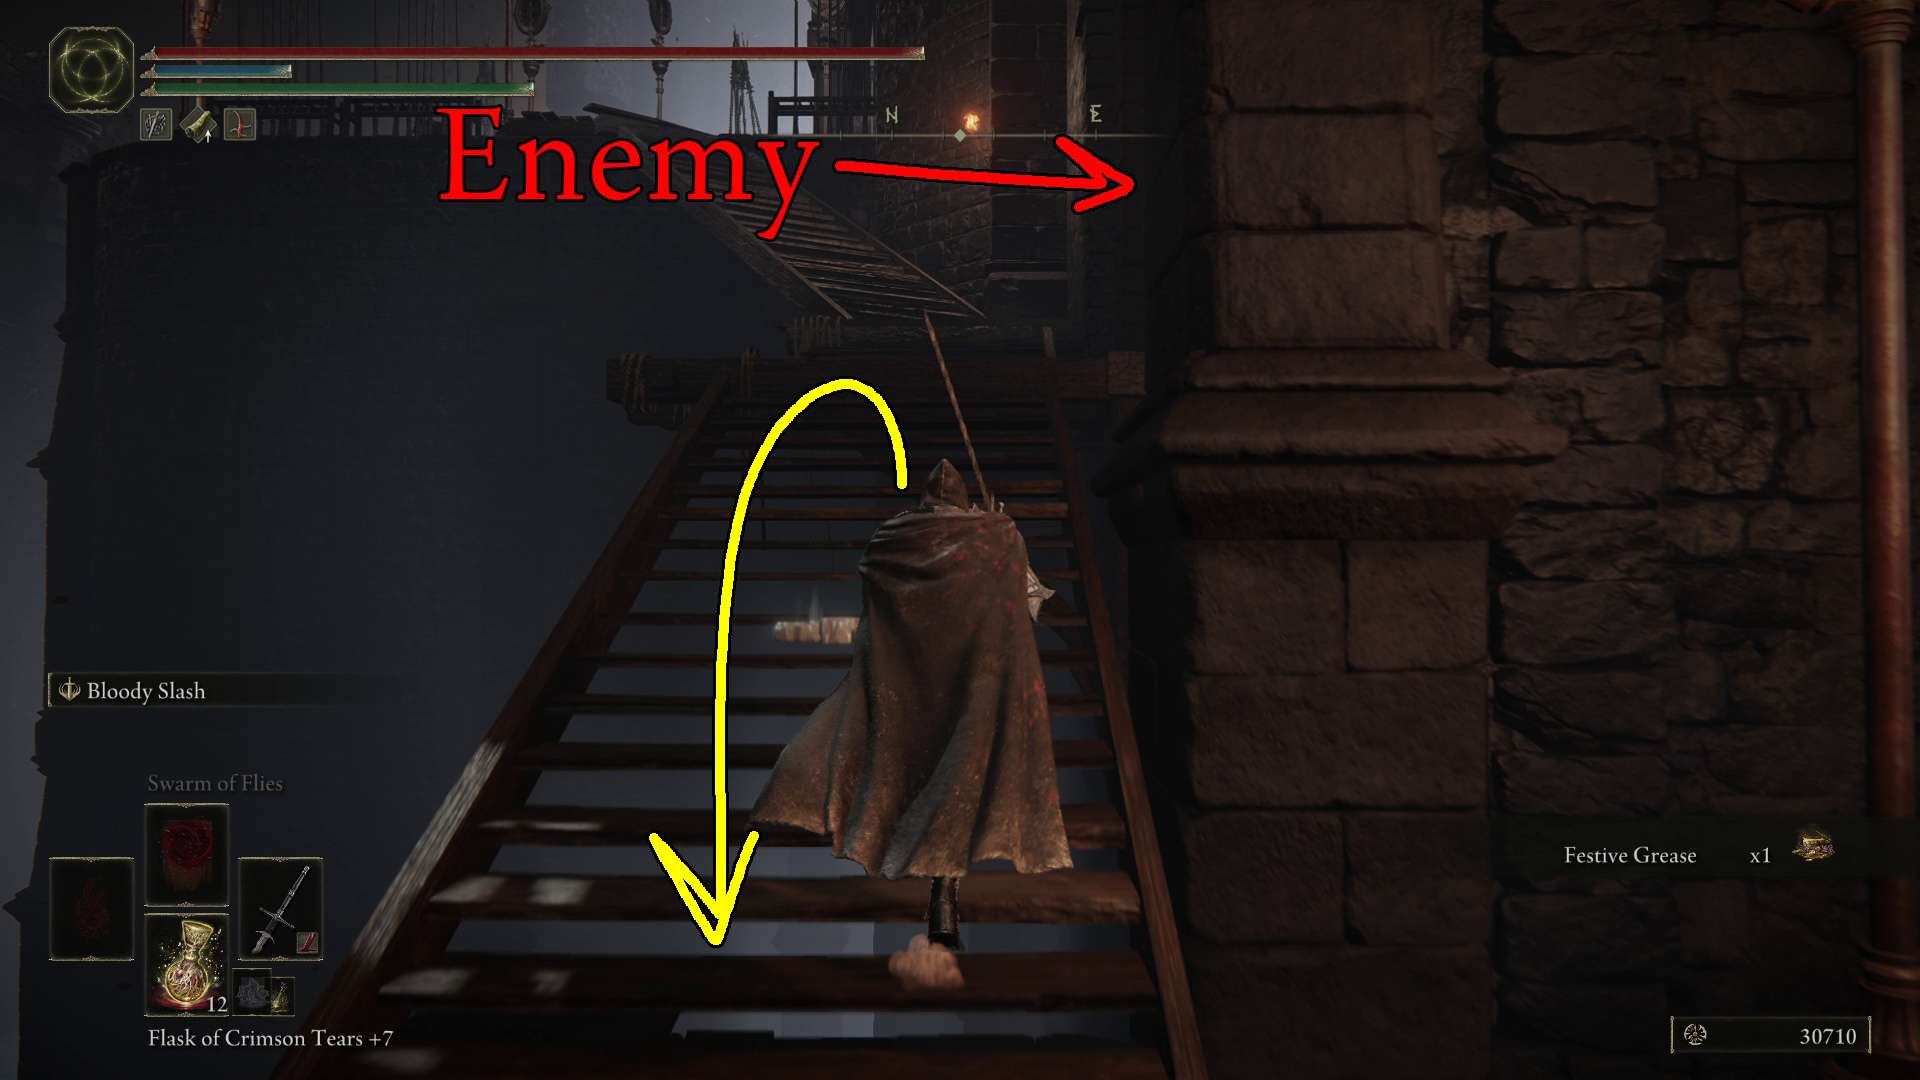
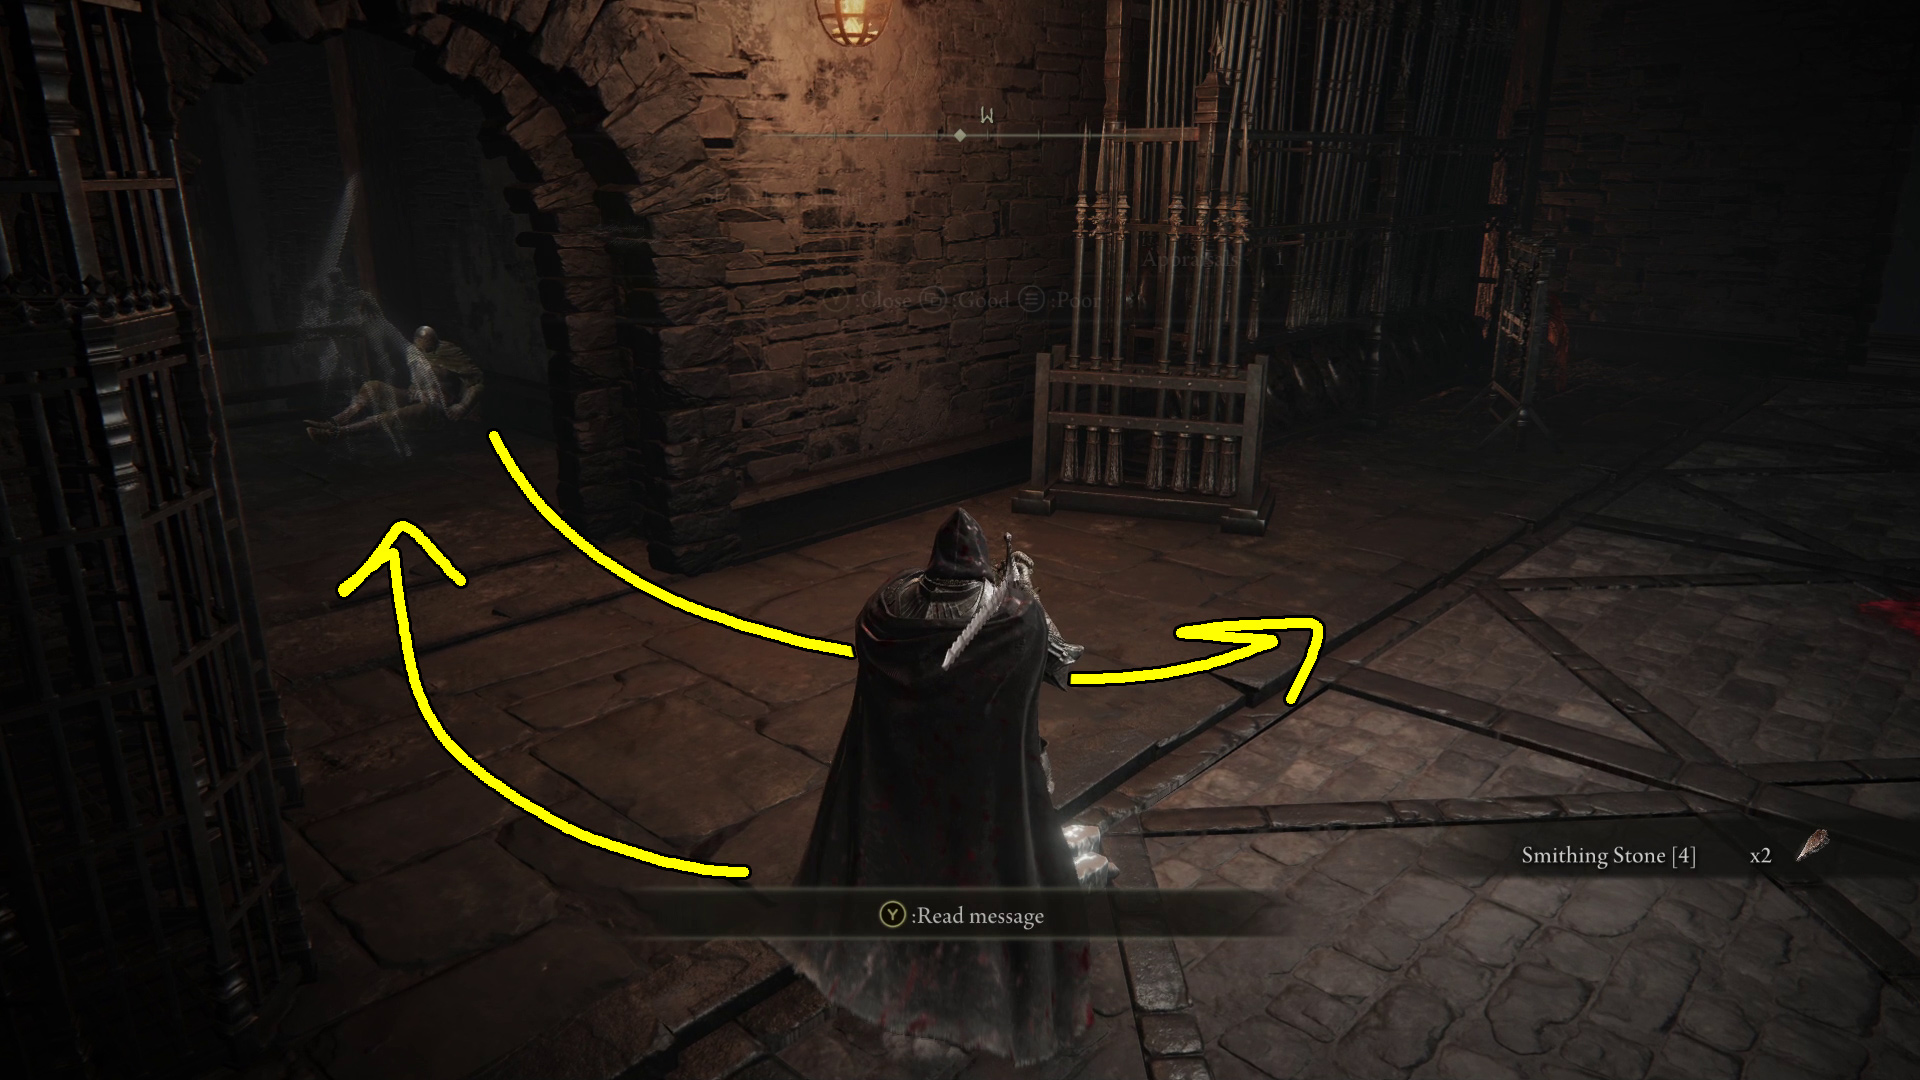
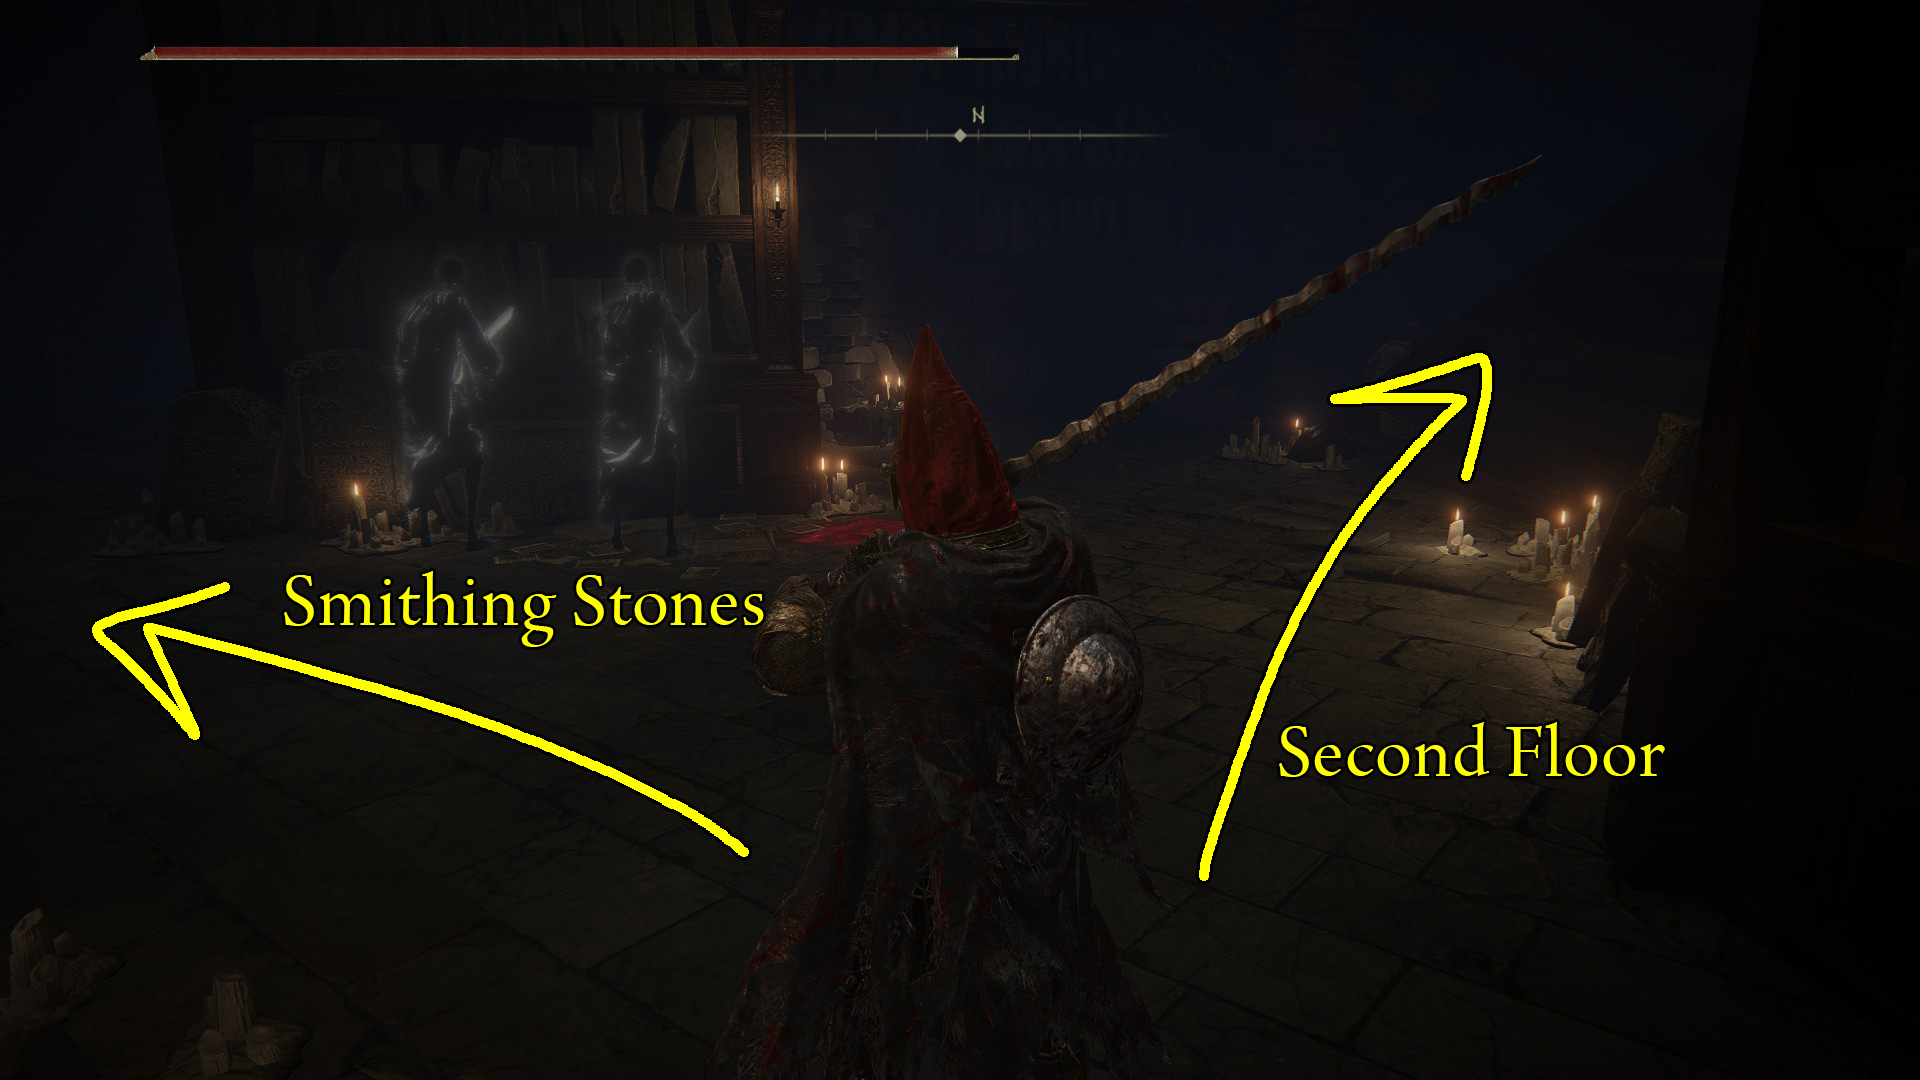
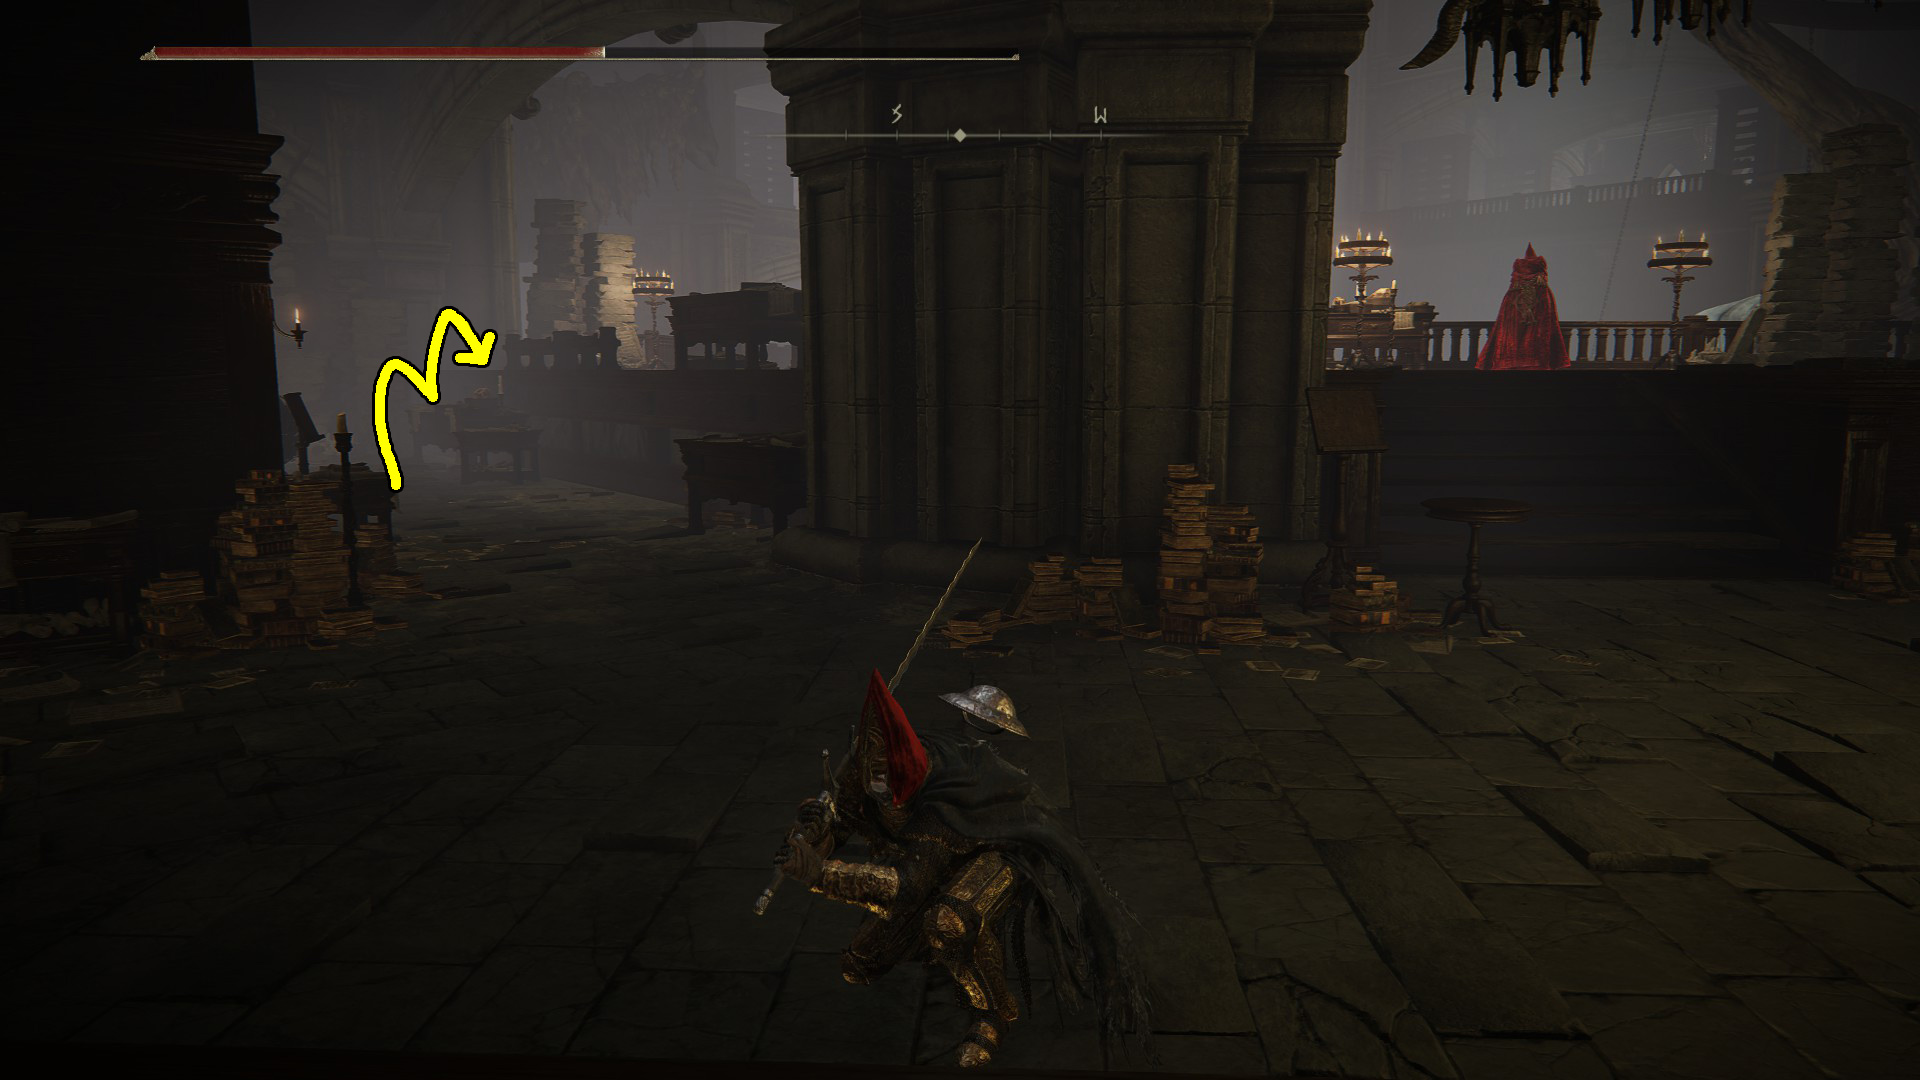
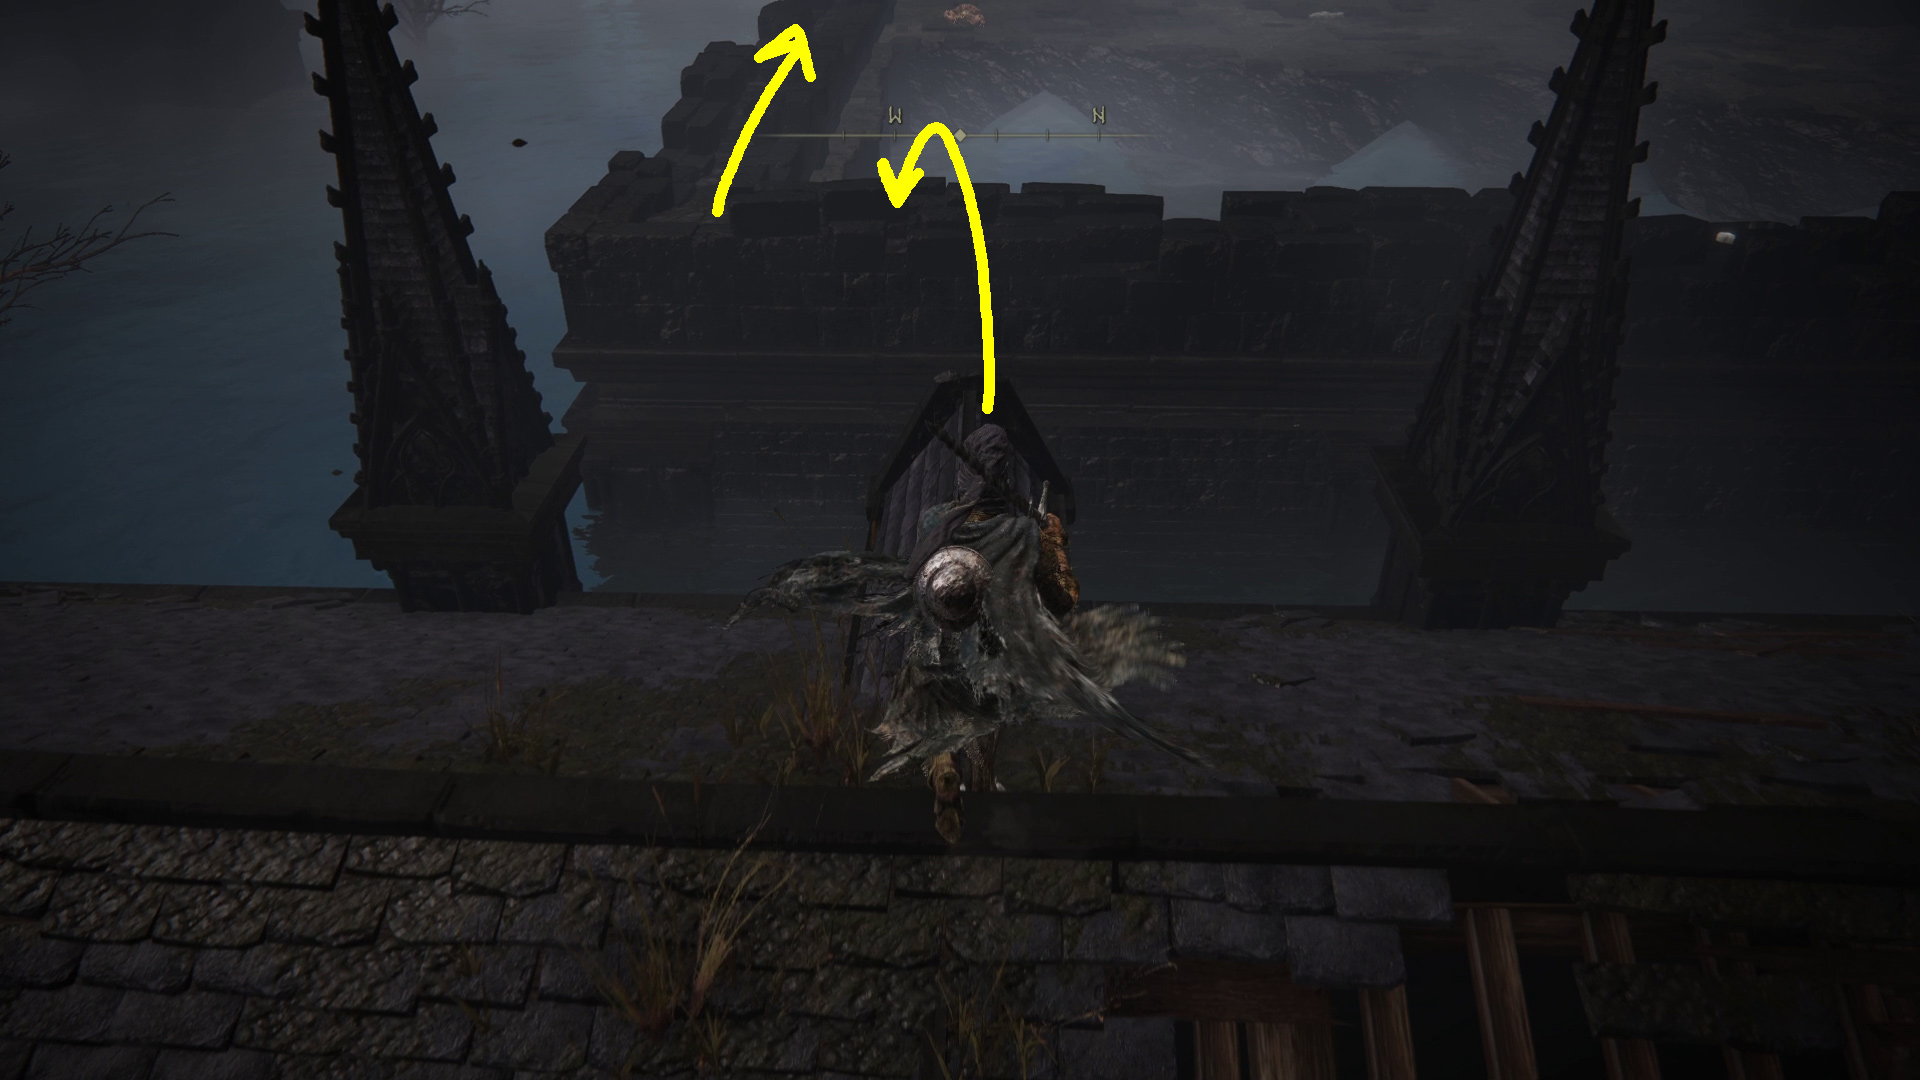
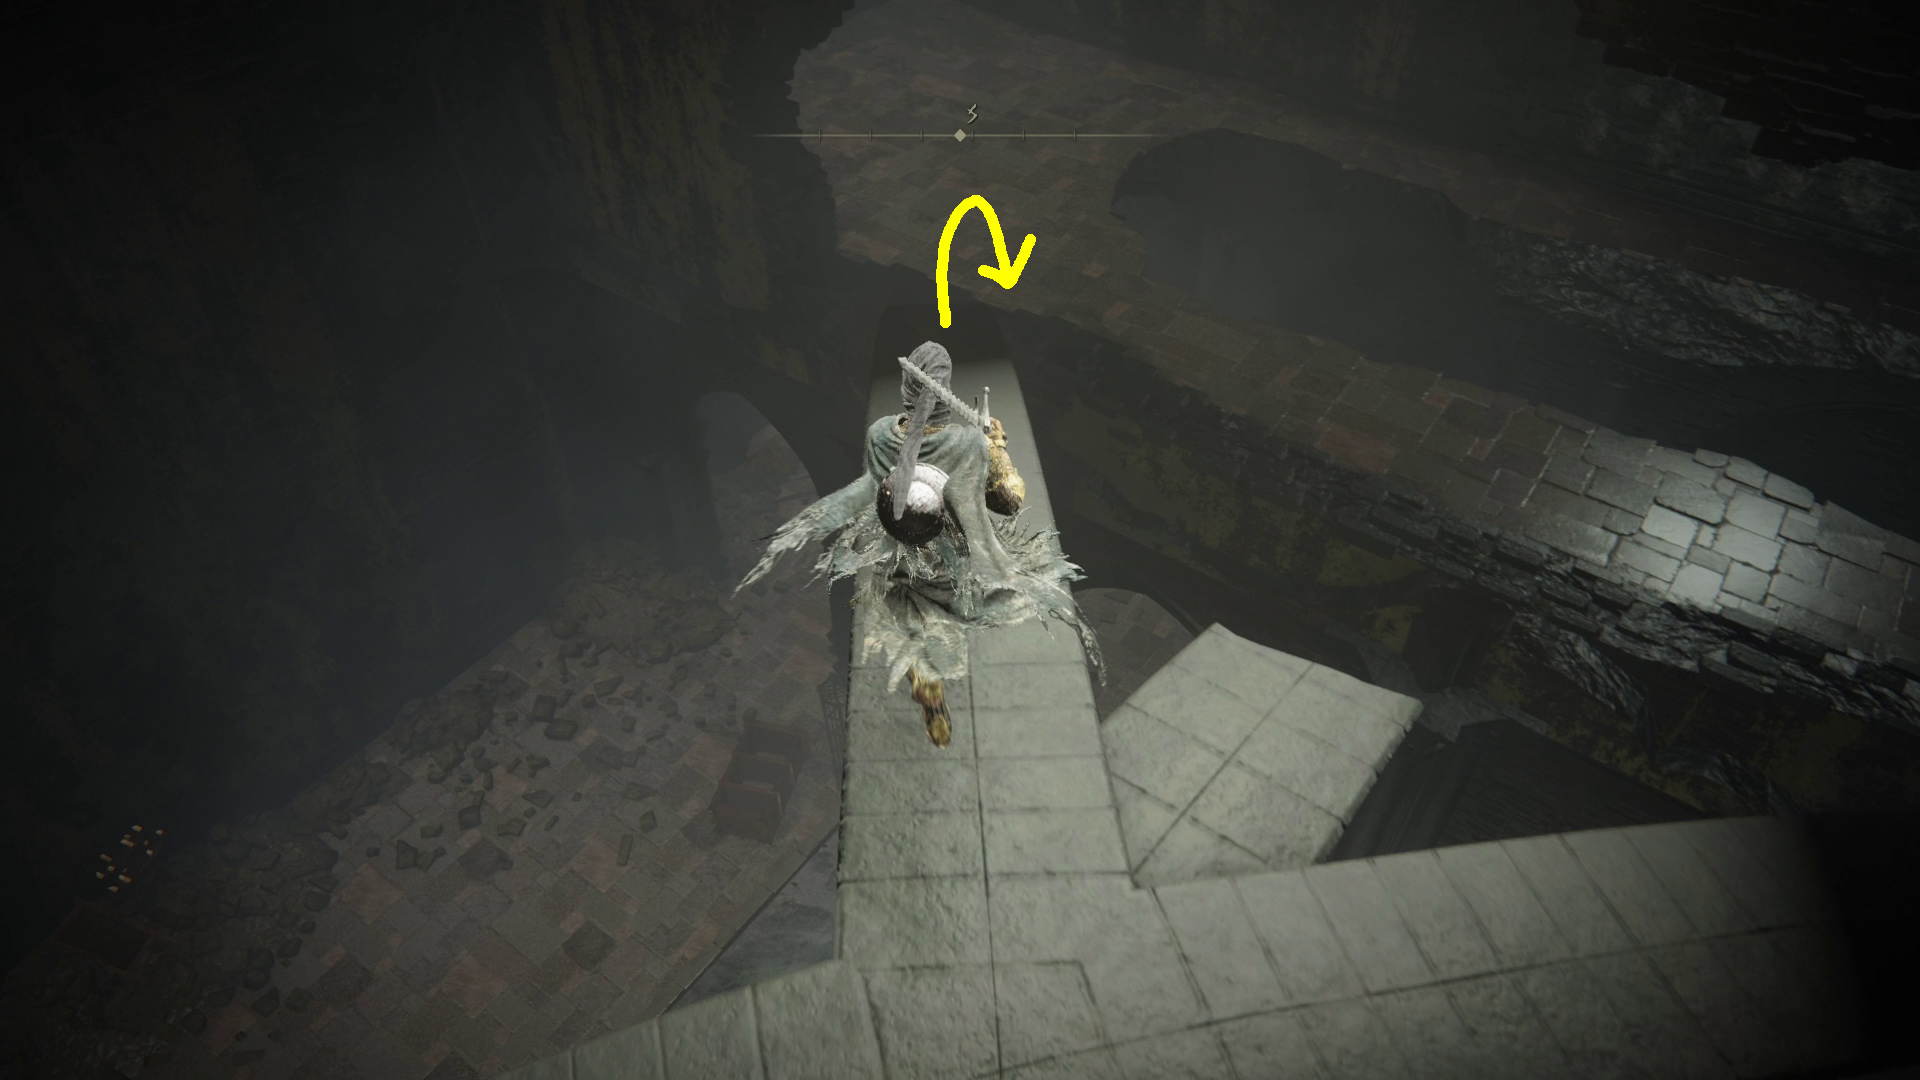
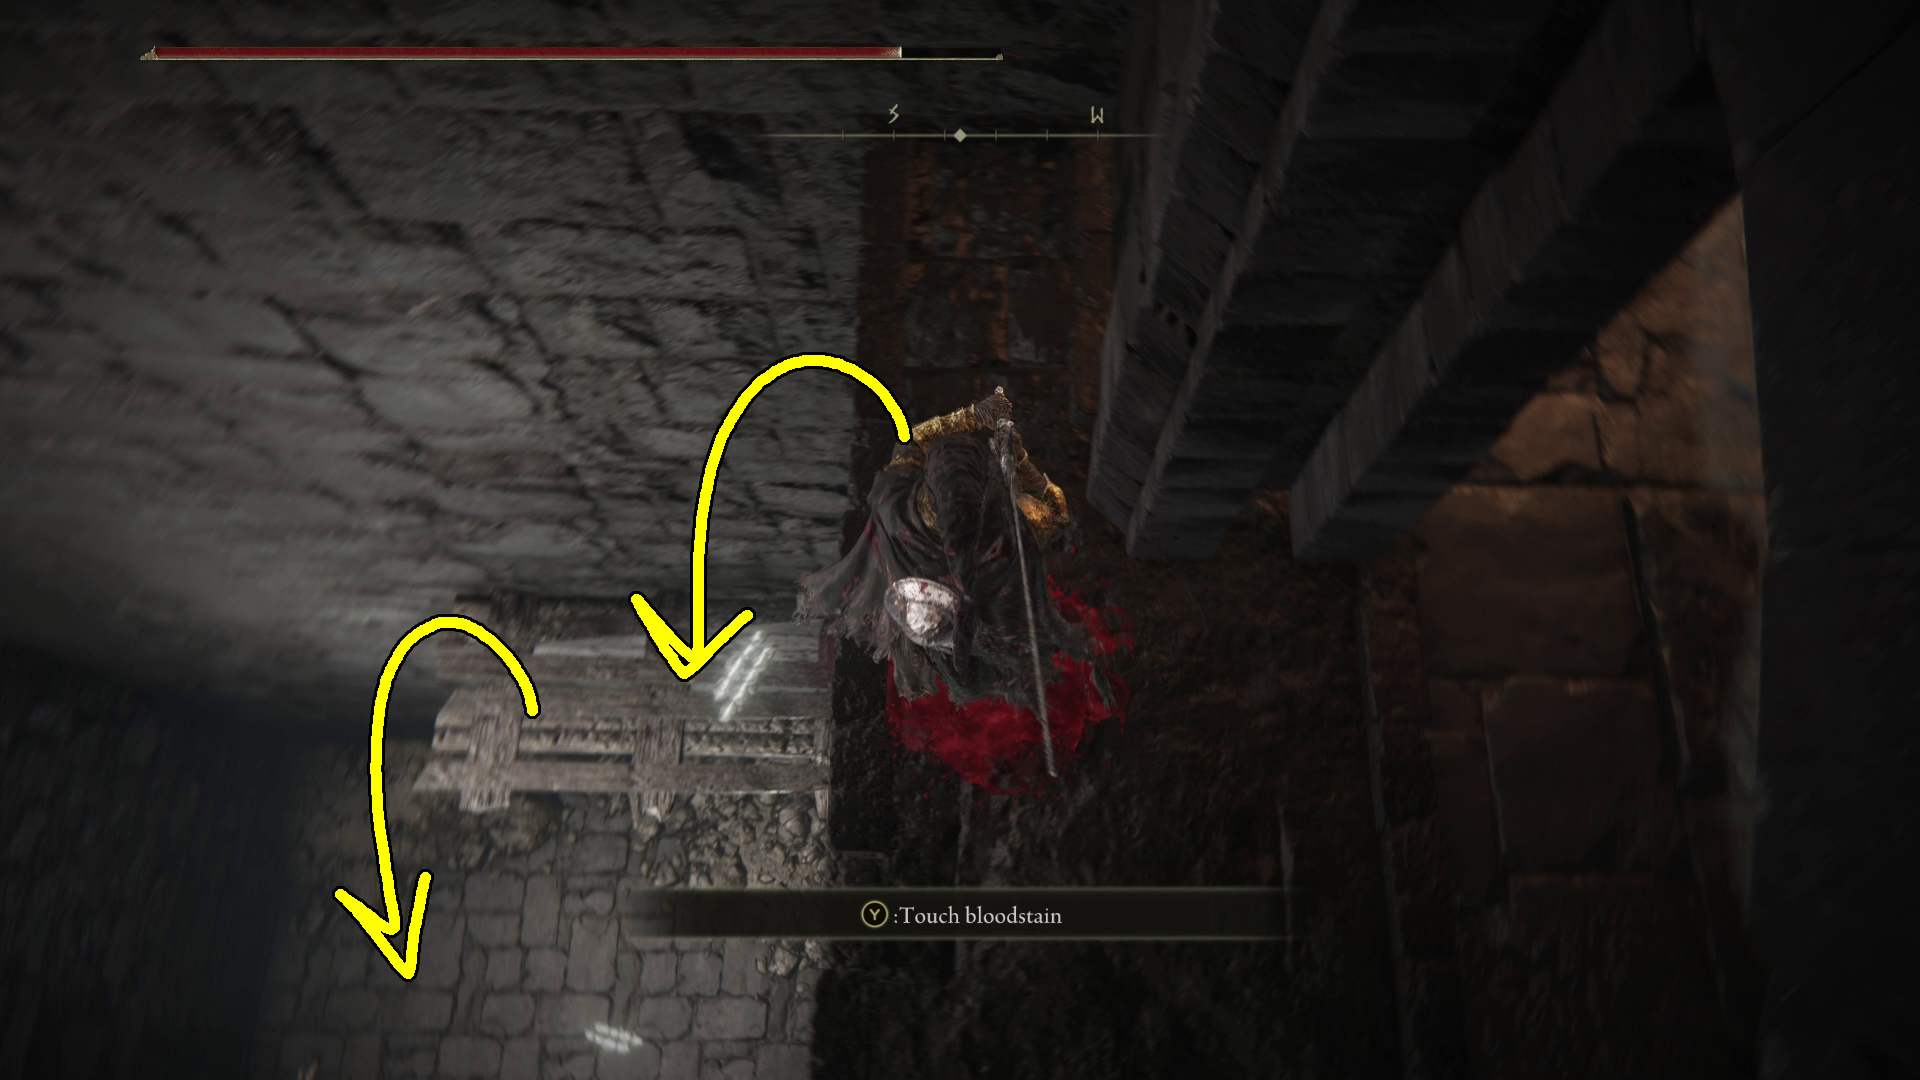
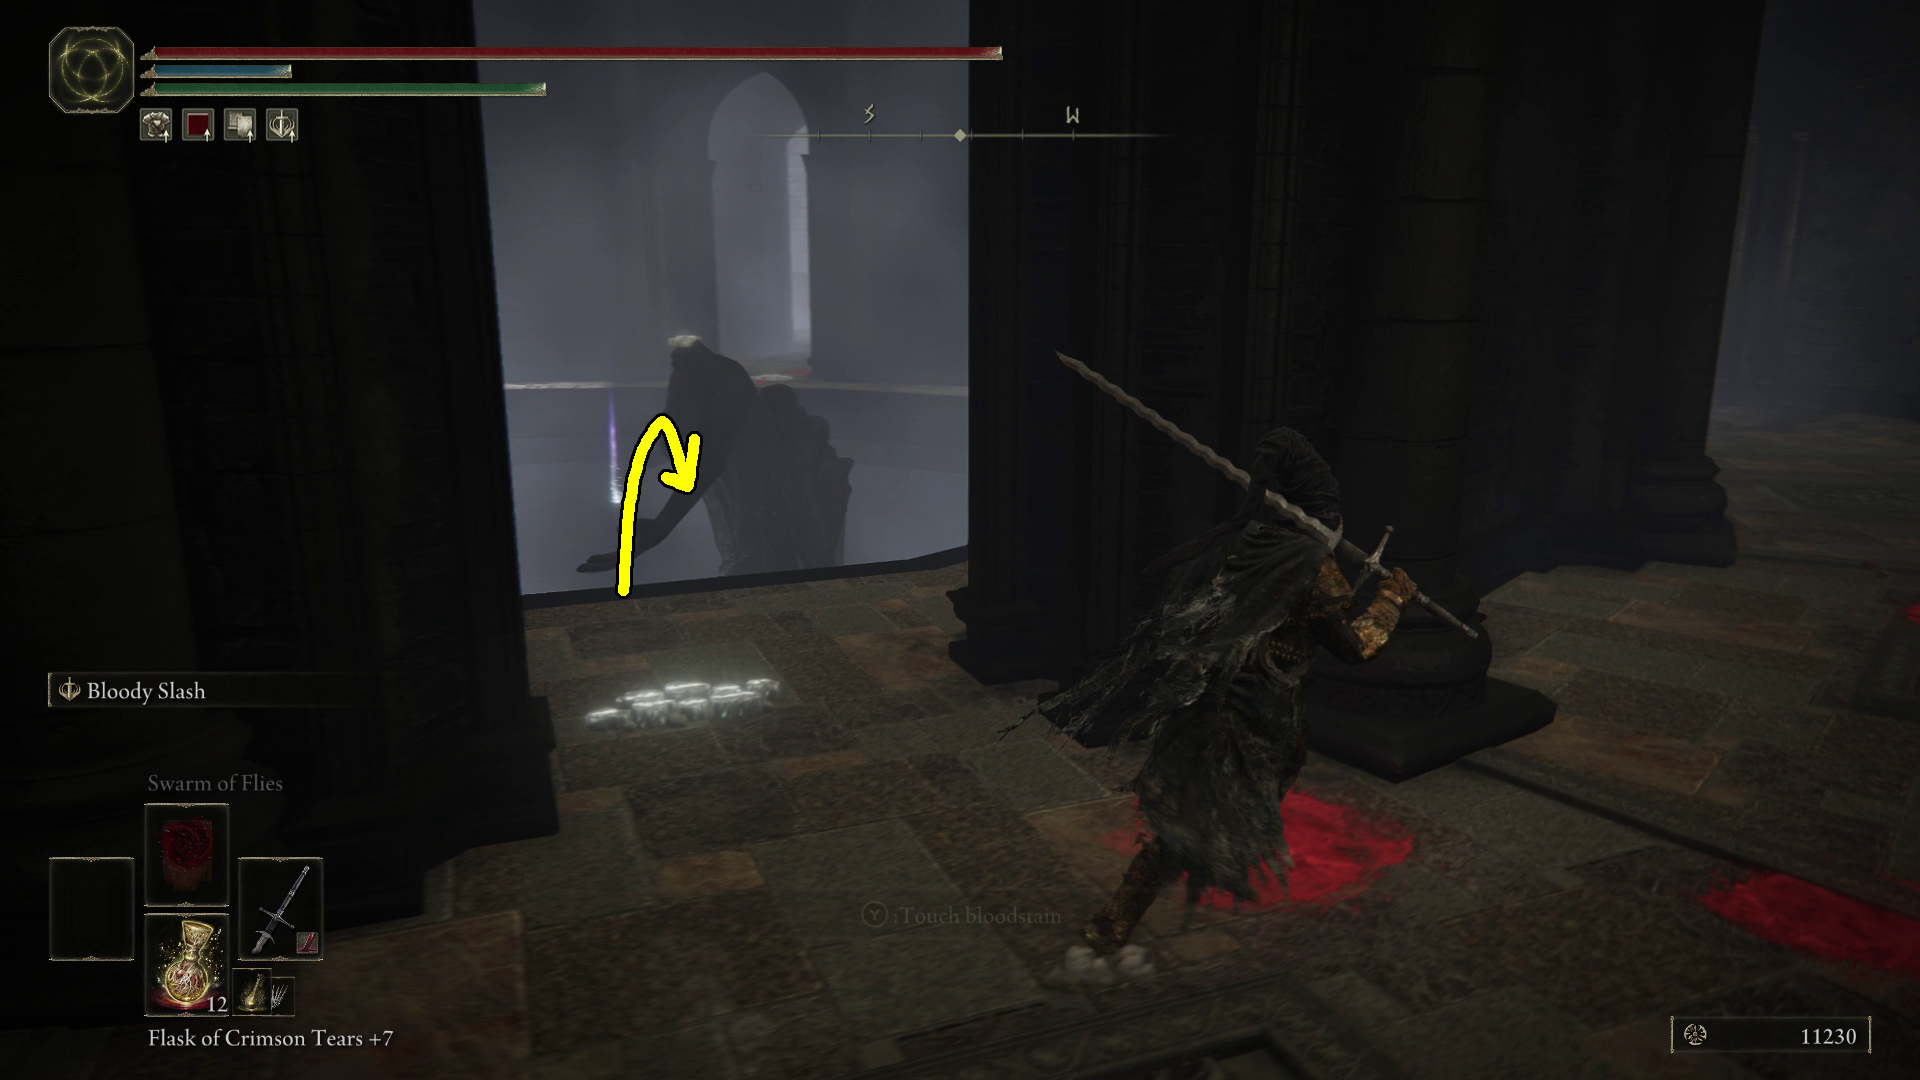
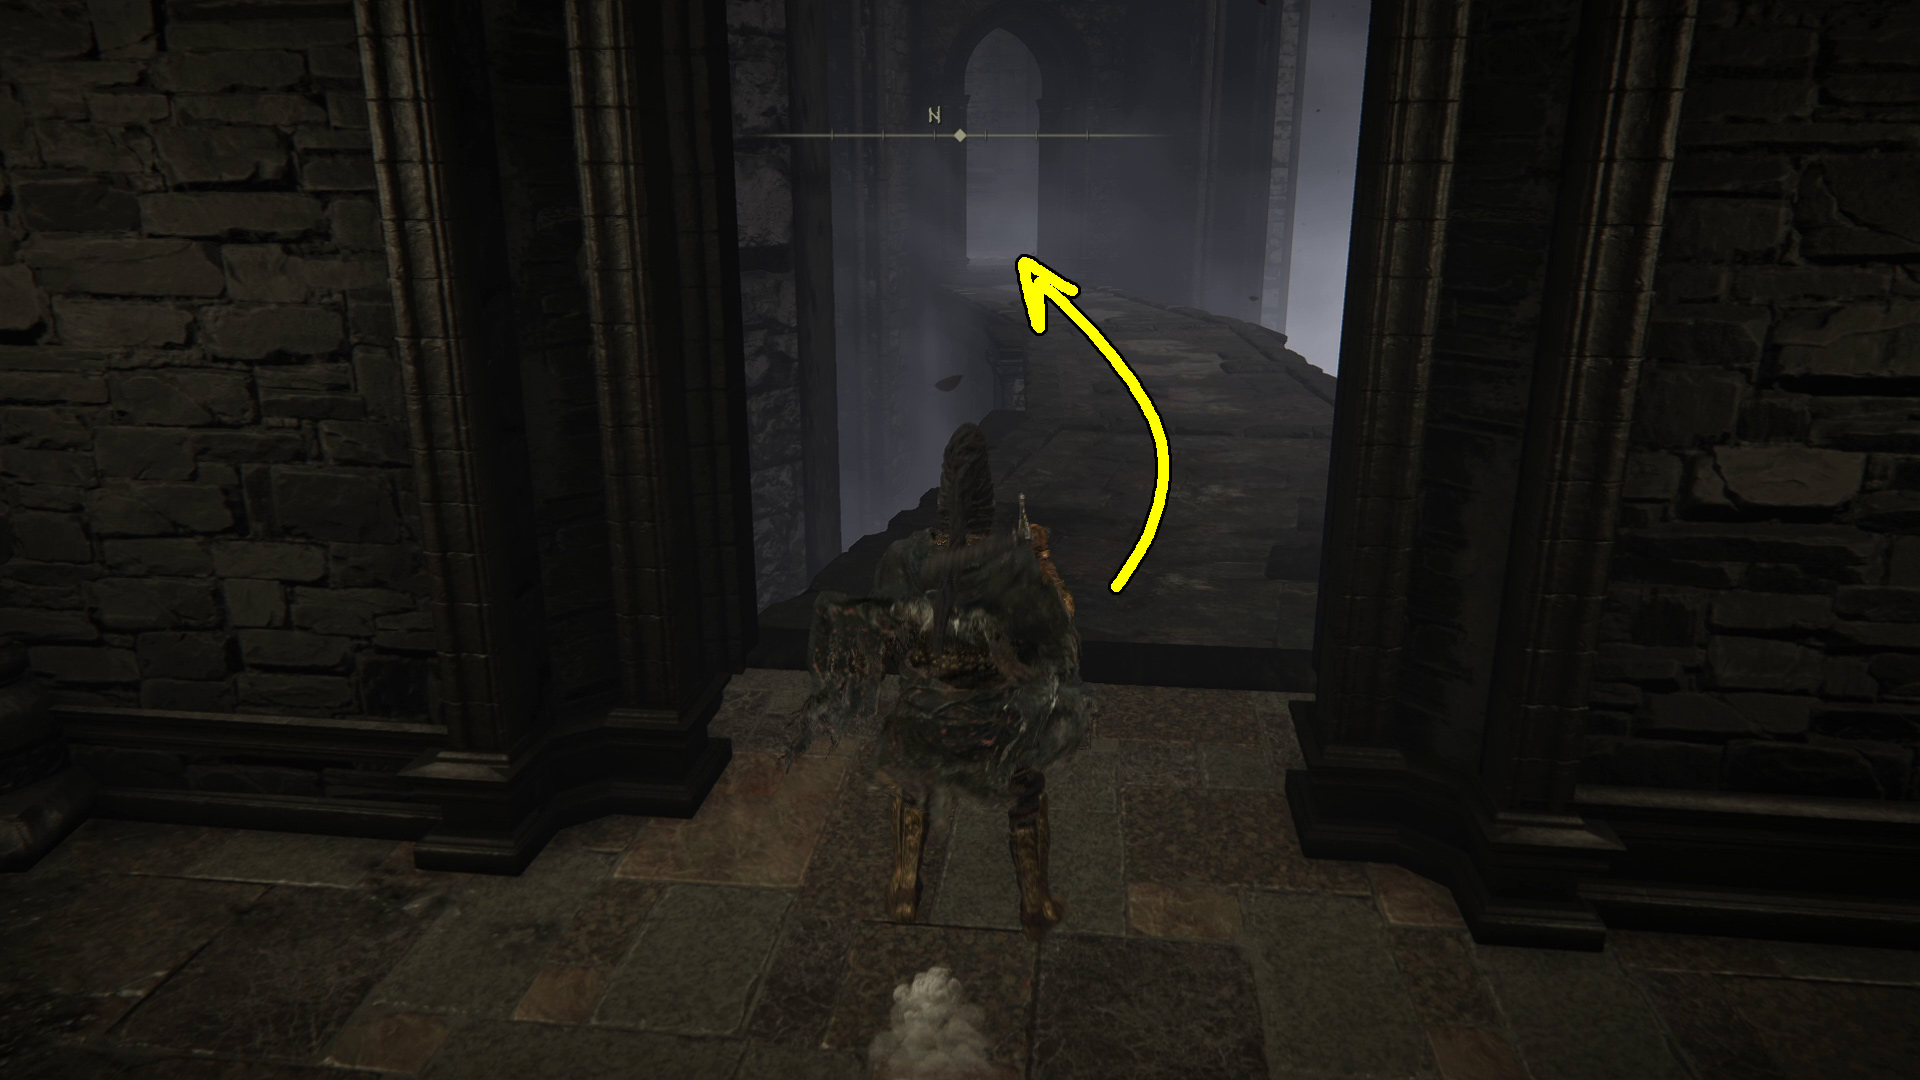
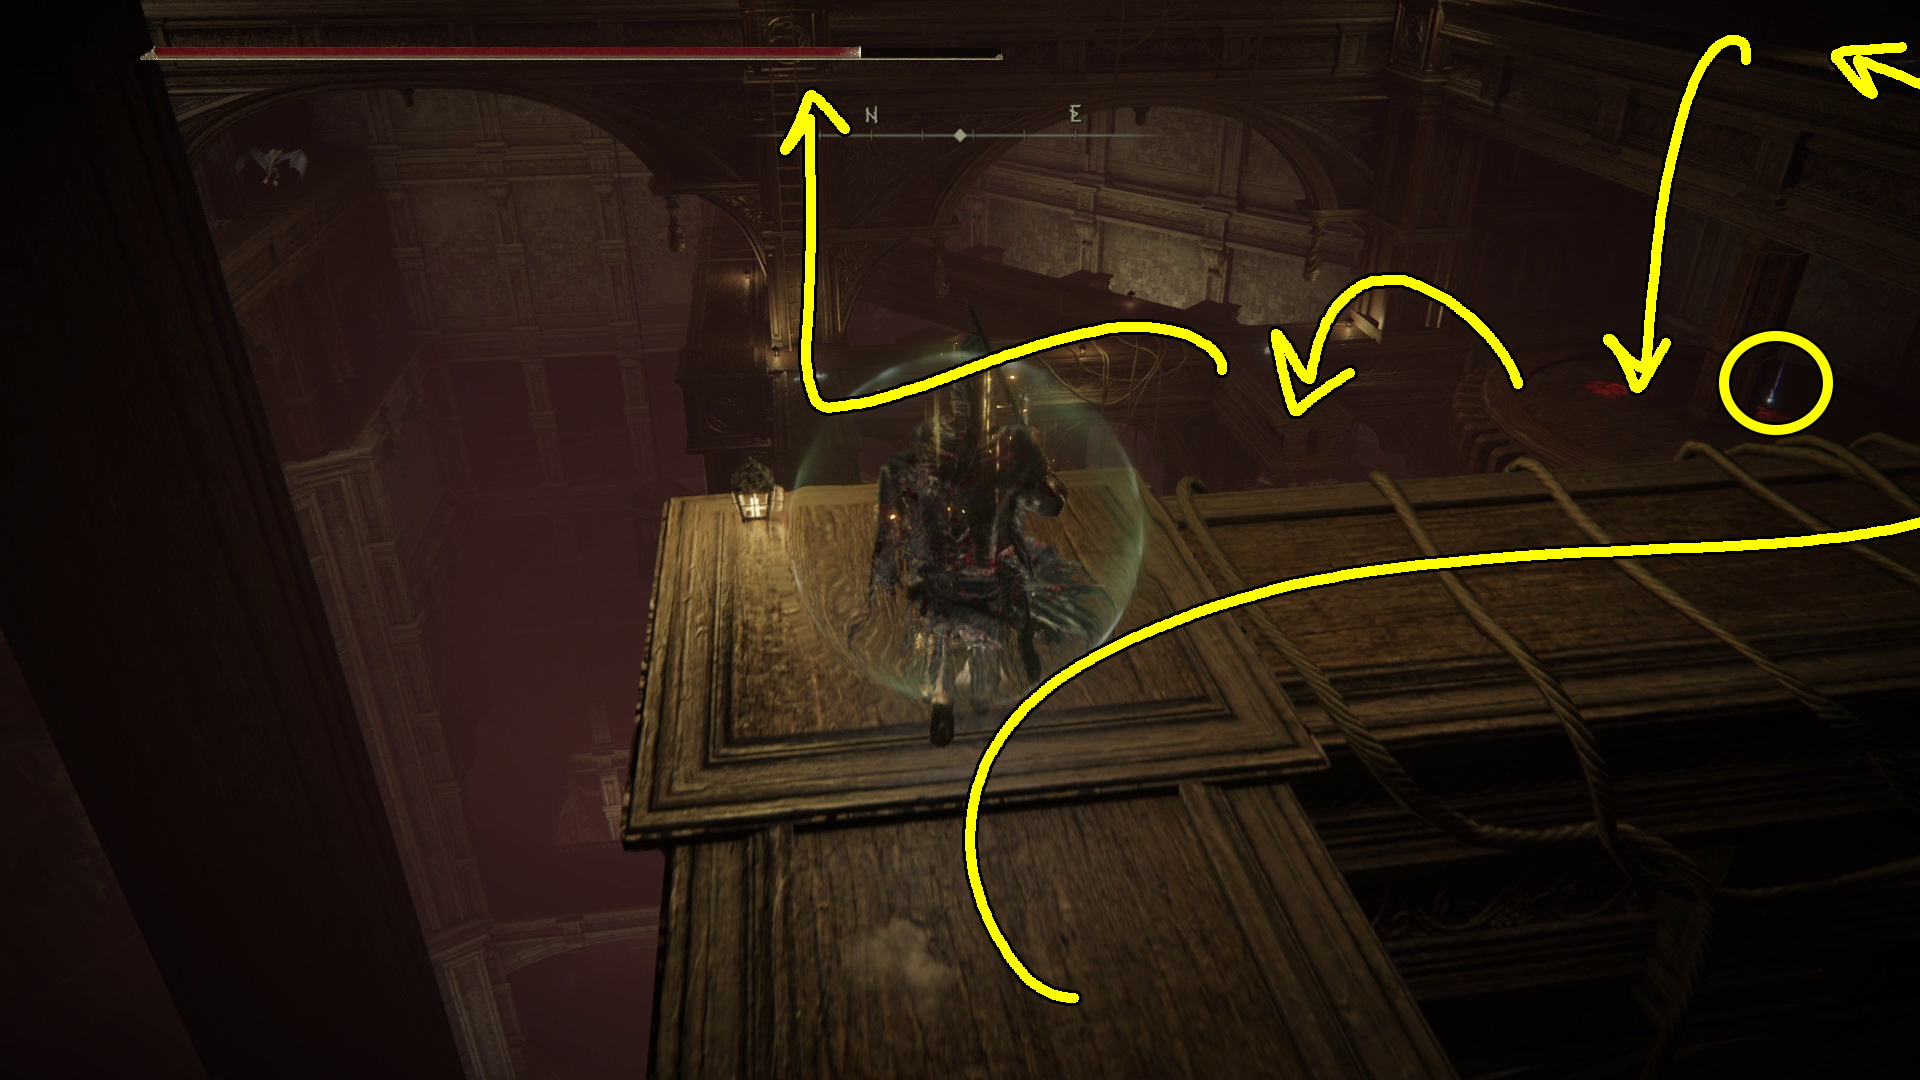
After you take out all three enemies, grab the Festive Grease from the corpse, then go halfway up the next stairs — there’s a foe ready to knock you off the edge here (Image 1), so get near the top of the stairs and then run/roll back down and let the soldier come to you. After dealing with this one, go through the doorway they came out of. Grab the x6 Smithing Stone [1] from the corpse, then sneak up and kill the soldier by the window. Next, go through the doorway west of the window, just far enough to pull the guard sitting by the door into the room (Image 2).
Image 1Image 2
Now you can sneak through the doorway and past the knight and soldier to grab the Main-gauche, then head back the way you came, to the outer stairs in Image 1. Turn right to head north up the next set of stairs, then immediately turn right and deal with the two soldiers there. There are two more soldiers to the northwest that can be snuck up on/knocked off the ledge. They guard a corpse that only holds x7 Redflesh Mushroom, so you may just want to sneak past them and up the stairs that lead northeast; however, if you want to pull the knight you encounter in the next room back to this spot (because he’s paired with an archer), you should eliminate the soldiers.
Above the Main Gate
Important & Unique Items
Lord’s Bestowal
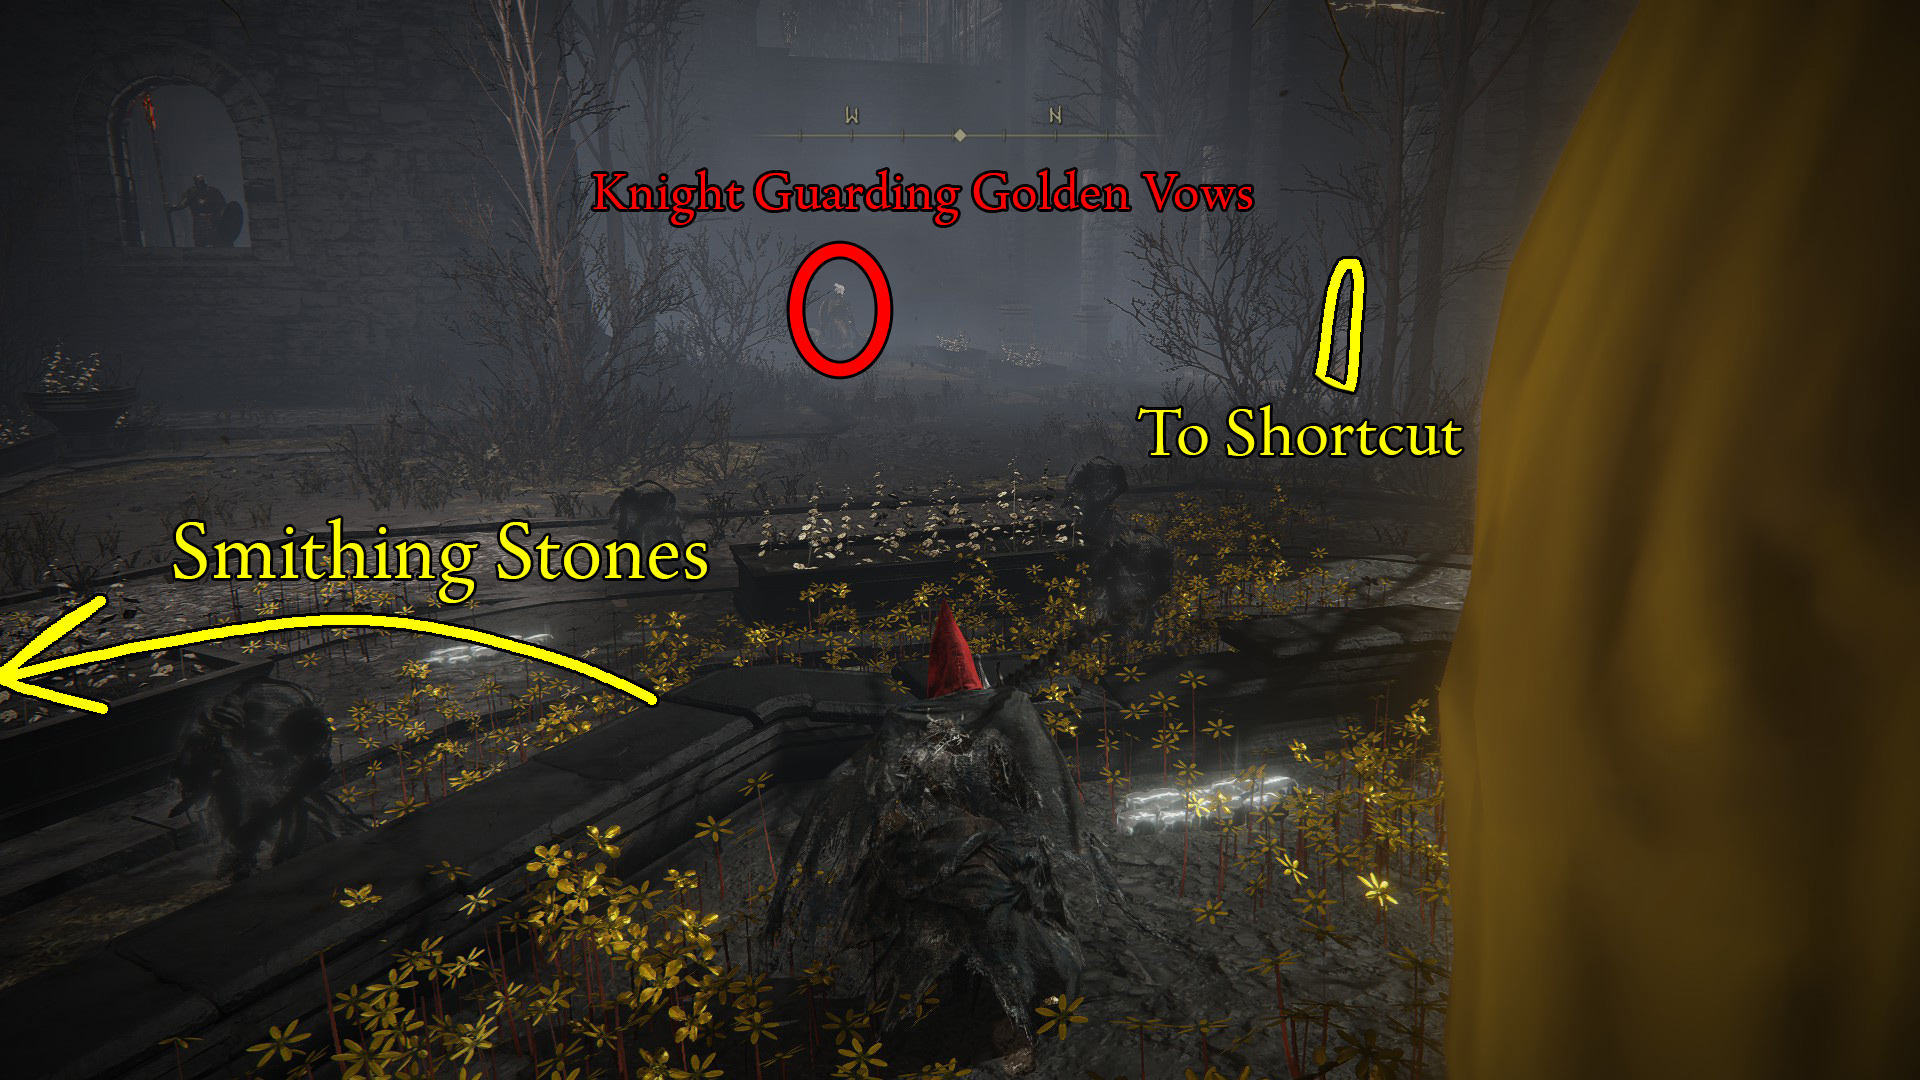
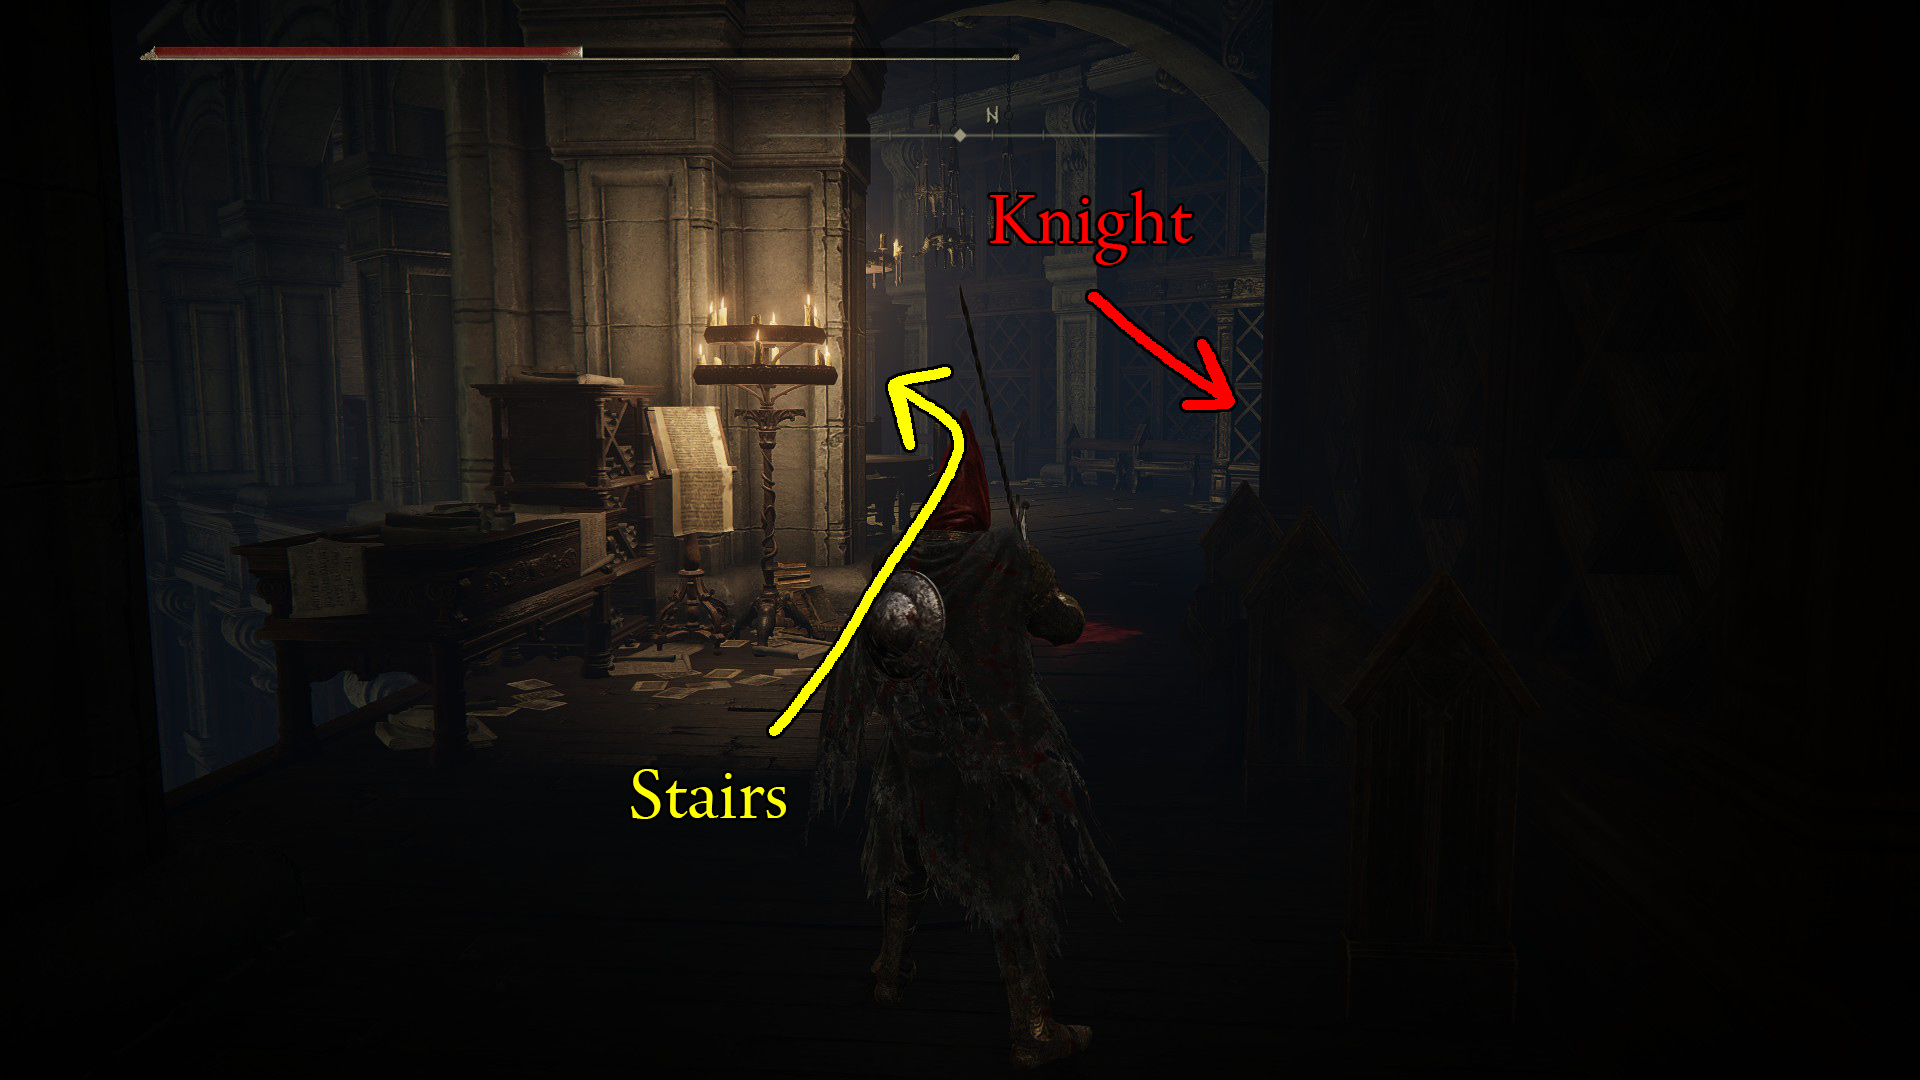
Up the next wooden stairs is a room with a patrolling knight, and a knight on the far side of the room by the fireplace. The corpse on the right laying out of the hole in the wall holds a Golden Vow. A Shadow Realm Rune [6] is on the corpse by the fireplace near the exit.
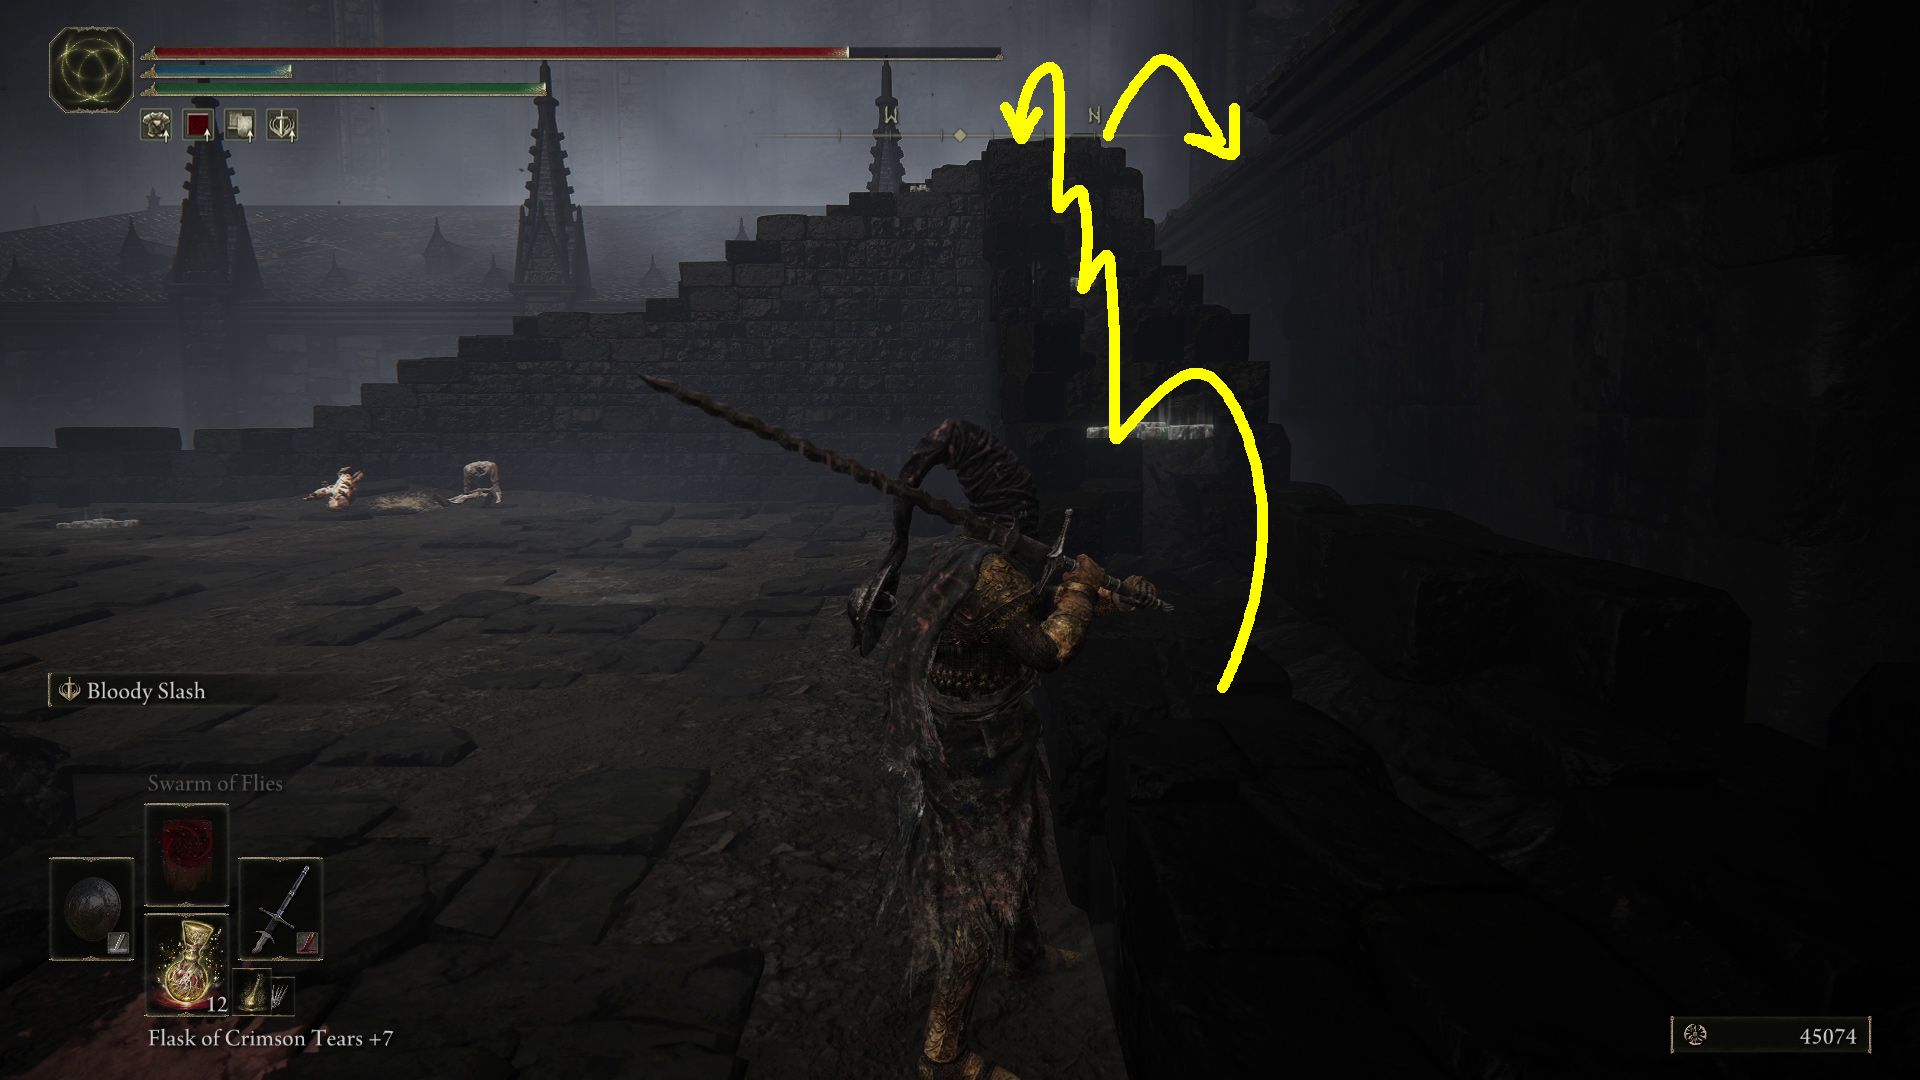
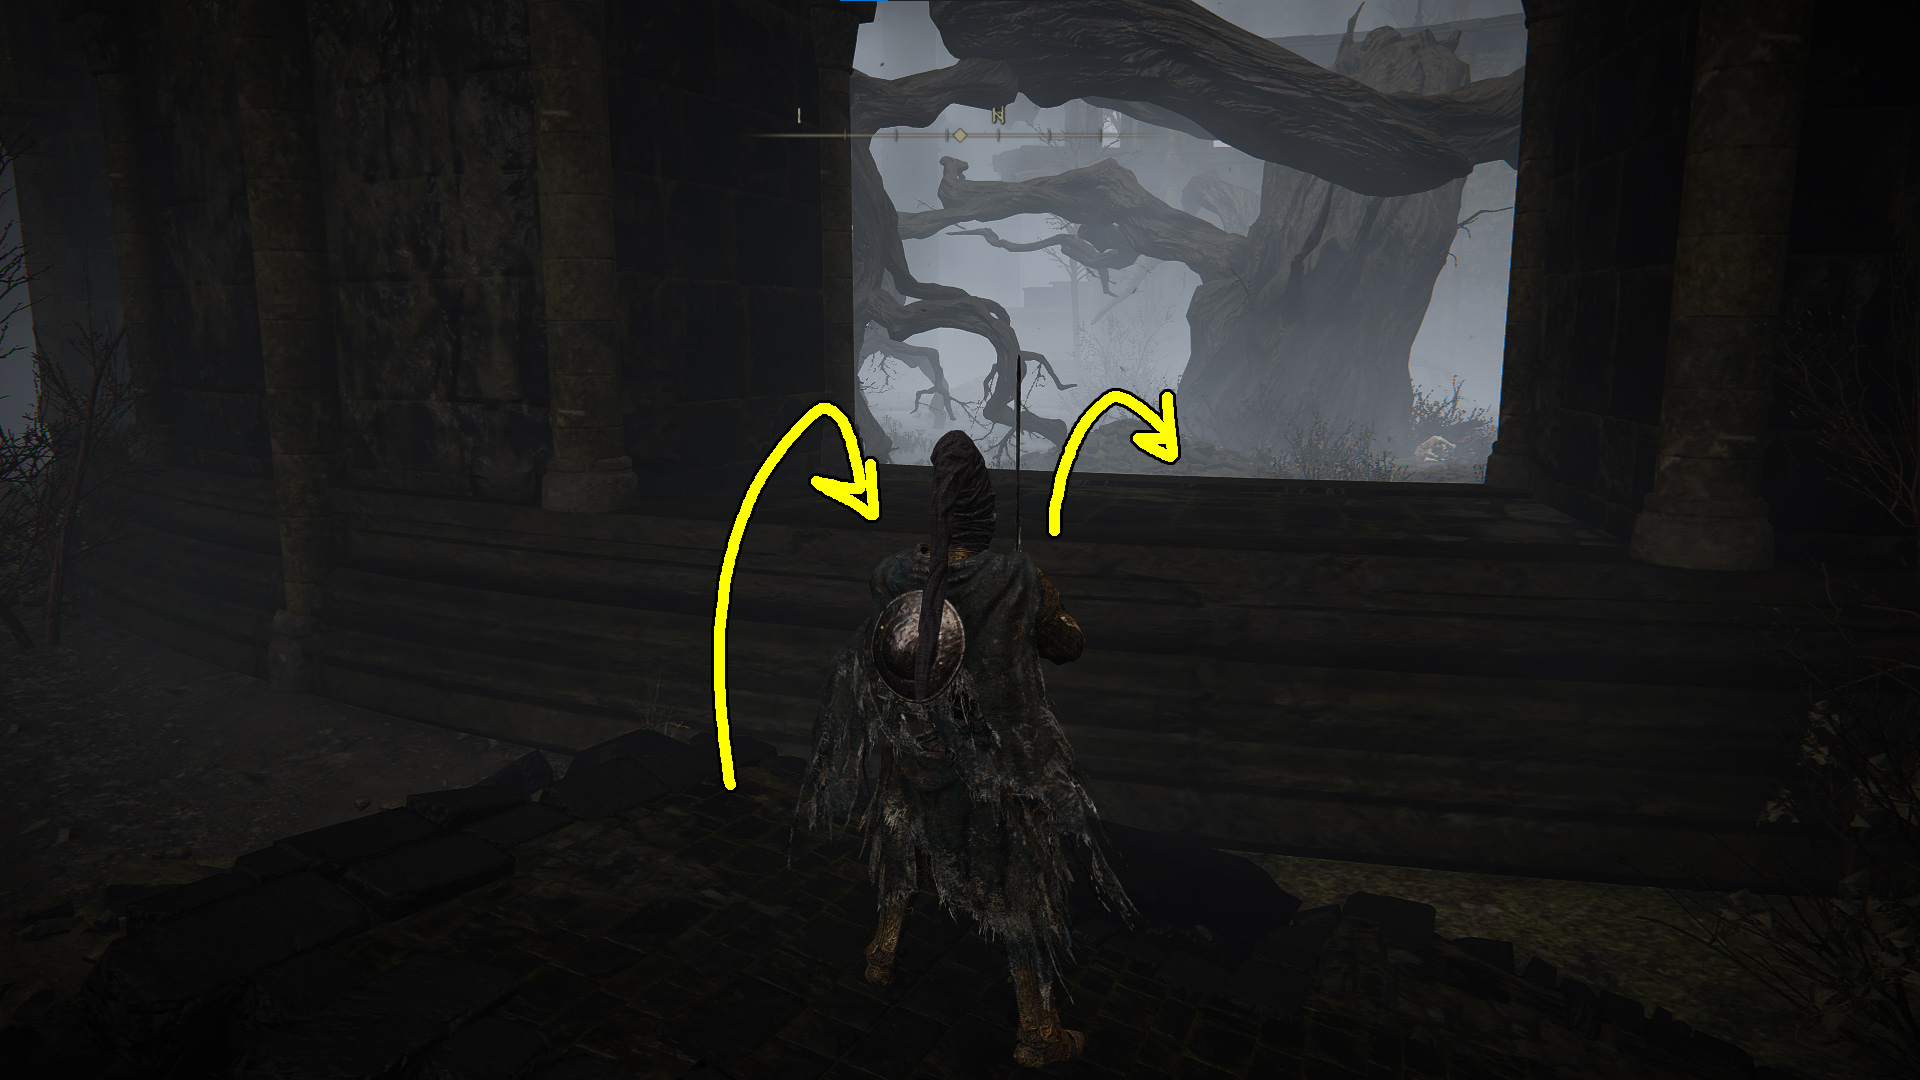
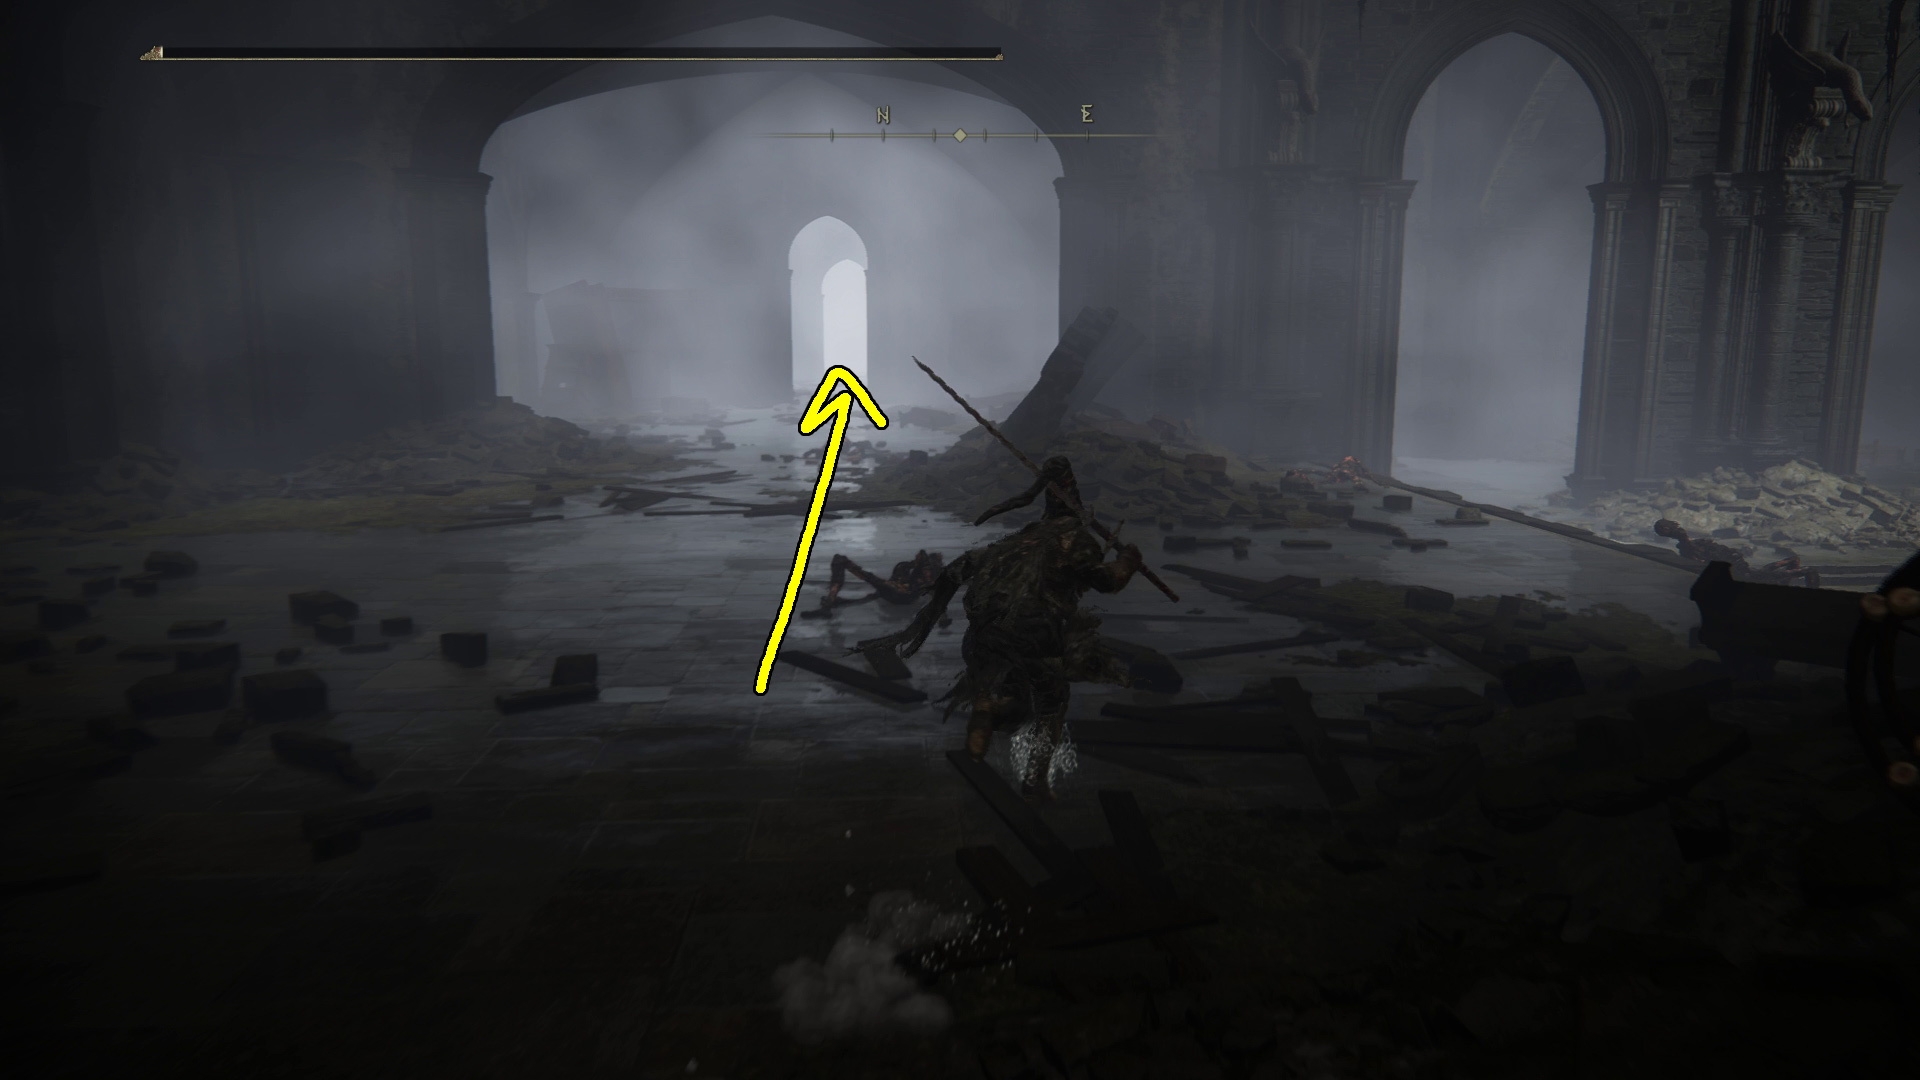
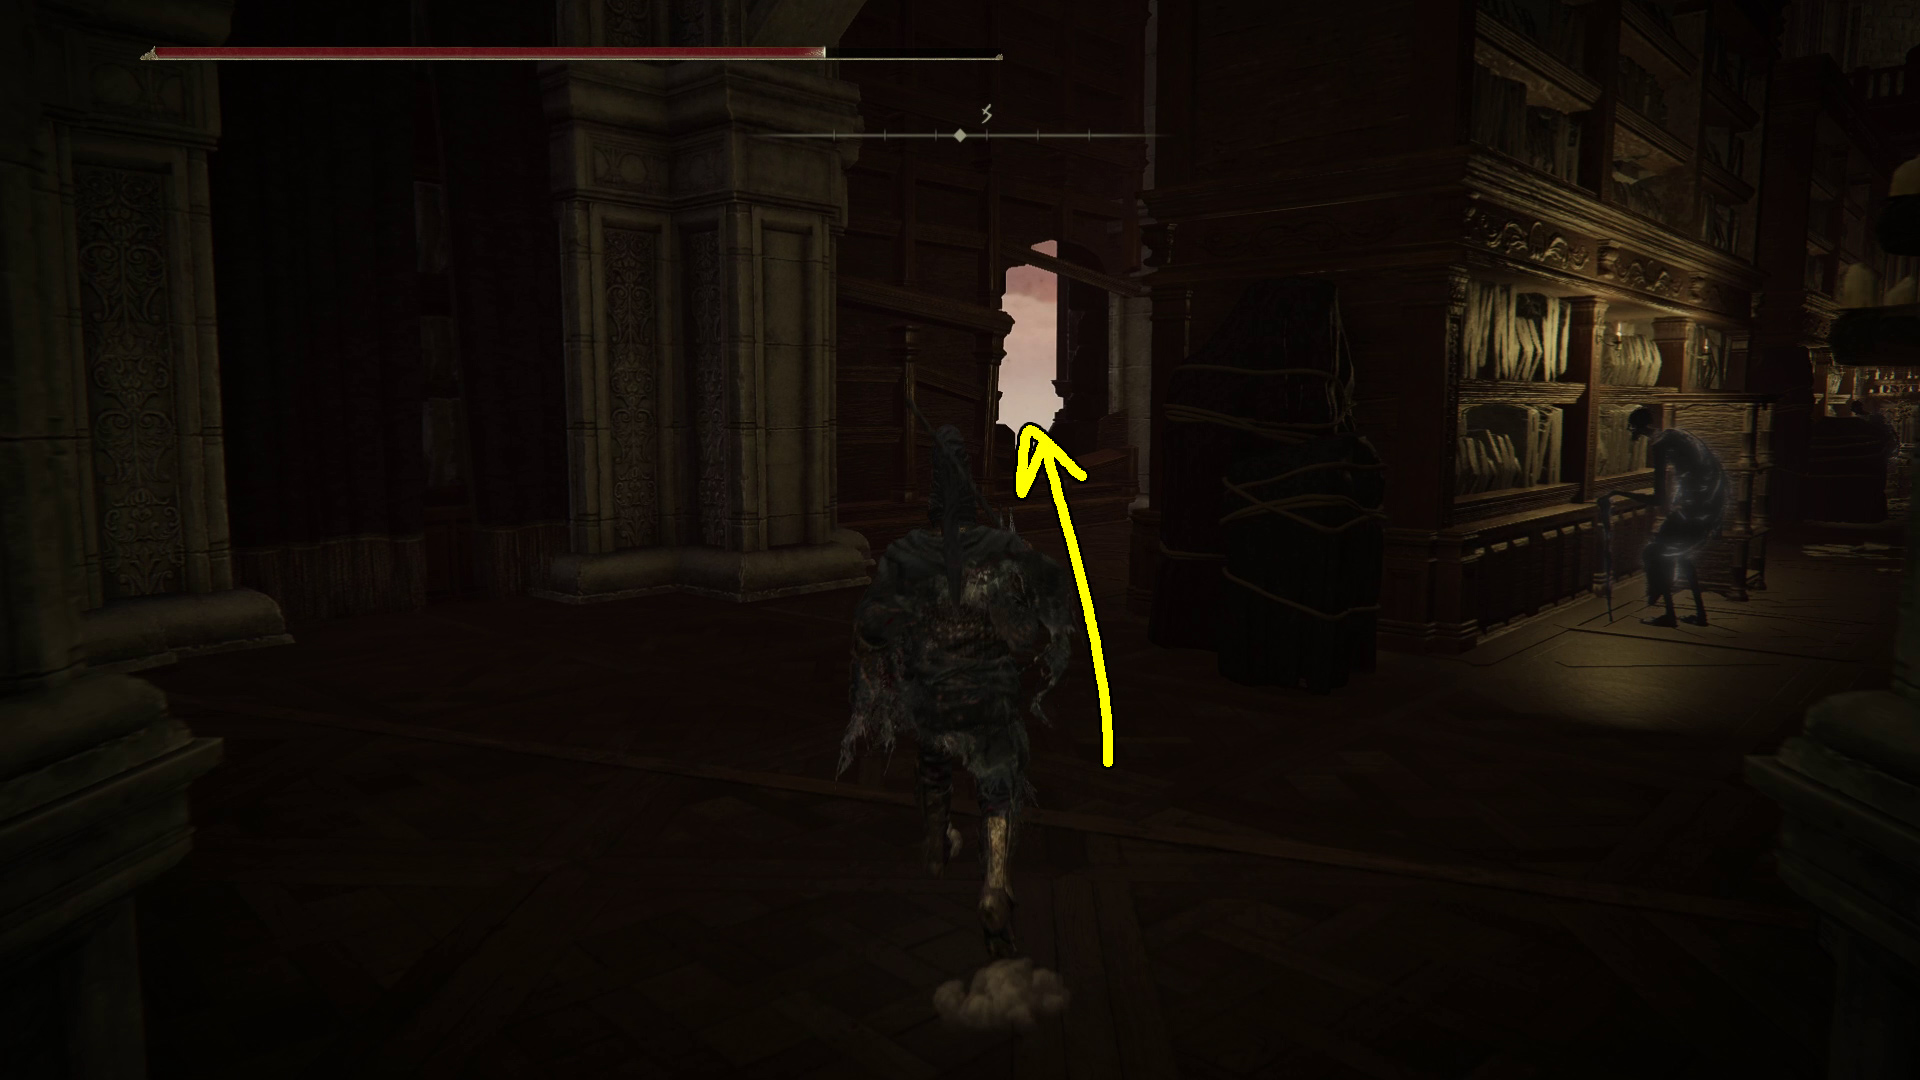
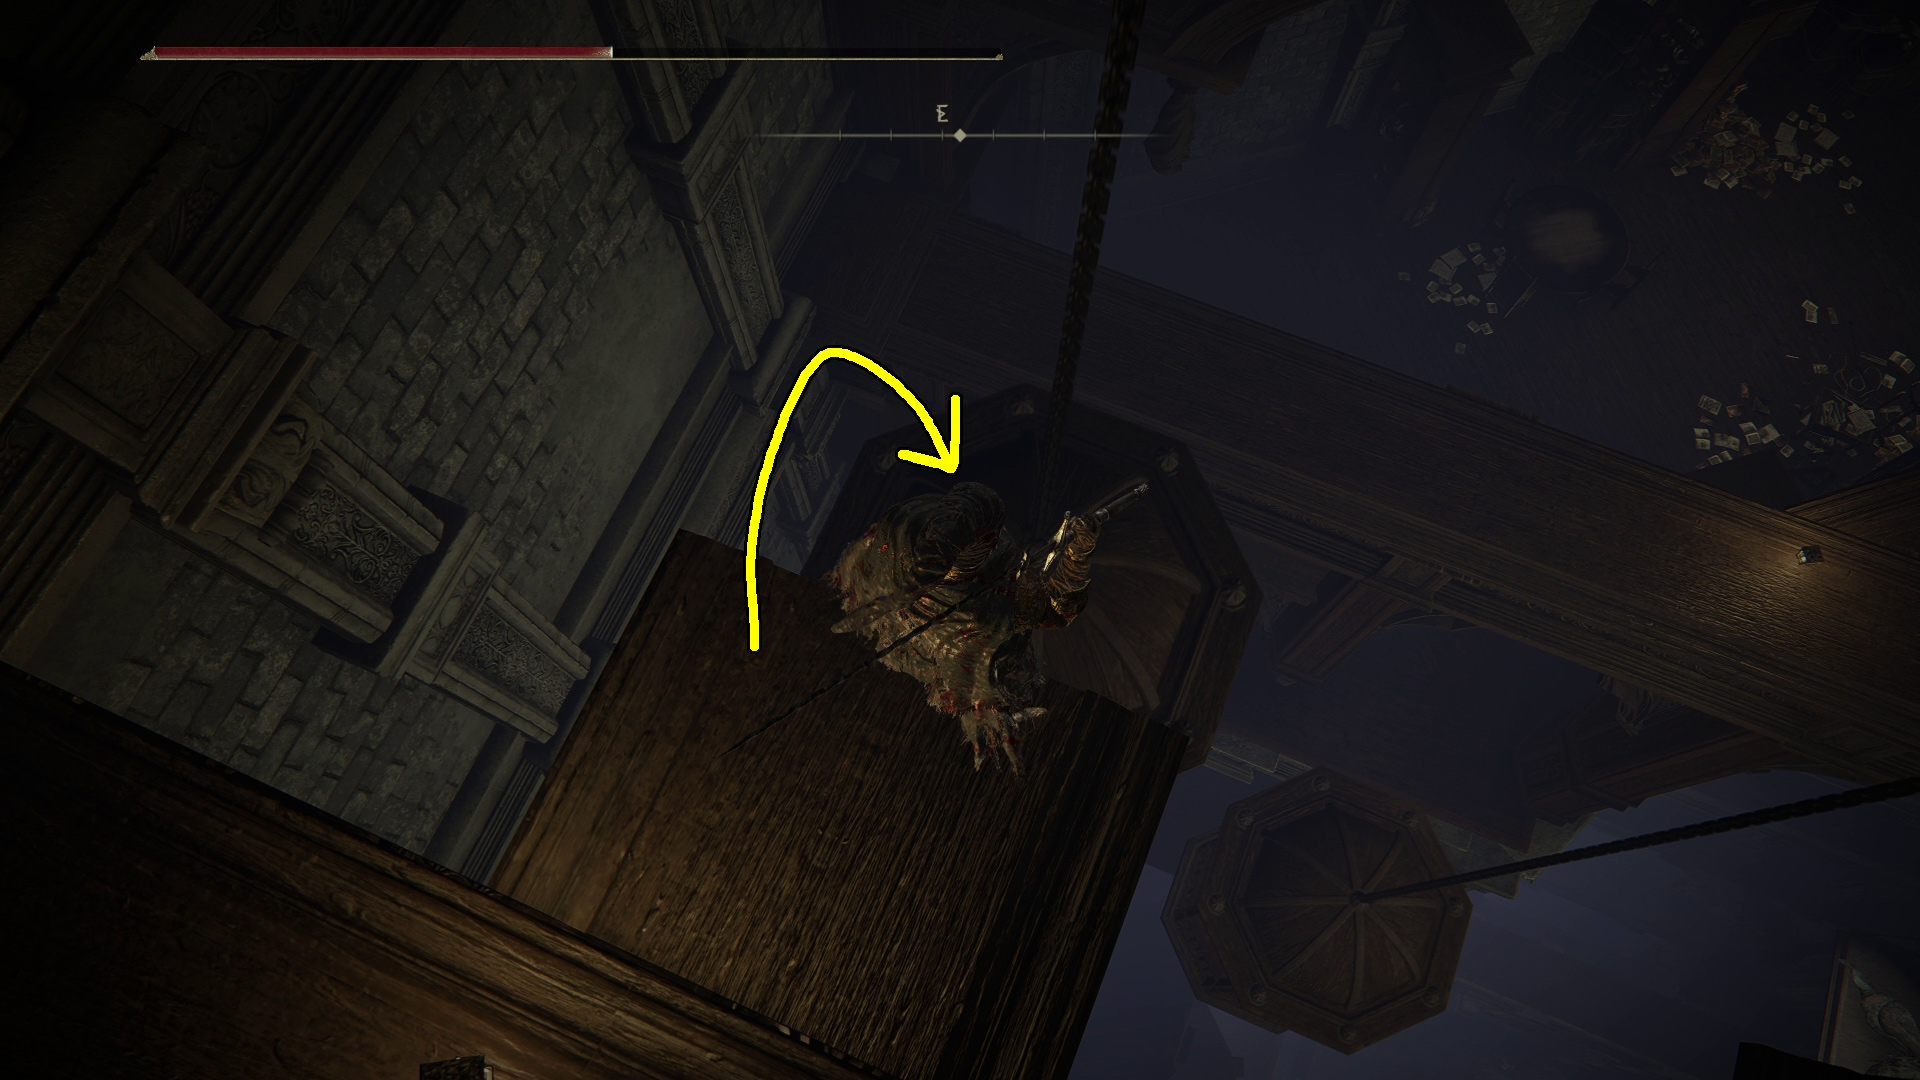
You can actually sneak past the patrolling knight, even though the ranged knight will notice you. Simply use the tables and chairs to block the arrows, wait until the patrolling knight is near the entrance, then run out of the room (Image 3) — the ranged knight will pull out his twinblades and follow you, but the other knight should remain patrolling. After going through the doorway, drop off of the small bridge (Image 4) — the knight will follow, so make sure you kill them.
Image 3Image 4
Grab the x5 Smithing Stone [5] from the corpse north of where you dropped, then go south to drop off the ledge and head to the golden tree. At the base of the tree is a talisman, Lord’s Bestowal. South of tree and through the doorway, you can follow the wooden walkway around the edge of the room to find x2 Smithing Stone [8]. Northwest of the tree, a knight guards x3 Golden Vow.
Image 5 – The view from where you find the Lord’s Bestowal talisman
The nearby doorway on the northeastern wall leads leads to the shortcut. In the first room, you’ll meet a soldier and a twinblade knight. Behind the weapon racks on the northwestern side of the room is a corpse with x4 Smithing Stone [1]. (If you don’t want to fight these enemies just to get the smithing stones, you can simply teleport to the Main Gate Plaza site of grace and head back up to the small bridge again.
If you do fight through the soldier and knight, in the next room is a ladder — it leads up to a door, which serves as a shortcut to the room with the archer knight by the fireplace. Note that upon opening this door, you’ll need to be ready to fight the patrolling knight unless you wait to open the door until he passes.
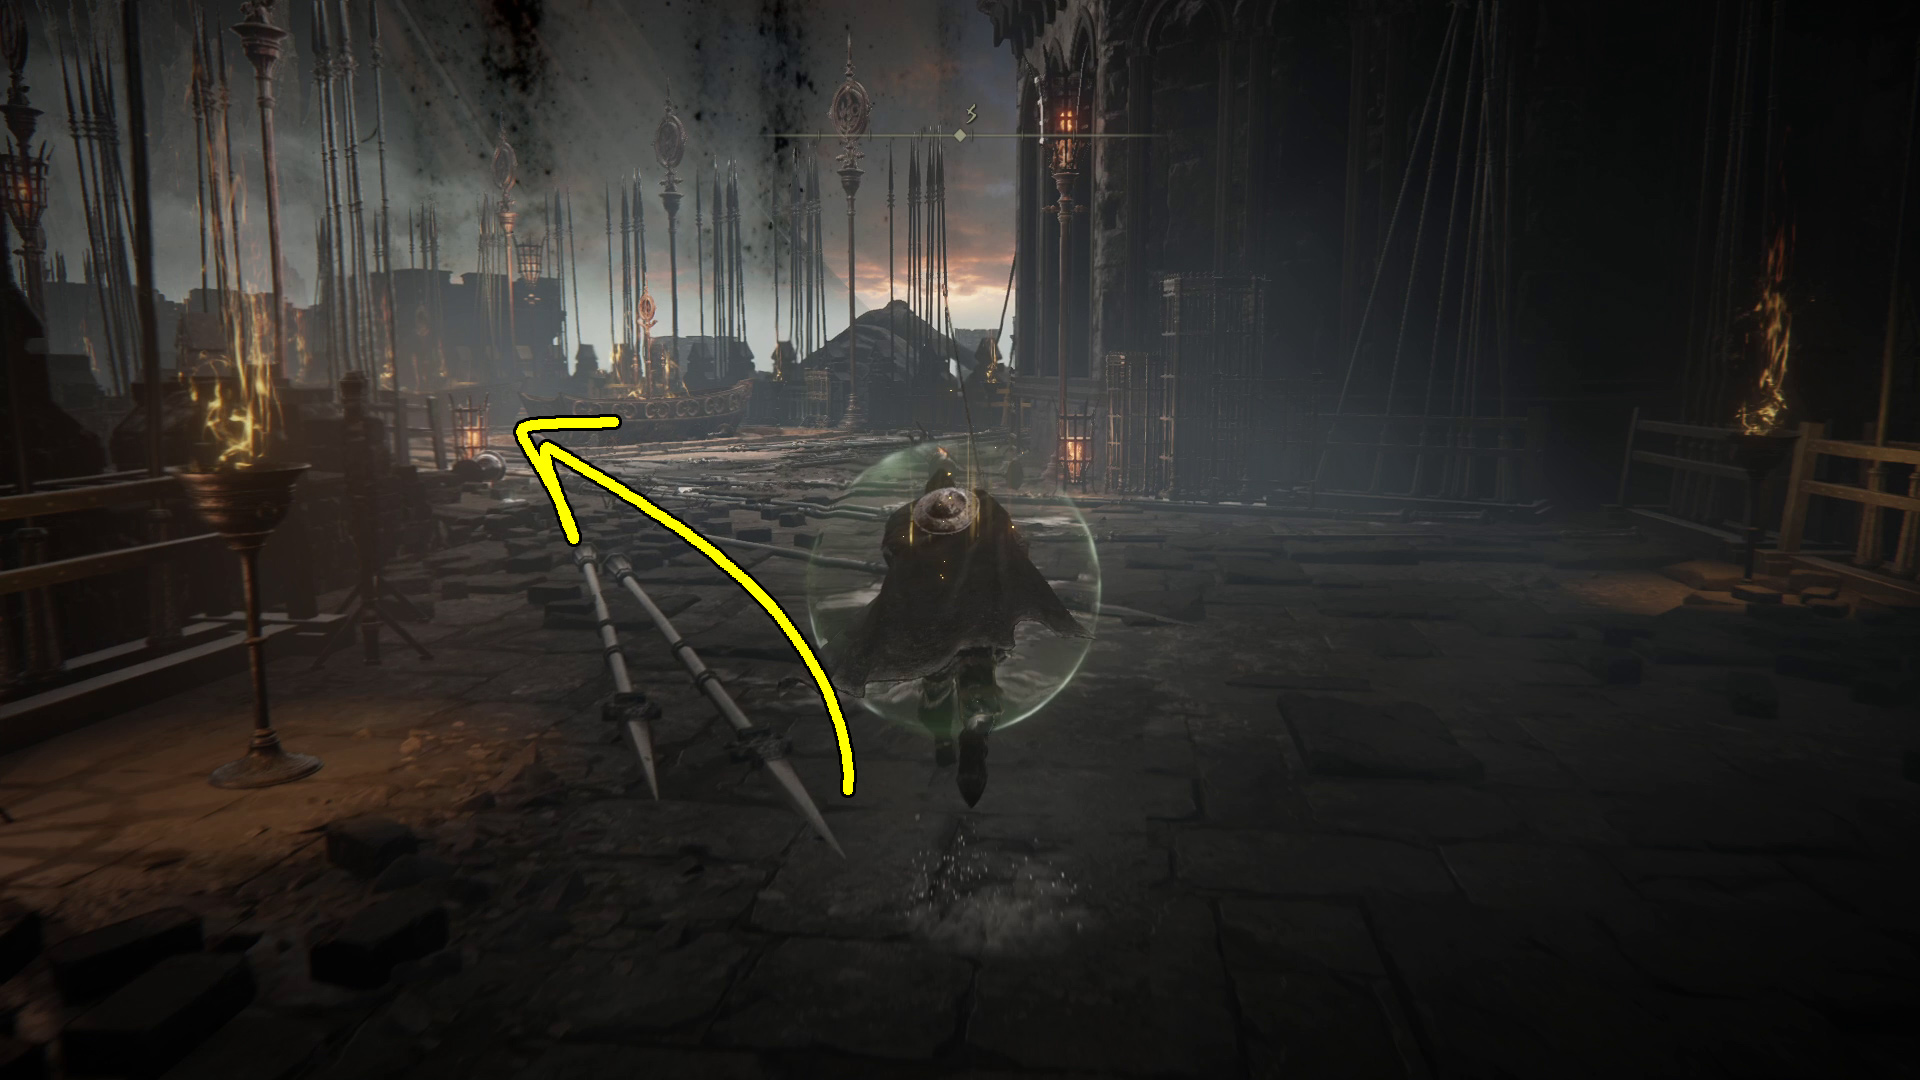
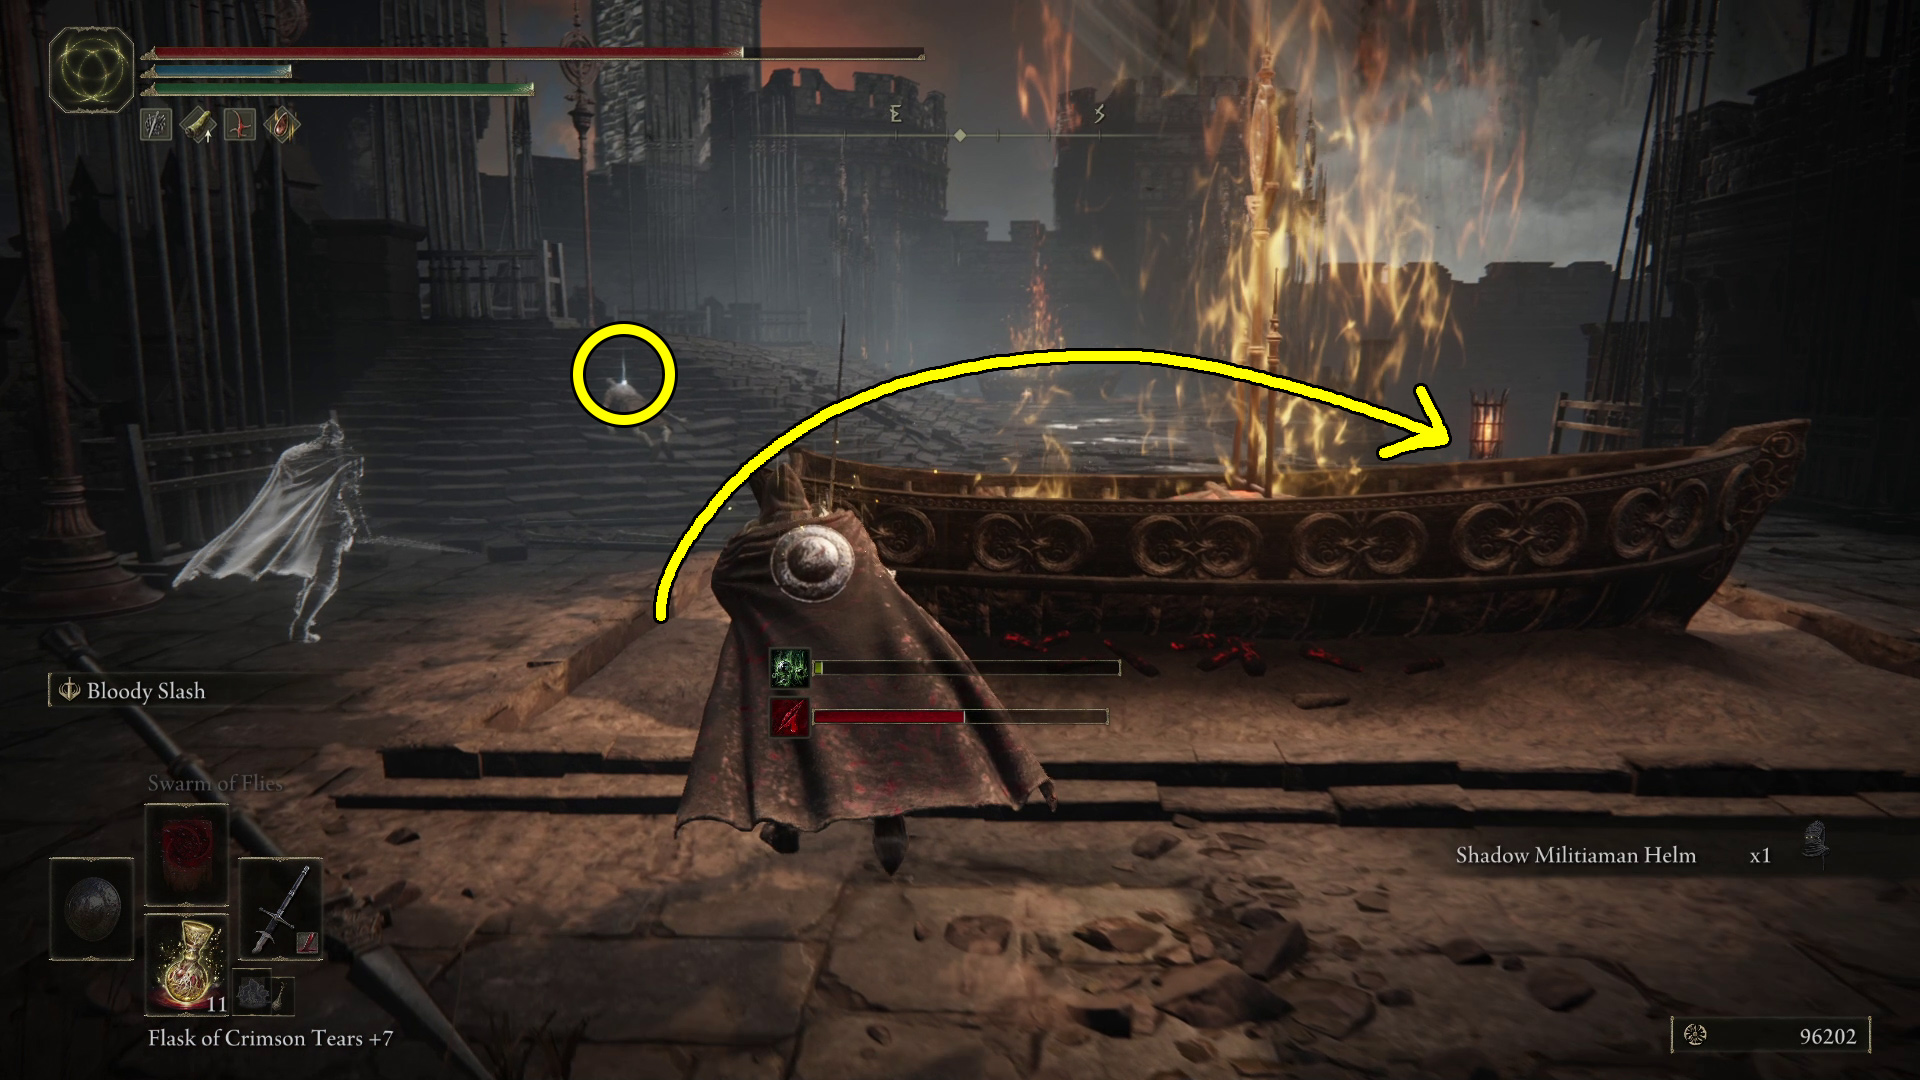
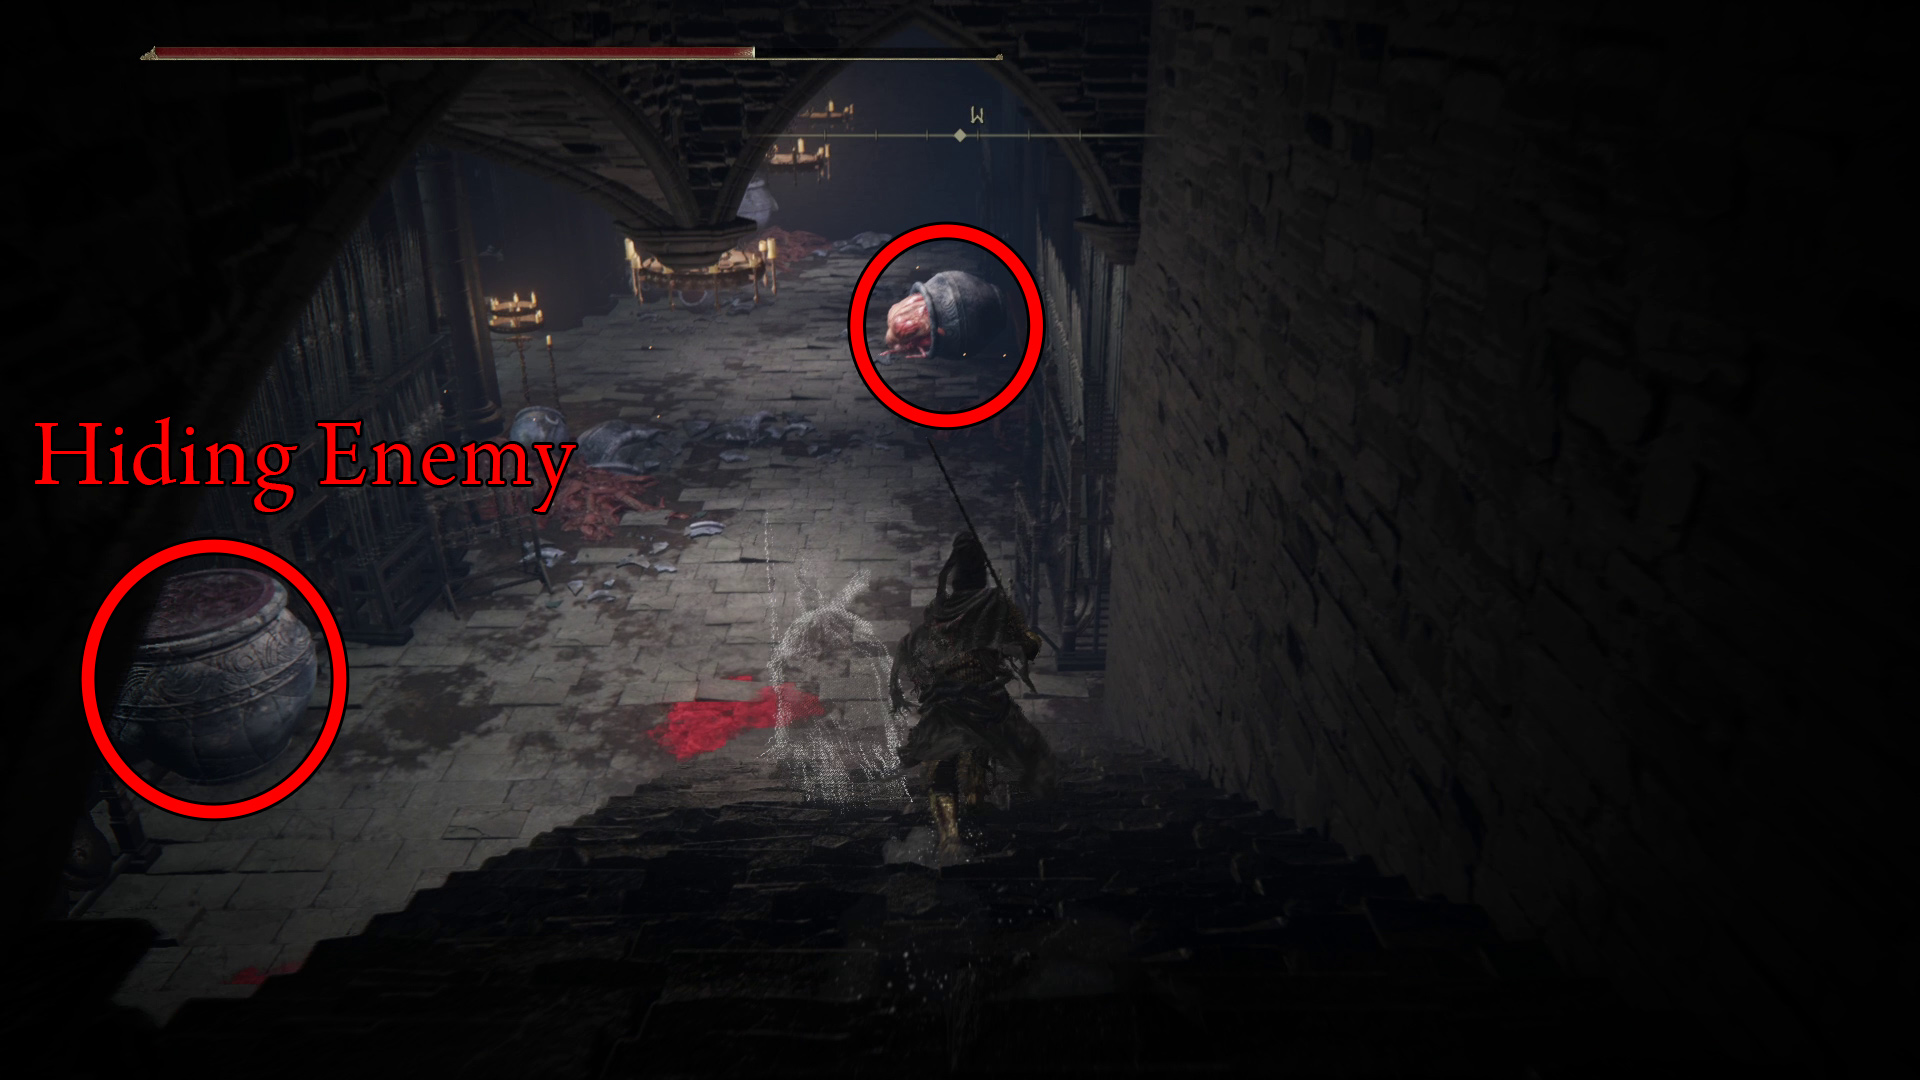
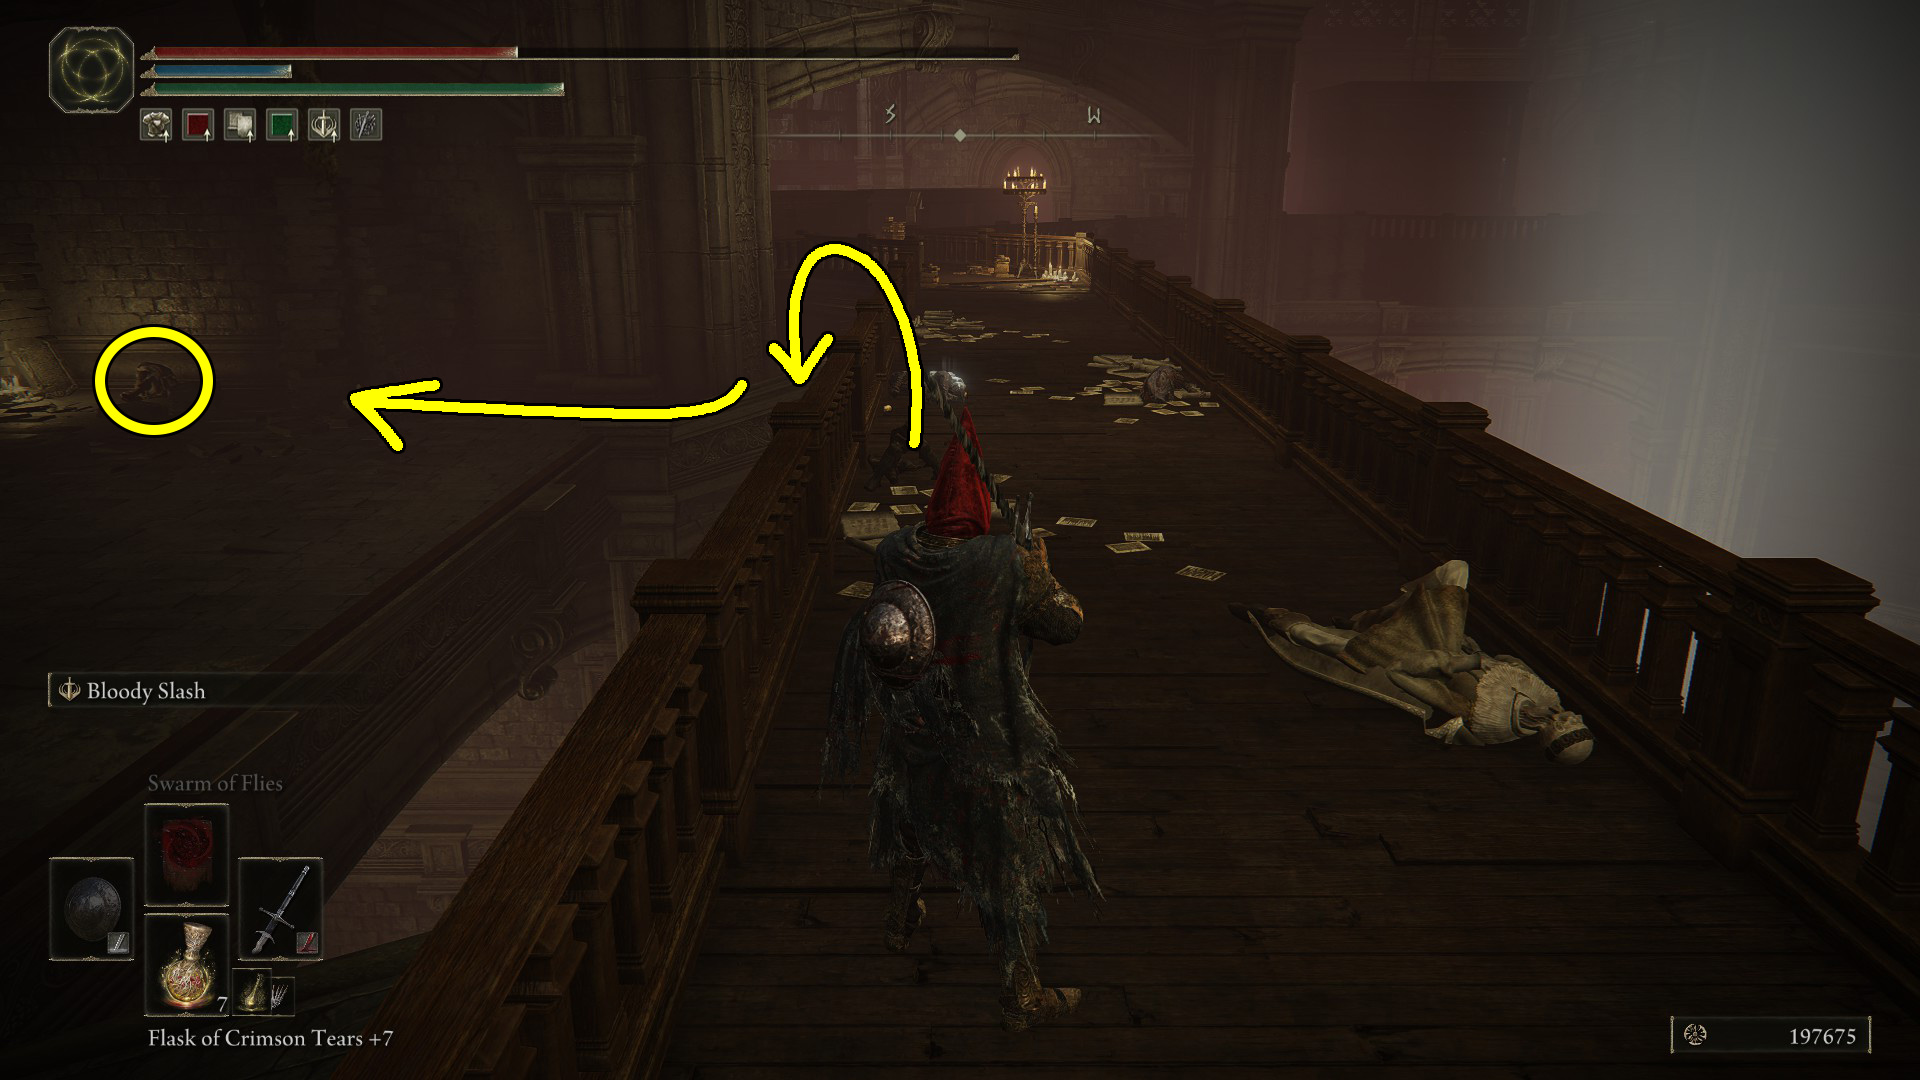
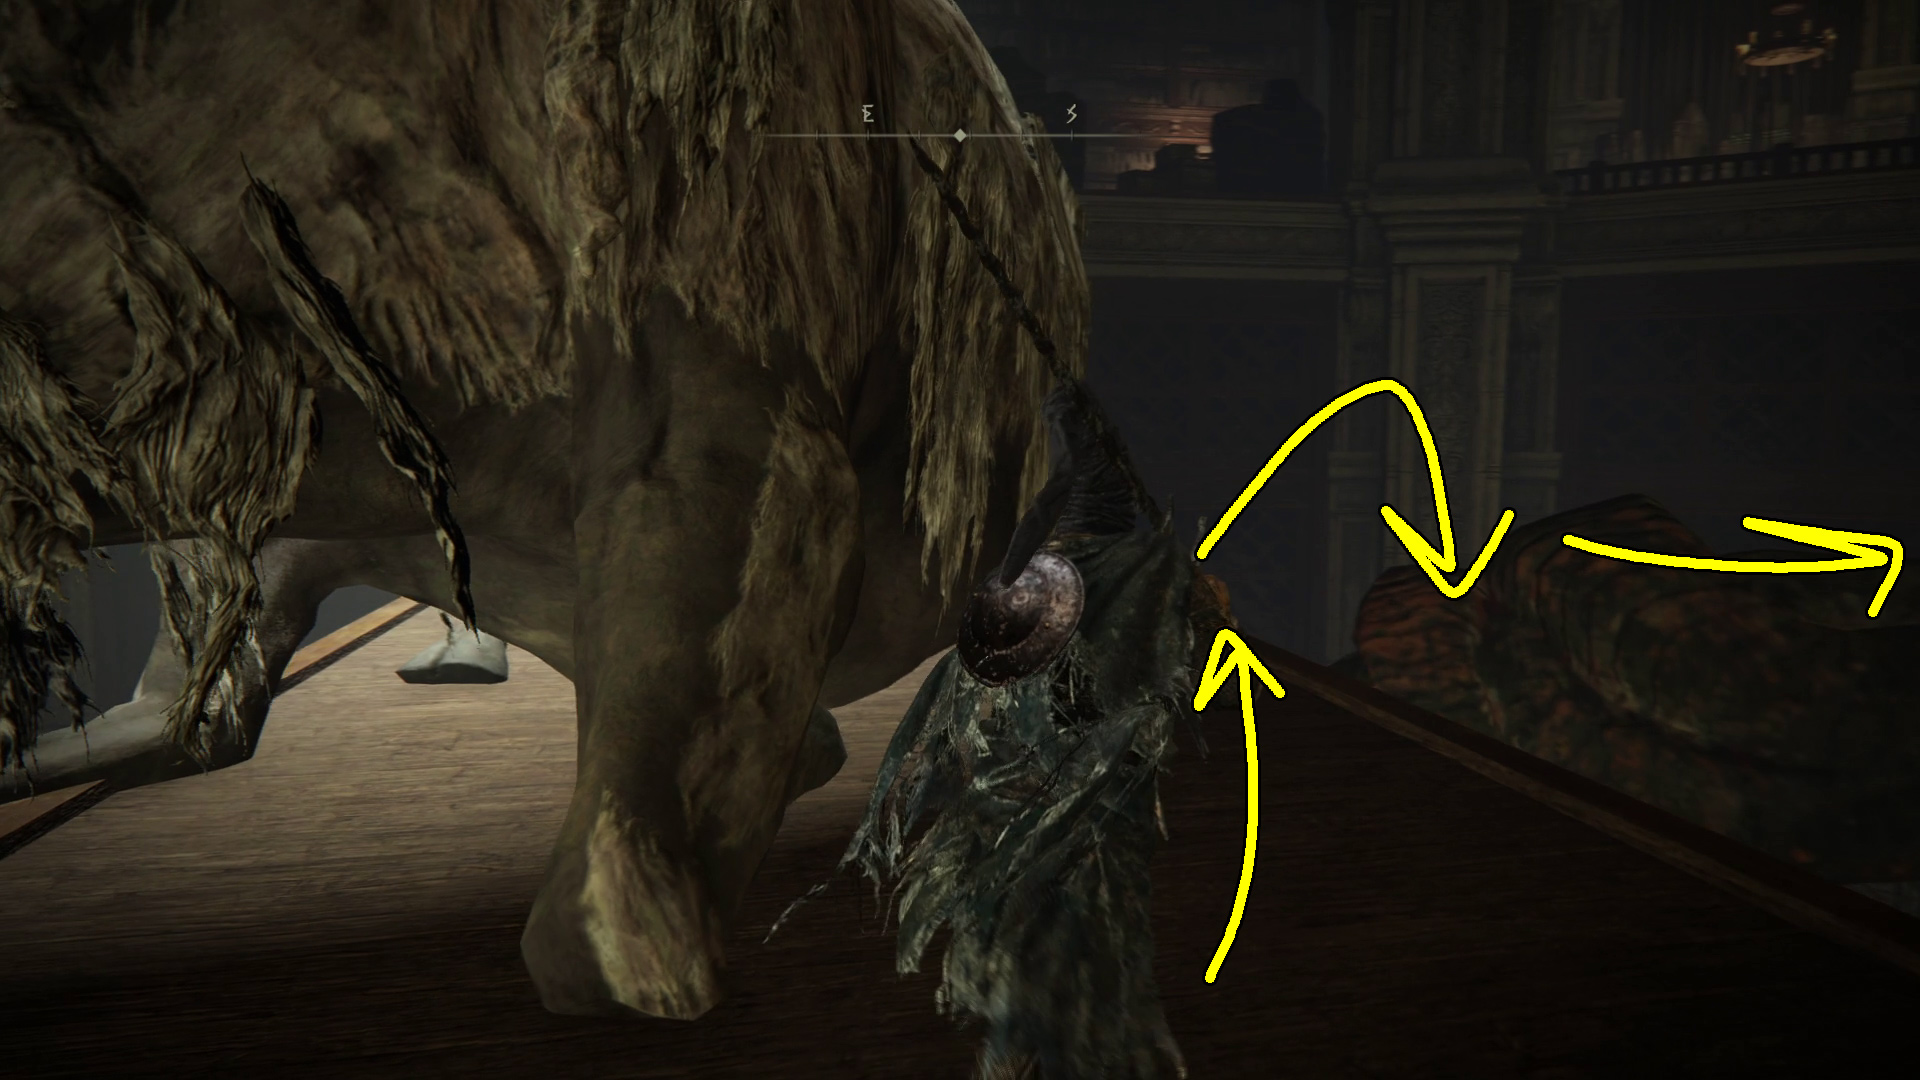
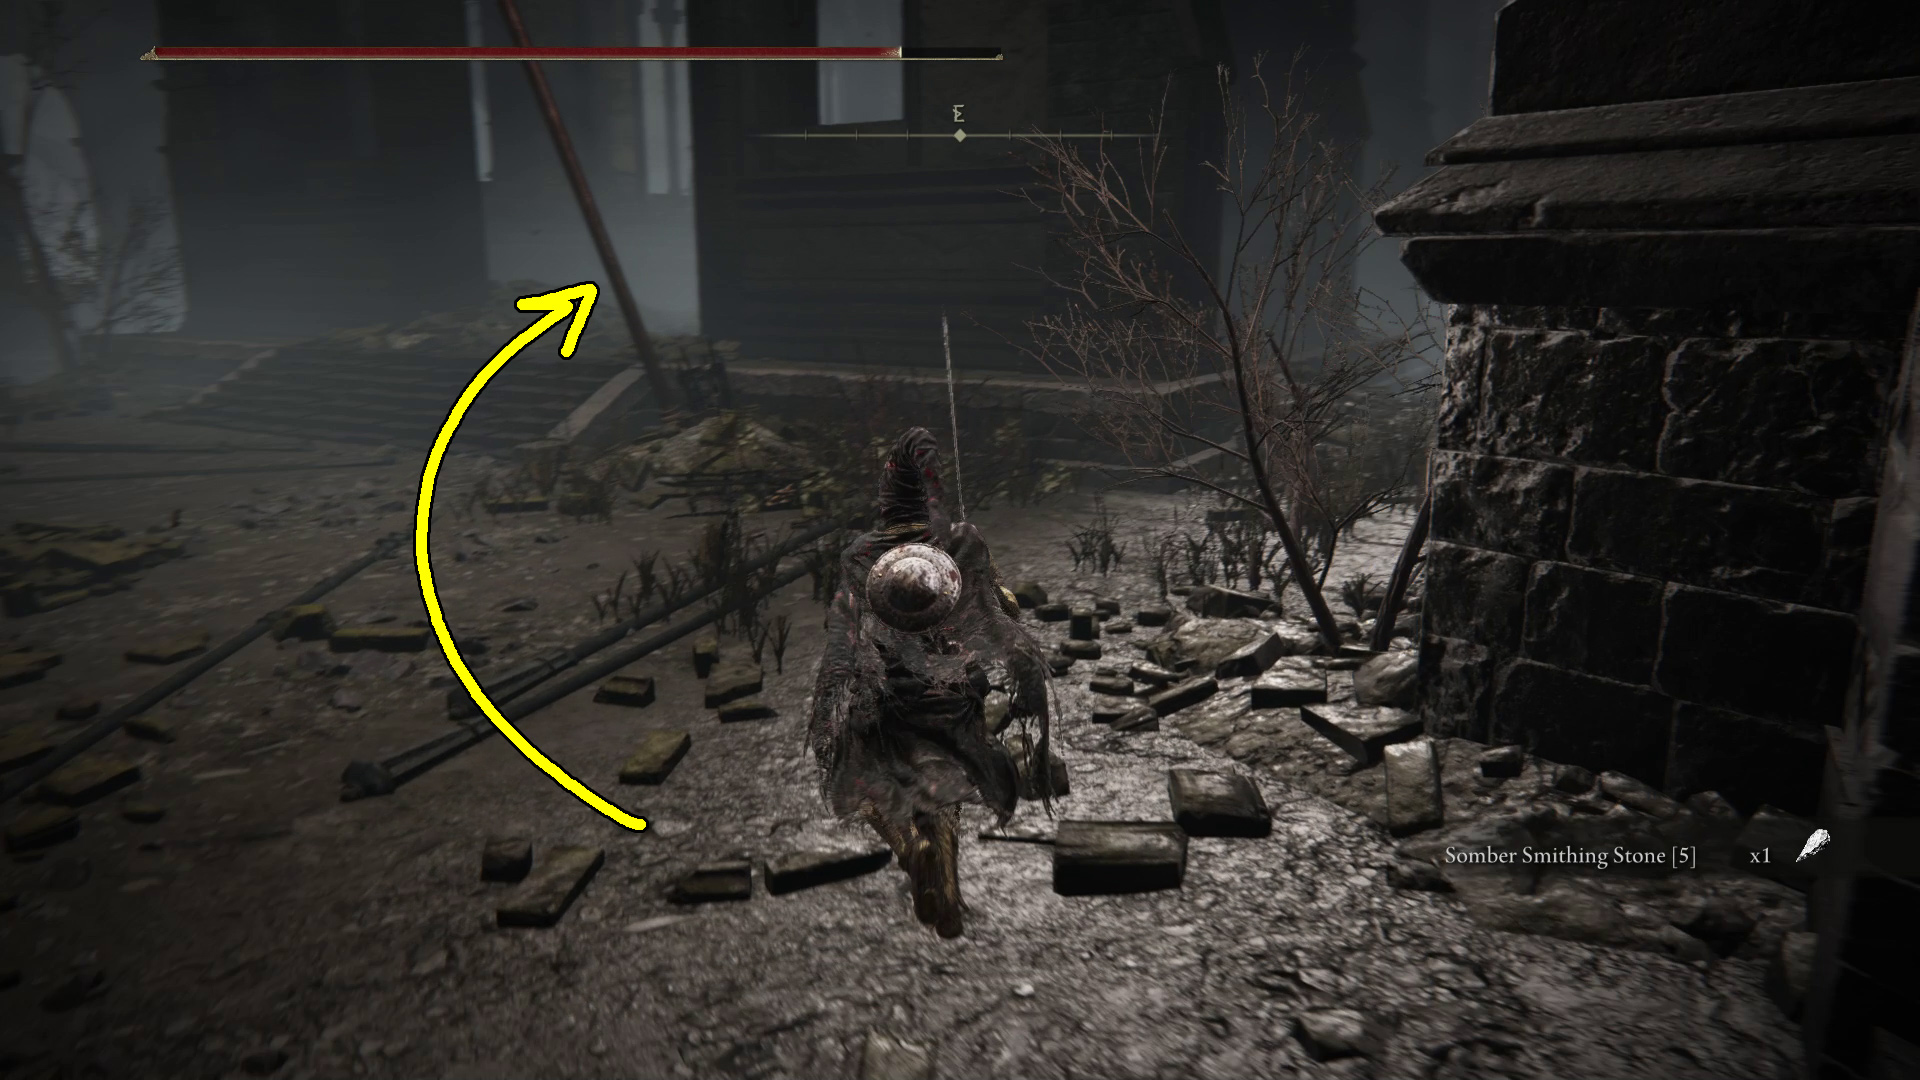
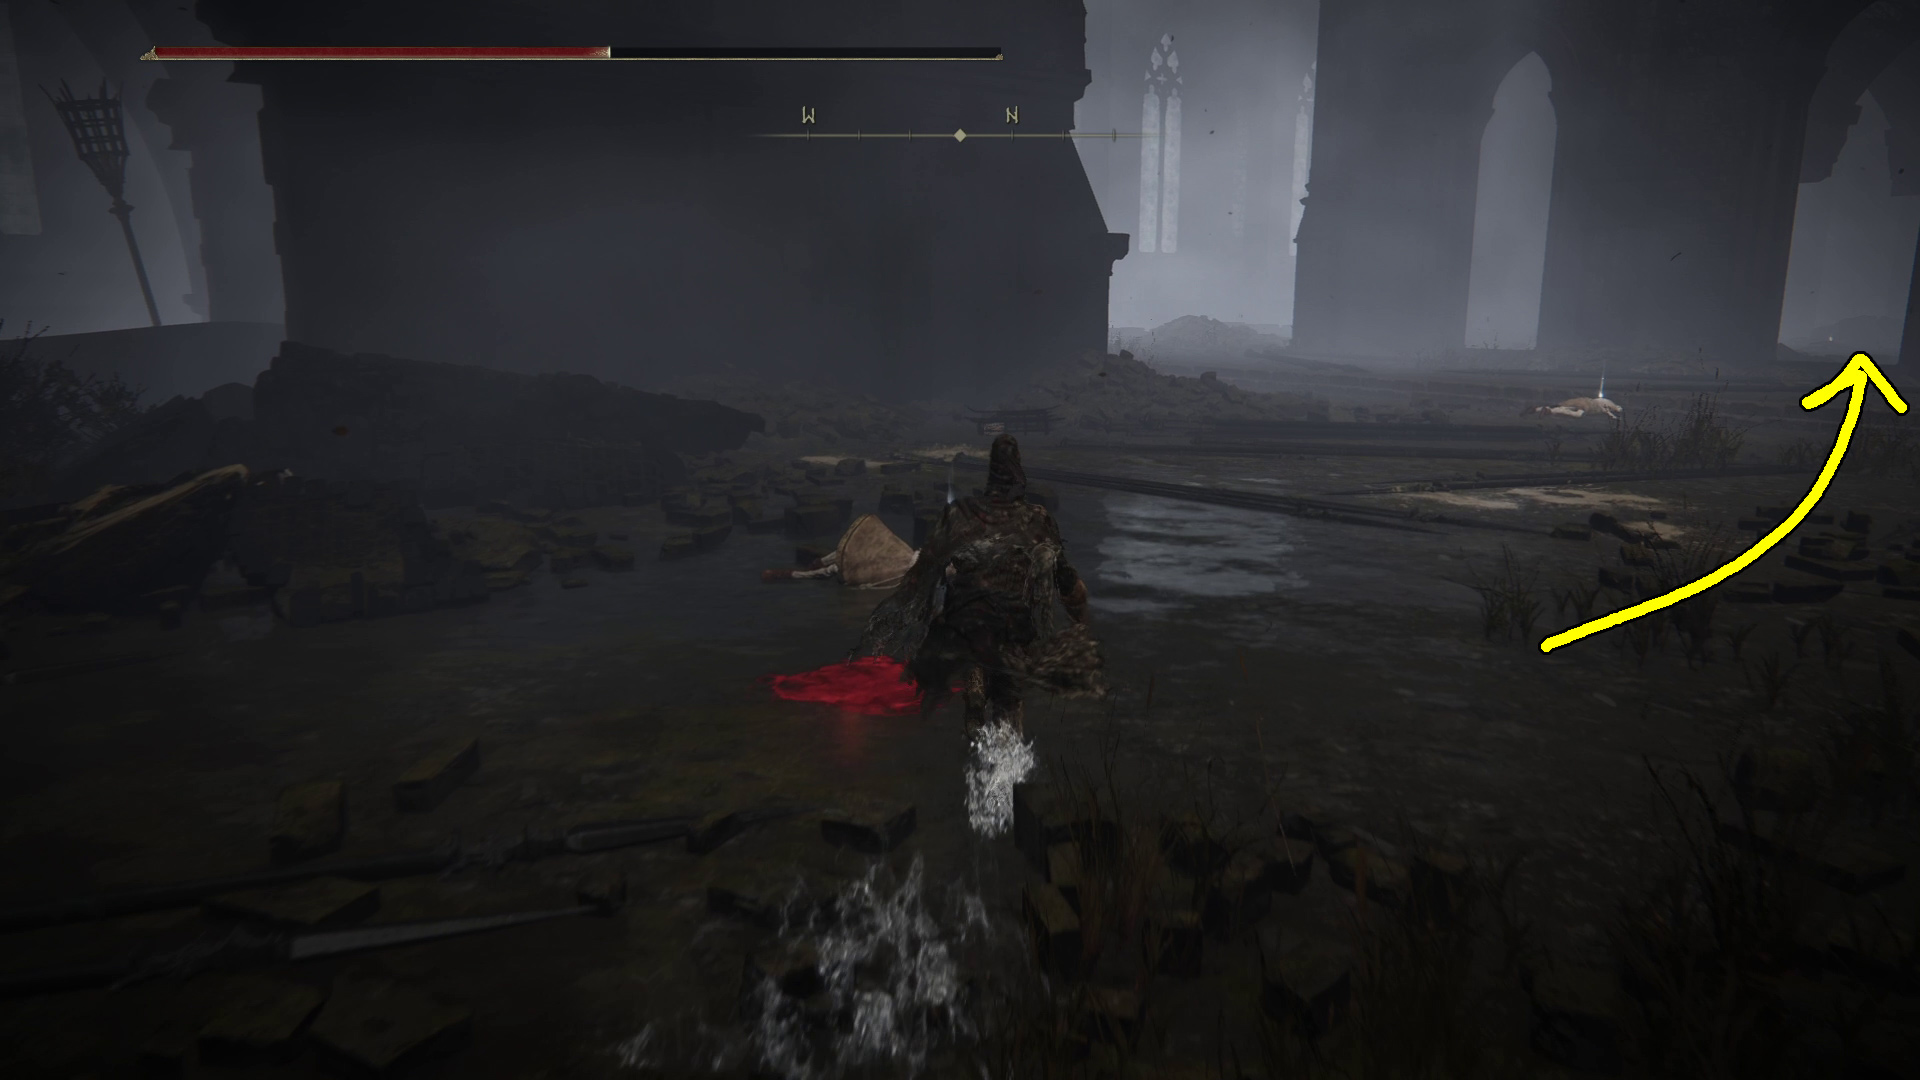
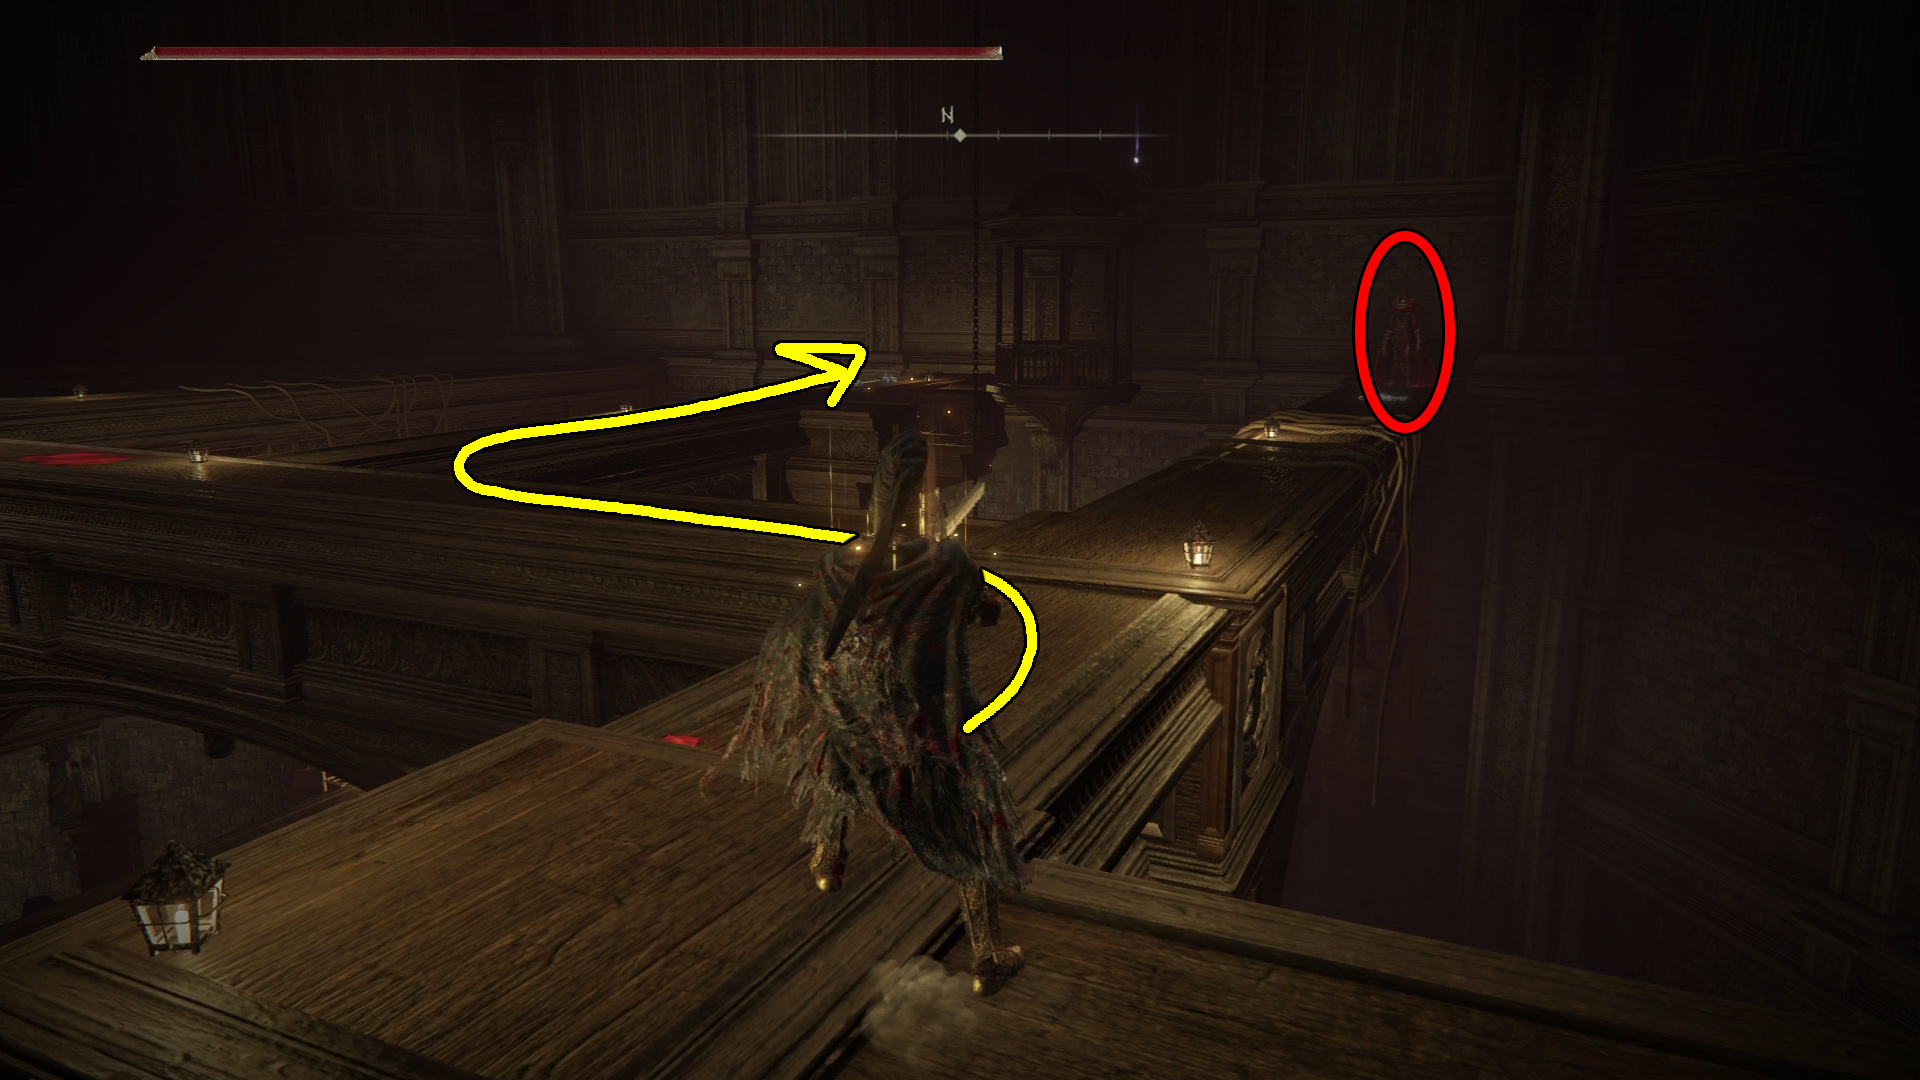
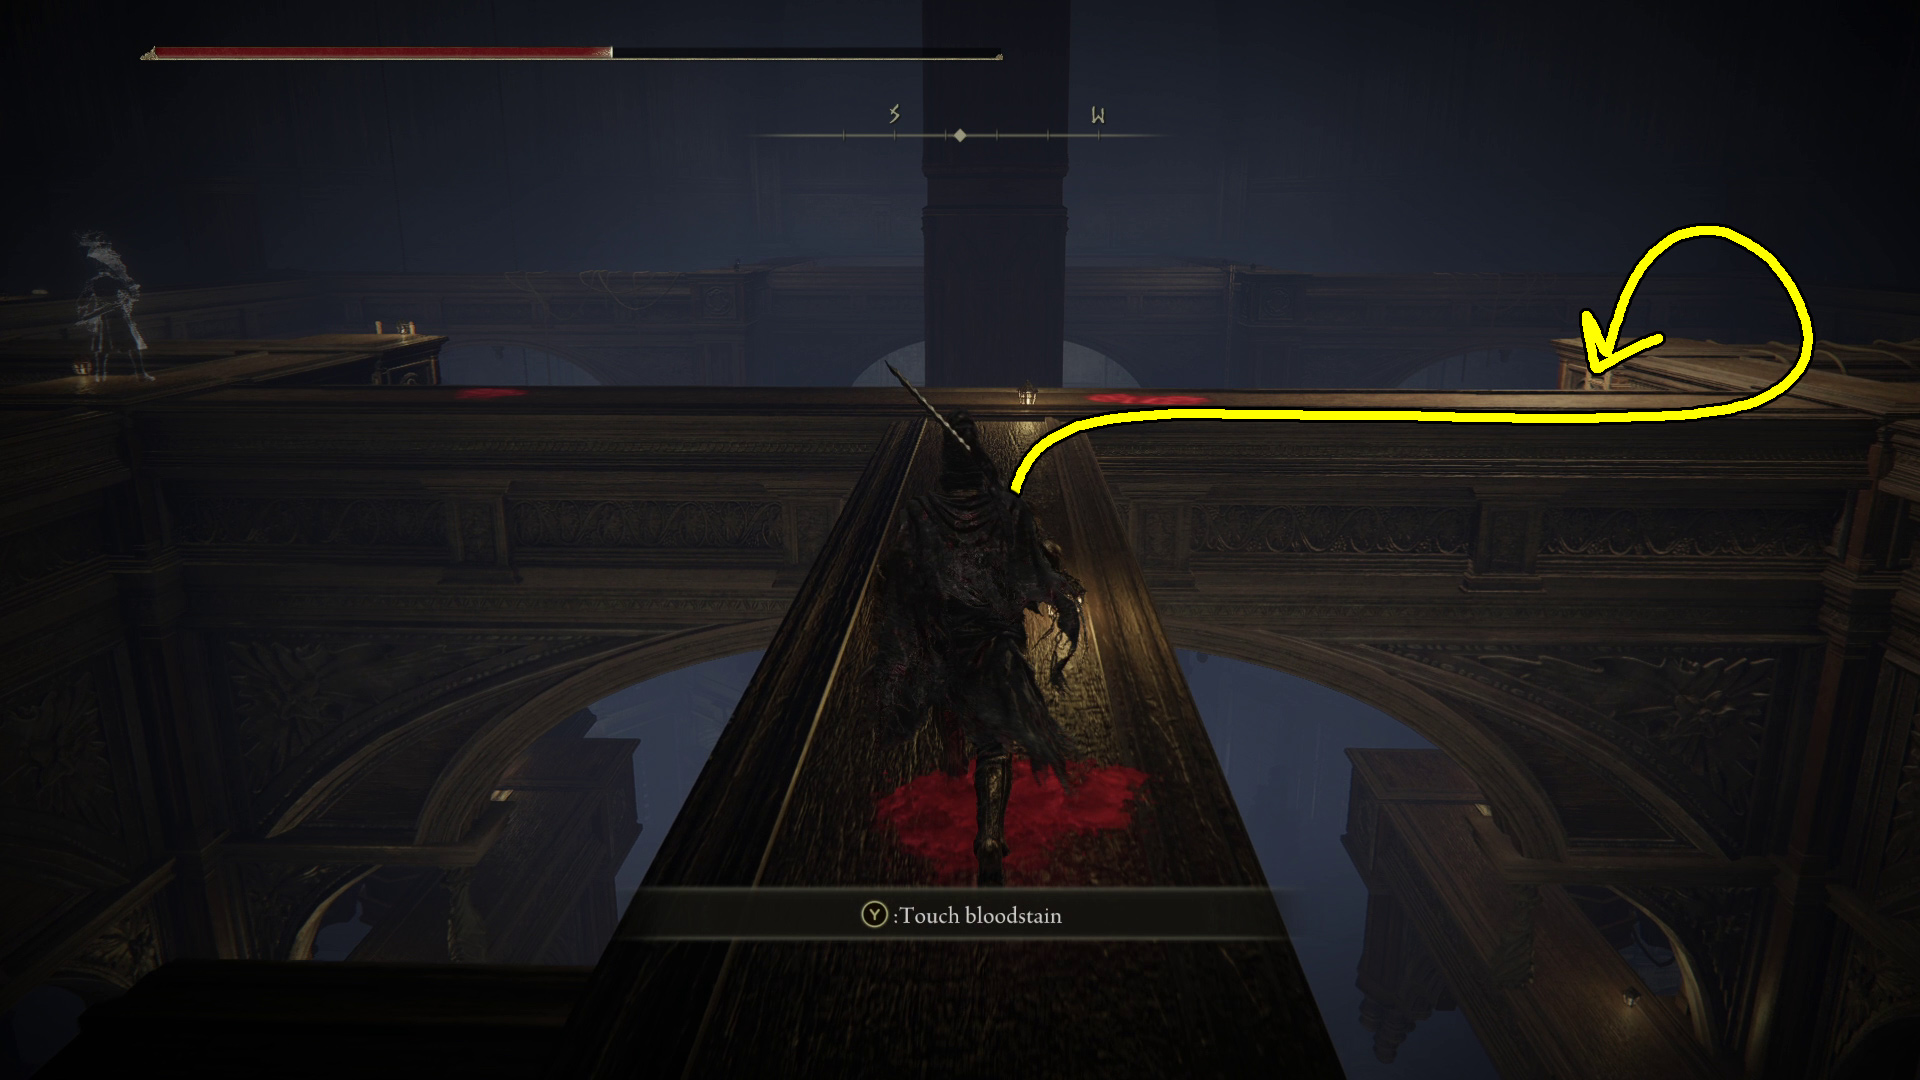
However you get there, make your way back to the small bridge in Image 4, and this time continue across it. After crossing the bridge, go left (northeast) to find a corpse with a Holyproof Pickled Liver. Then head south, to where there are rows of burning boats (Image 6). There are a total of 3 shadow militamen hiding behind the boats here, so go slowly (or else run past all of them). Past the first row of boats are some stairs on your left that lead to the Specimen Storehouse — we’ll come back here later, though you can grab the Messmerfire Grease from the corpse on the stairs.
For now, take a right to go southwest down the ramp (Image 7). You’ll see a large group of vulgar militiamen — you can fight them, or you can run past and open the huge doors on your right (they can’t attack you while you’re in the door-opening animation). This doorway leads back to the Main Gate Plaza site of grace, and serves as a shortcut.
Image 6Image 7
Rest at the Main Gate Plaza site of grace, then go back southeast, through the doorway you just opened. Deal with the militiamen, grab the Drawstring Golden Grease from the corpse near the bottom of the ramp, then continue up the ramp. Going straight up the stairs leads to the storehouse, but if you haven’t already done so, you’ll want to first take the secret path to the Recluses’ River and grab the Castle Watering Hole site of grace.
Image 8
Secret Path to Recluses’ River
Important & Unique Items
“Domain of Dragons” Painting
Head right (southeast) from the top of the ramp, towards the “River” as indicated in Image 8. Deal with the vulgar militia hiding behind the boats, and grab the x3 Smithing Stone [8] from the corpse on the far wall and the Silver-Pickled Fowl Foot from the corpse by the ladder. Then you can head down the ladder (Image 9).
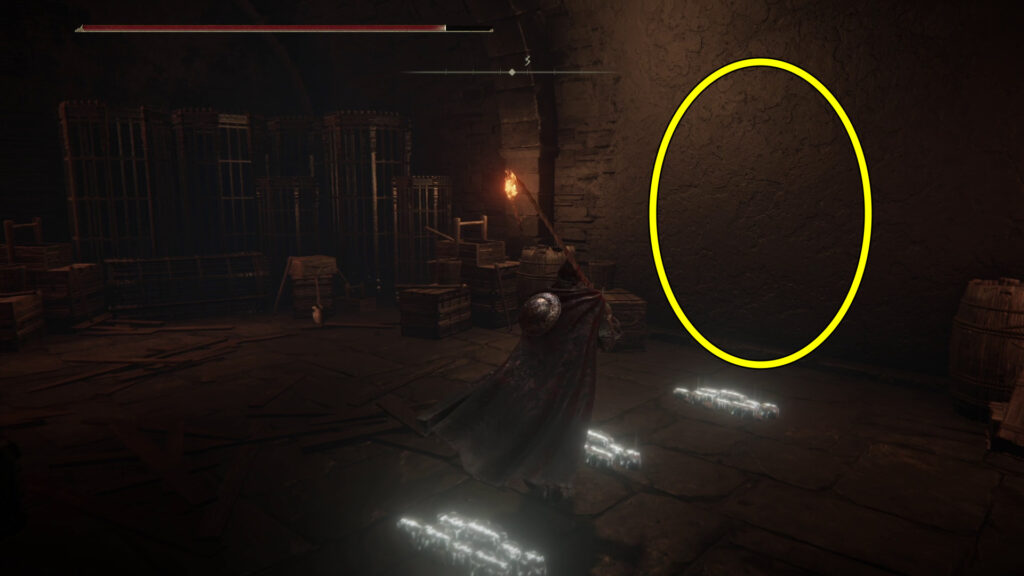
At the bottom of the ladder, take a left into the tunnel behind the waterfall, and go down the next ladder. Continue into the room with the “Domain of Dragons” painting. After you check out the painting, attack the center of the southwestern wall (Image 10) to reveal a secret tunnel. Go down the ramps and you’ll come to a coffin — interact with it to get inside, and you’ll be transported to the Recluses’ River. Head southeast out of the building and you’ll find the Castle Watering Hole site of grace!
Route to Storehouse
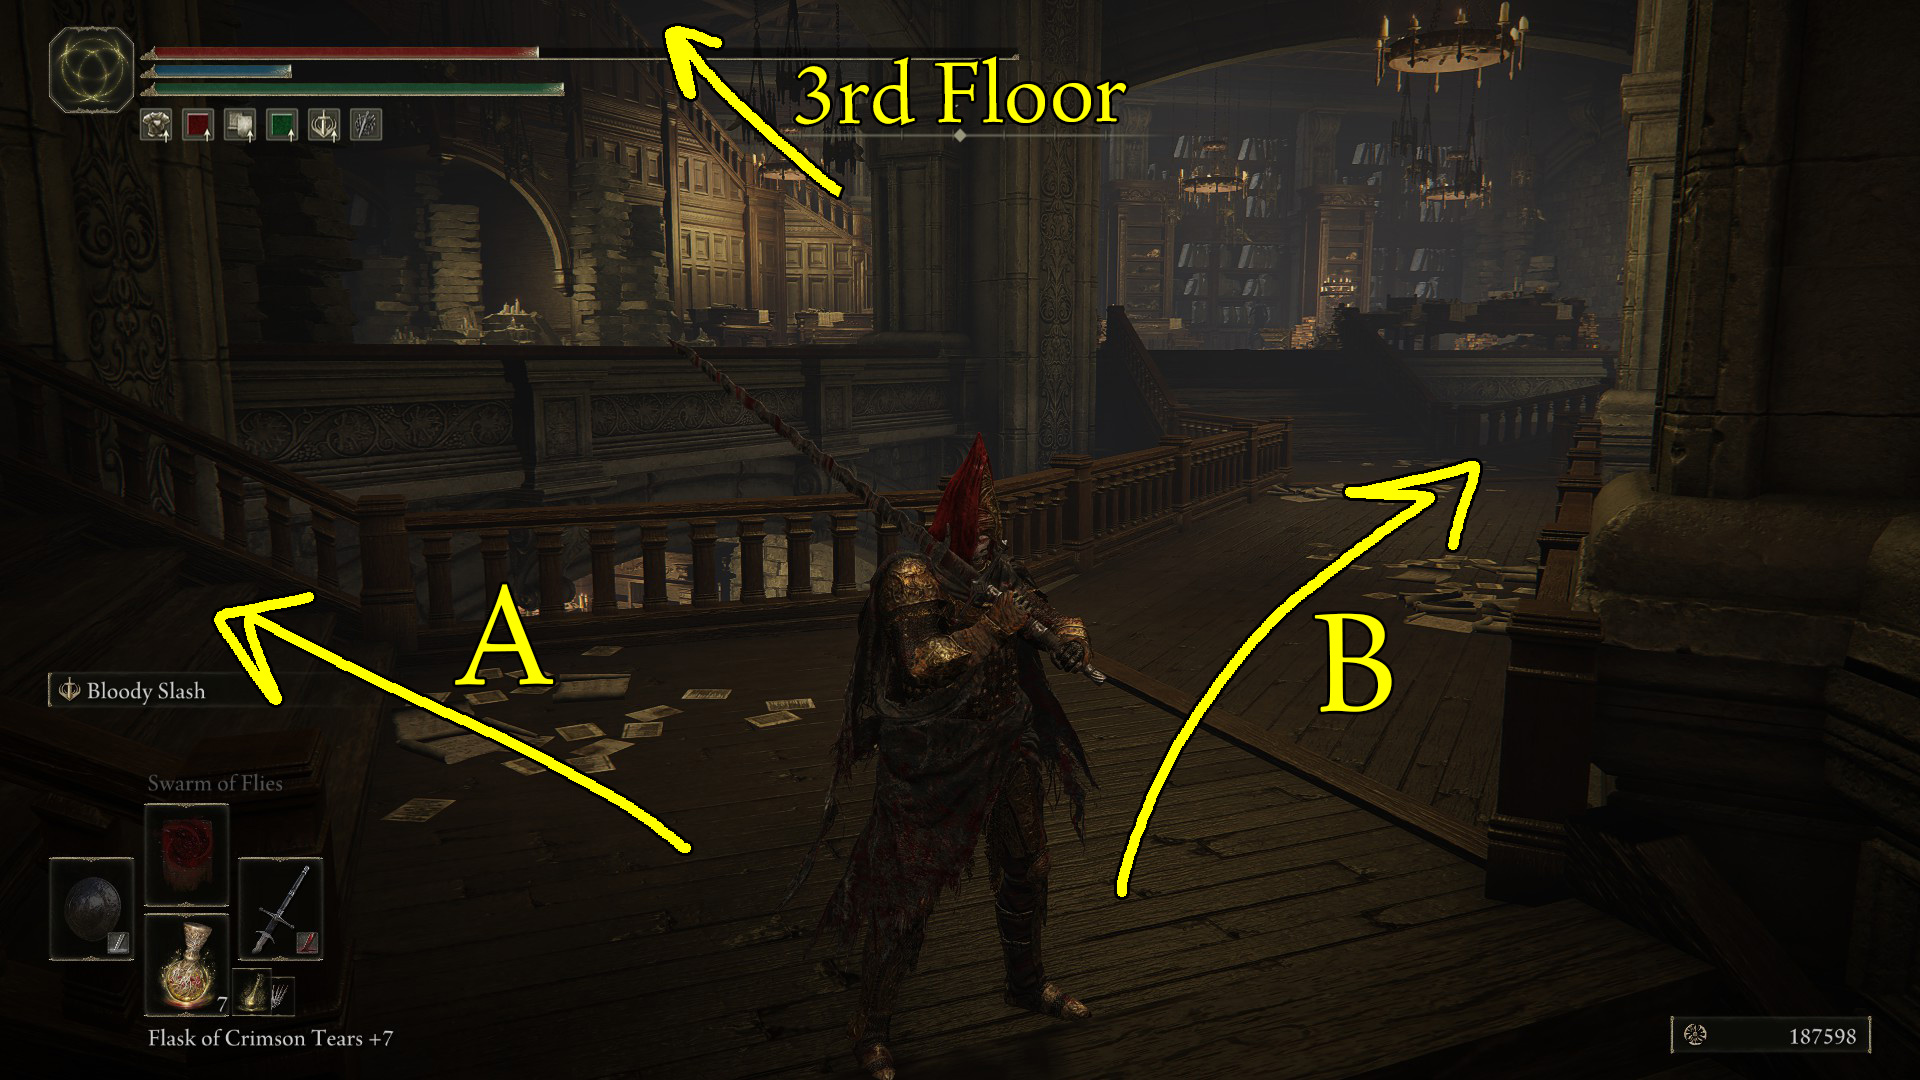
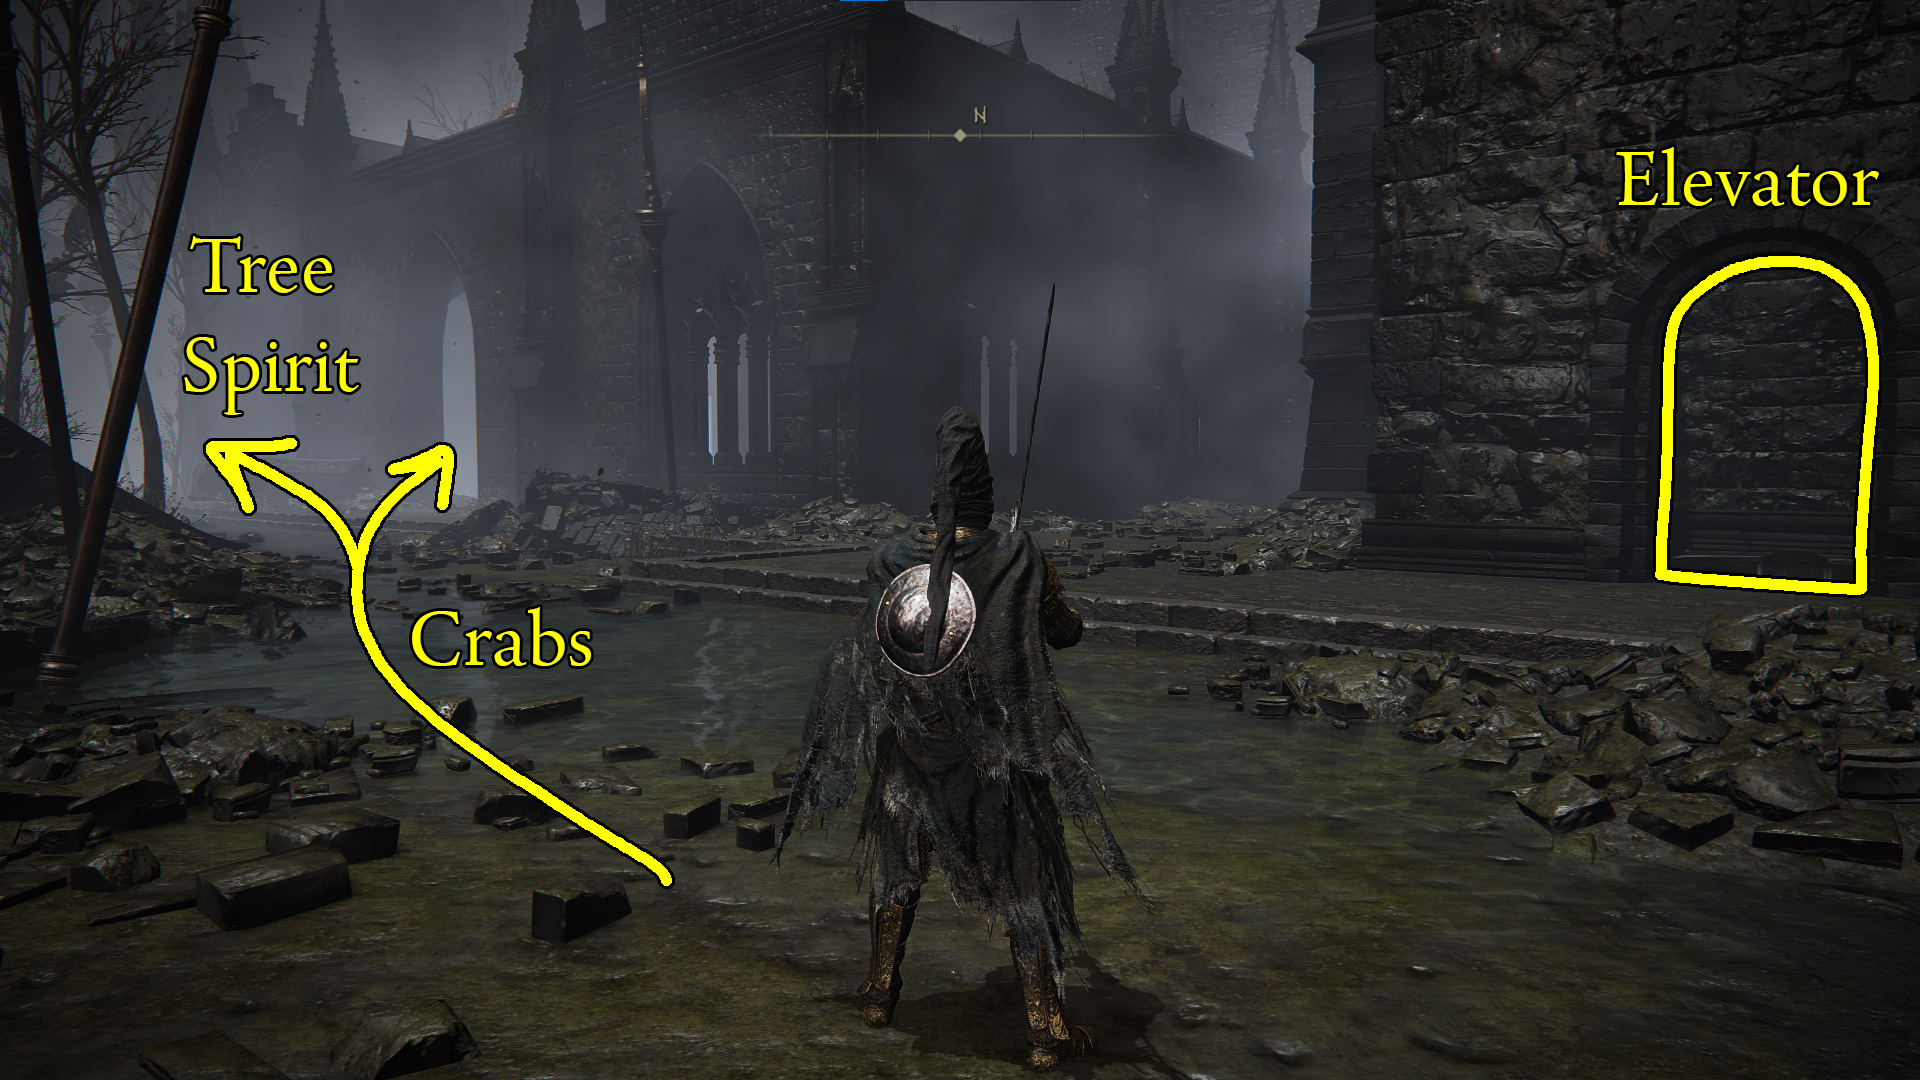
Next, to the storehouse! Teleport back to the Main Gate Plaza site of grace, then go southeast, through the doorway (kill the mobs), and up the ramp. From the top of the ramp, continue north-northeast up the stairs. The two corpses on the bridge here have x8 Bone Dart and x8 Smithing Stone [2], and ahead is a Fire Knight that is easily staggered or kited with ranged attacks. Beyond the Fire Knight is a large elevator — ride it up, and after heading up the stairs, you’ll enter the Specimen Storehouse.
Specimen Storehouse (Main)
Note: There are too many scholar enemies to mention them all, but particularly annoying or well-positioned ones may be mentioned. Many of them will not aggro, and you can safely ignore them — they’ll just keep reading.
Grab the Storehouse, First Floor site of grace, then go around the low bookshelf in front of you and kill the vulgar militiaman hiding there. Then go around the right (east) base of the huge fossil and grab the Fireproof Pickled Liver from the corpse at the base of the statue — watch out for the scholar hiding behind some stone tablets on your right as you do so. Return to the site of grace, and this time go northwest and then turn left and go into the room with the two scholars on the right.
Image 1 – To the militiaman, pickled liver, and room with two scholars
Route to West Rampart
Important & Unique Items
Battlefield Priest’s Cookbook [4]
Hefty Cracked Pot
Ash of War: Wall of Sparks
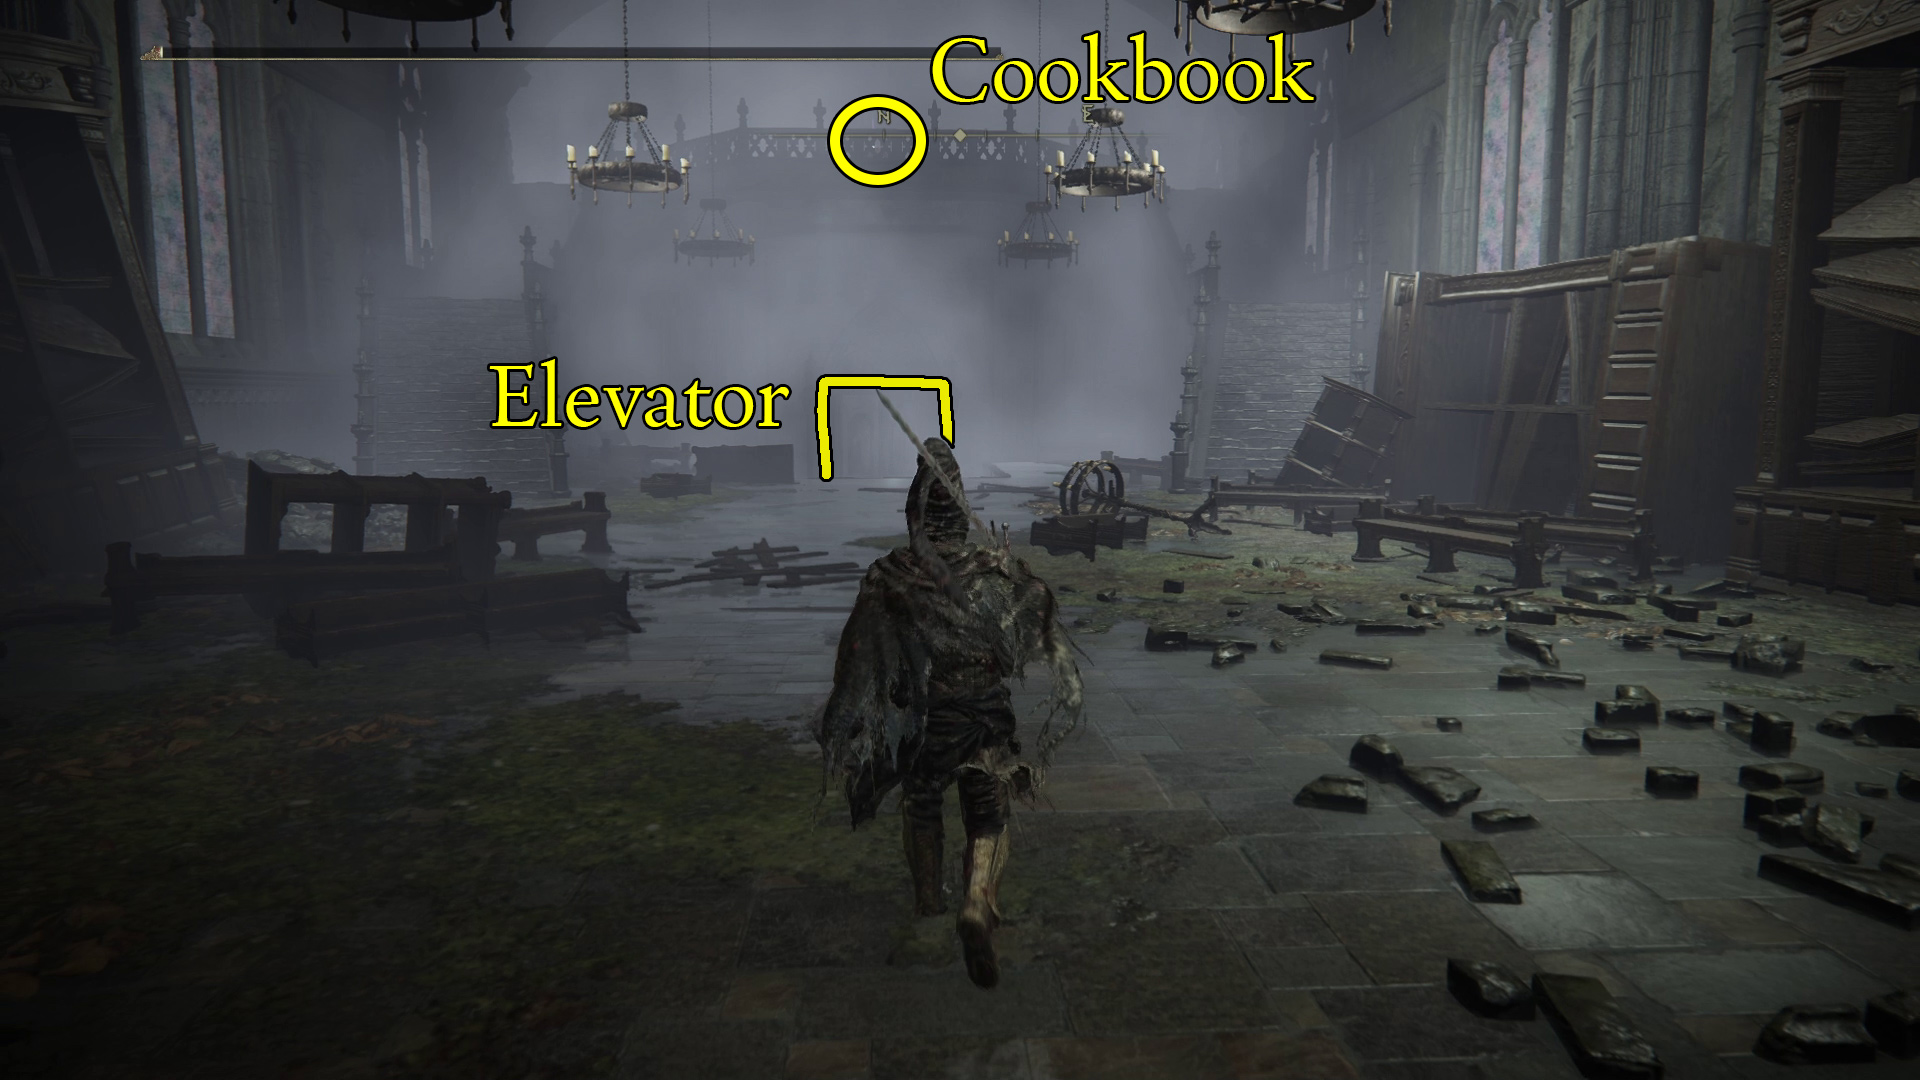
Kill the two scholars, grab the Rune Arc, then continue west and ride the elevator. Get off the elevator, note the hallway on your right, but for now go straight to the room at the far and of the wall — there’s a huge pot person hiding on your left, so be ready. Put poor pot person out of their misery and then loot the room’s corpse for a Gold-Pickled Fowl Foot. Now go to the hallway you passed and enter it — a naked pot person will jump out of the doorway on your left, so go slow until they appear. Take your first left (where the naked pot came from) and you’ll find a corpse on the balcony with the Ash of War: Wall of Sparks.
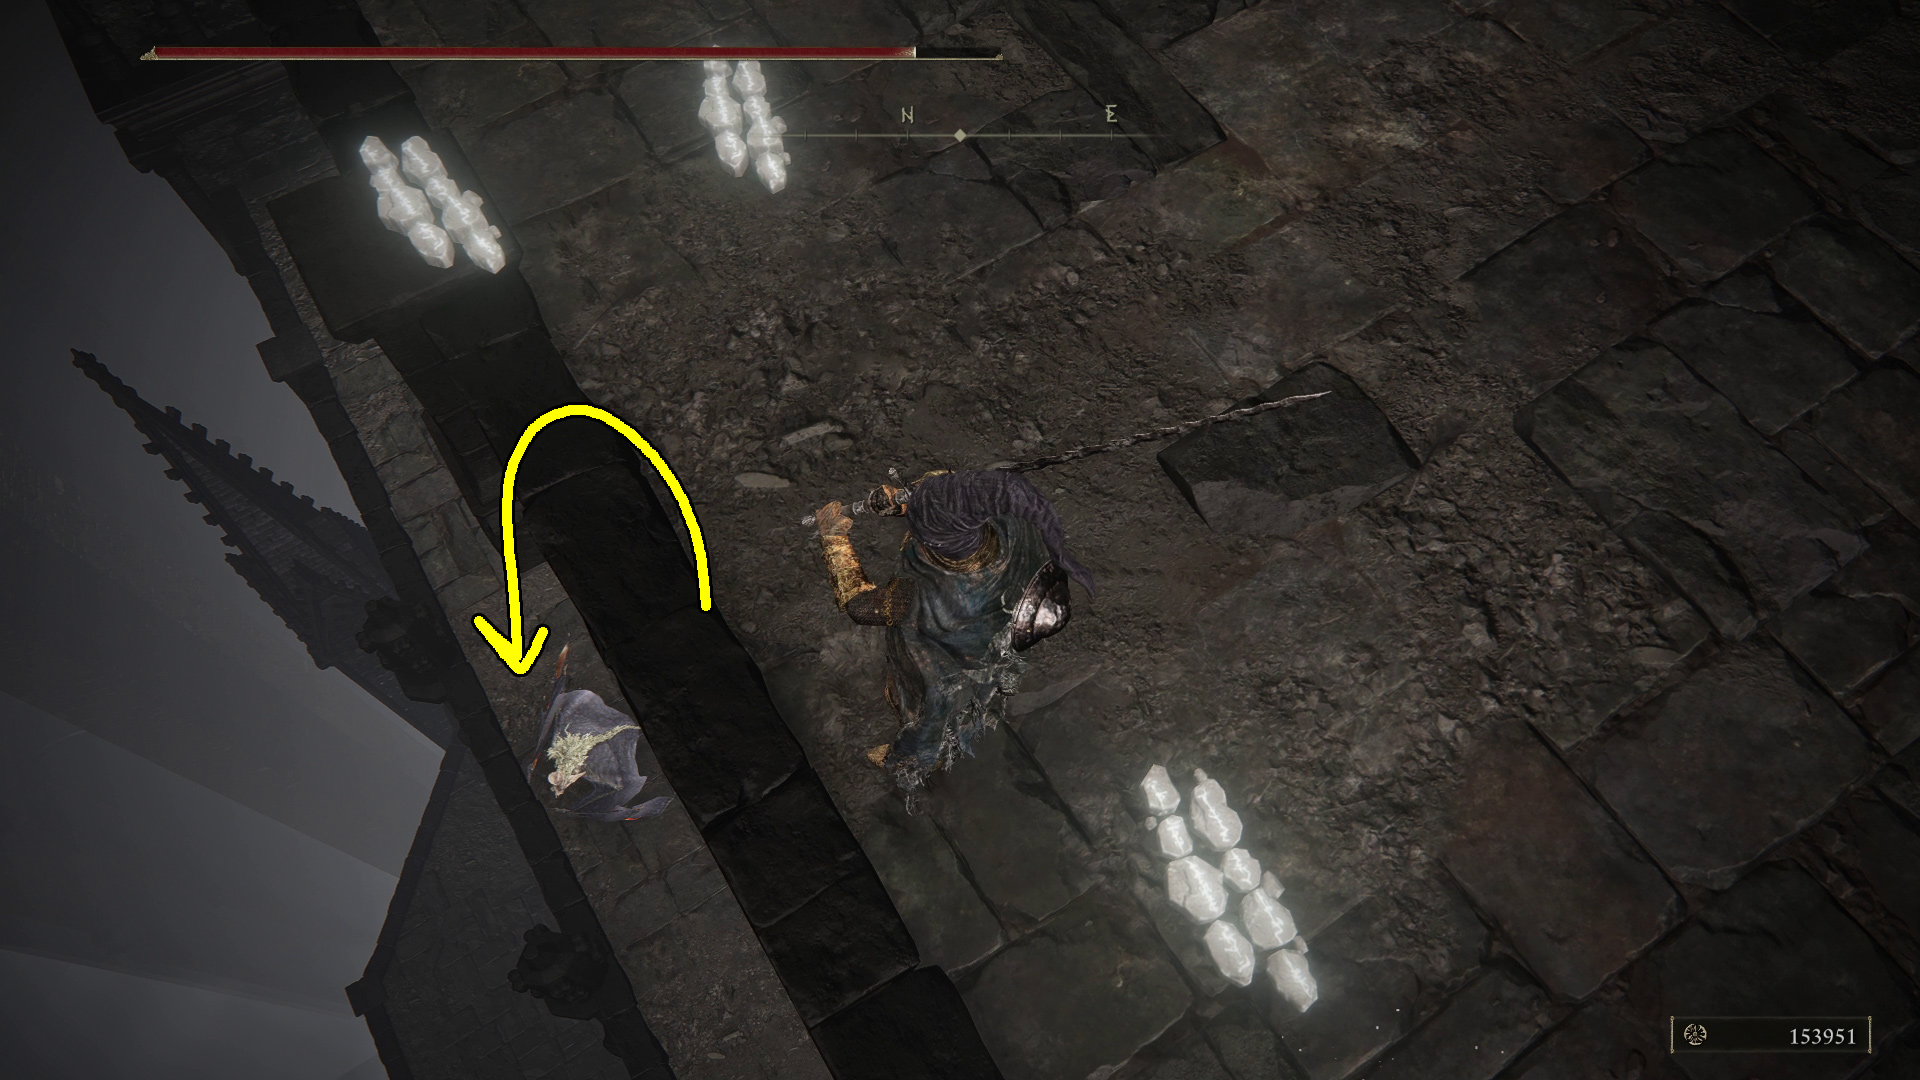
Go back to the hallway and continue north, then in the next room turn left to see a nekkid pot coming up the stairs. After defeating them, go to the far wall left of the stairs and hit it to open a secret room with the Battlefield Priest’s Cookbook [4] (Image 1). Grab it and then go around the corner and down the stairs, where you’ll have to fight a couple more pot people — one is hiding on the left (Image 2), so you’ll want to deal with them first, or perhaps even pull them up the stairs so you can potentially fight them one at a time.
Image 1Image 2
After dealing with both enemies, you can head through the large doorway that leads south. You’ll enter a kind of sick-room for pot people — to the east (left) is a unique naked pot enemy that casts a spell at your feet; the spell will damage and slow you significantly. Before approaching this foe, deal with the wandering pot person and the rest of the smaller pots in the room. Then you can head over and fight the caster pot. Behind them is an Iris of Grace, and on the nearby bed is a Hefty Cracked Pot.
After collecting both items, head west to the room’s exit, but note that there’s a naked pot ready to use its grab attack on you as you go through the doorway. Roll through and dispatch them, then continue down either set of stairs and keep going west out onto the rampart to find the West Rampart site of grace. Continuing west will take you across the bridge to the Ancient Ruins of Rauh, so for now just teleport back to the Storehouse, First Floor site of grace.
Storehouse, Floors 1-3
Important & Unique Items
Revered Spirit Ash
Boltdrake Talisman +3
Dueling Shield
From the Storehouse, First Floor site of grace, jump up onto the bookshelf just ahead of you via the stone tablets (Image 1). Then hold sprint and spin in a circle to build up speed and jump the gap to the base of the large fossil. Continue around its tail, jump up on the wooden bookcase, then from there use the stacks of tablets to reach the back of the specimen — jump/walk up its back to find a Revered Spirit Ash, but make sure you avoid the fireballs from the scholar to your left.
Image 1Image 2Image 3
Walk back down to the bookcase in Image 3, drop off the northern side, and go southeast to where the stairs are. A scholar here will be firing fireballs at you, so take ’em out first. Down the stairs is a corpse with x2 Ember of Messmer, grab them and then go up the stairs, where you’ll be ambushed by a militiaman. Continue northeast up the stairs — straight ahead you’ll see a corpse with a Fire Coil on your right. The scholars here will aggro, so be ready.
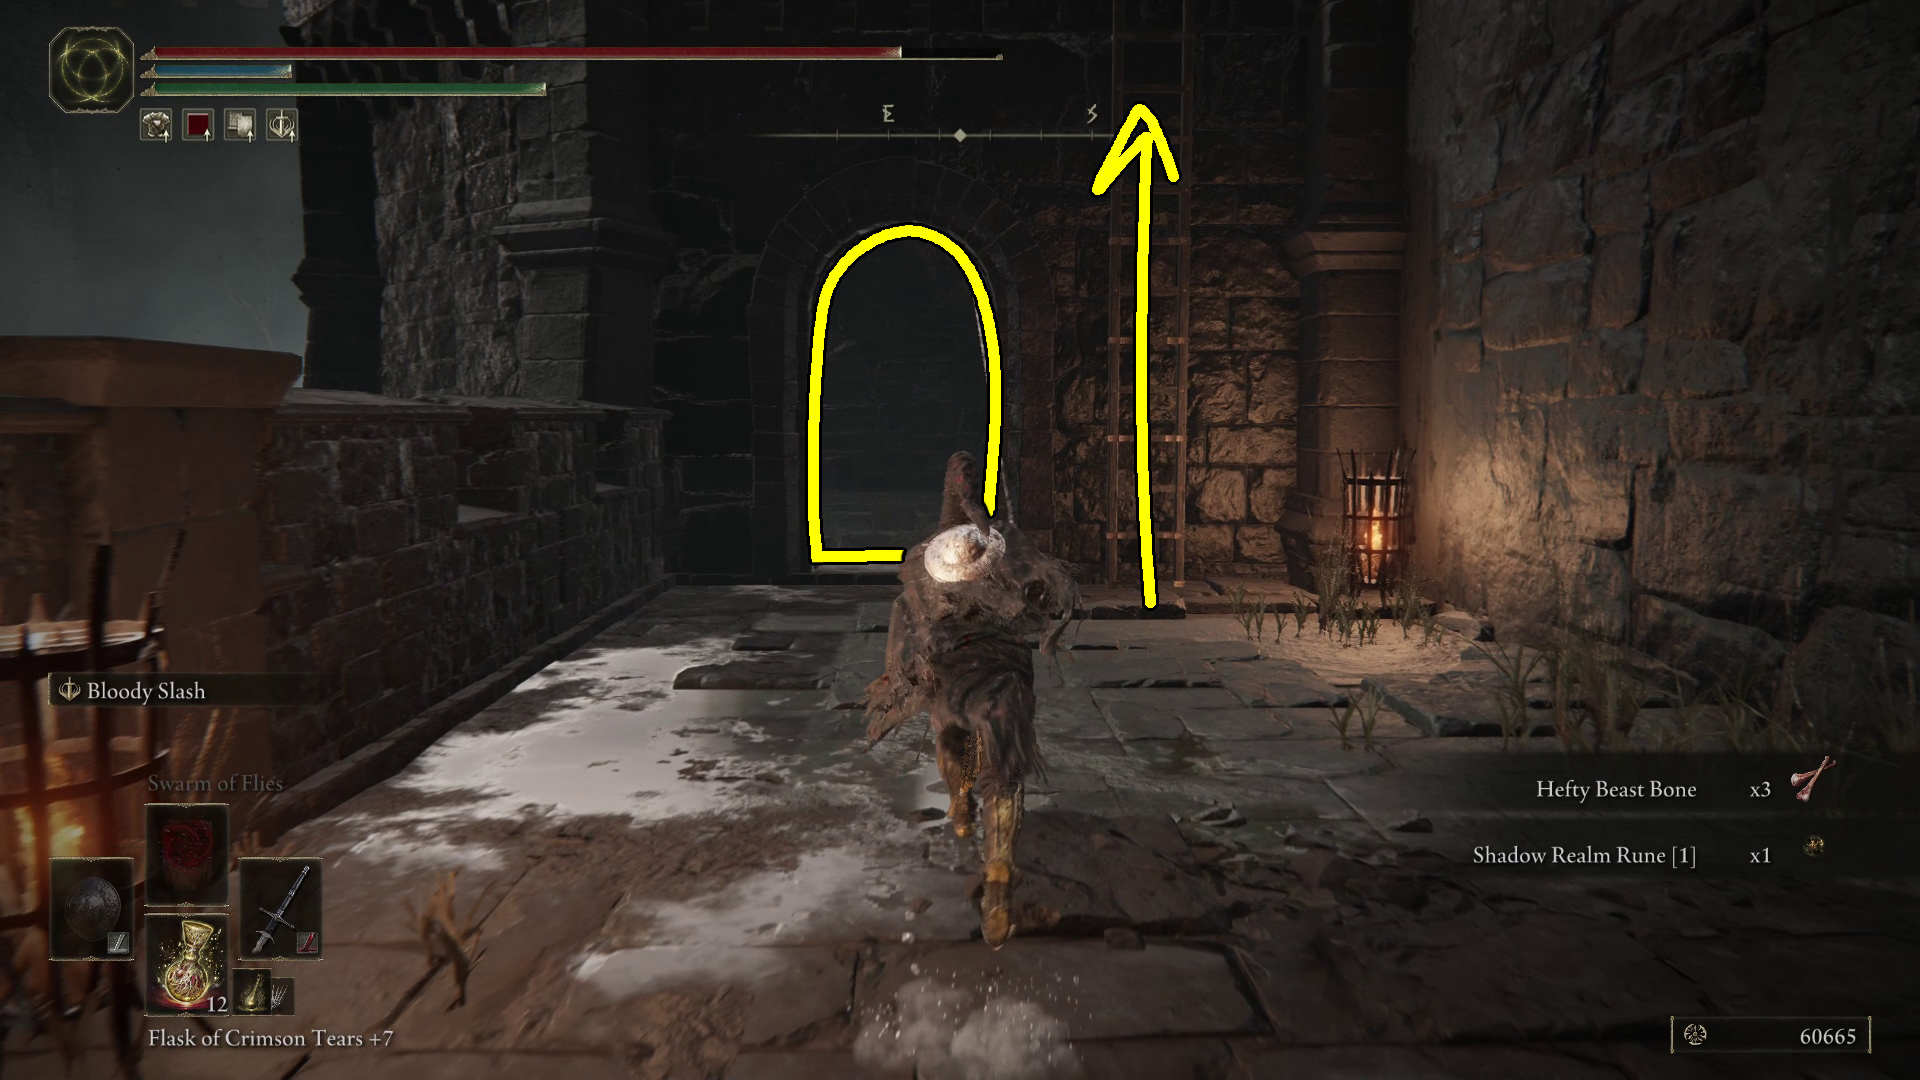
Along the northern wall, a bit to the west, are some stairs that lead down into a room with x3 Hefty Beast Bone. In this same room, at the back corner, you can find Ansbach (so long as you made sure to exhaust Needle Knight Leda’s dialogue at the Highroad Cross site of Grace in Scadu Altus). Speak to him and exhaust his dialogue, where he will give you some context about his past and what it is he is looking for among the books. Take note of his location, as you’ll want to return for him after encountering Freyja at the Storehouse, Seventh Floor site of Grace.
Go back up the stairs and turn right to continue northwest, and on your right you’ll see some stairs that lead up to the second floor — two militiamen hide in the darkness left of the stairs, ready to ambush you (Image 4). Before you go up the stairs, you can head southwest of the stairs, where x5 Smithing Stone [8] are guarded by a patrolling Fire Knight. You can use the nearby bookcase to sneak up on the knight as it patrols and get off a backstab.
Image 4
When you’re ready, go up the stairs to the second floor (Image 5-A) then take a left up the next small set of stairs. On this floor are three patrolling scholars you’ll have to fight if they see you. Head left (west) from the top of the stairs to find a corpse with x4 Black Pyrefly, and then continue east — you’ll see the stairs to the third floor on your left, but ignore them for now. Just ahead under the stairs is a fire knight (who seems impossible to sneak past) next to x4 Beast Horn. If you don’t want any of the crafting materials, you can skip this whole bit and just follow path B (Image 5).
Continue along the walkway and you’ll come to a spot where you can jump down over the railing to find the Boltdrake Talisman +3 (Image 6) — before you do so, you may want to walk to the end of the walkway to find x3 Smithing Stone [5]. There’s an annoying scholar who shoots at you from a ledge to the southeast, so either kill him with a ranged attack or move quickly.
Image 5Image 6
After you drop down to the talisman, you’ll be able to pull a lever on the northwestern wall to open up a passage back to the first floor area. You’ll be under the first set of stairs, so head up them and retrace your steps and then continue up the stairs that lead to the third floor. At the top of these stairs, go west into the small room with a fire knight at the far end. The scholars may aggro when you engage the fire knight, so take them all out before doing so — note that all there is here is x1 Beast Horn, so again, you may want to skip this room. You can also go southeast from the stairs to find a few aggro scholars and a Blessed Bone Shard.
Either way, you’ll next need to go past the fire knight, southwest of the stairs. If you want to sneak past, you’ll have to use the nearby table (Image 7) — these guys have a massive detection radius. Either way, follow the walkway south, where you’ll be able to jump on a narrow support beam to grab the Dueling Shield (Image 8). A total of four militamen will come around the corner near where you can jump, so deal with them before getting the shield.
Image 7Image 8
At the corner of the walkway where you fought the militiamen, you’ll see the large feet of a hanging specimen. Jump up onto them, and follow the path indicated (Image 9). You’ll be able to jump from the specimen’s horns (image 10) to the balcony with the Storehouse, 4th Floor site of grace.
Image 9Image 10
If you continue southwest instead of climbing the specimen, you’ll find a dark room full of scholars with x2 Lump of Flesh, and x4 Beast Horn guarded by a Fire Knight in the room beyond. If you do grab the crafting materials, you’ll need to backtrack and climb up the specimen when you’re done. Besides that, we’re ready for the fourth floor!
Storehouse, Floors 4-6
Important & Unique Items
Scadutree Fragment
Secret Rite Scroll
Make sure you grab the x1 Scadutree Fragment, and the Storehouse Cross message, then activate the Storehouse, Fourth Floor site of grace. Then head west out onto the balcony. You can turn right (north) to find x3 Stormhawk Feathers, then go south to the stairs that lead to a large platform and some stairs. Across the platform waiting on the next set of stairs is a fire knight that casts ranged spells. Dodge the spells by rolling sideways and go kill the knight. The corpse to the right of the stairs has x4 Black Pyrefly you can grab before continuing east up the stairs.
Ahead you’ll be able to go down some stairs on the left (Image 1), but you’ll need to take out the bats that appear from around the corner first. Down the stairs, take out the scholars and then go right to re-enter the storehouse. On your left when you enter the room is a Holyproof Pickled Liver — on the opposite side of the room near the edge of the platform is the Secret Rite Scroll. You can give this to Ansbach, though you should wait until after you finish Freyja’s questline later in this dungeon. Go back outside and head back to the stairs — before you go up them, go around the right side of the stairs to find a Shadow Realm Rune [5].
Image 1
Up the stairs and east around the corner you’ll find a doorway on your left that leads back into the storehouse. Before you head inside, you can continue straight to find two corpses that have x6 Redflesh Mushroom and x3 Ember of Messmer — careful attacking the feasting bat, as two more will fly down behind you when you get near the first bat.
Back inside the storehouse, start by going left (west), and you’ll quickly reach a room with x2 Smithing Stone [6]. Then go back northeast and continue past the doorway — around the first bookcase on the right is x2 Fire Coil. Further north you’ll find a fire knight hiding around the corner on the right (Image 2) by x3 Smithing Stone [7]. Continue past the deer specimen and you’ll come to some stairs that lead to the sixth floor.
Image 2
Here, you have a few paths you can take. The stairs continue up to the 7th floor and a site of grace, so we’ll grab that now — you can come back down to get the Spirit Calculus, and we’ll drop down to the lever in a moment. Go up the stairs to the grace (Image 3), then turn around and go west up the next flight of stairs — the Storehouse, Seventh Floor grace is straight ahead. There’s a fire knight that patrols the other set of stairs, so go quickly to the grace or else fight the knight.
Image 3
Storehouse, Seventh Floor
Important & Unique Items
Revered Spirit Ash
Winged Serpent Helm
Ash of War: Flame Spear
Scadutree Fragment
Impenetrable Thorns
Pearldrake Talisman +3
Boss Drops
Remembrance of the Impaler
Messmer’s Kindling
At the grace, you can speak to Freyja by the fireplace — her dialogue will depend on what you’ve done with other NPC quests. Exhaust it, and then teleport back to the Storehouse, First Floor site of grace and navigate back to Ansbach, in the lower room. Exhaust his dialogue and tell him about Freyja’s searching, and he will present you with the “Letter for Freyja”.
After this, return to the Storehouse, Seventh Floor site of Grace and decide whether to hand this letter to Freyja. If you do, then she will appear later in Enir Ilim to fight you, alongside Leda, giving you access to her armour and weapons. If you opt to not give her the letter, though, then she will remain at this location until you defeat the final boss, after which point she will disappear and you can collect her shield. In either case, this is effectively the last choice of Freyja’s questline.
After that, you are now safe to finish Ansbach’s questline without interrupting Freyja’s. Head back to him once more, and give him the Secret Rite Scroll you picked up after the Storehouse, Fourth Floor site of Grace. This will give him the information he needs, and so he will be able to be summoned during the final two fights of the DLC.
After finishing that, if you want to grab a crafting material (a Spirit Calculus) you can go to the room below the site of grace, then return to the seventh floor. Clear the scholars before engaging the fire knight, as they’ll potentially heal the knight.
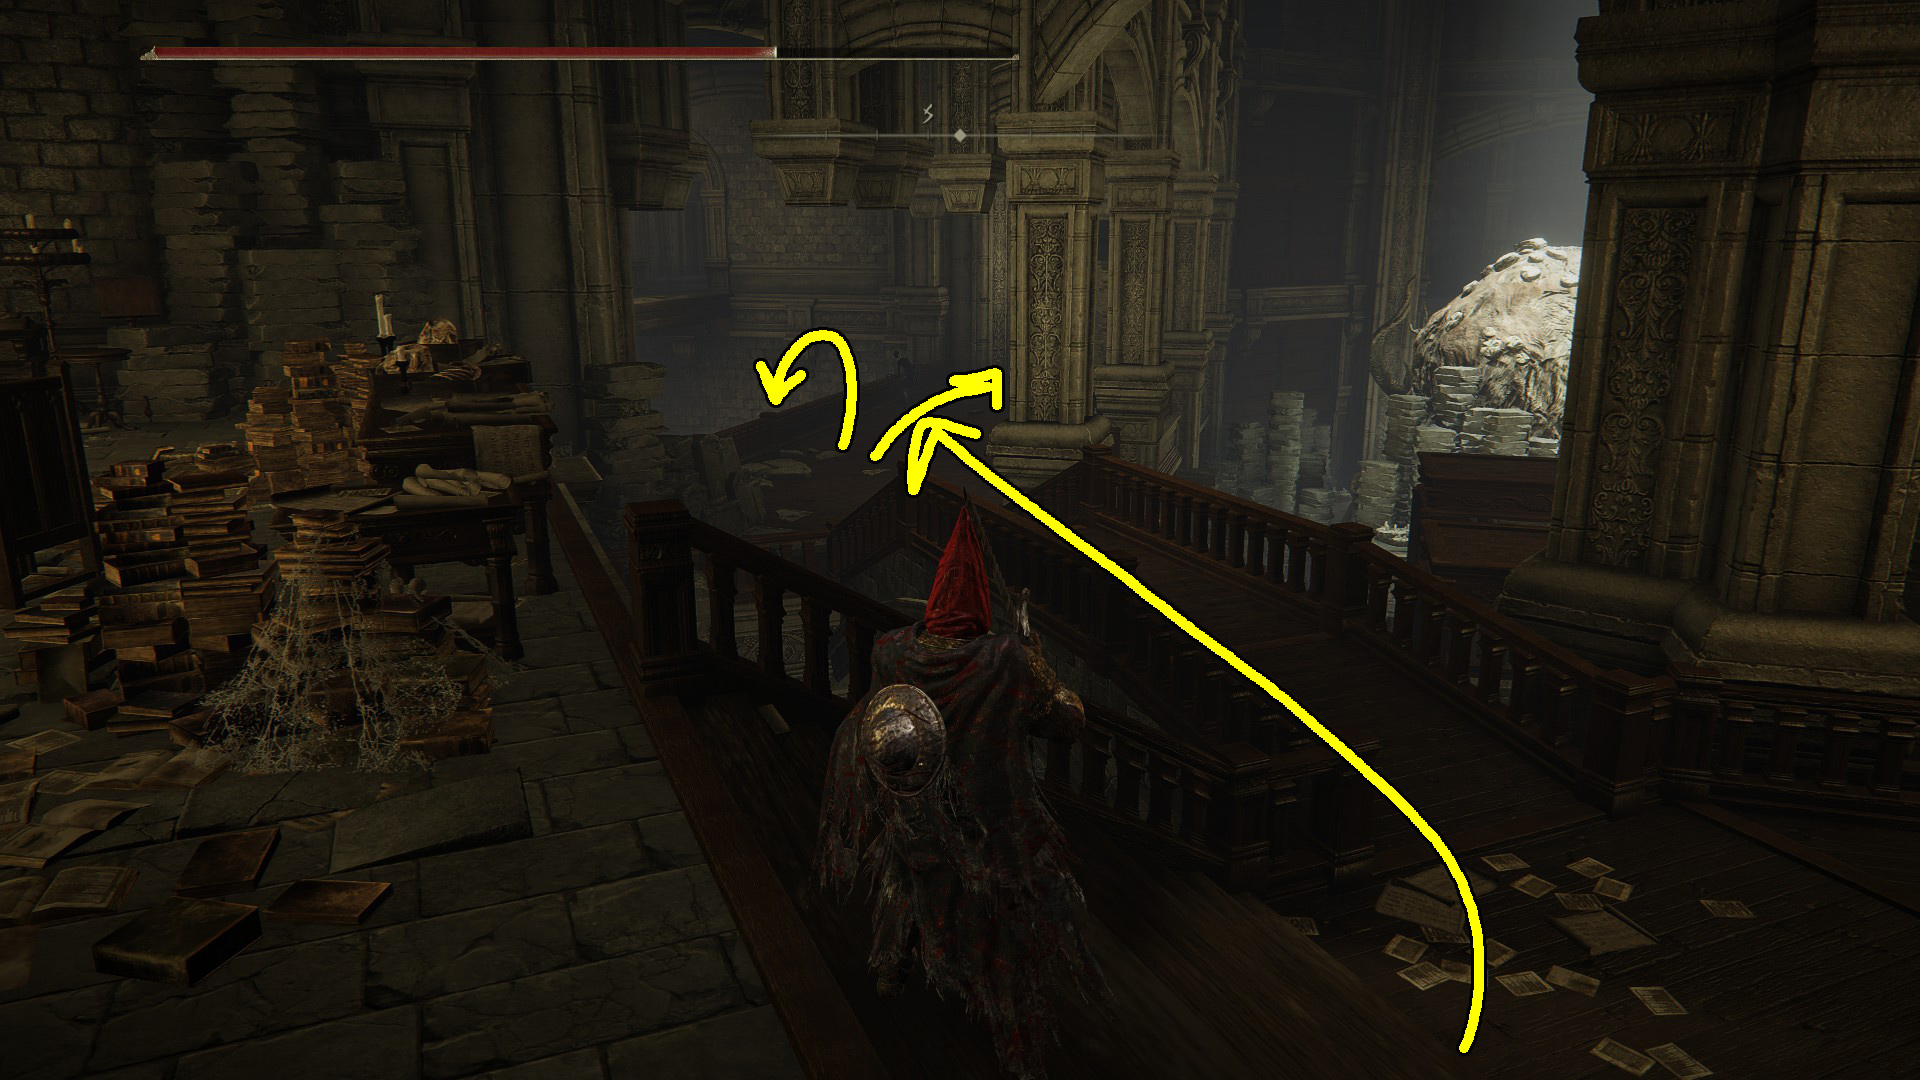
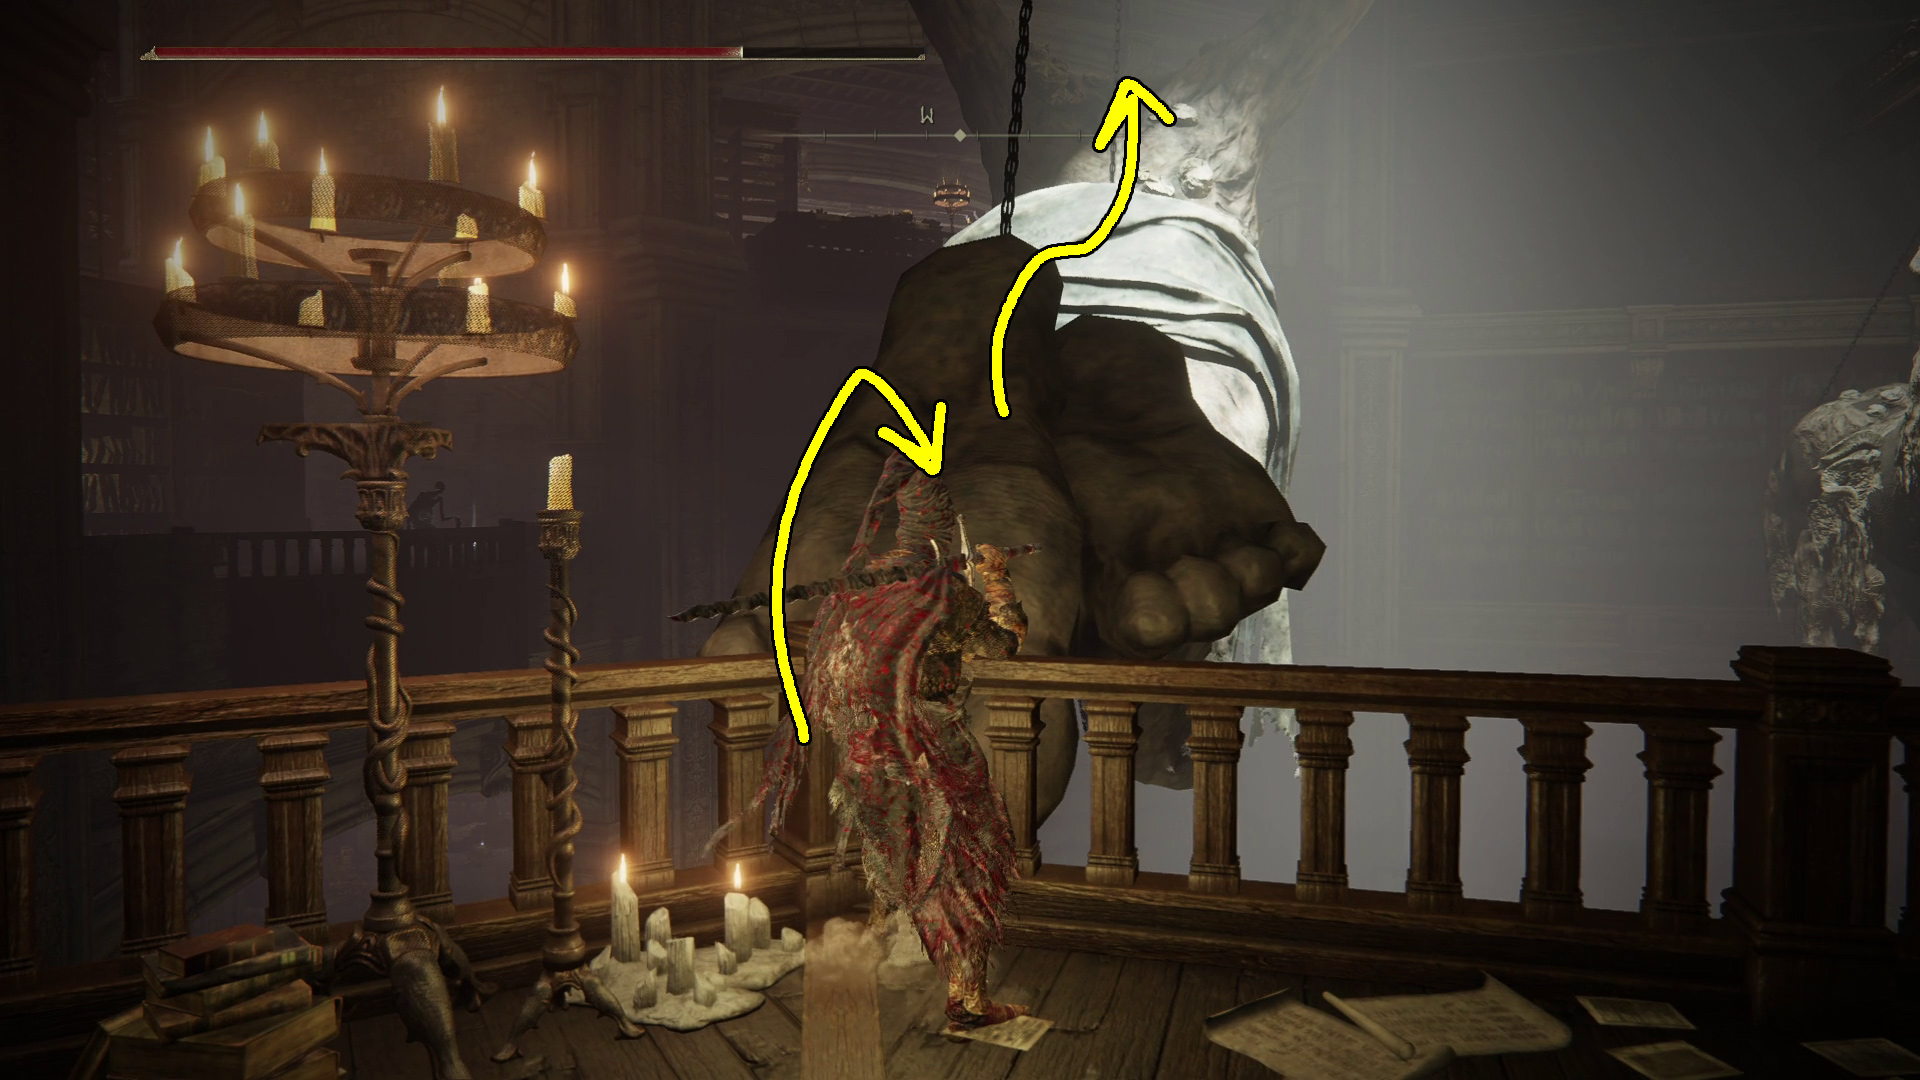
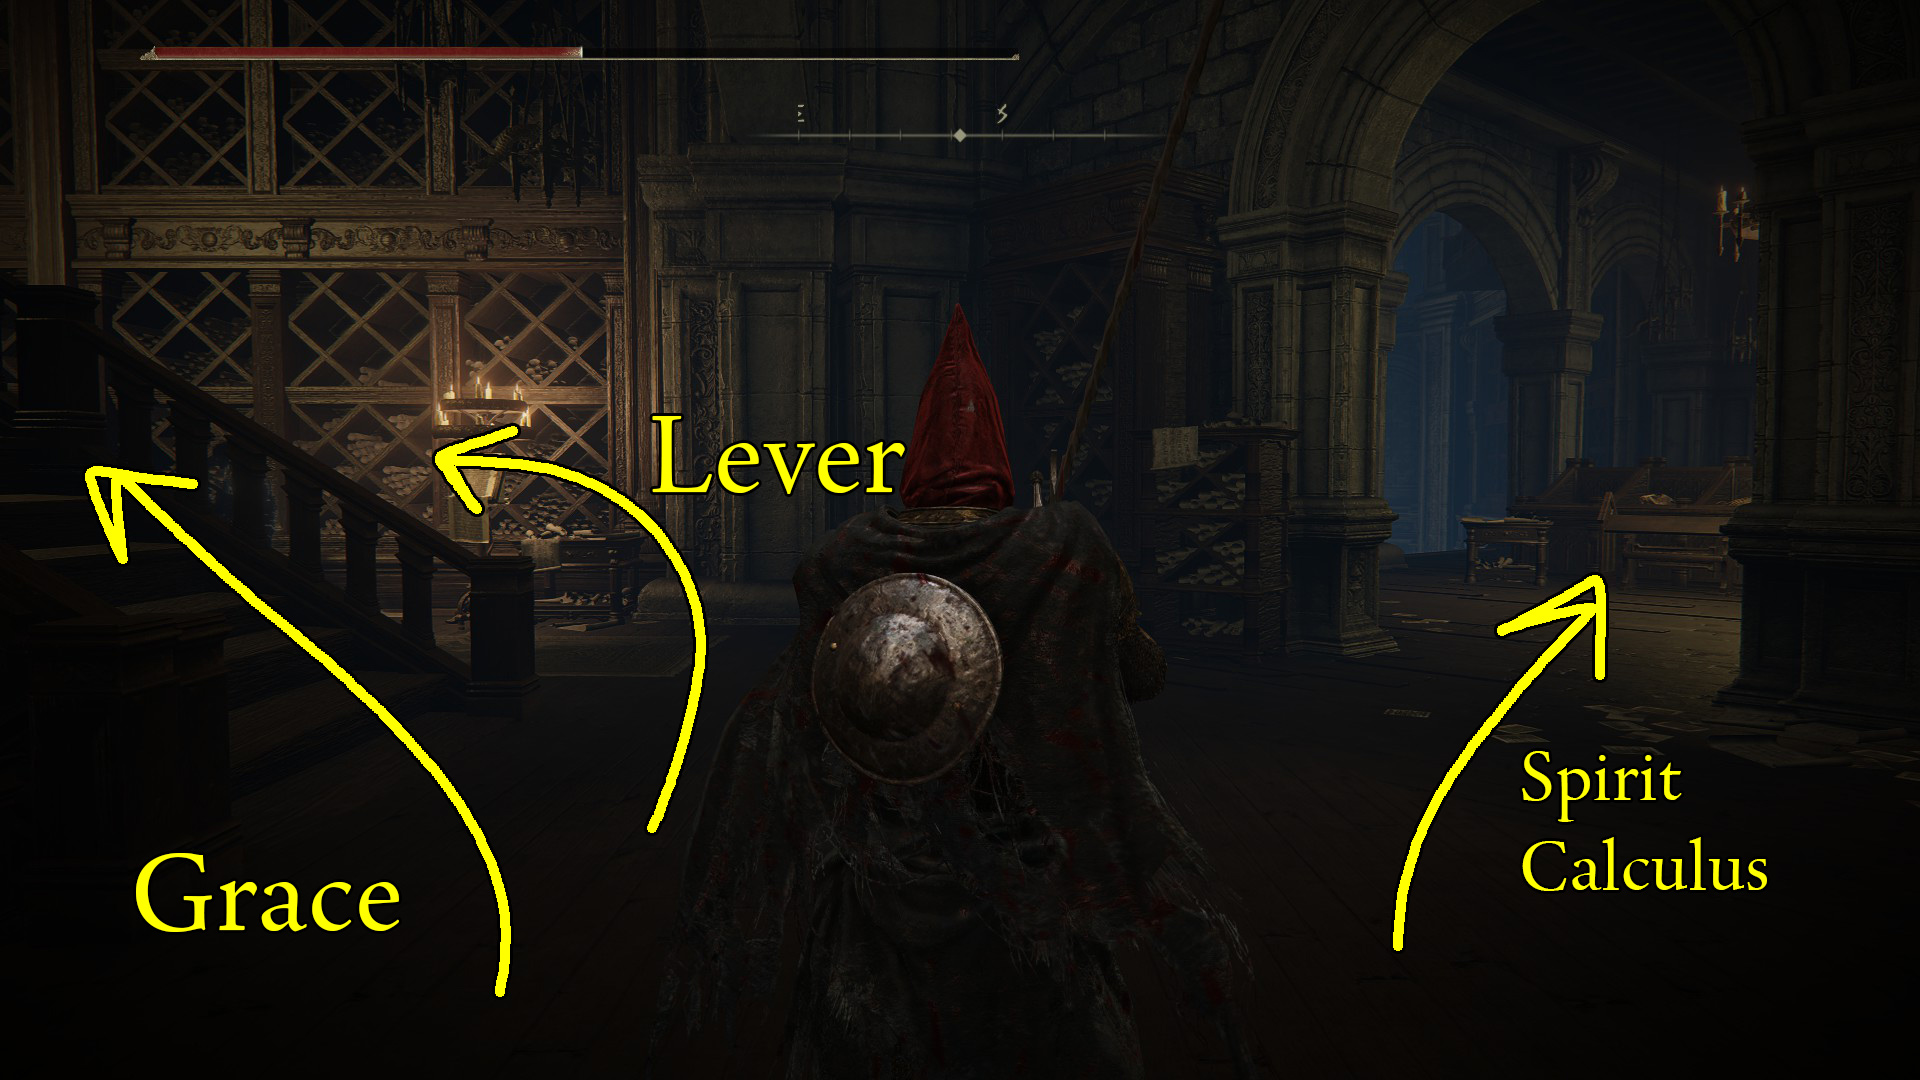
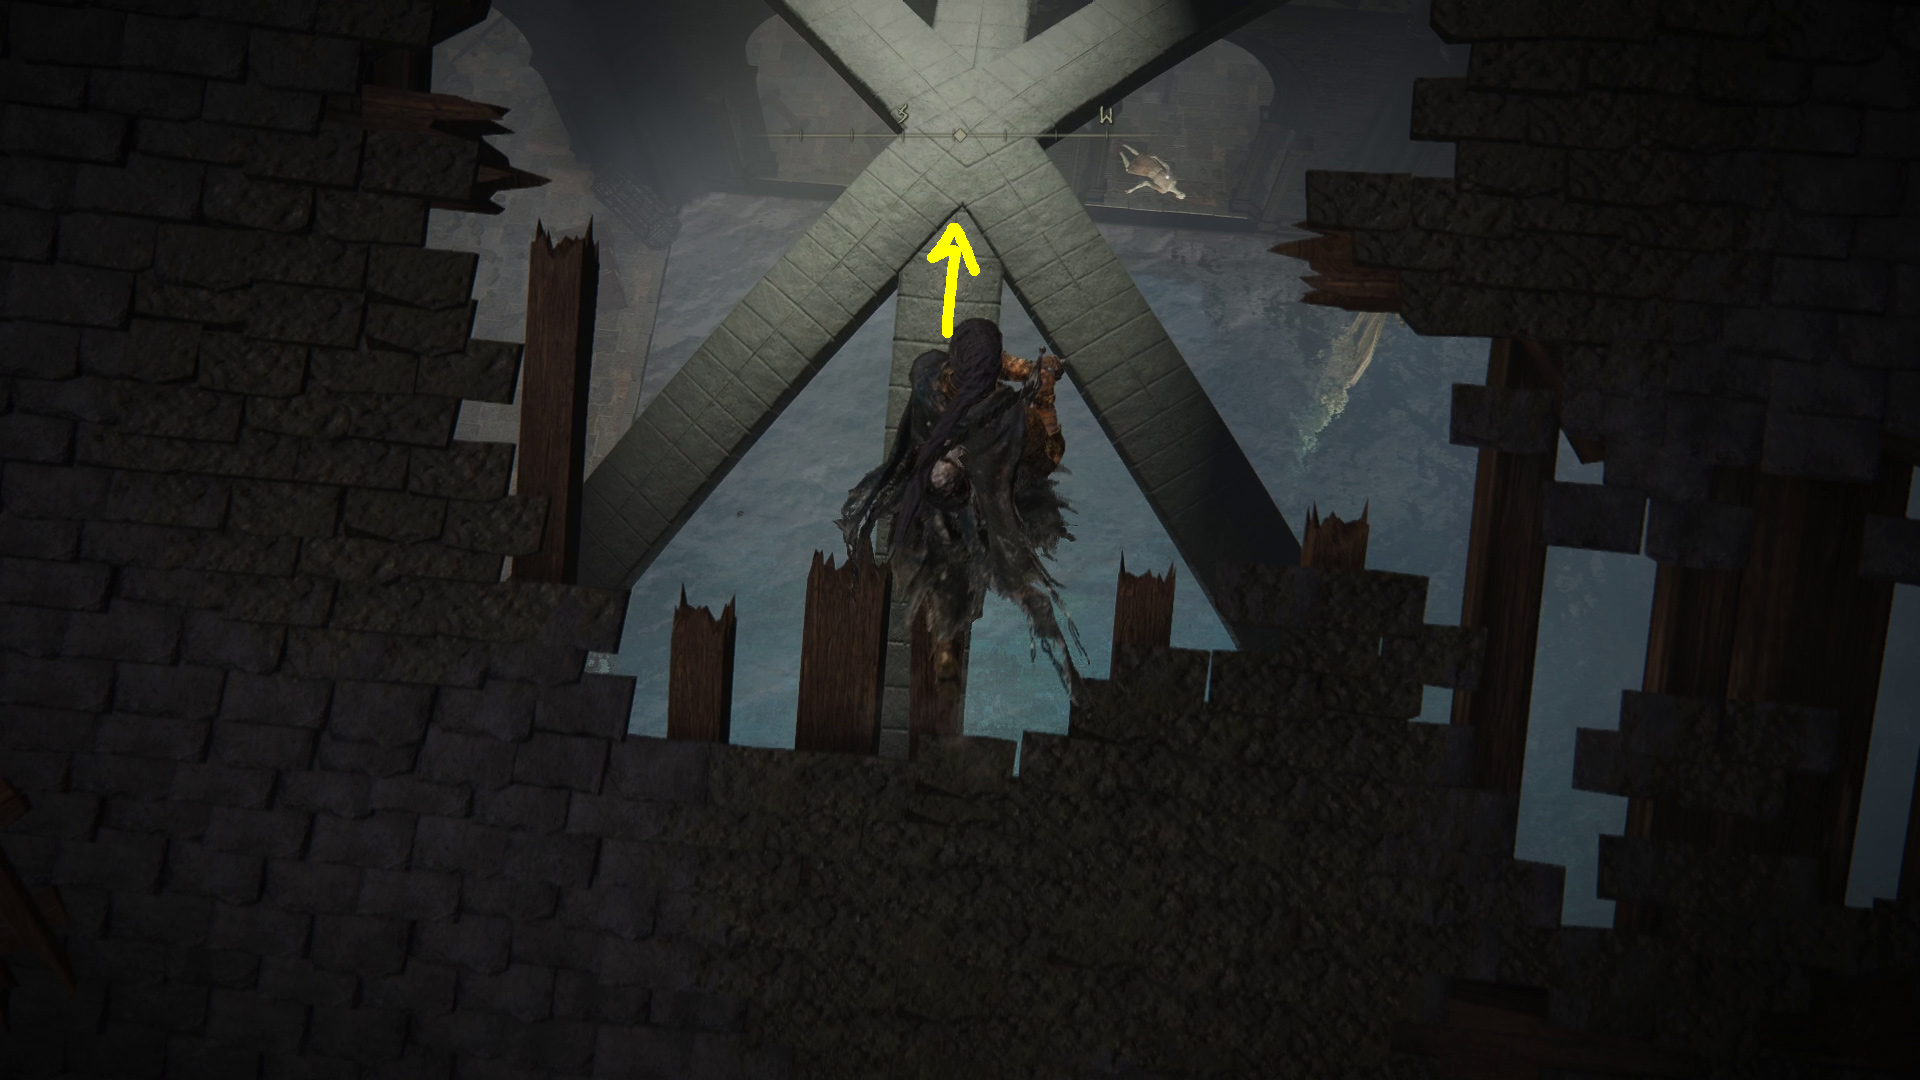
From the Storehouse, Seventh Floor site of grace, leave the room and go northeast over the wooden bridge, then deal with the fireknight patrolling ahead. Continue east to where you can jump up on the hanging bull specimen (Image 1) — on its back is a Revered Spirit Ash. Drop down from the bull’s butt — just to the south is a lever. Pull it, and all the hanging specimens in the center of the storehouse will rotate.
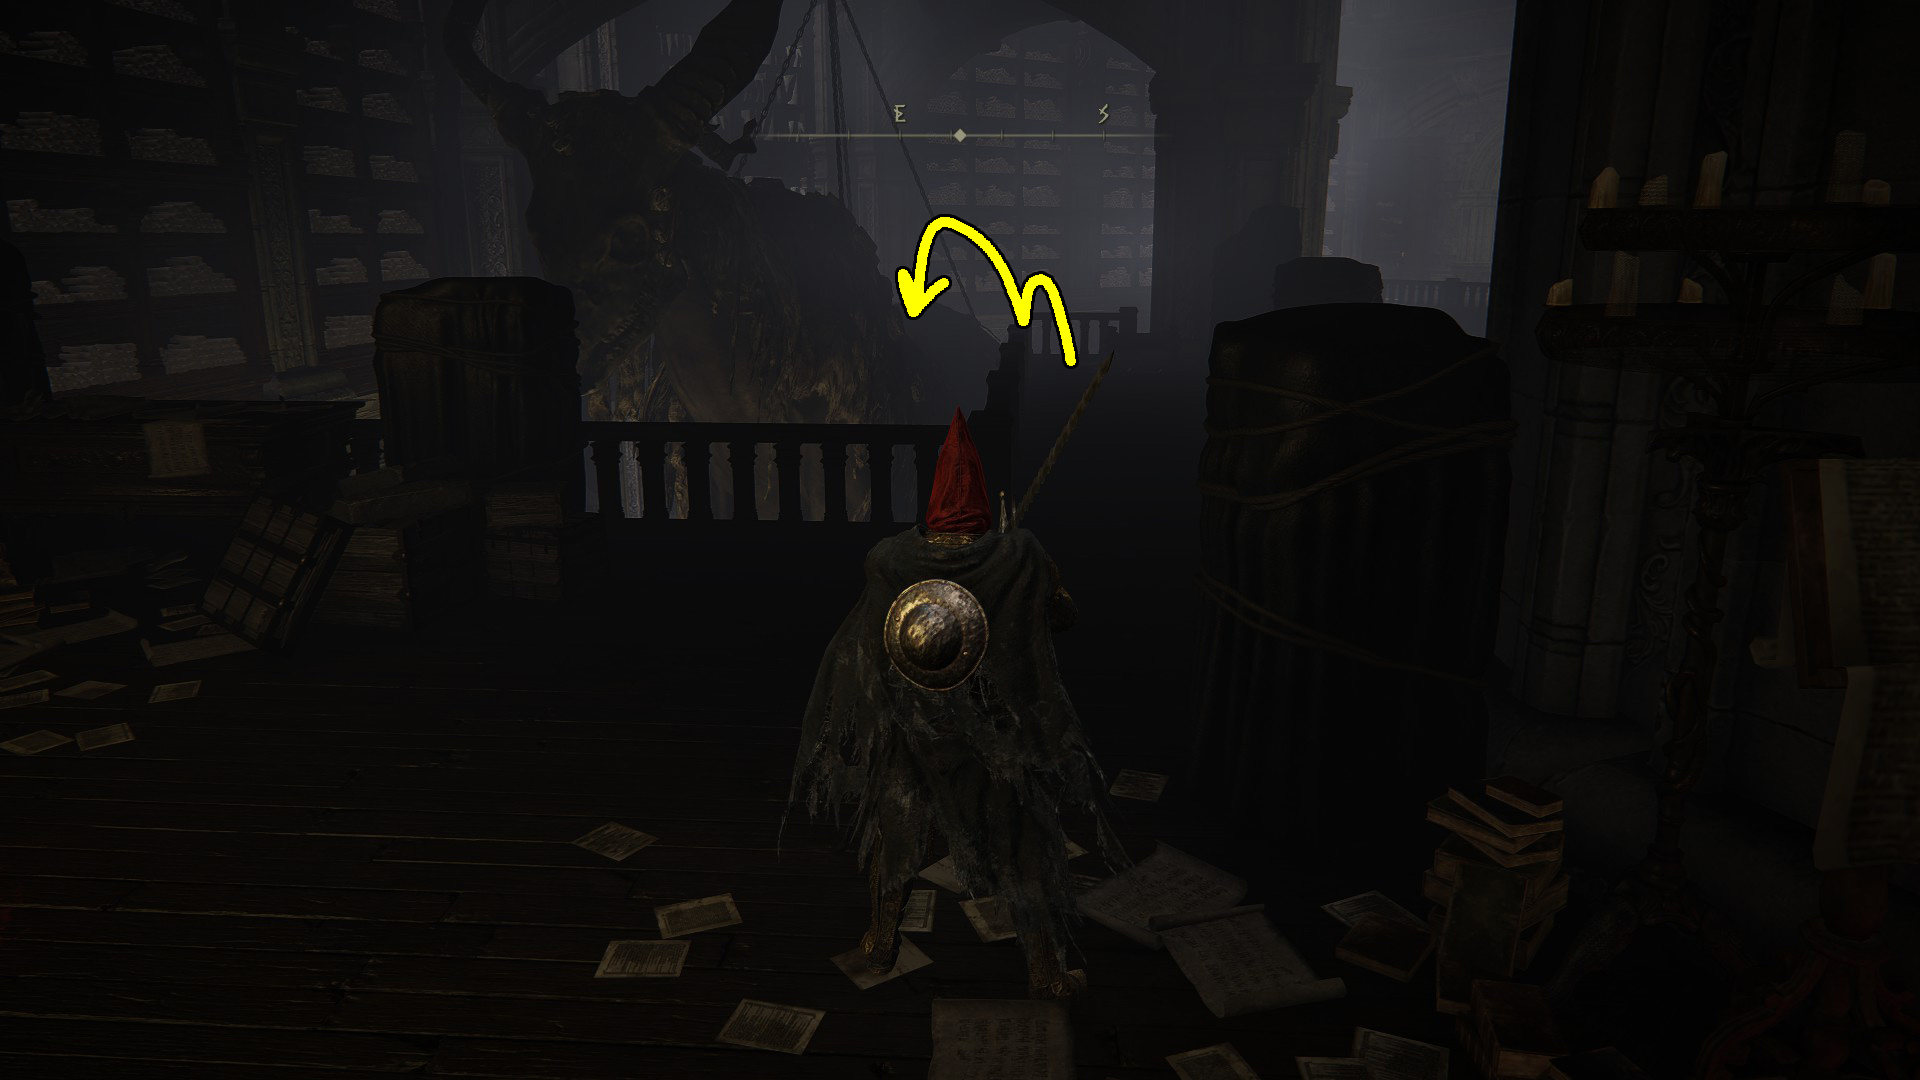
There’s a corpse on the balcony’s edge by the lever with a Shadow Realm Rune [5], and another near the bookcases with x3 Ember of Messmer, so grab those and then head to the balcony near the lever room’s doorway (Image 2). From there, you can jump out onto the narrow wooden beam. Continue to the central pillar and jump as indicated up onto the next specimen platform. Make your way around the far side of the specimen and jump west onto the tail of the nearby hanging specimen (Image 3).
Image 1Image 2Image 3
Climb the specimen’s back to its head, and jump from the tip of its horns down onto the balcony. Continue through the room and go outside, then turn right and fight through the scholars and up the stairs. At the top of the stairs, turn right and go back inside the storehouse to find a corpse with x3 Ember of Messmer. Go back outside and continue northwest across the bridge. Defeat the fire knight guarding the double doors, and they’ll drop the Winged Serpent Helm and the Ash of War: Flame Spear
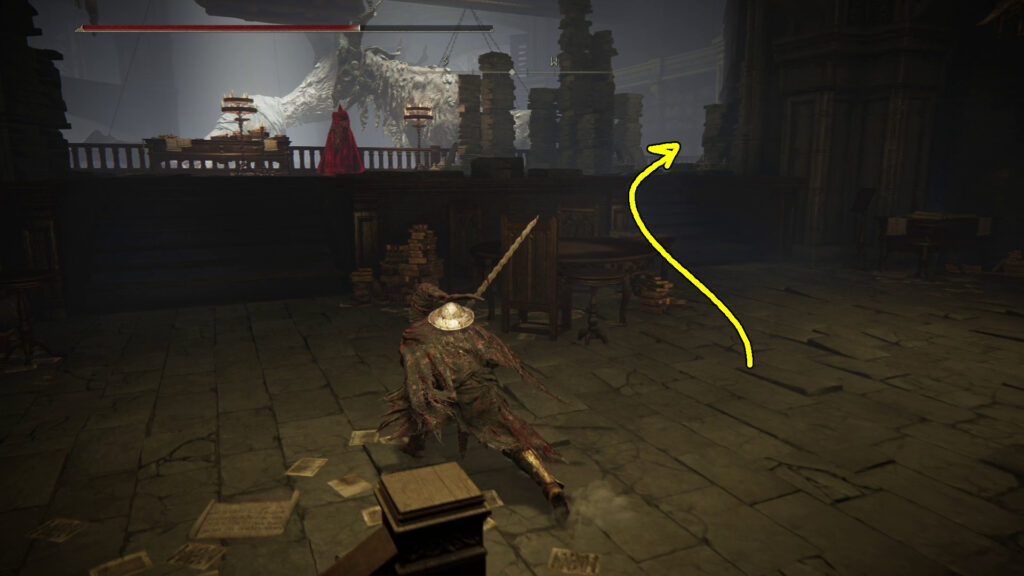
Open the double doors and head inside — on the far wall is a Scadutree Fragment. Continue up the stairs to the Dark Chamber Entrance site of grace. Through the nearby double doors is Messmer, the final boss of Shadow Keep.
You can fight him now, but whenever you want a break, we need to grab a couple of items we missed. From the Dark Chamber Entrance site of grace, head back down the stairs, across the bridge, and down the next set of stairs to the doorway that leads back into the storehouse. Where the scholar is staring out into the distance, drop down to the platform below (Image 4), where you can see a bat chilling. Deal with the bat, and then from the corpse on the eastern wall, you can grab the Impenetrable Thorns incantation.
Image 4
Next, teleport back to the Storehouse, First Floor site of grace and make your way to the third floor, where the fire knight faces the middle of the storehouse (Image 5). Kill the knight and turn right, heading west-southwest. In the corner there you can grab the Pearldrake Talisman +3 from the hair of the giant fossilized… whatever it is.
Image 5
With that, we’re all done with this section of Shadow Keep and the Storehouse! Next up is the back half of Shadow Keep.
Shadow Keep, Church District
Flooded Church District
Important & Unique Items
Great Grave Glovewort
Teleport to the Church District Entrance site of grace, then head northwest and jump from the ledge to the roof below. You can grab x2 Crab Eggs from the nearby corpse before heading south-southwest to the edge of the roof. Here you’ll find a corpse with x2 Strip of White Flesh, and beyond them a floating log. Follow the path of jumps indicated in Image 1 to reach the Great Grave Glovewort at the far side of the stone platforms.
Image 1
Now head back the way you came (or teleport back to the site of grace if you really hate jumping), and continue north-northwest along the rooftops. You’ll find a corpse being feasted on by a couple small crabs to the northwest containing x4 Thin Beast Bones, and west of the corpse, another jump you can make (Image 2). Get a running start and jump to the ledge, then continue northwest and hop down to the north. A couple of exploding zombies will come out of the ground, so either kill them quickly or roll away from them when the begin the explosion animation.
The corpse in the northern corner has a Fireproof Pickled Liver — from the corpse, go east, kill the next two explodey-bois that arise from the ground, then use your jumping skills to make your way up the broken wall, and from there jump onto the ledge to your right (Image 3). Three more flame zombies will come out of the ground on the ledge once you get close, two ahead of you and one right where you jump over.
Image 2Image 3
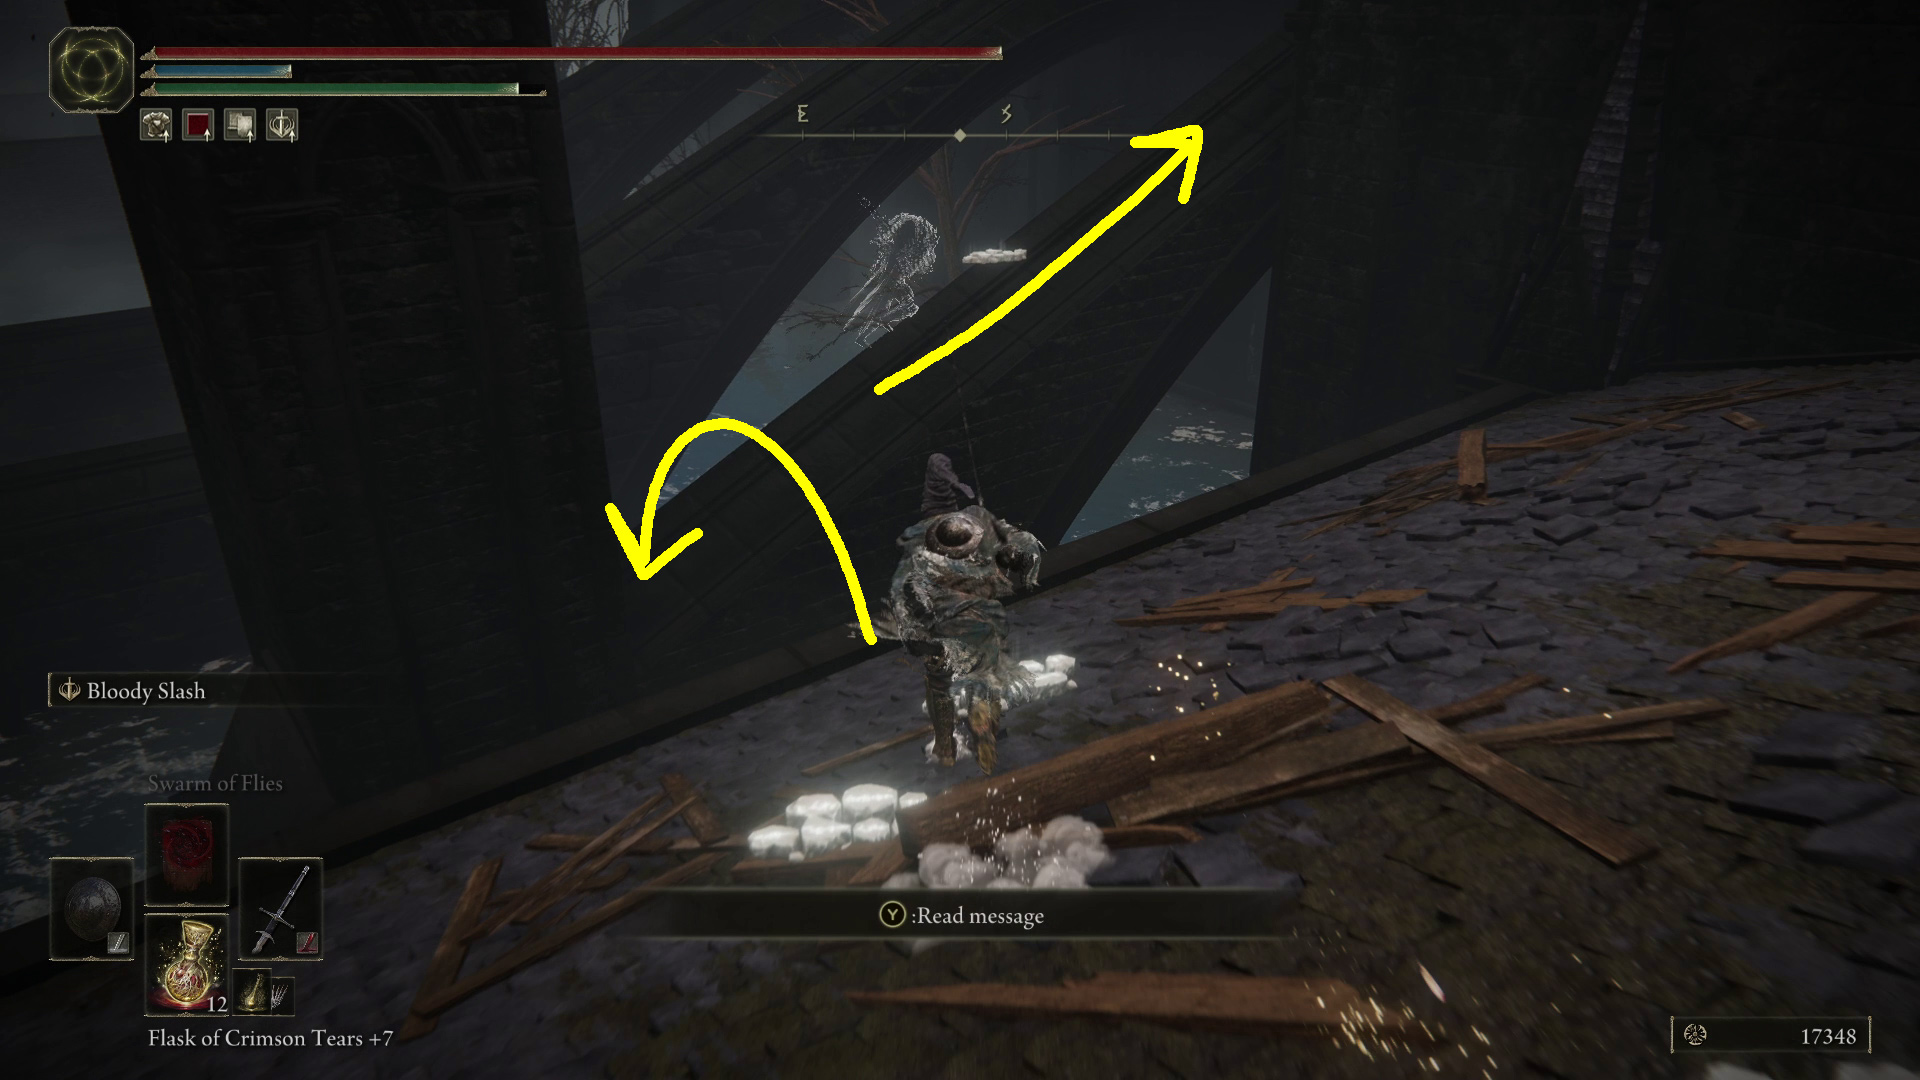
After dealing with the enemies, you can jump from the ledge west-northwest to the nearby roof. On the roof, you’ll encounter a Fire Knight. This one is a mage with some projectile and flame attacks, so if you need to gap close, approach at a diagonal and sprint in. Near the Fire Knight you can find x3 Ember of Messmer. Continue southwest across the rooftops, and on the last roof, grab the Slumbering Egg from the corpse hiding behind a pillar on your right (northwest). Then go to the southeastern edge of the roof and jump as indicated (Image 4) onto the buttress below — make sure you’re aiming for the lowest, leftmost part right where the buttress touches the pillar.
Don’t let the monster in the water startle you into falling off the buttress! Make your way southwest up the buttress, jump onto the ledge at the top, and from there carefully make your way onto the roof proper. There are a few large holes in the roof — head to the nearest one and drop carefully onto the center ledge below (Image 5). After landing, head south on the left-hand ledge and hop down into the room there (Image 6). Drop through the hole in the floor here, and you’ll find yourself next to a corpse and a crab — the corpse has a Lightningproof Pickled Liver you can grab.
Image 4Image 5Image 6
From here, if you go southeast to the wall, and then turn left to continue northeast, you’ll find a door. In the prayer room beyond you’ll find Fire Knight Queelign if you’ve been invaded by them twice. Queelign will drop Queelign’s Greatsword if you give him the Iris of Occultation, or the Fire Knight Queelign spirit ash if you give him the Iris of Grace (we grabbed the Iris of Grace earlier in this walkthrough, and we can get the Iris of Occultation in the next section).
Fire Knight Queelign in the prayer room
Return to where you dropped down by the water, and this time continue northwest, down the hall. You’ll come to two doorways (Image 8) — the room on the left has a Rune of an Unsung Hero, so grab that before continuing through the straight-ahead doorway. Just beyond you’ll encounter a spell-slinging Fire Knight. Near where you encounter the Fire Knight is another left-hand doorway, and beyond a small bridge that leads across the water. Head across the bridge, but watch out — there are a couple of bats hiding just behind the wall ahead (Image 9), so be ready.
Image 8Image 9
Kill the bats, then head south and up the stairs. Stop at the top of the stairs and look at Image 10 — there is a very easy — but very hard to spot — gap in the narrow section of platform you can fall into, so don’t do what I did the first time. Instead, jump over the gap and continue forward. There’s a bat hiding just inside an alley on your right, past the tall lamp. A second bat is flapping around further in the alley above, so kill both before grabbing the x3 Hefty Beast Bone. Then climb the ladder to the southeast (Image 11). You’ll find a big lever — head to the right side of it and activate it to drain the area, granting you access to all the previously watery spots.
Image 10Image 11
Drained Church District
Important & Unique Items
Mantle of Thorns
Iris of Occultation
Death Mask Helm
Battlefield Priest’s Cookbook [1]
Scadutree Fragment
Fire Knight’s Seal
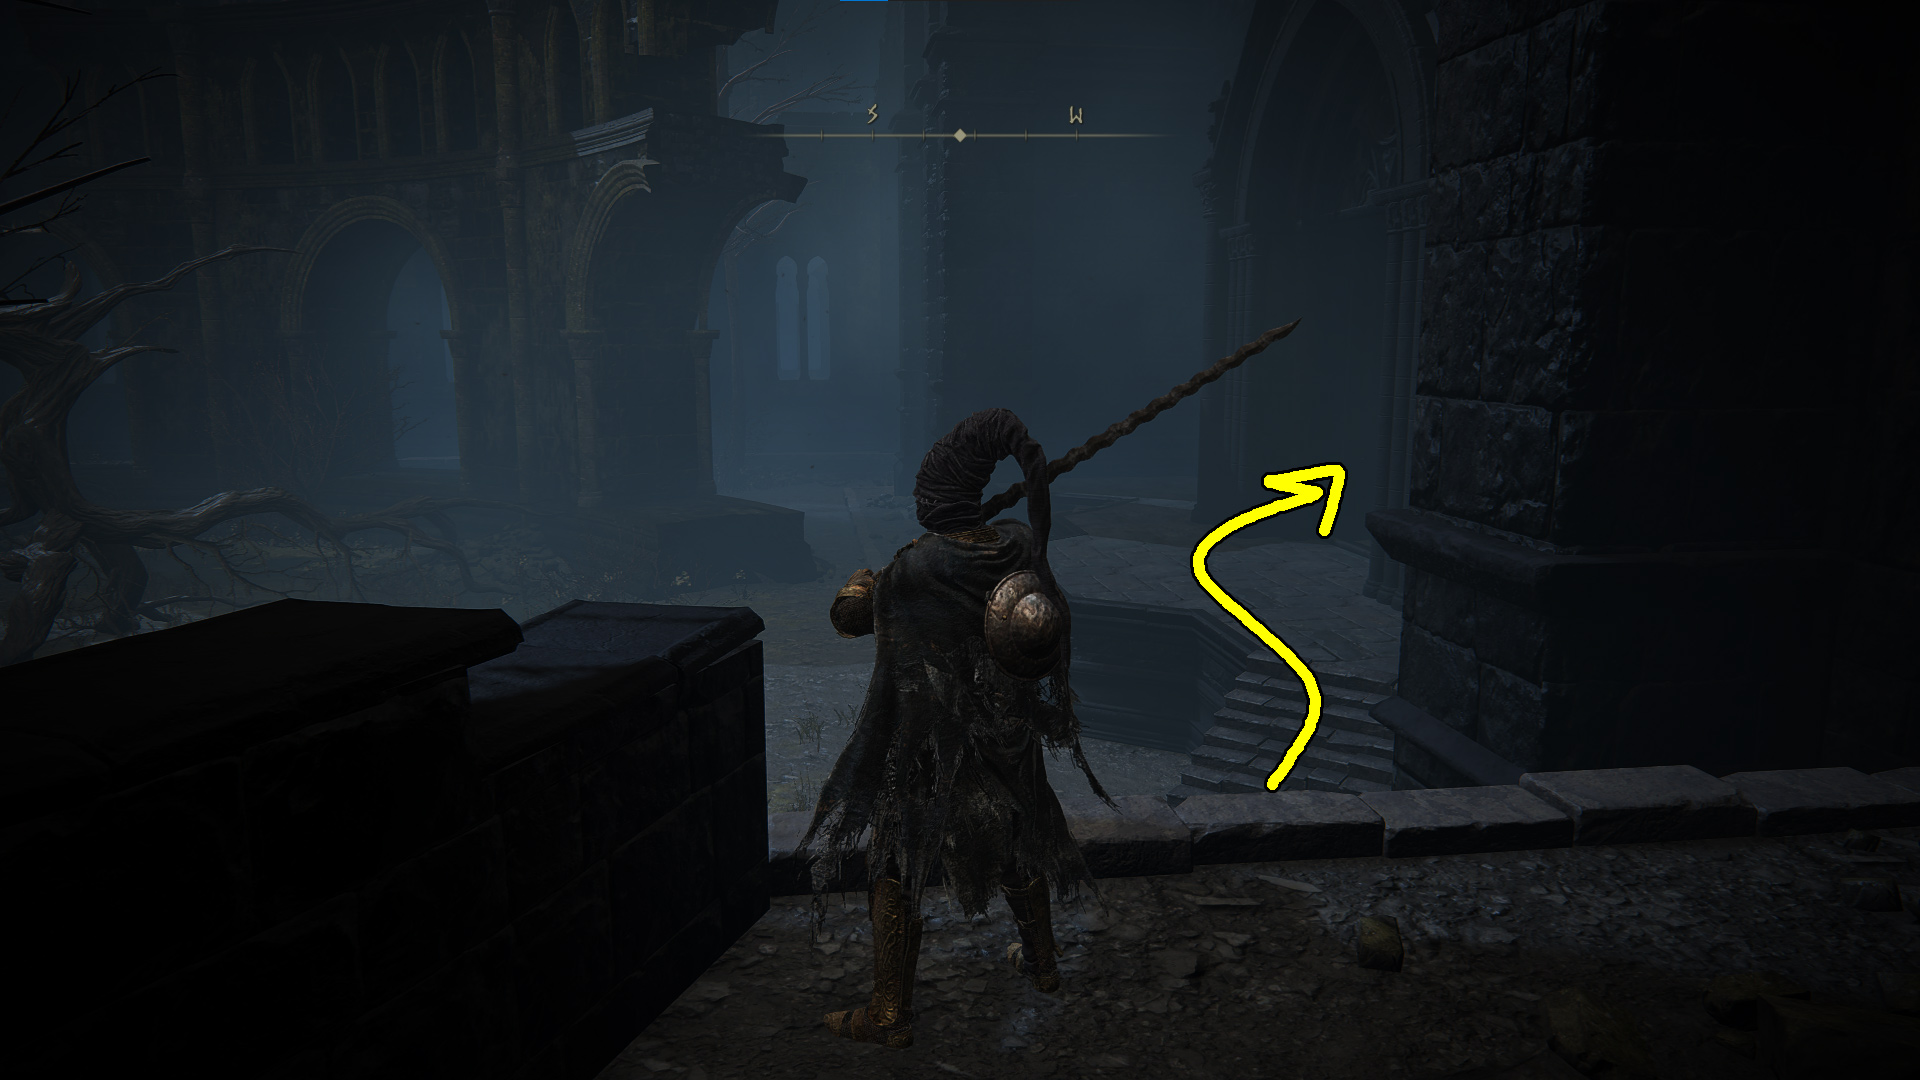
Go back down the ladder, and this time go through the doorway indicated in Image 11 above. Drop down (Image 1), grab the Somber Smithing Stone [5] and then after heading outside, bear right (east) and head into the ruined church to find the Sunken Chapel site of grace (Image 2). Activate it and rest if you need to, then leave the church via the large southeastern doorway.
Image 1Image 2
Head left (northeast) and you can grab the Ghost Glovewort [1] from the corpse the crabs are munchin’ on. Due east you’ll see another corpse, but it only has x2 Crab Eggs — and a giant crab will come up out of the ground and attack you, so you may want to skip them. Instead, look north, and jump on over to the big tree (Image 3).
Image 3
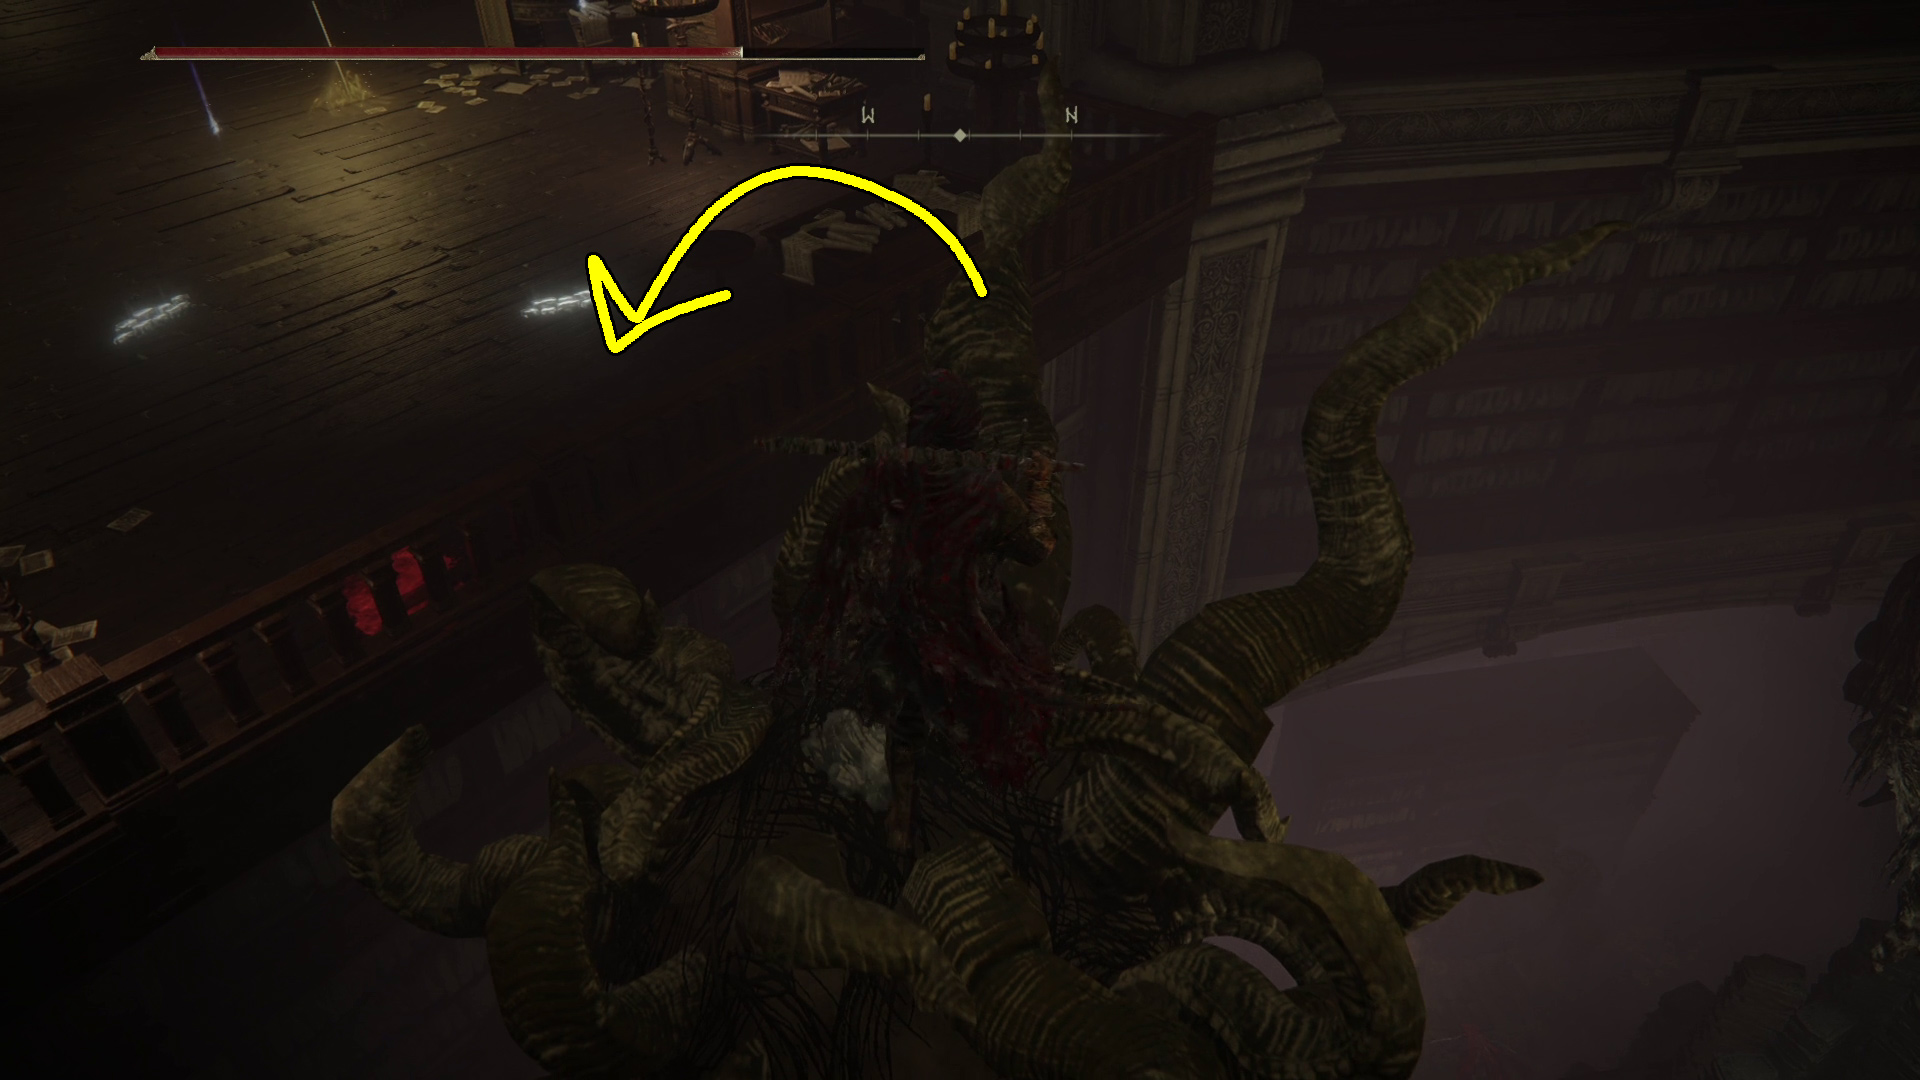
An Ulcerated Tree Spirit will spawn at the base of the tree — this one drops the Mantle of Thorns sorcery and 22218 runes, so if you don’t want either of those things, you can skip it. Doing so will make exploring a bit riskier if you don’t manage to avoid spawning it, but there isn’t all that much more to do down here so it’s theoretically possible to ignore it. In either case, there’s a Somber Smithing Stone [5] at the base of the tree.
Due east of the big tree are some stairs. Head up them and continue straight into the doorway, which will let you activate an elevator that serves as a shortcut back to the Church District Entrance site of grace. After activating the elevator, continue to the structure to the north (Image 4).
Depending on how you feel about dealing with giant crabs, you can skip this building entirely, as all you’ll get is a Shadow Realm Rune [5] that one crab is guarding — if you do go inside, make sure you’re aware of the crab hiding to the right of the obvious one (Image 5). Either way, next up is another Tree Spirit, which can be found by following the street northwest past the building with the crabs.
Image 4Image 5
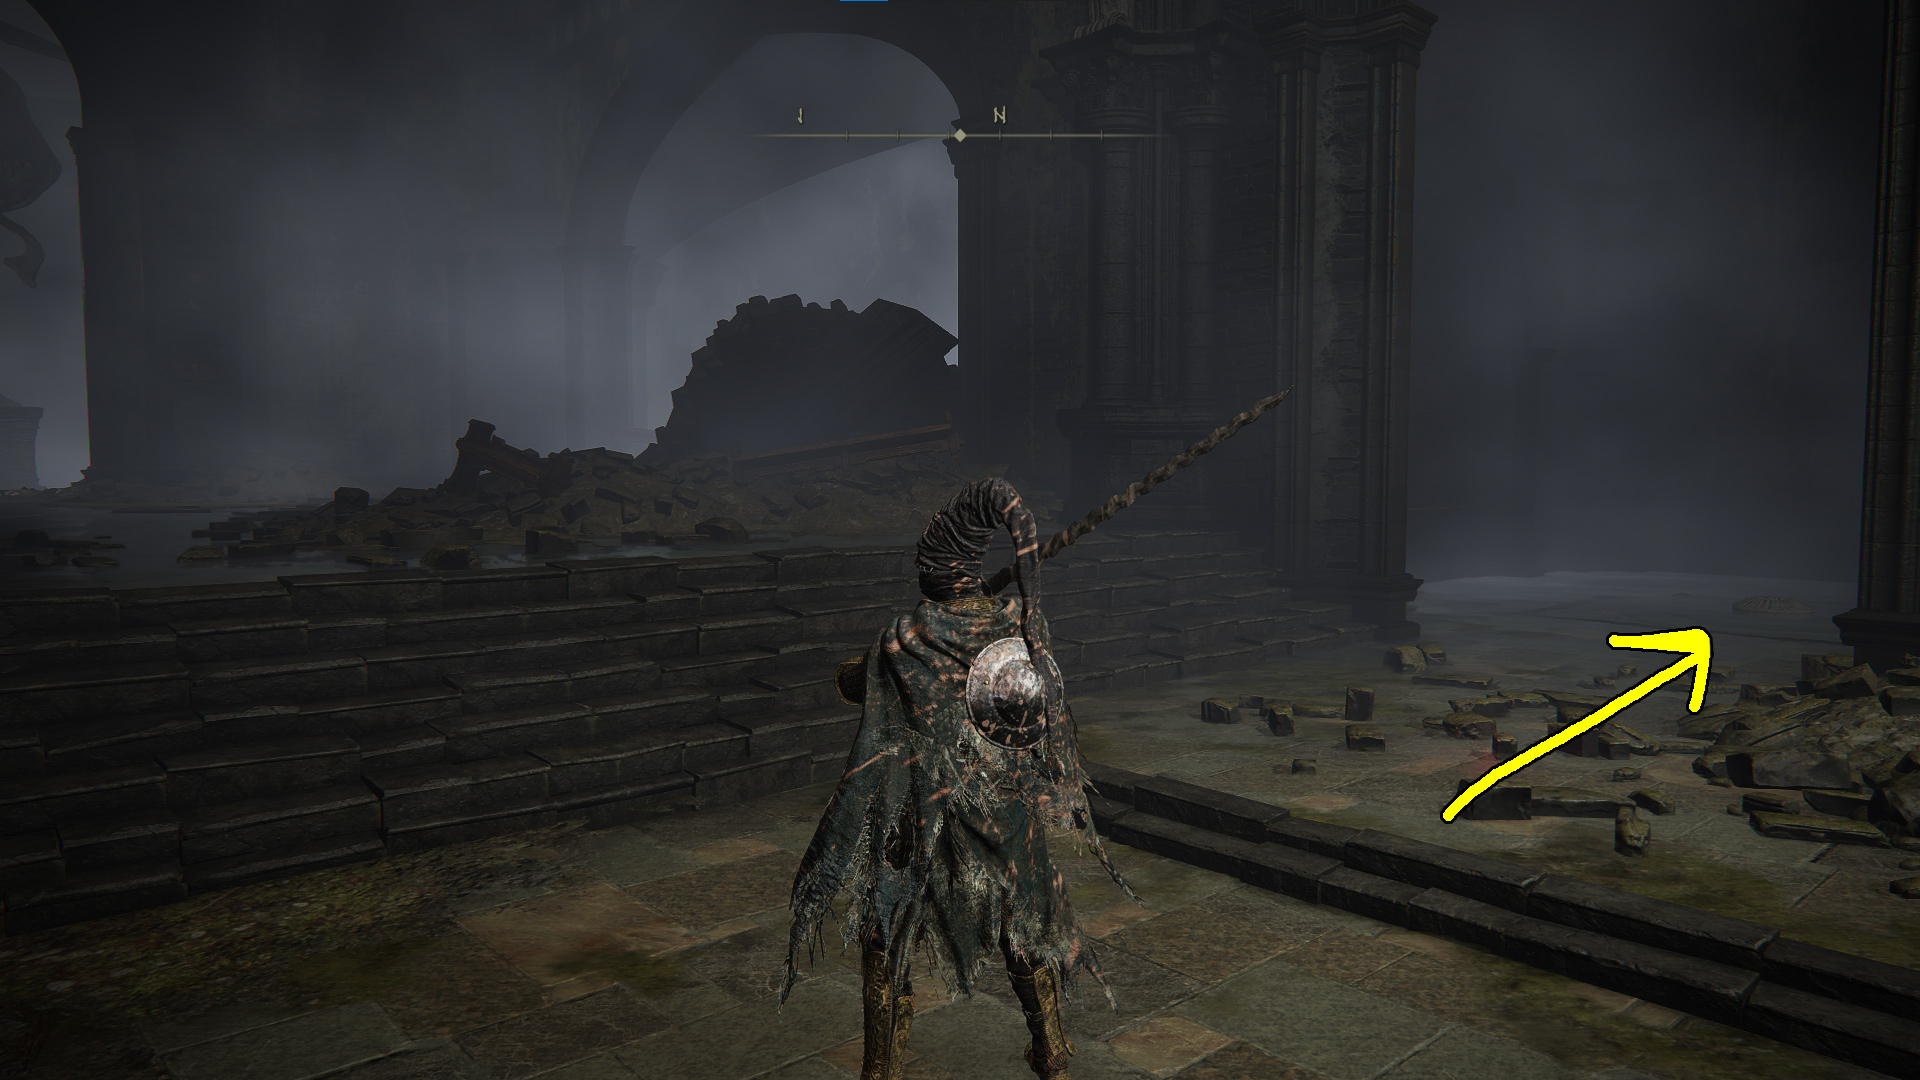
You’ll reach an intersection, and a corpse with an item will be on your right — when you get close to the corpse, an Ulcerated Tree Spirit will bust out of the ground. This one grants 22218 runes on death, and also drops the Iris of Occultation, which you can use on Fire Knight Queelign. The two nearby corpses have x4 Rada Fruit and x6 String so you can safely ignore them if you don’t want to fight the tree spirit.
To the north-northeast is another large building (Image 6), and within is x6 Kukri and x4 Smithing Stone [4]. After grabbing them, head back out the way you came in and head south-southwest, back towards the large tree from earlier. Drop down and head into the building on your right (Image 7) — the entrance in question is is northwest of the tree, in case you got turned around.
Image 6Image 7
Inside, you’ll see a Fire Knight at the top of the stairs ahead. The knight will summon four exploding zombies like the ones we ran into at the start of this area — if you rush the knight while they’re summoning, you can get a free hit or two in, and then dodge away when the exploding enemies come for you. This will often lead to them actually exploding on the Fire Knight, which is nice. The knight drops the Death Mask Helm.
Next, take the elevator that’s just to the right of the stairs (Image 8). It’ll take you up a floor, but weirdly you’ll have to jump northwest to actually reach the second floor. Don’t just jump — instead, wait for the elevator button to pop back up, then do your jump so that you sprint across the button and send the elevator down (this will save you some time if you fail an upcoming jump). Now you’re back where you initially dropped in through the broken roof! A Fire Knight patrols ahead (assuming you rested or didn’t kill them), so deal with them if you spot them. Otherwise, continue forward and look to your left and you’ll see an item you may have spotted earlier (Image 9).
Image 8Image 9
If you sprint and jump, and aim for the elbow or so of the statue, you can land without too much trouble. Try to jump so that if you overshoot, you’ll still hit arm. Pick up your hard-earned Scadutree Fragment, then drop down and also grab the Fire Knight’s Seal from the rear base of the statue.
Leave the room with the statue and turn left to head northeast down the hall (Image 10). Continue through the empty room and you’ll enter a chamber with stairs that lead to a balcony, and a door straight ahead (Image 11). First, go up the stairs and grab the Battlefield Priest’s Cookbook [1] from the balcony. That done, you can head through the door and ride the elevator down to the Tree-Worship Passage site of grace. This leads to an optional area, Scadutree Base, where you can choose to fight the Scadutree Avatar.
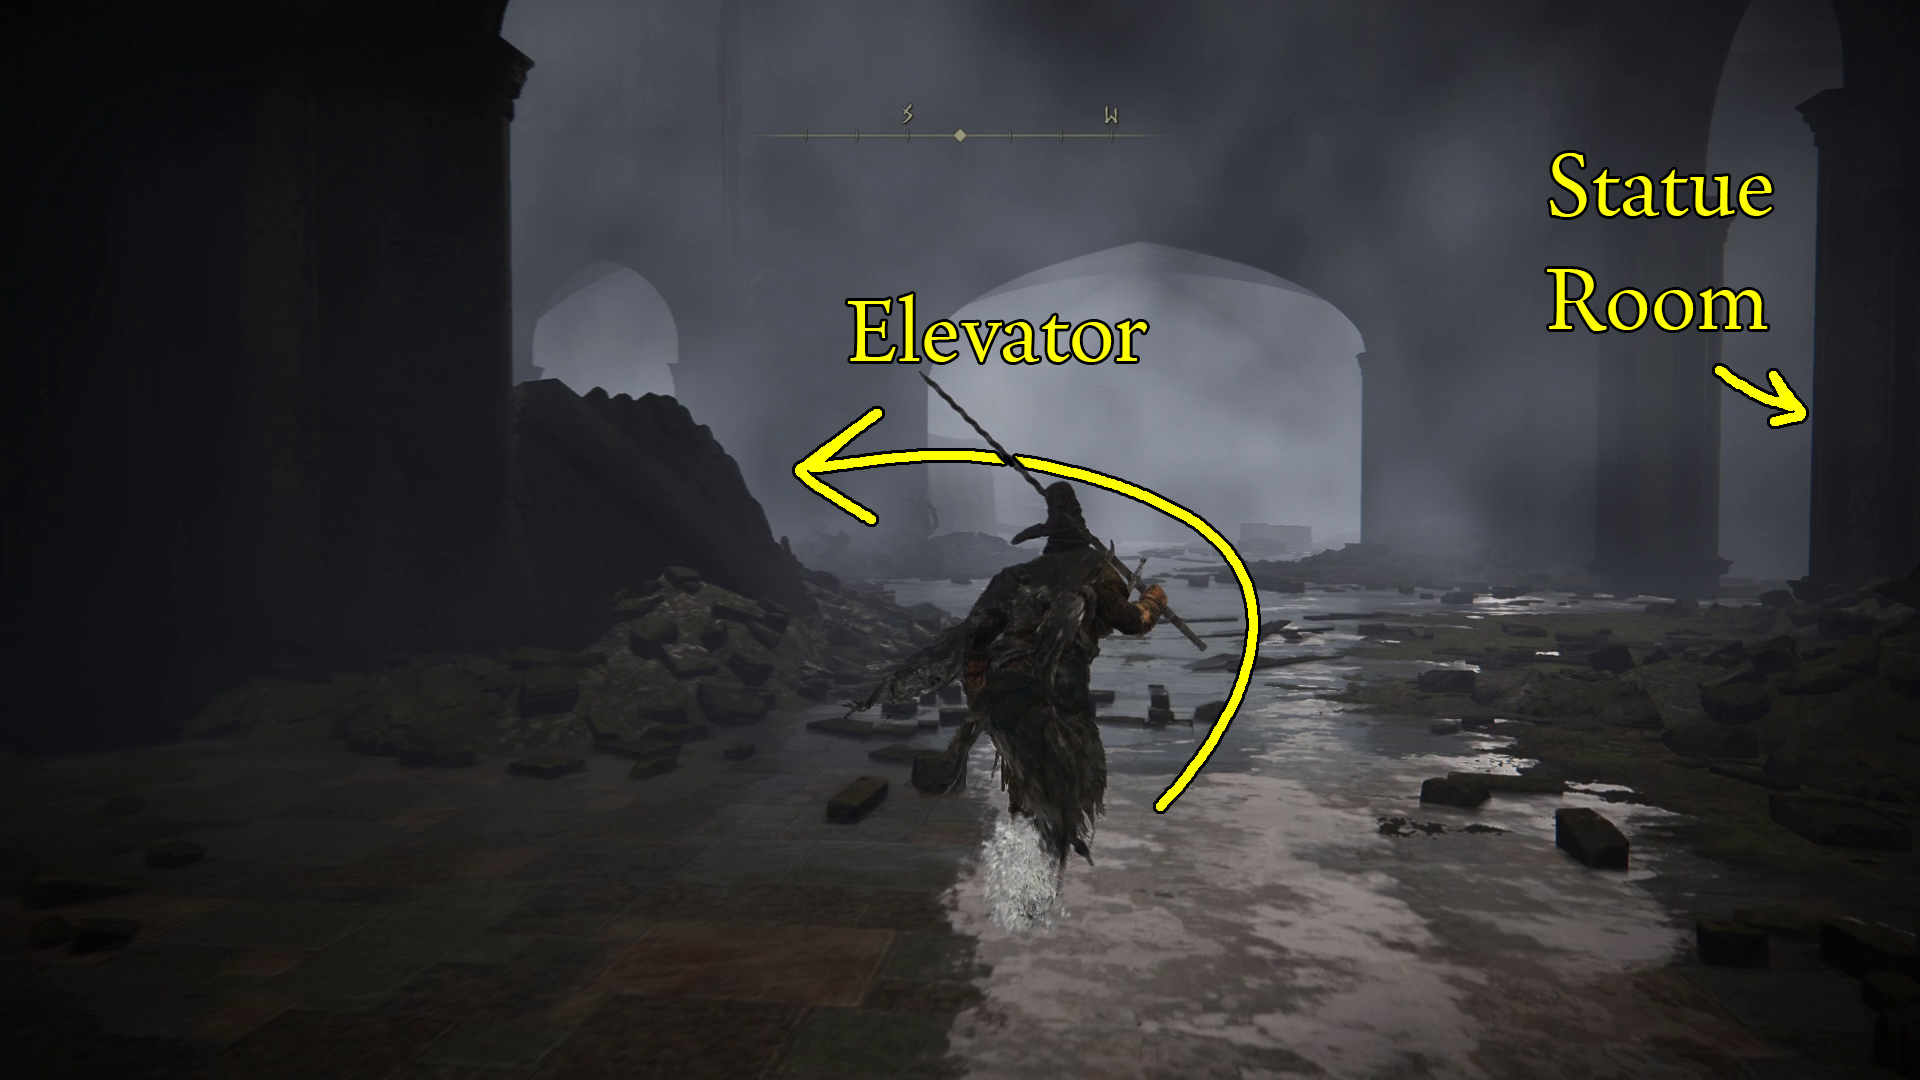
Whether you opt to fight the Avatar now or later, there is still more to explore in the Shadow Keep. To do so, retrace your steps, going back up the elevator and then southwest back to the area with the statue and the previous elevator from Image 8 (once back in the chapel, turn left as in Image 12, then left again, to find the elevator). Jump off the elevator and head northwest into the hallway, then take the first right you can and head north across the bridge (Image 13). Ride the elevator up, and you’ll enter the back side of the Specimen Storehouse!
Image 12Image 13
Specimen Storehouse (Rear)
Upon entering the back of the storehouse, turn right and you’ll find a Somber Smithing Stone [9]. You’ll also be able to kill that pesky shadow mage who was sniping you out of reach when you were in the storehouse before. Then head southwest through the doorway to find the Storehouse, Back Section site of grace.
Storehouse, Back Section
Important & Unique Items
Carian Thrusting Shield
Fire Serpent
After grabbing the Storehouse, Back Section site of grace, continue generally west and over the small wooden bridge — you’ll pass a ladder on the bridge, but go past it for now — to where some shadow scholars and a Fire Knight are waiting. Grab the x3 Glintslab Firefly from the corpse on the left and take out the three fireball-flinging shadow enemies before aggroing the Fire Knight, who can be snuck up on and backstabbed. The knight guards the Carian Thrusting Shield, so grab that and then head back to the bridge and go up the ladder.
At the top of the ladder you’ll find another Fire Knight you can sneak up to and backstab off the ledge. From the ladder, head east and up the stairs — a Fire Knight patrols on your right at the top, so deal with them first. On the western wall, left of the staircase, is a corpse with x3 Fire Coil. Continue northeast past the bookcases (grab the Ghost Glovewort [3] on your left as you do so), and head into the next room, where you’ll find the Fire Serpent incantation.
Turn around and go south, out the hole in the wall (Image 1). Turn right and head up the wooden walkway, grabbing the x6 Shadow Sunflower before continuing up the stairs. You’ll find another corpse with a Blessed Bone Shard, and then you’ll be able to reenter the storehouse and grab the Storehouse, Loft site of grace.
Image 1
Storehouse, Loft
Important & Unique Items
Wrath from Afar
Fire Knight Hilde
Before doing this section, if you don’t use ranged attacks with your character, make sure you have some throwing knives or other ranged damage options — fighting the bats on the rafters is very dangerous with melee weapons.
From the Storehouse, Loft site of grace, head north and ride the small elevator upwards. At the top, head west-northwest on the wooden beam, and make your way across the next beam to reach the ladder ahead (Image 1). A bat will flap down when you’re about halfway across the beam that leads to the ladder, so kill it before climbing up — if you use ’em, you can grab x7 Thin Beast Bones from the corpse around the corner just past the ladder first, but watch out for the bat beyond. After climbing up the ladder, go southwest, kill the bat on the far wall, then grab the x4 Smithing Stone [7] from the corpse on the far side of the central pillar (Image 2).
Image 1Image 2
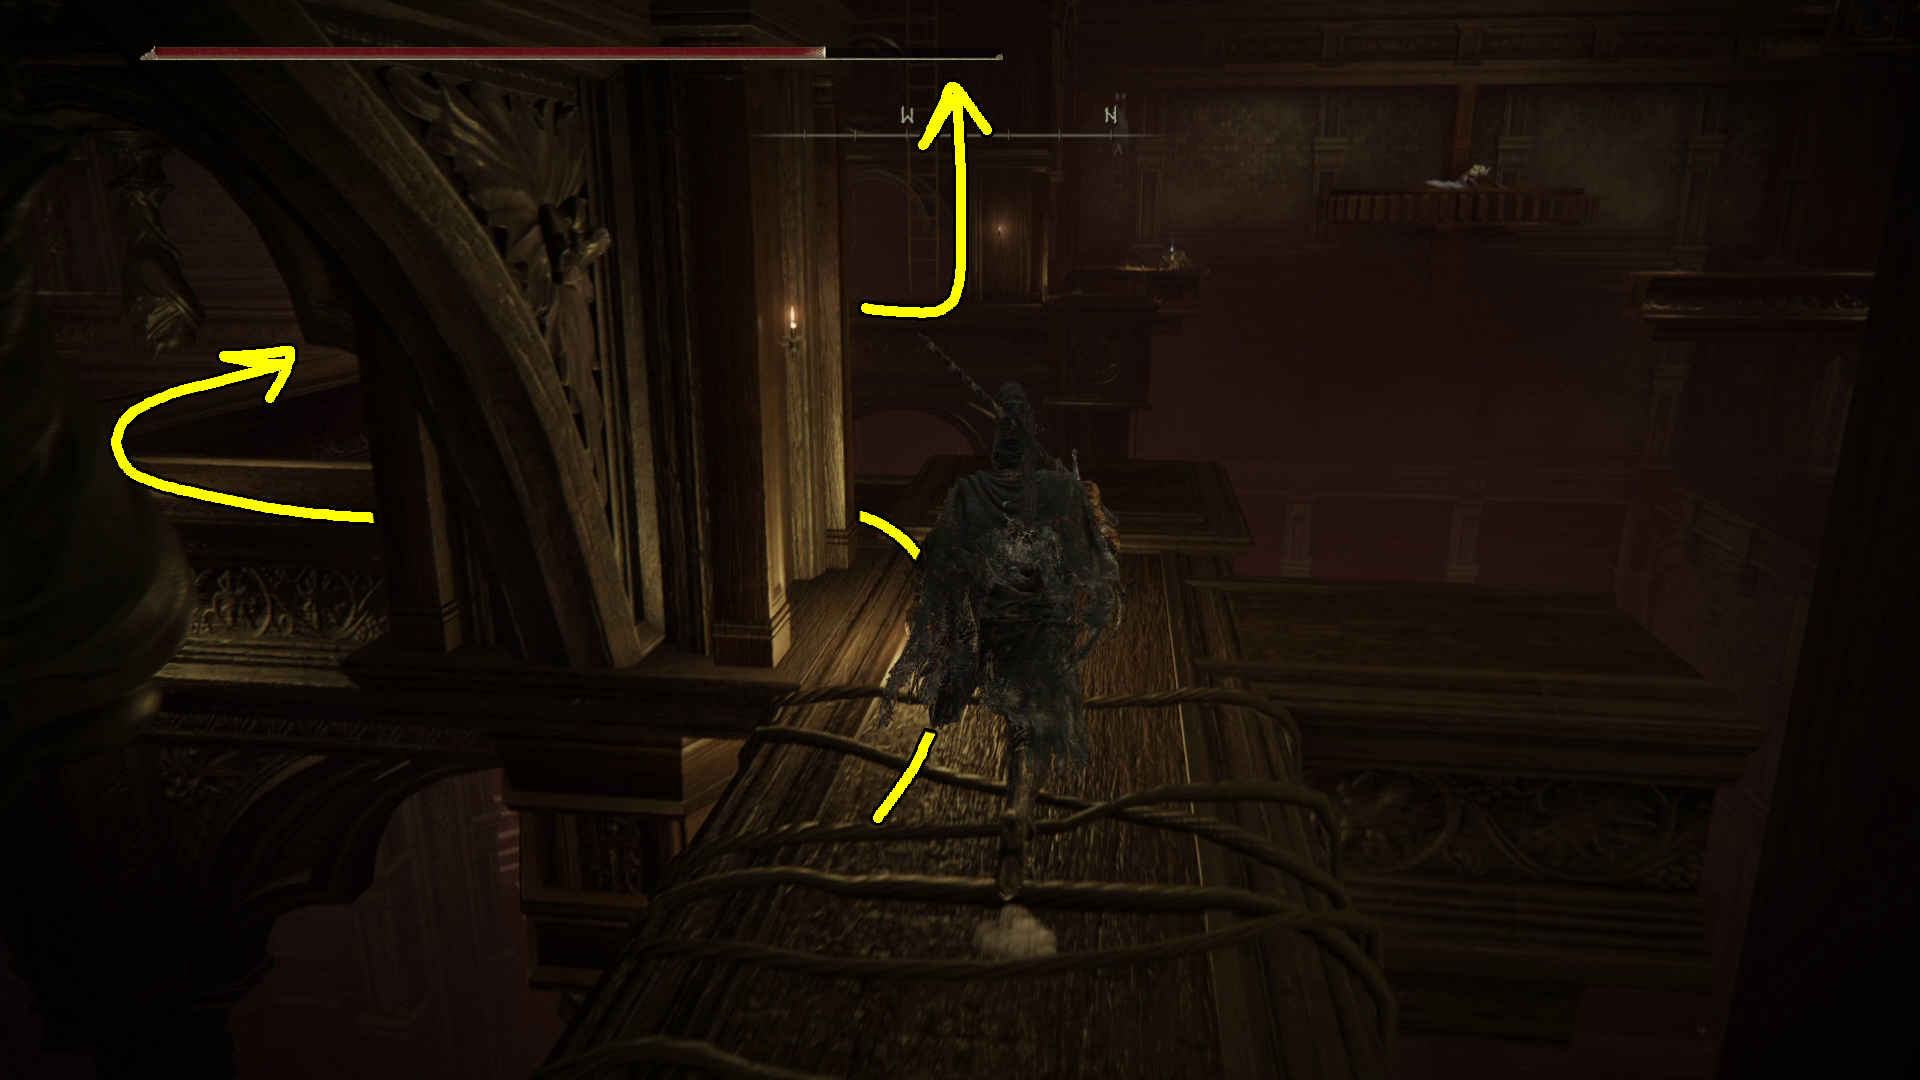
Next, head generally east, kill the bat, drop down onto the huge gear and grab the Wrath from Afar incantation (Image 3). Then get a running start and jump to the nearby beam and make your way up the ladder as indicated in Image 3. There’s a Fire Knight ahead that will knock you off the beams with ranged spells if you let them, so deal with them ASAP — but carefully! Then head over to the nearby elevator (Image 4).
Image 3Image 4
First, take the elevator down, and get off and go kill the Fire Knight on the far side of the room — once again, you can sneak up. Just to the knight’s right is a Rune of an Unsung Hero; grab it, then return to the elevator and ride it back up to the rafters.
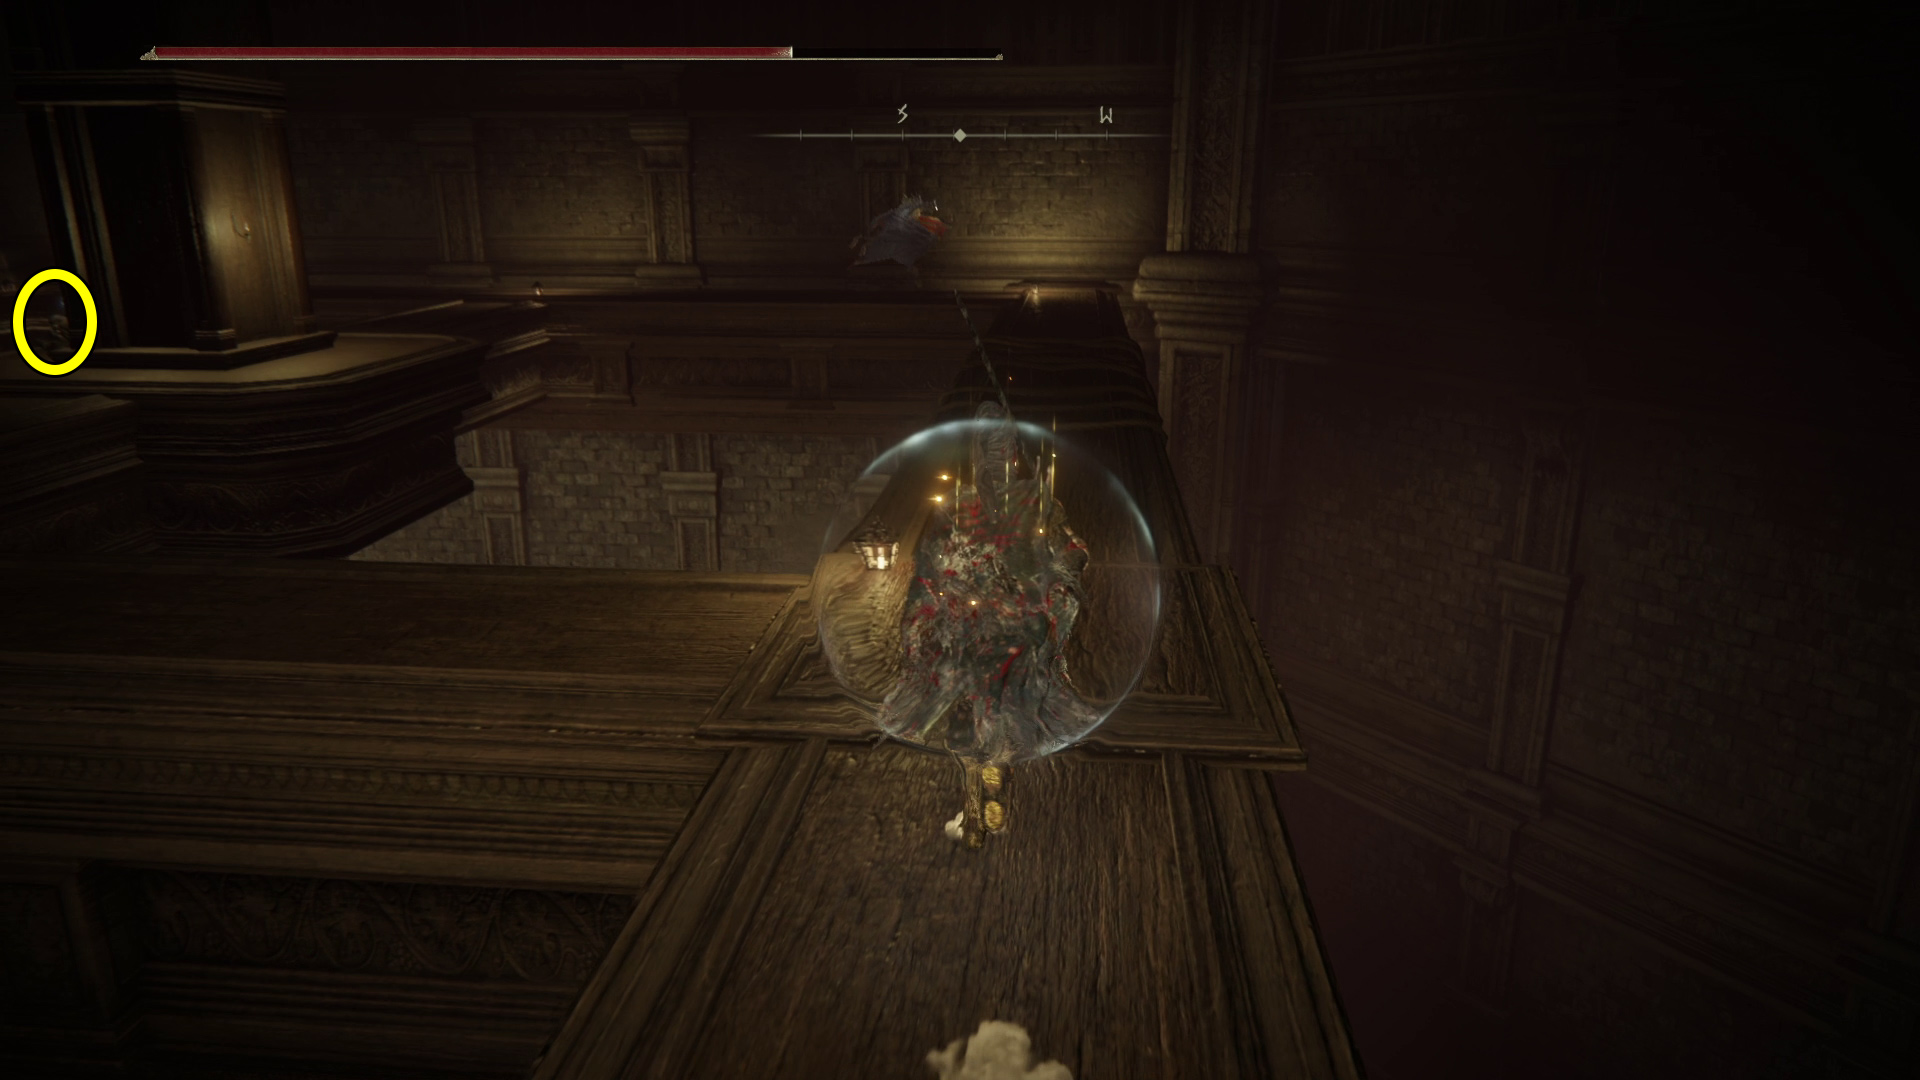
Now we’re going to grab the item sitting tantalizingly close, on the ledge above the elevator. Send the elevator down but step off of it. Once the right-hand elevator arrives, send that one down and also step off of it. Now go over to where the left-hand elevator arrives, and jump onto the top of it when it gets close enough (Image X). From there, it’s an easy jump to the Fire Knight Hilde spirit ash.
Finally, you can head west to the nearby ladder (Image 6) and climb down — just around the corner is a Somber Smithing Stone [8], and northeast of the bottom of the ladder is another ladder, guarded by a bat. Kill bat, climb down, and go through the nearby doorway.
Image 5Image 6
You’ll find yourself back outside. On your right is an elevator — ride it down and then follow the wooden walkway/stairs down to the southeast. This will lead you to a larger stone elevator, so hop on and let it take you down to the ground floor, where you’ll find the Shadow Keep, Back Gate site of grace.
Shadow Keep, Back Gate
Important & Unique Items
Scadutree Fragment
From the Shadow Keep, Back Gate site of grace, go into the room just southeast and grab the Scadutree Fragment from the base of the statue. Assuming you got the O, Mother gesture from the Bonny Village in Scadu Altus, you can use that gesture now in front of the statue to unlock a secret passage to the Hinterland site of grace.
That done, the only thing left to do is head through the doorway that leads northeast and fight Commander Gaius!
After completing Shadow Keep, you can head to the Tree-Worship Passage site of grace and go find the boss in Scadutree Base, or you can head to the West Rampart site of grace and continue into the Ancient Ruins of Rauh.
Unabashed FromSoftware fanboy still learning to take his time with games (and everything else, really). The time he doesn't spend on games is spent on music, books, or occasionally going outside.