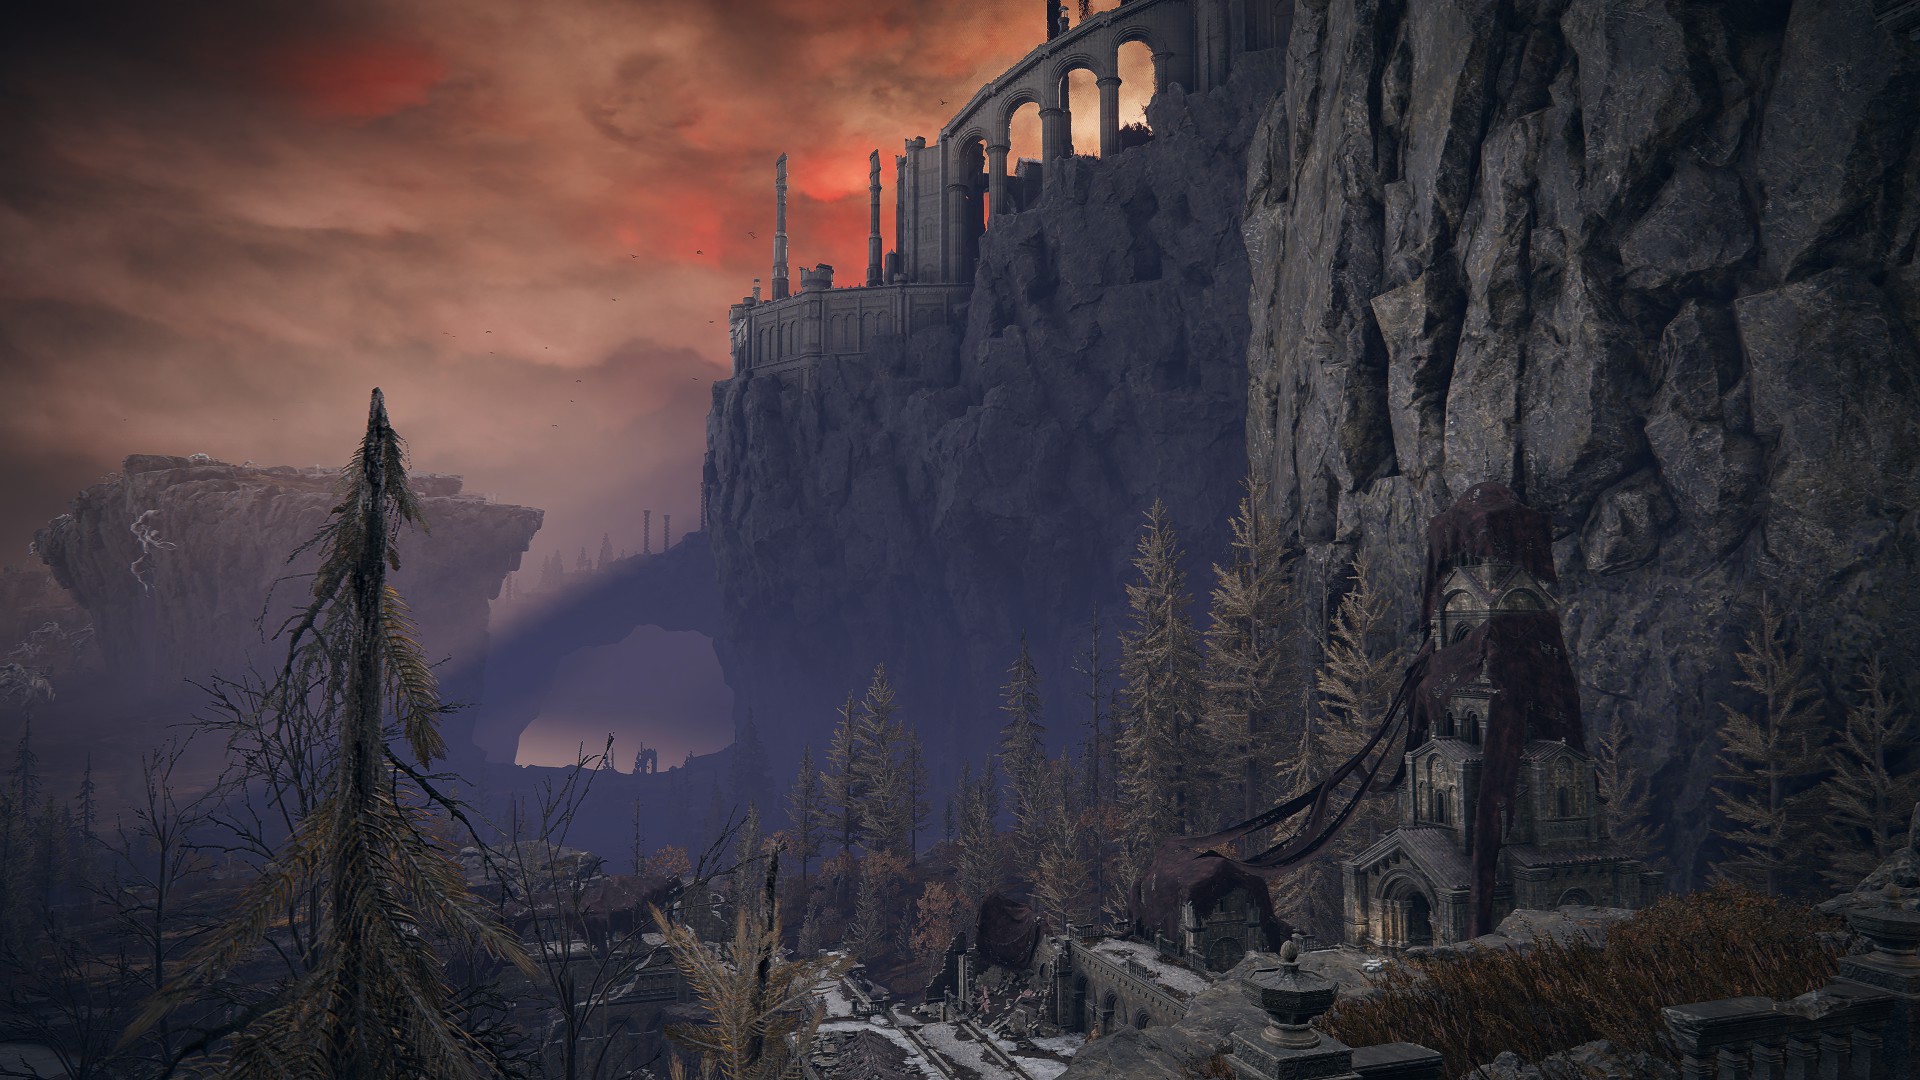
Rauh Base is an area connected to the Gravesite Plain, and serves as an optional break from the expansion’s main path. There are quite a few items to find, bosses to fight, and dungeons to clear. It’s not too tough of an area — excepting a certain golden excrement excreter — and therefore is a nice place to go if you’re stuck on a main story boss and want to chill and kill mobs for a bit.
How to Get to Rauh Base
From the Moorth Ruins site of grace in Scadu Altus, head northeast to the nearby lake, then continue north into the tunnel. Cross the poison and bird-filled area northwest, and continue northwest to reach the Ancient Ruins Base site of grace (you can see a detailed walkthrough for reaching Rauh Base in our Scadu Altus walkthrough).
Area Map & Grabbing Grace
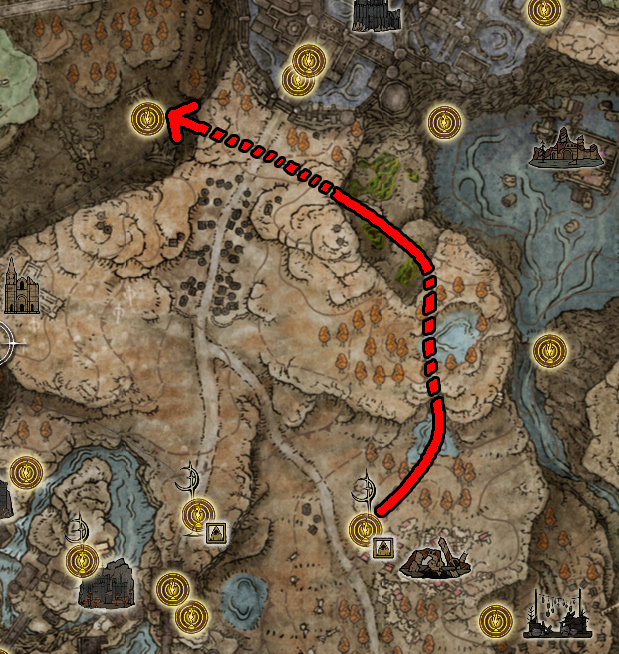
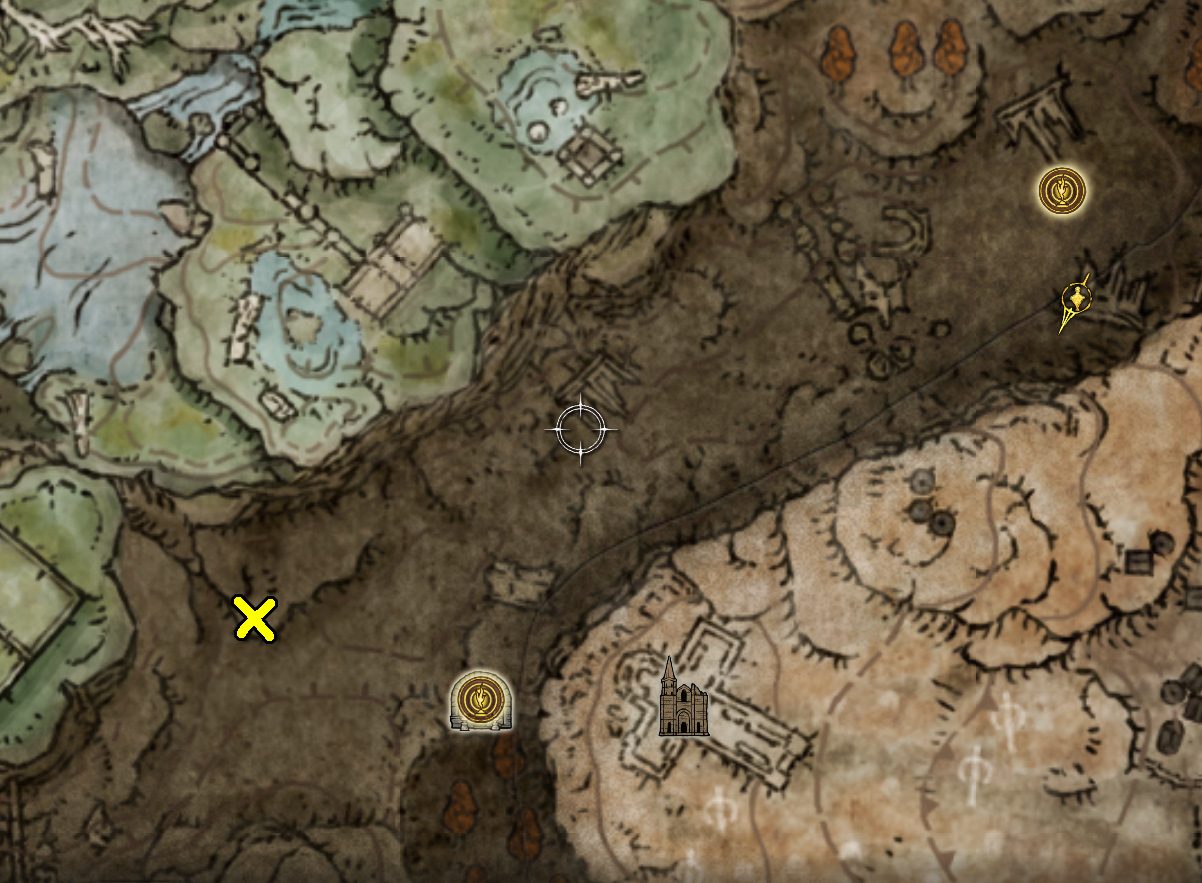
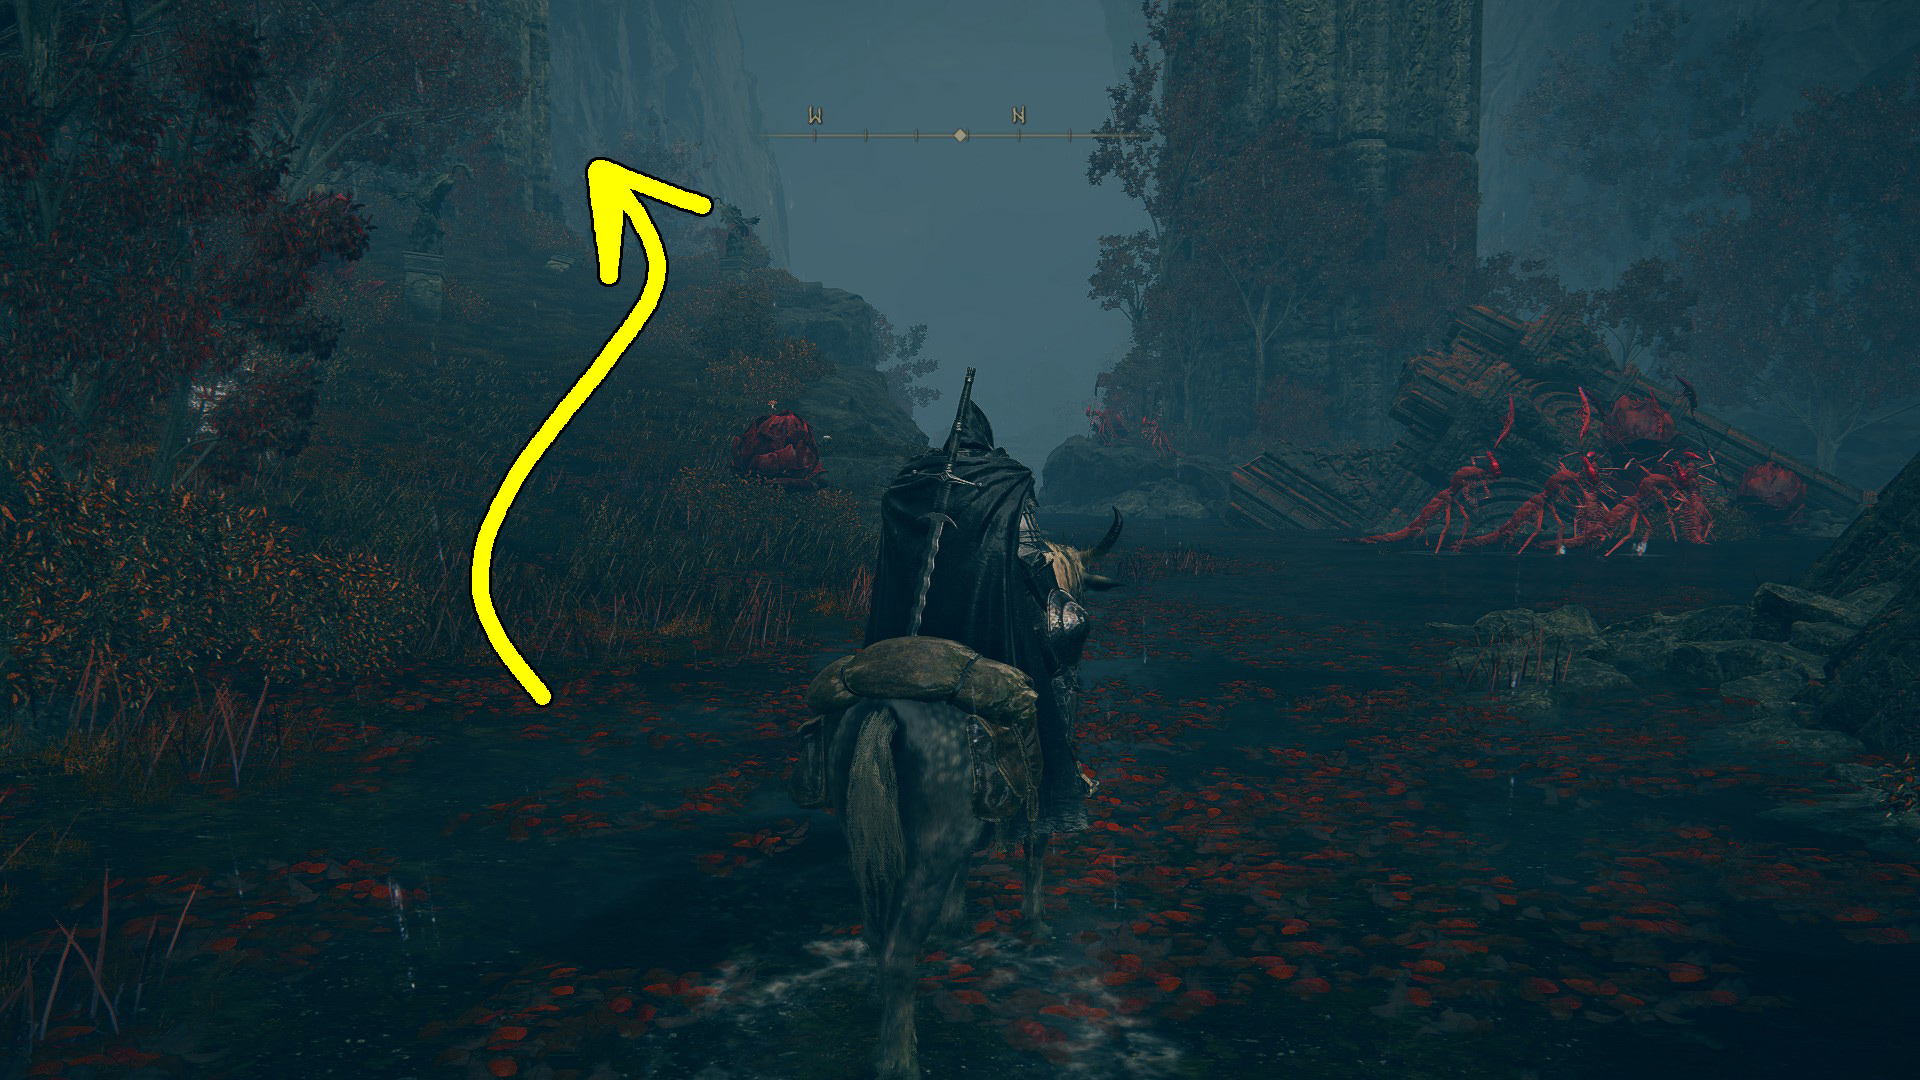
It’s a bit of a ride to get the area map, but it will make navigation much easier, so it’s highly recommended that you pick up the map fragment before you do anything else. As always, you can see the location of the map monument on your map — in this cast, it’s a decent ways west of the Ancient Ruins Base site of grace. Place a beacon on the map monument’s location, and then start riding that way — the canyon runs almost in a straight line that direction.
You’ll have to make your way around two giants, one with a bow and one with a melee weapon. While you can kill them if you like (each is worth 9158), note that they respawn. However you do it, get past the giants and grab the Rauh Ruins map fragment from the base of the monument, but don’t teleport yet! Instead, continue following the road southwest and west into the ruins. Then go west-northwest to find the Temple Town Ruins site of grace.
To Temple Town Ruins site of grace
Now that you have the map fragment and the Temple Town Ruins site of grace, you can teleport back to the Ancient Ruins Base, and this map will now be usable:
Ancient Ruins Base
Unique & Important Items
Ash of War: Scattershot Throw
Bloodfiend’s Sacred Spear
From the Ancient Ruins Base site of grace, follow the road northeast, through the checkpoint guarded my soldiers. There is also a patrol of 3 soldiers, so make sure you either avoid all of them by swinging wide around the road, or else fight the two groups when they are separated.
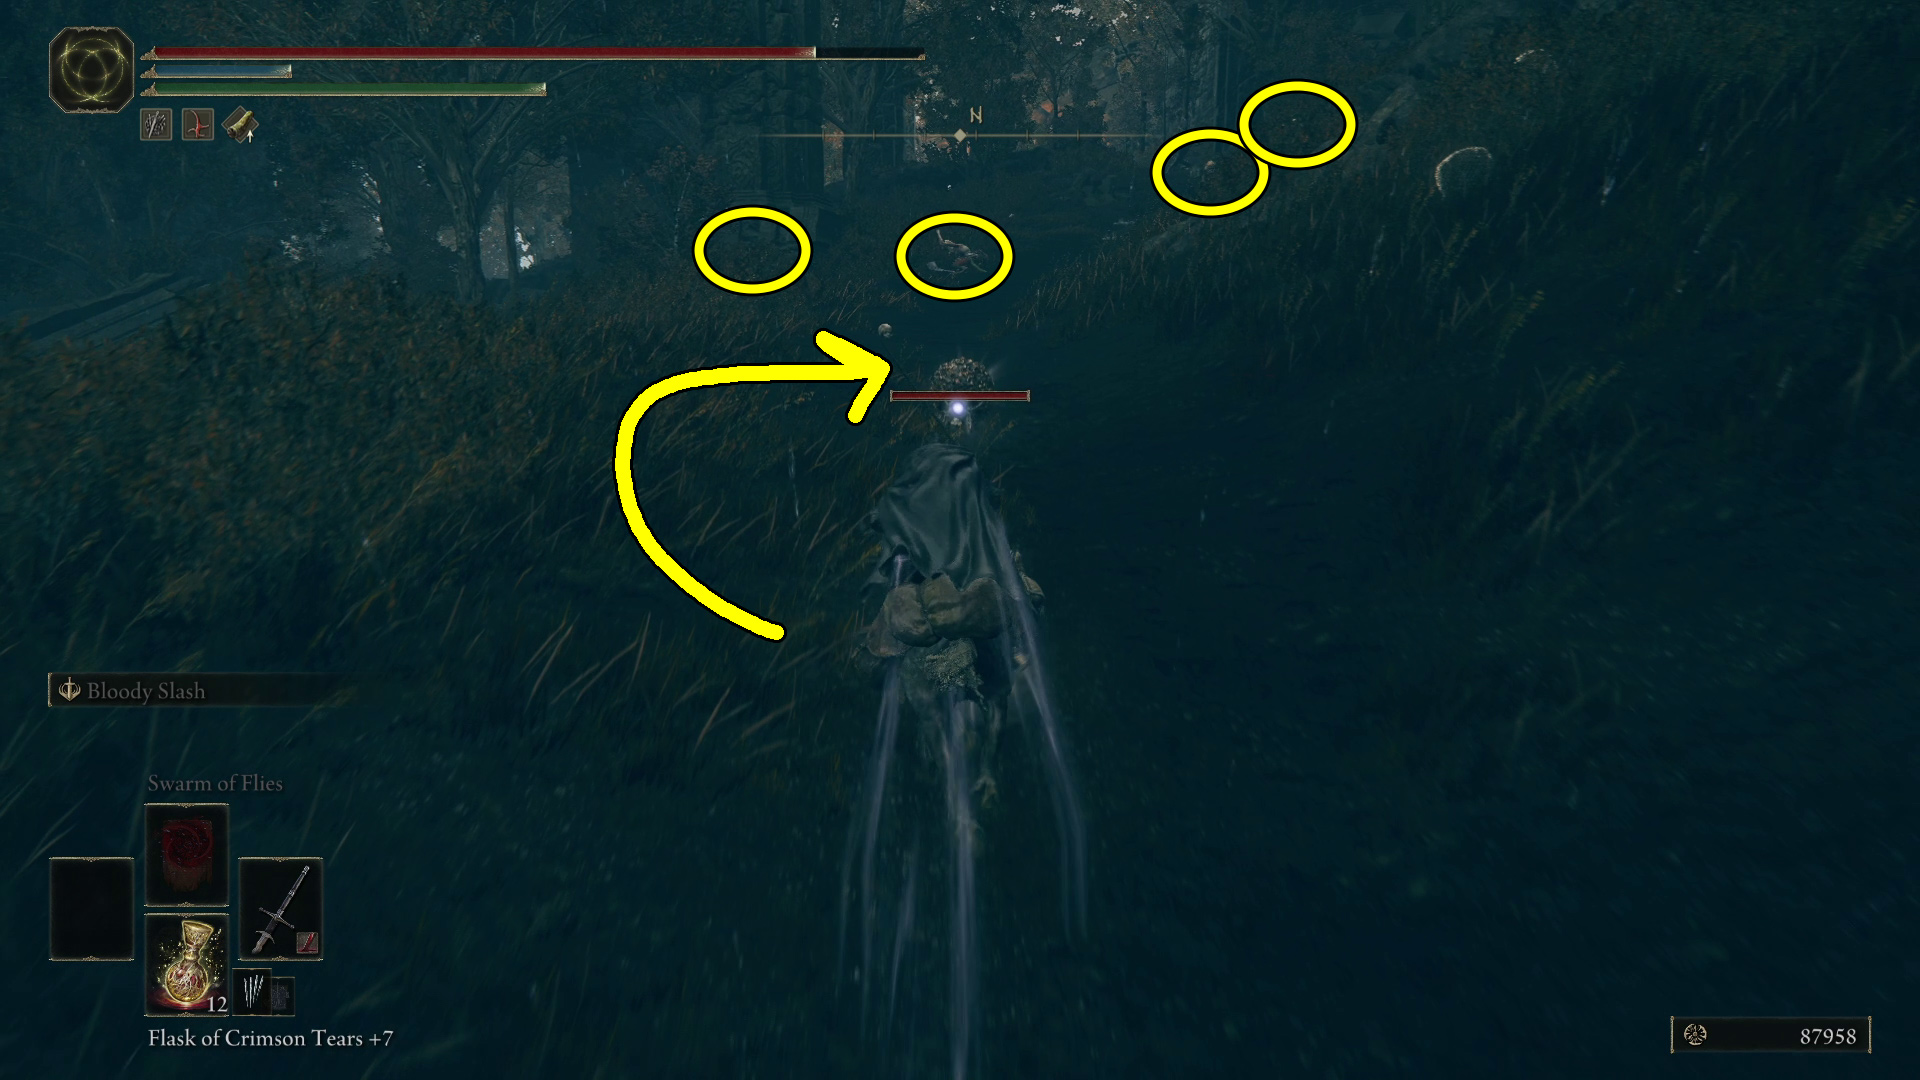
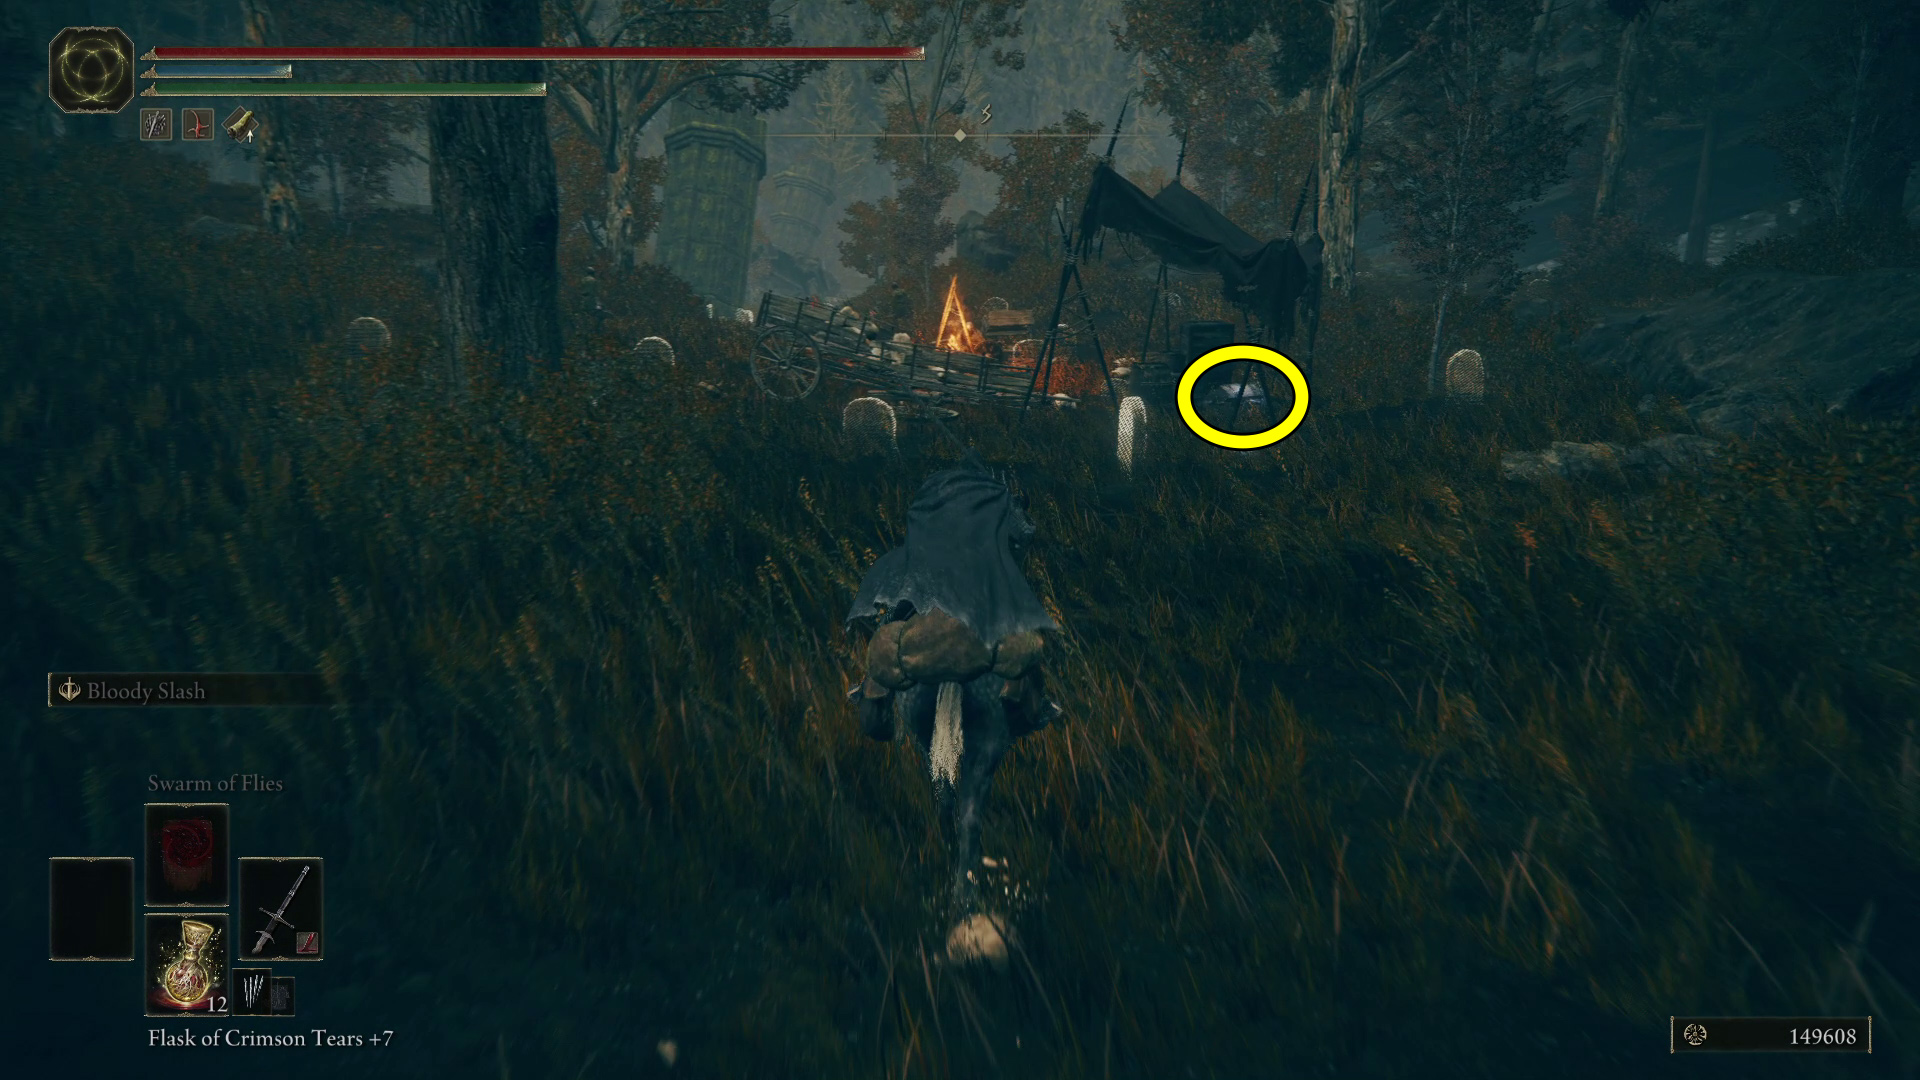
Beyond the soldiers, you’ll find a loot scarab in the middle of the road that (Image 1) drops a Somber Smithing Stone [7]. There are a lot of misbegotten behind it, however, so your best bet is to approach the scarab from the side — this will allow you to kill it without chasing it into the enemies. Kill the misbegotten, then continue up the road to the next group and kill all the ones on the right side of the road (there’s another group you can potentially avoid aggroing on the left side of the path). That done, you can use any ranged attack to force the loot scarab on the pillar to drop (Image 2) — this one drops Ash of War: Scattershot Throw.
Image 1Image 2
Continue through the arch and the road will lead you to a stone structure lit by torches — watch out for the two misbegotten hiding off the road to either side, and the other hidden one hanging out on top of a nearby pillar. You can go through the hole in the wall of the building to find Taylew’s Ruined Forge.
From the entrance to the forge, head west-southwest, towards the small pond you can see on your map. You’ll find a lone bloodfiend just before the lake, and in the pond find a group of bloodfiends surrounding their shaman. There are two dogs here as well, which are really the biggest threat while you’re mounted — one of the dogs is munching on a corpse with x4 Smithing Stone [7]. Use ranged attacks if possible to pull one or two enemies at a time — the shaman drops the Bloodfiend’s Sacred Spear when he dies.
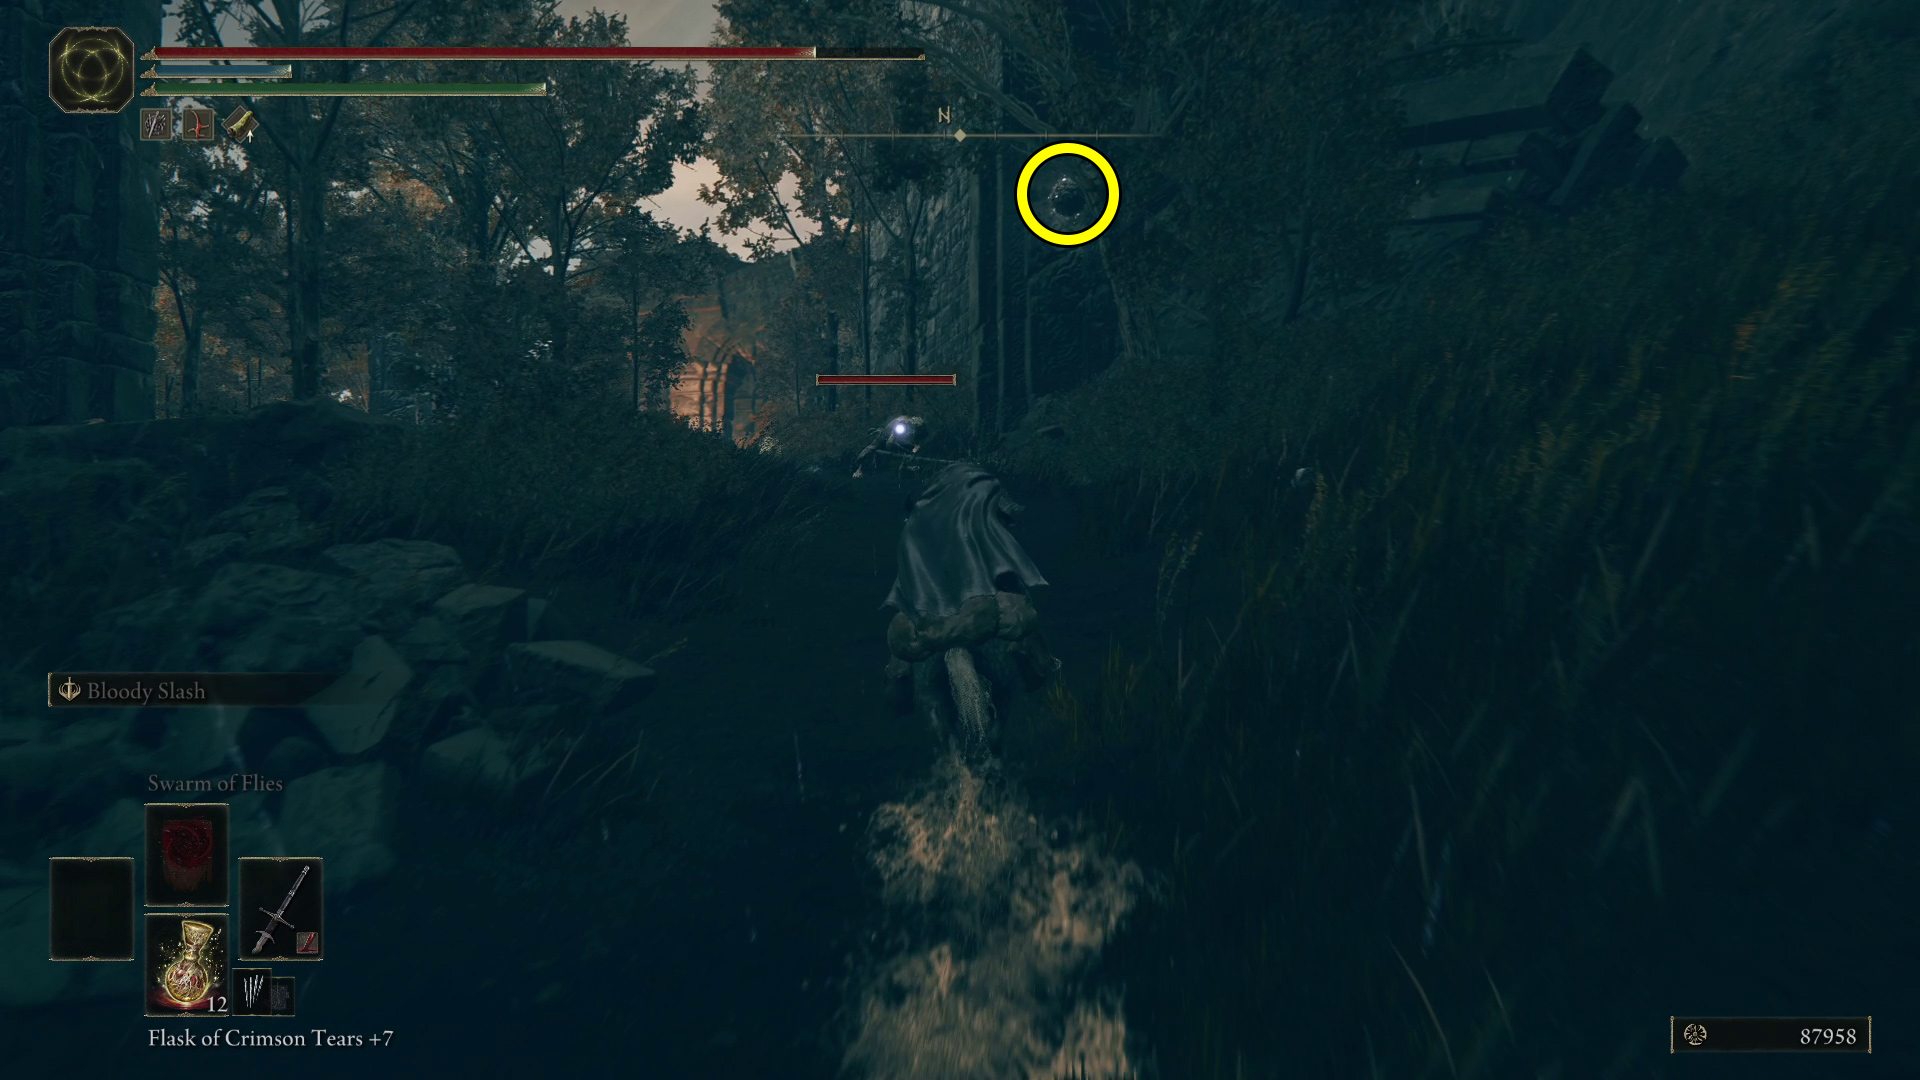
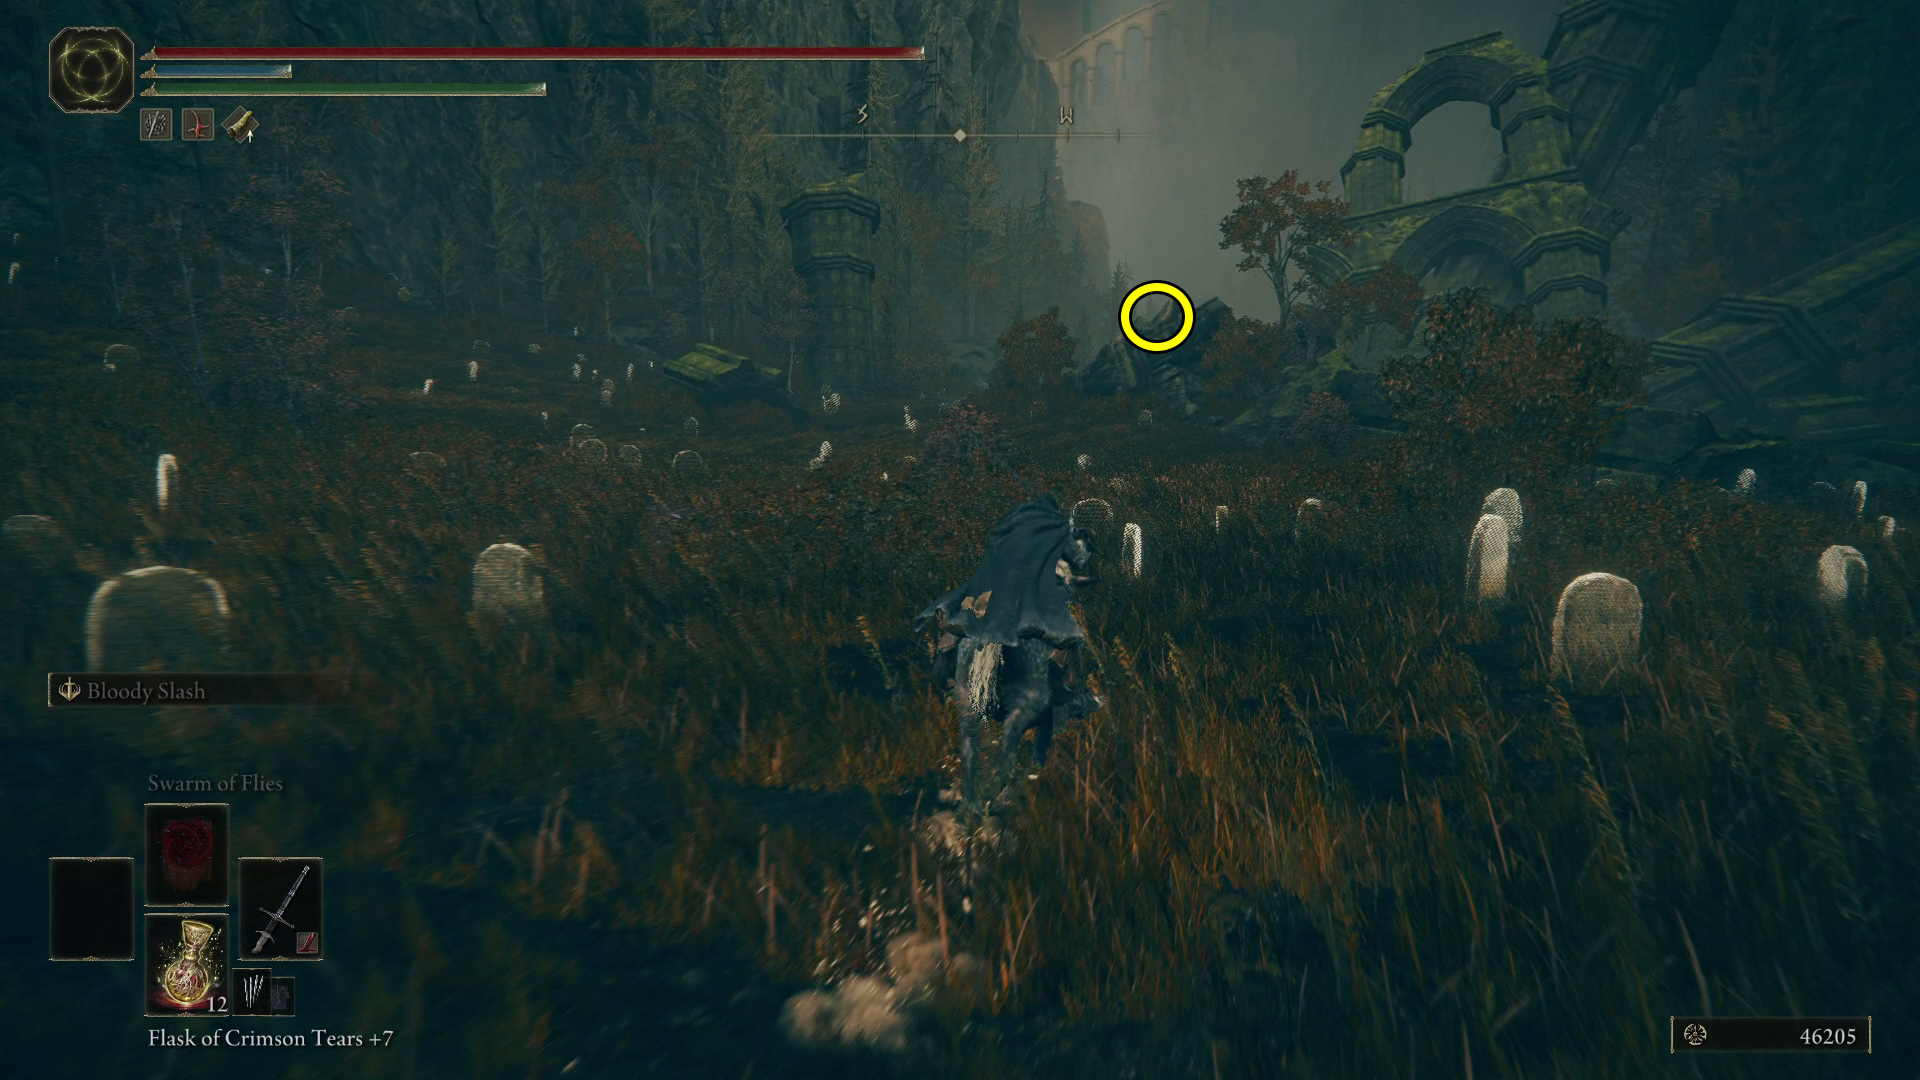
Now go due west to the cliffs and turn left (south) to find a corpse with a Shadow Realm Rune [3] in the shadow of the bridge (Image 3). Below are some bloodfiends fighting soldiers — you can simply ignore the fighting enemies if you want, but don’t get too close. From the rune, you can drop down and head west into the cave to find a corpse with x5 Sacred Bloody Flesh. From the mouth of the cave, go south-southwest to find a small soldier camp with a chest containing the Pearl Shield Talisman (Image 4).
Image 3Image 4
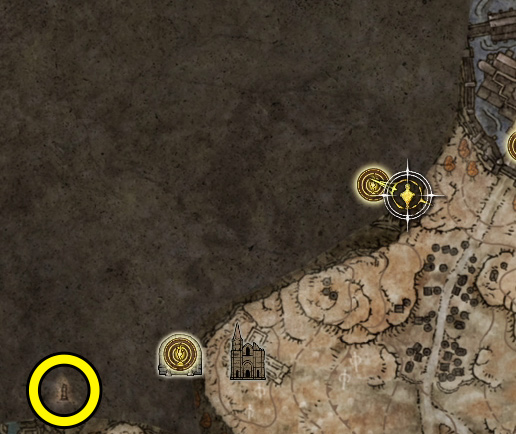
At this point, you may as well teleport or ride east back to the Ancient Ruins Base site of grace, so you can replenish flasks. From the site of grace, go west-southwest, and you’ll be able to find a Rauh Burrow on top of some ruins (Image 5). Now, if you want to avoid the giants, you can simply teleport to the Temple Town Ruins site of grace, however you’d miss out on x4 Smithing Stone [8] on a small hill just past the giants (Image 6).
Image 5Image 6
Whatever you decide to do about the giants, our next stop is a mausoleum for a boss.It’s somewhat inconvenient to return to the mausoleum, so before you do this bit, make sure you are committed to fighting the boss (see below for directions to the mausoleum). After you do the two dungeons (or leave ’em for later), next up is the Temple Town Ruins!
Following the road north from the Ancient Ruins Base site of grace will lead you to this dungeon. Like the other forges, it’s got a ton of upgrade materials, plus some new weapons.
First, go to the map monument east of the Temple Town Ruins that we visited earlier. Due east of the map monument, up on a ledge, is a locked spirit spring. From the spiritspring, go south-southwest up the path, and near a broken wall you’ll find the rock you need to destroy to unlock the spiritspring. Use the spiritspring to jump southeast onto the cliff, where you’ll find another spiritspring. Use this one to jump south and just ahead will be the Northern Nameless Mausoleum.
This mausoleum is like all the others — upon entering, you’ll face a tough humanoid boss, and receive their weapon and armor when you defeat them.
This area has too many weak shadow mobs to mention, so just assume that every single area you enter has one or more.
Depending on if you’re coming from the east or teleporting to the site of grace, the way you enter the town will be a bit different. Either way, there are a few things to do on the outskirts of the town before we make our way onto the roof.
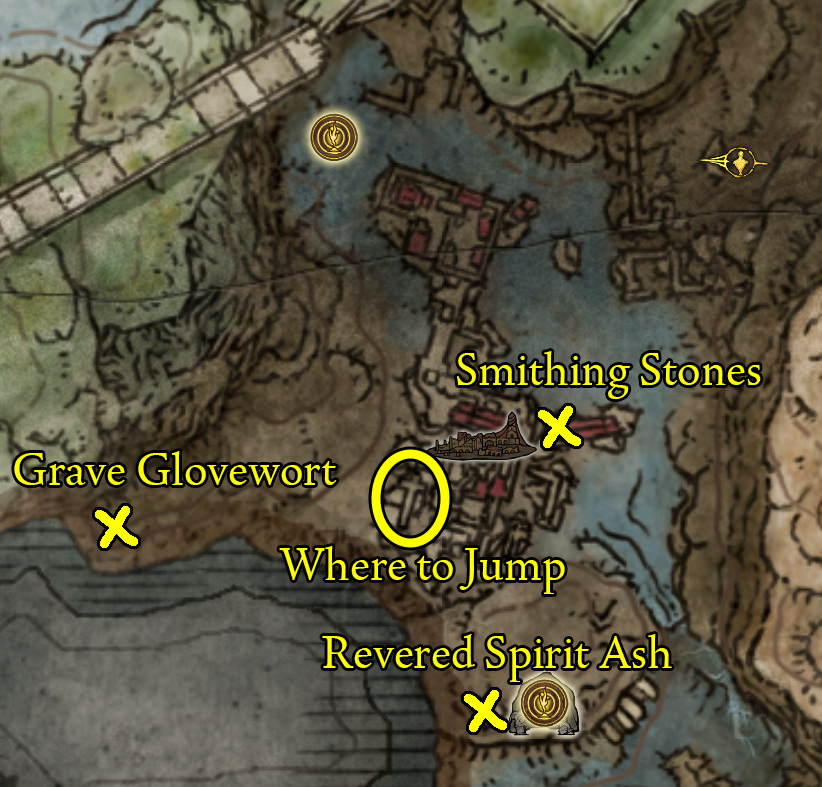
If you want a Grave Glovewort [5], you can find one in a small graveyard west of the village. There are a large number of shadowy mobs both on the path to the glovewort, and where the item is, so ride Torrent quickly or take your time and clear them patiently. Cheapskates may also want to grab the x3 Smithing Stone [3] from the eastern side of town as well.
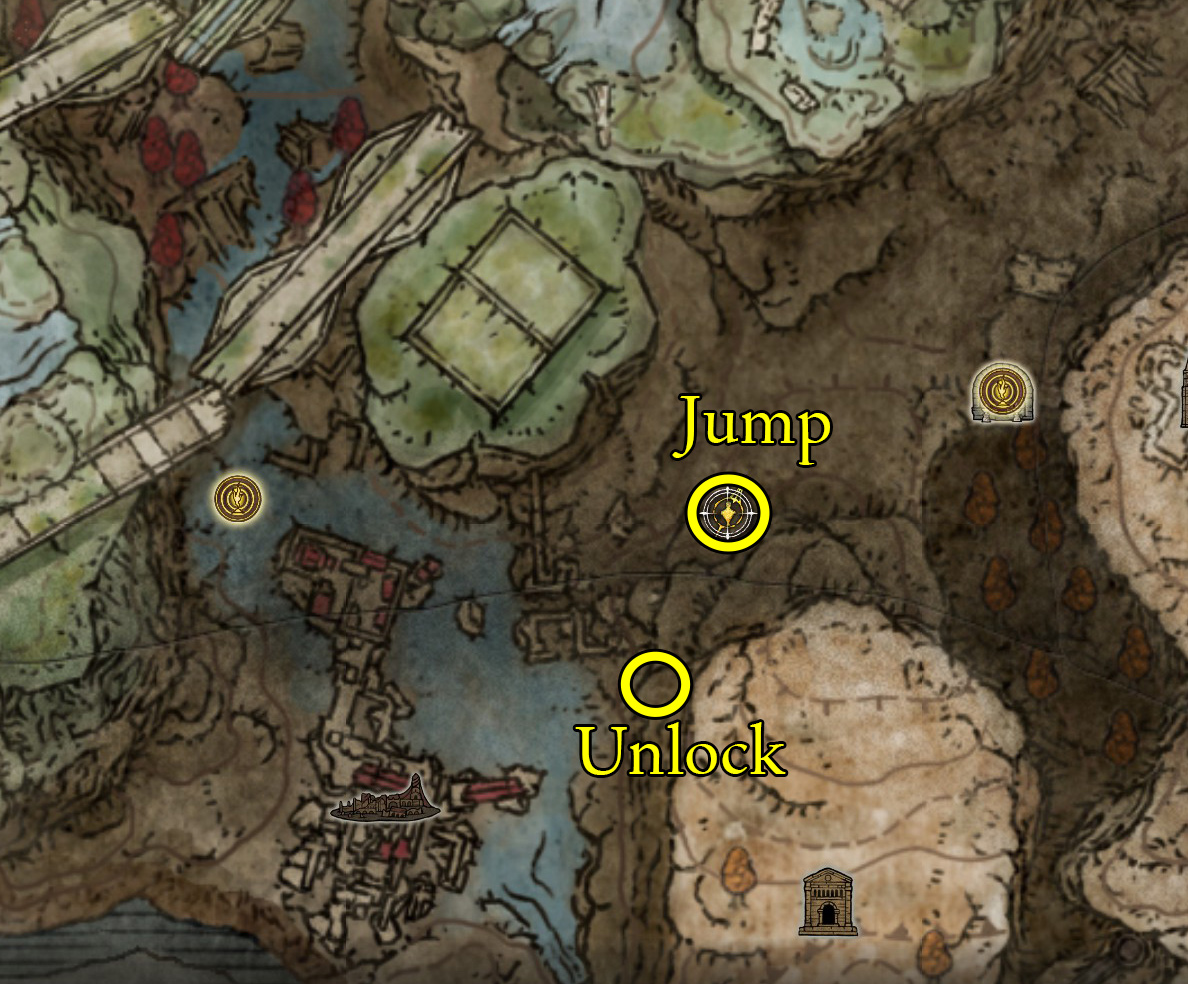
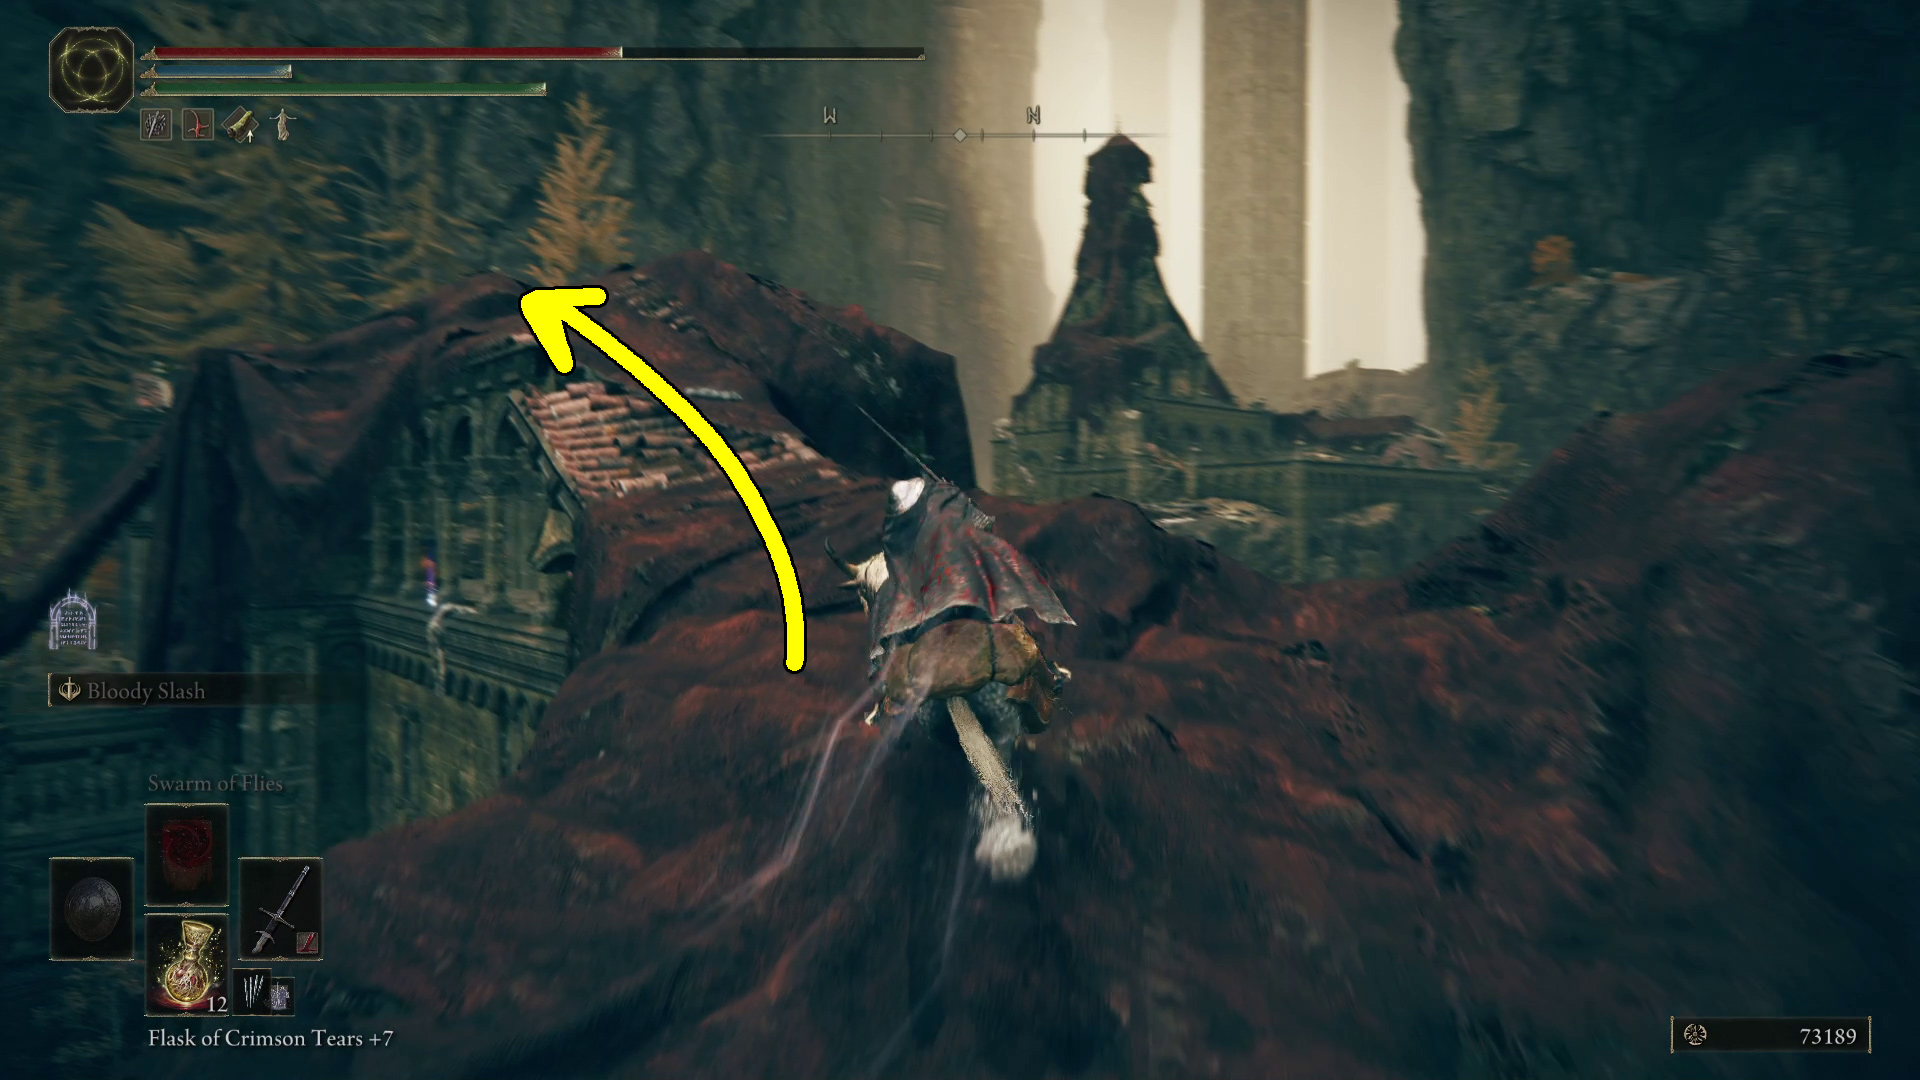
More importantly, there’s a Revered Spirit Ash south of the town in a ruined house. After grabbing the ash, and the glovewort if you want it, head to the southwestern side of the ruins, where it says “Where to Jump” in Image 1.
Image 1
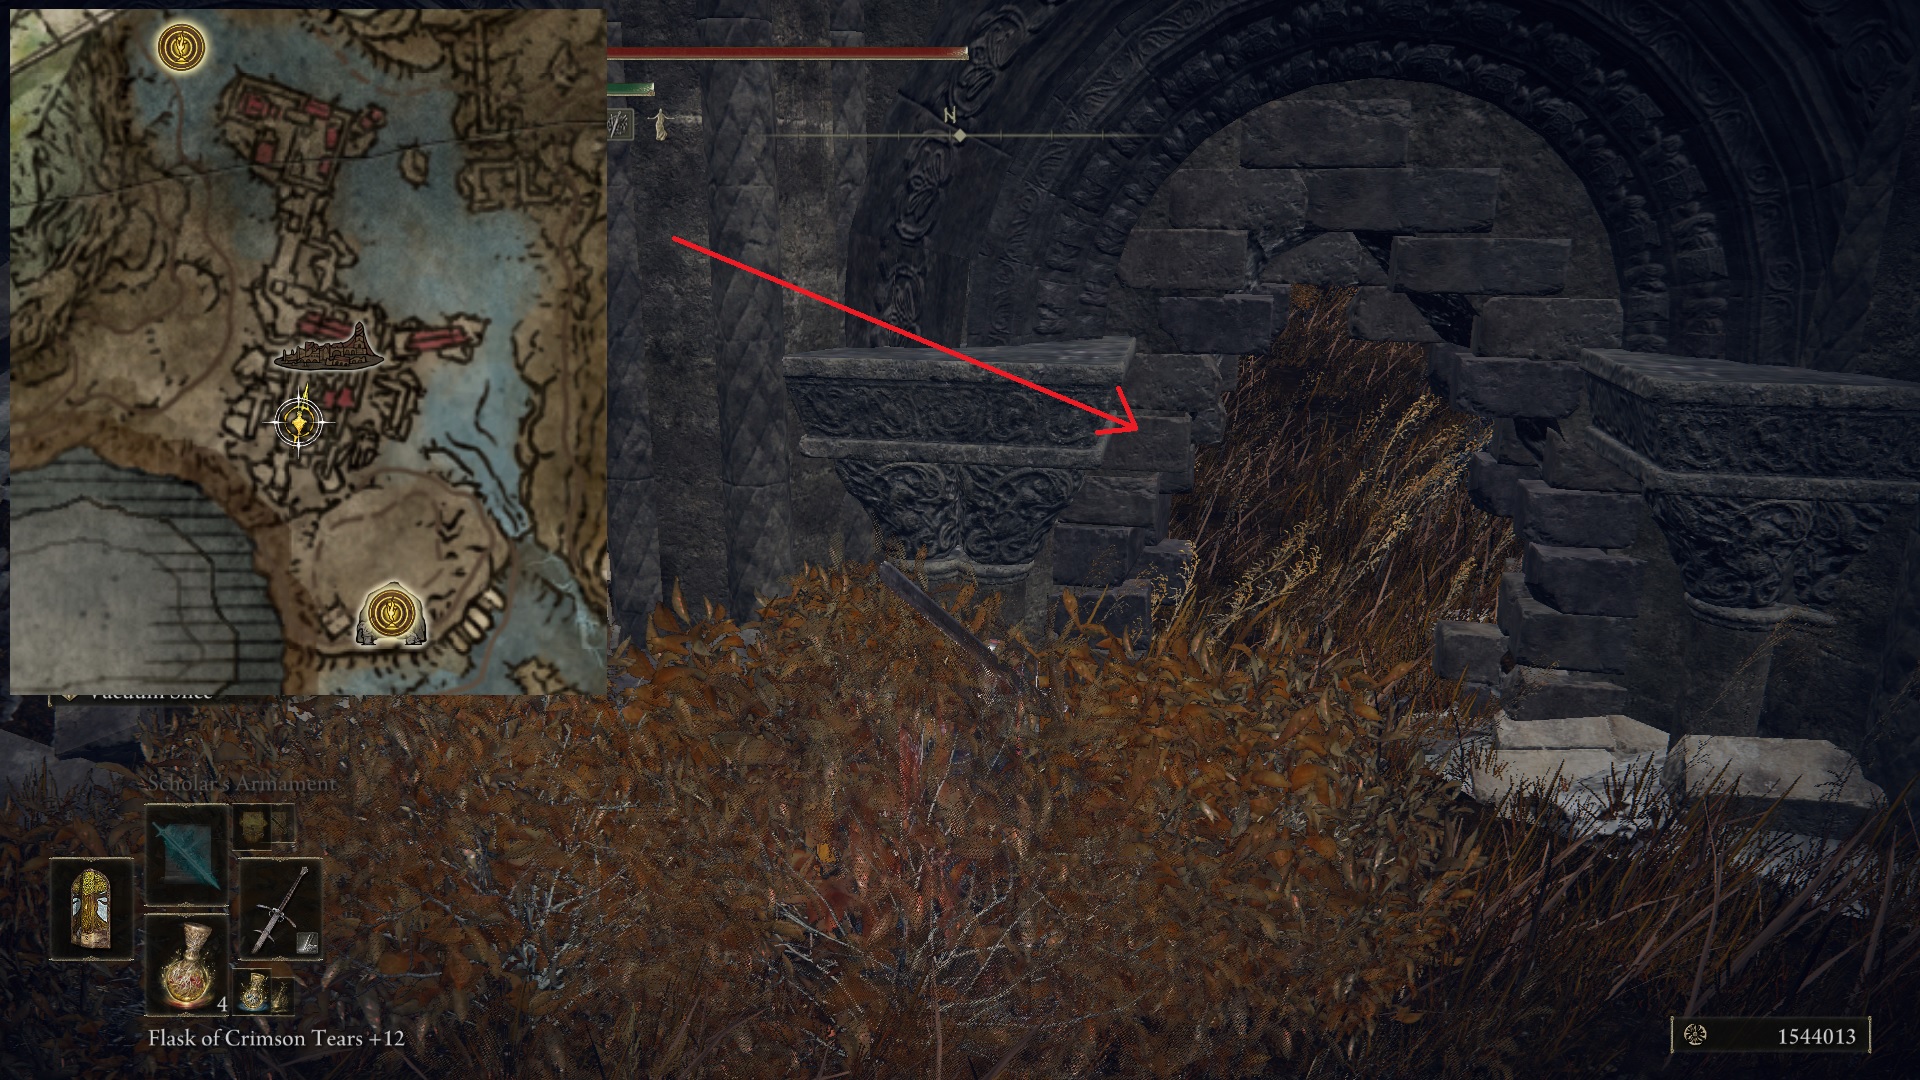
Fortunately, we’ve since learned that there’s a hole in the wall on the southern side of the ruins, so proceed past the “Where to Jump” and continue to the map location indicated in Image 1-A below. There, you’ll find a hole in the wall you can ride Torrent through. (We’ve left the Jumping Route below in case you want to flex your platforming skills.)
Image 1-A (courtesy of user Daiphuc)
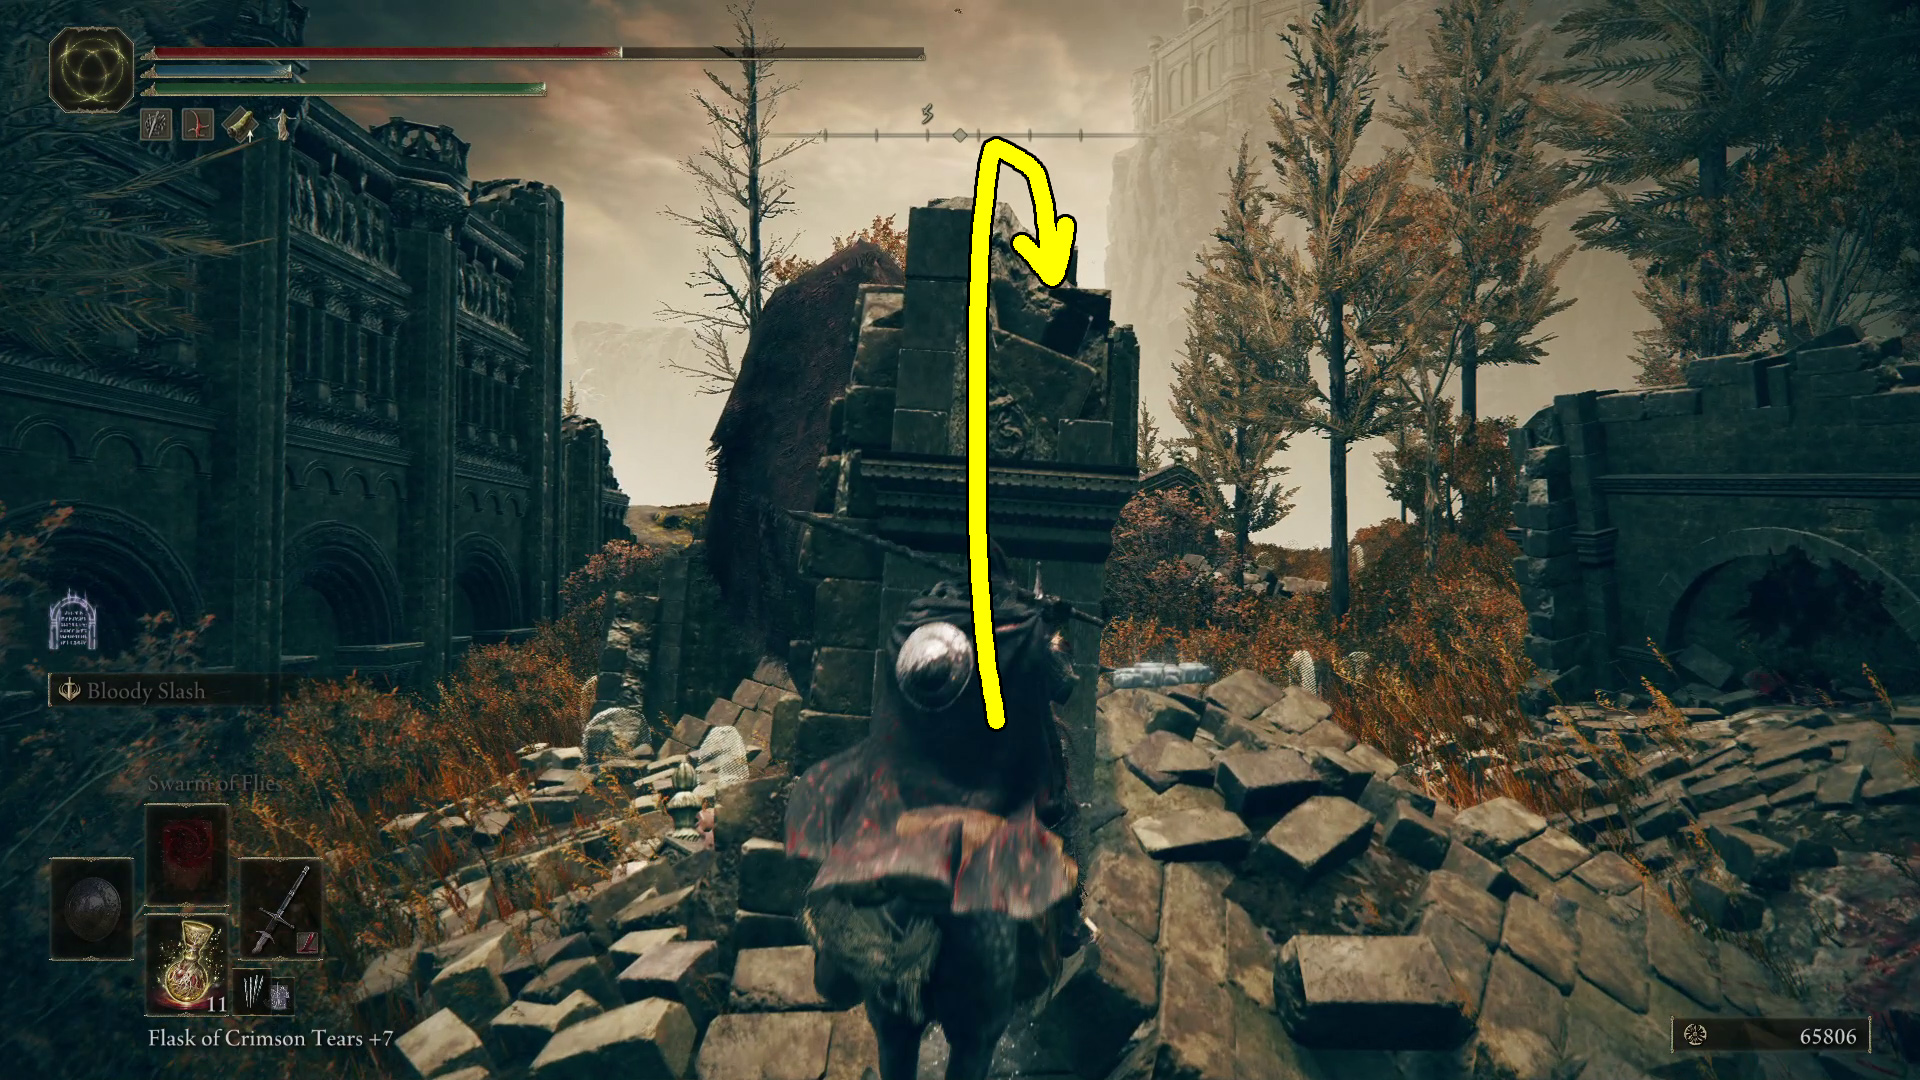
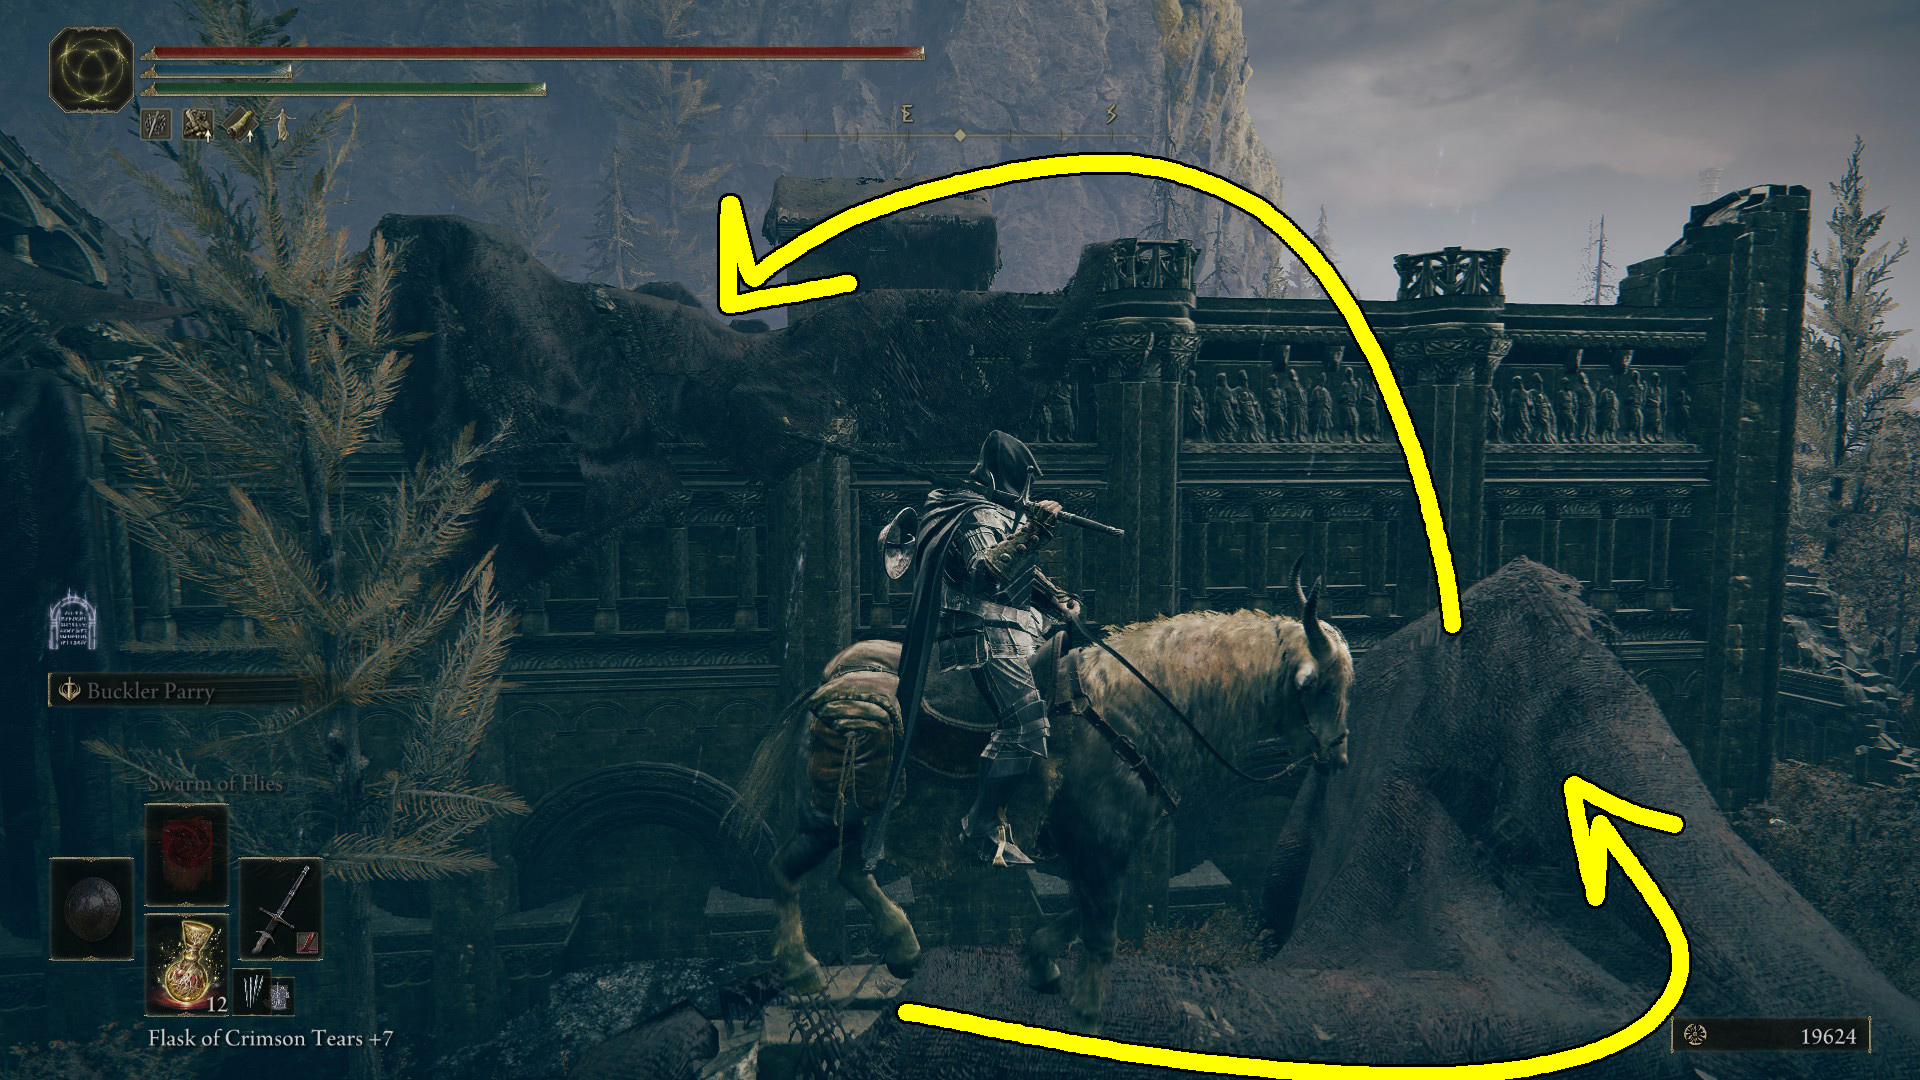
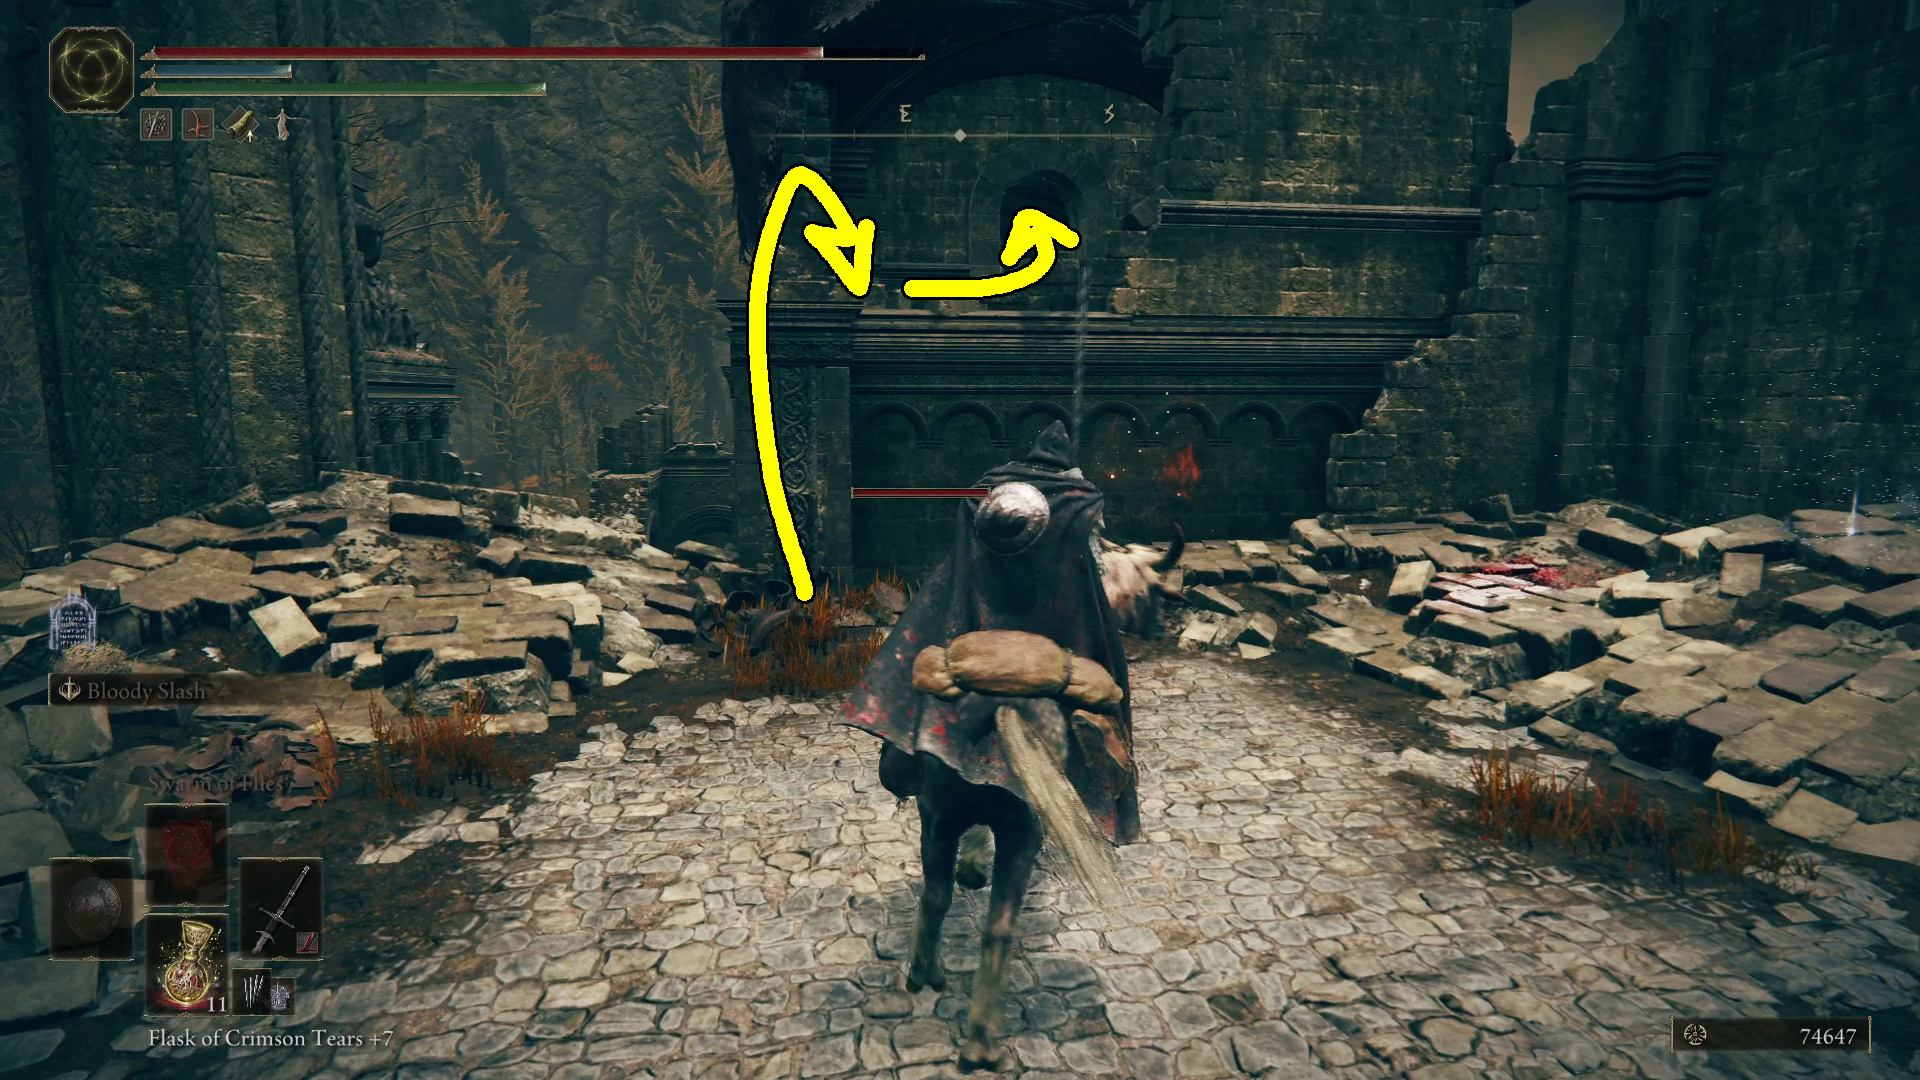
From the “Where to Jump” location in Image 1 above, face the northern side of the ruined wall as indicated (Image 2), hold forward on the left stick, then double jump straight forward onto the wall. Let go of the stick as soon as you complete the second jump and are above the wall. Next, go to the tip of the wall you’re on and double jump towards the town’s wall (Image 3). You don’t need to sprint, but it can help to not stop when making the left turn. Try not to spam the jump button, but wait until your first jump starts losing altitude, and then press the jump button again. It may take you a few tries, but eventually you’ll be over the wall and into the village.
Image 2Image 3
There are the regular shadow mobs in here, but more important (to kill) are the two doggos — one is straight ahead as you enter, the other is behind the fallen roof on your right near x3 Beast Blood. In the southeastern corner of the area you just entered, around the corner, is a Somber Smithing Stone [3]. Head up the stairs opposite where you jumped in, and continue northwest over the roof (Image 4). When you drop down, turn around and jump up the ledge — in the next “room” is a Scadutree Fragment.
Image 4Image 5
After grabbing the fragment, continue heading northwest, then go north up the three flights of stairs, where you’ll find a Horned Warrior coming down the stairs on your left. These guys can drop their armor, but if you don’t want to fight ’em, you can summon spirit ashes, wait for them to take aggro, then run up the last few stairs and open the chest to find the Two-Handed Sword Talisman. With that, we’re done in the town, so you can teleport to the Temple Town Ruins site of grace to continue with the area.
Ravine North
Unique & Important Items
Divine Bird Warrior Ornis
Gravebird’s Blackquill Armor
Antiquity Scholar’s Cookbook [1]
Ash of War: The Poison Flower Blooms Twice
Gloried Set
Larval Tear
For the routing below, we’re going to assume you want to avoid the Lesser Kindred of Rot (Pest) enemies in this area, as their ranged attack is very hard to avoid and does a lot of damage.
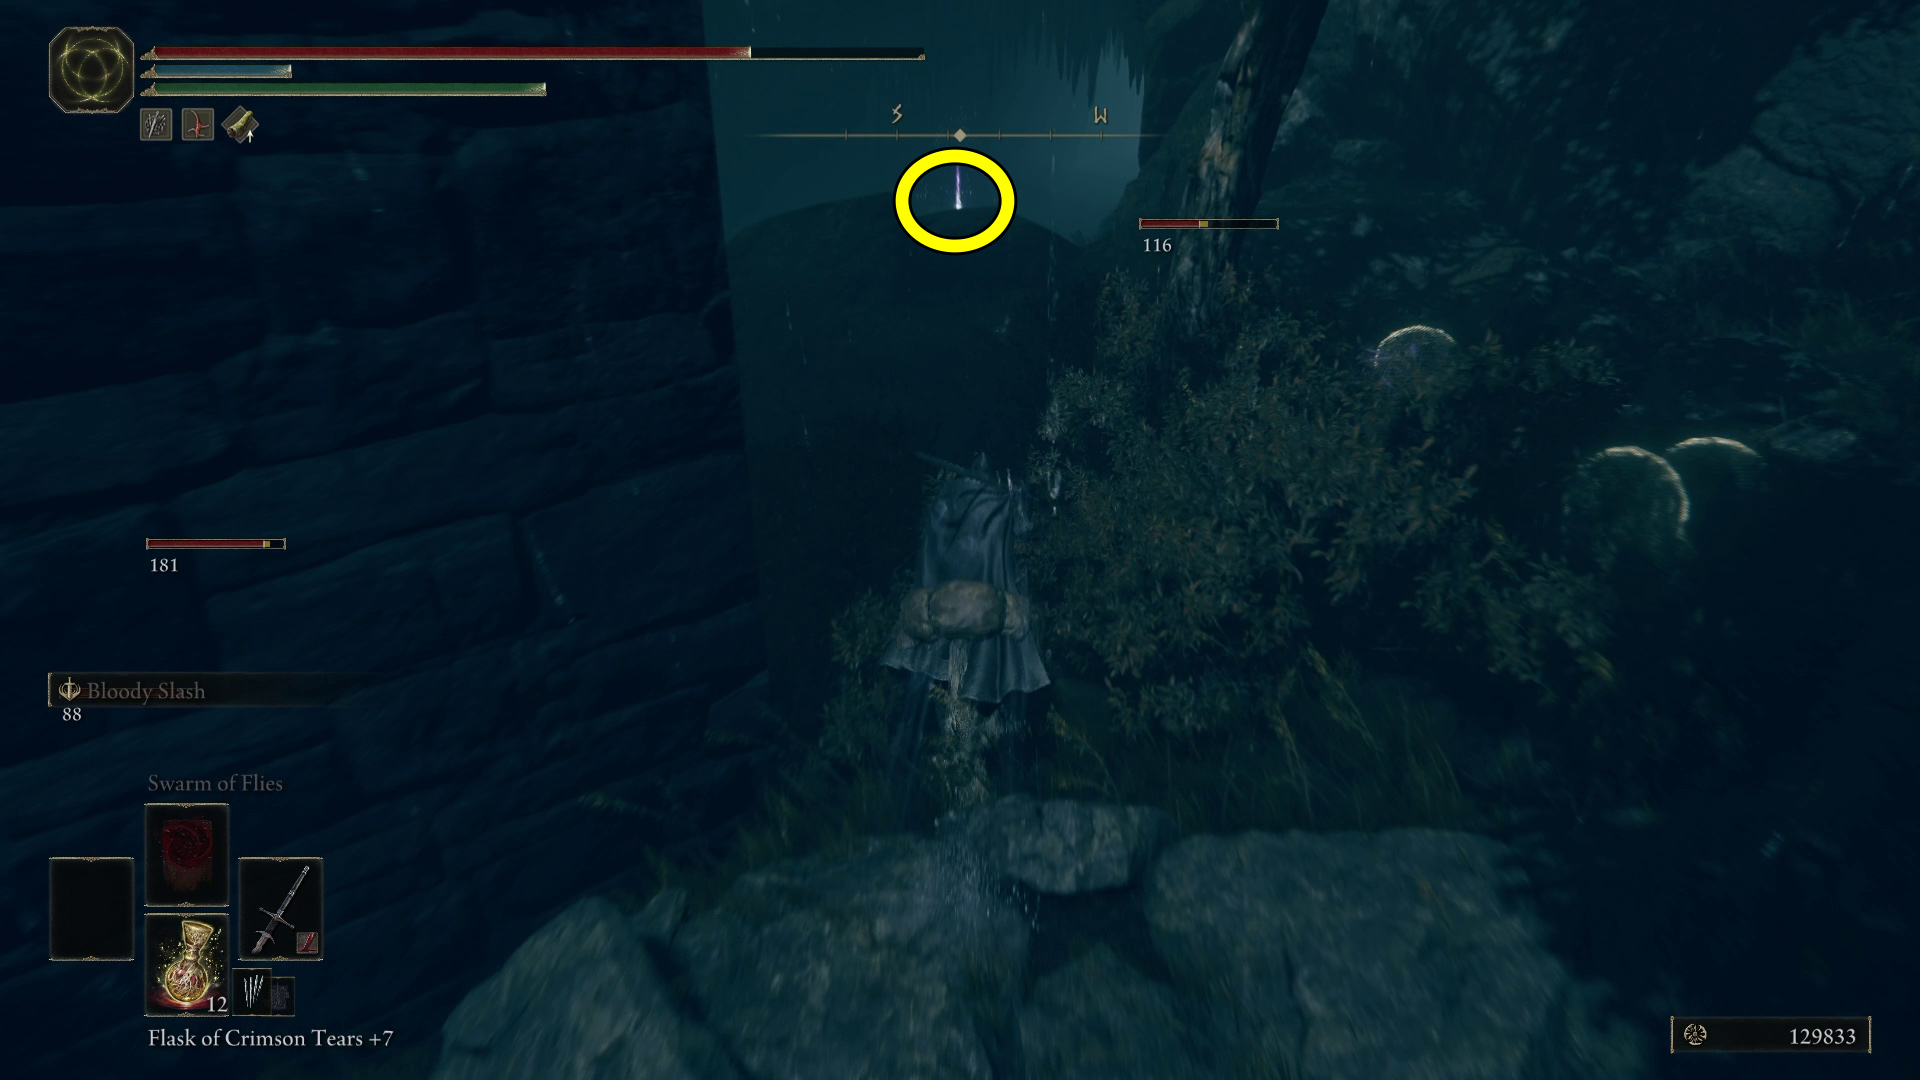
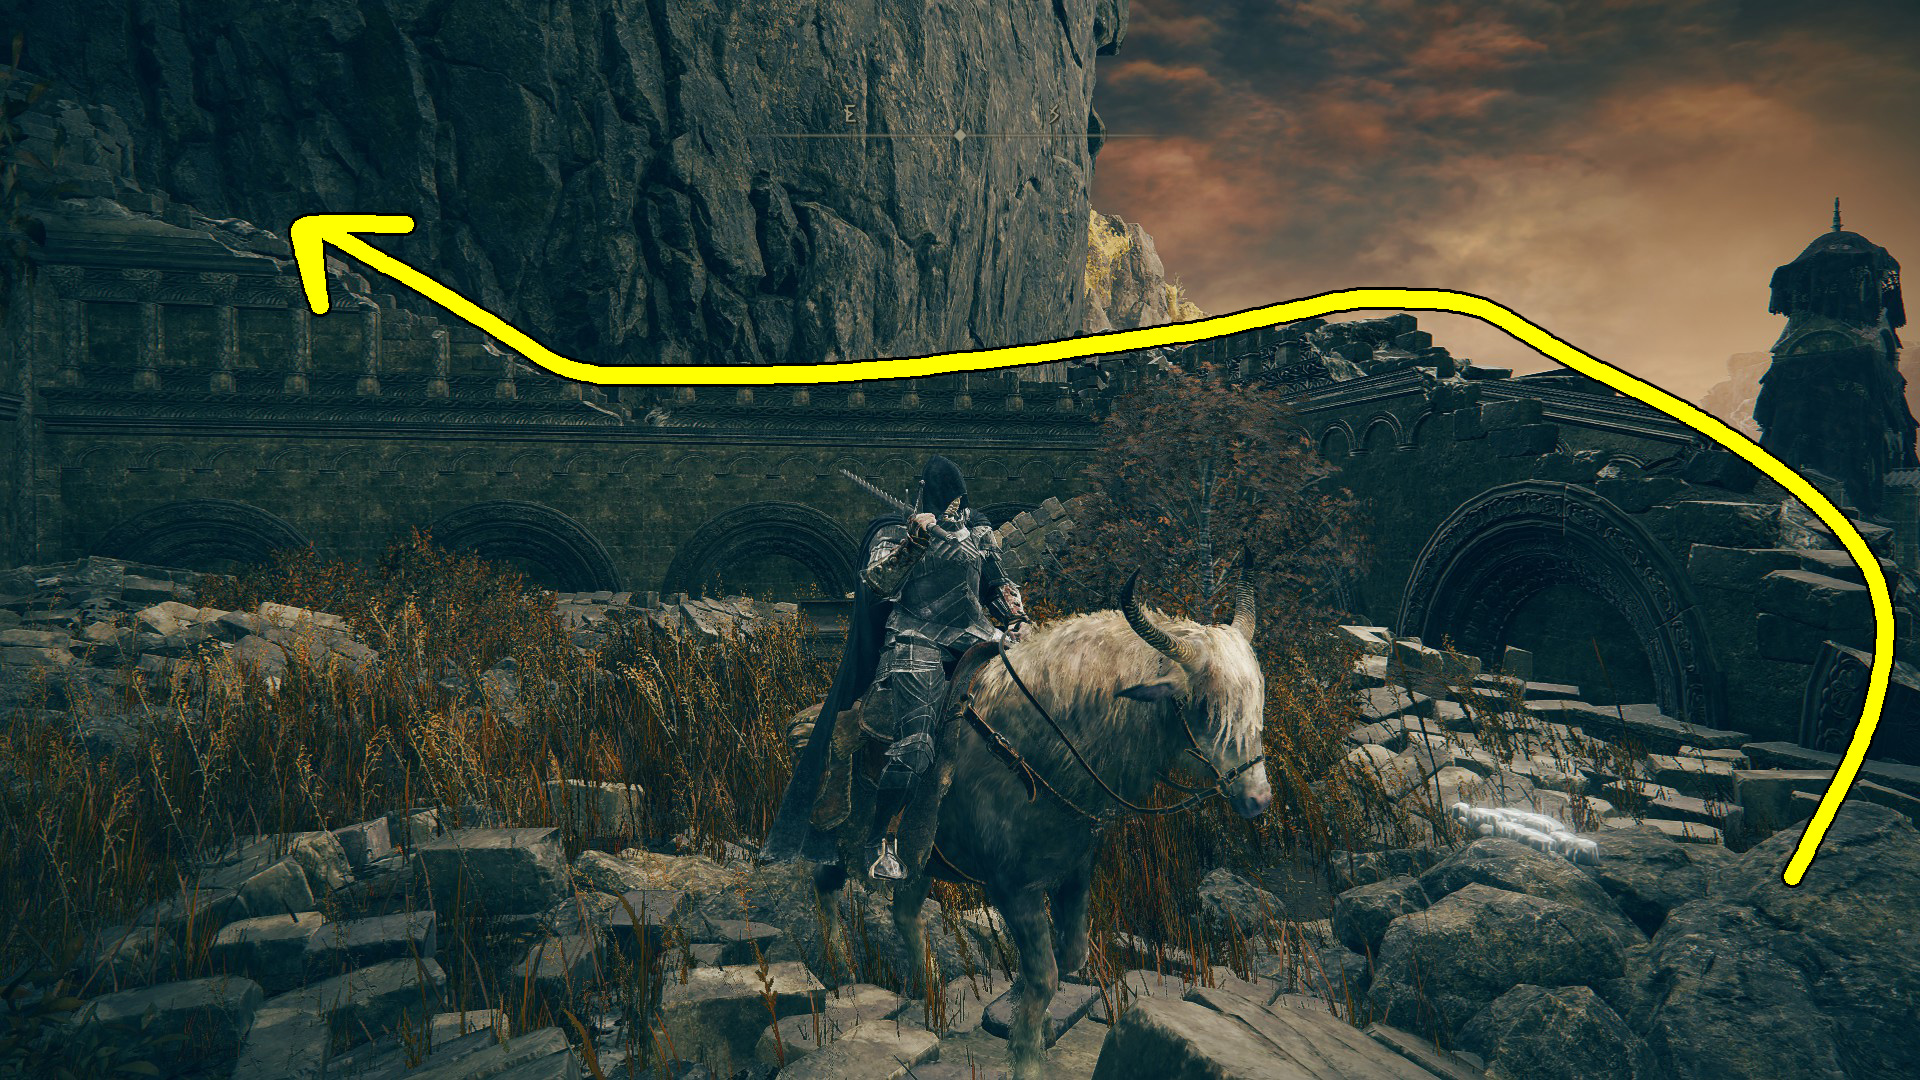
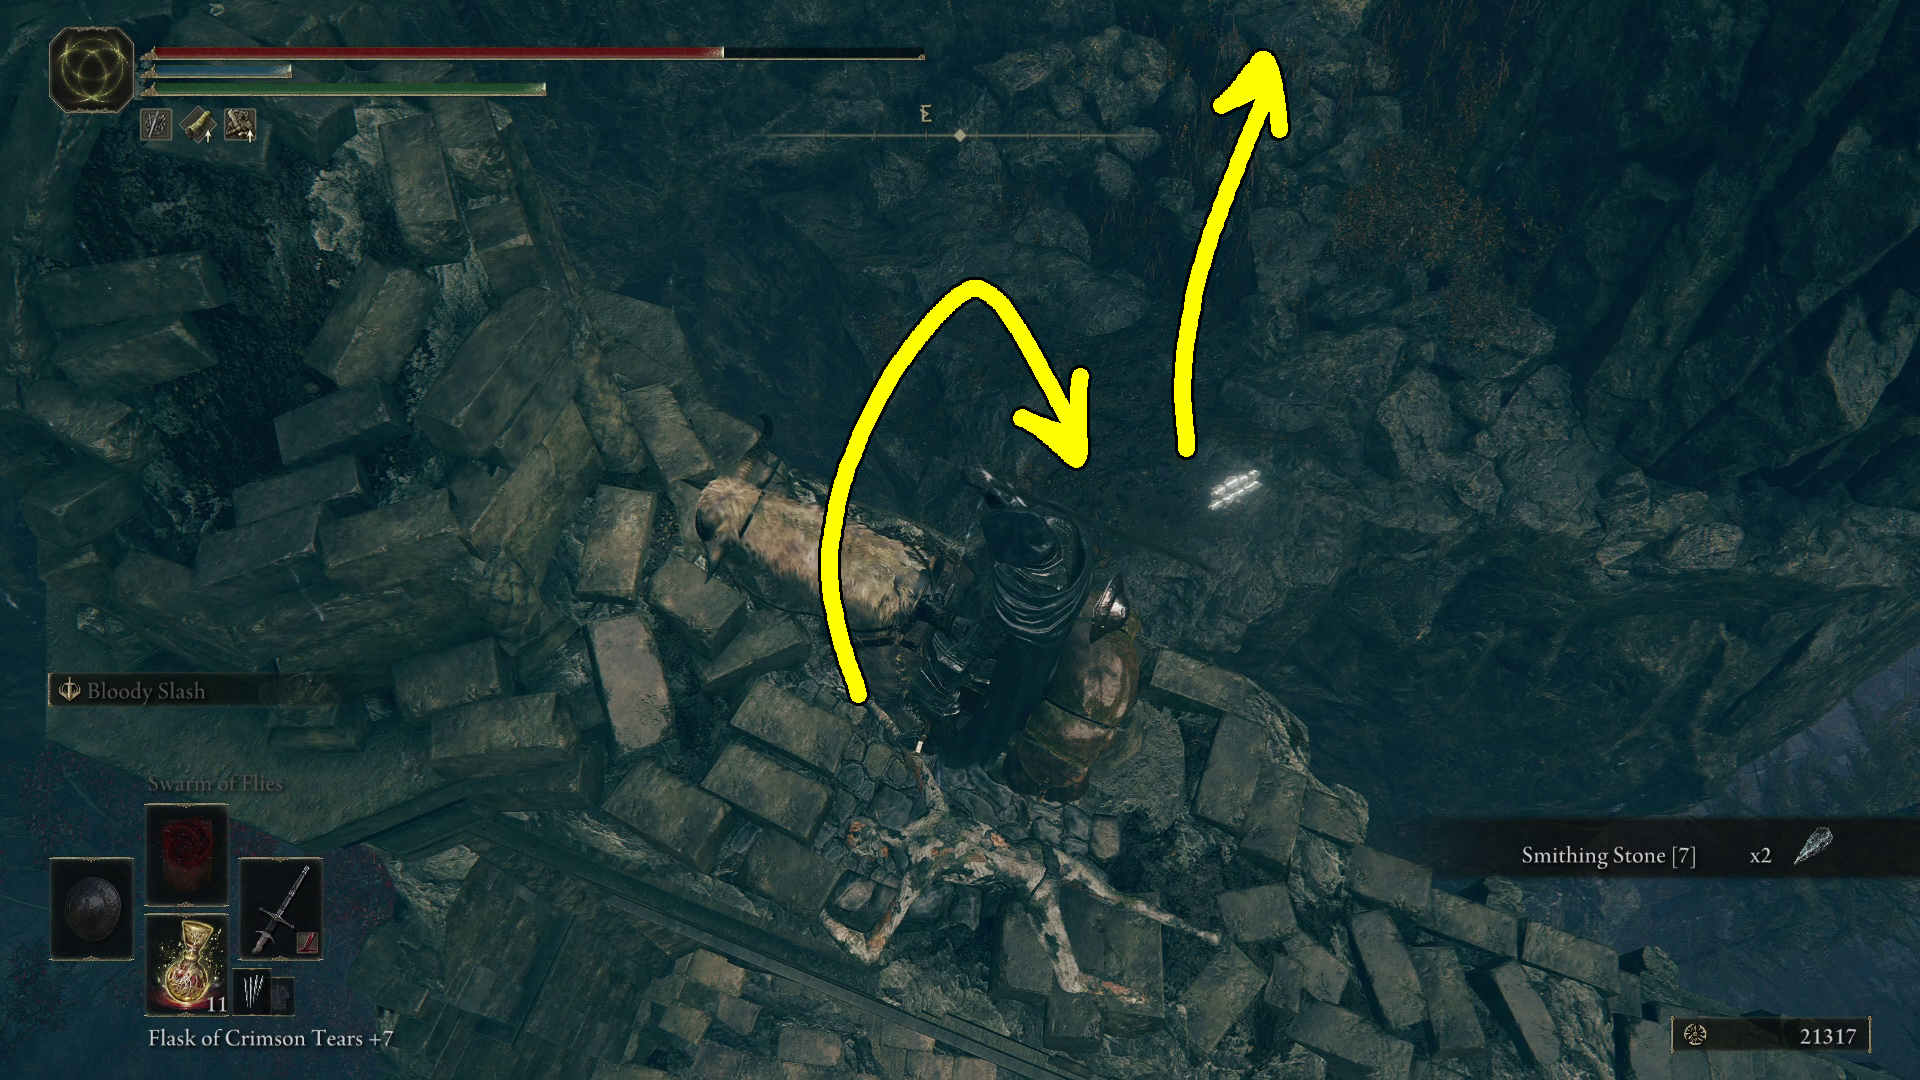
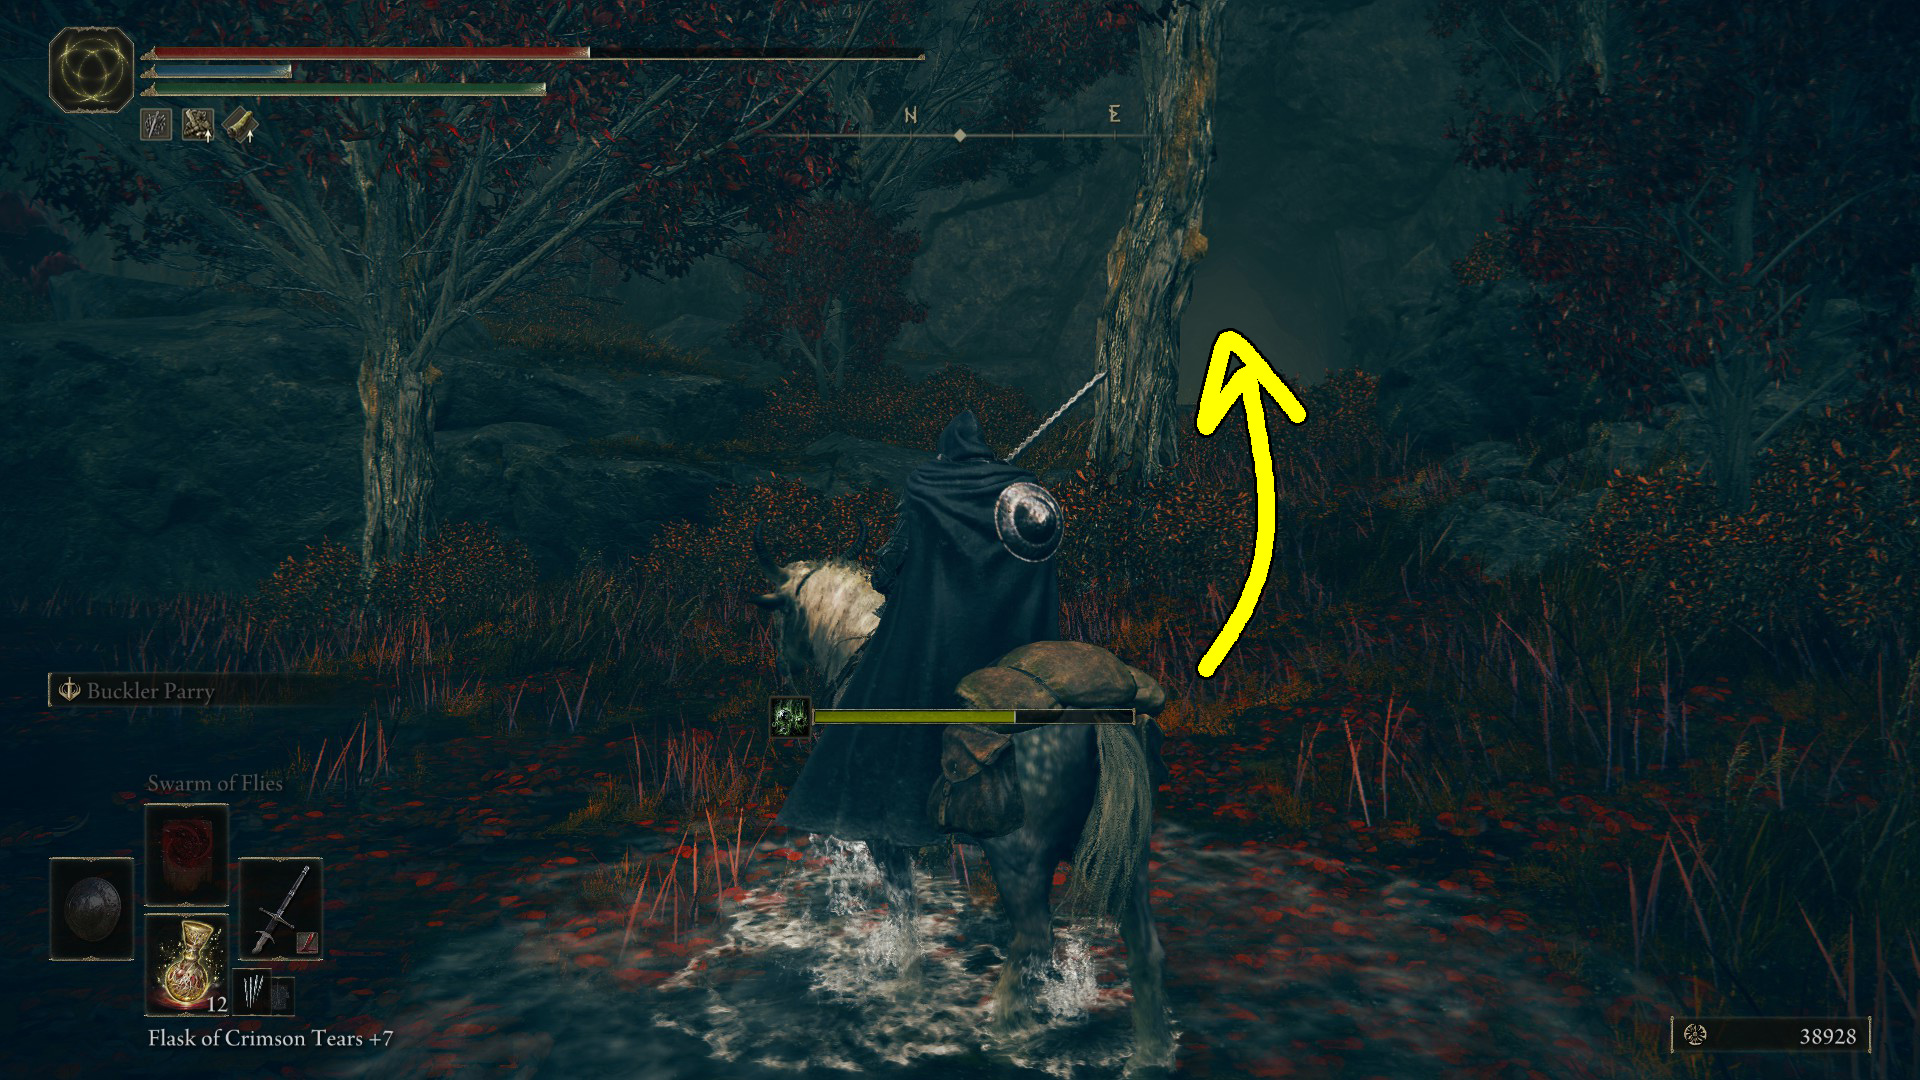
From the Temple Town Ruins site of grace, head due north to the rocks and hug the right hand wall as your path bends east. You’ll have to jump up some more rocks to reach the a spiritspring jump — use it to jump south up onto the cliff. Note that you will need to actually turn yourself a bit to avoid flying past where you want to land. At the top of the cliff is a chest containing x2 Beast Horn (disappointing to be sure), and then you’ll need to go up the rubble (Image 1) to the corpse with x2 Smithing Stone [7]. Jump across the gap and down to the southeast (Image 2). Continue through the tunnel and you’ll come to a small structure — inside are the Divine Bird Warrior Ornis ashes.
Image 1Image 2
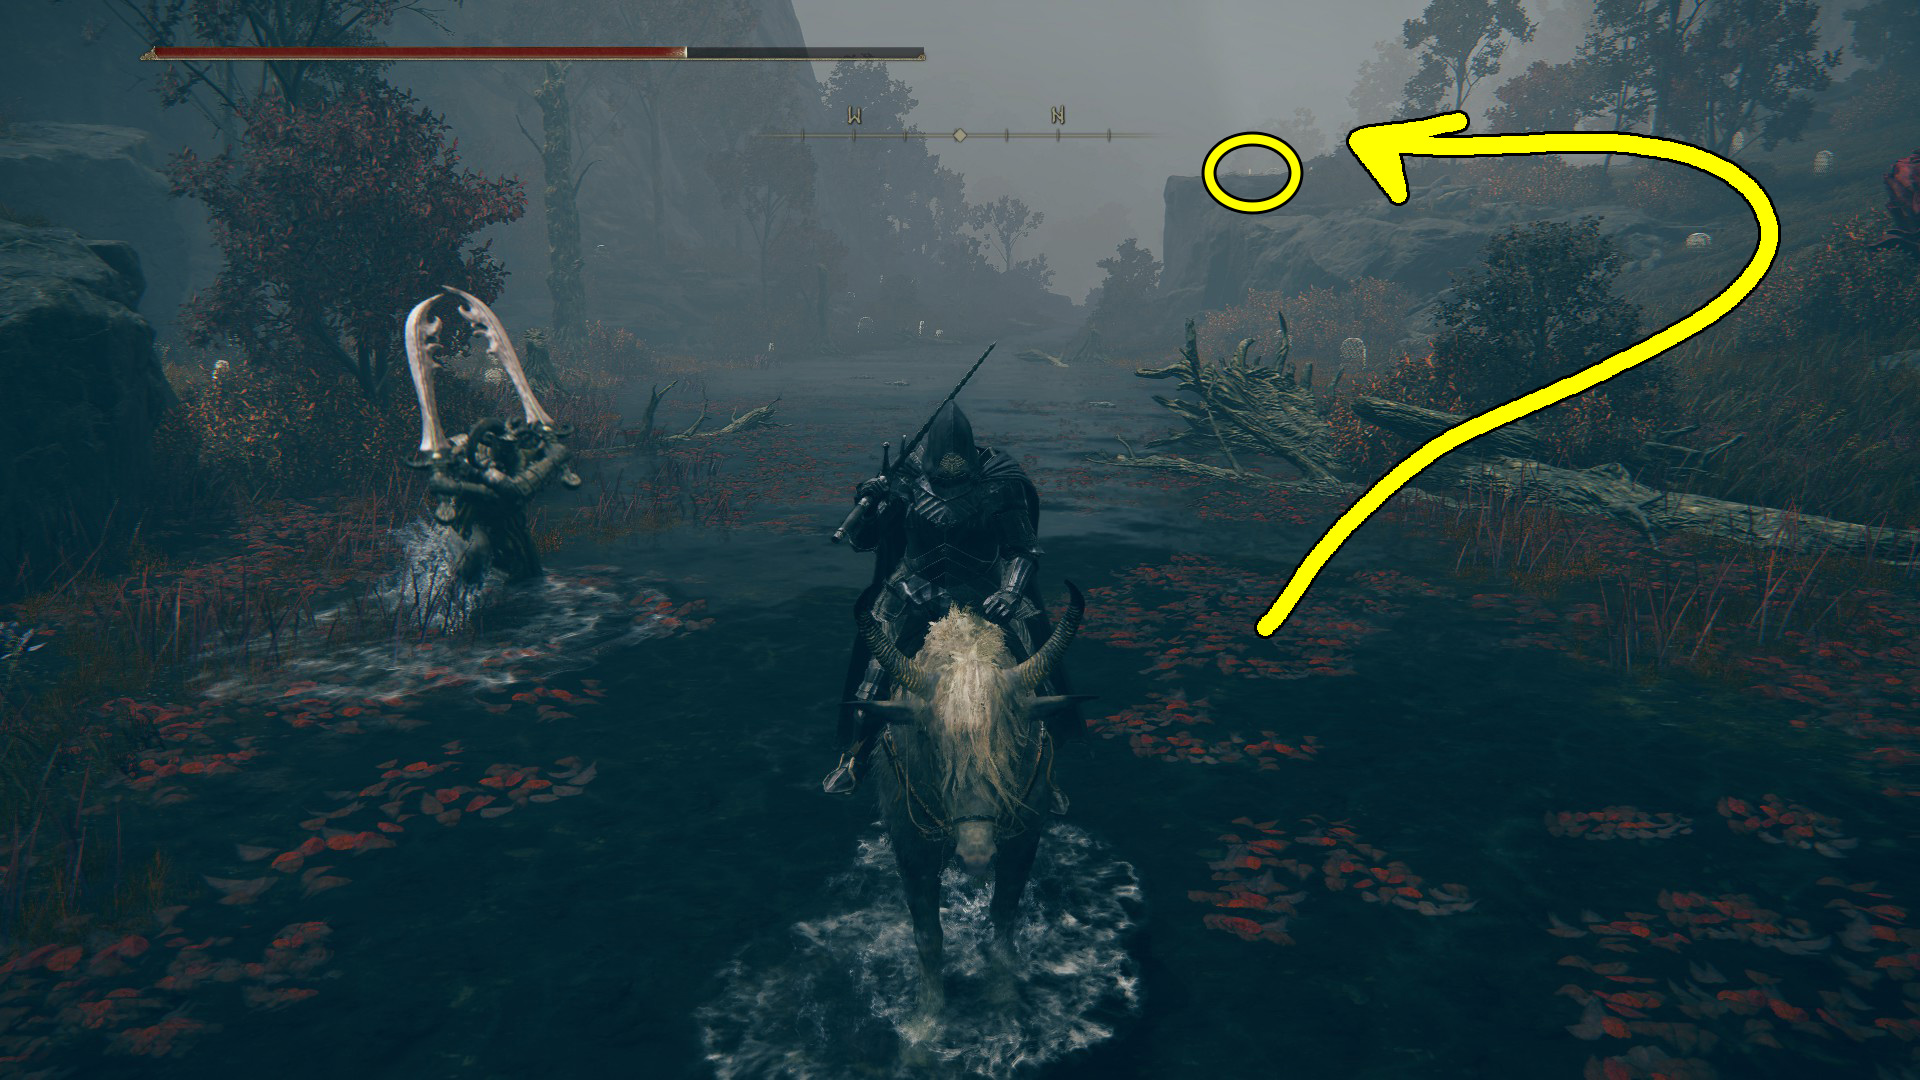
Teleport back to the Temple Town Ruins site of grace, and once again head north to the rocks so you can avoid the pest patrol in the river. Once you’re past them, head down into the river and continue northwest — stay away from the banks when there are no pests, as dangerous black-flame flinging birds wait on both sides of the river. There’s another pest patrol ahead, so be cautious! Up ahead the left you’ll see a ramp with some bird statues lining the path (Image 3) — use target lock to find the two real birds, and claim the Gravebird’s Blackquill Armor from the altar.
Go back down the path and cross the river, then head onshore and a bit northeast, where you’ll see a cave (Image 4). Don’t hesitate, as the entrance is trapped with poison. Kill the pot-wielding mob inside to find x3 Fire Spritestone and the Antiquity Scholar’s Cookbook [1].
Image 3Image 4
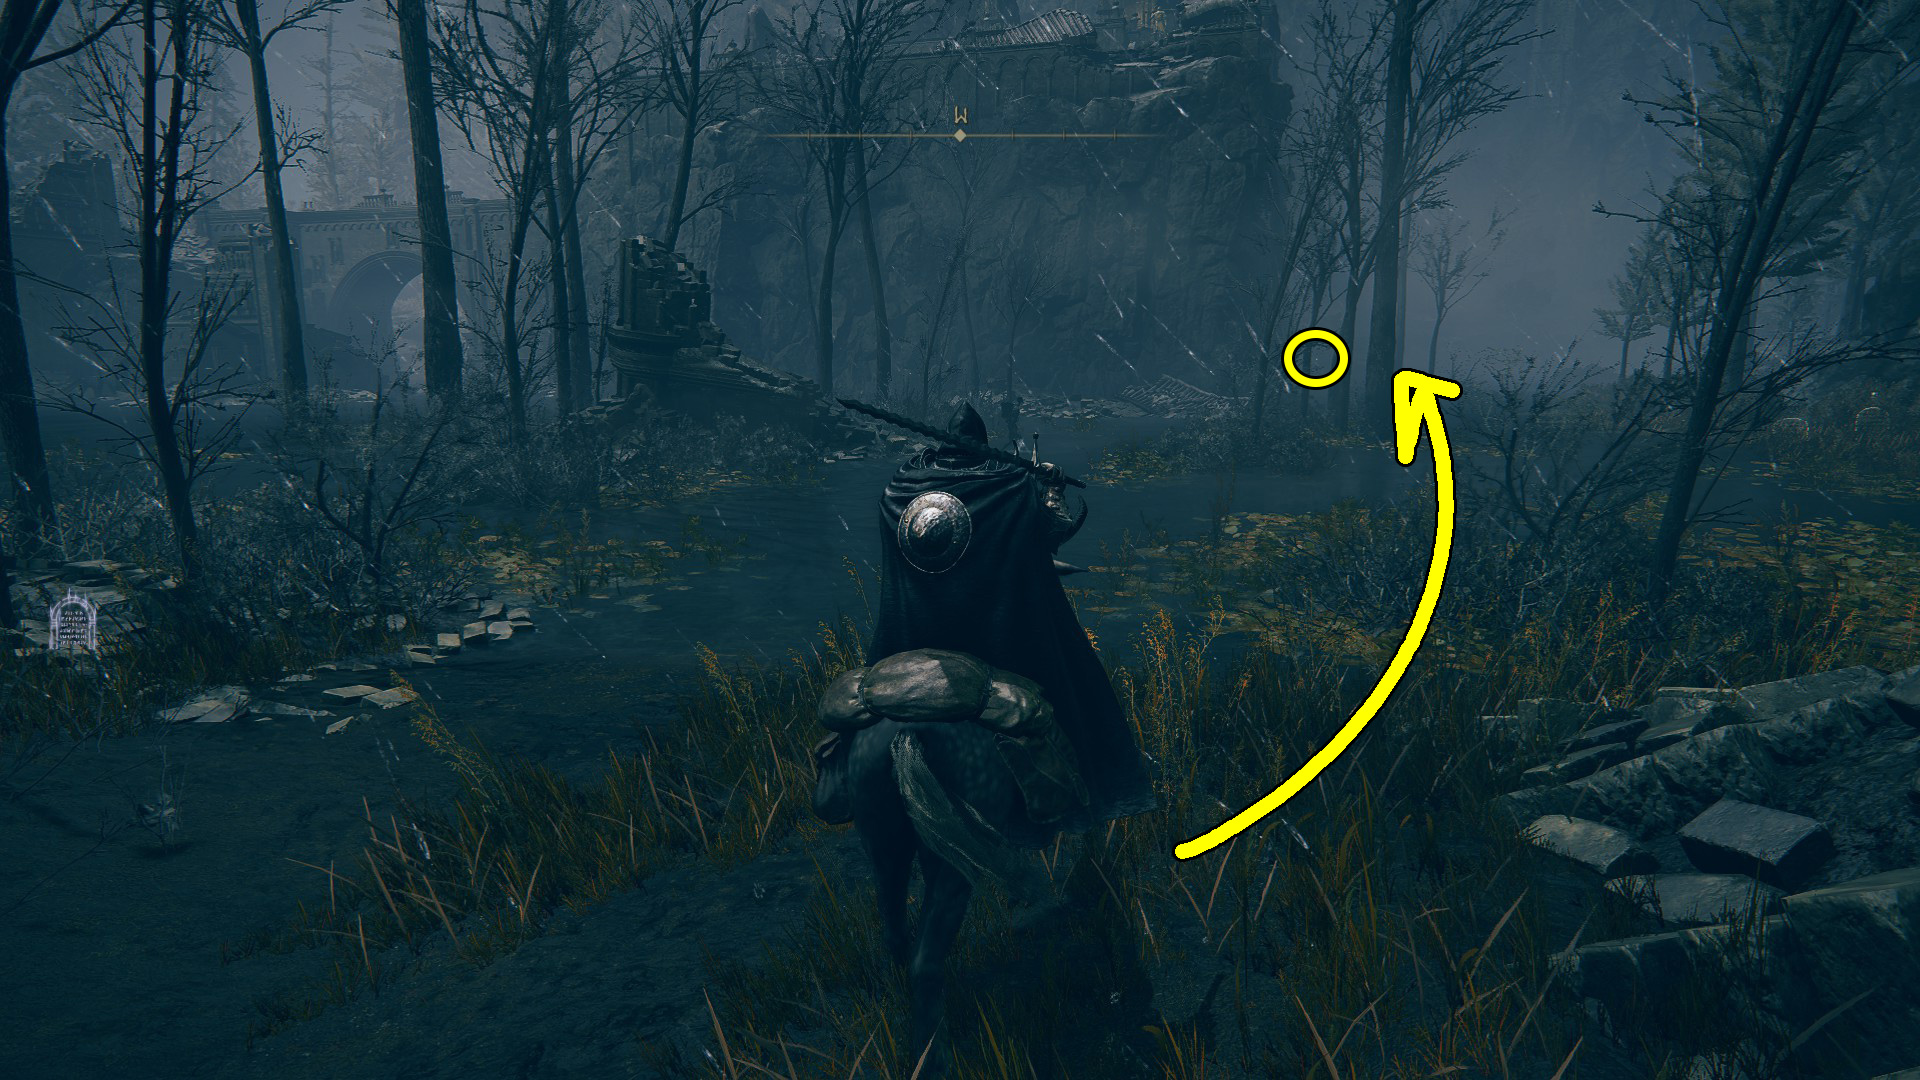
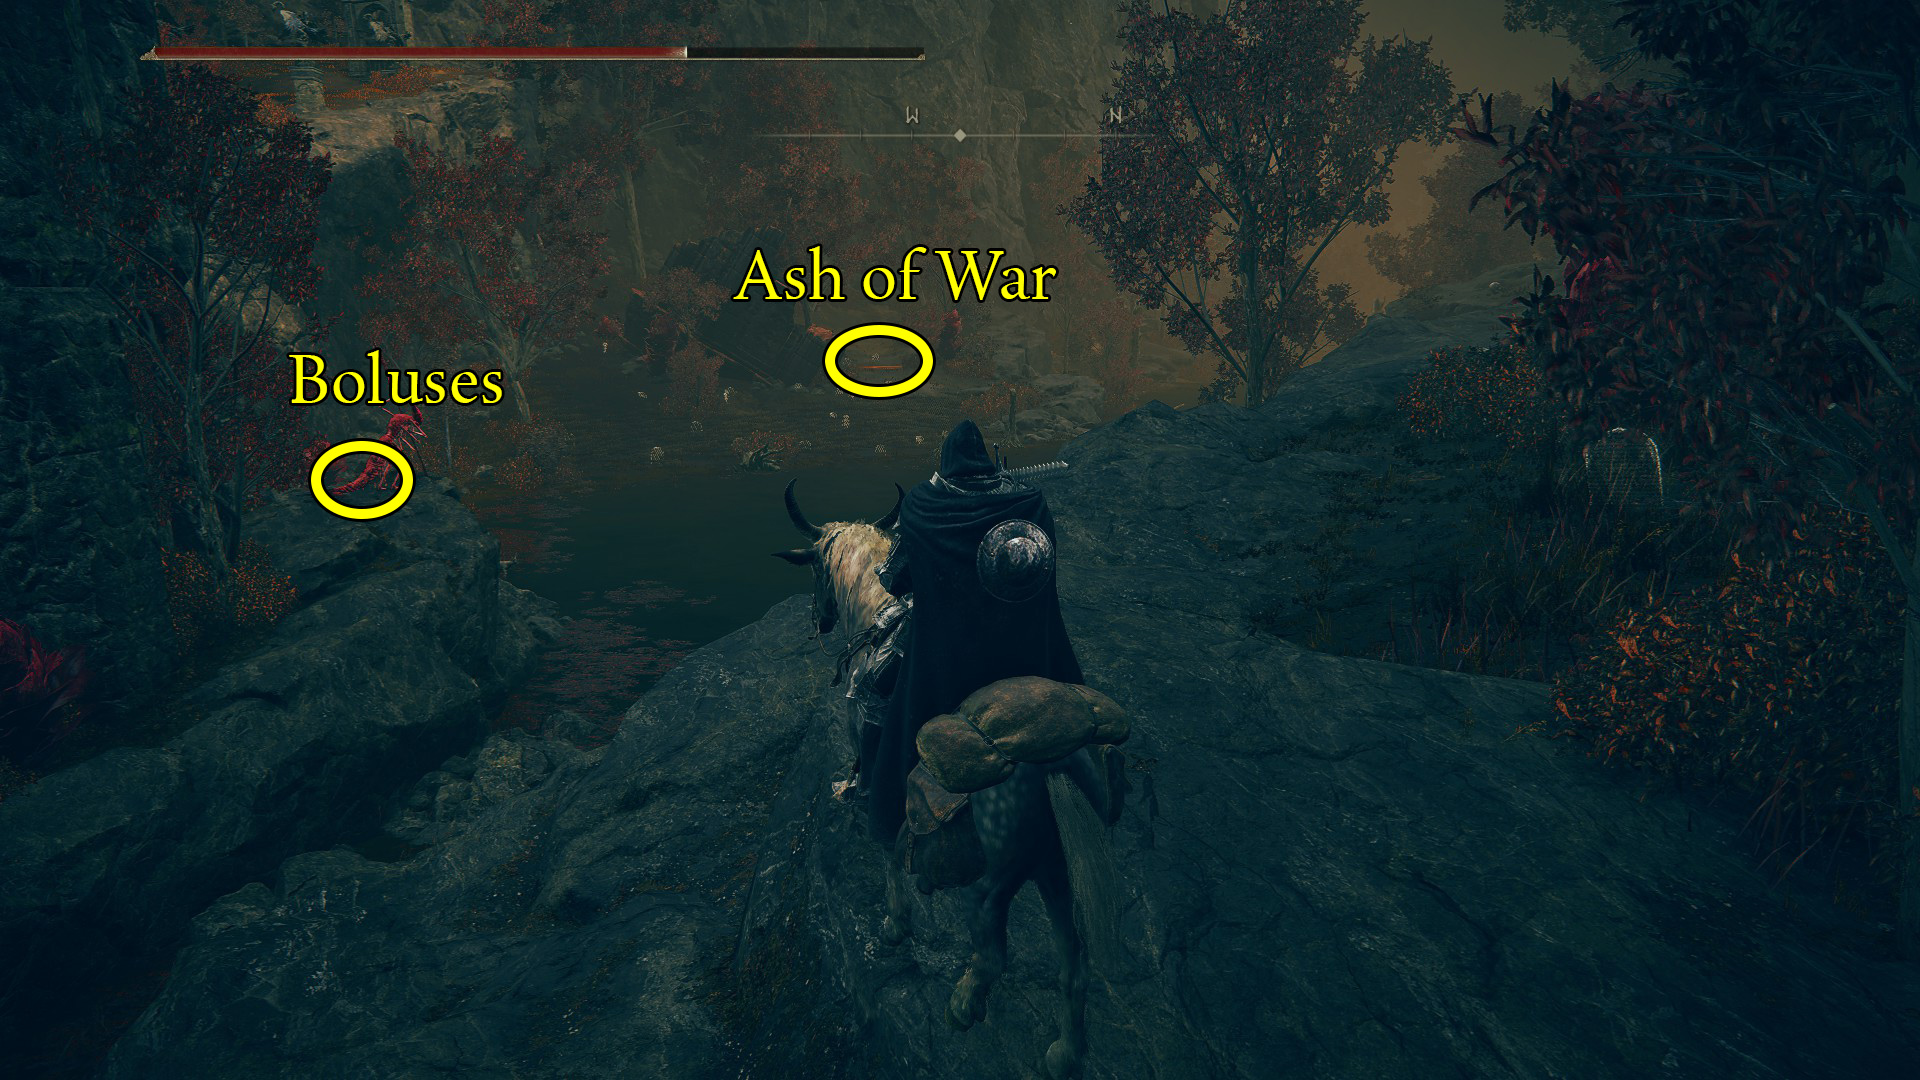
Take a right to go north upon leaving the cave, and look to your left — you’ll see a pest guarding a corpse with x2 Preserving Boluses. From the corpse, go back into the river and go northwest to the small puddle of rot to find a loot beetle containing the Ash of War: The Poison Flower Blooms Twice. Watch out for the pest hiding behind the red flower to the right of the scarab beetle! Continue northwest up the river, where you’ll quickly run into a Horned Warrior you can fight or ignore. Either way, head up the hill to the right of the river, as at its northernmost tip is the Ravine North site of grace (Image 6).
Image 5Image 6
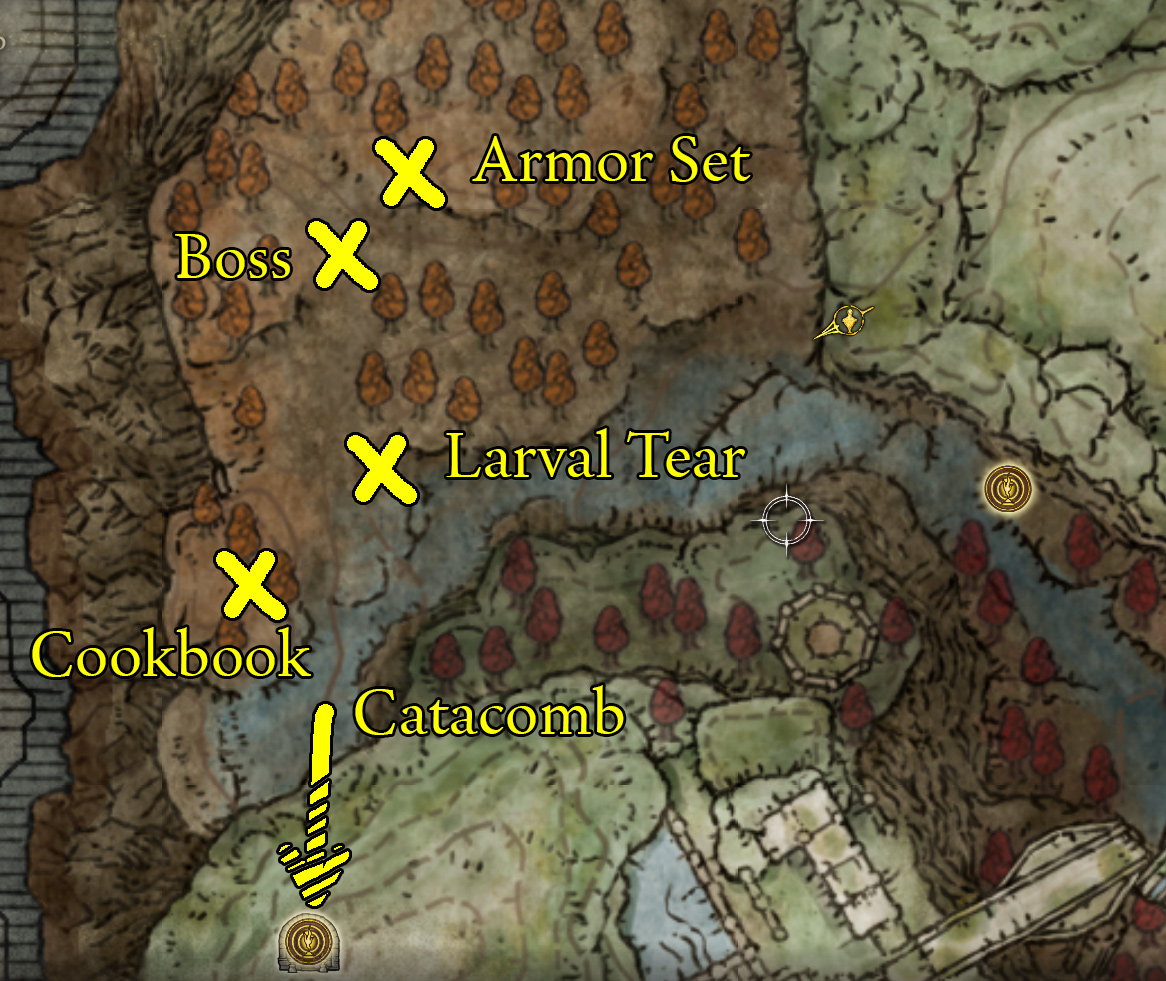
From the site of grace, drop back down into the river heading northwest. There are two paths you can take now — up the hill to northwest, or west along the river. We’ll go up the hill first, where you can meet Rugalea the Great Red Bear, and collect a few items. There are multiple rune bears in the forest, so go slow and use target lock to make sure you avoid them. Head to where the Gloried Armor set is, and from there you’ll see the boss — you can fight him or simply swing wide around him to where the Larval Tear is.
Northeast of the armor set are some rocks with a handful of mediocre common consumables and two sleeping rune bears — skippable unless you have a deathwish
You’ll see some blue tombstones surrounding the Larval tear, so it’s hard to miss. Note that if you went straight to the catacombs from the site of grace, you’ll meet some gigantic mosquito scorpion thingies: They look intimidating, but one hit from horseback with a big weapon and they’ll stagger — lighter weapon builds should be careful, however, and there’s also a scorpion chilling on the left-hand bank that’ll aggro if you get too close.
From the Larval Tear go a bit southwest onto a giant pile of poop to find the Greater Potentate’s Cookbook [8]. The river continues south — follow it and you’ll come to some coffins and statues, but just before the corpse with a Ghost Glovewort [2], the first of many vulgar militiamen is hiding. You can instead swing wide east, hugging the cliff’s edge, and enter the catacombs without engaging with the militiamen. At the river’s end just is the entrance to the Scorpion River Catacombs.
Rugalea the Great Red Bear
Unique & Important Items
Roar of Rugalea
You can reach this red bear by going west-northwest from the North Ravine site of grace (see the map in the previous section for details on the boss’ location). Some players have reported that this bear can be golden-eyed like normal enemies, in which case he’ll drop a million runes — folks looking for levels may want to return to the grace a few times to see if they can trigger this.
You can reach these catacombs by following the river west and then south from the North Ravine site of grace. Watch out for the vulgar militiamen that guard its entrance!
It’s likely you’ve done Cerulean Coast by now, so assuming you’ve already cleared Scadu Altus as well, your next stop should be Shadow Keep. The Abyssal woods is another option, though you’ll have to have done the Darklight Catacombs first.
Unabashed FromSoftware fanboy still learning to take his time with games (and everything else, really). The time he doesn't spend on games is spent on music, books, or occasionally going outside.


Just so you know, there is a hole in the wall to get into the Temple Town Ruin.
Whoops, thanks for the heads up! Great image, I’ll toss that in the guide for people to save them the convoluted jumping.