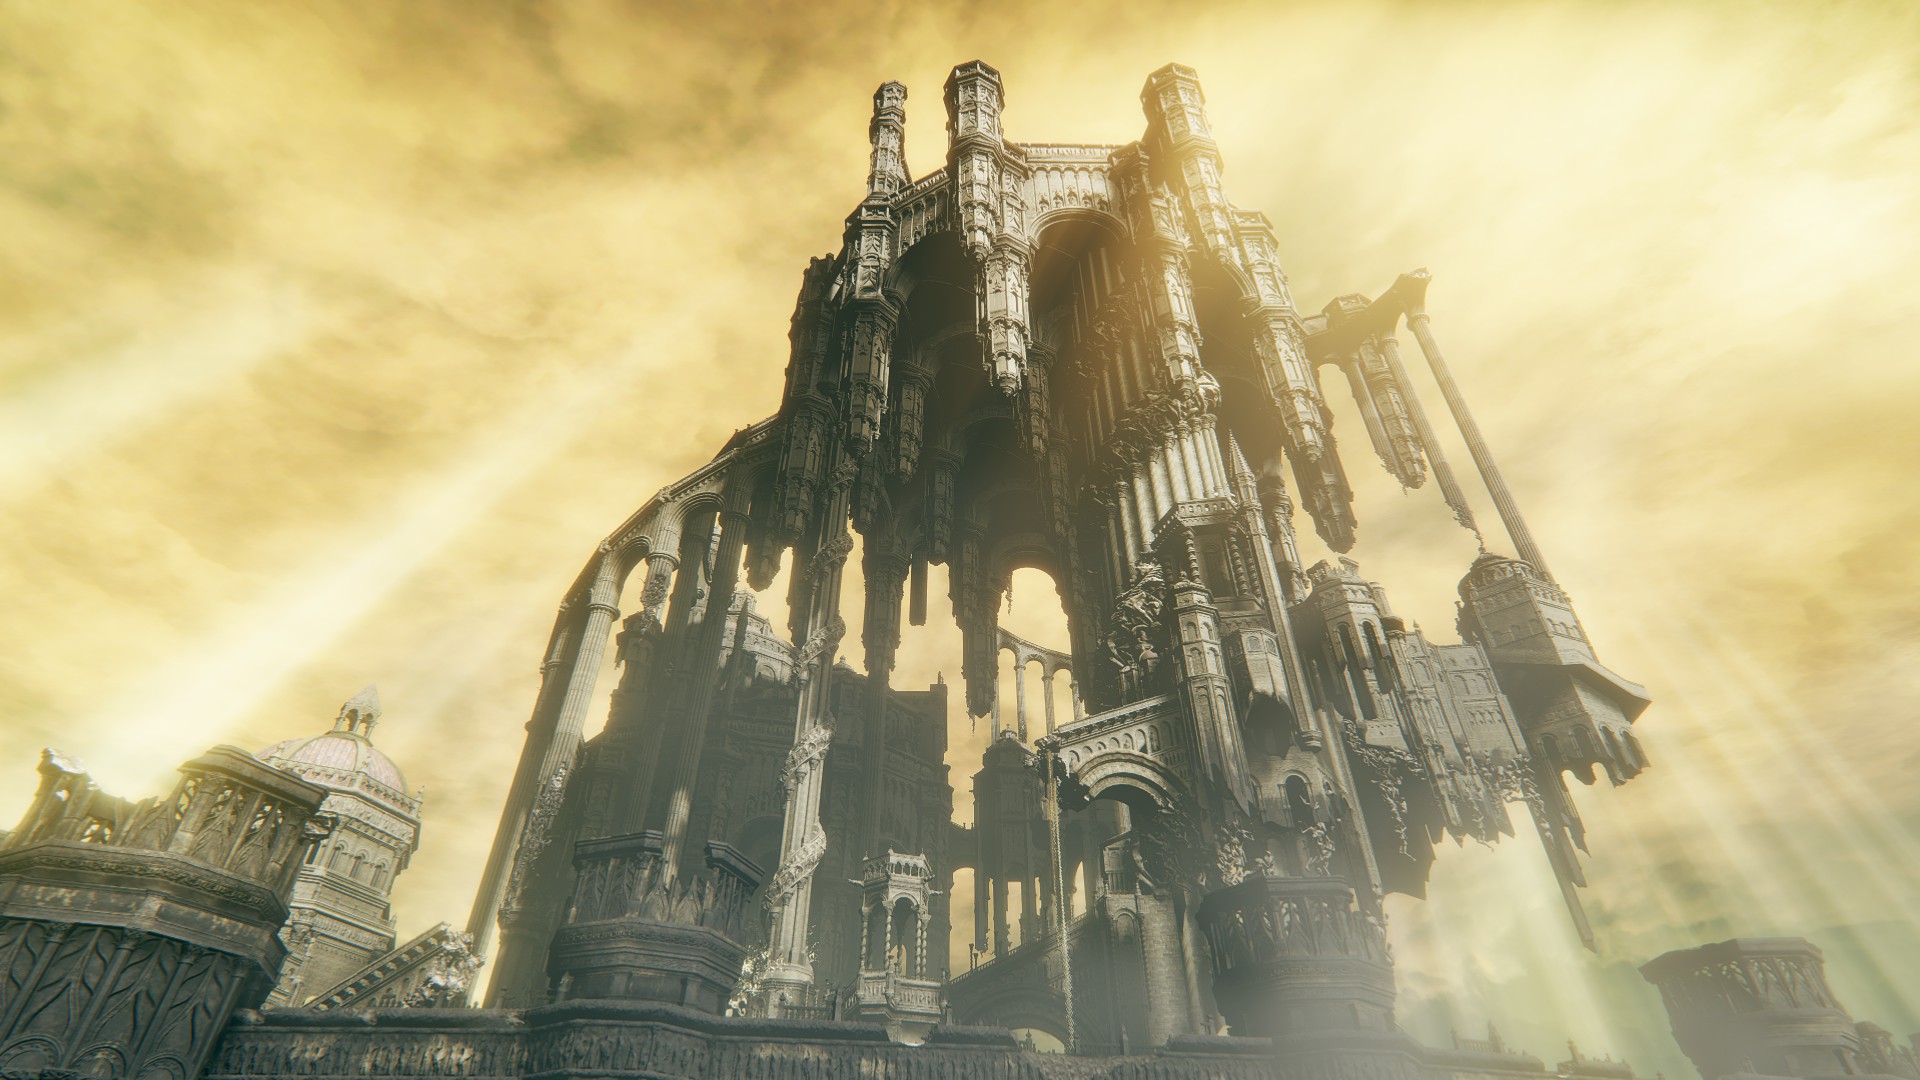
The final legacy dungeon of the DLC is suitably impressive, with awe-inspiring architecture and some brutal enemies to fight through — or run past. While in Enir-Illim, you’ll climb above the clouds to face the already infamous final boss fight of the DLC.
How to Get to Enir-Ilim
There are two bosses you have to defeat to gain access to Enir-Illim. In no particular order:
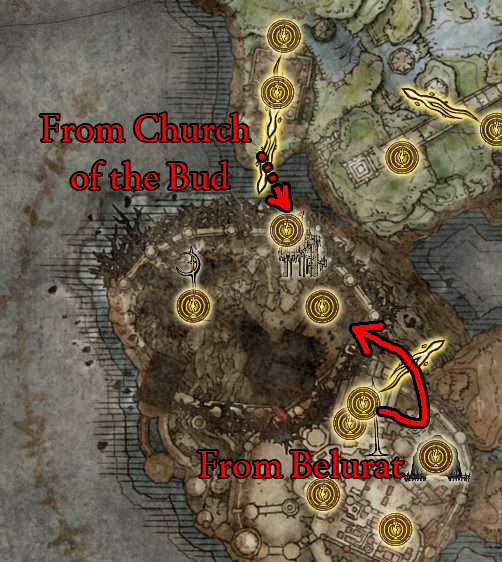
Defeating Messmer will earn you Messmer’s Kindling, while defeating Romina will allow you to access the Sealing Tree, located south of the Church of the Bud. Once you have the kindling from Messmer, you can burn the Sealing Tree, revealing Enir-Ilim. You’ll be teleported to Enir-Ilim’s outer wall after burning the tree.
It’s worth noting that the path to Enir-Ilim from Belurat will also be open at this point, so you can enter from there as well if you prefer, though the guide below grabs the only item gained on this route regardless. This guide will assume you teleported from the Church of the Bud, but if you enter from Belurat, you can easily reach the First Rise site of grace and start the guide from there.
Outer Wall
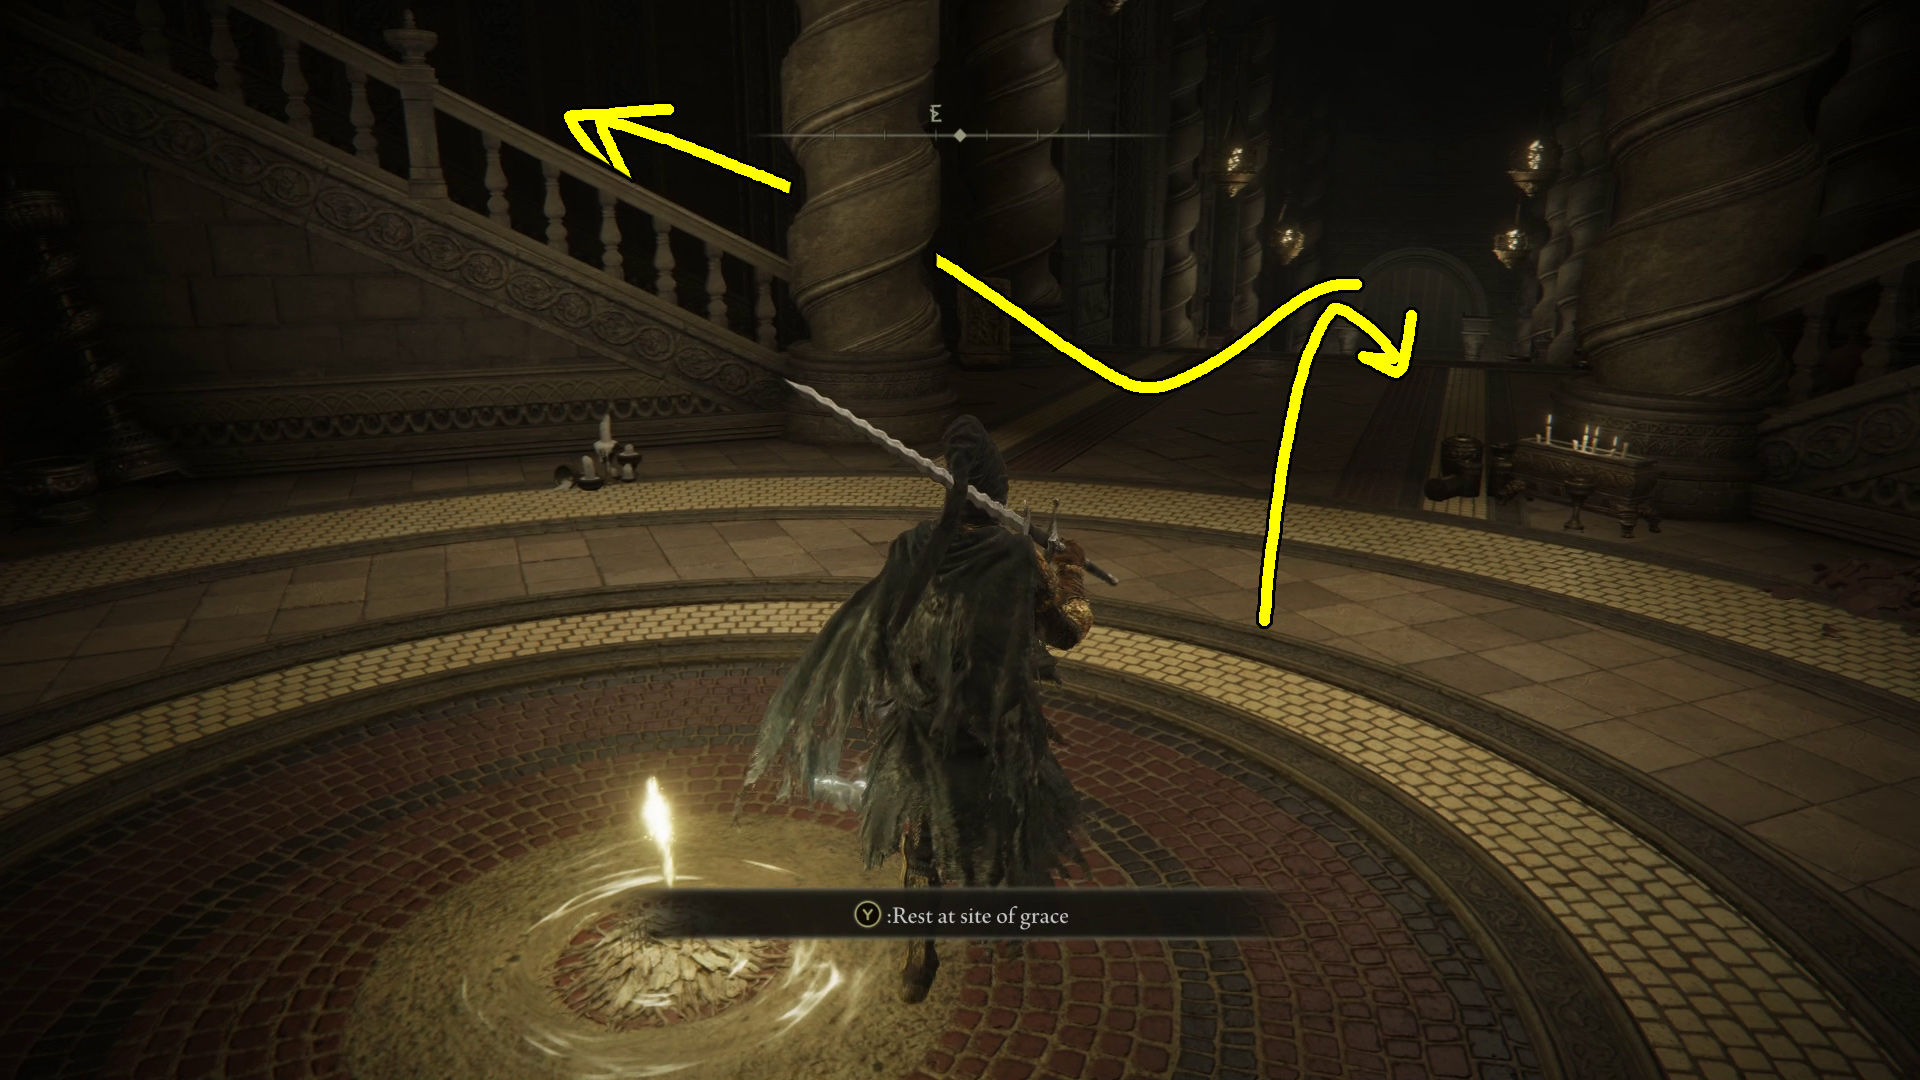
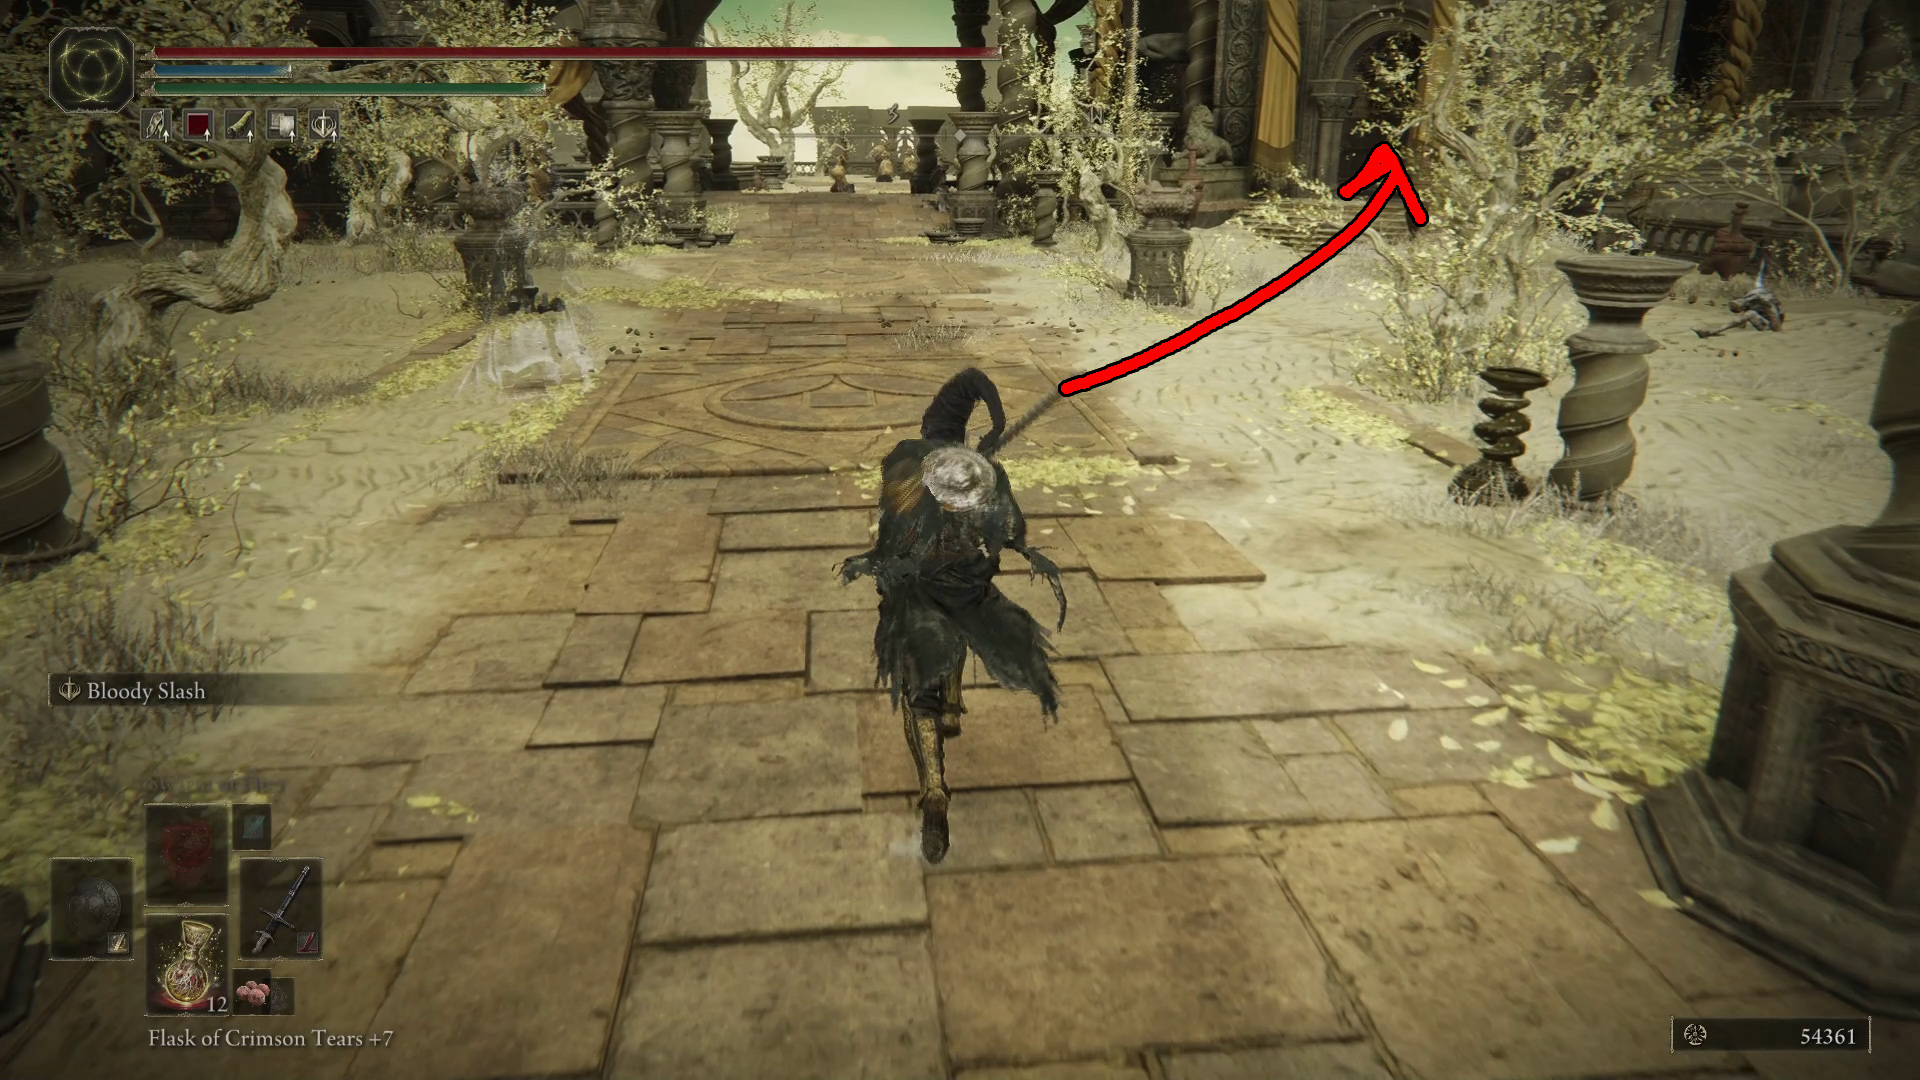
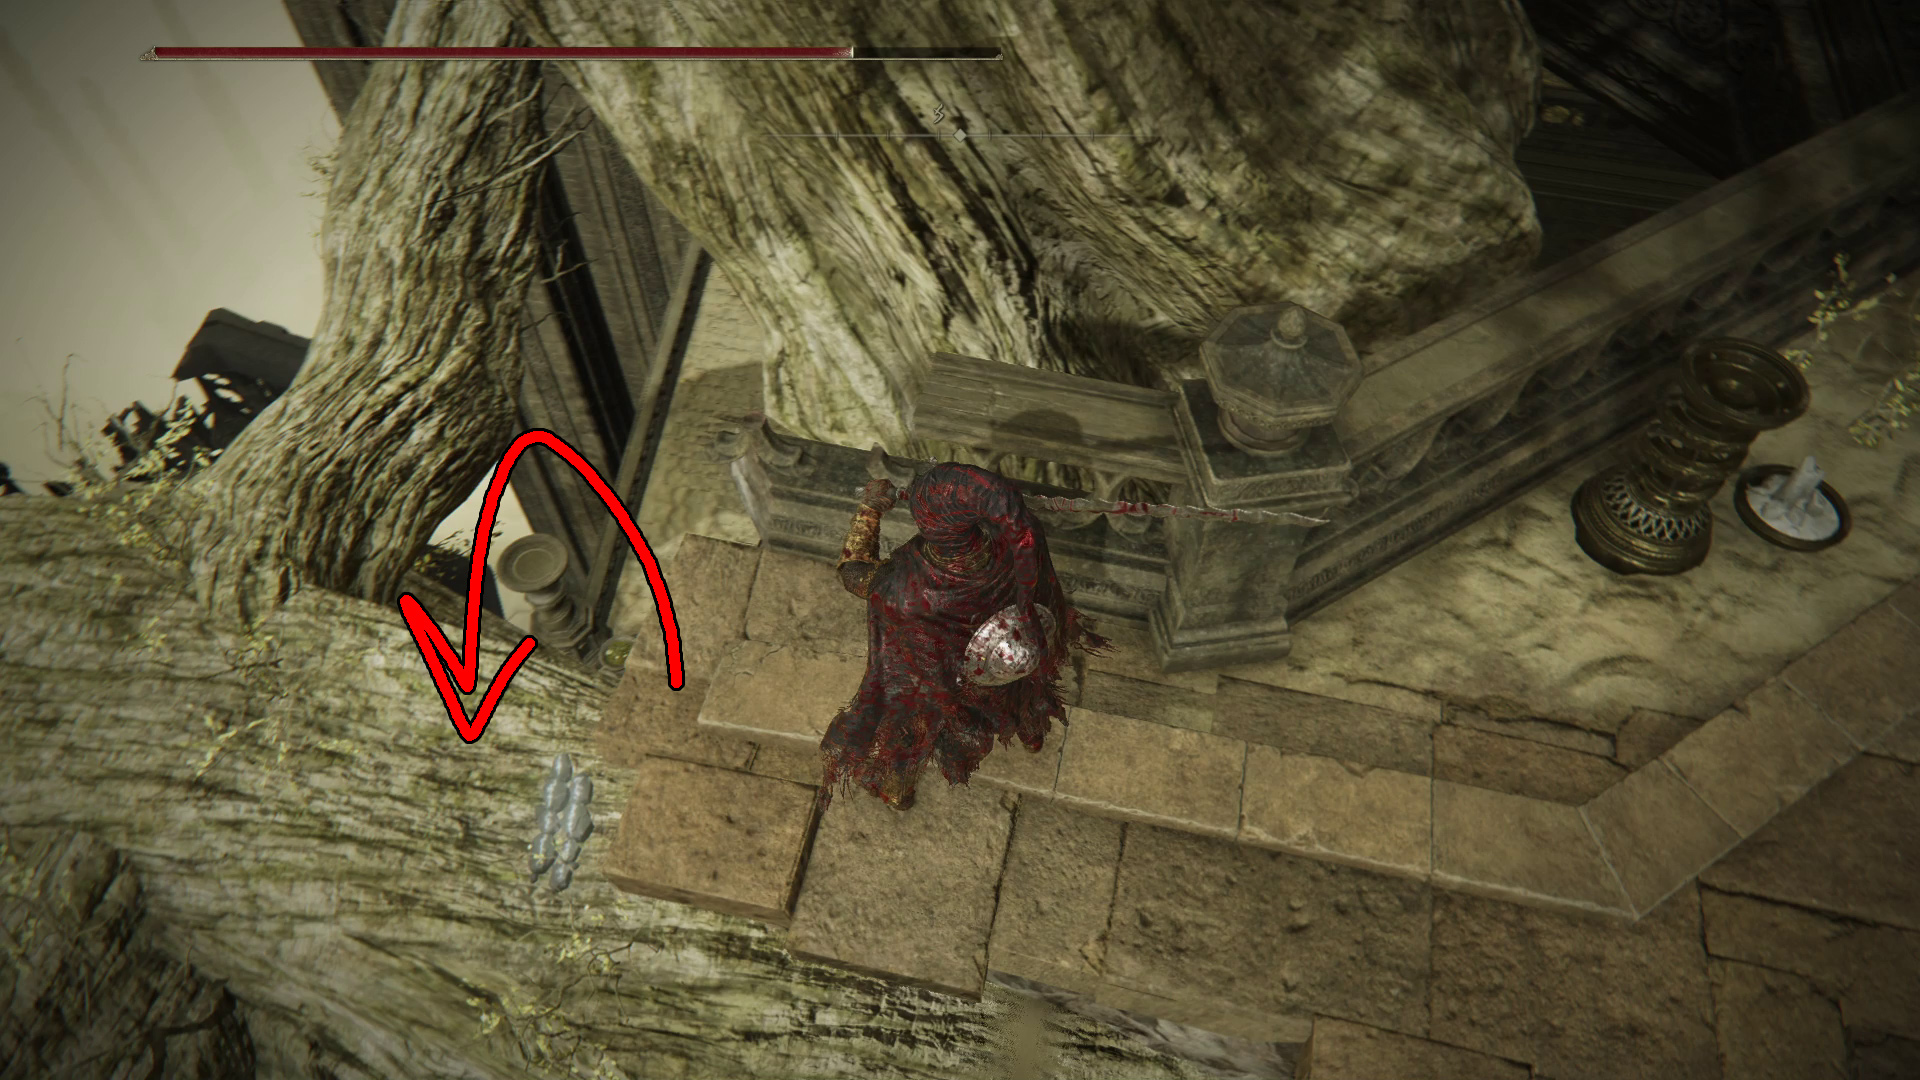
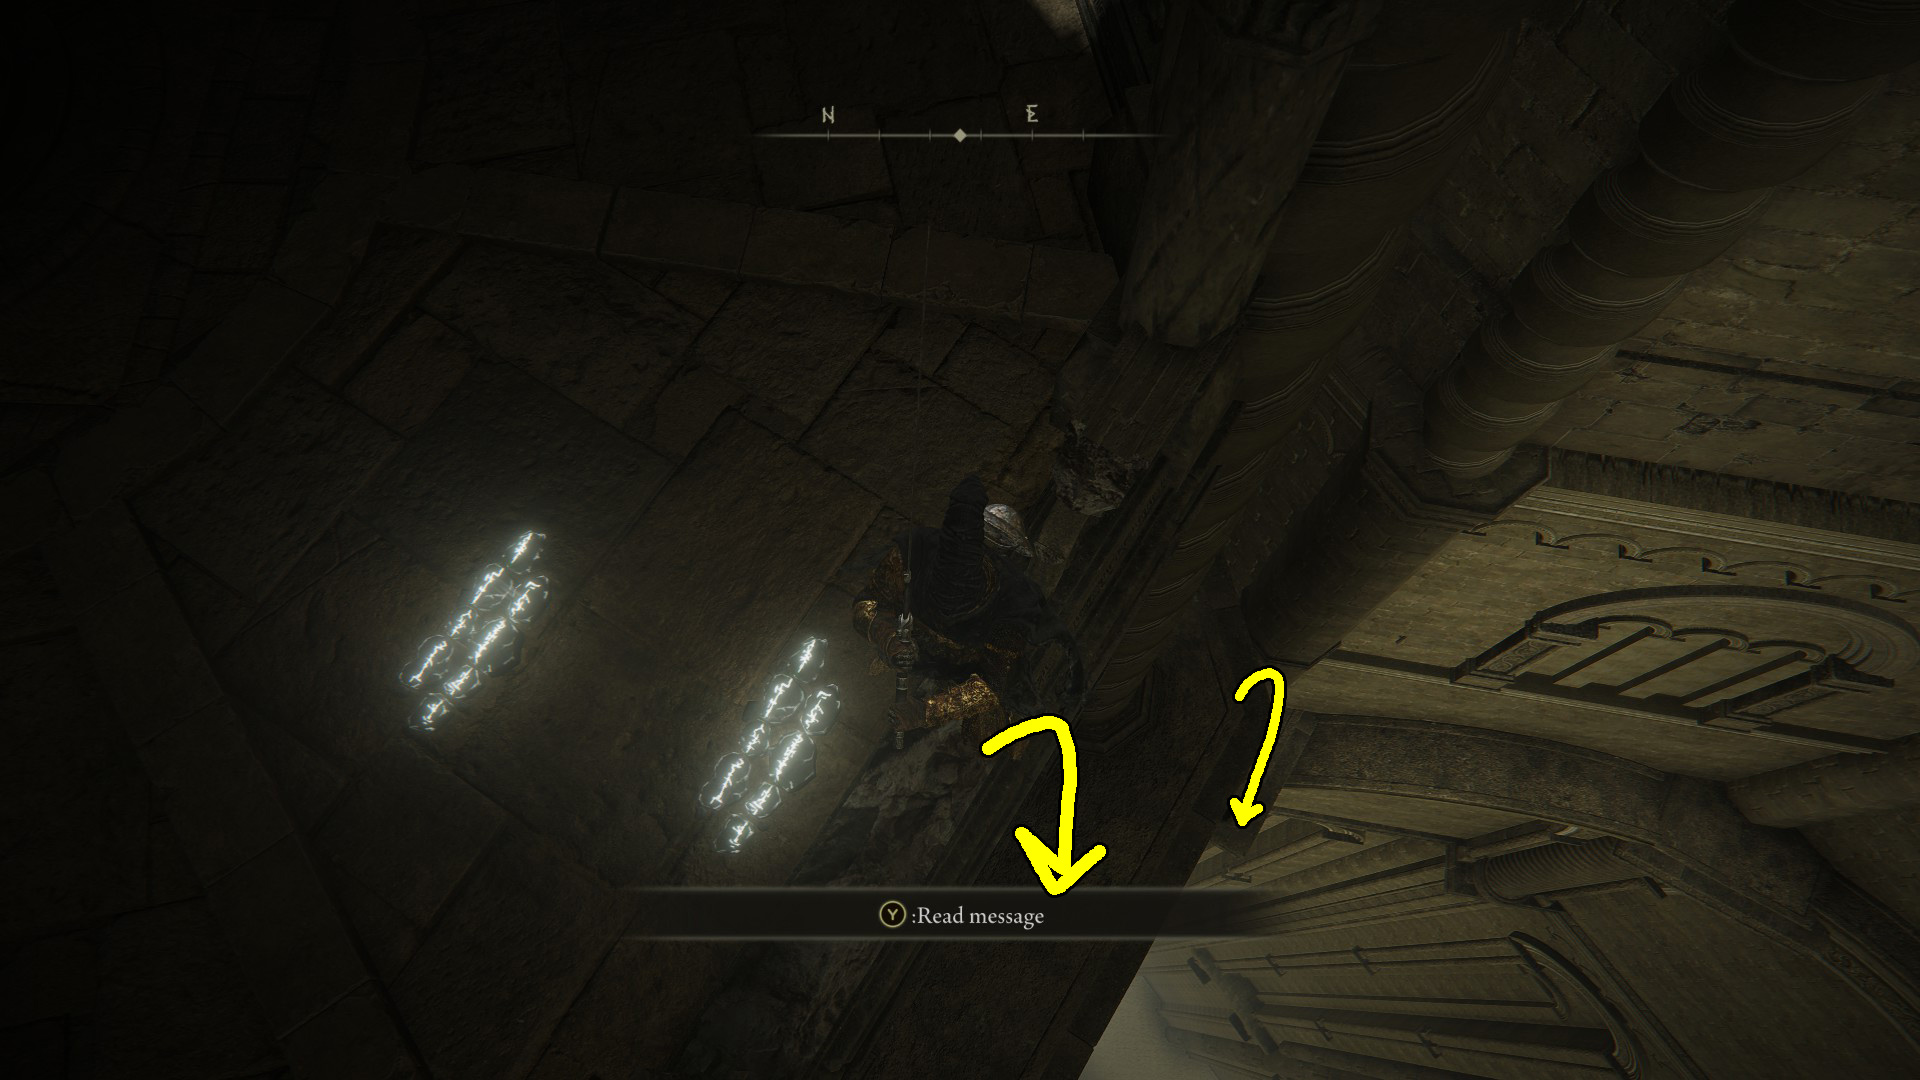
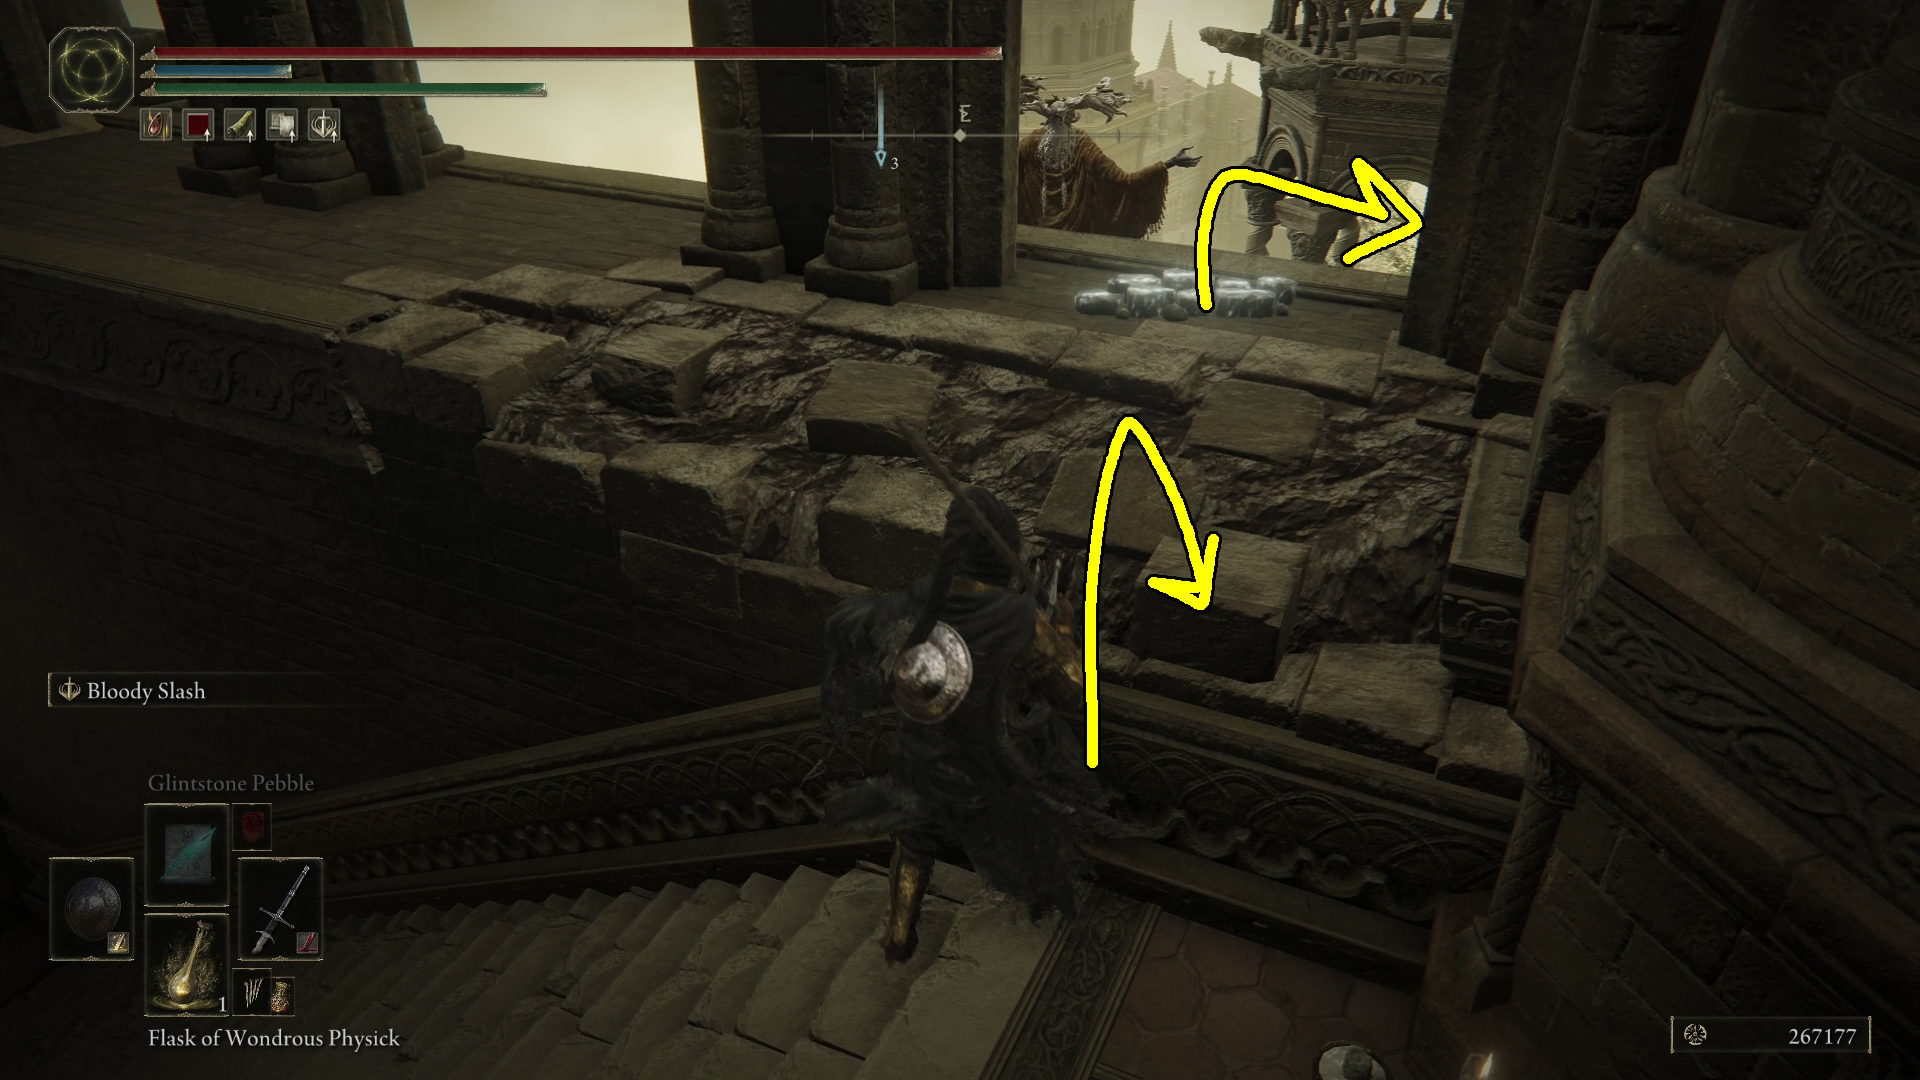
After burning the sealing tree, you’ll teleport to directly in front of the Enir-Ilim: Outer Wall site of grace. Activate it, then continue turn around and grab the Somber Smithing Stone [9] from the corpse hanging off the edge behind you. Head past the site of grace, northeast up the stairs to the large balcony. Go southwest up the next set of stairs, and then look left — up the stairs to the southeast you’ll see a divine bird warrior blocking the way forward. These guys can fly, so be ready. Defeat or sprint past the warrior and go up the stairs to enter the building, then jump up the ledges and over the balcony to find the First Rise site of grace (Image 1).
Image 1
First Rise
Unique & Important Items
x3 Revered Spirit Ash
Spira
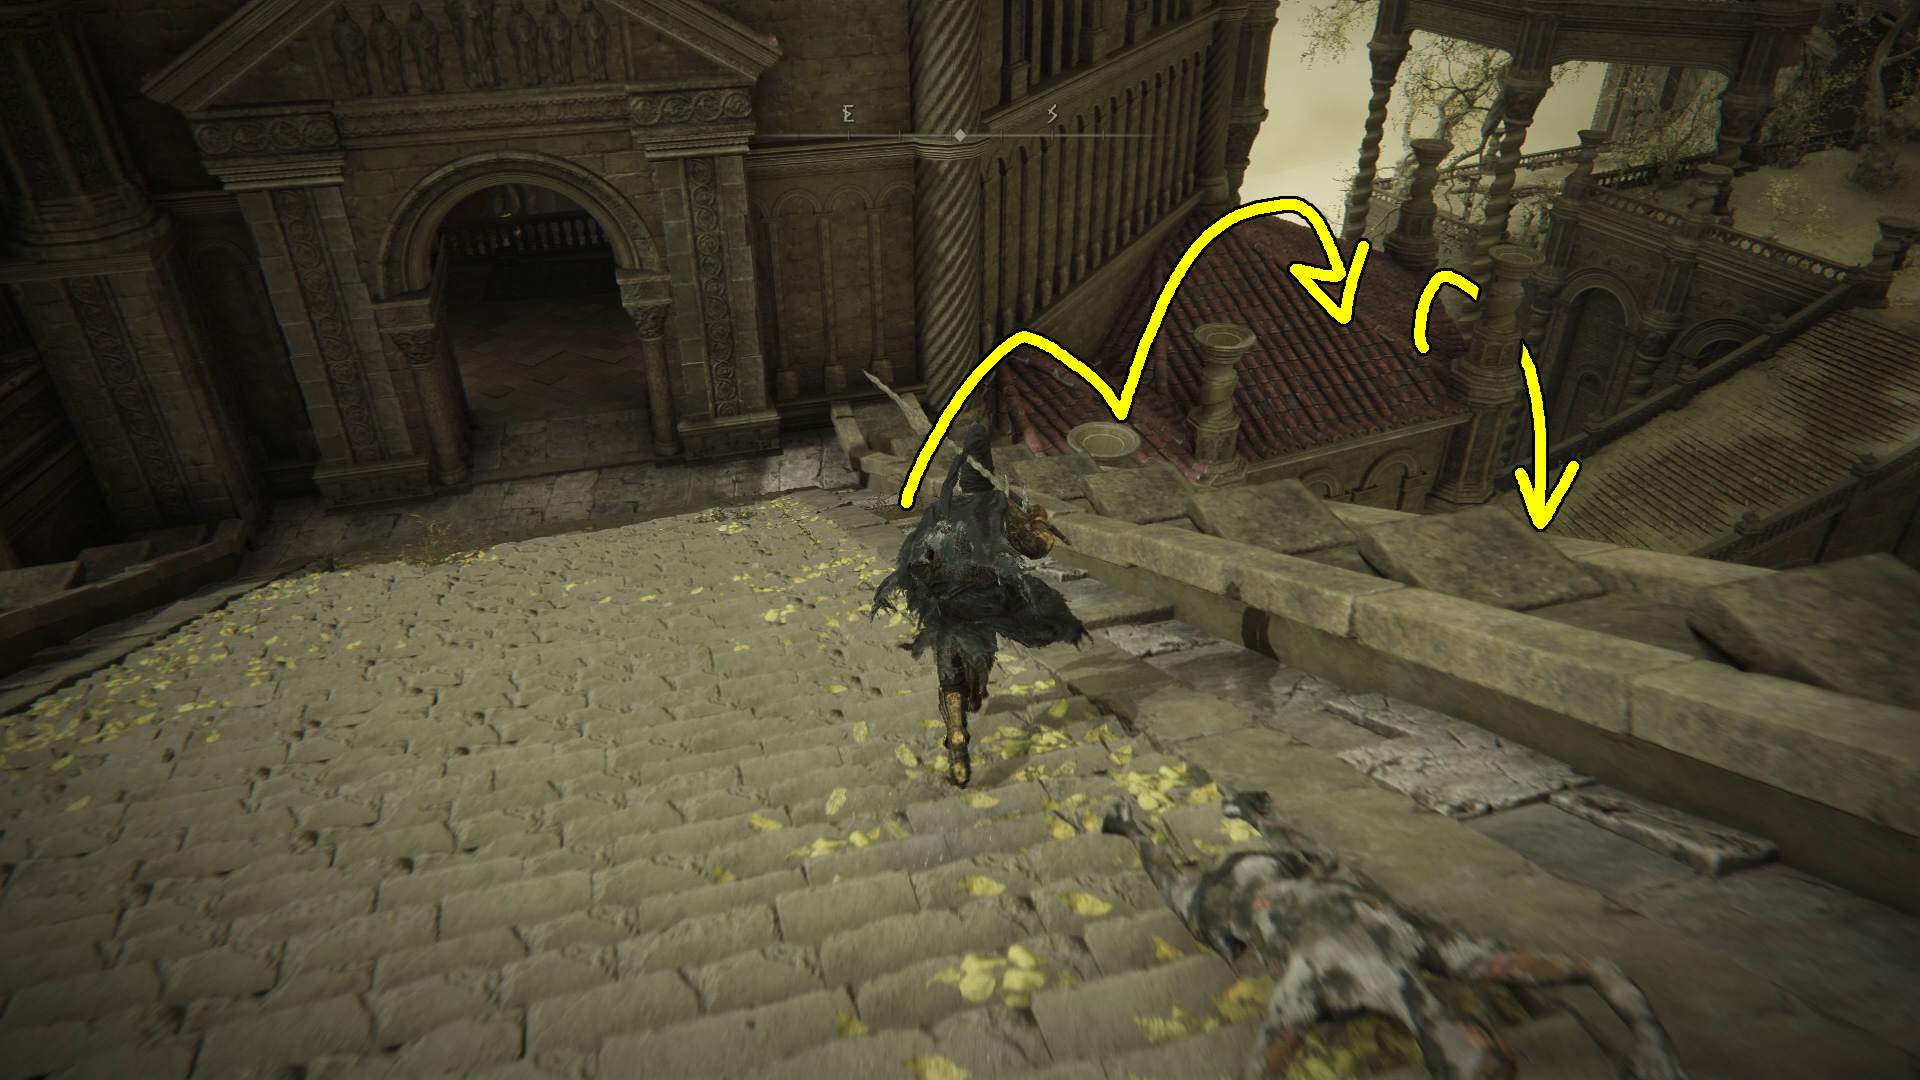
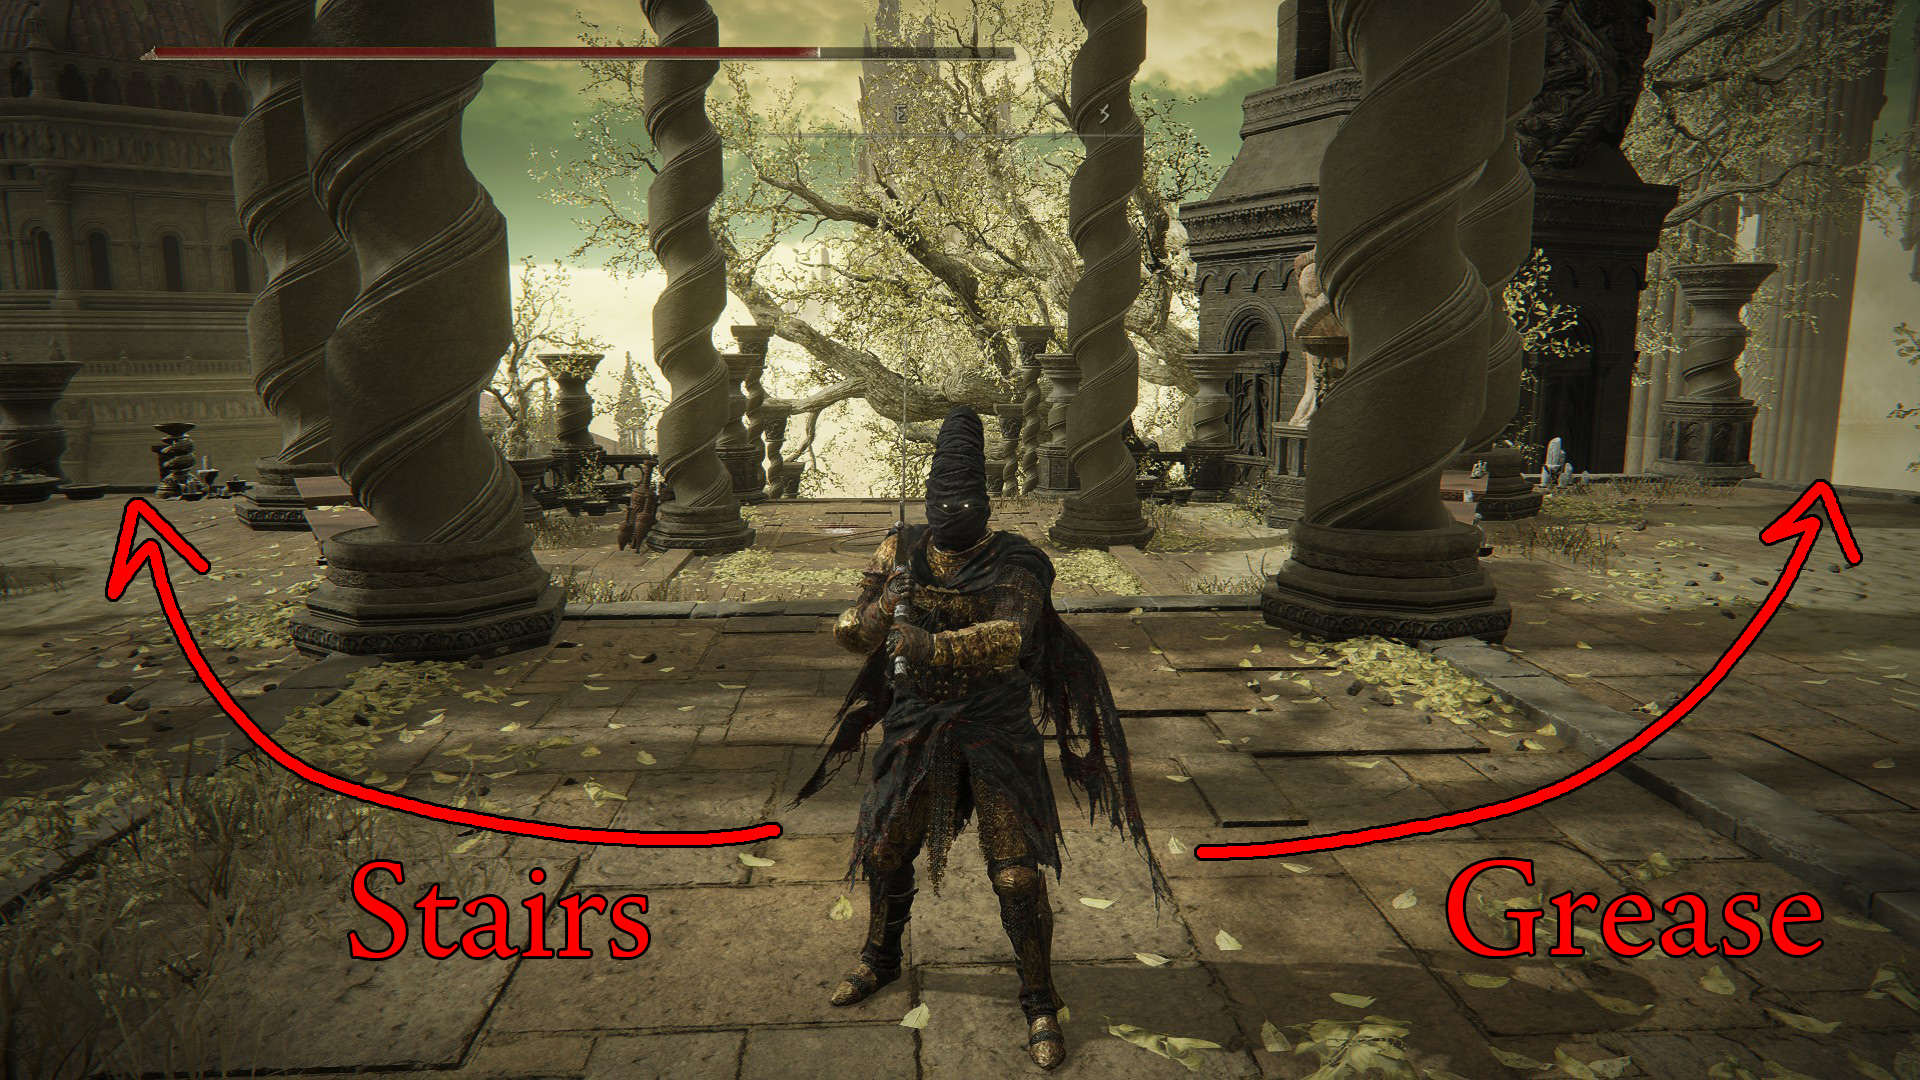
From the First Rise site of grace, go southeast down the stairs and you’ll find a Messmerfire Grease (Image 1). Then head back up the stairs and take either the left or right staircase up to the second floor. Head out the northwest doorway and you’ll find a corpse on the stairs with Somber Smithing Stone [5]. From here, you can actually use the nearby rooftops to save a bit of time (Image 2), but note that if you die, you’ll need to head through the doorway southwest from the site of grace to reach the staircase we drop to in Image 2.
Image 1Image 2
Continue up the stairs and you’ll come to a spot with a few ways forward. Head through the doorway on the right (Image 3), but watch out for the inquisitor enemy hiding just inside the doorway on your right. There’s a second inquisitor praying you can take out easily, then use the planter to jump over the tree root and go through the western doorway (Image 4).
Image 3Image 4
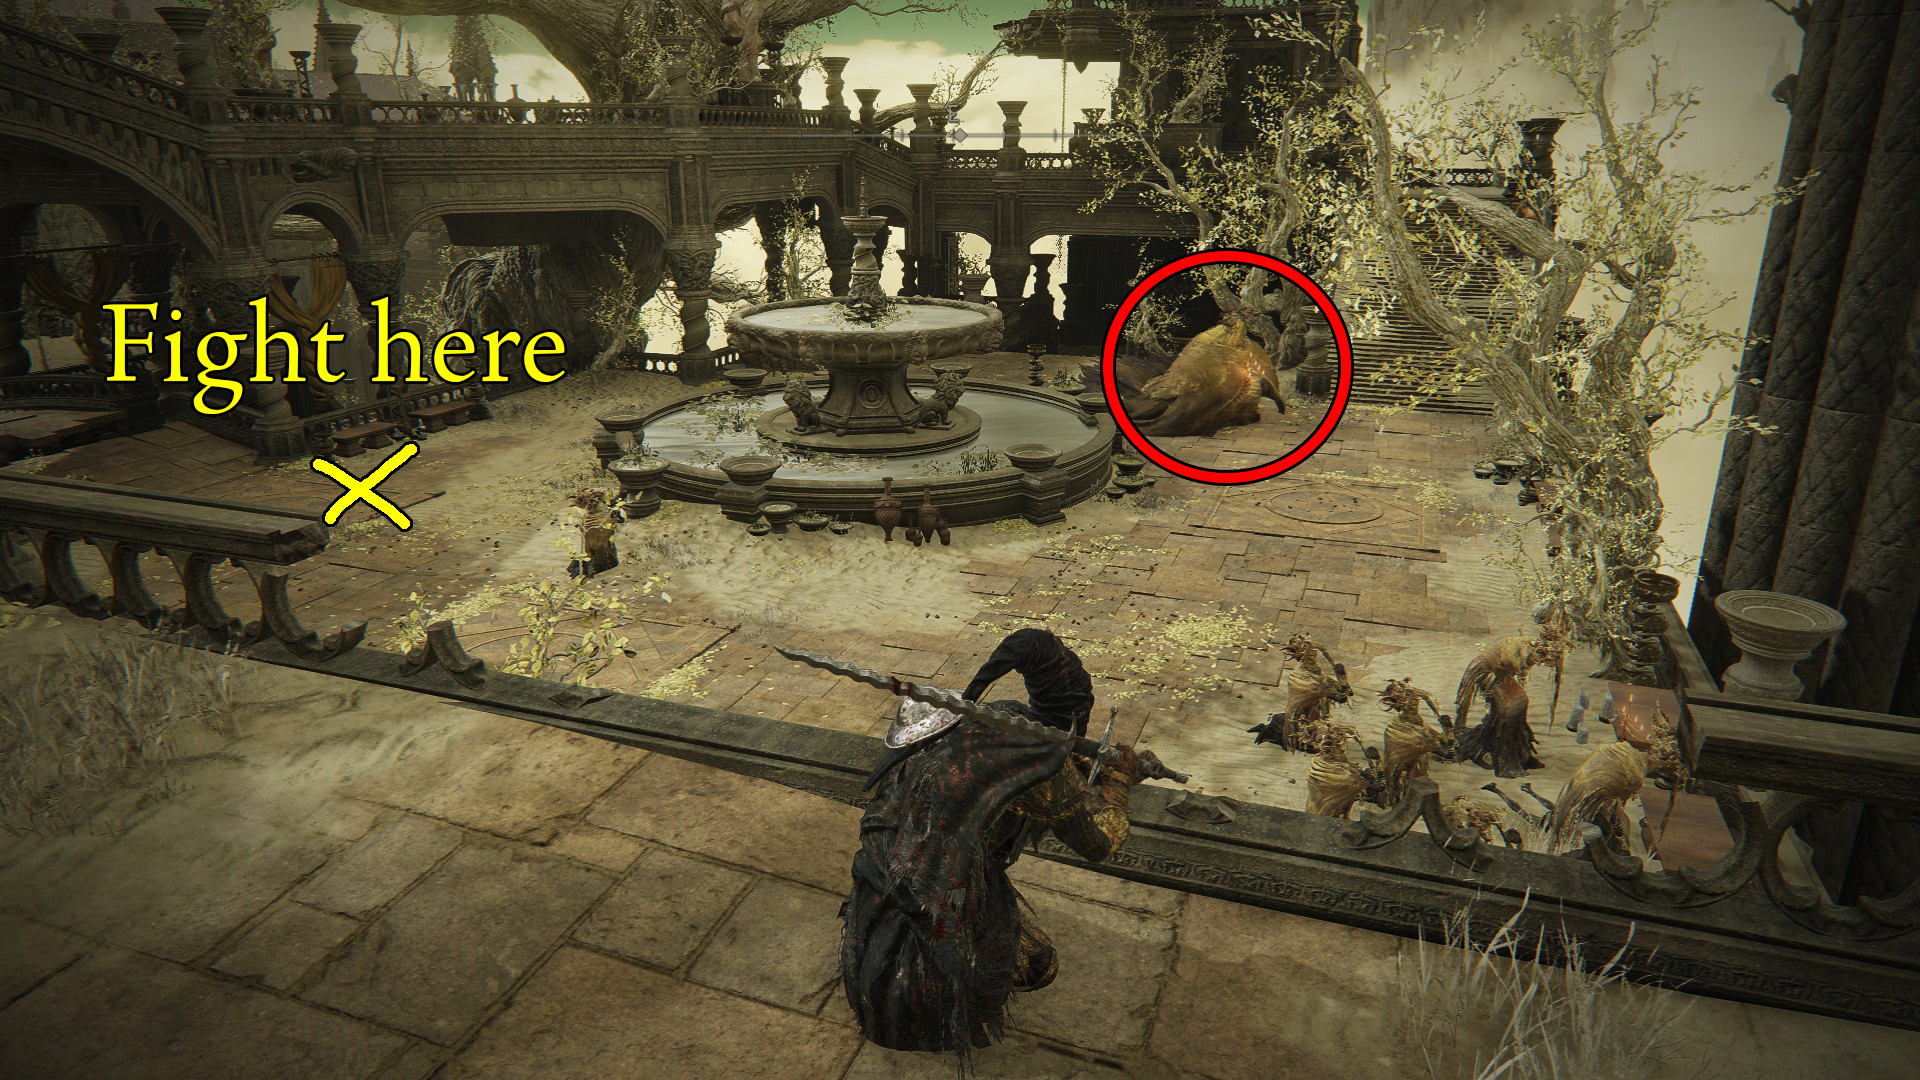
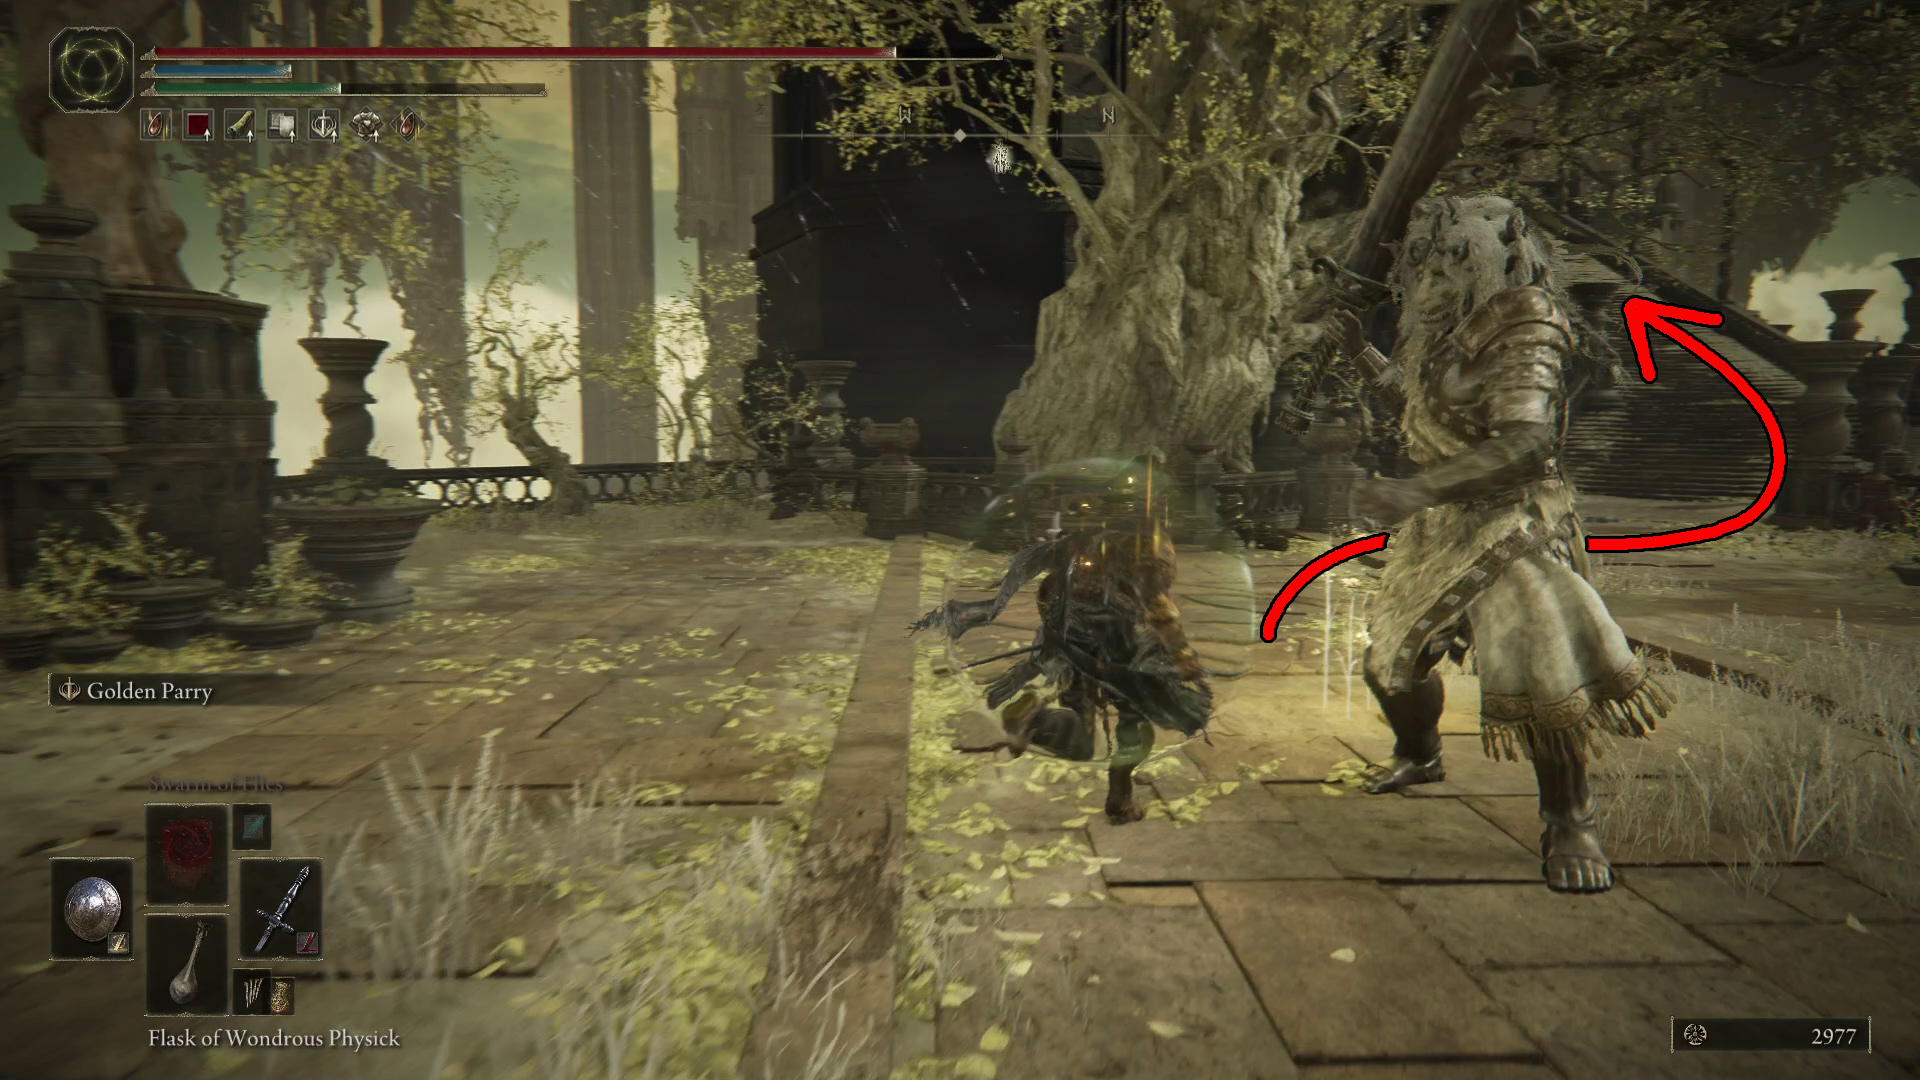
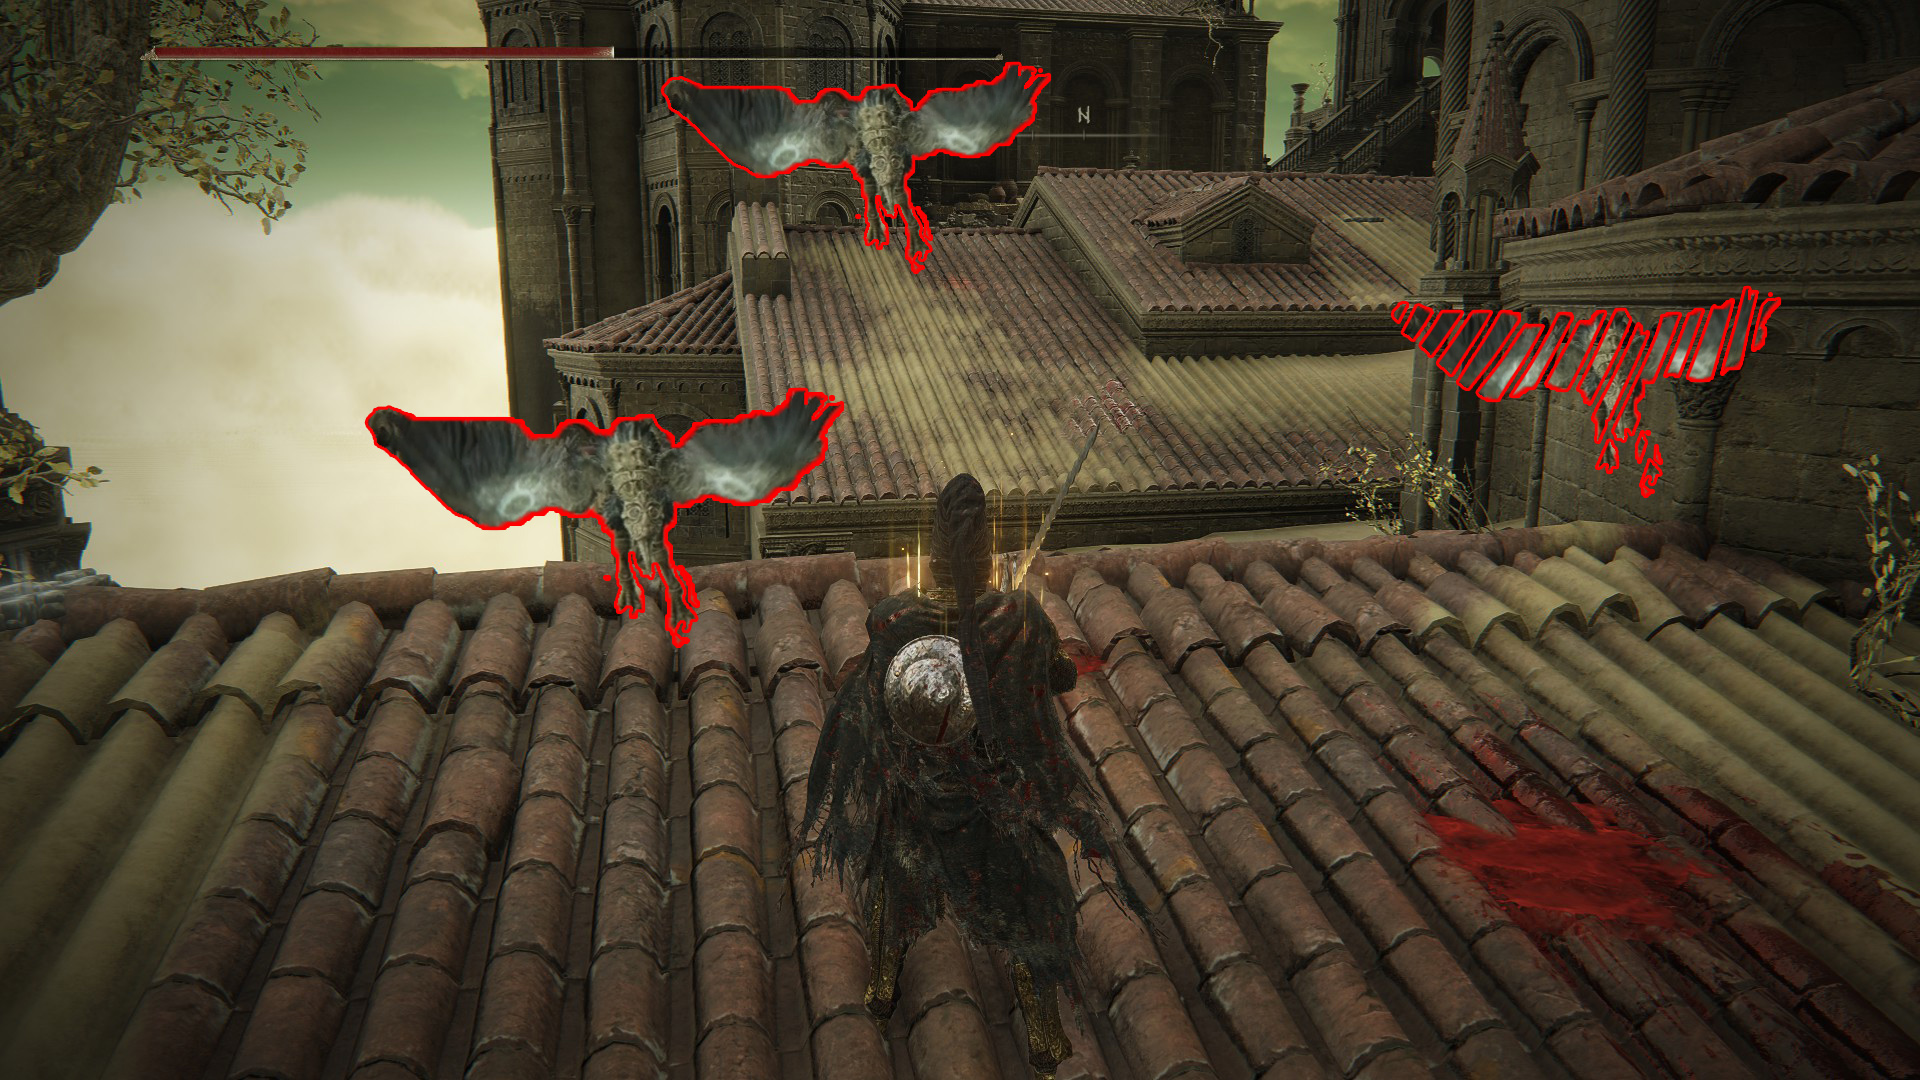
You’ll encounter another inquisitor up here, take ’em out and then grab the Rune Arc. Then look to the east, and you’ll see a chunky boy patrolling, and a large group below you praying (Image 5). The praying enemies will only aggro if you get very close, so with that in mind: go back the way you came, over the root, and then go outside through the doorway to the southeast. This will take you into the courtyard with the chunky boy, who drops a Revered Spirit Ash when killed. Make sure you fight him far away from the praying enemies, and keep an eye out for the two enemies further to the southeast, who may aggro if you get too close.
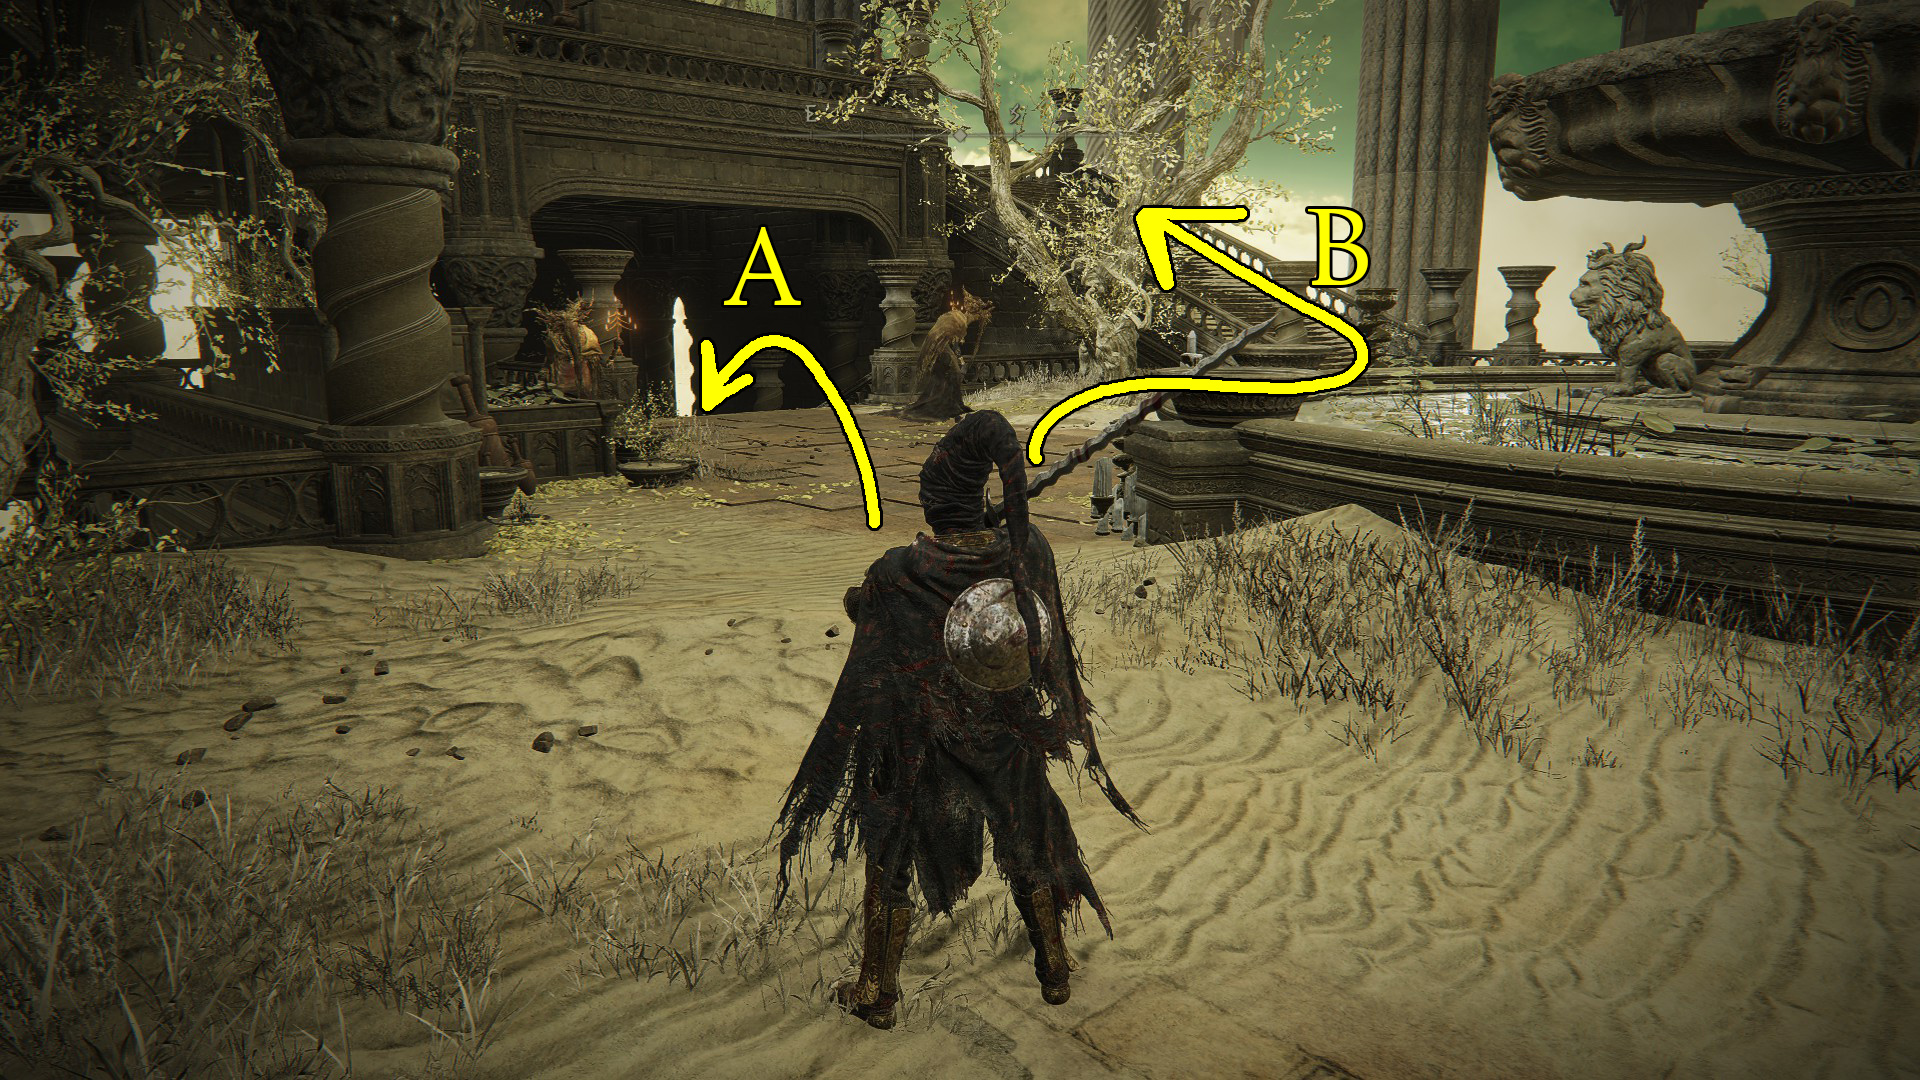
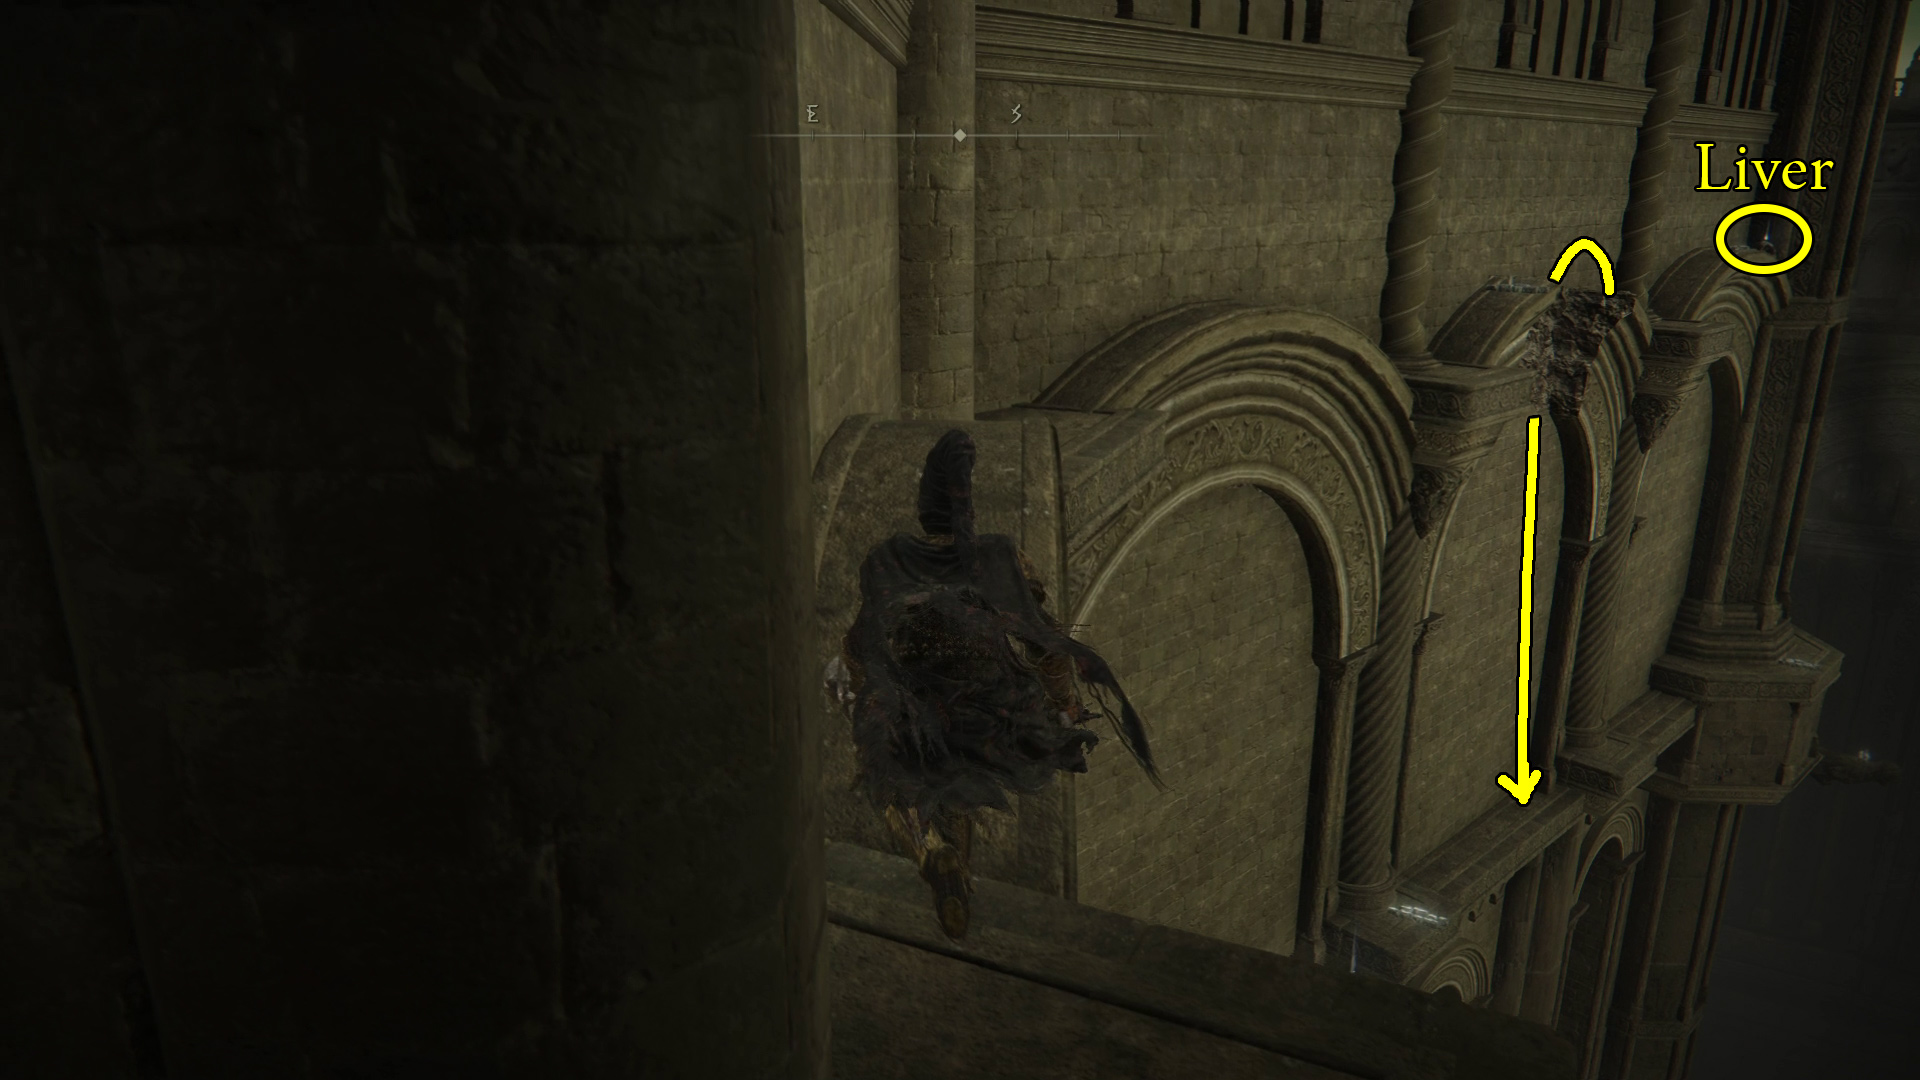
After dealing with the big fella, look southeast and you’ll see stairs leading down (Image 6-A) and up (6-B). Deal with the two mobs if you haven’t already, grab the x2 Lightningproof Pickled Liver from the corpse left of path A, then head down the path A stairs.
Image 5Image 6
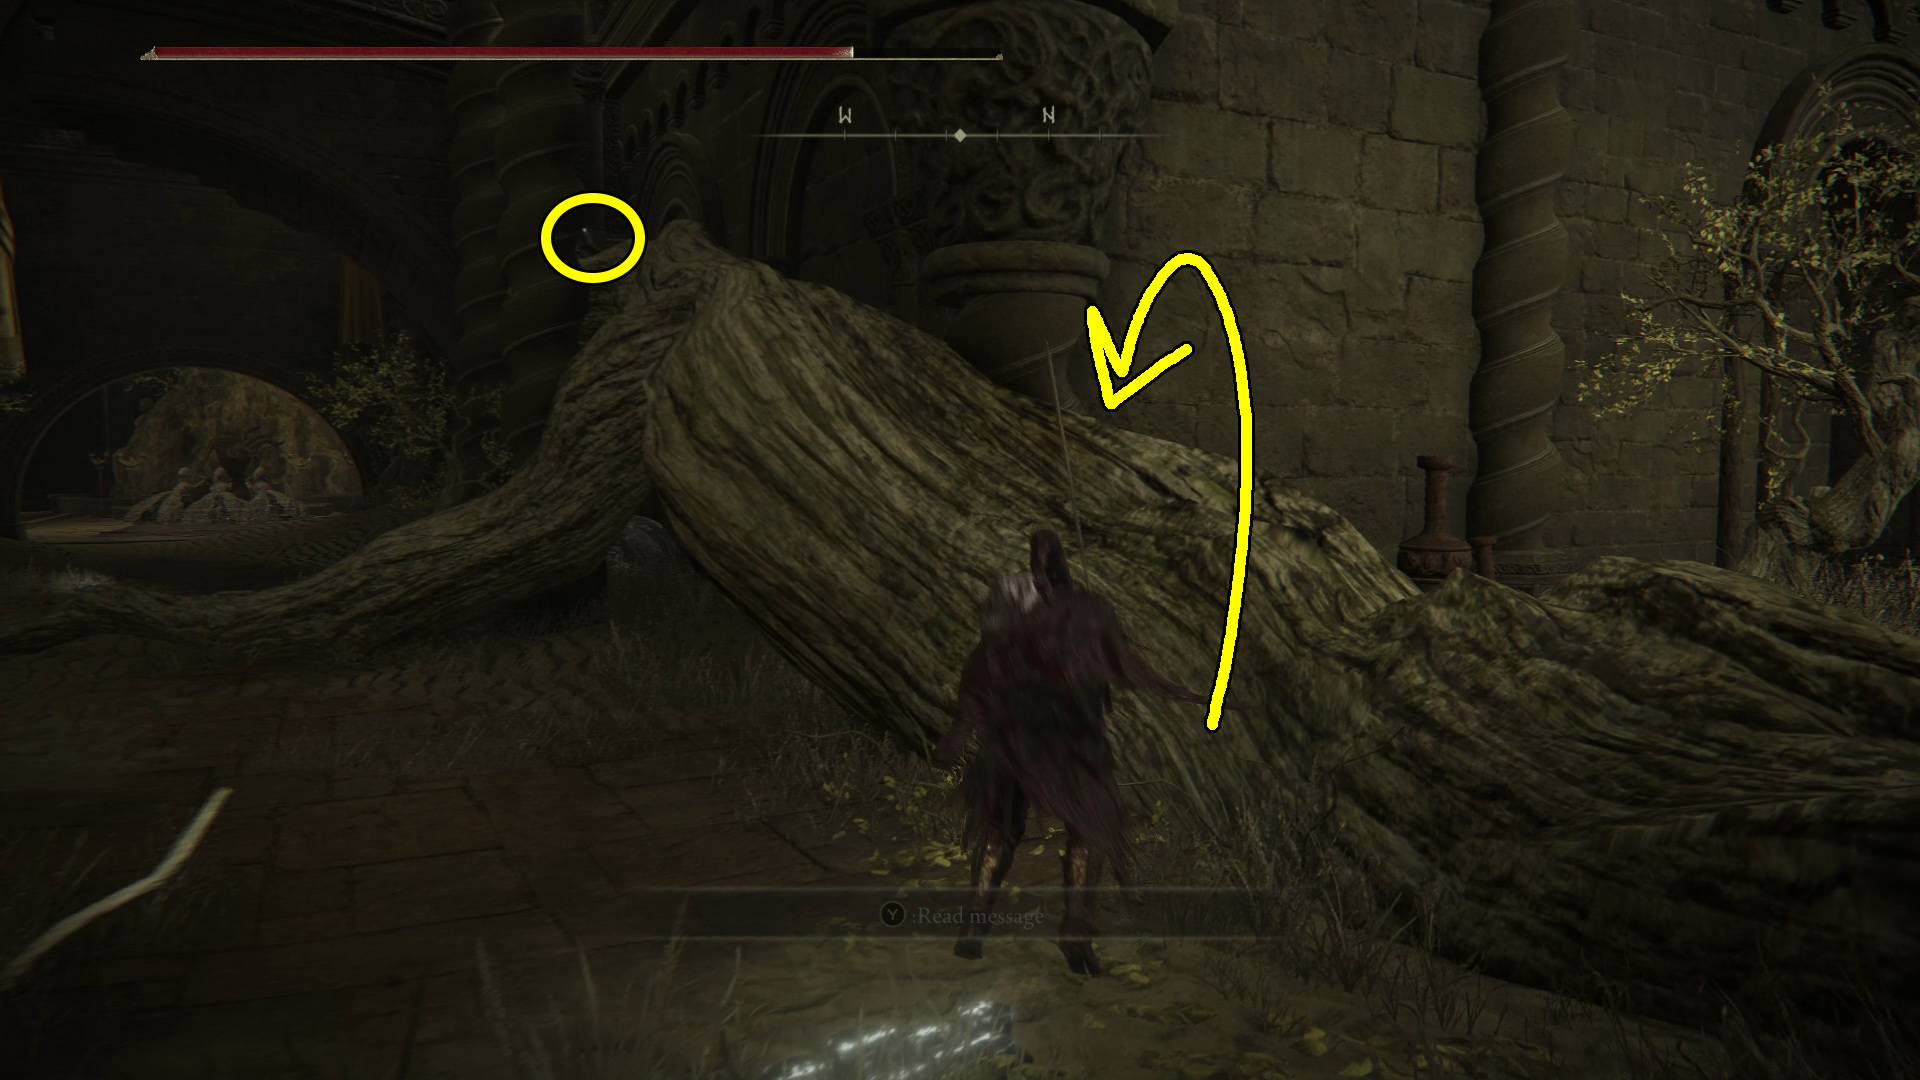
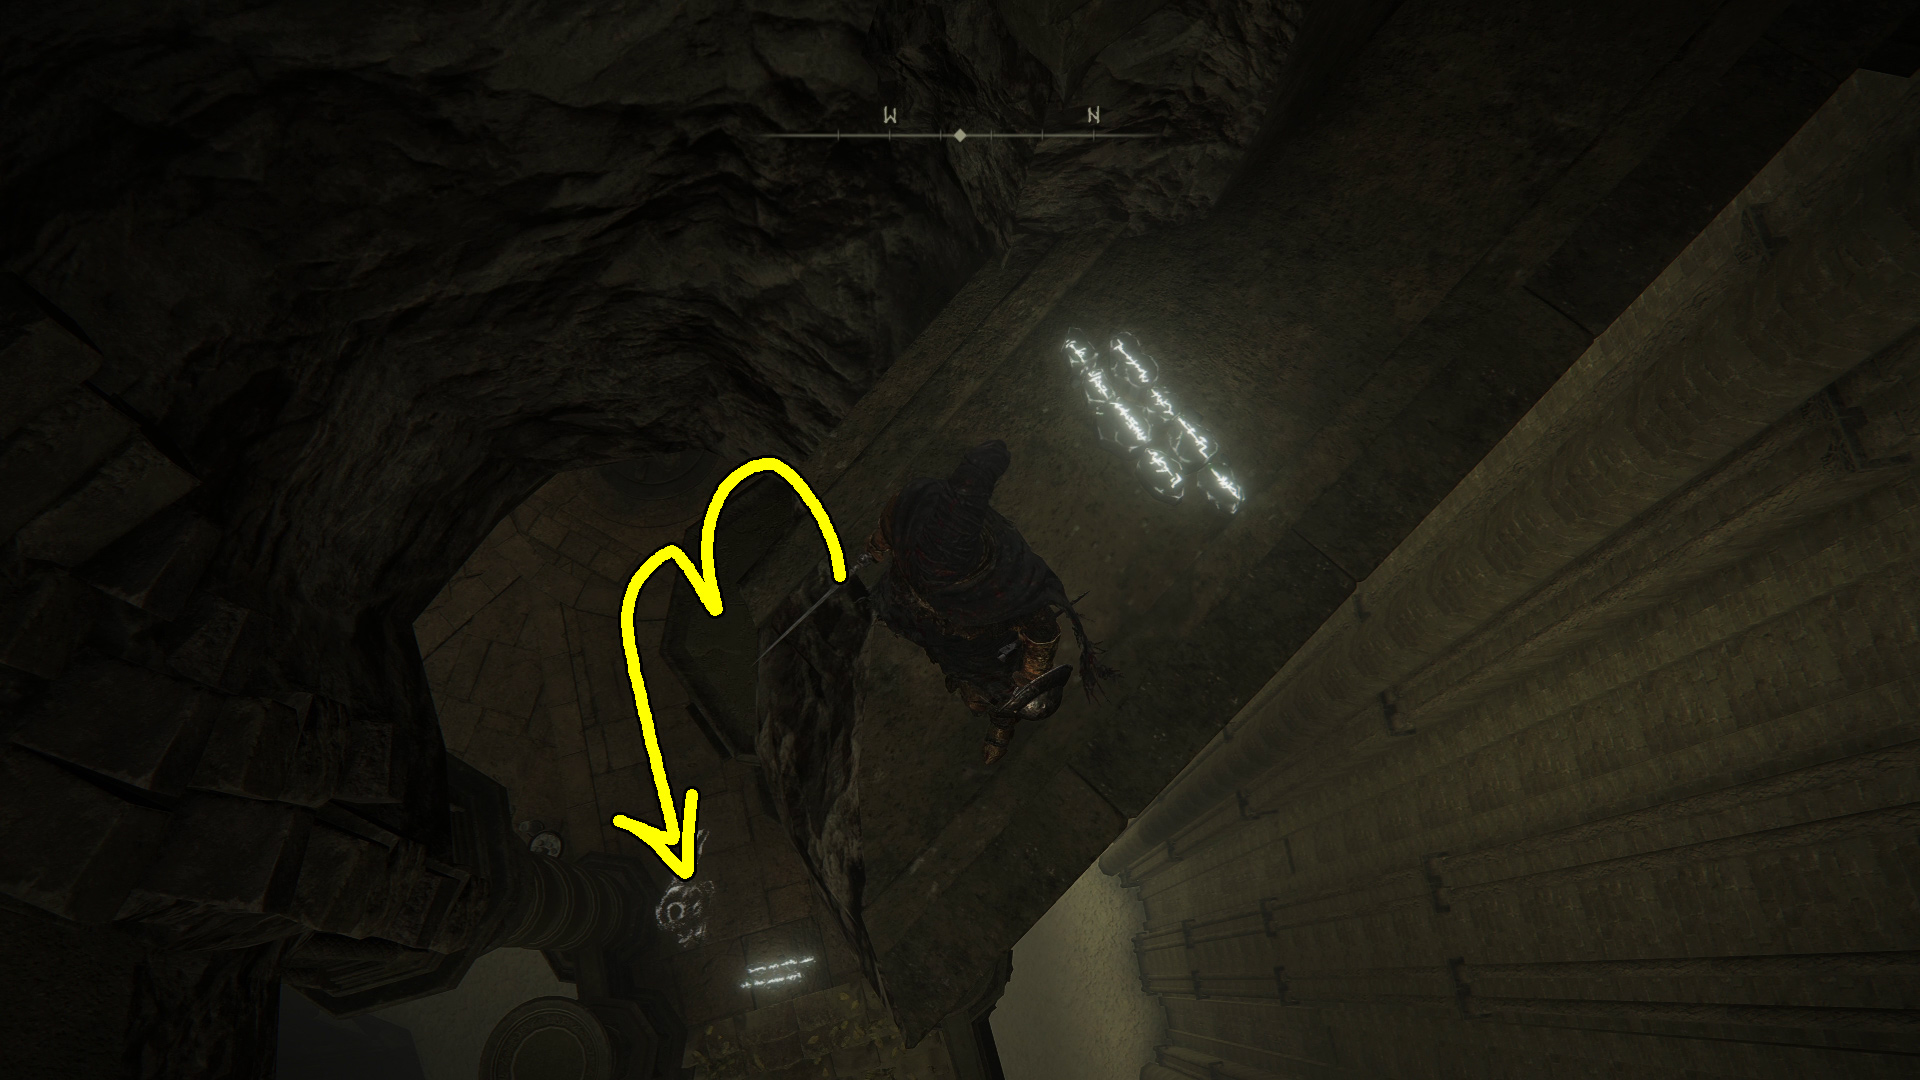
At the bottom of the stairs, you’ll encounter a huge tree. Around the left side of it are a couple of fly-folk munching a corpse with x8 Thin Beast Bones, and around the right side of the tree are another few flies and x3 Whiteflesh Mushroom. On the other side of the tree, head west down the narrow alley. A fly will drop down, and then you’ll see three flies praying to a statue with x2 Revered Spirit Ash at its base. Watch out, as when you enter the room with the statue, another fly will drop down.
Head back the way you came, and if you want, you can jump on the northern root that runs east-west and follow it to x4 Redflesh Mushroom (Image 7). That done, you can go back around the big tree and up the stairs, and this time follow path B (Image 6). (If you want, you can first go over and slaughter the large group of praying inquisitors to the west and kill them, but the corpse they’re guarding only holds x4 Budding Horn.)
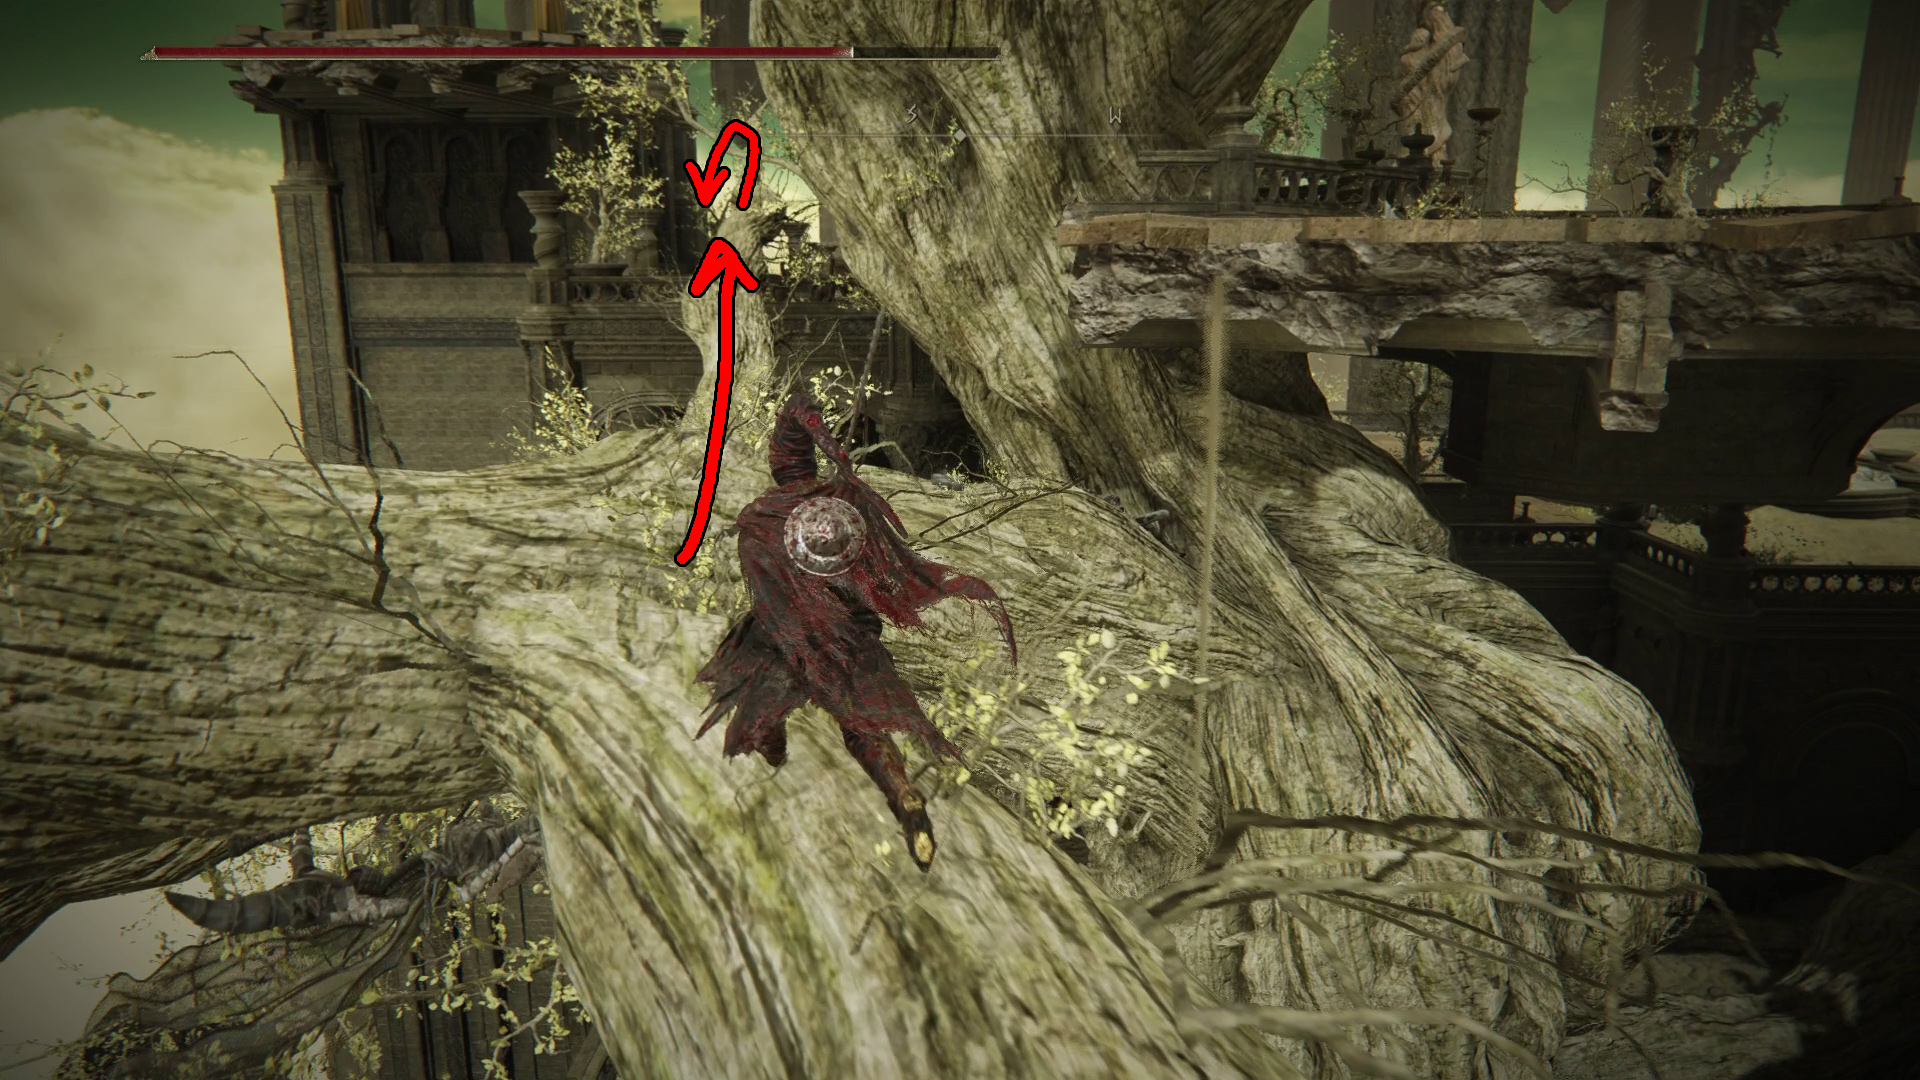
Up the stairs, there are two super annoying mobs that rapid-fire ranged spells. Melee characters should bait their attack and wait behind the banister, then gap close when they stop firing. Continue north up the next set of stairs, and you’ll pass the giant tree from earlier. Go round the tree, and you’ll find a spot you can drop down onto a branch (Image 8).
Image 7Image 8
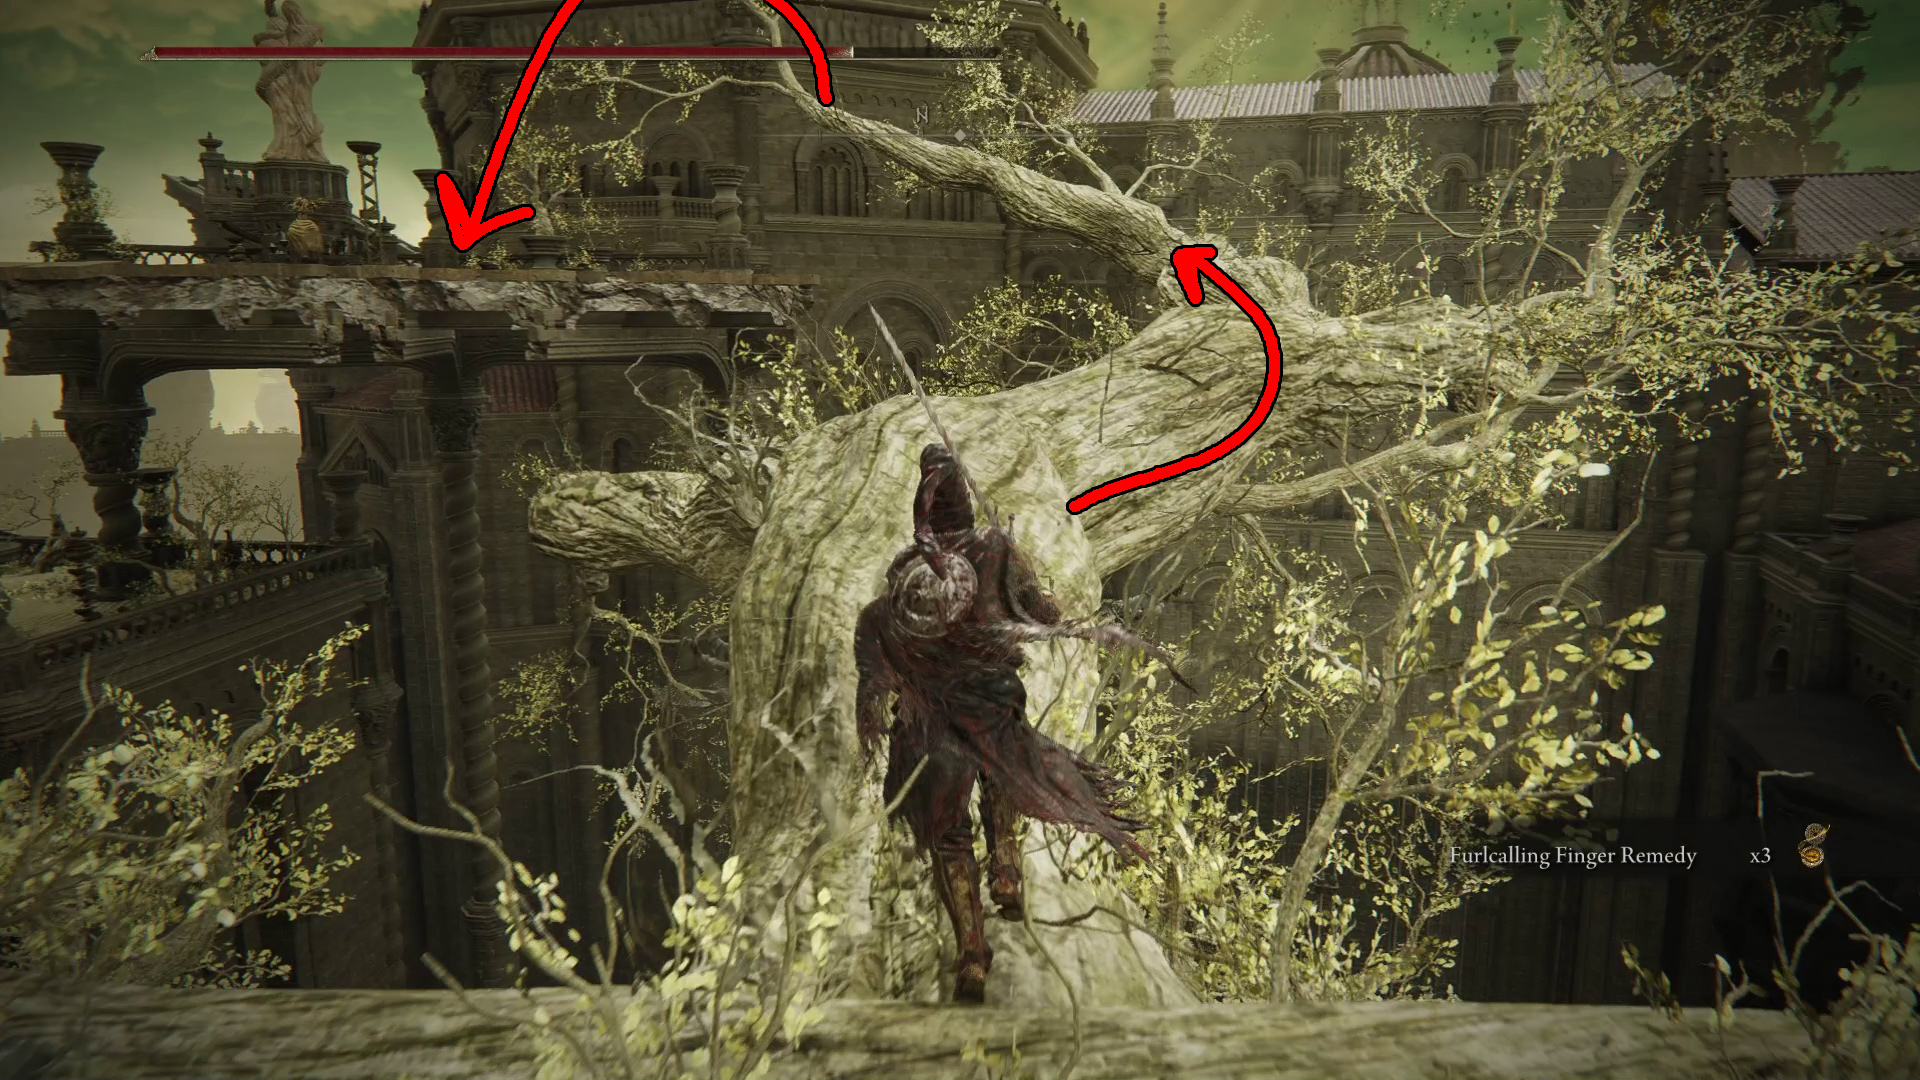
There will be x3 Furlcalling Finger Remedy directly behind you to grab. Next, head forward so you can turn left and go north on another large branch (Image 9) — continue on the branch as indicated until you can drop onto the nearby platform. Backstab the praying enemy there and then grab the Spira incantation, then you can drop back onto a lower branch of the tree (Image 10) and continue south off of another branch (Image 11).
Image 9Image 10Image 11
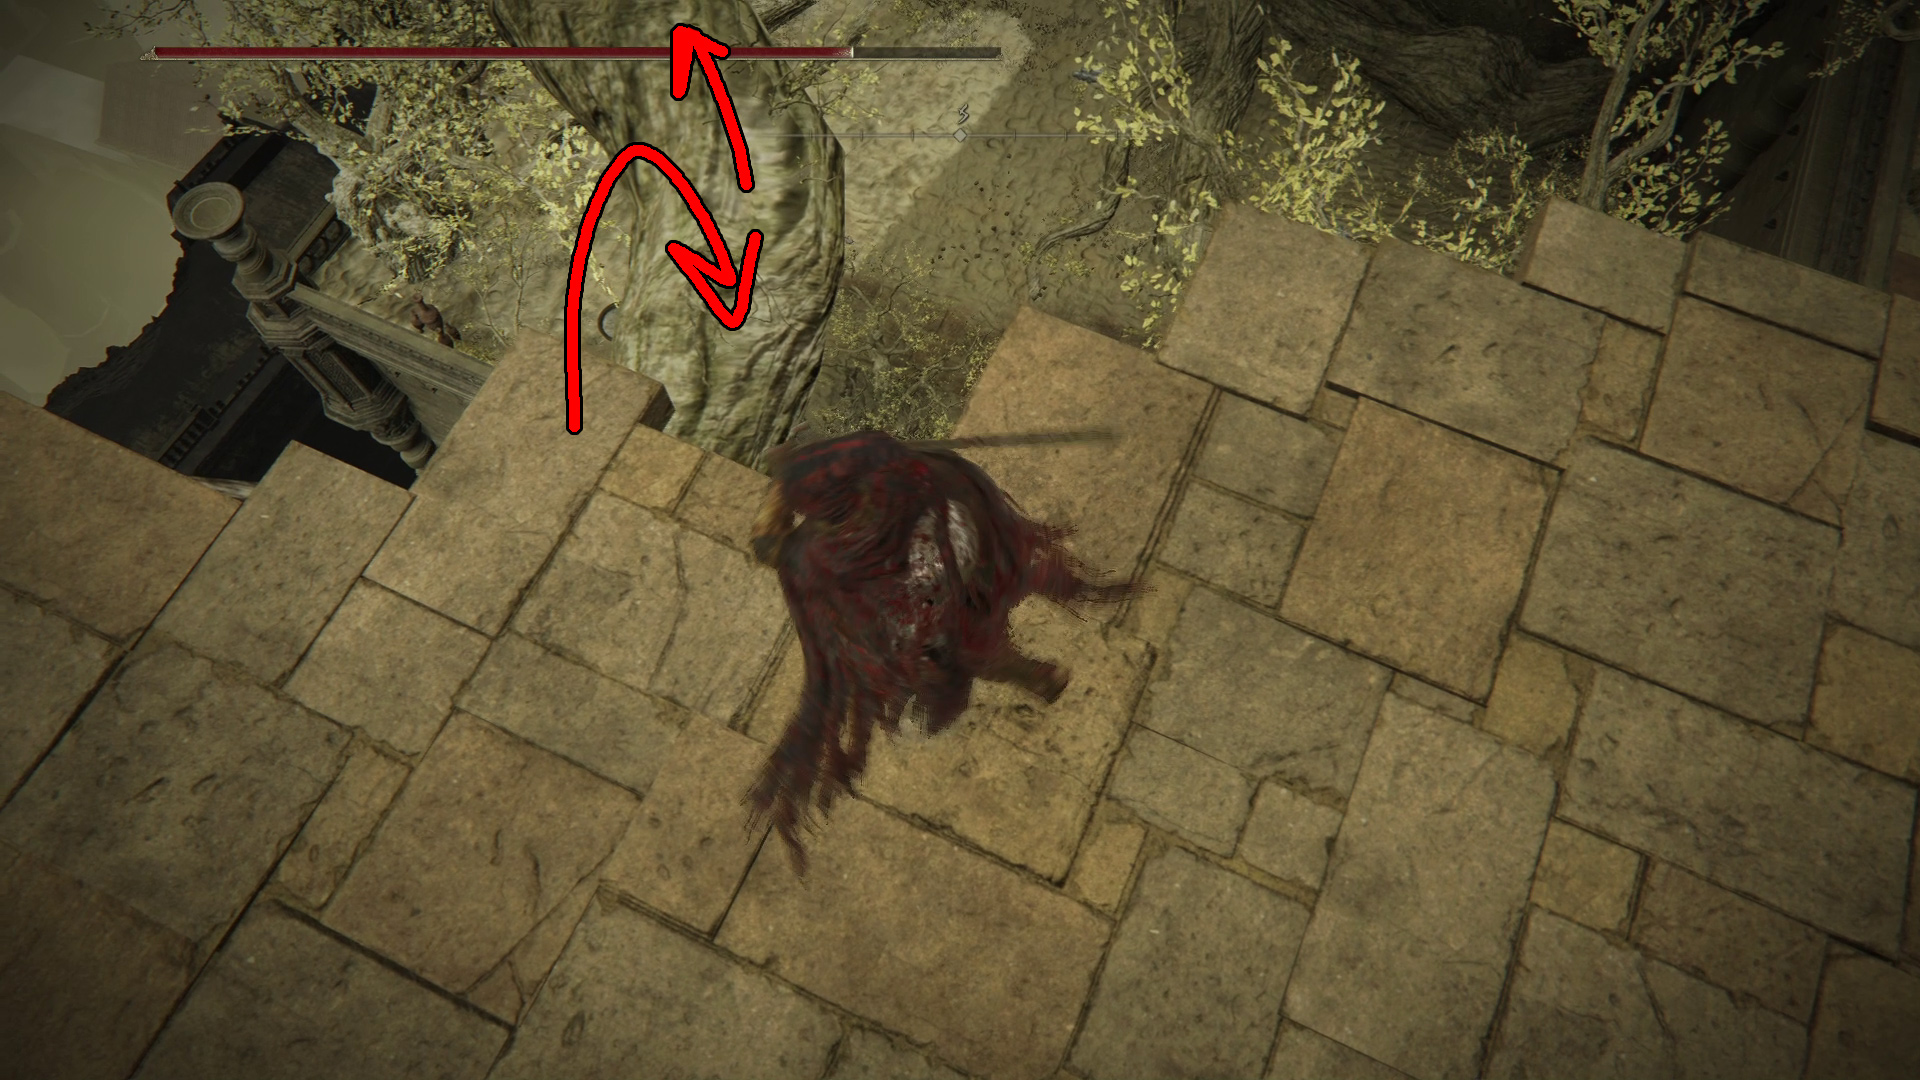
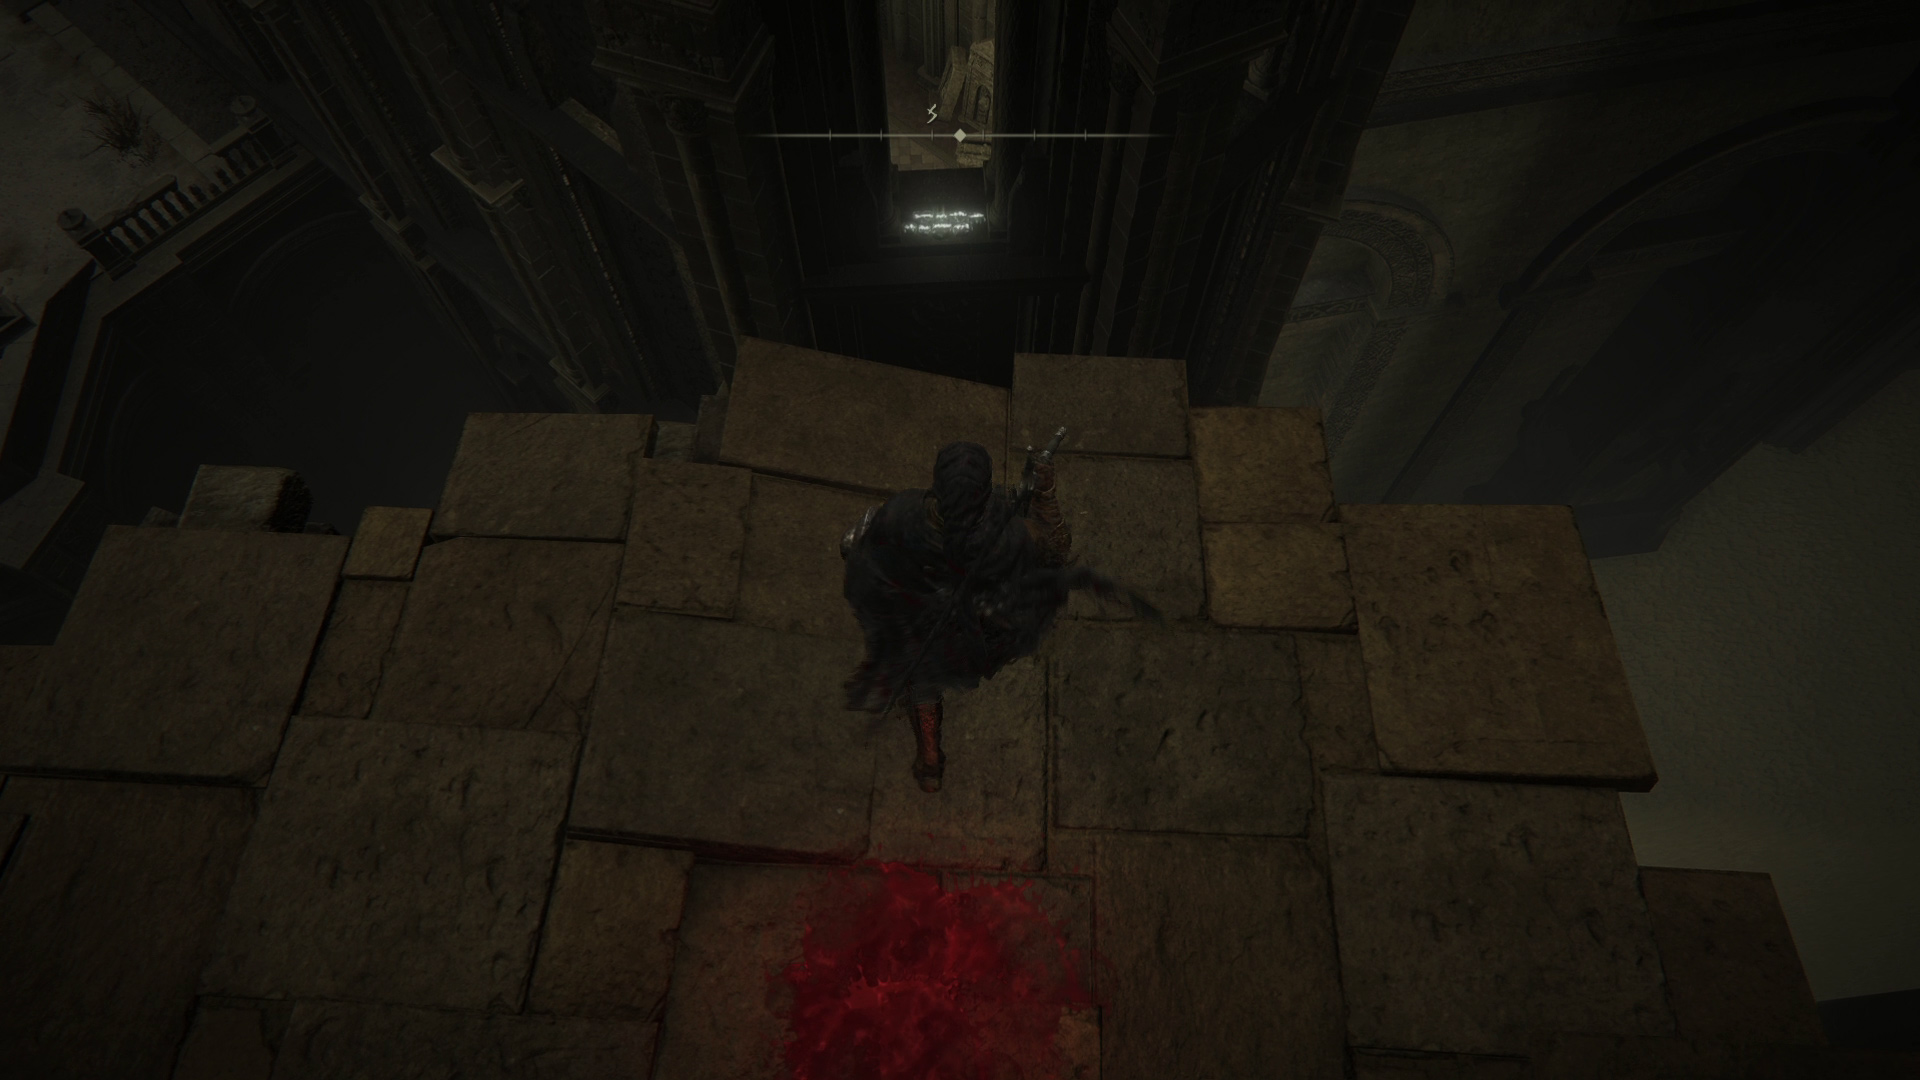
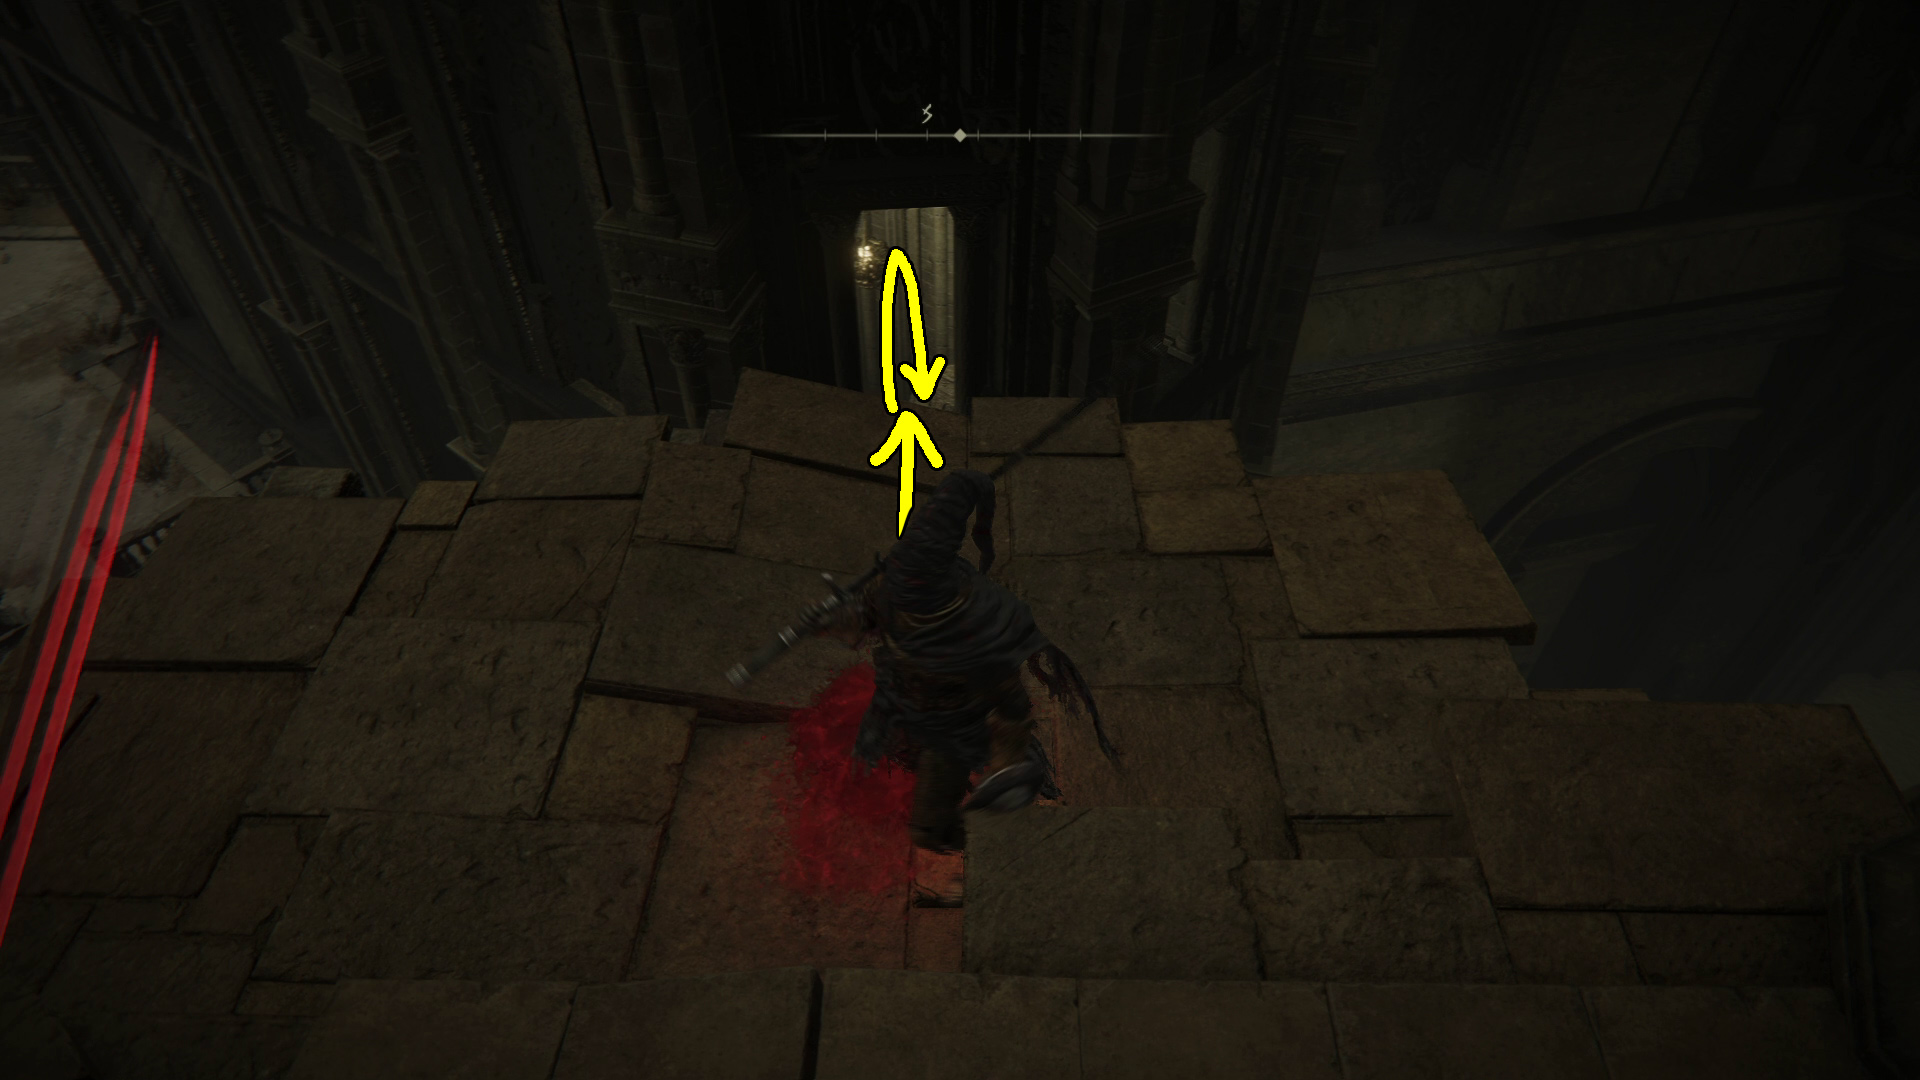
You’ll drop back onto the balcony where you just were — continue northwest, and you’ll meet a very tough foe, a divine beast warrior. He can be quite a challenge, so if you want, you can skip ’em for now and head further northwest up the nearby stairs (Image 12) — the corpse at the foot of the stairs had some Dragonbolt Grease you can grab as you bravely sprint away. As you go up the stairs, you’ll be targeted by a spell that comes out of the floor, so keep sprinting in a straight line to avoid getting hit — the channeler guy at the top of the stairs is the one casting the spells.
Image 12 – …I went back and pwnd him
Take him out, then head up the next set of stairs, and continue forward up the large staircase that leads west-northwest. On the stairs are x10 Fire Arrow and x10 Golden Bolt. Another annoying channeler enemy is on the balcony above the stairs, so once again you’ll need to keep moving — it’s best to ignore the enemy on the stairs and just open the doors at the top of the stairs. Run inside and activate the Spiral Rise site of grace
Spiral Rise to Belurat
Unique & Important Items
Inquisitor Ashes
Note: This next section contains some tricky platforming. Make sure you spend any runes you don’t want to lose before proceeding! You may also want to equip the Placidusax’s Ruin incantation if you have the stats to cast it — you can cast it while falling to freeze yourself in mid-air, buying yourself time to save and quit. Useful if you know you’ve messed up a jump and need to retry it.
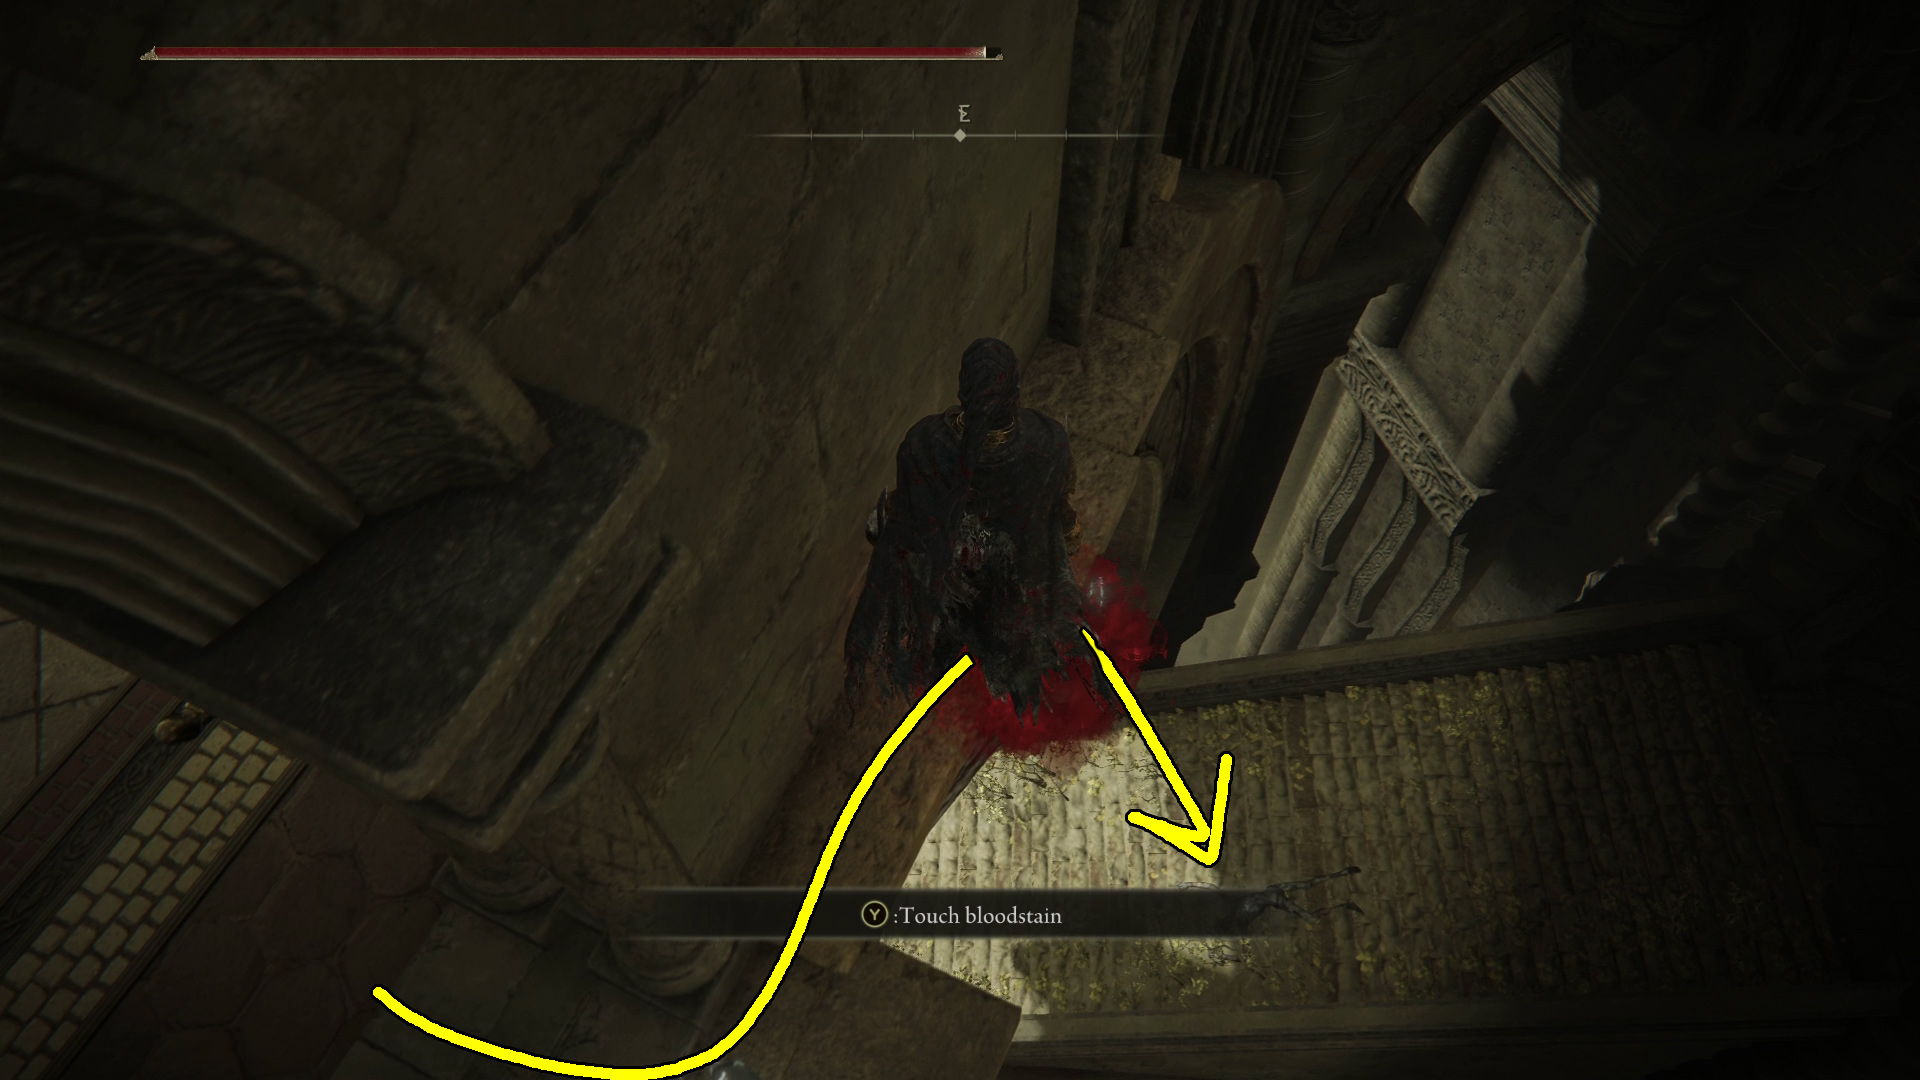
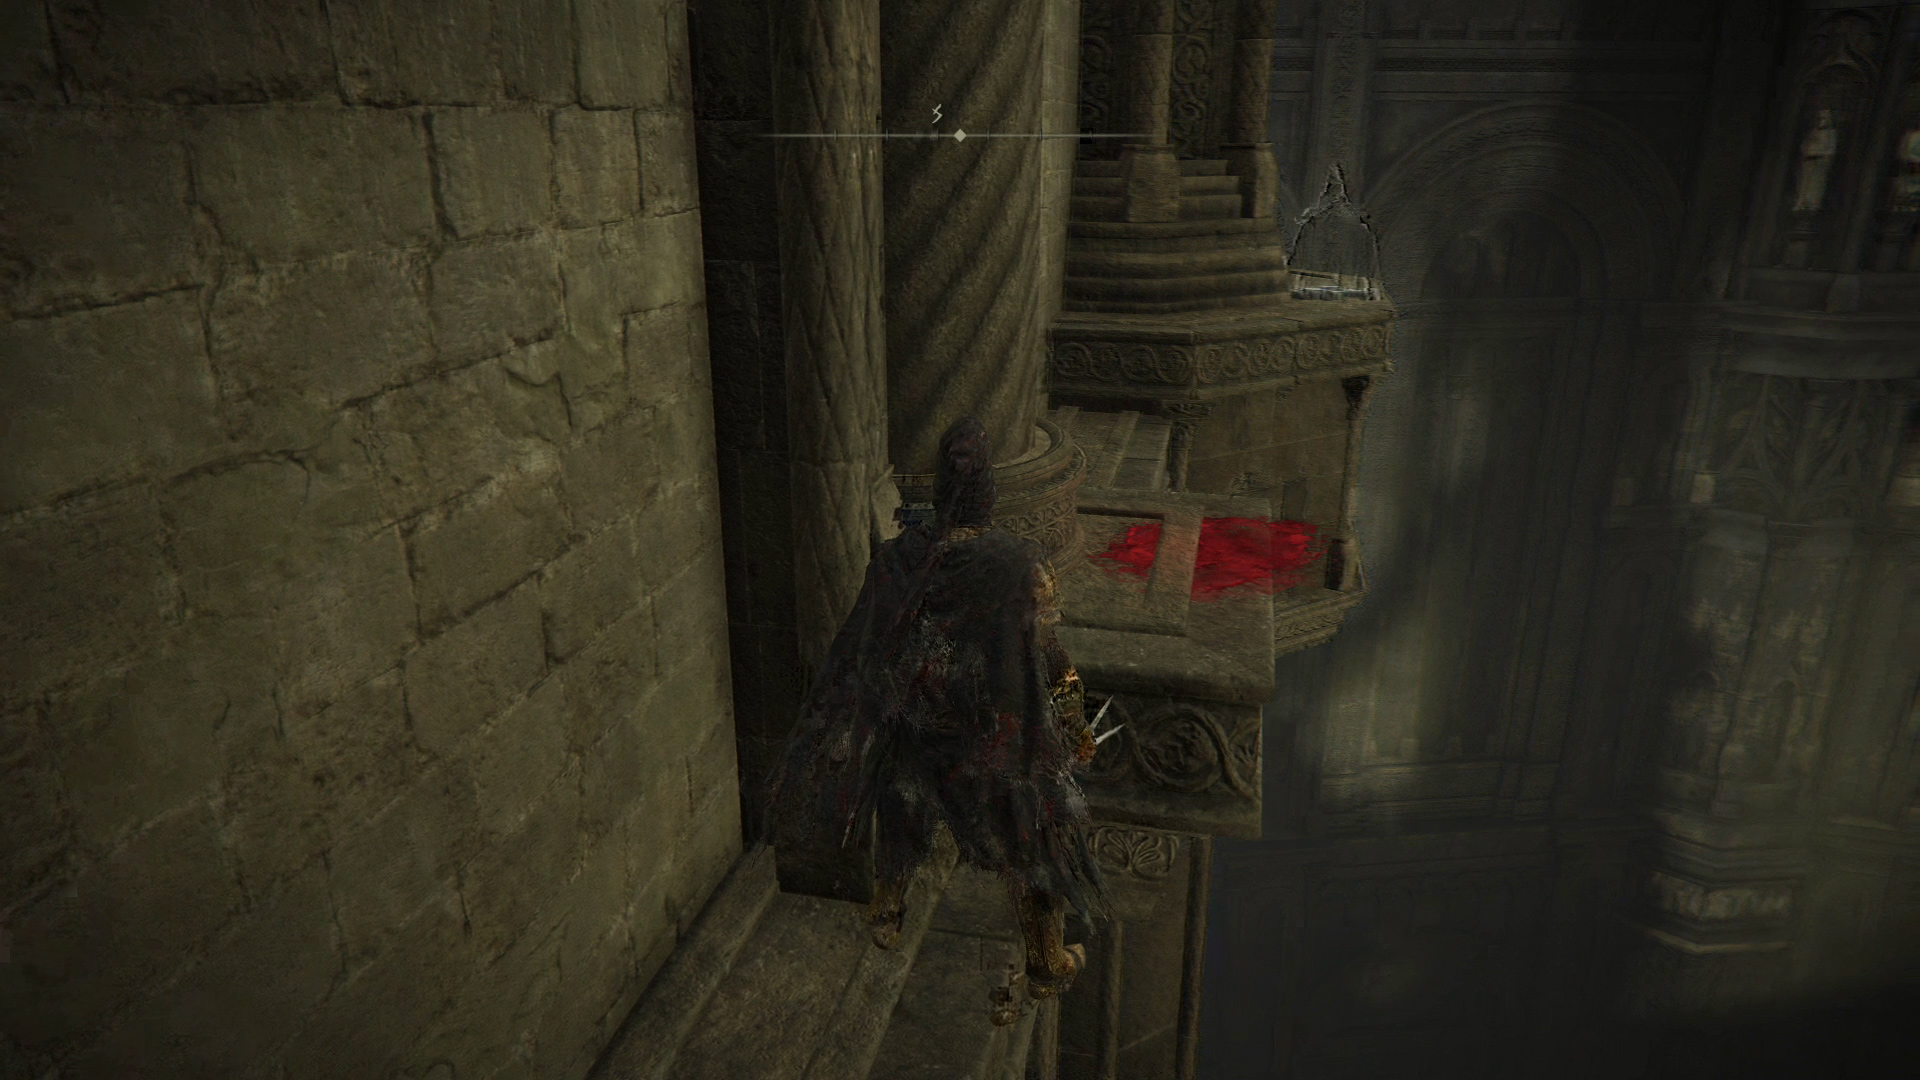
We’re going to back track now. Head east-southeast back down the stairs, then stop when you reach the platform where the channeler is (or was). On the the south-southeastern side of this platform is some Drawstring Golden Grease near a drop, so go slow when grabbing it. Then head to the opposite side of the platform and go down the stairs there (Image 1). Head through the archway and go west-northwest down the hall to find a sandy room with the Inquisitor Ashes. Go back the way you came and then go right (south) and out onto the broken balcony. Make your way very carefully out onto the small section of stones, primarily walking against the wall but also moving slightly east. Eventually, you wont be able to go further on the ledge, at which point you can fall off eastward, down onto the stairs (Image 2).
Image 1Image 2
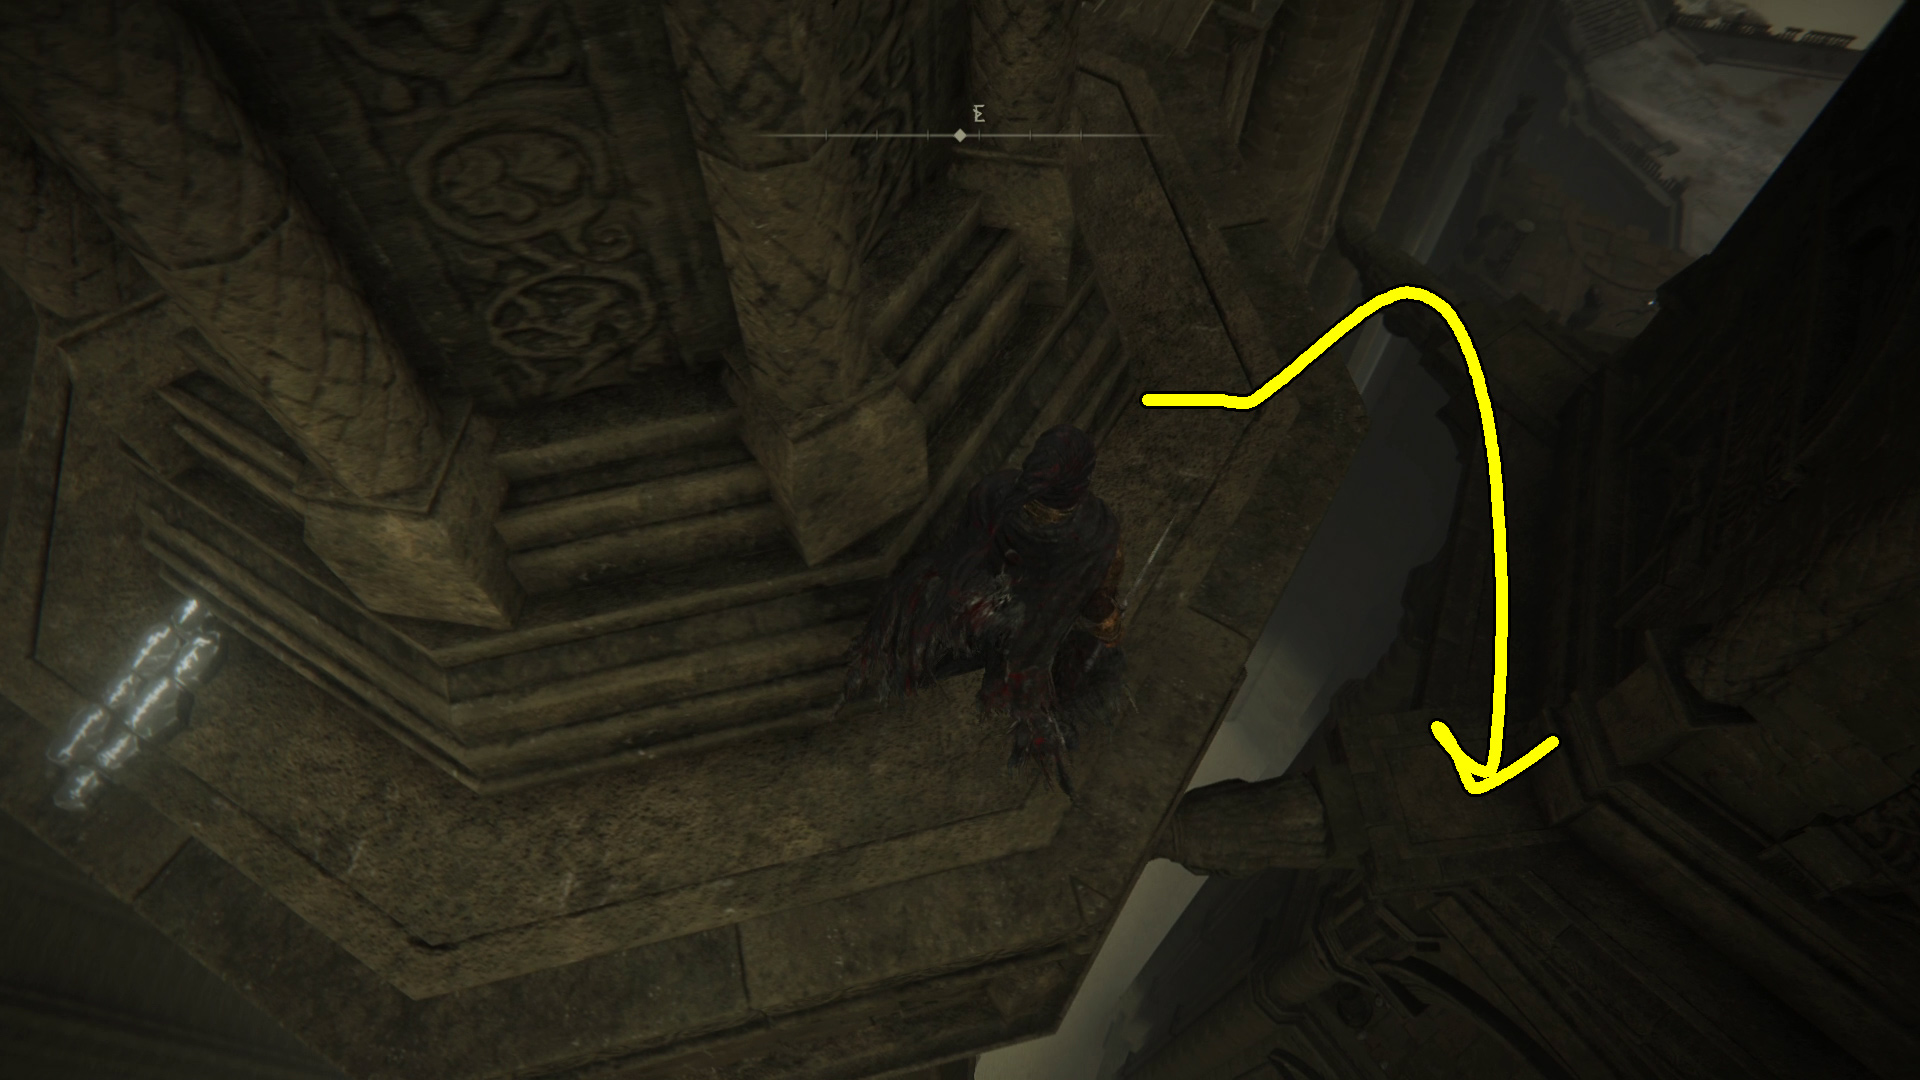
Right next to where you land is x2 Fireproof Pickled Liver. Grab it and head south up the stairs, then continue forward to the broken section of railing (Image 3). Drop down to the ledge below, then walk east and drop down again onto the square section around the pillar (Image 4). Head south along the ledges a bit and you’ll reach a broken section (Image 5) — if you jump across, you’ll be able to reach a corpse with Holyproof Pickled Liver. Whether you risk the jump or not, next you’ll need to drop down through the broken section — just walk mostly into the wall and slightly sideways and it’s an easy fall.
Image 3Image 4Image 5
After dropping, you can go northeast to find a corpse with x2 Smithing Stone [8], but note it’s a tricky jump up over a small ledge to reach it, and falling is pretty easy here. Either way, you’ll next need to head south-southeast, where another tricky jump is required to go forward. The key is to very slowly inch your way until you’re fairly far out on your current ledge (Image 6), and then jump while holding forward. If done correctly, you’ll go forward and sort of slide around the pillar, at which point you want to kill your forward momentum by letting go of the left stick.
Image 6
That done, you can continue forward and do a much easier jump, then make your way around the corner. You’ll next need to do another scary jump, though this one is straightforward: position as indicated, walk forward, and jump towards the bit of ledge that sticks out below (Image 7) — no need to sprint. Upon landing, you can go southwest to find x10 Lordsworn’s Bolt, and then make your way back to where you landed and go southeast. Keep following the ledge until you come to another broken spot, at which point you can drop onto the pillar below, and from there onto the ground (Image 8). You’ll be attacked as soon as you land, so be ready! Fortunately, it’s just a weak shadow mob that will attack you from up the stairs.
Image 7Image 8
After you deal with the shadow mob, go to the far side of the platform at the top of the stairs to find a Somber Smithing Stone [5], and then east down the stairs. On the landing a corpse holds a Fireproof Pickled Liver you can grab. Next comes the most difficult jump yet, so mentally prepare yourself. First, get a good look at the exact jump you need to make (Image 9). Then, back up to the “wall” behind you, then sprint and jump directly at the window (Image 10). (If you don’t like not having full vision of the jump, you can also hold sprint while running in a circle and then jump.)
Image 9Image 10
Belurat, Tower Settlement
Unique & Important Items
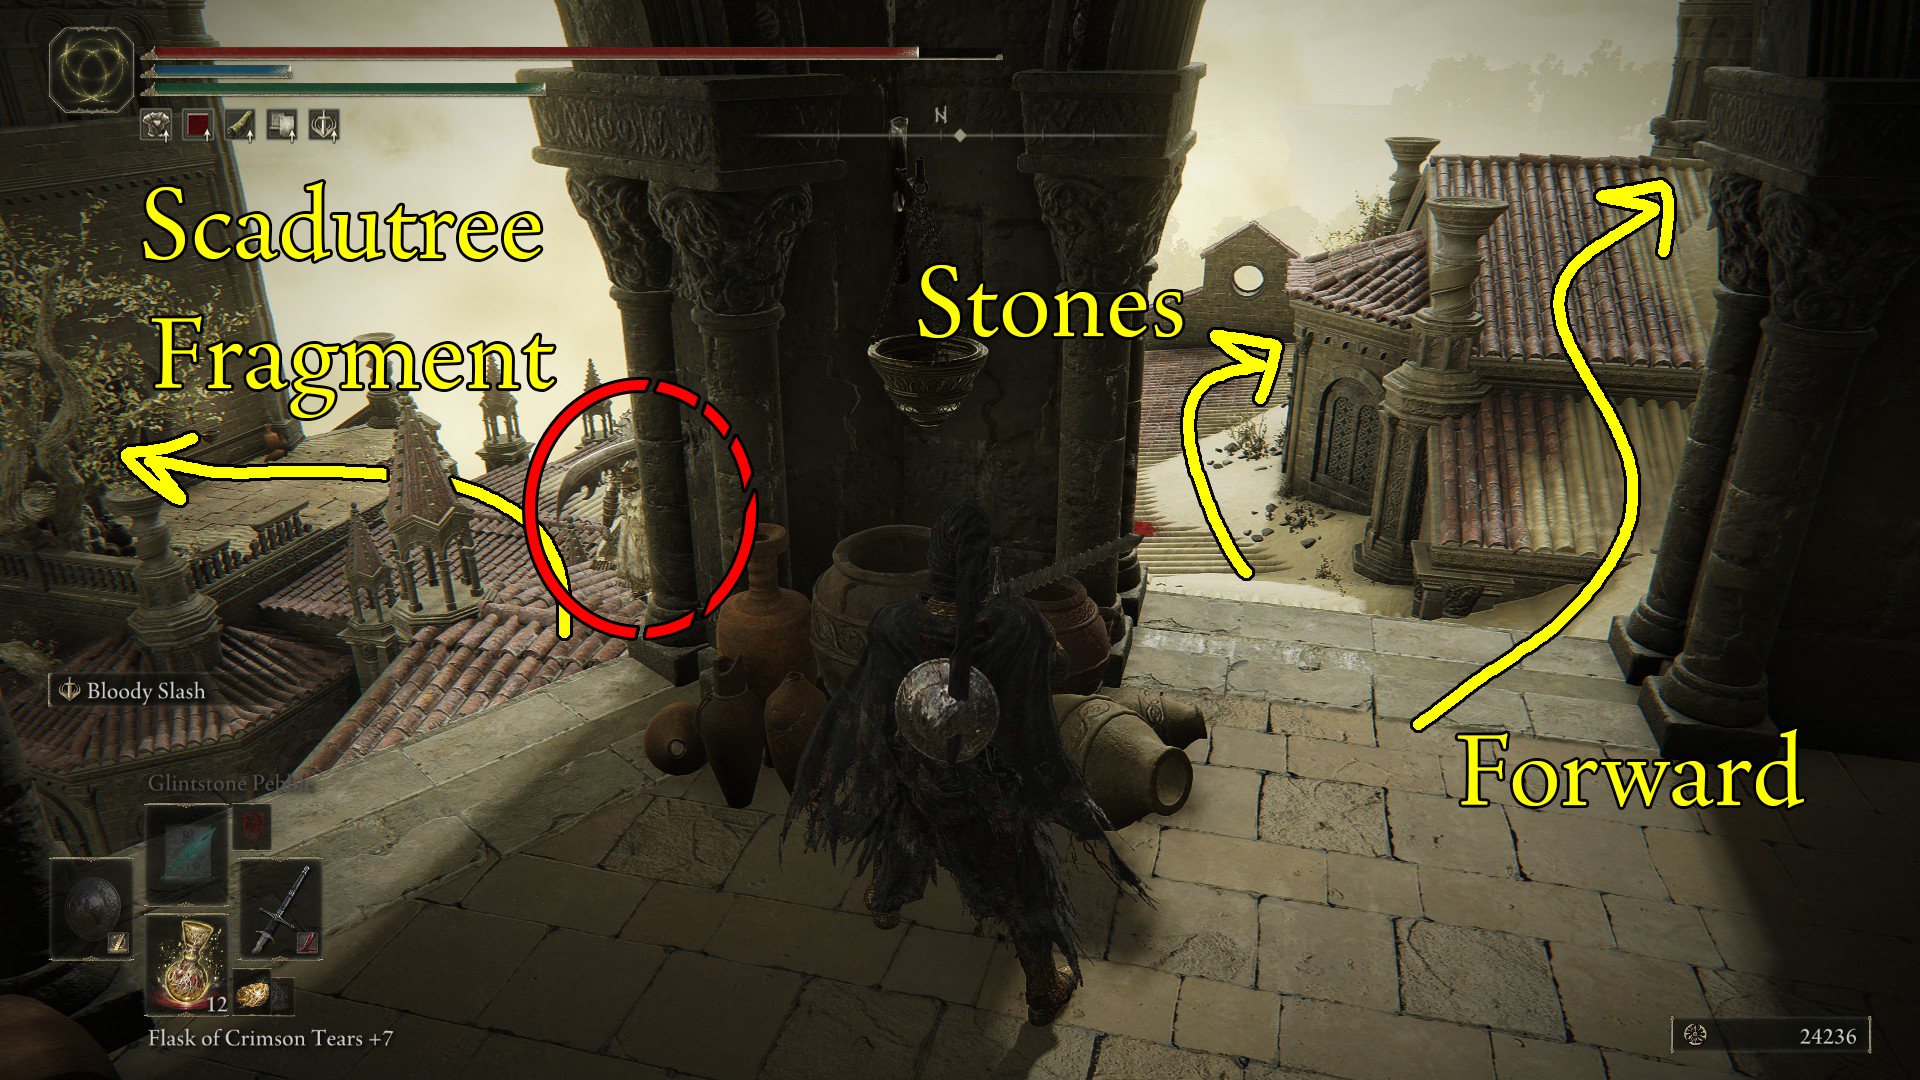
Scadutree Fragment
Euporia
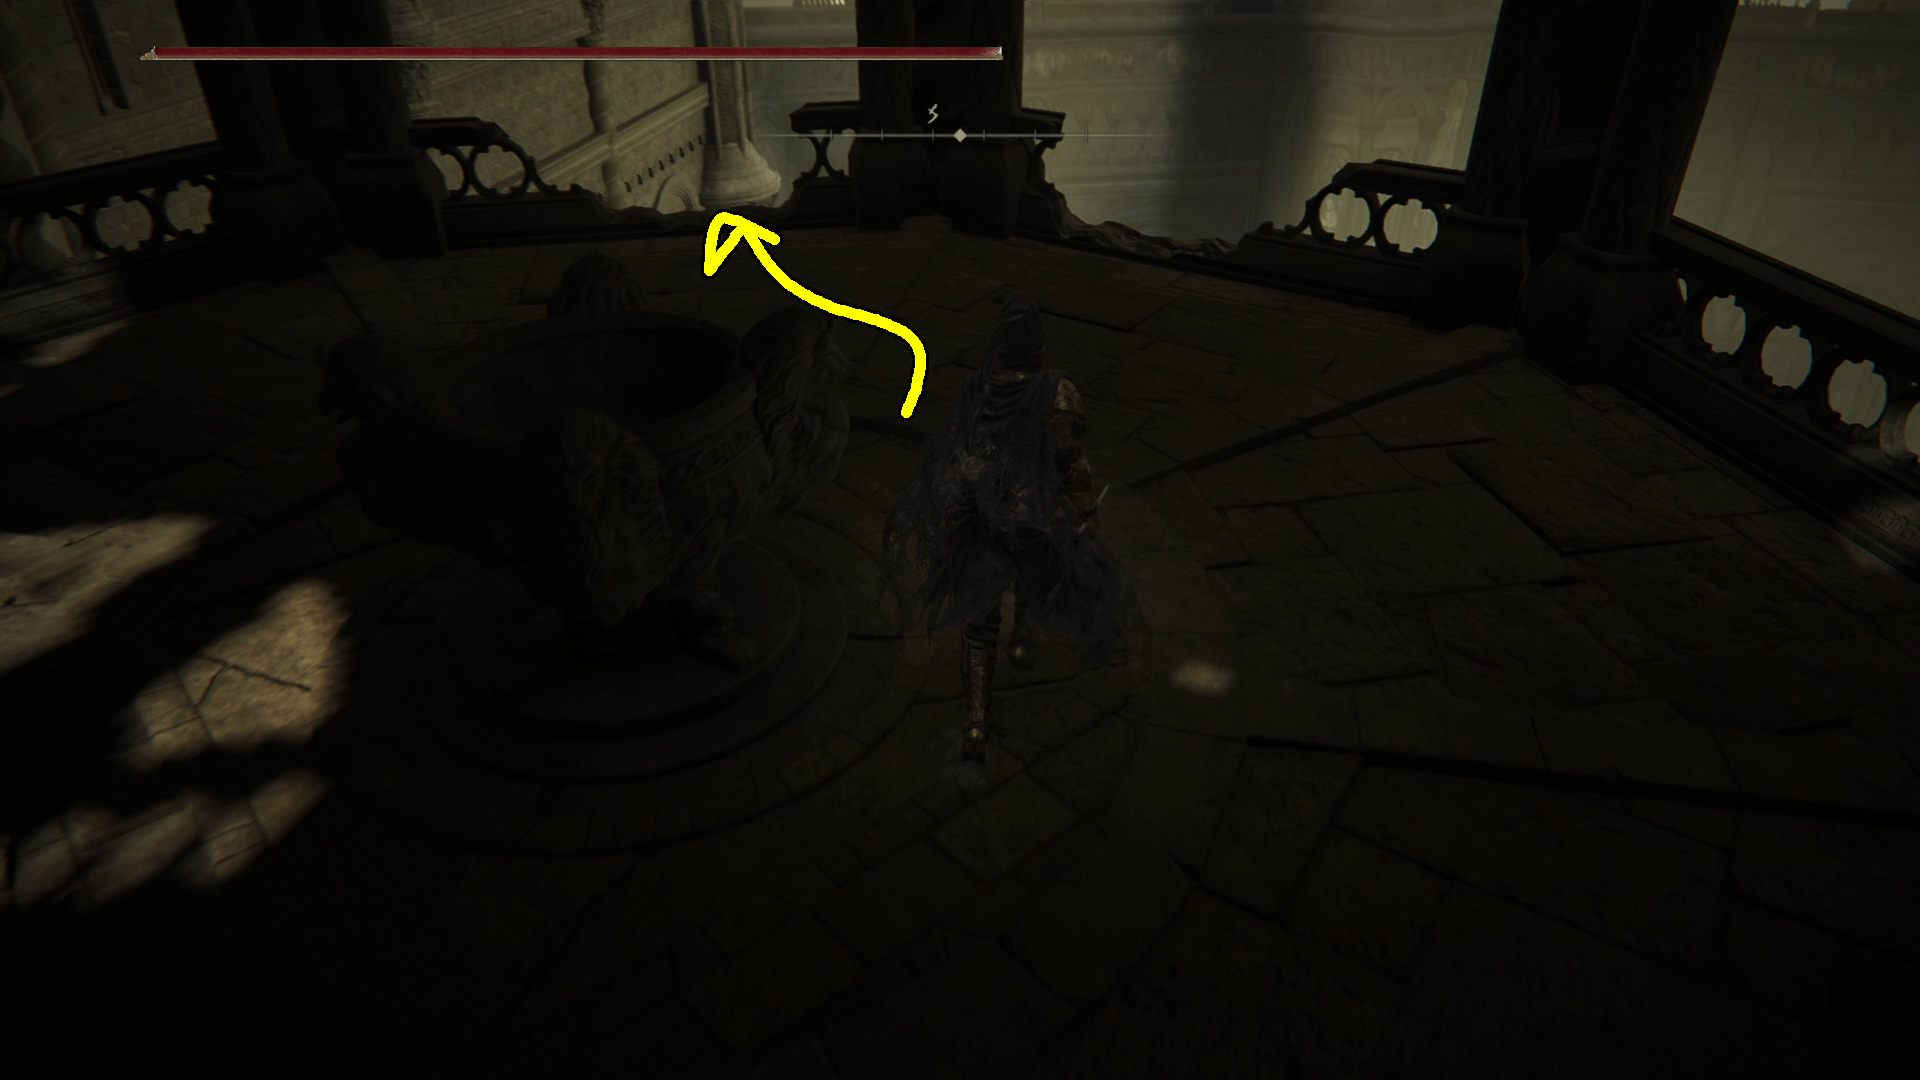
After making the jump, you should pat yourself on the back — but maybe not until you’ve dropped south down into the room and officially entered Belurat! There’s no item in this room to reward your sick jump, so head southeast and outside. A moment after you exit the building, a large scorpion will drop from above, so be ready. After dealing with the big bug, you can grab the Scadutree Fragment from the nearby shrine. To the northeast is the path back to Enir-Ilim, but we aren’t done here yet. Instead, go right (southeast) down the stairs, and activate the large elevator in the center of the structure.
Image 1
Ride it down, and then be very careful getting off of the elevator — there are multiple holes you can fall into. When it stops, make sure you’re facing southeast, then go down the stairs and outside. On your right to the southwest is another set of stairs, head on down and you’ll enter a small structure with three inquisitors. You can sneak up to one before the others notice you, if you’re careful. Once they’re all taken care of, head out the doorway to the southwest — down the stairs is a divine beast warrior just like the one we met earlier in between First and Spiral Rise. Once again, you can totally just run past this guy if you want.
Past the divine beast warrior is another small structure — continue inside and go down the stairs, and you’ll find an elevator. Ride it down, then head west across the bridge and open the large double doors. Inside, you’ll find the legendary weapon Euporia. After grabbing it, you can retrace your steps and ride the elevator back to Enir-Ilim… or you could just teleport to the Spiral Rise site of grace.
Spiral Rise
Unique & Important Items
x2 Scadutree Fragment
Horned Warrior Ashes
Gravebird Helm
Somber Ancient Dragon Smithing Stone
Horned Warrior’s Greatsword
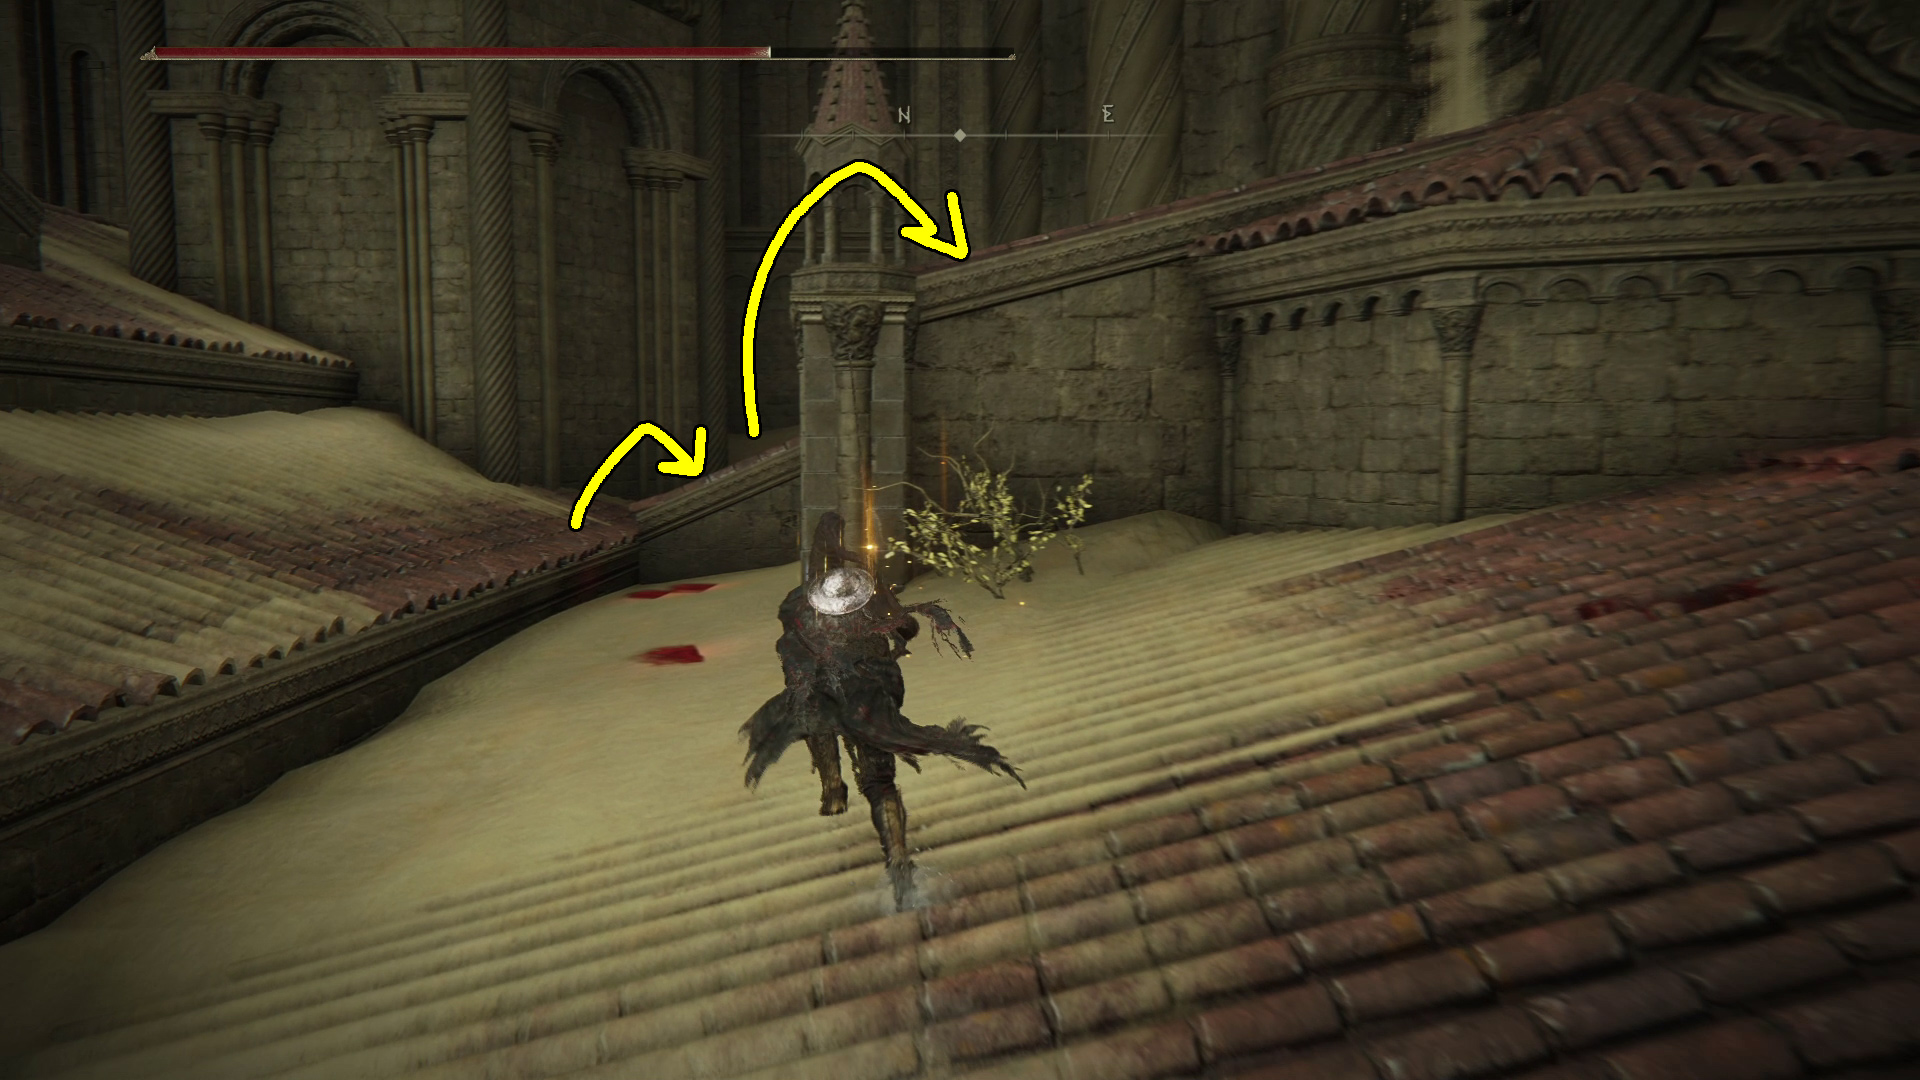
You probably already grabbed it, but there’s a Scadutree Fragment by Miquella’s Cross, which is right next to the Spiral Rise site of grace. From the site of grace, head up the nearby stairs, and keep going up until you find the windows. Jump through the window (Image 1), then its Time for revenge.
Image 1
Head southwest on the roof, and a narrow path will lead around the side of the building. You’ll need to jump to continue west onto a larger section of roof, at which point a bird will appear ahead — this guy has a high damage ranged attack, so melee users will need to gapclose quickly.Further nothwest is a second bird with the same ranged attack that you will likely aggro when you get close to the first bird, and there is a third bird around the corner ahead (Image 2), so melee characters will need to approach this section carefully.
After killing the first bird, you can aggro the far bird without aggroing the one hiding around the corner — once you get the far bird’s attention, go hide around the corner on your right and wait for it to come to you (this will let you avoid fighting two at once). After dispatching the birds, you can find x2 Smithing Stone [8] on the section of roof the third bird was hiding behind (Image 3).
Image 2Image 3
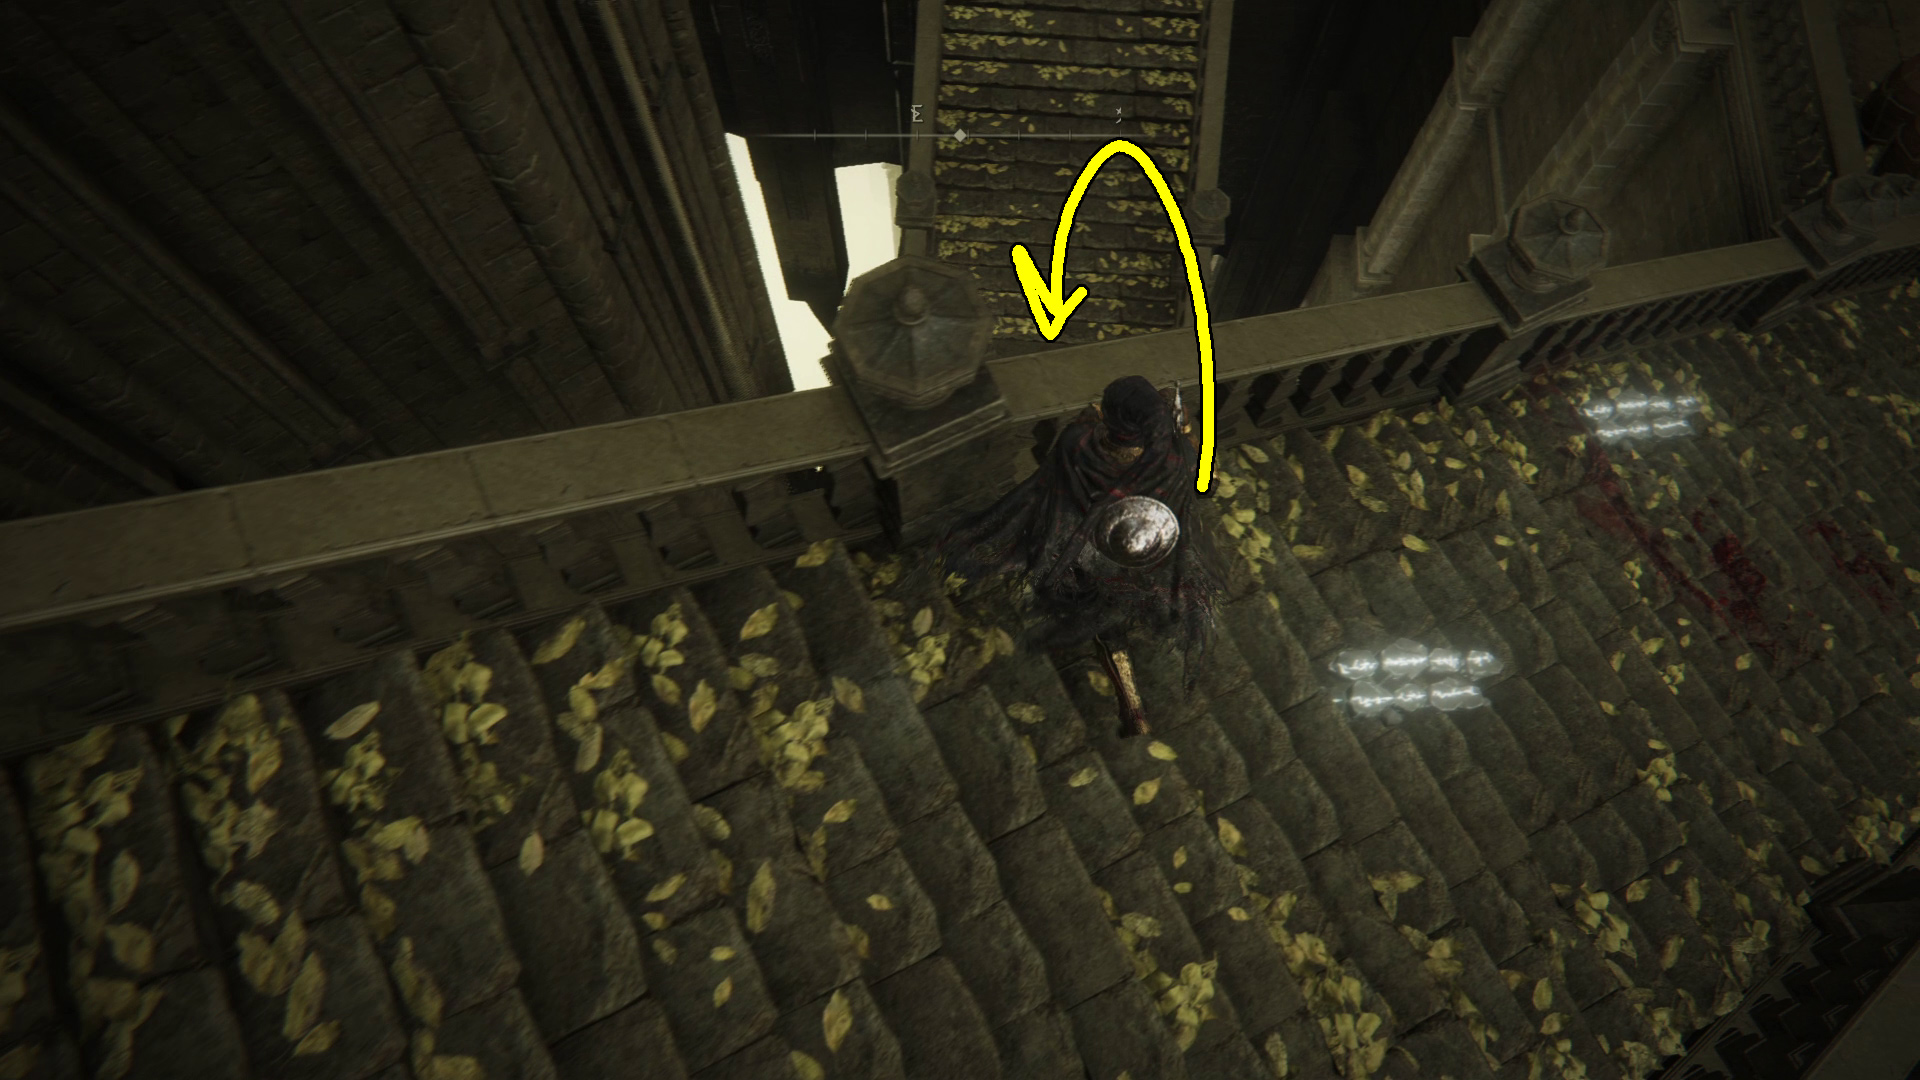
Head northwest and jump up from the roof onto the platform, and a bird will drop down while an inquisitor heads up the nearby stairs. Deal with both mobs, then go south-southwest into the building the bird landed in front of to find a Revered Spirit Ash. Head north up the stairs, but stop halfway up and jump down over the right onto the staircase below (Image 4). (Note that if instead of jumping, you continue up the stairs, you’ll find another inquisitor, and then up the next set of stairs you’ll reach the area with the beast warrior mentioned below.)
After jumping, down the stairs to find a Silver Horn Tender, then head up them and inside the building Here, you’ll find the Horned Warrior Ashes, x2 Neutralizing Boluses, and some Stanching Boluses. Then head through the doorway on the southern wall and go up the ladder. Go out onto the balcony, carefully grab the Golden Horn Tender, then go up the nearby ladder. Head forward and you’ll find yourself behind a divine beast warrior — this flavor has ice attacks! You can sneak past him, as he does have a bit of a patrol route; you can also simply run past him. You’ll want to grab the Scadutree fragment in the structure to the northwest, and from there go due east to find x2 Sunwarmth stones on a corpse. That done, you can head up the rooftop that’s next to where you found the Sunwarmth Stones.
Image 4Image 5
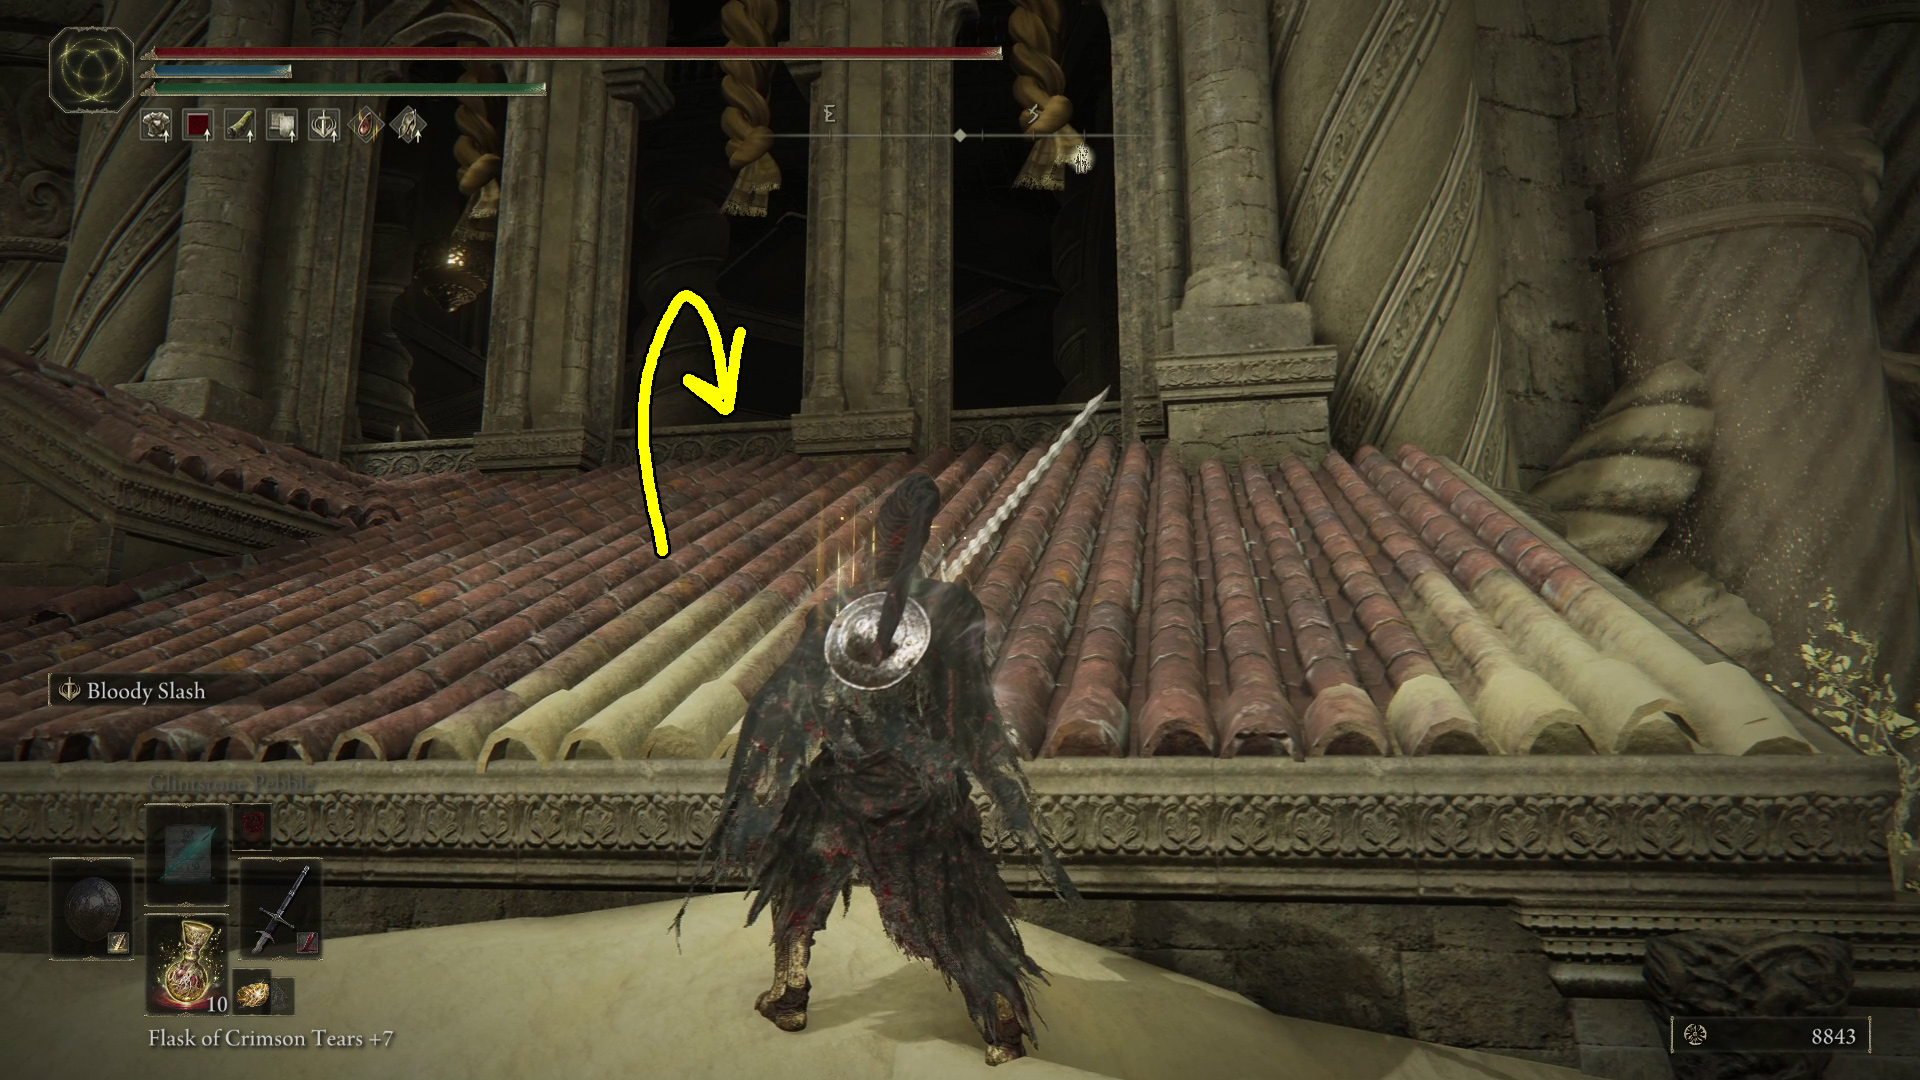
After going up on the roof, you’ll see windows to the southeast — head through them (Image 6), then go down the stairs a bit to find a Somber Smithing Stone [6].
Image 6
Next, head up the stairs, where you’ll find an elevator bringing an inquisitor to you. Kill them plus the other one on the nearby steps, then step on the elevator and ride it down. Look down over the southern side of the elevator, and you’ll see an item on the top of an altar, so drop off onto the altar to find the Gravebird Helm — if you miss it, you can just ride the elevator back up and try again.
After grabbing the helm, you can drop onto the lower sections of the altar to reach the ground. Head out the doorway on the northern wall, go down the stairs, and into the circular chamber. A Curseblade will attack you here, and without torrent it can be hard to run past him, but it’s possible to simply avoid him. Through the doorway he came through on a broken staircase you’ll find a Somber Ancient Dragon Smithing Stone.
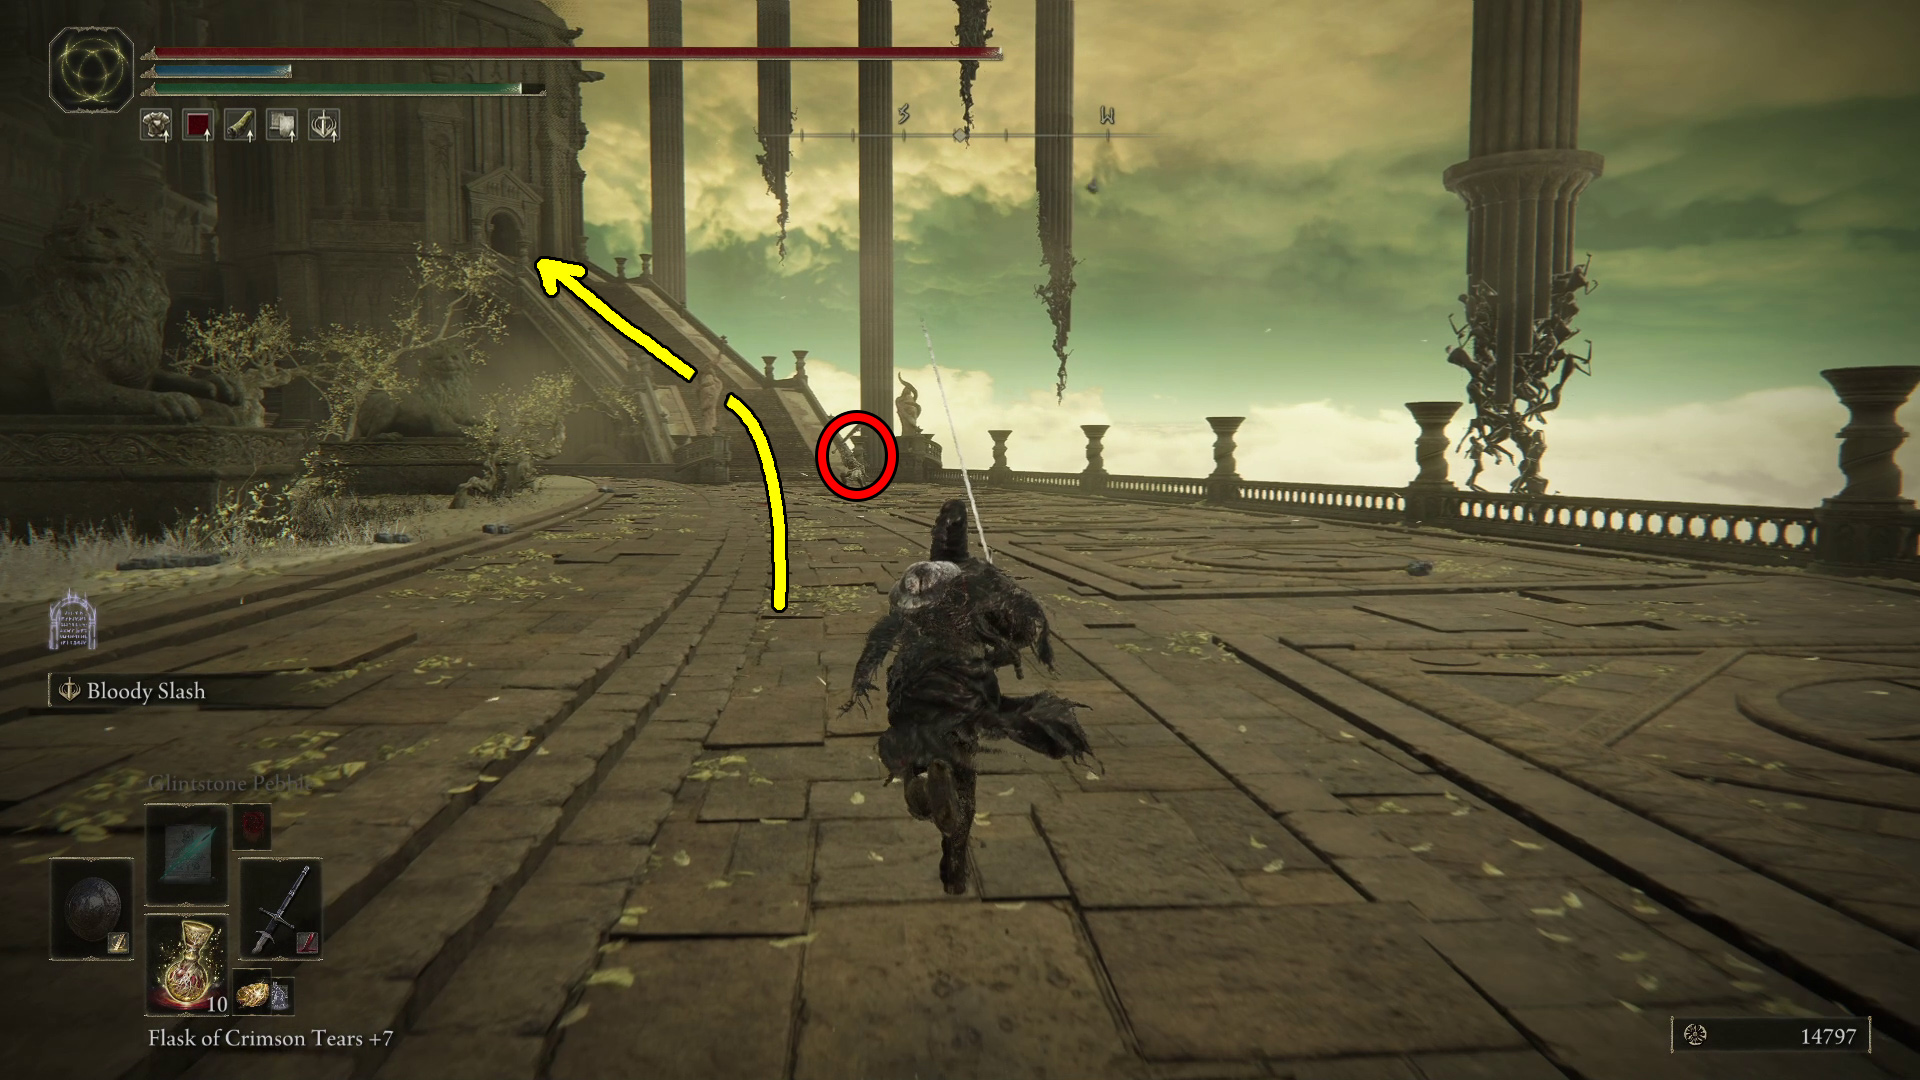
Head back the way you came and ride the elevator back up, then go south-southwest up the stairs and outside. Up the next set of stairs you’ll find a huge platform, where you can fight a final divine beast warrior — this one’s got wind magic, and drops the Horned Warrior’s Greatsword. You can summon spirit ashes here, which can help a lot if you want to fight him, but before you fight him, it’s best to run past him and up the stairs (Image 7) to the site of grace. If you want, you can summon a spirit ash and let it take aggro before you do so.
Image 7
Up the stairs, go inside to find the Cleansing Chamber Anteroom site of grace. Activate it, and then you can go back down the stairs and beat up that divine beast warrior — it’ll have its back to you, so you can sneak up and charge a heavy or use an Ash of War if you like. Once you claim your prize — or give up — return to the Cleansing Chamber Anteroom site of grace.
Cleansing Chamber Anteroom & Divine Gate
Unique & Important Items
x1 Scadutree Fragment
Circlet of Light
Various NPC drops (see below)
Depending on how far along you got various NPC questlines, you’ll be able to obtain certain armor sets, weapons, and spells (Dane seems to be the only one that always shows up allied with Leda). These will drop either after the fight with Leda and her allies, or after the fight with Radahn. In both cases, it appears you’ll need to summon the NPCs in order for their equipment to drop (unless Leda summons them). Note that you may have to reload each area to get the loot to spawn.
Here is the full list:
Needle Knight Leda
Leda’s Sword
Leda’s Armor
Sir Ansbach
Obsidian Lamina
Ansbach’s Set
Furious Blade of Ansbach
Thiollier
Thiollier’s Set
Thiollier’s Hidden Needle
Redmane Freyja
Freyja’s Greatsword
Freyja’s Set
Moore
Verdigris Set
Verdigris Greatshield
Dryleaf Dane
Dane’s Footwork
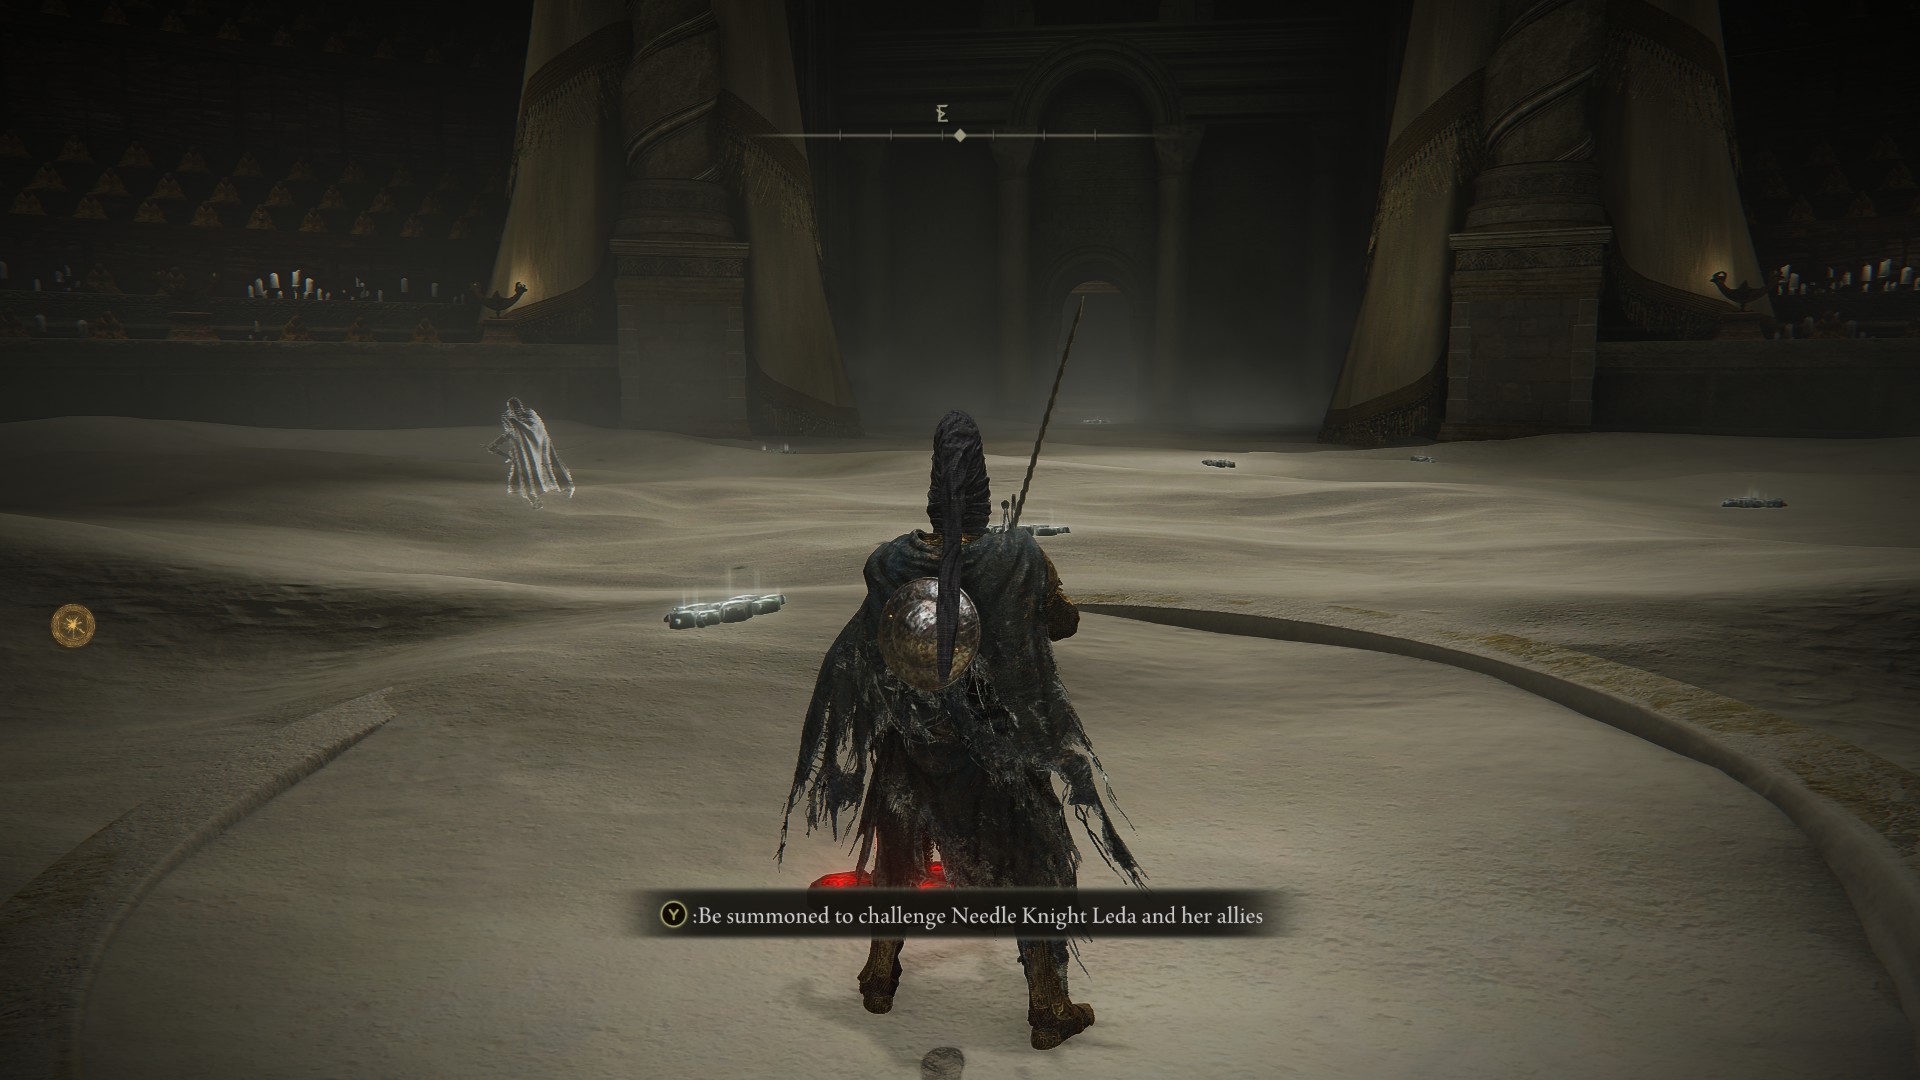
From the Cleansing Chamber Anteroom site of grace, all there is to do is grab the nearby Scadutree Fragment and then head up the stairs that lead east. You’ll enter a large sandy chamber, where Needle Knight Leda will give a brief speech. At this point, you can summon any allies you’ve managed to collect along the day, and when you’re ready, you can activate the red summon sign to start the battle (Image 1).
Image 1
It’s a long fight against up to 5 NPCs, so mentally prepare yourself, and prep any consumables you might want. You should also make sure you summon any available NPCs via their summon signs, both to make the fight more manegable and to get their drops.
After defeating Leda and her allies, make sure you loot all of their corpses! Then go through the doorway on the eastern side of the arena. On your right will be Leda’s corpse, with Leda’s Armor on it. Grab it and head north up the stairs, and forward onto the elevator. Ride it up, and then if you like you can speak with Ansbach, who should be standing by the doorway if you followed his questline.
Head outside and run up the stairs, and activate the Divine Gate Front Staircase site of grace on the penultimate landing. Up ahead is the boss fog gate for Promised Consort Radahn, the final boss of the DLC! There will be summon signs for Thiollier and Sir Ansbach outside the fog wall if you’ve followed thier questlines– note that you’ll be able to collect the equipment of NPCs you summon, so you may want to do so for this first time beating this boss if you’re trying to collect everything.
Winning this fight will let you activate the Gate of Divinity site of grace near the entrance of the arena. You’ll also be able to find equipment from any NPCs you summoned for the fight, and interact with the glowing yellow ball in the center of the arena to see a memory — when it ends, you’ll receive the Circlet of Light.
And with that, the DLC comes to an end! Assuming you’ve already beaten all the optional bosses of course, and and explored all the optional areas (we’re still working on those guides, but they are coming). We hope these guides were helpful, and we can’t wait to guide you through another FromSoft masterpiece soon.
Unabashed FromSoftware fanboy still learning to take his time with games (and everything else, really). The time he doesn't spend on games is spent on music, books, or occasionally going outside.
Thanks for the guide! Rather than dropping down over the railing to get to the Inquisitor Ashes, there is a stairway pathway on the other side that you can walk down…Northeast, if you’re heading West and right before the final set of main stairs.
Daiphuc
4 months ago
For anyone doing any kind of jumping puzzle, you should equip a Placidusax’s Ruin incantation (if you have the stat for it).
If you missed any jump, use the incantation. It has a 17-second-long animation that freezes you in midair. Just quit out during the animation and you will be back at the start before you jump.


Thanks for the guide! Rather than dropping down over the railing to get to the Inquisitor Ashes, there is a stairway pathway on the other side that you can walk down…Northeast, if you’re heading West and right before the final set of main stairs.
For anyone doing any kind of jumping puzzle, you should equip a Placidusax’s Ruin incantation (if you have the stat for it).
If you missed any jump, use the incantation. It has a 17-second-long animation that freezes you in midair. Just quit out during the animation and you will be back at the start before you jump.
This is a killer tip! I’ll get it added to the guide.