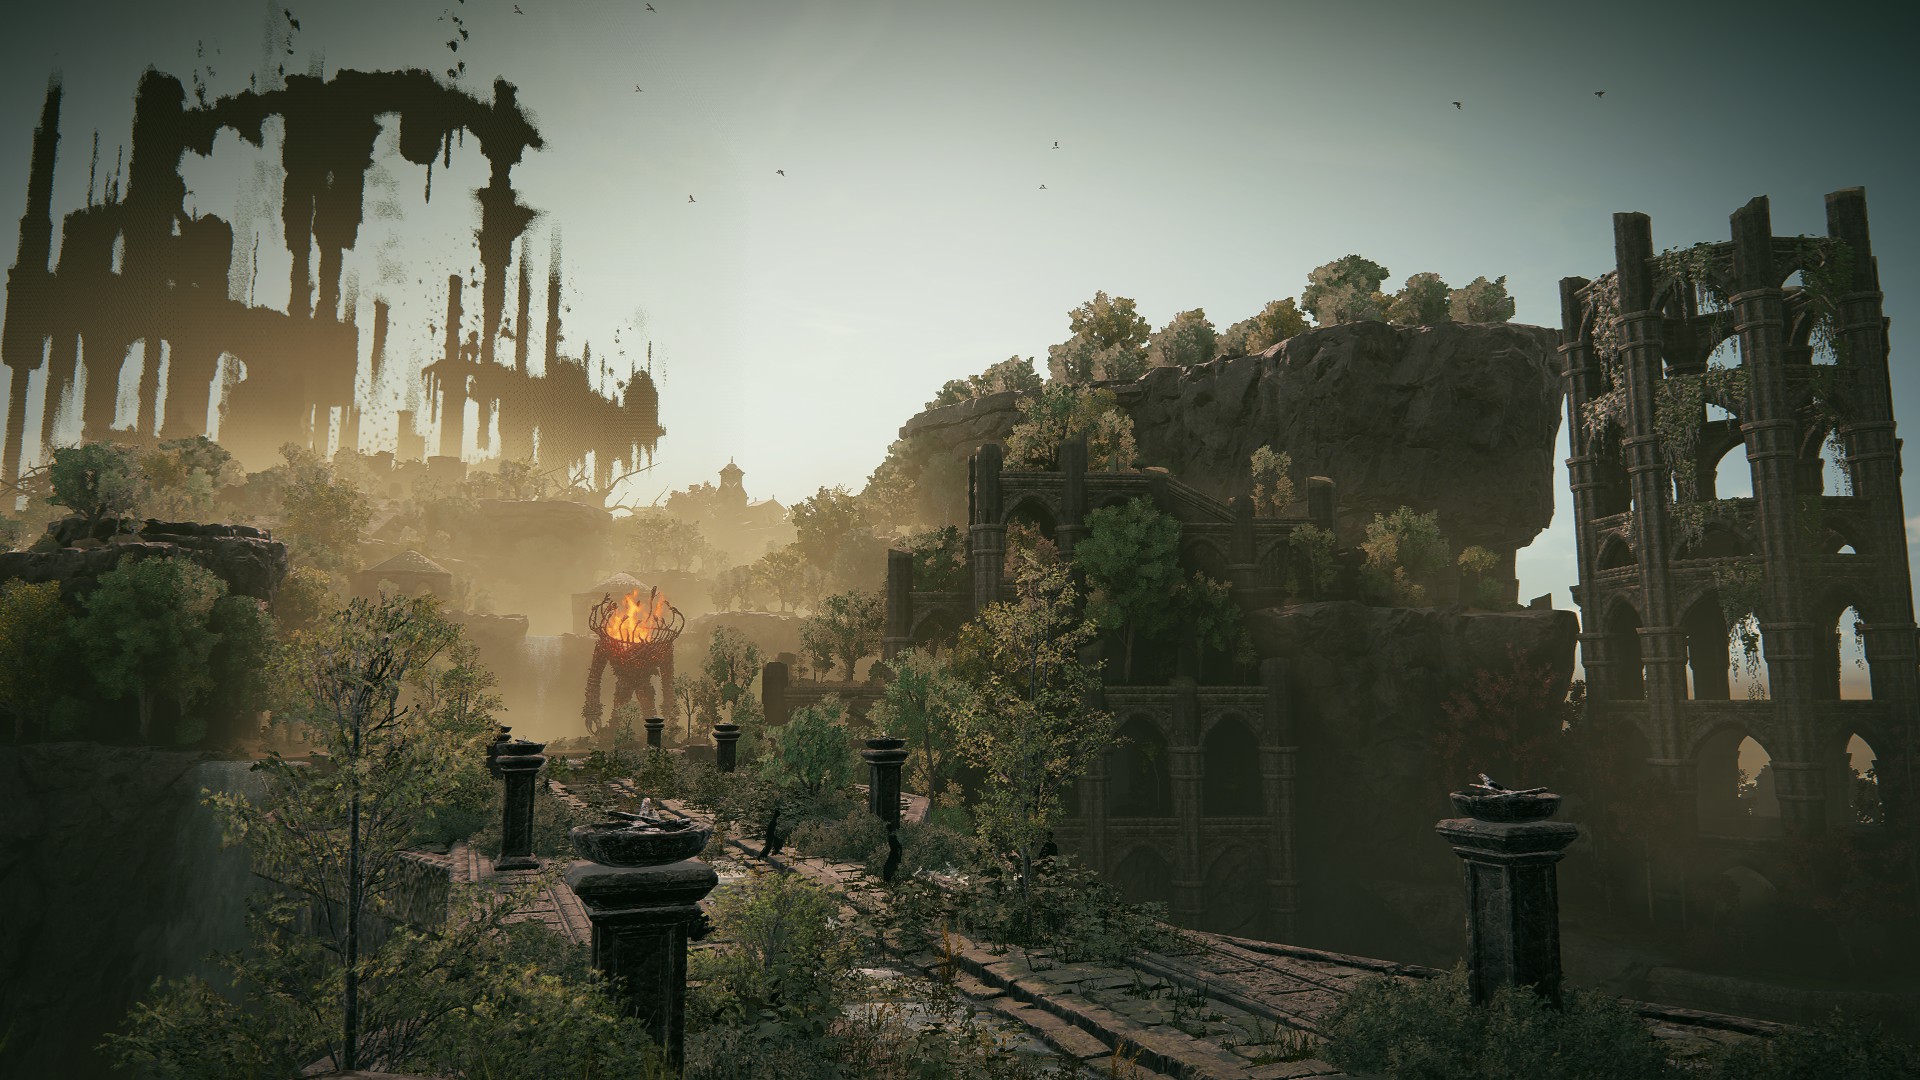
The Ancient Ruins of Rauh offer a respite from the dark and somber environments of the DLC, with lush green fields and sunny ruins. Naturally, there’s also some rot here, because otherwise it would be too nice of a place.
How to Get to the Ancient Ruins of Rauh
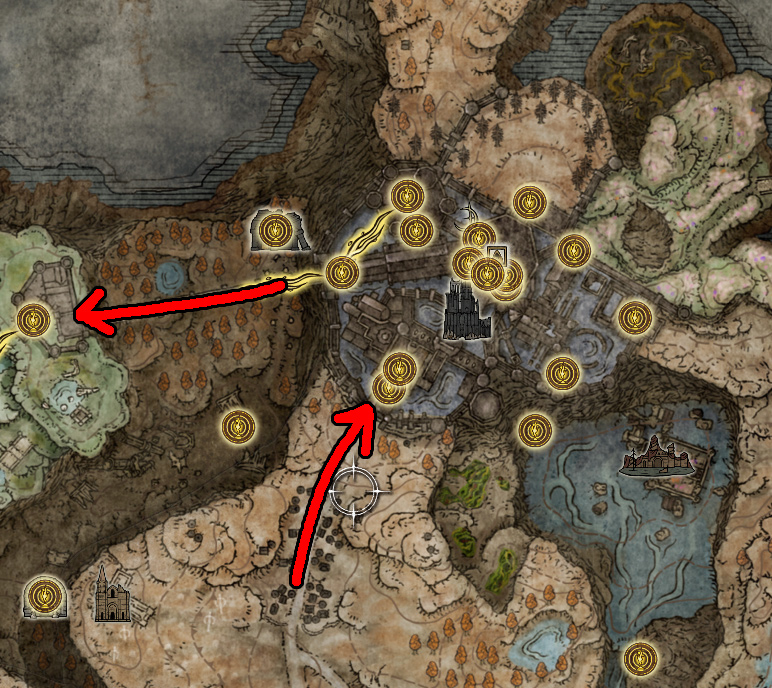
To reach this area, you must go through Shadow Keep, which is found in Scadu Altus. In Shadow Keep, you’ll need to enter the Specimen Storehouse. From the first floor of the storehouse, you can take an elevator down to the basement, and then continue through the subsequent area to reach the West Rampart site of grace — from there, crossing the bridge west will take you to the Ancient Ruins of Rauh.
For detailed instructions on reaching the West Rampart, see the Route to West rampart section of our Shadow Keep Guide.
Area Map
West Rampart
Unique & Important Items
Salza’s Hood
Rain of Fire
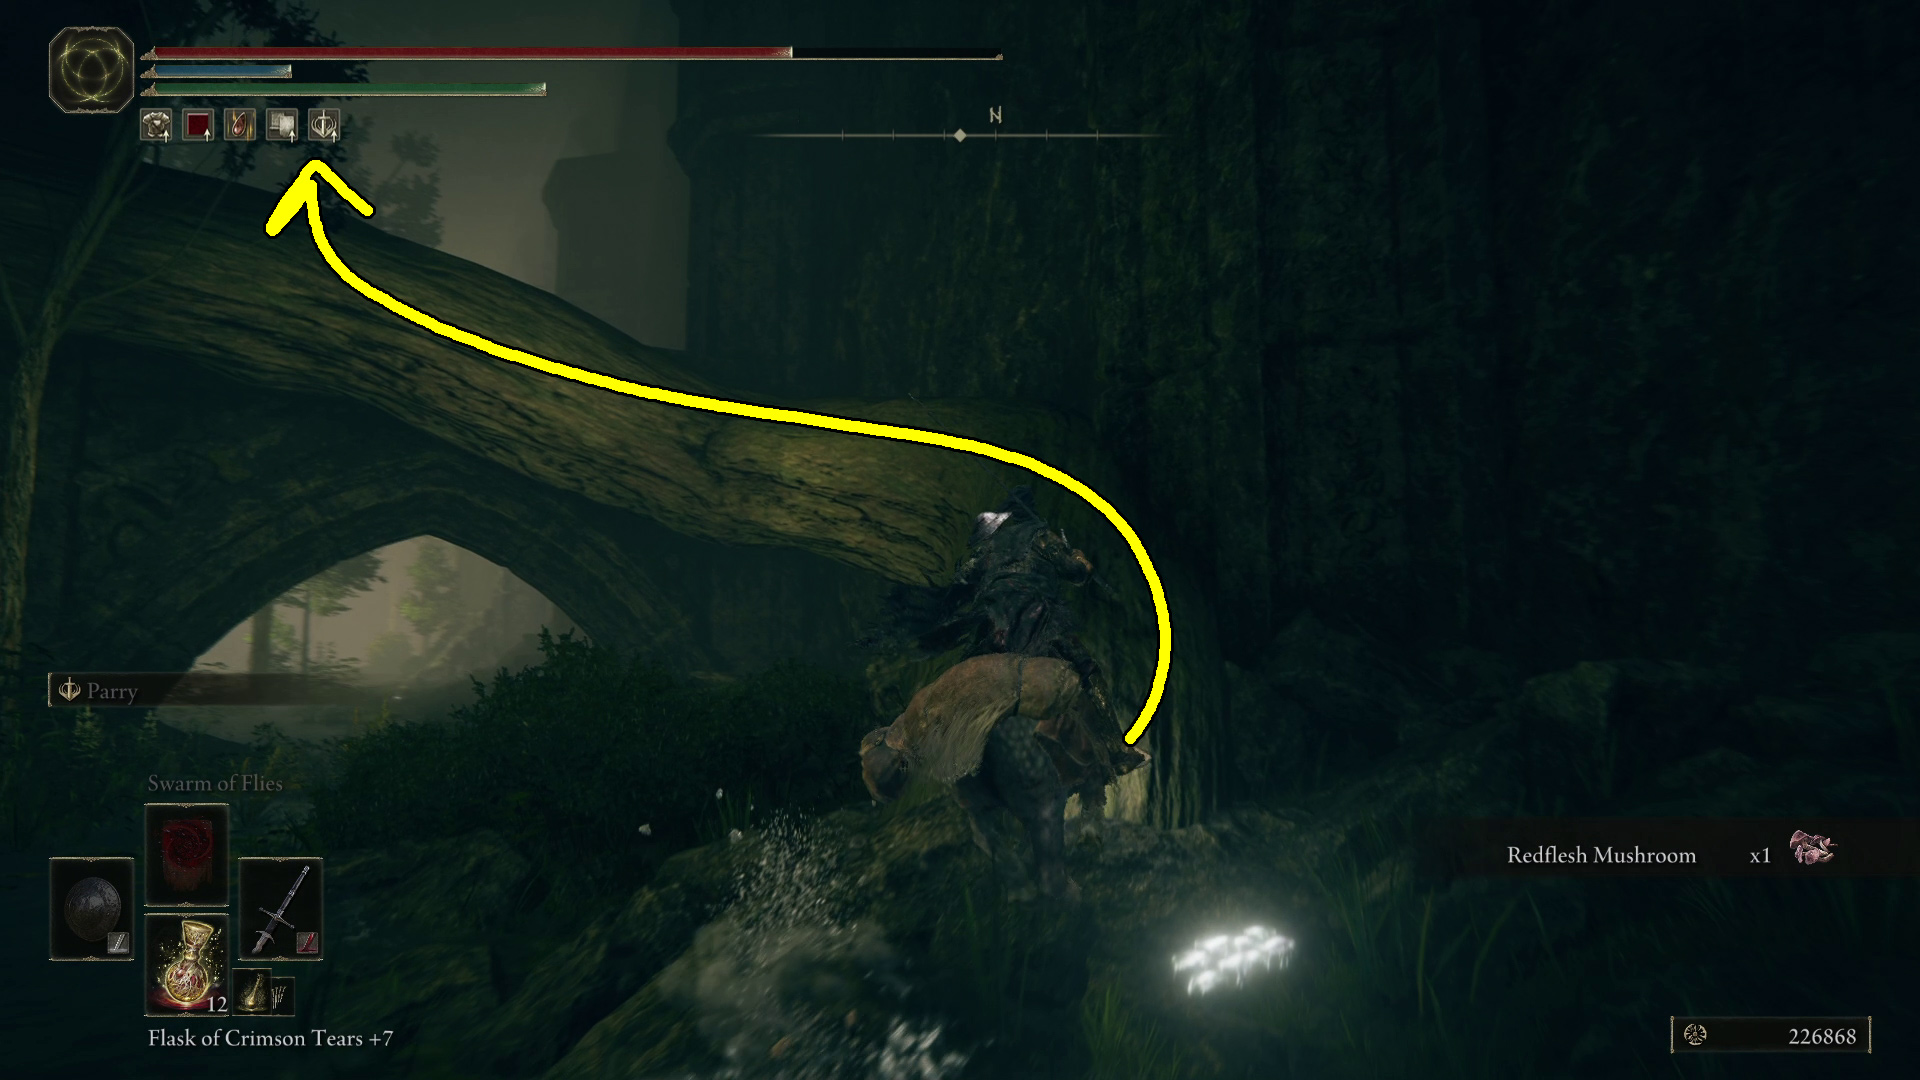
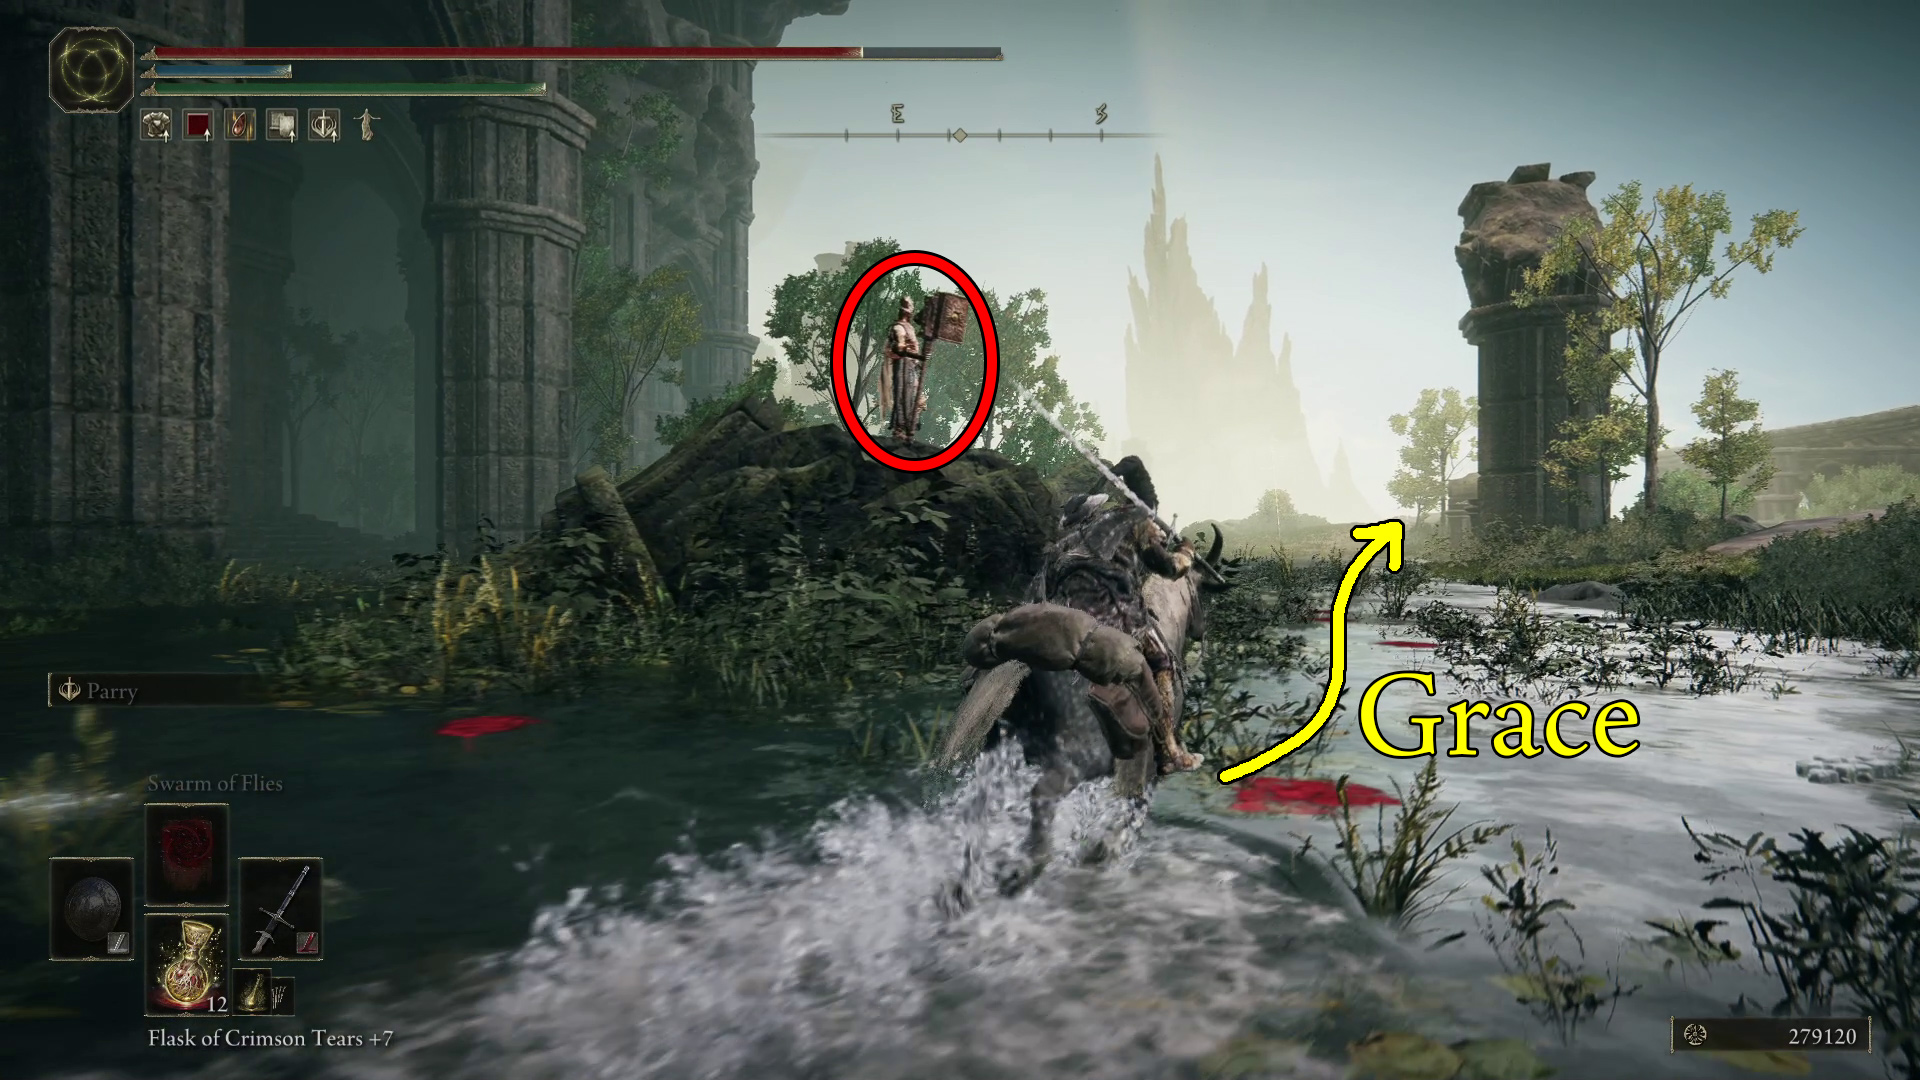
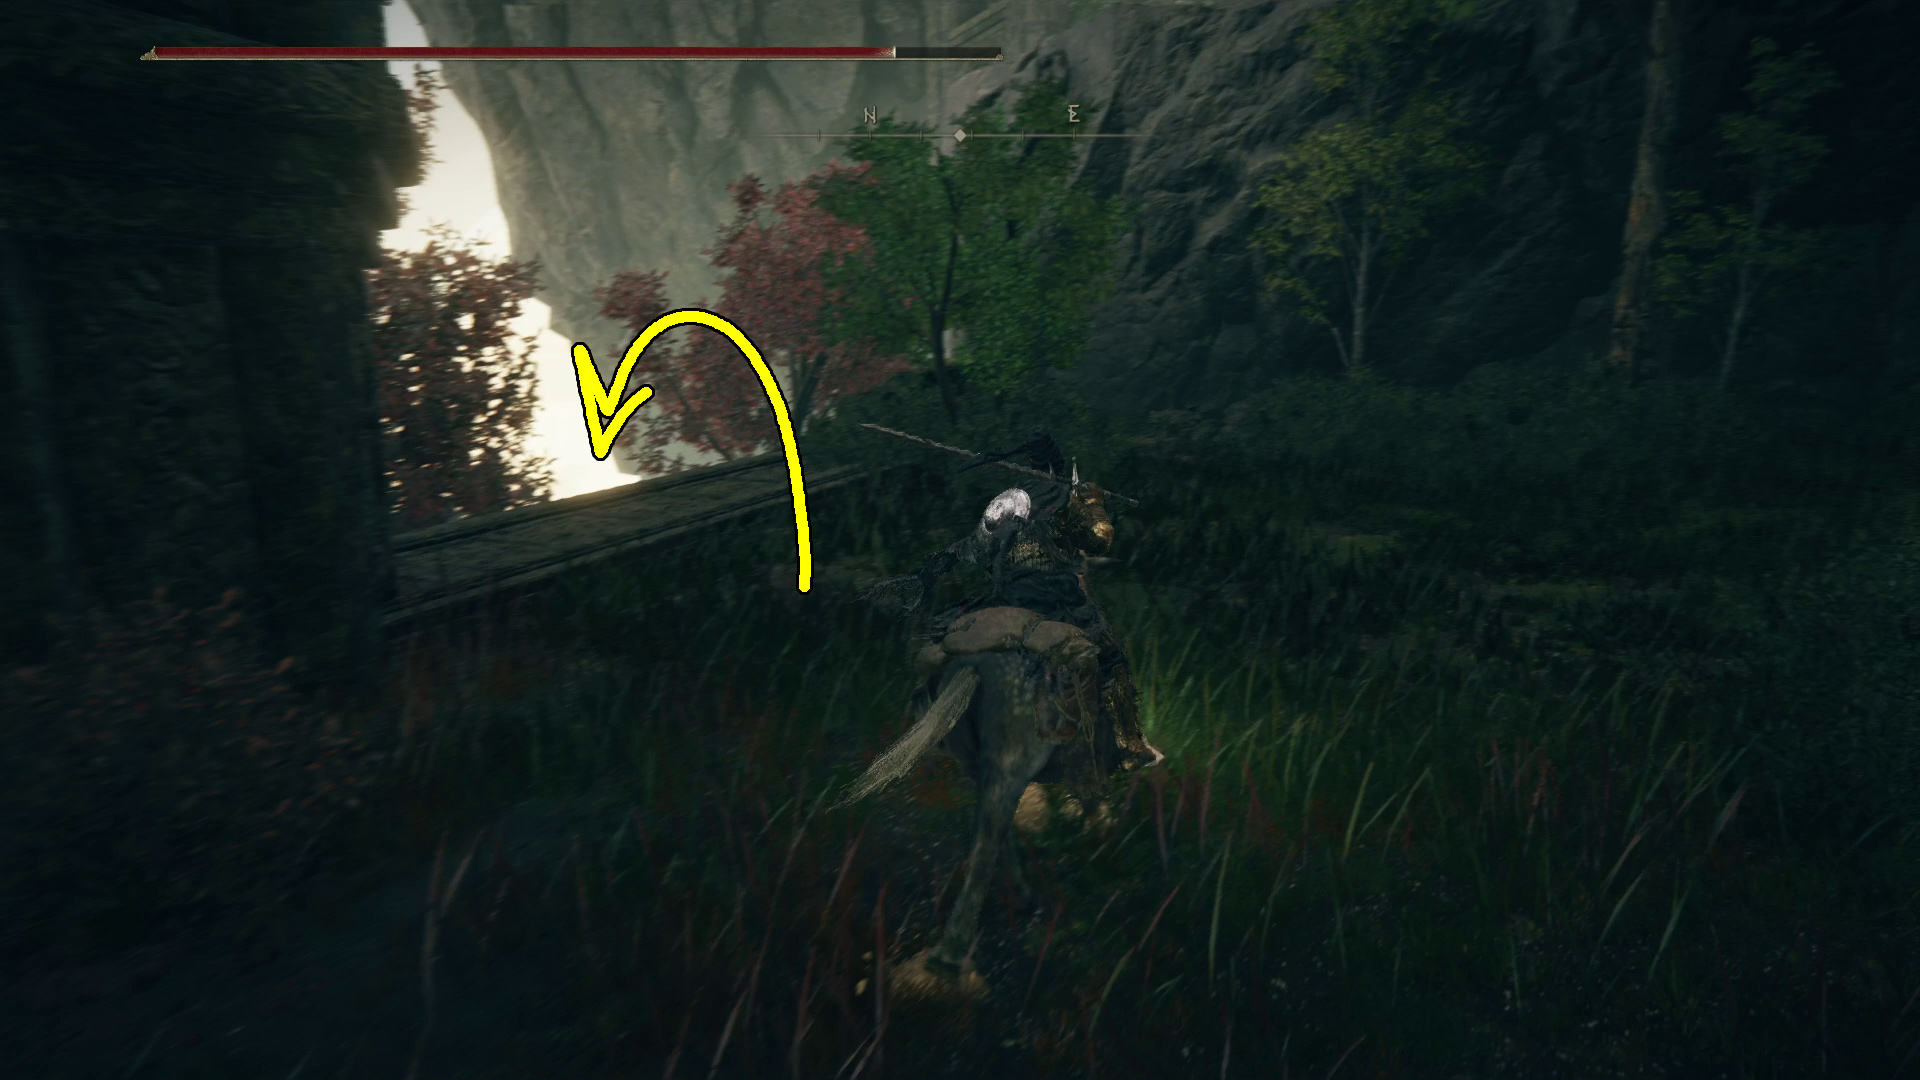
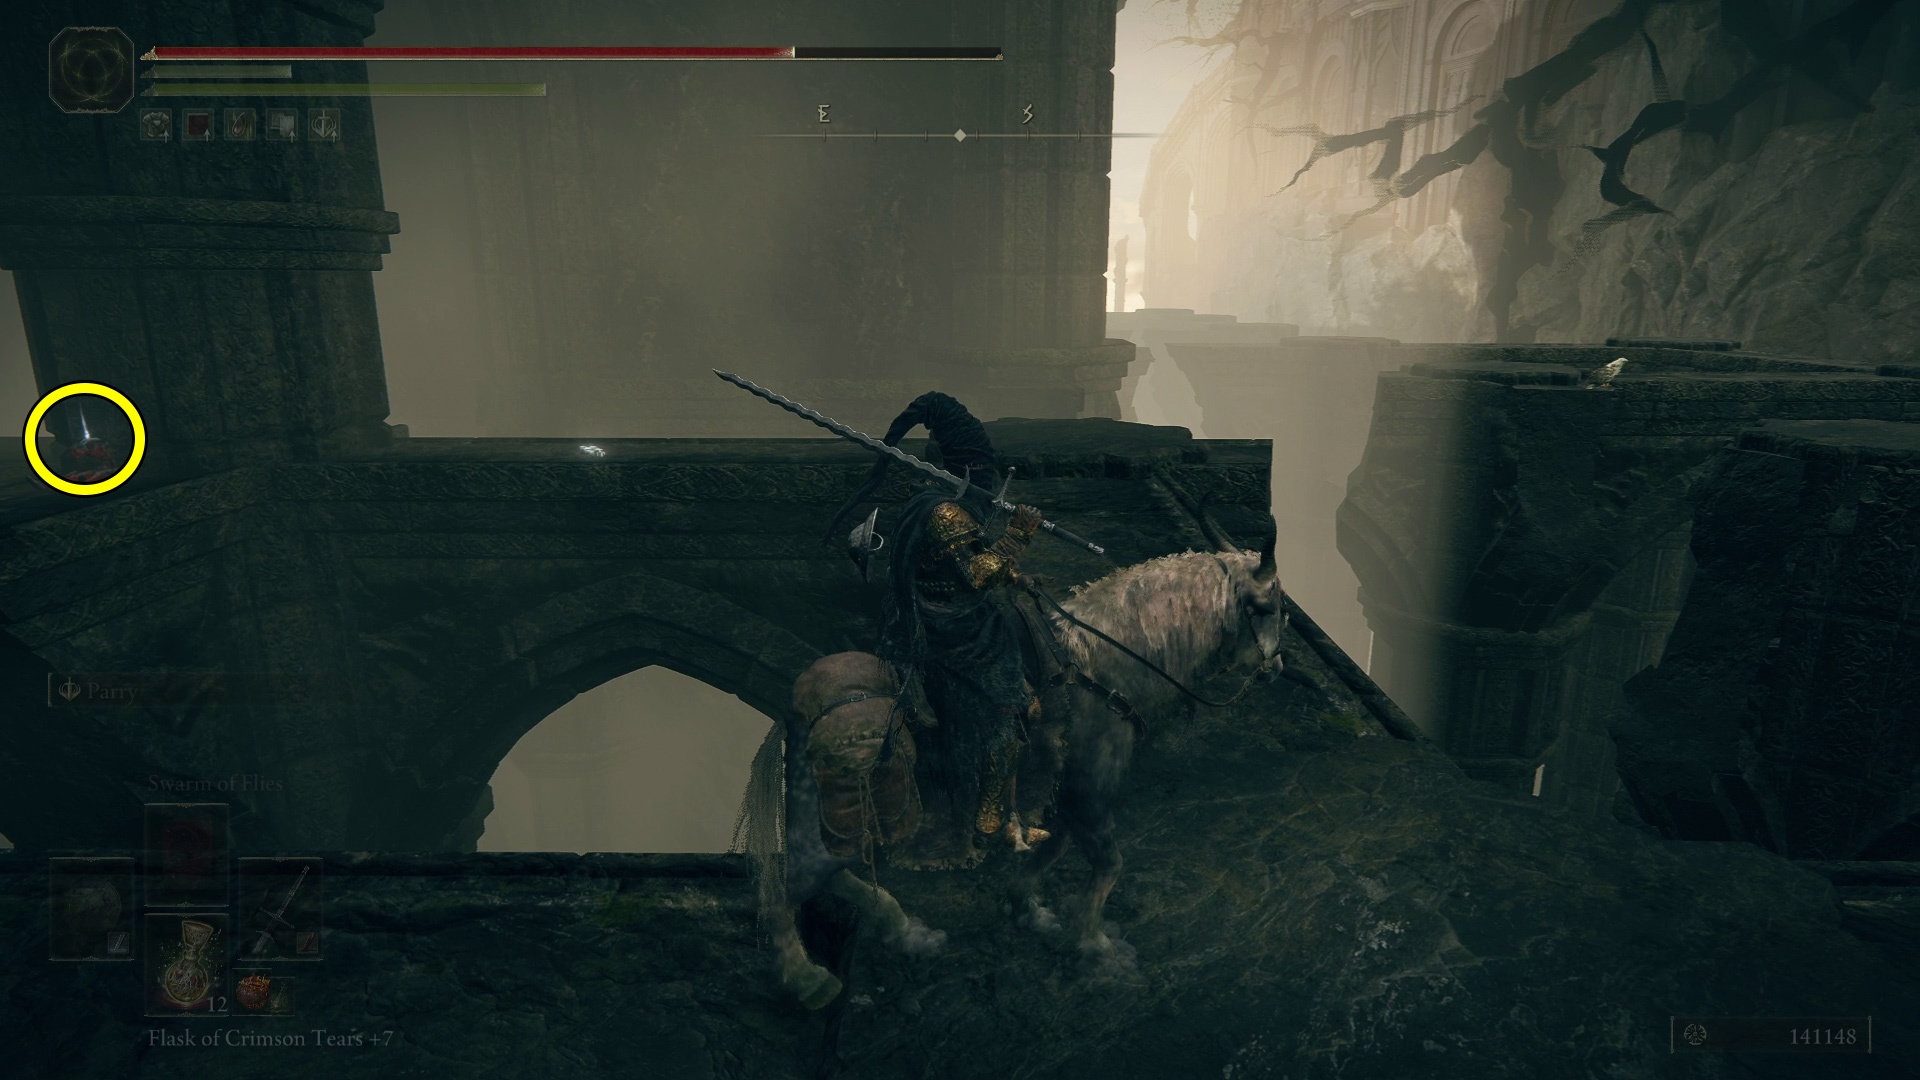
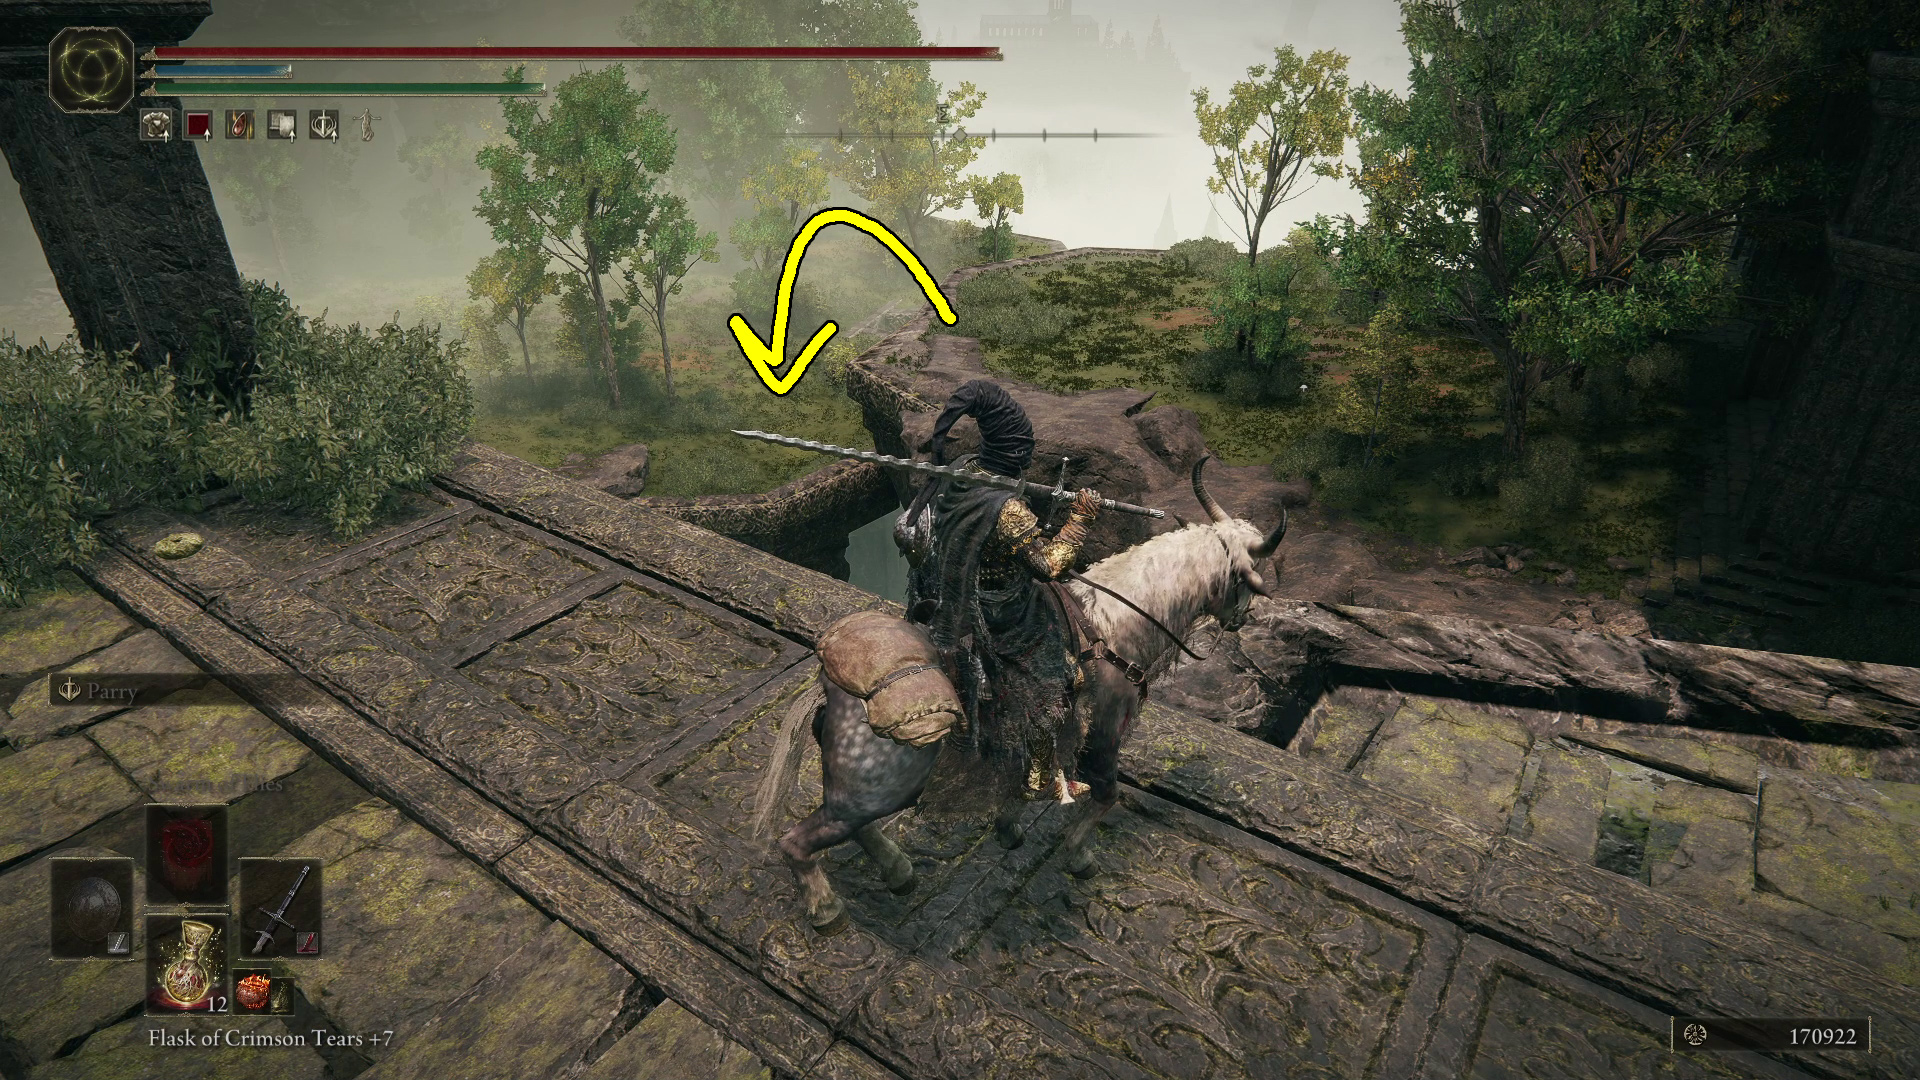
From the West Rampart site of grace, head west, through the small door to the right of the big door (you don’t have the right O you don’t have the right). You’ll find yourself on a huge rampart serving as a bridge. Torrent is available now, so mount up and then head west, but not before looting the oh-so-valuable Smithing Stone [3] from the corpse on your left. You’ll see a trio of bats ahead, feasting on a corpse with x3 Beast Liver. Another corpse being eaten further west has x3 Beast Blood. You’ll then pass under an arch — beyond this point, a Red Knight will start casting Rain of Fire on you from the far end of the bridge, so don’t stay in one place until you kill them.
More bats ahead are eating a corpse with x2 Smithing Stone [4], with the subsequent corpses containing x5 Redflesh Mushroom, x8 Thin Beast Bones, and a Somber Smithing Stone [2] — long story short, if you want you can probably ignore all the bats and loot and ride straight to the knight. The knight has twin daggers and some pretty fast melee attacks, so the easiest way to deal with them may be to circle with Torrent and dash in and out of range. They’ll drop Salza’s Hood and the Rain of Fire spell when defeated.
Head through the doorway to find a Somber Smithing Stone [9] and a doorway on the right. Through the doorway you’ll find some stairs leading to an elevator. Ride it down, and you’ll see the Viaduct Minor Tower site of grace.
Viaduct Minor Tower
Unique & Important Items
Scadutree Fragment
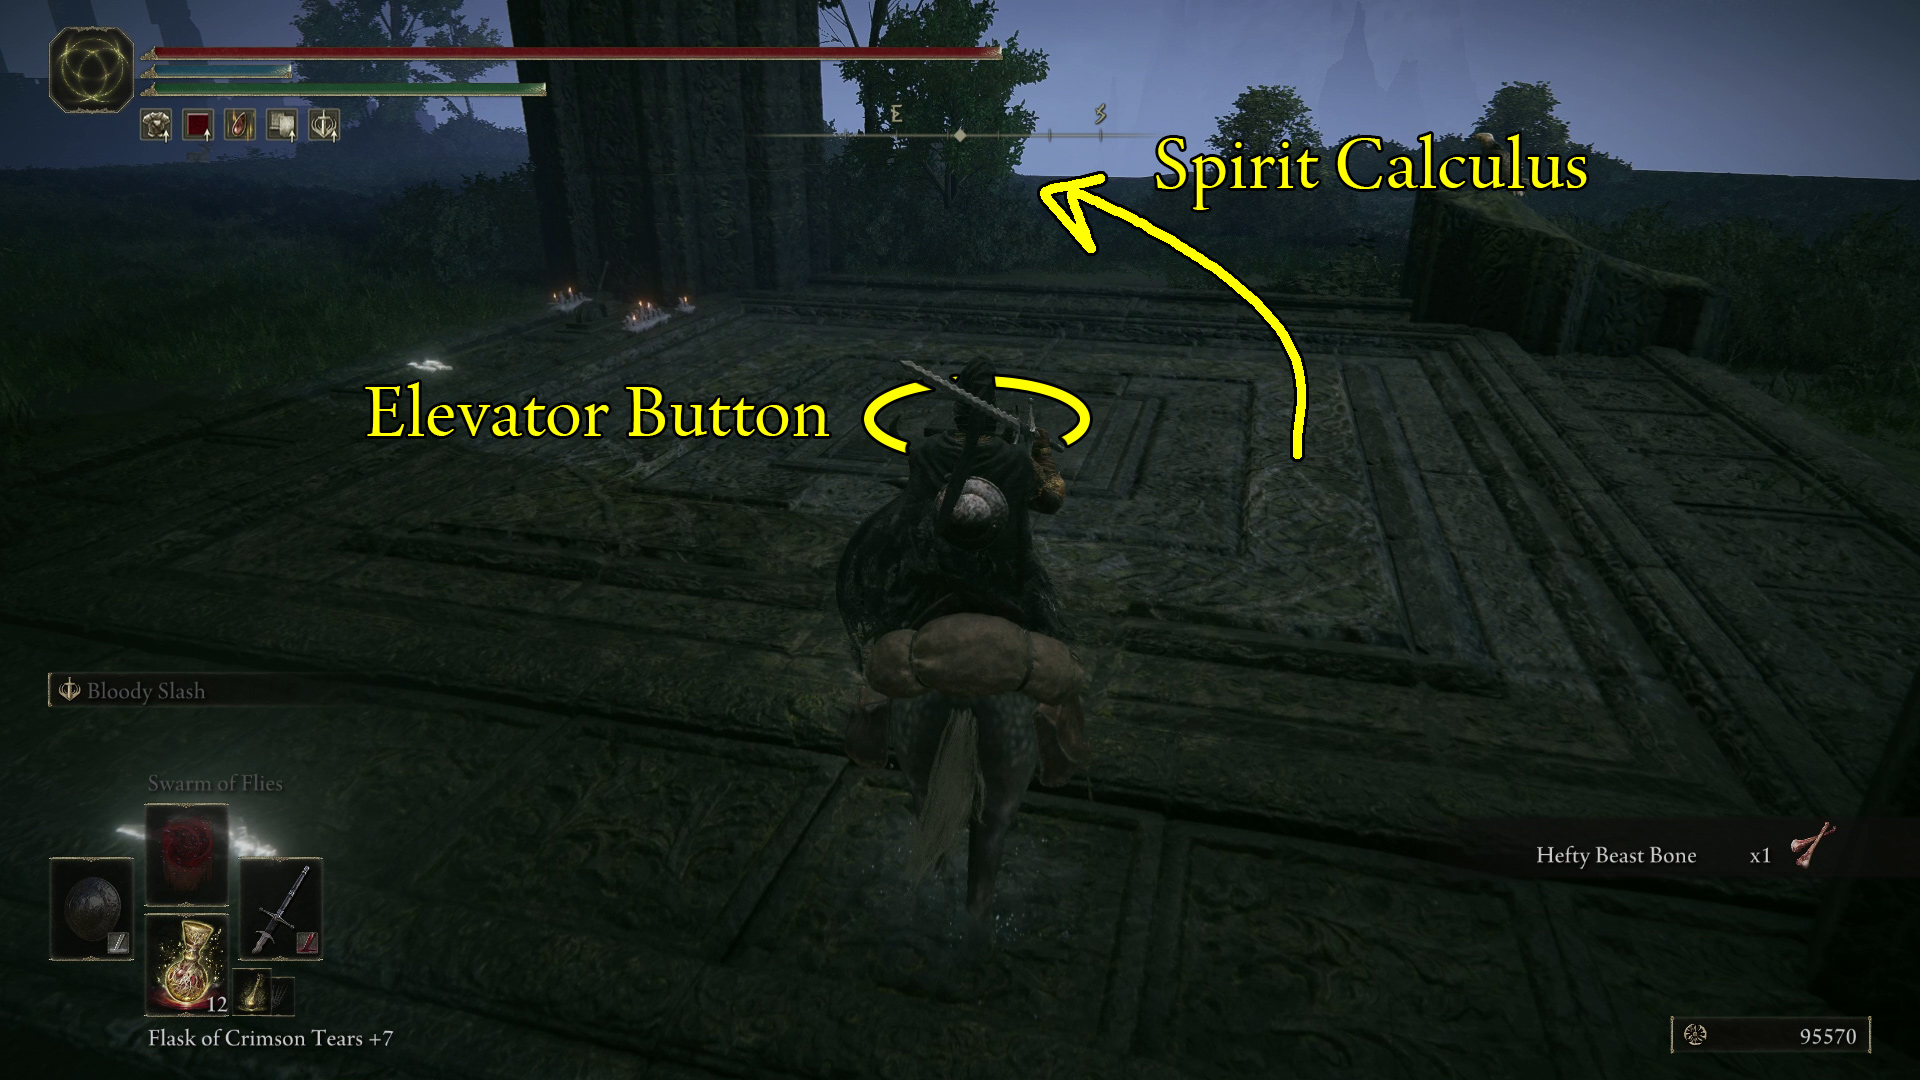
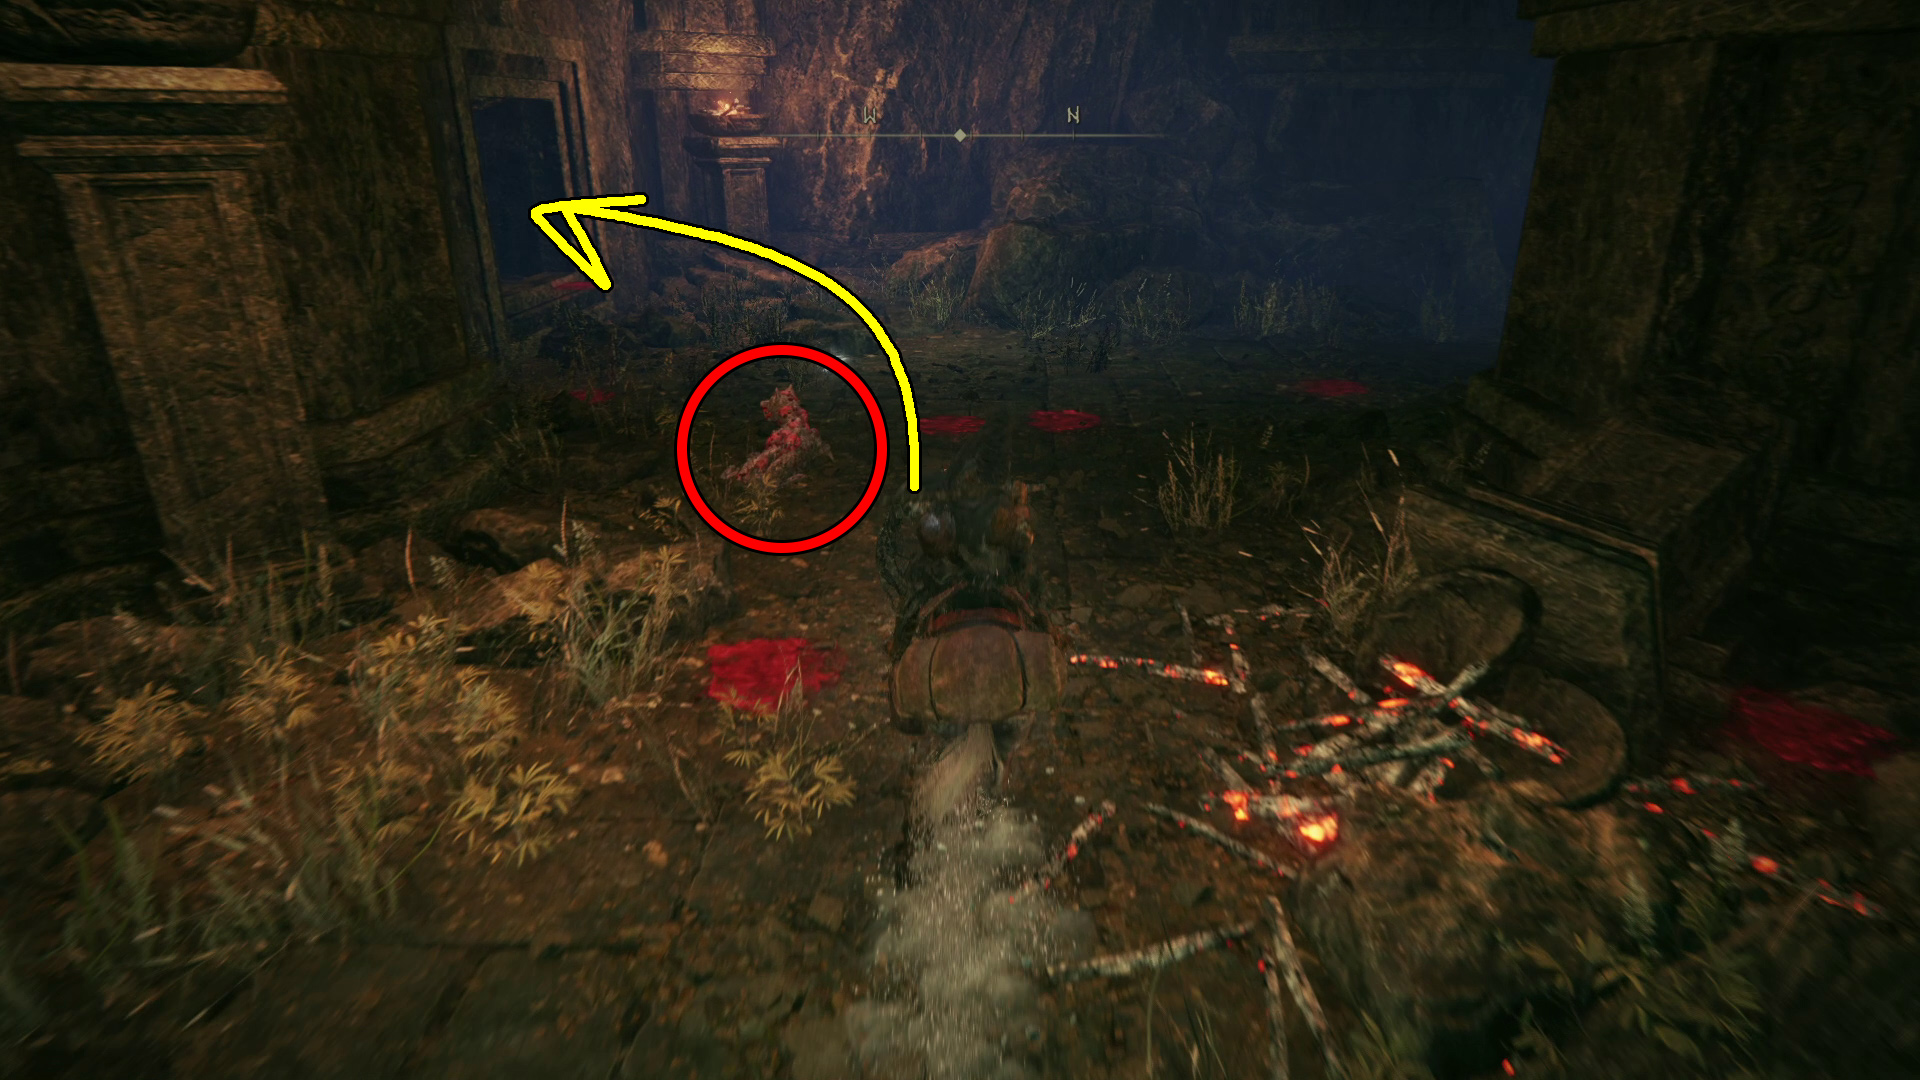
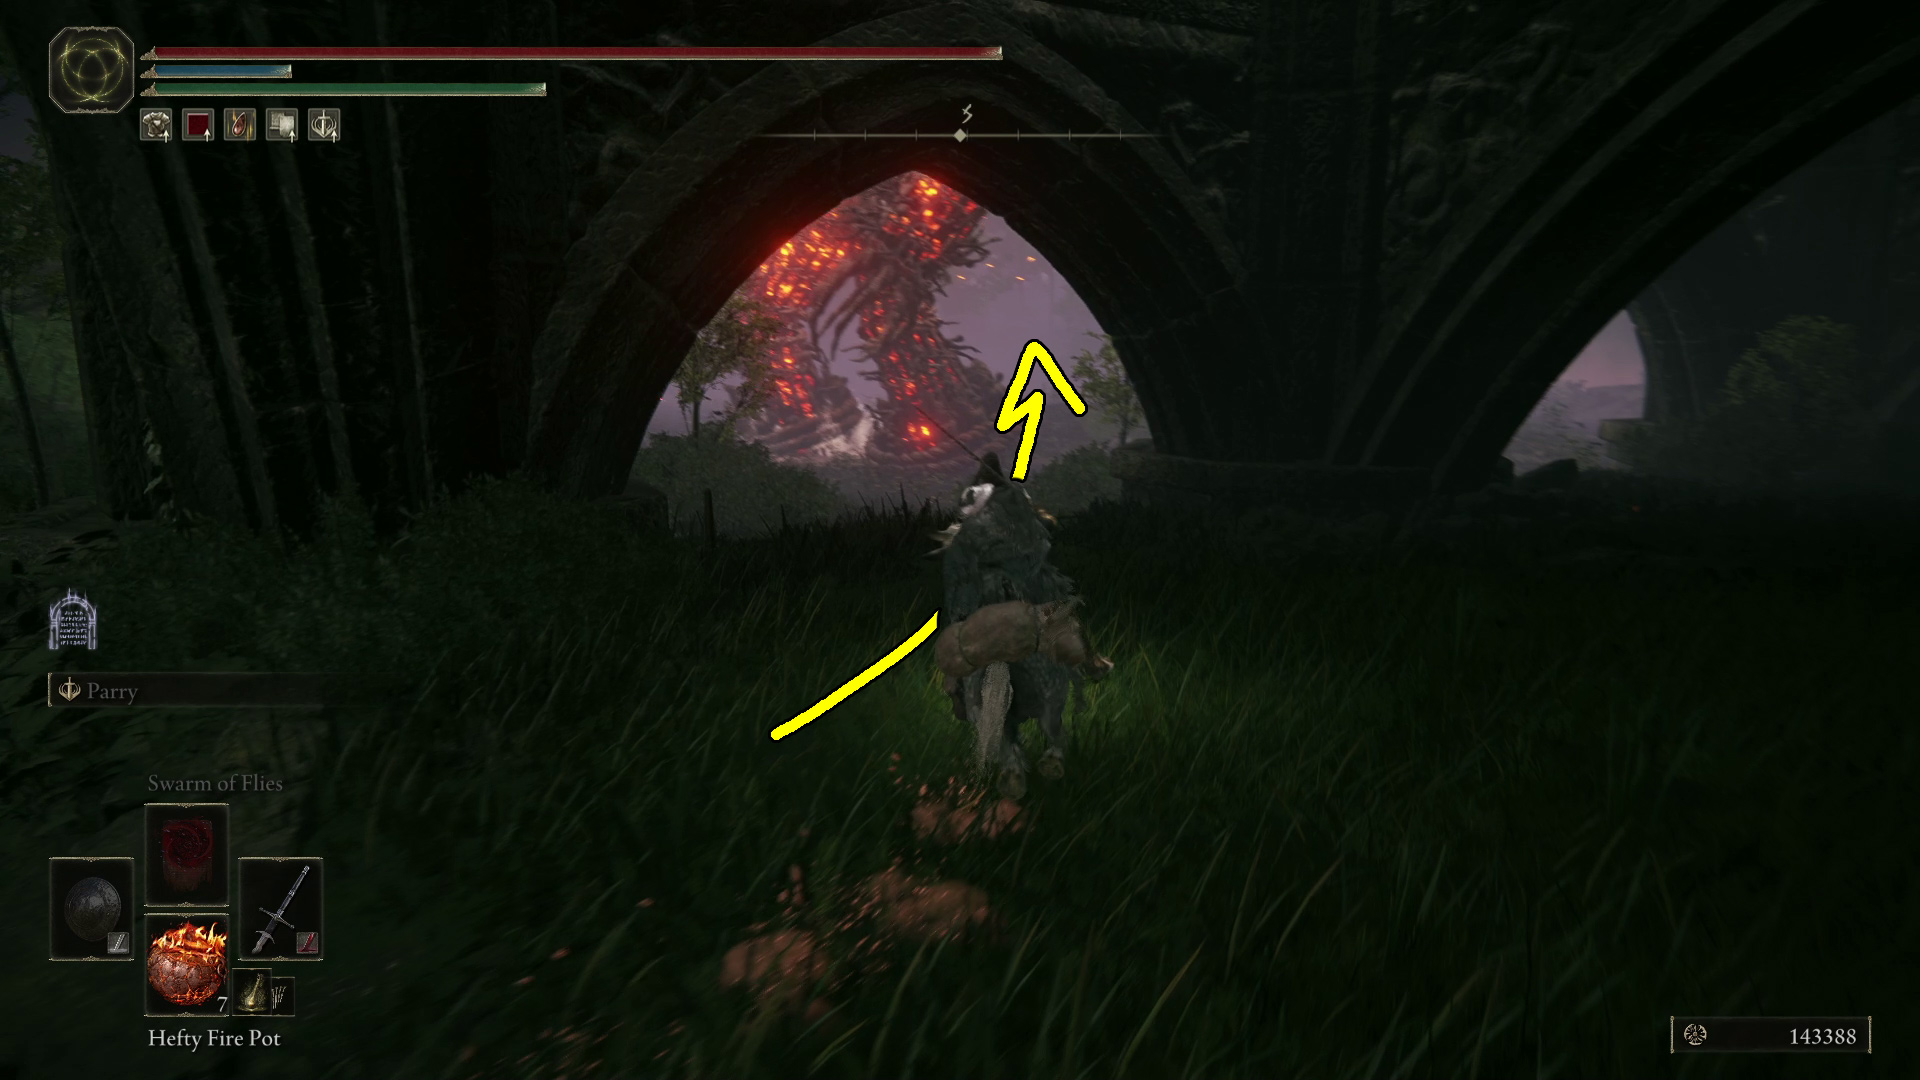
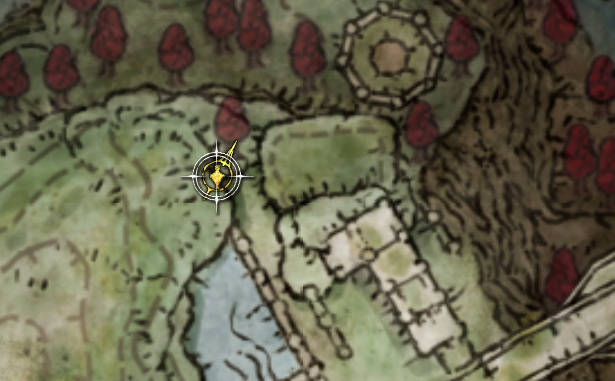
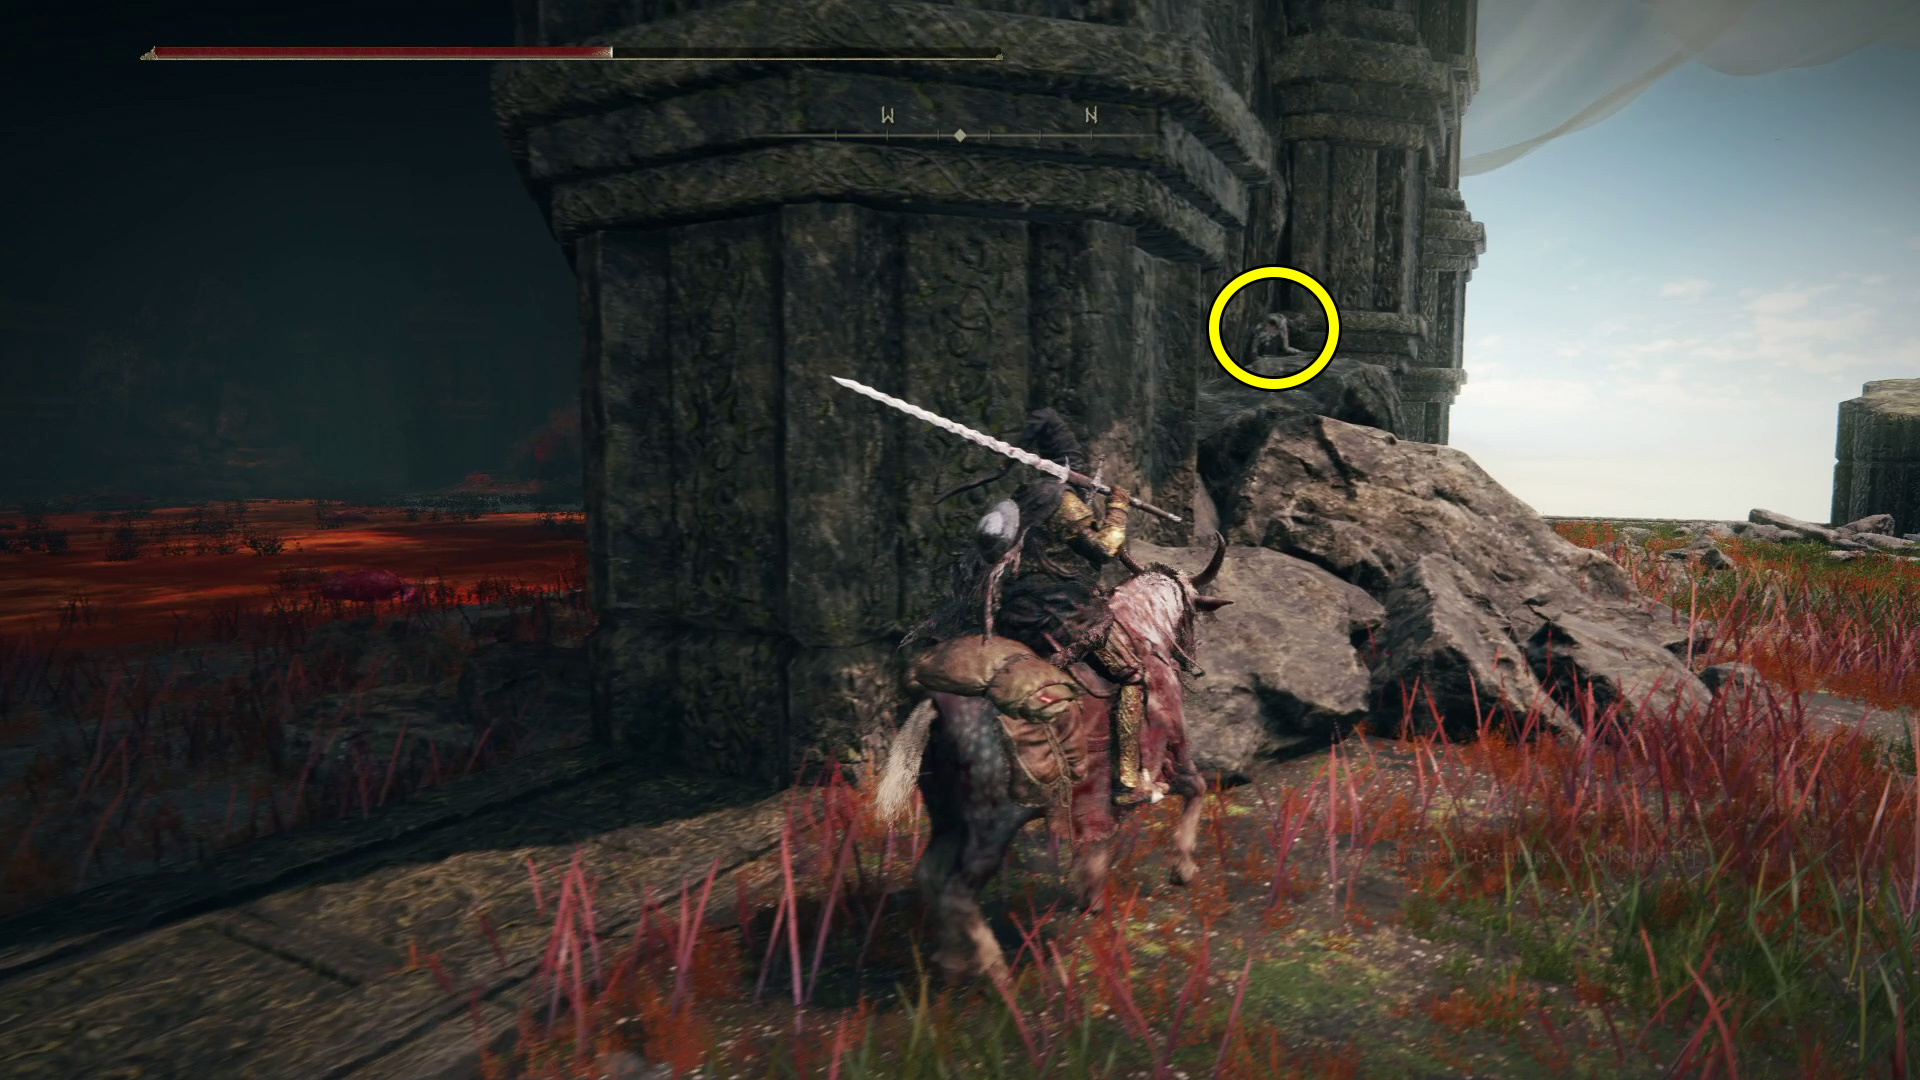
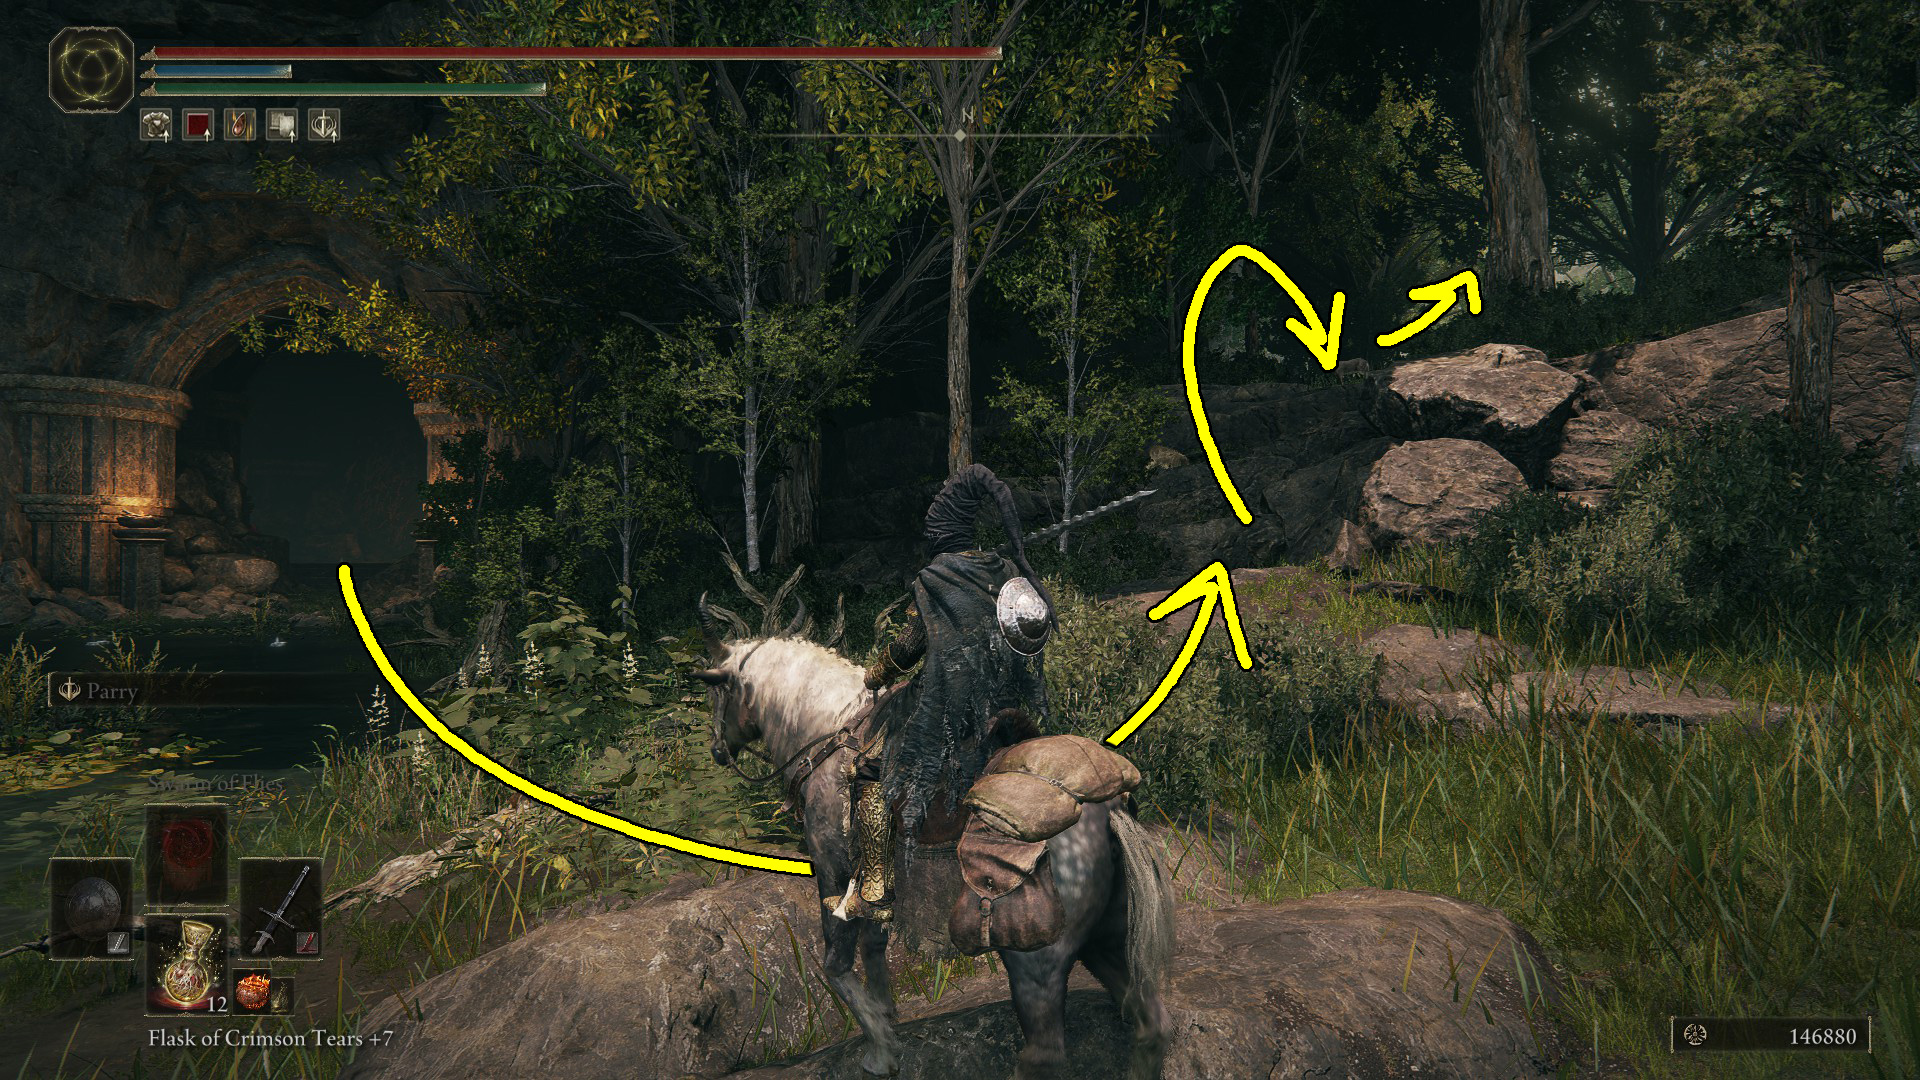
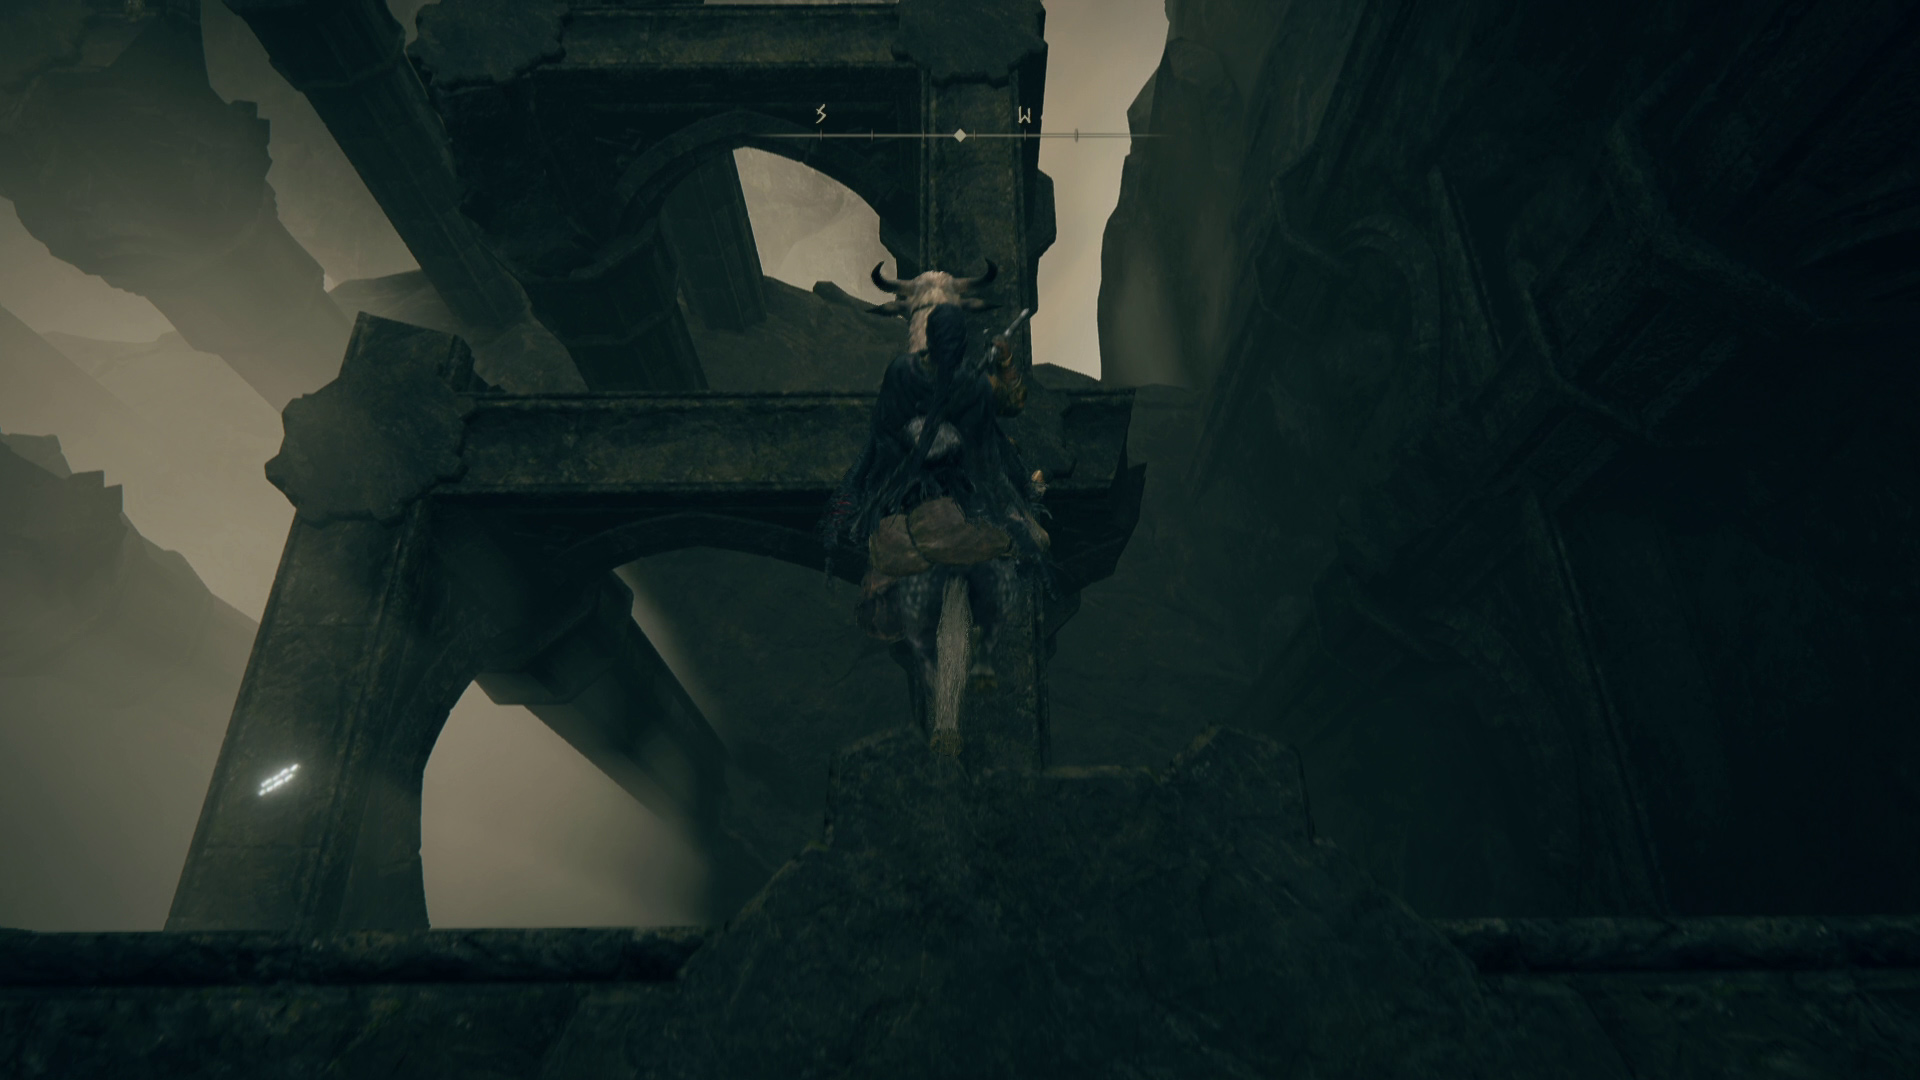
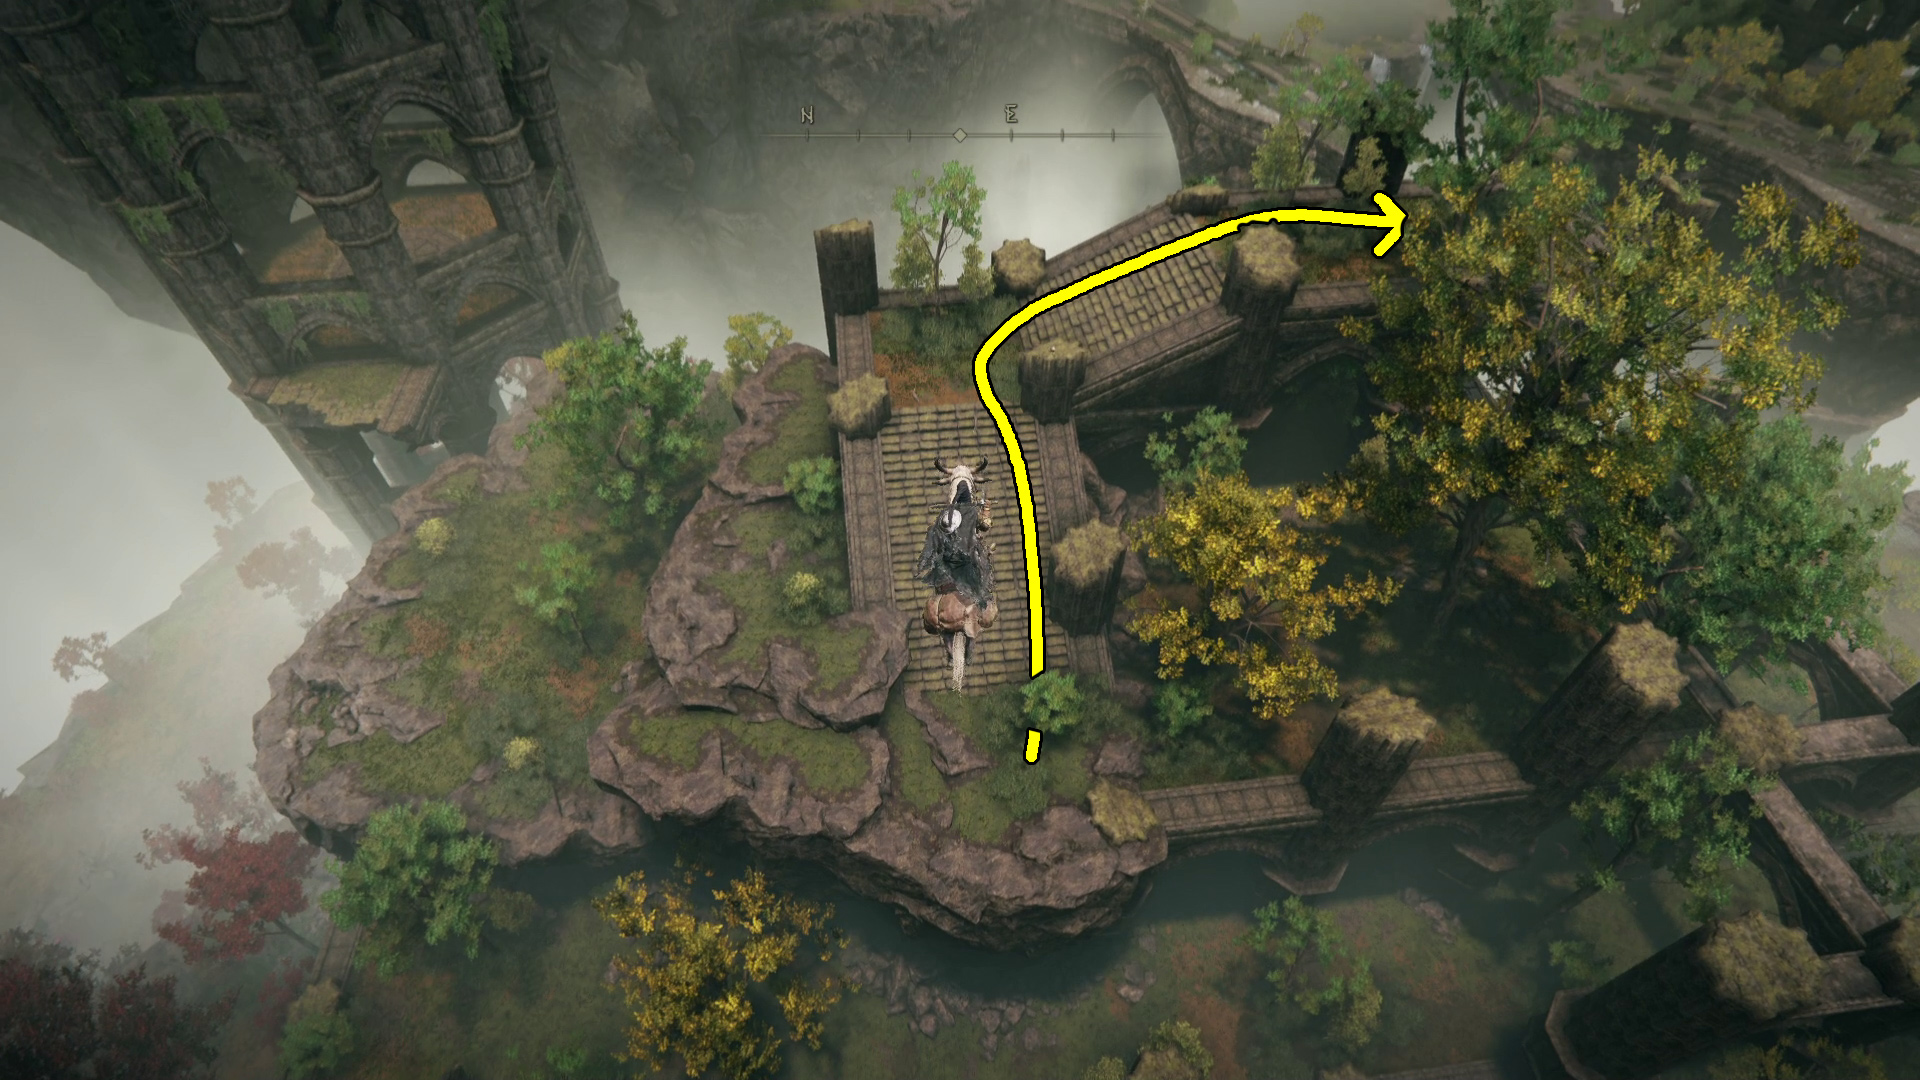
From the Viaduct Minor Tower site of grace, head southwest and you’ll enter the Ancient Ruins of Rauh! Mount up again and head southeast from the bottom of the stairs, towards the small pond visible on your map. Just southeast of the pond, you’ll come to an elevator, but before you ride it down make sure you grab the Spirit Calculus from the corpse just past the far pillar (Image 1).
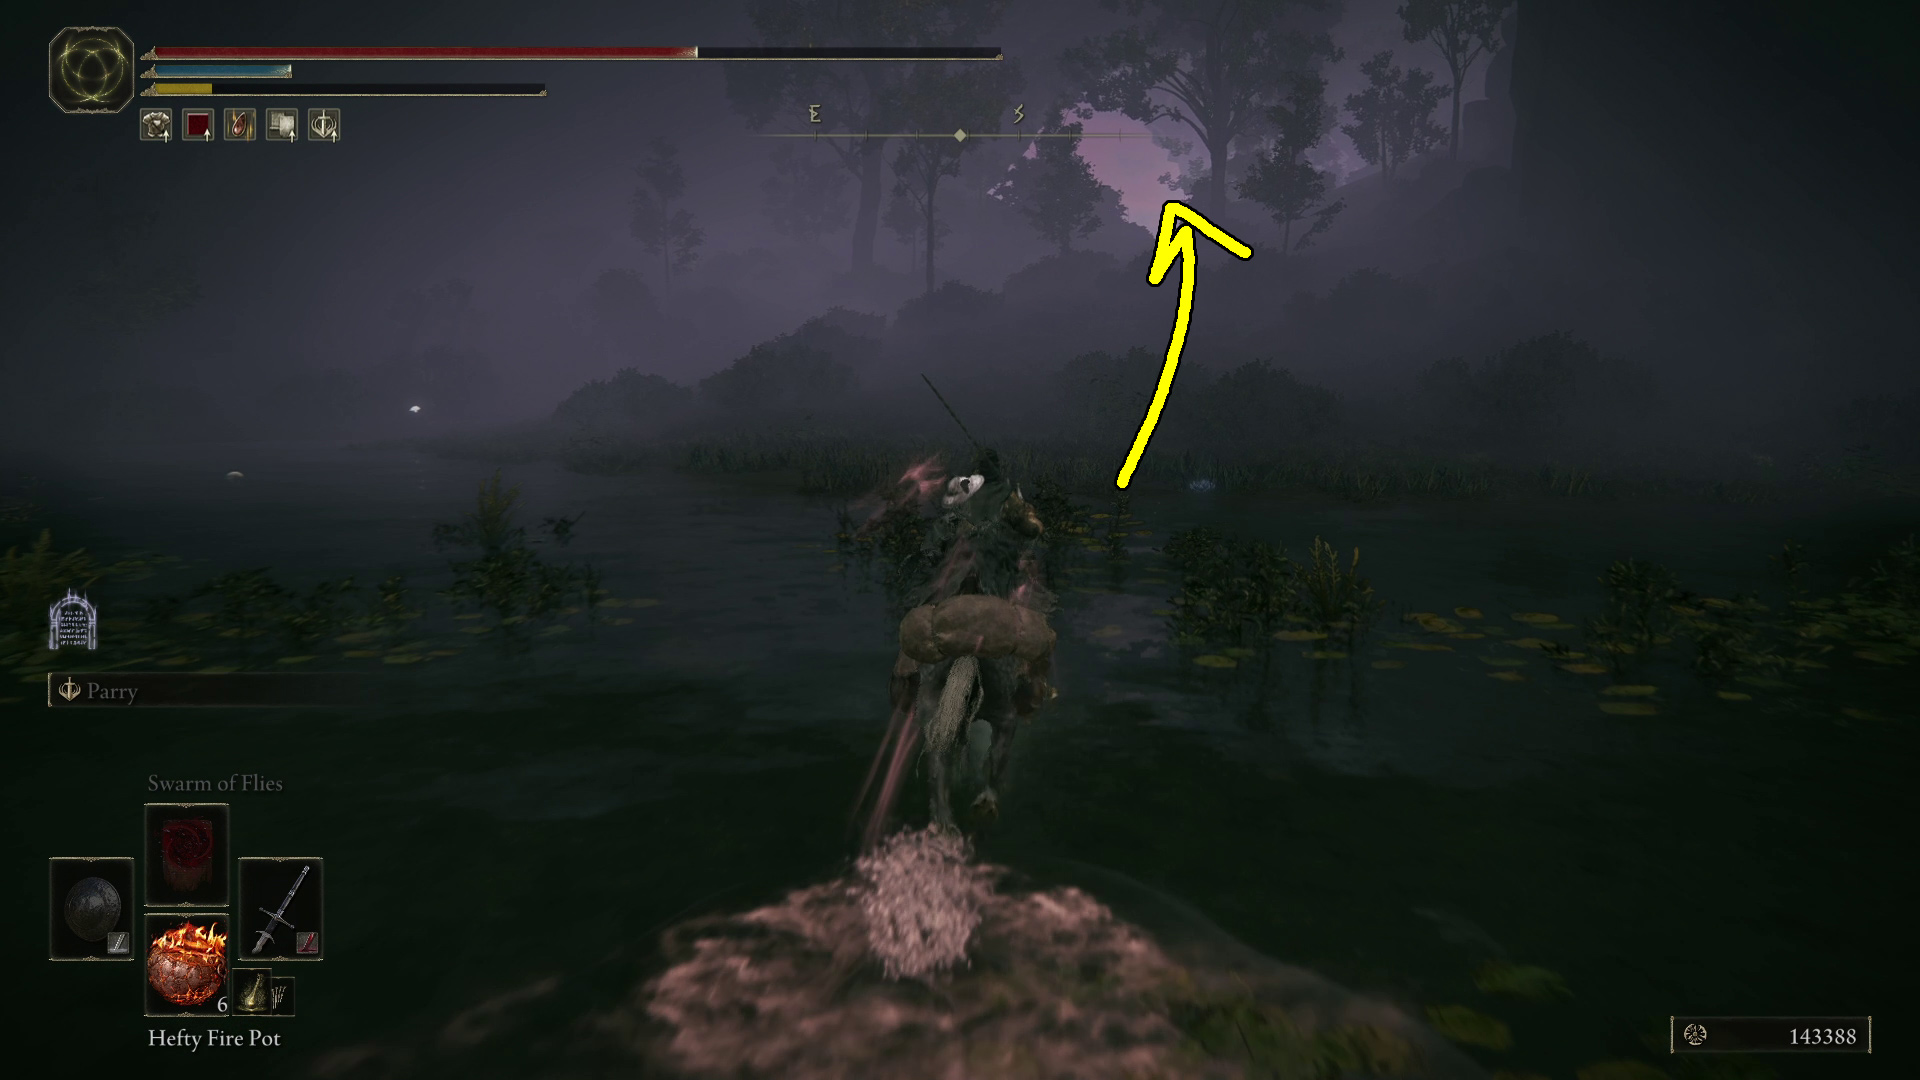
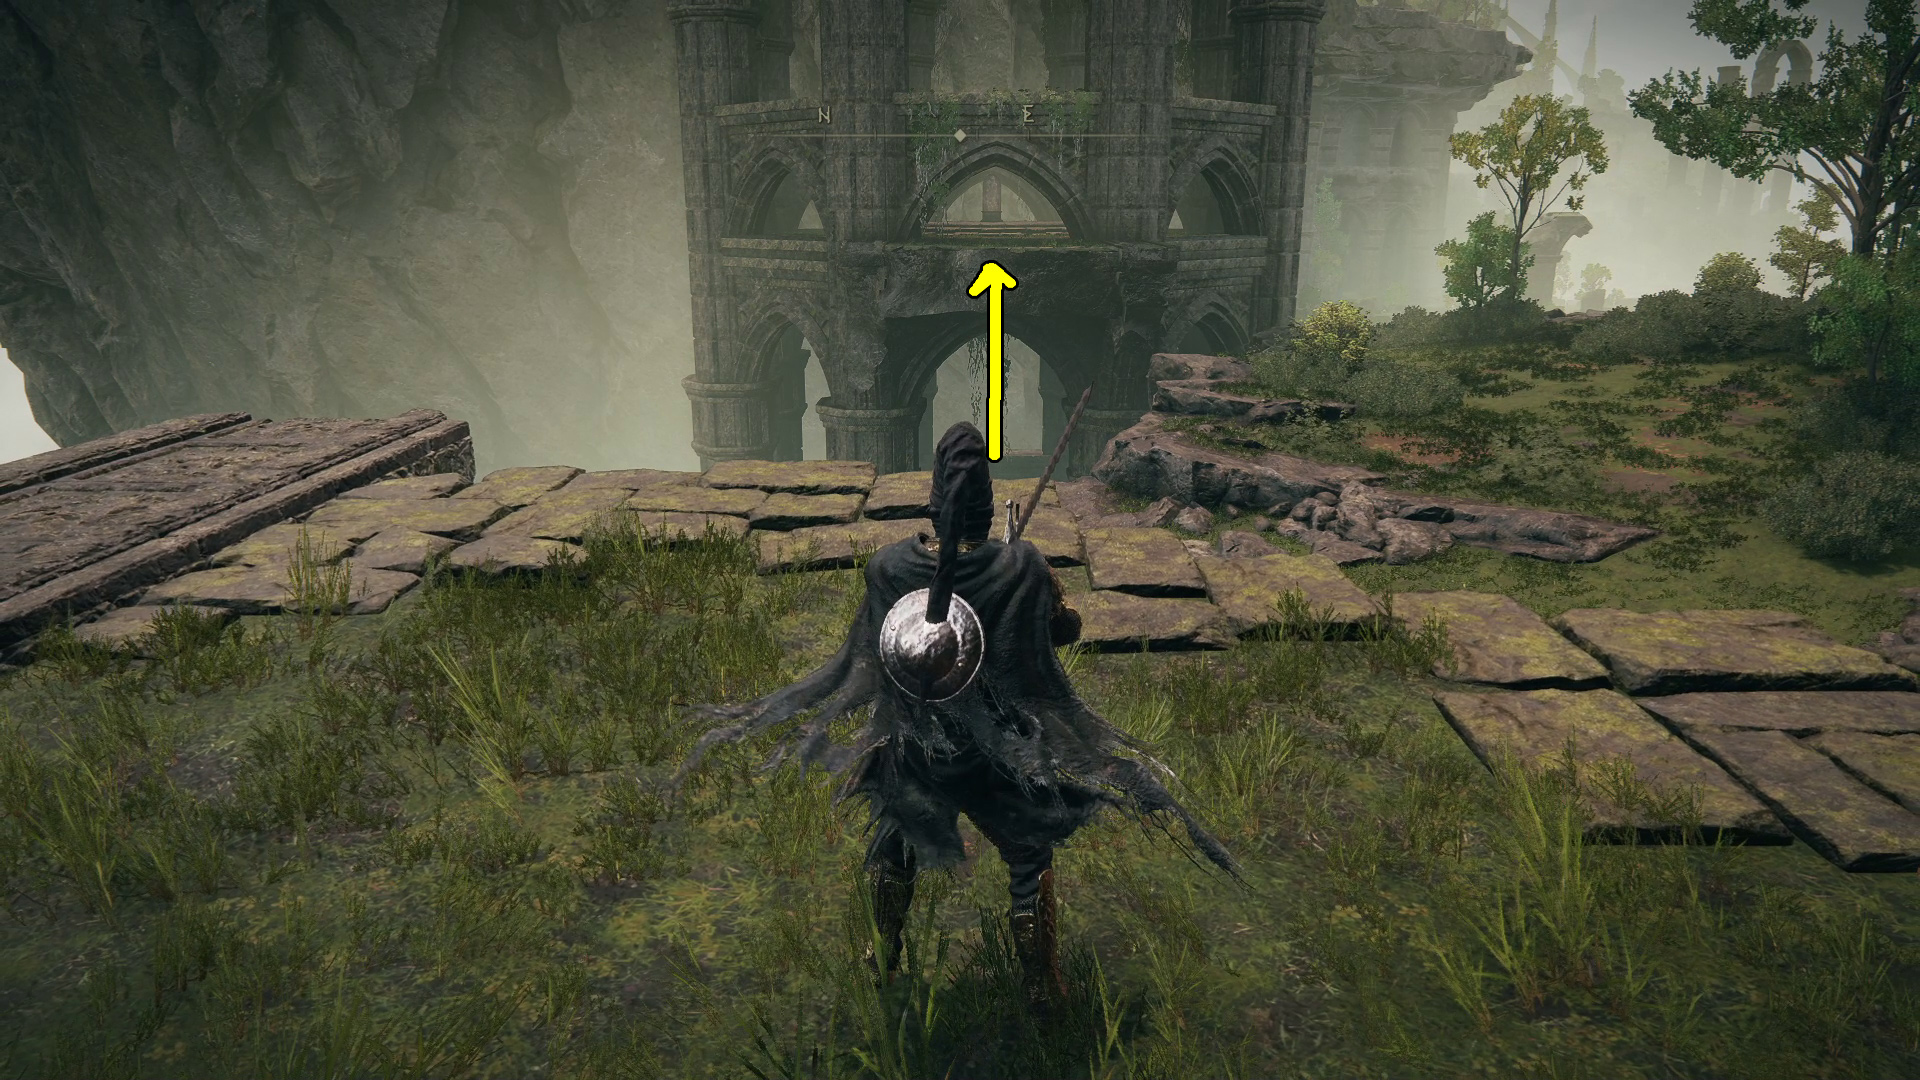
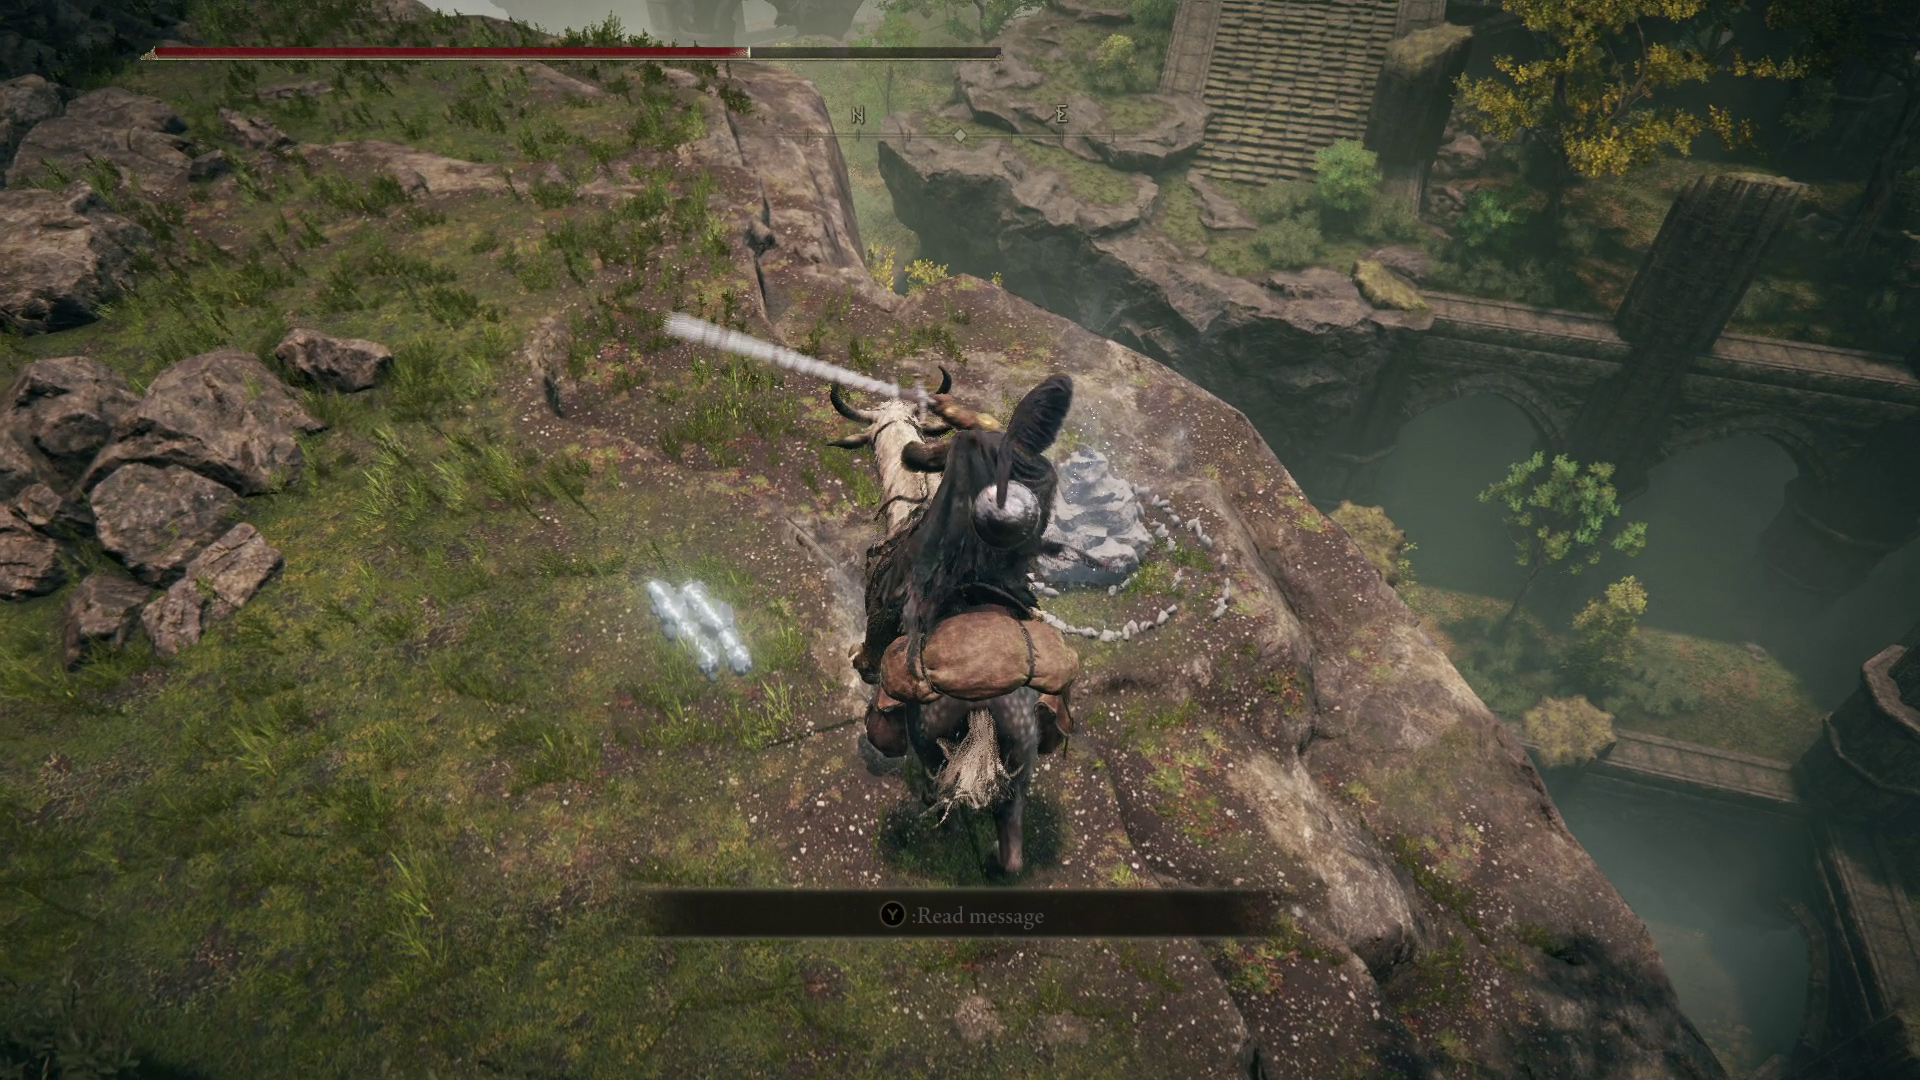
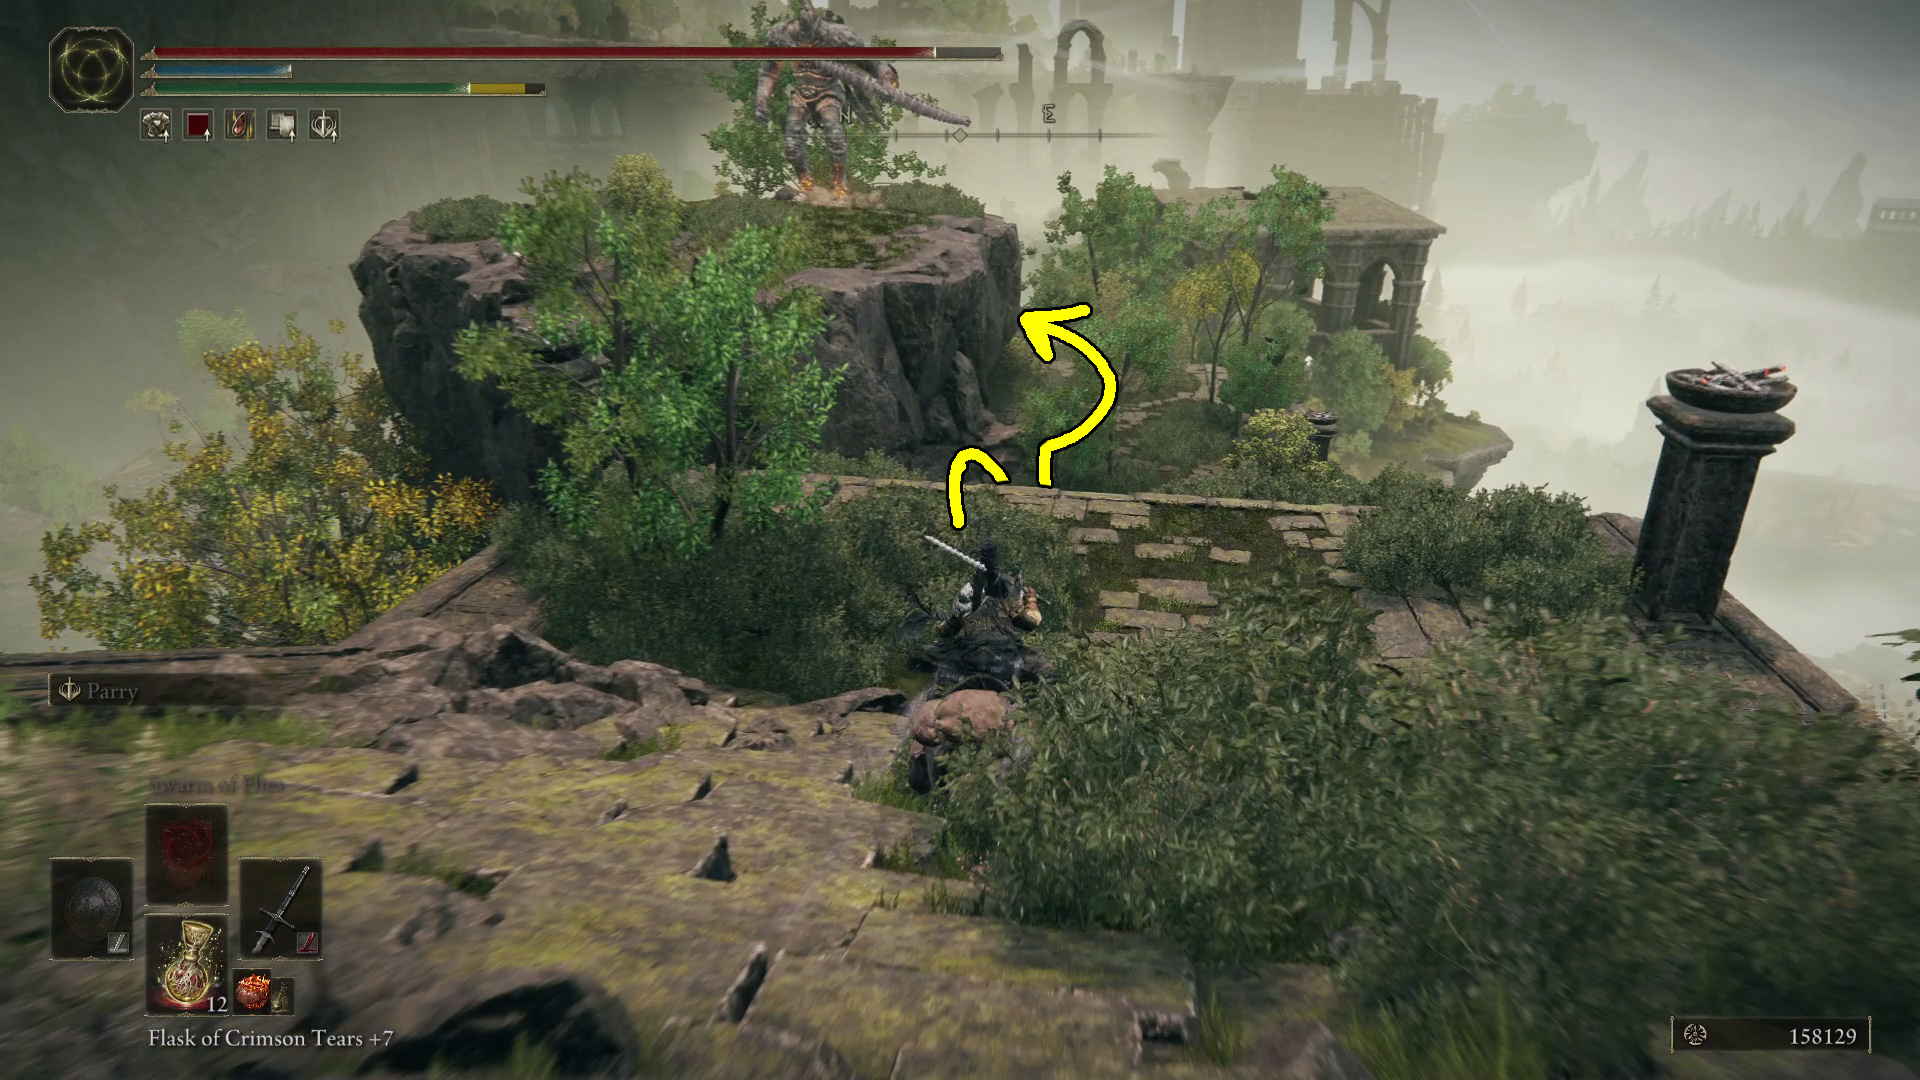
At the bottom of the elevator, you’ll encounter a bloodfiend. You can still ride torrent, so killing this one is optional — past it to the northwest you’ll find a hole in the wall (Image 2), guarded by a dog. You might have noticed the bloodfiends further down the corridor — they don’t guard anything, so kill them only if you’re bloodthirsty.
Image 1Image 2
Exit the small tunnel and head south-southeast and down the stairs to find a hippo that drops a Scadutree Fragment. Staying on torrent lets you stick to the hippo’s butt, which in turn lets you avoid its attacks fairly easily. After defeating the hippo, there’s nothing else to do here, so teleport back to the Viaduct Minor Tower site of grace.
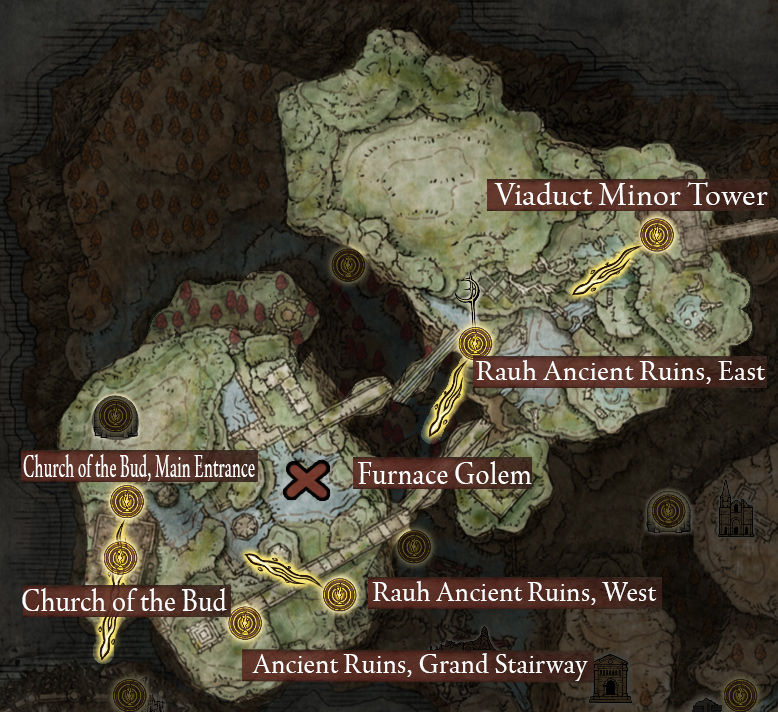
Rauh Ancient Ruins, East
Unique & Important Items
x3 Scadutree Fragment
Fine Crucible Feather Talisman
Spider Scorpion Ashes
Devonia’s Hammer
Crucible Hammer-Helm
Ancient Ruins Cross Message
If you are a rune farmer and want a Golden Horn Tender, from the Viaduct Minor Tower site of grace you can exit the building, hug the wall and make your way north, then east and south around the outside of the Viaduct Tower to find one at the back of the structure.
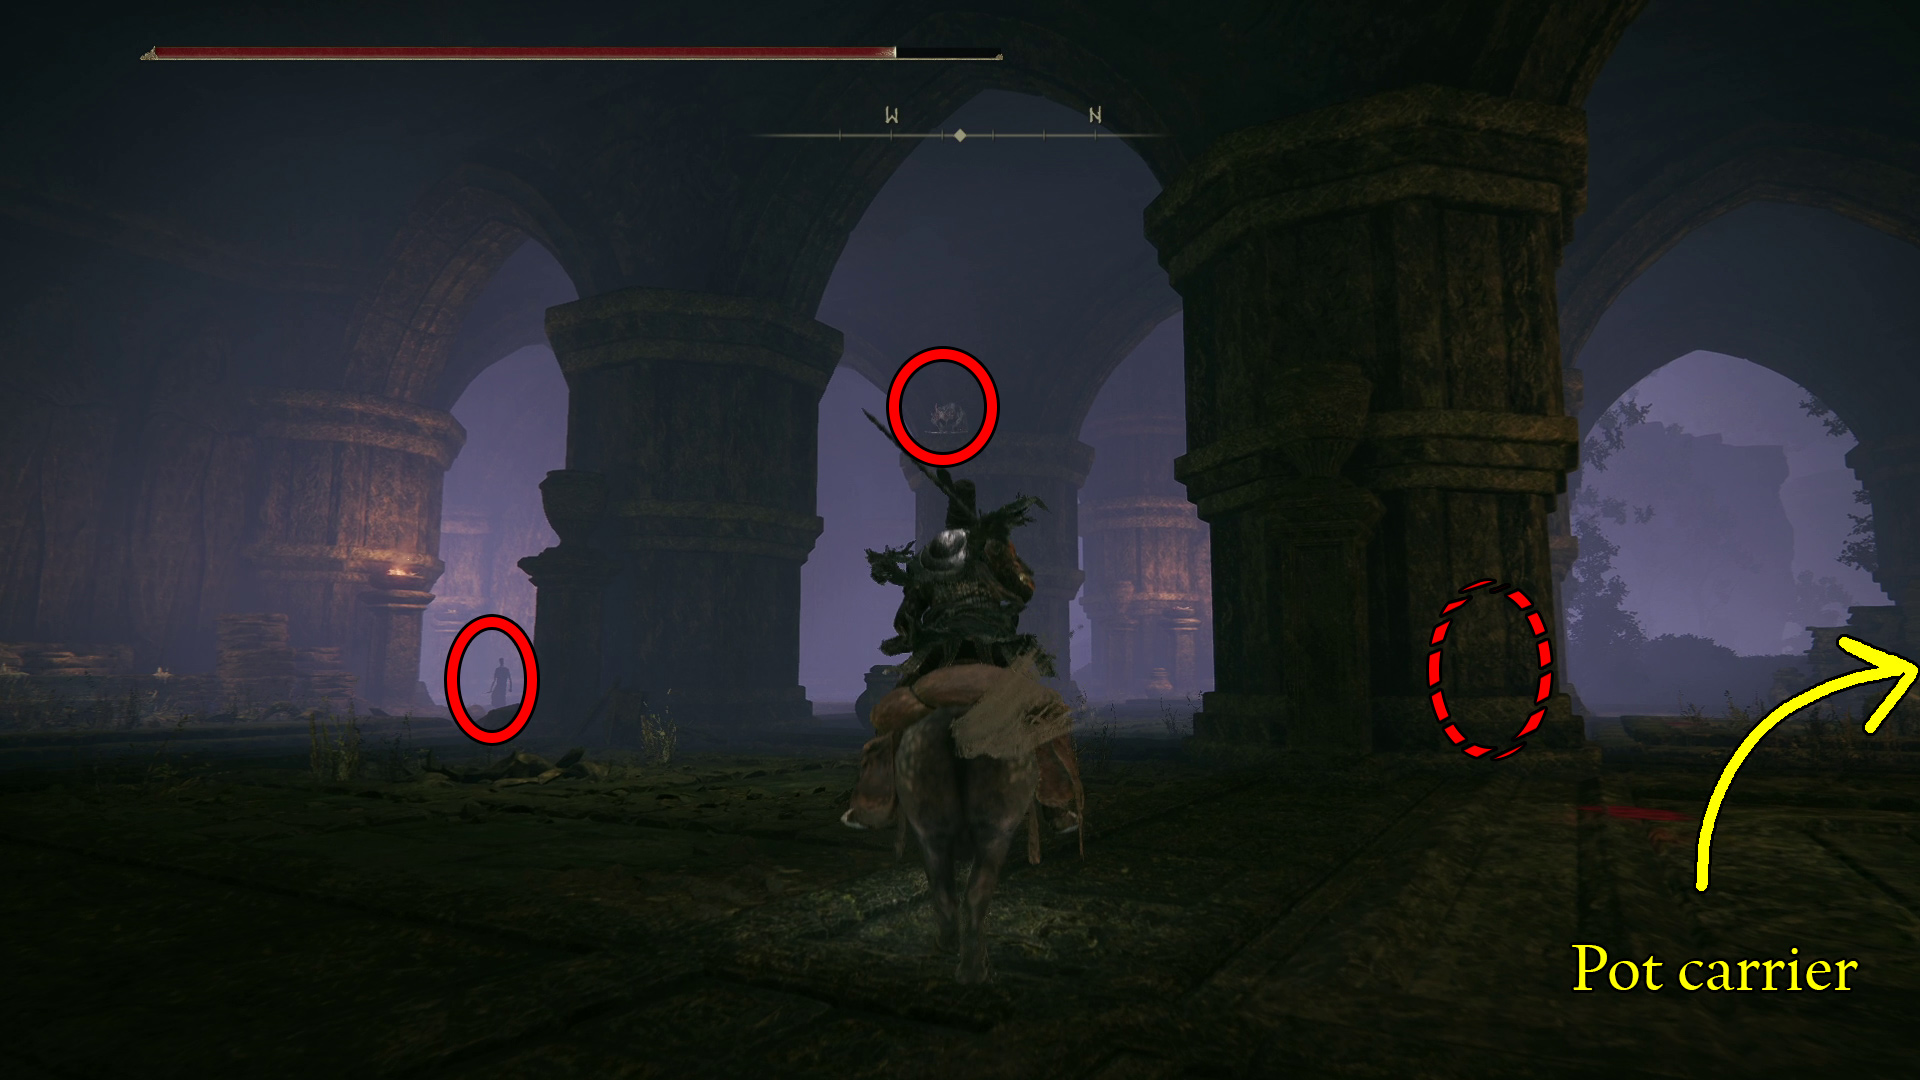
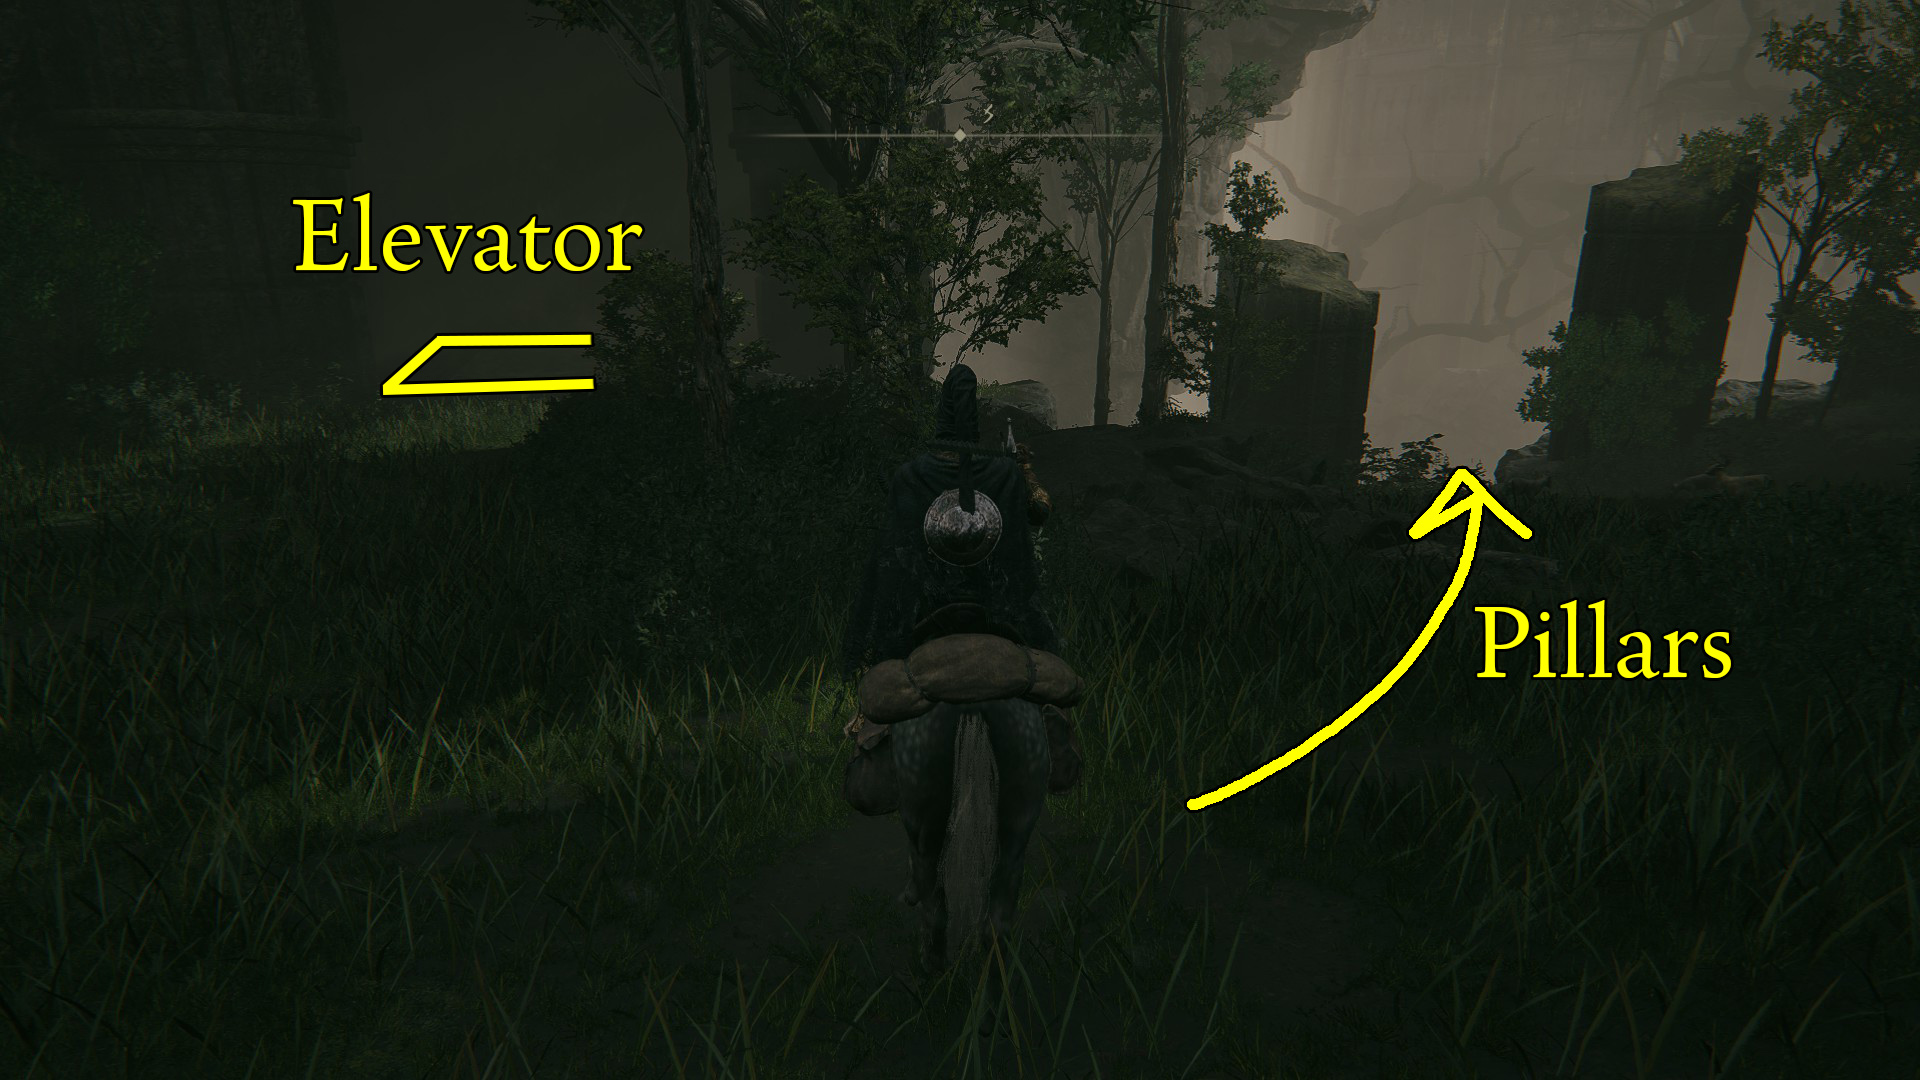
Then, from the stairs southwest of the Viaduct Minor Tower site of grace, follow the path that leads west, slightly downhill (Image 1). The path will curve slightly south, and then you’ll see large stone pillars on your right. Head between the lit braziers and downhill, northwest and into the ruins. Up ahead, you’ll see a shadow mob with a sparkling pot — this guy drops a Revered Spirit Ash, but there is a Curseblade ready to ambush you around the pillar on your right (Image 2).
Image 1Image 2
As always, we aren’t going to point out every single shadow enemy, as there are simply too many and they aren’t all that dangerous. However, it is worth noting that some of the shadow mobs in this area have a ranged spell that is only dangerous if you stand still — golden swirls will appear at your feet if you’re targeted.
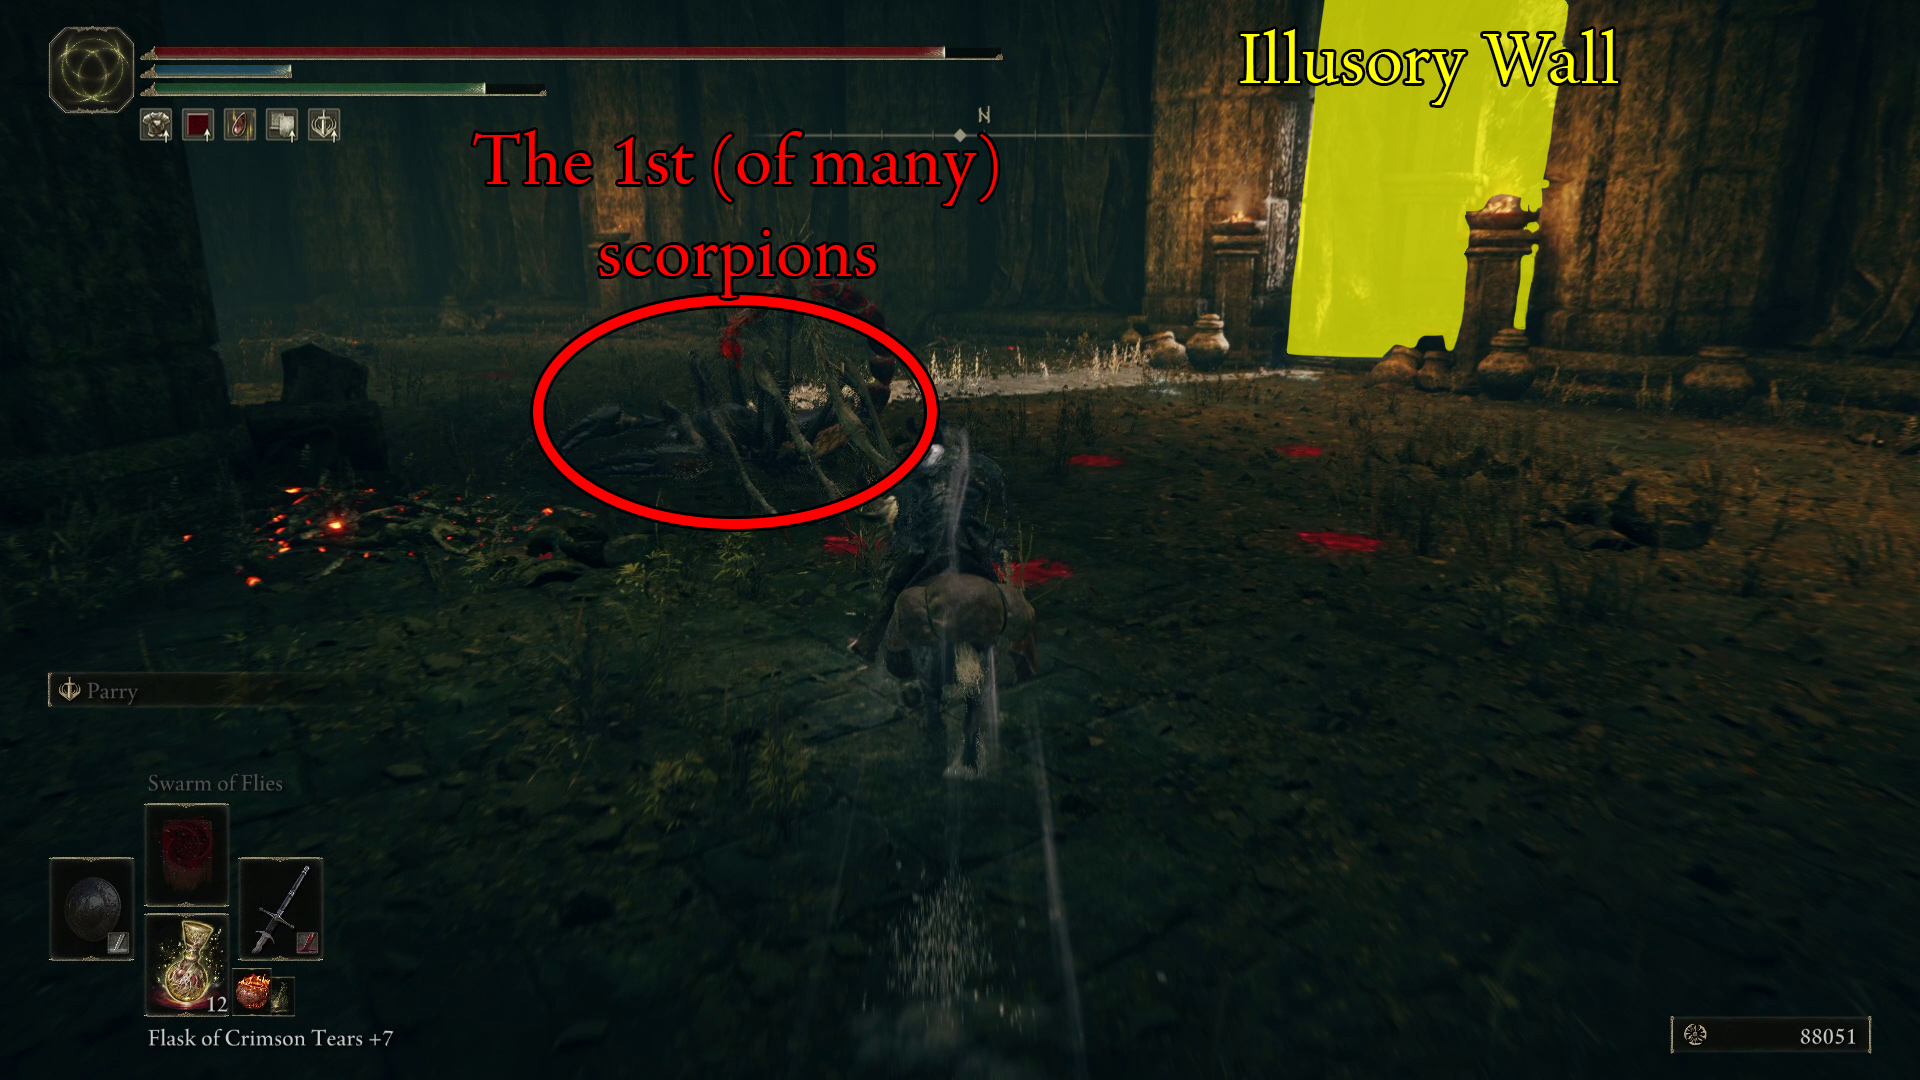
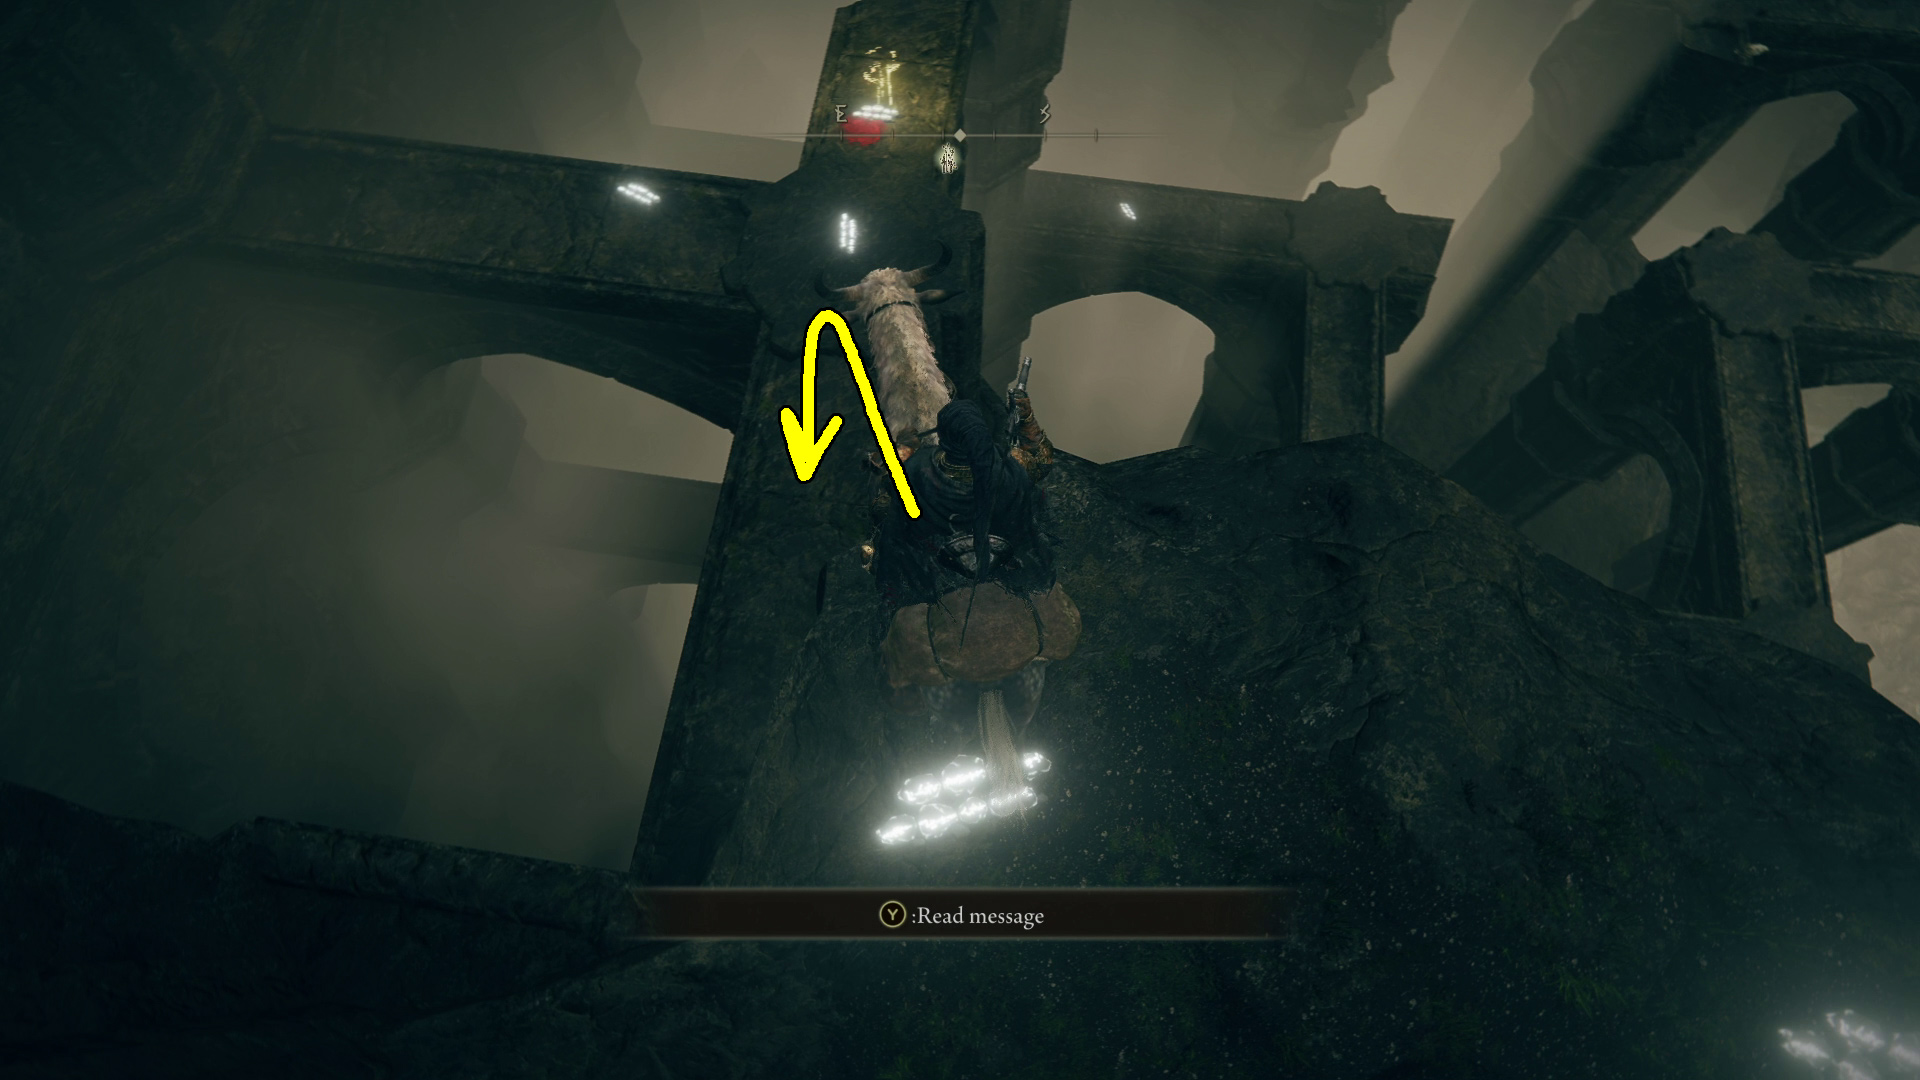
Head northwest and then look right to see a huge set of double doors (Image 3). Before you head through them, you may want to go left — in the next room, hanging off of the ledge in the center of the room, is a Fire Spritestone. You’ll have to dismount torrent to open the doors in Image 3, and then you can remount and ride down the stairs. You’ll encounter a large scorpion, and a couple small ones will drop down as well. Deal with them, then take out the scorpion around the corner guarding a Shadow Realm Rune [5] — three more scorpions will drop from the ceiling when you get close, one after another, so if you can’t kill them quickly, you will need to back off.
Once you take out all the scorpions, go to the wall northeast of where you fought them, and hit the space between the two lit braziers to reveal a secret room (Image 4) — the corpse at its base holds a Bondstone and the Antiquity Scholar’s Cookbook [2]. Grab ’em and head west, then southwest down the ramp. In this chamber there’s a pot-carrying shadow mob that drops x3 Spirit Calculus, so find it and kill it.
Image 3Image 4
Next, on the southwestern wall, are some double doors — open them and go through. On your right behind the doors are x5 Rauh Burrow, so grab ’em and then continue down the hall and northwest — the snails here are slow, so you can ignore them if you prefer. When you reach the large square hole in the floor, drop down (the updraft from the large spiritspring jump will prevent you from taking damage).
This next area has a lot of fly-people — unless they’re well hidden or particularly dangerous for some reason, we won’t bother noting every single one.
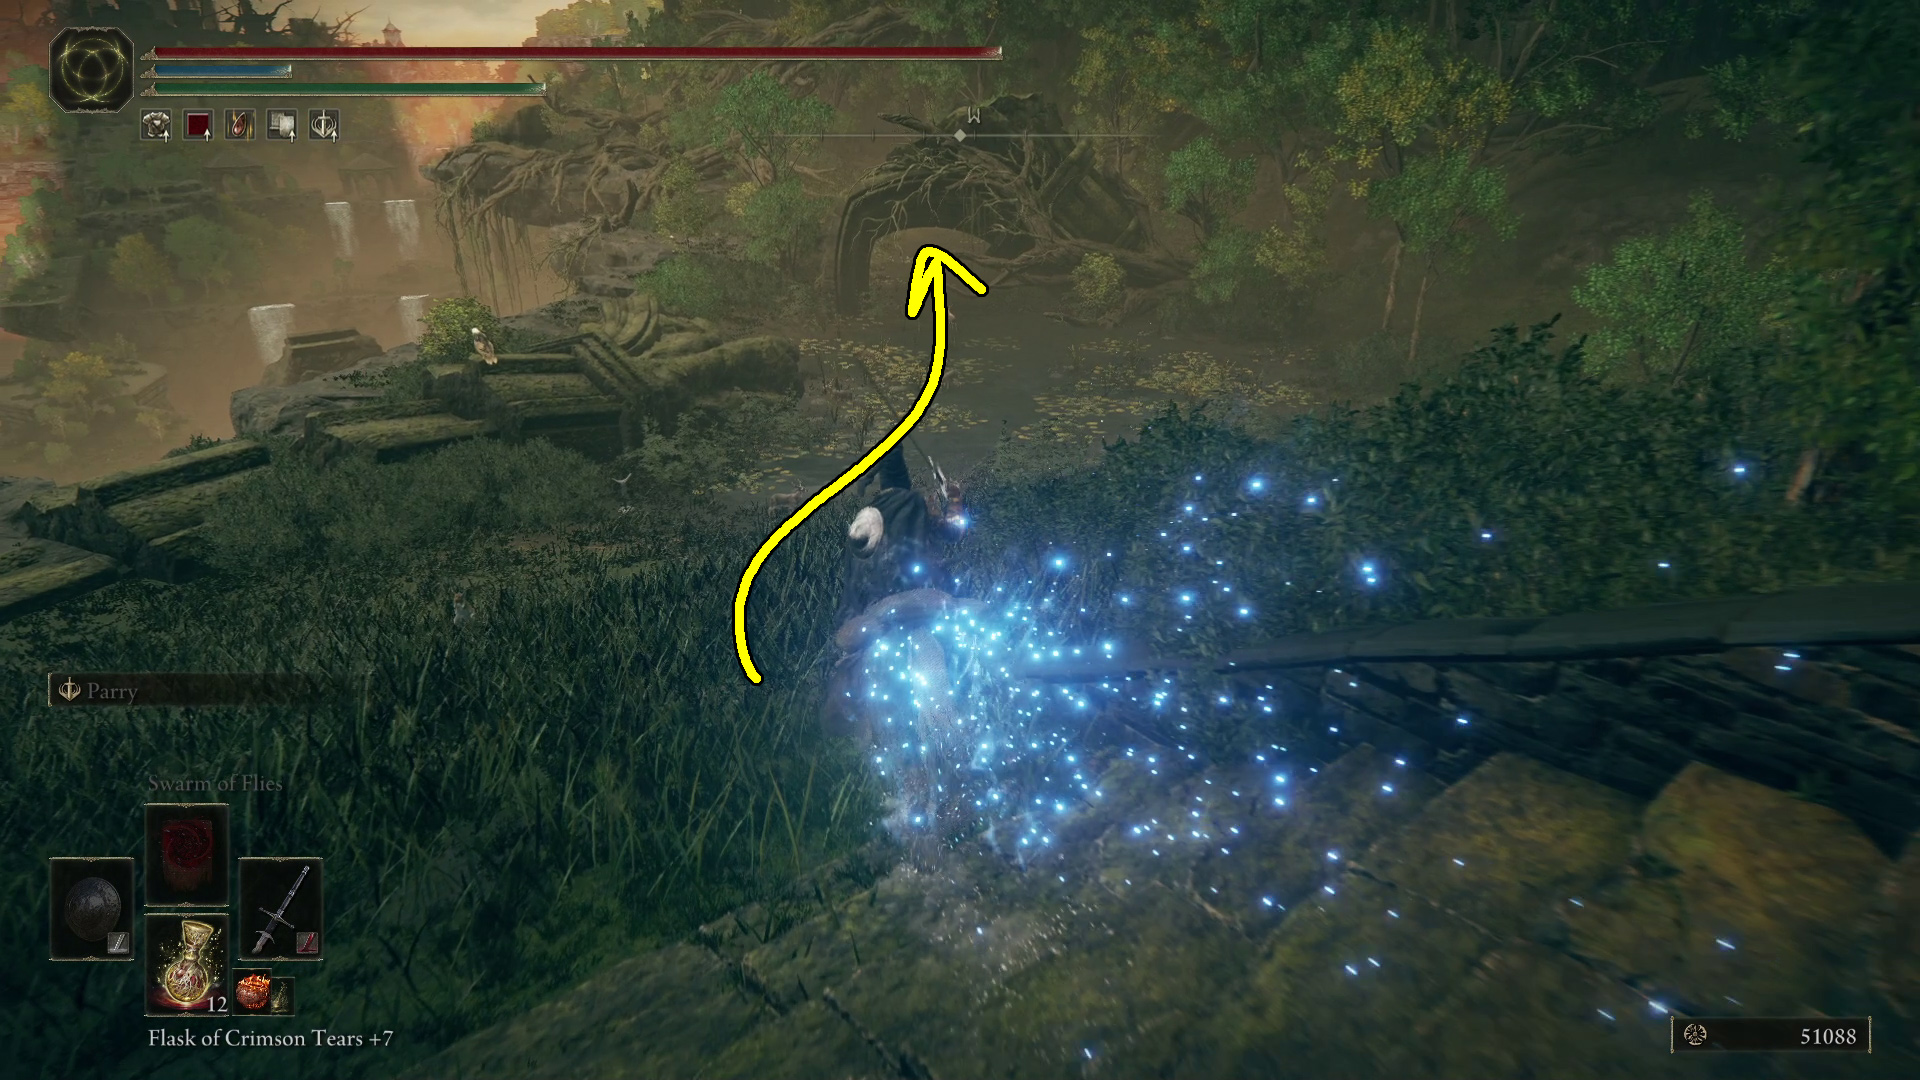
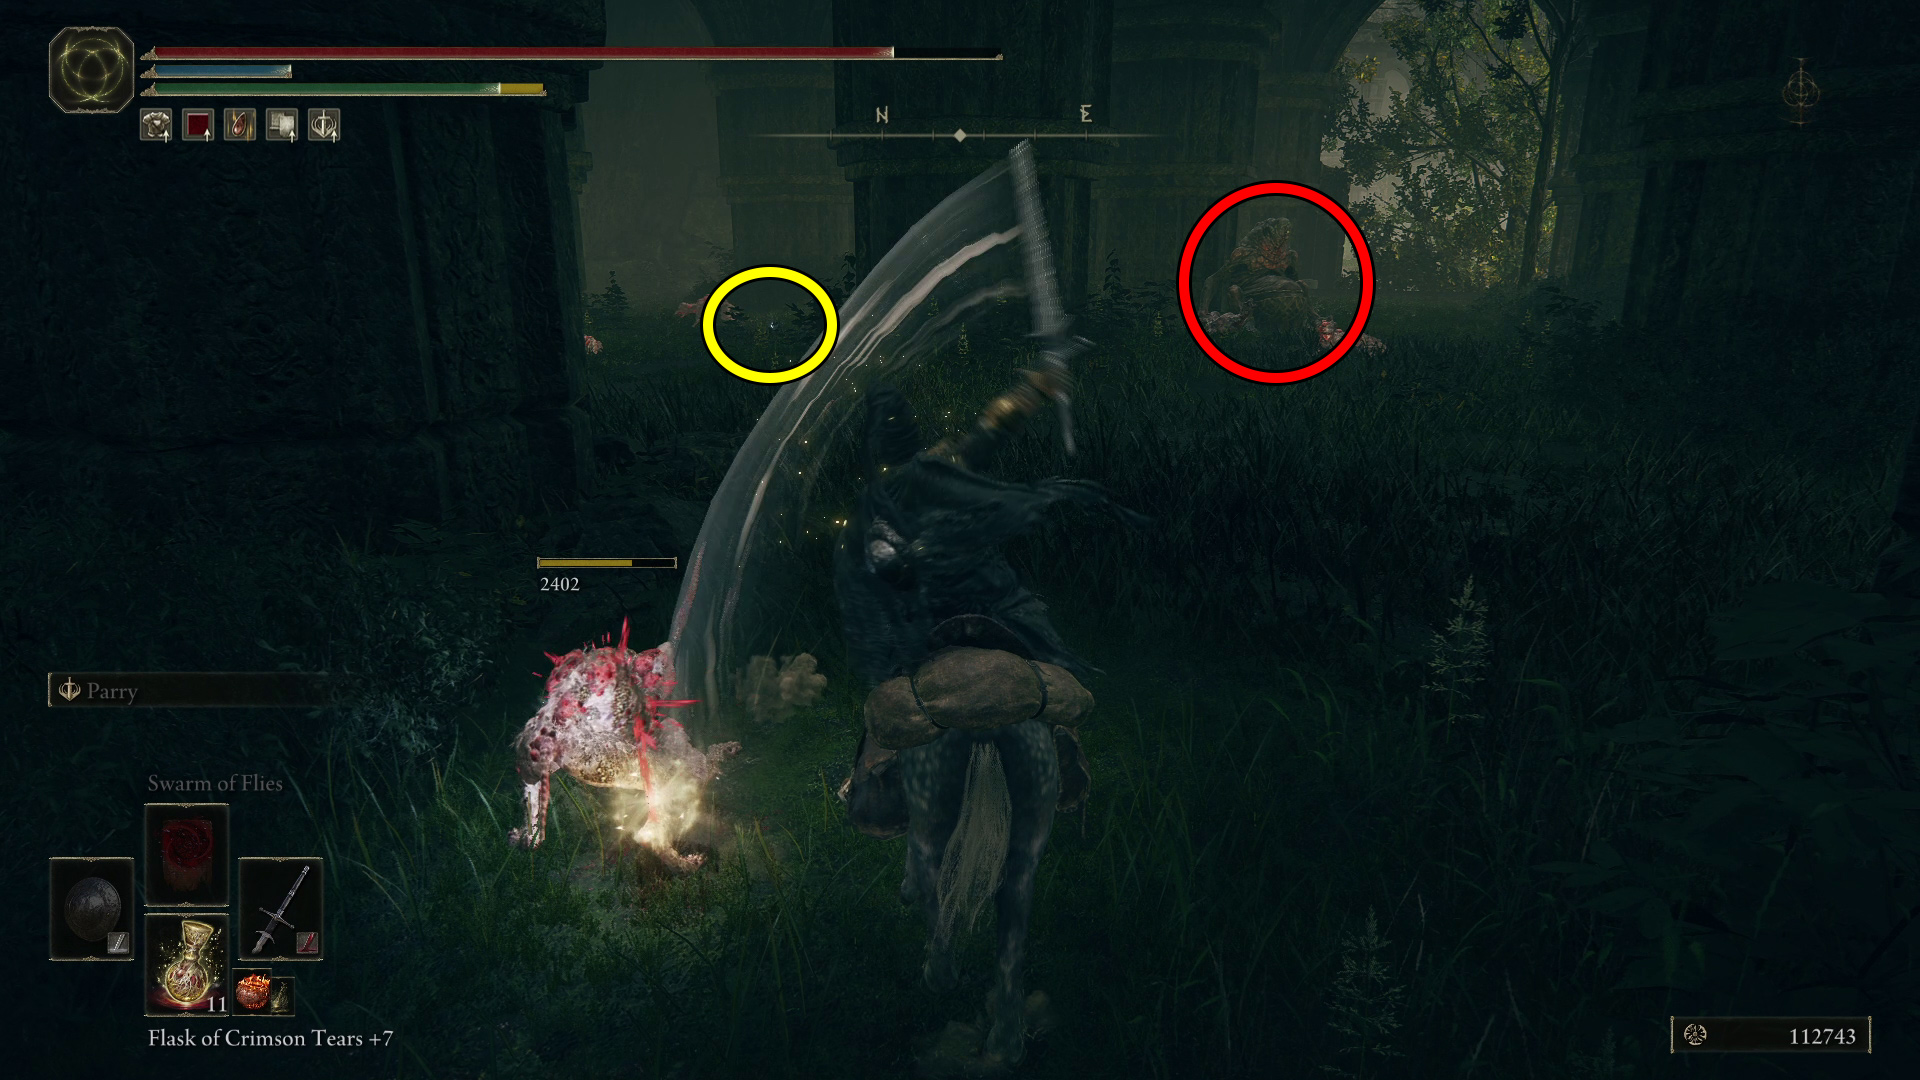
Upon landing, head southeast down the narrow passage. You’ll pass through a smaller spiritspring jump, then see a Shadow Realm Rune [6] that a pair of fly people are worshiping. Grab it, then jump up via the smaller spiritspring you just went through. Southeast of where you land you’ll see a glimmering pot person standing in a hallway — they’ve got a Scadutree Fragment, so don’t miss them! Past them in the next large open area you’ll be able to spot a Curseblade chilling on a pillar (Image 5).
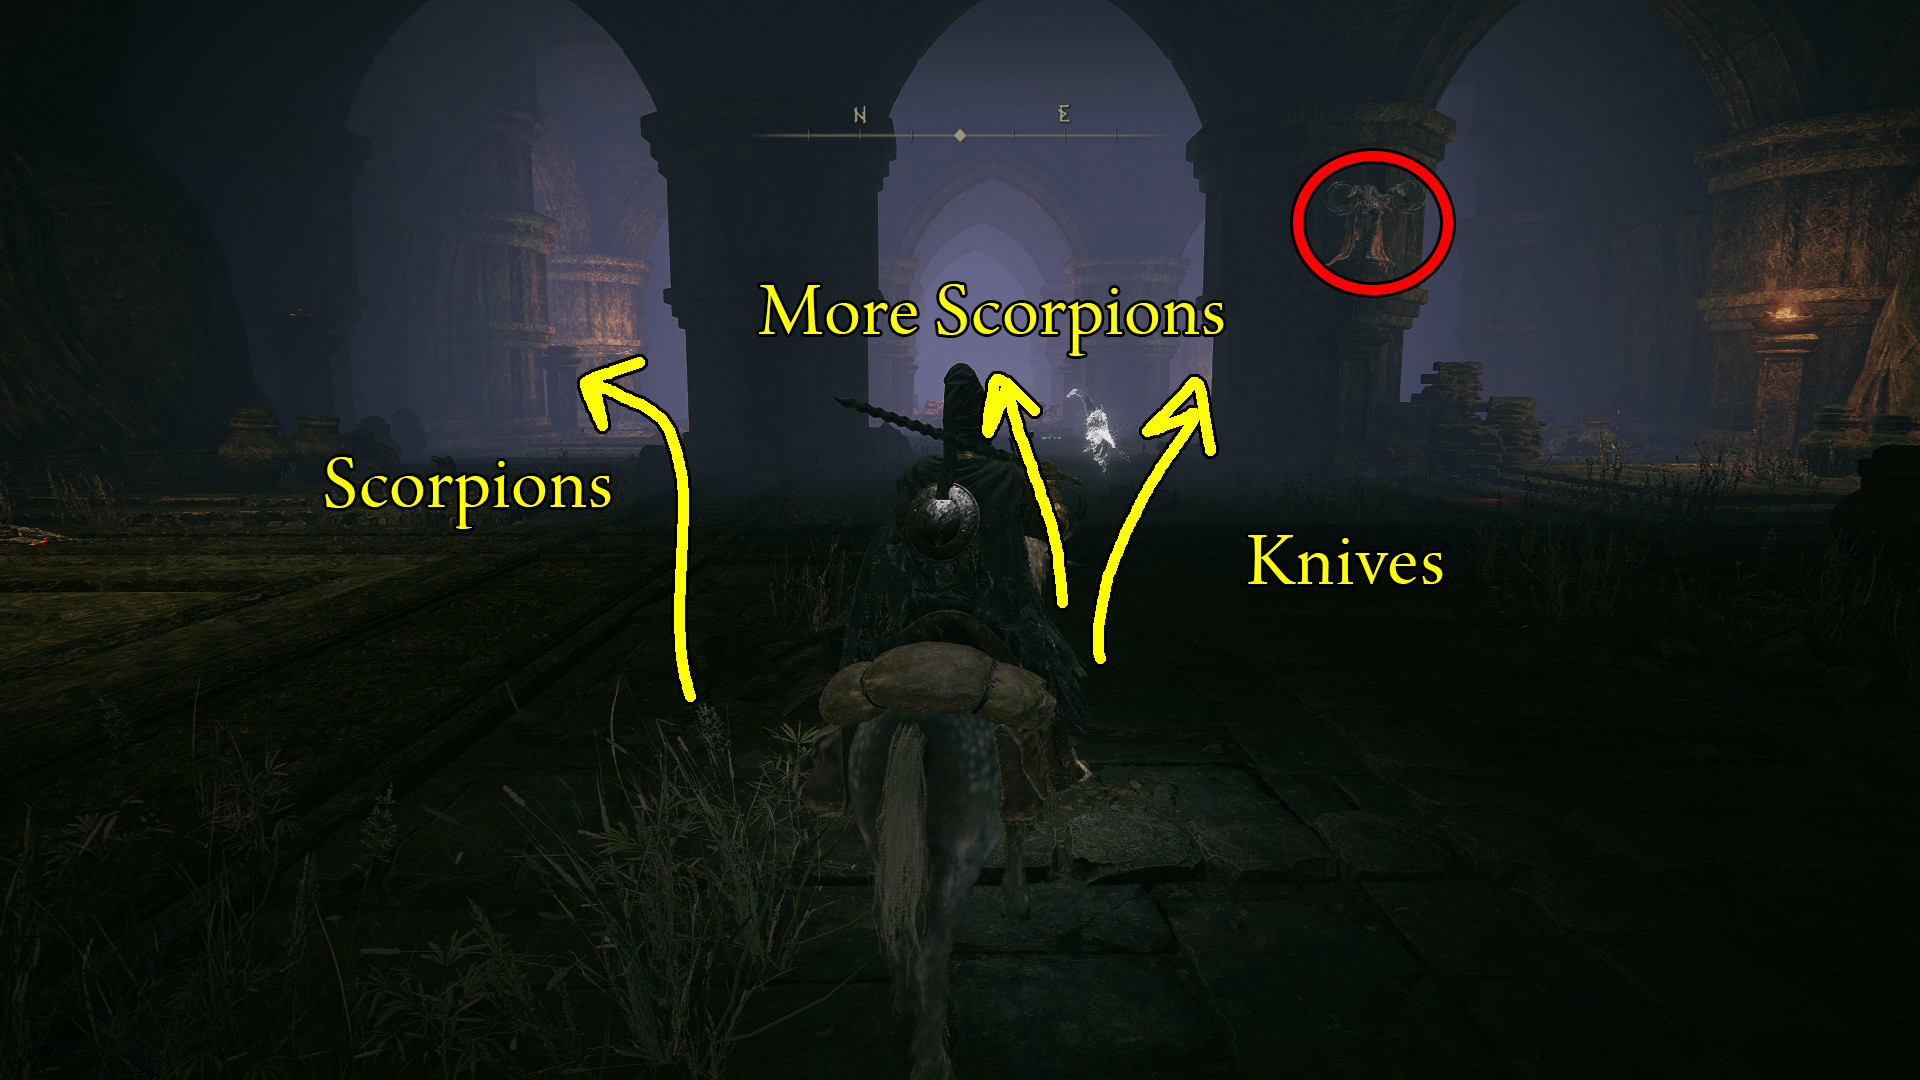
On the northwestern wall, just northeast of where you landed after the spiritspring jump, you can find a room with a hole in it (Image 6 – Scorpions). There are a couple scorpions in here, and on the left at the top of a pile of rubble is a smithing stone. The hole leads back to where we already were, so instead head back into the main chamber, and in the eastern corner you can find x5 Throwing Daggers at the base of a statue (Image 5 – Knives). That done, head northeast down the hallway (Image 5 – More Scorpions).
Image 5
You’ll come to an intersection — turn left (northwest) and continue around the next corner, where two scorpions wait on the walls. Deal with them before continuing forward into the next chamber, where you’ll see a scorpion hanging from the ceiling. Beneath it are the Spider Scorpion Ashes, plus x3 Scorpion Liver and x2 Sliver of Meat. Across the room is another scorpion lurking. After collecting the loot here, you can retrace your steps, returning to the area in Image 6. Make your way back to where you initially jumped up on the spiritspring, and drop down.
Upon landing, head northwest, and when you reach the T-intersection with the statue, head right (northeast). You’ll come into a room with some large roots — head up them and go left to find the Fine Crucible Feather Talisman. Head back the way you came and this time continue straight (southwest) at the intersection. You’ll pass under a stone arch, and then the path will turn left (southeast) — when it does, kill the mage hiding to the northwest before continuing southeast.
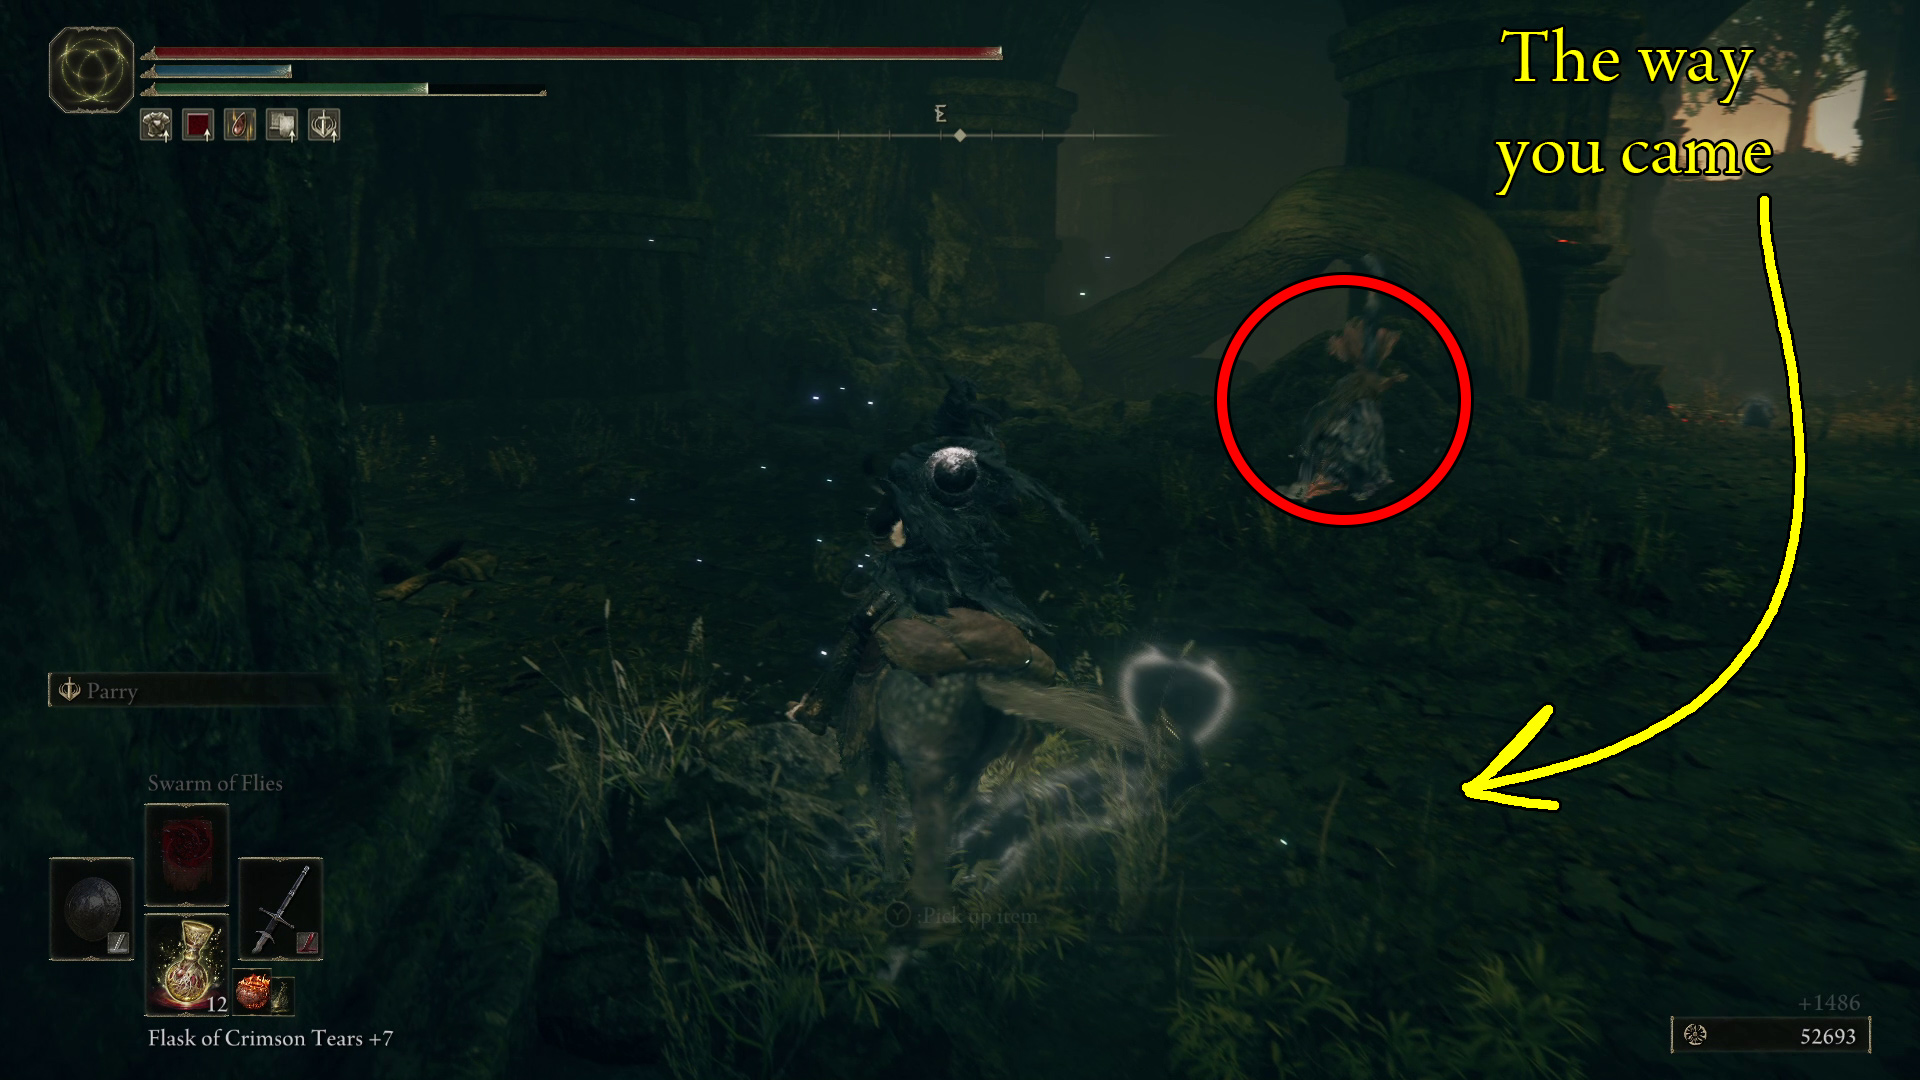
After passing under another set of arches, turn left and head up the branches by the wall (Image 6) to reach a Shadow Realm Rune [7] — you’ll have to kill the two flies feasting on the corpse first — then keep going southeast under the next set of arches. You’ll encounter an enemy that you should ignore — instead, swing well wide of the knight on the rocks, and make your way to the Rauh Ancient Ruins, East site of grace further southeast (Image 7). It’s a little hard to spot, but fortunately its a few steps south from the Cross of Miquella, which is much easier to see.
Image 6Image 7
Make sure you grab the Scadutree Fragment and the Ancient Ruins Cross Message from the base of the Cross, then activate the site of grace and rest.
Next, from the Rauh Ancient Ruins, East site of grace, follow the edge of the cliff north east, and you’ll come to a spot where there’s a small waterfall. The Ash of War: Dryleaf Whirlwind will be on the ground next to a pillar. That grabbed, you can head back to the knight you skipped in Image 7 and fight them if you want Devonia’s Hammer and the Crucible Hammer-Helm. You can use torrent to bait out an attack, then dash in for a quick strike or two when the attack finishes, but watch out — this knight has a lot of wild jumping moves and some gap closers.
Rauh Ancient Ruins, West
Unique & Important Items
Crimson-Sapping Cracked Tear
Scadutree Fragment
Mottled Necklace +2
Aspects of the Crucible: Bloom
Revered Spirit Ash
Pest-Threaded Spears
Divine Bird Feathers
Talisman of All Crucibles
From the Rauh Ancient Ruins, East site of grace, head west and drop down onto the bridge. Partway across the bridge, a Furnace Golem will wake up, so keep an eye on it — as long as you keep moving its first ranged attack should miss. If you want to kill the golem for its Crimson-Sapping Cracked Tear, it’s easier done with the upcoming grace as a spawn point, so ignore it for now.
Continue southwest on the bridge — the corpse on your left ahead has some crafting materials — then drop down to the right near the end of the bridge (Image 1), then continue southwest and up the stairs ahead. Turn left and head south past the Furnace Golem (Image 2-3). You’ll go over a small hill, and on the other side of the hill just to the southeast is the Rauh Ancient Ruins, West site of grace. Activate it and rest if needed.
Image 1Image 2Image 3
If you want to take out the furnace golem, you should know it’s one of the annoying armored versions that necessitates throwing a Furnace Pot in its brazier, unfortunately, and your best bet is to wait until you unlock the spiritspring jump later.
Otherwise, from the Rauh Ancient Ruins, West site of grace, head southwest into the nearby structure. There is a new type of caster shadow mob here that fires bouncing blood projectiles, so once you’ve dealt with the dogs, they should be your next target — unlike most of the shadow mobs, these can actually be a problem if you ignore them. Take out the enemies at the bottom of the stairs, then head up them.
At the top of the stairs, head a bit to the right and then take a look at Image 4 — there are two of the blood-flinging mobs nearby, and a Curseblade hiding up on a pillar. Deal with the casters first, then decide if you want to run away from or kill the Curseblade — note that this one is unique, and casts slow, tracking dark magic spells (they aren’t too tough to avoid, but make sure you keep an eye on them). Finally, there’s also a mob with a glimmering pot on their head — but don’t get too excited, they’ve only got x3 Spirit Calculus in their pot.
Image 4
After cleaning up here, you can grab a Scadutree Fragment from the altar on the north-northwestern wall of the room, next to an exit. Then head north out the doorway, and you’ll spot a gazebo with a couple of knights patrolling (there’s another gazebo on the high ground, but we aren’t talking about that one). Note that a giant to the east will fire arrows at you while you’re near the gazebo in the water, so either make sure you’re always dashing on Torrent, or else hide behind cover and only move between shots.
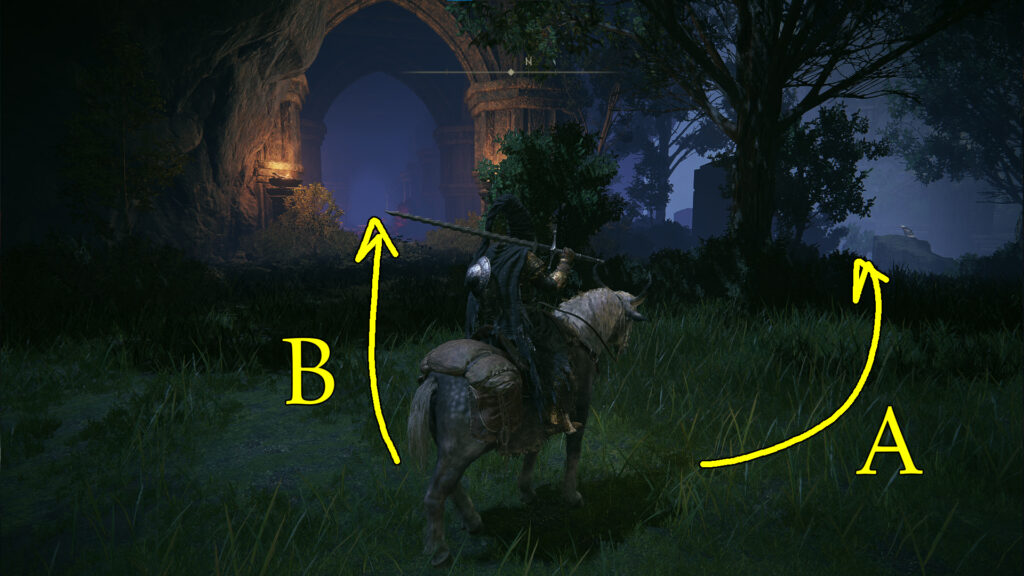
Grab the Revered Spirit Ash from the statue in the gazebo, then continue north northwest through the gazebo and up the stairs. Here (Image 5) you’ll be able to continue straight (Path B), or right and then down some stairs (Path A).
Image 5
As you may have guessed, we’re gonna start with path A, going around the broken column and down the stairs. The stairs branch (Image 6) — continue straight north-northwest, and you’ll see a corpse on your right with x3 Root Resin. Further ahead is a covered area where you’ll find two Bloodfriends and a trio of doggos. You can ride torrent past these enemies if you want, or fight ’em, but either way go northeast until you’re out from under the roof, at which point you can drop down to your left (Image 7, 8 – there aren’t any obvious landmarks, so here’s a map location for where to drop down).
Image 6Image 7Image 8
After dropping down, head southwest through the scorpions (1 small, 2 large) until you’re forced to turn right. Continue north downhill a bit and you’ll come to an elevator. We’ll come back to it — for now, continue northeast past the elevator and around the corner. To the east, past the flying scorpions, is a structure with some flowers in and around it. In the middle of the structure, next to the large flower, is the Aspects of the Crucible: Bloom incantation.
Now you can head back to the elevator. Ride it up, and straight ahead to the southeast you’ll see a shadow mob with a glimmering pot — kill him and grab the Revered Spirit Ash he drops. Continue southeast and drop down to where you encountered the Bloodfiends and doggos earlier, and keep going southeast back to the stairs.
Go up the first set of stairs, then go left (northeast) down the stairs towards the covered area (Image 9). Here you can fight a Chief Bloodfiend, but all they drop is x5 Sacred Bloody Flesh and a few thousand runes — and there are a bunch of dogs defending him as well. So, you may just want to grab the Golden Horn Tender (Image 10) from the corpse in this area and then head back the way you came.
Image 9Image 10
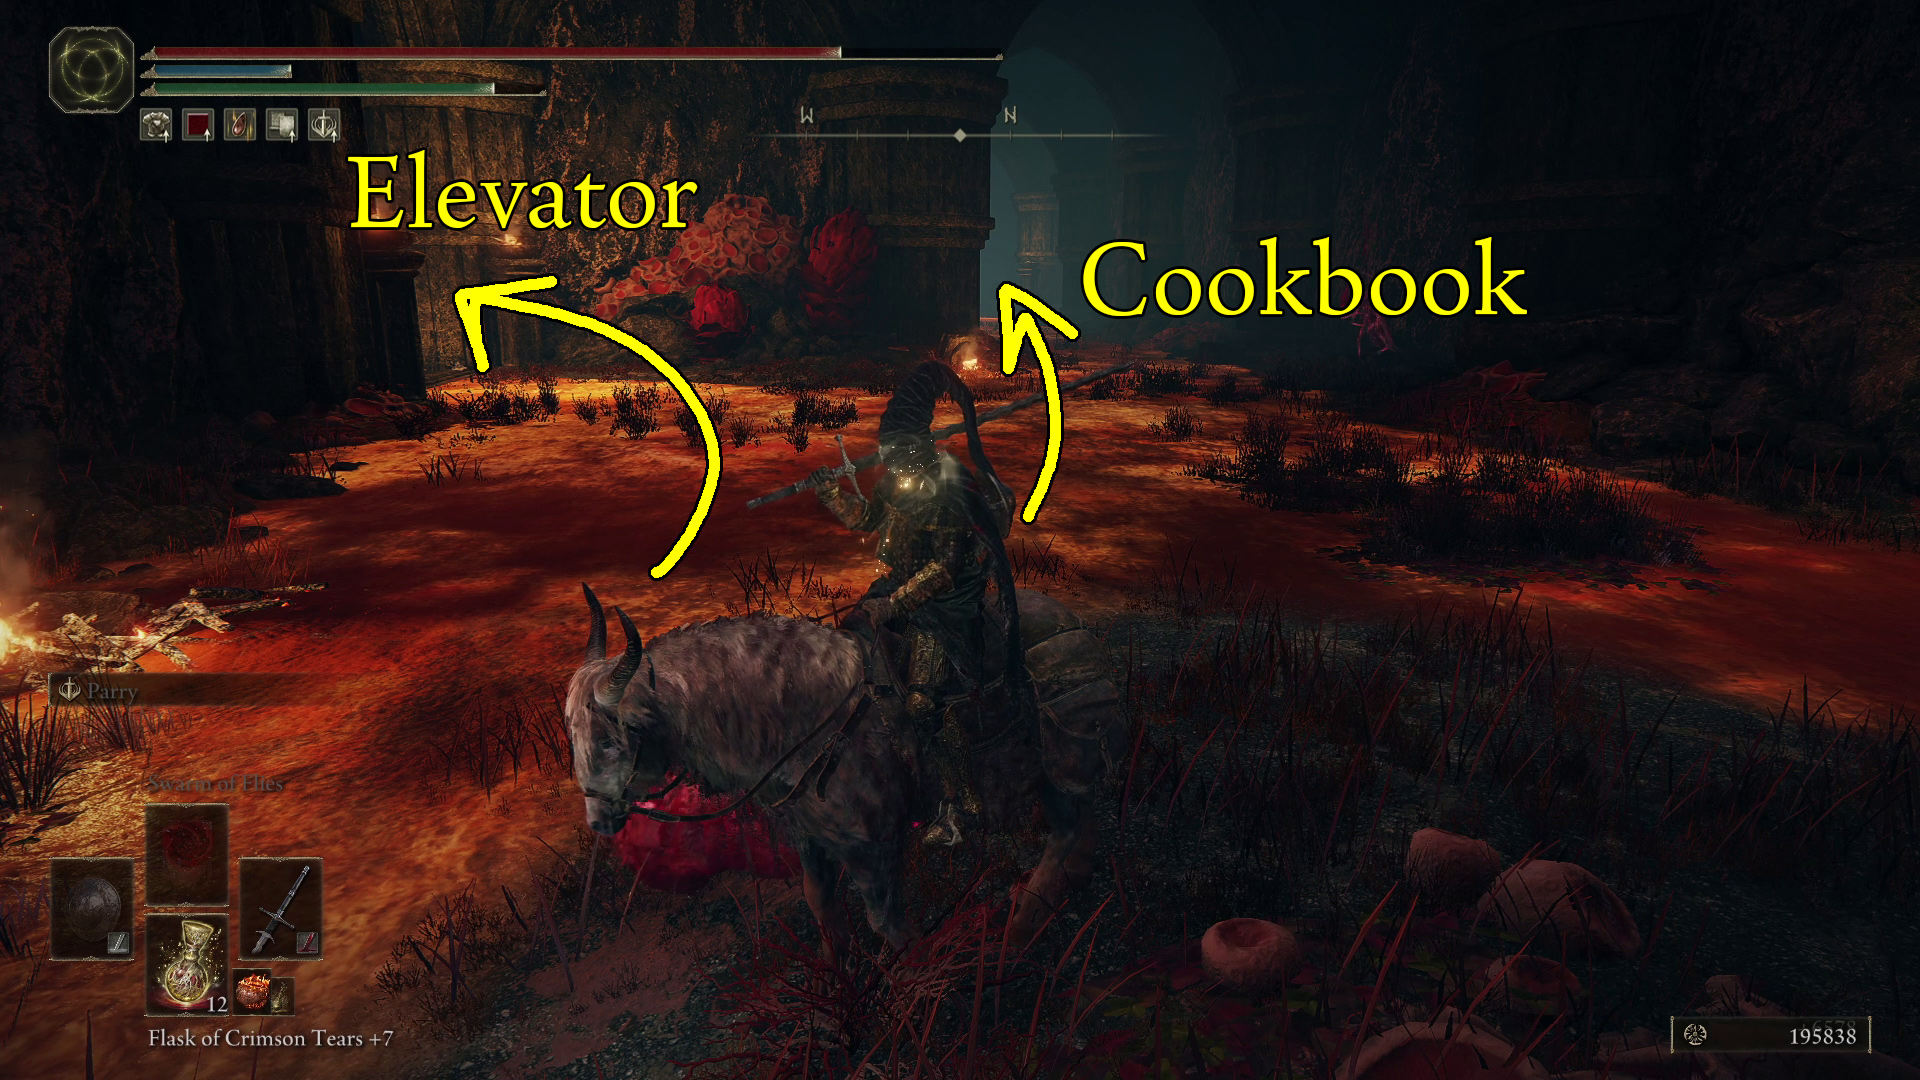
Return to the stairs in Image 9, but this time continue up, to where you went right in Image 5. This time take path B, into the structure with the rot all over the place. You will definitely want to take advantage of Torrent’s speed here, as the easiest way to dodge the pest’s ranged attacks is by dashing towards them and getting behind them before the animation finishes. The pests can often de-horse you if you ignore them, go past them, and aggro them, so its best to clear them one by one as you make your way north deeper into the structure. You’ll be able to go up an elevator on your left, but first continue forward to grab a cookbook (Image 11) — even if you don’t want the cookbook, there’s a cool secret to find this way.
Down the hallway to the north, the corpse on far wall has Dappled White Cured Meat x2. Grab it and head east-northeast into the next large chamber, where you’ll have a bunch more pests to fight. As long as you stay close to each one as it aggros, you can generally avoid aggroing the whole room. The corpses here have x4 Fly Mold, x3 Immunizing Cured Meat, and x8 Smithing Stone [2]. The real prize is outside on the rocks around the corner, where you’ll find the Greater Potentate’s Cookbook [9] (Image 12).
Image 11Image 12
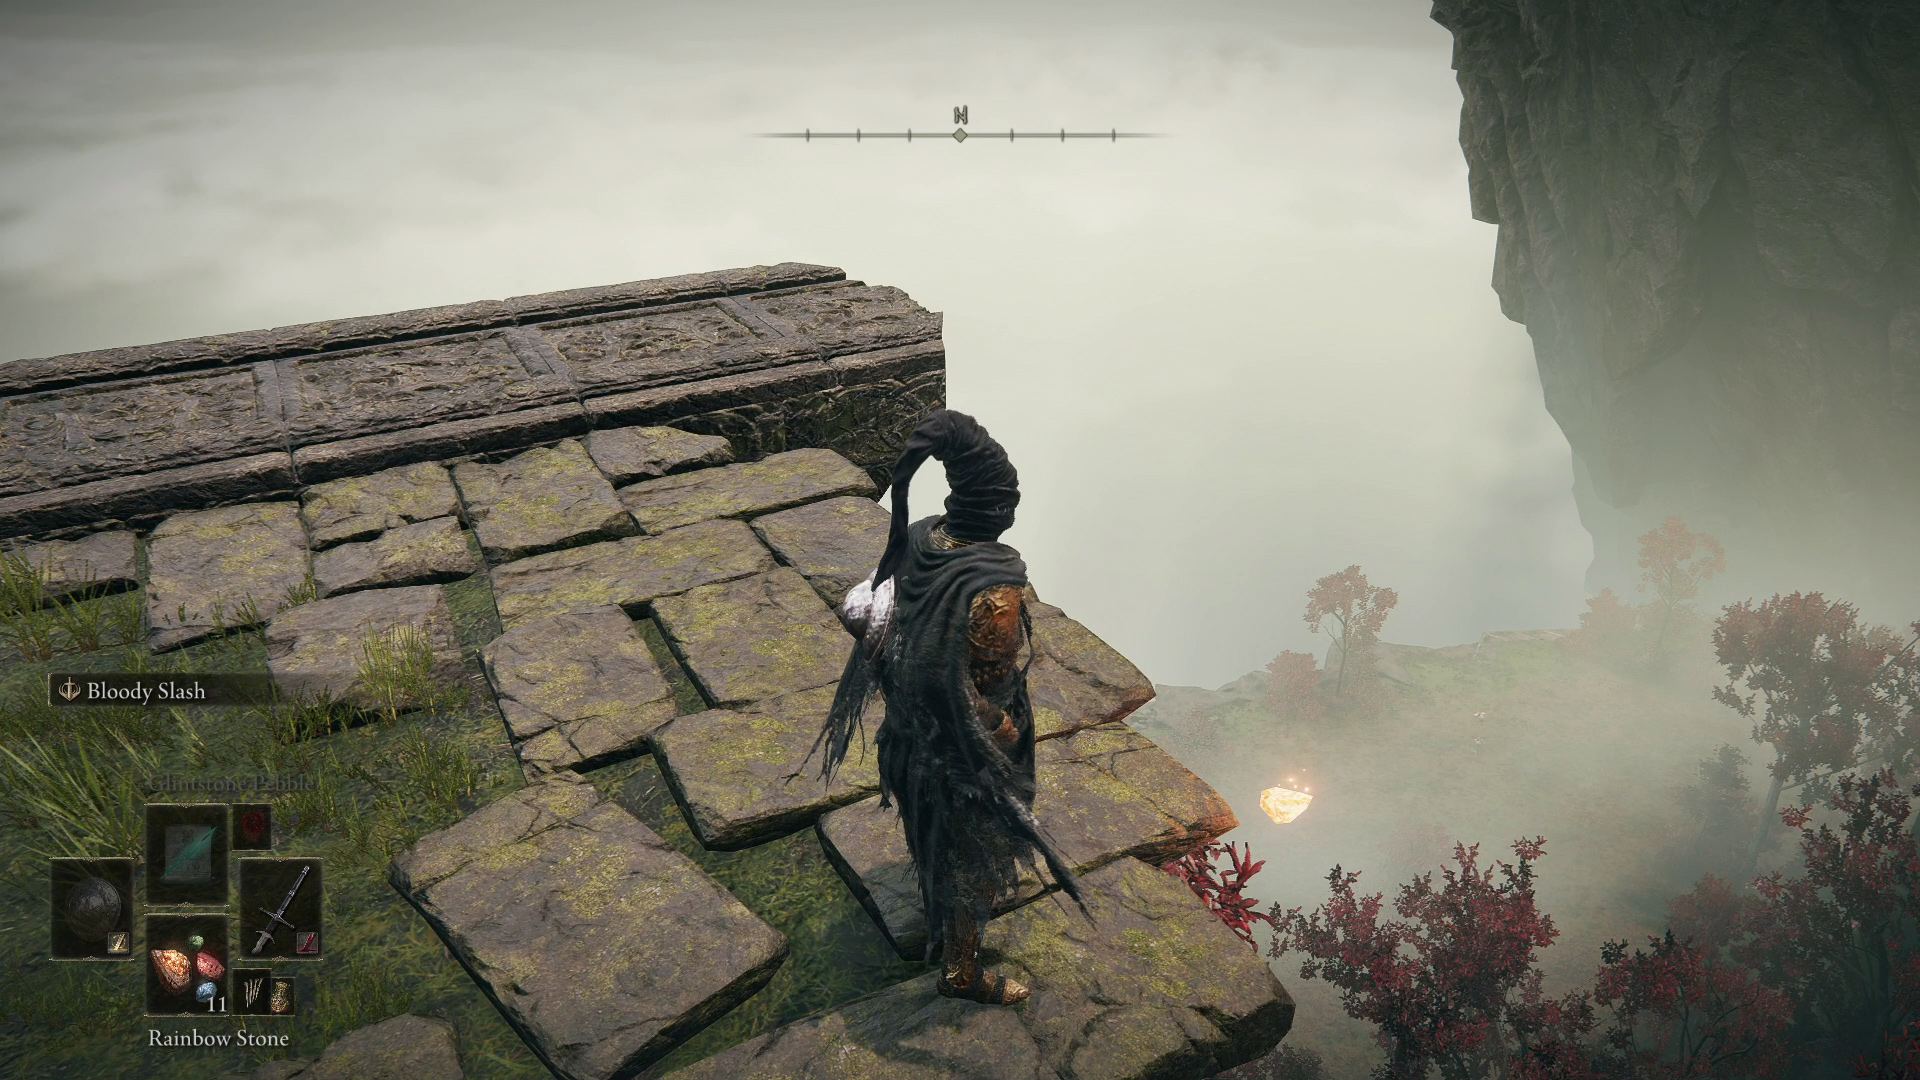
Now look northeast, and you’ll see an altar in a nearby tower. This is one of the Sword of Light and Darkness altars, so if you already have the Sword of Light, you’ll be able to turn it into the Sword of Darkness here, or vise versa. There’s an invisible path that leads to the altar — it’s a straight shot from the ledge to the altar (Image S1), but to be safe, drop a Rainbow Stone and confirm you’re in the right spot (Image S2). This will also help you on your return trip across the bridge, since the rainbow stones are easy to spot even from far away.
Image S1Image S2
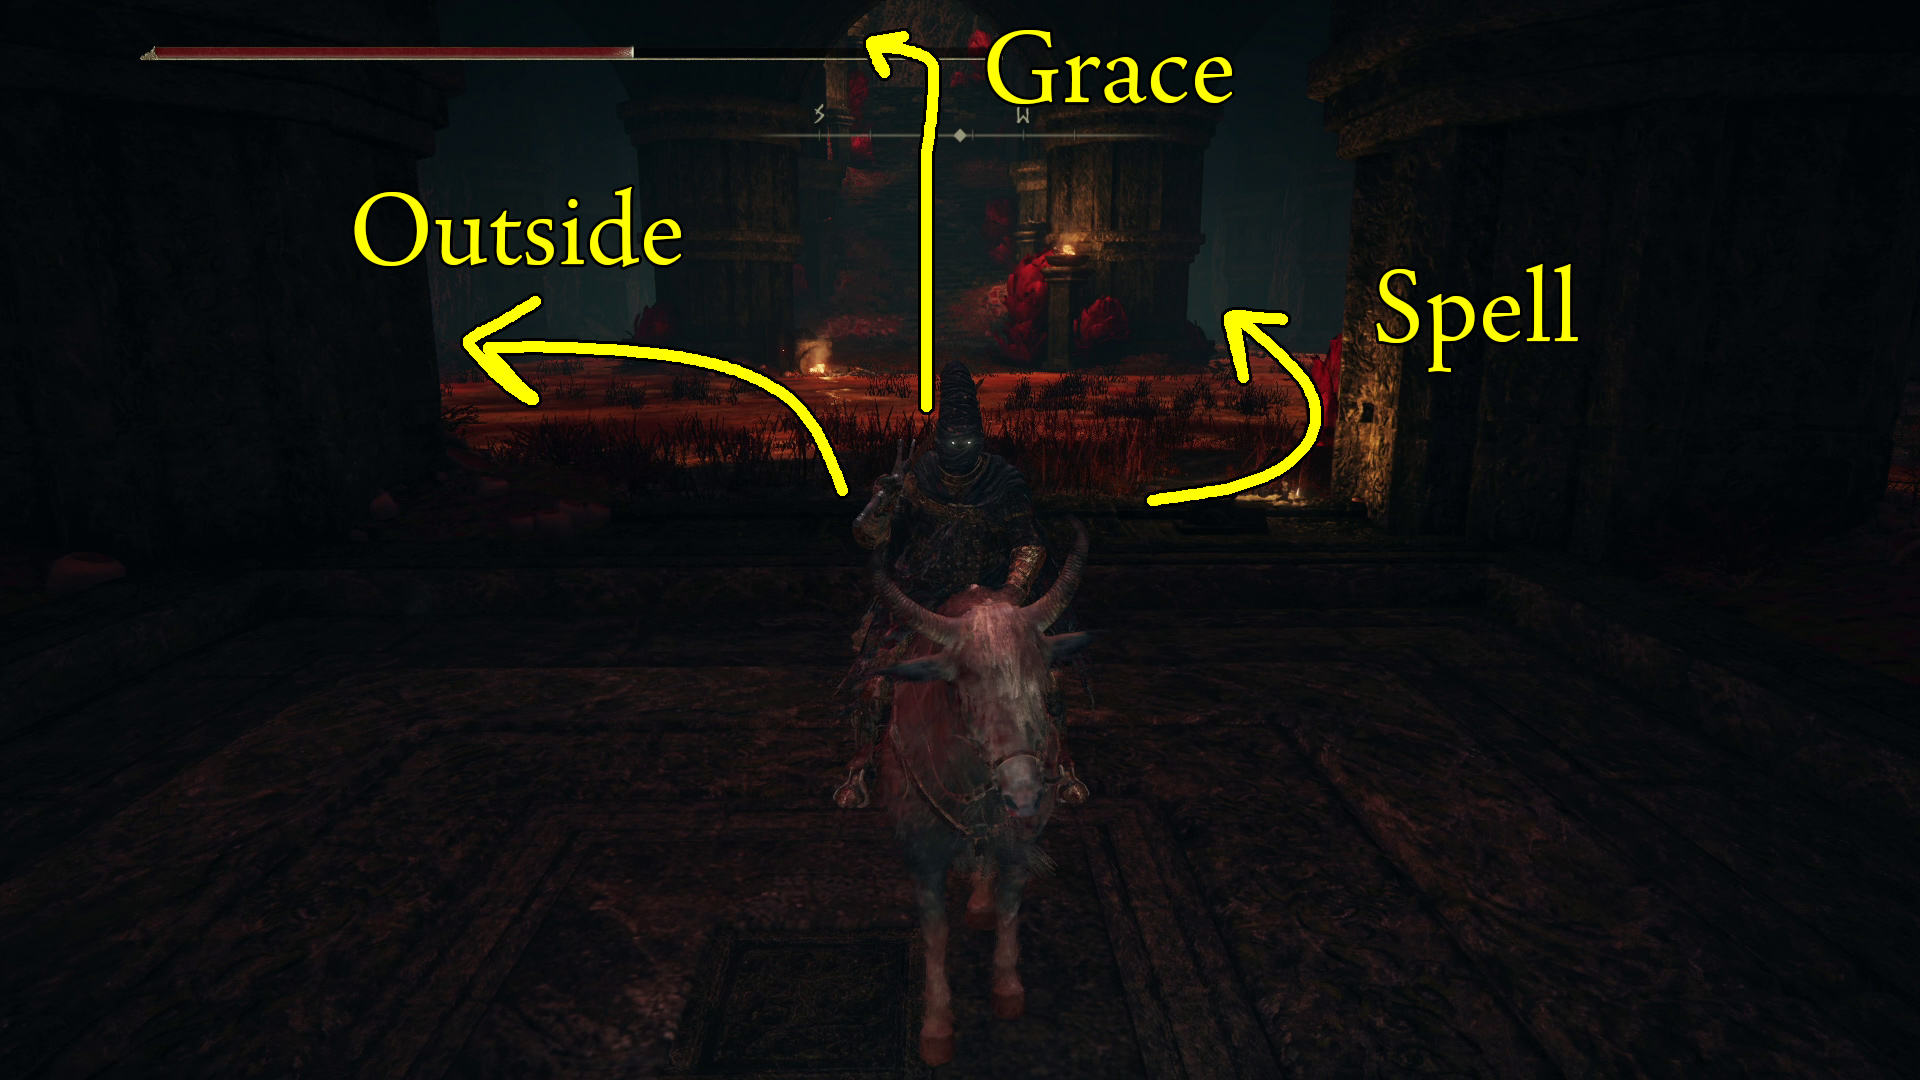
Retrace your steps back to the elevator (Image 11) and ride it up to the next floor. Head right and go behind the stairs. You’ll find a corpse with some Rot Buds, and then at the back of the stairs near a pest is the Pest-Threaded Spears spell. Grab it and then retrace your steps and go up the stairs to the grace. Head left (southeast) and you’ll see the grace just outside, right in front of the Church of the Bud. Grab the aptly named Church of the Bud, Main Entrance site of grace, then turn around and go back down the stairs. Turn right and head southeast outside as per the “Outside” path in image 13.
Image 13
First, turn left, jump up on the rocks, and head north-northeast to the very end of the cliff (Image 14) — here, you’ll find a spiritspring locking rock you can destroy (Image 15). This will unlock the spiritspring below, which we will use later to grab some treasure.
Image 14Image 15
For now, turn around and head south-southwest, back to the gazebo. Just past the Gazebo is a bird knight guarding the Divine Bird Feathers incantation. Up the stairs past the knight is an elevator that takes you to the first indoor area from this section! Cool, but not useful for us right now. Instead, head to the right, between the broken pillars (Image 16), and then drop down where indicated (Image 17) — continue to the next drop point as shown in Image 17 (Image 18 offers another perspective on the drop). This drop will hurt you and Torrent a bit, but it’s very survivable.
Image 16Image 17Image 18
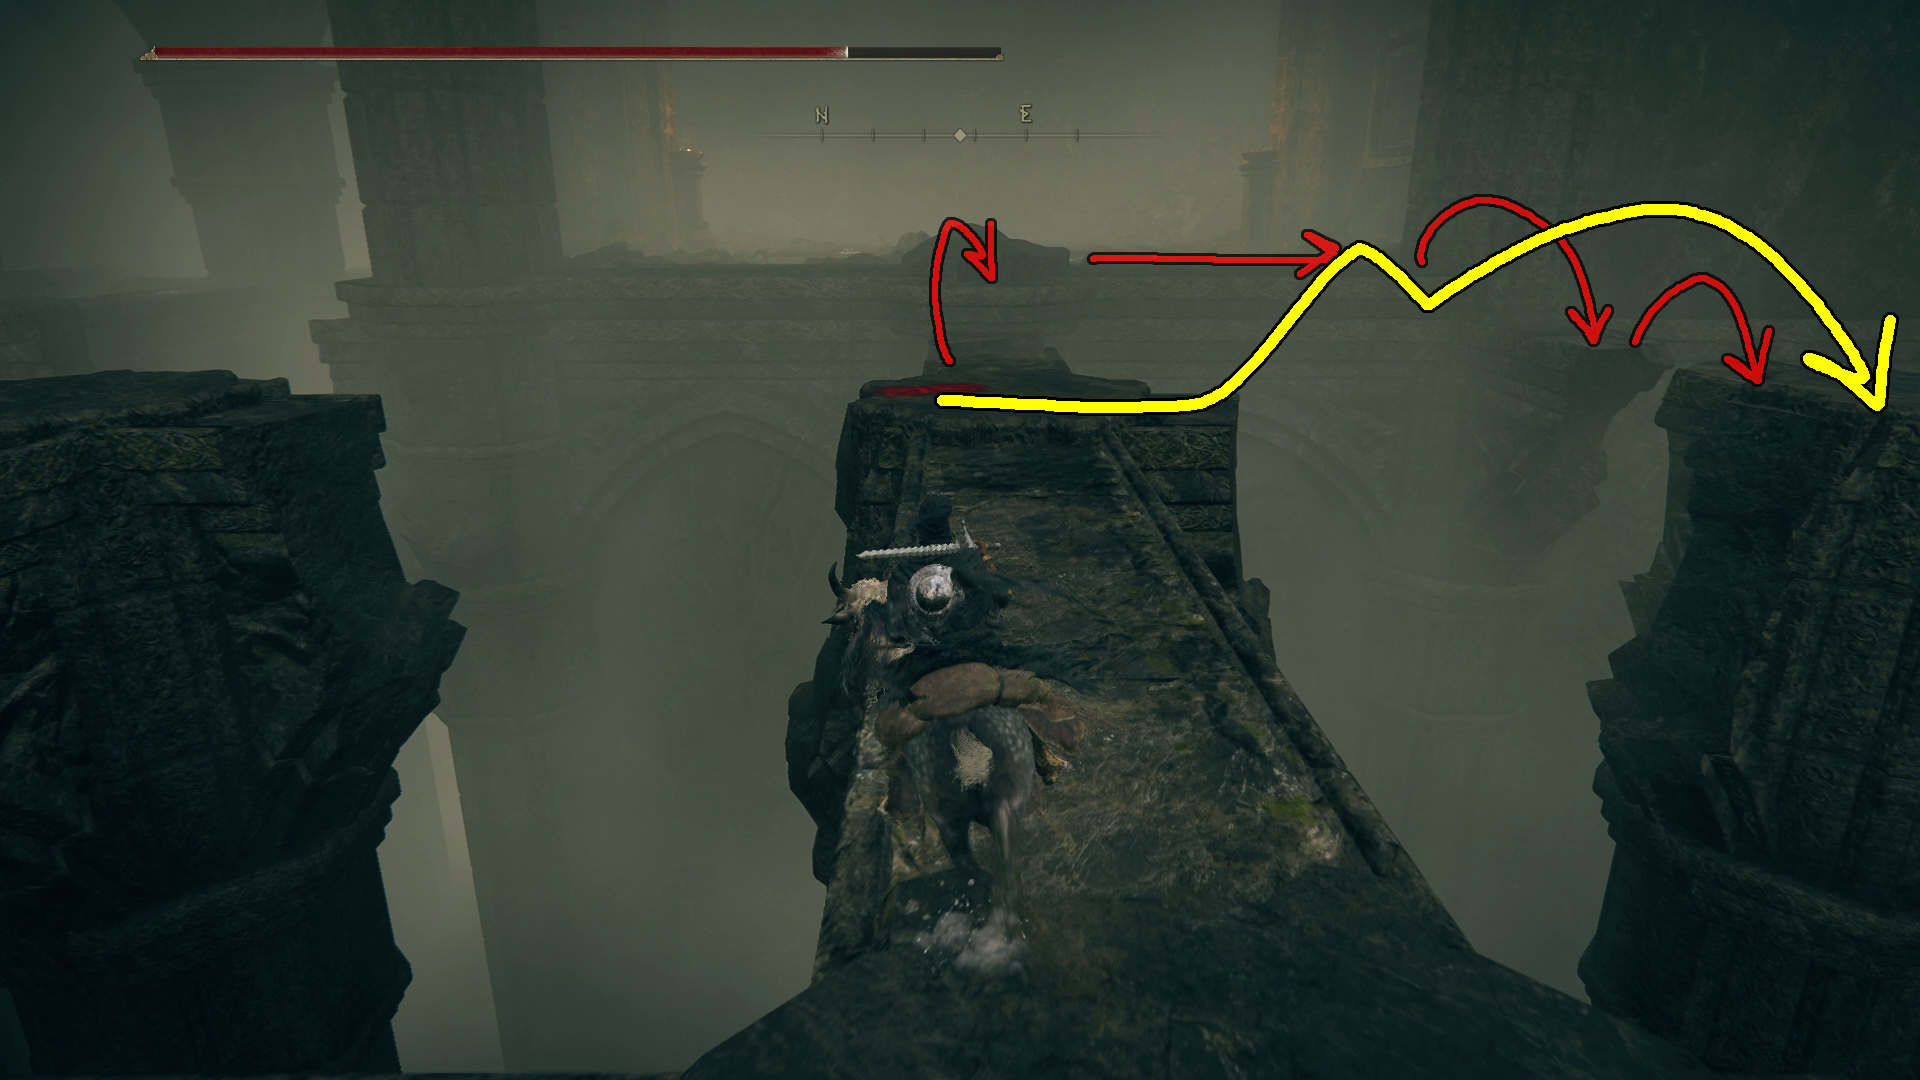
Turn left (southeast) and you’ll see a corpse in a tricky-to-reach spot (Image 19). Fortunately, it’s only holding x3 Four-Toed Fowl Feet, so unless you like challenging yourself with platforming, you can safely ignore this jump. What is mandatory is continuing across the pillars, generally southwest and then southeast. You’ll come to a spot where you can go forward to an elevator, or jump right — we’ll loop around to the elevator, so jump right (southeast) as pictured in Image 20 (the yellow path).
It requires a double jump, but so long as you wait a moment before tapping the jump button a second time, and jump as late as possible, you should make it no problem. You can also take the alternate path pictured in red; it’s trickier horizontally but easier in terms of length.
Image 19Image 20
Continue southeast, going slow so you see the gap you have to jump right before the path turns left. After that jump, there’s one more jump to a nearby grassy area that contains two enemies. They are easily avoided if you want — hug the left-hand wall and continue northeast, and you’ll go up some stairs and find a hole in the wall. Head through the hole, then through the next one, and you’ll find a chest with the Talisman of All Crucibles.
On the northwestern wall is yet another hole — head through, and you’ll be taken to the elevator we mentioned earlier. Ride it up, then ride east-northeast a short ways to find the Ancient Ruins, Grand Stairway site of grace. Grab the site of grace, then teleport to the Rauh Ancient Ruins, West site of grace — we’ve got one more thing to do in this section!
From the Rauh Ancient Ruins, West of grace, head northwest up the hill and then continue north northwest through the arches (Image 21). You’ll come to the spiritspring jump we unlocked earlier — use it to jump northeast onto the nearby raised area with stairs (Image 22), then take the stairs to the top of the platform to find a chest containing the Mottled Necklace +2.
This is also a spot you can potentially kill the Furnace Golem from, if you wake him up and pull him towards the high ground.
Image 21Image 22
Once you’re done here, you can teleport back to the Ancient Ruins, Grand Stairway site of grace!
Ancient Ruins, Grand Stairway
Unique & Important Items
Divine Beast Tornado (boss drop)
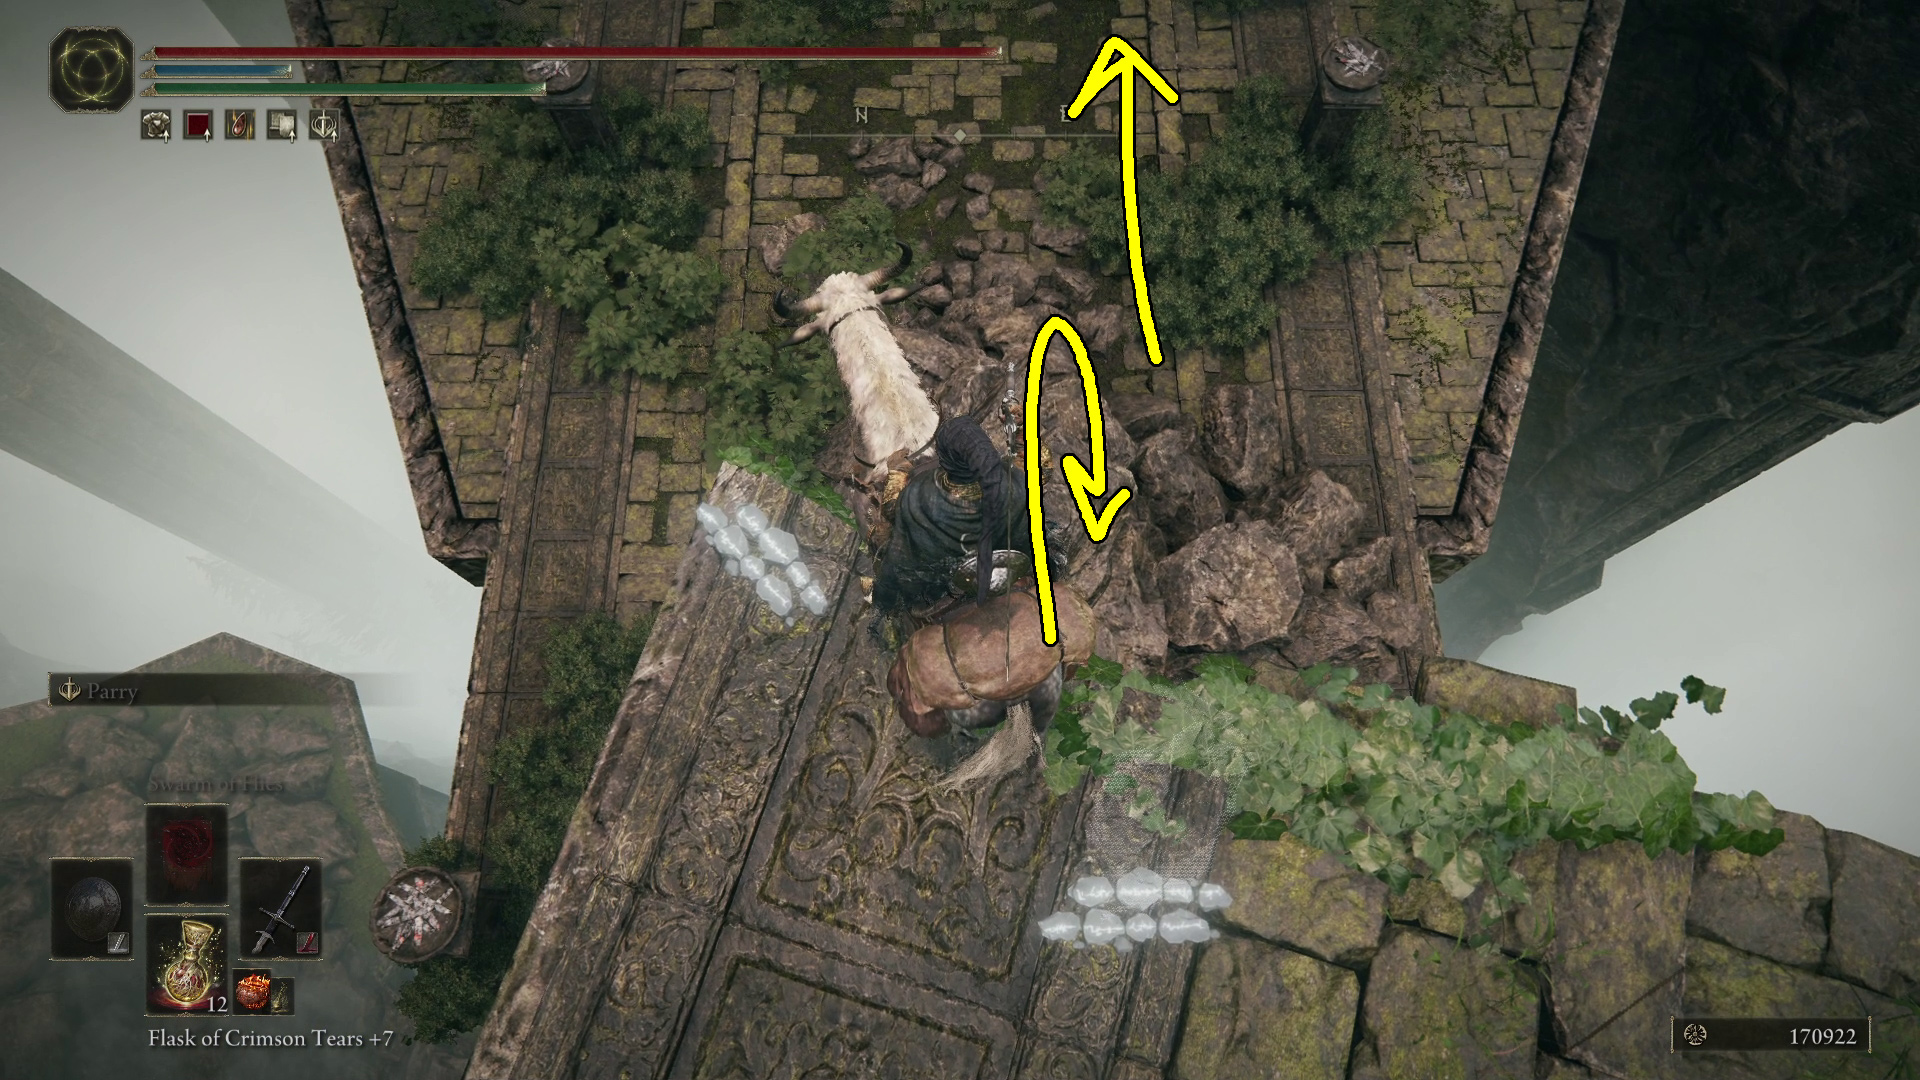
From the Ancient Ruins, Grand Stairway site of grace, go down the nearby stairs, heading east-northeast. On the second set of stairs you’ll meet a shadow dog. At the next landing, turn right and make your way south-southwest to find a corpse on the edge of the cliff with a Spirit Calculus. Head back to the staircase and continue down the stairs, noting that you’ll be in range of the giant archer once you get further down the stairs. Gallop perpendicular to him as he fires to avoid getting blasted, and hug the rock the giant is on, making your way around it (Image 1) so you can jump up and kill it.
After dealing with the giant, hop down to the staircase again and grab the x2 Smithing Stone [7] from the corpse the pair of dogs is munching on. Continue east-northeast down the staircase to where it ends. From here, drop onto the pile of rocks below to avoid taking damage (Image 2), then head northeast. Near the end of this section of bridge, you’ll find a Shadow Realm Rune [7] by a few shadow mobs.
Image 1Image 2
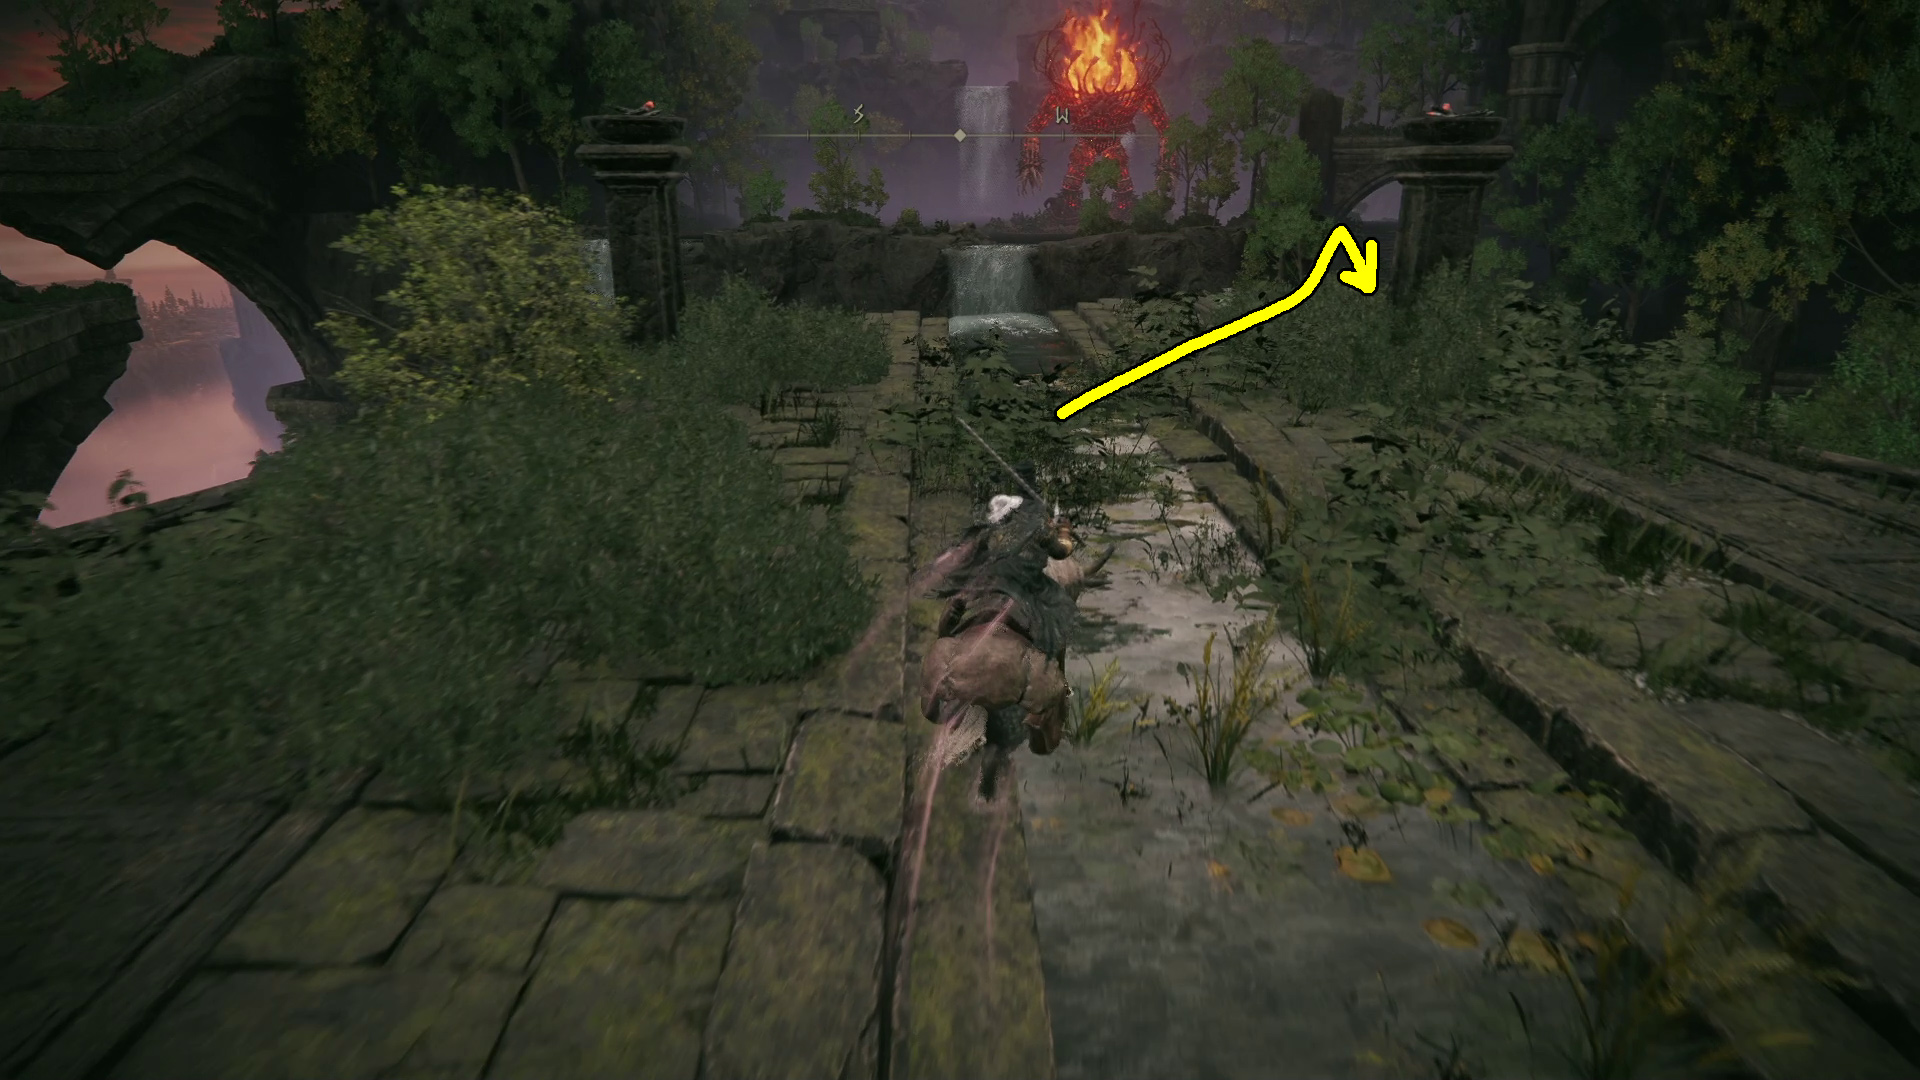
Southeast of here, you can drop down and fight a Divine Beast Dancing Lion — or you can cheese it with arrows from the high ground (Image 3). If you do the ranged cheese, the lion will get too close to shoot at, but just wait and it’ll return to the arena. Note that if you go down onto the low ground to fight the lion, you can always run away by dropping off the platform northeast of the boss arena (Image 4).
Image 3Image 4
This fight is very similar to the previous Divine Beast fight, but with the added fun of deathblight and basilisks! The guide linked below is for the previous fight, but many of the same principles apply. One very useful trick is to bring the Beast-Repellent Torch with you into the fight, and have it on your back — you can two-hand a weapon while having the torch “in” your left hand, and it will still keep the basilisks away. Check out the first part of our Dragonbarrow walkthrough to find the Isolated Merchant that sells the torch.
Once you reach the Divine Beast, there’s nothing left to do but head to the Church of the Bud and fight the non-optional boss there! When you’re ready, teleport to the Church of the Bud, Main Entrance site of grace.
Church of the Bud
Unique & Important Items
Remembrance of the Saint of the Bud (boss drop)
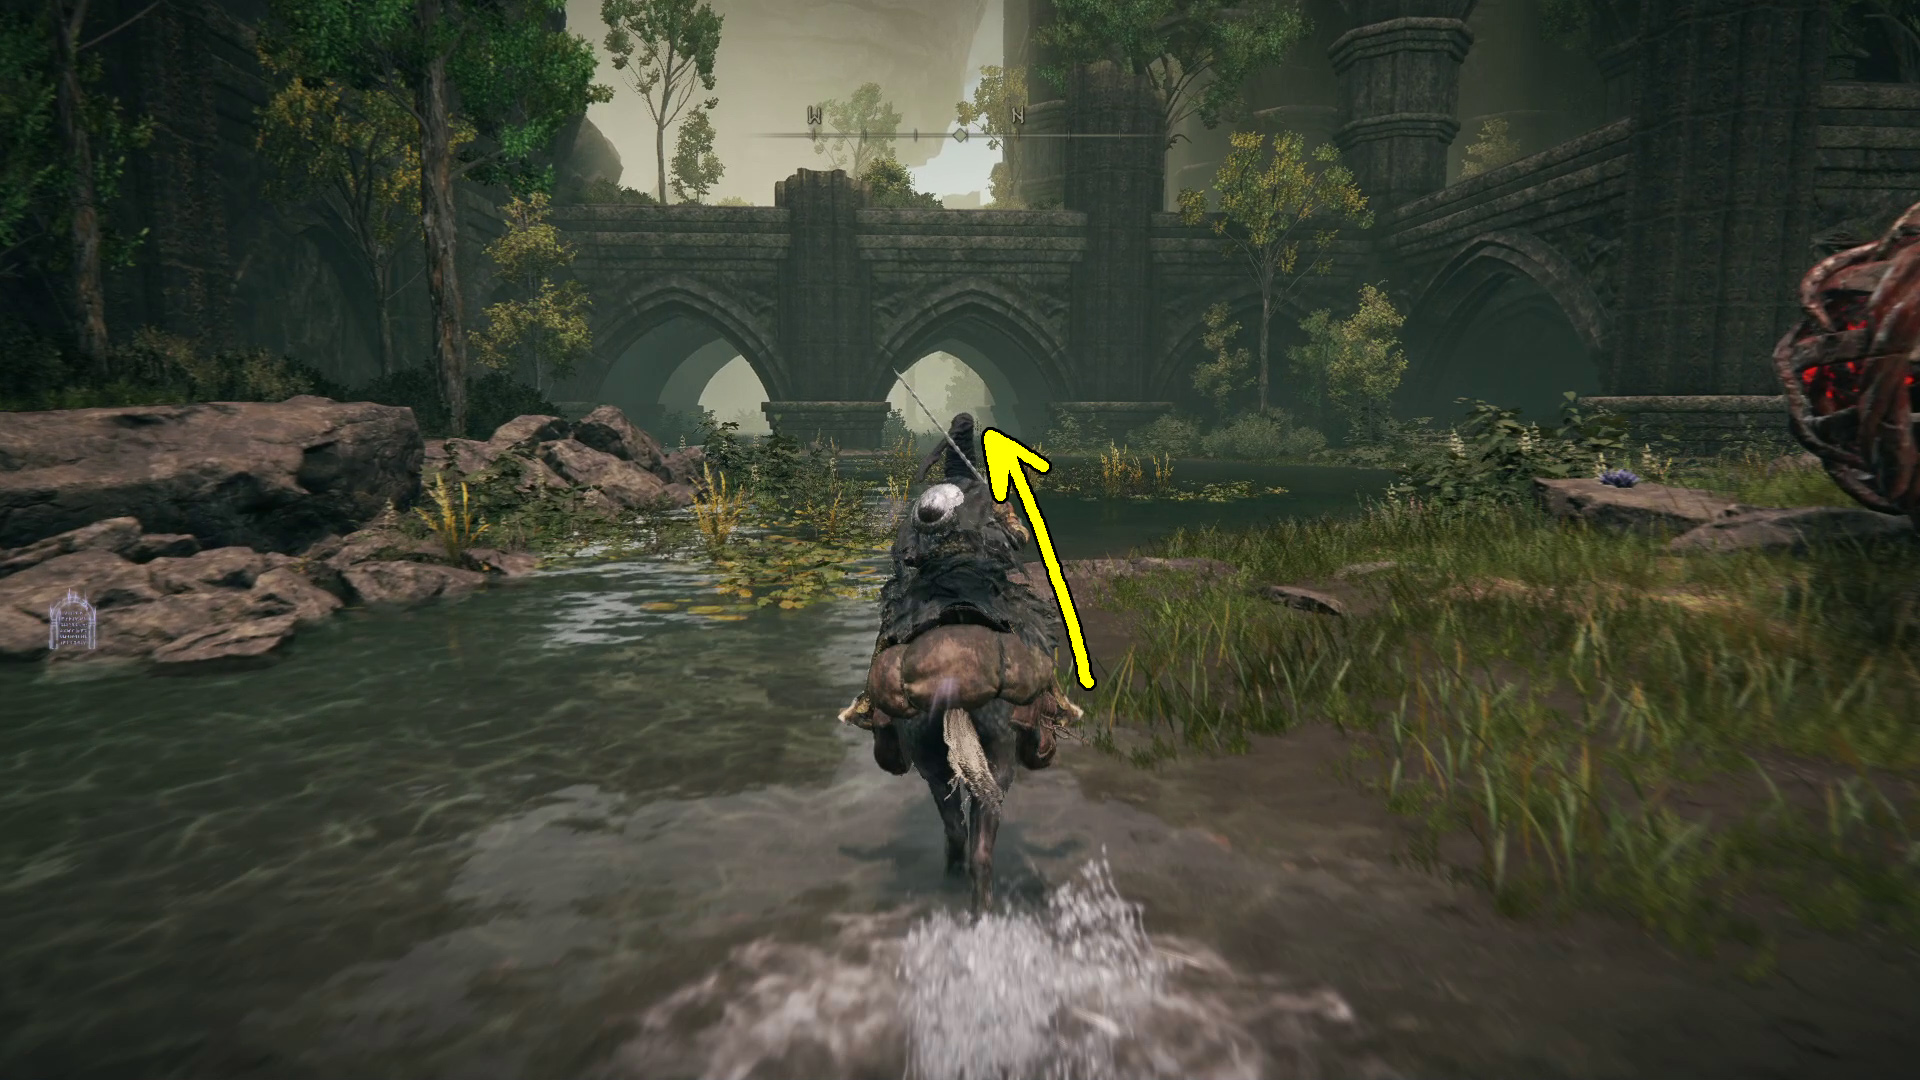
From the Church of the Bud, Main Entrance site of grace, you can head south through the golden fog wall and face Romina, Saint of the Bud. This boss is required to reach the subsequent area, the DLC’s final legacy dungeon.
After you defeat Romina, you’ll be able to grab the Church of the Bud site of grace. Next, south to exit the church, and continue up the hill to the lone tree. Assuming you’ve defeated Messmer, you’ll be able to interact with the Sealing Tree, and then select Yes to burn it, opening the way to Enir-Ilim.
Unabashed FromSoftware fanboy still learning to take his time with games (and everything else, really). The time he doesn't spend on games is spent on music, books, or occasionally going outside.
Hey dude think I found a misprint. On the below part I think you mean the West site of grace not East?
From the Rauh Ancient Ruins, East site of grace, head northwest up the hill and then continue north northwest through the arches (Image 21). You’ll come to the spiritspring jump we unlocked earlier — use it to jump northeast onto the nearby raised area with stairs (Image 22), then take the stairs to the top of the platform to find a chest containing the Mottled Necklace +2.
Nice catch mike, thank you!