This spooky area is found at the end of a dungeon, and while it’s got some reworked Winter Lanterns, there isn’t much else to do but hike to the handful of items and then make your way to the mansion in the corner. It does have wildlife that apply madness, so that’s fun.
How to Get to the Abyssal Woods
The woods are found at the end of the Darklight Catacombs in Scadu Altus. However, the part of Scadu Altus that the catacombs are in is accessed via secret, so check out our guide on Lower Scadu Altus to see how to reach the catacombs. After defeating the boss of the catacombs, you’ll unlock the Forsaken Graveyard site of grace.
Area Map
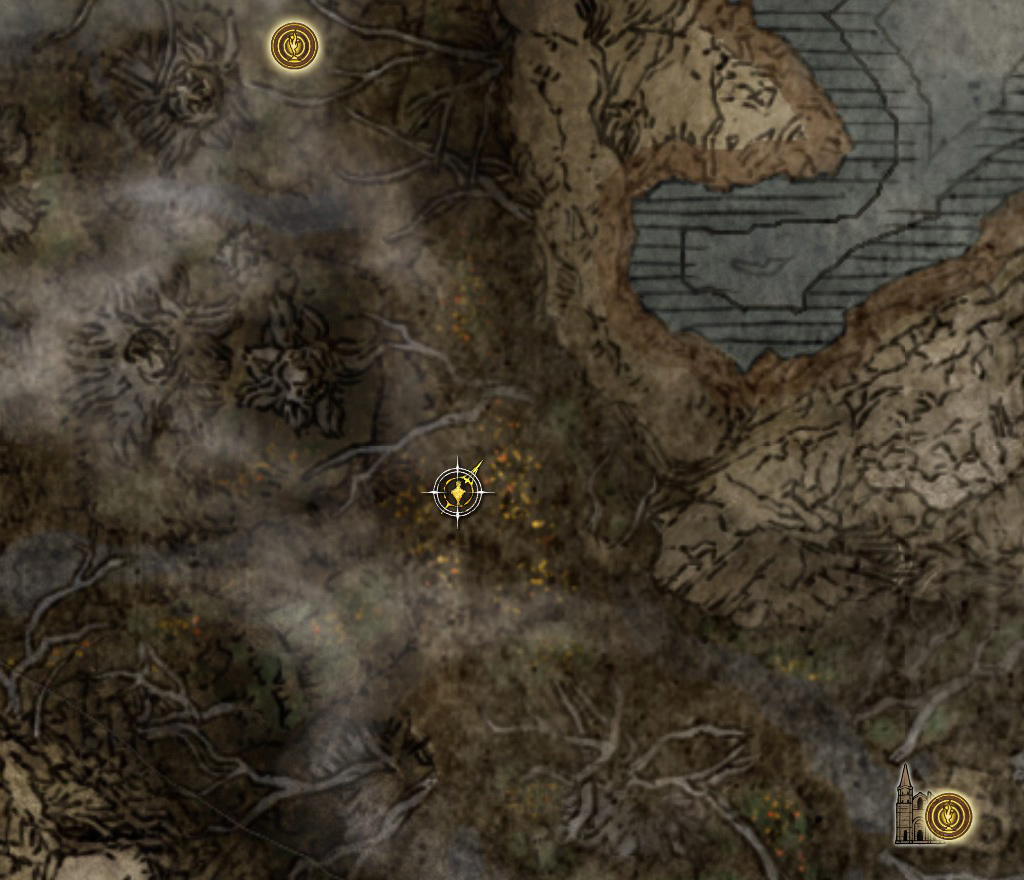
As always, when you enter the area, you’ll be able to see the map monument on your map. In this case, it’ll be south and slightly east of the Forsaken Graveyard. There’s a path that leads to the map fragment, but it’s still best to mark it on your map by placing a beacon. Because you can’t use Torrent in this area, we won’t be rushing to the map fragment and then teleporting back to the start of the zone. Fortunately, it’s not particularly hard to get the fragment, so long as you stay on the path.
Woodland Trail
Unique & Important Items
Madding Hand
From the Forsaken Graveyard site of grace, go south through the doorway in the stone wall. You’ll find some developer messages basically telling you “this place big scary, go away”.
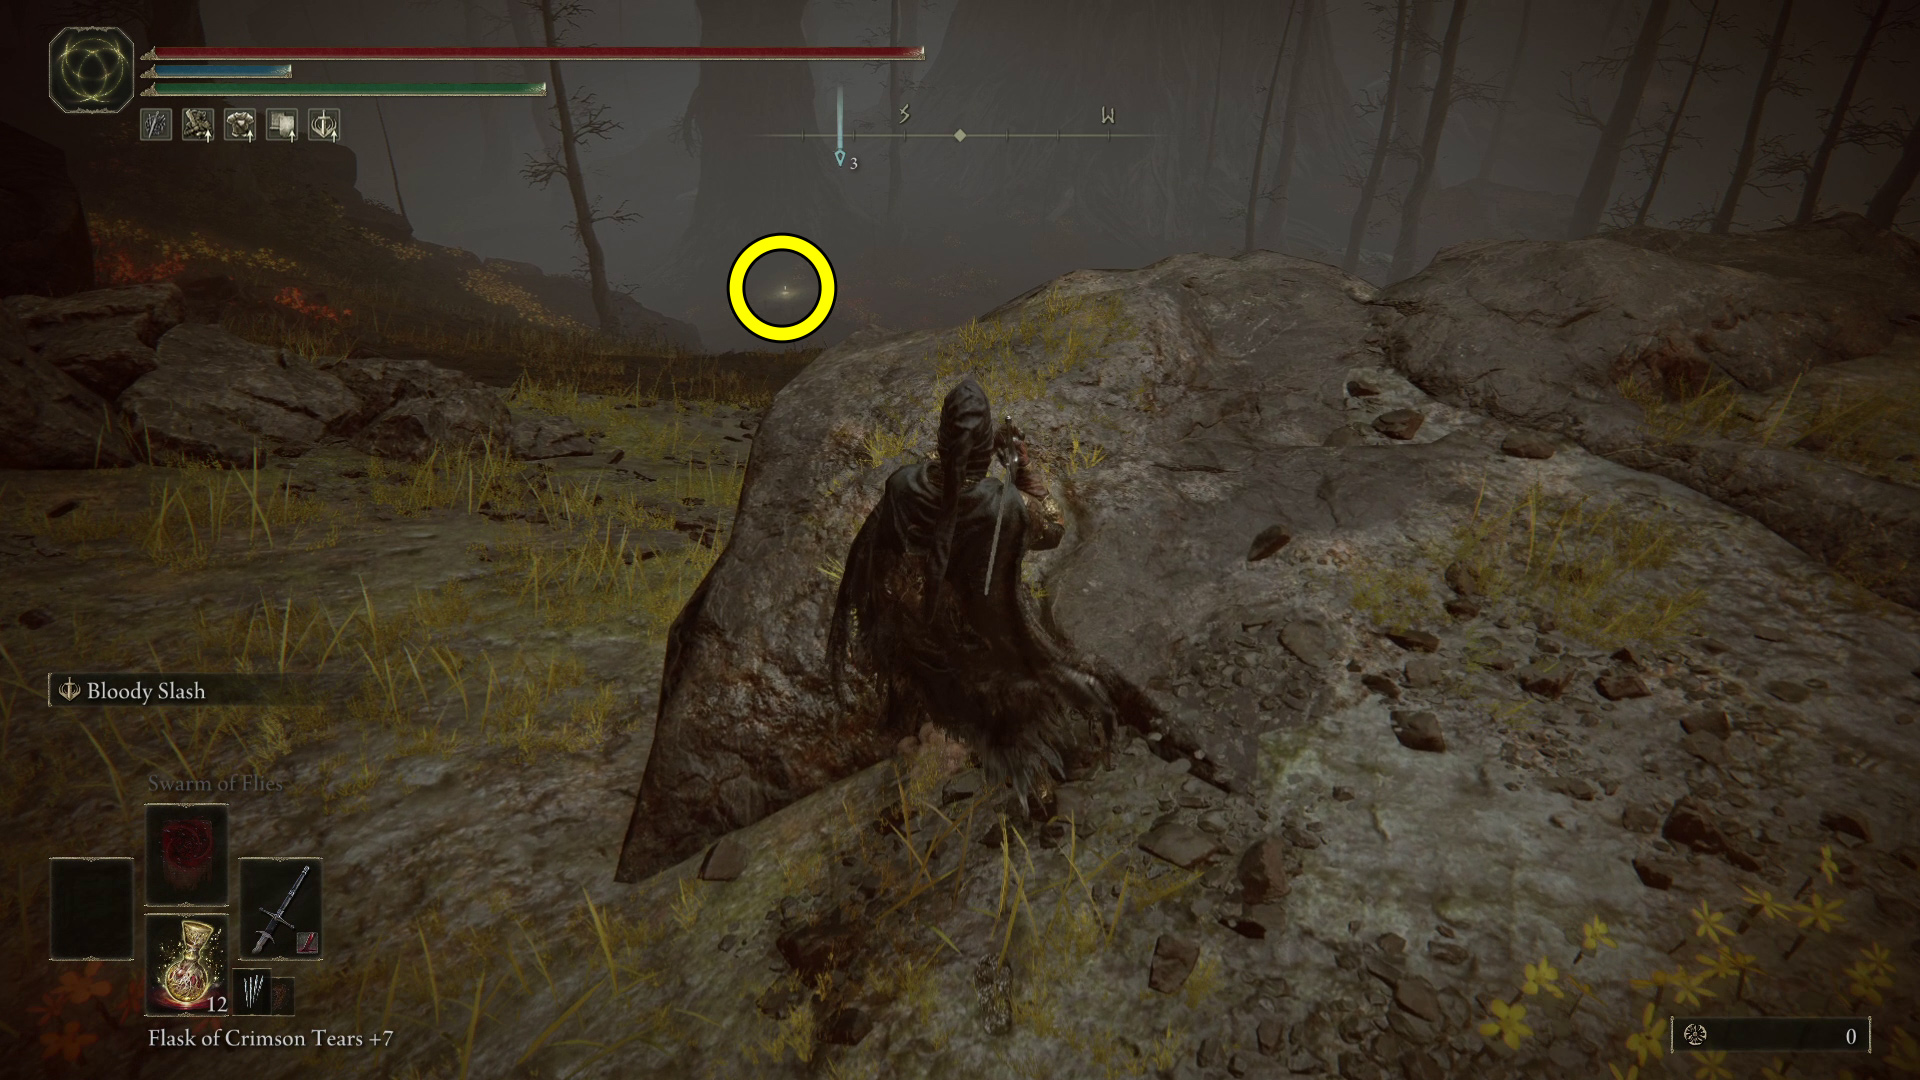
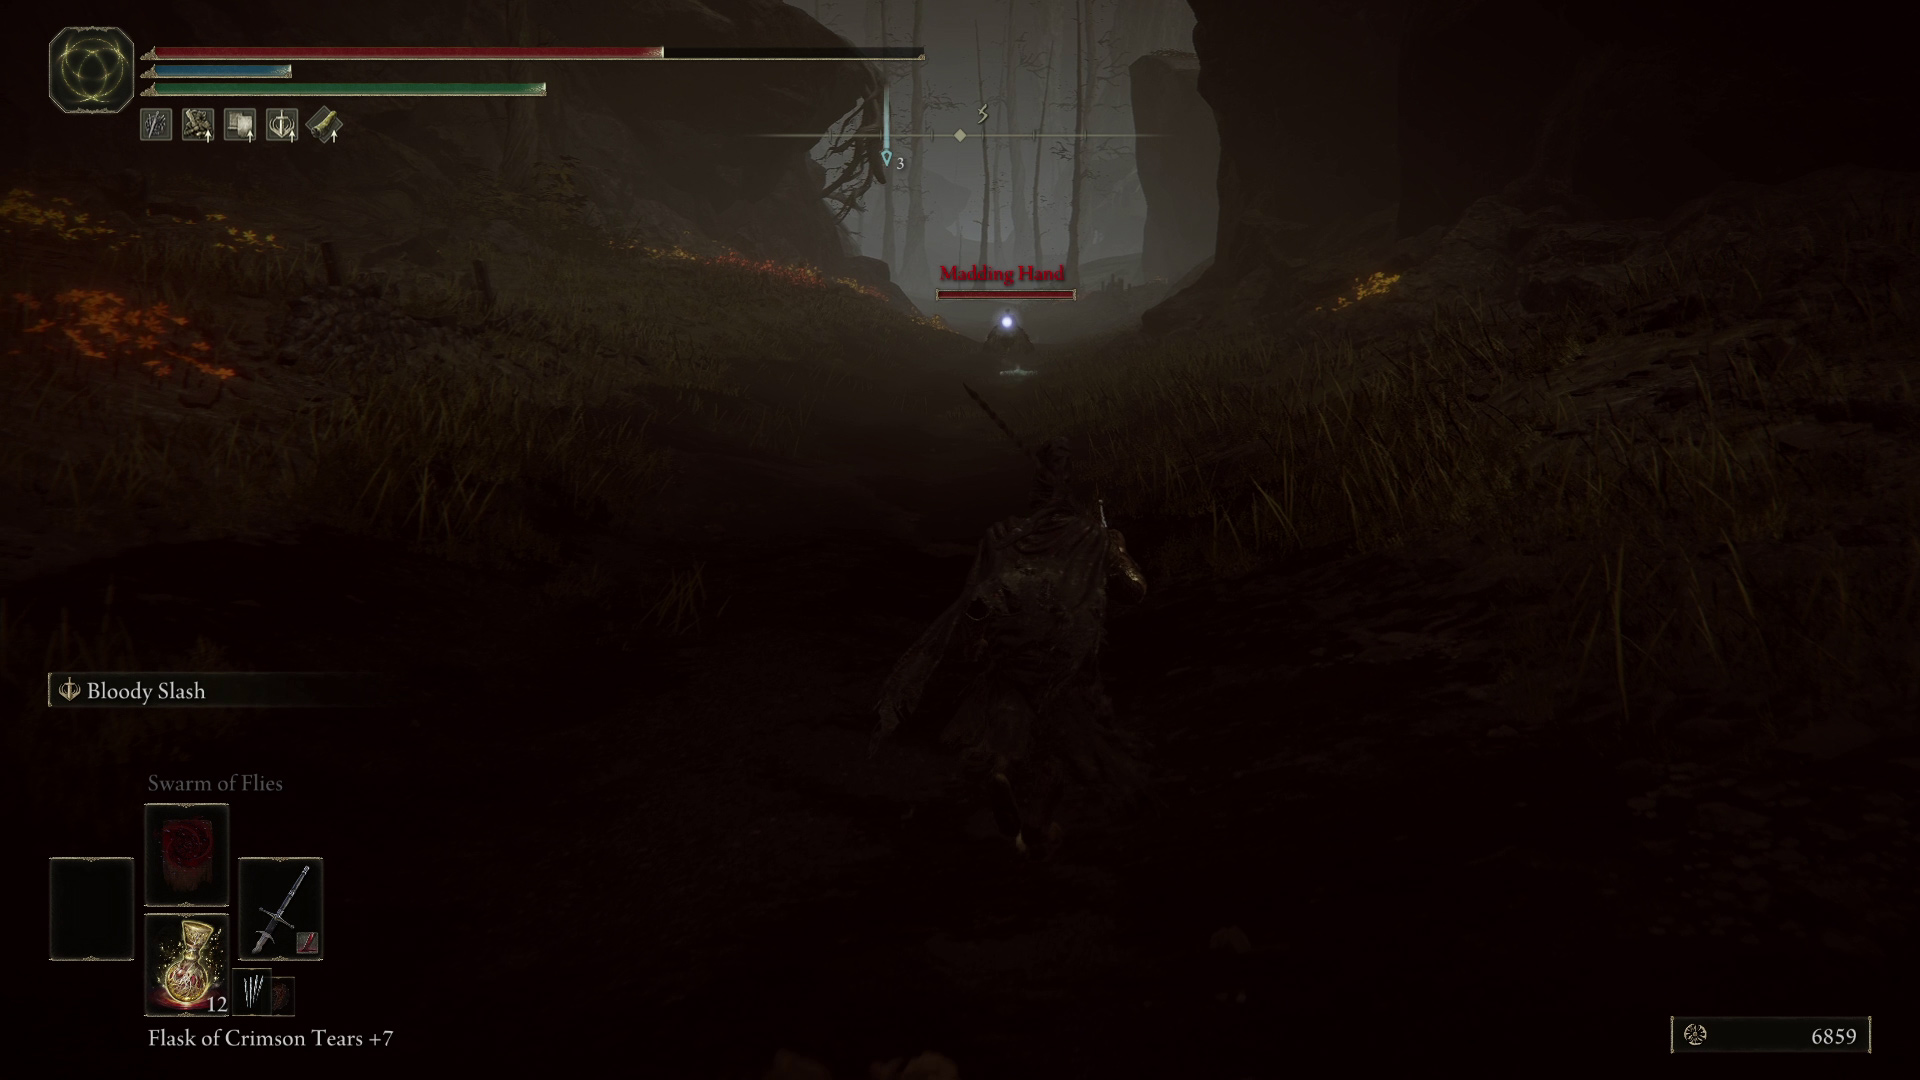
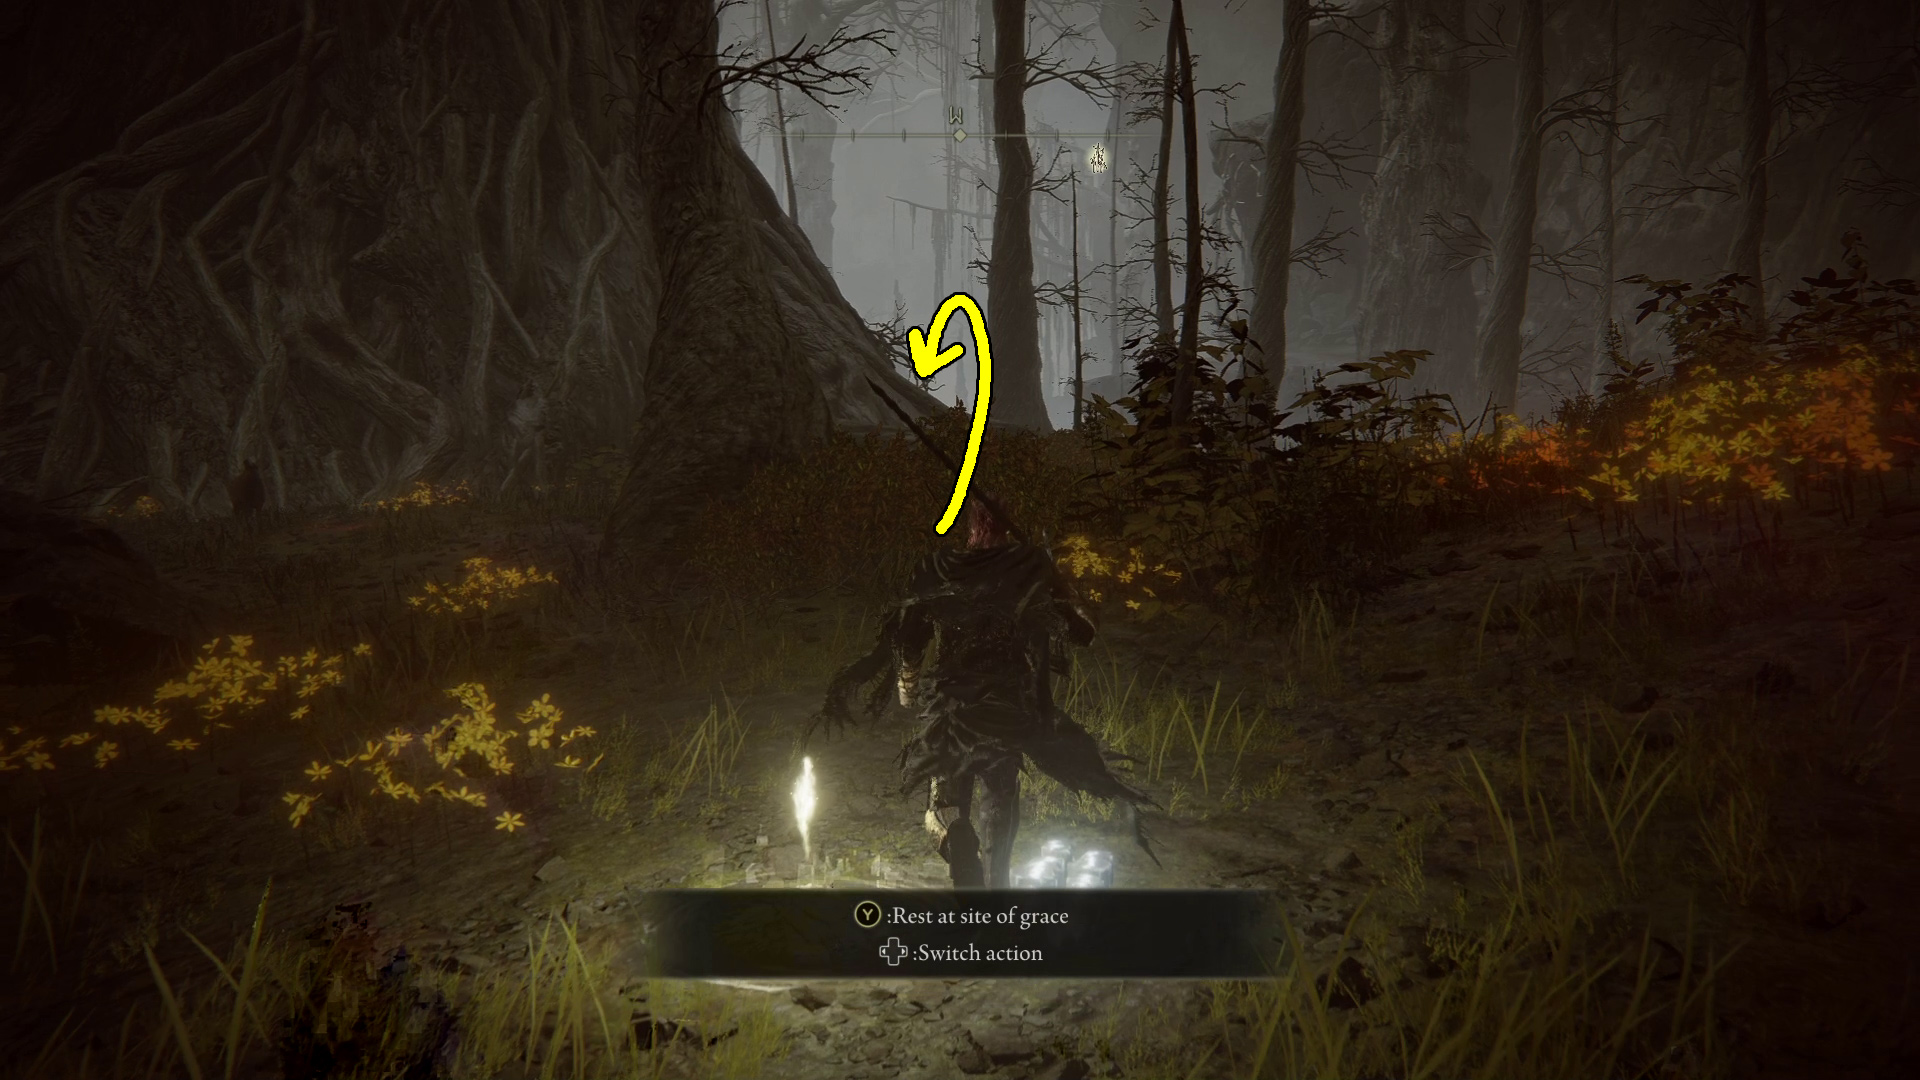
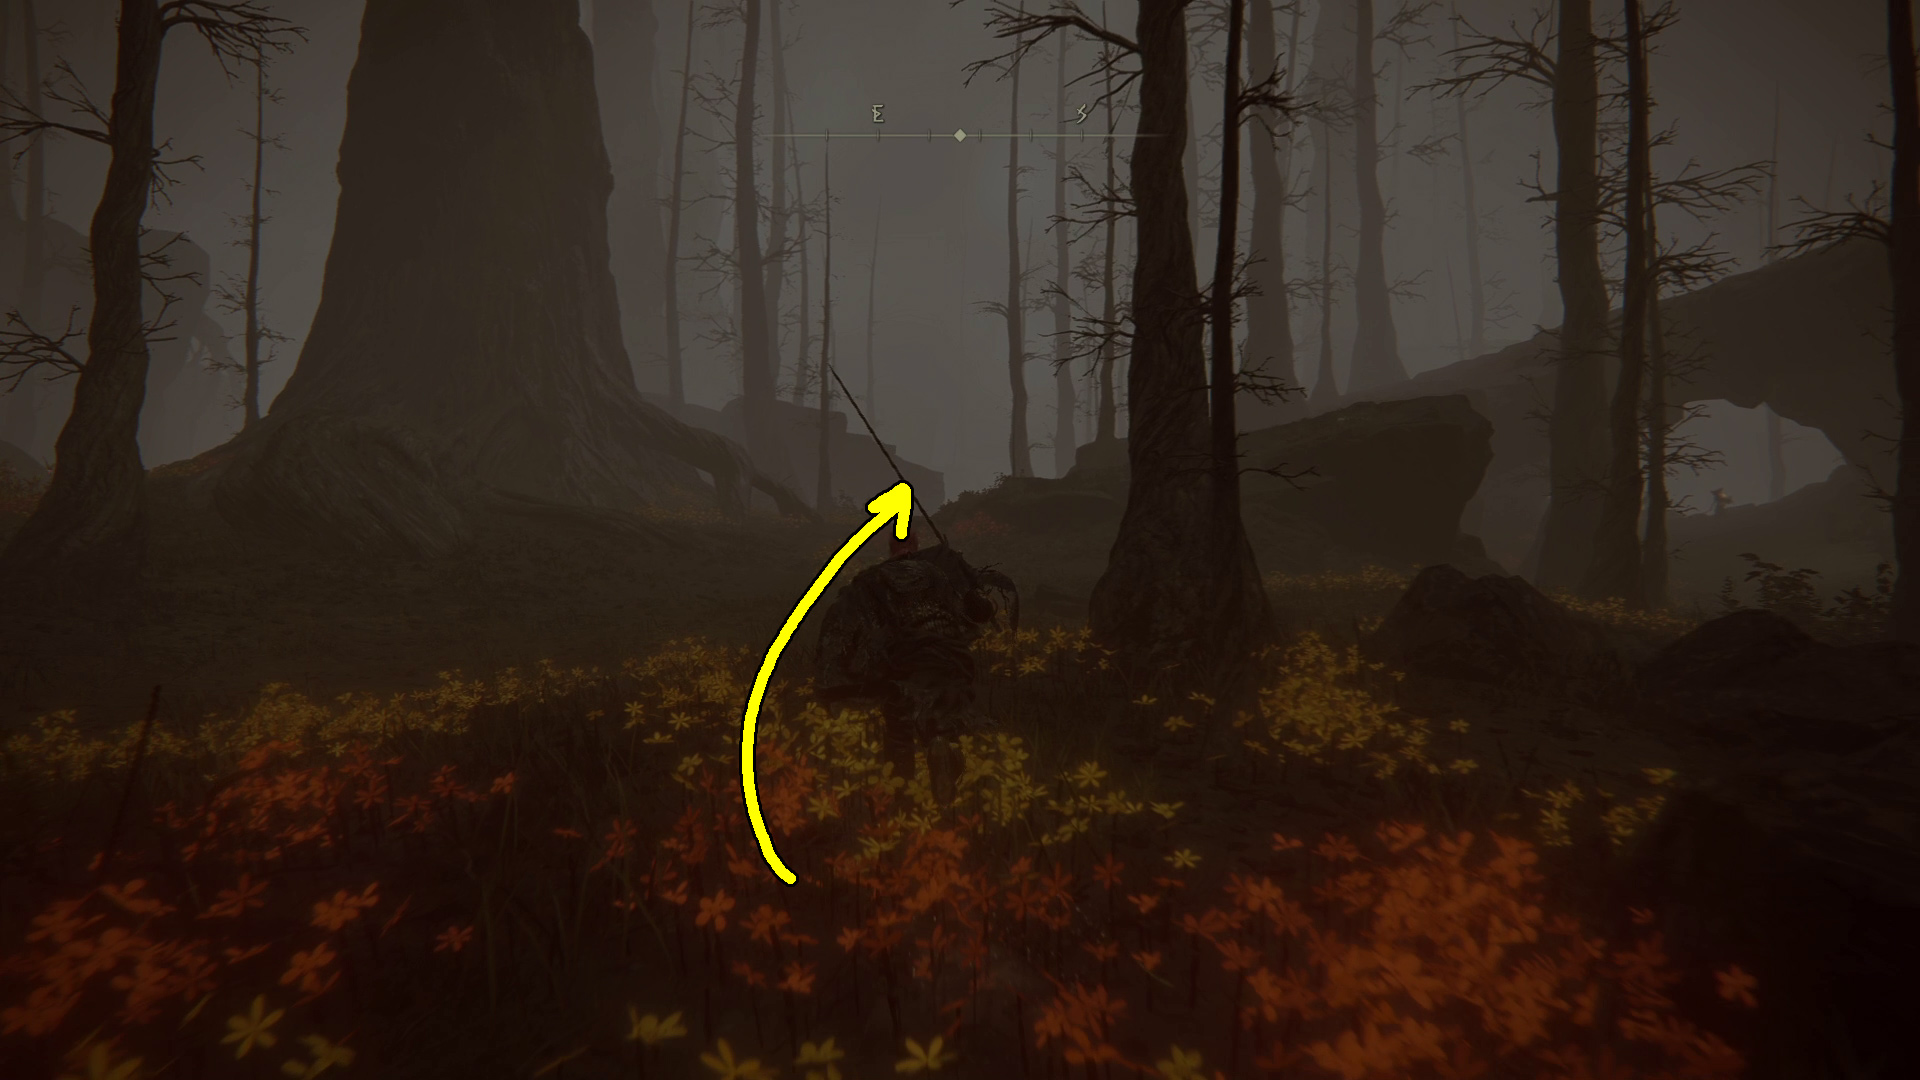
Continue generally south-southwest, past the messages, and enjoy Torrent while you can — you’ll be kicked off quite quickly. You’ll soon come to a spot where the path heads downhill, and ahead will be the Woodland Trail site of grace (Image 1). Activate it, and then go south from the site of grace, following the path. Use target lock and keep your eye out for the Madding Hand, who patrols the path (Image 2).
You can easily sneak up on this NPC and get a backstab off. If you want, you can then run away and lose aggro, and the NPC will return to patrolling after you get not-so-far away. Many builds will be 1-shot by the madness spell the NPC has, and it has significant AoE — so if you are struggling, try exploiting the aggro range. Like all NPC enemies, jumping and heavy attacks that can stagger the Madding Hand are pretty OP.
After defeating the NPC (or deciding to just sneak past it), keep following the path southeast. You’ll see some rats to the right-side of the road — you can swing wide to the left off the road if you want to avoid them. The path will continue southeast to the Abandoned Church.
Abandoned Church
Unique & Important Items
x2 Scadutree Fragment
Frenzyflame Perfume Bottle
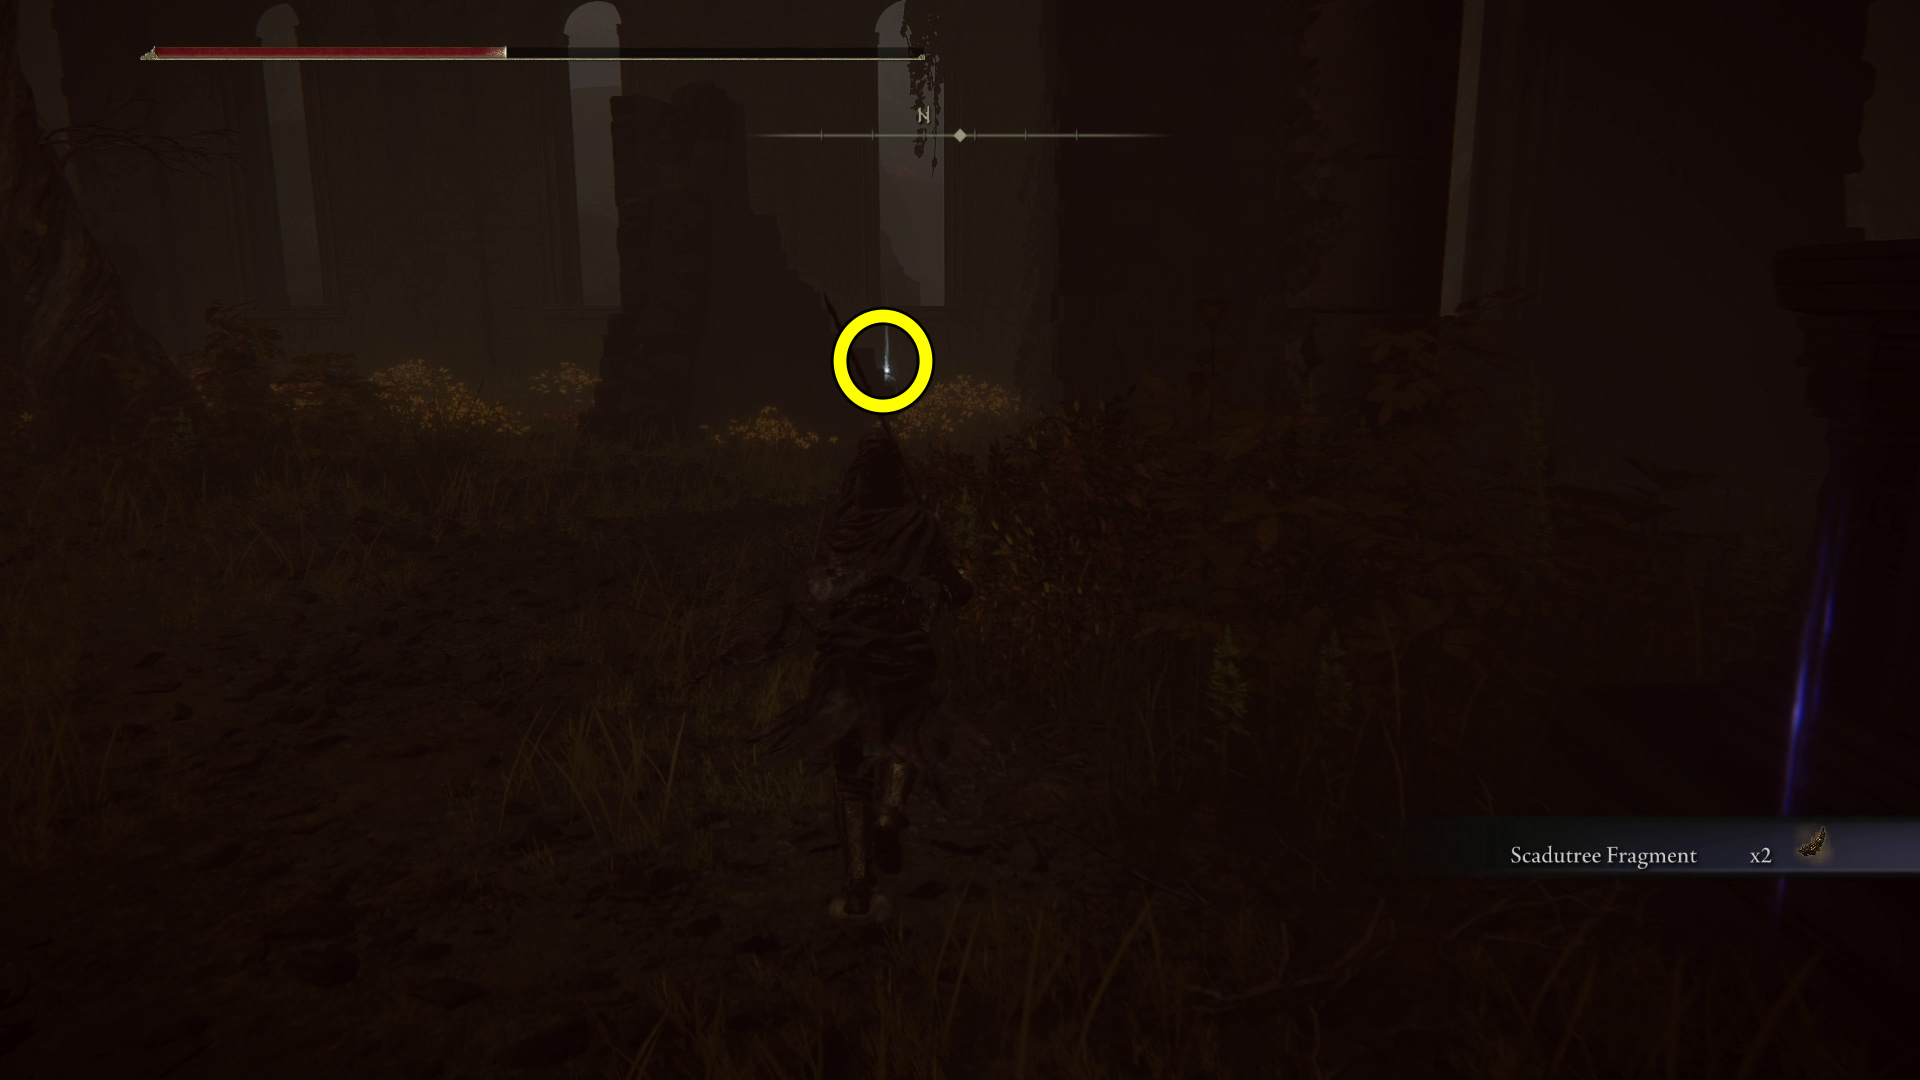
Out in front of the church is the map monument — at its base is the Map: Abyss. Inside the church is the Church Ruins site of grace. Activate it, then pick up the x2 Scadutree Fragment from the altar. Turn left (north), and you should see a corpse with the Frenzyflame Perfume Bottle (Image 1). Go back out the front of the church and look west, and you’ll see a corpse with a Shadow Realm Rune [7]. You’ll have to go around to the left and up the hill to grab it.
Image 1Image 2
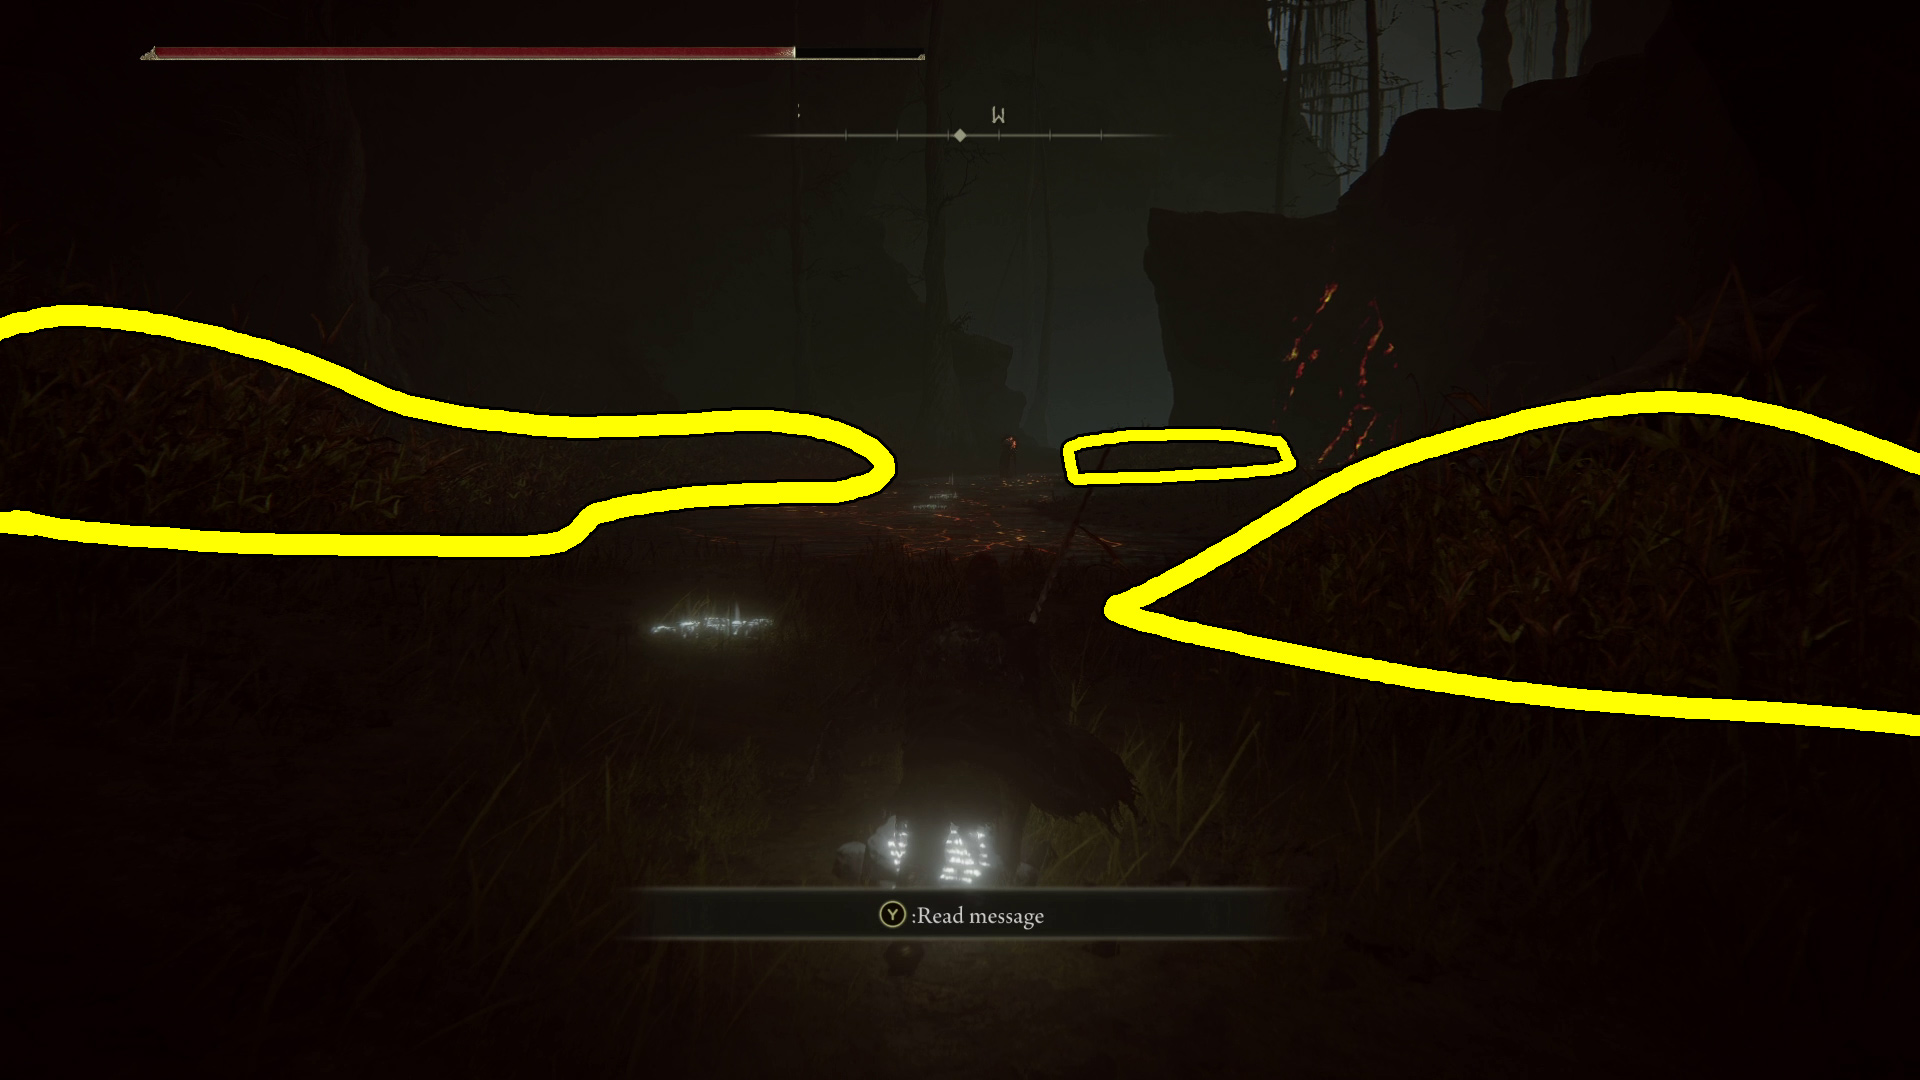
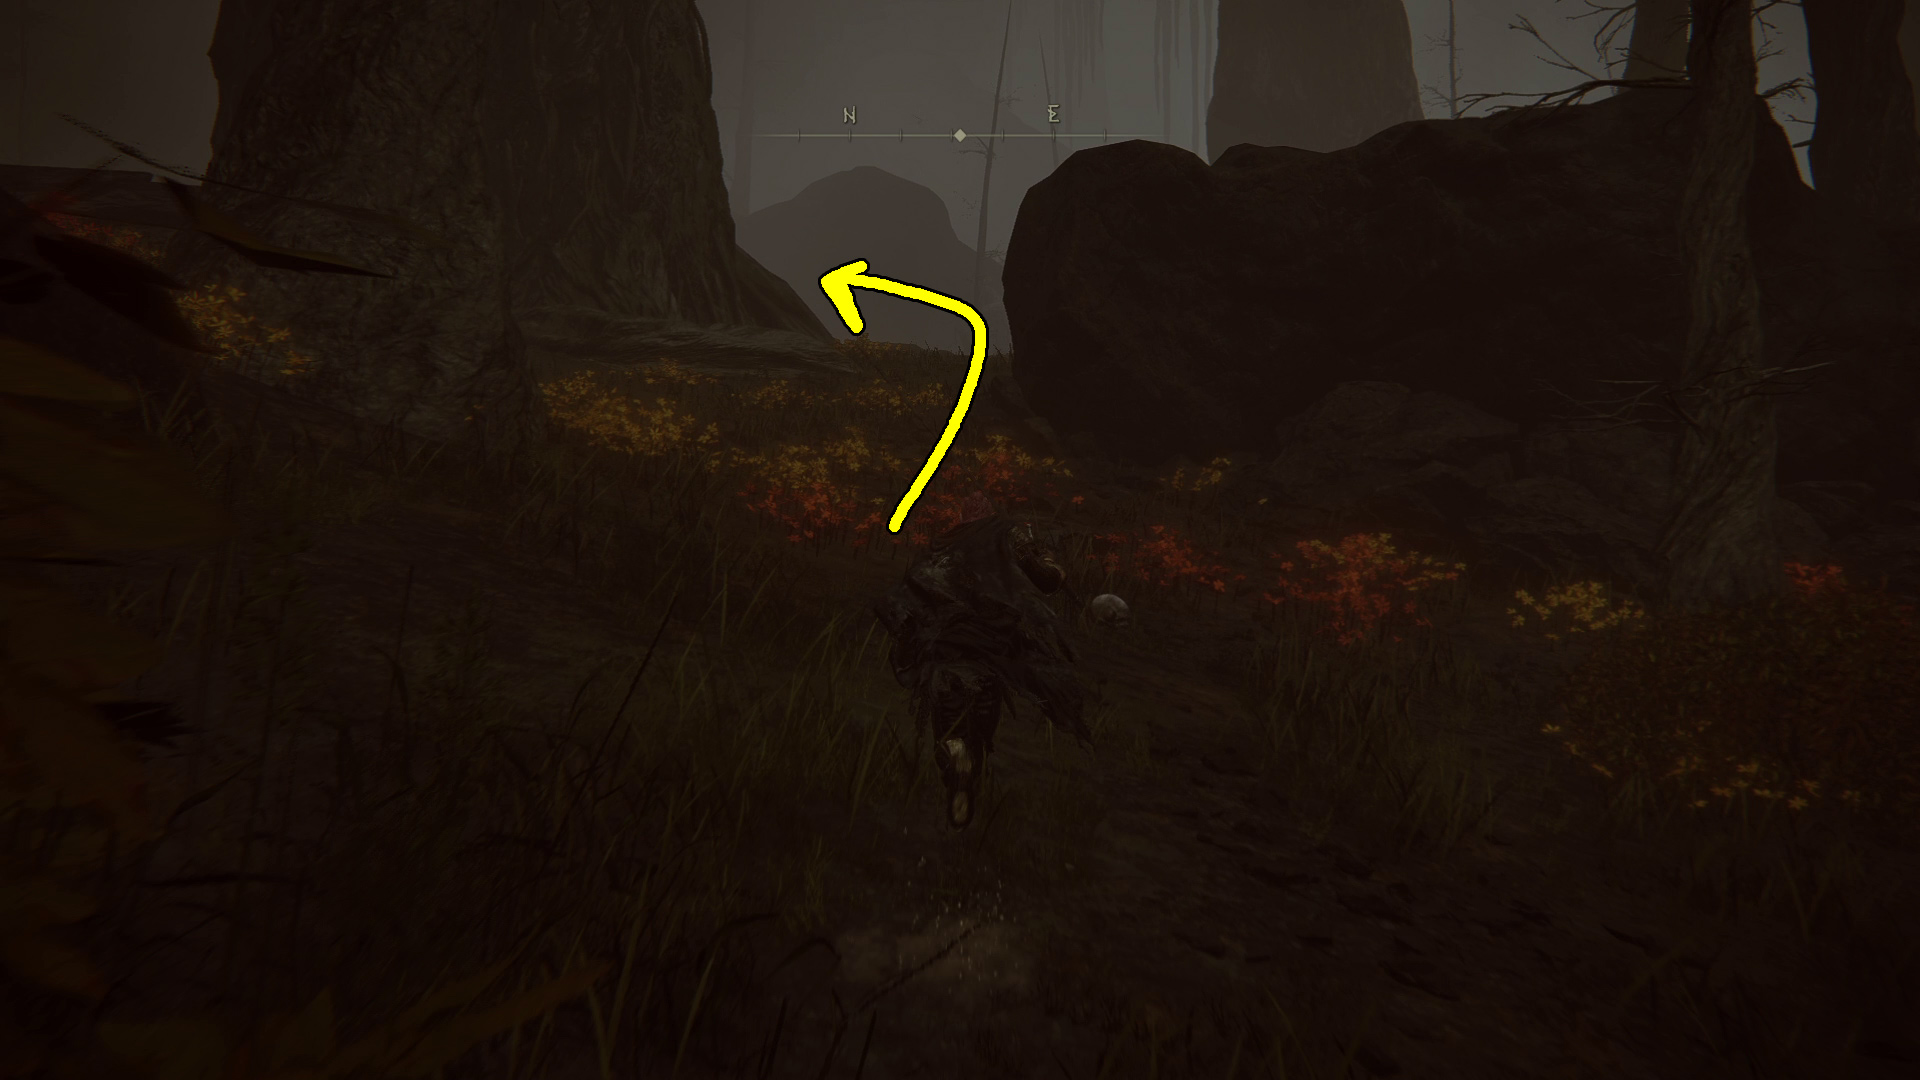
After you do so, you can head northwest to drop back down onto the trail. Continue following it until you reach the spot where you found the rats before (Image 3) — turn left (west) and you should see another series of developer messages ahead (Image 4), and beyond them a Winter Lantern patrolling.
Image 3Image 4
Abyssal Woods
Unique & Important Items
Aged One’s Exultation
Scadutree Fragment
Ahead is the first (of many) winter lanterns in the woods. You cannot damage them unless you parry their grab, so if you aren’t comfortable doing so, you can sneak past them. However, if you want to make a madness build, this first winter lantern drops the Aged One’s Exultation, a talisman that buffs attack power near madness. It’s also worth noting here that you can roll to dodge the one-hit “grab” attack — though you won’t be able to damage them, so the best you can do is try and run away, which is near-impossible.
Take a look at the parry timing — start your parry when the lantern raises their weapon
If you want to avoid the winter lanterns entirely, you can skip the first two stealth sections.
Teleport to the Woodland Trail site of grace, and head due west. You’ll drop down near some rats, but you can use the nearby bushes to sneak past them. Keep going due west, and you’ll see the Abyssal Woods site of grace! You can skip to the paragraph after Image 4 to continue the walkthrough.
Even if you want to parry the lantern, you should still use the bushes to get close, so you don’t get madness built up on approach. The high grass to either side of the path will hide you, and naturally if you’re sneaking while the lantern’s back is turned, you will avoid detection.
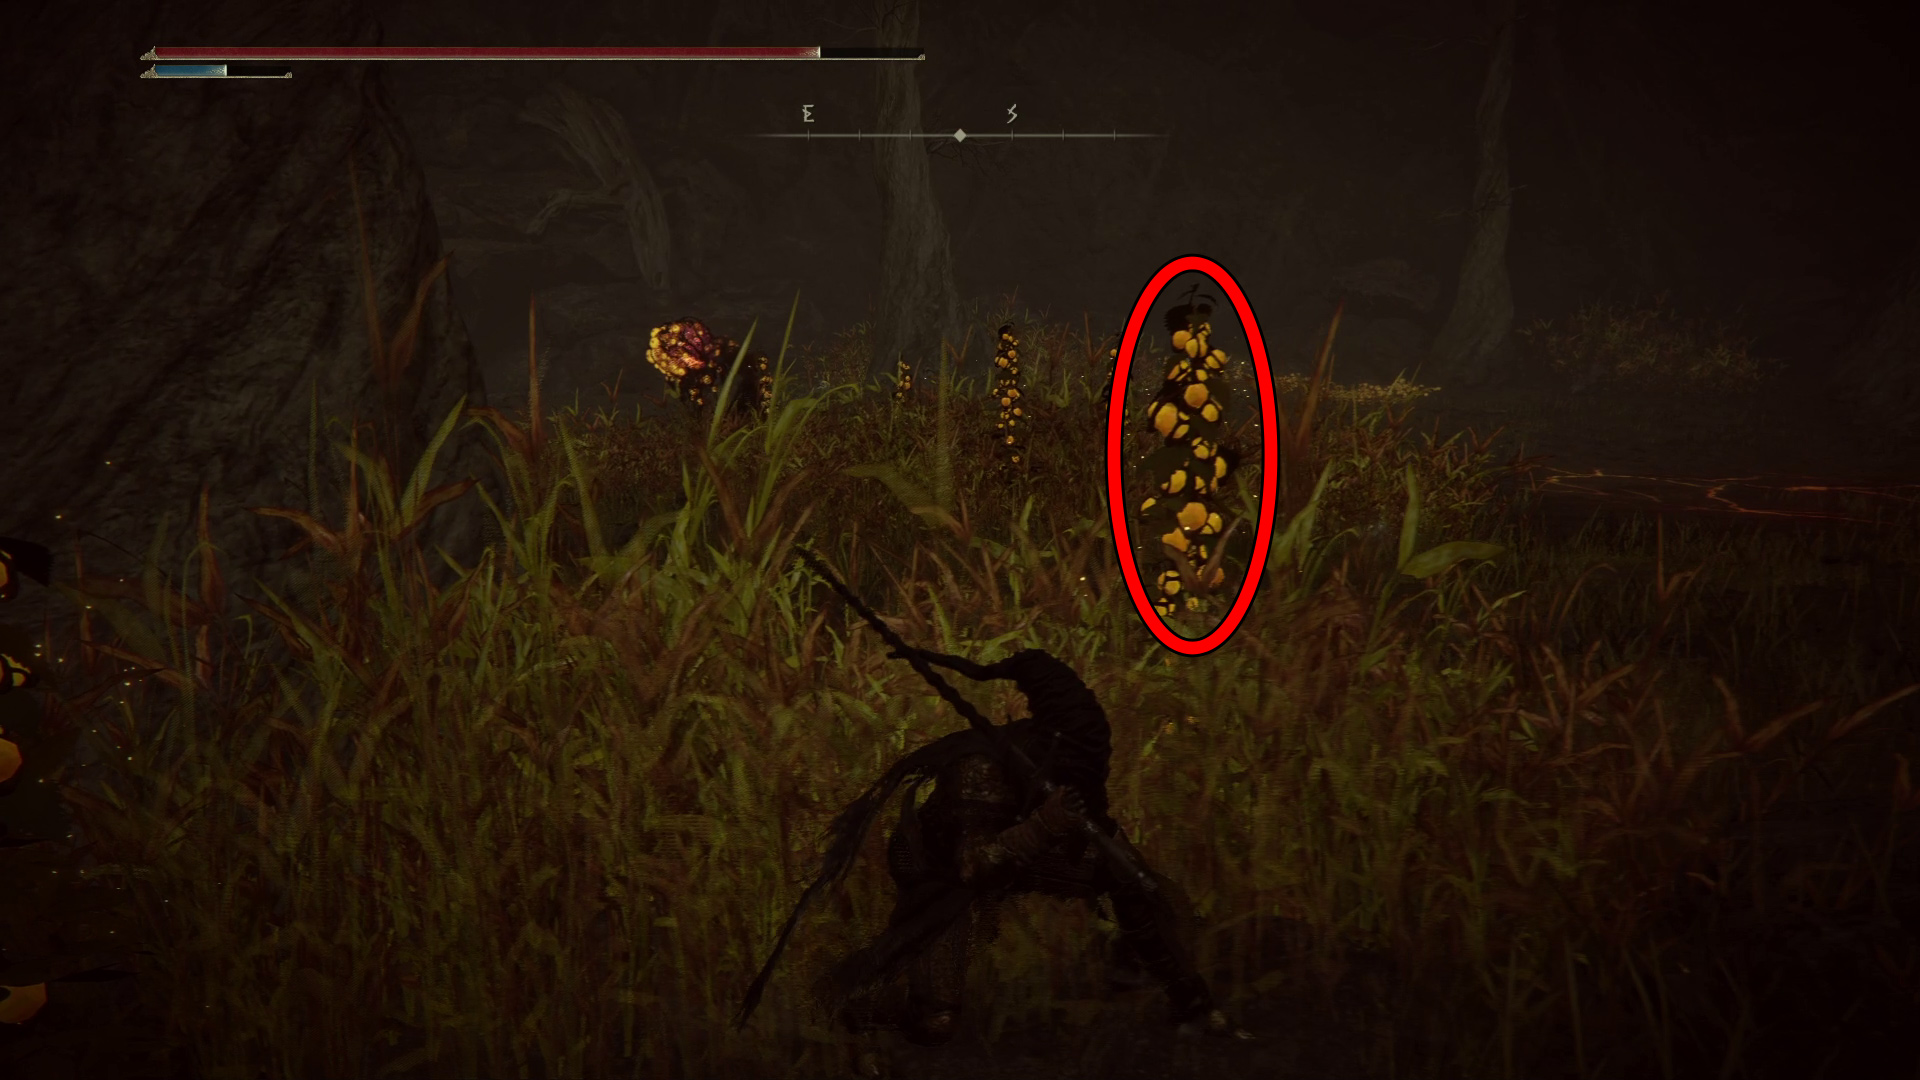
West of the first lantern is another area full of grass and a second lantern. This one drops a Swollen Grape, a rare crafting material (the rest of the winter lanterns in the area drop these). There are fruits in this set of bushes that will make noise if you touch them (Image 2). This will cause any nearby winter lanterns to rush over, which you can use to get them to get out of your way (assuming you can safely move to another bush without being seen).
Image 1Image 2
Continue west, and the path will curve northwest. On your left will be a large tree, with a few rats at its base. Here, the path west leads into a foggy area with some winter lanterns — you can choose to go this way later — and the path north-northeast leads to the Abyssal Woods site of grace (Image 3). Either way, grab the grace first (Image 4).
Image 3Image 4
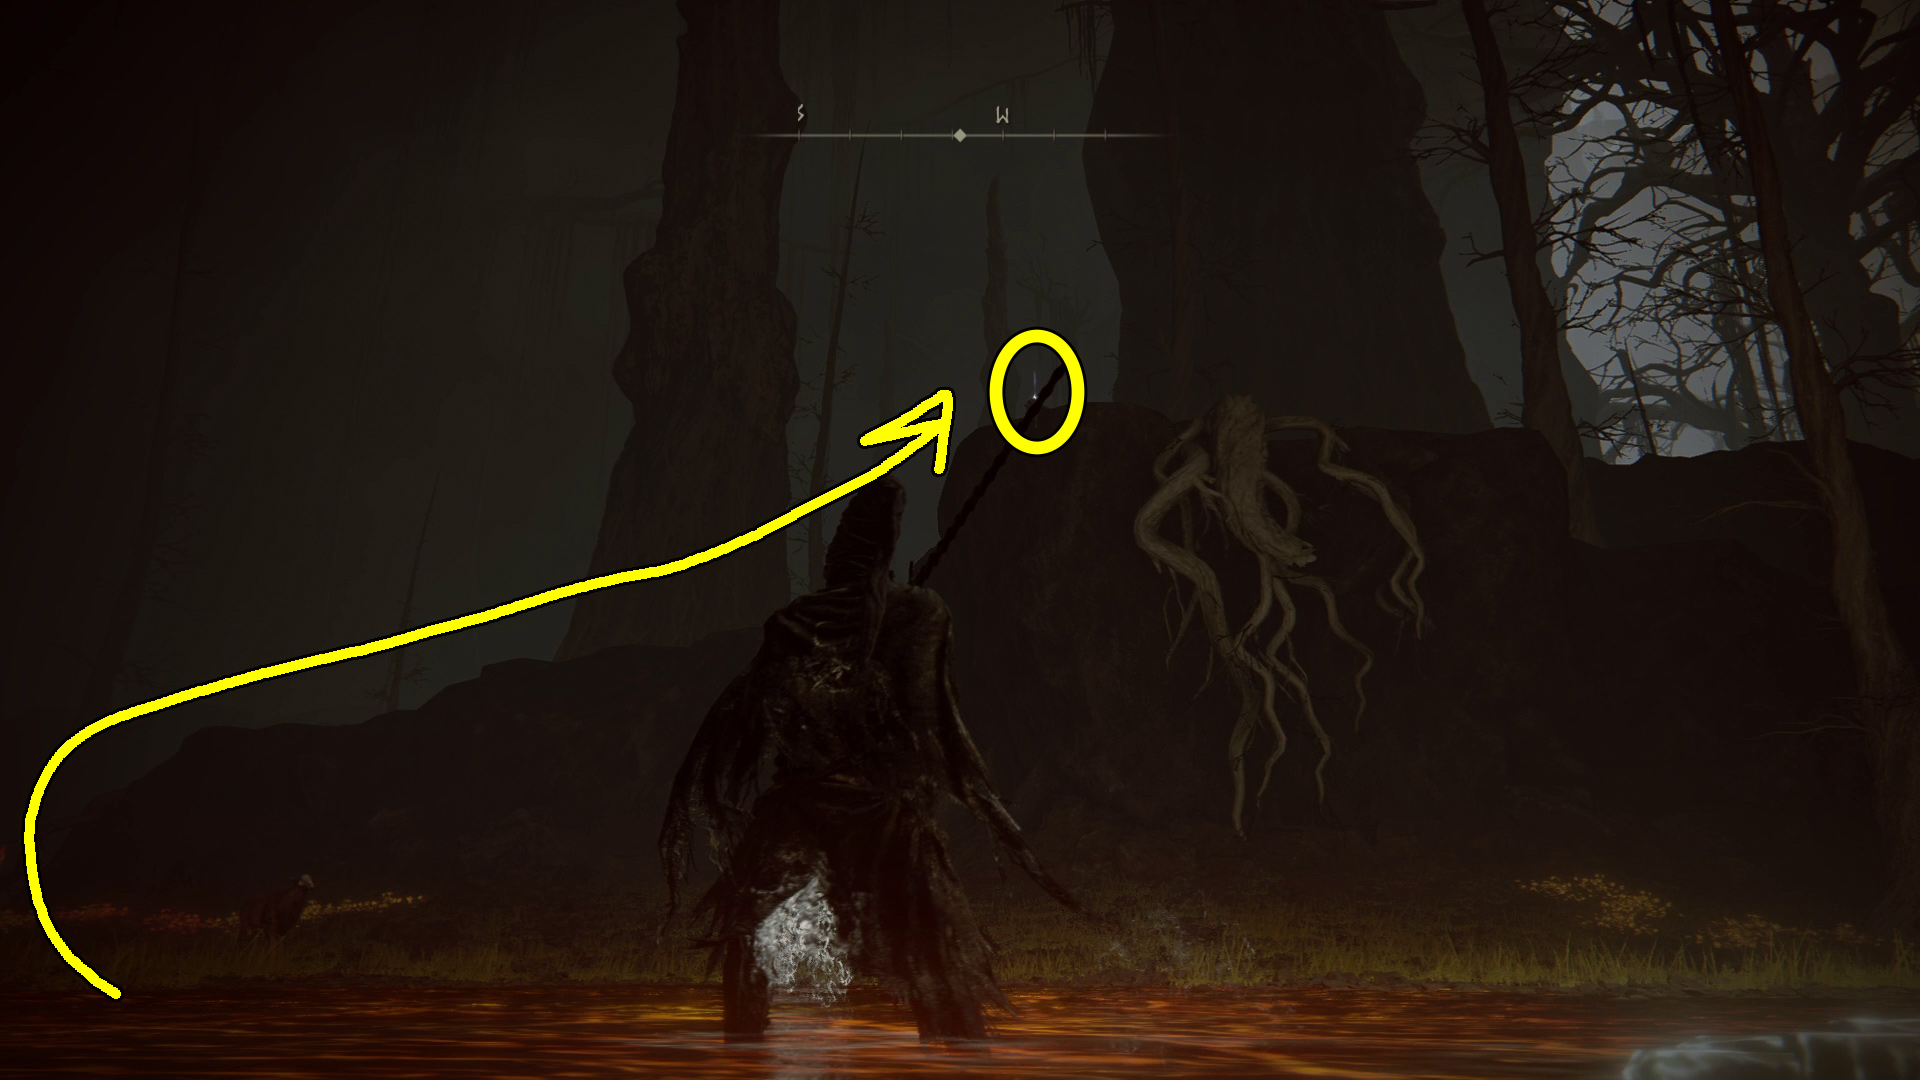
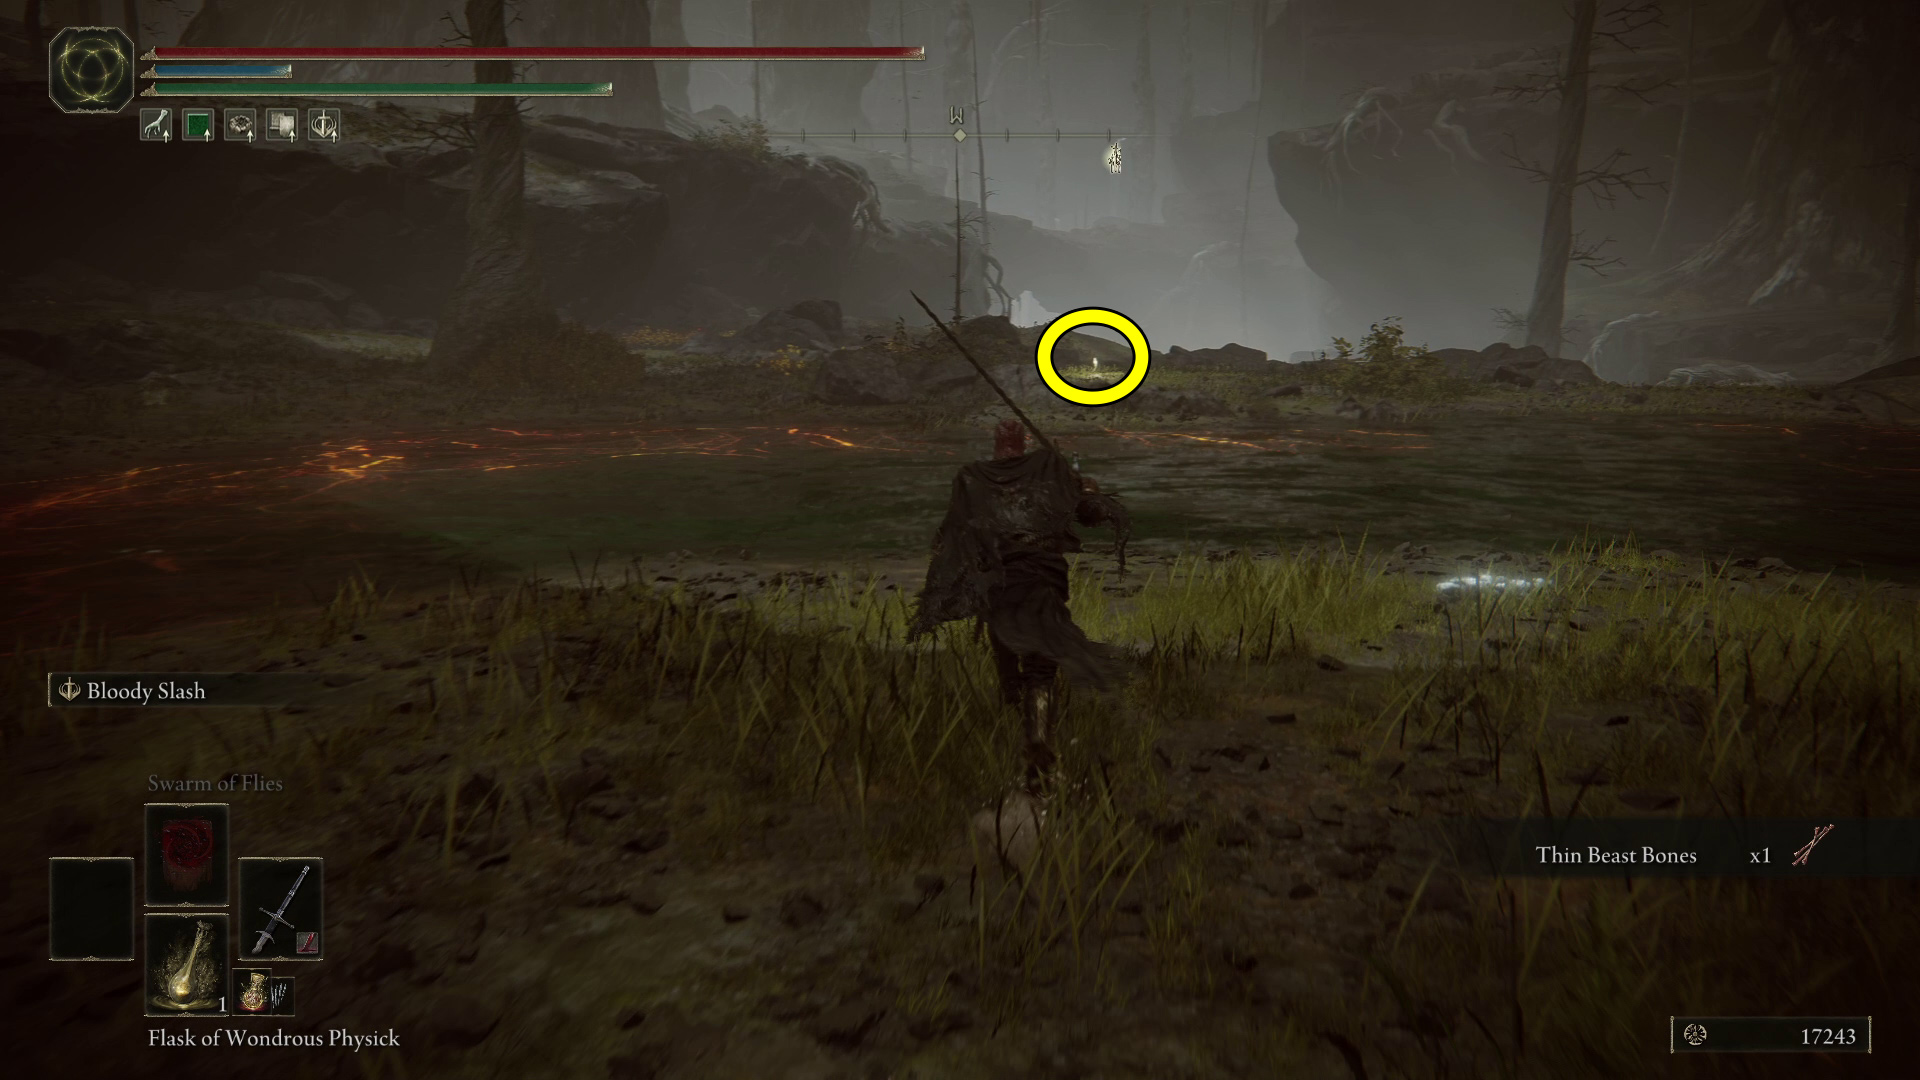
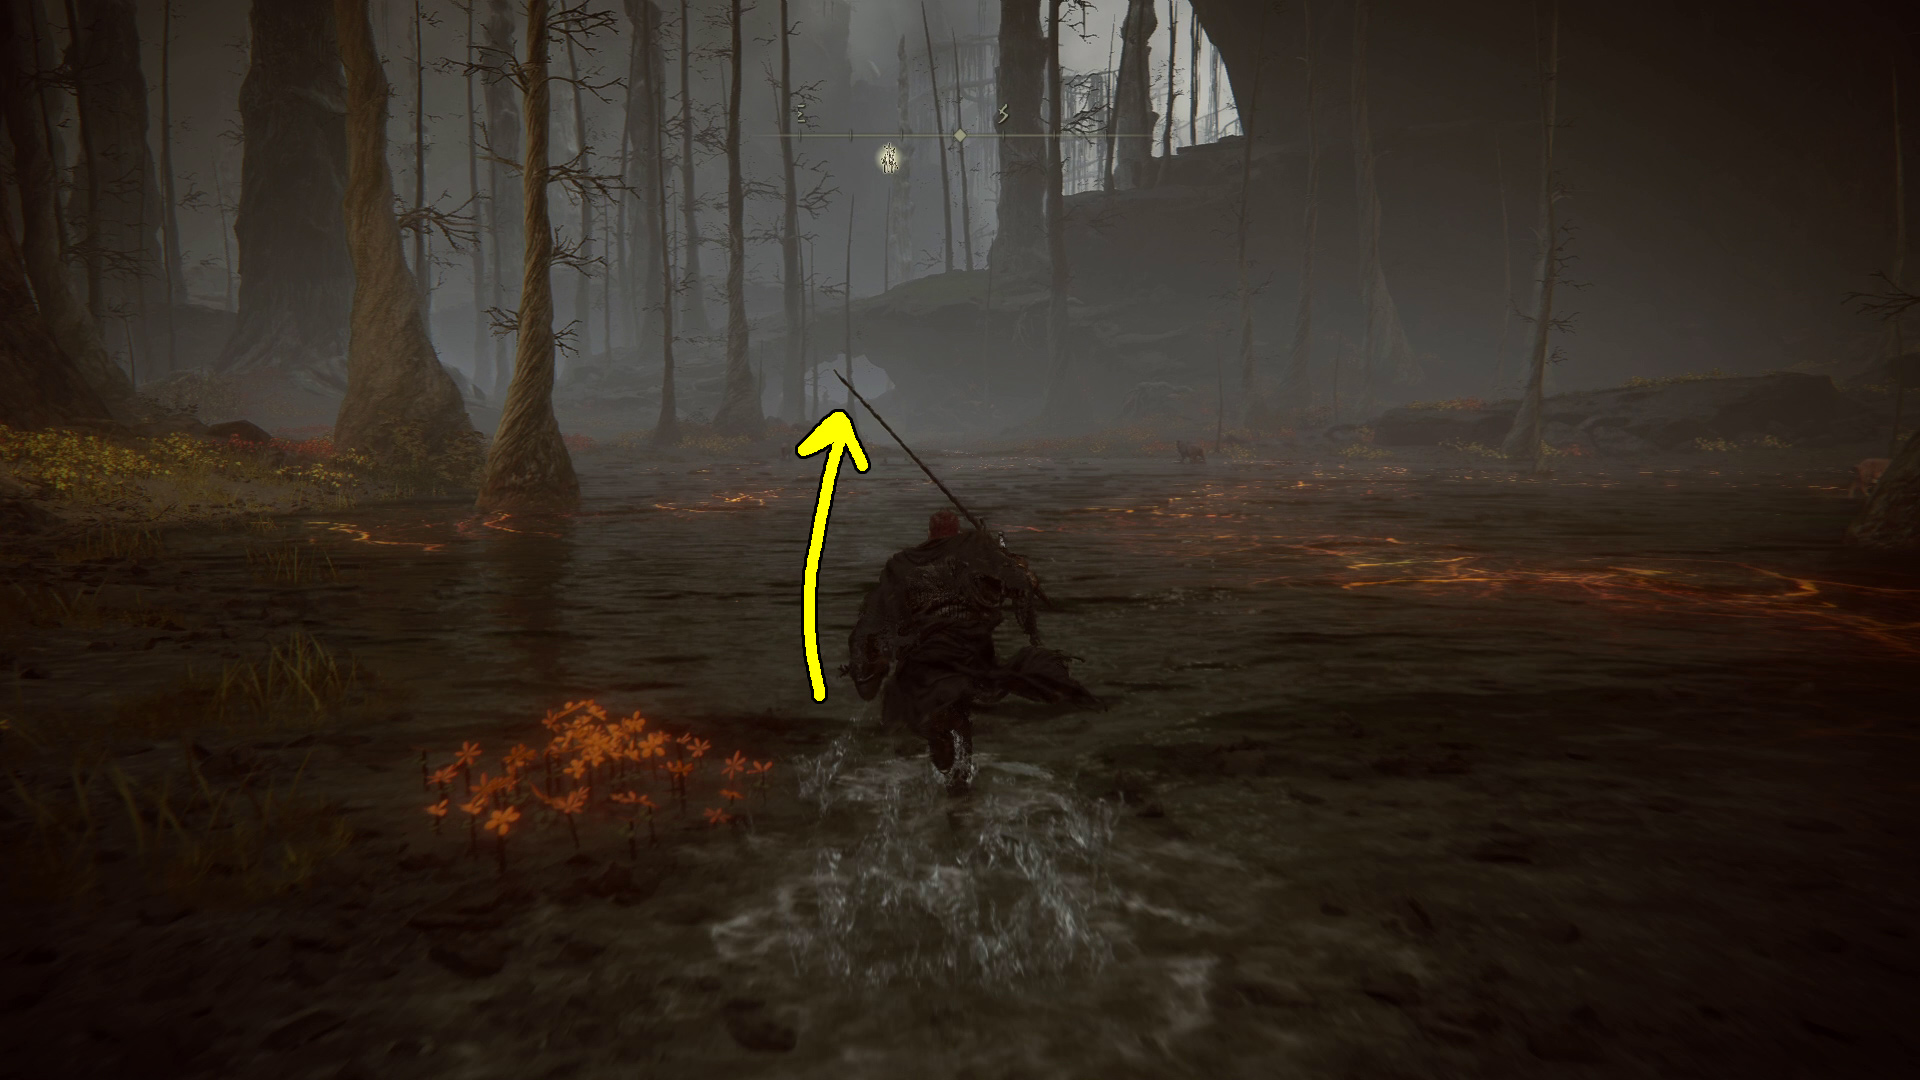
From the site of grace, go due north, past the rats, and you’ll enter an area of shallow water that has a number of caster mobs around. Take them all out, and then look southwest, where you’ll see a Scadutree Fragment at the base of the furthest tree in the corner.
Teleport back to the Abyssal Woods site of grace. Next, you have two choices: you can go back the way you came, down into the foggy area, or you can continue west. Both choices have winter lanterns, and they are challenging in different ways, so there’s no right answer. Would you rather not be able to see where you’re going, but have an easier stealth path? Pick the fog. Rather have a harder stealth path but good visibility? Pick west.
Foggy Path
From the Abyssal Woods site of grace, go south until you can go southwest. You’ll run into a large tree — turn right to continue west into the fog. Hug the left-hand wall, go west, and use target lock to make sure you aren’t going to run into a lantern. You should be able to hug the left wall, hide behind trees, and make it all the way to the end of the stealth section with little trouble. You’ll probably run into a corpse with x3 Clarifying Boluses — that means you’re going the right way. Once you exit the fog, you’ll be facing northwest, and some rats. Ahead you can see the waterfalls — north of them is the Divided Falls site of grace.
Western Path
From the Abyssal Woods site of grace, go west and drop down towards the winter lantern below. If you use the bushes to sneak past, be very careful about the flowers hidden in them — some are hard to spot until you’re right on top of them.
Past the lantern is a stone archway, and then you’ll have a bit of a jog before you reach the next stealth section. This time there are two winter lanterns, and one is hiding behind a log on your left — hug the right hand (northern) side of the approach, and get near the tree opposite the first lantern. Bump into one of the flowers, then sneak around to the other side of the tree and wait for both lanterns to investigate — once the second lantern runs by, quickly sneak west, still hugging the right-hand wall.
You’ll soon come to a shallow lake, where the Divided Falls site of grace is found on the the right-hand side of the water.
Divided Falls
Unique & Important Items
Mad Craftsman’s Cookbook [1]
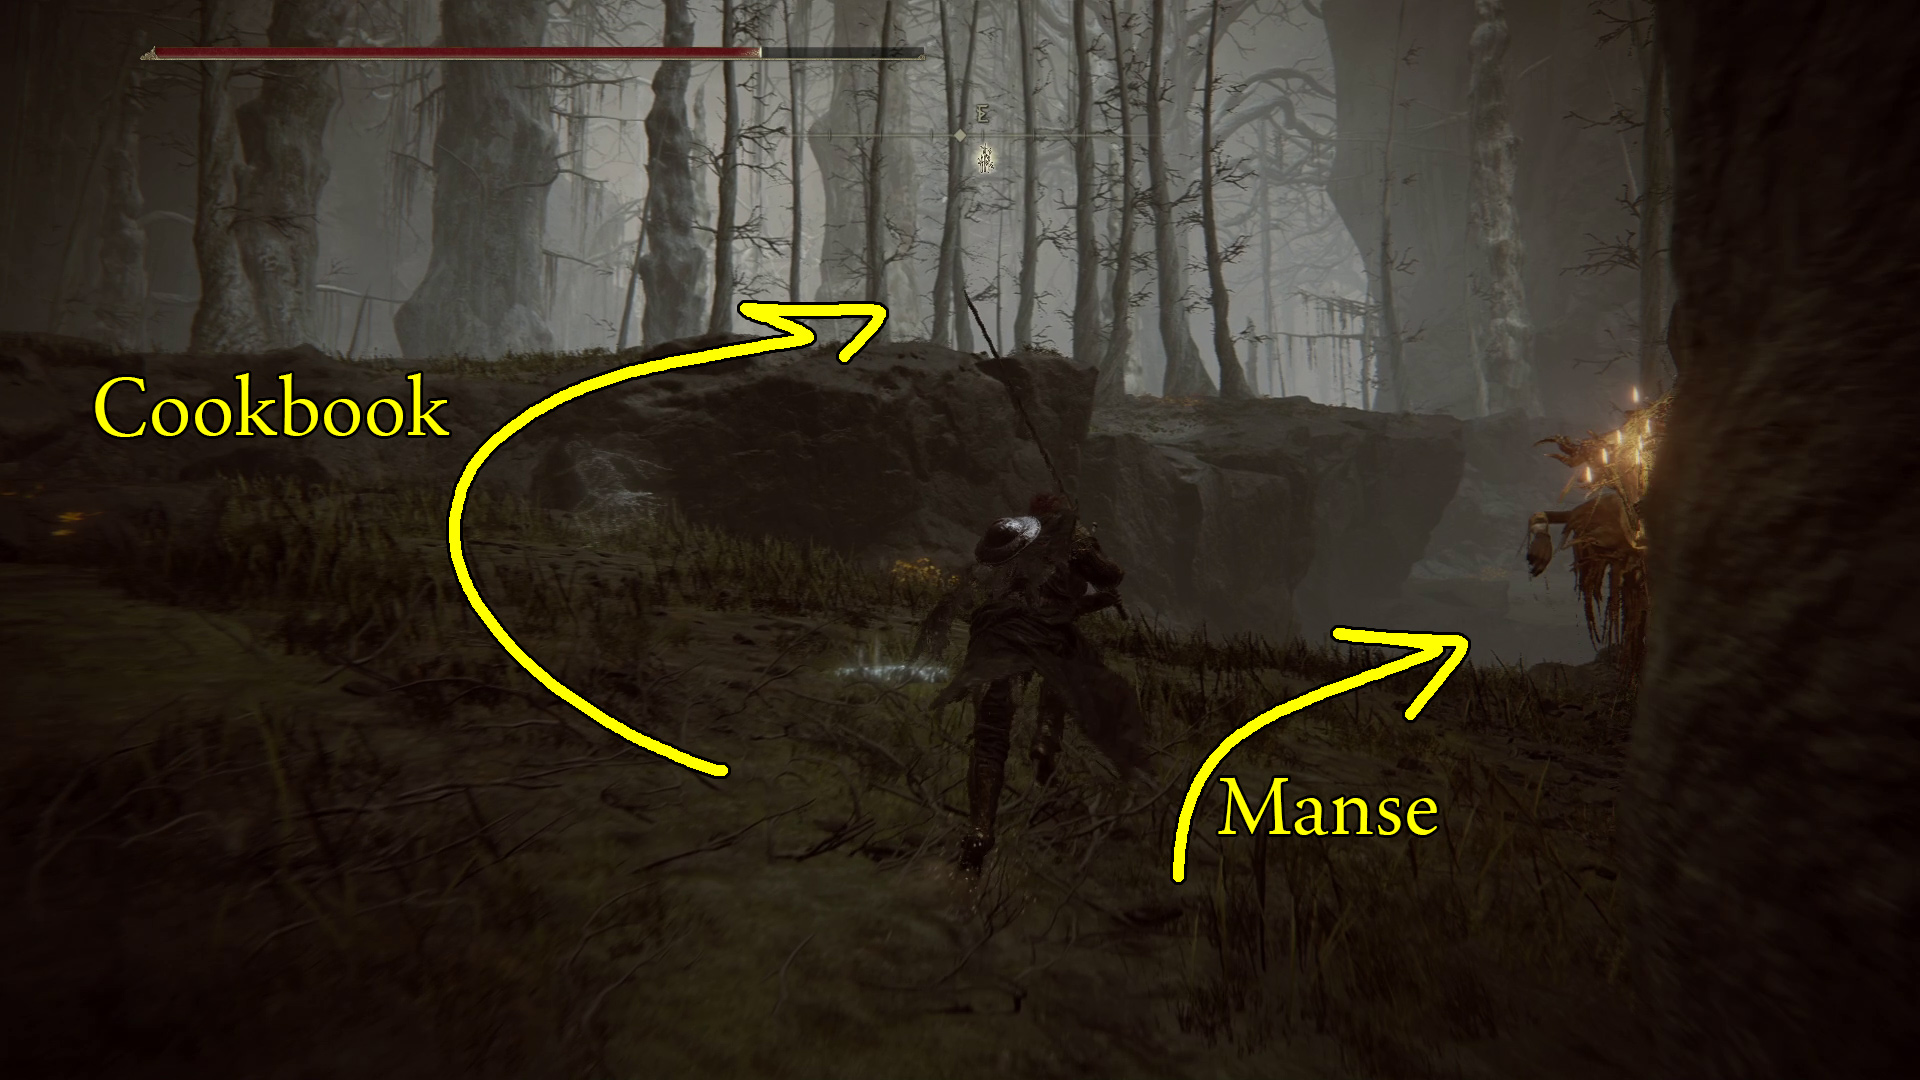
There are a couple of items to grab here, including the X cookbook, but if you aren’t interested in either the cookbook or a Somber Smithing Stone [7], you can skip ahead to the Midra’s Manse section, where we’ll journey to the spooky mansion in the depths of the woods.
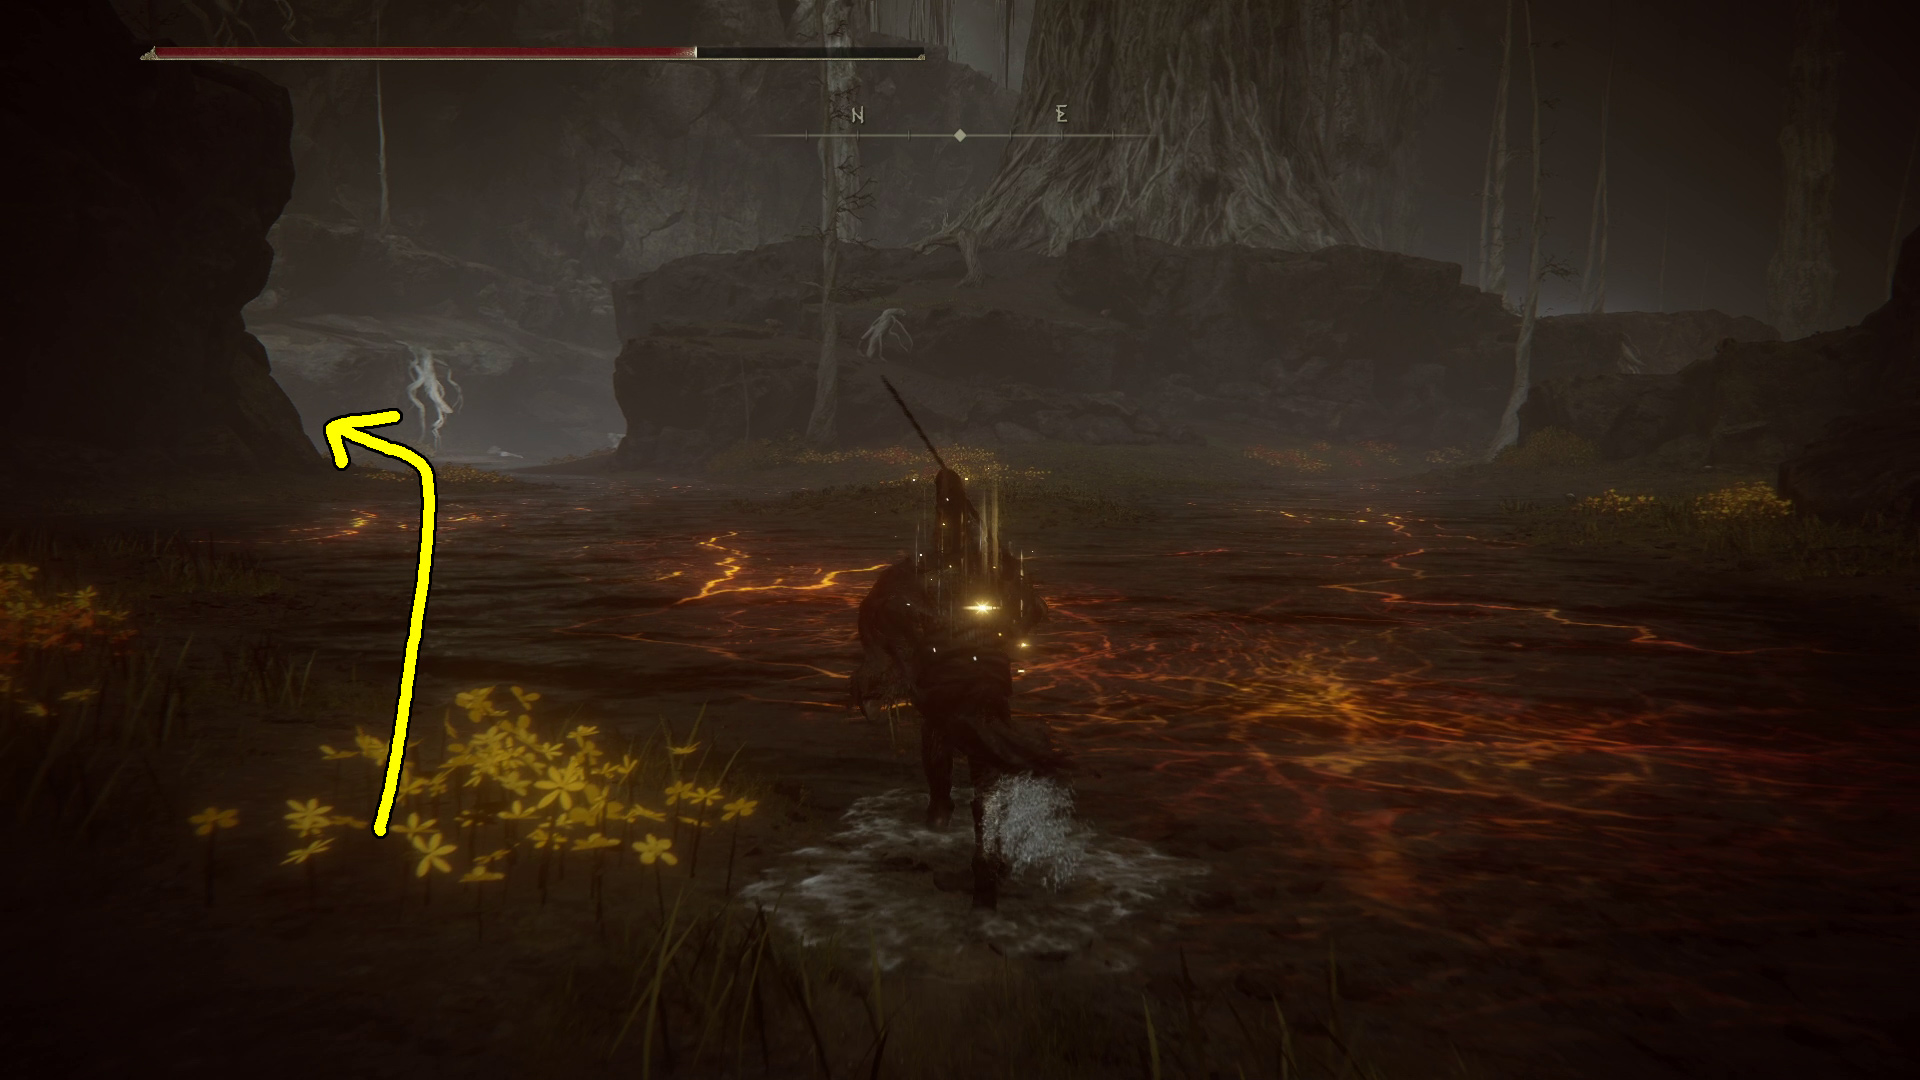
To grab the cookbook, head south from the Divided Falls site of grace, and take the path that leads west up towards the falls (Image 1). There is a group of rats on the path, but you can hug the left-hand wall and avoid them. Near the end of the path, you’ll find a corpse with the Mad Craftsman’s Cookbook [1].
Image 1
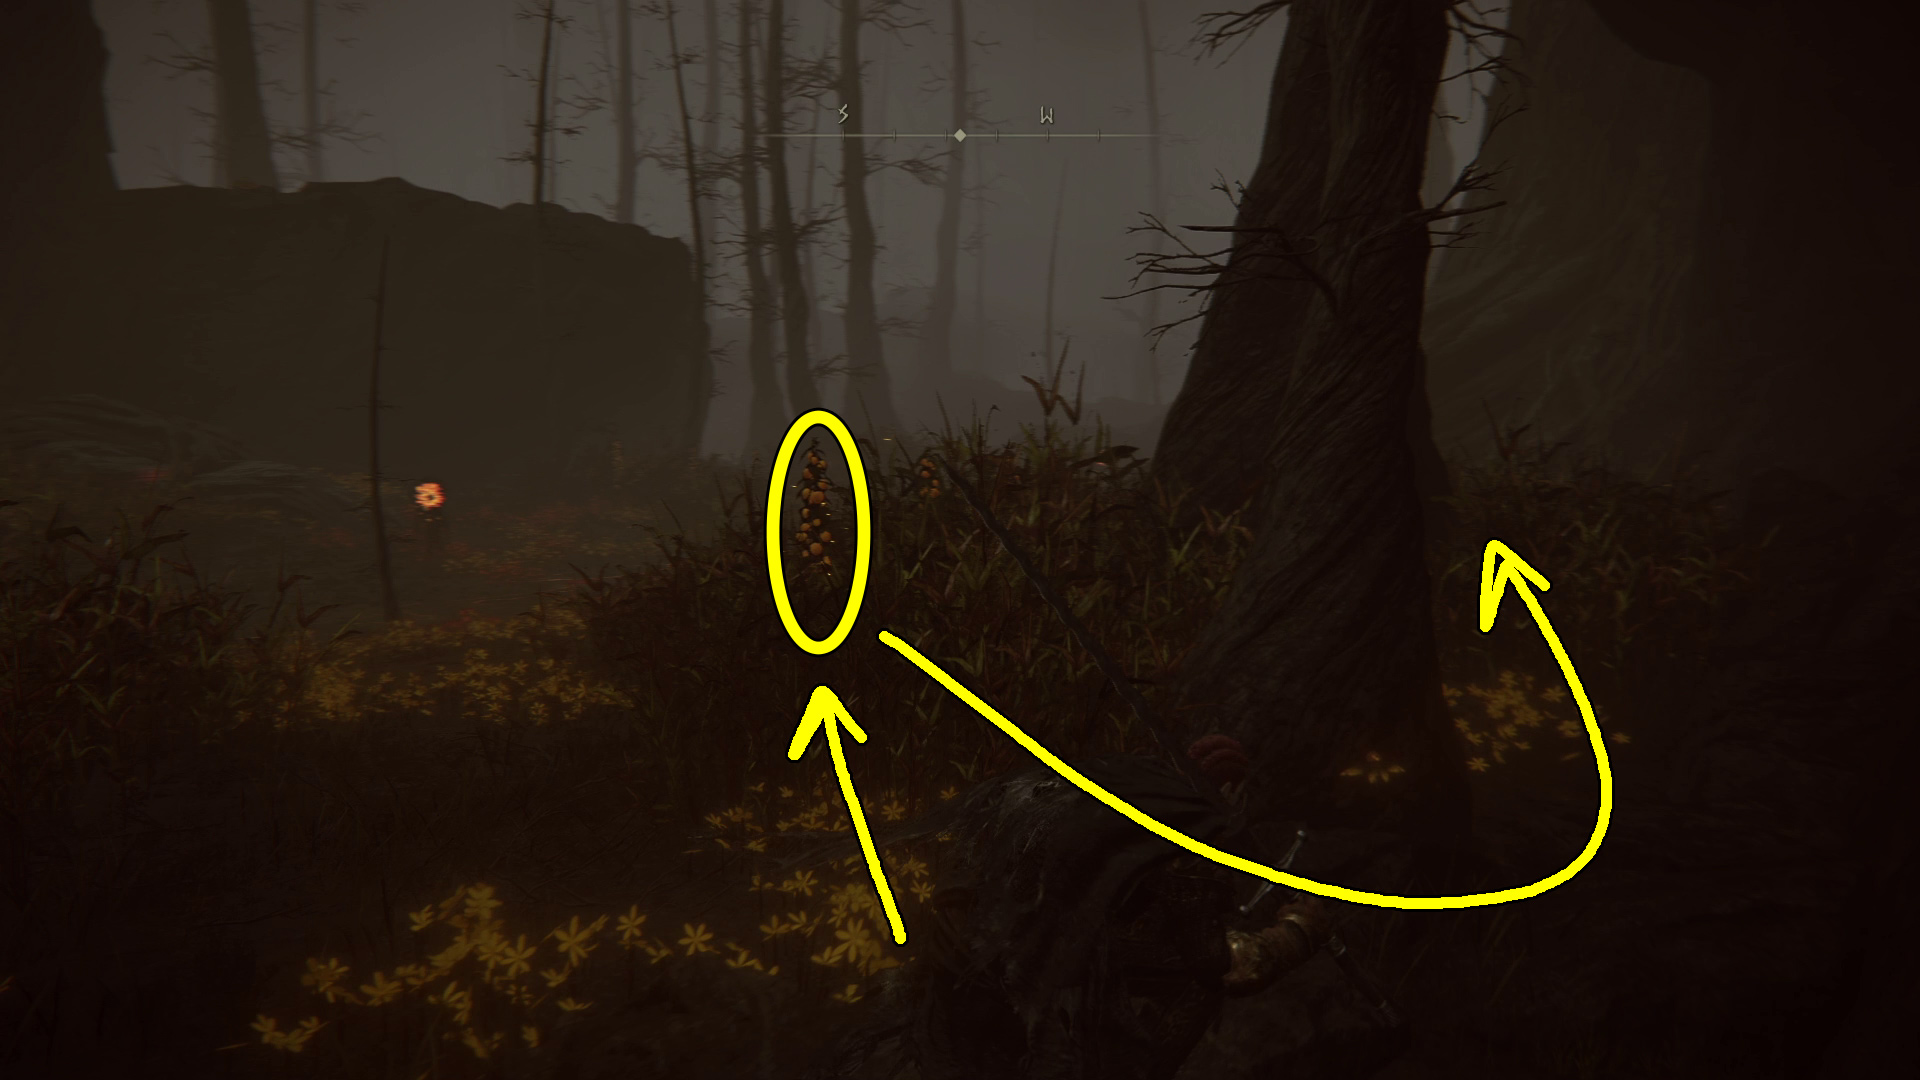
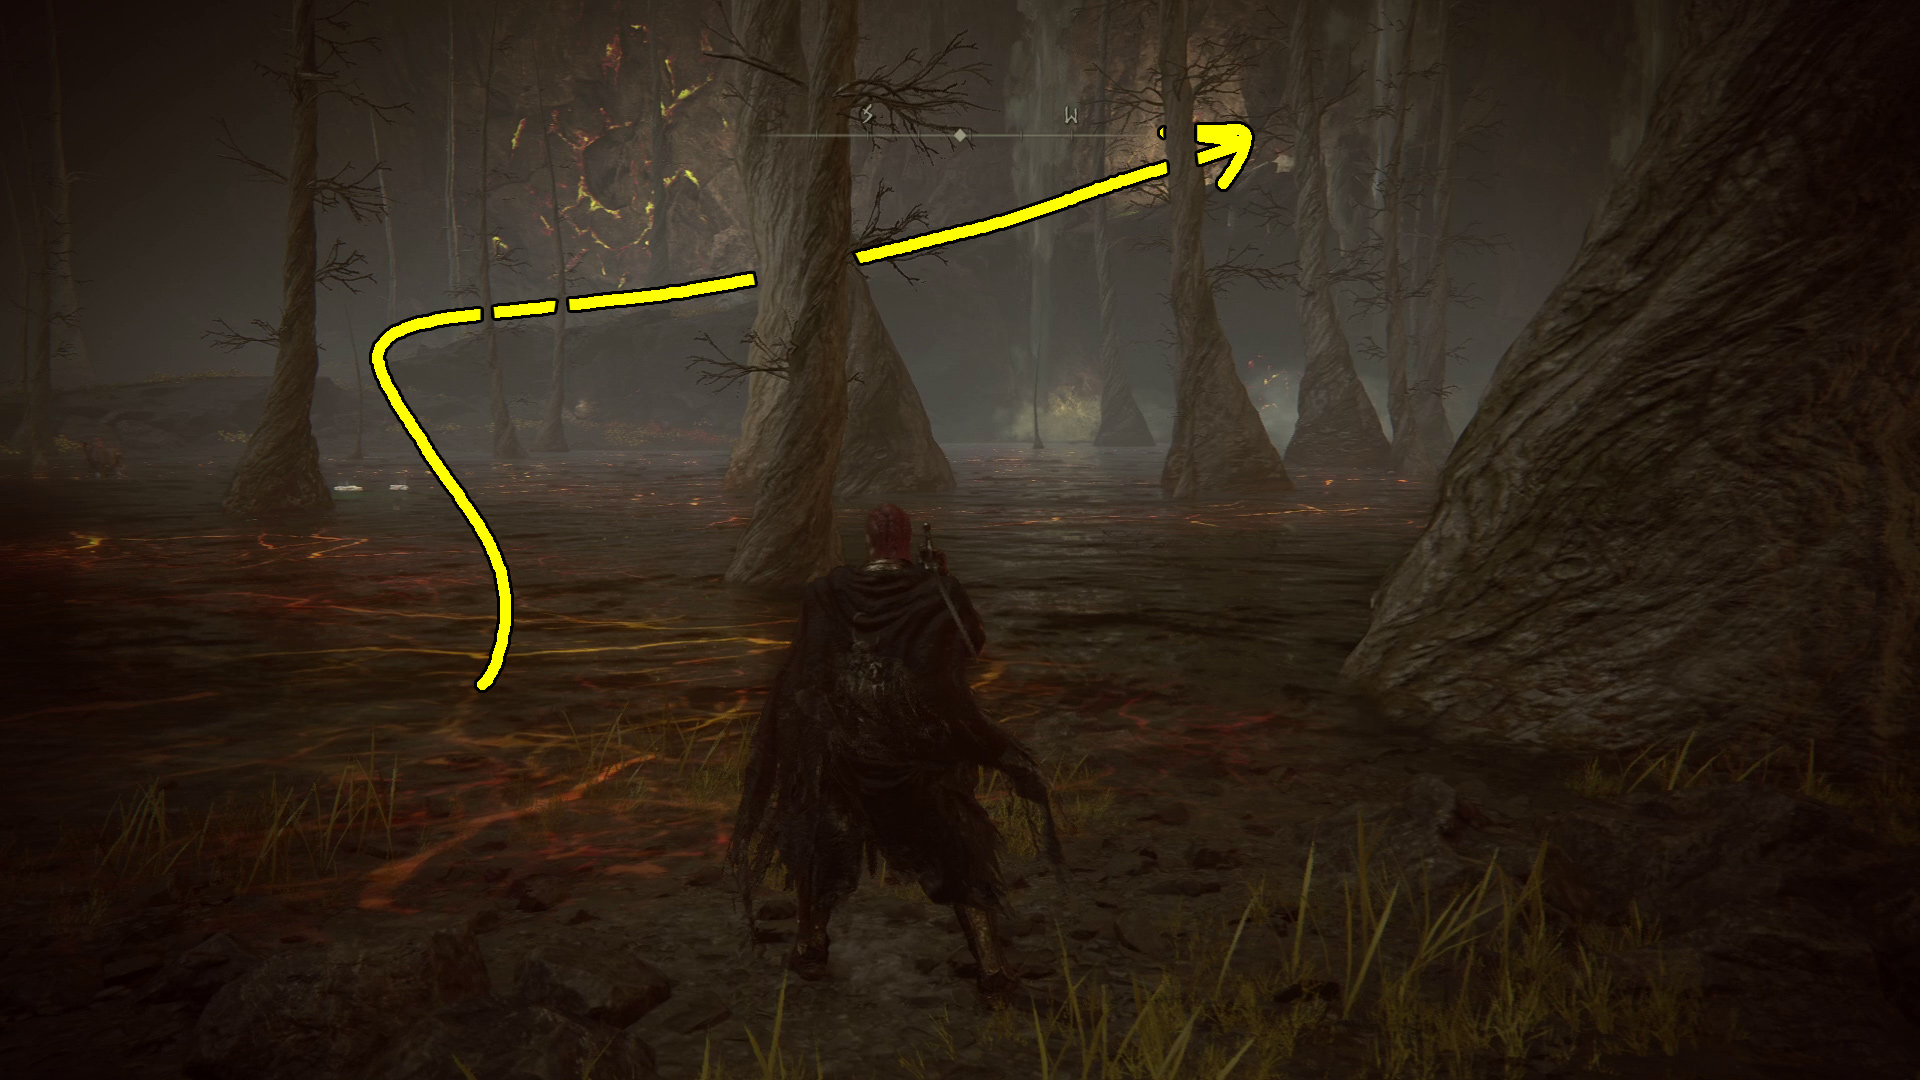
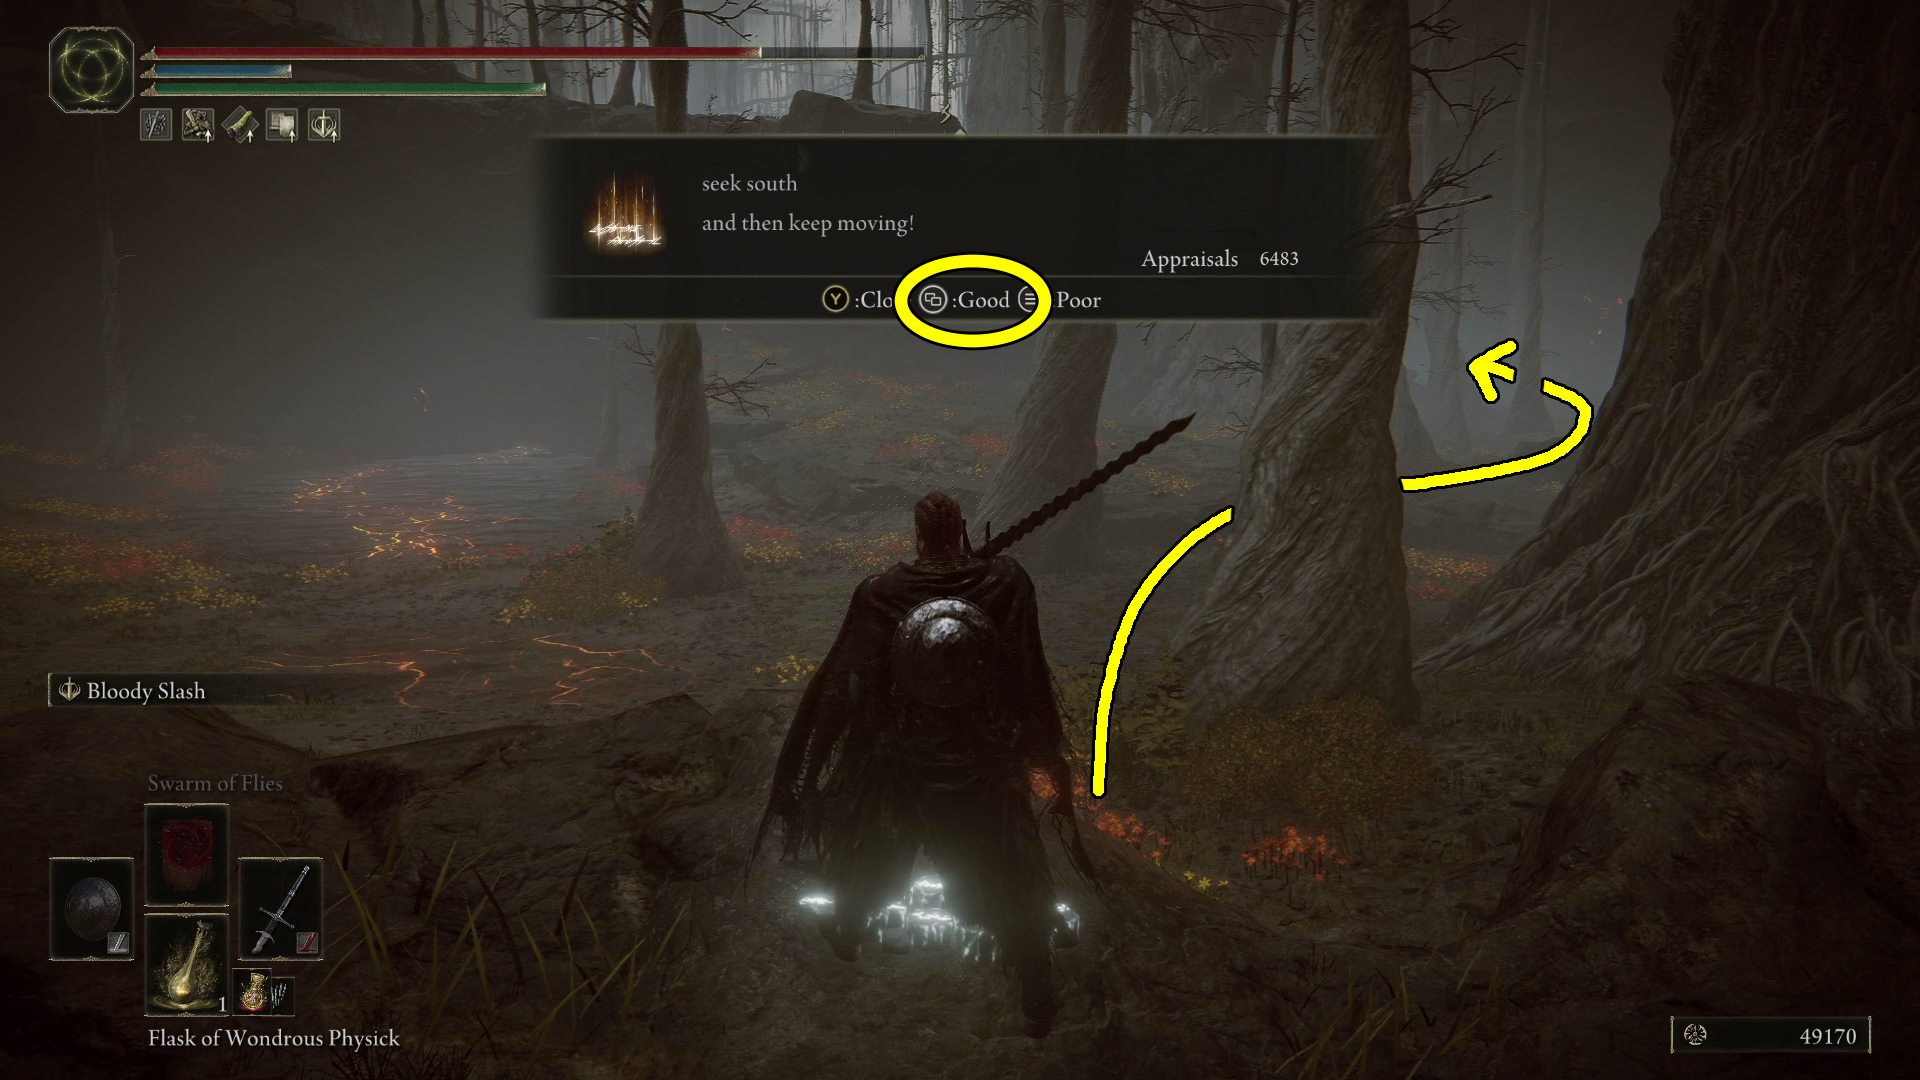
To grab the smithing stone, head southeast from the Divided Falls site of grace. At the water’s edge, continue southeast, past the large tree (Image 2). Follow the shallow water until you can turn left to go up a hill to another large tree (Image 3, 4). Around the tree on the edge of the ledge is the Somber Smithing Stone (7).
Image 2Image 3Image 4
Midra’s Manse
Unique & Important Items
Before Manse
Mad Craftsman’s Cookbook [2]
In Manse
Nanaya’s Torch
Mad Craftsman’s Cookbook (3)
Revered Spirit Ash x2
Remembrance of the Lord of Frenzied Flame (boss drop)
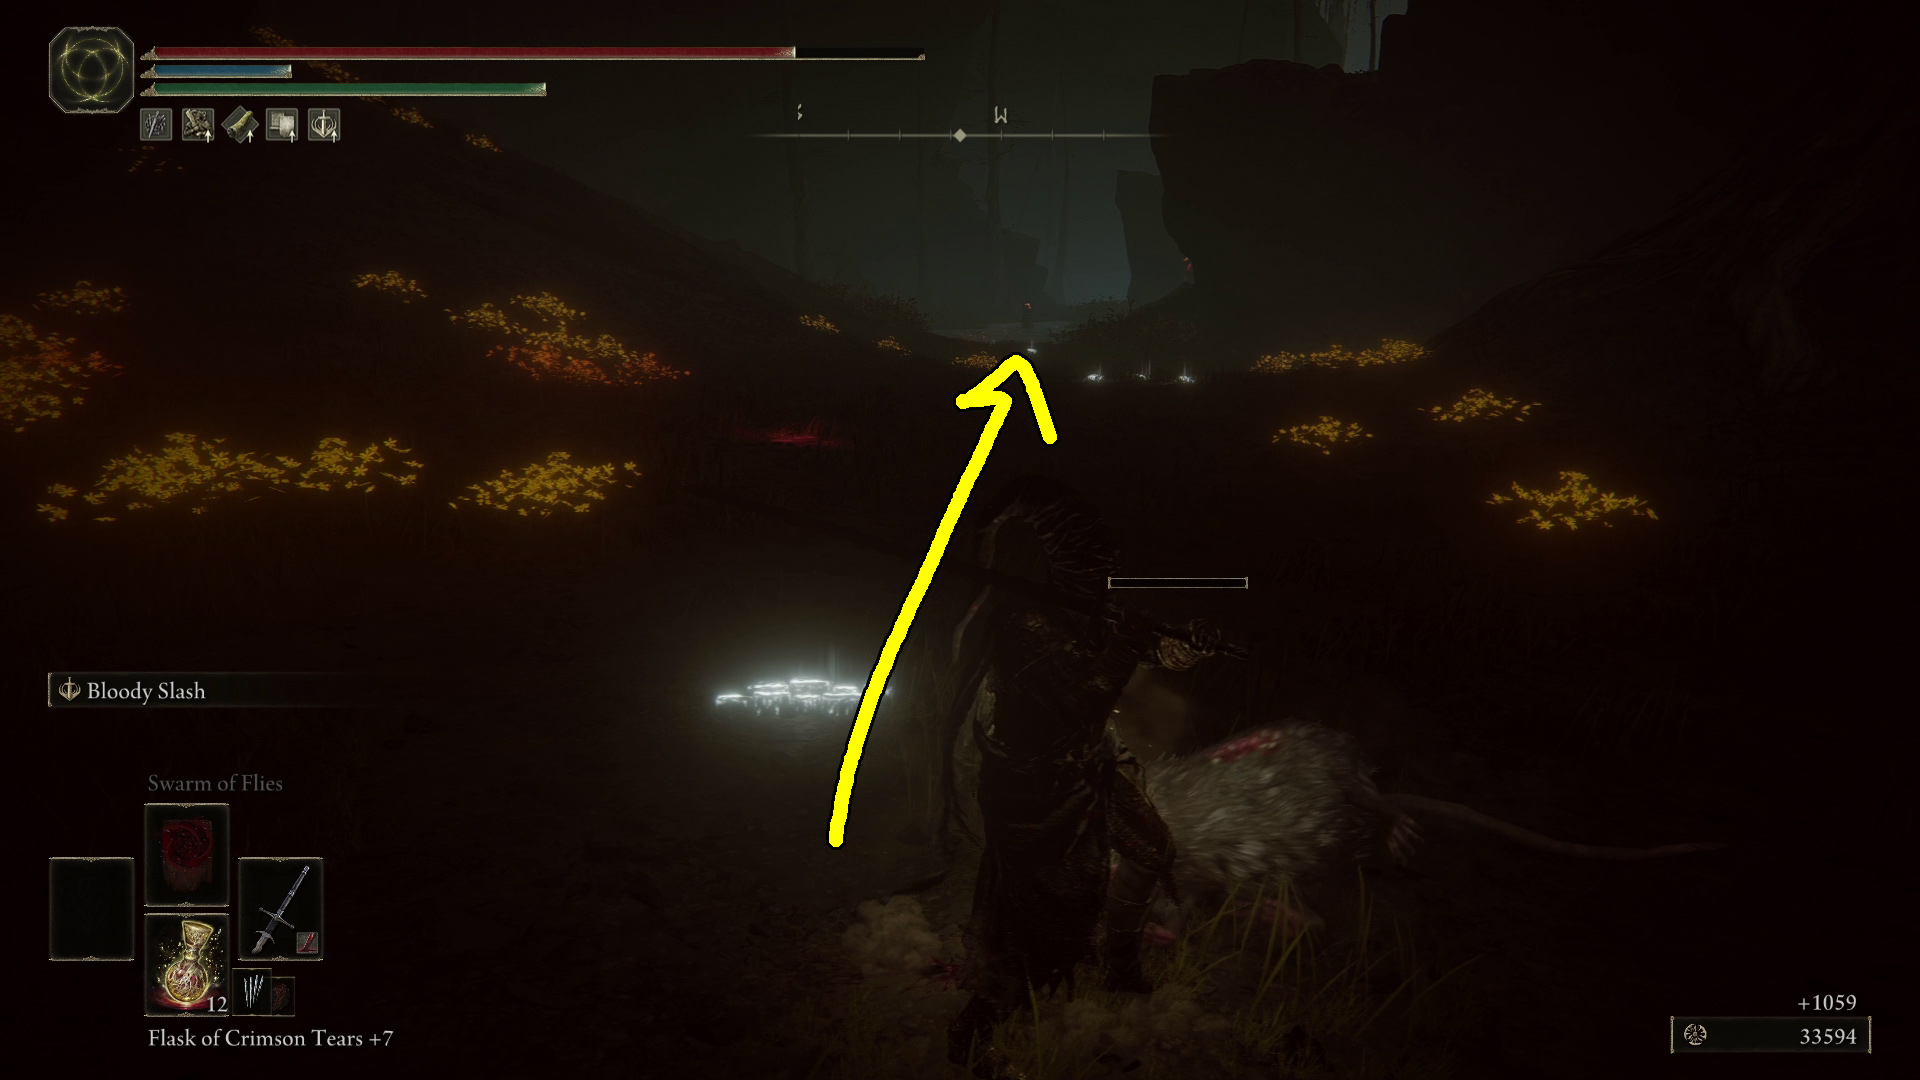
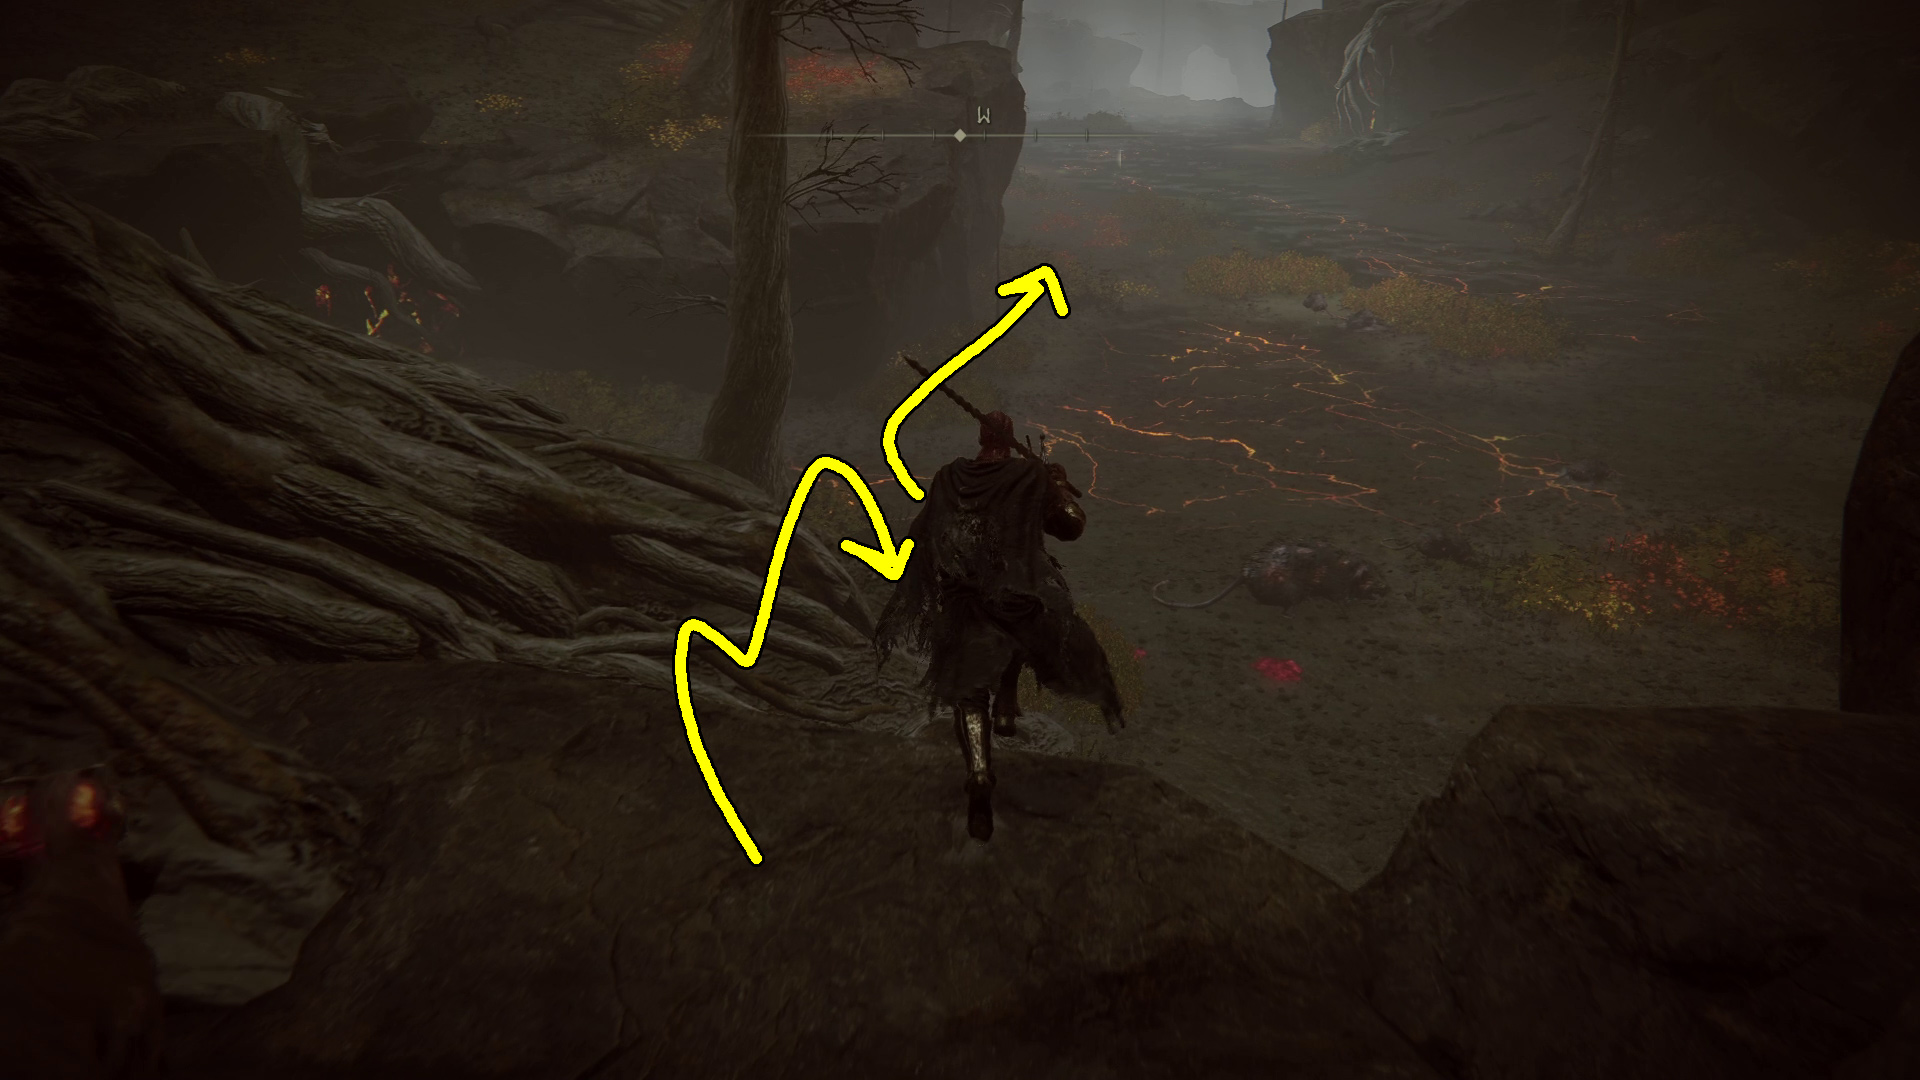
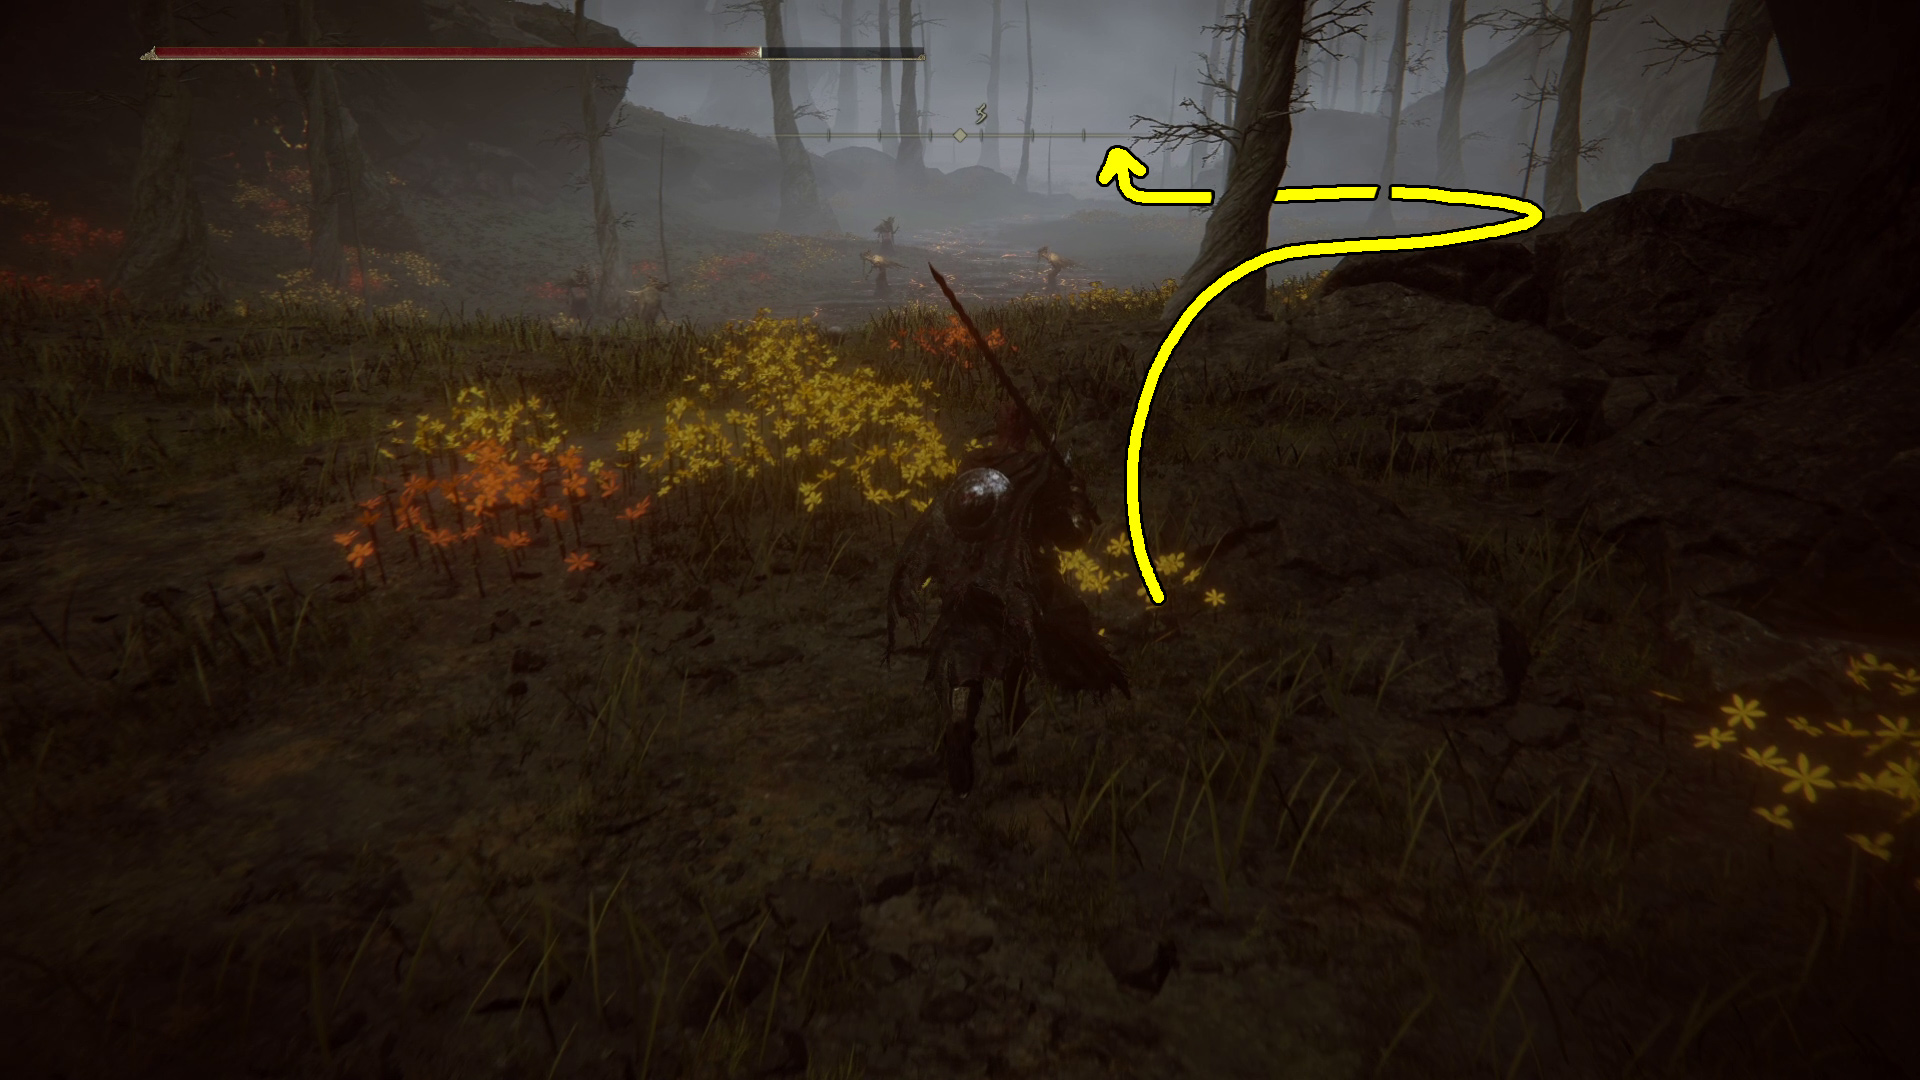
We’ve grabbed everything we can near the falls, so next we’ll head to the manse. The simplest way is through a couple of mobs visible from the Divided Falls site of grace (Image 1), but you can go around them to the east if you prefer. Either way, make your way southwest (Image 2) past where the two mobs were. You’ll soon meet another candle-wielding mob — take ’em out and continue south to the next one.
Now you can head back the way you came, and this time follow the path to the Manse. You’ll come to a ledge — drop off it and continue south. There is another, very large group of enemies up ahead, so consider going around them by hugging the right-hand edge of the water and sneaking. Past them is the Manse!
From the second mob, head uphill to the east, where you’ll find another enemy and two paths. To grab the cookbook, you’ll need to jump up on the rocks, then continue east through a number of mobs. Use the trees for cover as you approach, and try to fight one at a time. After you defeat the trio of enemies, you’ll continue southeast, and eventually come to a large tree — the Mad Craftsman’s Cookbook [2] is around the right side of it.
The Manse is a madhouse, quite literally. It also contains some Revered Spirit Ashes and a Remembrance Boss, and so is well worth exploring.
Unabashed FromSoftware fanboy still learning to take his time with games (and everything else, really). The time he doesn't spend on games is spent on music, books, or occasionally going outside.