This hidden legacy dungeon at the very southern tip of the Cerulean Coast is where you can find St. Trina, and progress Thiollier’s quest line. It’s a rather long endeavor that includes lots of exploring and a challenging boss, but the loot is worth it. If that doesn’t entice you, the stunning locale and scenery will. Let’s go through this elaborate dungeon step by step, and detail everything you won’t want to miss.
Unique Rewards:
Scadutree Fragment
Velvet Sword of St. Trina
Mass of Putrescence
Multilayered Ring of Light
St. Trina Disciple’s Cookbook (3)
Remembrance of Putrescence (boss drop)
St. Trina’s Smile
St. Trina’s Blossom
When you make it to the Cerulean Coast, head all the way south until you’re on a peninsula. You’ll find a big hole there that you can descend into on its western side. This will bring you to The Fissure site of grace; walk a short distance through a tunnel to enter the dungeon.
Note that you must have reached the Shadow Keep gate (and received the message that a Great Rune has broken) before you can enter this dungeon — otherwise, the entrance will be sealed.
Descending into Stone Coffin Fissure
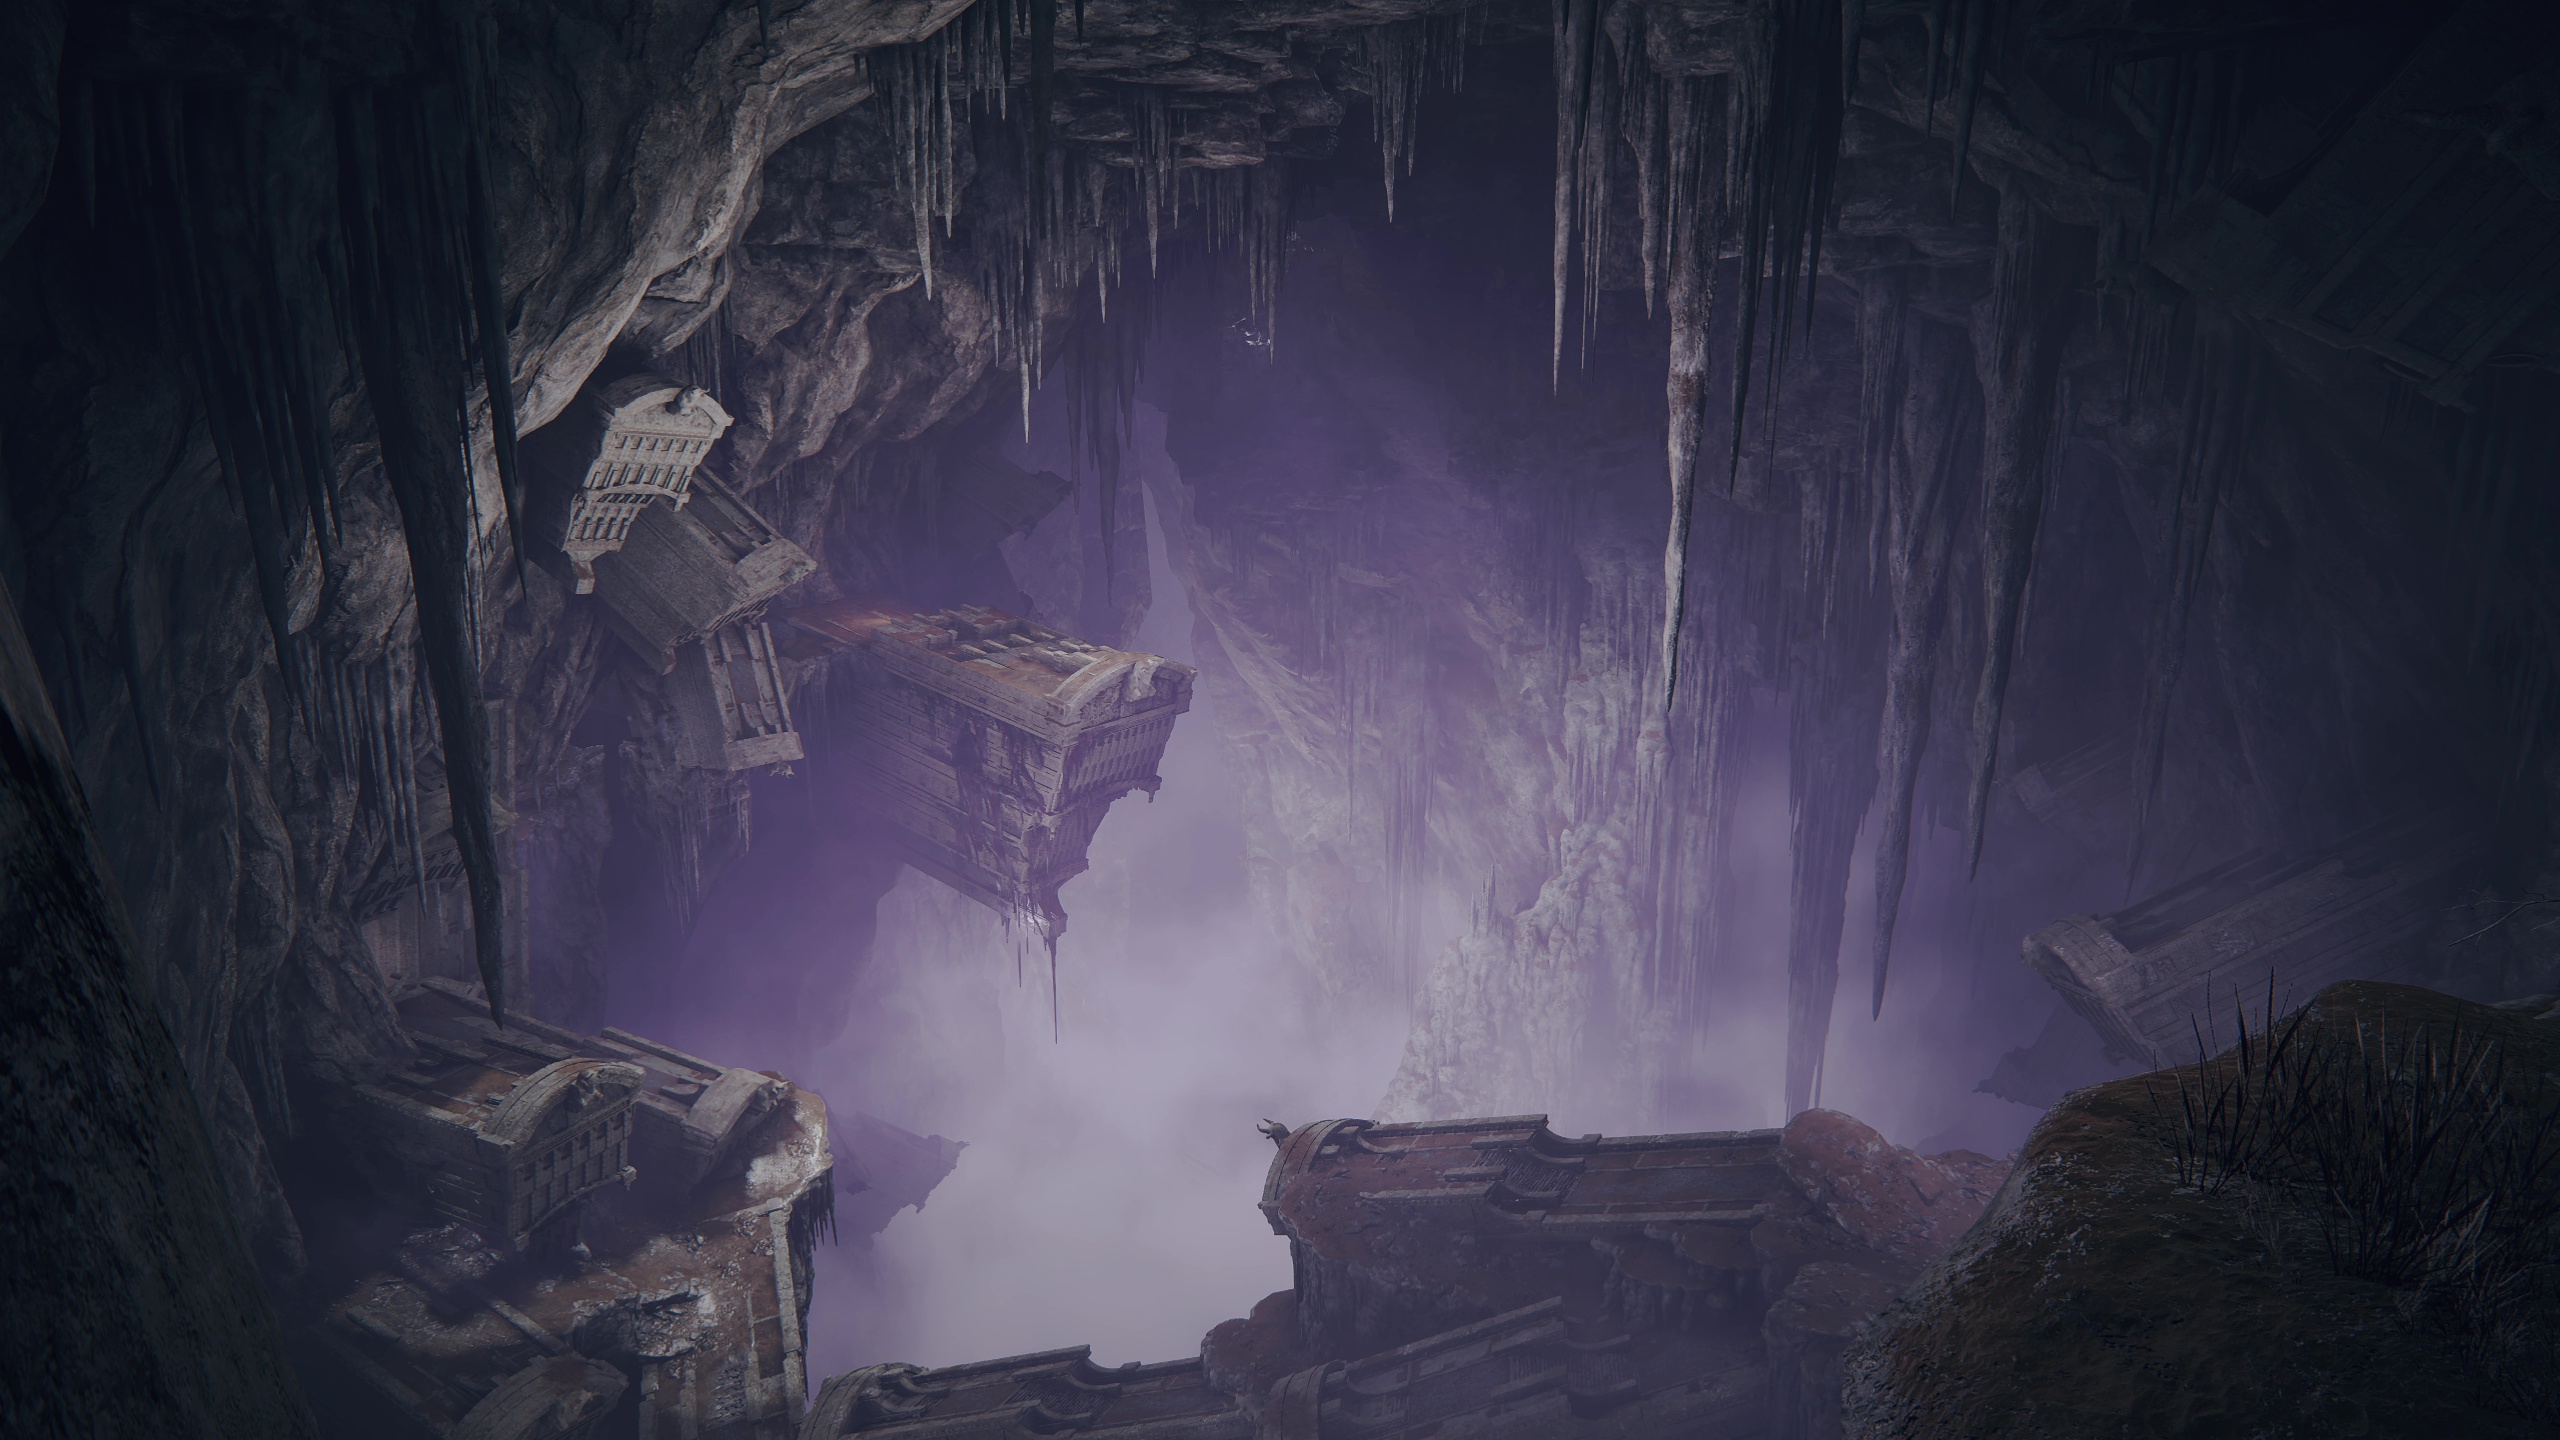
When you enter the dungeon, you’ll be on a precipice overlooking the area. Take in the sights, then meander to your right to the Stone Coffin Fissure site of grace. Be sure to rest here so that you have a save point, and your flasks and health are refilled.
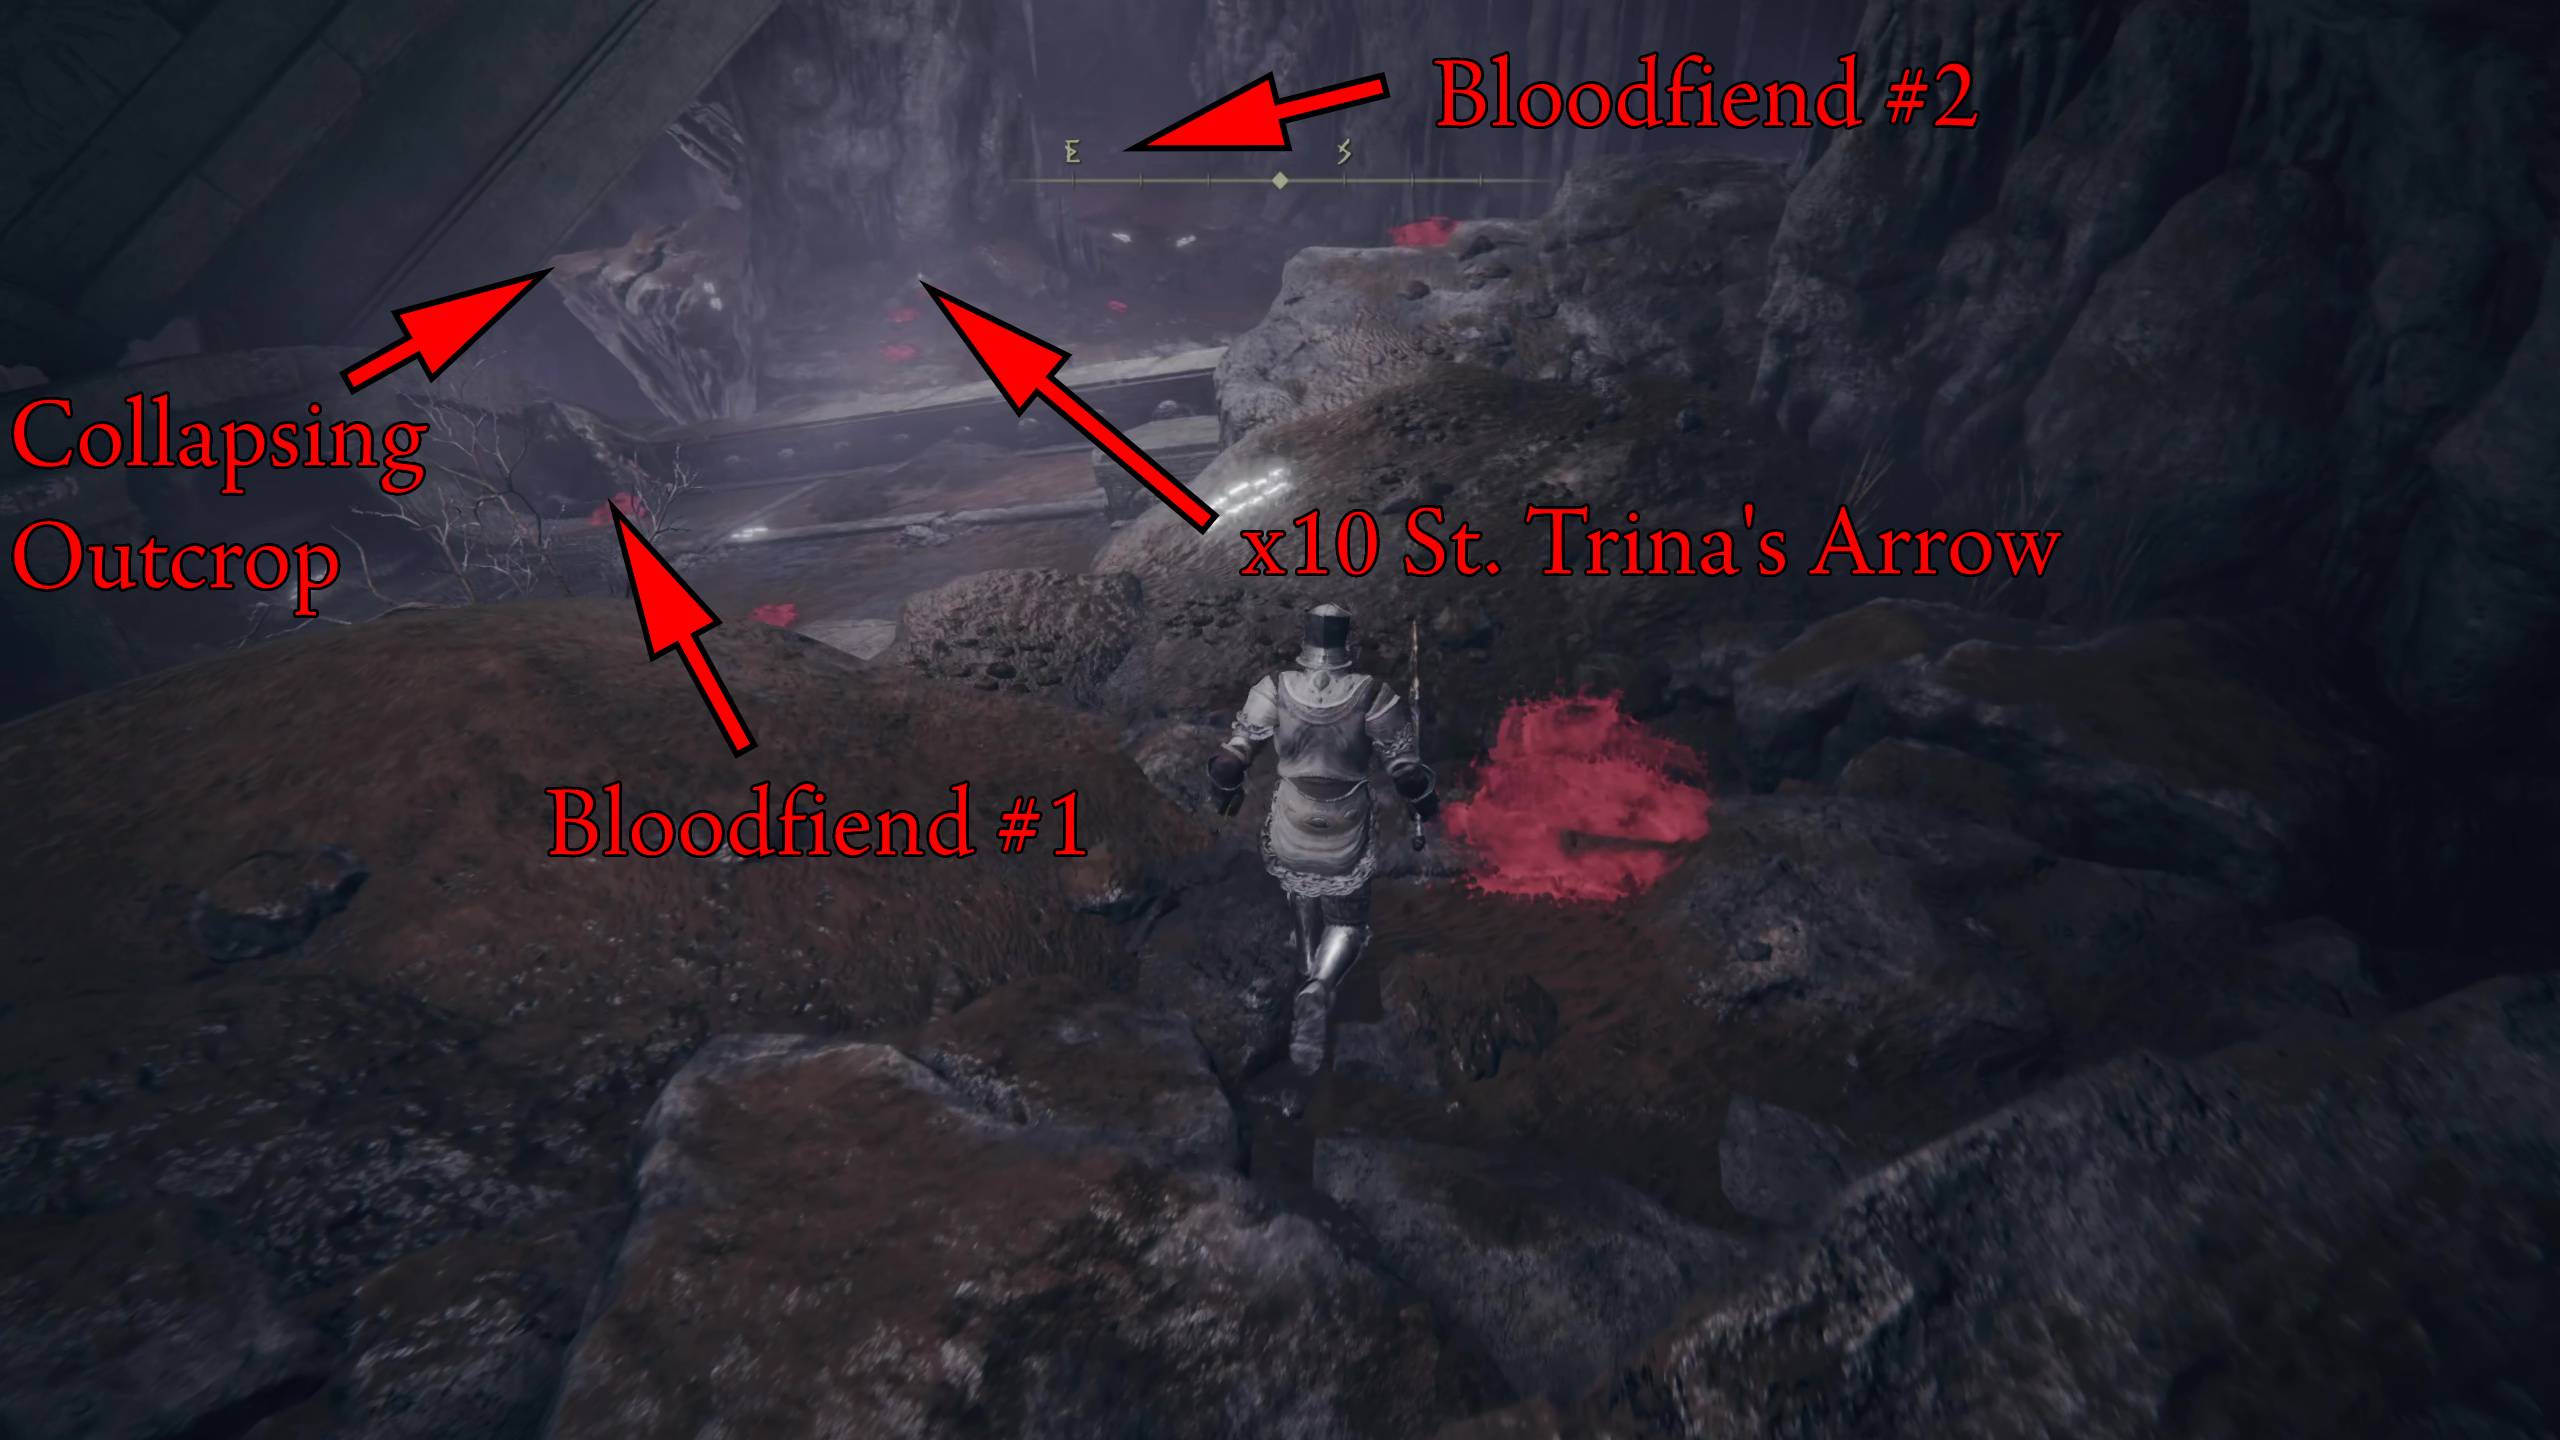
Continue along this overlooking edge towards the southeast, and you’ll come across a couple bloodfiends. It’s best to deal with these enemies one at a time (don’t run past the first one and get ambushed by the second). If you have any weapons that deal fire damage, bloodfiends will stagger when set on fire. Also, you’ll want to pick up the St. Trina Arrows on the corpse leaned up against a rocky pillar. Behind this pillar, you’ll find a rocky outcrop that will collapse when you walk on it — this is supposed to happen.
After you’ve fallen, you’ll find that you’re in an area overrun with bloodfiends. If you make your way to your right, you can run past these enemies and make it to the Fissure Cross site of grace. Don’t forget to grab the Scadutree Fragment under the cross.
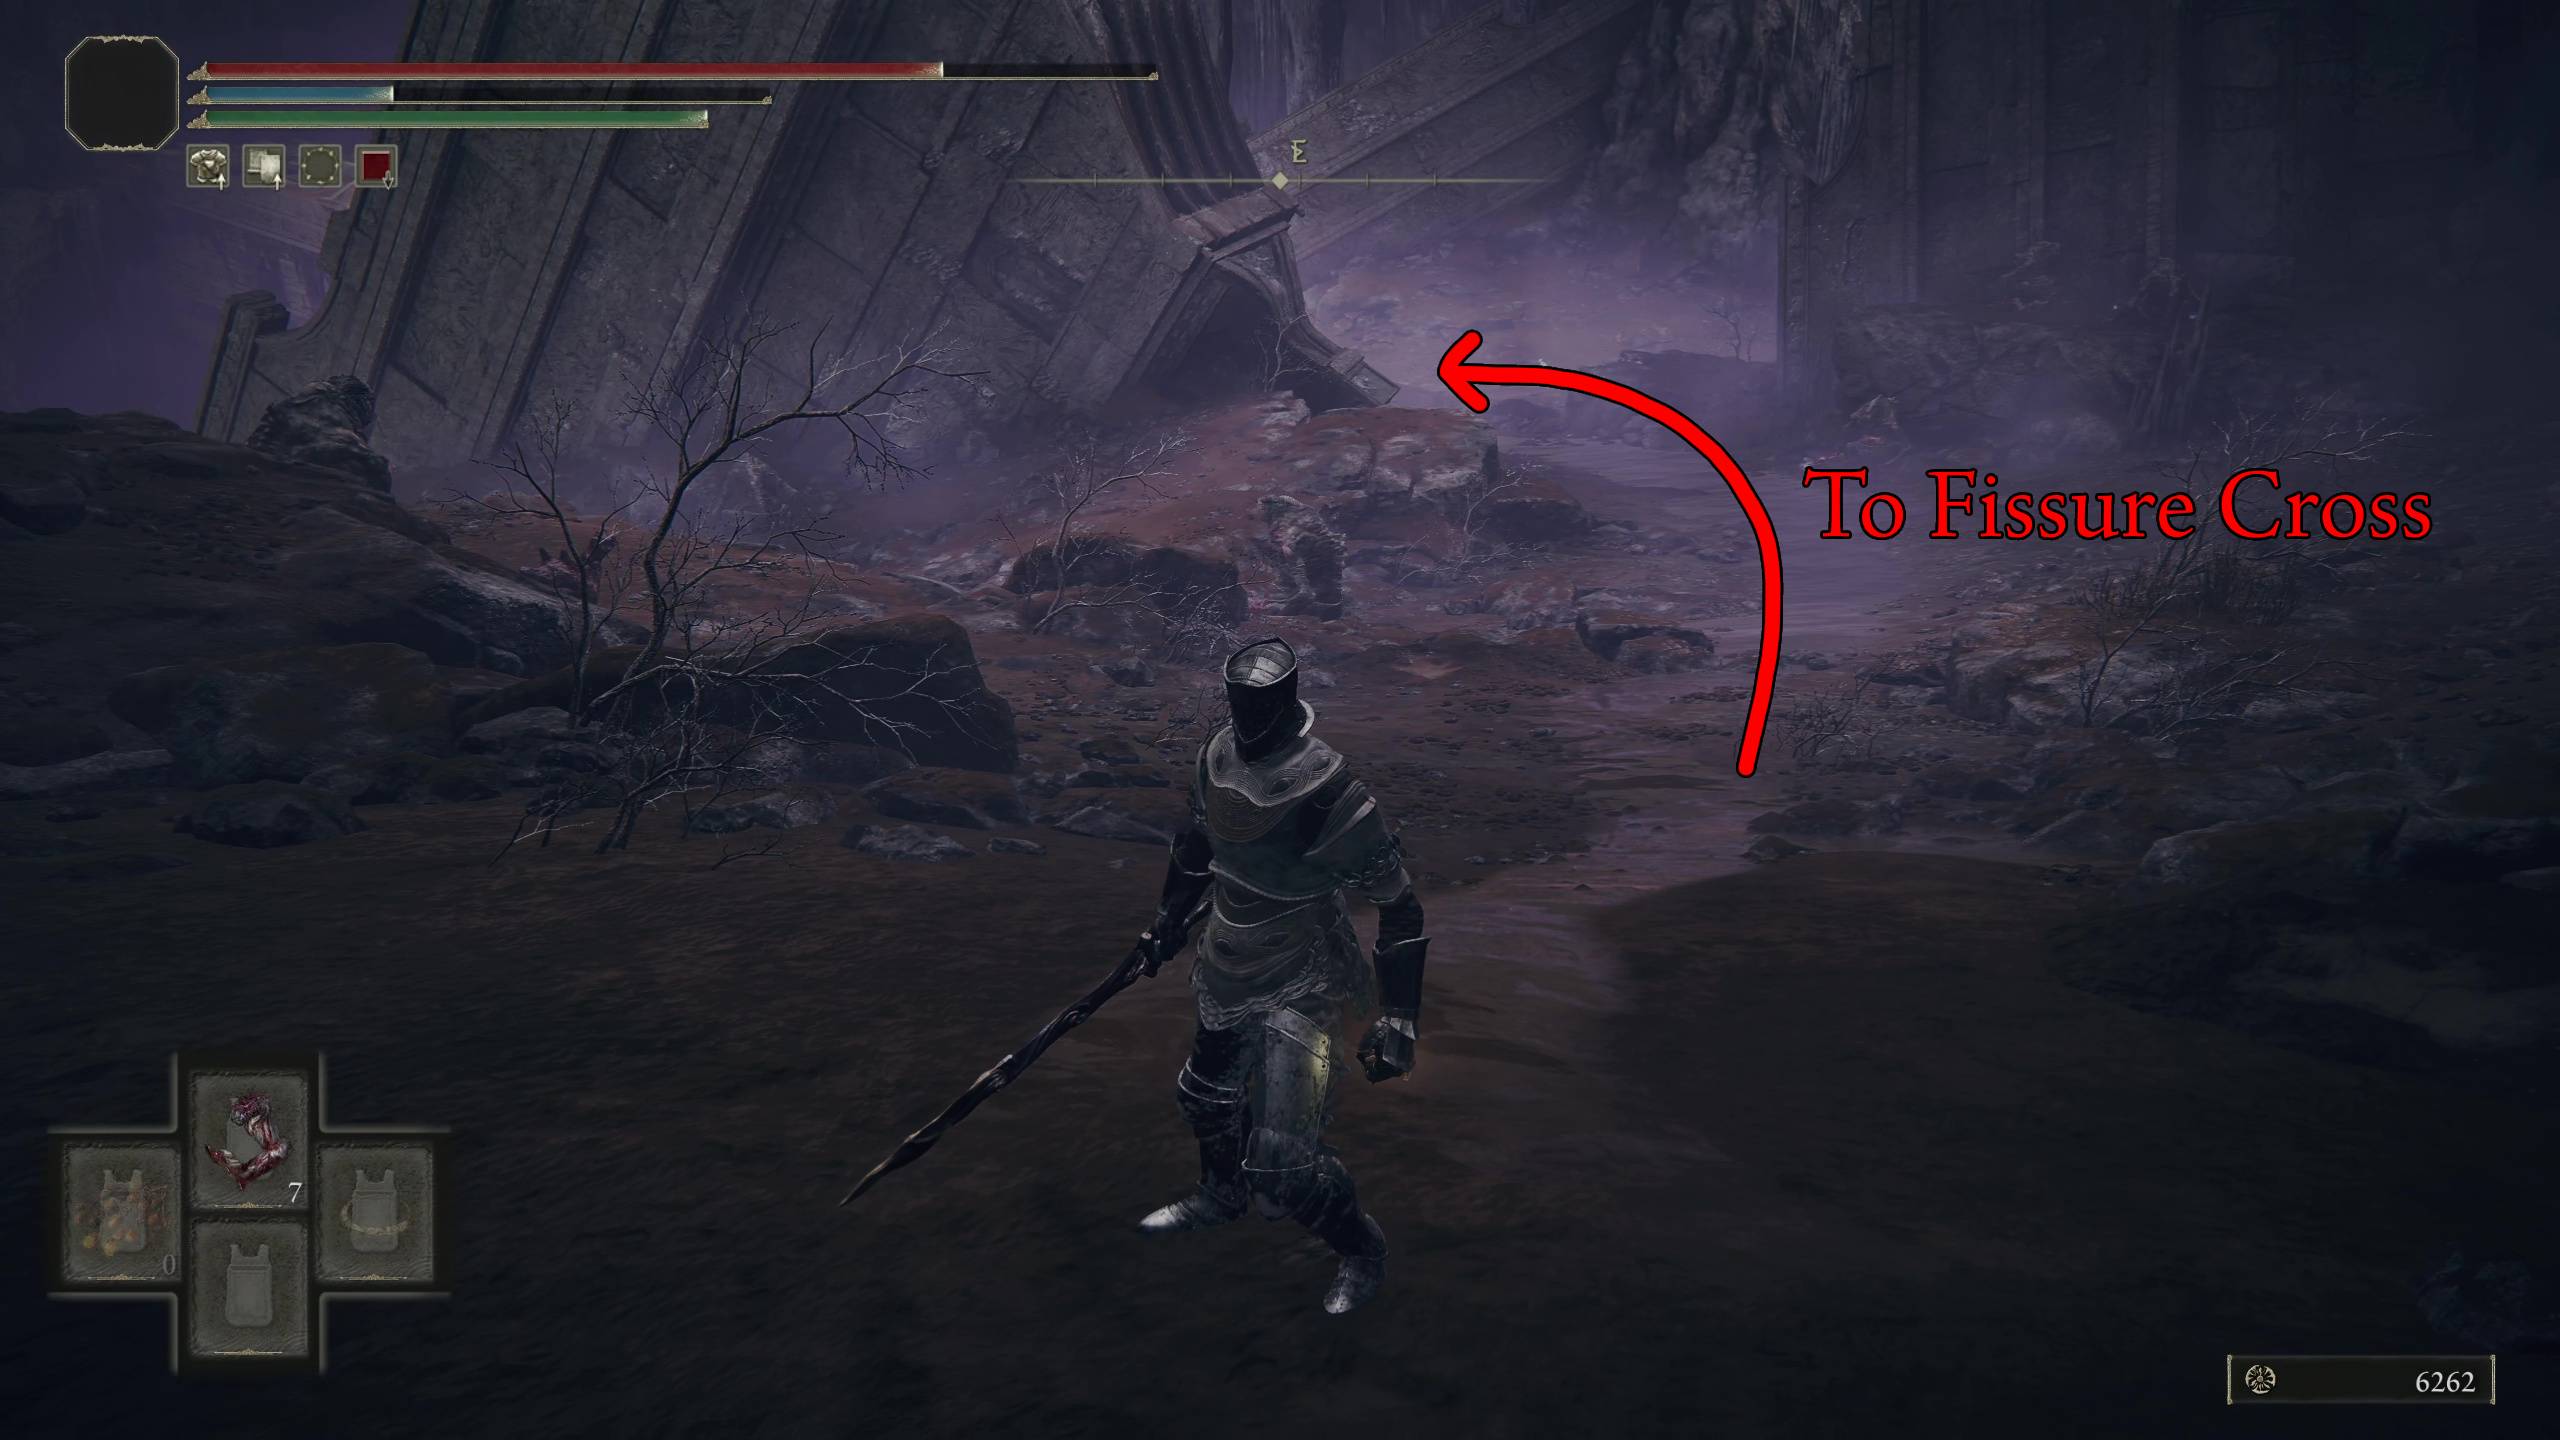
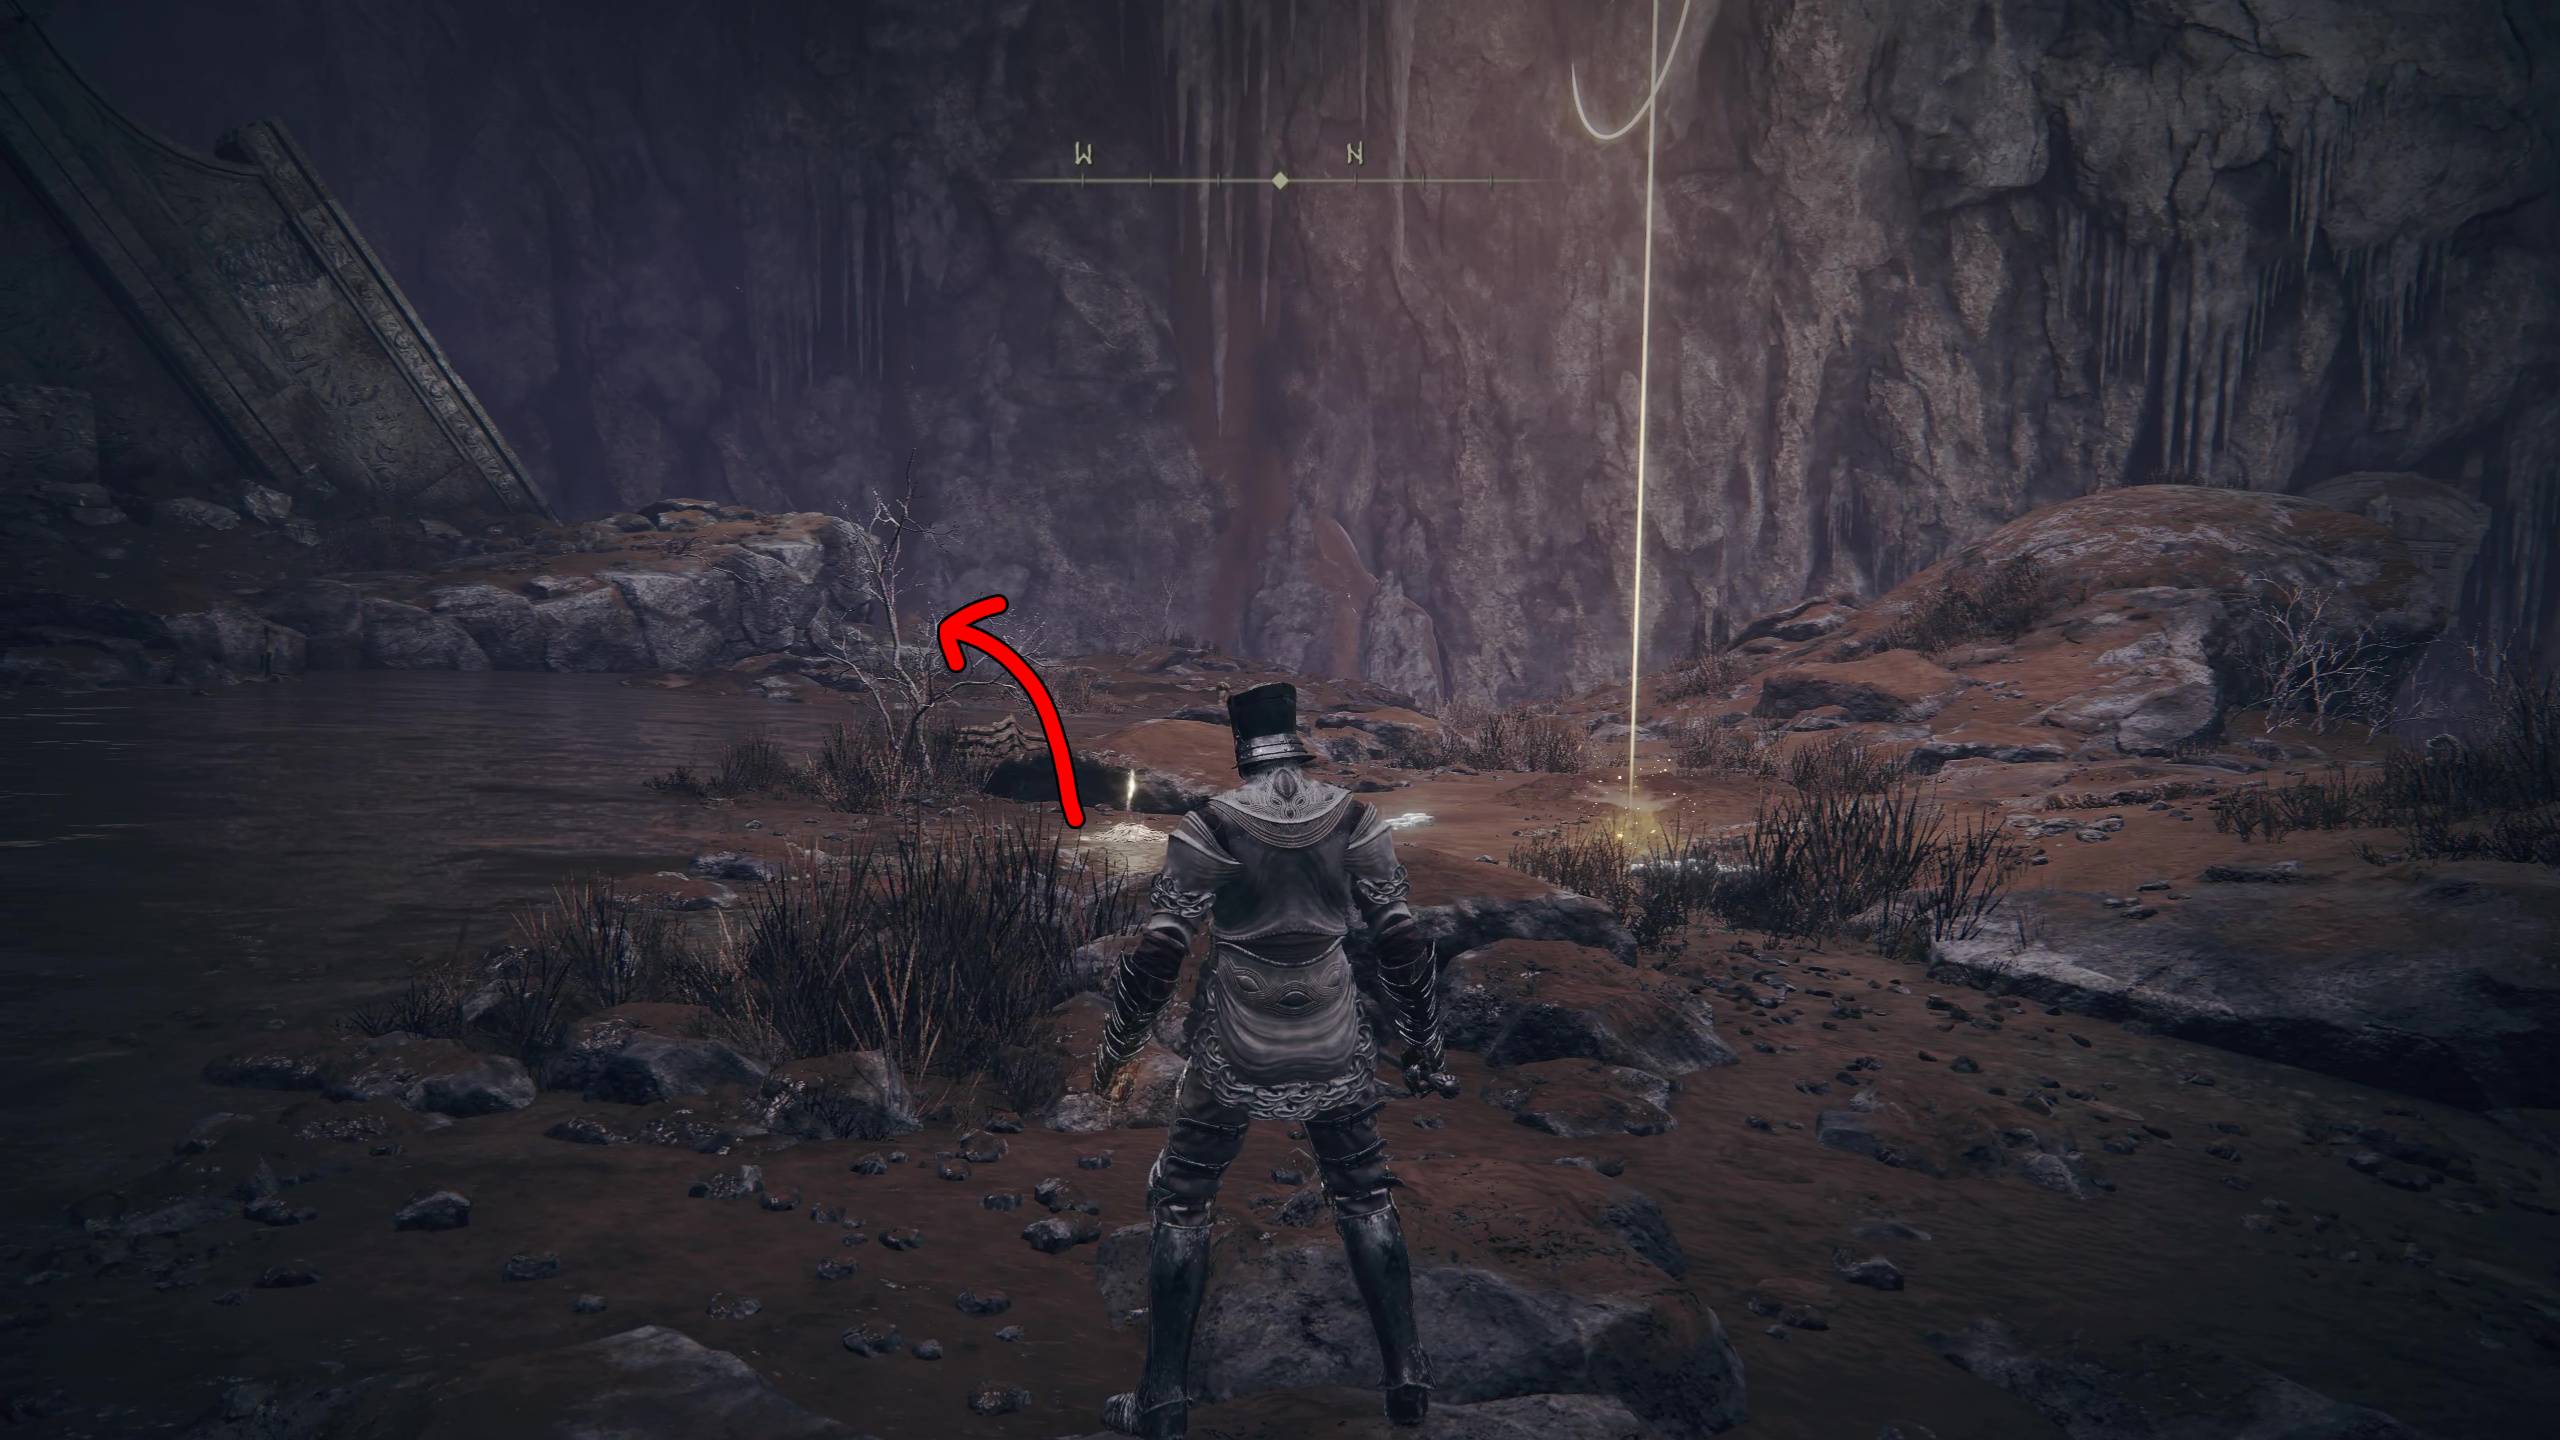
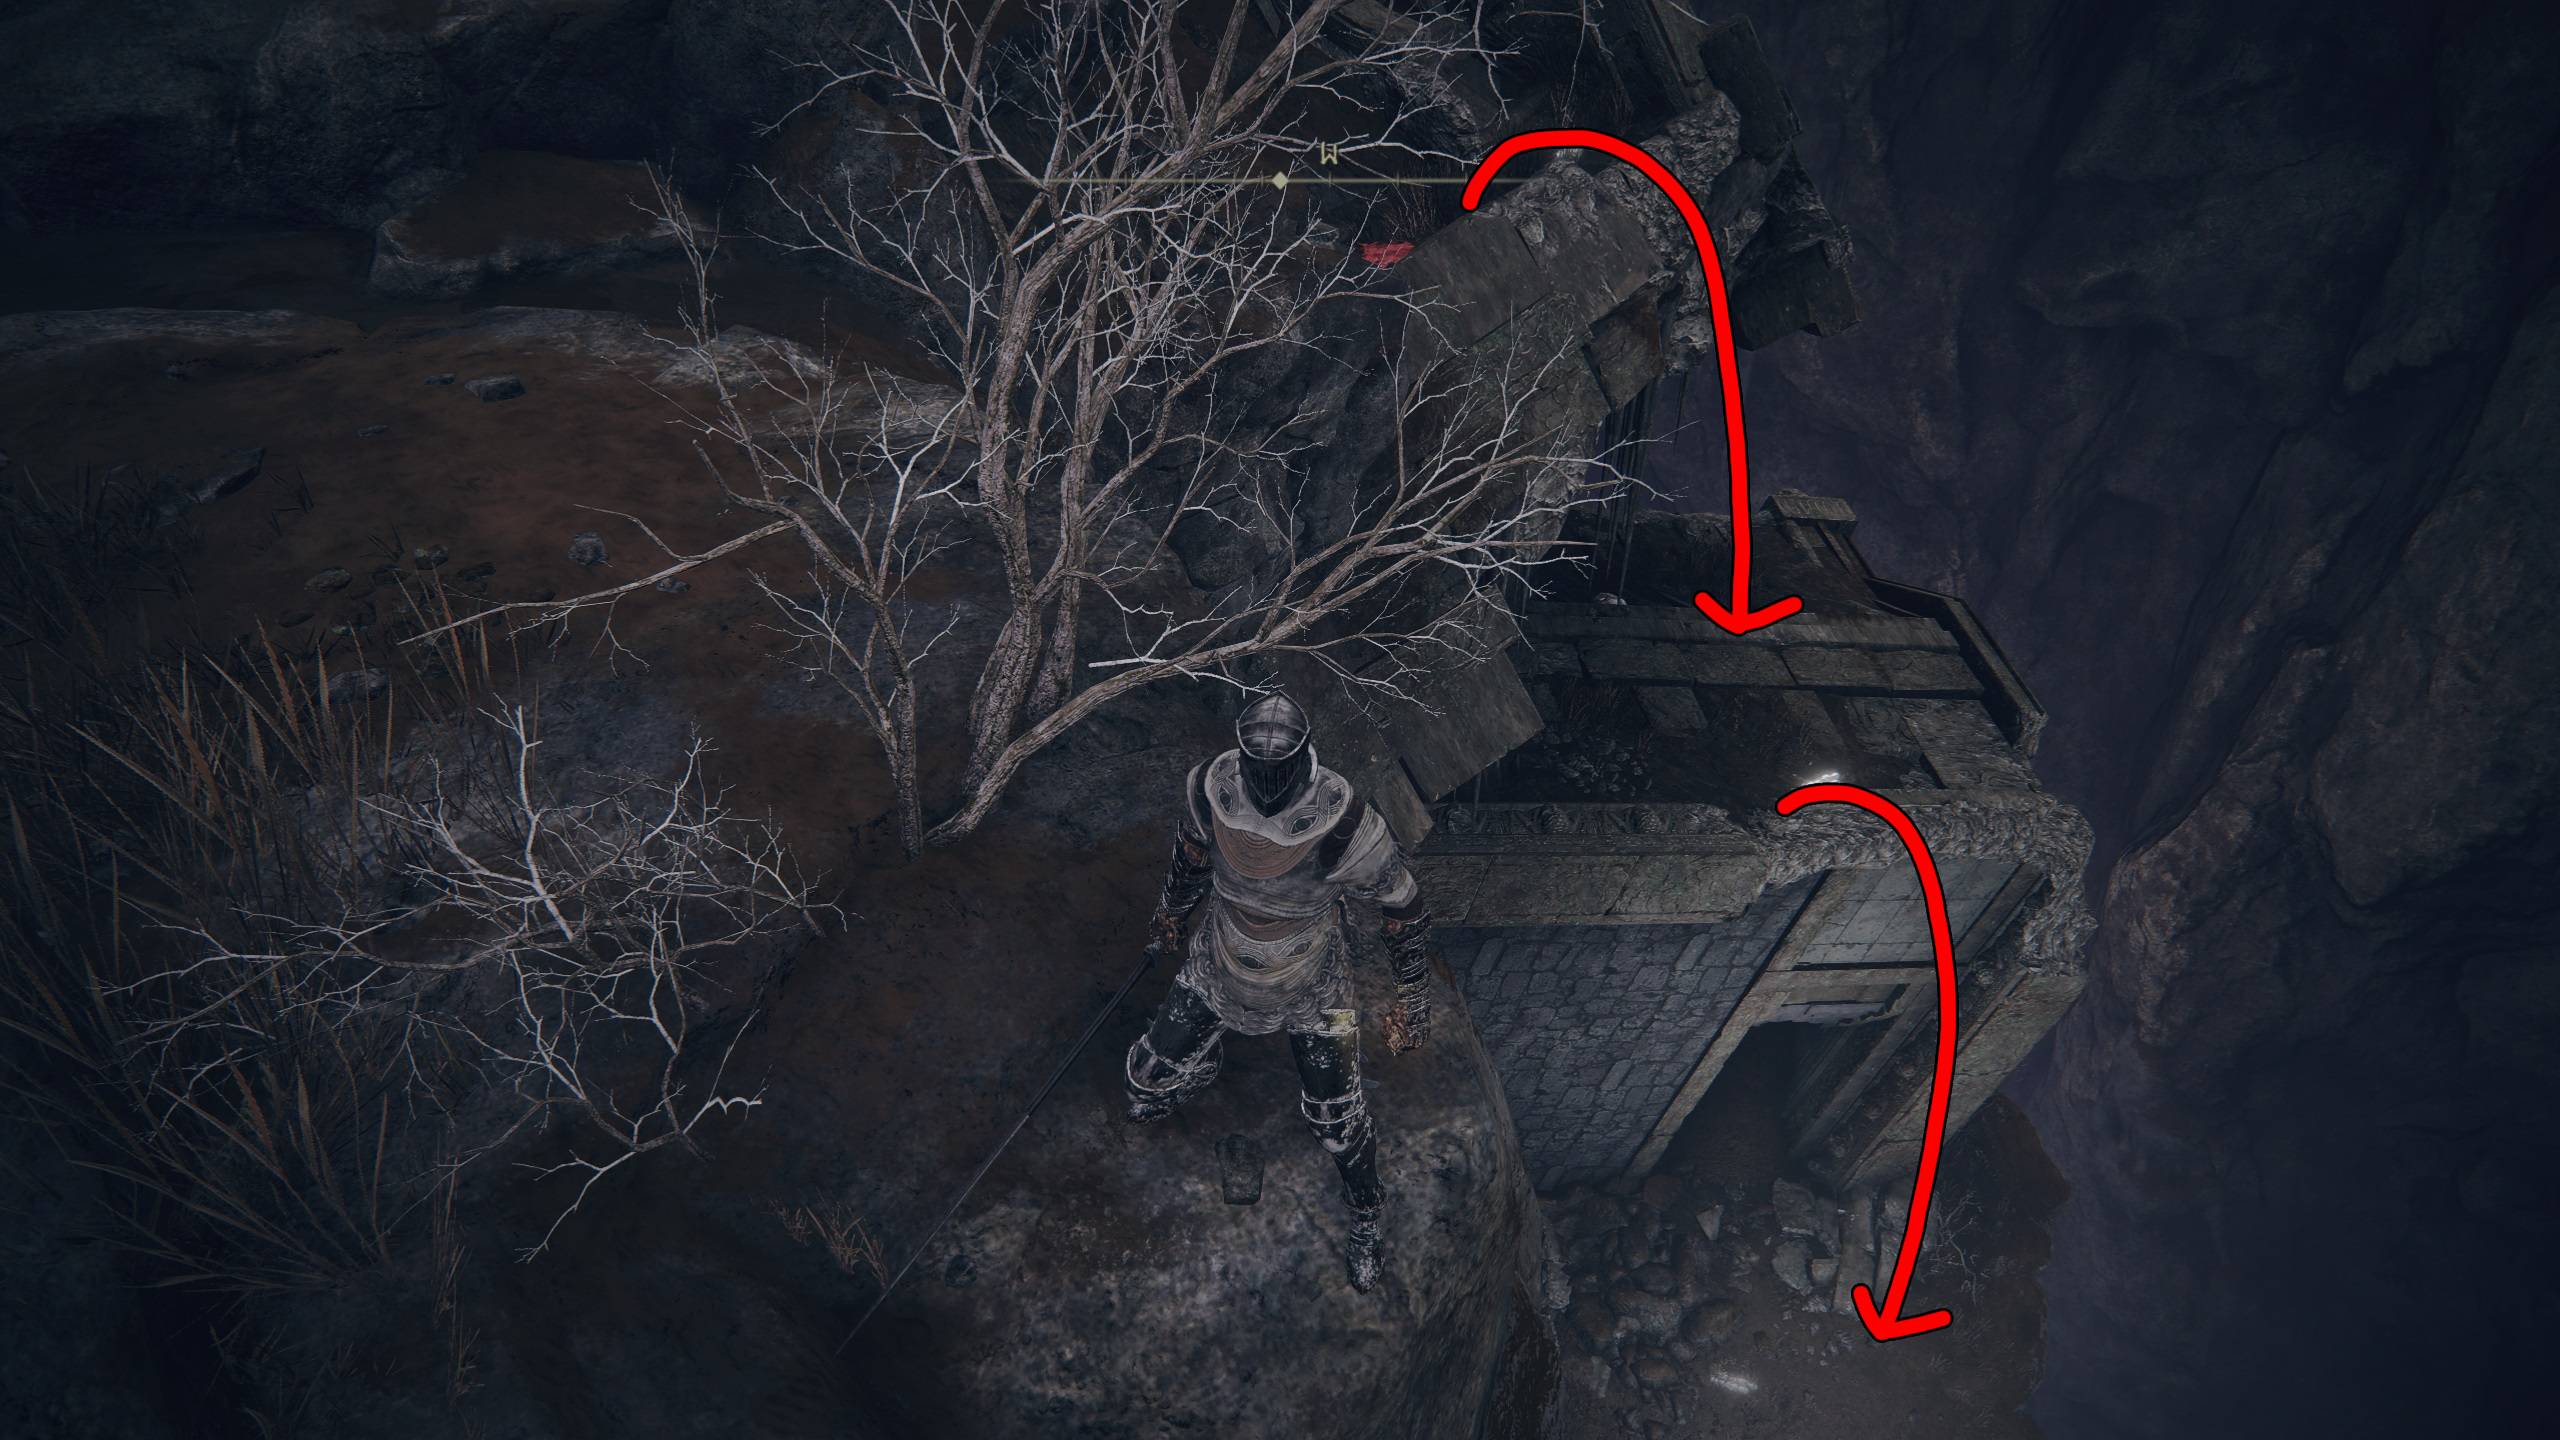
Now that you have the save point, you could go back and deal with those bloodfiends, but all you’ll get for exploring their area are runes and a Deep-Purple Lilly (crafting material). You can take two paths to continue forward, but only one will give you a cool sword (so we’ll go that way). Head northwest from the Fissure Cross site of grace (image 1), and you’ll come to a large pile of fallen rubble where you can drop to some ledges (image 2).
Image 1Image 2
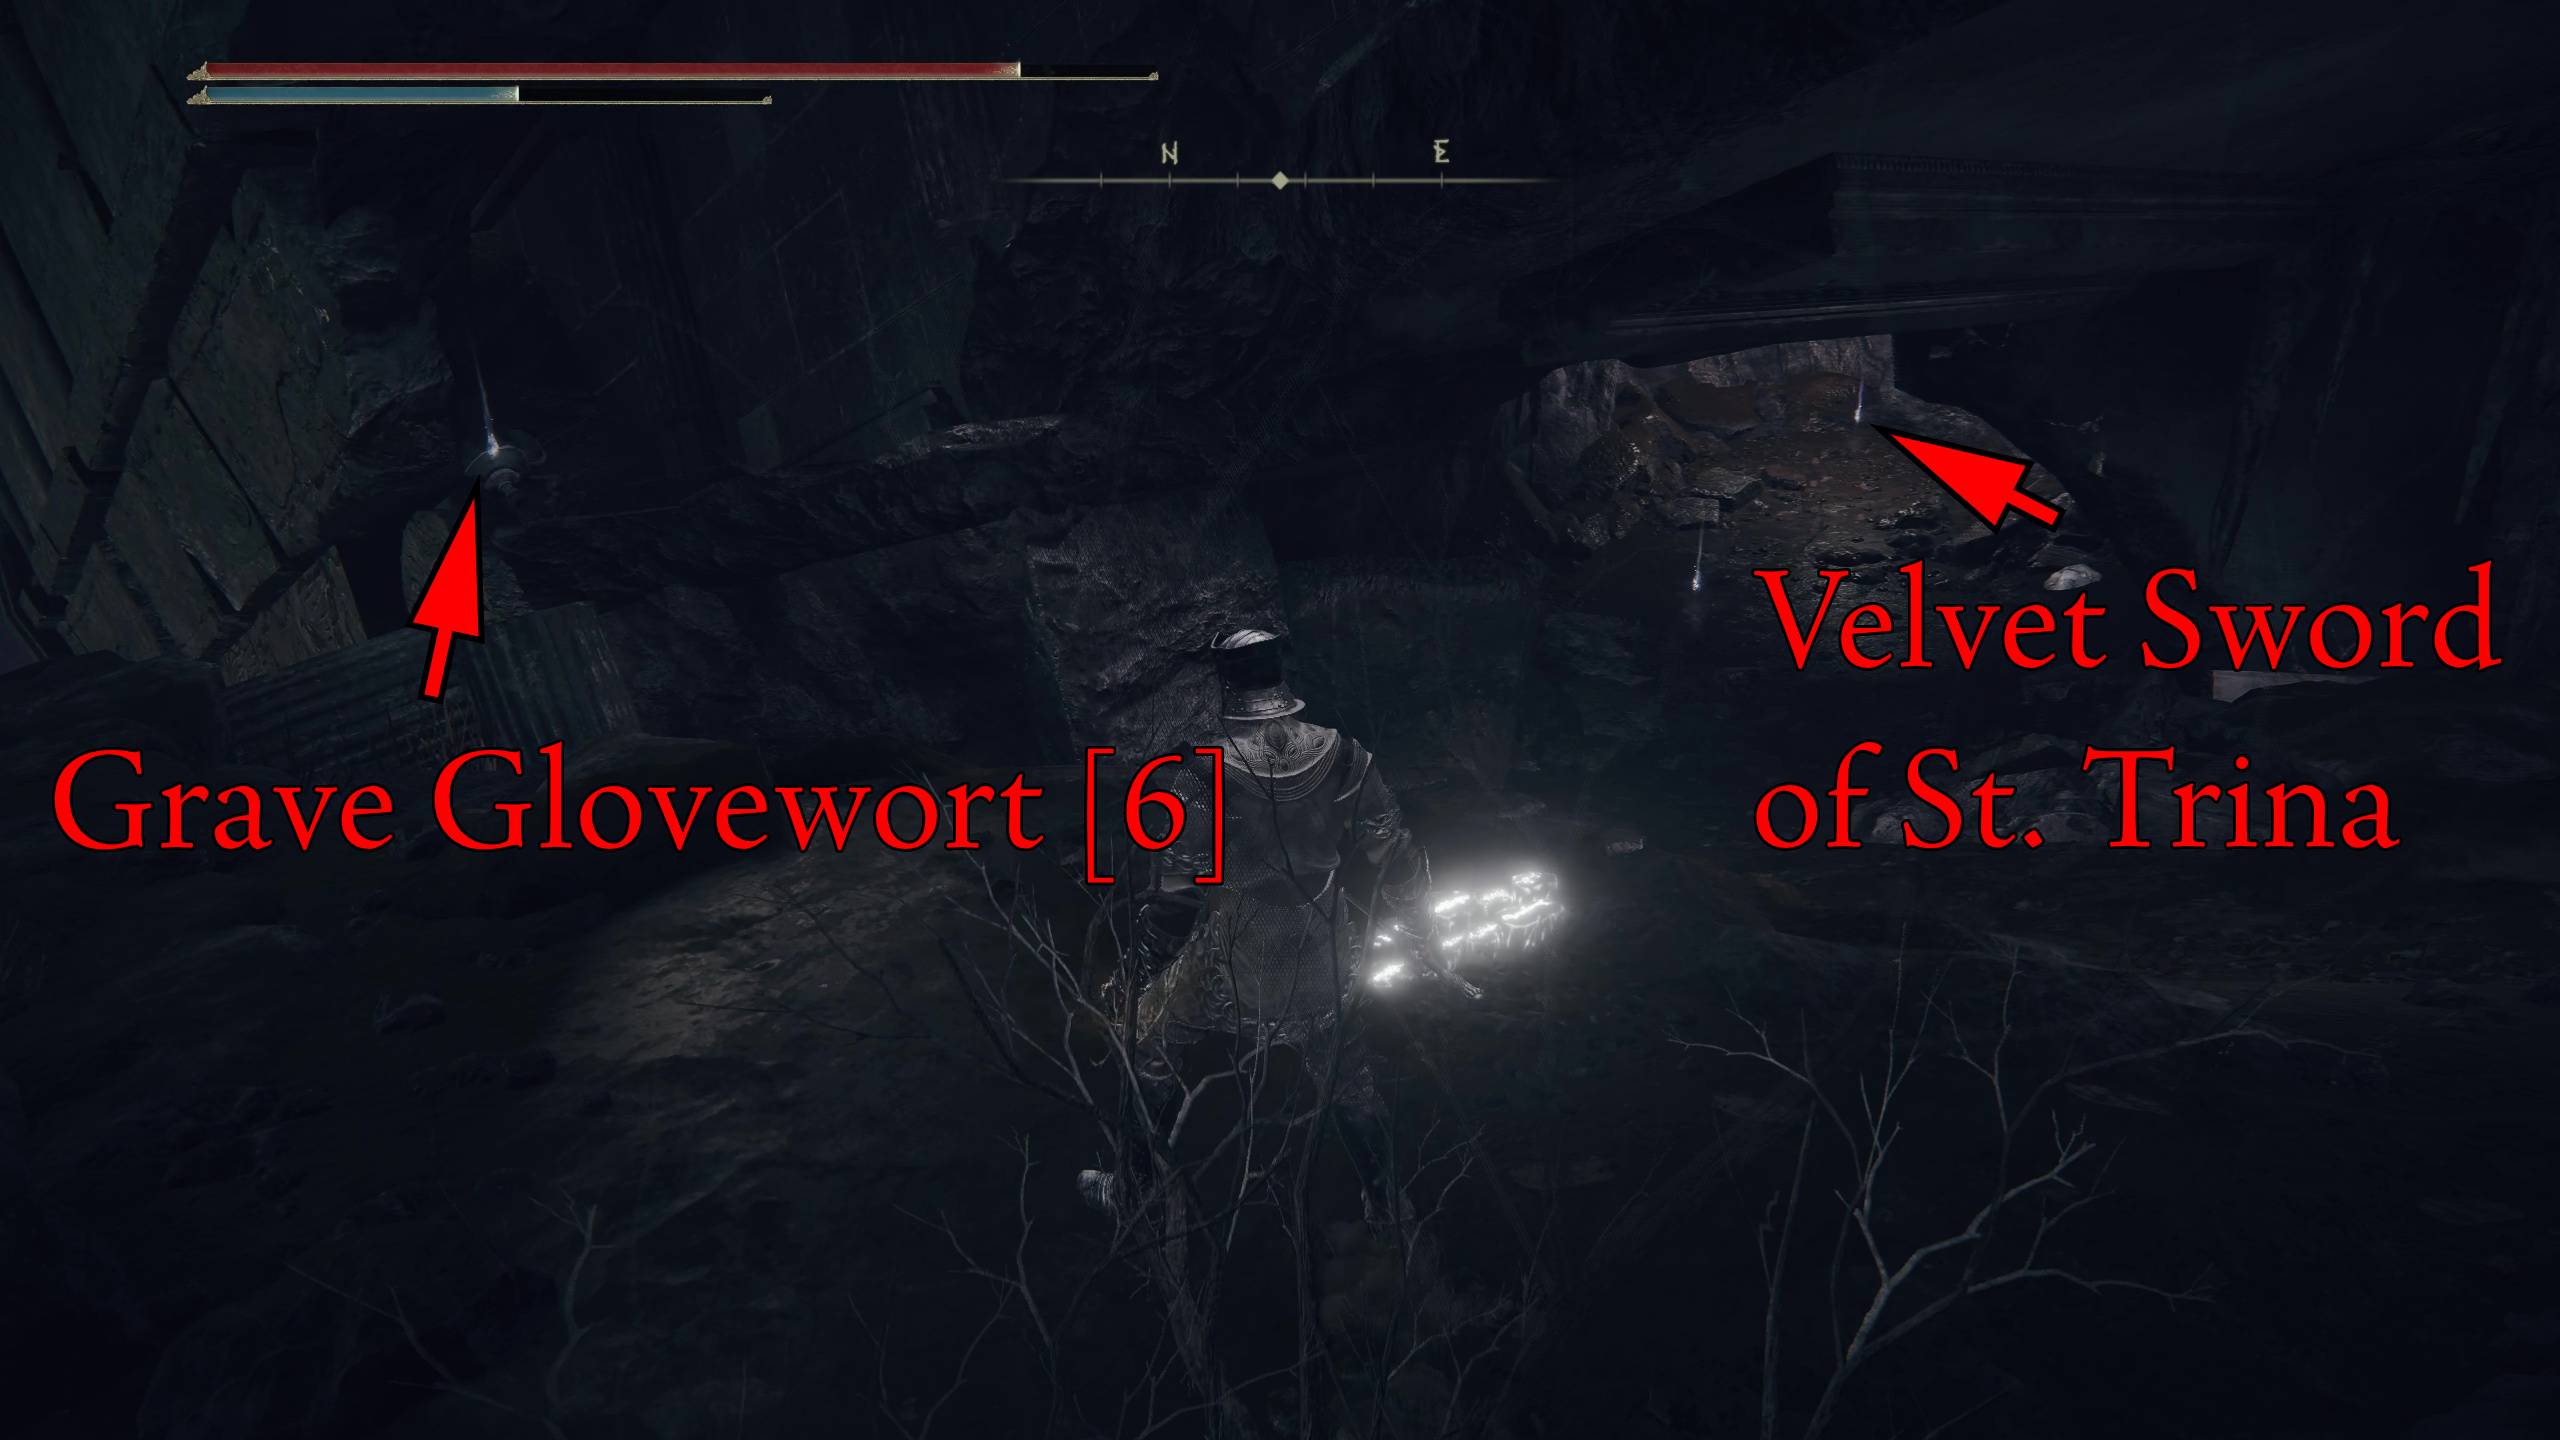
From here, you’ll see a cave in front you with some objects. Be careful, because there are some Stone Slimes hanging from the ceiling that will ambush you when grabbing the object further in. These slimes are resistant to physical damage, but weak to most spells and elemental damage. Kill them then grab The Velvet Sword of St. Trina. Behind you, there is also a Grave Glovewort [6] tucked away in a nook.
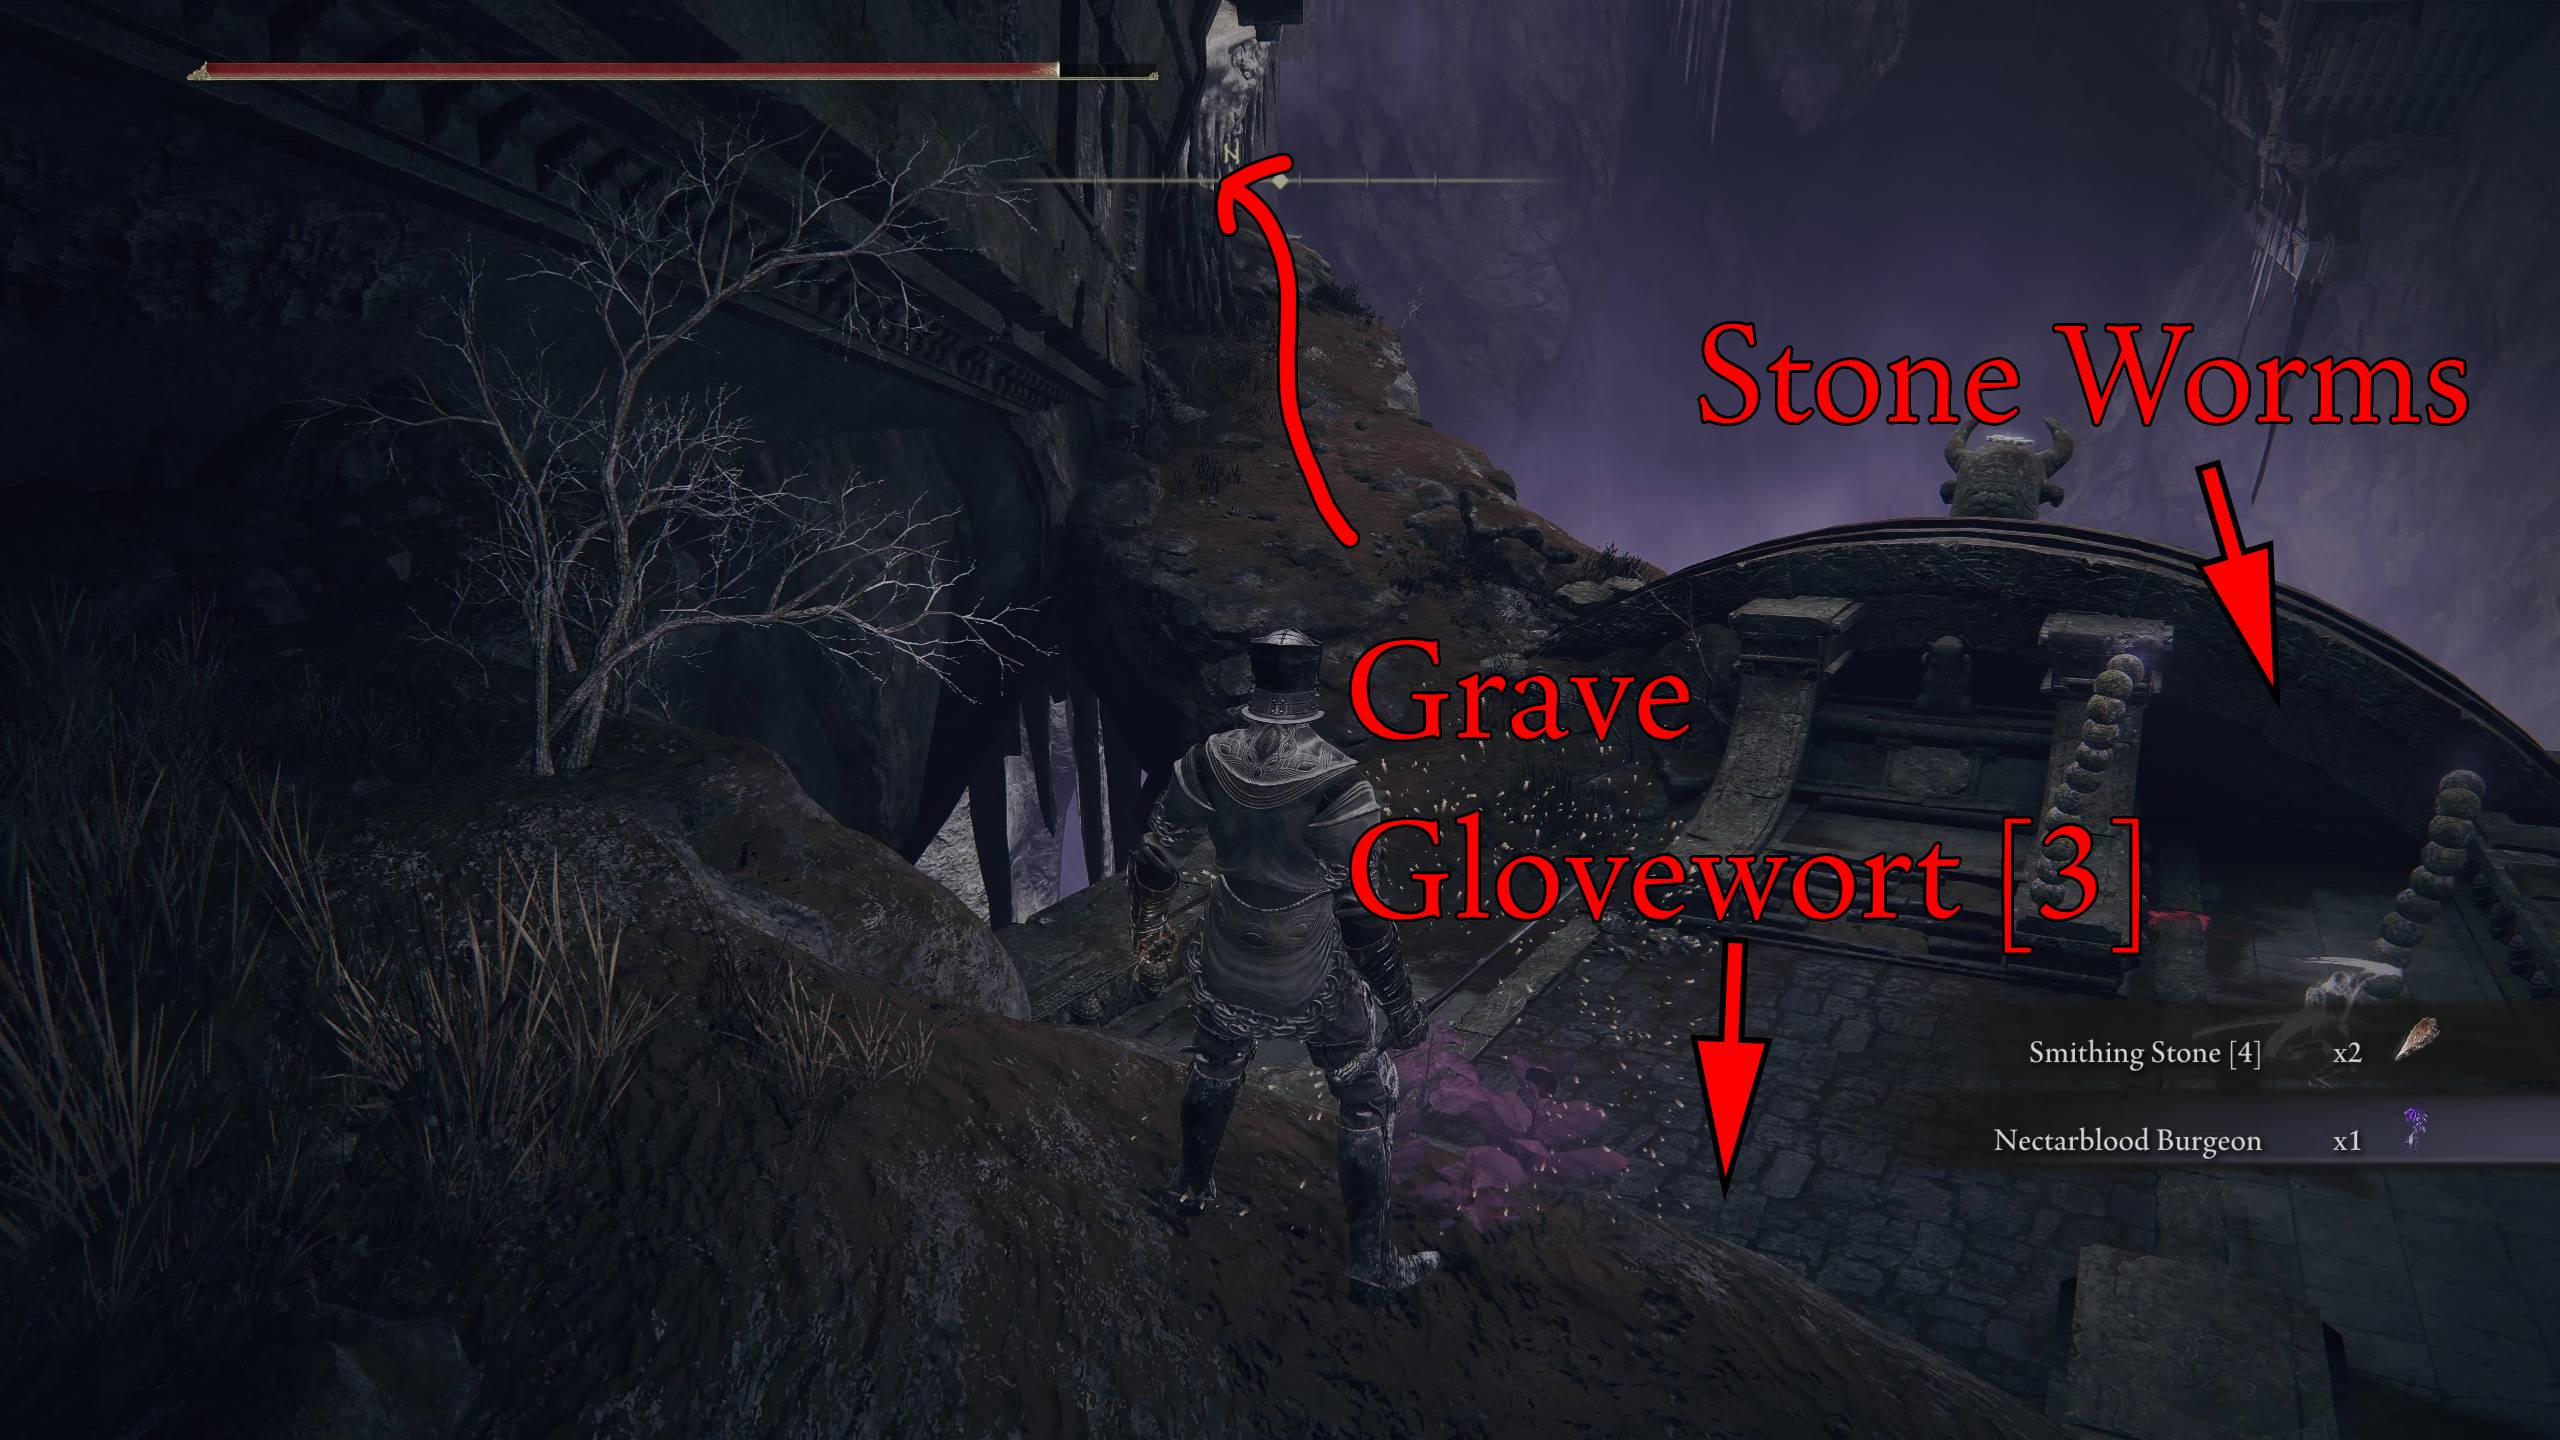
Deeper in the cave you’ll encounter more slimes, then the cave will open, and you’ll see a Gravebird. You have probably fought these before (and you’ll fight more in this dungeon) but it’s best to kill them quickly before they can take flight. Fire damage will stun them, and they are pretty easy to kill with combos from physical attacks. When you drop off this ledge, there is a Ghost Glovewort [3] against the wall you jumped off.
On this stone coffin, you’ll fight two Stone Worms for the first time. These ball-like enemies have various attacks, like shooting lasers and boomeranging their body at you. Try to kill them quickly, as most of their moves take significant time to prepare.
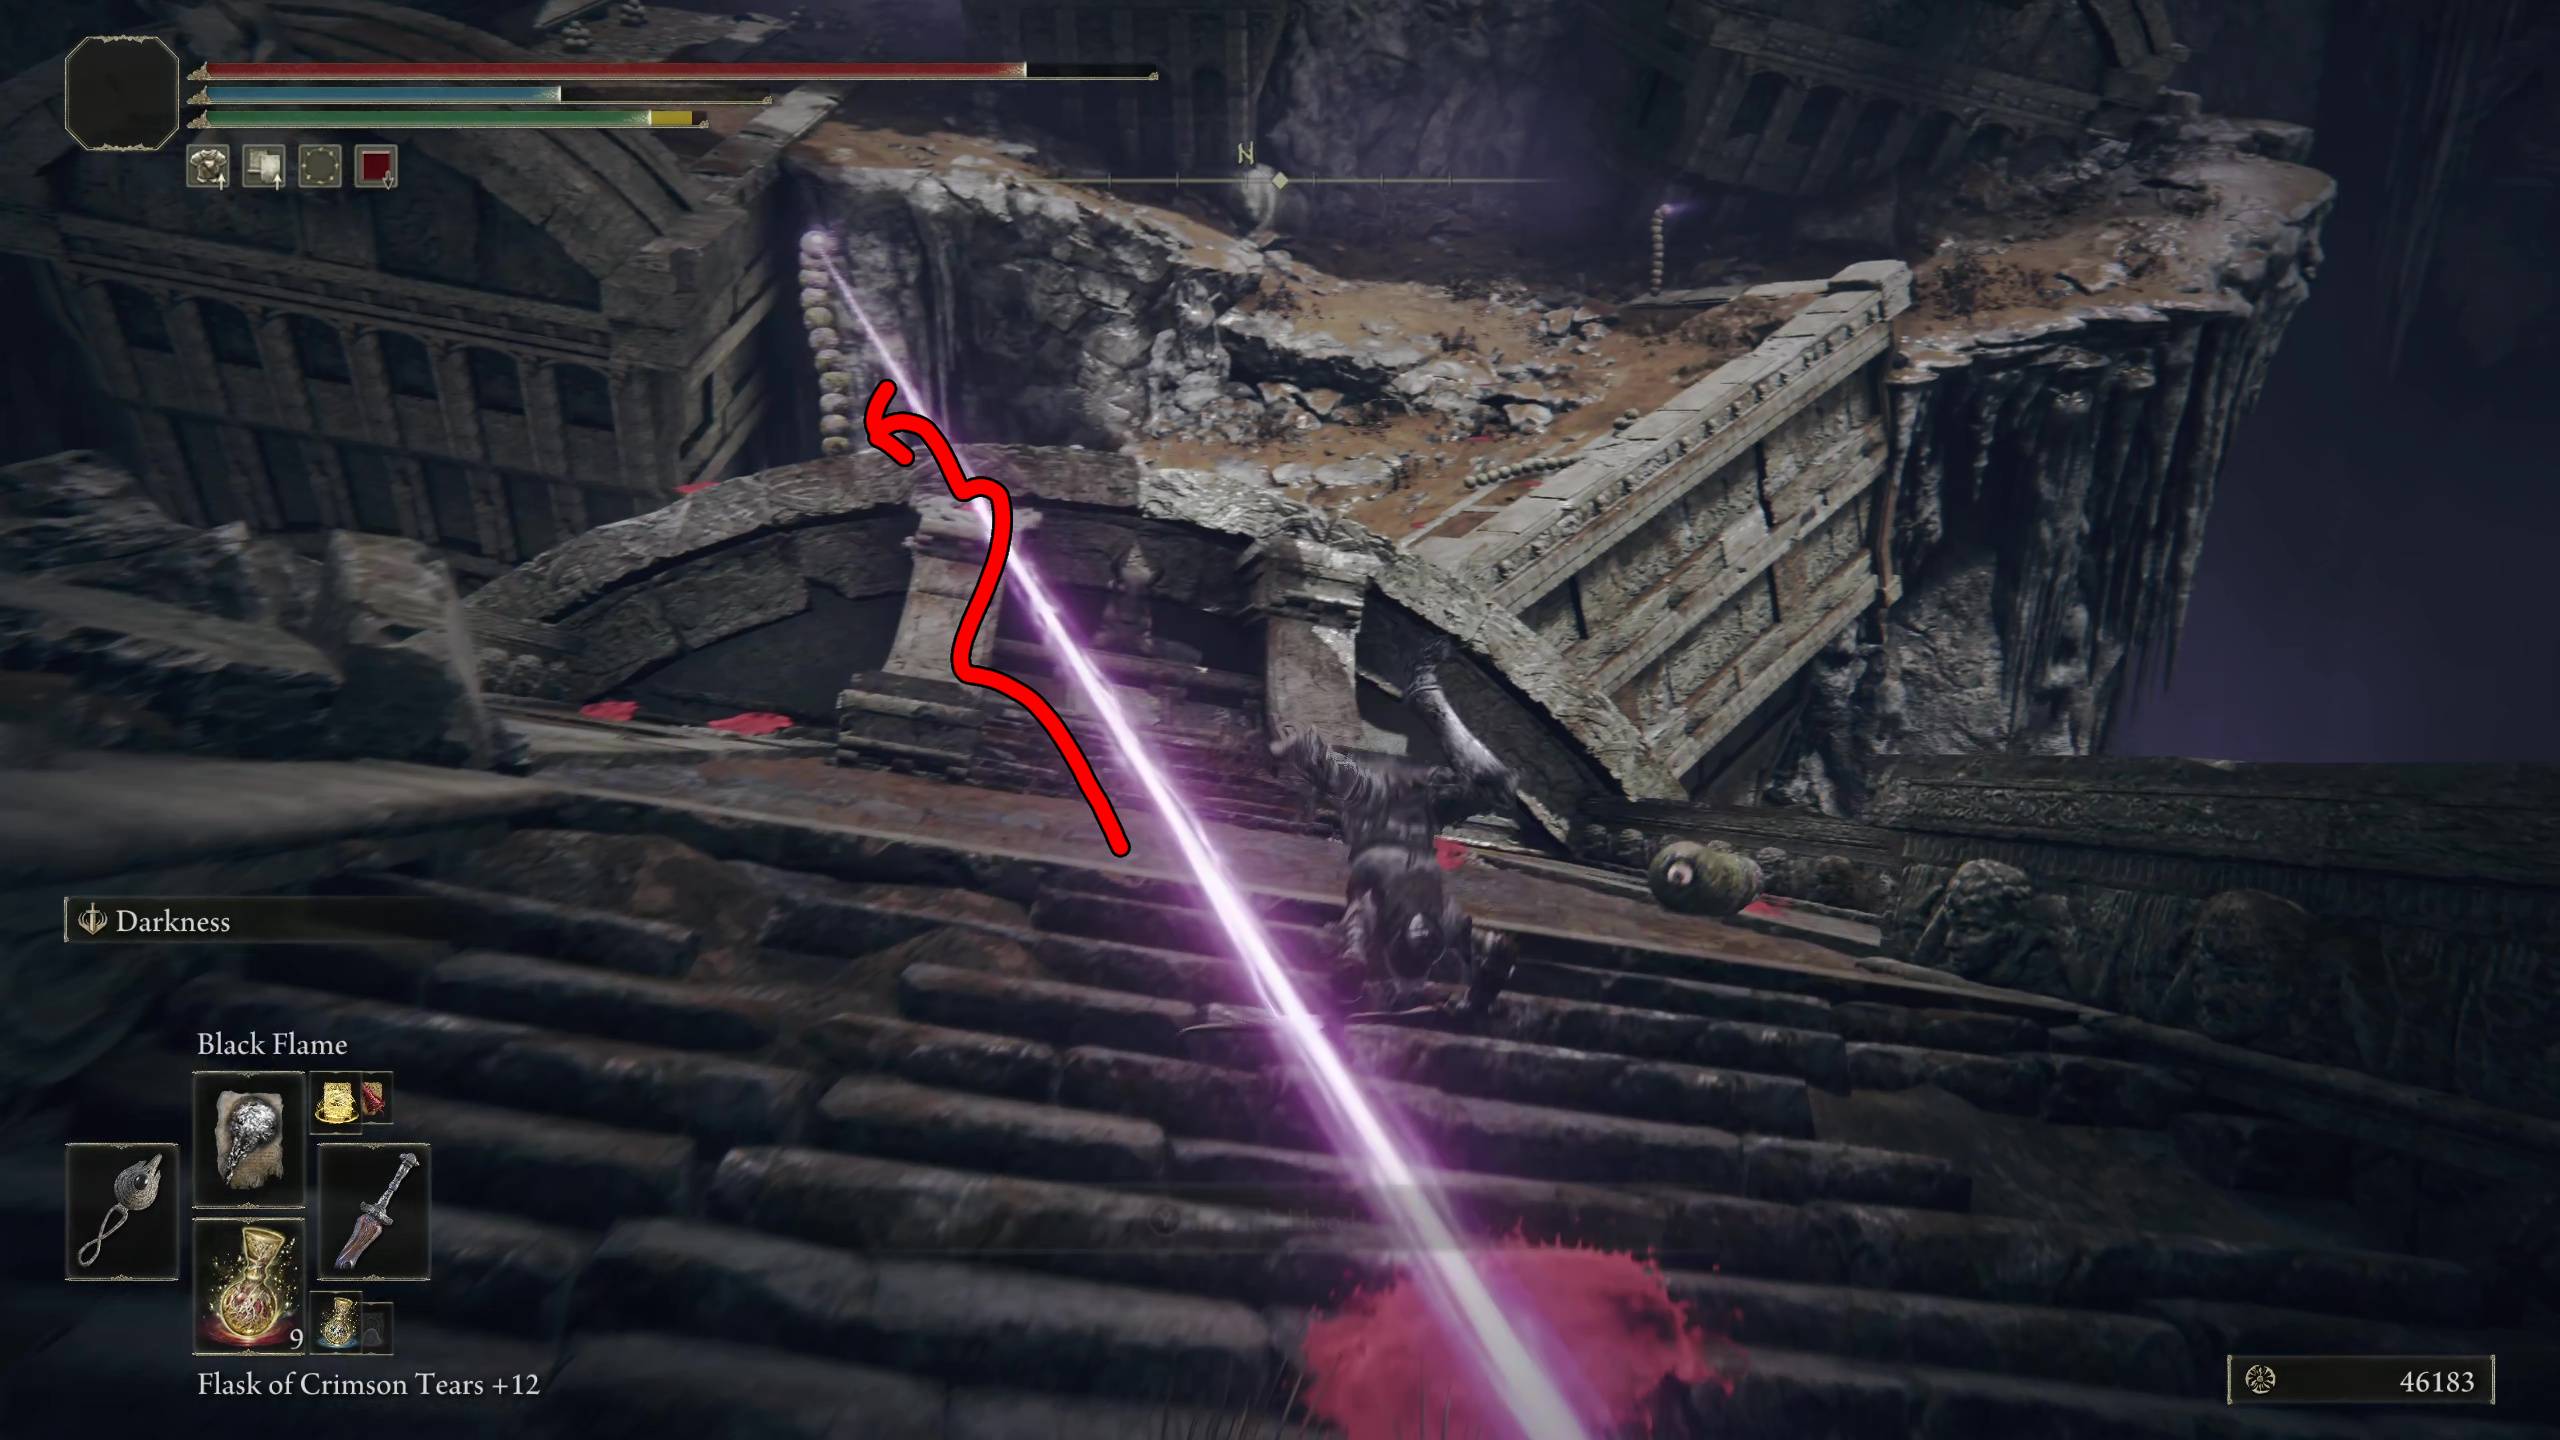
Continue up the path to the other stone coffins that make a bridge across the fissure. If you go left, this is part of the other path that you could’ve taken from Fissure Cross site of grace. If you backtrack up there, you will find some Gravebirds protecting a Grave Glovewort [2]. After grabbing the item, you’ll head back down (northward) and battle the enemies on top of these stone coffins. These are difficult fights, and if you die, then you can come down from Fissure Cross site of grace to this area (instead of going through the cave where you got the sword).
On the coffin where the two paths link up, this first coffin will have a Gravebird on it that you can kill without arousing suspicion from the two Stone Worms. When you proceed closer to the worms, there will be a Stone Worm in the back that will shoot lasers at you every couple seconds. It is very difficult to fight while you have a continuous laser being blasted at you. So get a rhythm for the sounds of the lasers, and dodge every time it’s shot at you (or you can use a shield), while making your way to kill the laser worm.
There are stone ledges in front of it that you’ll have to jump up to reach it. Try to time your jumps in between the lasers, cause they will pelt you while you jump. When you get within melee range, the lasers will miss you and you can whack the laser worm to death.
After it’s dead, kill the other two stone worms behind you, then drop onto the next stone coffin. There’s one normal Stone Worm on this one, but there are also piles of stones that look like worms; these will actually just explode when you get close. Simply approach them until they glow, then retreat to a safe distance to avoid their explosion.
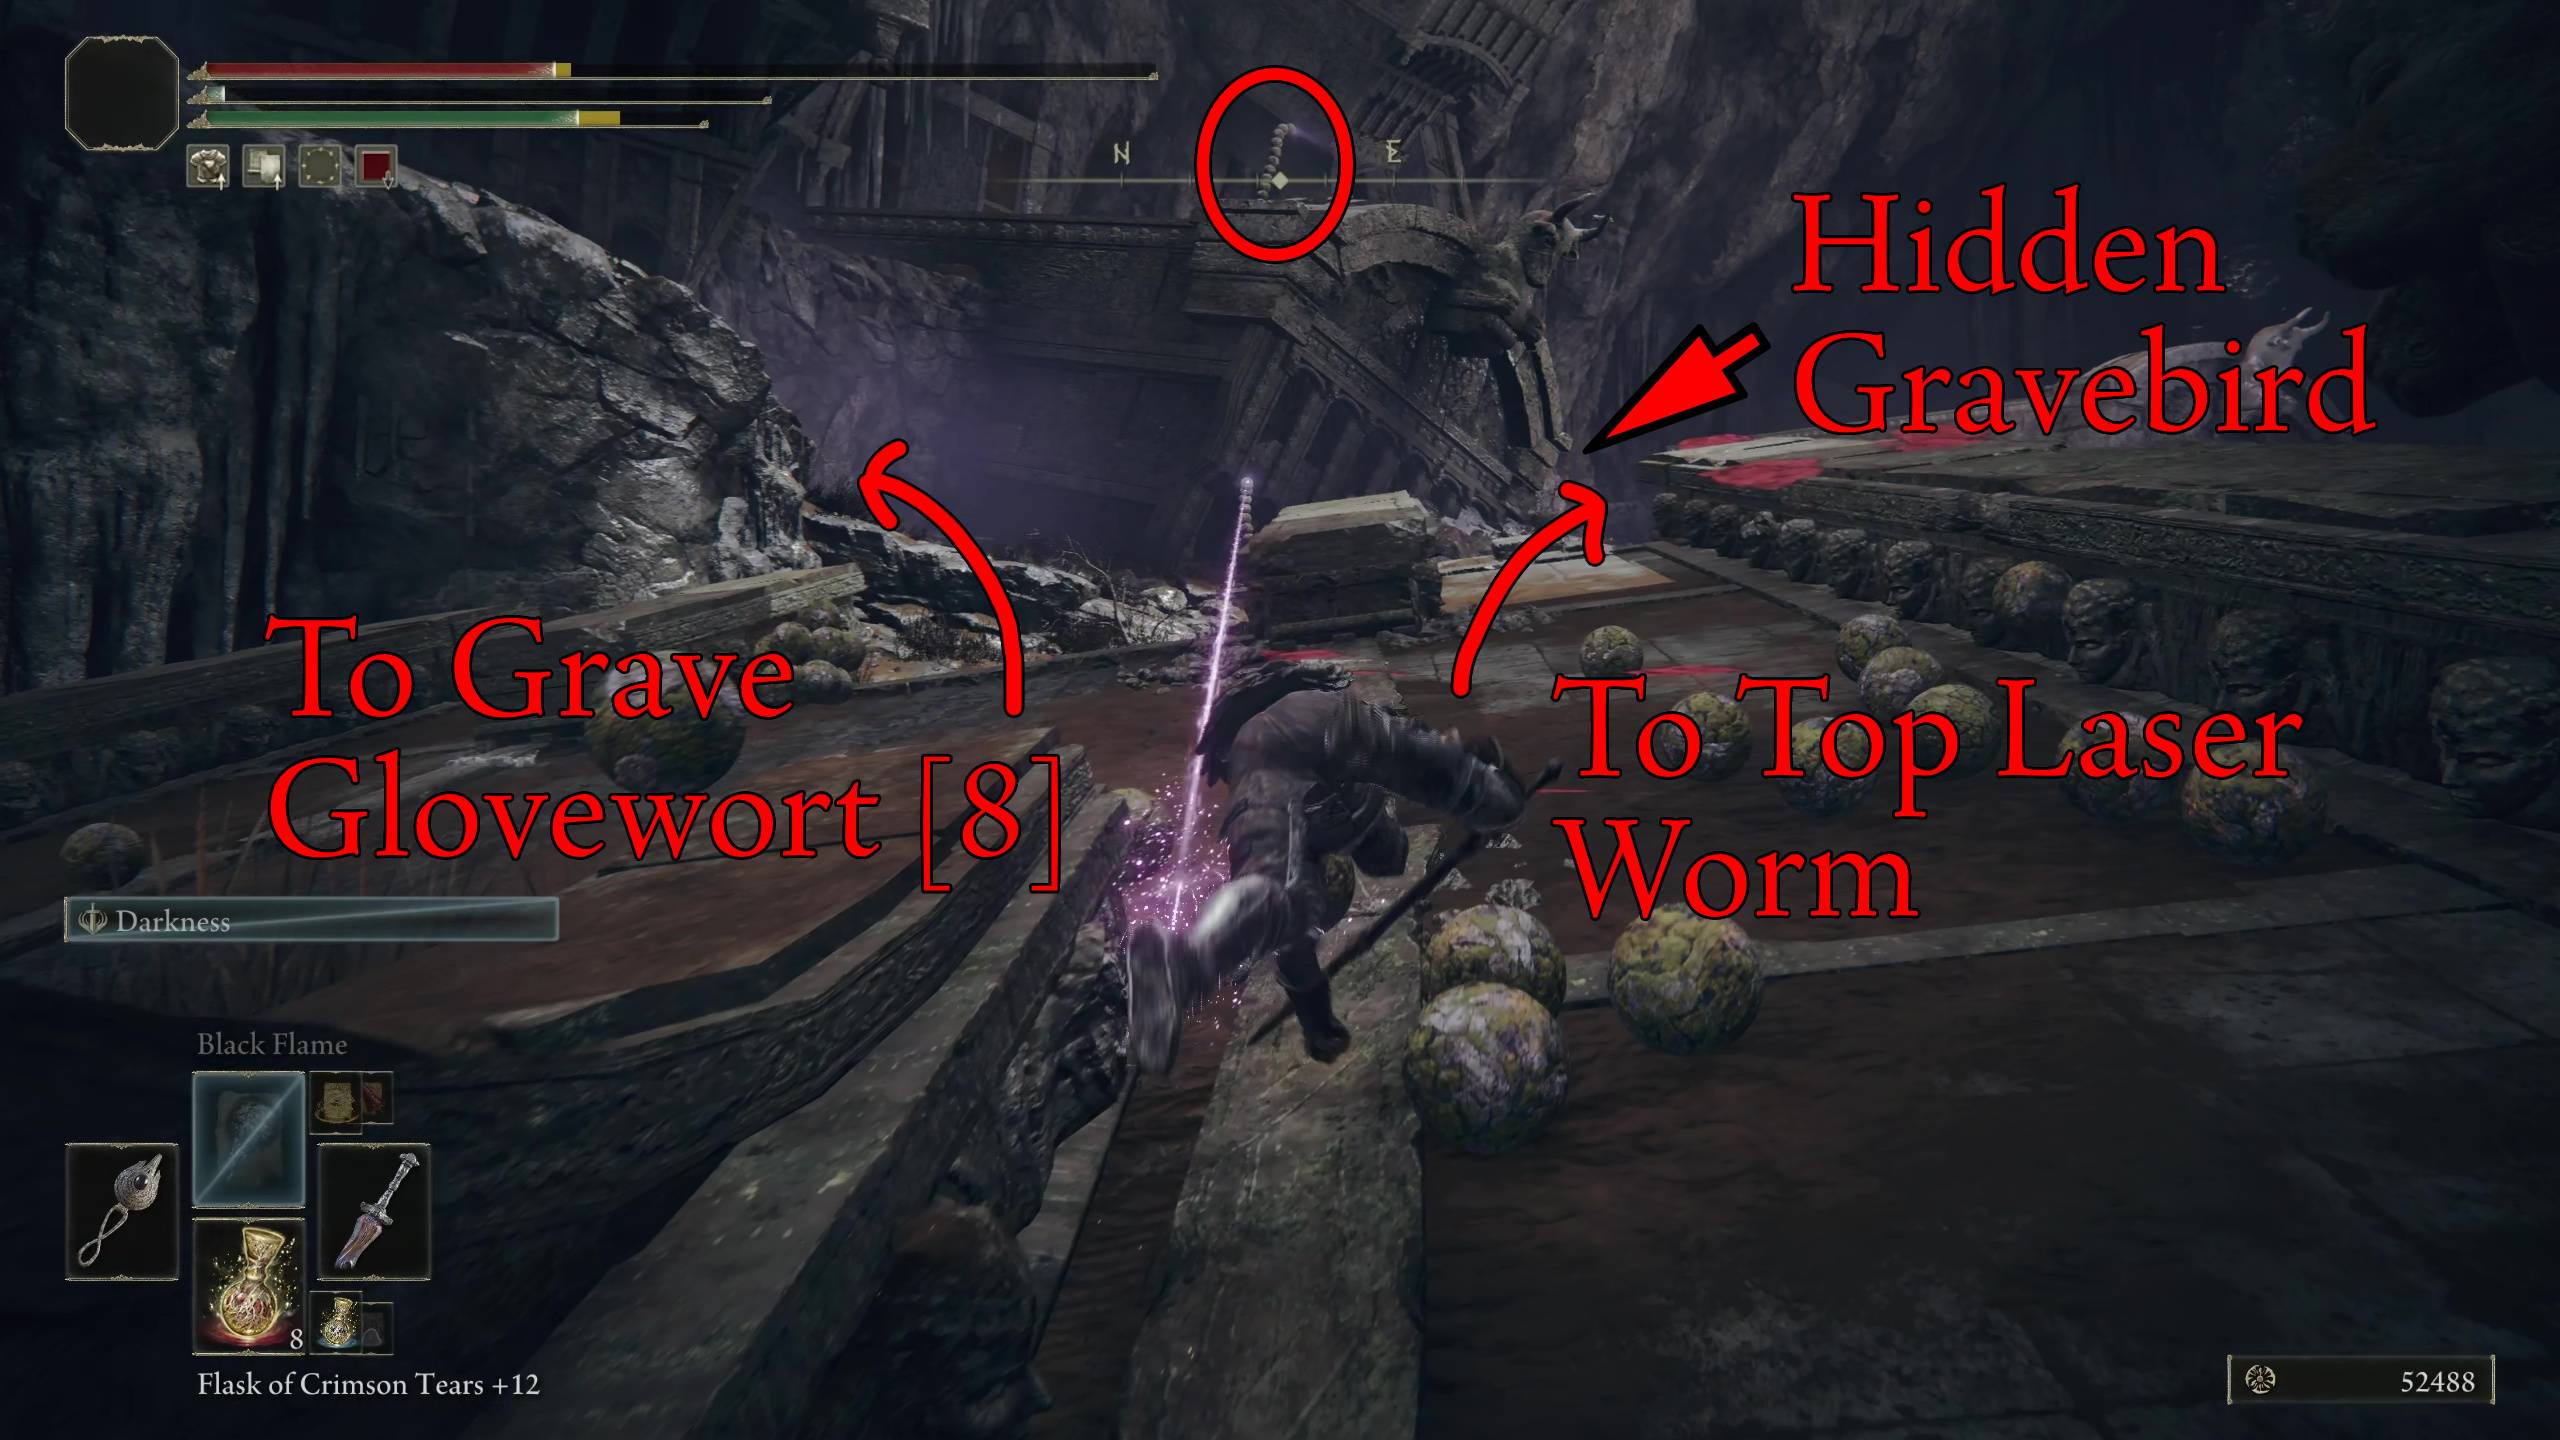
Now you will have two laser worms blasting you from ahead. Run past the explosive piles and rock worms to the bottom laser worm and kill it (the top laser worm won’t be able to hit you here). Kill the worms that you ran past, then head around to the right; this path leads up to the top laser worm, but be careful because a Gravebird will ambush you from behind a corner.
Take out the top laser worm, then head back down and go to the left from where you killed the bottom laser worm. On this stone coffin there will be a plethora of those explosion-y piles. Just like before, bait their explosions then run away. They’re guarding a Grave Glovewort [8].
Go back up to where you killed the top laser worm, and you’ll fight another two Stone Worms with a laser worm in the back. You can actually flank this laser worm by going around to the left (where you’ll also grab a Smithing Stone [6]). Once again, kill the laser worm first before dealing with the normal two. Be careful when jumping onto the next stone coffin, as you’ll land on some of those explosion piles; roll away from them as soon as you land.
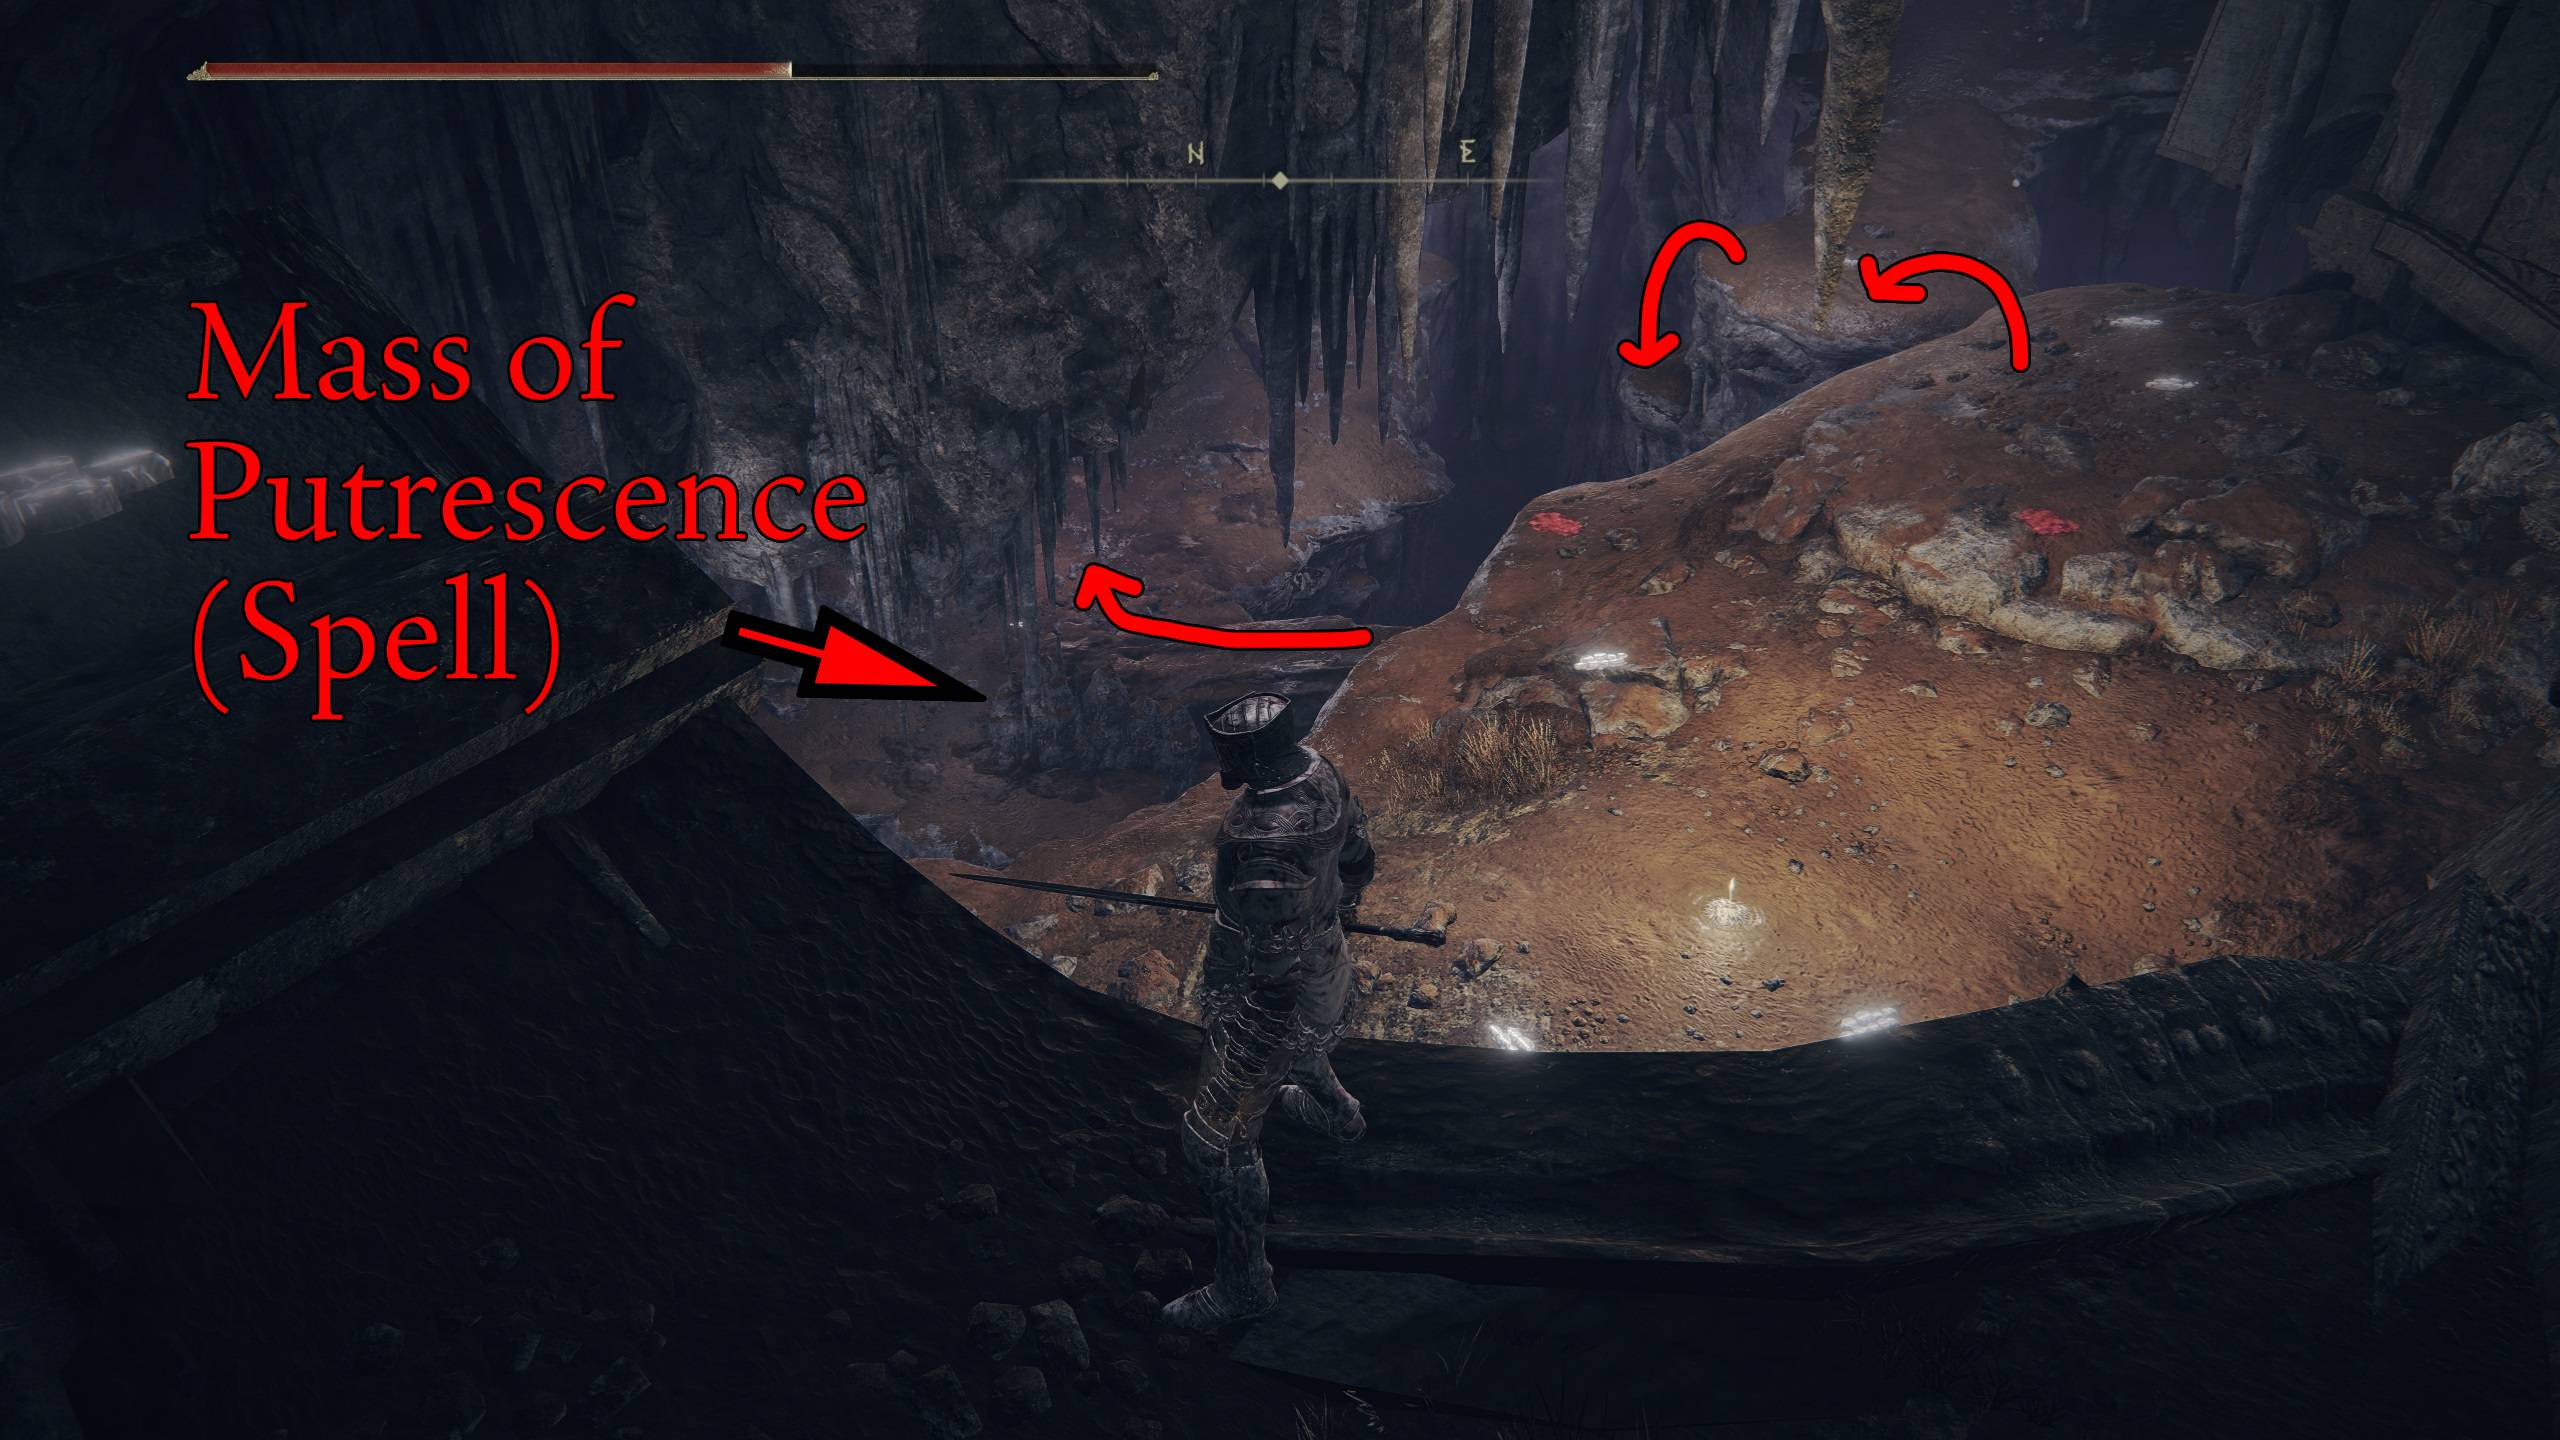
Drop off this next ledge, and you’ll see the Fissure Waypoint site of grace. Go northeast from the site, and you’ll see a little gap to jump onto a rocky ledge. Don’t linger here, because skeletons will attack you from the right. Go down the ledge drop-offs to your left and pick up the spell Mass of Putrescence behind a rock formation.
Head northeast up the slope, but be very cautious as you’re going into an ambush. There will be skeletons throwing firebombs at you from up high, and Stone Slimes dropping on you as you run up the slope to kill the skeletons. Ignore the slimes, and run up the slope to kill or knock the skeletons off the cliff. This is easier said than done, though, since there will also be skeleton archers from another higher ledge shooting at you. Remember that skeletons will have to be hit again after dying for them to stay dead.
Collect the materials, then head run up and take care of the archers. After the archers, there is a Giant Stone Slime below a small drop-off. Use some ranged firebombs or spells to kill it easily, and receive a bunch of materials. Taking a right after killing the giant slime will lead you back to where you came from, so go through the left passage.
You’ll come through a tunnel where some slimes will drop on you, forcing you forward. However, up ahead, you’ll see the spirit of the Misbegotten Crusader coming towards you. This is a tough and agile enemy that will use vicious sword combos to attack.
He’s weak to slashing and fire damage, so use that if you can, or heavy weapons to stagger him. Another tip to keep in mind while fighting him is that you don’t want to dodge backwards into the slimes. Lastly, this boss can be cheesed by running past him and jumping over the gap, which he might fall down to his death while chasing you. If you need additional help with this boss, consult our guide on the non-spirit version.
Killing this enemy will drop the powerful spell, Multilayered Ring of Light. From this fight, it’s a short jaunt eastward up some rocky ledges to the Fissure Depths site of grace. You’ll know you’re there when you see all the forest animals gathered around it. Be sure to interact with the site of grace and replenish your supplies because the boss is next.
From the Fissure Depths site of grace, head south up the stairs, and you’ll come to a precipice with a horned statue overlooking the area. Jump off the statue head, and you’ll fall to the dungeon boss, the Putrescent Knight. This otherworldly creature is a difficult boss, so if you’re having difficulties with it, please refer to our guide:
When the boss is dead, he’ll drop the Remembrance of Putrescence, and you’ll find the Garden of Deep Purple site of Grace. Just west of the site is a short tunnel that leads to St. Trina herself. Once inside her flowery abode, go to the right and pick up the St. Trina Disciple’s Cookbook [3]. When you speak to St. Trina (the big purple flower), you can imbibe her nectar, which will kill you. This will start / progress Thiollier’s quest line. Here’s a quick list of the next quest steps:
Steps that must be done before burning the Sealing Tree at the Church of the Bud.
Imbibe St. Trina’s Nectar and die.
Talk to Thiollier next to Pillar Path Cross site of grace, and tell her where to find St. Trina.
Travel back to the Garden of Deep Purple site of grace where Thiollier will now be.
Imbibe St. Trina’s nectar 4 times (dying four times), then you’ll hear her voice.
Tell Thiollier what you heard, then try to tell him again, and he’ll get mad.
Rest at the Garden of Deep Purple site of grace, when you wake up you will fight Thiollier (he’ll drop the talisman, St. Trina’s Smile).
Imbibe the nectar again, and St. Trina will say that you need to kill Miquella.
Steps to take after burning the Sealing Tree at the Church of the Bud (these need to be done before the confrontation at Enir-Ilim)
Return to the Garden of Deep Purple site of grace and talk with Thiollier repeatedly until you can pass to him St. Trina’s words.
You might have to travel again to the site of grace, and / or imbibe the nectar again to pass on the words.
Summon Thiollier to fight at Enir-Ilim.
Summon Thiollier to fight the final boss.
After you have beaten the final boss of the DLC, you can return to St. Trina and collect St. Trina’s Blossom (helmet) at her dead body.
Kelson is a spud head from out west. He is most happy when holding a milky tea with too much honey and playing a sprawling role playing game or reading a fantasy novel. His video game tastes vary but his main genres are looter shooters, RPGs, and real time strategy games.
Hi Chub, I believe you have to approach the Shadow Keep main gate and receive the message that a Great Rune has broken in order to pass through areas that are sealed by Miquella. Let me know if this works and I can update the guide accordingly!


When I tried to go here, there is a seal blocking the pathway. It says, “Sealed and obscured by Miquella”.
Hi Chub, I believe you have to approach the Shadow Keep main gate and receive the message that a Great Rune has broken in order to pass through areas that are sealed by Miquella. Let me know if this works and I can update the guide accordingly!
I finally went to Shadow Keep and the Great Rune broke. You were right! I’m now able to get to Stone Coffin Fissure.