Despite the name, you won’t be encountering any scorpions in these macabre catacombs. You will, however, be dealing with death blight, traps, and general trickery (as is common in these places). Besides that, there’s a boss that you might’ve already fought in a previous catacomb, and a whole mess of good loot to snatch up. This guide will walk you through each area step by step.
Unique Rewards:
Black Knight Captain Huw (Spirit Ashes)
Imp Head (Lion)
Knight’s Lightning Spear (spell)
Ancient Dragon Knight’s Cookbook (2)
Death Knight’s Longhaft Axe (boss drop)
Cerulean Amber Medallion +3 (boss drop)
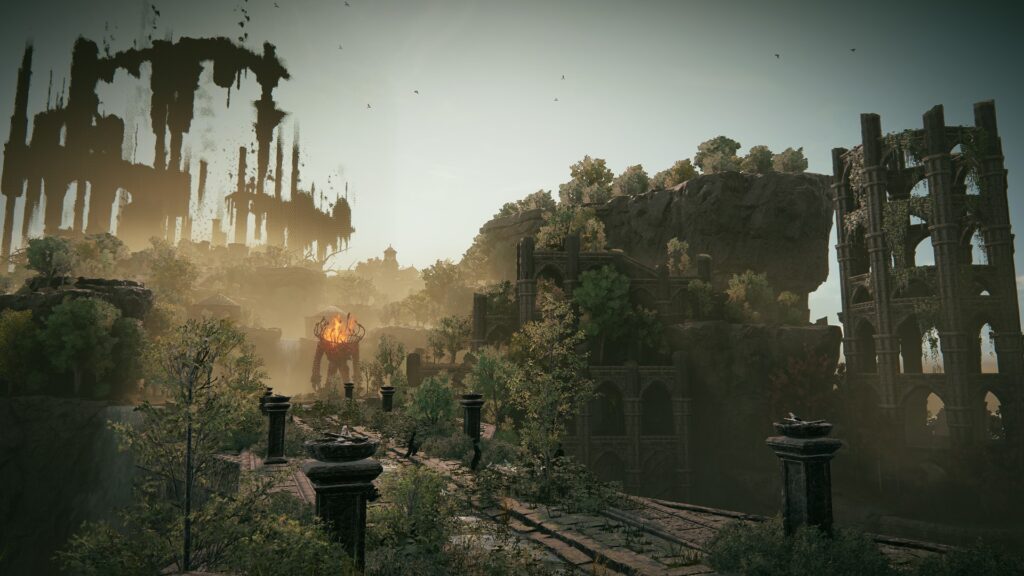
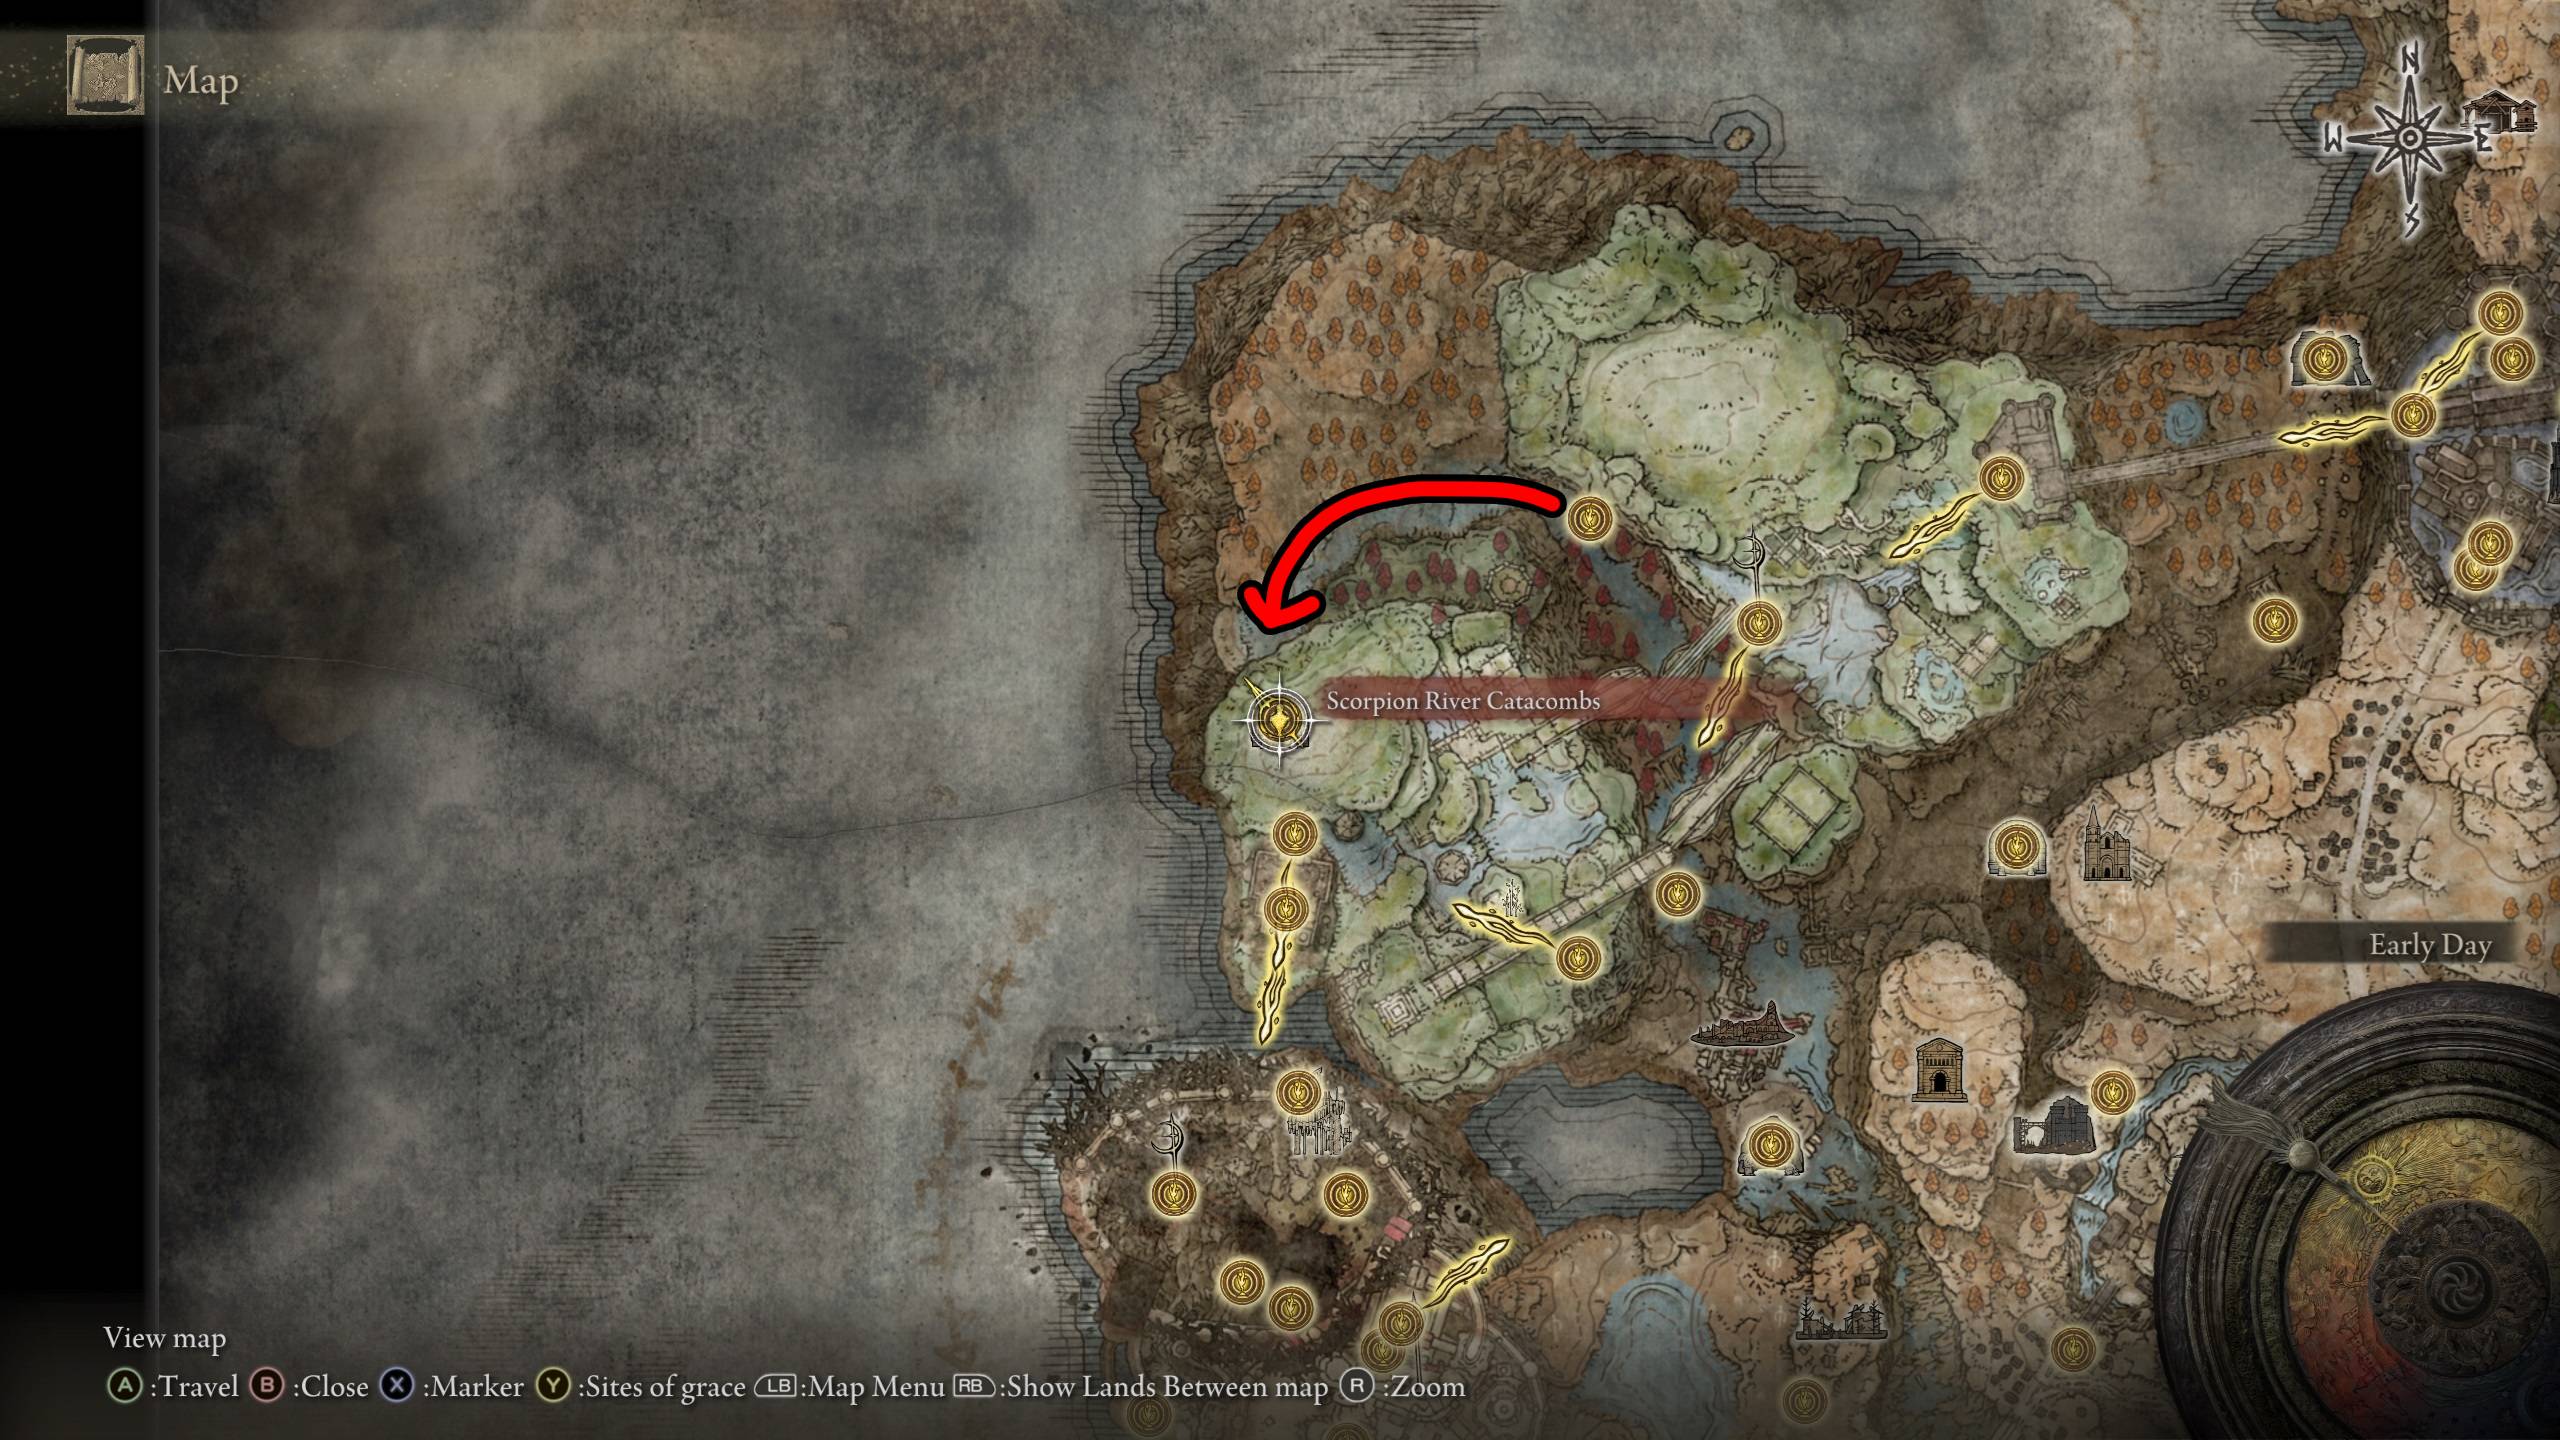
From the Ravine North site of grace, head west then south, and eventually come to some scorpions sitting in a river (hint, hint). This will mean you’re close to the Scorpion River Catacombs. Continue down the river, and you’ll see the classic statues pointing you towards the entrance to the dungeon. Approach carefully, though, as there will be Vulgar Militiamen guarding its entrance.
Death Blight / Basilisk Eyes
Go through the wooden doors, and go down the elevator. Be sure to rest at the Site of Grace here to refill your health and supplies. In the first room, you’ll find a Cannon Imp. You should be able to run up and attack without issues, but if its mouth starts to glow red, then get ready to dodge the massive fireball it’ll shoot out.
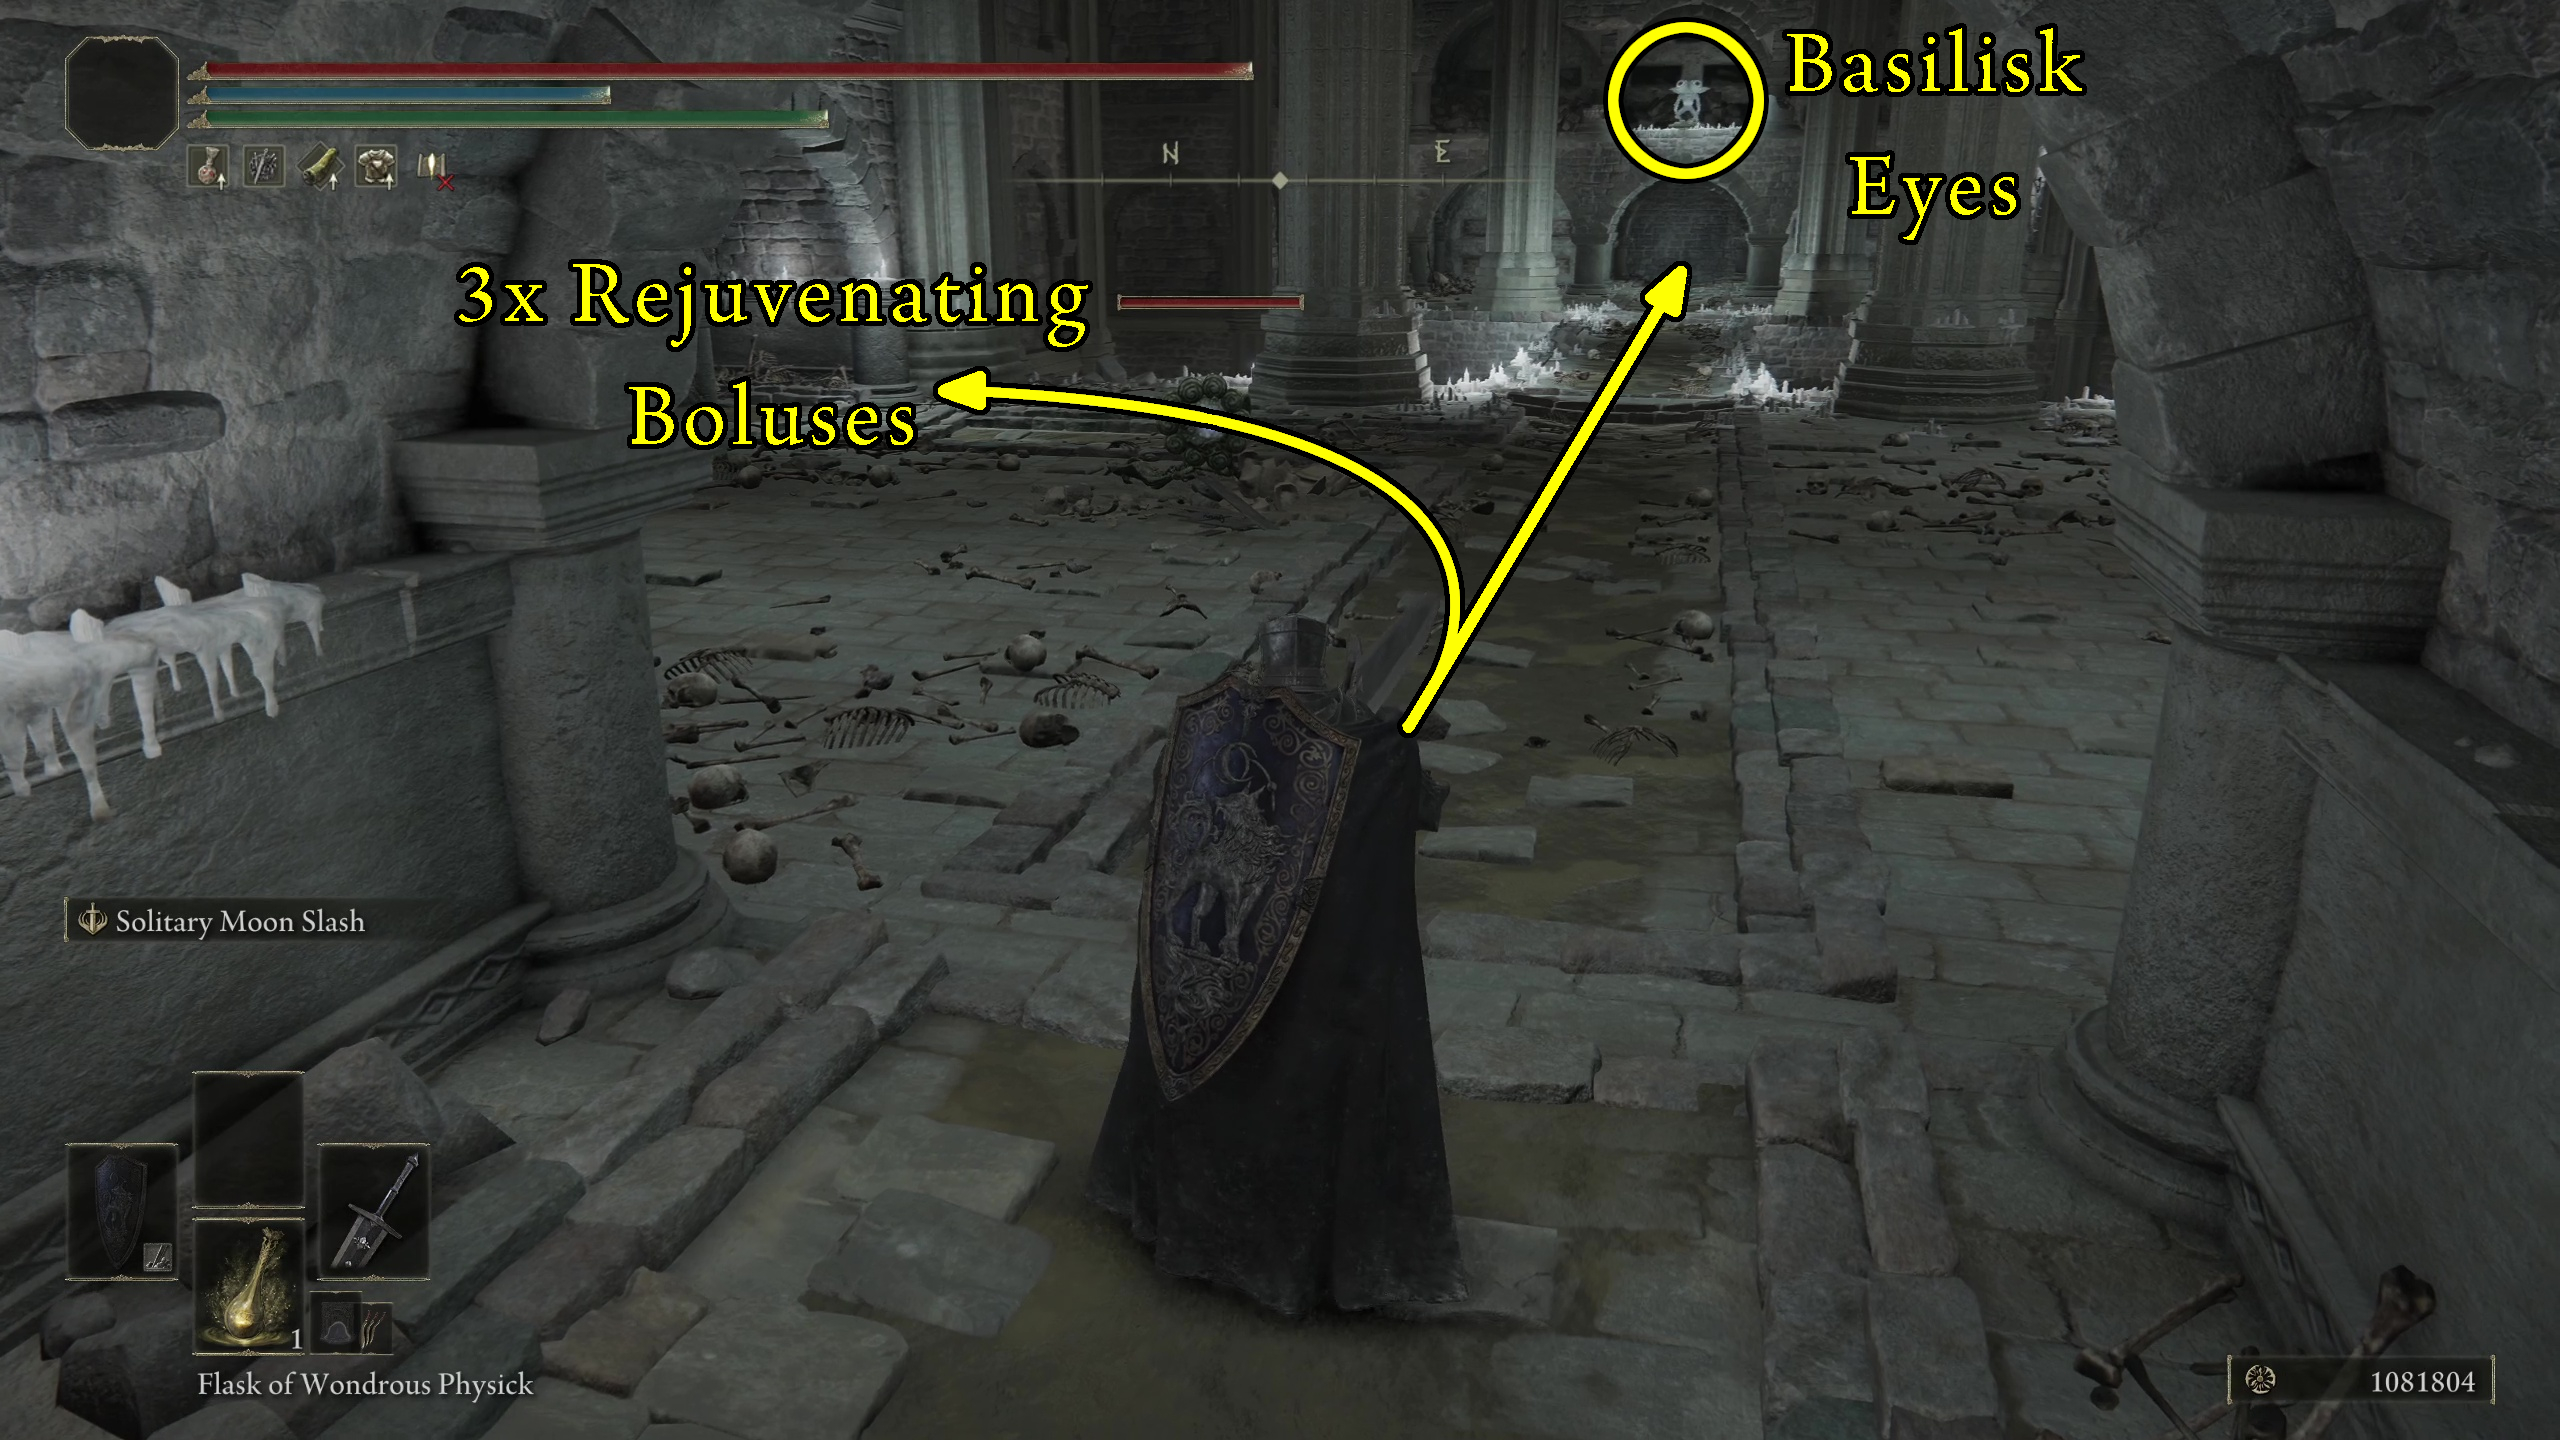
Make your way through the passage to your left, then down some stairs, and you’ll be in a larger room. There’s a normal hatchet-wielding Lion Imp in front of you, so kill it. Go through the passage to your left and kill the imp that drops down in front of you. Grab the Rejuvenating Boluses off the corpse. These are going to help a lot in this dungeon because they take away your Death Blight buildup.
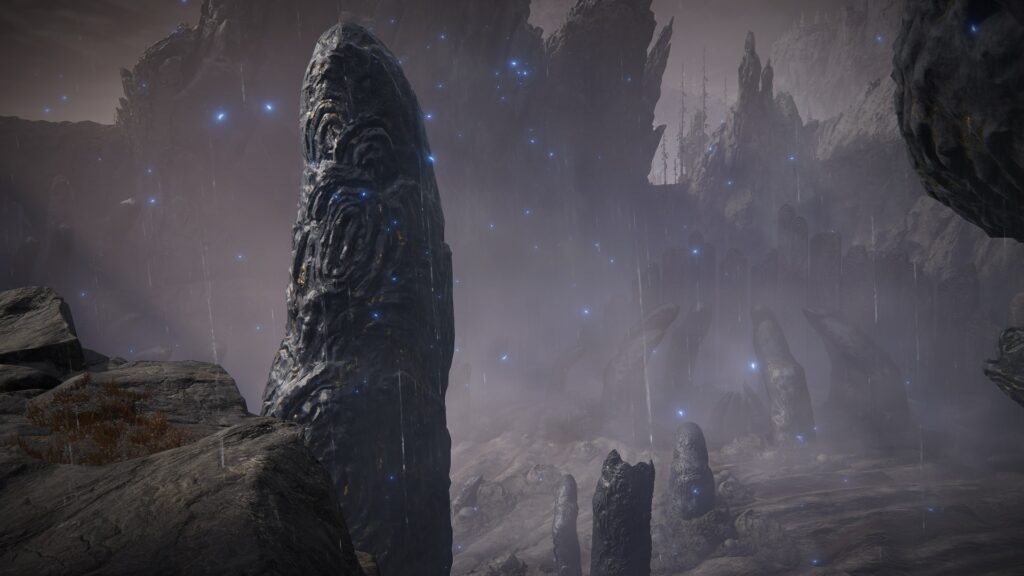
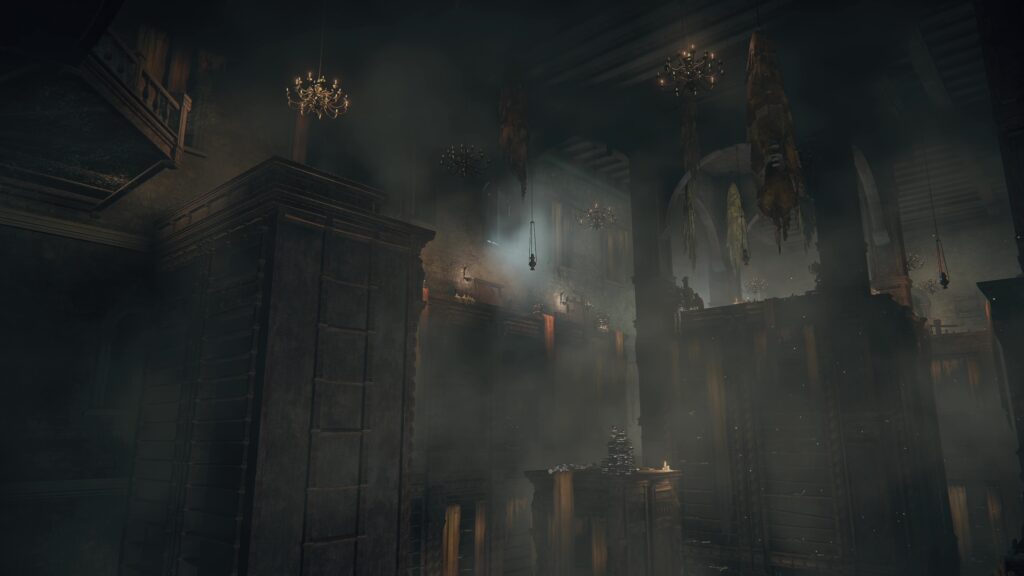
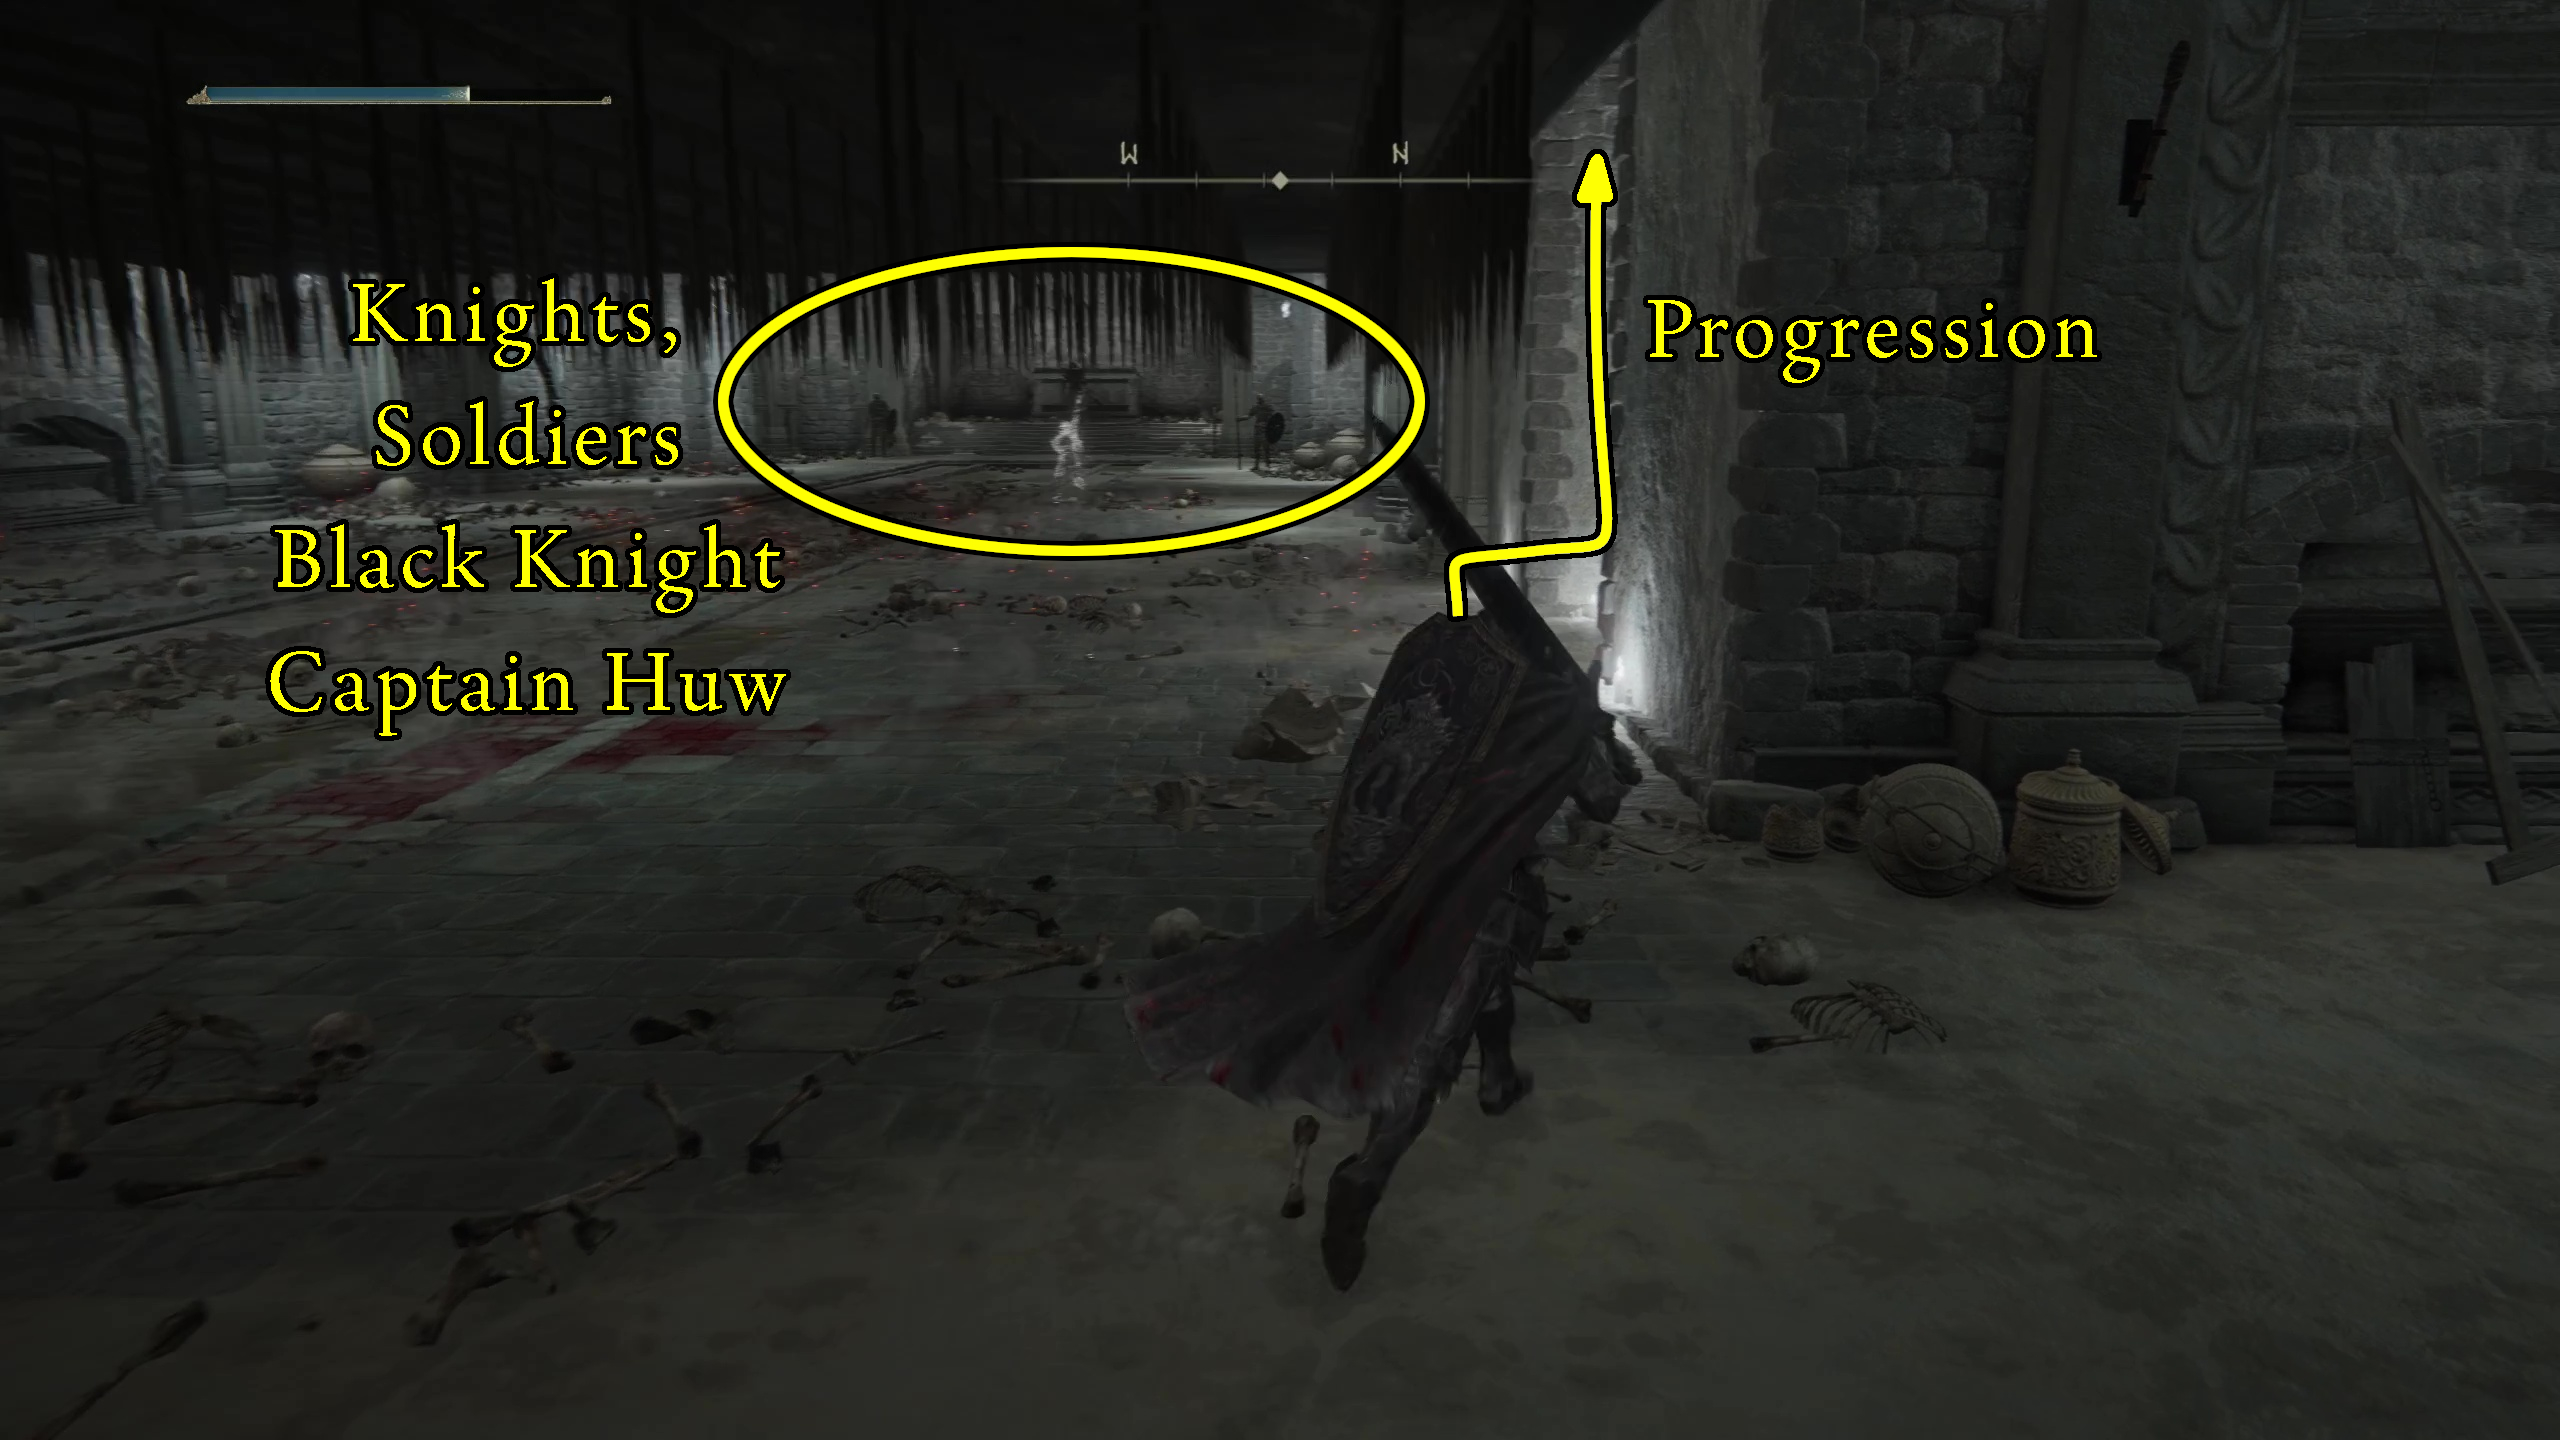
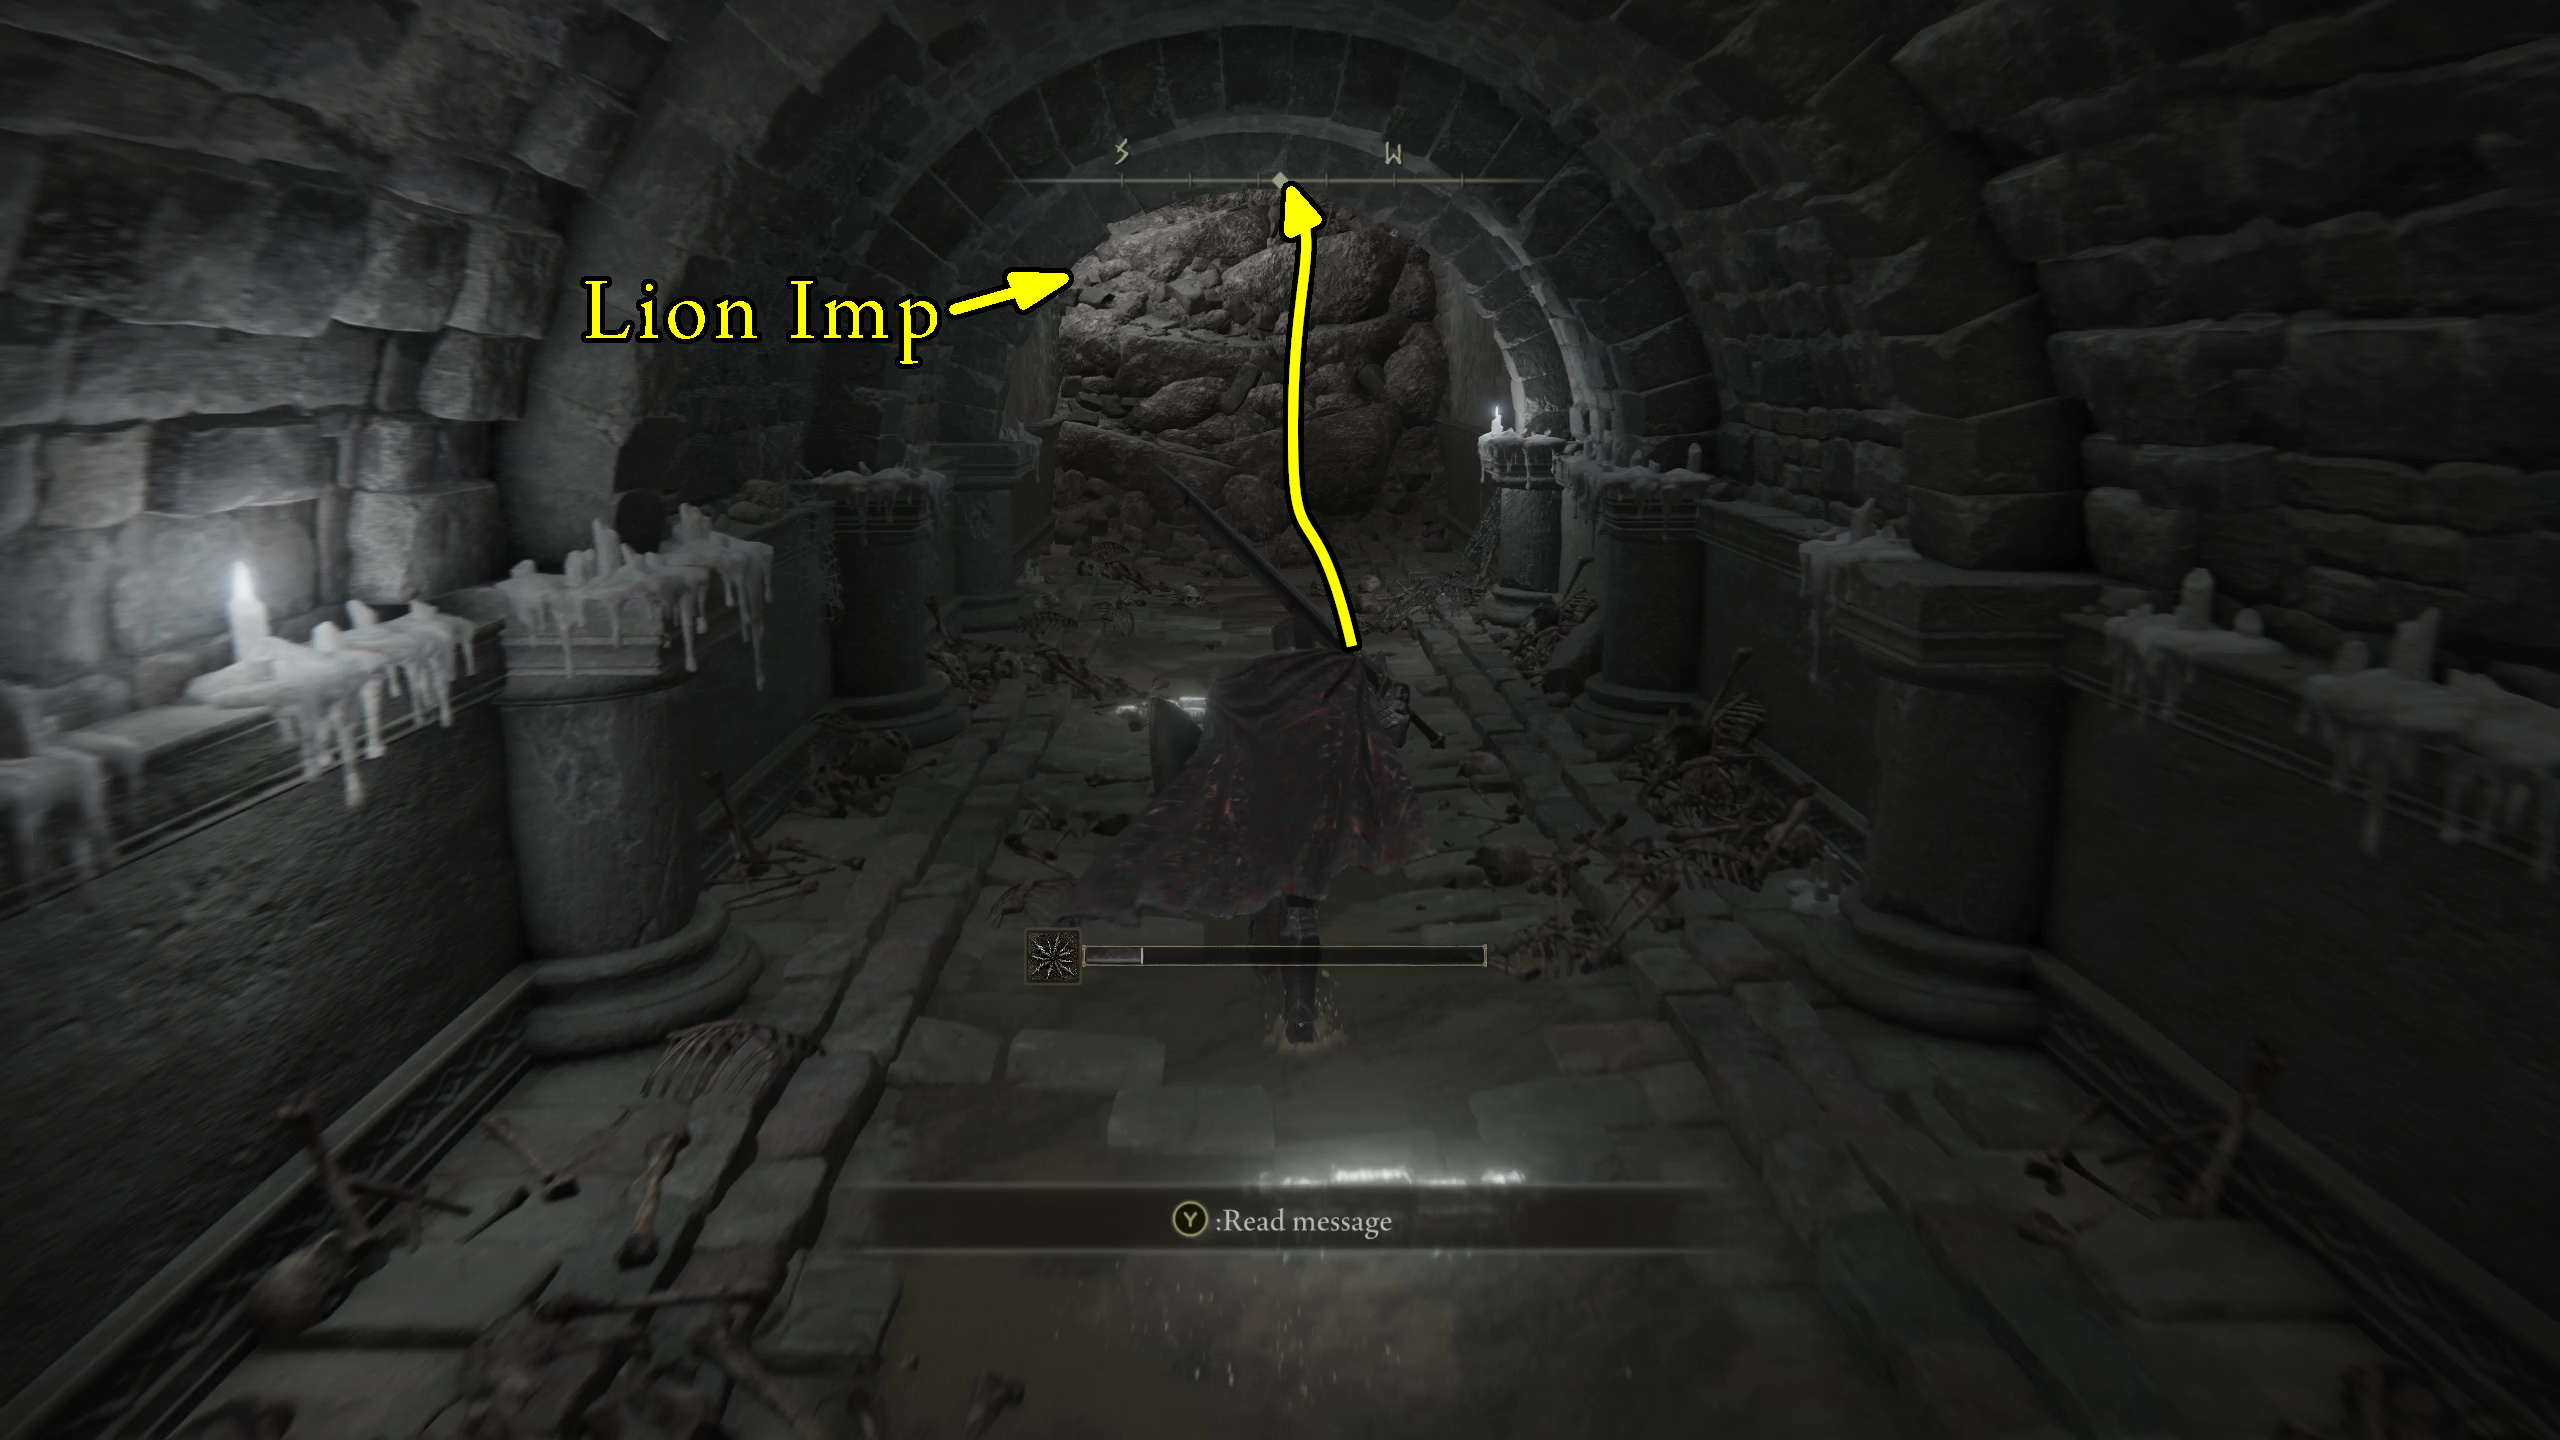
Back out into the larger room, you’ll see a bridge with a statue overlooking it. As soon as you step onto the bridge, two big eyes will appear in front of the Basilisk Statue. As long as you’re within the vision of these dark, smokey eyes, then Death Blight will build up on your character. If the gauge fills up all the way, then you’ll die. (Image 1)
Image 1
You will encounter these eyes frequently throughout the dungeon. There are two tools you can use for the Basilisk Statue’s eyes to make dealing with them much easier:
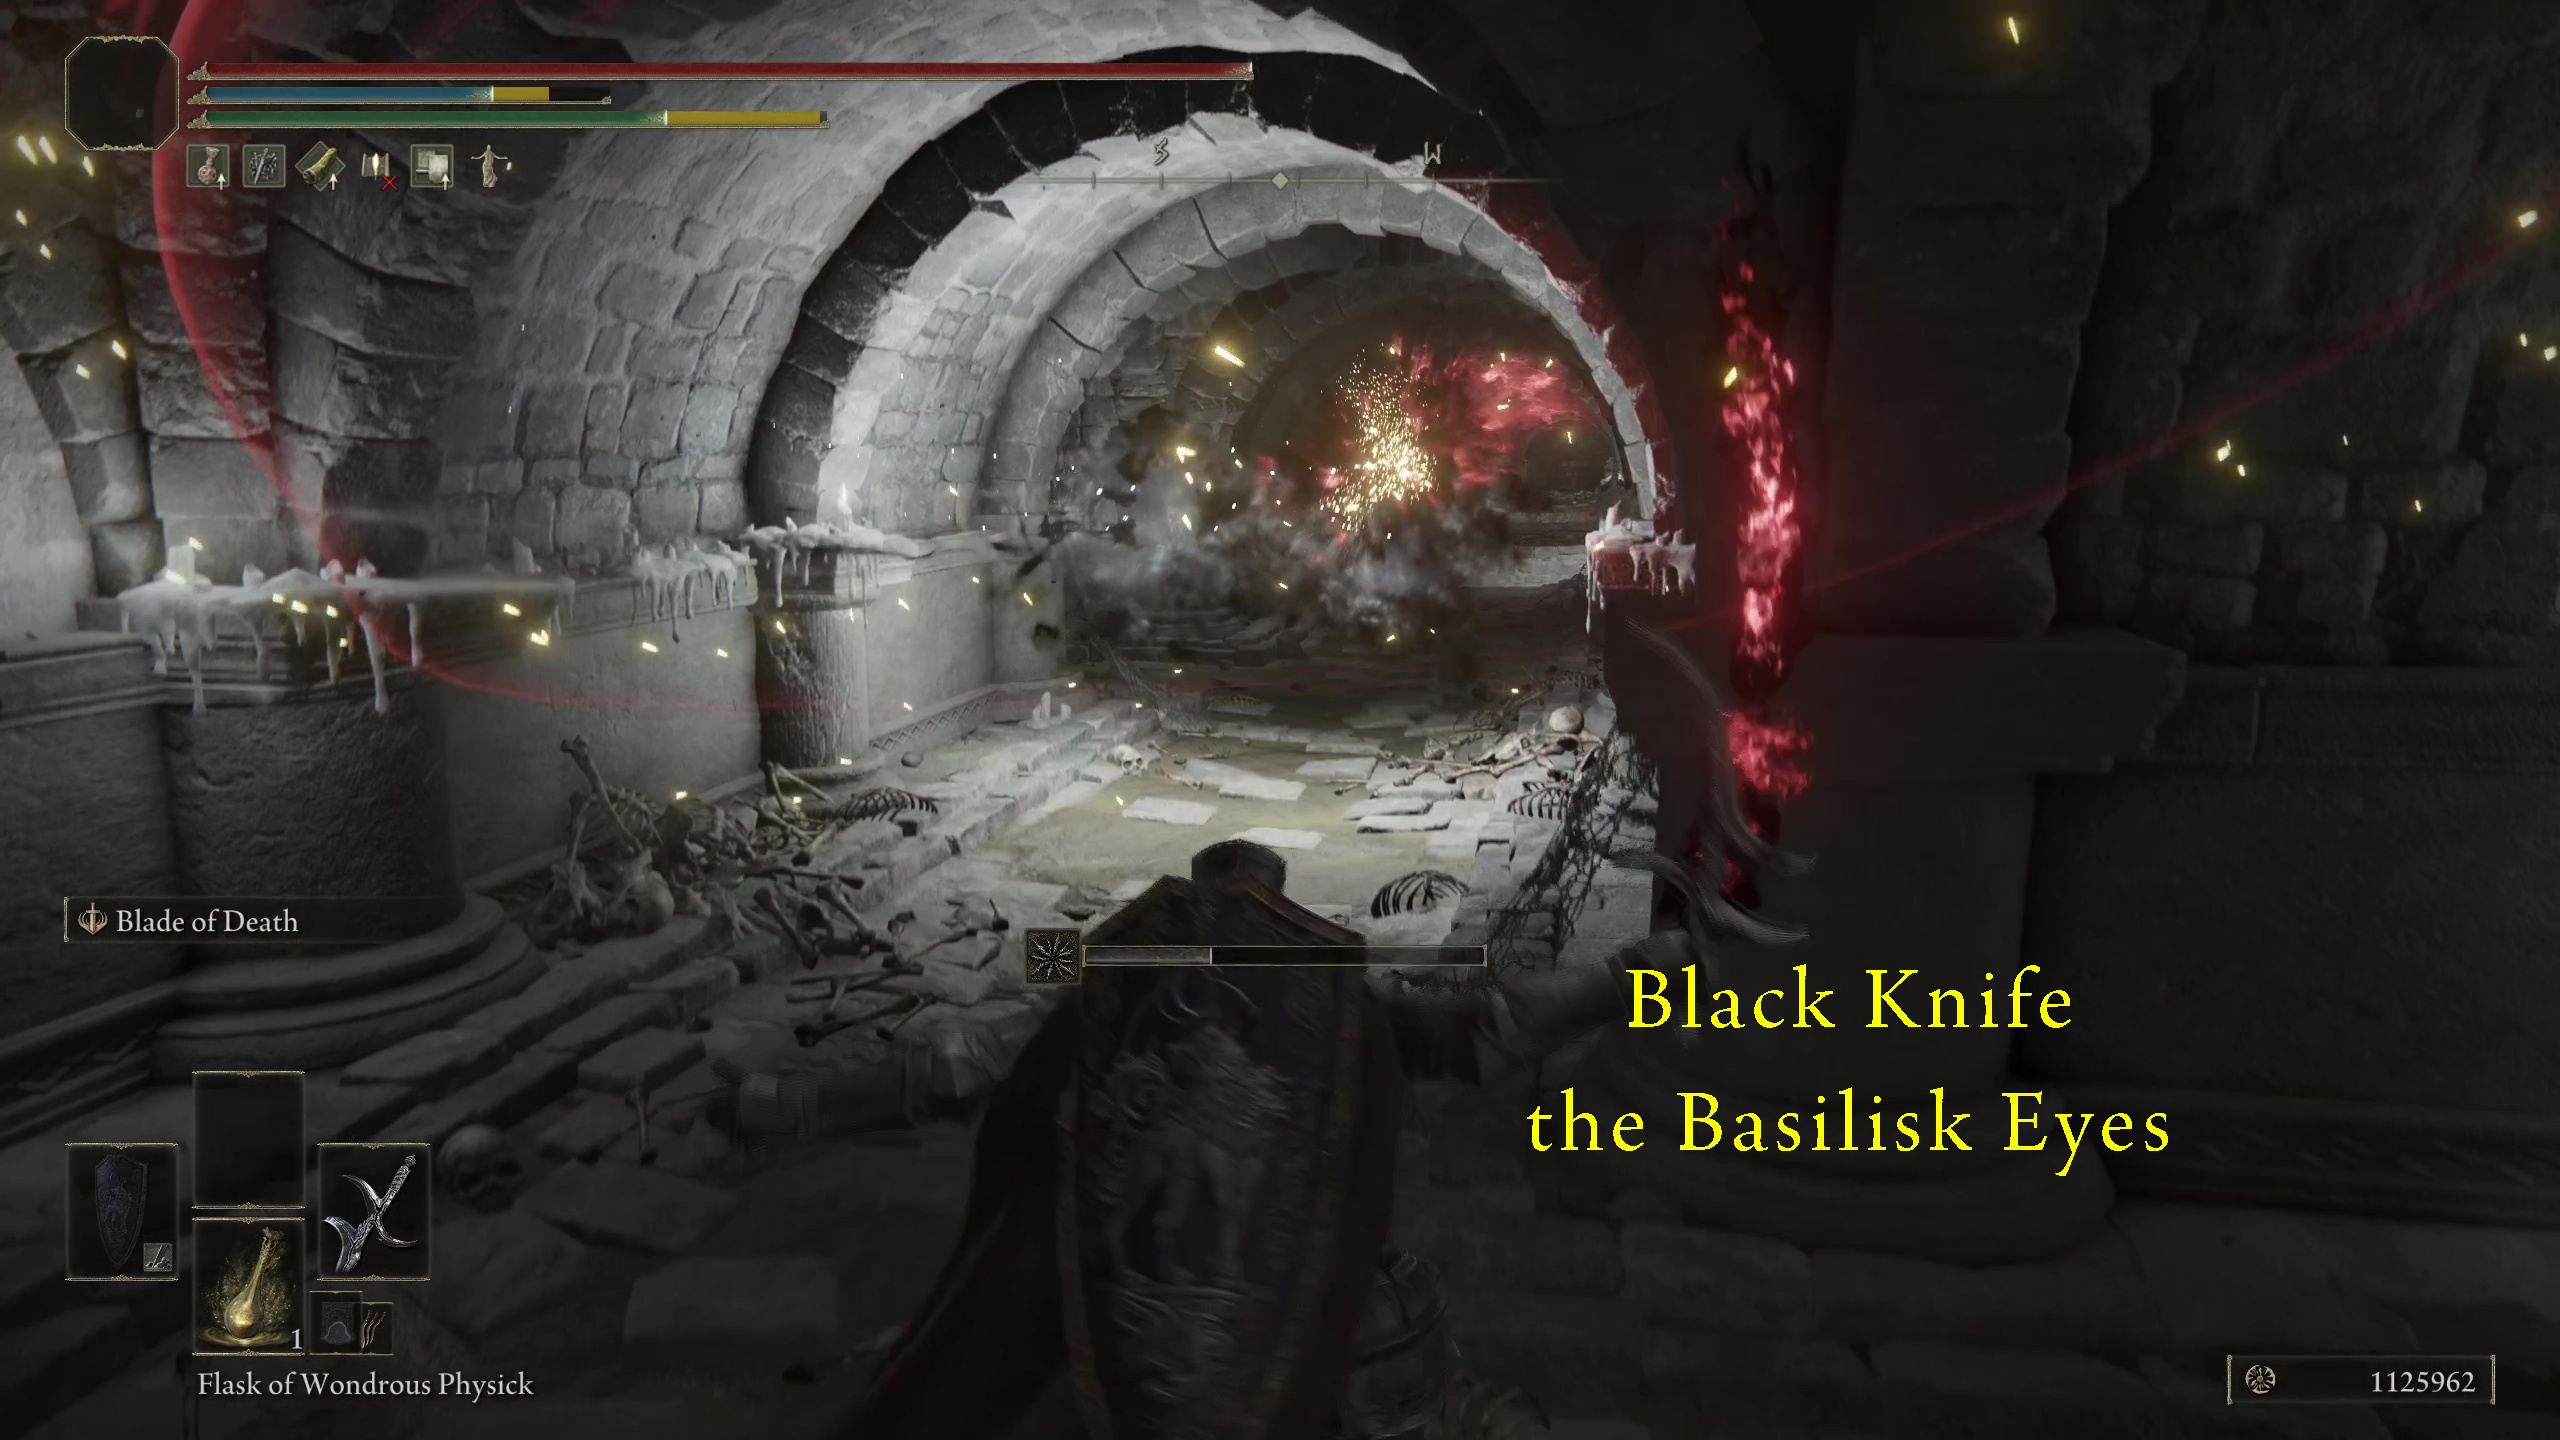
Black Knife – This iconic weapon has a special skill (ash of war) called Blade of Death, where the player’s character does a flying somersault and launches a red wave at the enemy. If you hit the eyes with this attack, then it will “kill” them. They will transform to look extra smokey, and they will no longer cause Death Blight.
Lamenting Visage – You can pick up this special torch in Lamenter’s Gaol, which is in the Charo’s Hidden Grave region. Using this torch’s skill will make you harder to see, or in this case, invisible to the Basilisk Statue Eyes.
You don’t need to use either of these tools for this first instance with the eyes, but they will be more helpful later on (although not completely necessary). You can simply sprint past the bridge and under the statue to avoid your death gauge filling up the whole way. A Lion Imp will come out and try to keep you from crossing the bridge, just run past him and lure him under the statue to kill him.
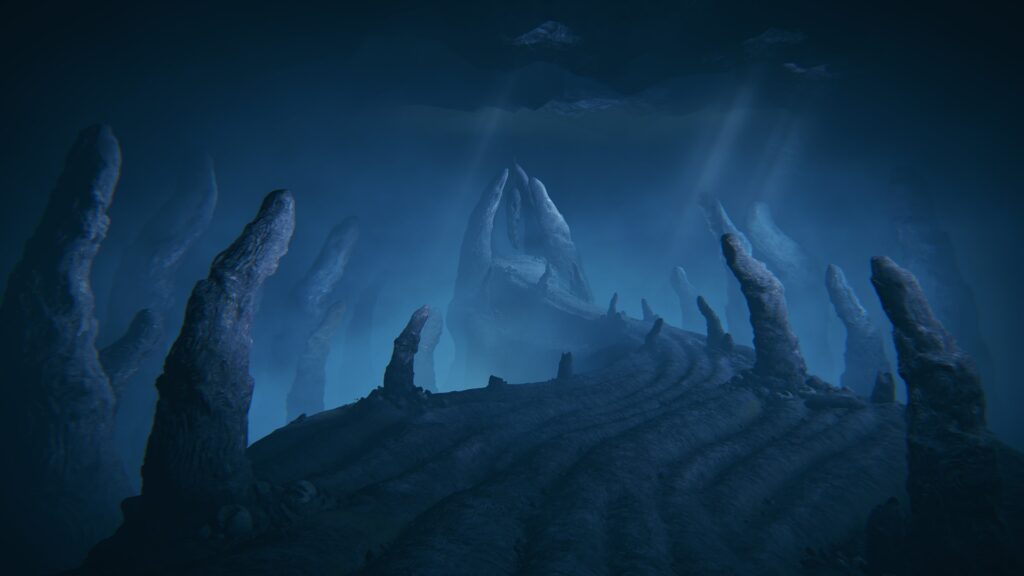
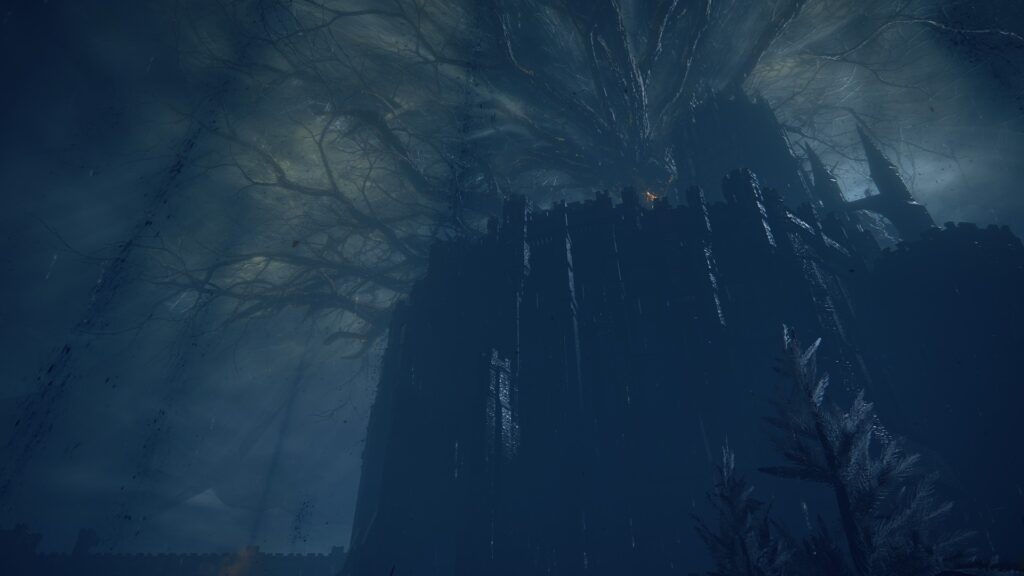
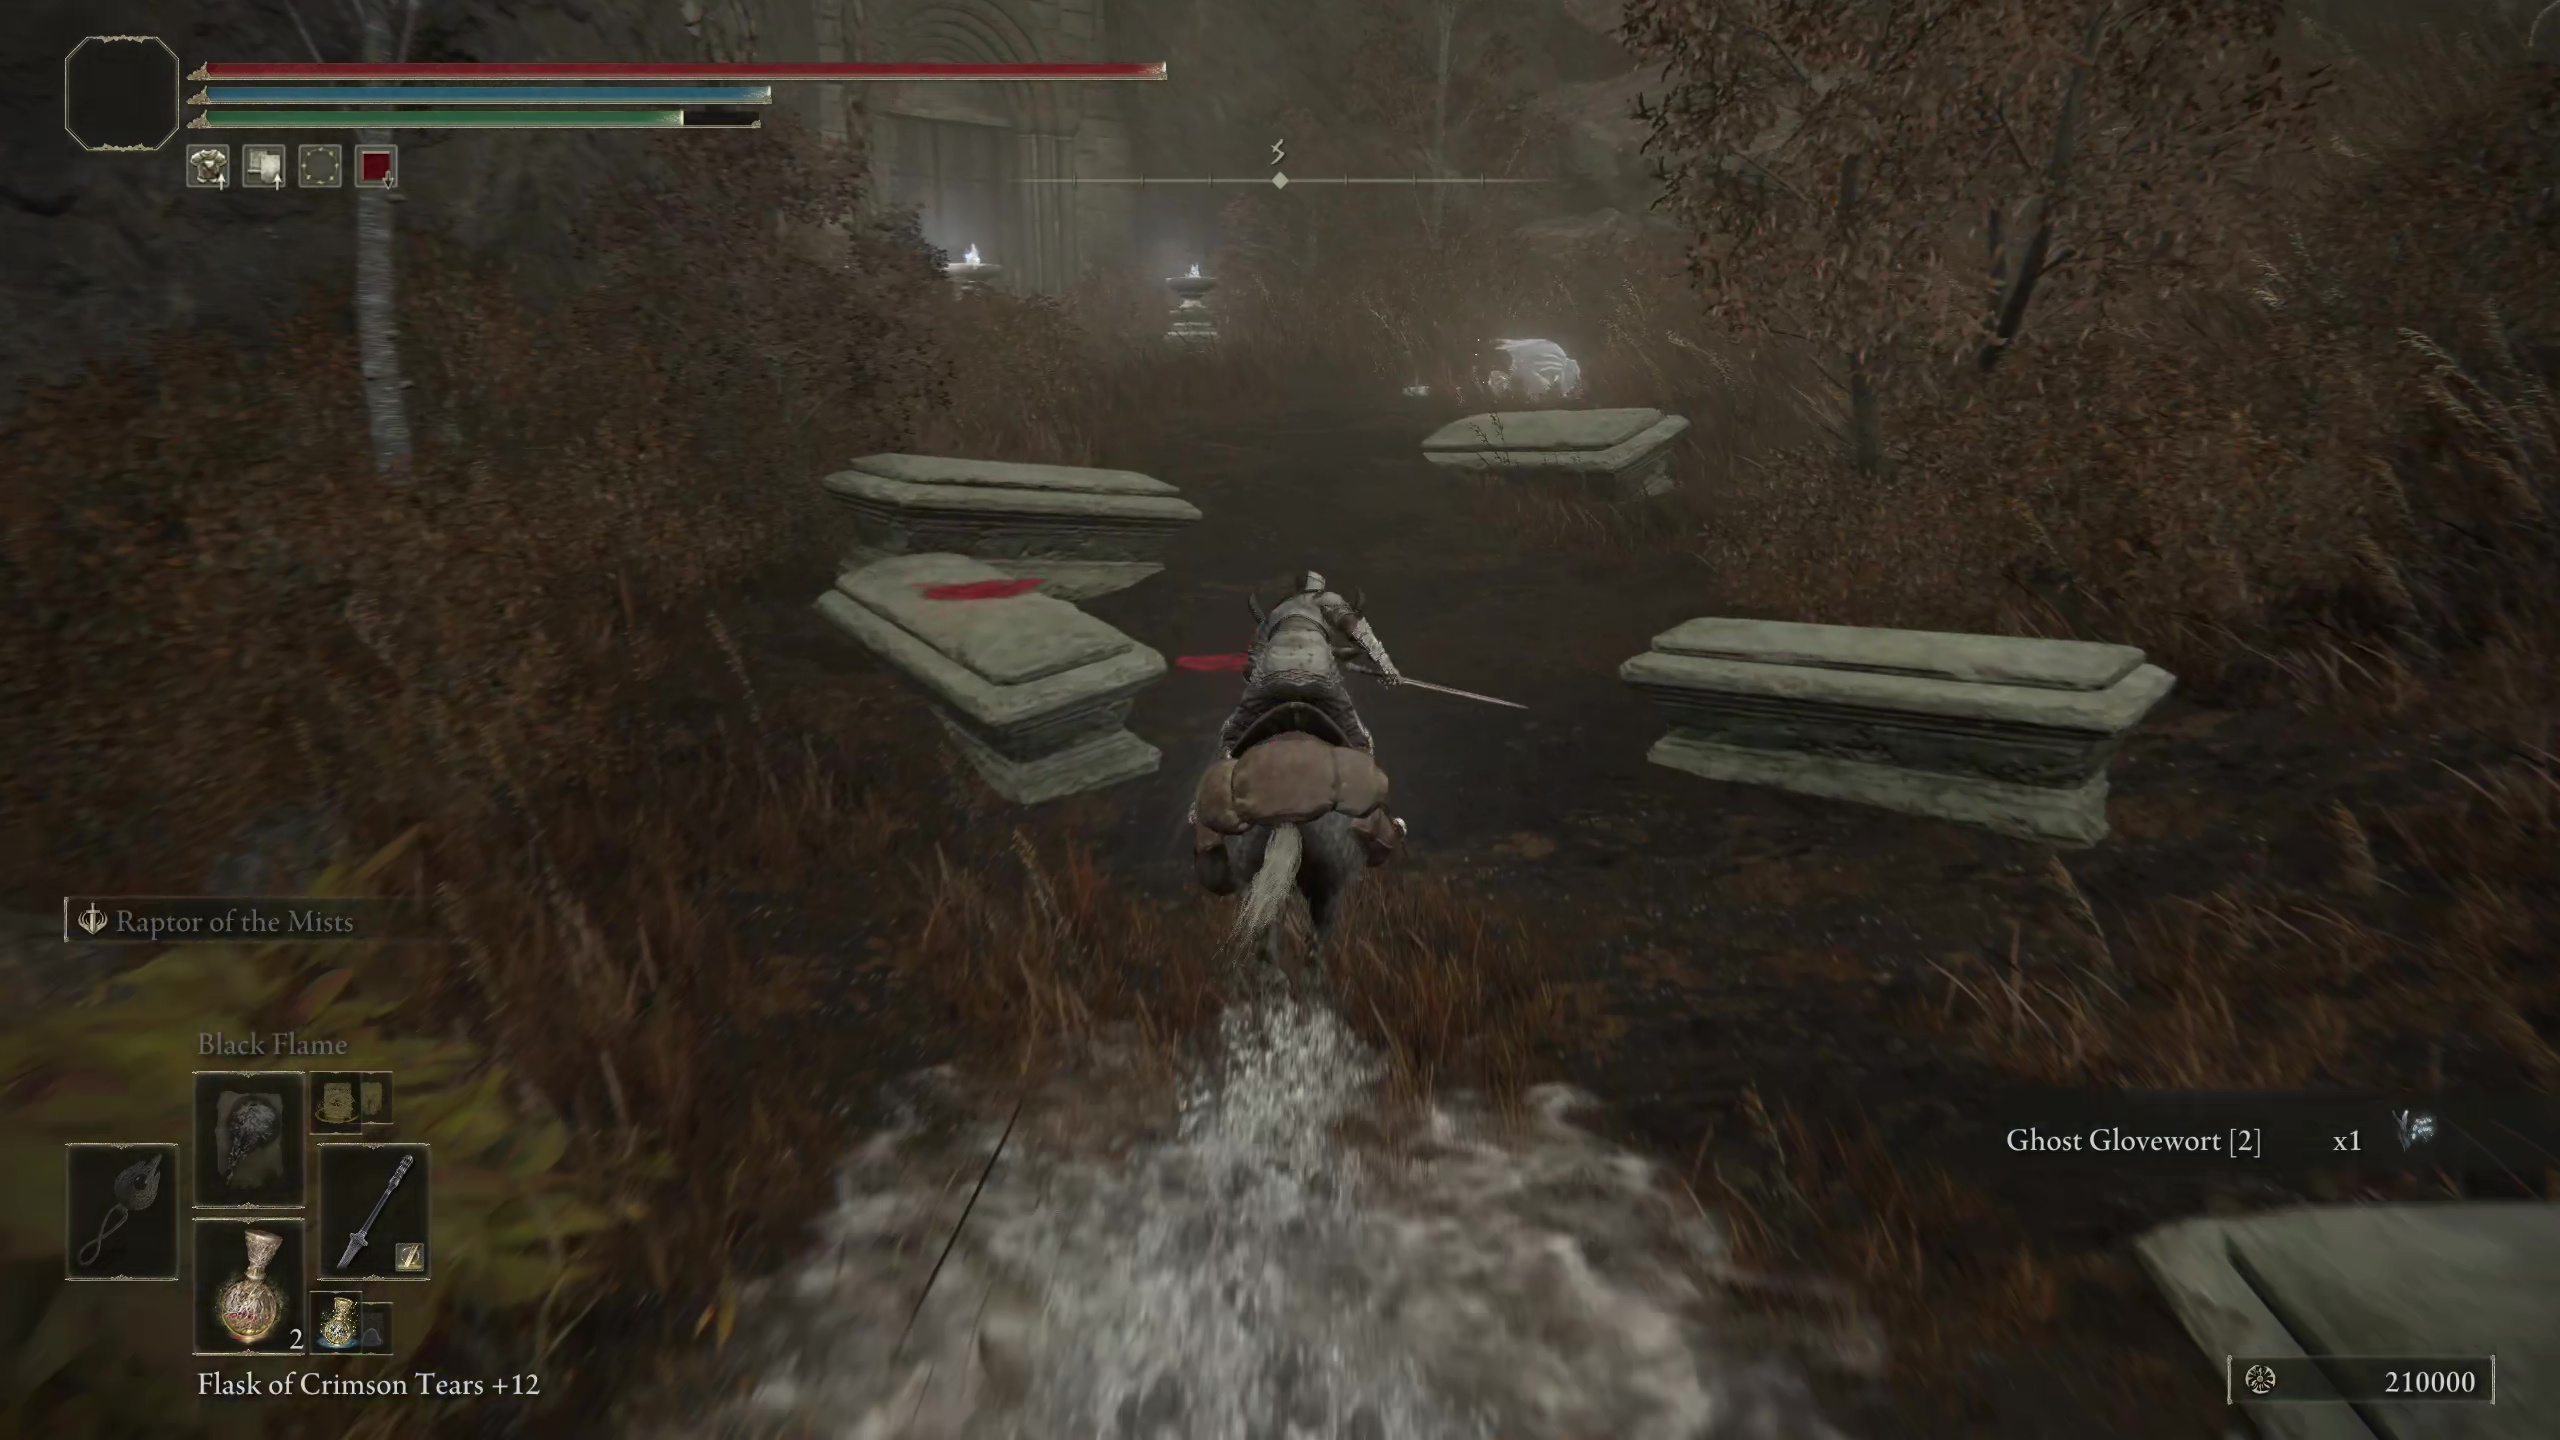
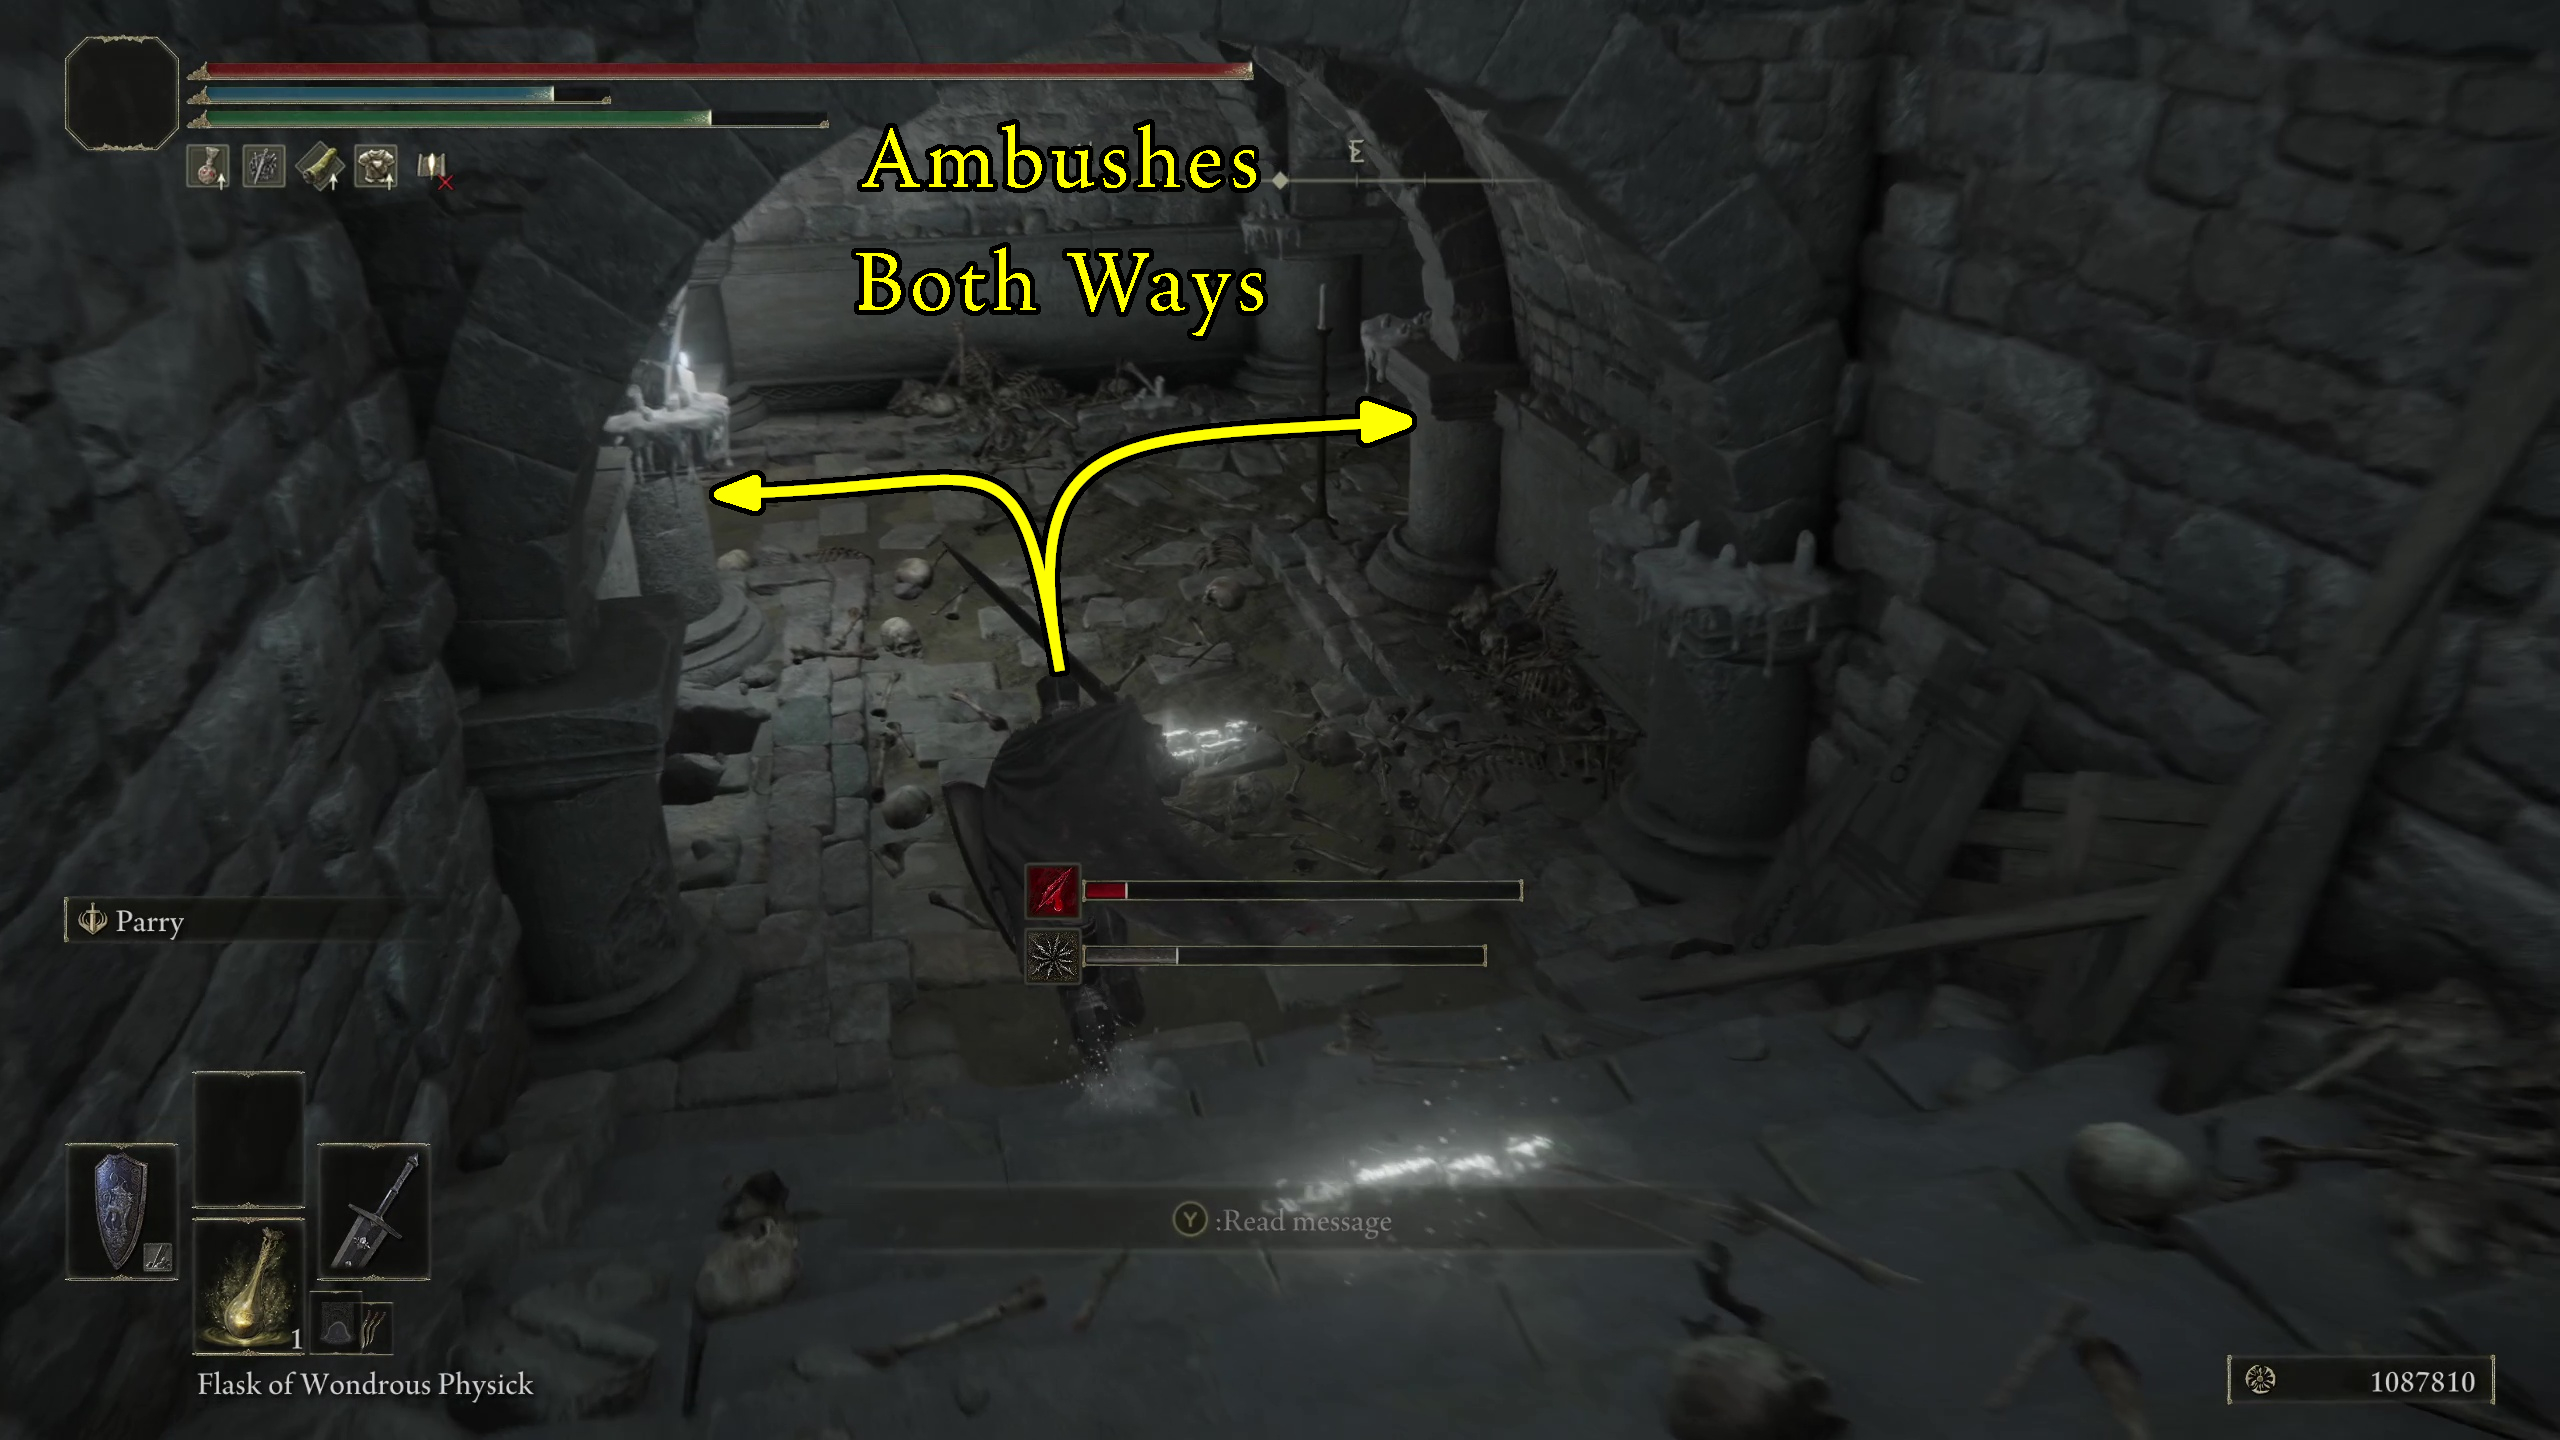
These next parts are very linear. Go down the stairs and kill the Lion Imp hiding around the corner to ambush you to your right (Image 2). In the next room, there will also be an imp waiting for you around the corner to your left. Go down the stairs and kill a third Lion Imp waiting that’s just sitting there casually. In the corner of this room is a corpse holding a Ghost Glovewort [3].
Image 2
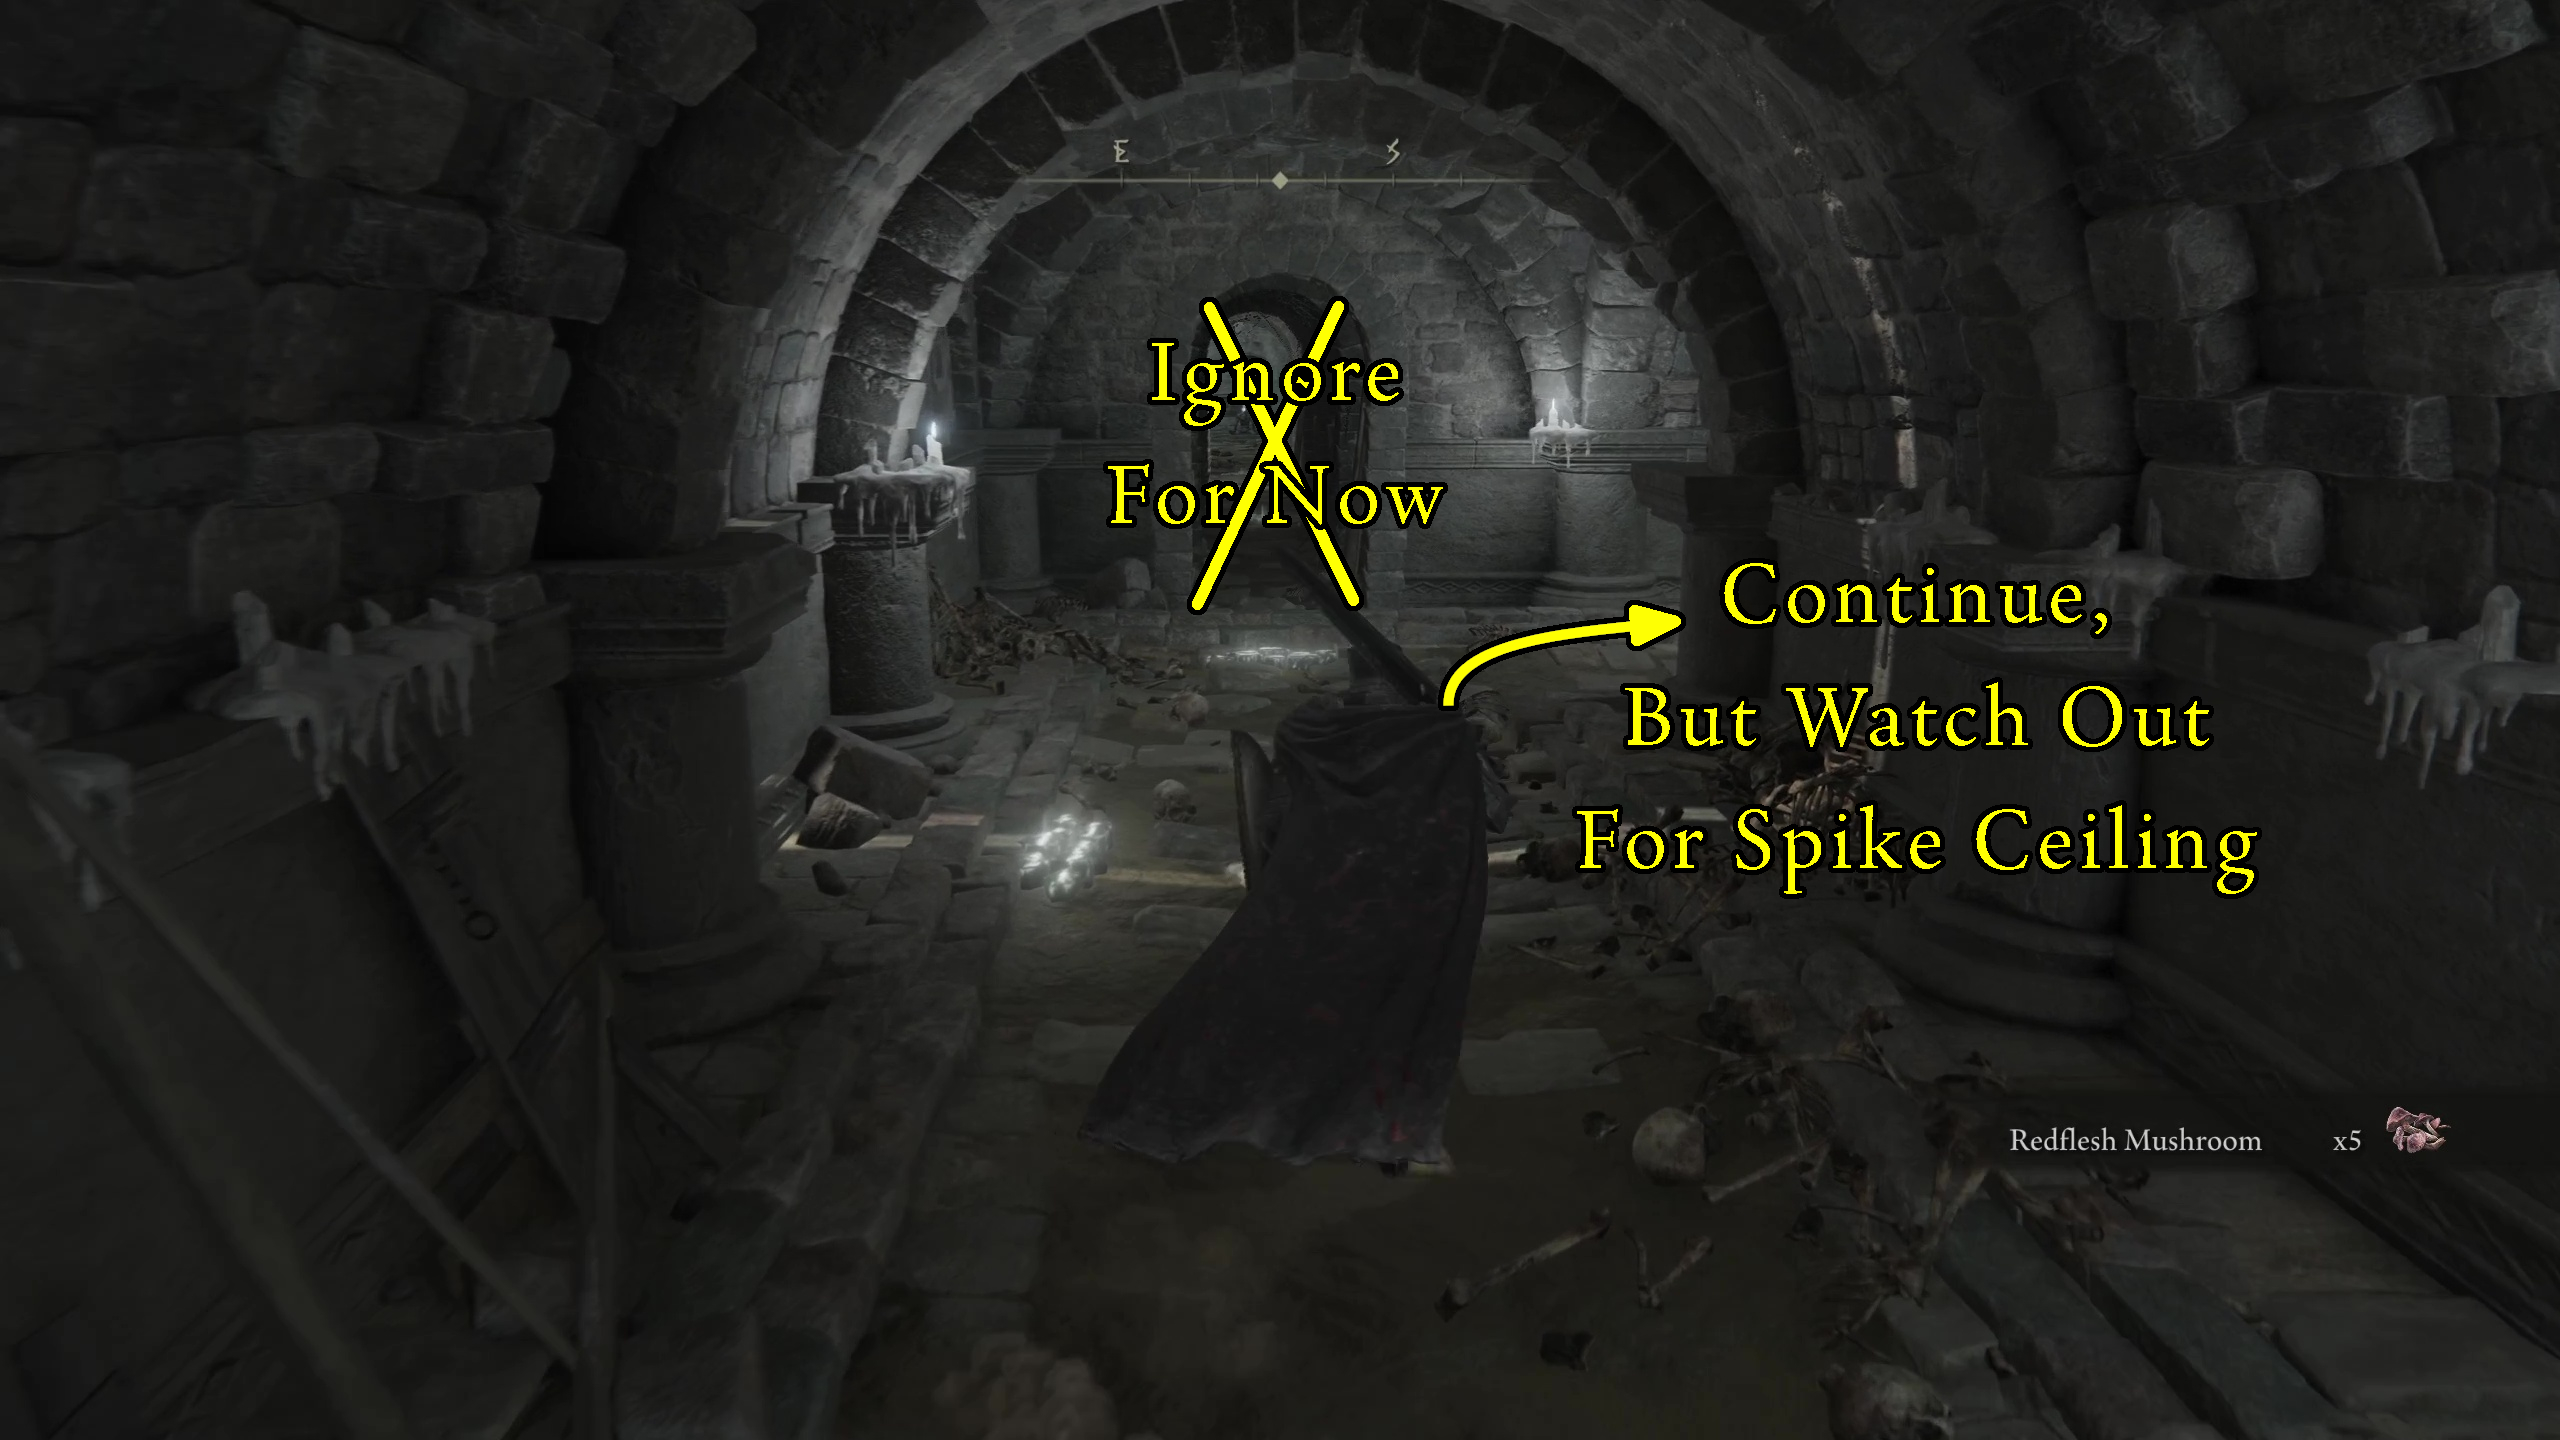
Down the stairs and in the next room will be a Cannon Imp sitting in an alcove to your left with a Yellow Fulgurbloom. In this same room, there is also a corpse with a much-coveted Redflesh Mushroom. Again, try not to get blown up by taking him out quickly.
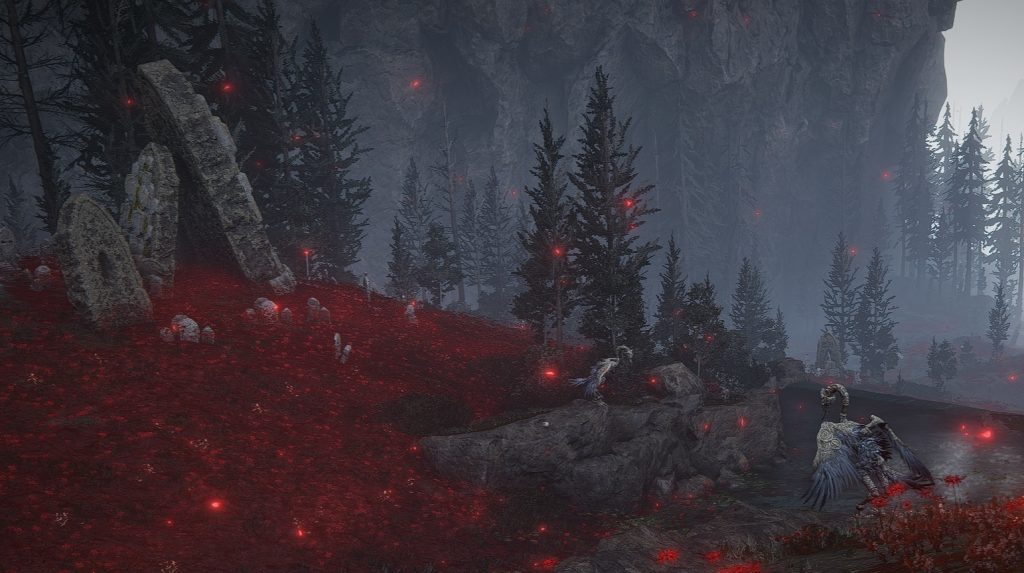
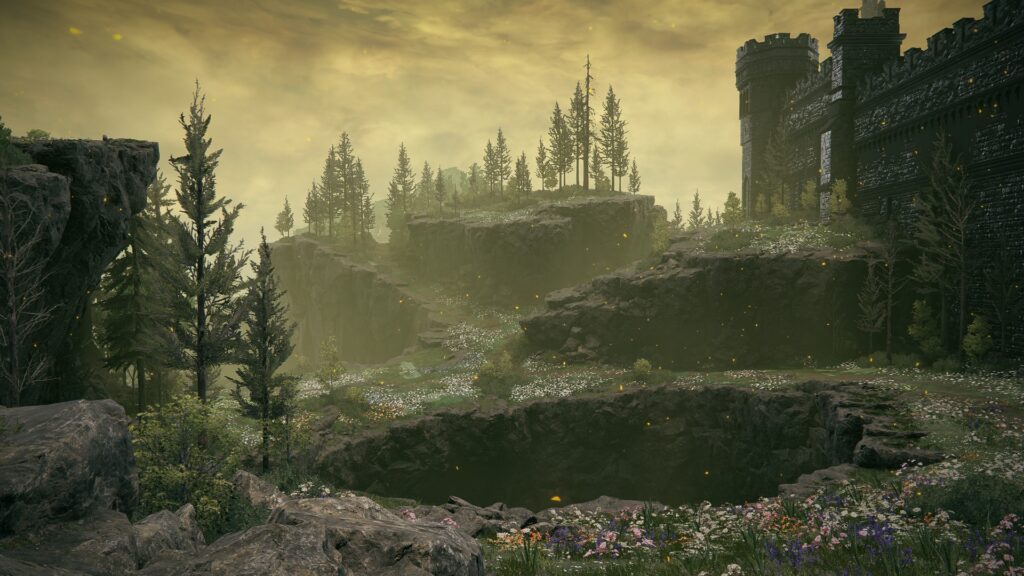
In the next passage will be a narrow corridor heading to a room, but you can ignore this for now: you’ll be back soon. Instead, go past the narrow passageway and continue to the right, down the stairs (Image 3).
Spike Ceiling Traps
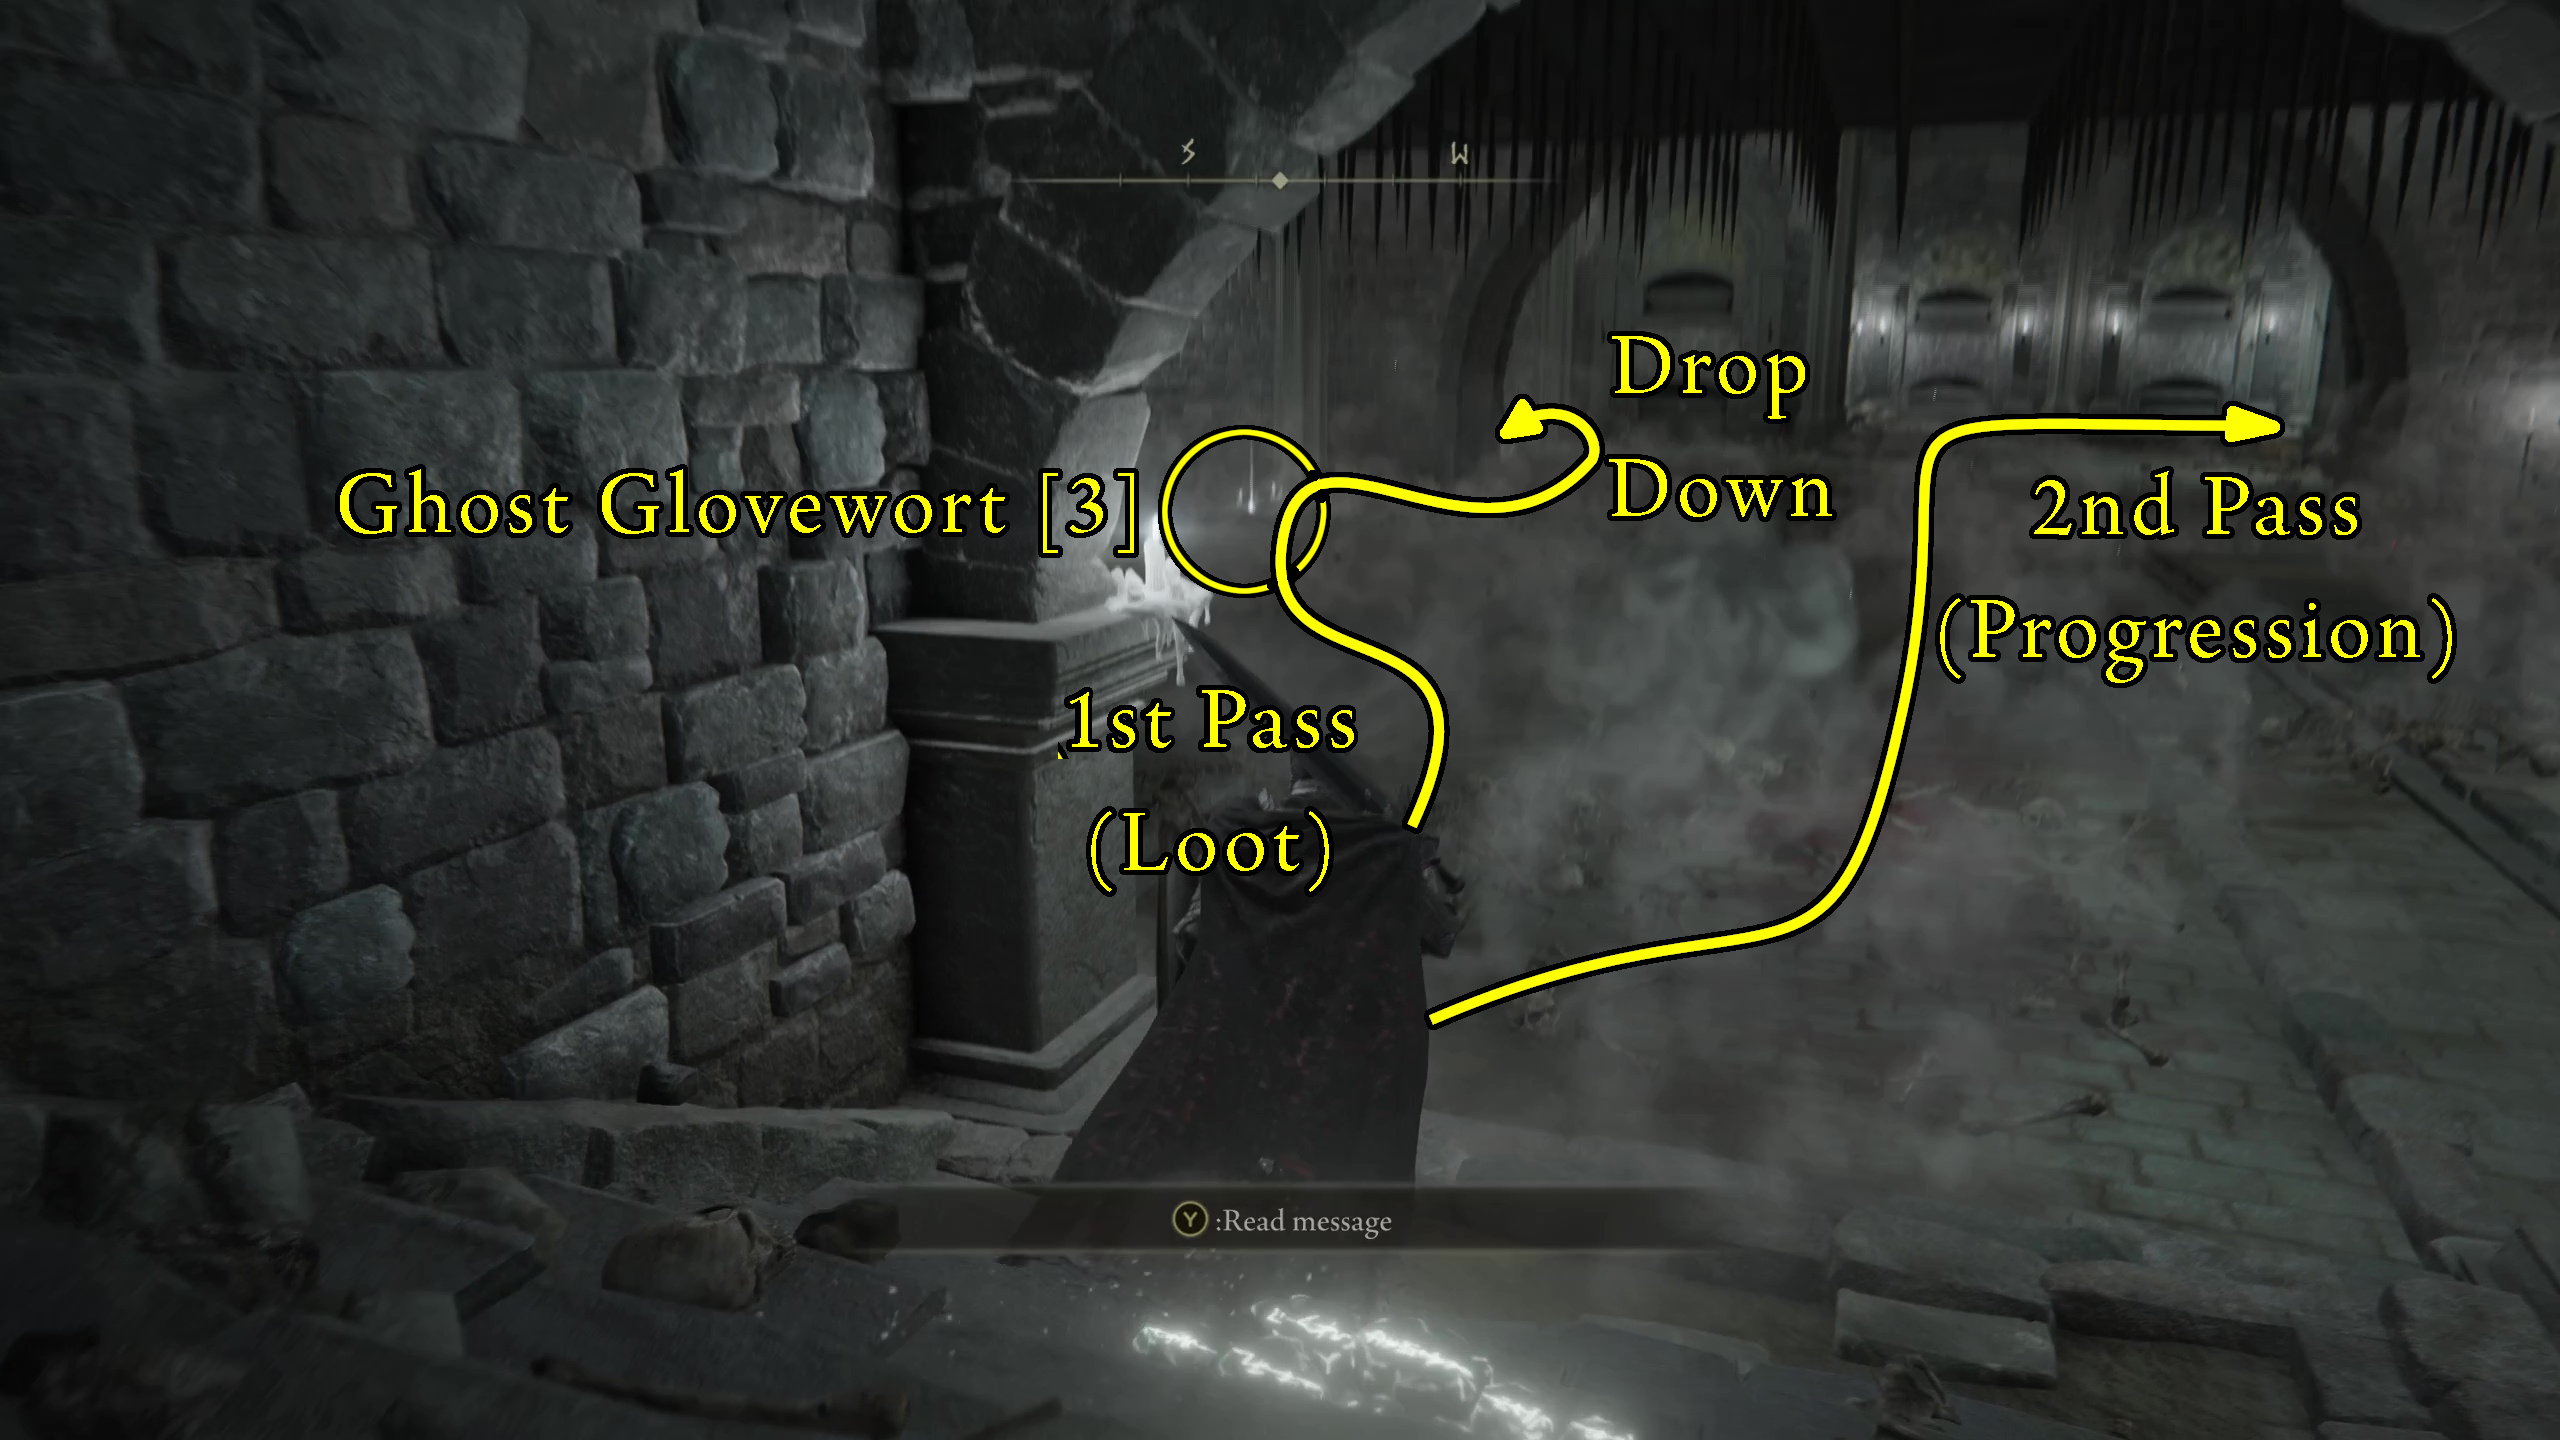
Be careful at the bottom of the stairs because there is a spike trap that will crush you. Walk next to the threshold, the spike trap will fall, then you can run across, grabbing the Ghost Glovewort [3] on the corpse along the way (Image 1). Once you’ve picked that up, you can drop down into the area to your left. We recommend jumping in the second drop-down area, after the bridge overpass, as it tends to be safer.
Once you drop down, there will be 3 Death Frogs which will activate right away, a corpse with a Shadow Realms Rune [4], and two Lion Imps guarding the ladder out of this area. It will lead you to the same room we passed earlier, with the Lion Imp’s back facing you, letting you dispatch the Imps and grab the Ghost Glovewort [5] before heading back to the Spike Ceiling and passing under it the same way as before.
Image 1
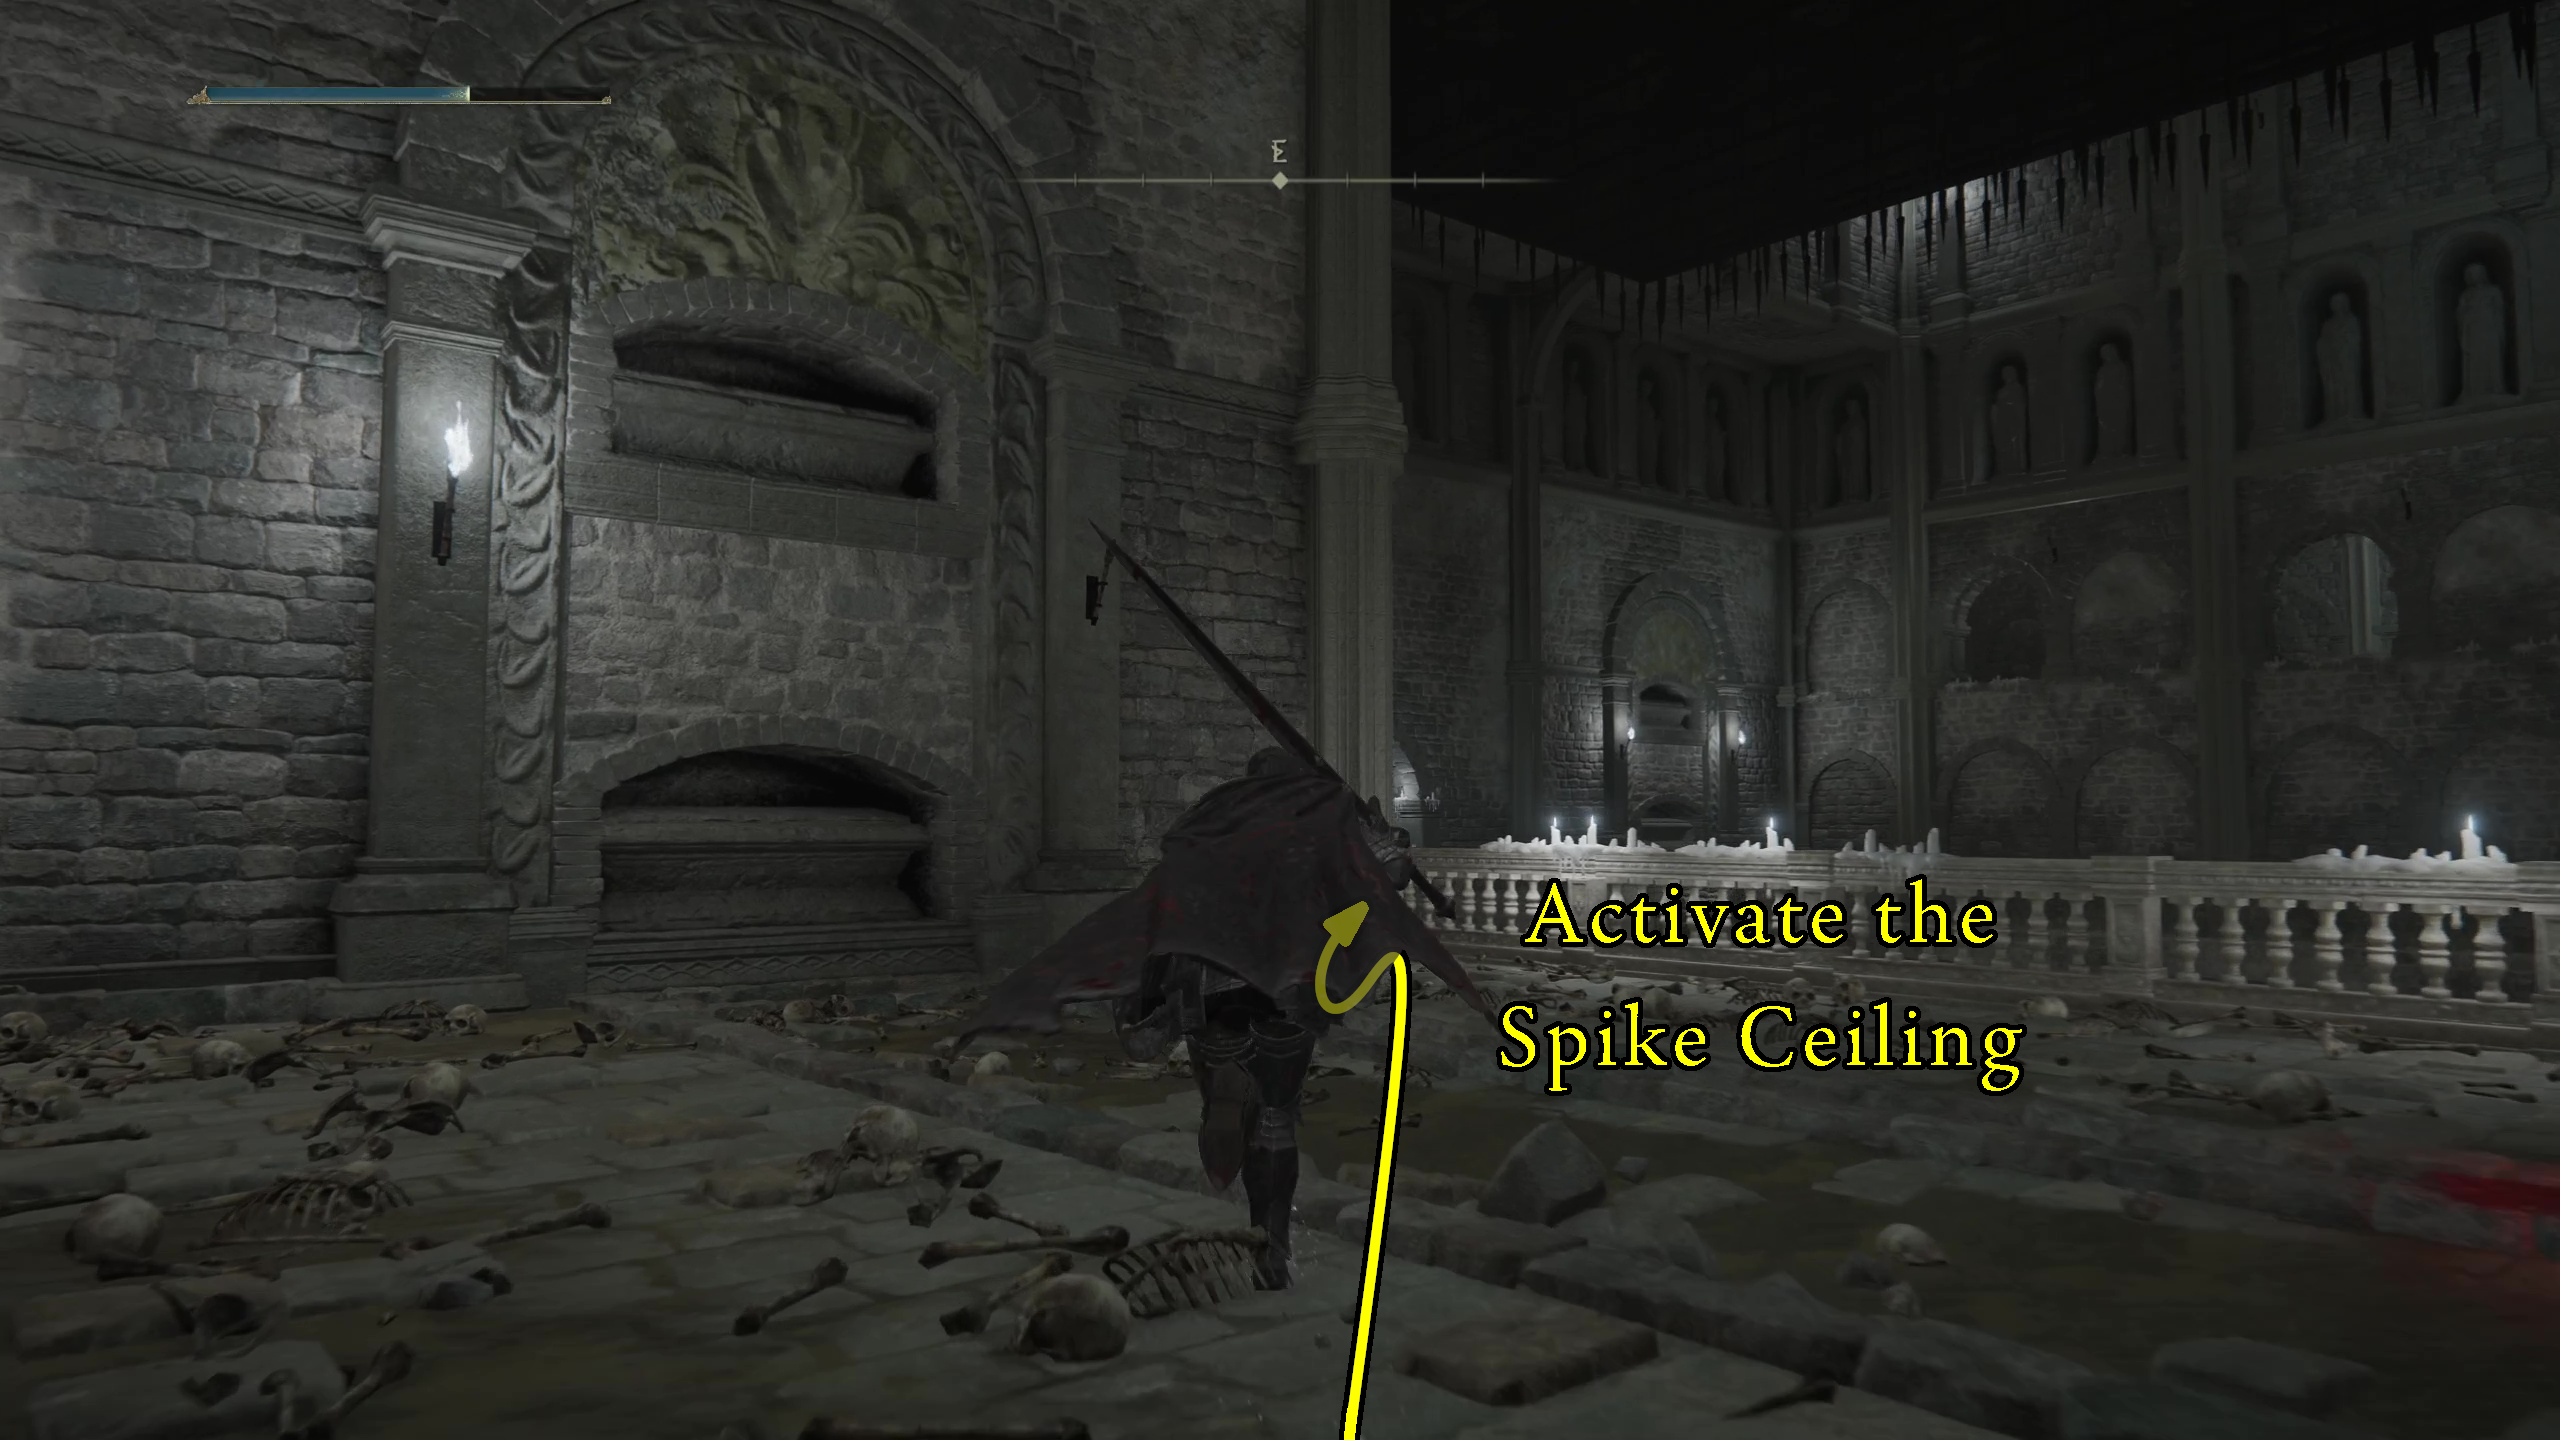
Once you’ve made it under one Spike Ceiling, keep your eyes up because there will be another Spike Ceiling (Image 2). Approach the corner, let the Spike Ceiling drop, then sprint across to the other side. Two footsoldiers will be waiting for you, and you can let them approach you to lure them away from the Messmer Knight. Once they are dealt with, you can take out the Knight and then grab Black Knight Captain Huw.
Once you’ve grabbed those, turn around, and look toward the east wall (your left). There is an alcove, which you can reach after triggering the Spike Ceiling and going under it as it lifts up.
Image 2
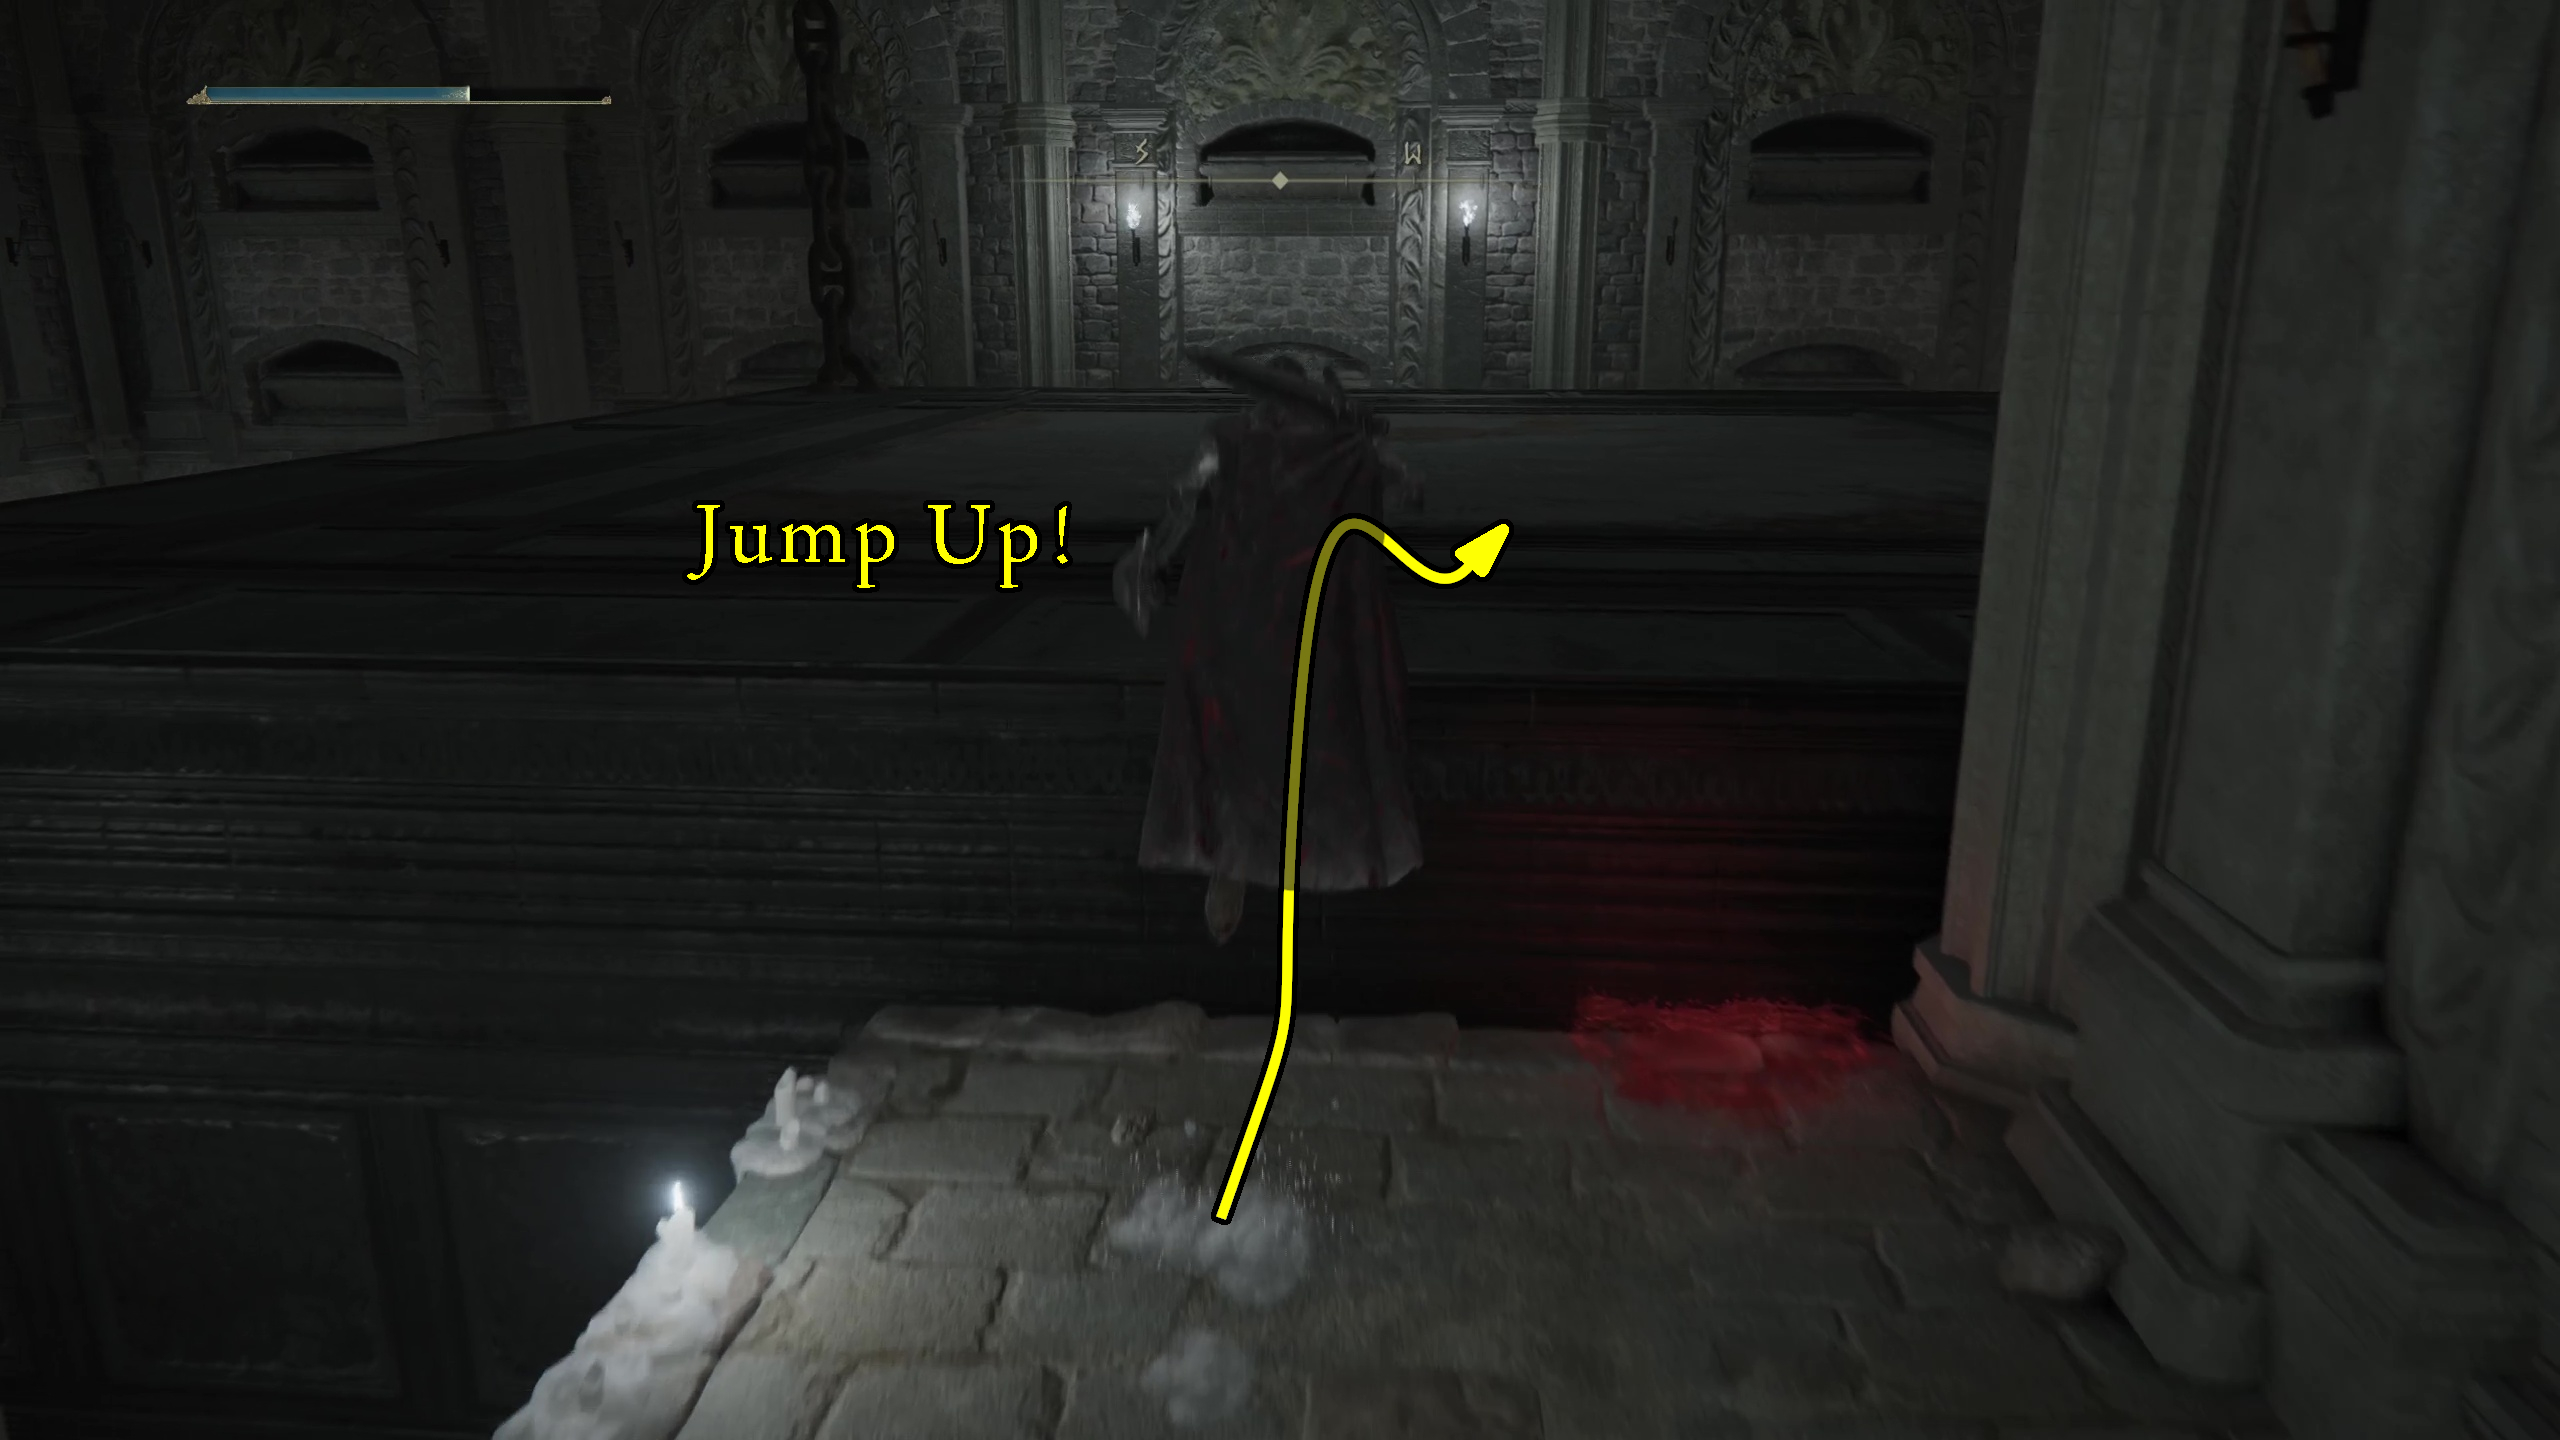
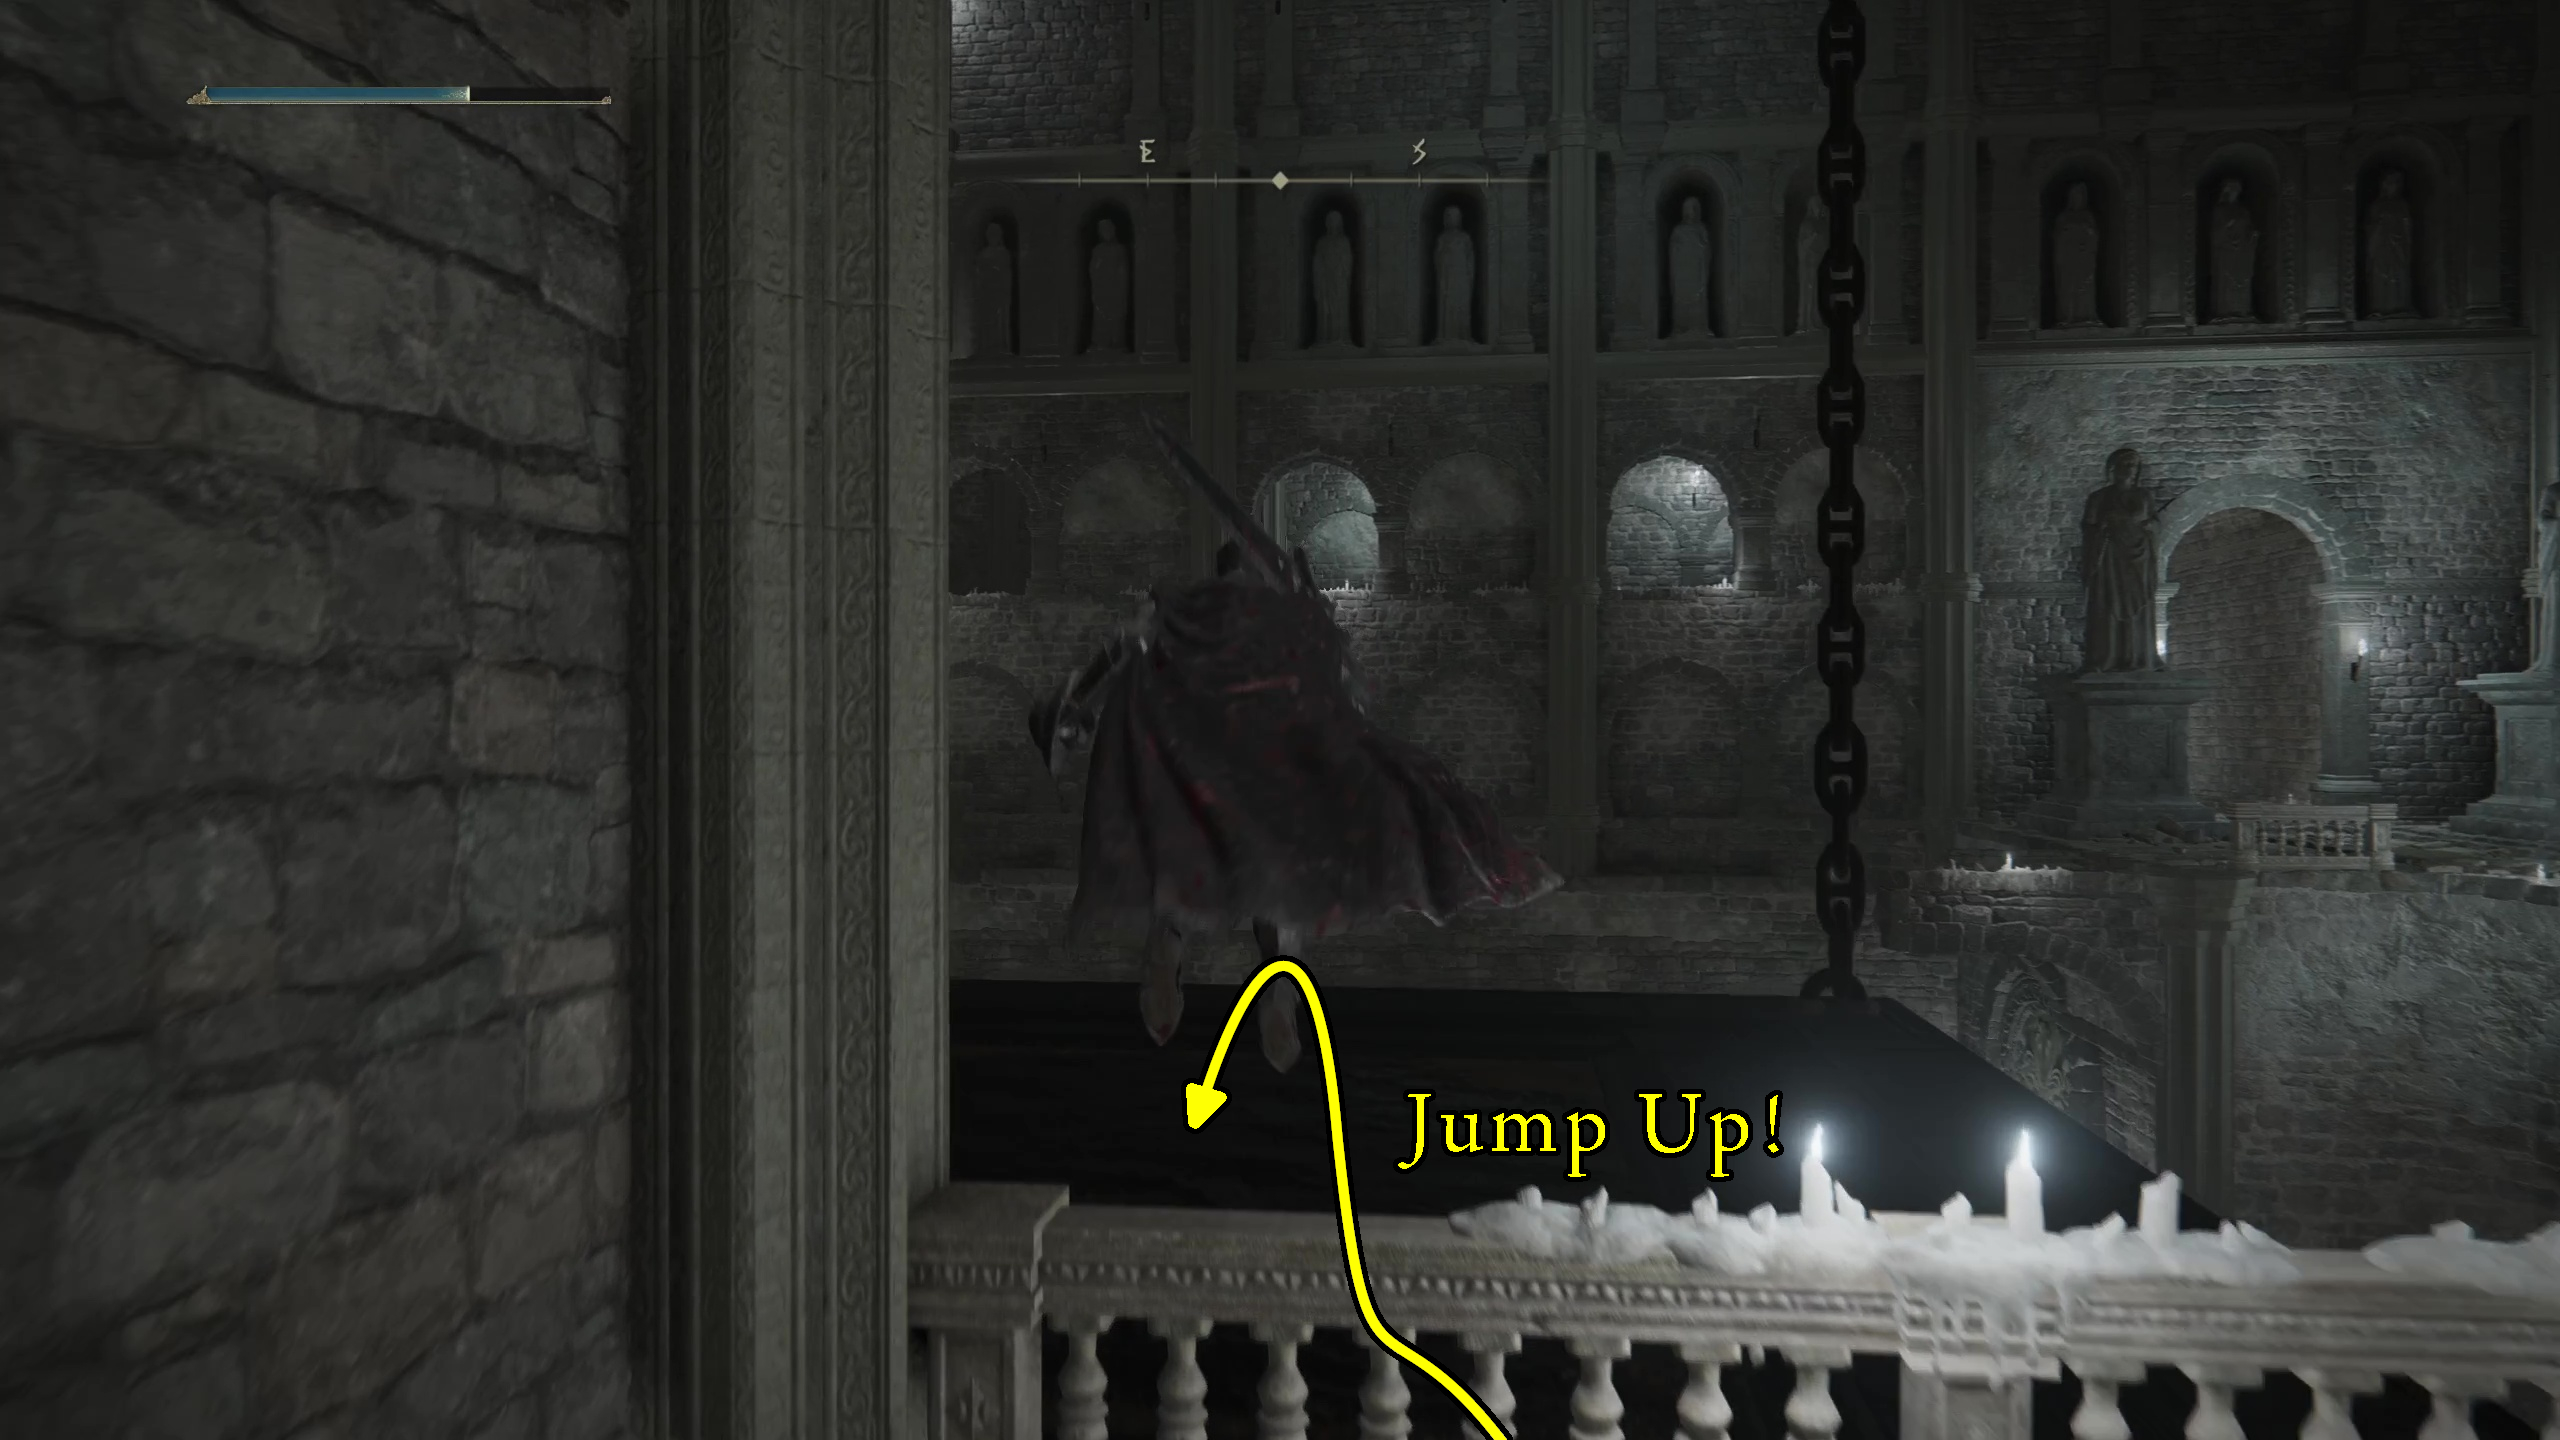
Once you make it to the top of the ladder in the alcove, DON’T WALK FORWARD (Image 3). Instead, you are going to immediately go to the ledge to your left, get the Ceiling Spike to drop, and then jump onto it (Image 4). Ride it up to acquire a Grave Glovewort [6] on a higher ledge to the northeast of the trap.
Image 3Image 4Image 5
After you’ve done that, get ready to do the same trick again. Drop down, and some Basilisk Eyes will activate, though you can mostly ignore them so long as you are keeping your eye on the blight meter. If it starts to get high, don’t forget to use those Rejuvenating Boluses you found earlier.
Aside from that, approach the railing at the corner of the ledge and get the other Spike Ceiling to drop down (Image 6), allowing you to jump on it (Image 7). Near the top, there is another ledge to the left that you can drop onto to grab the Imp Head (Lion) headpiece. Then take the Spike Ceiling back down to the Basilisk Eyes, jumping behind them (where they can’t add Blight). If you are using the Black Knife, you can disable these, though there is little point.
Image 6Image 7
Continue through the path behind the Basilisk Eye Statue, and you’ll find the Knight’s Lightning Spear spell guarding by two Lion Imps. Grab that, then head up the stairs to the side of the hallway. You’ll soon come into a room where a Lion Imp will ambush you from the right of the doorway, with another approaching from further in the room. Dispatch them, then jump down, where you’ll be on the other side of the bridge in front of the Basilisk Eyes, allowing you to take the elevator down to the next level.
Catacombs Floor 2 / Wandering Basilisk Eyes
Firstly, note the Stake of Marika at the bottom of the elevator, and breath a sigh of relief. Then, continue forward, and you’ll hear the sound of Basilisk Eyes. But this time, they are moving. If you are using the Black Knife, you can use it to dephase these Eyes, though they will still be active until they reach the statue at the end of the room (Image 1).
In any case, you’ll want to go down the hallway to your right, going down the ramp in front of you. If the Eyes are still active, wait until they pass going toward the statue so you can run behind them. You will reach a passageway filled with debris, allowing you to climb back up, but do beware of the Lion Imp hiding on the other side of the overpass that will drop down (Image 2).
Image 1Image 2
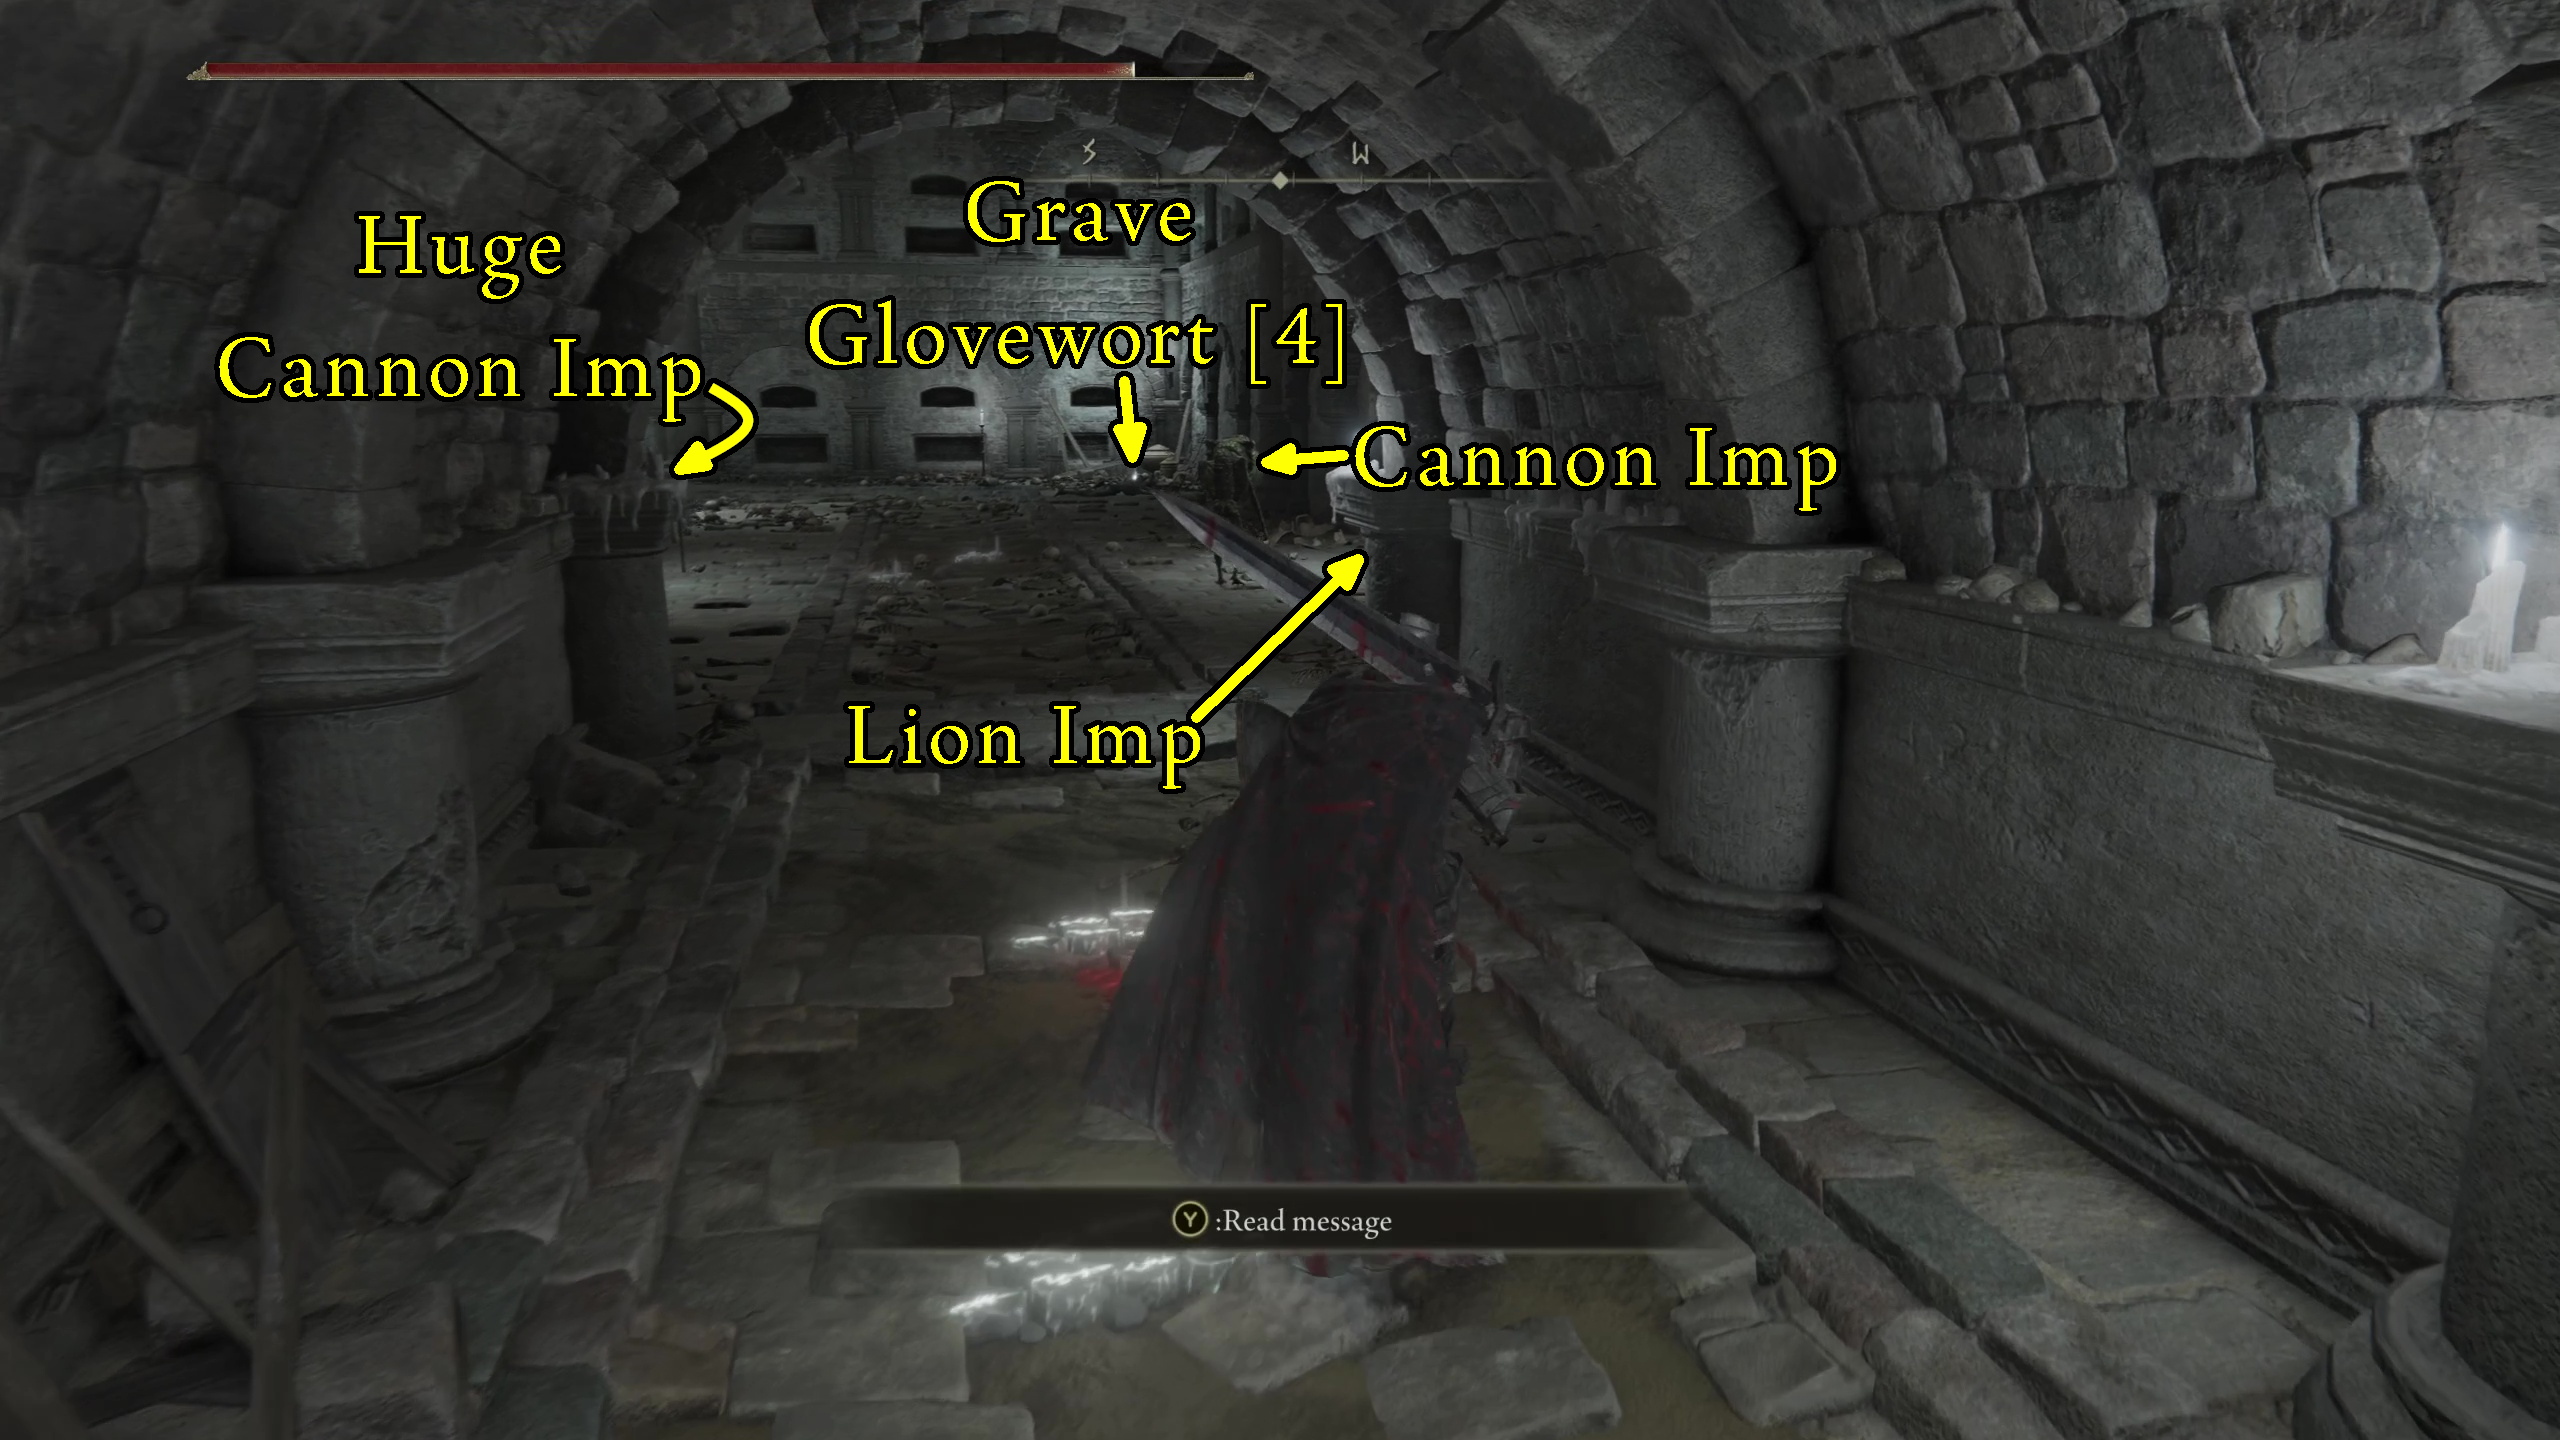
After getting to the end of the hallways and turning right, you’ll soon end up in a large corner catacomb. When you get near the entrance, you’ll be attacked by a Lion Imp, with a Cannon Imp just behind (Image 3). A corpse has a Grave Glovewort [4], being watched over by a Huge Cannon Imp on the opposite side of the room.
The next room can be a bit tricky. To start, 2 Lion Imps will jump down and attack you (Image 4). At the same time, a Wizard will start slinging a tricky-to-dodge spell at you. The trick to dodging them is to dodge the crystal that will appear at your feet just before it shoots up, then dodge again a moment later as the crystal comes back down.
Once you’ve defeated at least the Imps, and the Wizard if you have ranged options, you can drop down into the square hole in the room. 3 Death Frogs will ambush you here, but you can also find a Great Ghost Glovewort on a corpse and can quickly climb the ladder out, allowing you to grab the Ghost Glovewart [8] in front of the top of the ladder.
Image 3Image 4
Move on to the next room, where you will hear yet another set of Basilisk Eyes. They will be bouncing back and forth in a hallway you can reach by climbing the stairs, letting you use the Black Knife to disable them, should you choose to.
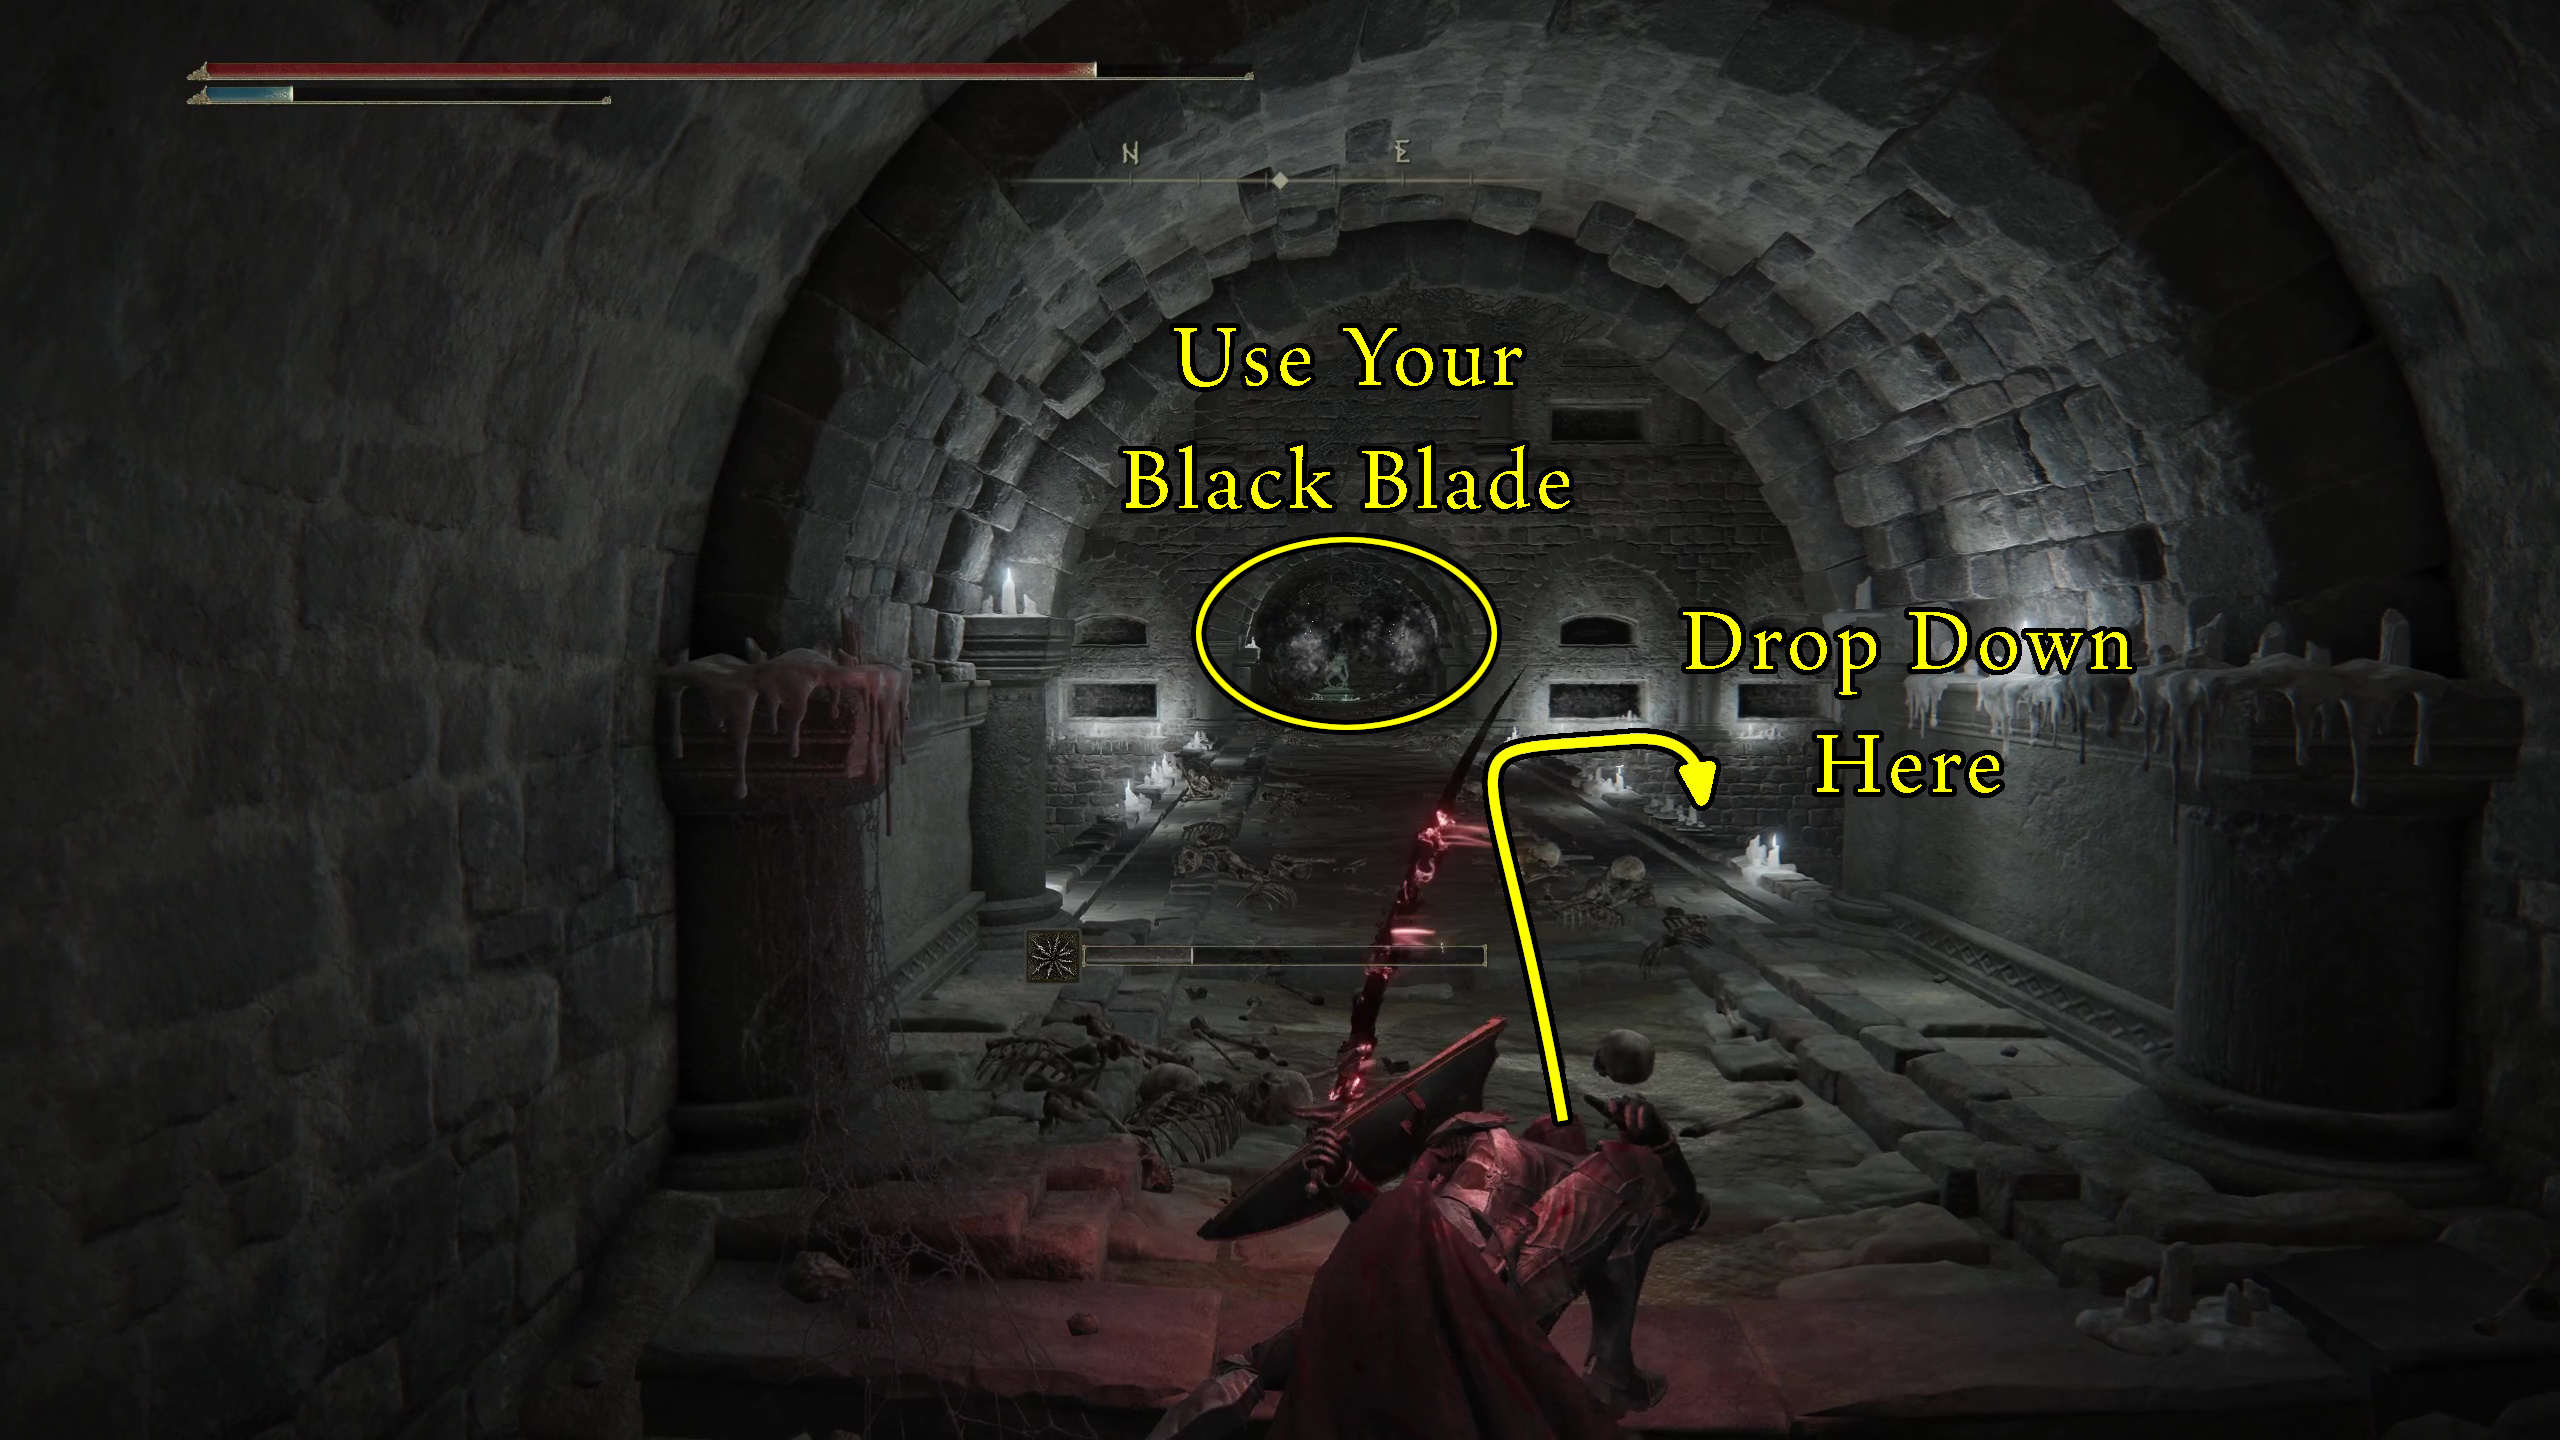
In either case, go out onto the bridge that the Basilisk Eyes were going over the top of. From here, you can jump down to another, lower bridge at about the midpoint (Image 5). There will be a Lion Imp here, and a Yellow Fulgurbloom.
Image 5
At the end of this lower bridge, you’ll find a ladder. Climb it, and be prepared to fight a Cannon Imp at the end of the room and a Lion Imp that comes from a narrow hallway to the left. Once they are defeated, you can open the chest to grab the Ancient Dragon Knight’s Cookbook (2).
Then, go down the hall that the Lion Imp came out of. There is a corpse to the right with 2x Rejuvenating Boluses. Then, to the left, you can reach the place where the Wizard was (and might still be), allowing you to backstab him before his guard Lion Imp comes at you. Defeat them, then contine down the short hallway to grab a Yellow Fulgurbloom and Broken Rune (woo?). Though do be careful, as if the Basilisk Eyes are still active, they can see you here, necessitating good timing.
After grabbing those, you can continue back across the bridge (going all the way across this time). If the Basilisk Eyes are still active, you should just follow them so that they don’t tick up your Death Blight meter. At the end of the hall, take the side hallway to reach the final elevator, which will take you down to the Death Knight boss fight, which you can find a guide for below.
After defeating this more powerful version of the Death Knight (which you might’ve fought a version of already in the Fog Rift Catacombs), the Death Knight will drop the Death Knight’s Longhaft Axe and the Cerulean Amber Medallion +3.
Kelson is a spud head from out west. He is most happy when holding a milky tea with too much honey and playing a sprawling role playing game or reading a fantasy novel. His video game tastes vary but his main genres are looter shooters, RPGs, and real time strategy games.