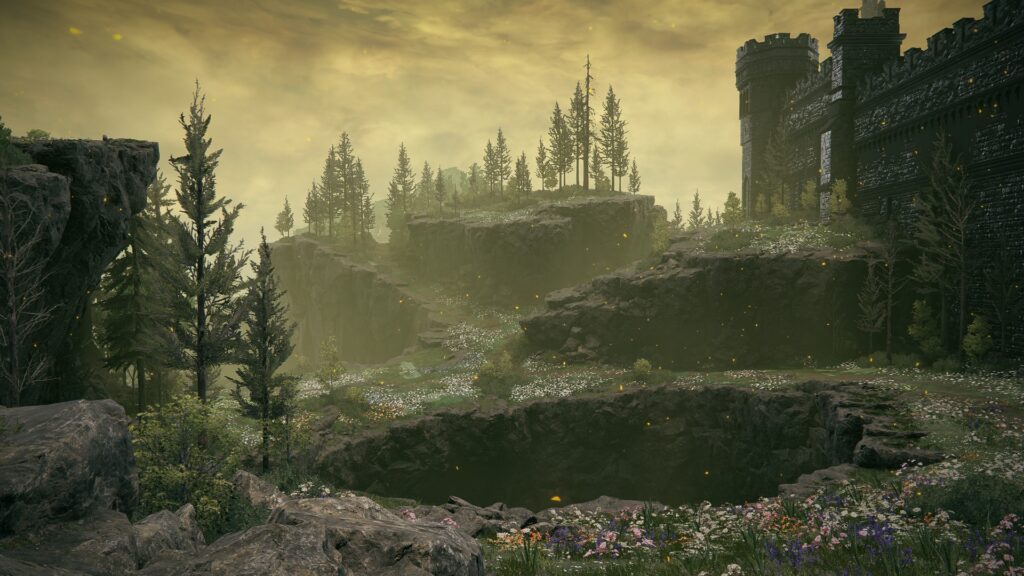
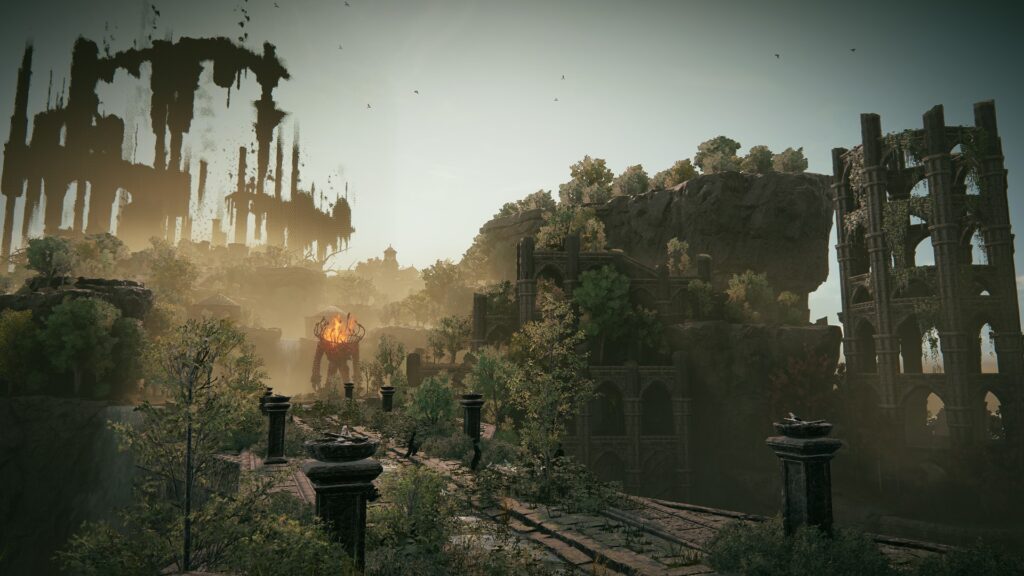
There are a lot of jails (or gaols) in Elden Ring, so it seems the lively residents of Bonny Village in Scadu Altus felt they needed one, too. It’s quite a long dungeon, and it has some great loot, but the boss is rather underwhelming (they are usually when you get them as Spirit Ashes for rewards). Let’s go through these cage-filled caverns section by section.
Unique Rewards:
Night Armor Set (Helm of Night, Armor of Night, Greaves of Night, Gauntlets of Night)
Shield of Night
Stalwart Horn Charm +2
Curseblade Meera Ashes (boss drop)
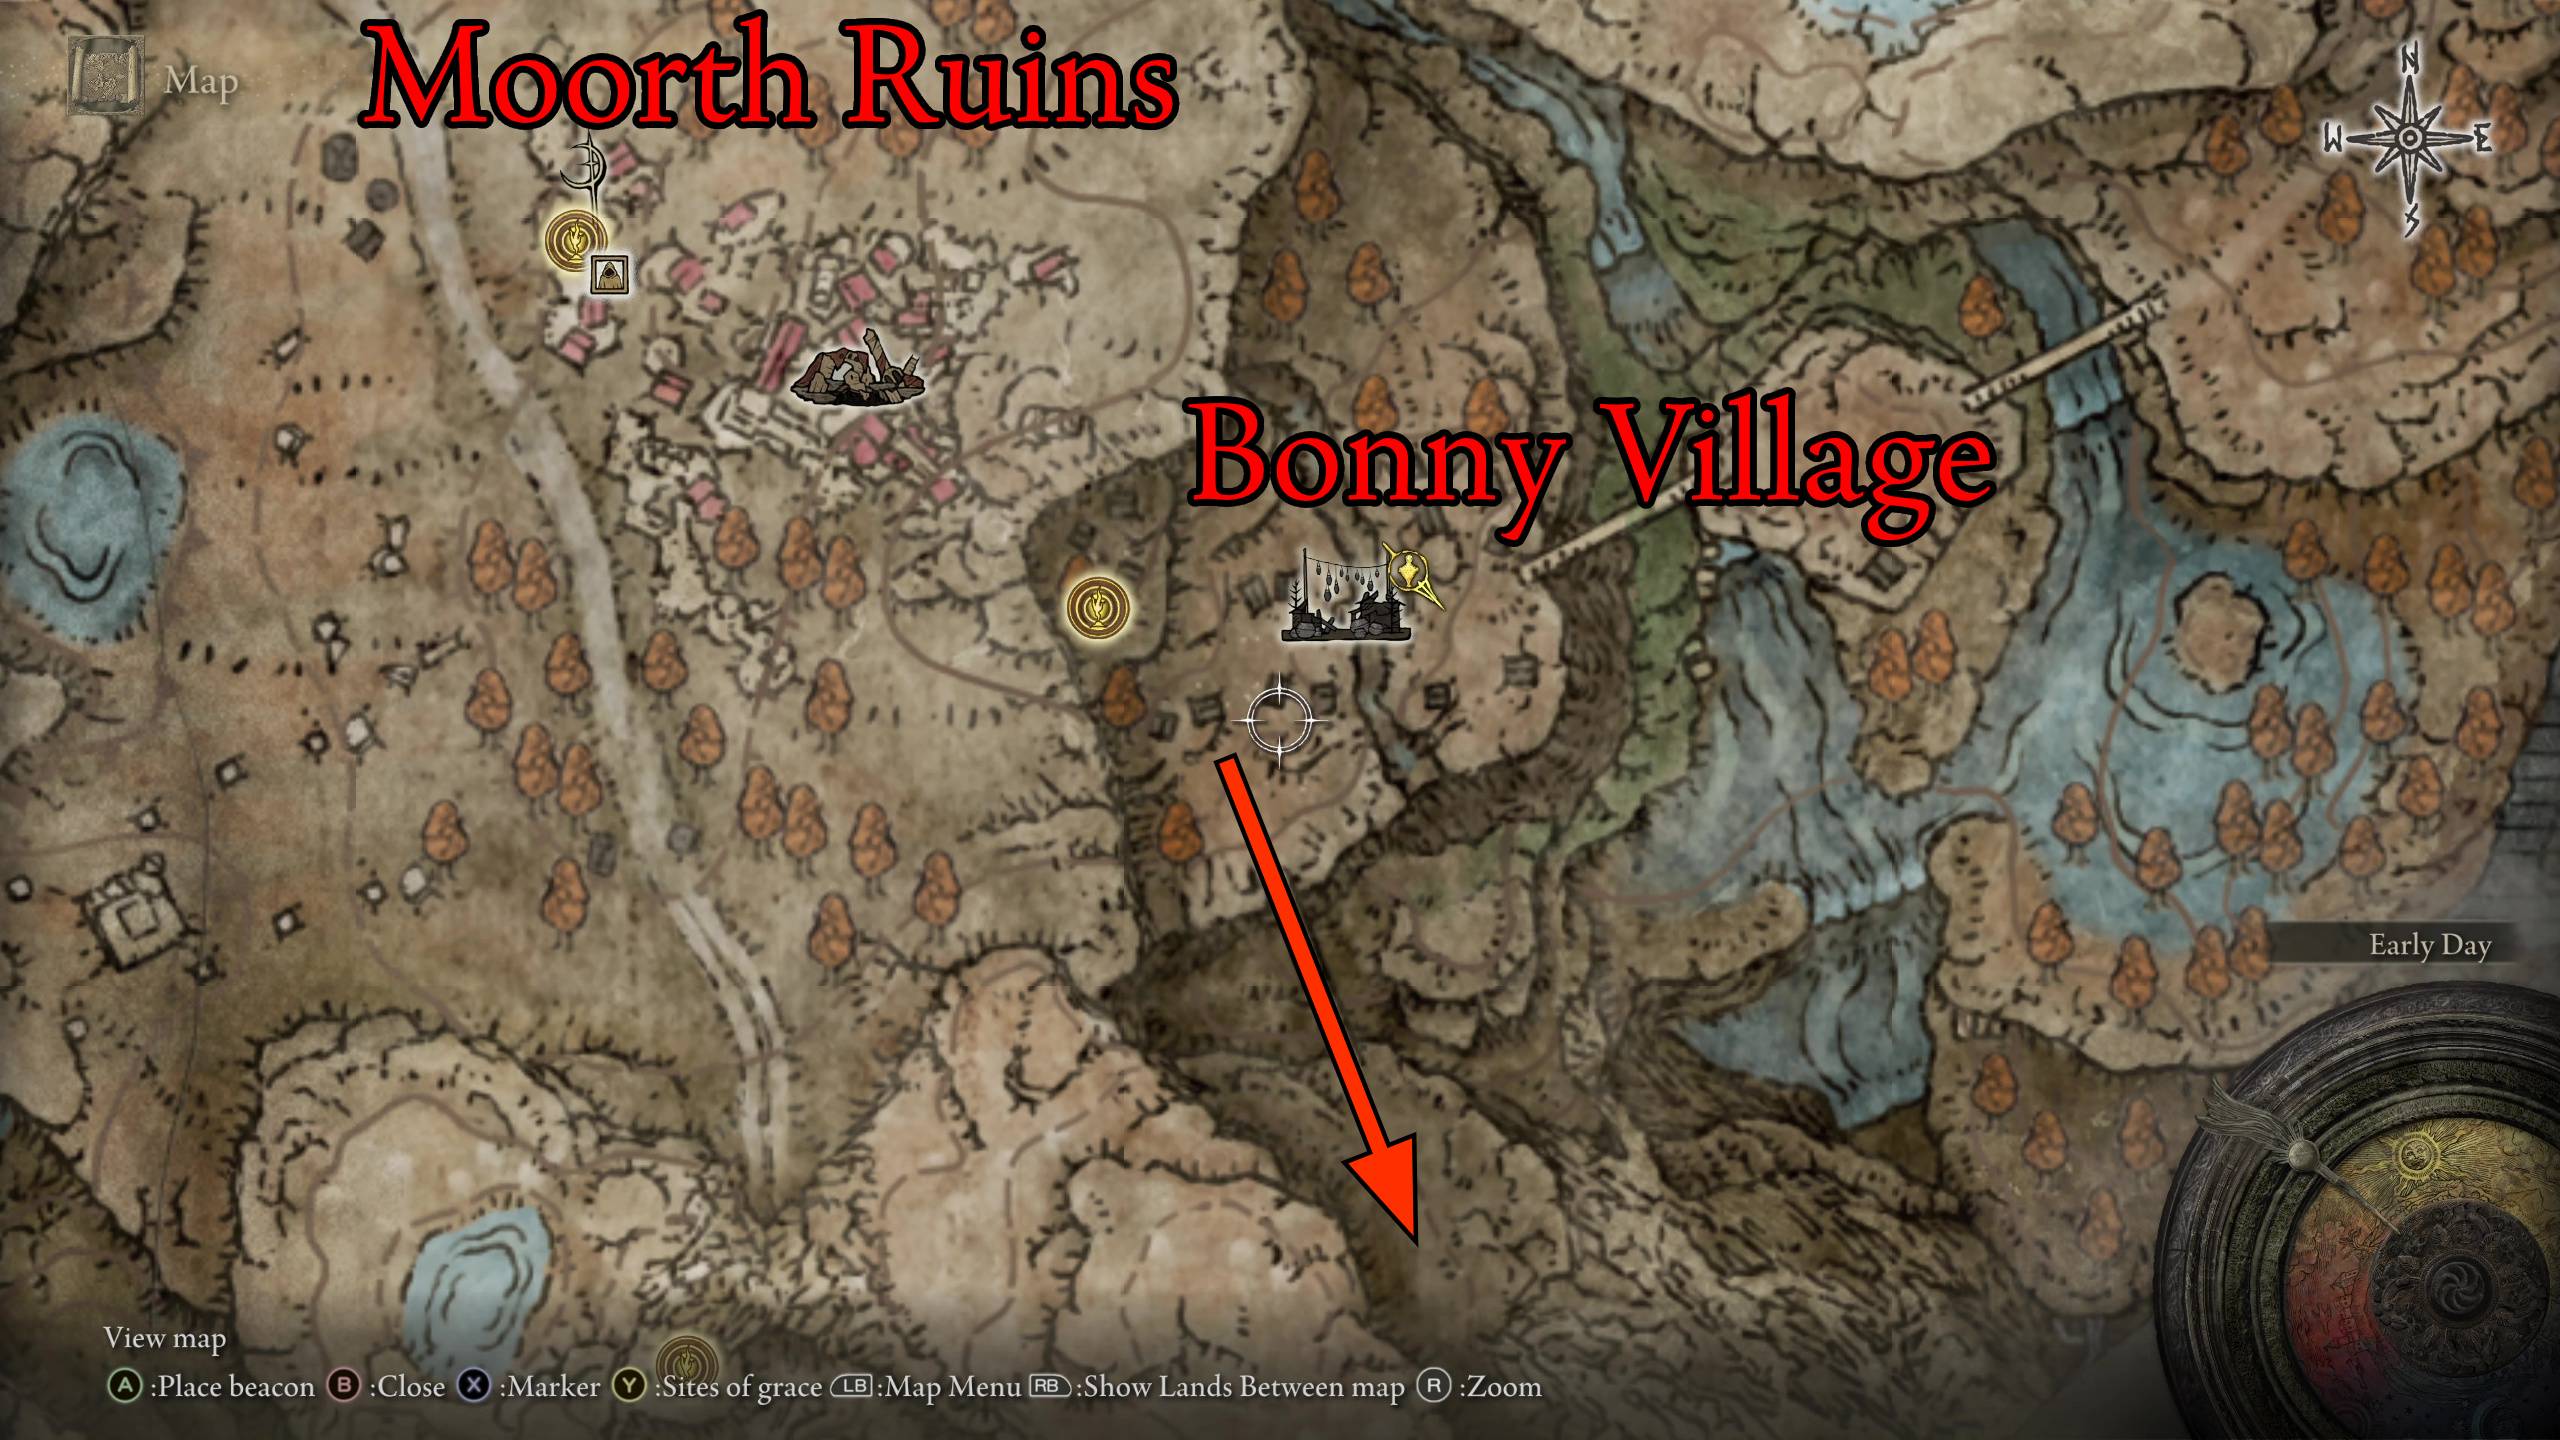
This dungeon can be a little hard to find if you’re not in the area. First off, you’ll need to have access to Scadu Altus, and you’ll have to take the Moorth Ruins down to Bonny Village. From there, it’s a short ride south across a bridge, where you’ll find the cave to the dungeon.
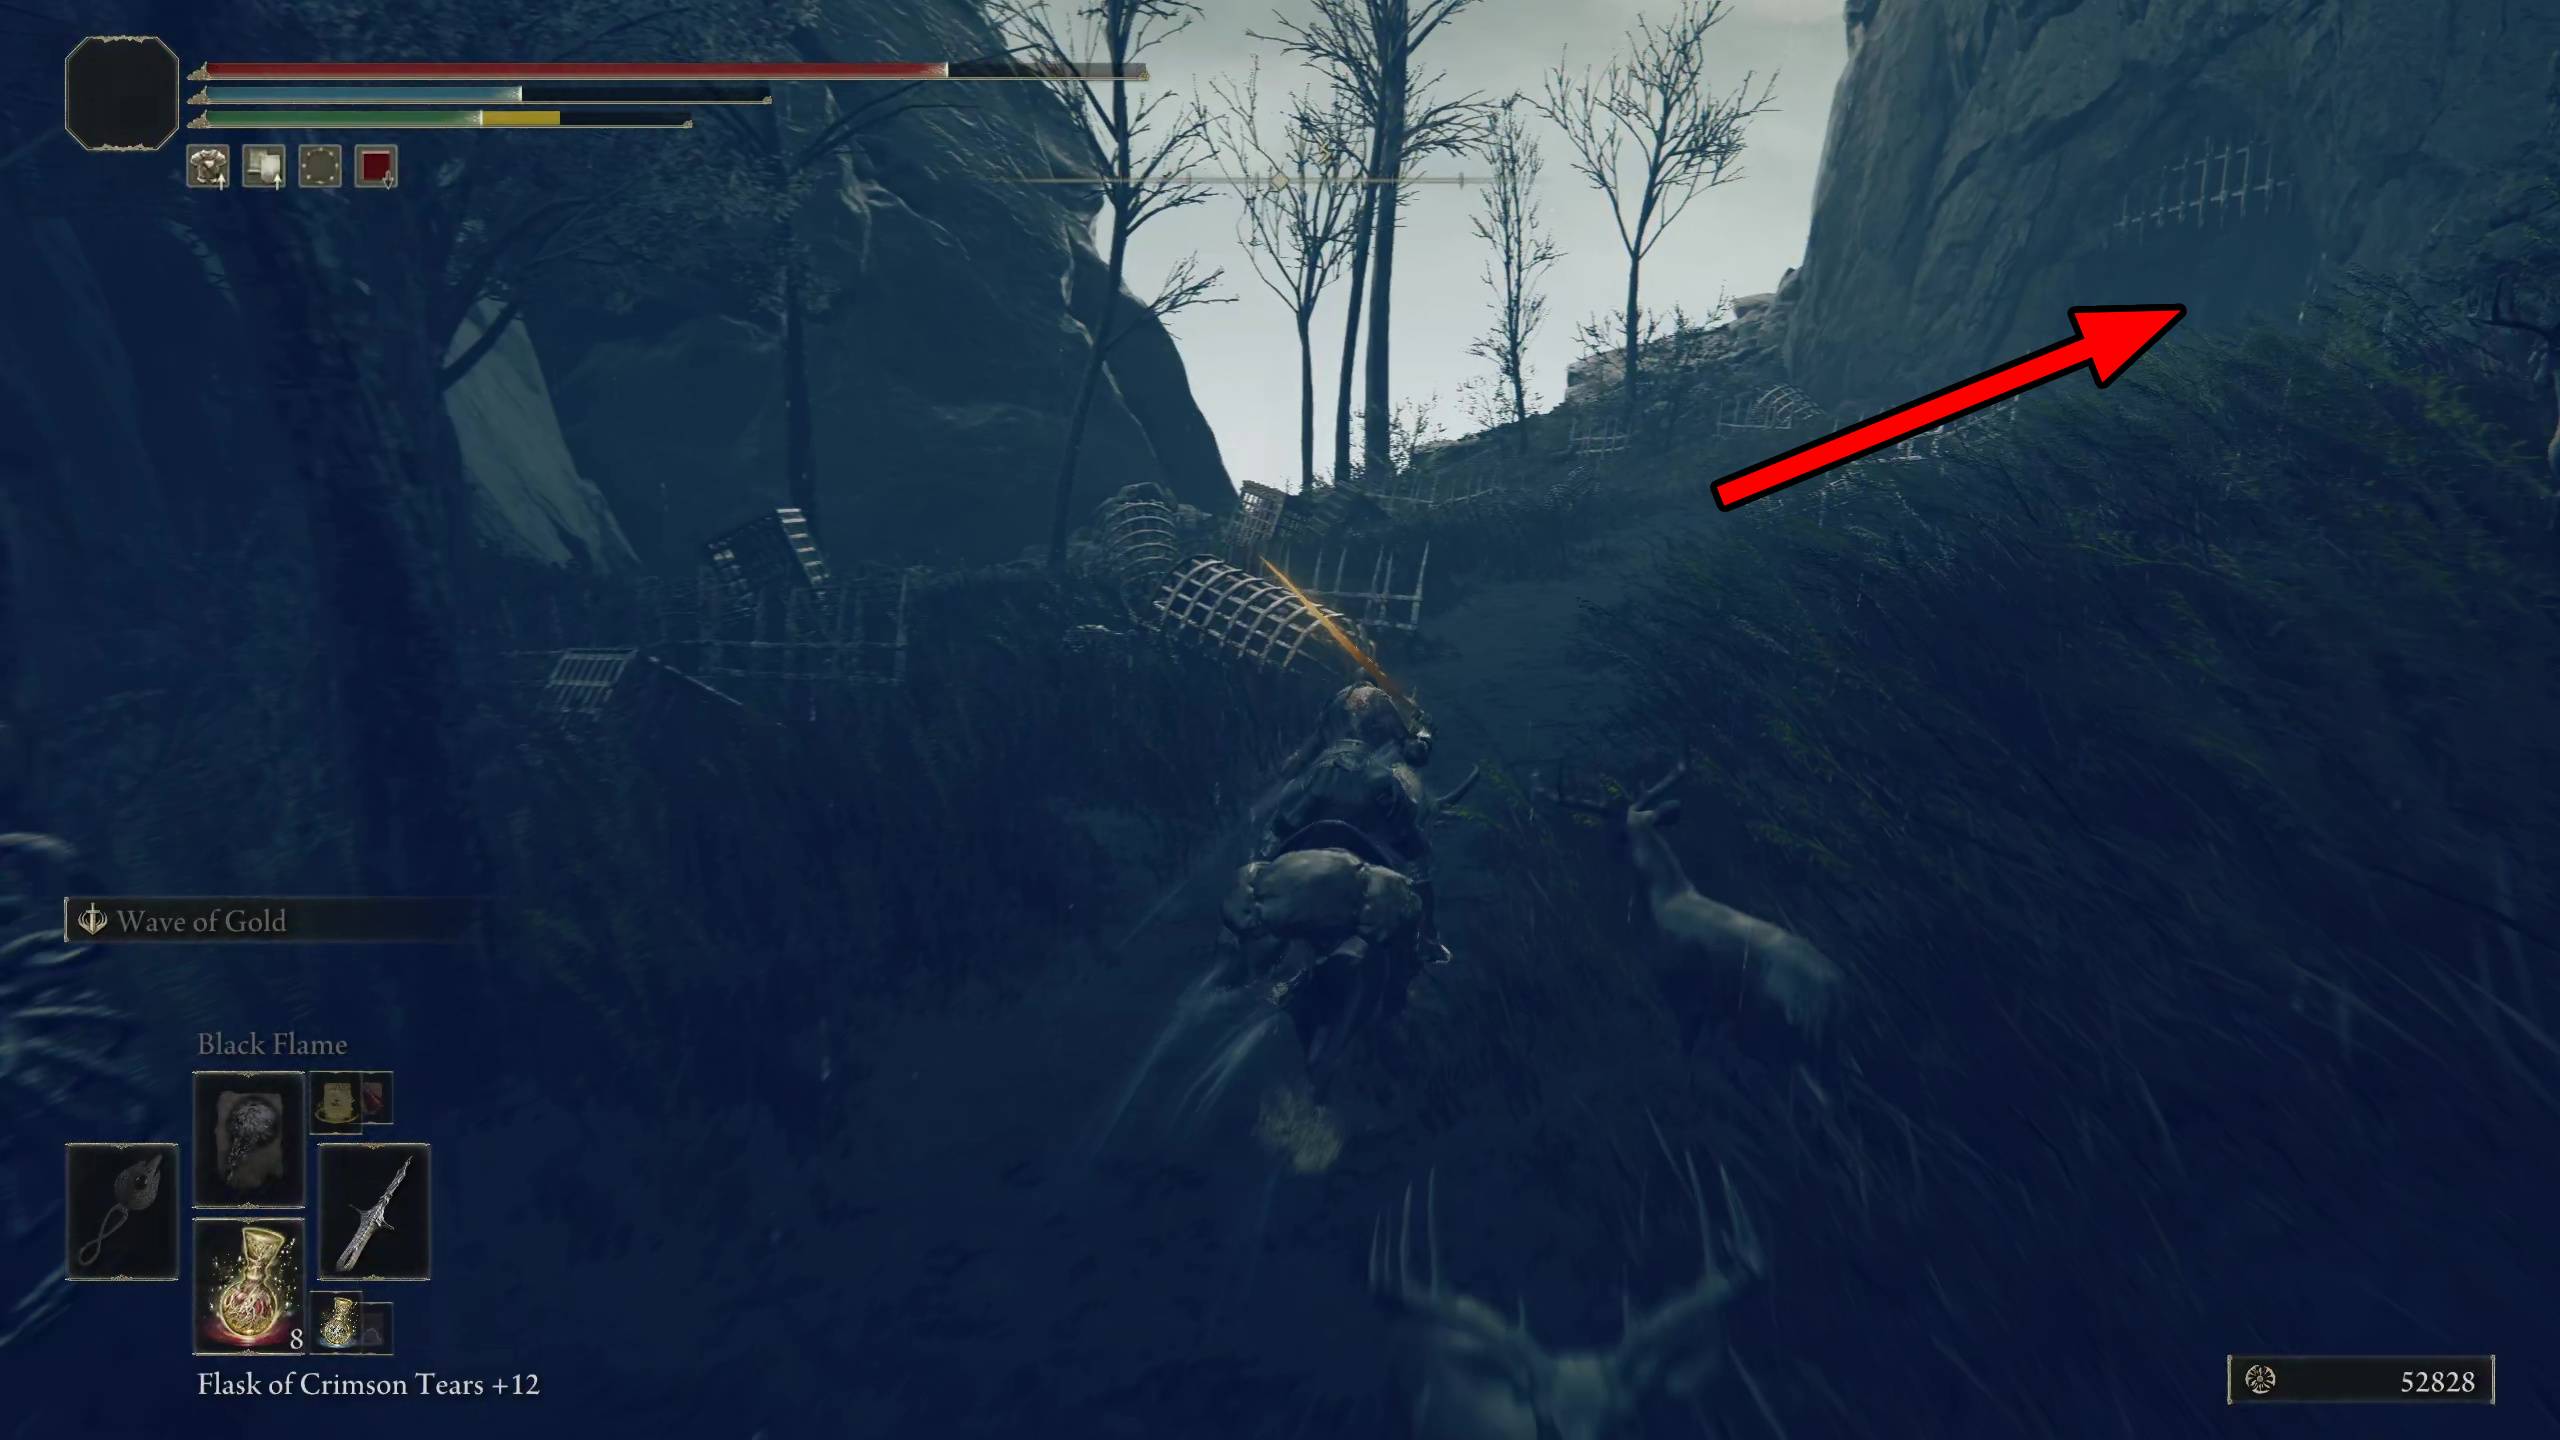
Just ride past the big scorpions
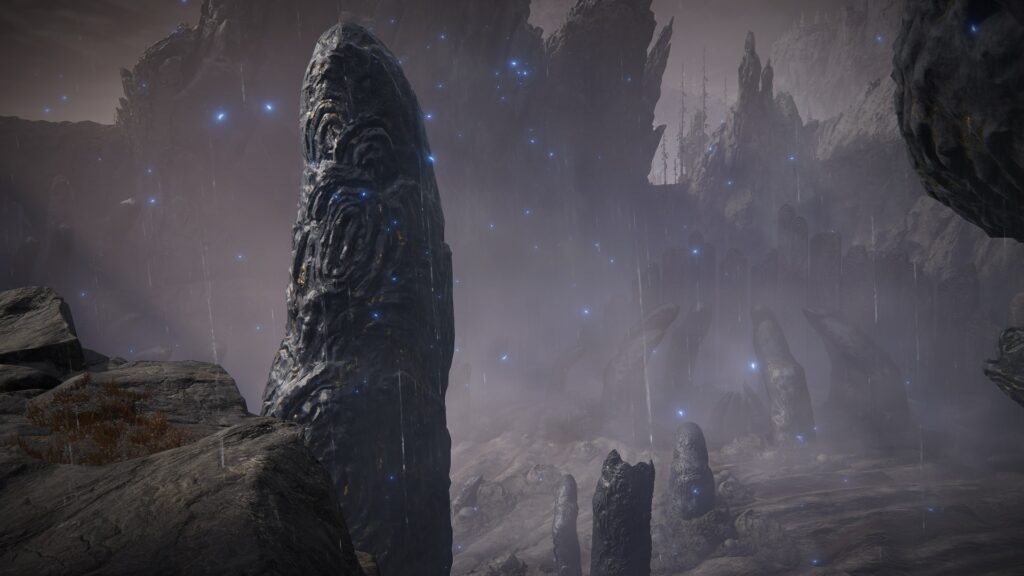
Starting Ledge
As is the case with most dungeons, you’ll want to make sure you rest at the site of grace at the beginning to refill your flasks, health, and magic. Heading down, you’ll find the first large cavern has a deep pit, with a ledge leading you across to the right. The first enemy is one that you’ll see a lot in this dungeon: a Jar Condemned that’s been taken out of its jar (gross).
The main threat from these enemies is their move where they shoot out a part of their body that will either grapple you and do damage, or push you. Since you’re right next to a cliff, you don’t want to be pushed. Hug the wall while you fight it, and take it out quickly. Heavier weapons will stun lock it, making the fight easy.
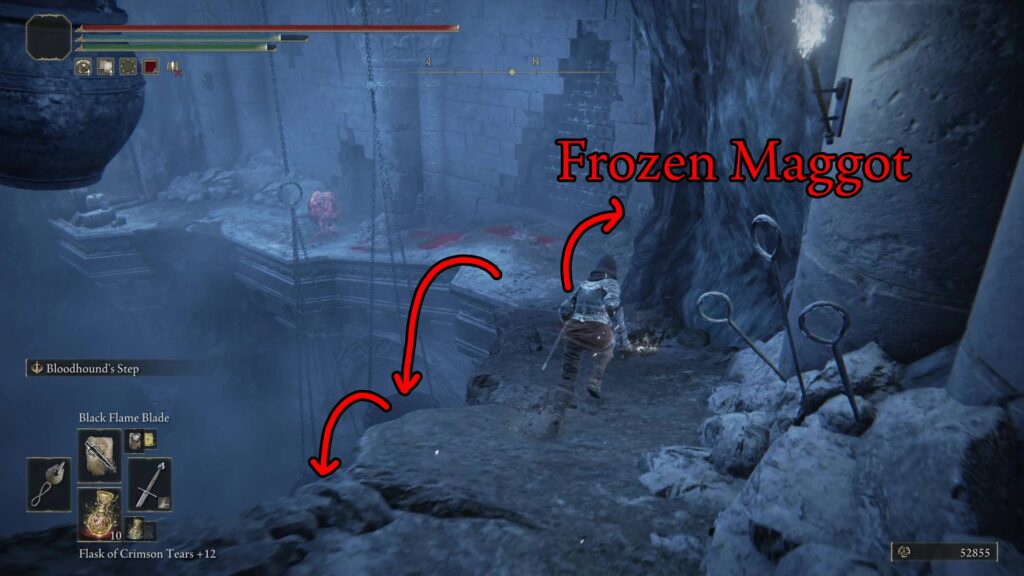
Don’t worry about the room to the right of the enemy you just killed (there’s nothing there), but you will want to turn around and go into the room behind you. There you will find a Frozen Maggot x8. There is also a Jar Condemned enemy in this room, and a basic enemy, that you’ll want to deal with.
When you come back out on to the ledge, look over the side, and you’ll notice you can walk off onto a hanging jar. Walk off onto it, then onto the next jar, and it will float down from your weight, then you can walk off onto the lower platform.
Don’t overjump the hanging jars, just walk off the ledge
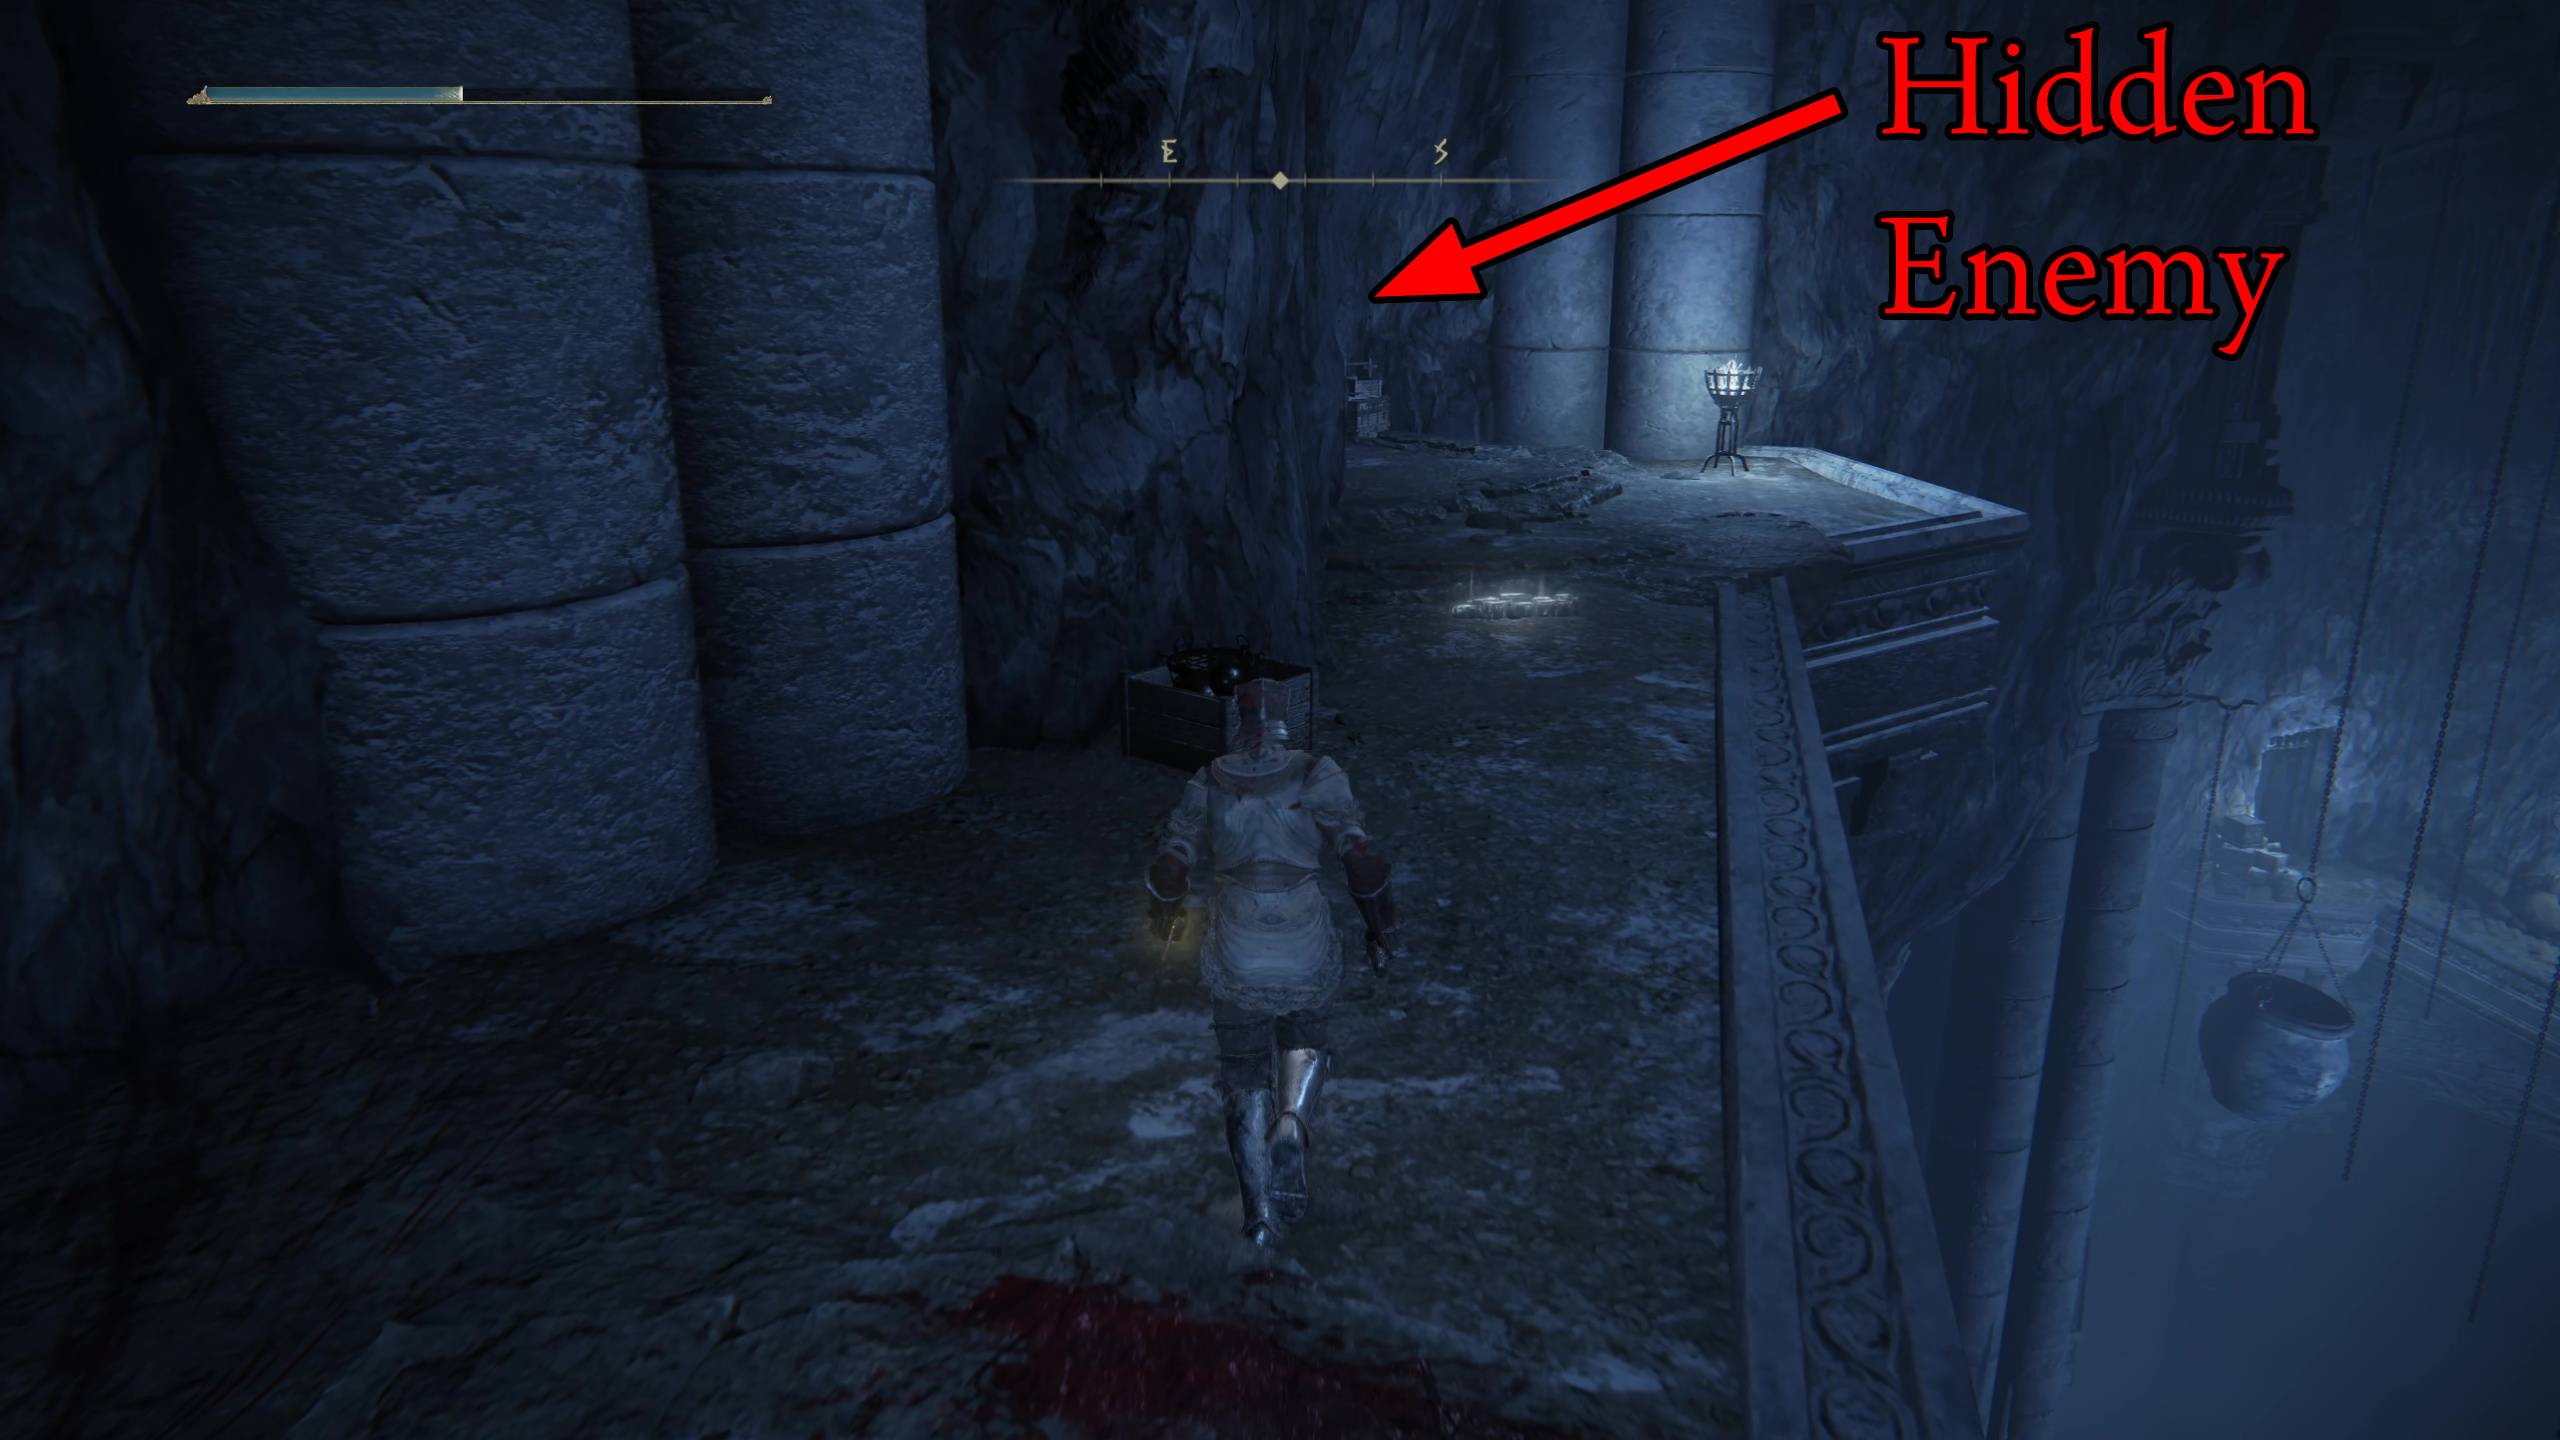
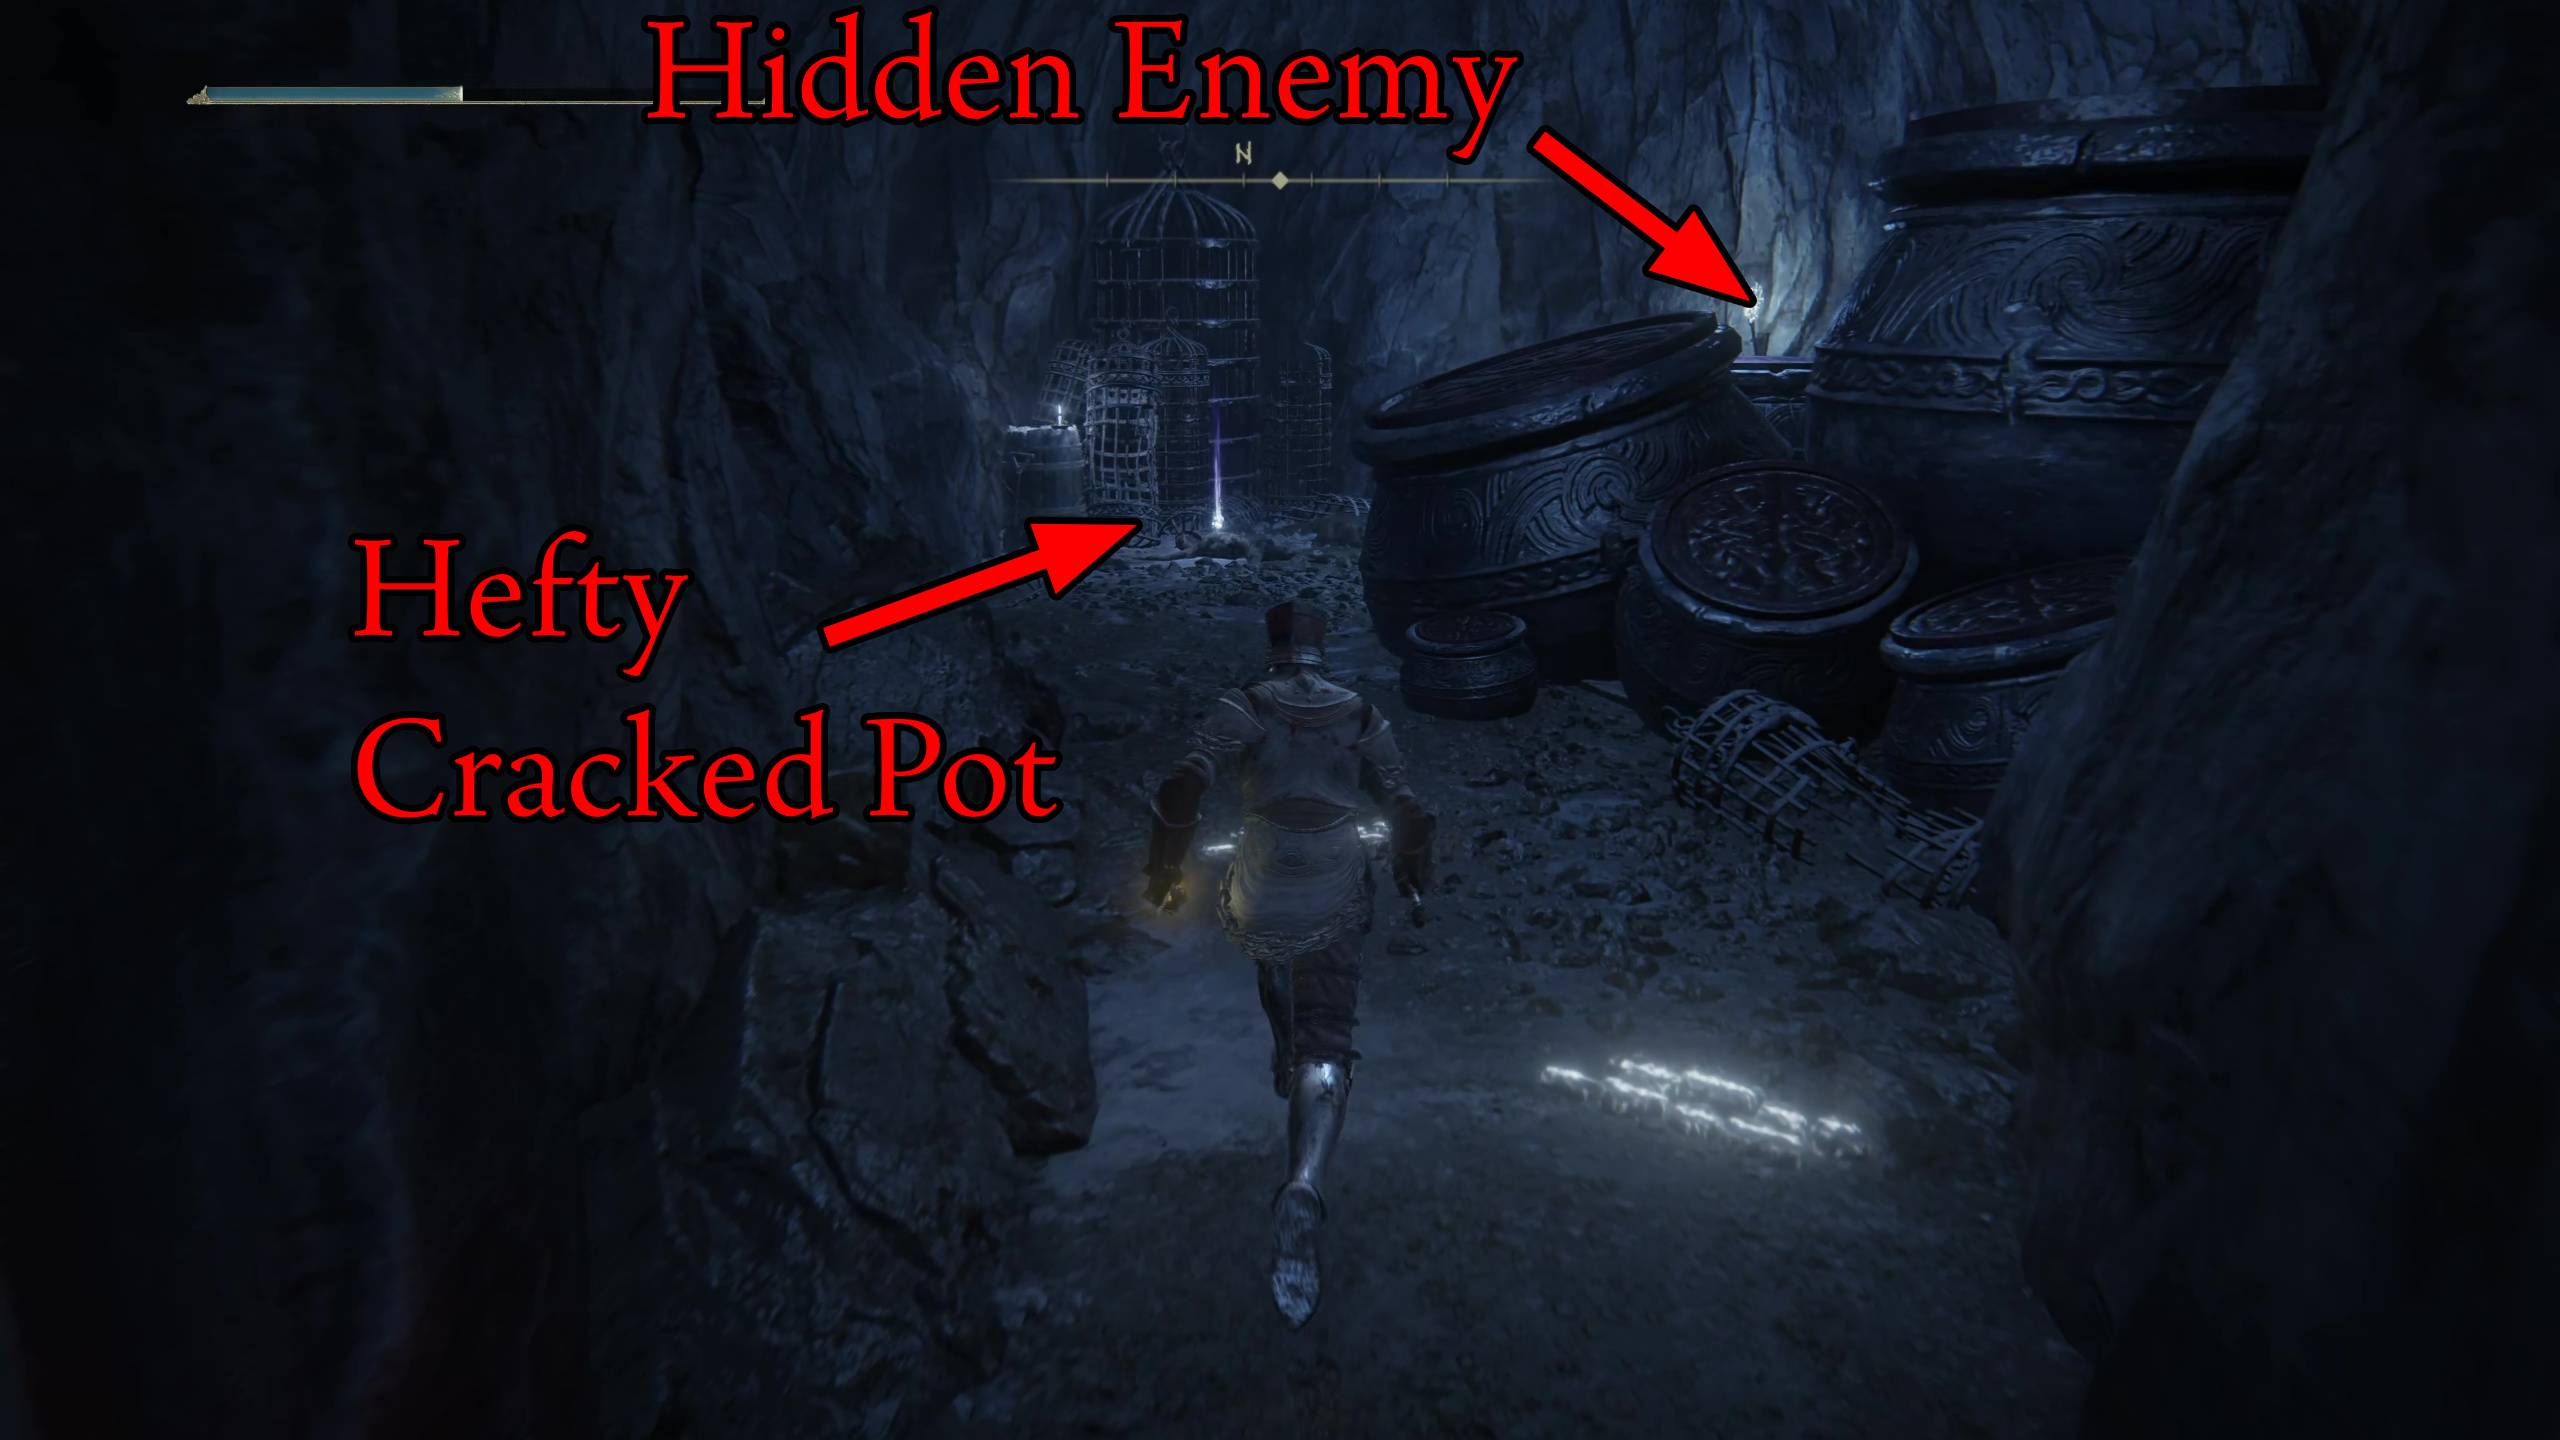
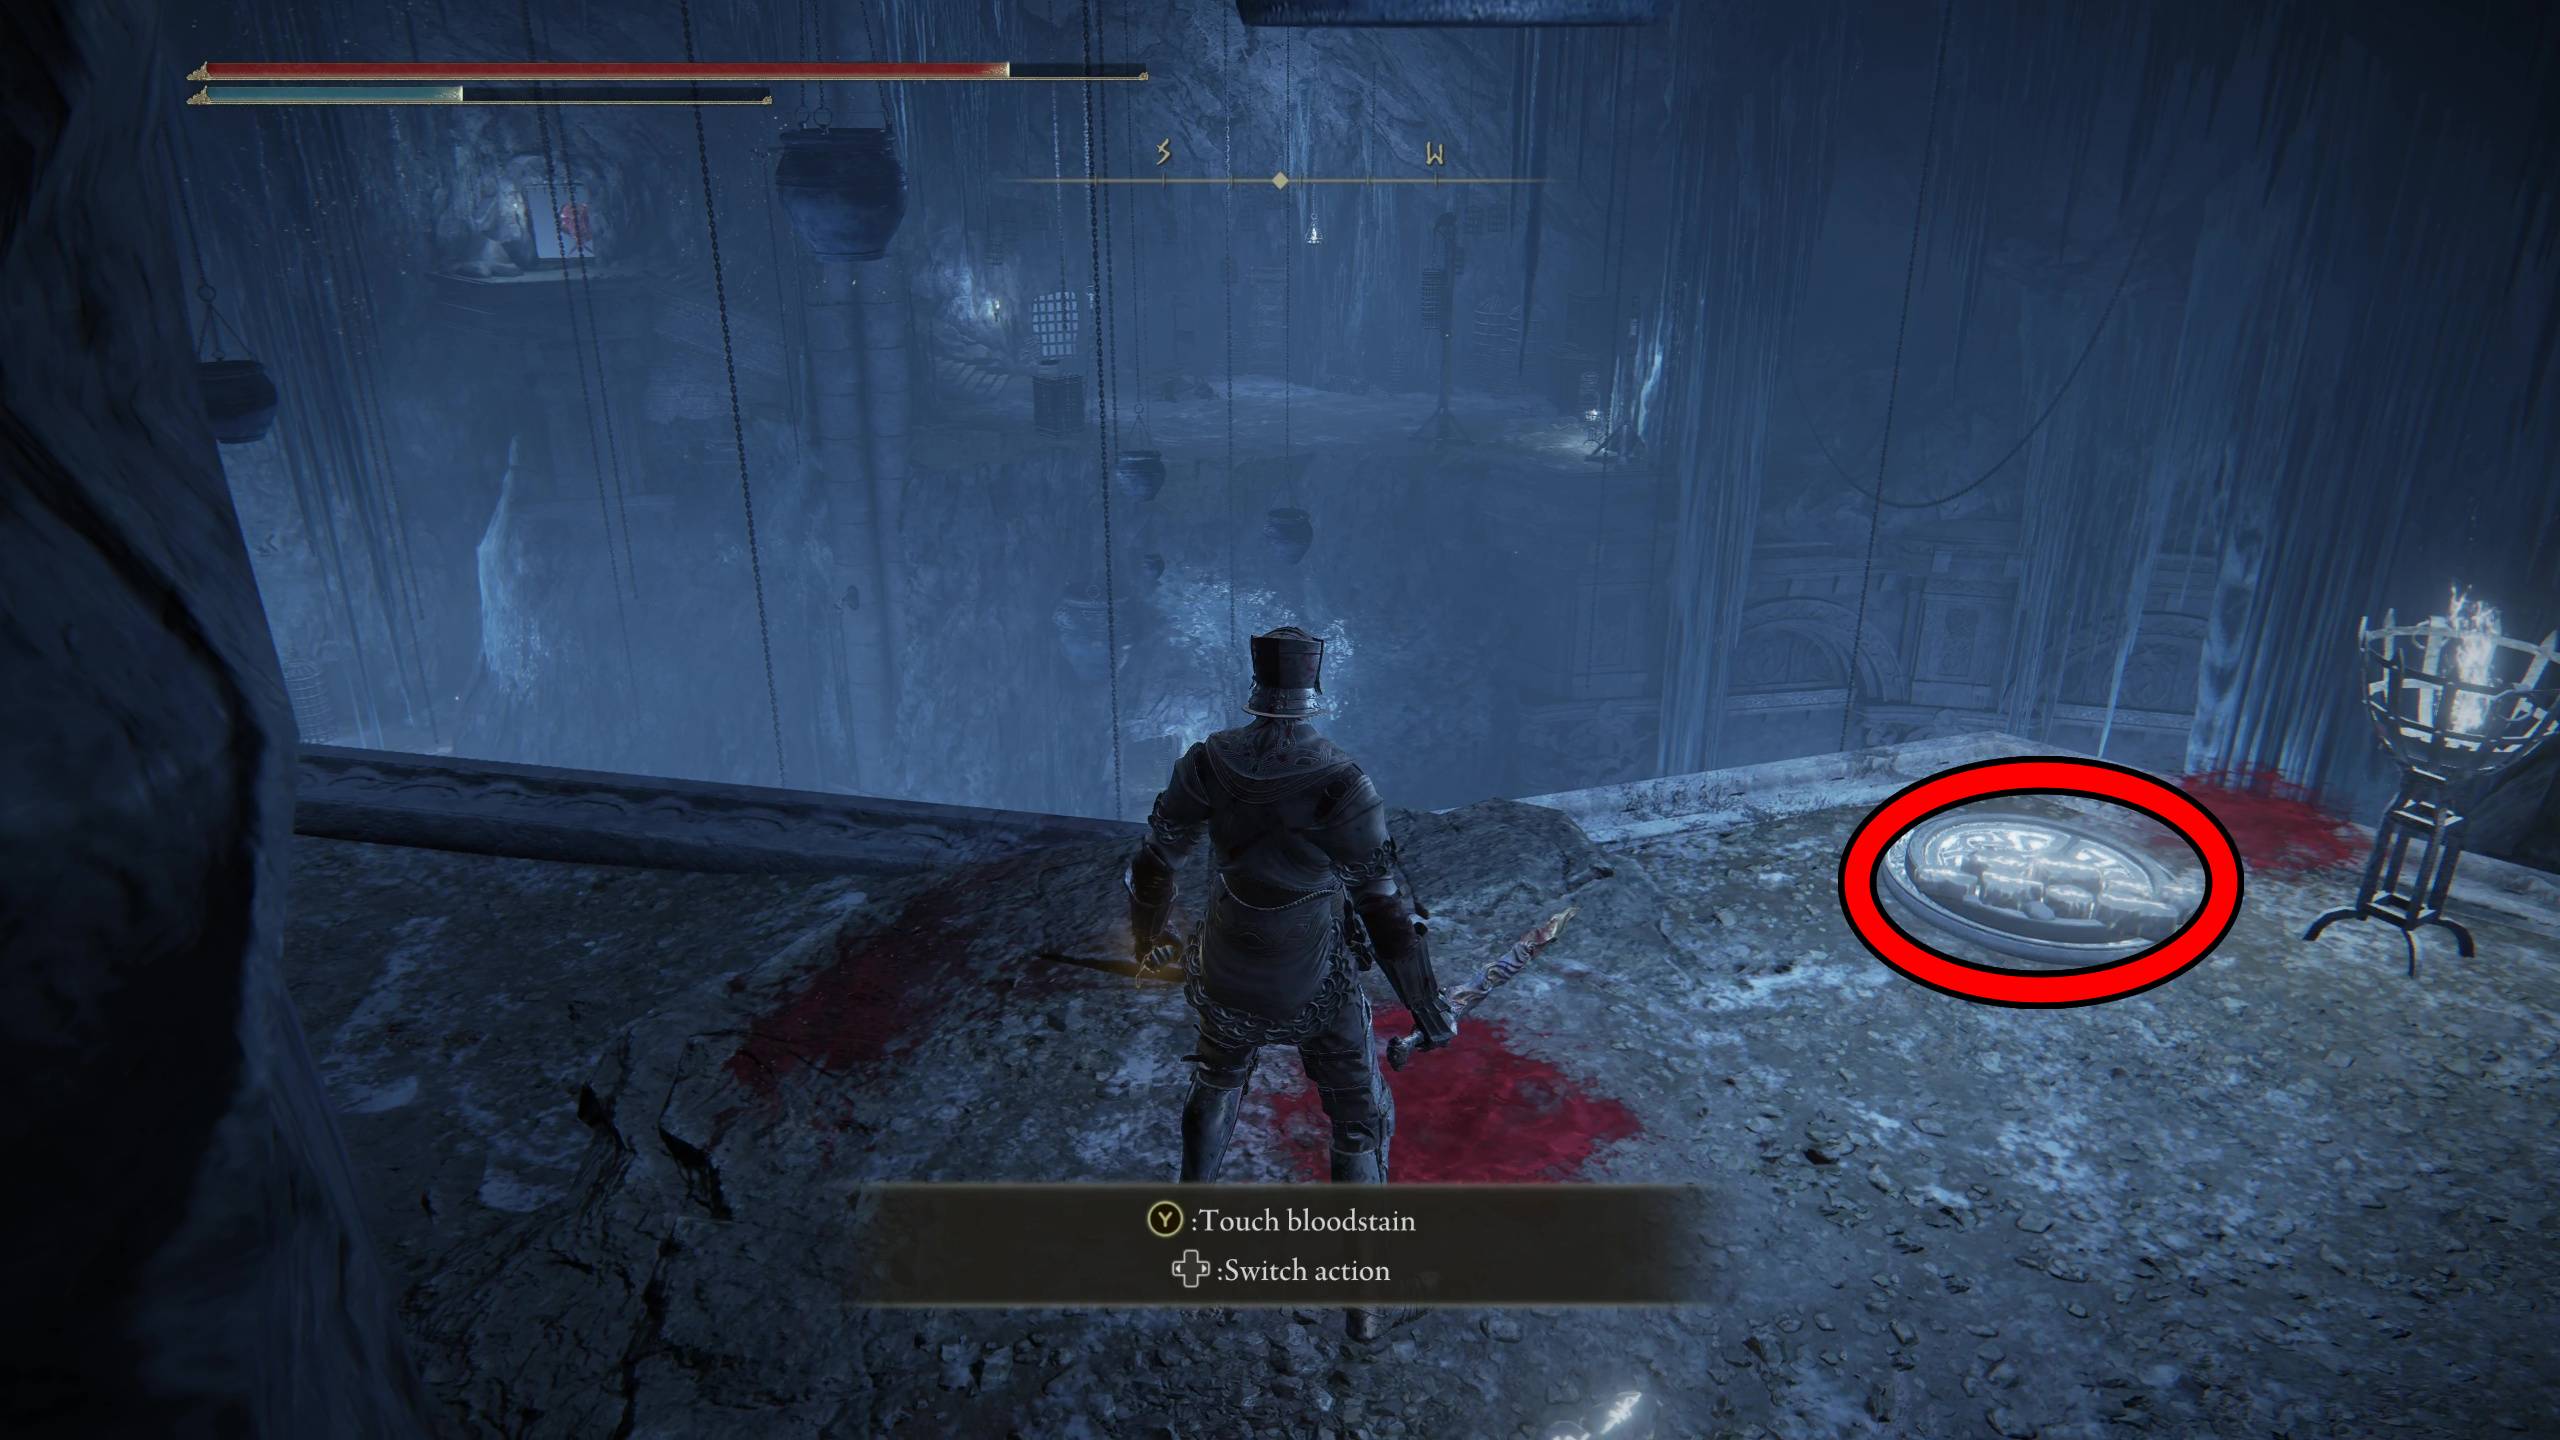
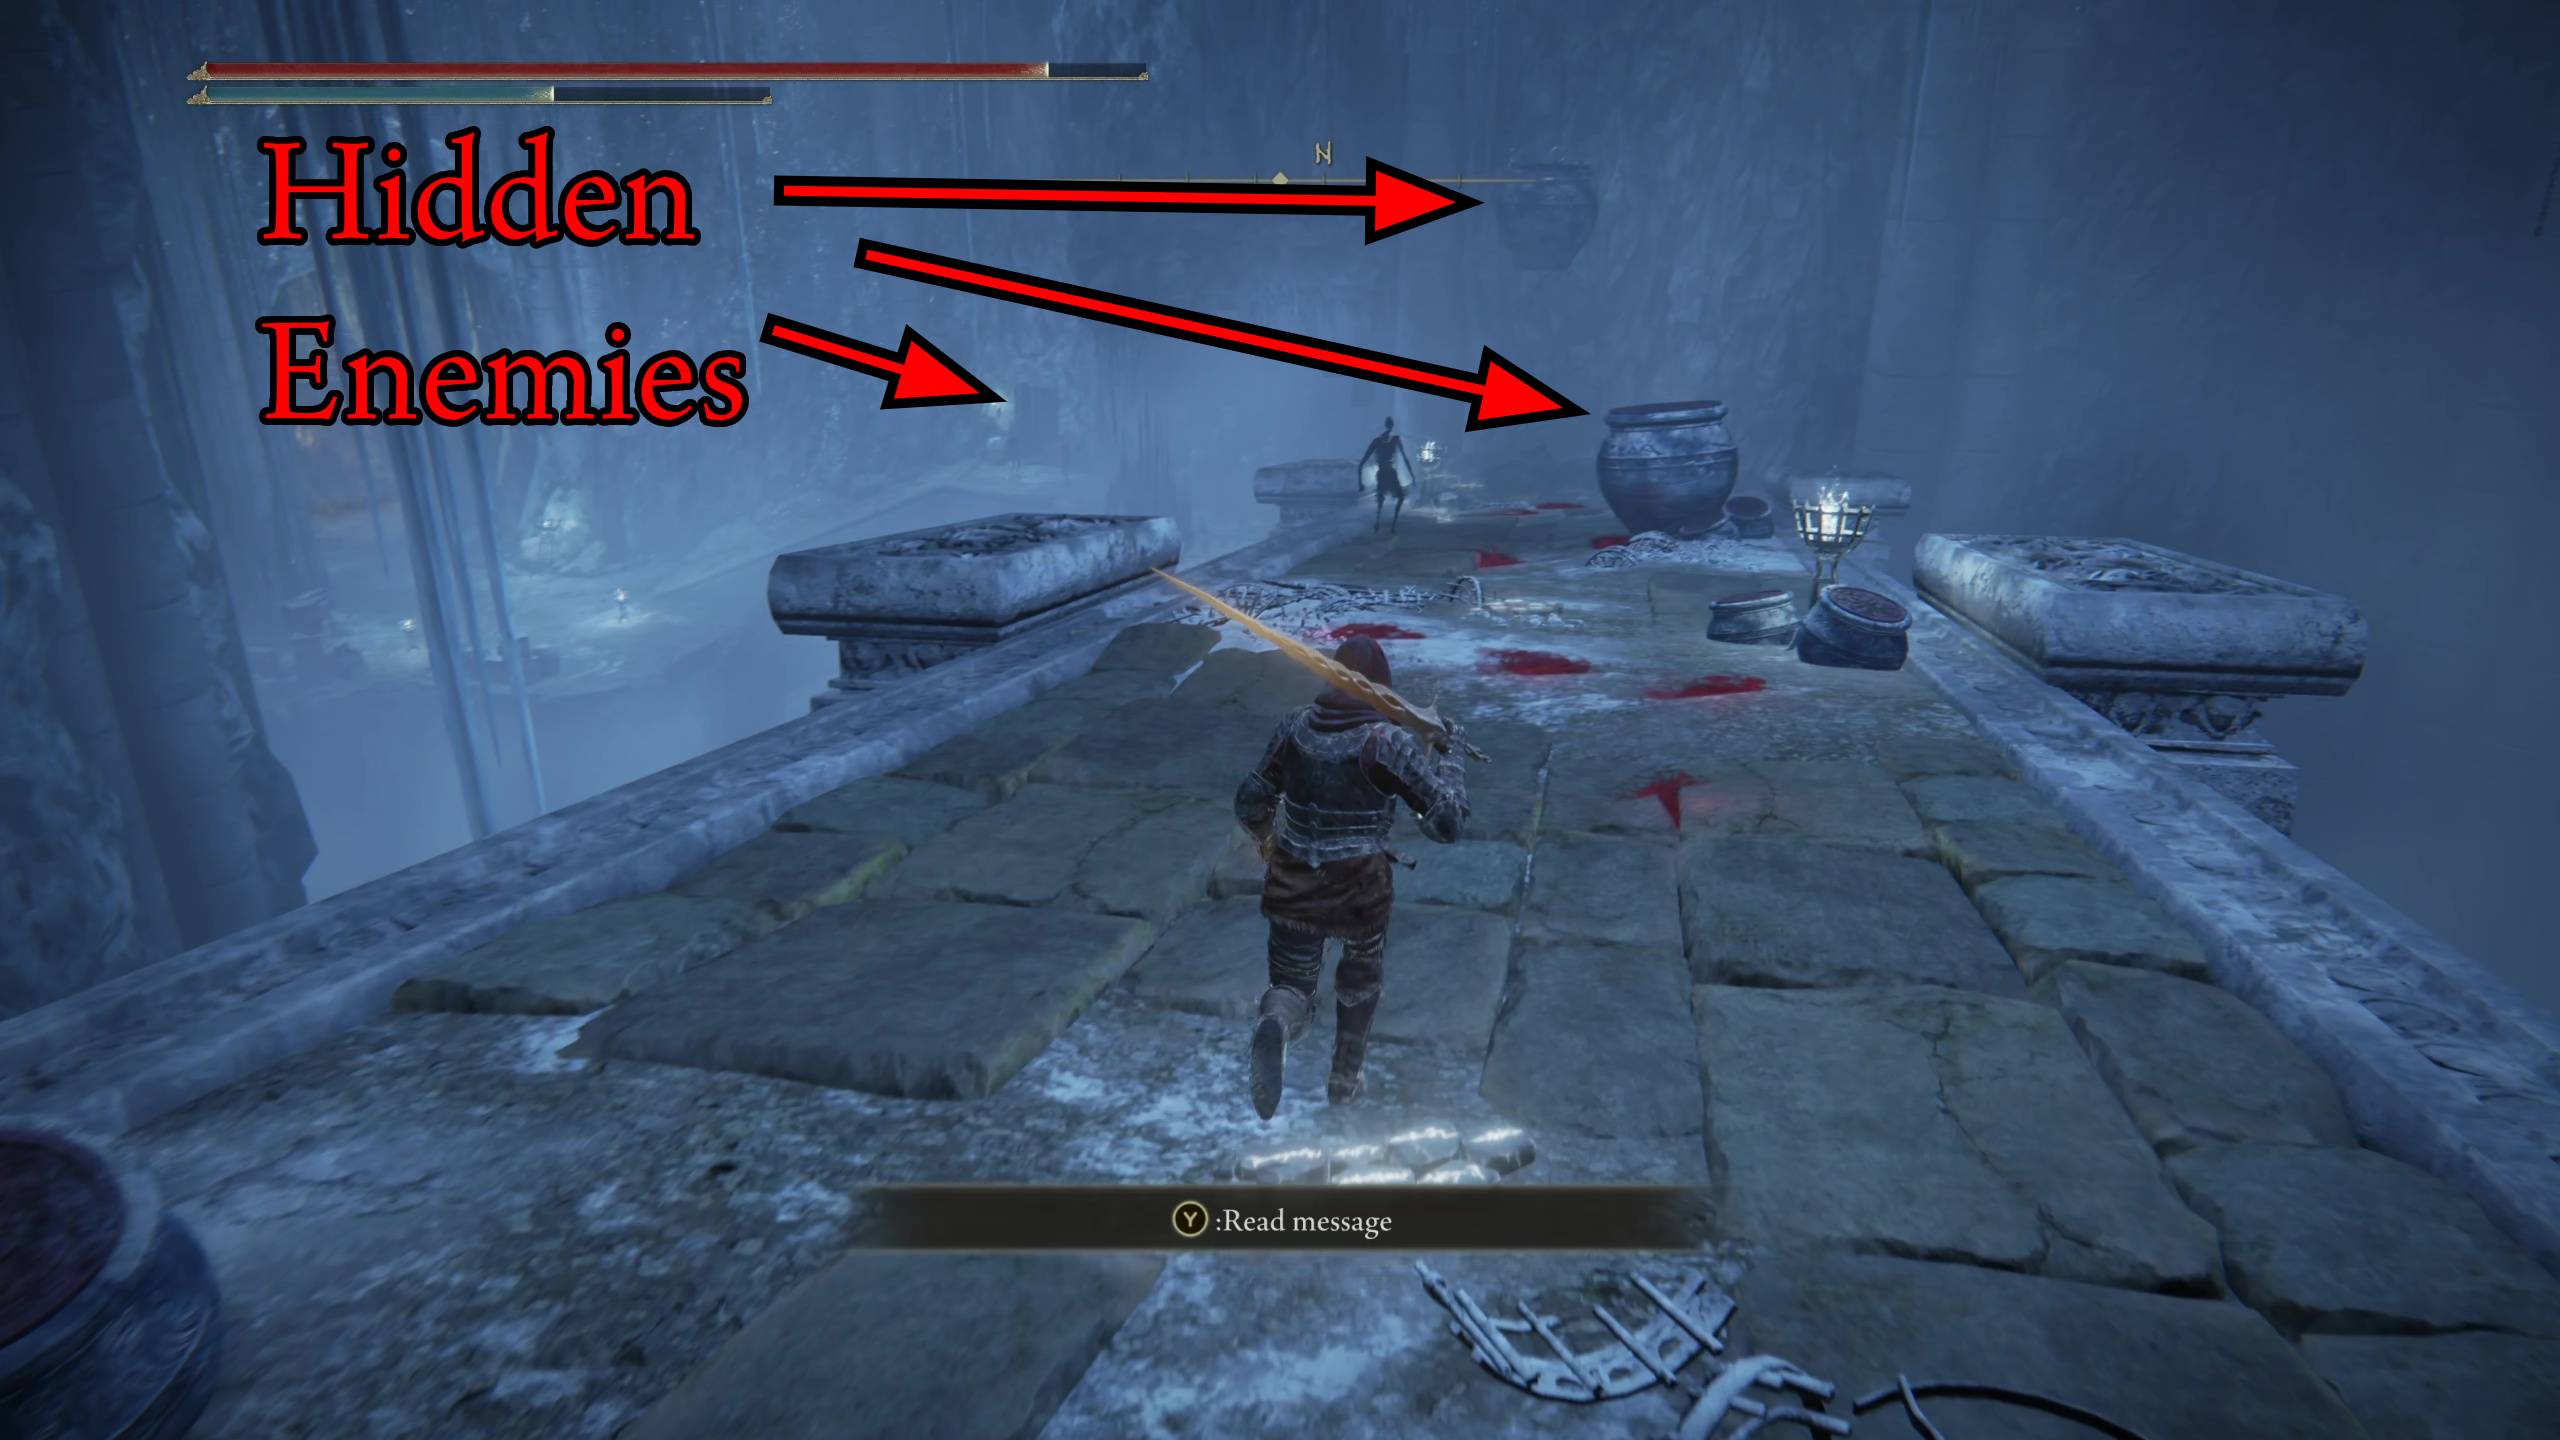
Go into the first big room closest to you when stepping off the jar, and you’ll find a Black Ghoul that will try to bite you. Kill him, then head back out onto the ledge, but be careful as there will be another hidden Jar Condemned that jumps out at you (image 1). Head into the room that it came from, and there will be another hidden Jar Condemned enemy behind the group of jars. Deal with it, then loot the Hefty Cracked Pot (image 2).
Image 1Image 2
When you want to go back up, you’ll have to step on the plate that summons the hanging pot to come back down. When you step onto it, it will carry you up to the original upper ledge. Then you can continue past where you killed the first enemy.
Summoning plate for hanging jar (step on it)
Exploring Cells and Dung
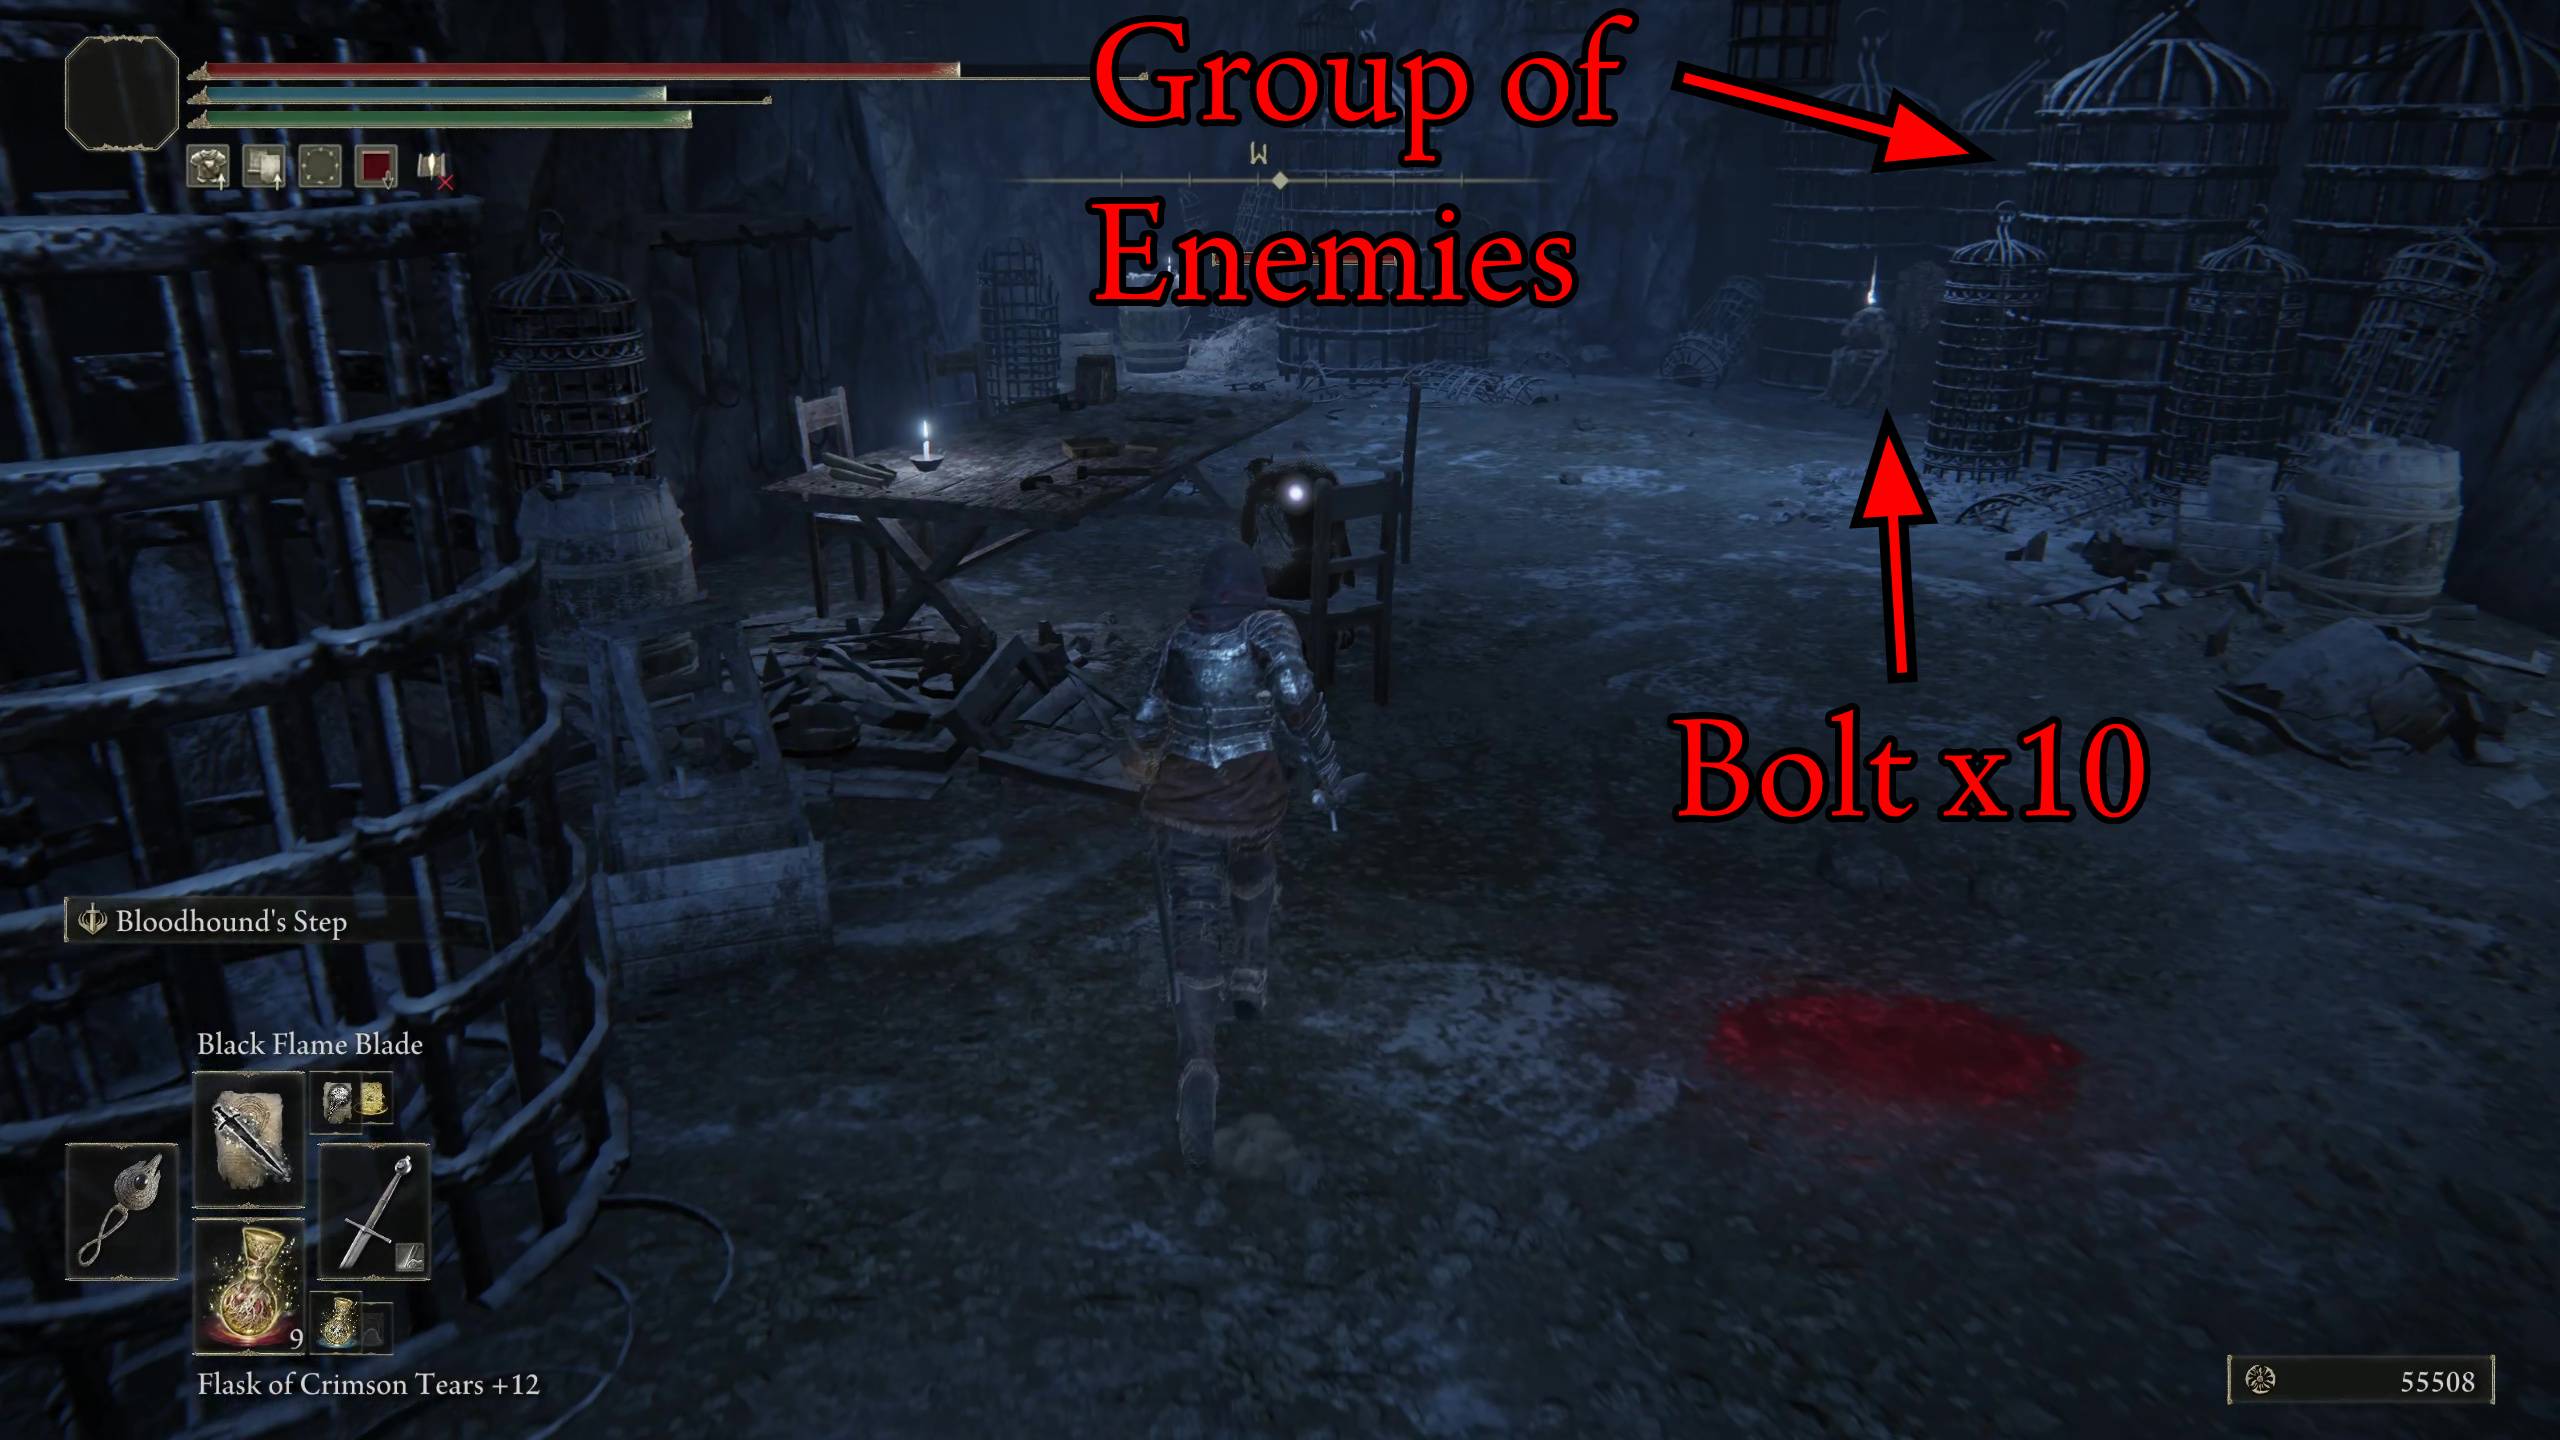
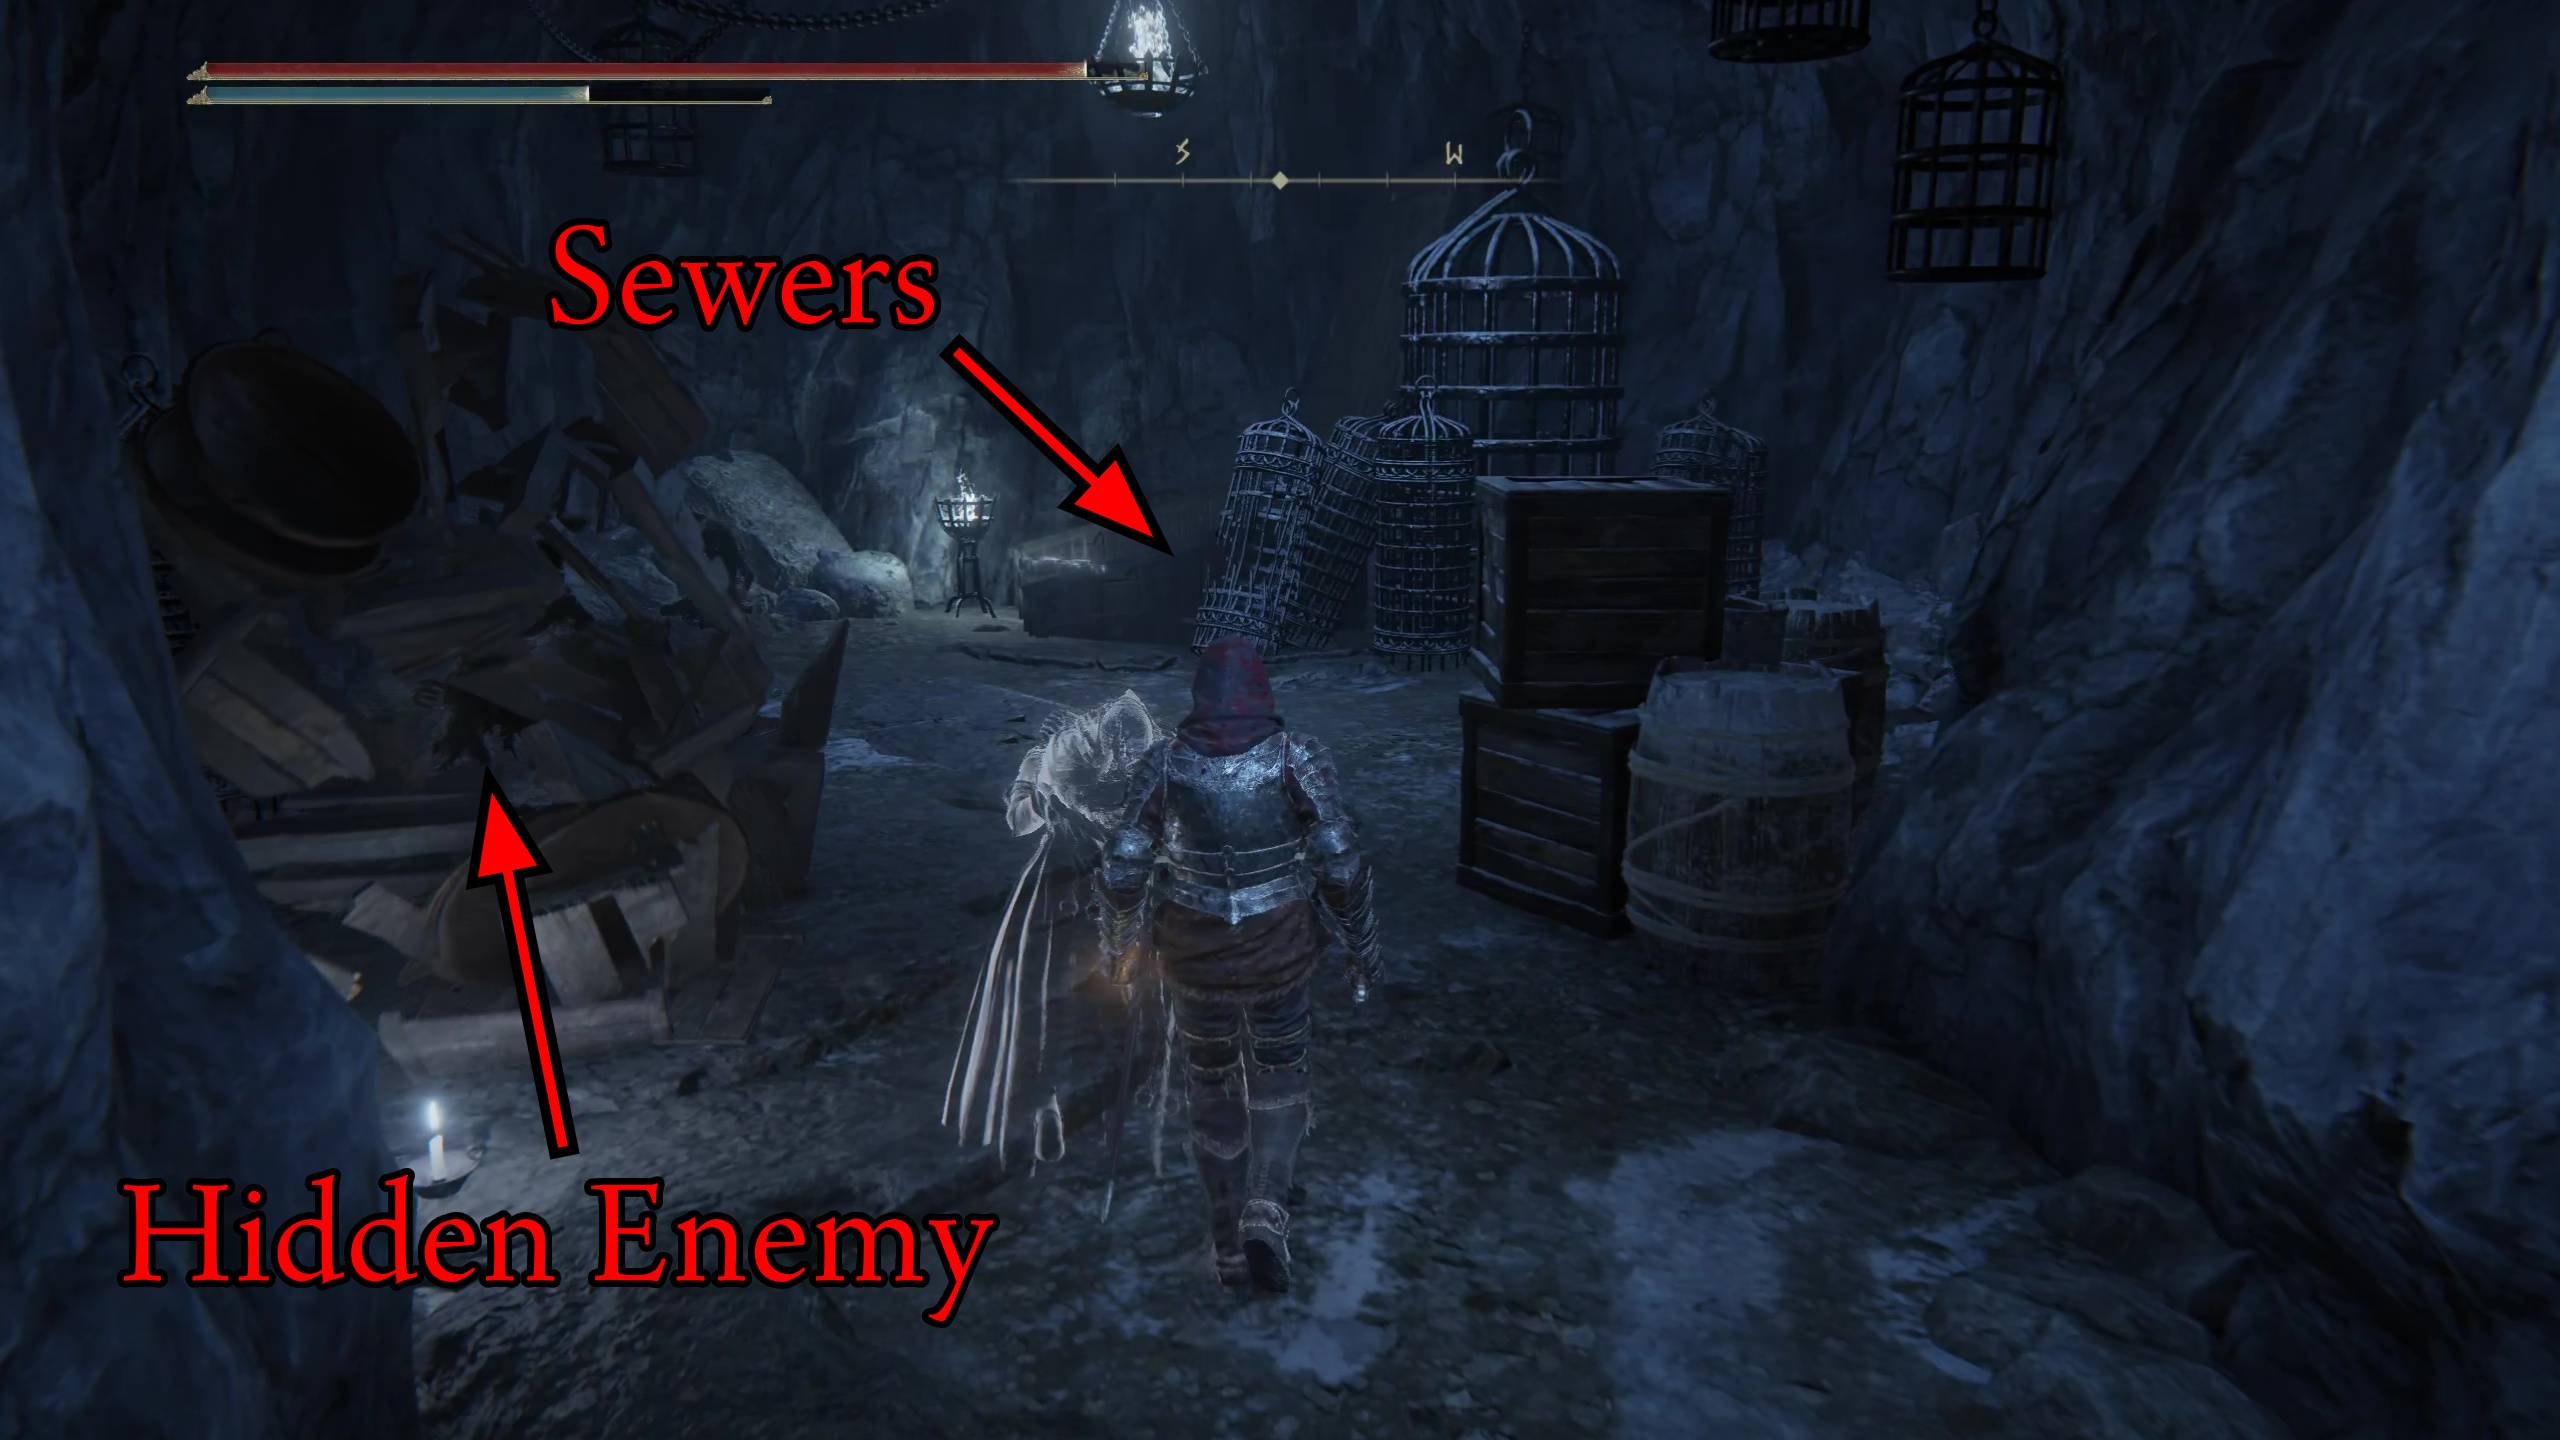
When you go into the next room, you’ll see an enemy at a desk, and an item, but what you don’t see is a group of weak enemies that will jump out and try to bite you (image 1). Slowly approach this group and they will jump out prematurely. Take care of them, then loot the Bolt x10 they were using as bait. Open the next cell door, and once again there will be a single enemy waiting for you to advance to bite you (image 2). Kill him, then jump down the hole into the dung caverns (or sewers if you prefer).
Image 1Image 2
When you drop into the sewers, turn around and head that direction. You’ll know you went the right way because you’ll start fighting rats and a giant rat. Don’t let them surround you, and take care of the rodents. You’ll find a Smithing Stone [2] where you killed them.
Continuing in that direction, you will find a ladder that takes you upwards, and at the top you’ll be attacked by another Jar Condemned. Inside that room, you’ll find the Stalwart Horn Charm +2. Then you can drop into the room on the starting ledge of the dungeon, next to where you fought the very first enemy.
Jump back into the sewers, and this time head the other direction (or straight). As soon as the tunnel opens up, don’t run into the room, as there will be a large group of skeletal slimes that drop from the ceiling. These enemies have a lot of physical defense, but they are more vulnerable to magic attacks. They are all over these sewers, and they will follow you to block your escape in the dead ends, so kill them all just to be safe. If you go straight through this room, you’ll run into a dead end with a Broken Rune.
Taking a left from the first room with slimes will lead you to another fork, where if you go left again, you’ll hit another dead end, but you can grab some Invigorating Cured Meat. Going right at the fork will have you dropping off a little edge with water pouring over it, and into a larger cavern.
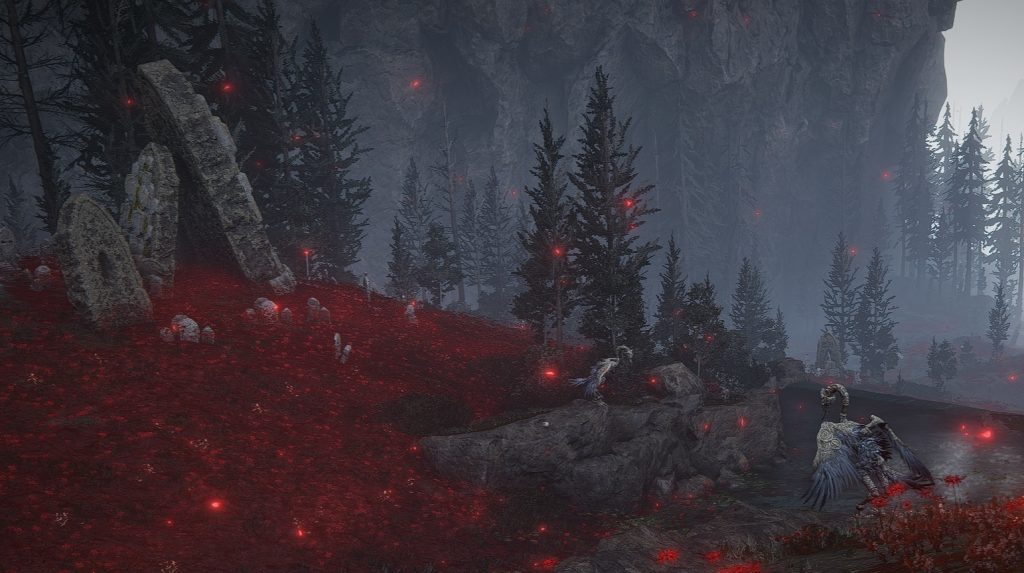
Fighting Jars Among the Corpses
After exiting the sewers, you’ll find yourself in caverns that are filled with corpses. Moving forward and taking a left, you’ll see a Living Jar (this being the first one that actually has a jar). This room is full of enemies, so try to lure this first big one back to where you came in.
Fighting these can be tricky as their moves are unique and the timing awkward. They have a butt slam attack, and spinning attack where they spin towards you and fling their arms. Keep backing up if you need to hit-and-run to chip away their health.
Try to finish the big pot off quick, as your fight will attract the attention of its kin, or at least it’s little kin. The little variations of Living Jars are much easier, but can be dangerous if they surround you. Use heavy attacks to stagger them, which will keep them from attacking.
This room is filled to the brom with hostile Living Jars
You’re not done fighting pots; in that same cavernous room, there are two more big jars, and a bunch of little ones. The total makes three big Living Jars and eight little Living Jars— for those keeping count. Handle them one at a time if possible, or back up and try to coax them into duels. If you would rather just run past these enemies, you aren’t missing much. There’s just a Broken Rune off to the left near a water grate, and a Lost Ashes of War to the right on a pile of corpses by a little waterfall.
When you jump down the small waterfall ledge into the next room, you’ll see an item straight ahead. Of course, this is another trap and a Jar Condemned will attack you. The item is ironically Innard Meat, by the way. There are actually two more Jar Condemned in this room waiting to attack you. One is in the middle, and another is hidden in a broken jar off to the left. The left one is protecting a Raw Meat Dumpling inside its hiding jar.
The next room is full of the jarless enemy variations
In the next room, you will be attacked by another Jar Condemned that breaks out of a hanging jar on your right. Then you will find yourself in the large cavern you were in at the beginning, but you’ll be on the far side from where you came in.
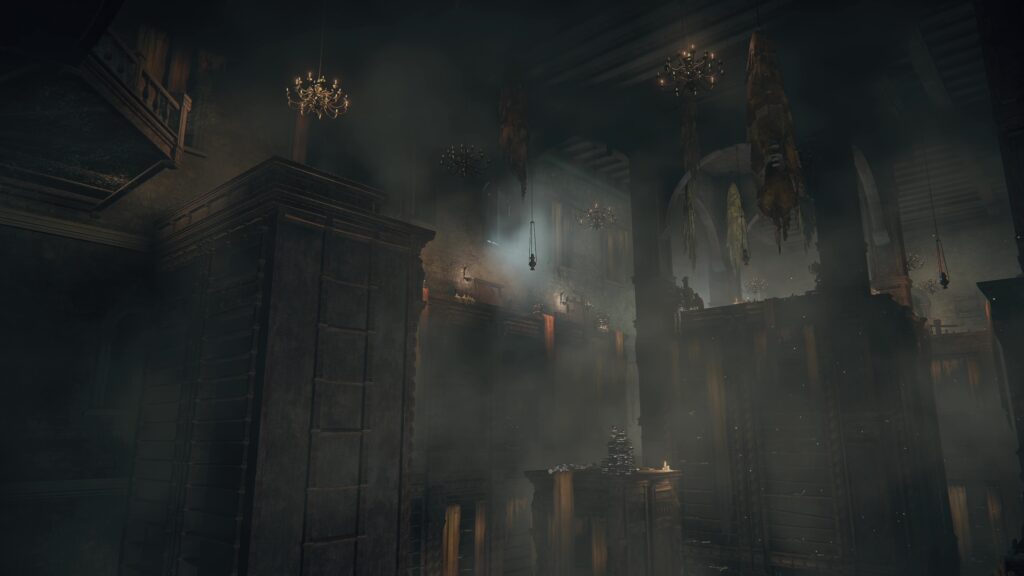
Jar Elevator to Night Armor Set and Boss
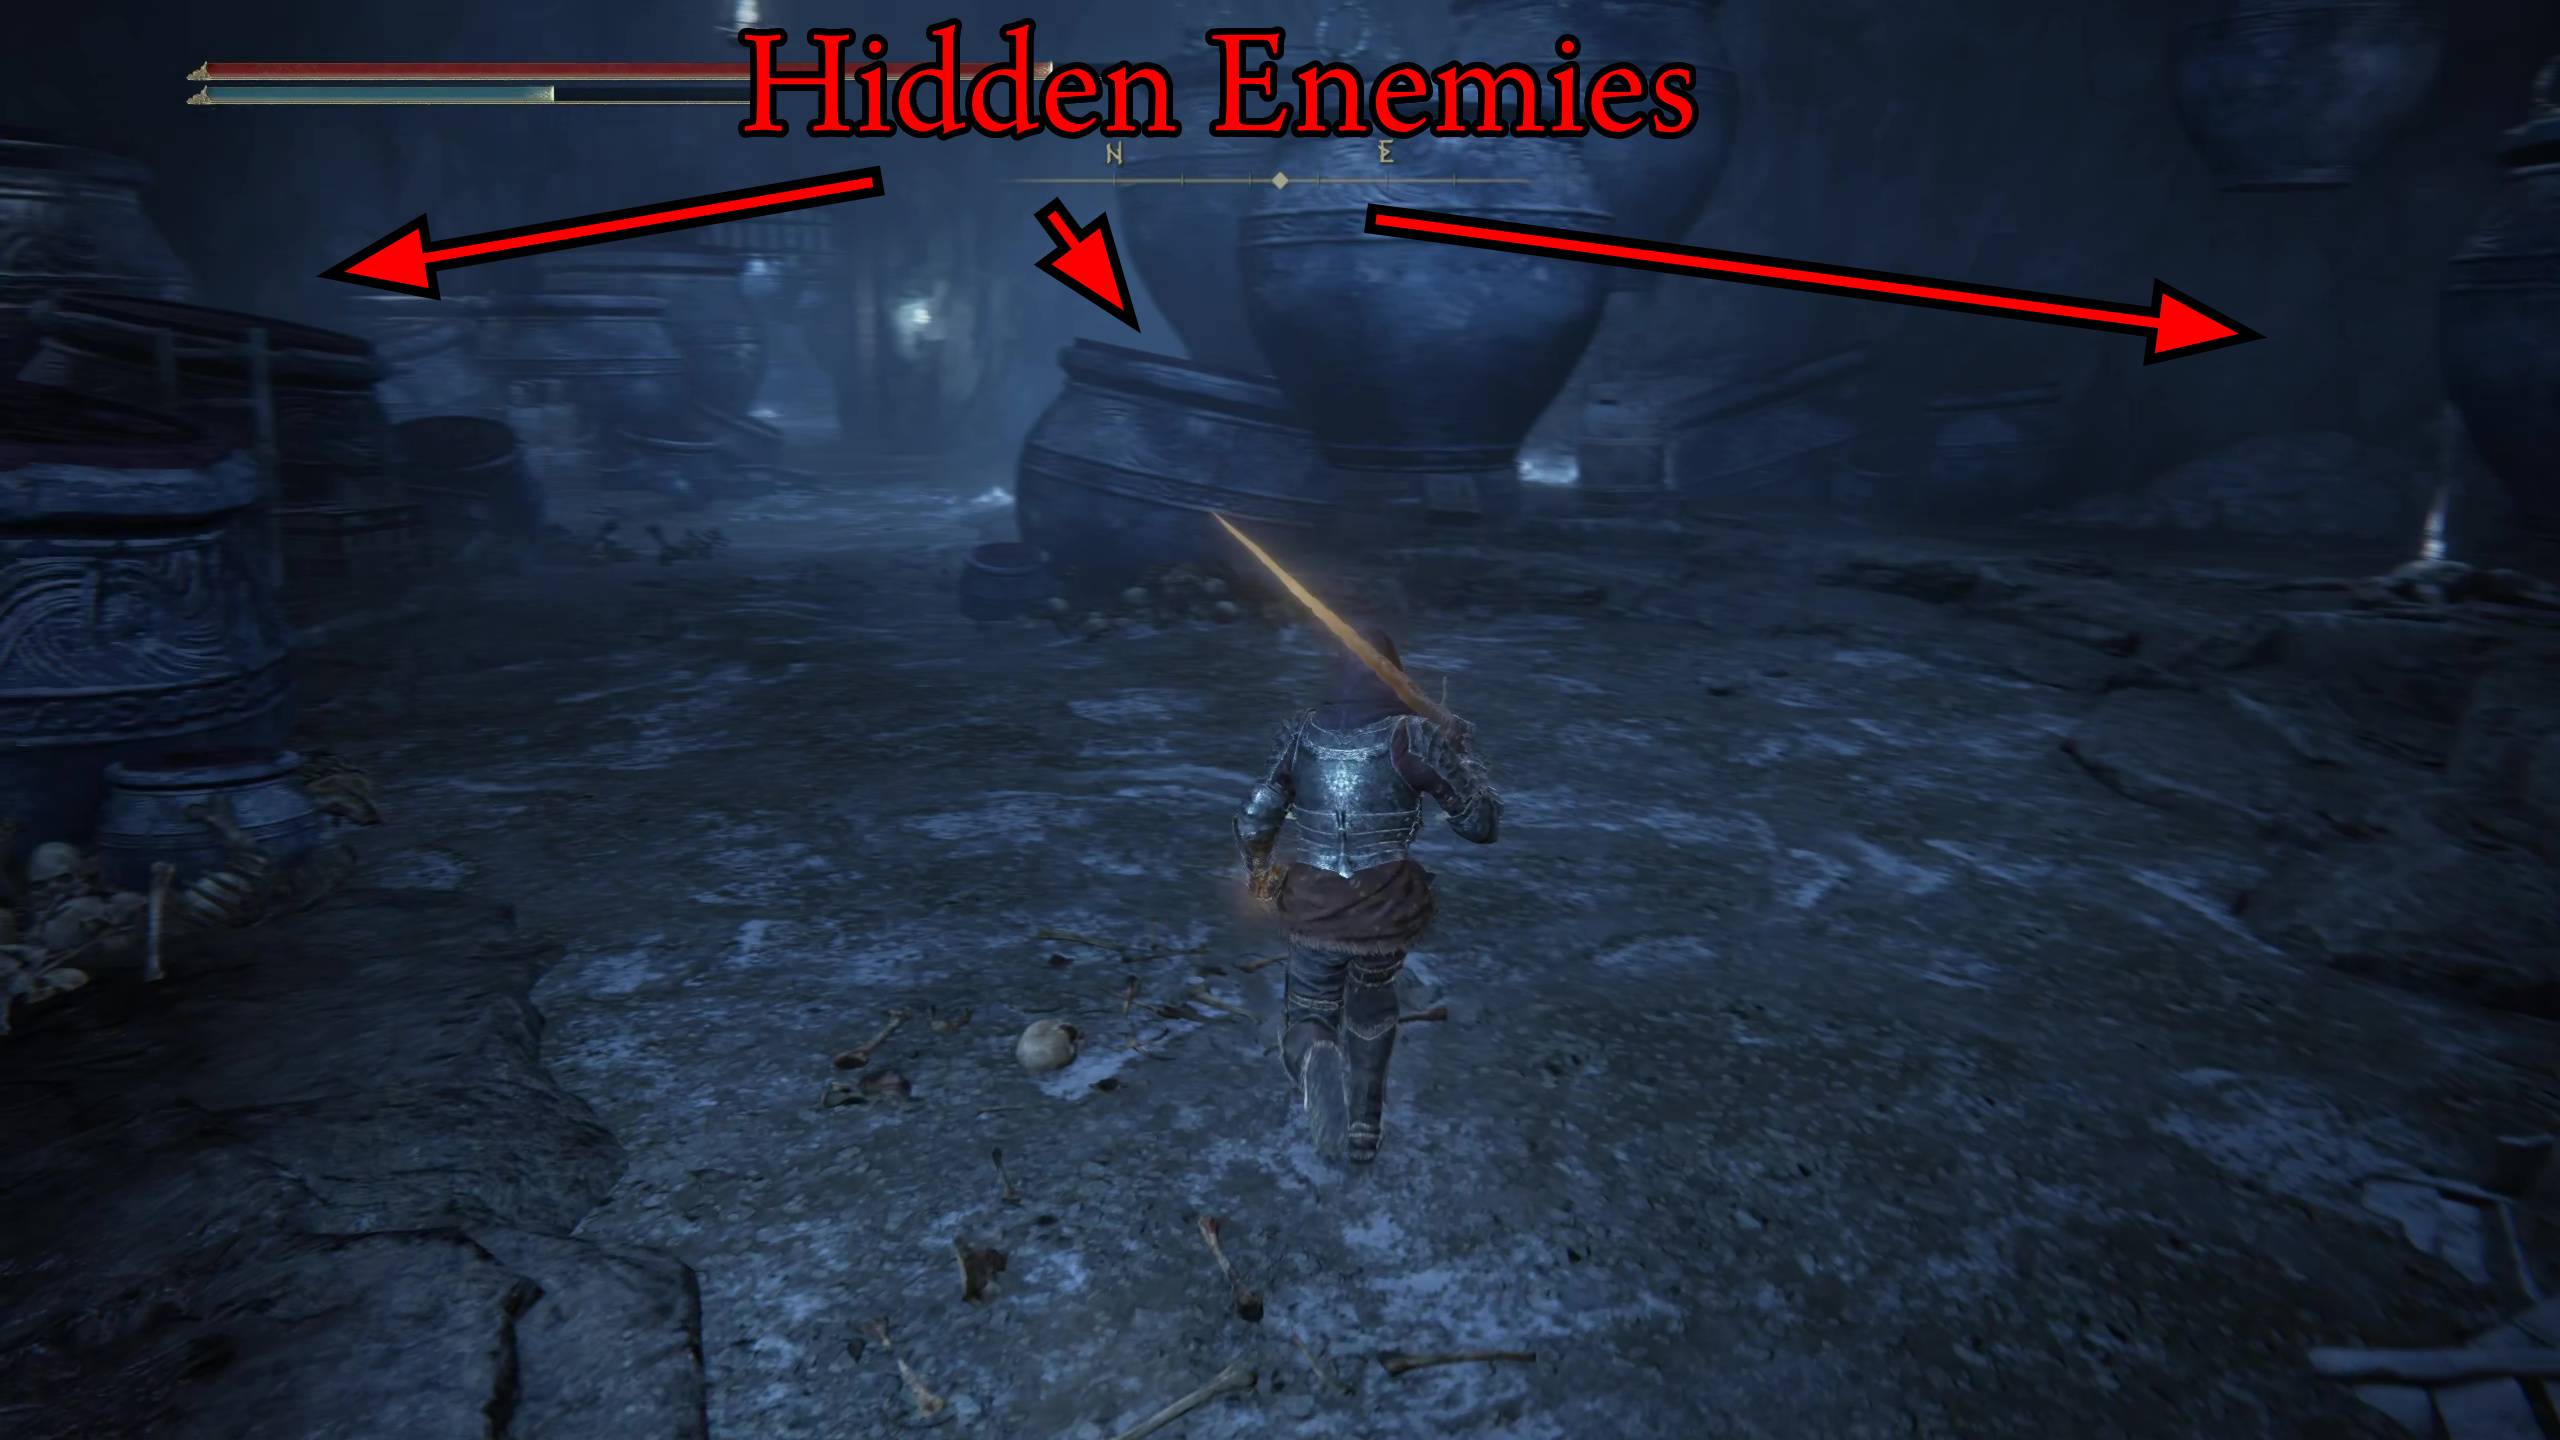
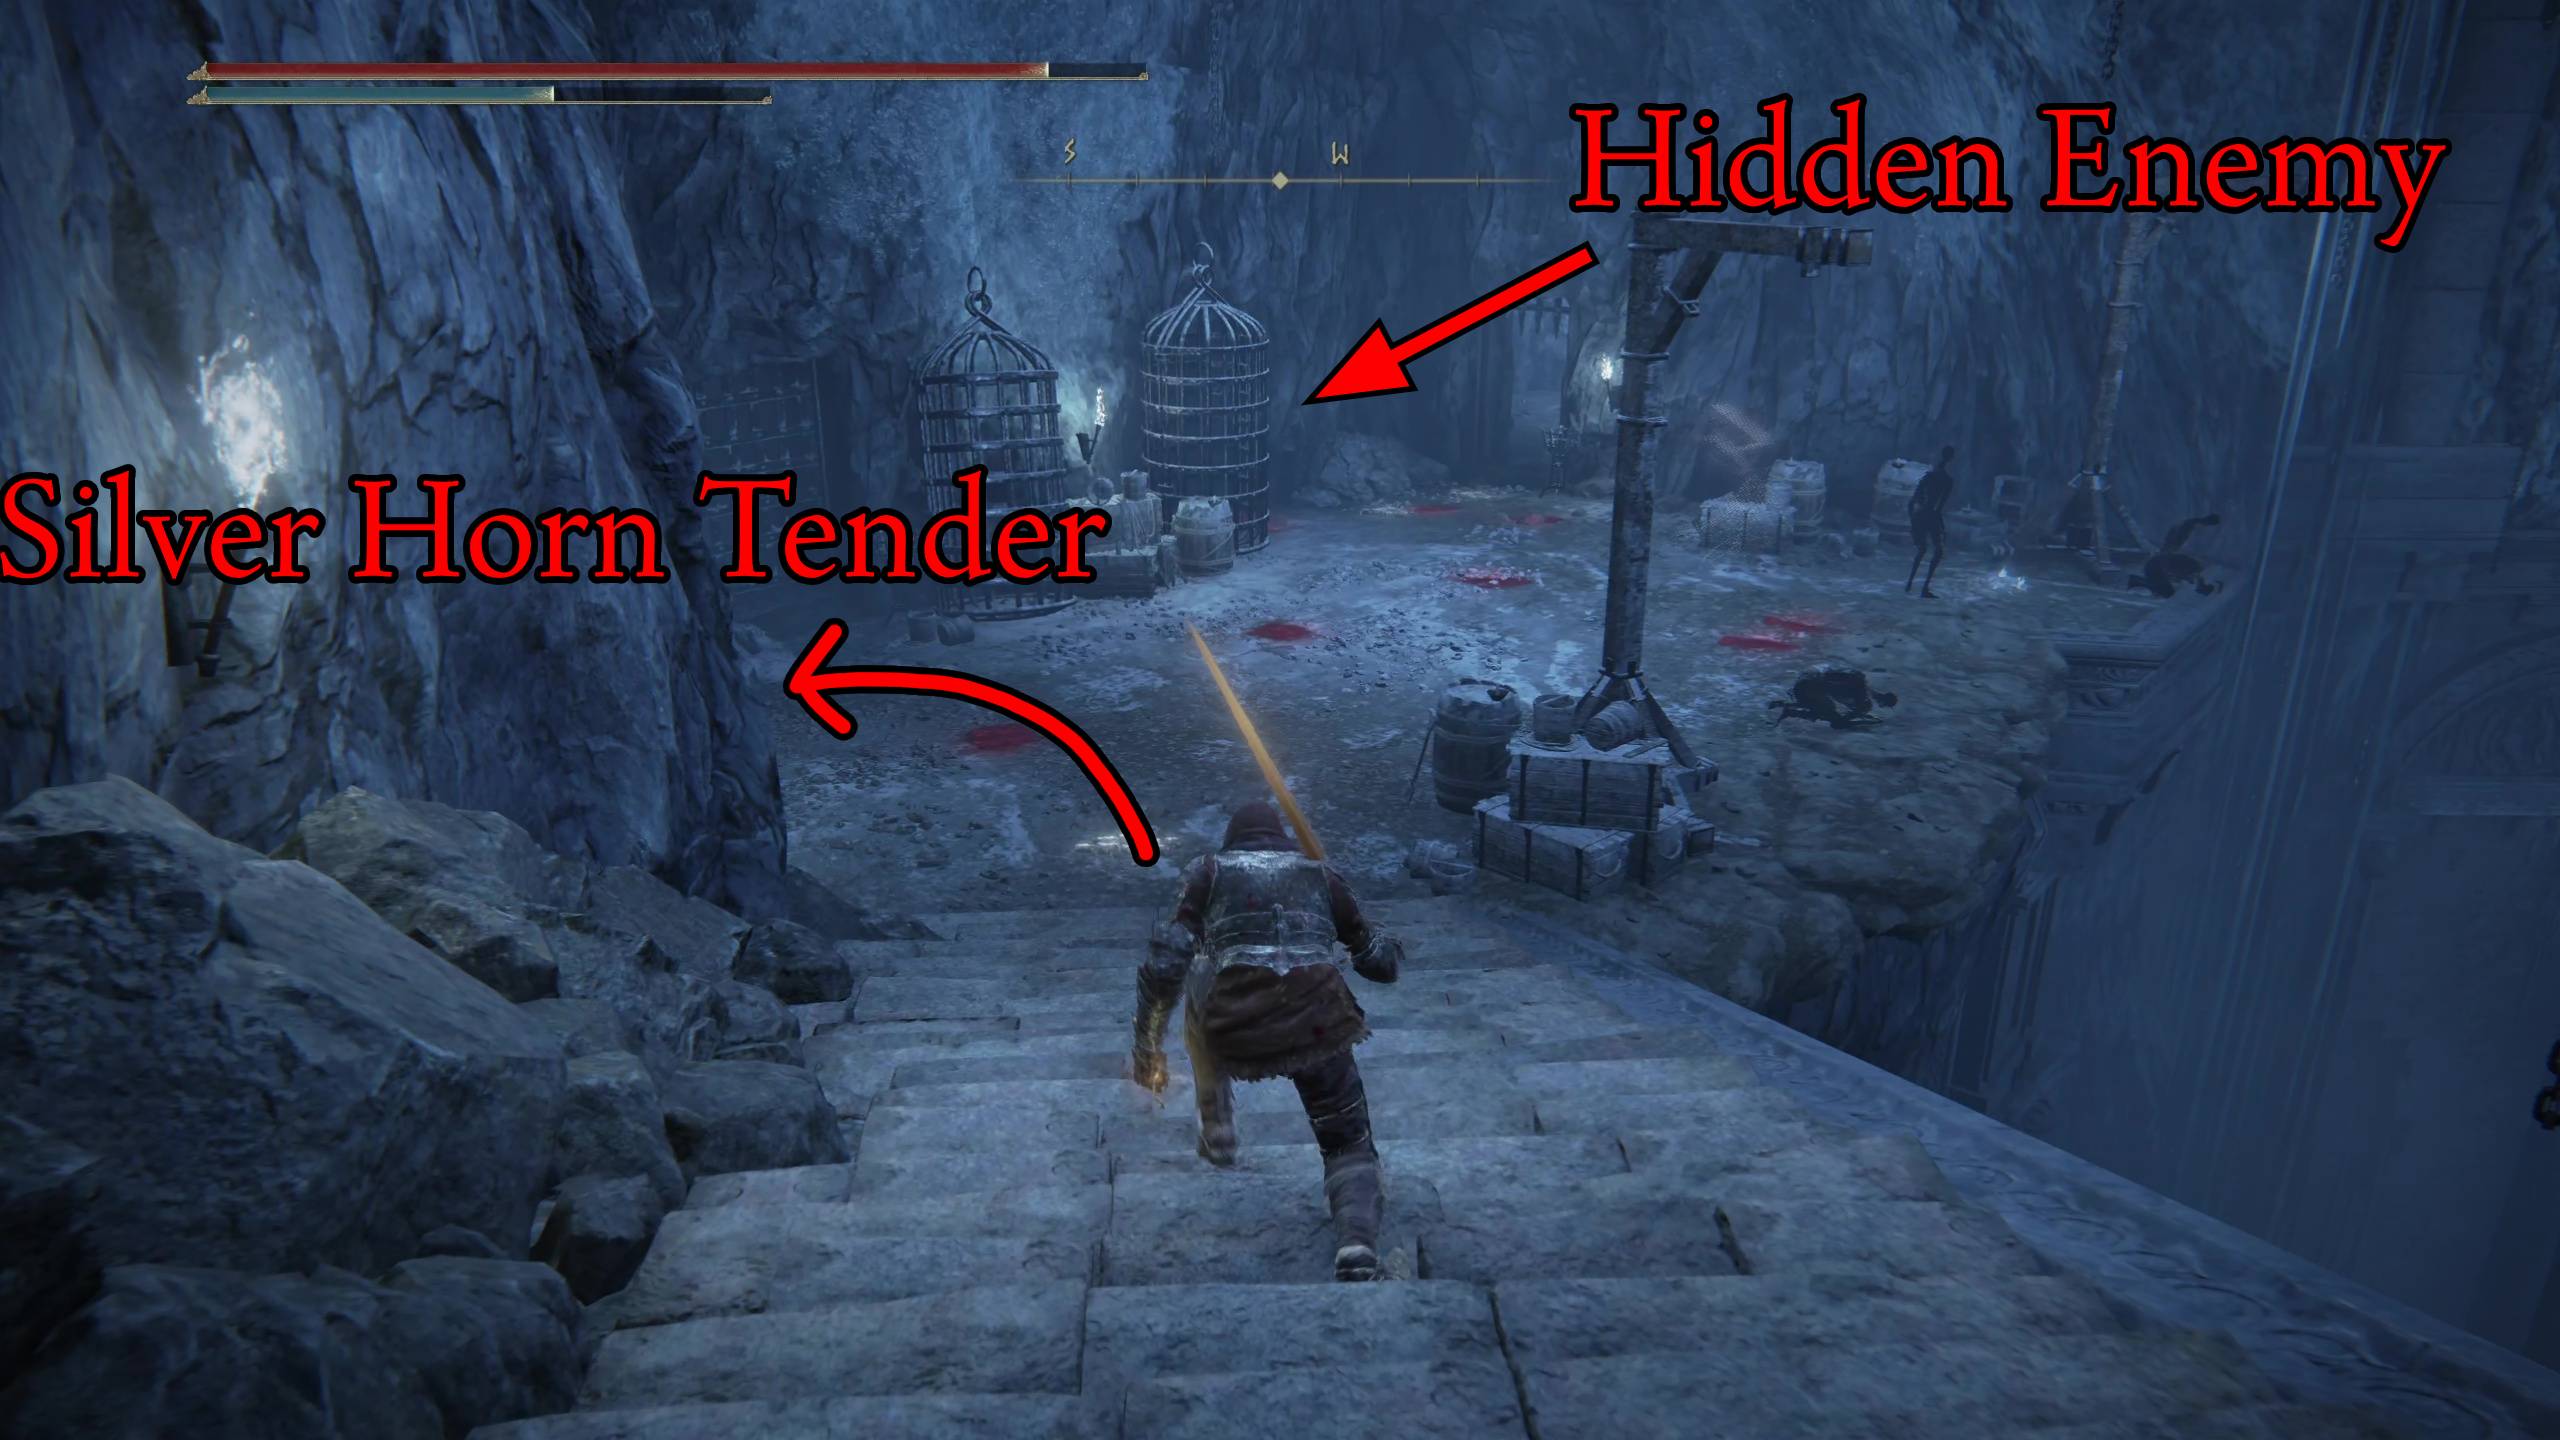
Turn left at the bottom of the stairs, and you’ll find a Silver Horn Tender in a cell. There will be several weak enemies by the ledge that you’ll want to kill, because a hidden one will lunge at you from the left, and they can gang up on you. After they’re all dead, be careful entering the next room, as another basic enemy will lunge at you.
So many hidden enemies…
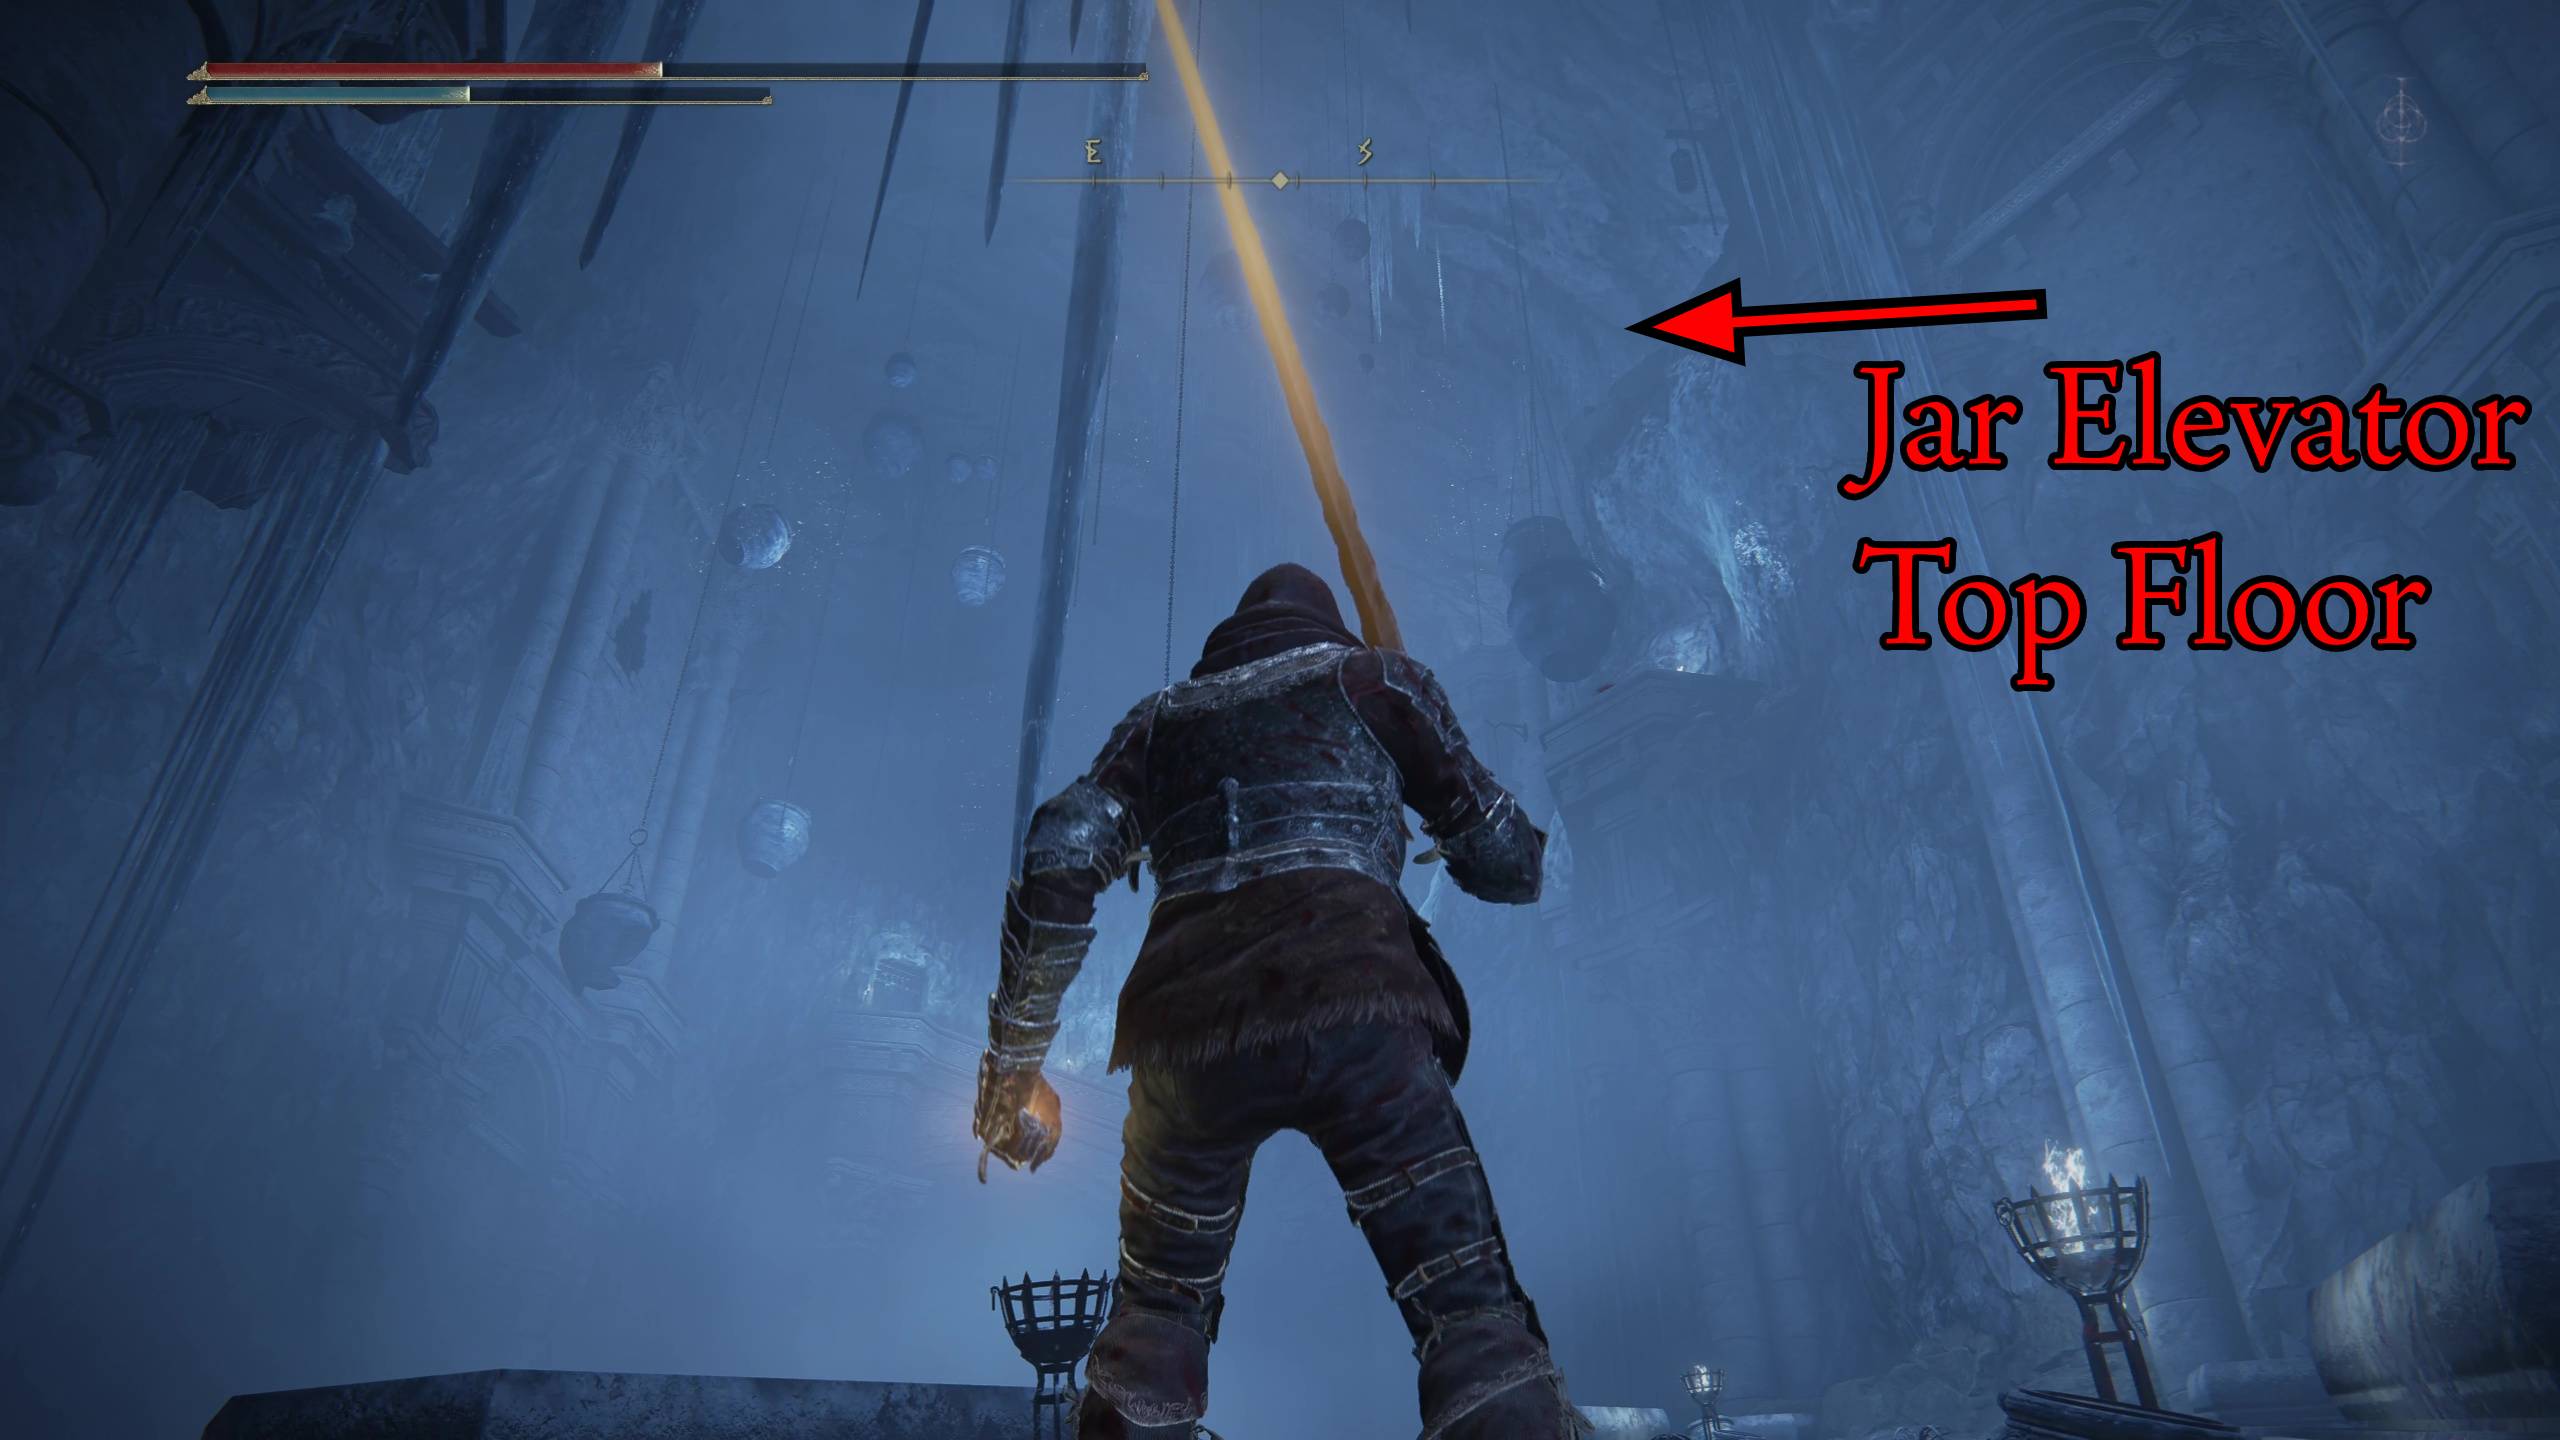
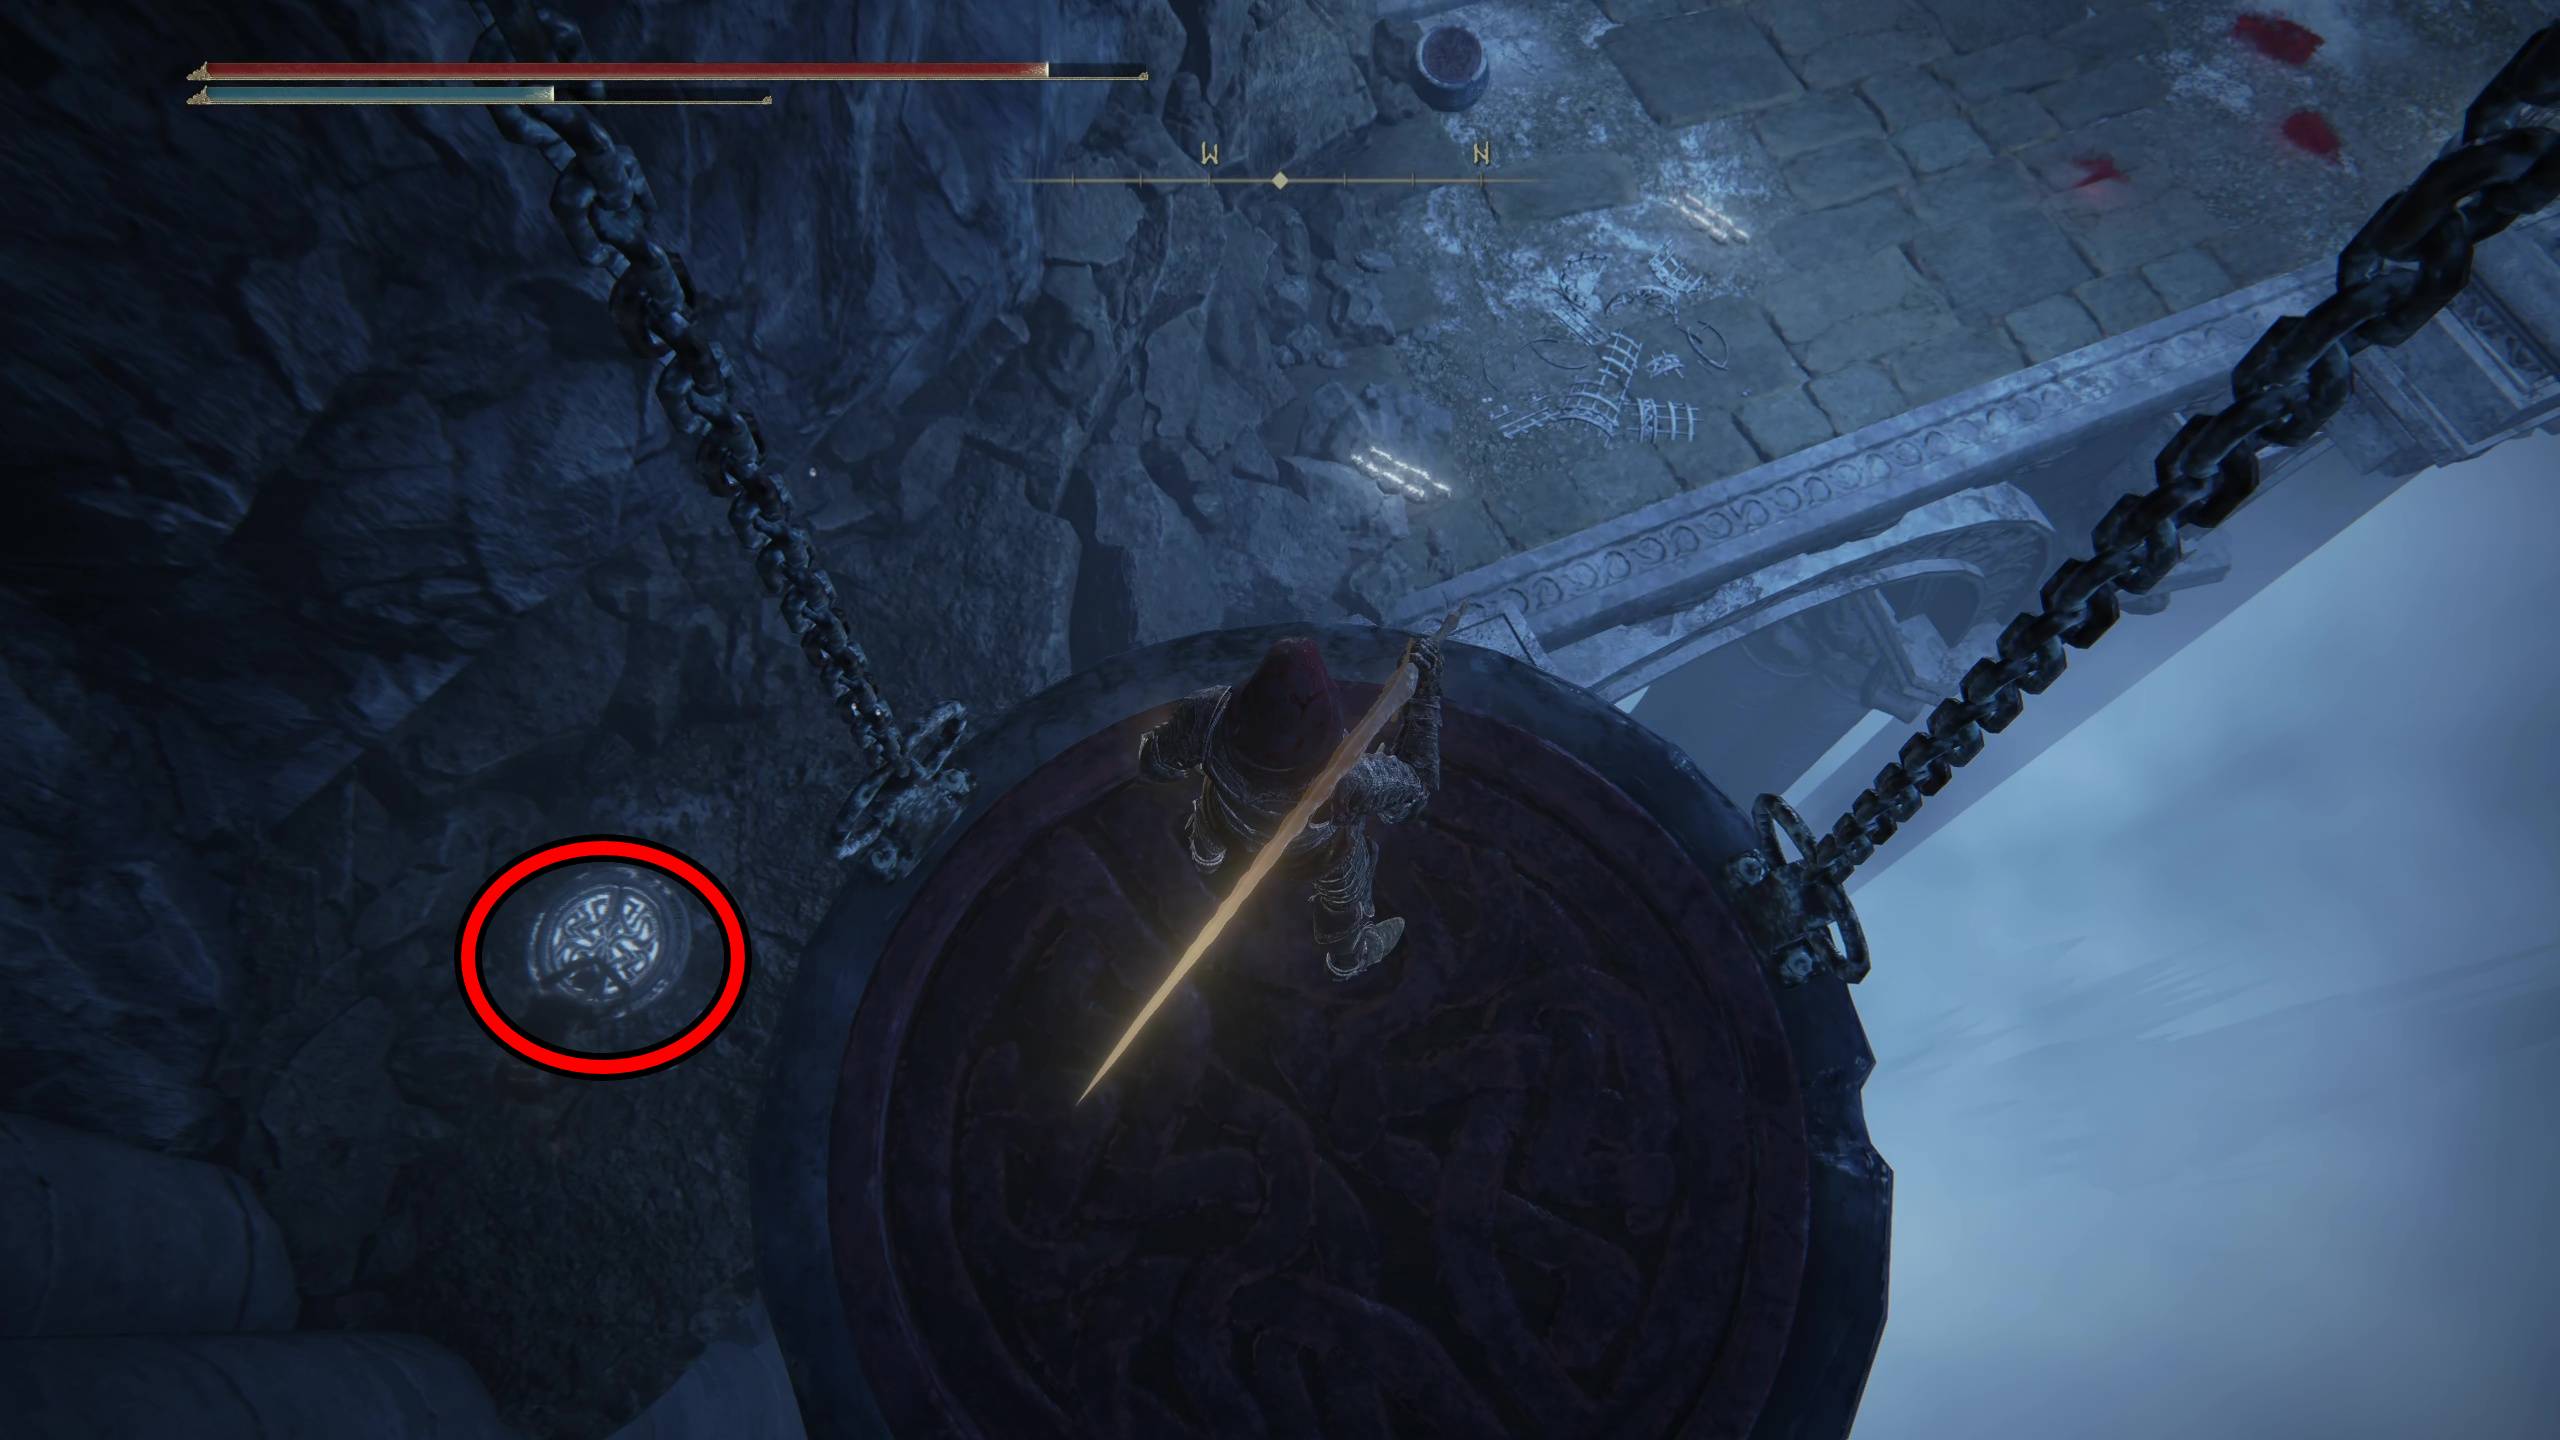
Go forward and open the gate to the next room by interacting with it, then you’ll come to a ledge where you have to drop off onto another pot (like at the start). When you land on it, the jar will slowly descend. When it’s at the bottom, stay on the pot, and let it take you upwards. It will actually take up higher than the ledge you were originally on. If you got off at the bottom, simply step on the summoning plate, and it will come down and take you up.
View of elevator from bottomStep on the summoning plate to bring the jar back down
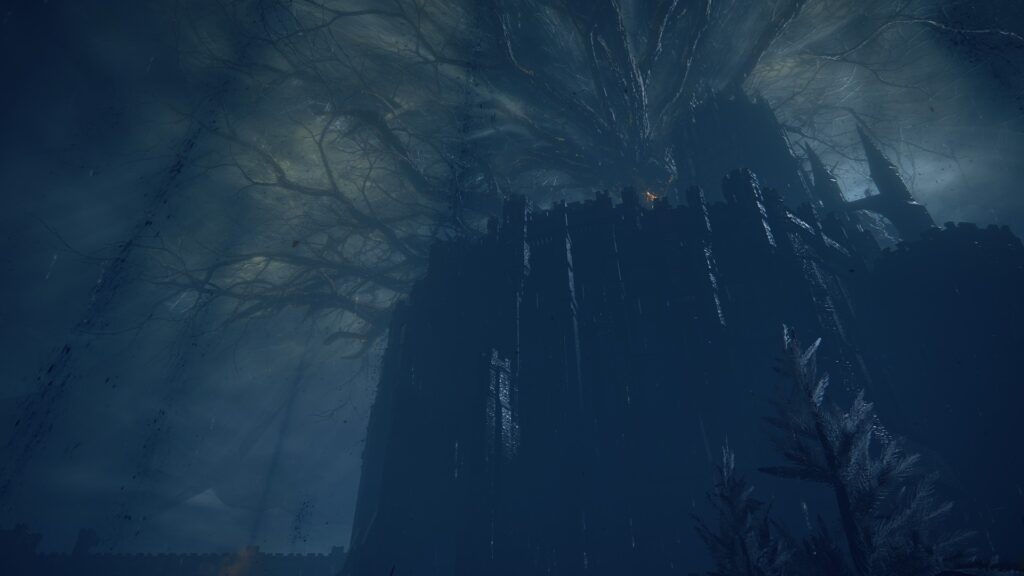
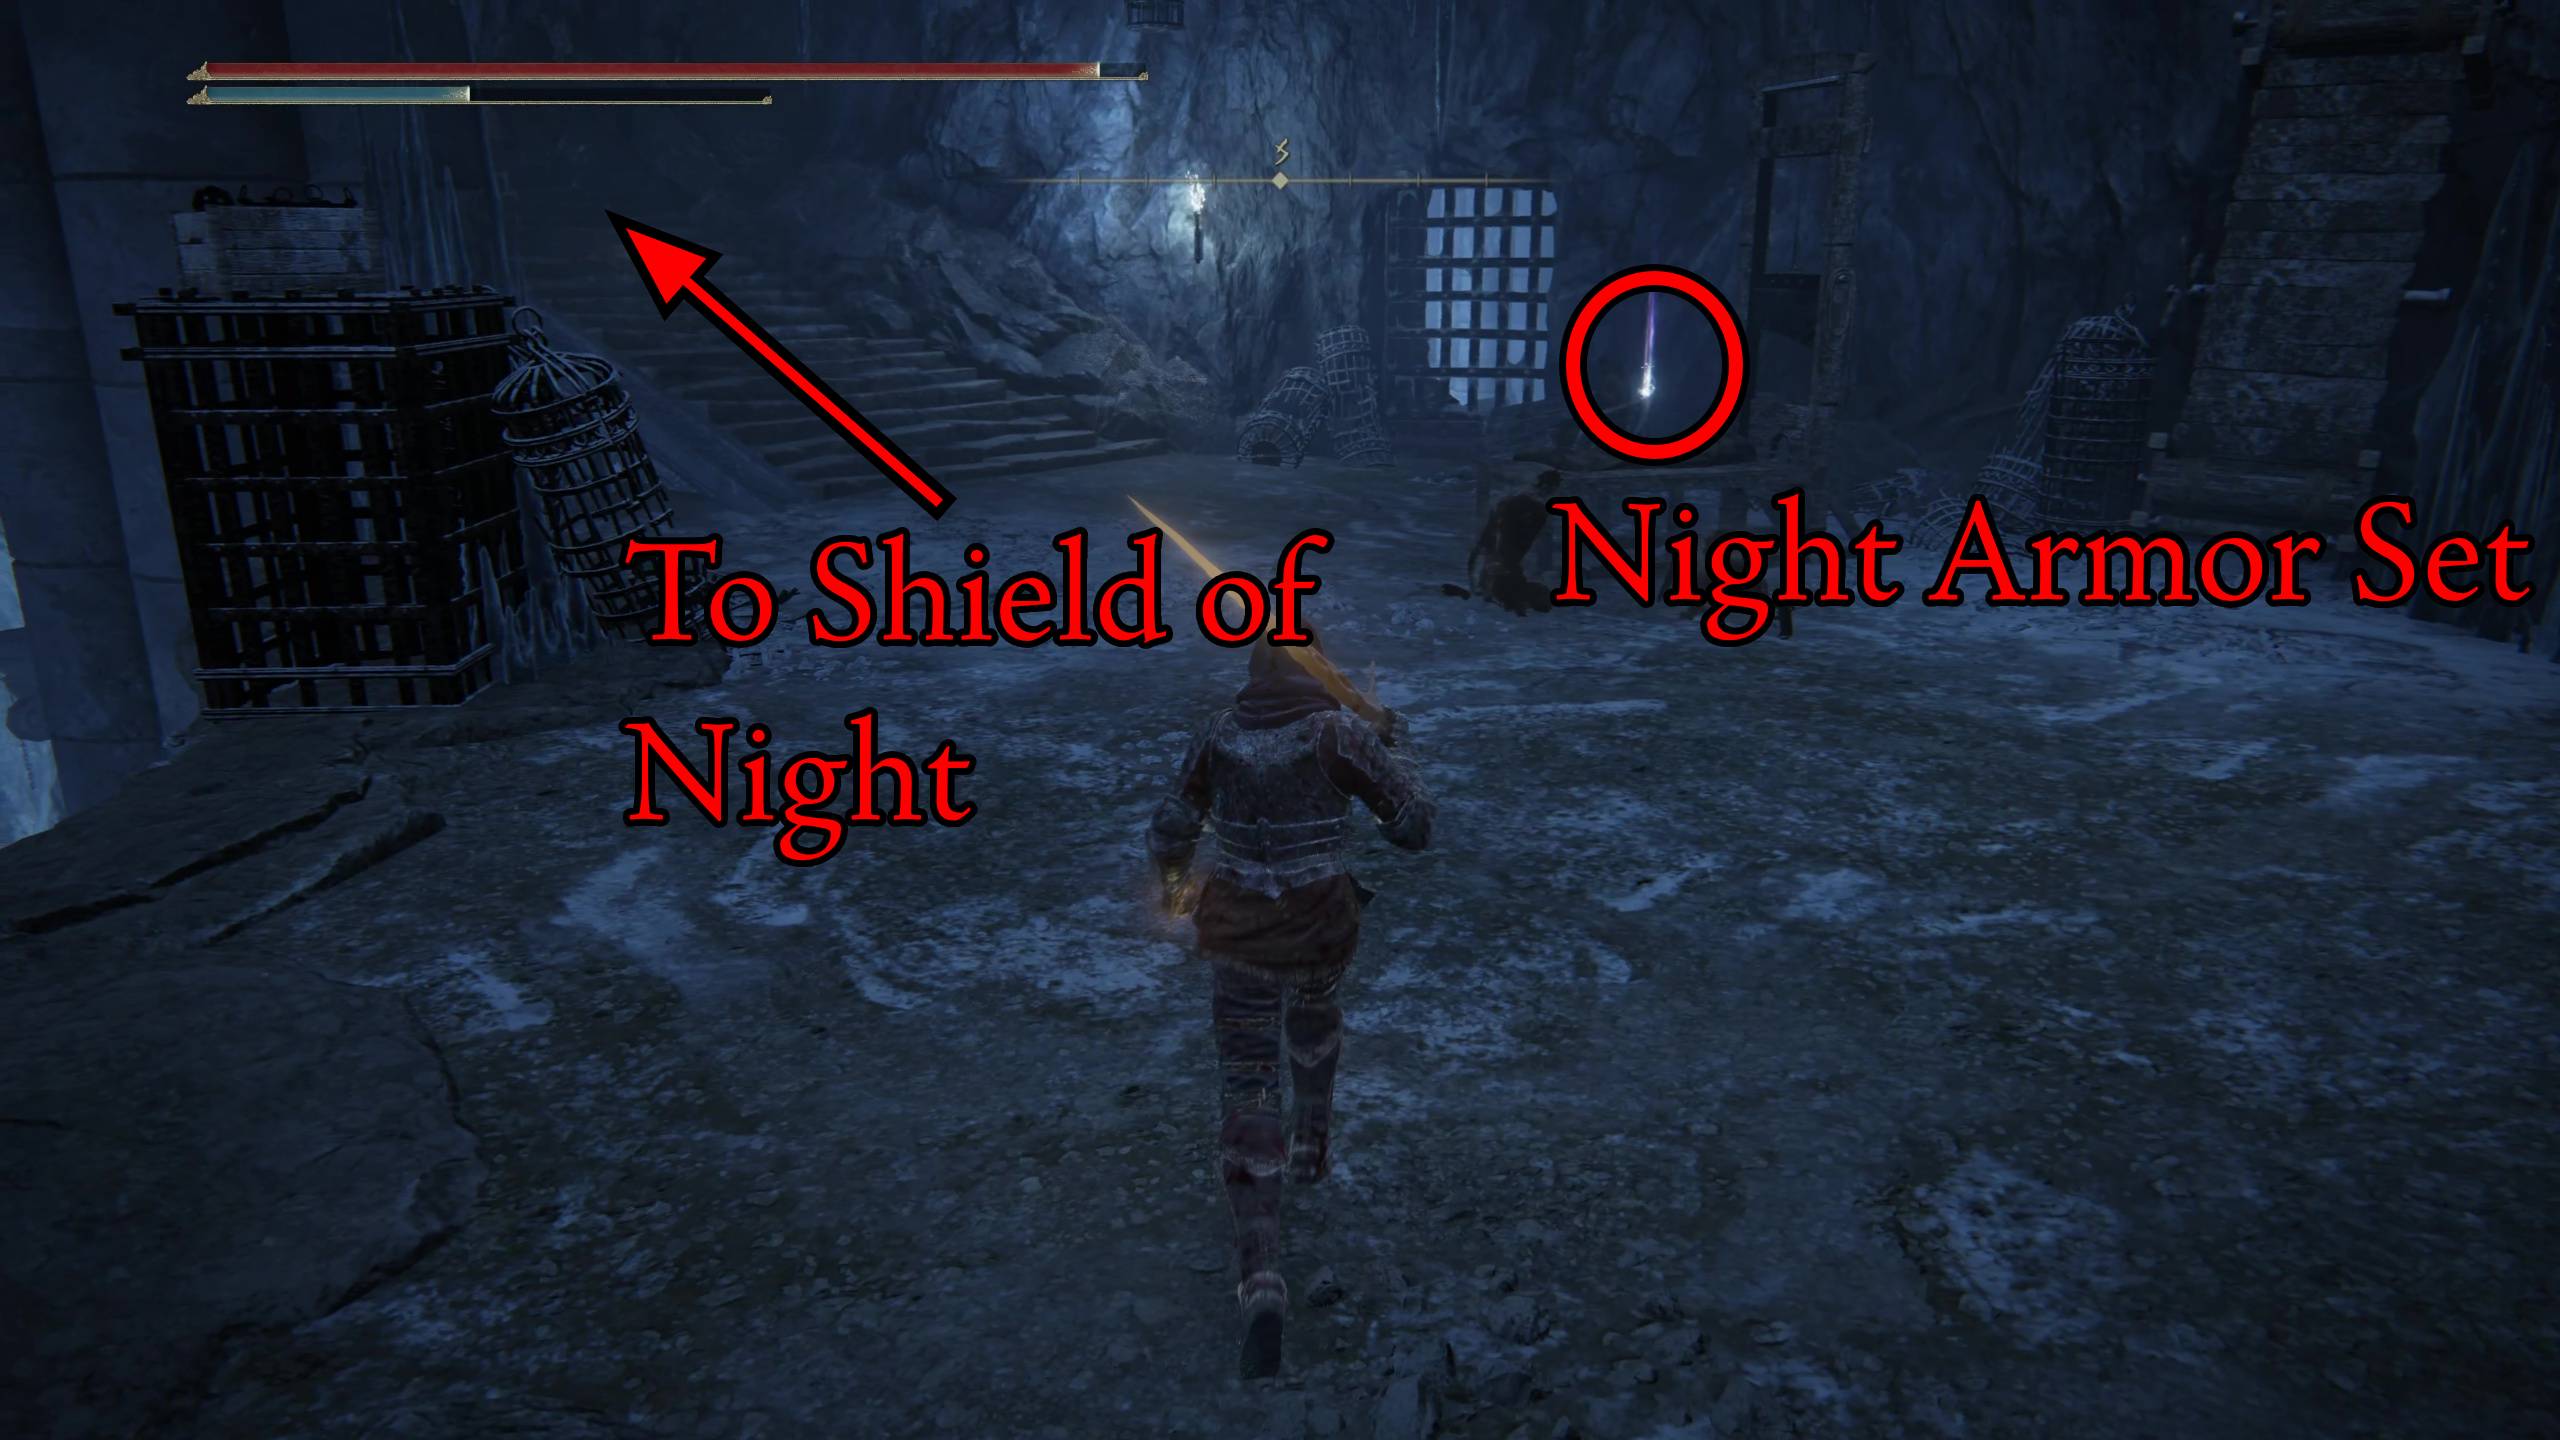
Once you’ve reached the top, jump off the jar elevator, and you’ll see the Night Armor Set on a corpse in front of you. This is a really cool set that makes you look like Sauron from The Lord of the Rings. At the top of the stairs on the left, there is another Jar Condemned that will try to knock you off into the chasm. Don’t die this far into the dungeon! After killing it, you will find the Shield of Night on a corpse slumped over a ledge. Don’t jump off the ledge, instead head back to the elevator and take it to the bottom.
Be careful at the top of the stairs!
After taking the jar elevator to the bottom, you’ll have to cross a bridge, but two Jar Condemned will surprise attack you. If you back up, you should be able to fight the first one without the second interfering. Hop off the ledge to the left, kill the weak enemies, then bait the hidden enemy out of her hiding spot on the right. When that’s done, you can move onto the boss!
Don’t let these hidden foes vanquish you right before the boss
The boss is rather easy; it can dish out a lot of quick bleed damage, but it will be staggered with heavier weapon attacks and doesn’t have a lot of health. If you need any additional tips, you can go to our boss guide using the link below.
After defeating the boss, you’ll receive the spirit ashes that are just like it: Curseblade Meera. Even though you probably destroyed it, it might be a good companion for fighting bosses weak to bleed. After you’ve made sure you got the best loot in the dungeon (the Night Armor Set and Shield of Night), use the blue wisp in the boss room to return to the entrance.
Kelson is a spud head from out west. He is most happy when holding a milky tea with too much honey and playing a sprawling role playing game or reading a fantasy novel. His video game tastes vary but his main genres are looter shooters, RPGs, and real time strategy games.