The conflict between Ryujin and Infinity LTD heats up in this Ryujin Industries faction mission. Our walkthrough will help you navigate a mercenary-filled mine and an orbital medical clinic in your hunt for a missing shipment of Rothicite.
At the start of this mission, you’ll need to go to the Research and Development floor — like the rest of Ryujin Tower, you’ll get there via the elevator, and as always, the correct floor will be helpfully indicated by the objective marker (). You can also use the and/or your scanner to find your way to Veena’s office; talk to Masako to continue the mission.
Talk to Masako
Ask any questions you like, and/or pick the first dialog option to keep the conversation moving forward. Don’t bother looking for the dialog option that lets you avoid the Neuroamp, because there isn’t one — getting the Neuroamp installed is a mandatory part of this questline, although that doesn’t actually occur until after you go get the key ingredient (hence the mission’s name).
Travel to Carinae III-A / Land at CM Station RC-1
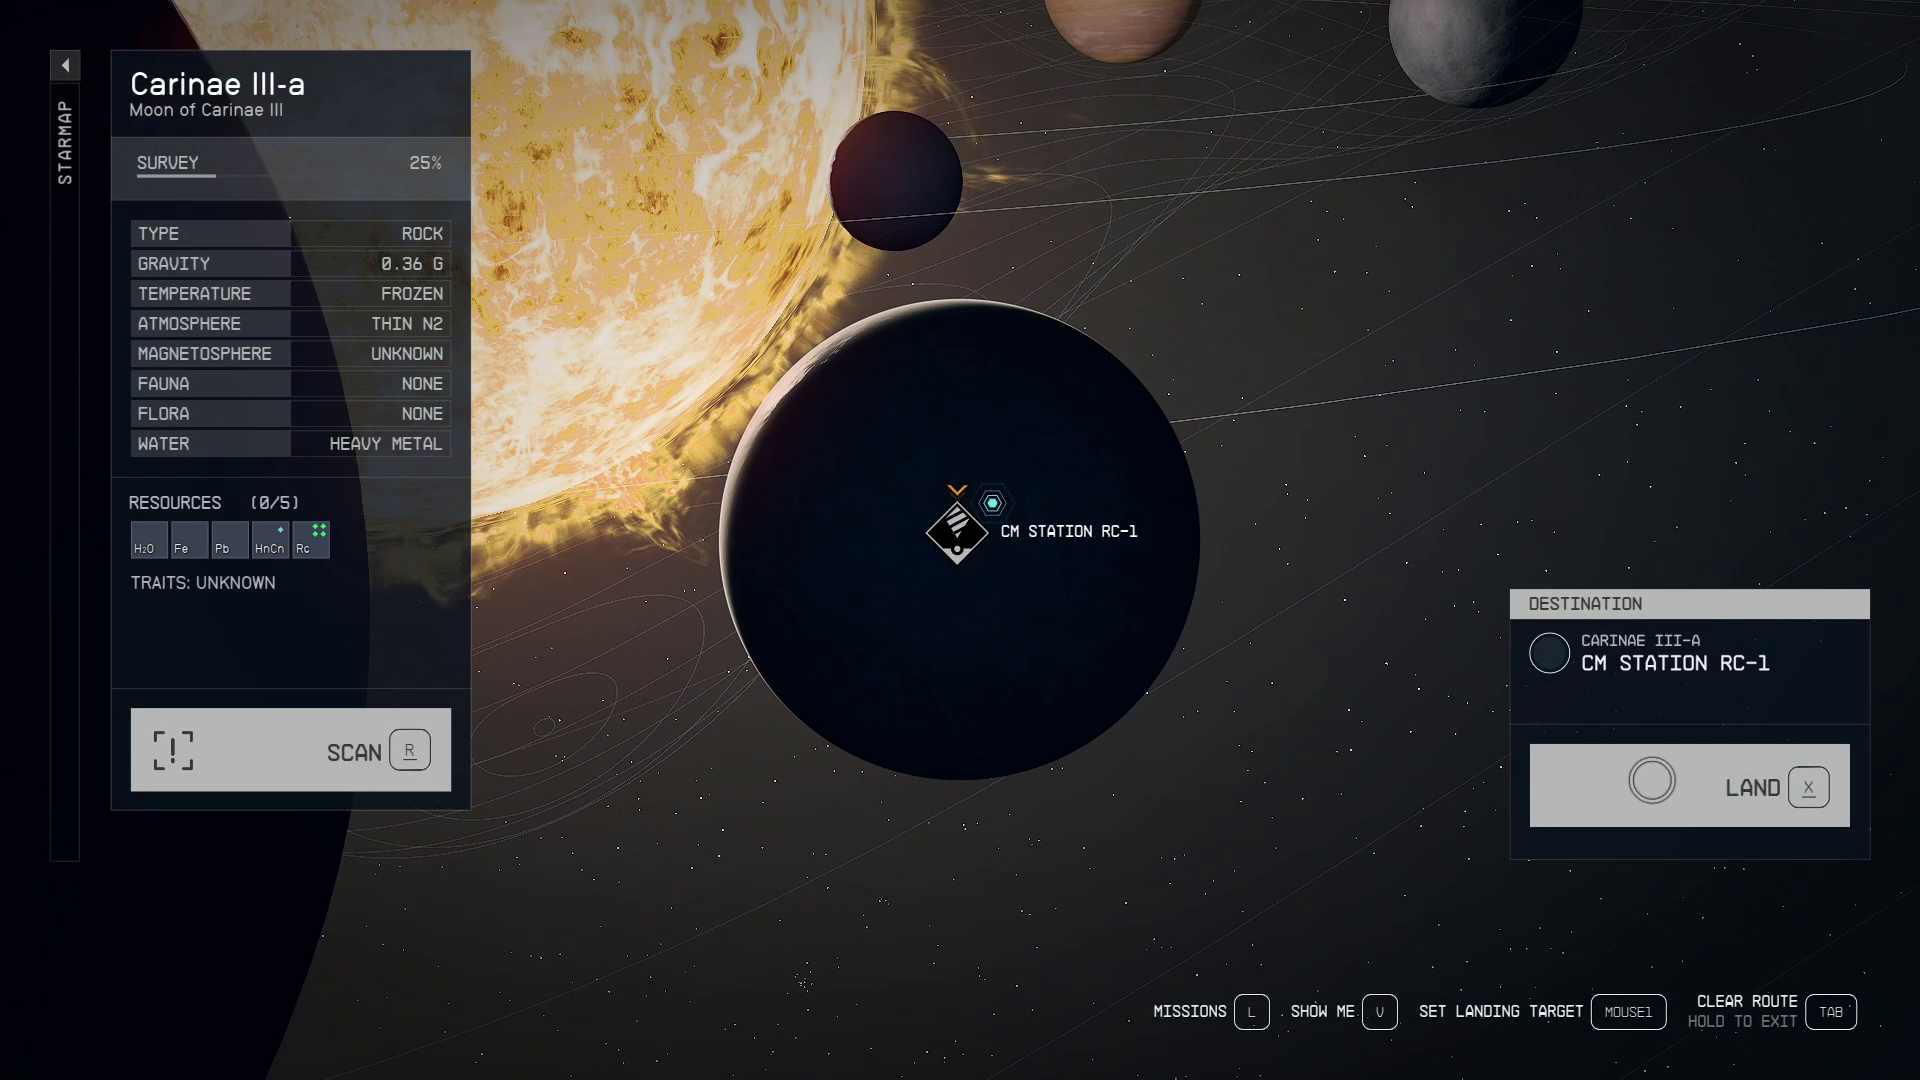
Unless you’ve already been to Carinae III-A for some reason, you’ll first need to use the Mission Log to set a course to orbit of the planet; once there, you can use the log again to set a course for landing at CM Station RC-1 (Image 1).
Image 1 – Landing at CM Station RC-1
Enter the CM Station RC-1 Mine
Your Hand Scanner can lead you to the entrance throughout this section.
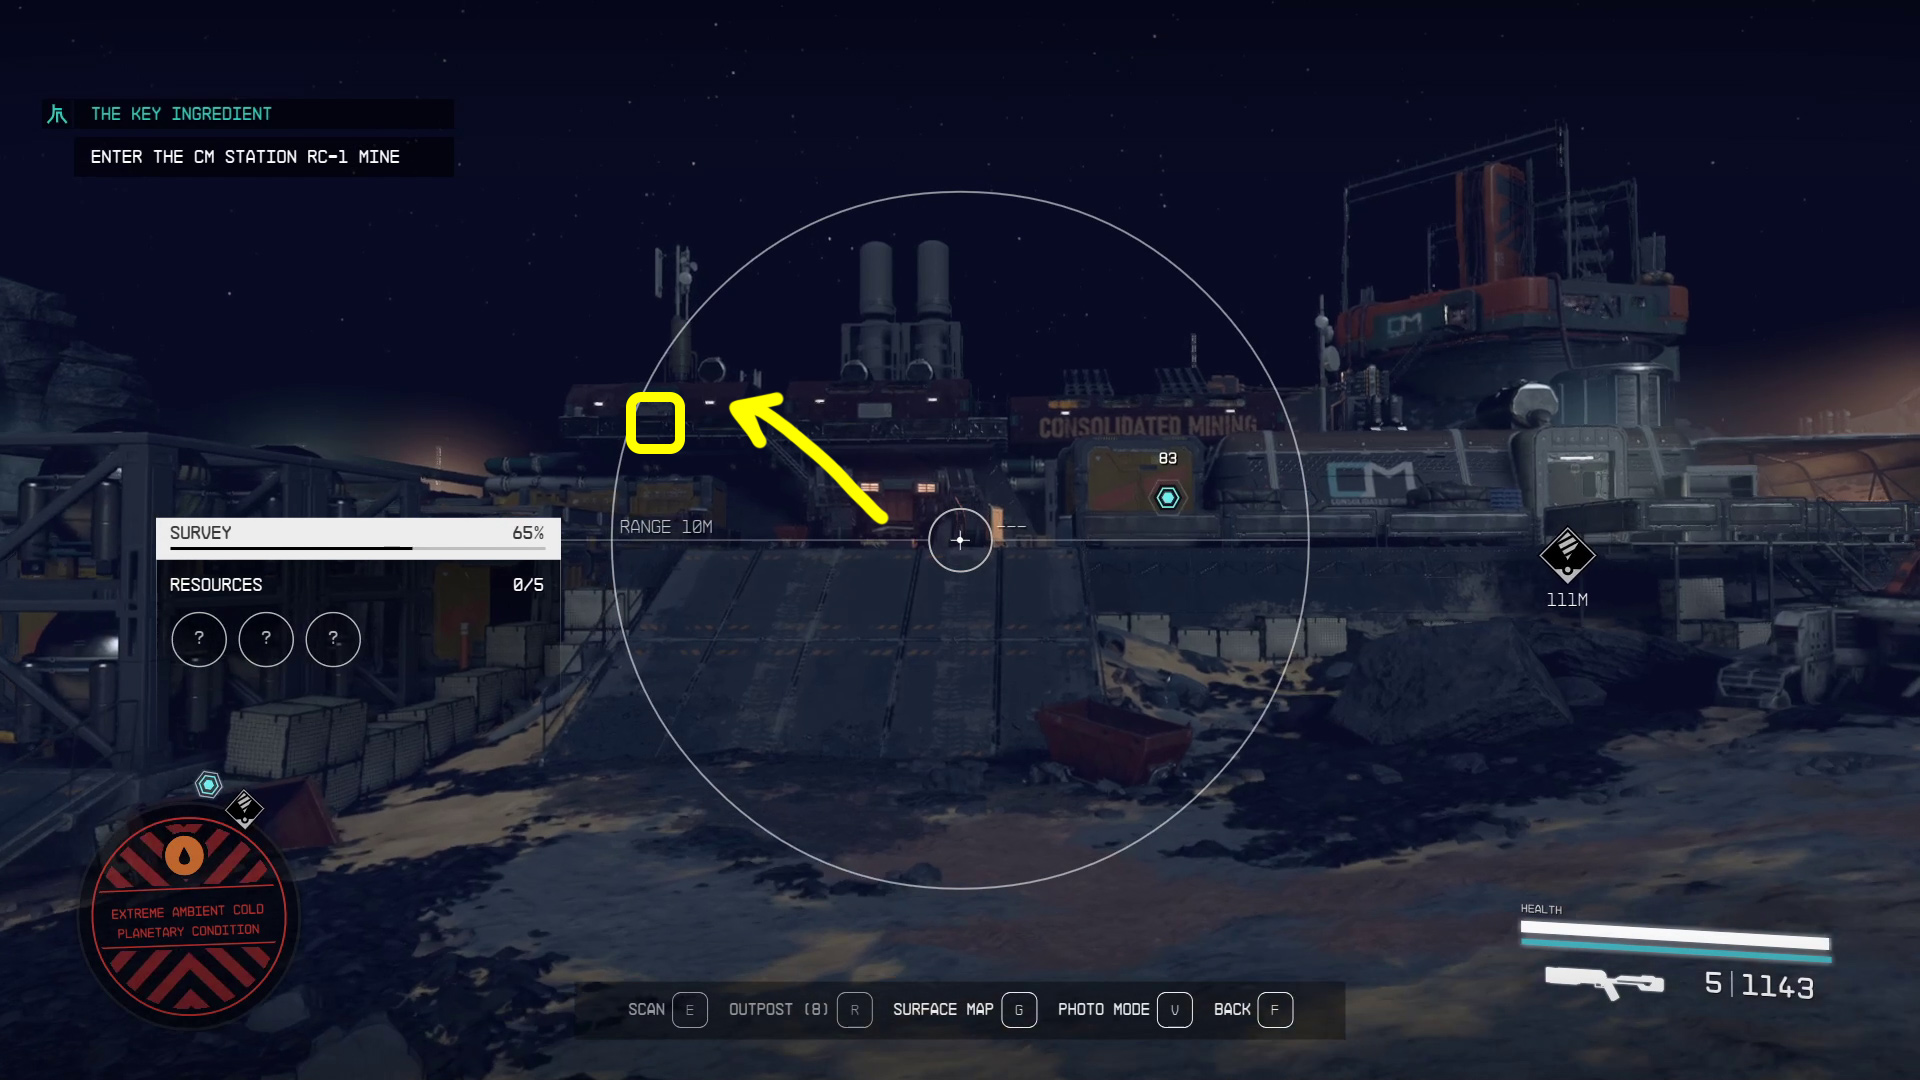
Your character manages the fairly rare feat of landing nice and close to your objective, so it’s a quick jog to the entrance of the station. There are Ecliptic mercenaries near the entrance, and since you can’t go straight into the mine, you’ll want to clear them out before proceeding into the interior of the mining structure (Image 2), which is up the stairs on your left.
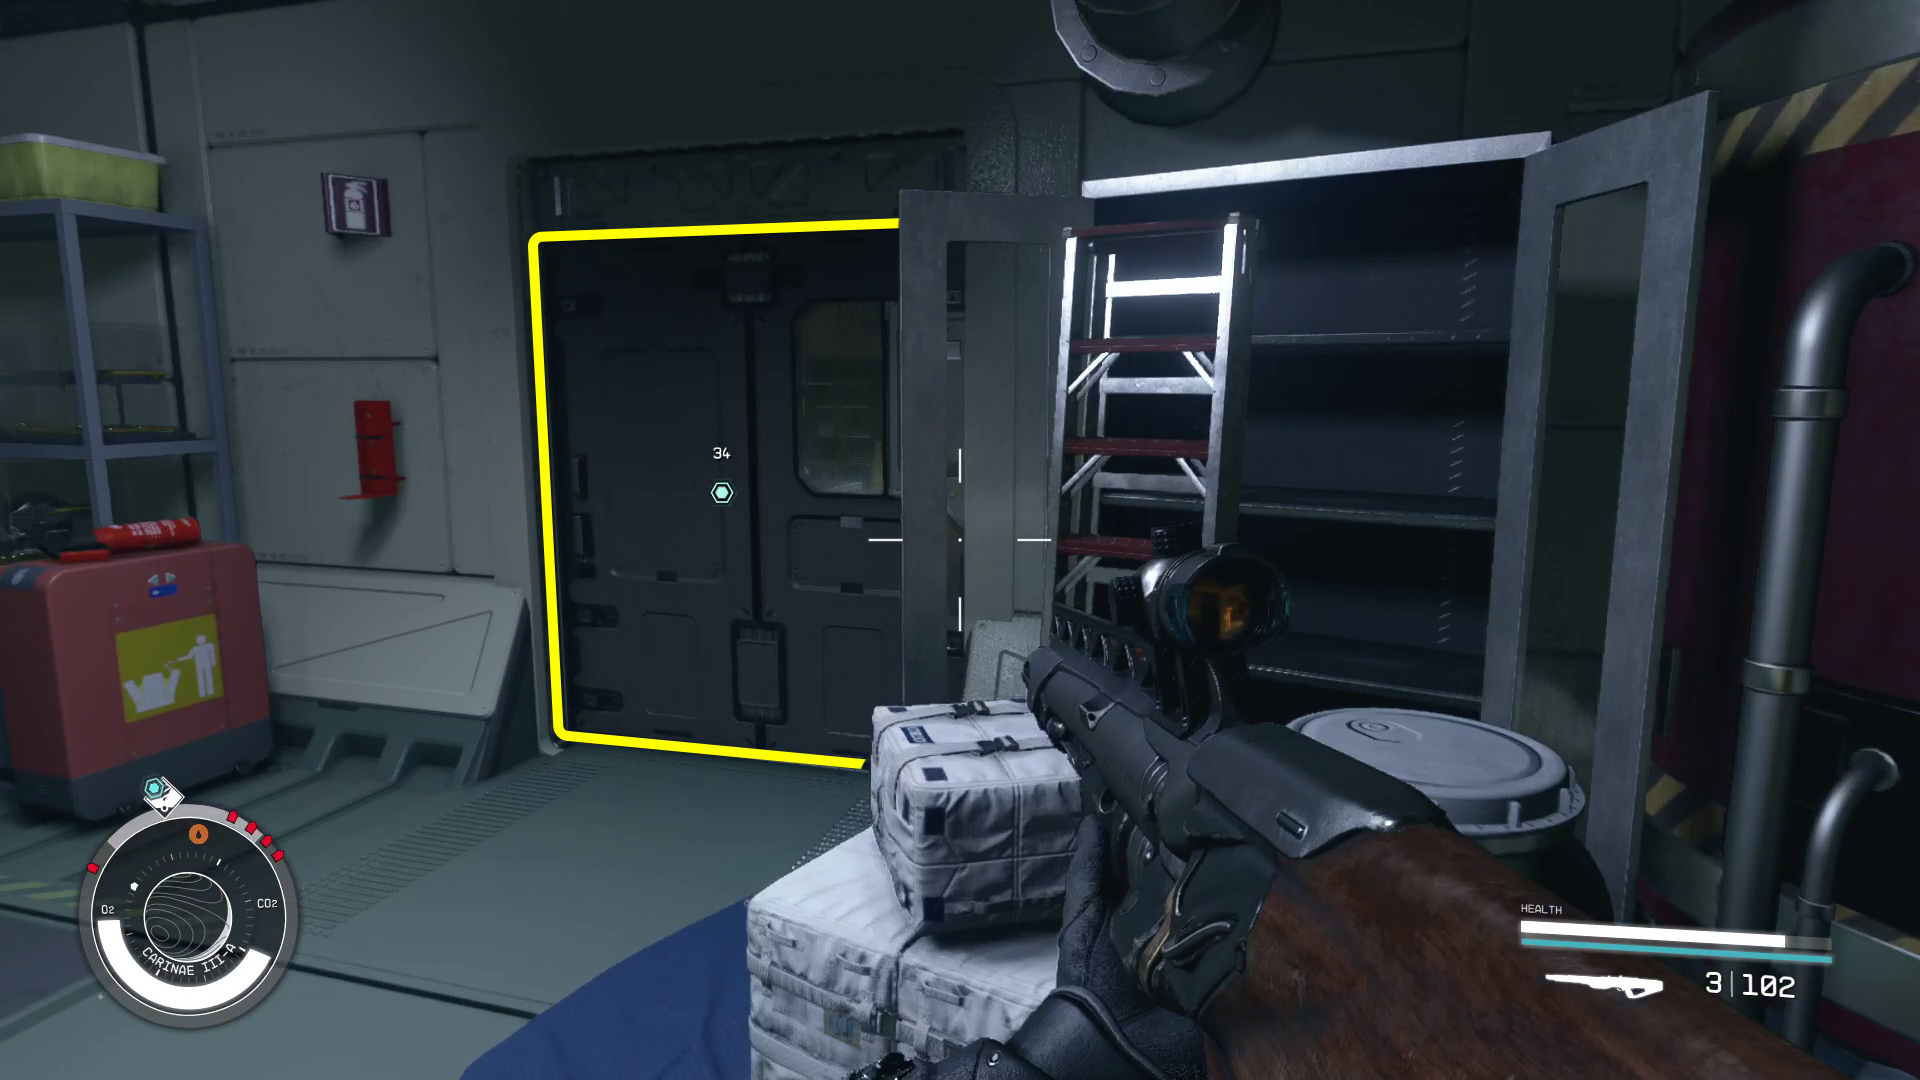
You’ll be attacked immediately upon entering, so be ready — once the enemies go down, loot the weapons and ammo crates on and around the table in the second room, then go through the door on your right to continue further into the structure (Image 3).
Image 2Image 3
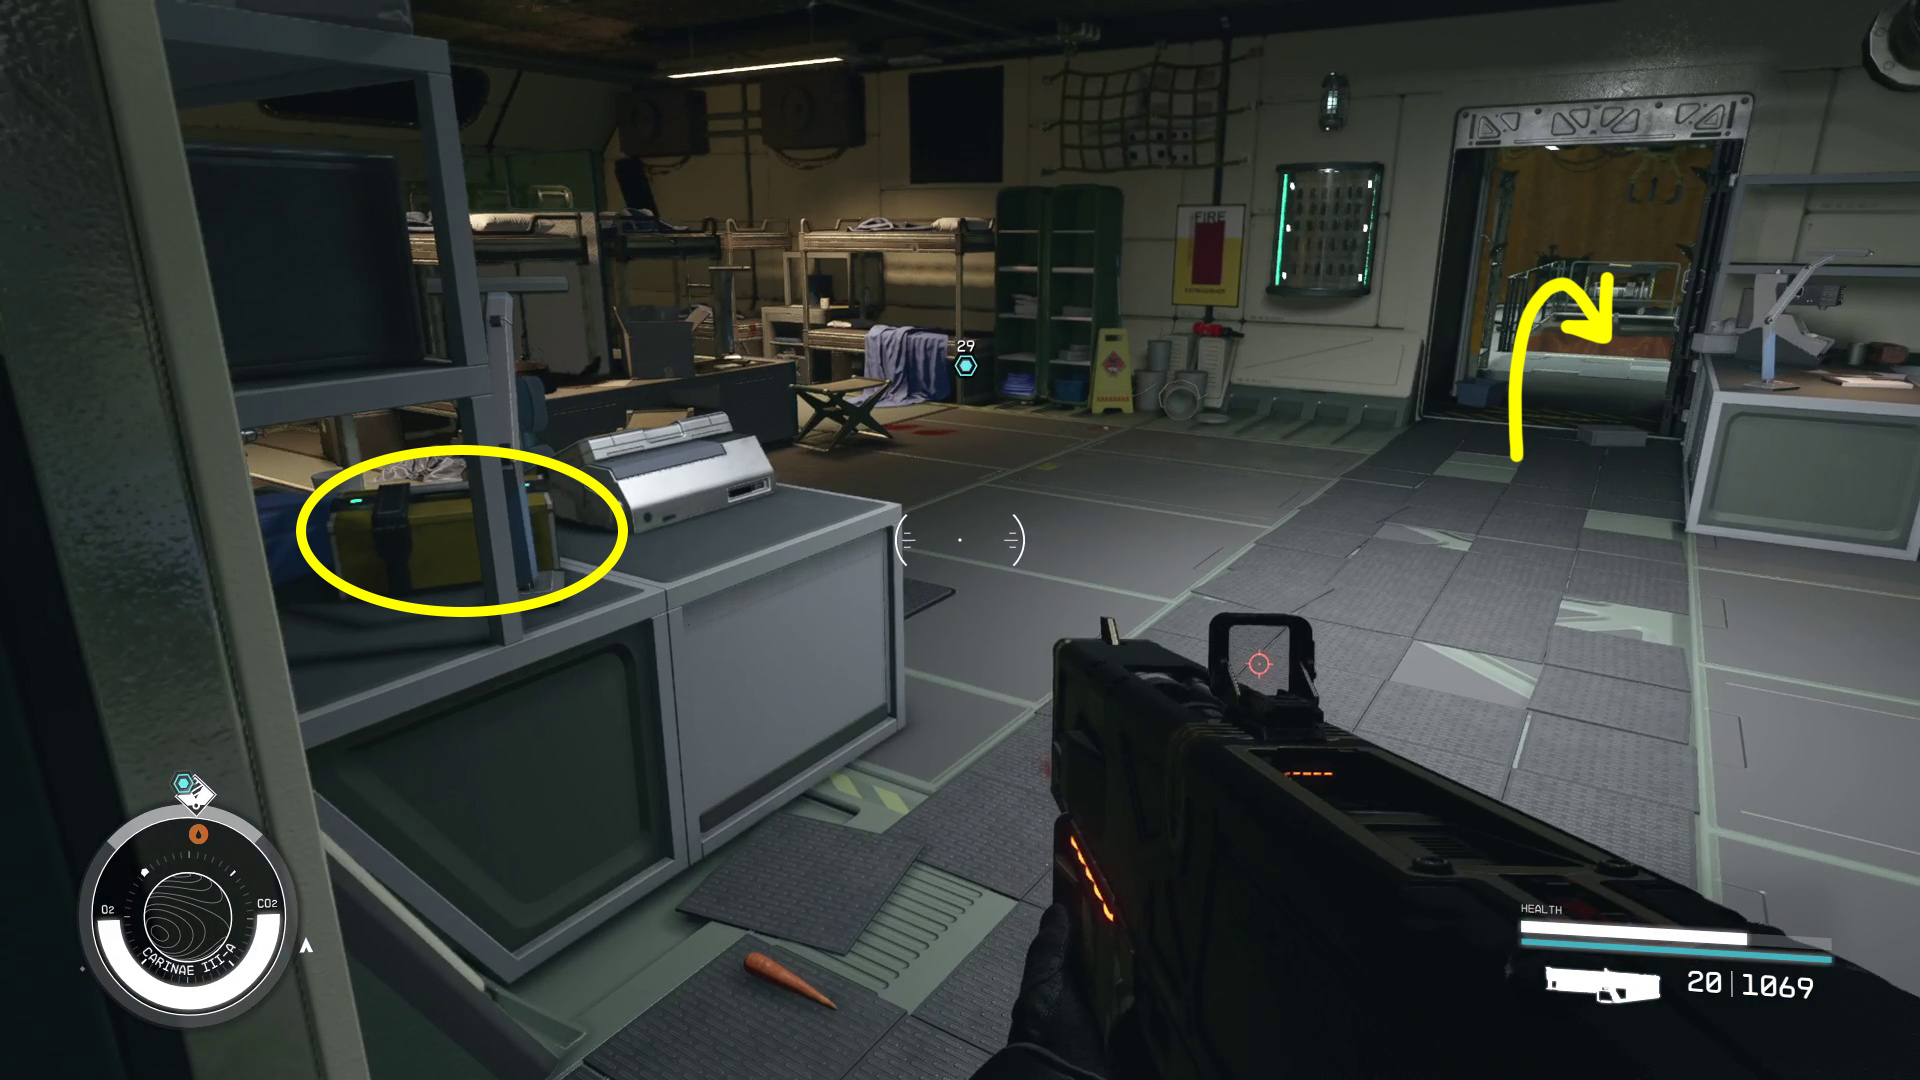
Deal with the next set of foes in the following room, then again take the time to loot the place — there’s food in the fridge if you need consumables, and there is also ammo on the far table if you go left from the door you entered by. Go back and stand by the door you came through, then look at the table on your left (Image 4) — in the storage box is the CM Station RC-1 Mine Keycard you need to enter the mine.
After grabbing the keycard, head down the stairs (Image 4), where you can find a bit more loot in the lockers. When you’re ready, head towards the elevator controls indicated by the to use your newfound keycard and enter the mine.
Image 4 – Location of key and stairs
Find the Rothicite Shipment
Again, your Hand Scanner will be able to guide you throughout this section, so feel free to use it if you get turned around.
When the elevator lets you out, you’ll head straight, into a storage area that has some loot — be sure to duck down and check the backs of the shelves, as some of it is fairly hard to spot while standing. Continue through the storage area into the mine proper, where you’ll find more enemies to fight. You can sneak into the tunnel and get a sneak attack in to start combat out, if you want. Don’t rush in, and make good use of cover — the path temporarily splits, so if you rush forward you can be attacked from behind.
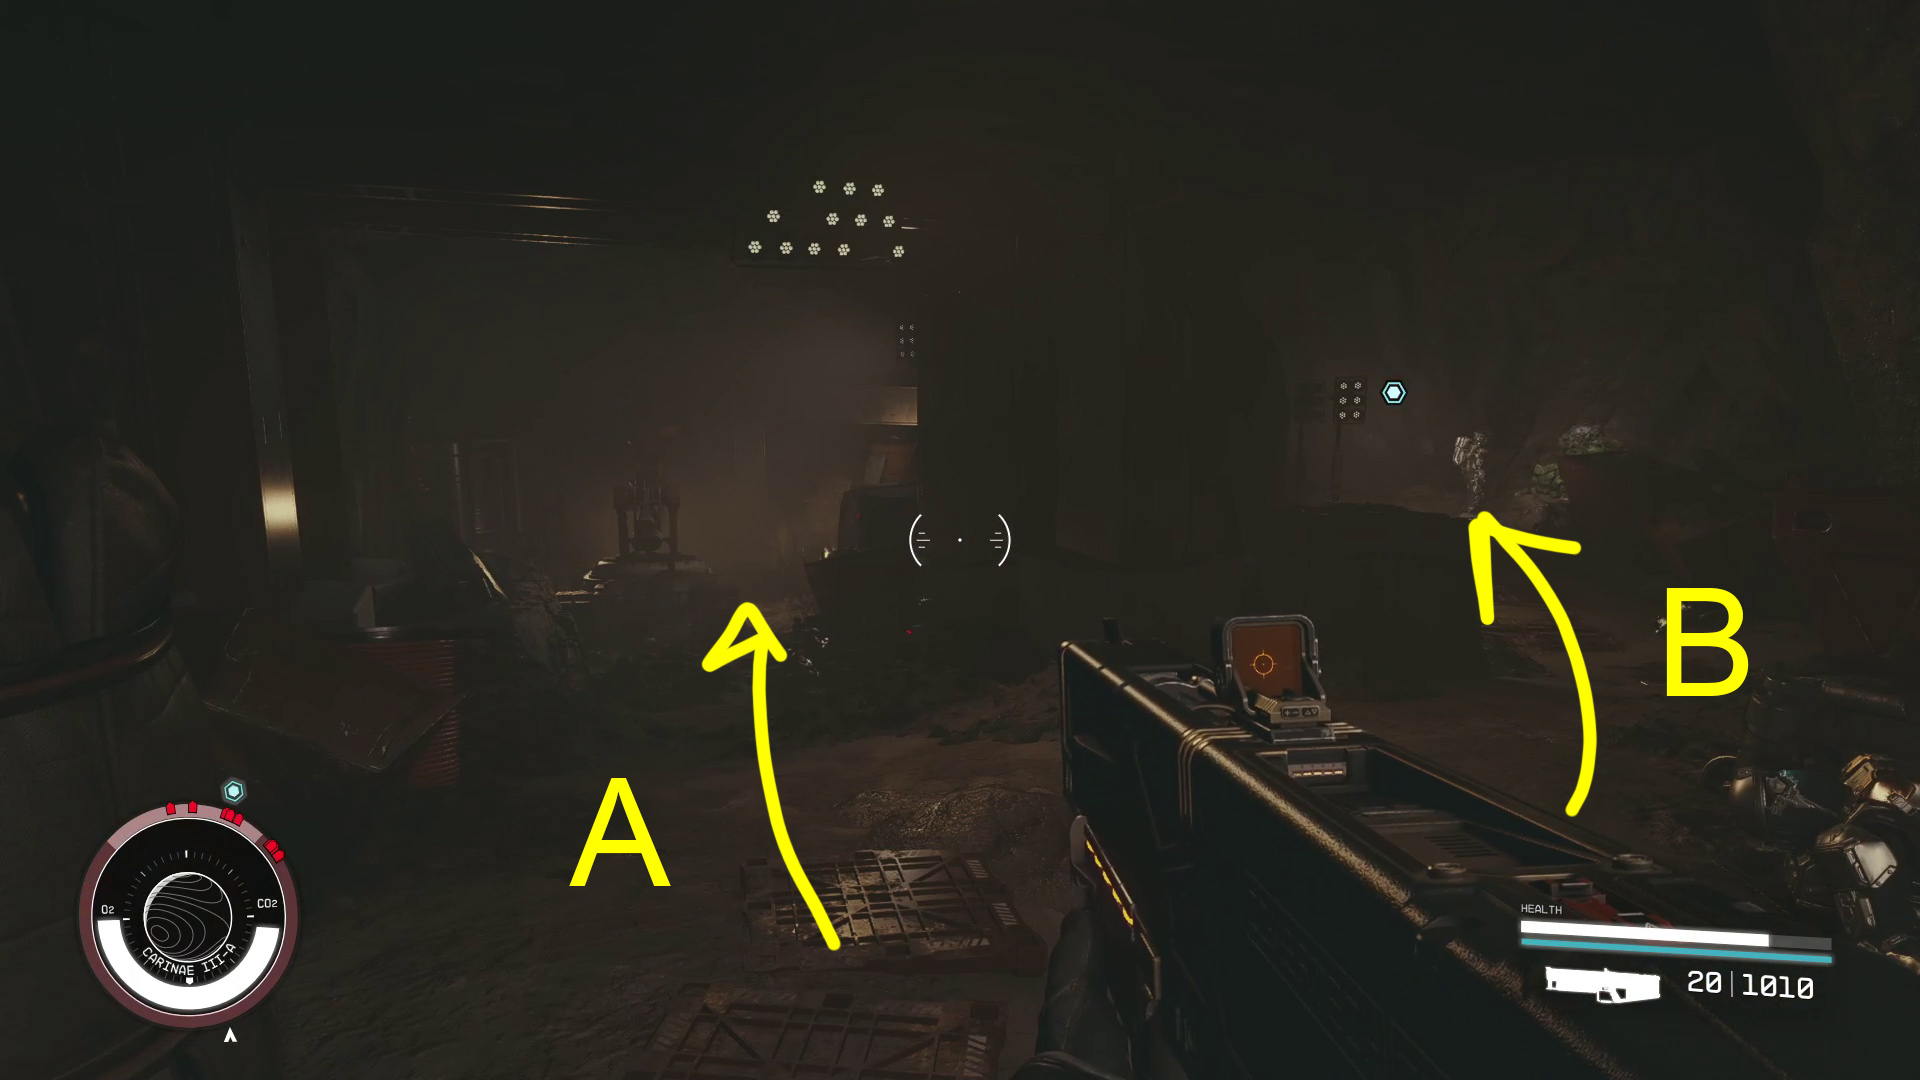
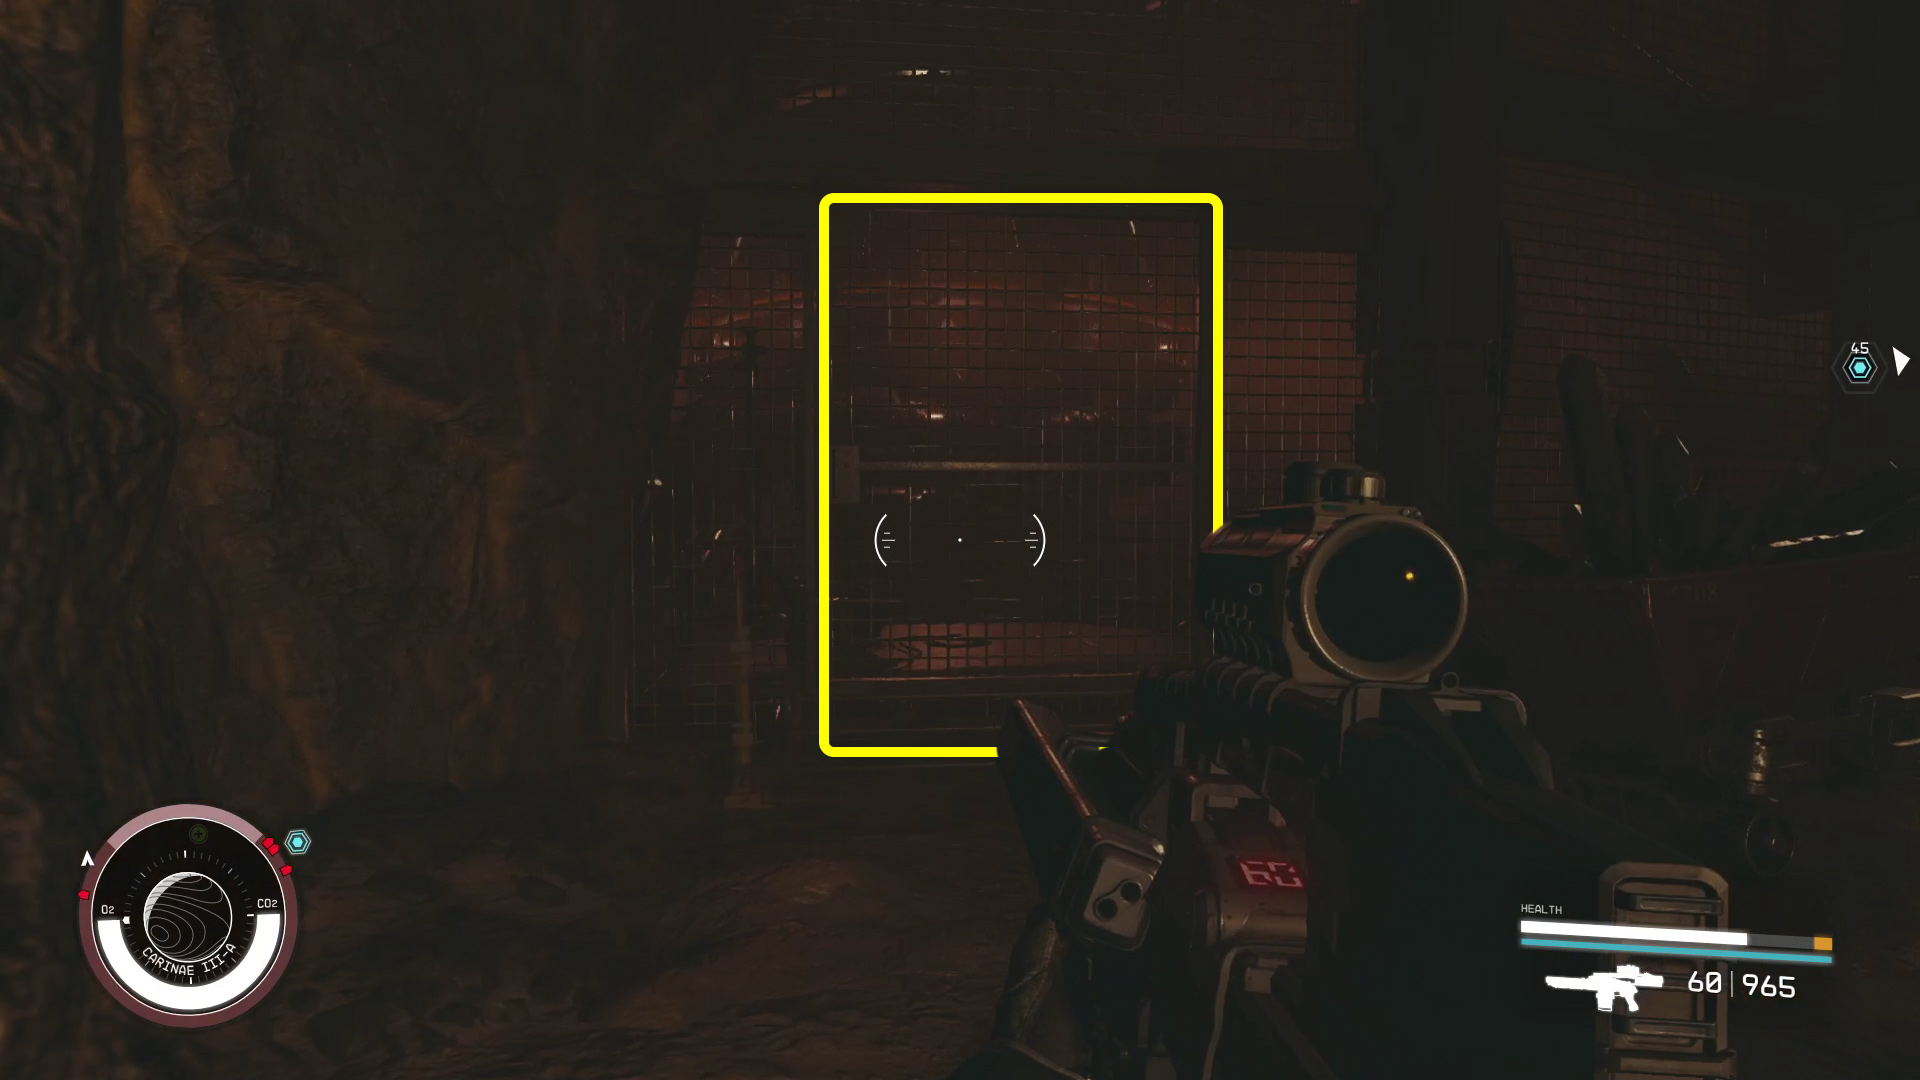
There’s a weapon case you can find on the right-hand path (Image 5B) before you continue further into the mine (5A) — on your left will be a table with more weapons and ammo. You’ll need to make your way out onto a catwalk (Image 6), and then still further into the mine. There will be enemies all along this route, so keep an eye on your compass and make sure you don’t rush past any Ecliptic mercs or their turrets.
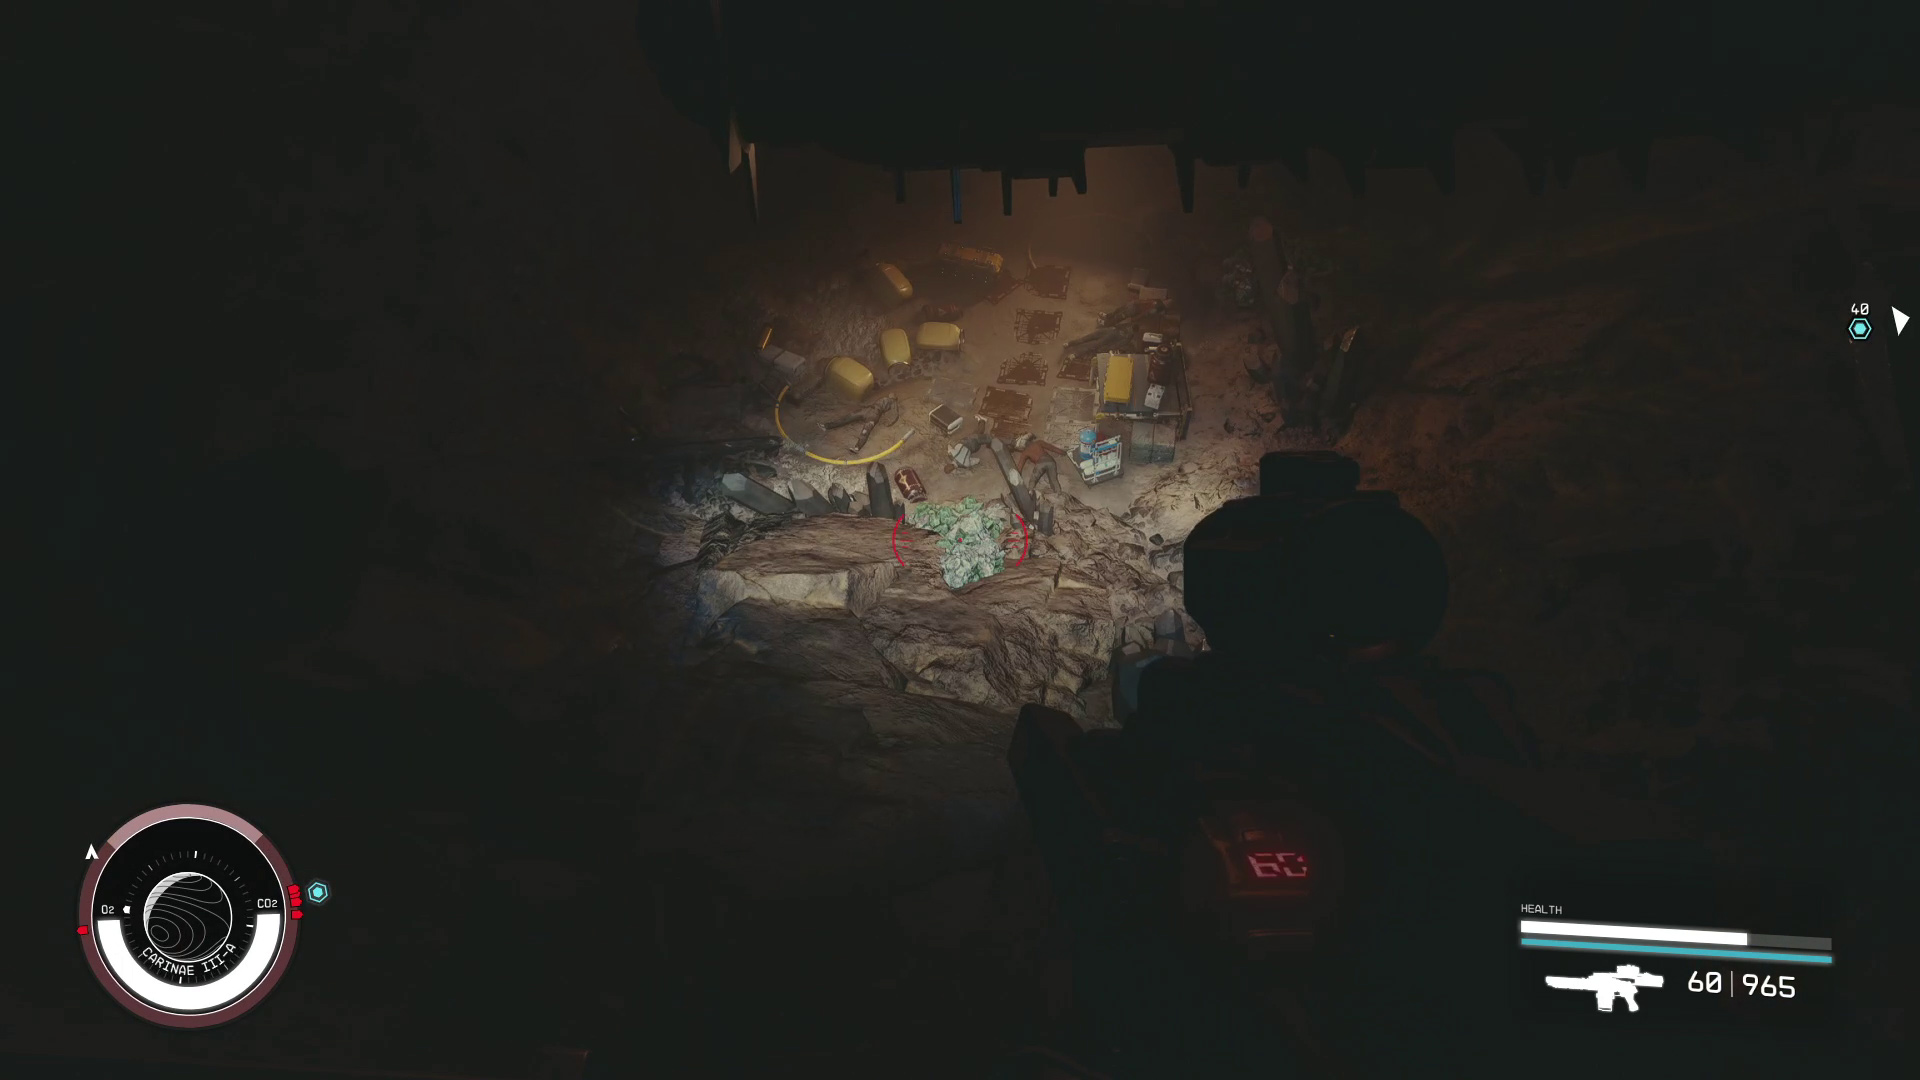
On your left where you meet the first turret, you can go through a gate (Image 6). Straight ahead through the gate is a mining pit with a bunch of brutally murdered miners (Image 7) — but there’s loot on their corpses, so make sure their deaths aren’t in vain and give those pockets a check. There is also a weapon case on a table by the corpses, and a storage crate nearby, so loot both before heading up out of the pit and back through the gate.
Image 5Image 6Image 7
Go left and continue uphill towards the , where you’ll need to take out a few more Ecliptics and a turret. There’s a storage crate to either side of the elevator, plus loot on a table to the left, so check ’em before you use the lift indicated by the . When the elevator stops, check out the weapon case behind the elevator, and then go through the door (note that you can surprise the enemies in the next room if you start sneaking first).
The next room has both a computer and an enemy tagged with — the enemy will run away after a bit of combat, but you’ll be able to catch them later, so just deal with the enemies that remain, then use the – indicated computer. Select “Shipments” and then “Ryujin Industries [CANCELED]” to complete this objective.
Discover What Happened at CM Station RC-1
To the left of the computer in the next room is a science crate you’ll want to loot, and there’s also other goodies throughout this hall. Grab what you want, and then you can use your scanner to follow the enemy that ran away — in our playthrough, they ran outside, towards where we landed at the start of the mission.
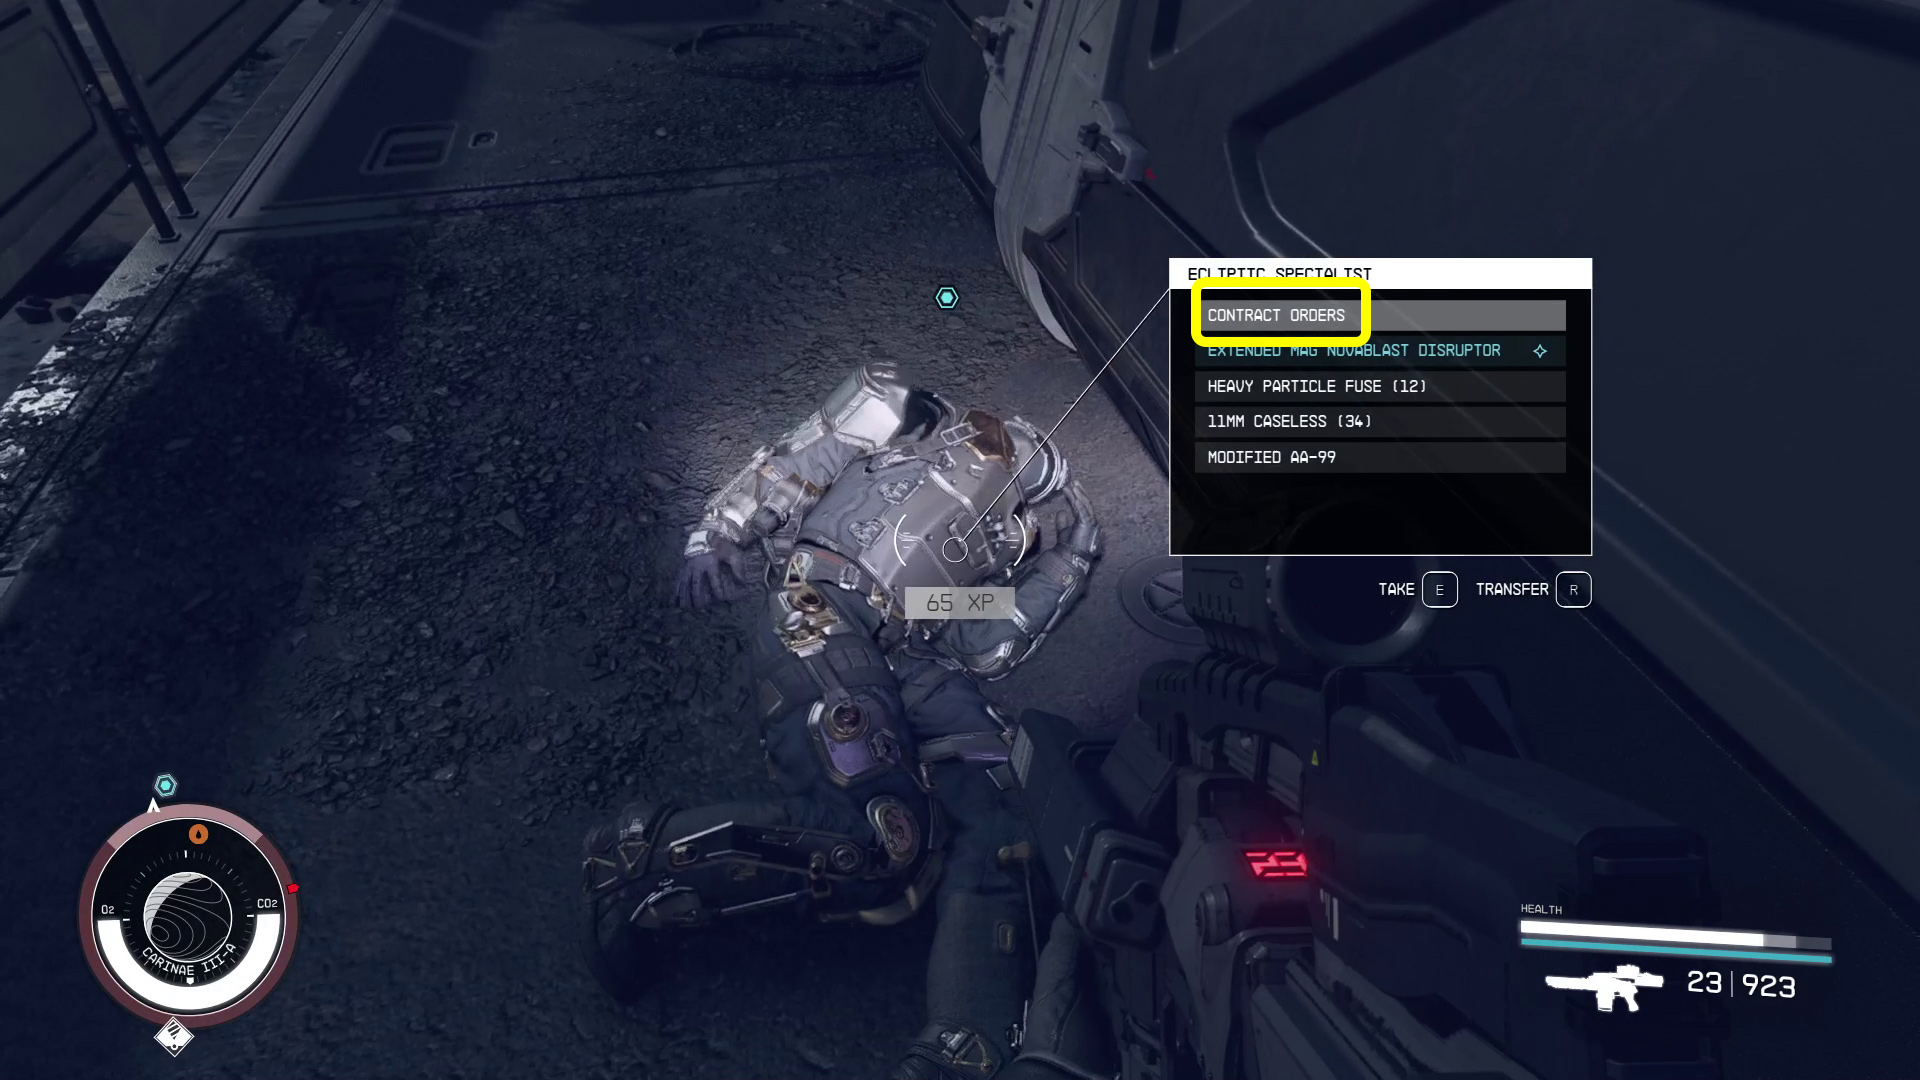
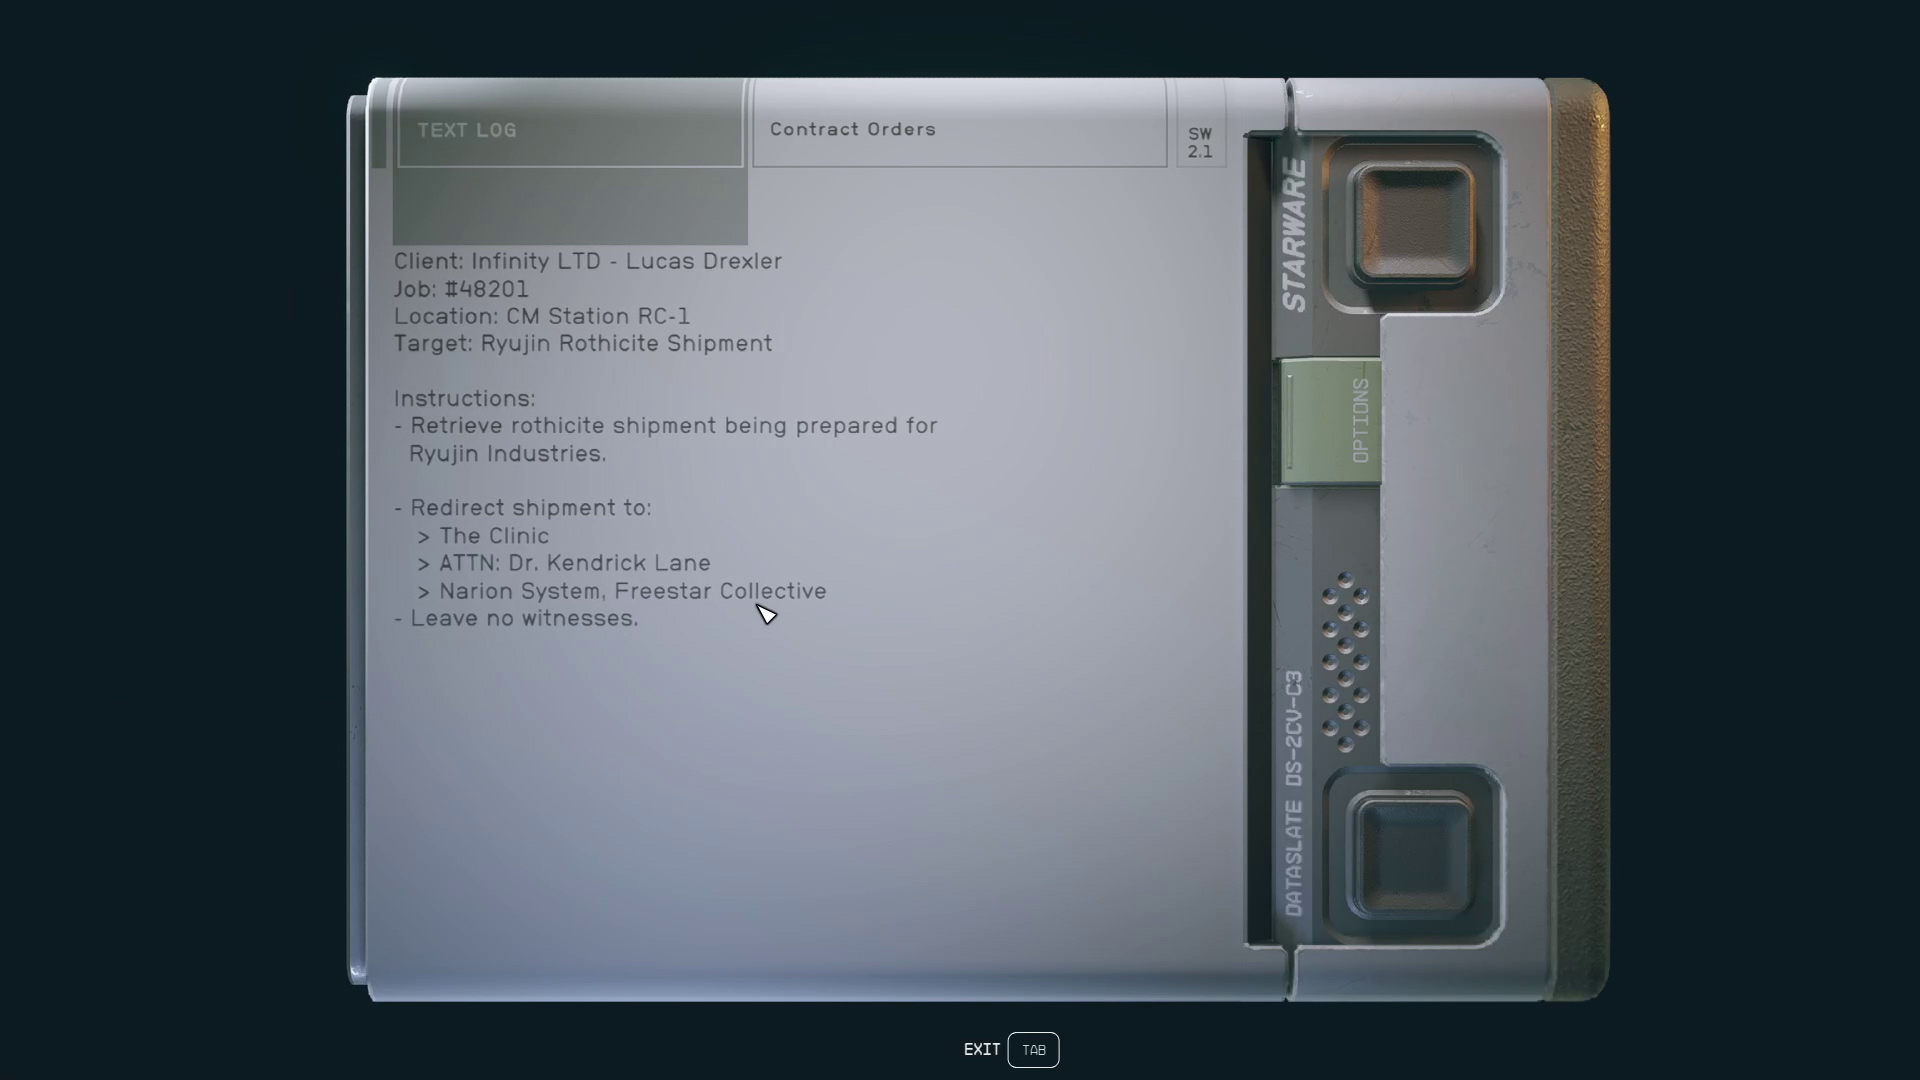
Don’t underestimate this foe, as they’re going to be fairly high level — check your HP and ammo before engaging. Once they go down, grab the Contract Orders from their corpse (Image 8) and then go into your inventory, select New Items, and read the Contract Orders (Image 9) to discover that the shipment you want has been sent to the Narion system.
Image 8Image 9
Travel to the Clinic in the Narion System / Dock at the Clinic
Use your Mission Log to set a course for The Clinic in the Narion System and grav jump there. You’ll arrive facing the Clinic — target it, then approach and dock/board.
Discover What Infinity LTD is Doing at the Clinic
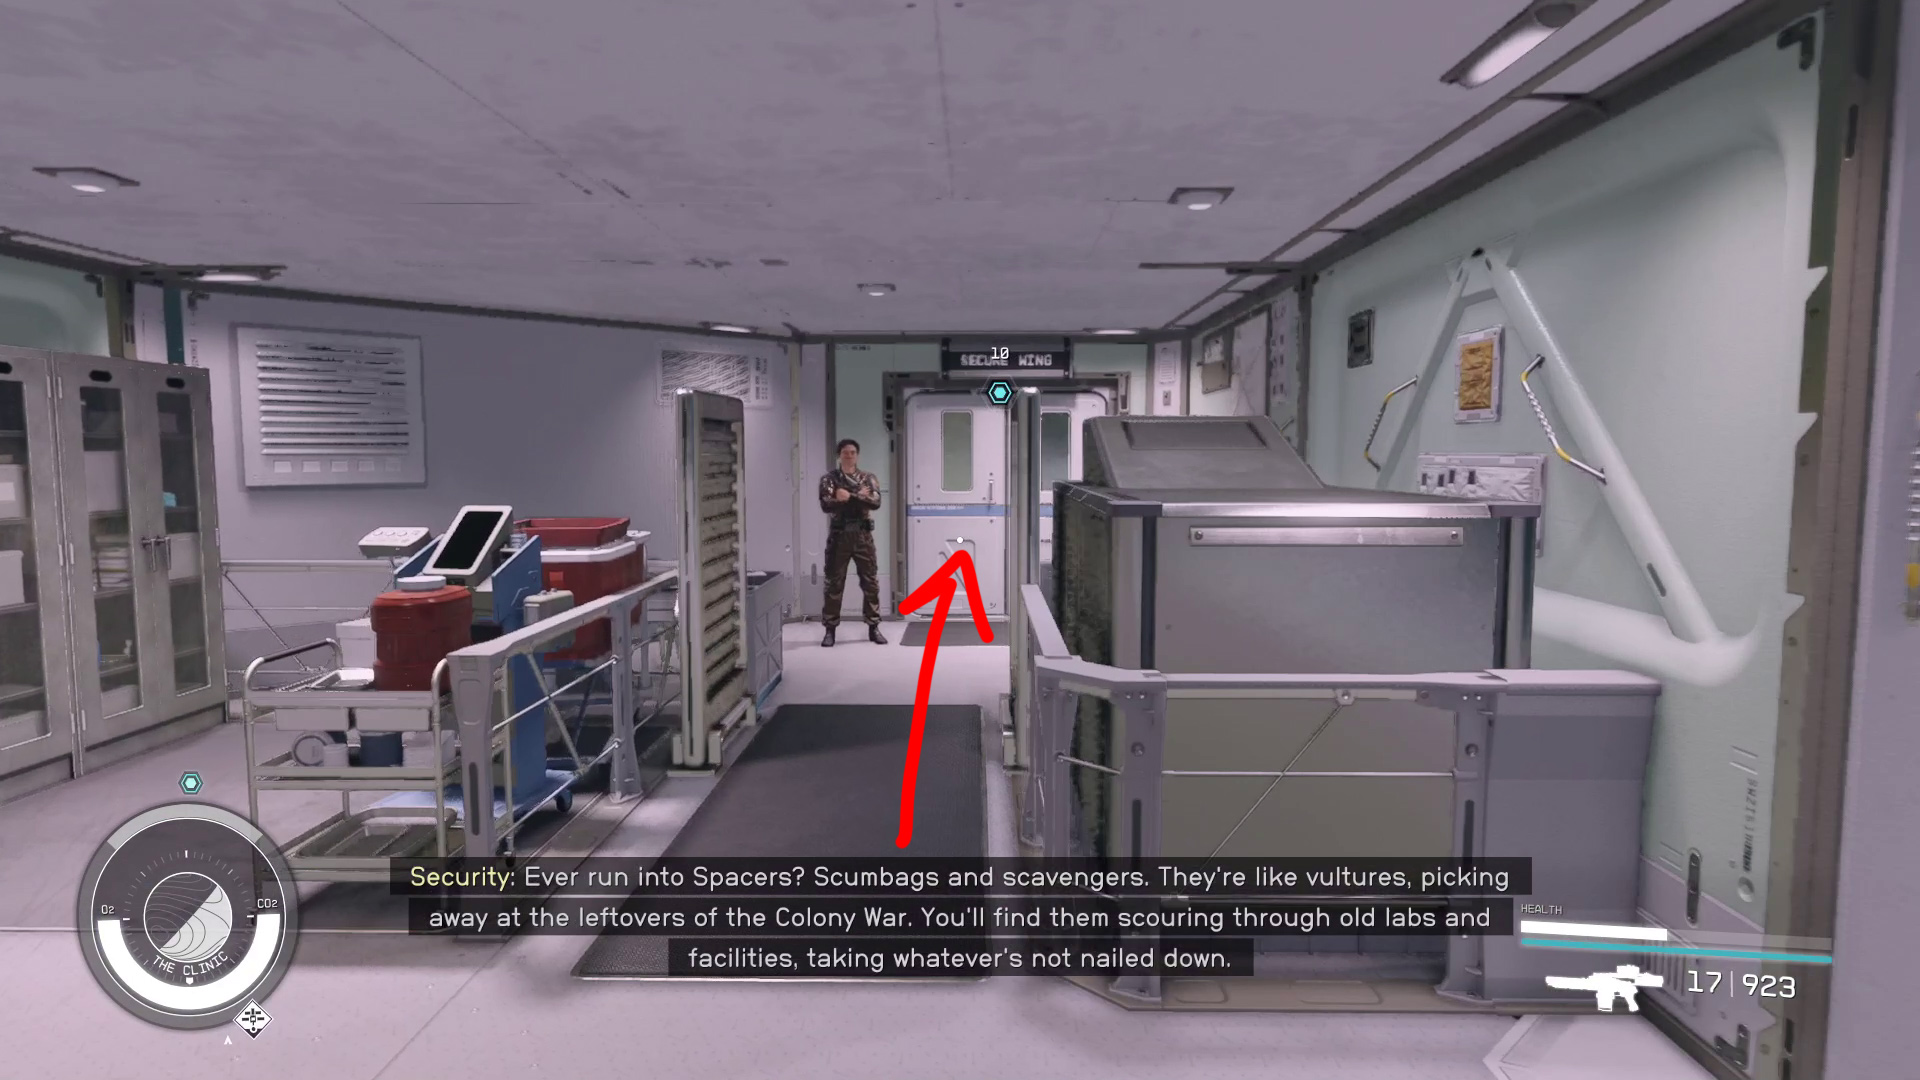
Head into the clinic, and continue past reception and towards the door marked with (Image 10) — when you get close enough, the guard will stop you. Try and [Persuade] him, and if you succeed, use the Secure Wing Access Key he gives you to go through the door and into the secure wing.
Image 10 – The door to the Secure Wing
Find a Way Inside the Secure Wing
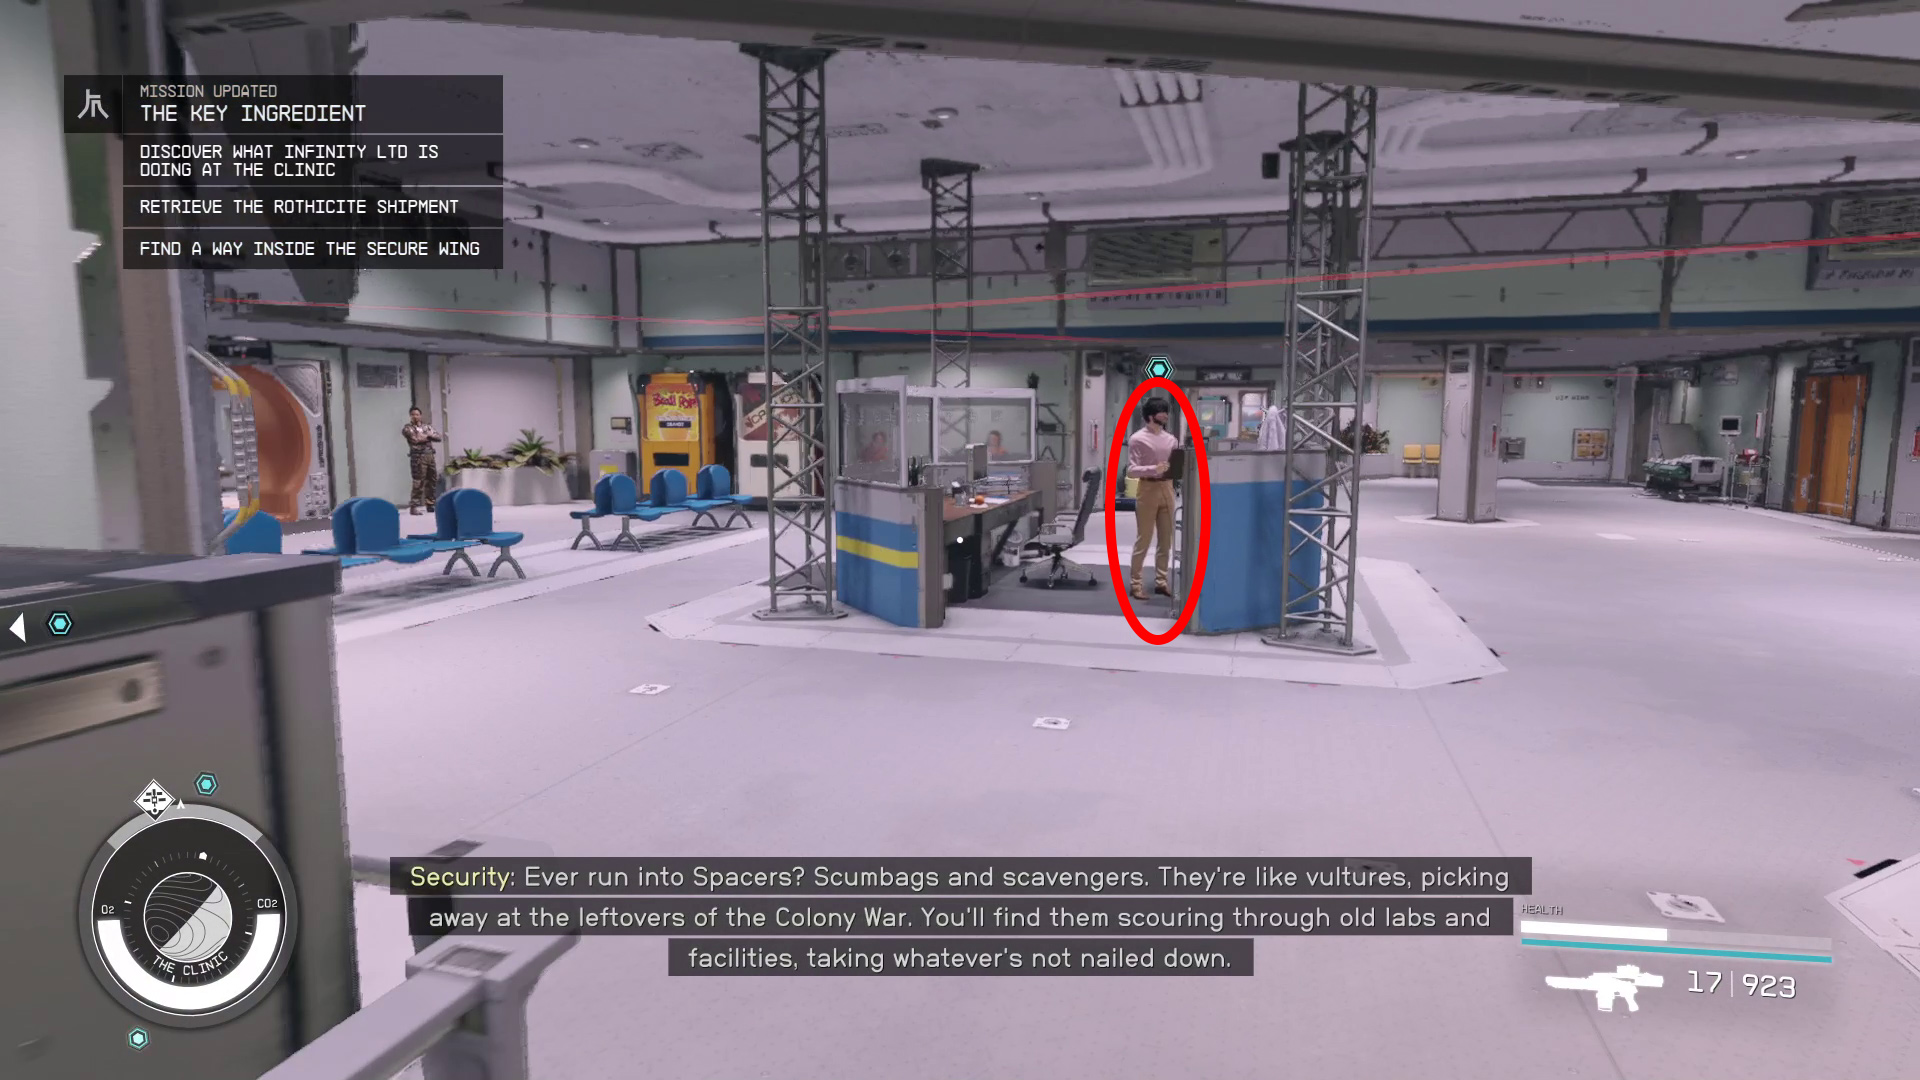
If you fail to [Persuade] the guard, turn around and go talk to the -marked man in the pink shirt (Image 11). Pick the first dialog option until the conversation ends — in doing so, you’ll learn that the guard has an Aurora addiction and a crush on Dr. Osian. Return to the guard and either [Give Aurora] (only works if you have some in your inventory) or [Lie] — either choice will get the guard away from the door, allowing you to stealthily pick the lock and head into the secure wing.
Image 11 – Speak to this NPC to get crucial info on the Secure Wing guard
If you have enough ranks in Stealth, you might be able to pickpocket the guard, or simply pick the lock on the door, if you find the right angle. We were unable to do so in our playthrough.
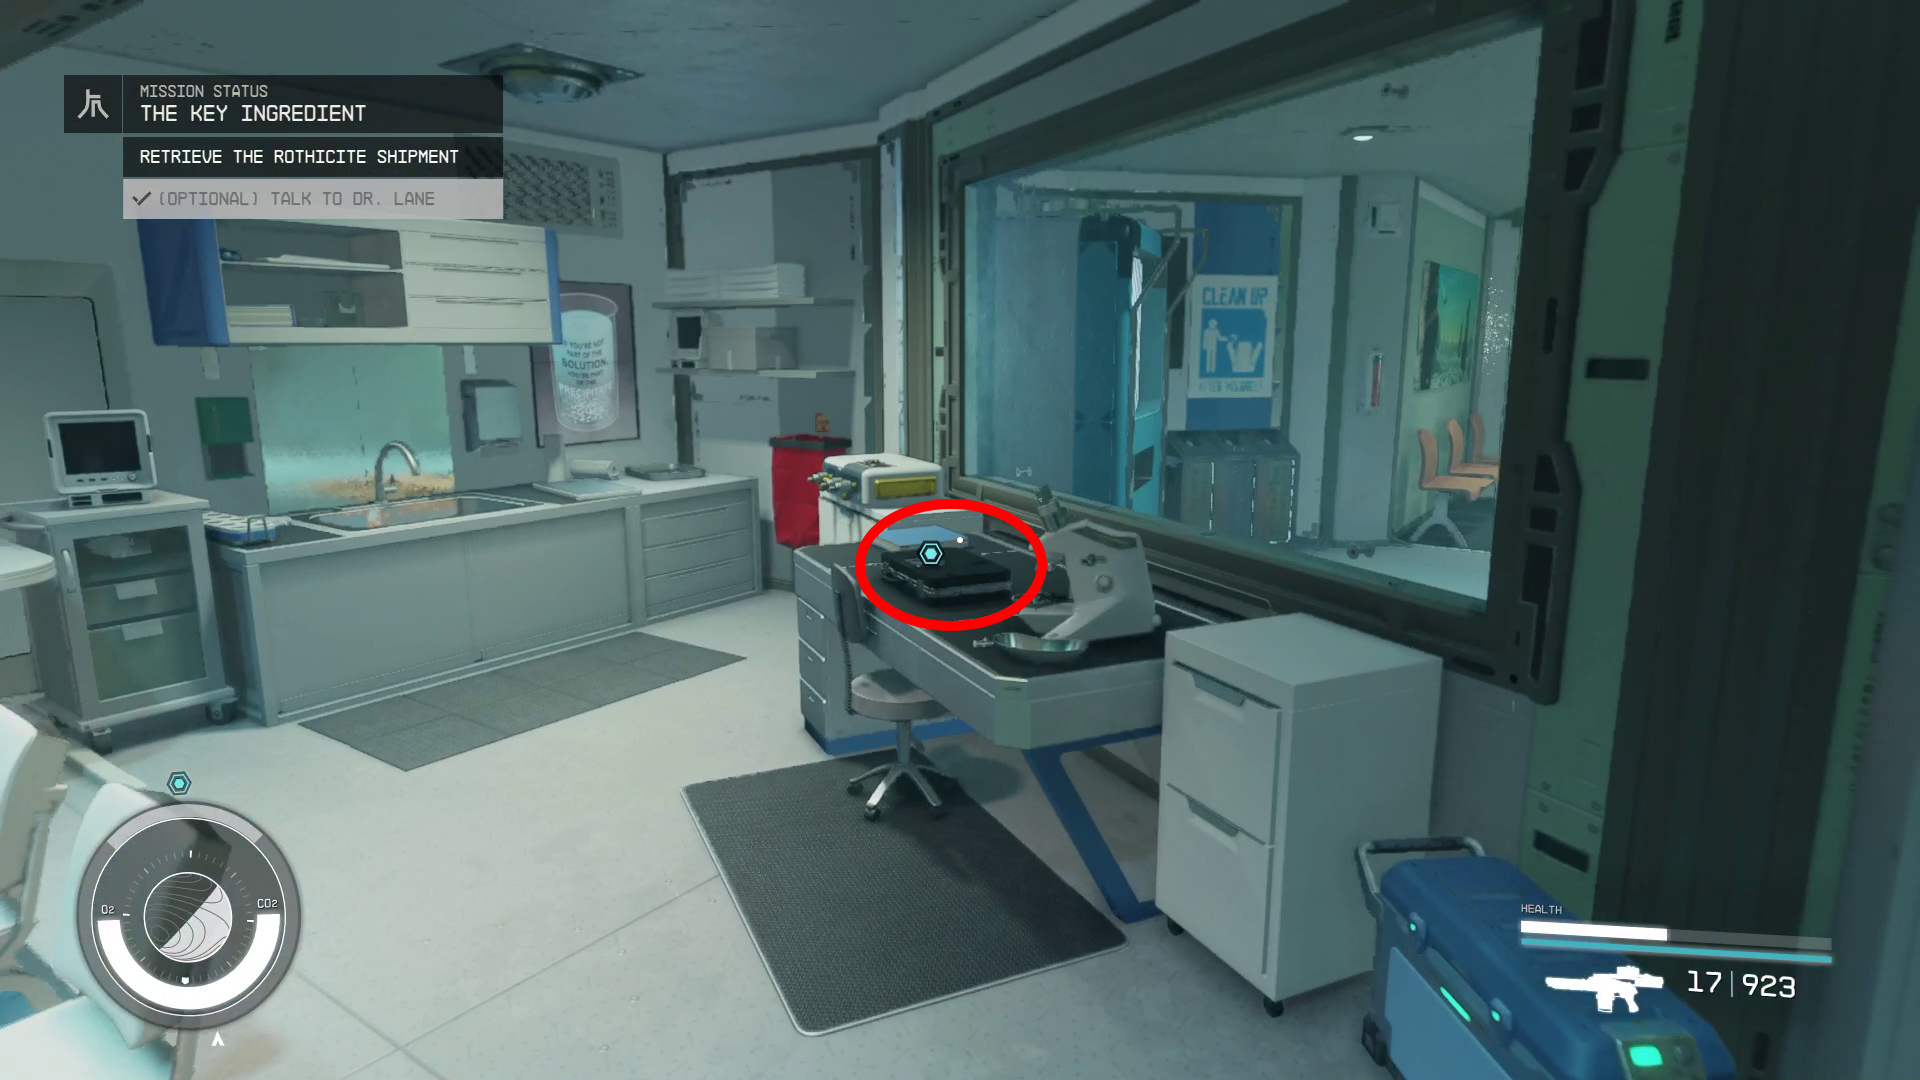
Retrieve the Rothicite Shipment
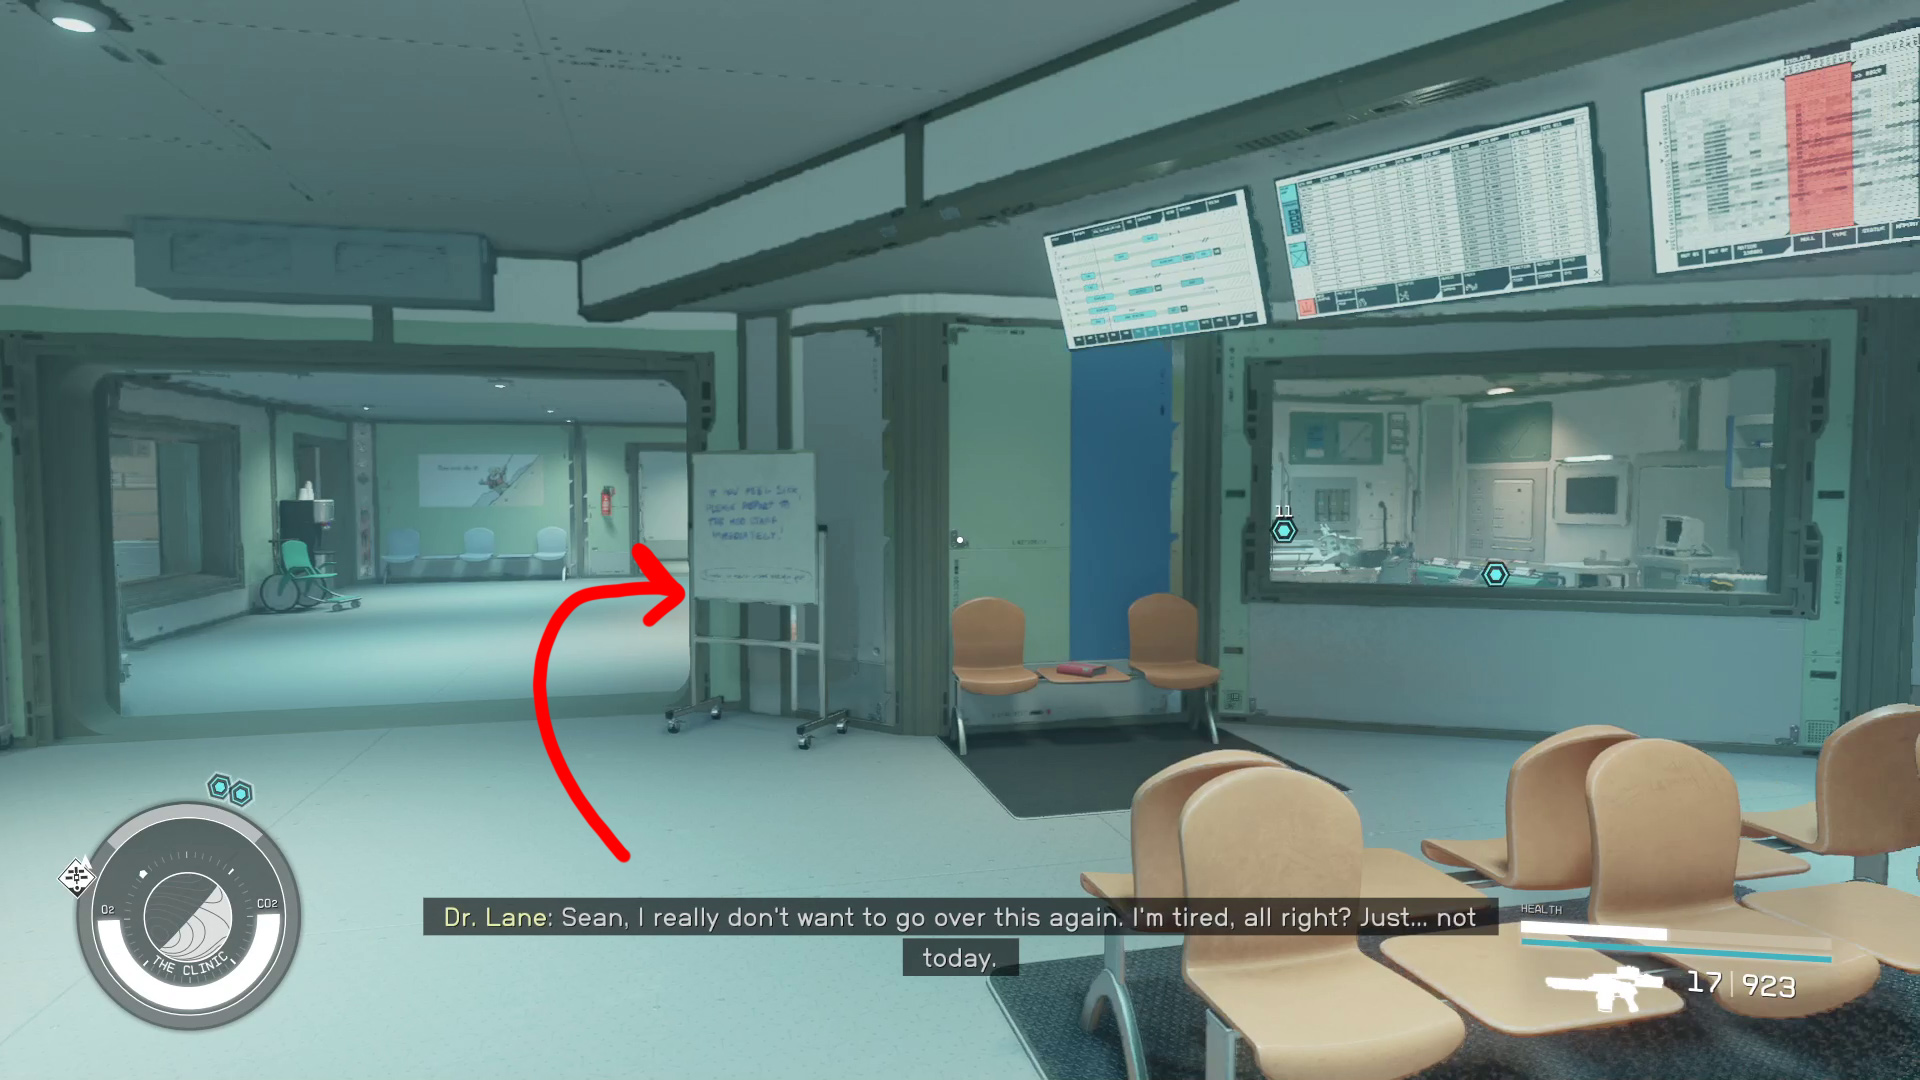
Once inside, head right into the office where the two markers are (Image 12). You’ll be stopped by Sean — choose the [Lie] option, otherwise you’ll have to succeed at a [Persuade] to avoid having security called. Sean will leave once you [Lie], and then you can speak with Dr. Lane and [Lie] to him as well.
Ask for a verbal update on the project (this takes care of the “Discover What Infinity LTD is Doing at the Clinic” objective), and then pick whatever options you want — the first choice will end the conversation the quickest. Then you can go over to the table by the window and grab the Rothicite shipment (Image 13).
Image 12Image 13
Return to Veena at Ryujin Tower
Retrace your steps back to the airlock and board your ship, then use your Mission Log to fast travel back to the Neon Core. From there, make your way back to Ryujin Tower, take the elevator to the Research and Development, then go and talk to Veena.
Talk to Veena / Masako
Pick one of the [Give Rothicite] options, and then after a brief conversation with Veena, Masako will begin a dialogue with you. As usual, you can pick the first option to move things along if you want.
If you skipped talking to Dalton in the previous mission, or otherwise pissed off Bayu, Masako will bring up a debt to him that Ryujin owes. If you kept Kumohi’s Slate, there’s an option to [Give Kumiho’s Slate]; presumably, this should let you skip Managing Assets, but in our playthrough, doing so did not let us skip the related mission, so your mileage may vary.
Once you finish talking to Masako, this mission is complete! Depending on how you handled the last mission, your next mission will either be Managing Assets or Sabatoge
Unabashed FromSoftware fanboy still learning to take his time with games (and everything else, really). The time he doesn't spend on games is spent on music, books, or occasionally going outside.