This Ryujin Industries faction mission is perhaps the most frustrating mission in the game, at least if you try to do it stealthily. Fortunately, this walkthrough will not only help you sneak your way through Infinity LTD, but also offer you an alternative method that still allows you to stay in character.
As with most of the Ryujin missions, you’ll likely end up doing this step immediately following the previous mission — if you are on this step, however, you can find Dalton in the Ryujin Industries Tower in the Neon Core. Take the elevator to the Executive Offices, then use your Hand Scanner to find Dalton and speak to him.
Take a Seat in the Conference Room / Wait for Dalton to Arrive / Listen to the Meeting
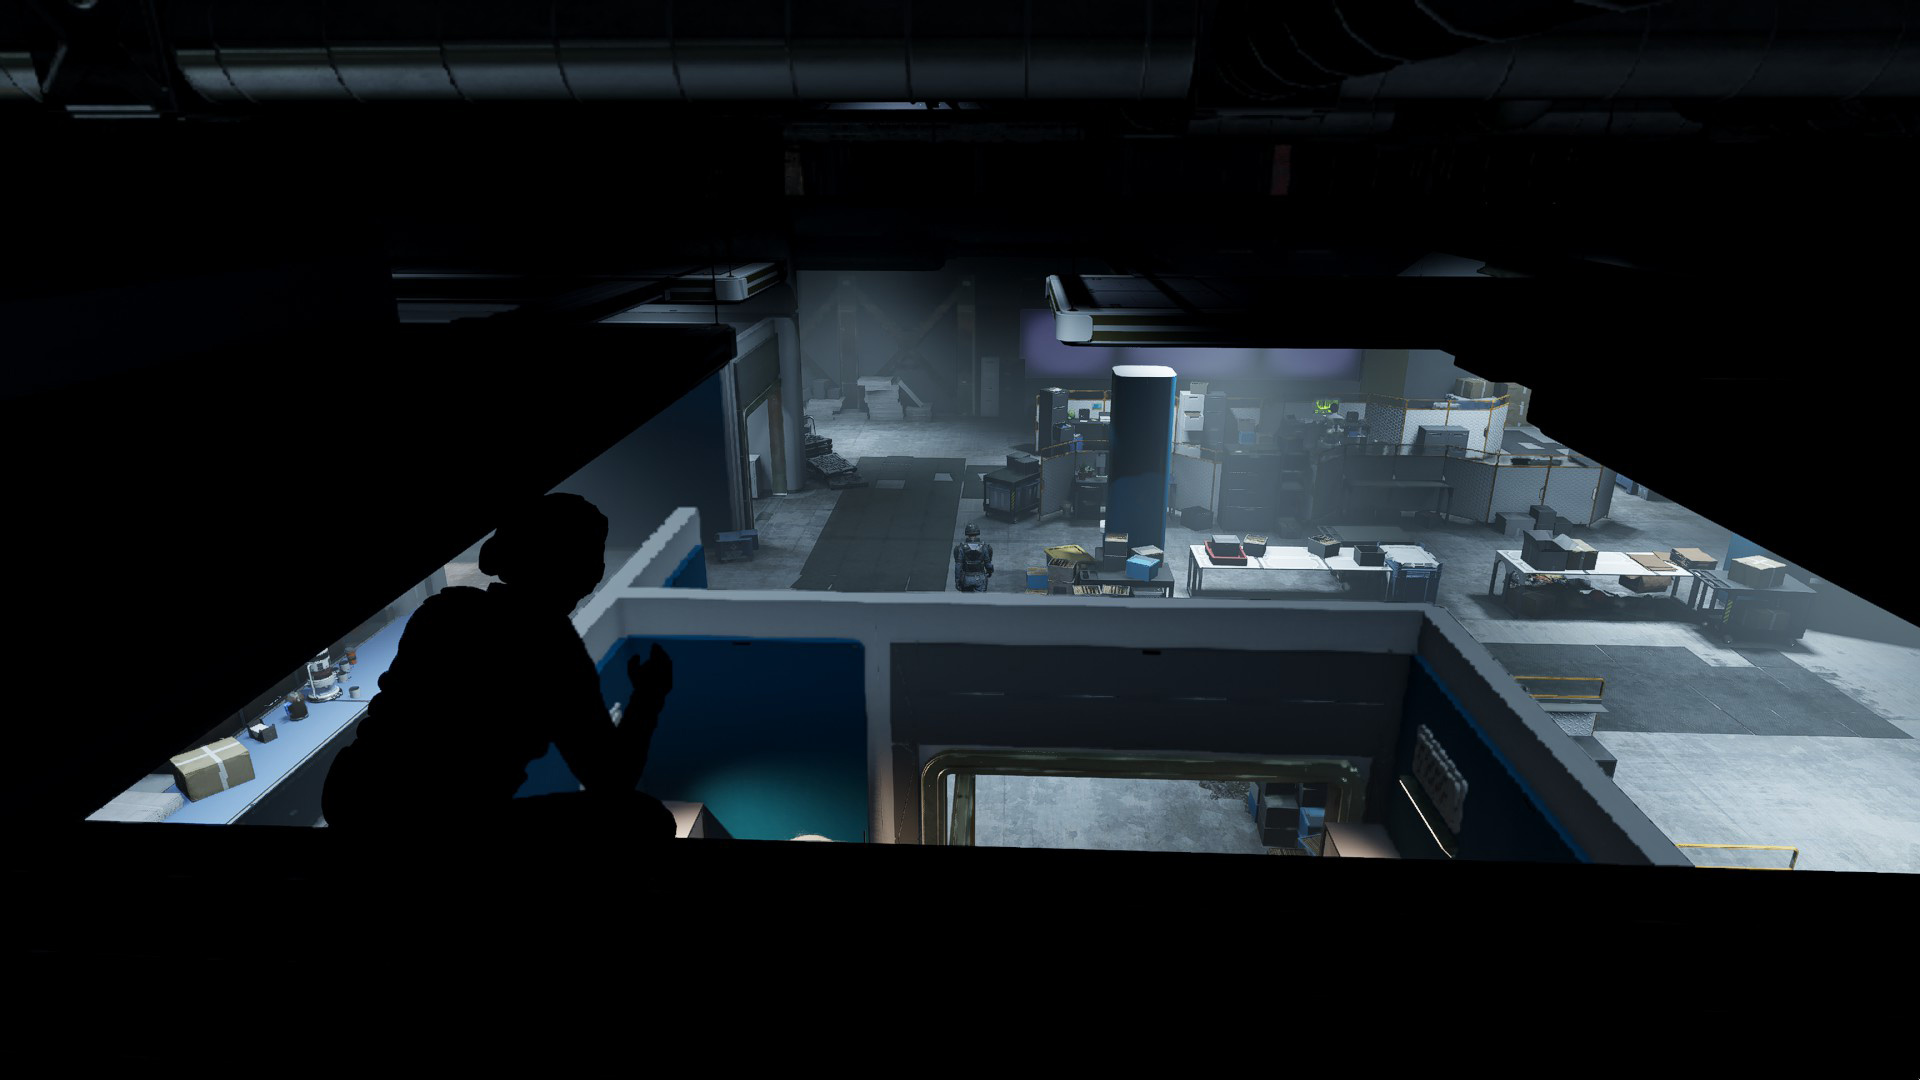
Either follow Dalton, or simply head towards the , which indicates a chair you need to sit in (Image 1). Once Dalton shows up, the meeting will start. You’ll have a few chances to chime in — say whatever you want, as it has no effect on the mission.
Image 1 – Sometimes it feels like Bethesda just doesn’t trust its players… also, what if I want to stand?
Meet Veena in the Neuroamp Division / Talk to Veena / Lie Down on the Operating Table
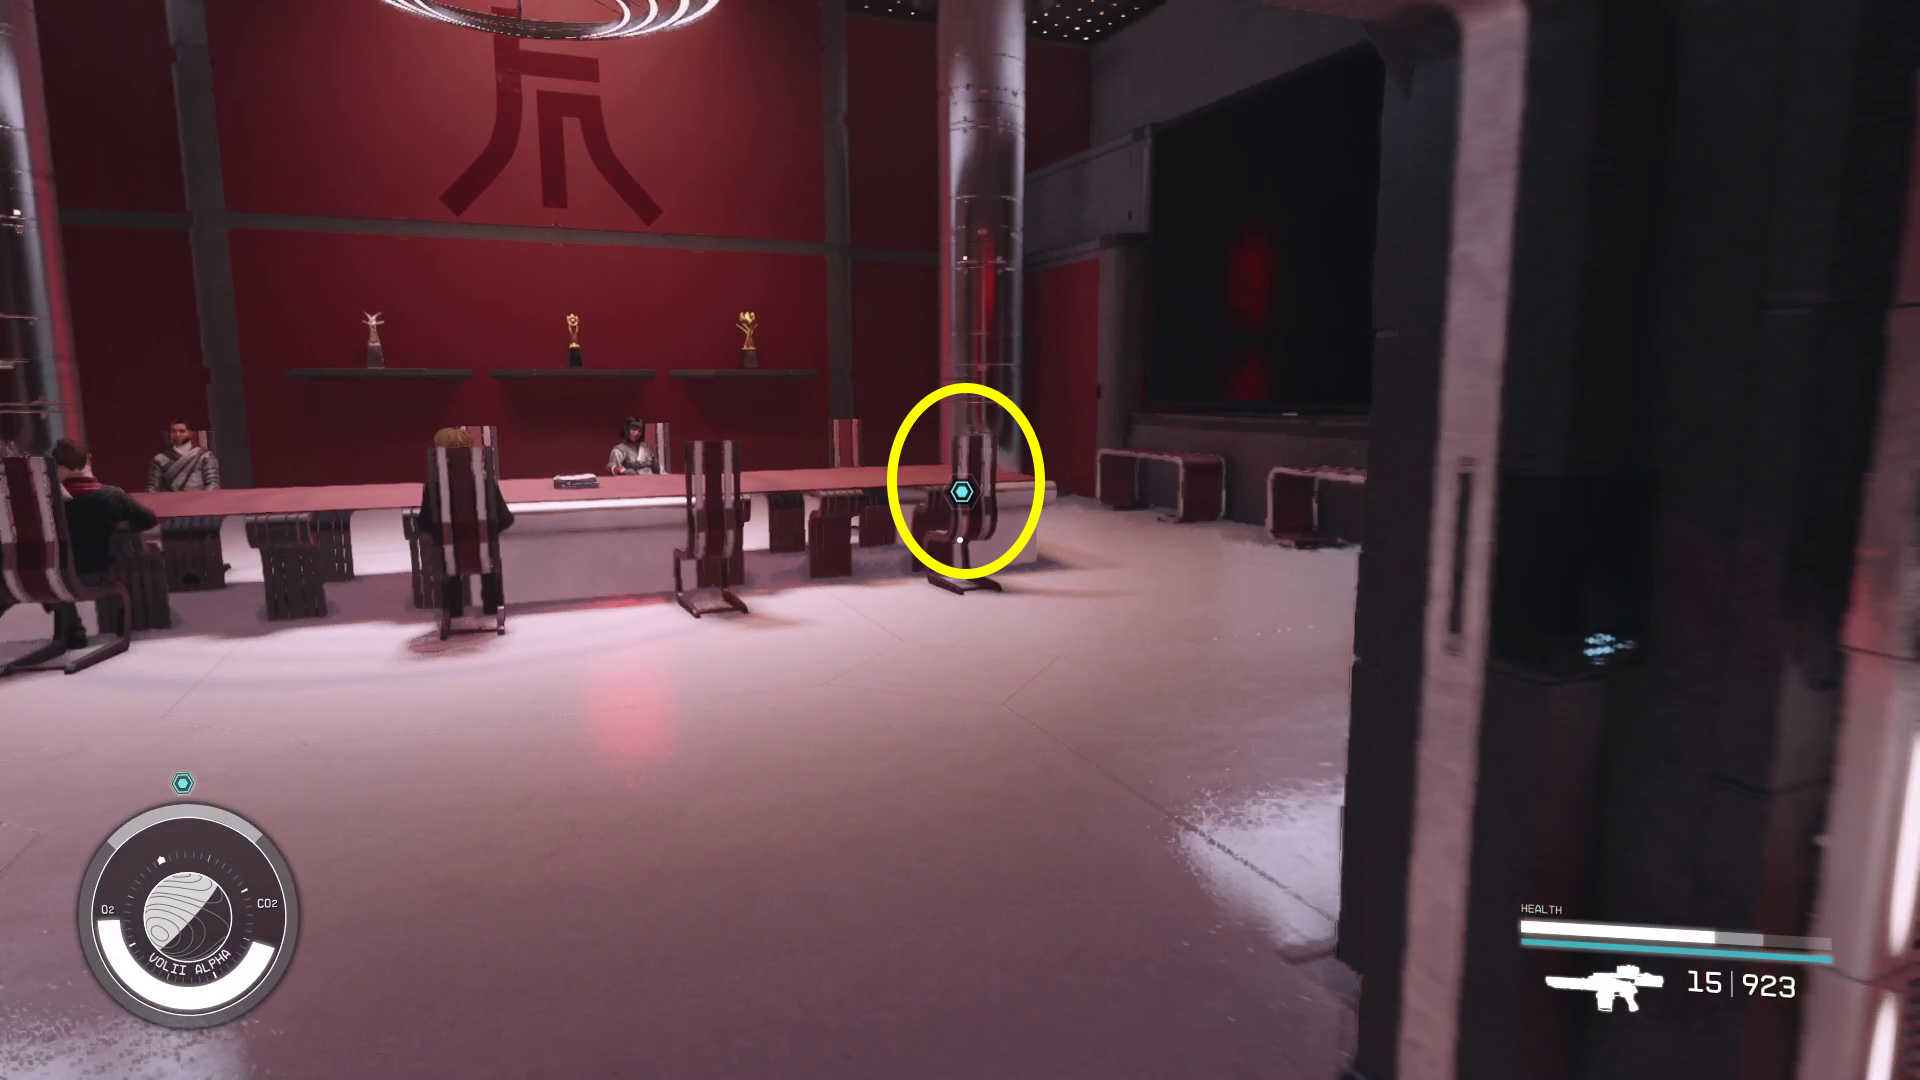
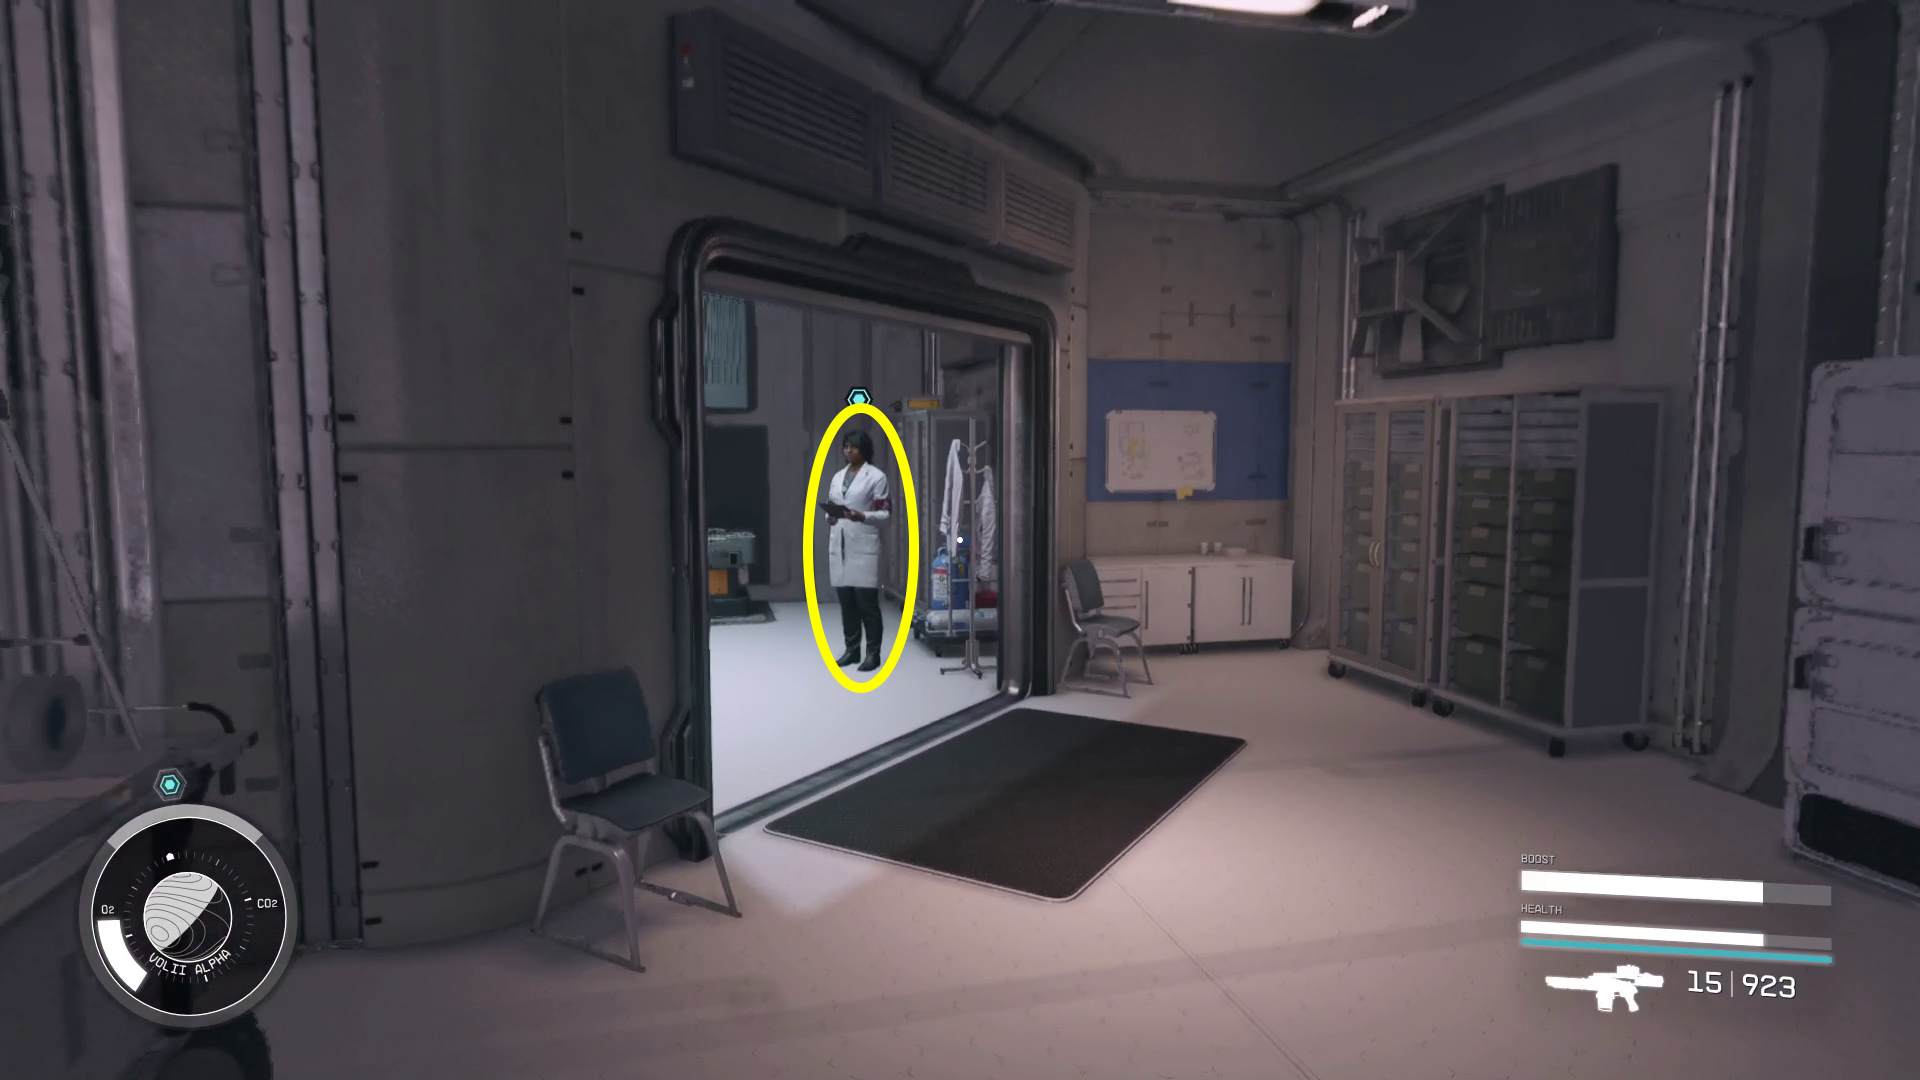
Once the meeting ends, you’ll automatically get up. Use your scanner to find your way to the elevator, and then take it to the Research and Development floor. Take a right out of the elevator and head across the floor (again using your scanner if you need to) until you find Veena (Image 2). Speak with her, and say what you like — there is no option that allows you to skip this procedure (besides not completing the mission, of course). When the conversation ends, you’ll need to lie down on the table (Image 3), and then the procedure will begin.
Image 2Image 3
Talk to Veena / Go to the Observation
You’ll have to manually start a conversation with Veena after you get off the operating table. Handle the convo as you like, and then leave the operating room and go right, then up the stairs to the observation deck indicated by the .
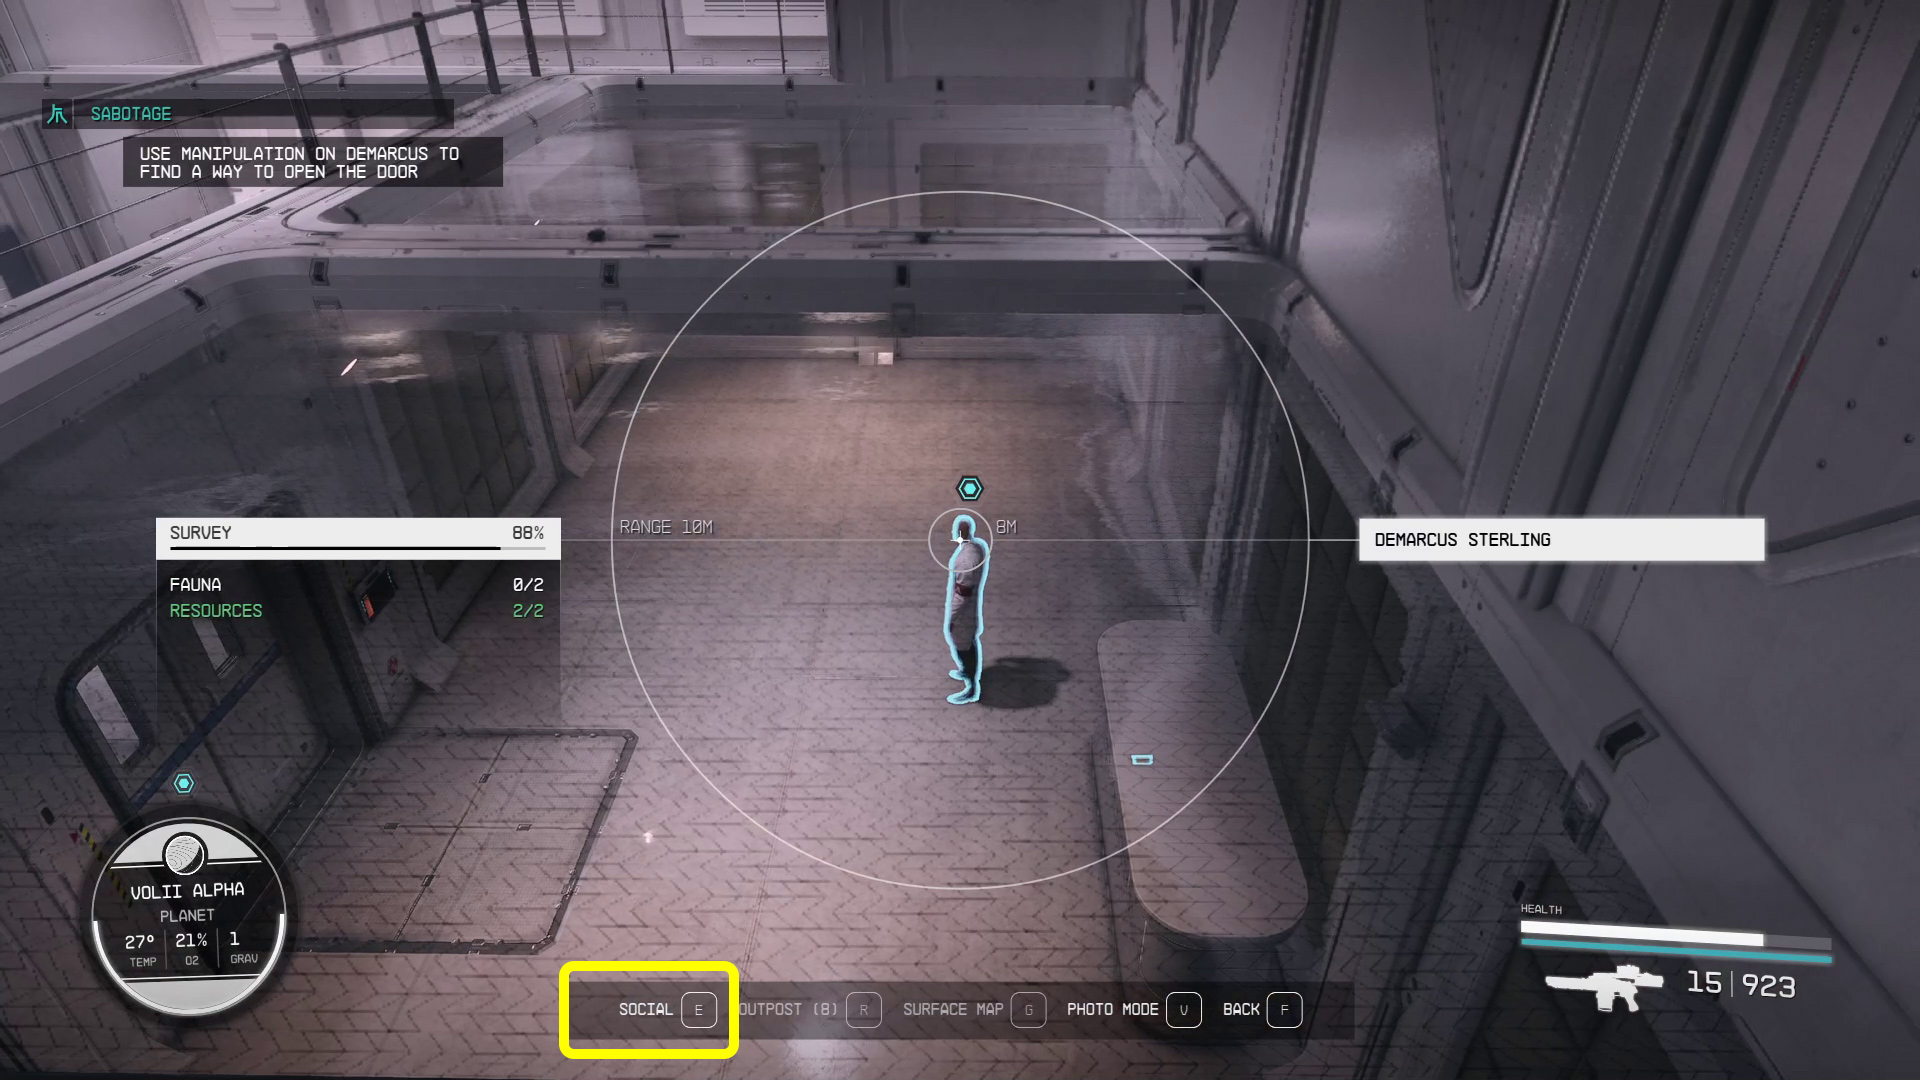
Use Manipulation on DeMarcus to Find a Way to Open the Door
At this point, you’ll get some instructions from the game on how to use manipulation. In case you skipped right over ’em, here’s all the details on what you need to do here:
Open your scanner (F/LB) and target DeMarcus.
Press the Social button (Image 4).
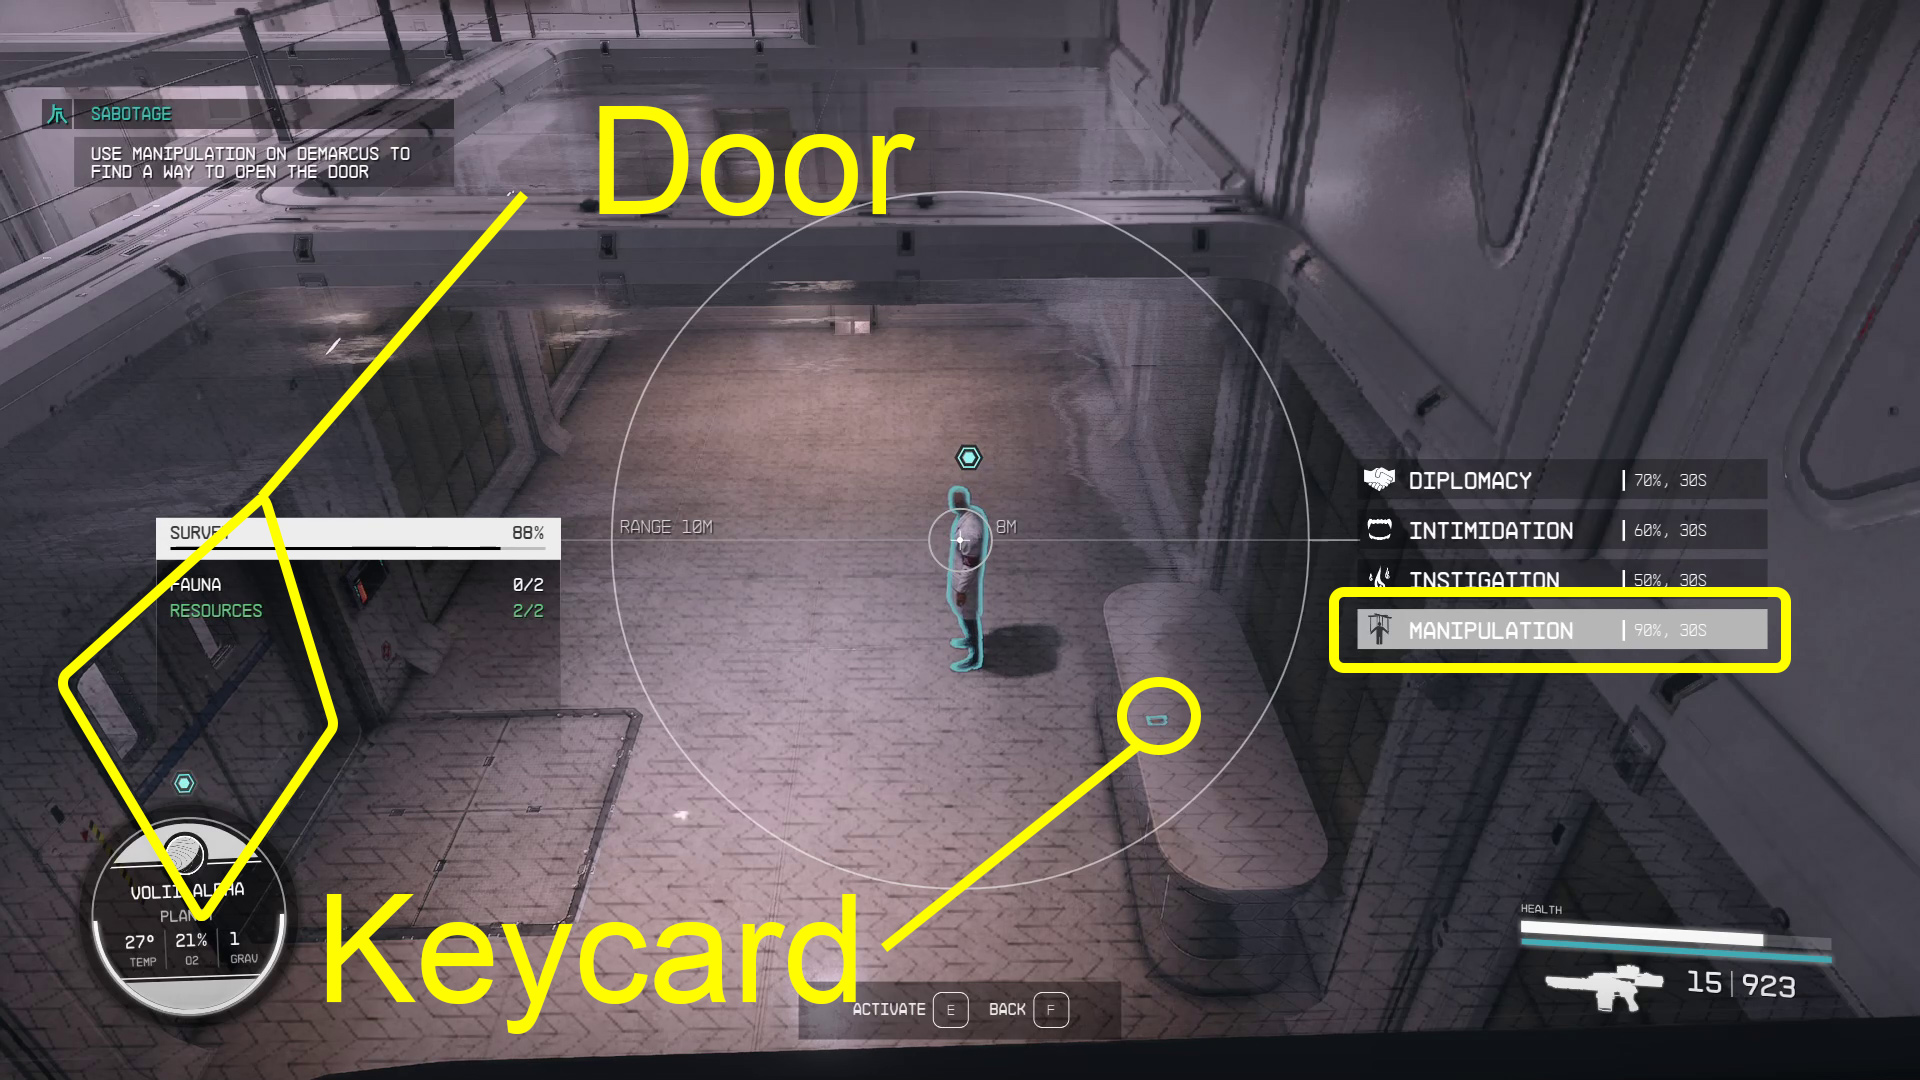
Select “Manipulation” and press the Activate button (Image 5).
Put your cursor over the keycard and press Move (Image 5).
Repeat steps 1-3 (you may have to wait a bit), then put your cursor over the door to the room and select Unlock (Image 5).
Image 4Image 5
Wait for Veena and DeMarcus / Talk to Veena / Talk to Masako in Her Office
Once you’ve made DeMarcus open the door, head down the stairs to where Veena is waiting by said door, and wait for DeMarcus to stop being under your influence. The two scientists will then have a conversation, and when it ends, you’ll need to talk to Veena again. Say what you want, and when the dialog ends, use the scanner to find your way back to the elevator. Return to the Executive Offices floor, and then head on up to Masako’s office and talk to her. She’ll brief you on the mission and then send you on your way.
Meet Ularu In Her Office or Talk to Dalton
Depending on if you decided to side with Ularu in Guilty Parties, you’ll either be sent to Ularu’s office or Dalton’s. Use your scanner if you need help finding your way, and then talk to whichever Ryujin employee you were sent to.
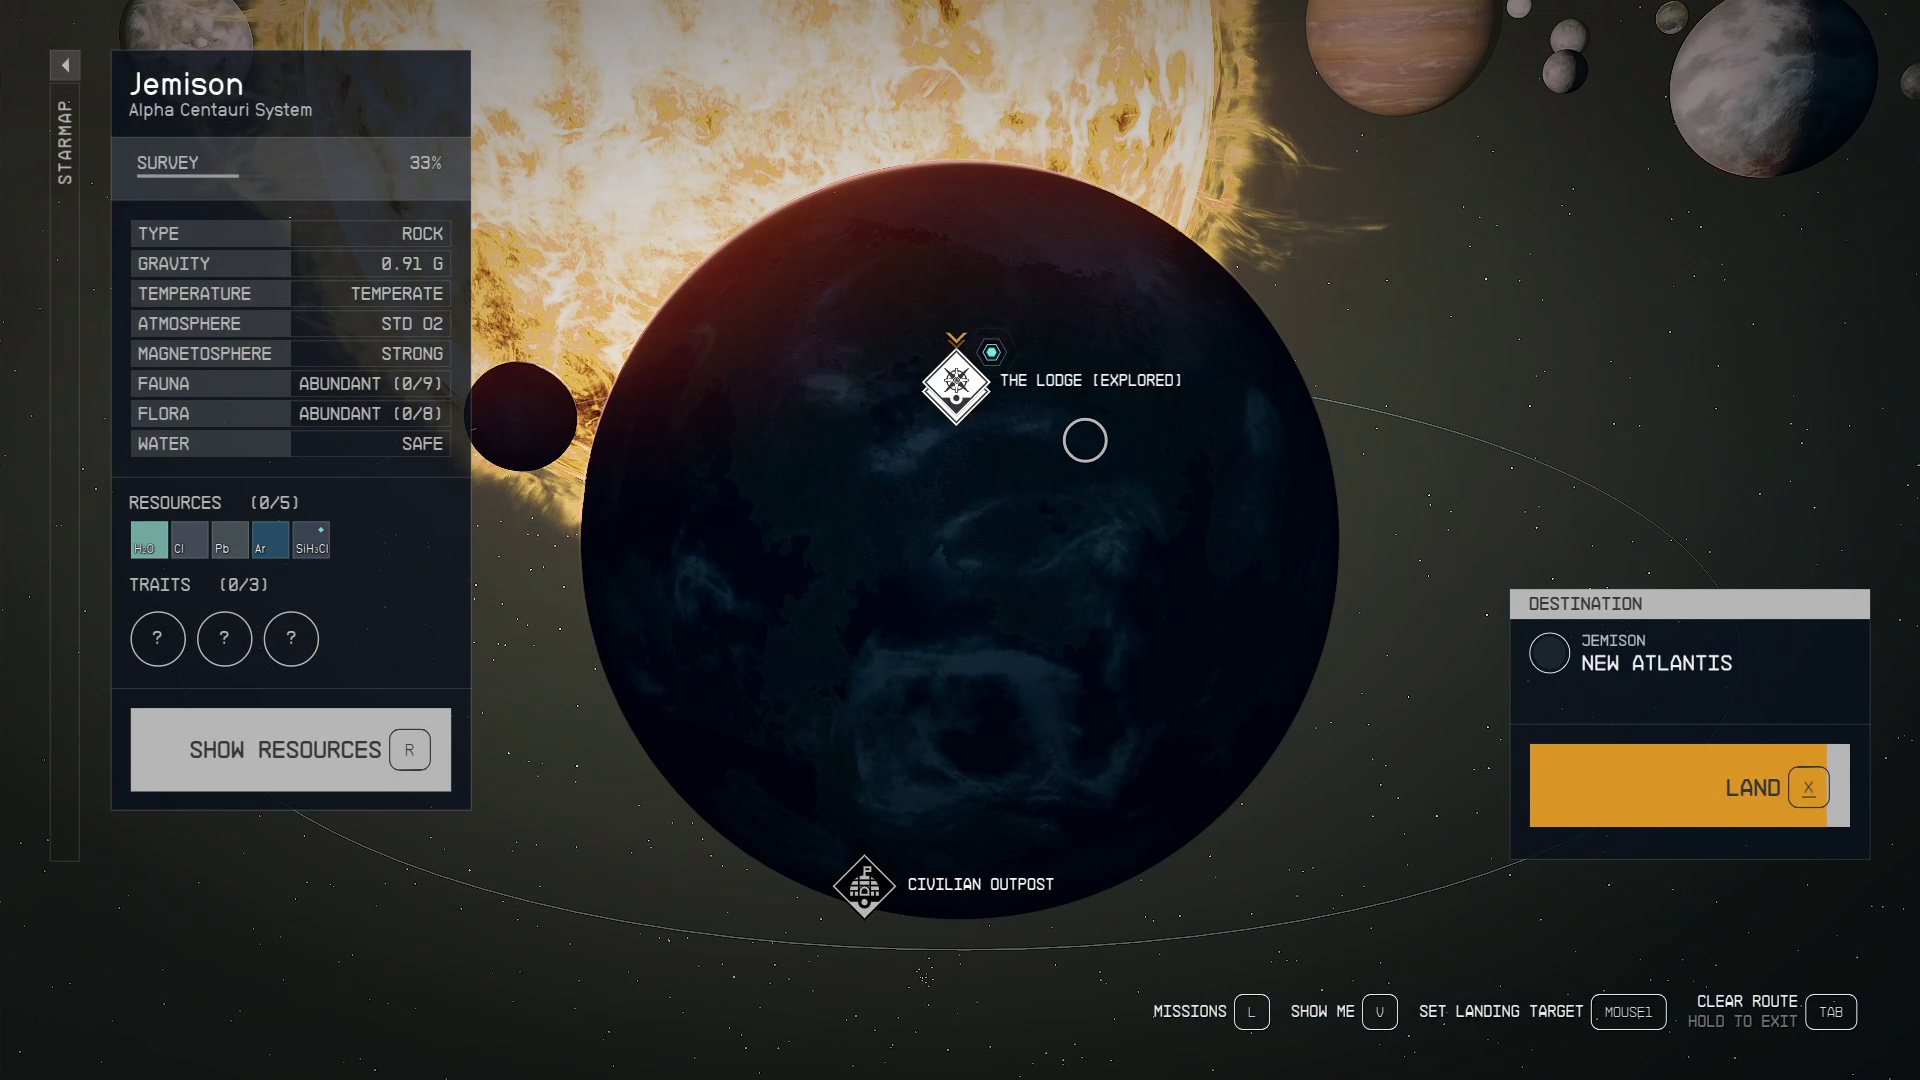
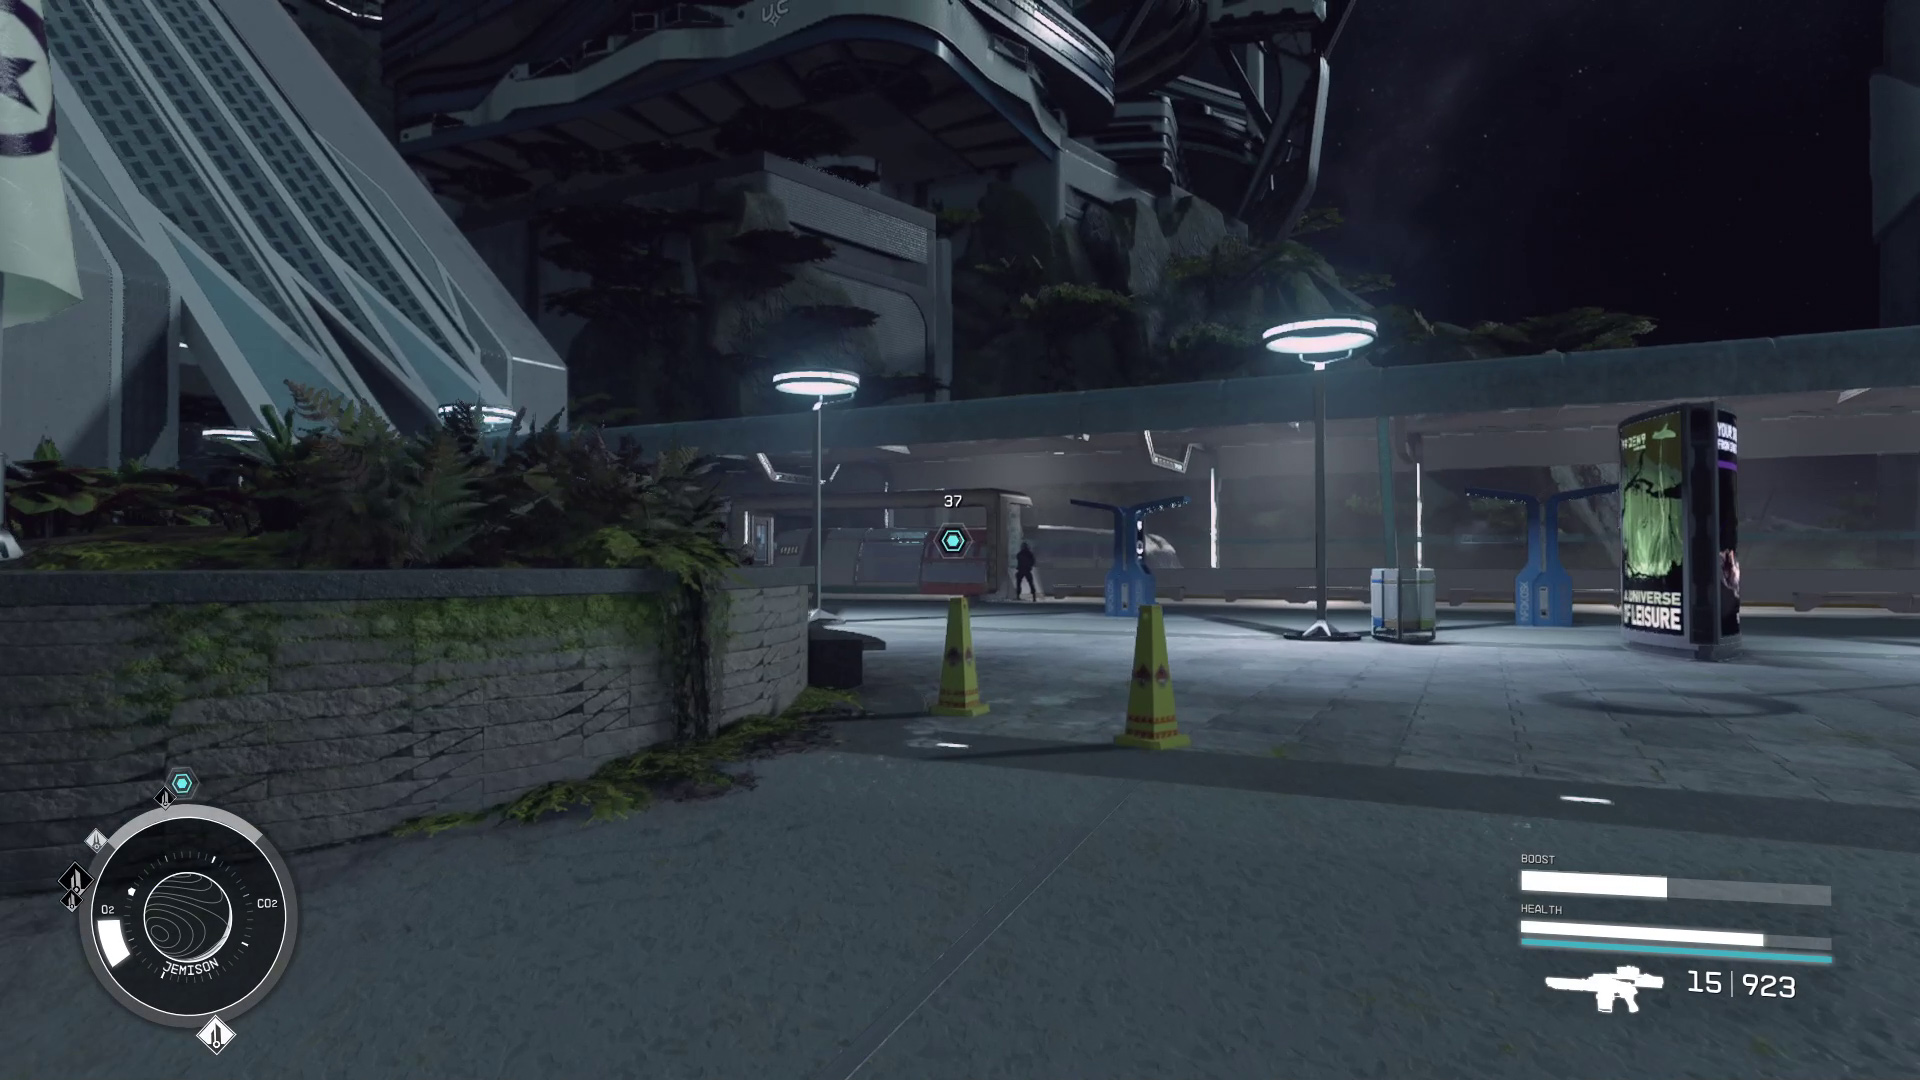
Travel to New Atlantis
If you’ve already been to the Commercial District on New Atlantis, you can and should fast travel directly there. Otherwise, land at the main spaceport (Image 6) and then follow the scanner arrows to the NAT train (Image 7), then take it to the Commercial District. (As a reminder, New Atlantis is on the planet Jemison in the Alpha Centauri system.)
Image 6Image 7
Enter the Infinity LTD Corporate Headquarters
Note: There does not appear to be any reduction in rewards for blasting your way through LTD — if you don’t want to bother with stealth or manipulation, feel free to simply shoot your way to the two computers and the prototype. If you are going to sneak, you’ll want to tell your companion to wait behind.
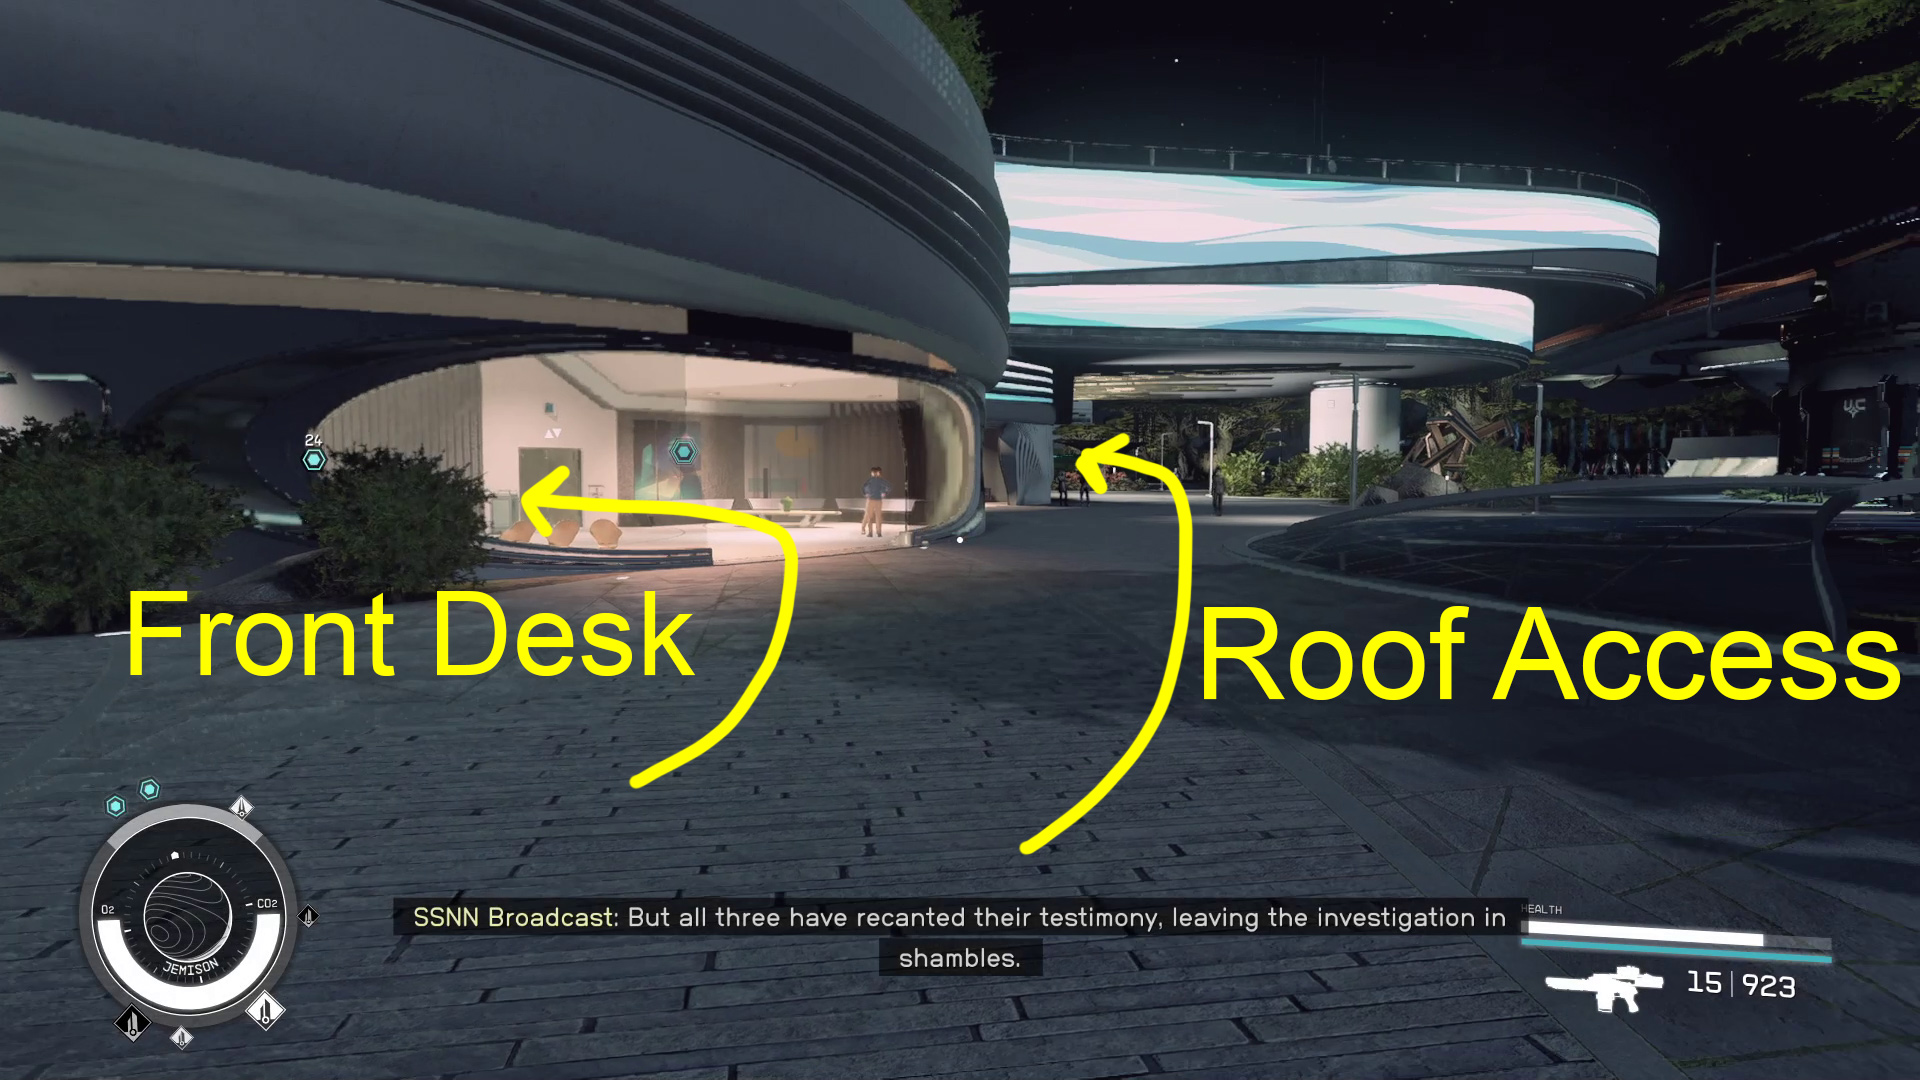
Upon arrival at the Commercial District, Infinity LTD will be just ahead (Image 8), so make your way towards the entrance. There are two paths you can take at this point:
The roof access entrance – This saves a bit of time in terms of waiting and dialogue, and leads to the same place as checking in at the front desk.
Check in at the front desk (recommended) – This is the James Bond style option, as you get to do a bit of undercover work. This option leads to another set of choices: you can either sneak around once you gain access to the building, or you can continue being undercover and manipulate your way to your objectives.
A walkthrough for each route can be found below.
Image 8 – The two paths you can take into Infinity LTD
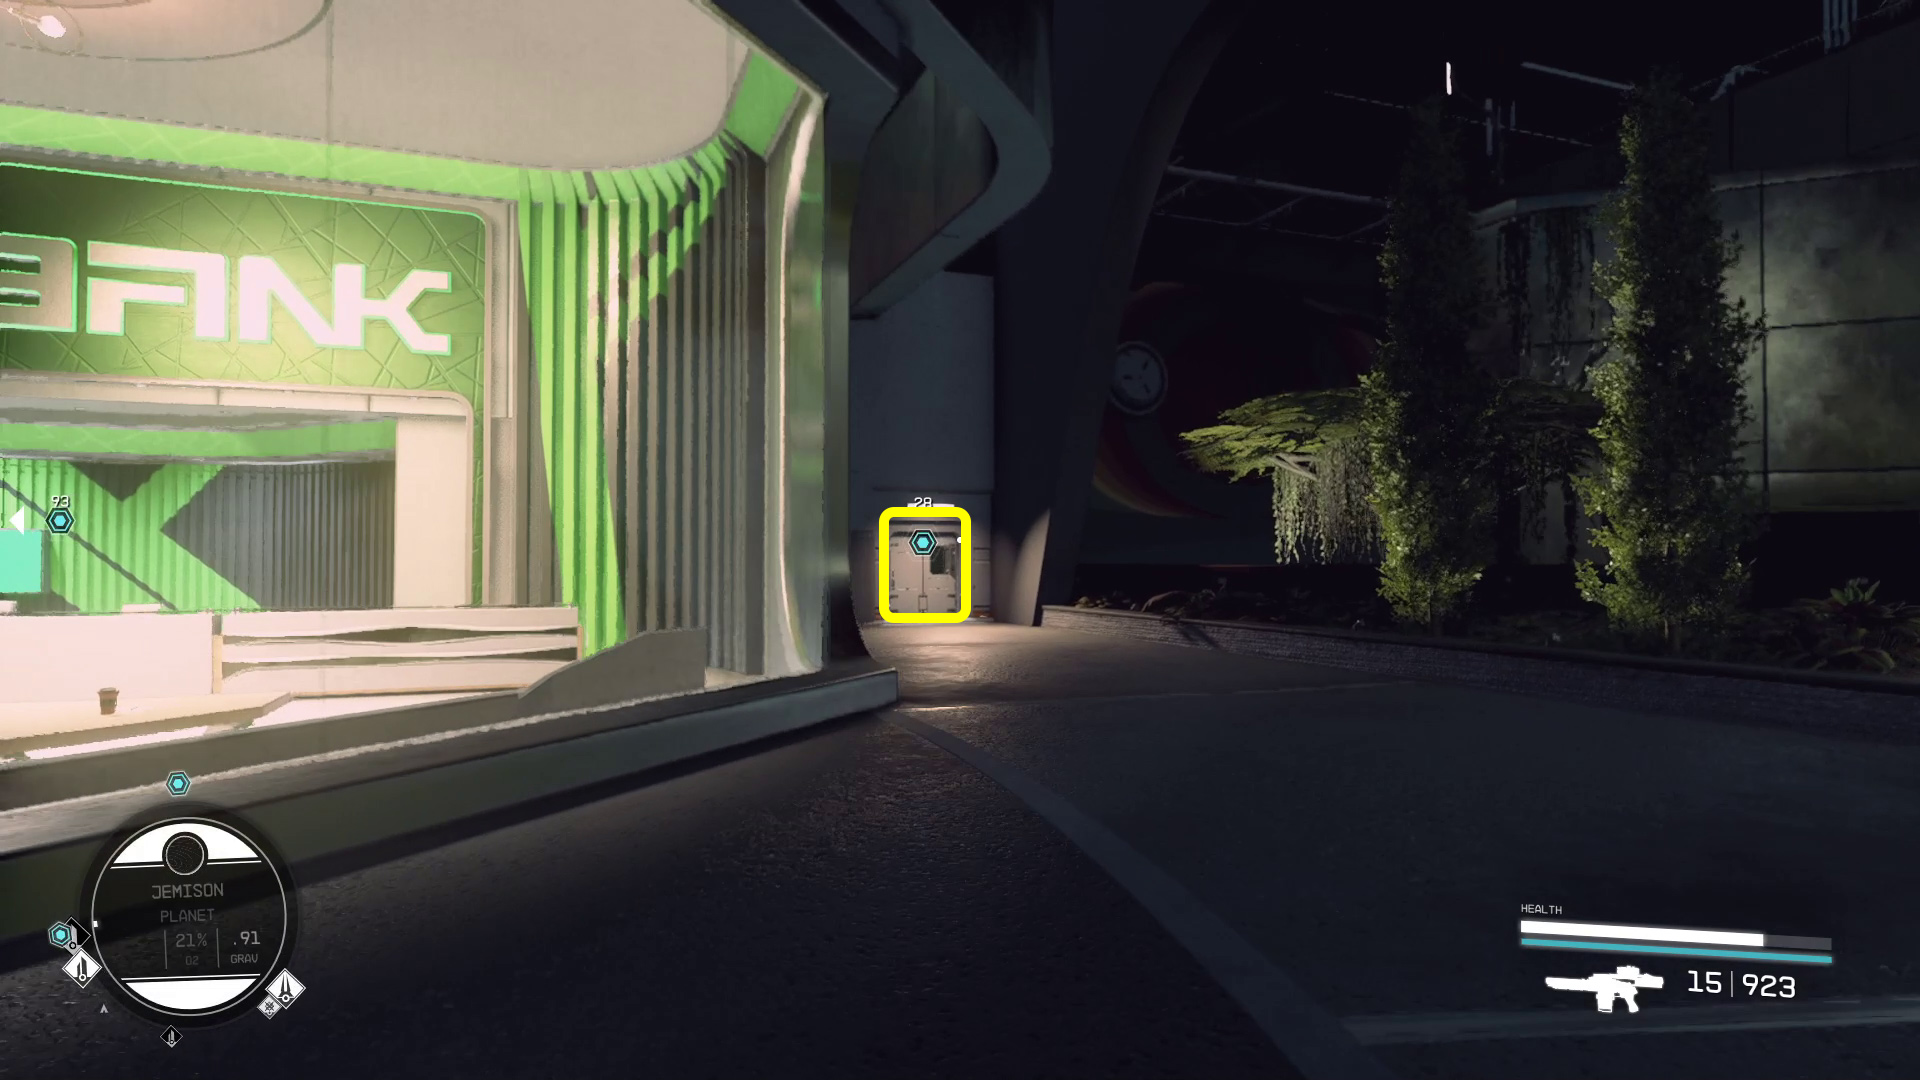
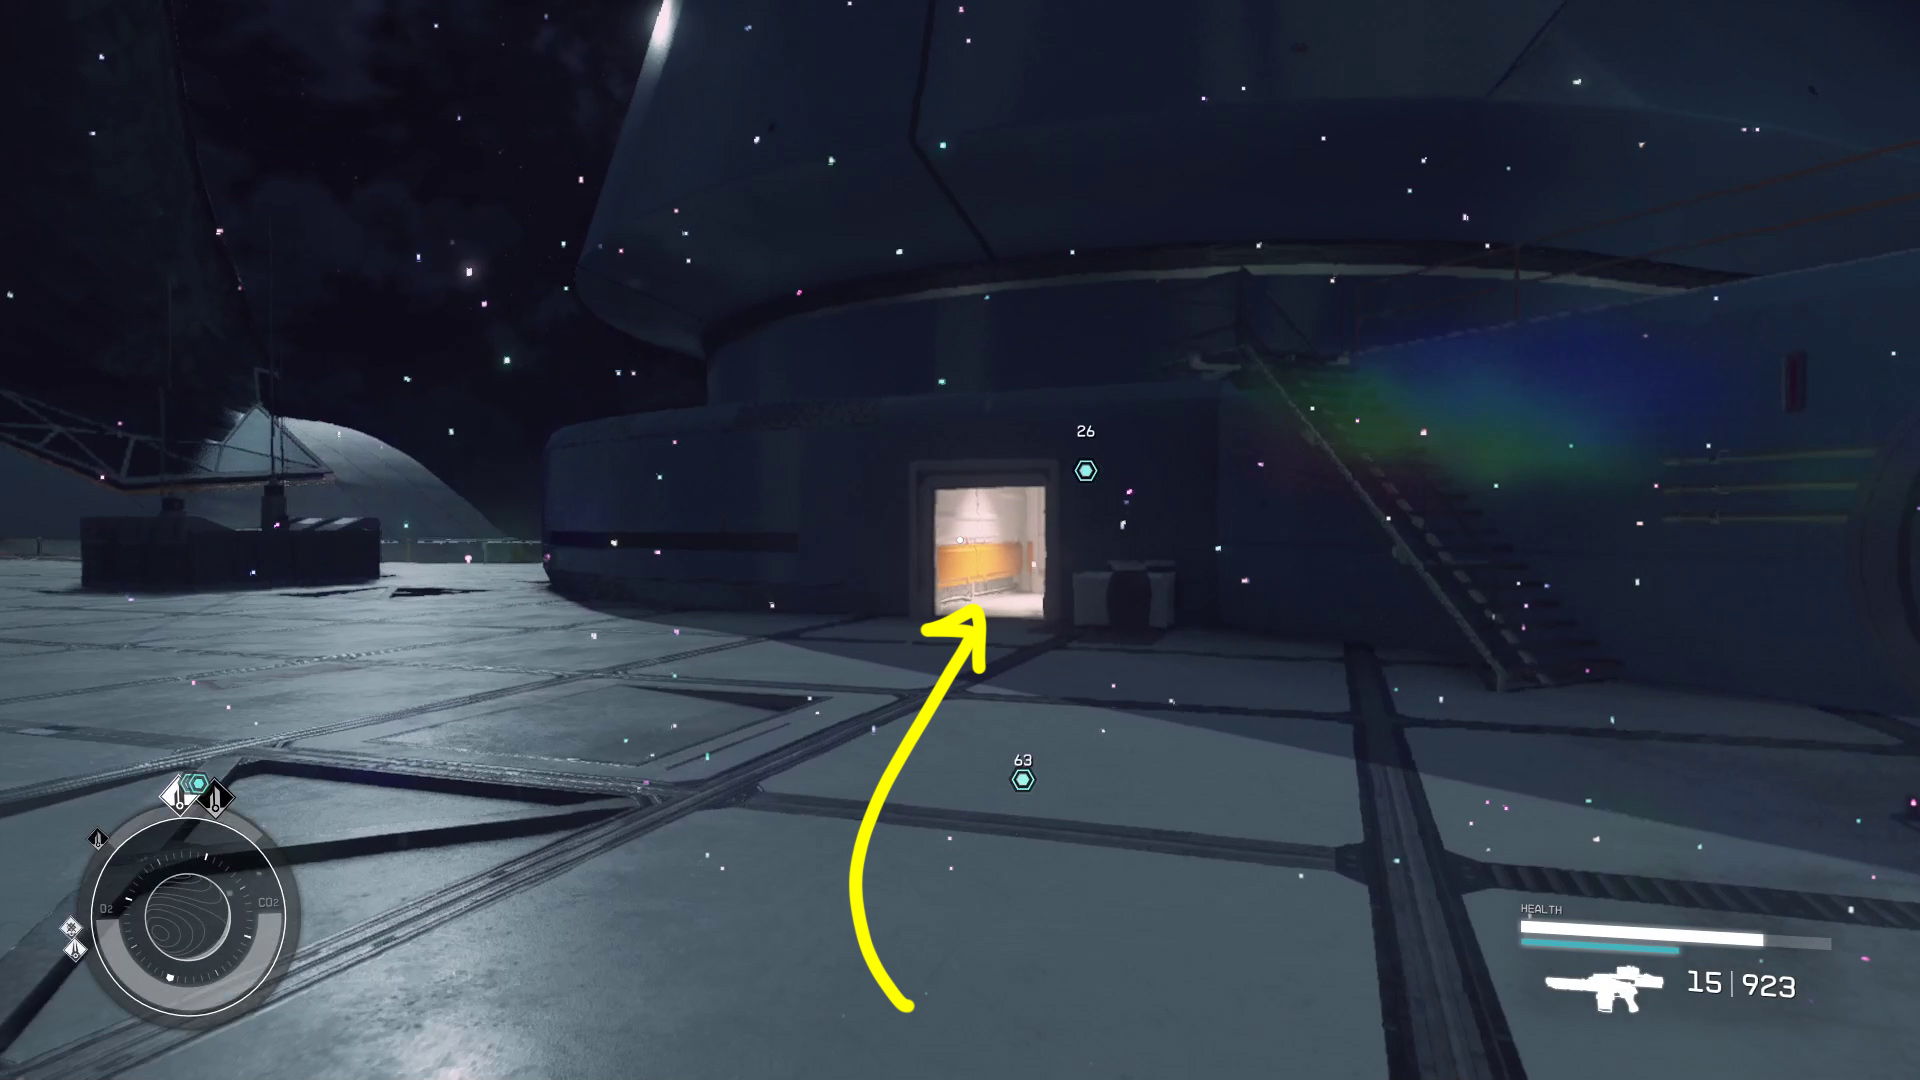
From the main entrance, continue around the building (Image 8). Just past Galbank is a door (Image 9) that leads to the roof. Open the door and continue forward, then go left and up a series of ramps. You’ll exit onto the roof — keep going forward, towards the upper , and you’ll see a lit hallway (Image 10). Inside is an entrance to Infinity.
Image 9Image 10
Speak to the NPC at the front desk indicated by , and pick one of the first two dialog options. Dezi will give you access to the marketing floor, and you can turn right, go into the elevator, use the Choose Floor button, and select Marketing. Exit the elevator and talk to the -marked NPC that’s straight ahead; you’ll be asked to wait on the nearby couch, so sit down where -indicated.
After a moment, the receptionist Aelys will walk away. At this point, you can go wherever you like in the building — if you’re doing the stealth route, you’ll want to go back into the elevator and select Roof Access. If you want to avoid stealth and simply manipulate your way to your objectives, however,follow Aelys.
As mentioned above, there are a few ways to approach the mission from this point:
So anyways, I started blasting – There seems to be no practical consequences for simply shooting your way through Infinity — this is the simplest way to go about the mission. You’ll still need to gain access to some of the floors, however, so you can follow the path in the stealth route and simply not worry about staying hidden.
Bond, James Bond – There are actually two sneaky/secret-agent type options:
Neuroamp – You can utilize your Neuroamp to manipulate people into letting you complete your mission. This is comparable in terms of time-to-complete to the violent route, but much easier.
Stealth – You can sneak your way through Infinity to complete your objectives — this is far and away the most difficult option, but it’s possible.
Mission Approach Options
We recommend using your Neuroamp to complete this mission, but below you’ll find a walkthrough for both the stealthy route and the Neuroamp route.
Neuroamp Route
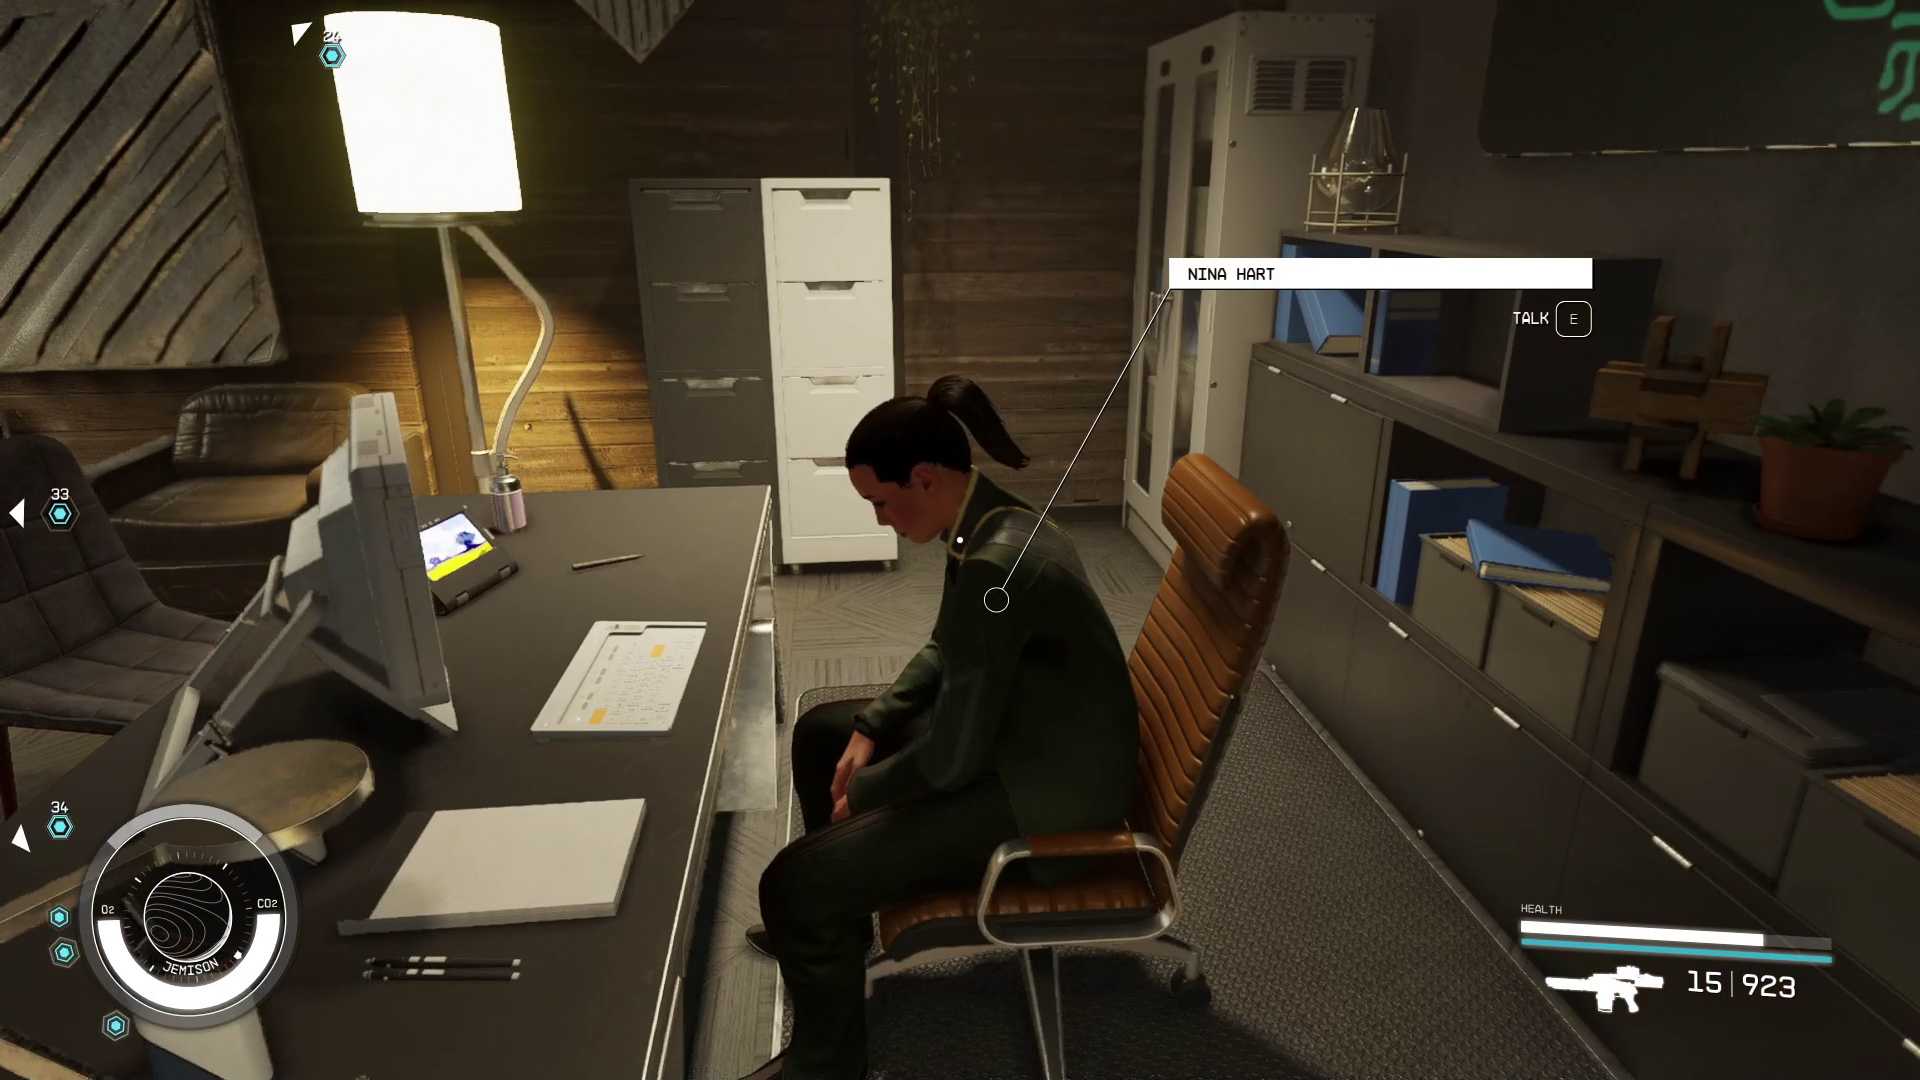
You’ll need to have started with the Check in at the front desk route. When Aelys goes to get Nina Hart, follow him through the offices, and he’ll lead you to Nina. Don’t get too close, or he’ll stop walking! Once you find Nina (Image N1), talk to her, and pick the [Manipulation] dialog option — this will allow you access to the Executive Floors, and set up a meeting with Lucas Drexler.
Run the Program on Lucas’ Computer
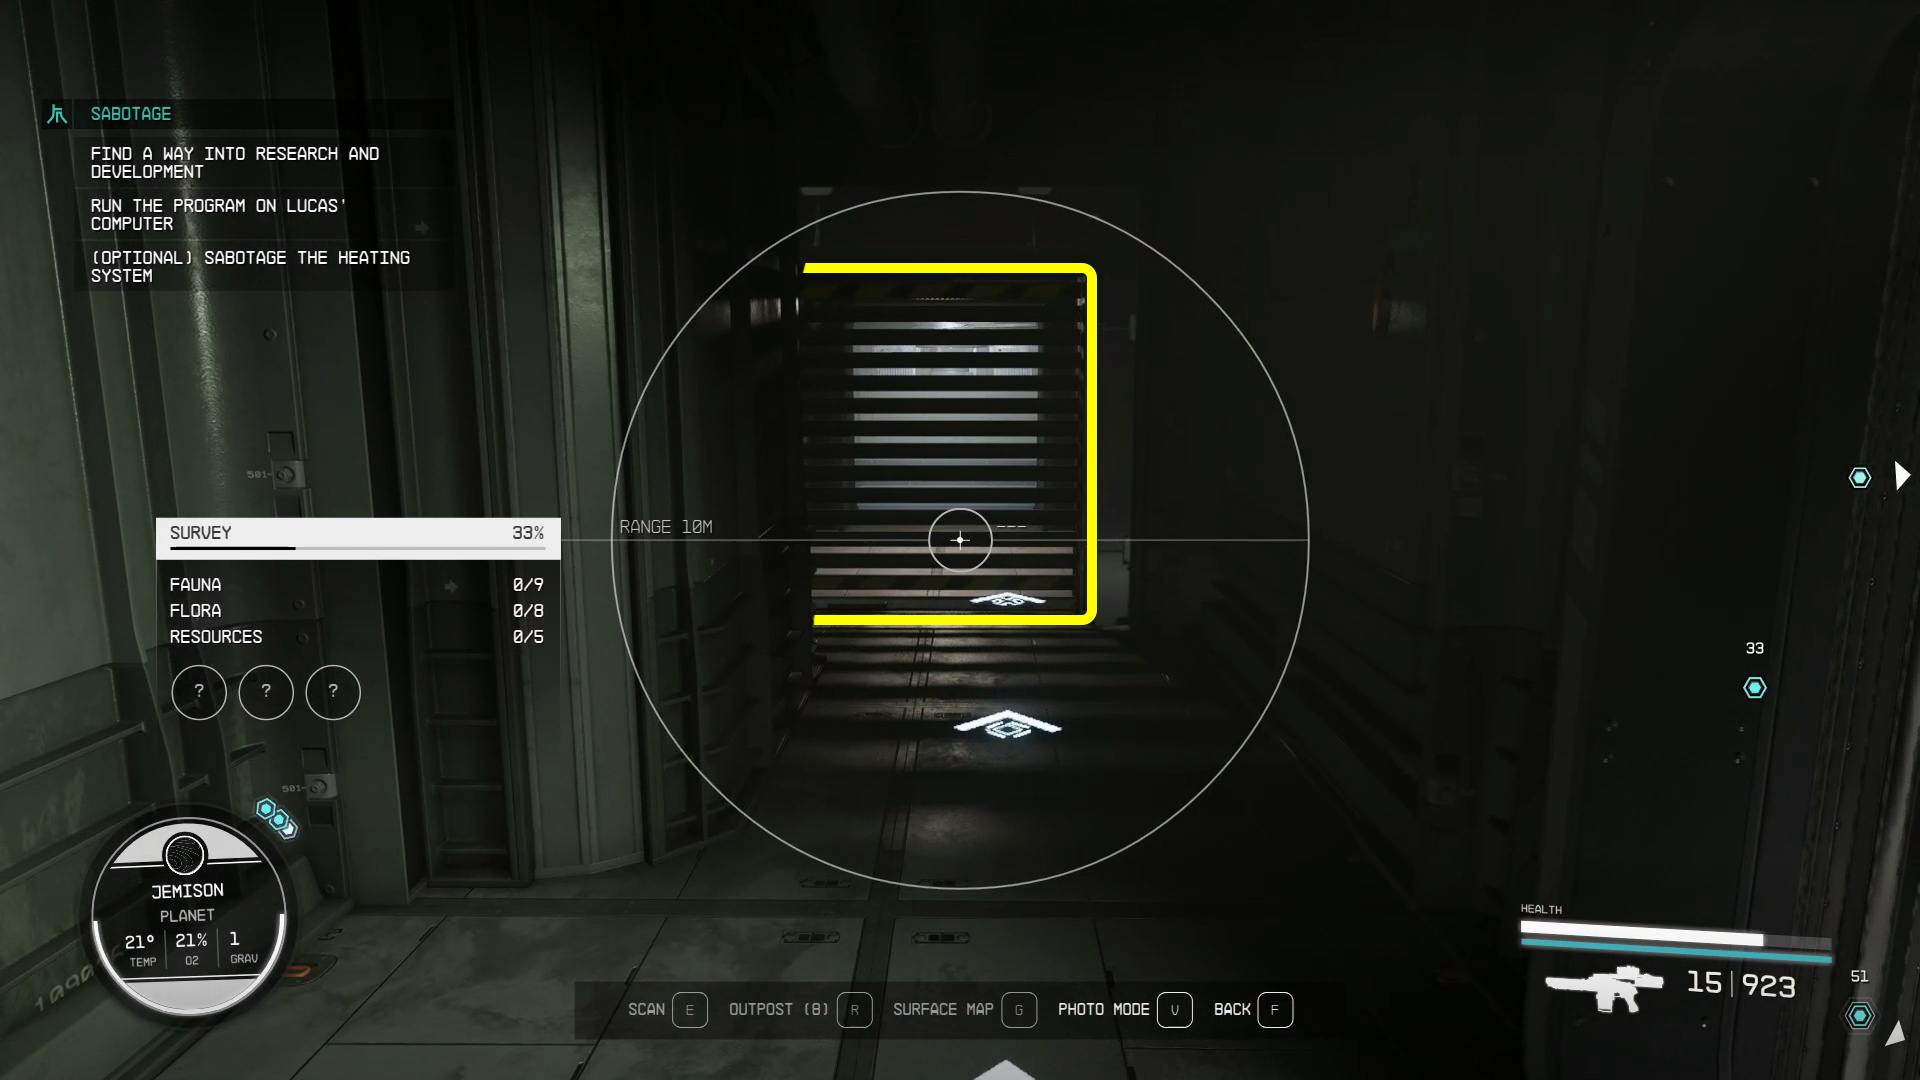
Head back to the elevator and take it to the Executive Offices (you should still have the – (Optional) Sabotage the Heating System you can use to find the elevator again if you need it). From the elevator, turn right and go up the stairs (Image N2), and you’ll see two s ahead, indicating Lucas and his computer. Go into Lucas’ office and speak with him.
Image N1Image N2
Pick the first dialog option until you can choose the [Manipulation] option. Then use his computer and select the “Overseer Program”.
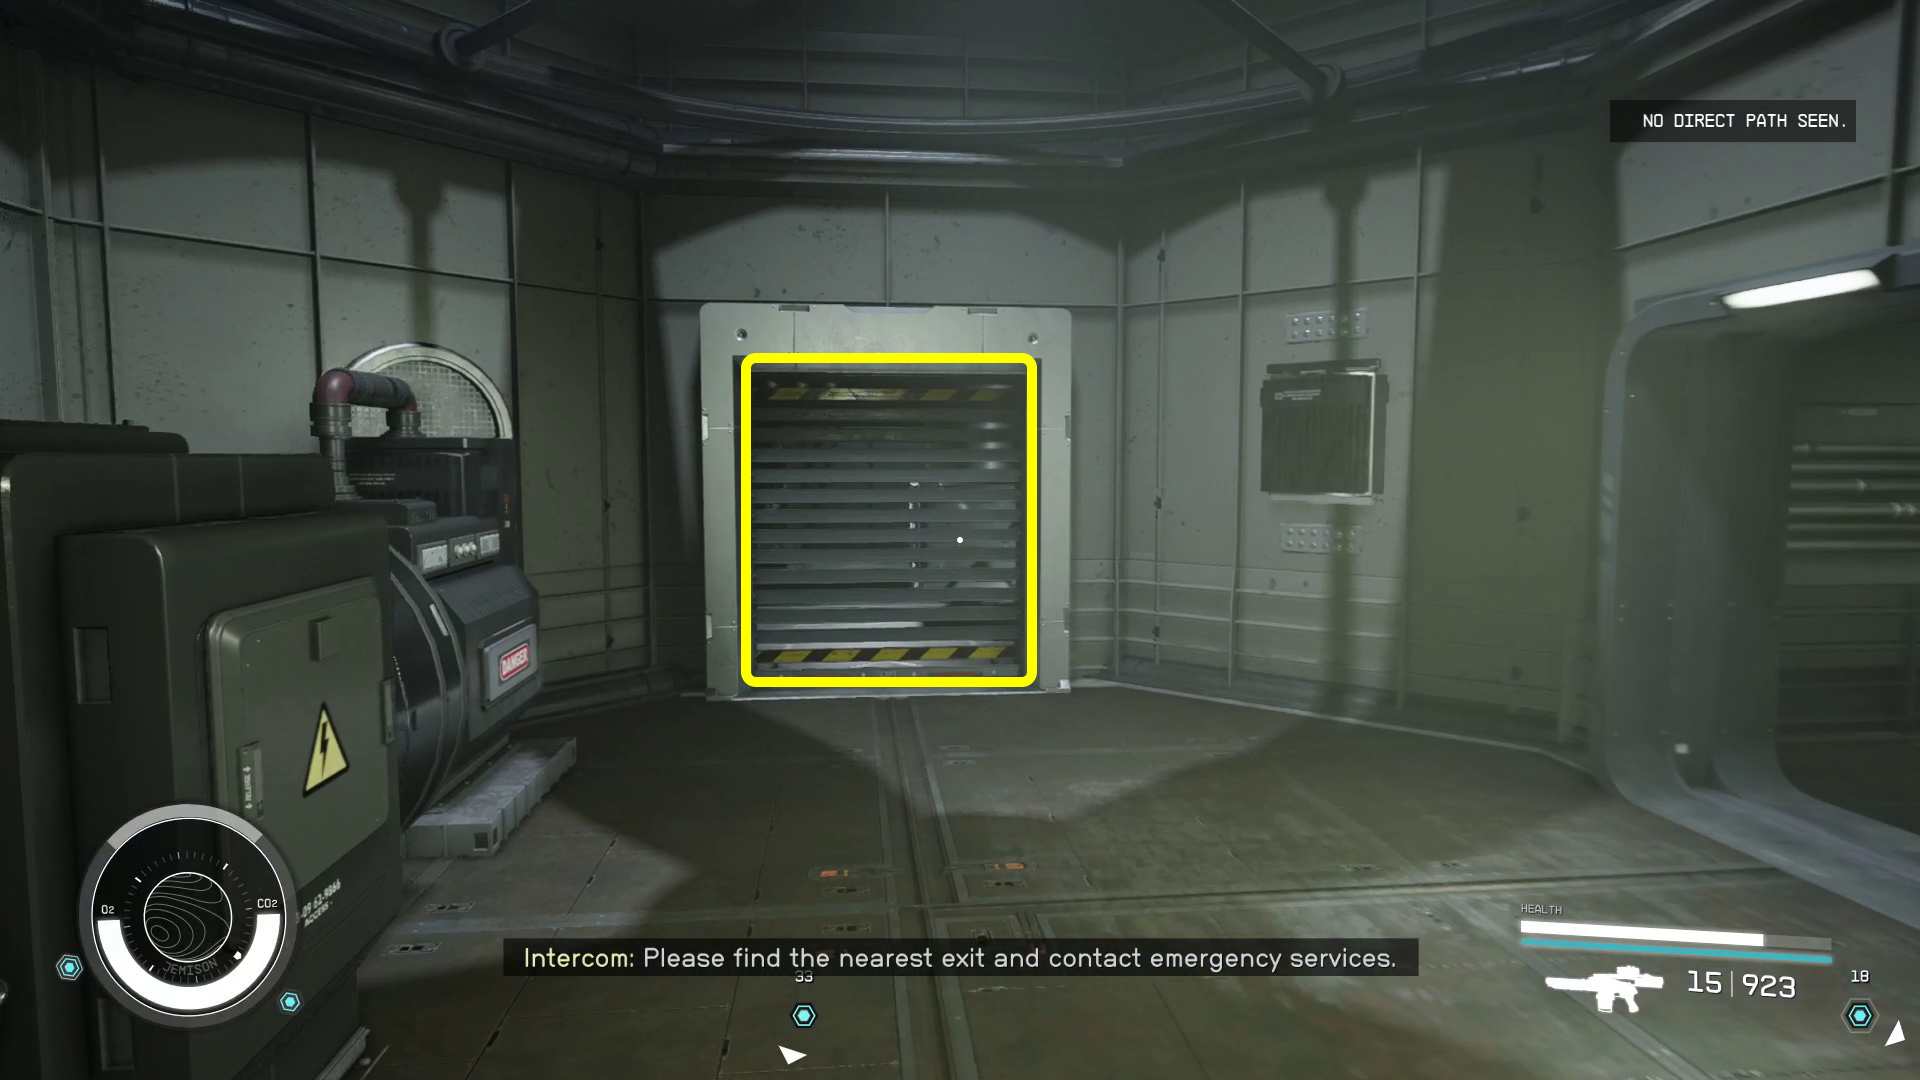
Find a Way Into Research and Development
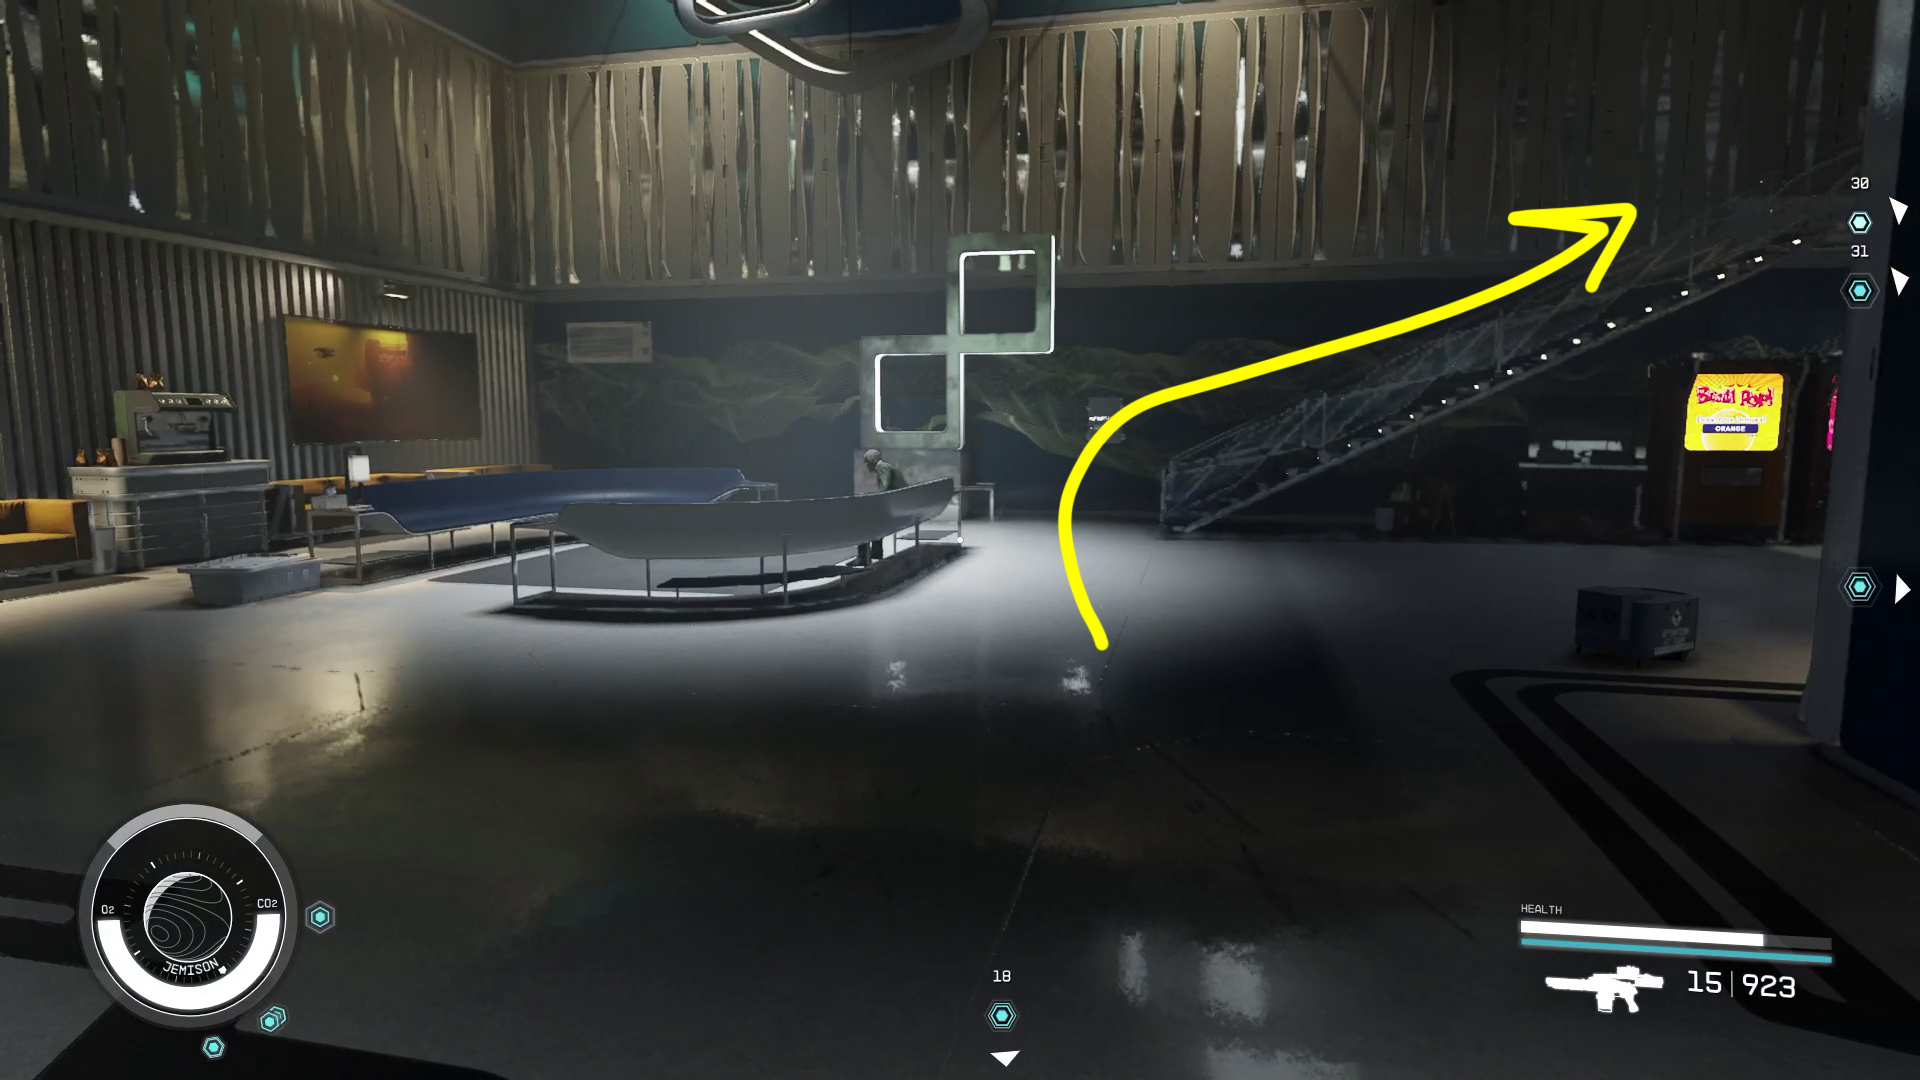
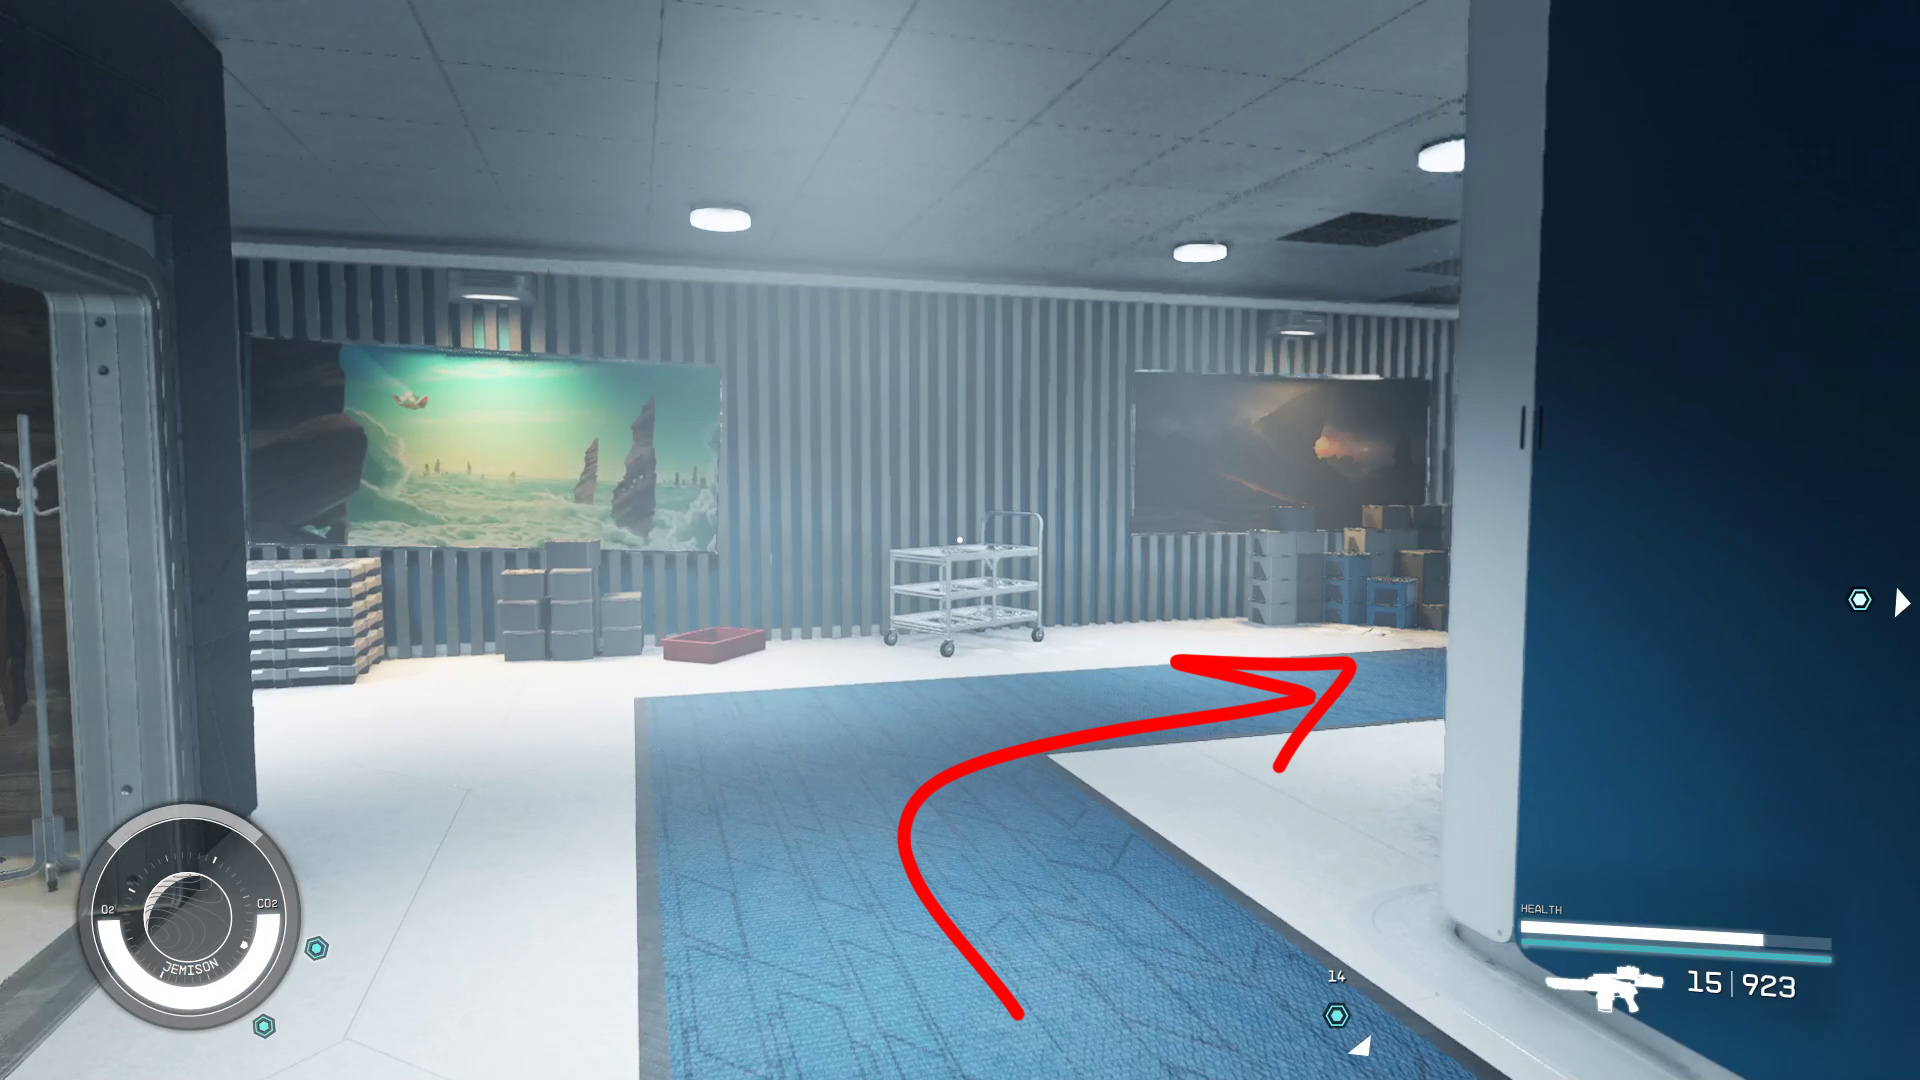
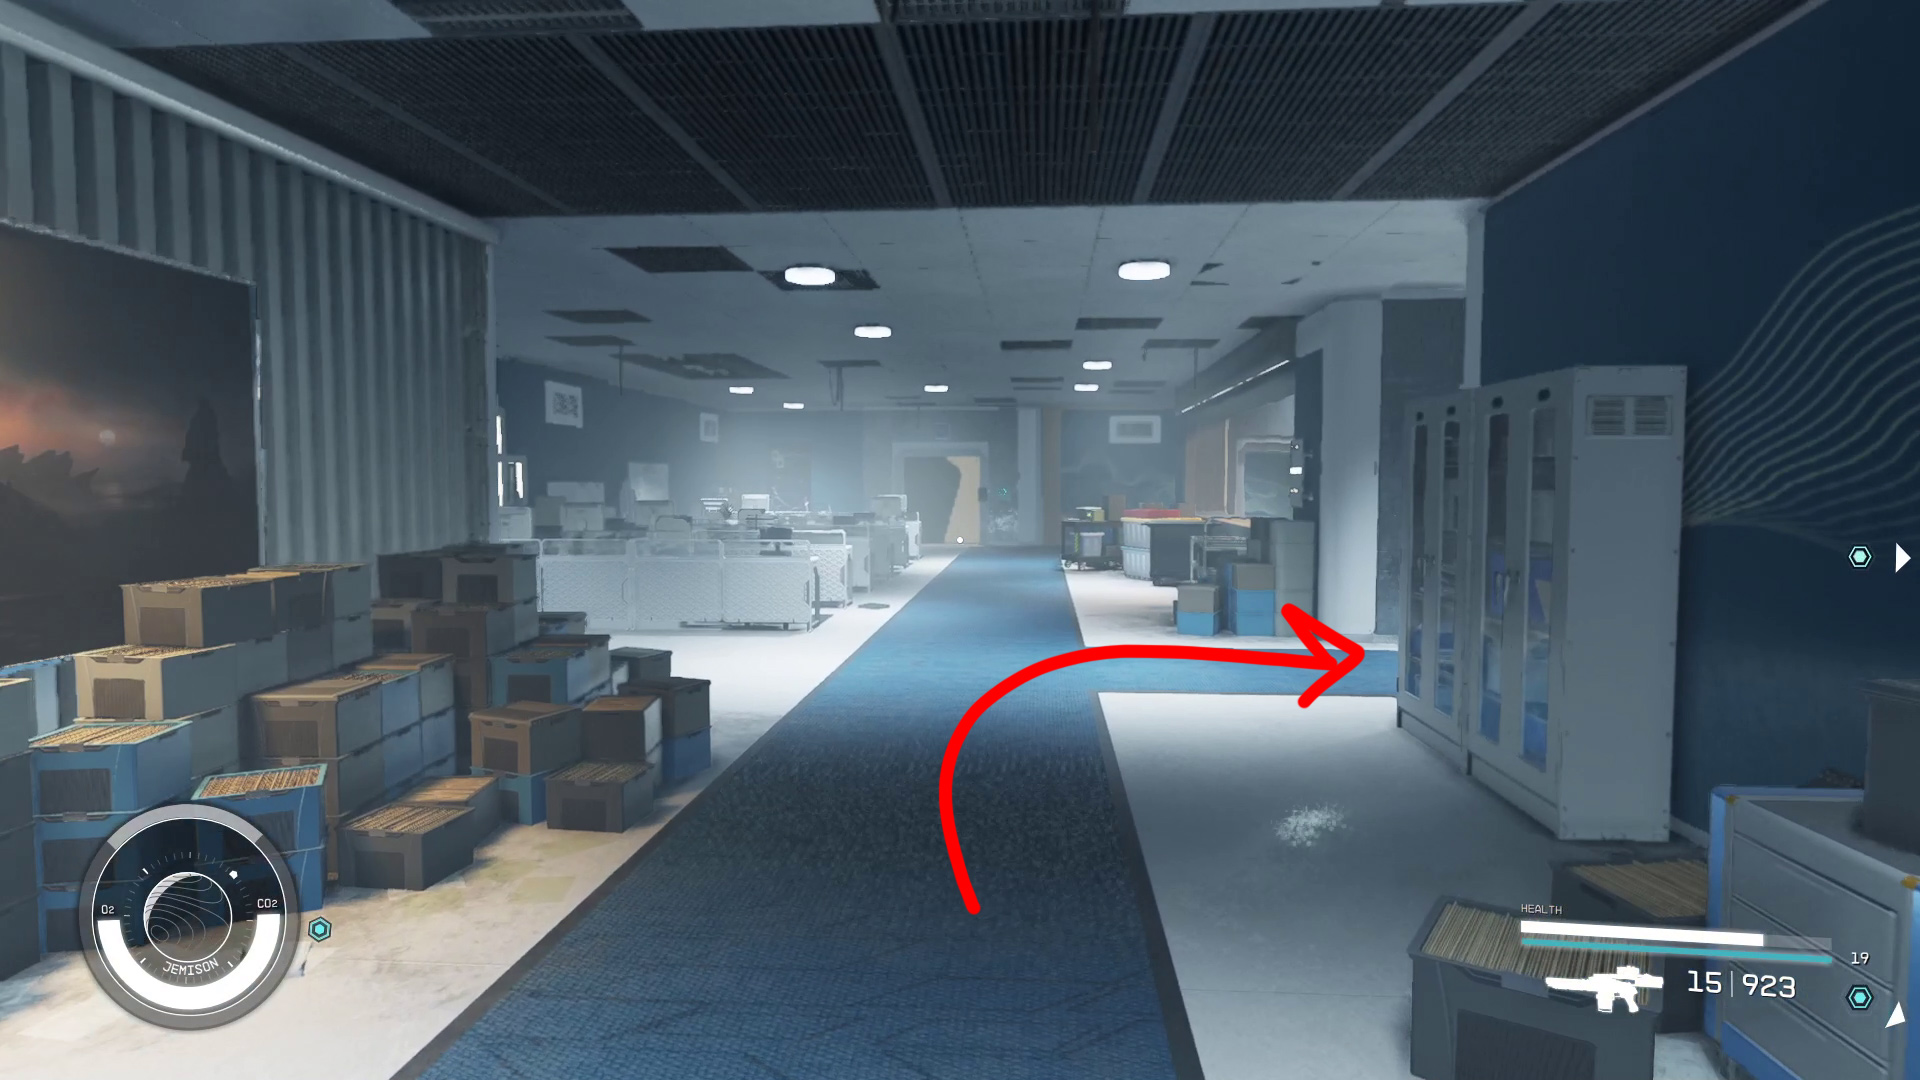
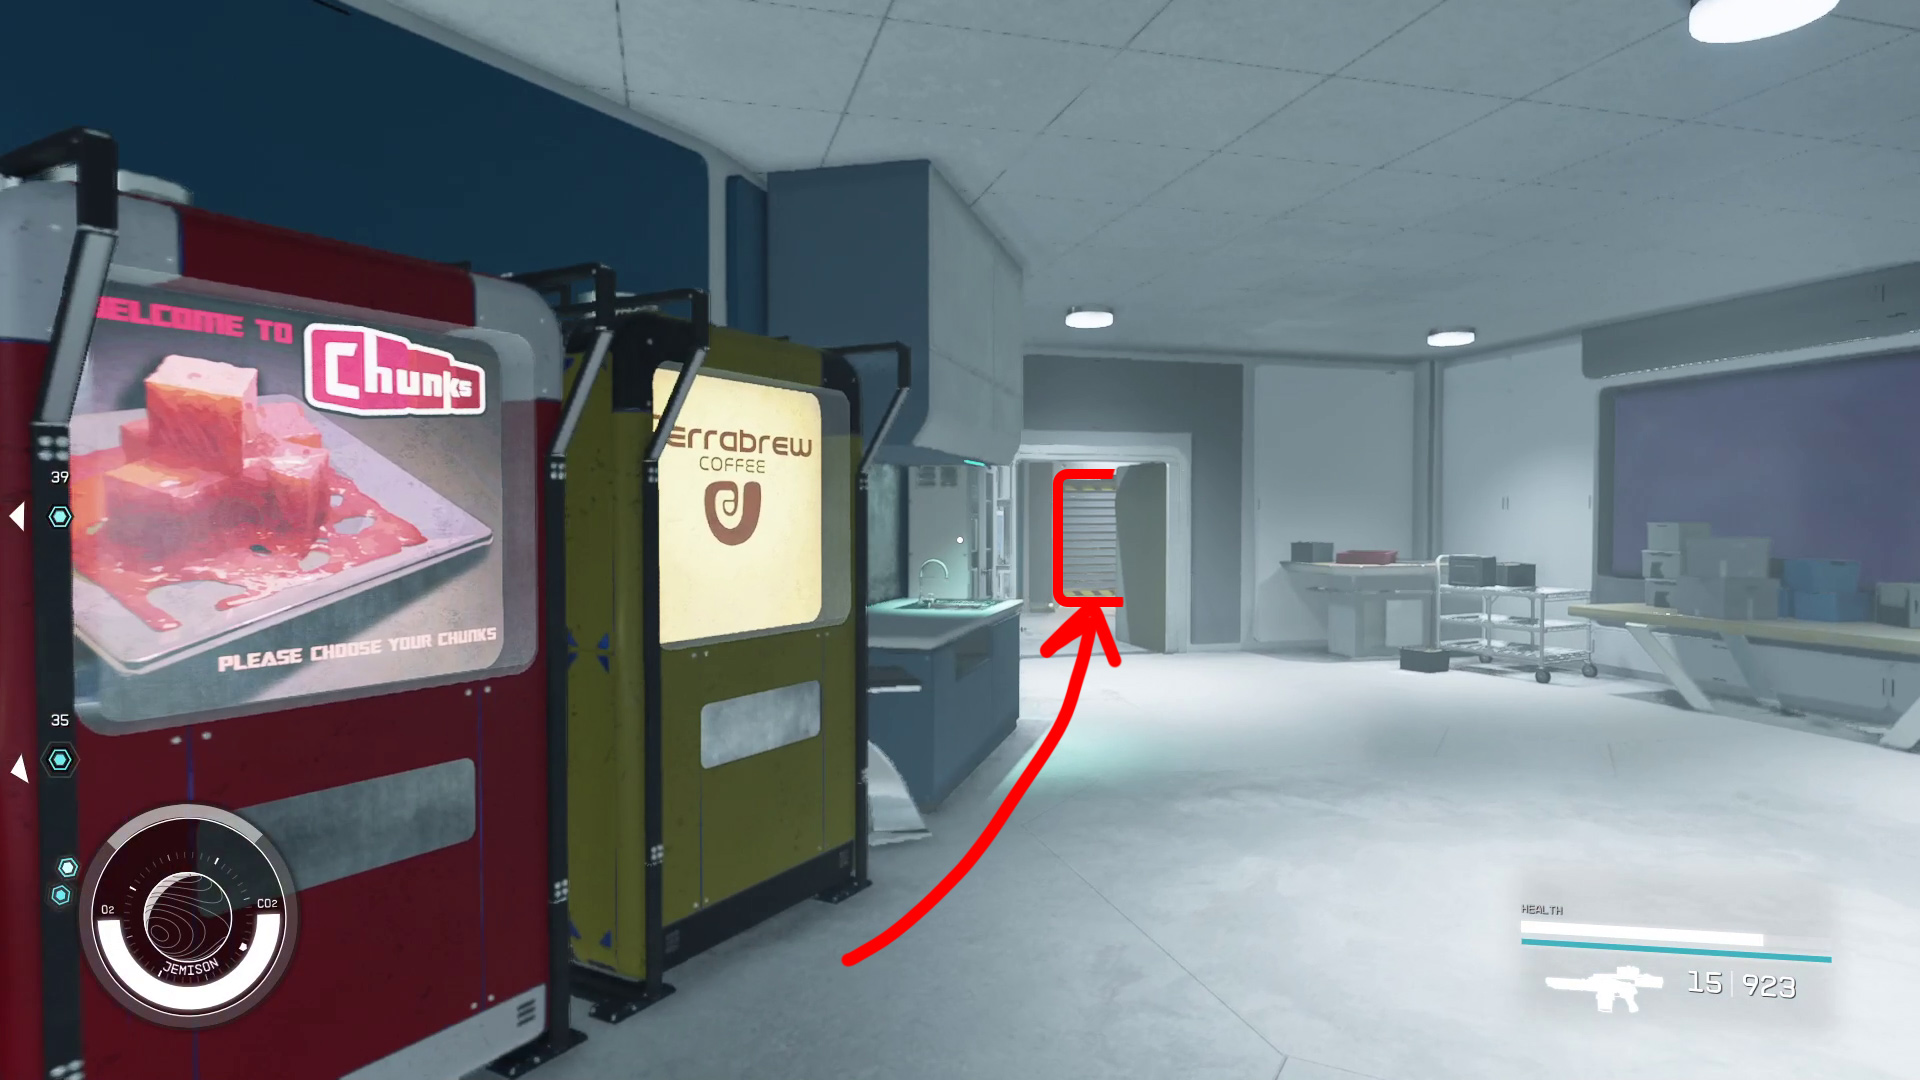
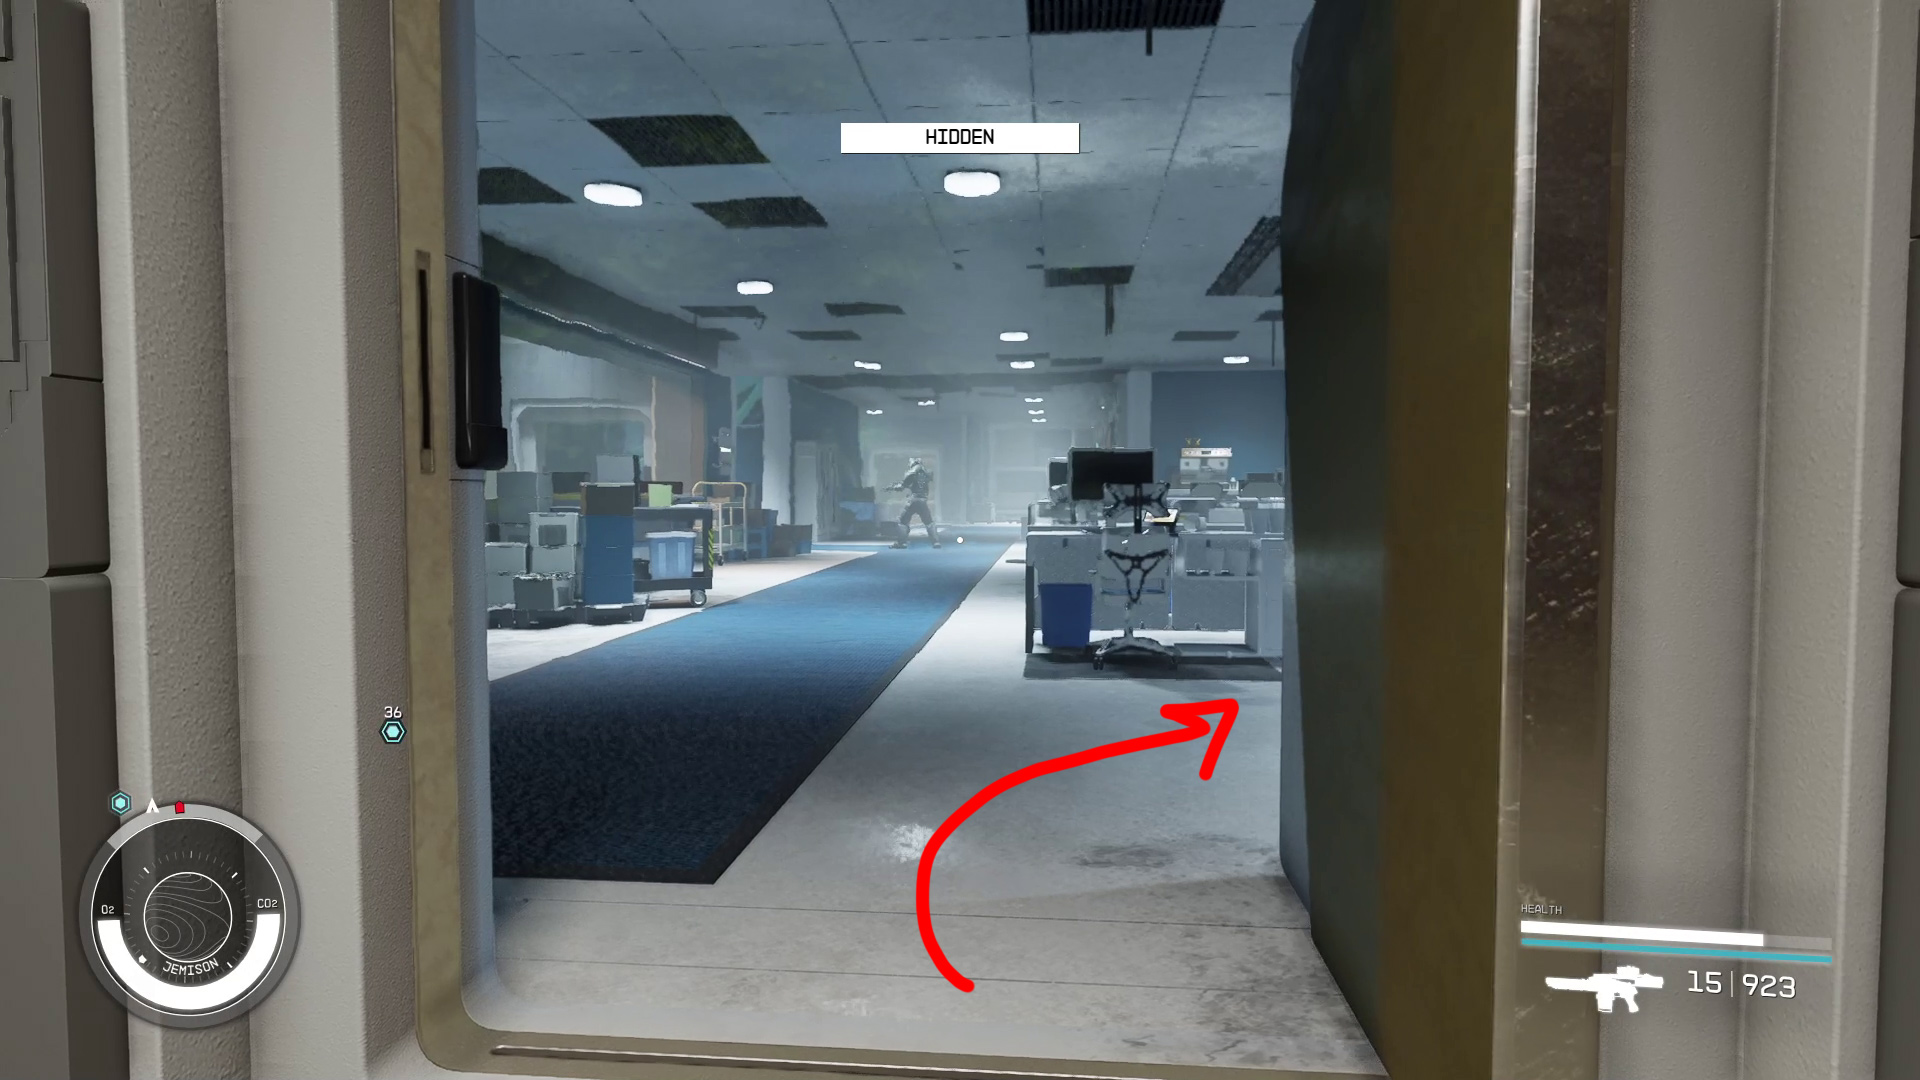
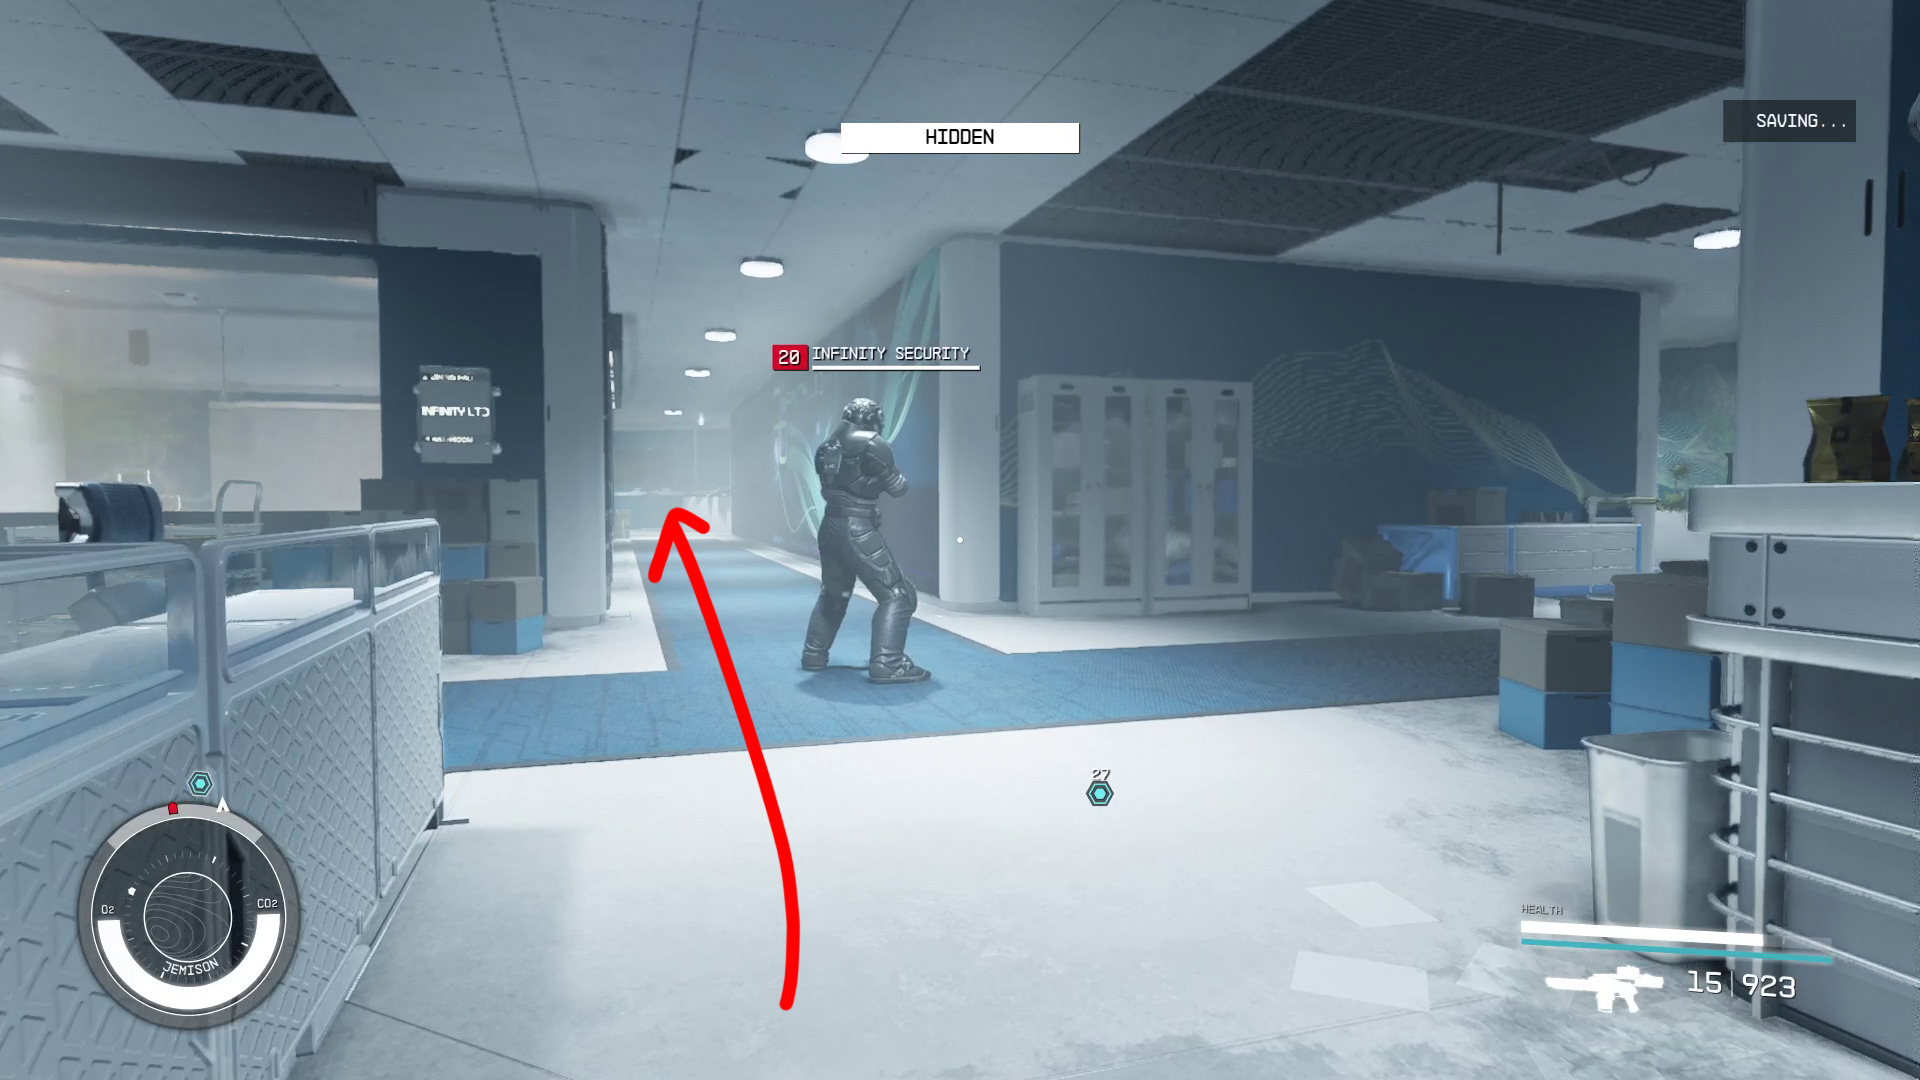
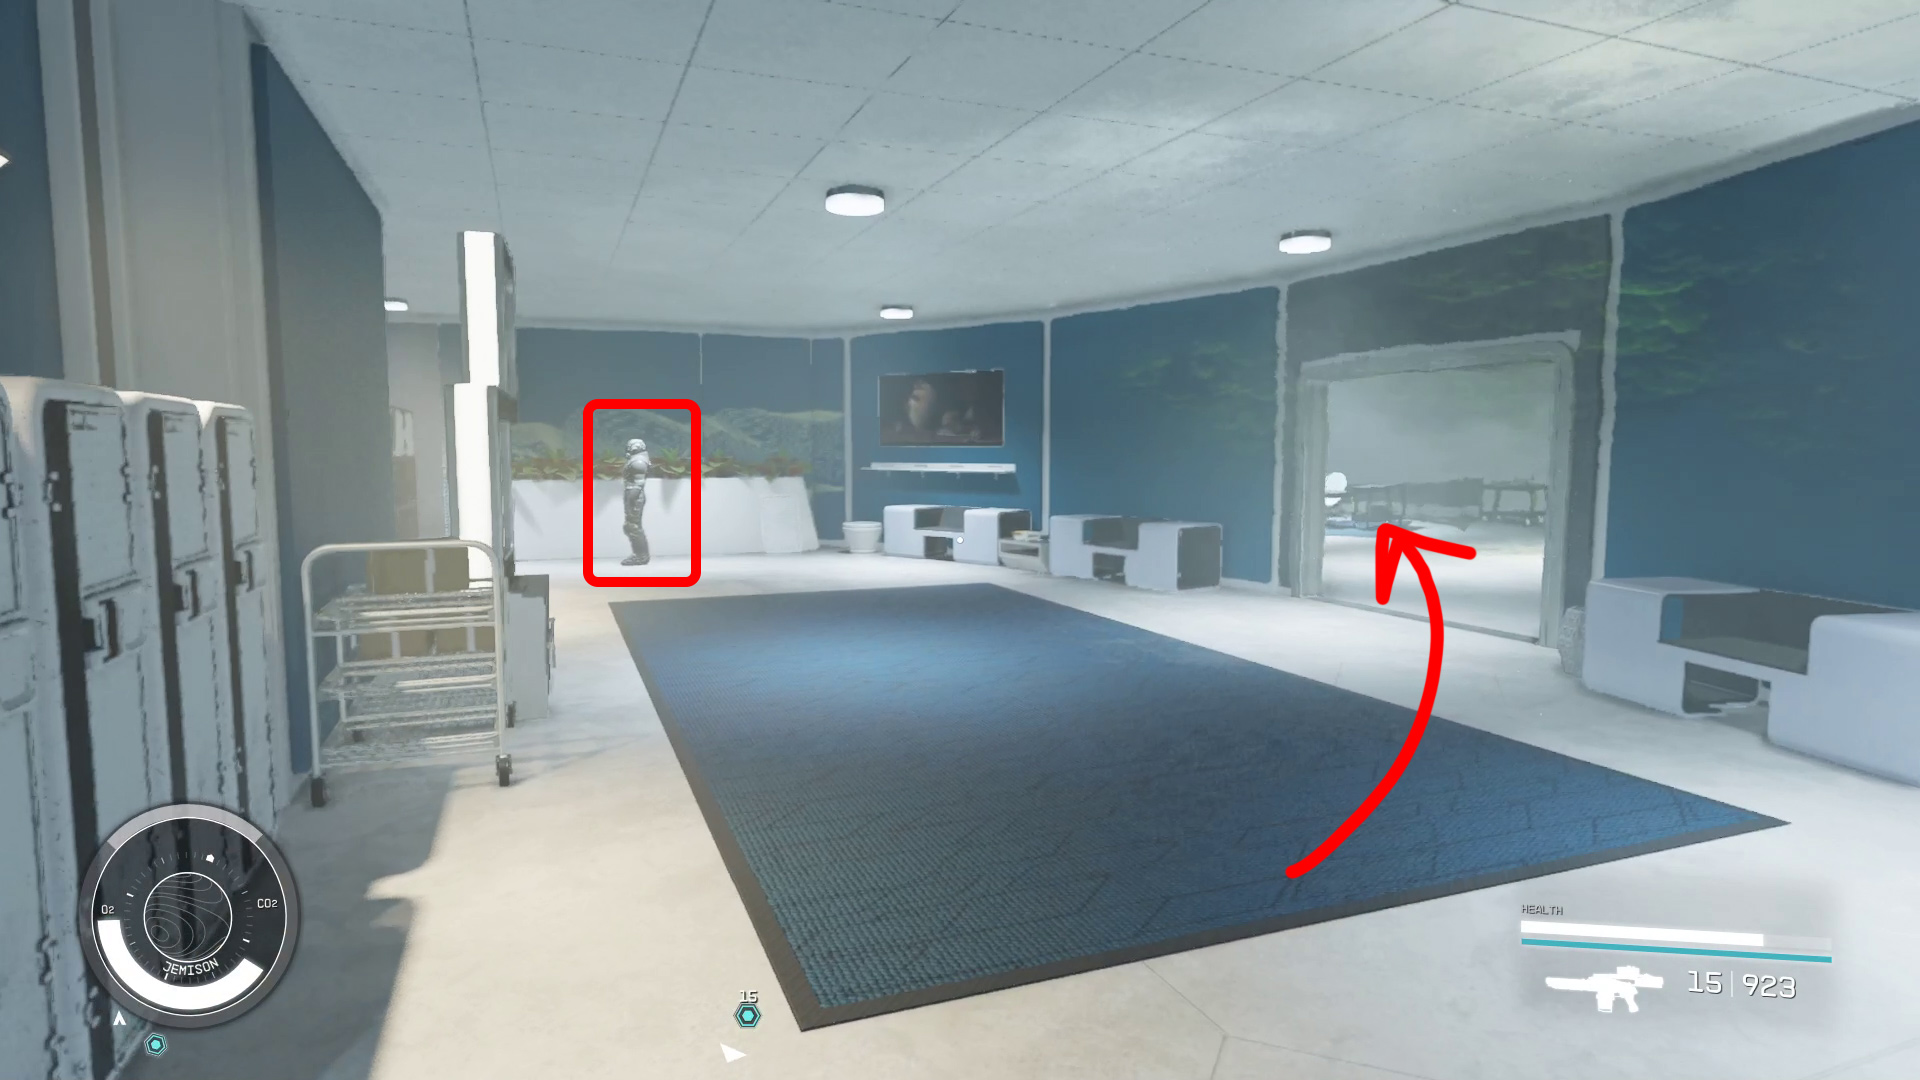
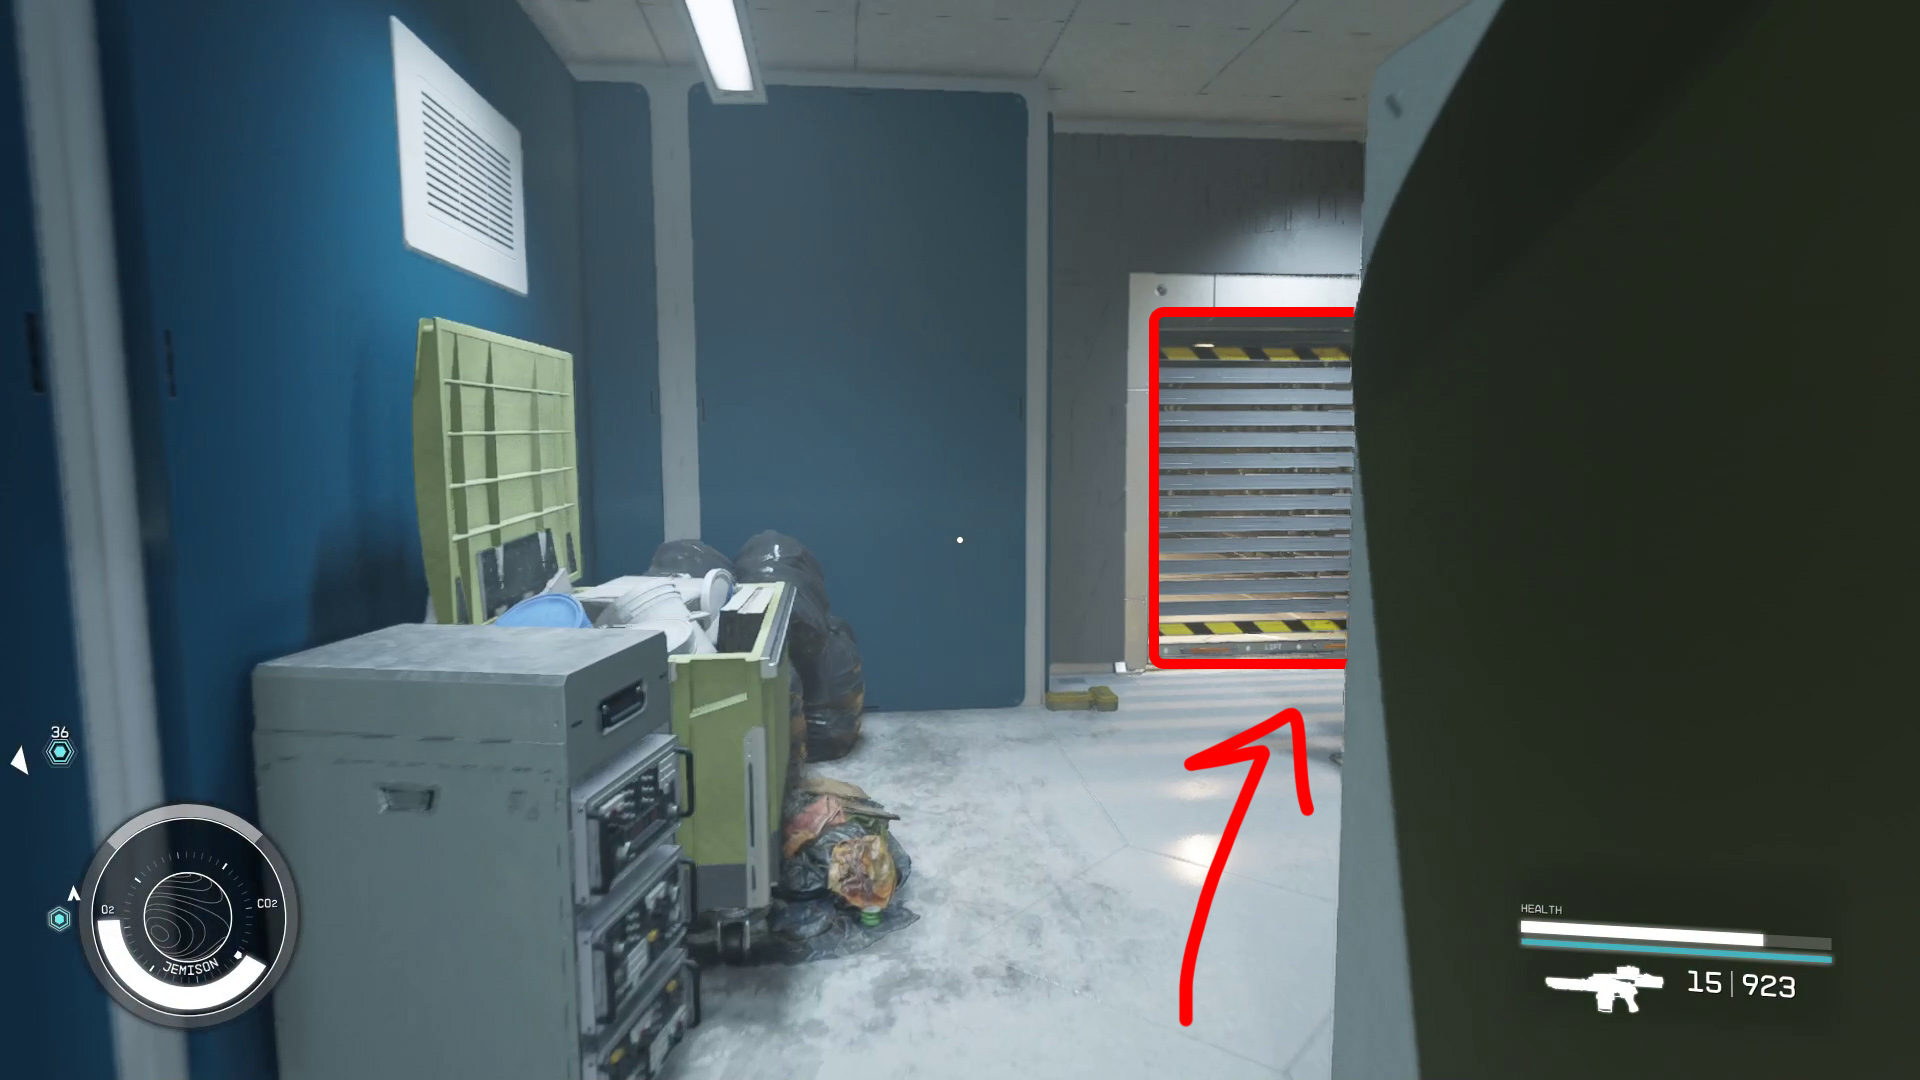
From Lucas’ office, go back the way you came, down the stairs and back into the elevator, and return to the Marketing floor. We’re going to head to the dining hall storage area now: From the elevator, turn right, then take a right at the end of the hall (Image N3) and your next right as well (Image N4). Continue down the hall and you’ll see the dining hall (Image N5) — enter it and turn left, and continue to the storage area, where you’ll find a vent you can enter (Image N6).
Image N3Image N4Image N5Image N6
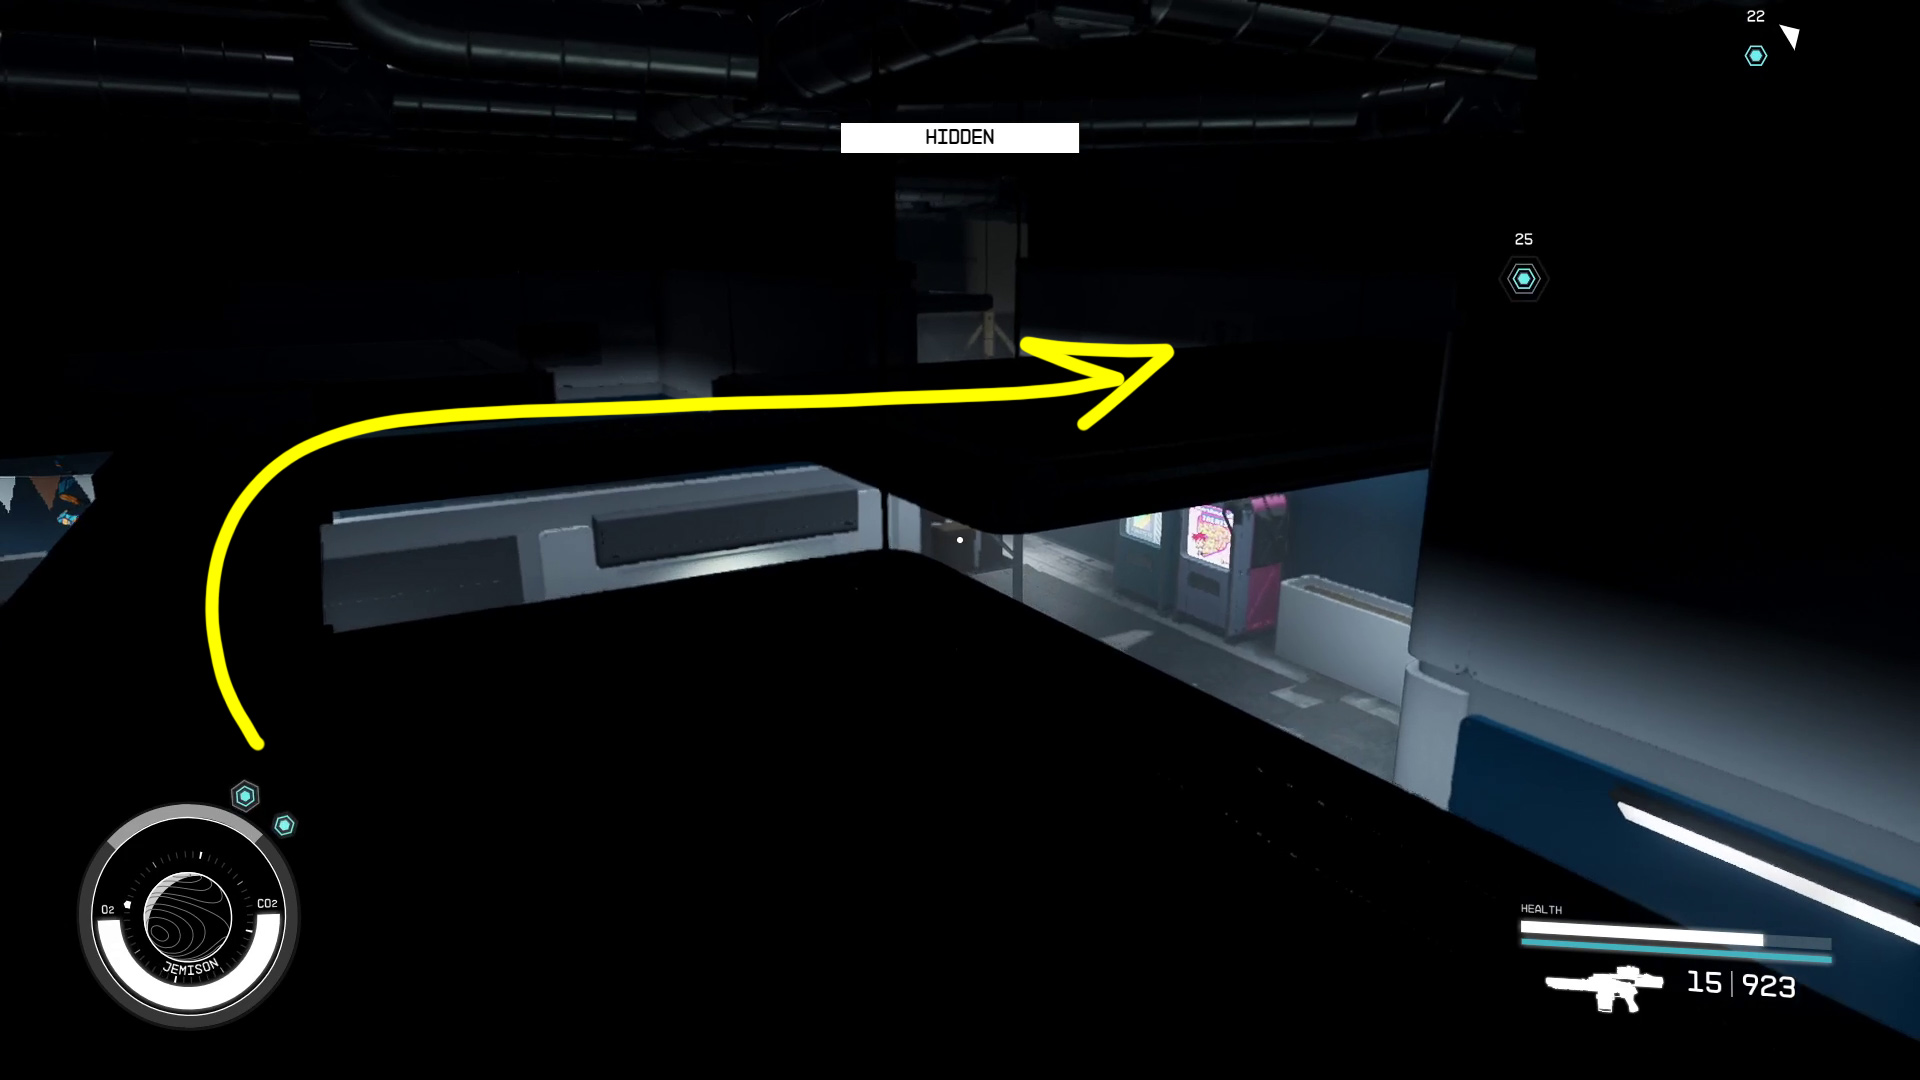
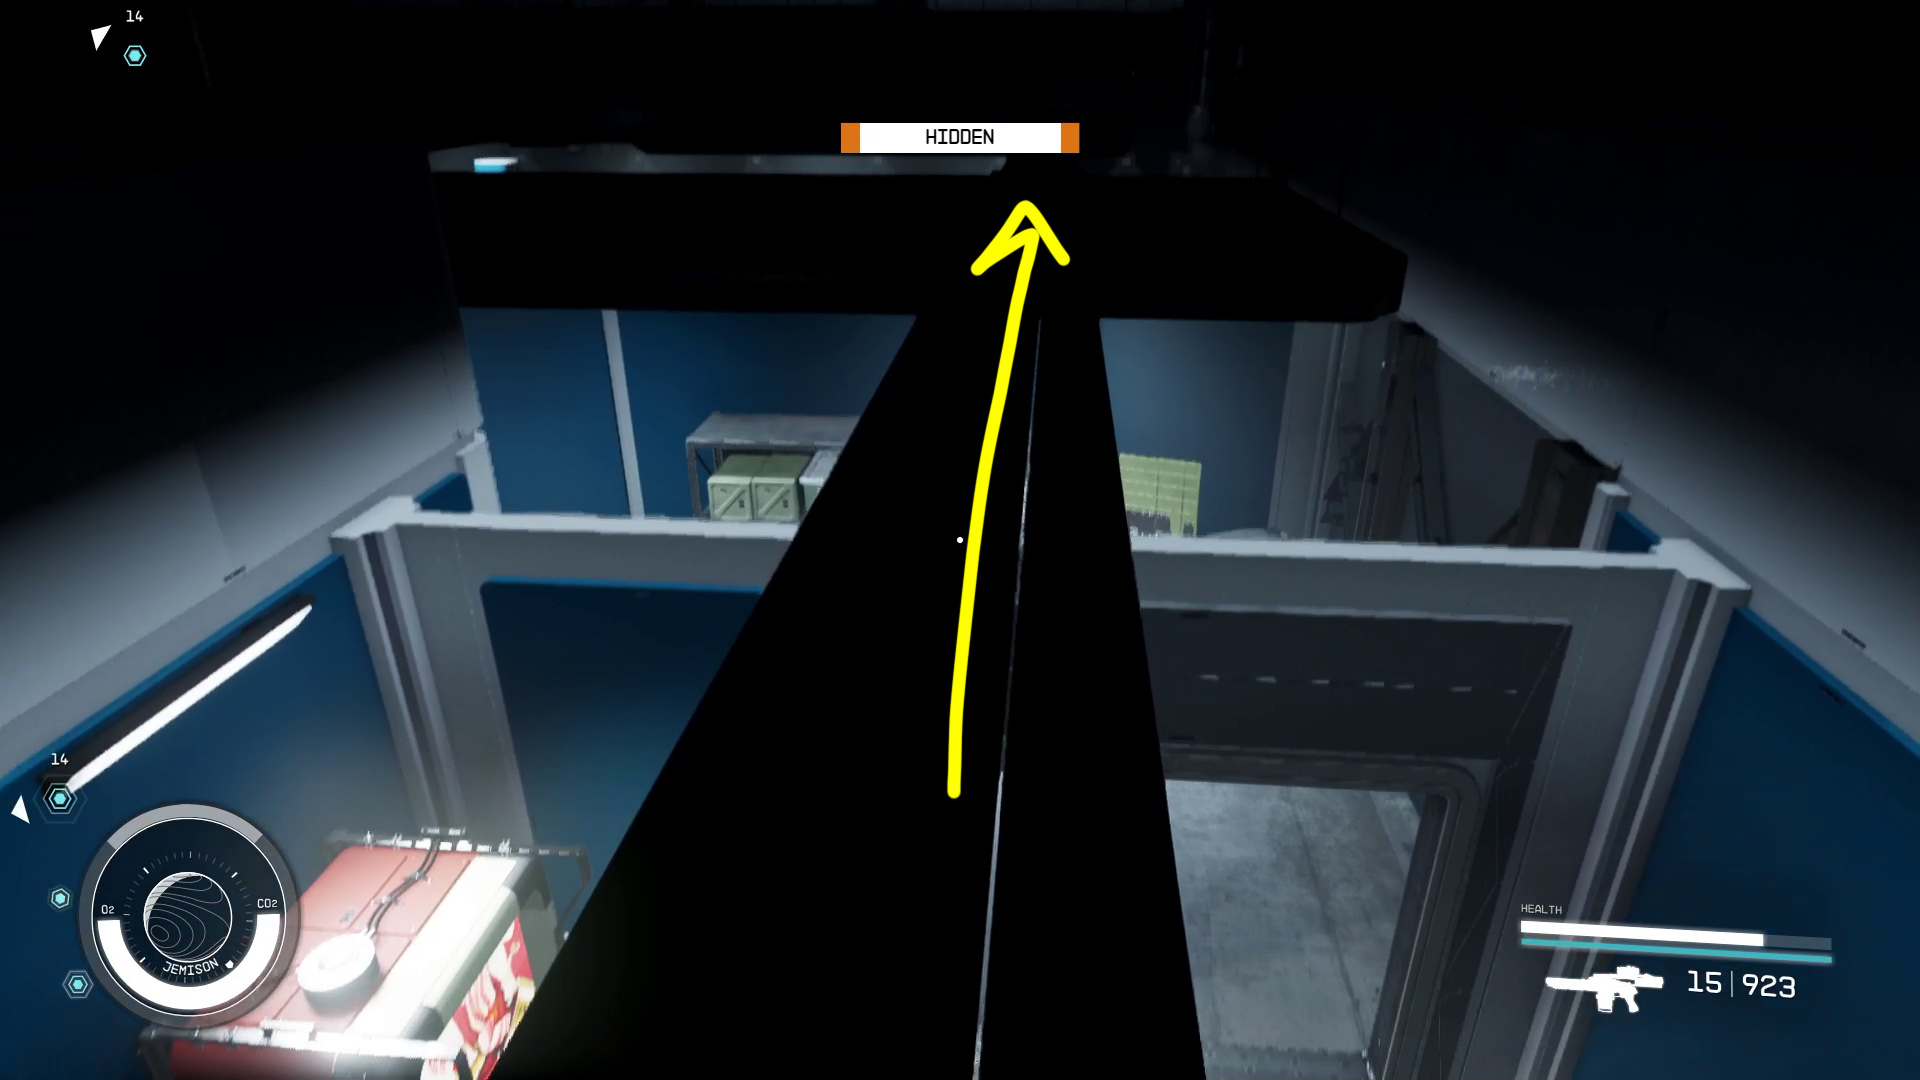
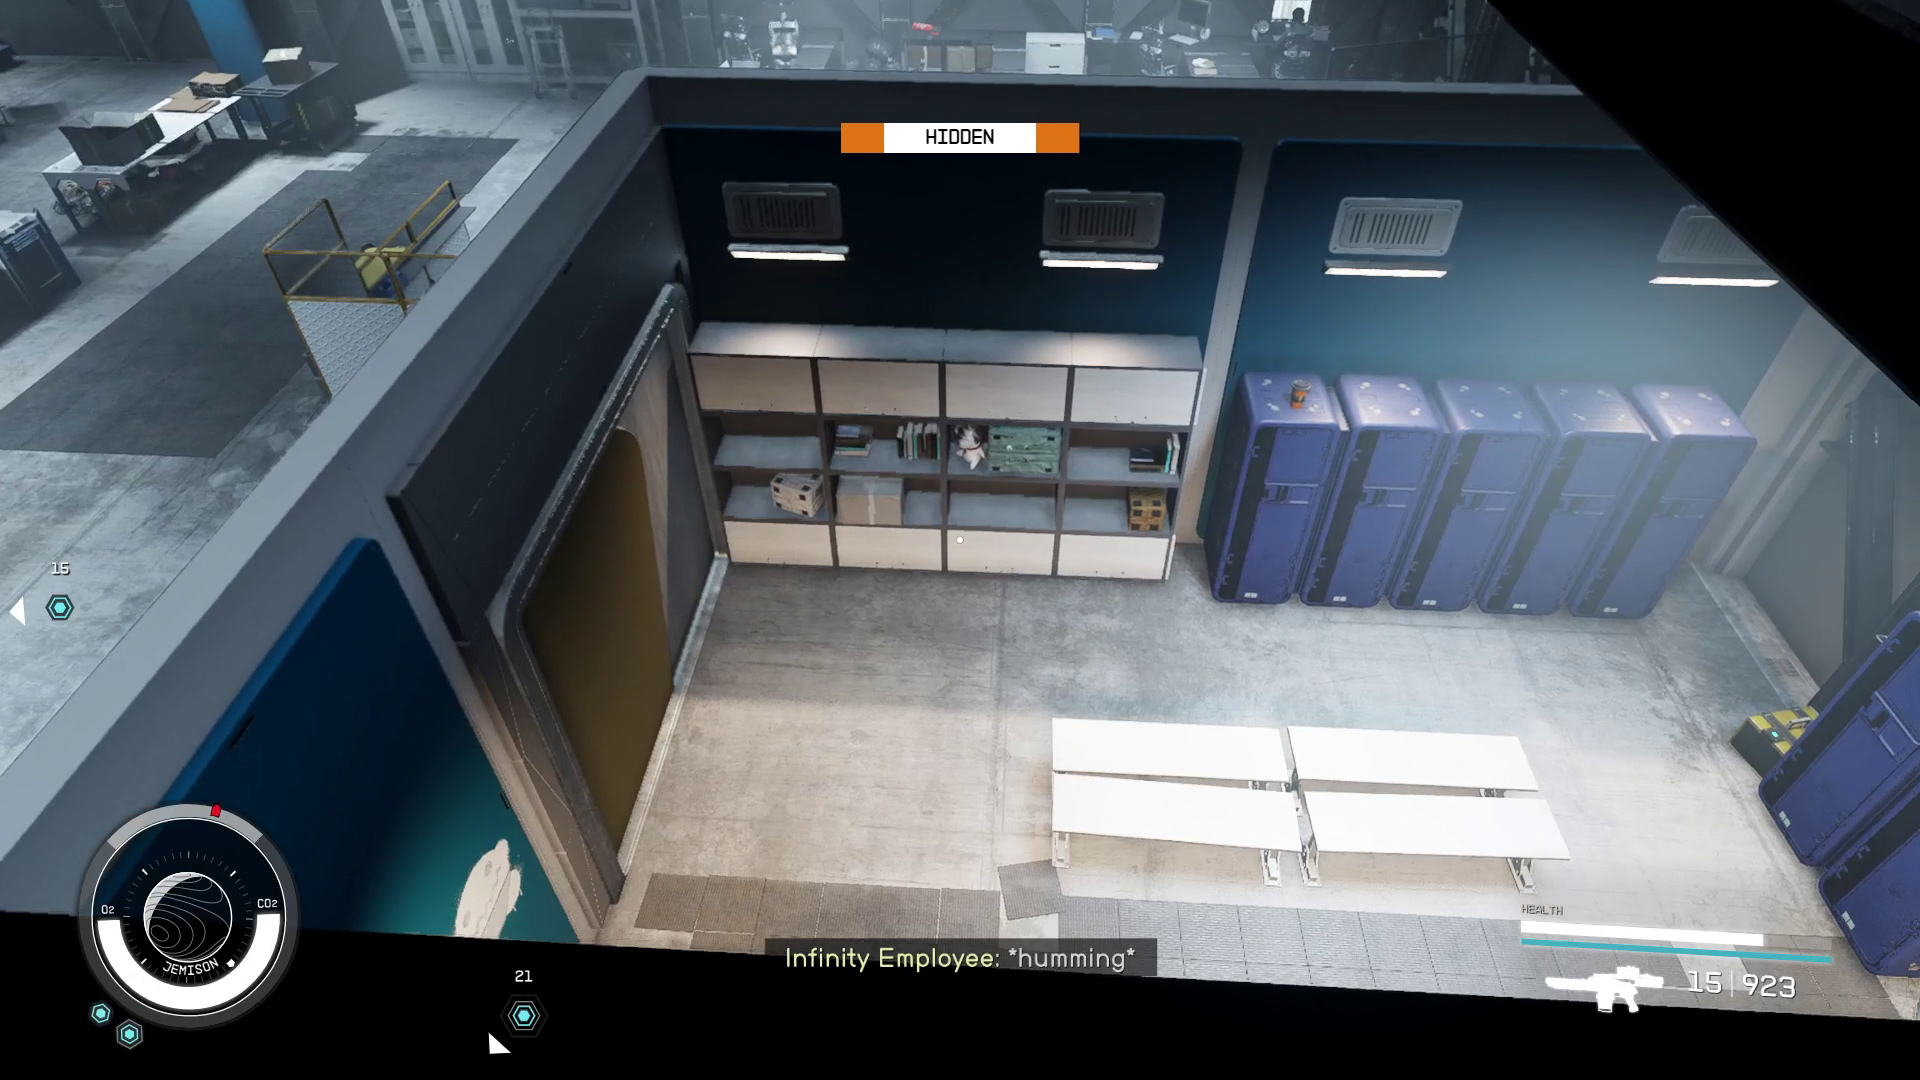
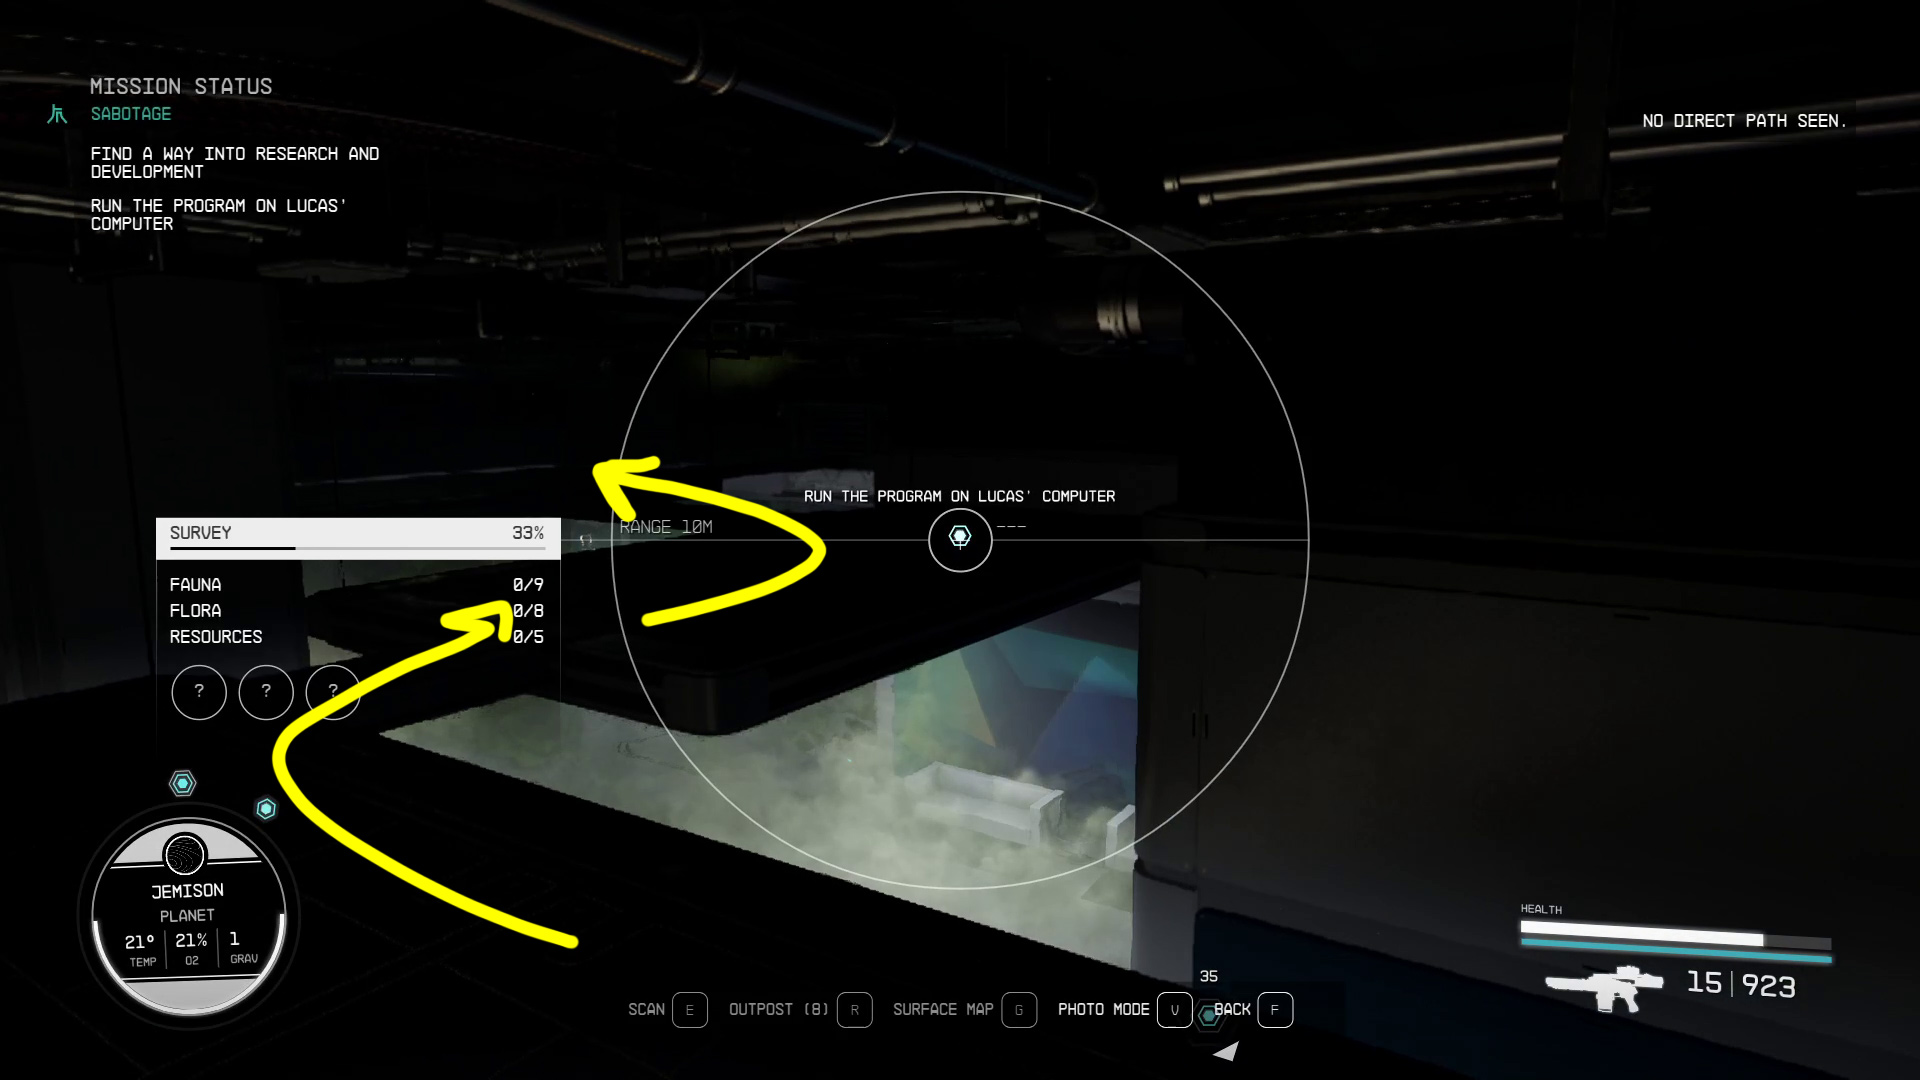
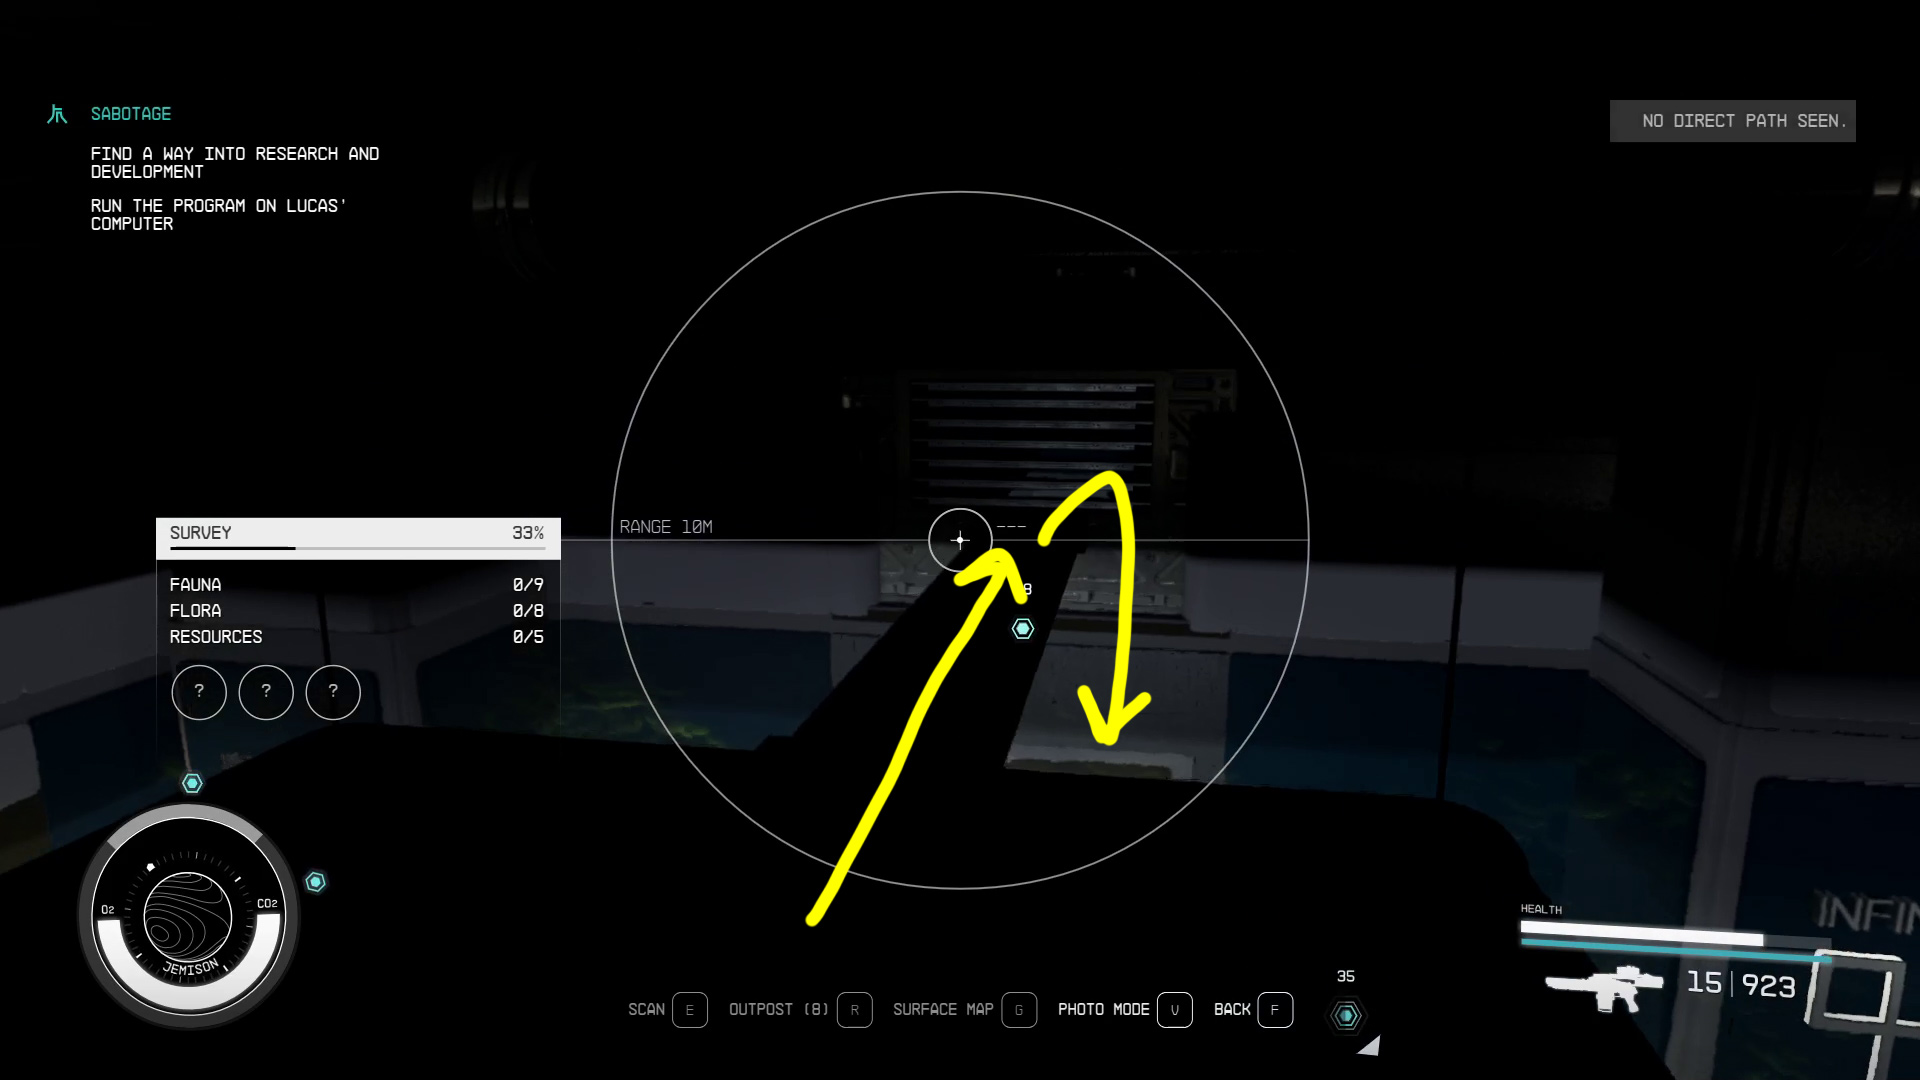
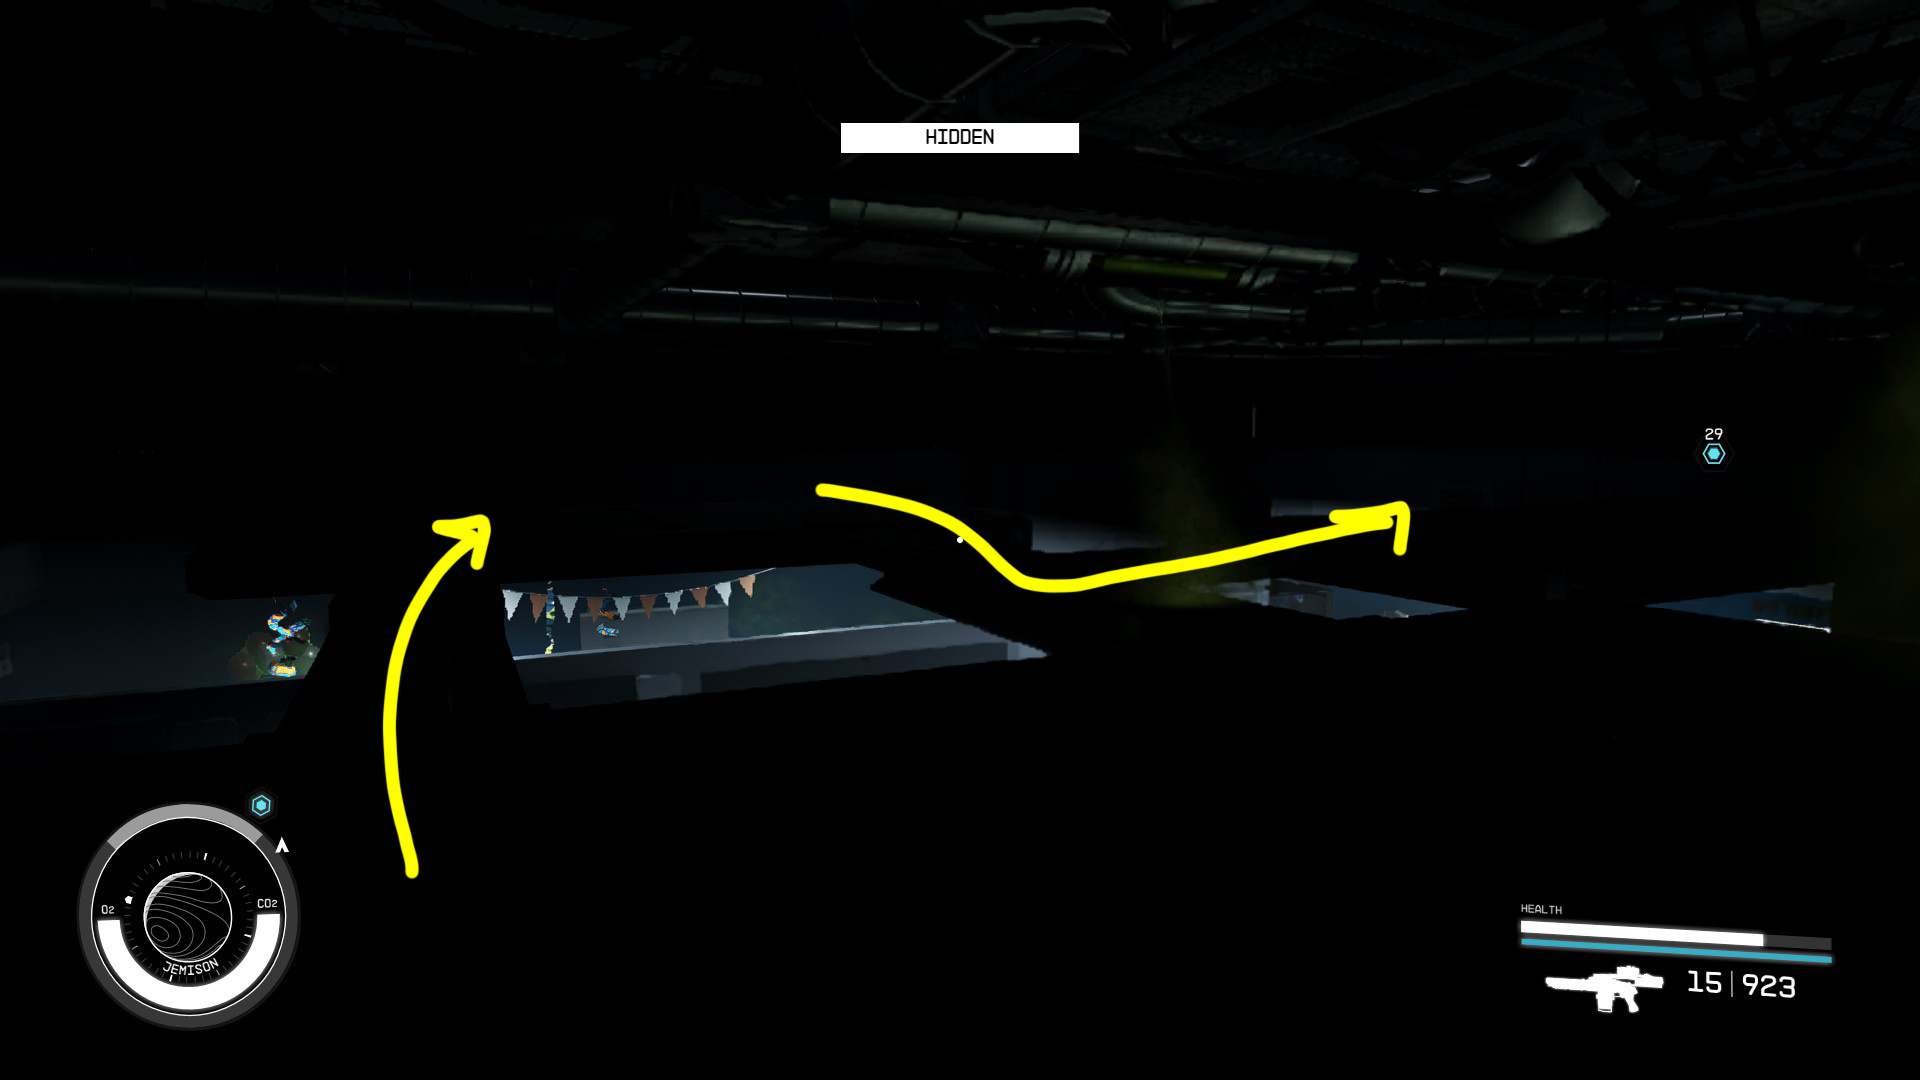
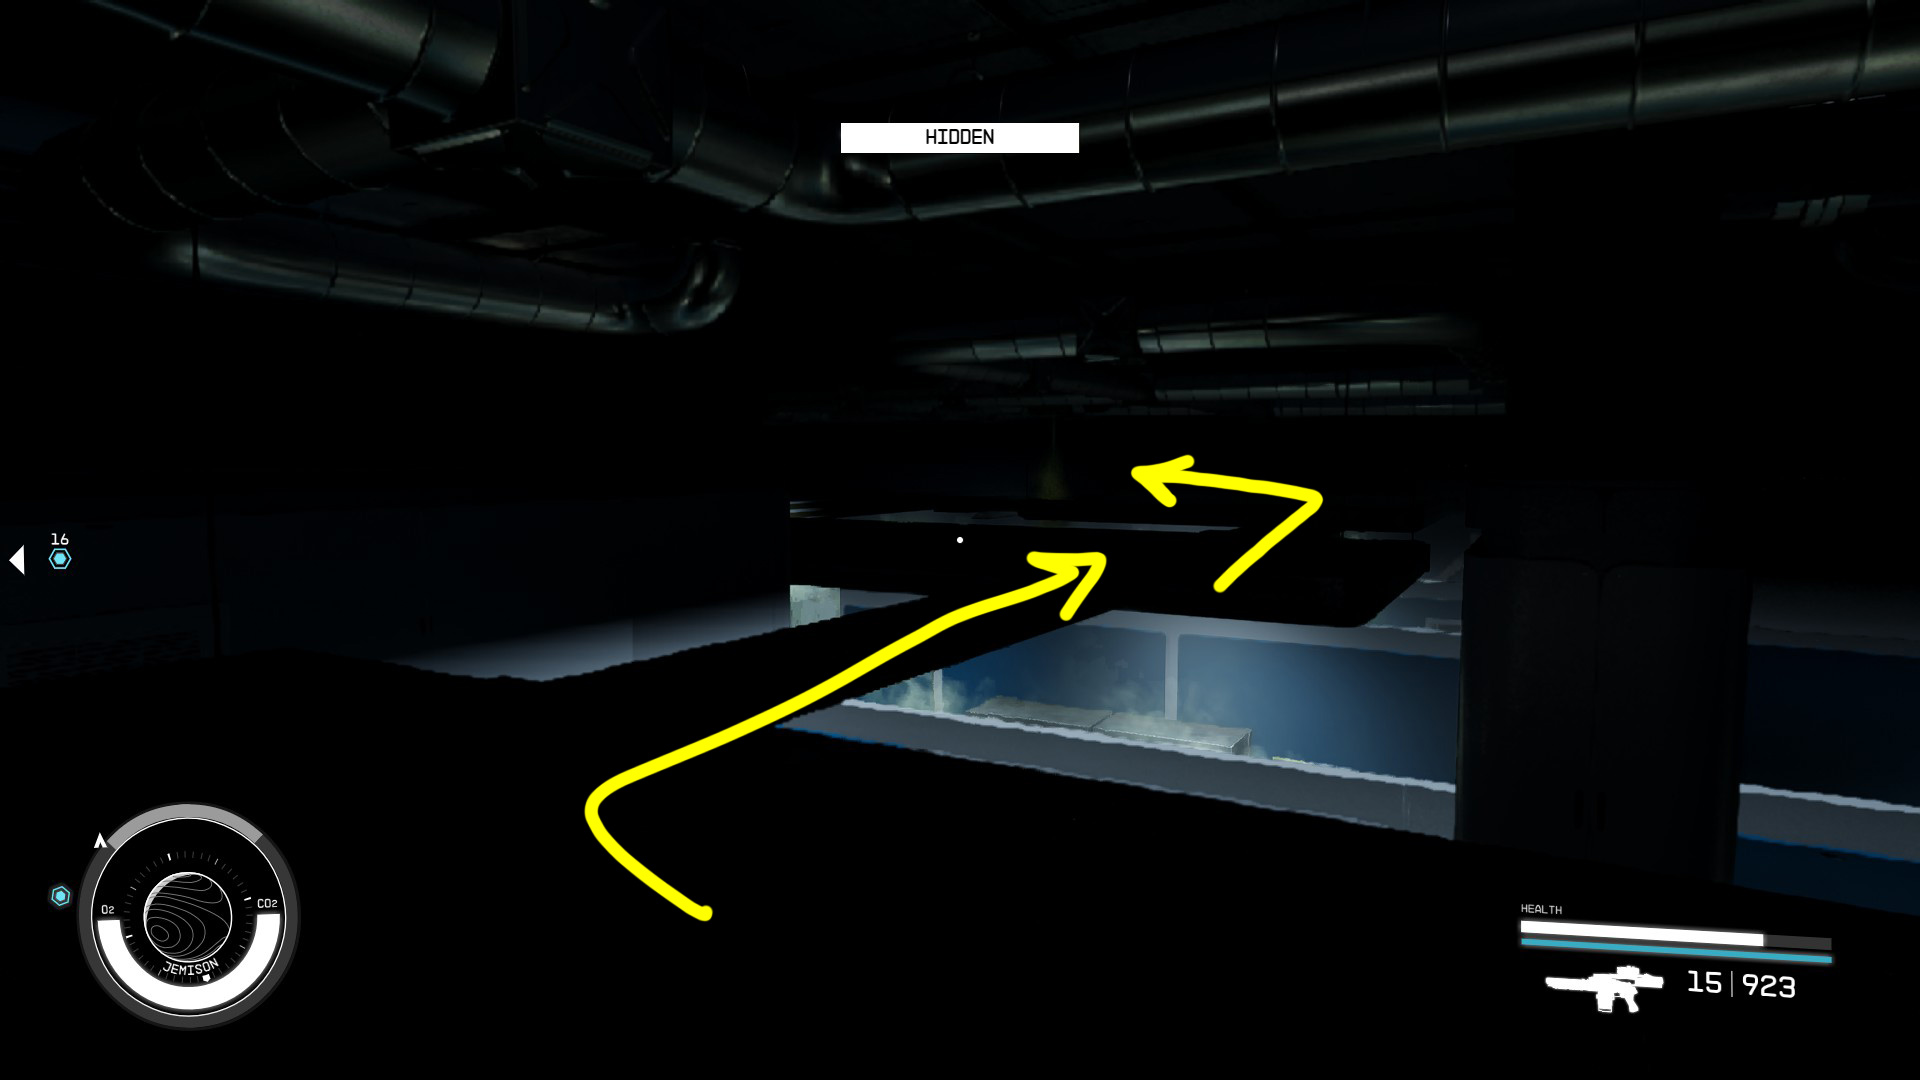
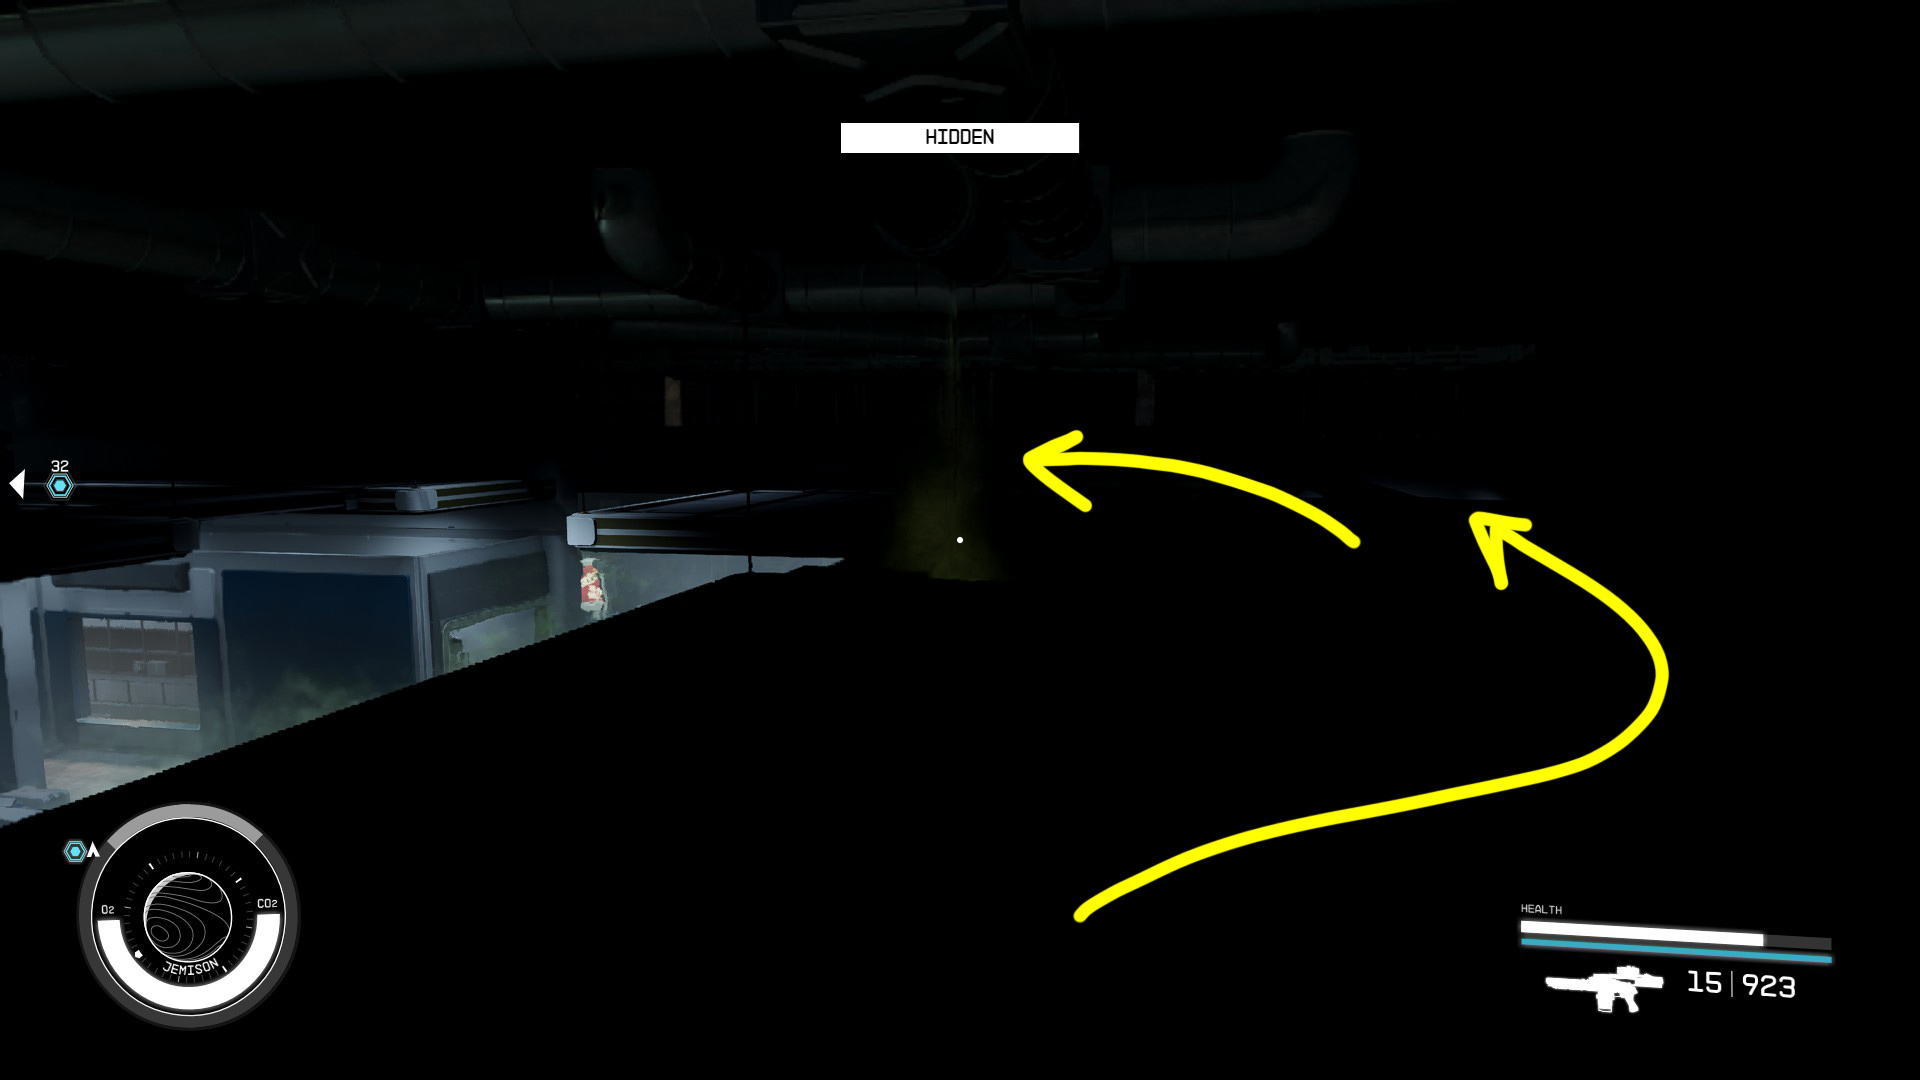
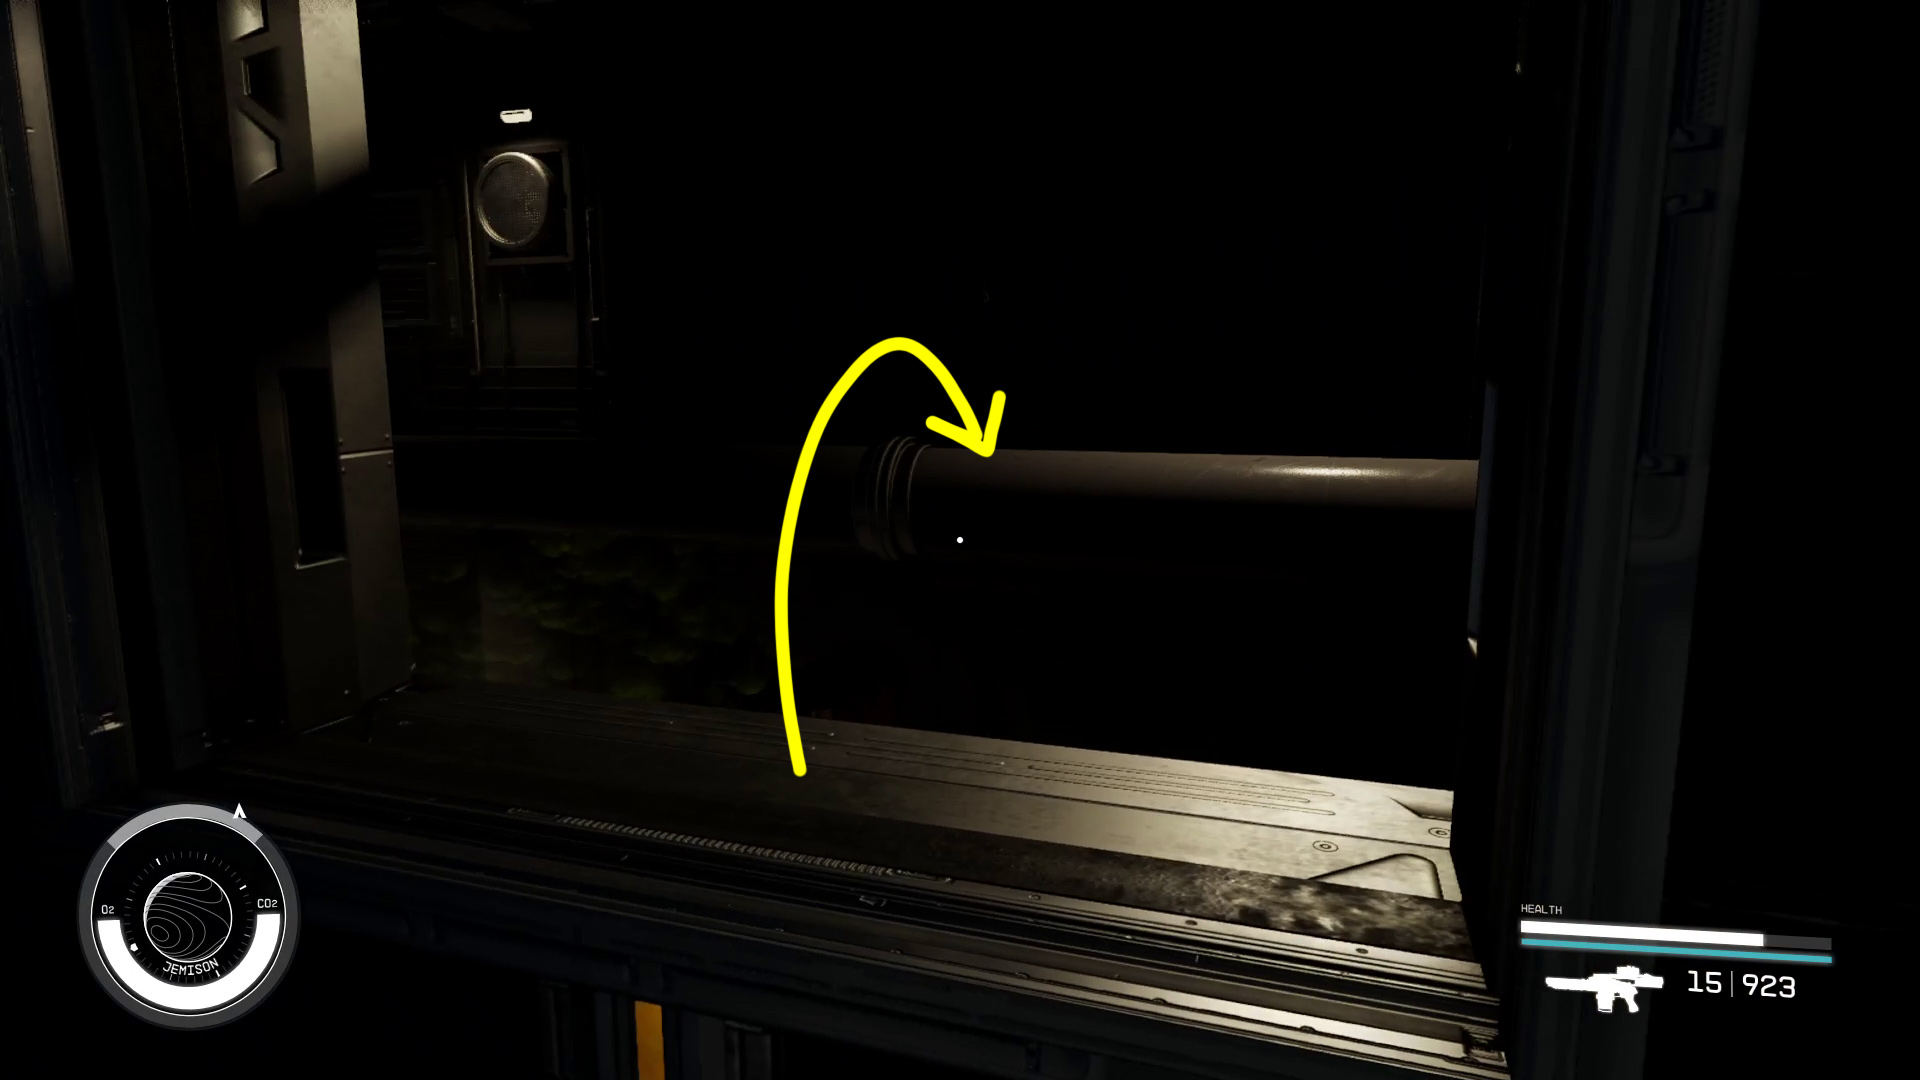
Open the vent and continue into the ventilation shaft, and you’ll drop down a few times and end up on some rafters. Start sneaking and continue forward (Image N7) out onto the beams, then turn right and keep going on the rafters (Image N8) until you end up above the locker room (Image N9).
Image N7Image N8Image N9
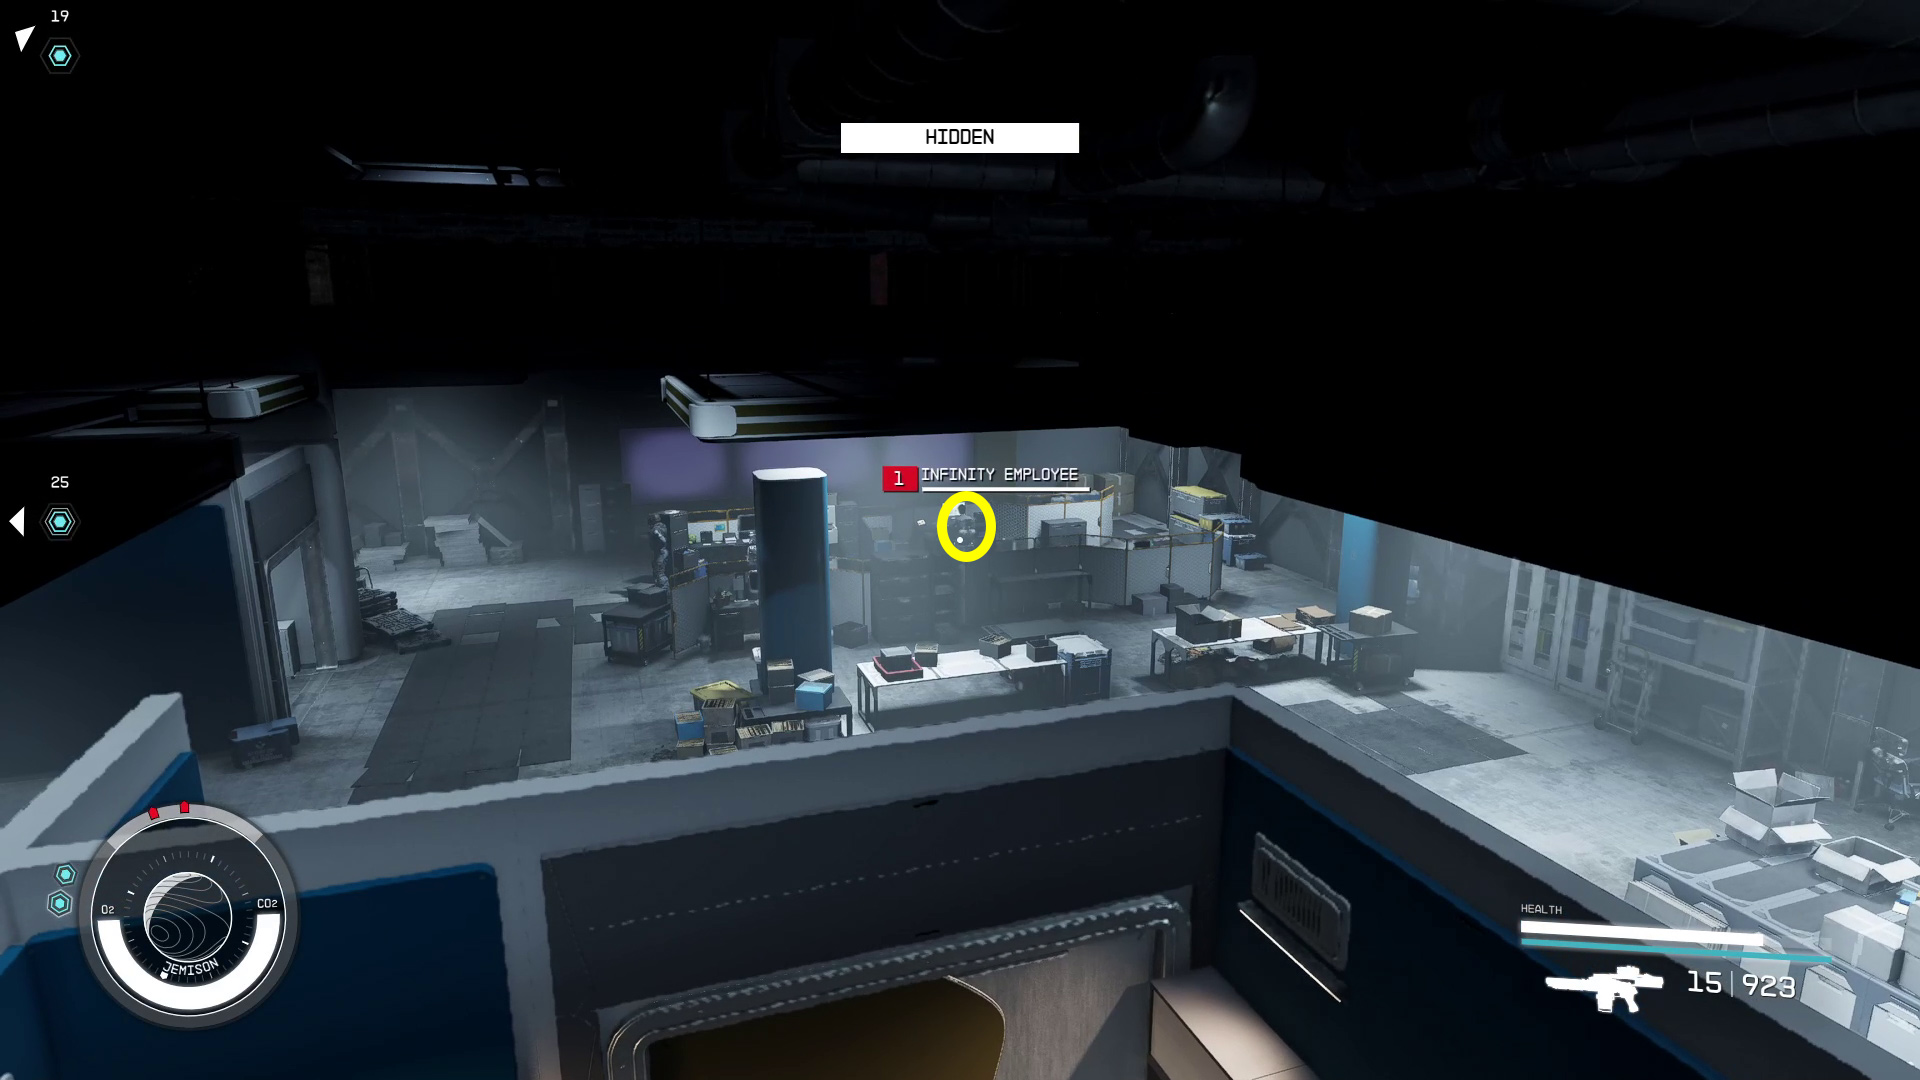
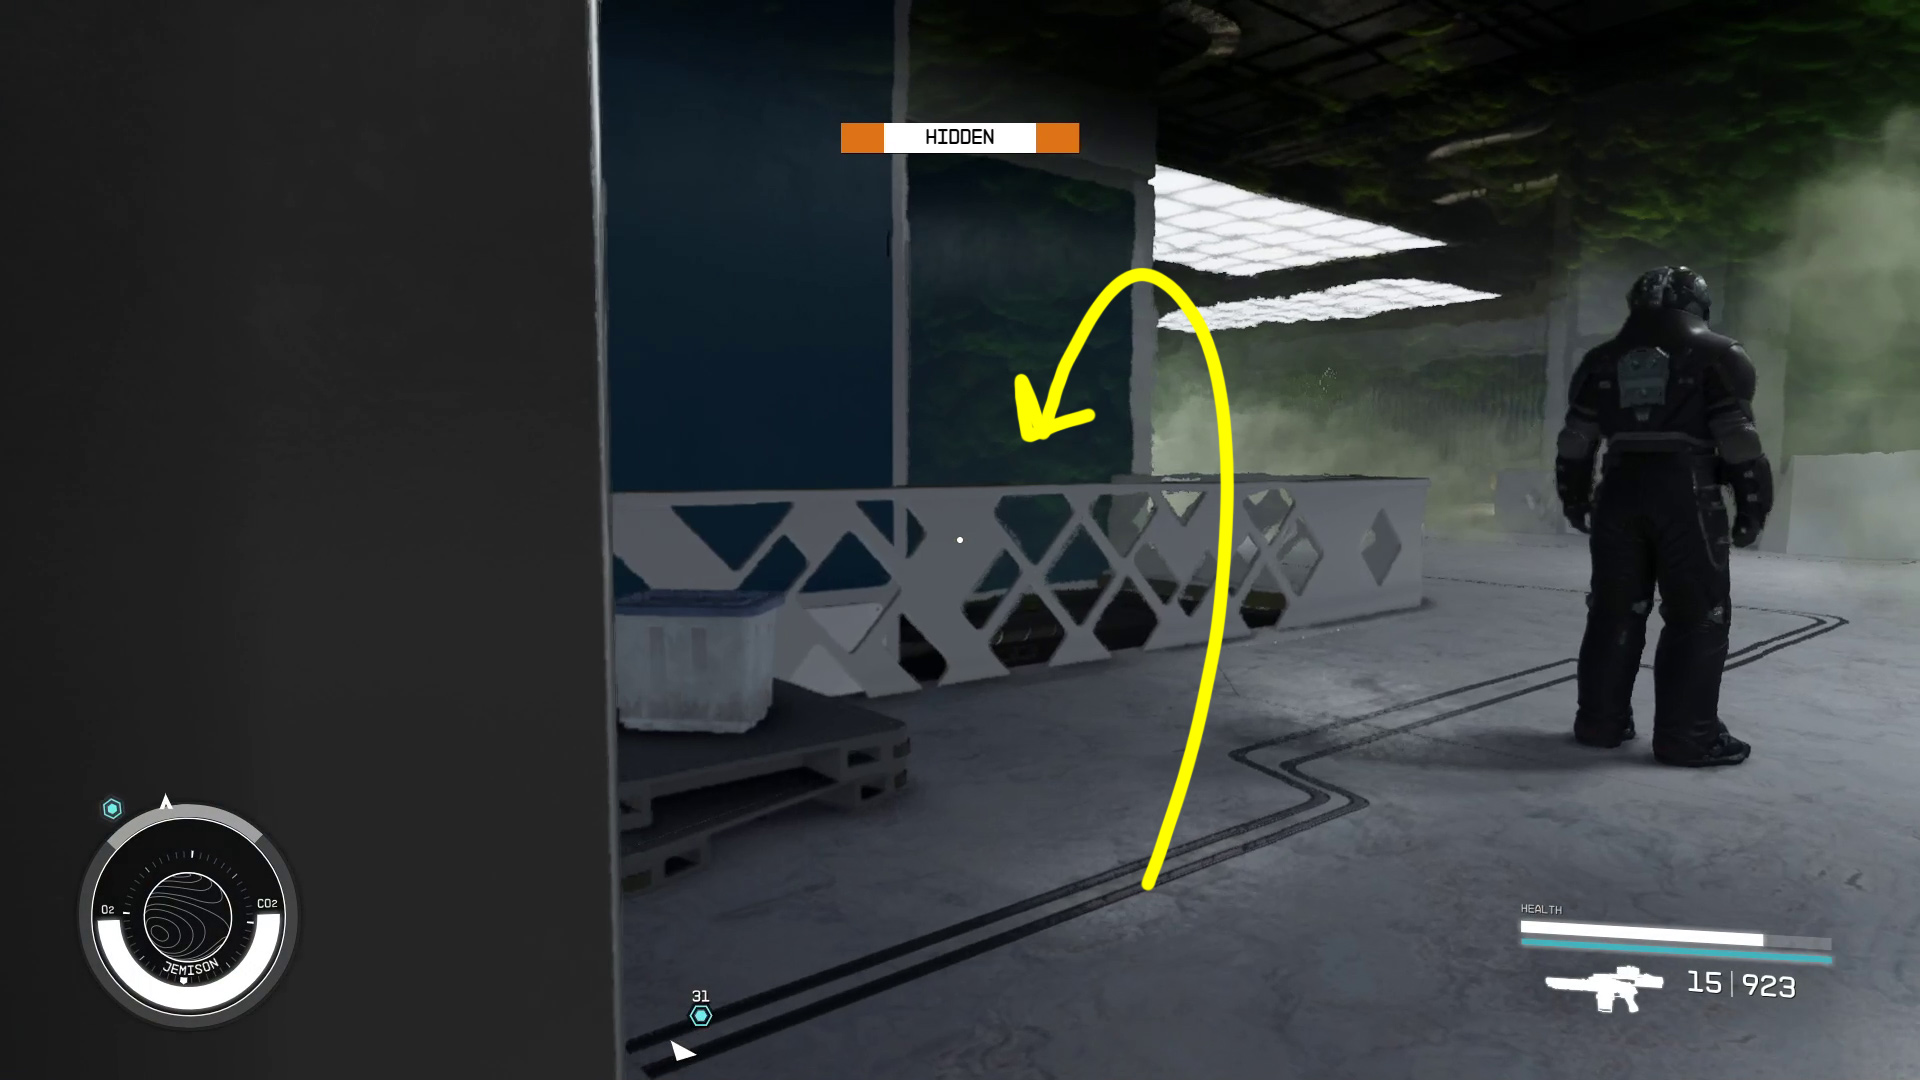
Open your scanner and look for an Infinity Employee (Image N10), then use your Manipulate social skill on them, and have them open the the locked locker below you (Image N11). There are a few employees in this room, but if you can’t find any, you can have a security guard open the locker — this is less ideal simply because it’s possible they “see” you even while you’re sneaking on the rafters.
Image N10Image N11
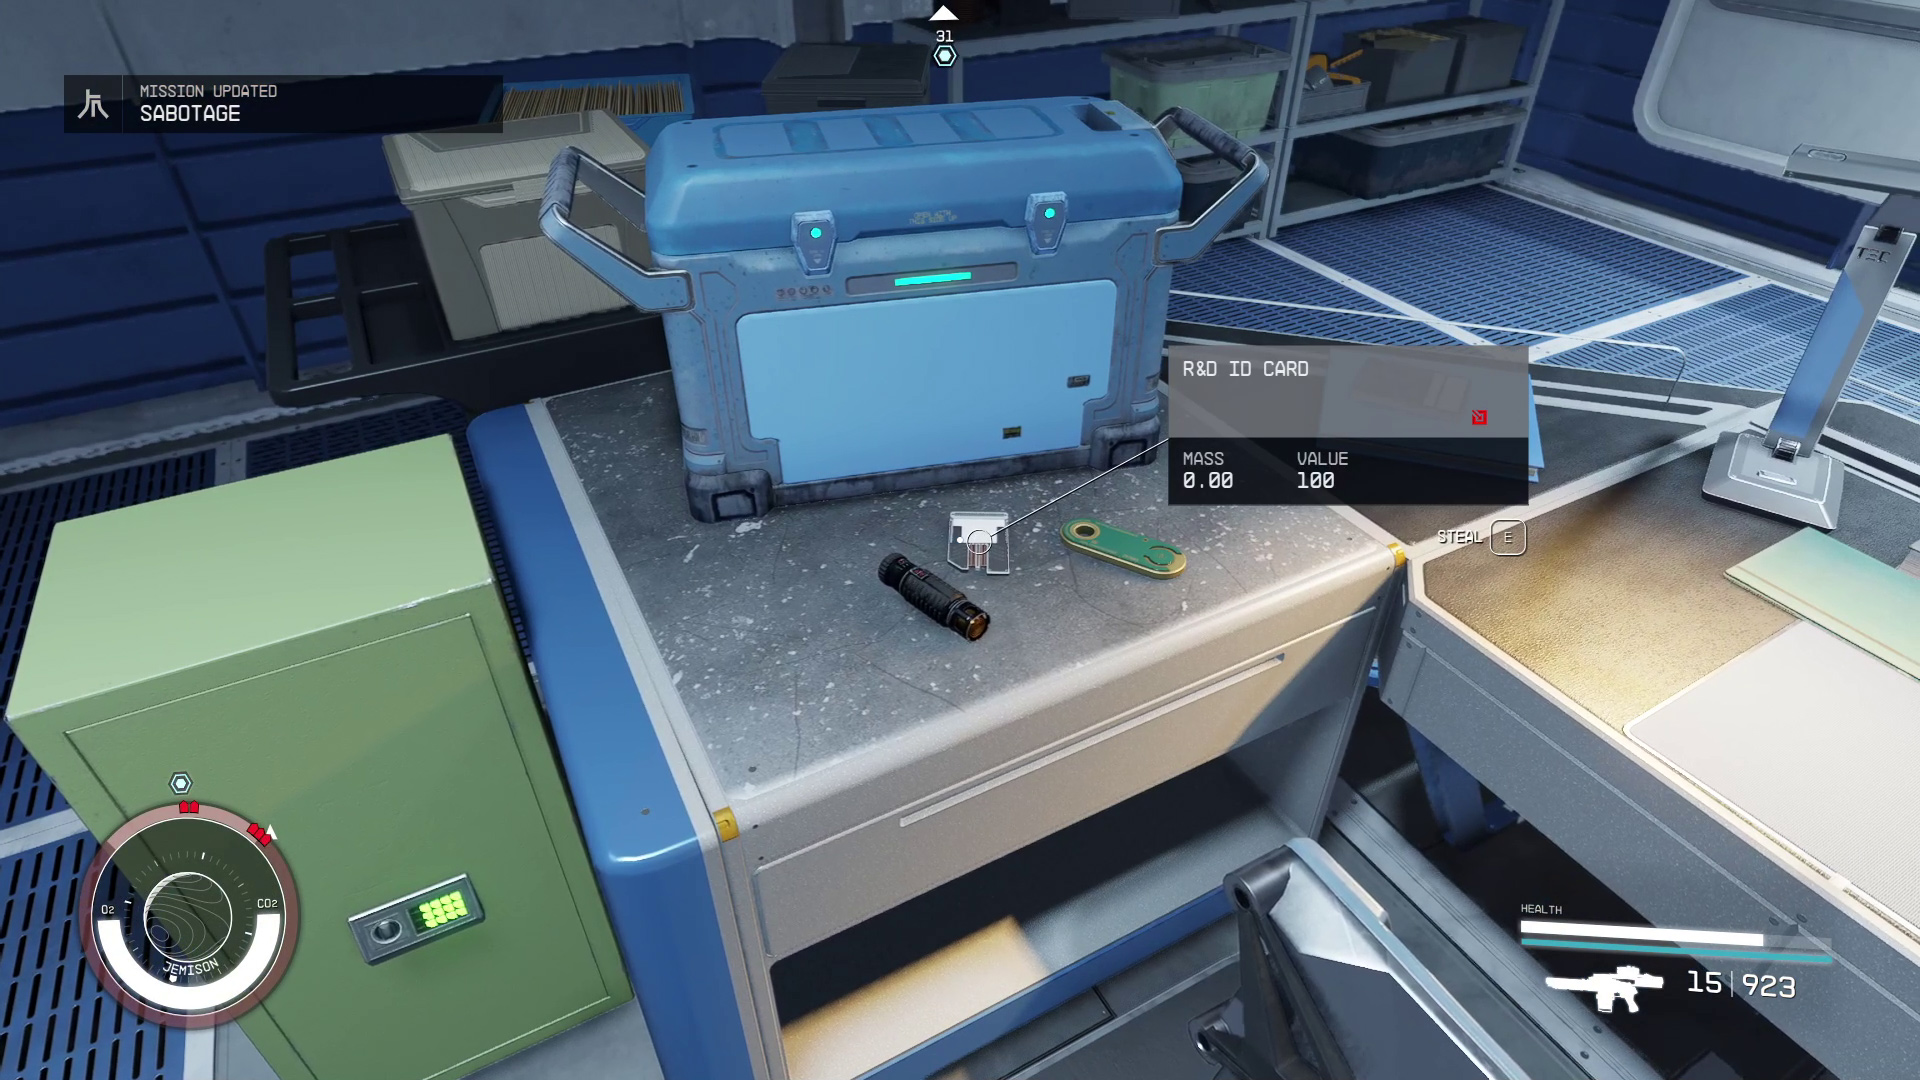
After you manipulate someone into opening the locker, wait for the manipulation to wear off and for your victim to leave the locker room. Drop down, sneak over to the locker, equip the Research Tech Outfit on the bottom of the locker, and grab the R&D ID Cardon the top shelf. There’s a safe in the locker next to this one if you want to loot it before continuing.
With the Research Tech Outfit equipped, you no longer need to sneak! Stroll on out of the locker room and go left to the elevator (which will be indicated by ), then take the elevator to the Research and Development floor.
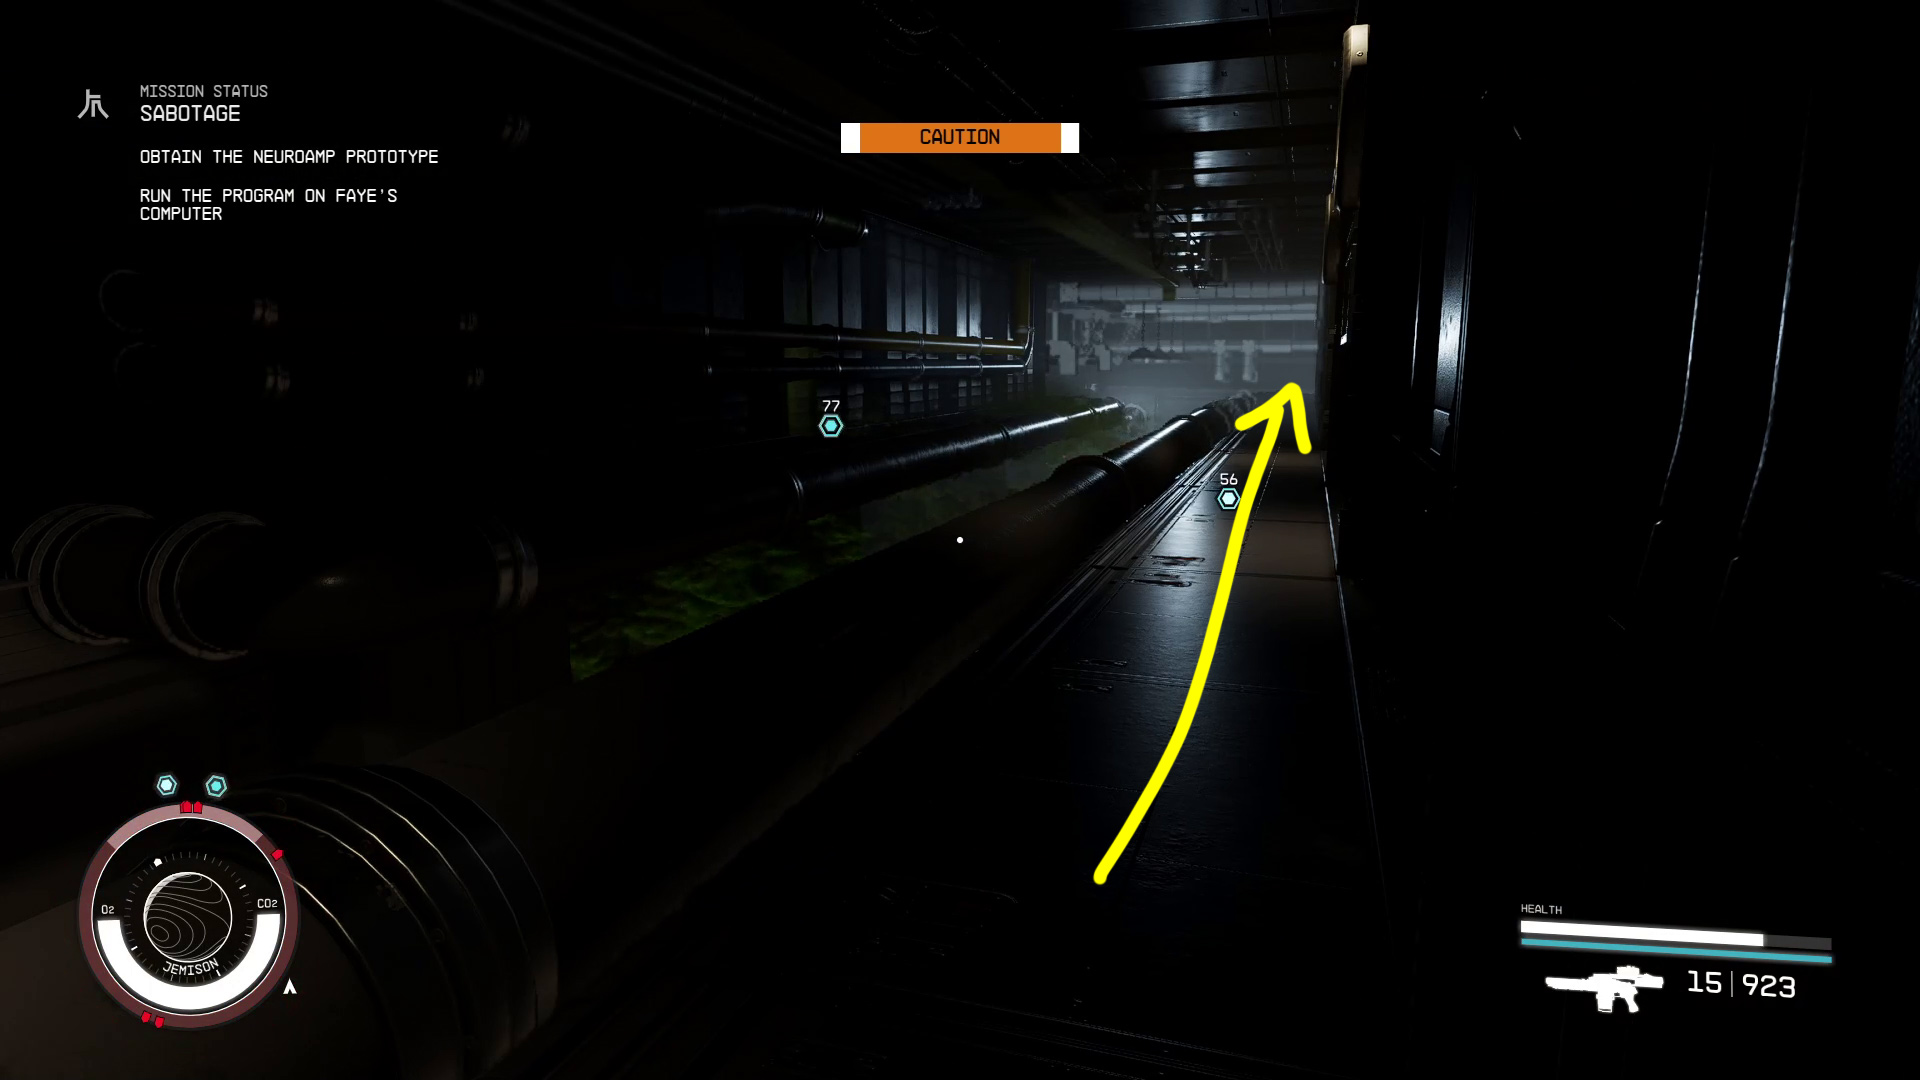
Run the Program on Faye’s Computer
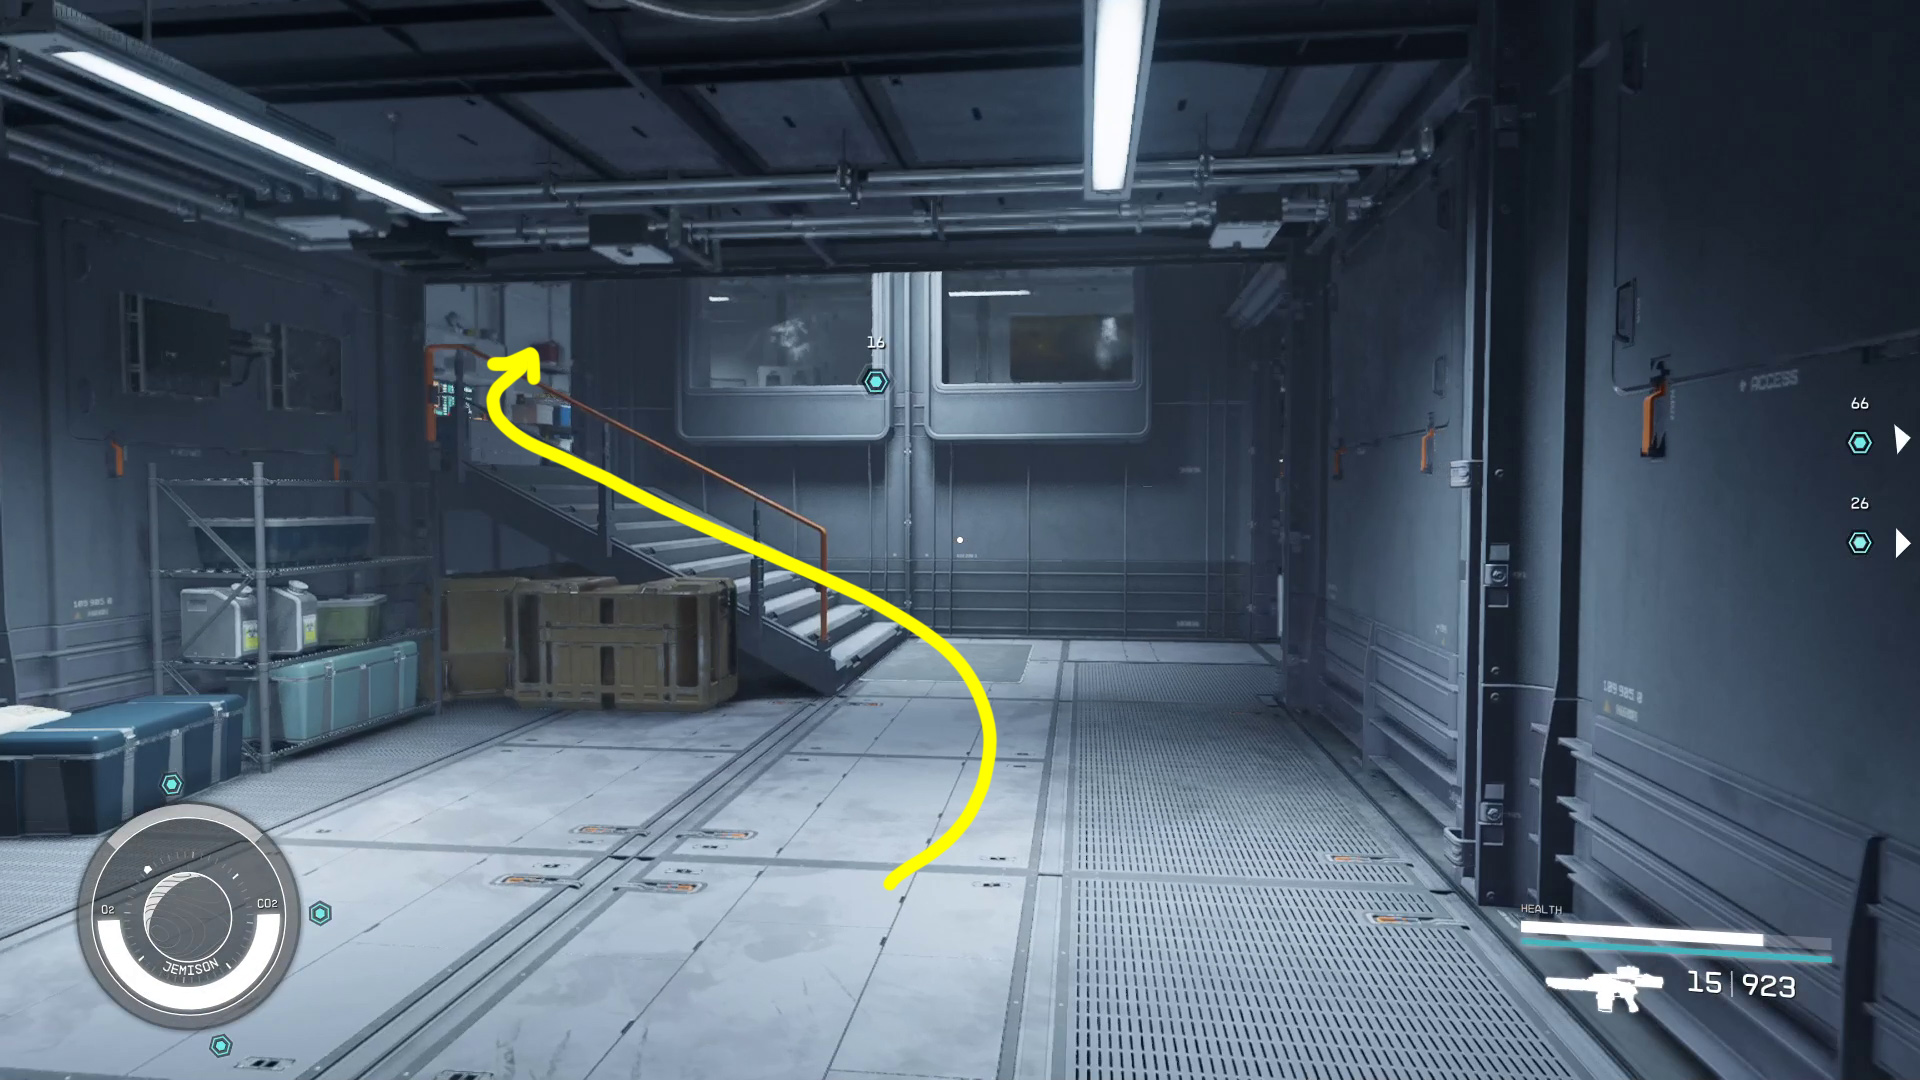
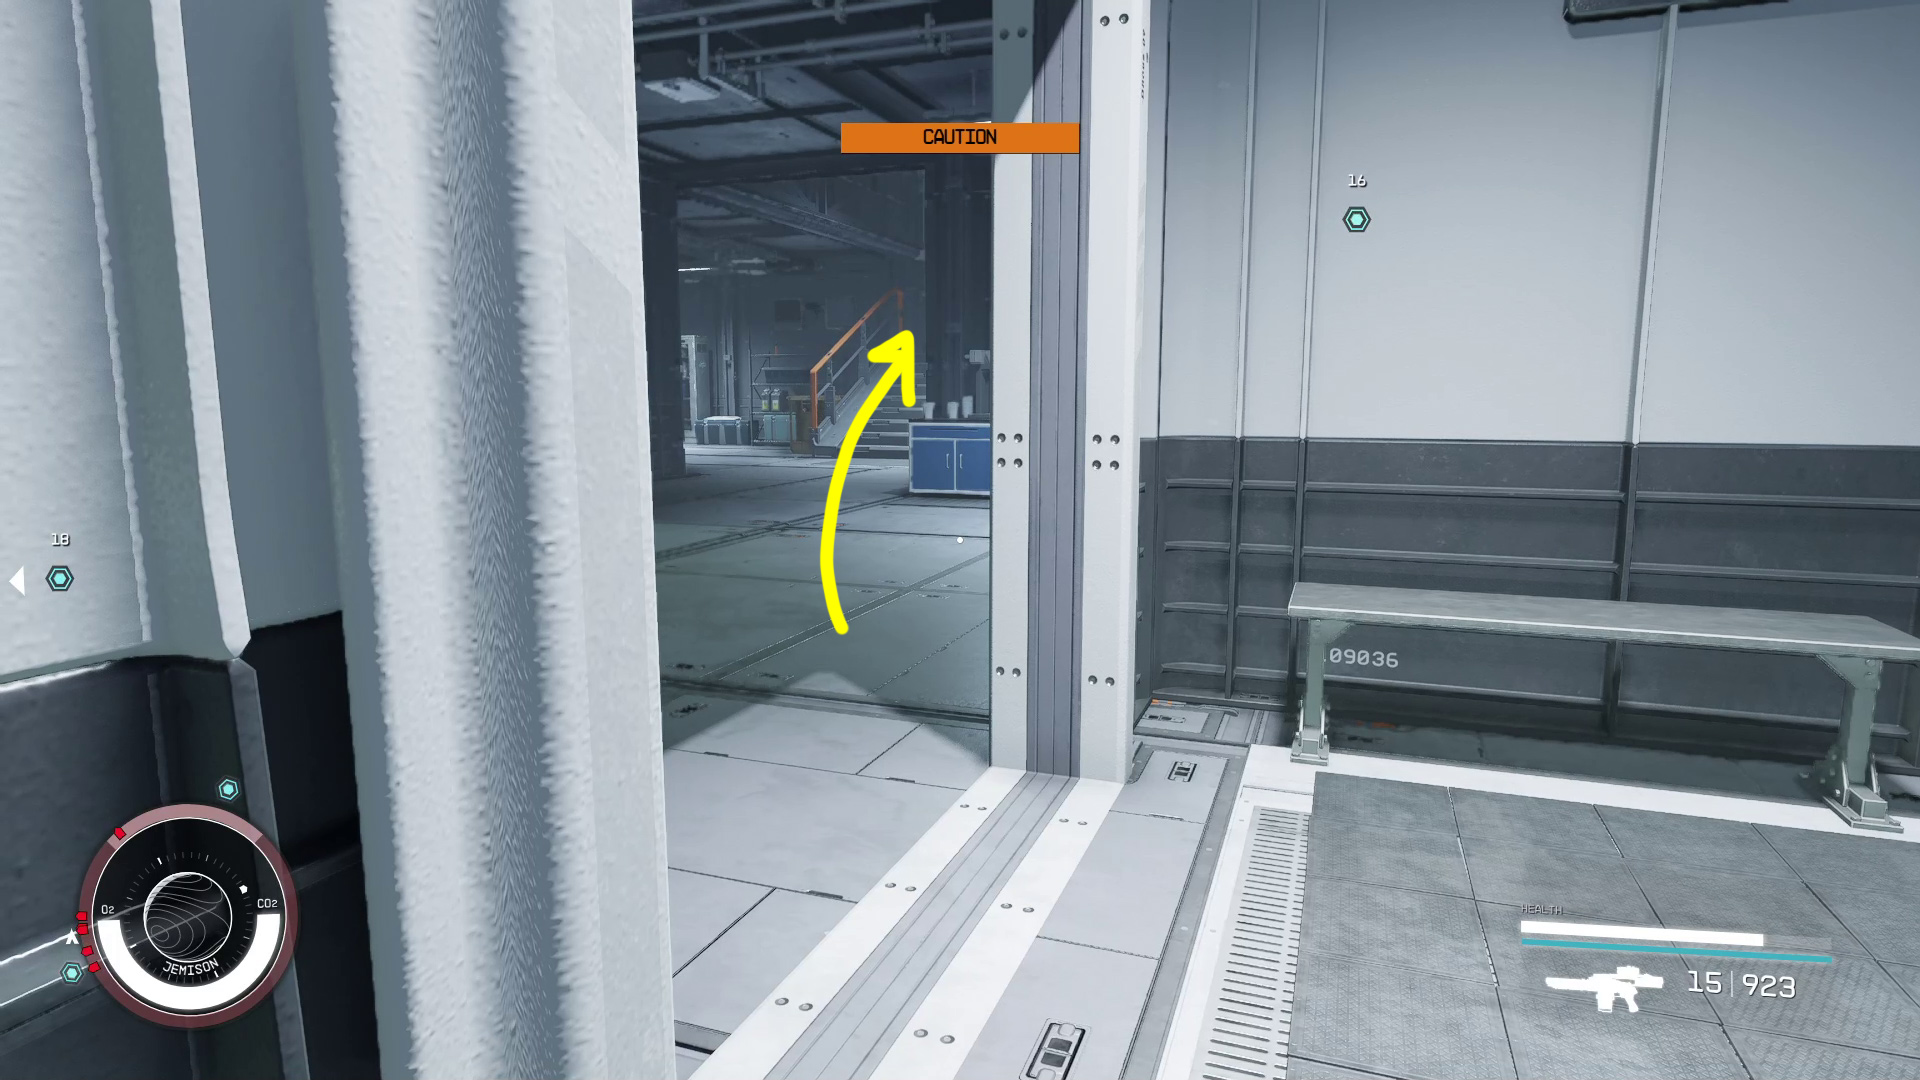
Exit the elevator and turn left, and continue down the hallway to the stairs. Go down the stairs (Image N12) and head towards the left side of the room, then continue through the doorway there (Image N13) — up the stairs just ahead is Faye’s office (N14).
Image N12Image N13Image N14
The indicates Faye’s computer — simply wait for her to be looking the other way, then sneak, make sure you’re Hidden, and use her computer. Pick the lock, then select “Overseer Program” to run the program.
Obtain the Neuroamp Prototype
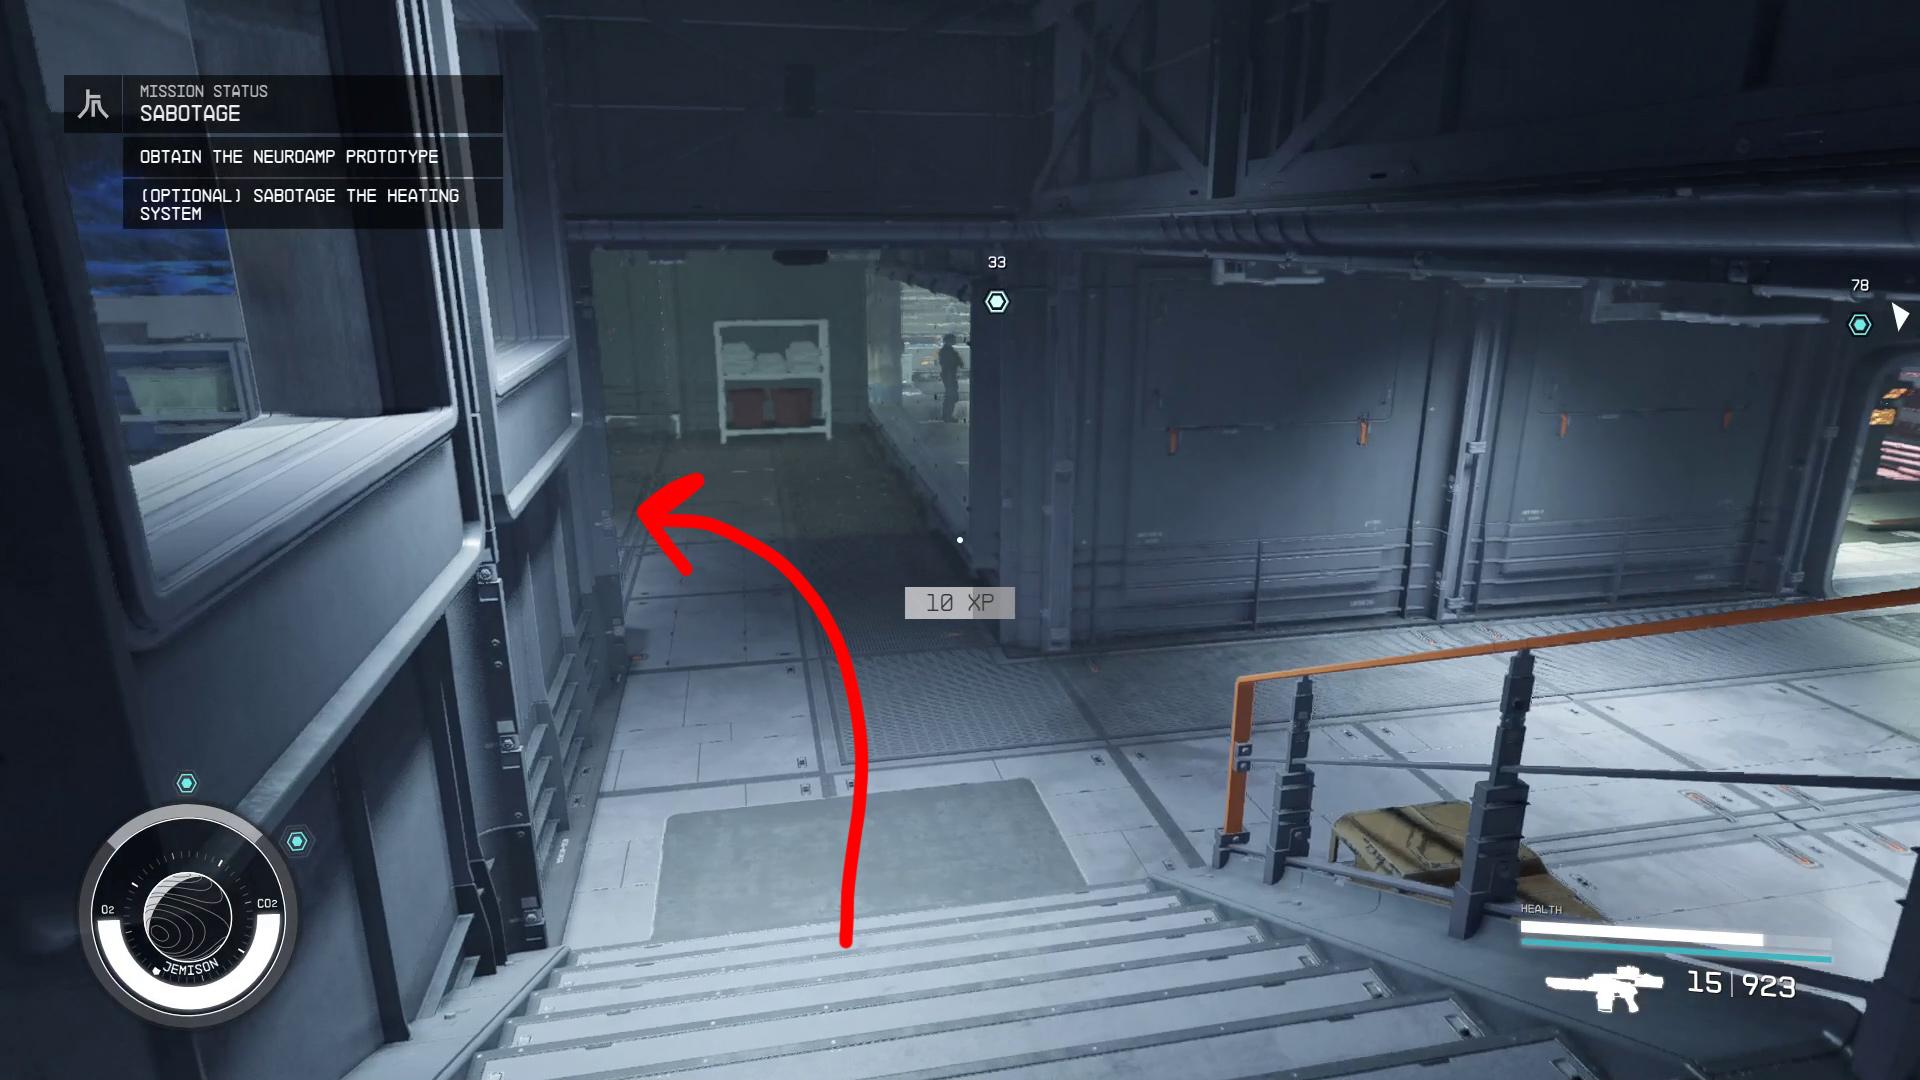
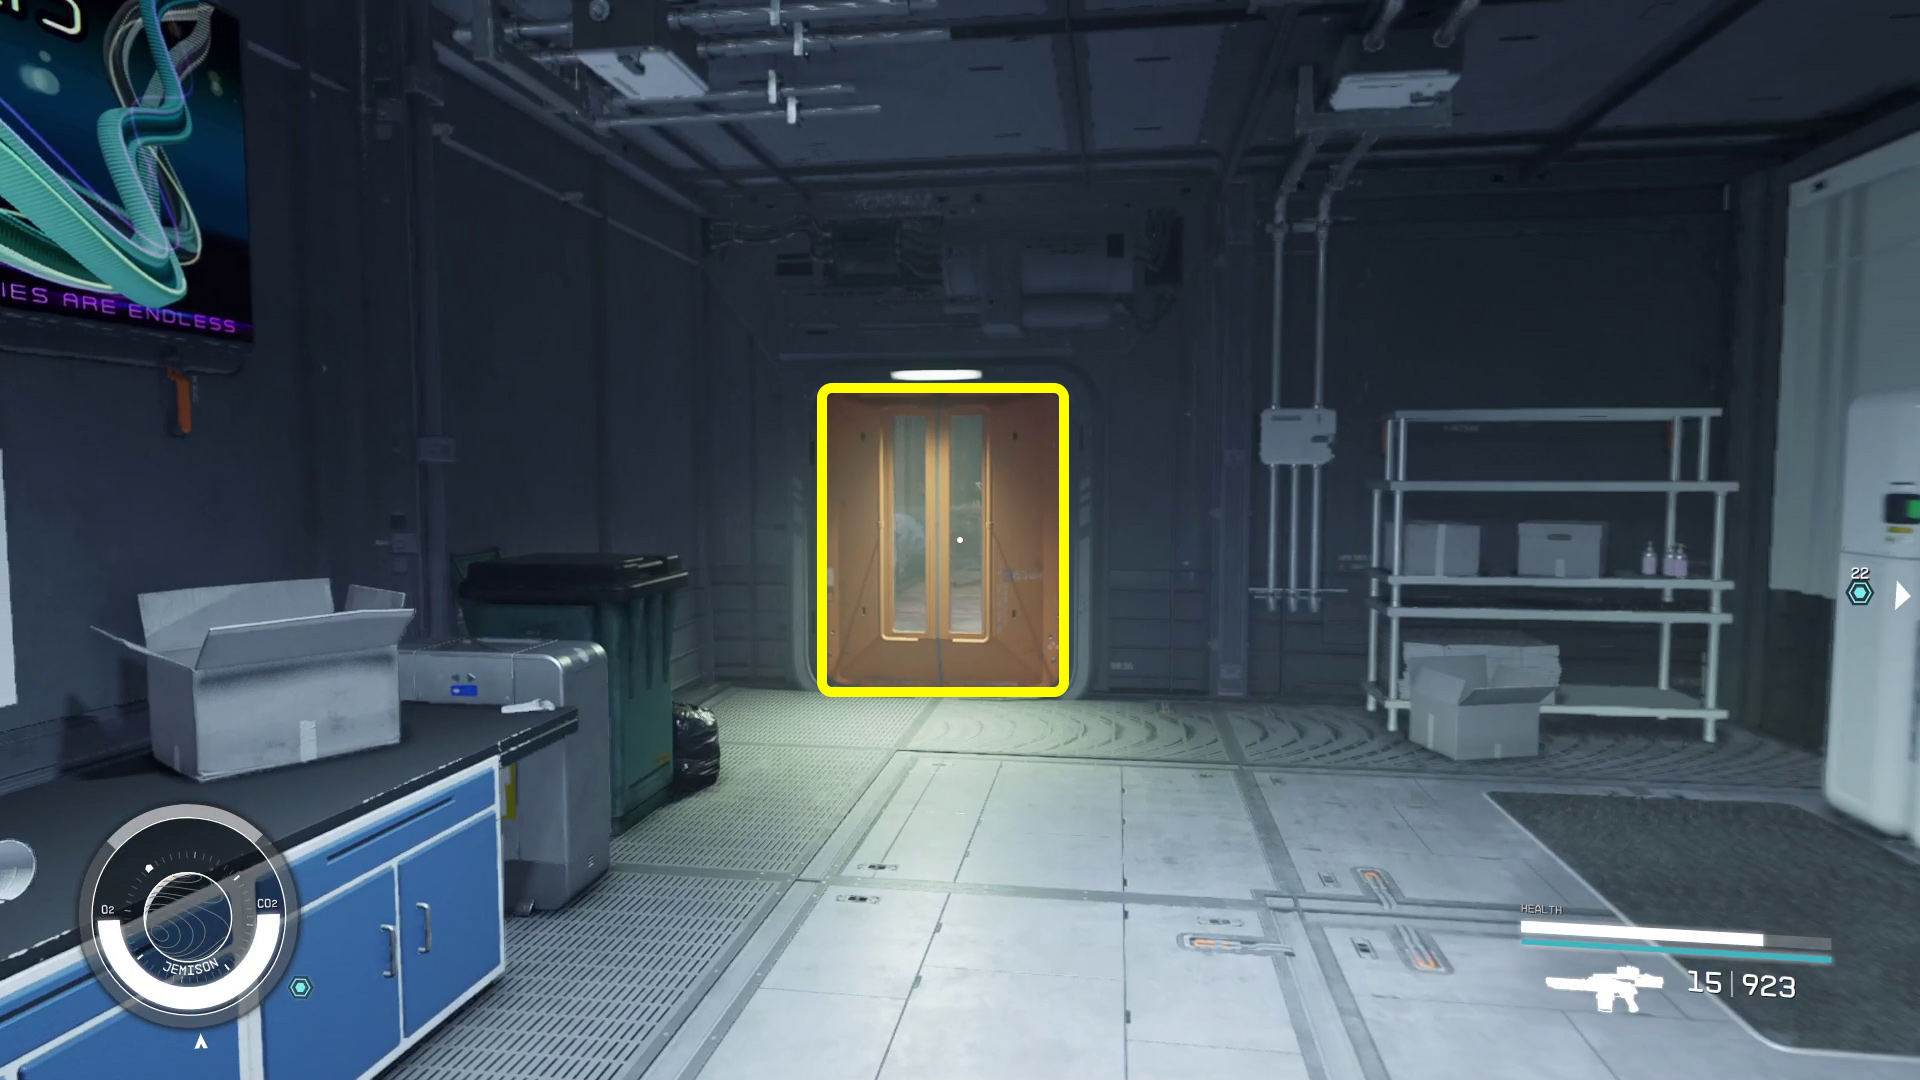
Go back down the stairs and take a left (Image N15), and go through the orange door. Continue through the hall into the next area, where you can use the keycard you got from the locker at the ID Card Reader (Image N16). Go through the door after it opens, then turn around and use the switch on the right of the door to close it behind you.
Image N15Image N16
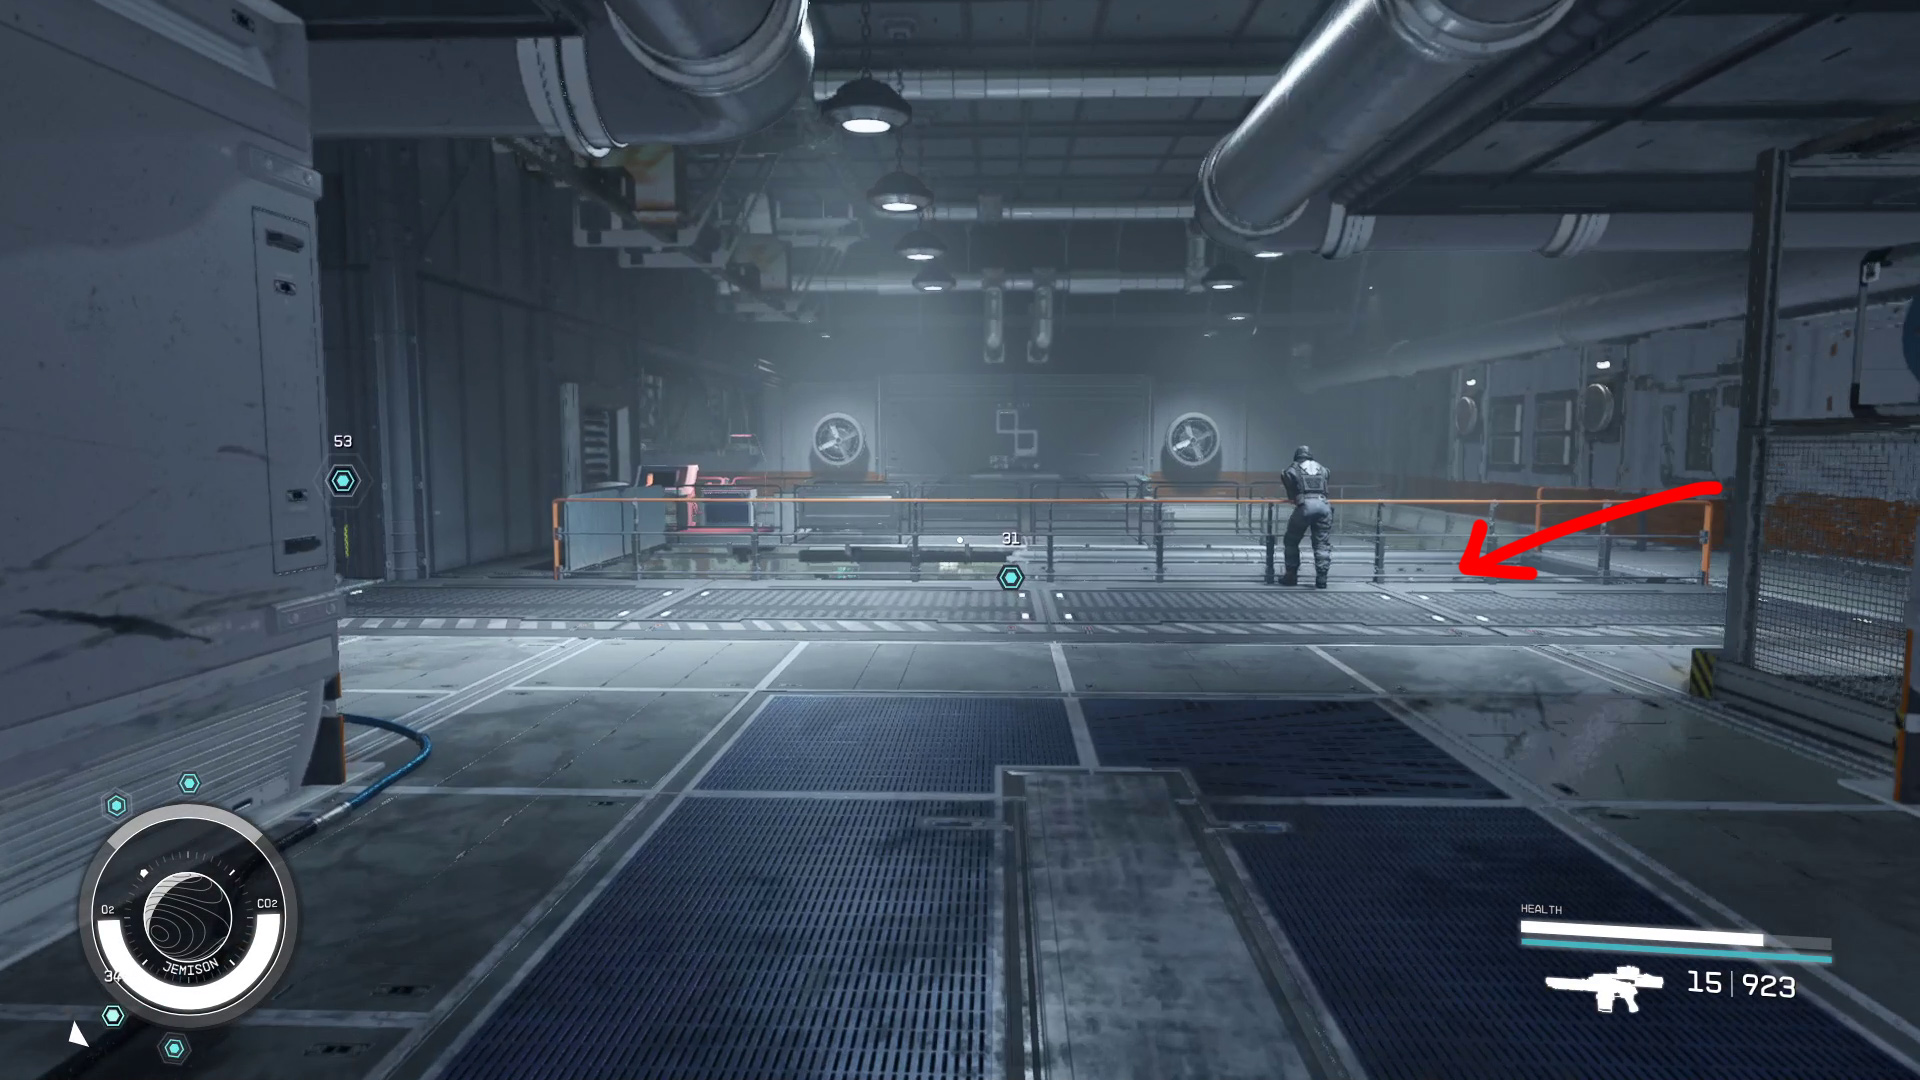
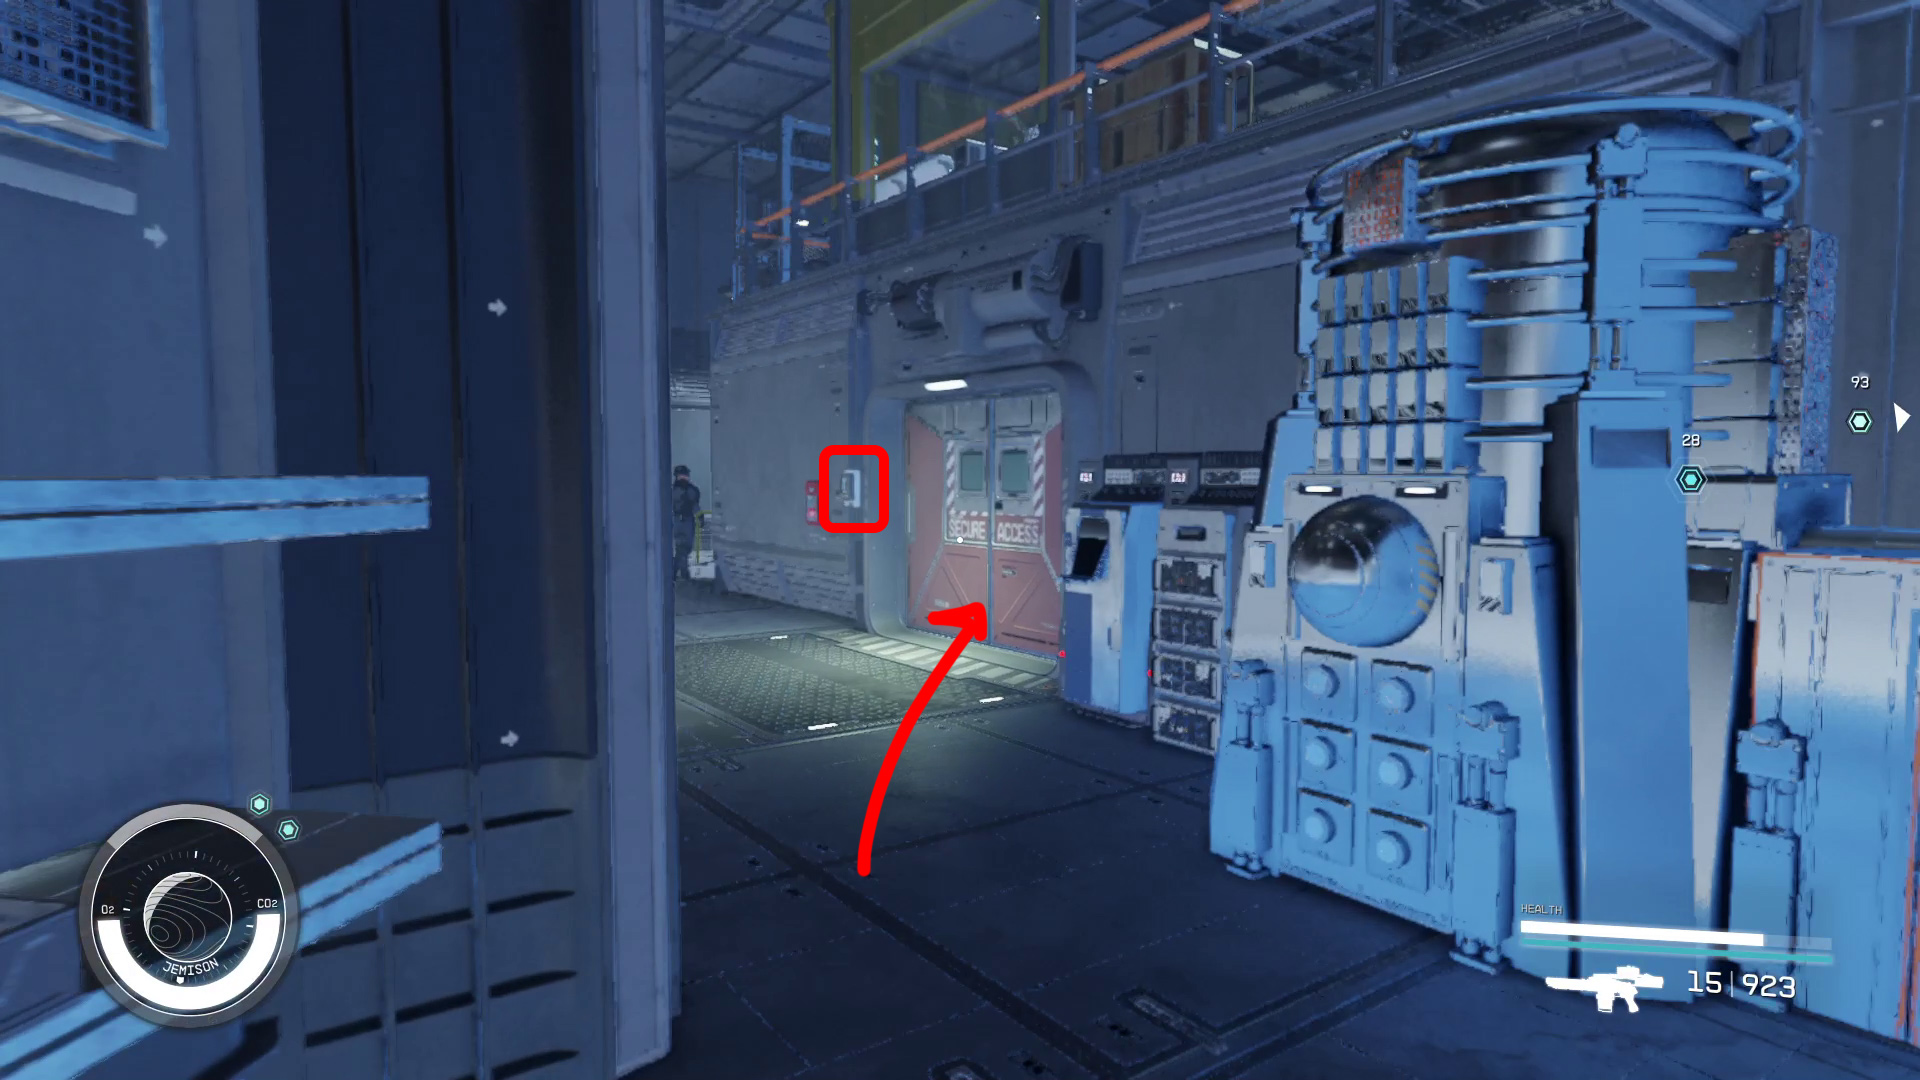
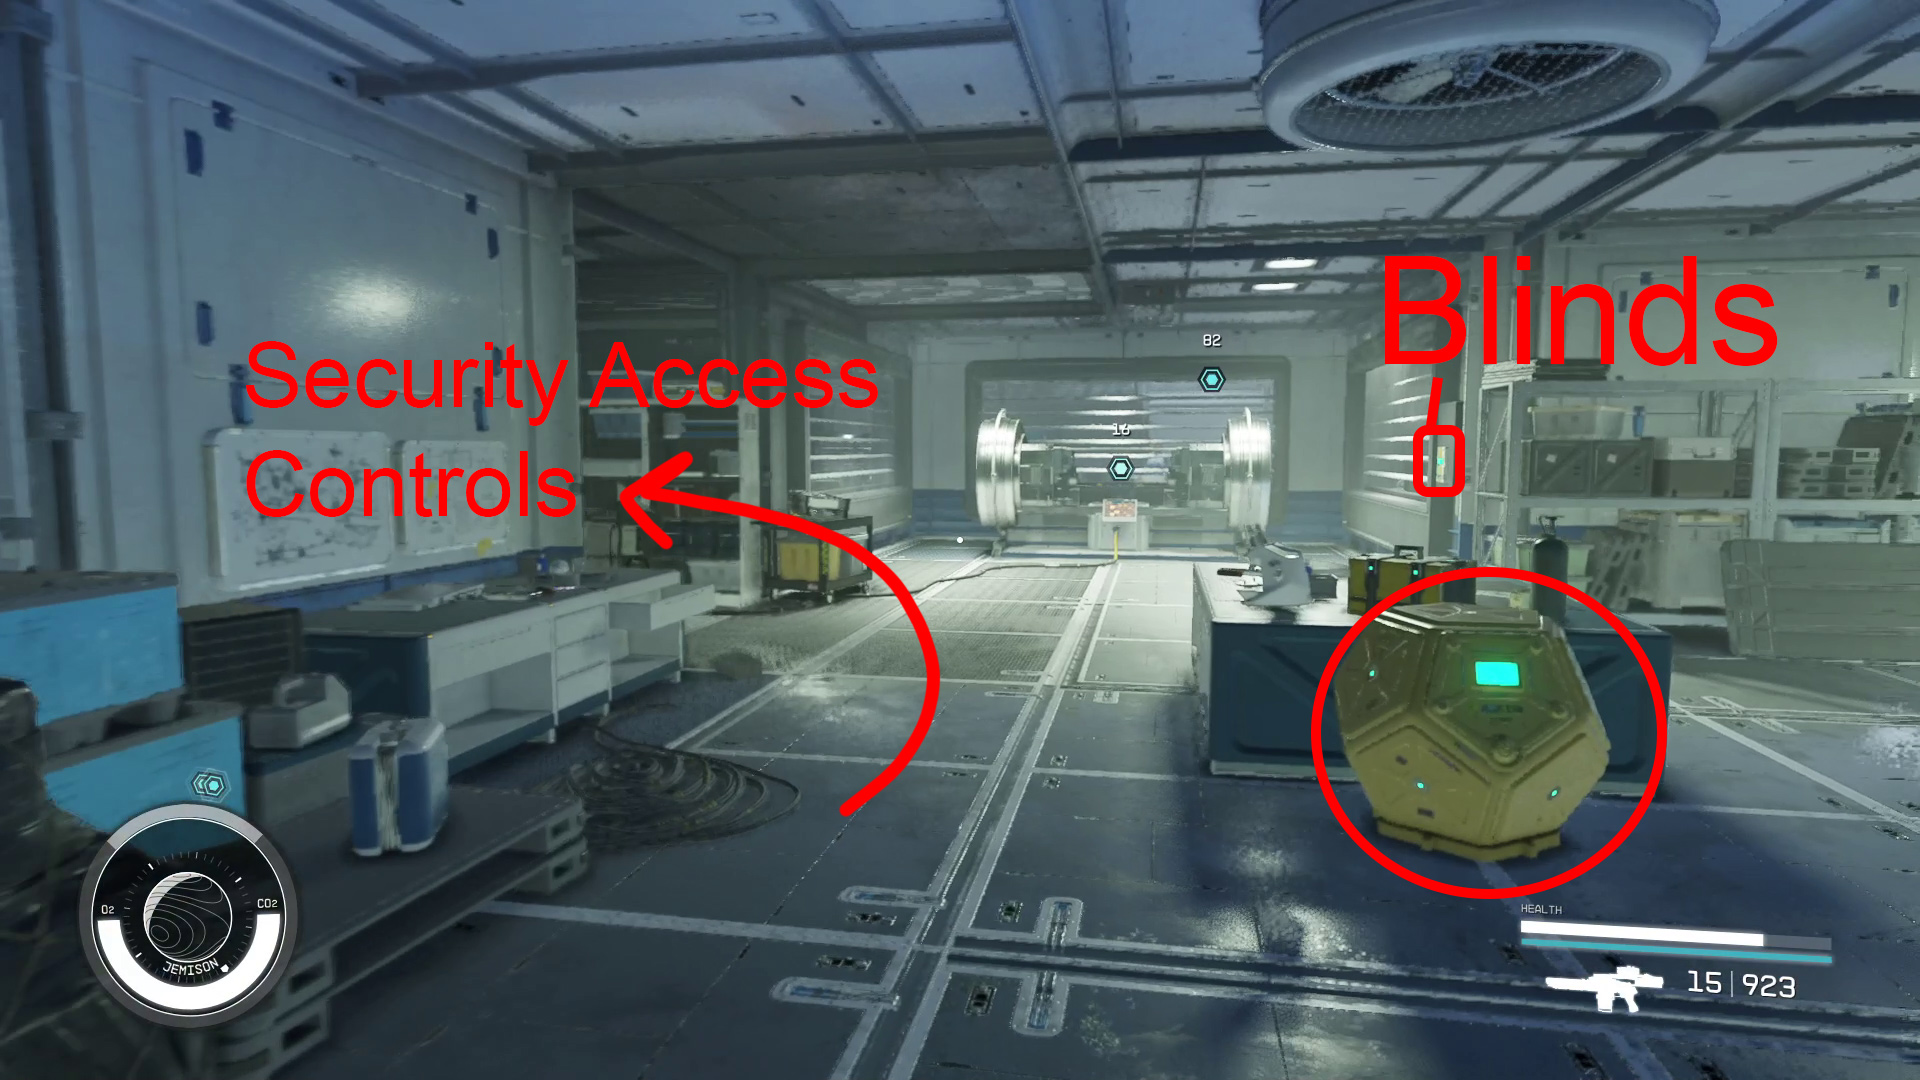
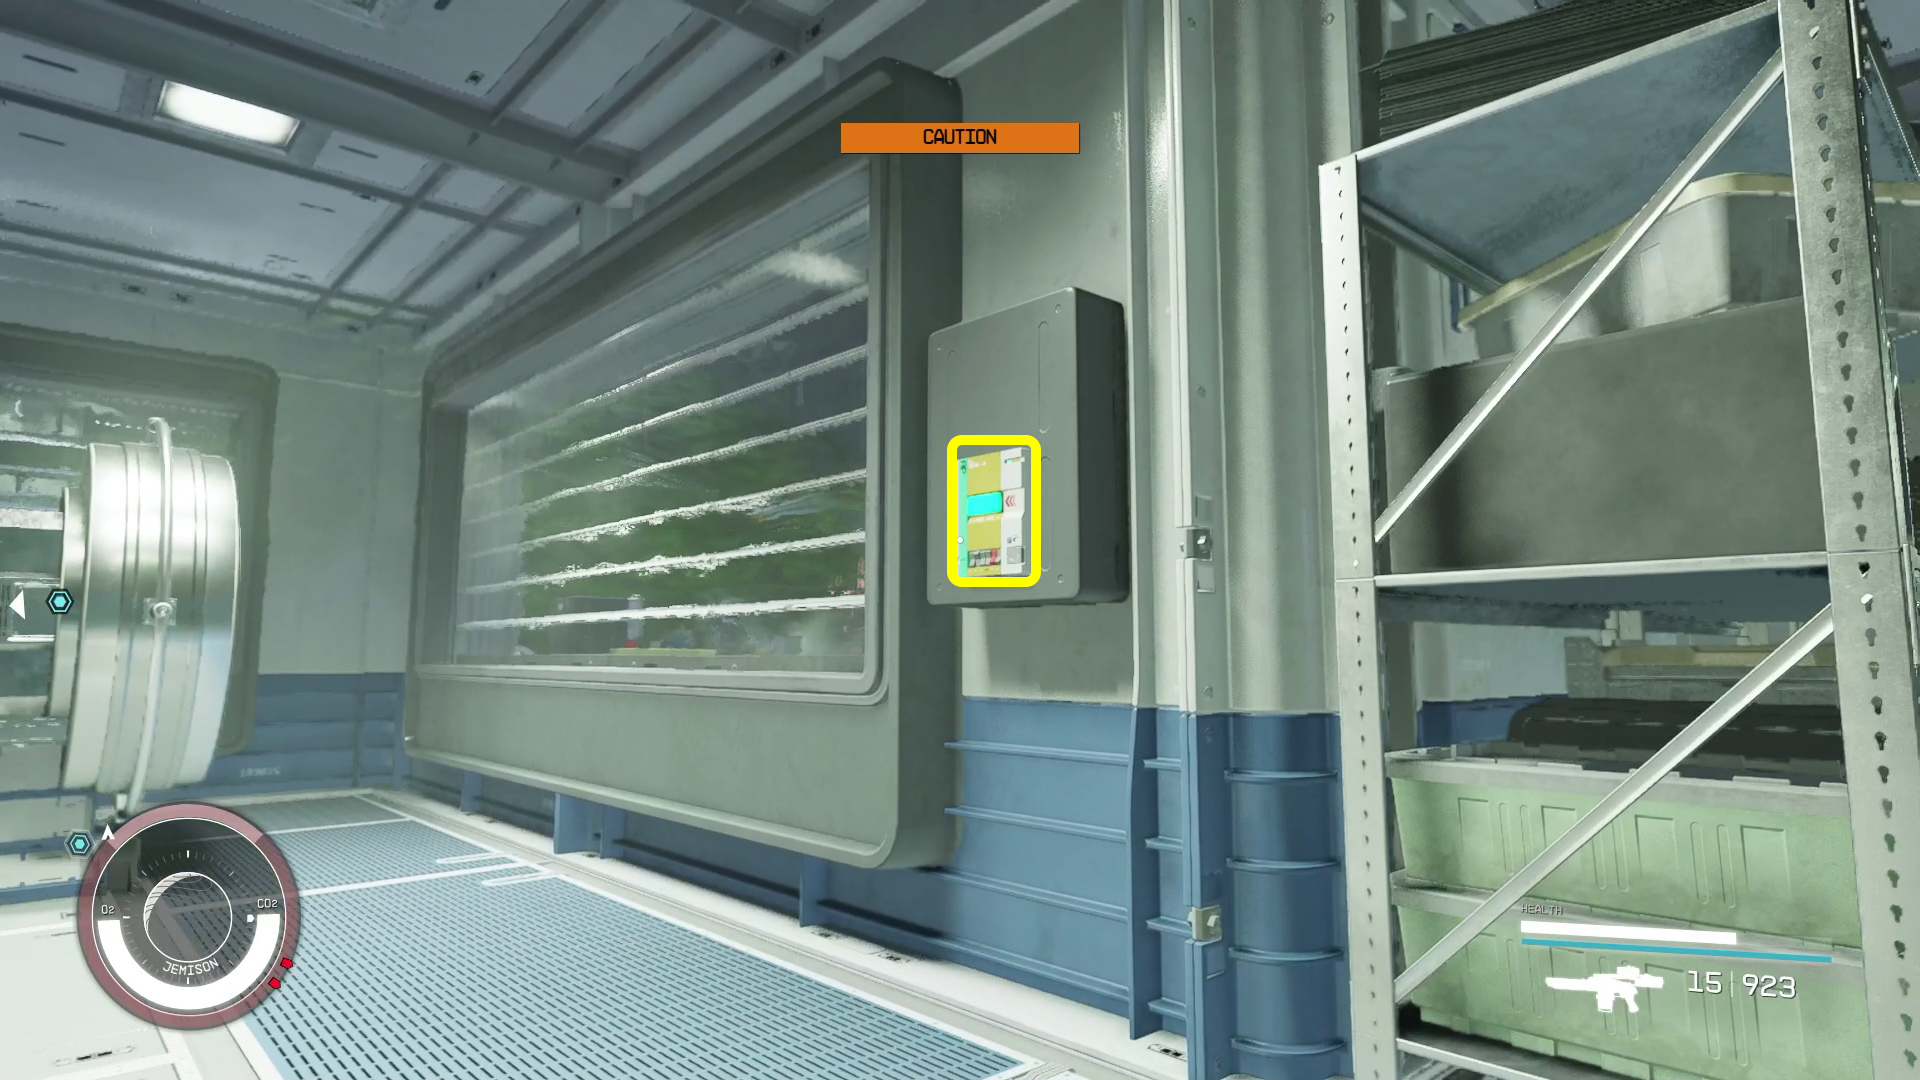
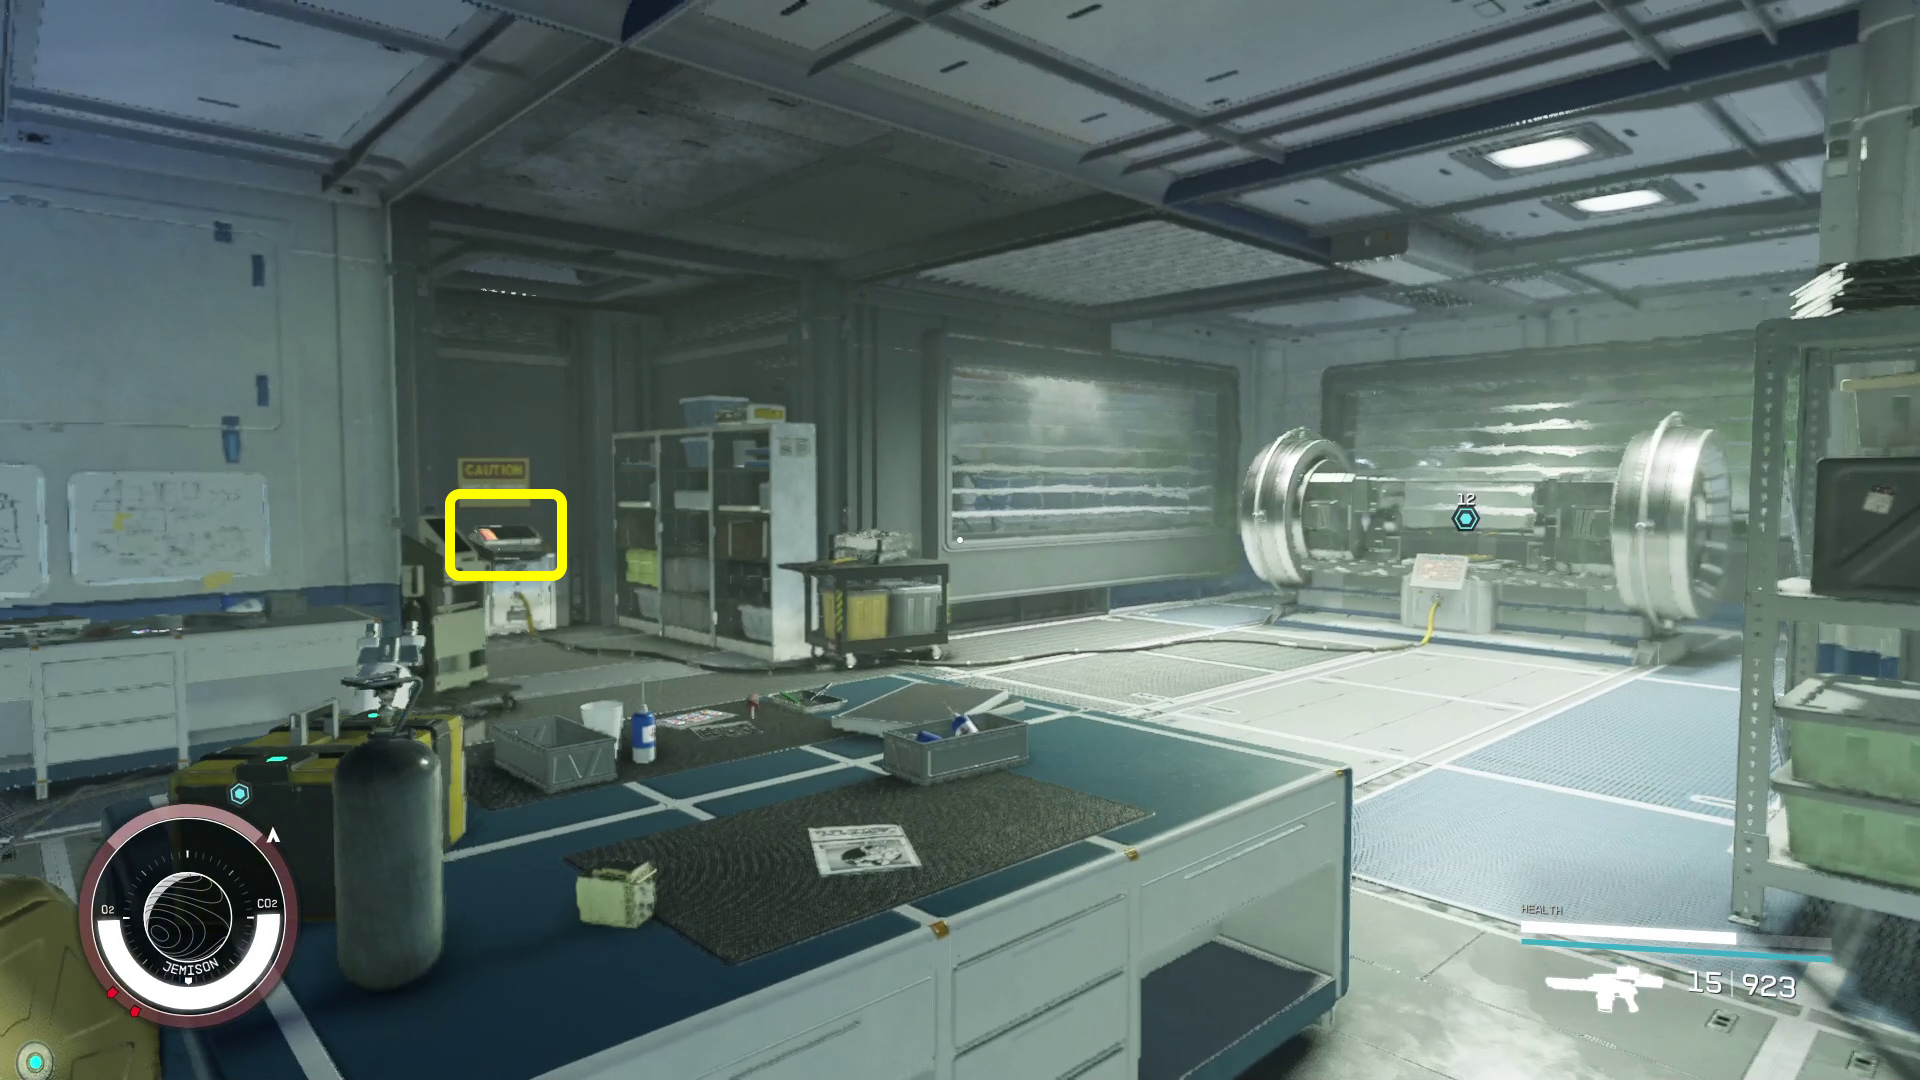
Loot the science crate (Image N17), close the blinds with the switch on the other side of the room (N17), then Manipulate the NPC in this room and send them to a corner. While they’re manipulated, digipick into the Security Access controls on the left side of the room (N17), and select “Disable”, then “Yes”. That done, you can grab the Neuroamp Prototype indicated by the — if your manipulation ran out, make sure you’re sneaking and Hidden before taking the prototype.
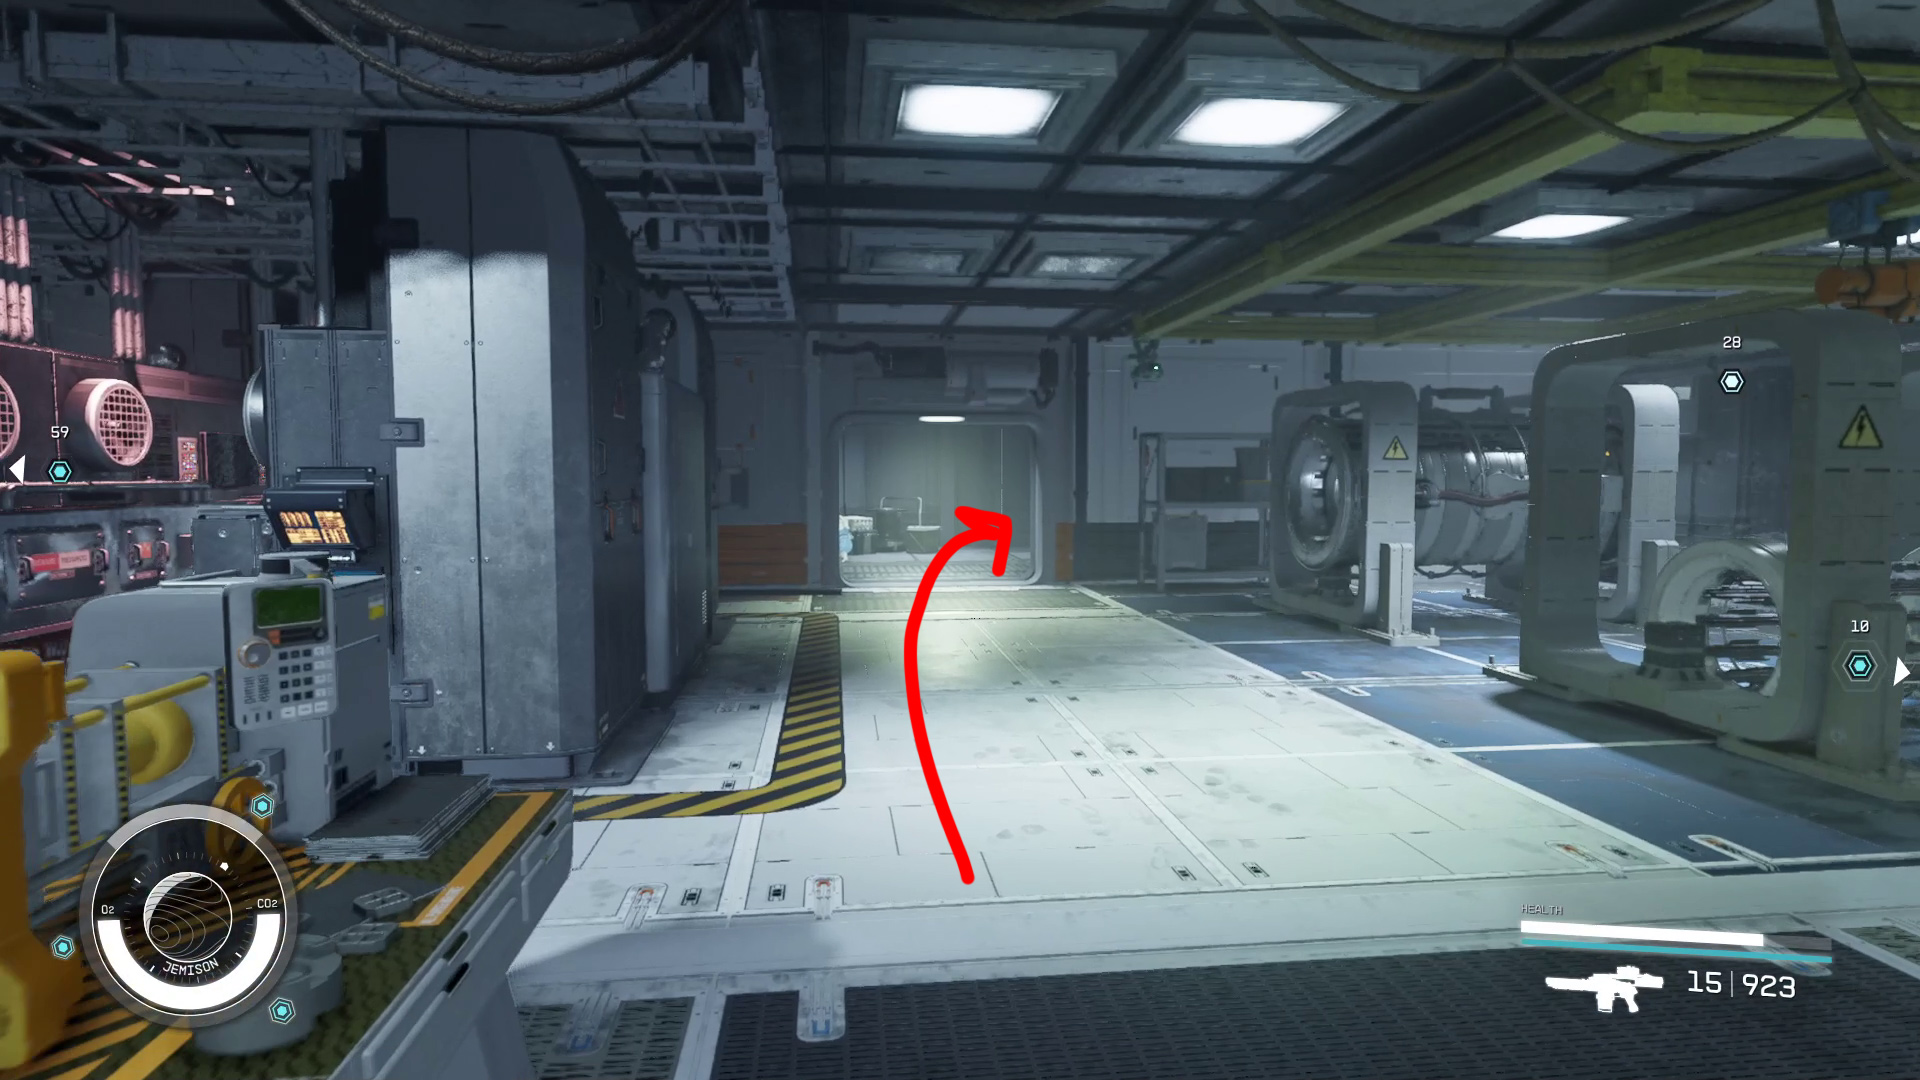
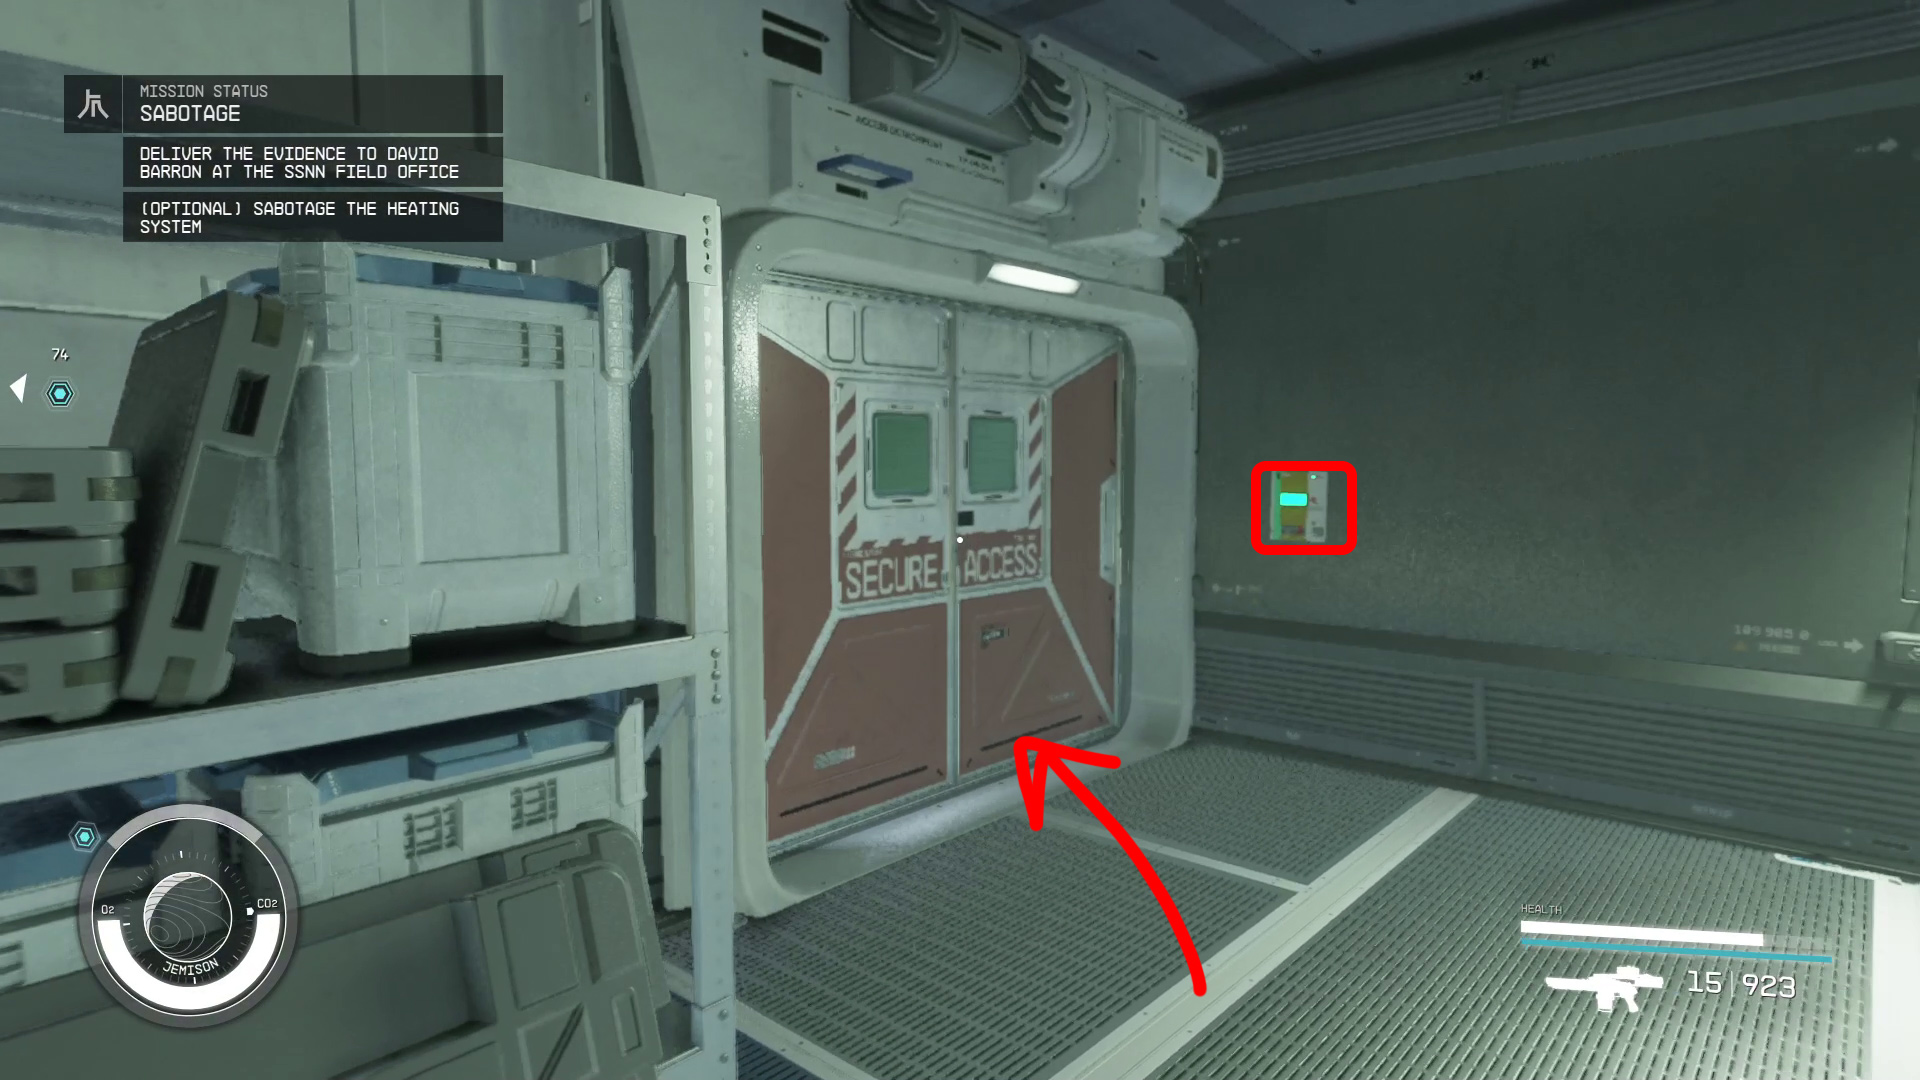
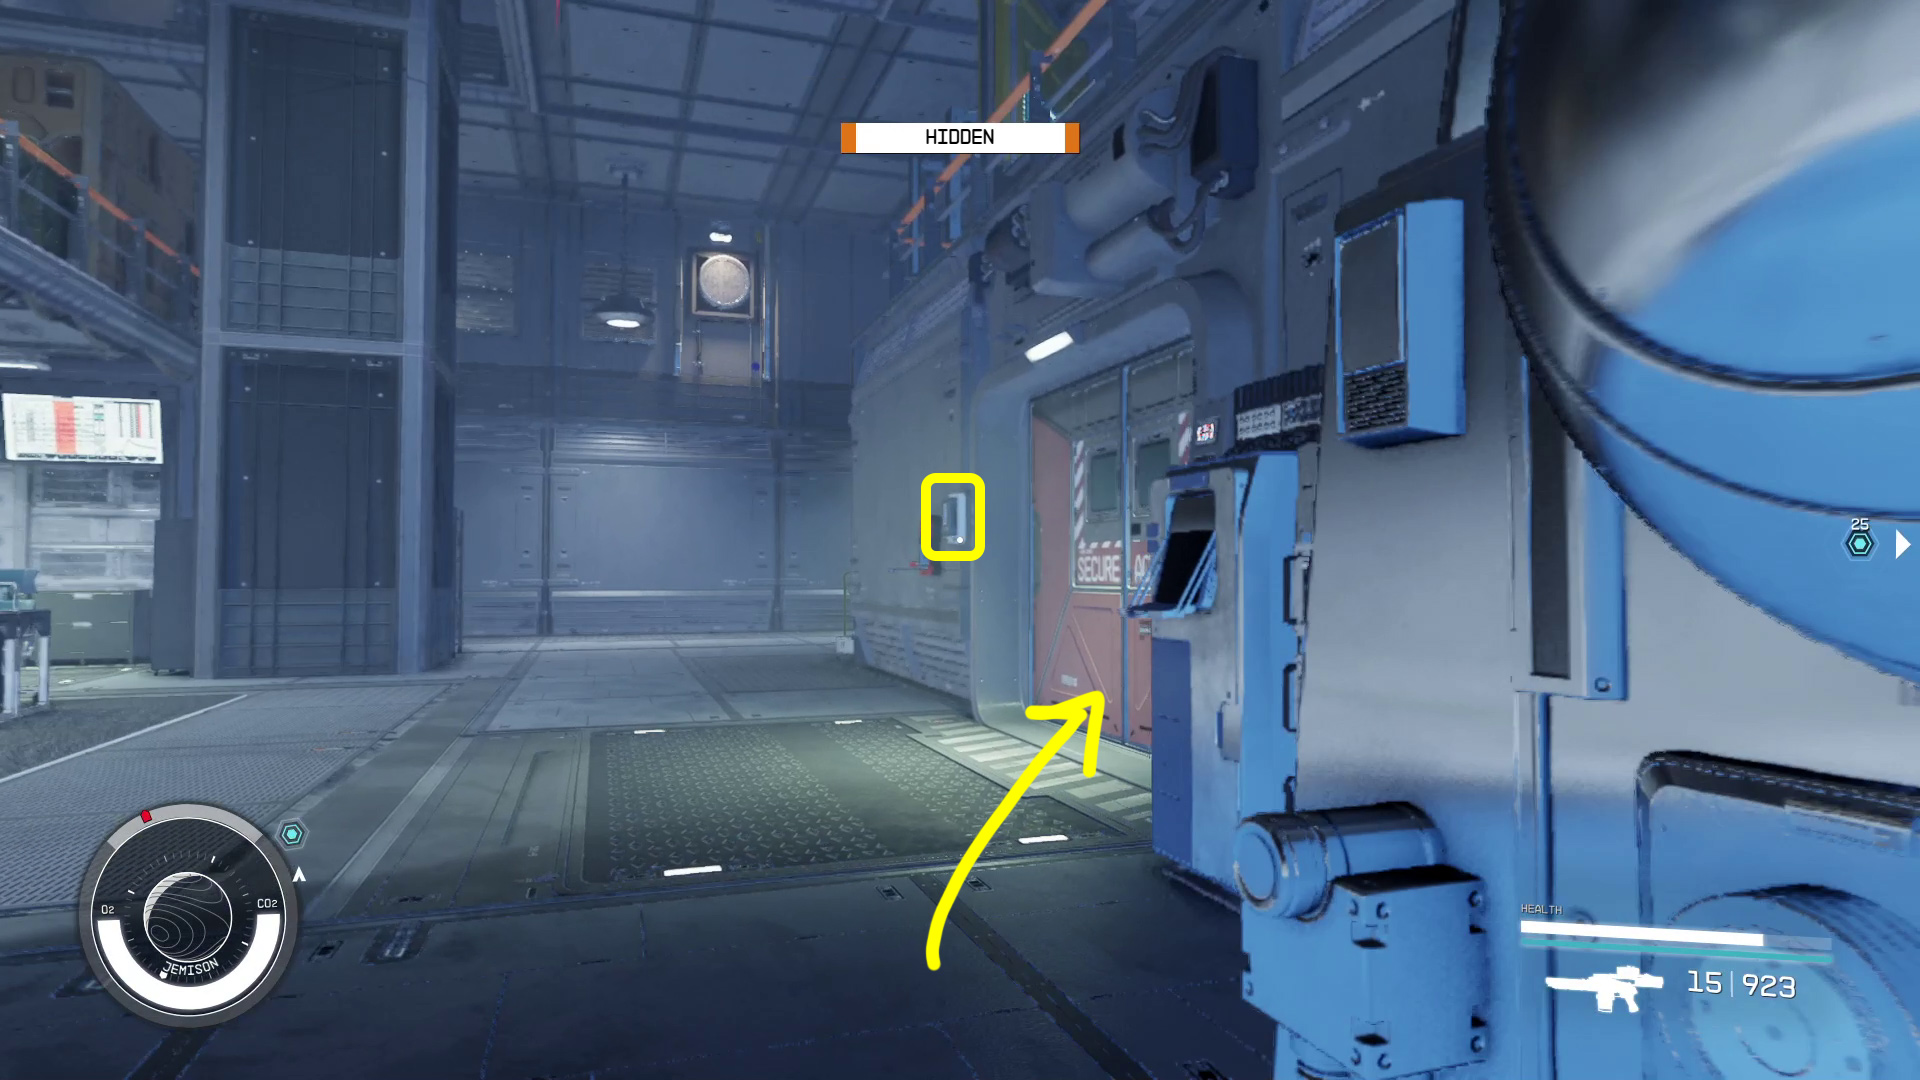
From the prototype’s container, turn around and go left around the corner, where you’ll find a Secure Access door. Open it with the switch and head through (Image N18). Then you can follow your scanner’s guide arrows to the elevator, and take the elevator to the Entrance floor.
Image N17Image N18
Stealth Route
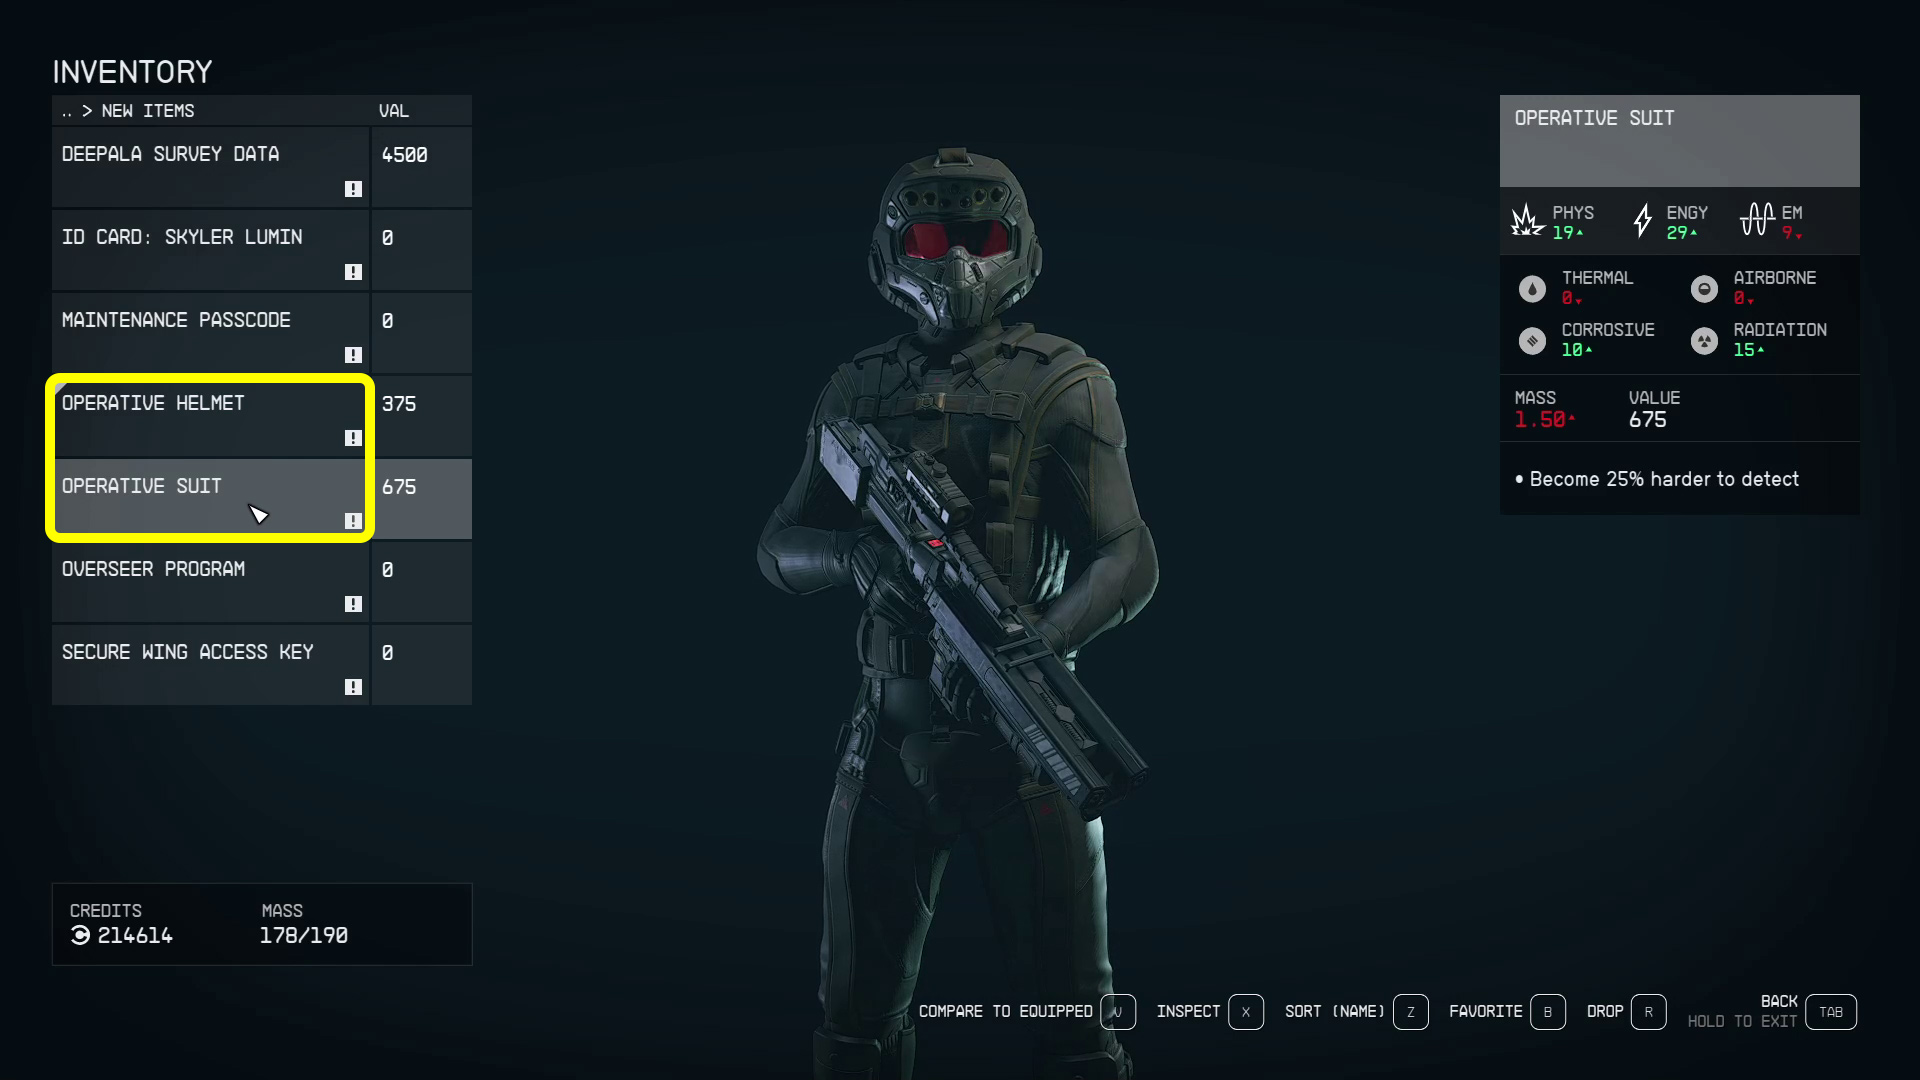
Before you attempt any stealth, equip the Operation Suit and Operative Helmet, which you should find in the New Items category of your inventory (or else under Apparel). It should happen automatically, but if it doesn’t, make sure you unequip your spacesuit and helmet, so that all you’re wearing is your pack, the Operative Suit, and the Operative Helmet apparel (Image 6).
(Optional) Sabotage the Heating System
While you don’t have to sabotage the heating system, it makes stealth much easier — without doing this step, you have to avoid both guards and employees, and what was already a very difficult stealth mission becomes nigh-impossible.
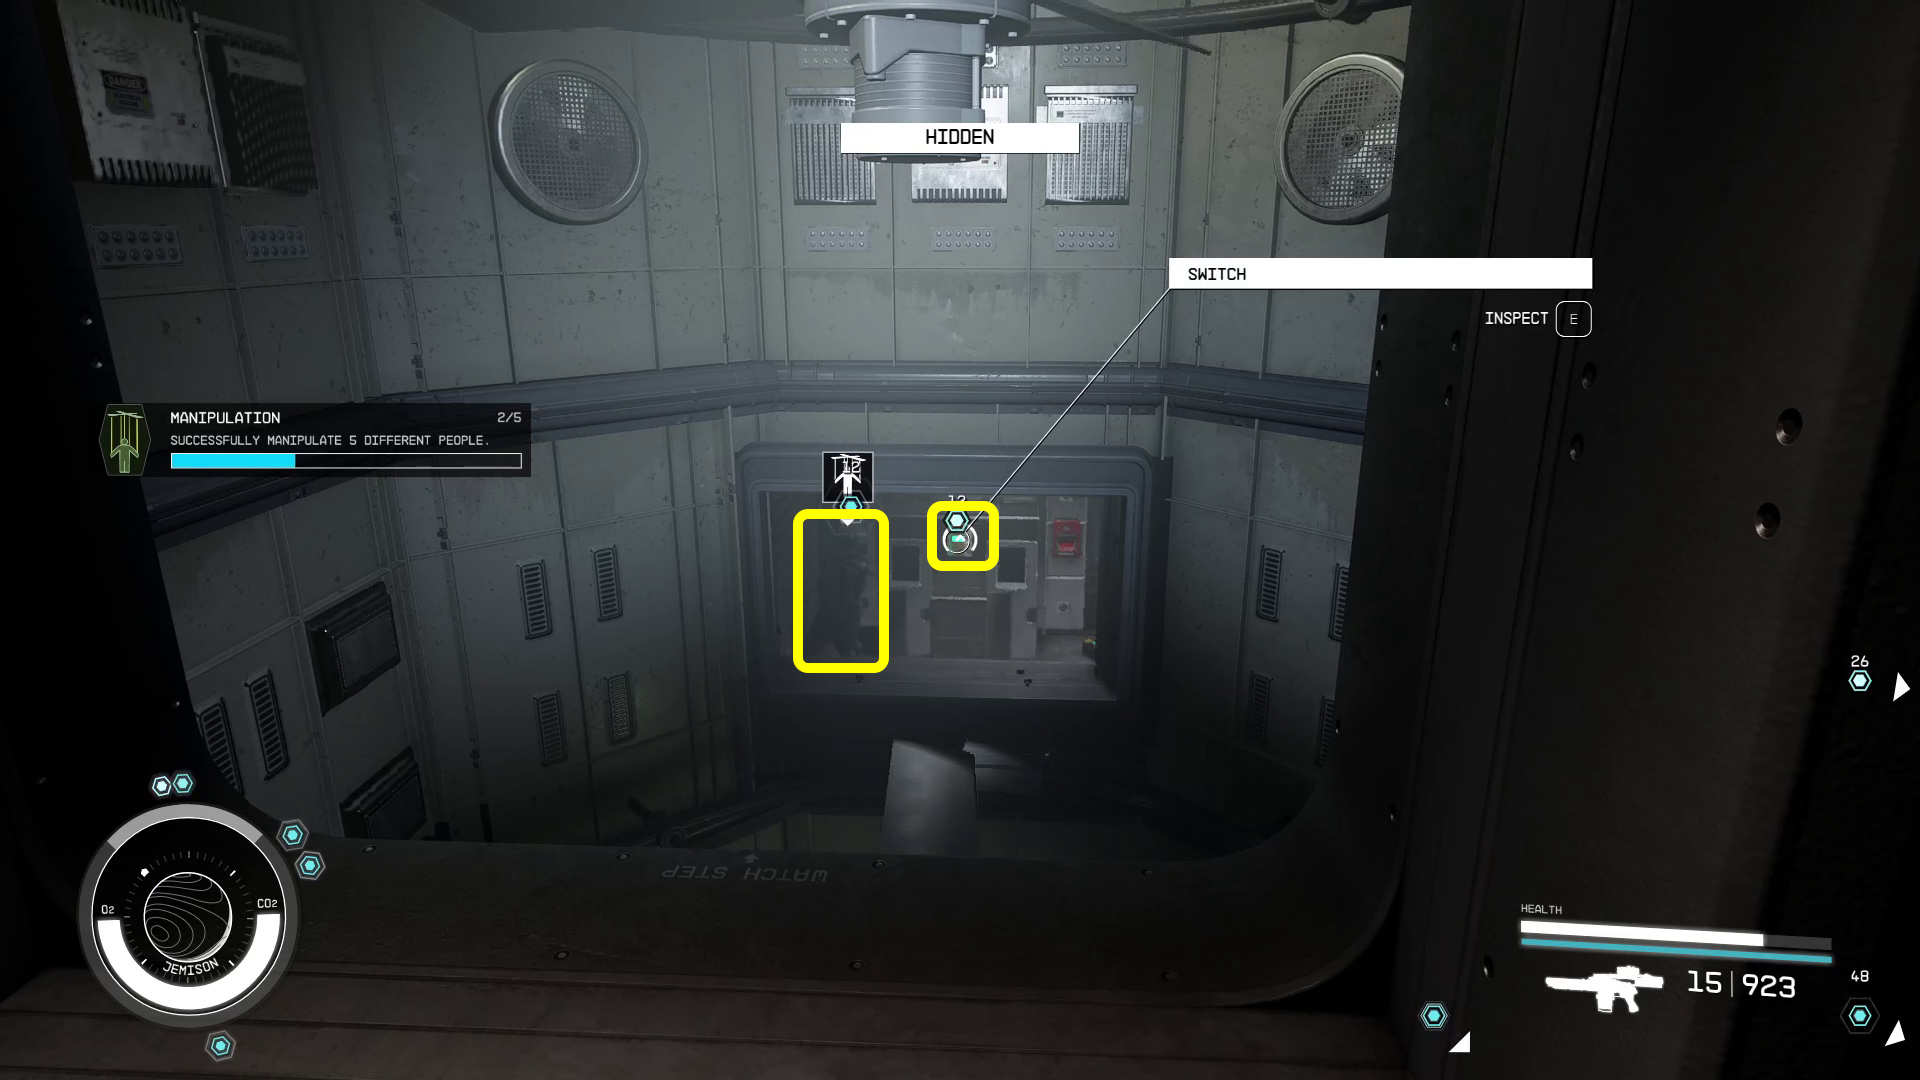
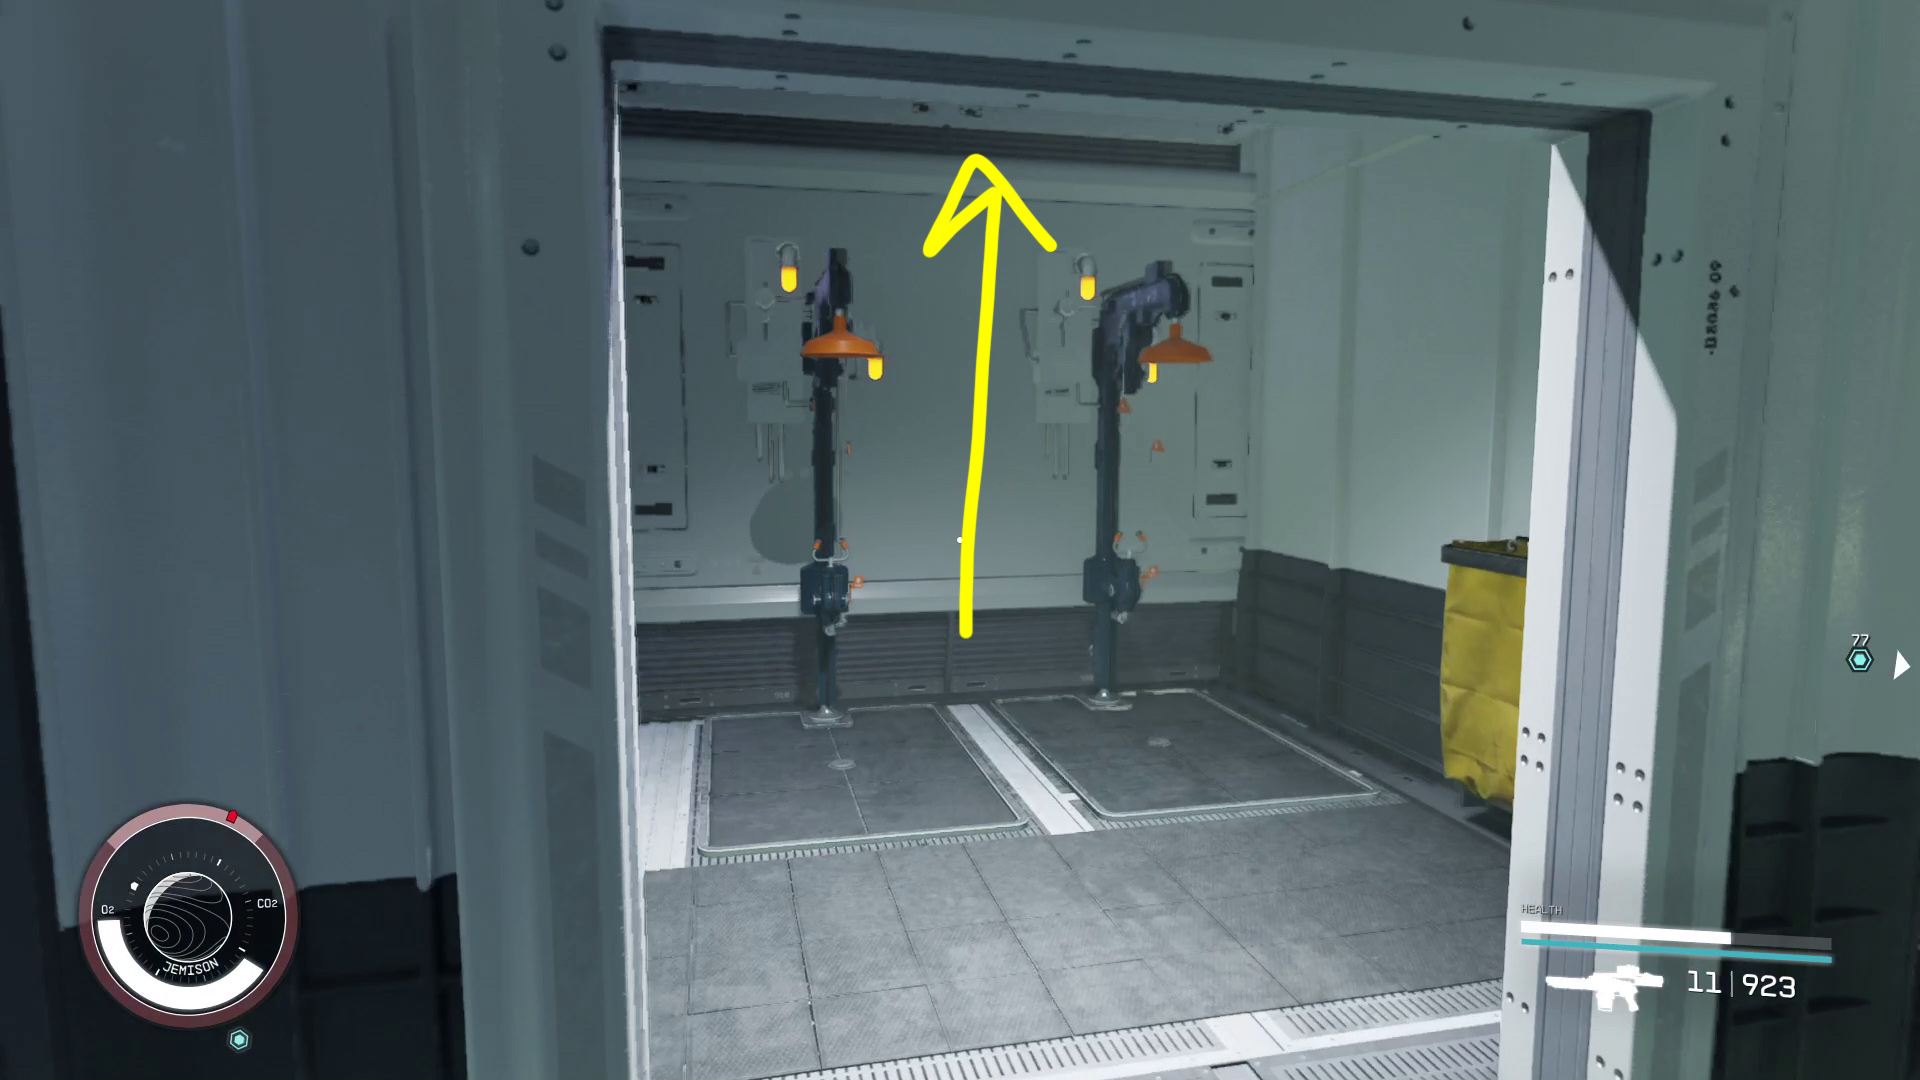
You should have either come in through the roof, or taken the elevator from Marketing to the Roof Access level. Either way, you’ll be in a small room with a vent on one side (Image S1). Open the vent, and just ahead you’ll see a guard through a window. Manipulate the guard, and have him turn off the fan by hitting the nearby switch (Image S2).
Image S1Image S2
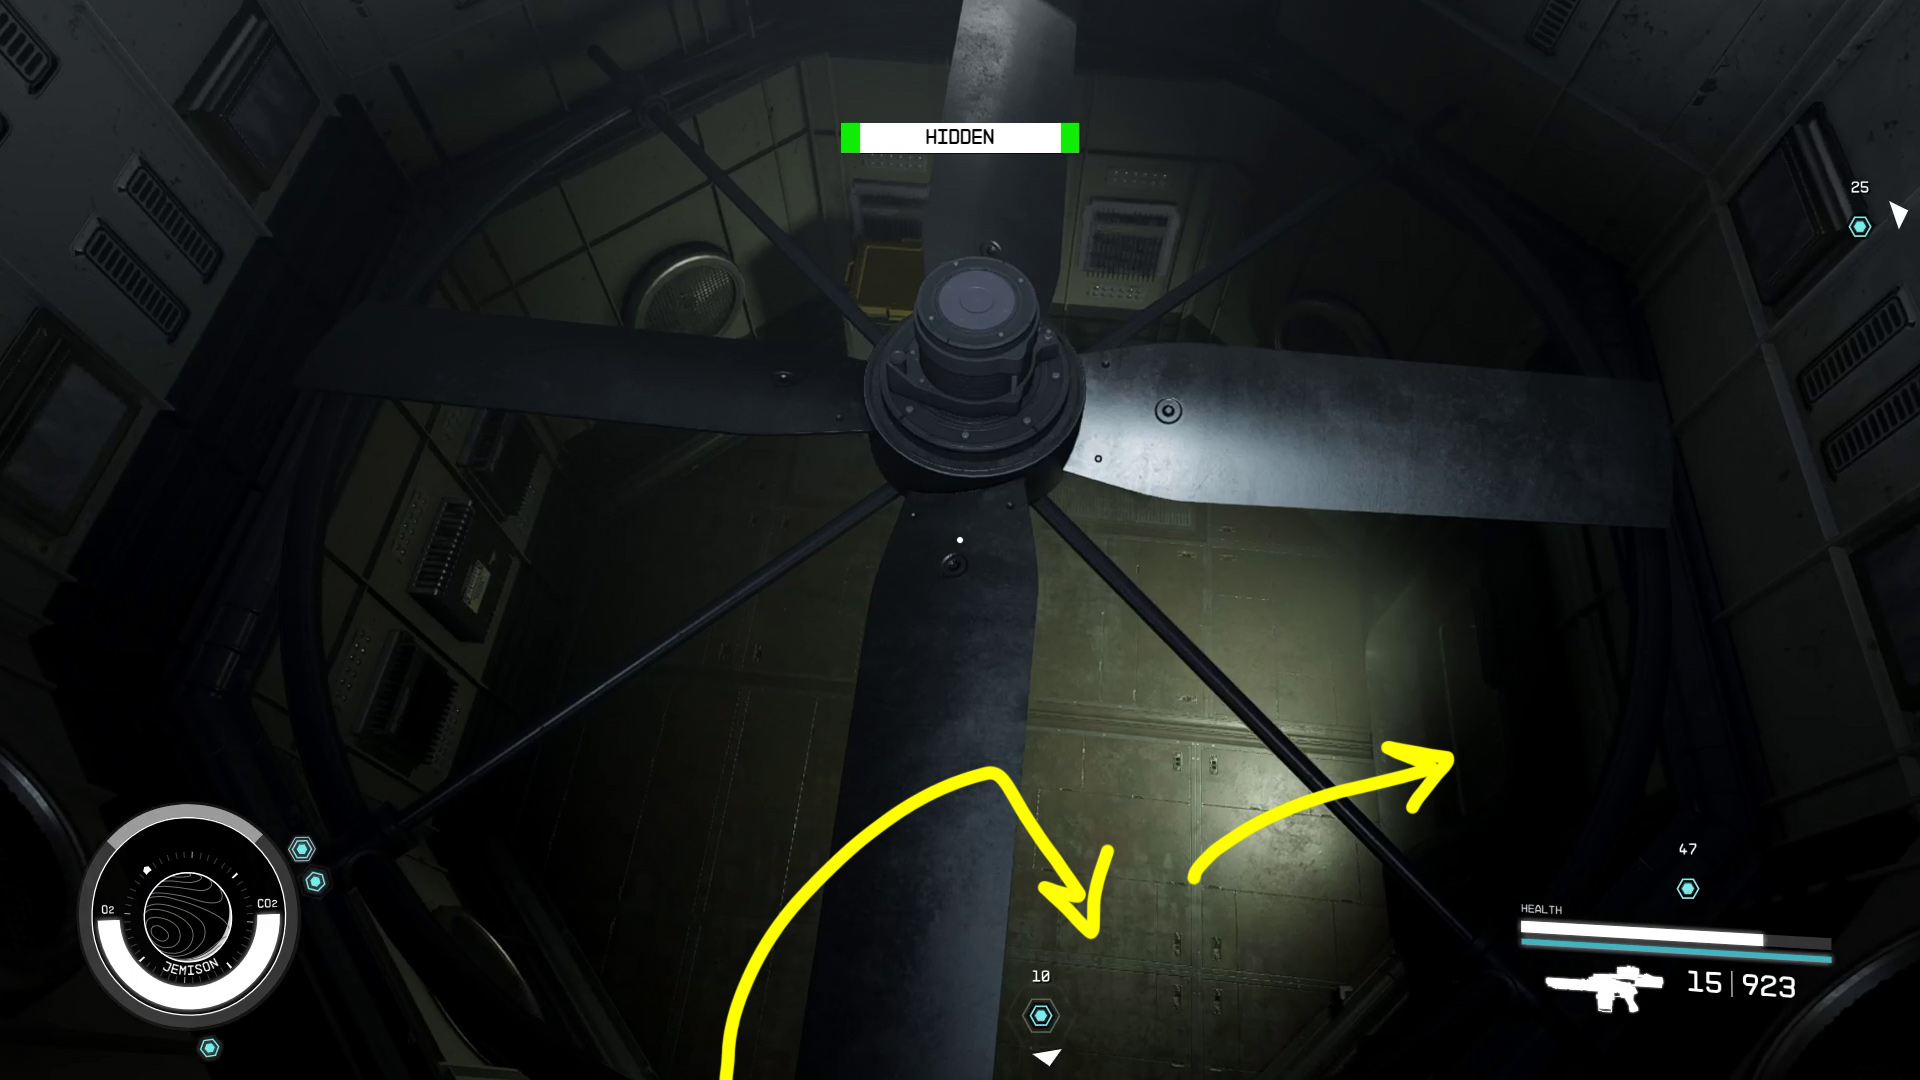
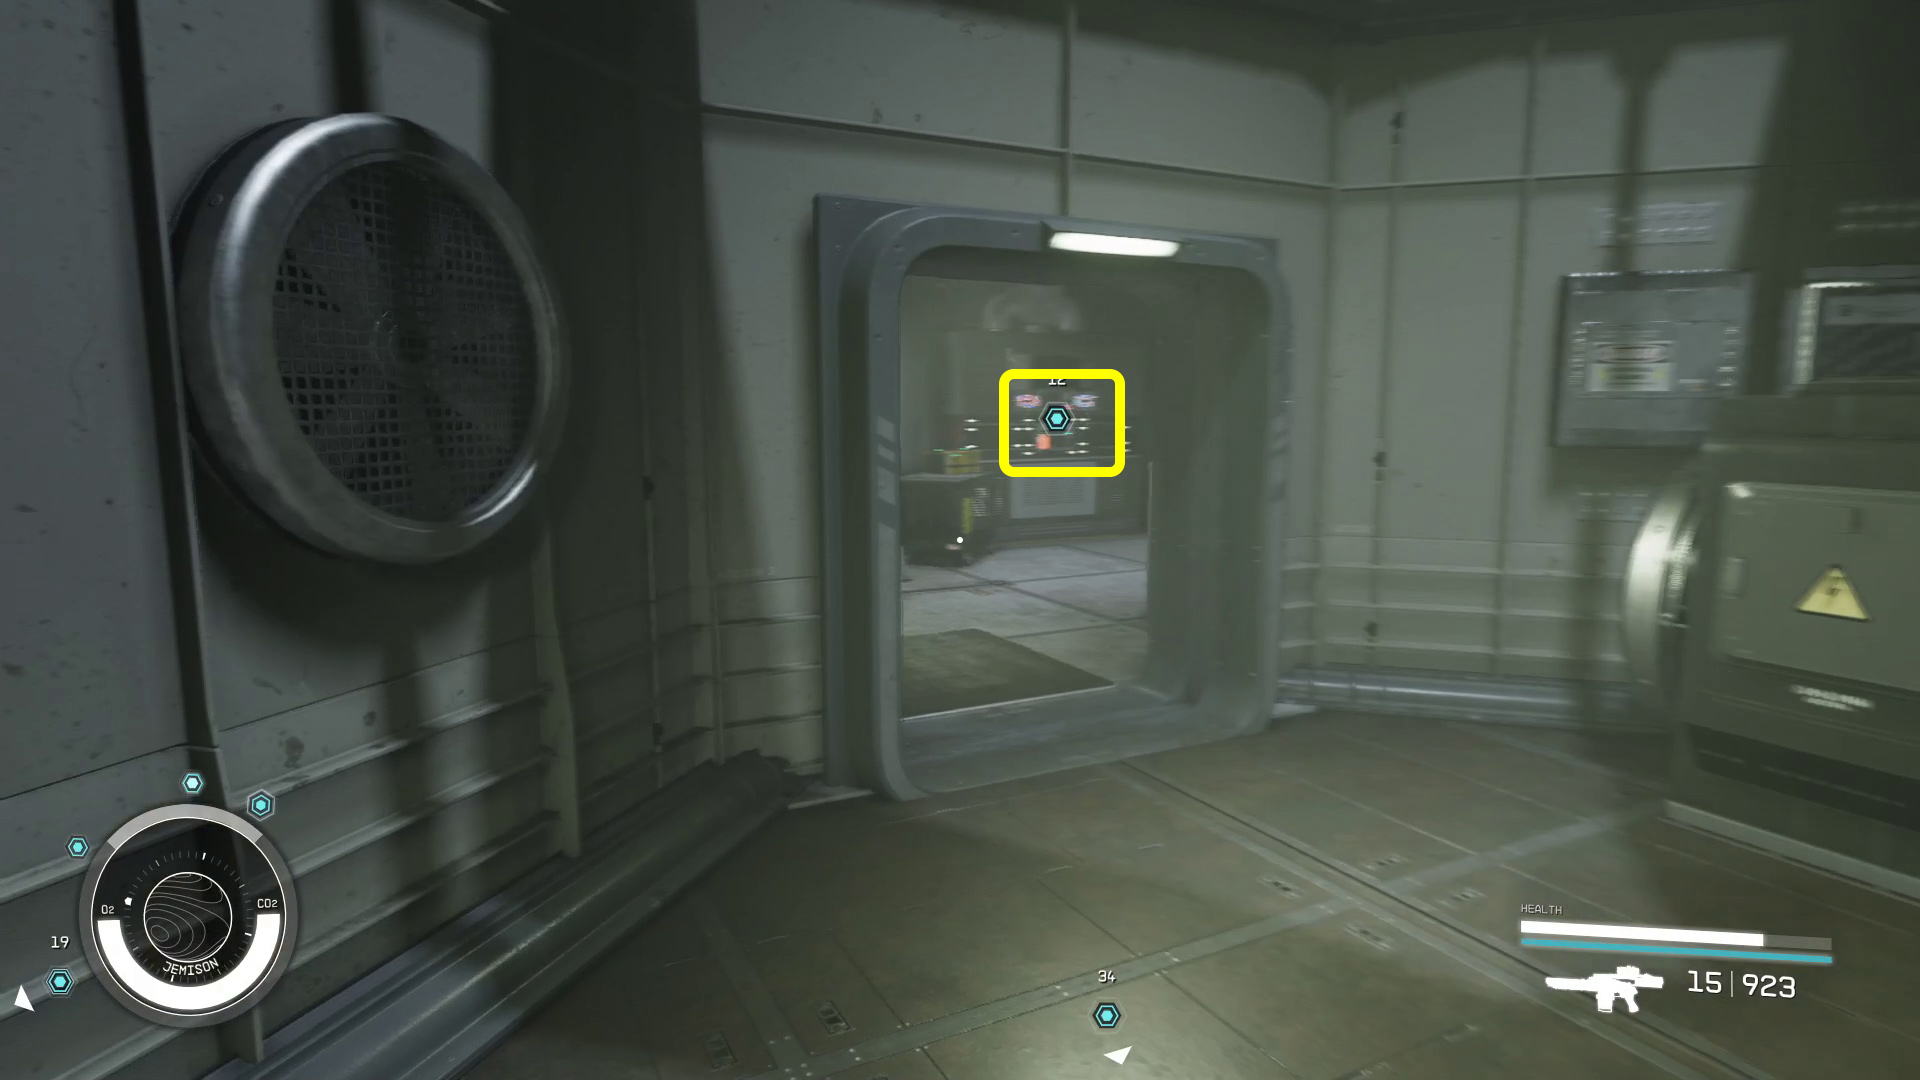
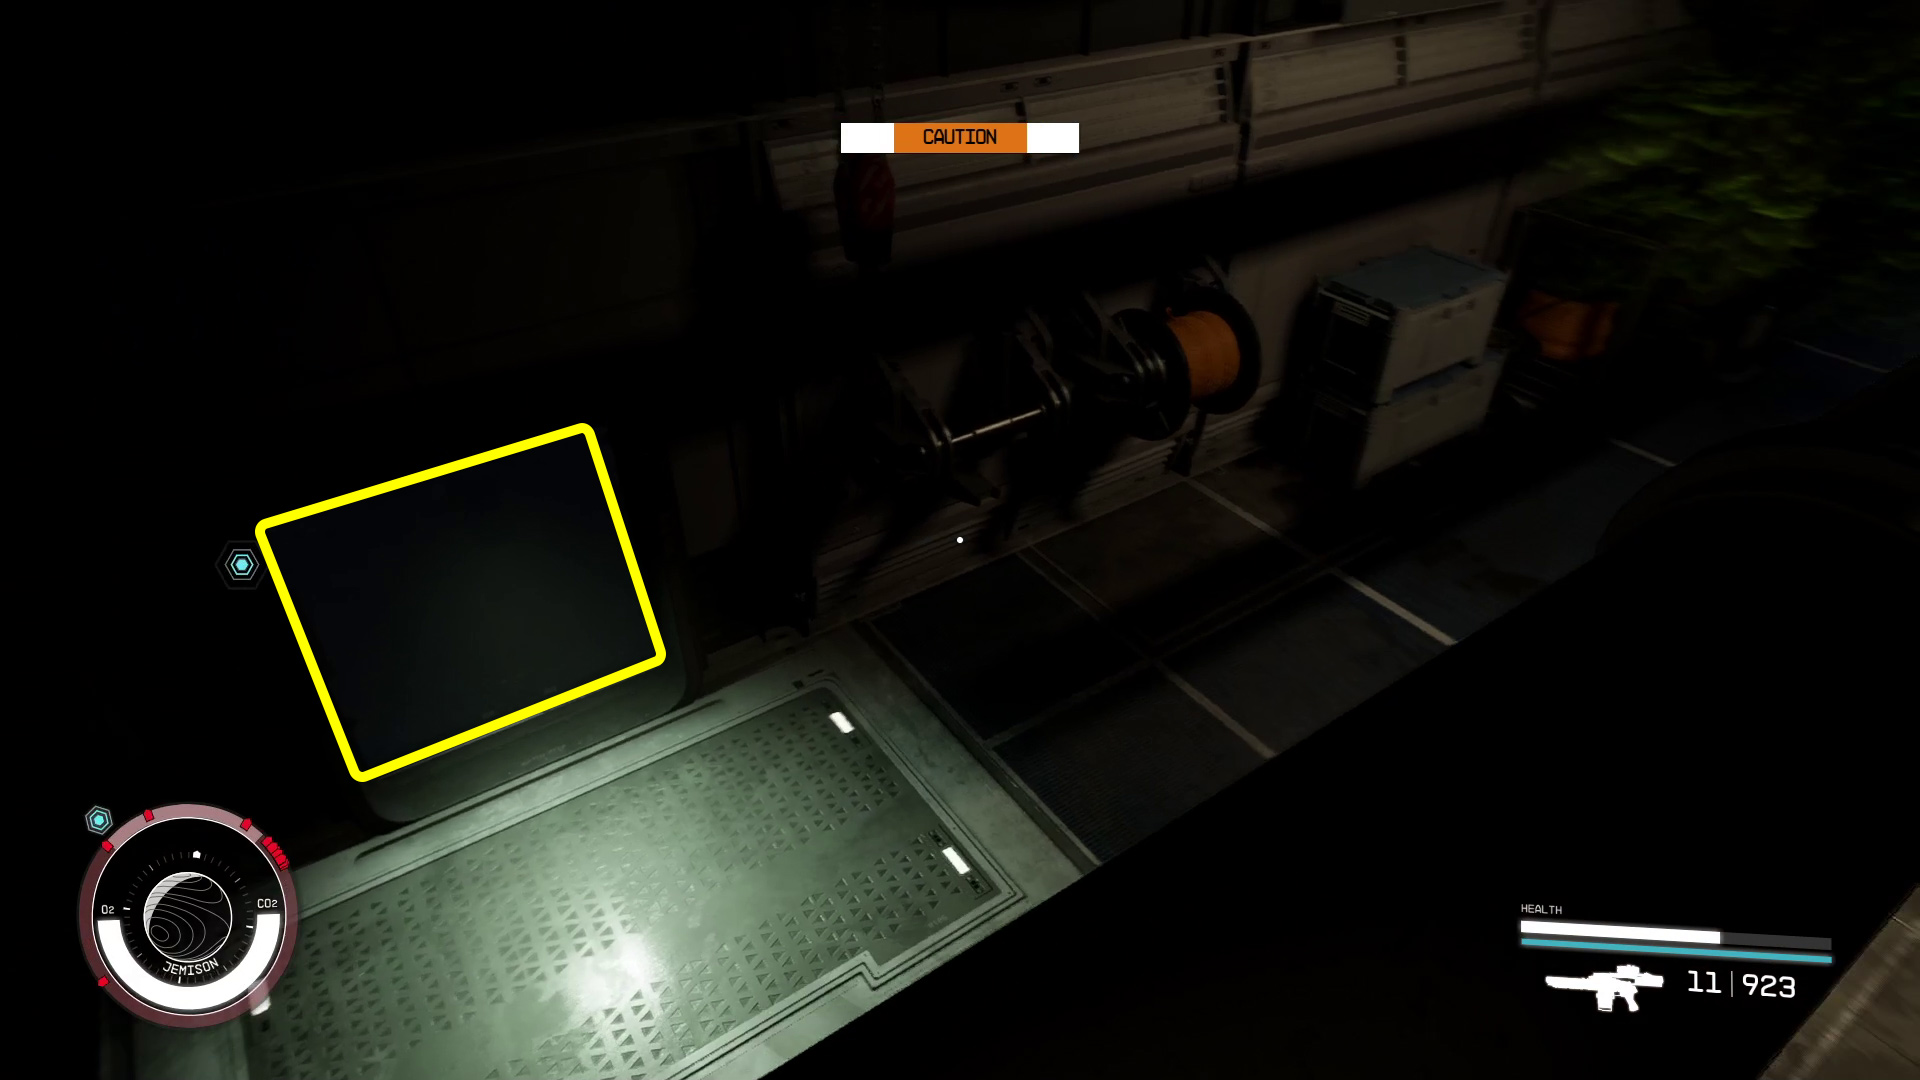
Move forward and drop down through the now-still fan (Image S3), then exit the fan chamber — the hallway leads to another chamber. Continue into the room to the left, where you’ll find the Maintenance Systems computer (Image S4). Don’t go up the stairs on your left, as that’s where the guard you manipulated is.
Use the computer, select “Critical Systems”, then select “Heating[1]”, “Activate System”, and finally “Yes”. This will release gas throughout the building and make stealth much easier (since the employees will leave). Go back into the previous room, open the vent, and head through (Image S5).
Image S3Image S4Image S5
Run the Program on Lucas’ Computer
You’ll need to turn left, and then you’ll be able to drop down through a hole onto some rafters. This is a good point to save — the guards have some seriously good detection skills throughout this mission. Turn left, towards the objective marker that is on the same level as you, and head across the rafters (Image S6) until you come to an impassable vent just outside Lucas’ office (Image S7). Get right up against the vent, and then while still sneaking, drop down, then pick the lock on the door and enter the office.
Image S6Image S7
Lucas’ computer is your next target — you’ll have to pick another lock, and then select “Overseer Program” on the desktop to run the program.
Find a Way Into Research and Development
Save your game again, then sneak back out of the office, and jump down over the railing on the left (Image S8) — the nearby guard doesn’t seem very aware, but you can manipulate him out of the way if you want. Upon landing, head forward and turn right, then head across the rafters to the nearby vent (Image S9).
Image S8Image S9
Go through the vent and drop down to the hatch below. Open it up and drop into the bathroom, save again, then open the bathroom door. There’s a guard ahead — sneak around to the right (Image S10), then manipulate them out of your way and continue down the hall (Image S11).
Image S10Image S11
There will be another guard on your left you need to sneak past as you enter the dining hall (Image S12). In the dining hall, there’s another guard to manipulate out of your way, and then you can go left and enter a storage area with a vent (Image S13).
Image S12Image S13
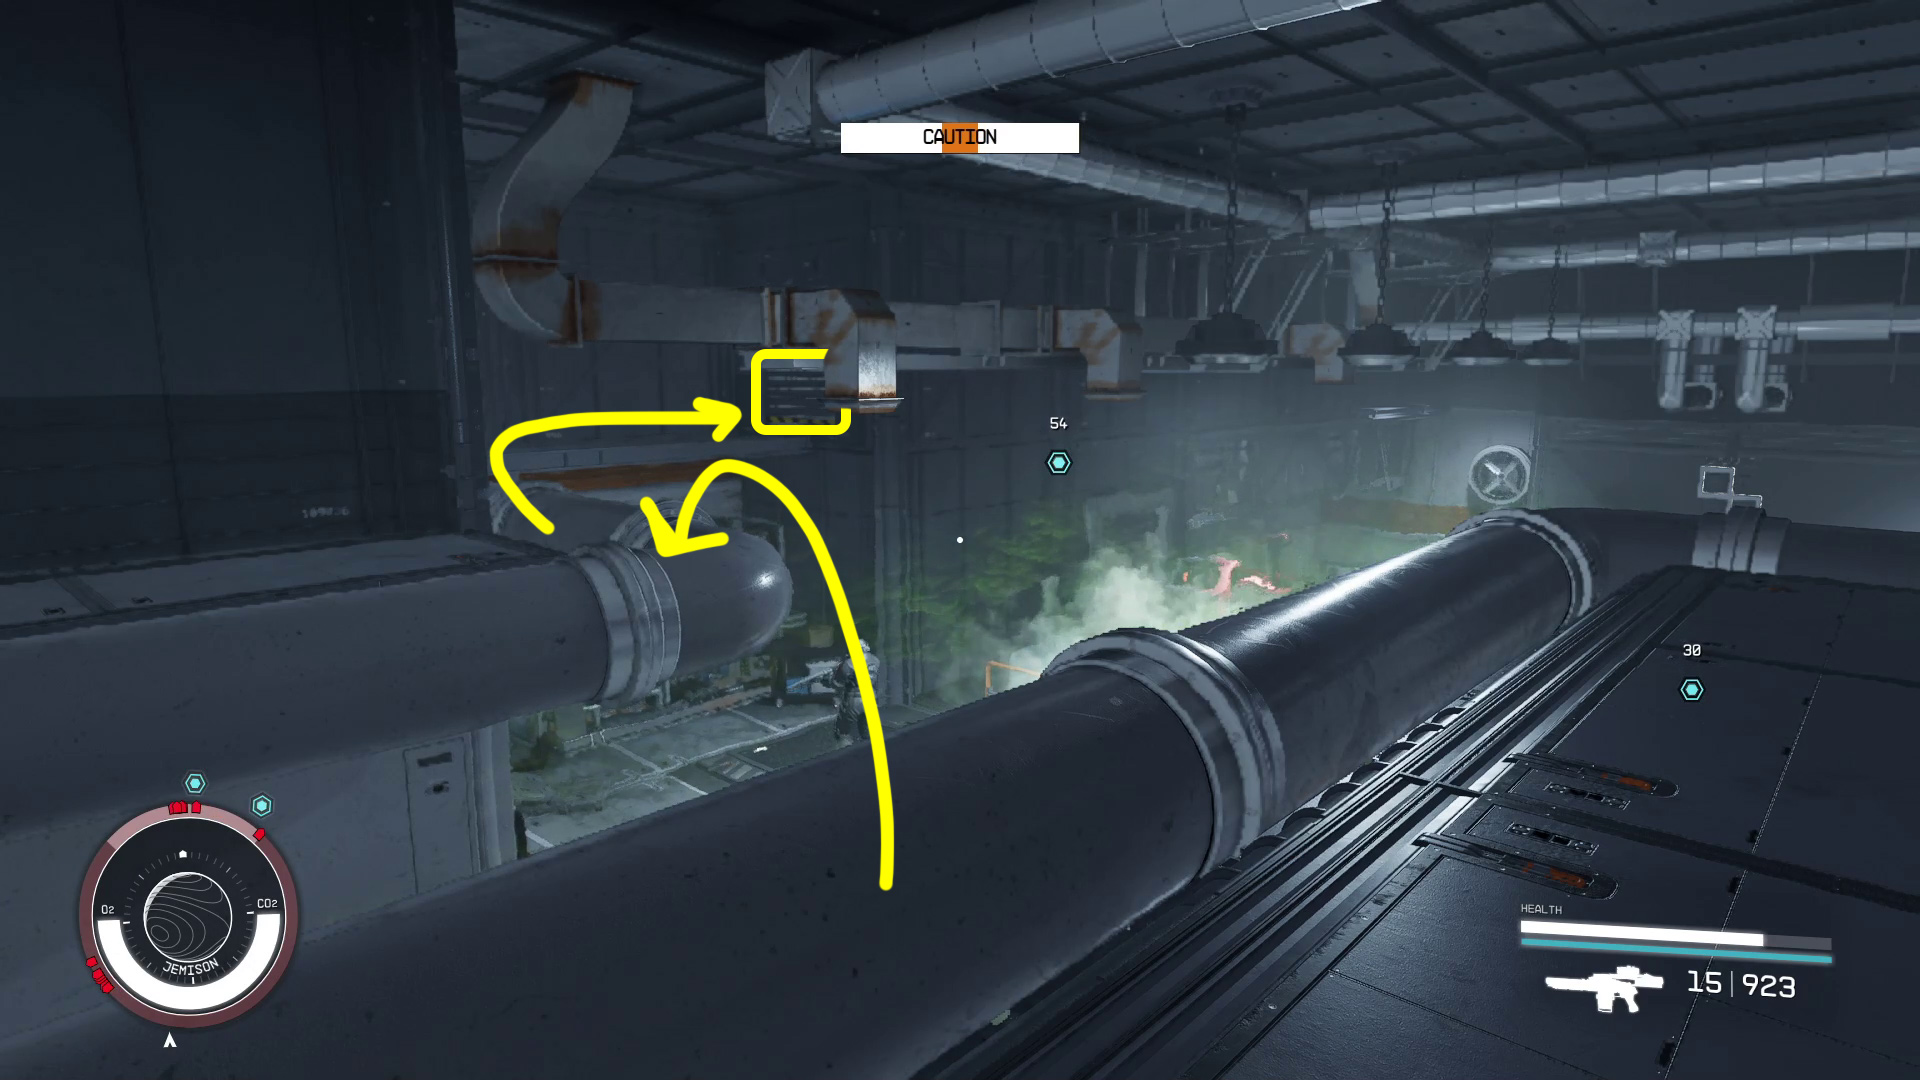
In the vent, go forward and drop down a few times, and you’ll end up on some more rafters. Save again, then sneak your way forward on the rafters (Image S14-17), making sure to avoid the toxic gas coming out of the pipes. Your ultimate goal is a -marked vent (Image S17).
Image S14Image S15Image S16Image S17
Run the Program on Faye’s Computer
Go through the vent and drop down the shaft, then go through the vent at the bottom and jump across to the pipes on the other side of the hall (Image S18). It’s pretty tough not to get spotted while jumping, but you can simply wait here (Image S19) for the guards to forget about you. When you’re ready, continue towards the objective markers, and at the end of the balcony you’re on, you will need to jump back across and continue into another vent (Image S20).
Image S18Image S19Image S20
You’re visible in the ventilation shaft, so keep sneaking as you make your way through it. You’ll reach a hatch — open it and drop down into the emergency shower, then leave the shower room and go up the stairs to the right (Image S21). In the office at the top of the stairs, you’ll find Faye’s Computer — it is sometimes locked, sometimes not — either way, get into it and run the “Overseer Program”. Grab the R&D ID Card to the left of the computer (Image S22), then go back down the stairs and take a left to head through the orange door (Image S23).
Image S21Image S22Image S23
Obtain the Neuroamp Prototype
Continue down the hall and into the next room, hug the right wall, and you’ll come to a secure door you can open with the R&D ID Card you just picked up (Image S24). Go into the lab, loot the Science Crate, then close the blinds with the switch to the right of the prototype (Image S25). Next, hack the nearby control console and select “Disable”, “Yes” to disable the alarm (Image S26) — that done, you can safely grab the prototype.
Image S24Image S25Image S26
Retrace your steps, and after you go through the orange door again, turn left and head back to the emergency shower (Image S27). Use your boost pack to re-enter the vent. Retrace your steps, all the way back to the pipes, and follow the pipes to the elevator marked with (Image S28). Use the Choose Floor button and take it to the Entrance.
Image S27Image S28
Deliver the Evidence to David Barron at the SSN Field Office
The SSN office is conveniently located just across the plaza from Infinity LTD. You can use your scanner to find your way to David Barron, who is waiting just inside the lobby of the SSN Field Office. Keep a close eye on the guide arrows, as the way up to SSN is a little bit roundabout (you have to go up a ramp rather than heading straight towards the marking David). Talk to David, pick one of the [Give Slate] options when they appear, then finish up the conversation.
Report to Masako at Ryujin Tower / Listen to the Conversation
All that’s left to do now is return to Ryujin Tower. Head on up to the Executive Offices and use your scanner to find Masako and talk to her. Depending on if you sided with Ularu earlier, the conversation after the SSN broadcast will be different — you have a chance to [Demand 10,000 Credits] from Masako, and this does not prevent you from siding with Masako in the final mission if you want.
Once the conversation with Masako ends, all that’s left is the final Ryujin Mission. Time to decide the future of Ryujin!
Unabashed FromSoftware fanboy still learning to take his time with games (and everything else, really). The time he doesn't spend on games is spent on music, books, or occasionally going outside.