Ship customization and diversity is probably one of the coolest systems in Starfield. You can find a bunch of different ships, but what better is you can upgrade them in countless ways when at a port with a ship technician. However, building one from the ground up and really diving into the builder menu scratches an itch that few games can. The building screen can be confusing, and sometimes finding some settings can be hard, so let’s go through the process in case anyone is stuck.
This is a large guide — if you are looking for specific info, hit the contents button above!
Where to Build a Ship
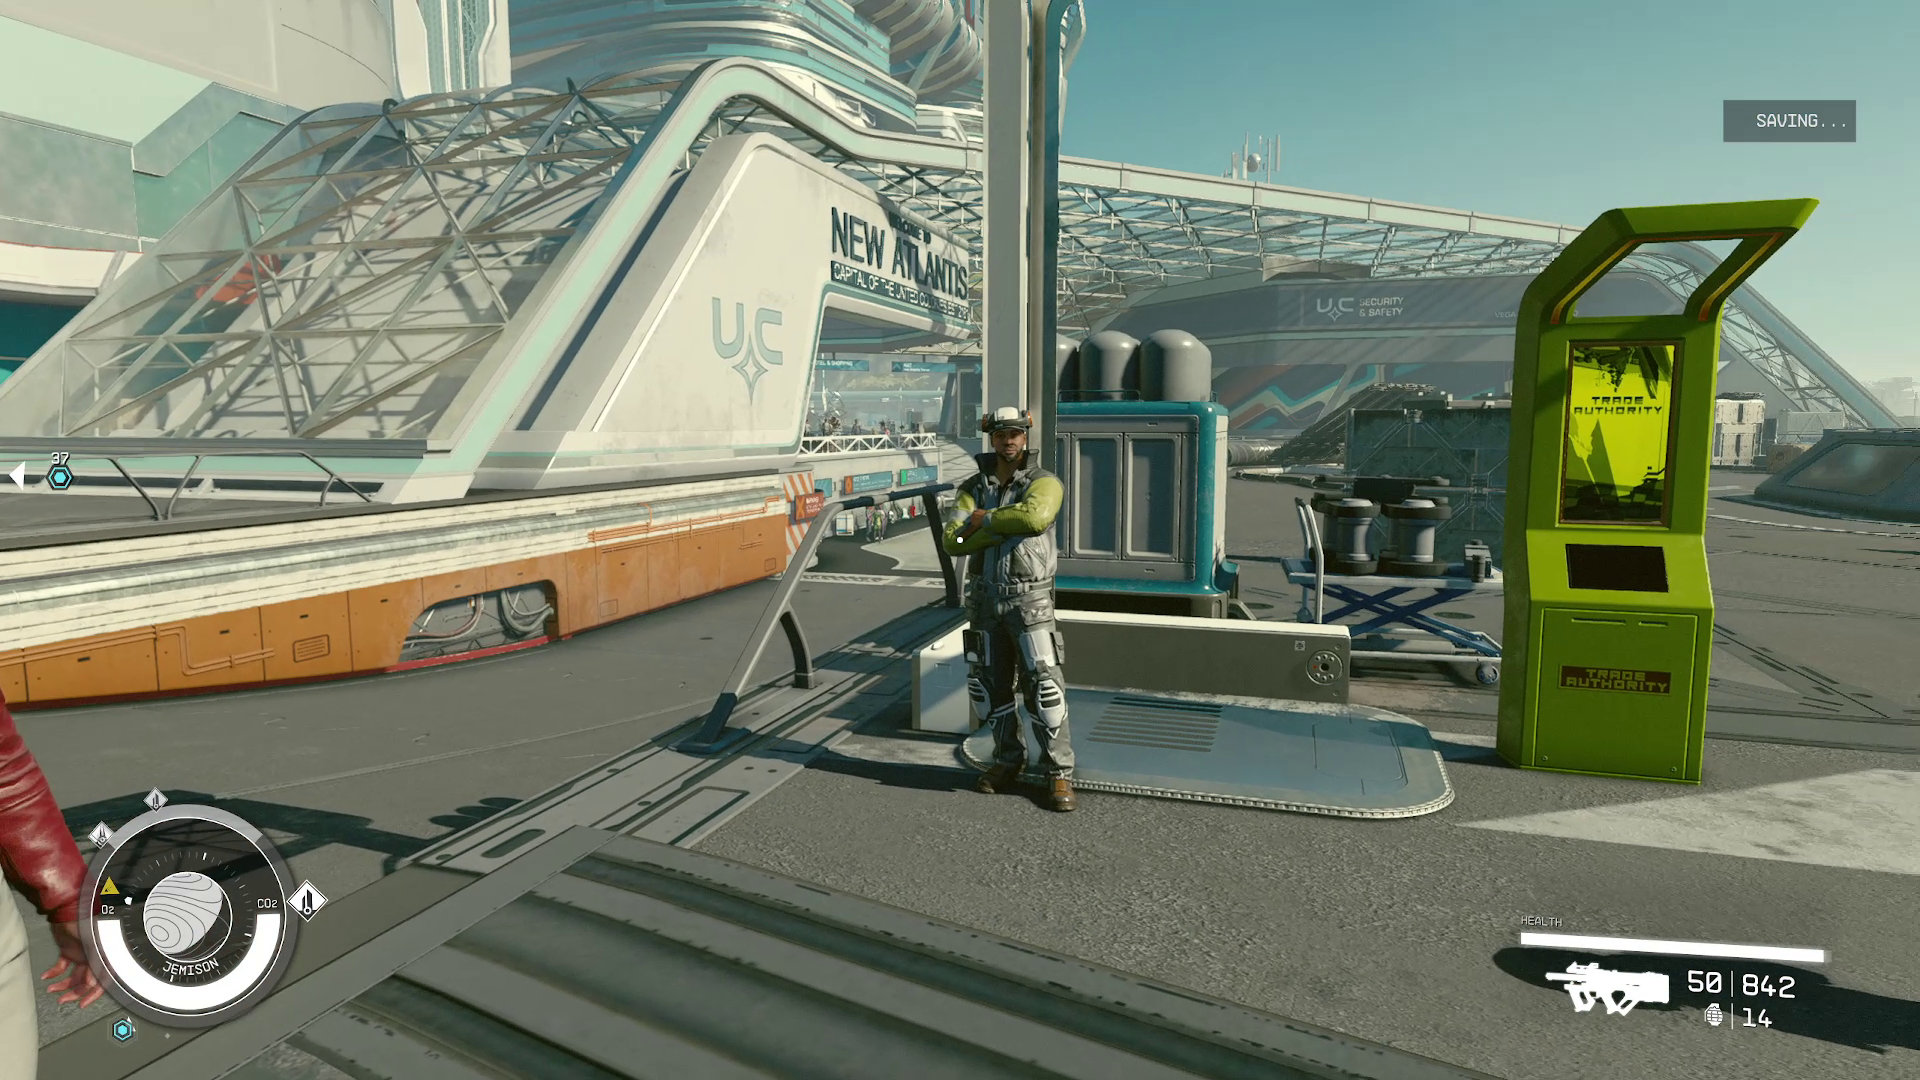
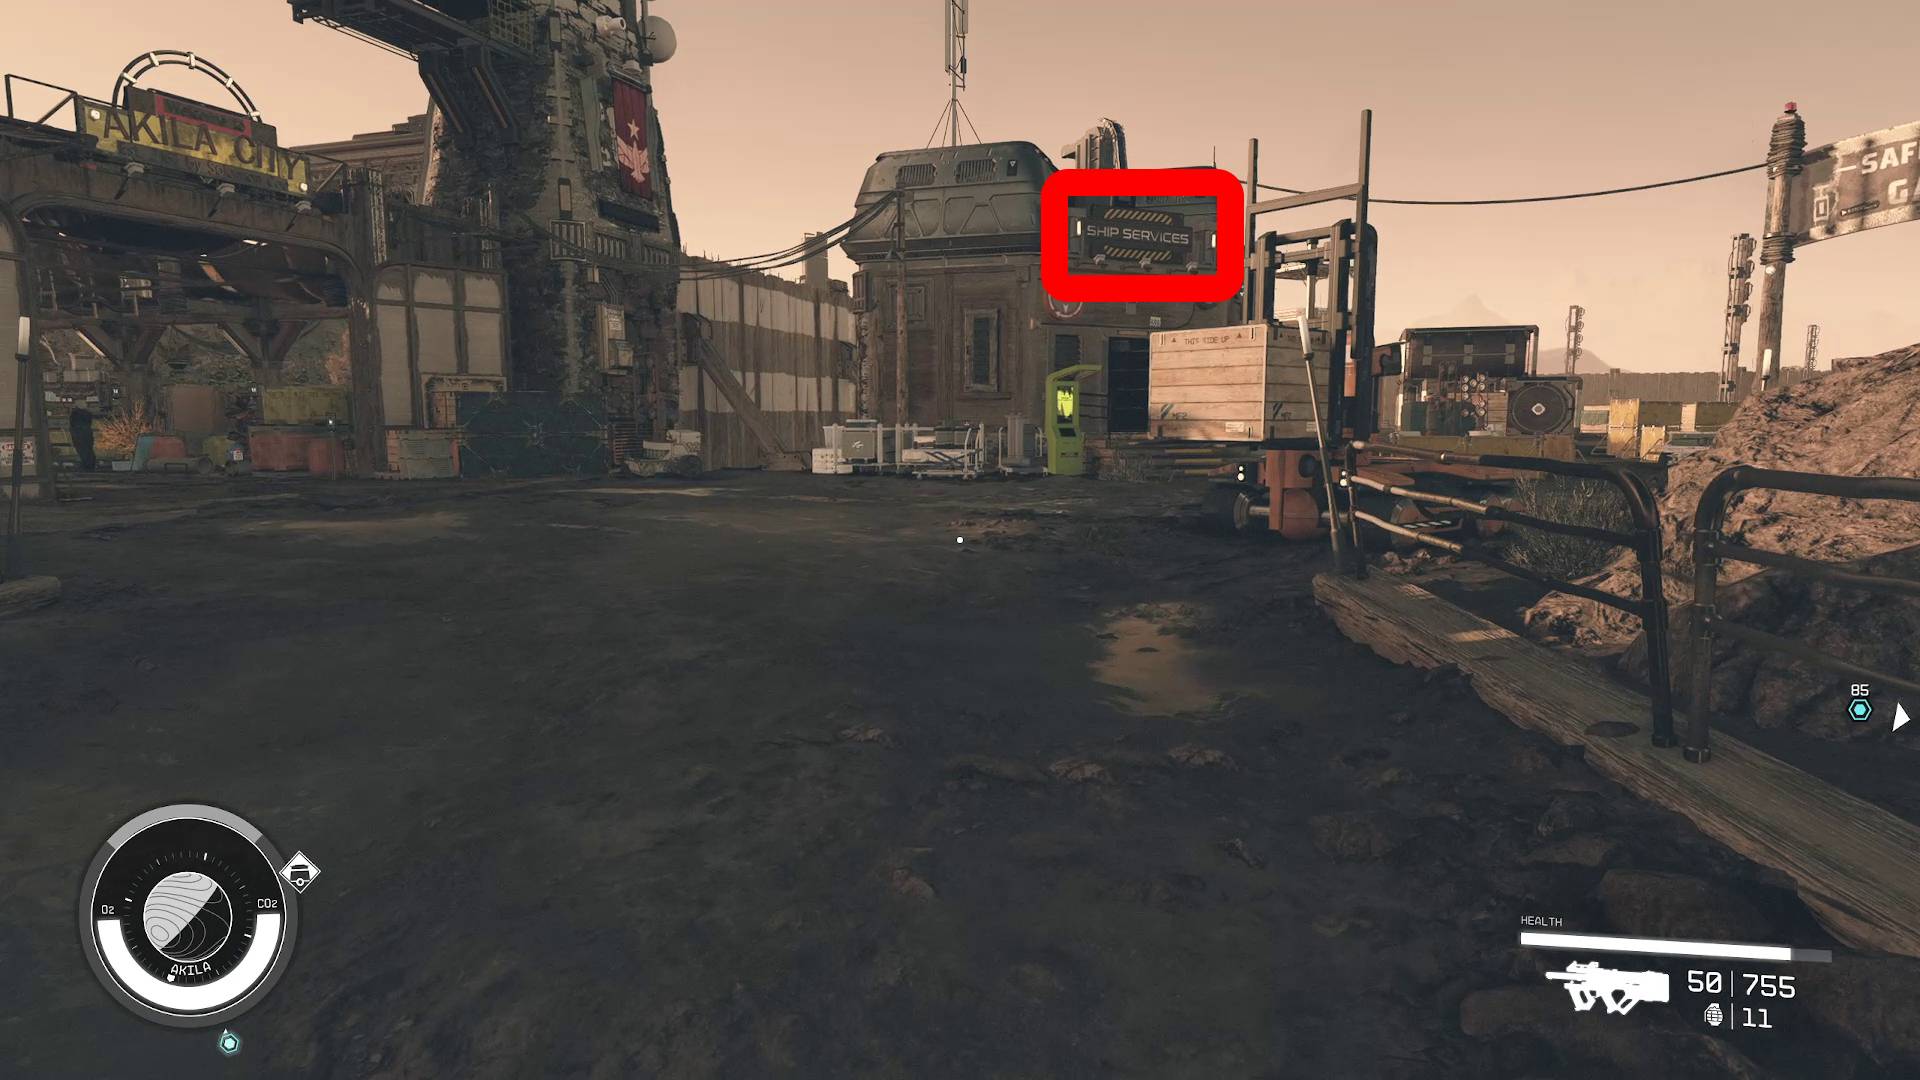
You can build a ship in any port where there is a ship technician. These NPCs are always hanging around the preliminary landing zone of cities and bigger areas. The first one you will encounter is on New Atlantis, and he is directly right of the ramp leading away from the landing area (1). Sometimes, you will have to walk a small distance to find one, like in Akila City (2), where the technician has a shack by the city’s entrance.
12
It does matter what port in which you decide to build your ship; some have more parts than others. For your first build, we recommend shopping around between the major cities, as they seem to all have different aesthetics and parts. As you travel more and reach higher levels, you can swap out parts à la carte. Also, building isn’t cheap. We saved up around 100k credits for our first build, and we nearly spent it all.
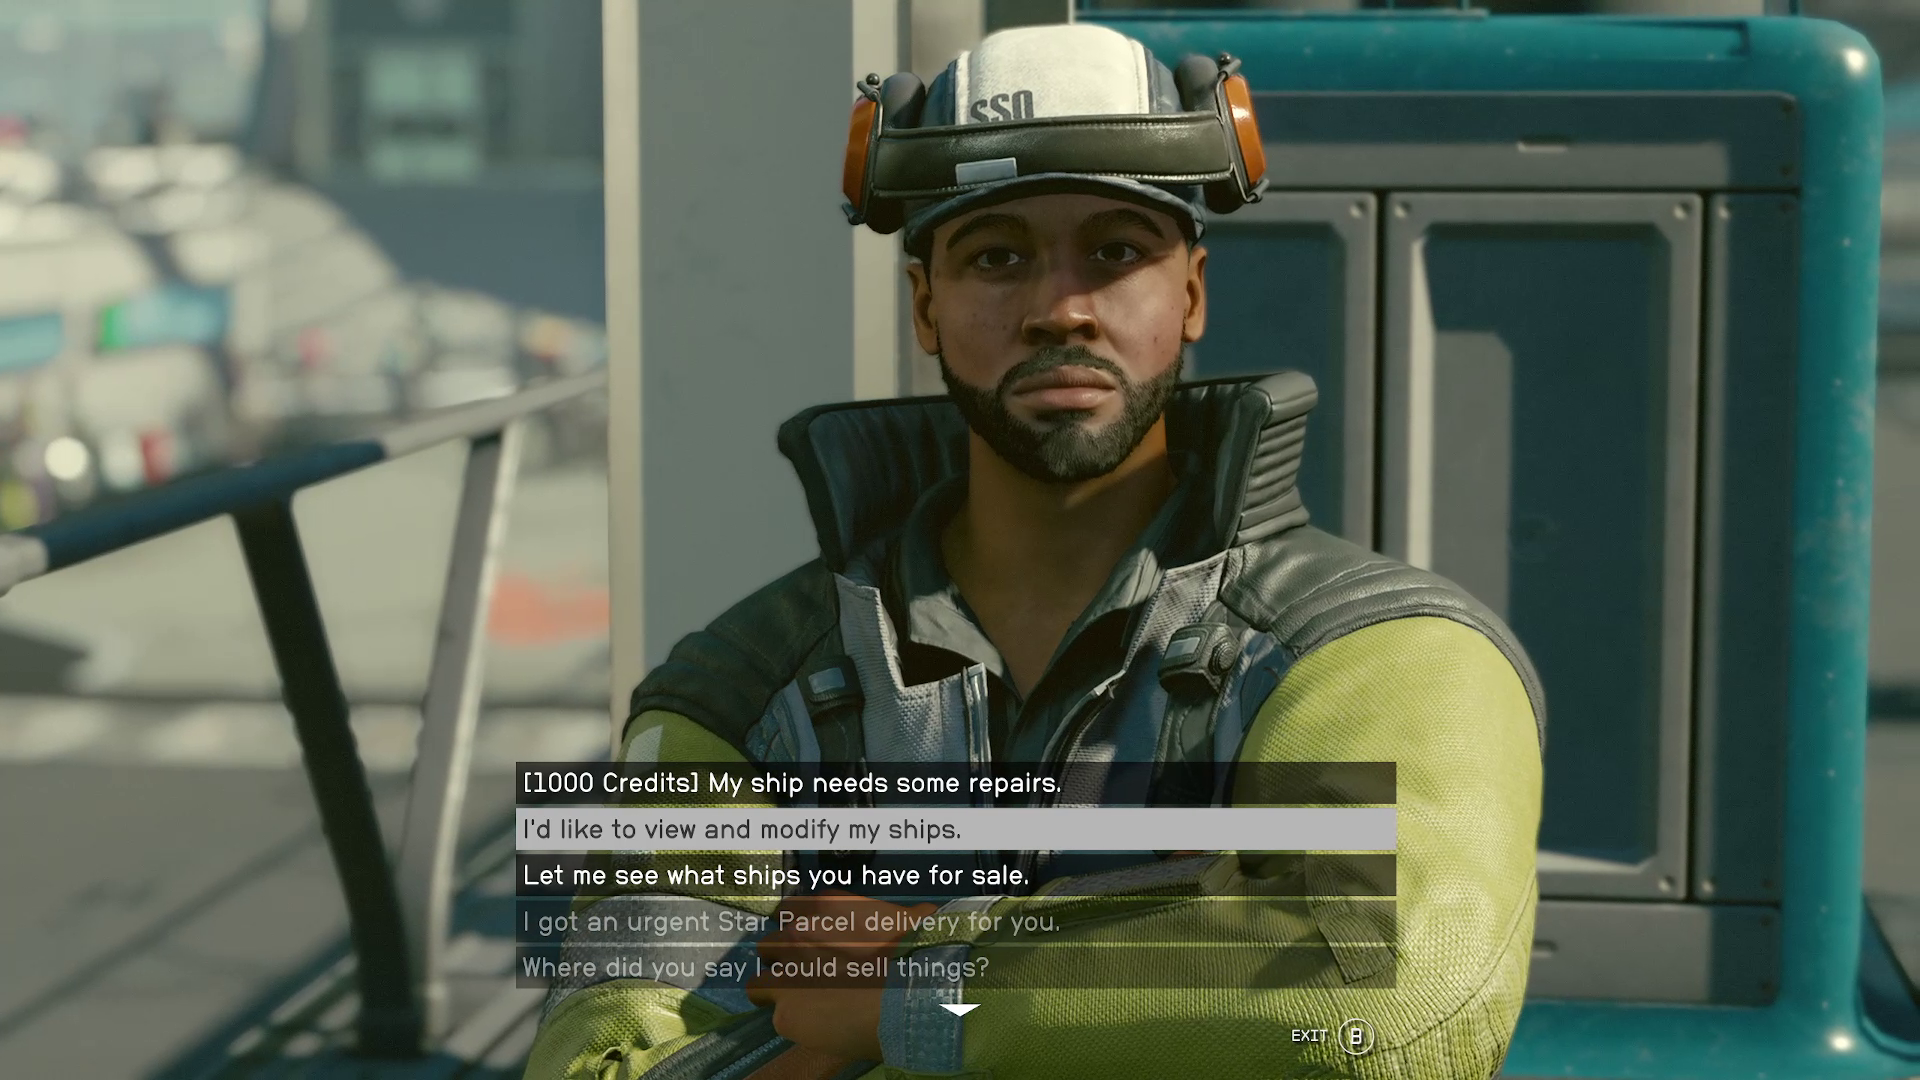
When you talk to the Ship Services Technician, he offers several services (like fixing your ship), but the option you are interested in is “I’d like to view and modify my ships.”
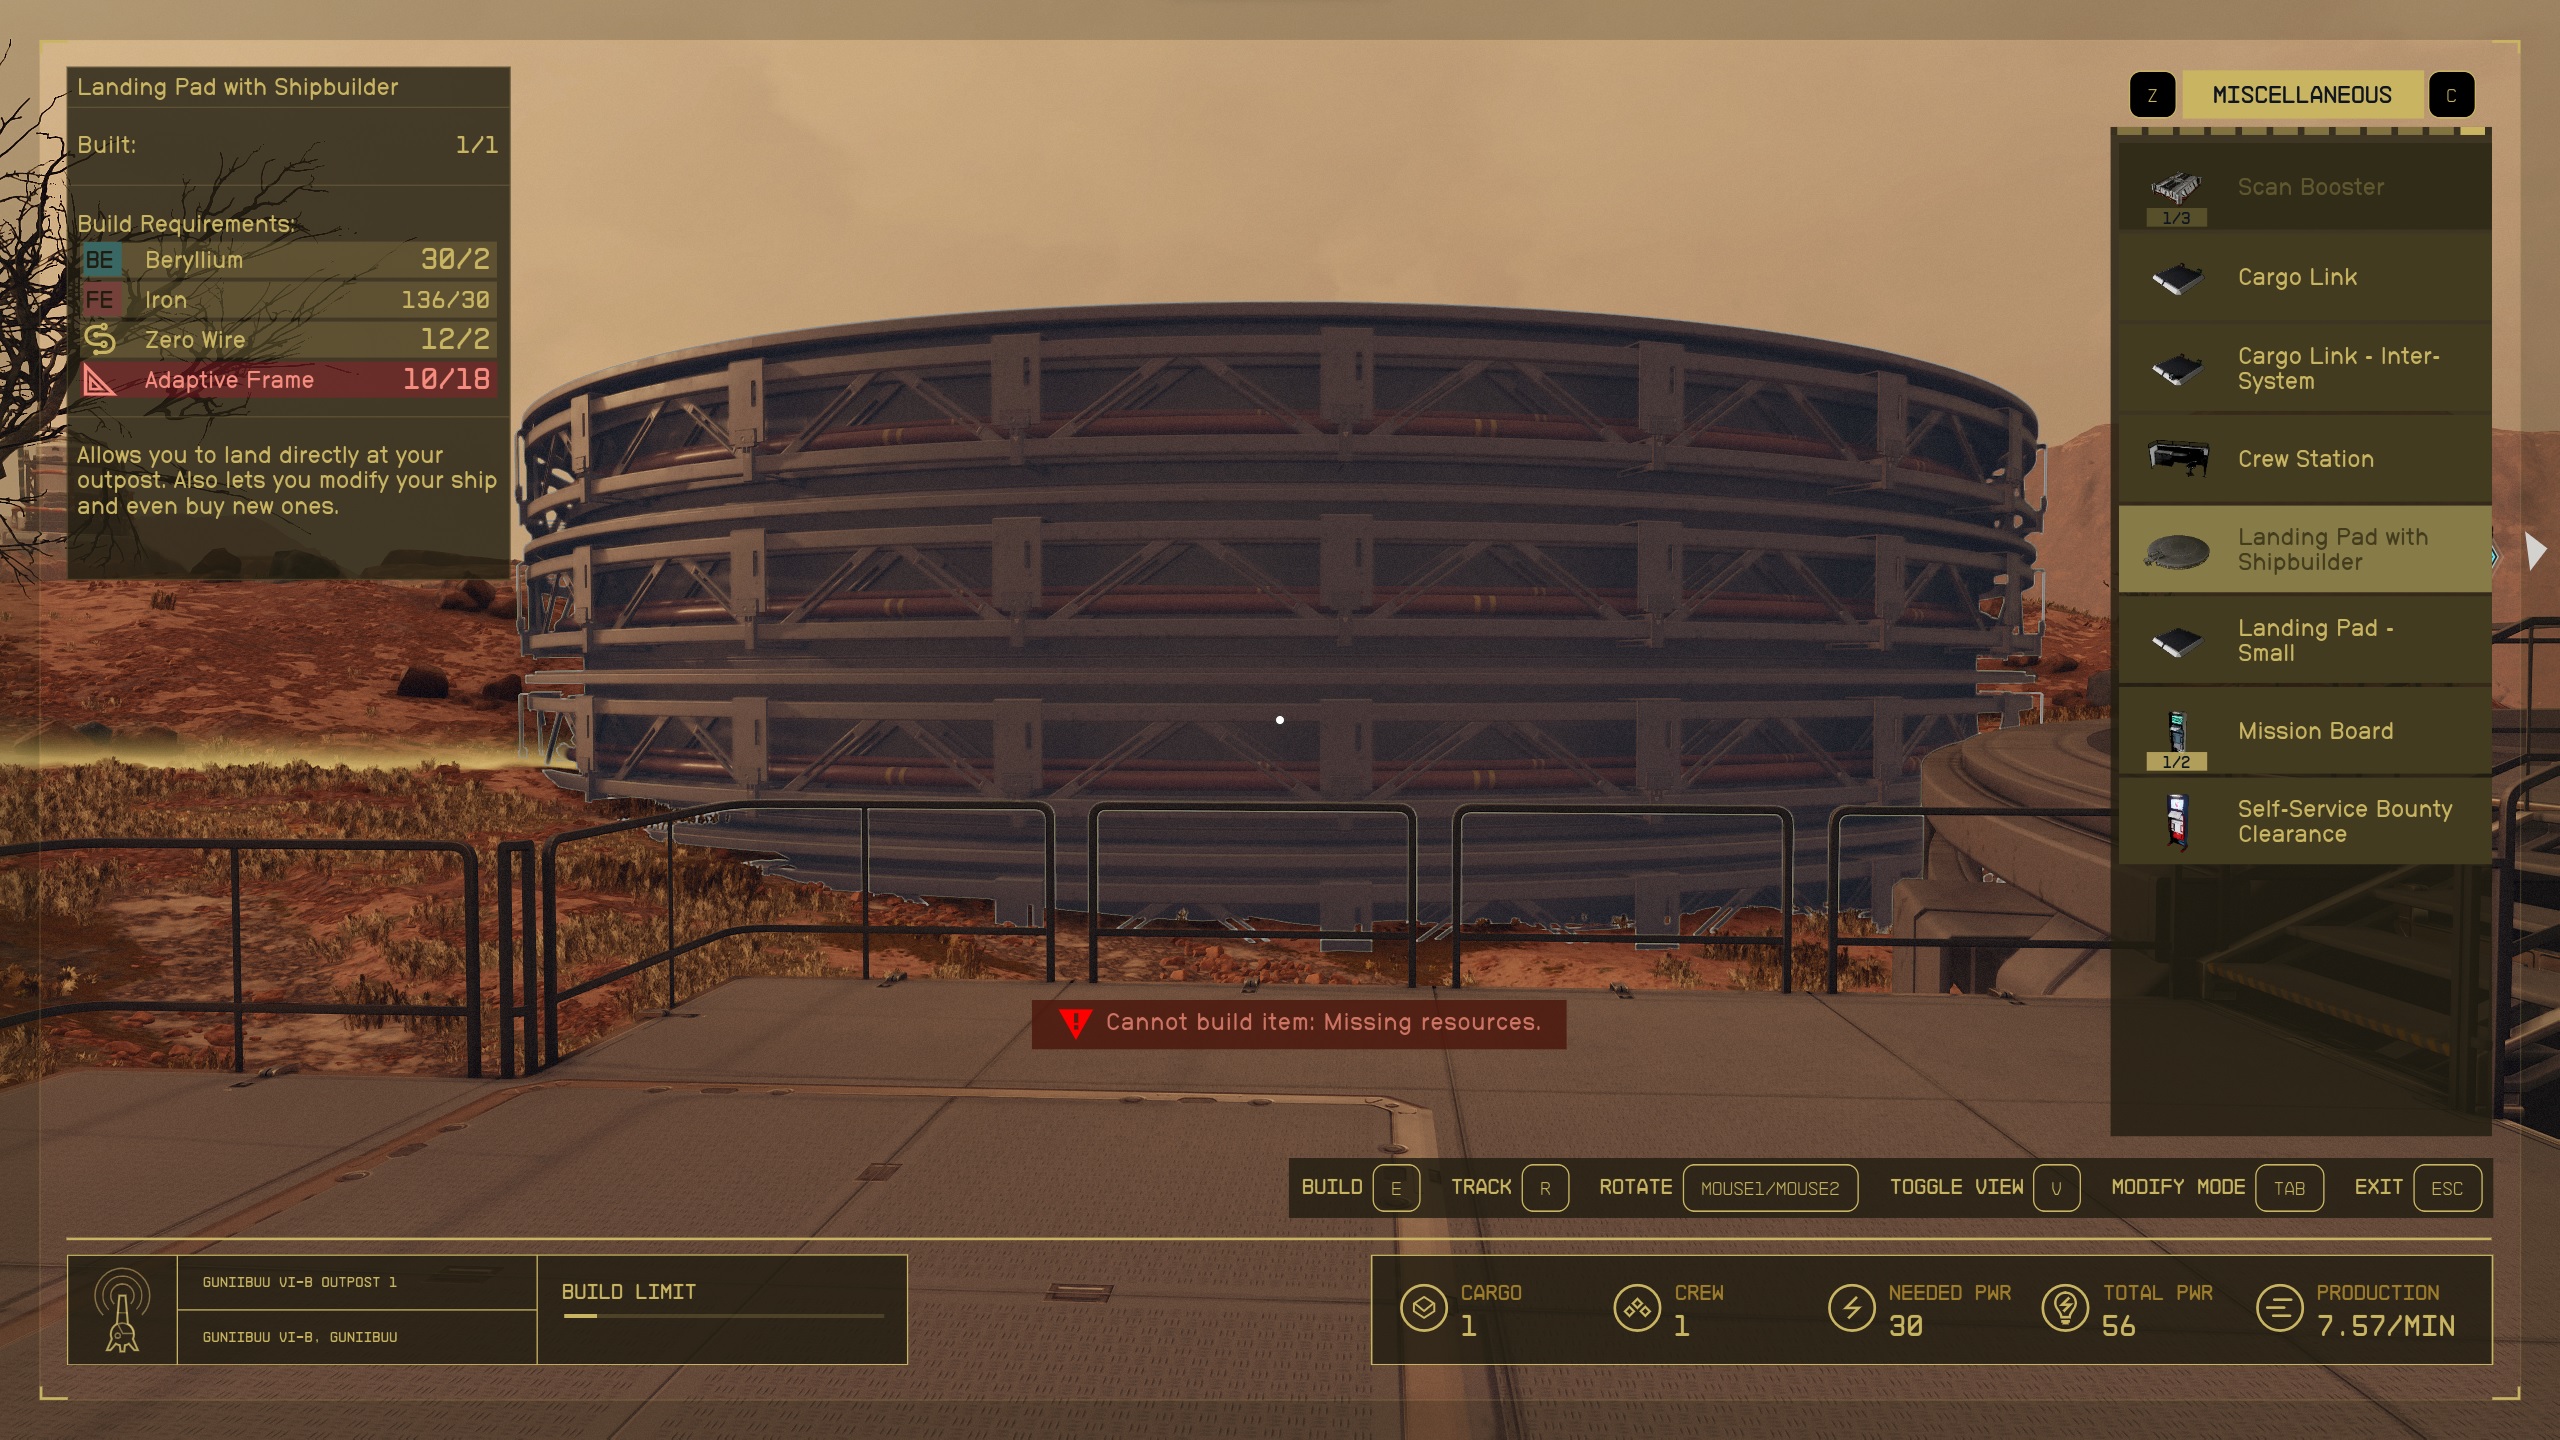
For those of you who are building a ship later on in the game, you should consider building a big landing pad at an outpost. These landing pads let you upgrade and build ships. The real selling point, though, is that they allow you to browse all the purchasable ship parts instead of the limited selections at each city.
They’re expensive, but totally worth it
How to Build a Ship
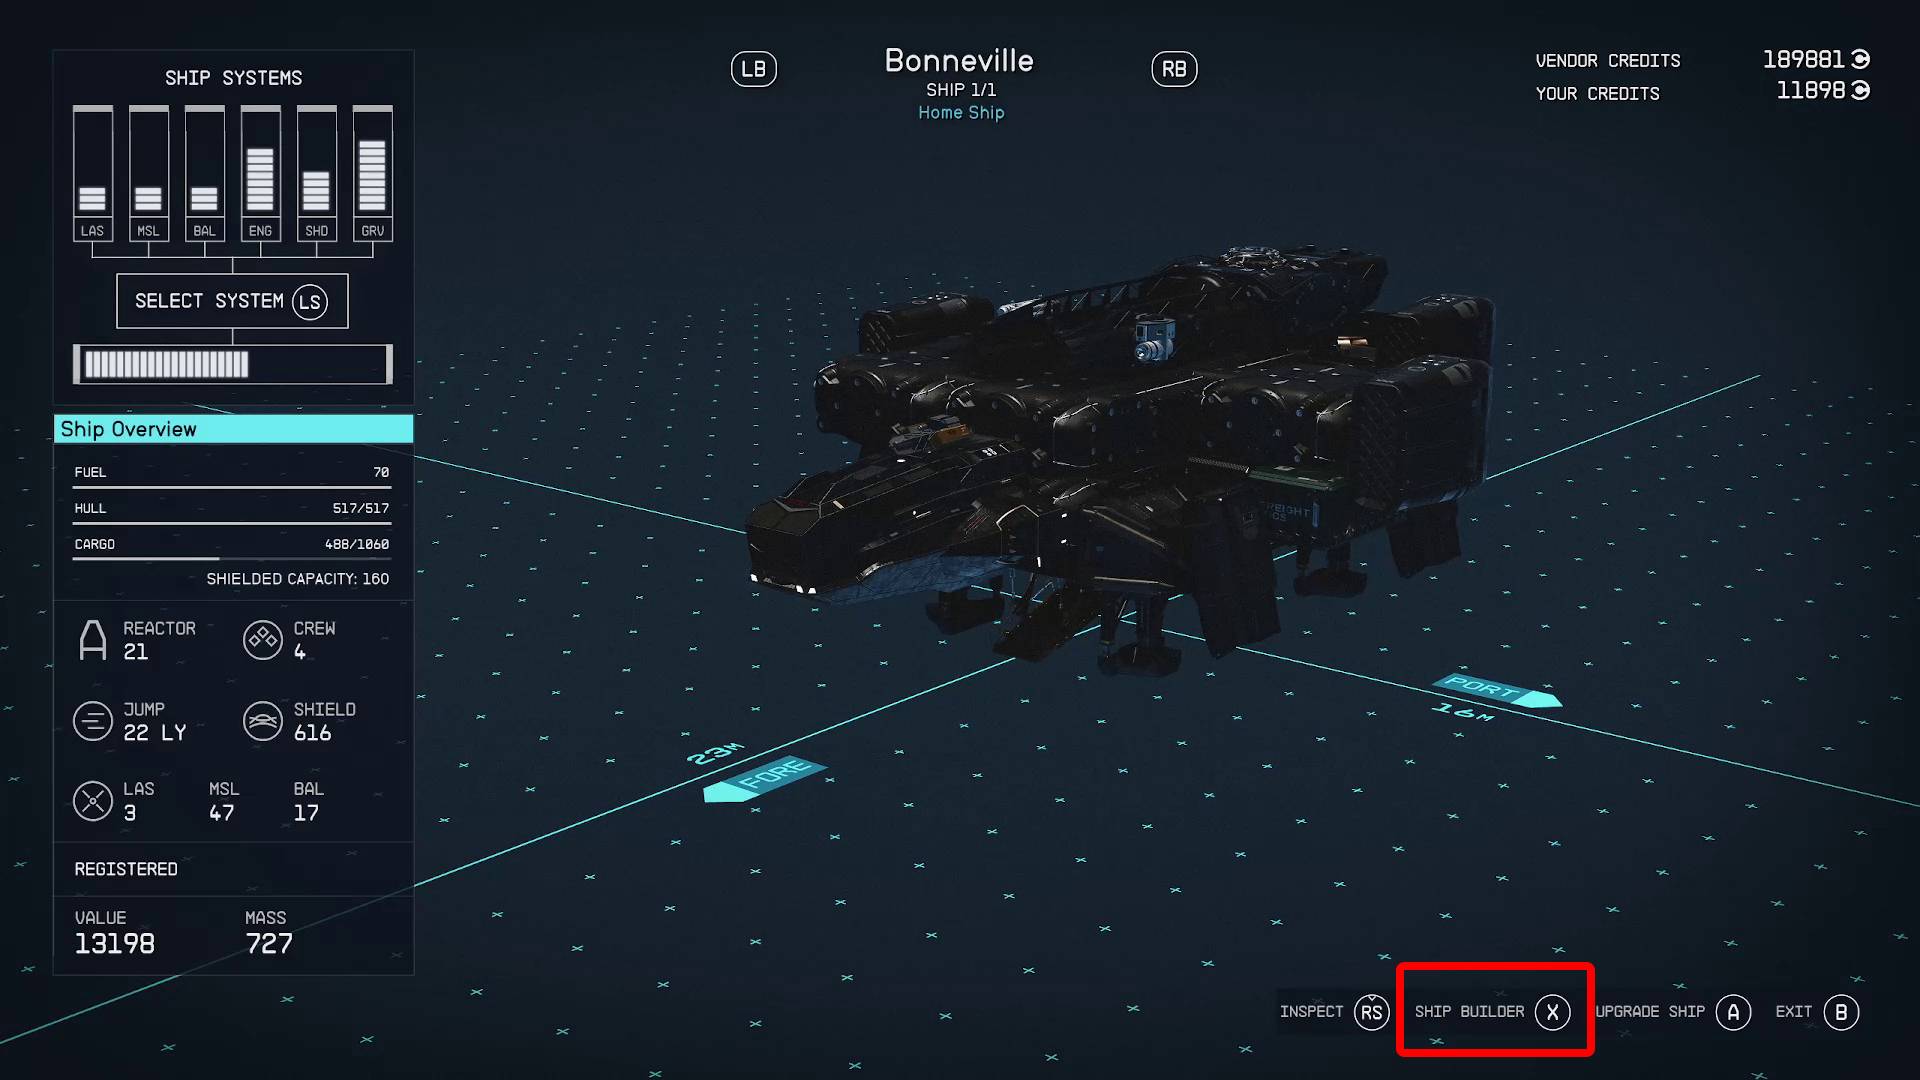
After choosing the ‘Modify’ dialogue option, you will be in the ship customization screen. From there, click the button shown at the button to take you to “Ship Builder” (, ). Now that you’re in the actual building screen, you need to decide what you want to do.
If you want to just replace a couple parts, you can hover over them and delete them (, Delete), then replace them with parts of your choosing with the ‘Add’ button (, ). If you want to start from scratch, you can spam the delete button. When you delete each part, it gives you some money as if you had sold them, but no deals are final until you leave the builder and accept.
One more click and you’re in the ship builder
Unfortunately, there isn’t a way to build a ship and just add it to your fleet. You have to first have a ship to build on or replace. You can add ships to your fleet, so you have more options to build (without affecting your other baby) by boarding enemy ships.
Once you’ve deleted all the parts, you now have a blank slate. Start building by pressing the ‘Add’ button (, ). You can cycle through the categories of parts, of which you will need at least one of each (switch categories with the bumpers or / ). Don’t worry about keeping track of what parts you do and don’t have, as the game will do that for you.
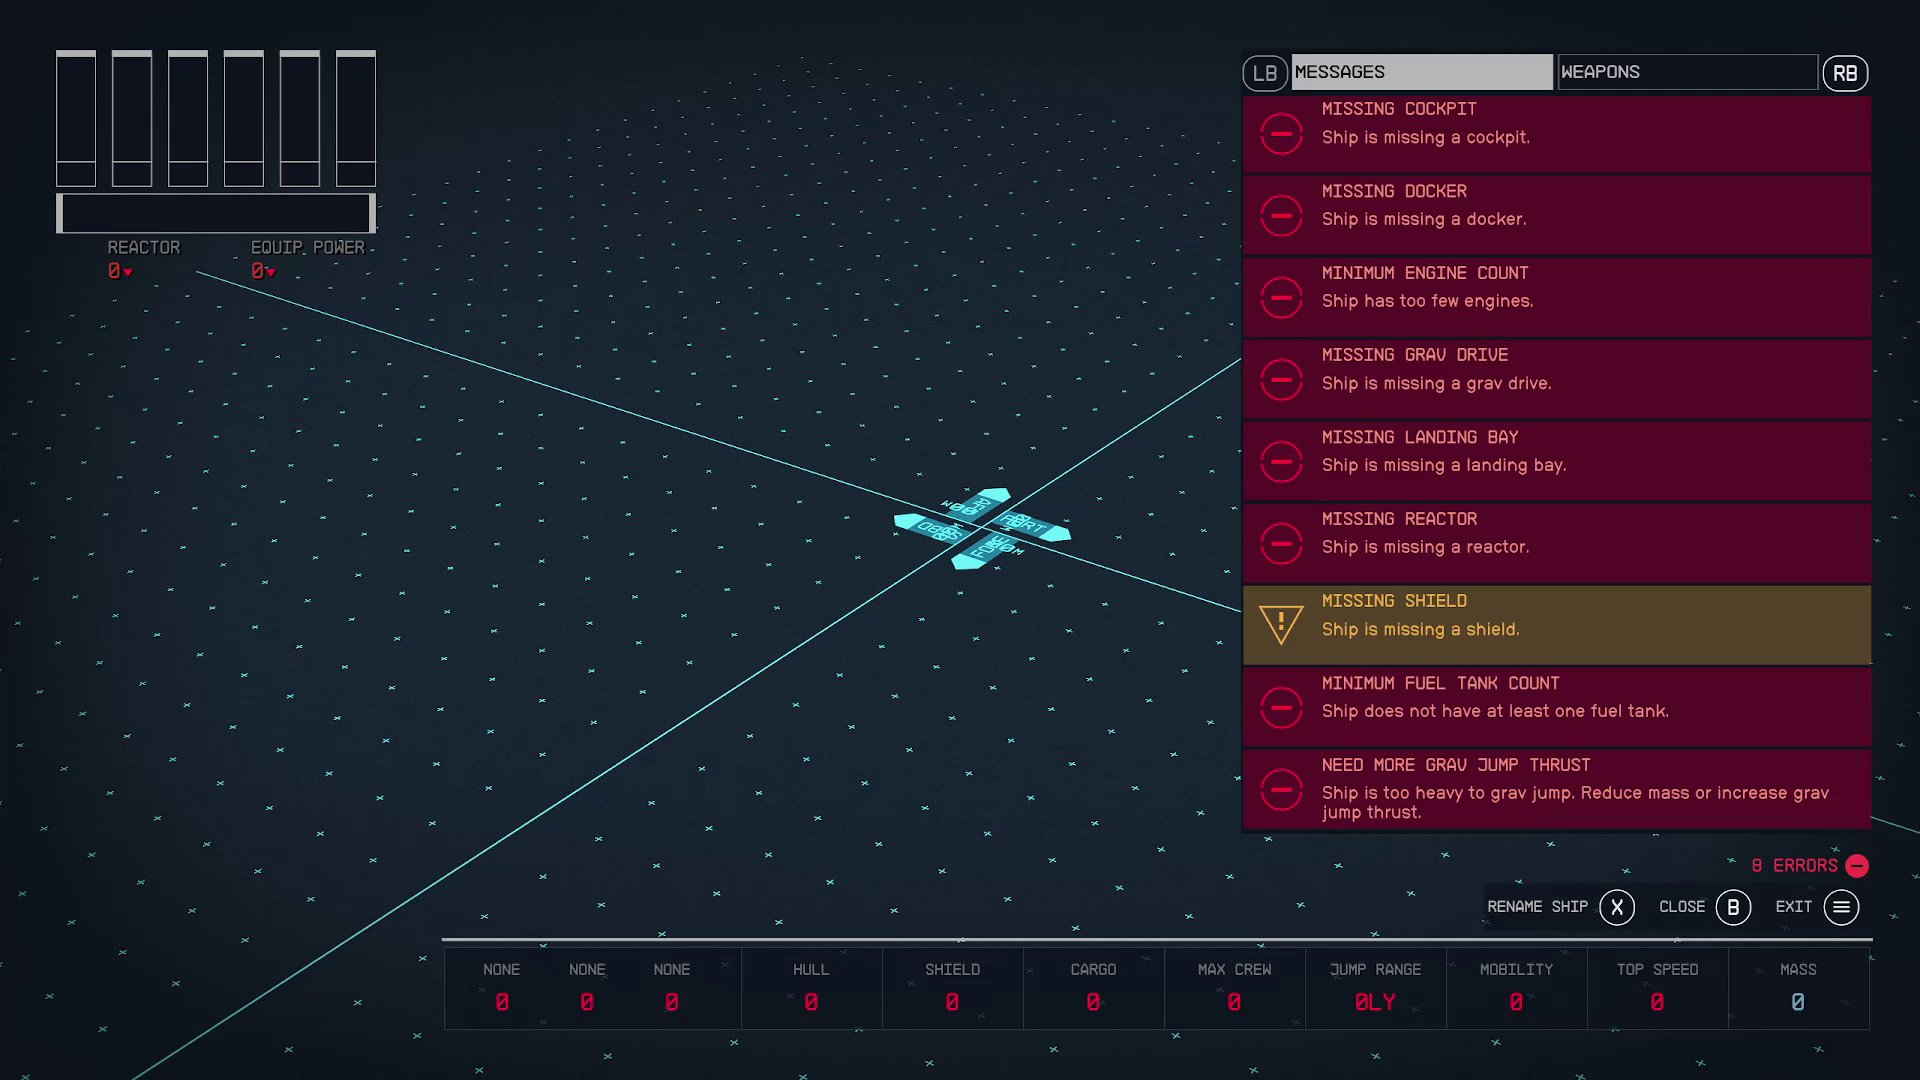
If at anytime in the process you need to see what’s missing and / or get some help, you can do a ‘Flight Check’ by pressing , . Here’s a list of the mandatory parts you will need:
Landing Bay
Grav Drive
Landing Gear
Cockpit
Reactor
Fuel Tank
Engine (s)
Docker
And here’s the list of the highly recommended parts you should also have:
Weapon(s)
Shield Generator
Cargo Hold
Structural Parts
Habs
Note that you can only fly ‘Class A’ ships until you unlock the higher piloting skills. As a result, there are some parts (like reactors) that are specific to the class of ship. For your first ship, you will want to only use the ‘Class A’ parts.
Your ship can’t exceed the grid’s size
Ship Building Controls
This is a part of the game where your input changes things considerably. For example, on mouse and keyboard (M&K) you can drag and drop parts with . While on controller, you have to first select the item with , then move it with , then press to confirm. The ship builder is a very comprehensive tool, but it is also well labeled. If you forget which button / key does what, then look at the border of the screen, and it will more than likely be labeled. Here’s a list of the controls (that isn’t nearly exhaustive) that we will use in the guide, as they’re the ones that might be a little trickier:
Add Part/Attach Part = /
Flight Check = /
Select = /
Raise or Lower Part = / or / (must be selected)
Flip Part = / (must be selected)
Change Color = /
Select All (whole ship) = / double-click
Rotate View – Right Stick / + hold + drag
Move View – Left Stick / WASD
How Parts Connect
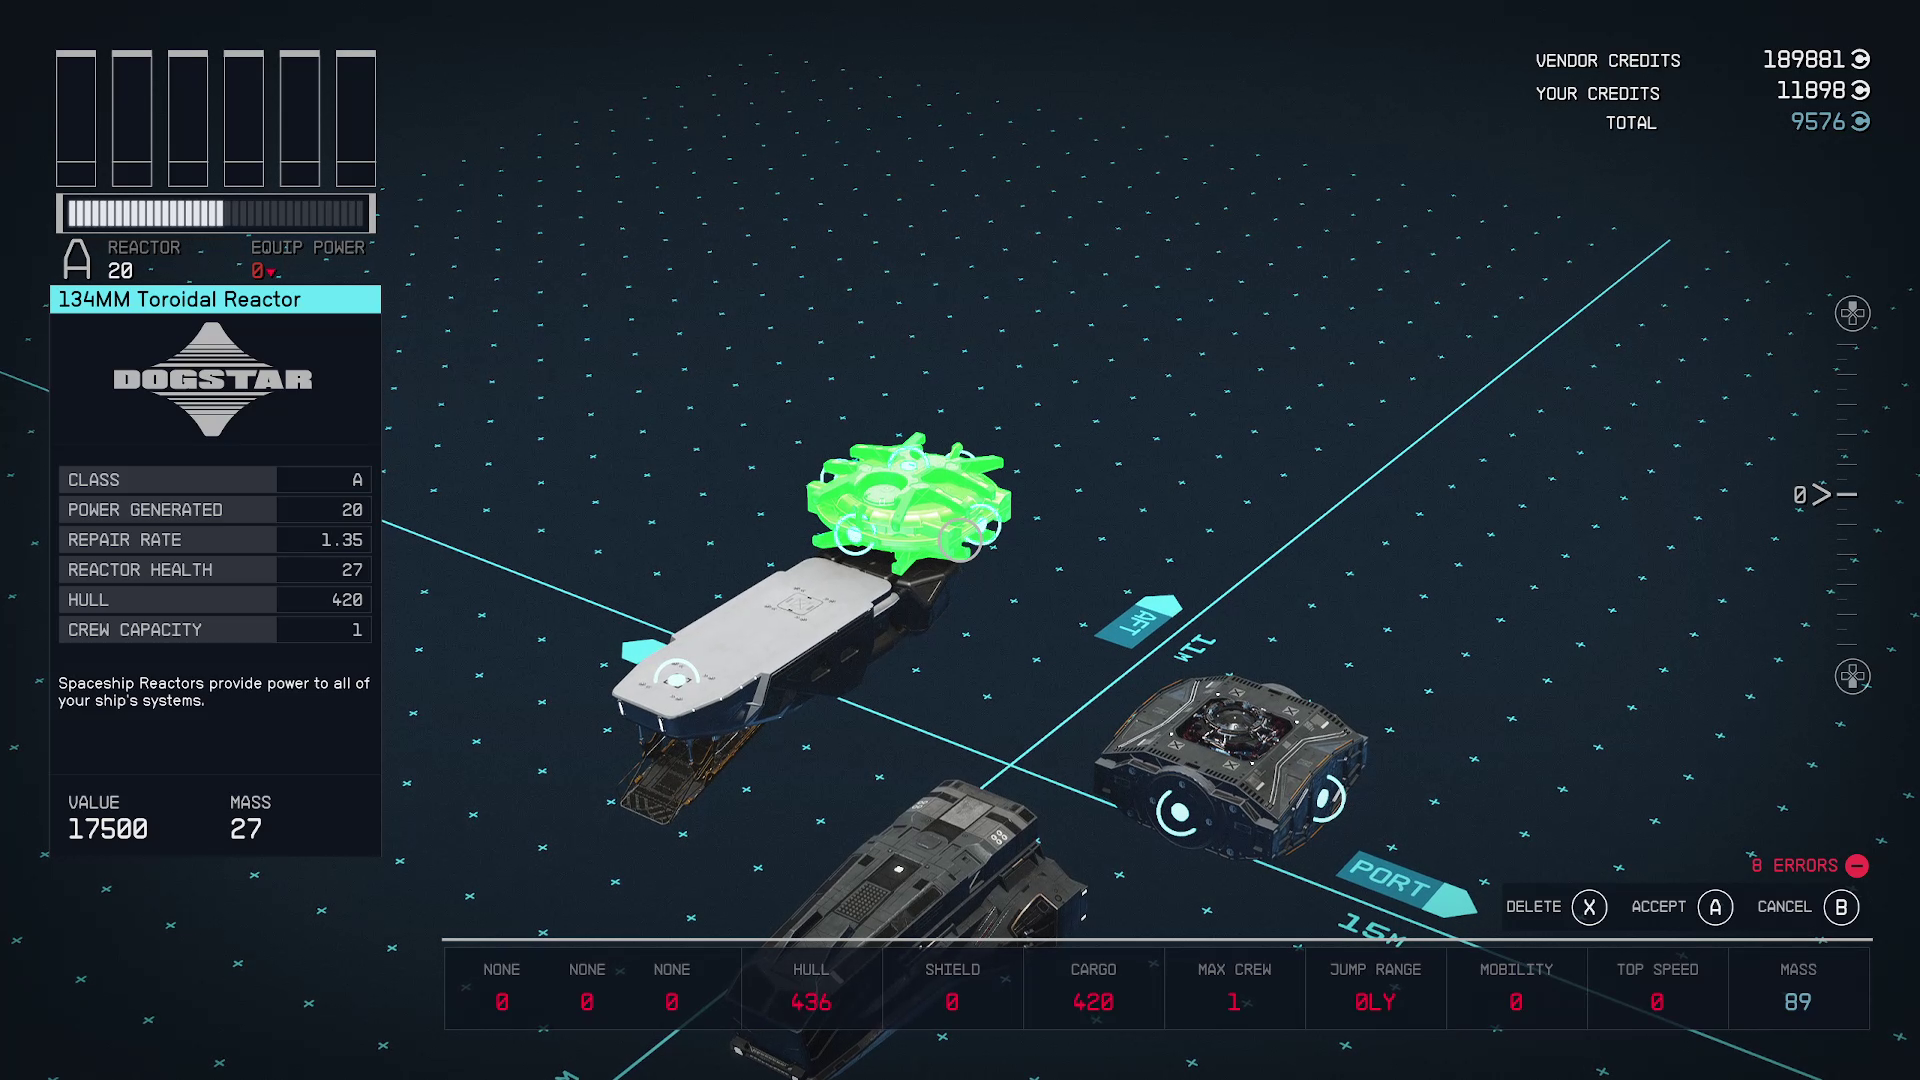
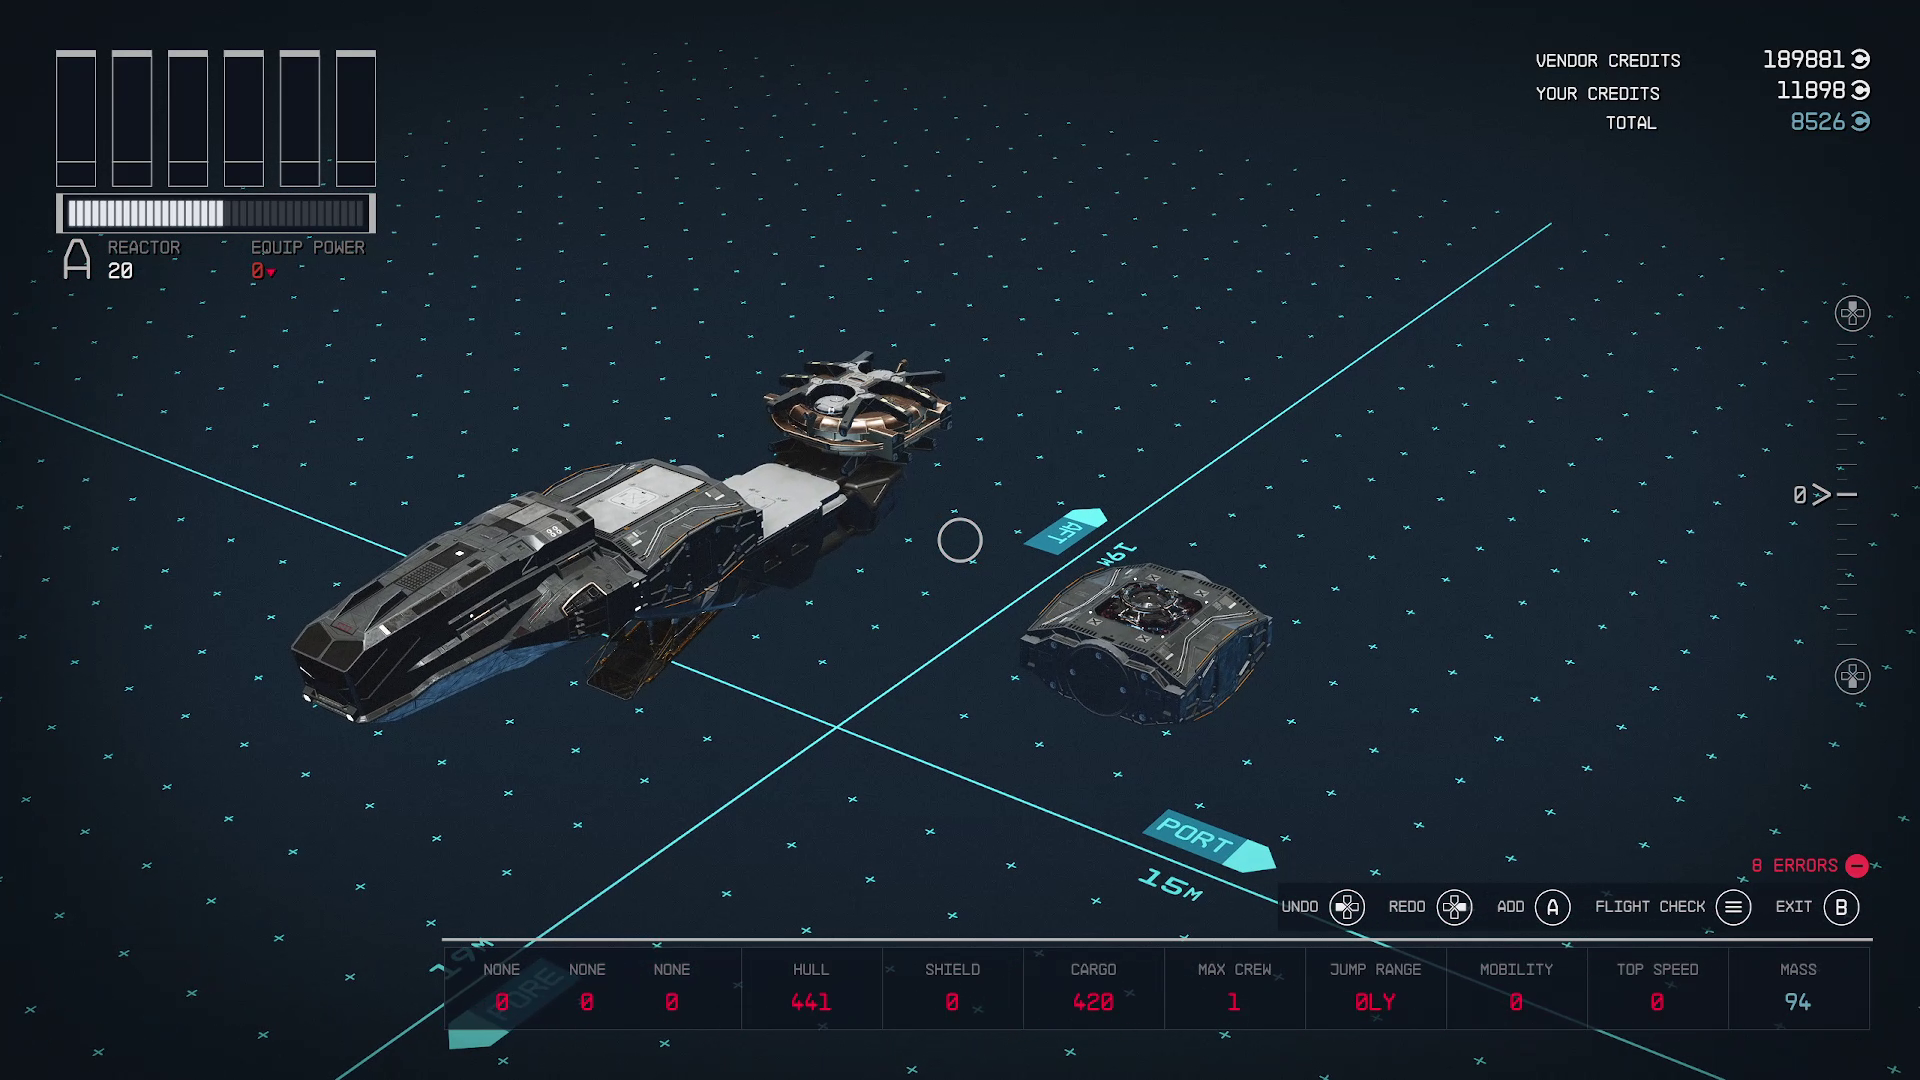
Every part has one or more connection points — these are indicated by blue circles that you see when hovering the part with your cursor, and when selecting it from the Add menu. To attach one ship part to another, you must do so by placing one connection point over another. Functionally, this means that not every part will work anywhere, as many only have one connection point, and can only be oriented two ways. You will often have to make use of Structural parts in order to make your build work the way you want.
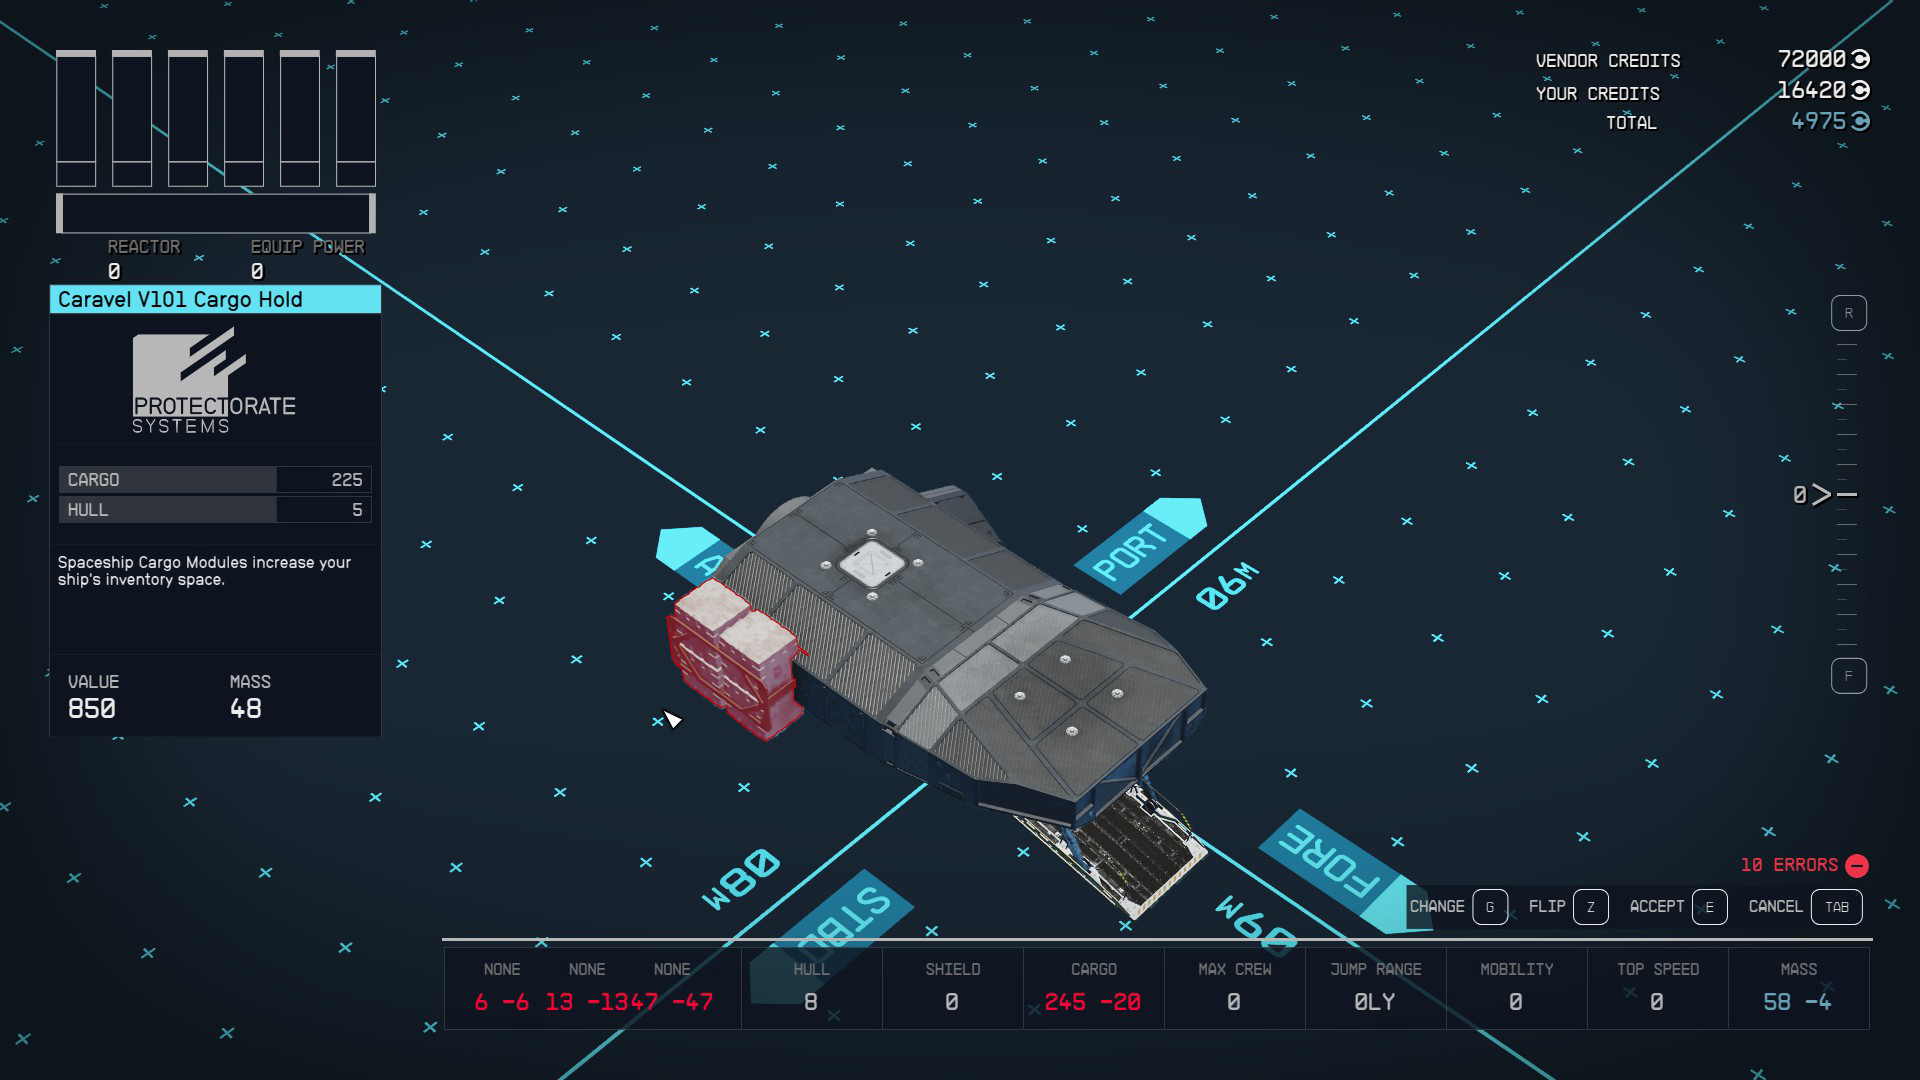
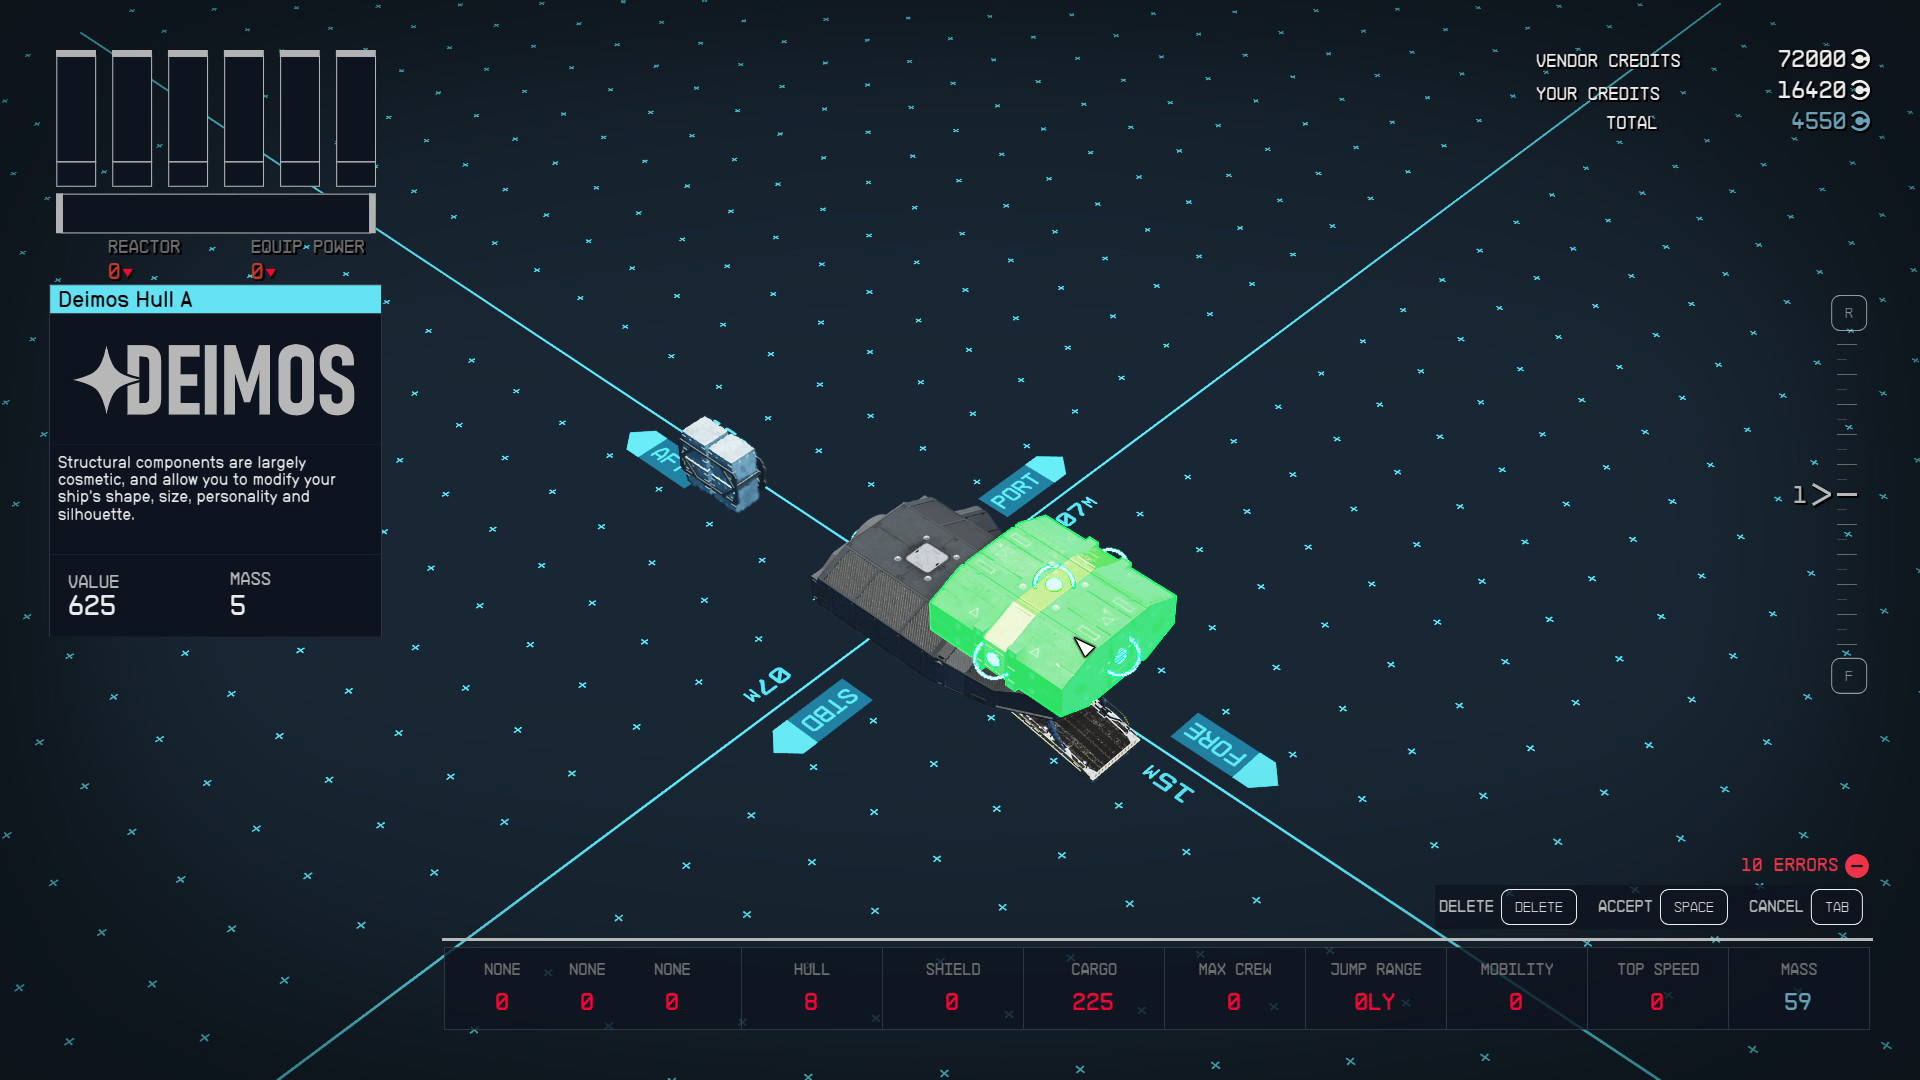
In the example below, we cannot add the desired component because the connection point orientations don’t match (1). To mitigate this, we can add a structural component that fits on the base of our ship (2) — one that has connection points that match the orientation of the desired component. We can then place the component (3).
123
There’s a trick to make this process easier if you’re using M&K, fortunately. If you place your cursor over a part, the Add button becomes the “Attach” button. The ship parts menu, when accessed via “Attach”, will only display parts that fit onto your currently selected component. By adding parts this way, you can avoid the headache of trying to figure out how to make everything fit. Astoundingly, this tool is not present on the interface when using a controller. You will have to select a part from the main list and add it away from the build by pressing , then select and drag it to the ship to be placed.
Example Build
Landing Gear and Guts
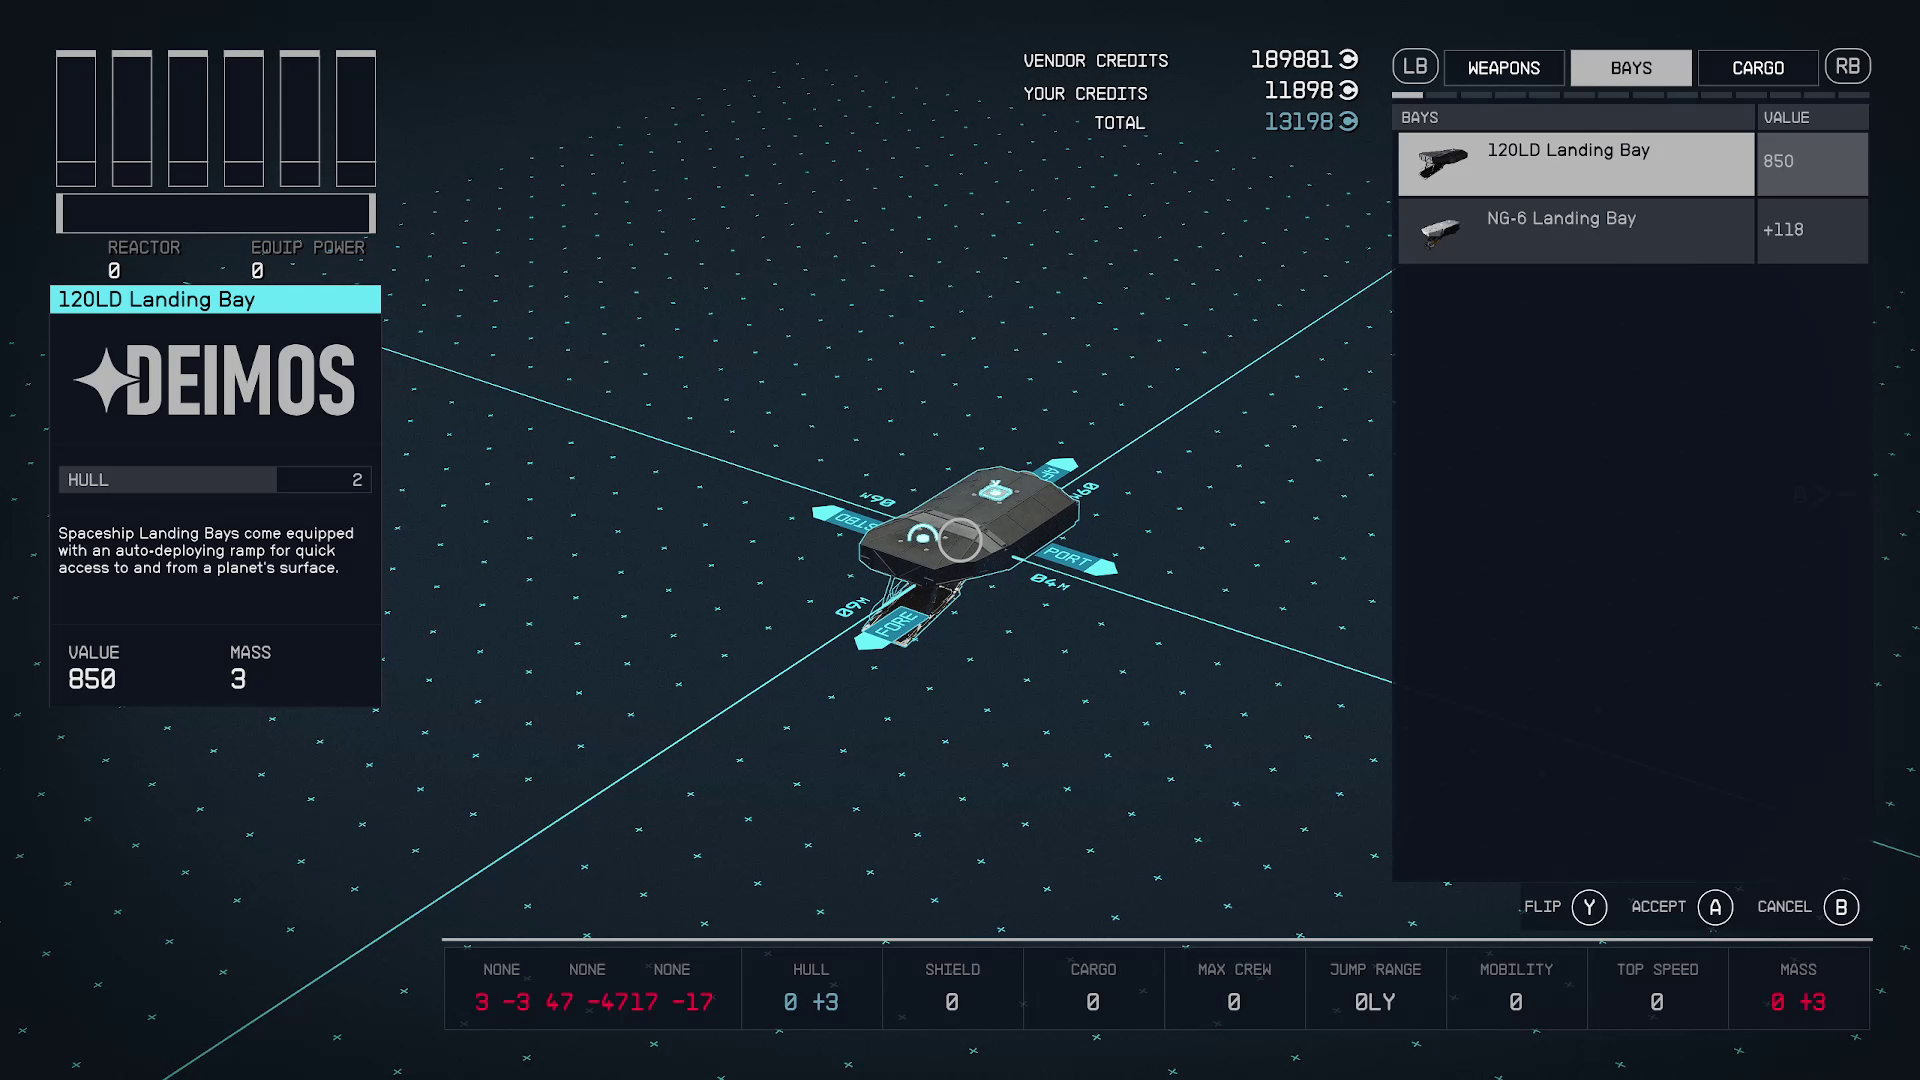
We found that it was easiest working from the bottom, so we started with the Landing Bay, then built on top of (and behind) that. Add a part, then use the marked buttons to toggle categories until you’re in ‘Bays’. After choosing one, it will populate on the grid. There are plenty of unique ways to assemble a ship, but we’ll show you how we did it for a baseline, then you can experiment from there.
Thankfully, no part types need to be connected to other specific part types (that would be way too complicated) — instead, any part can be placed on any other part, assuming the connection points match. Remember to select the part you want to attach your next part to before pressing / , in order to make it easier to find a part that will fit.
Putting the first part, the landing bay, on the grid
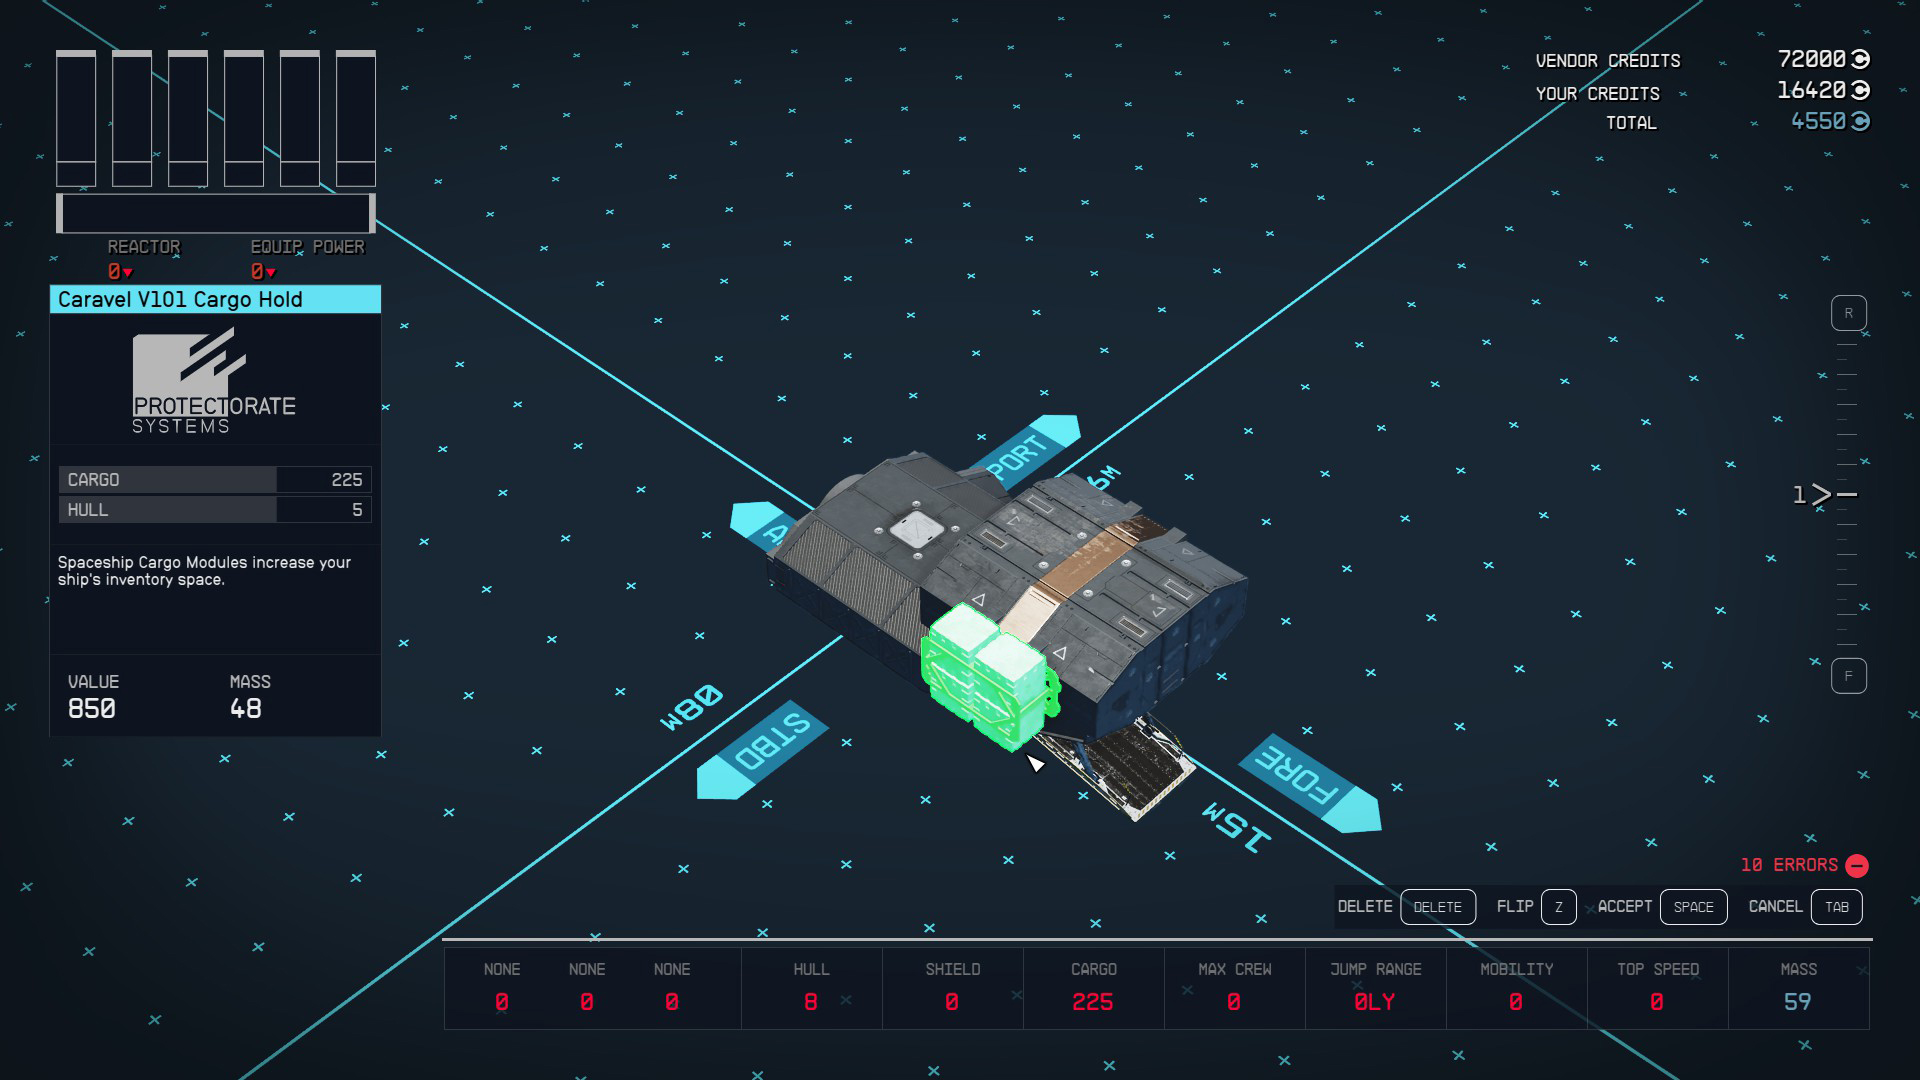
You will know when new parts fit on the build because they will glow green when the fit is correct. To us, it makes sense to put all the “guts” of the ship towards the back and on the bottom. This would include things like the Grav Drive, Reactor, Fuel Tank, and Cargo Hold. Go to the ‘Cargo’ category and drop a Cargo Hold on the grid. Then bring it towards the back of the landing bay; it should snap into place and glow green, showing it’s correctly set. Press , or release to attach it to the build. You can slap one of these to the back of the Landing Bay, then pile them on top of (or next to) one another.
Attaching the Reactor and Cargo Hold to the back of the Landing Bay
The Habs, Landing Gear, Cockpit, and Engines
The middle layer of the ship is probably where you can be the most creative with the layout. You use the ‘Hab’ category to install the living and working quarters of the ship. These go right on top of the landing bay, and are very easy to connect to each other because each of their sides has a connector, which is represented by a blue circle. If you’re having difficulties raising a part to a higher level, don’t forget to press / , / to raise or lower said part. At this point, if you’re doing a normal symmetrical ship, the whole thing will probably resemble a rectangular cube.
Setting a Hab on top of the Landing Bay
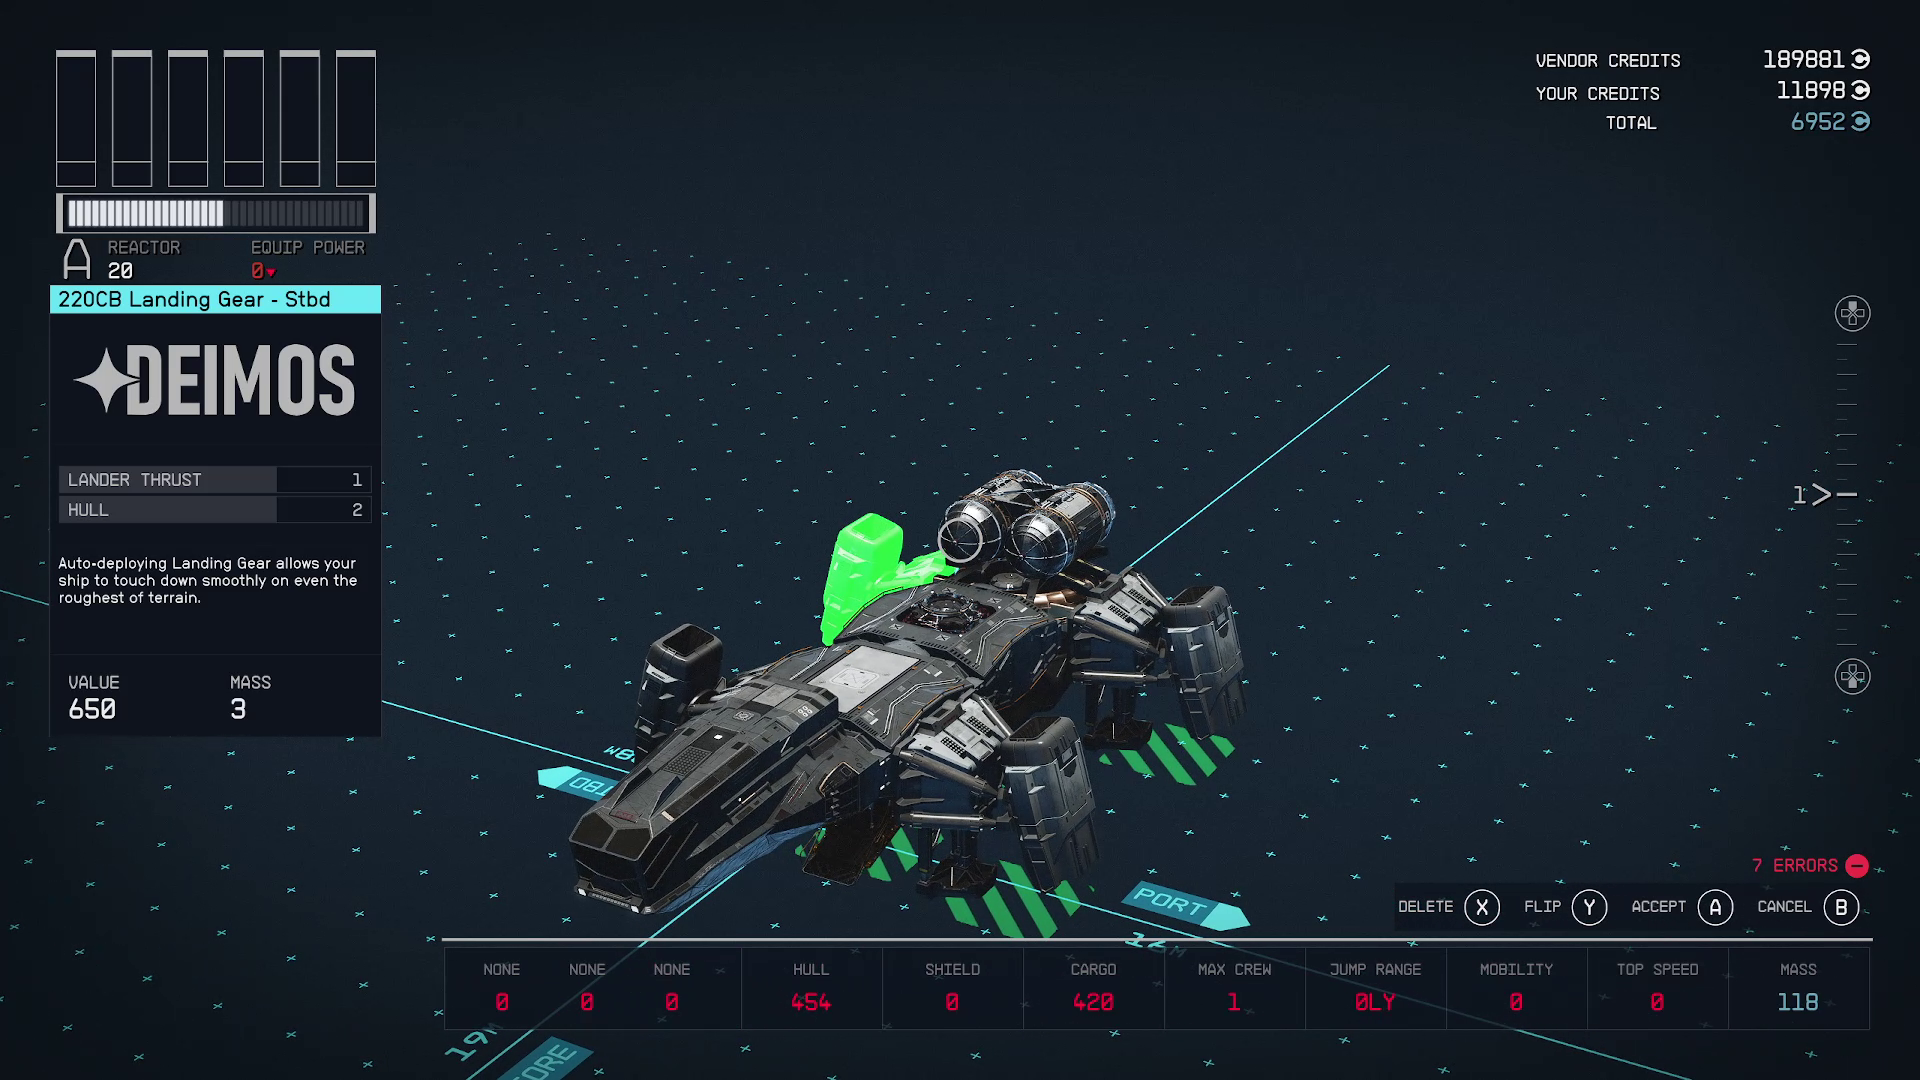
Next, you won’t want to forget the landing gear — the little leg-looking things. After doing one side, you might realize that you have to flip the part to attach them to the other side. This is what the ‘Flip’ action is for when you have the part selected ( , ). With all four connected, it’s actually starting to look like a ship!
Connecting back-right Landing Gear to the build
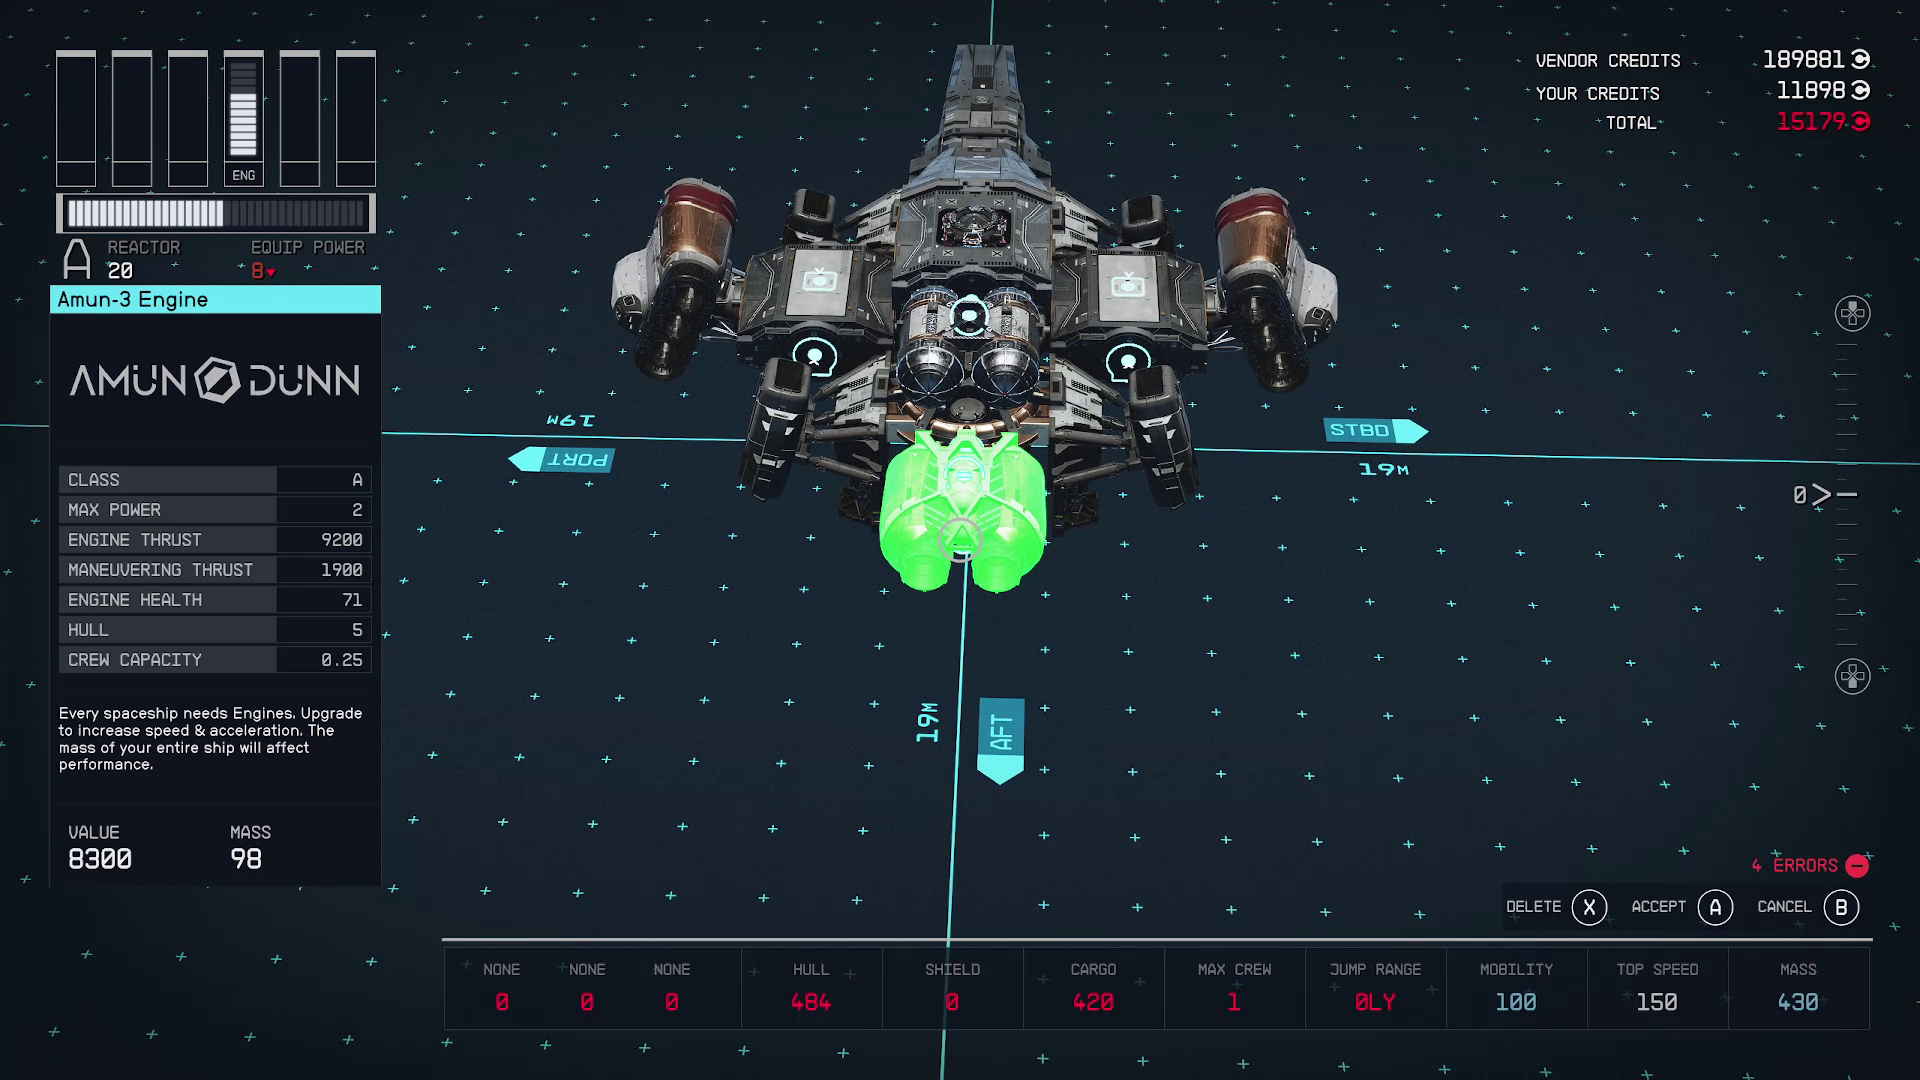
The cockpit is pretty straightforward, it goes on the front, unless you want to build a Millennium Falcon type of ship and shove it off on the side. Next, you can place some engines on the build. You might want to consider a layout to allow for multiple engines, if your ship is bigger. There are two types of engines, ones that connect on the back, and ones that connect laterally on the side. The sideways ones are more difficult to attach multiples, typically requiring some kind of wing formation with your Hab parts.
Placing back engine on the build
Docker, Shields, Weapons, and Colors
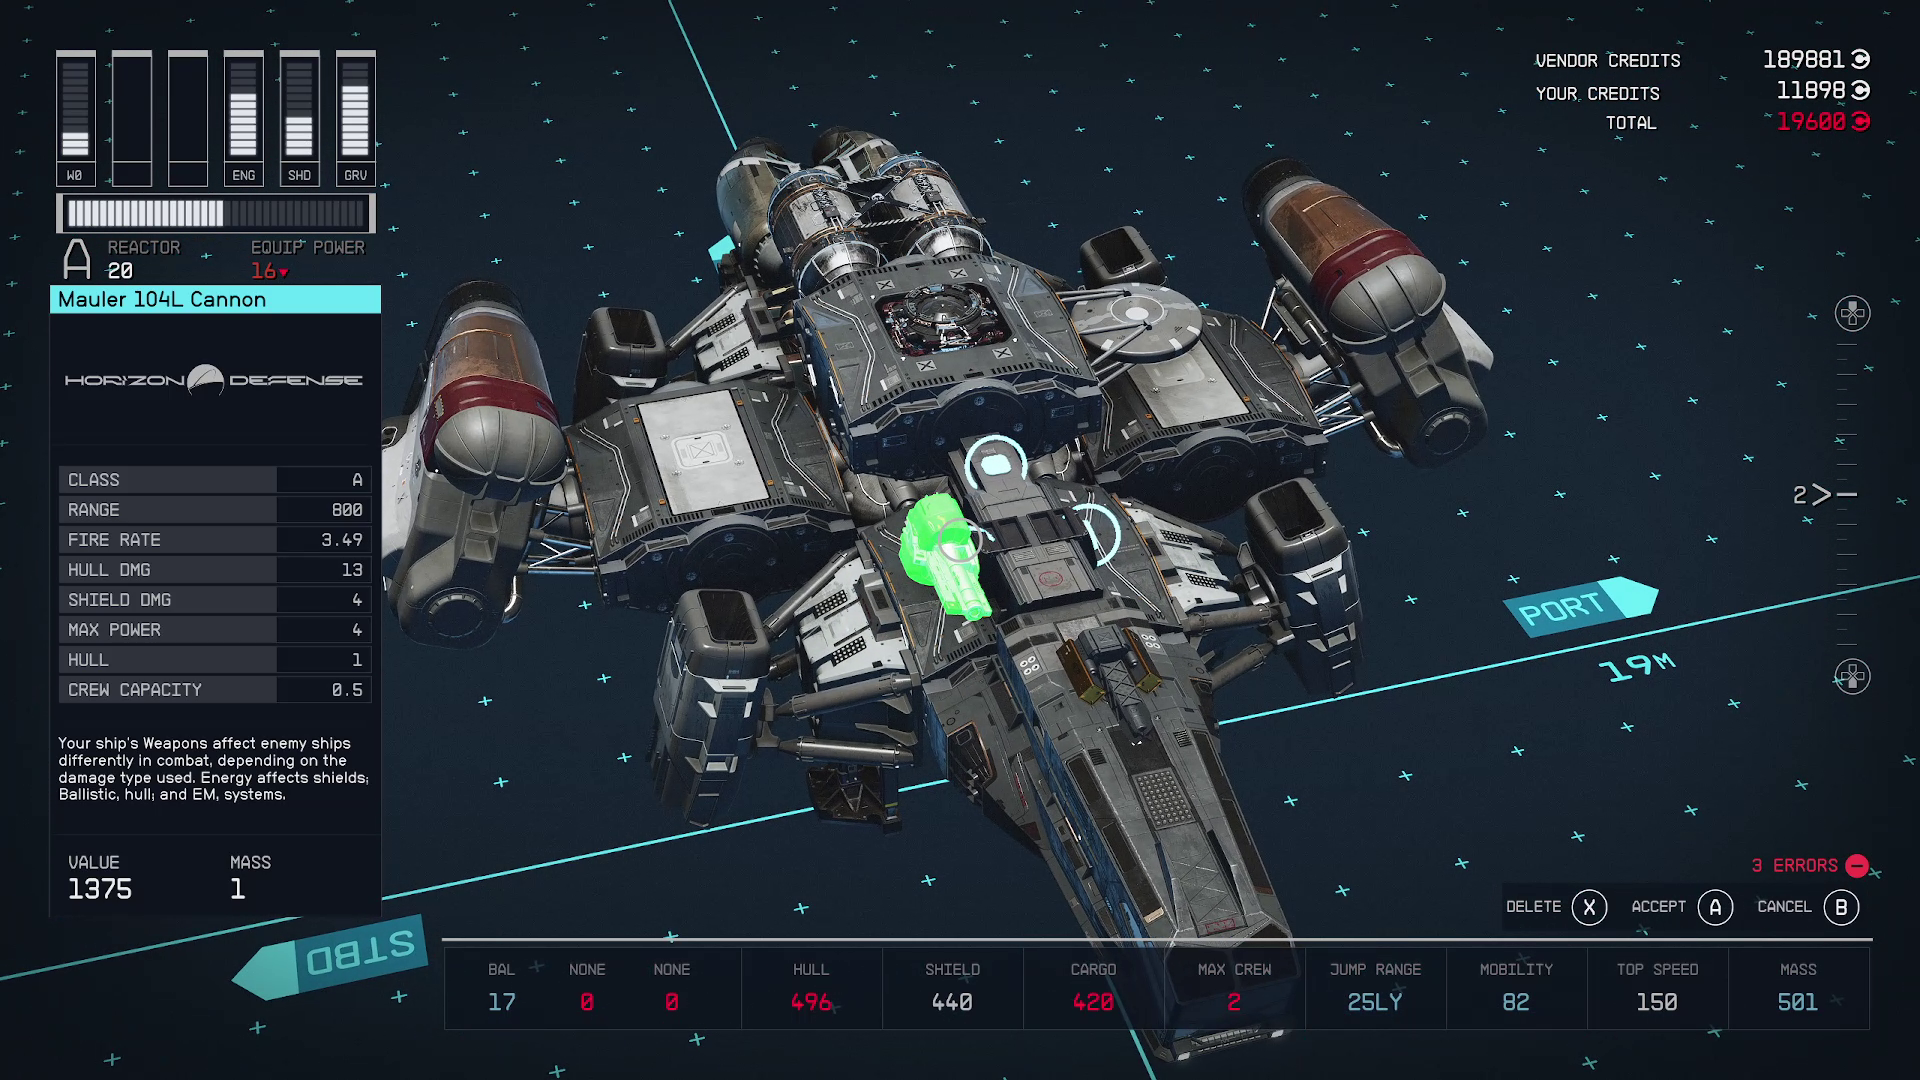
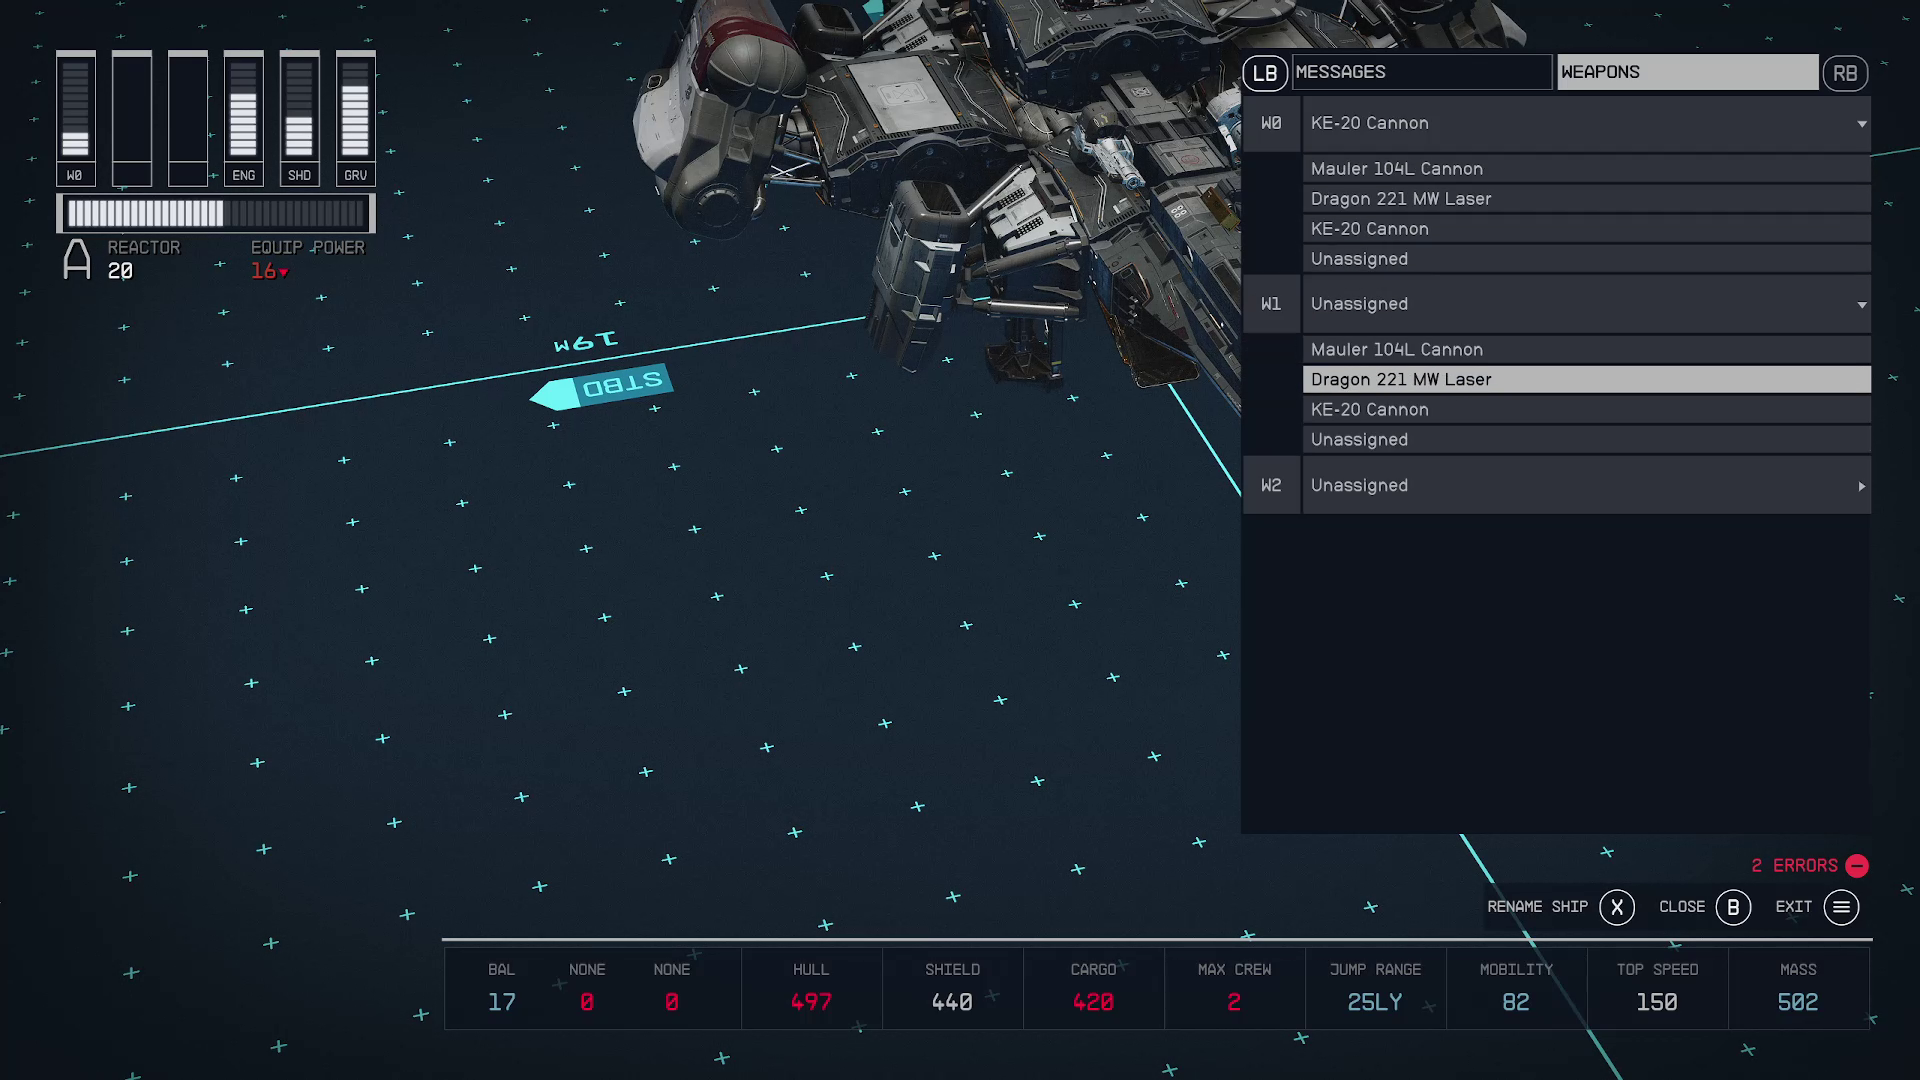
That covers most of it, but now you need some peripheral parts. The Docker has to go on an outside edge, so you can put it on top of the main Hab. The Shield Generator can go anywhere. There is usually one spot on top of the Cockpit for a weapon to be placed, however, you will likely want two more weapons. This is a good time to go to the ‘Structuring’ category of parts and find either a Cowling or a Bracer to put on top of your ship. These parts are cool because they have a bunch of connectors for things like weapons (1). After the guns are on, you have to link them to a weapon slot (2) by going to your Flight Check (, ).
12Setting up the weapons
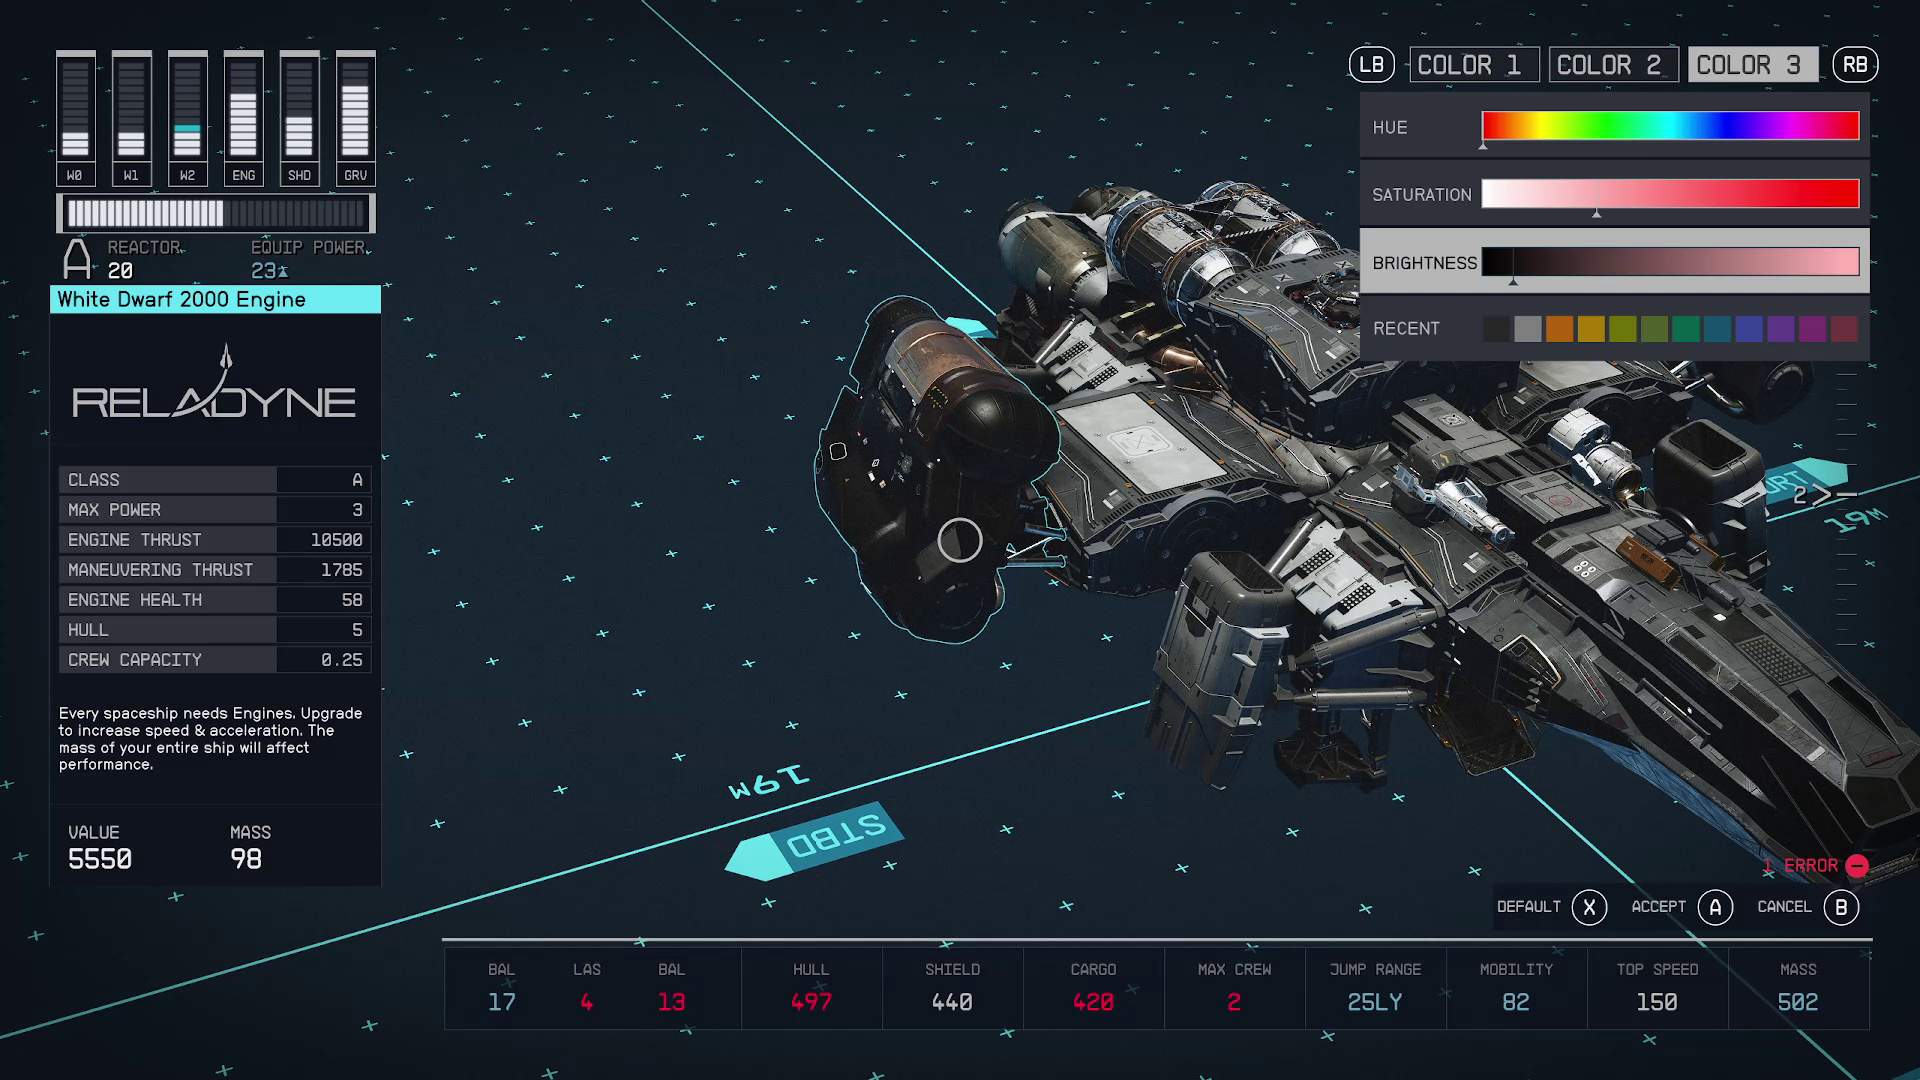
Now that you’re nearly done, you have to make the last and most difficult choice, the color. Thankfully, you can select the whole ship at once by pressing or double-clicking , then change its color with /. Of course, you can also select each part individually if you want to fully customize the colors. They do make it a little easier by saving your most recent colors to apply to the other parts. Then you can double-check everything in your Flight Check and settle up with the Technician.
Coloring a single piece of the ship
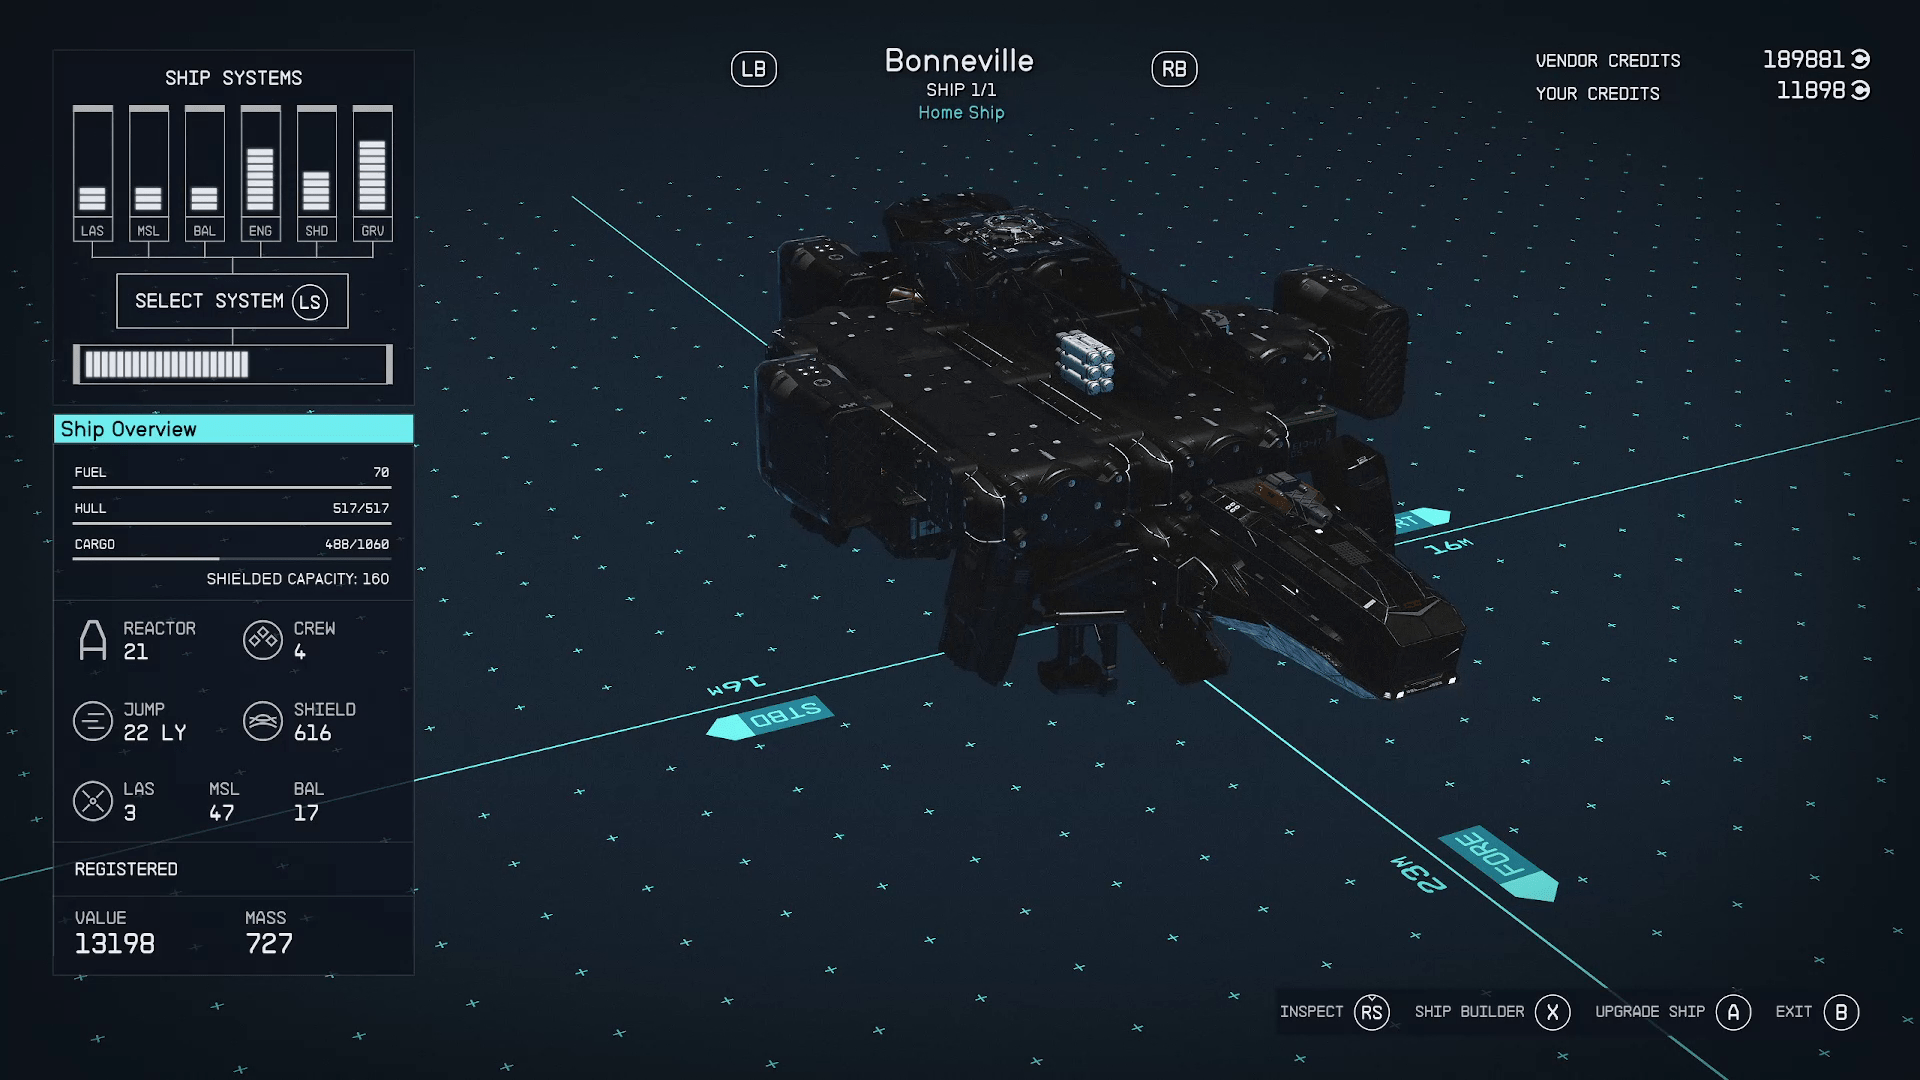
Congratulations on building your first ship. We are very curious how it turned out, and if it actually flies. Leave us a comment to let us know, and/or share a picture of your creation!
Share this article:
Kelson H.
Kelson is a spud head from out west. He is most happy when holding a milky tea with too much honey and playing a sprawling role playing game or reading a fantasy novel. His video game tastes vary but his main genres are looter shooters, RPGs, and real time strategy games.


 , then press
  /
/