This main story mission takes place in the Sol system. In Unearthed, you’ll explore a couple of NASA facilities in your search for answers about the Artifacts.
To unlock this mission, you’ll need to get to the end of In Their Foosteps. When you’re leaving the Hunter’s ship, the Emissary will give you a key to the Luna moon base, and landing coordinates to the Nova Galactic Research Station.
Use your Mission log to set a course for the Nova Galactic Research Station, which is on Luna (Earth’s Moon) in the Sol system.
Investigate the Research Station
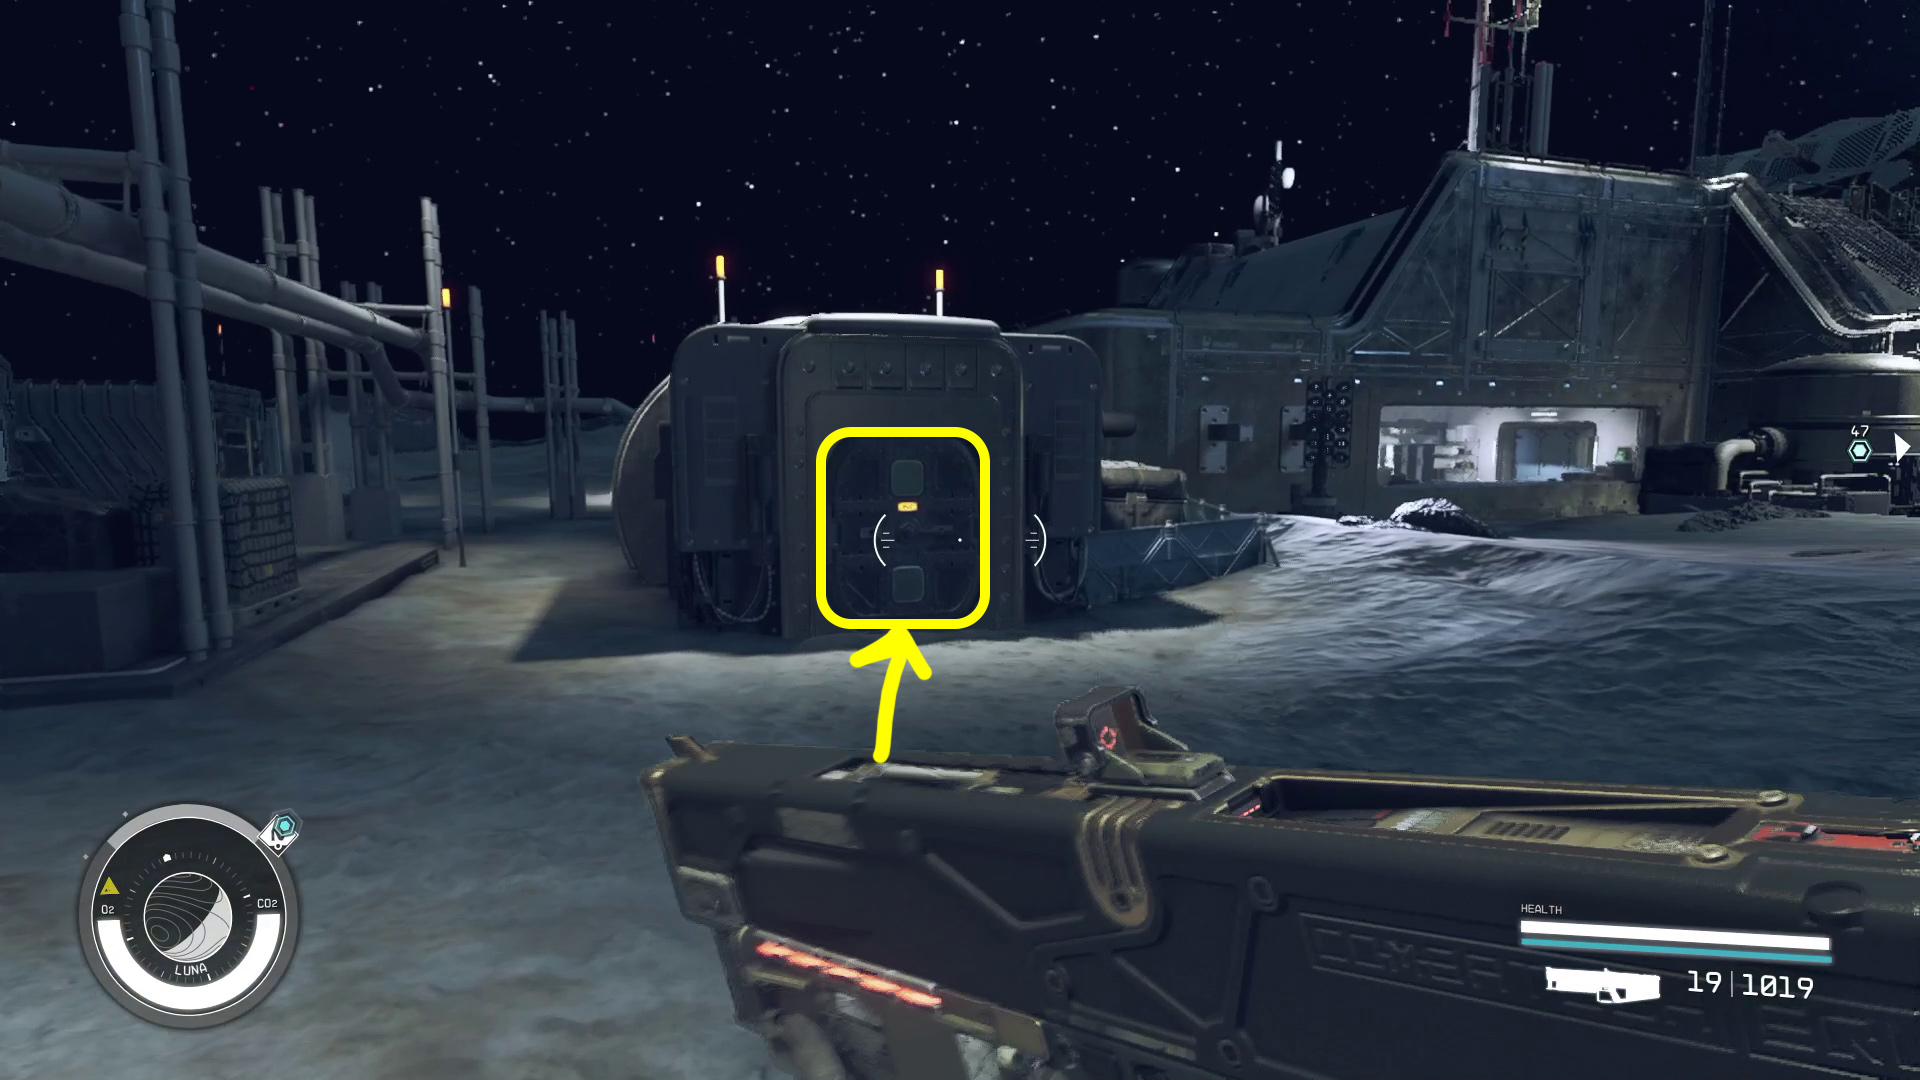
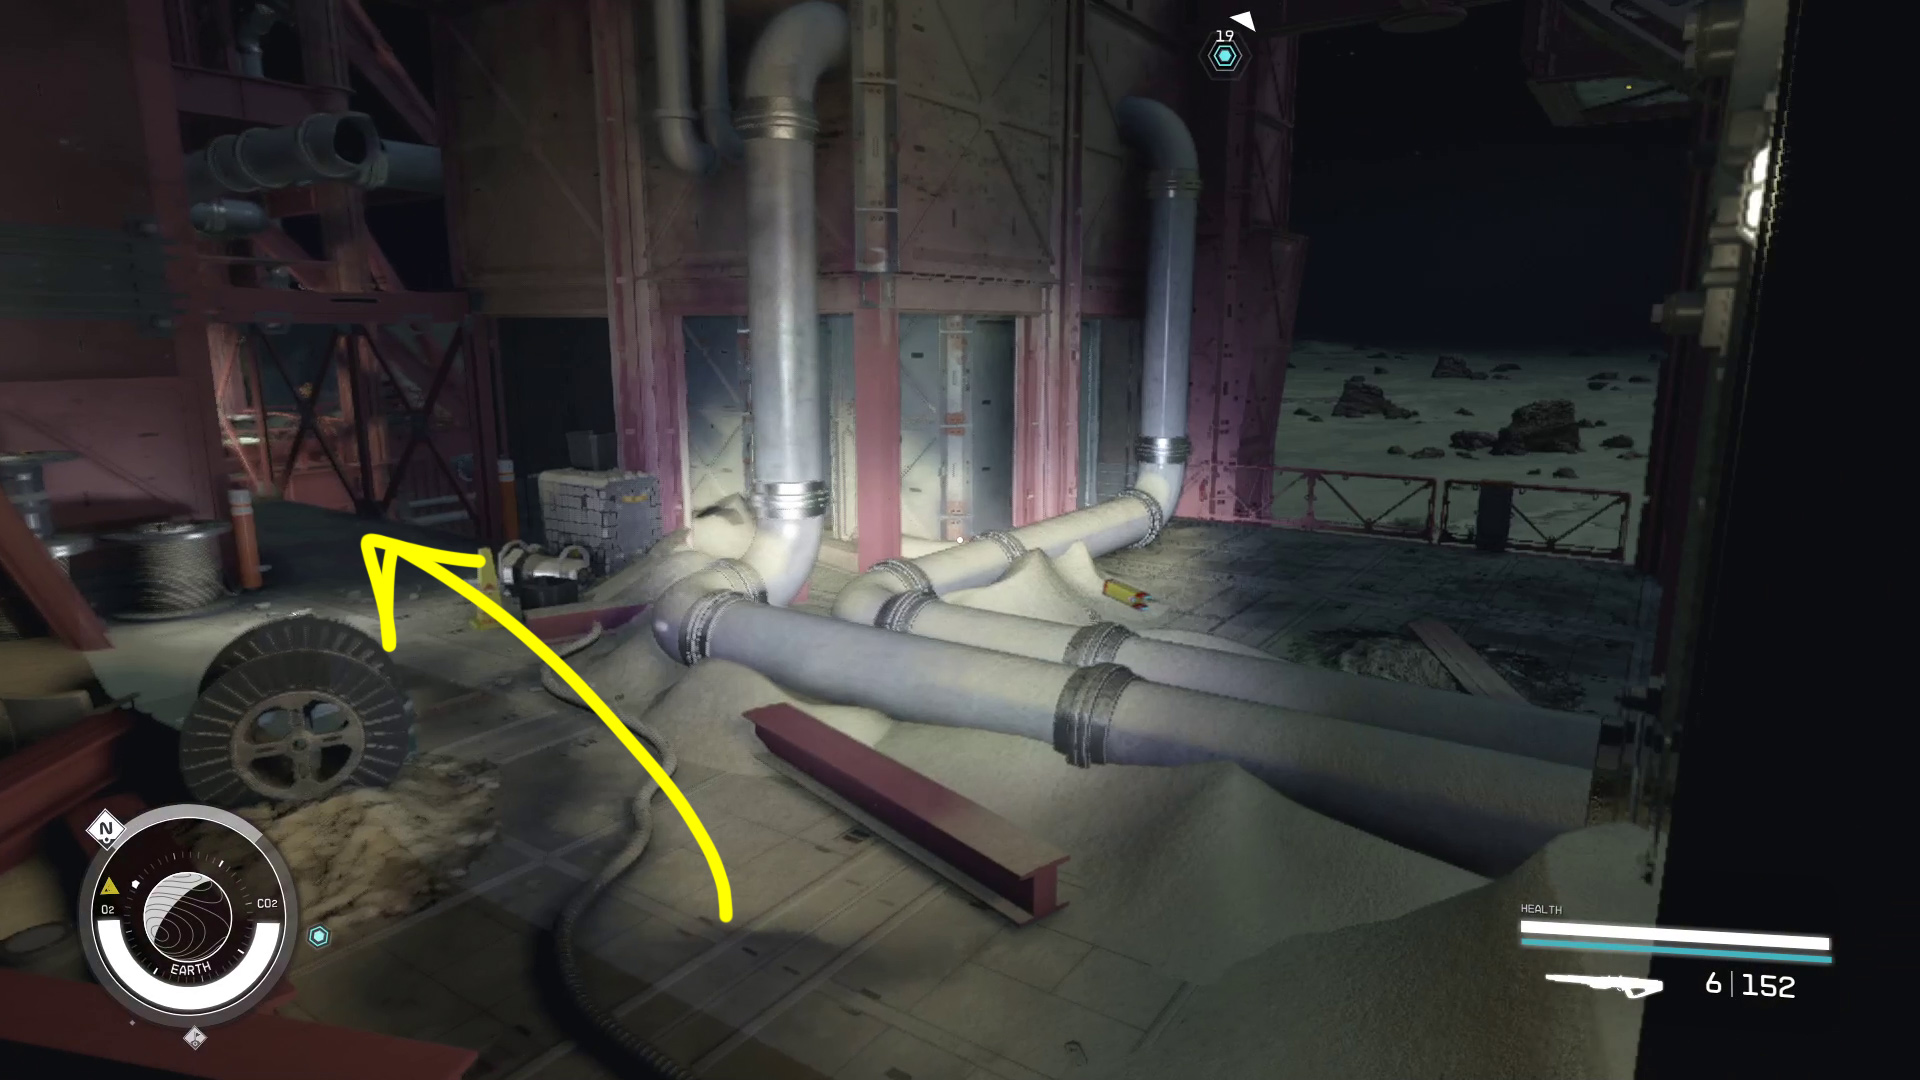
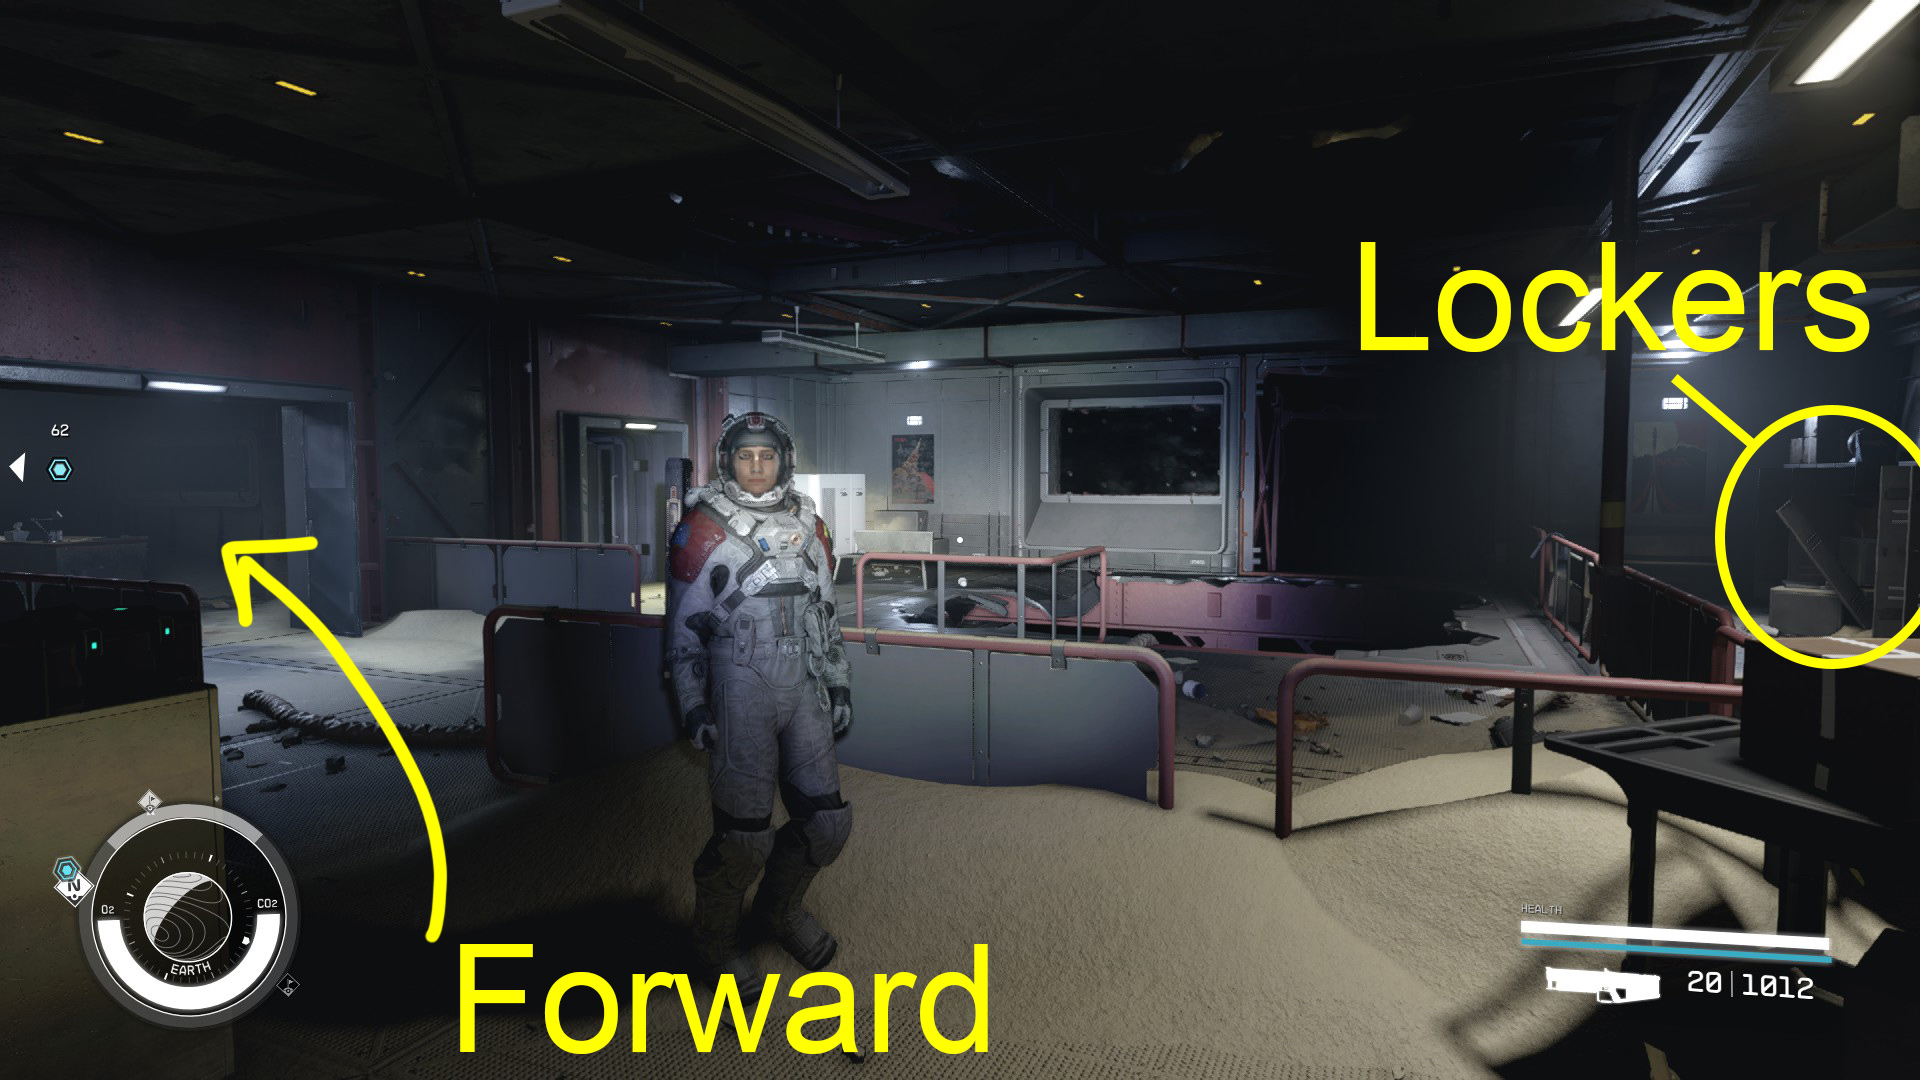
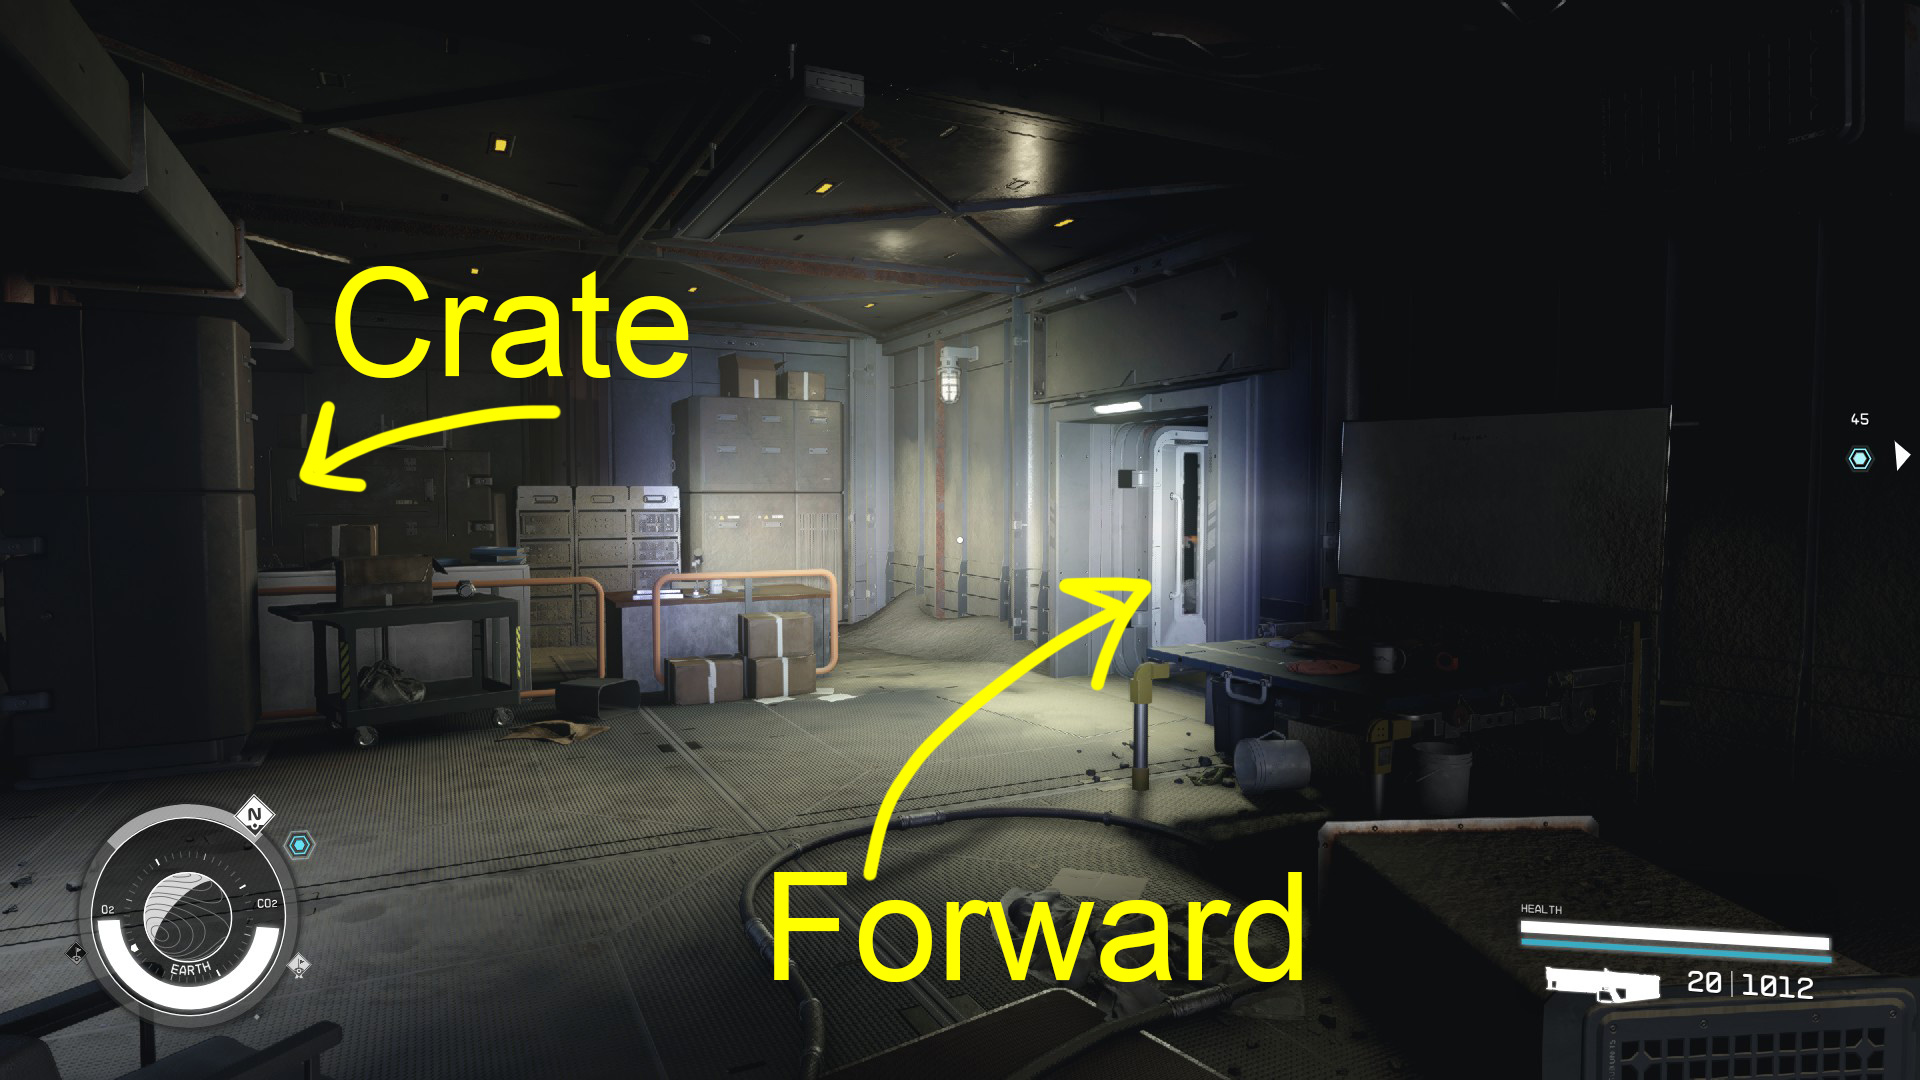
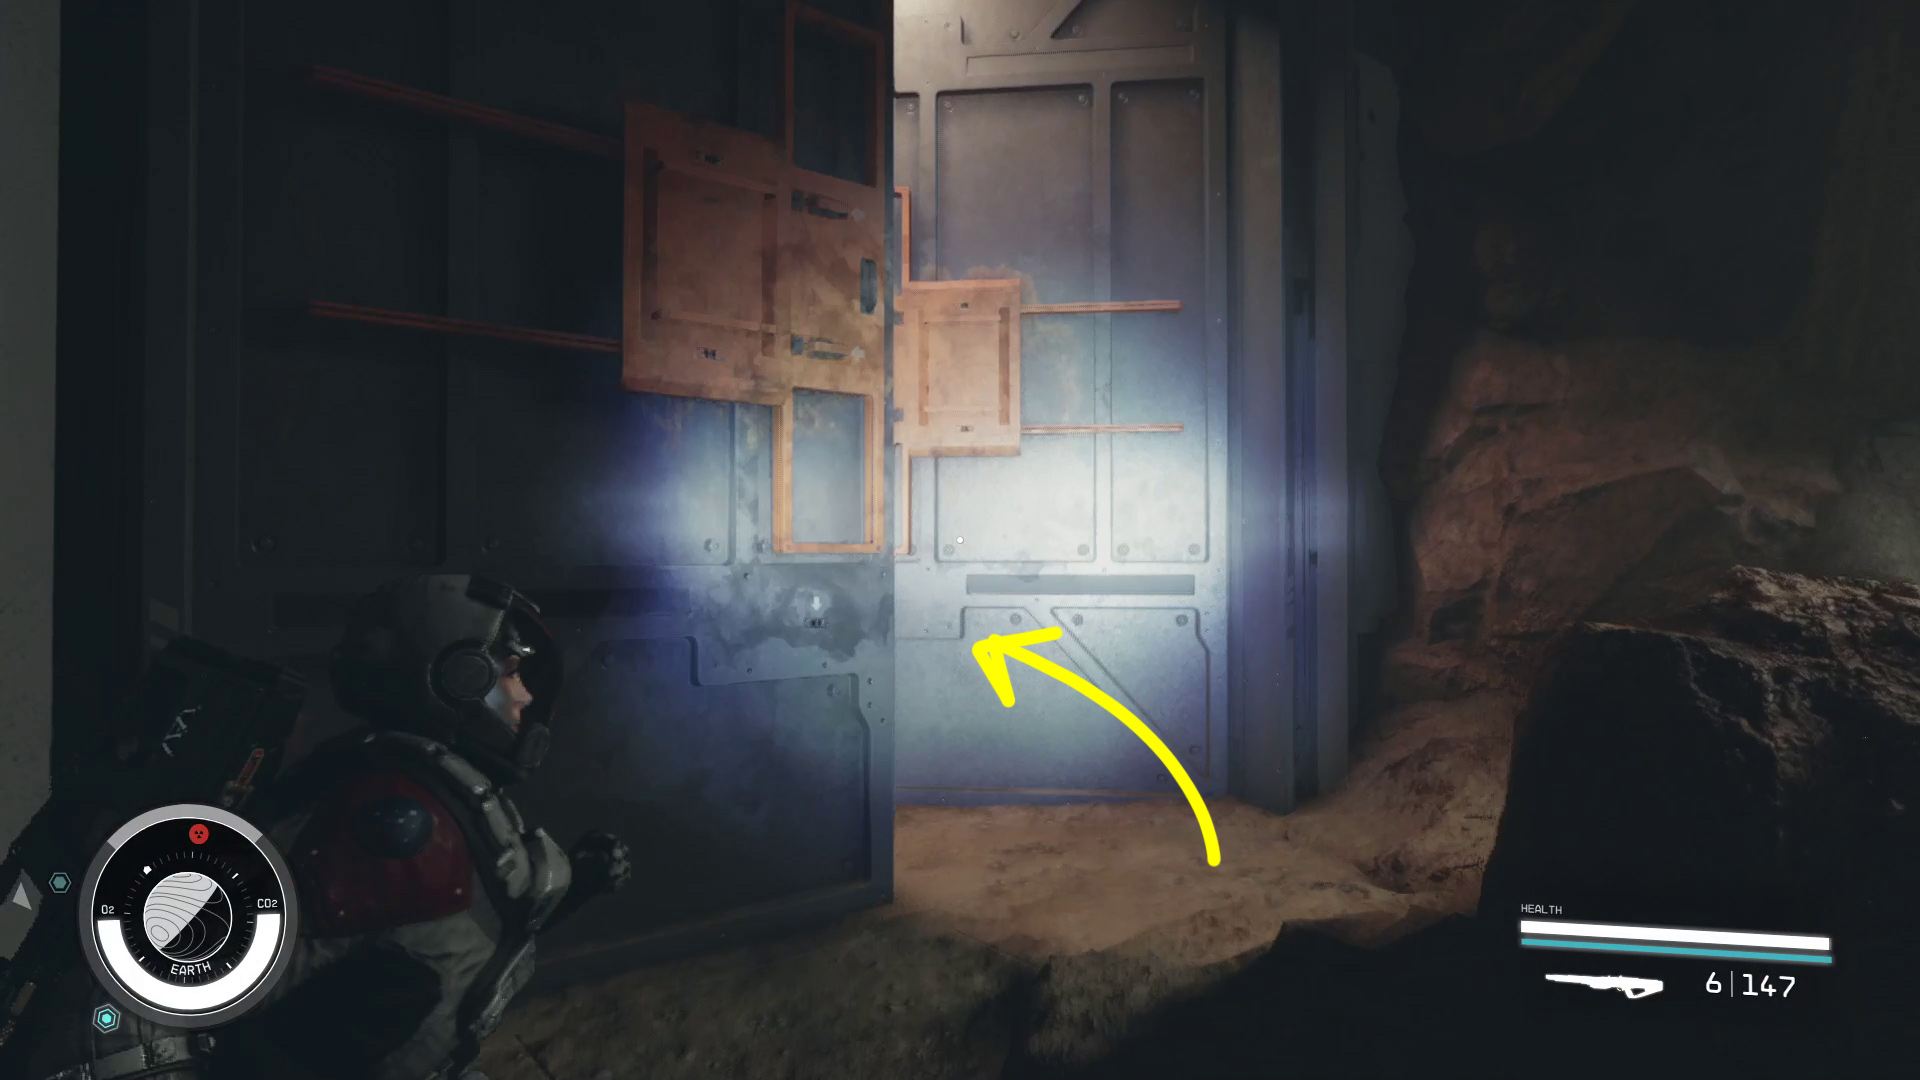
Once you land at the research station landing site, exit your ship and head towards the moon base, which will be indicated by your objective marker. Use the airlock on the left side of the base (Image 2) — the Moon Base Key will unlock it — and enter the base. Continue forward until you find some stairs on your left (Image 3) — grab the items from the first aid kit, loot the nearby lockers if you want, then head up the stairs and go through the door to find a science crate and storage crate you can loot.
Image 2Image 3
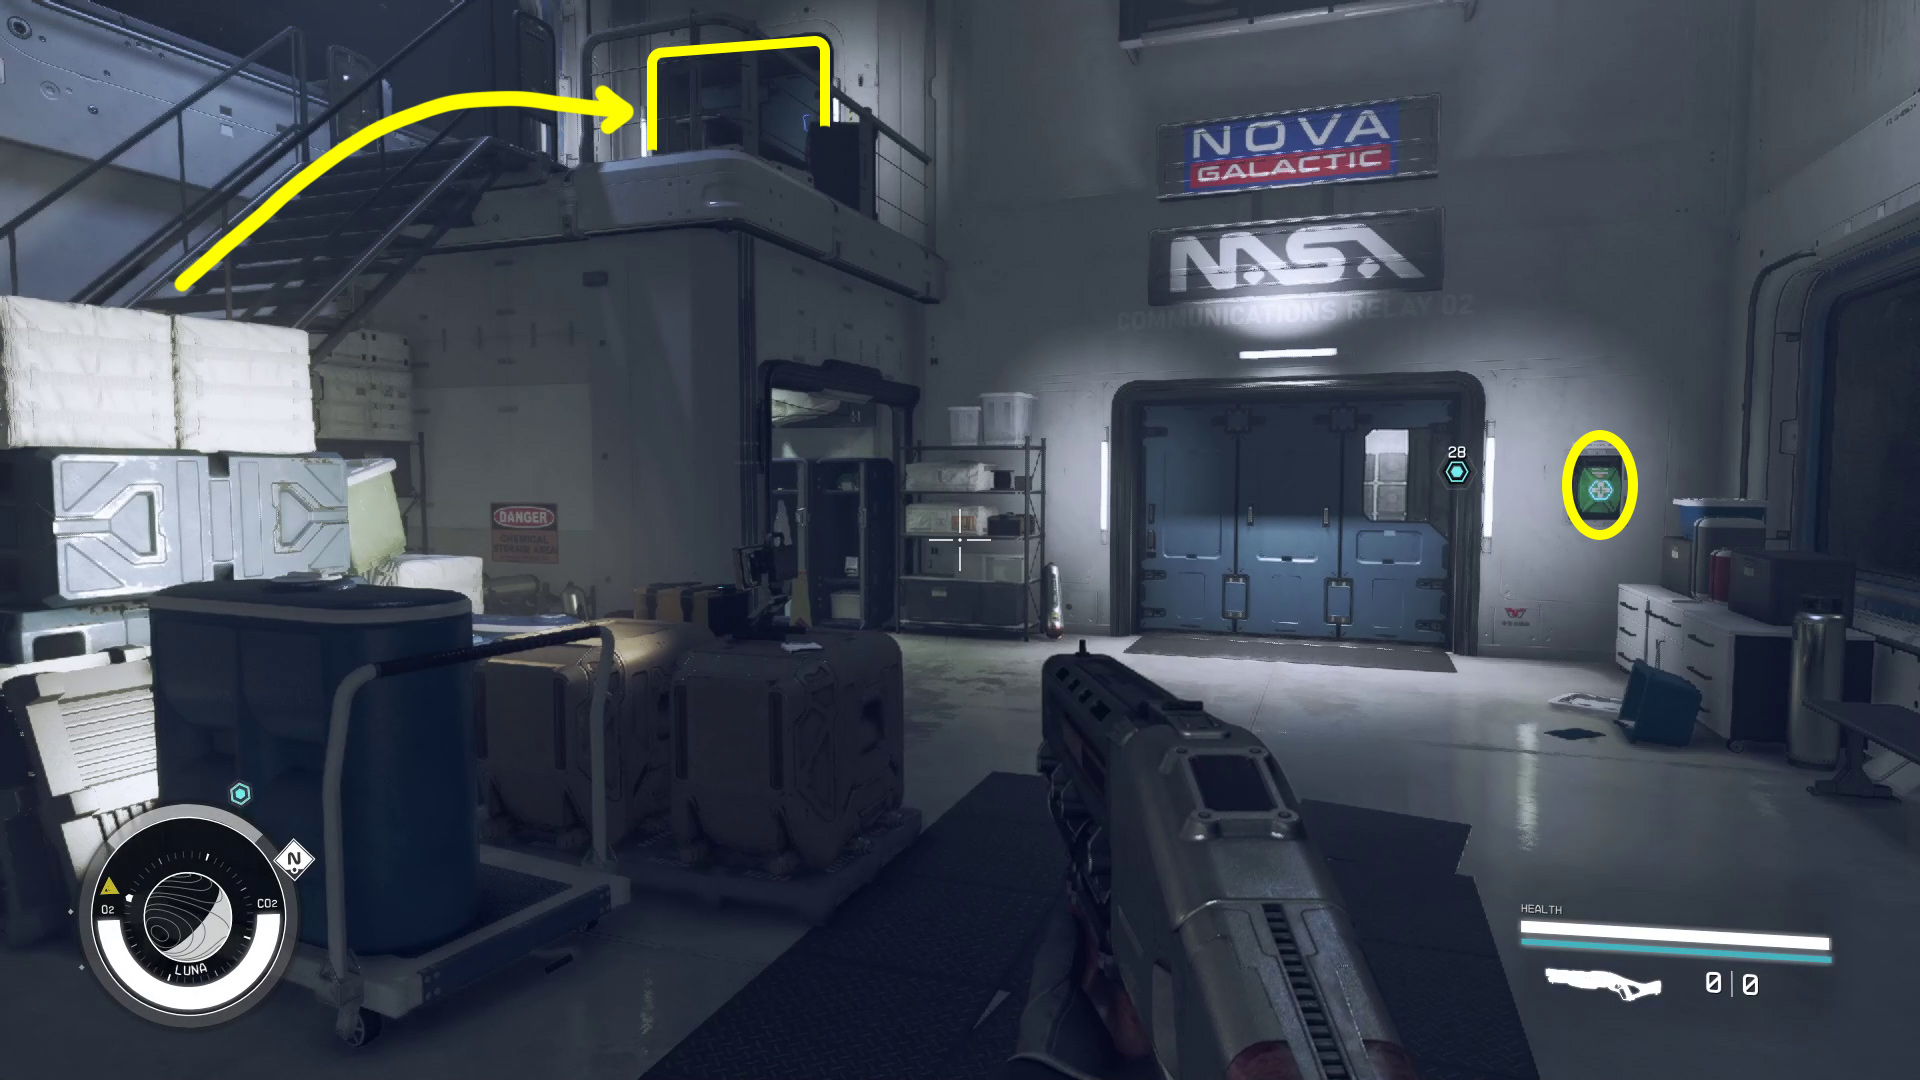
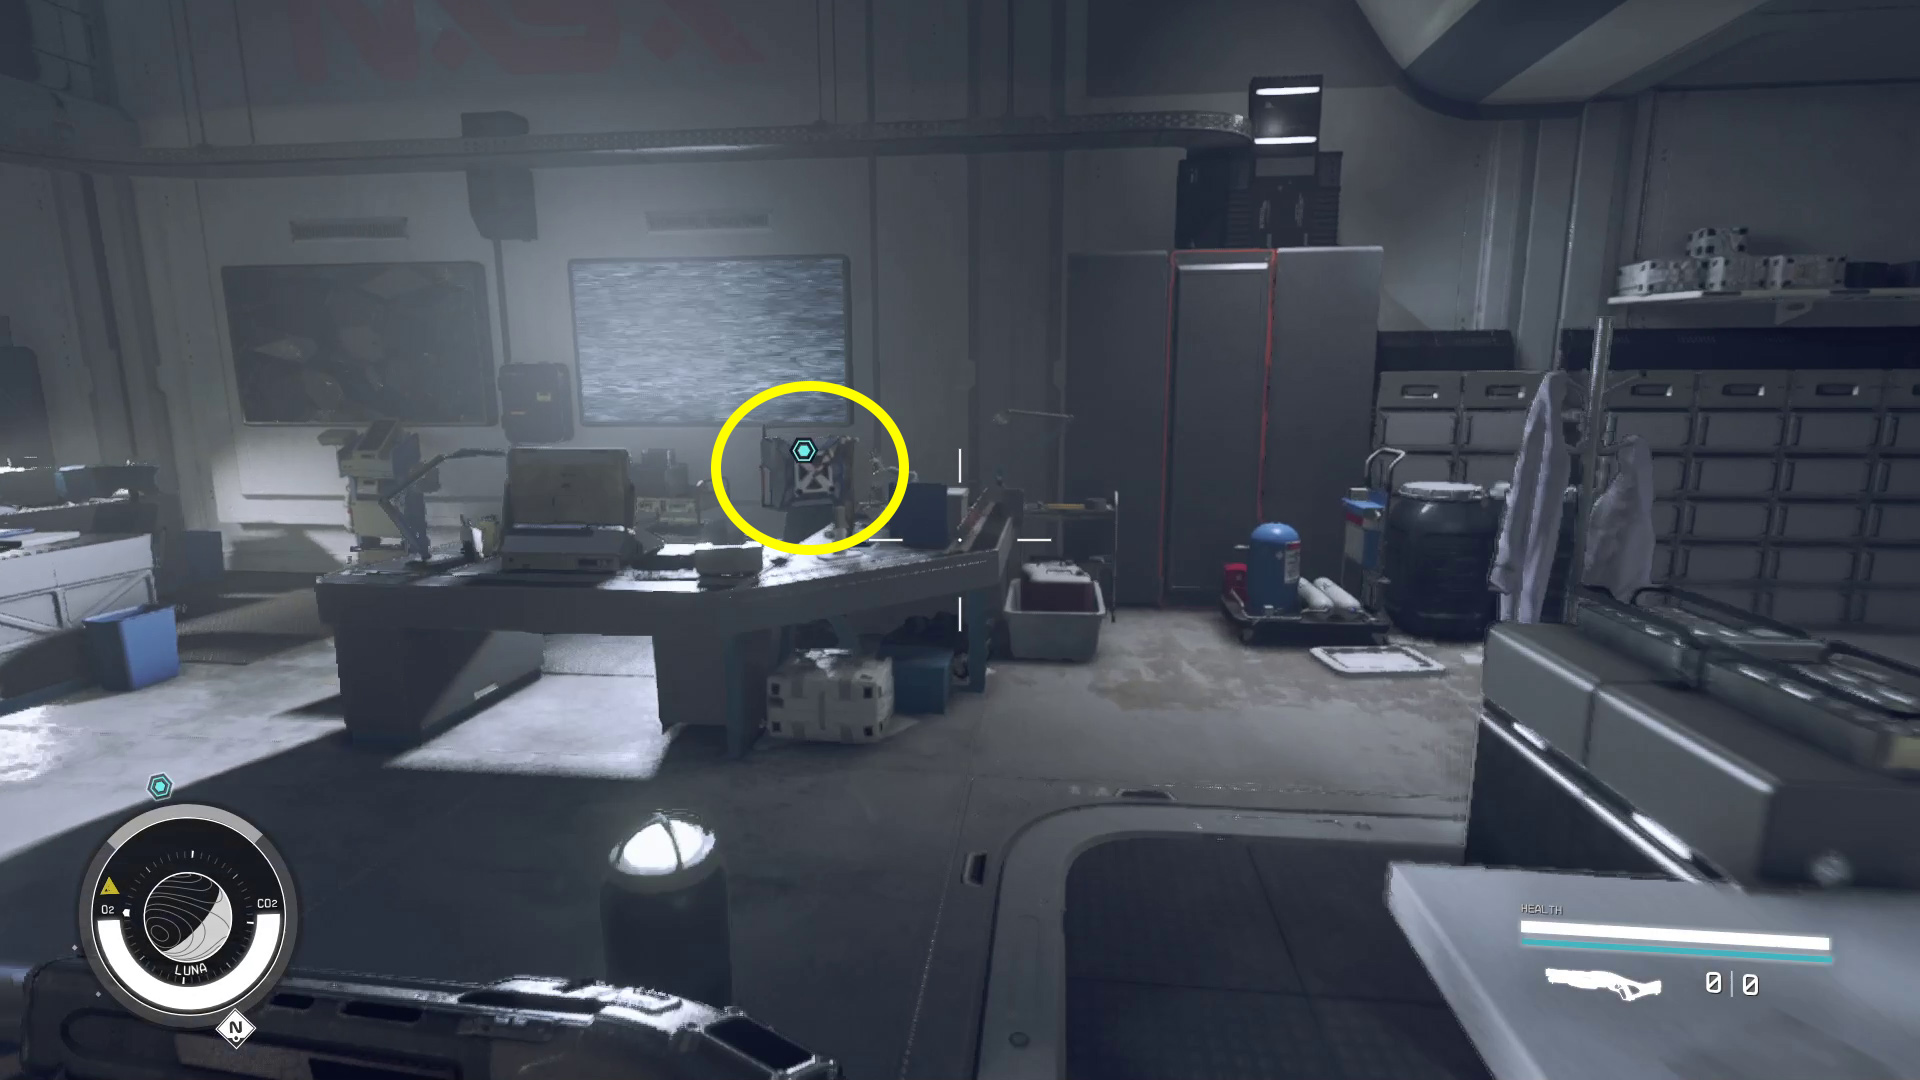
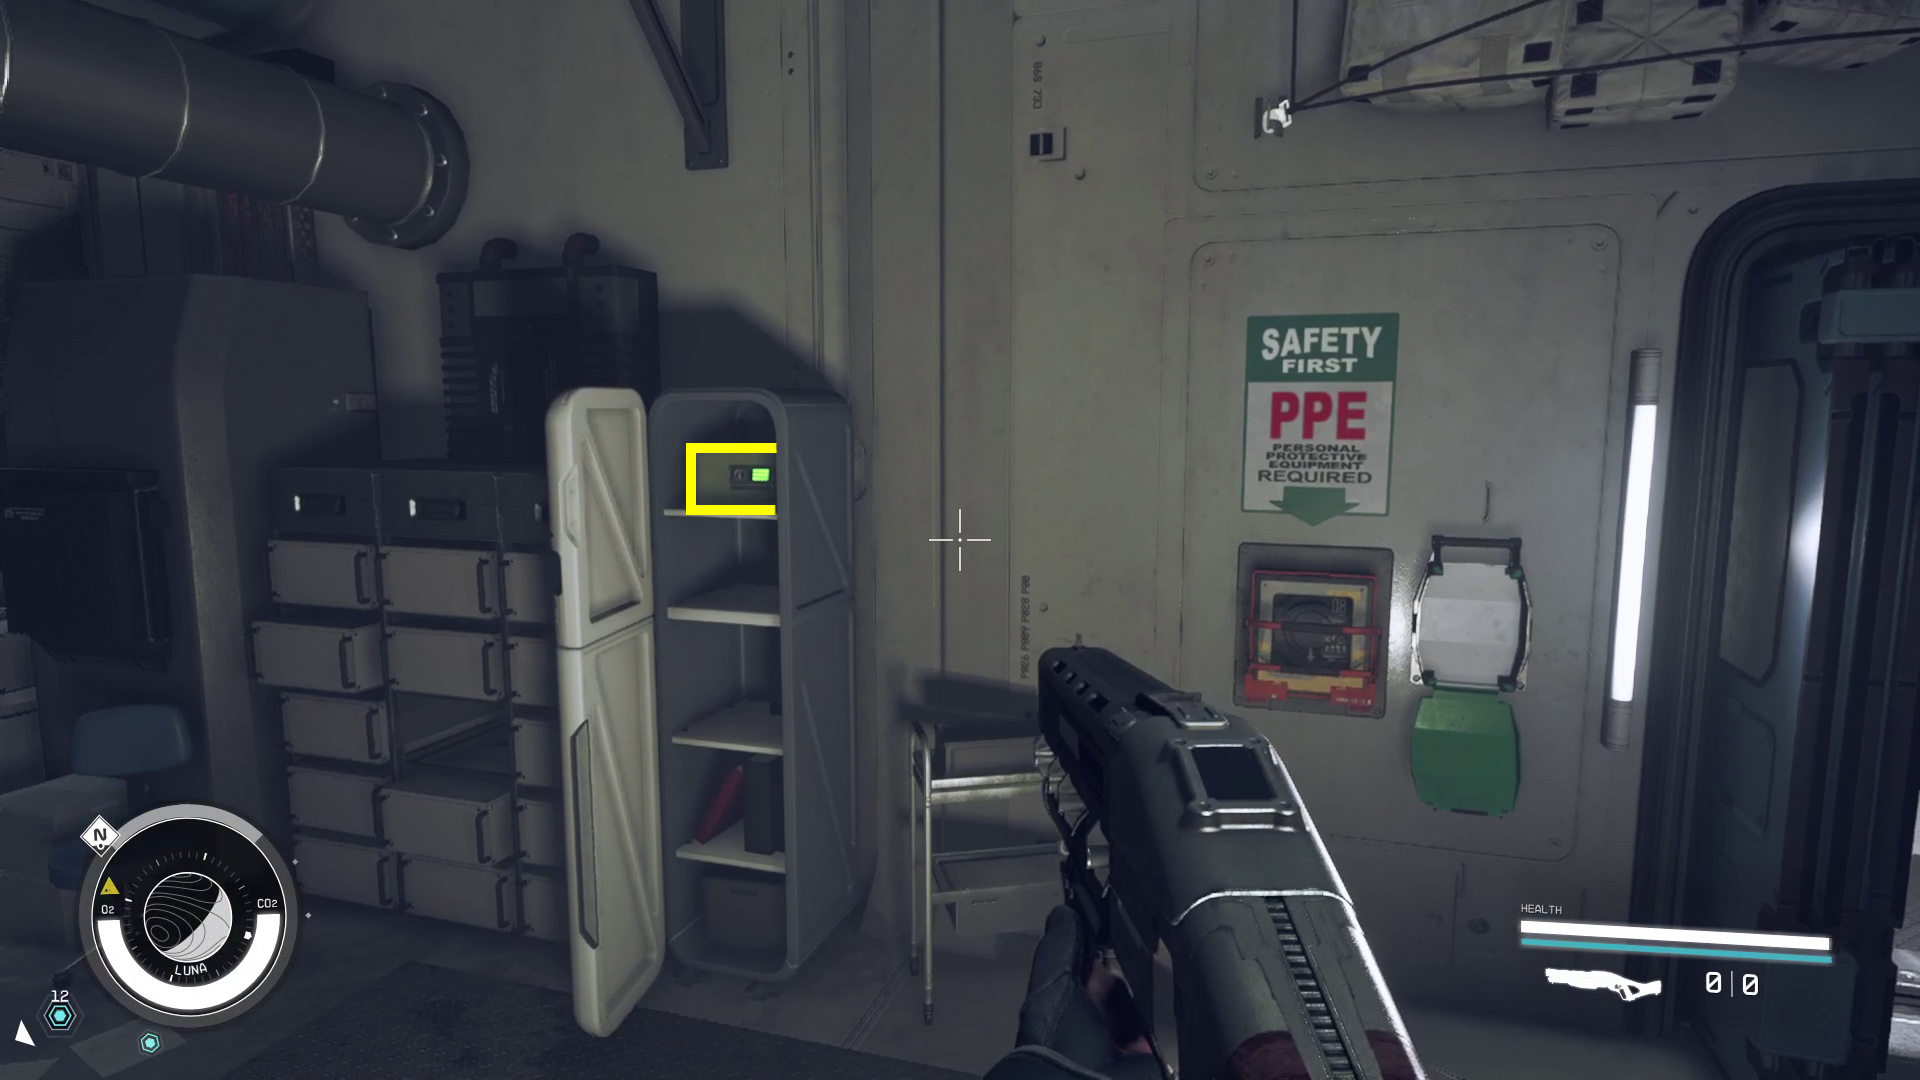
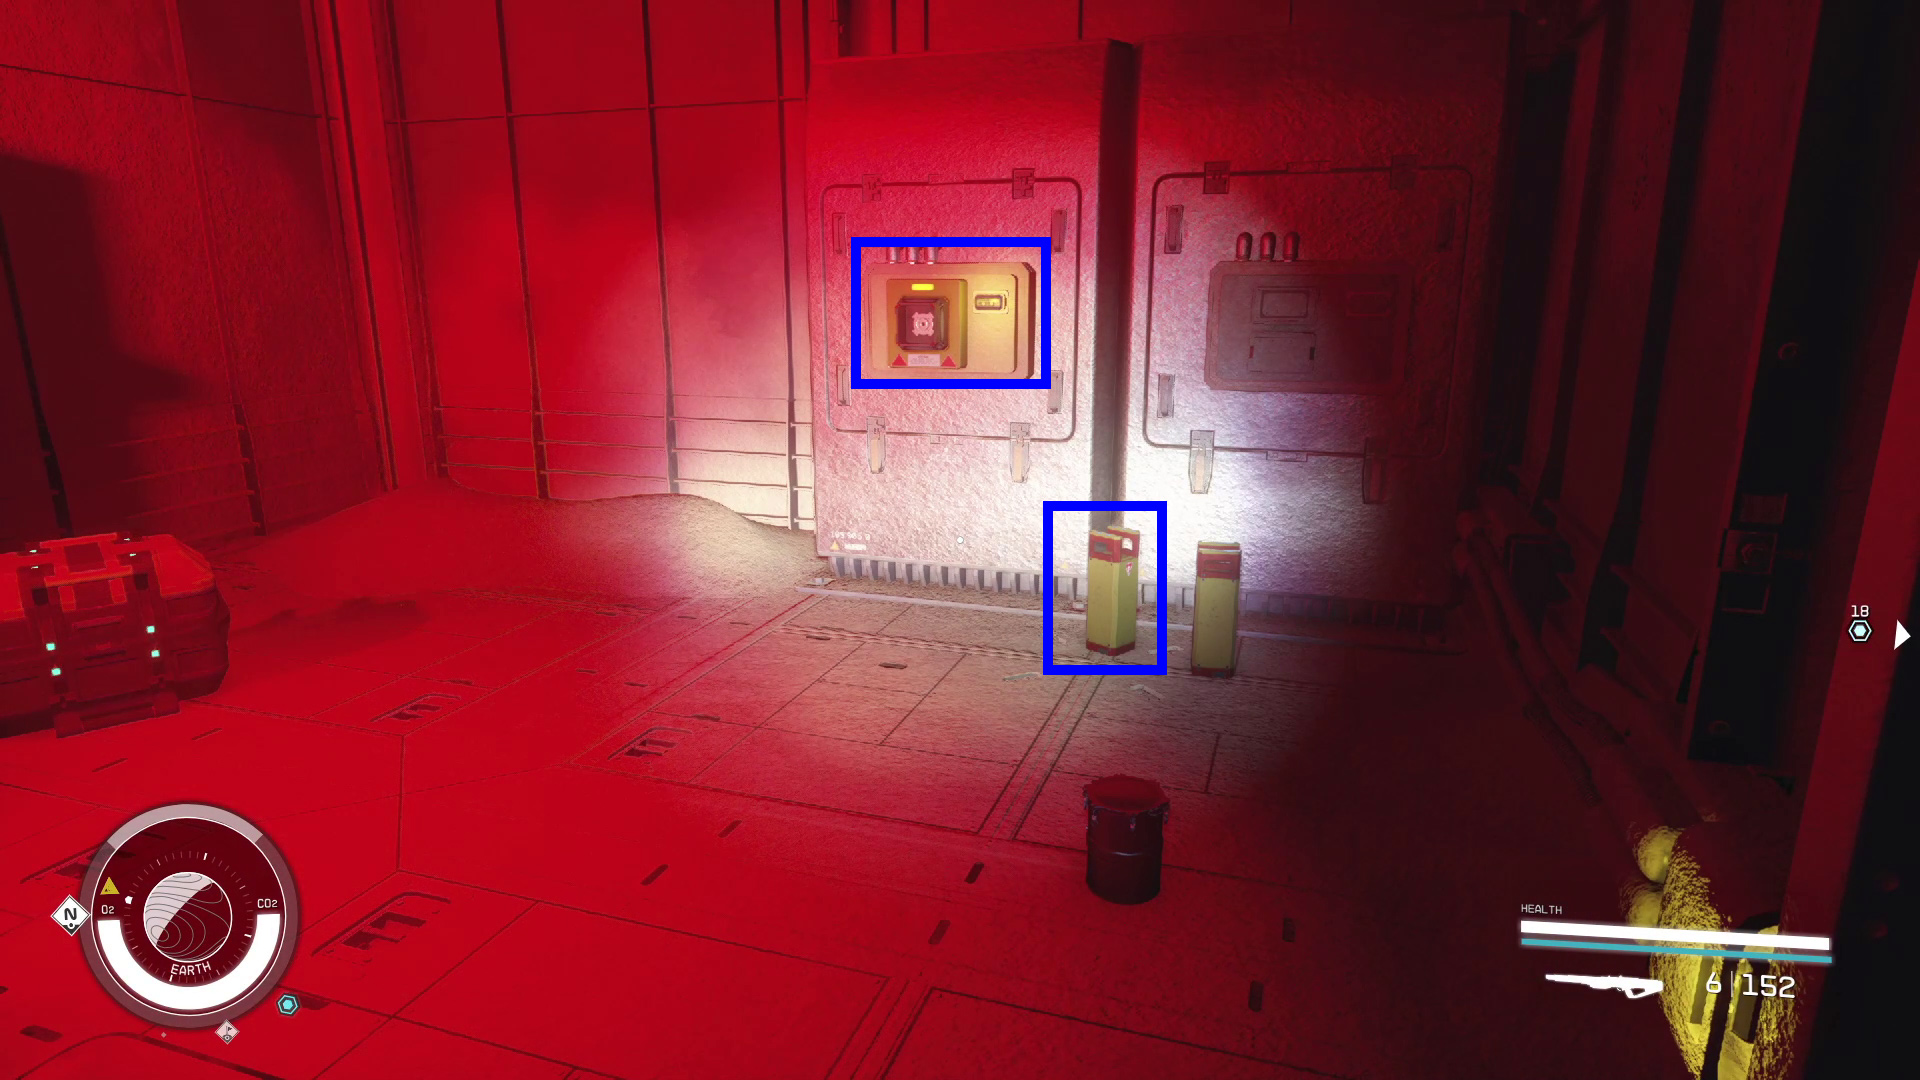
Jump or use the stairs to get to the first floor, then follow the objective marker to the Nova Galactic Research computer (Image 4). Use it and select “Project Prism Launch”, and you’ll get a new objective to play the recording on the roof. There are odds and ends to loot in here before you leave, if you so choose — of particular note is the safe in the locker on the opposite side of the room from the computer, to the left of the door (Image 5).
Image 4Image 5
Play the Recording on the Roof
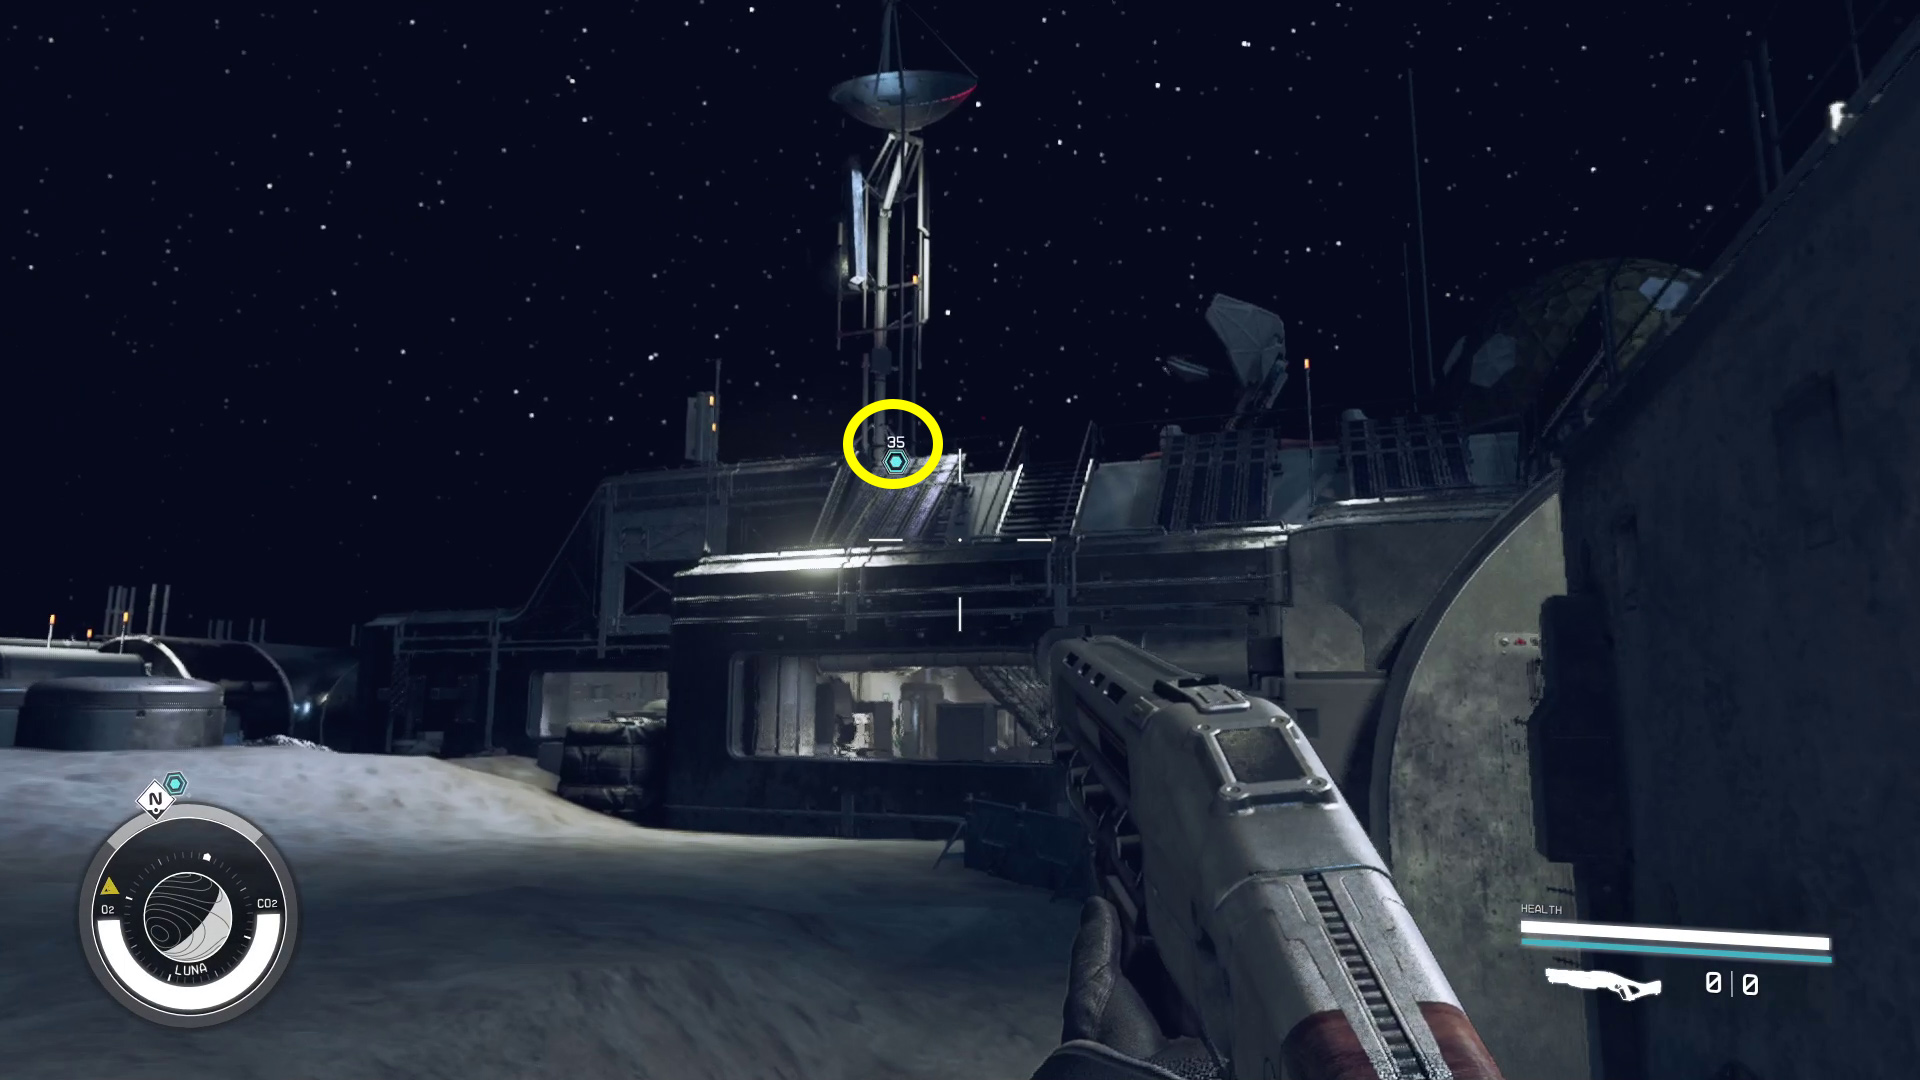
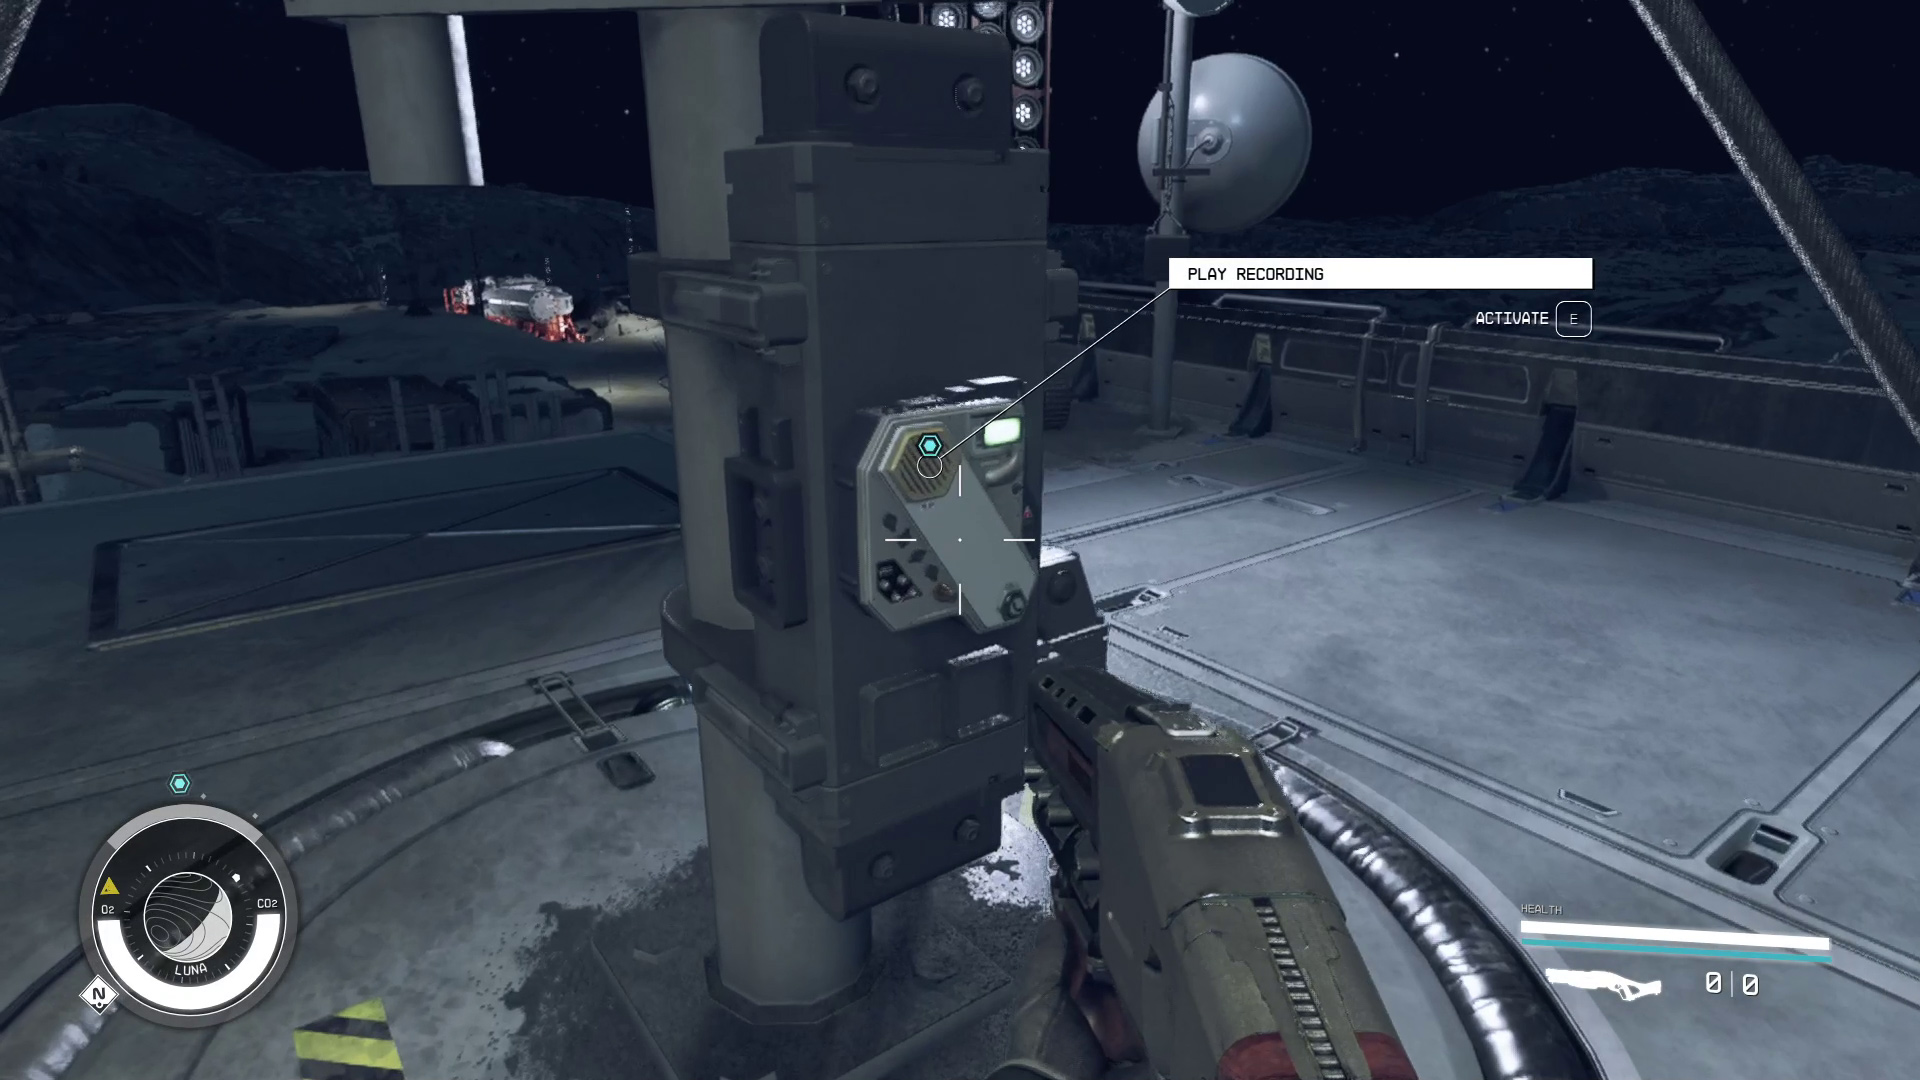
You can turn left from the computer and go out the airlock there, or go out the way you came in. Either way, you’ll need to end up on the roof (Image 6) — easily accomplished with the low gravity on the Moon and a boost pack. Approach the intercom and press the indicated button to activate the recording (Image 7). Listen to the entire recording, and then you’ll get the NASA Access Code and your next objective.
Image 6Image 7
Go to NASA/Find a Way Inside
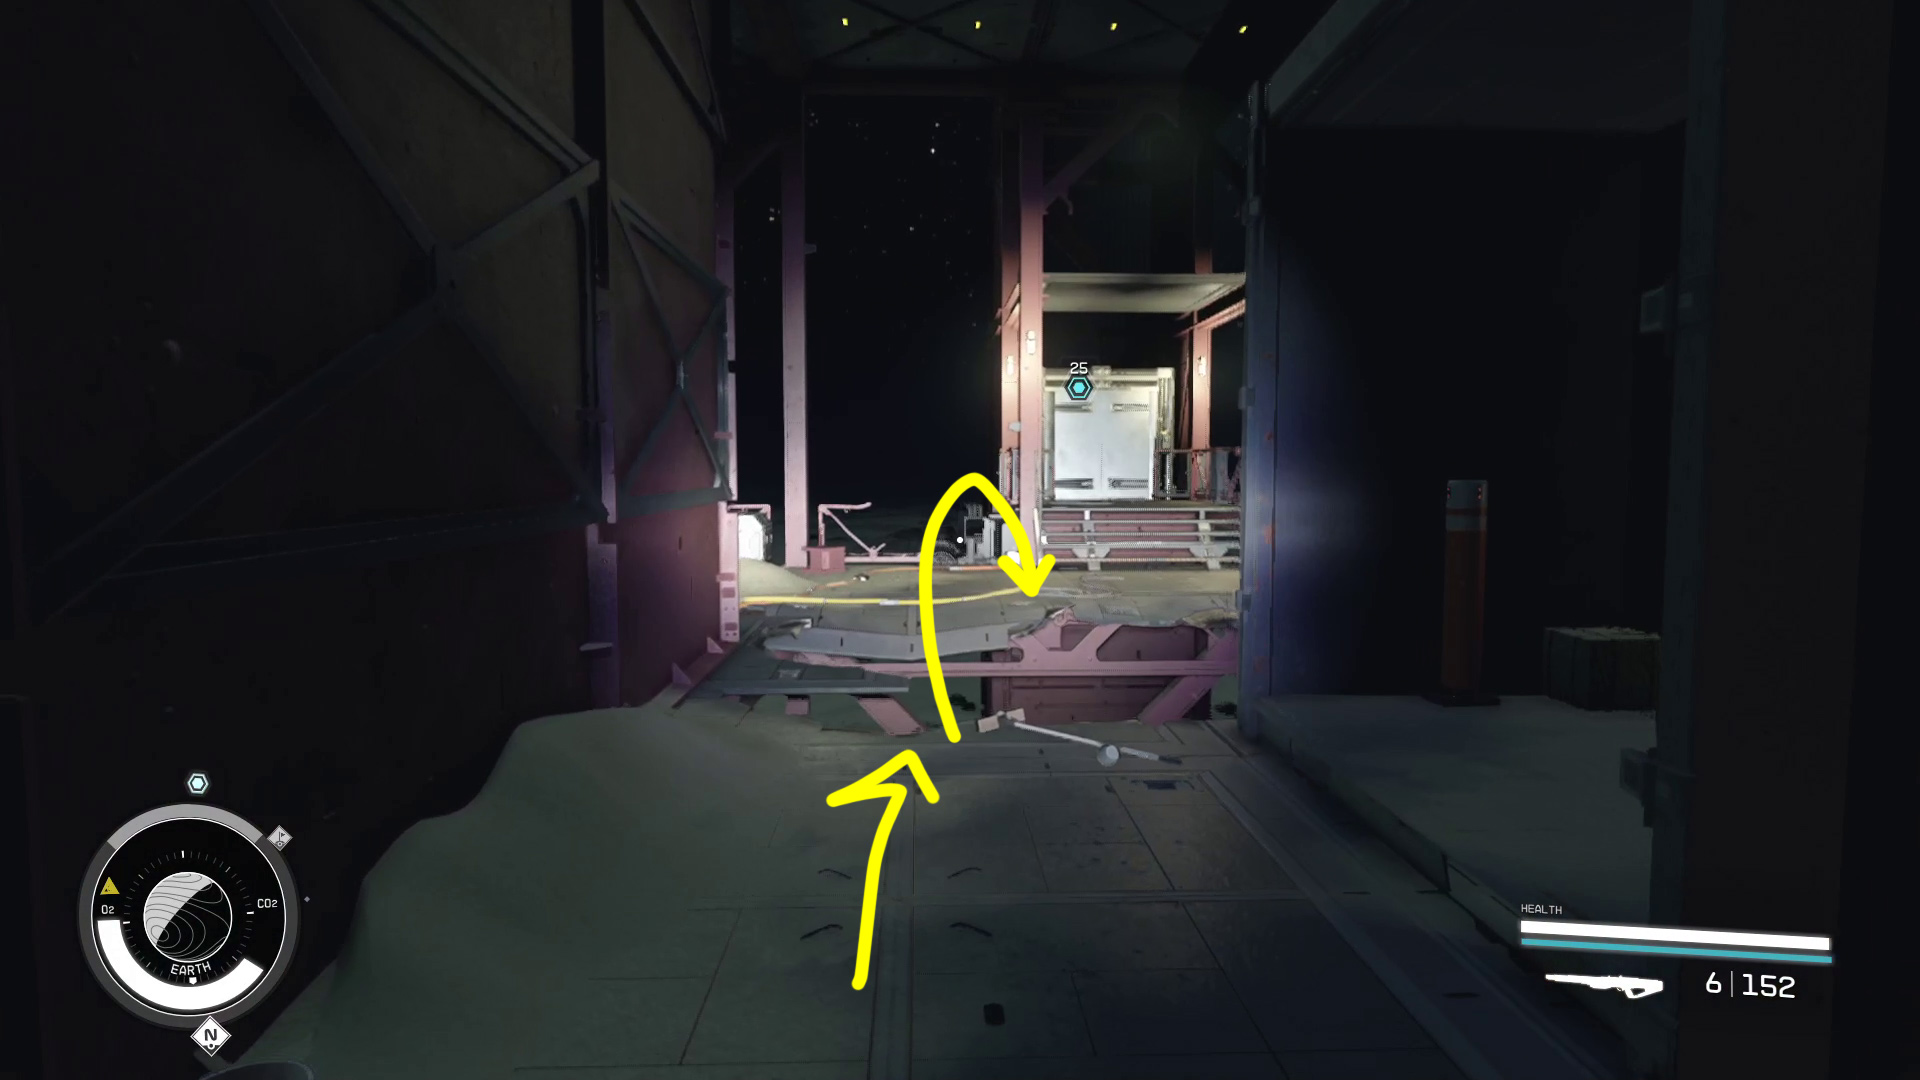
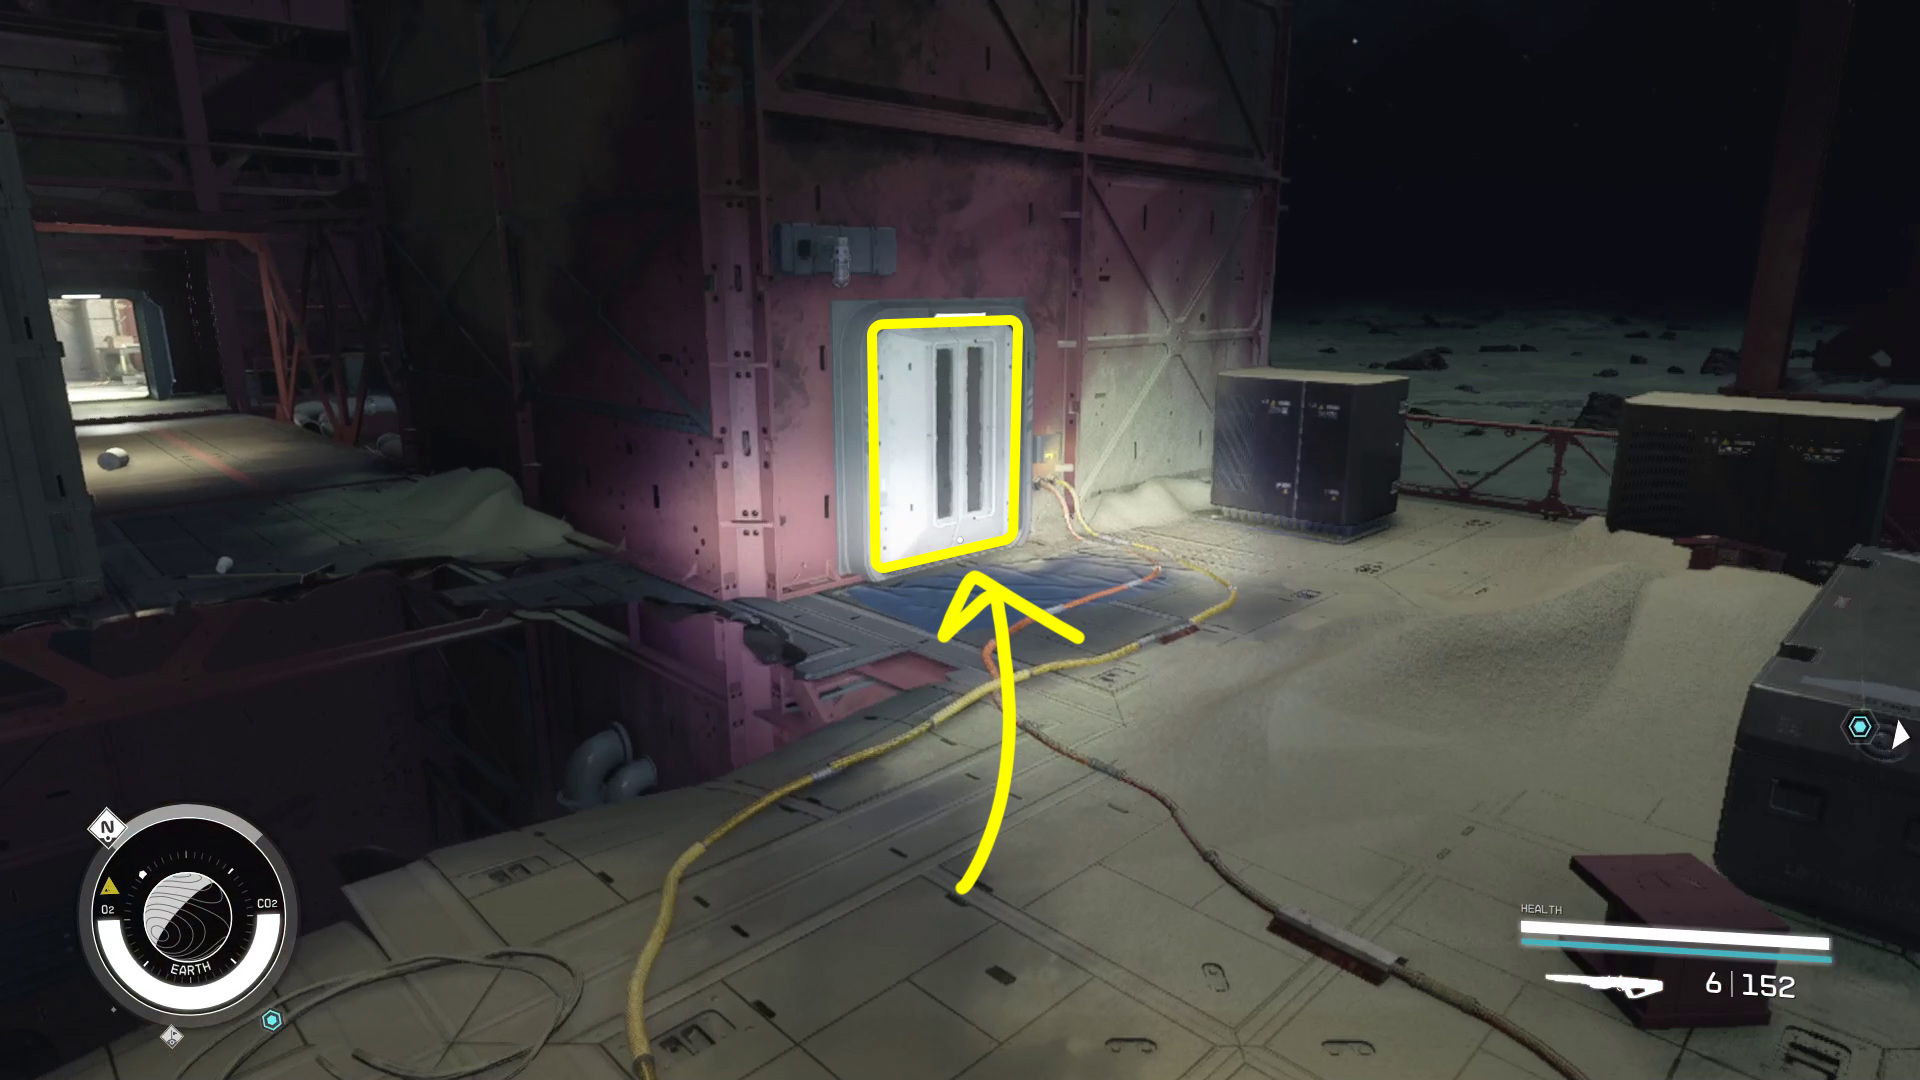
User your Mission log to set a course to Earth, then use it again to land at the NASA Launch Tower. Exit your ship and head towards the tower — it’s pretty hard to miss, given that it’s the only structure around. As you near the launch site, head to the right-hand side of the tower opposite the ship (Image 8). If it’s night, you’ll need to turn your flashlight on to find the path up to the locked door (Image 9) — you can jump on the crates, or go around to the left.
Then, grab the nearby power cells and put one in the power socket — that’ll let you use the switch and open the door (Image 10), then loot what’s inside.
Image 8Image 9Image 10
That done, we need to start making our way to the top of the tower (ironically, so we can ride the lift down). The path up starts right near the door you powered up (Image 11) — we’ve also included another perspective of the spot you need to find, but during the day to make it easier to spot (Image 12).
Image 11Image 12
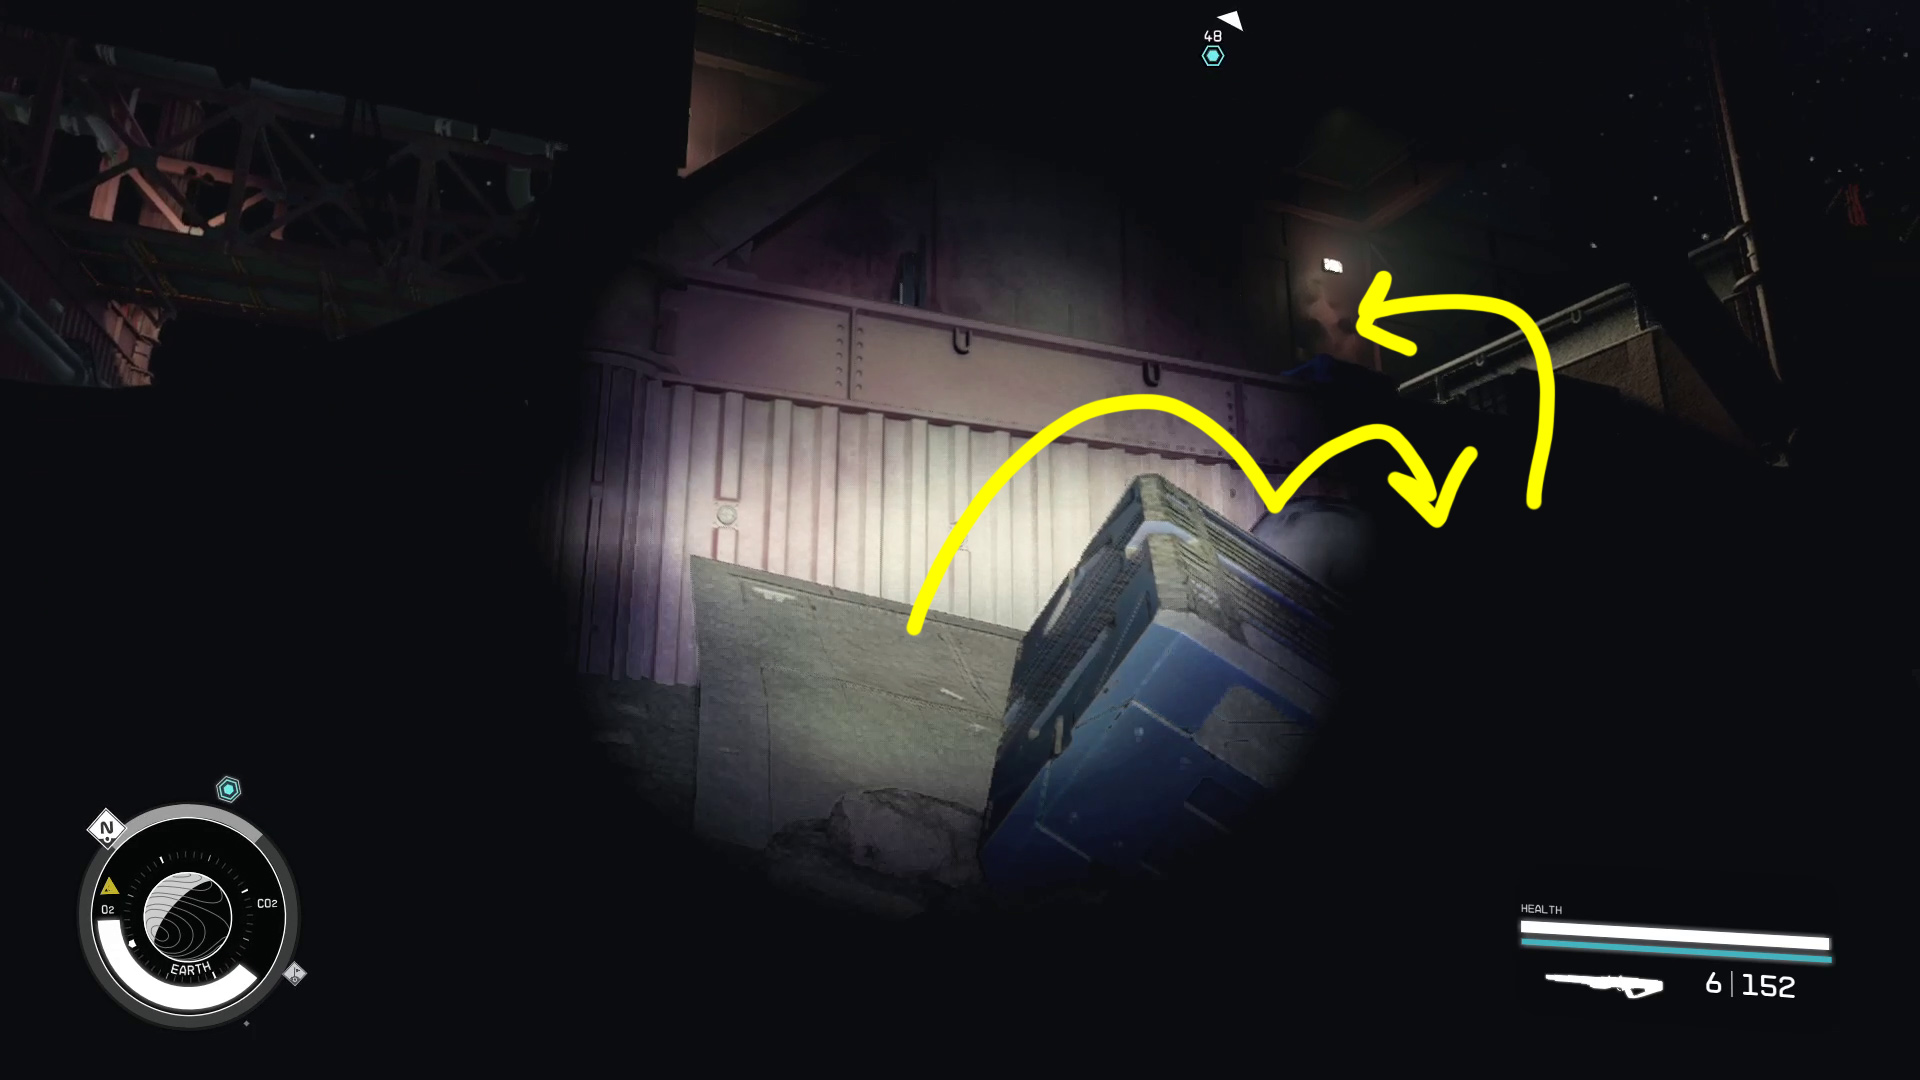
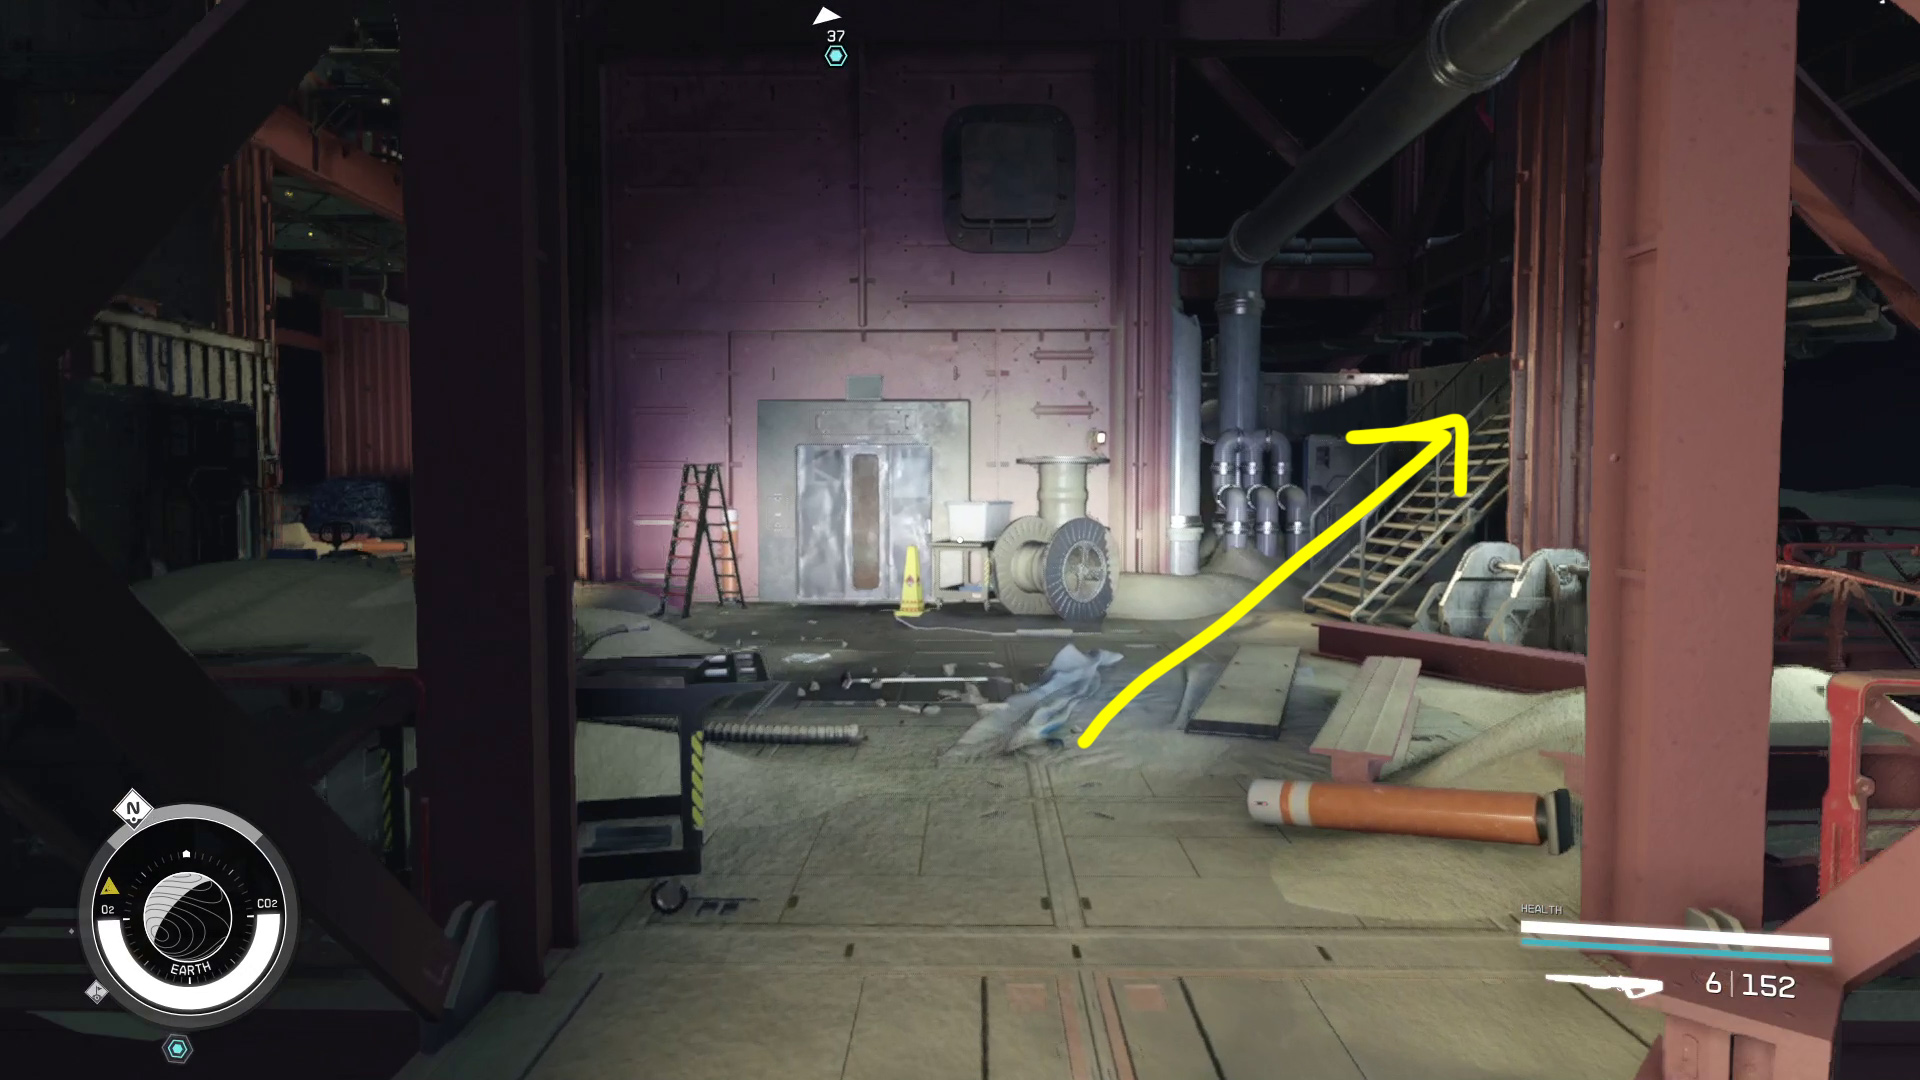
Once you’ve climbed up the indicated path, turn left and head through the gap in the steel beams, and continue forward onto the bridge (Image 13). Cross the bridge and then go up the stairs on your right (Image 14). (There’s a storage crate through the door straight ahead, but you have to drop down and then make your way all the way back around — unless you’ve got a really good boost pack.) You’ll need to go across some large steel containers and jump onto another catwalk, then jump the gap in the broken catwalk (Image 15).
Image 13Image 14Image 15
Ahead, you’ll be able to turn right and go down some stairs to find a bit of loot in some storage boxes — the way forward is straight, following the catwalk as it curves left (Image 16). Mind the gap right before the curve! You’ll go up another couple sets of stairs, and then head through the illuminated doorway (Image 17). There’s a bit of loot in here — folks who are fans of interior decorating will want to snag the NASA Snowglobe in the lockers in the far right corner (Image 18) before continuing into the next room.
Image 16Image 17Image 18
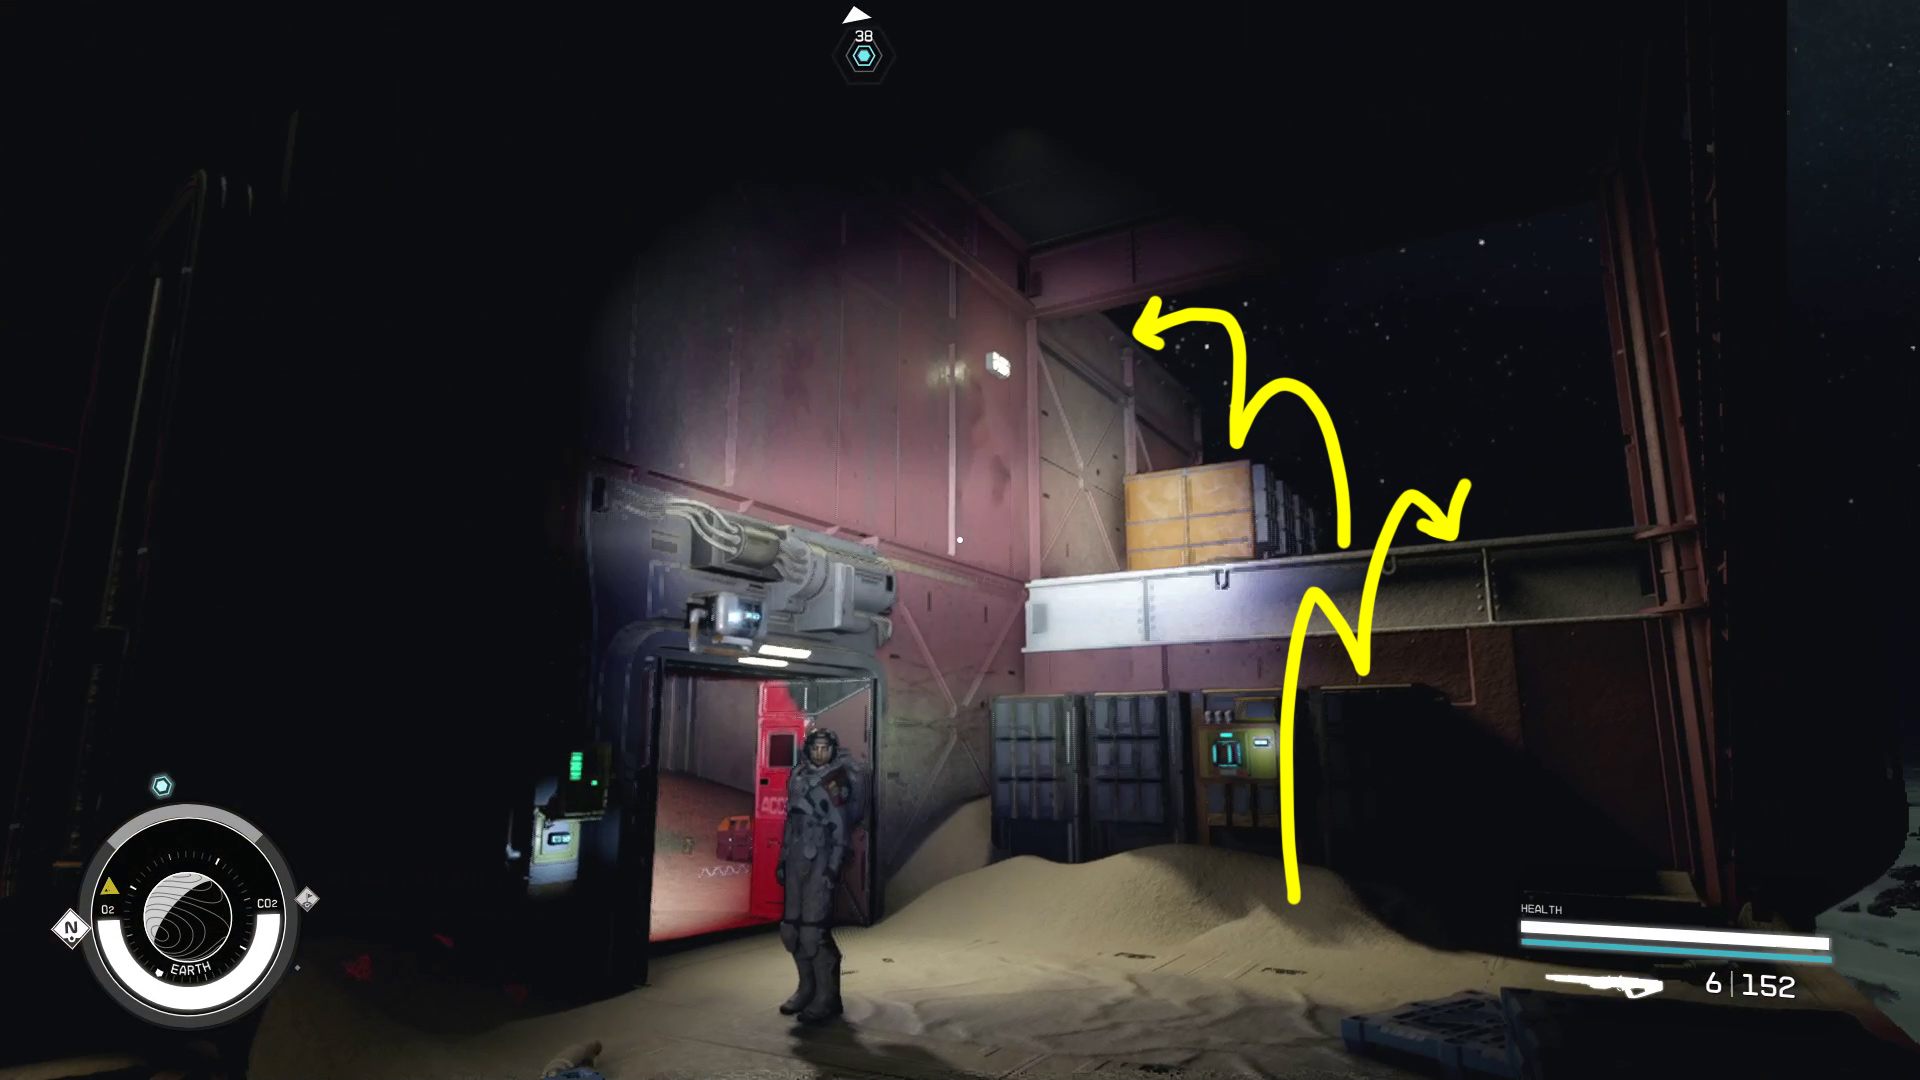
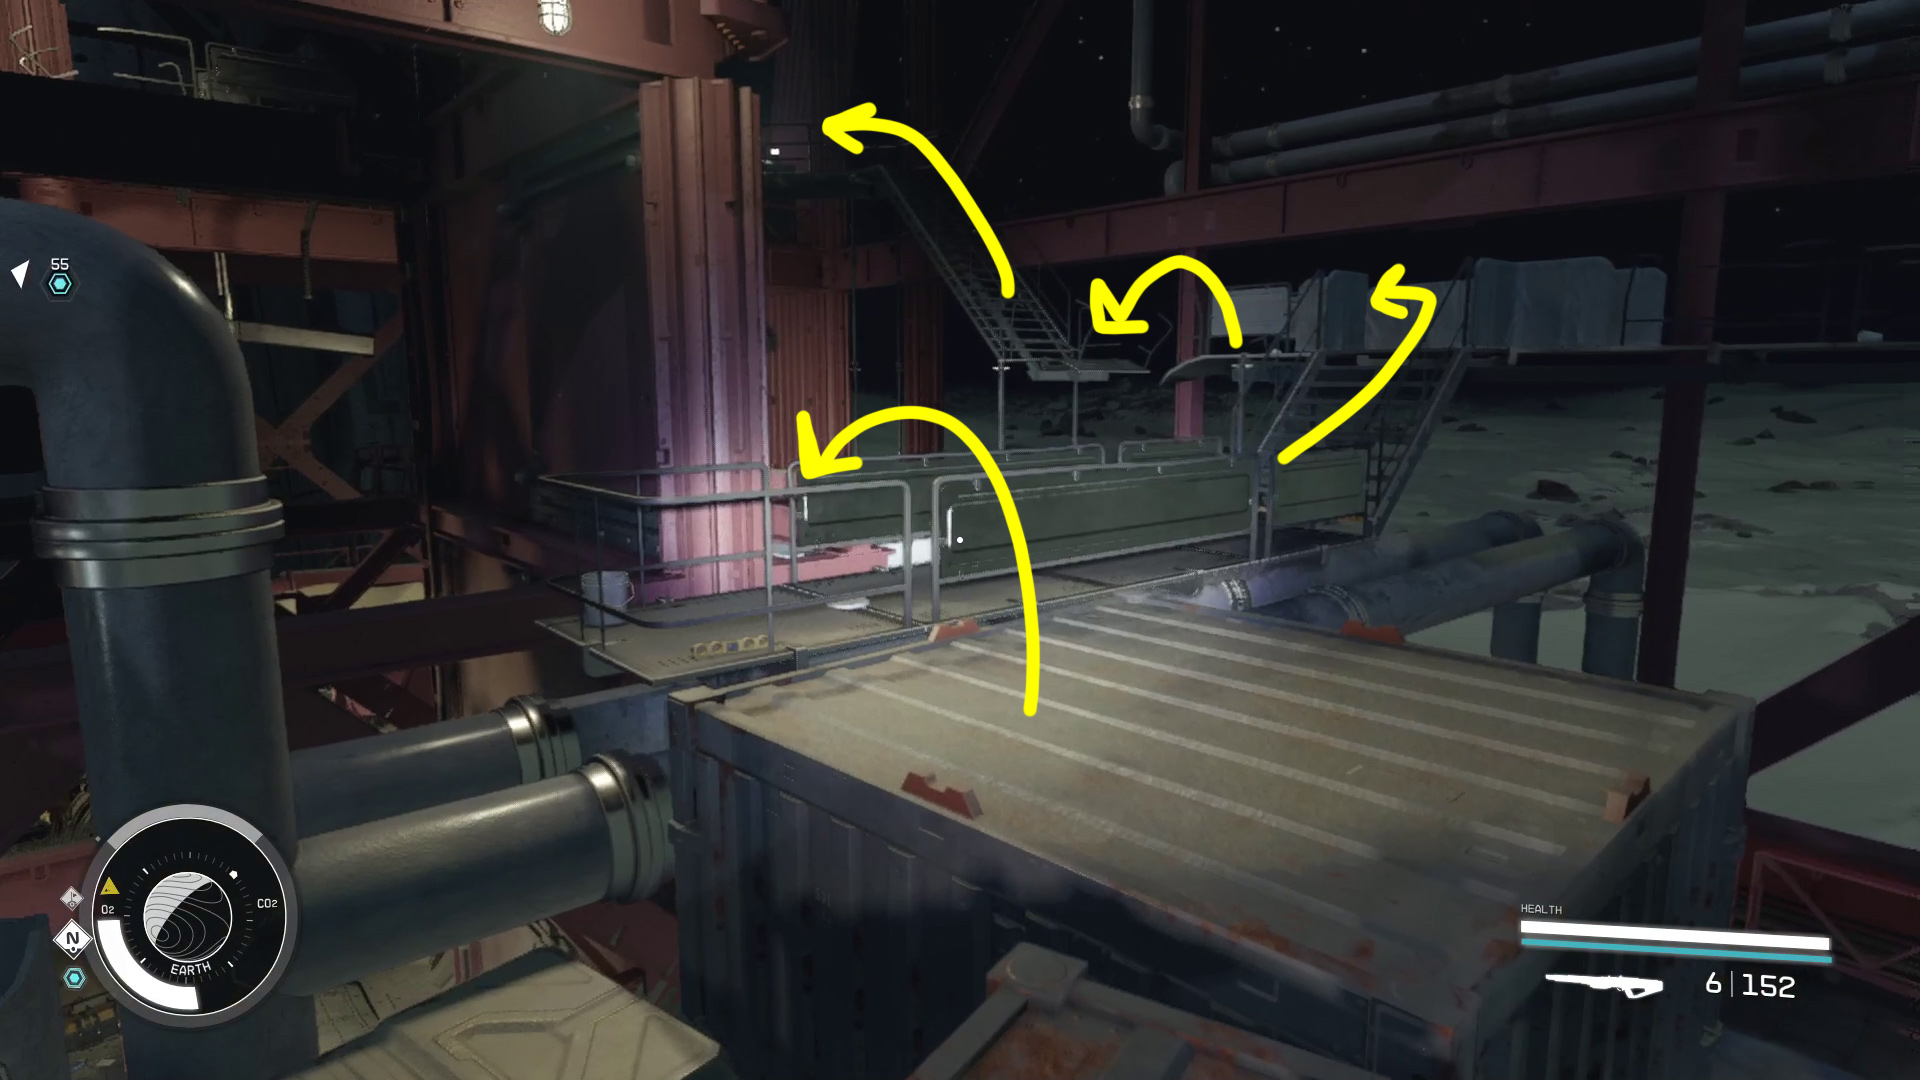
There’s a bit more stuff scattered about here, and a storage crate is tucked into the corner opposite the way forward (Image 19). Head straight across the bridge, and then you can jump and boost pack across the gap towards the lift (Image 20) — or go the long way around if you aren’t confident in your Mario skills.
Image 19Image 20
Enter NASA
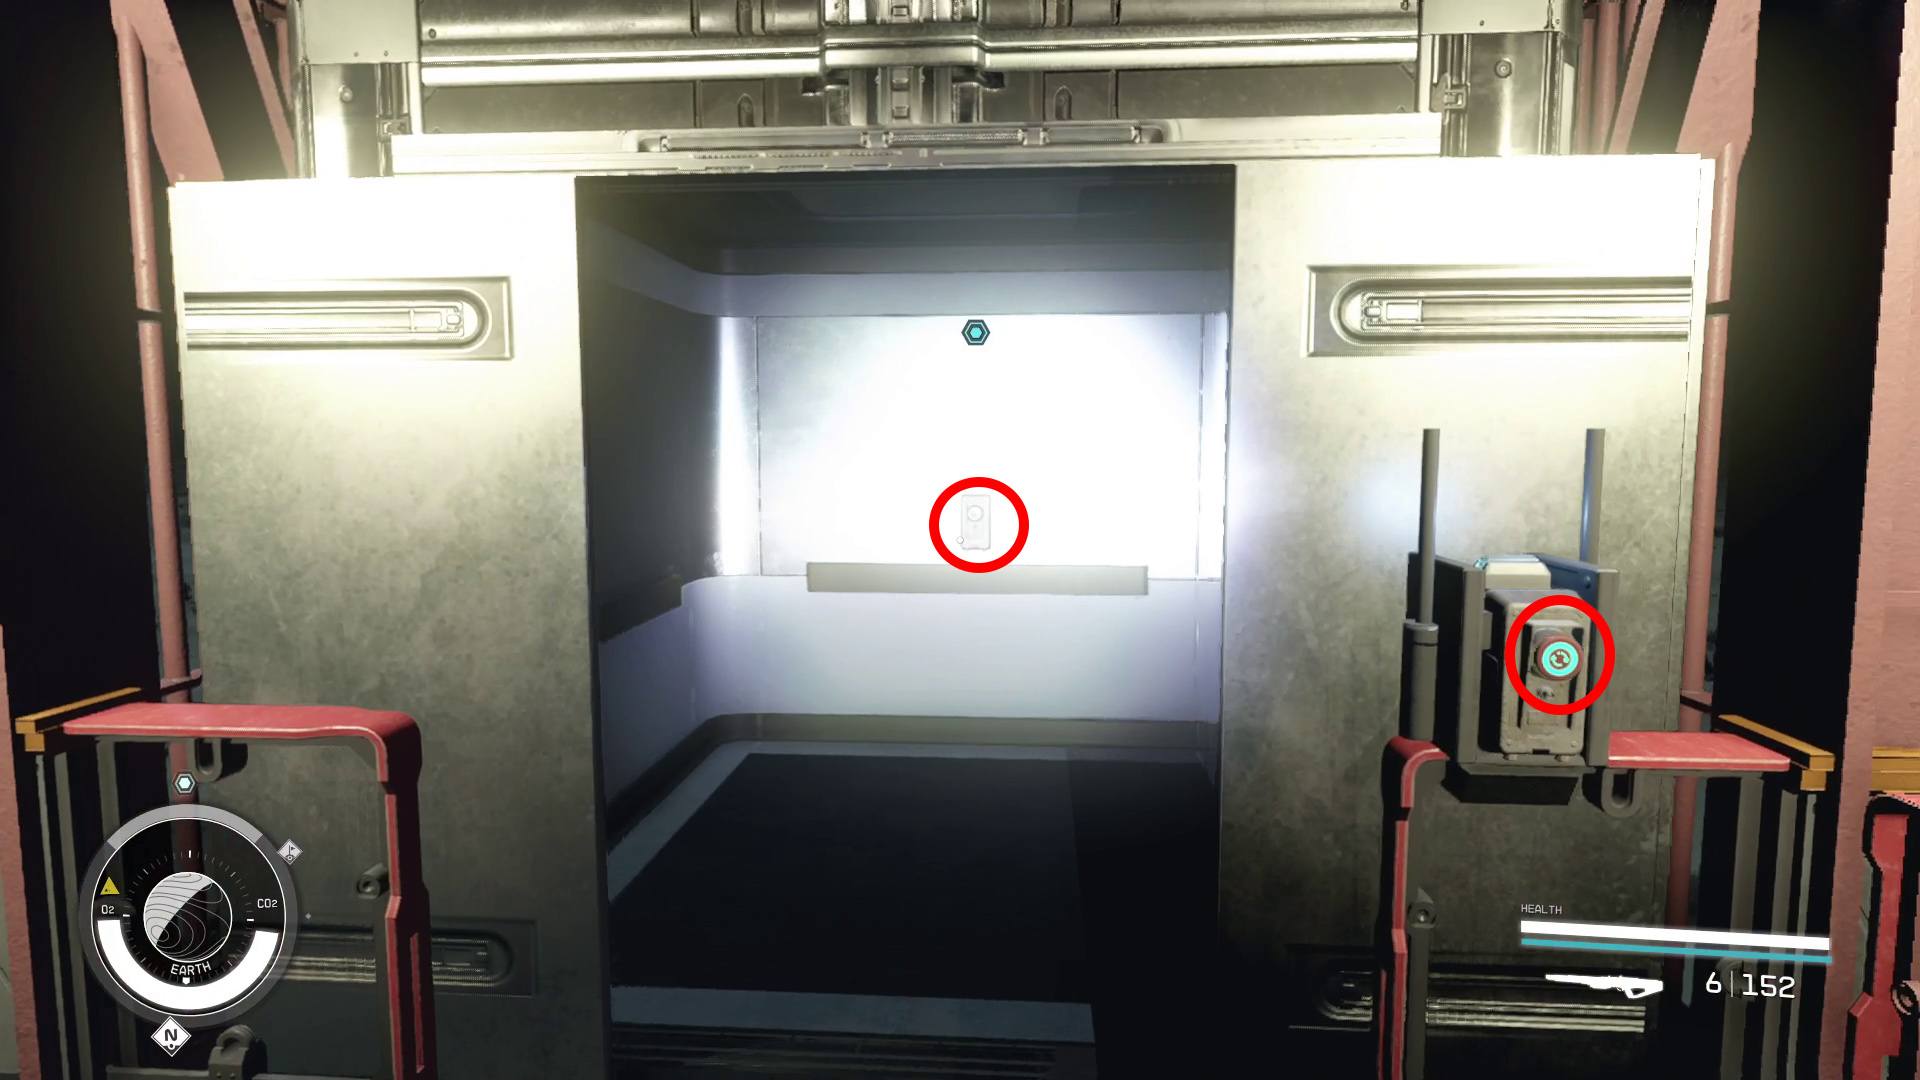
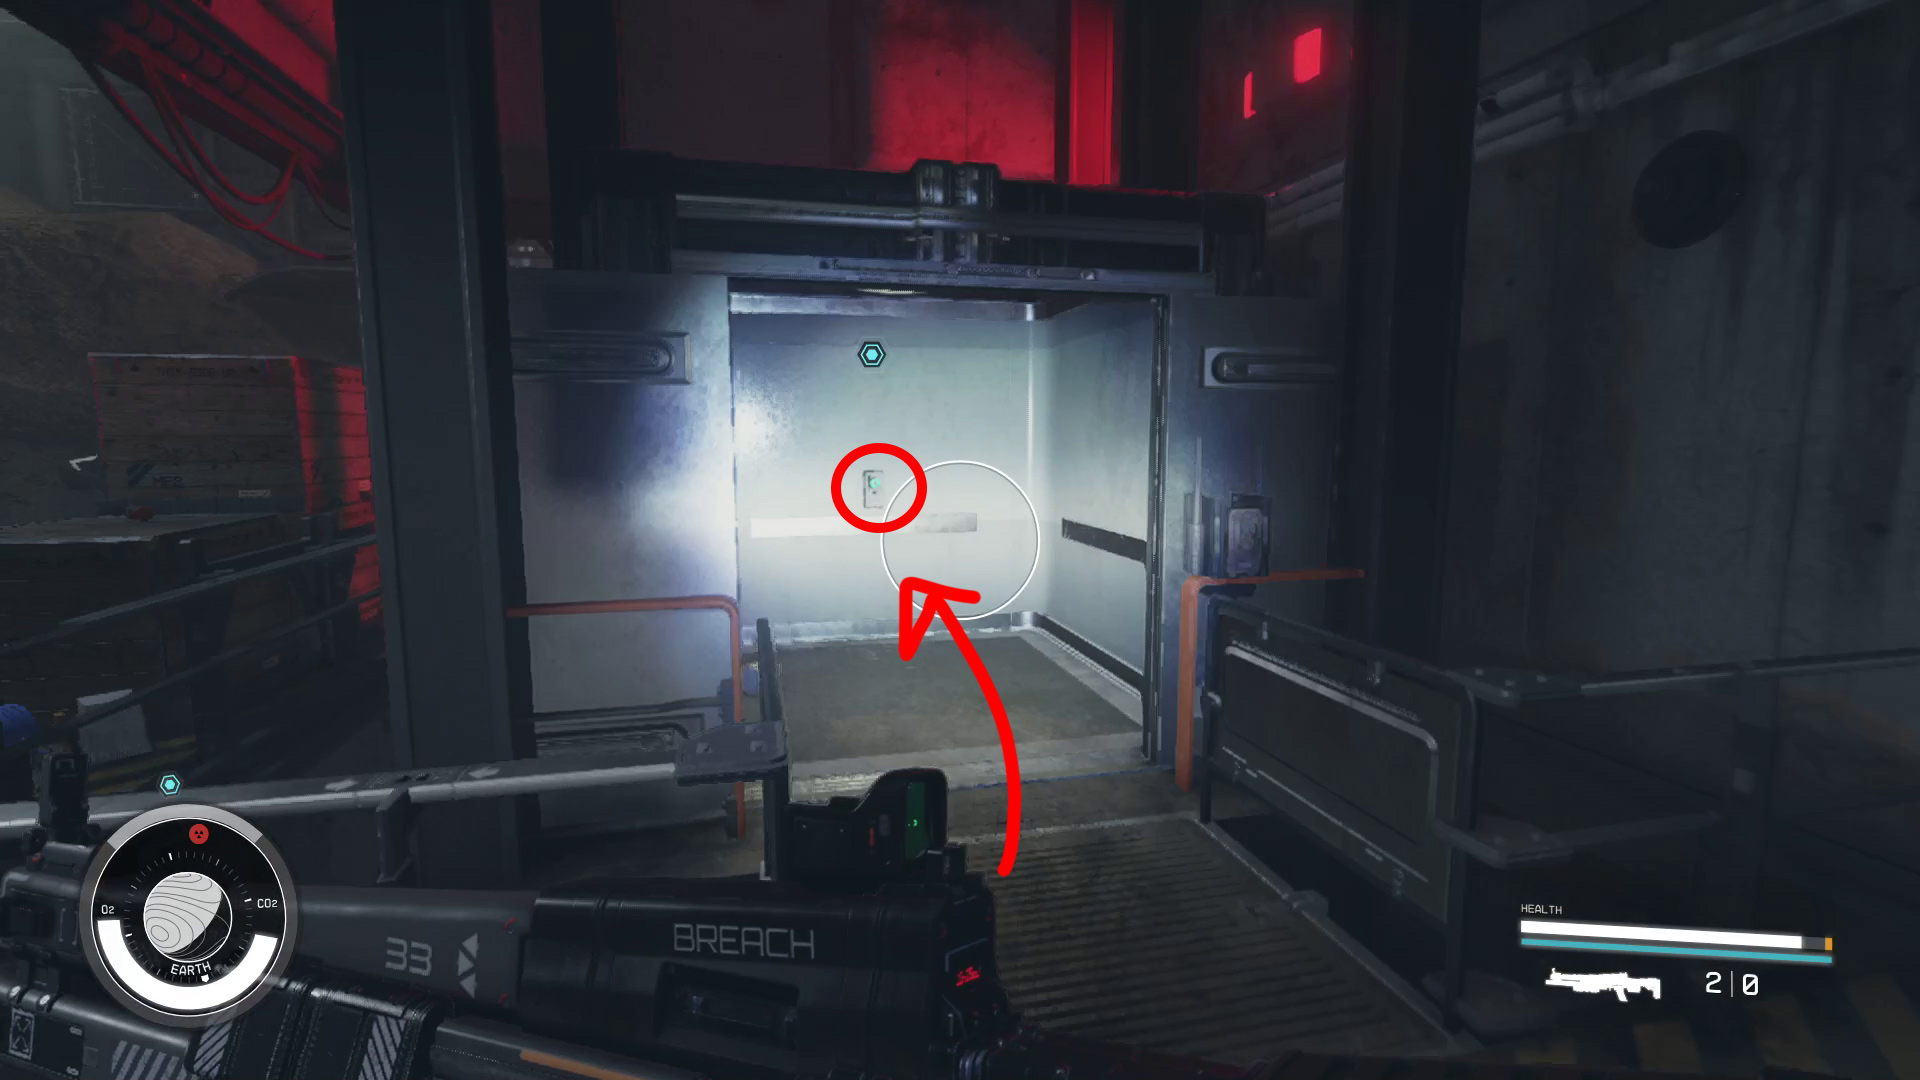
You can’t use the lift yet, since it isn’t powered. Turn around and enter the room the cables are leading into (Image 22), where you’ll find an empty power socket and some conveniently-placed power cells (Image 23). Pick up a power cell and put it in the socket, loot the nearby containers, then return to the lift. Hit the button to the right of the lift (Image 24), then hop on and hit the similar-looking button to send the lift into the facility.
Image 22Image 23Image 24
Find Information About NASA
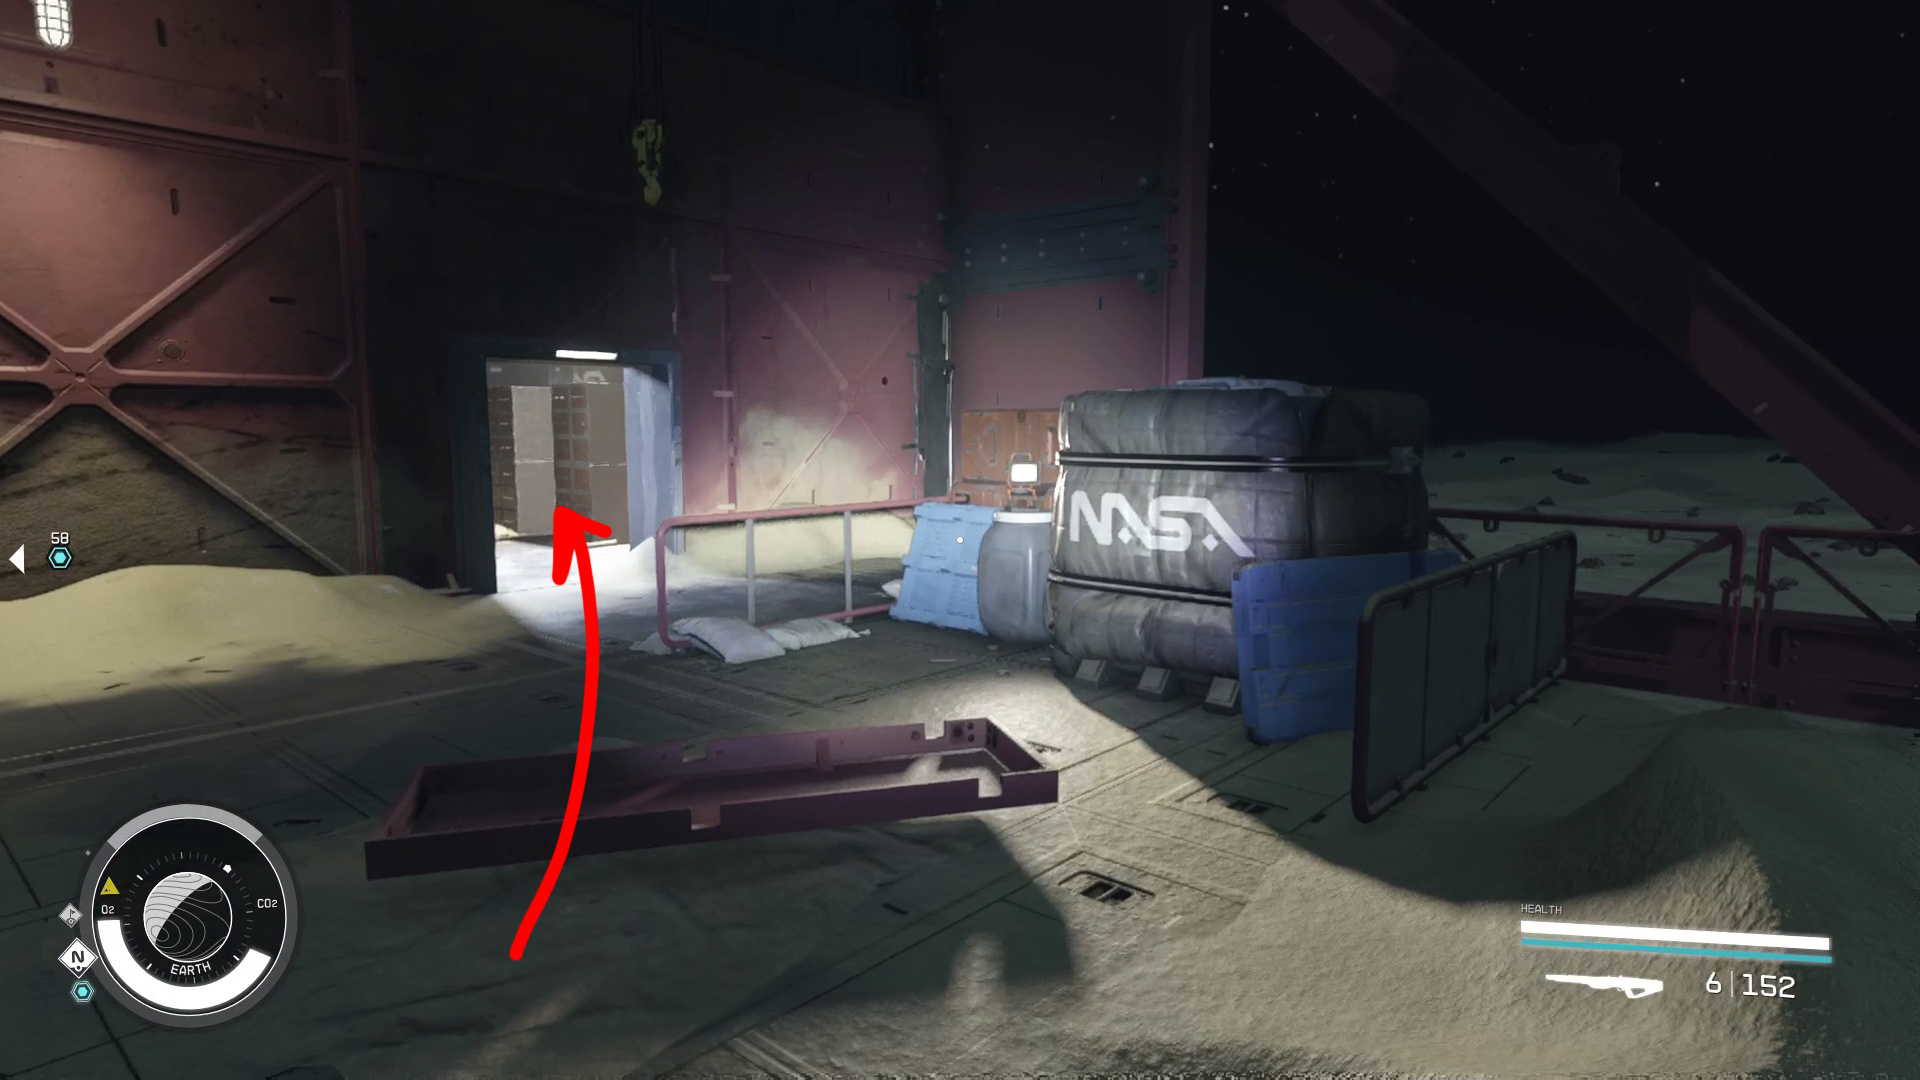
When the elevator lets you out, head across the room to the computer near the glowing exit sign (Image 25). Use the computer, select “Access Station Logs”, then select “Delivery from Mars.” You’ll get a new objective, and you can leave through the exit door indicated in Image 25.
Image 25
Find Information About the Martian Sample
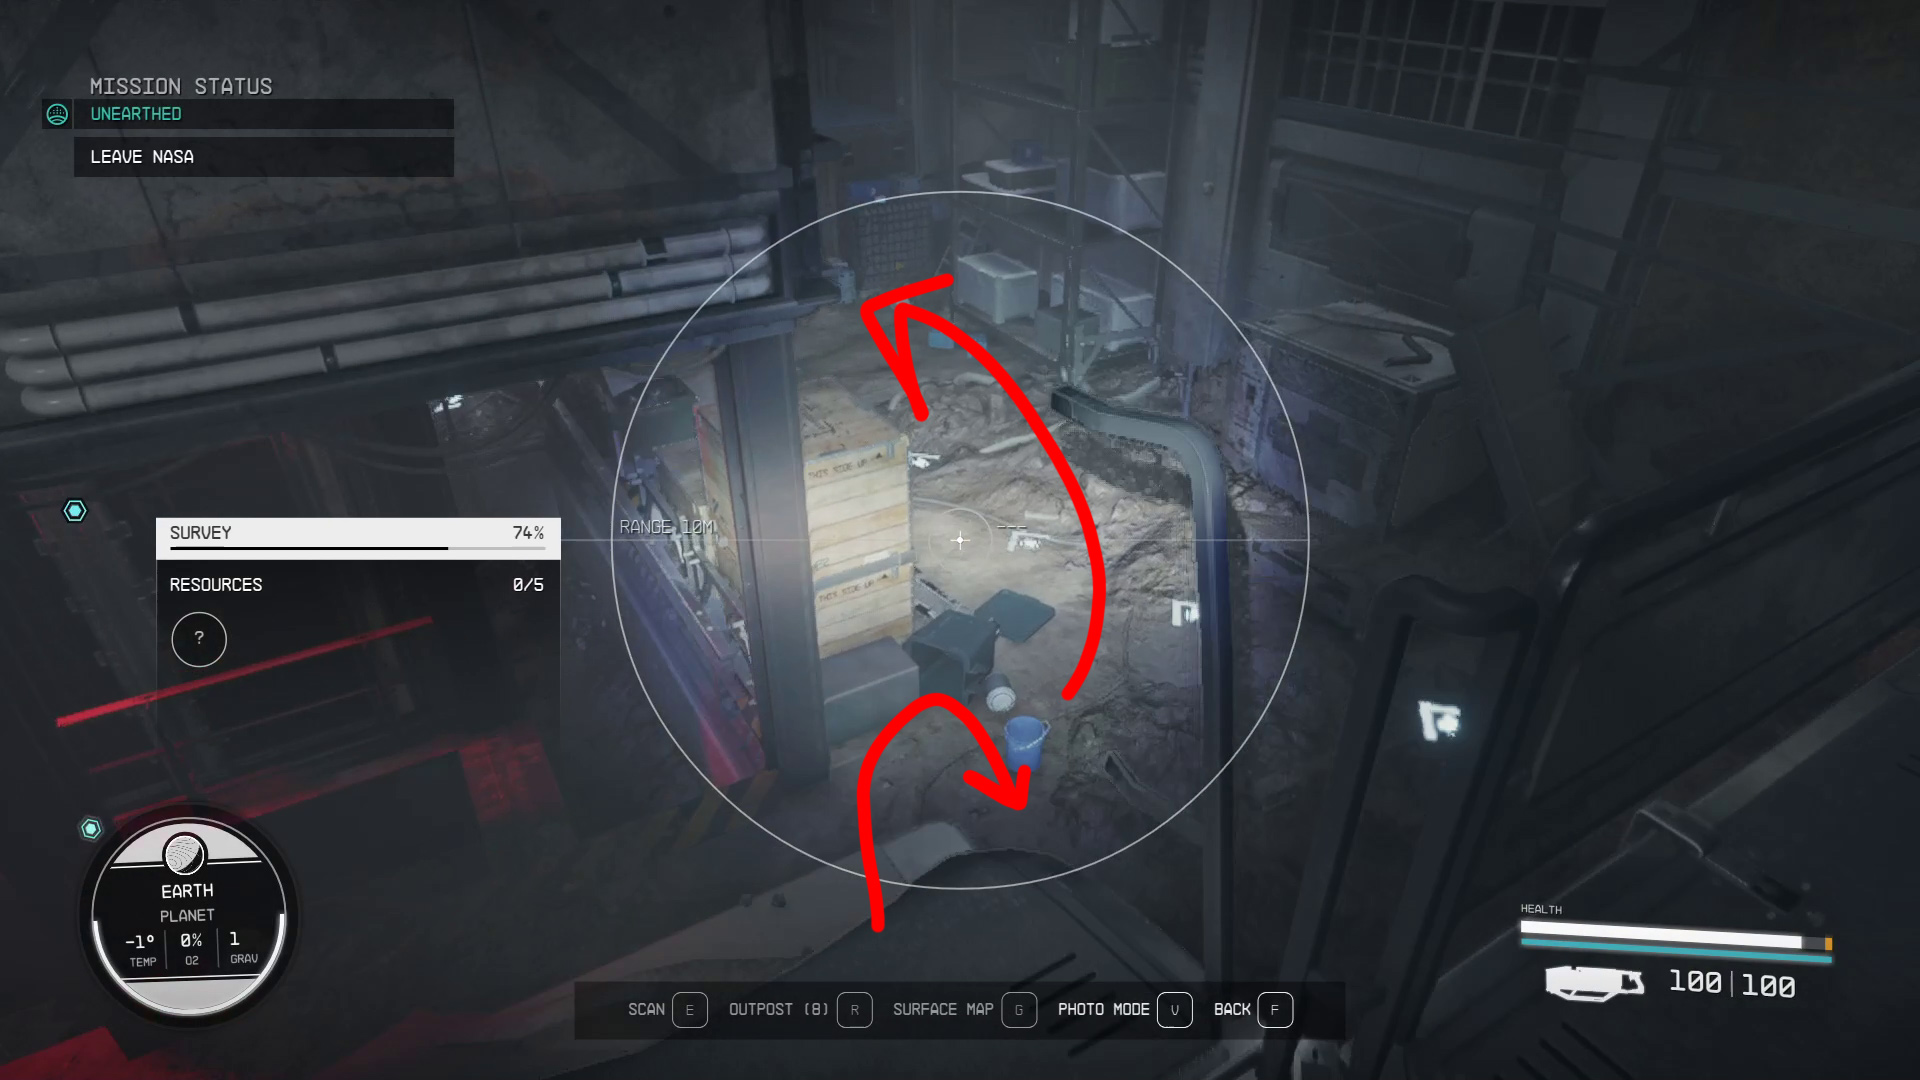
For this bit, you’ll be able to use the Scanner to guide you to the next objective, so just press / if you get turned around.
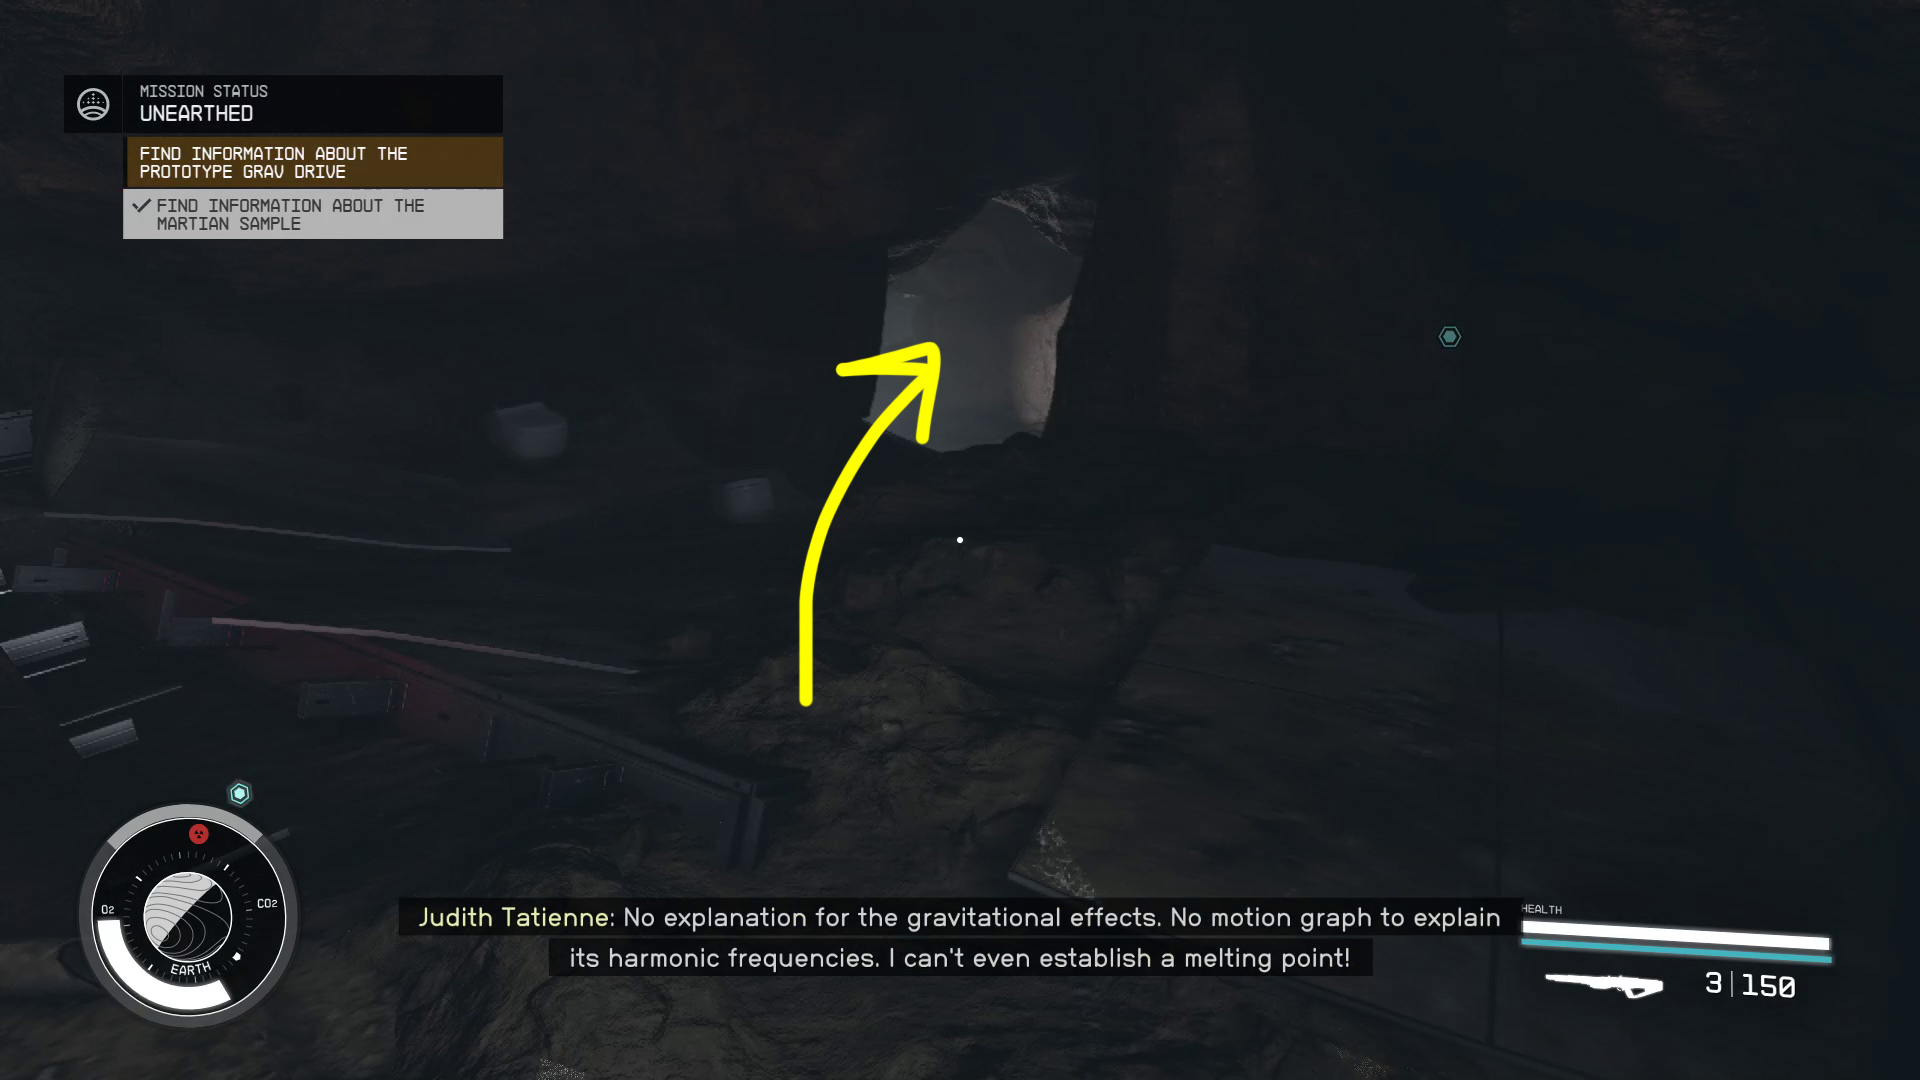
Continue through the door and then drop down into the stone tunnel. Keep going forward and you’ll find an open door that leads into a large room full of NASA artifacts. There’s quite a bit to see in here if you’re interested, and many of the exhibits have touch screens you can interact with for additional information. This is optional, but you should definitely use the Mars Rover touchscreen (Image 26), as it will give you a Landing Site for the rover on Mars. You can find the rover on the left side of the hall as you cross it, heading towards the objective marker.
Image 26
Once you’re done checking out the exhibits, continue to the far side of the hall, and go through the exit illuminated with red light. On the counter in the next room, you’ll find the objective marker indicating Judith’s Personal Recording. Pick it up to get your next objective.
Find Information About the Prototype Grav Drive
The scanner stops giving path guidance for this next section.
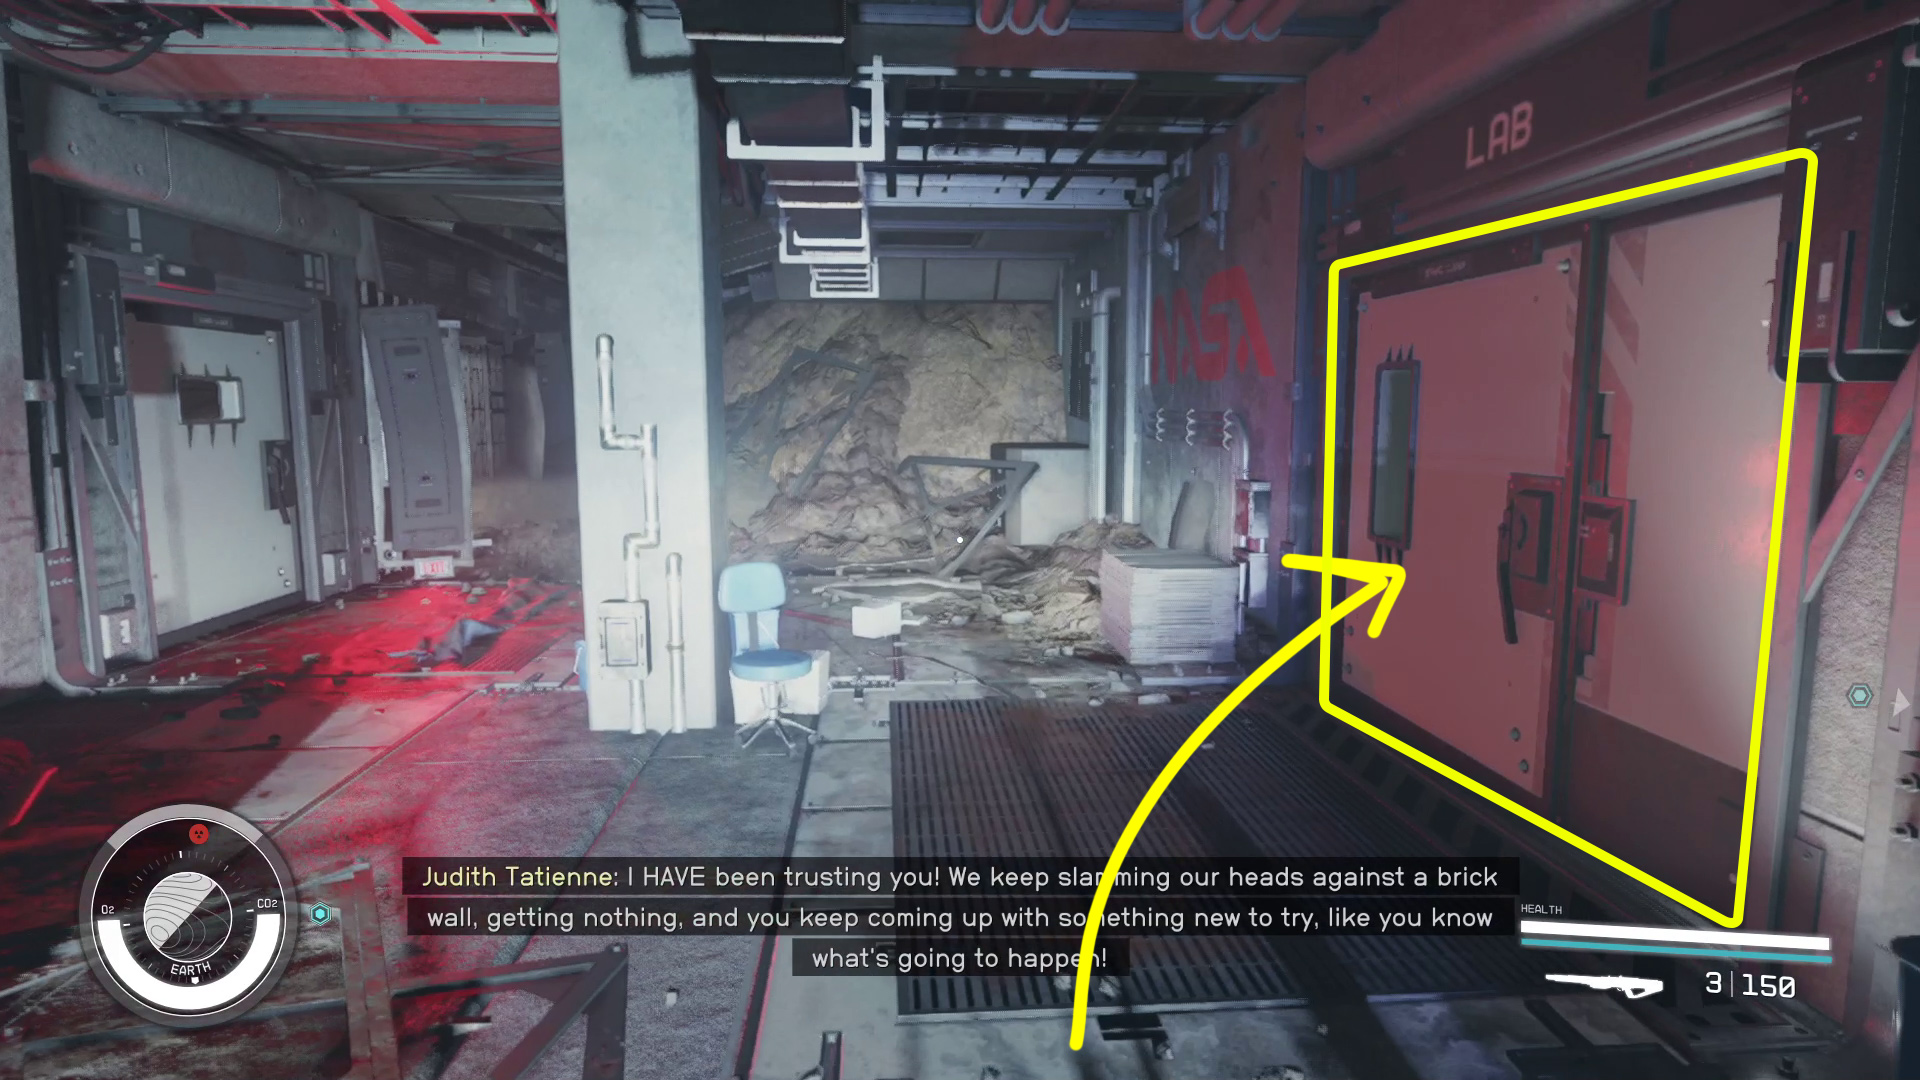
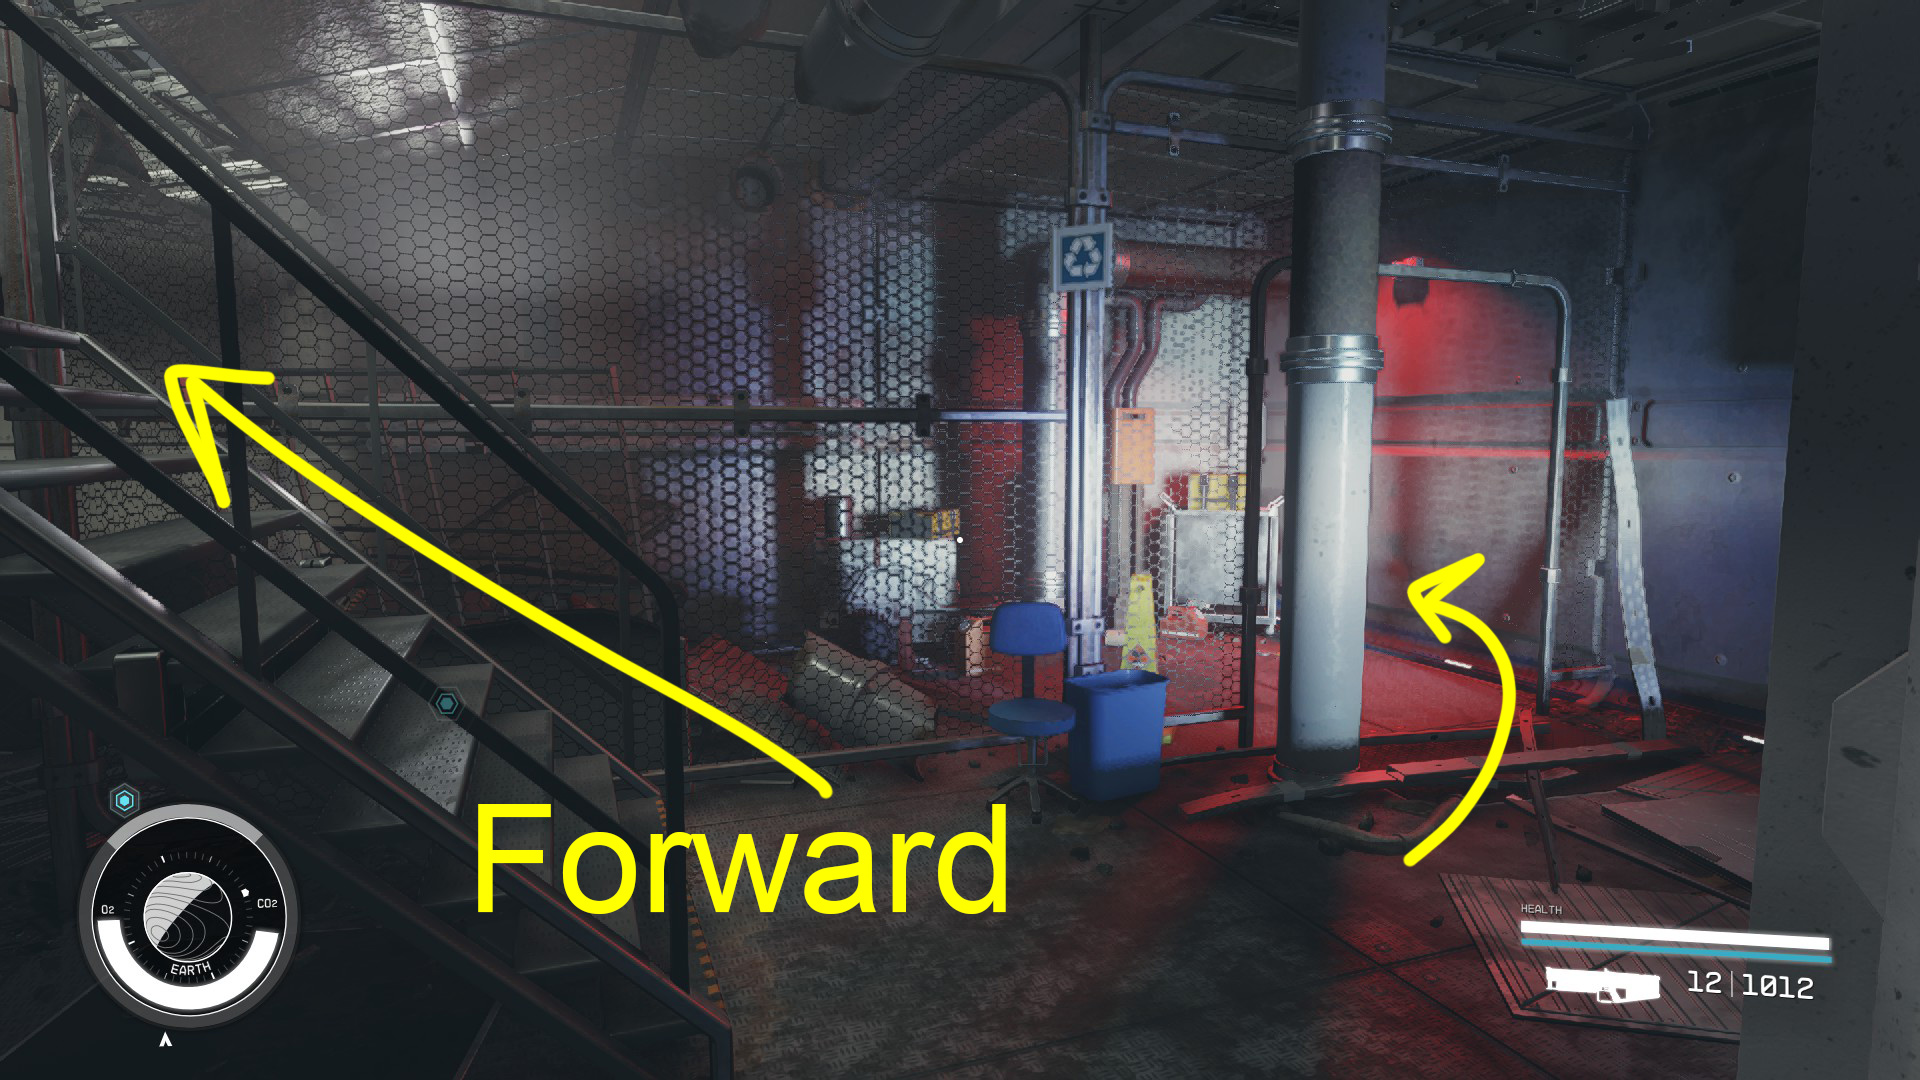
From the counter where you grabbed the recording, turn left and head into the tunnel (Image 27). You’ll soon come to a wide hallway — head down it, and at the far end, go through the door on the right marked “Lab” (Image 28). In the next room, go up the stone ramp (Image 29), and continue through the doorway and down the stairs.
Image 27Image 28Image 29
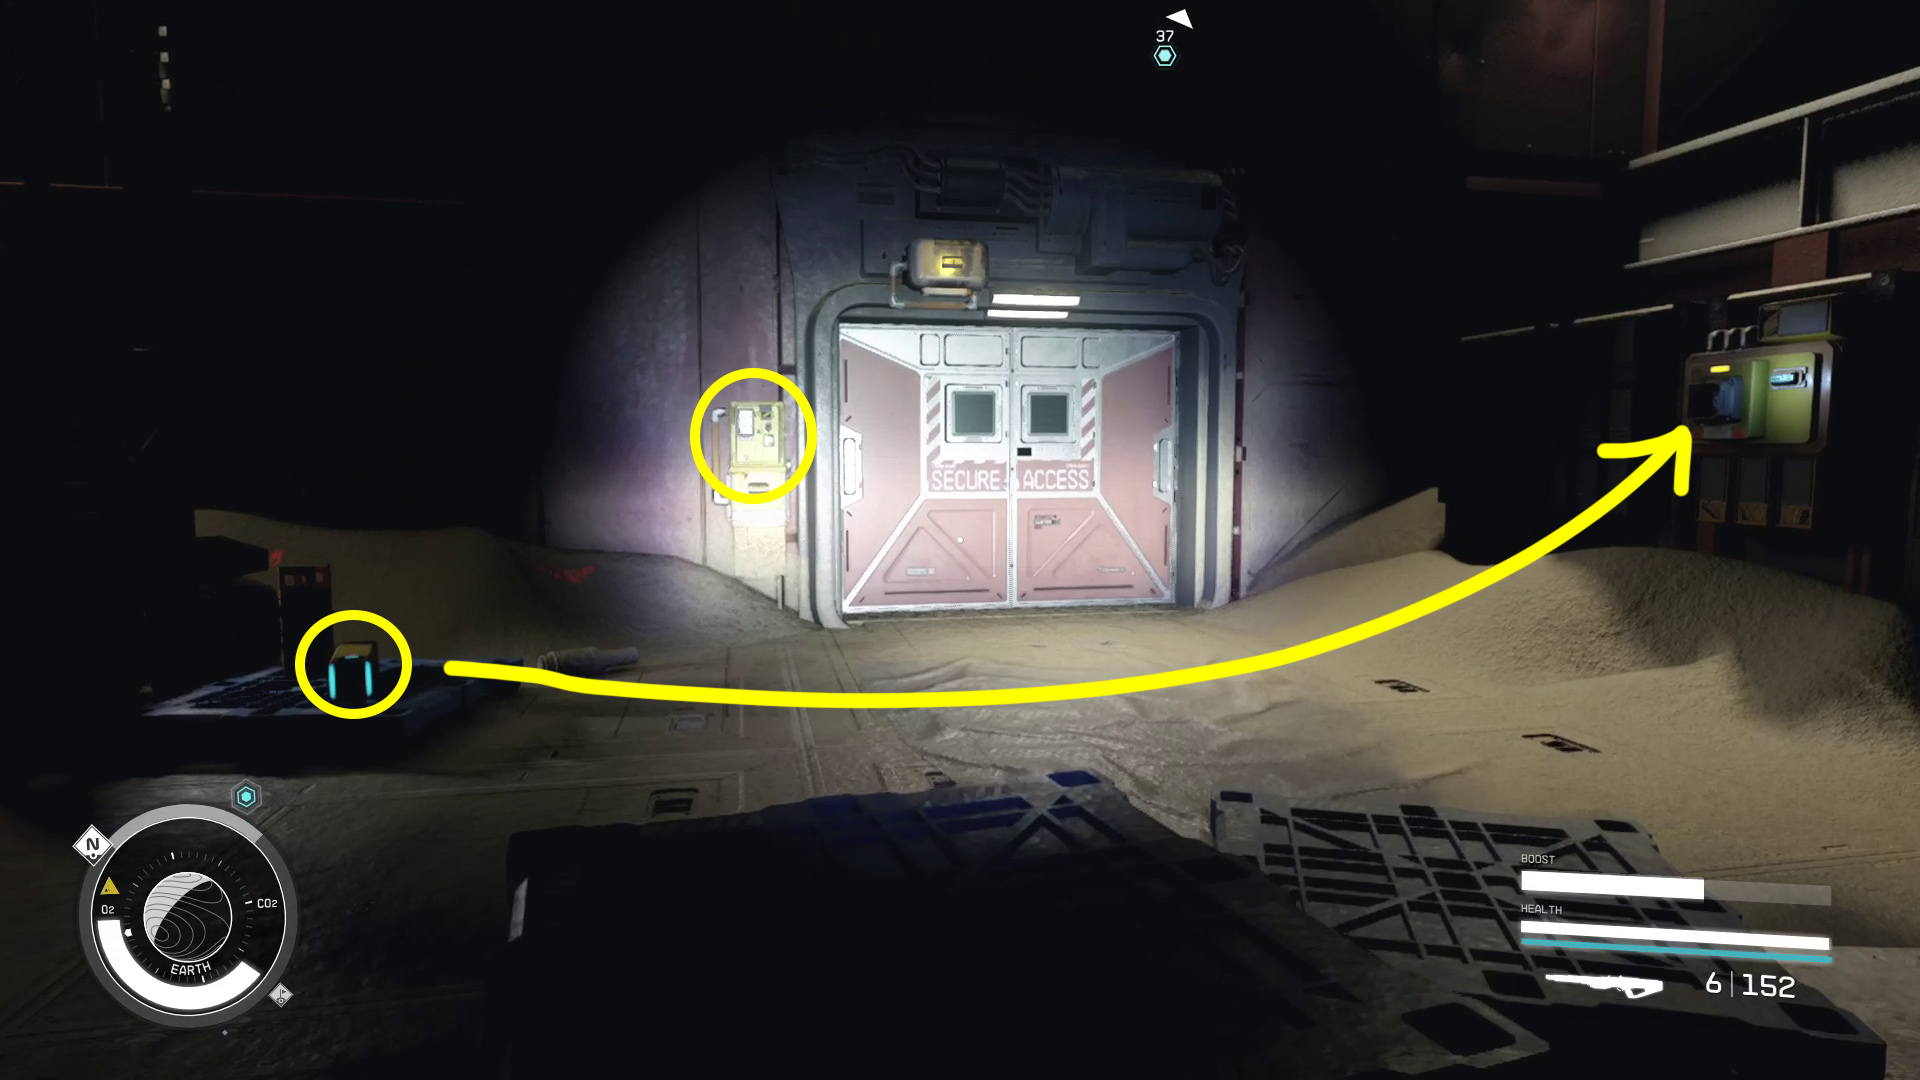
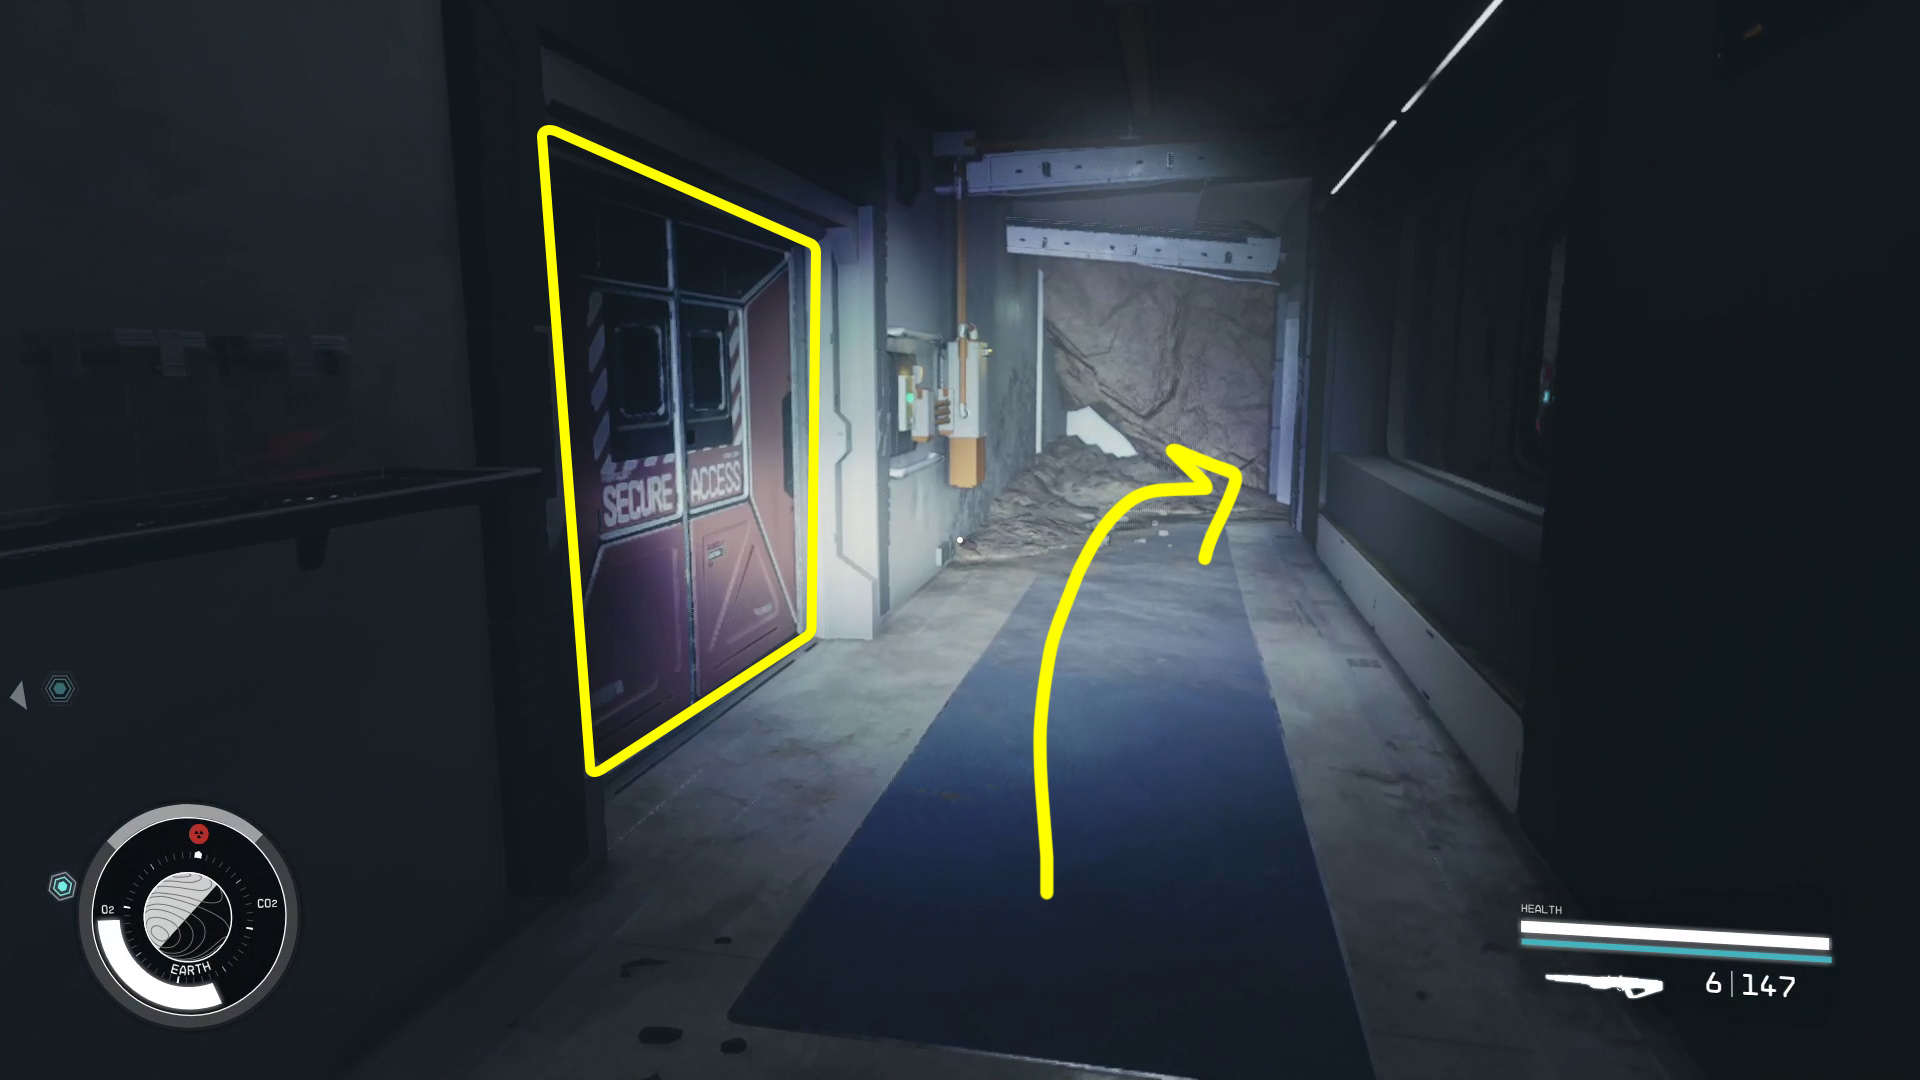
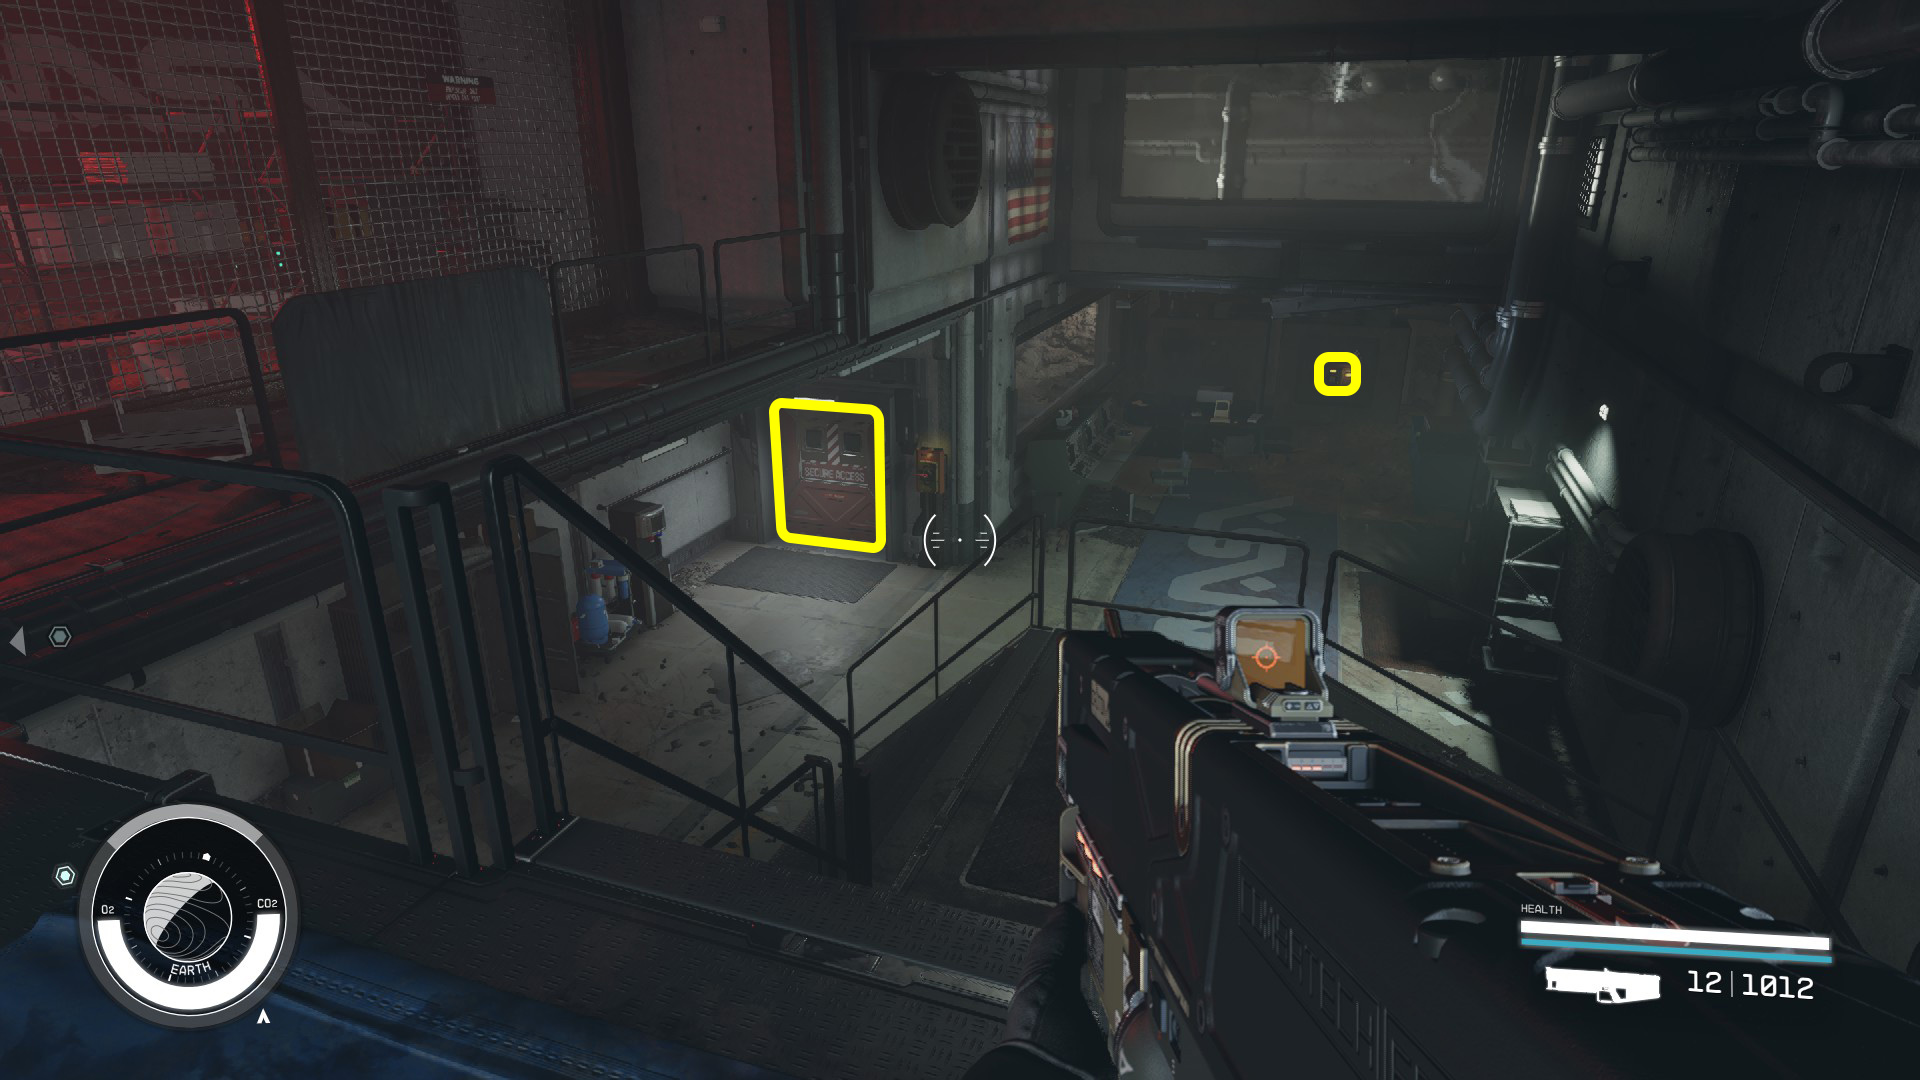
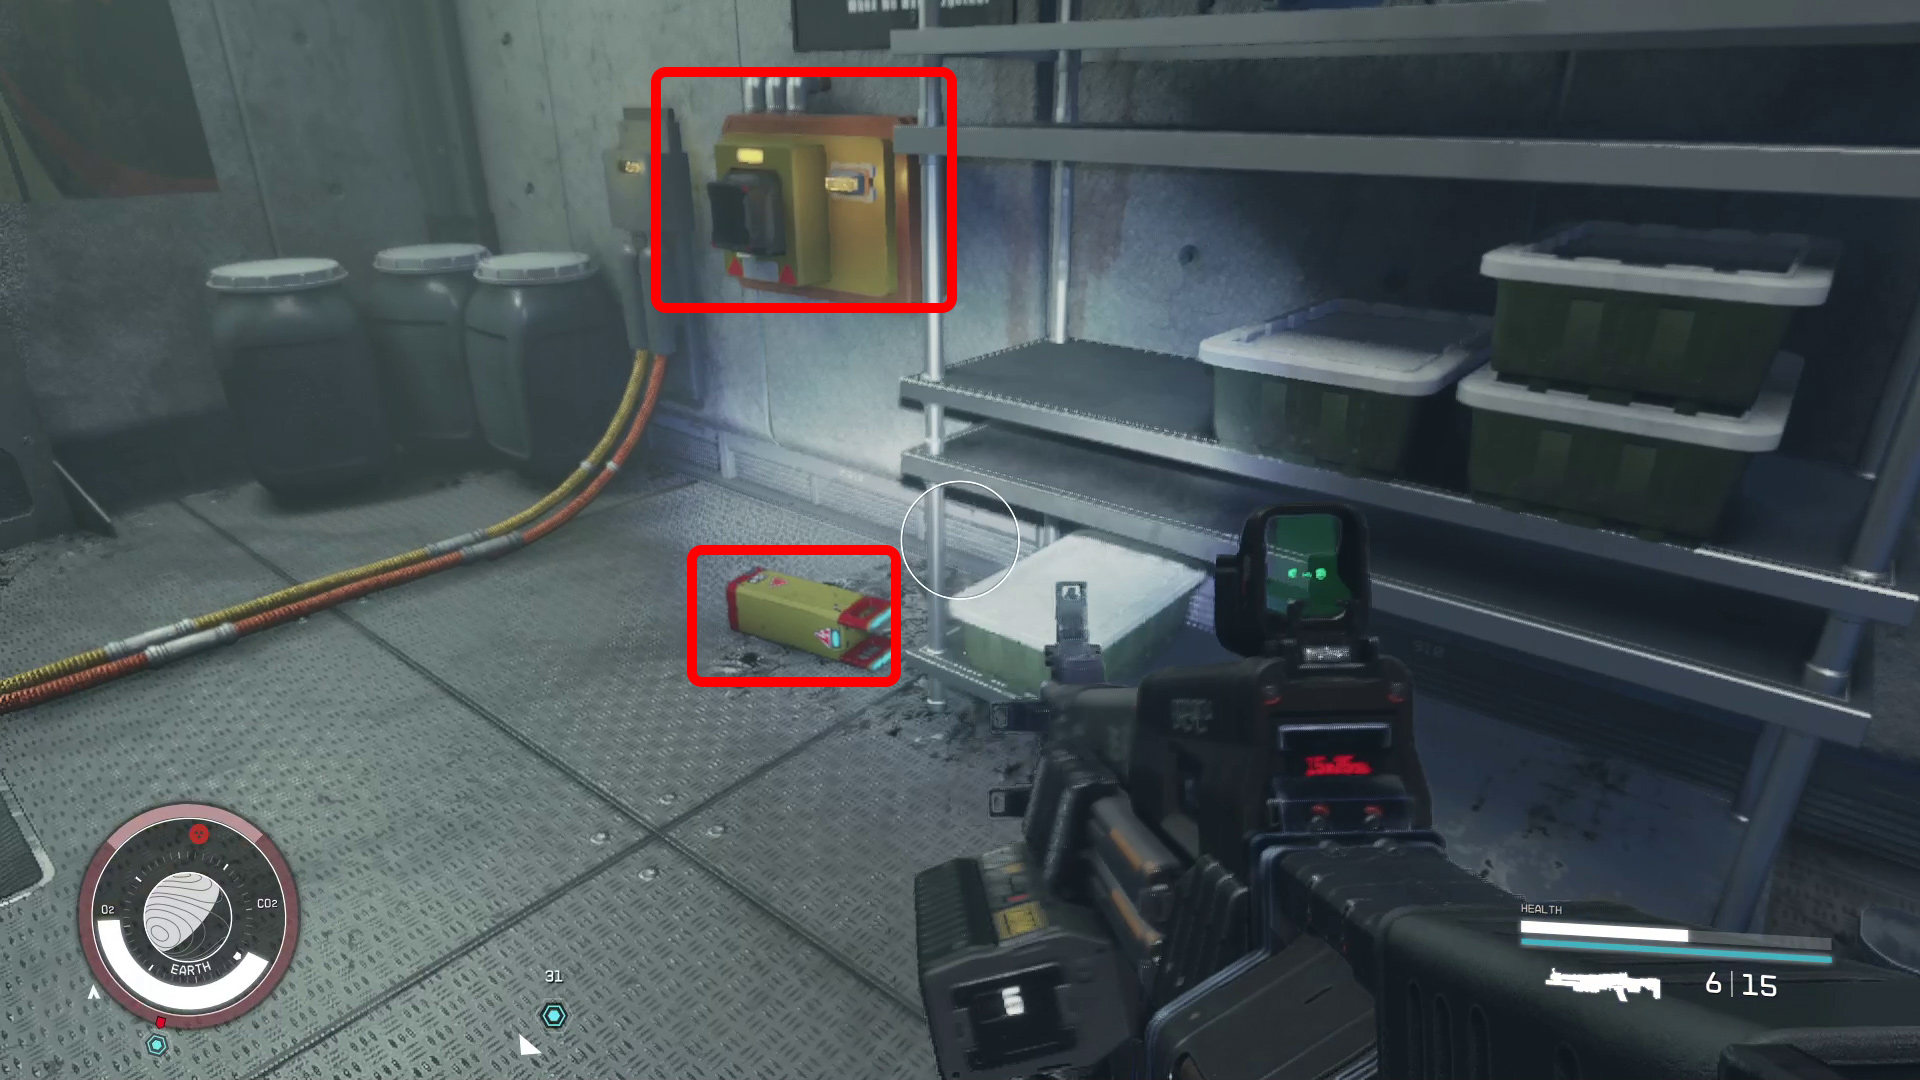
You’ll pass a door on your right you can unlock for some loot if you want, and then on your left another door marked Secure Access (Image 30) — go past it for now, following the cables through the door at the end of the hall. They’ll lead to a Power Switch; activate it, loot the nearby storage crate, then head back to the door in Image 30 and use the switch to open it.
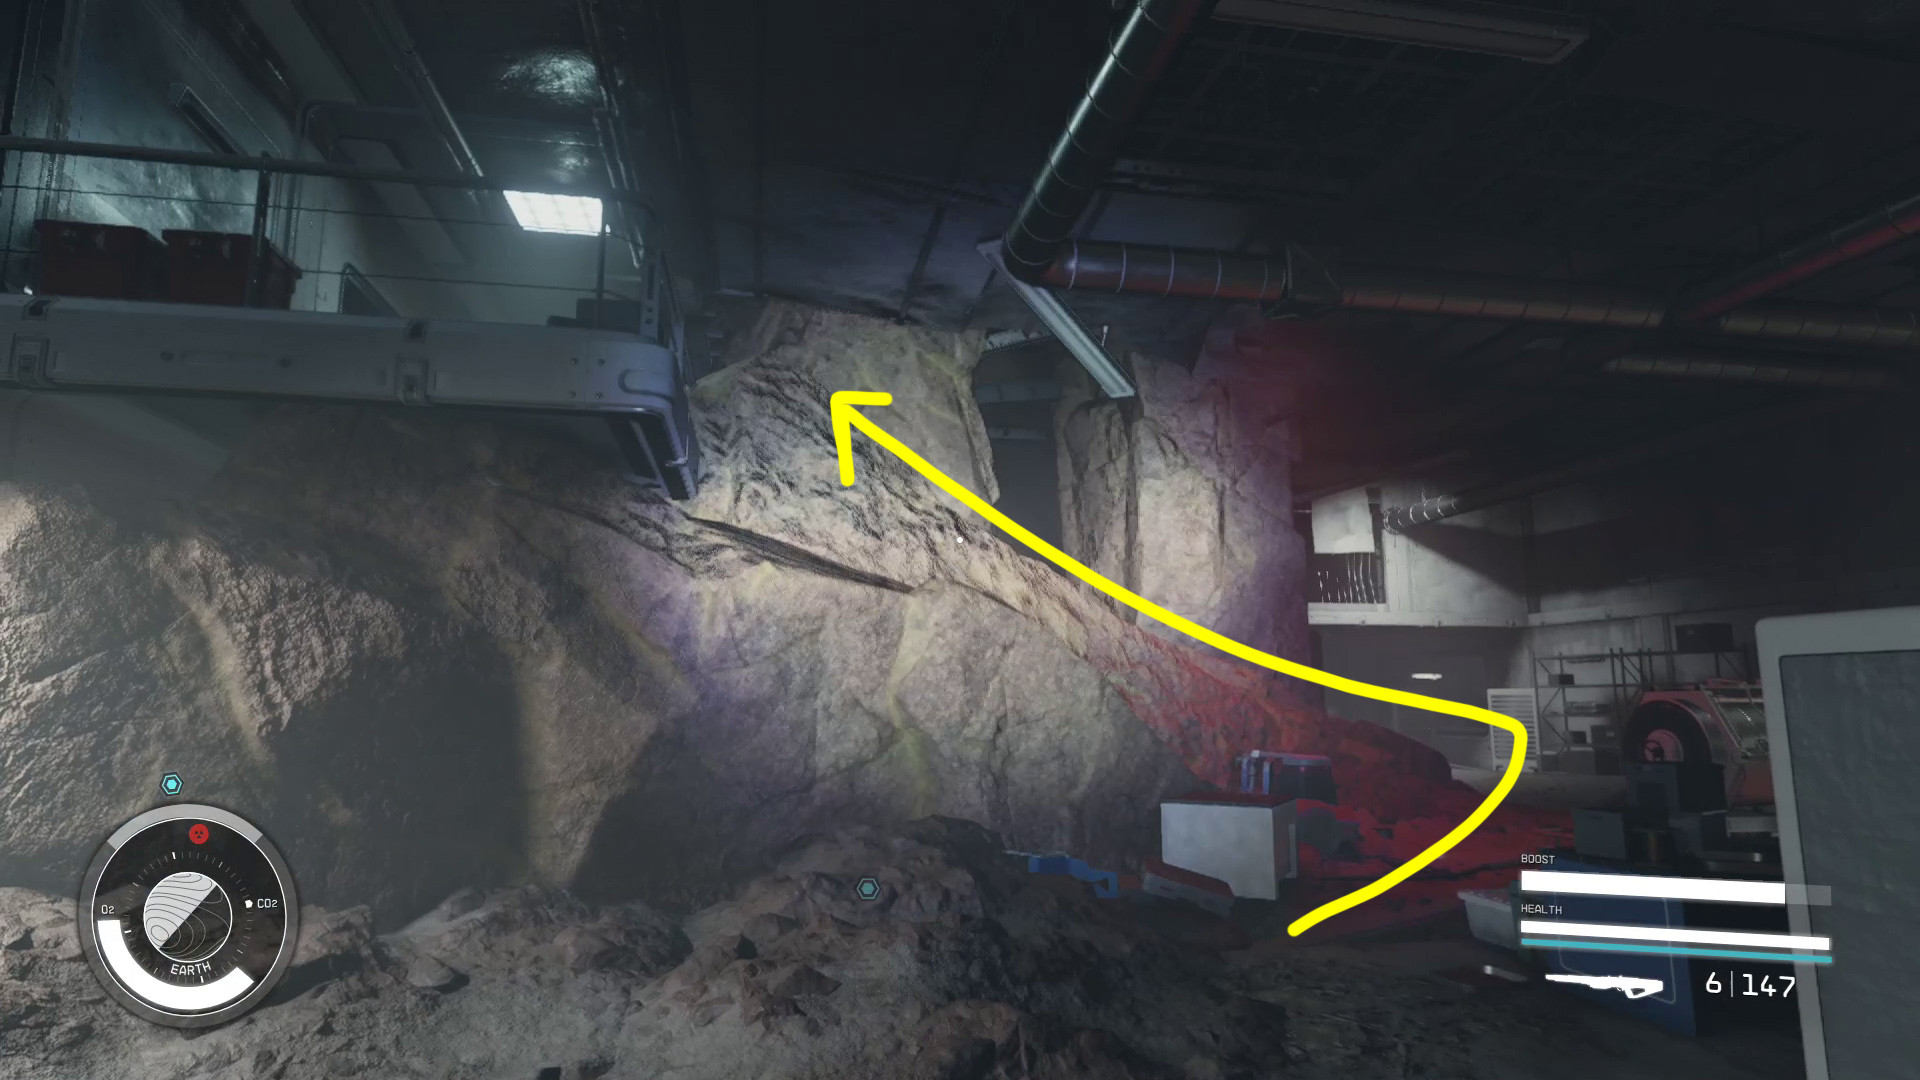
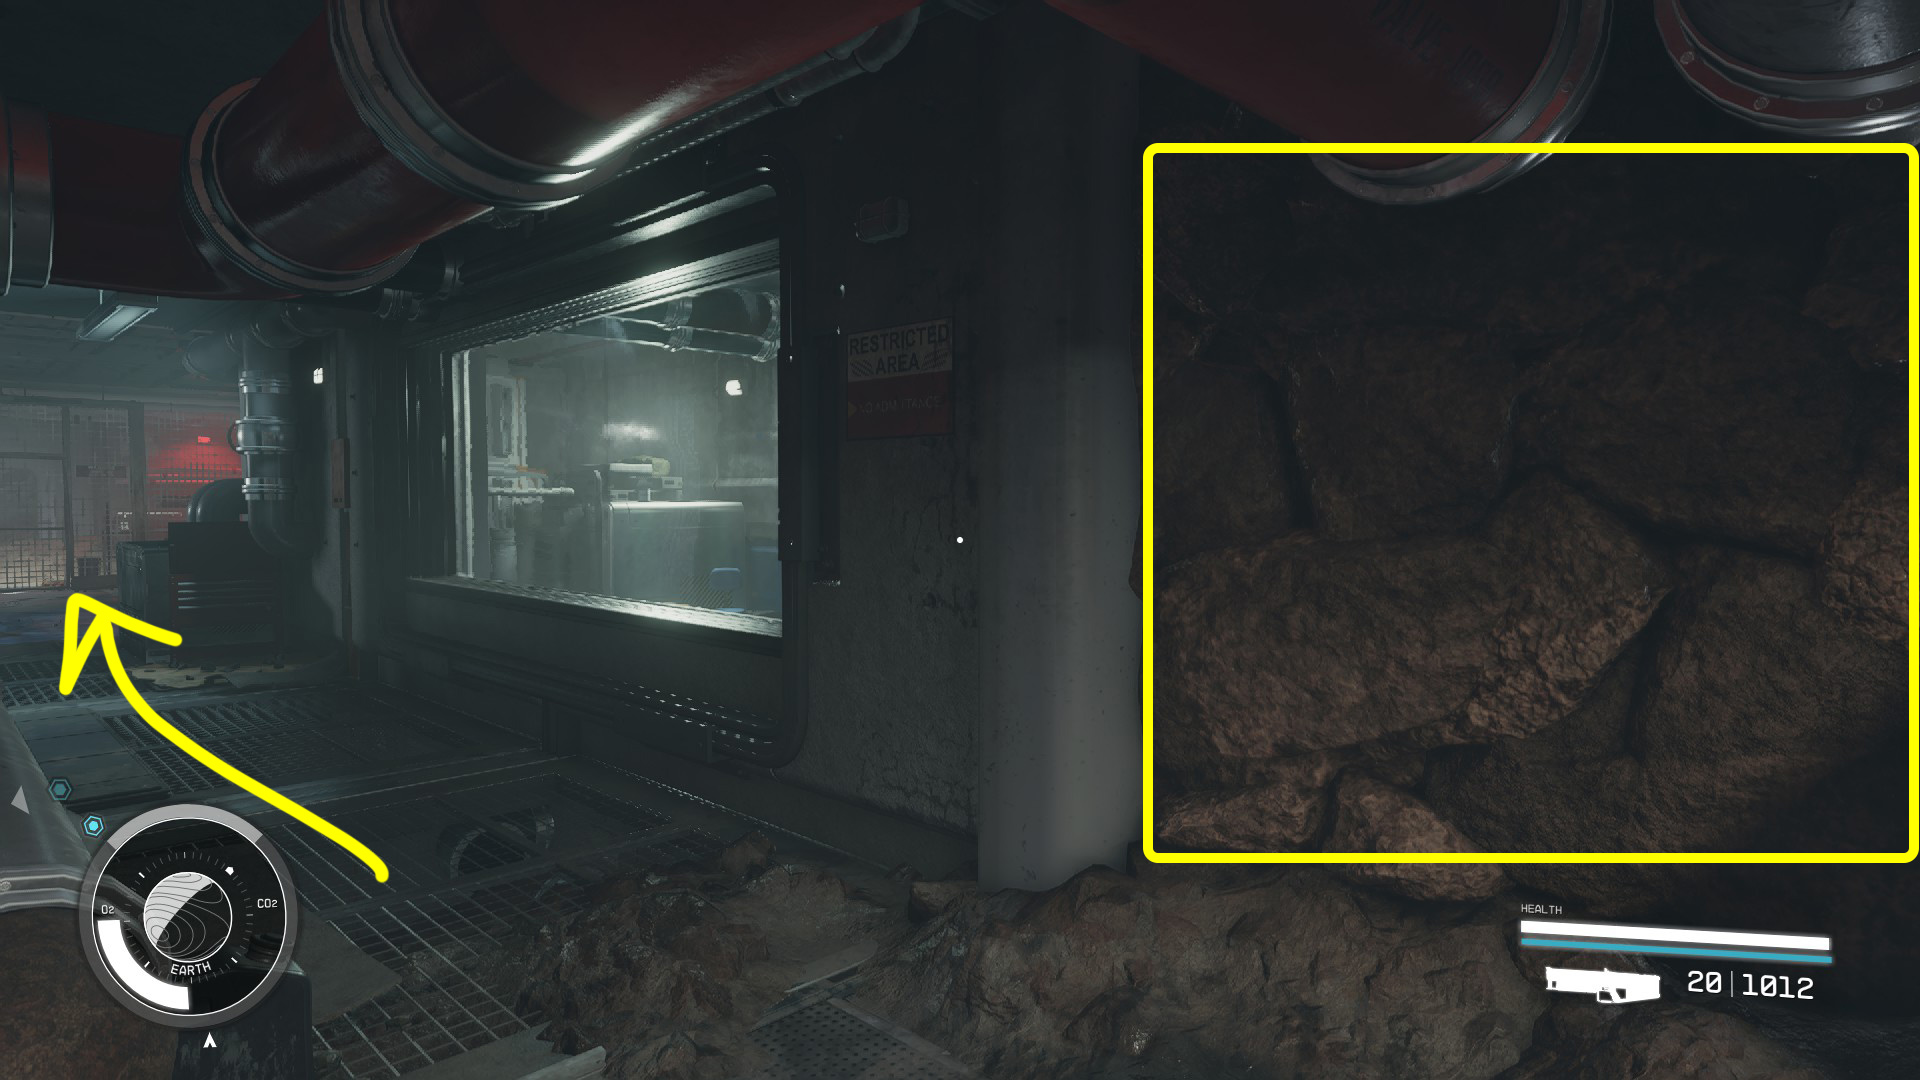
Head through and you’ll enter another tunnel. Make your way down it, and you’ll go through a doorway, then you’ll have to turn right and follow some pipes. You’ll hit what looks like a T-intersection, but the right hand path is blocked. Here, you can use a weapon to blast the rocks (Image 31) and access a storage crate before proceeding further down the hall.
Image 30Image 31
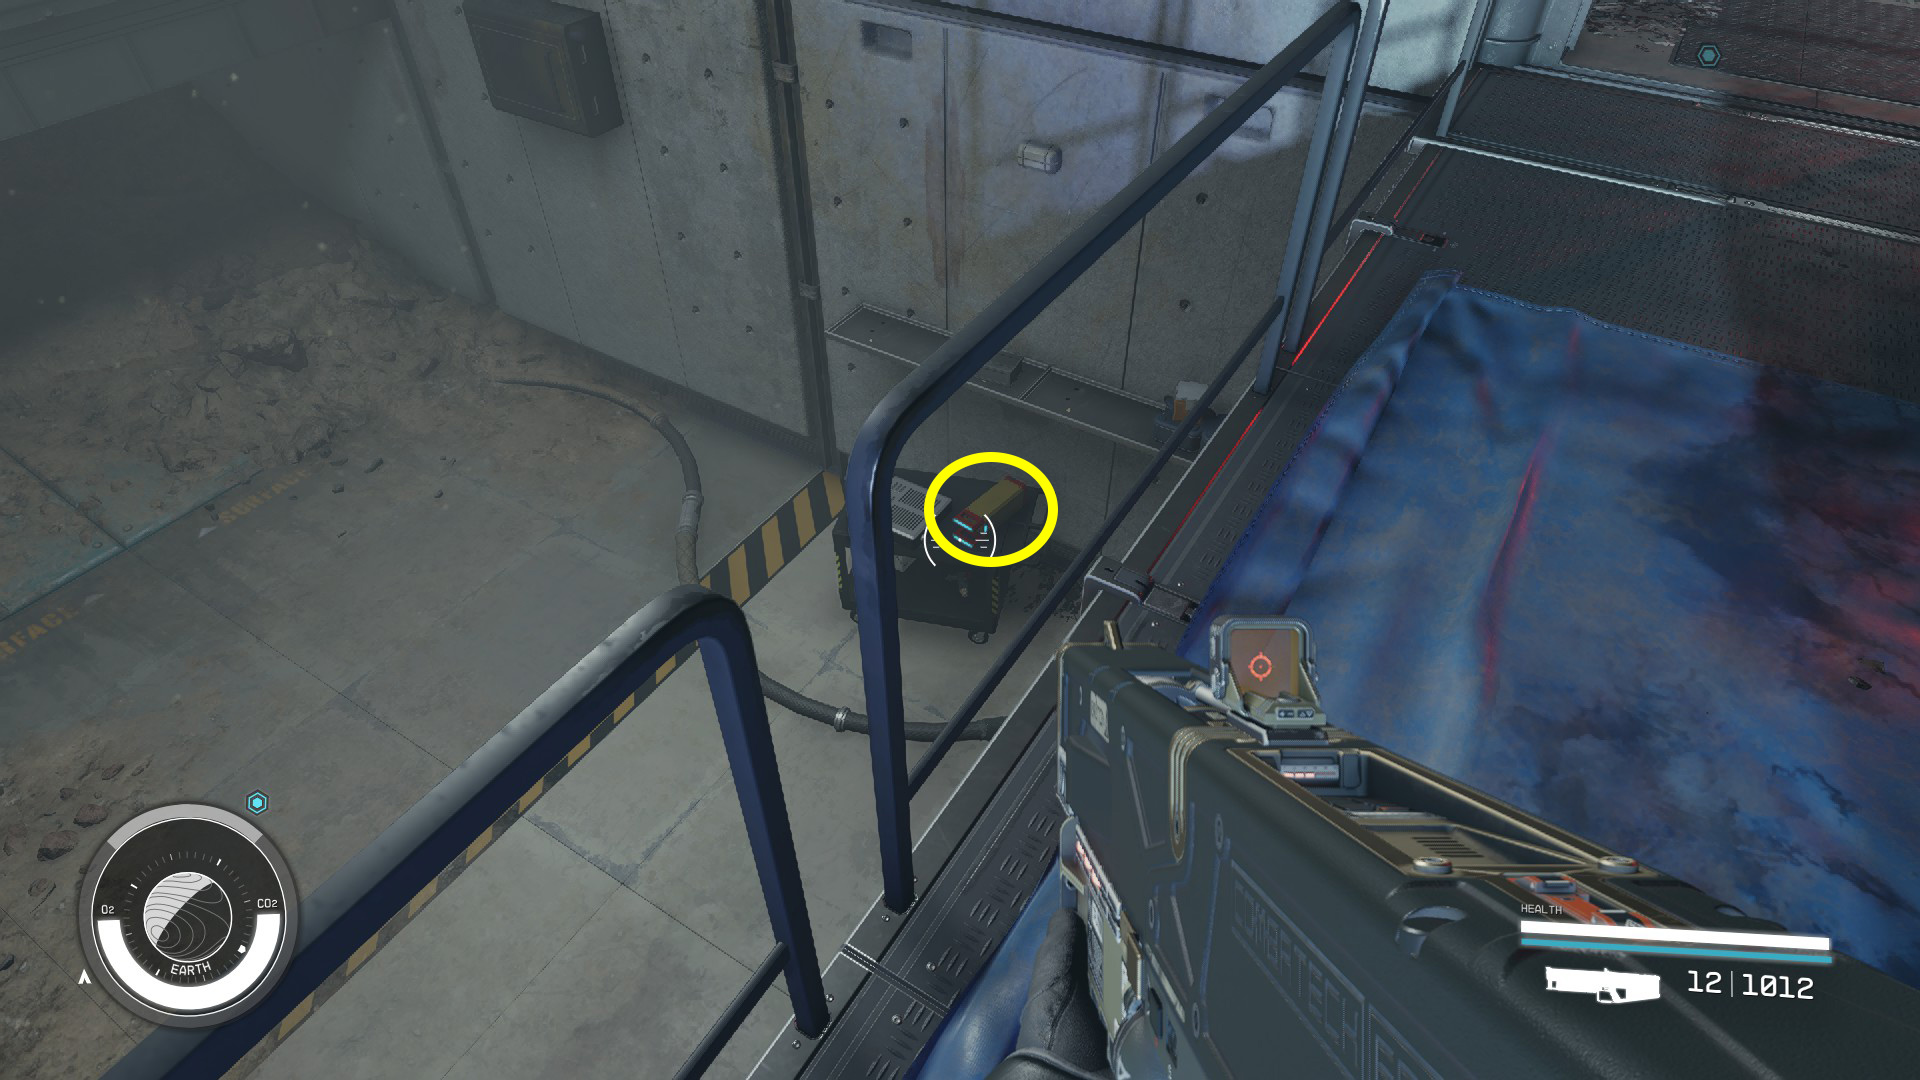
You’ll come to some stairs — on your left over the railing you can see the power cell you’ll need to grab (Image 32, and then put in the power socket (Image 33). Doing so will allow you to open and go through the door indicated in Image 33. In the hallway beyond, you’ll go left, then left again and through an open doorway. In this room, you’ll be able to grab some loot behind the fence before proceeding up the stairs (Image 34).
Image 32Image 33Image 34
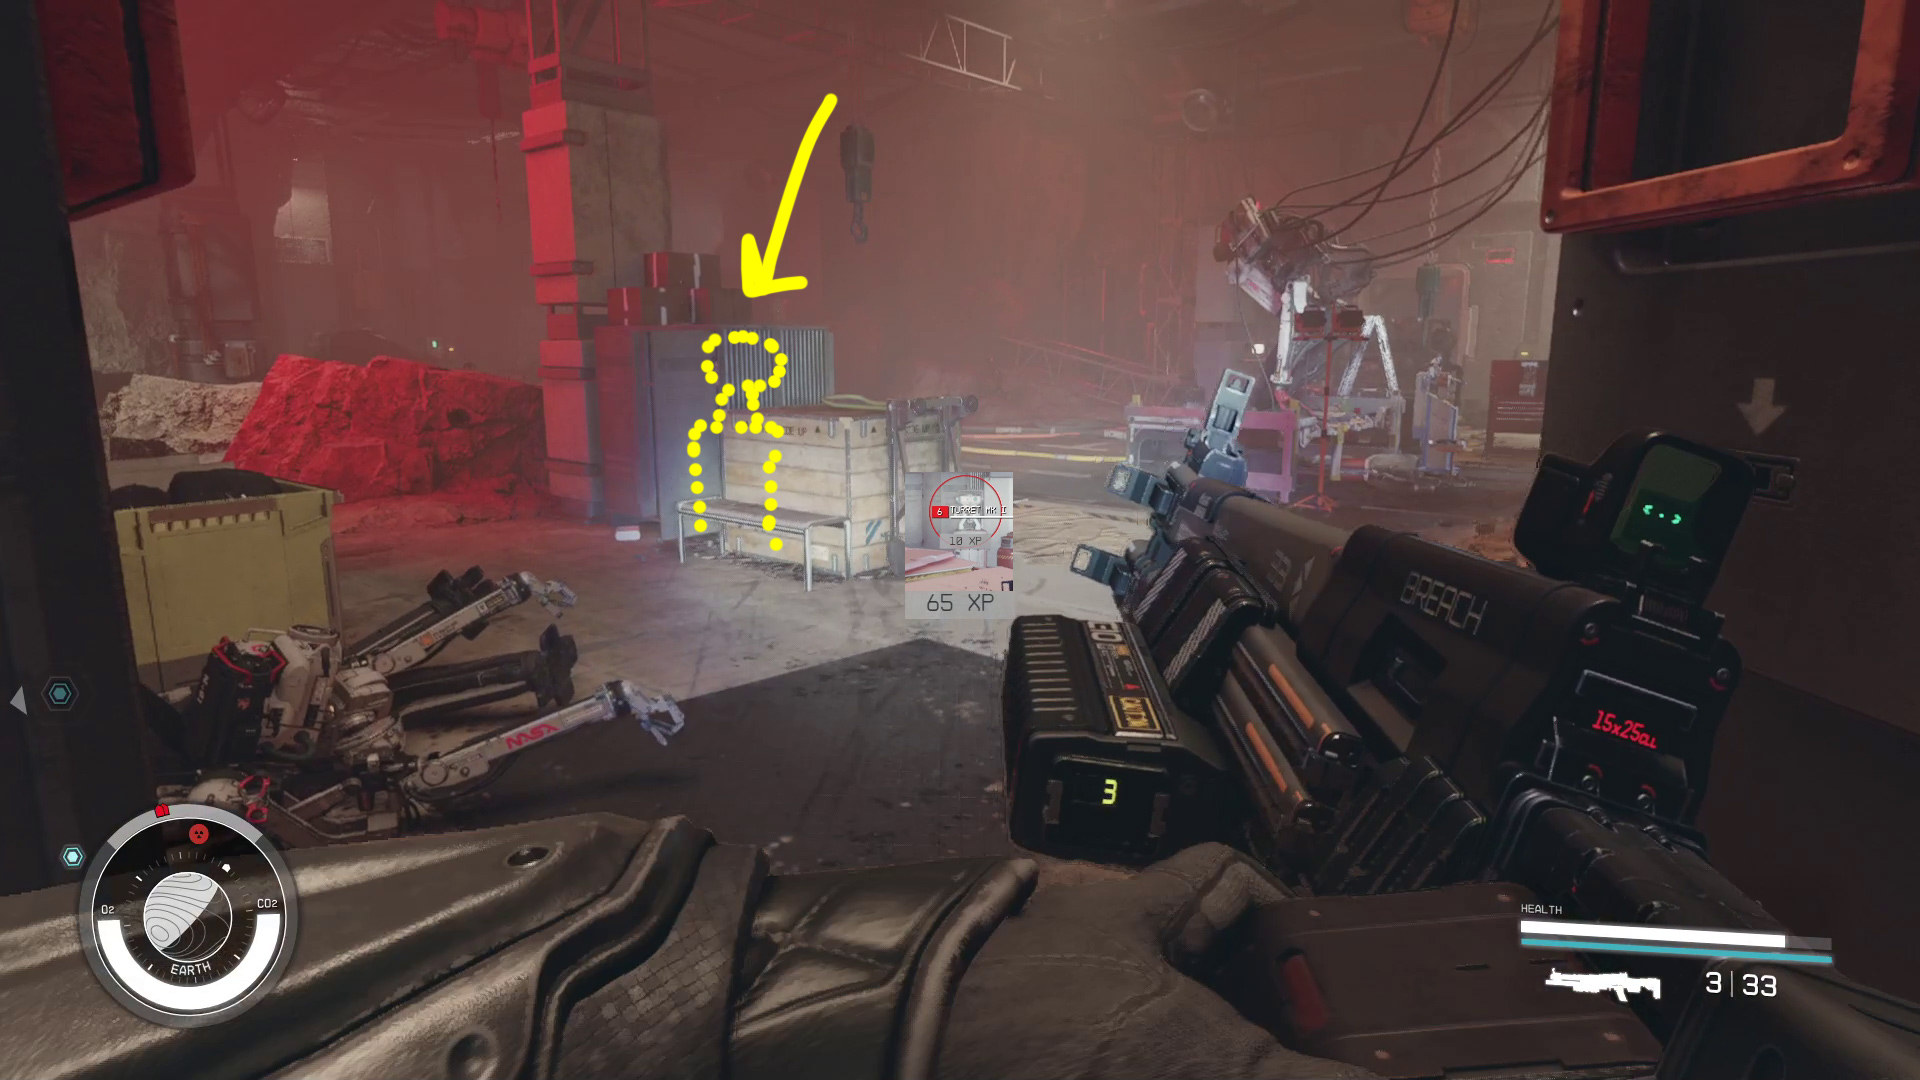
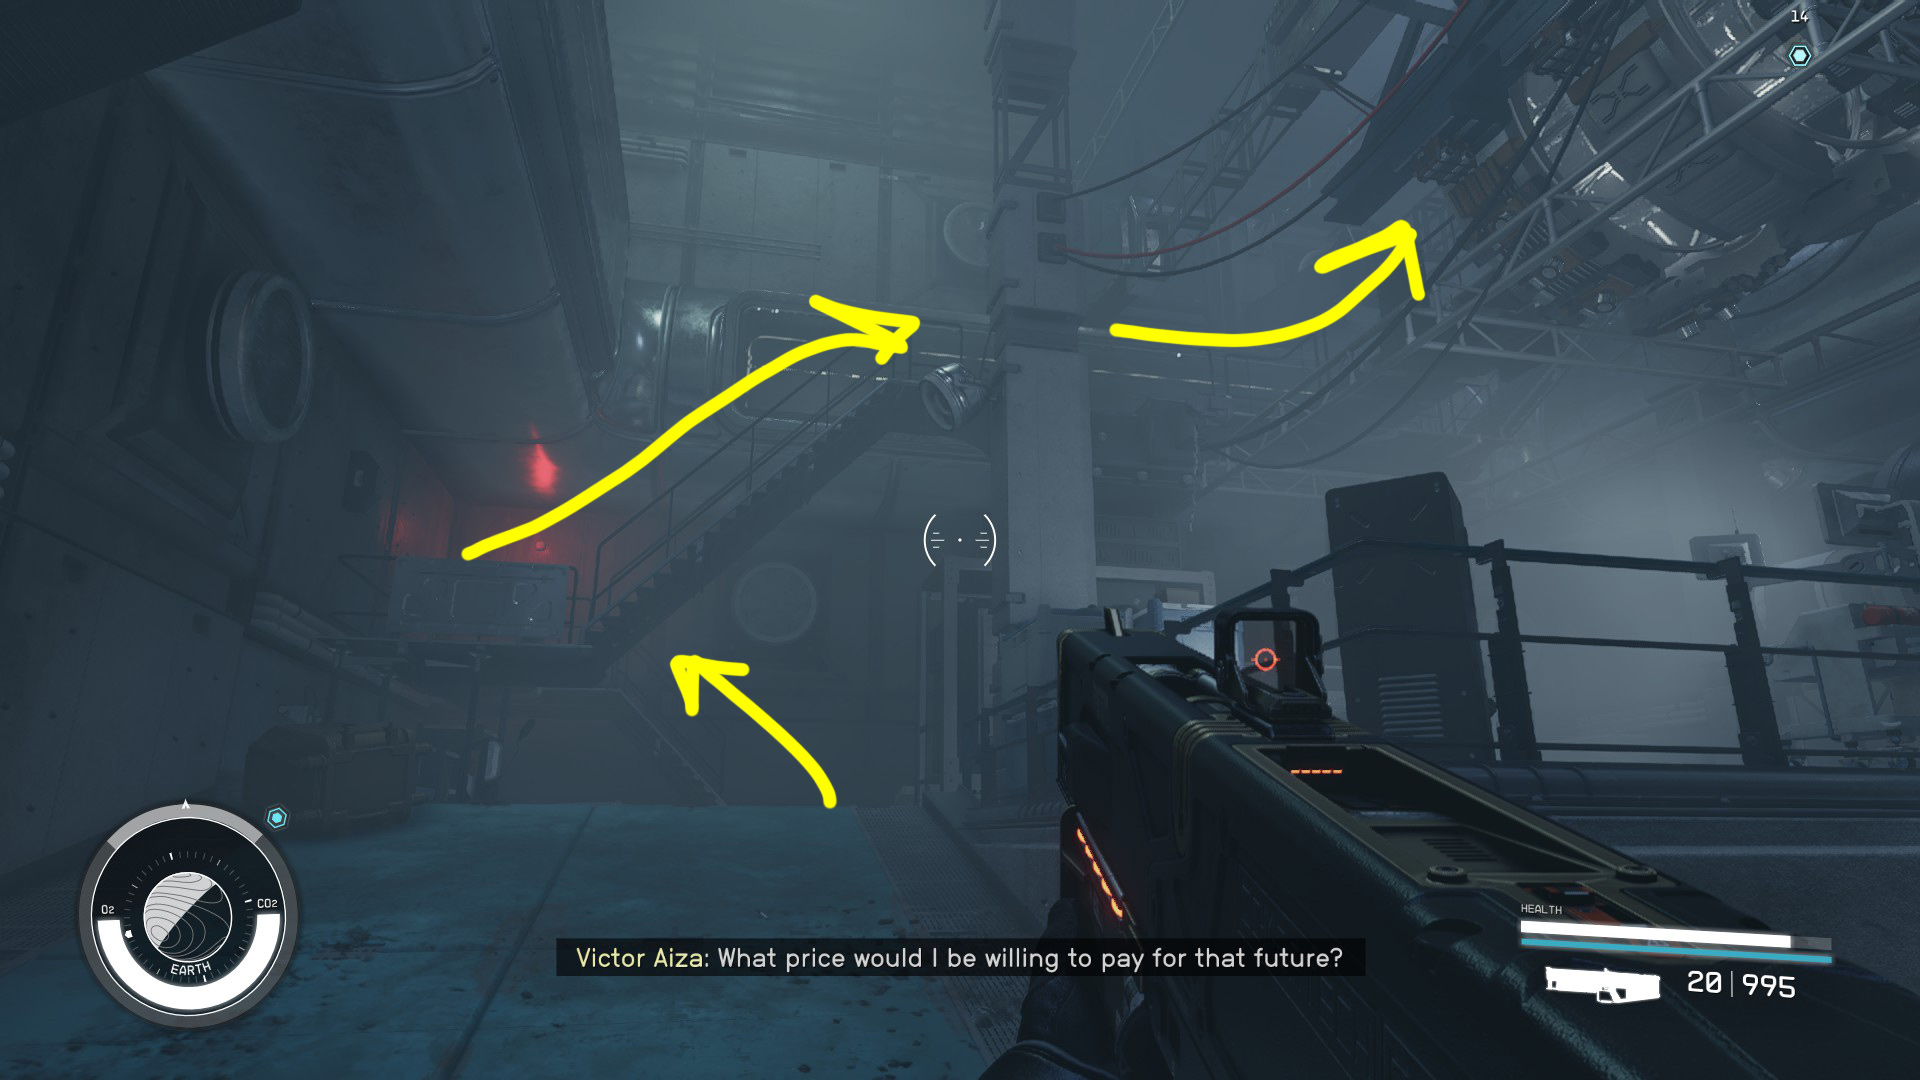
At the top of the stairs, go forward through the open doorway and go right, then left through the huge metal doors (Image 35) — be ready for combat in this next area. There are four turrets and a robot here, and one of the turrets is on the opposite side of a pillar from the double doors (Image 36).
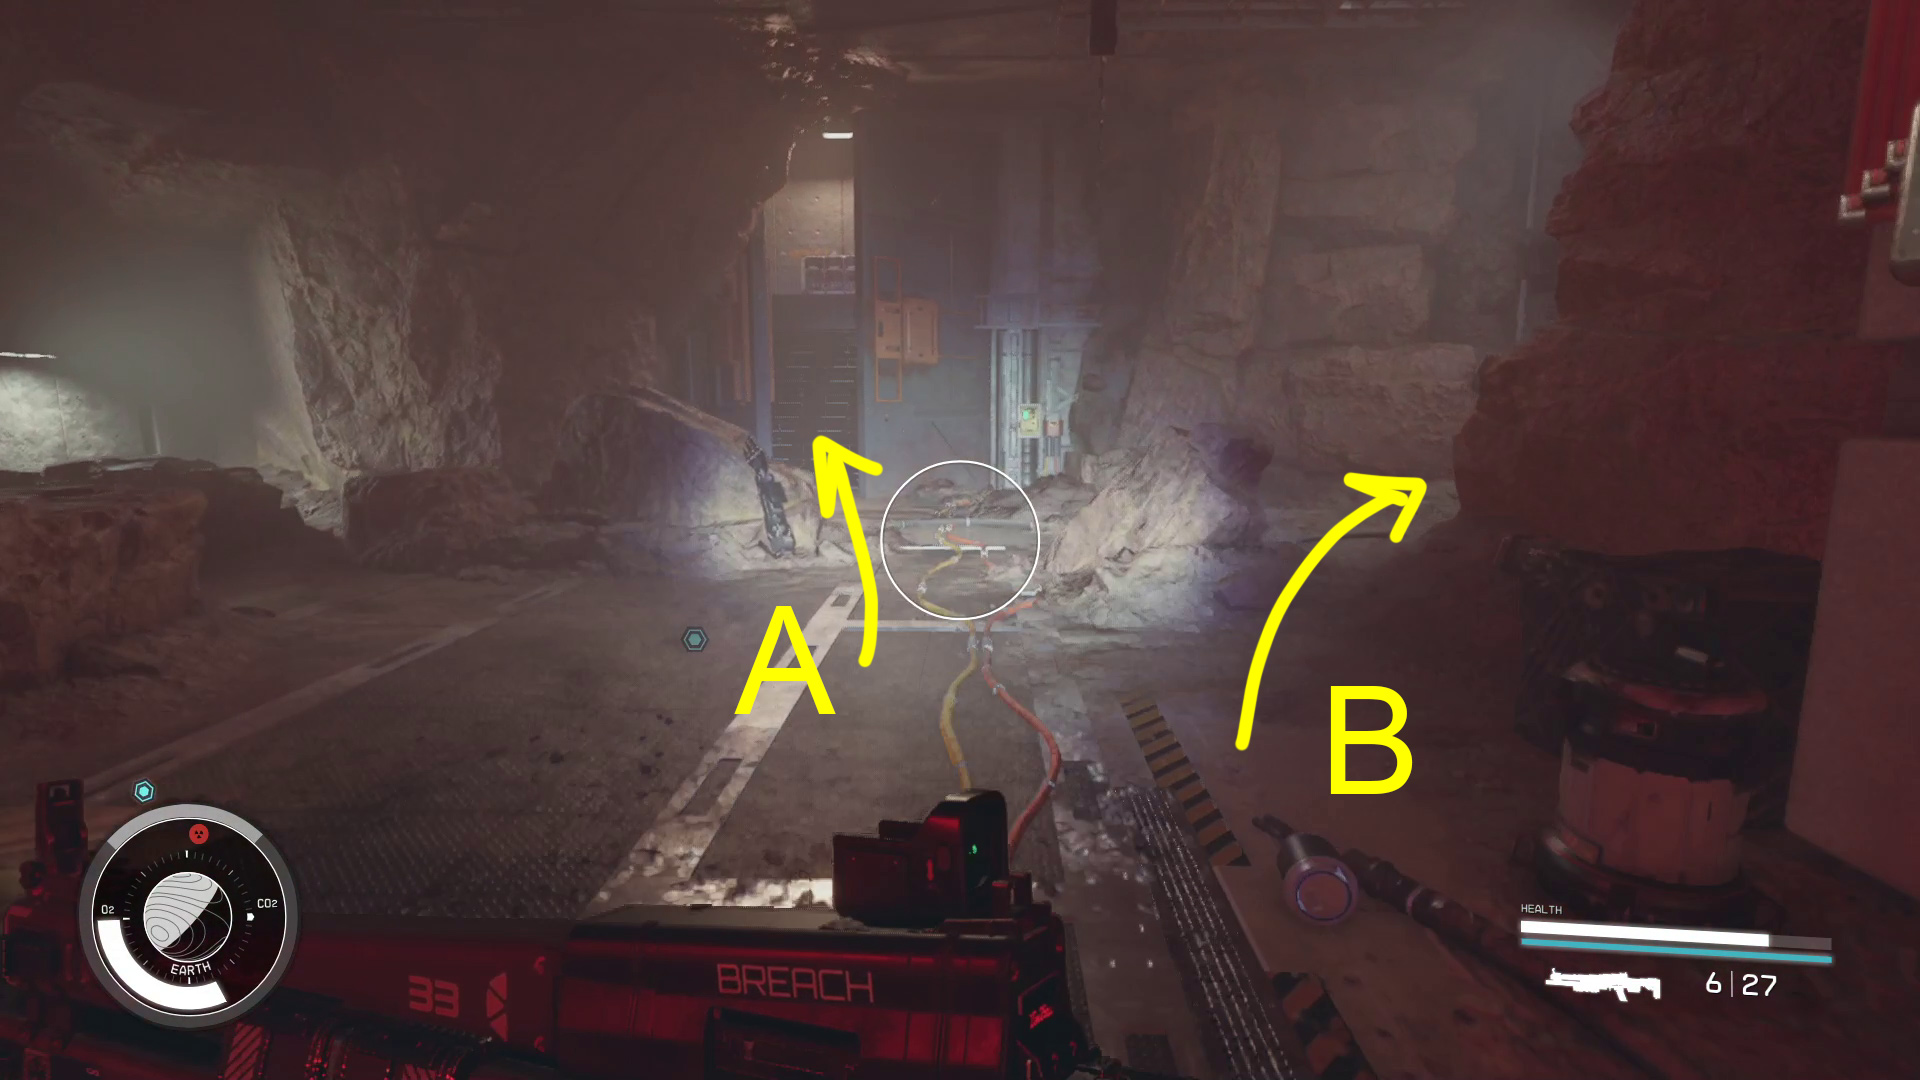
Turning left from the double doors you entered by will lead you to another set of double doors, but with a gate blocking the way forward (Image 37A). Go right (37B), through the doorway, and down the hallway to find the power switch on the right-hand wall near the windows. Then you can go back and throw the switch to open the gate.
Image 35Image 36Image 37
Note that the scanner will be able to lead you to the next objective.
Head through the double doors and down the ramp, then continue forward — there’s only one way to go — down a few more ramps. You’ll pass a door on your right that leads to a room full of junk, with a bit of crafting materials and other odds and ends. Past the door, you’ll go down a long ramp, and then enter a room with a computer, indicated by the objective marker (Image 38). Access the computer and select “Access Station Logs”, then select “December 8, 2141” to get your next objective.
Image 38
Find Information About Grav Drive Side Effects
For this section, you’ll once again be able to use the Scanner to guide you to the next objective — press / if you get turned around.
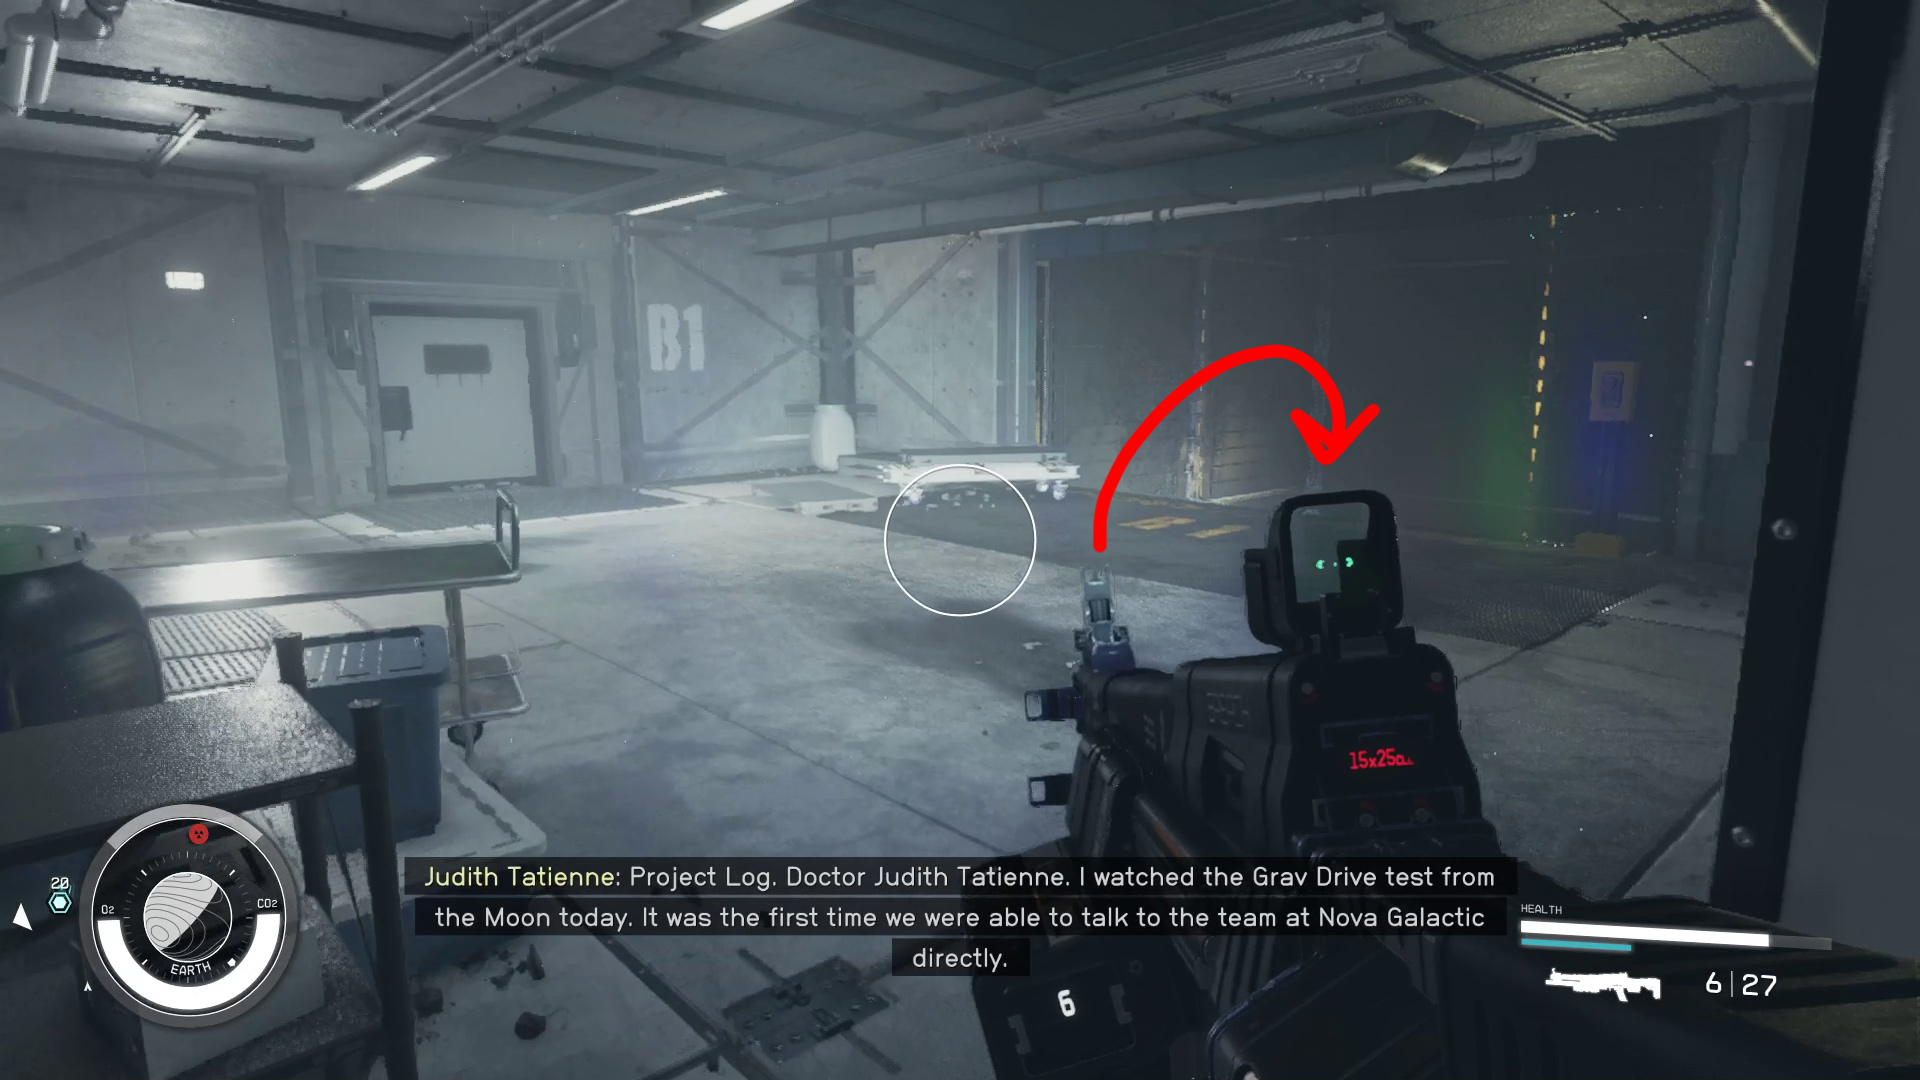
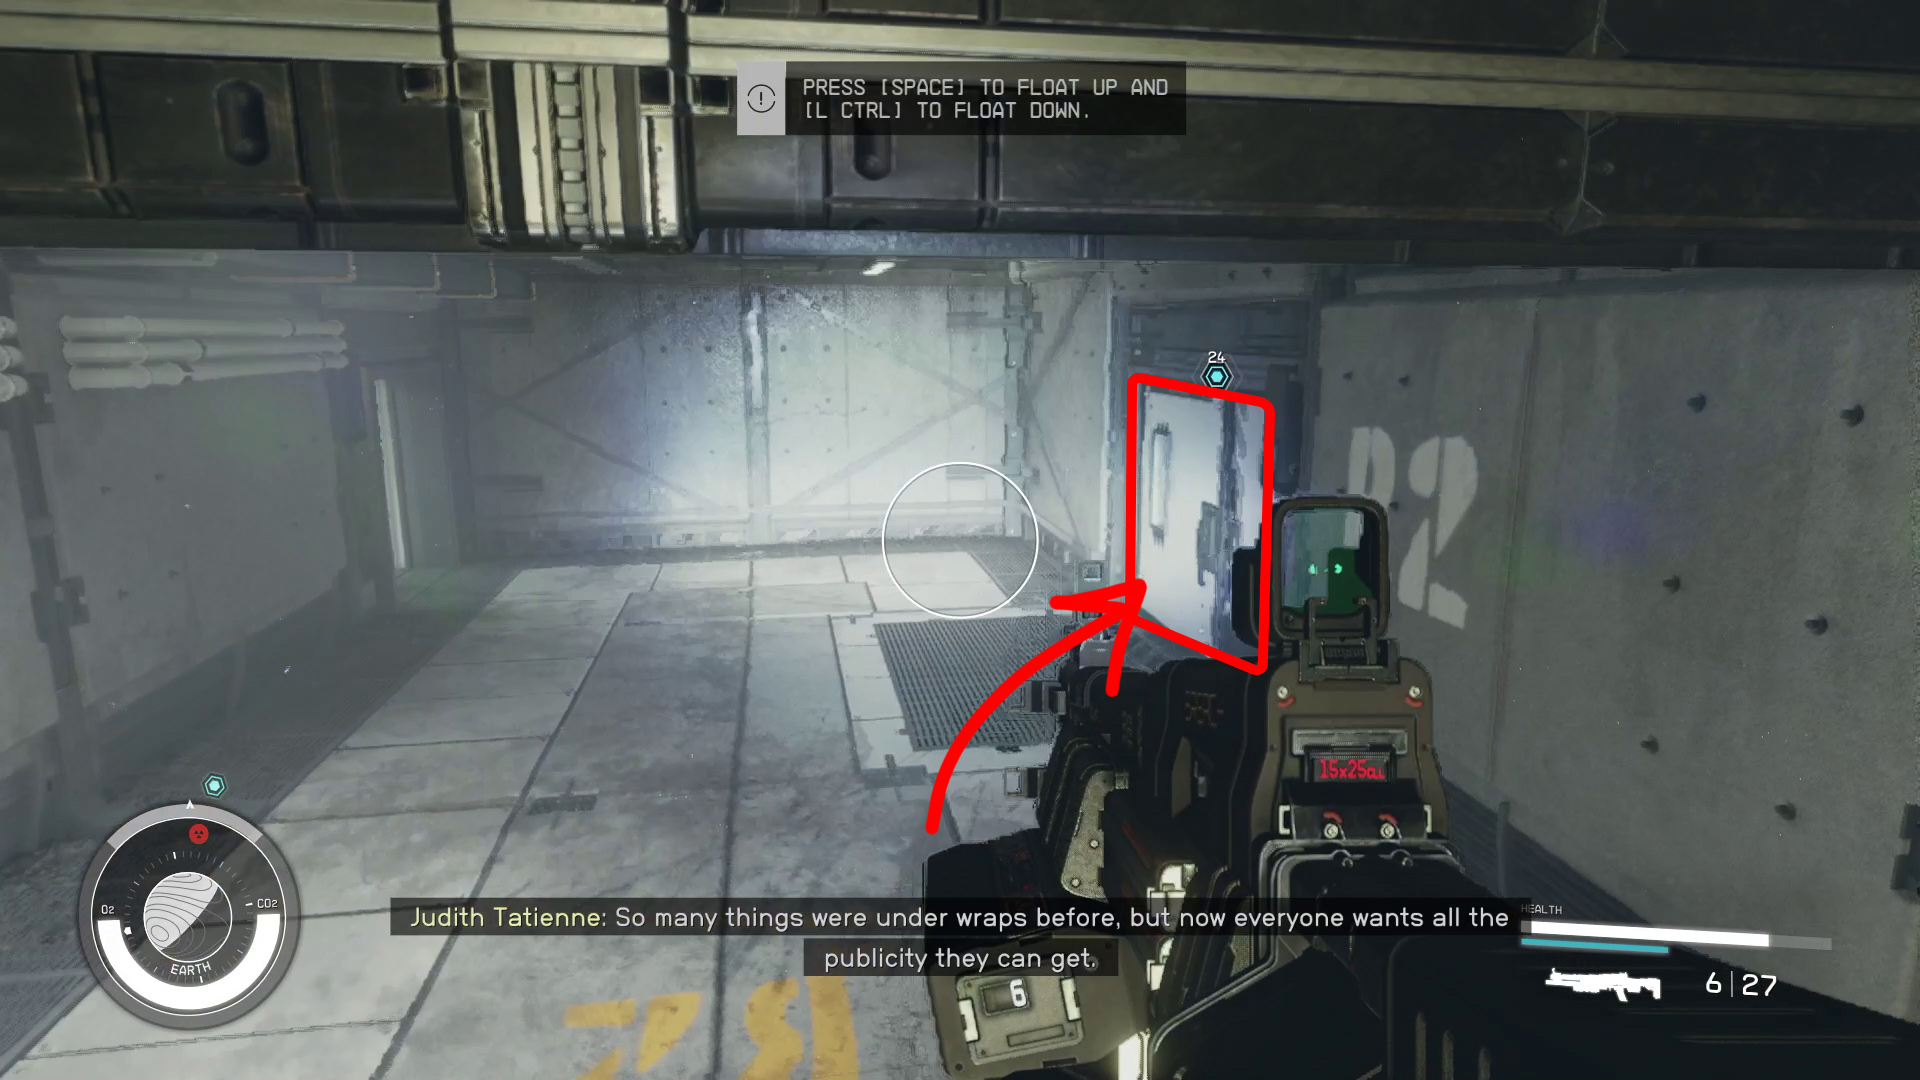
From the computer, turn right and head through the nearby door, then turn right and you’ll see a dark section of floor marked B1 (Image 39). Walk into the shaft there, then hold the crouch button to go down one floor. Get out of the shaft at B2 and go through the door on the right (Image 40). In the hallway, go left, and you’ll go through a doorway and find a control room with a computer.
Grab the NASA Maintenance Key (Image 41), then use the NASA Research Computer the objective marker is indicating. Select “Access Station Logs”, then “September 8, 2160”. You’ll receive the Protoype Access Code, and your next objective.
Image 39Image 40Image 41
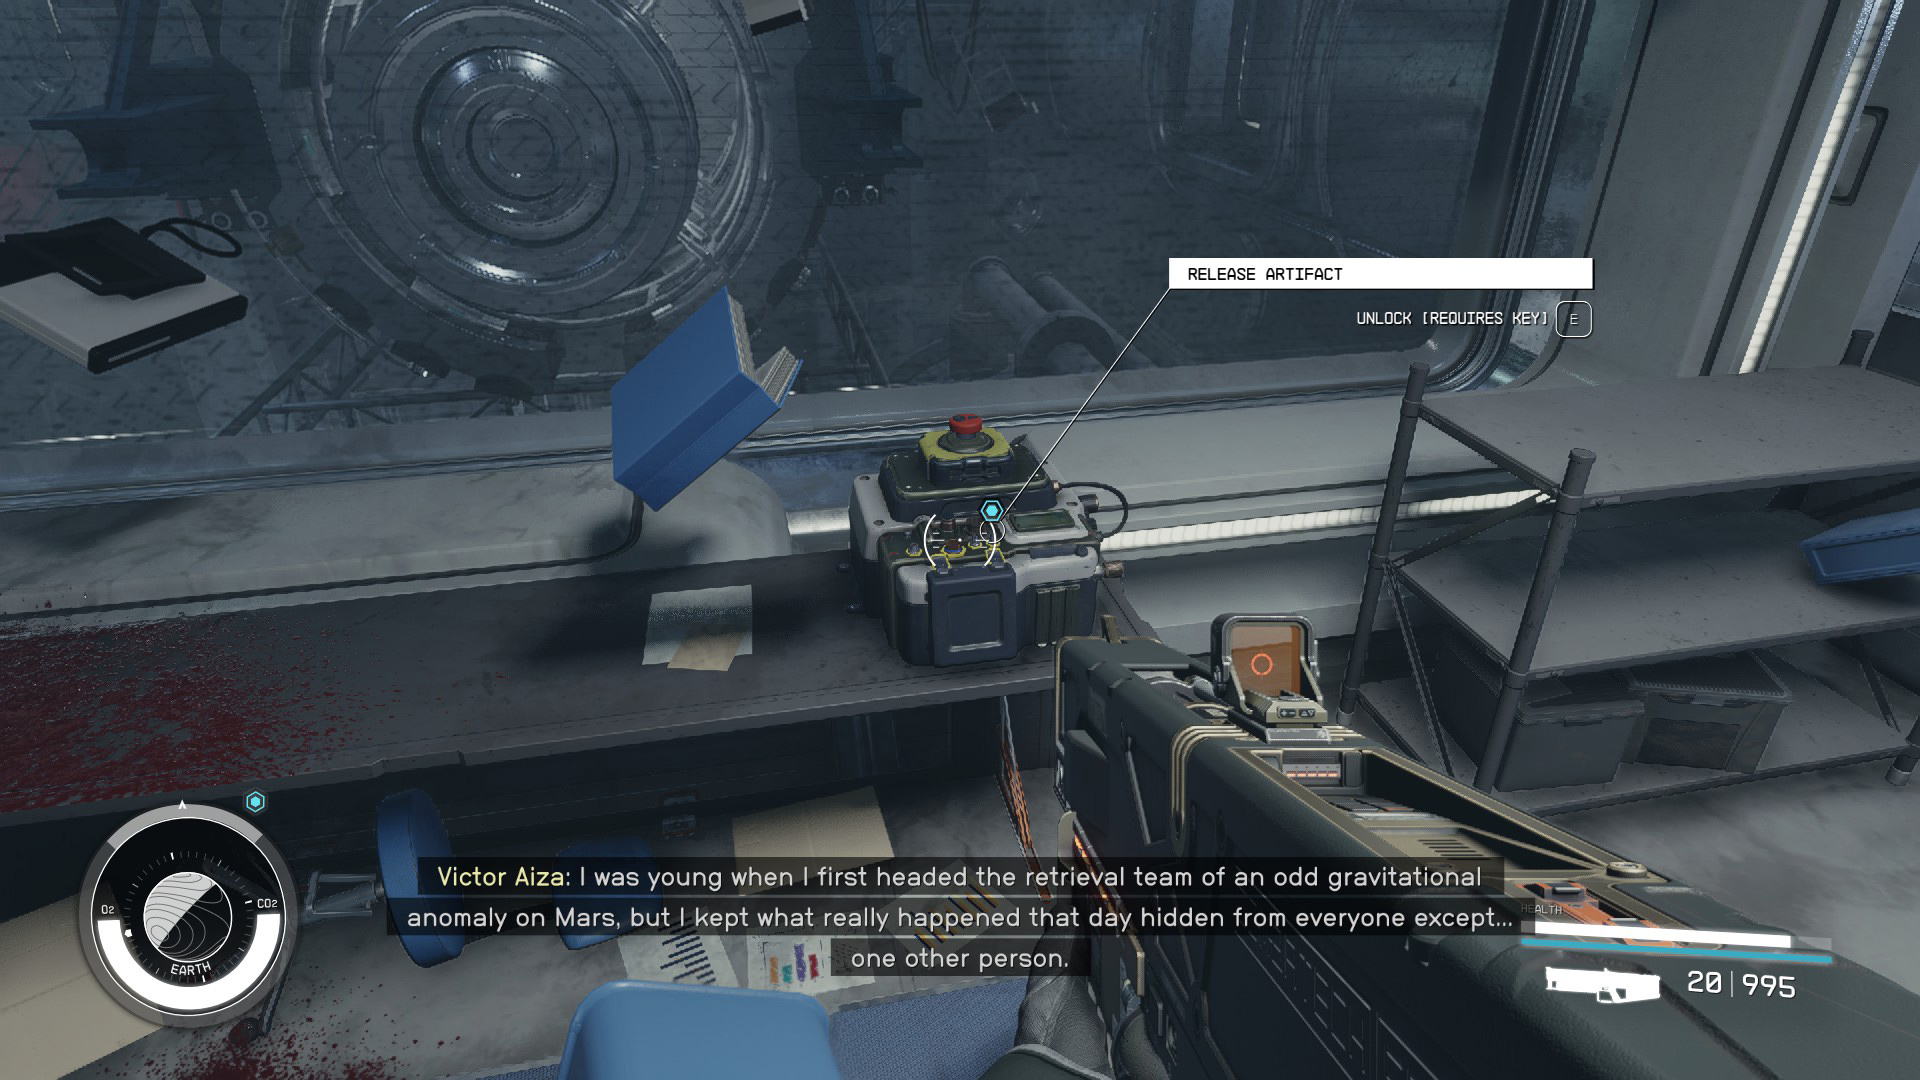
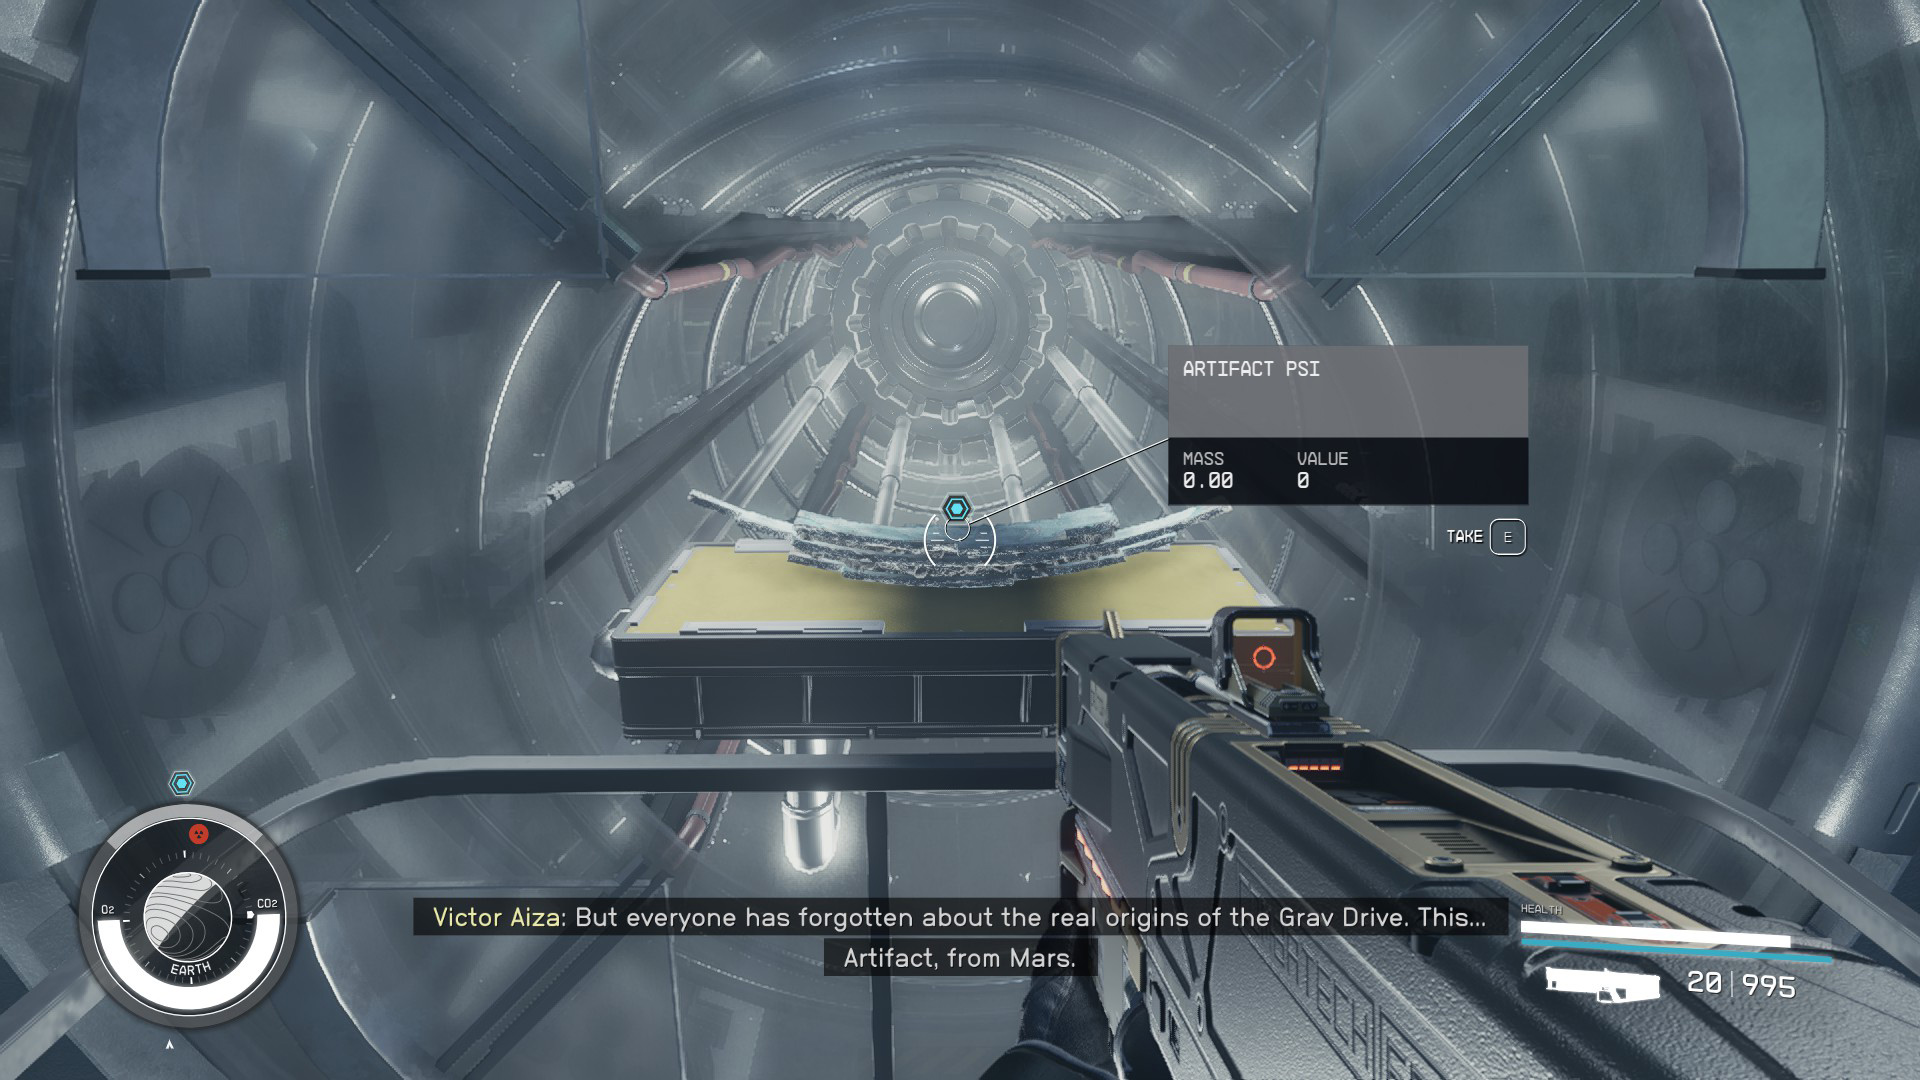
Release the Artifact
On the same desk as the computer is the the button to release the Artifact (Image 42). Simply press the indicated button to Release the Artifact.
Image 42
Take the Artifact
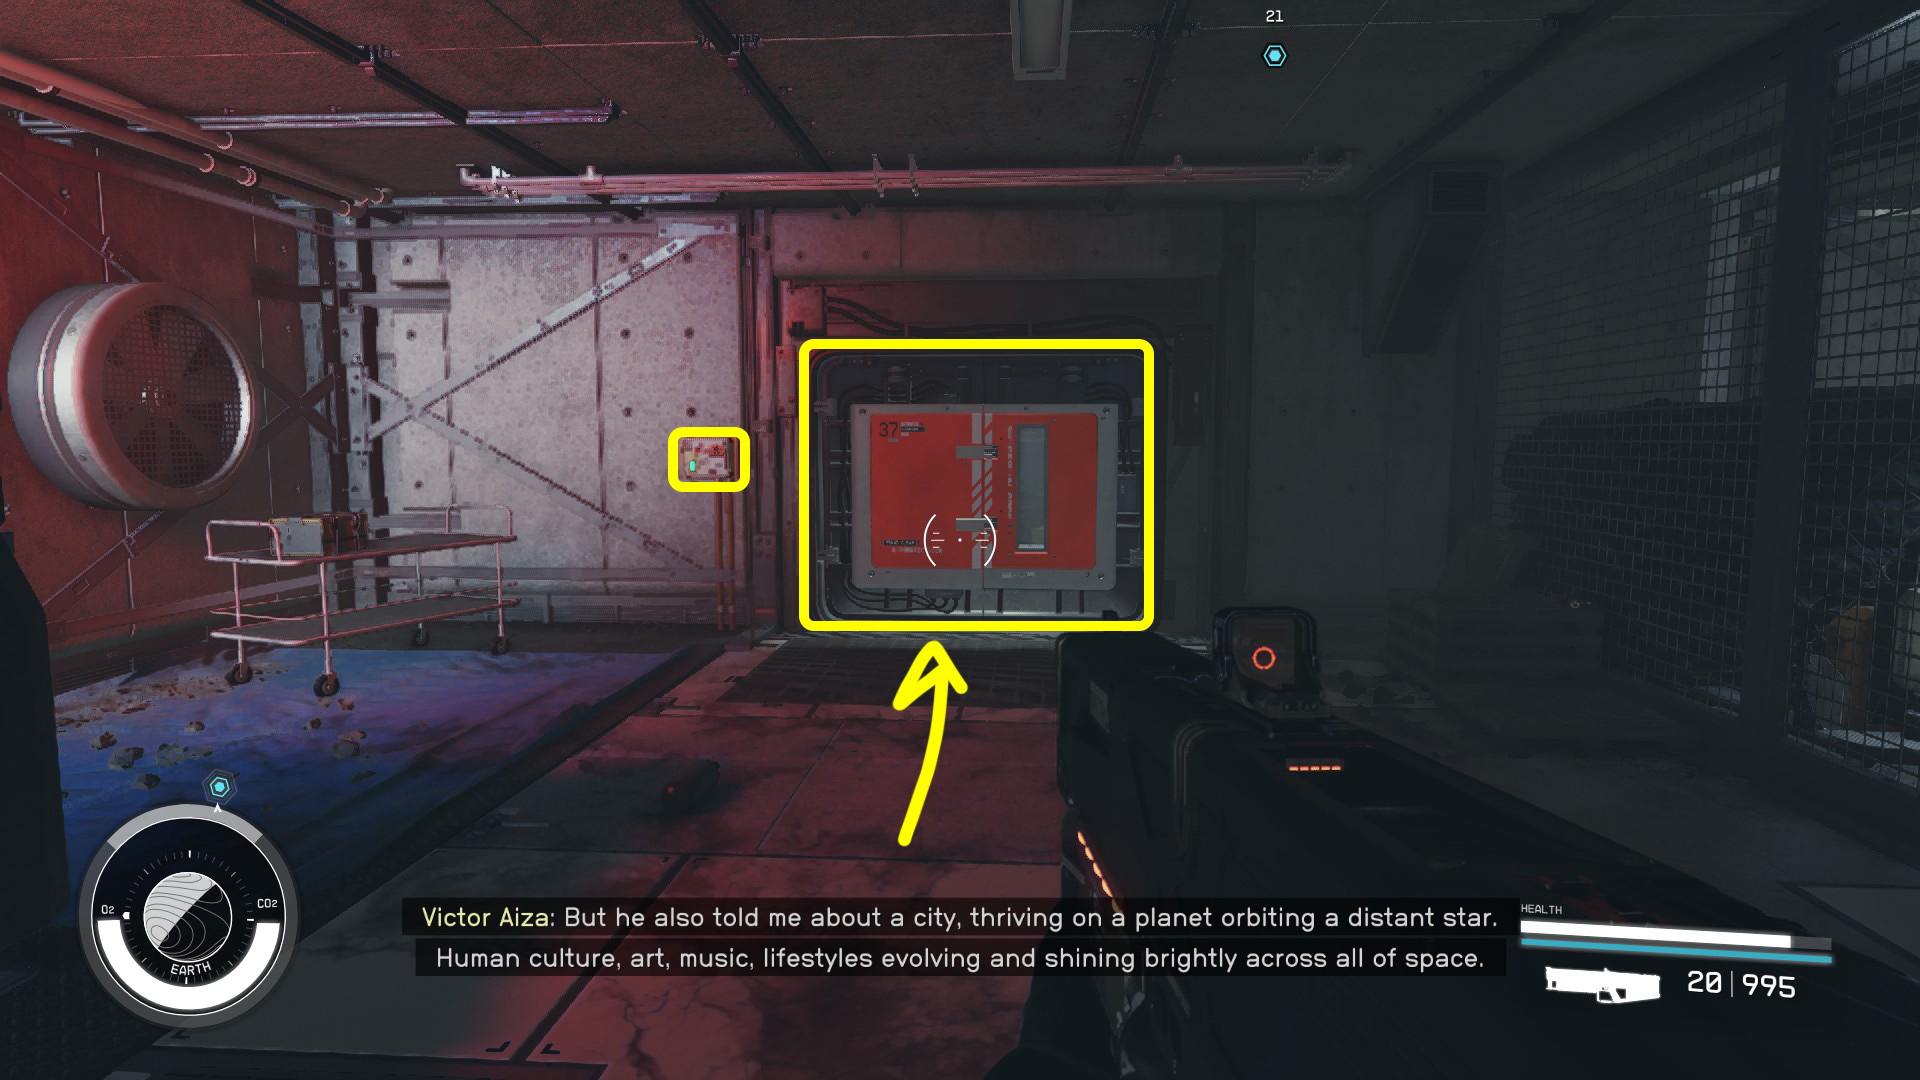
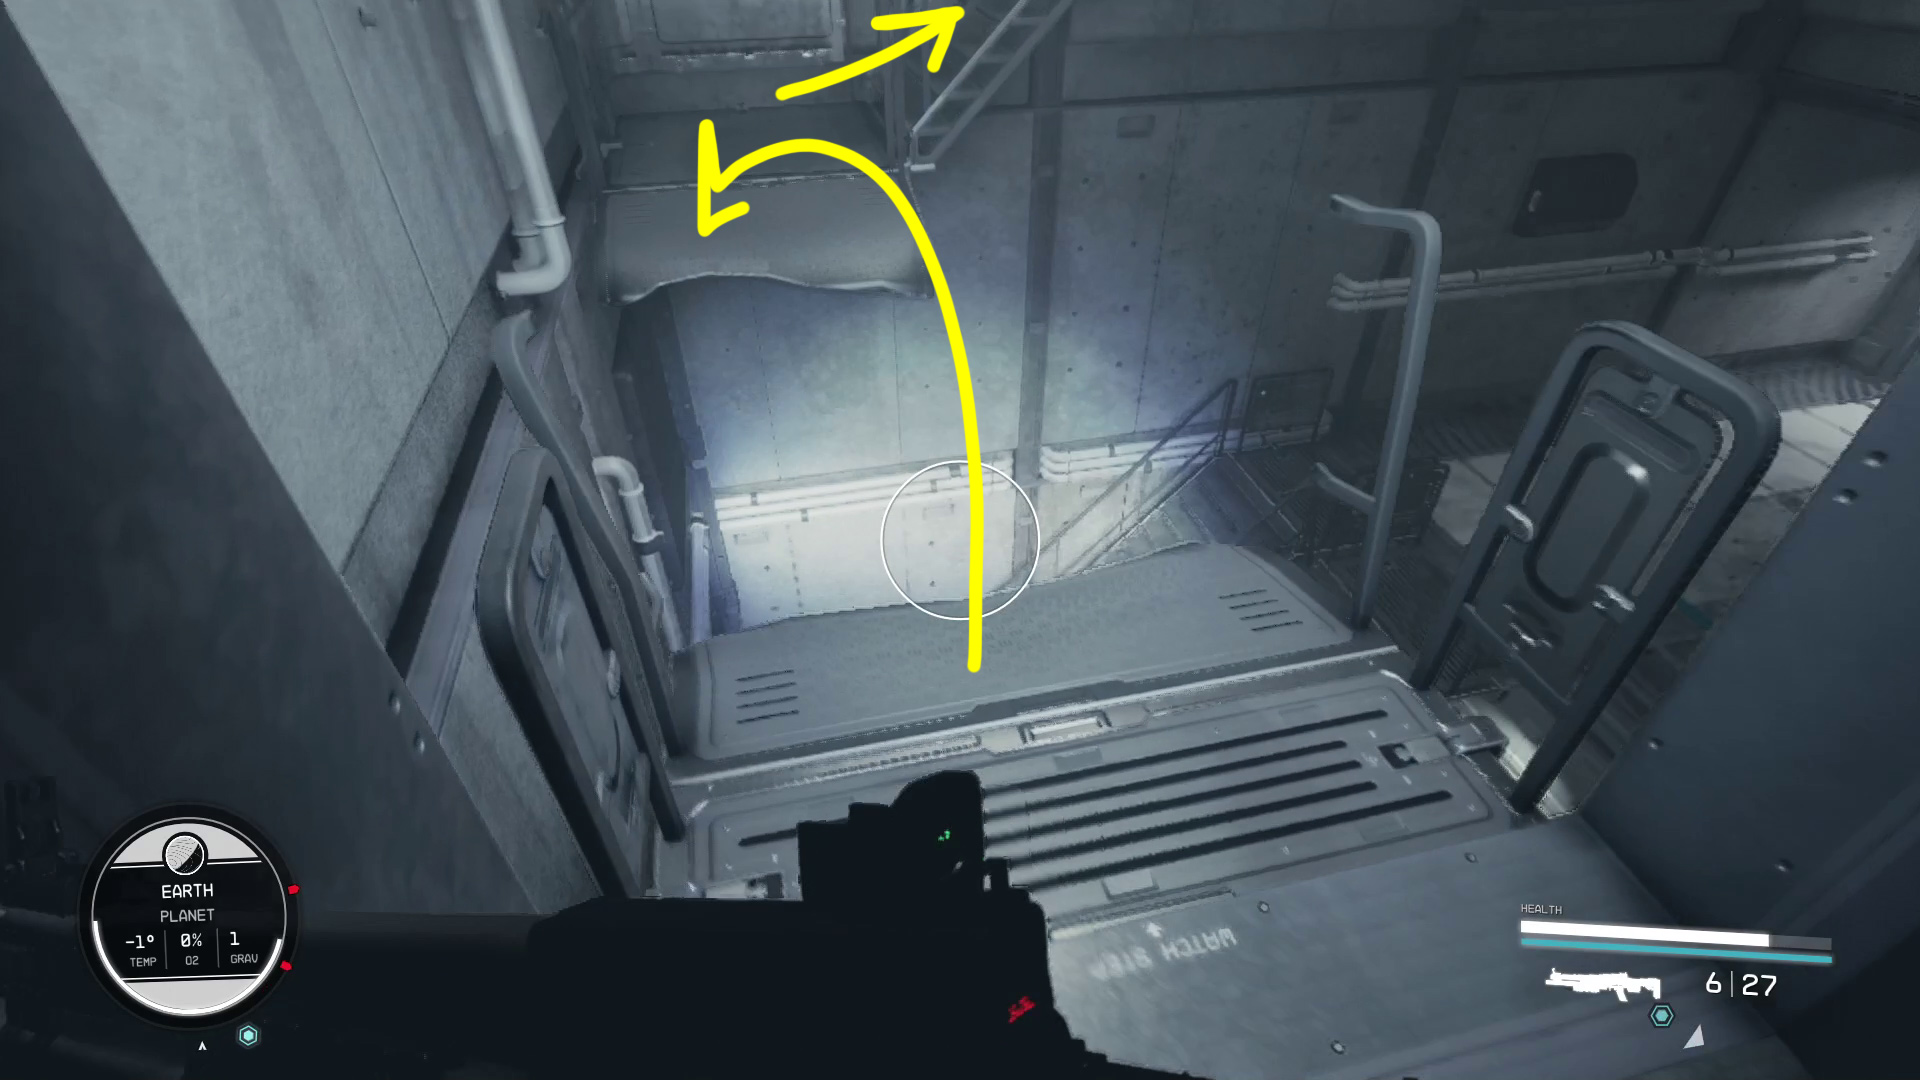
Go back to the shaft you came down (Image 39), and drop from level B2 to B3 — there’s no zero G anymore, so use your booster to make sure you don’t take fall damage. If you miss B3, you can just jump/climb up to the ledge. Go through the door on the right (Image 43), then turn left and use the switch next to the door ahead to open it and head on through (Image 44).
Image 43Image 44
In the next room, go up the stairs on the left side of the room (Image 45), and then head towards the device in the middle of the room that the objective marker is indicating. Wait a moment, and the Artifact will come sliding out of the machine for you to snatch up (Image 46).
Image 45Image 46
Leave NASA
Time to go! For your escape, you can use the Scanner to guide you out of NASA — press / if you get turned around.
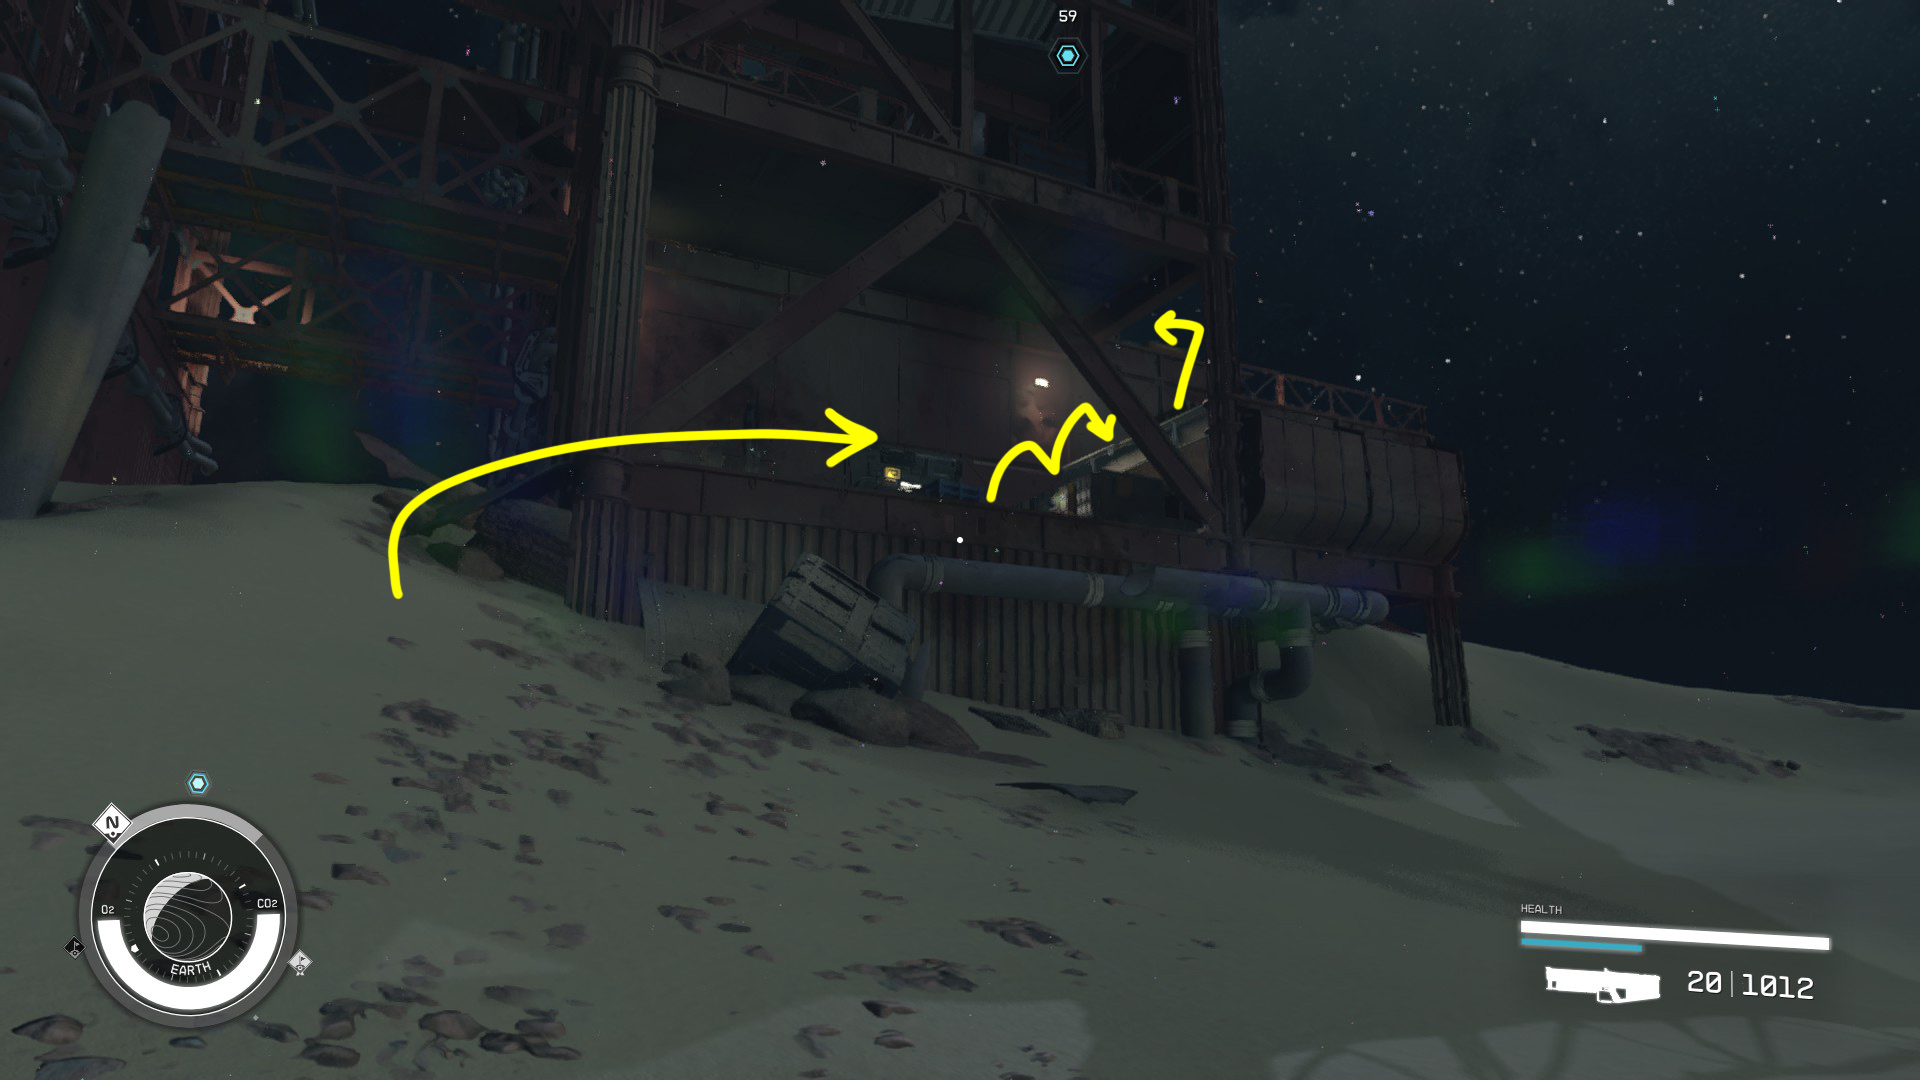
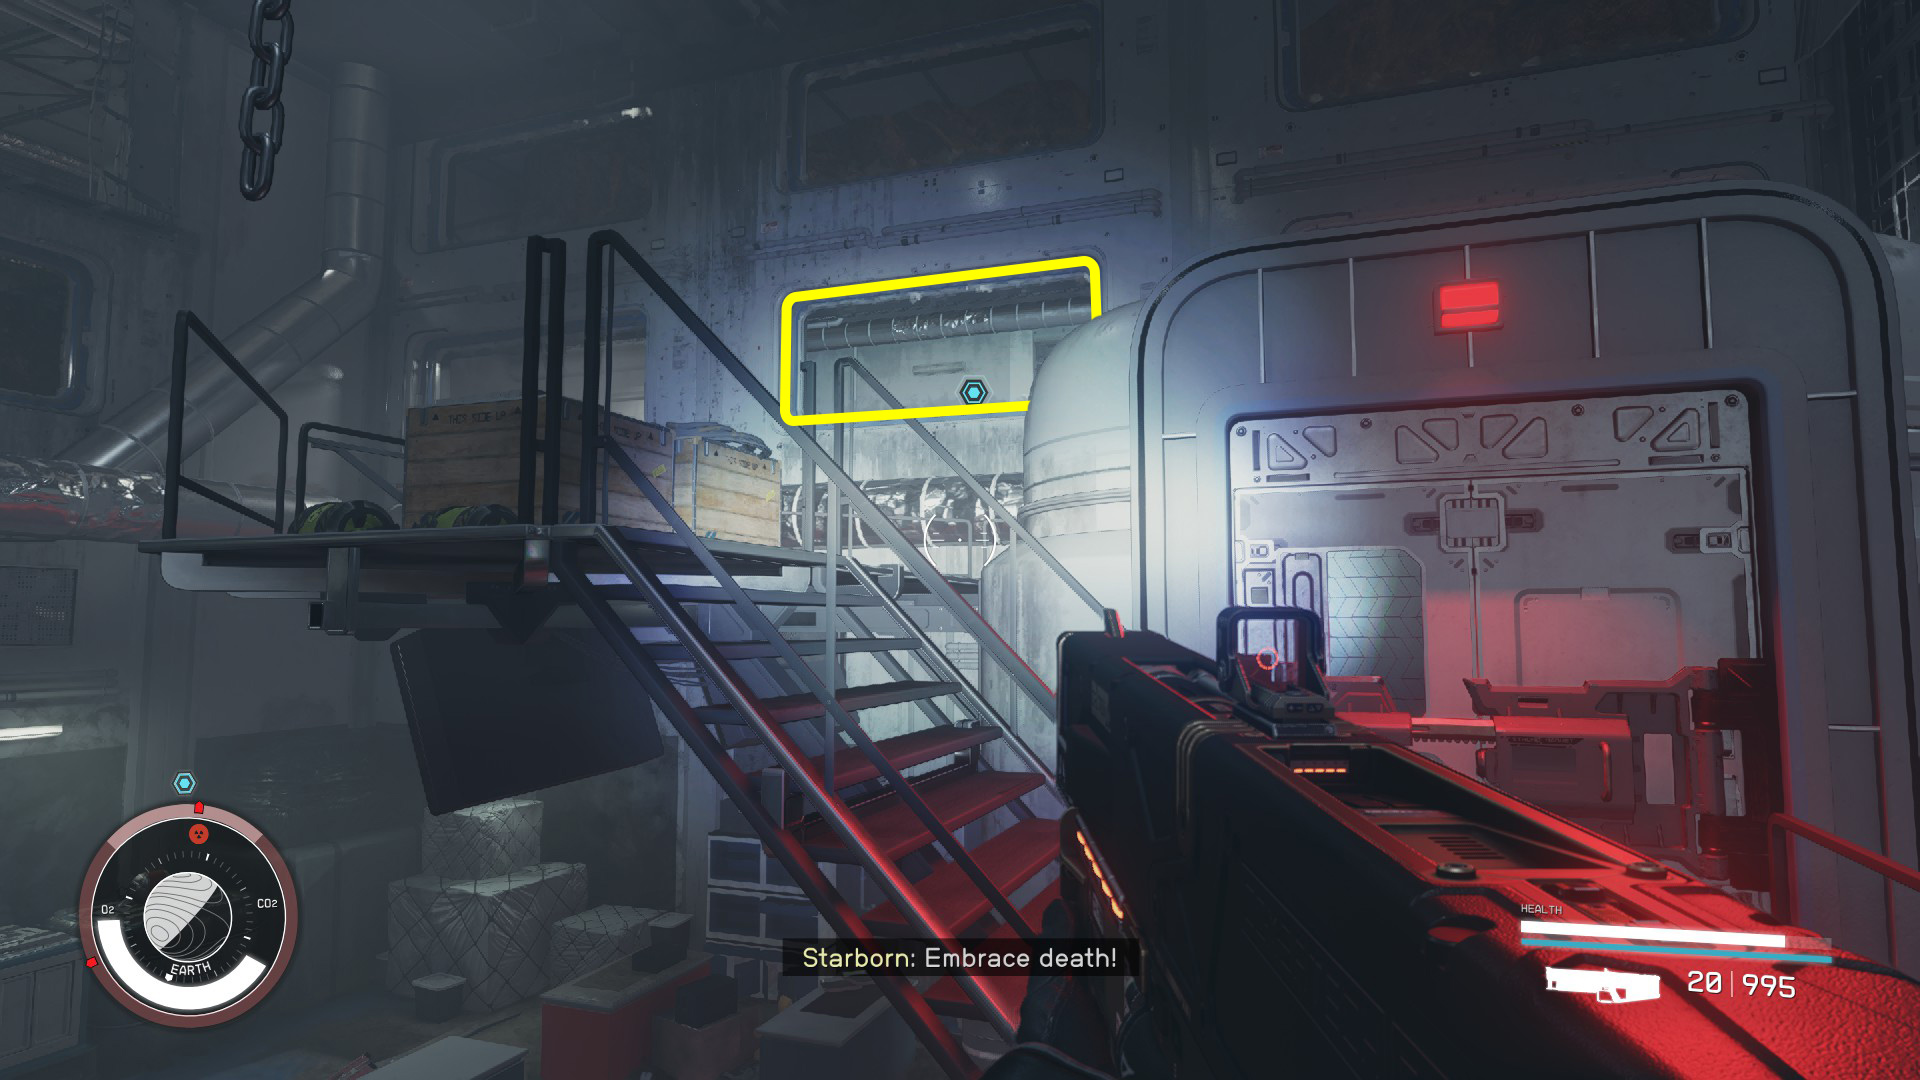
Turn around from the device and go up the stairs to the right, go through the doorway in the gate, then turn right and continue to the end of the hallway. You’ll need to jump over the gap in the catwalk in the stairwell (Image 47), then use the path the scanner gives you to make your way out of NASA.
Image 47
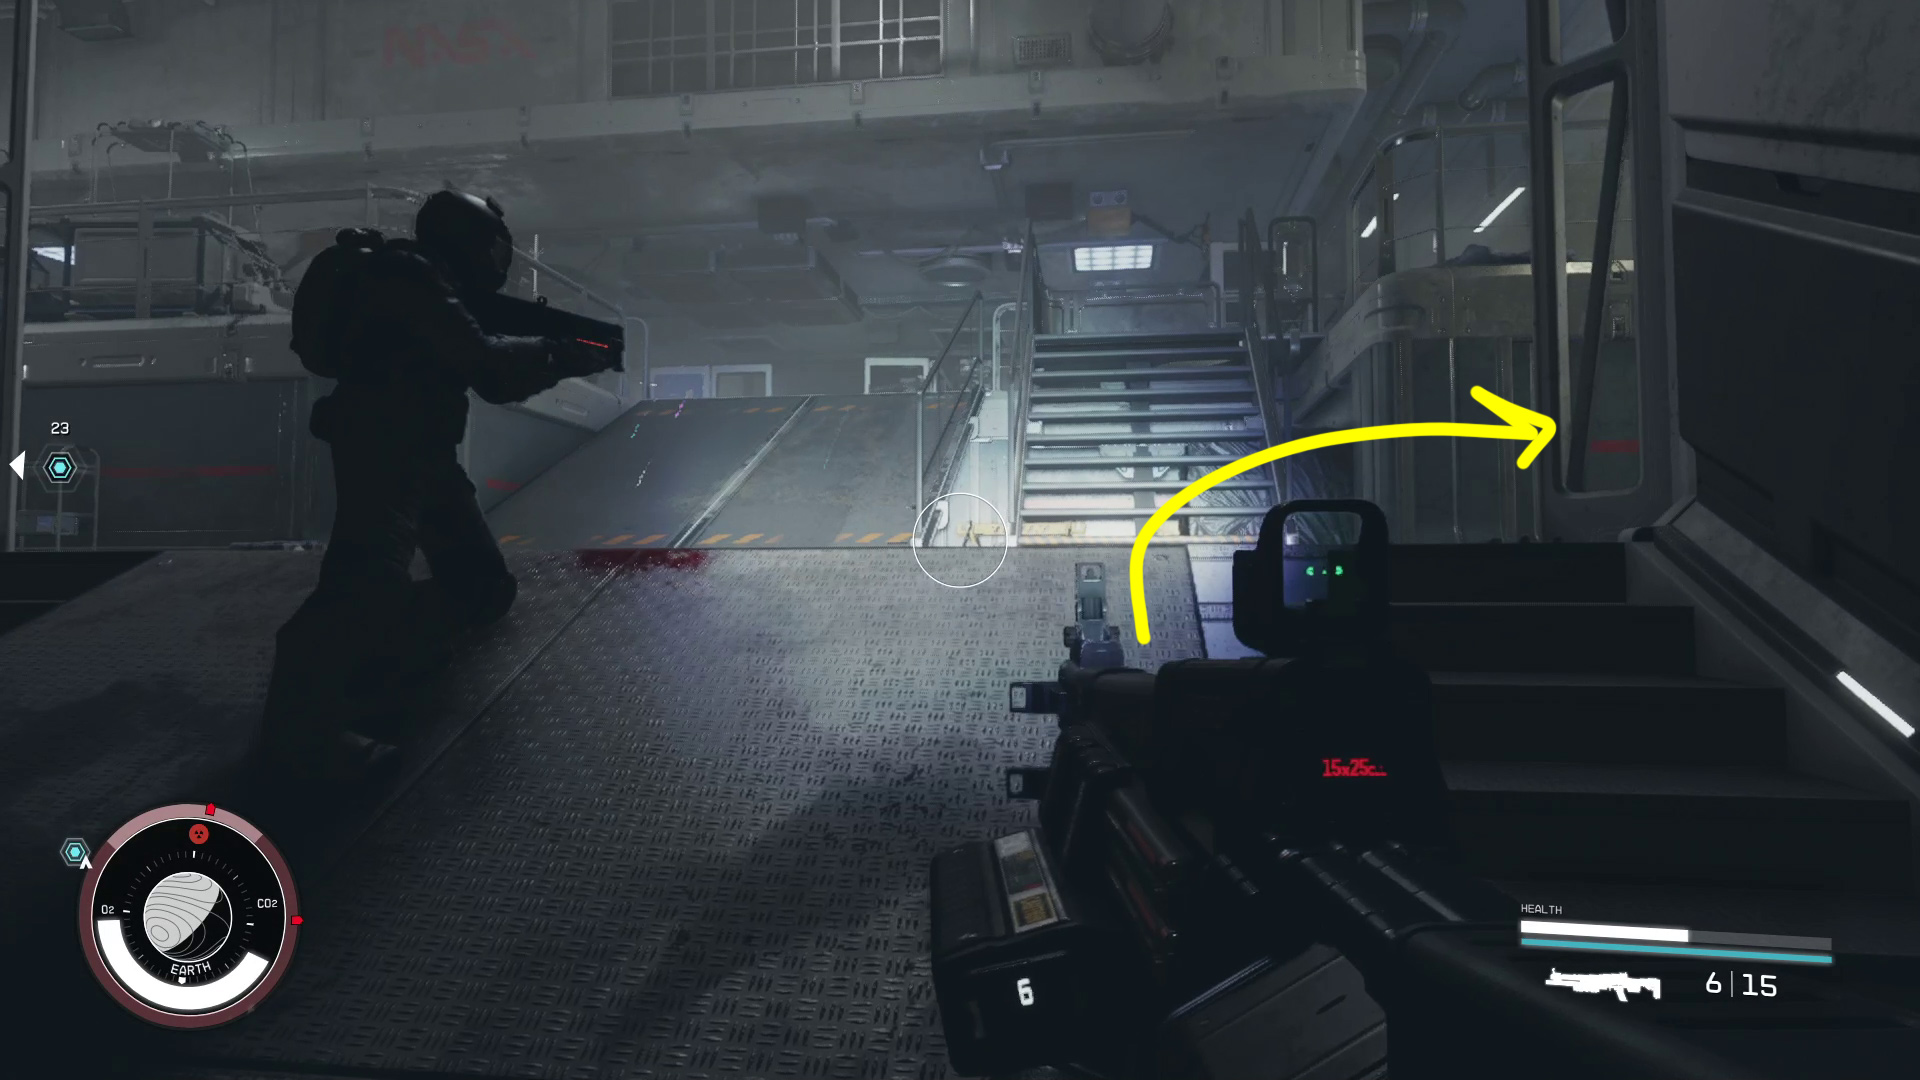
You’ll run into a Starborn in the room just past the basement shaft, right before you go up the large ramp. Another Starborn waits at the top of the ramp. Past the 2nd Starborn is another ramp, and at the top, your path out will be blocked by a door that needs power. There are two Starborn here — you can choose to fight them or just move quickly and ignore them. Go right (Image 48) and hug the right wall: in the far corner is a Power Receptacle with a power cell on the floor right next to it (Image 49). (Sometimes the Power Cell can end up getting moved around, but it should be nearby).
Image 48Image 49
After slotting in the power cell, you can follow the cables around the edge of the room to the door — throw the switch, and head through. Continue up the stairs, and you’ll go through a couple of rooms with some loot crates. Then go through the locked door — good thing you grabbed the maintenance key earlier — and continue forward, still using the scanner’s helpful arrows to find your way forward.
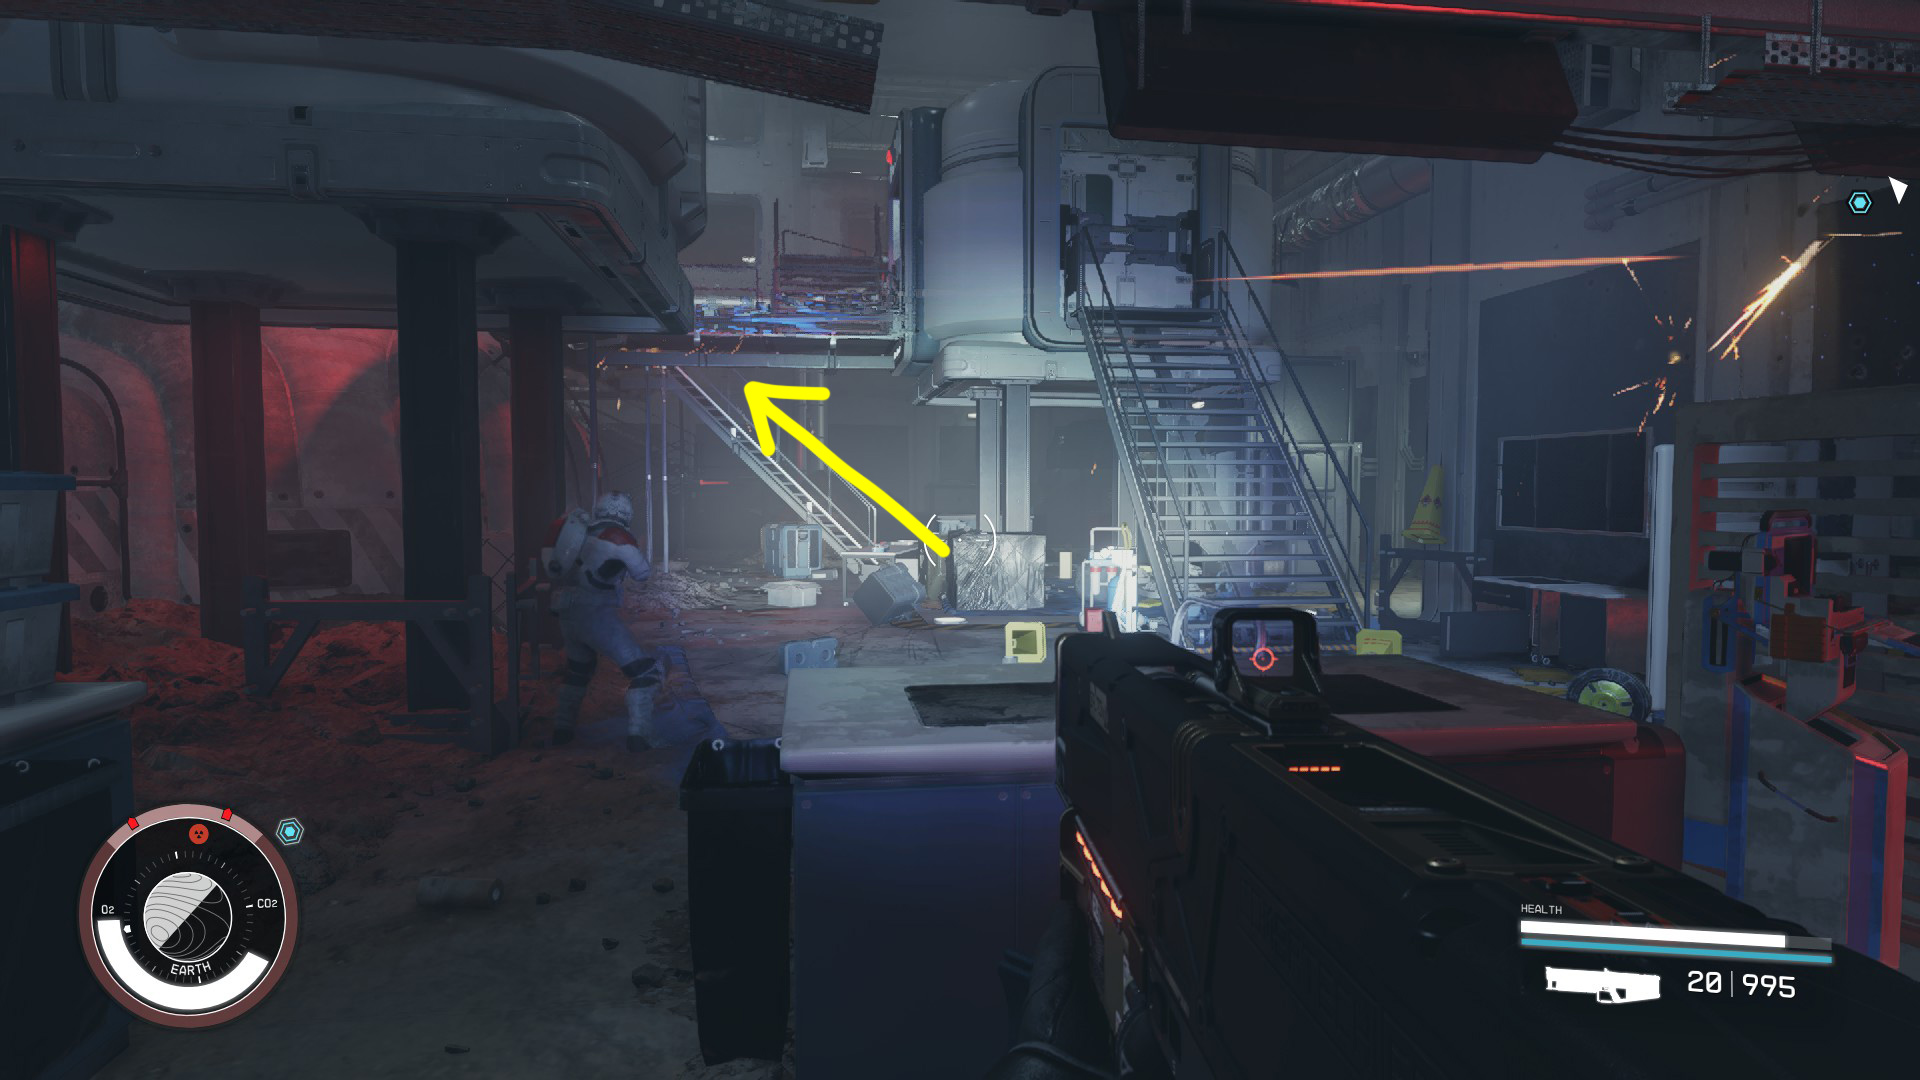
The scanner will lead you down some hallways, and then through a storage room, and from there into a large chamber where two more Starborn will attack you. The path can be a bit confusing here: you’ll need to head up any of the stairs that lead up to the catwalk (Image 50) and then make your way to the broken window (Image 51) — the objective marker should be generally in the same direction as the window once you’re on the catwalk.
Image 50Image 51
Once you’re through the window, continue using the scanner’s path arrows — they’ll lead you through a couple of destroyed rooms and up a ramp. You’ll go up some stairs, and then through a door, and then to continue you’ll have to drop down to a lower level (Image 52). On the left side of this room is an elevator, indicated by the objective marker (Image 53). Enter the elevator and press the button to ride up and out of NASA.
Image 52Image 53
Talk to the Emissary
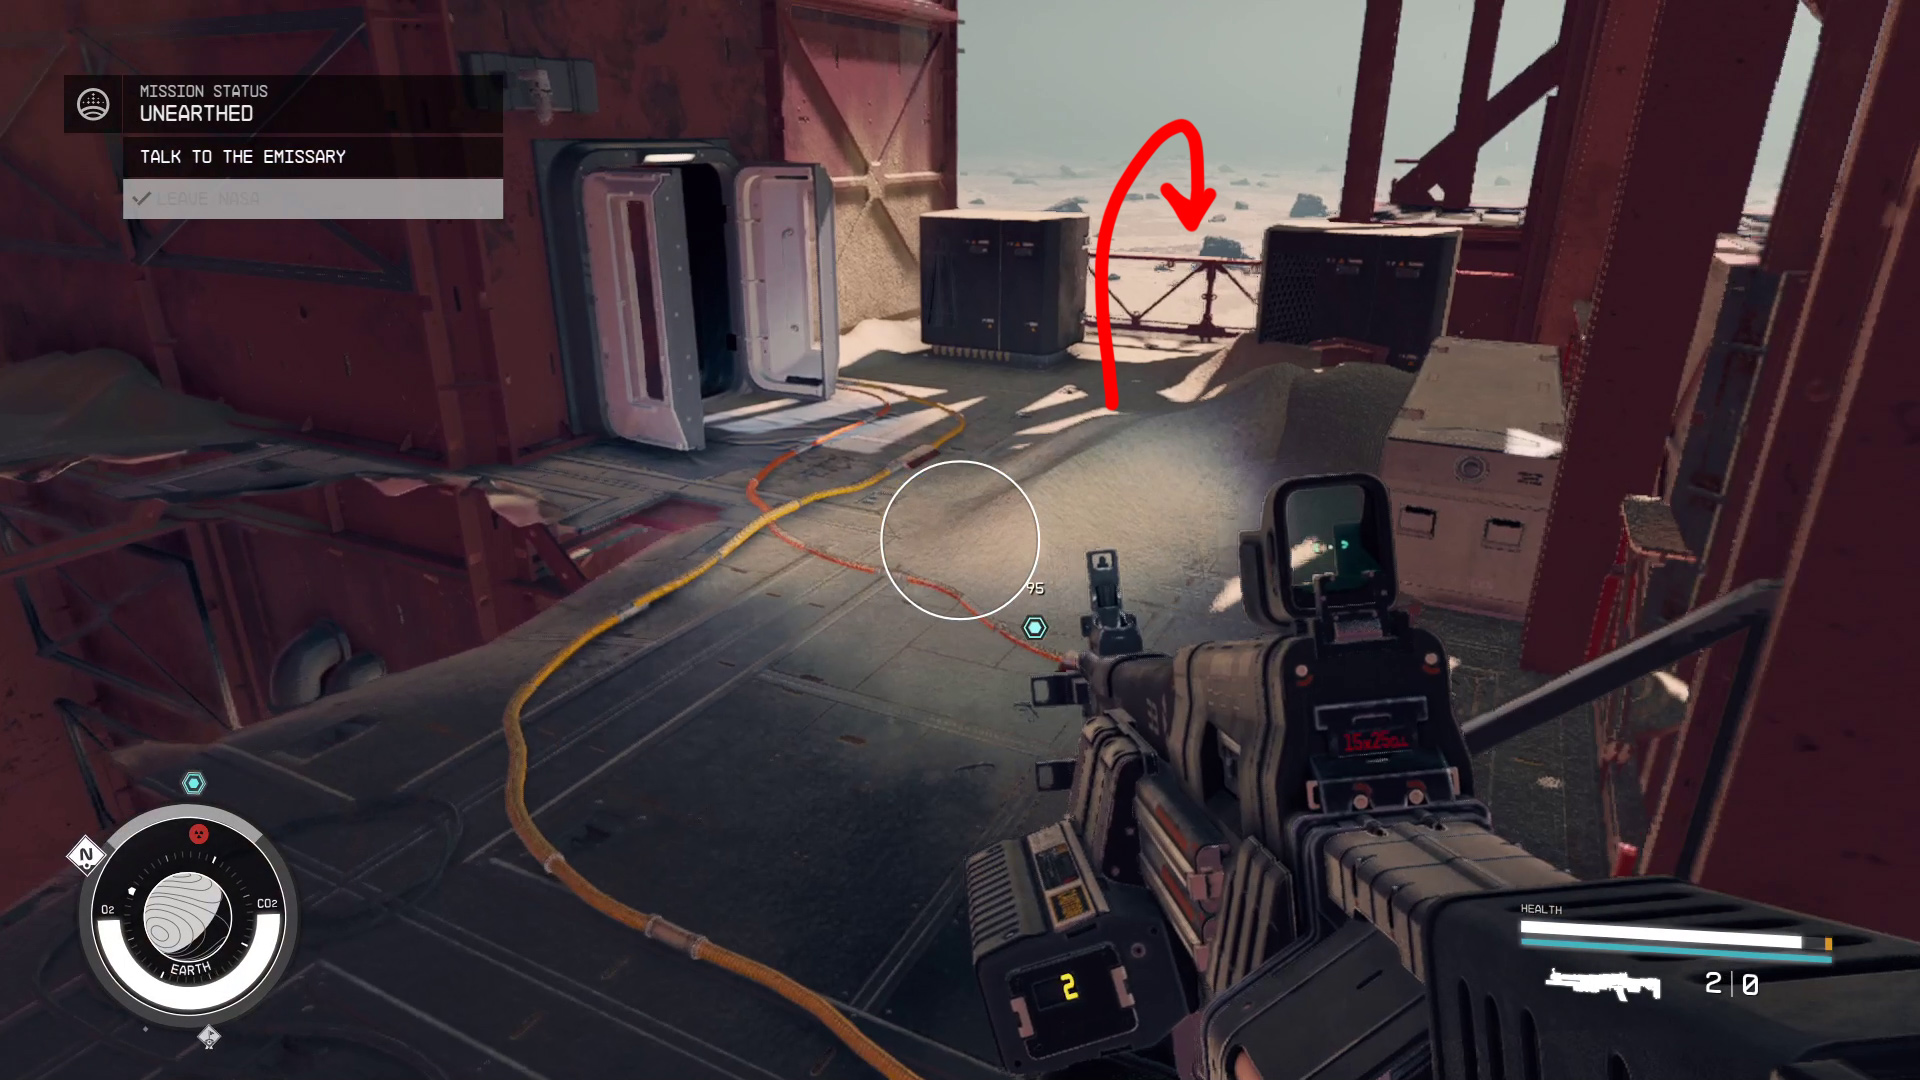
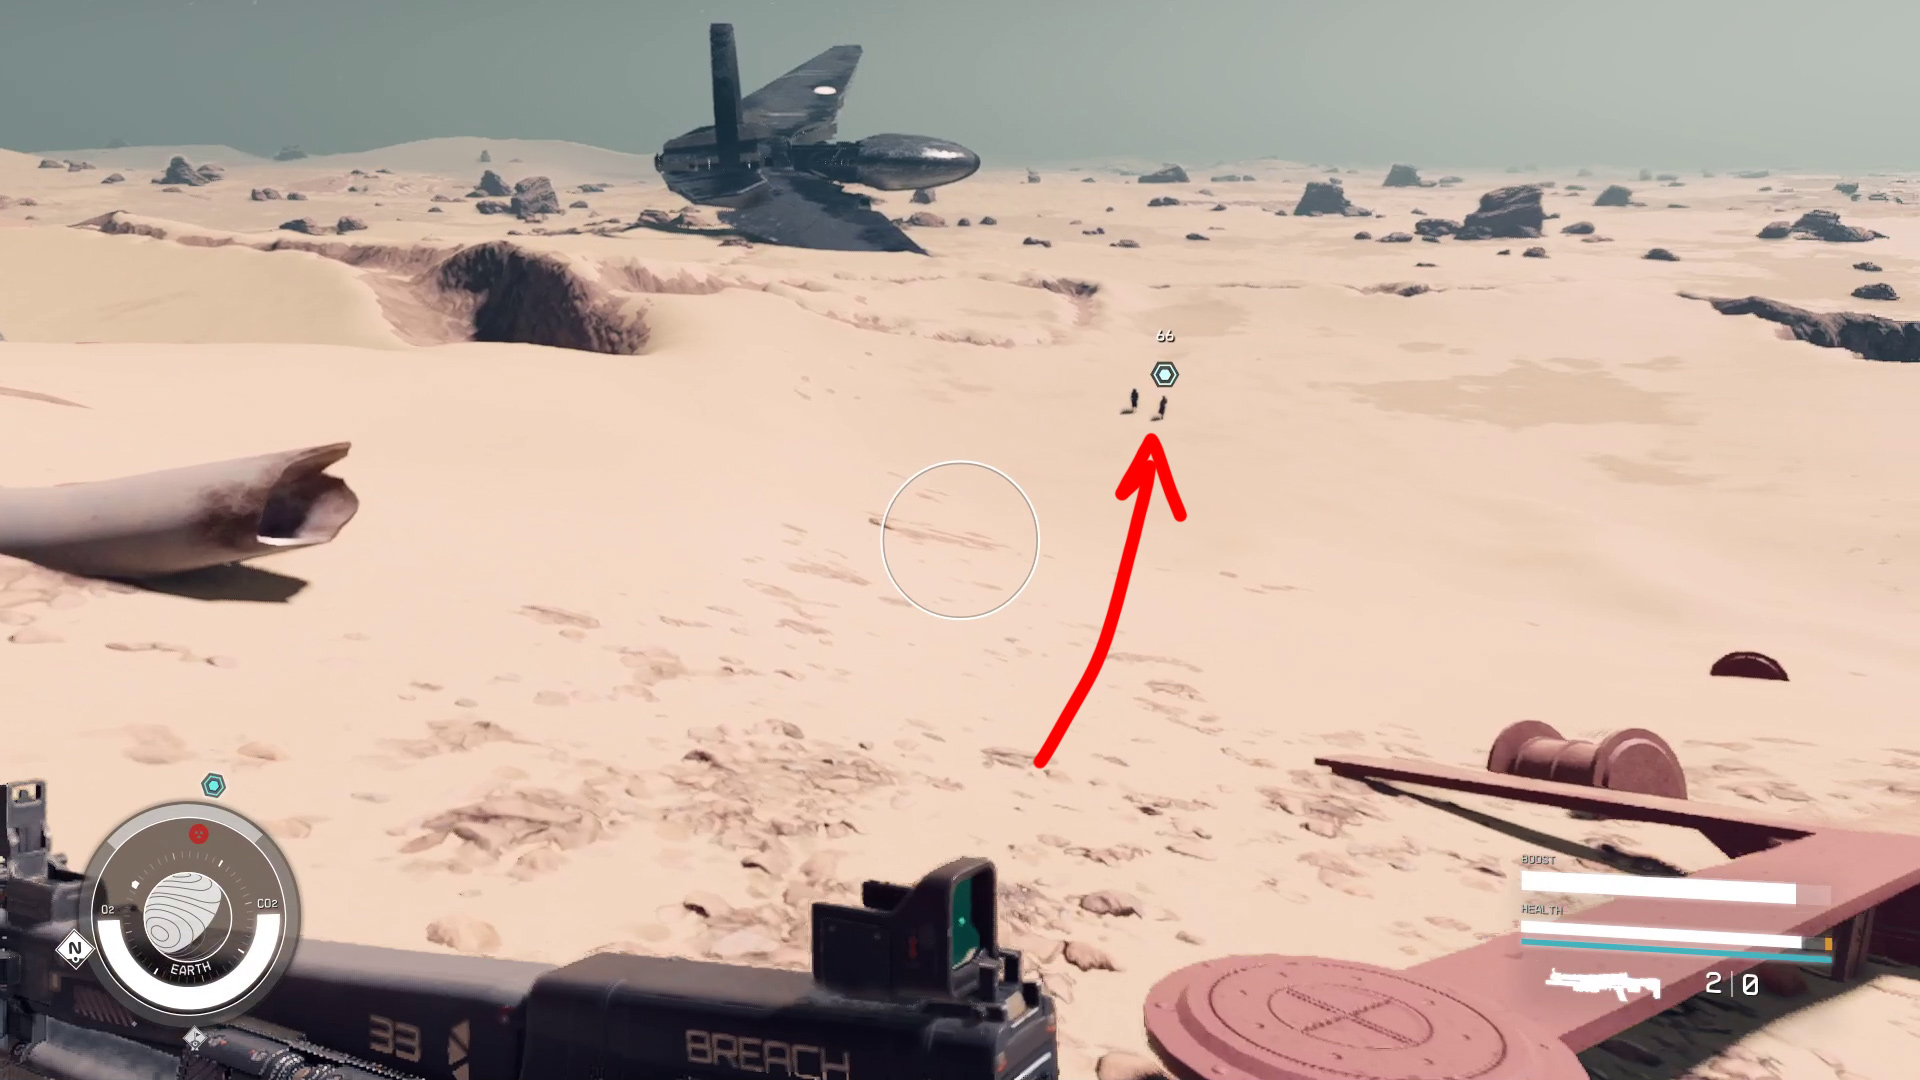
You’ll find yourself back where you first entered NASA. Next, you’ll need to meet the Emissary and the Hunter back at ground level. You could retrace your steps, but you’ve got a boost pack, so let’s do this the quick way (save your game first, just in case). From the elevator, go right and jump over the railing (Image 54) to the ground. When you’re maybe 5-10 meters from the ground, tap your boost pack button, then tap it again a moment later, and you’ll land safe and sound. Walk over to where the two NPCs are waiting (Image 55) — when you’re close enough, a dialog will start.
Image 54Image 55
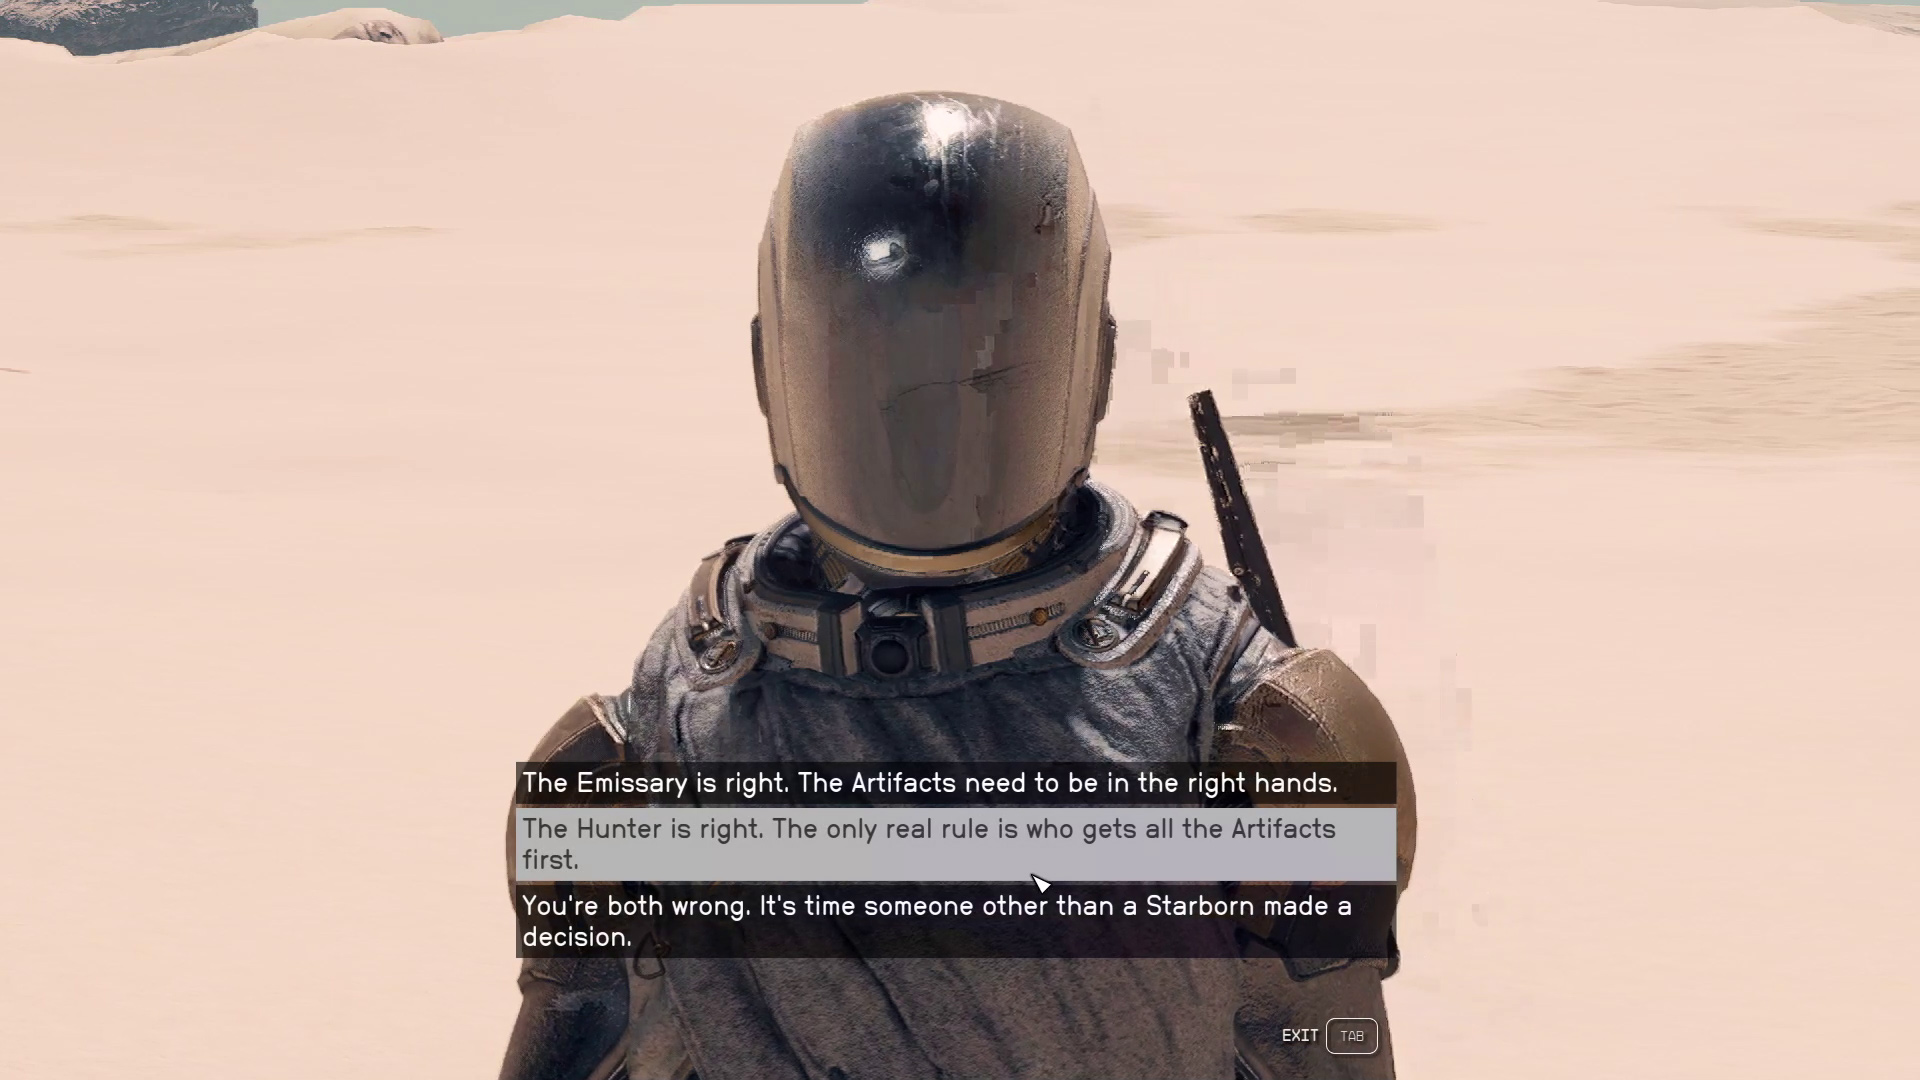
Unlike most conversations in Starfield, this one contains an actual decision with consequences (Image 56). When deciding who is right, the dialog option you choose determines whether you side with the Emissary, the Hunter, or neither. The next mission involves space and ground combat, and the option you choose here determines if you have one of the Starborn as an ally, or if you have to fight both of them:
“The Emissary is right.” – In the next mission, The Emissary is your ally throughout the mission.
“The Hunter is right.” – In the next mission, The Hunter is your ally throughout the mission.
“You’re both wrong.” – In the next mission, you will have to face both The Hunter and The Emissary in combat (once in space, and once on the ground).
The next mission is long, and involves a lot of combat, so if your decision is more utility-based rather than roleplaying-based, you probably want to side with either The Emissary or The Hunter. However, you won’t be able to get the two NPCs unique weapons if you don’t kill them — but you’ll have a chance in NG+, so it doesn’t matter too much.
Image 56 – The dialog options with The Emissary
Once the conversation ends, so will the mission. All that’s left now is to head to Masada III for the epic hunt to grab the last Artifact! Before you travel to Masada III, however, make sure you stock up on Aid items and Ammo. You’re going to need it.
Unabashed FromSoftware fanboy still learning to take his time with games (and everything else, really). The time he doesn't spend on games is spent on music, books, or occasionally going outside.