This main story mission begins as a part of Final Glimpses. While seeking an Artifact on Freya III, you receive a distress call, and must go down to the planet to investigate.
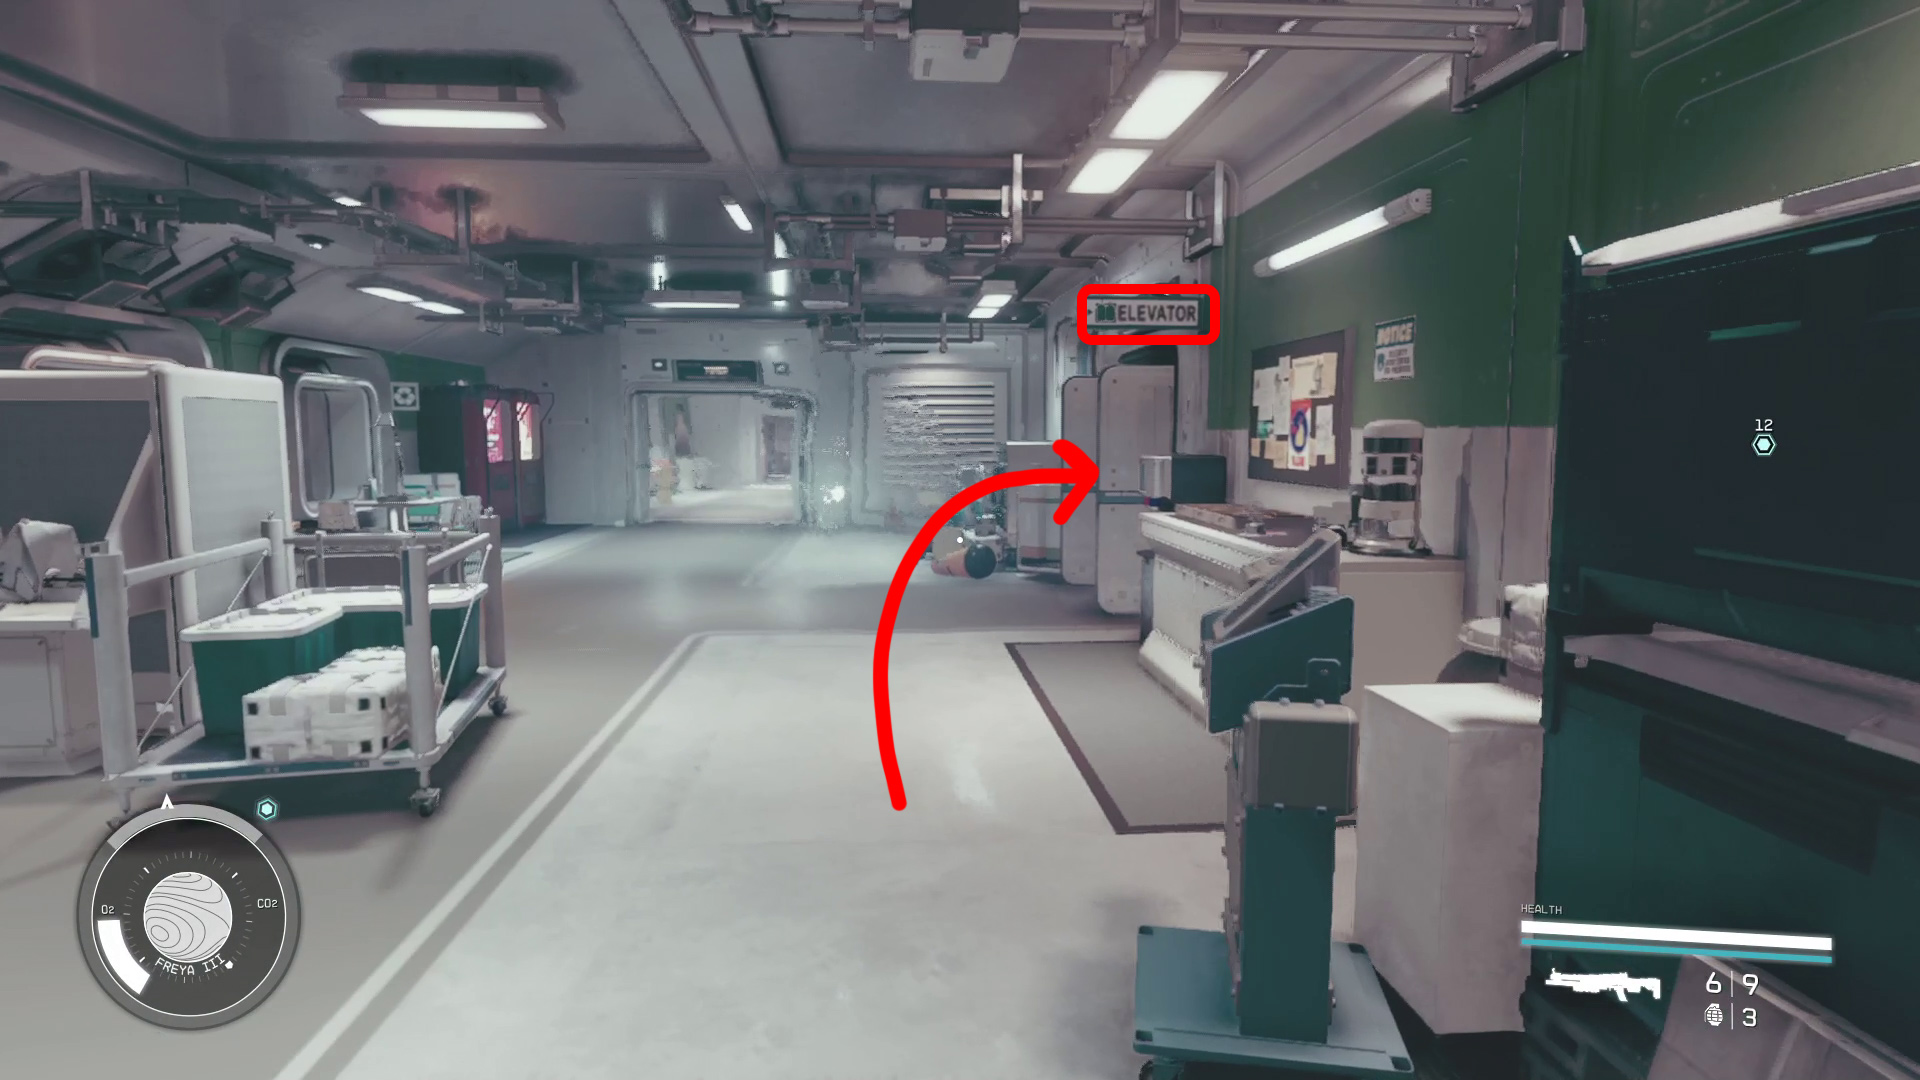
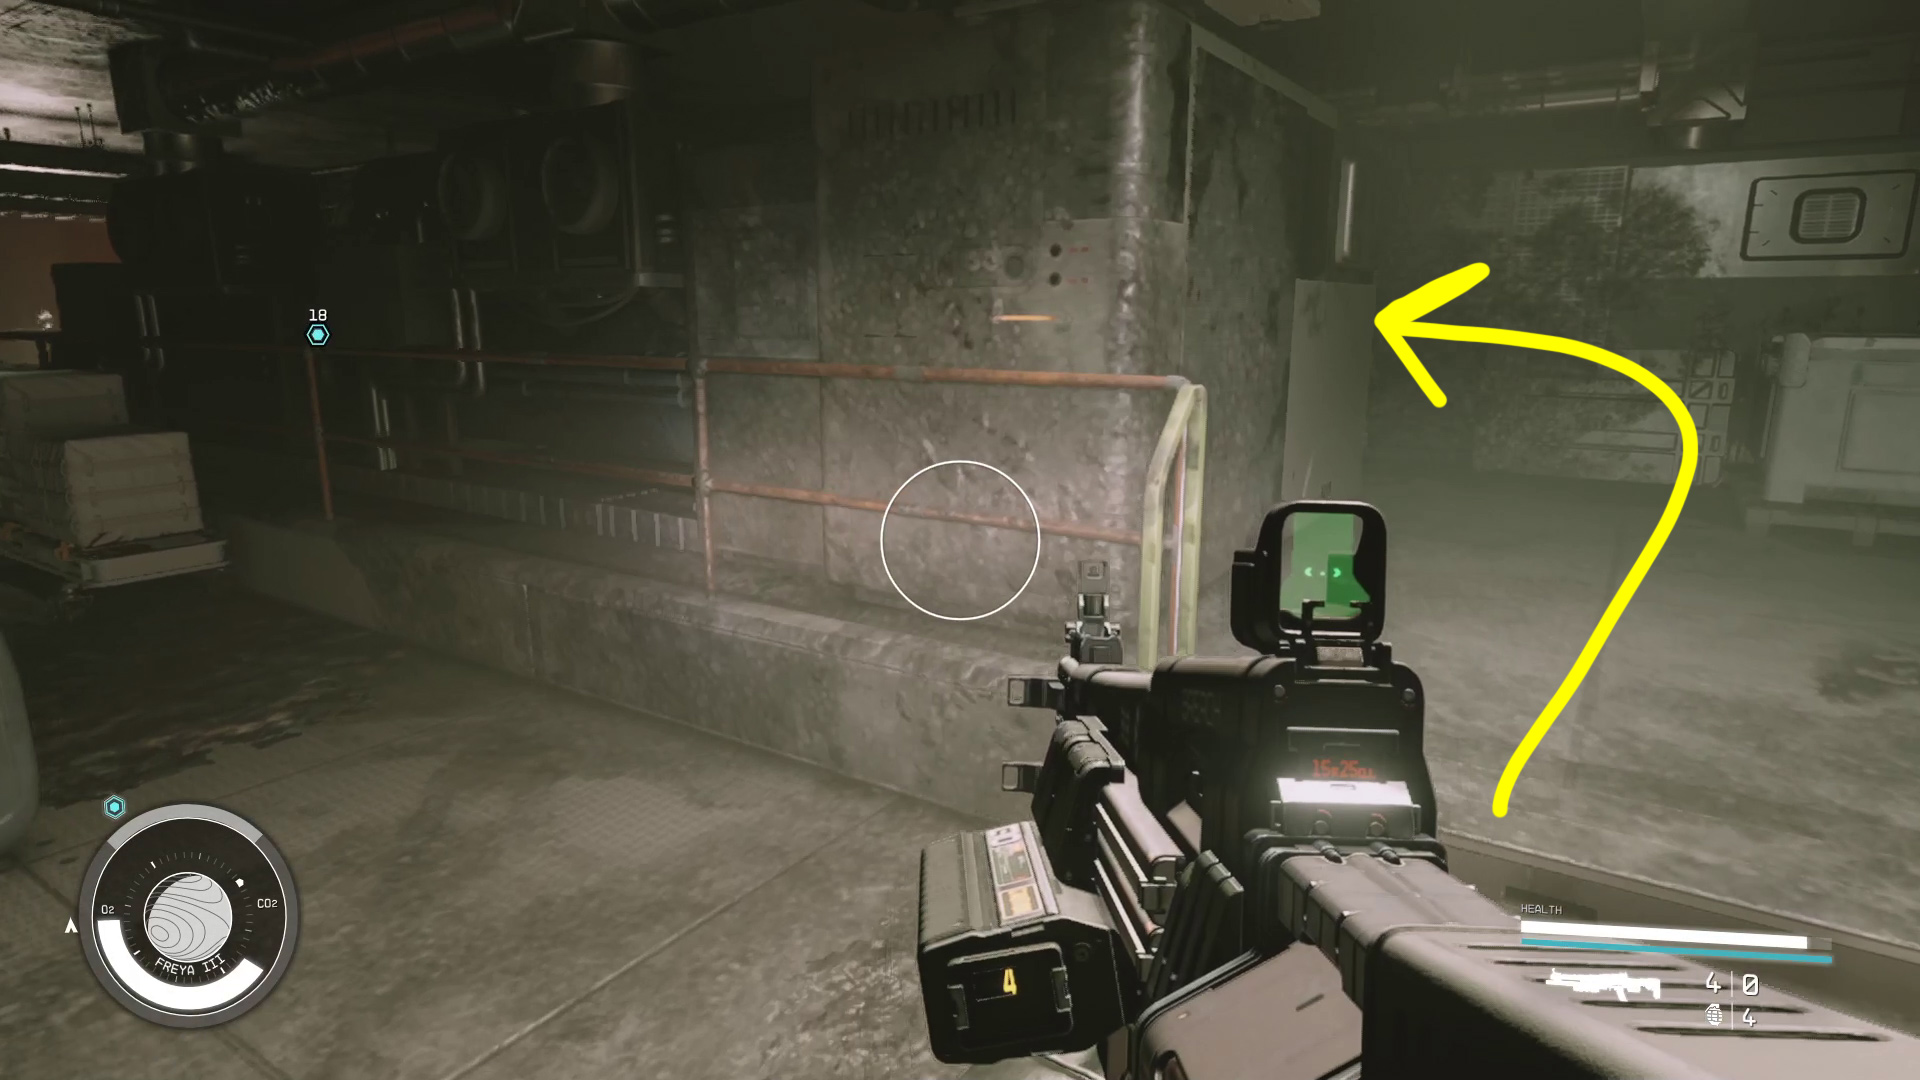
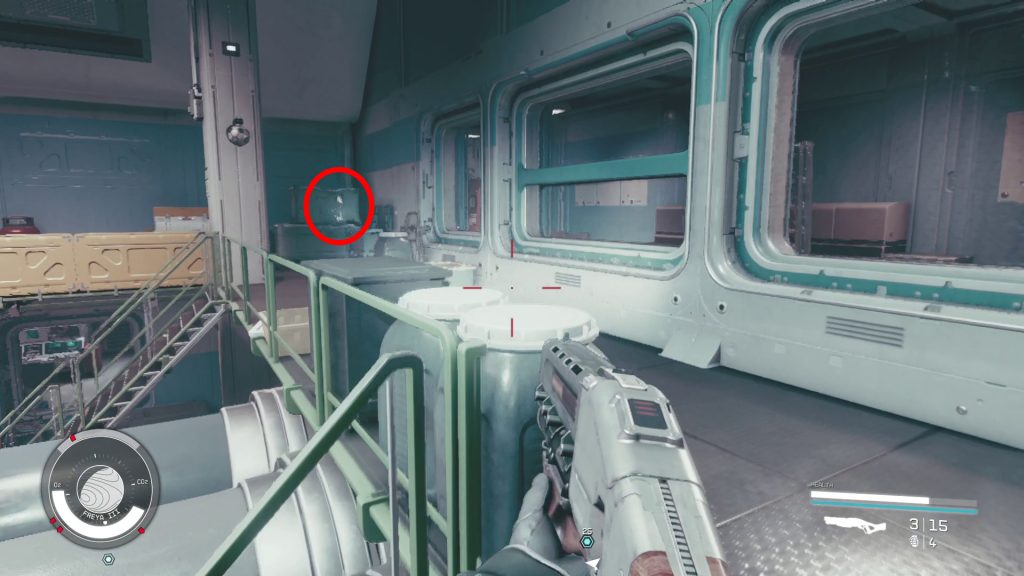
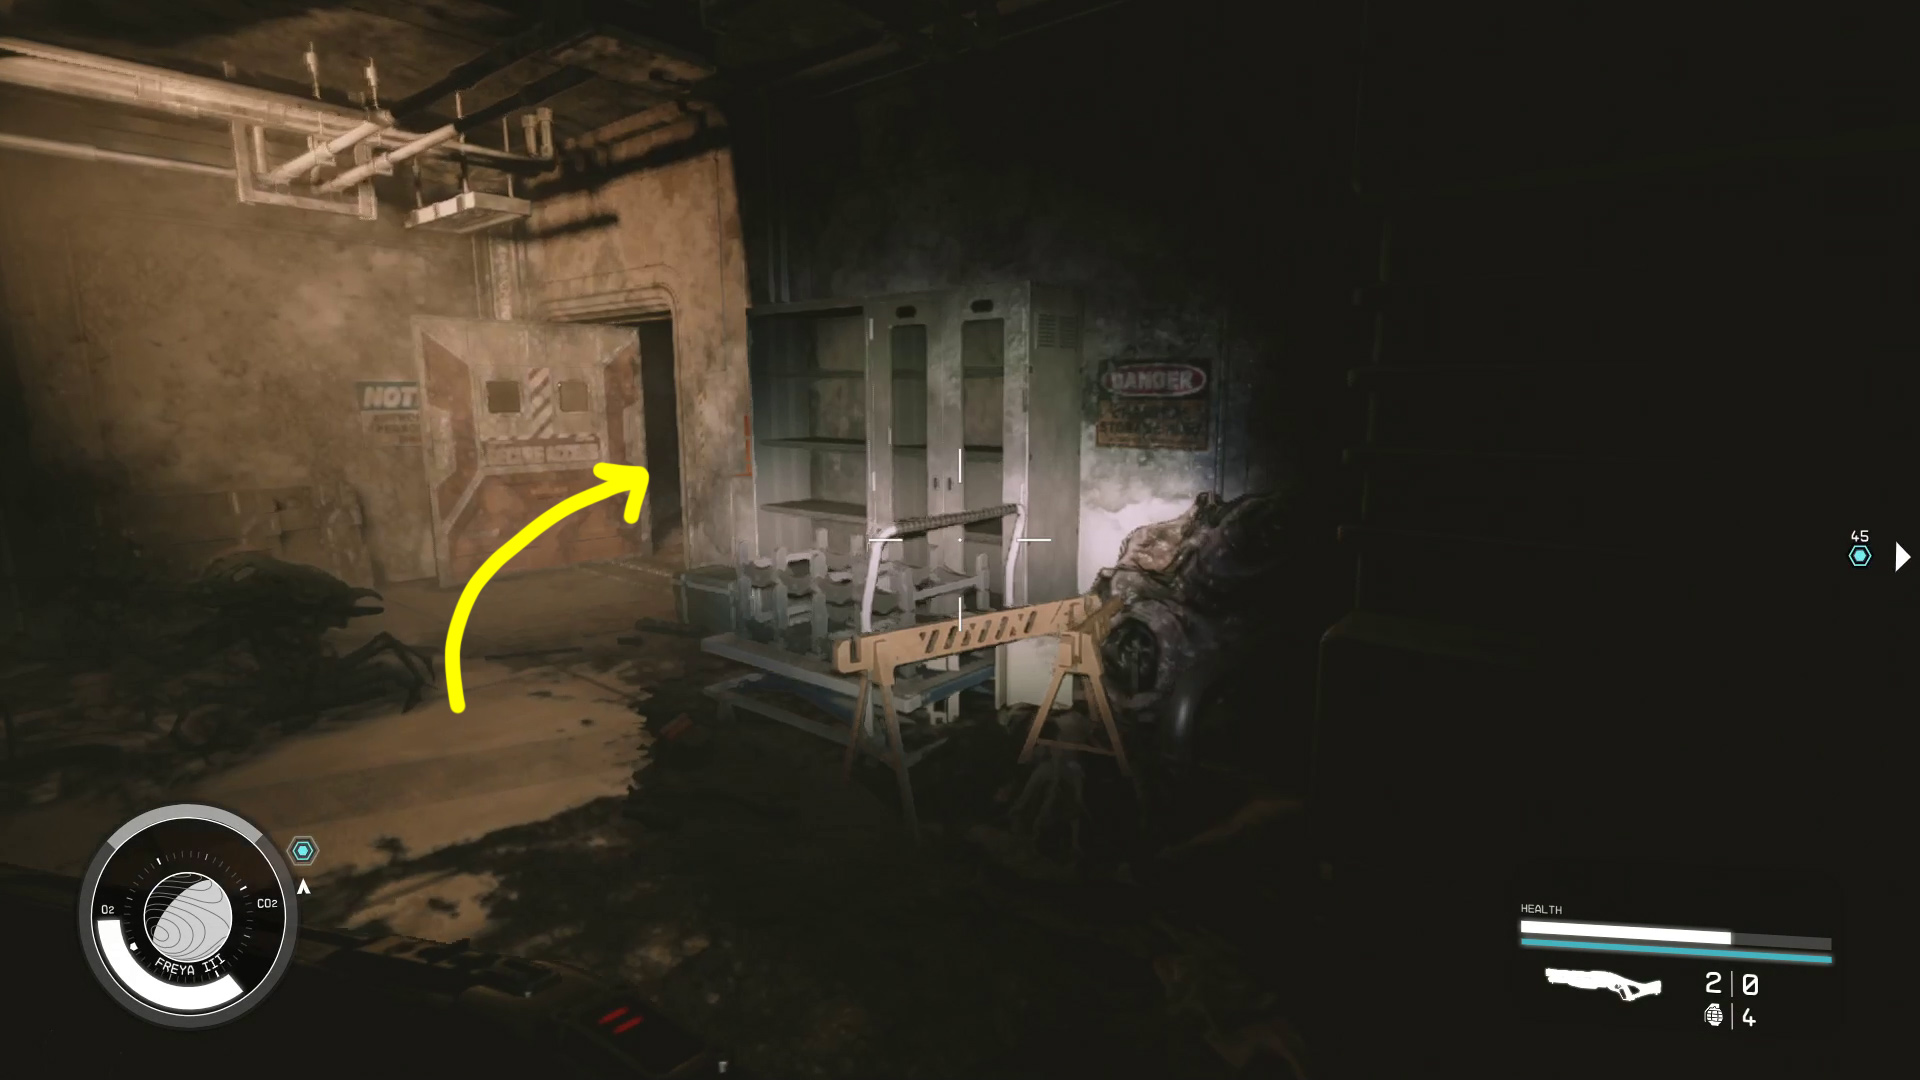
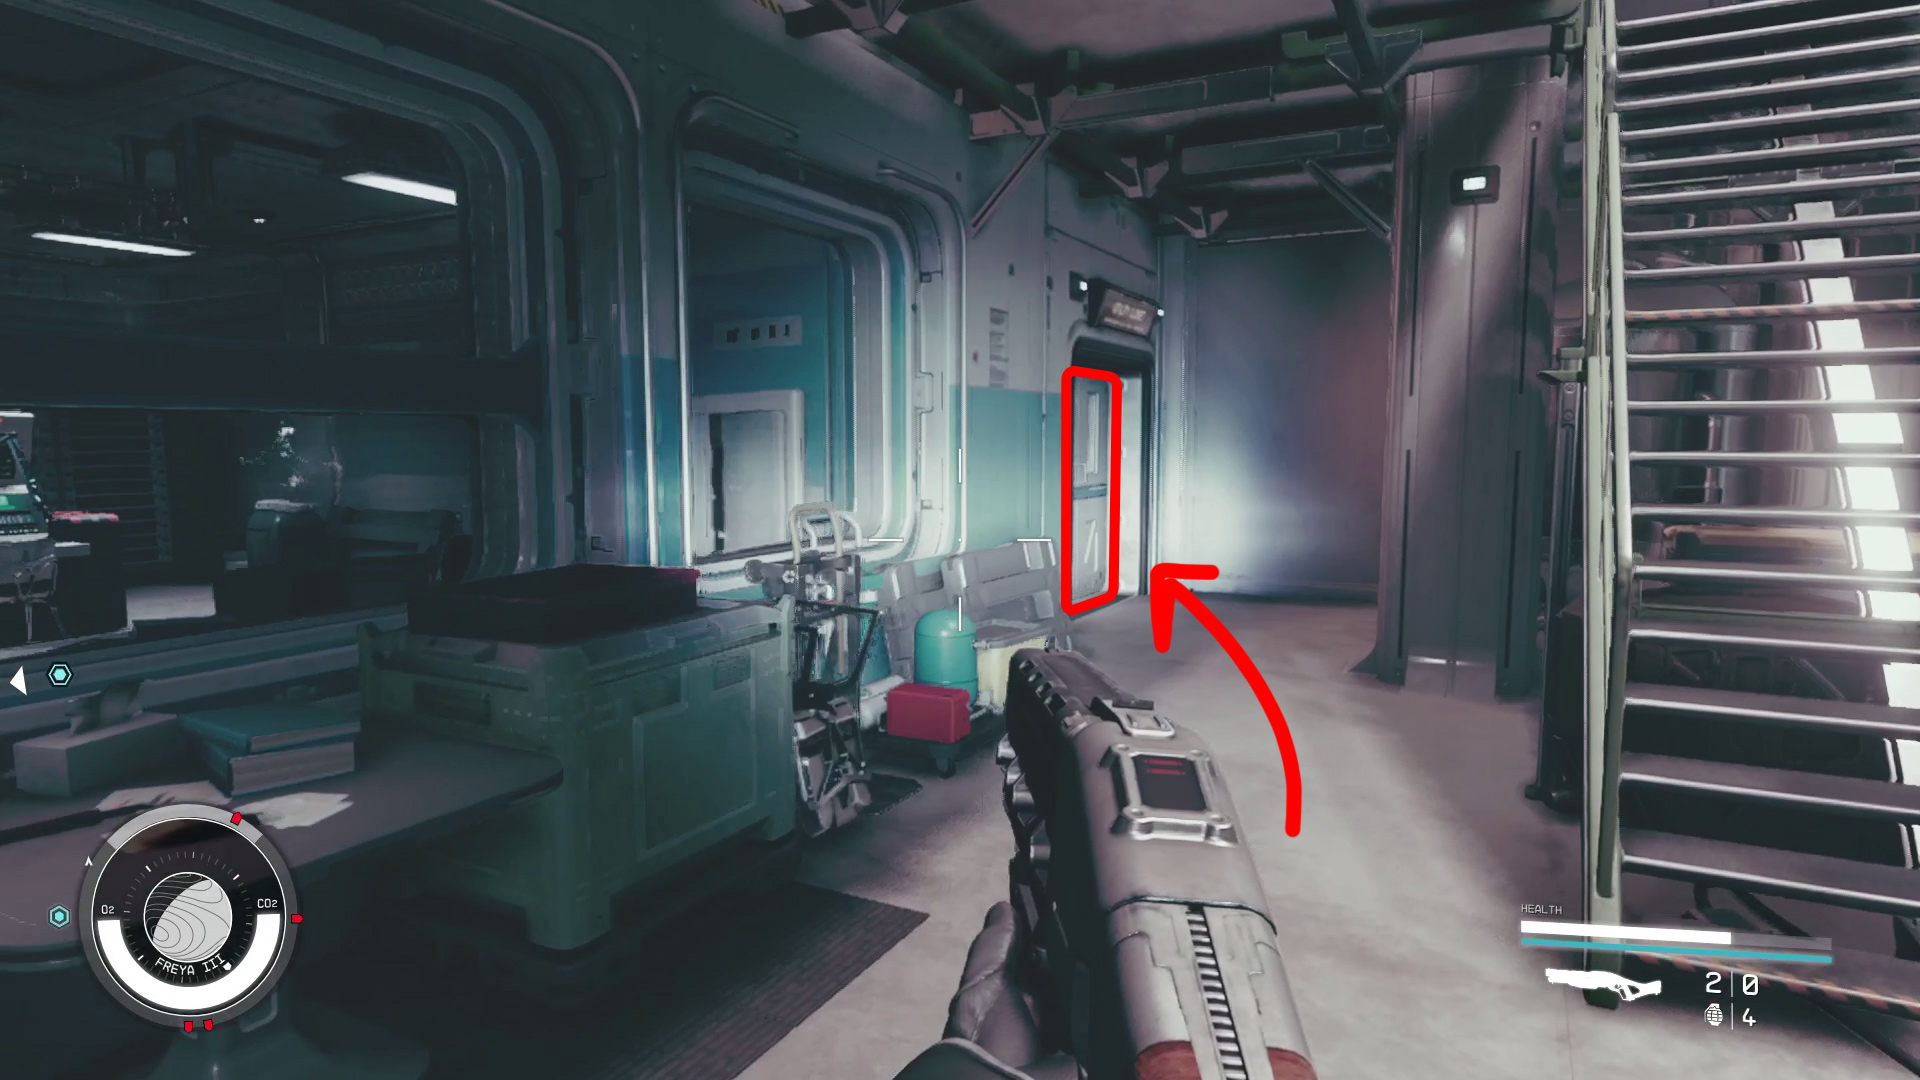
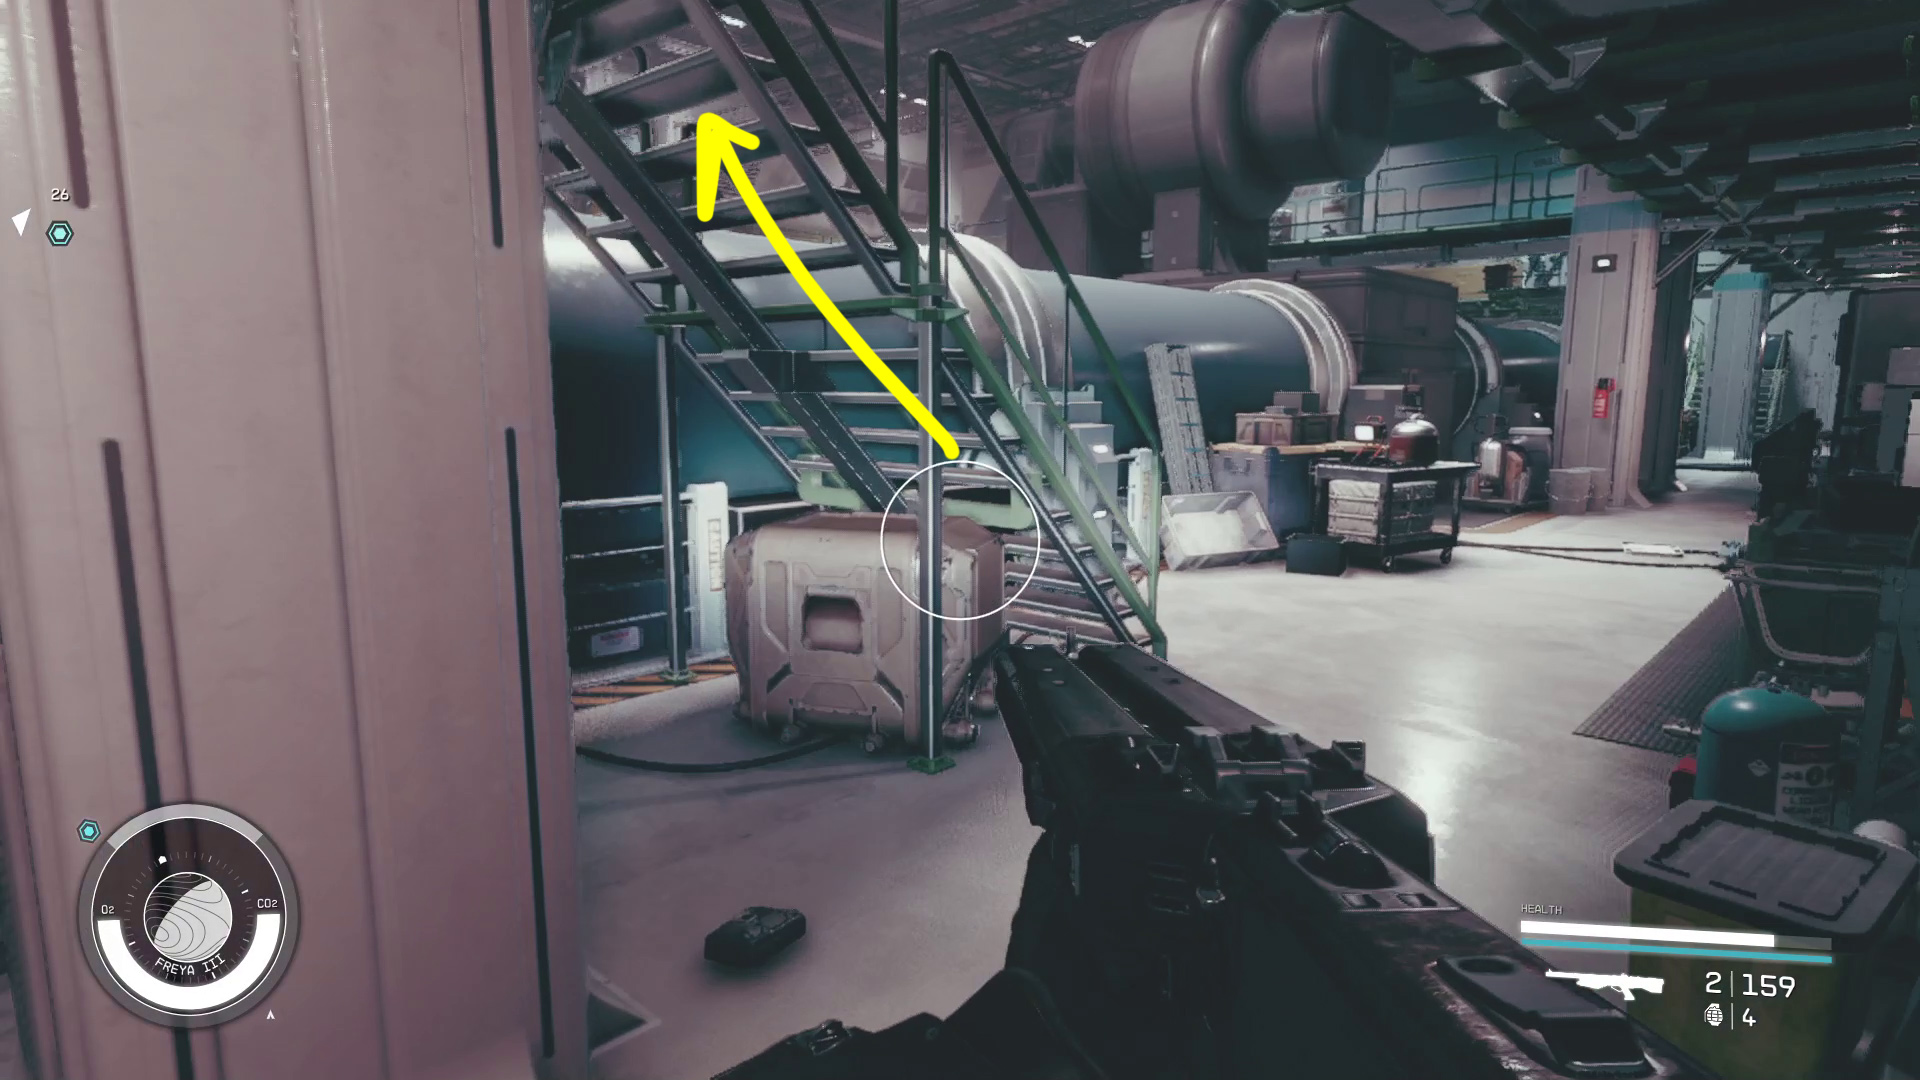
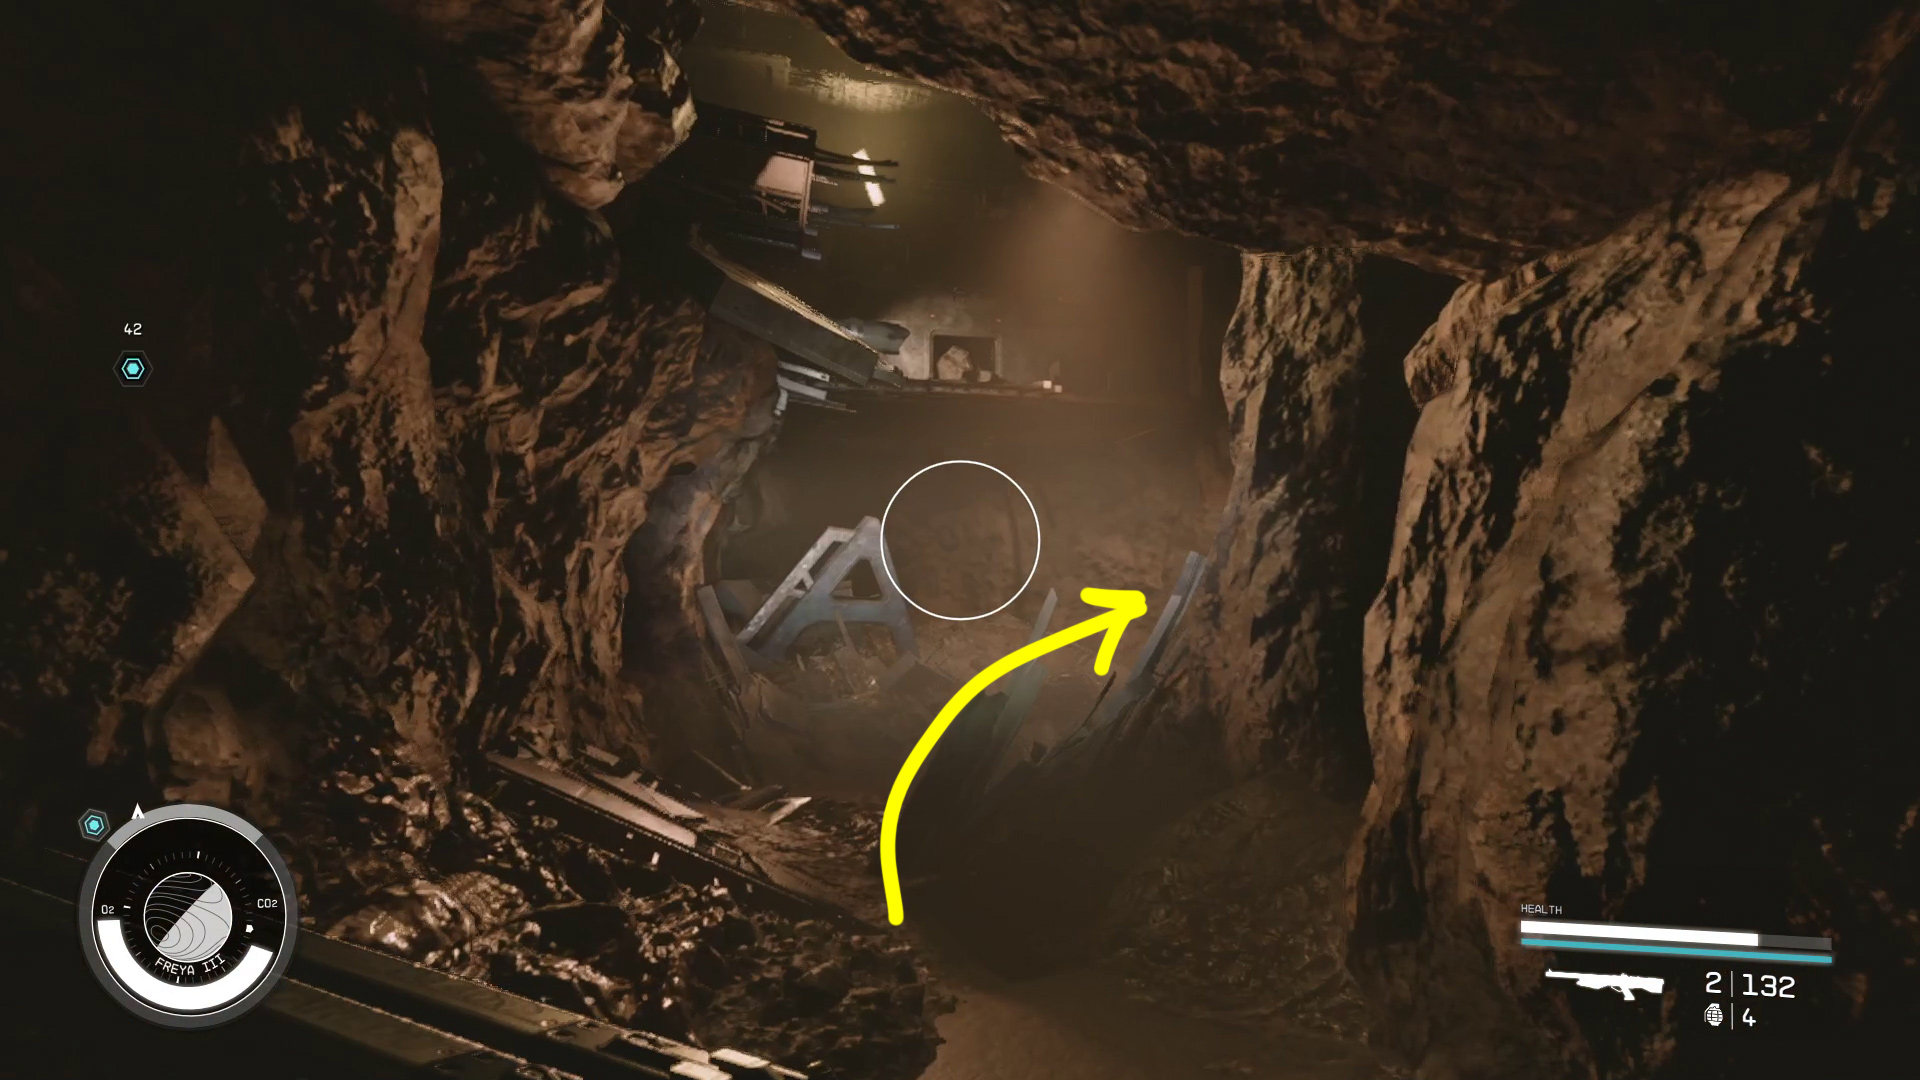
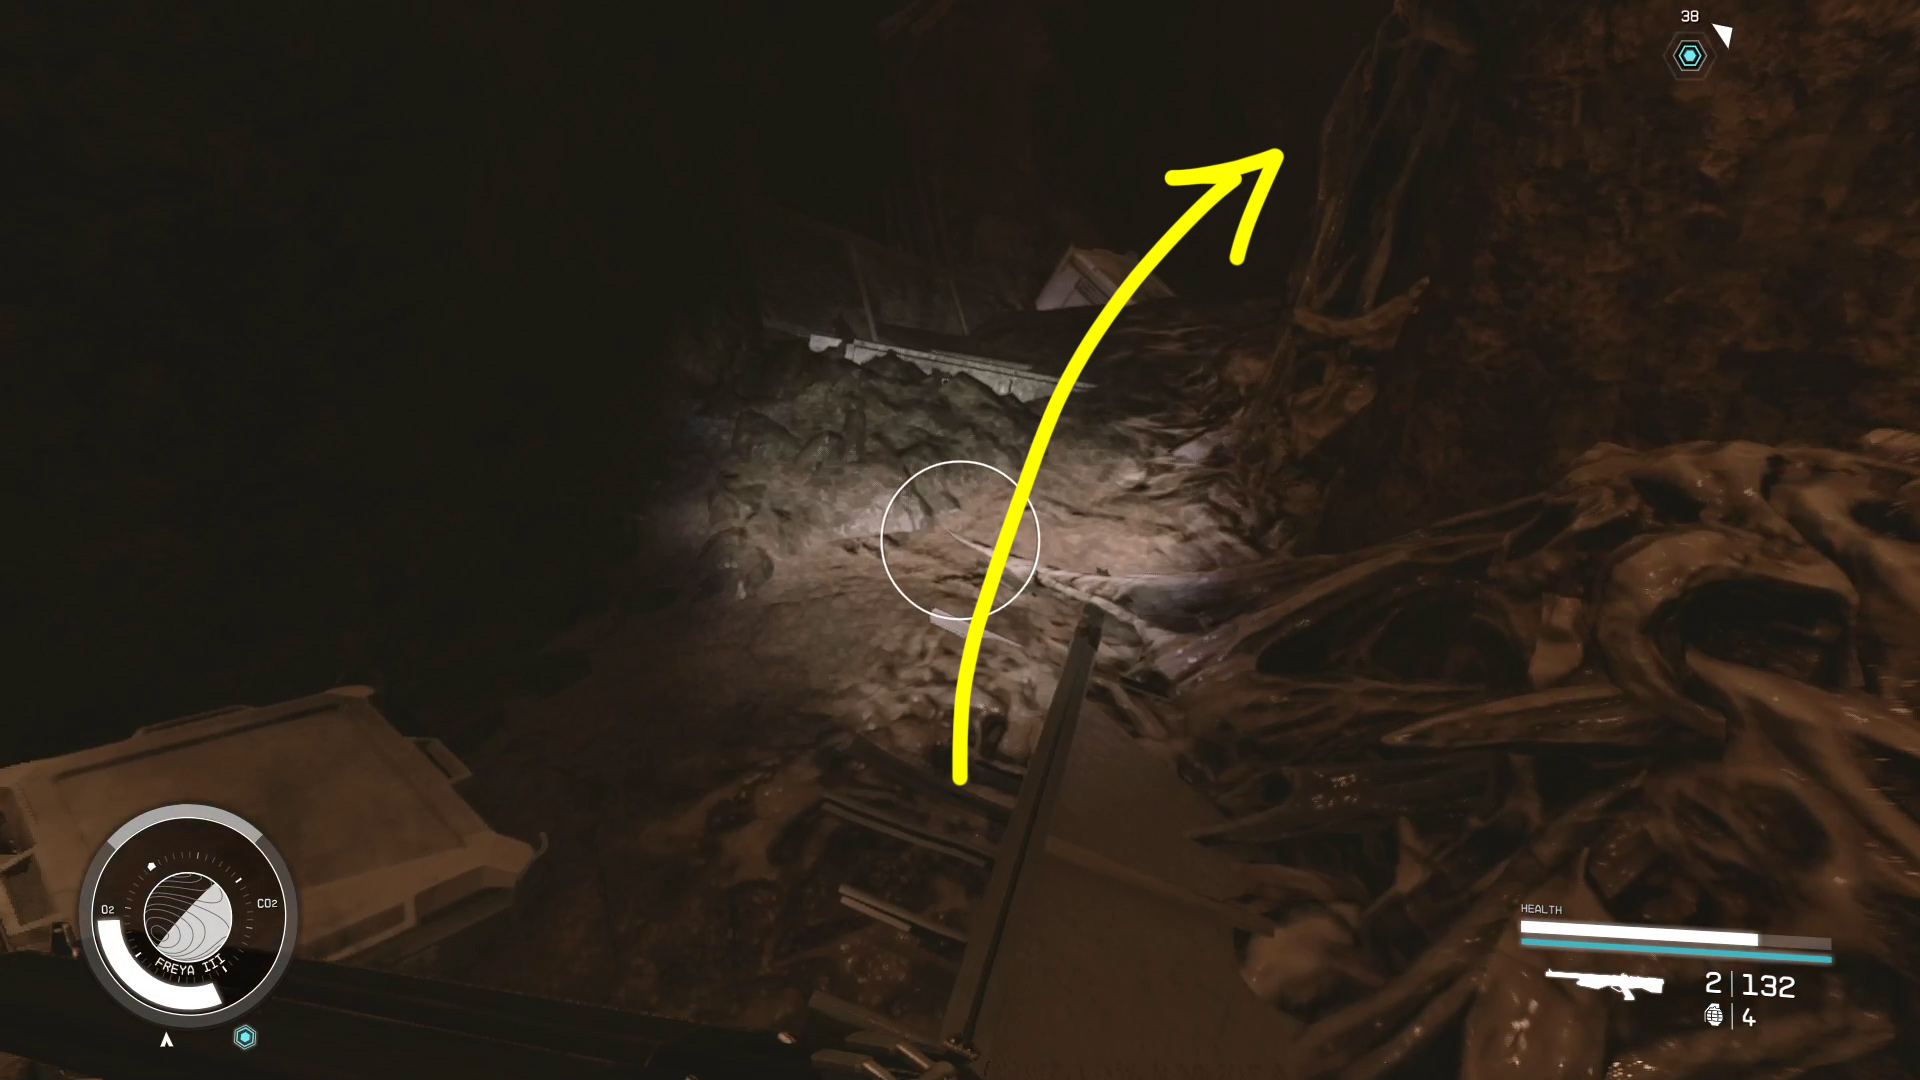
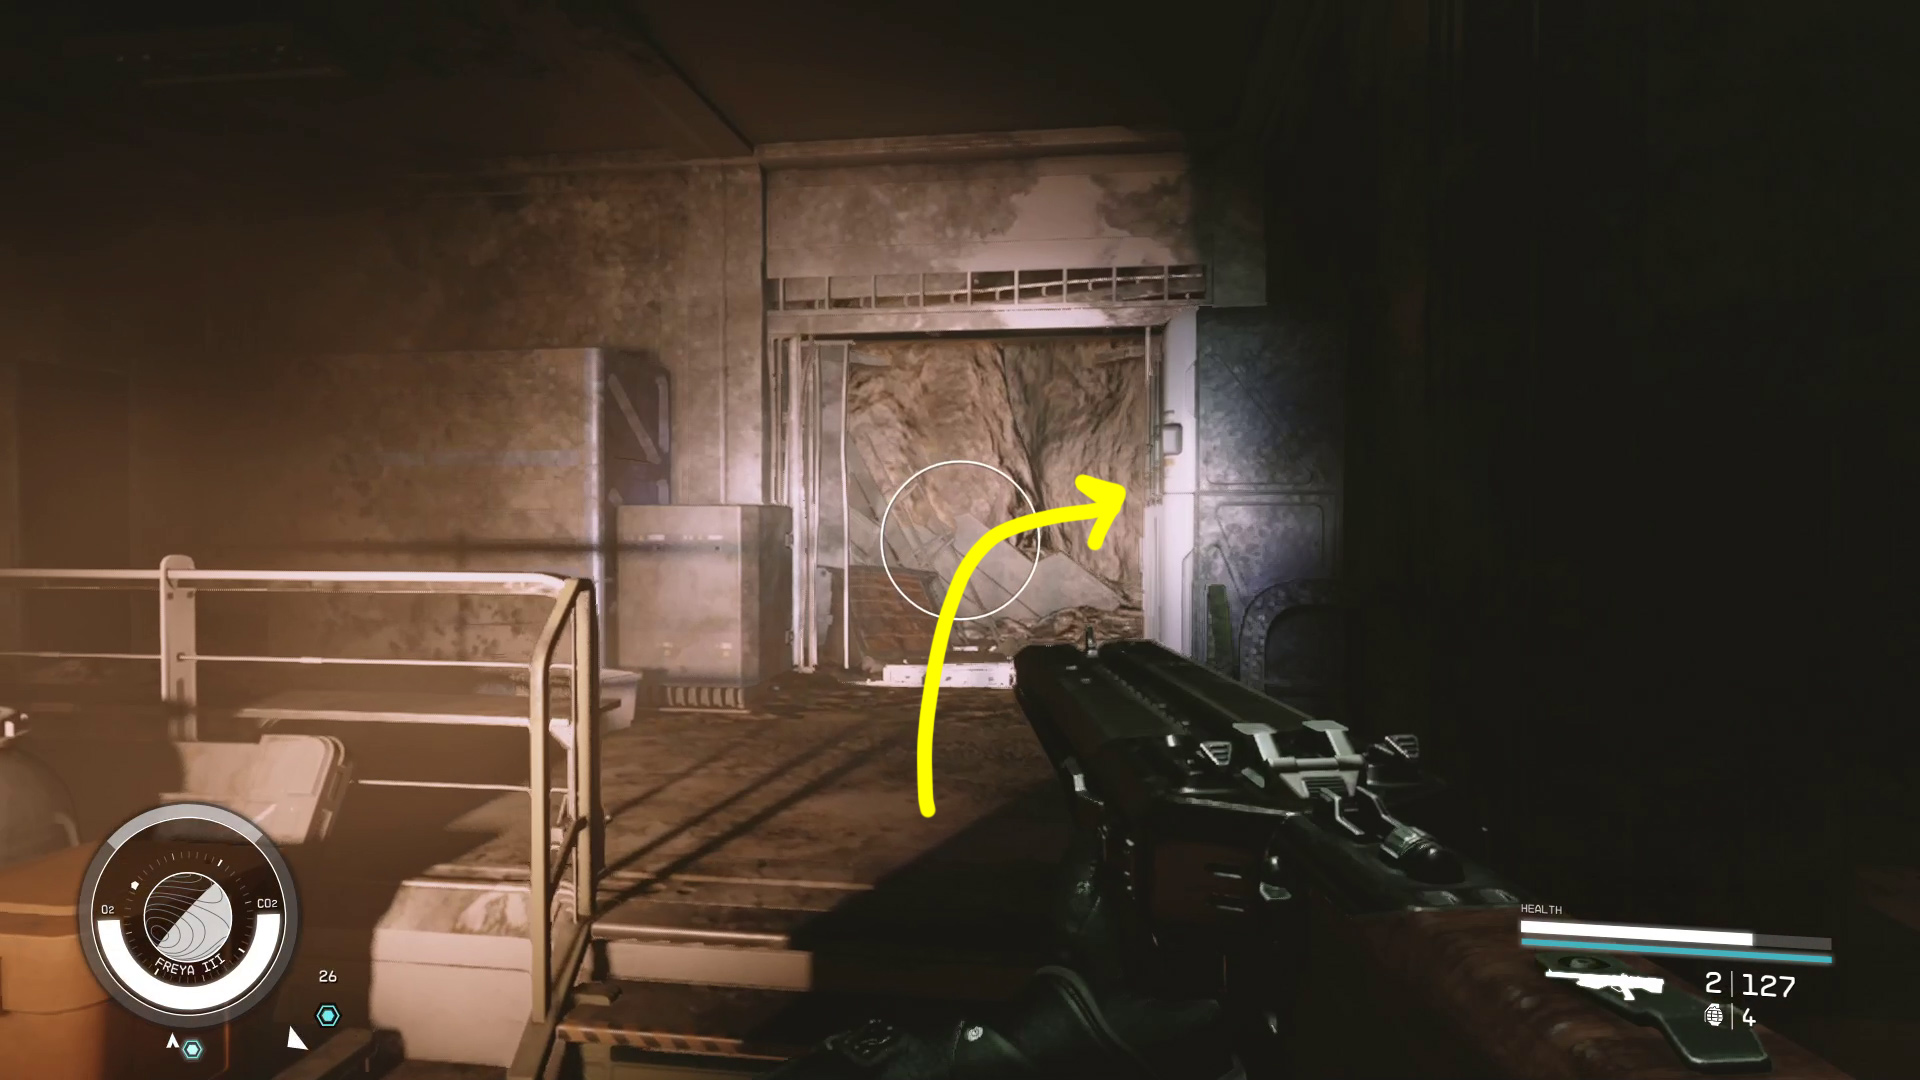
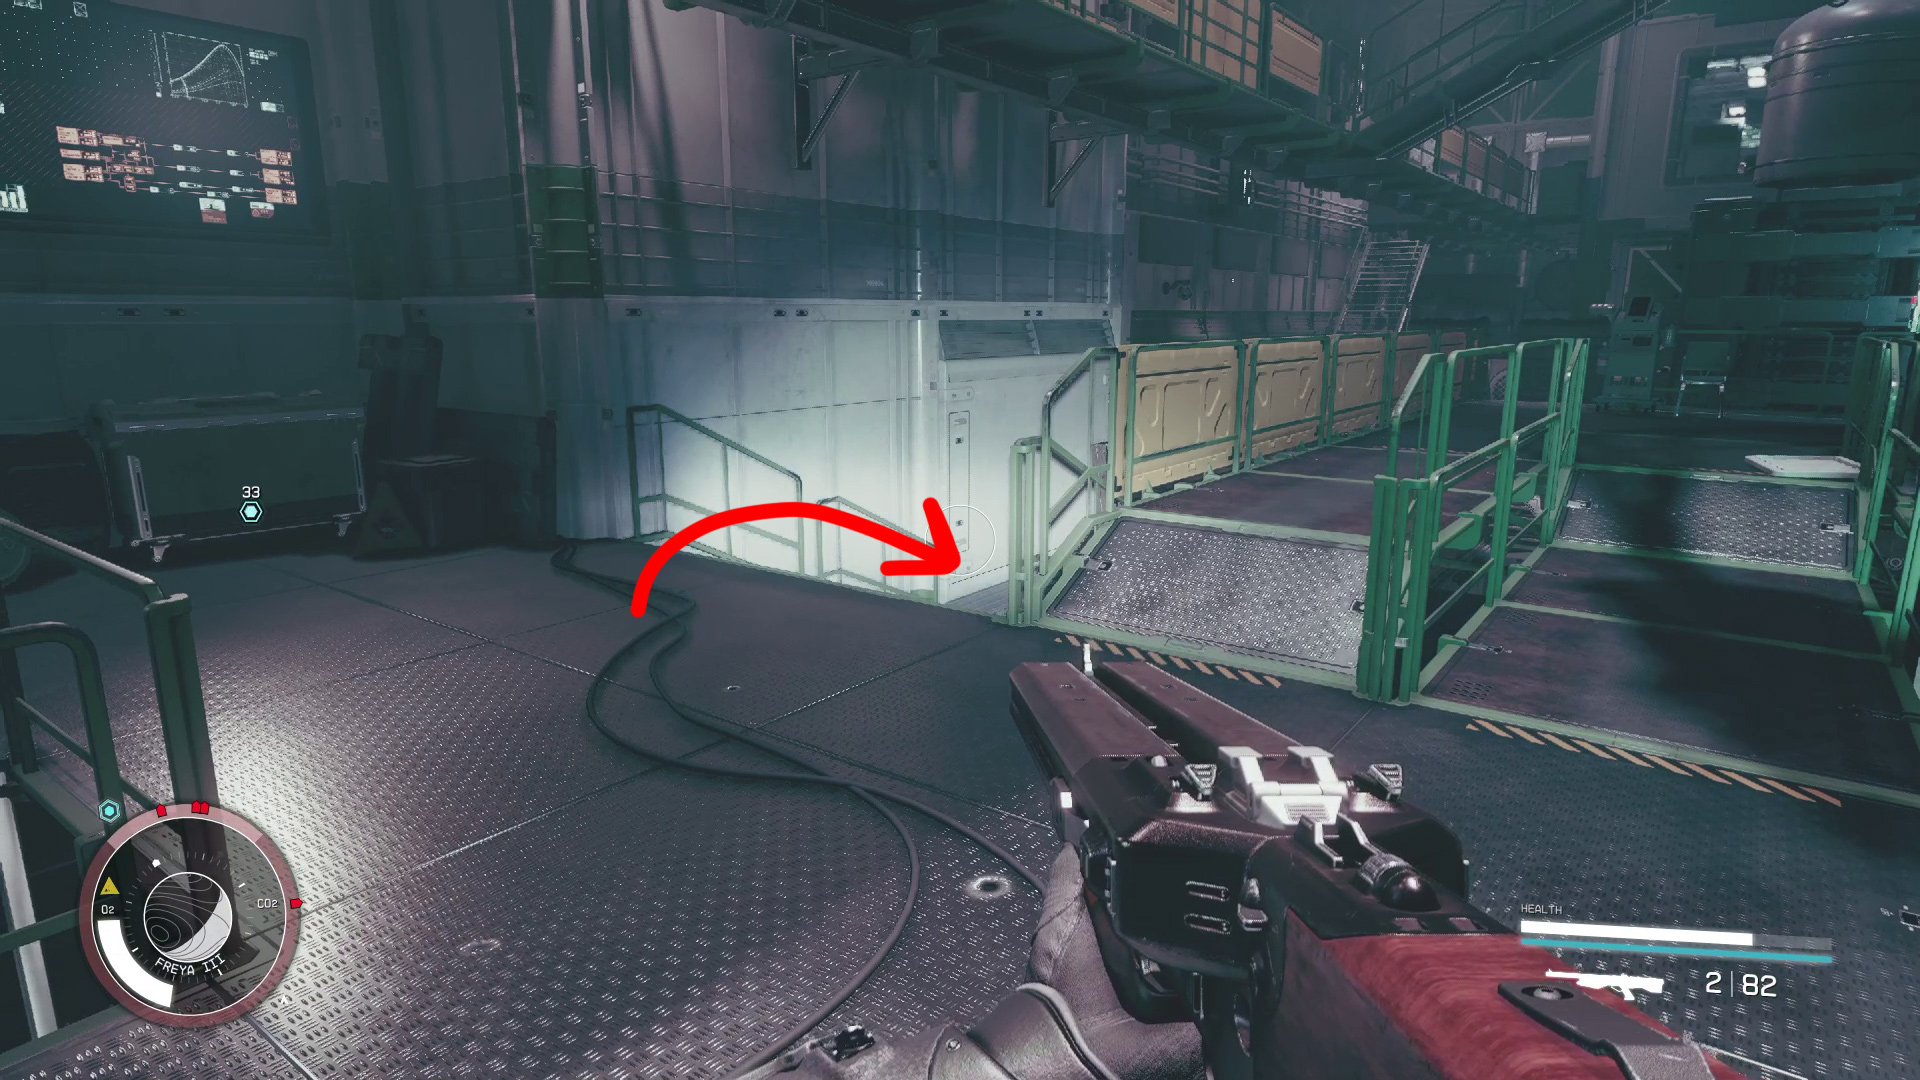
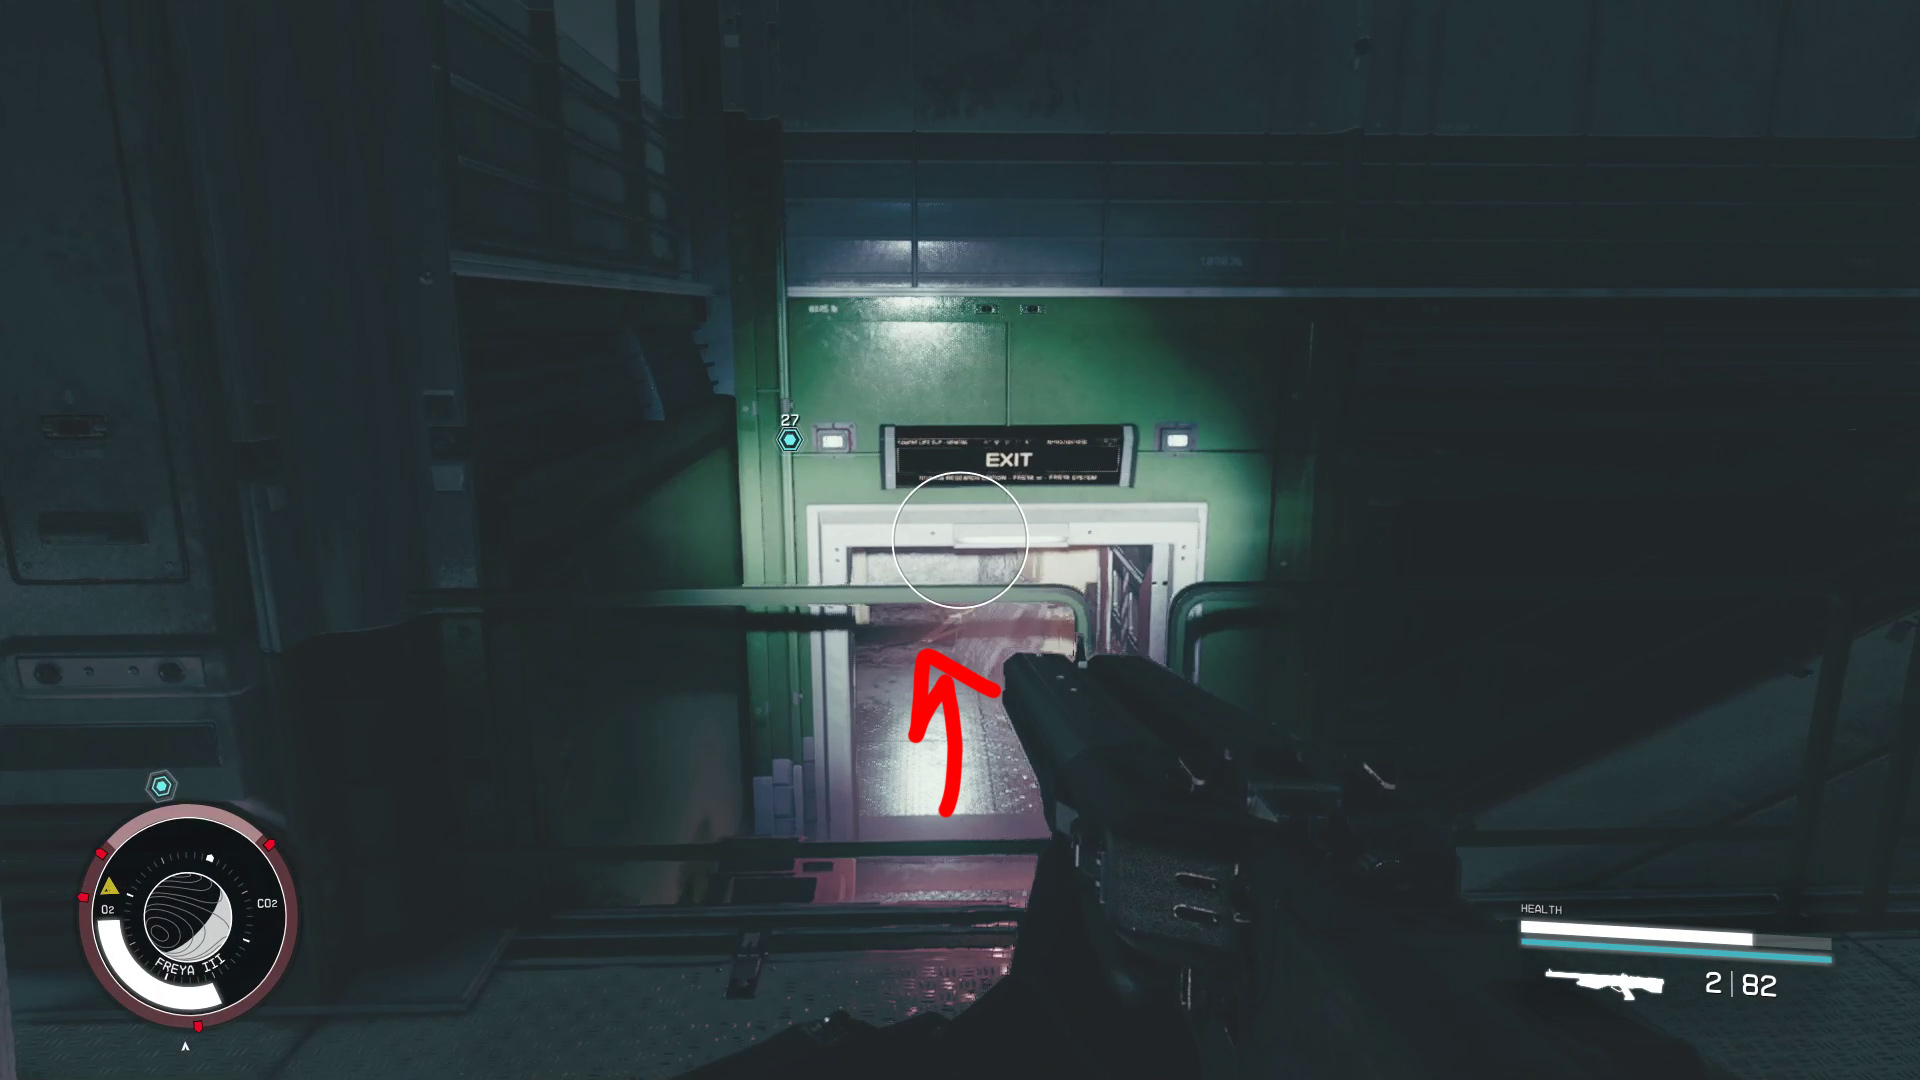
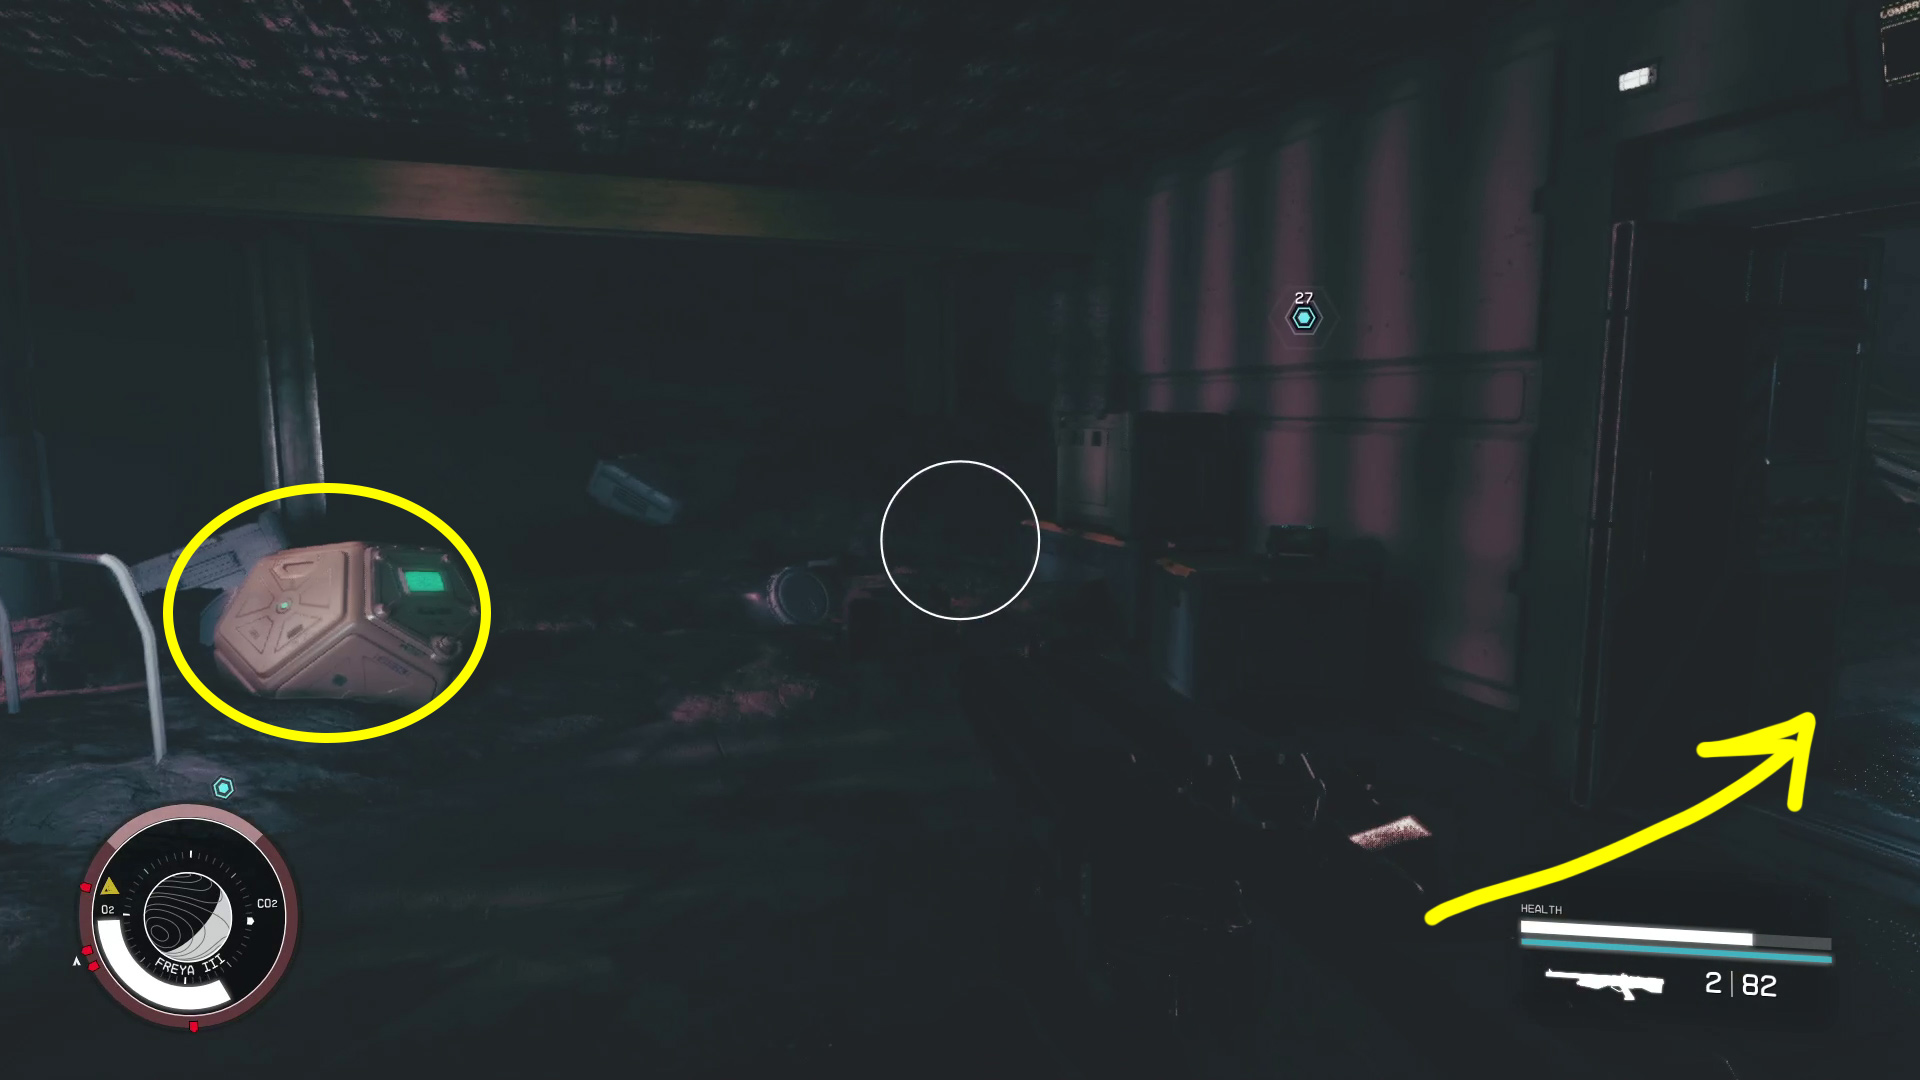
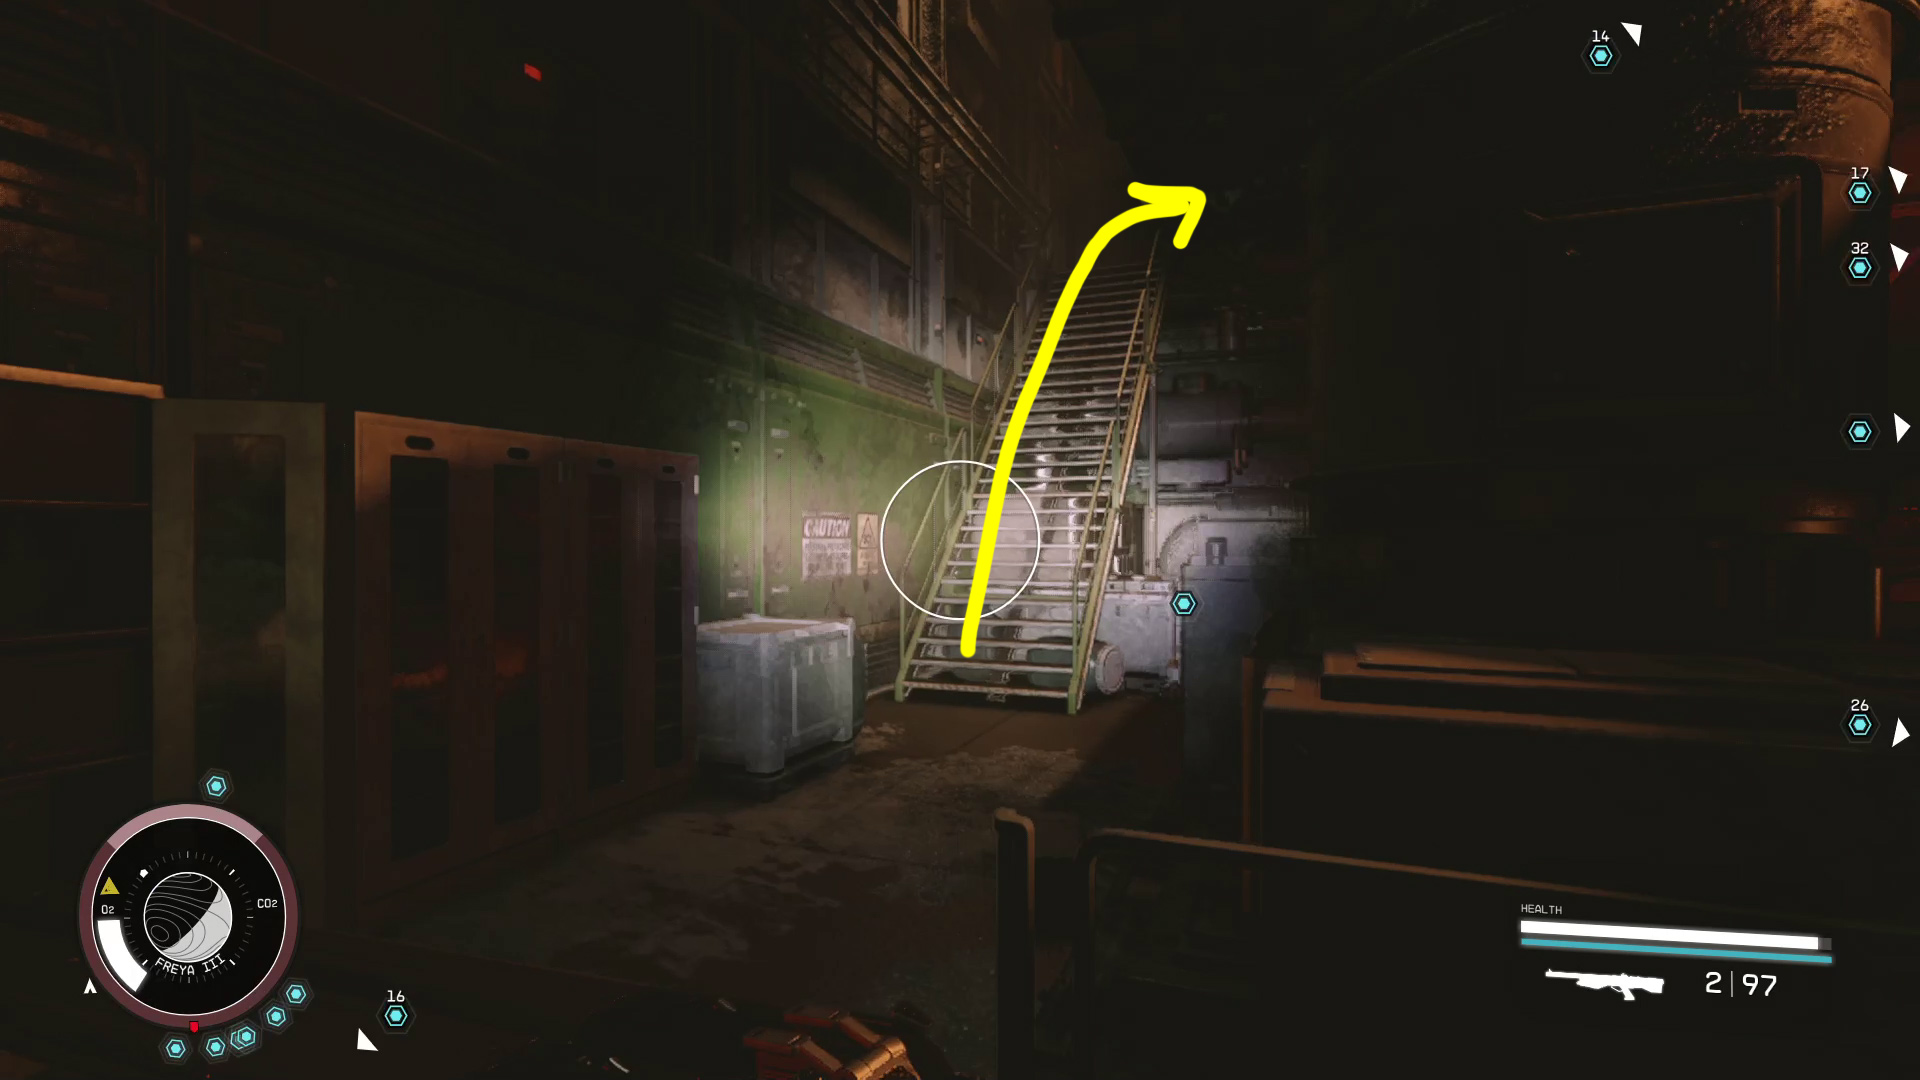
If you aren’t already in the Freya system, you’ll need to get there in order to complete this mission. Use your Mission log to set a destination, and land at the Nishina Research Station on Freya III. Exit your ship and head towards the large industrial lift, then hit the button to ride it up (Image 1). Head up the ramp to the right (Image 2) and loot the stuff under the small hanger. Then turn back the way you came, head up the small ramp to the right (Image 3), and approach the entrance.
Image 1Image 2Image 3
When you get close enough, you’ll start a conversation with Ethan Hughes via the intercom. You can go through the convo however you like — the first option will generally move things along the fastest.
Enter Nishina Research Station/Speak to Ethan
After Ethan tells you he’ll get the door, you can go through the door to the left of the intercom — leaving your companion behind. You’ll have to wait in a security airlock while Ethan does security stuff, and after a moment, he’ll open the door opposite the one you came through. Go through the door once it opens, and walk up to Ethan to begin a conversation. You can ask a few questions — saying “All right, let’s go” will end the conversation.
Follow Ethan/Explore the Ruins
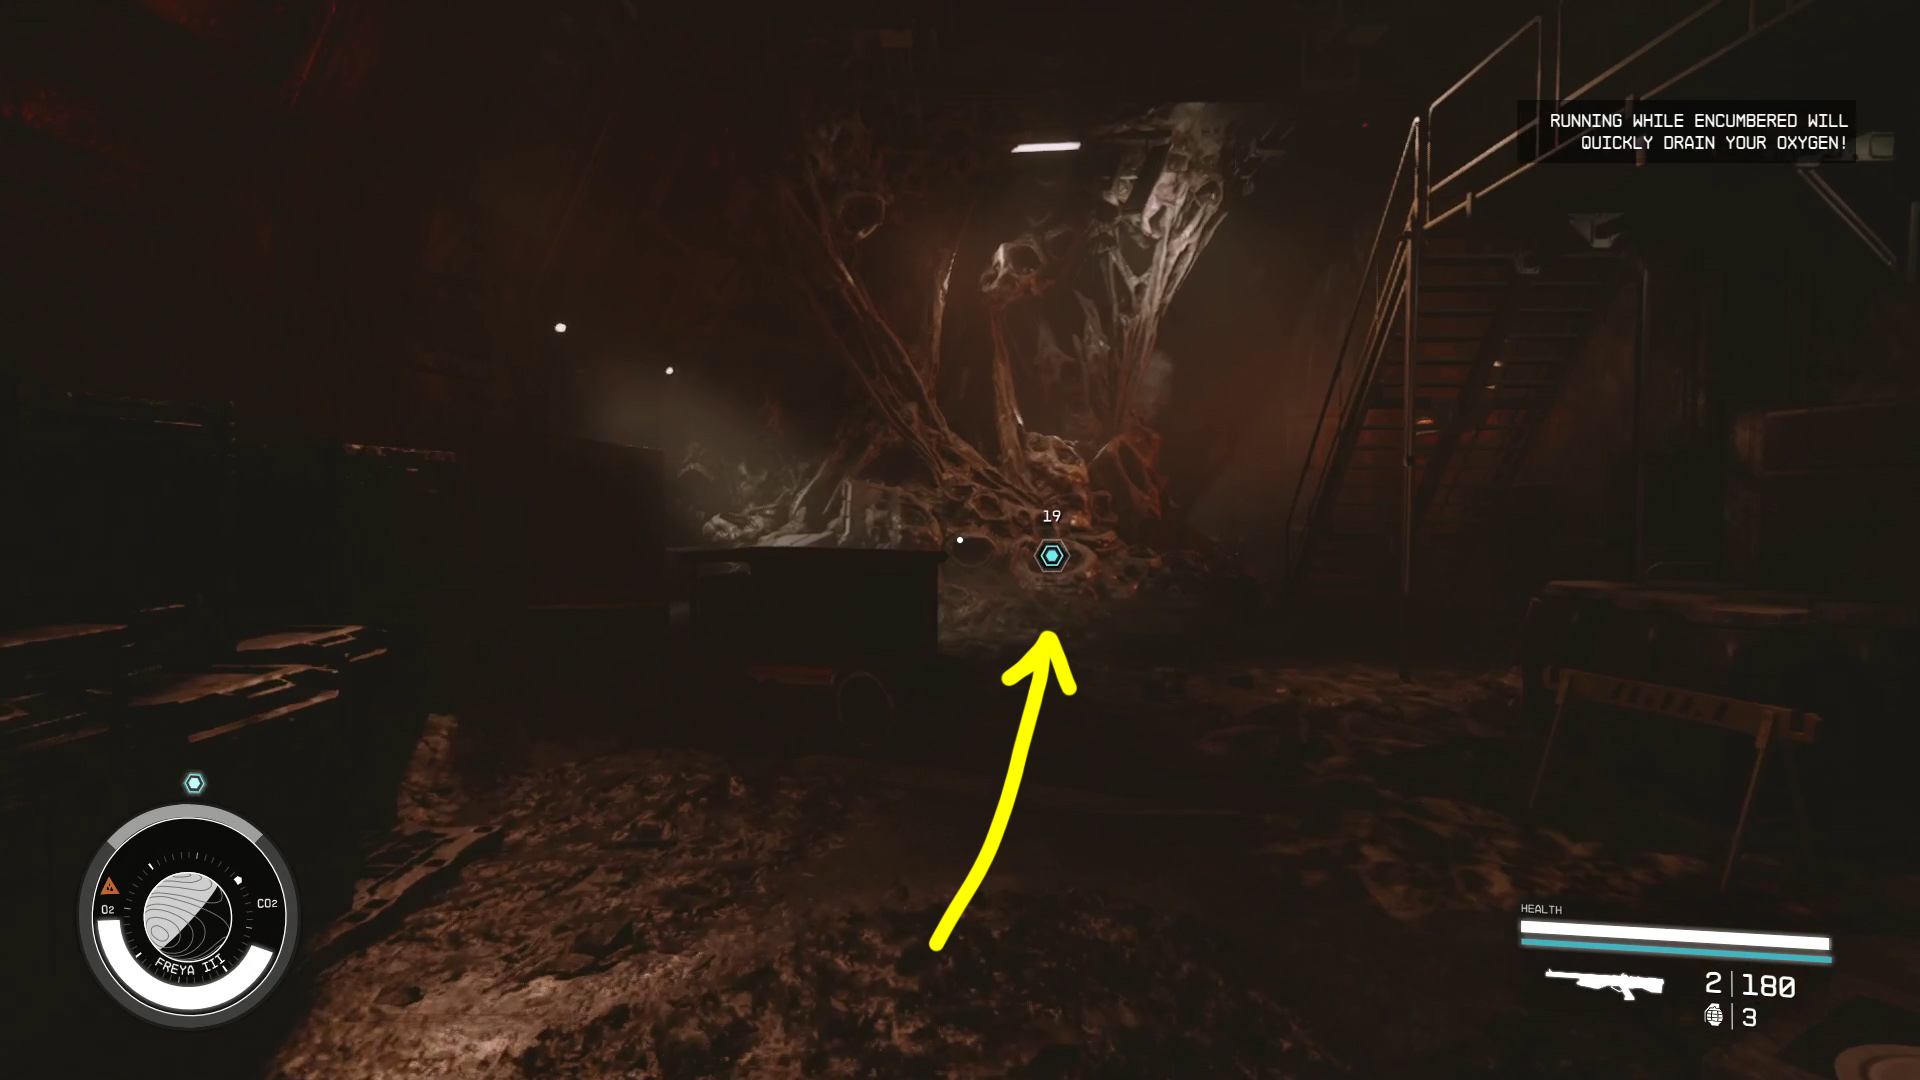
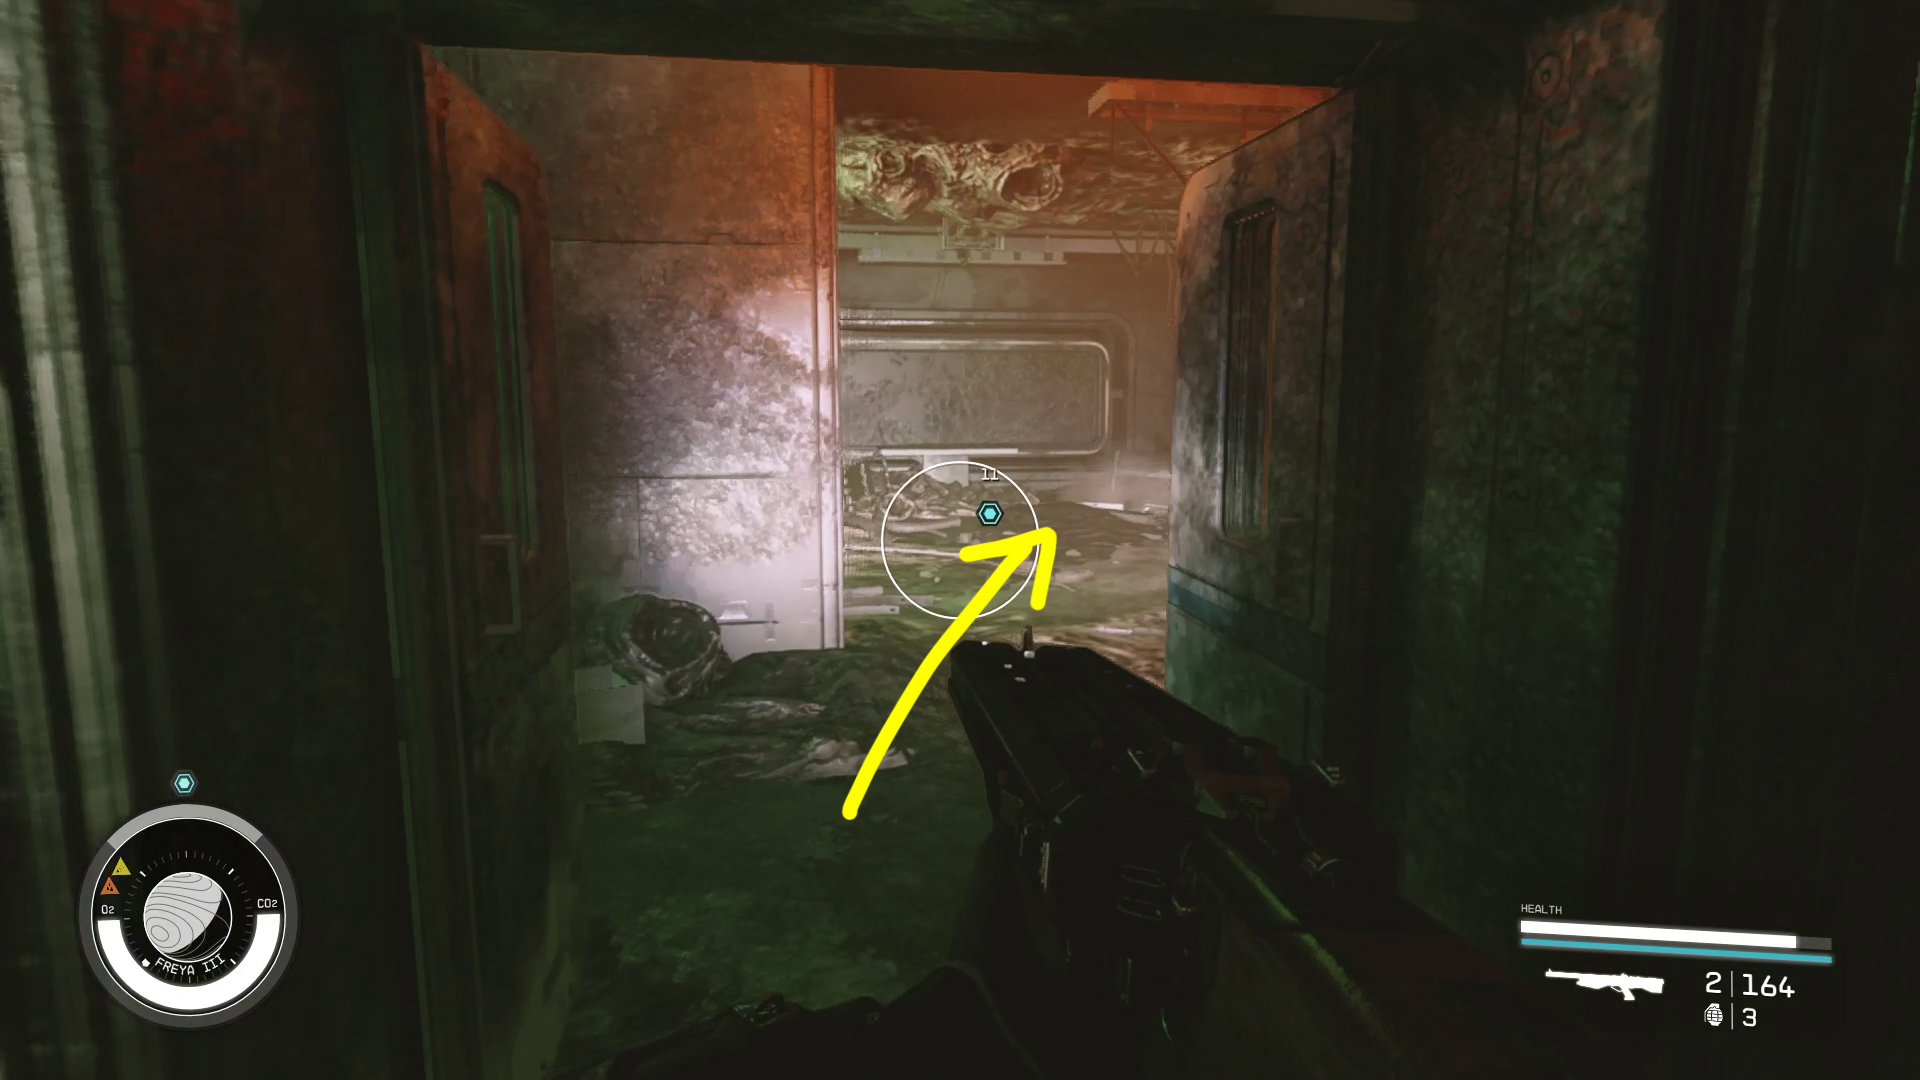
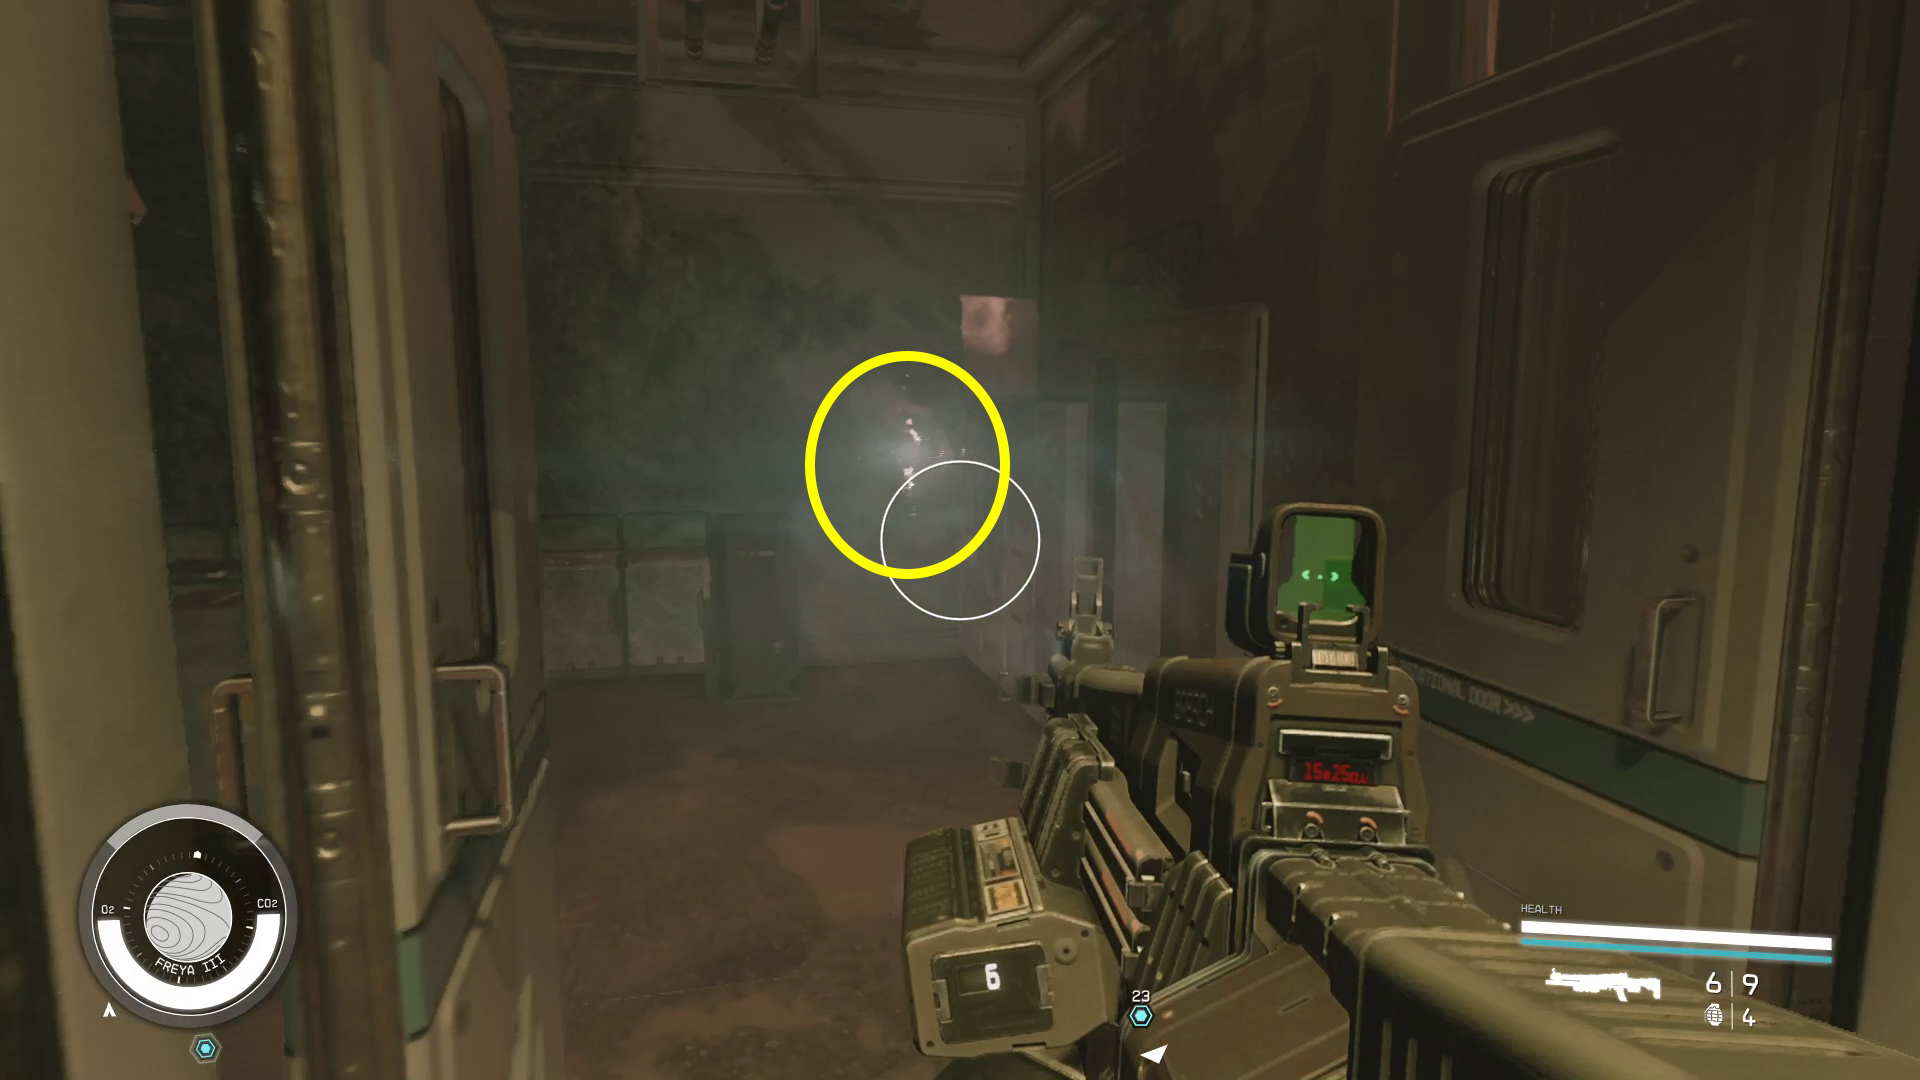
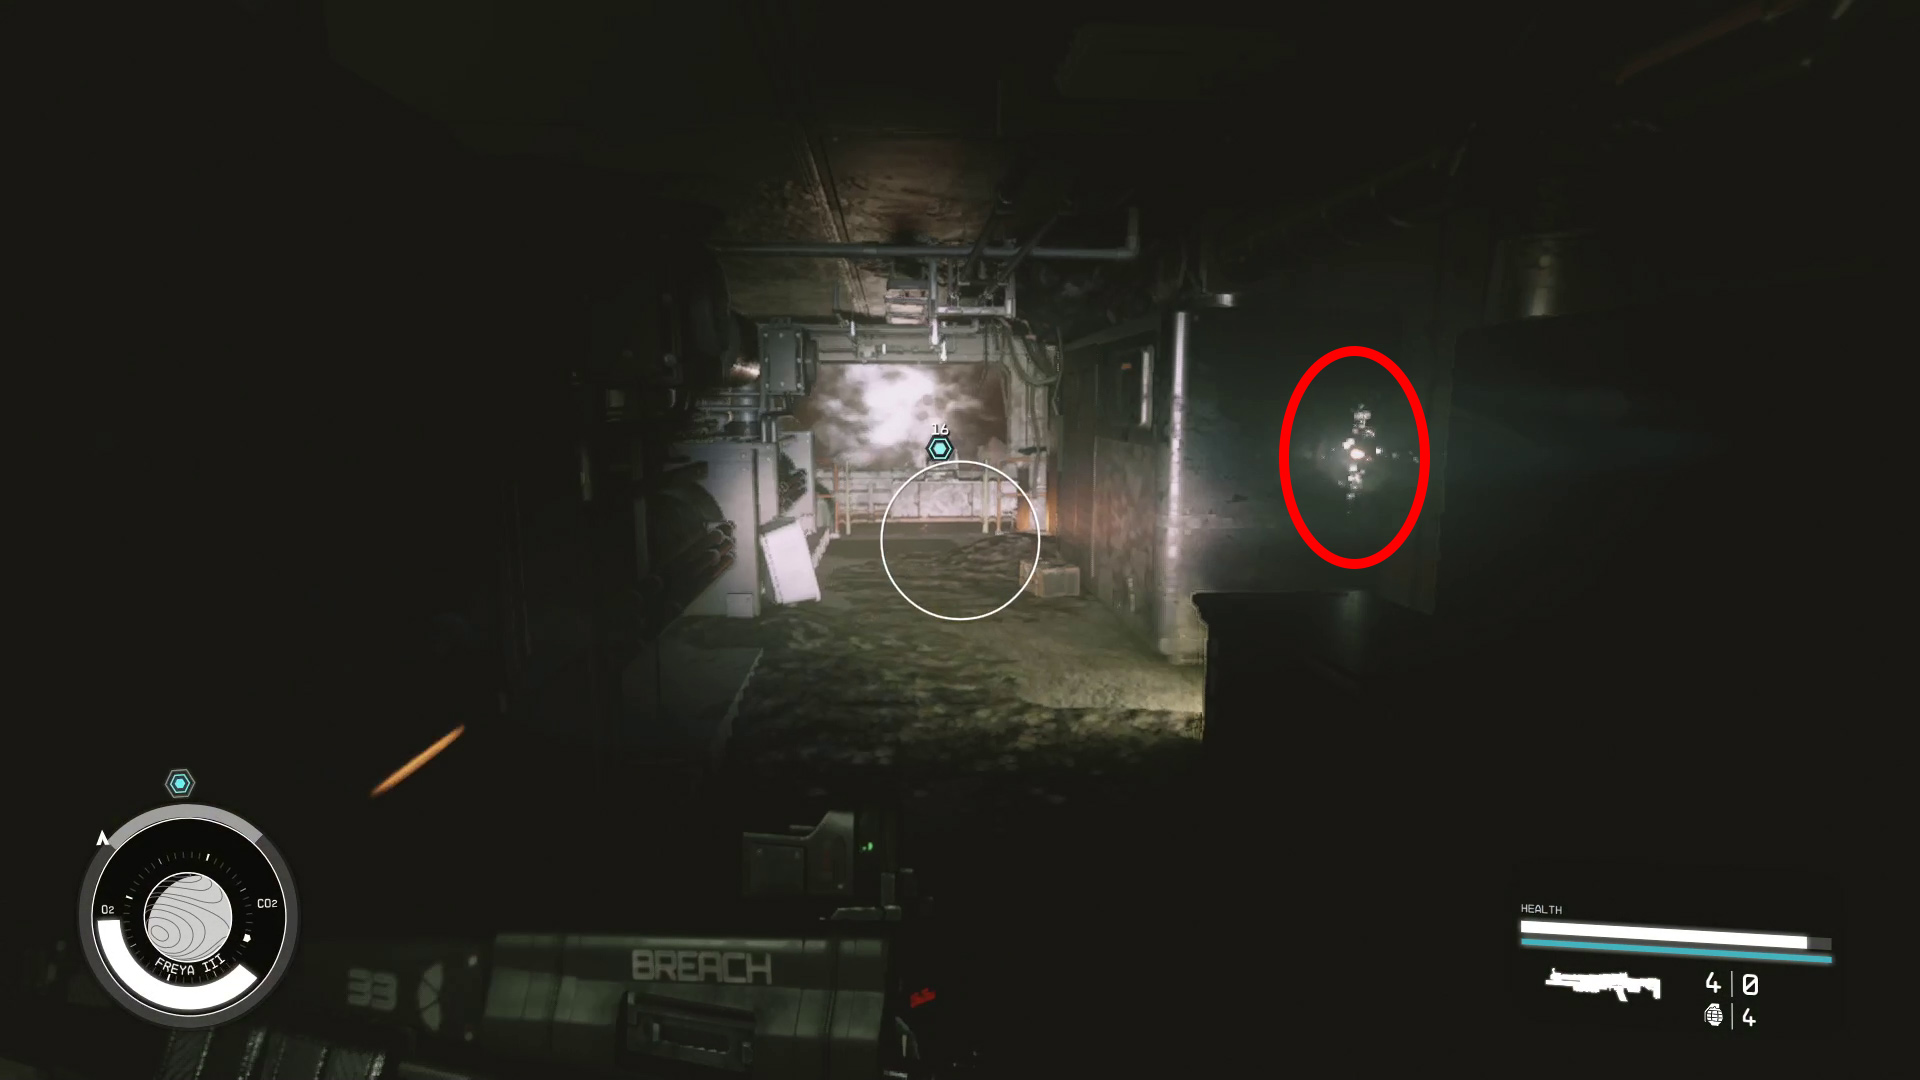
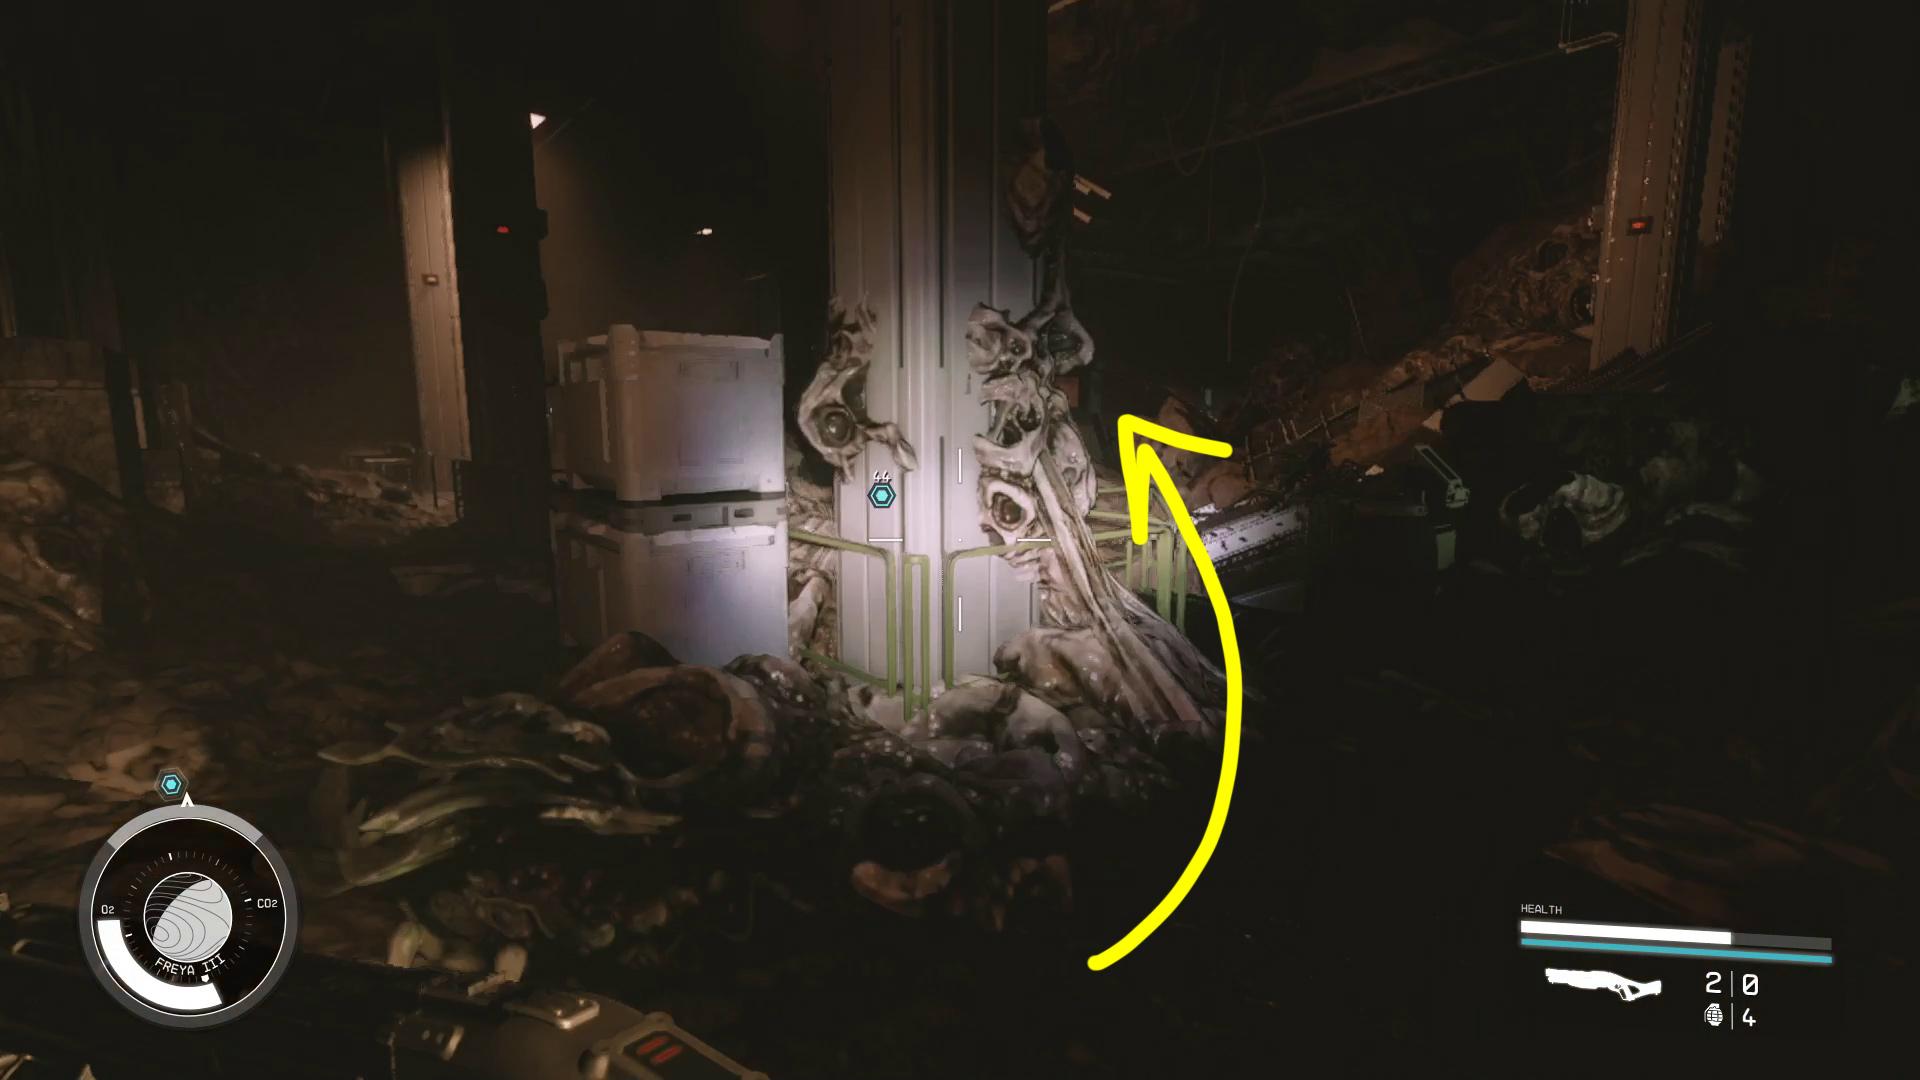
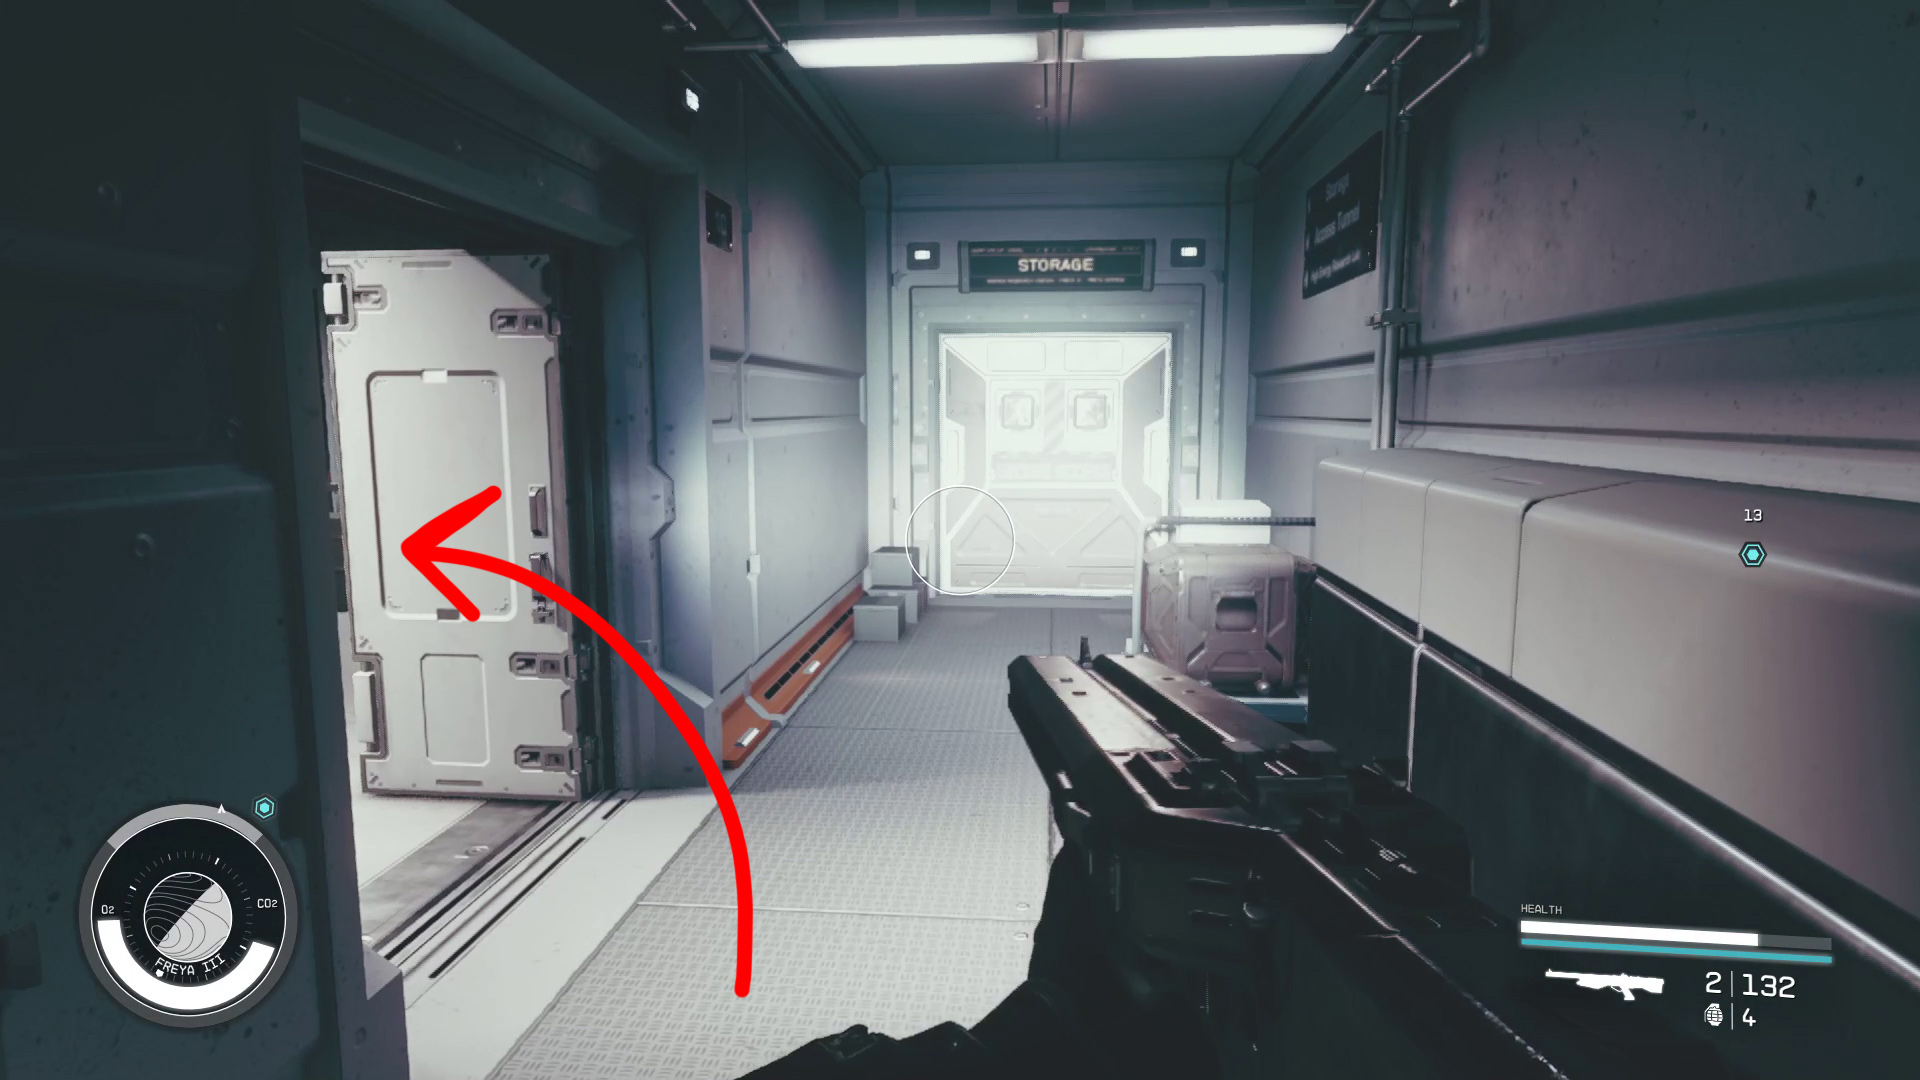
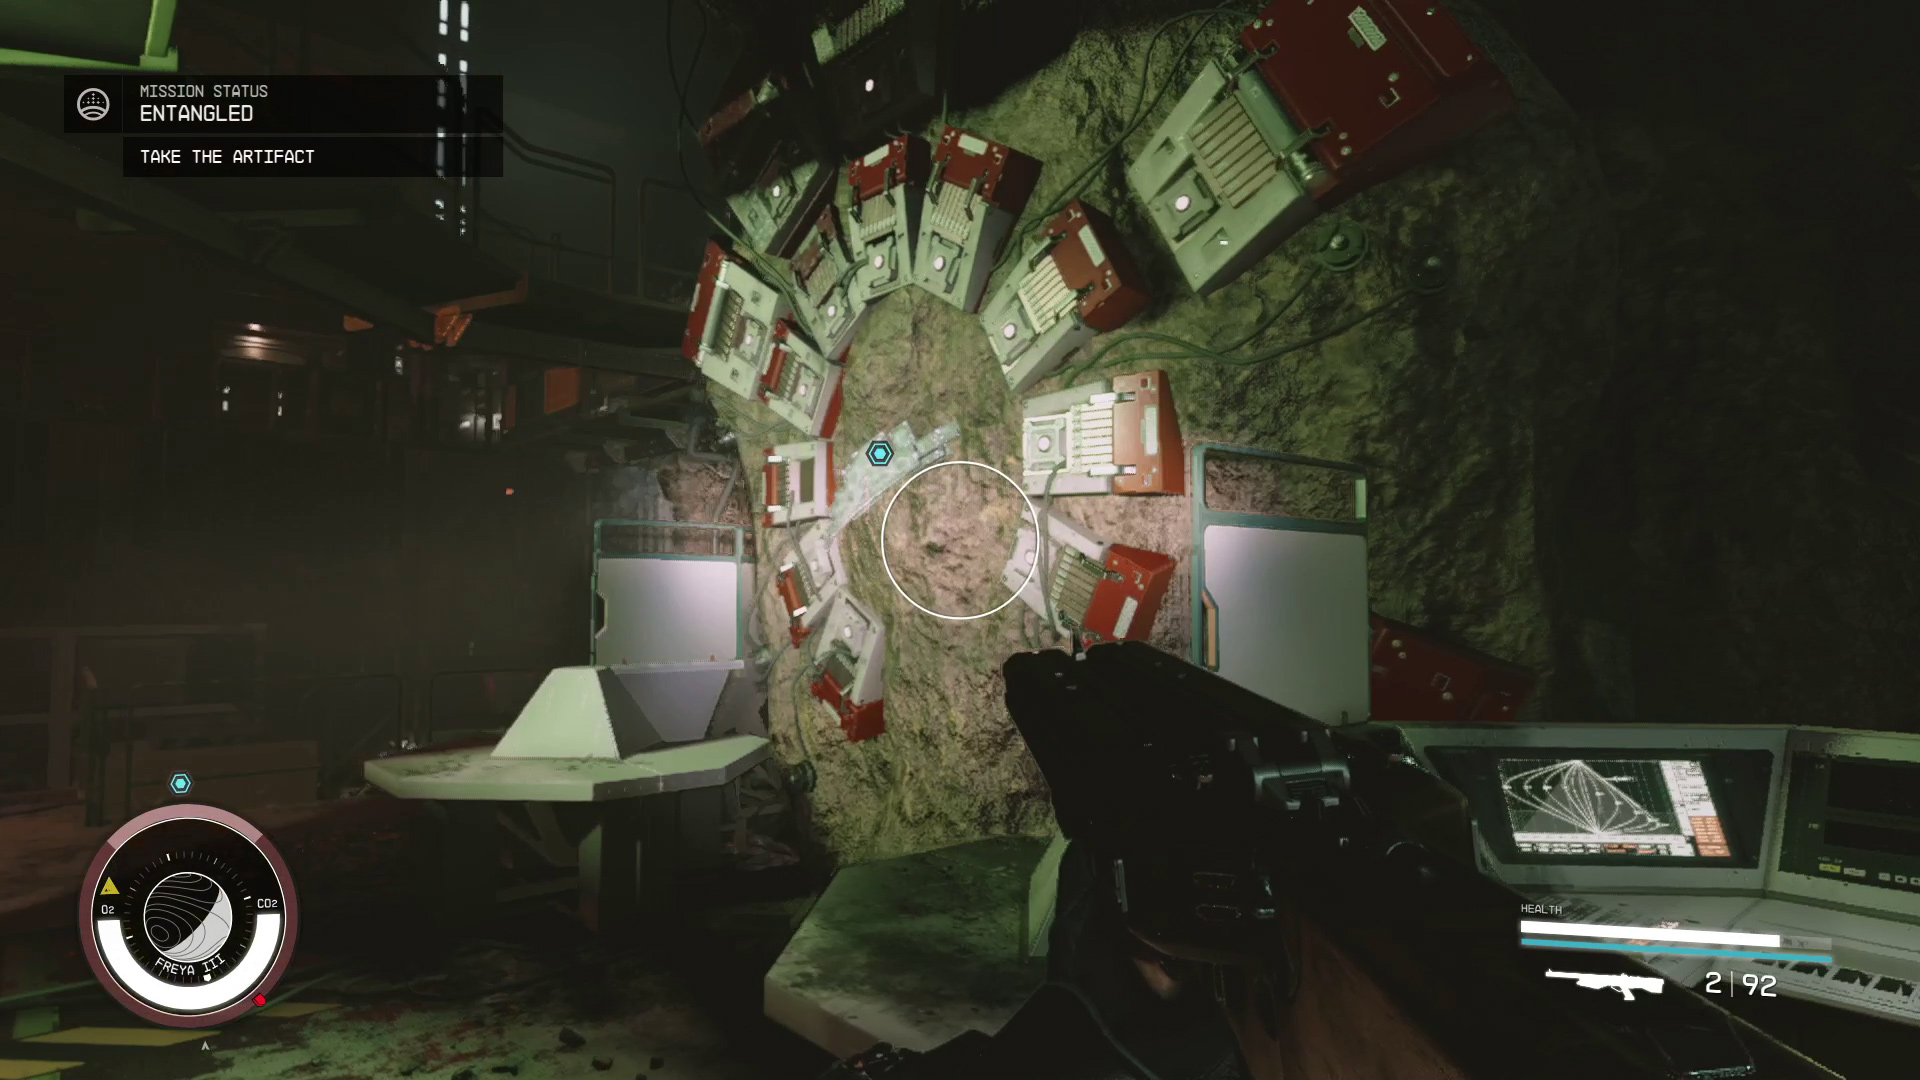
Now you get to play follow the slow-walking NPC — but fortunately, it doesn’t last long. Soon after entering the storage room, you’ll find yourself transported into another version of the lab, one where things have… not gone well. Your objective marker will indicate an organic tubule ahead (Image 4) — make sure you have a weapon out, and then approach the tubule. Alien creatures (Cataxi) will emerge and attack, and then after a moment you’ll be transported back to where you were before.
There will be a lot of back-and-forth between the two universes, so let’s call the not-destroyed lab the “Intact Station” and the one full of alien creatures the “Ruined Station”.
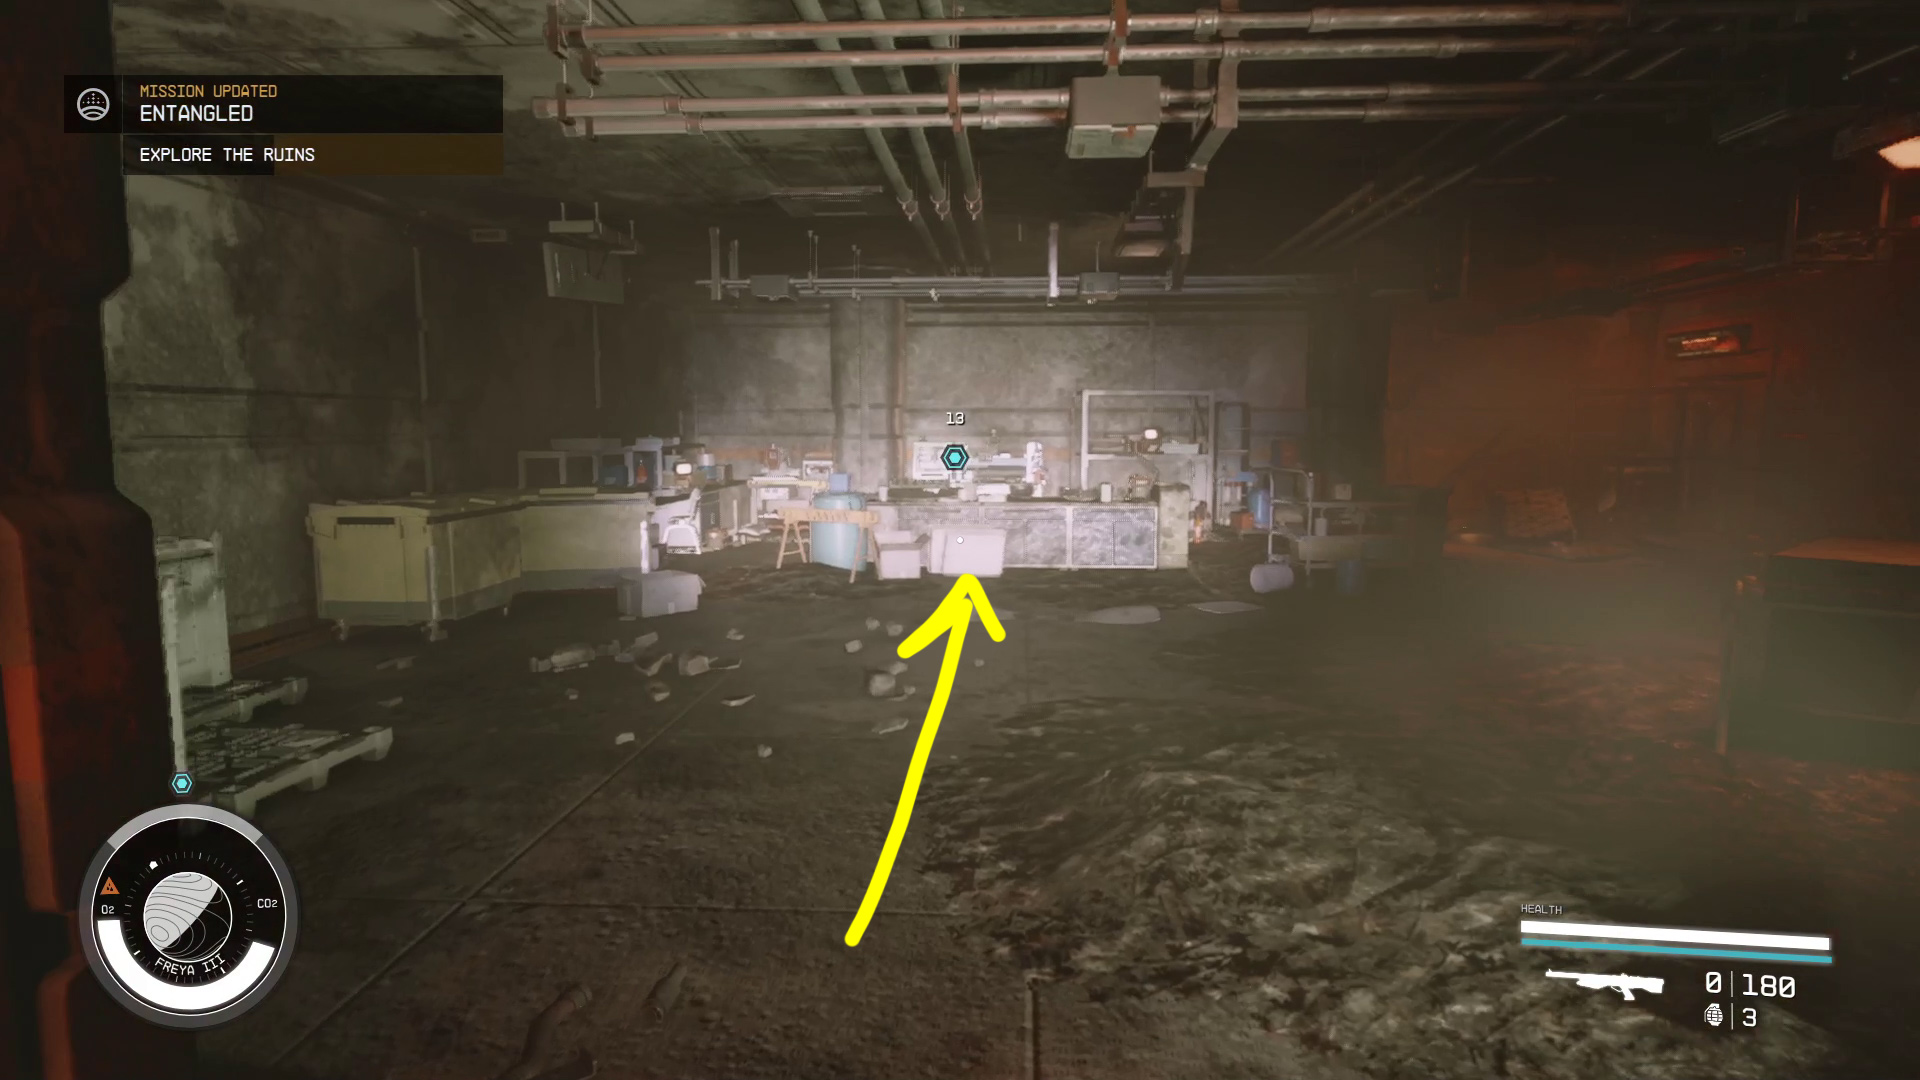
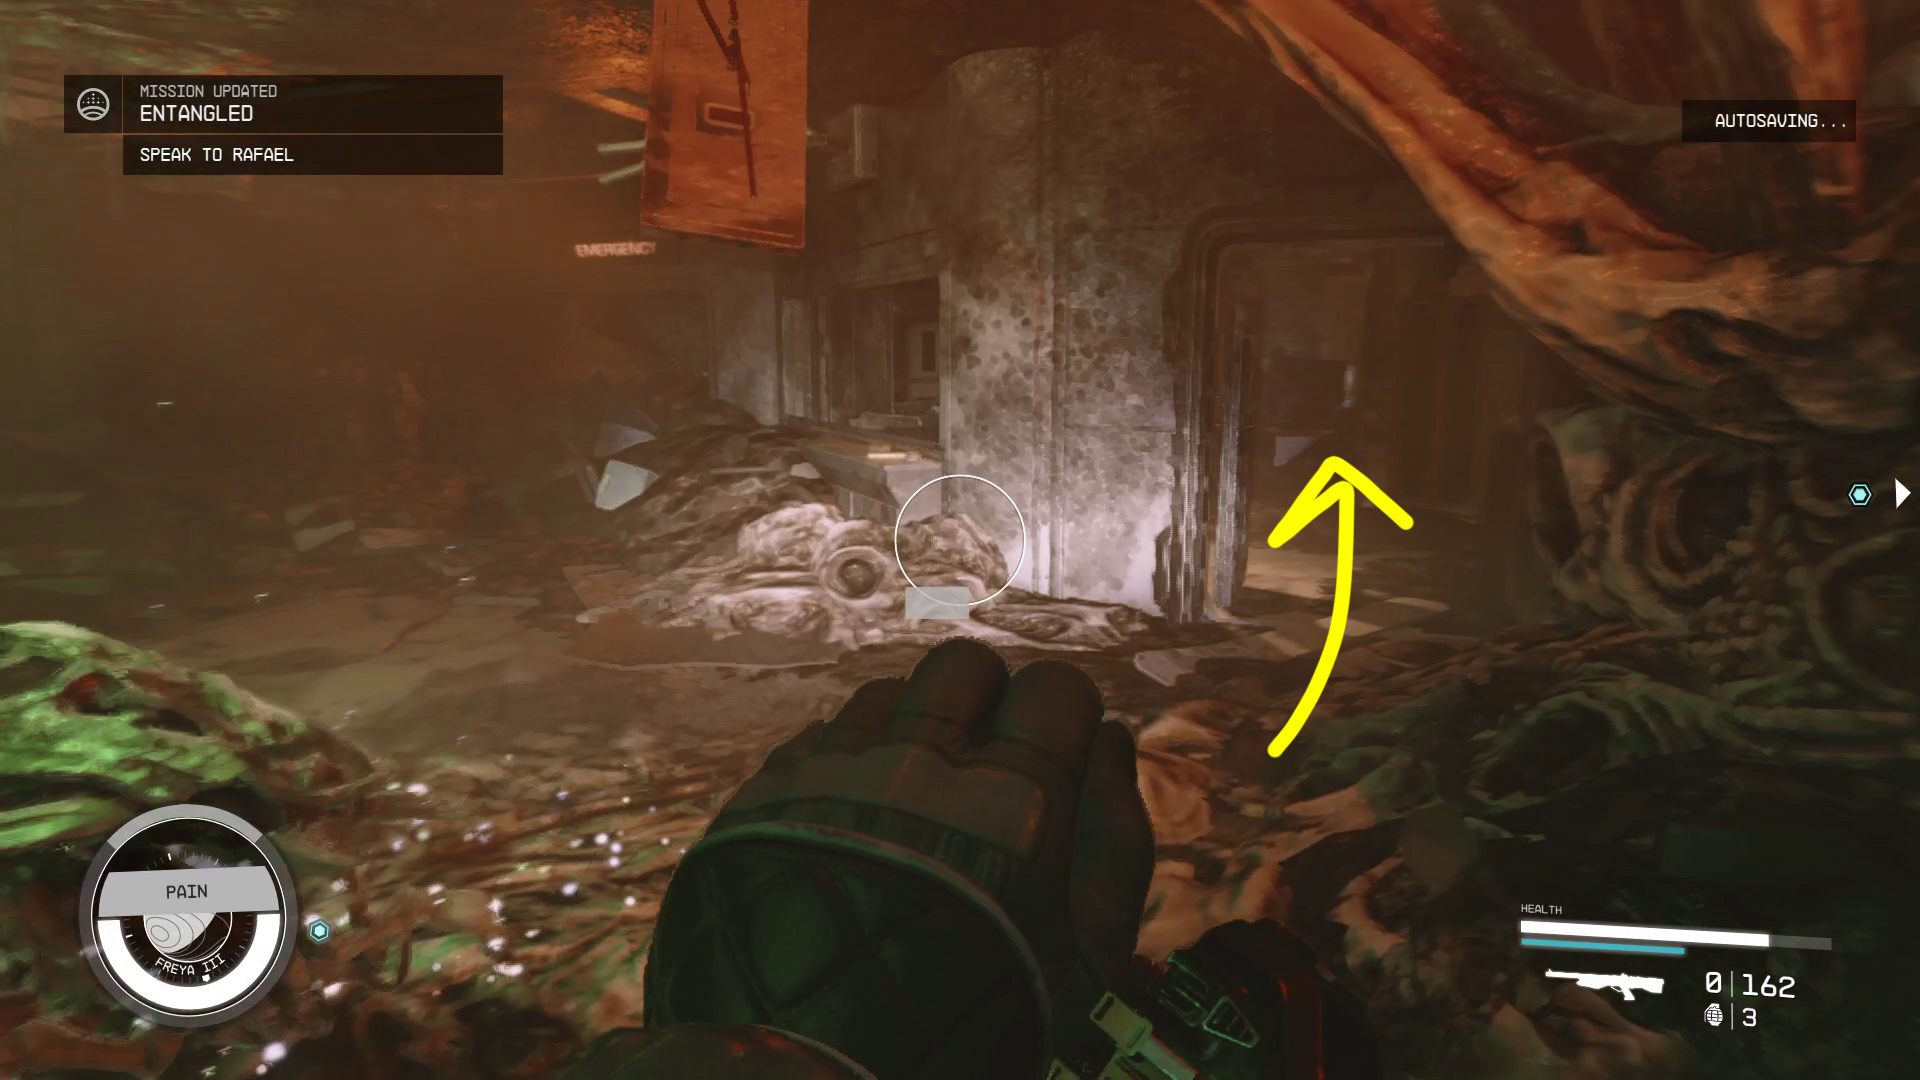
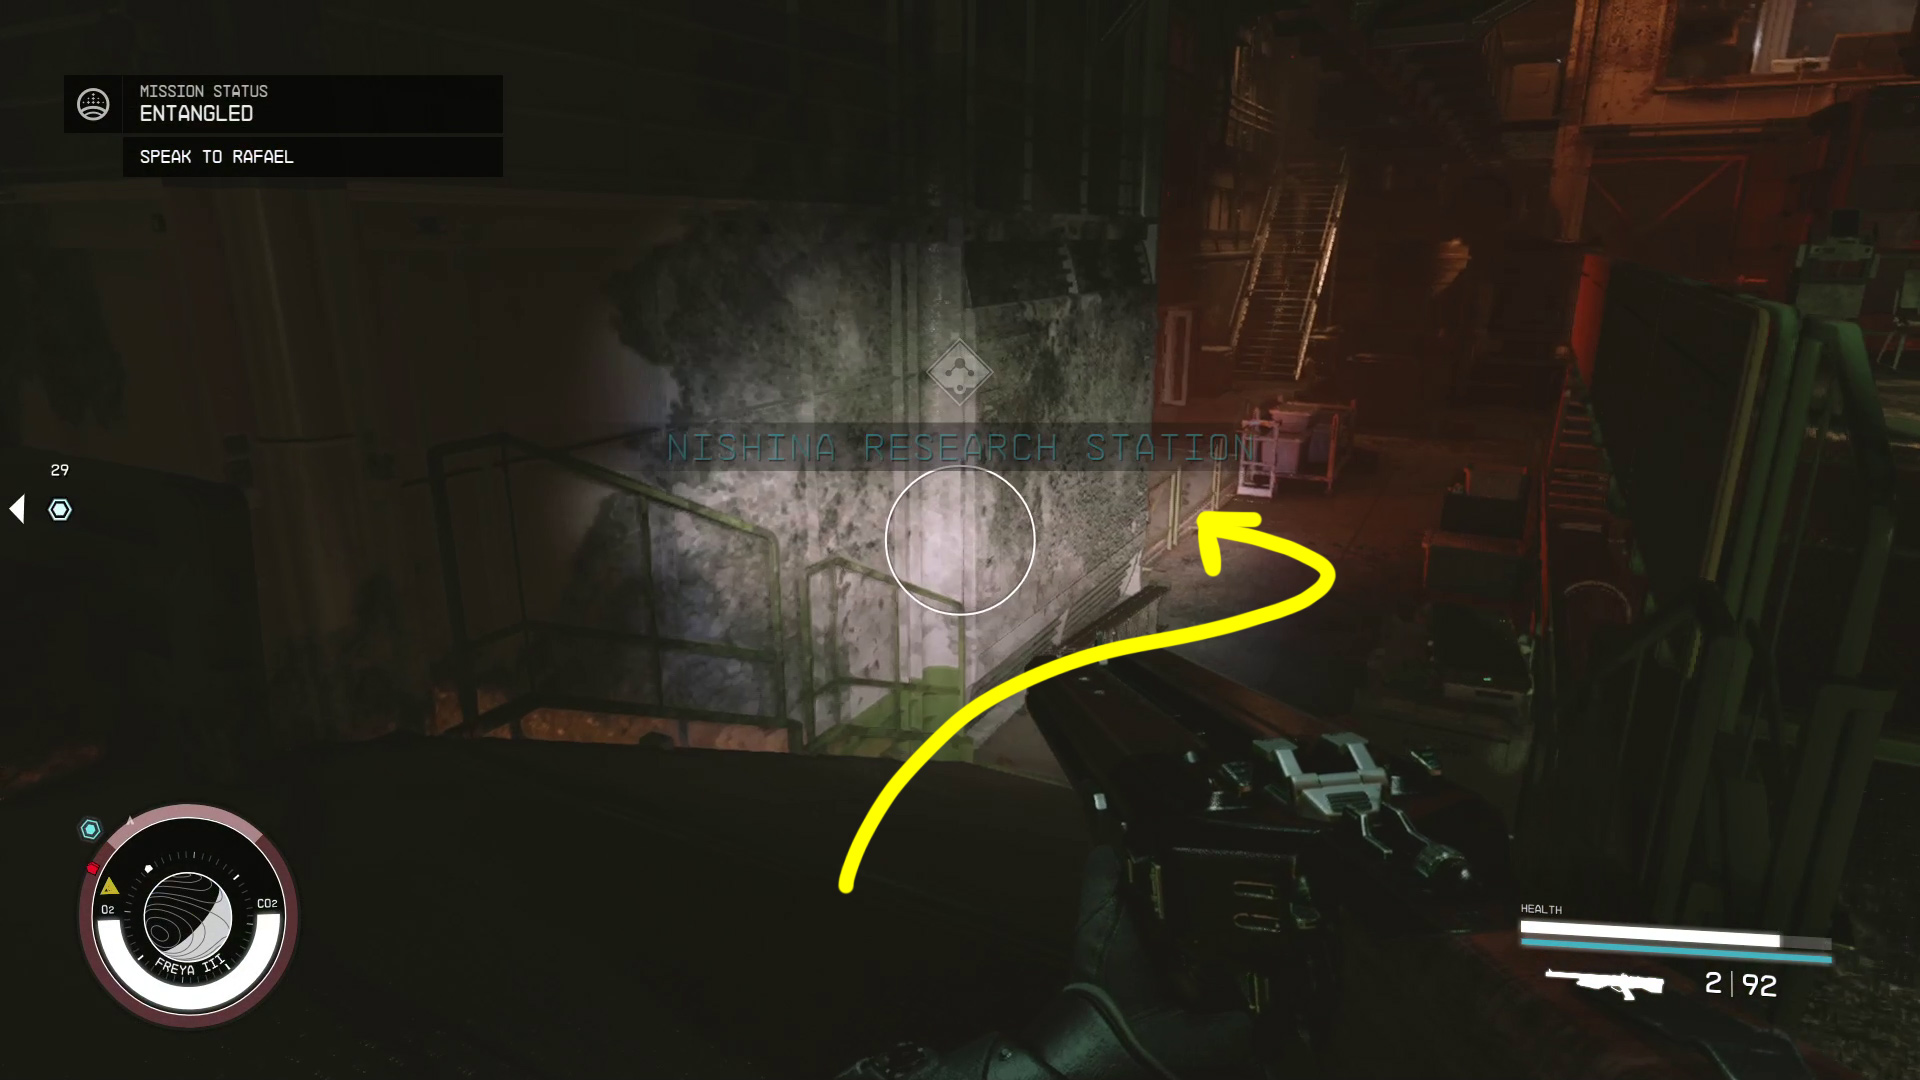
Complete the conversation with Ethan however you like, and then follow him into the Work Room. In the hallway, you’ll once again warp to the Ruined Station, and once again there will be an objective marker ahead (Image 5). Approach it, and you’ll find that it’s a person, Raphael.
Image 4Image 5
Speak to Rafael
Finally, some answers — well, kind of. Talk to Raphael to learn a bit about why you might be warping between different versions of the station. Once you get far enough into the conversation, it’ll end mid-sentence, and you’ll warp back to the Intact Station.
Follow Ethan/Explore the Ruins (2)
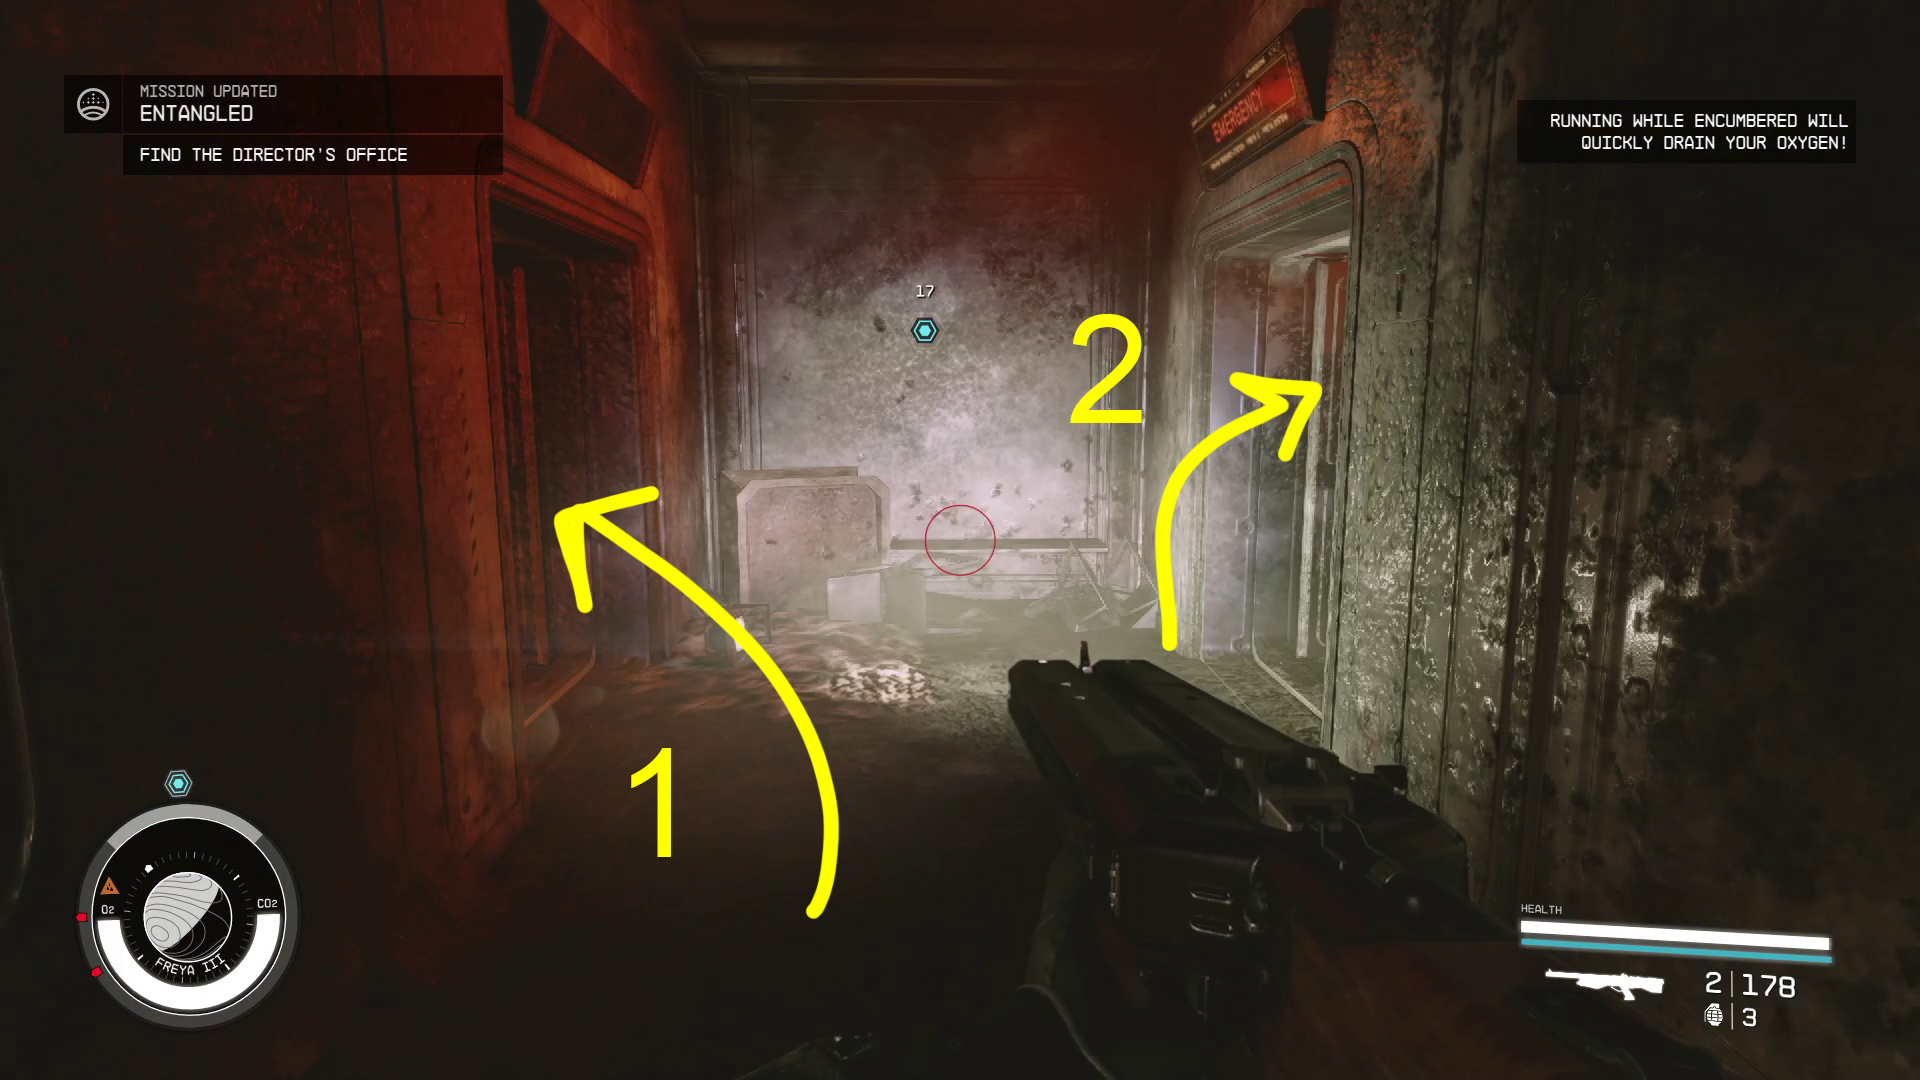
In the Intact Station, follow Ethan through the door marked Hall, and then go left — you’ll then teleport back to the Ruined Lab. Ahead there are two doors (Image 6) — the left-hand room has enemies, but offers a first aid pack on the wall, just to the left of the doorway. There’s a connecting room you can enter if you go straight and then turn right — inside is another aid kit, plus some credstiks on the counter.
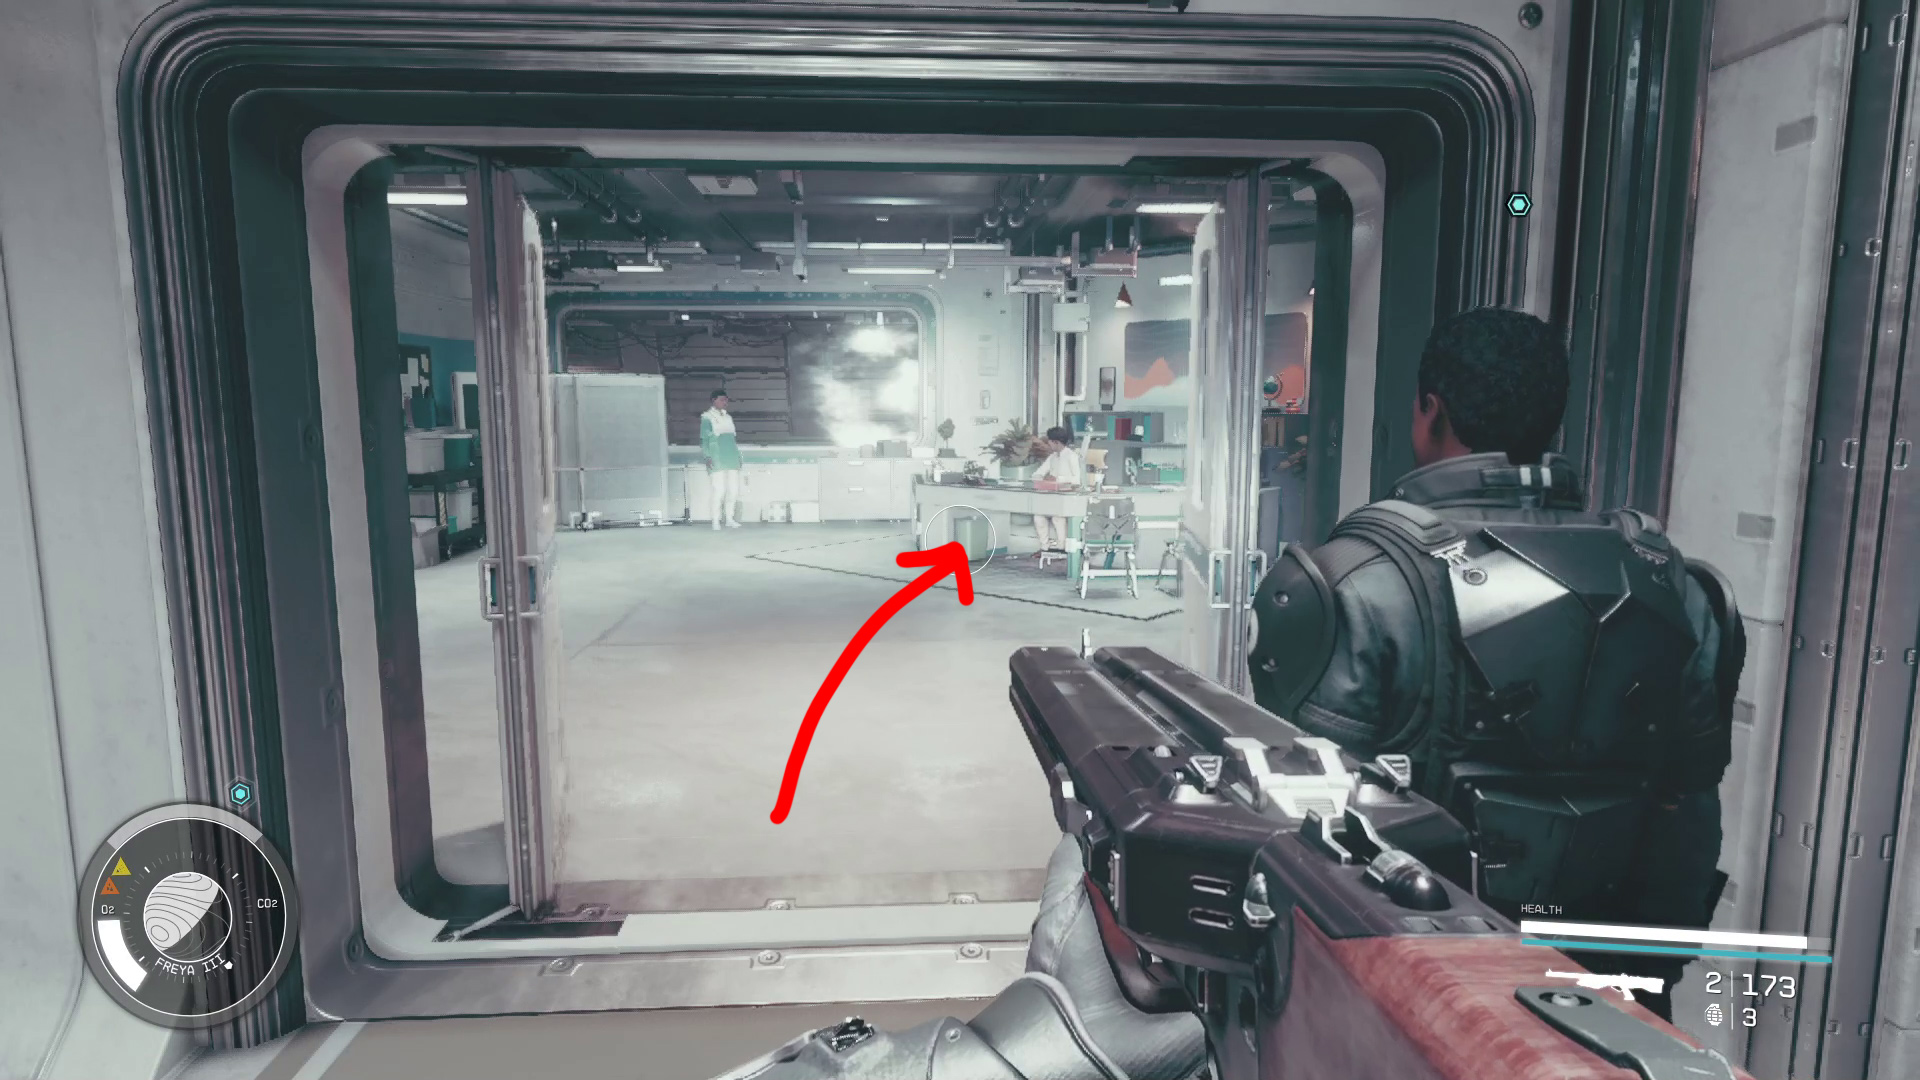
The right-hand door also leads to enemies — continue up the stairs and into the next room, where you’ll warp to the Intact Station. Keep following Ethan, and he’ll lead you into the Director’s Office. Walk up to the desk (Image 7) to start a conversation with Director Patel. Handle the conversation as you like, and then you’ll be sent with Maria.
Image 6Image 7
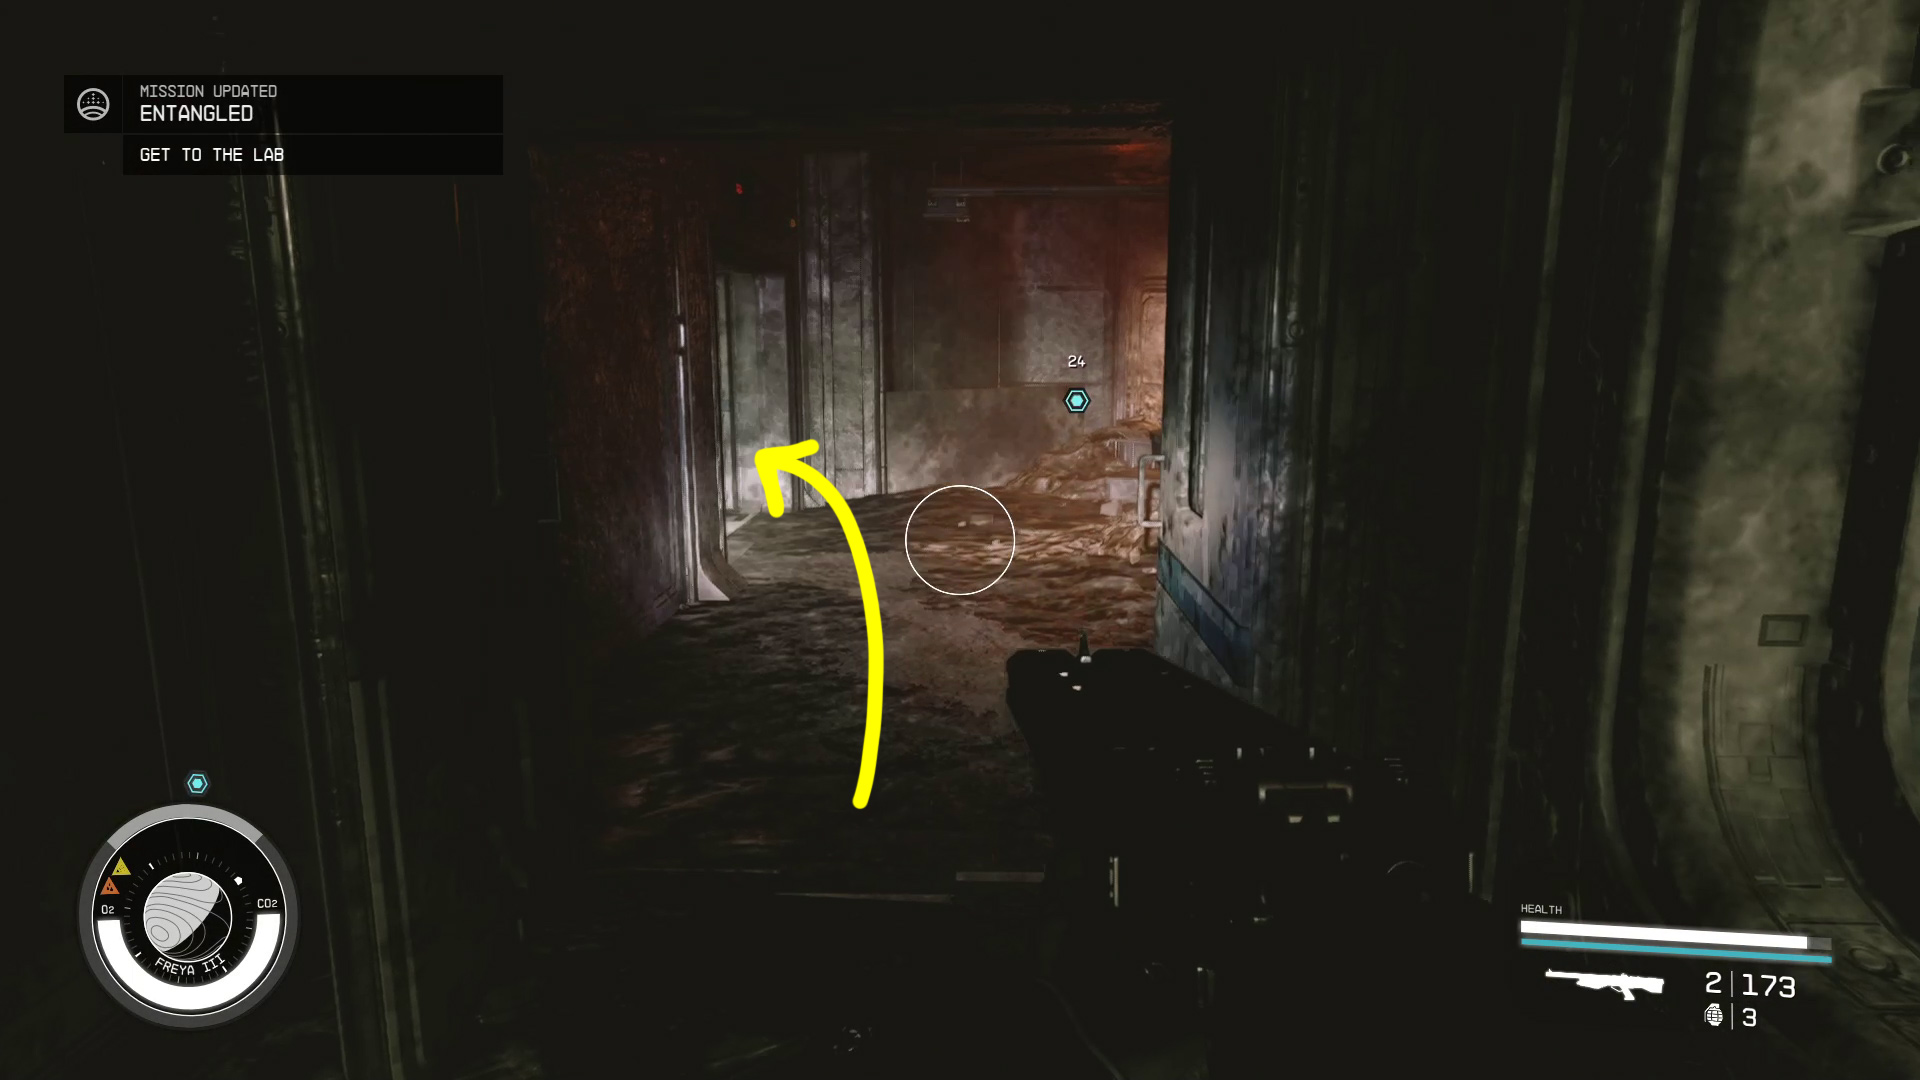
Follow Maria/Get to the Lab
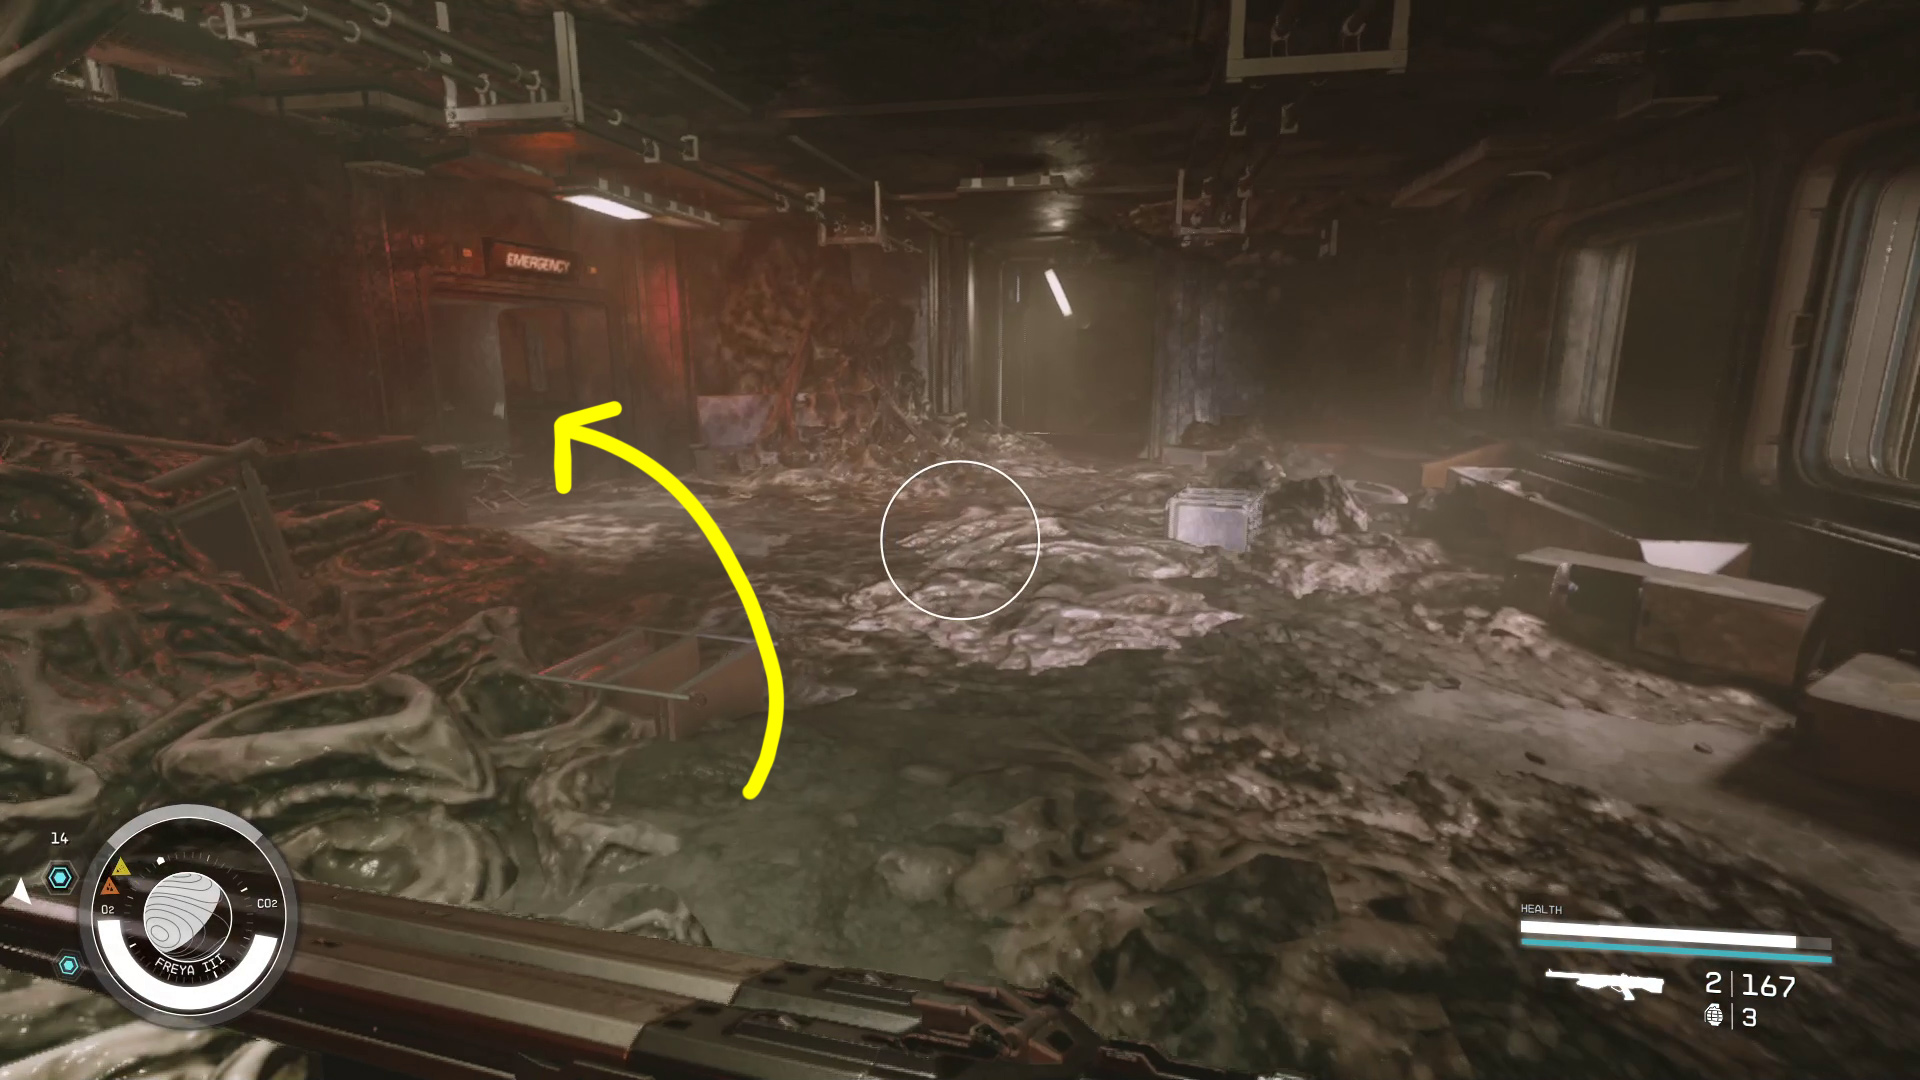
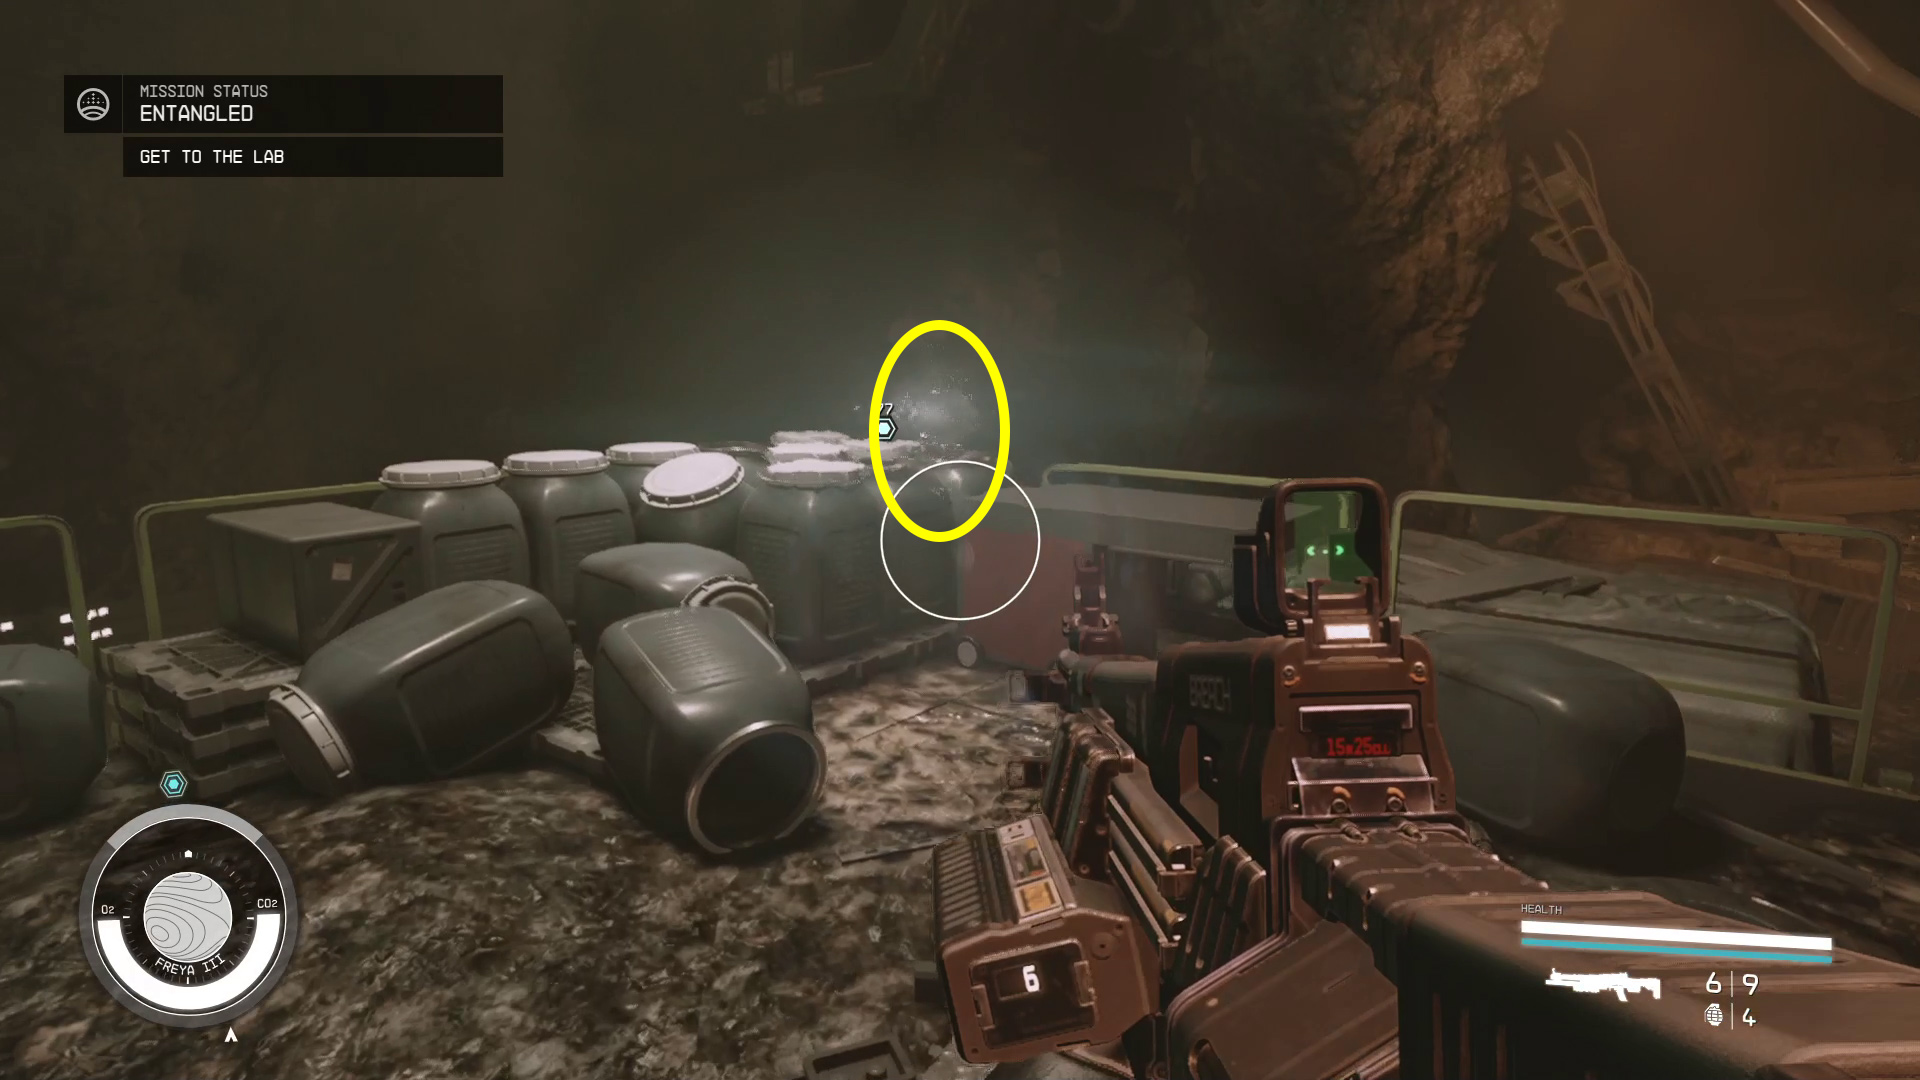
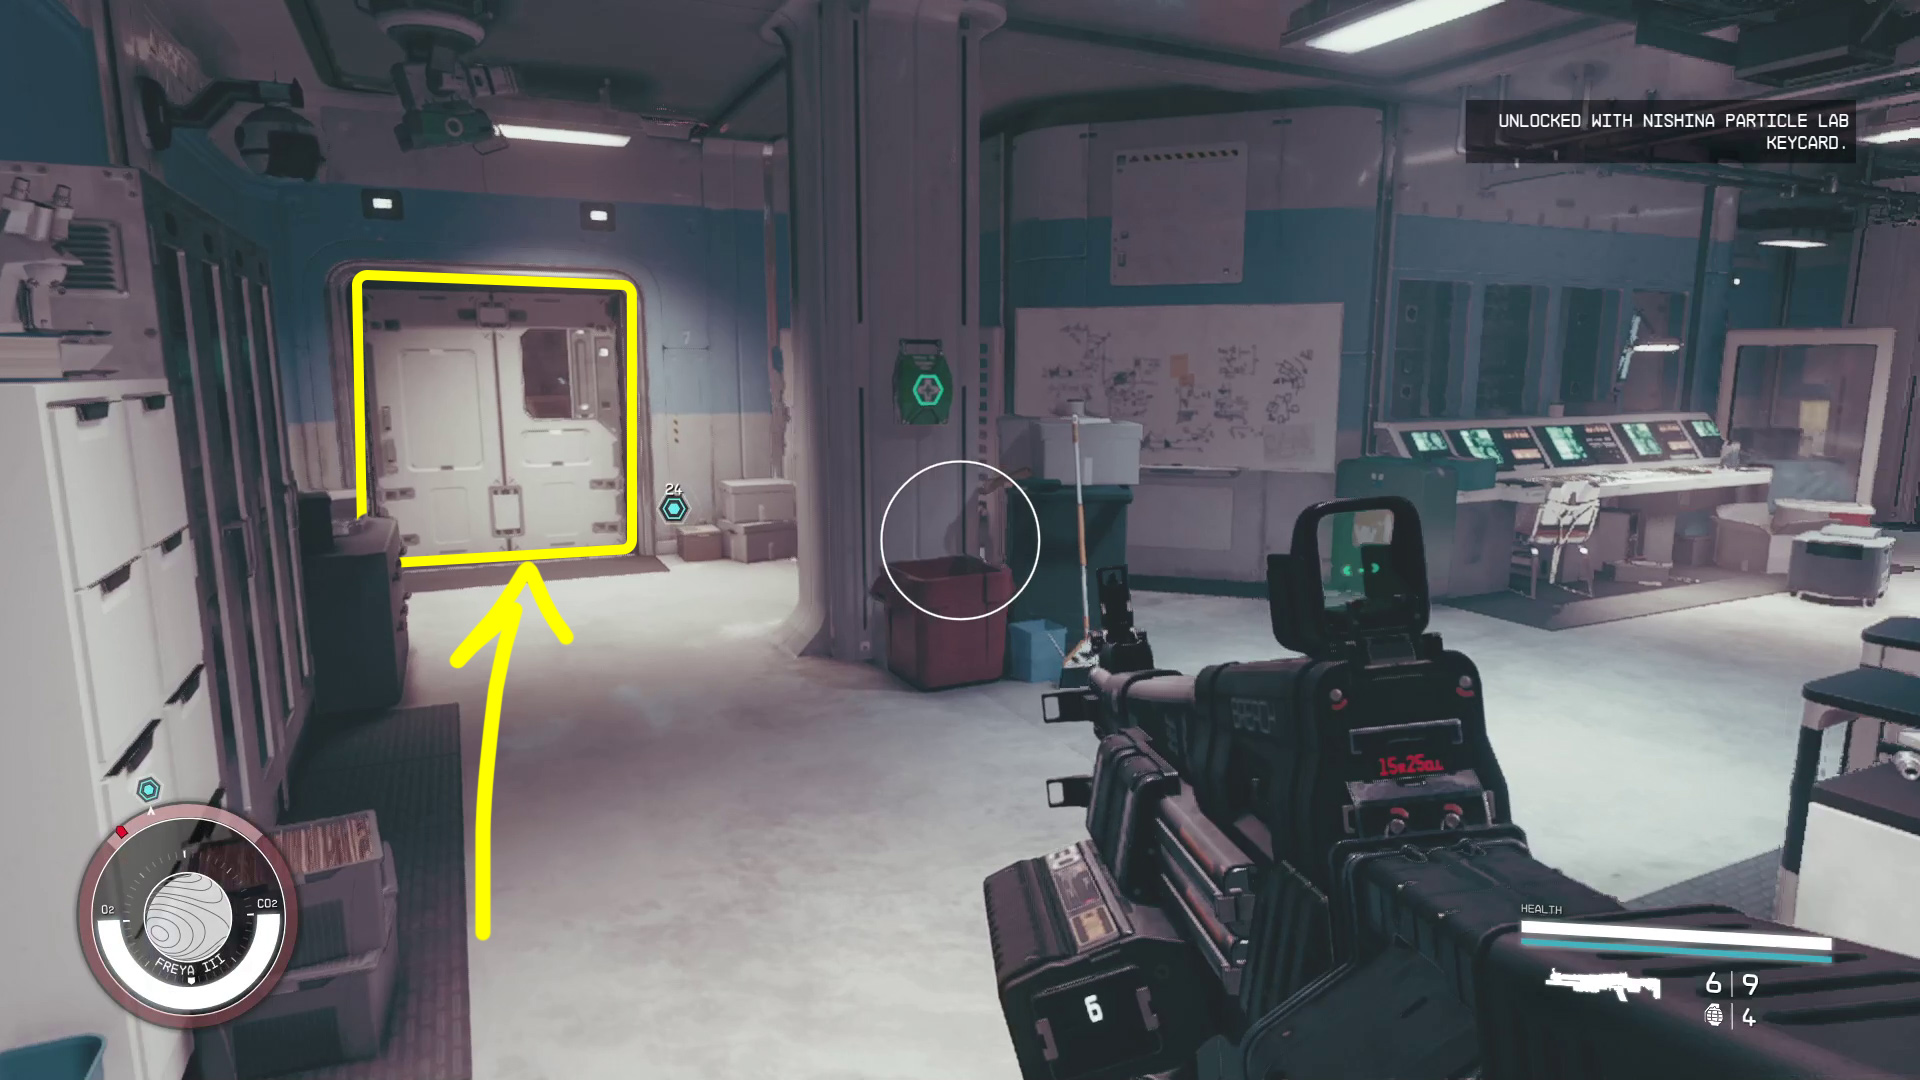
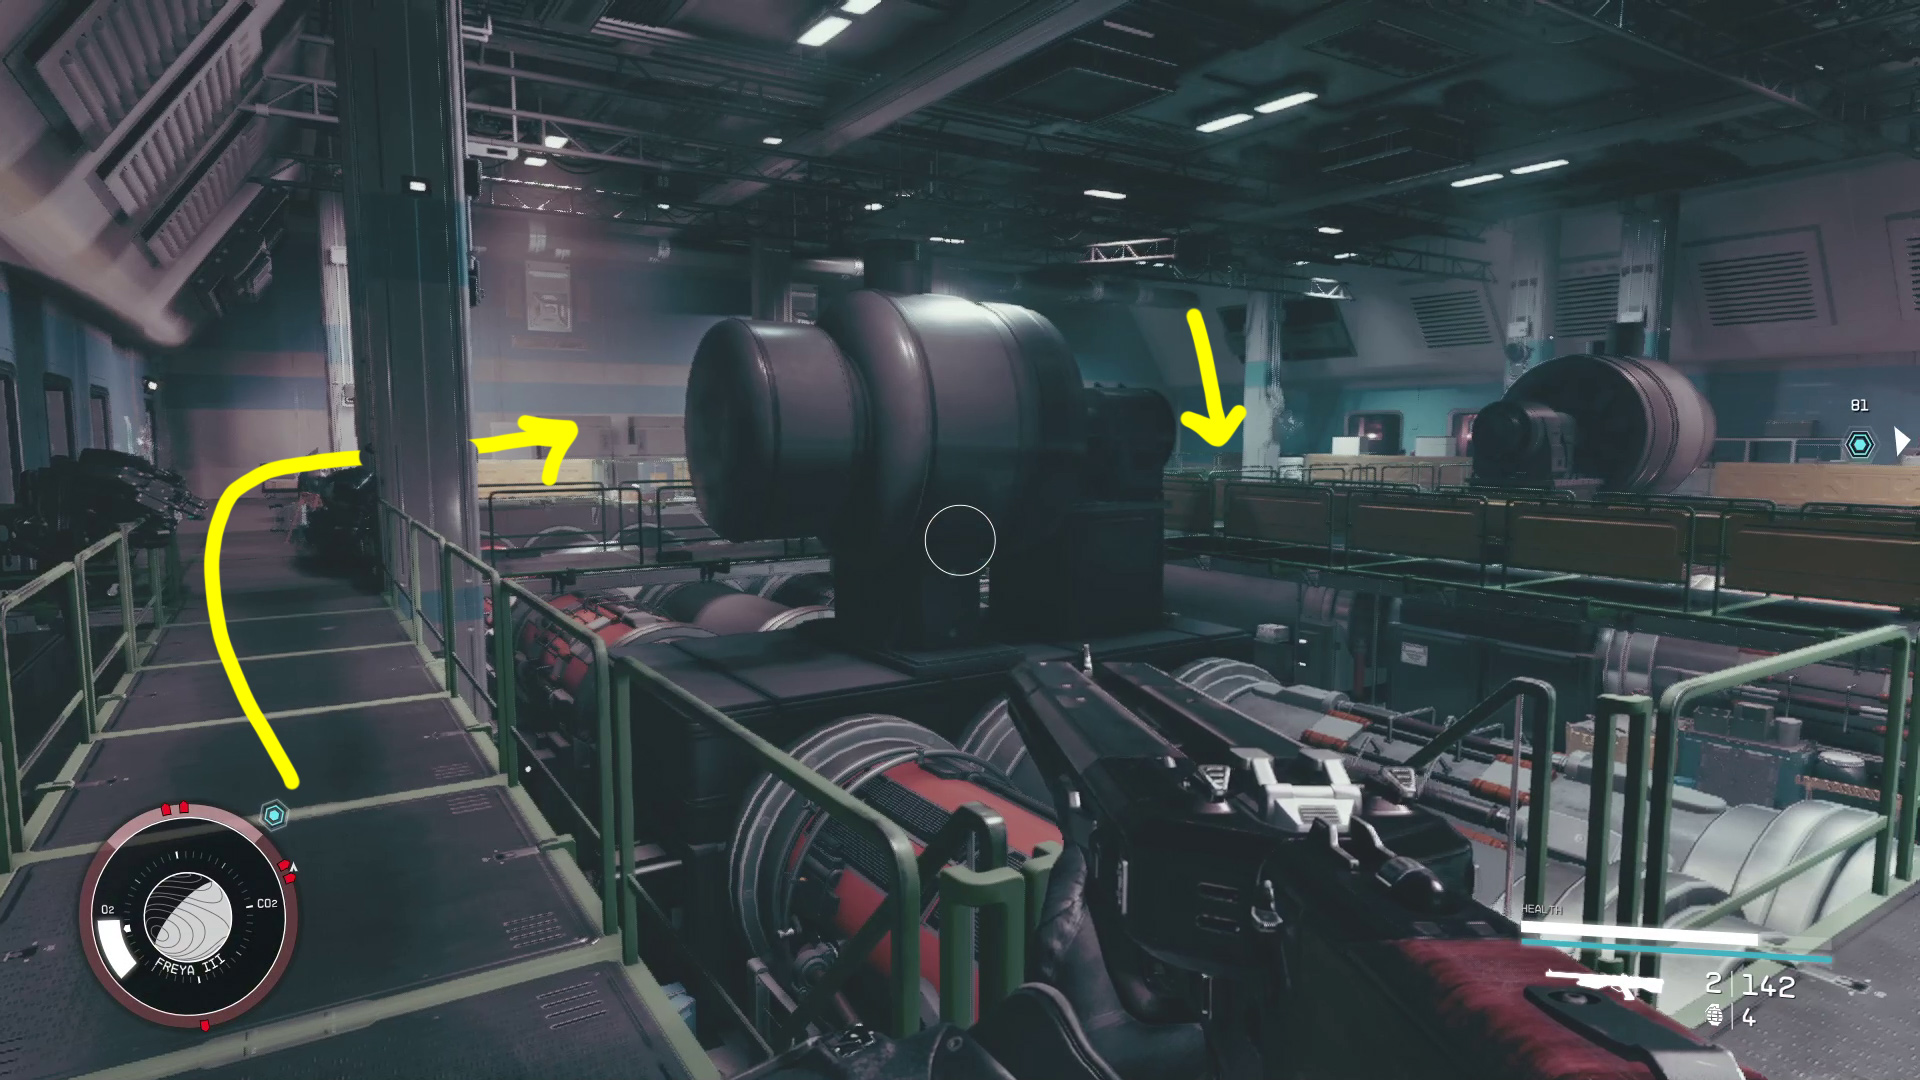
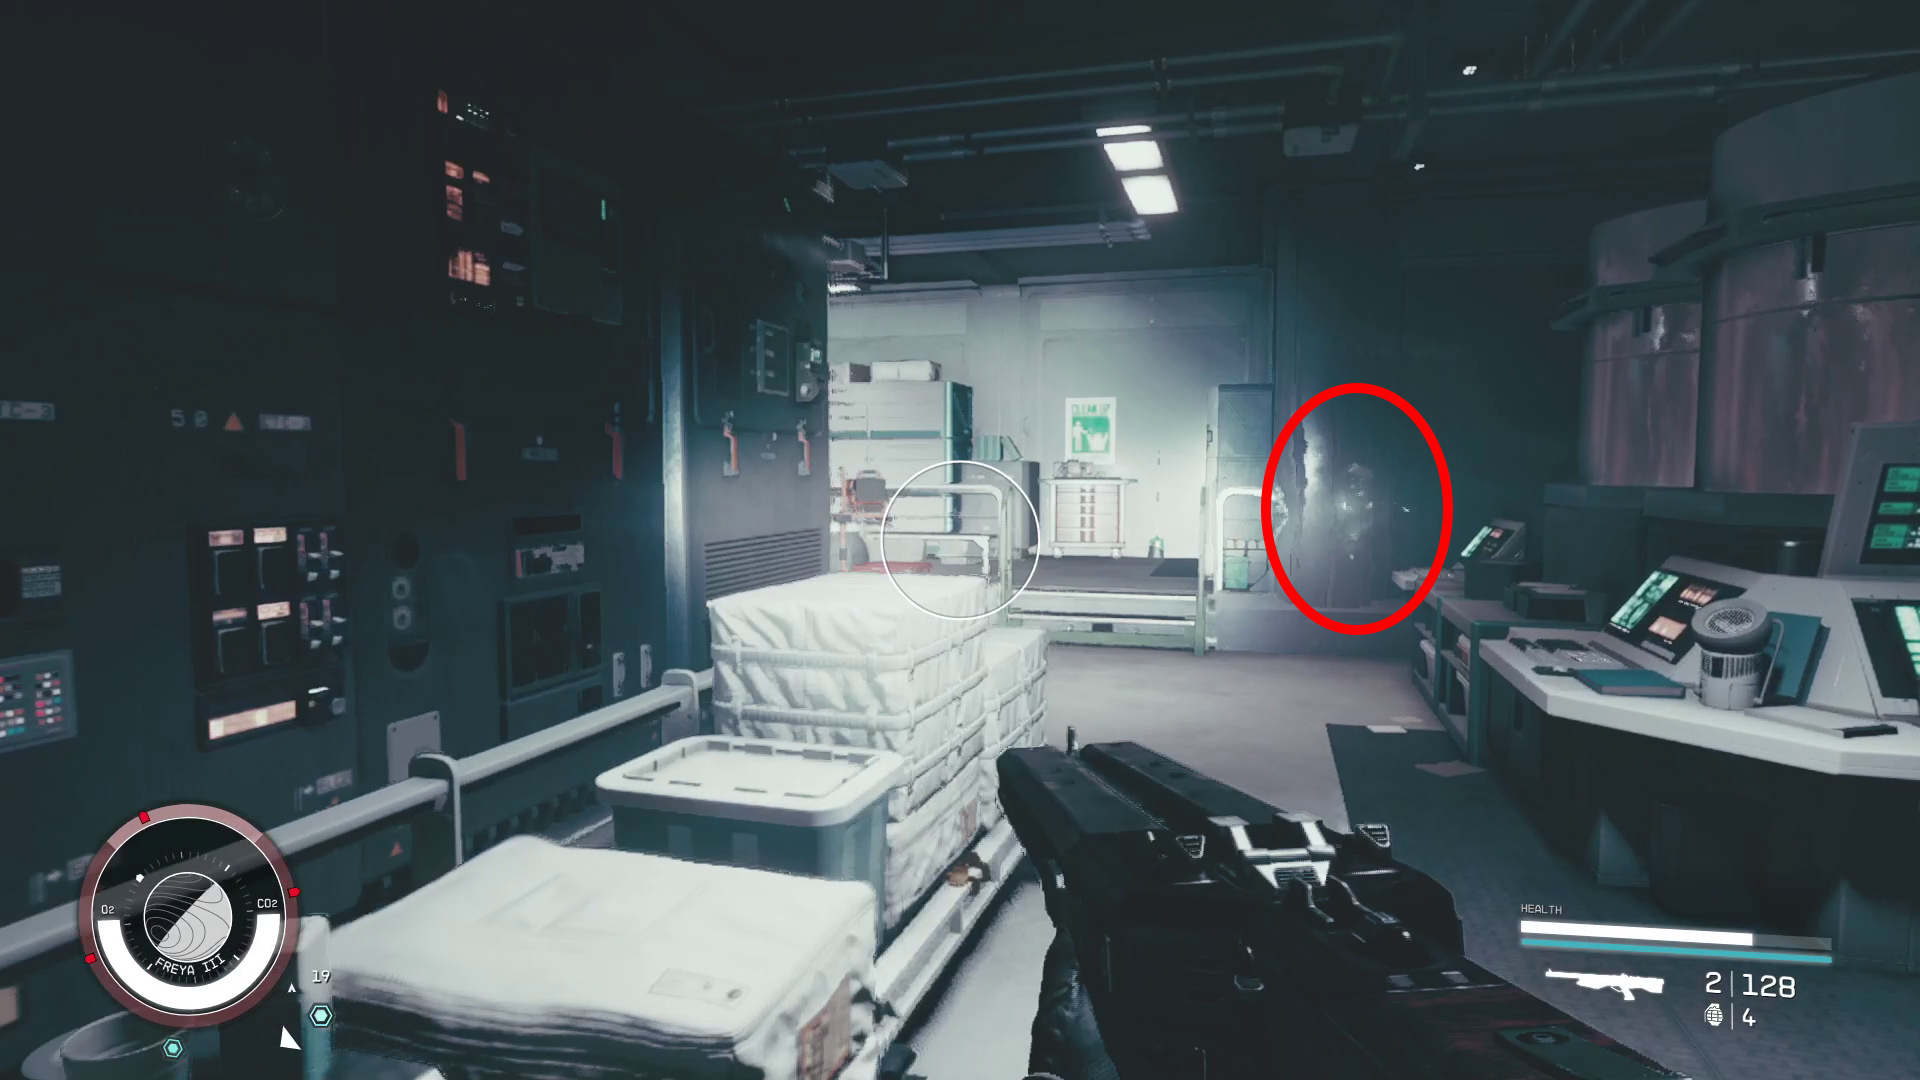
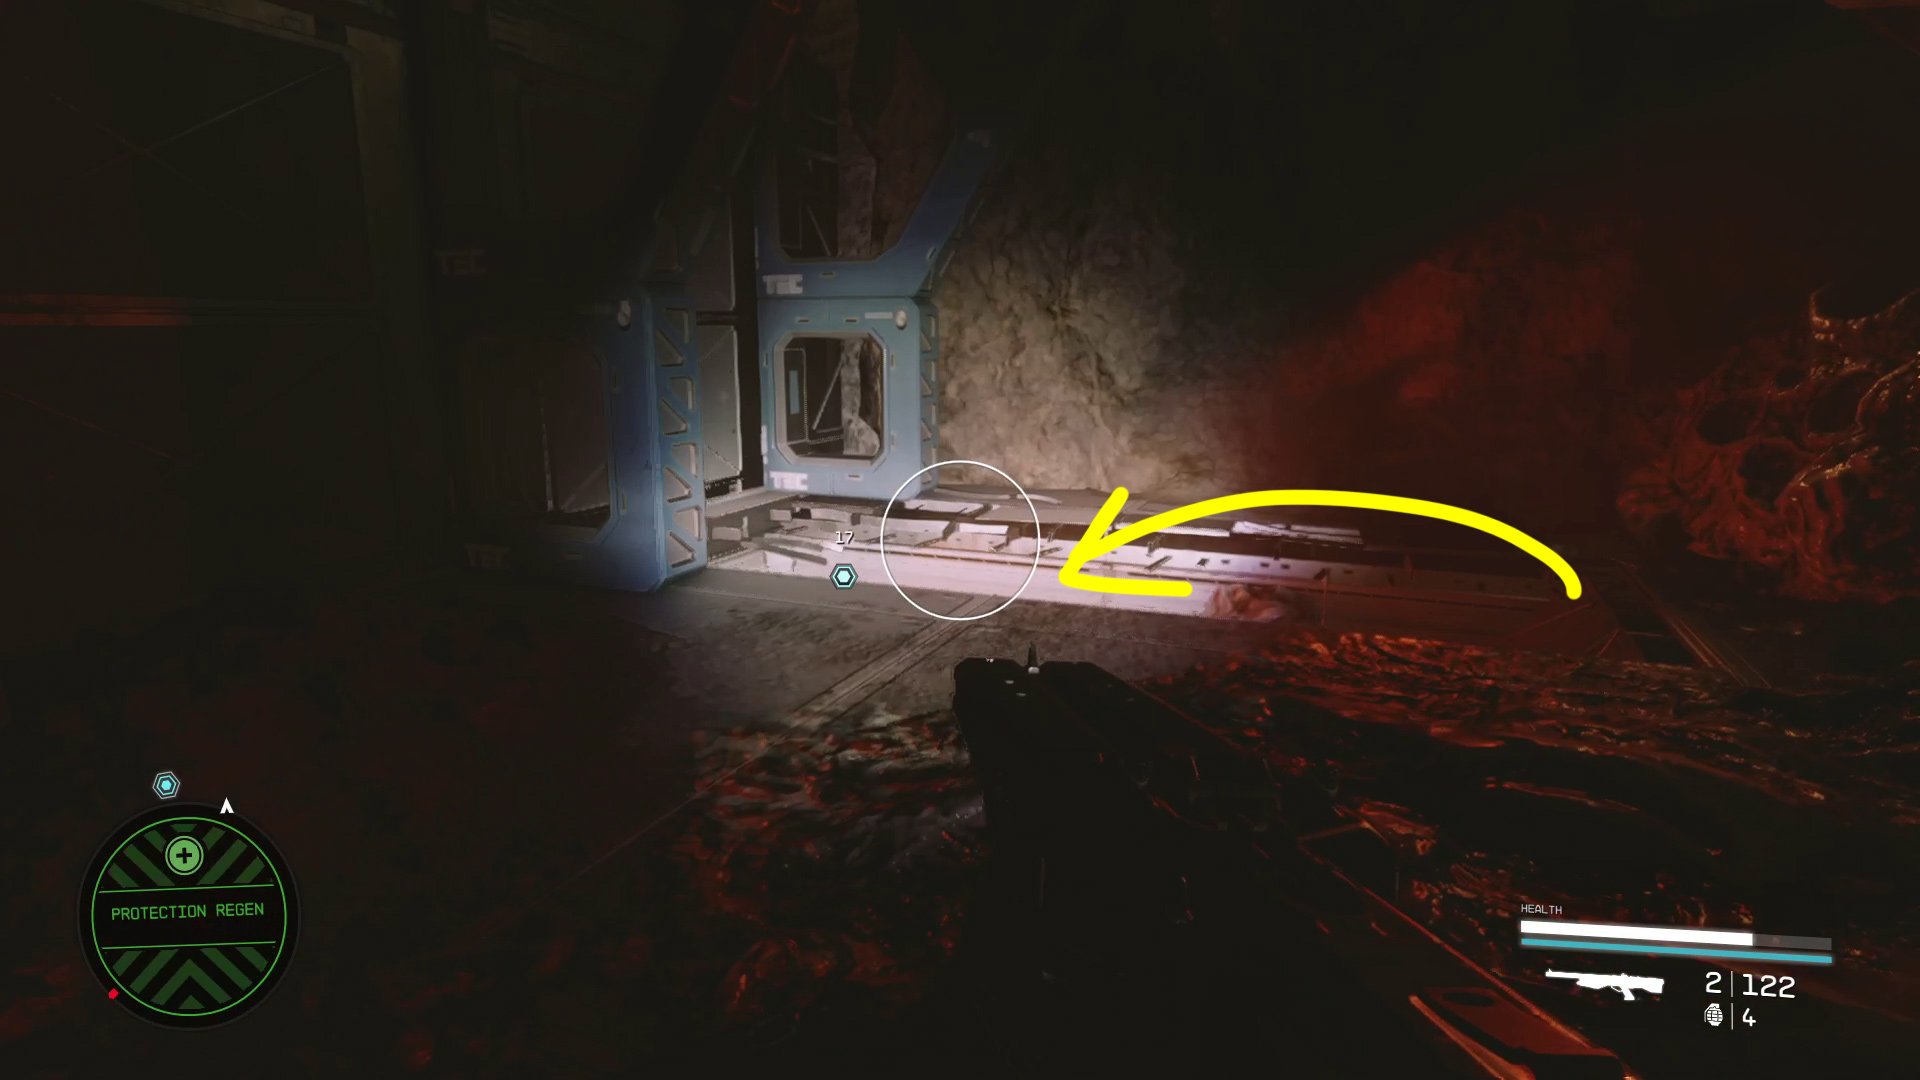
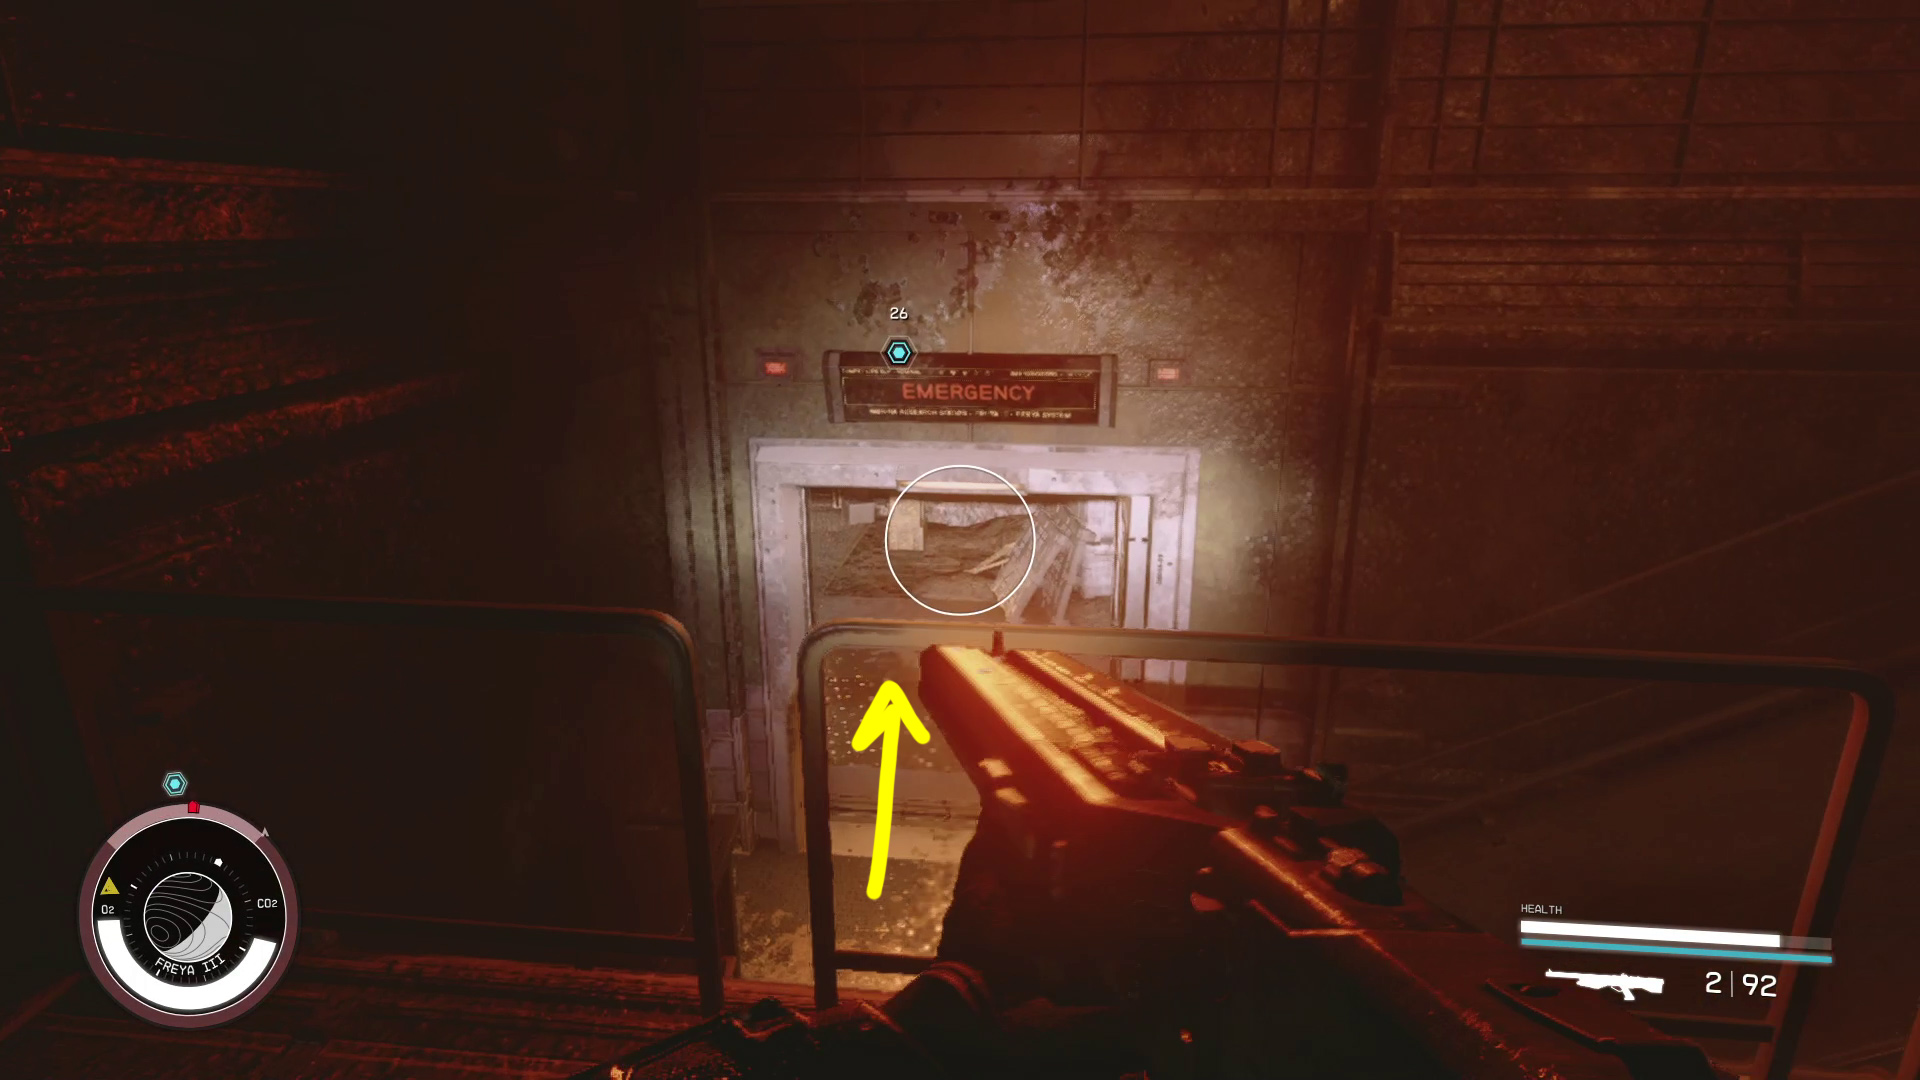
Follow Maria — she’ll leave the office and turn right — and you’ll almost immediately warp to the Ruined Station. Move cautiously through this next area, as enemies will pop up in basically every room. You’ll be facing a dead end, so turn around (Image 8), then go left, back into the Director’s Office. There’s another room to the right as you enter, where you’ll find a safe if you want to loot it. Then leave the director’s office and continue across the room (Image 9) — deal with the enemies that appear — then go through the door on the left marked Emergency (Image 10).
Image 8Image 9Image 10
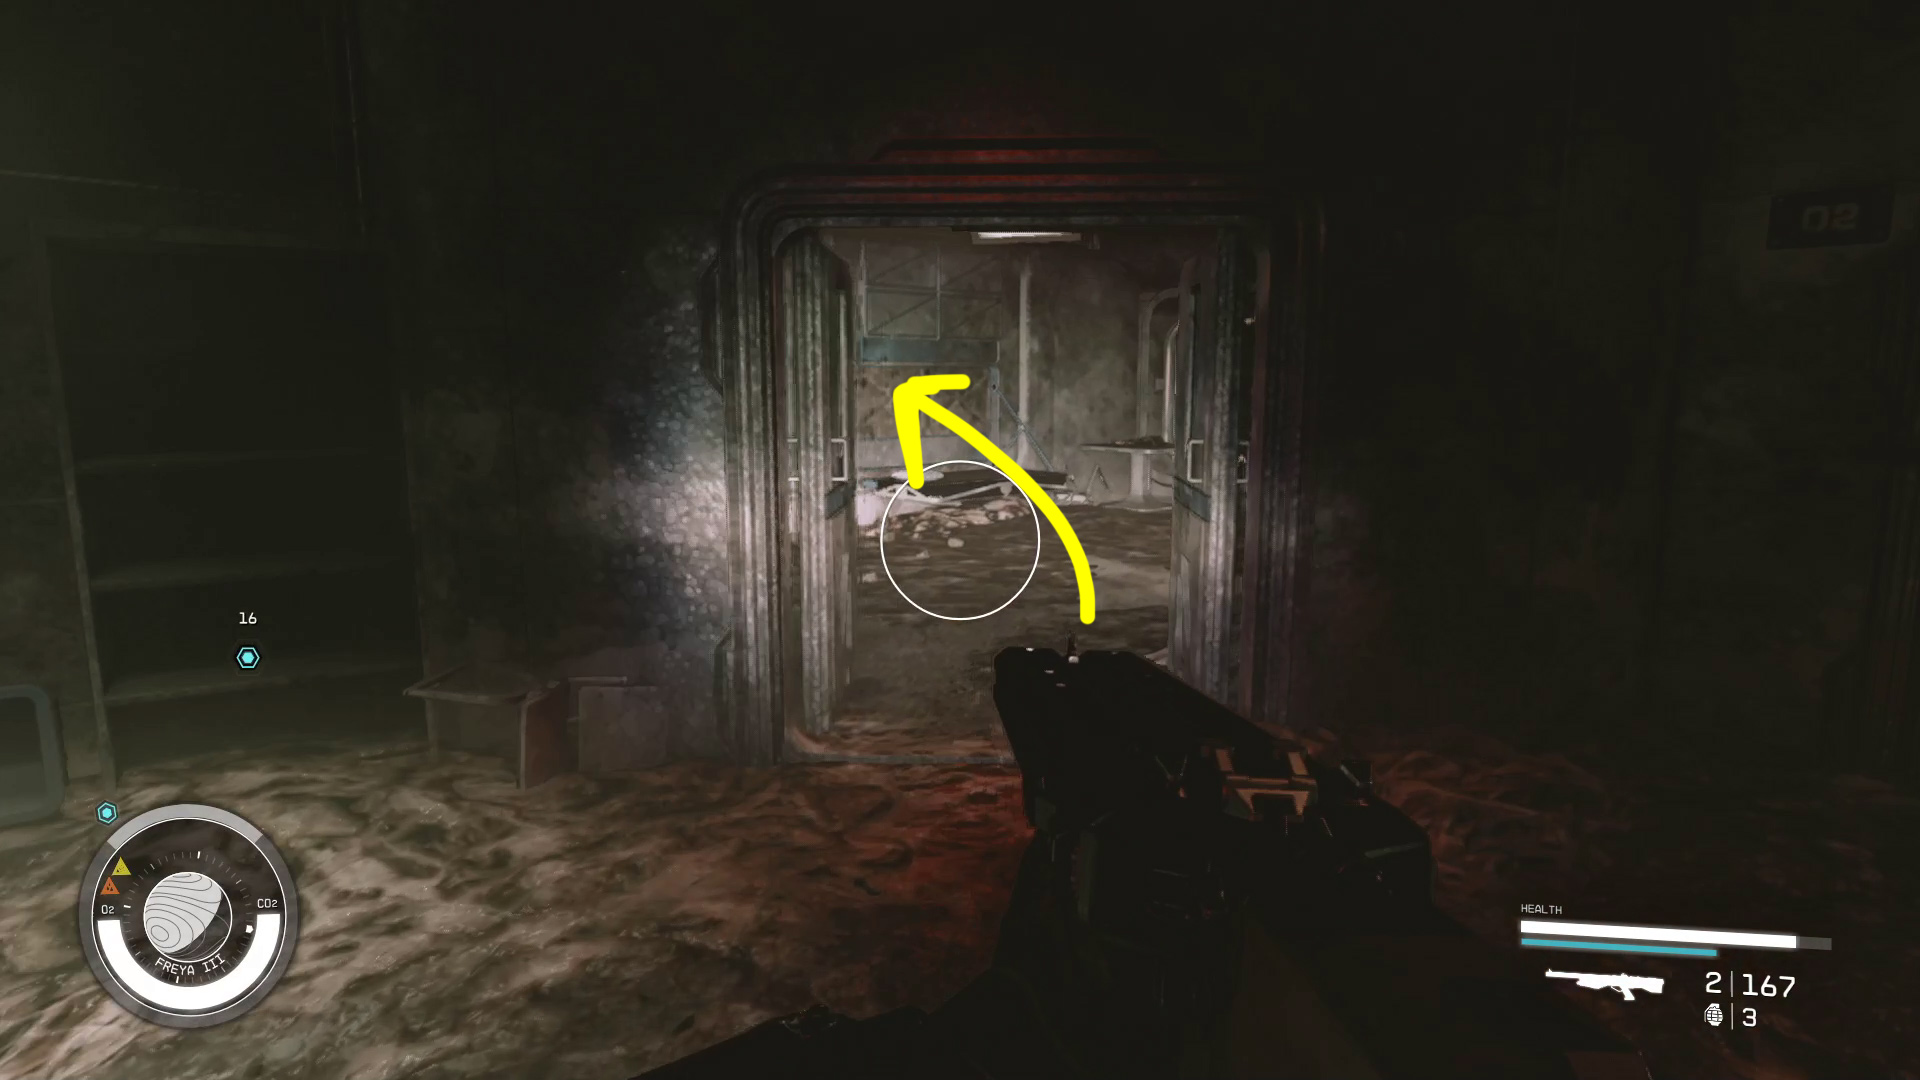
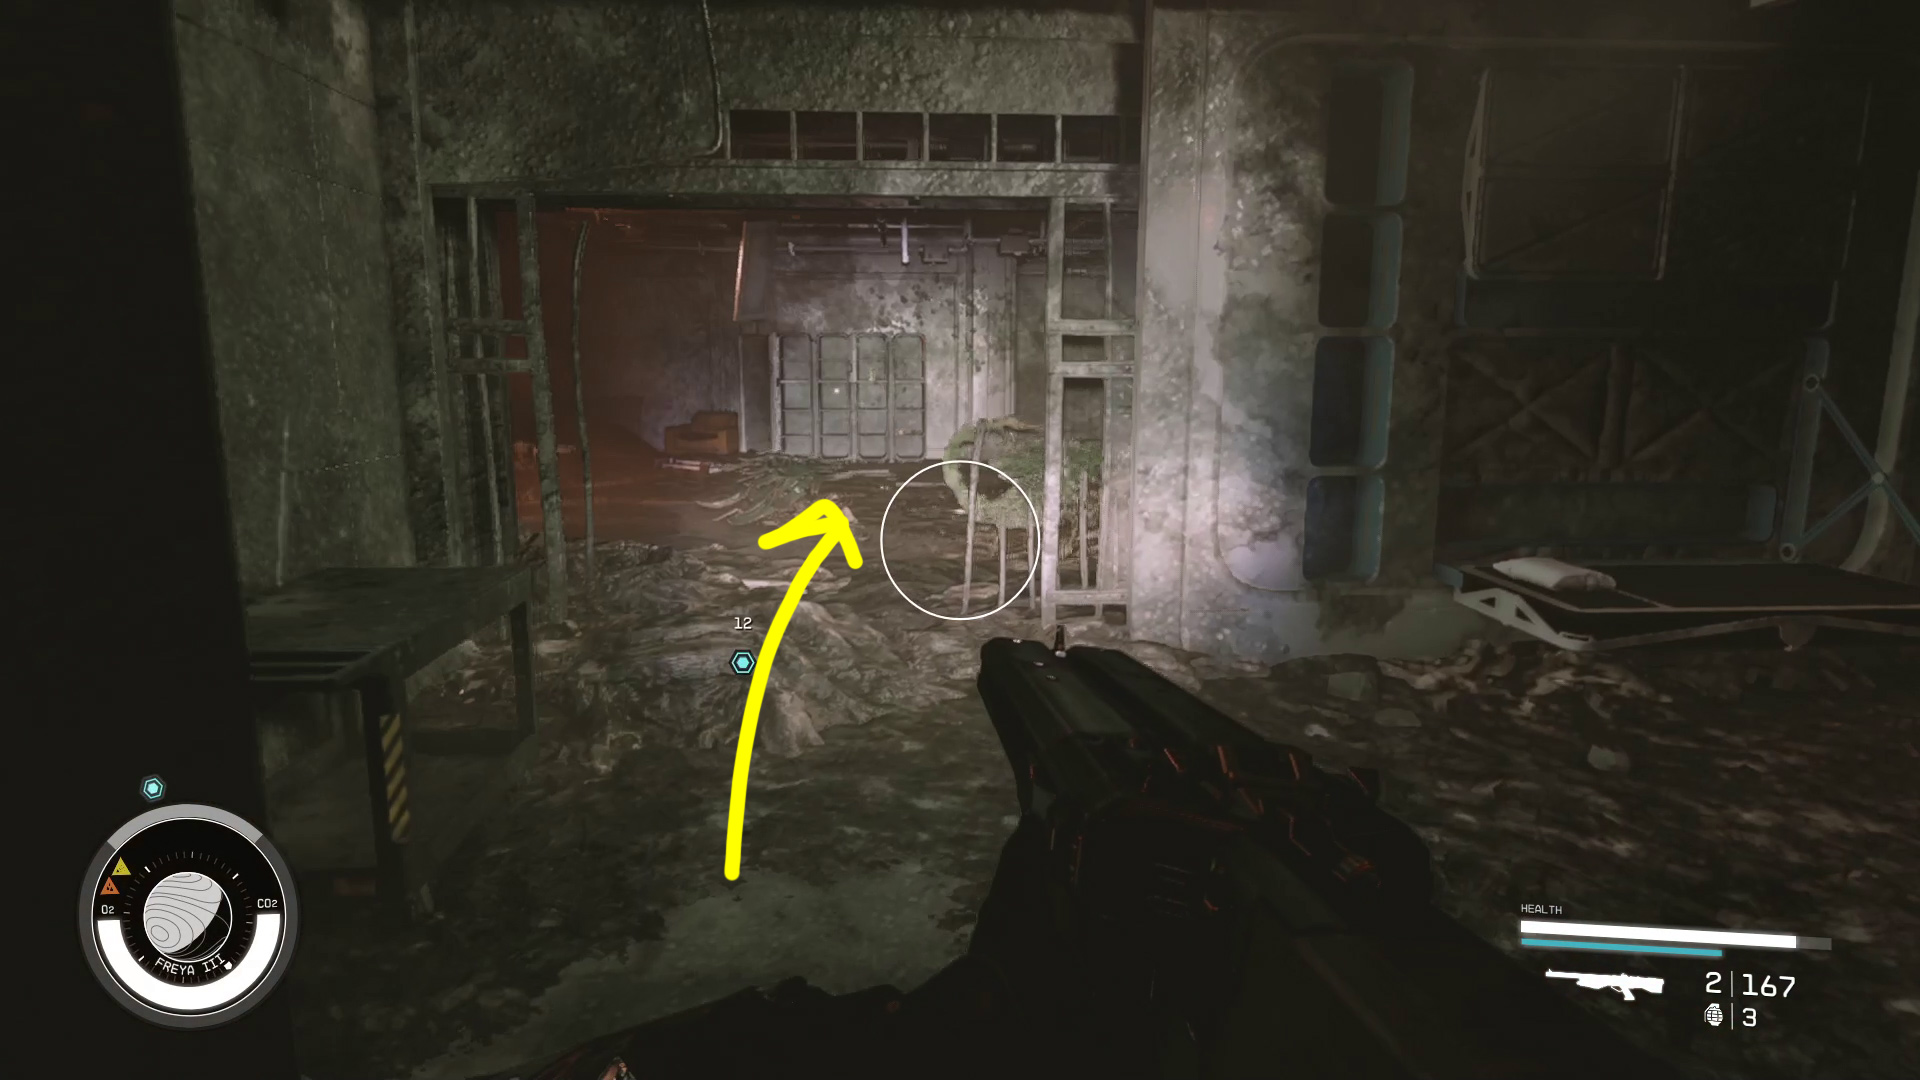
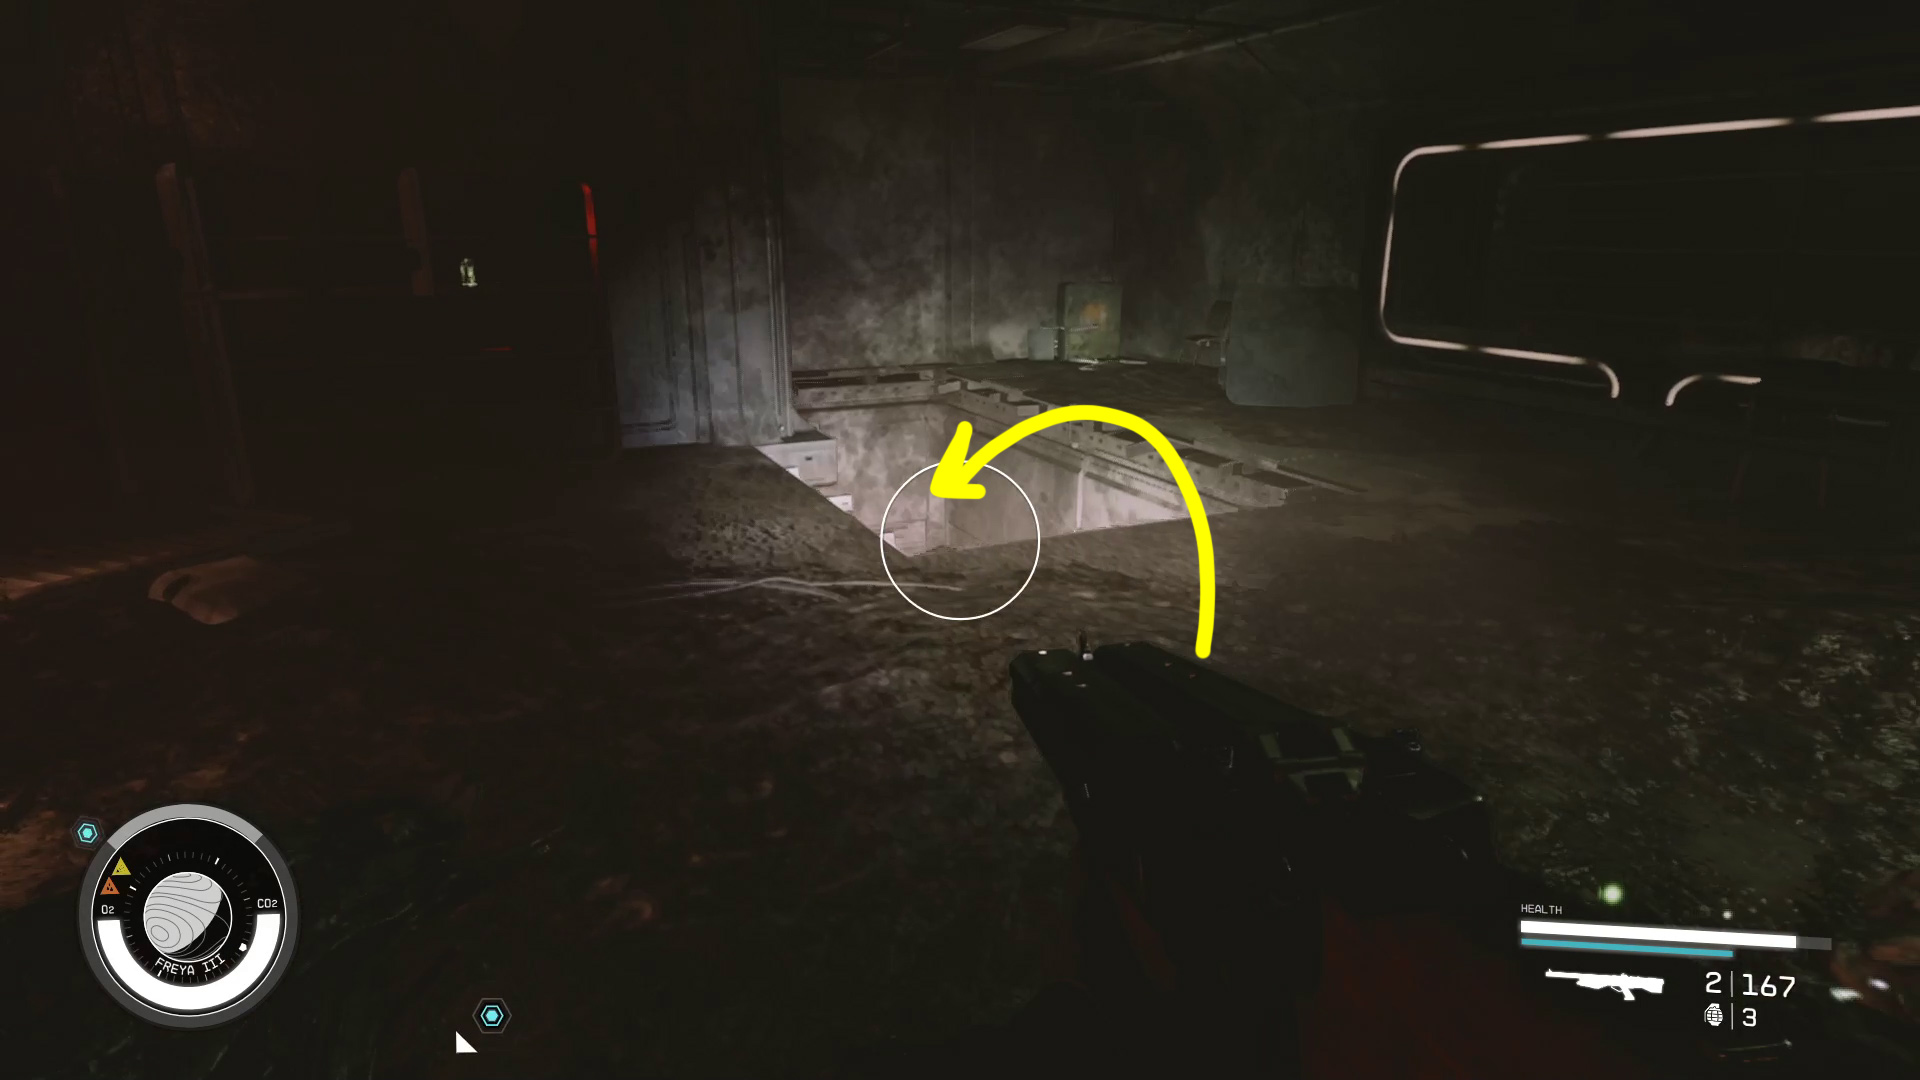
Go through the left door (Image 11) and continue through the next left-hand door as well (Image 12), where you’ll have to fight some more creatures. Then go through the hole in the floor in the following room (Image 13).
Image 11Image 12Image 13
Speak to Raphael (2)/Get to the Lab
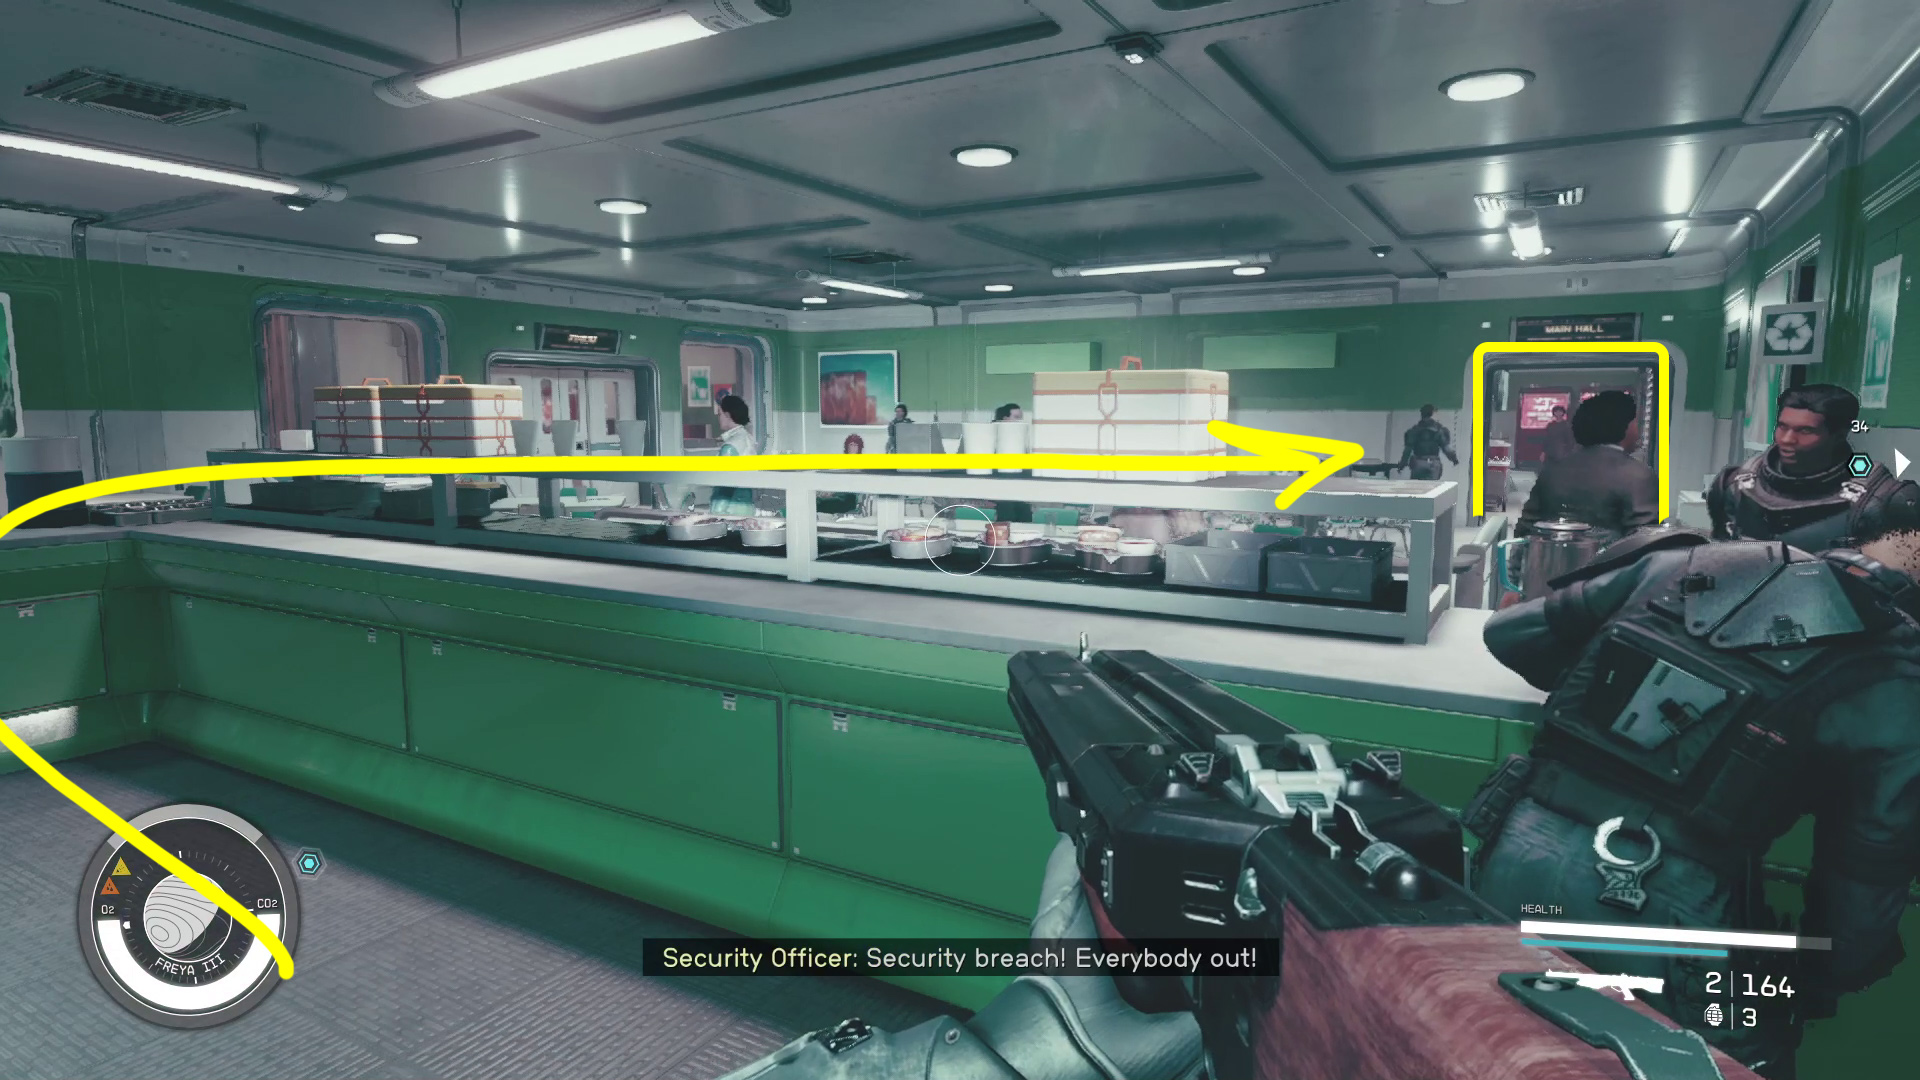
You’ll run into Raphael again. Chat him up as you like, and when the conversation ends you’ll get the Nishina Pantry Keycard. There’s a nearby white door that opens with the pantry key (Image 14) — open it, then head inside, where some Cataxi will appear. Defeat them, then head through the open doorway on the other side of the room — doing so will teleport you back to the Intact Station. Cross the dining room and enter the Main Hall (Image 15) to teleport back to the Ruined Station.
Image 14Image 15
You’ll be back where you were when you teleported out of the pantry — if you turn around, you’ll probably see Raphael, and/or the door you unlocked with the key. Continue away from the entrance to the pantry, through the doorway and generally towards the objective marker (Image 16). A number of Cataxi will spawn in this room, so be ready.
Once the enemies are defeated, go into the security room (Image 17) and use the computer there. Select “Security Logs”, then select “Download Survey Data” — this will earn you some XP, plus survey data for the planet. You can also browse the rest of the computer’s files if you want to learn more about the Cataxi.
Image 16Image 17
Speak to Raphael (3)
Raphael should have caught up by now — go back into the previous room (the one visible in Image 16) and wait for him to find the dead end. Stand close enough, and he’ll start talking to you. Ask him any questions you like, and then leave when you’re ready.
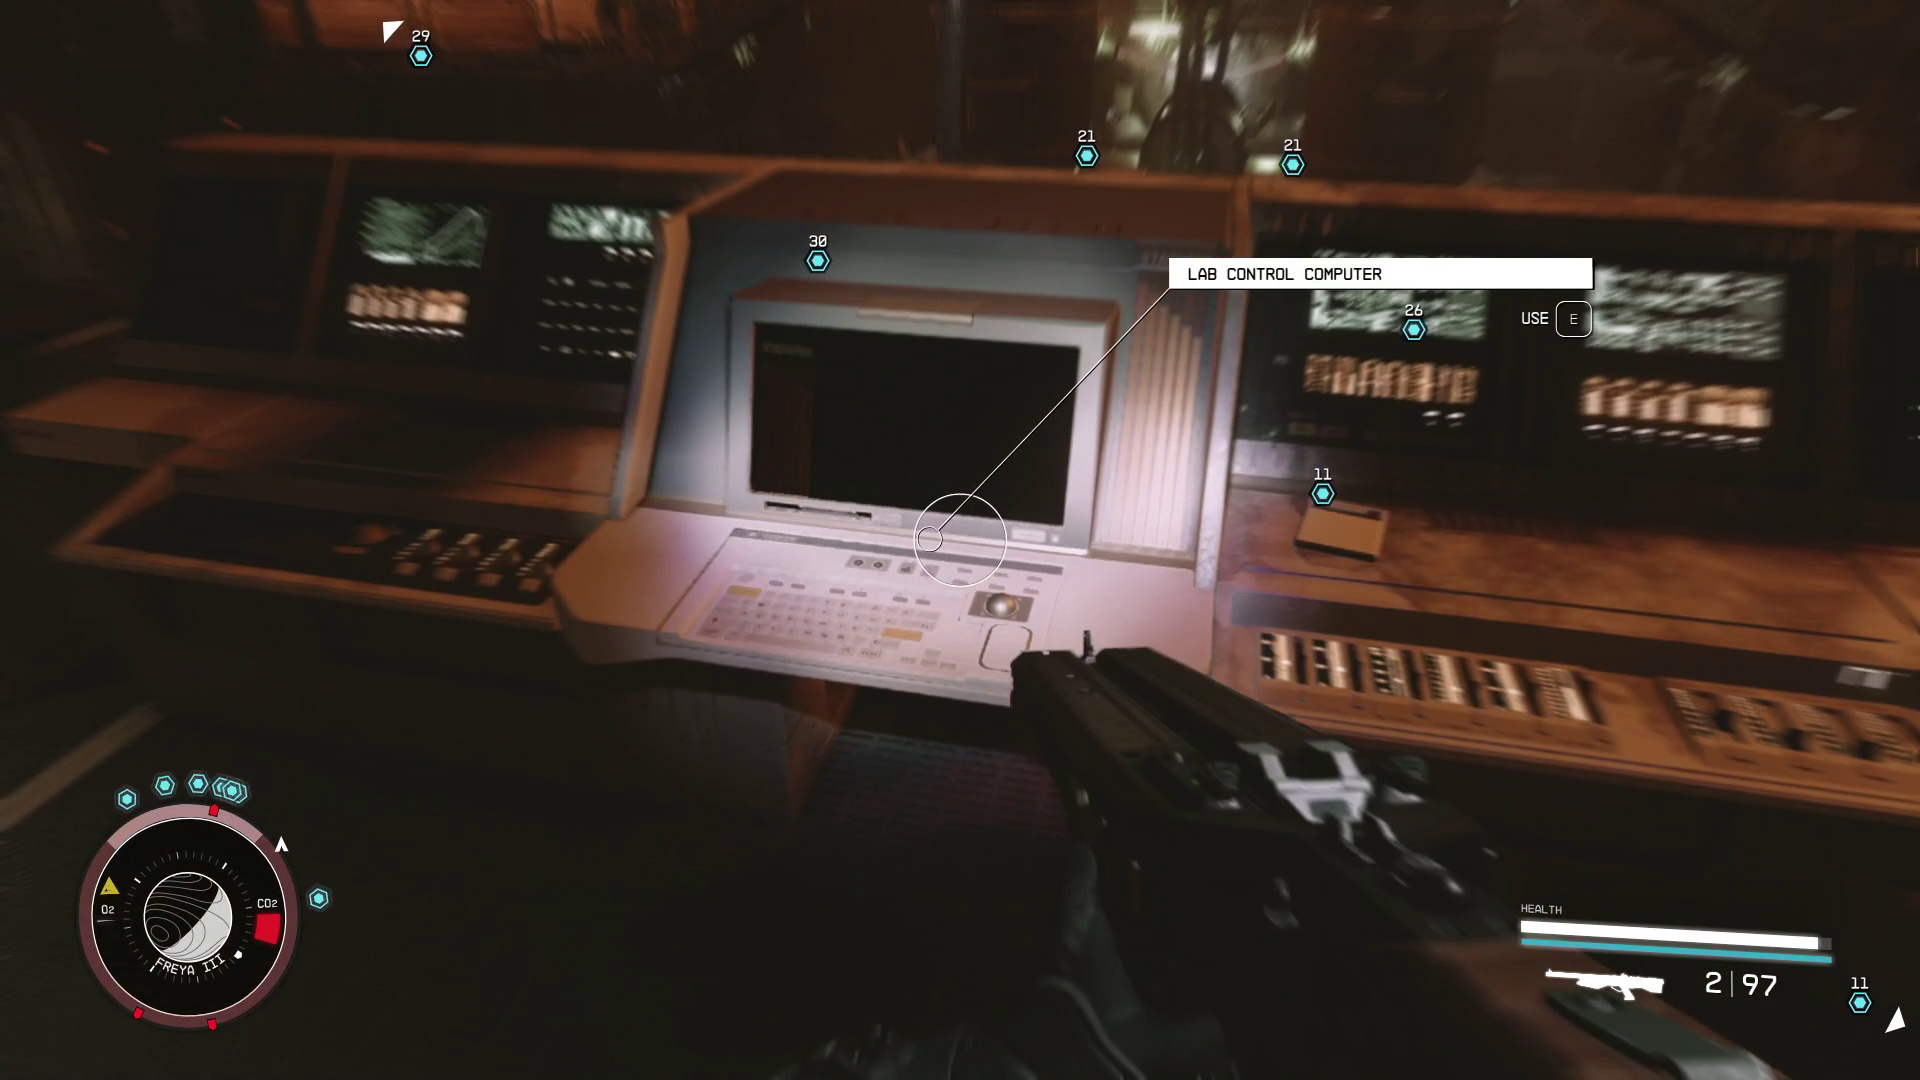
Get to the Lab
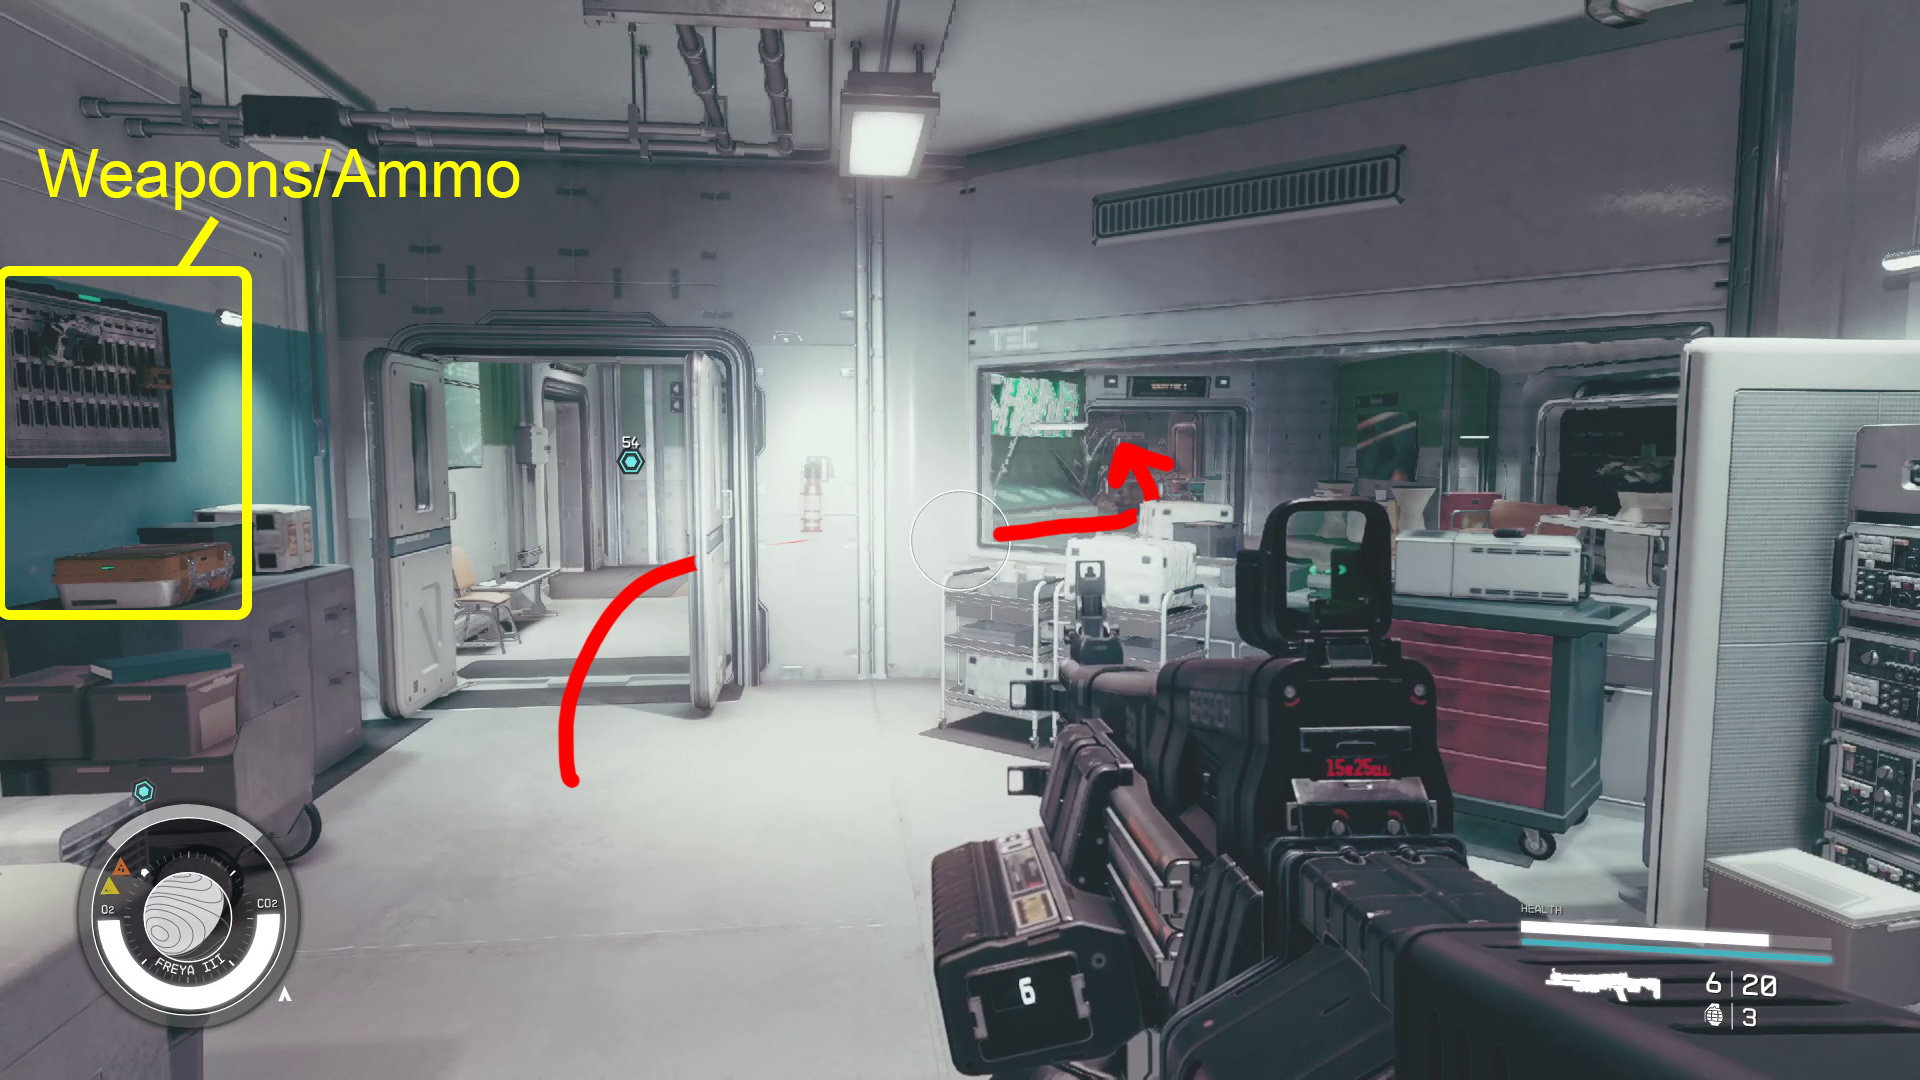
Go back into the Security office (see Image 17), and once you get far enough in, you’ll warp to the Intact Station. Talk to Ethan, and he’ll open the doors for you. Before you leave, speak with him again (and save first if you like to savescum Persuasion attempts). Ask him “Are there any scorpions native to this planet” — doing so will reveal the dialog opion to [Persuade] him to give you something to help fight the Cataxi. Succeeding will net you the “Experiment A-7” shotgun, plus some ammo for it — very useful in fighting the Cataxi.
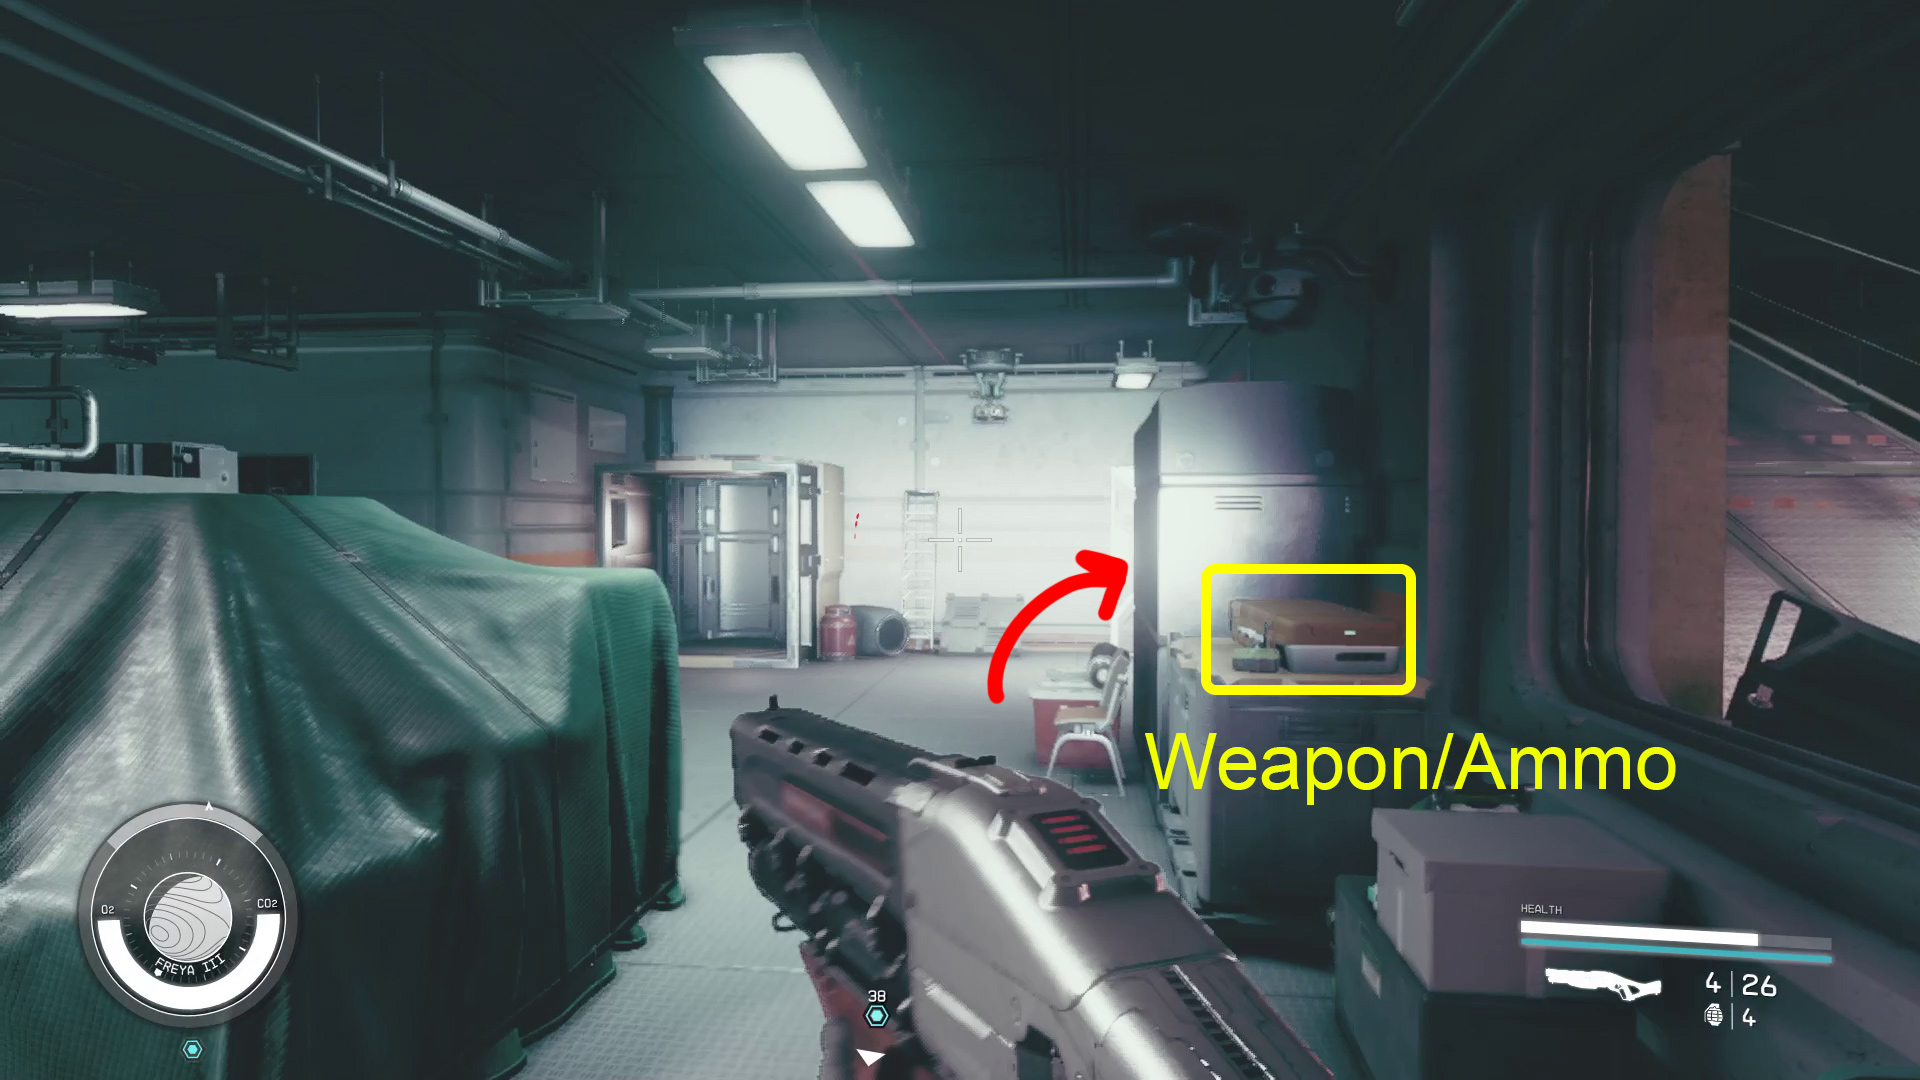
From Ethan, turn left and loot the ammo/weapon case on the file cabinet before heading through the open doors and continuing into the Main Hall (Image 18). Keep going straight down the hall, and you’ll warp to the Ruined Station, where some Cataxi will be crawling out of the ground. Continue forward through the large doorway (don’t miss the First Aid item on the right side of the doorway ahead). Beyond, you’ll find two doorways (Image 19) — the one on the right has some loot, while the one on the left is the way forward.
Image 18Image 19
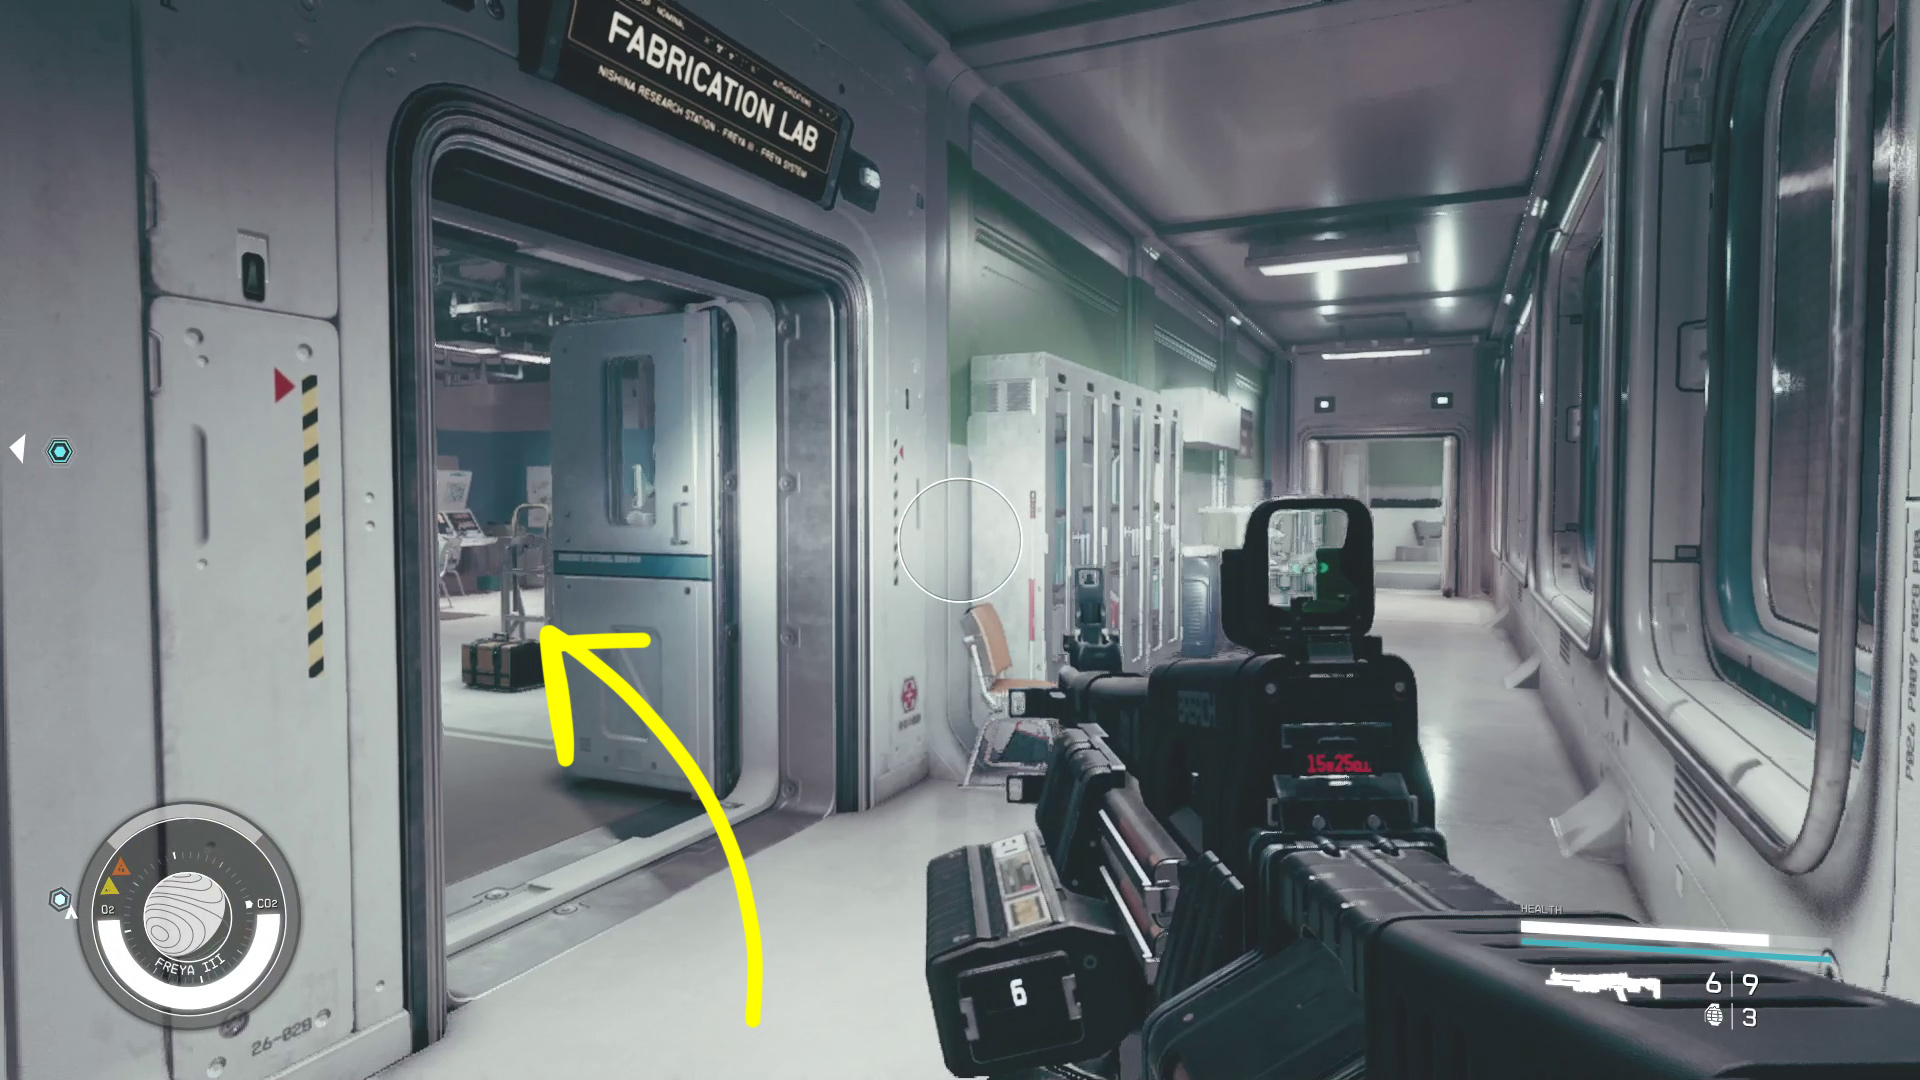
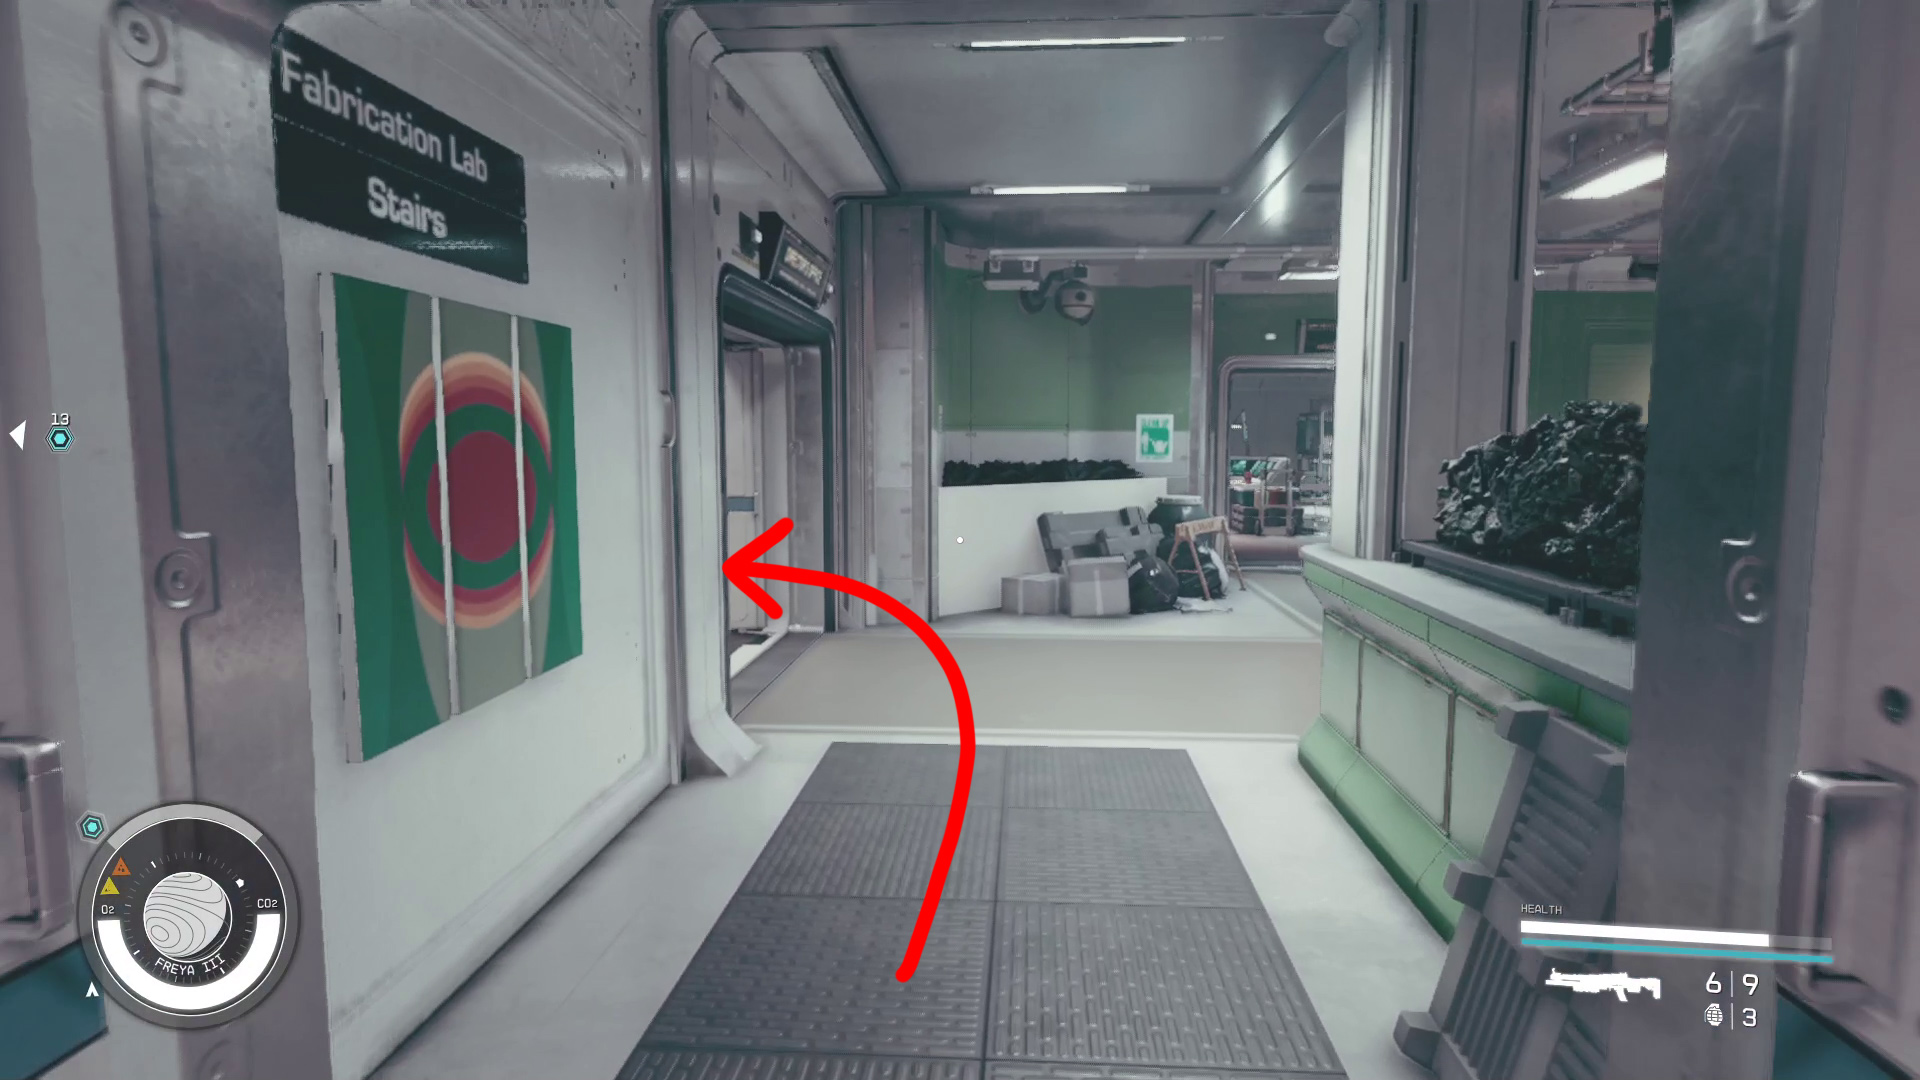
You’ll run into some enemies after going through the left-hand doorway. Dispatch them and continue forward, turning left and going through another set of open doors to enter a large room where more enemies will spawn. Take them out and head through the door on the far side of the left-hand wall (Image 20), and continue up the stairs. You’ll warp back to the Intact Station — keep going up the stairs, then take your first left into the Fabrication Lab (Image 21).
Image 20Image 21
Speak to Maria/Assist Maria
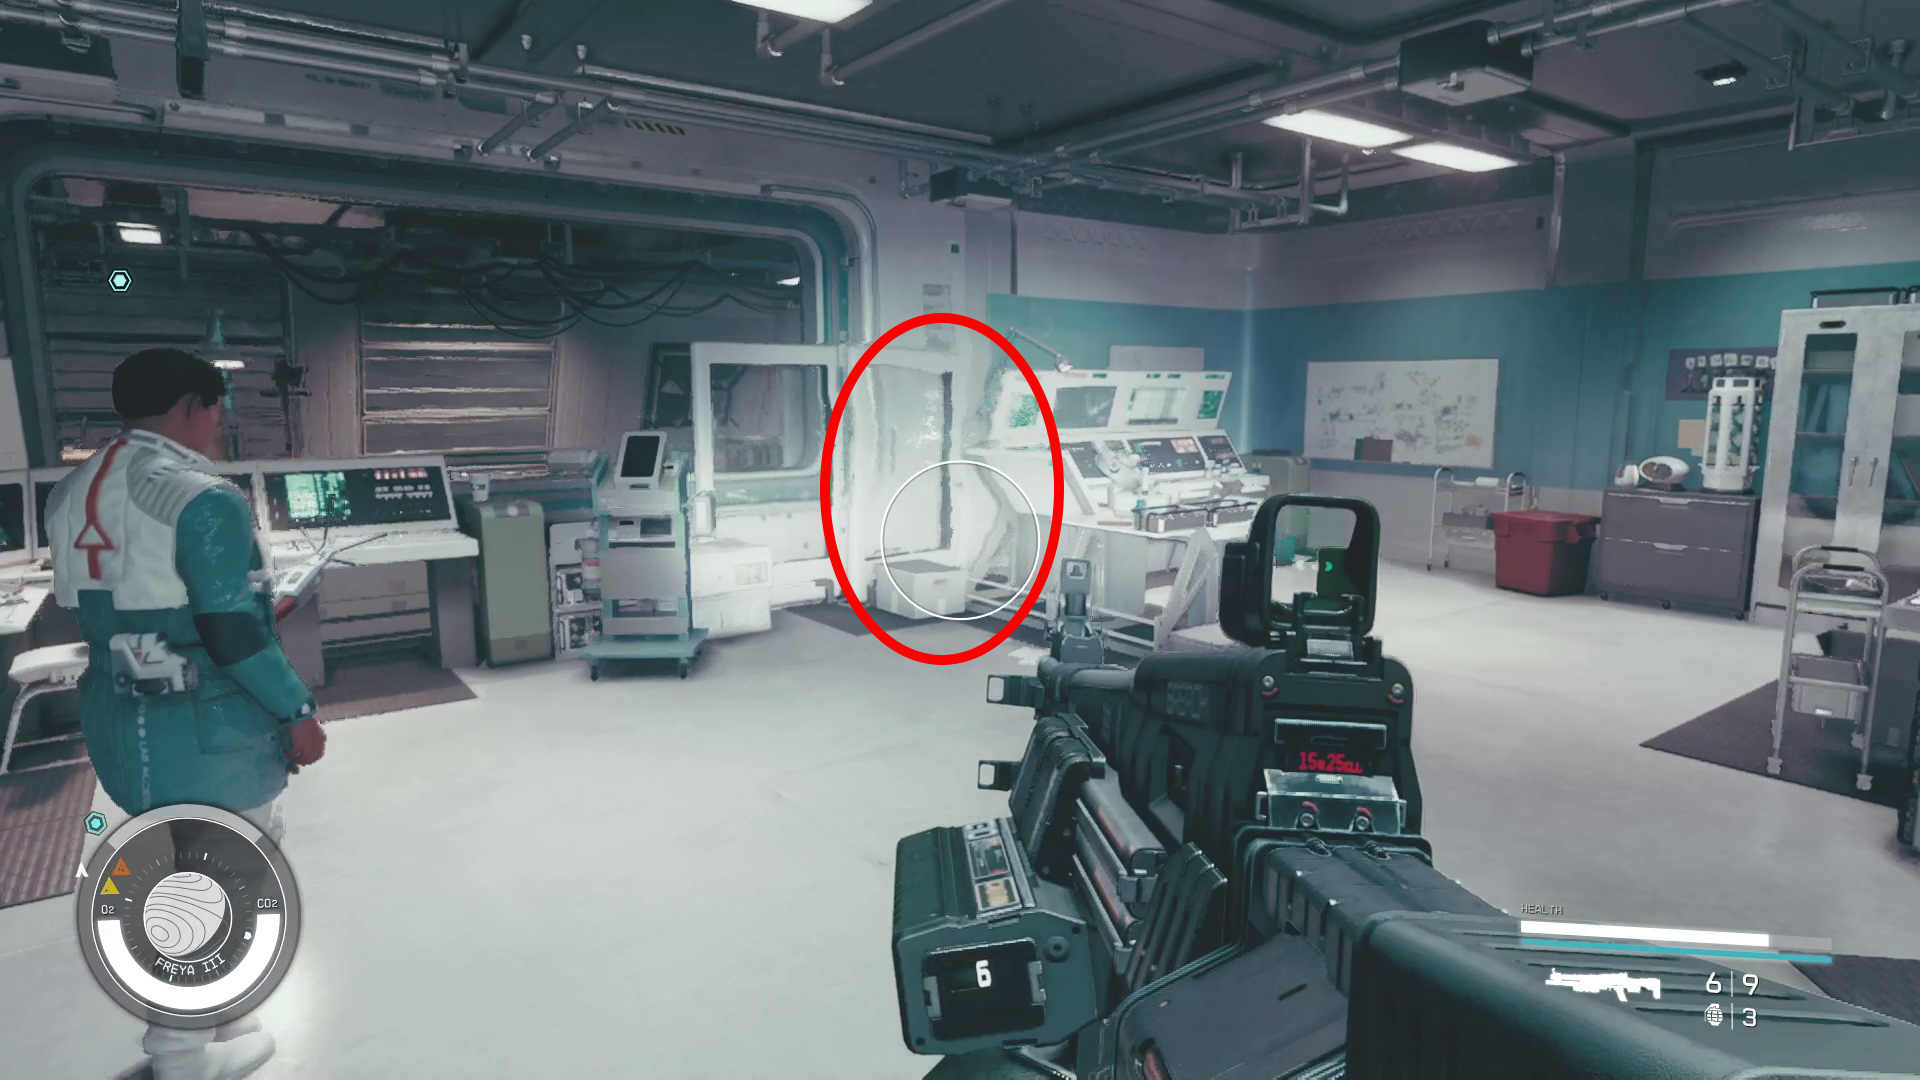
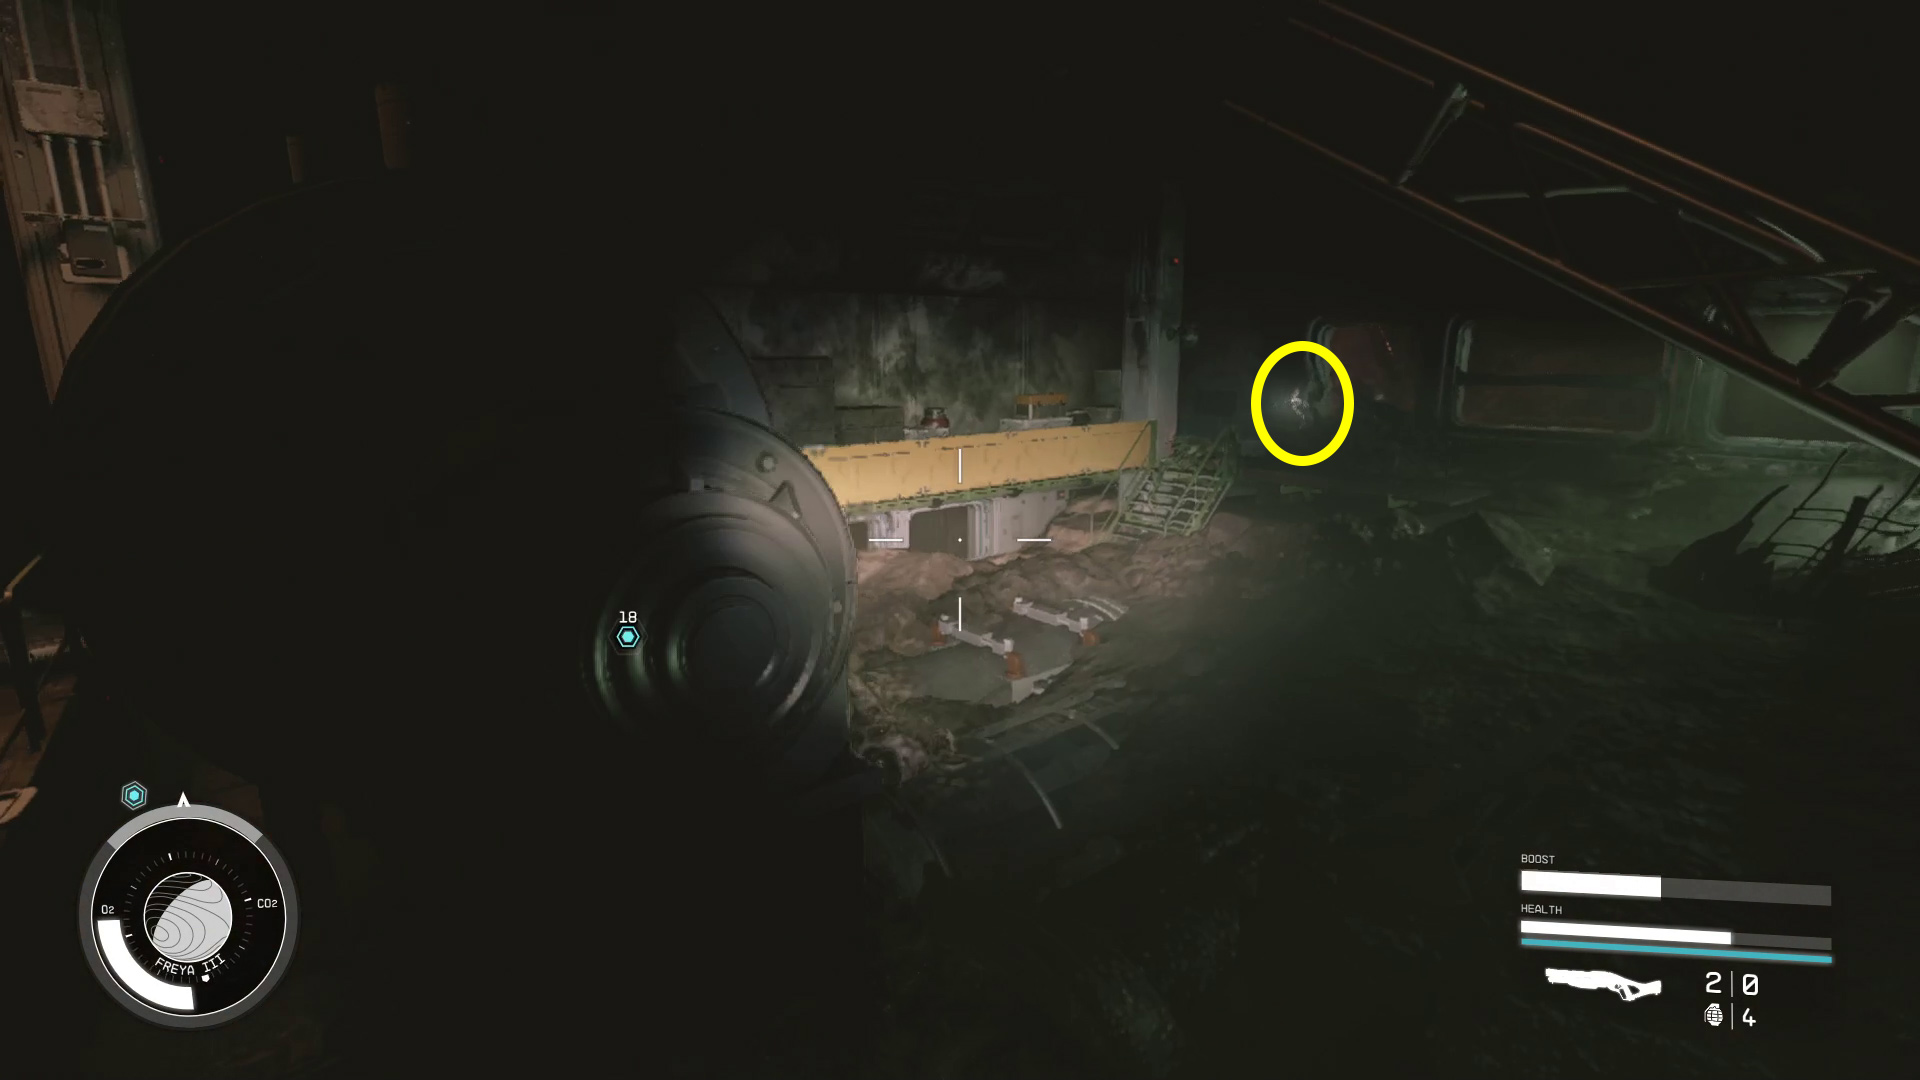
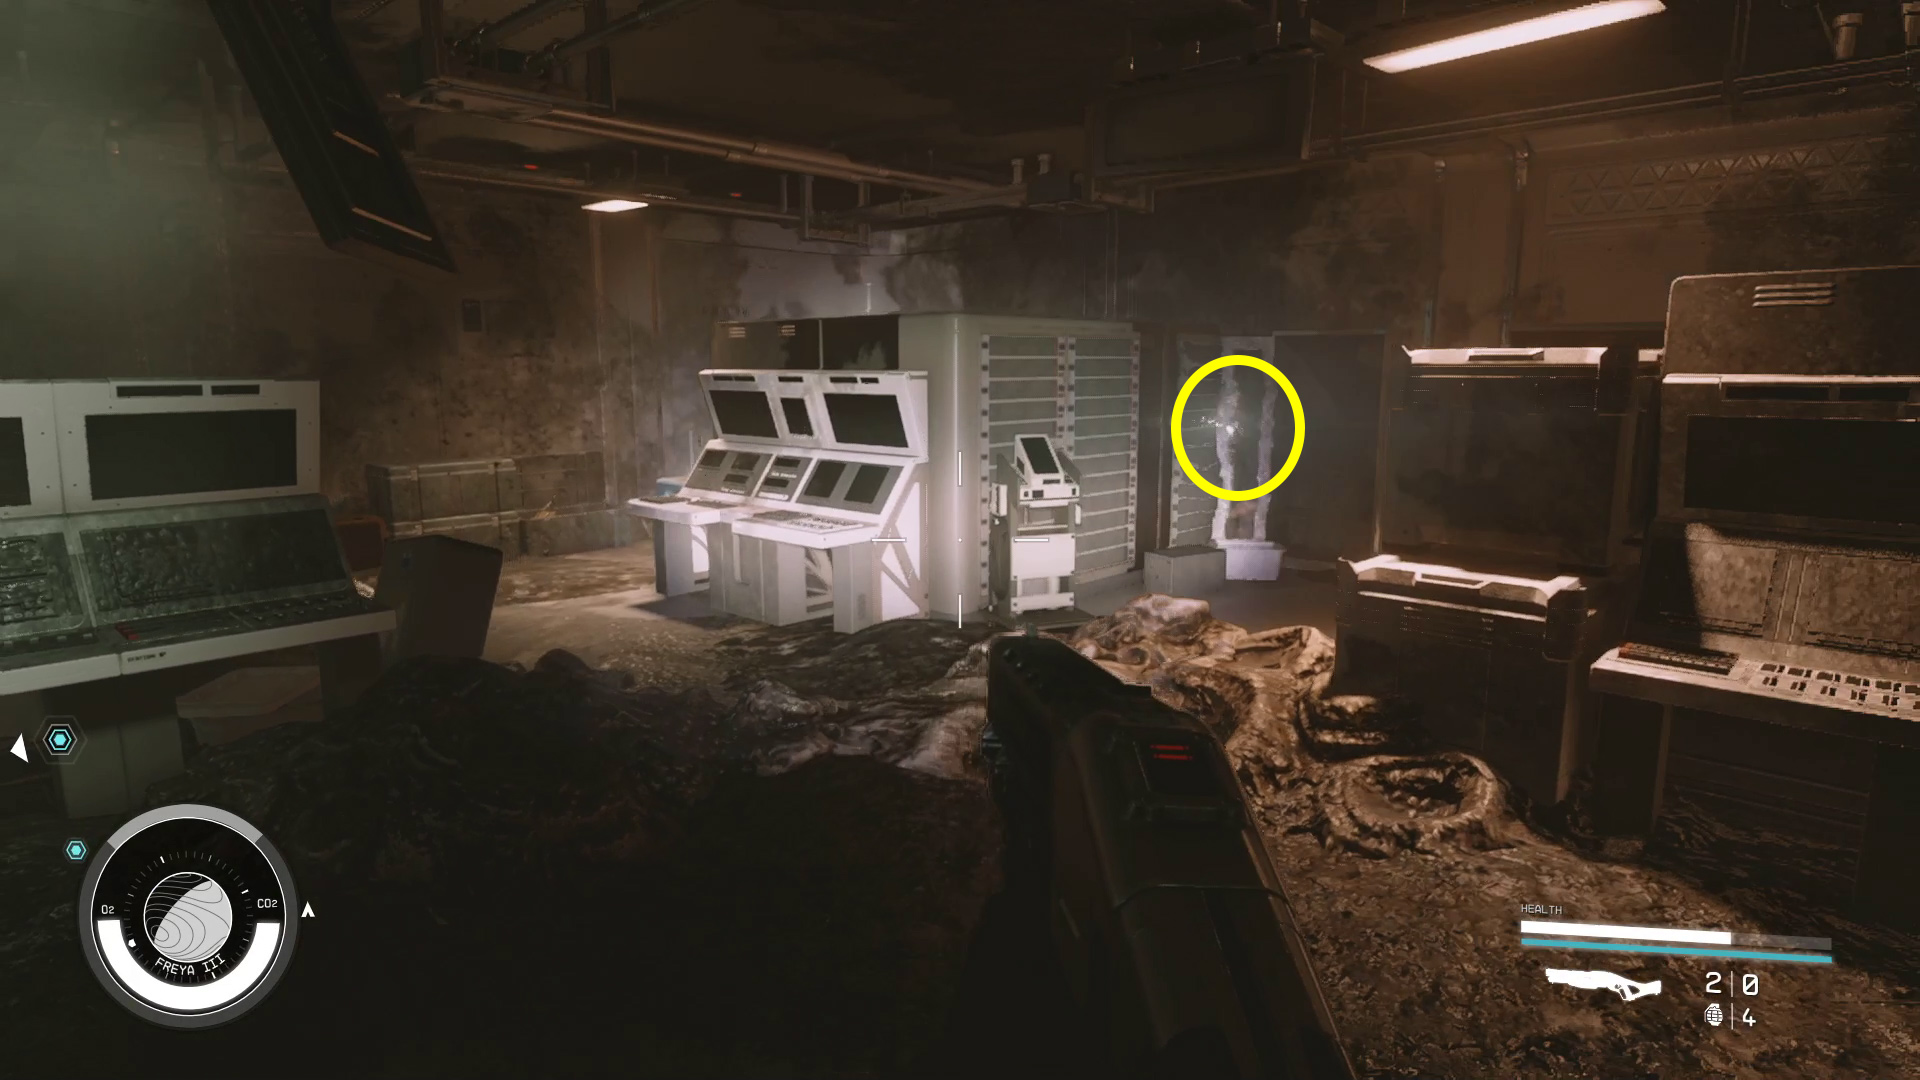
On your left as you enter is Maria Hughes — start a conversation with her, and after you pick a dialog option, she’ll do some science in front of you. While you’re waiting, you can check the nearby counters for loot. After a bit, she’ll say “What the…” and then “Ok. Ok. It looks safe to approach…”. At this point, a microdistortion will spawn on the other side of the lab (Image 22). Walk over to it and wait.
Image 22
Stand in the Distortion/Assist Maria
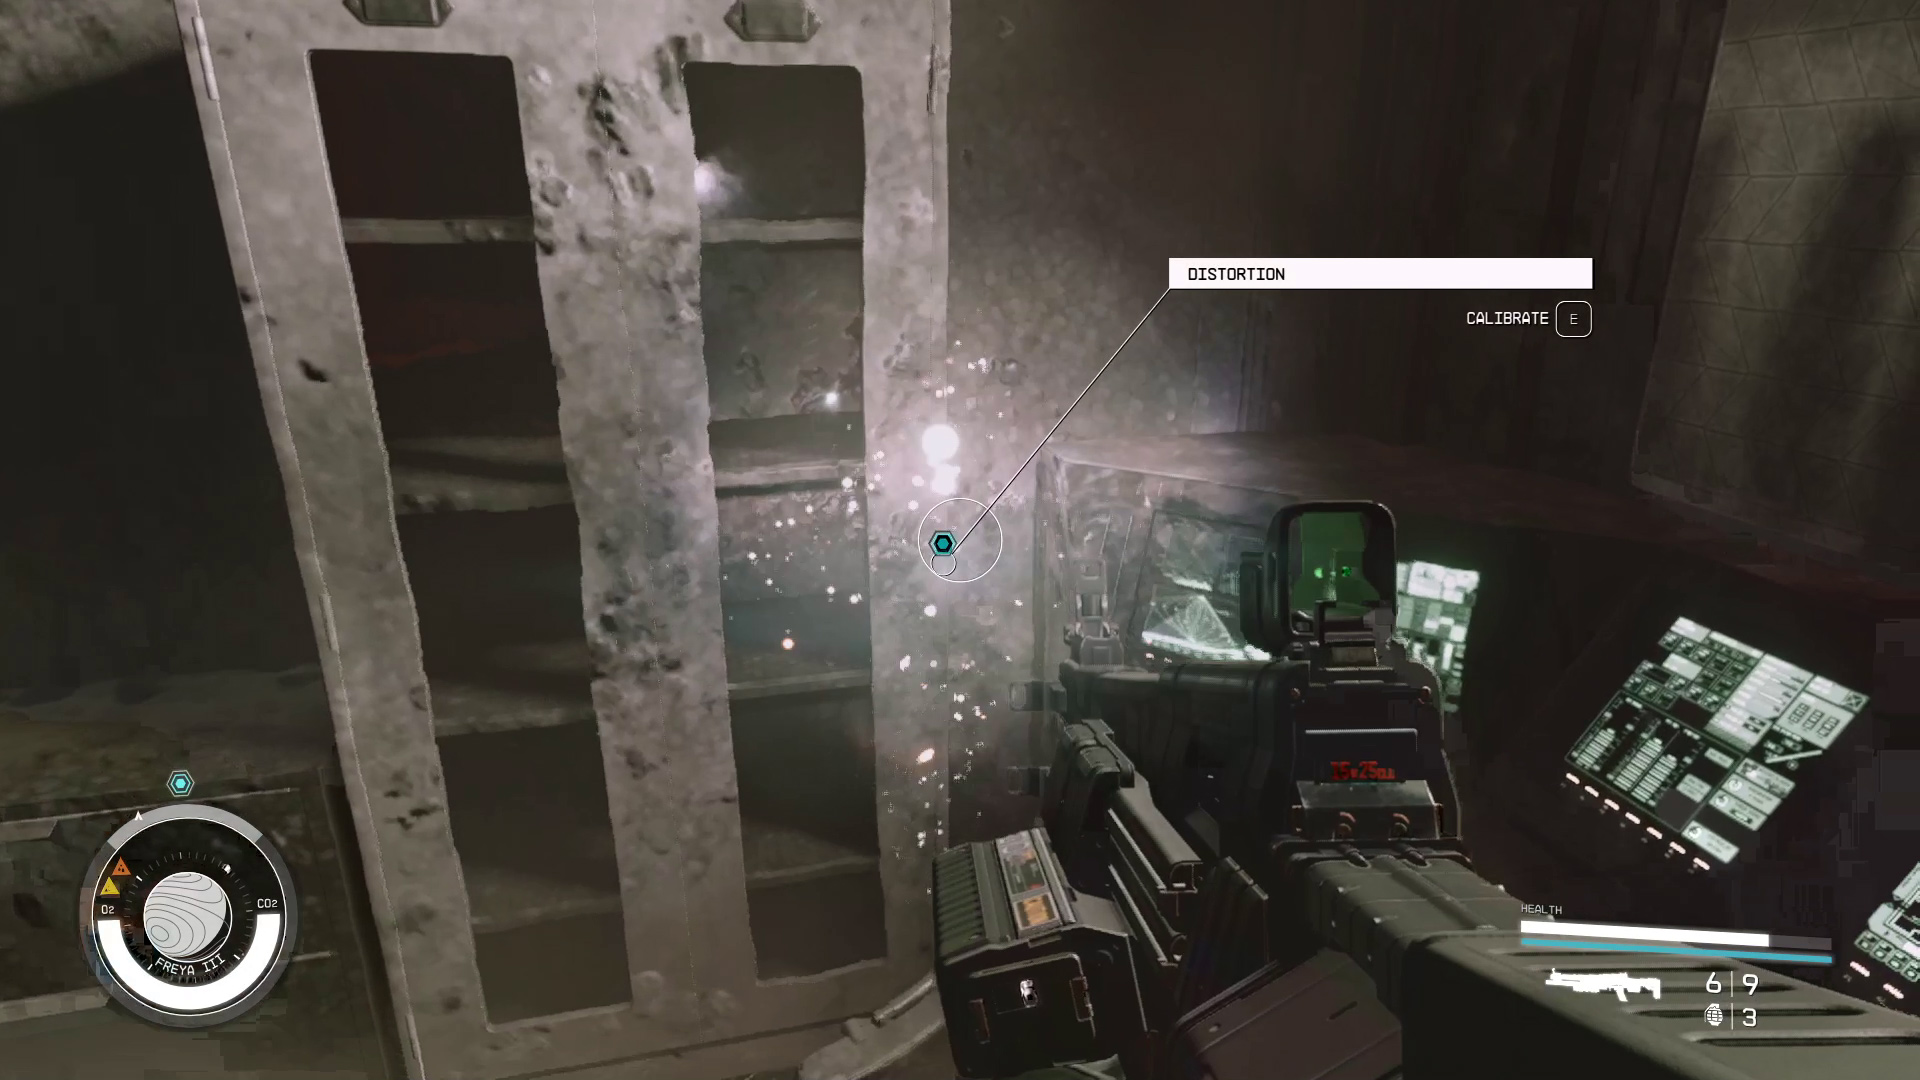
When Maria asks you to, stand in the distortion. She’ll make some adjustments, and you’ll warp to the Ruined Station. Across the lab from you, your objective marker is indicating a Probe Control Unit (Image 23). Go pick it up, then turn around and go to the distortion indicated by the objective marker — when you get close enough, you’ll get a prompt to Calibrate (Image 24) . Press the indicated button, and you’ll find yourself back in the Intact lab with Maria.
Image 23Image 24
Speak to Maria/Speak to Director Patel
Maria will run over and talk to you again. She’ll explain what you need to do next, and then tell you to go speak to Director Patel again.
For the rest of this mission, you’ll be able to switch between the Ruined Station and the Intact Station by interacting with the distortions scattered throughout the station. Doing so will be necessary at certain points to proceed through the facility and complete the mission.
Head out into the hall (Image 25) and go left, then continue until you can take a left into the Director’s Office (Image 26). Inside, speak to Patel, who will help you understand the difficult choice you’ll soon face (but don’t worry, there’s a third, good option).
Image 25Image 26
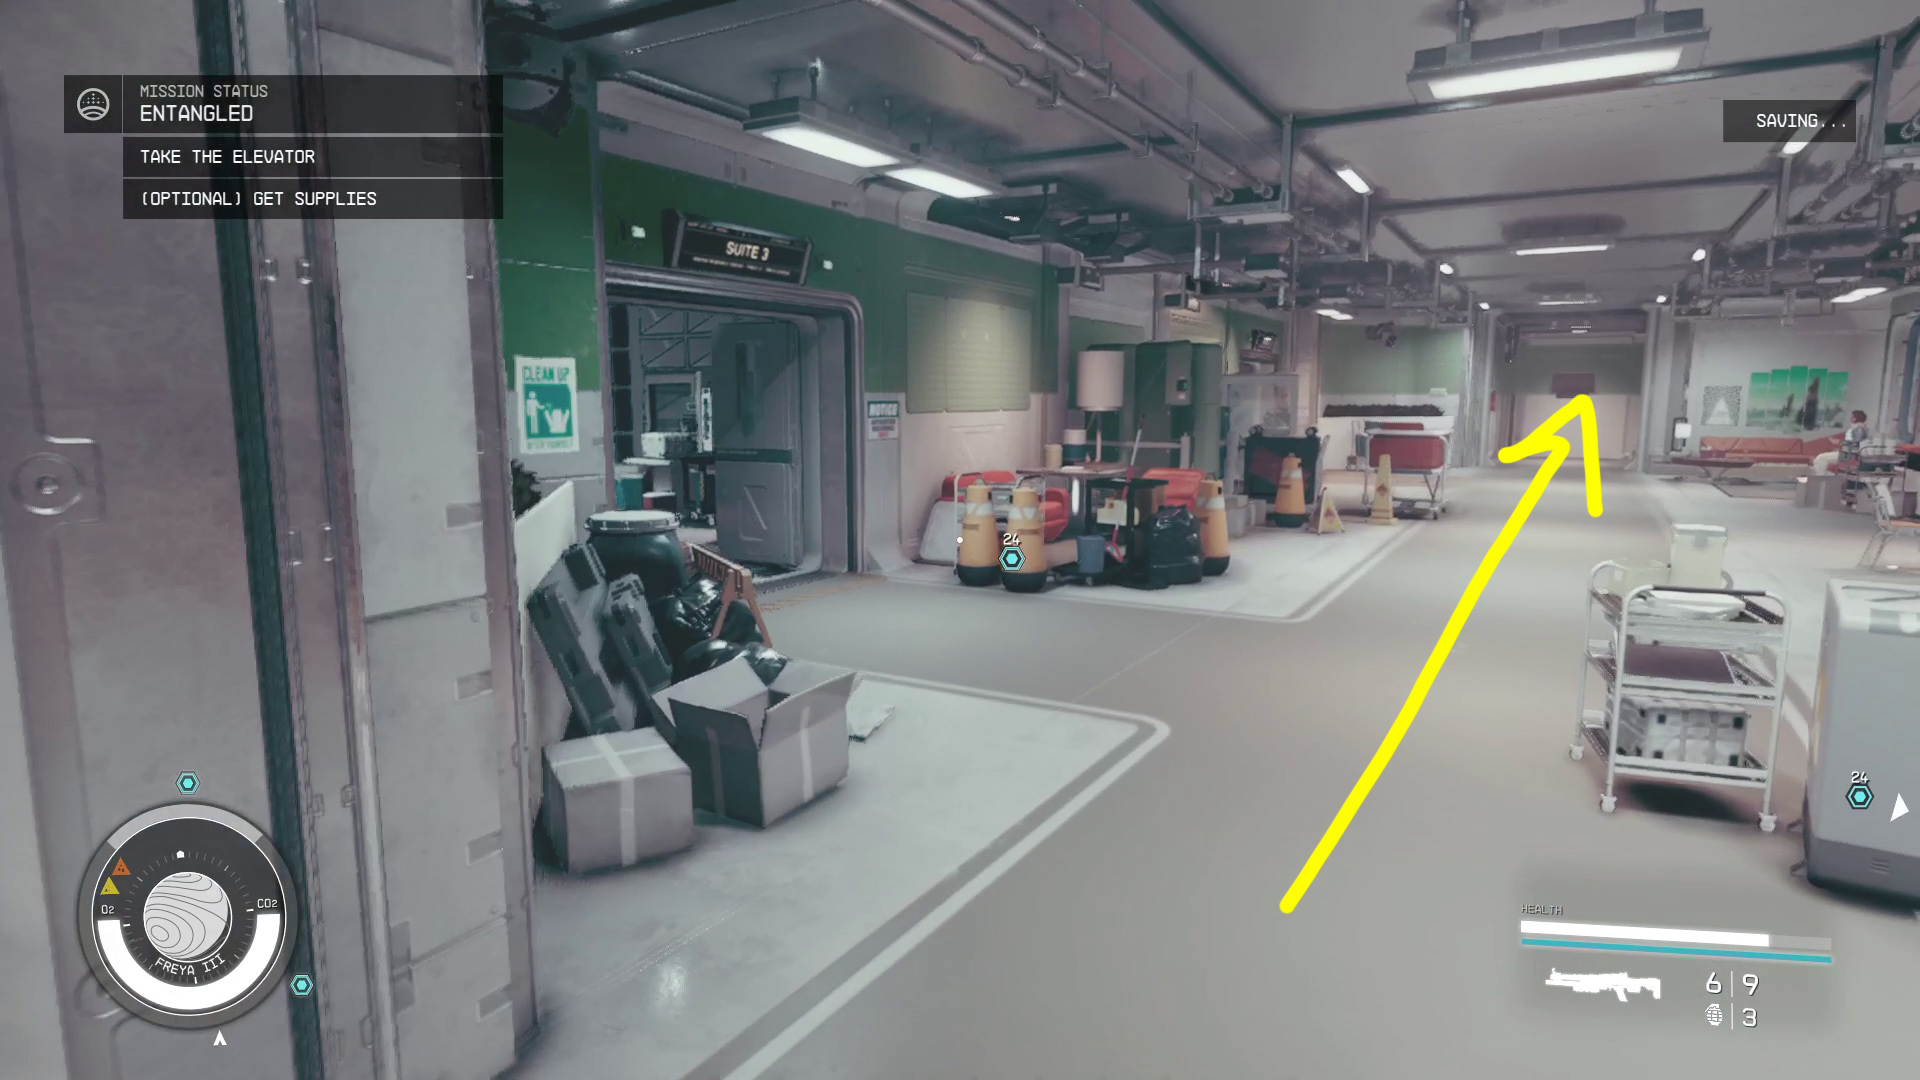
Get Supplies
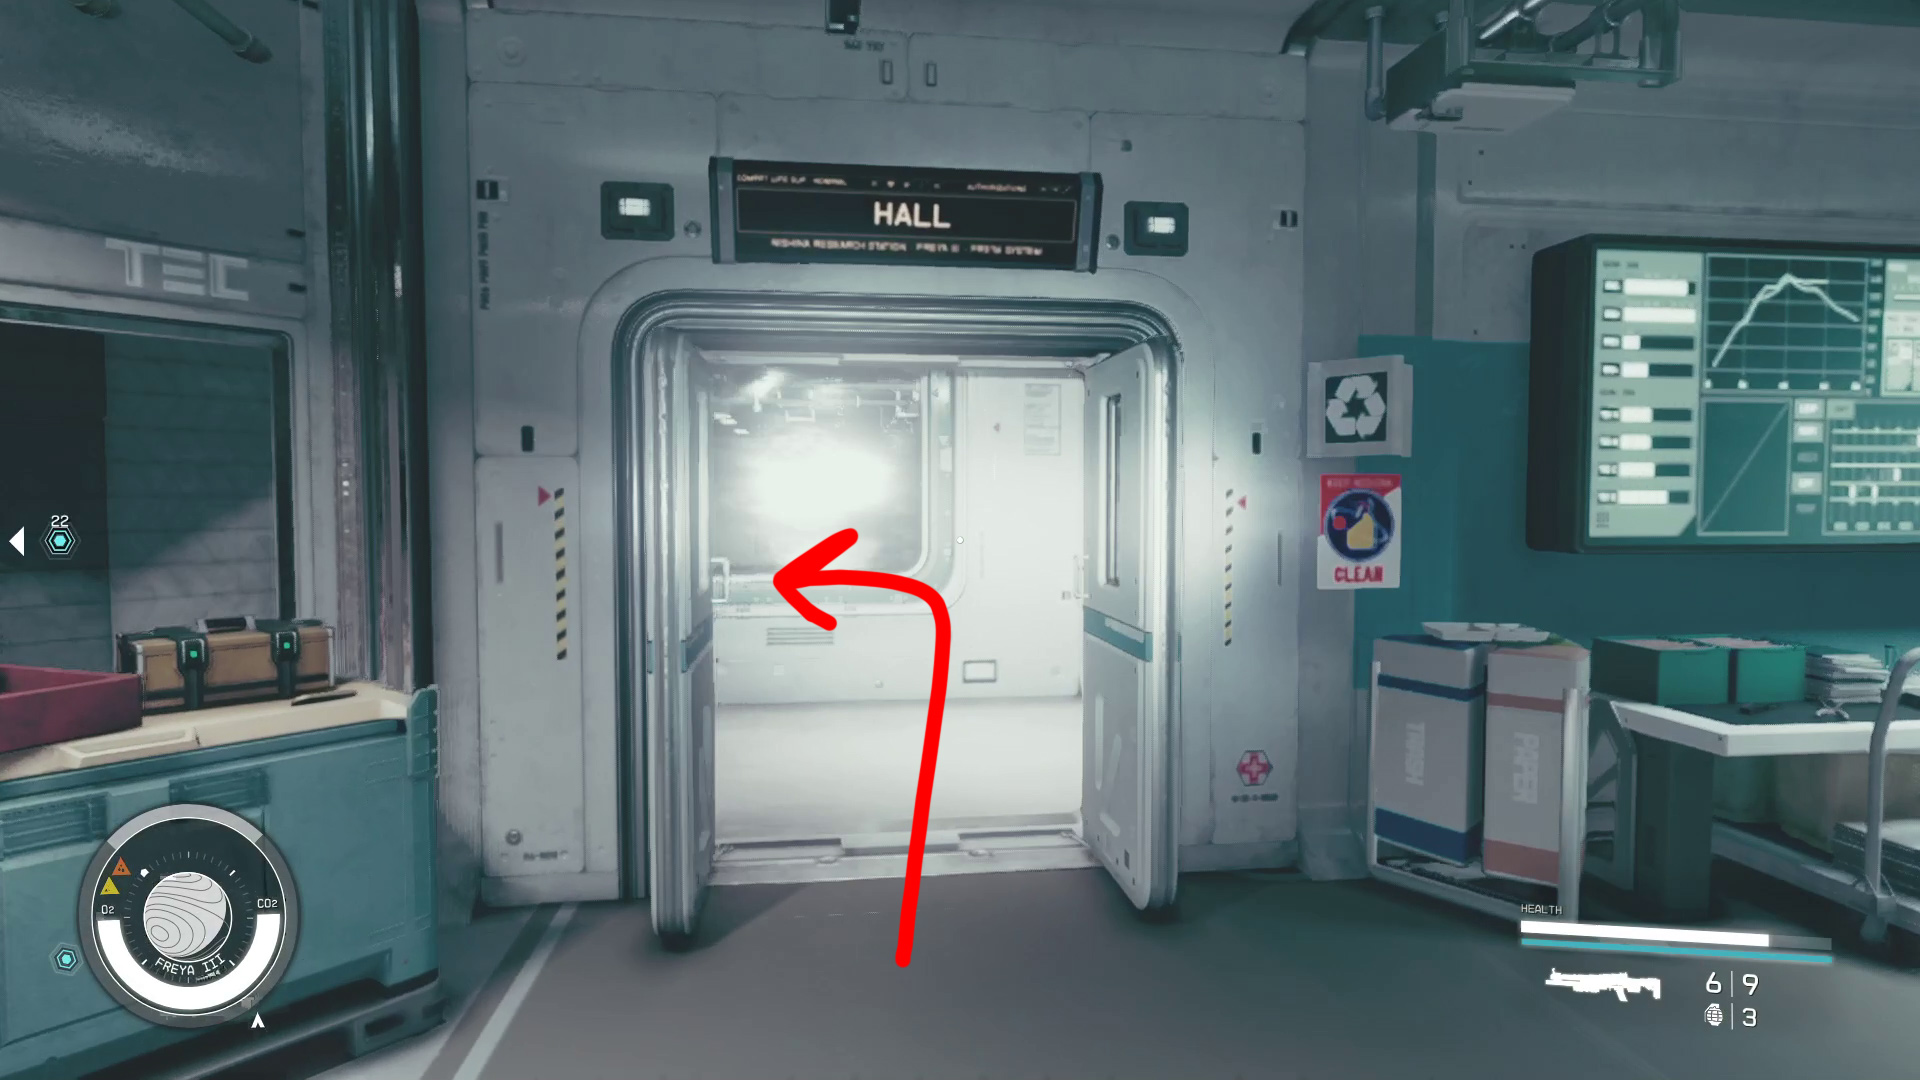
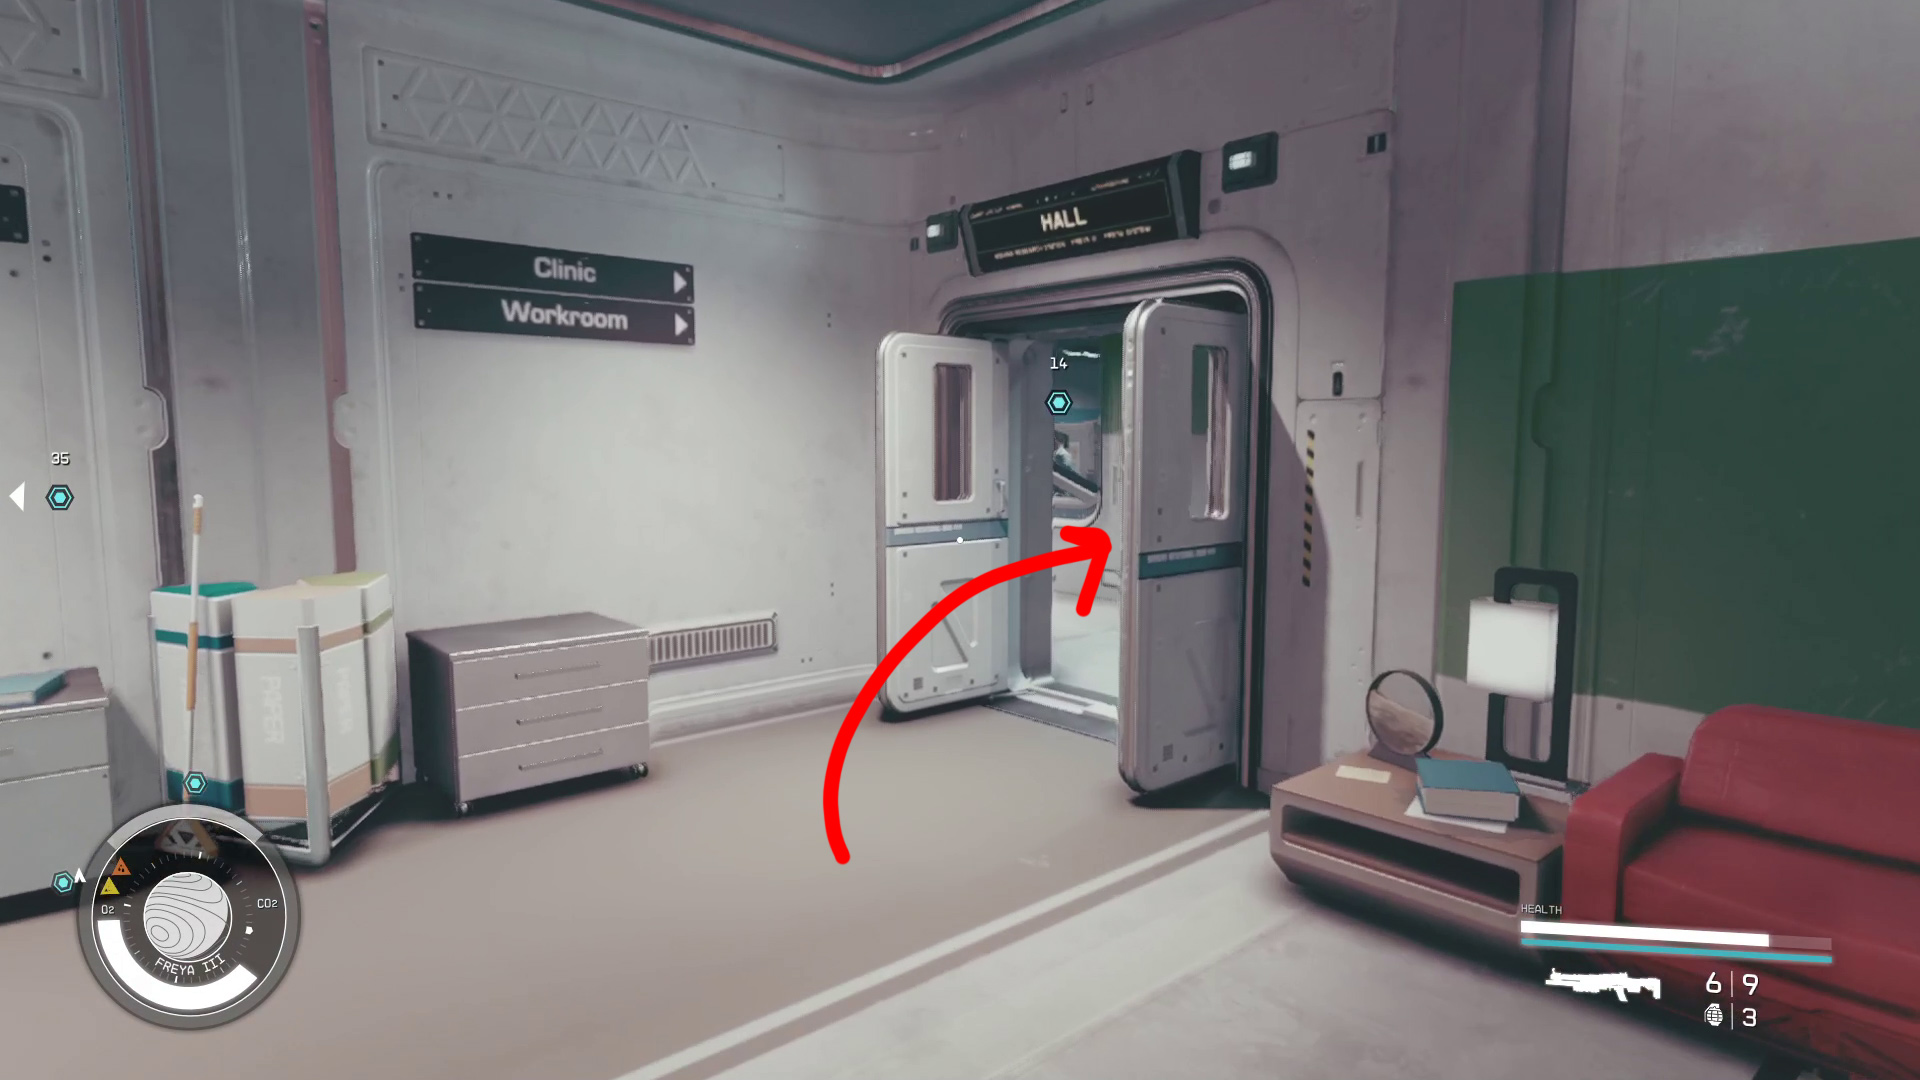
Once the conversation with Patel ends, turn around and leave her office, then continue to the far end of the hall (Image 27) and go down the stairs. At the bottom of the stairs, go right (following the sign to the clinic) through the door marked Hall (Image 28), and continue straight into the Clinic. Here, you’ll find an NPC tagged by the objective marker — speak with her to get some free first aid supplies (you can loot a bit more from the room as well).
Image 27Image 28
Take the Elevator
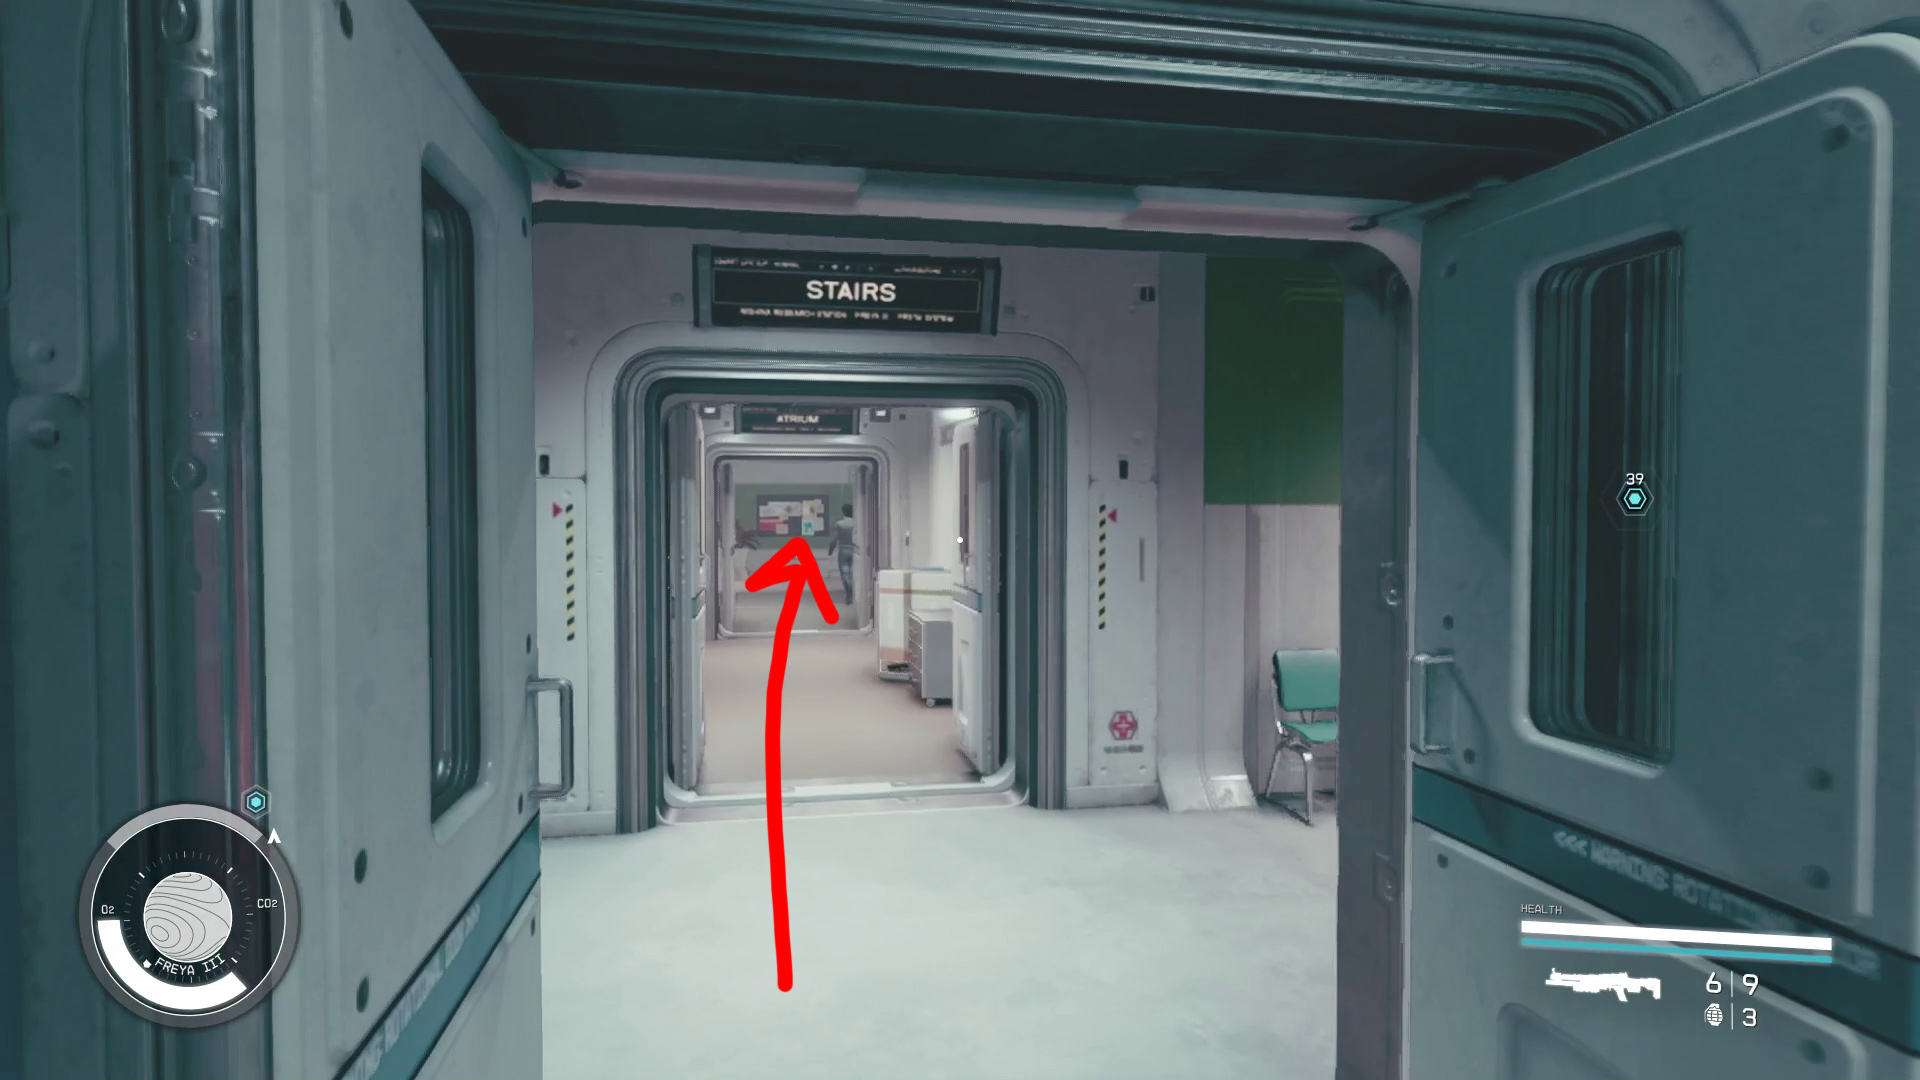
Leave the clinic and go straight through the door marked Stairs, and continue through the Atrium door (Image 29). Head across the Atrium past the ping pong table through the door marked Main Hall (Image 30 – there’s a sign for the elevator), then go past the stairs and turn right, where you’ll see a sign for the Elevator. Go through the doors there (Image 31). In front of the elevators, you’ll see a distortion with the objective marker on it — approach it and press the Calibrate button.
Image 29Image 30Image 31
Back in the Ruined Station universe, go into the elevator, then use the control panel to go to the Nishina Research Level.
Get to the Lab
Upon arrival, pick the lock on the storage box to your right if you want, then calibrate the distortion to the left by the barrels (Image 32). In the Intact Station, go down the ramp and calibrate the distortion to the right, by the locked door (Image 33).
Image 32Image 33
Override the Lockdown in the Facilities Section
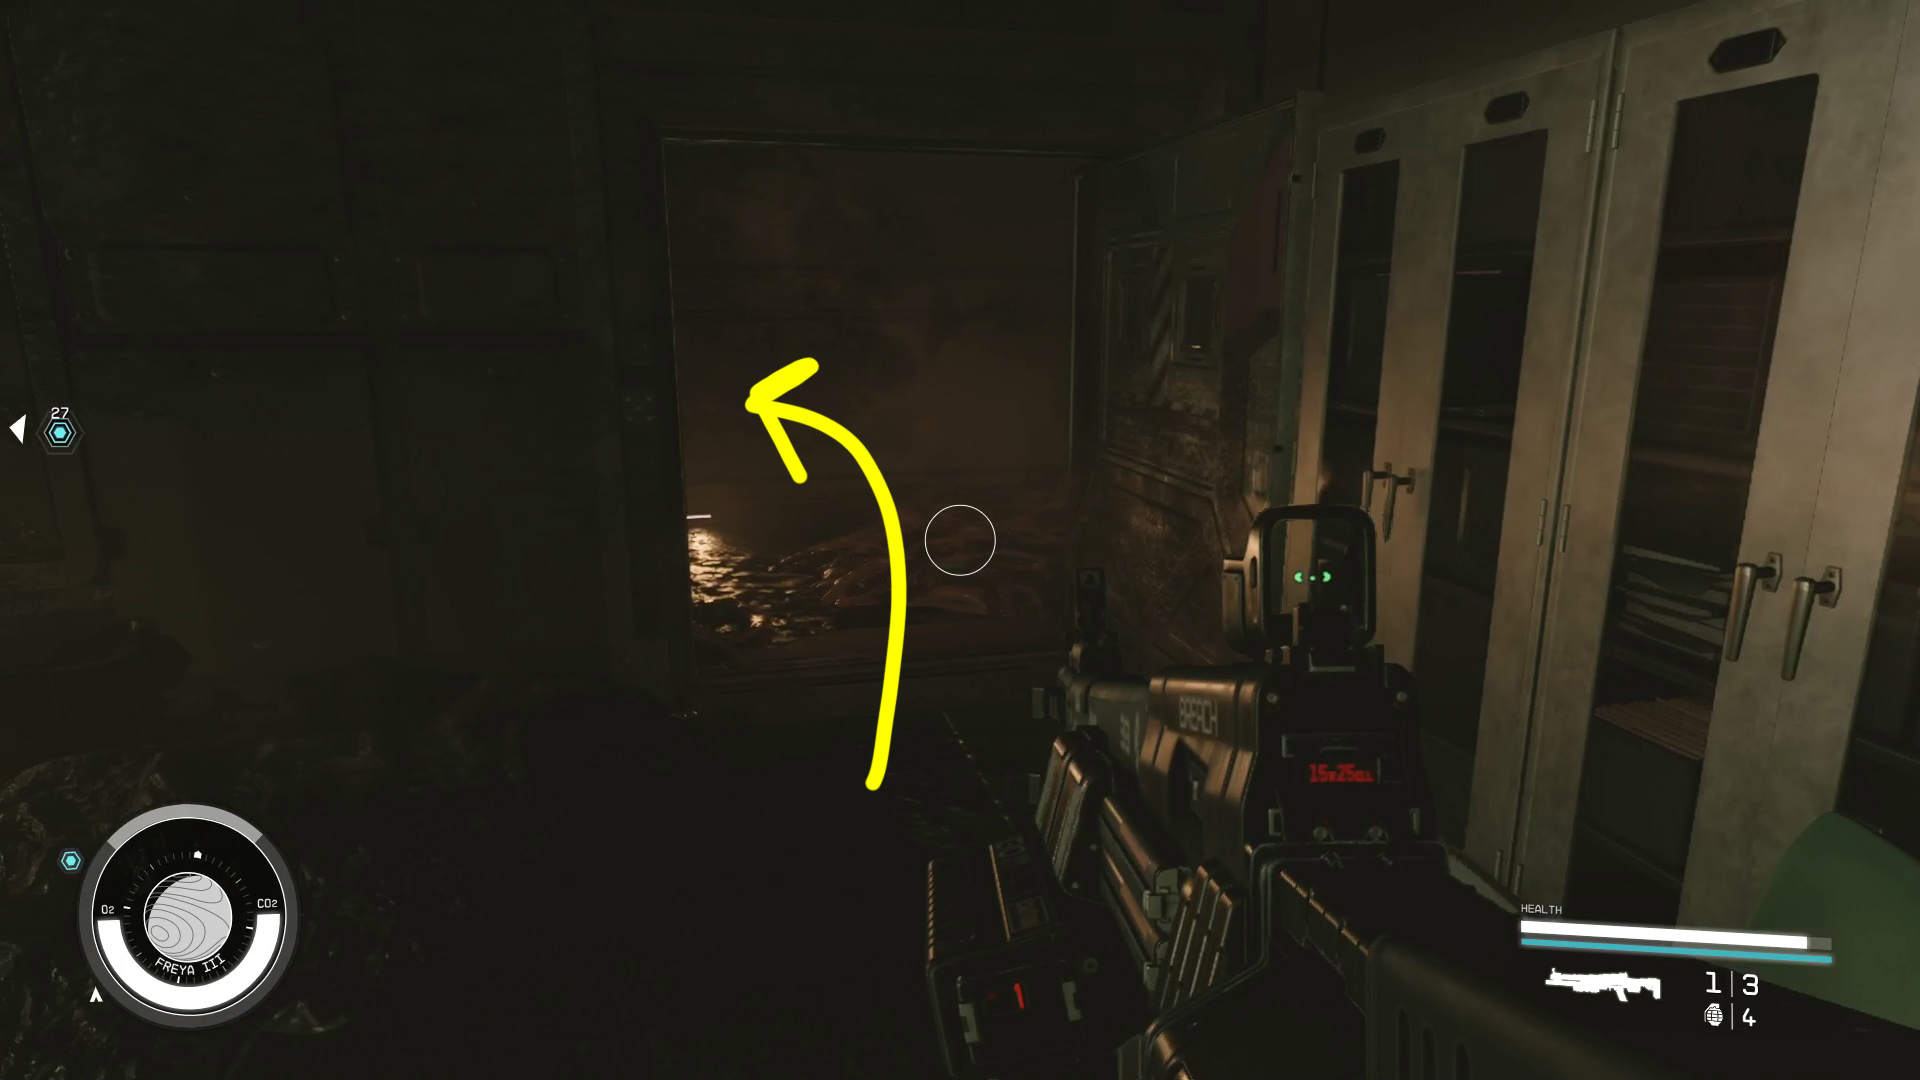
Continue through the now-opened door, then head forward and into the doorway on the other side of the room (Image 34). In the room on the right side you’ll find a Nishina Particle Lab Keycard indicated by the objective marker. Pick it up, then unlock the door just ahead to your right, loot the first aid back on the column, then turn around and go through the distortion behind you (Image 35) to return to the Intact Station.
Image 34Image 35
Unlock the Nishina Particle Lab door in this universe, then deal with the turret on the ceiling ahead, and the 2 robots that come out of their alcoves to your right. That done, you can loot the aid items from the column again, then go through the door that’s just past the turret (Image 36). Continue down the stairs, and you’ll be attacked by another turret at the end of the hall. Go through the doorway on the right and use the distortion in the room (Image 37) to warp to the Ruined Station.
Image 36Image 37
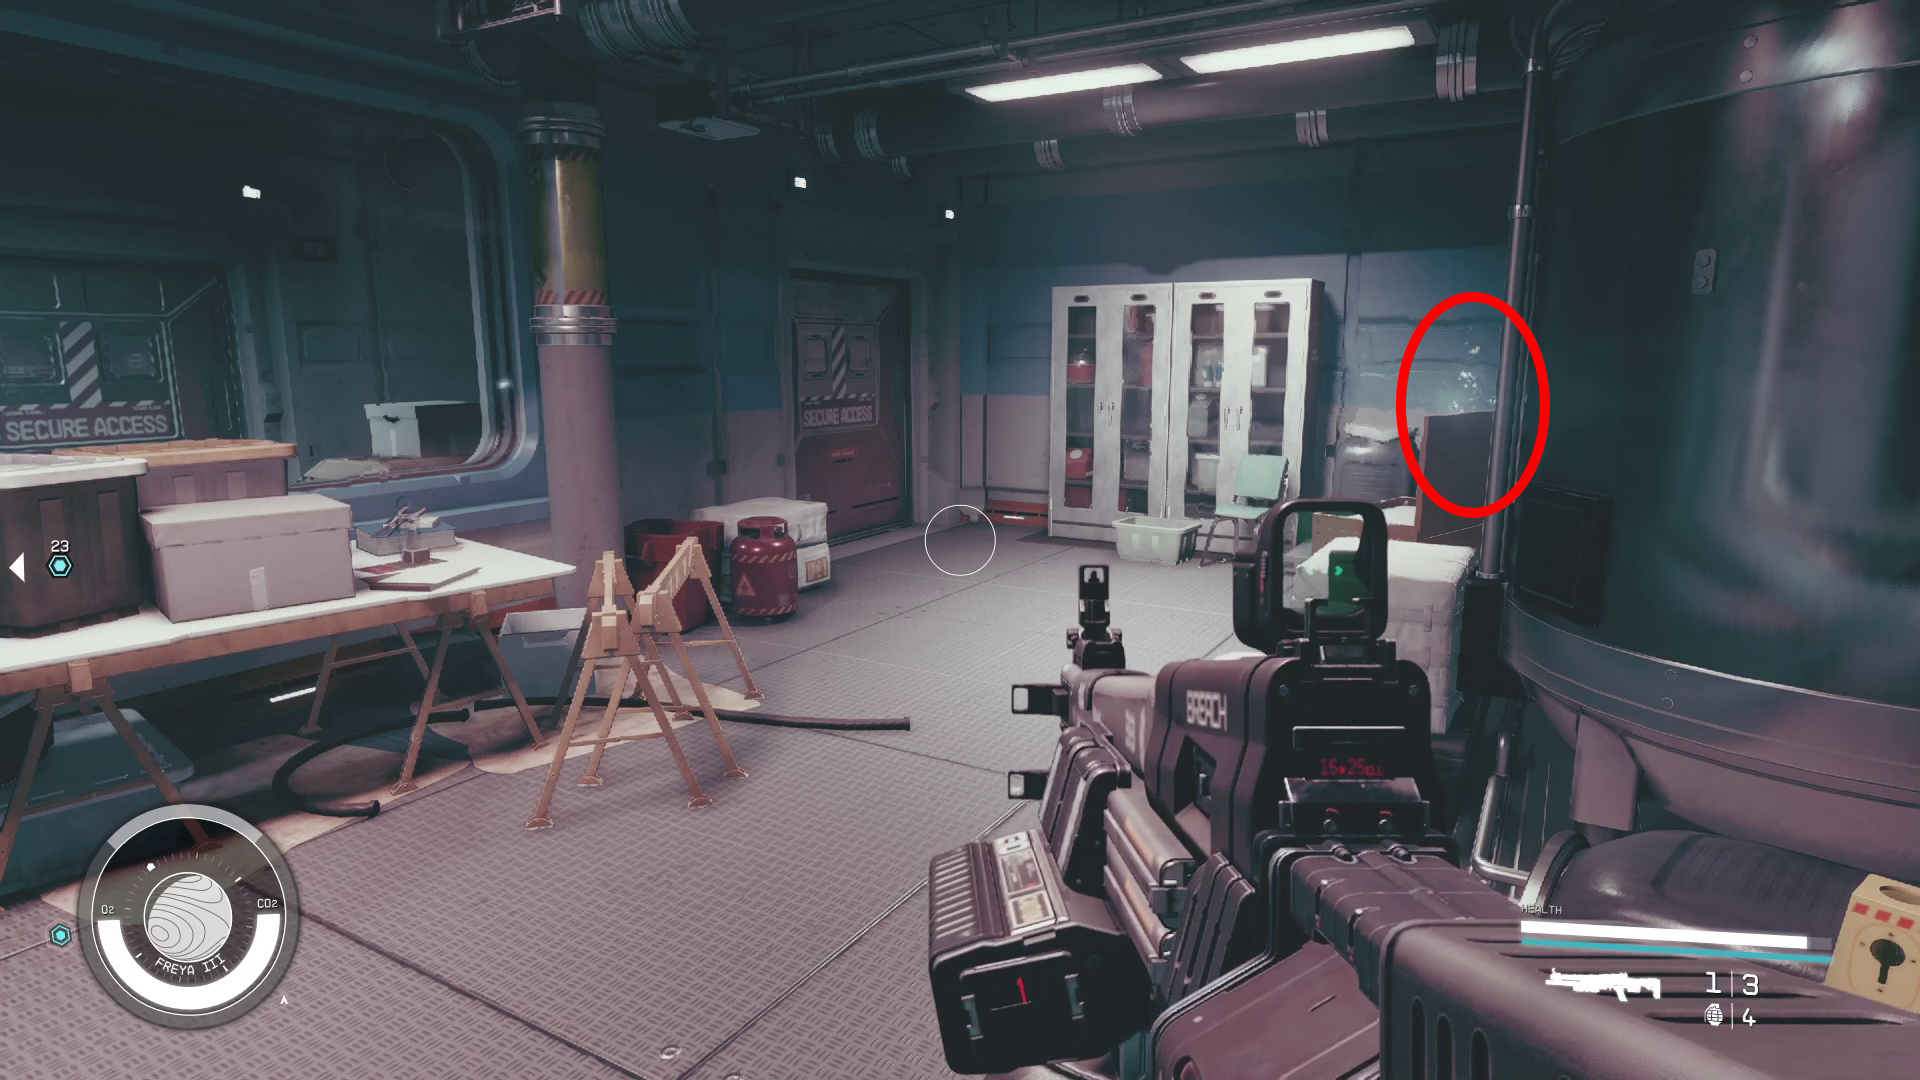
The door on your left will now be open, so head through (Image 38), and continue through the next door as well. To avoid a corrosive puddle, go up the small set of stairs and then turn left (Image 39) then use the distortion on the right (Image 40). (You may want to continue to the panel before warping to the Intact Station — on the right of the counter is a safe you can pick in both universes).
Image 38Image 39Image 40
On the intact side, continue to the computer indicated by the objective marker and interact with it. Select the “Security System” option, then select “Override Lockdown: Facilities Section”. While you’re here, you should also go into the Remote Turret Control and Robot Controls and either deactivate them or Recalibrate their Friend/Foe Settings.
Get to the Lab
From the computer, turn left and loot the weapon and ammo, then head forward and go right through the door beneath the turret (Image 41). Turn right again and go around the stairs, head through the door marked Particle Accelerator, continue to the closed security door, then go left down the stairs (Image 42).
Image 41Image 42
Override the Lockdown in the Accelerator Section
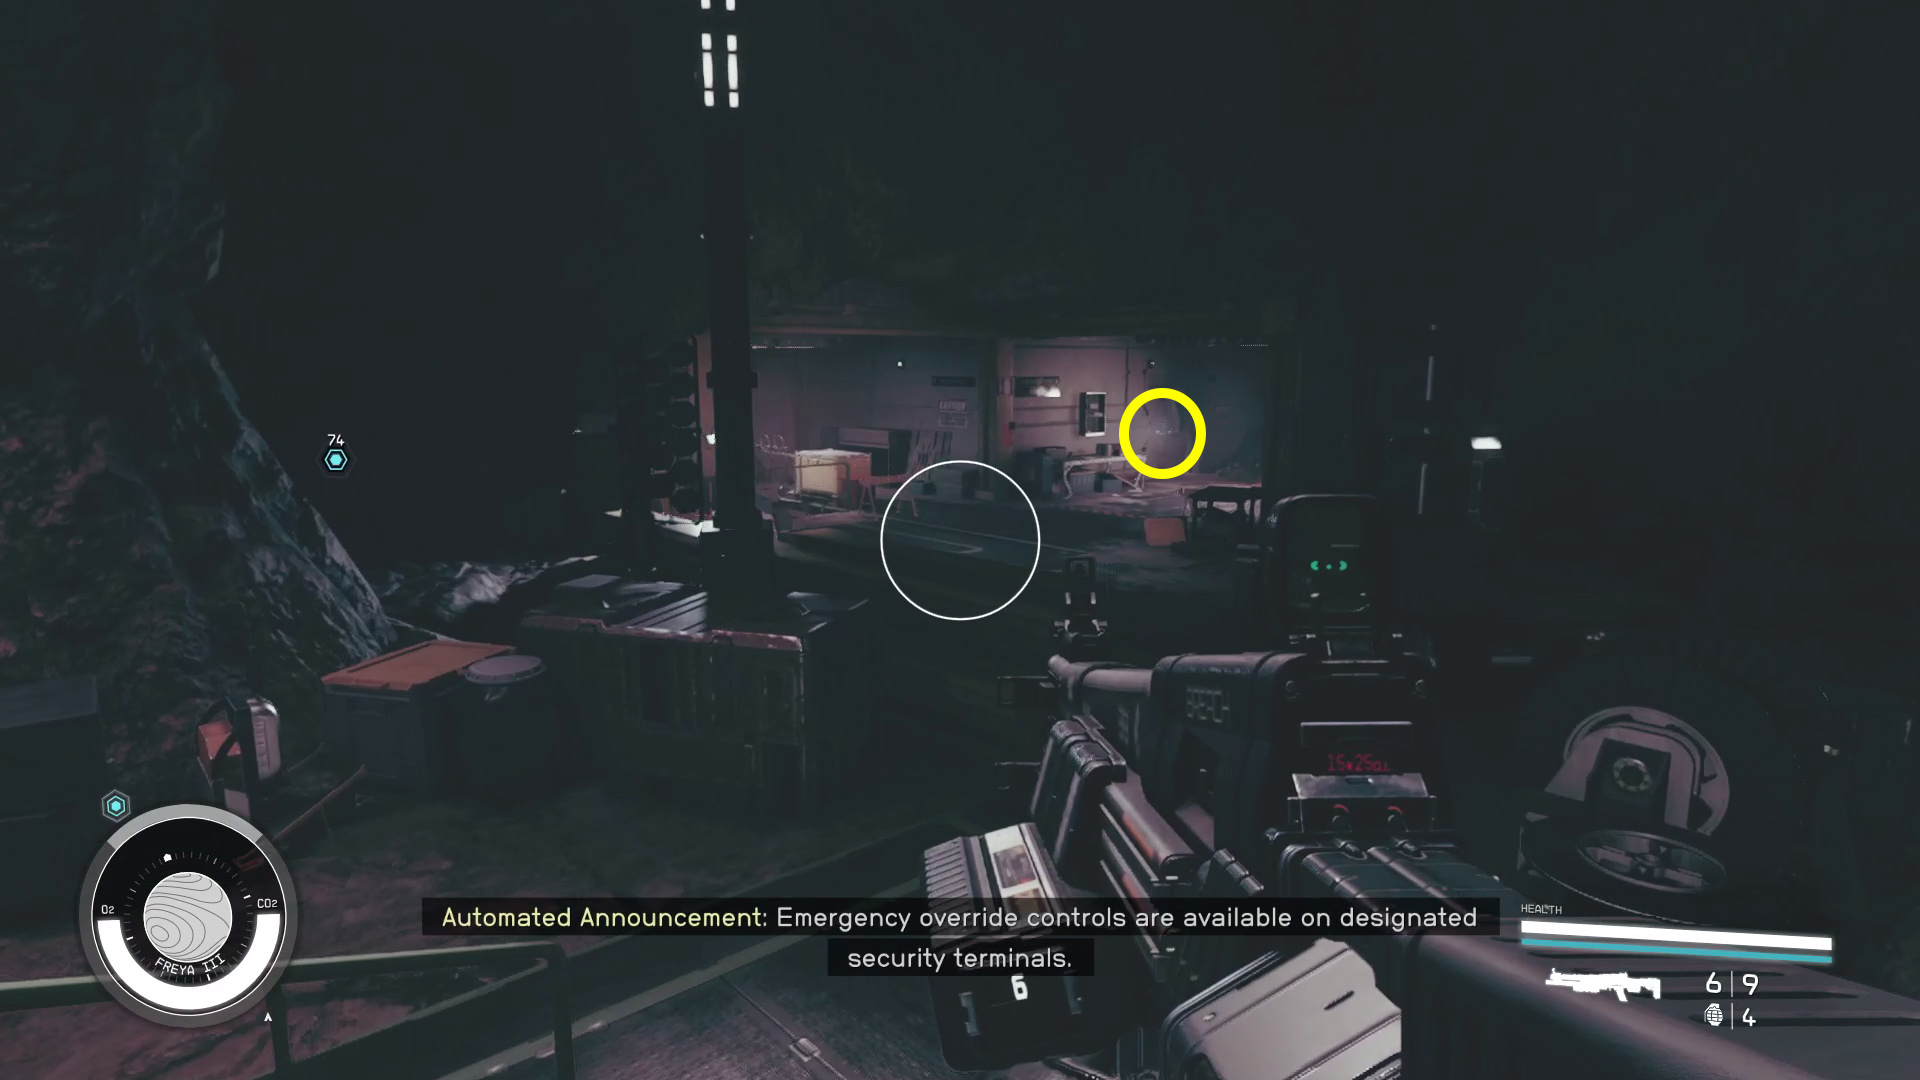
At the bottom of the stairs, you’ll find a closed door. Make sure you’ve got full health and a weapon with enough ammo ready, as you’ll be attacked by numerous enemies in both version of the large chamber beyond the door. You can choose to simply avoid combat if you want by just running to the distortion instead of fighting — but you’ll be back here, so it’s best to deal with at least some of the enemies now. When you’re ready, go through the door. From the door, go up the stairs on your right (Image 43), then turn left and use the distortion just ahead to warp to the Ruined Station (Image 44).
Image 43Image 44
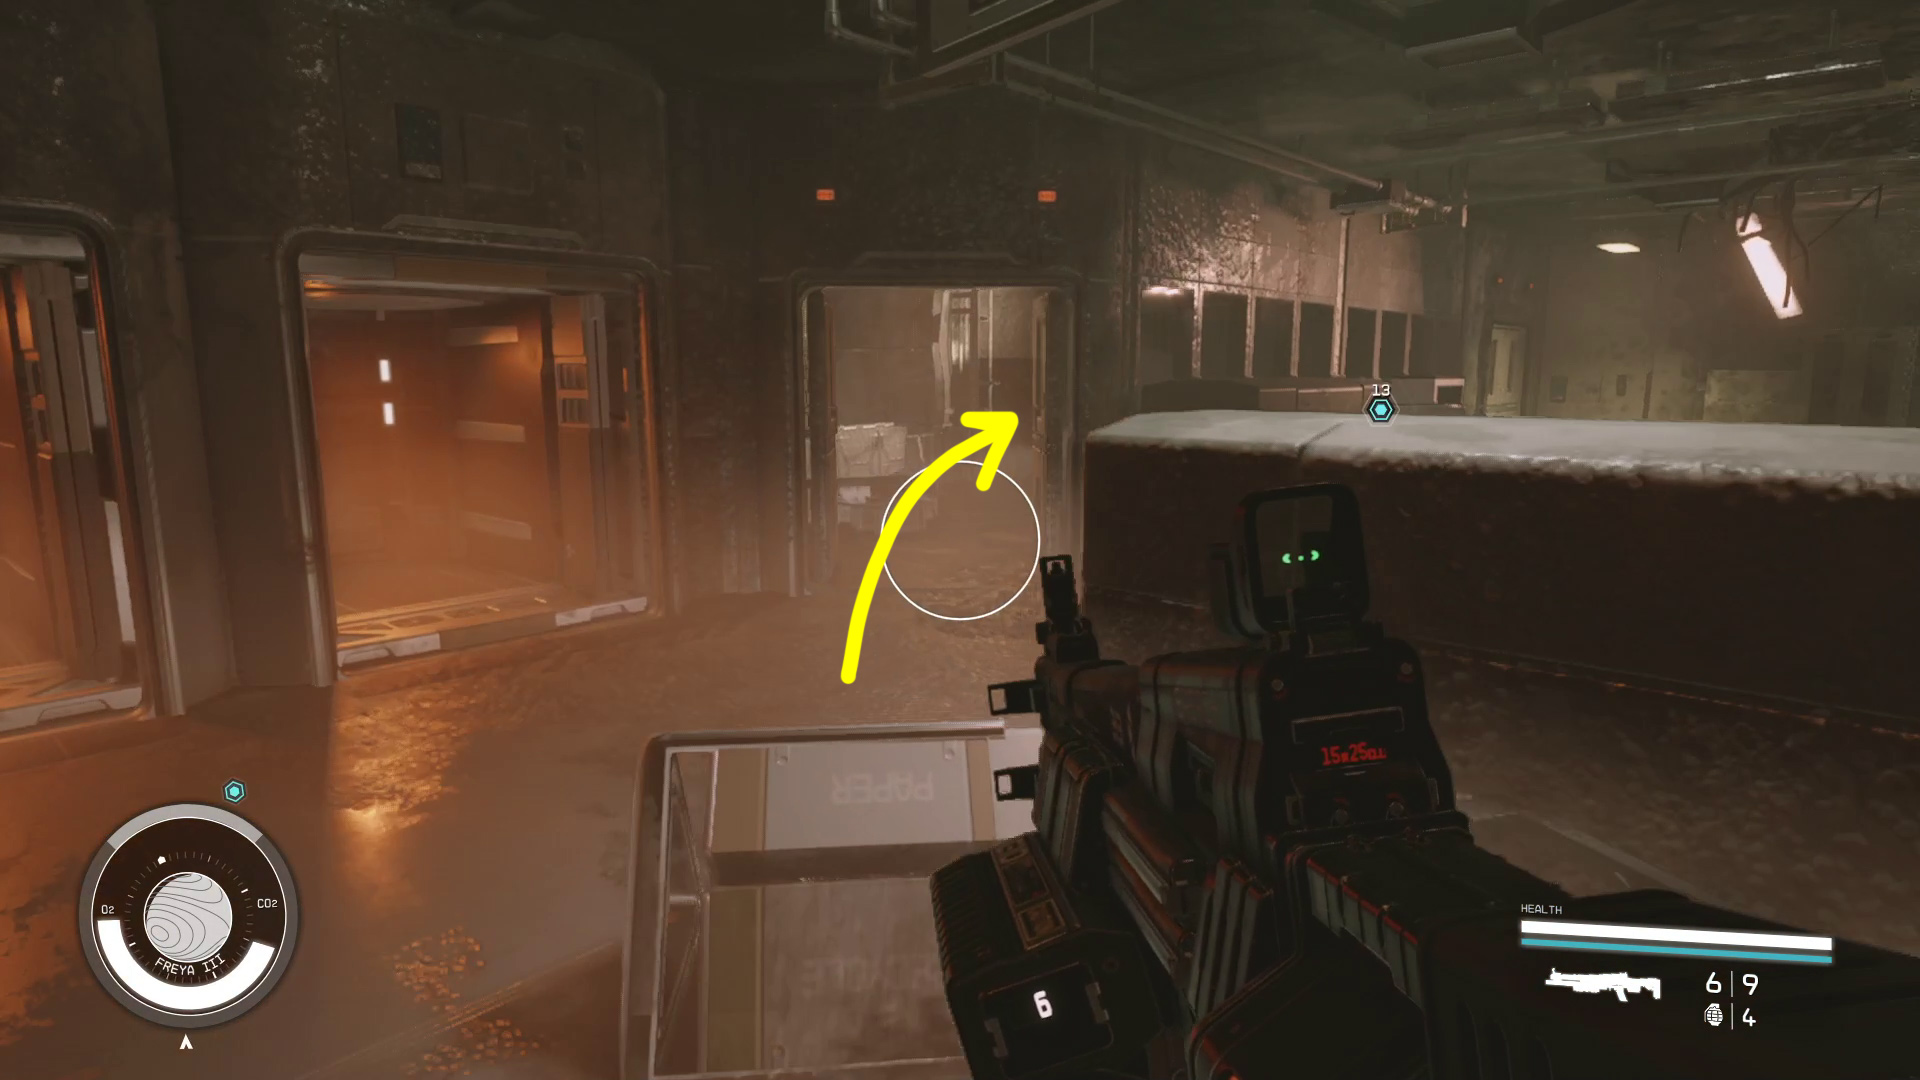
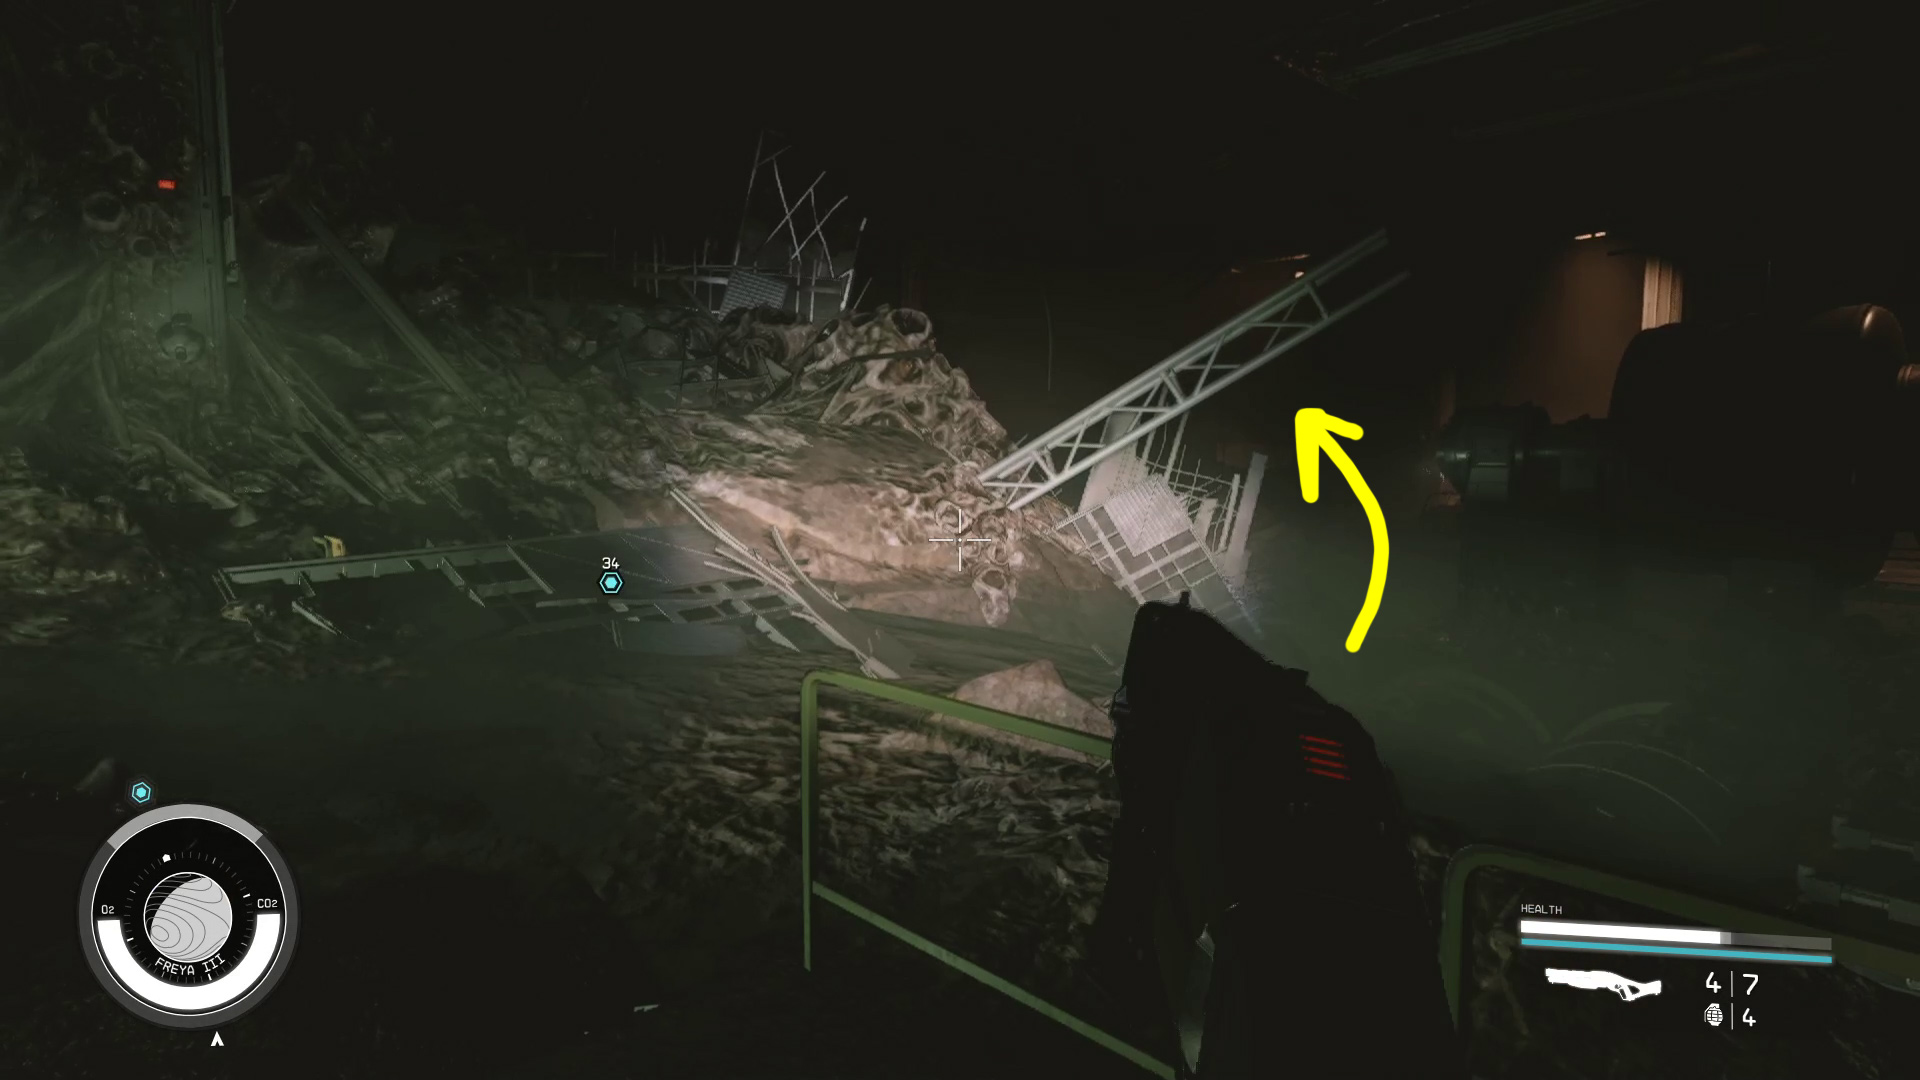
There are a lot of Cataxi that will spawn as soon as you use the distortion — again, you can theoretically just avoid them, though it’s much harder in this instance. The distortion you want to use is through a door that’s in the opposite corner from where you arrived, so head around the debris (Image 45) and then continue to the far corner and go through the open door marked Emergency (Image 46).
Image 45Image 46
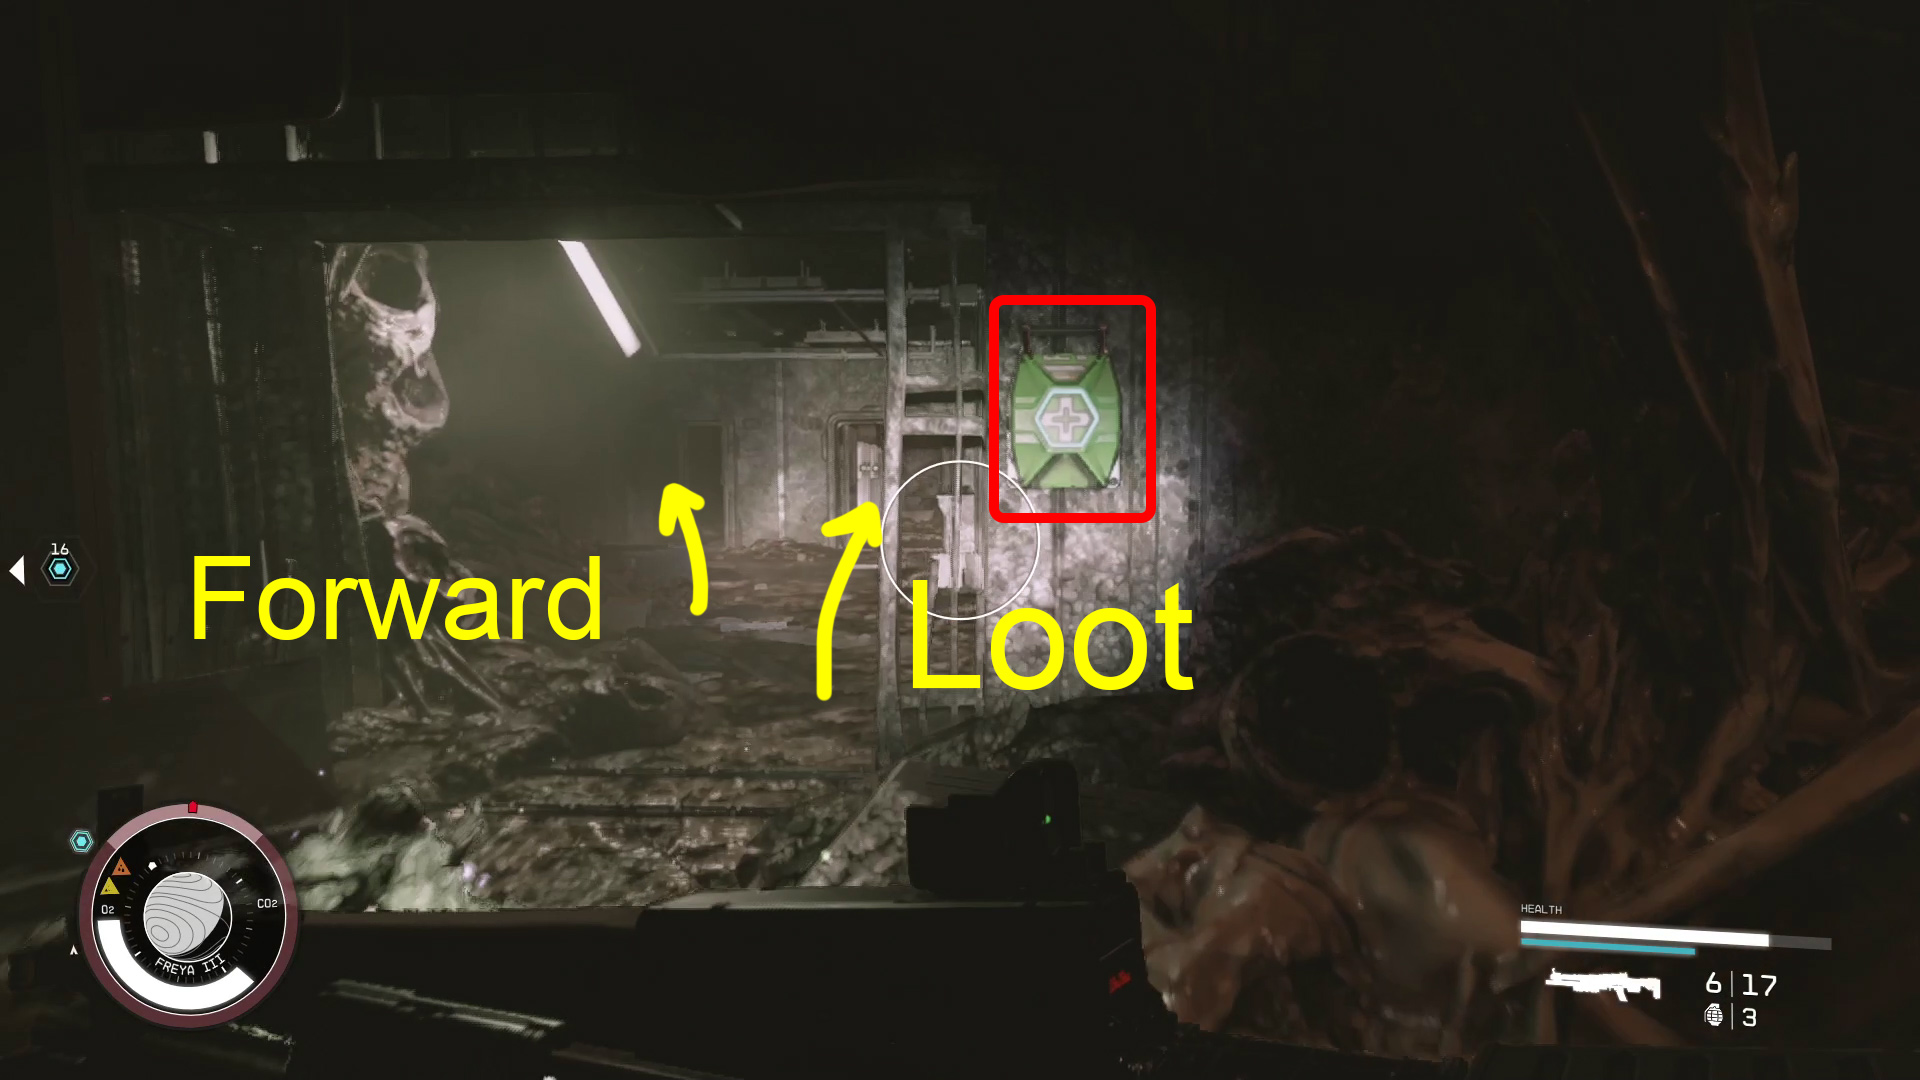
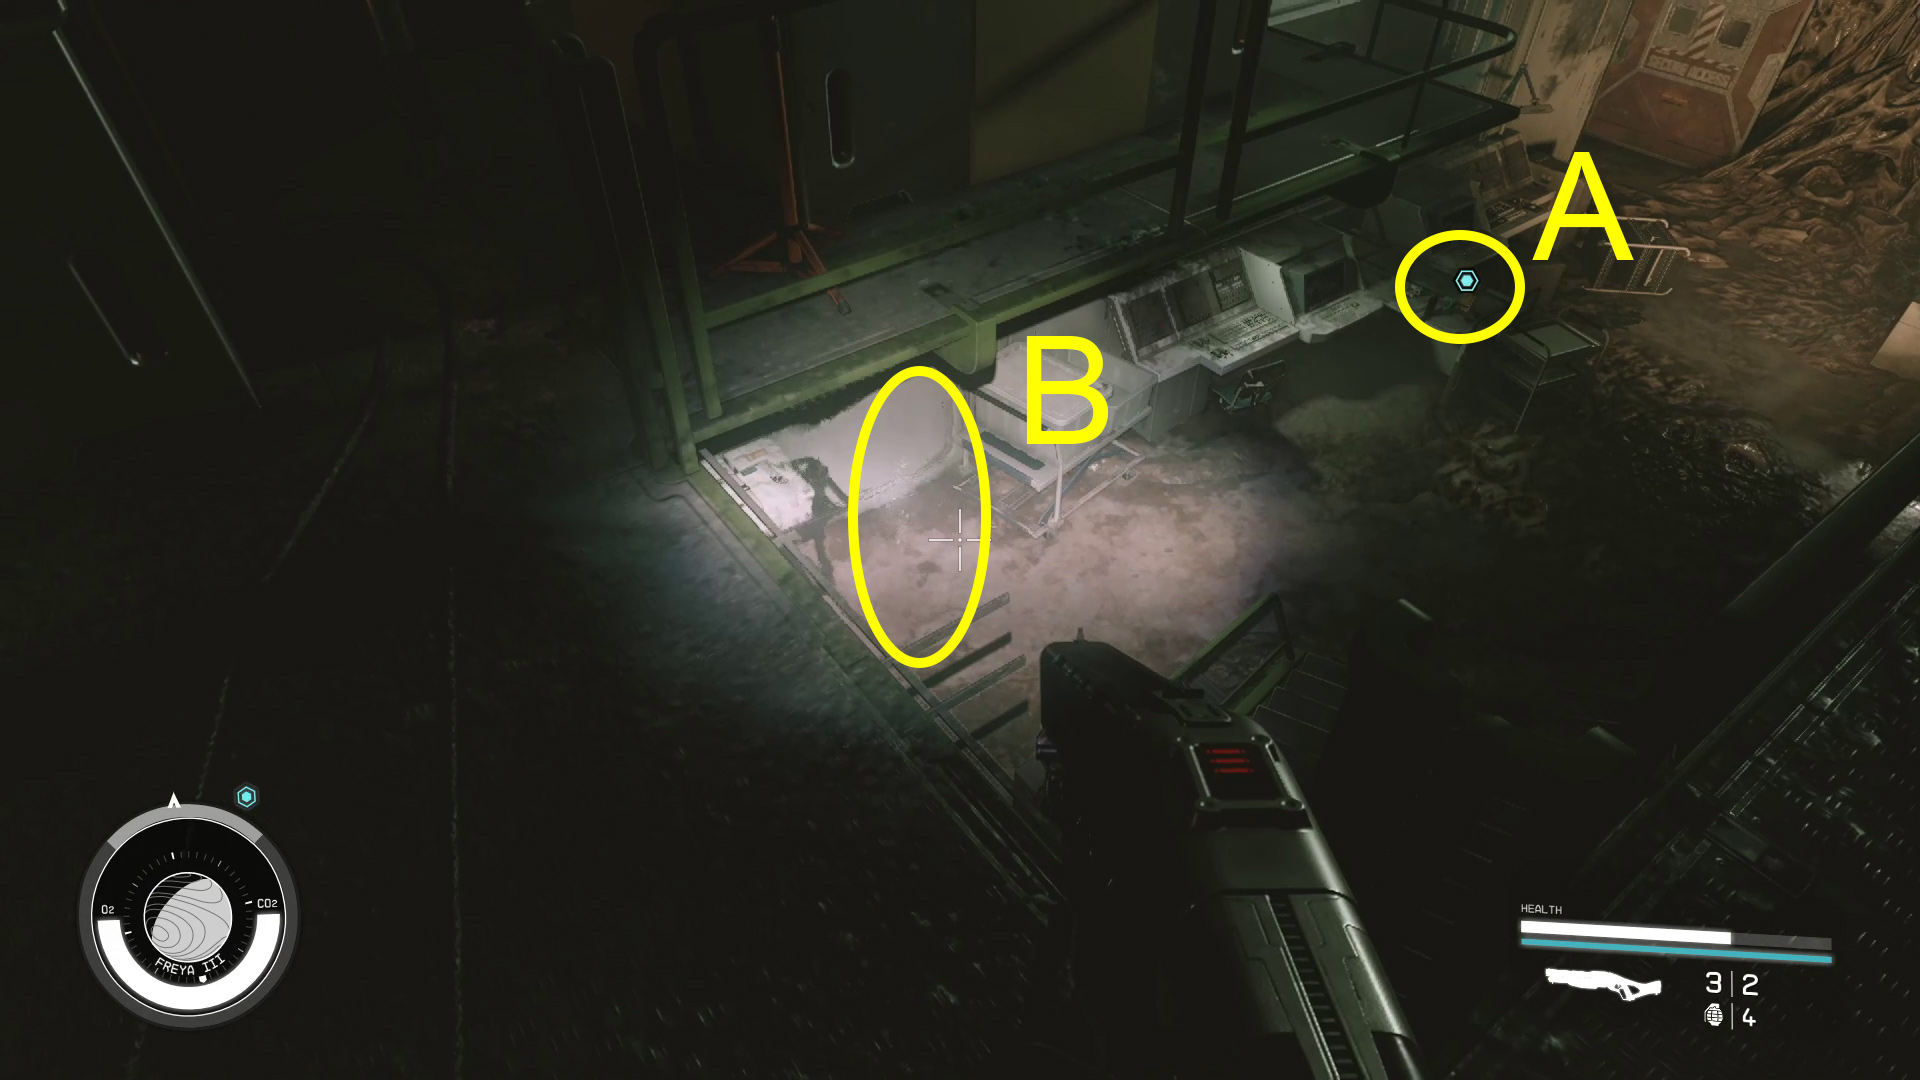
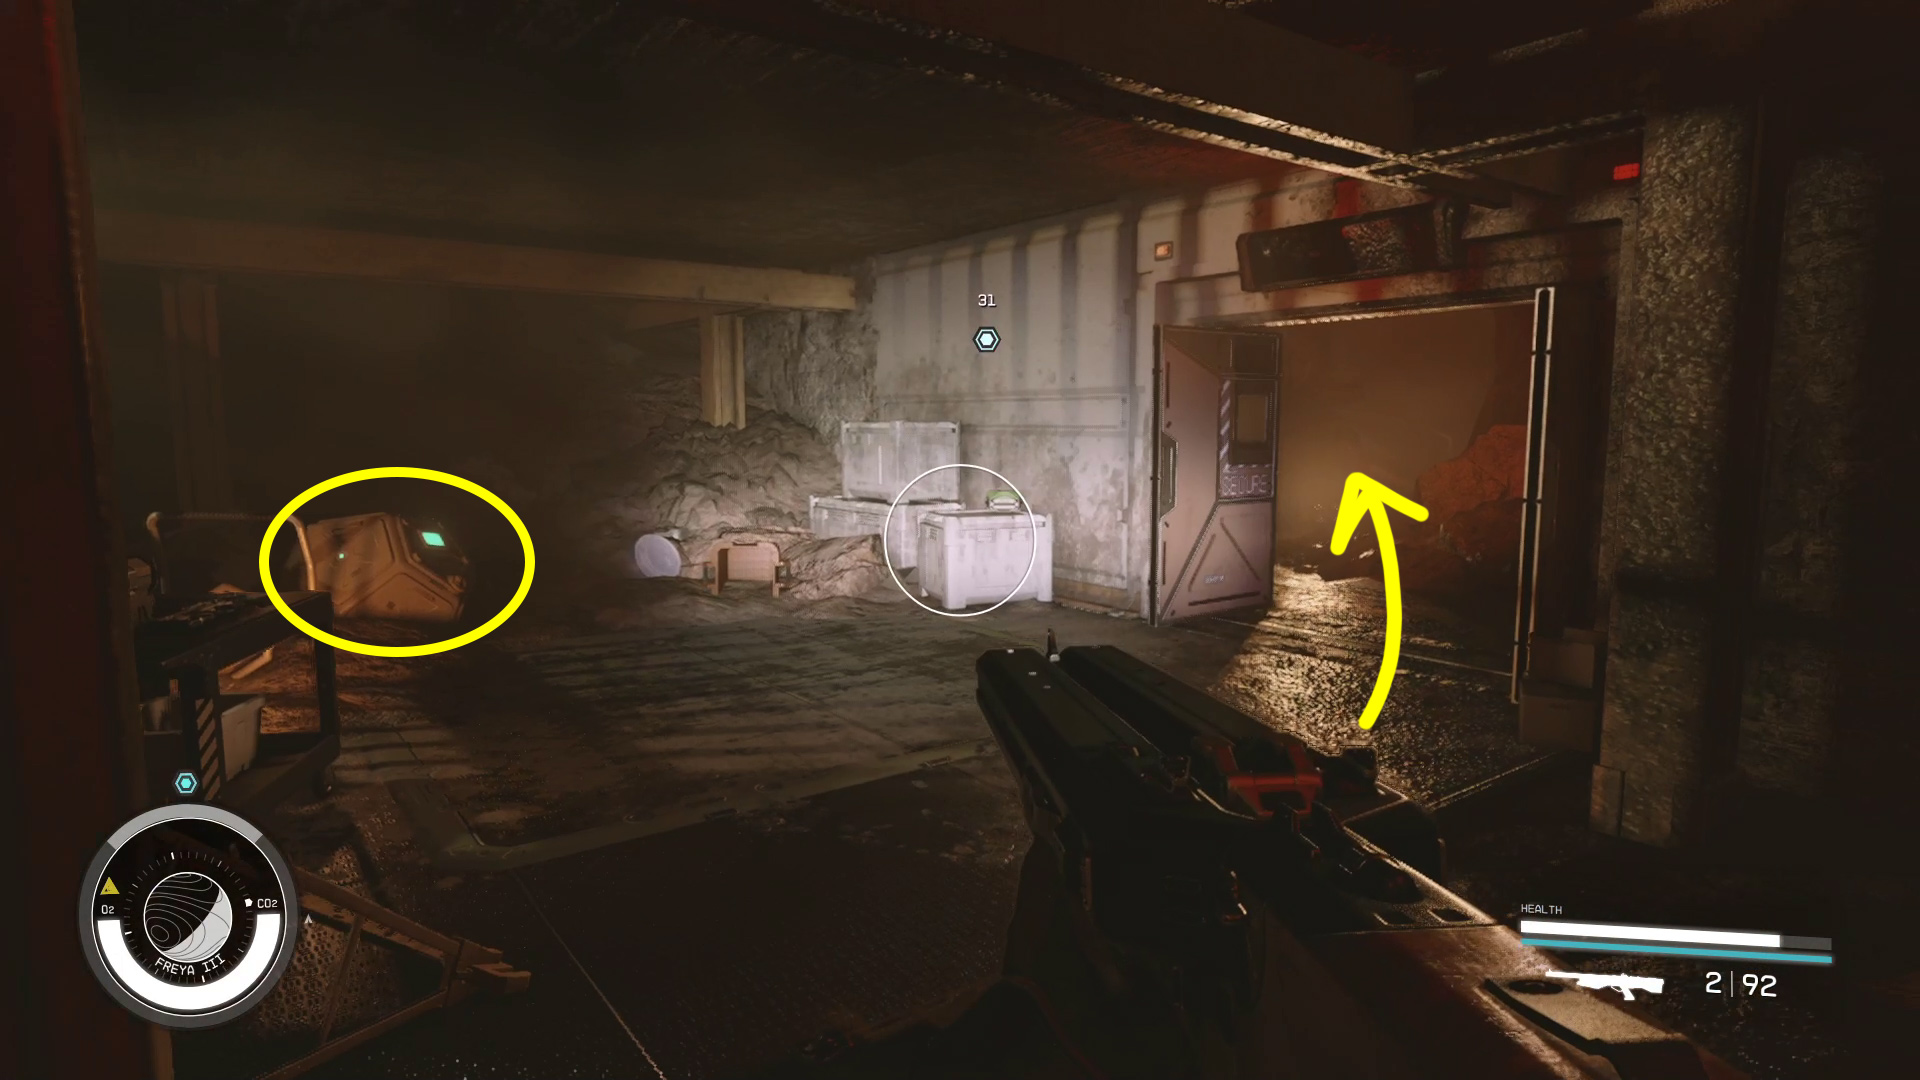
Turn left and continue forward until you have to drop down. Grab the Nishina Utility Closet Keycard (47A) — and the loot next to it. There’s also weapons and ammo on the wall near the distortion, which you can use if you want to loot the room a second time (47B). There’s a distortion near the door you came through in the Intact Station — you’ll need to be in the Ruined universe in order to leave this room. Once you’ve done the looting you want, make sure you’re in the Ruined Station and then leave the way you came in (Image 48).
Image 47Image 48
Head to the opposite corner of the room (Image 49), retracing your steps from when you came in, and use the distortion there (Image 50). Read ahead, and remember to move quickly in this next section if you didn’t kill the robots and turrets in the Intact Station!
Image 49Image 50
In the Intact Station, go down the nearby stairs (Image 51), then turn around and use your newfound key to open the Storage Closet (Image 52). Inside is a distortion — use it, then turn left and enter the control room. Use the distortion across from the objective marker (Image 53) to return to the Intact Station.
Image 51Image 52Image 53
Turn around and use the Accelerator Mainframe Computer the objective marker is indicating. Select “Security System”, then click the “Override Lockdown: Accelerator Control Room” button. Strangely, that doesn’t complete our current objective, but it will make the turret on the ceiling above you shoot at you in a moment, so watch out.
From the computer, turn left and you’ll see a distortion (Image 54) that you’ll need to go through to leave the room. Head back into the Storage Closet and use the distortion to return to the Intact Station (Image 55), then leave the closet and go back up the stairs (Image 56). Hug the left wall and continue towards the objective marker, which will lead you to the computer in a room marked Accelerator Control.
Image 54Image 55Image 56
Two robots will step out of their crèches when you enter, so take them out — and the turret on the ceiling — before using the computer. On the computer, select “Security System”, then “Override Lockdown: Accelerator Section”.
Get to the Lab
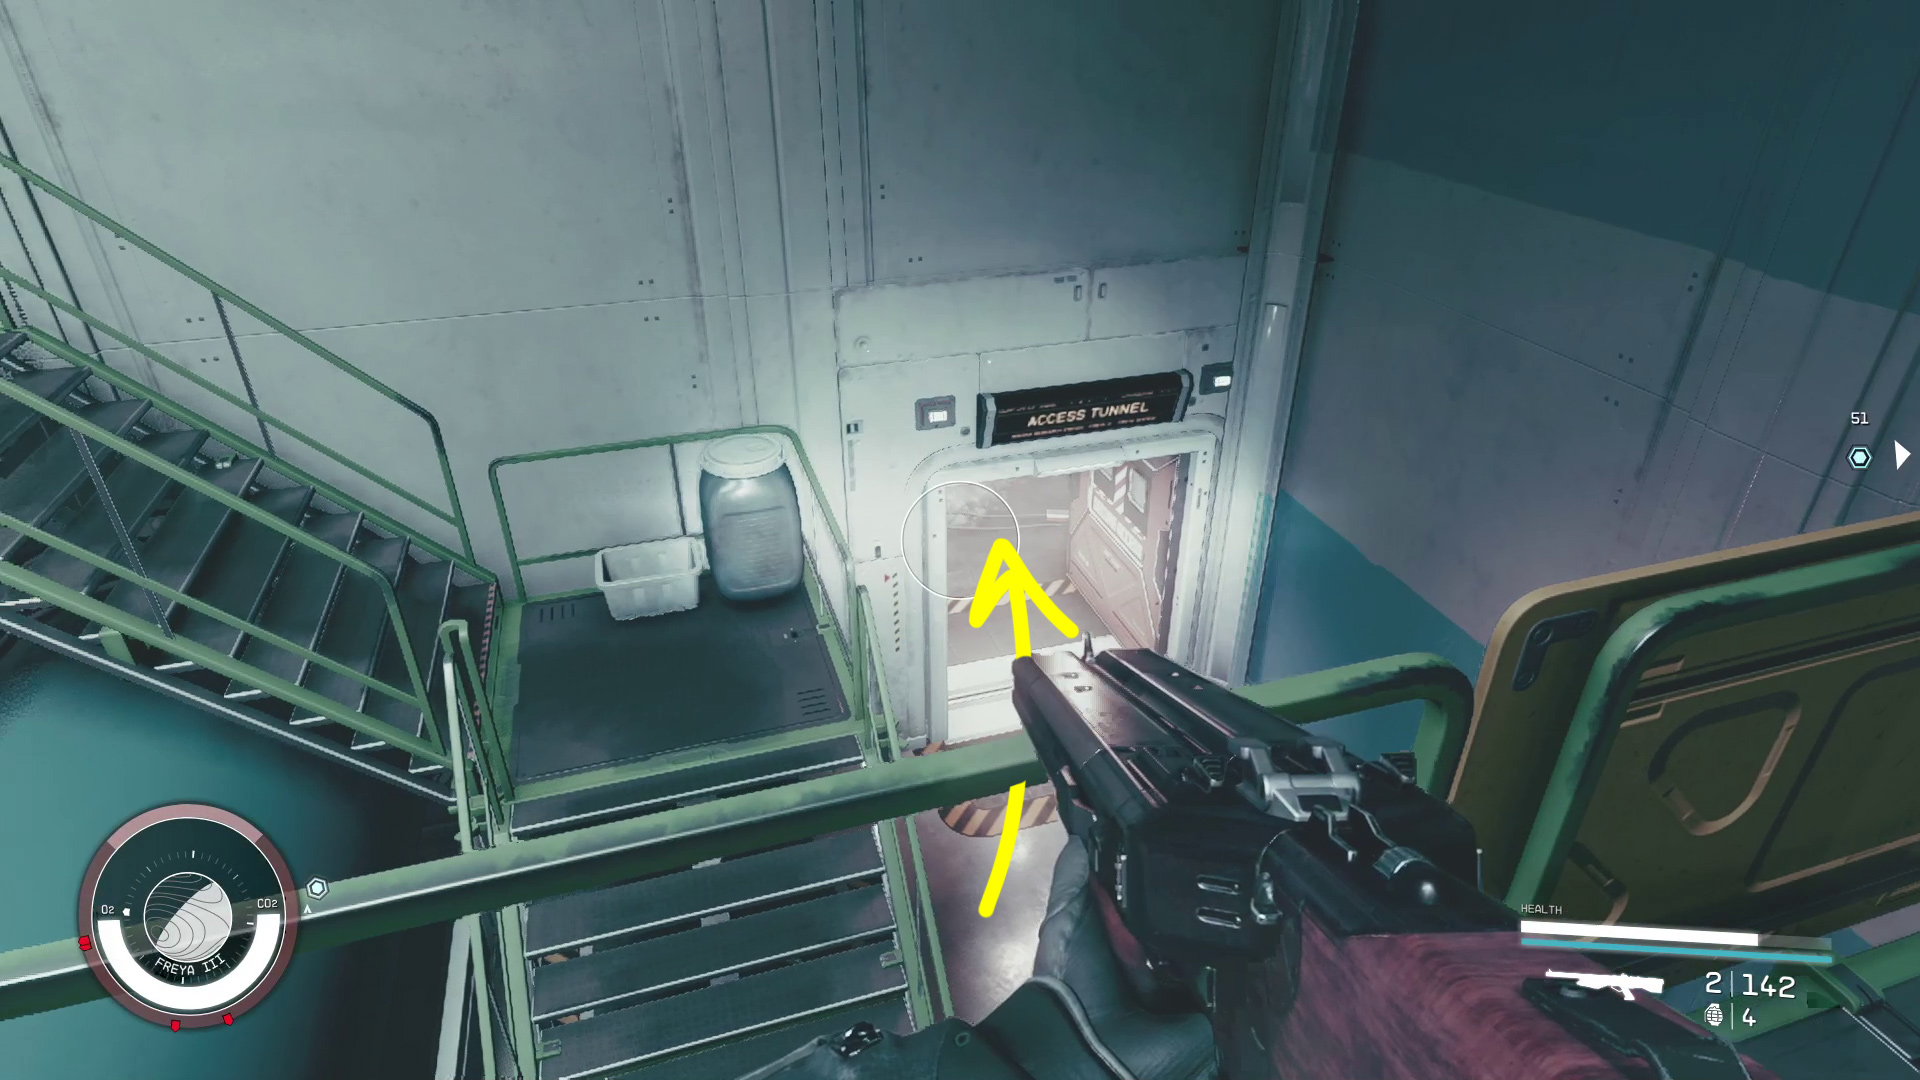
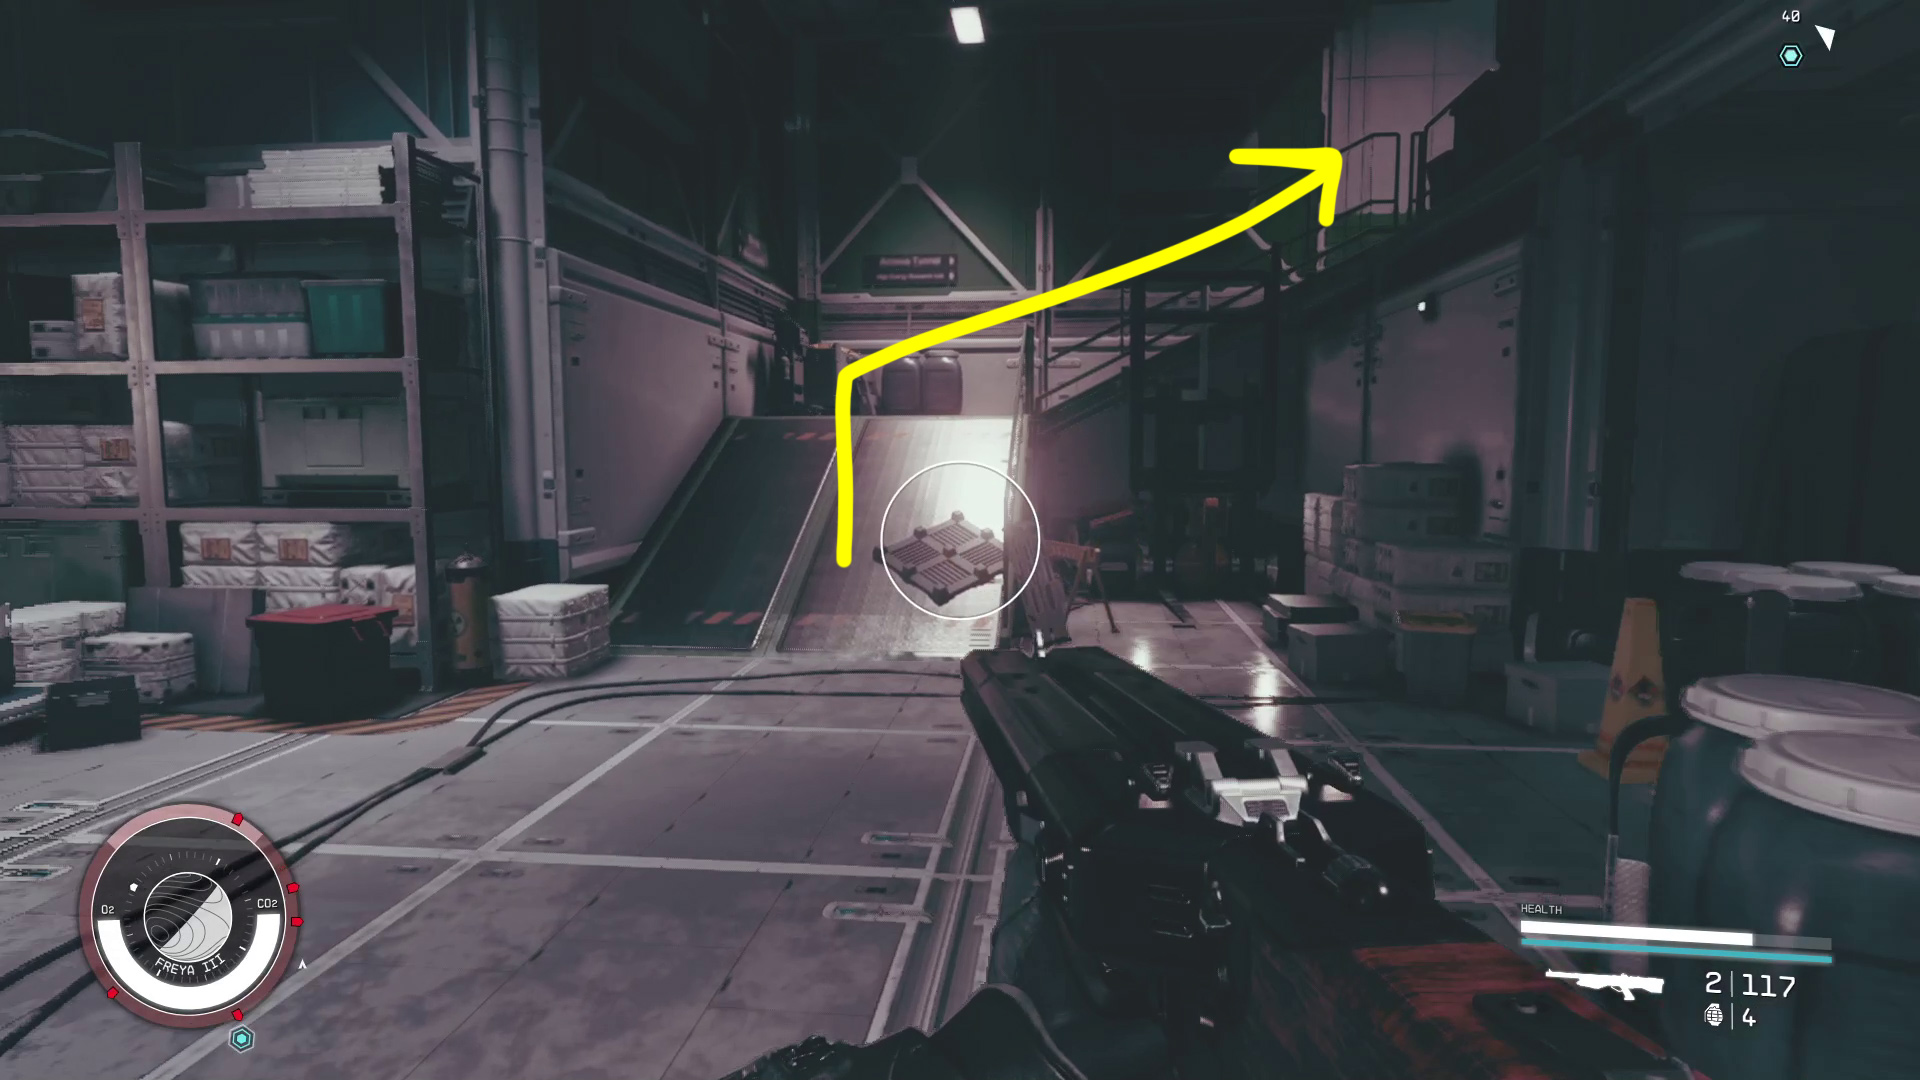
Leave the Accelerator Control room, then go to the first floor of the opposite corner (Image 57), where you’ll find a door marked Access Tunnel. Enter the Access Tunnel (Image 58), then use the distortion that’s about halfway down the tunnel (Image 59) to return to the Ruined Station.
Image 57Image 58Image 59
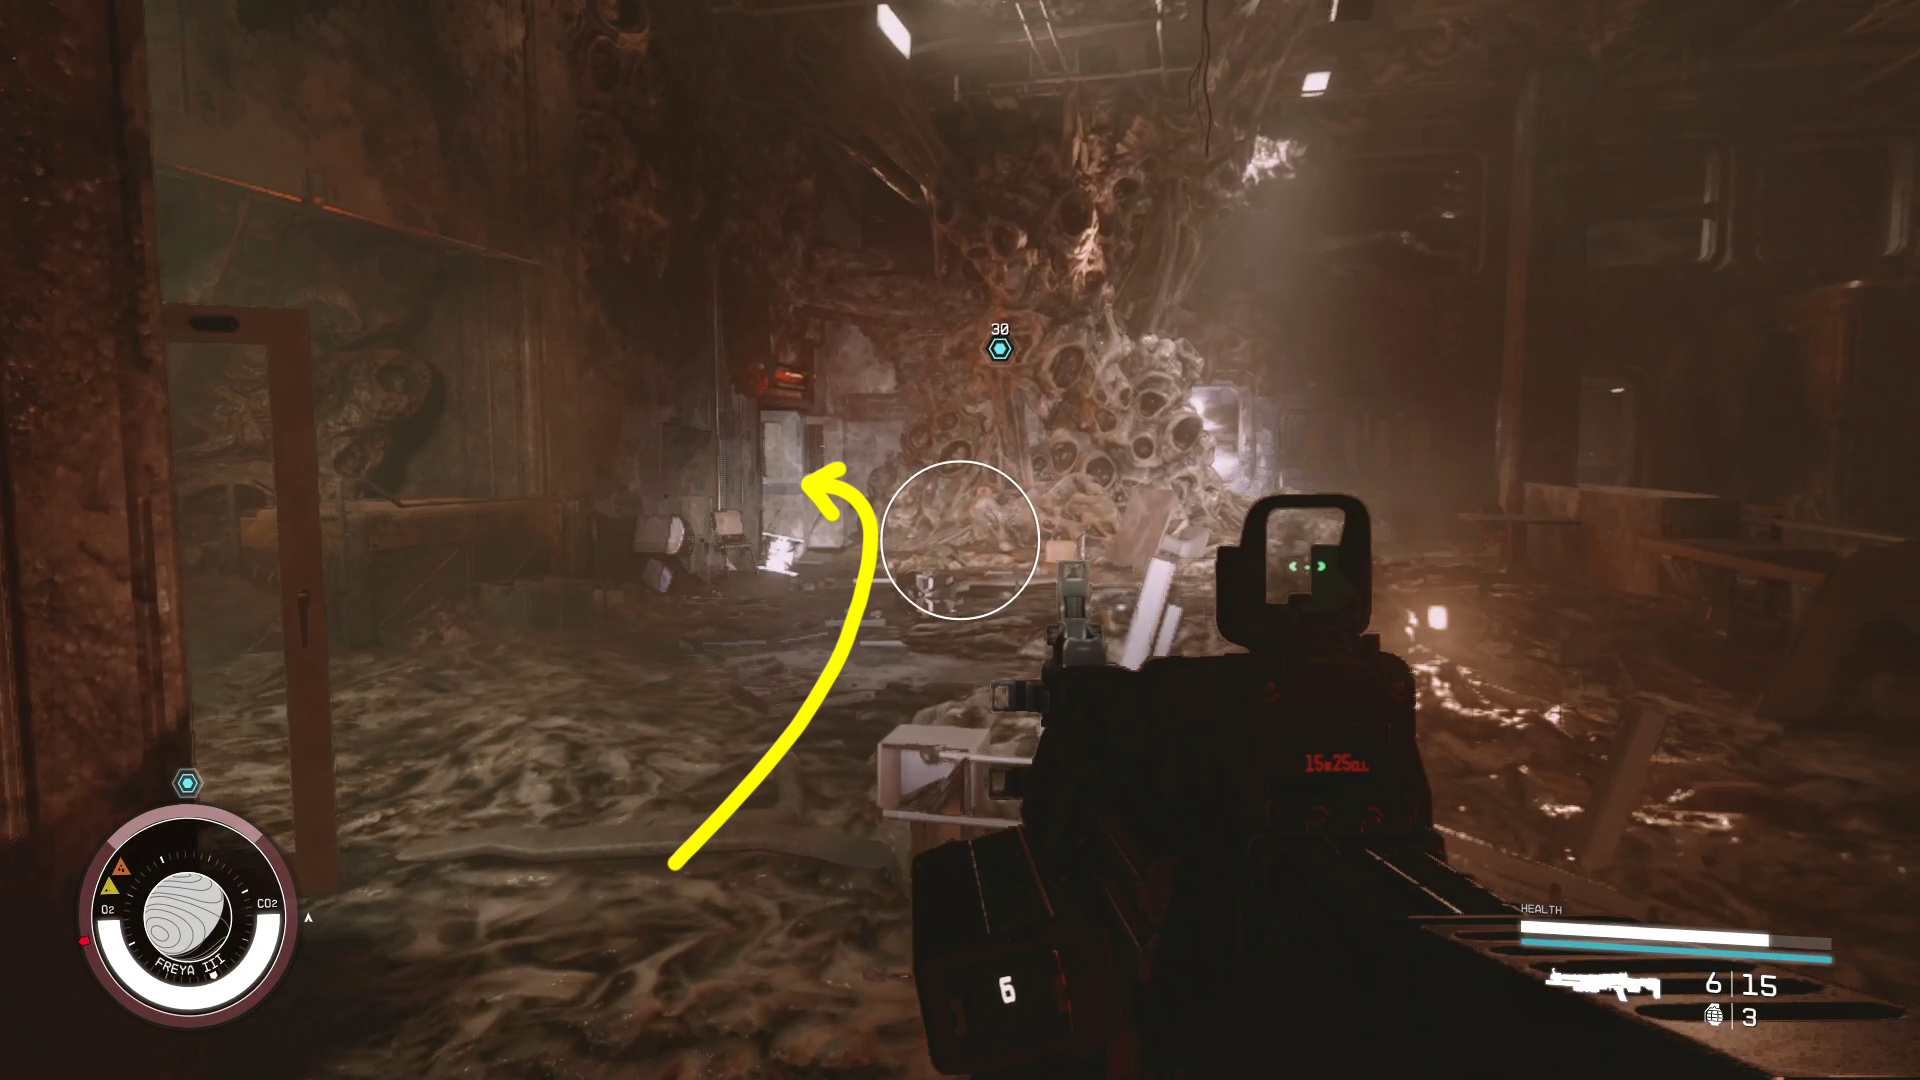
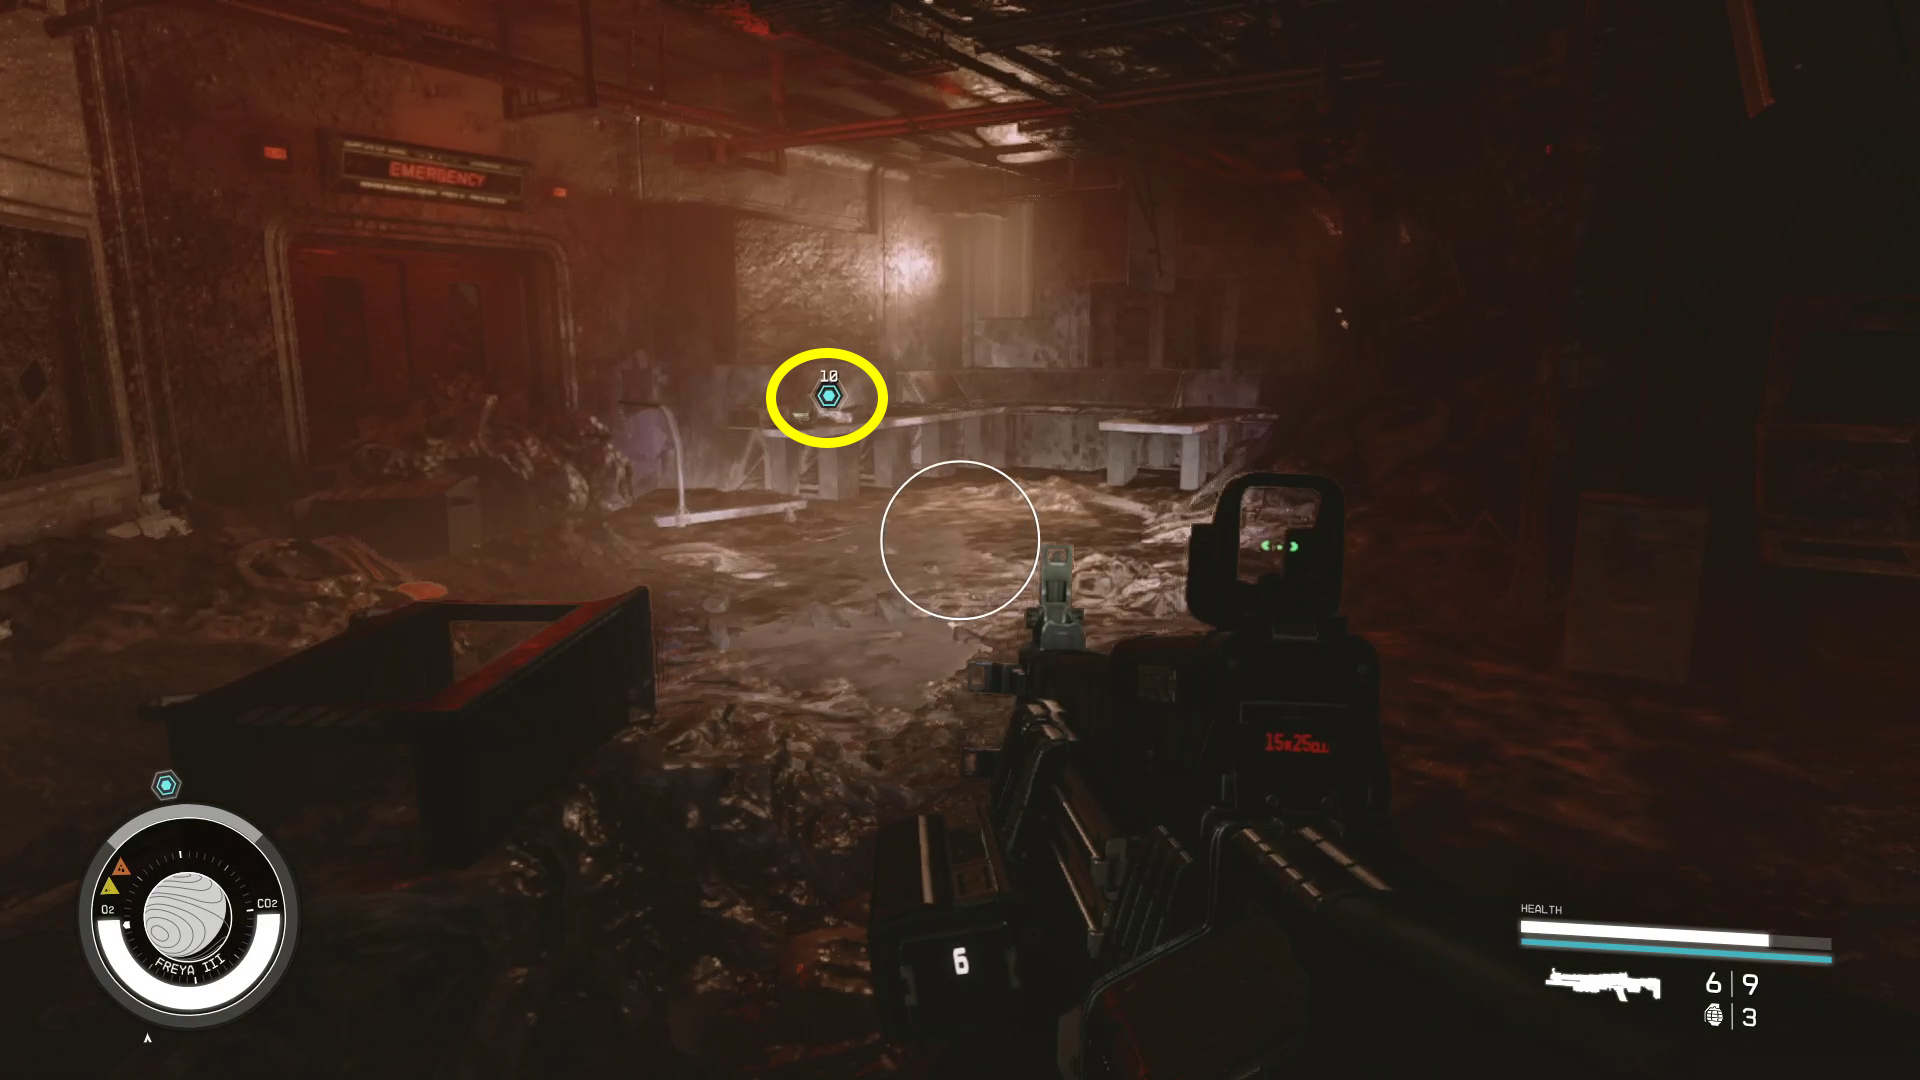
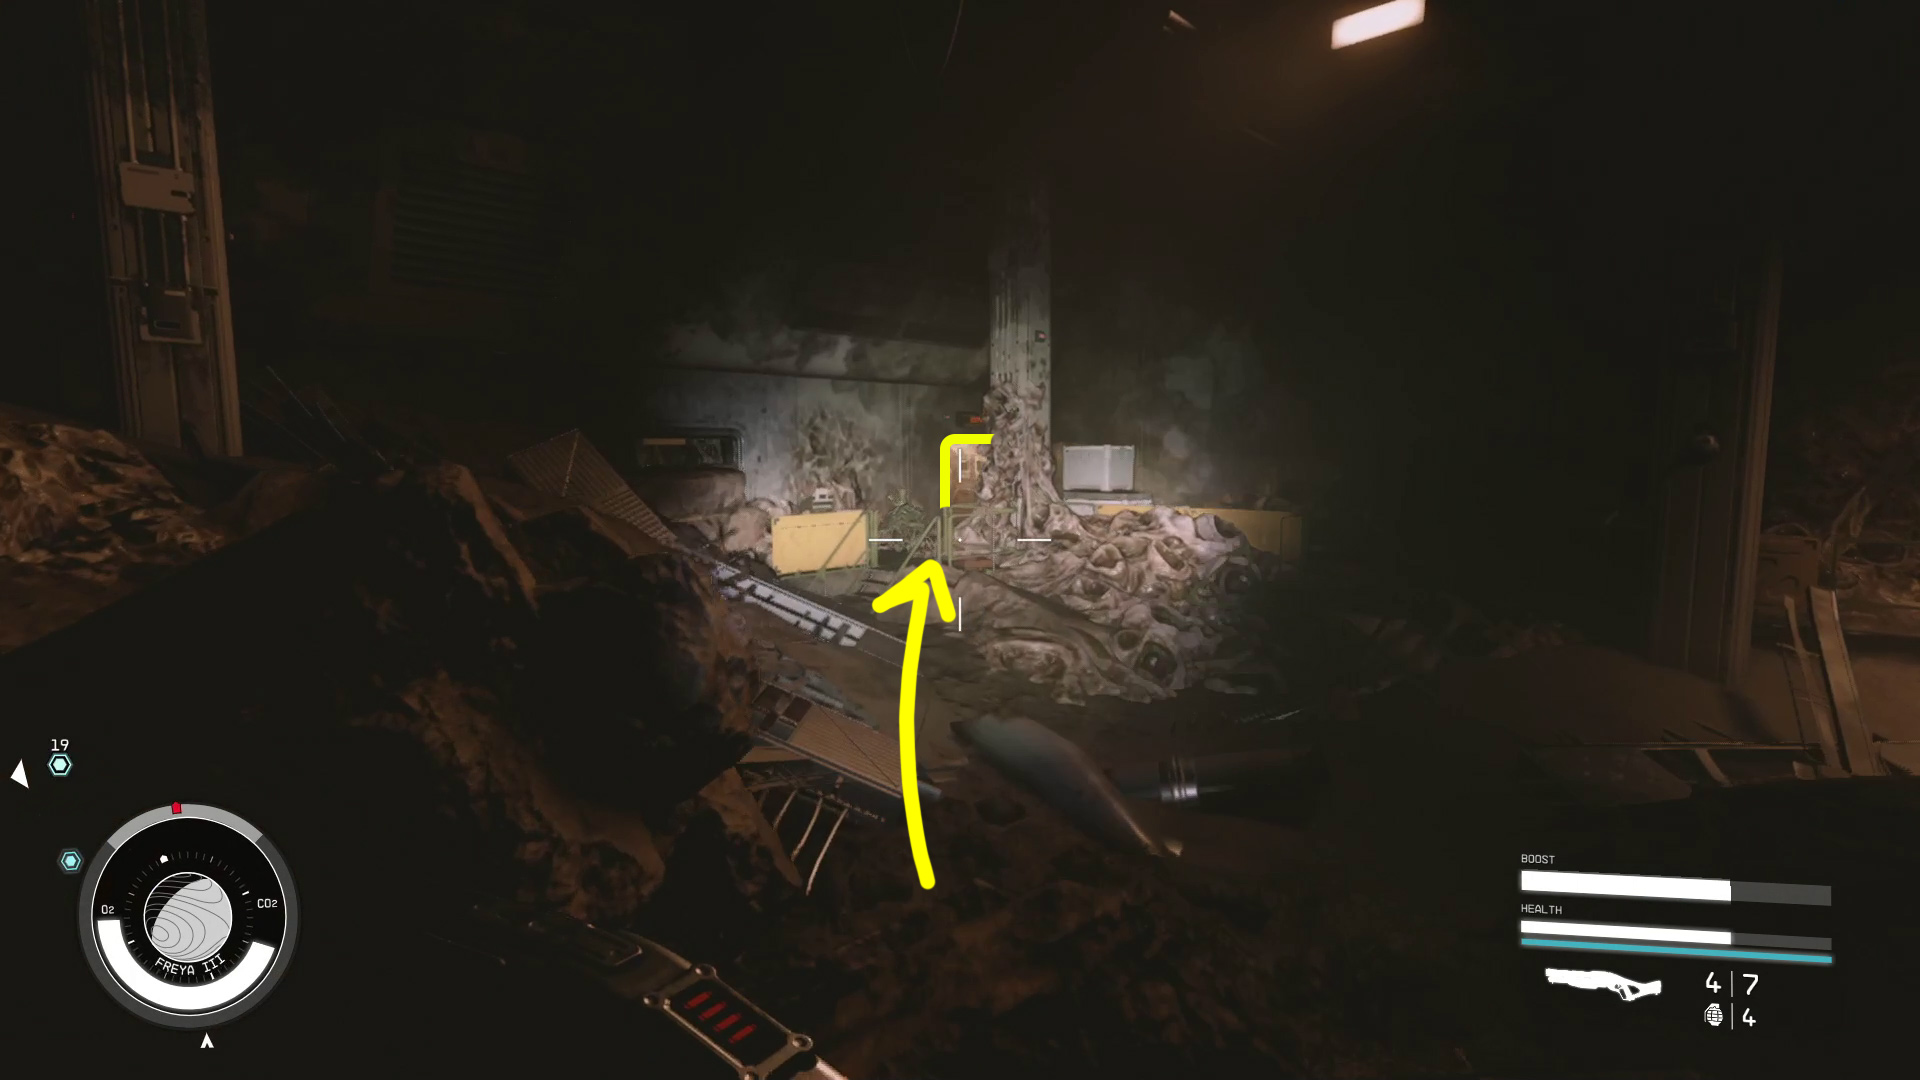
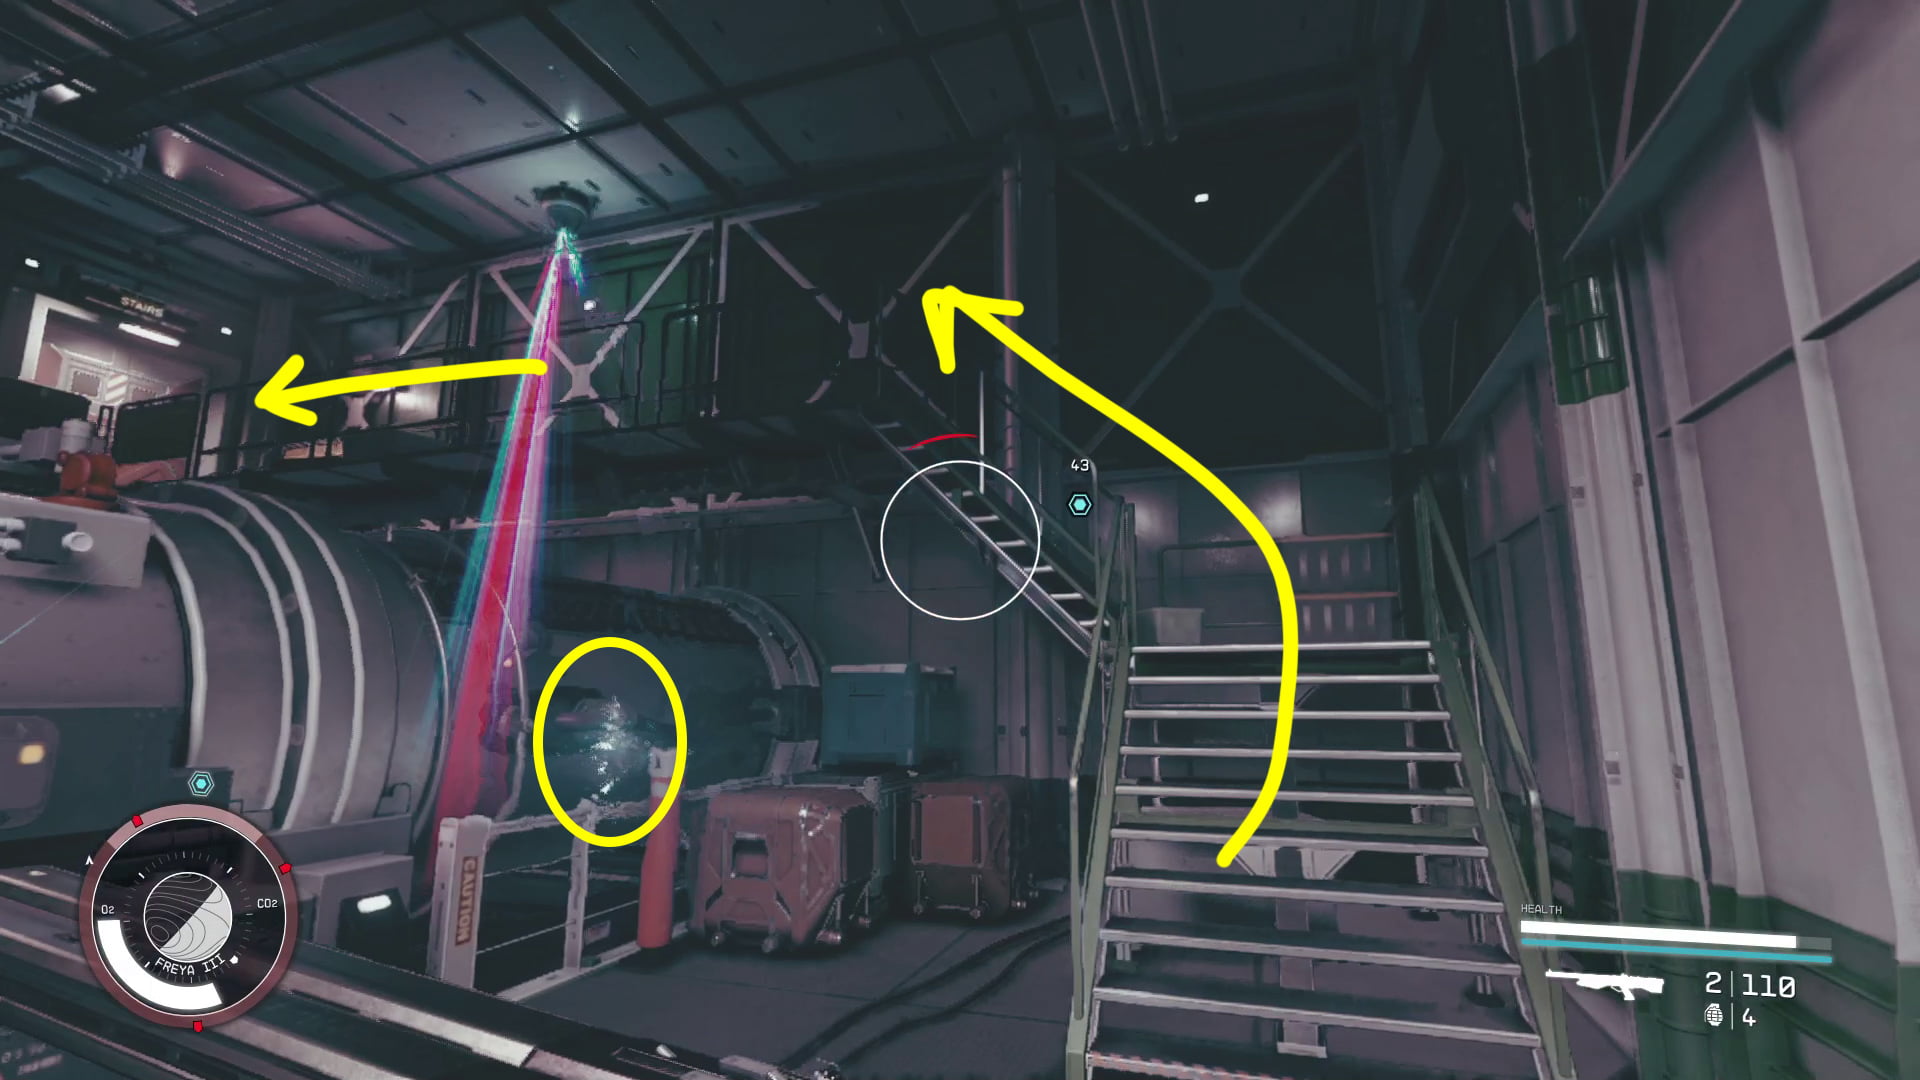
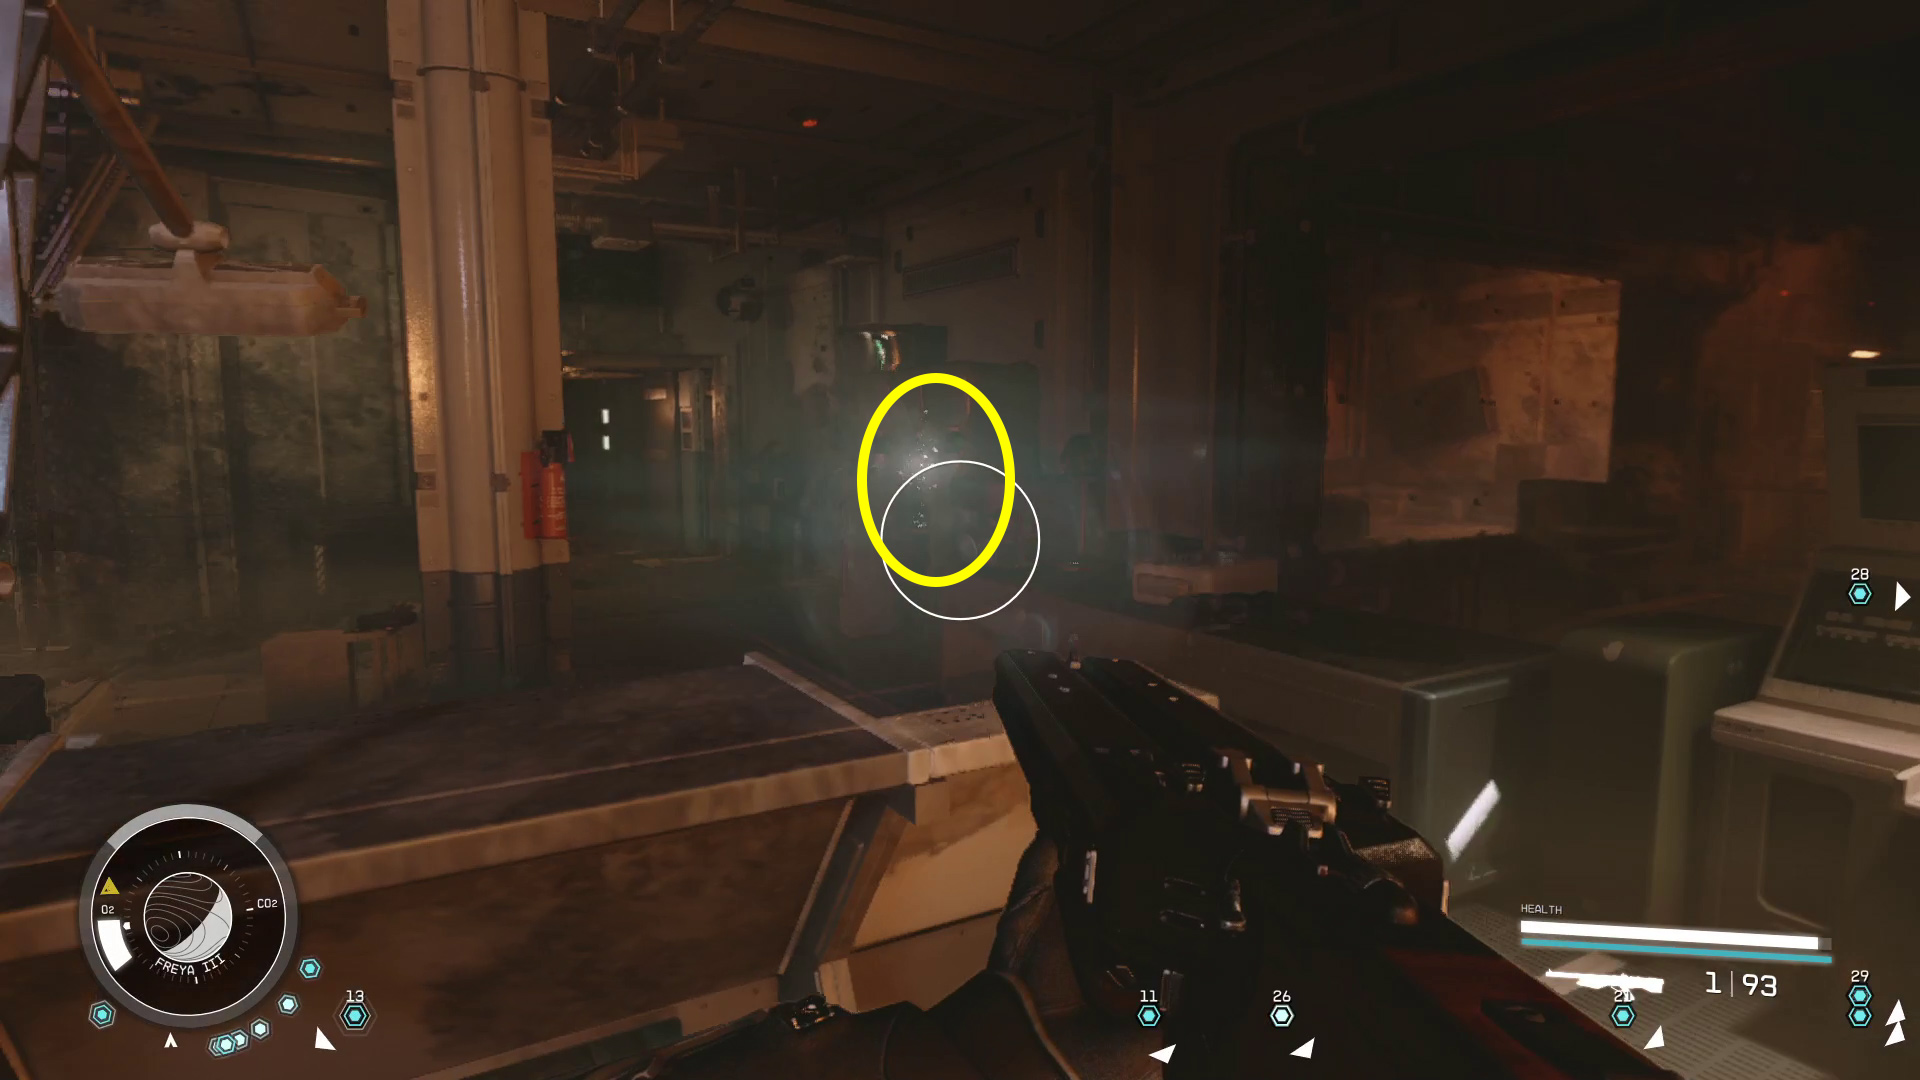
Continue forward (away from the entrance to the Access Tunnel) and make a right (Image 60). You’ll enter an area totally taken over by the Cataxi goop, and naturally you’ll soon be attacked by Cataxi. Continue forward, and you’ll have to turn right, where you’ll see a broken section of the facility (Image 61). Near the broken chunks of metal, turn right and you’ll find a path leading upwards (Image 62). Follow it upwards, and keep following the path across a narrow bridge and to a distortion.
Image 60Image 61Image 62
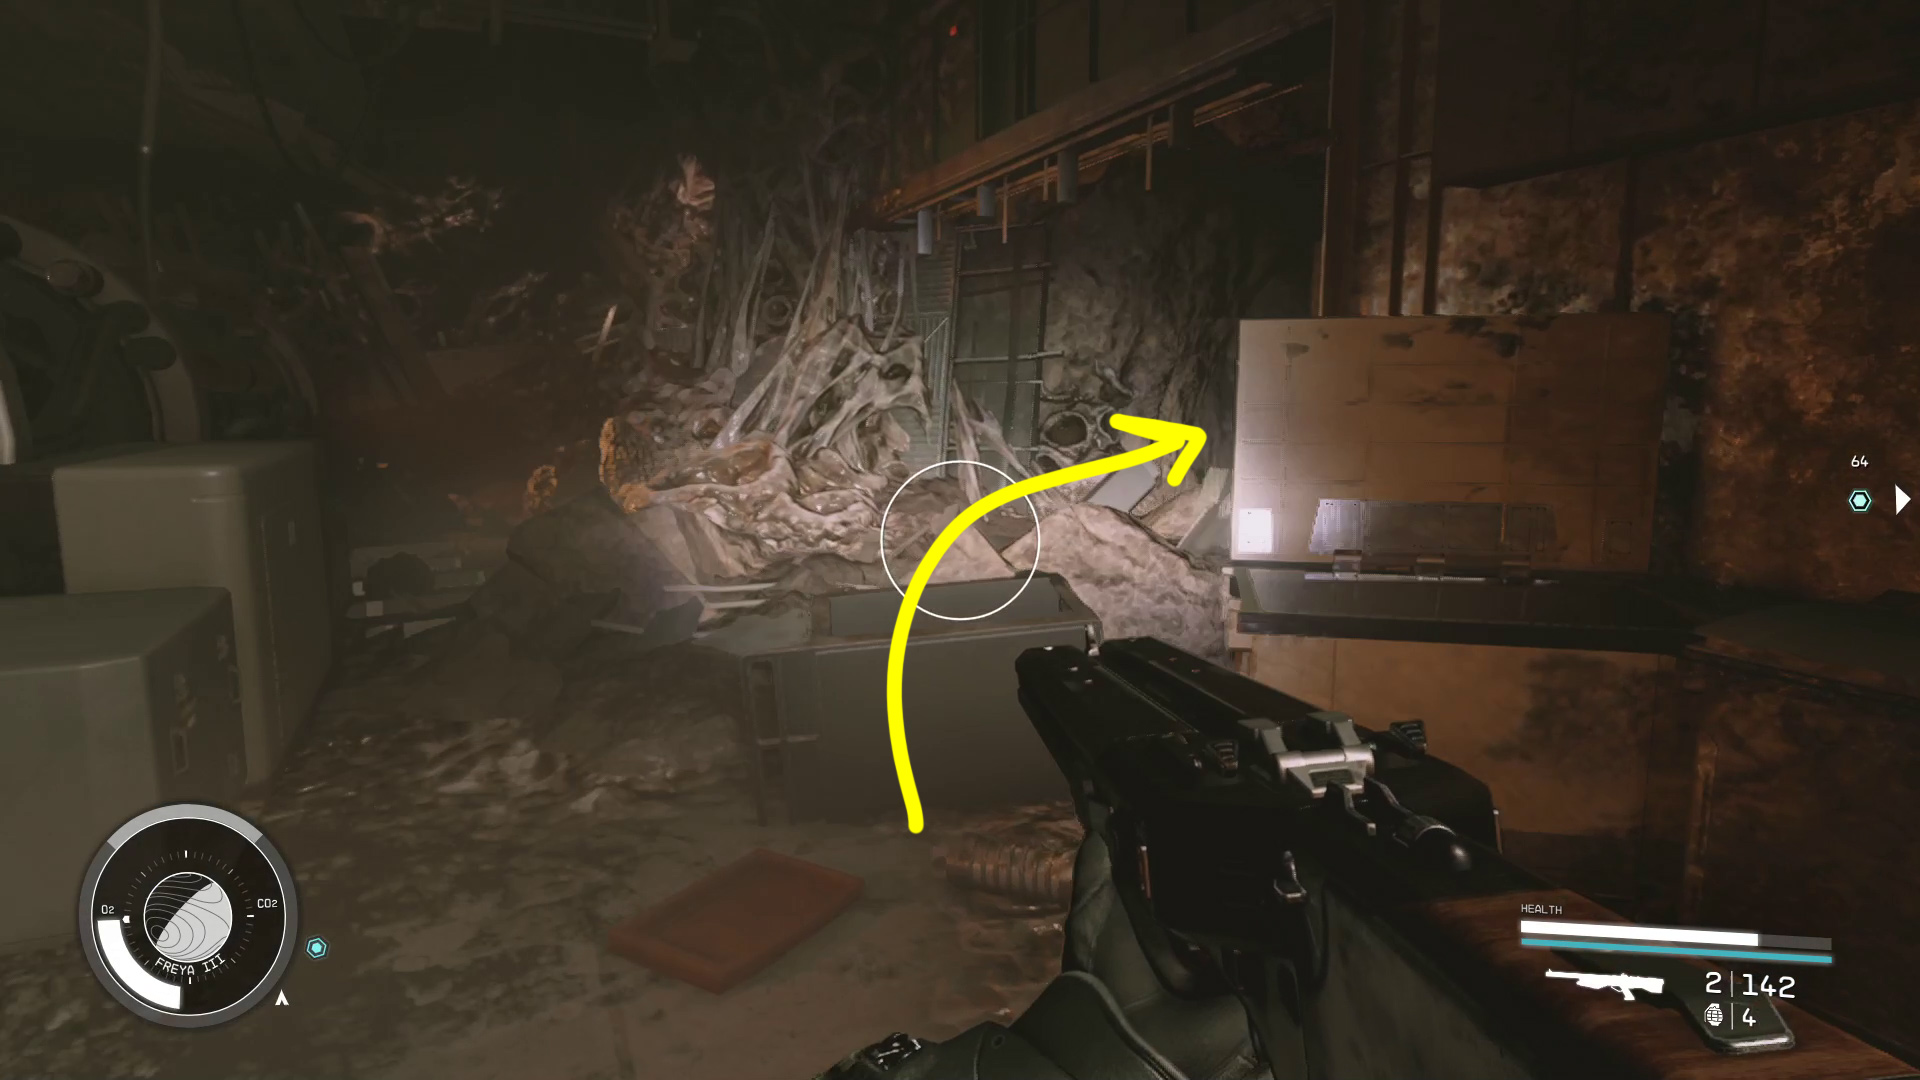
Use the distortion, then leave the room you’re in via the only door. Continue down the hall until you reach a door marked Storage. It’s blocked, but you can go left through the open doorway (Image 63) — watch out for the robots and turrets in this next room! In the far right corner (relative to the entrance) is another distortion you’ll need to use (Image 64).
Image 63Image 64
In the Ruined Station, you’ll find that there is now an open doorway up the small set of stairs (Image 65). Head through, deal with the Cataxi that rise from the floor, then continue forward around the corner and up the stone ramp. At the top of the ramp, go straight, then turn left when you have to, and you’ll find a hole in the floor by some blue support beams (Image 66).
Image 65Image 66
Go down the ramp, and you’ll enter a large room with more Cataxi to fight. Make your way through the room until you find the door marked Emergency and go through. In this next room is a distortion tagged by the objective marker — use it after looting the aid items on the nearby table.
Override the Lockdown in the Storage Section
You’ll find yourself near yet another computer, helpfully marked by the objective marker. Use the Storage Room Computer, and select “Security System”, then “Override Lockdown: Storage Section”.
Get to the Lab
The door to leave the room will now be open. Head out, and deal with the turrets and robots in the next room before continuing up the ramp (Image (67). Turn slightly right at the top of the ramp, and you’ll see the next distortion you need to use (Image 68). After using it, go up the stairs indicated (68) — but in the Ruined Station — and through the door marked Emergency.
Image 67Image 68
Continue forward, up another set of stairs and through an open door, then through another room (there’s only one way forward) and you’ll finally have reached the Lab.
Disengage Power Interlocks or Switch Universes
Before you do anything else, you’ll want to clear the Cataxi out of the lab, as you’ve got quite a bit of running around to do in here. You’ll want to do the same with the robots and turrets in the Intact version of the lab once you warp over.
There are now three options available to you:
End the experiment and save the Ruined Station’s universe
This will save Raphael, but “kill” everyone else that was in the research station. It also gives the worst rewards, though it does offer a chance to recruit Raphael later.
End the experiment and save the Intact Station’s universe
This will “kill” Raphael, but earn you better rewards
Finish the experiment, merging the universes and saving everyone
This lets you keep everyone alive, and earns you the best rewards, plus the chance to recruit Raphael later.
In terms of outcomes/rewards, finishing the experiment is far and away the best option — the only downside is that it’s a bit more work. Besides wanting to finish this mission ASAP, the only real reason to end the experiment and save only one universe is if you want to end the lives of the characters in the station, or want to leave Raphael dead (this may be why they make so many NPCs in the station rude — to make one of the “bad” options more appealing). We’ll explain all three options below.
This option makes the Ruined Station the only reality, essentially killing everyone who died in the accident for good.
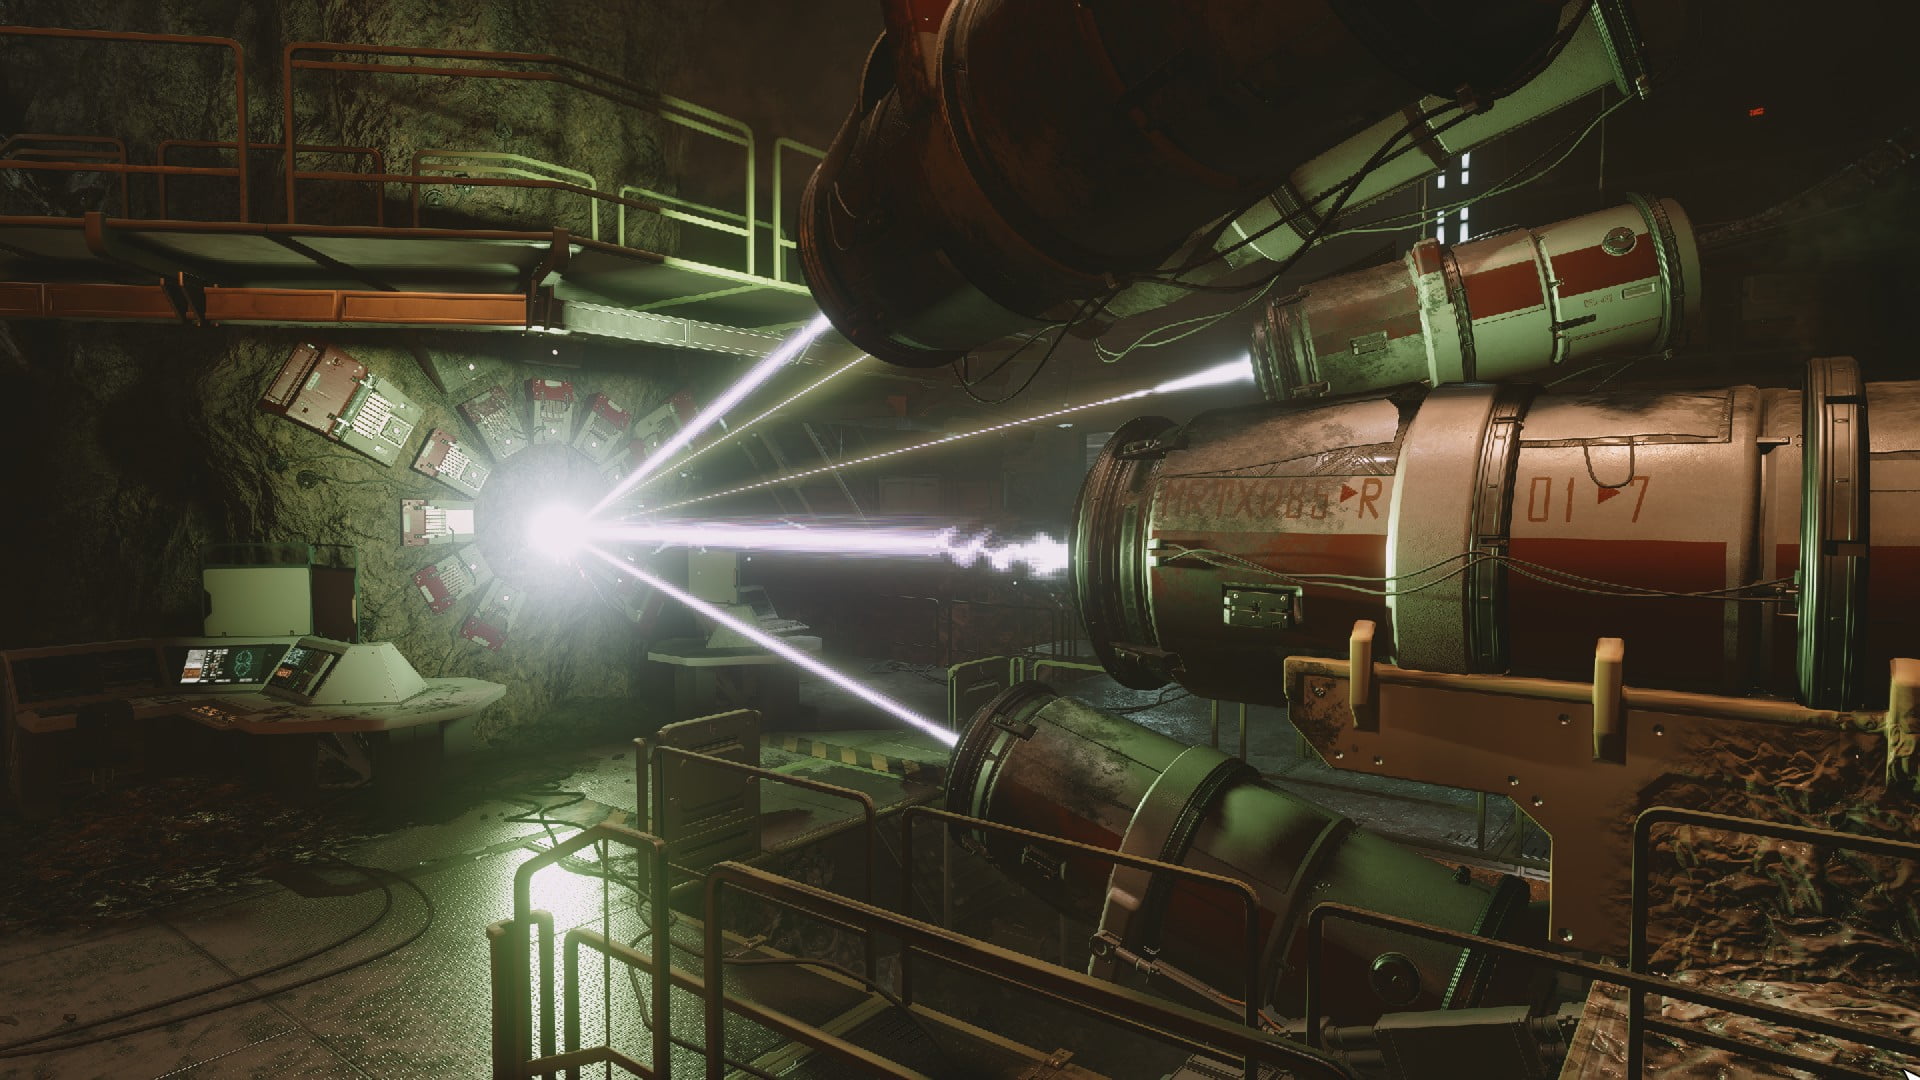
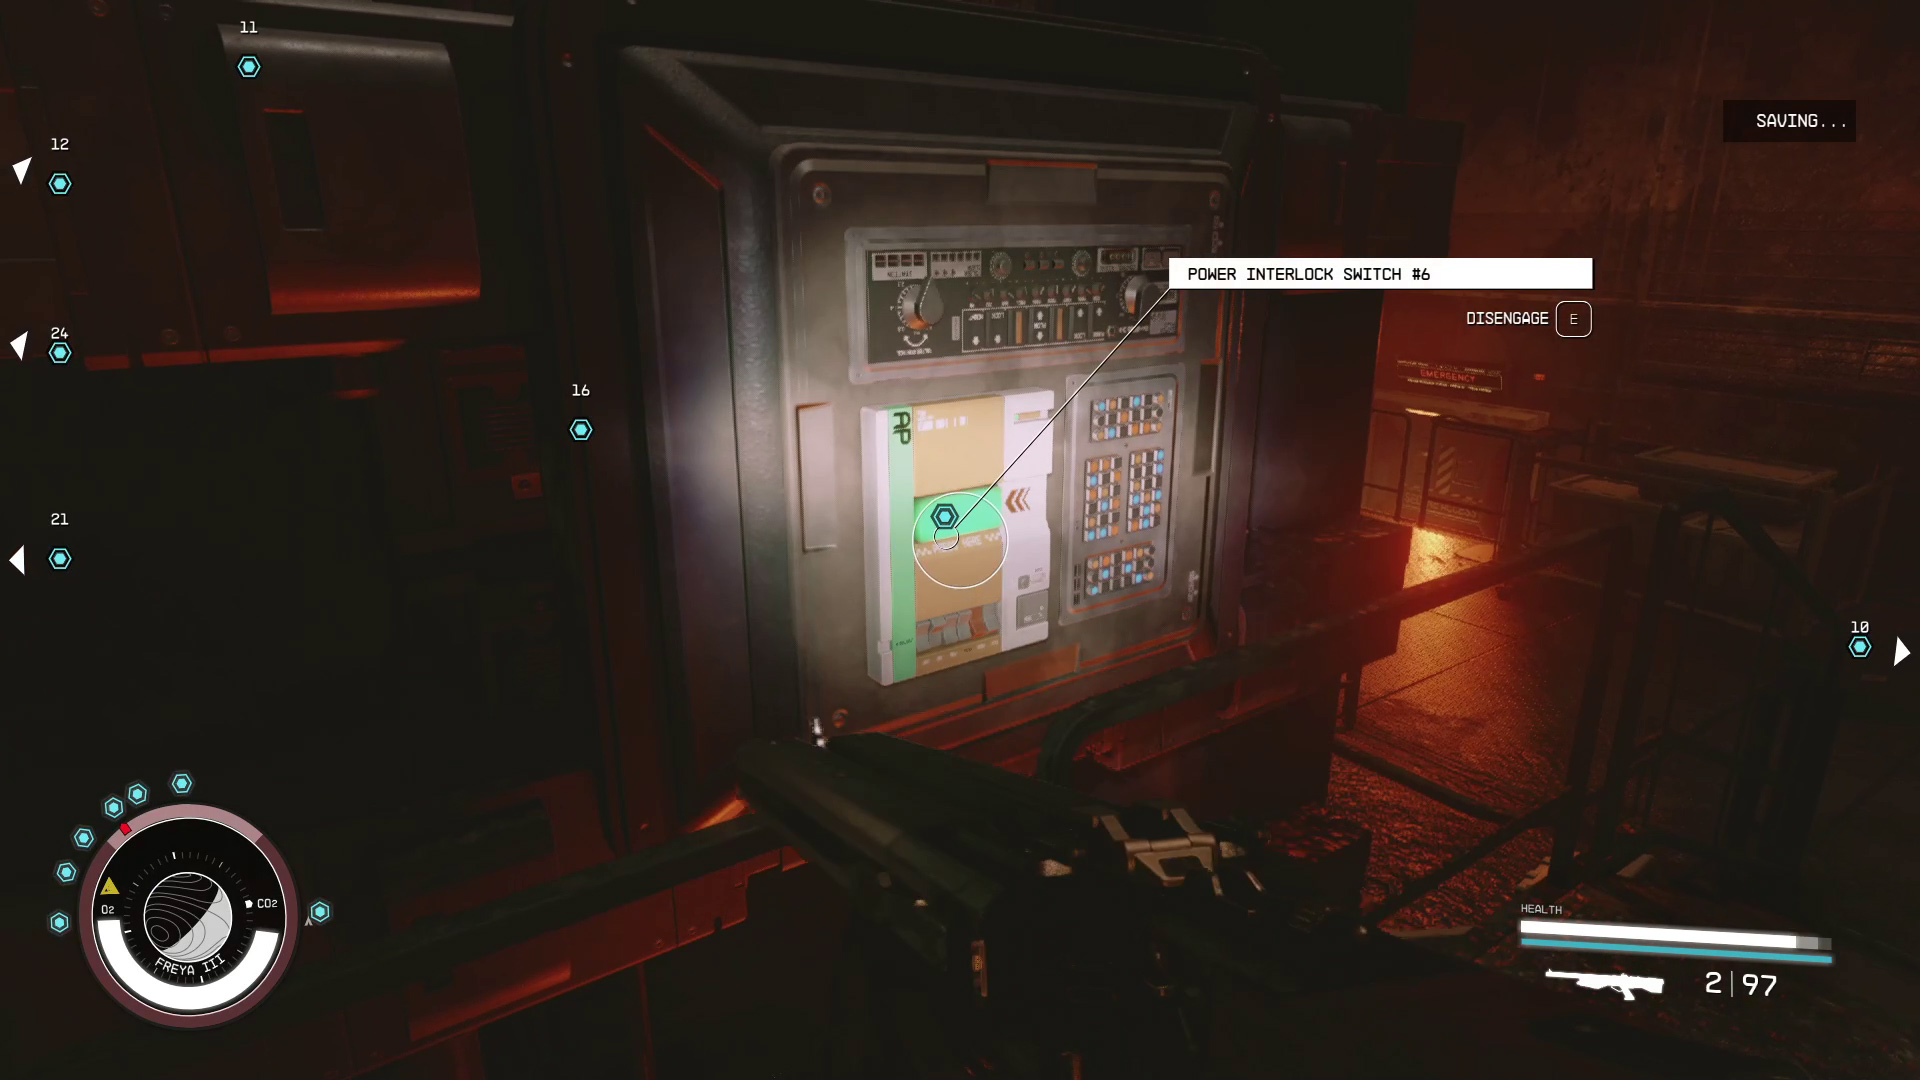
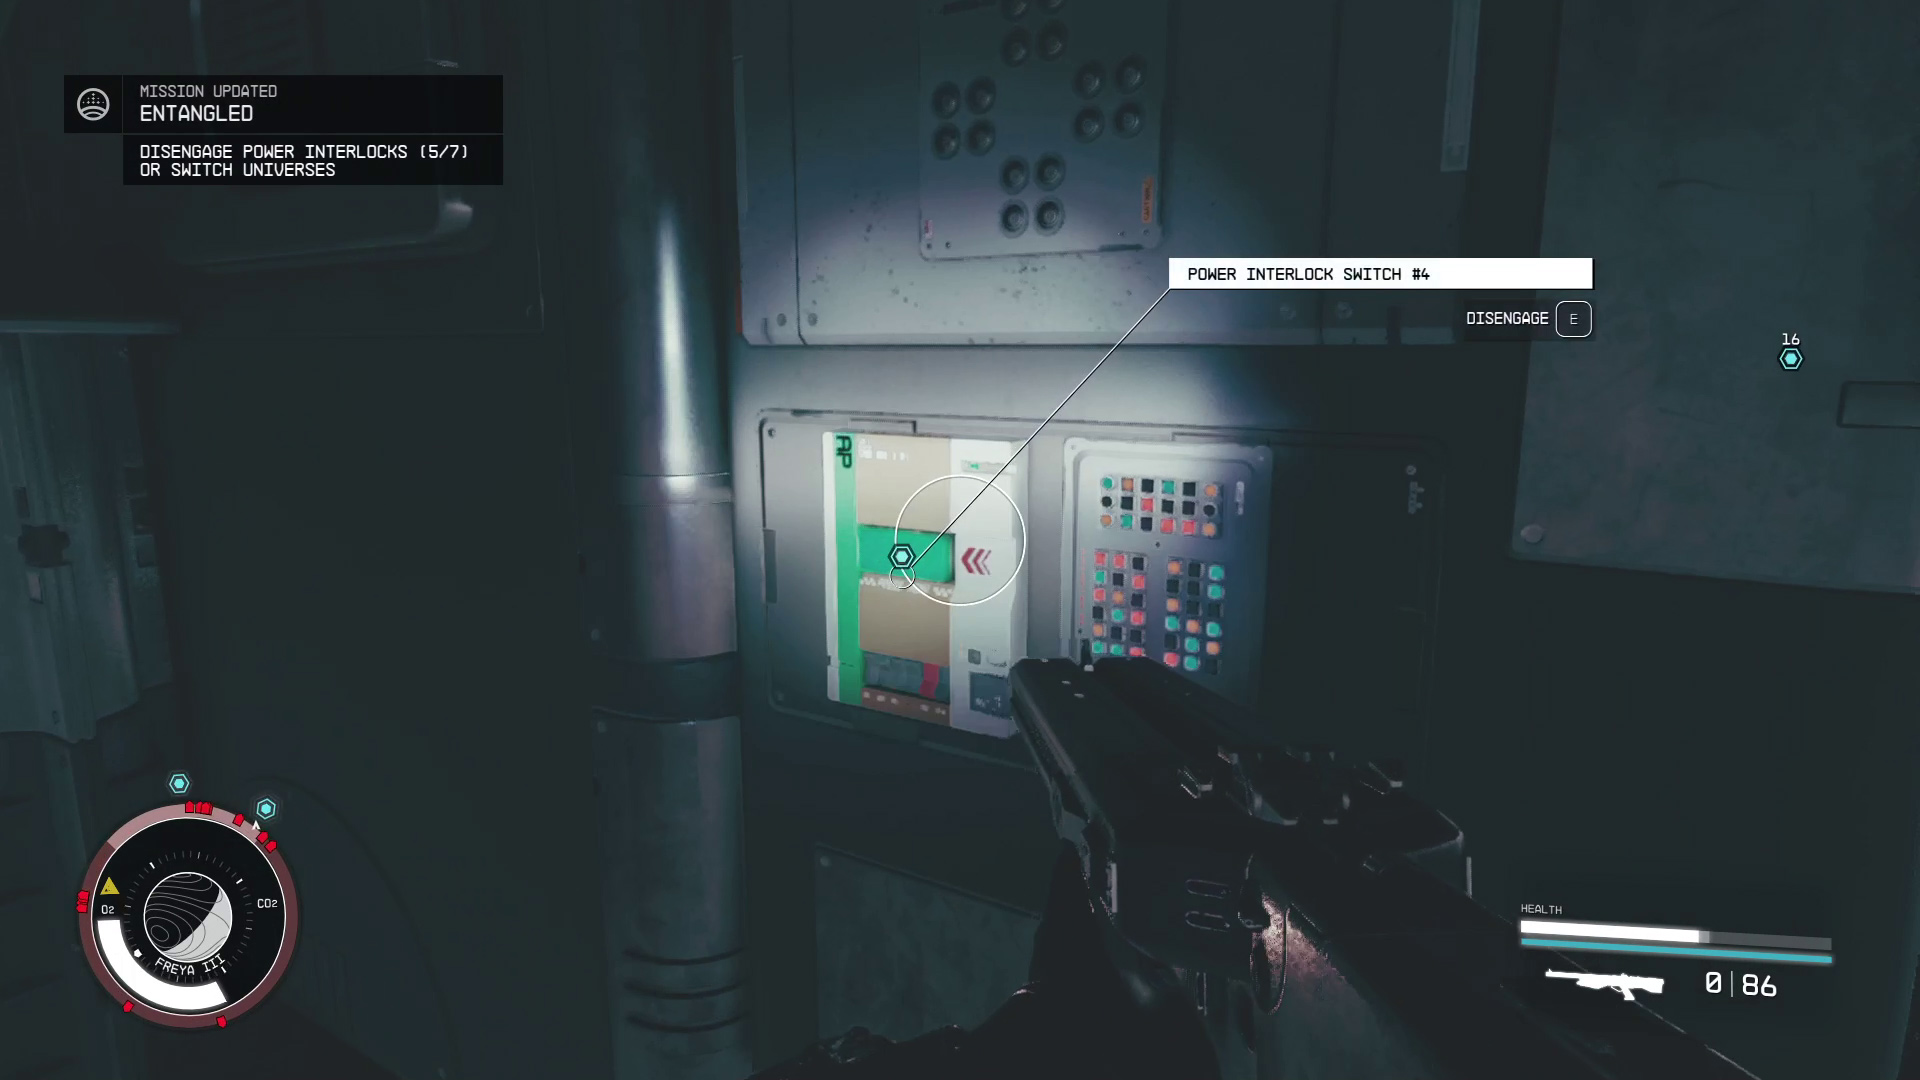
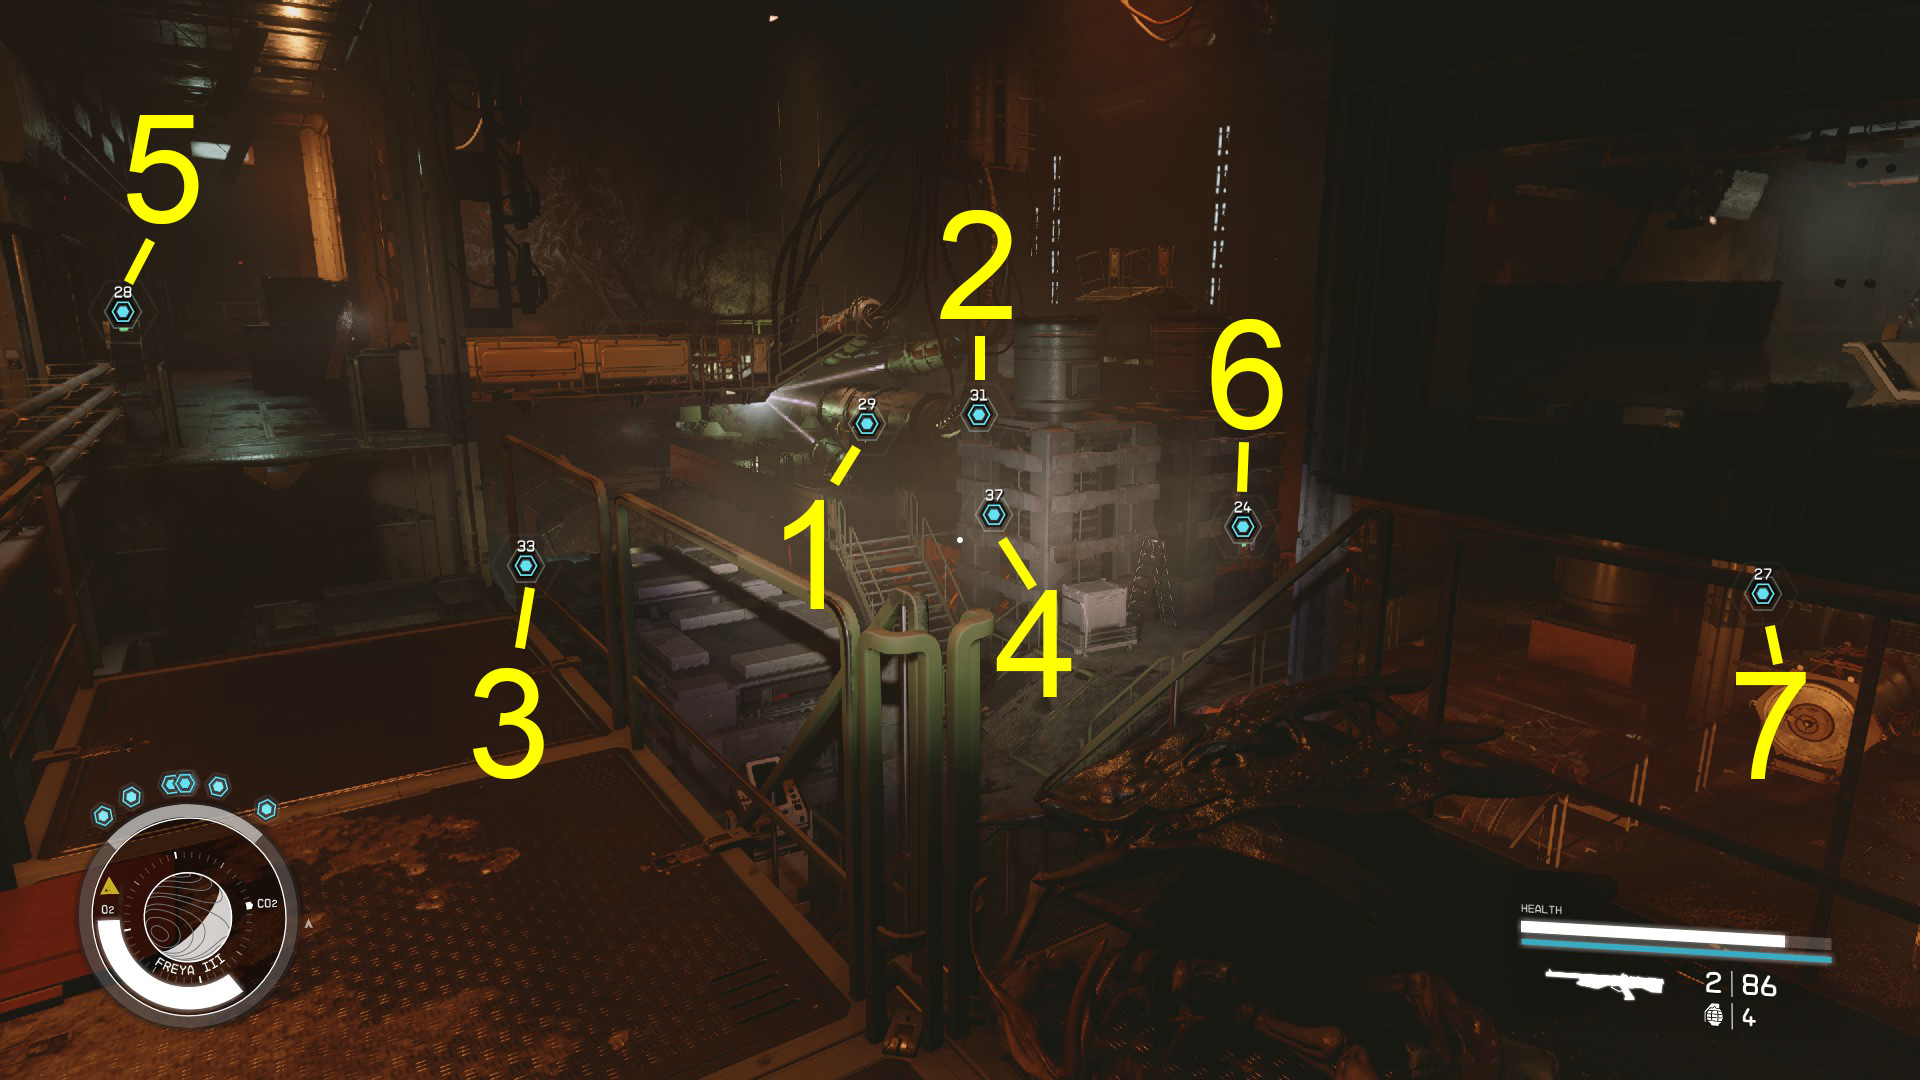
First, you’ll naturally want to make sure you’re in the Ruined universe. Then, to end the experiment, all you have to do is disengage all 7 of the Power Interlock Switches found in the Lab. They’re easy to find, as objective markers are present on all of them. Walk up to each one, then press the indicated button to disengage them (Image R1).
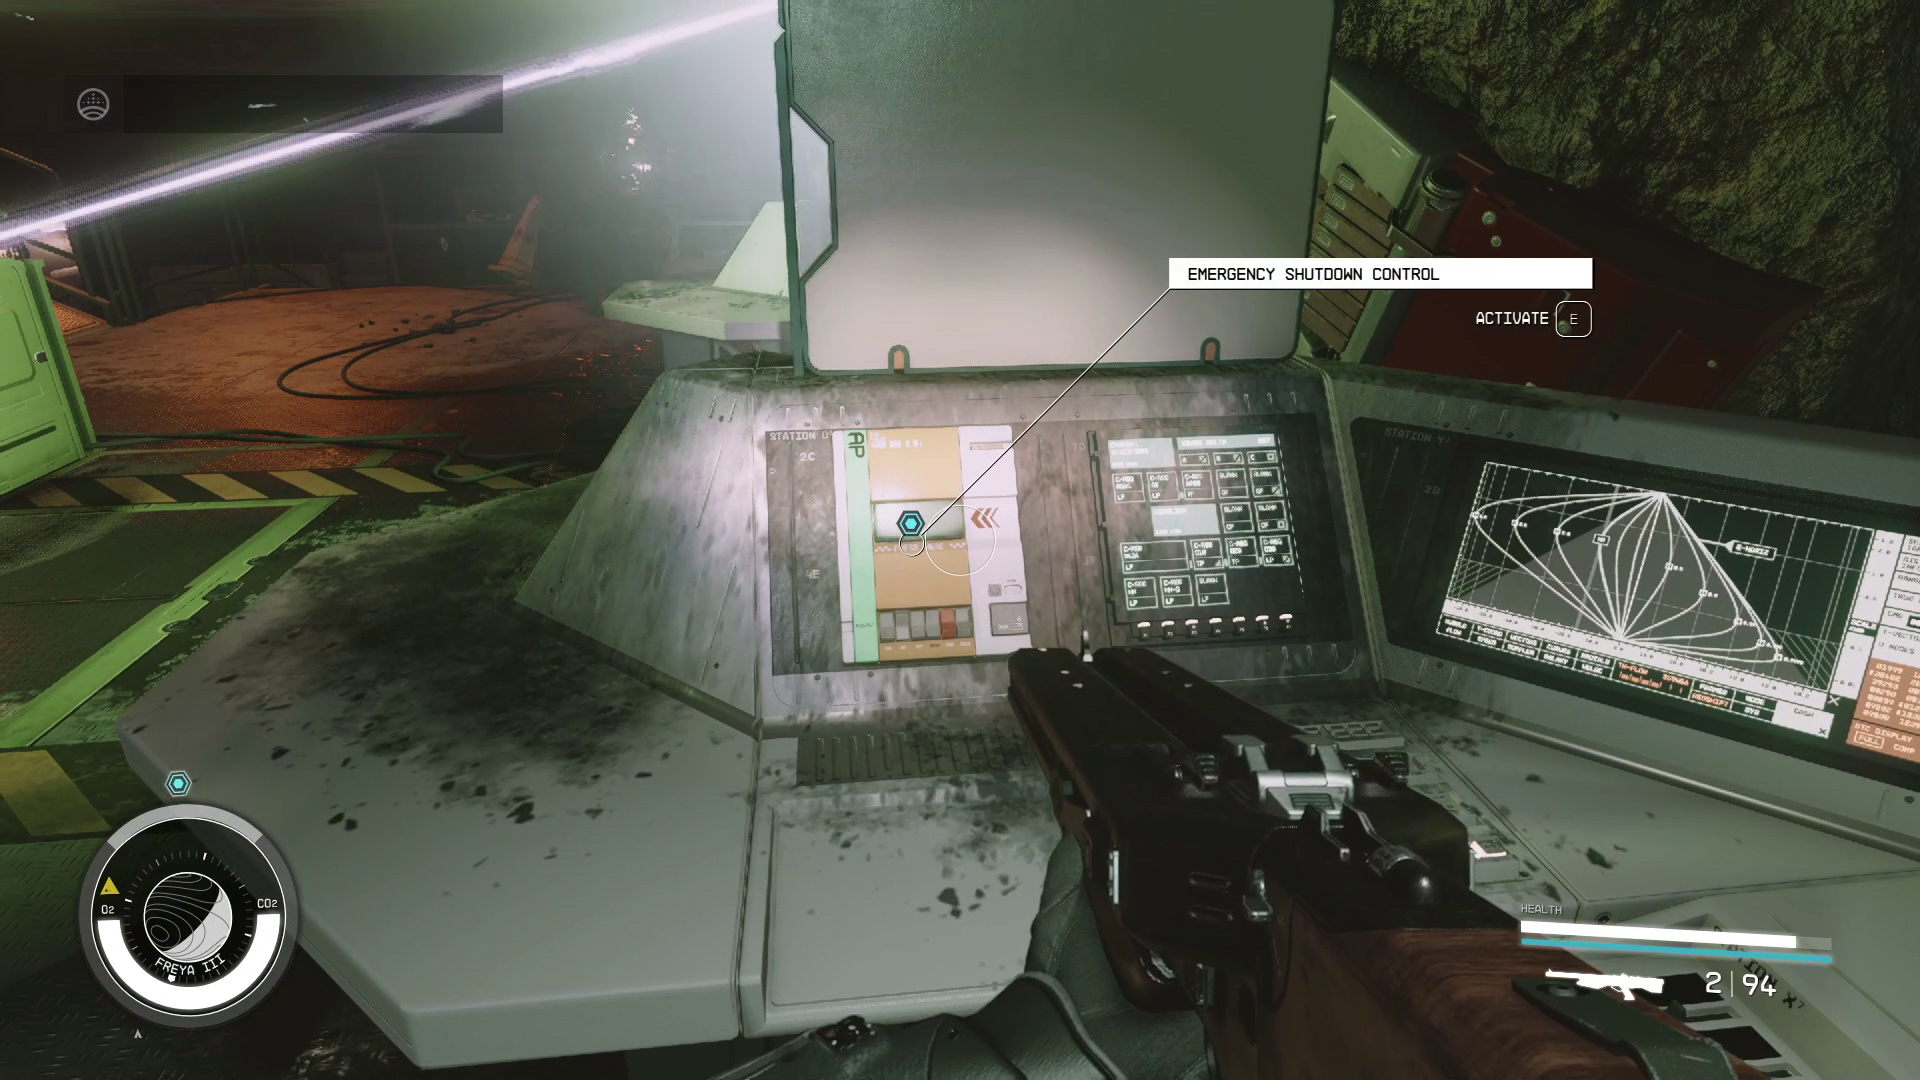
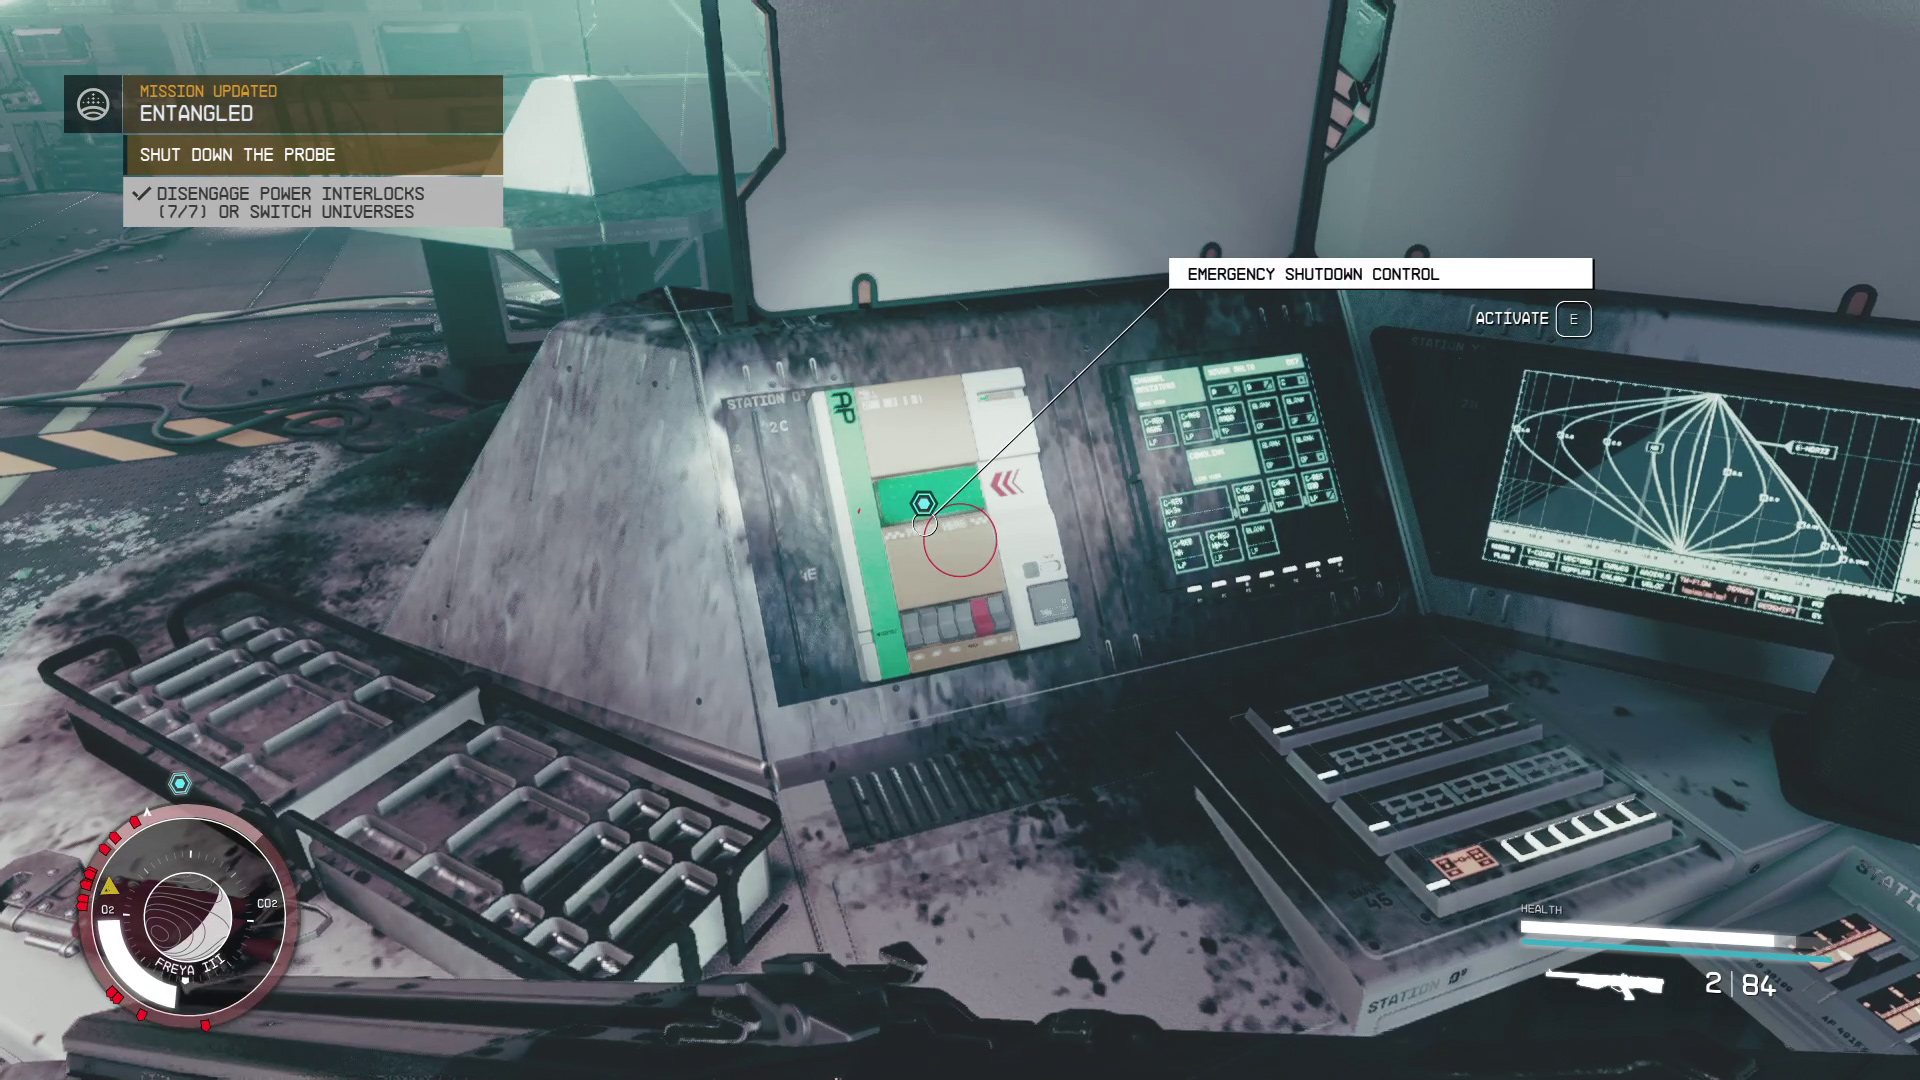
Once that’s done, you’ll get a new objective marker on the Emergency Shutdown Control panel (Image R2). Press the indicated button to Activate the control, then choose “Shut Down” and the experiment will end, allowing you to take the Artifact from where the lasers were targeting (Image R3).
R1R2R3
Speak to Raphael
After the cutscene plays, turn right (from where you collected the Artifact) then take a right down the nearby ramp (Image R4) and then go through the door you find on your left just ahead (R5). Make sure you loot the science crate on your left in the next room (R6), then continue forward towards the objective marker, which will lead you to the elevator controls.
R4R5R6
Use the elevator controls, and when the ride ends, leave and turn left, where you’ll find Raphael waiting. Approach him and a conversation will begin — say whatever you want, and you’ll have completed this mission.
To leave the station, just turn right and head through the doorway marked Foyer. Continue towards the objective marker, which will lead you to the exit. You’ll need to fight your way through some Cataxi once you’re outside in order to get back to your ship.
This option makes the Intact Station the only reality, leaving Raphael dead.
First, make sure you’re in the Intact universe. Then, to end the experiment, all you have to do is disengage all 7 of the Power Interlock Switches found in the Lab. They’re easy to find, as objective markers are present on all of them. Walk up to each one, then press the indicated button to disengage them (Image I1).
Once that’s done, you’ll get a new objective marker on the Emergency Shutdown Control panel (Image I2). Press the indicated button to Activate the control, then choose “Shut Down” and the experiment will end, allowing you to take the Artifact from where the lasers were targeting (Image I3).
I1I2I3
Speak to Director Patel
After the cutscene plays, turn right (from where you collected the Artifact) then take a right down the nearby ramp (Image I4) and then go through the door you find on your left just ahead (I5). Make sure you loot the science crate on your left in the next room (I6), then continue forward towards the objective marker, which will lead you to the elevator controls.
I4I5I6
Use the elevator controls, and when the ride ends, leave and turn left, where you’ll find Director Patel waiting. Approach her and a conversation will begin — say whatever you want, and you’ll have completed this mission.
To complete the experiment, you’ll first need to get to the lab’s control room. From where you entered, go down the stairs and across the room (F1), then up the stairs on the opposite side (F2). At the top of the stairs, turn right and go through the door. In the center of the console nearest the window is the Lab Control Computer (F3). Note that the door to the control room is impassable in the Intact Lab, so you’ll need to be in the Ruined universe to enter the control room.
Interact with the computer, then select “Lab Controls”, then “Degaussing”. This will give you a list of Power Interlocks to degauss. Write down the numbers you get, then turn around and go through the distortion (F4) — be ready to fight the robots in the room! Once you’re safe, use the computer again in the Intact universe, and again go to “Degaussing” and note which Power Interlocks are listed.
Image F4
In our game, the following interlocks were listed — please let us know in the comments if yours were the same or different!
Ruined Lab – #4, #7
Intact Lab – #1, #5, #6, #7
Now, leave the lab (remembering that this is only possible in the Ruined universe), and go toggle all the Interlink Switches you wrote down, in both universes — turning them off and on again will “degauss” them. Don’t forget that there are lots of enemies in the lab in both universes, so either move slowly and take them down methodically, or run to each switch and ignore them. You’ll be able to see the number on each switch when you look at it from up close, but we went ahead and made it a bit easier for you:
The view from the door you entered the lab by
Once you’ve degaussed all the necessary Interlink Switches by turning them on and off, enter the control room once again, and use the computer. Select “Frequency Calibration”, then press the “Initiate Frequency Calibration” option, and then you’ll need to set the Frequency Calibration to a specific frequency in both universes:
Ruined Lab – 24 GHz
Intact Lab – 40 GHz
After setting the correct frequency in one universe, you’ll need to use a distortion and then repeat the process in the other universe.
Activate Primary Calibration
Once you correctly recalibrate the experiment, you’ll have a new mission objective: “Activate Primary Calibration”. Go back into the main room of the lab, and head to where the lasers are firing. On the left side of the lasers is the Primary Calibration Control (R5). Press the indicated button to Activate the console.
Image R5
Wait for the Experiment/Speak to Everyone
You’ll need to wait for the experiment to end, and then after a brief cutscene, you’ll wake up in the clinic. End the conversation however you like, and then you’ll receive your rewards, plus Artifact Lambda.
Note that for the two options in which you save Raphael, you’ll have to go meet him later on New Atlantis, after he’s had a chance to rest.
However you decided to end the quest, completing Entangled should also finish the mission Final Glimpses — assuming you already picked up Artifact Omicron on Piazza IV-C. That means that the main quests currently available are Missed Beyond Measure and Unearthed.
Since this last mission was a lot of work, we’ll take some time to relax — and grieve — by doing Missed Beyond Measure. It’s optional though, and you can simply move on to Unearthed if you prefer.
Unabashed FromSoftware fanboy still learning to take his time with games (and everything else, really). The time he doesn't spend on games is spent on music, books, or occasionally going outside.