This is it! The moment you’ve been waiting for ever since you heard about Jasper Kryx’s treasure during Echoes of the Past. This mission is probably one of the most cinematic in the game, giving players a nice slow burn that culminates into a frantic rush of action.
Unlike the last several missions, there won’t be a sneaking option for this objective. However, there are plenty of containers to loot. Also, If you’re getting into the story, then this mission offers a bevy of recordings and backstory for you to sink your teeth into. While this guide won’t be super long – because it’s mostly you blasting your way through a ship – there are some technical challenges and prepping that you will want to do for the next mission, which starts right after this one.
The ending of the last mission, Absolute Power, comes quite abruptly. As soon as you dock with The Key, you’re told to go find Delgado, who is talking to Jasmine in ship services. In a sense, the ending of the last mission is kinda rolled into the start of this one.
When you find Delgado, he will be talking with Jazz about the defenses of The Key. Wait for them to finish, then Delgado will ask you to hand over the Conduction Grid Data. He’ll tell you that a SysDef attack on the station is eminent, and that you have to go get Kryx’s Legacy immediately.
Install Both the ComSpike Module and the Conduction Grid Module
In order to find and dock with The Legacy ship, though, you will have to modify your ship with the modules you stole in the prior missions. Talk to Jasmine and pick the dialogue option “Mind helping me with my ship?”, then “I’d like to view and modify my ships.”
Now, you should be in the ship modifier screen. This is a good time to spend some (but not all) of your hard-earned credits and upgrade your ship, because there are some tough starship battles in the next mission. We have dedicated guides to help you do this:
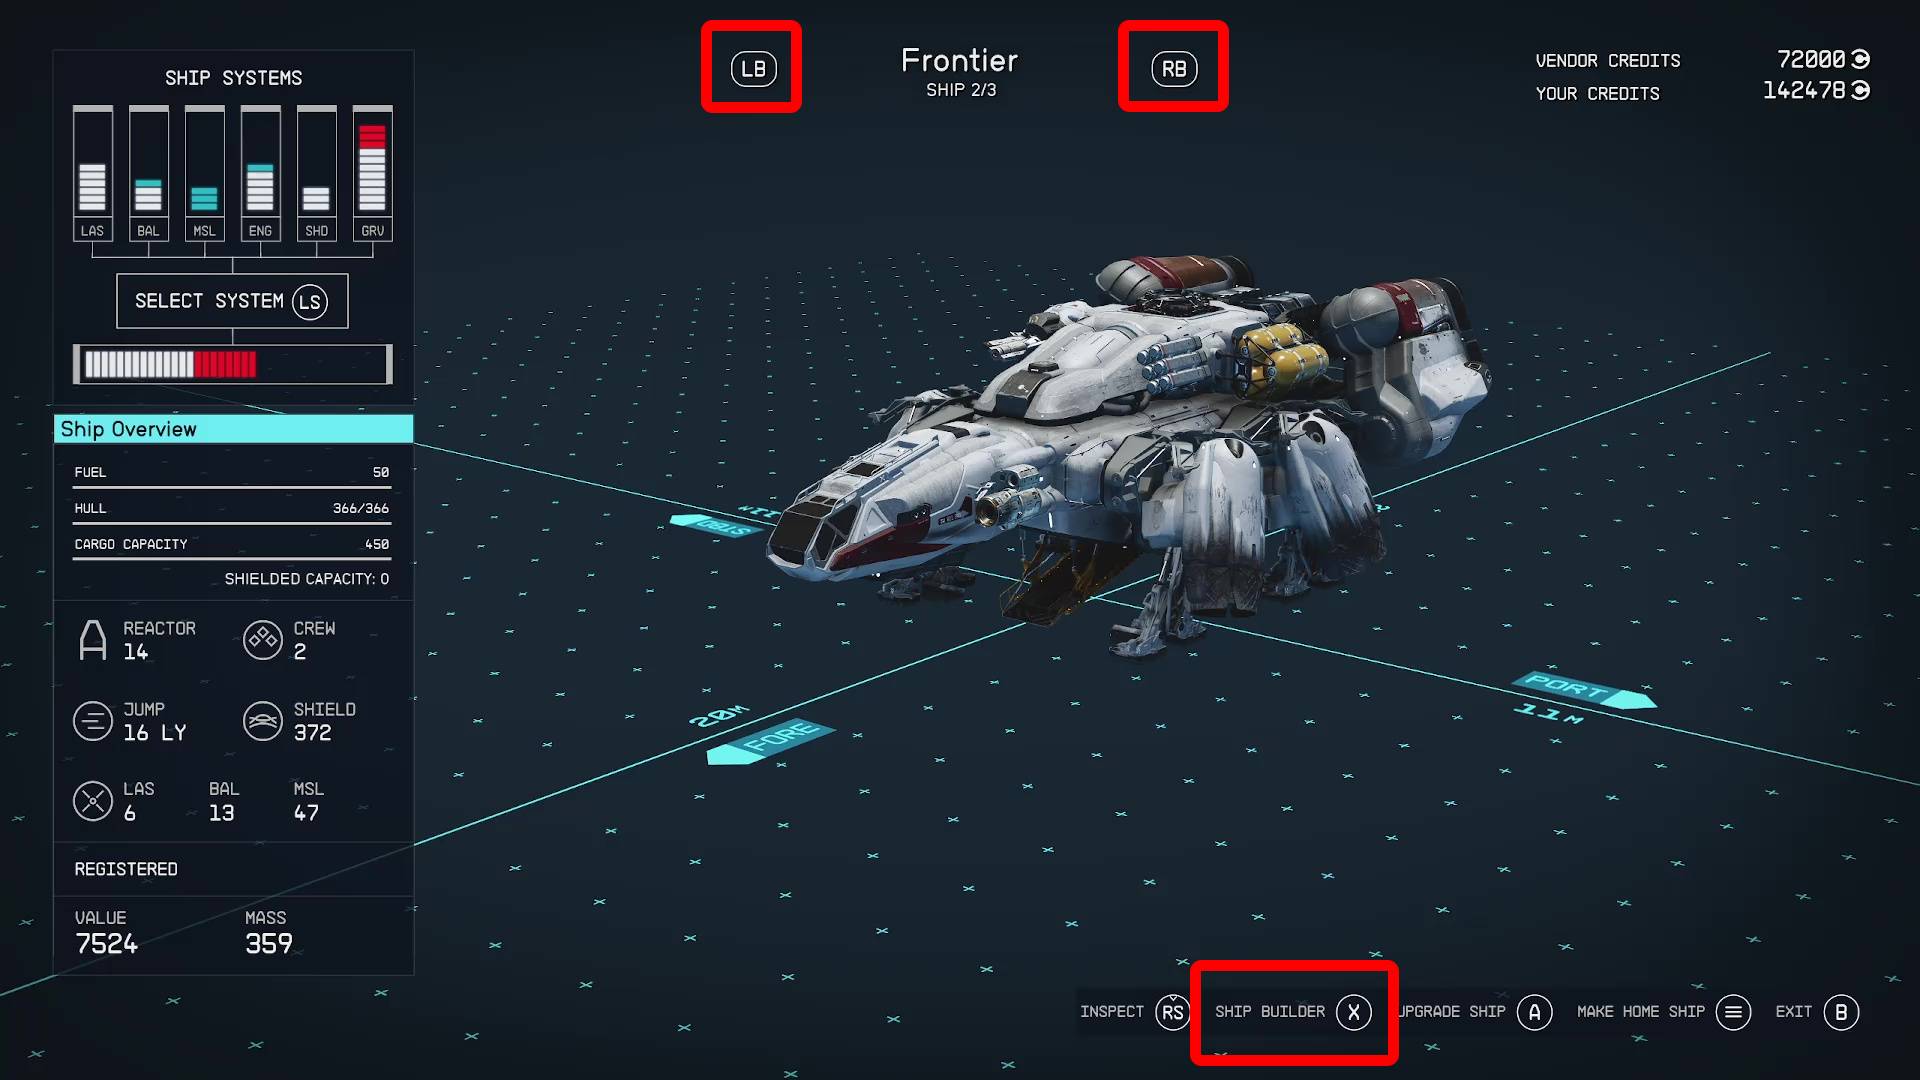
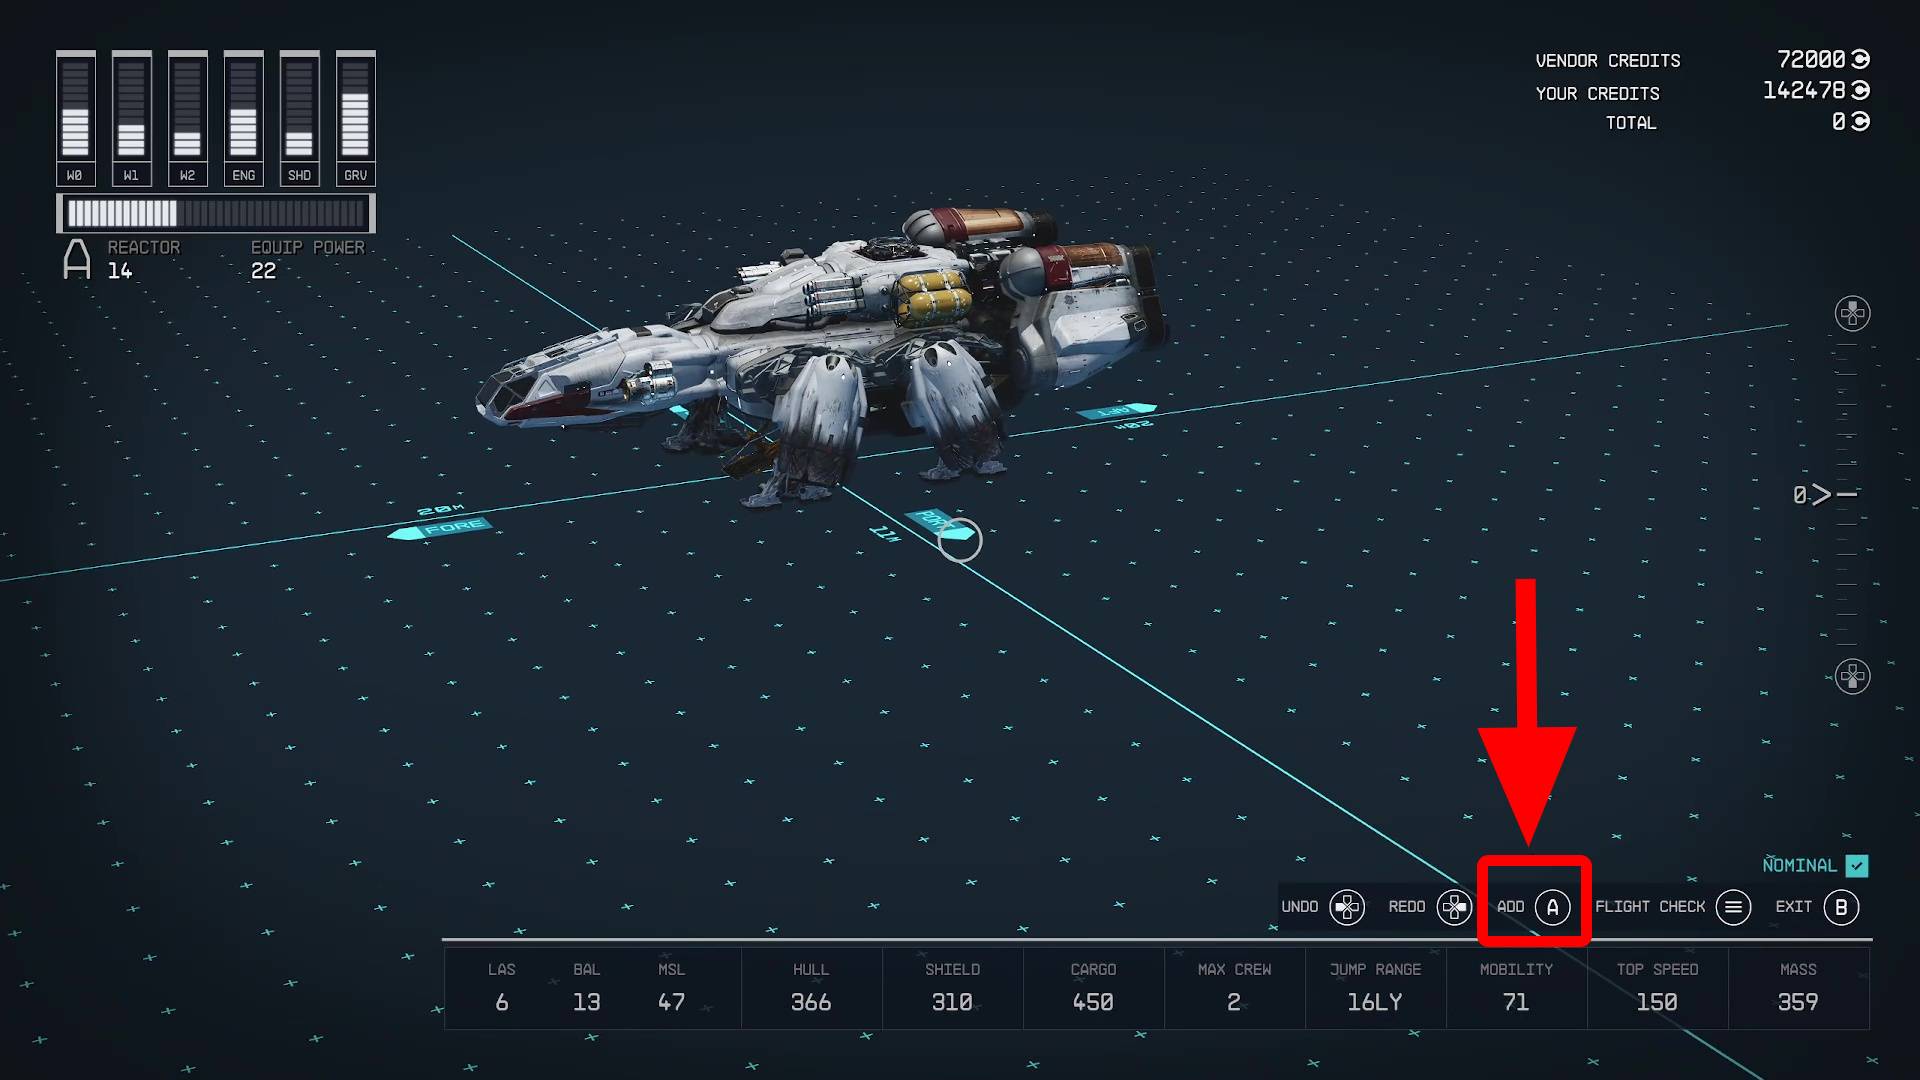
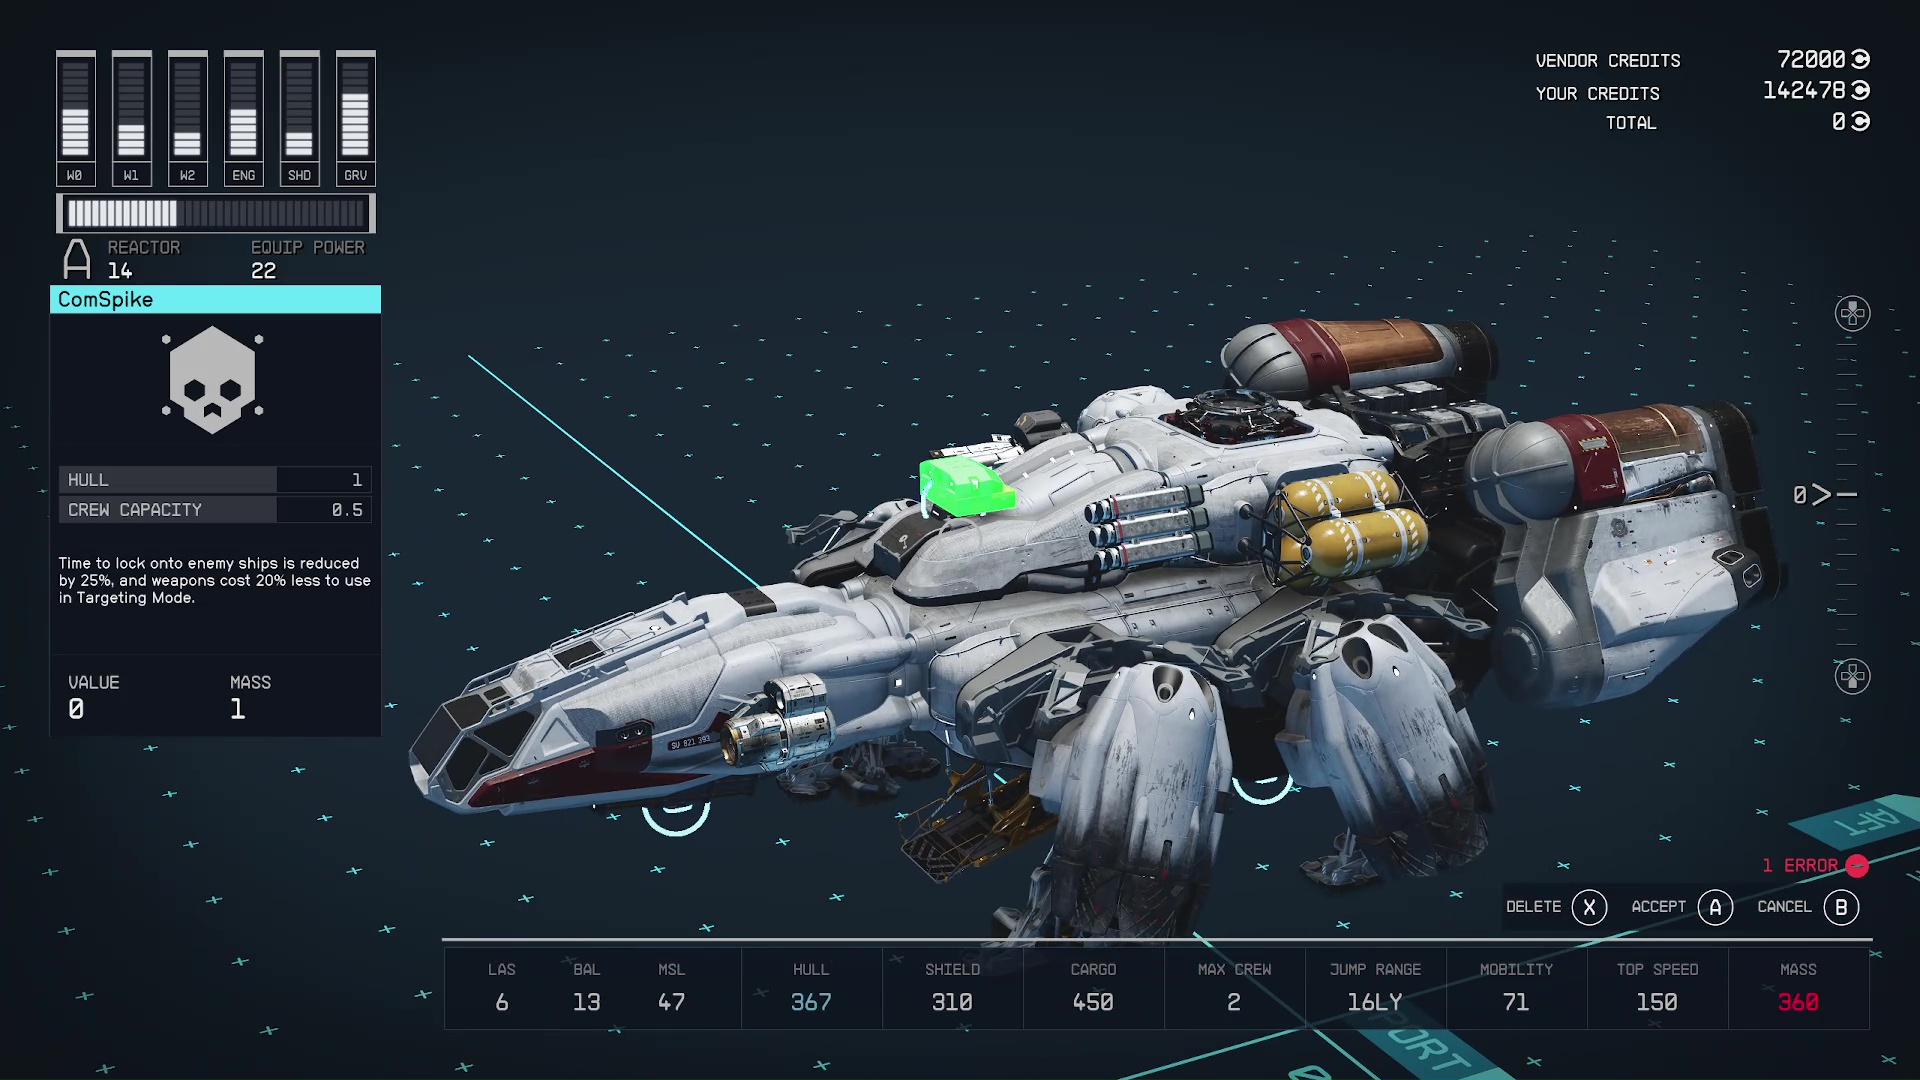
If you think your ship is ready, then you need to add on the special modules for the mission. Select the ship that you’e taking to Bannoc, and press the ship builder button at the bottom of the screen (Image 1). Next, hover over an empty space on the grid and press the button for ‘add’ (Image 2).
Image 1Image 2
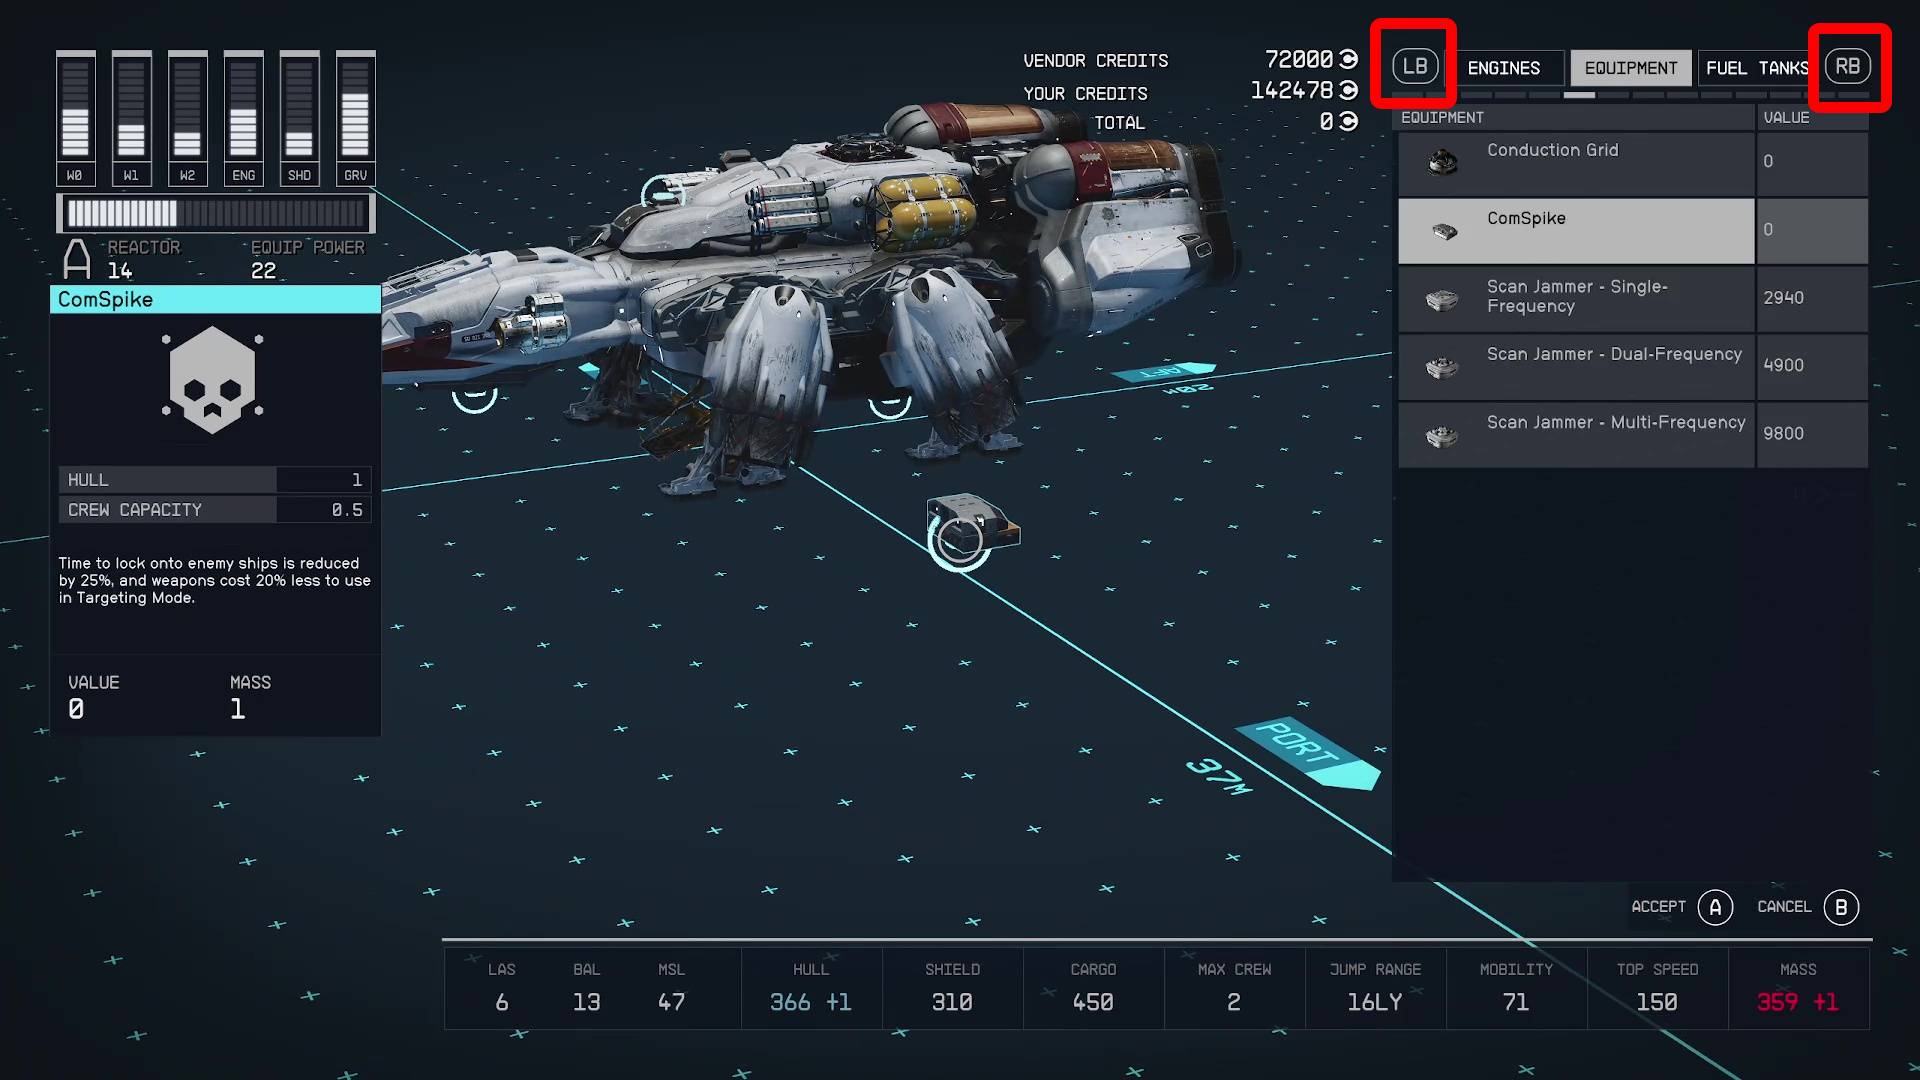
Toggle between the categories of ship parts until you find the ‘Equipment’ tab. You should see the ComSpike and the Conduction Grid here (Image 3). Select each module and find a place to attach it to your ship. These particular parts need to be attached to a socket facing upwards or downwards (can’t be attached laterally). Good spots that are usually open are on top of the cockpit / cowling, or under the cockpit / landing bay (Image 4).
Image 3Image 4
You will know that they are correctly placed when they glow green. For a more in-depth explanation of attaching parts, see the How Parts Connect section of our ship building guide.
Preparing for the Mission
As we mentioned above, this mission is more action oriented, so as a result, you will want to load up on some supplies. Walk across from ship services over to The Depot, the area with all the vendors on The Key. This mission has a lot of locked containers and doors (although none of them are mandatory), as well as a ton of robotic enemies. Due to this, you will want to load up on:
Digipicks
Ammunition
Aid
Prioritize what you have least of, or if you don’t plan on lockpicking for loot, you can do without the digipicks. Don’t forget that there is the infirmary in the back of The Depot, where you can buy Med Packs and Trauma Packs.
Report to Commander Ikande
This step hearkens back to what you did last mission. Those of you who are still snitching (in league with SysDef) will follow your and fast travel / fly to the UC Vigilance. If you shot up the Generdyne facility in Absolute Power, you will be kicked out of SysDef and arrested.
If you did the mission stealthily, then you’ll report on the current situation to Ikande, and he will make it clear that you’re supposed to bring the credits back to the Vigilance. For those of you who have been doing a good job collecting evidence for Burden of Proof, he will inform you that the UC has sent help for the attack on The Key. This is a good time to turn in the three pieces of evidence from the last mission to Lieutenant Toft if you grabbed them.
Proceed to Bannoc IV and Board the Galbank Transport “Legacy”
The mission will lead you way out into space to the Bannoc System. Before leaving, double check that you have the right ship as your home ship (the one with the mission-specific modules equipped). Depending on your ship’s grav drive, you might have to make several jumps to get there.
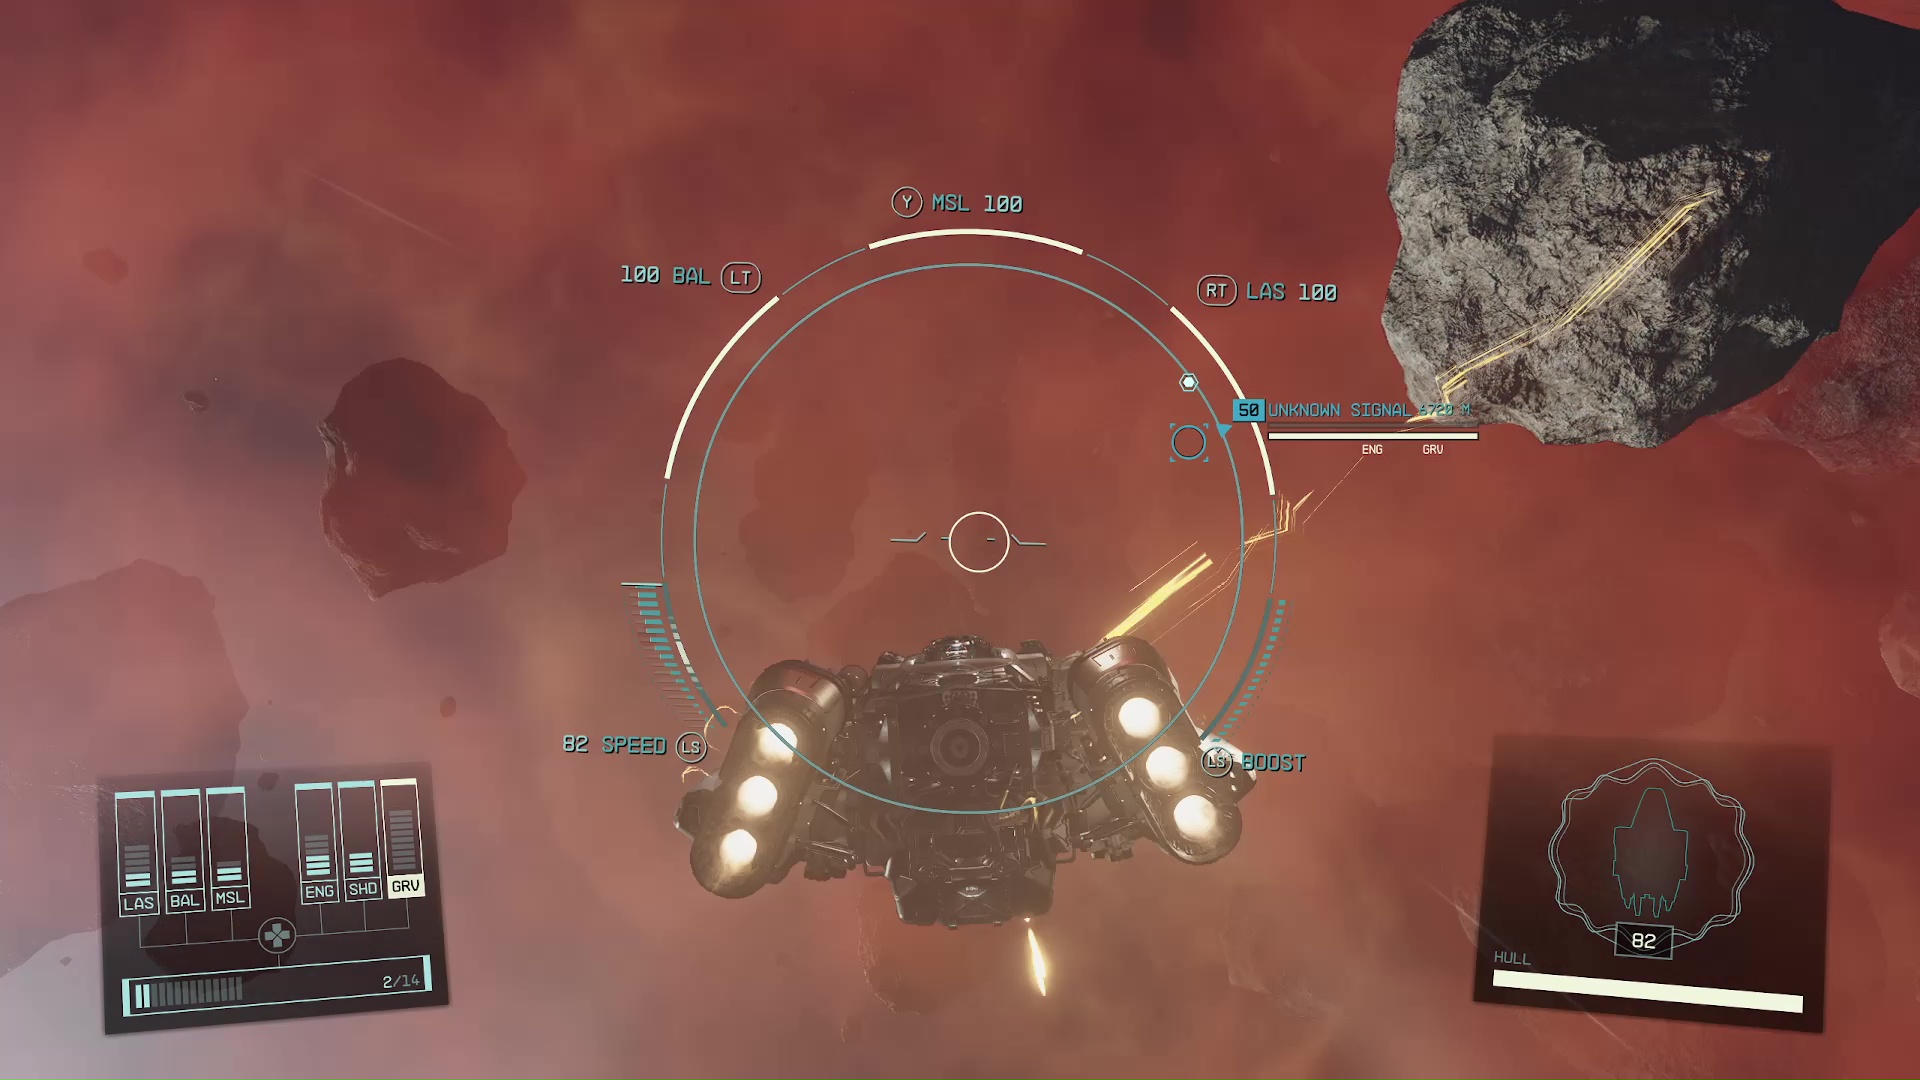
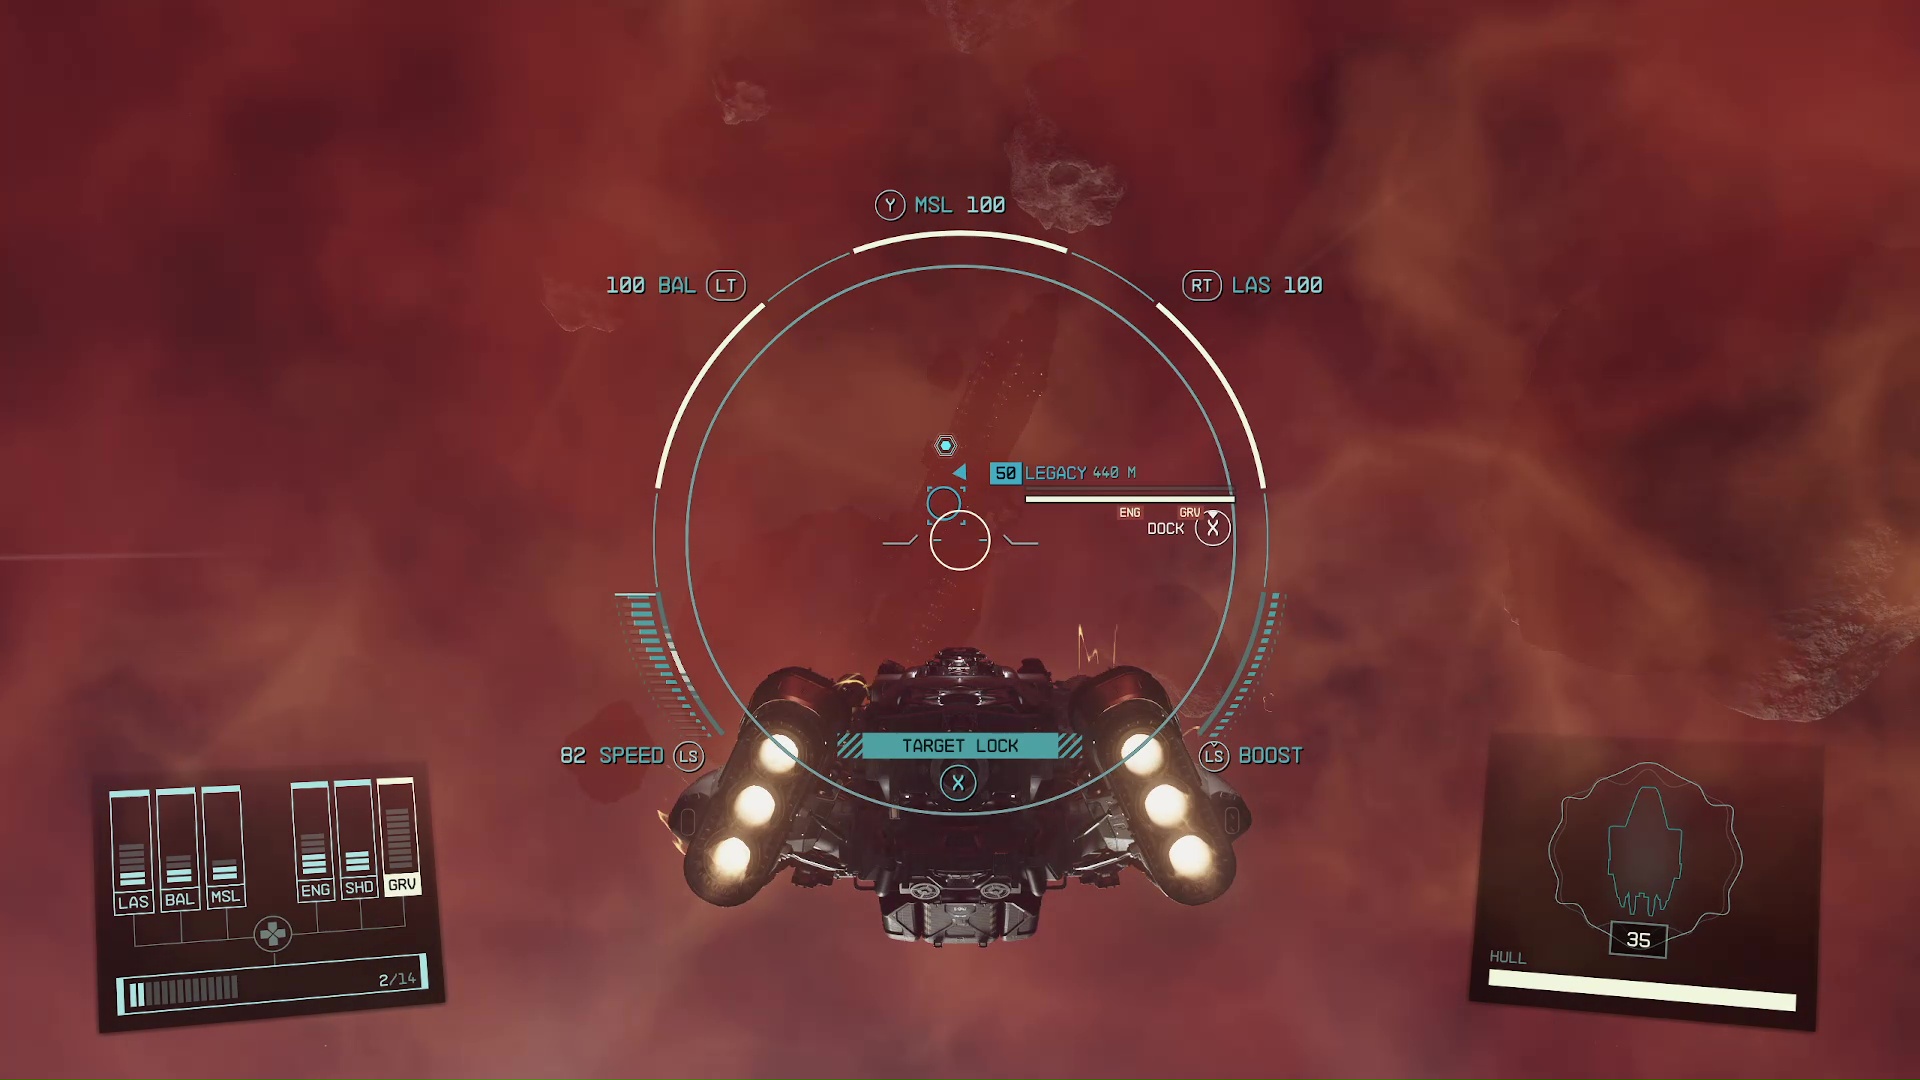
Once you arrive, you will have to fly your ship towards the . Make sure that you are using your booster to get there fast (, , Left ), as the lightning strikes will be slowly diminishing your ship’s shields (Image 5). Once you are within 500 m of The Legacy, you can dock with it (Image 6).
Image 5Image 6
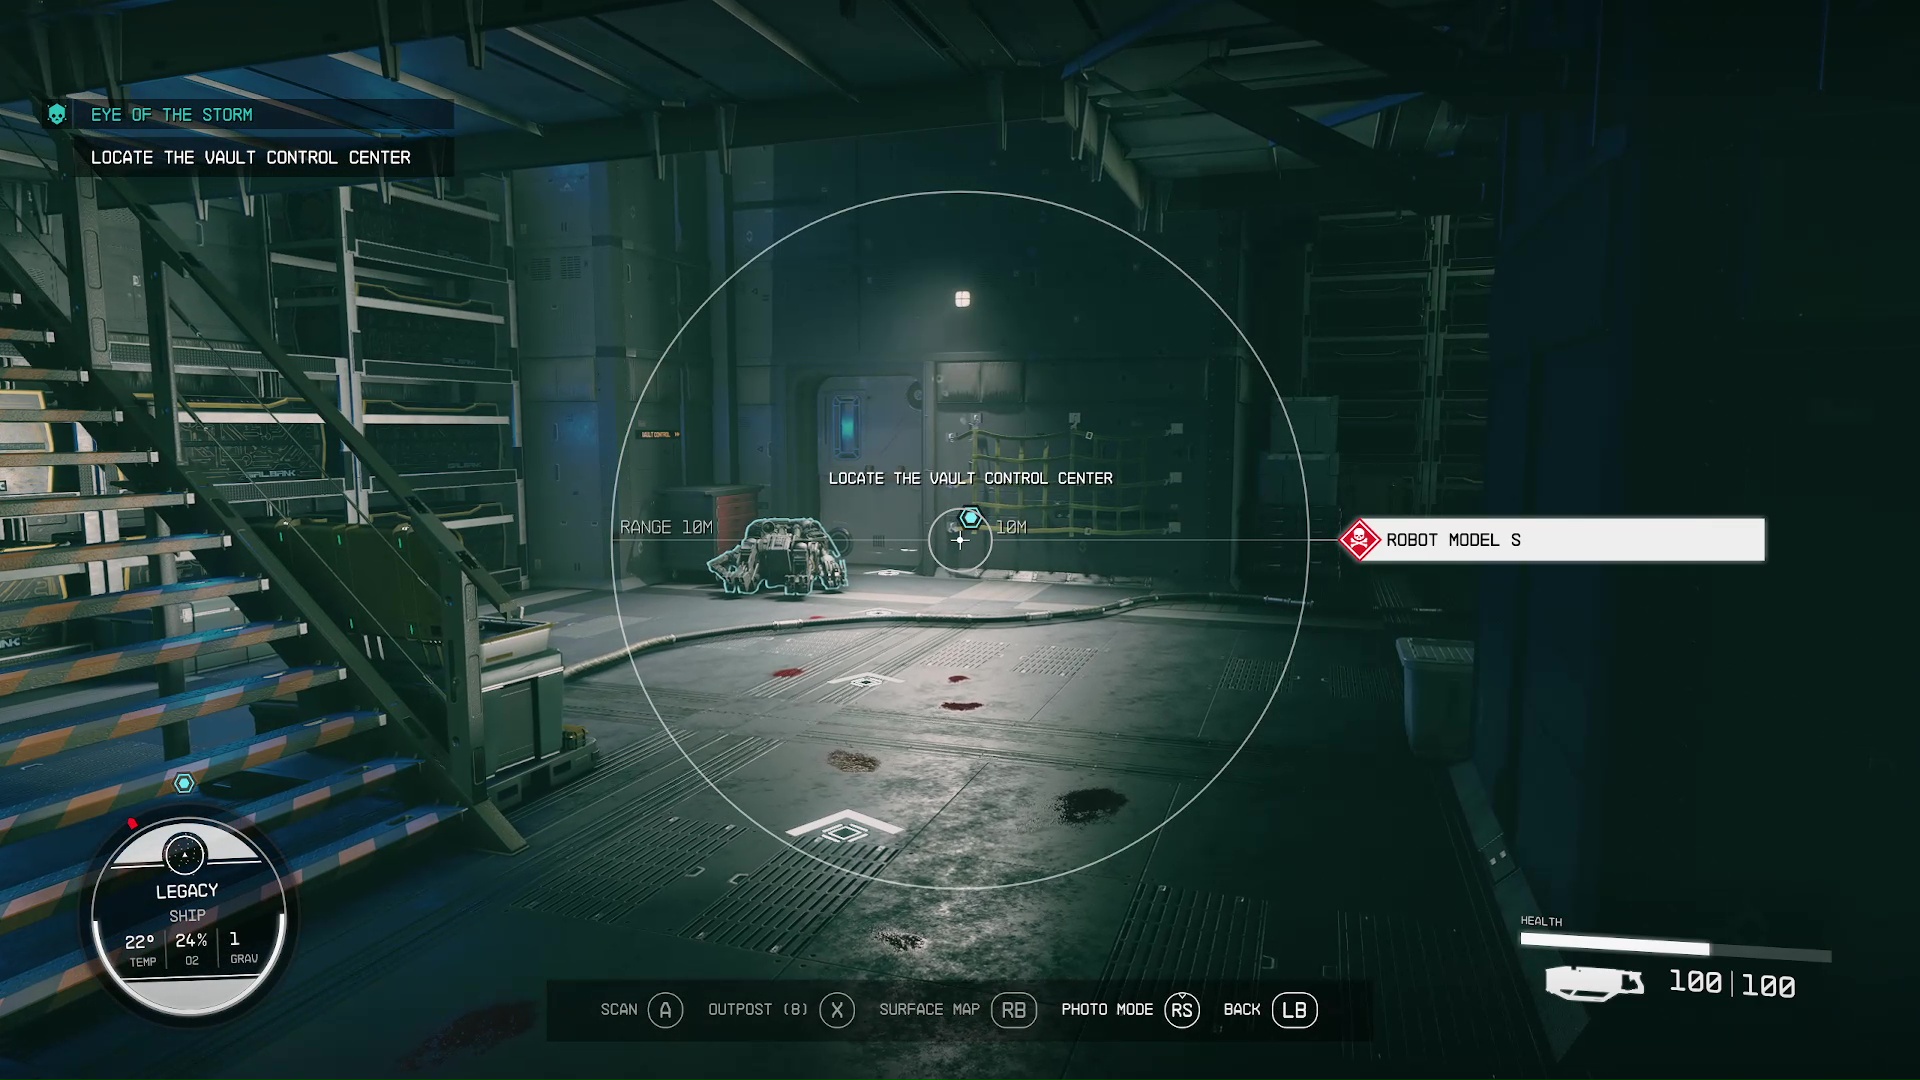
Locate the Vault Control Center
Locate a Transfer Module and Open the Vault Door
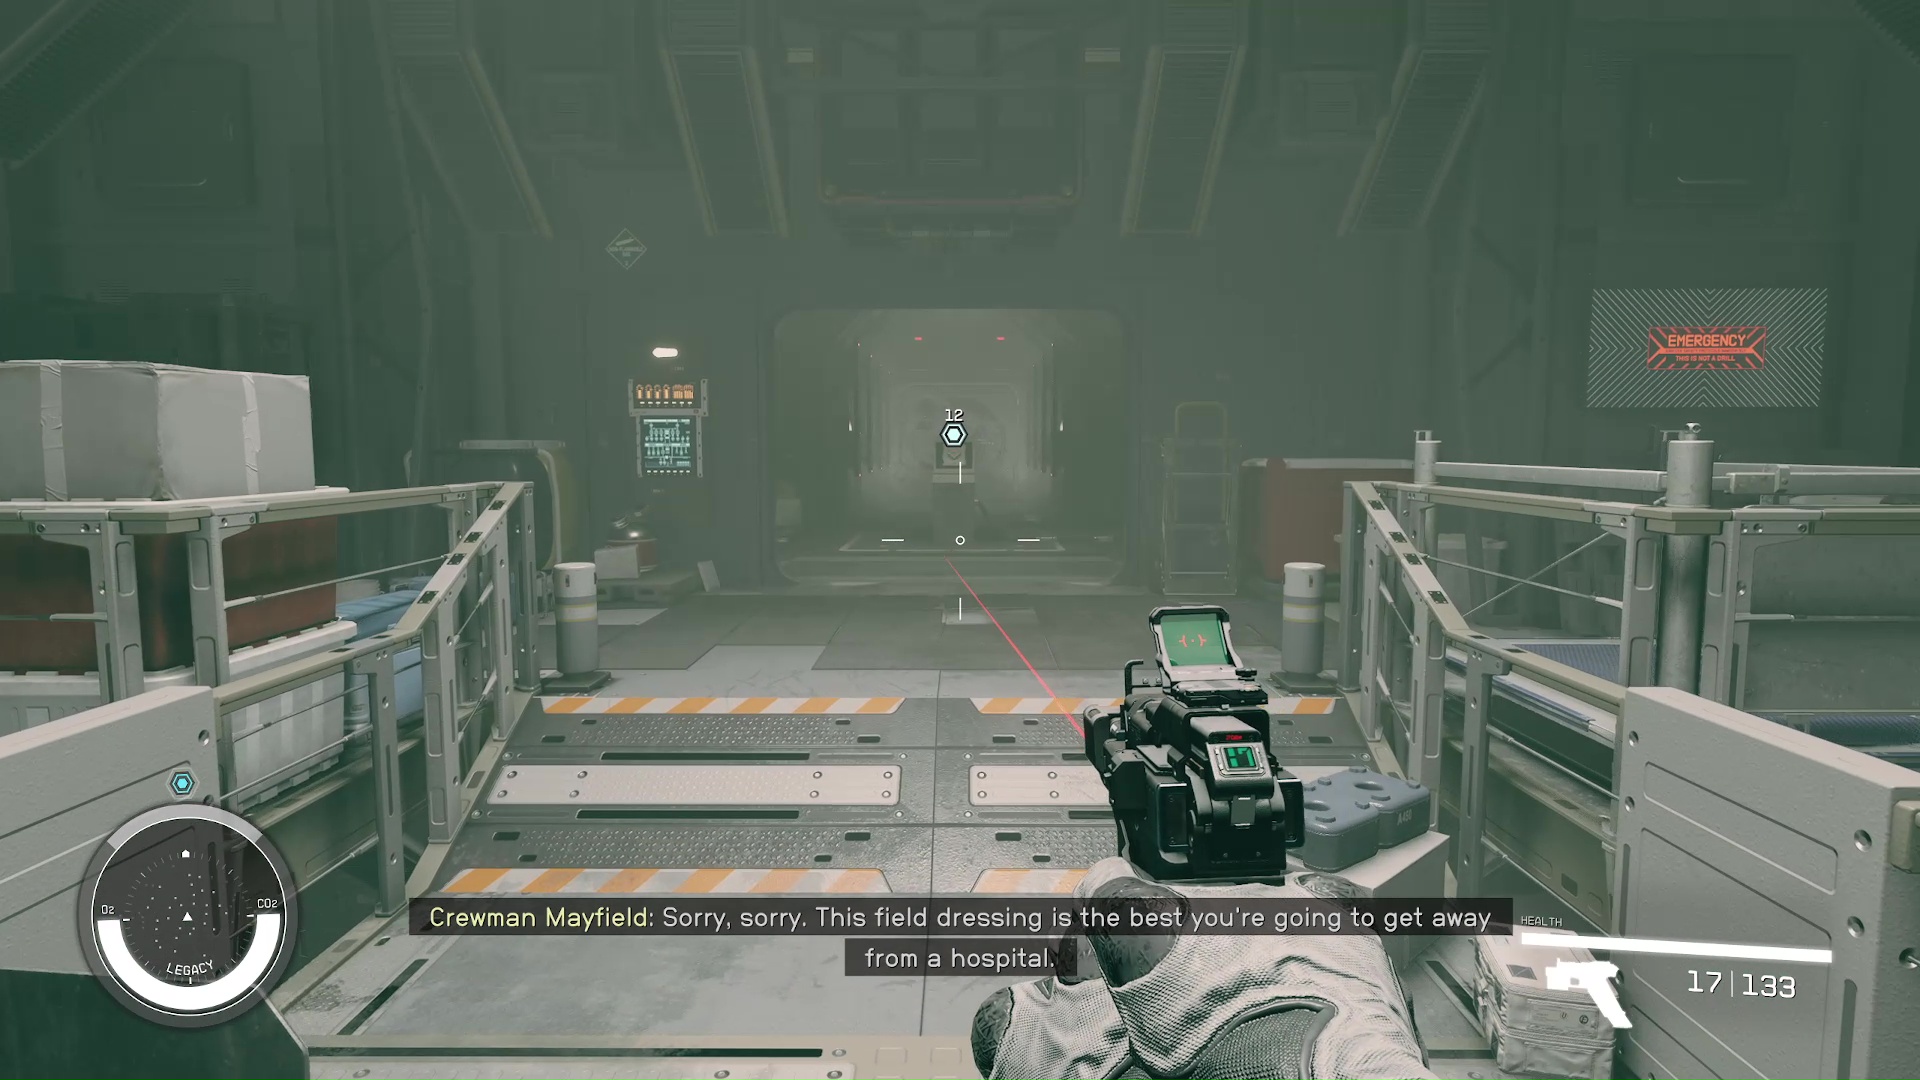
Now that you’re aboard, you can simply follow your scanner to each of the objectives. It is very easy to get turned around in the ship while looting, so always remember that your scanner will guide you right to the current objectivewith arrows on the ground.
You will first go left on the ship and up some stairs to a hallway with doors on either side. If you are curious about the crew of the ship and the backstory of it getting caught in Bannoc IV, there are recordings in this first hallway to enlighten you (Images 7 & 8).
Image 7Image 8
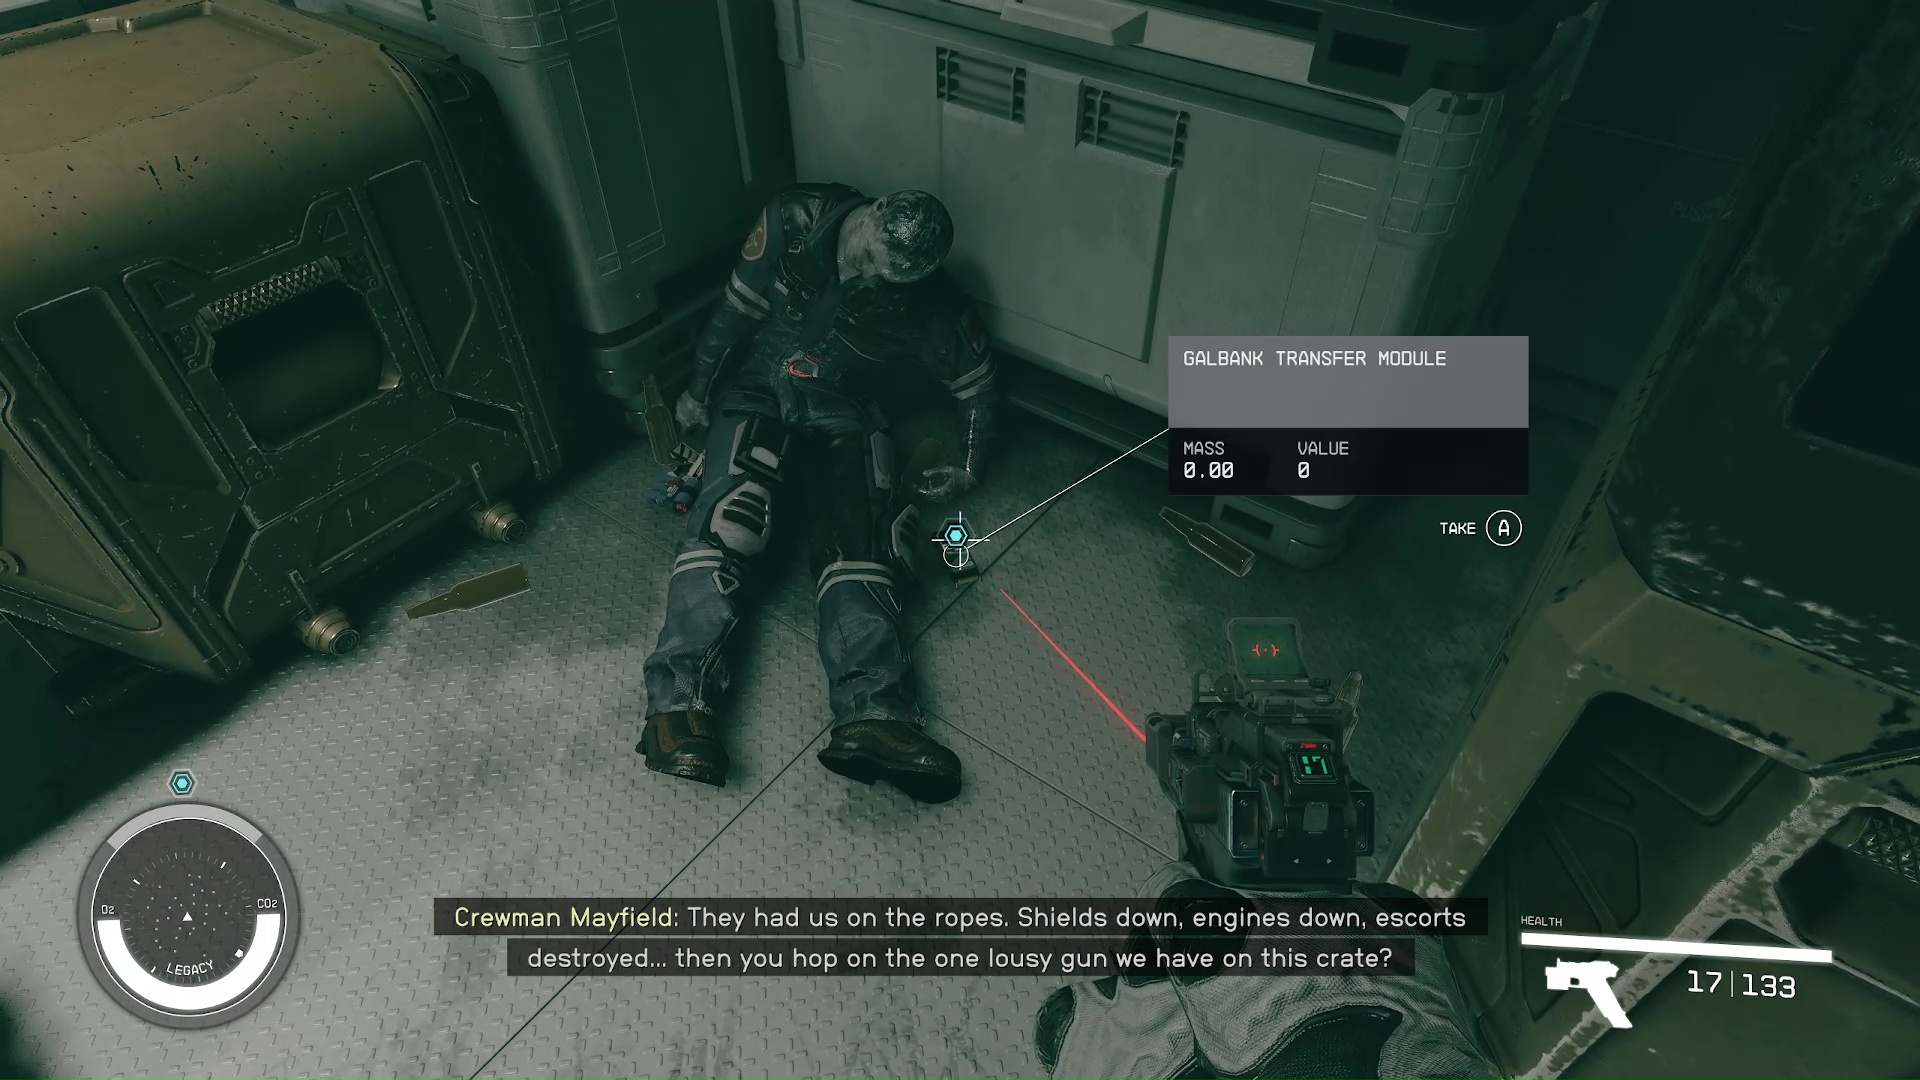
Continue down the hall and follow the scanner up some stairs, then you will be at the Transfer Module Lock (Image 9). After you approach it, you’ll get a new objective to find a transfer module. If you turn around, there will be a transfer module next to a dead worker (Image 10). Turn back around and use the newly-found transfer module to open the lock.
Image 9Image 10
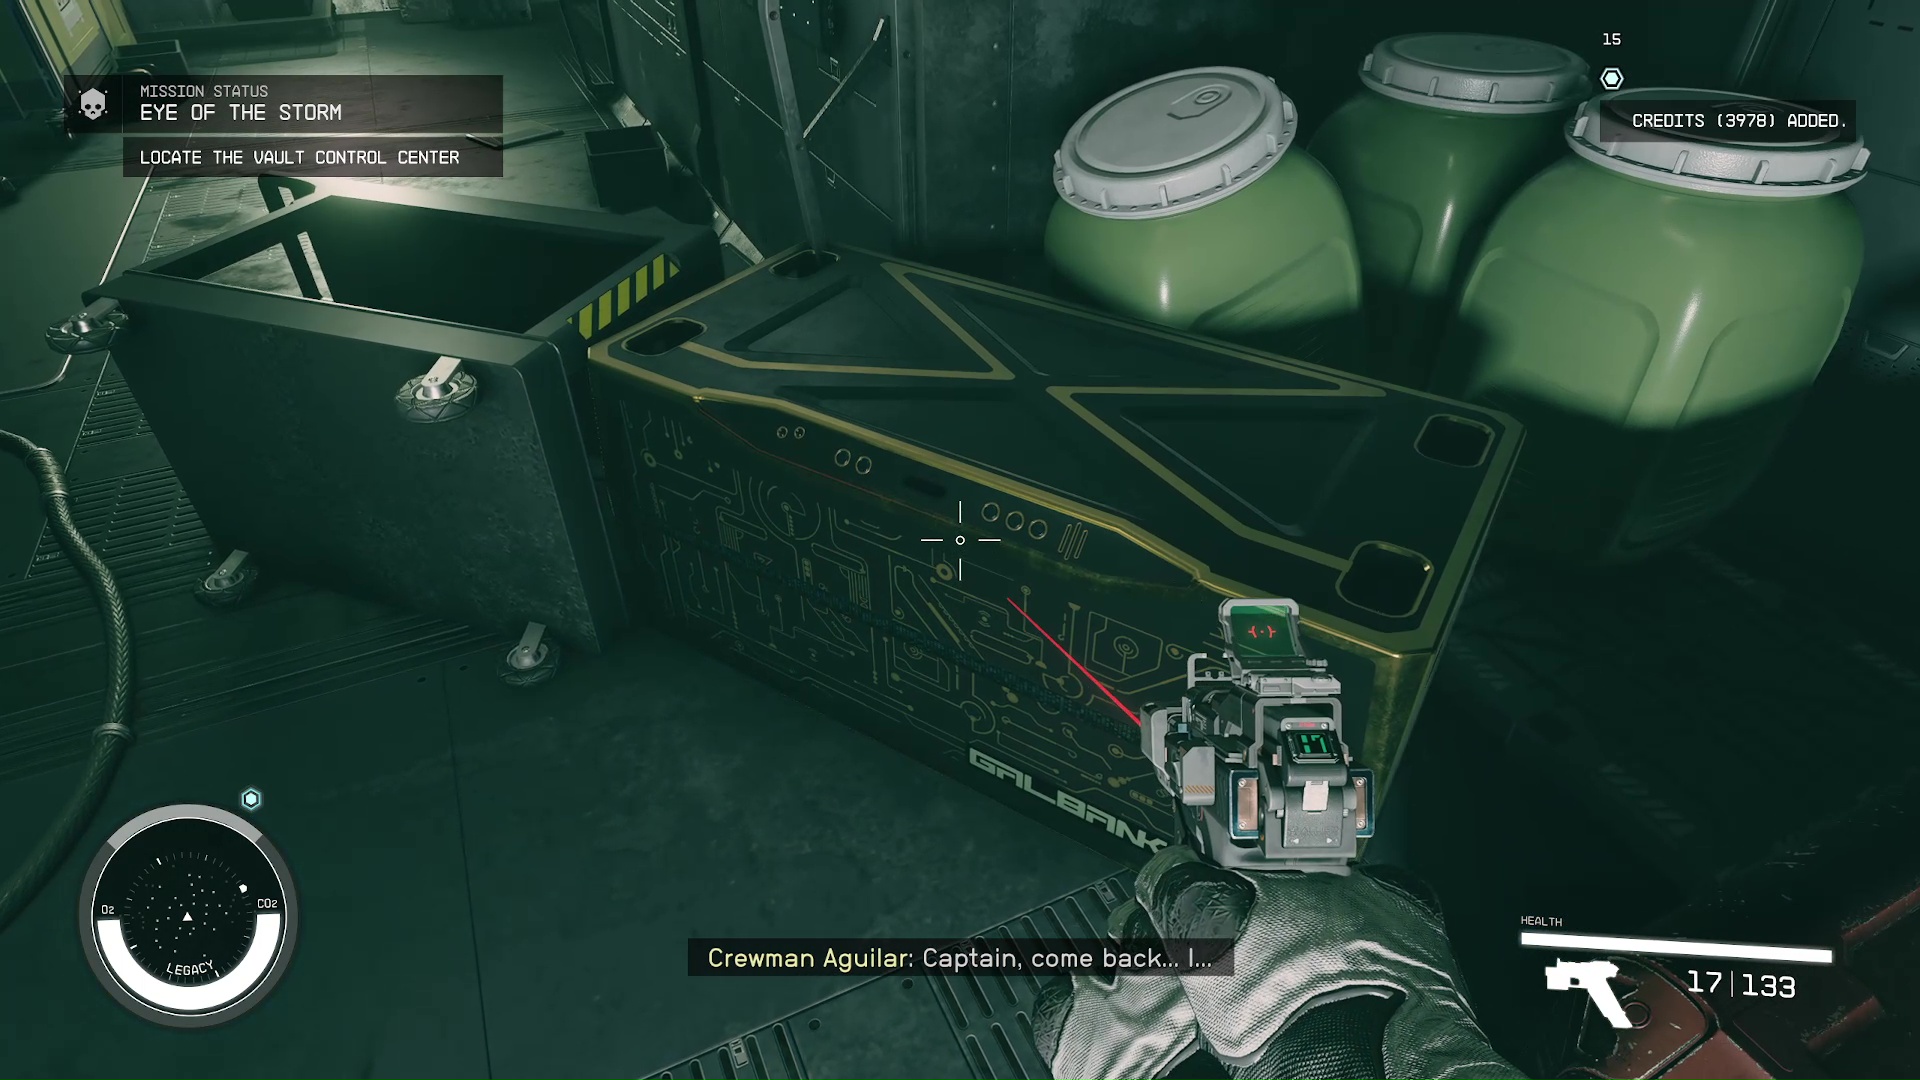
Access the Credtank (Optional)
Follow your scanner to the left after opening the door, and you will run into a credtank. These are the big containers that Galbank uses to transport credits. If you go up to it, you will be able to open it and grab the credits; you won’t even have to pick the lock (Image 11).
Image 11
Control Room
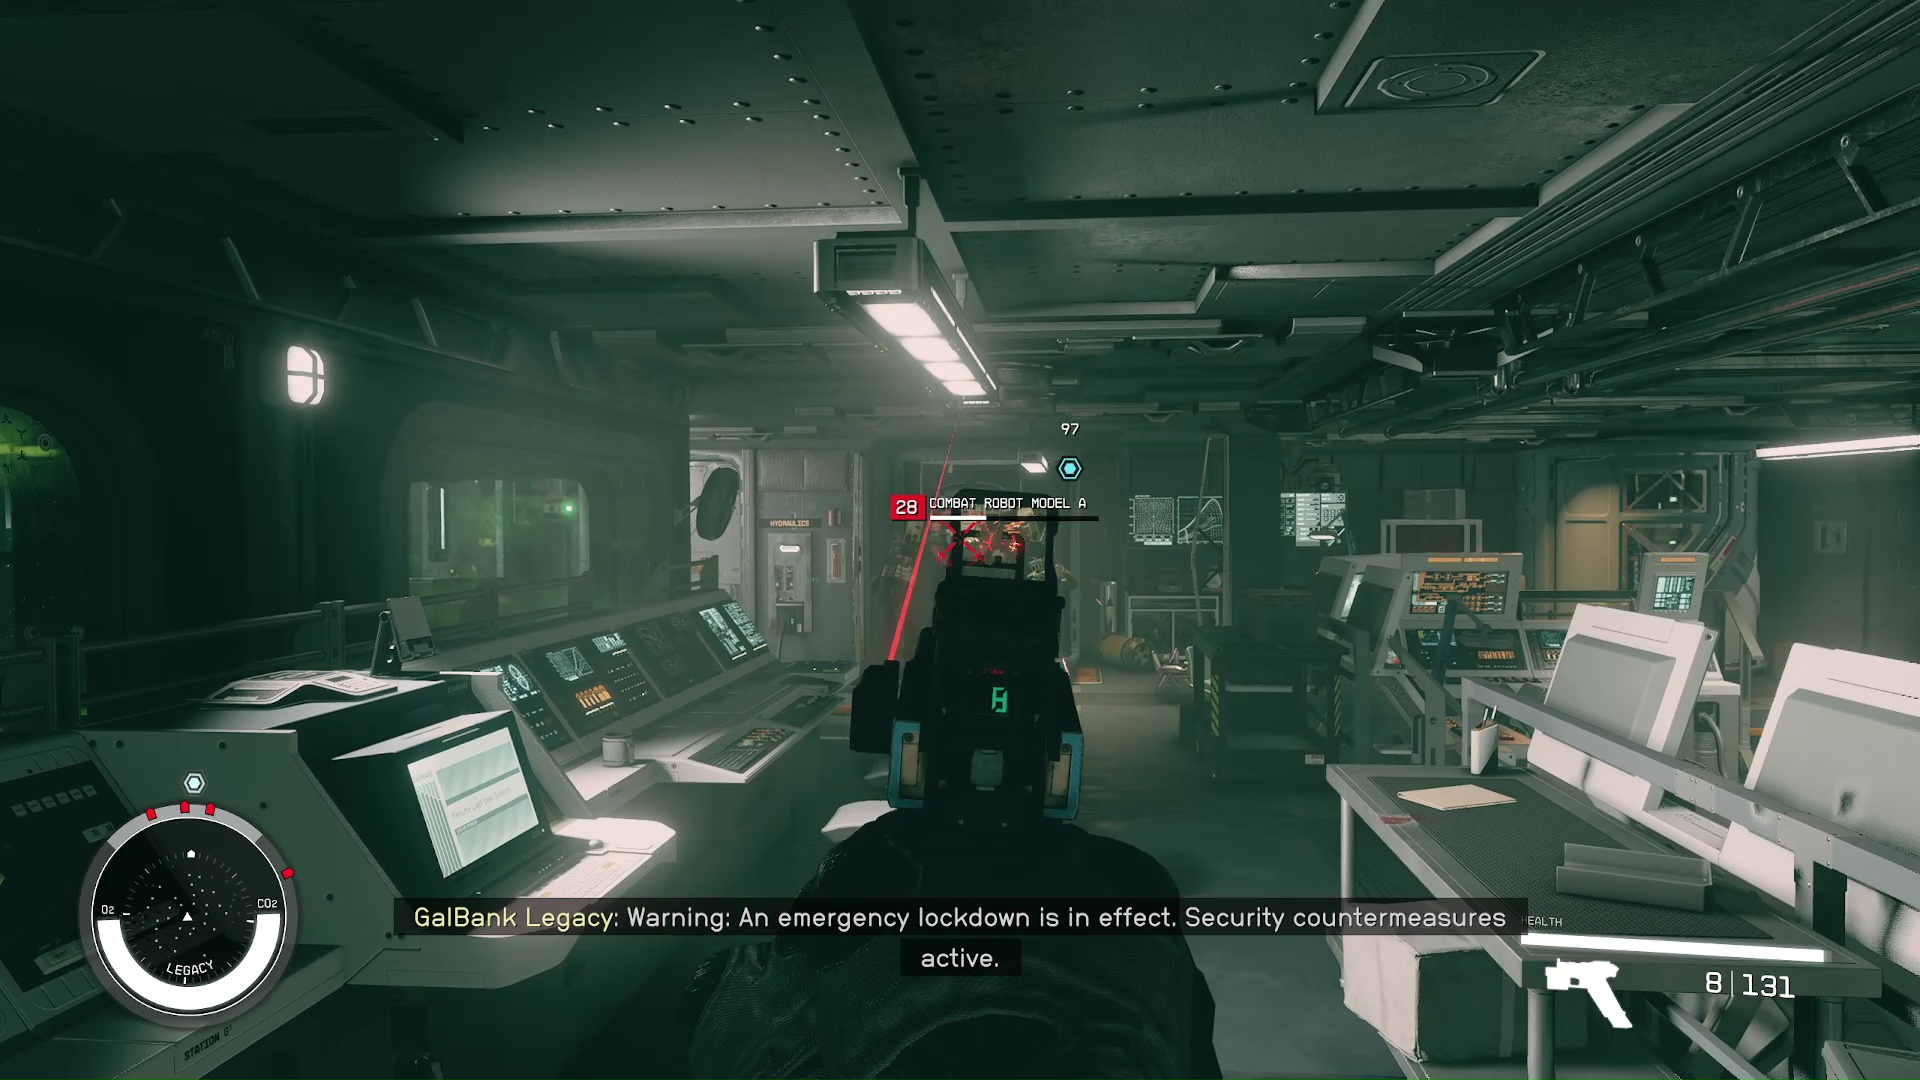
This is where the combat starts, so make sure you’re ready with good weapons and med packs. You will enter a room that has some security cameras on the pillars. The alarm will go off, and a combat robot will get out of its case. There’s a turret in the back left corner, so if you stand near the door where you came in, you can kill the robot as it exits the case, then take care of the turret (Image 12). Save your game here, so you don’t go back to the start if you’re killed.
Image 12
Reactor Room
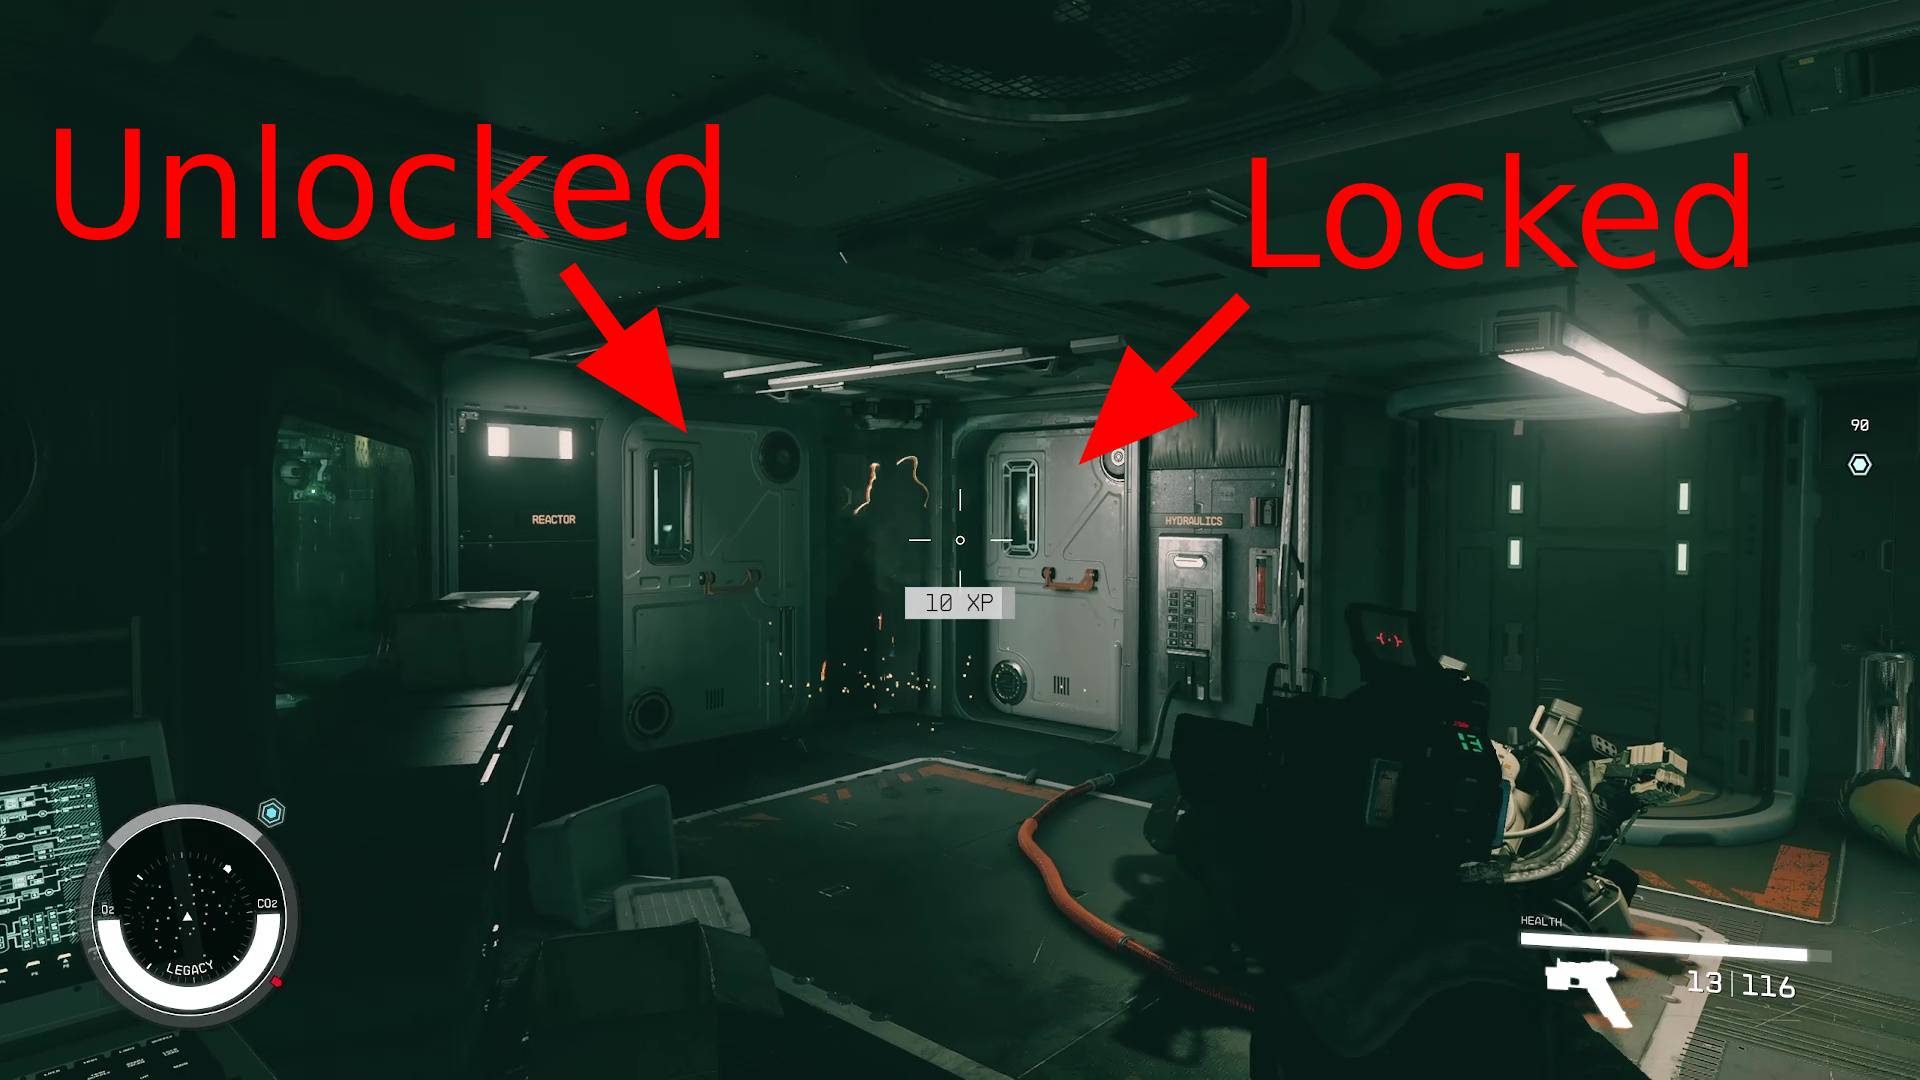
In the corner, in between where the turret was and the robot case, is a door locked with an advanced lock. This is a shortcut to the next hallway, but you can go through the door on the left to go around (Image 13). Inside the unlocked door, the reactor room, is another turret. Also, if you turn left in the reactor room, you will find a master-locked door with some good loot in it for those with the patience to digipick.
Image 13
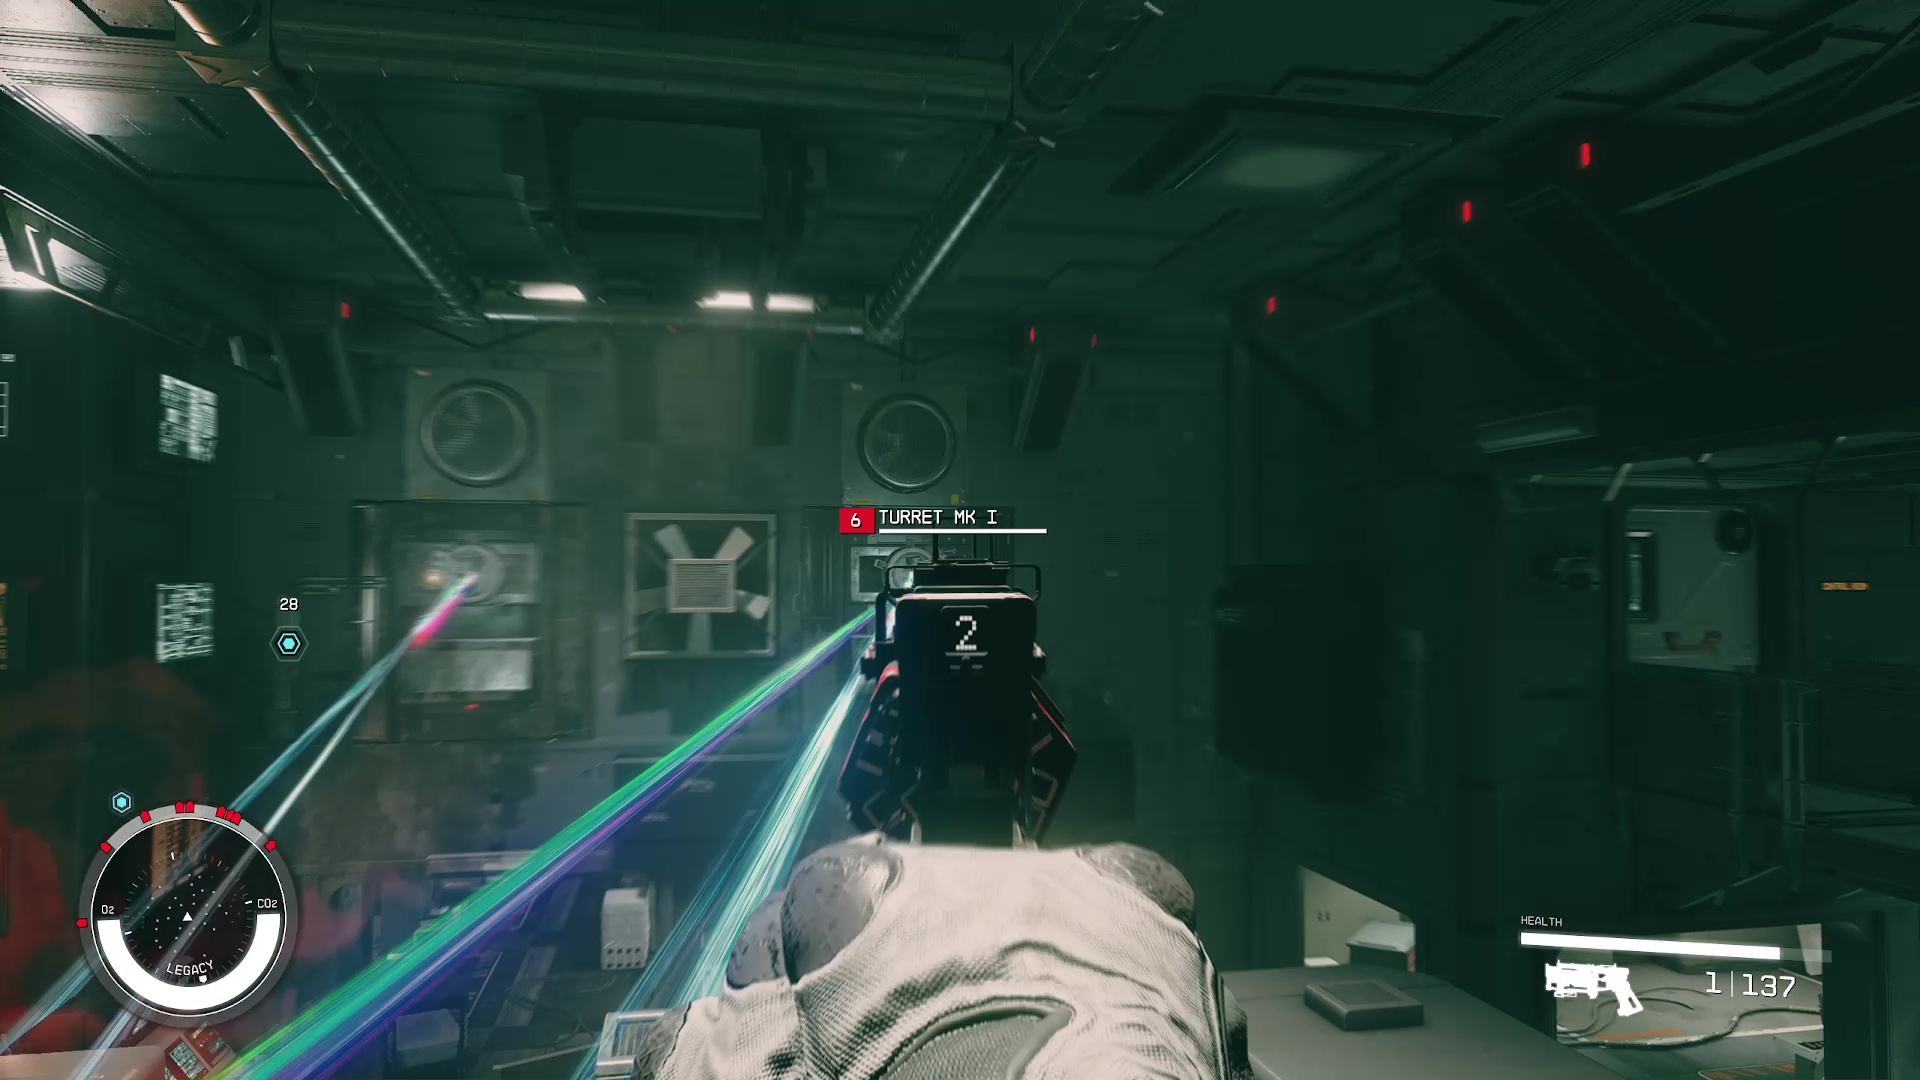
Hydraulics Room
Follow the scanner arrows into the Hydraulics room, where you will find two turrets and two robots attacking you. Do your best to not get pinned down, while going for the turrets first, then the robot charging you. You can then take out the gun robot before continuing on.
Shield Generator Room and Physical Plant Room
Through the next door, your scanner path will go left, but a robot will come out of its case at the top of the stairs. Take care of it so it doesn’t sneak up on you later. Next is the Shield Generator room, which has a turret in it up high in the corner. You will then go up the stairs and through the ‘Physical Plant’ room. Here you will fight another two robots and a turret.
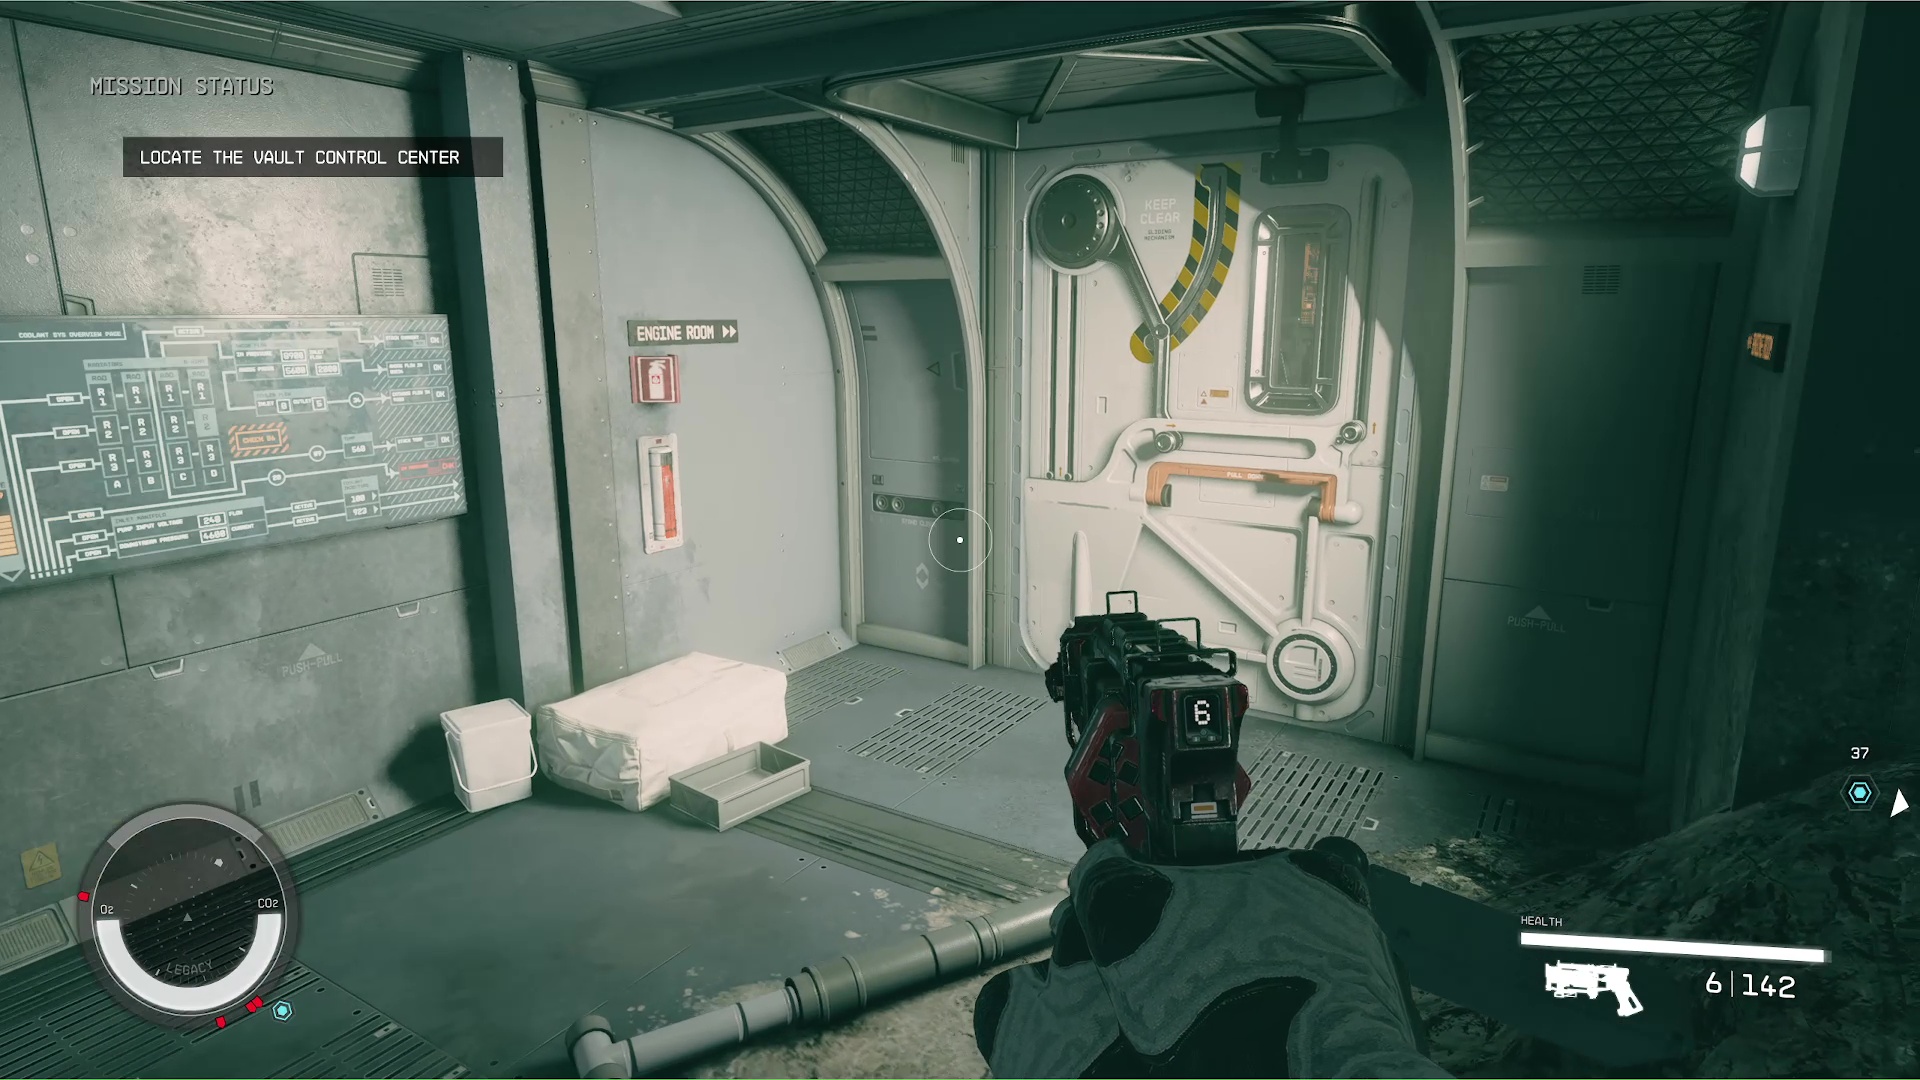
Engine Room
Keep going (there’s only one way to go) and you will see signs for the engine room (Image 14). This is one of the harder rooms combat-wise, so save before heading in and be ready for a lot of robots and turrets.
Image 14
A good strategy is to stay in the first half of the room, and take care of the one turret and couple robots that charge you. After that you can progress to the other half where there are four turrets and a couple more robots. Be careful if you move along the catwalk, as there will be two turrets hosing you down at a certain section (Image 15).
Image 15
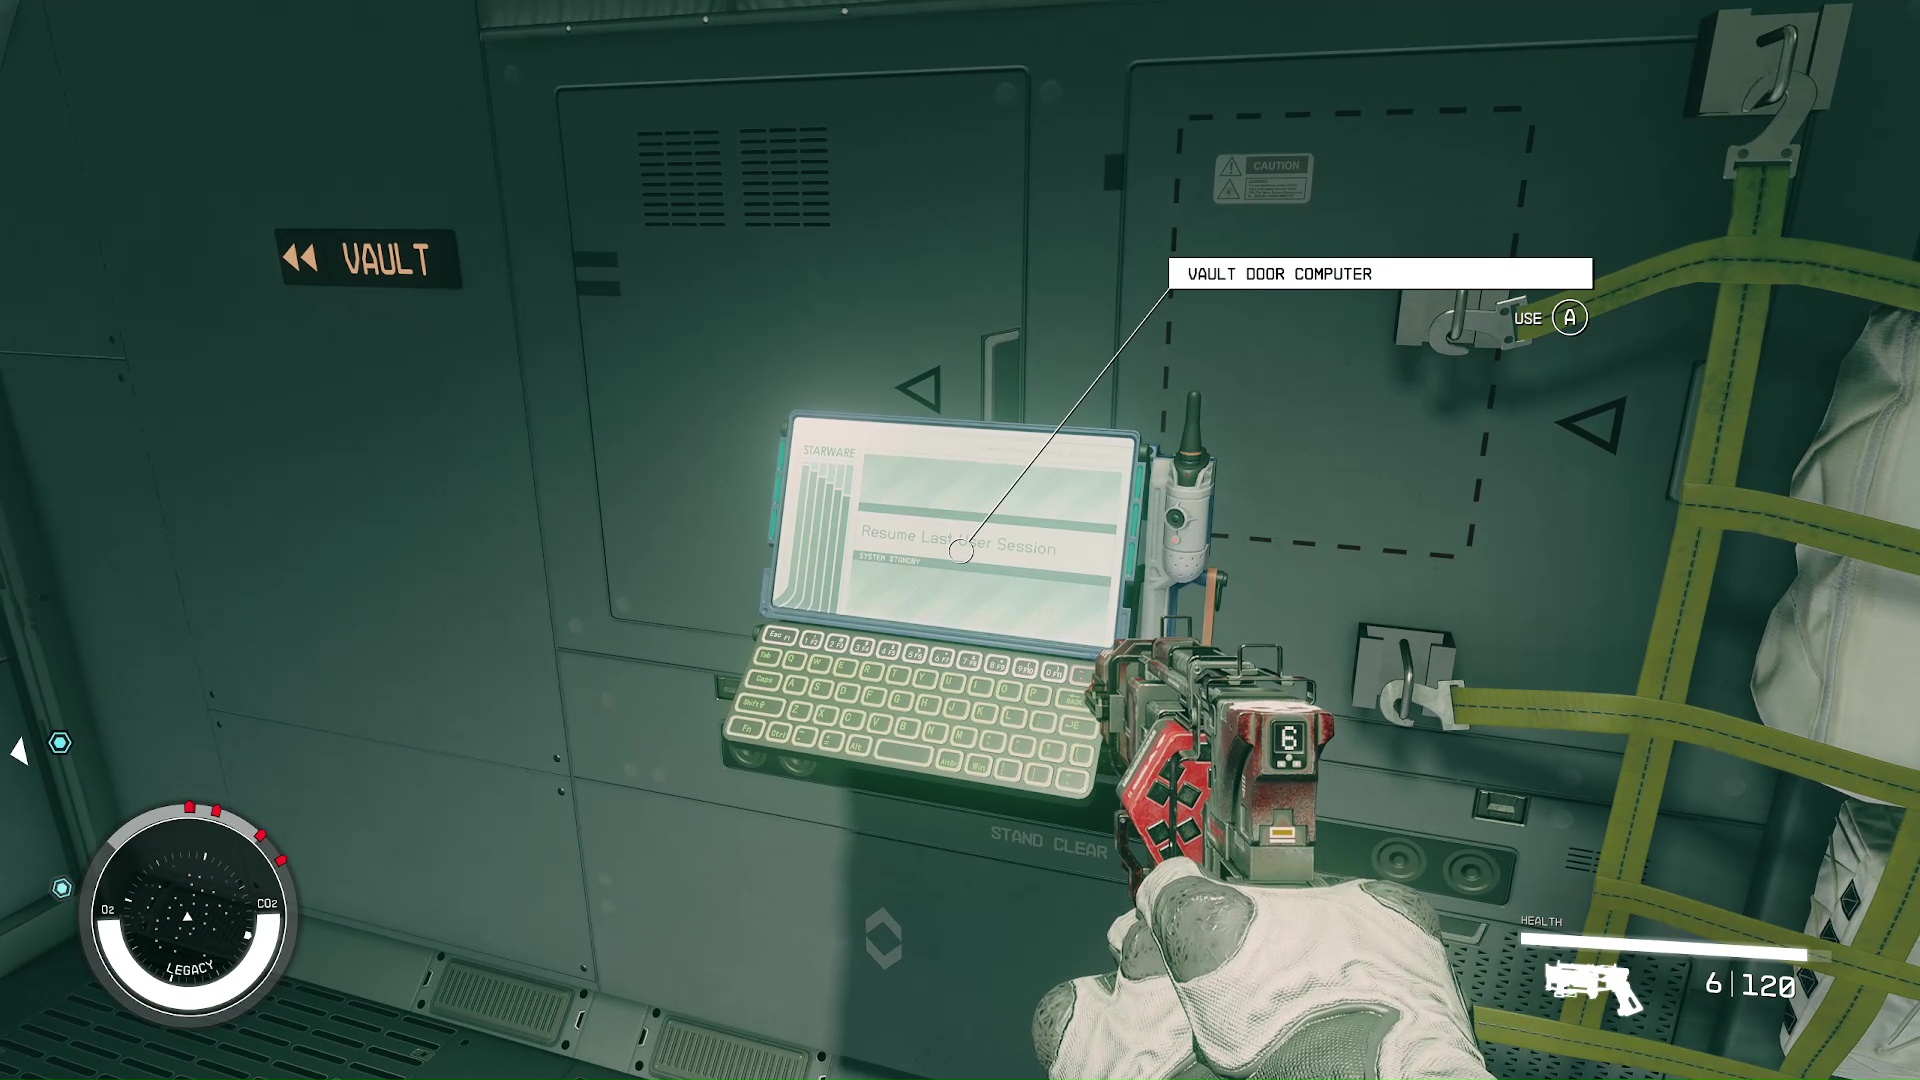
Follow your scanner to the far side of the Engine Room, and it will take you up the stairs and in front of the vault door. You have to use the computer right next to it to open the door (Image 16). Be sure to save your game before going into the vault.
Image 16
The Vault Room
This is definitely the room with the most enemies, but it has a lot of space for you to run around and pick them off. A word of caution, though, be careful of the turrets in the very middle of the vault. The path forward is on the exact opposite corner of the vault from where you came in, so use your scanner and head that direction (Image 17).
Image 17
The more dangerous enemies will spawn from their cases at the far end of the vault by the door you’re trying to reach (Image 18). A well-placed grenade could be very decisive in this fight, or you can let them chase you while you drop mines around the room. After you clear them all out, there is also quite a bit of looting to do if you want to take your time and grab it all.
Image 18
Through the door, you will see signs pointing towards the ‘Vault Control Room’. Go up the stairs, and you’ll finally be in the room that you’ve gone through the whole ship trying to find.
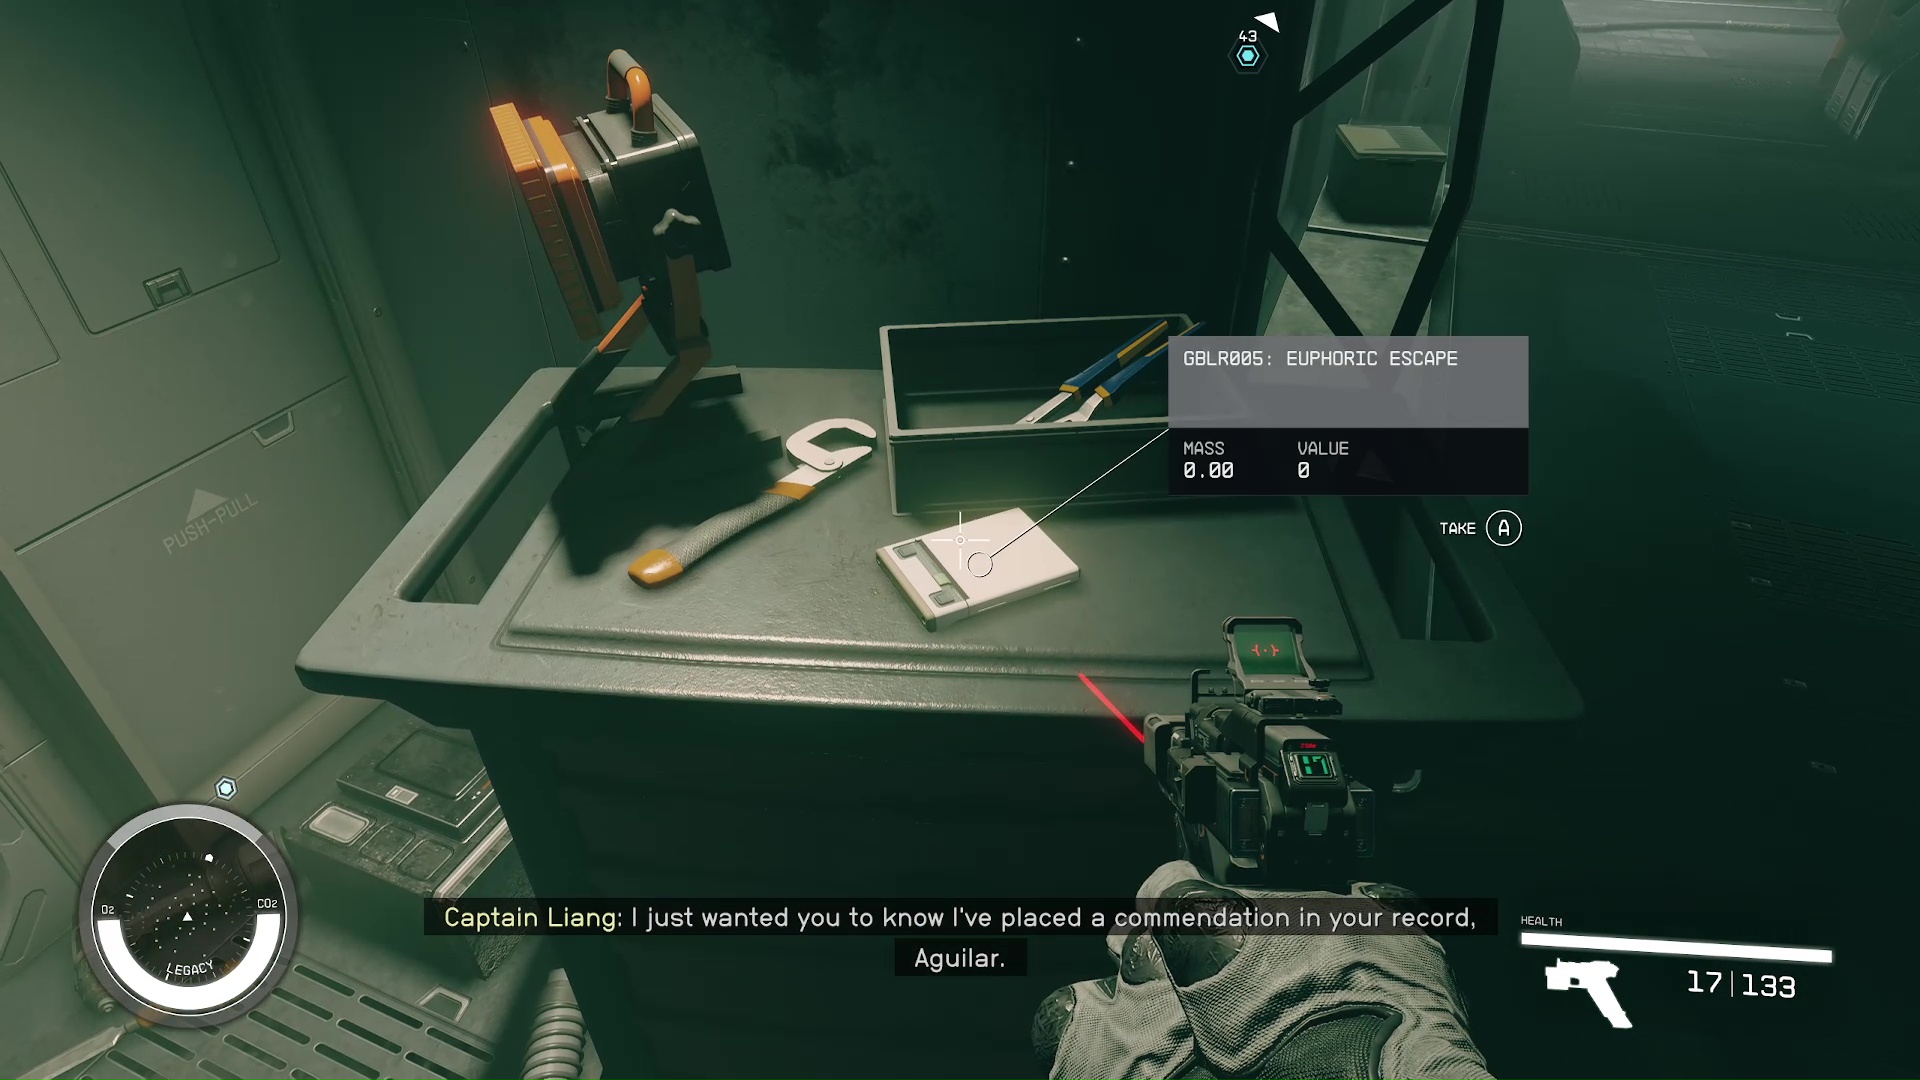
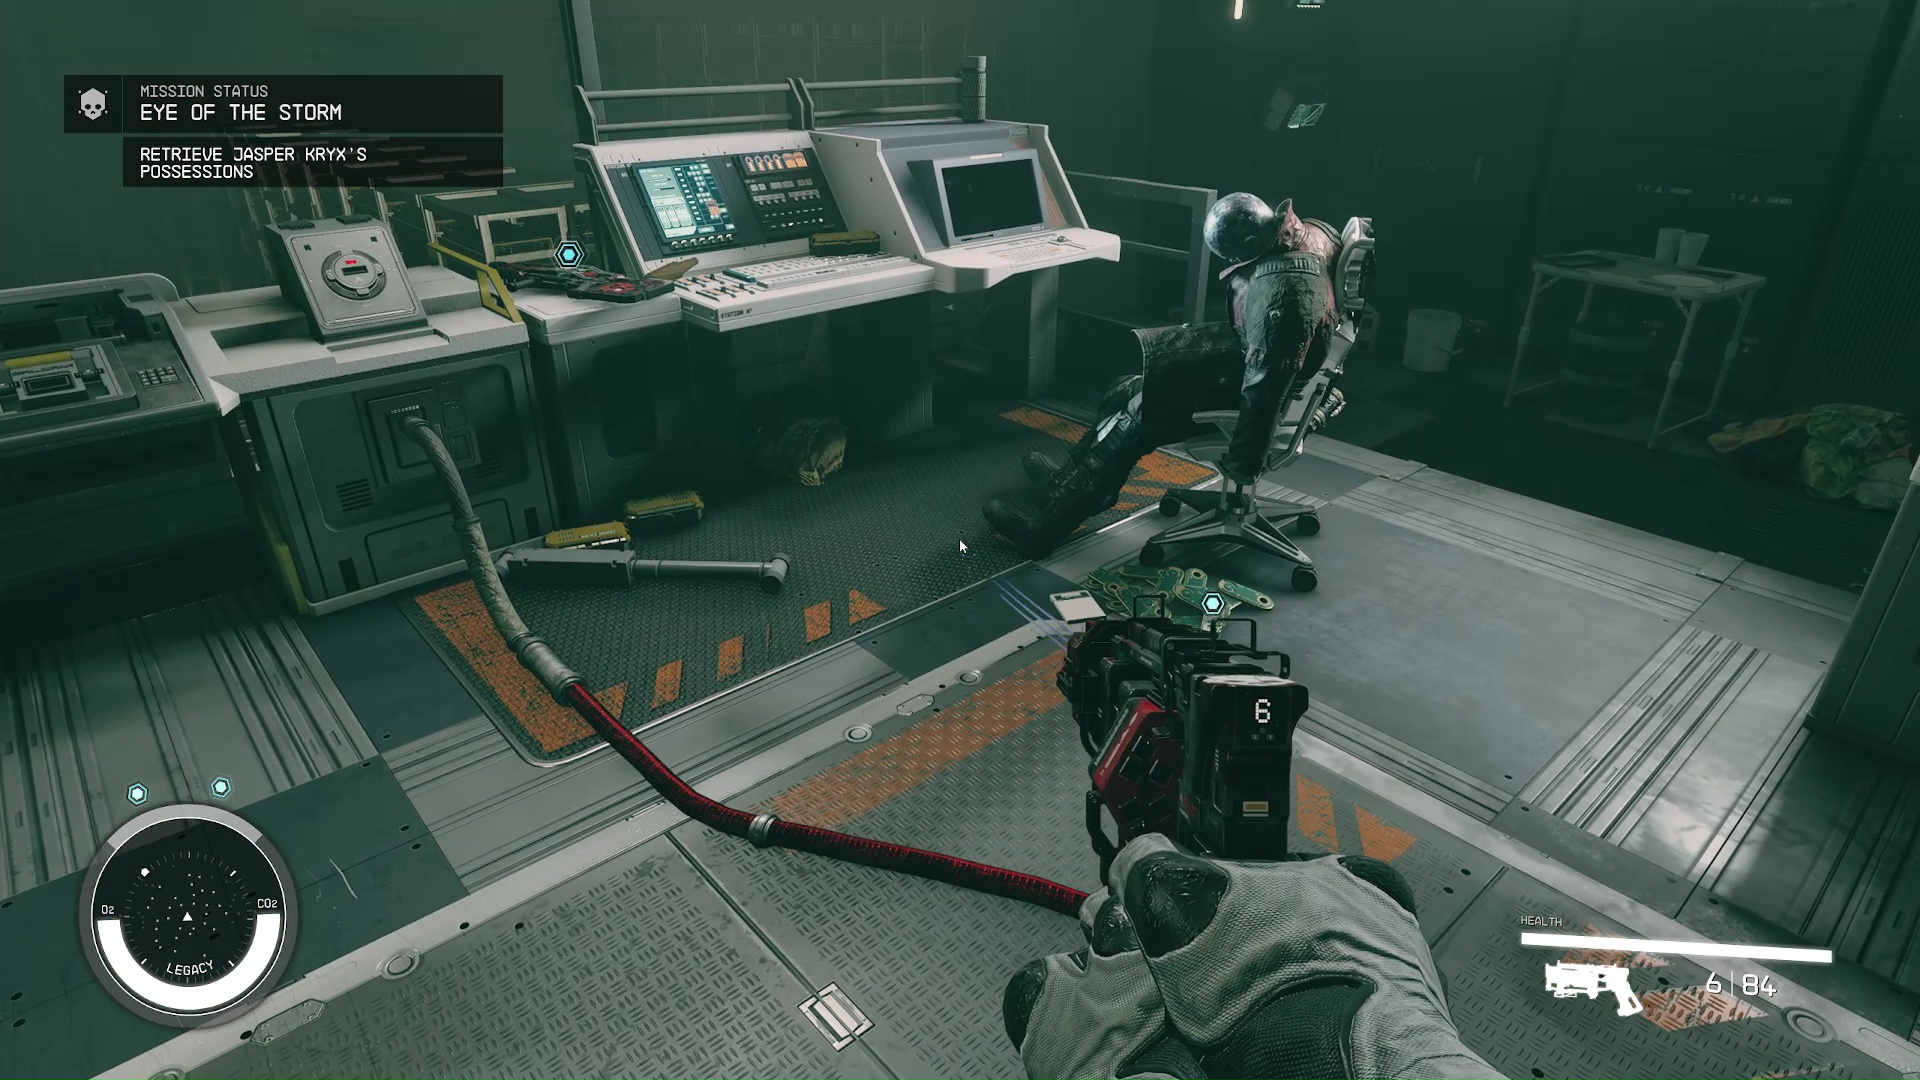
Retrieve Jasper Kryx’s Possessions
You’ll see the legend himself, Jasper Kryx, dead in a chair surrounded by his possessions (Image 19). He was so close to claiming the treasure, but his plan went sideways. All the things you will want to grab around his body are:
Revenant – on the counter in front of him, Jasper Kryx’s unique rifle.
Galbank Transfer Module – laying on the pile of credits on the floor, the second module that will allow you to take all the credits.
GBLR011: The Waiting Game – on the counter by the rifle, a recording explaining how Kryx got stuck.
GBLR013: Mortem Obire (Evidence) – recording by the pile of credits on the floor, evidence for Burden of Proof.
GBLR012: No Return: – sitting on the counter away from Kryx (behind our character in Image 19), more of Kryx’s story.
Image 19
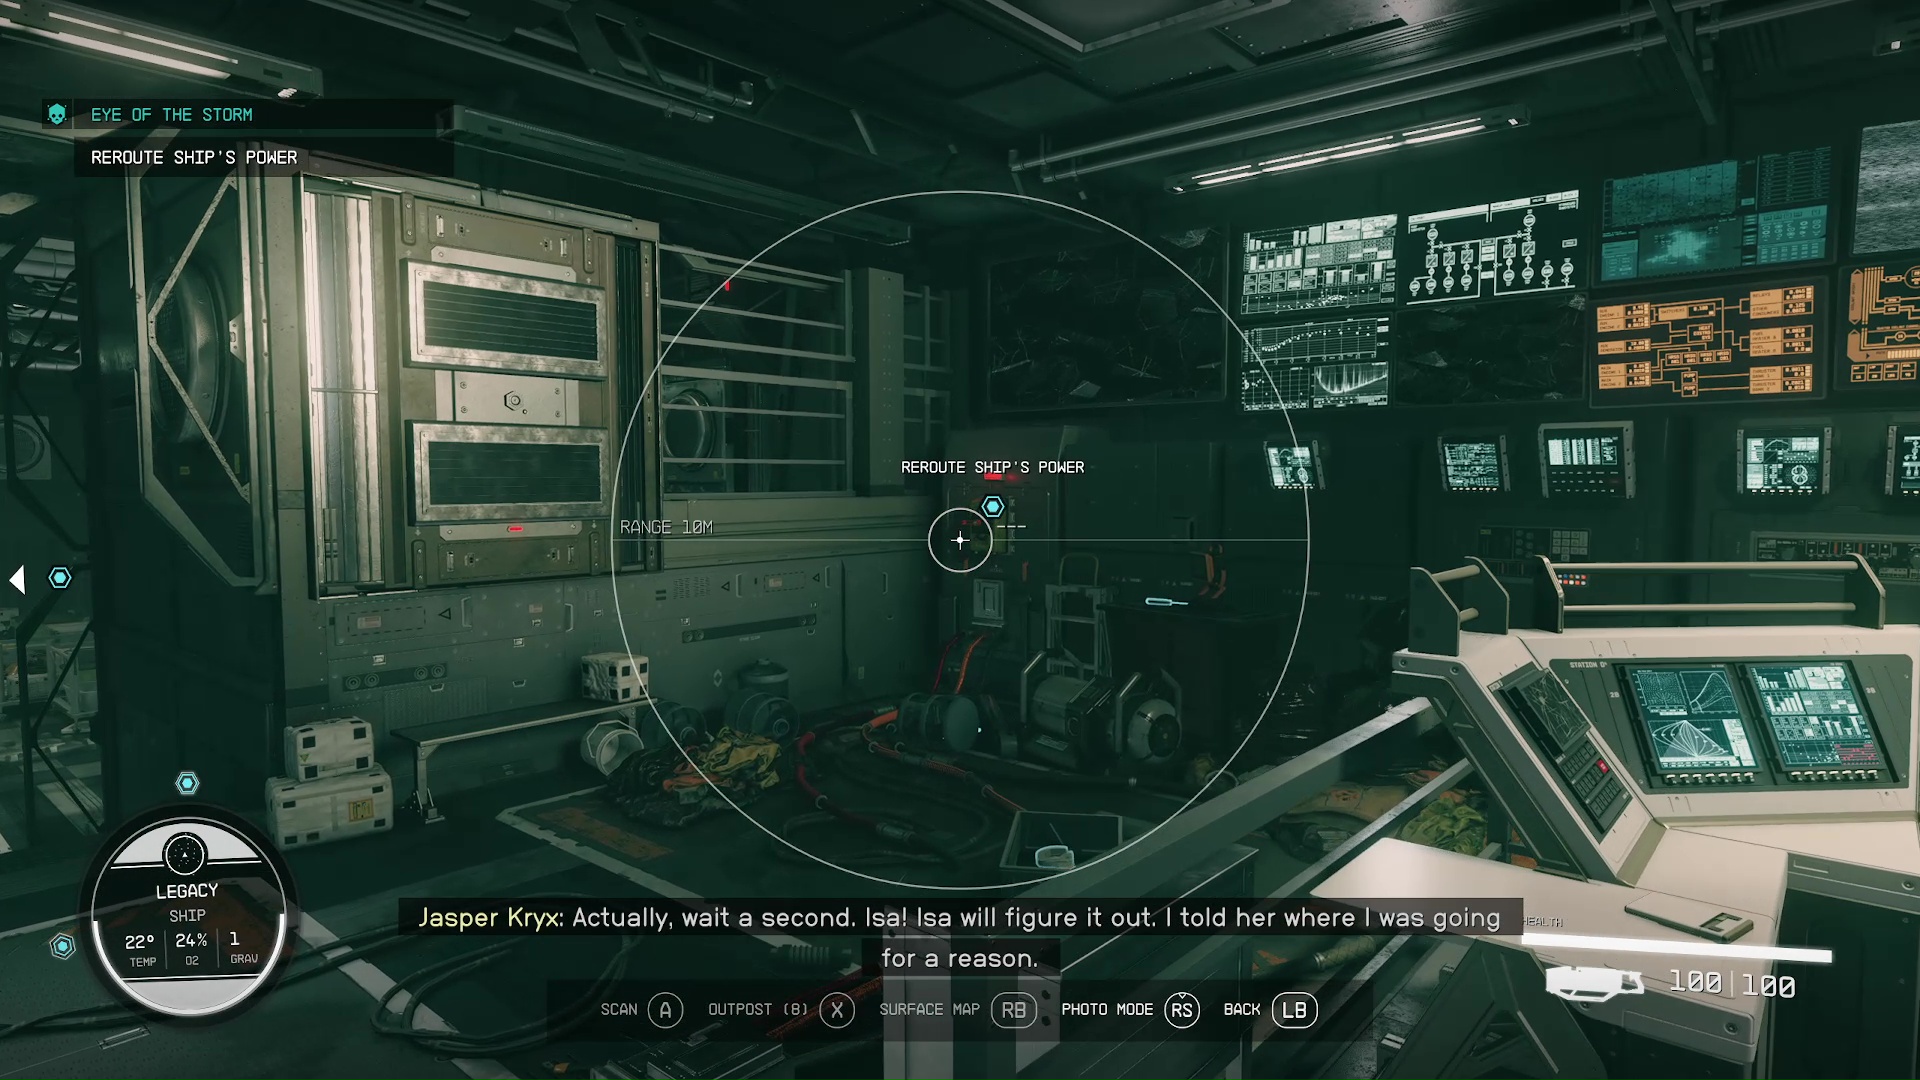
Reroute Ship’s Power
After listening to Kryx’s recording, you will be given the objective of rerouting the ship’s power. It is very easy; the two switches are in the same room as Kryx in the two corners. Approach each one and select them to reroute power (Image 20).
Image 20
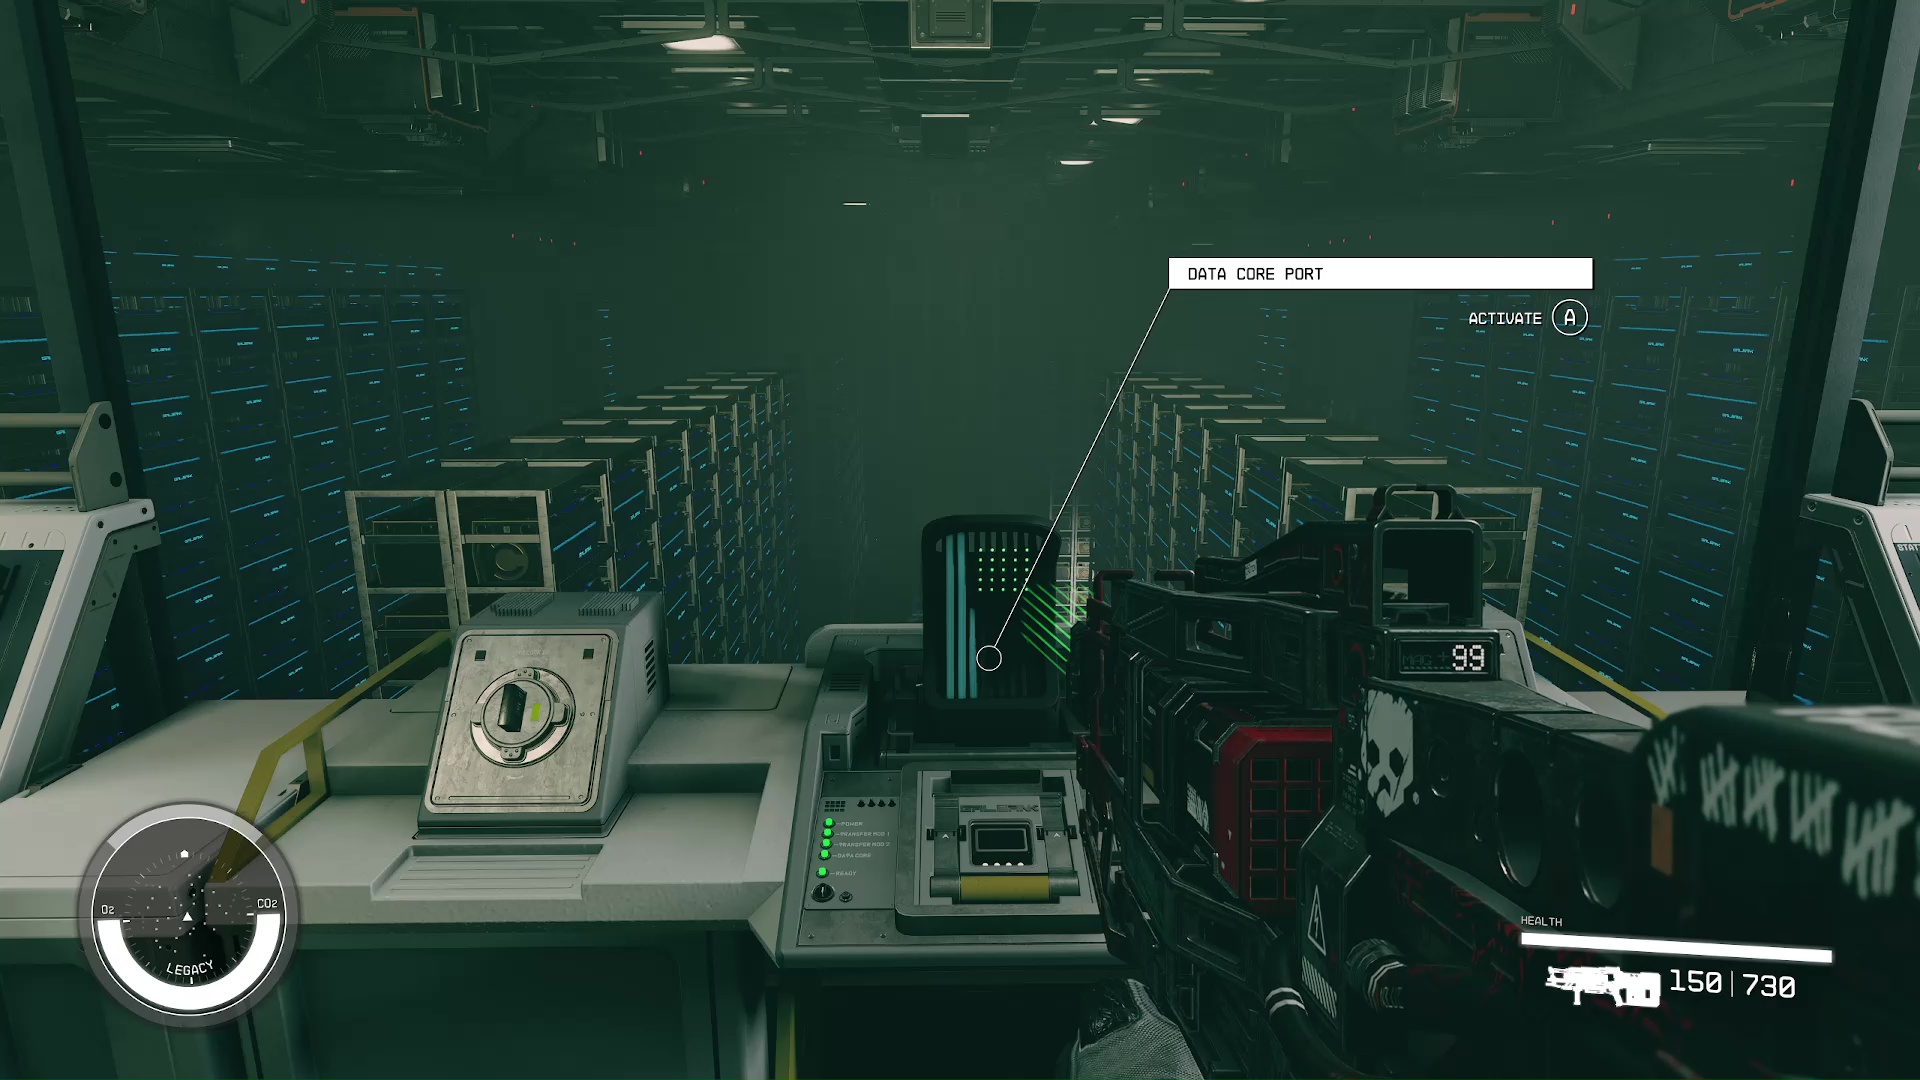
Access the Legacy’s Credit Reserves
Time to get paid! The game will walk you through each of these steps to transfer all the credits into your special Data Core. All the steps are done at the vault control counter (Image 21):
Insert the Transfer Modules into the two Transfer Keys.
Place the Data Core into its port.
Hit the download control switch.
Wait for the transfer process to complete.
Remove Transfer Modules.
Take the loaded Data Core.
Run for your life!
Image 21
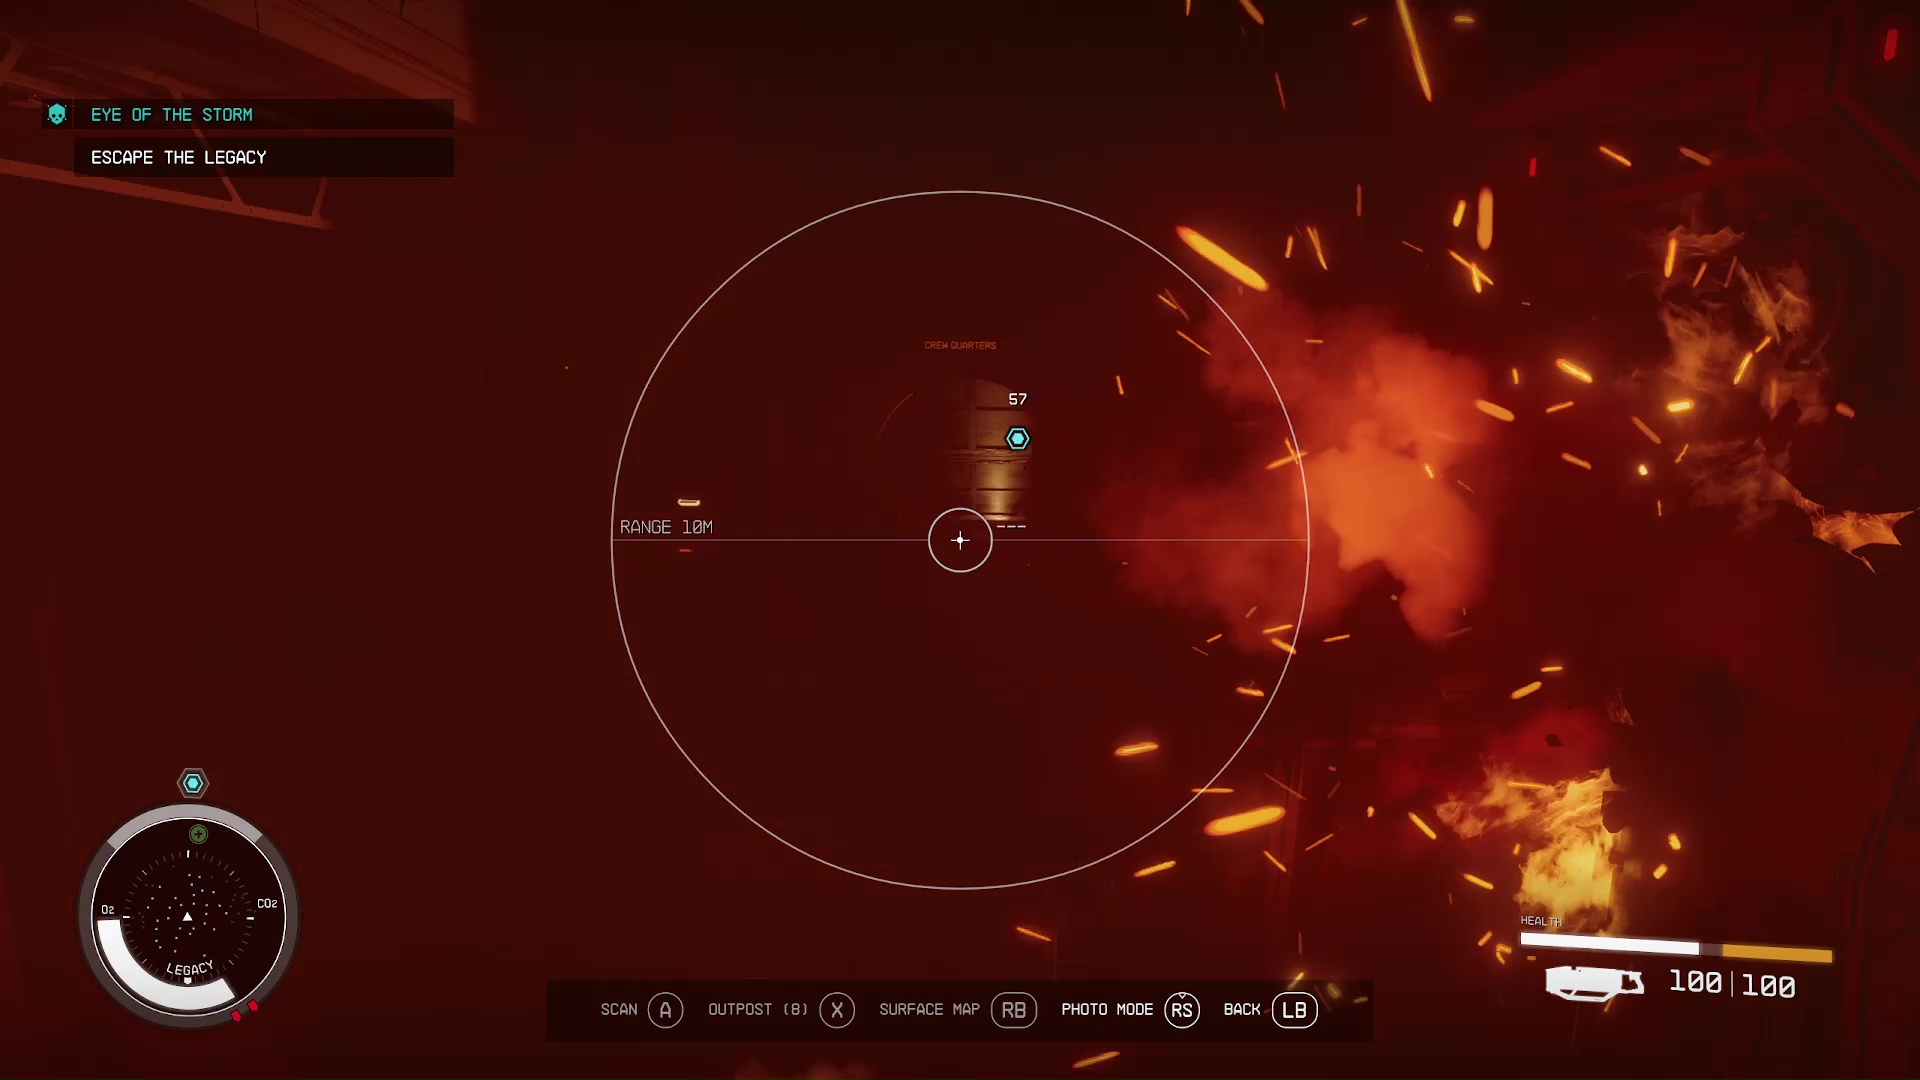
Escape the Legacy
Rerouting the power probably caused the shields to malfunction, because you will see a scary amount of hull breaches and mayhem happening. This whole section is you retracing your steps while the ship falls apart. Your handiest tool in the part is your scanner as it will lead you directly to your ship!
There are a couple rooms on the way back where you will encounter some enemy robots. You will want to be ready to switch from your scanner to your weapon in these rooms (don’t accidentally try to shoot them with the cutter, it won’t be effective). These are the problem rooms:
The Shield Generator Room – 1 robot
Hydraulics Room – 3 robots (1 higher high level)
Keep following your scanner, and when you come to the area where you unlocked the vault door with the first Transfer Module, you will have to jump and use your jetpack to fly into the crew quarters (Image 22).
Image 22
The crew quarters are very hard to navigate, mostly because of the very limited visibility, but your scanner should lead you through to your ship.
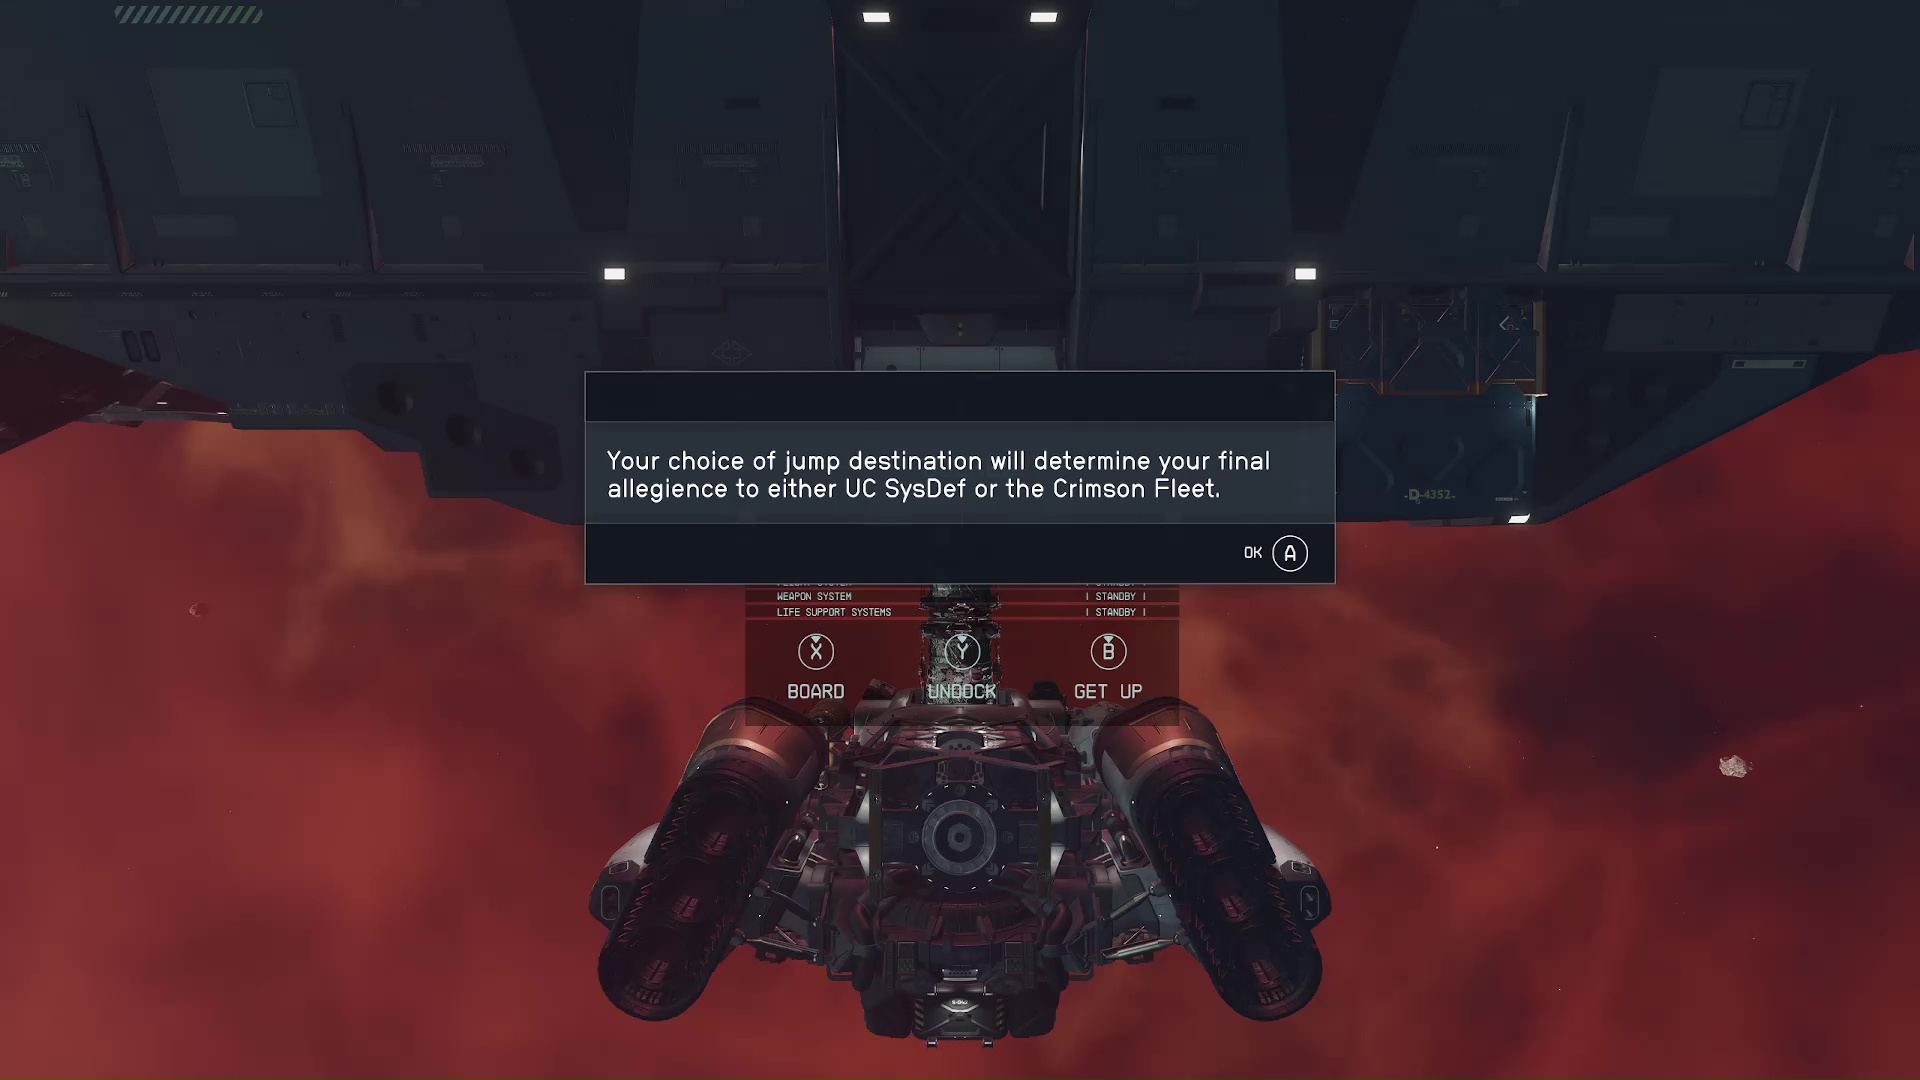
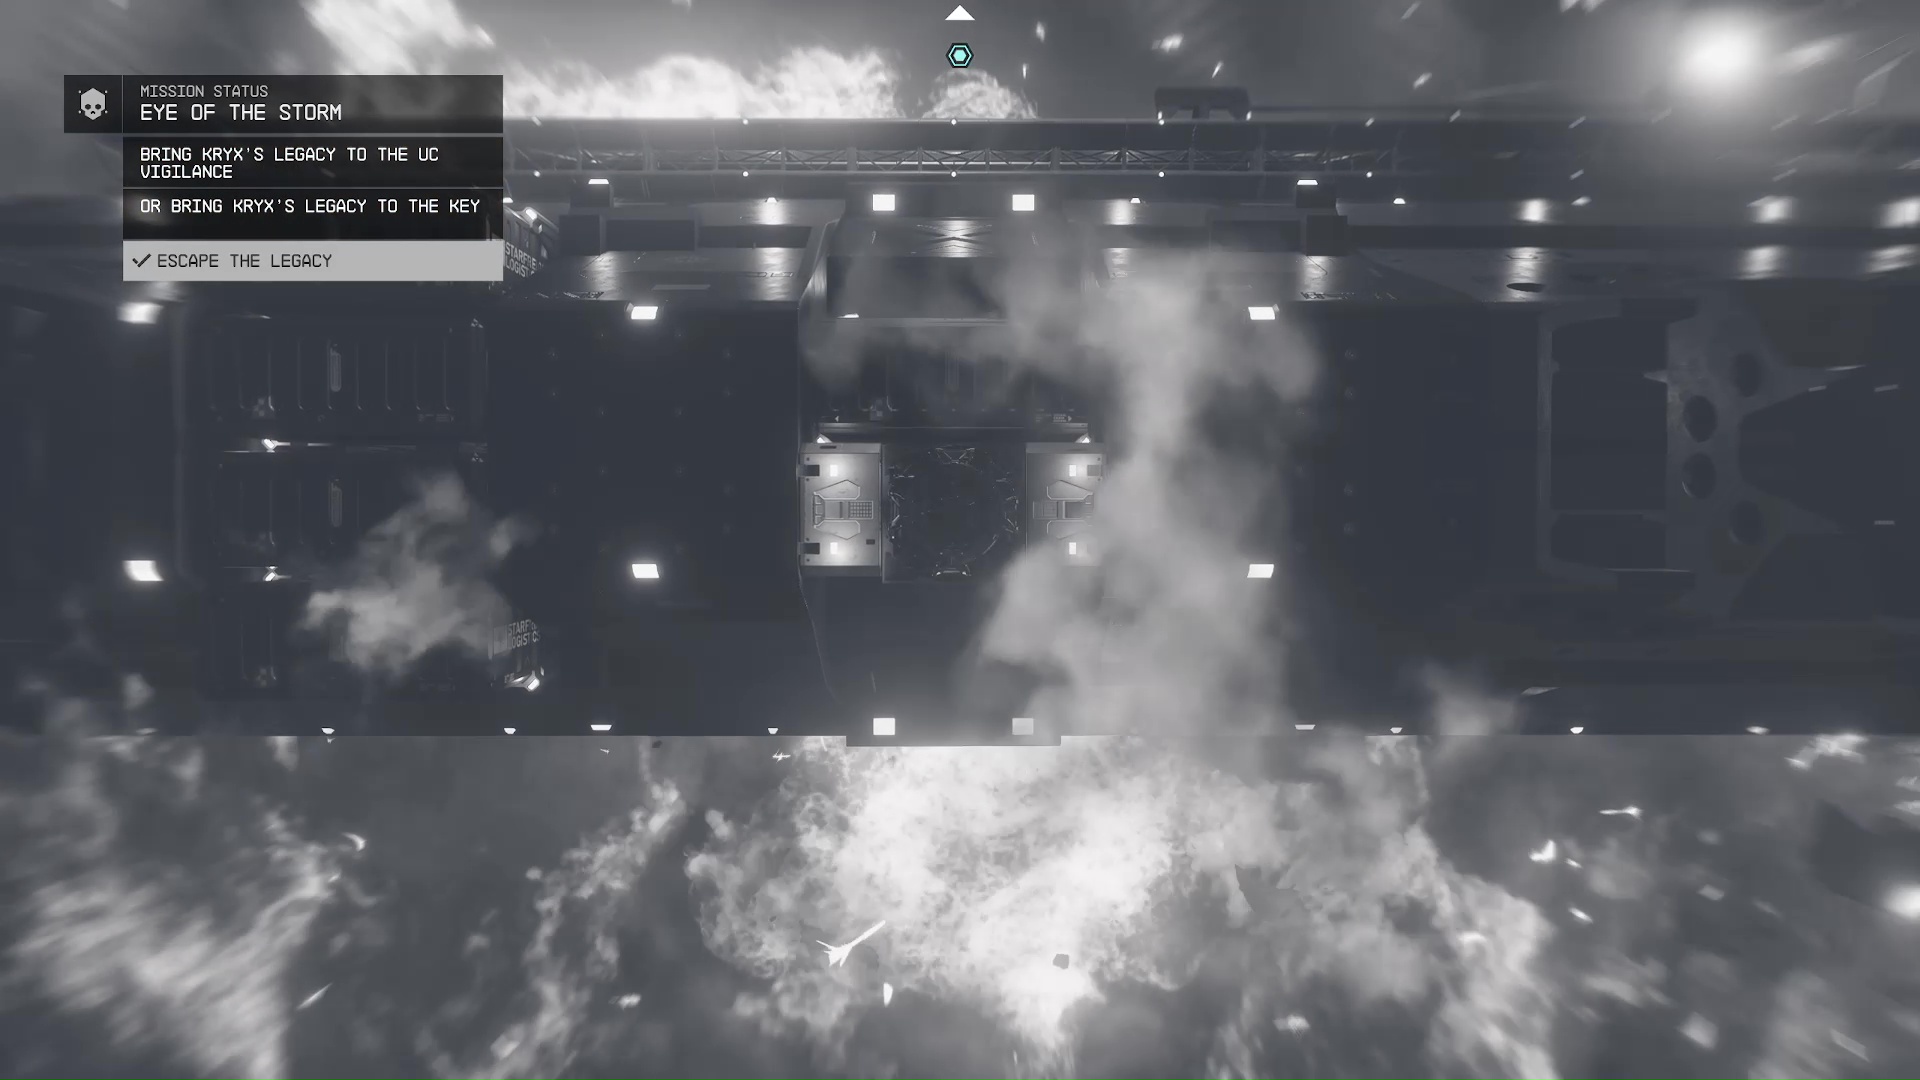
Bring Kryx’s Legacy to The Key or to the UC Vigilance
When you board your ship, you will be given the notification that you will choose which side you’re with, depending on where you grav jump. If you grav jump to SysDef on the UC Vigilance, then you’re against the Crimson Fleet and vice versa (Image 23). When you undock, the Legacy will explode, and you will get the new mission objectives (Image 24).
Image 23Image 24
As soon as you arrive in orbit at either location, you will finish the mission.
Kelson is a spud head from out west. He is most happy when holding a milky tea with too much honey and playing a sprawling role playing game or reading a fantasy novel. His video game tastes vary but his main genres are looter shooters, RPGs, and real time strategy games.