In this guide, we’ll walk you through Starfield’s first mission. This mission is quite long, and takes you from the game’s introductory sequence, to character creation, to your first forays into combat, spaceflight, and more.
Love ’em or hate ’em, Starfield begins in the same manner as Skyrim, with an extended conversation in which all you can do is look around. You’ll meet your boss, Supervisor Lin, plus the wise-cracking Heller. Once you’re all suited up, the game will let you know you can move around by displaying the movement controls.
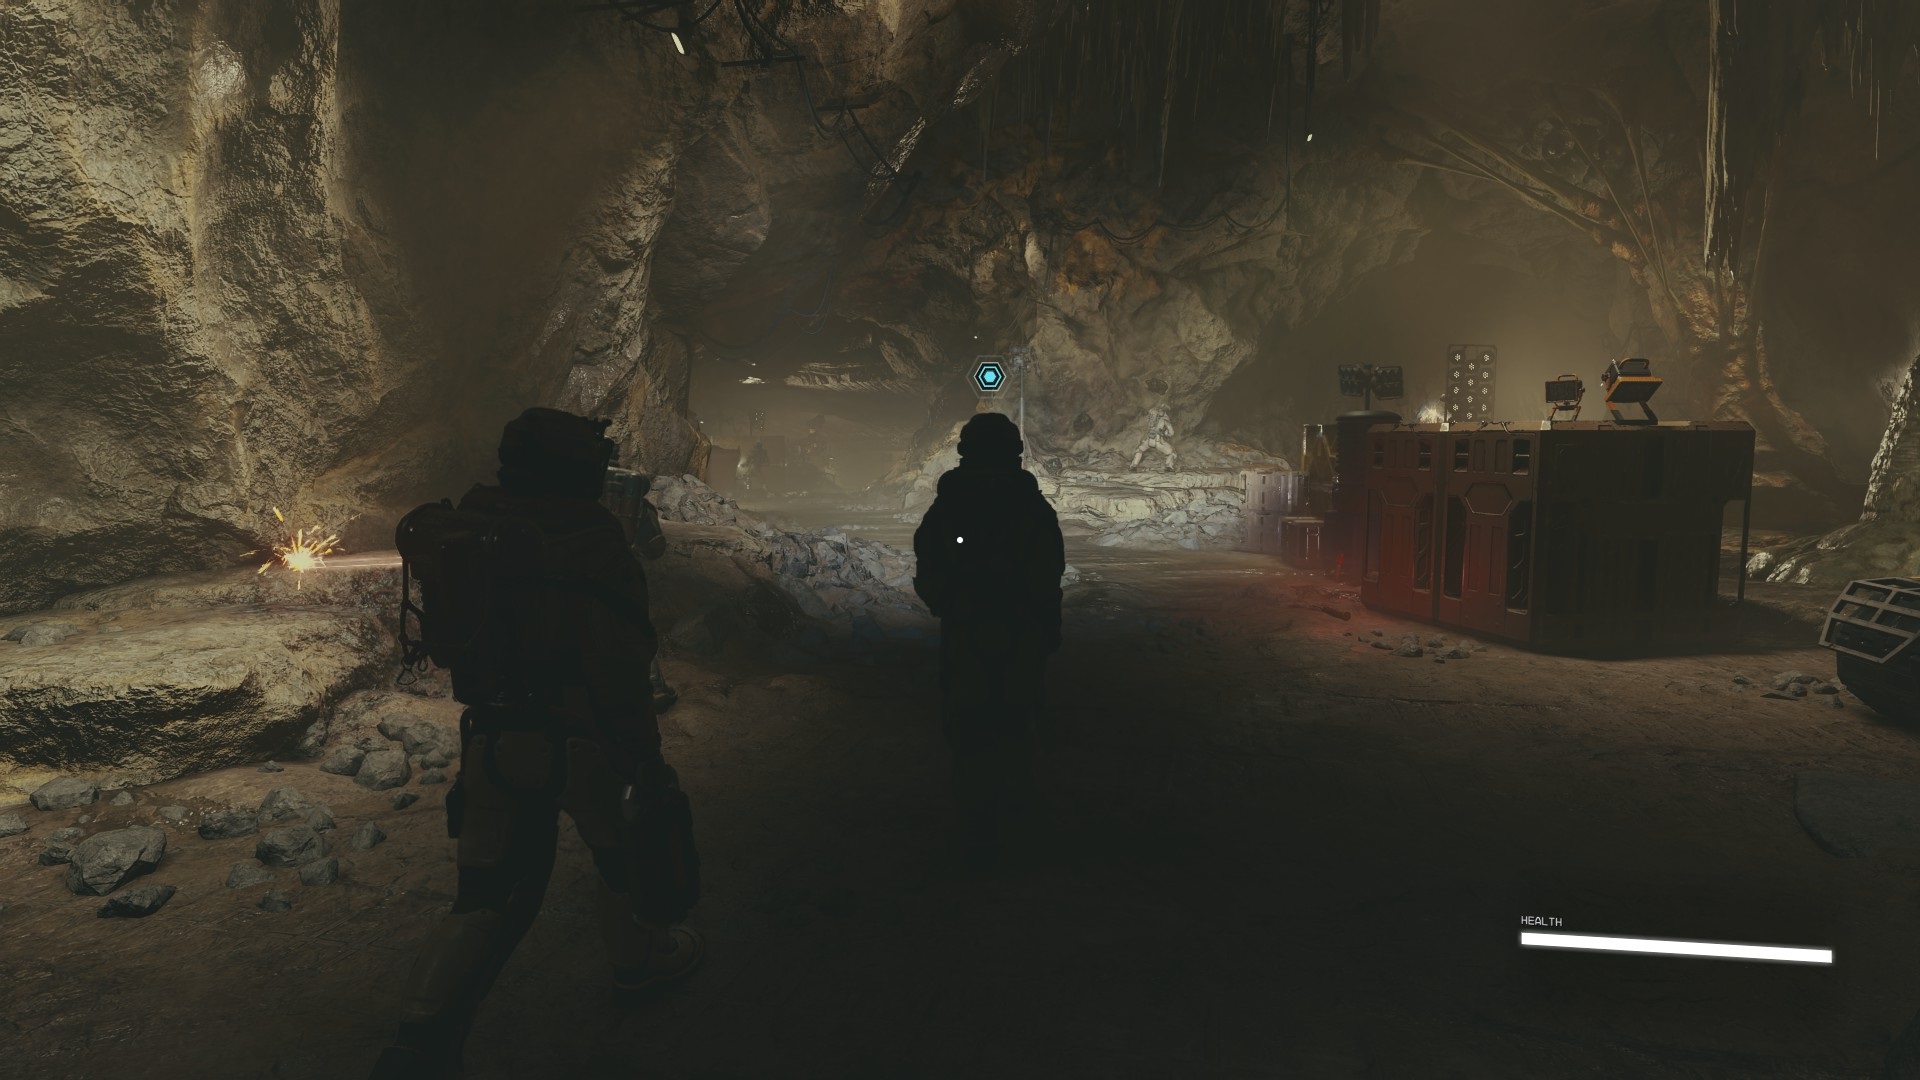
Follow Lin
At this point, you’re finally in control of your character — follow Lin through the mining tunnel with WASD/Left Stick (Image 1). She’ll wait for you if you lag behind, so feel free to poke around and see what the miners are doing; we didn’t find any secrets ourselves while doing so, but Lin will wait patiently for an hour if you make her do so. / will activate your flashlight, in case you want a closer look into some of the dark corners.
Image 1 – Naturally, it’s impossible to exactly match speeds with Lin
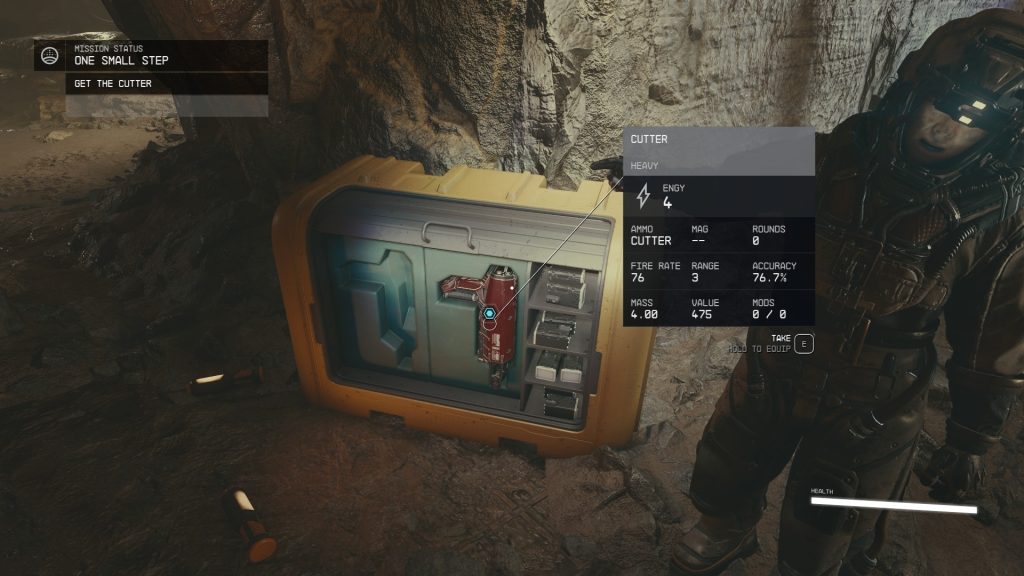
Get the Cutter
Once you’ve followed Lin for long enough, she’ll stand next to an equipment case and tell you to pick up a mining laser, a “Cutter” (Image 2). Usually, you’d have to hold / / to equip the Cutter directly from the environment, but in this instance pressing the indicated key will immediately equip the cutter.
Image 2
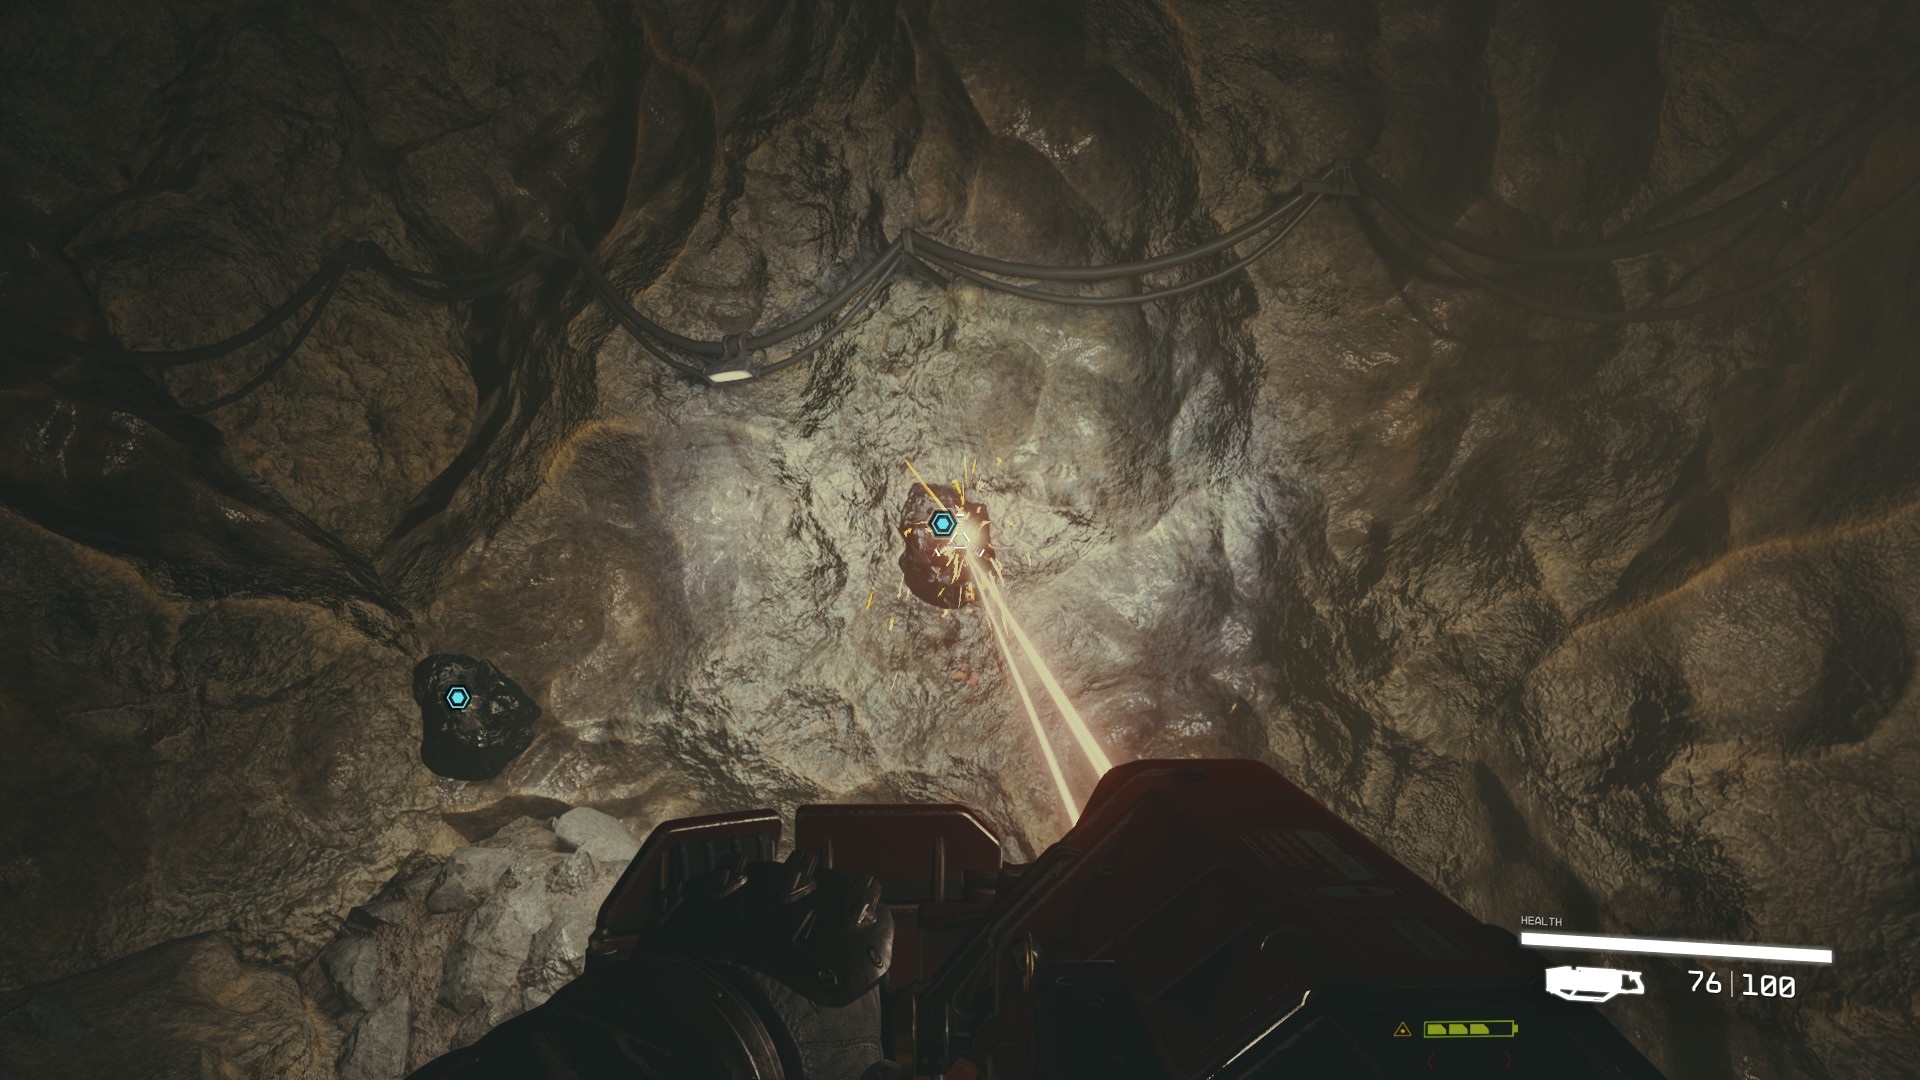
Collect Mineral Deposits
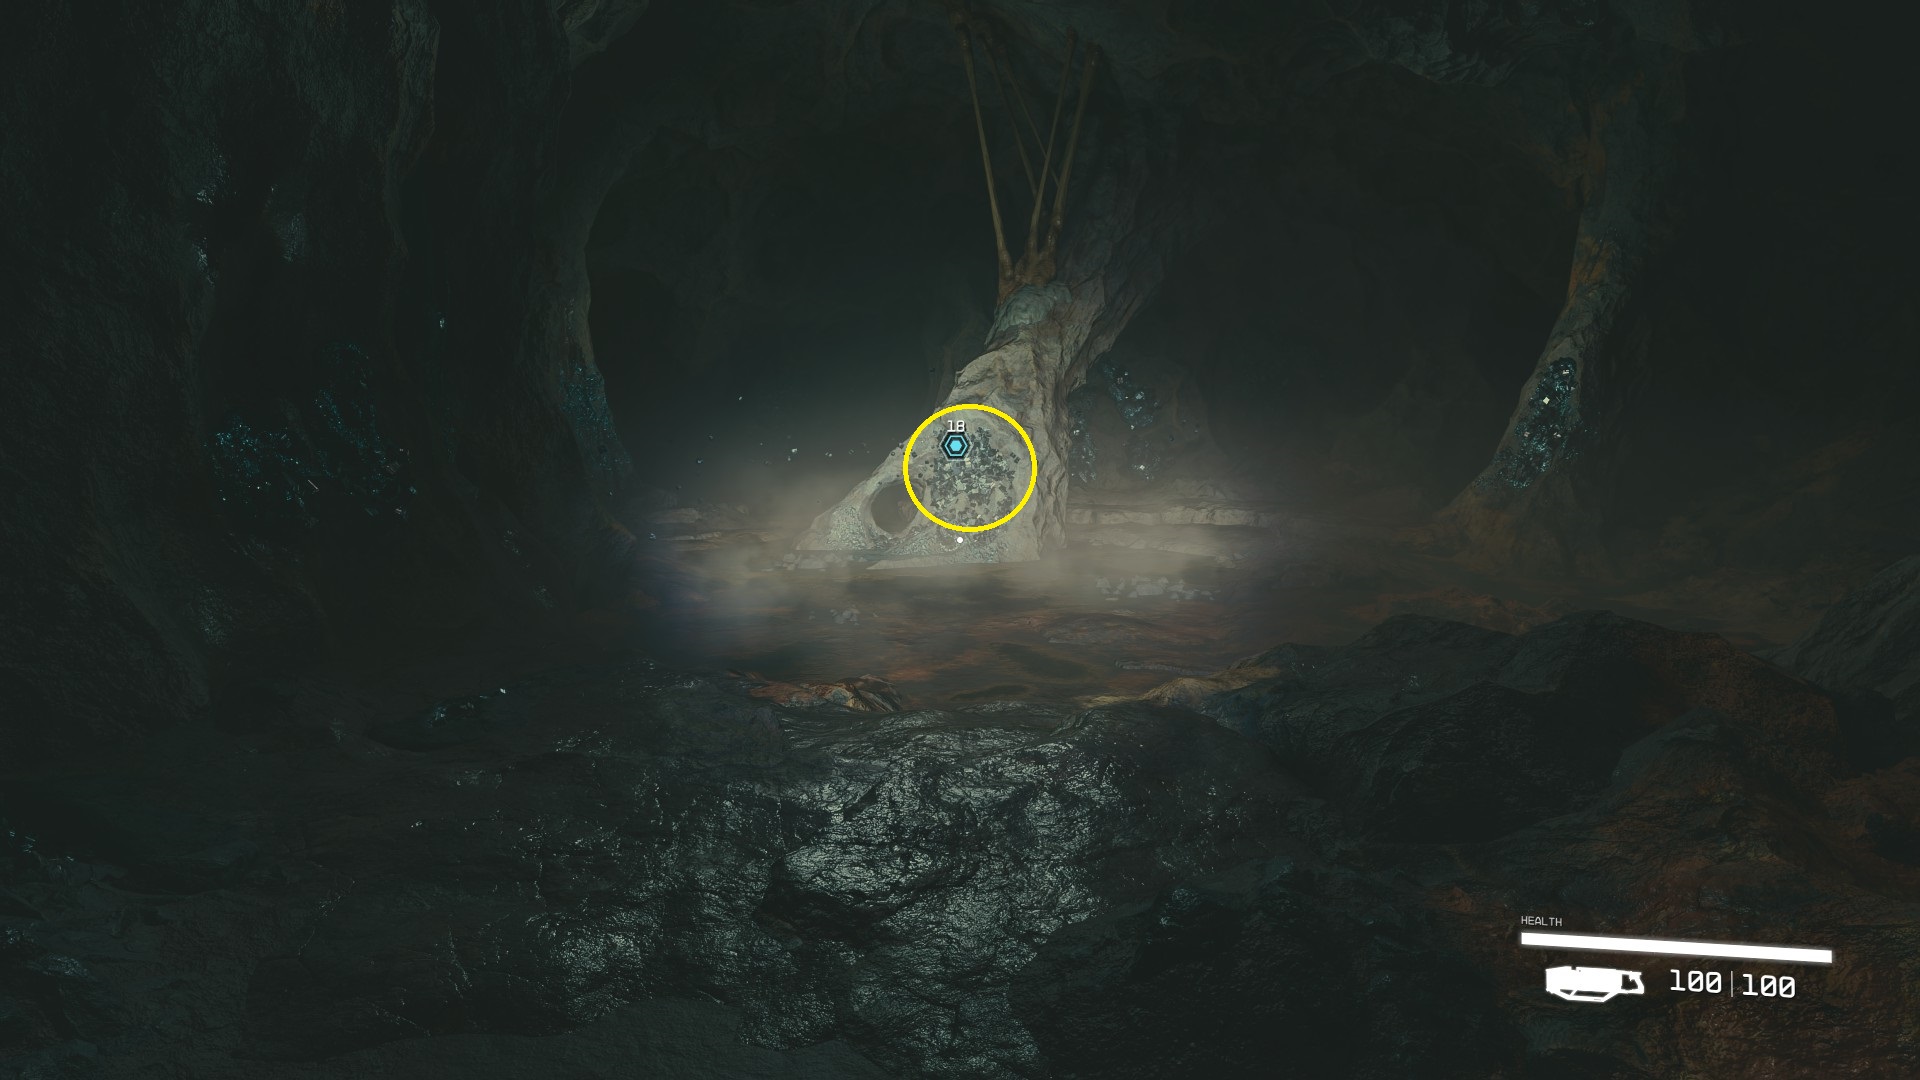
Cutter firmly in hand(s), look left, into the nearby tunnel, where you’ll see 5 different objective markers (the blue hexagons). Approach each one and aim at it, then press / to fire the Cutter (Image 3). Once you’ve collected all 5 deposits, you’re done mining.
Image 3
Return to/Follow Supervisor Lin
You can sprint now, so feel free to use Left Shift / to run back over to Lin, who is waiting where you grabbed the Cutter. Follow her once more, and then you’ll have to wait at the end of the tunnel for a digging machine to make you a new path. Stick with Heller and Lin as they proceed deeper into the tunnel
Explore the Cavern
Your companions will stop near a rock bridge, and Lin’ll tell you to explore the cavern. Head across the rock bridge, and turn on your flashlight if you haven’t already ( / ). Continue into the tunnel indicated by the objective marker, and you’ll soon enter a small cavern.
Break Up the Deposits/Take the Strange Object
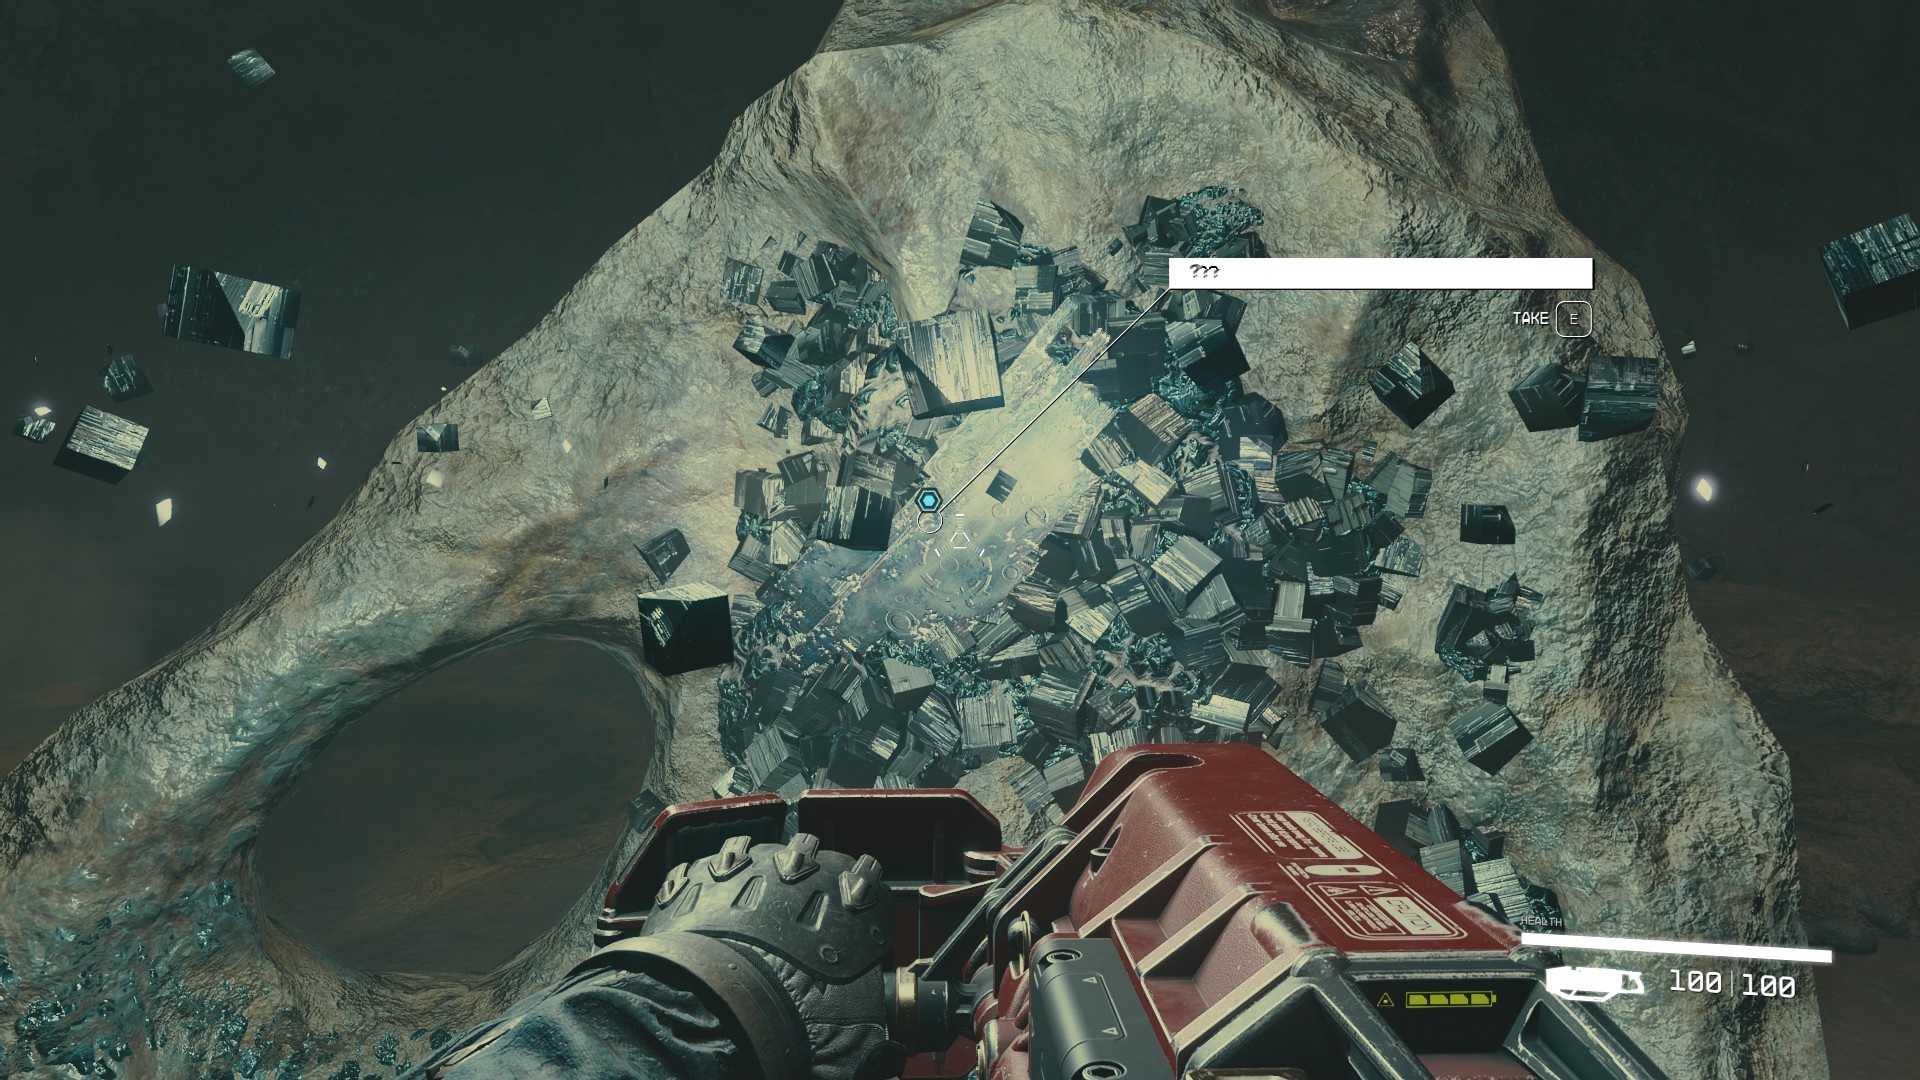
Approach the indicated chunk of minerals (Image 4), and use your cutter on them. You’ll expose a “Strange Object” — get close enough, and you’ll be prompted to Take it with / / (Image 5). This is Artifact Eta.
Image 4Image 5
Doing so will start a cutscene, and then you’ll awaken to another brief dialog, followed by character creation.
If you aren’t sure what kind of character you want to make, you may want to check out our Builds page, learn more about Skills, or see what we think the Best Traits are!
Follow Lin
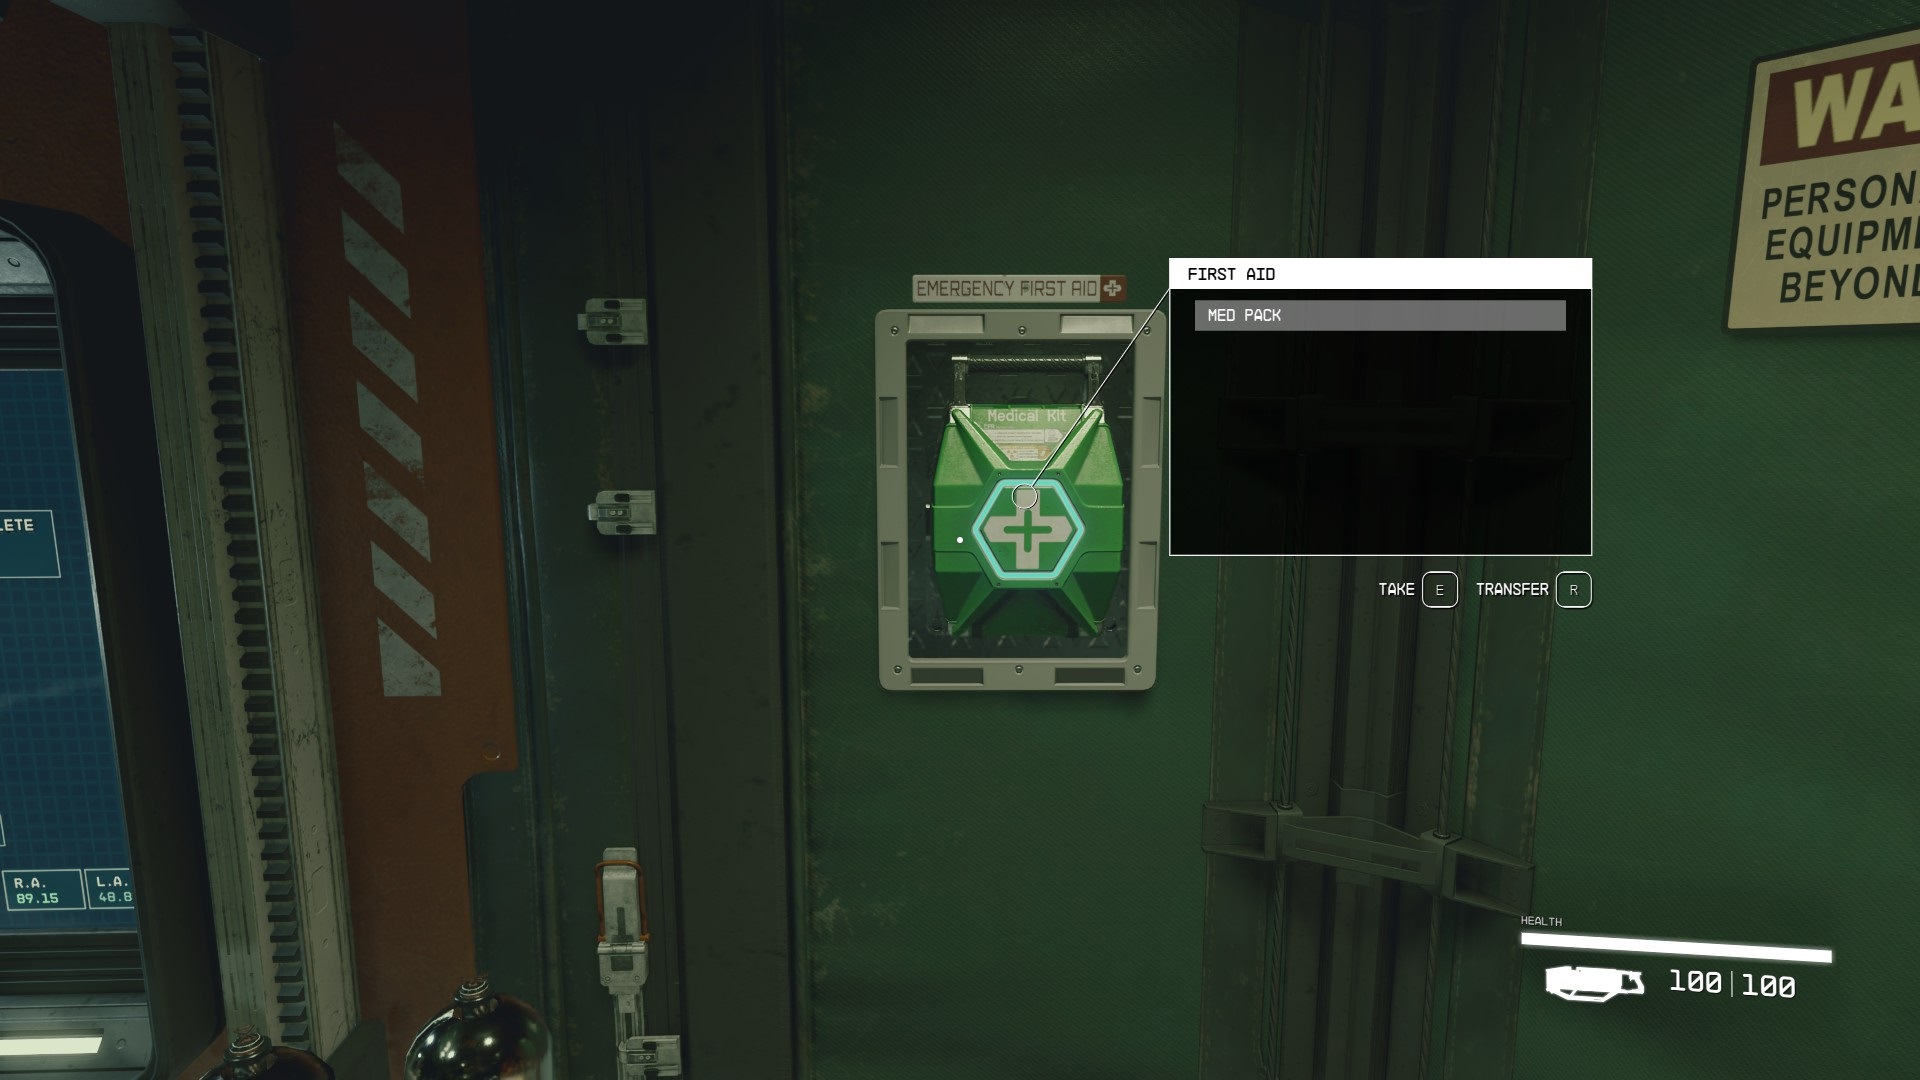
Now you’re back to following Lin. Before you do, however, turn around — on the wall to the right of the medical bed is a First Aid container with a Med Pack (Image 6). Further to the right on the wall with the med pack, you’ll be able to open a large orange door via a switch — the door lets you enter a room that contains Heller’s personal log, and a locked gate door — you won’t be able to open it at this point, but keep it in mind for when you’ve got Rank 3 in the Security skill, as it’s got some valuable goodies in a crate.
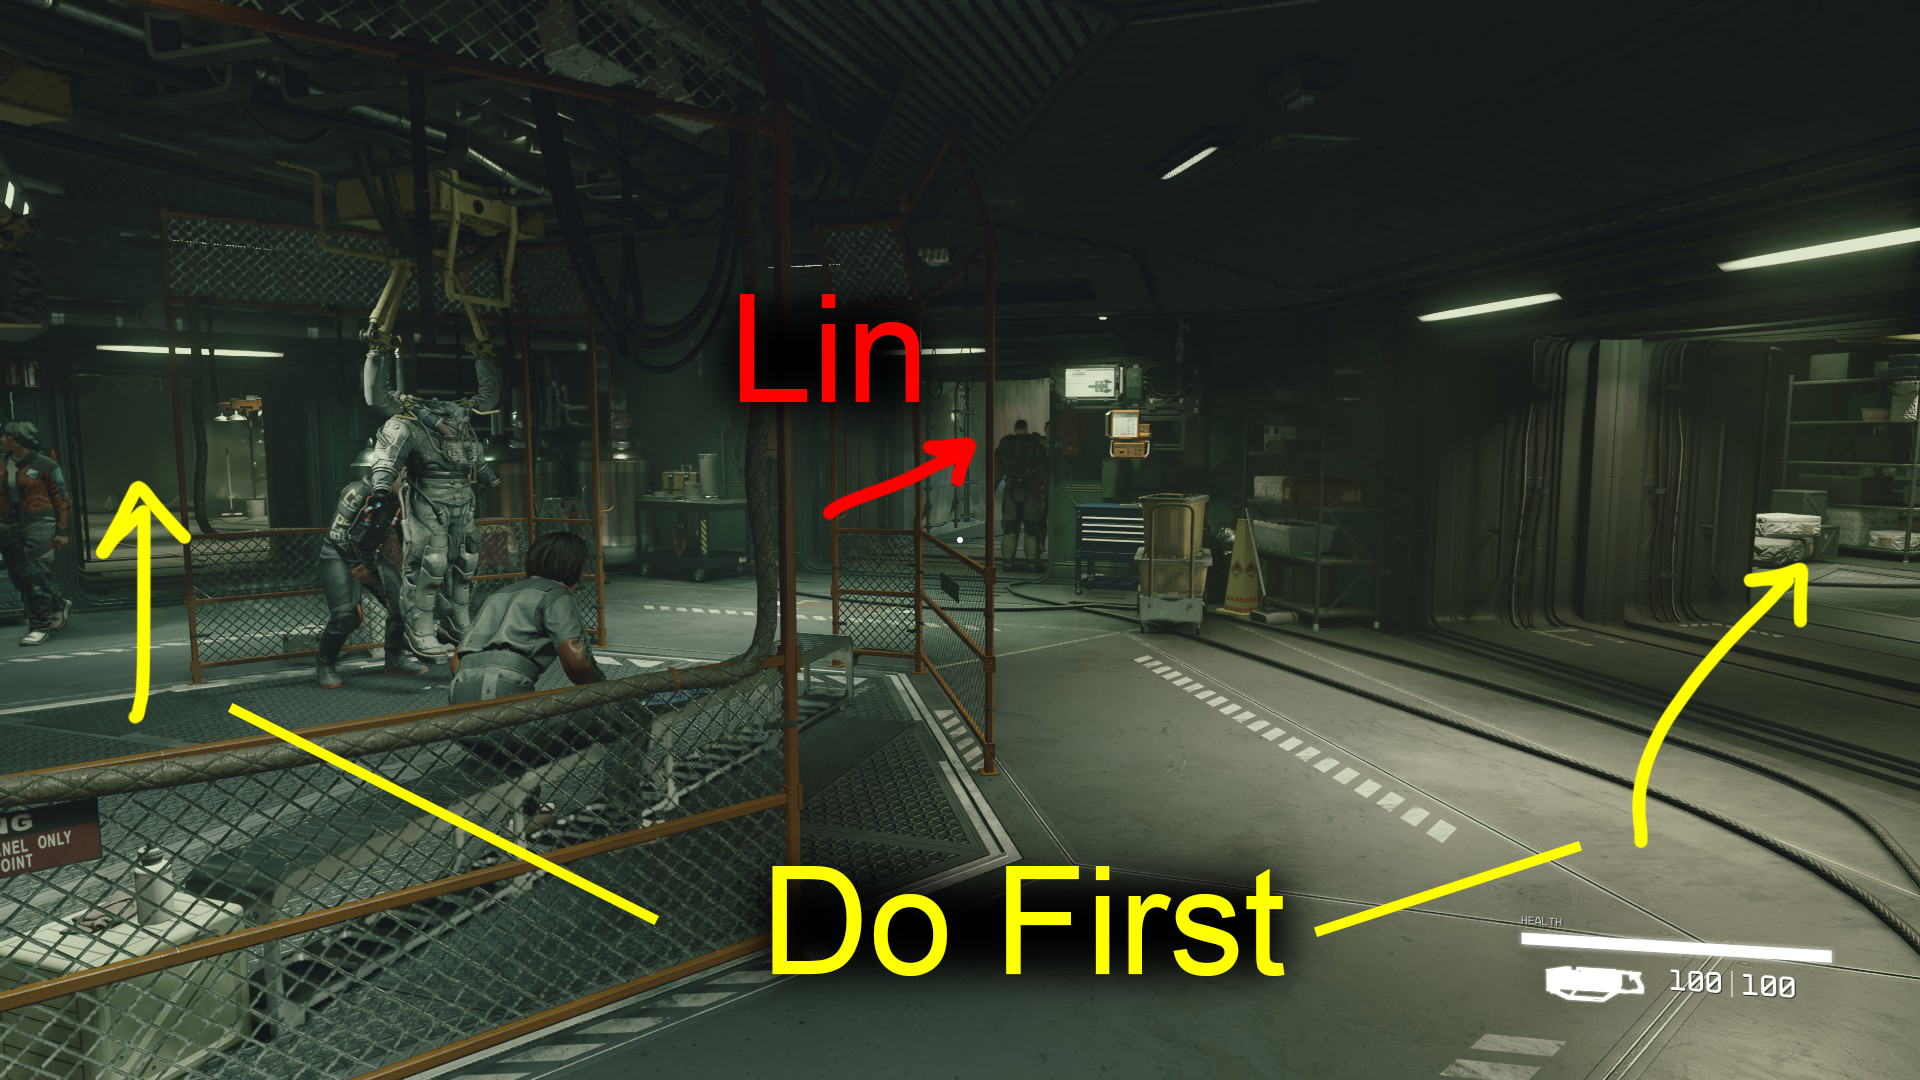
Additionally, players who like collecting everything not bolted down will want to investigate the two rooms to the left and the right of the hallway Lin goes down (Image 7) — of particular note is the Med Pack in the bathroom of the left-hand room.
Once you’re done grabbing all the cups and pens and healing items, follow Lin through the small hallway.
Image 6Image 7
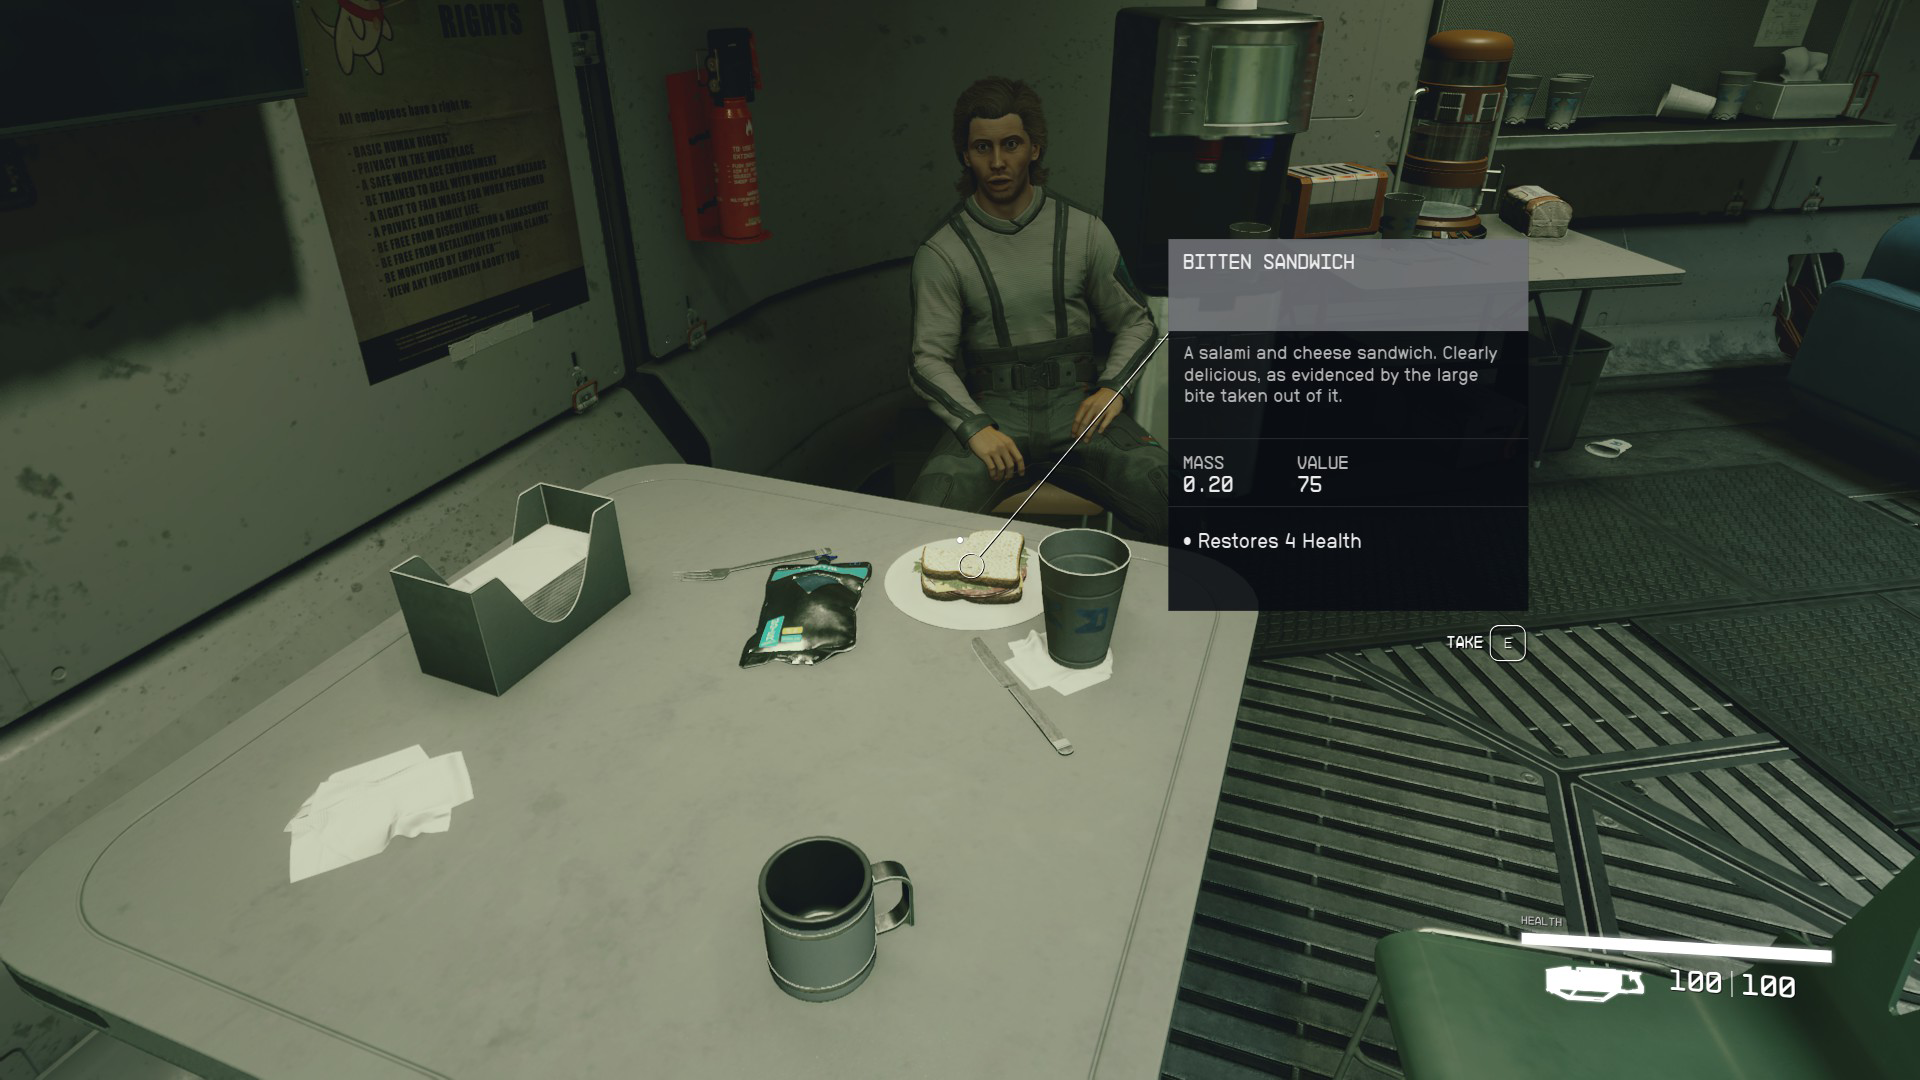
The next room contains a bunch more stuff you can grab — make sure you take the sandwich from the guy sitting at the table on the left (Image 8). When you’re ready, follow Lin into the airlock (Image 9).
Image 8Image 9
Equip a Helmet
You’ll need to open your inventory and equip a helmet before the airlock can be cycled. Press your keyboard to go directly to your inventory; on controller, press and then move the cursor to the lower right (where the Cutter probably is) and then press / . Next, go to the Helmets category and equip the Deep Mining Space Helmet, then hold the button indicated on-screen to exit the inventory menu.
Follow Lin & Meet With the Client
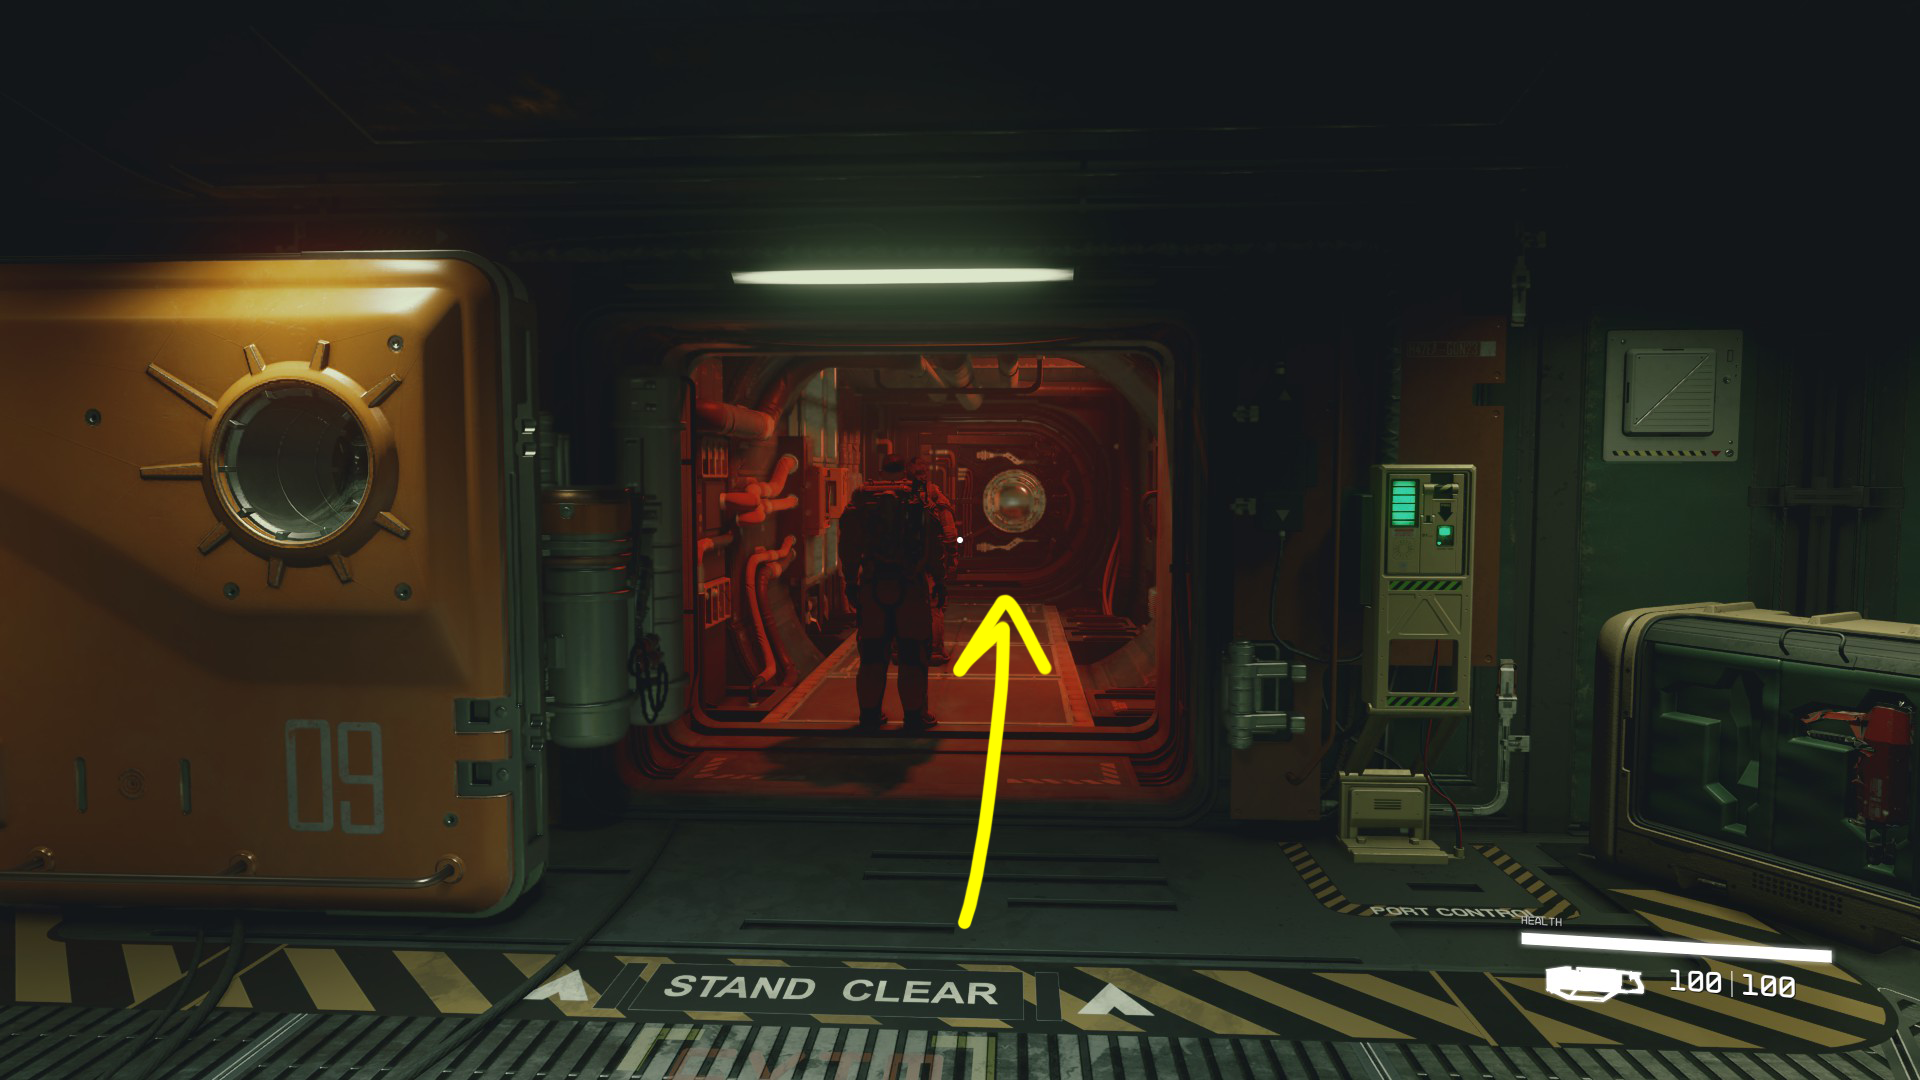
Once the airlock opens up, head outside, and enjoy your first view of the outside world. Look up and to the right, and you’ll see a ship coming in to land. Follow Lin out to the docking pad the ship is headed for, and wait with her as Barrett comes up to meet your party. Barrett and Lin will speak for a while, and then Barrett will engage you in conversation. Say whatever you want to him, and soon the conversation will end. Lin and Barrett will speak a bit more, and then Vasco the robot will say that pirates are inbound.
Hold Off the Pirates
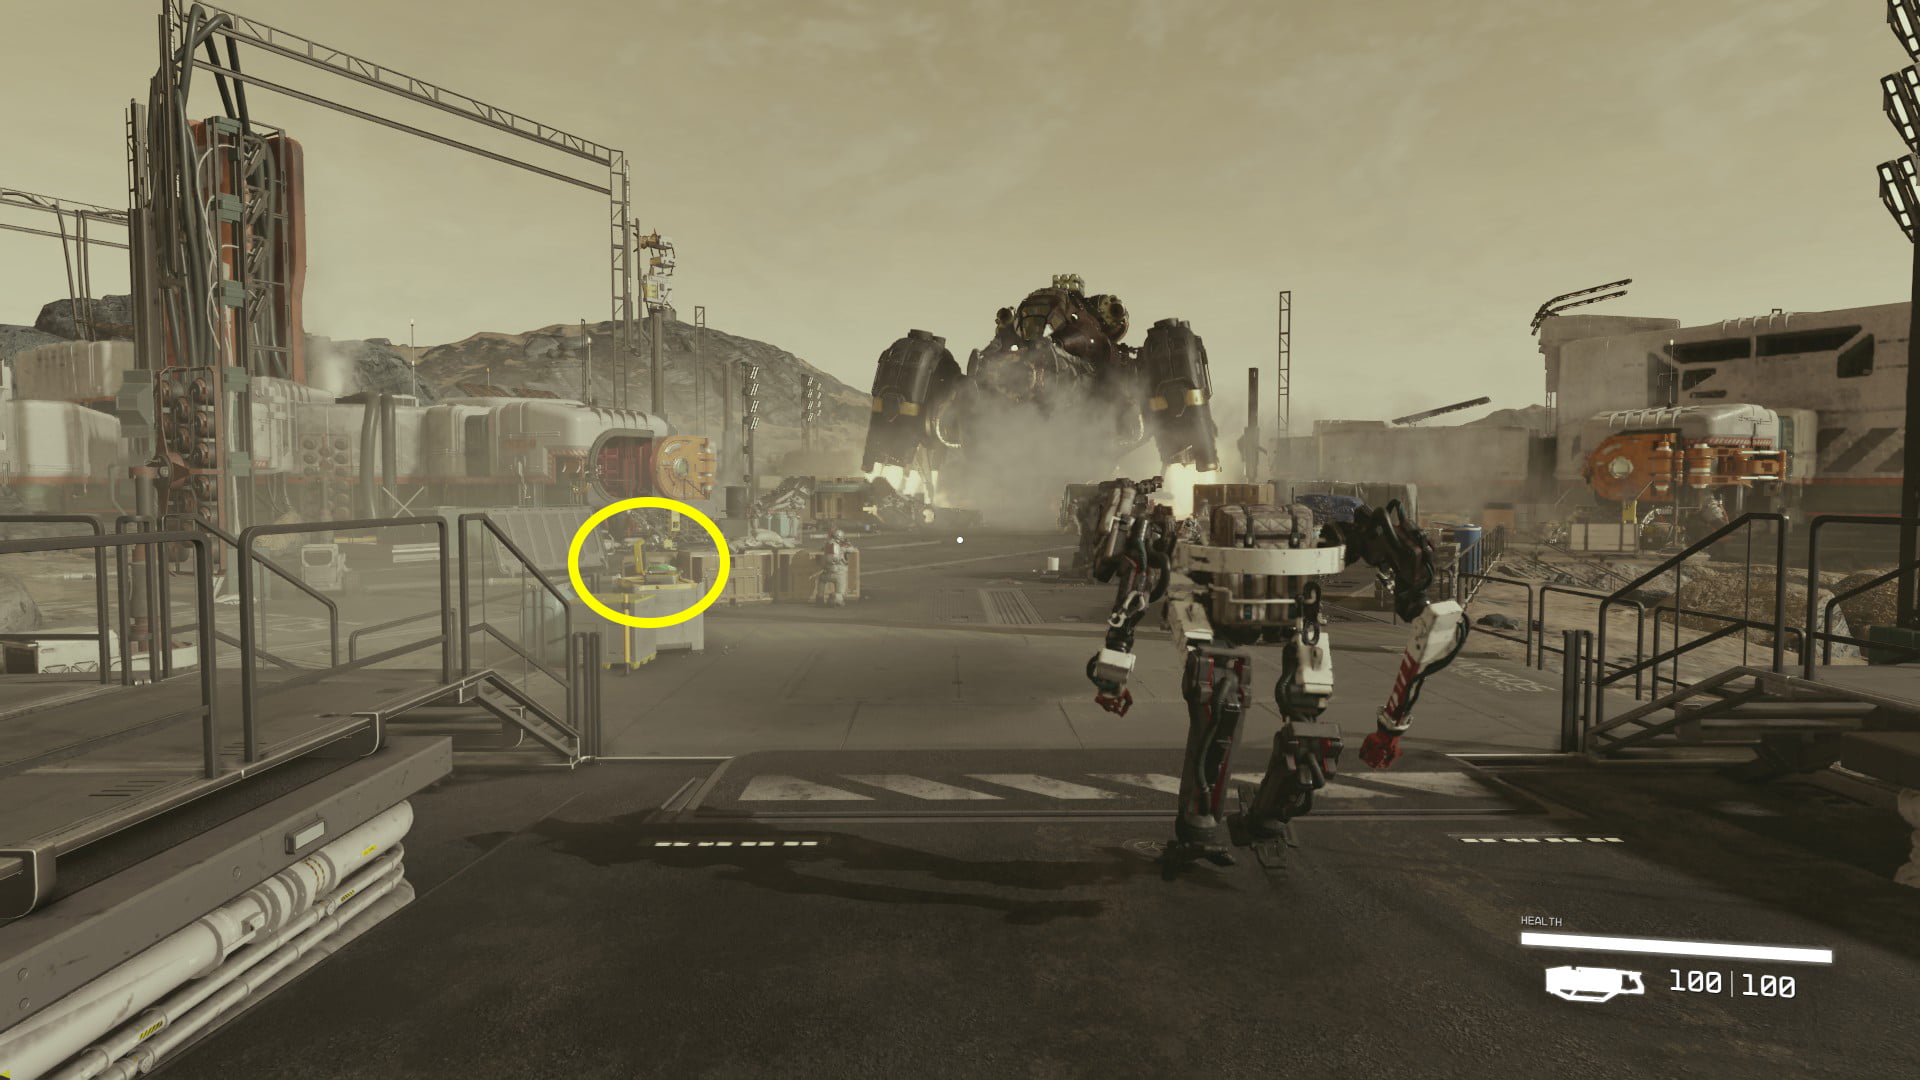
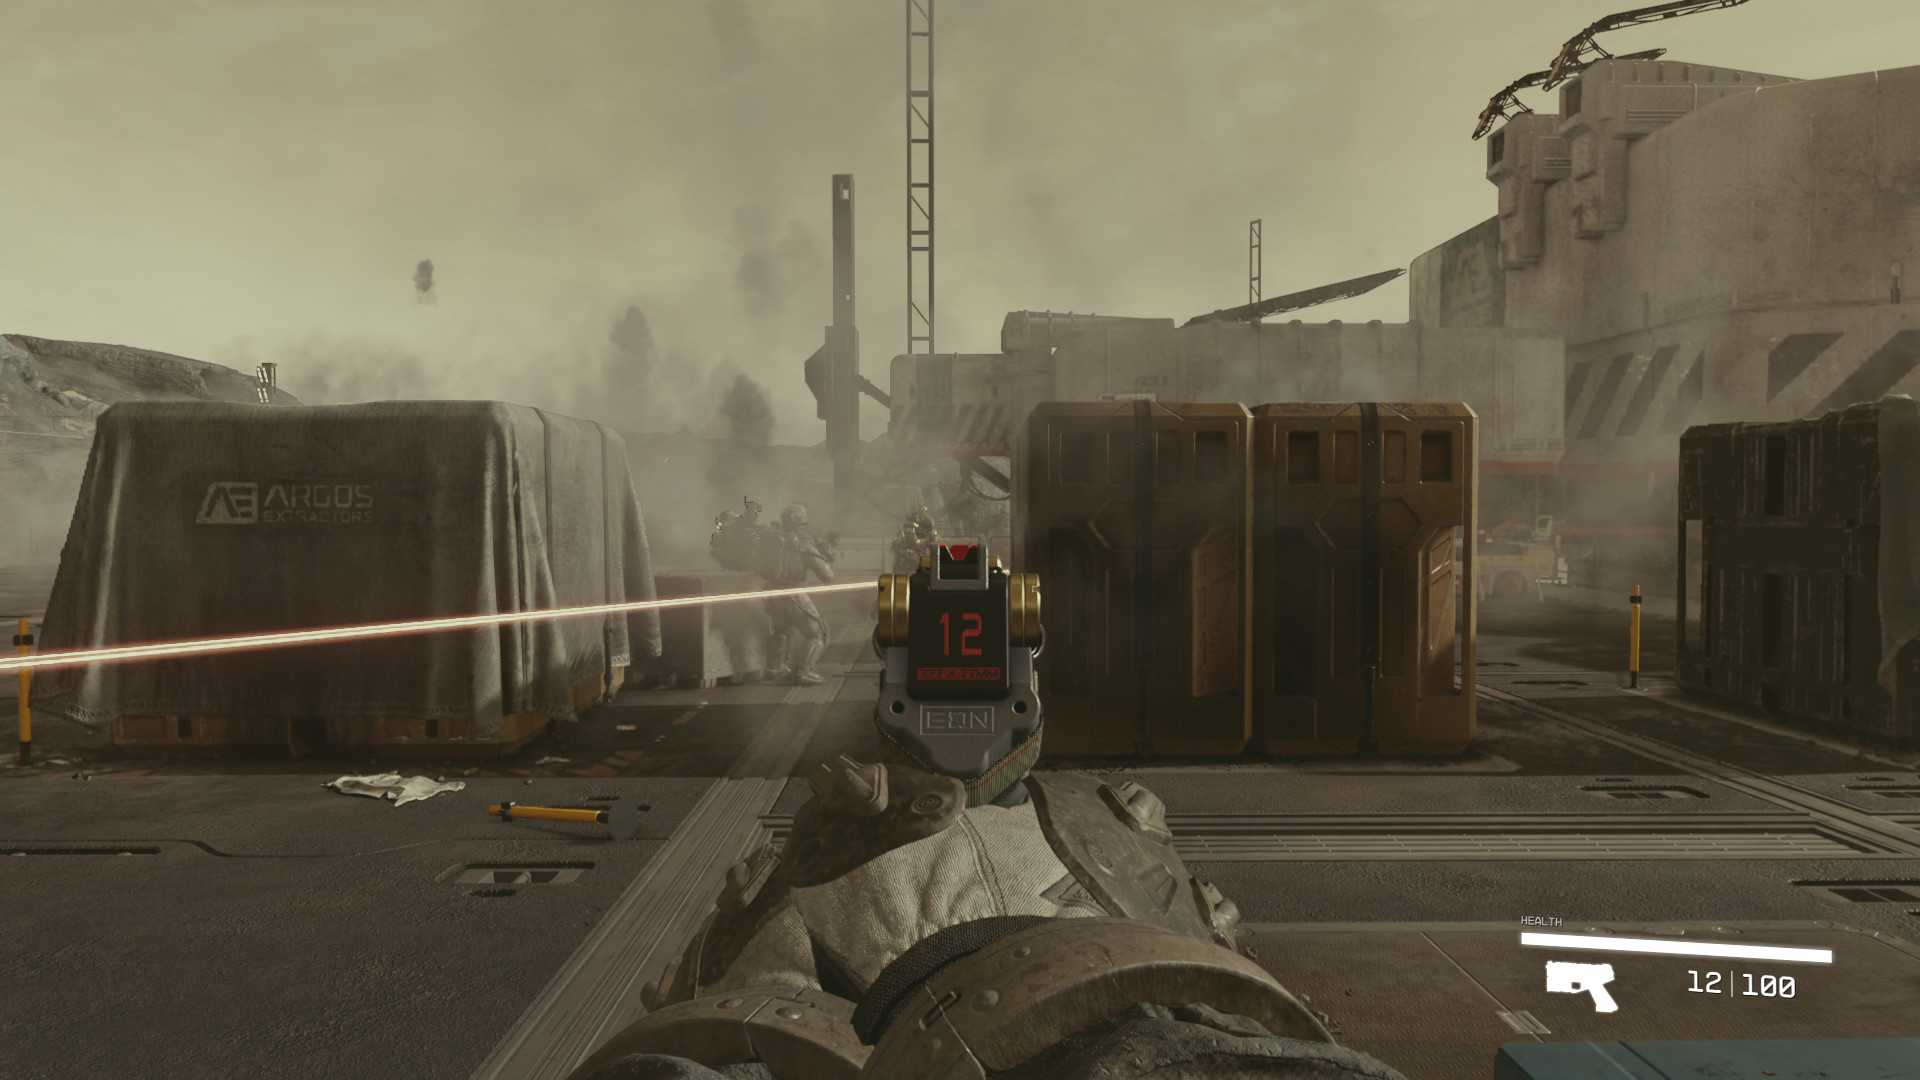
If you’re still facing Barrett’s ship, turn around, as the pirates will be landing on the other side of the area. Ahead on your left is a case with an Eon pistol and some ammo, plus a Med Pack (Image 10). Grab it, and go into your inventory and select the Weapons category if you want to equip it. Your best bet is to take the time now to favorite your new pistol plus the Cutter, so that you can swap between them as needed for this combat encounter.
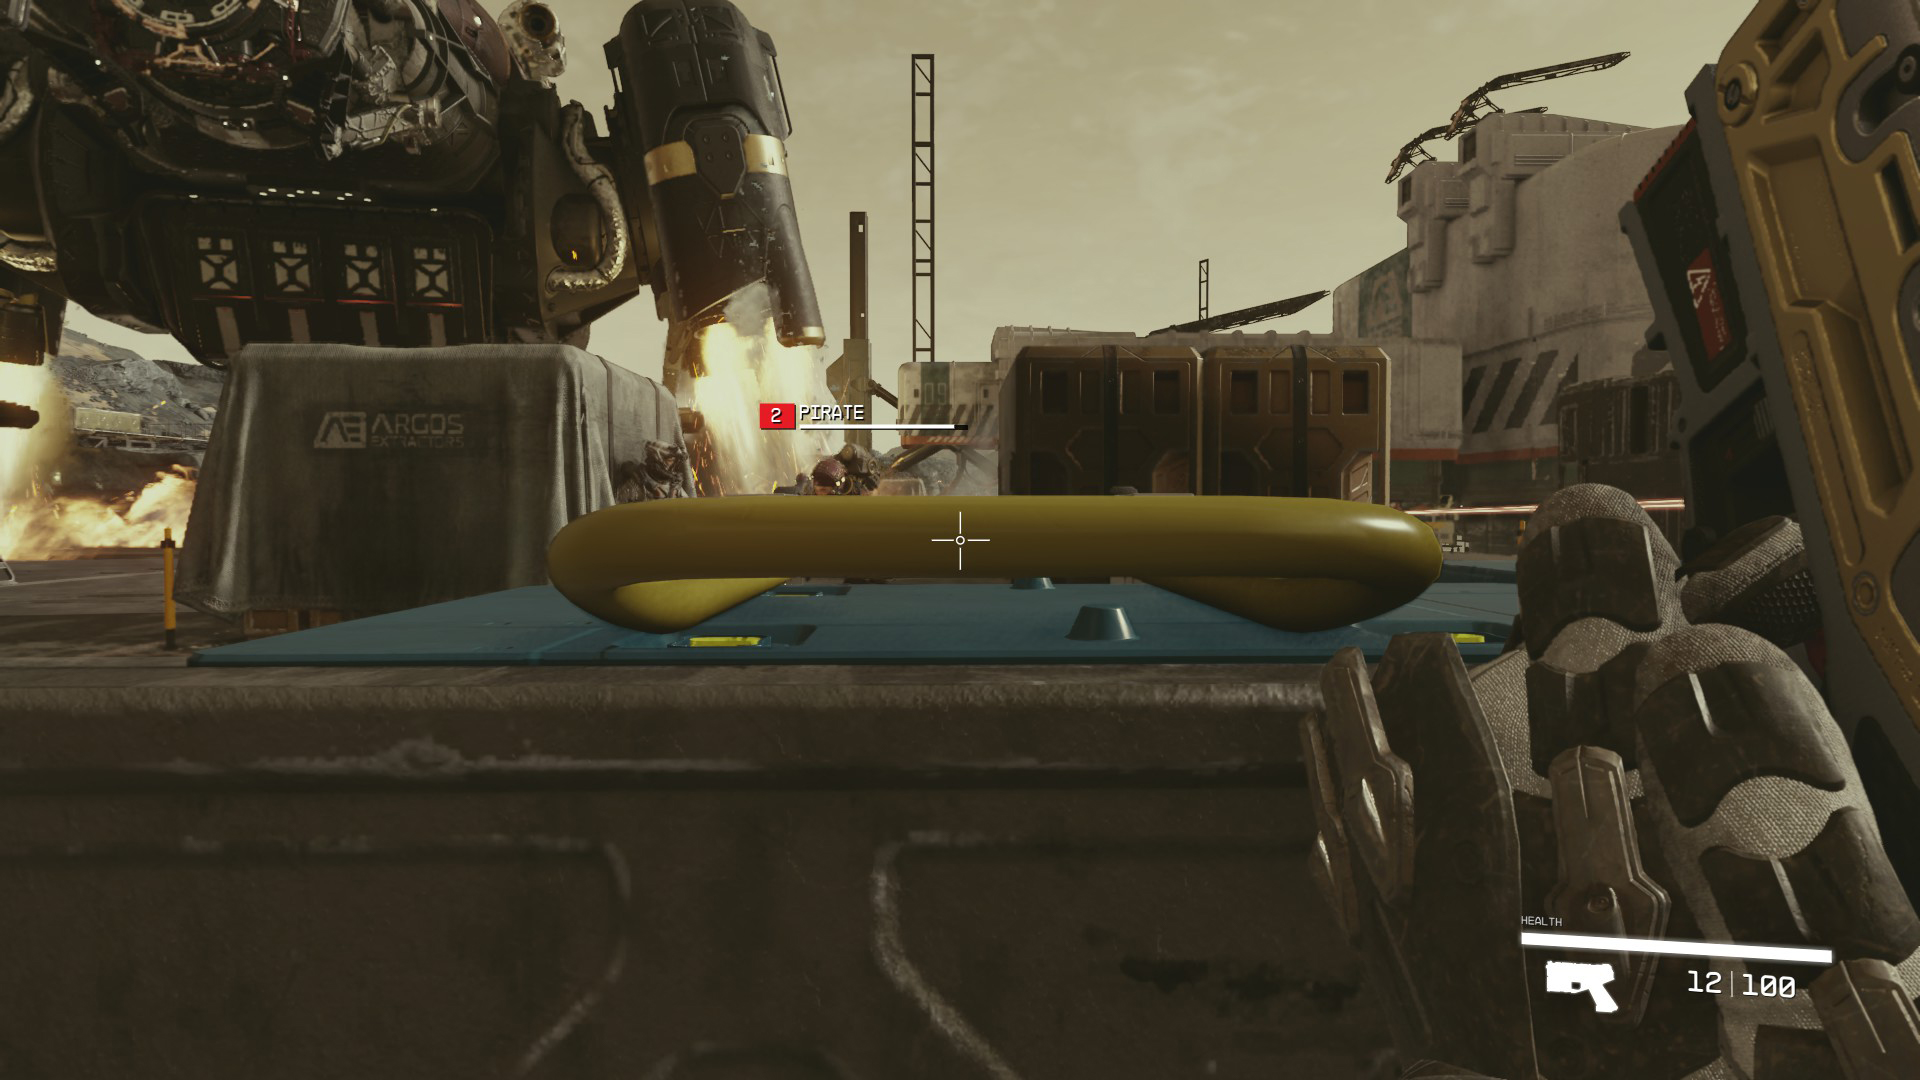
It’s important to note that the cover system only works properly in first person camera. While in first person, you can get close to cover, and you’ll see your weapon aim upwards (Image 11). At this point, pressing the aim button (/ ) will pop you out of cover (Image 12), and releasing the aim button will allow you to hide again.
Image 10Image 11Image 12
Use the Cutter and the Eon to take out the pirates, and make sure you loot their corpses once they’re all dead.
Talk to Barrett
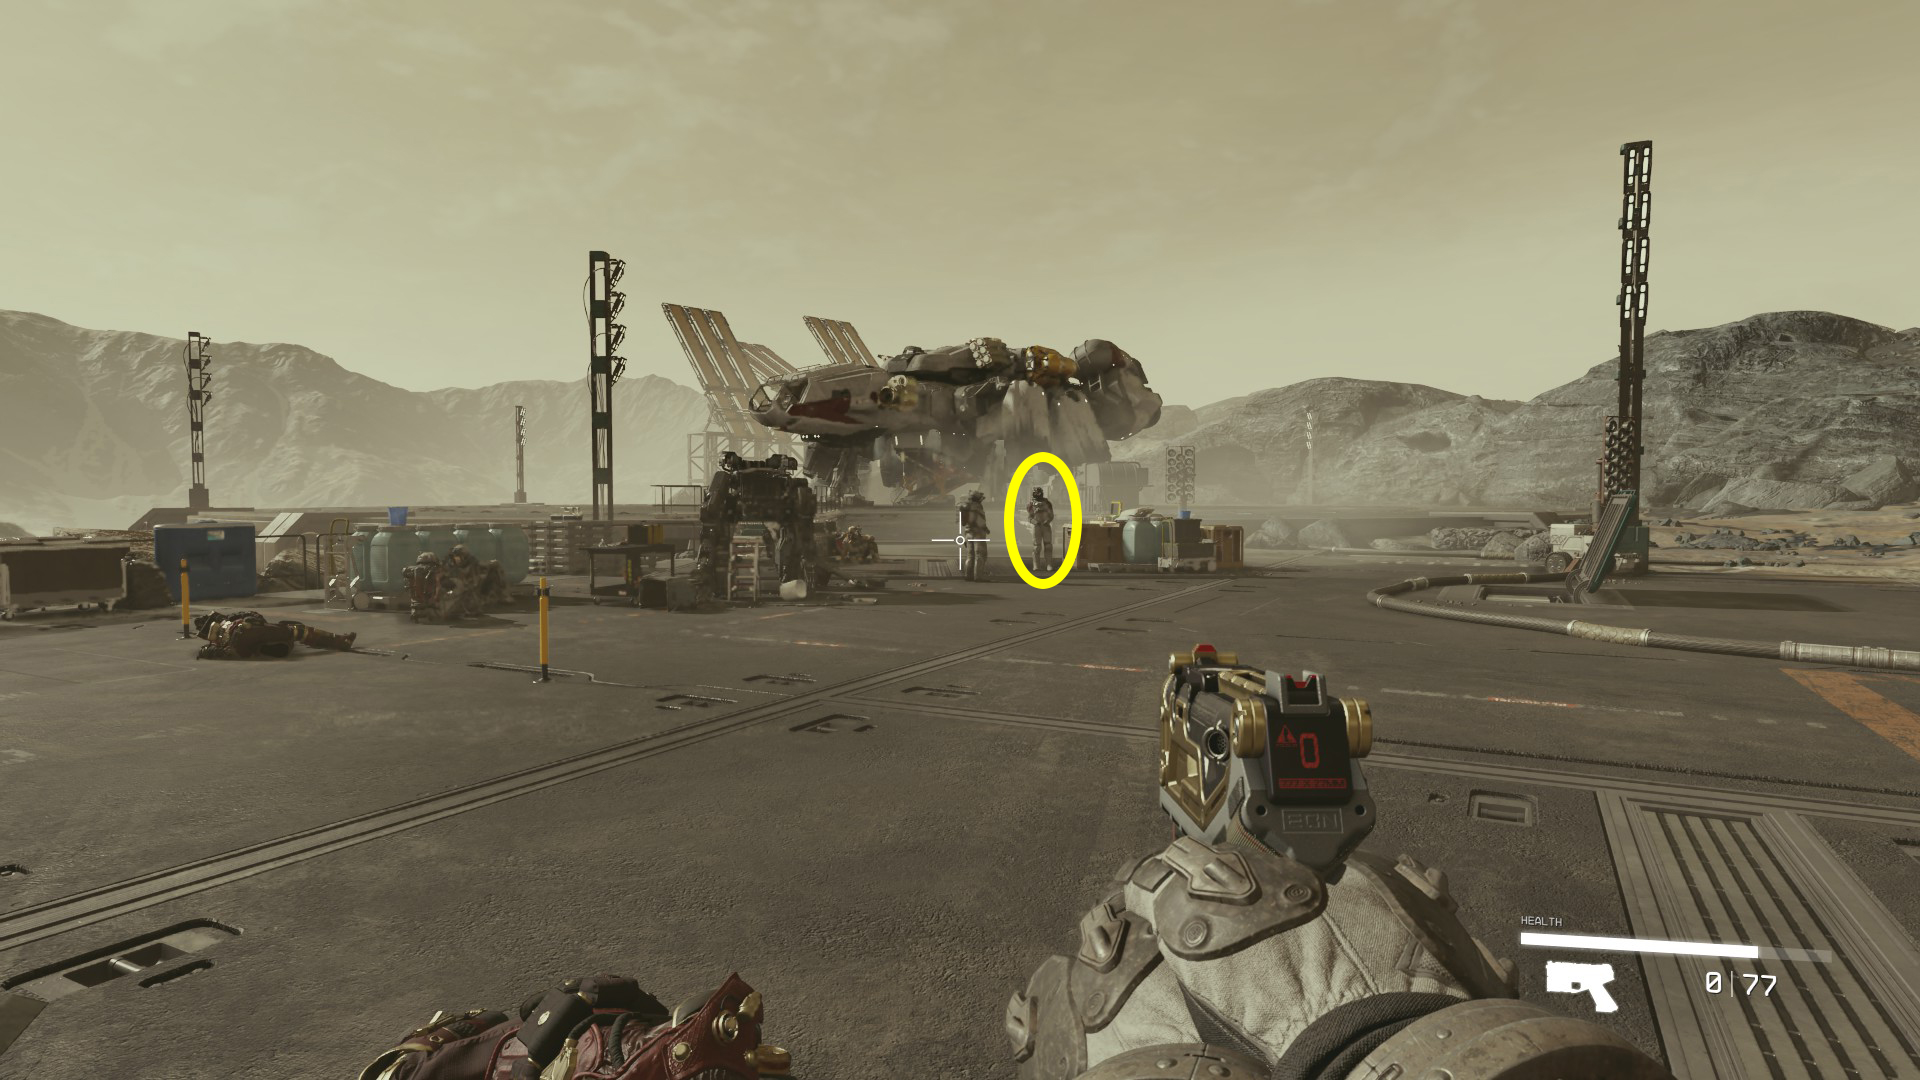
Head back towards Barrett, who is waiting back at the ramp that leads to his ship (Image 13). Press / / to speak with him; no matter what you say to him — or what you say to Lin once you turn and speak with her — you’re going to end up doing what Barrett wants. But hey, at least you get a new watch, a ship, and a robo-buddy in the bargain. You’ll get a chance to talk to Barrett at the end of this dialogue sequence — feel free to ask him all the questions you want, then end the conversation when you’re ready by pressing Tab / / .
Image 13 – Barrett’s location after the battle with the pirates
Board the Ship
Head past Barrett, and go up the ramp of the ship. Then walk up to the ladder, look up at the hatch, and press / / to board the ship.
Take Off From Vectera
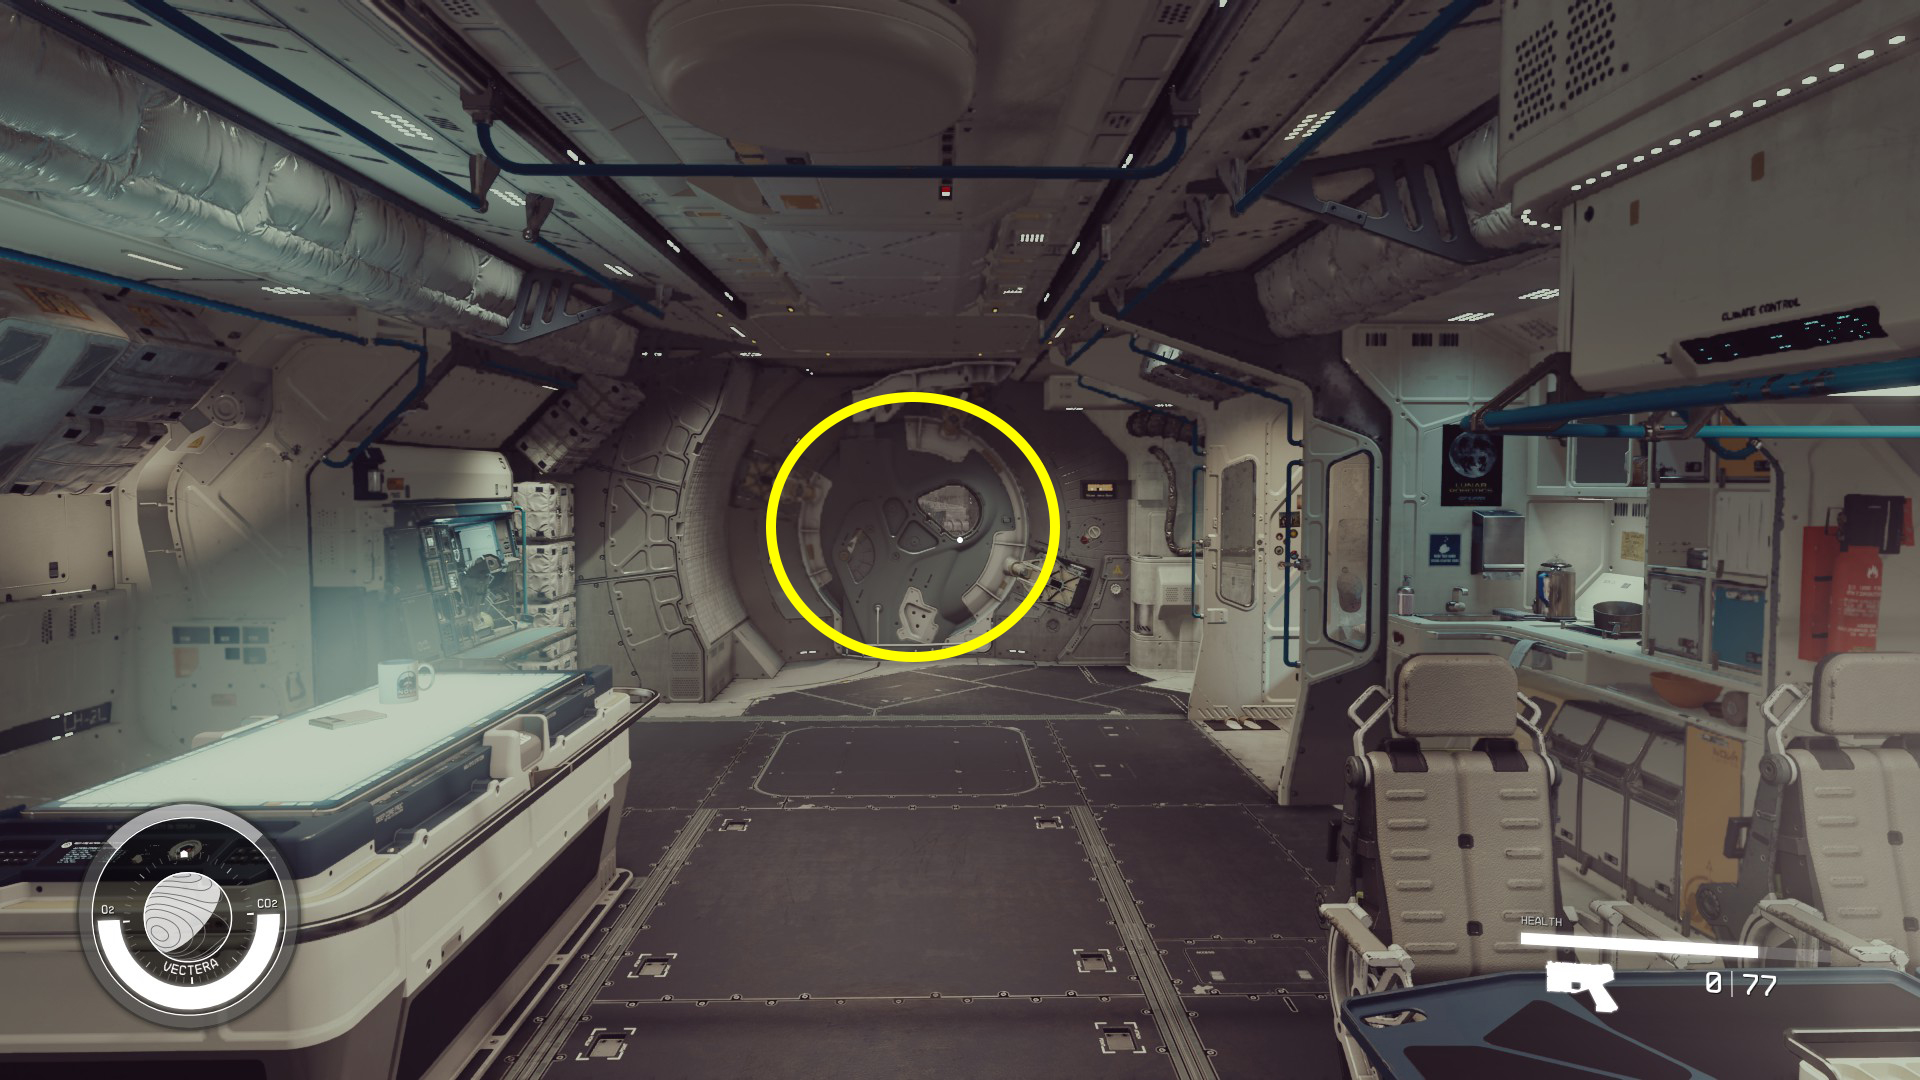
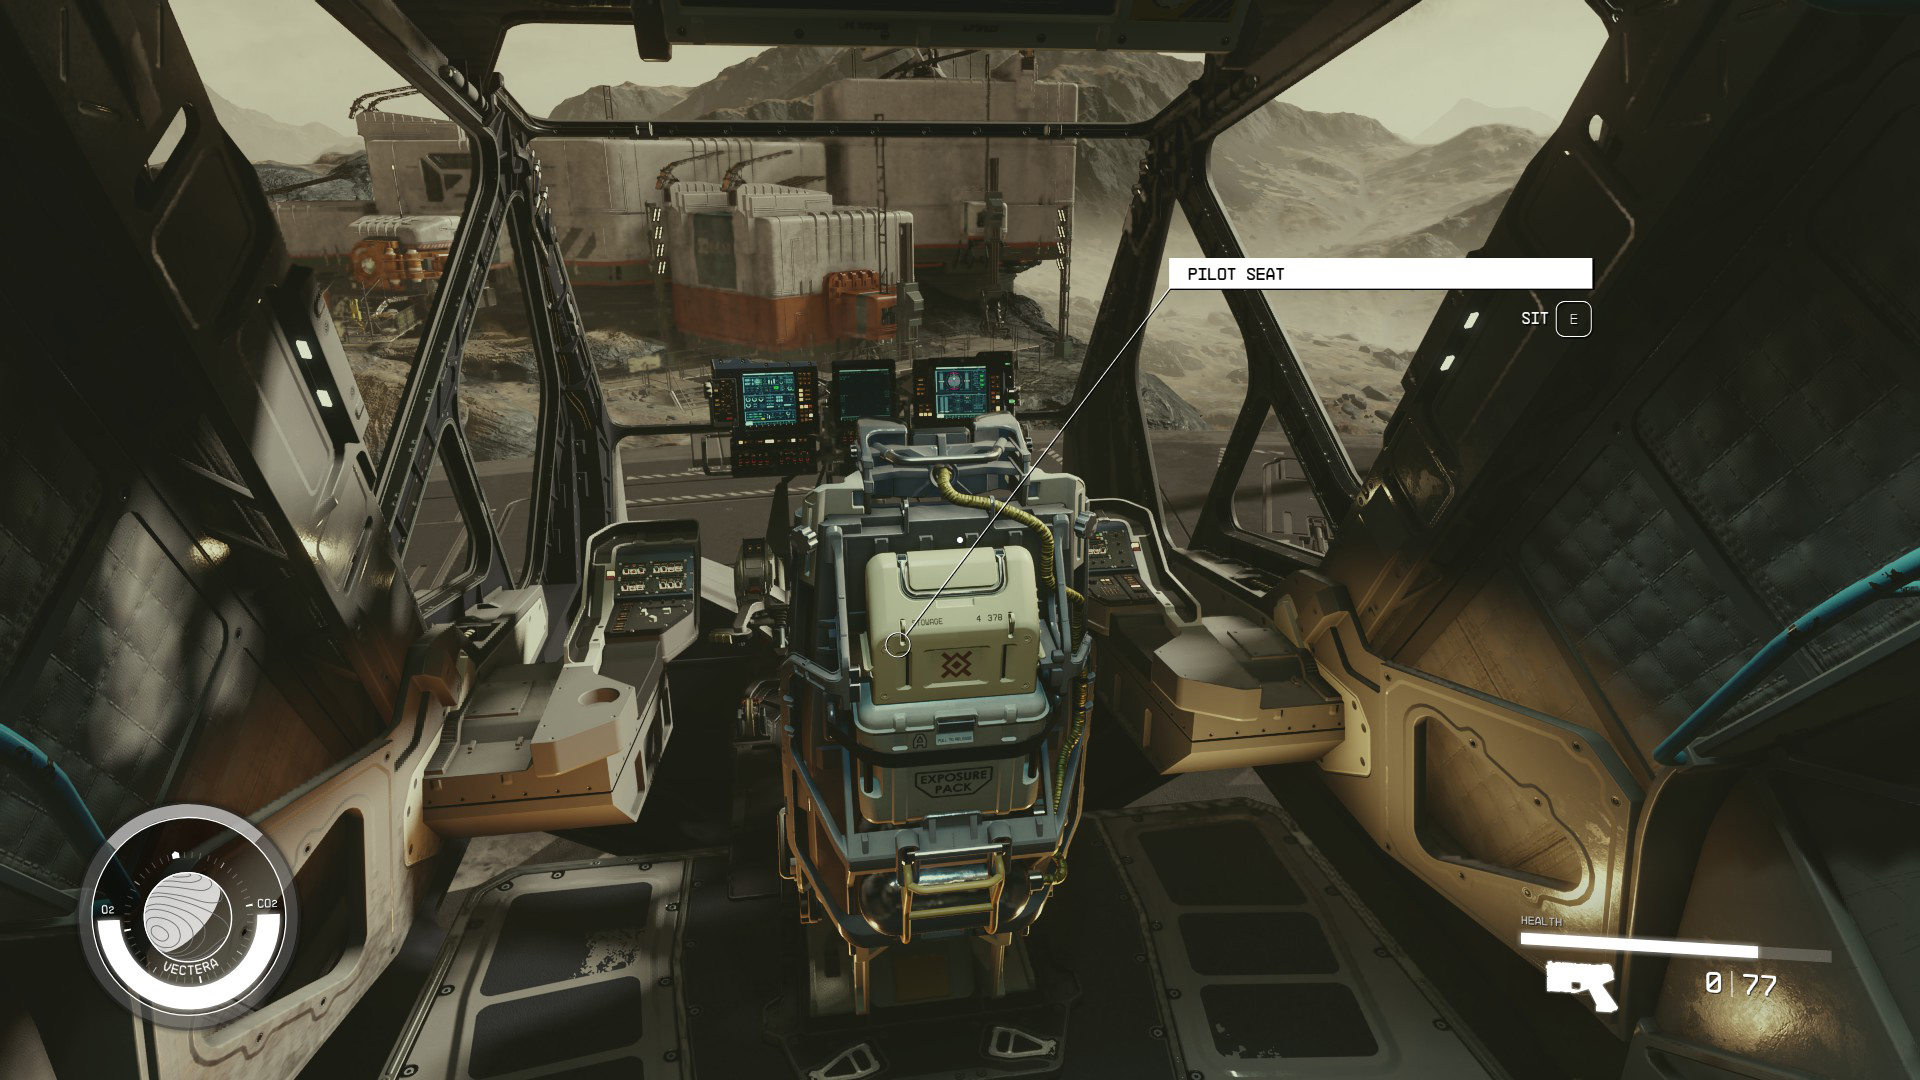
Once on your new ship, “The Frontier”, head to the hatch (Image 14), approach the pilot’s seat (Image 15), and sit in it. Once seated, hold Space Bar / / to take off.
Image 14Image 15
And with that, we’ve left our first Starfield planet behind! Next up, some space flight training, and then a brief jaunt across the galaxy.
Ship Tutorial
At this point, the game allows you to familiarize yourself with the ship controls — it’s a good idea to do so, as you’re about to need them. If you do want to skip the tutorial, lower power in a few other systems (without turning them off completely) and then put those points into the Grav drive — if you don’t know what that means, don’t skip the tutorial.
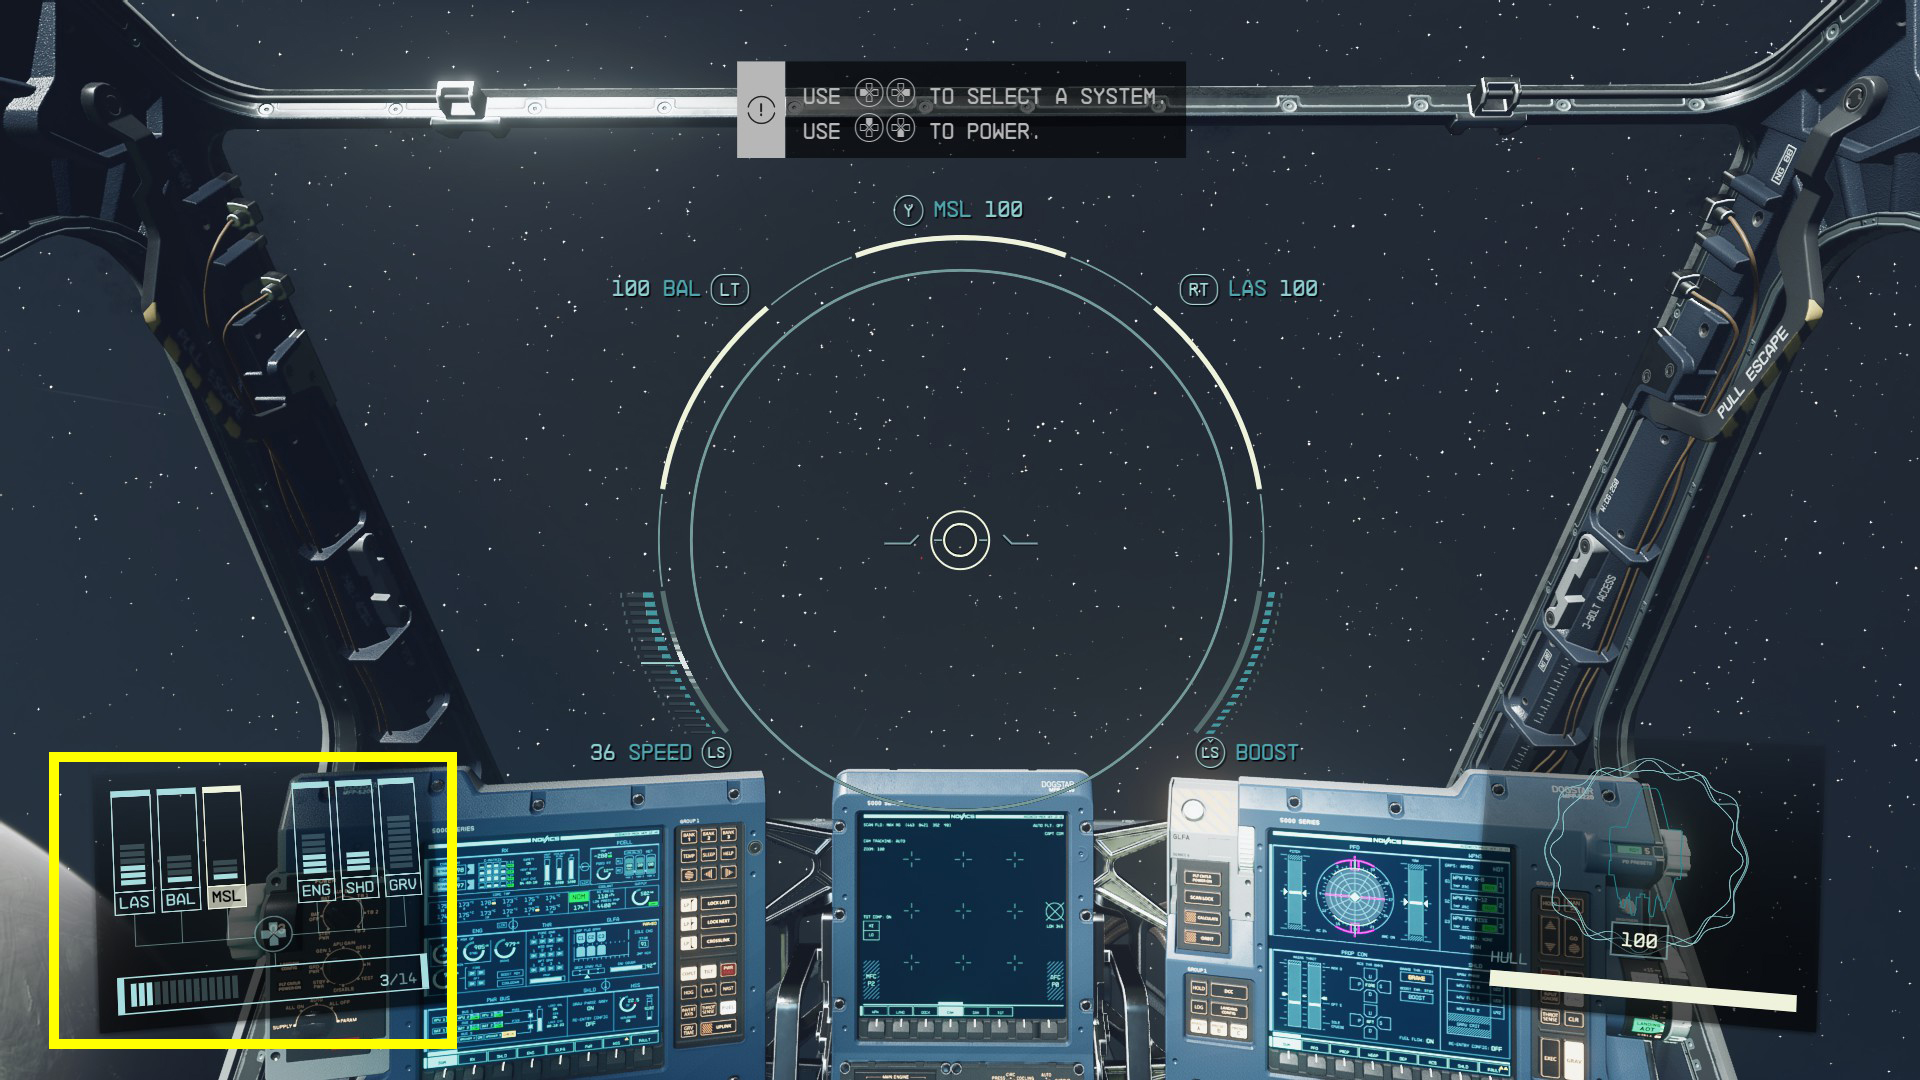
First, try allocating power to the various systems: on keyboard and mouse, this can be done two ways: holding Left ALT and using WASD, or by using the arrow keys. Left and right swap between the systems, up and down to raise or lower power (Image 16). On controller, the D Pad can be used the same way. Avoid putting power into the far right setting, “GRV”, as it can cause you to end the tutorial early.
Image 16
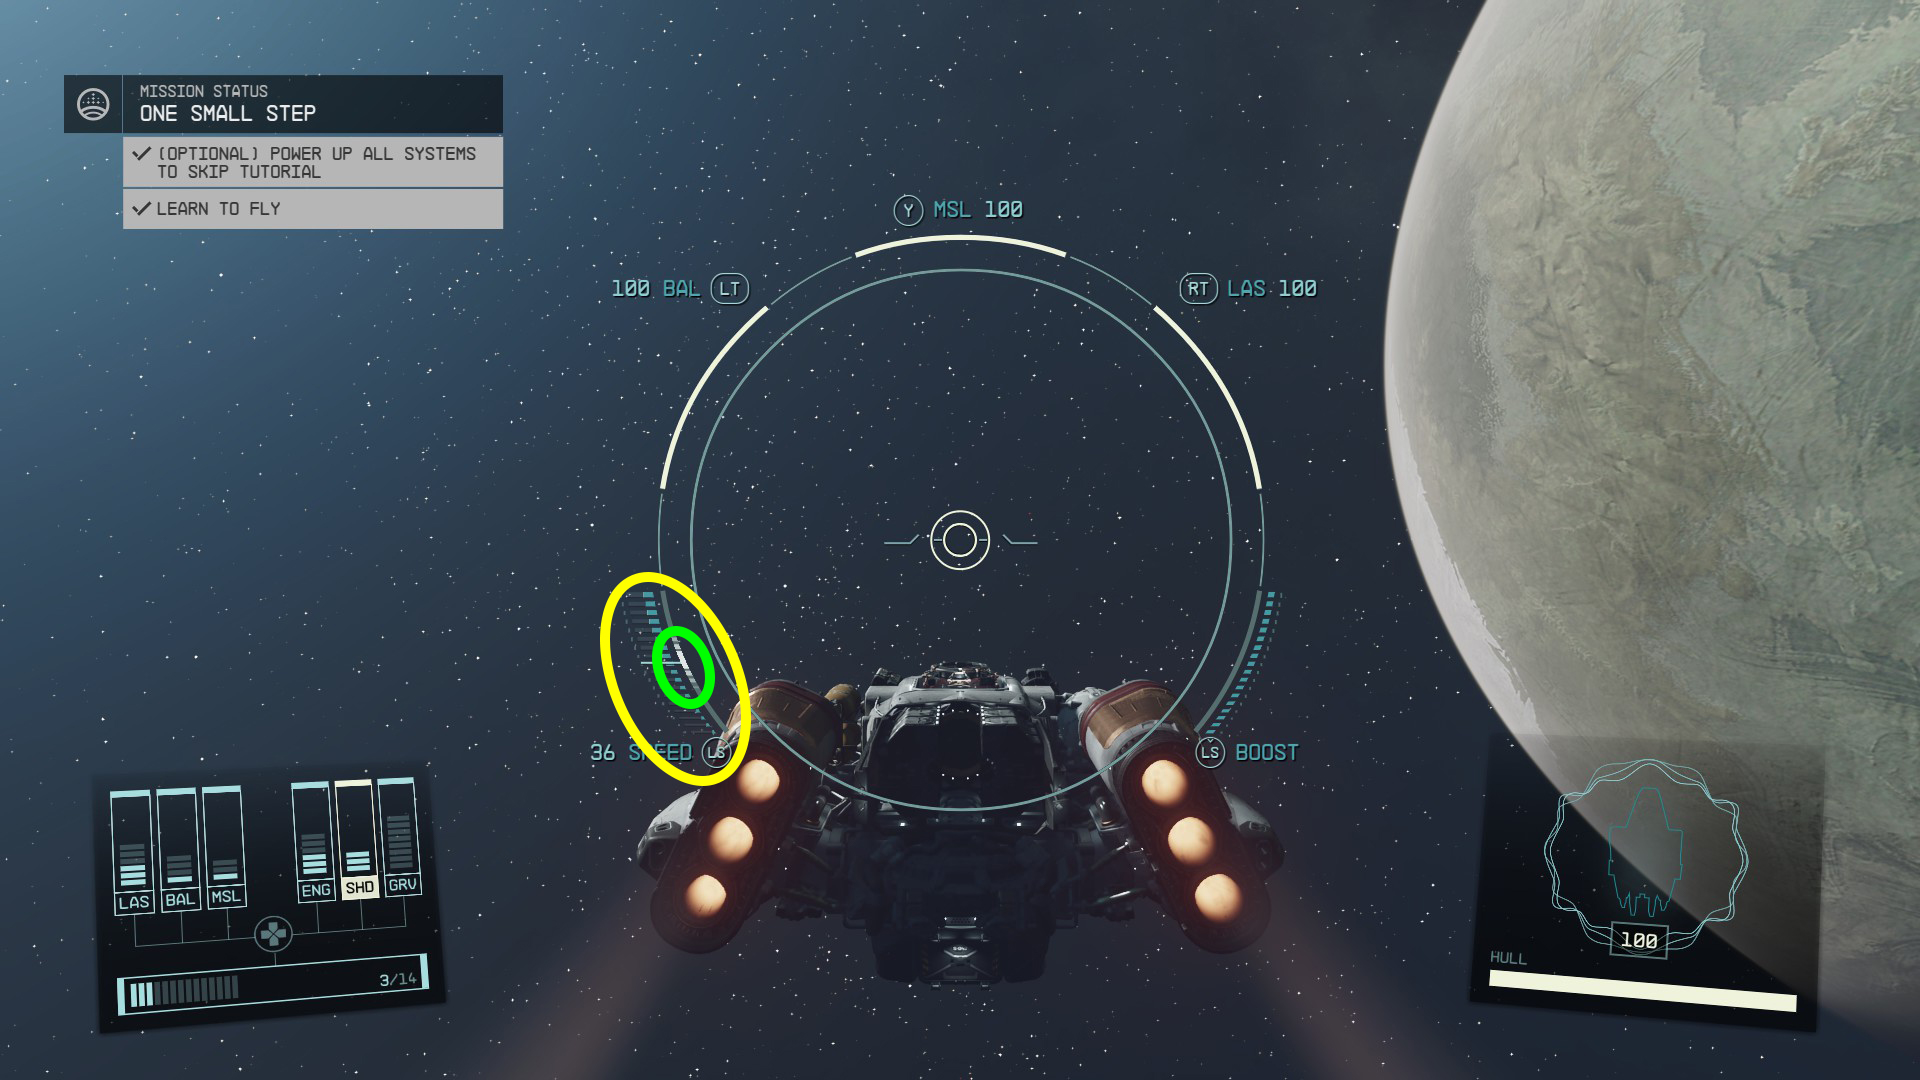
Once you’ve moved the power around a bit, you’ll need to test out the engines. Use W and S, or the left stick, to increase or decrease your speed. There is a “sweet spot” for your engines — the white zone in the middle of the meter (Image 17) — that gives you the best possible handling (more responsive turning). After moving the gauge up and down, set it in the sweet spot.
Image 17 – You can see the engine settings in the yellow oval — the green oval is around the “sweet spot”, the white section of the vertical engine meter
Next, you’ll need to try out the boost, activated with Left Shift or by pressing in on the left stick. Your boost meter is on the opposite side of the targeting circle from the engines — you can end your boost before you run out of boost energy by throttling down on the engines (S/down on left stick). Finally, the computer will direct your attention to the shields and your hull status, which are found in the lower right of the screen. Lowering the power on the shields will, naturally, lower the amount of shields you have available.
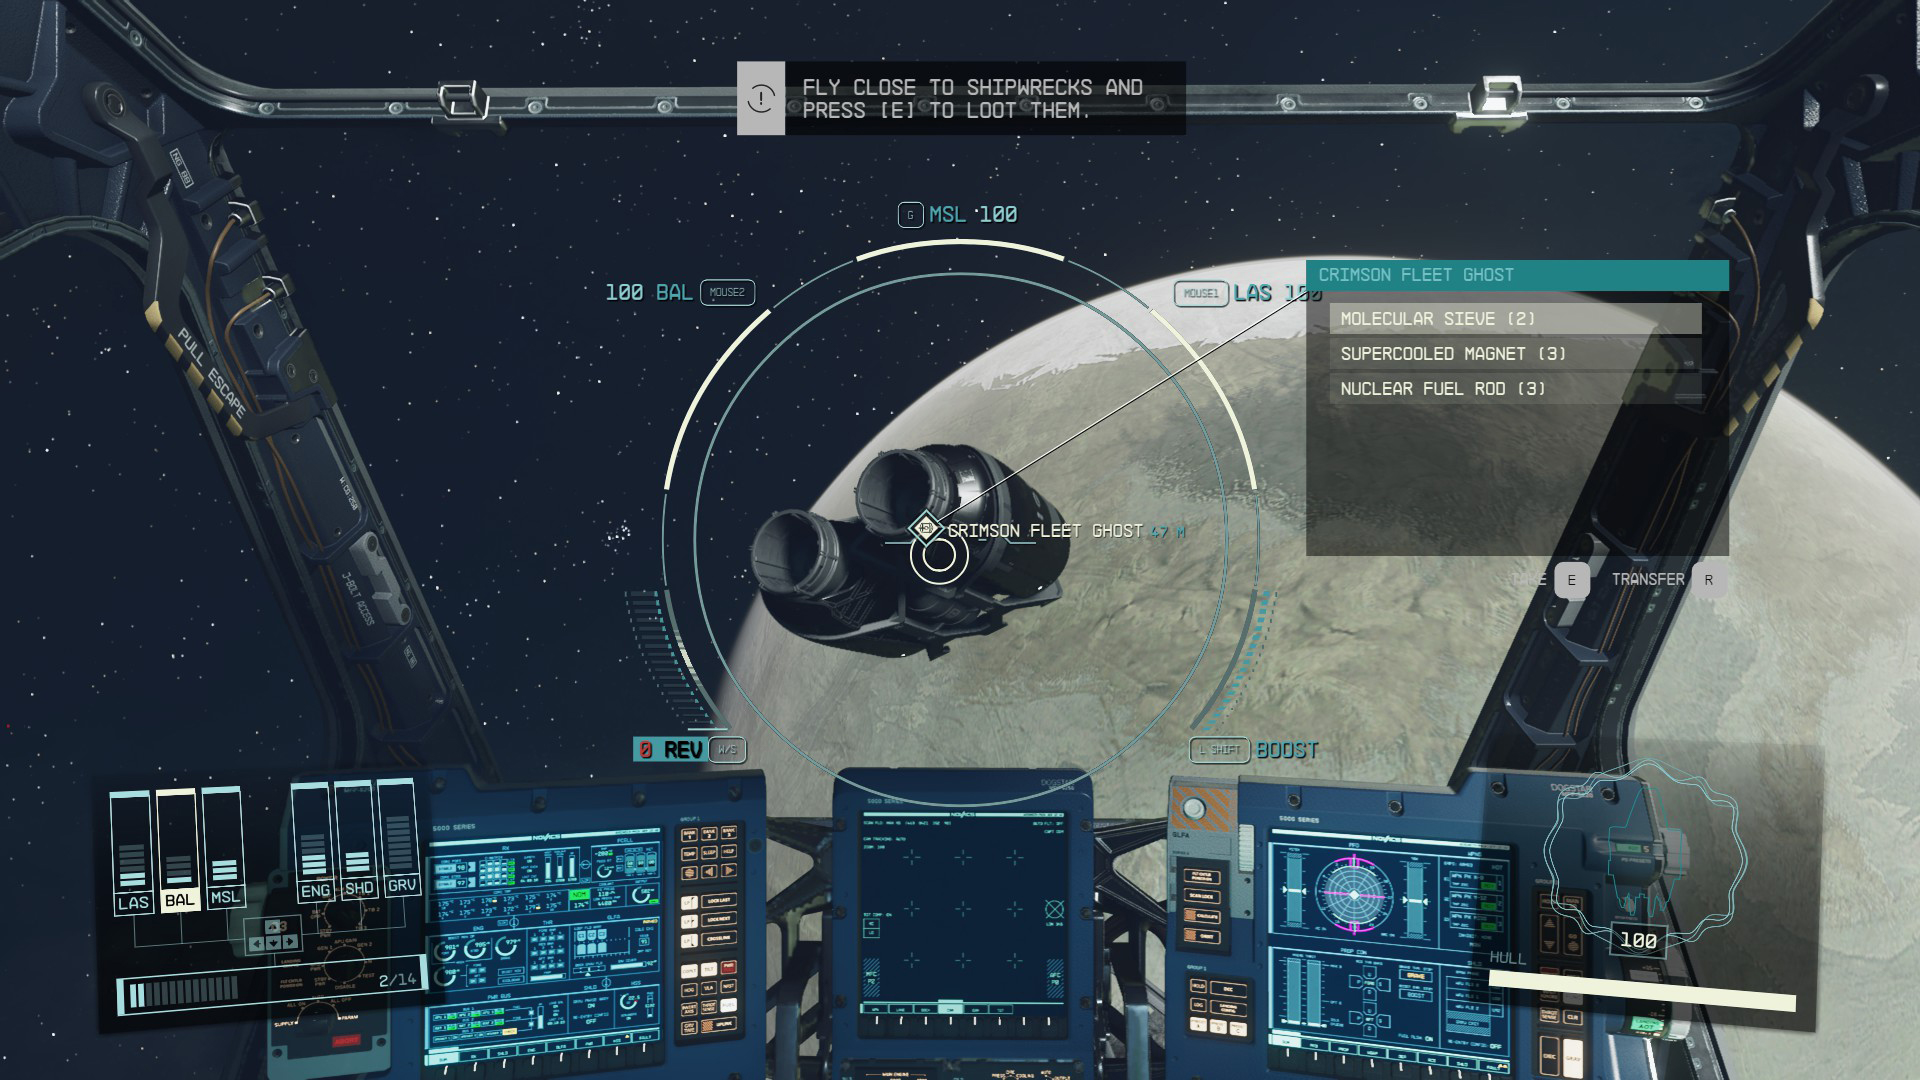
Deal With the Crimson Fleet
After finishing (or skipping) the Ship Tutorial, you’ll be attacked by a Crimson Fleet pirate ship. This combat encounter also serves as a sort of tutorial, as in it, you learn the order of operations for destroying enemy ships:
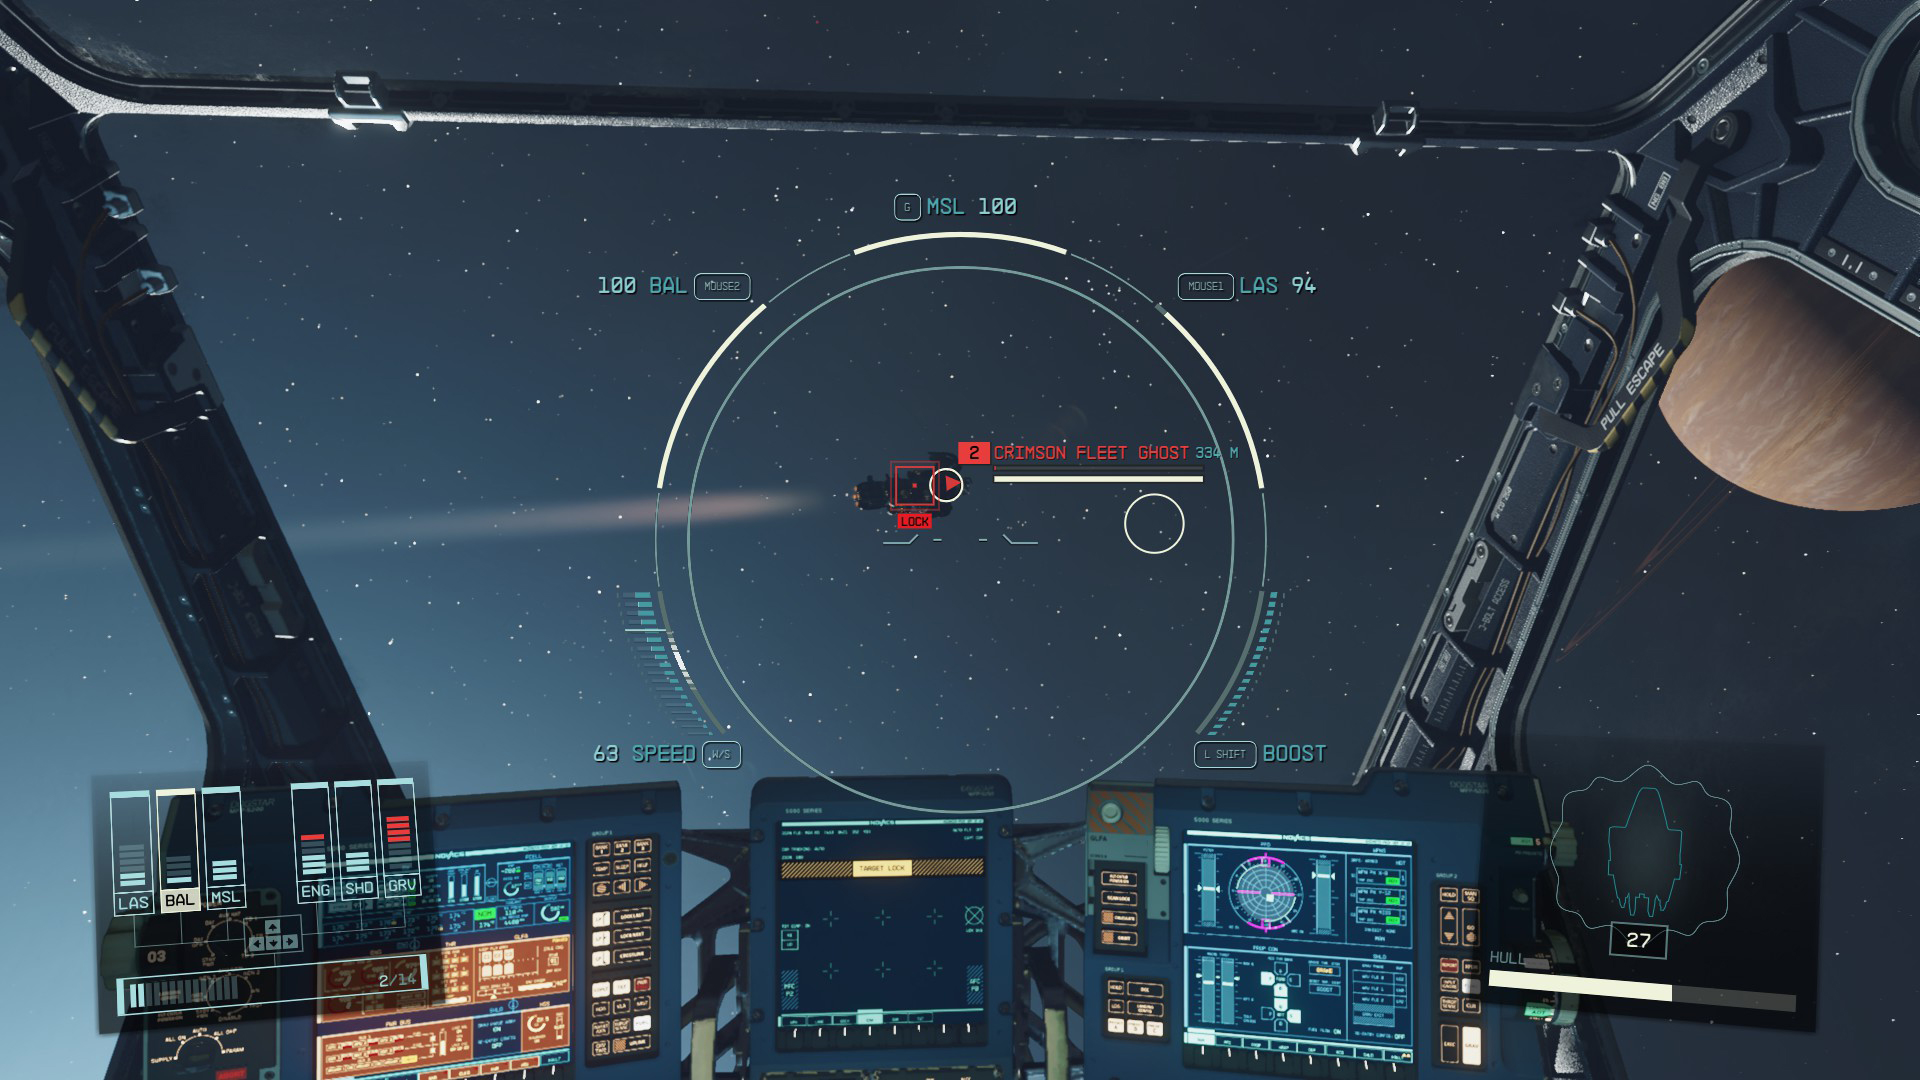
Press / / to lock onto the closest target, then try and keep your enemy close and within the targeting circle in the middle of your screen. A red square indicates a missile lock; when you keep your target in your sights for long enough will cause the white targeting circle to move onto them.
Once the targeting circle is on your enemy, press / to fire the Gatling Laser — this is the best weapon for taking down enemy shields.
Once the enemy shields are down, press / to fire the ballistic cannon, which does more damage to enemy hulls. (You should still also utilize your lasers at this stage, as they do respectable damage to hulls as well.) Ideally, at this point you’d reduce power to your lasers and maximize power in your ballistic weapons.
Once you have a missile lock, you can launch missiles with / / . This is best done after their shields are down.
Image 18 – Note the red square and white circle on the enemy vessel — these indicate missile and regular weapons locks, respectively. As long as you have the enemy selected and keep them within the circle in the middle of your HUD, you’ll stay locked on.
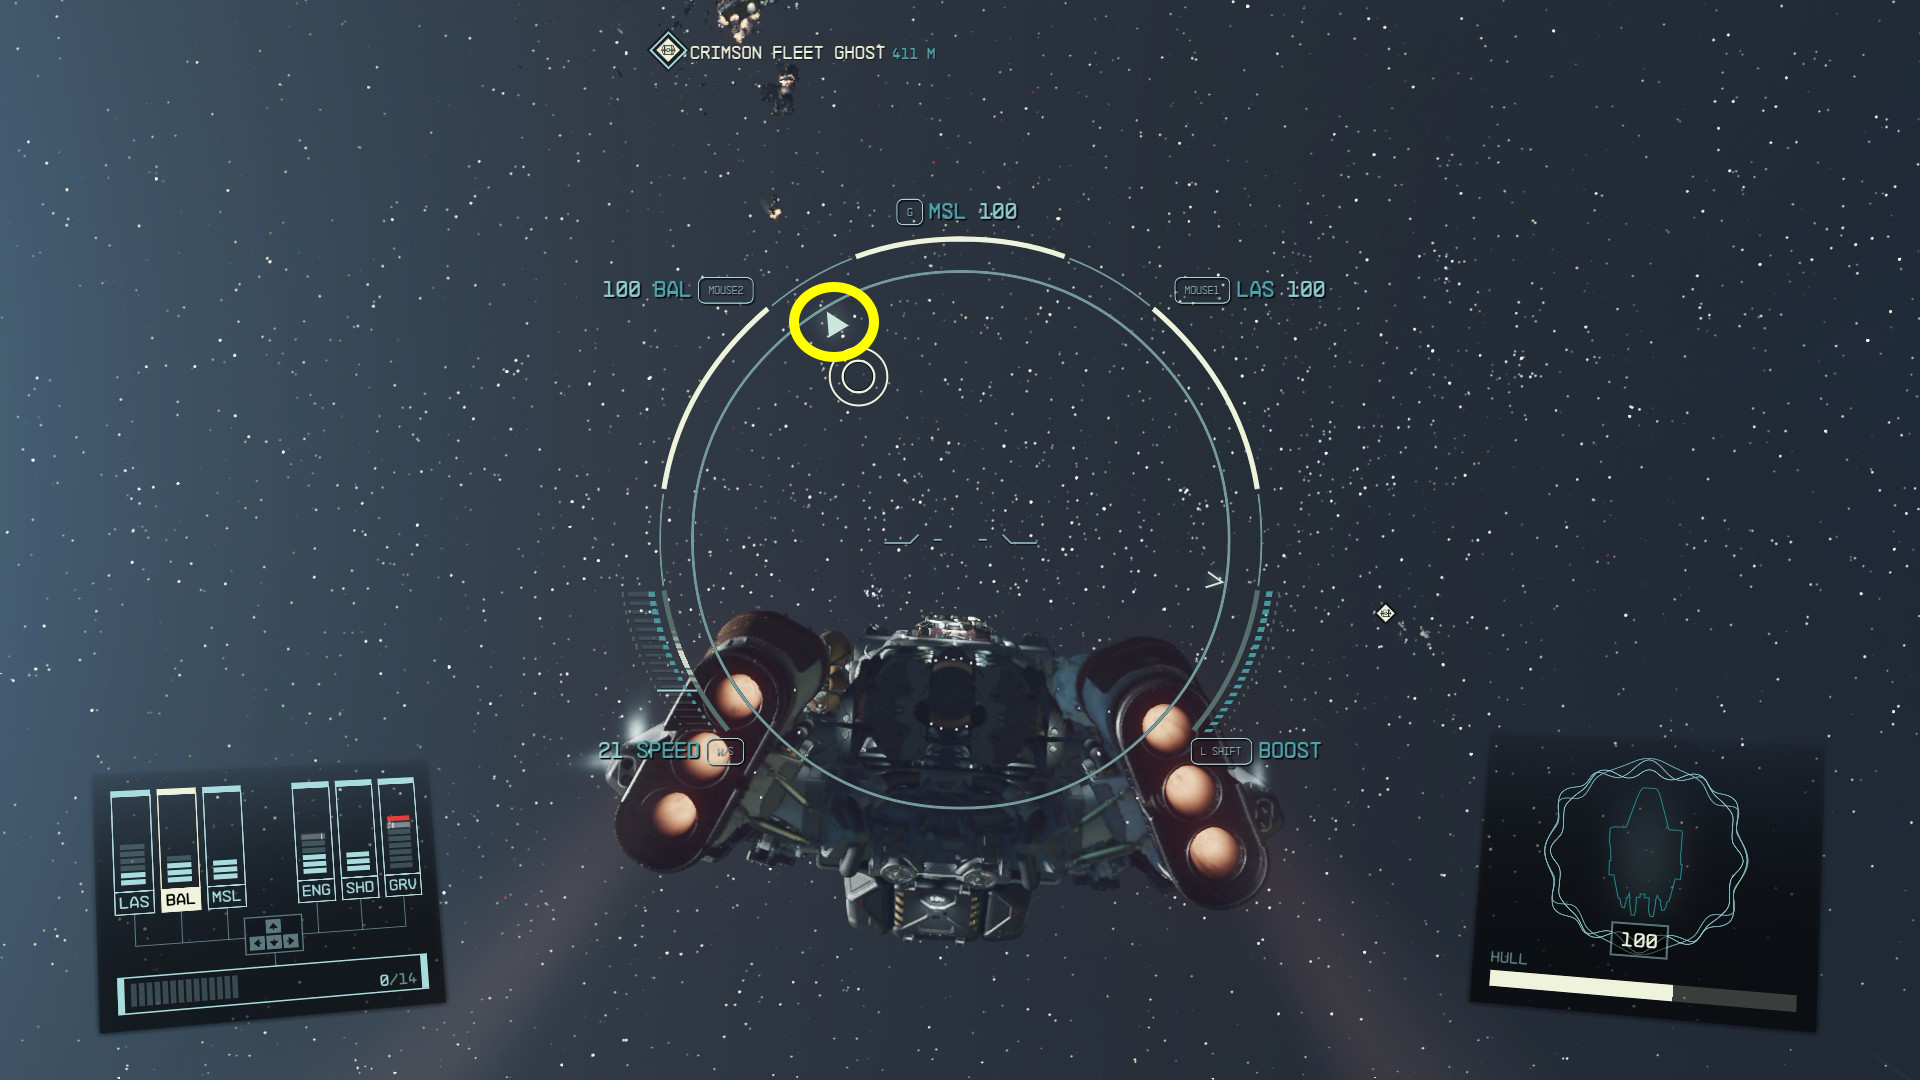
Once you’ve destroyed the enemy ship, you’ll need to loot the debris. You’ll see small arrows on your targeting circle that you can use to find the debris (Image 19) — to make it even easier, you can target debris the same way you target ships, with / / . Approach the debris and press the targeting button to interact with the debris (Image 20).
Image 19Image 20
After grabbing everyone from the debris, two more Crimson Fleet ships will attack you. Dispatch them the same way, and make sure you loot them once they’re out of action!
Travel to Kreet
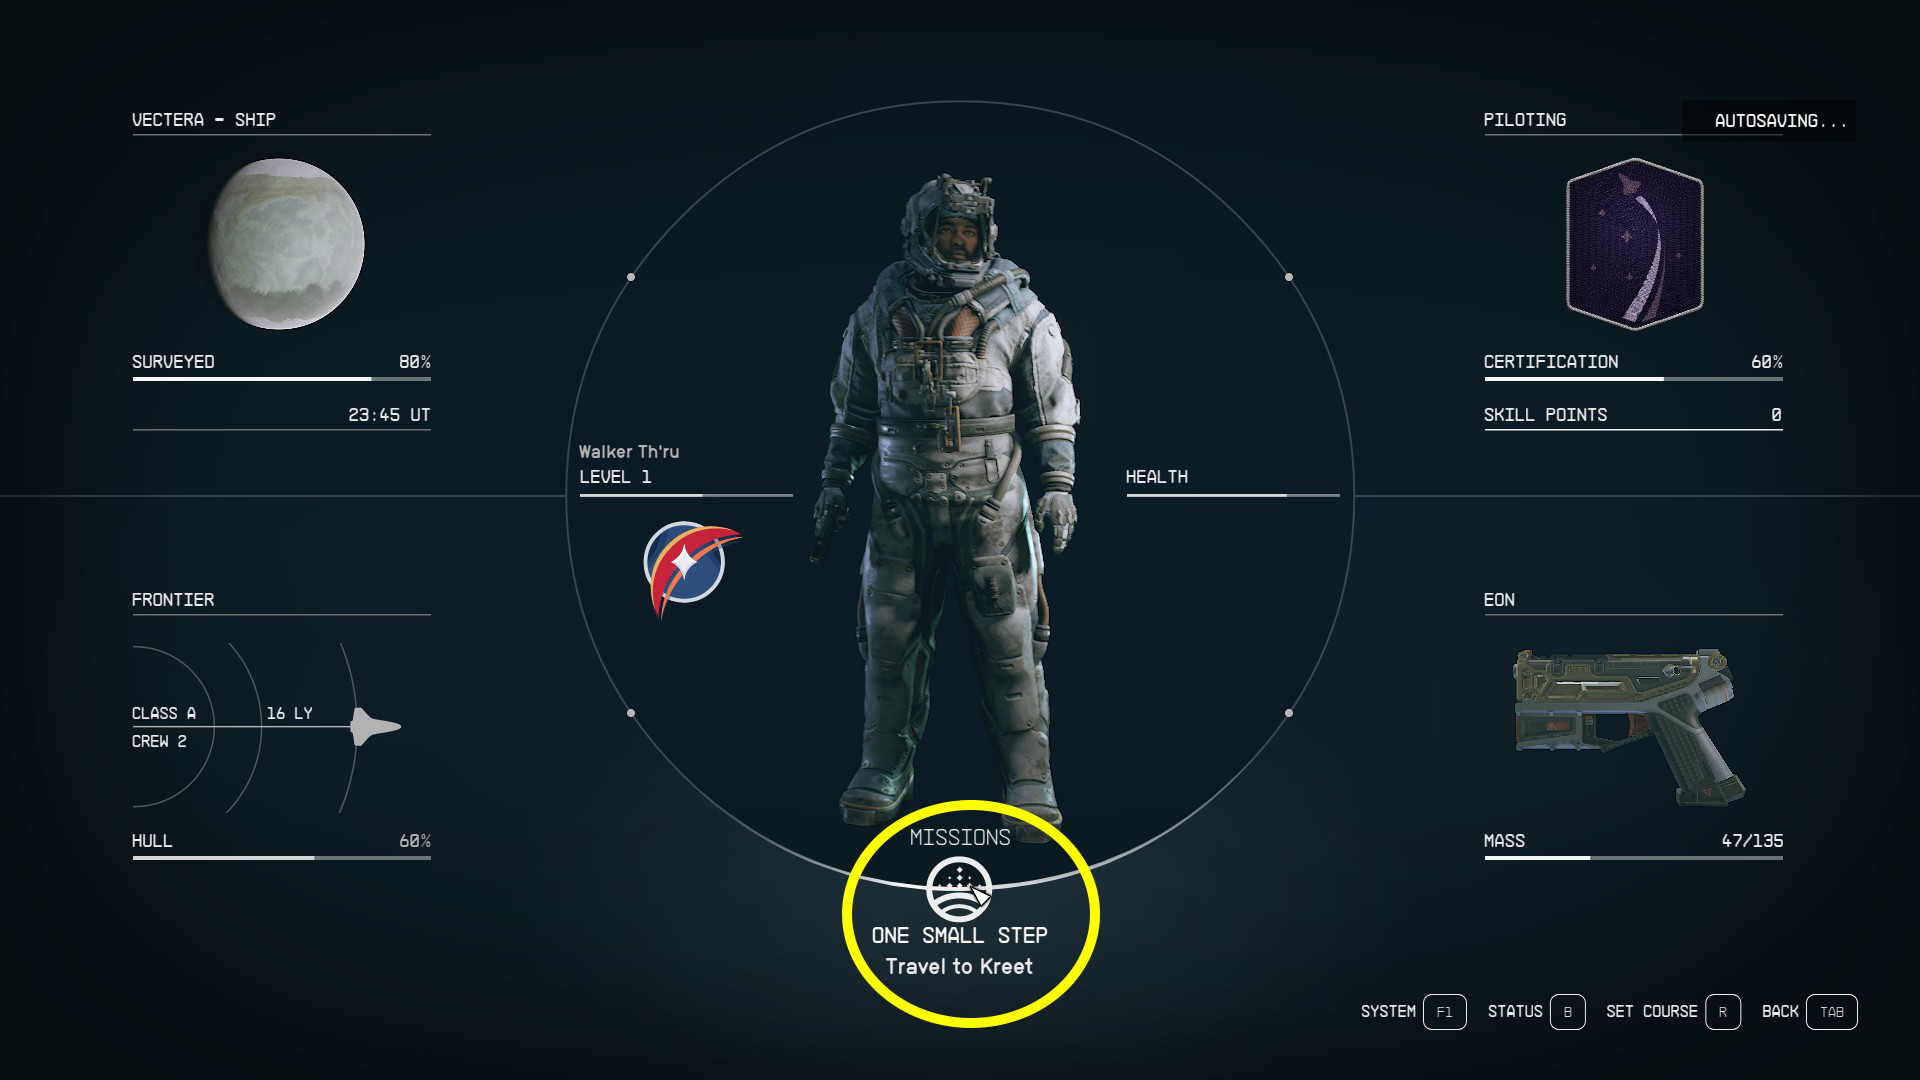
The Frontier’s computer suggests that you won’t be able to survive for long unless you find a permanent solution to the Crimson Fleet problem — their base in Kreet is therefore your next destination. To travel to Kreet, you can use the starmap, but that’s a complicated process. Instead, open the Data Screen with [Tab] / / , and then move your cursor to the bottom middle of the screen, where the Missions button is (Image 21) and press / / .
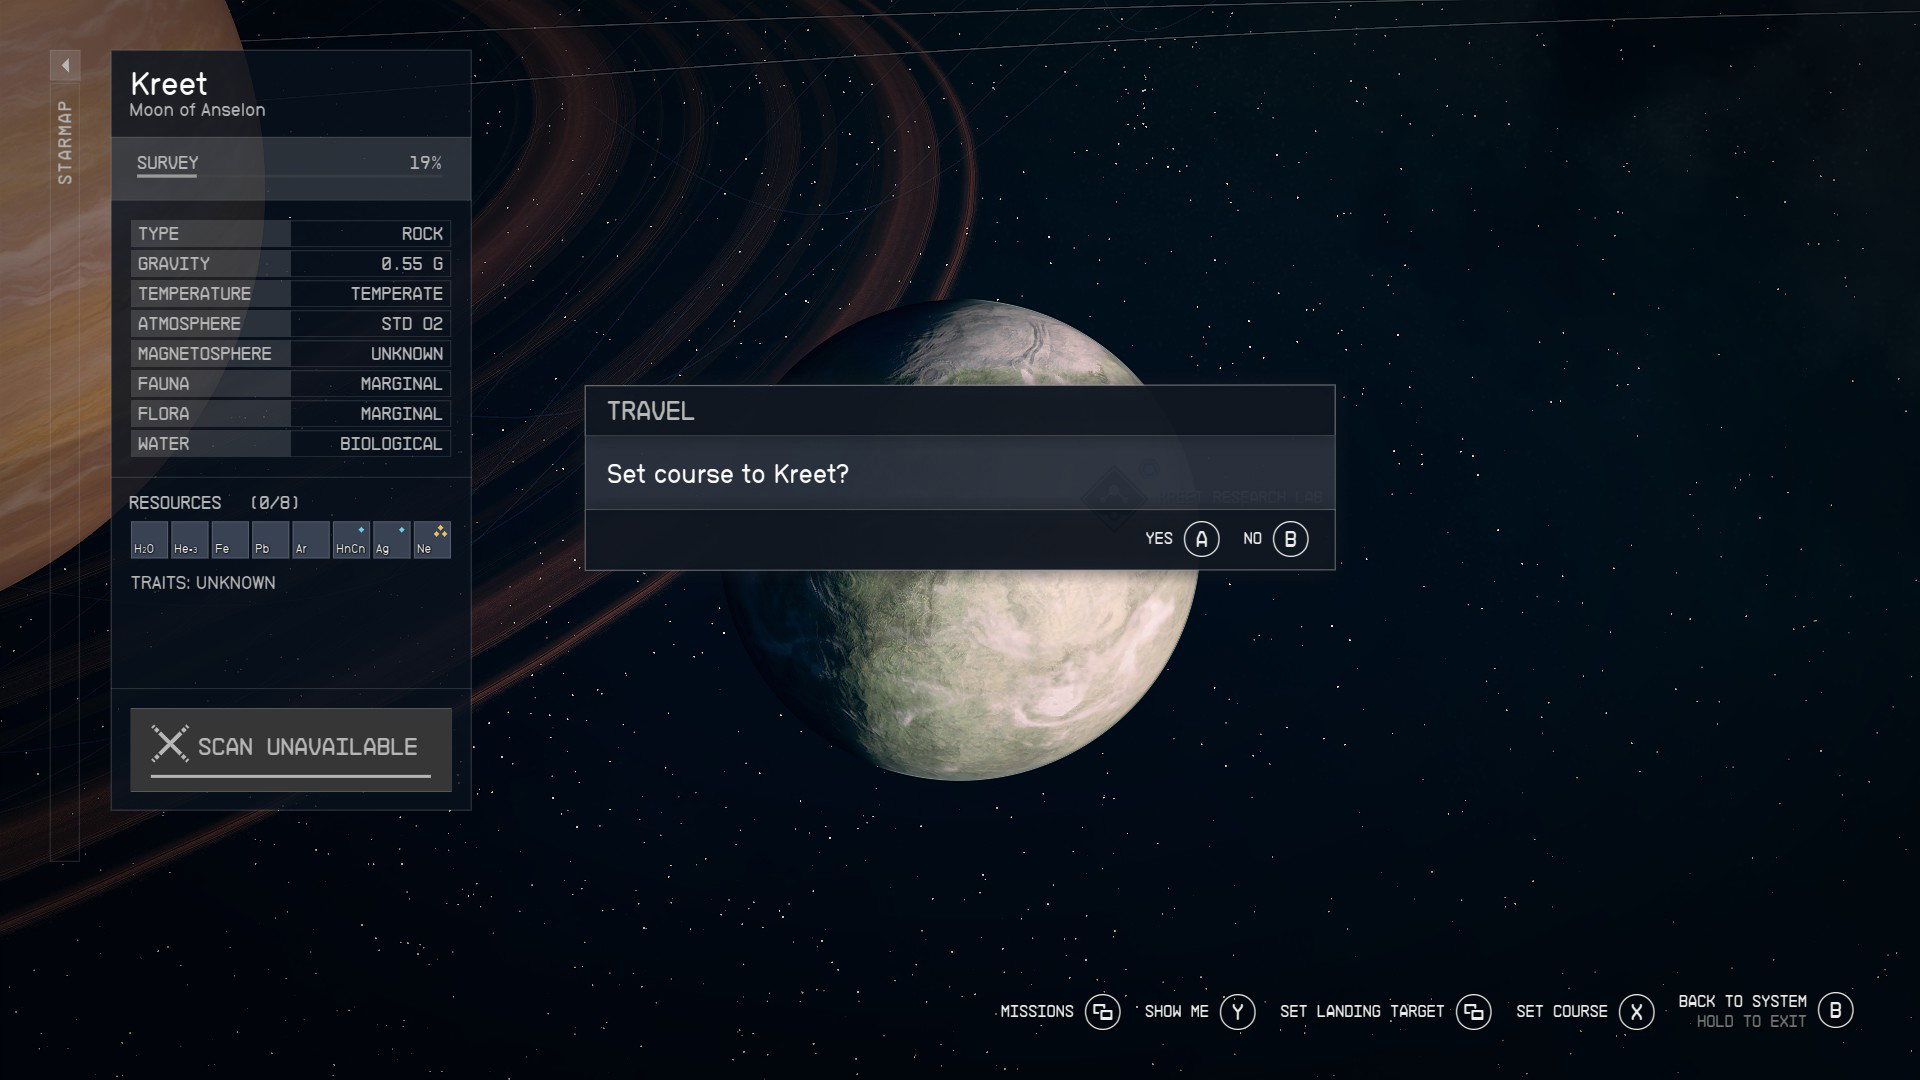
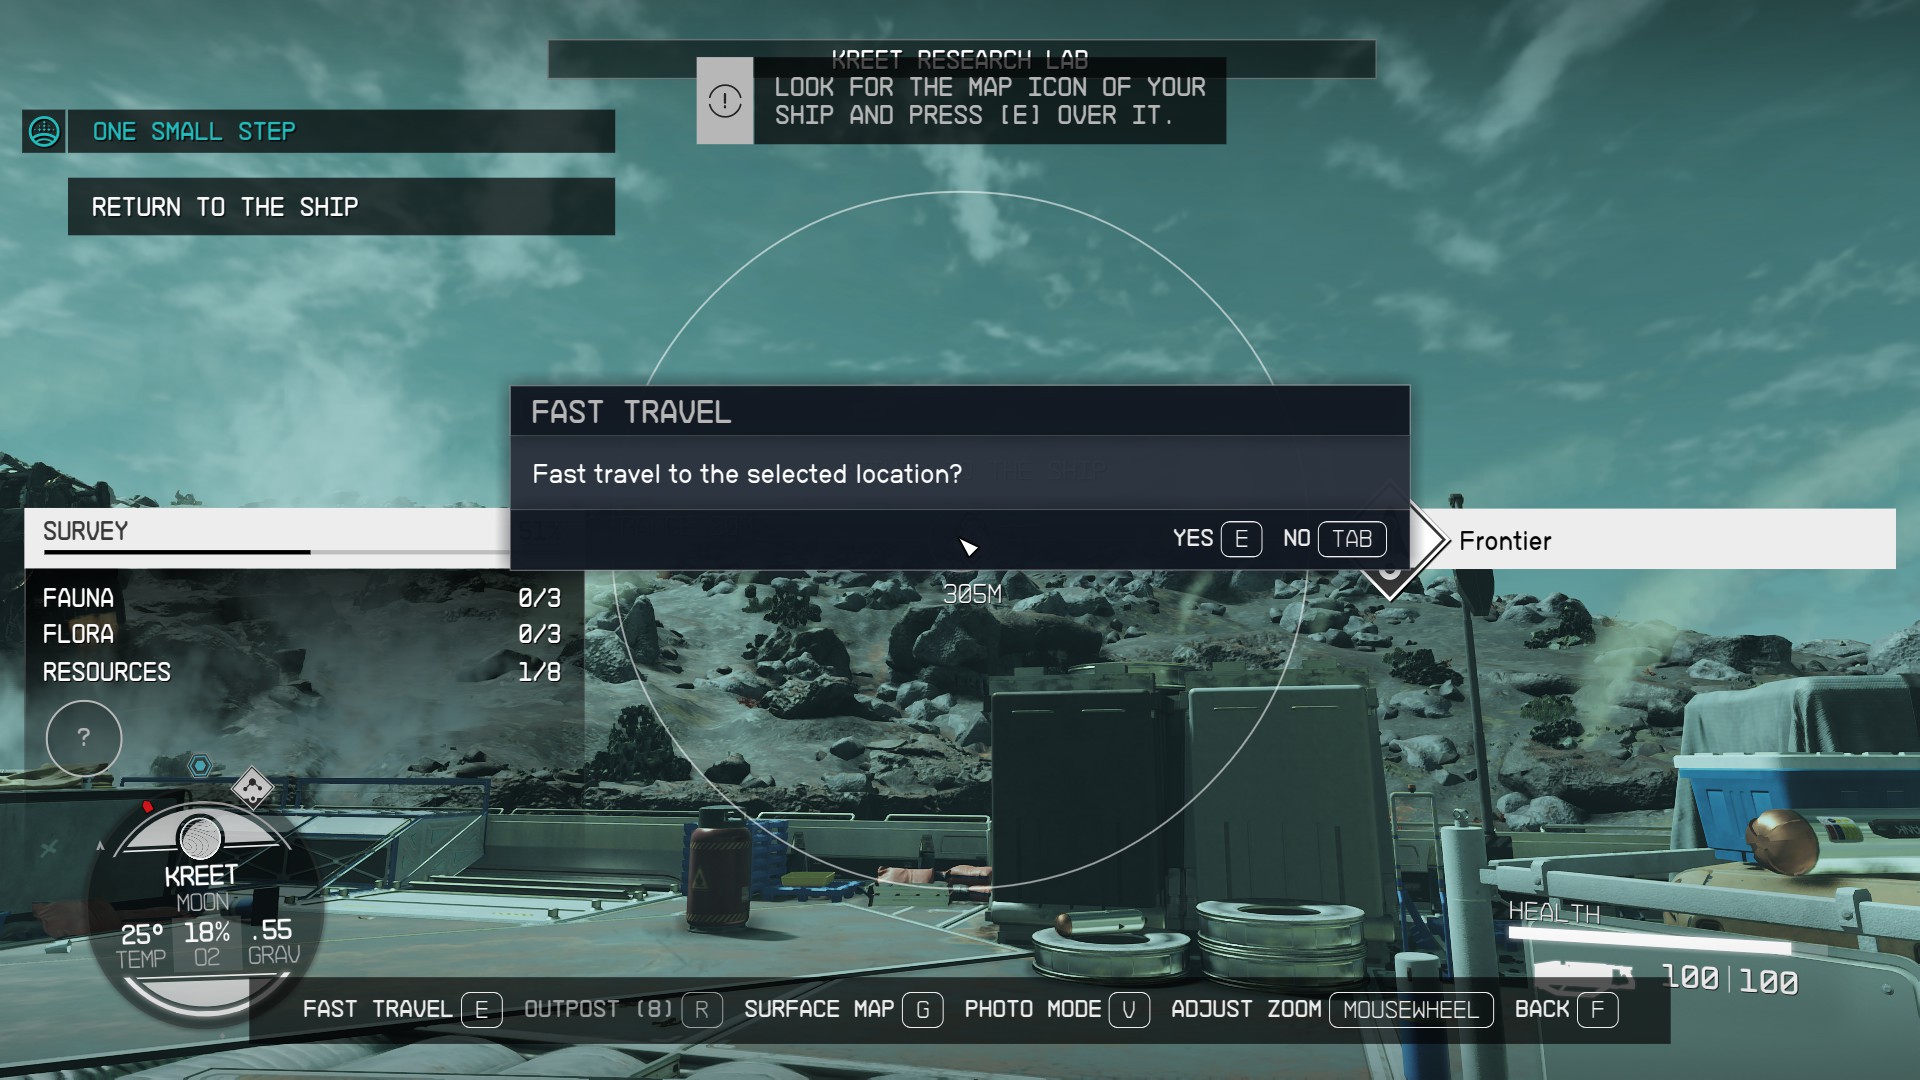
On the Missions screen, select One Small Step, and then press / / to Set Course for the objective. You’ll be taken to a new screen that shows Kreet, asking if you want to set a destination (Image 22). Select “Yes”, and hold / / (or click and hold the land button with your mouse) to travel to Kreet.
Image 21Image 22
You’ll find yourself in orbit of the planet — open your Starmap my pressing [Tab] / / and then moving the cursor to the upper left of the Data menu, then pressing / / . -click and move your mouse, or use the right stick, to rotate the planet until you can select the Kreet Research Lab. Once it’s selected, you can hold / / to land.
This walkthrough continues in the next tab, “Kreet”!
From the moment you land on Kreet, you’ll have a couple options – abandon the main quest and go exploring, or proceed straight to the Kreet Research Lab to advance the story. If exploring is more your speed, then you might want to check out our How to Survey Kreet guide. Once you’re ready to continue with the main quest, read on!
Either way, you’ll need to start by getting out of your ship. Hold / / to immediately exit your ship — or get up and walk to the hatch if you prefer to stay immersed.
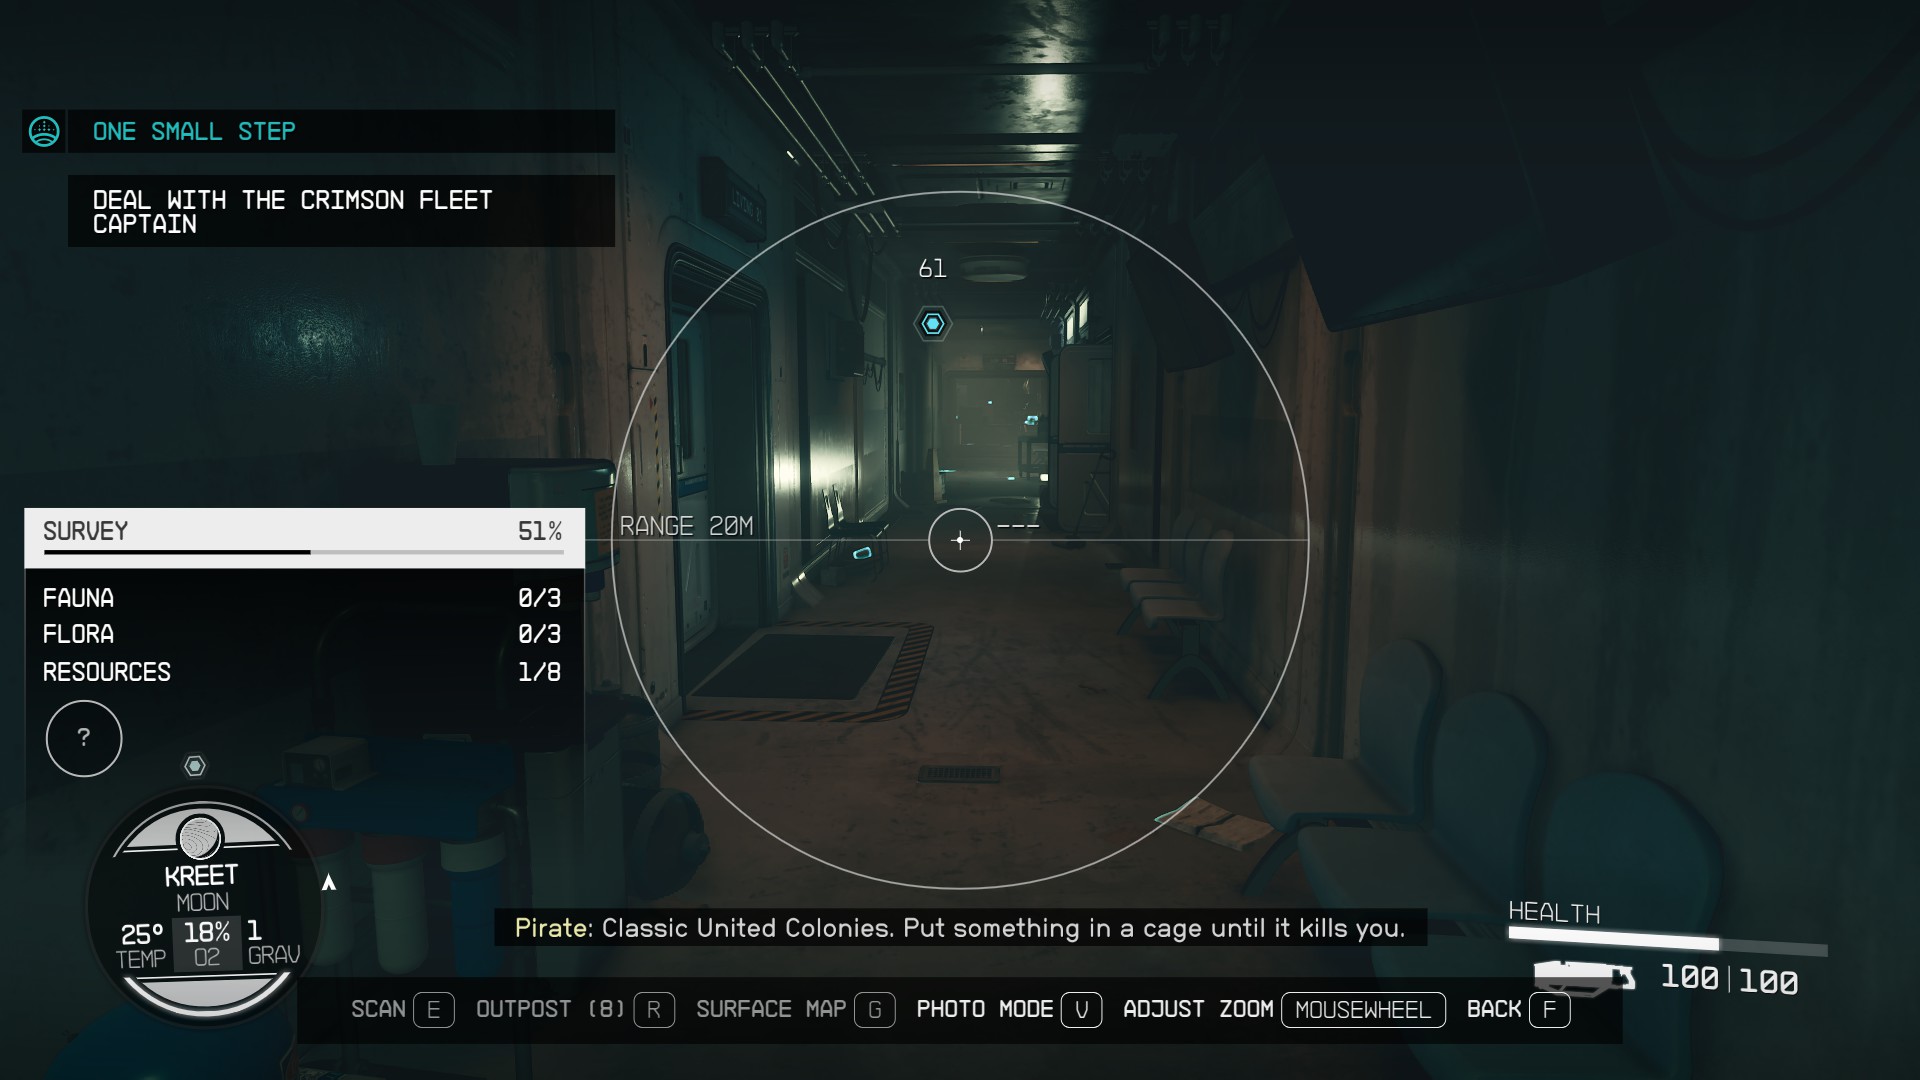
Deal With the Crimson Fleet Captain
Finding the Kreet Research Lab
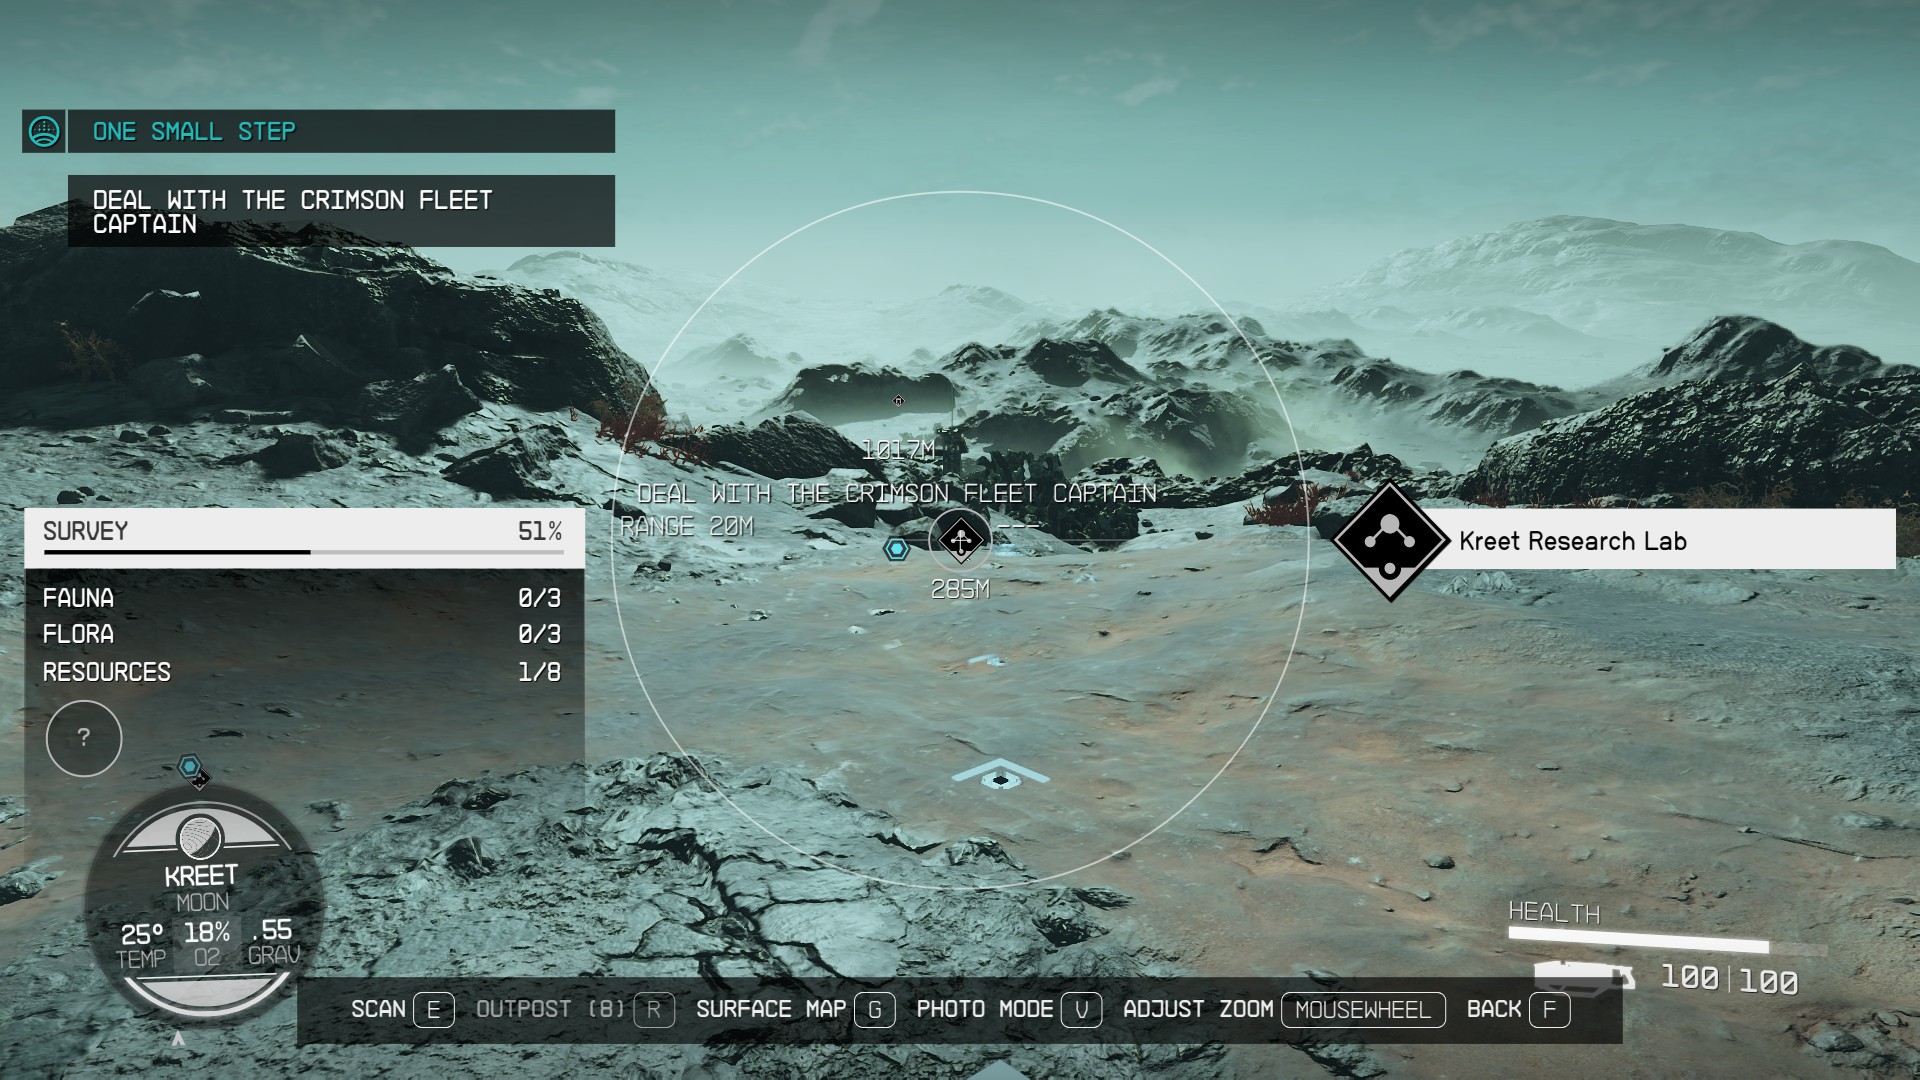
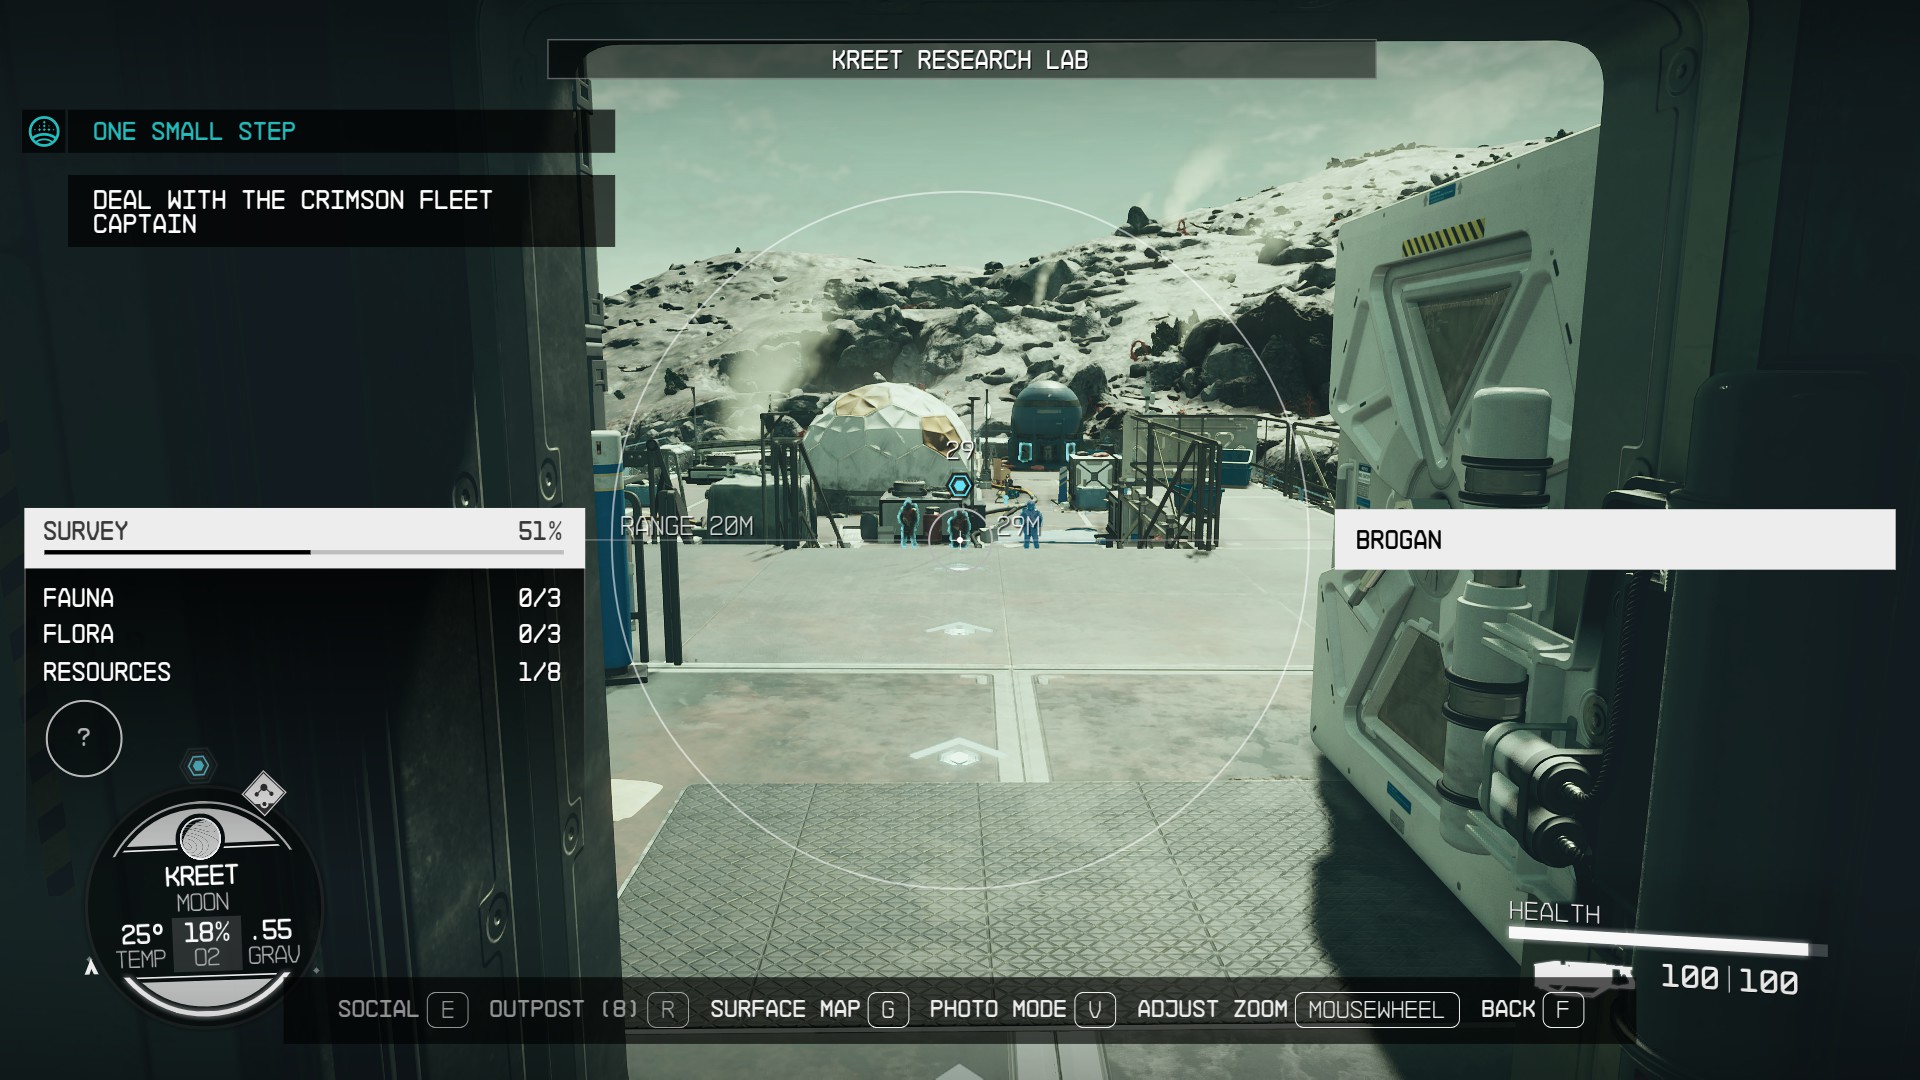
When you first step out of your ship, you’ll be able to just about see the Research Lab. To make that easier, you should fire up your hand scanner by pressing /(depending on your peripherals of choice). Doing so (1) will show you a map marker for the Research Lab and draw an arrow on the ground with a suggested path for getting there. This arrow points you in the direction of your currently active quest, but since at this point this is our only quest, there won’t be any confusion.
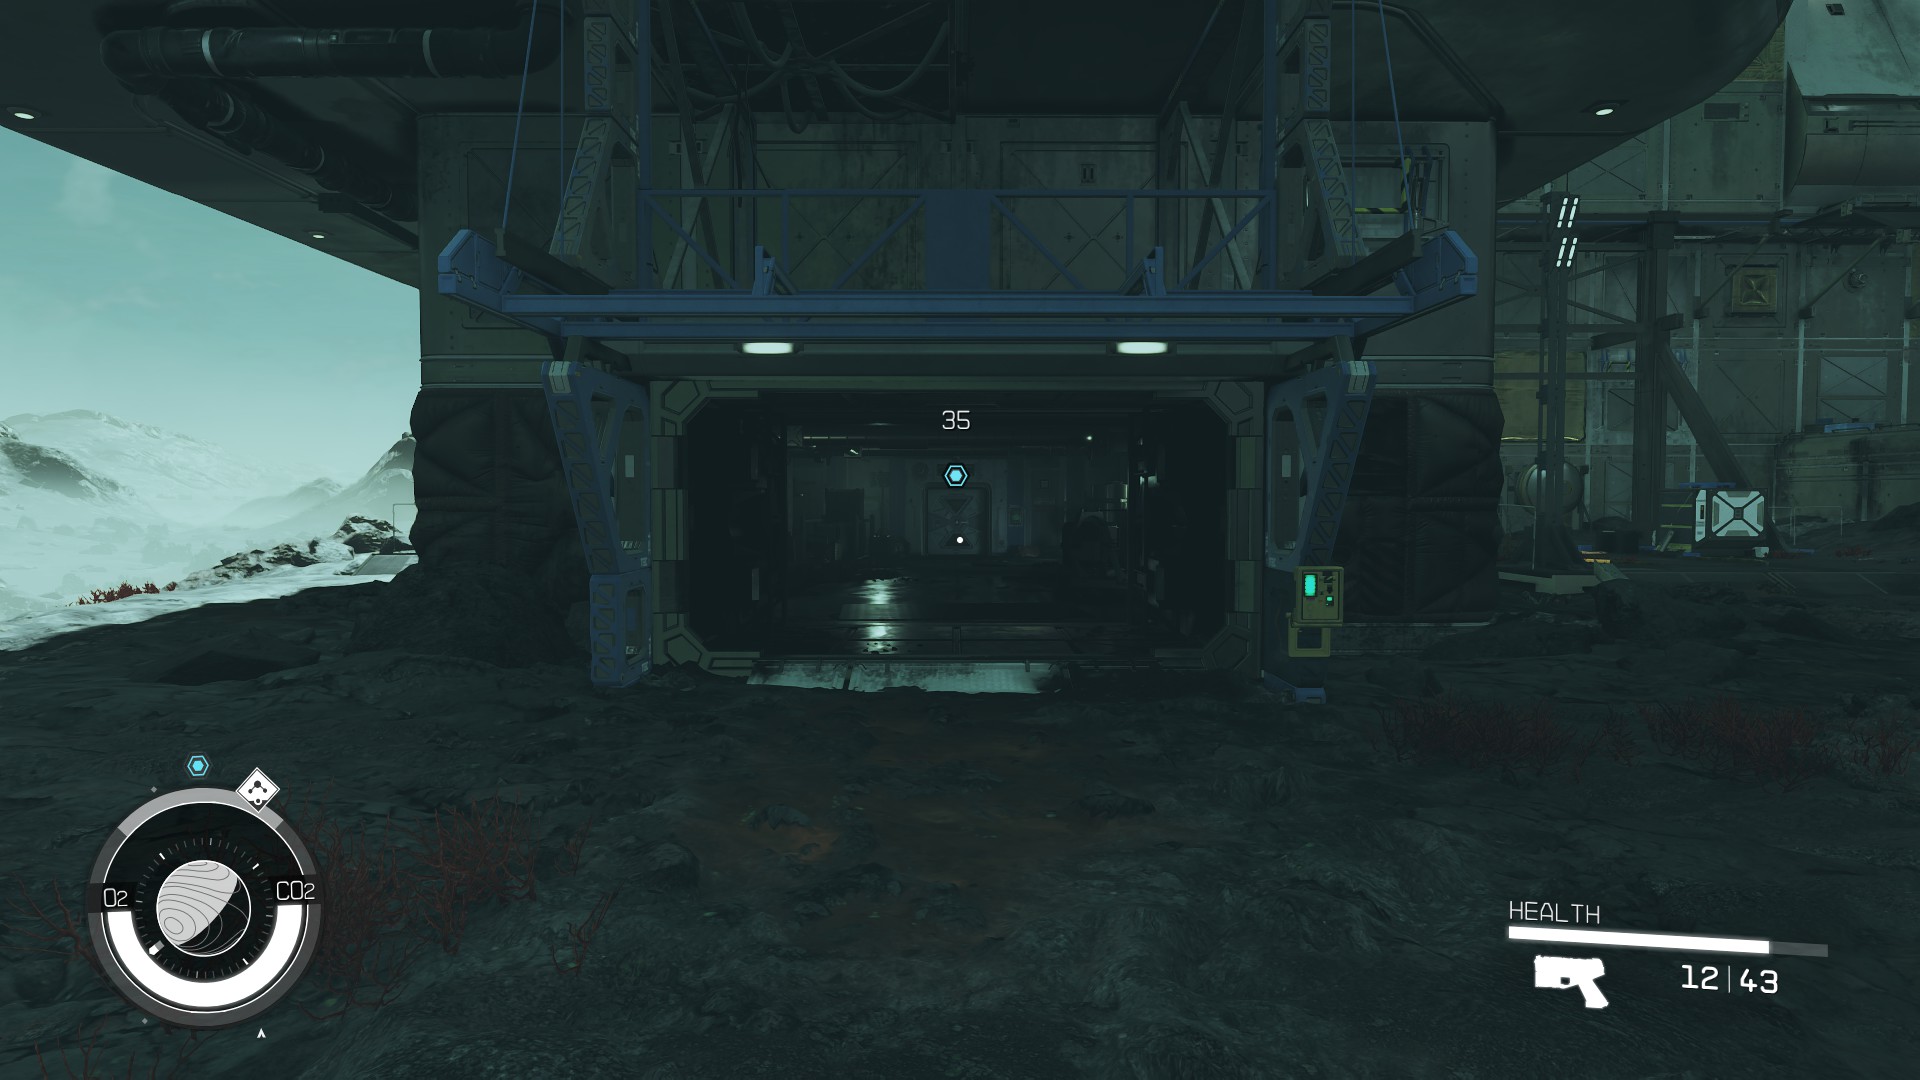
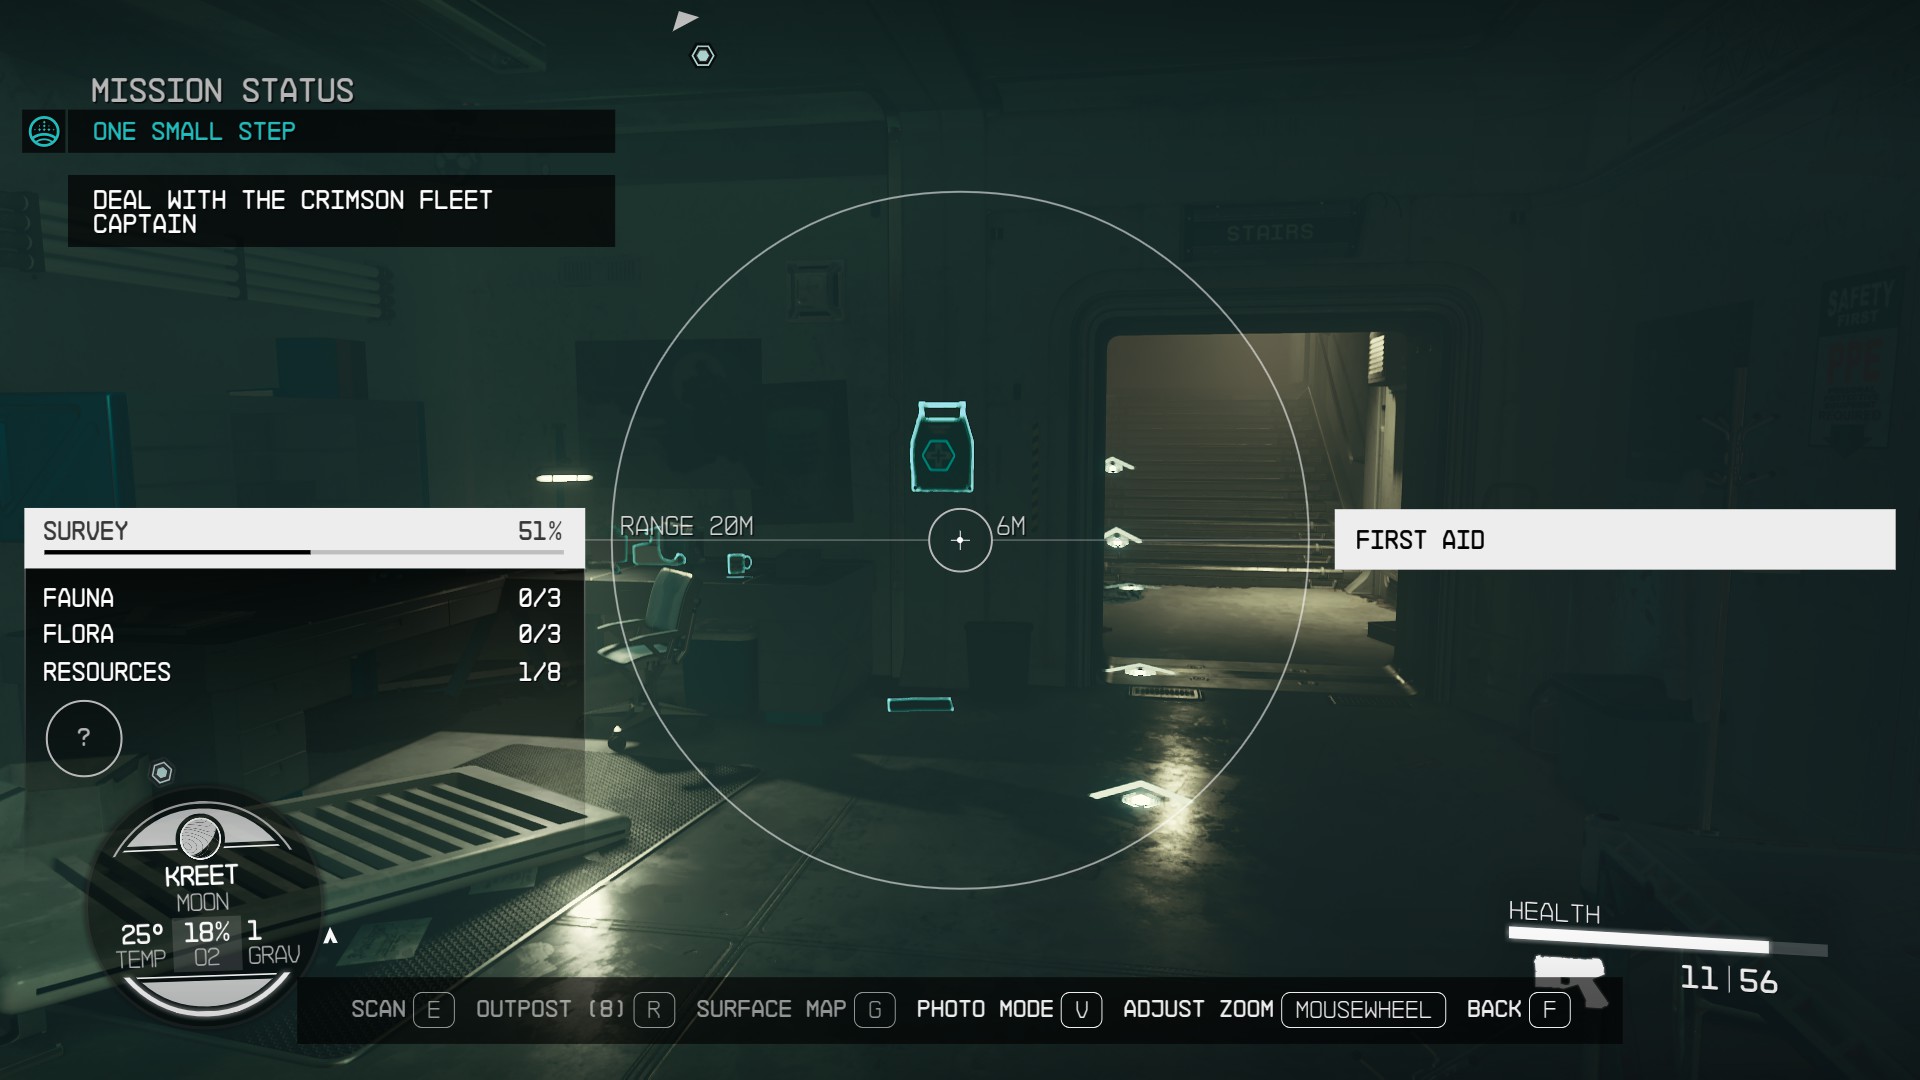
Even without the scanner, reaching the Lab is easy – simply follow the path in front of you and you won’t be able to miss it. From what we can tell, there’s nothing of interest in the immediate area surrounding the lab, so once you reach the front entrance (2), you might as well just go inside after looting the First Aid station (3) by the door.
(1)(2)(3)
Exploring the Kreet Research Lab
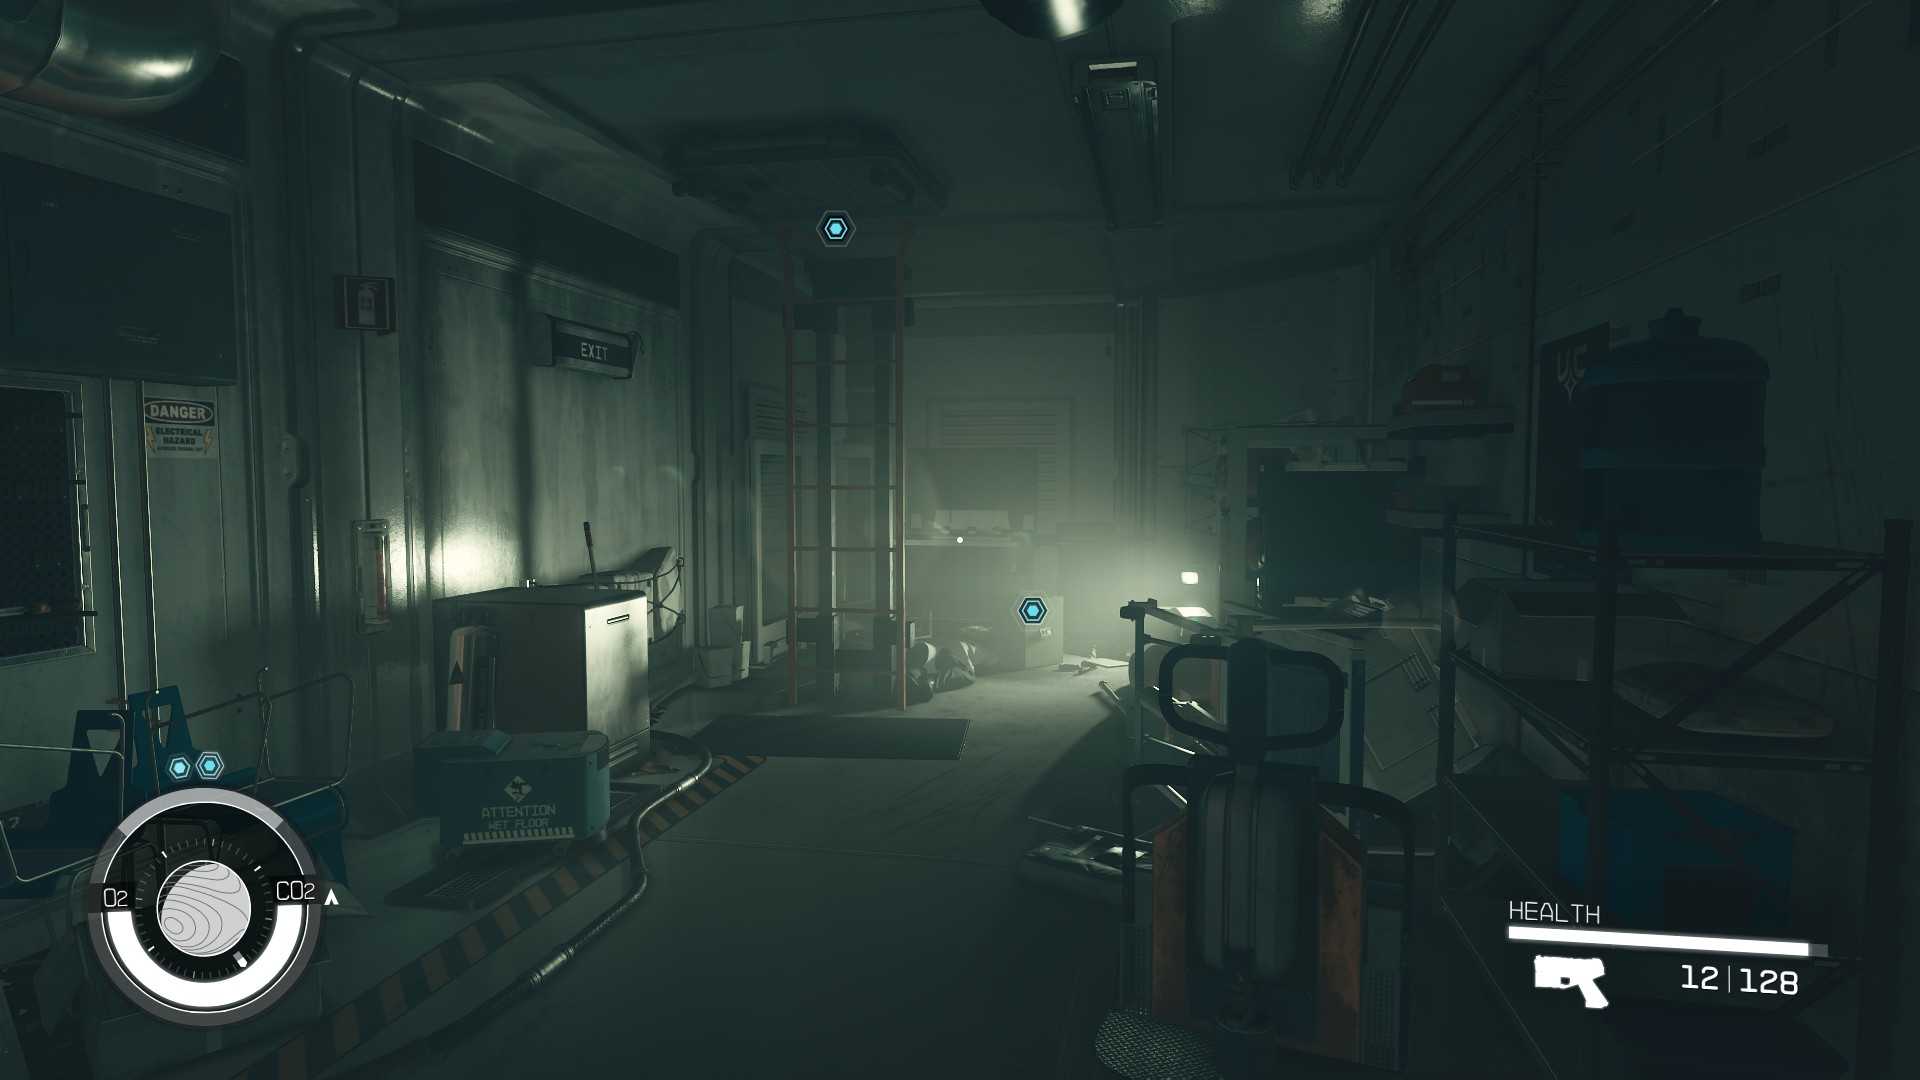
Inside the Research Lab, your goal will be to get to the roof where you’ll find the Crimson Fleet captain you’re after. And since there’s no map of interior areas, you should use the hand scanner liberally whenever you feel like you may have gotten turned around — you’ll get white arrows on the floor guiding you to your objective each time you activate your scanner.
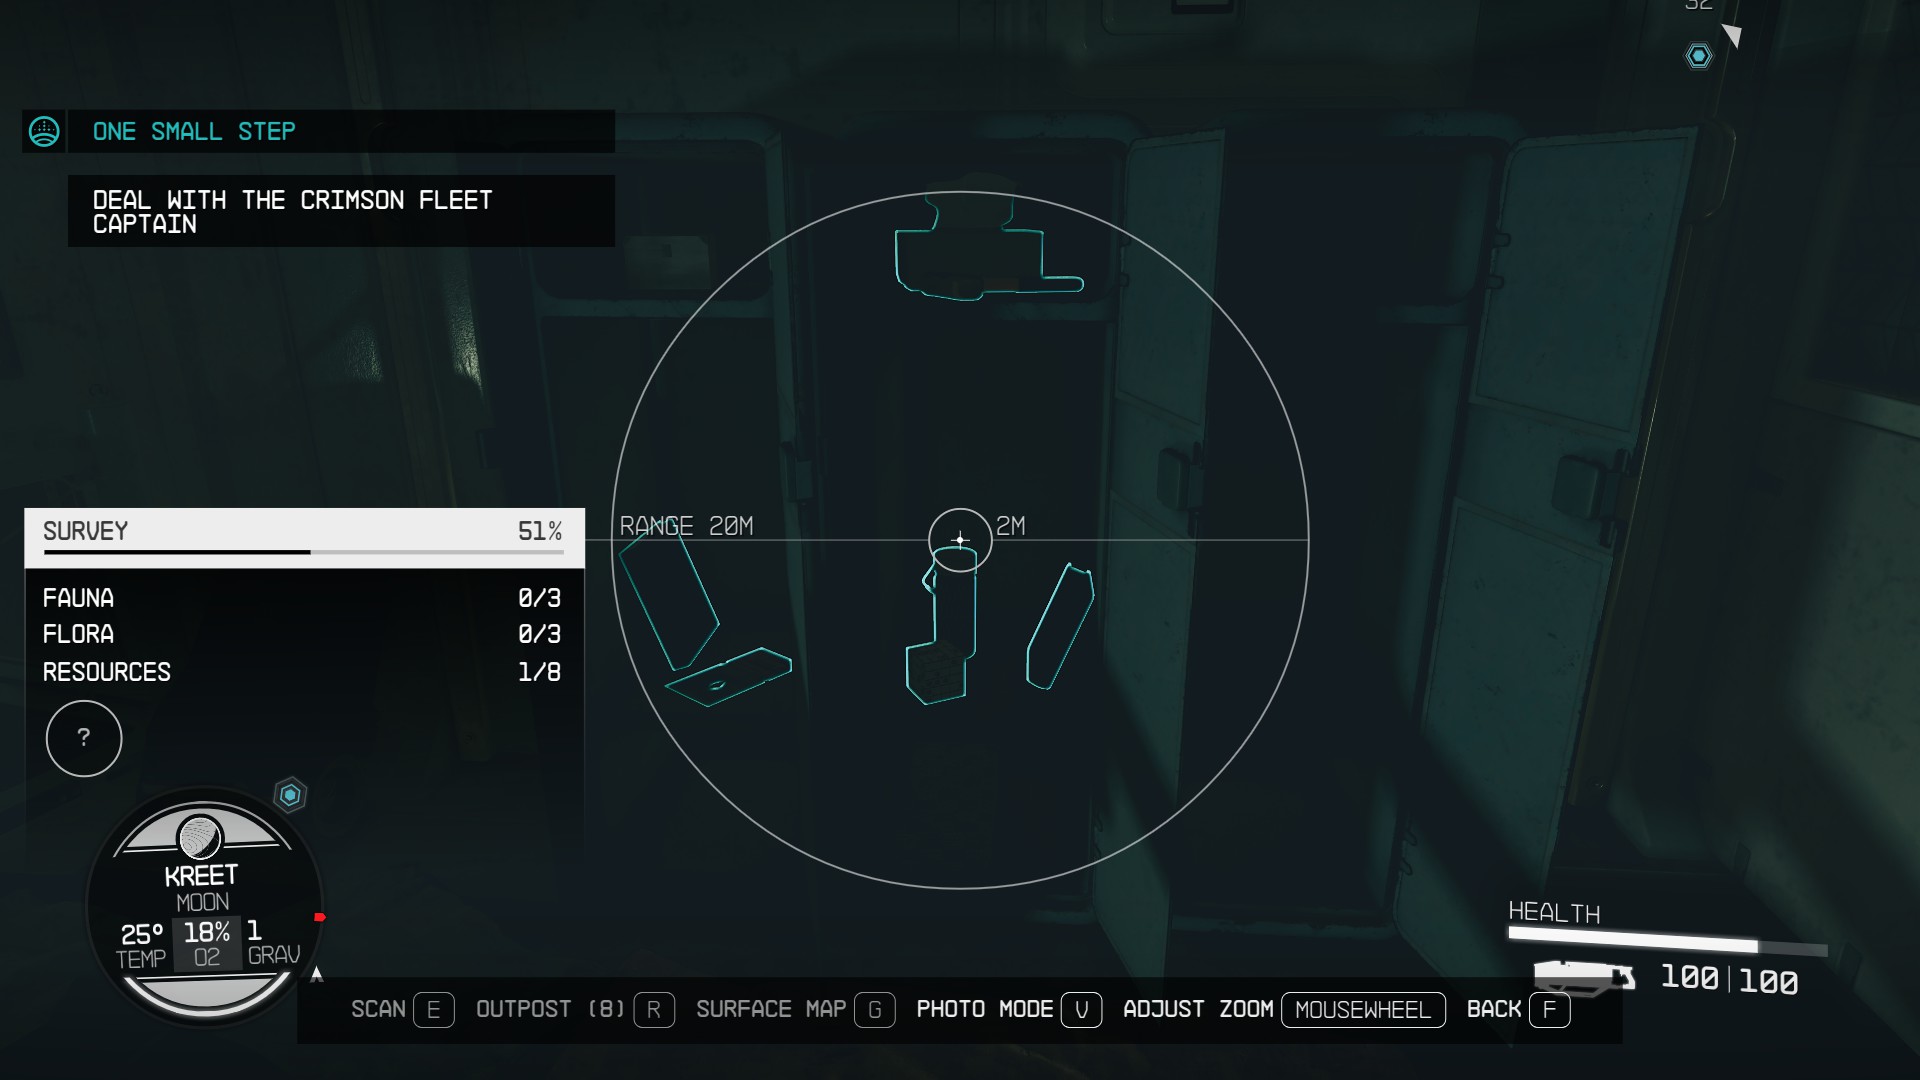
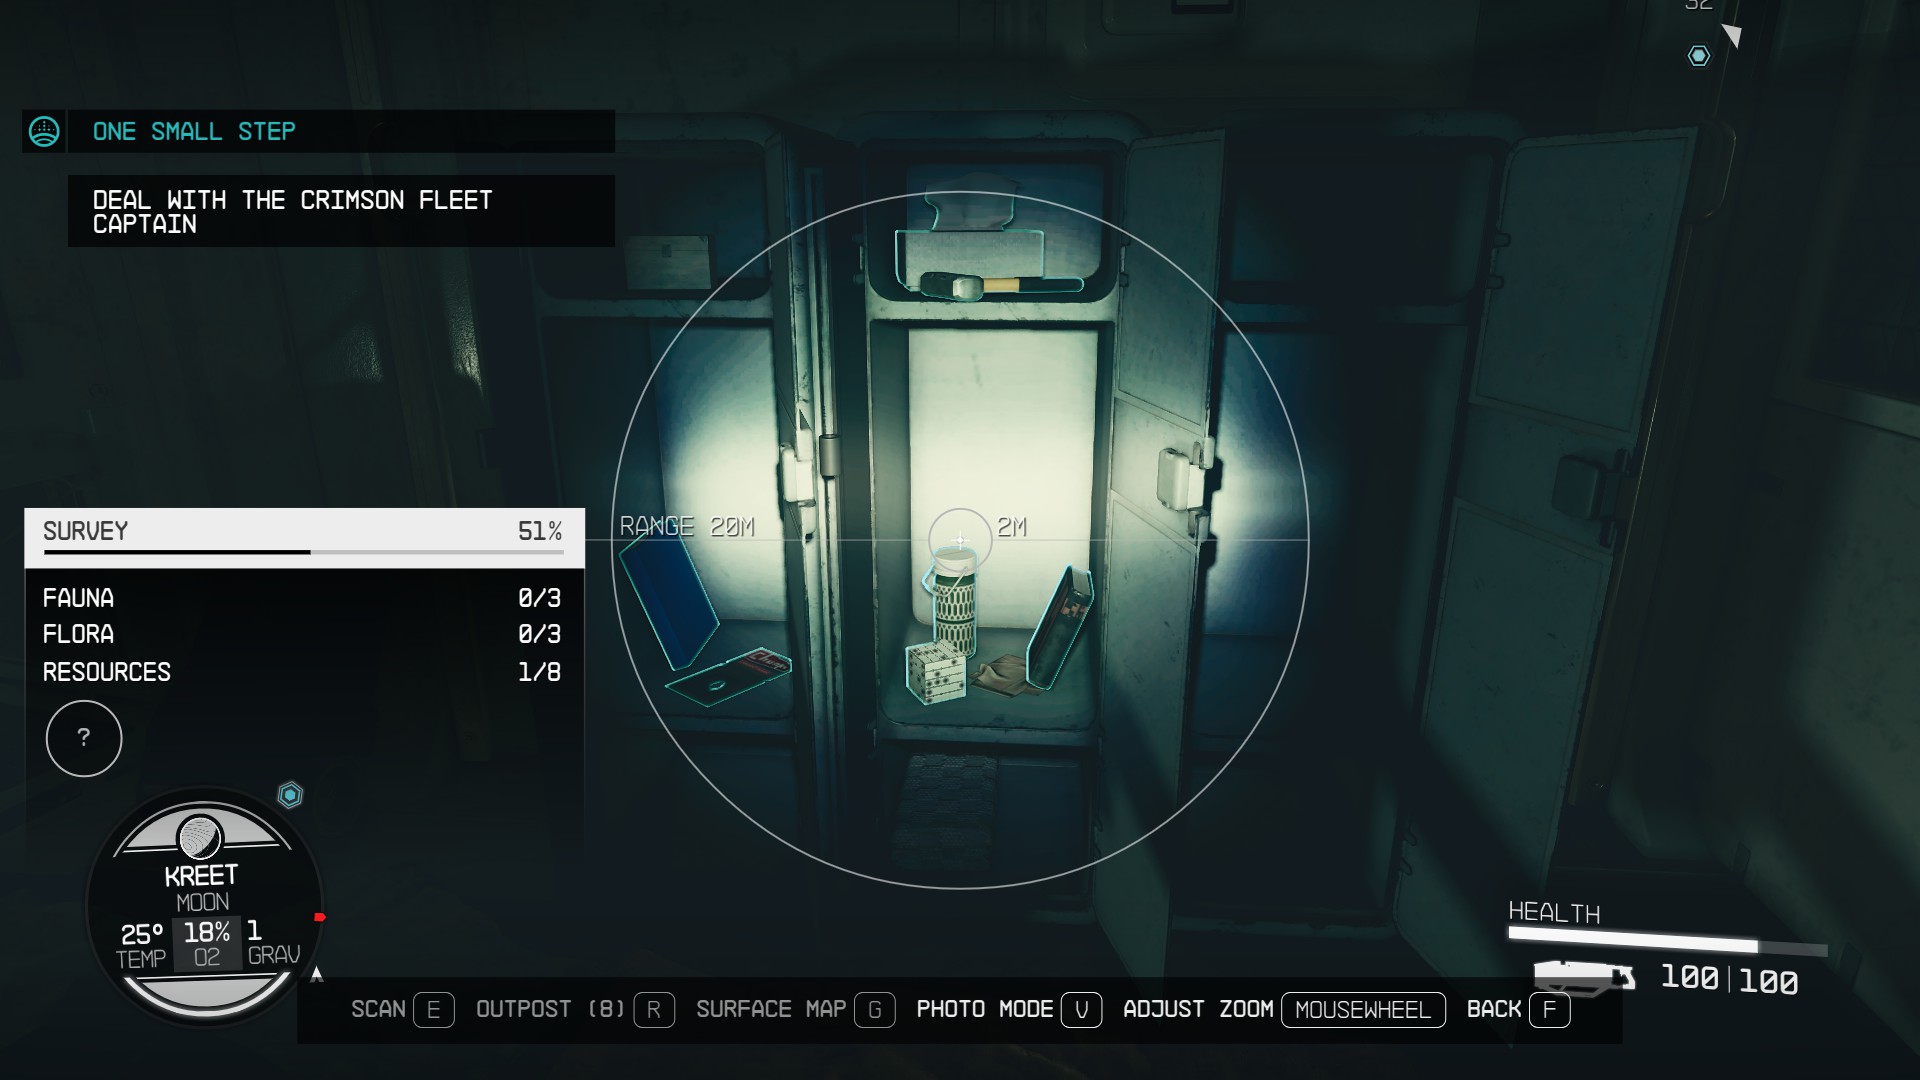
The scanner will also highlight all sorts of lootable items (4), but unless you have a compulsion that forces you to loot everything you see, you should do your best to ignore the siren call of loot – most of it is borderline worthless, but weighs a ton.
Since the lab has seen better days when you find it, it can be quite dark inside (5). As such, you should remember that by holding your hand scanner button instead of pressing it, you can enable your flashlight that will help you better see all that loot (6) you won’t be picking up.
(4)(5)(6)
Having explored the Lab with two characters, we concluded that loot is randomized to a degree, and as such we won’t be pointing out every useful thing we were able to find inside and instead focus on hand-crafted points of interest.
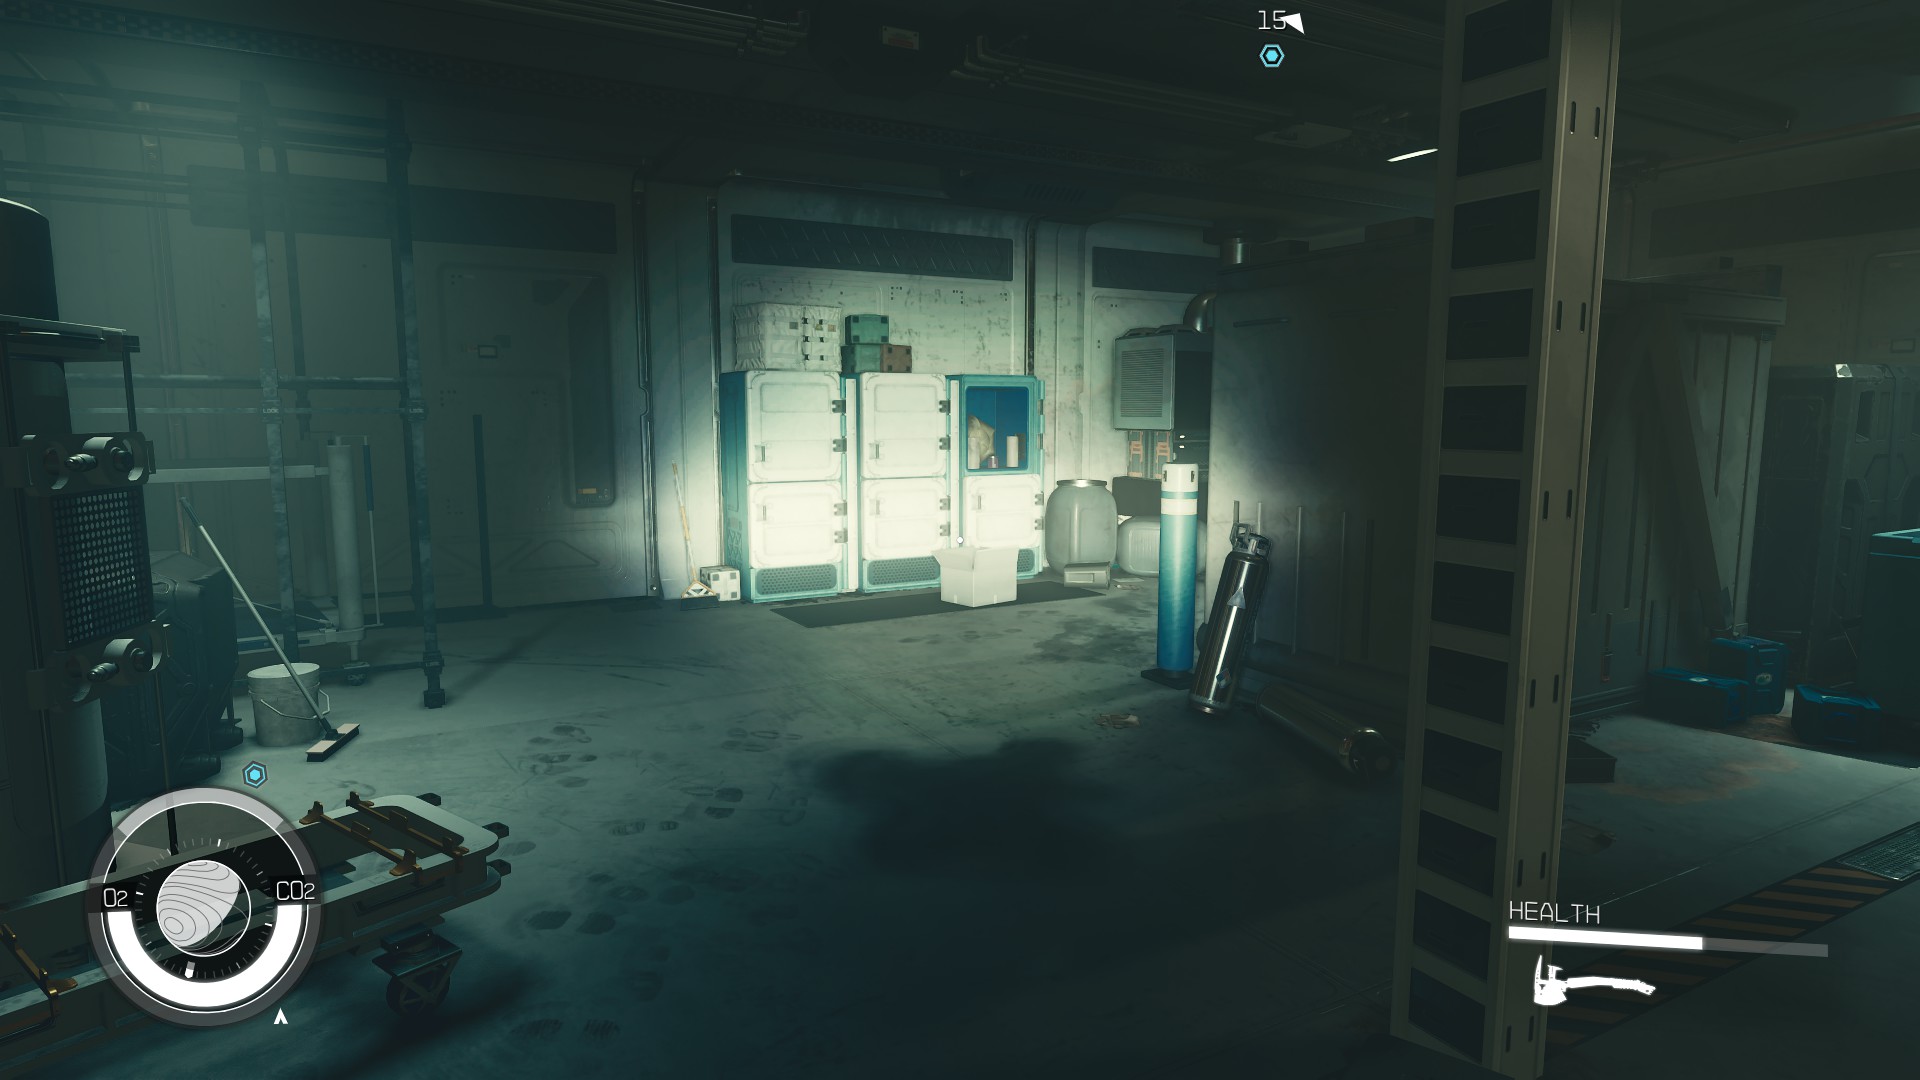
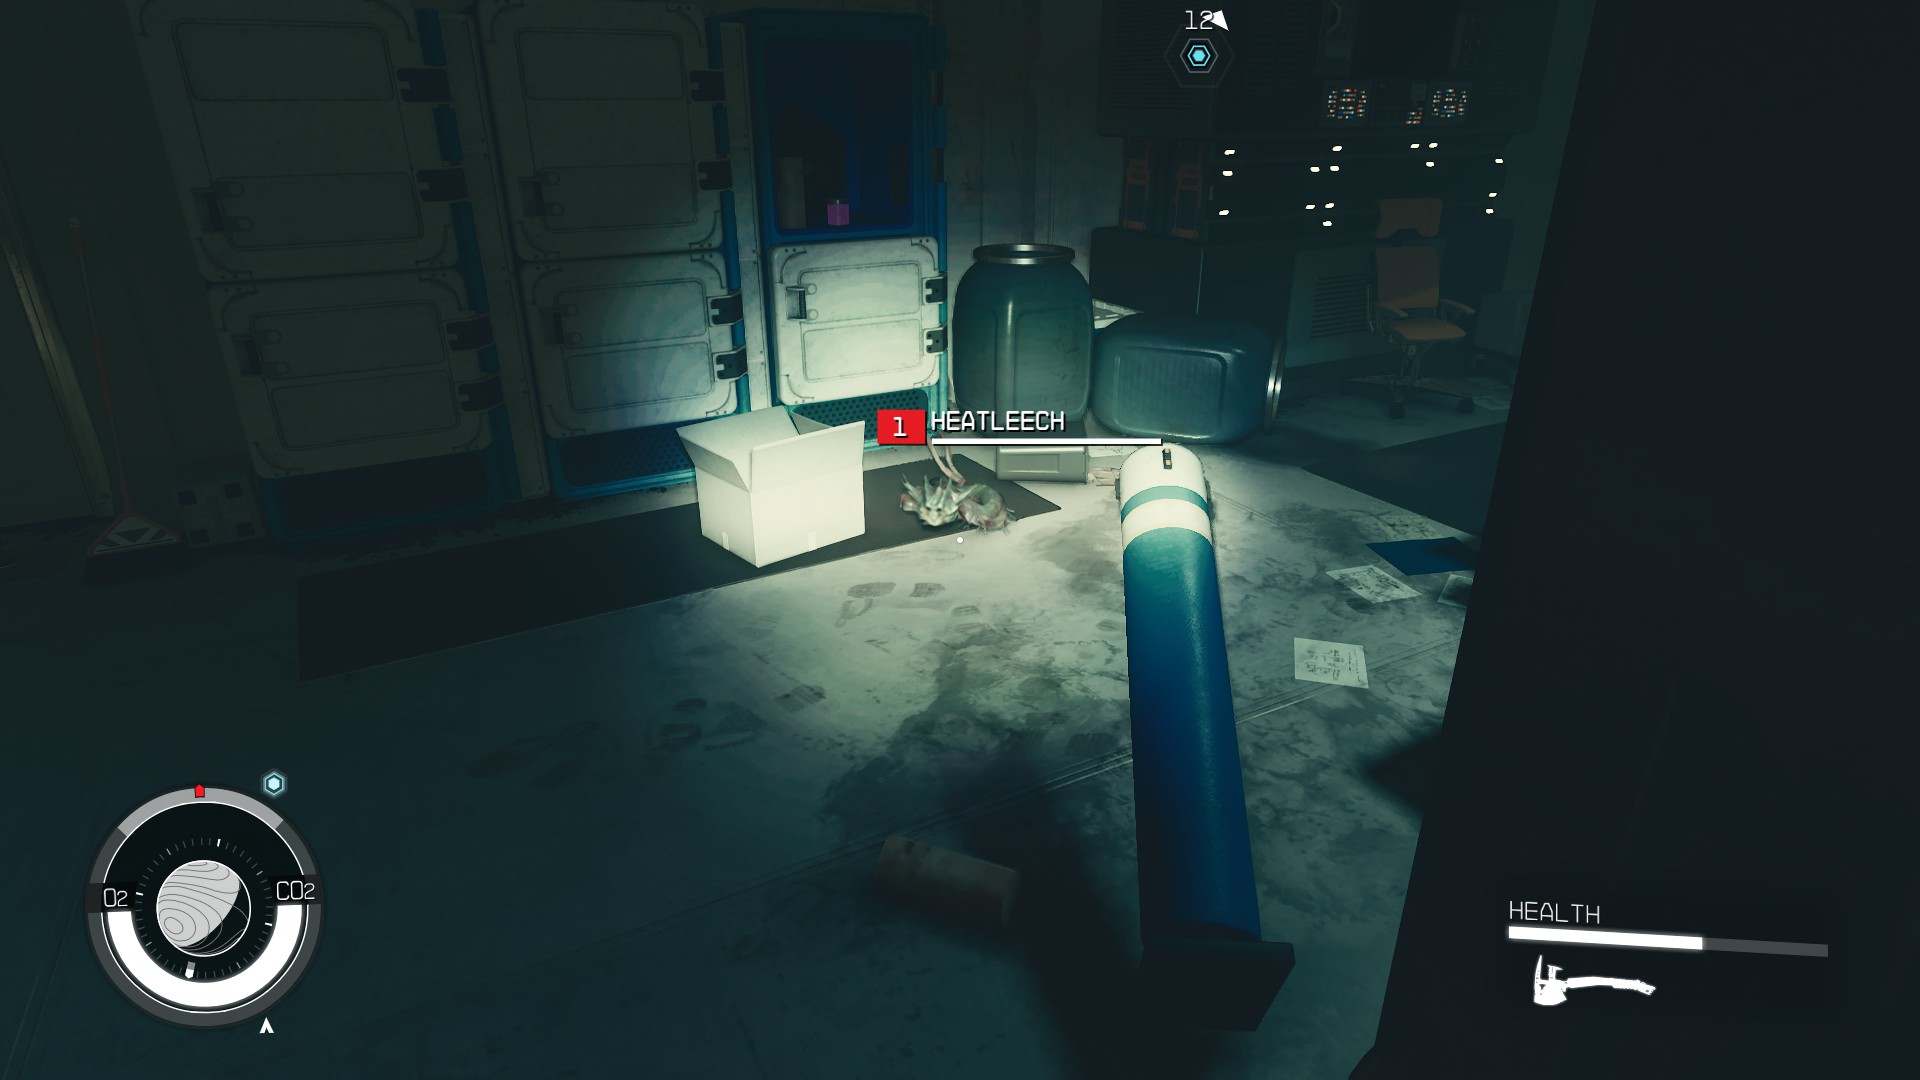
In the Lab’s first room one such point is hidden inside a stack of fridges by a wall furthest from the entrance (7). Move close enough and a Heatleech will pop out from one of the fridges (8). The leech doesn’t do much, but you should still prepare yourself for it if you’re susceptible to jump scares.
(7)(8)
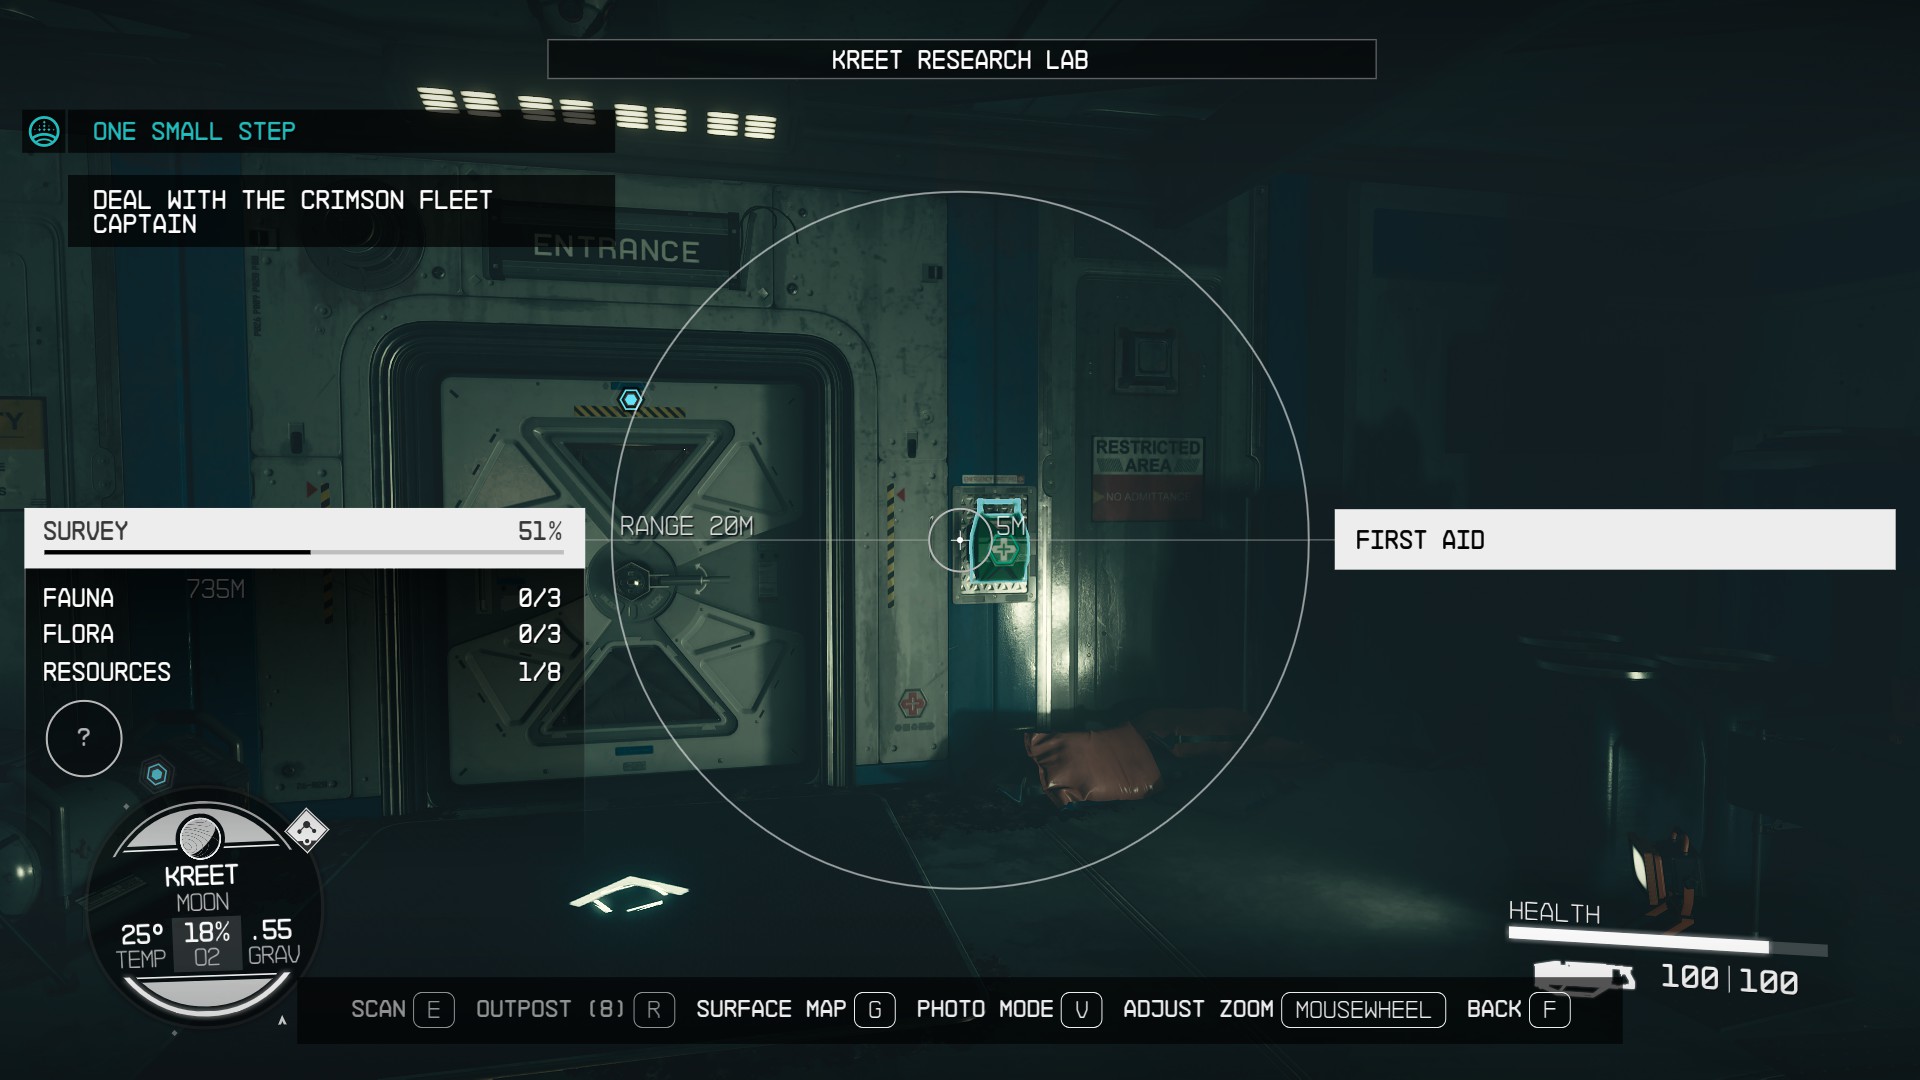
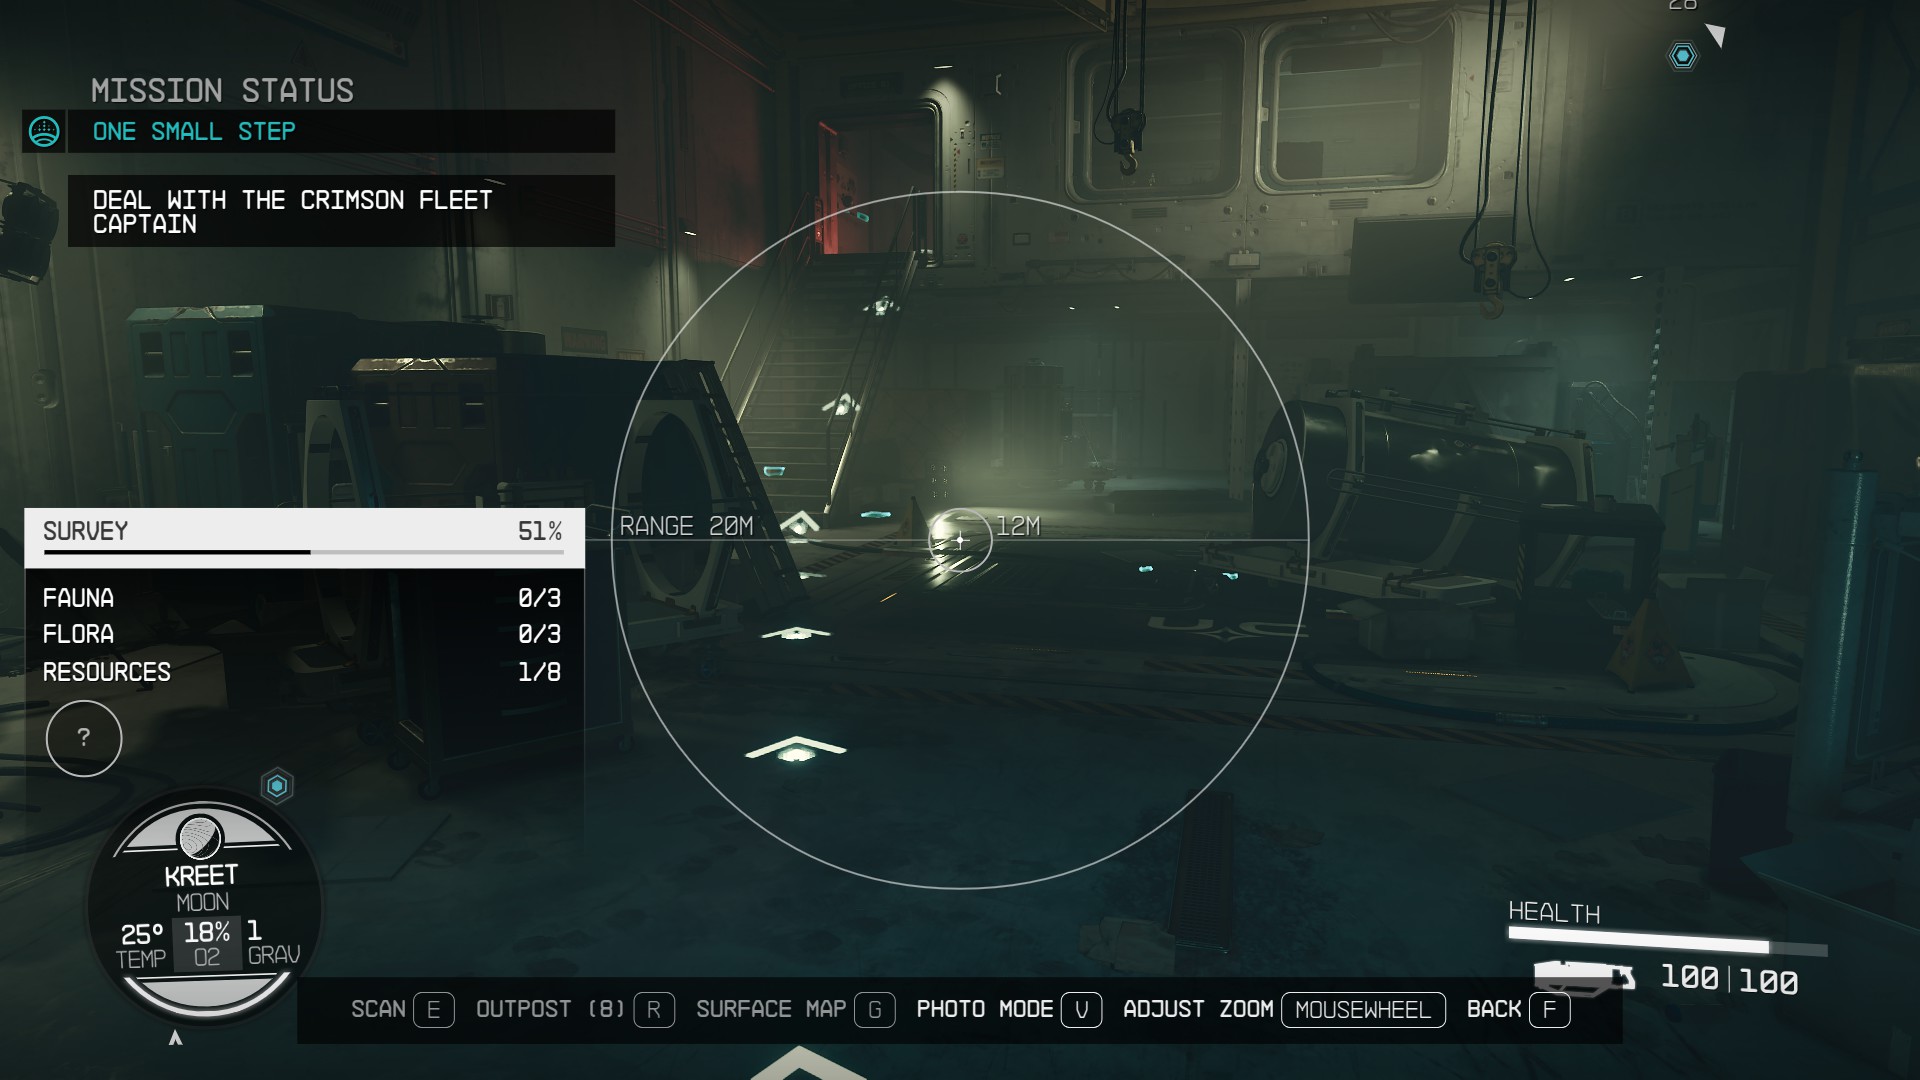
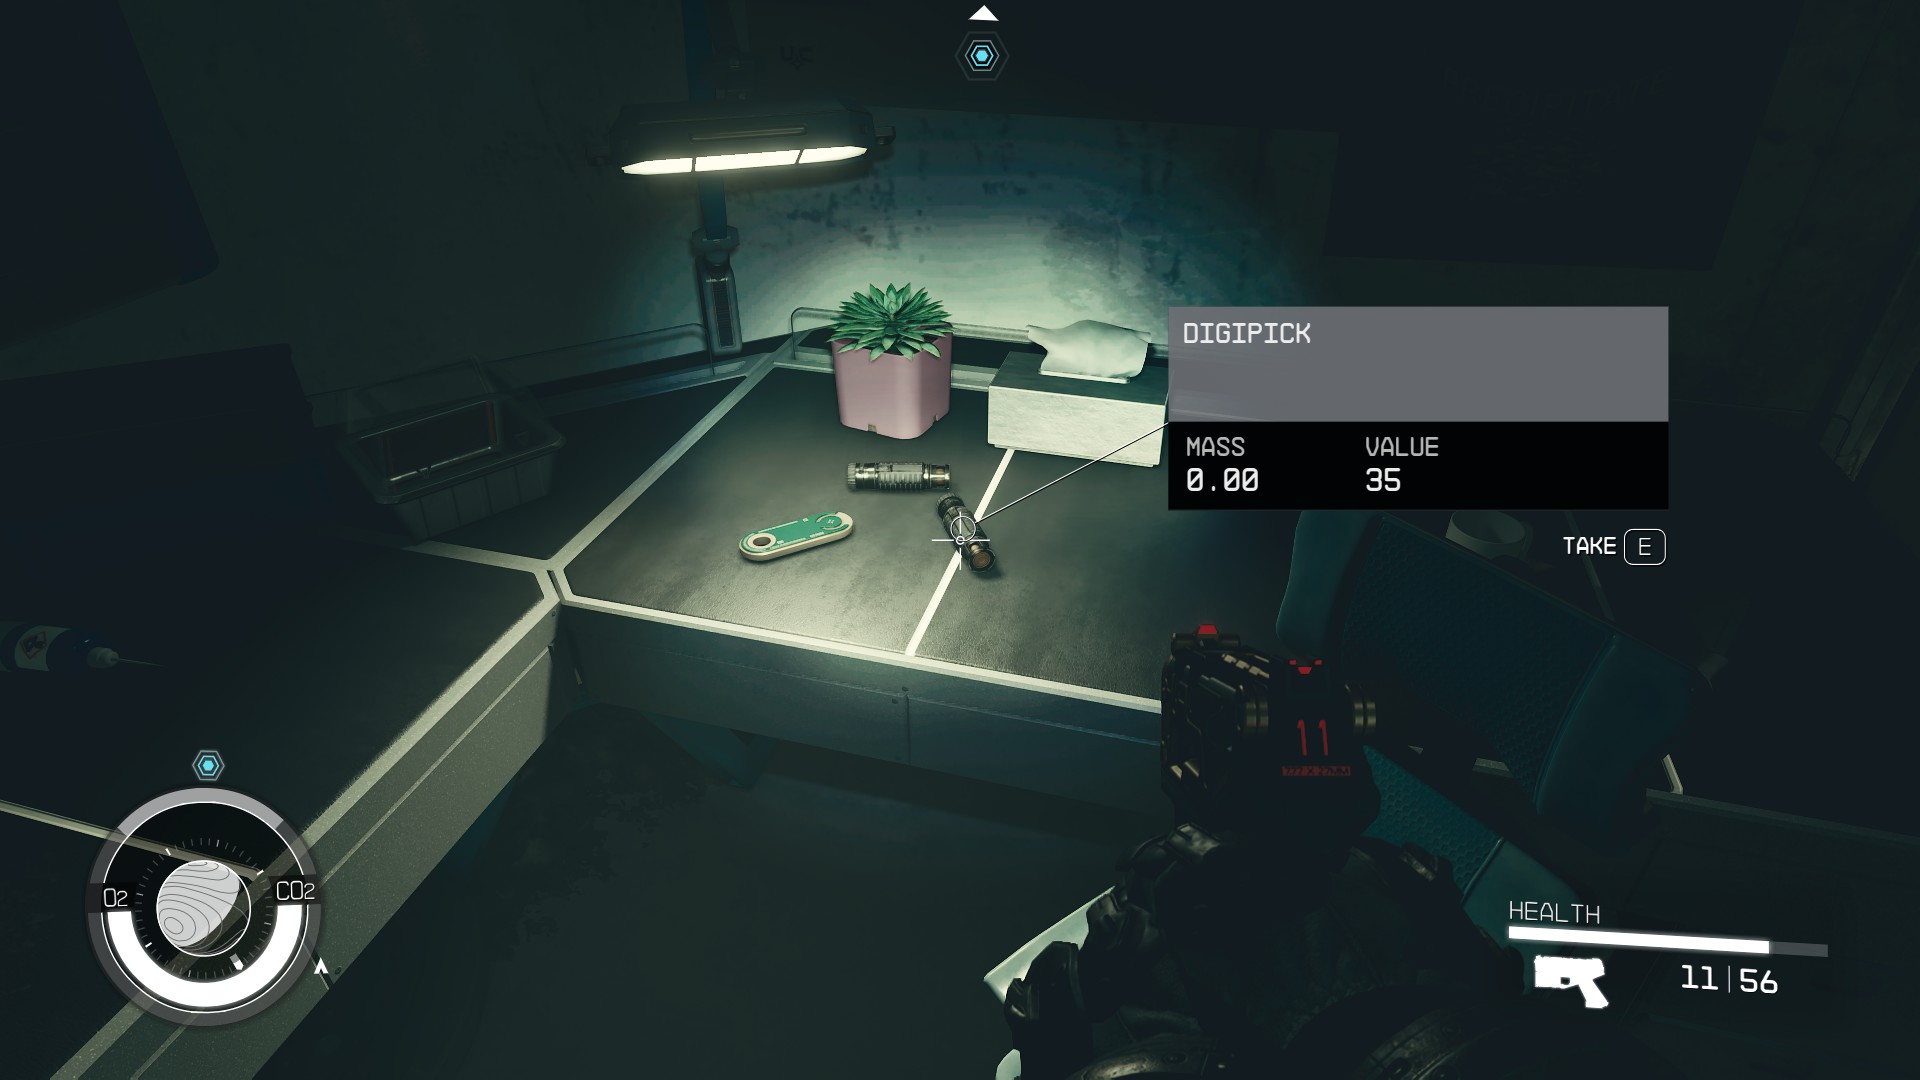
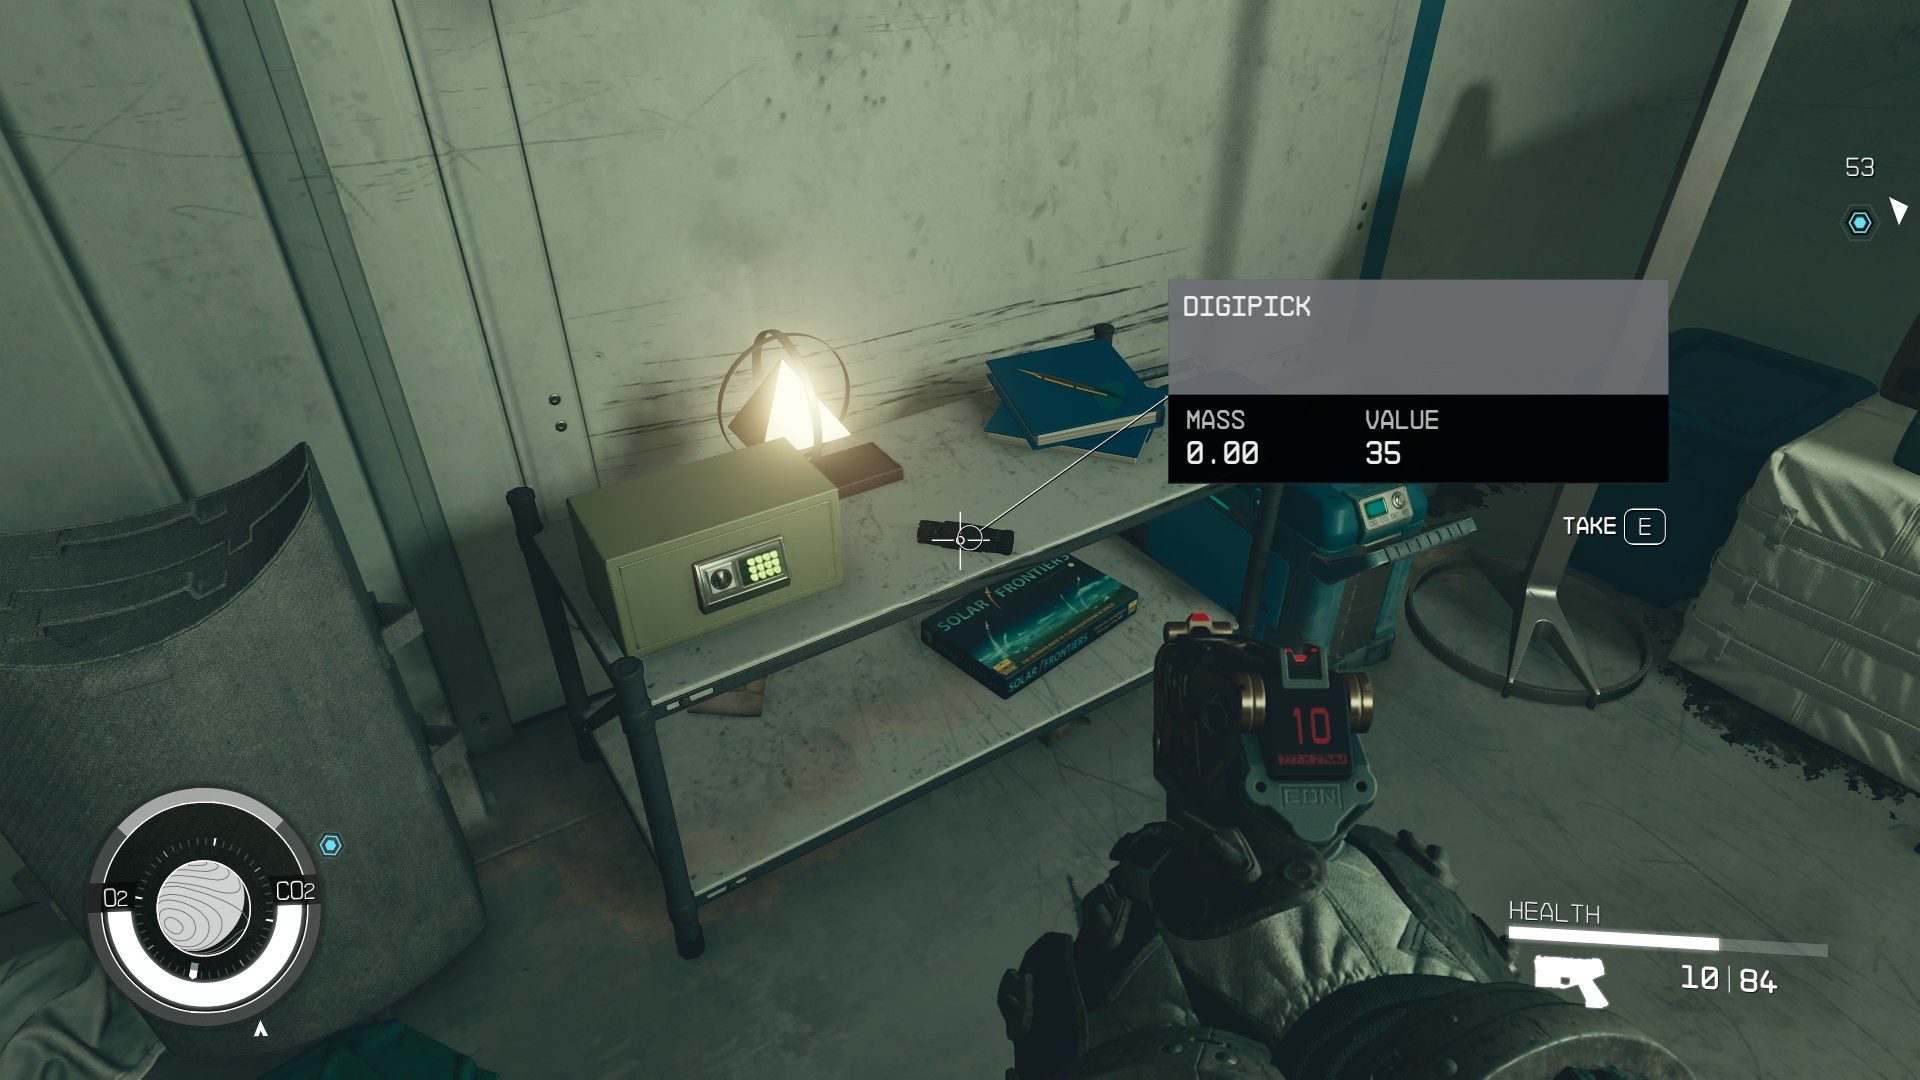
Once you’ve dealt with the leech, you should move up the stairs into the observation room above (9). By the door leading further into the lab, you’ll find another First Aid station (10), while the desk right next to it tends to have some nice goodies (11), like a Credstick with some money and a couple of Digipicks used for picking locks in Starfield.
(9)(10)(11)
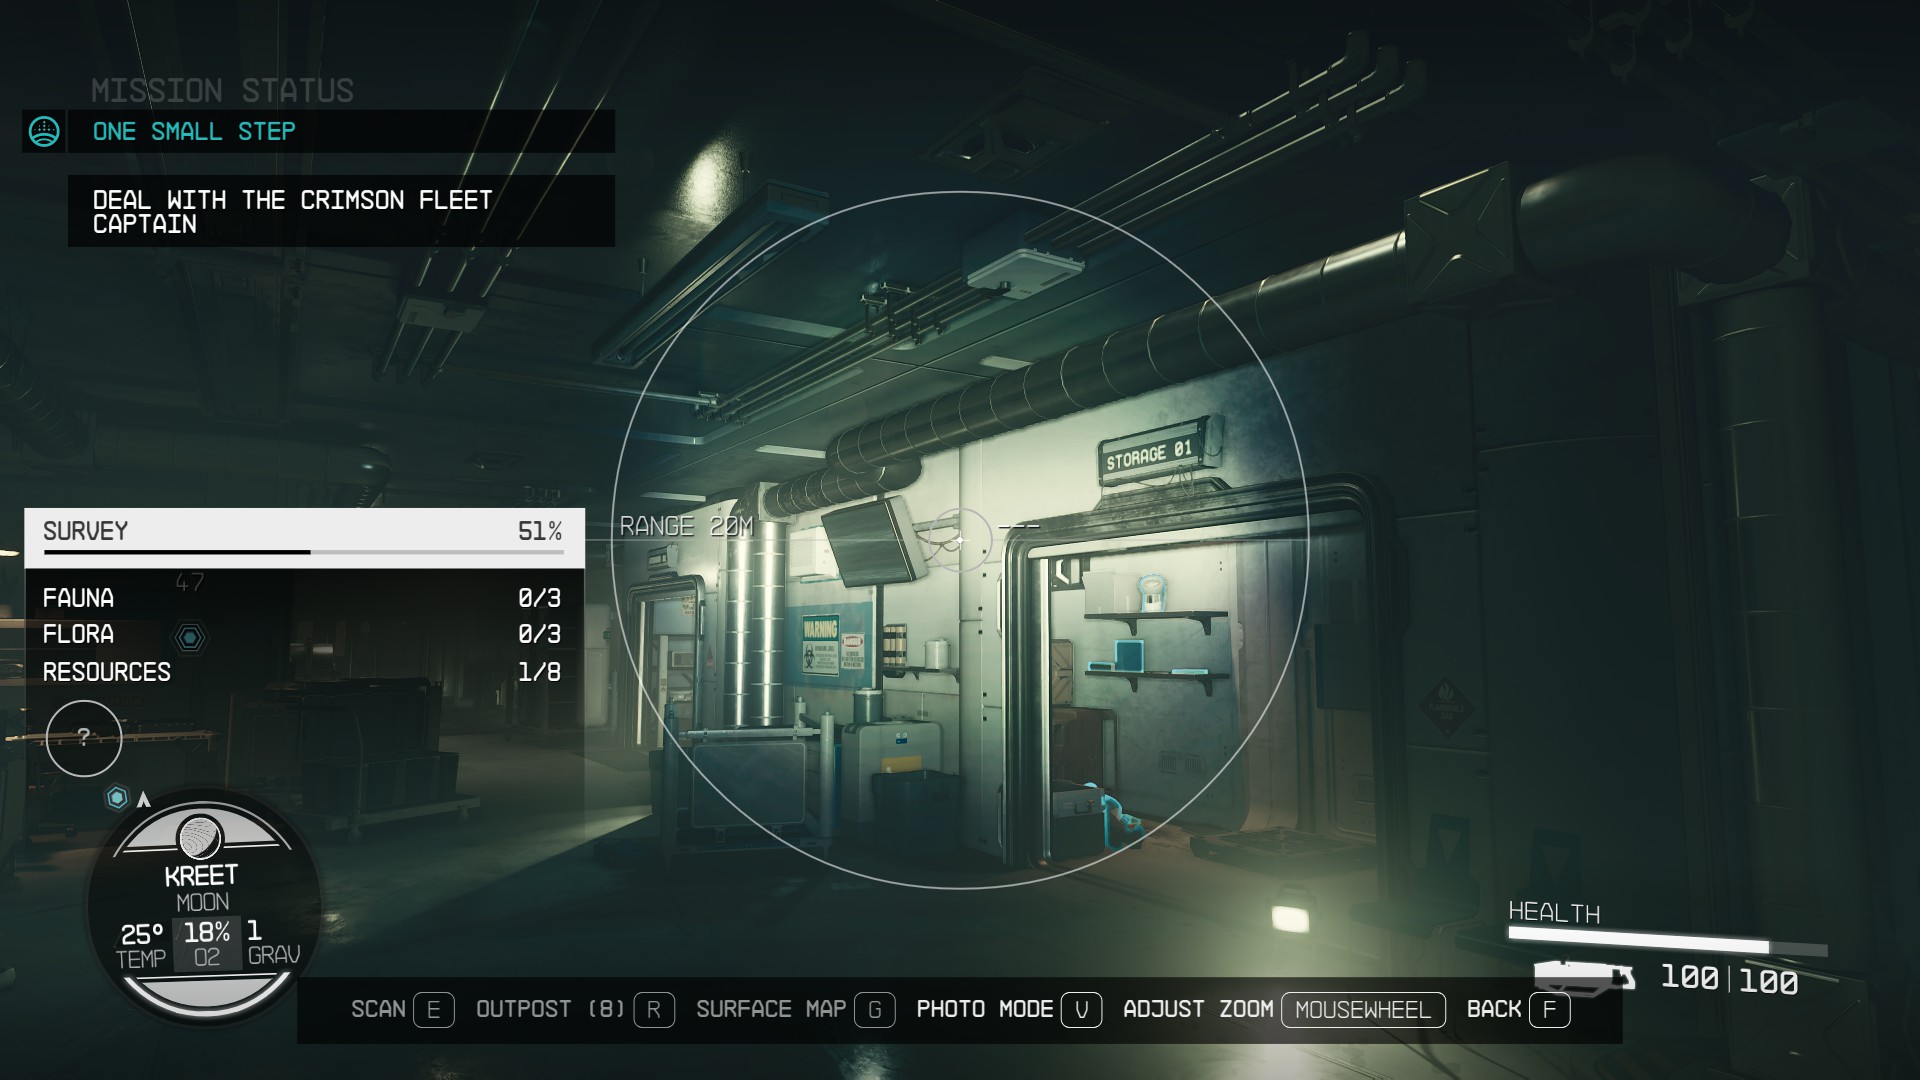
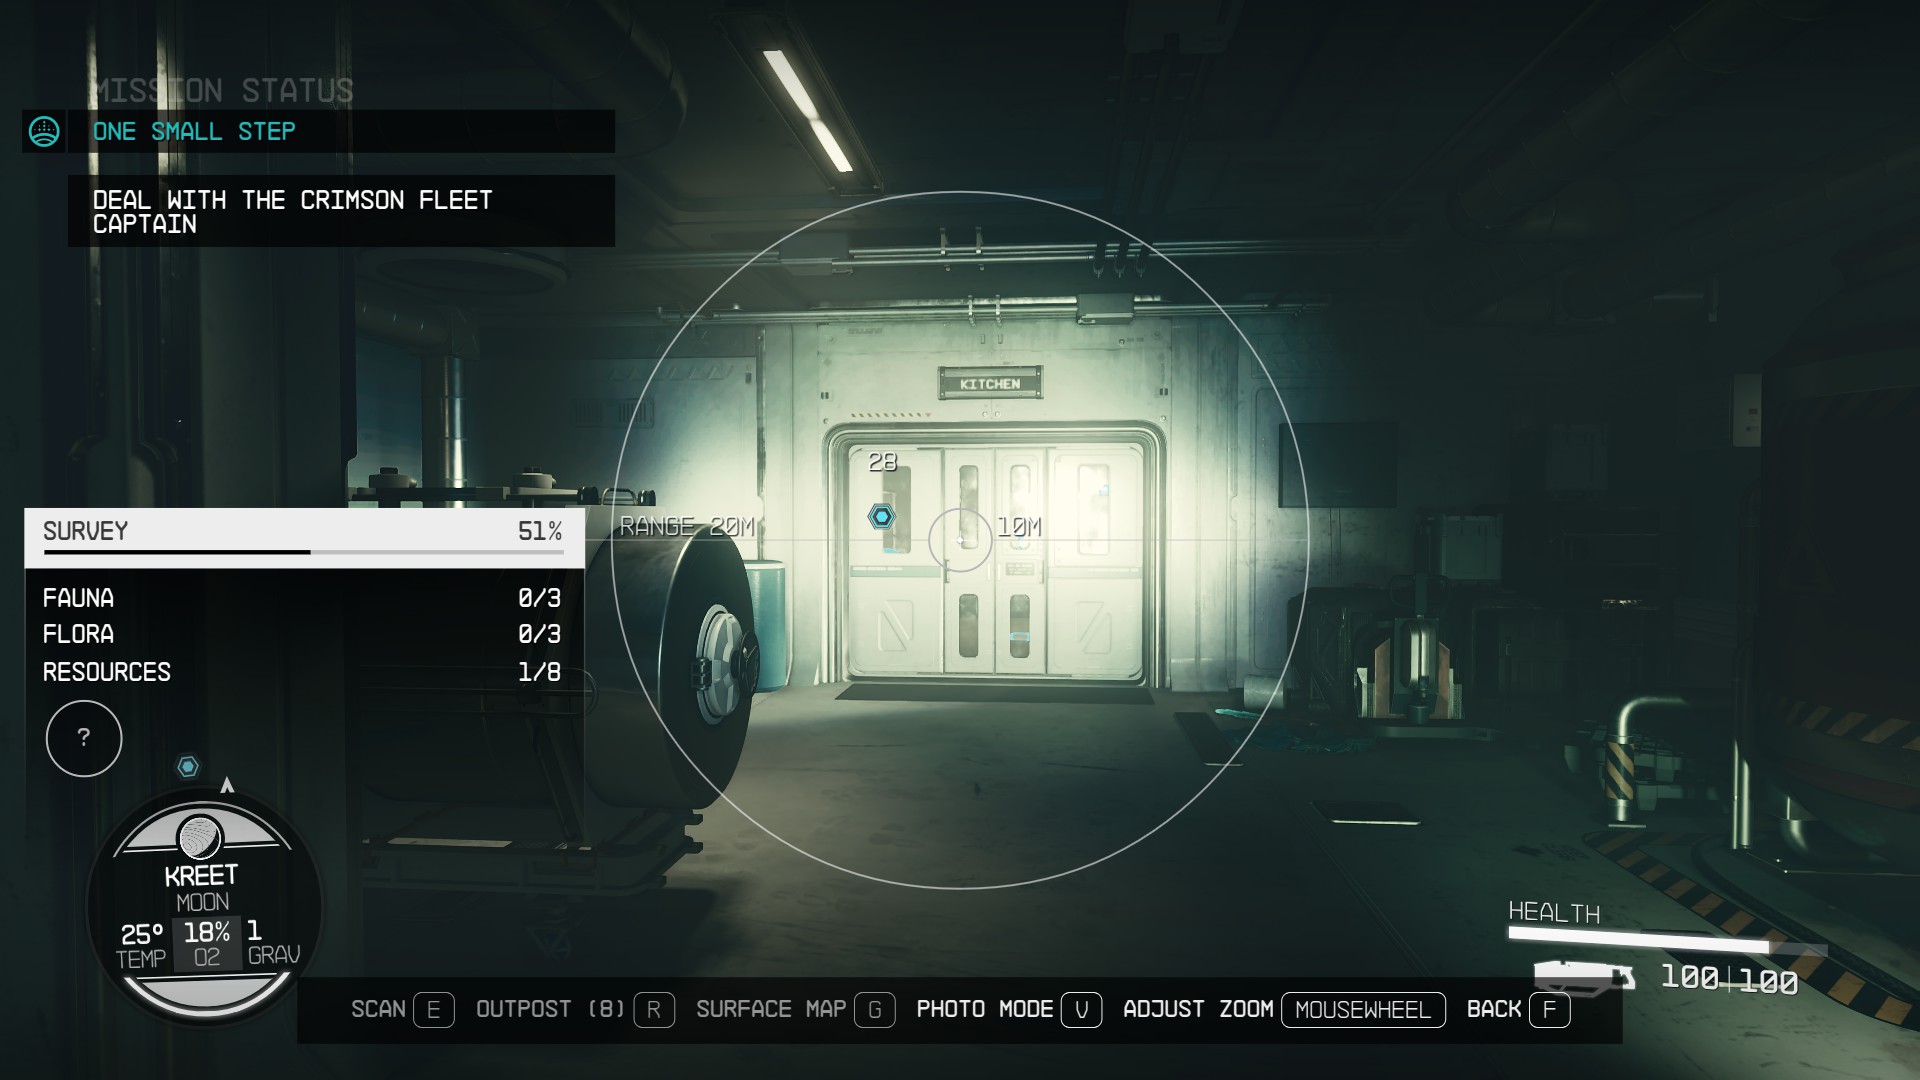
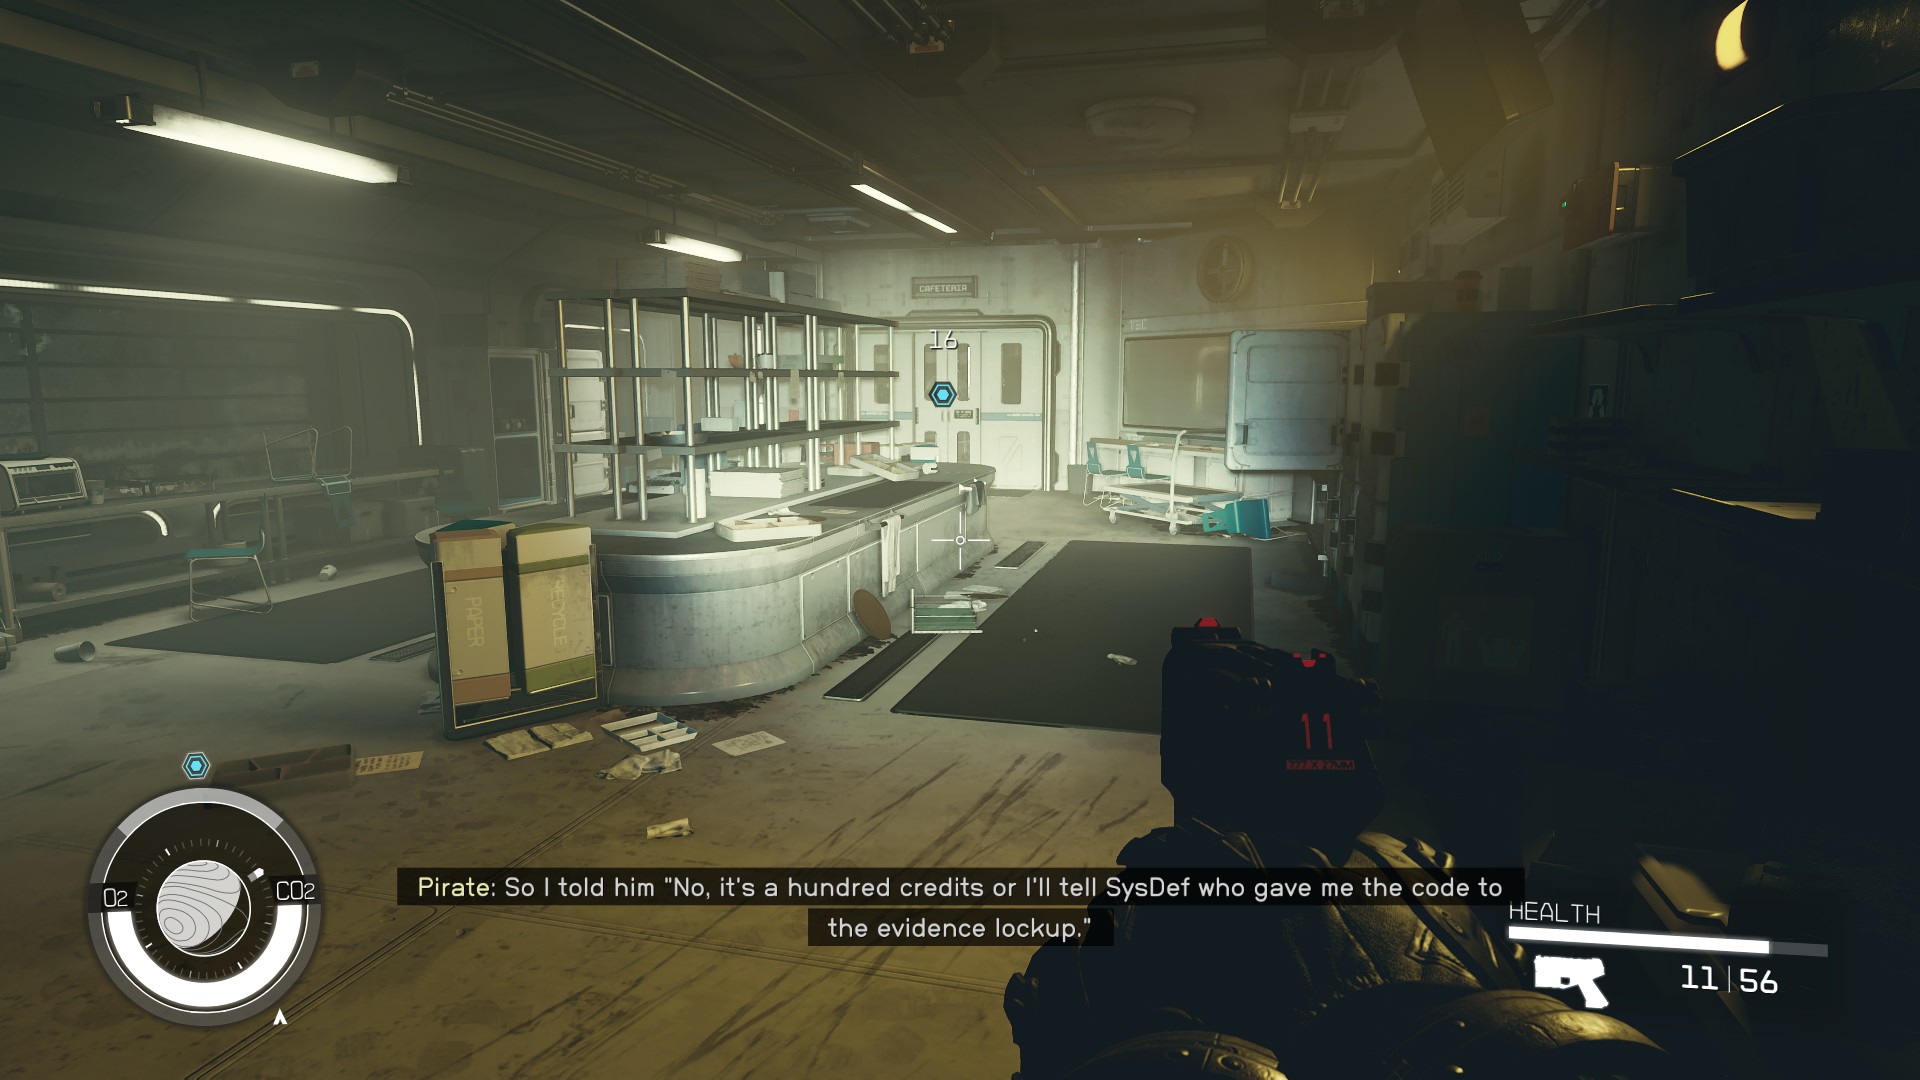
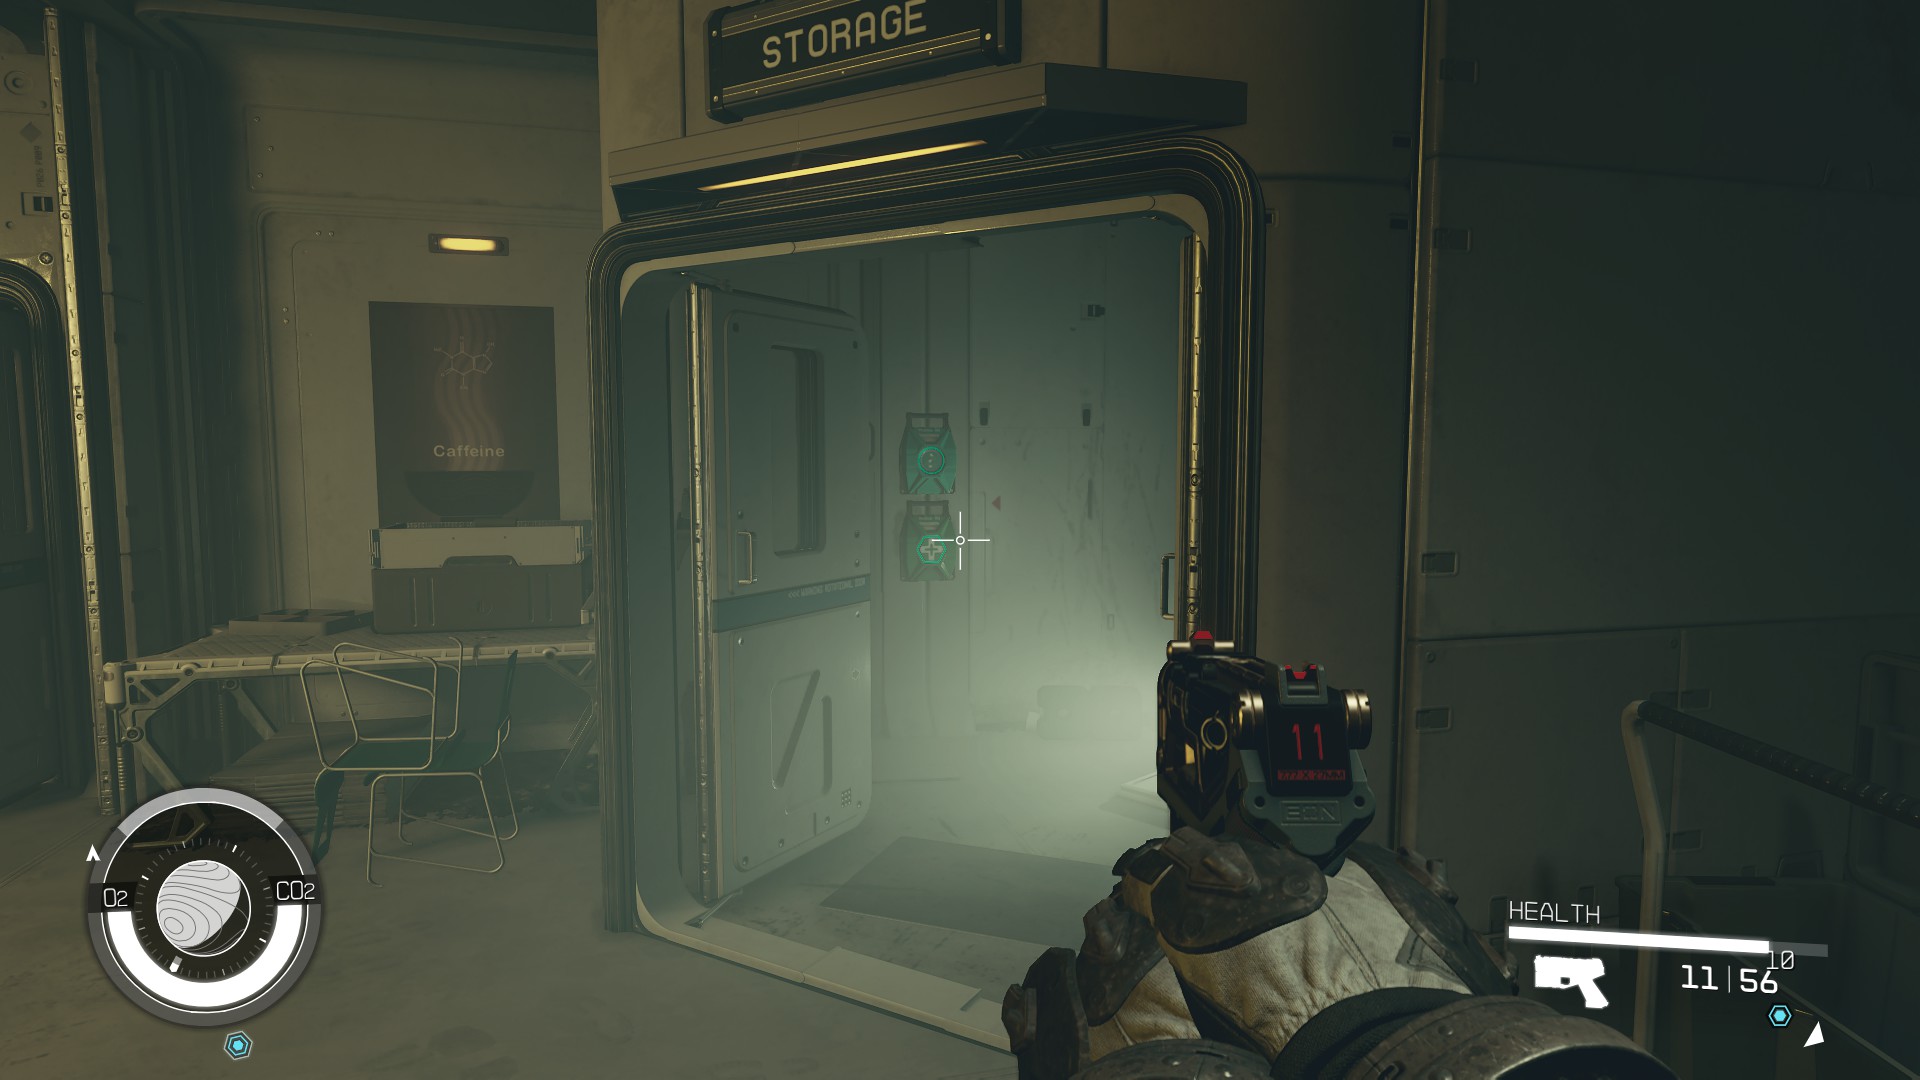
After you get up the stairs, you’ll find yourself in a Storage room that tends to have at least some nice loot, most notably in the area marked as Storage 01 (12). With the Storage room successfully looted, ahem, explored, you’ll be heading to the Kitchen (13) next. Upon entering, you’ll overhear some Pirates having a chat (14). This is your cue to get ready for combat. Luckily, the Storage room (there are a lot of storage rooms in the Lab) inside the Kitchen (15) has a couple of First Aid stations.
(12)(13)(14)(15)
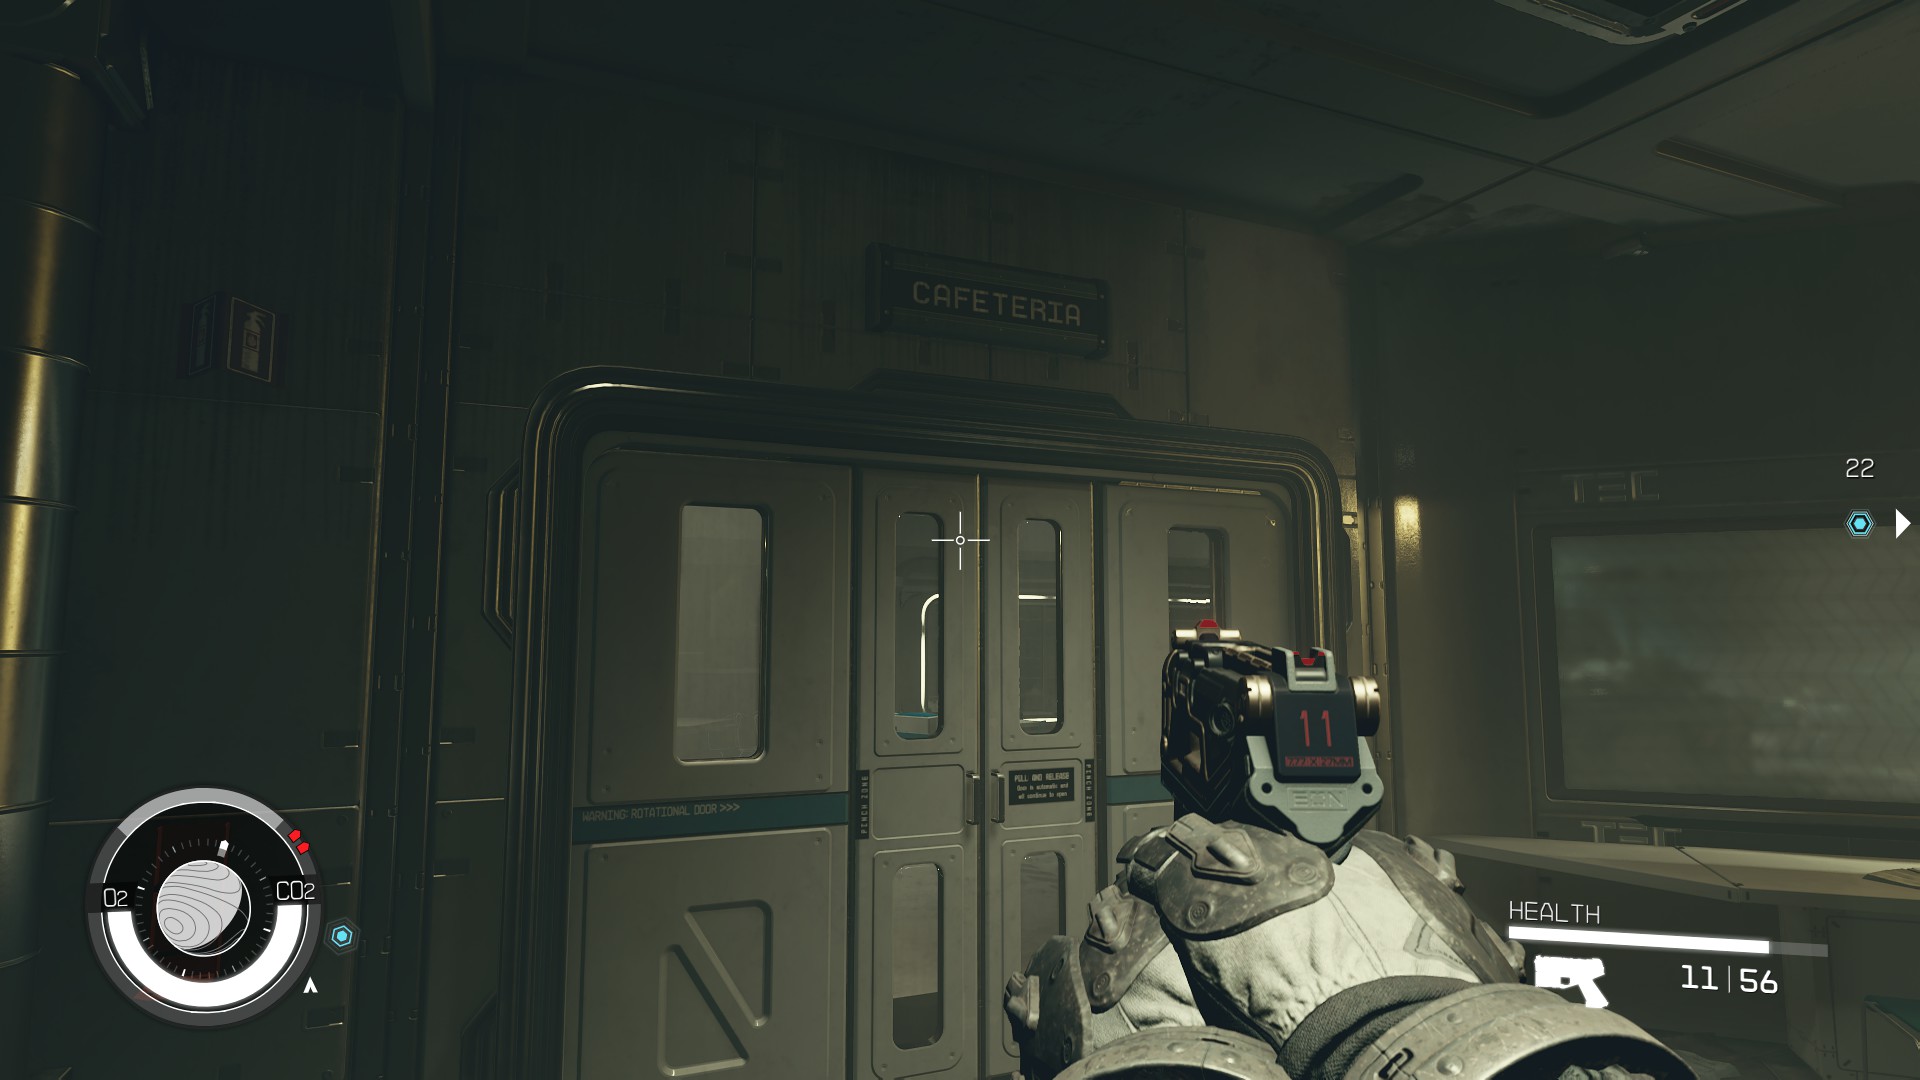
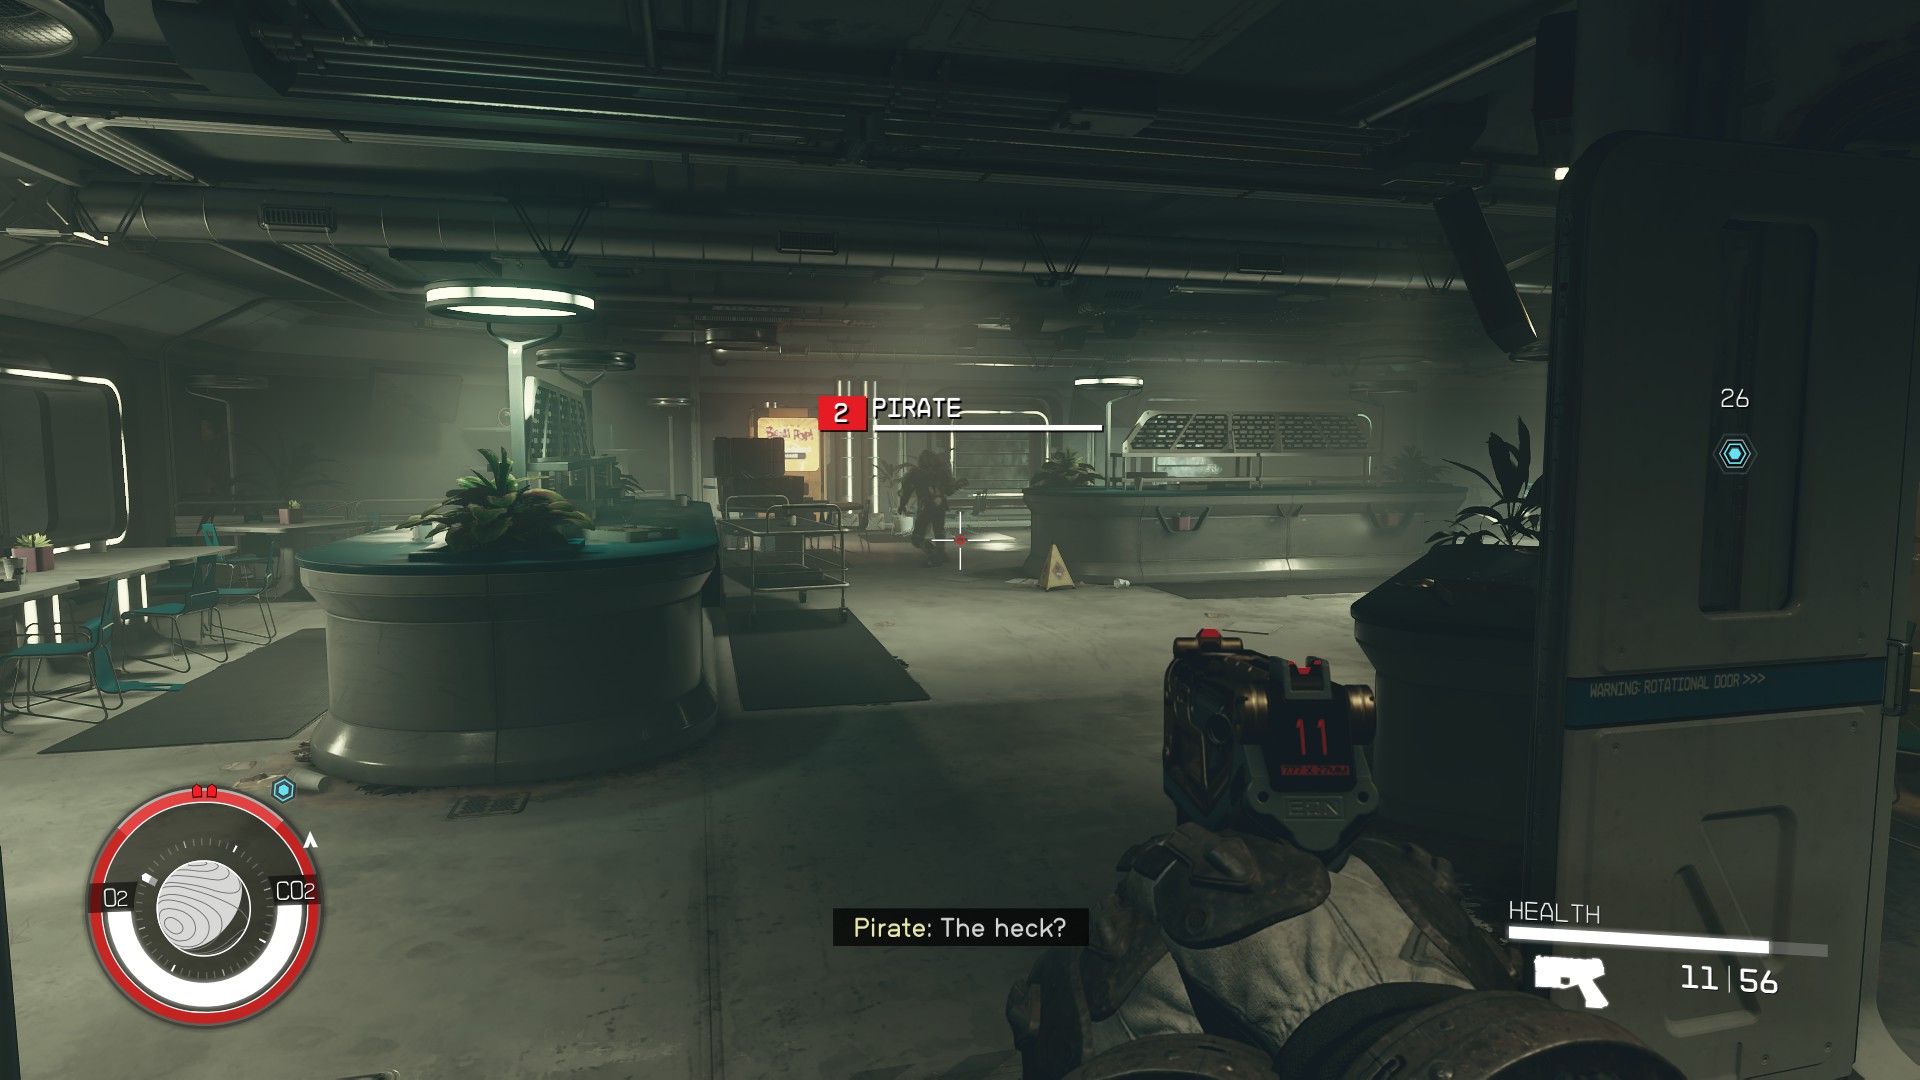
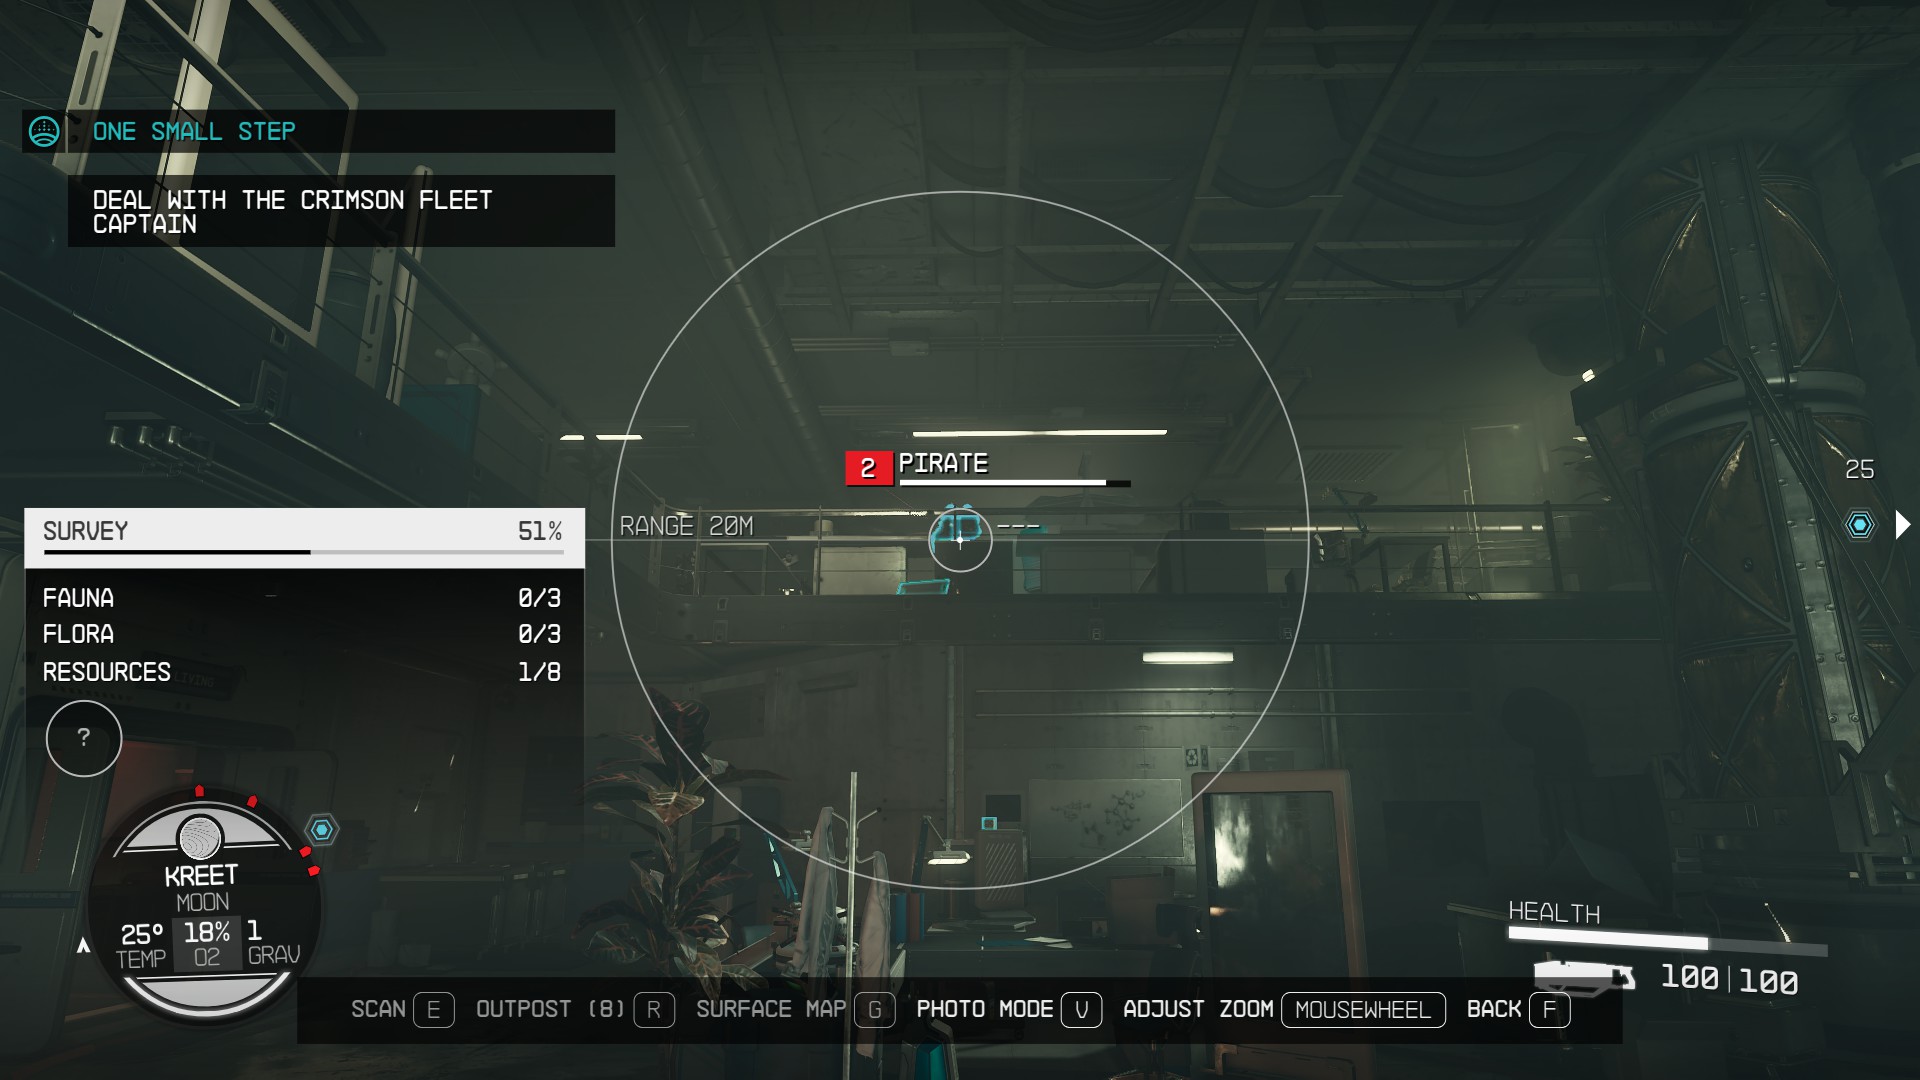
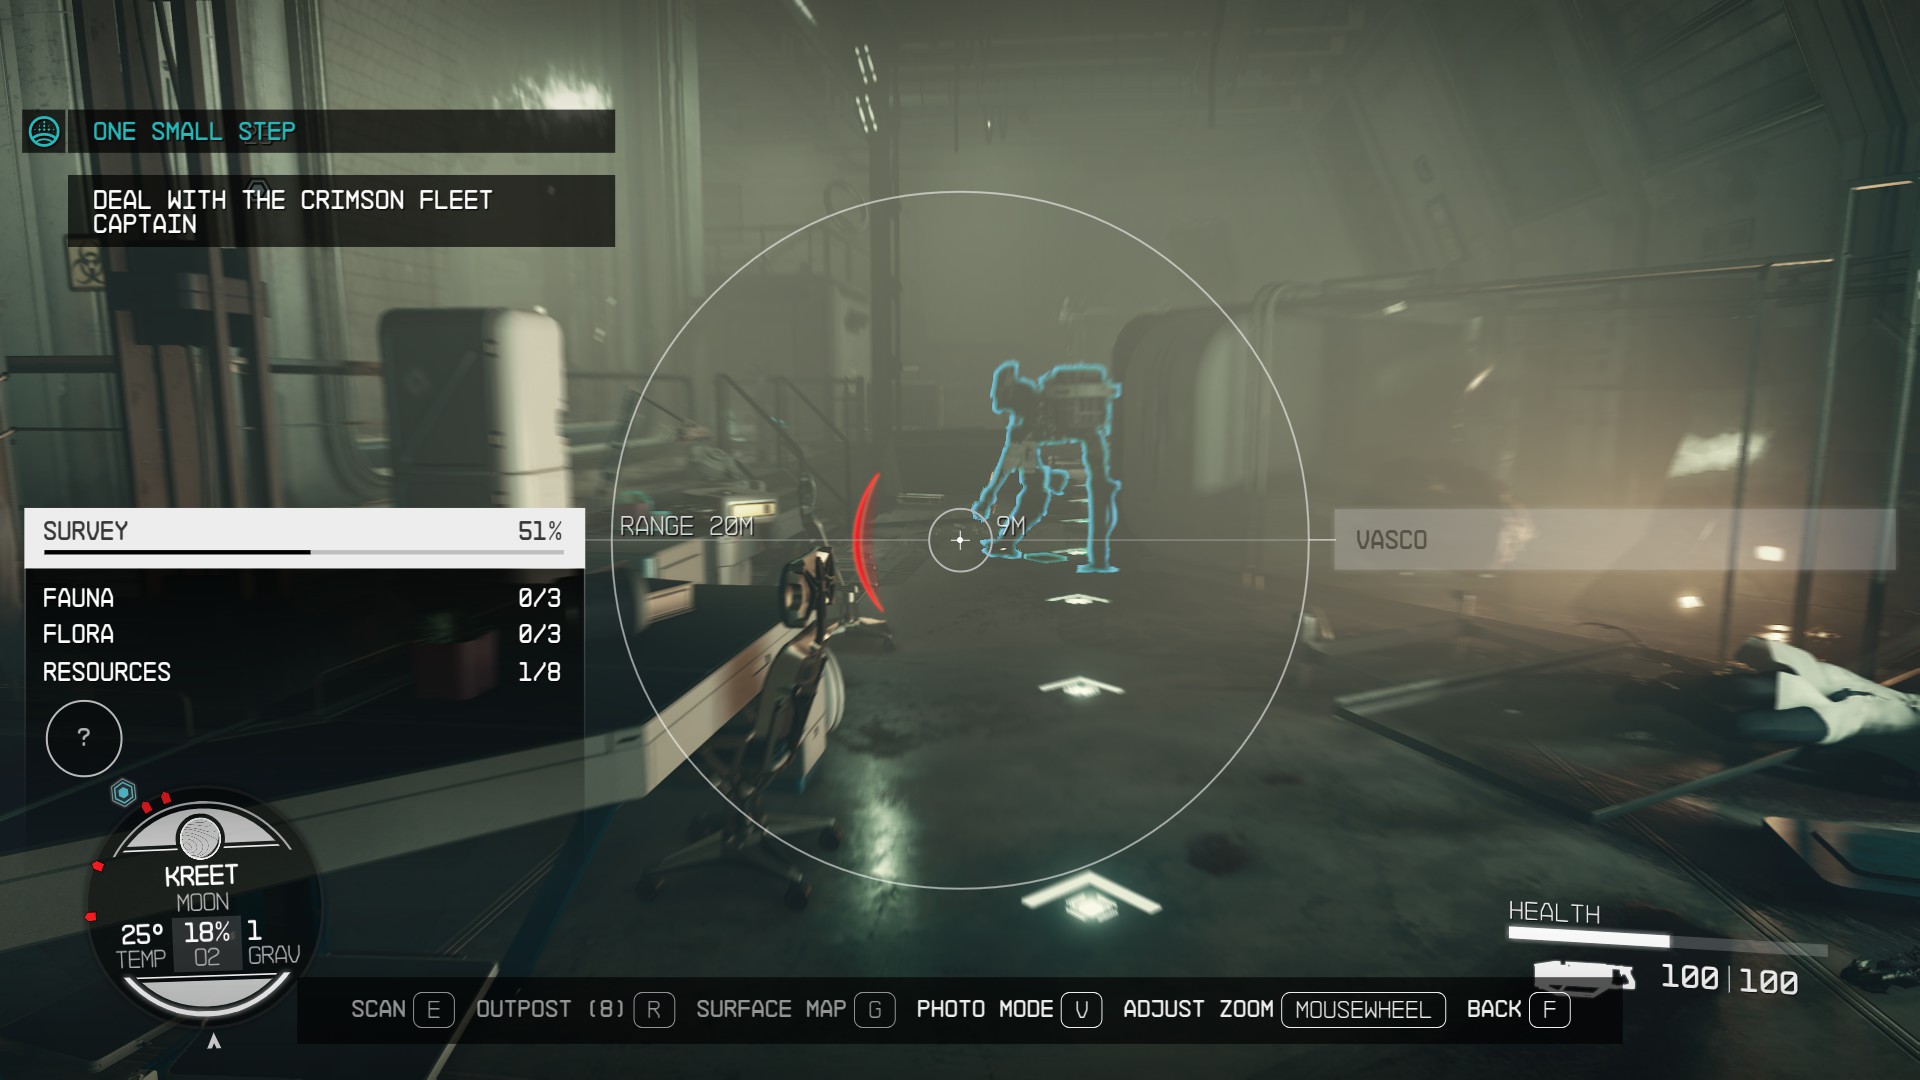
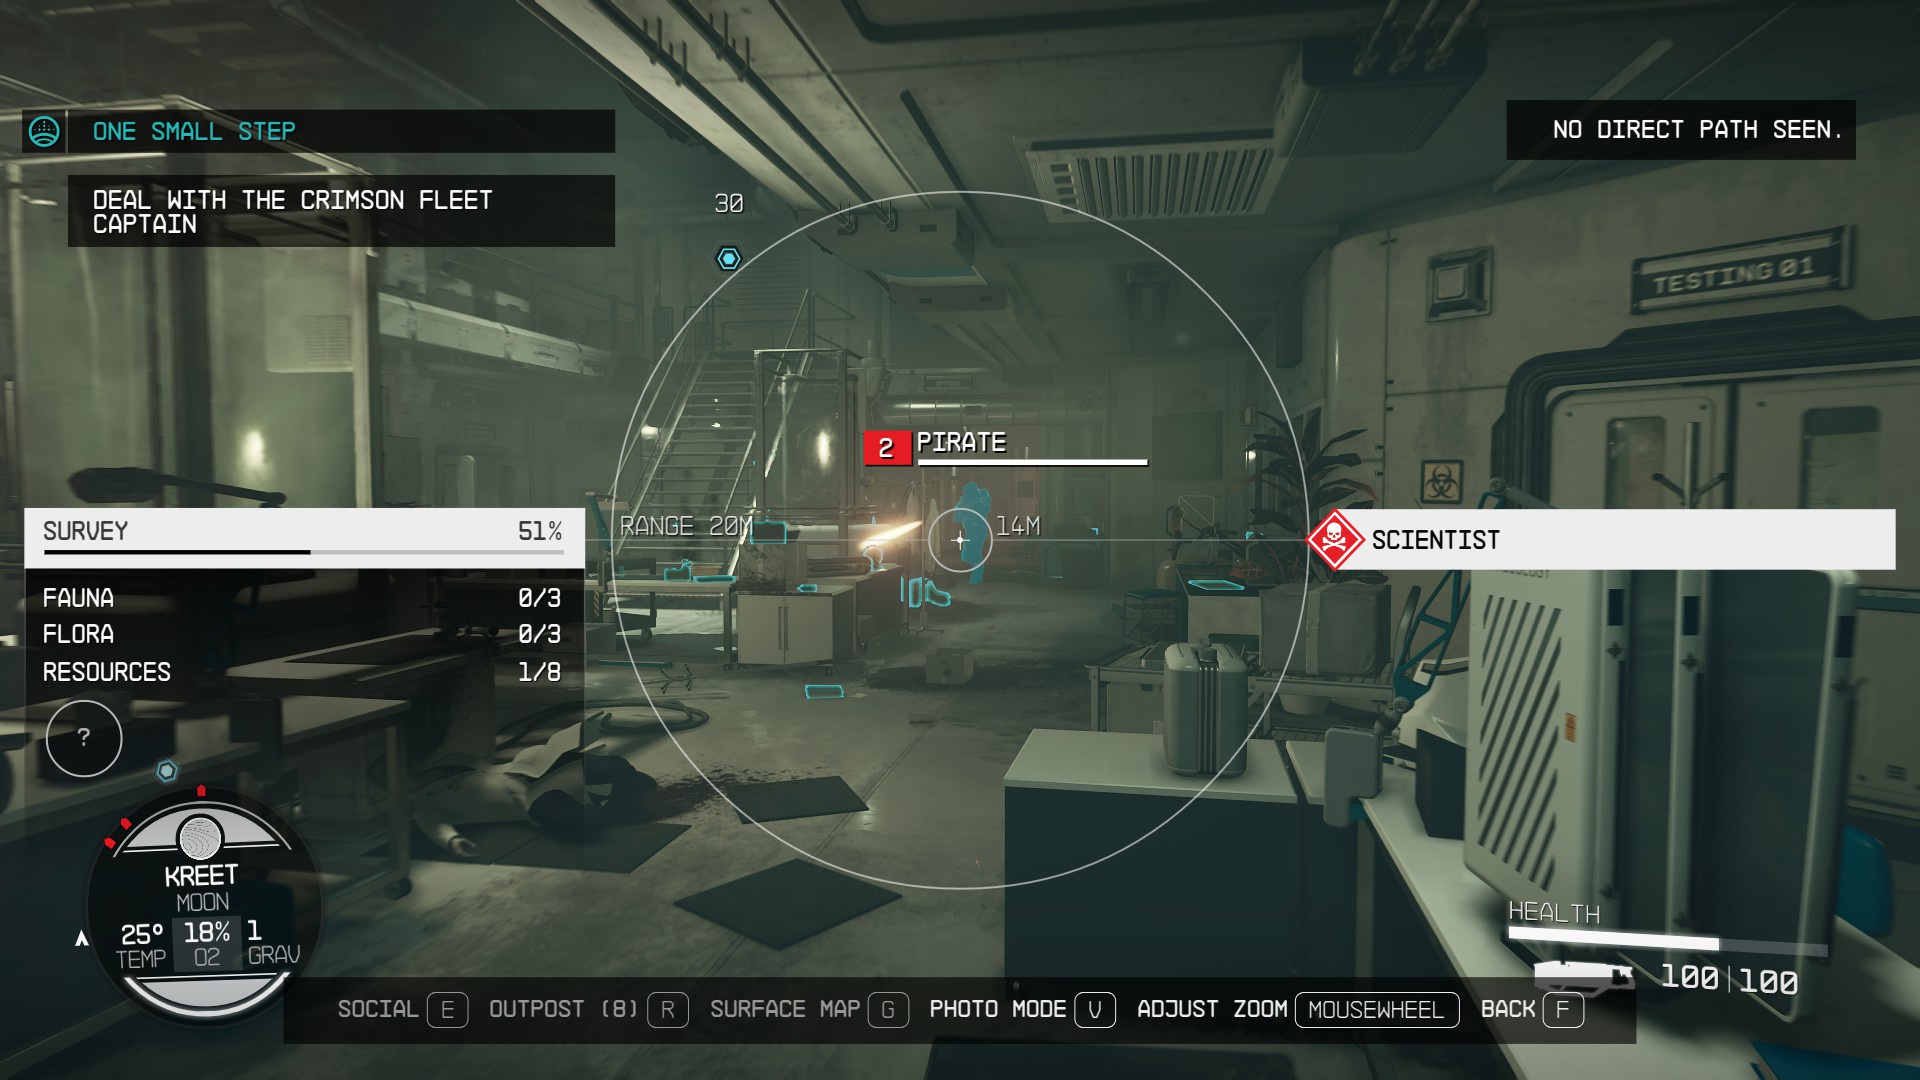
Following the Kitchen, you’ll be entering the Cafeteria (16) where you’ll get your first proper combat encounter (17) in the Lab. You’ll face a total of 3 pirates there. Two of them will try to shoot you, while one will charge you with an axe.
(16)(17)
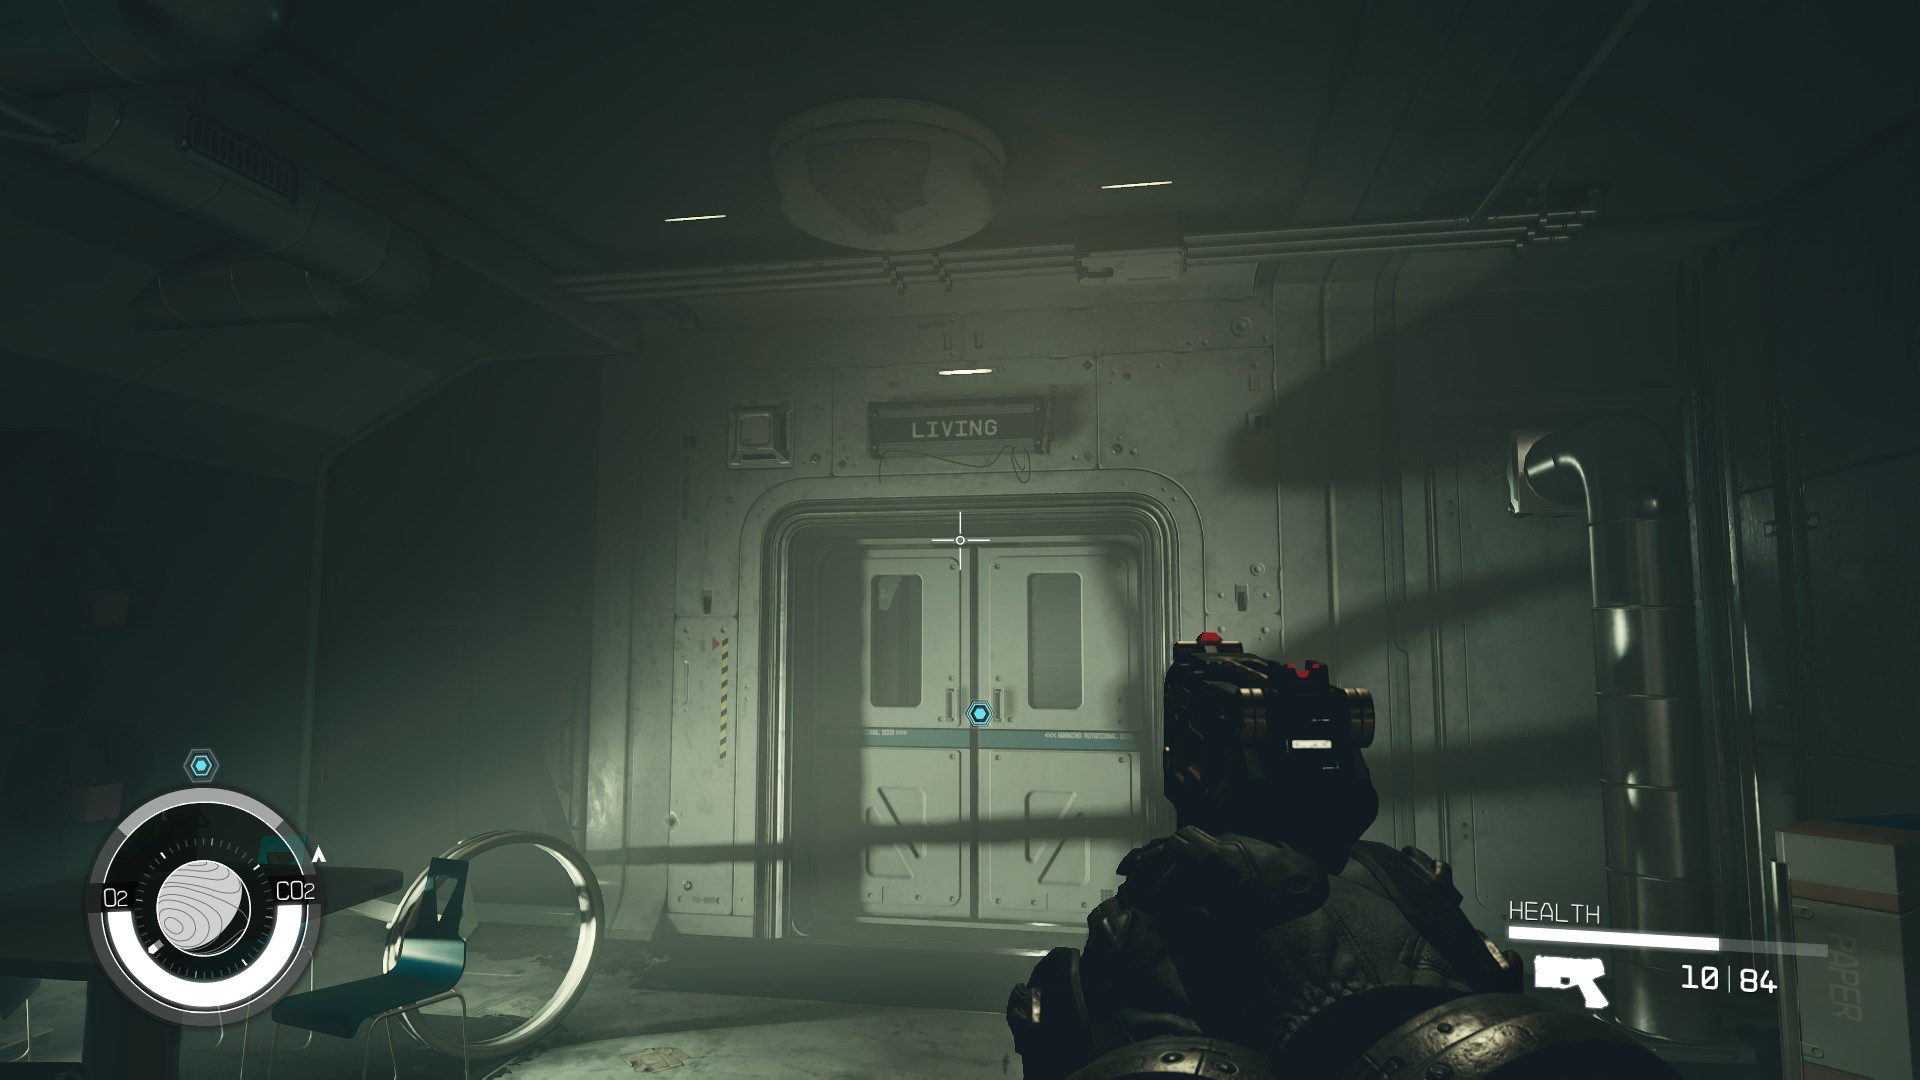
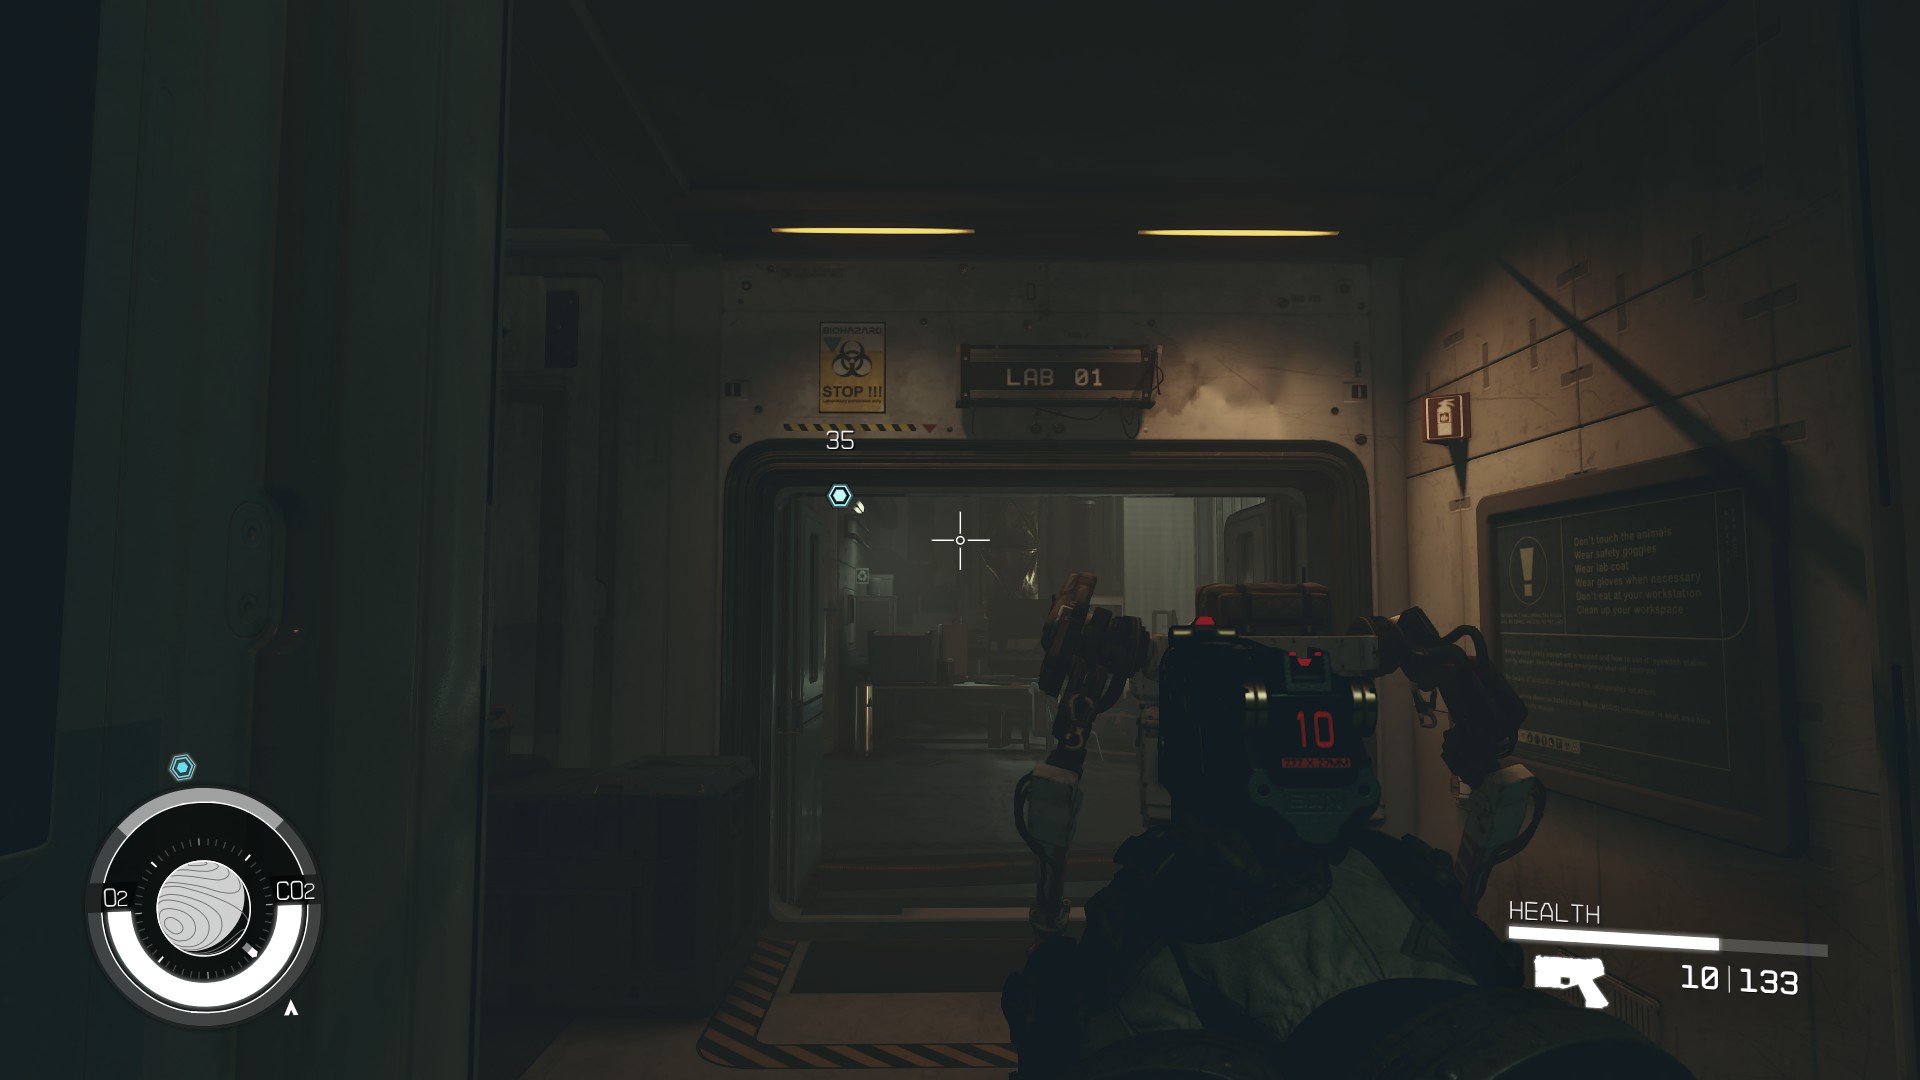
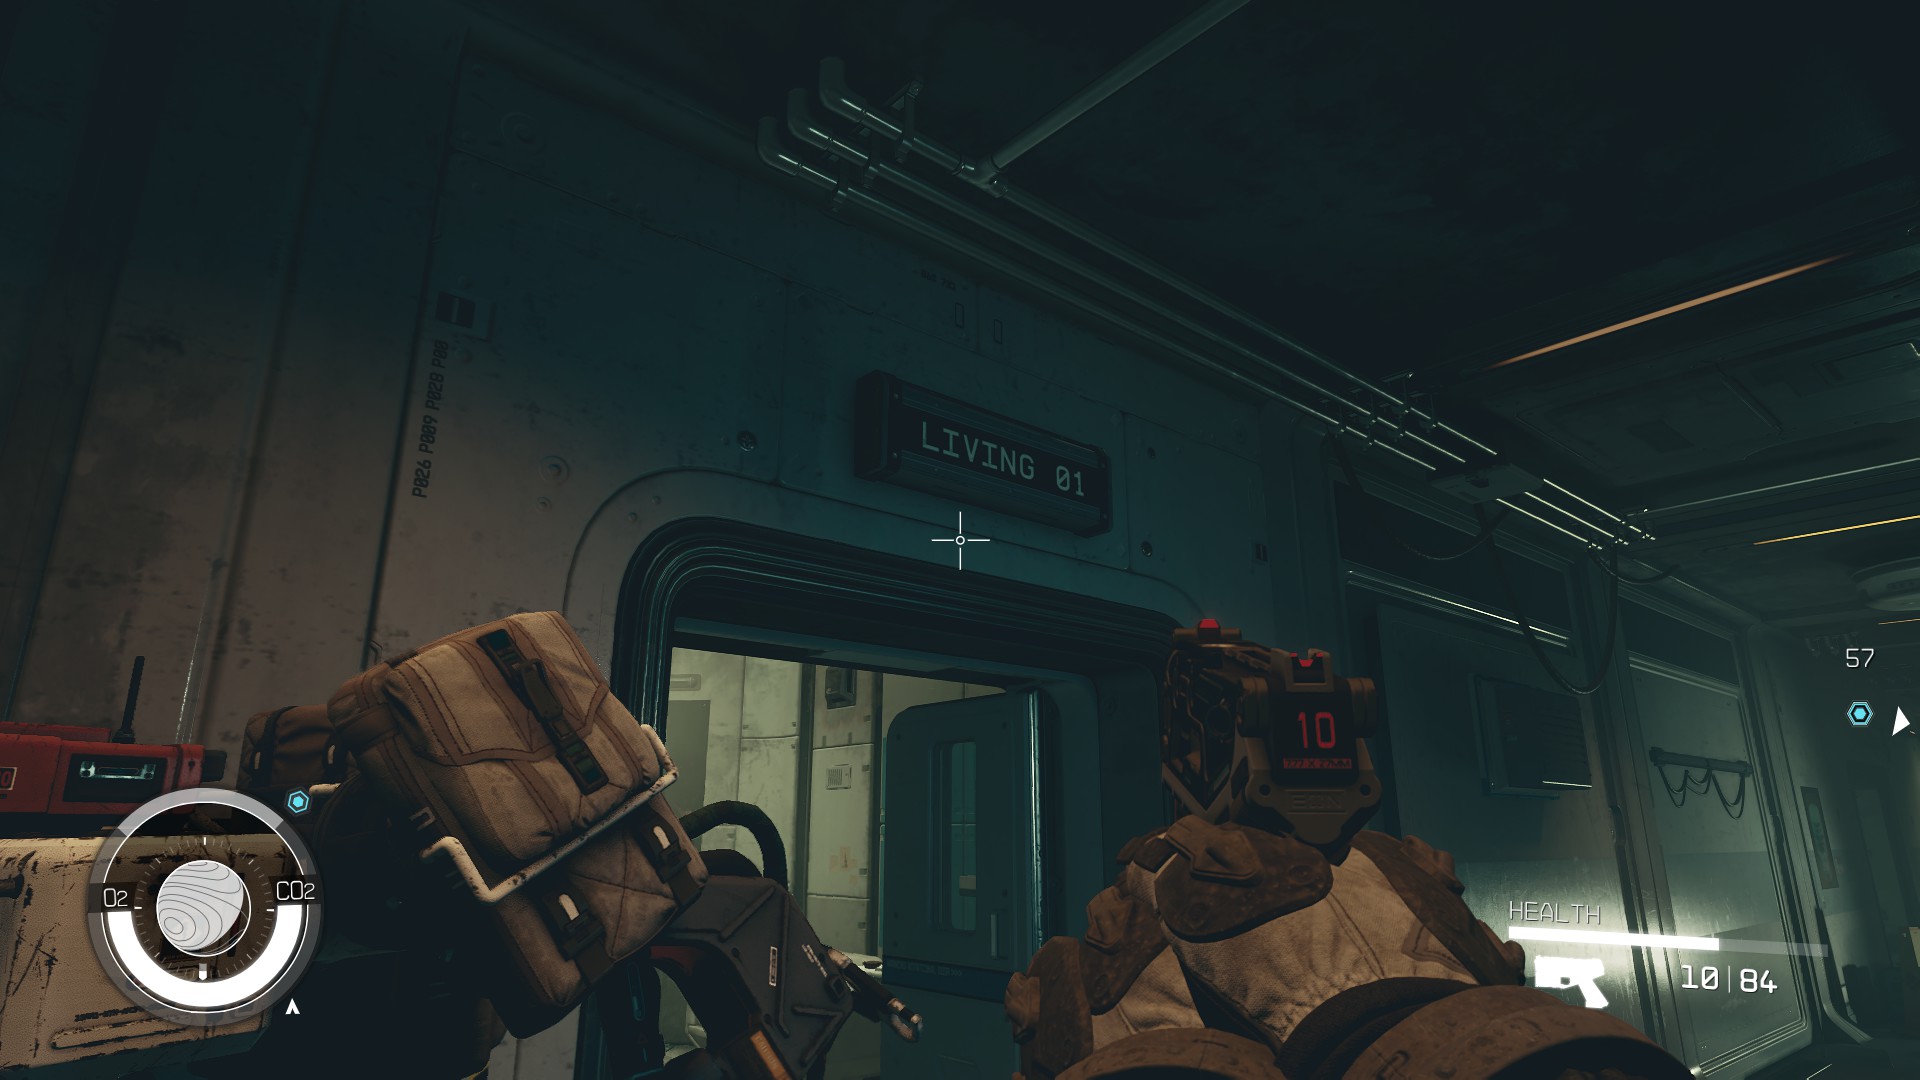
The Living quarters are next in line (18). Head up the stairs and then either proceed straight ahead (19) for Lab 01 (20) or visit the side rooms that tend to have some neat stuff.
(18)(19)(20)
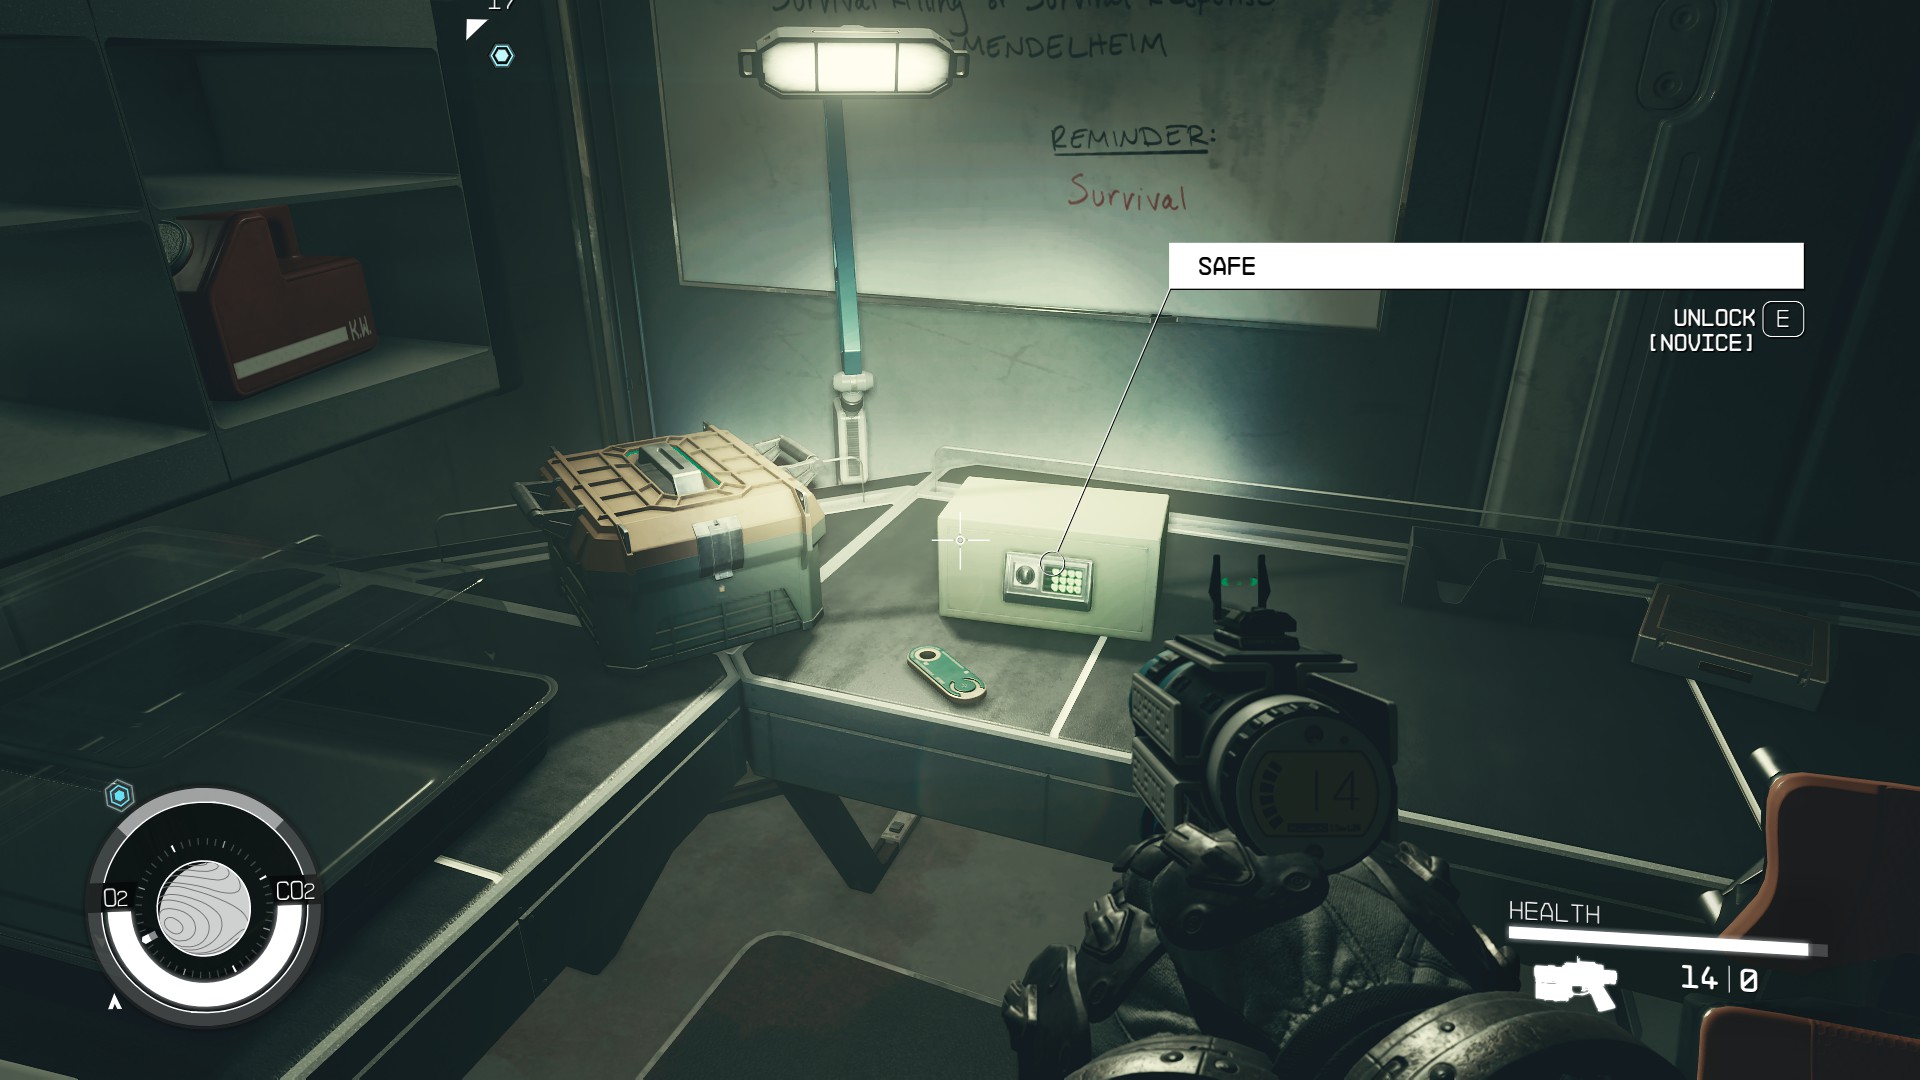
The room marked Living 01 (21) has a computer with notes detailing the Lab’s original purpose and the events that led to it becoming abandoned (22). We were also able to find a Novice-level safe and a Digipick to help unlock it there (23). Consult our lockpicking guide if you’d like to know how all that works.
(21)(22)(23)
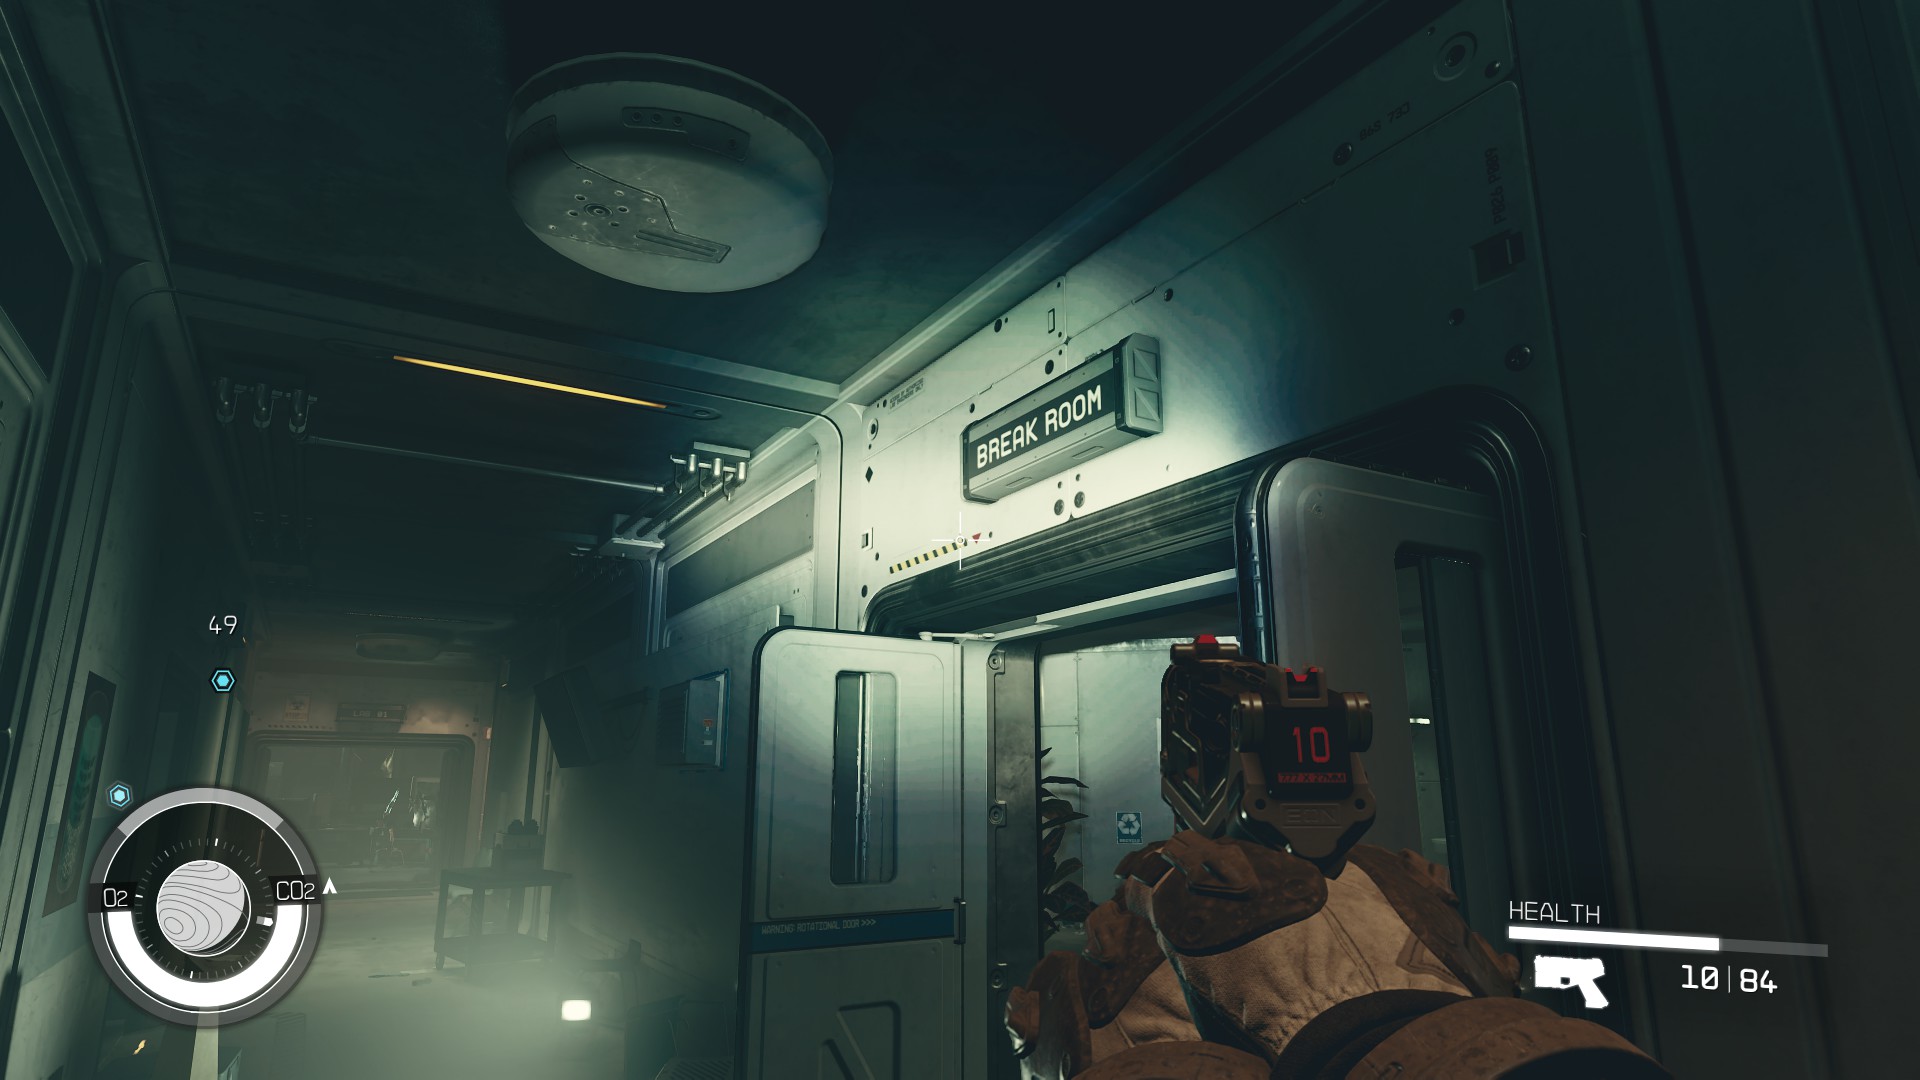
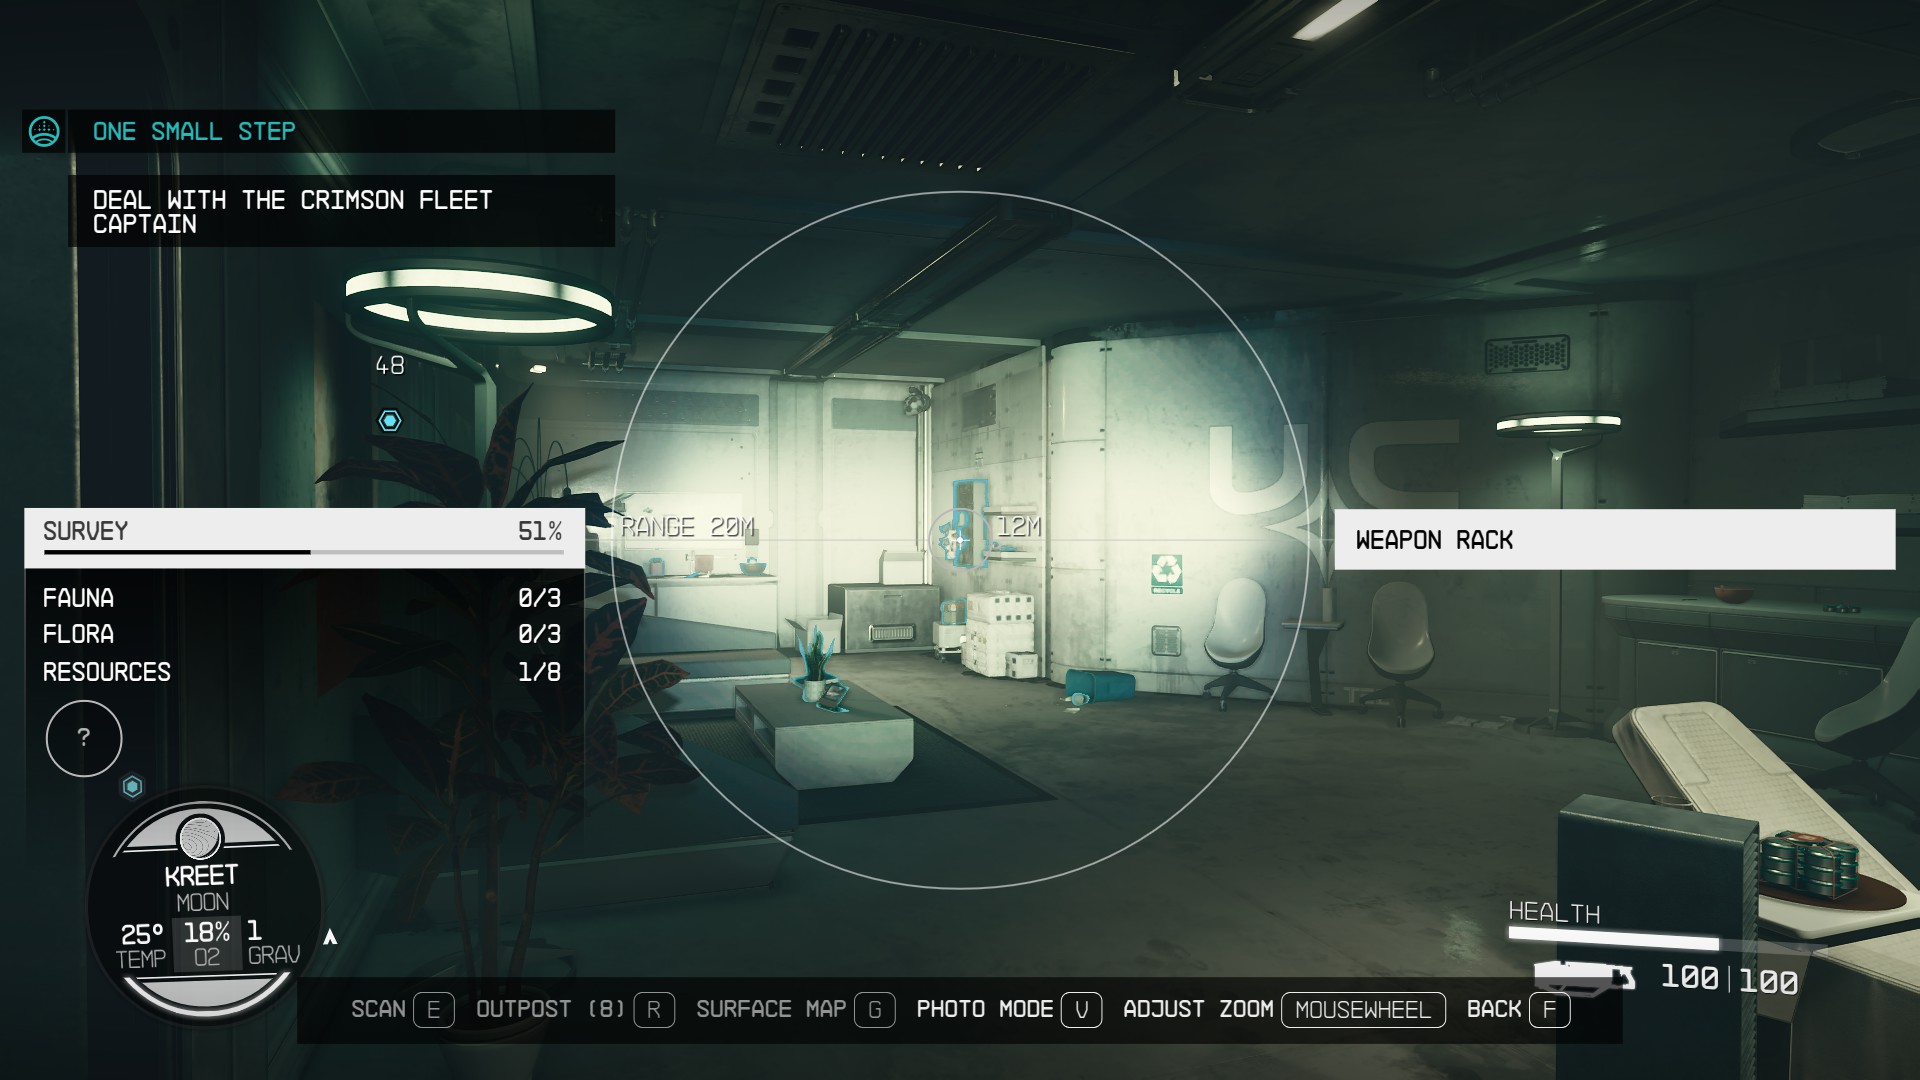
Next, you’ll be able to visit the Break Room (24) that holds a Weapon Rack (25) with some guns and ammo.
(24)(25)
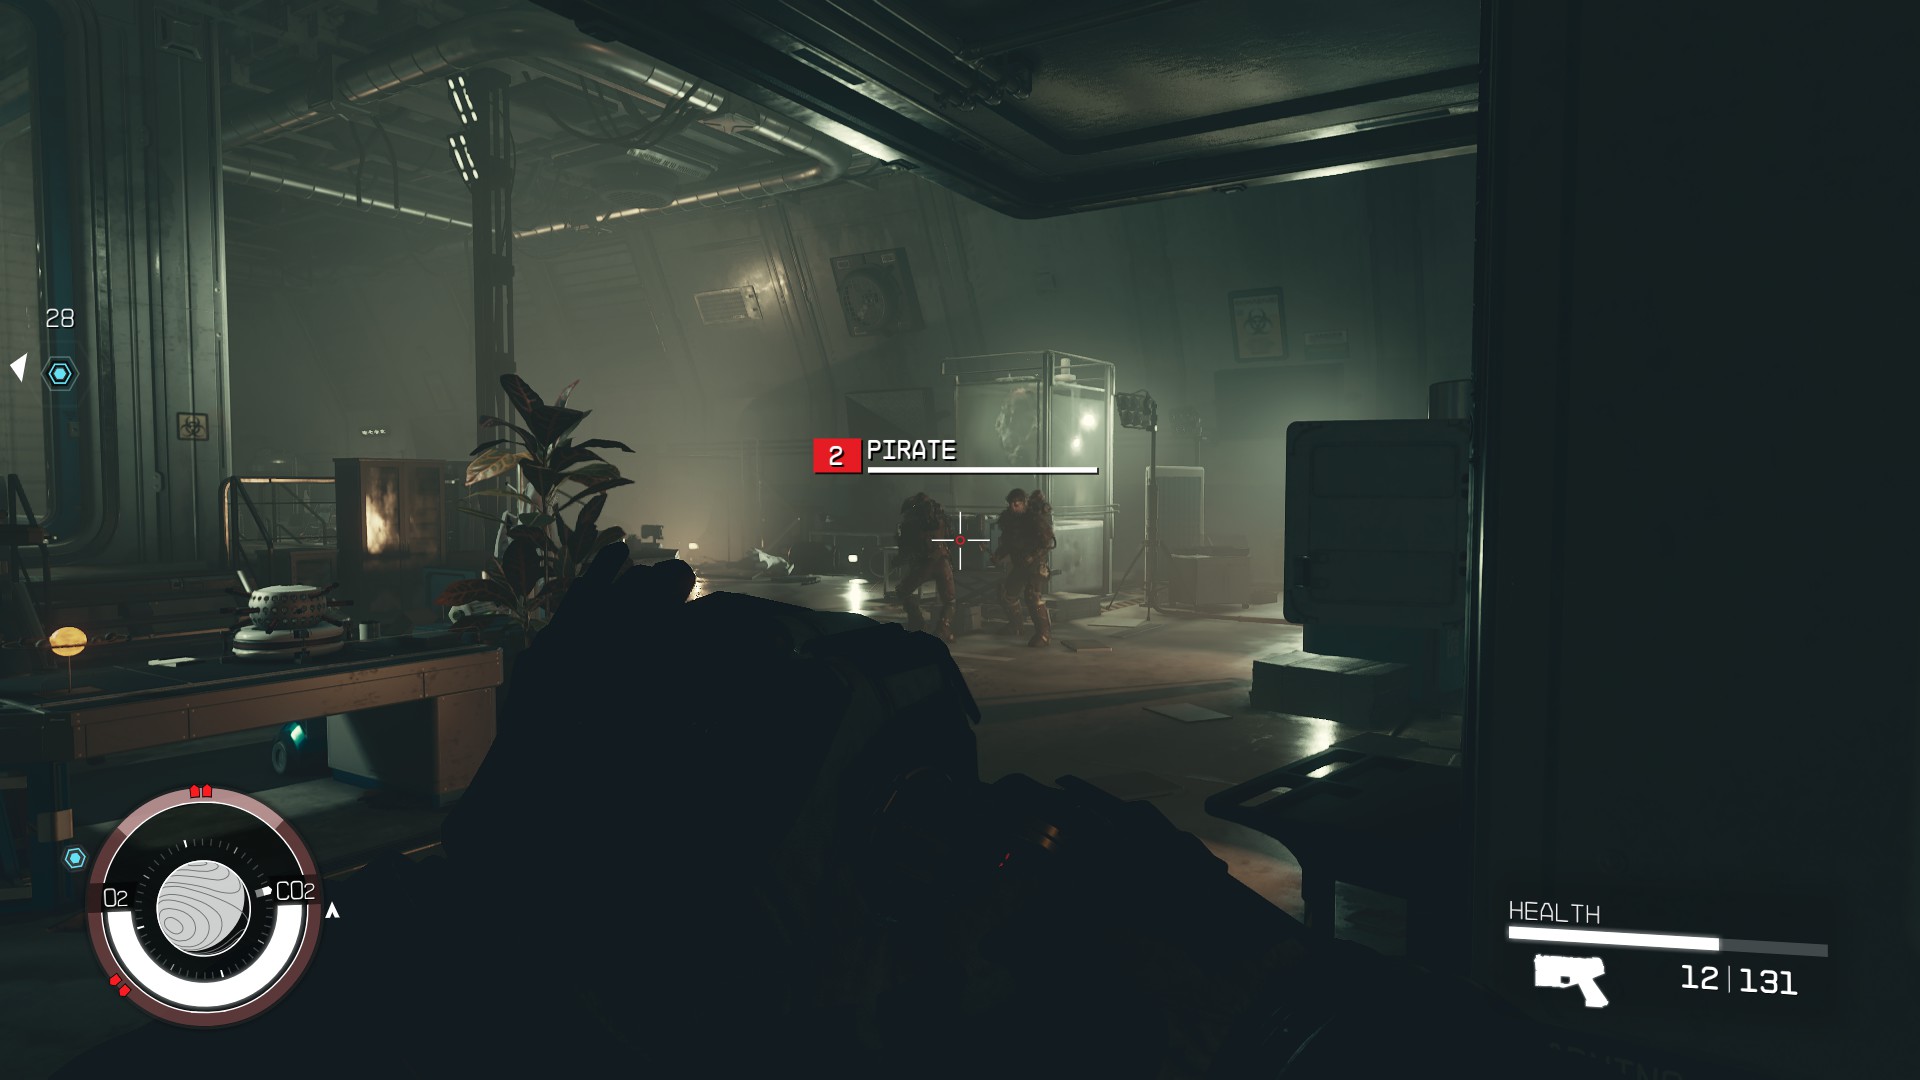
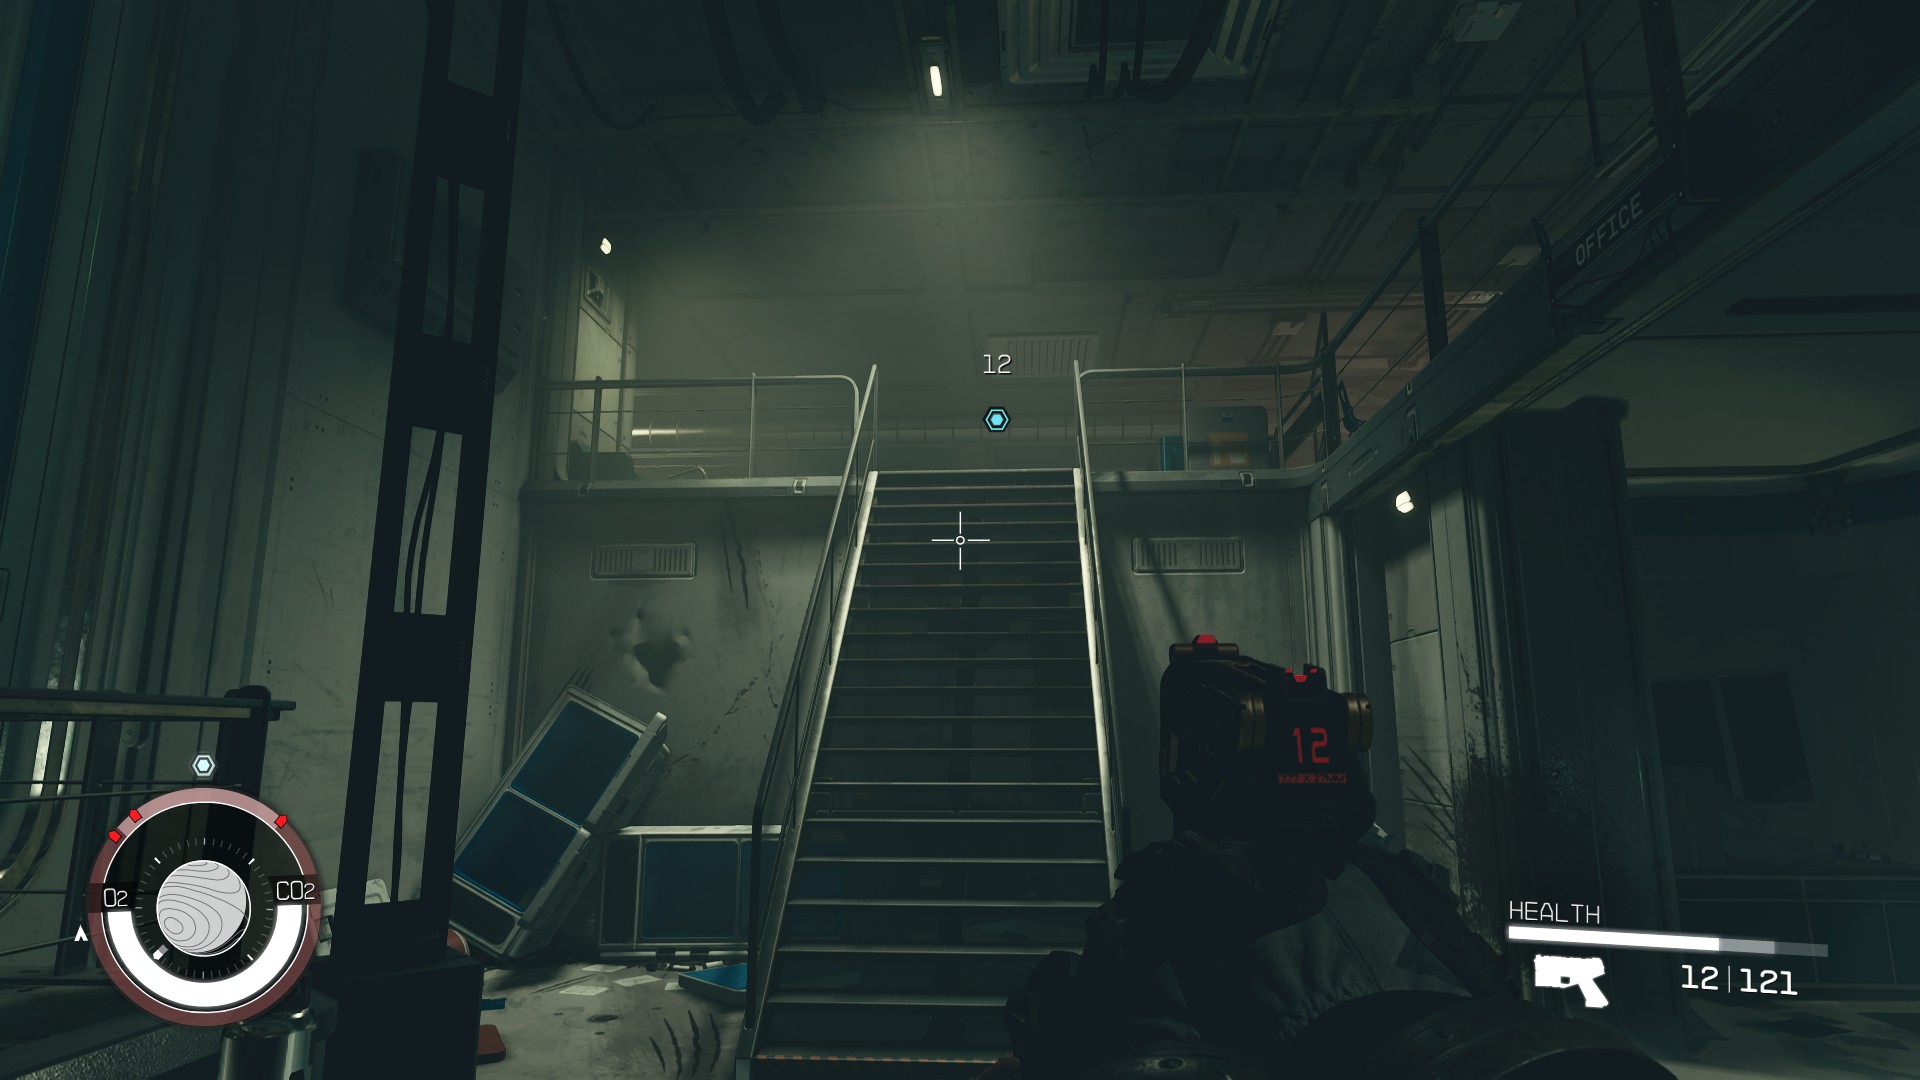
That should help you get ready for the combat encounter in Lab 01. A couple of pirates will wait for you inside (26), and once you attack them, there’s a good chance you’ll alert their friends on the next floor who’ll start shooting at you almost right away (27). If you don’t want to get some first-hand experience regarding the folly of fighting foes who hold the high ground, you should dash ahead in the direction the scanner arrows are pointing to (28), while fighting the pirates you meet along the way. This will soon let you ascend a flight of stairs (29) and deal with the annoying high-ground pirates without them having all the cover in the world. Once that’s taken care of, you’ll be able to loot the area to your heart’s content.
(26)(27)(28)(29)
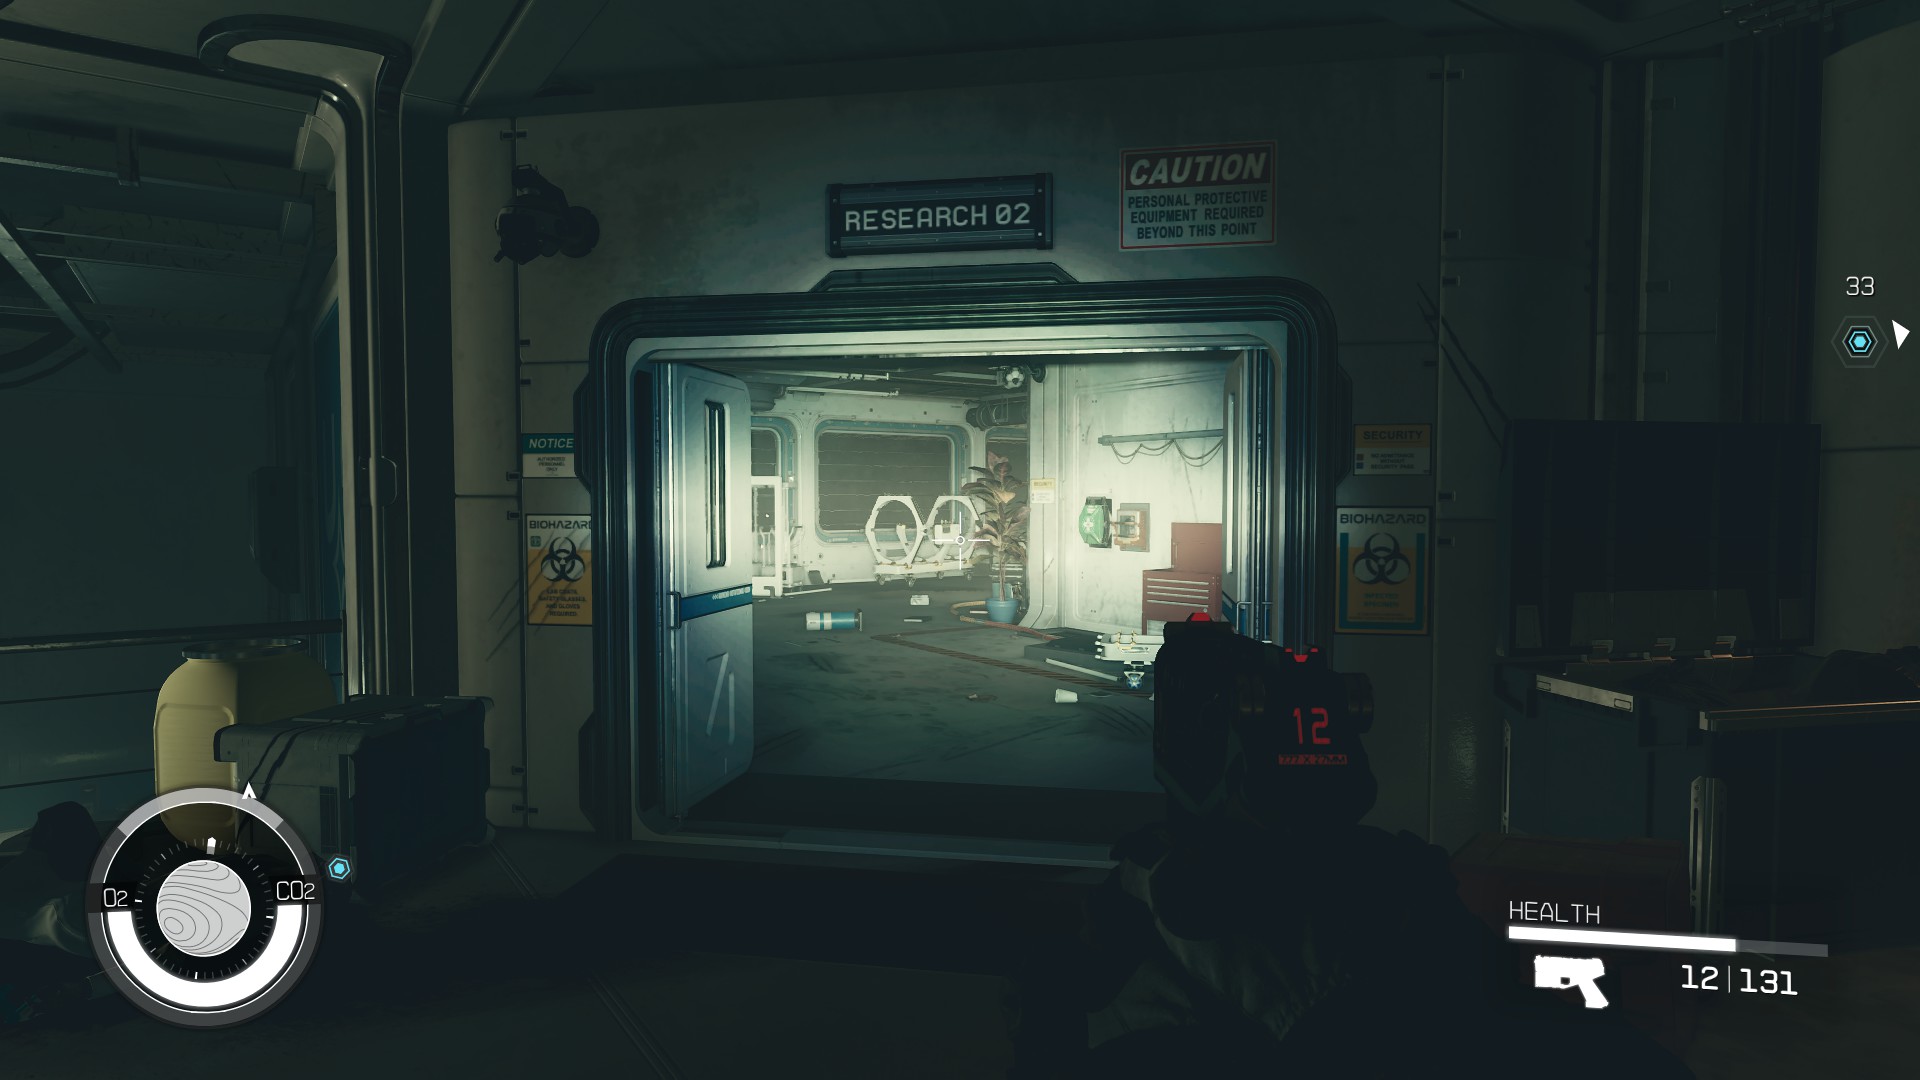
Afterwards, you should proceed to the room up above marked Research 02 (30). The hand scanner gave up on us there and stopped drawing the arrows, but the quest marker still pointed us in the right direction (31). Ascend another flight of stairs dealing with pirates as you go (32). If you have a spare Digipick, you can take a detour to the Testing 01 room. Inside you’ll find some assorted loot, including an Ammo Case and a Novice-level safe (33).
(30)(31)(32)(33)
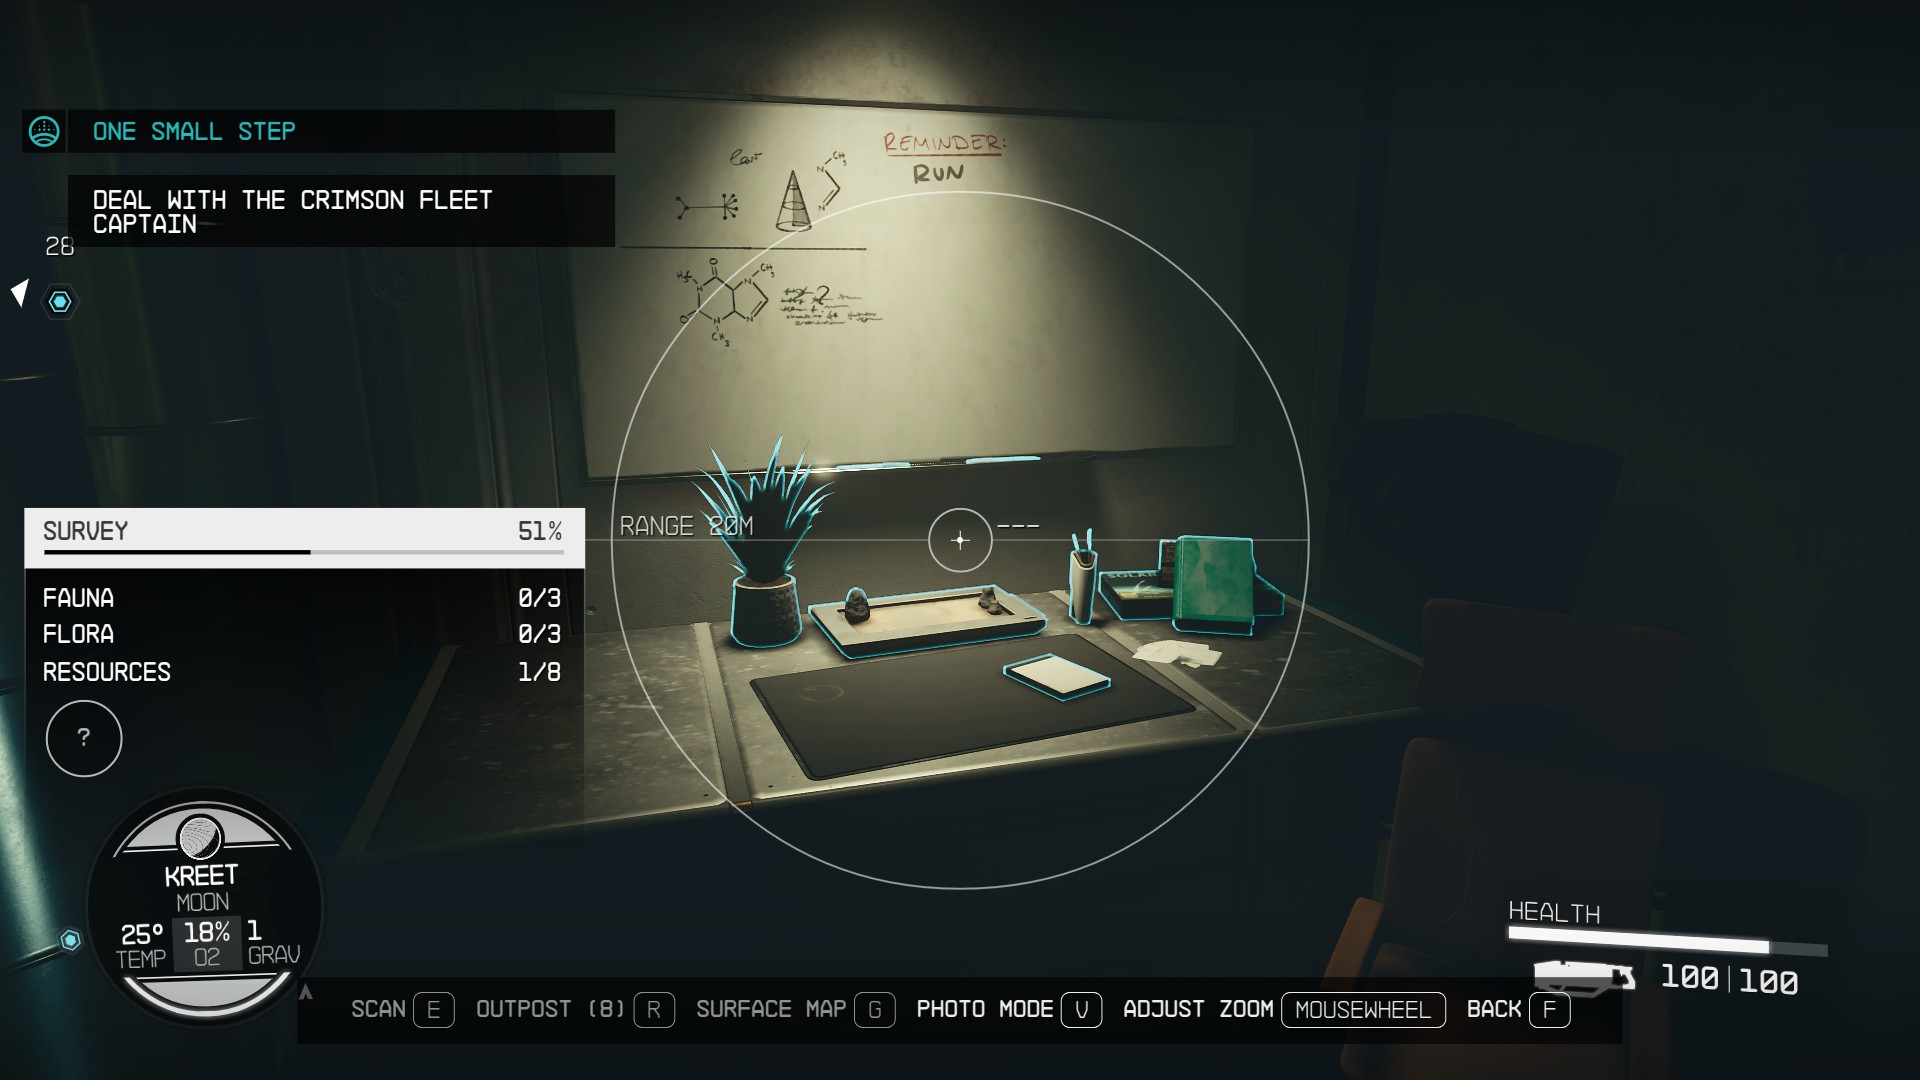
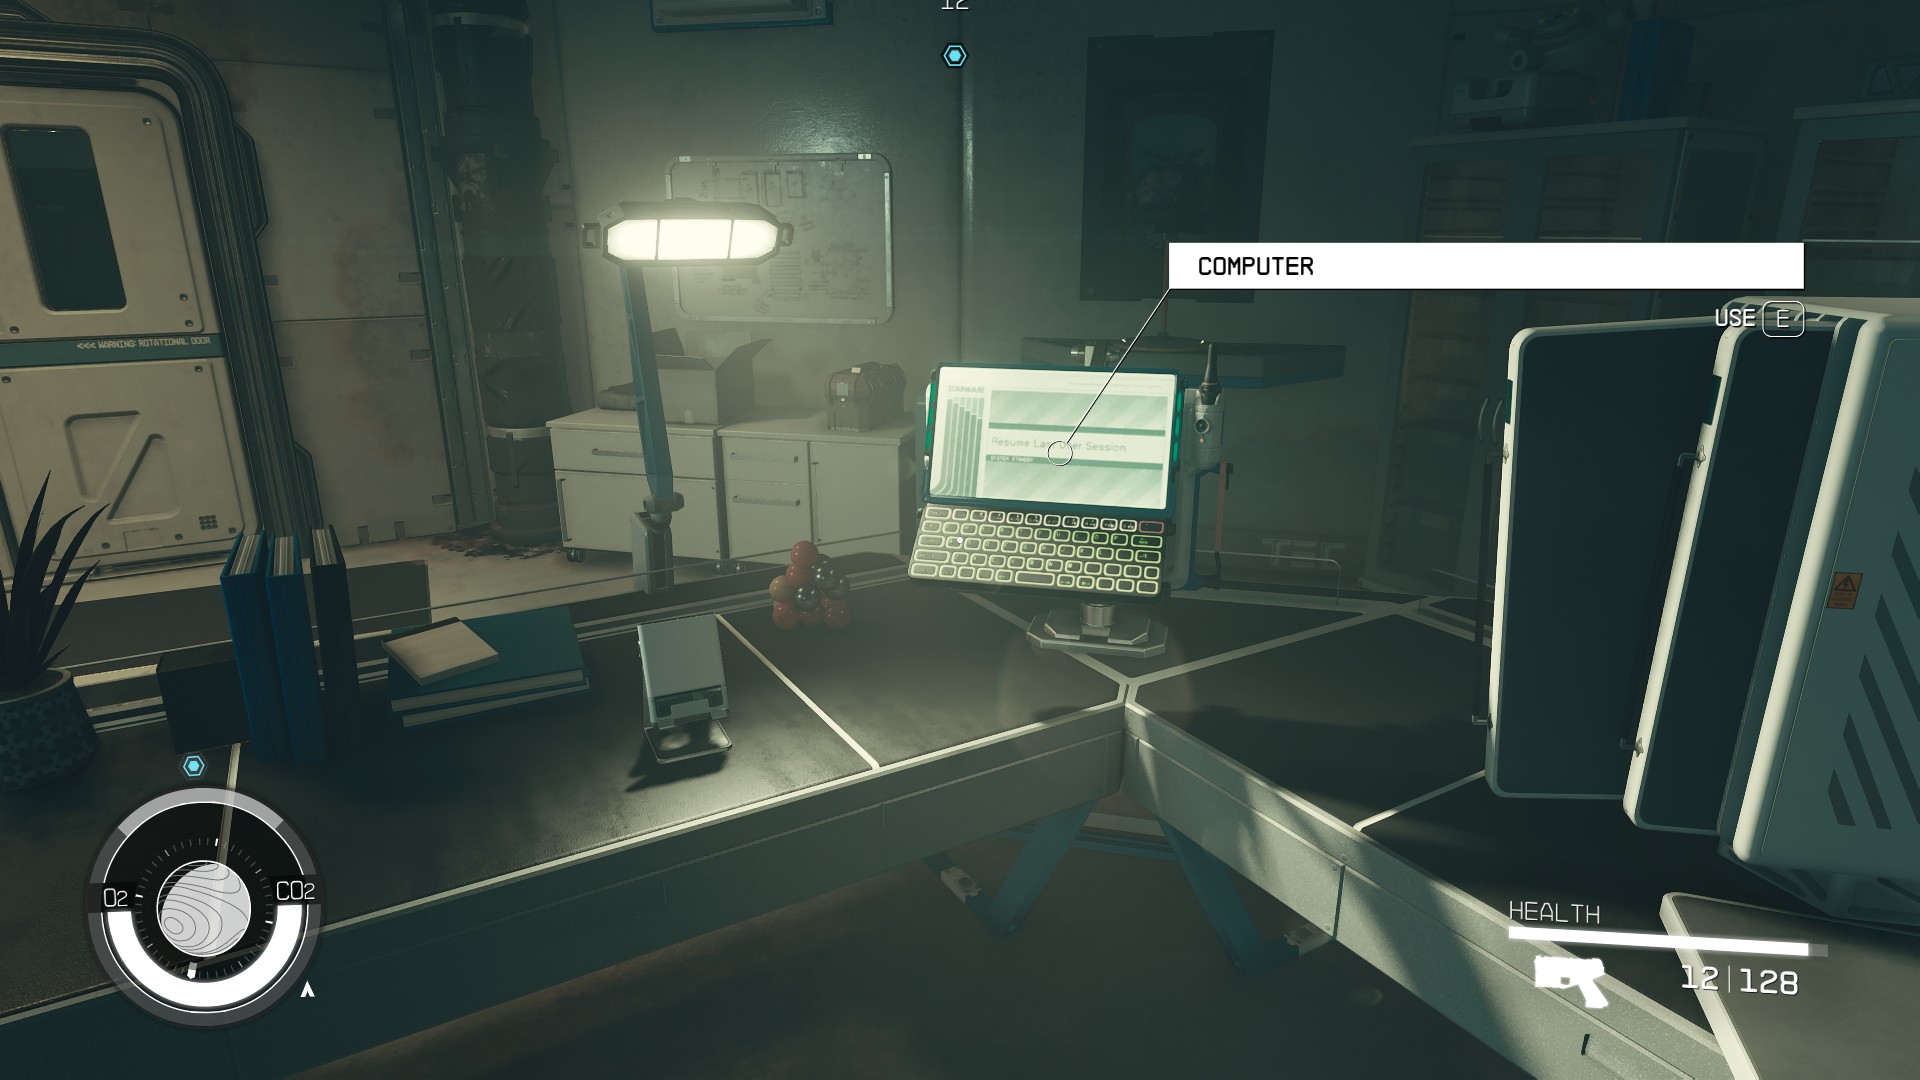
Upstairs, a fairly linear path will take you into an Office (34) with a computer (35) among other things. Reading the notes on the computer will reveal some Terrormorph lore.
(34)(35)
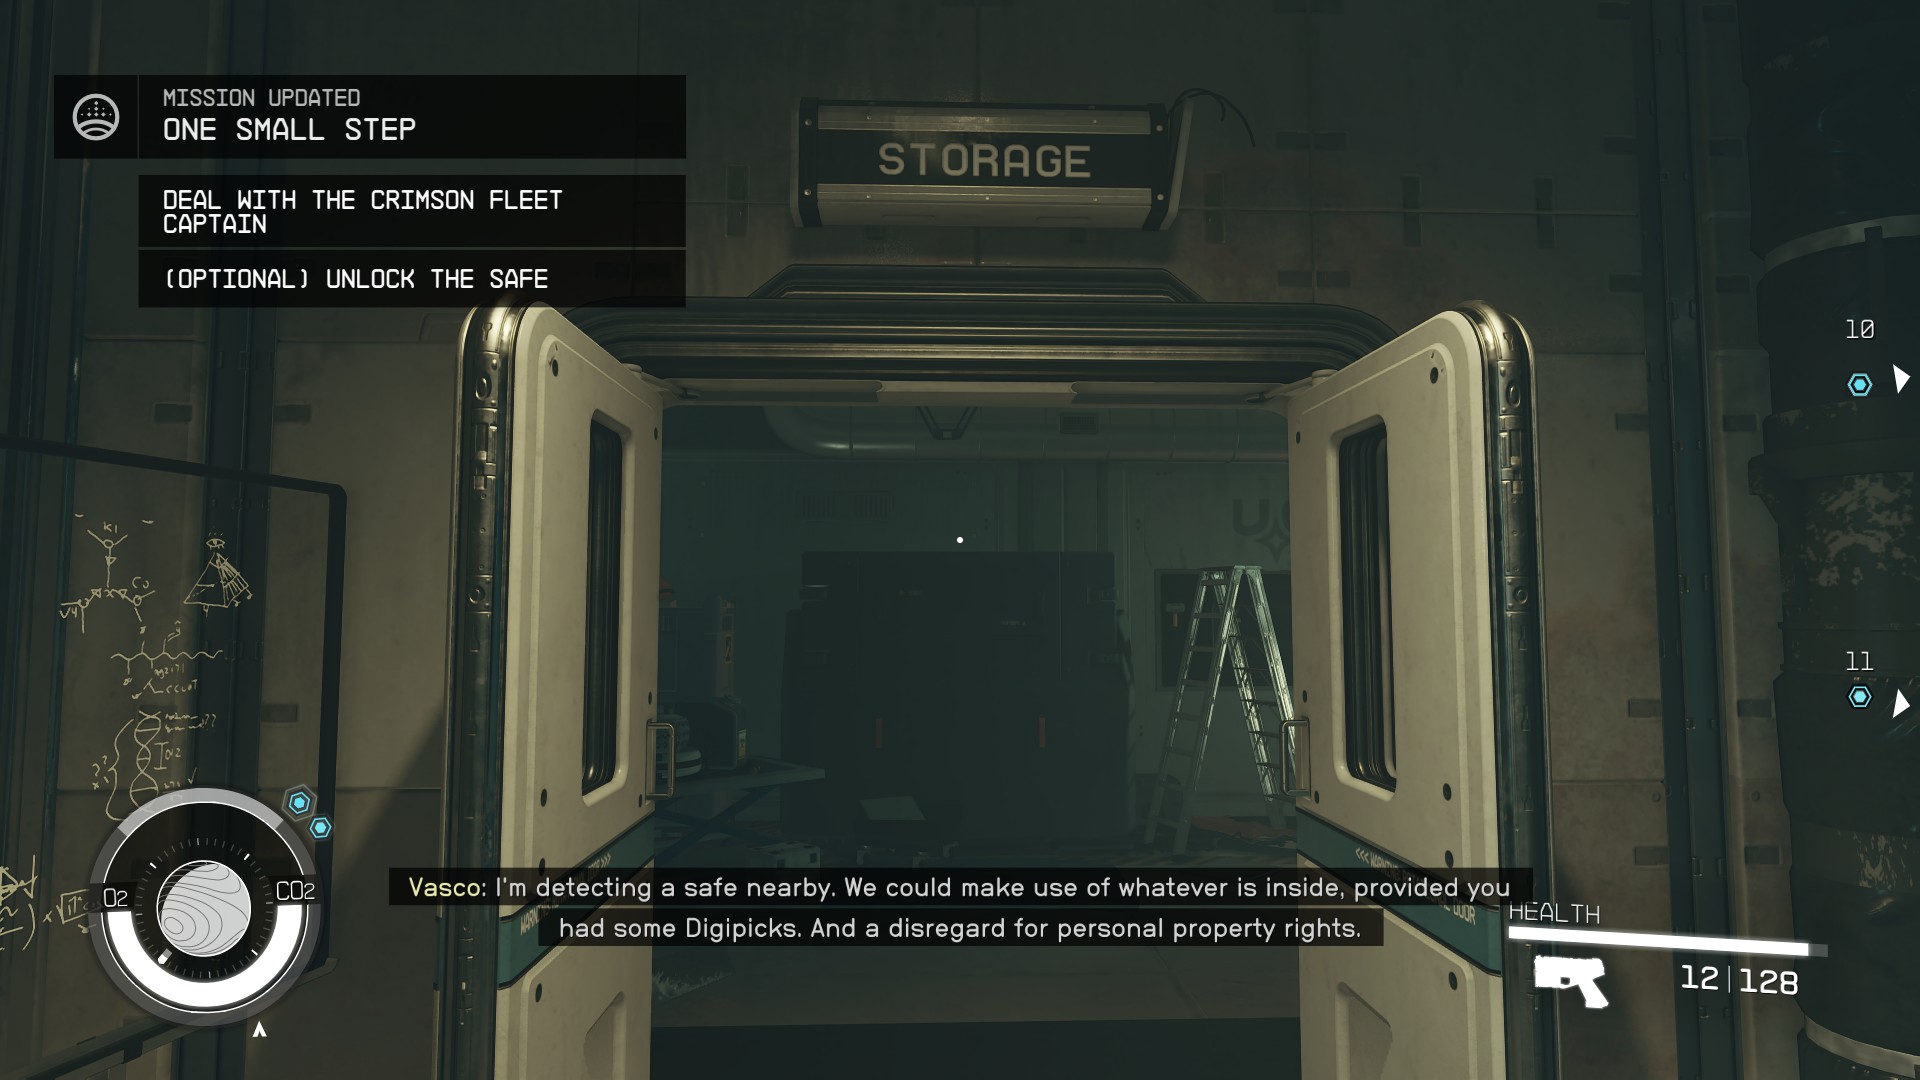
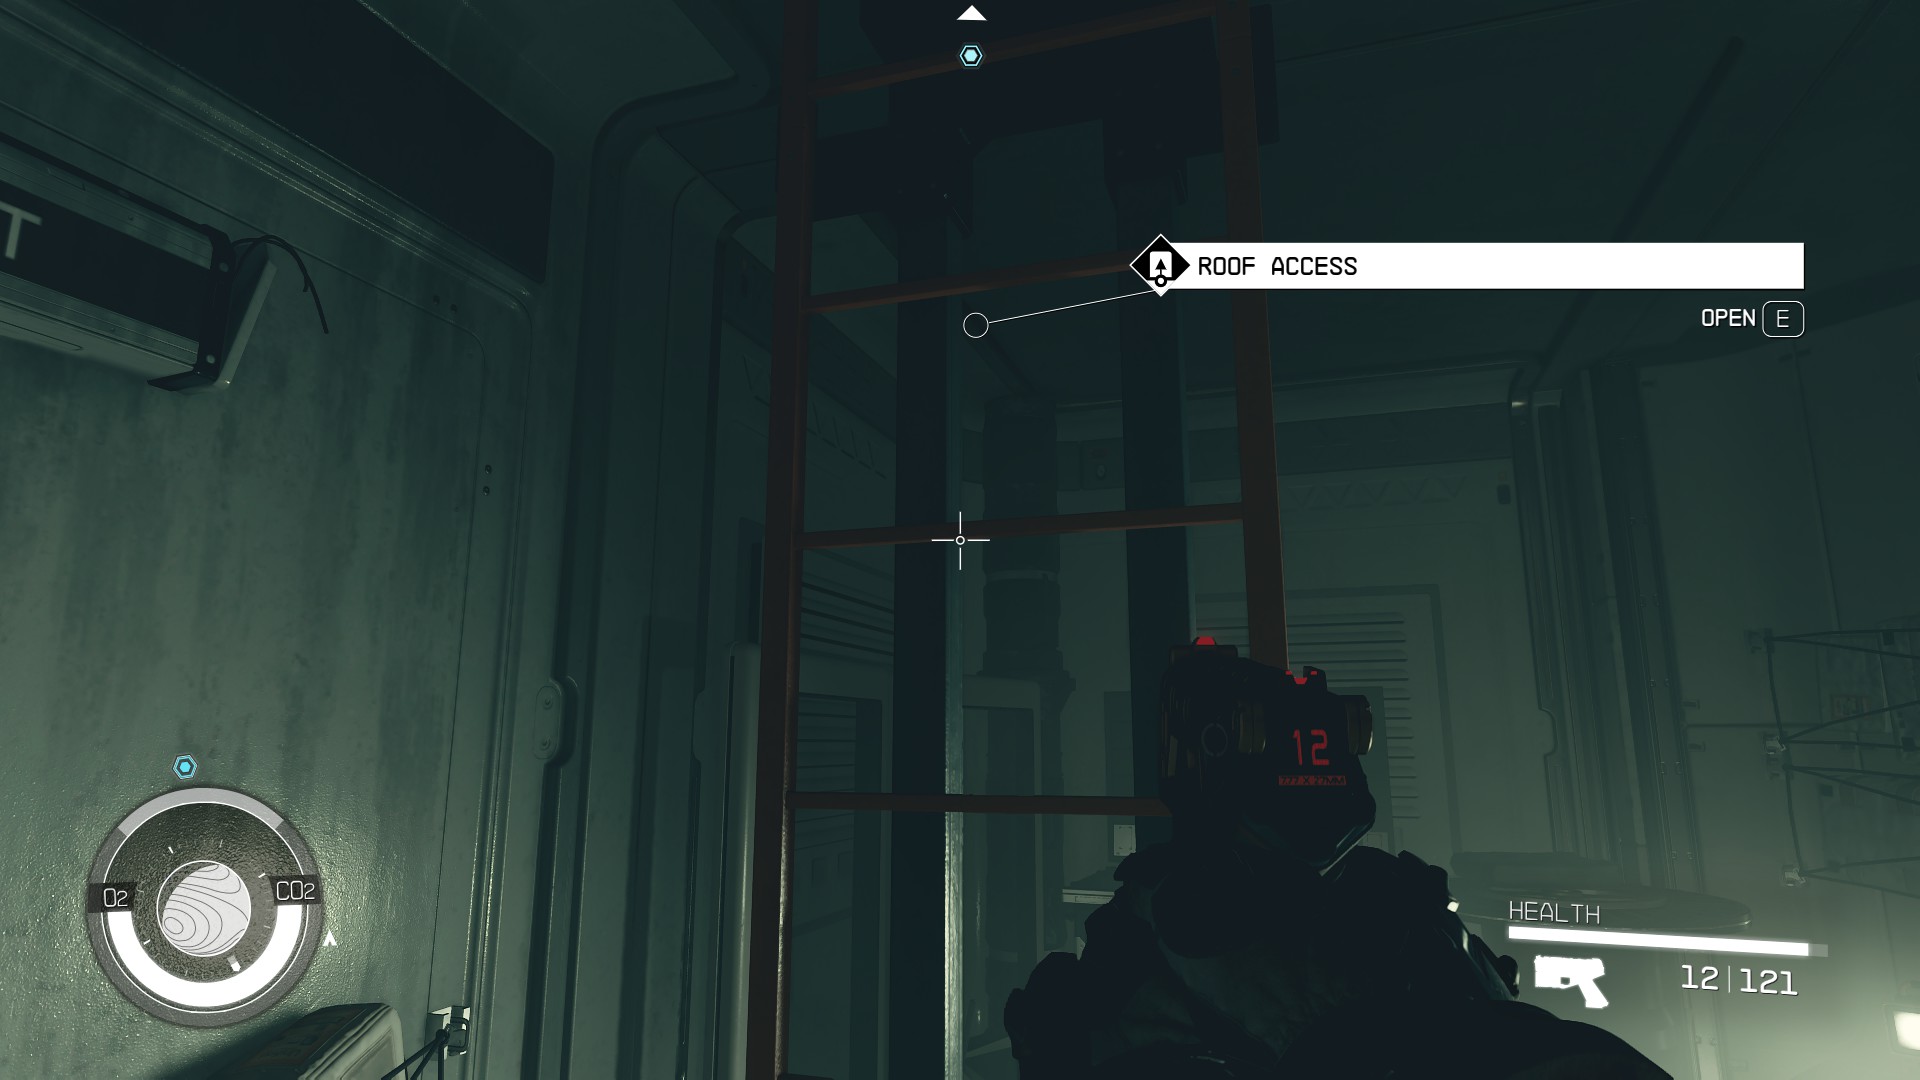
Another Storage room is up next (36). Once you enter it, you’ll get a new optional objective that will serve as your official introduction to Digipicks and their uses. To complete it, you’ll need to crack the safe now marked on your screen (37). Alternatively, or afterward, you’ll need to climb up the ladder right by the safe to finally reach the Lab’s roof.
You’ll find some Digipicks right there by the safe, with only a Heatleach barring your progress (38).
(36)(37)(38)
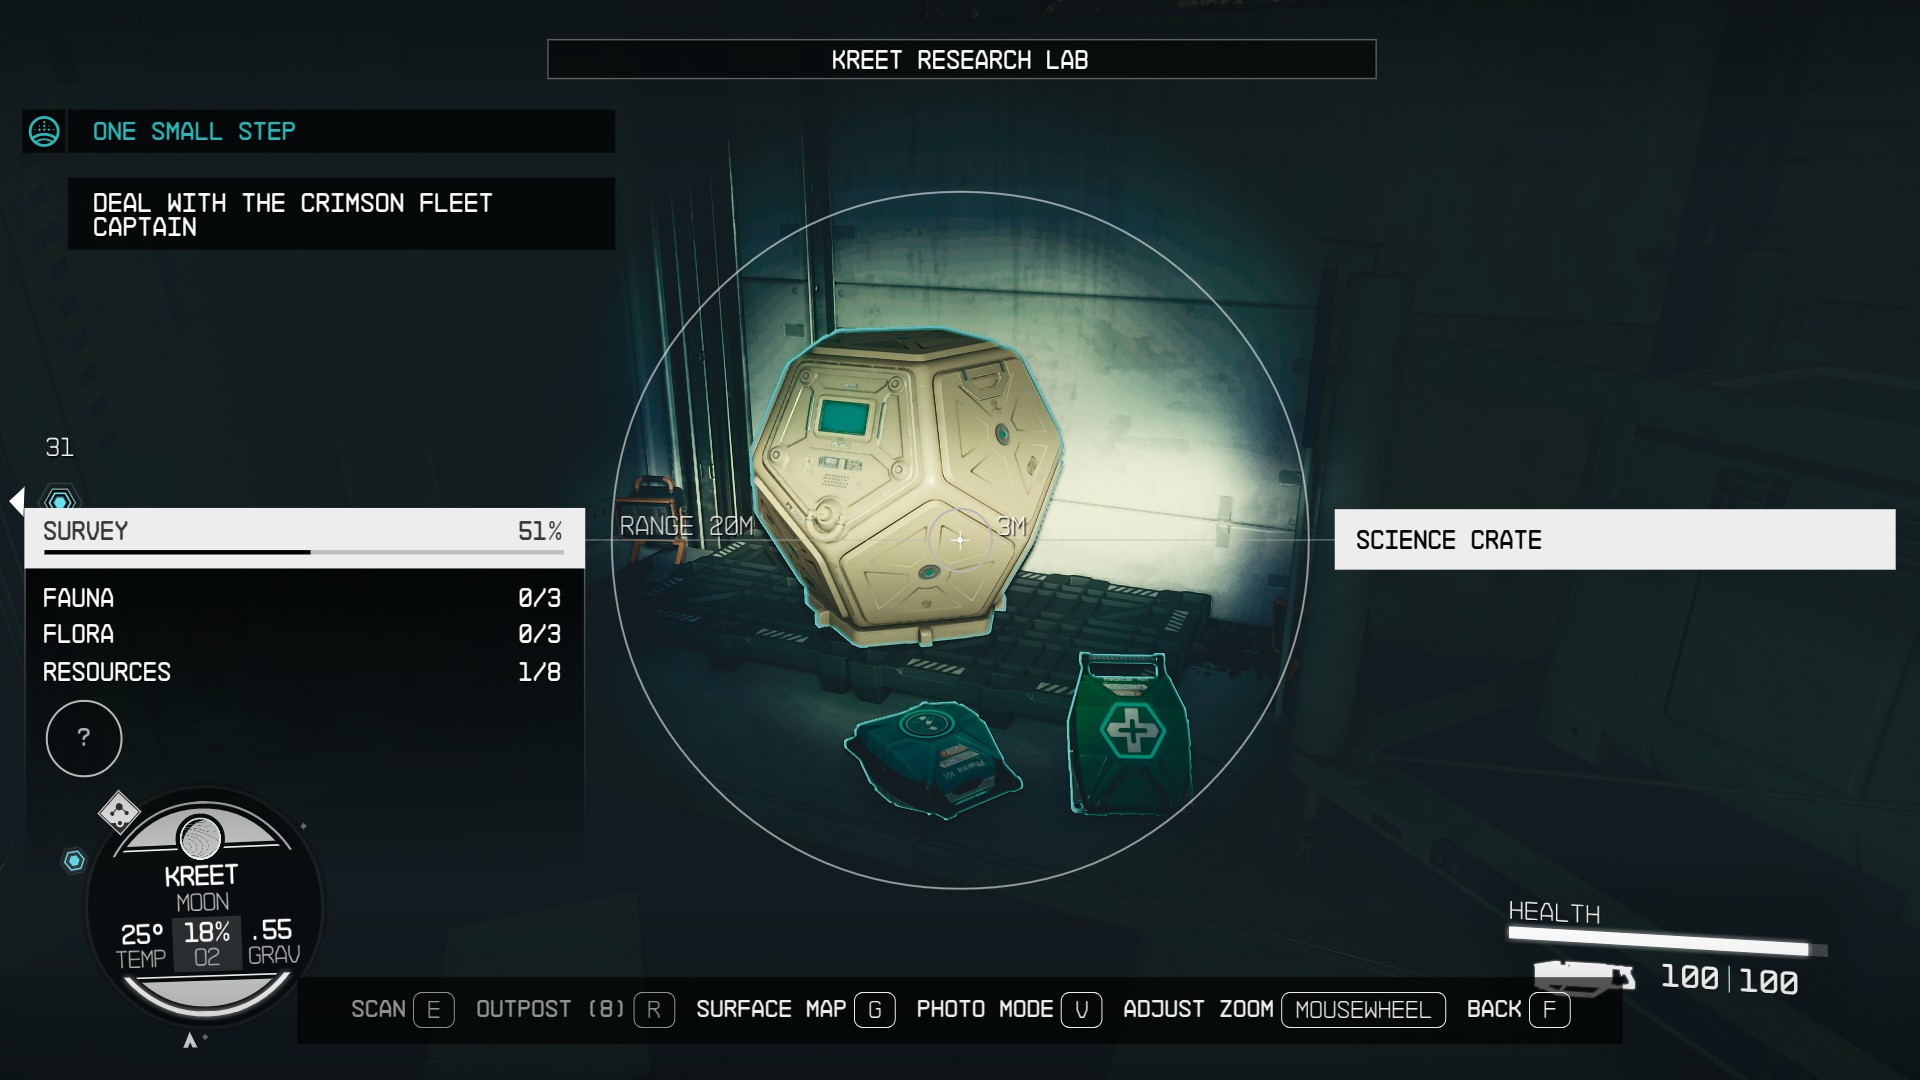
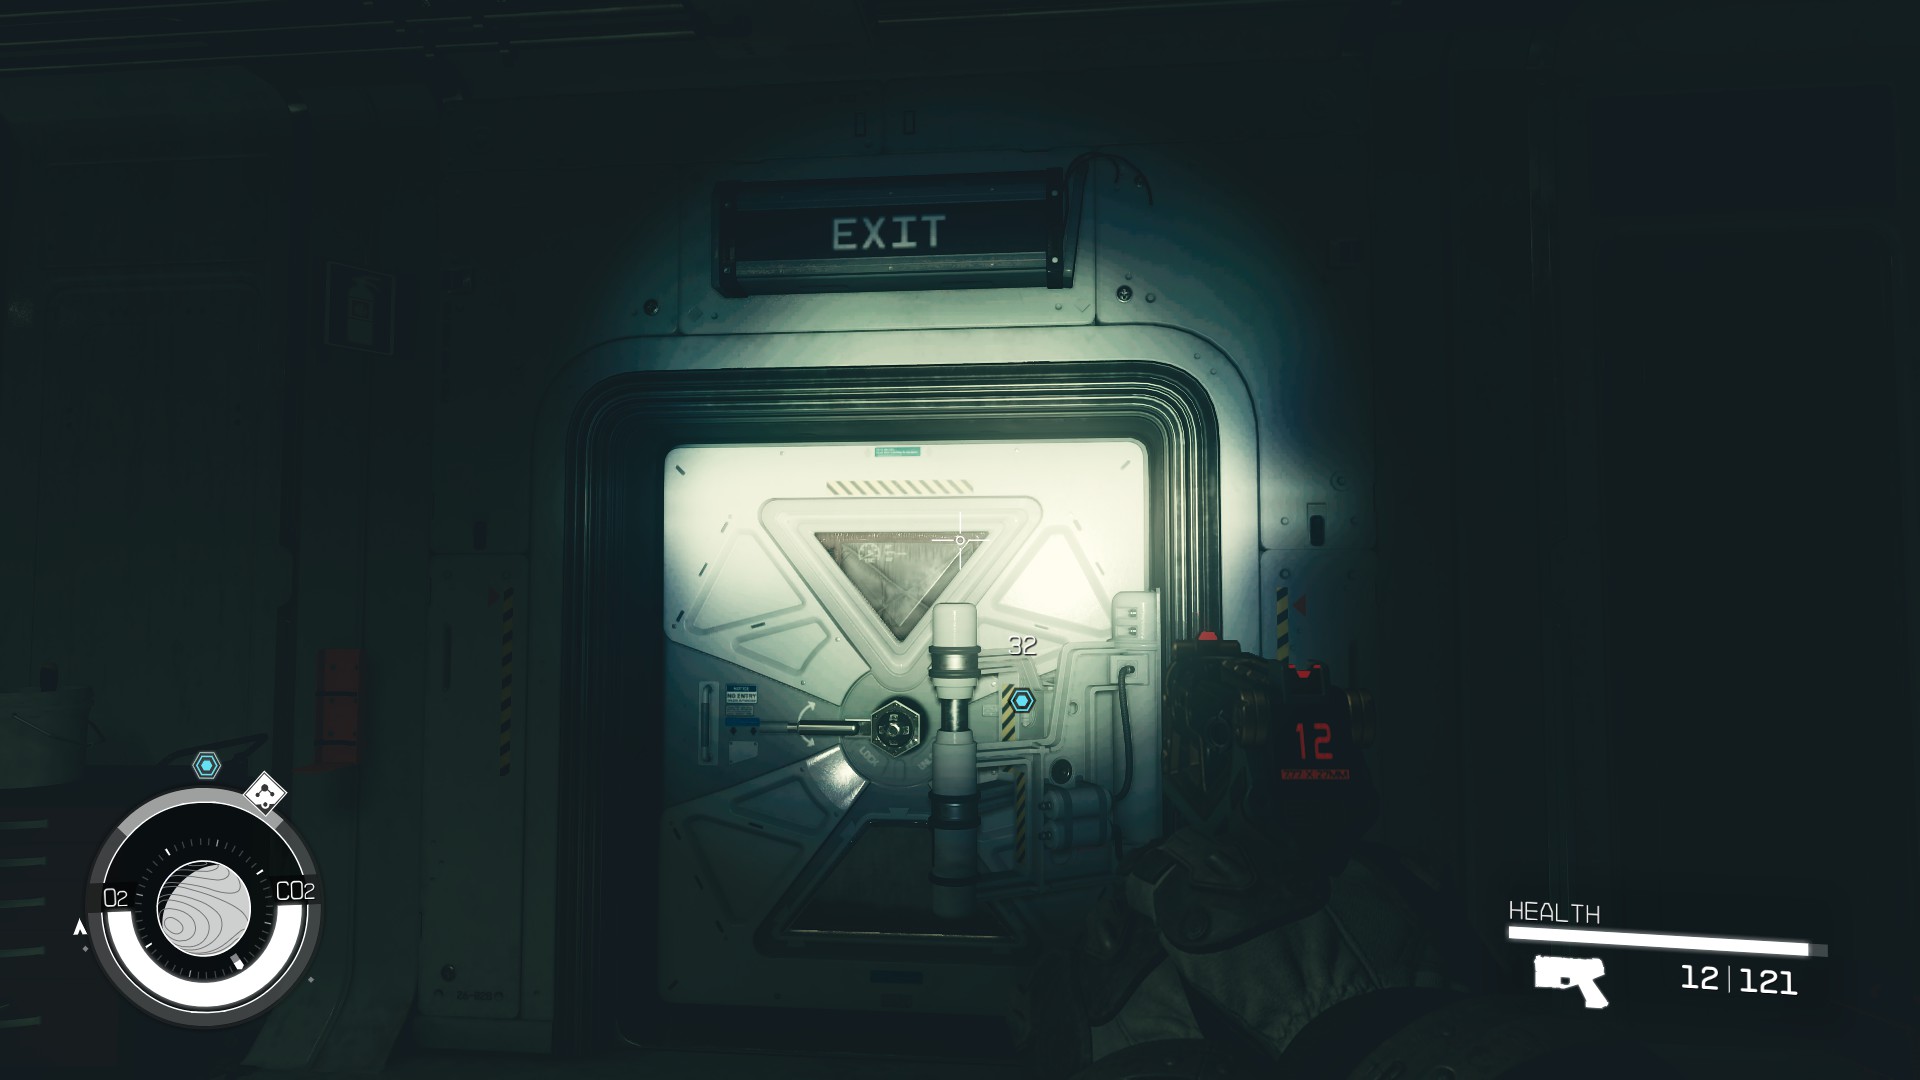
Climbing the ladder (39) will put you inside a closet of a room holding a couple of First Aid kits and a Science Crate (40) that tends to have valuable loot inside. The door marked Exit (41) will take you to the pirate captain Brogan (42) you’ll need to deal with.
(39)(40)(41)(42)
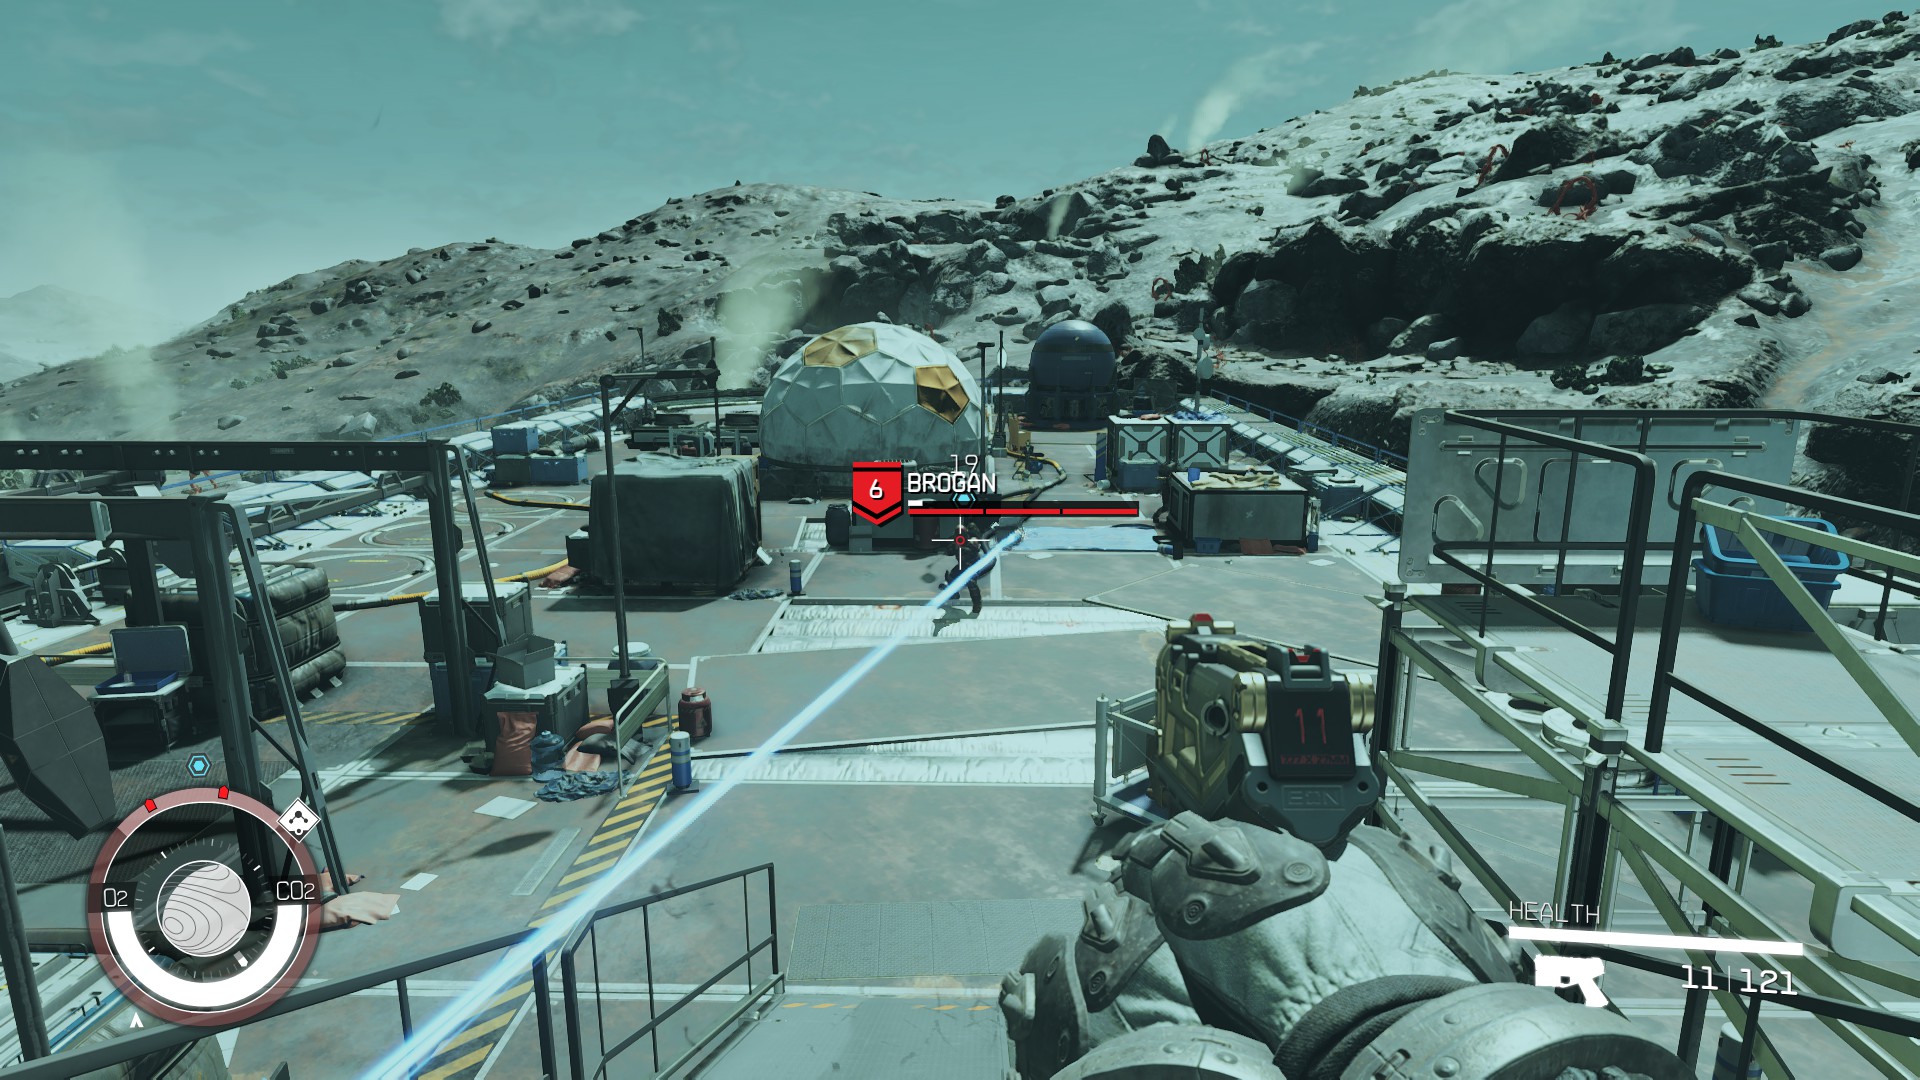
To complete the quest, you’ll need to either kill Brogan (who’s level 6 [43] as opposed to his level 2 underlings) and his crew or Persuade him to leave you be. Consult our Persuasion guide to learn how that works.
Return to the Ship
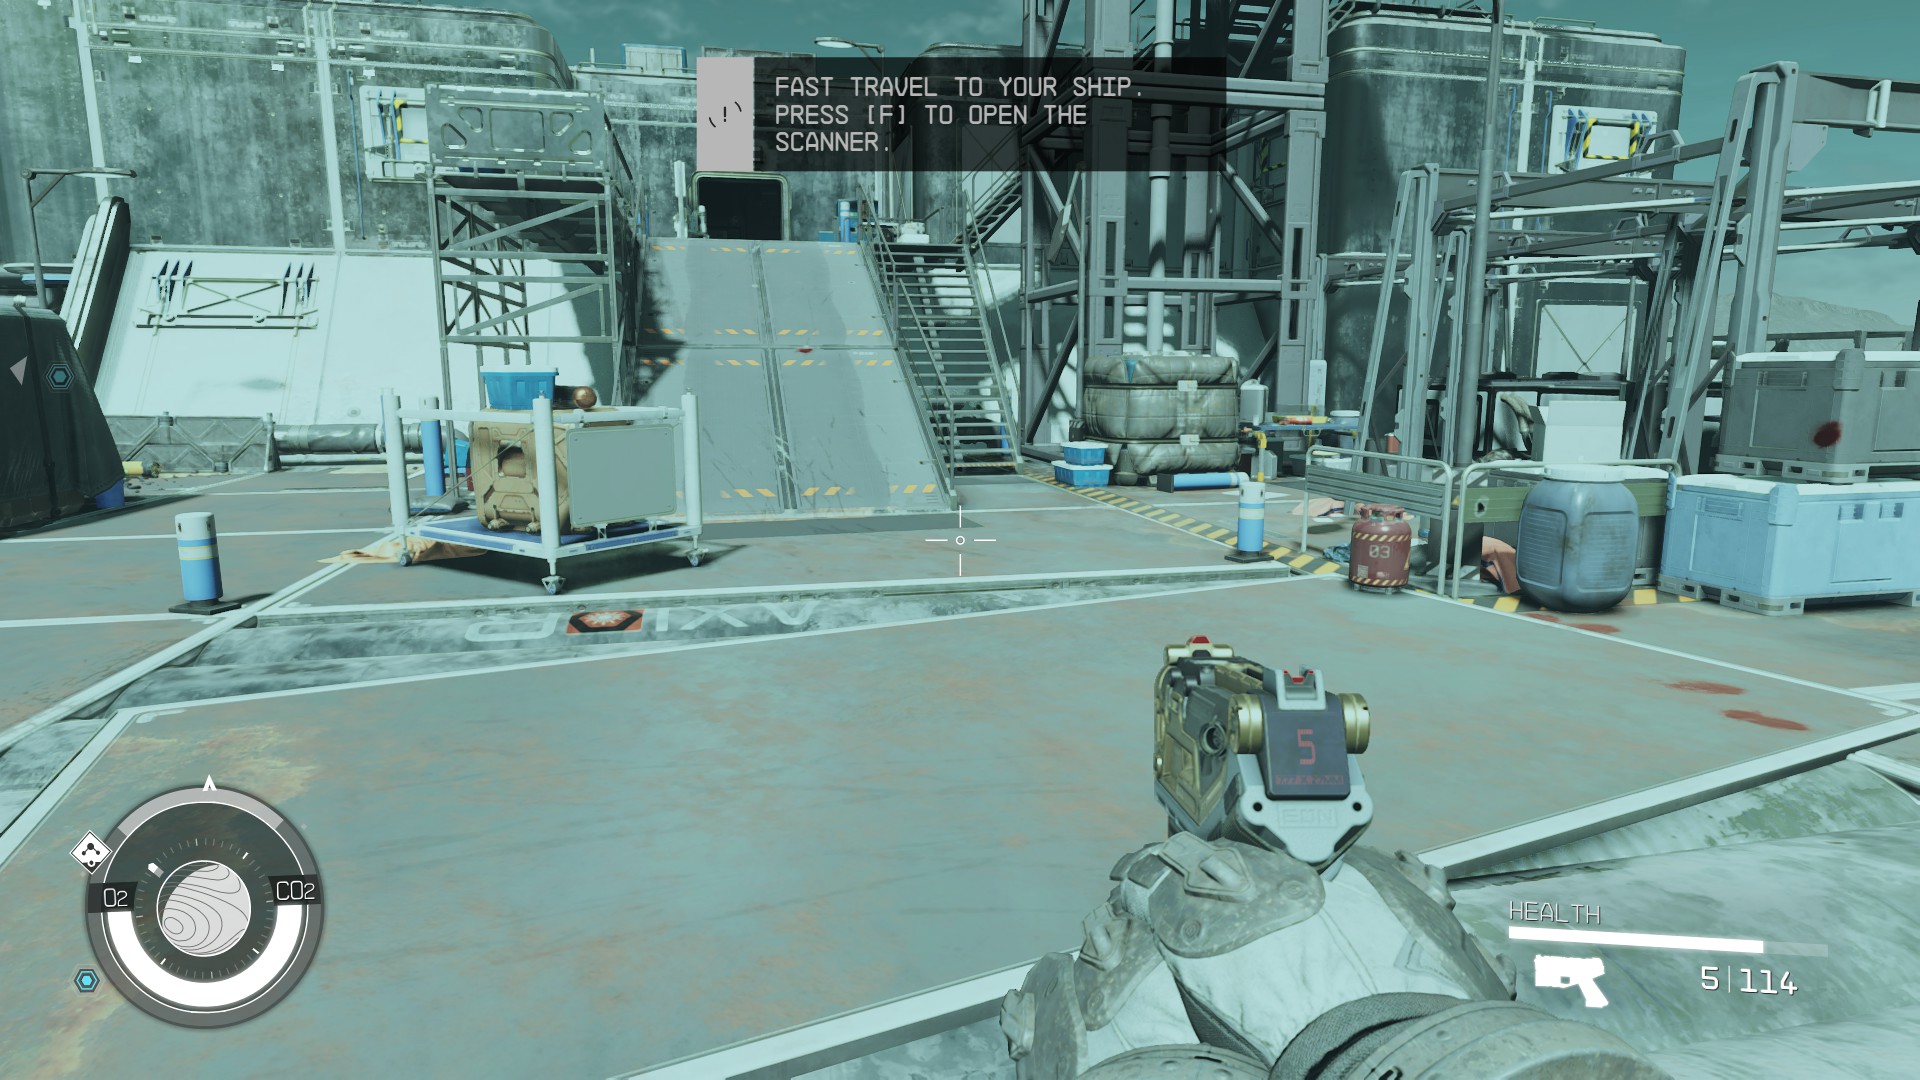
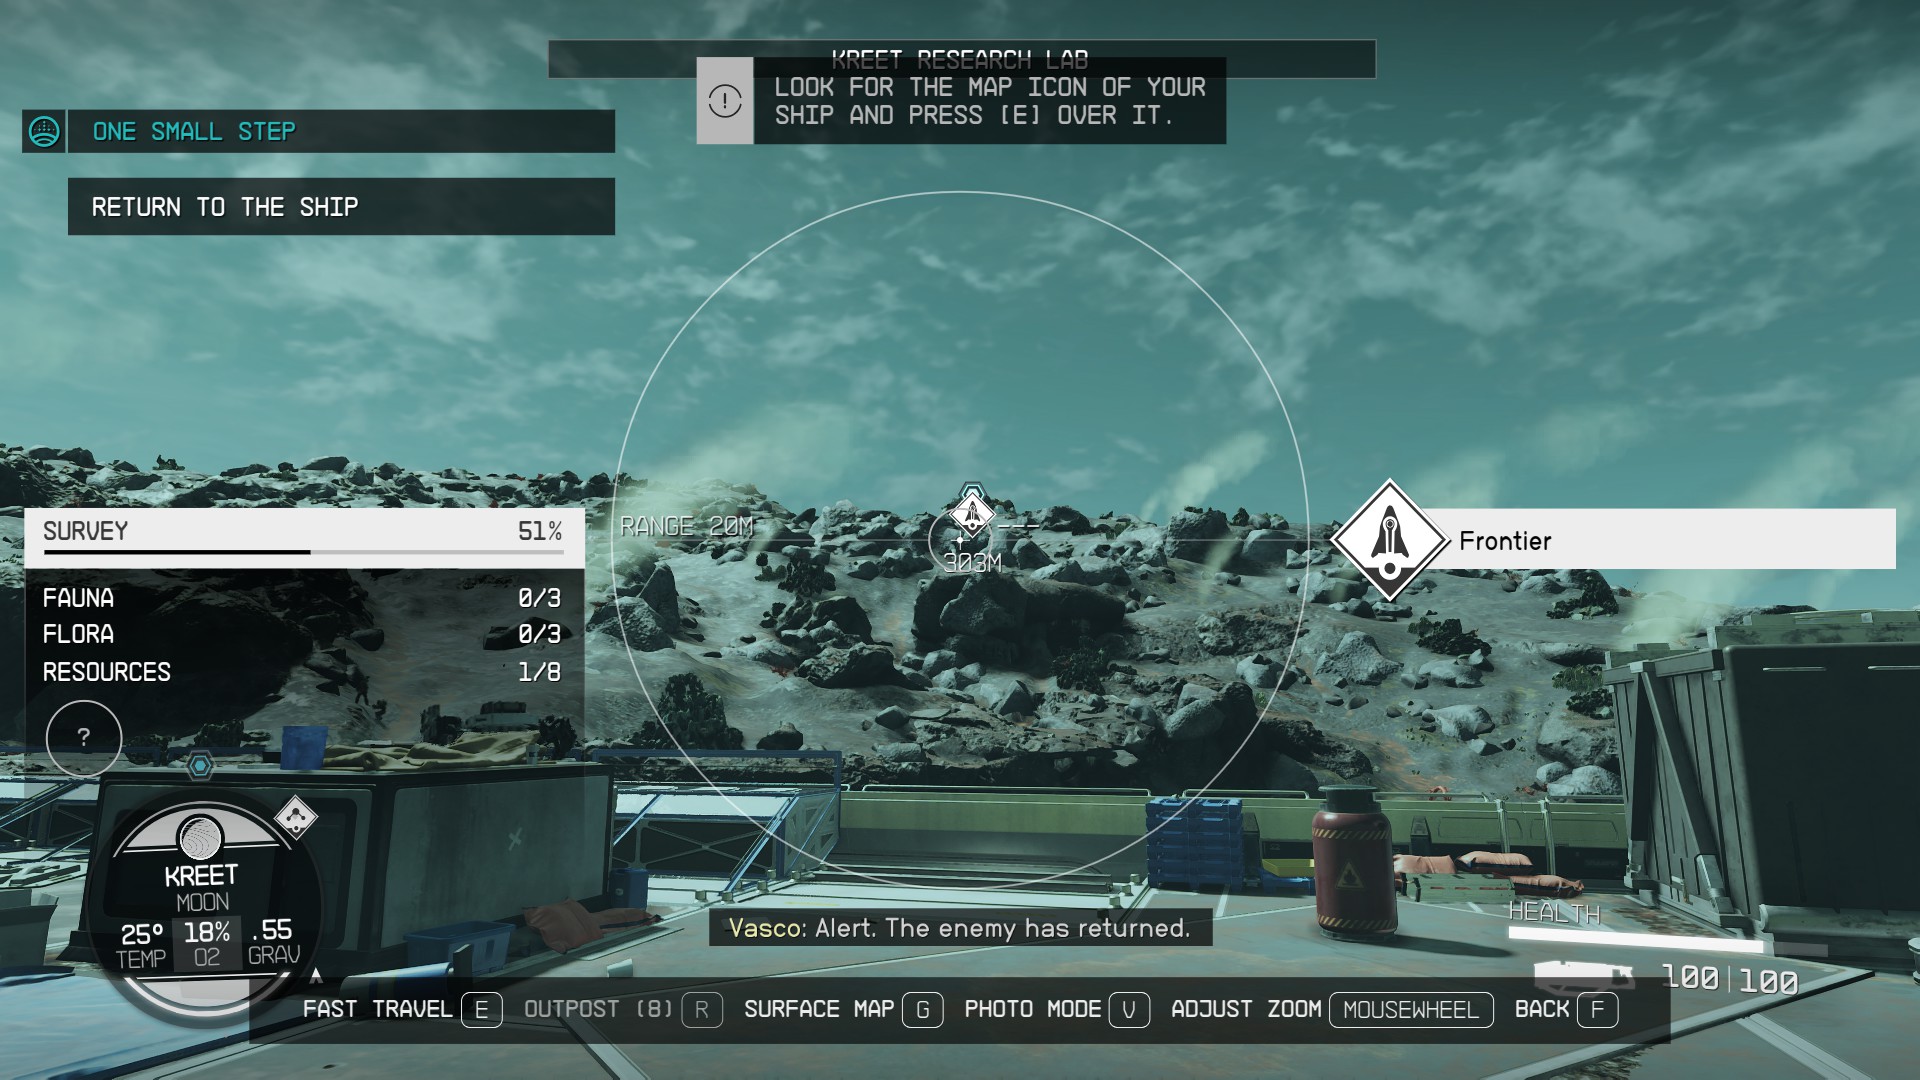
Either way, you will then be prompted to Fast Travel (44) to your ship by opening your scanner, finding your ship, and then pressing E, or / if you’re using a controller (45). This will conclude your adventure (46) inside the Kreet Research Lab and allow you to continue your quest.
(43)(44)(45)(46)
You’ll find yourself in the pilot’s seat after fast traveling — open your Missions Log with , or by opening the Data Menu and then selecting the Missions at the center bottom of the screen. Then, select One Small Step and press / / to Set Course for your next objective. You’ll be taken to the Starmap, and you can hold / / to initiate the grav jump to Jemison.
You’ll be scanned for contraband, and then you can use the same Mission log method to set a new “course” — this will allow you to use the same series of hotkeys to land at New Atlantis.
This walkthrough continues in the next tab, New Atlantis (Jemison)!
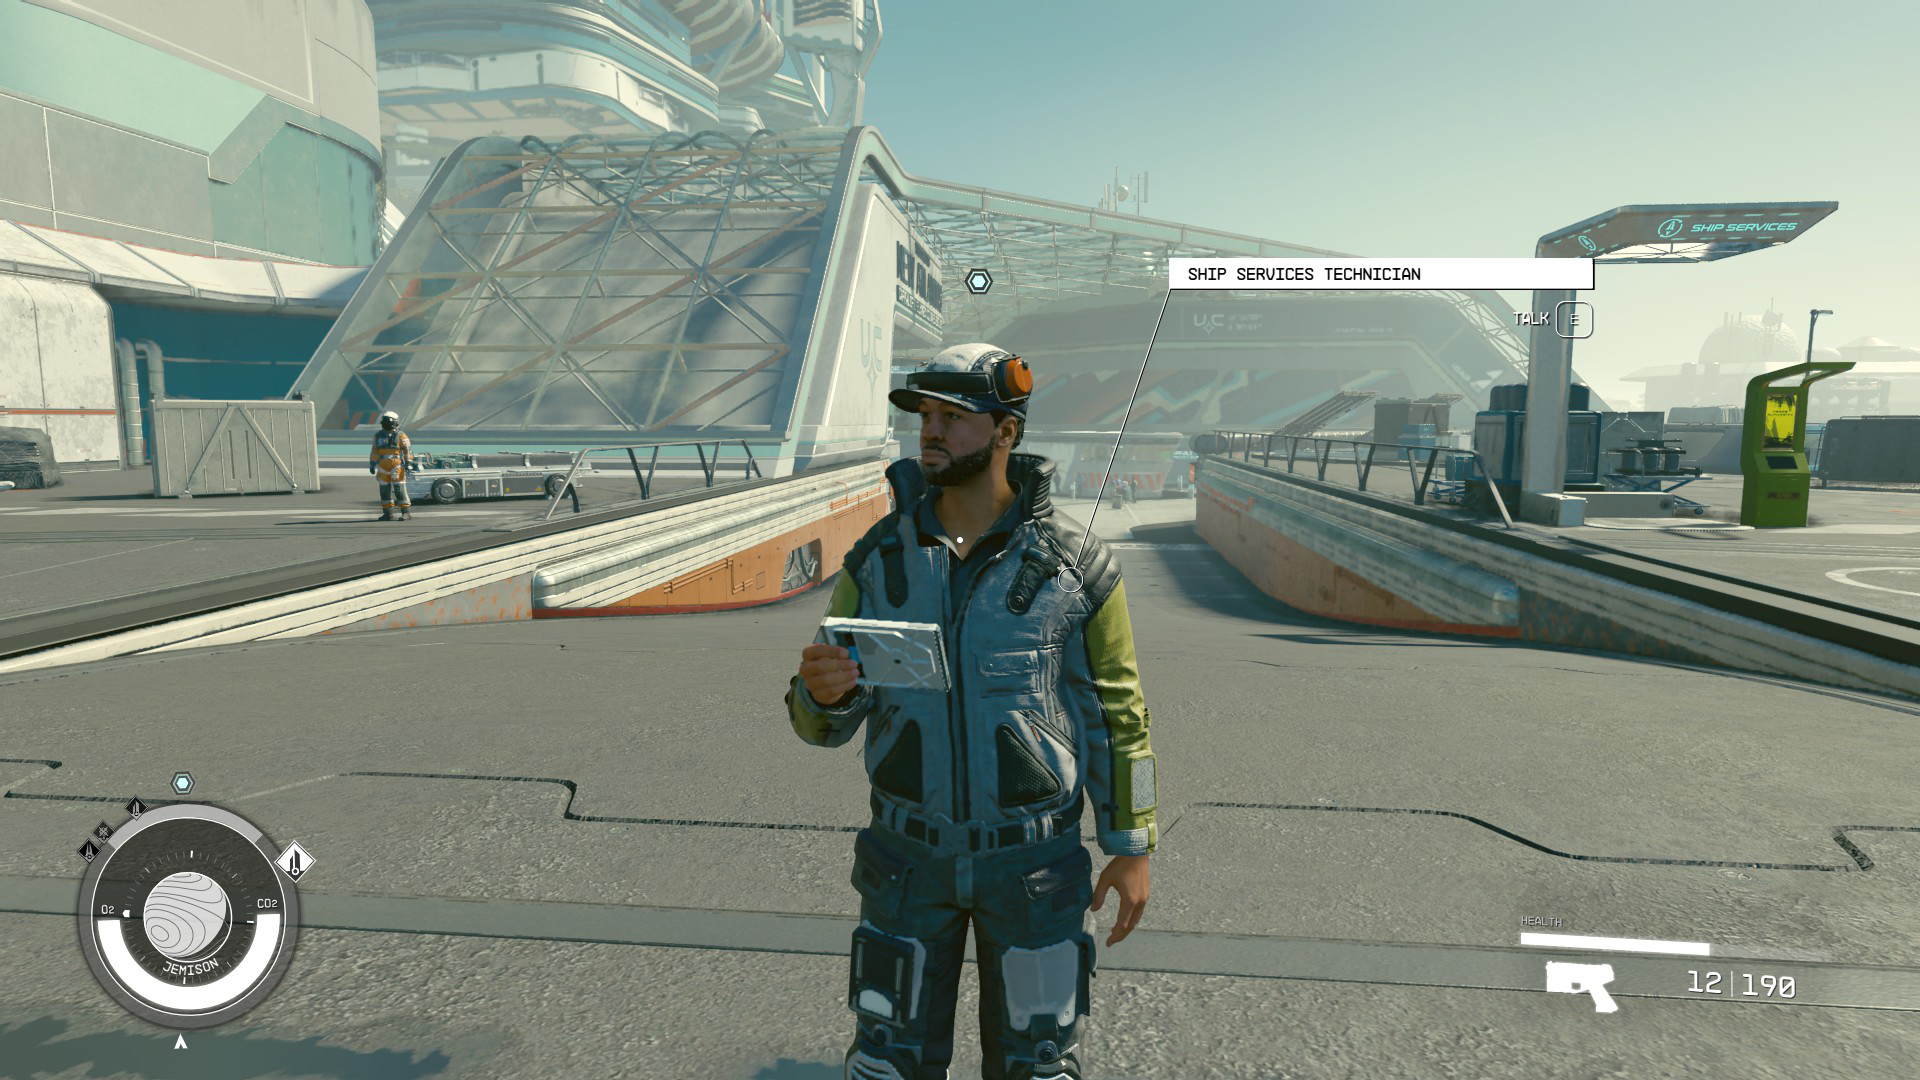
Go to the Lodge (MAST District)
Exit your ship, then go and speak with the Ship Services Tech, who has the blue objective hexagon helpfully placed above his head (Image 1). If you’re eager to start messing around with ship design, you can peek at it now, but since you’re probably low on money, your best bet is to just ask the tech any questions you want, and then end the conversation. If you’ve collected a bunch of loot and/or junk on your travels thus far, you should head to the Trade Authority Kiosk (Image 2) and sell some stuff.
Image 1Image 2
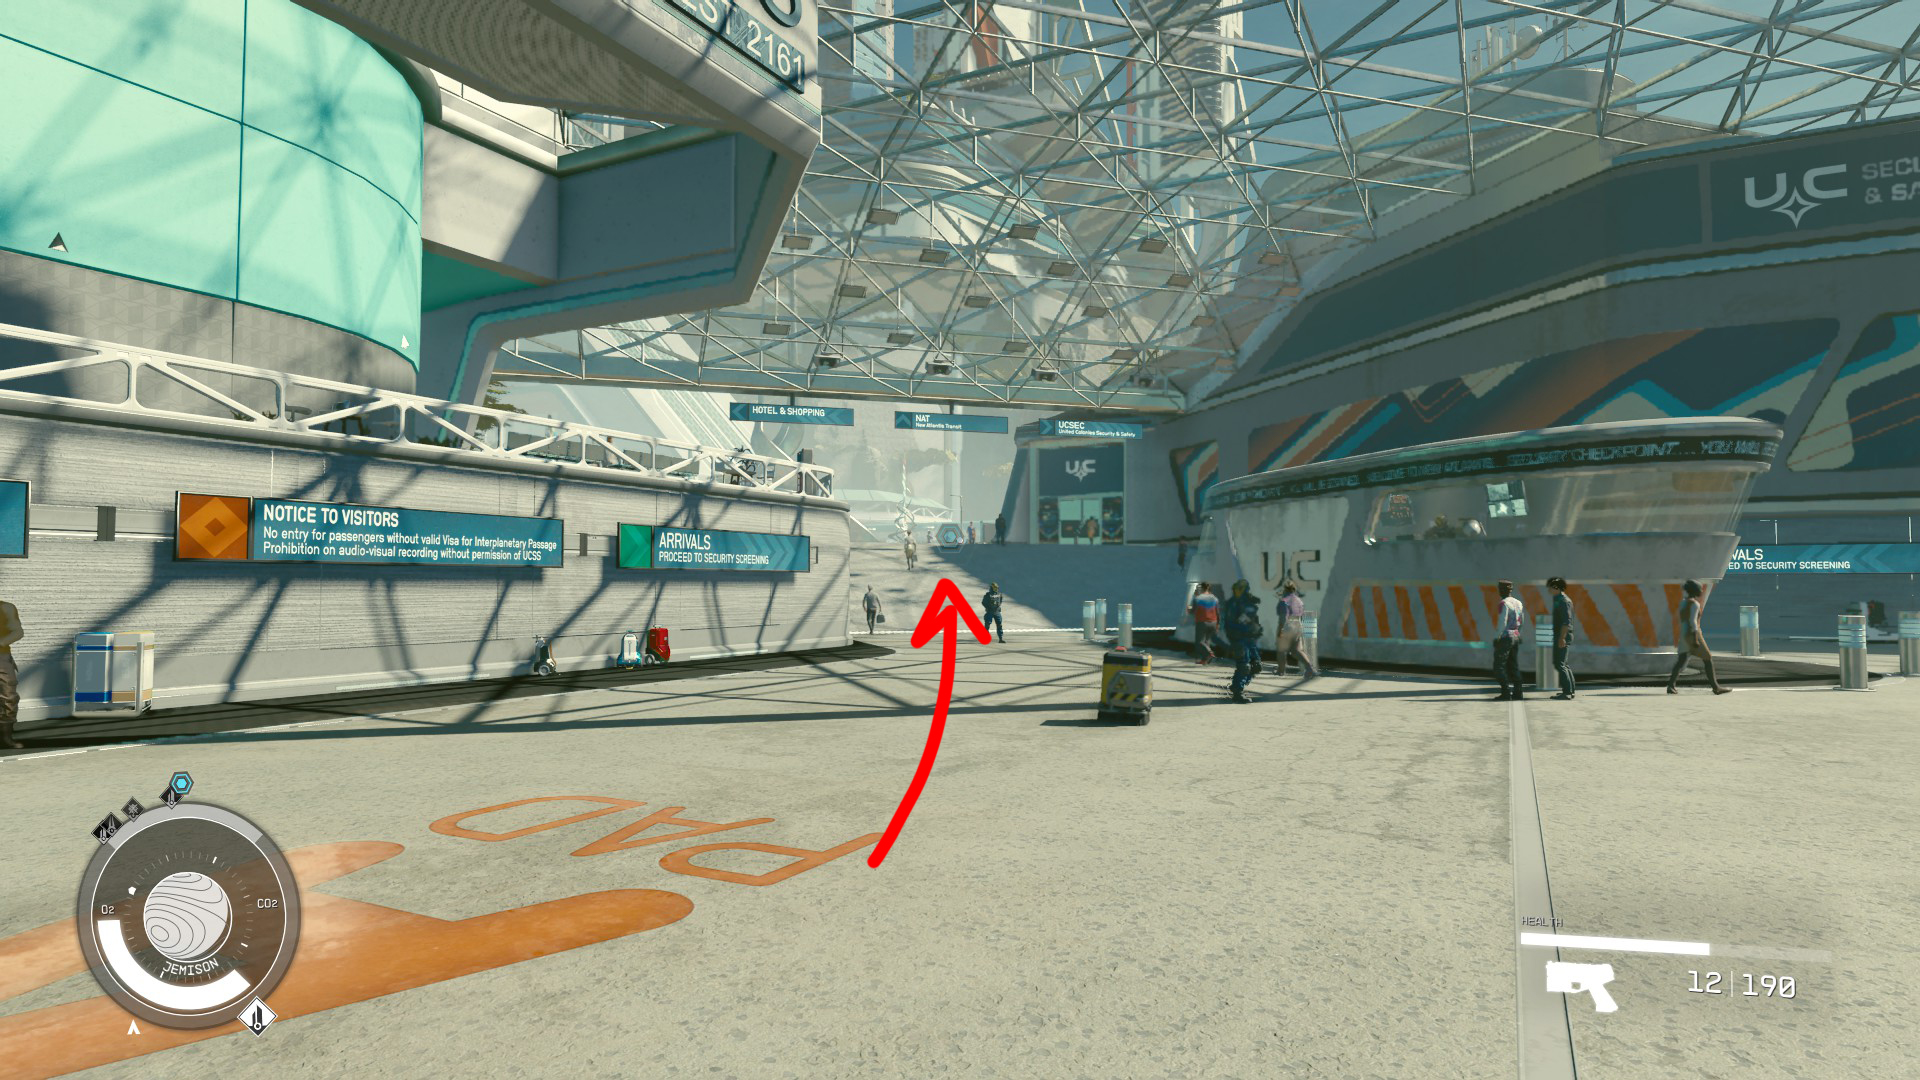
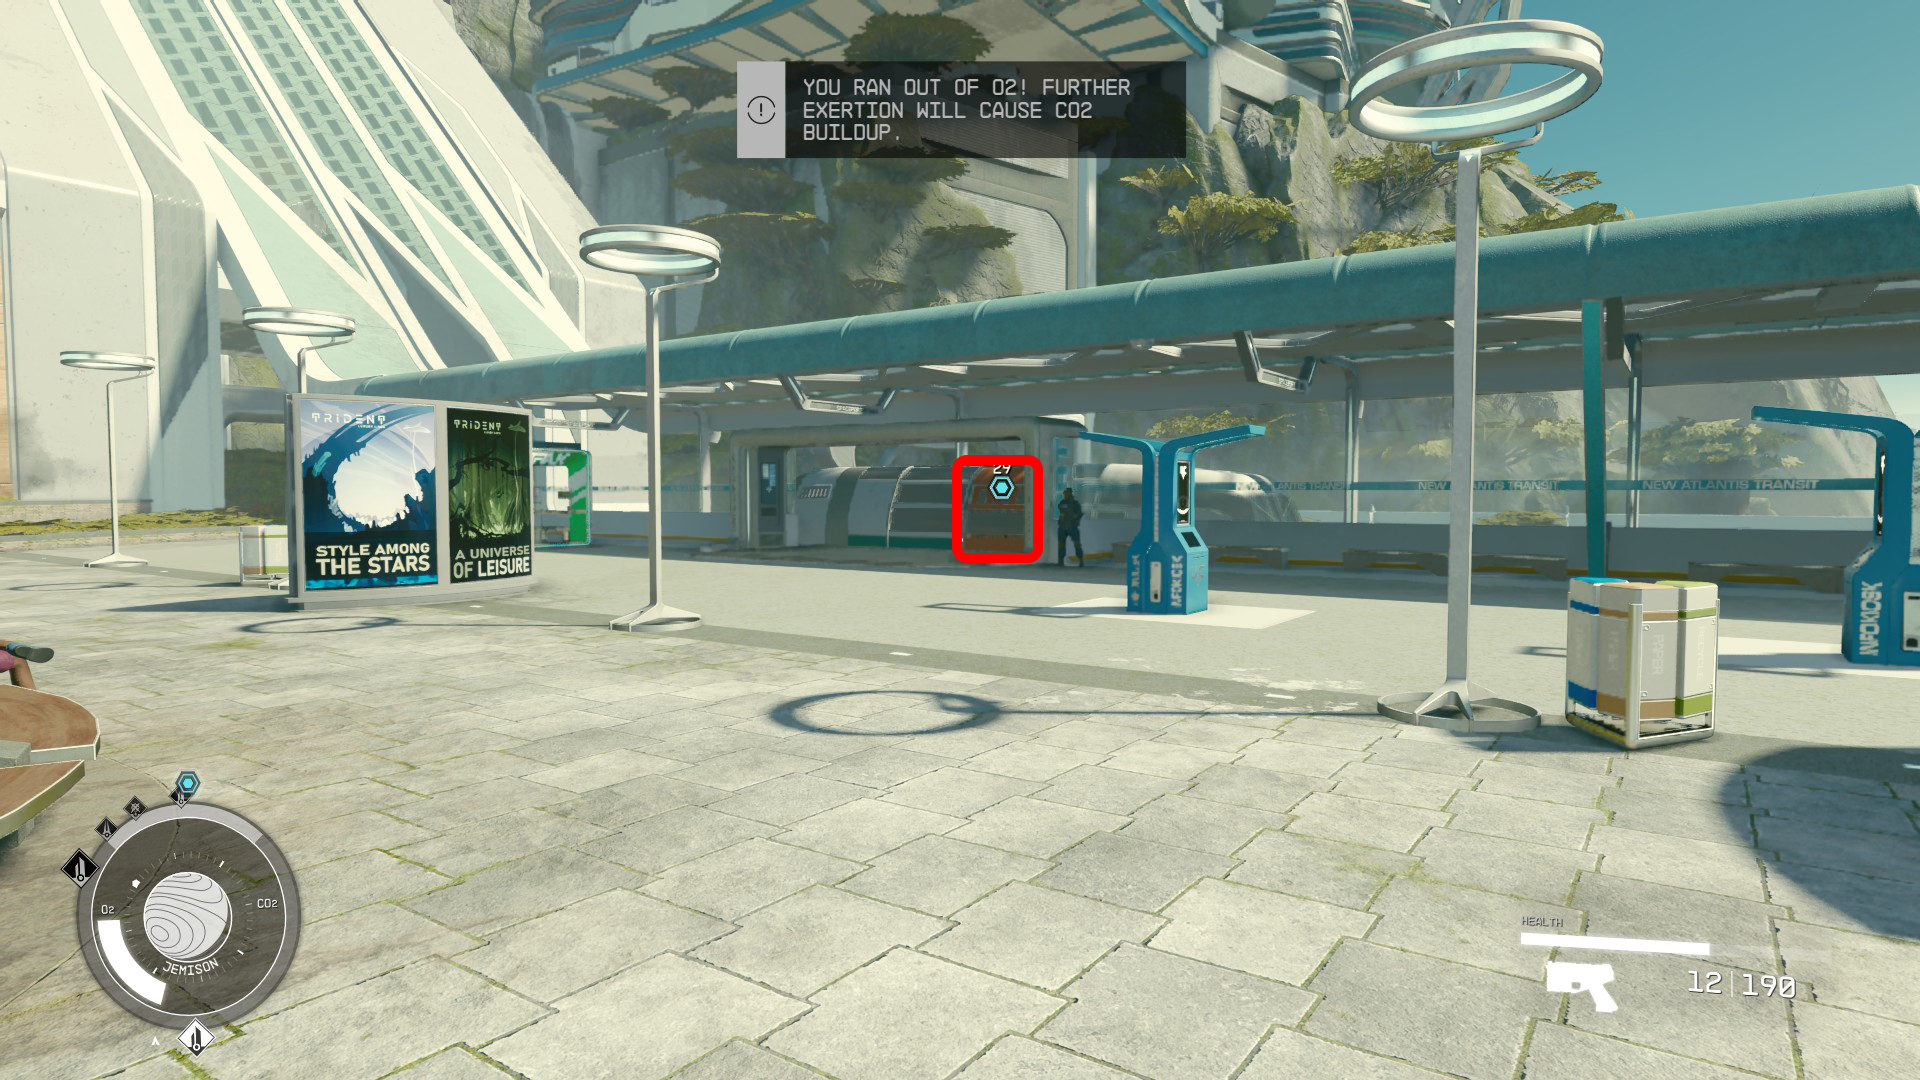
When you’re ready, head down the ramp deeper into New Atlantis (Image 3). Follow the objective marker to the NAT Train (Image 4), then interact with the orange door (it’ll have the objective marker on it) and select the MAST District.
Image 3Image 4
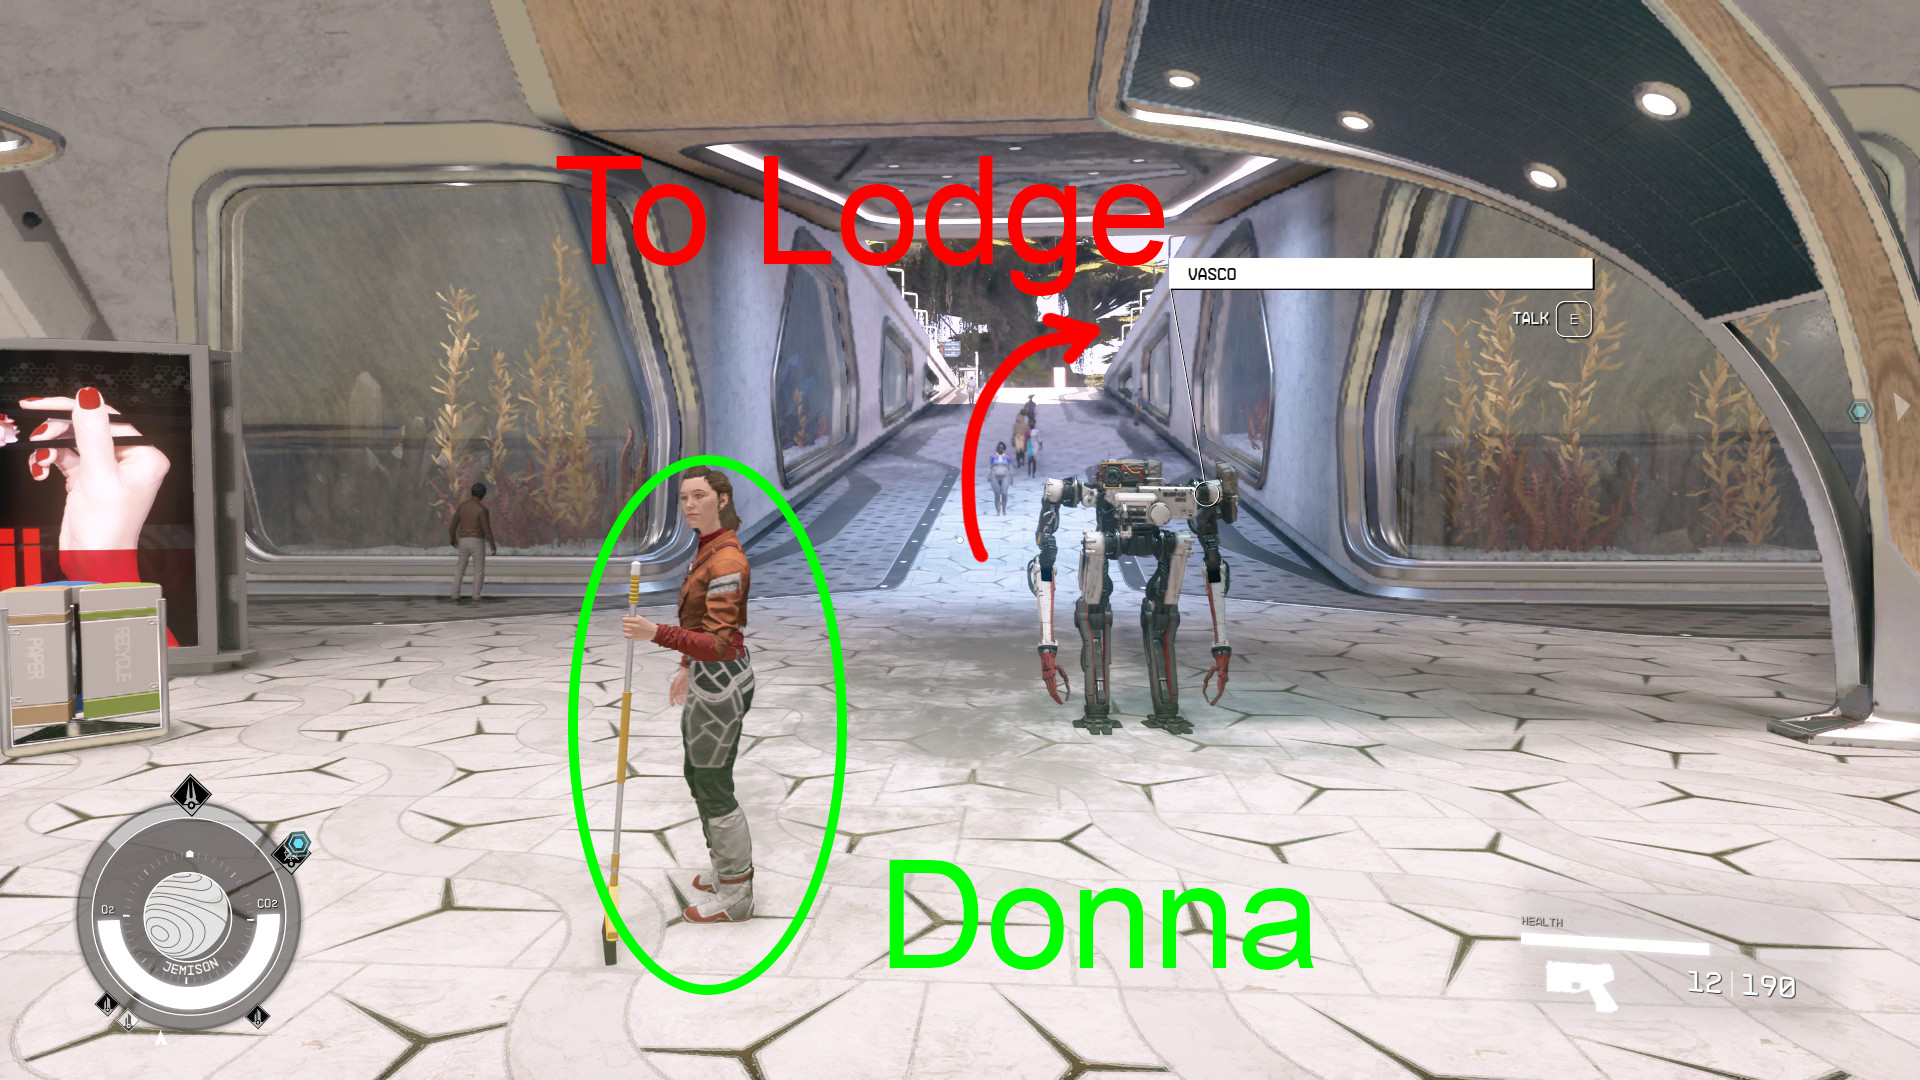
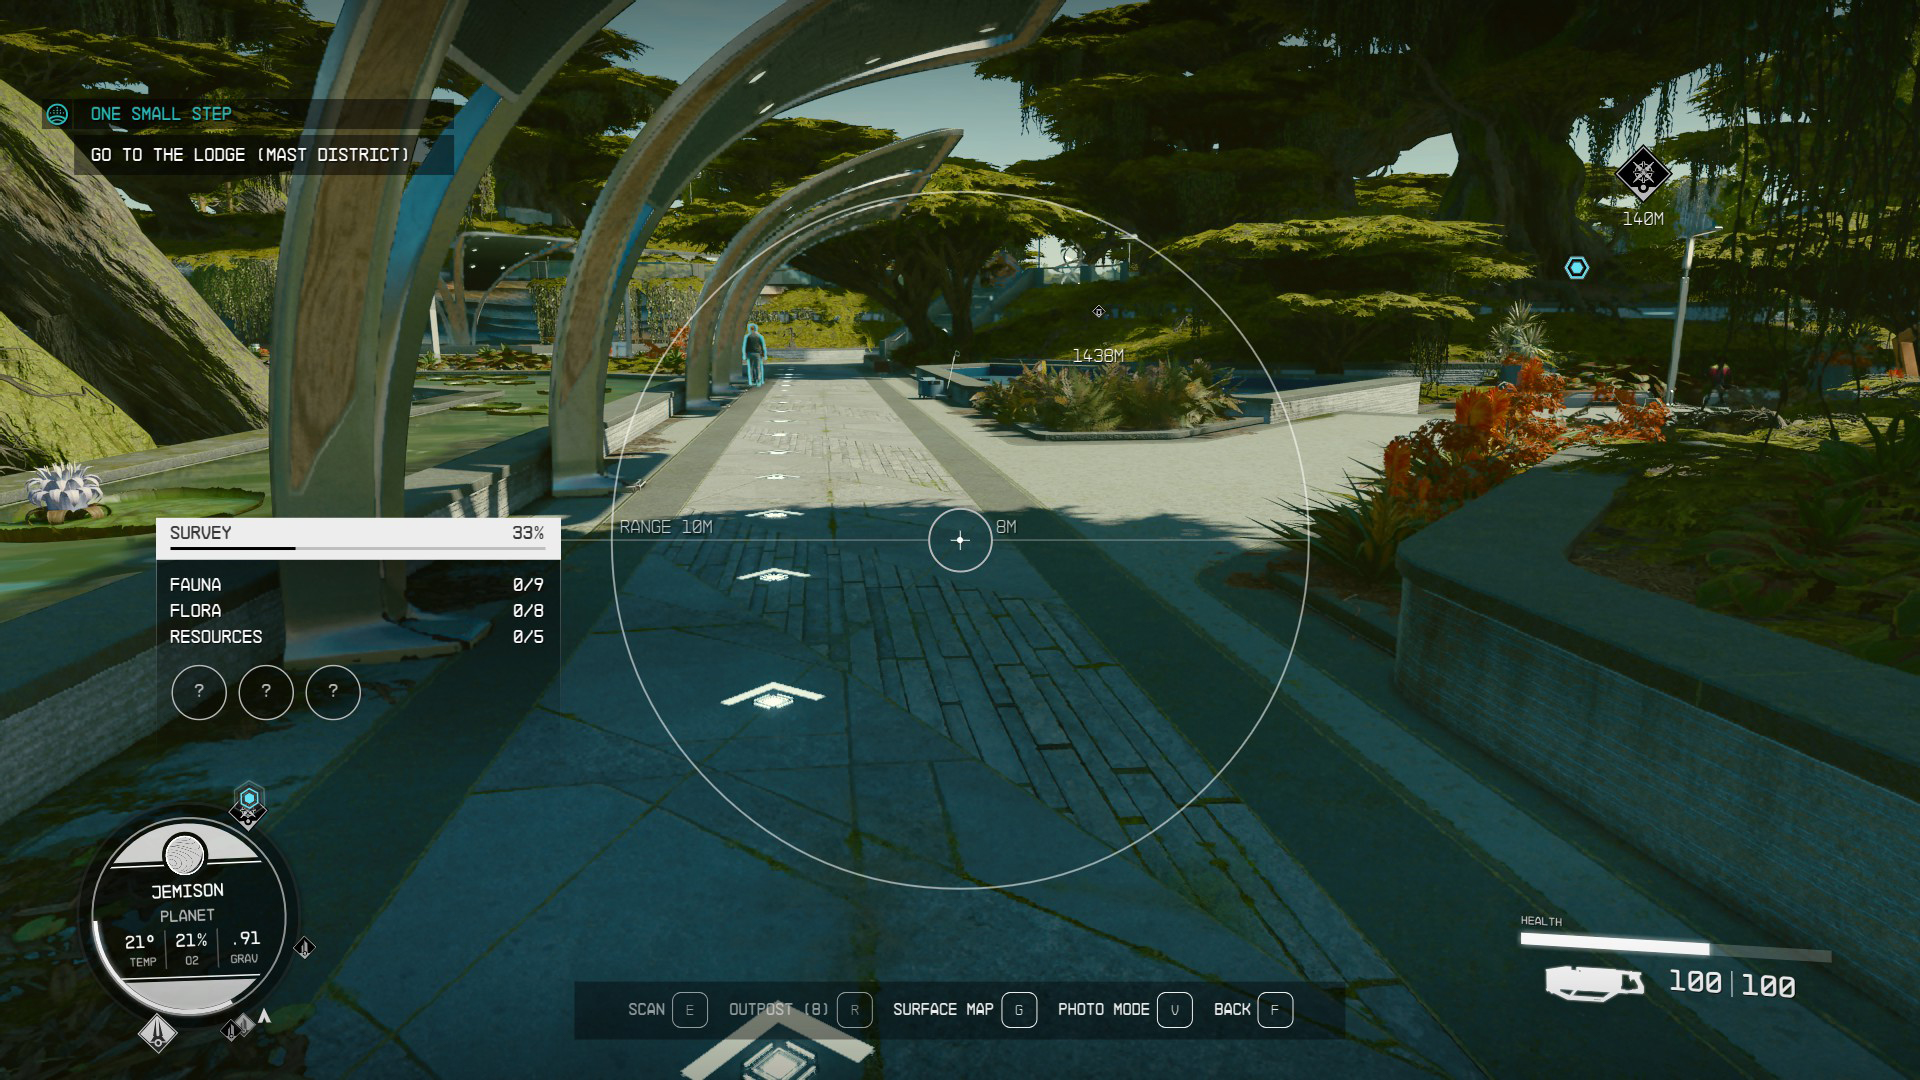
The train will drop you in the MAST District. You can speak with the janitor here — Donna Rain — if you want to do a fun little side quest. Otherwise, head up the ramp and out of the station (Image 5). At the top of the ramp, turn right — towards the objective marker — and continue through the park. If you get turned around, don’t forget you can activate your scanner with /; doing so will put little white arrows on the ground that show you the best path to your current objective (Image 6). You’ll soon come to the entrance of the Lodge. Interact with the door, and your character will use the watch Barrett gave you to open the door.
Image 5Image 6
Enter the Library
Inside the Lodge, open the doors ahead of you and enter the library. Approach the woman straight ahead, and a conversation will start.
Talk to Sarah
You’ll meet Sarah Morgan — feel free to approach the conversation however you like, as these story missions tend to only go one way regardless of your dialogue choices. You’ll also meet other members of the Constellation group here — keen-eared folks may hear a familiar sci-fi actor’s voice!
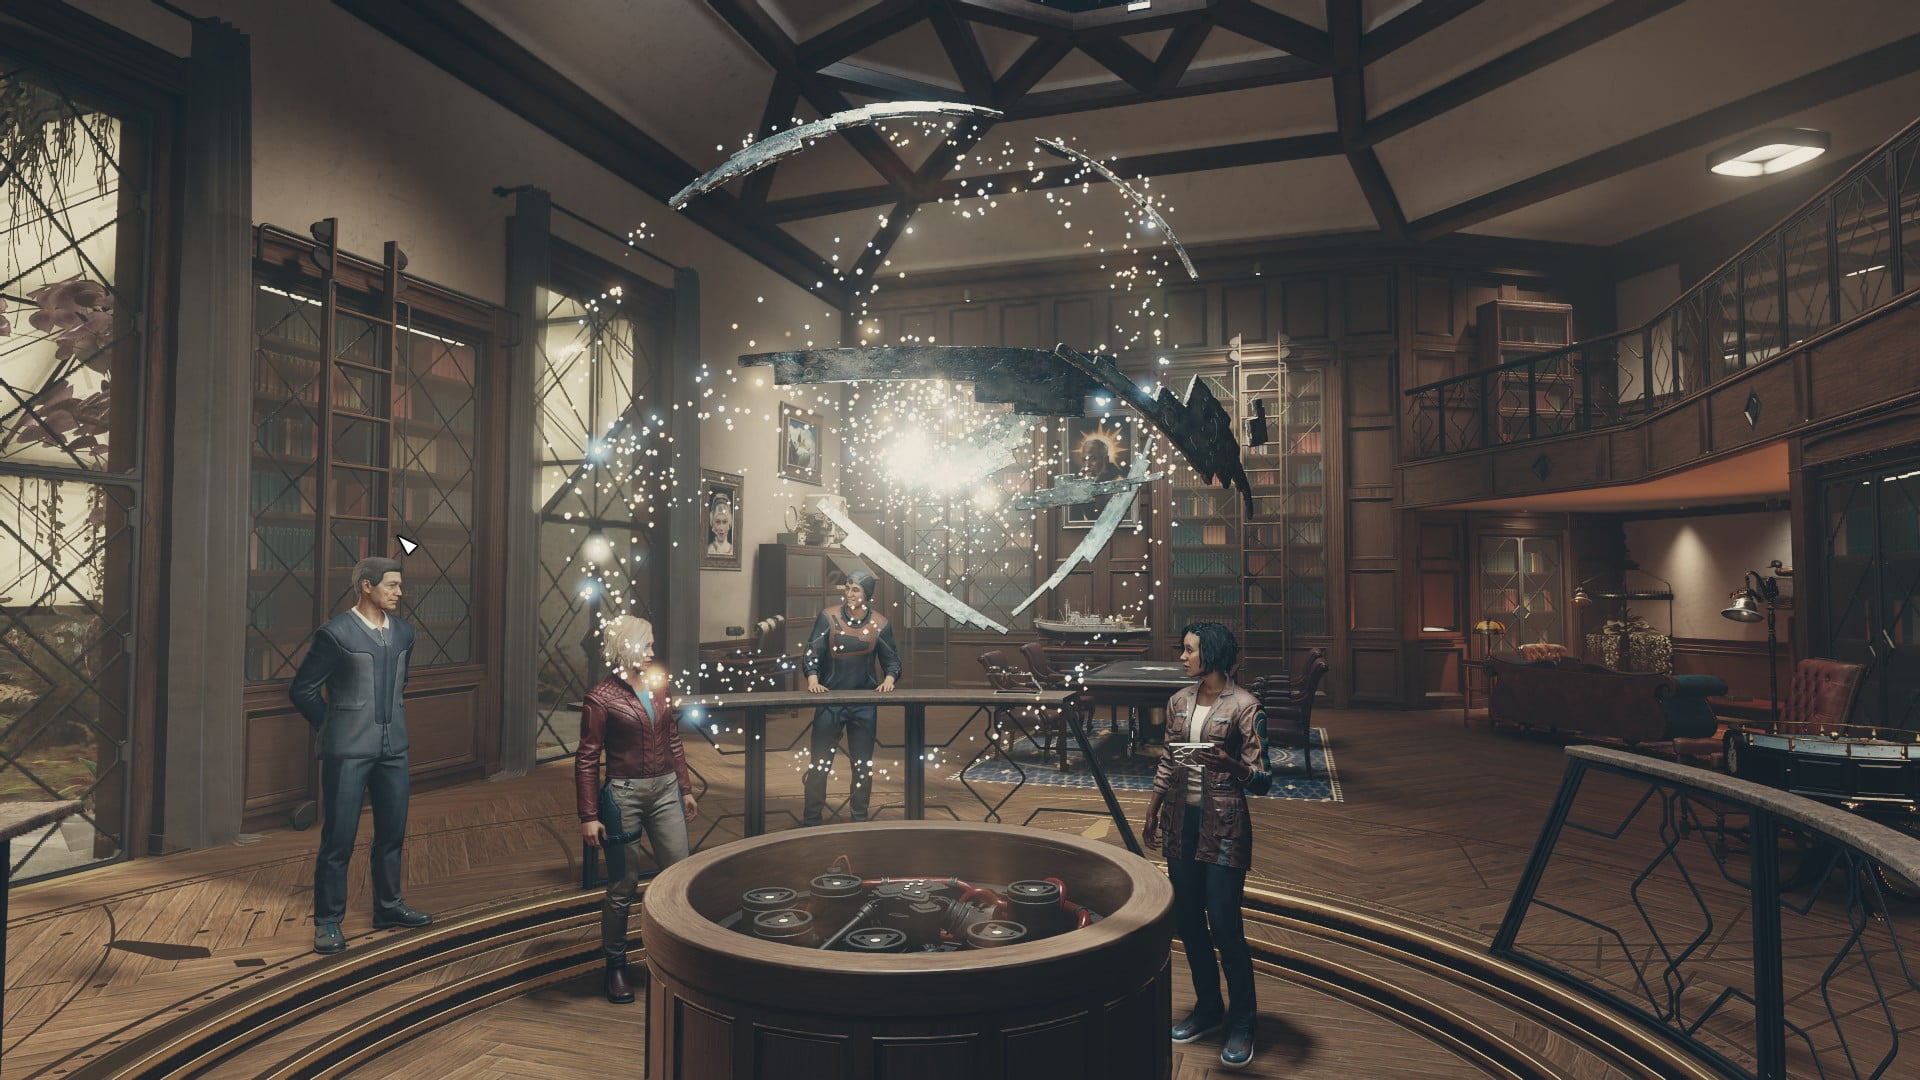
Listen to the Meeting/Place the Artifact
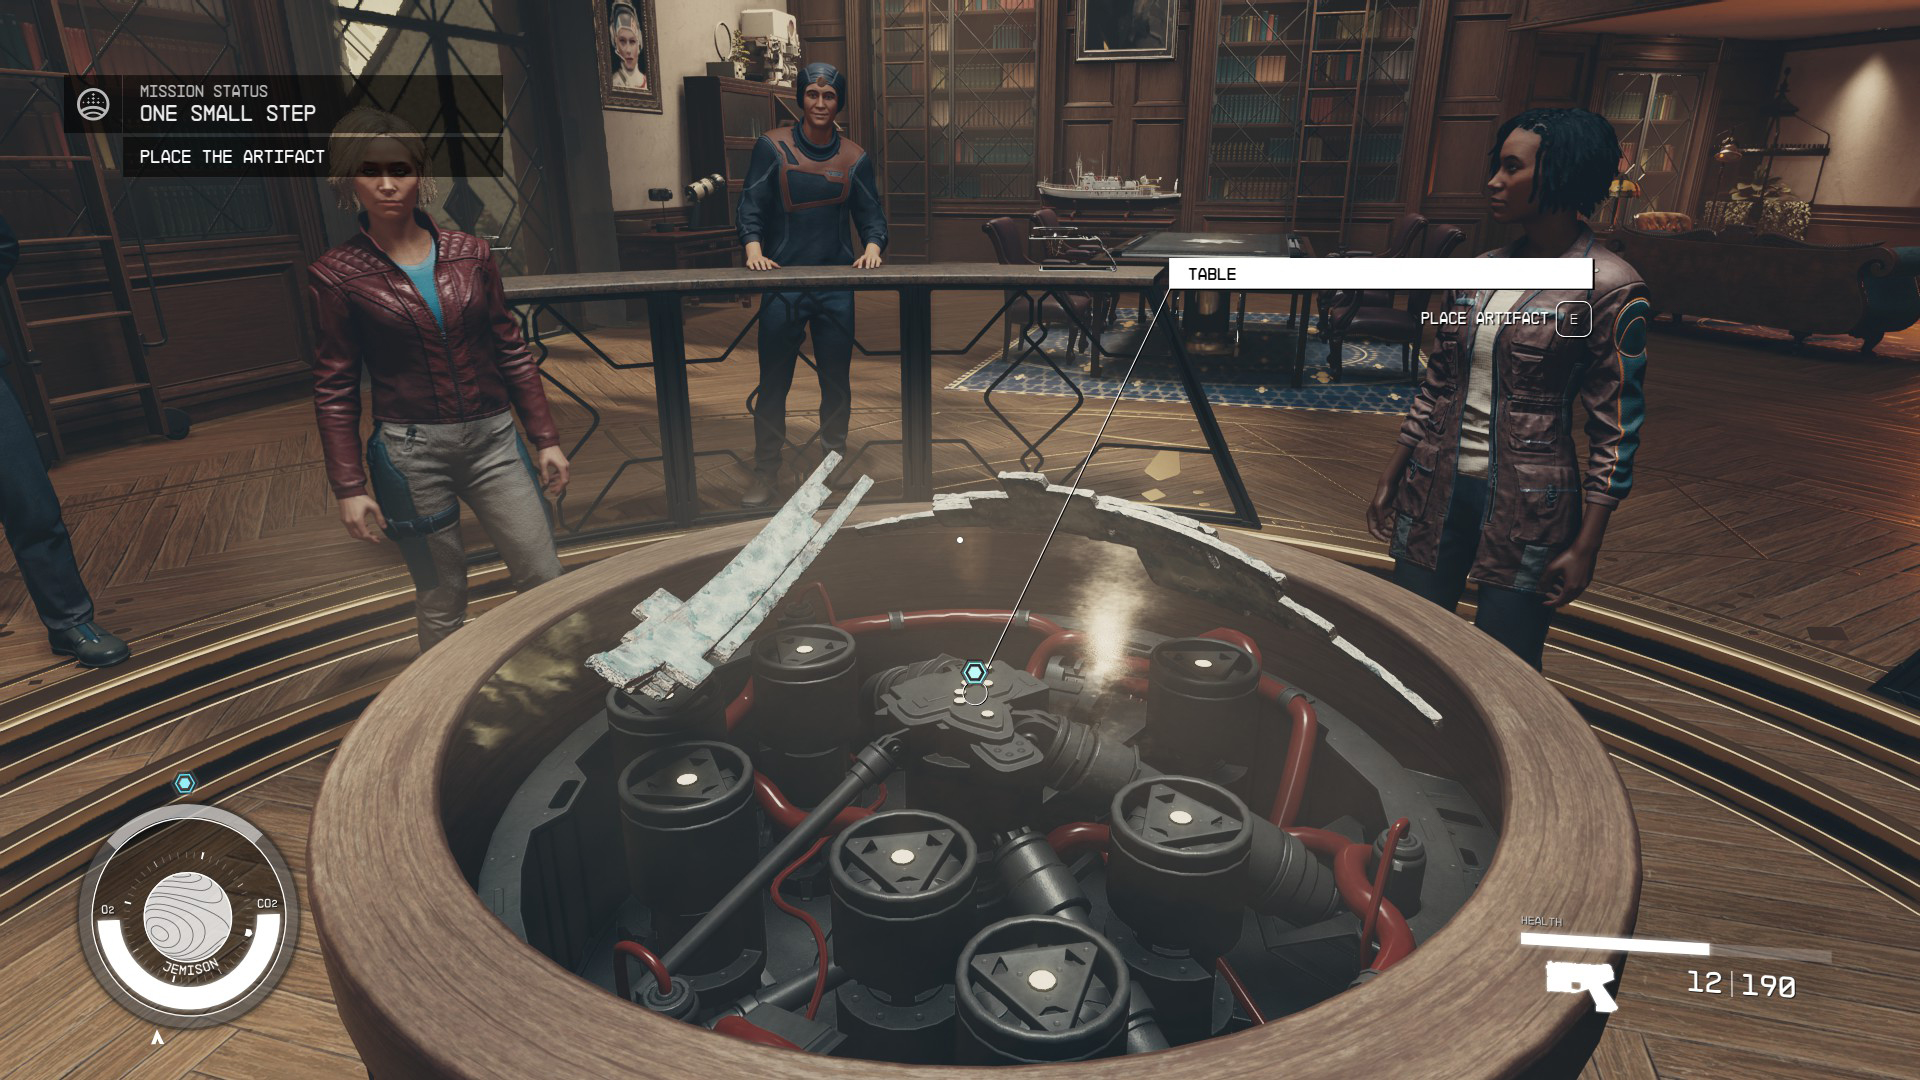
Hang out and follow along to the conversation — the volume of character’s voices gets pretty low when you aren’t close, so you’ll need to get pretty close to the speakers if you want to be able to follow what they’re saying. Soon, you’ll be asked to place the artifact on the table — approach the dais pictured below (Image 7) and press the indicated button to place the artifact.
Image 7
Talk to Sarah
Keep listening to the conversation, and then Sarah will speak with you again. You can ask her some questions to learn more about Constellation and their mission, and then end One Small Step either by saying “All right. I’m In…” or by selecting “This is all a little much…”. It’s an RP choice, as in either case, you’ll need to speak with her again to begin the next main story mission, The Old Neighborhood.
What to Do Next
There is a lot to do in New Atlantis, including plenty of side missions and smaller missions, called “Activities”. You can also go and join one of the game’s factions at this point, by starting the quest Supra Et Ultra. For starters, you might want to talk to Noel, who’s hanging out near Sarah, and can show you to your room — at a minimum, it’s another room full of junk you can loot and then sell, and there’s some storage there too (although your ship is usually a more convenient place to store things). You should also talk to Vasco, and assign him to your crew — he’s hanging out near the entrance to the library.
The next story mission isn’t particularly difficult even if you go straight to it, and so there’s no “right” choice at this point. If you don’t want to explore New Atlantis, it’s fine to continue with the next main mission, The Old Neighborhood.
Unabashed FromSoftware fanboy still learning to take his time with games (and everything else, really). The time he doesn't spend on games is spent on music, books, or occasionally going outside.