In this Ryujin Industries faction mission walkthrough, you’ll have to infiltrate your own company’s offices, in an attempt to root out the mole that’s stealing company secrets. Stealth can be a pain in Starfield, but fortunately you also have the option of (non-lethally) blasting your way through the joint.
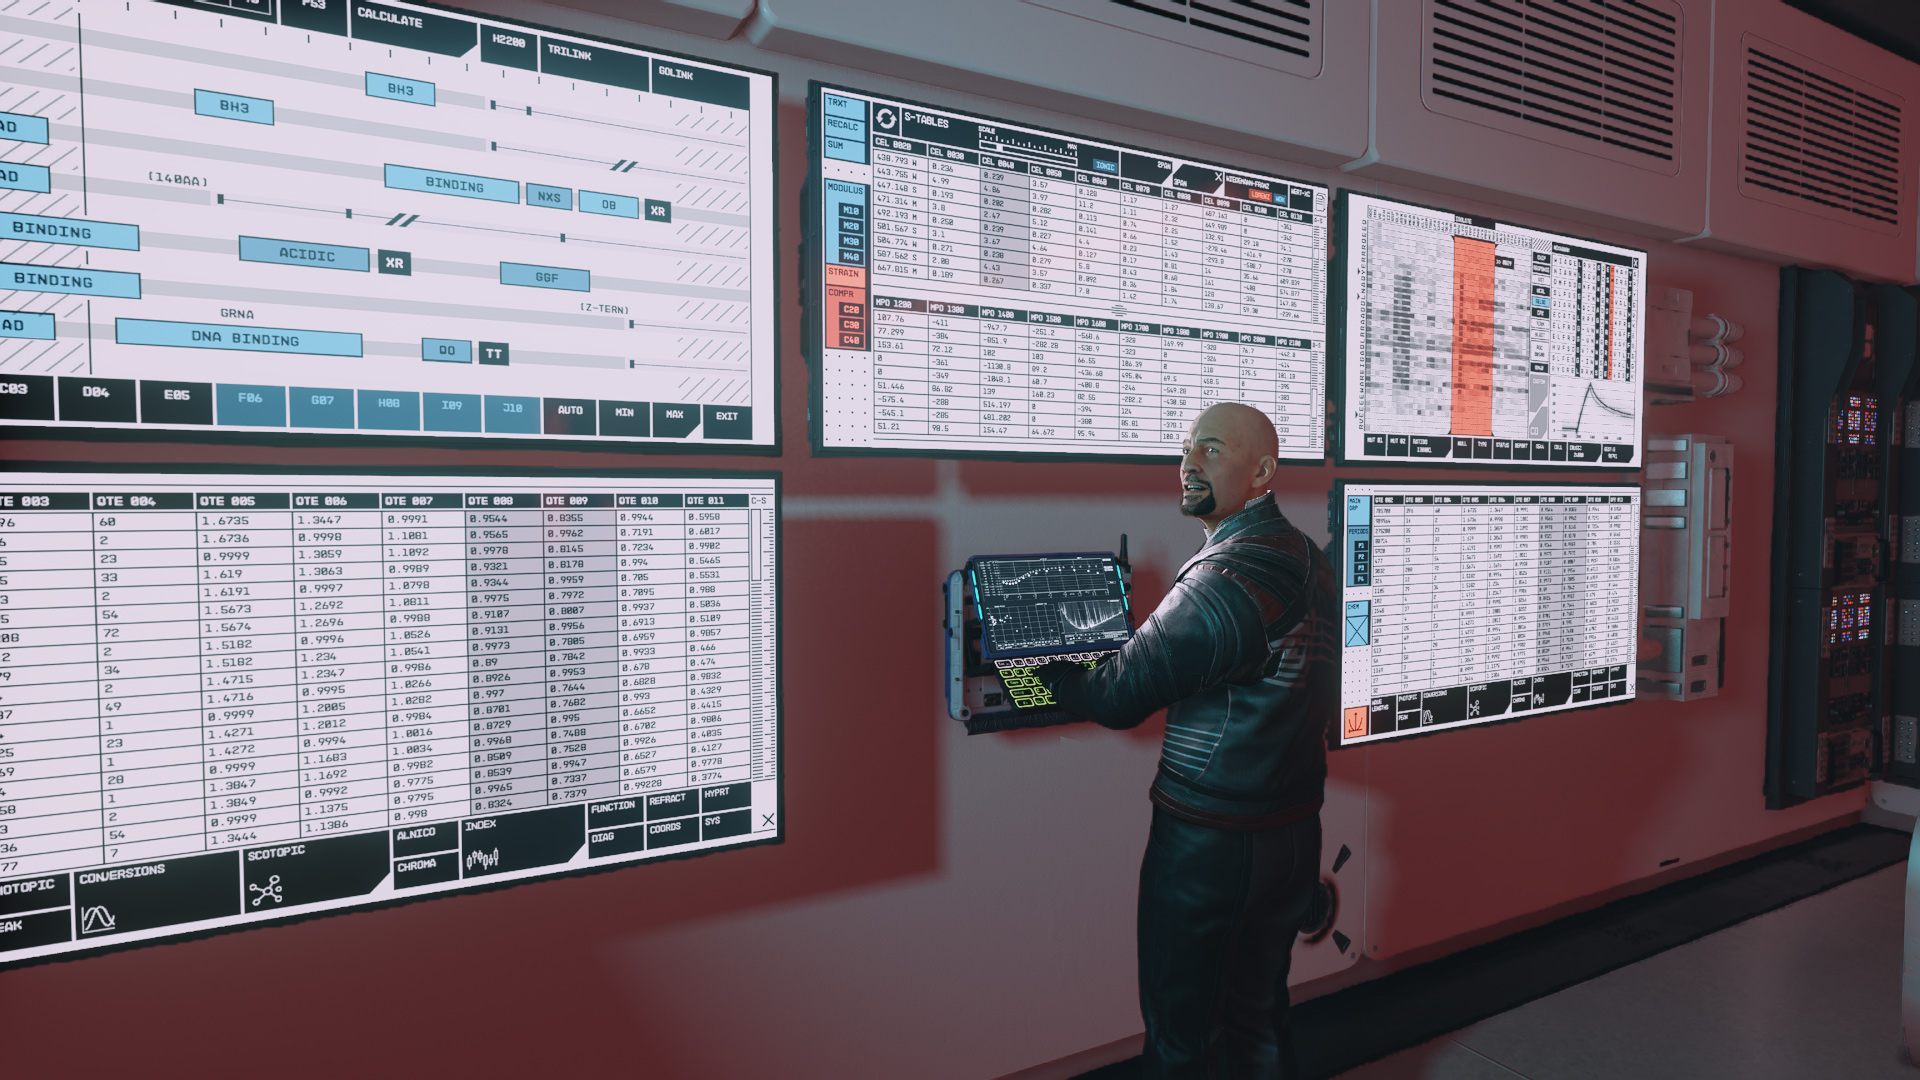
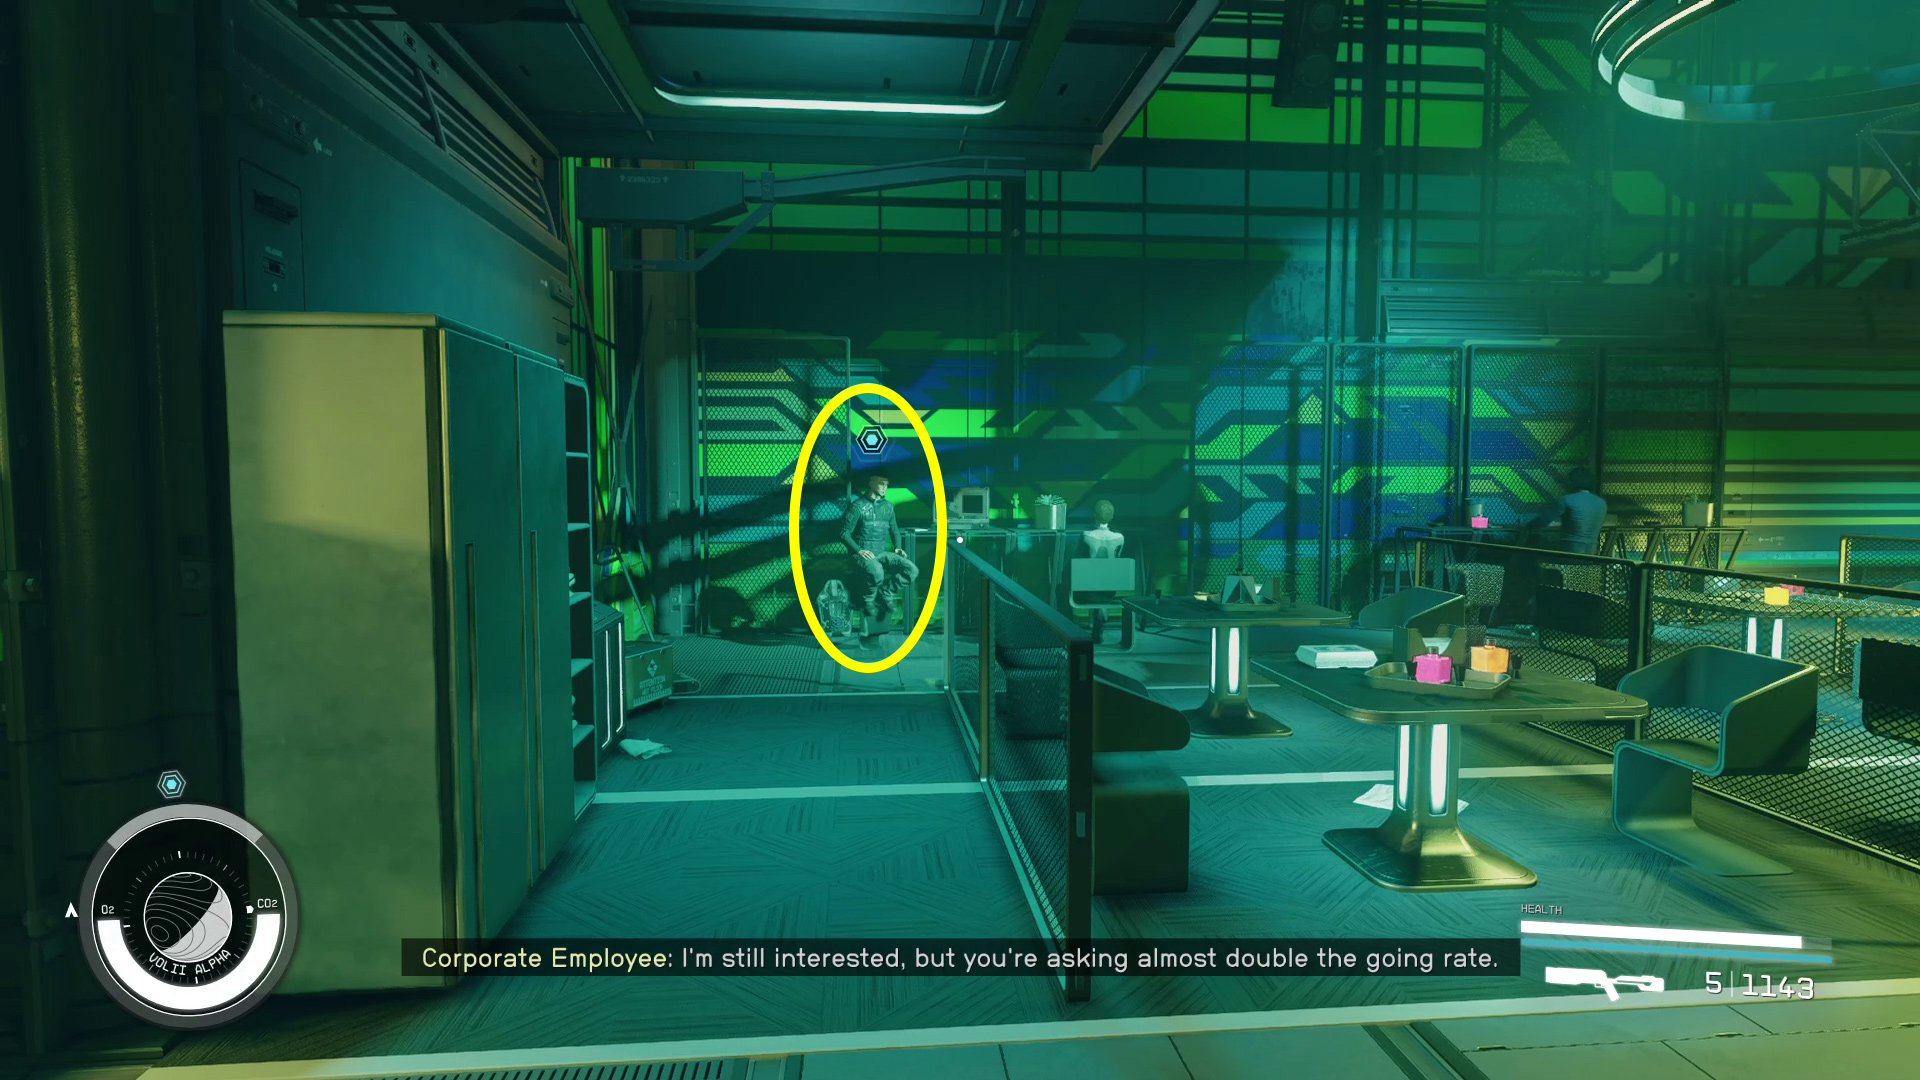
Dalton is found in the Executive Offices level of the Ryujin Industries Tower — this level can be reached via the elevator in the Lobby. If you just turned in Top Secrets, you’ll already be on the correct floor. With Background Checks tracked in your Mission Log, you’ll be able to use your scanner to make your way to Dalton’s office. Talk to Dalton (Image 1), and he’ll explain the mission/let you ask questions.
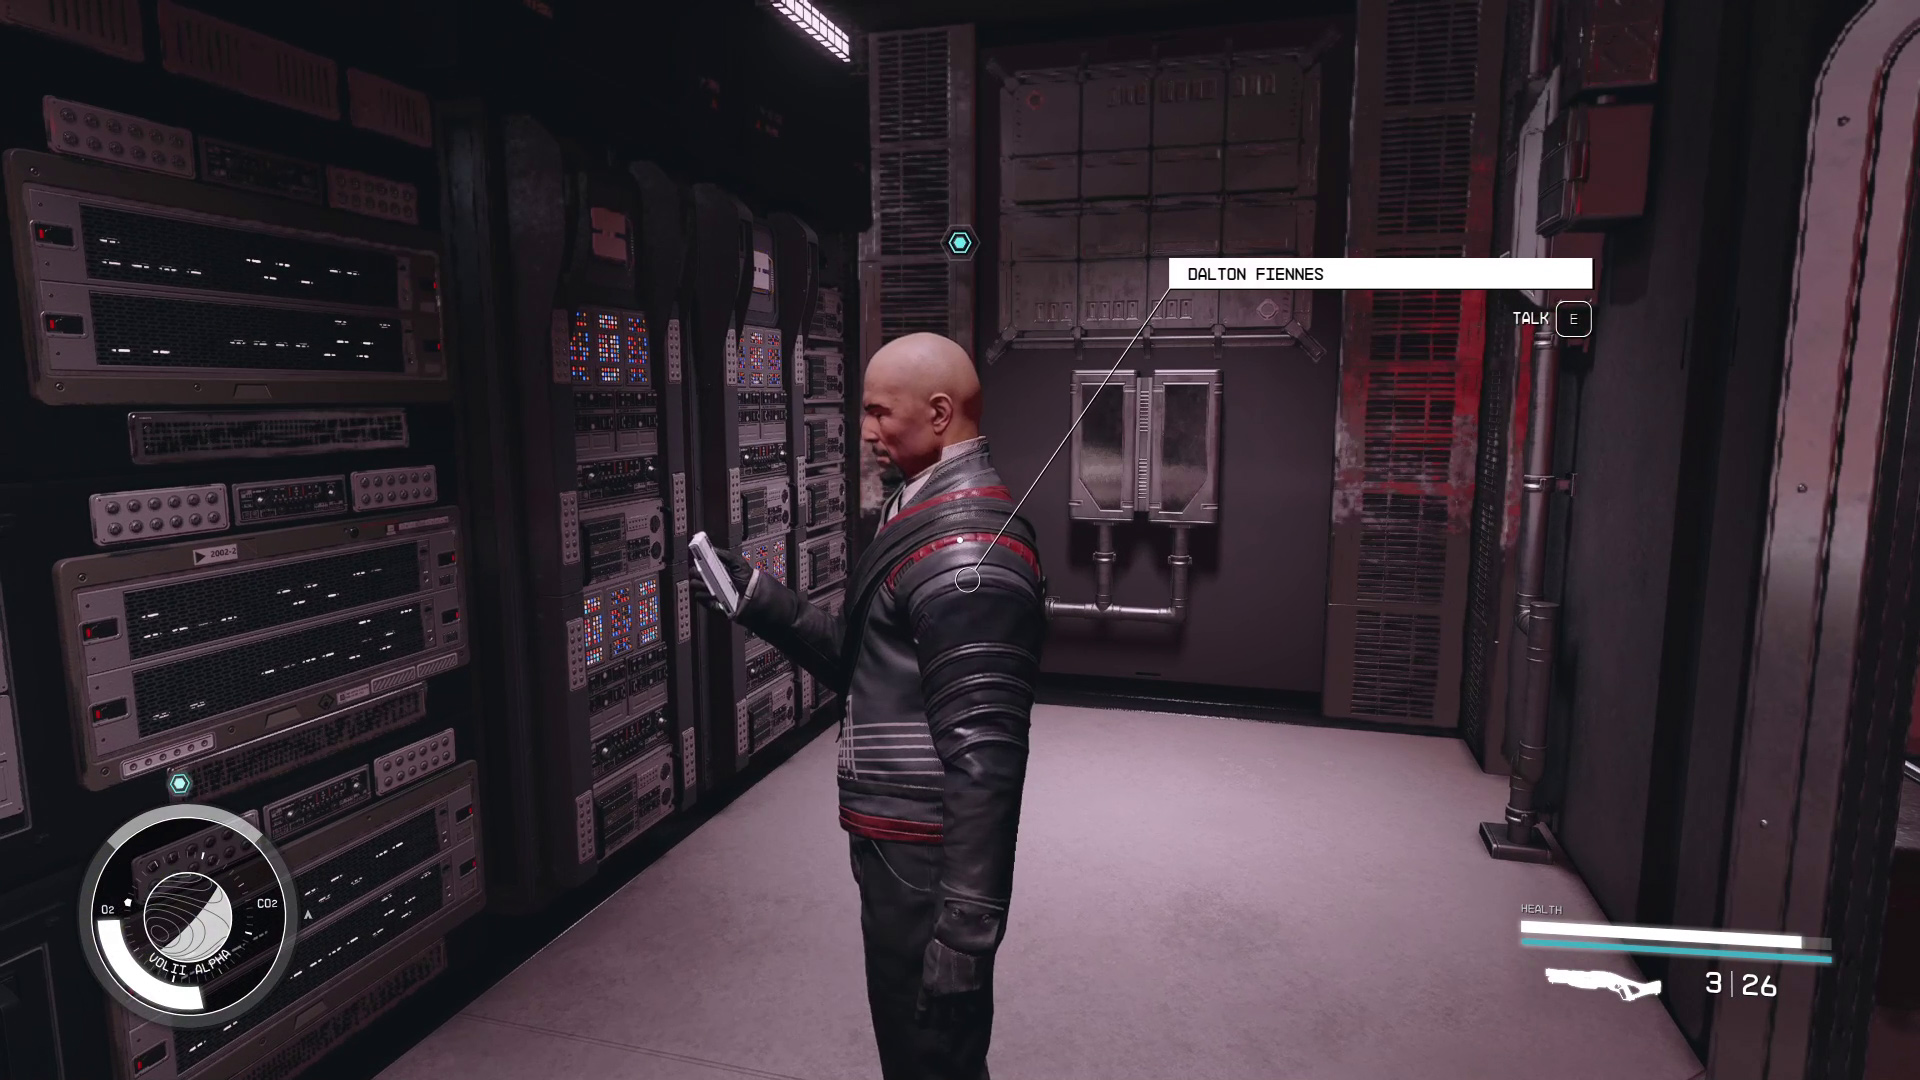
Once the conversation ends, go into your inventory and equip the Novablast Disruptor Dalton gave you (Image 2) — or else another EM weapon you have that’s better. This will let you disable enemies without killing them; while optional, you’ll miss out on rewards (and be ignoring your mission parameters/committing murder) if you kill the Ryujin guards you encounter on this mission.
Image 1Image 2
Meet Nyx at Madame Sauvage’s Place
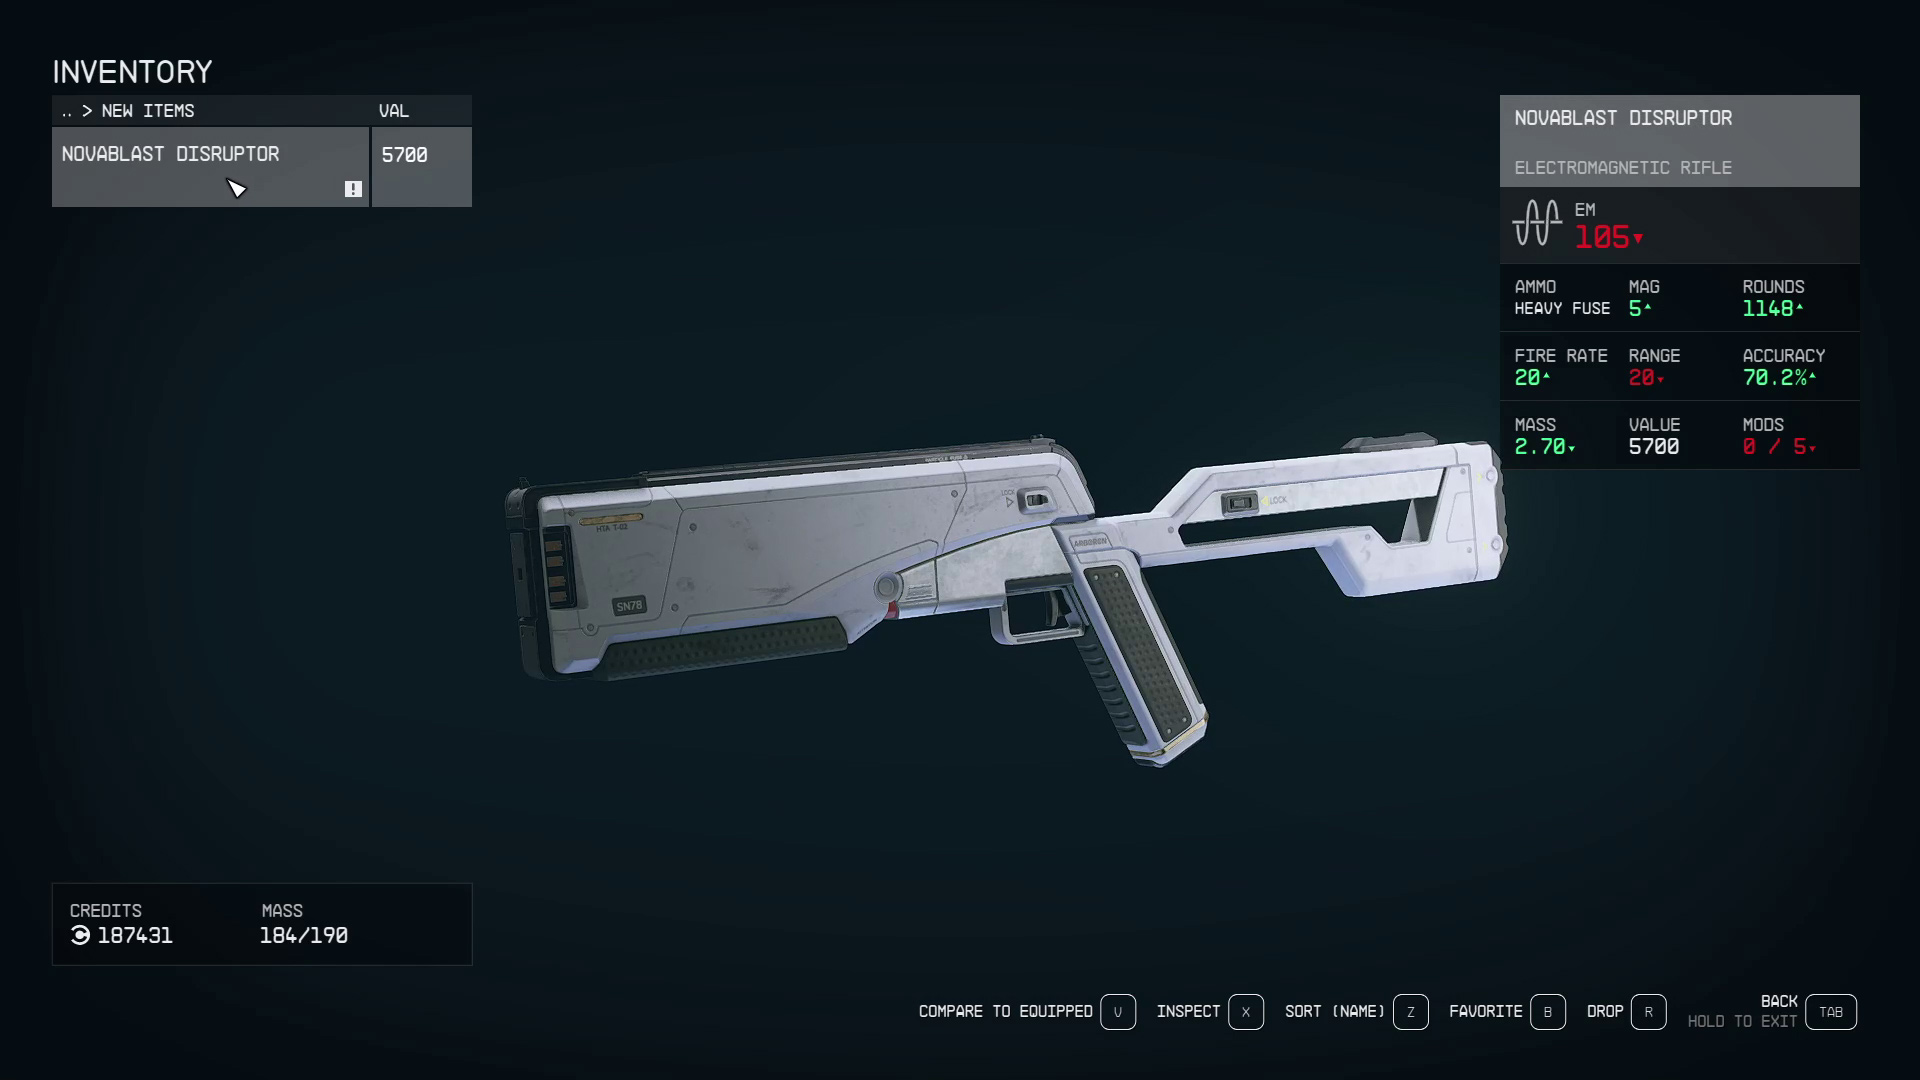
Make your way back to the elevator (your Hand Scanner can guide you) and take it to the lobby. Leave the tower and again use your scanner to make your way to Madame Sauvage’s Place, which is in Ebbside. The entrance to Ebbside is to the right of the Spaceport elevator, and once you’re in Ebbside, Madame Sauvage’s is just ahead (Image 3). Head inside, then turn left and you’ll see Nyx waiting for you (Image 4).
Image 3Image 4
Nyx will ask you to pay 2500 credits for the slate with the program you need — you can [Persuade] him down to 1000 credits, or alternatively, agree to the favor he wants by saying “Let’s hear that favor” and then “No problem. Just a quick stop along the way”. Doing the favor is only a minor inconvenience, but then again, so is 1,000 credits, so either option is fine.
In this walkthrough, we’ll assume you wanted to save the credits, and so the pathing in the guide will include the favor.
Find a Way Into Ryujin Tower
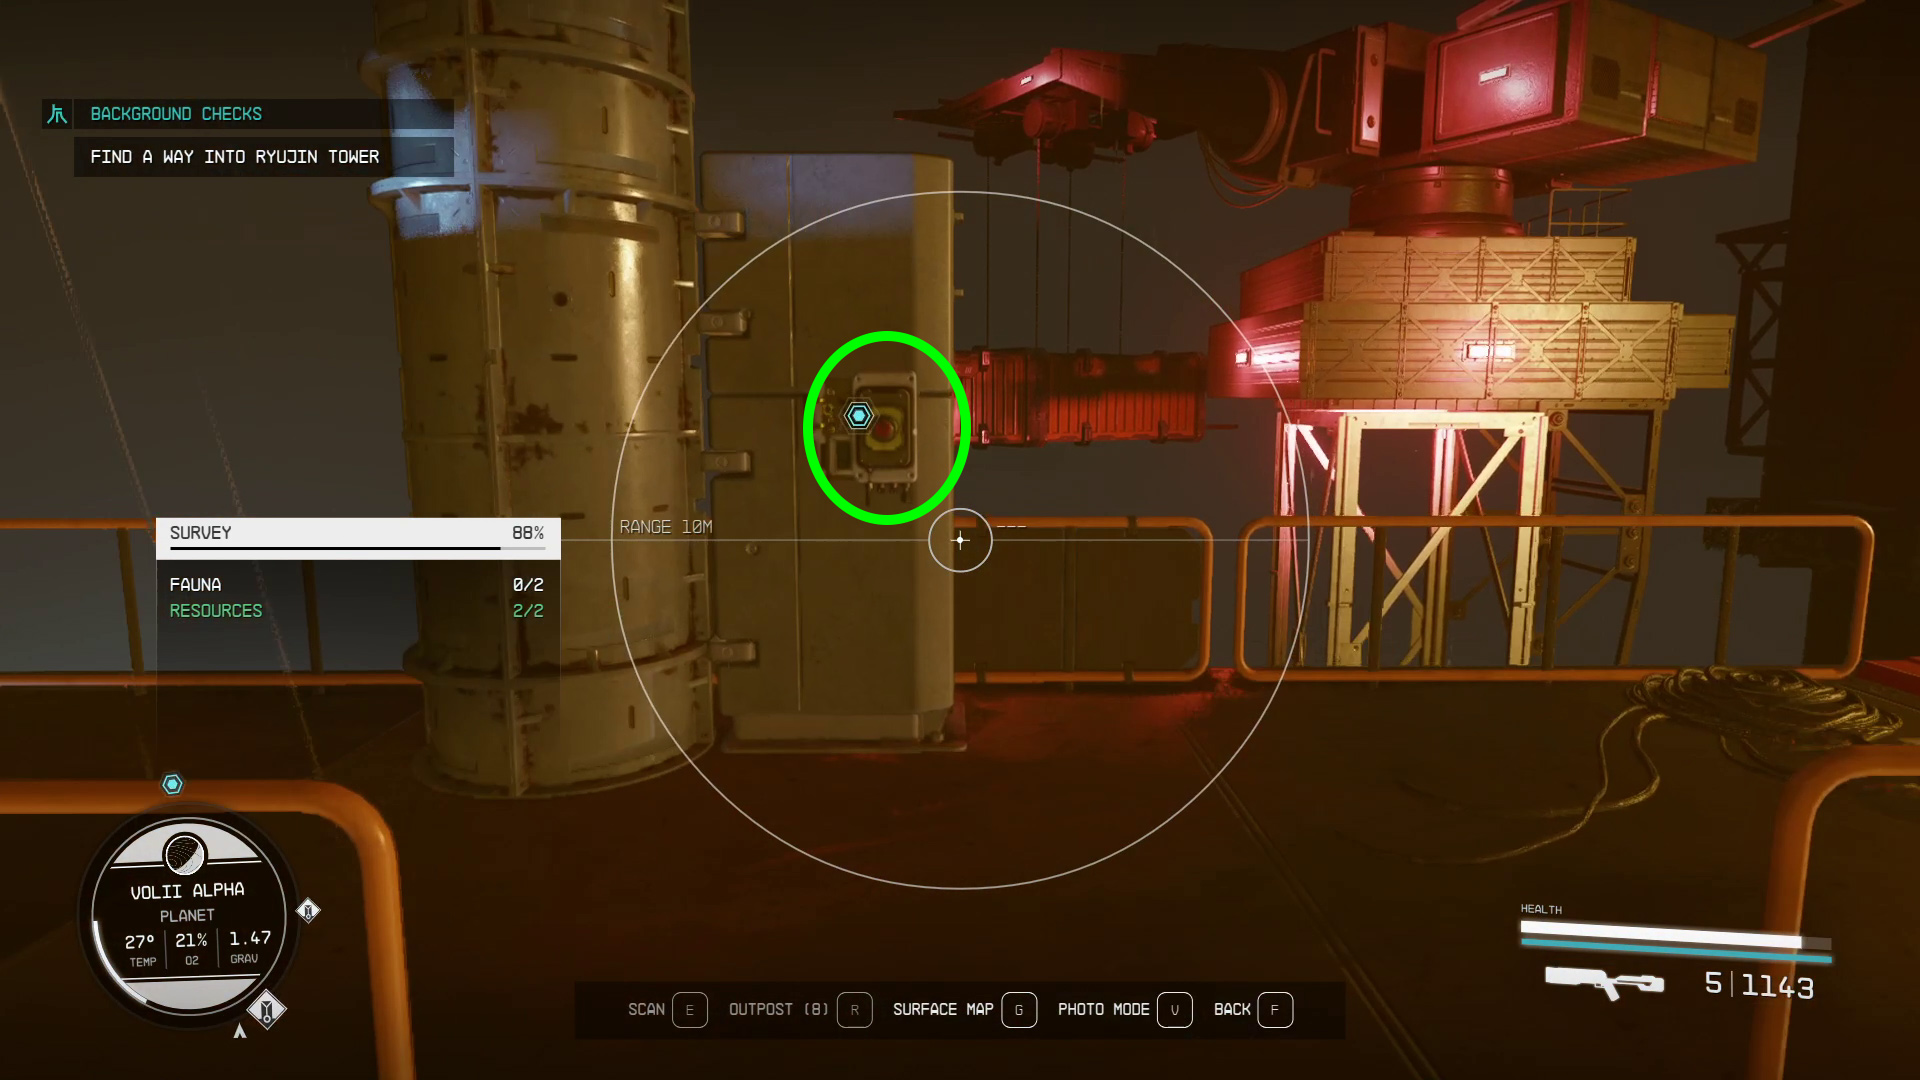
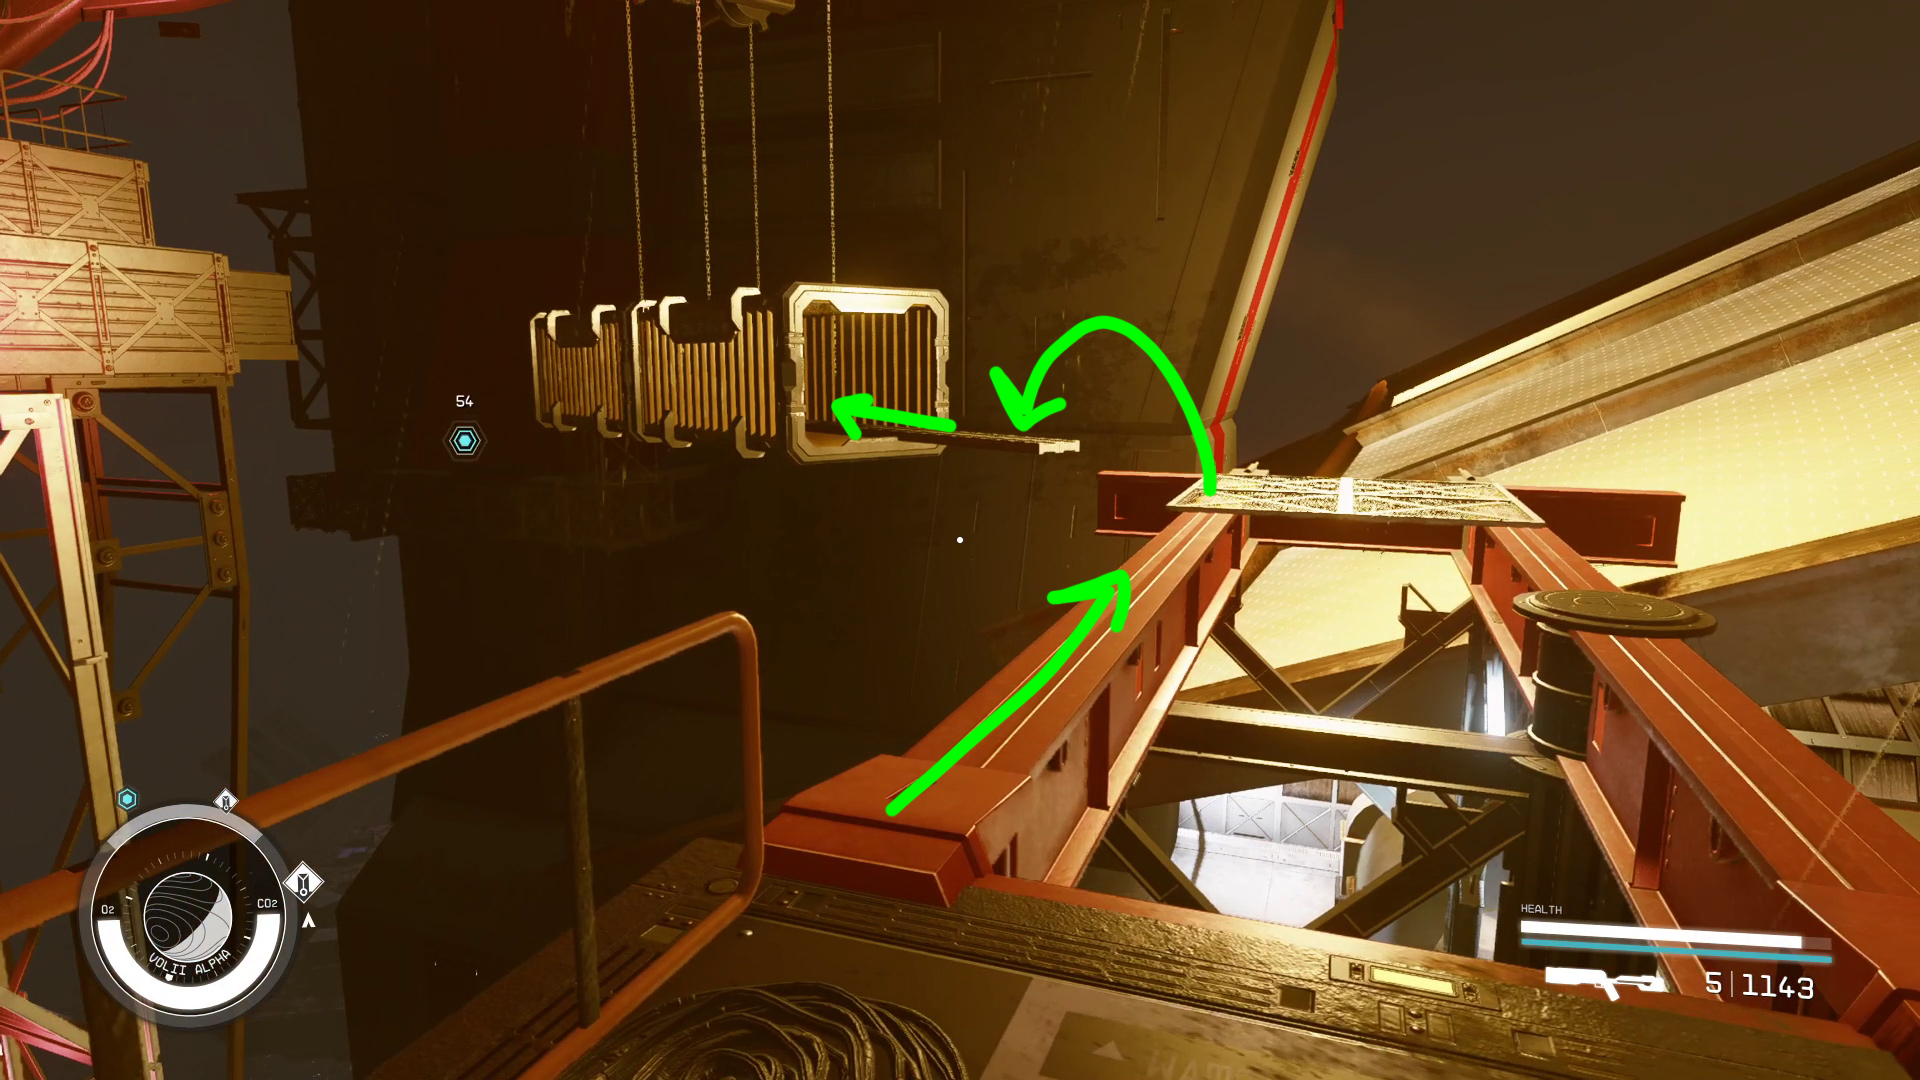
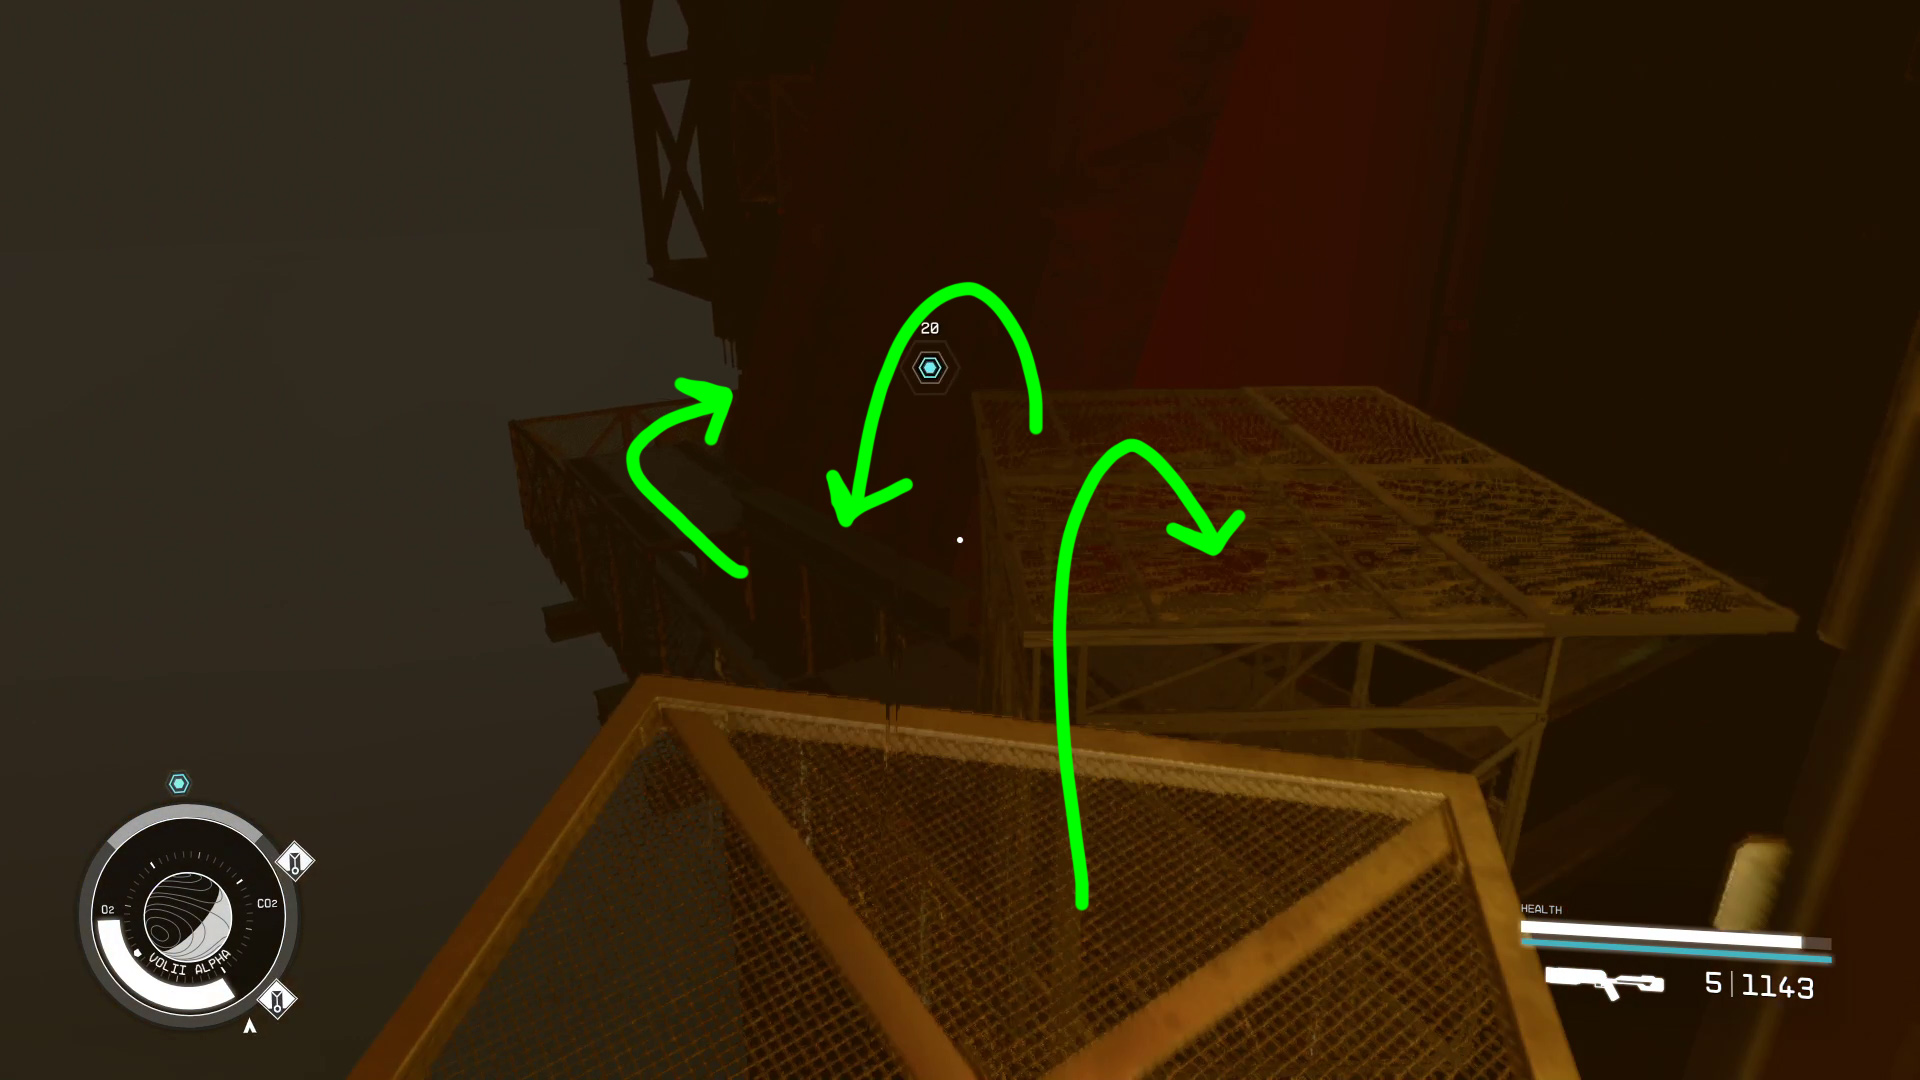
Despite how the objective is worded, you don’t have to find anything — the scanner will lead you right to an entrance. Leave Madame Sauvage’s, then activate your hand scanner and follow the guide arrows into the alley to the left, then up the many stairs. You’ll reach a button (Image 5) — activate it, wait until the crane stops moving, and then cross the “bridge” created by the movement of the crane (Image 6). Continue across the pseudo-bridge onto the tower and go around the corner (Image 7). Then go through the door the objective marker is helpfully indicating.
Image 5Image 6Image 7
Run Nyx’s Program on Ularu’s/Camden’s Computer
Note: There is a lot of stealth in the next section. If you want to play the mission “right”, you’ll want to avoid being caught. However, it is possible to ignore stealth and simply use the non-lethal weapon you were given to avoid a bounty. You can even sprint past all the enemies to the objectives if you want. If caught, you can attempt to [Persuade] the guard to let you go, or fight (or let them arrest you, but there’s no reason to choose that option).
All that said, this walkthrough will assume you want to play secret agent and stealth your way to the two computers. We suggest using the Novablast Disruptor Dalton gives you to take out any guards you’re having a hard time sneaking past.
For most of this section, you can use your Hand Scanner if you get turned around, and it will lead you to the objective. Also note that most of the vents mentioned will need to be opened before you can enter them.
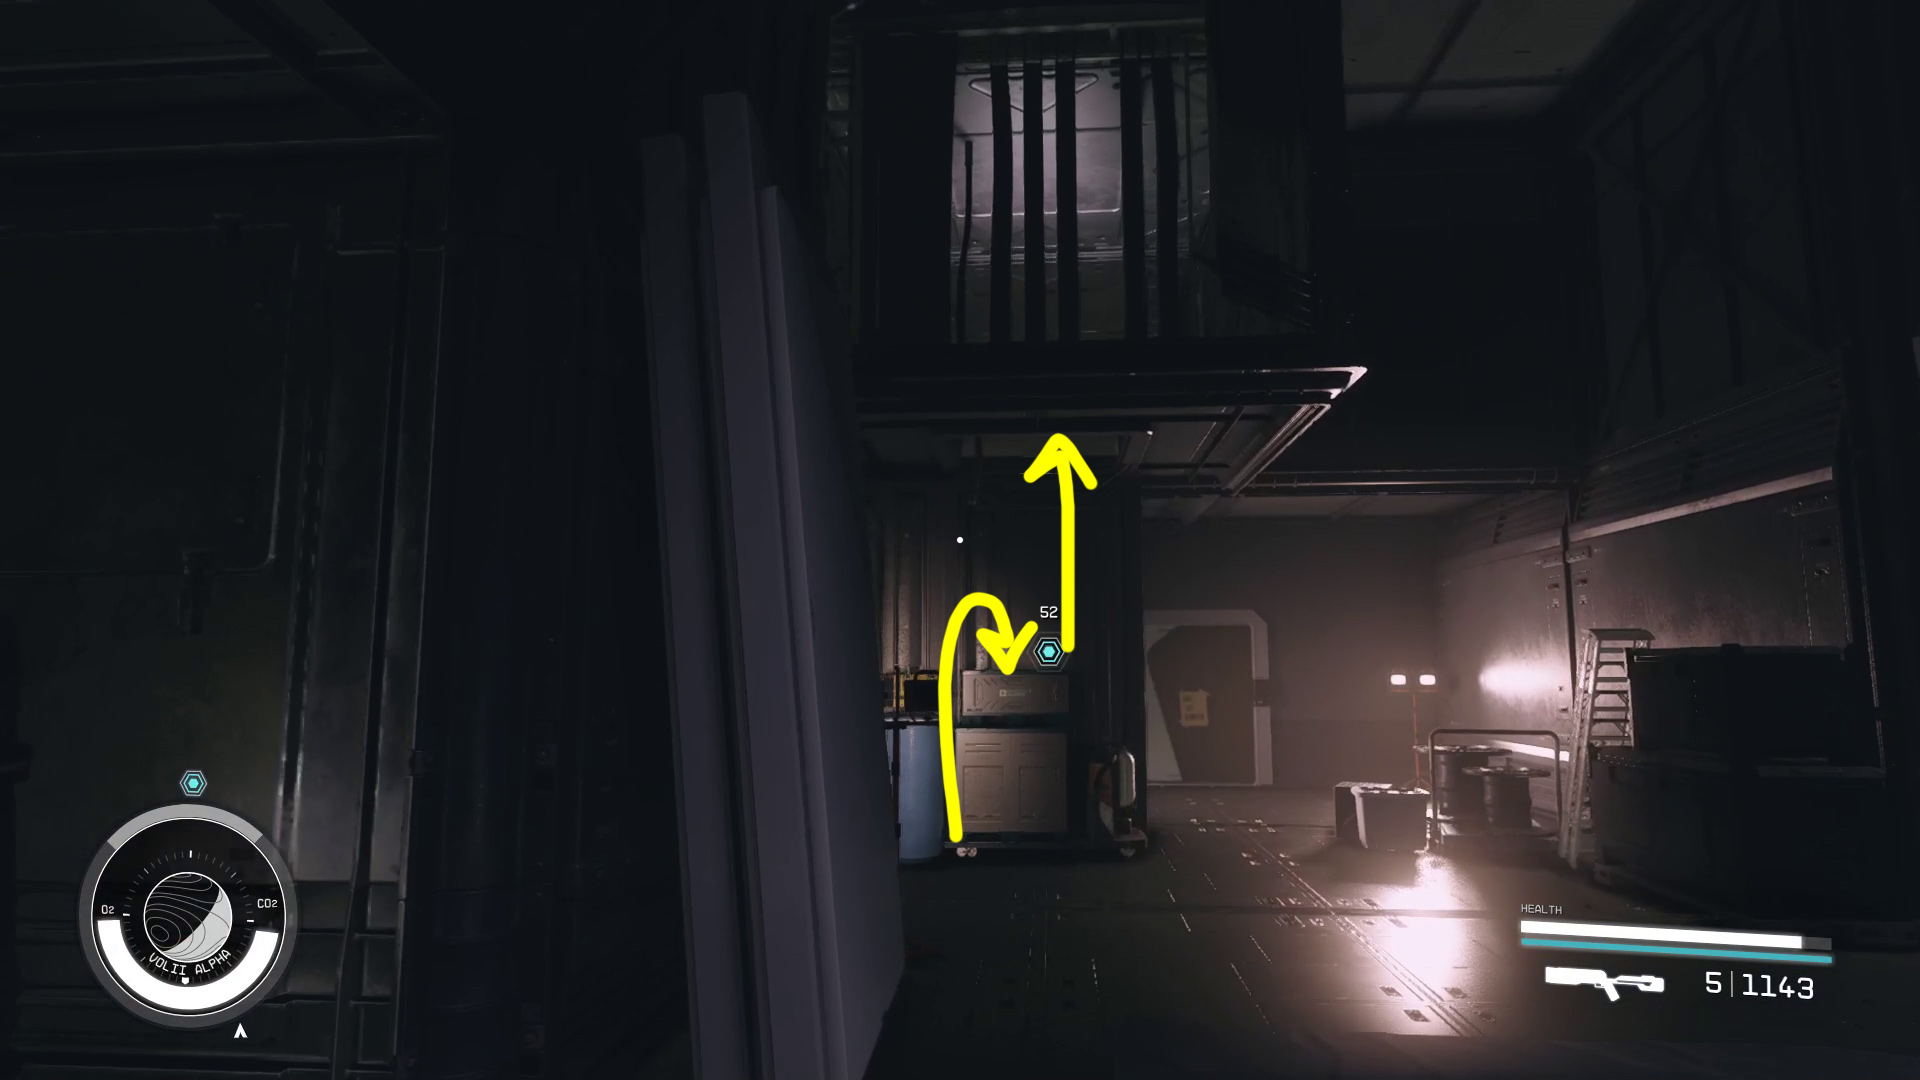
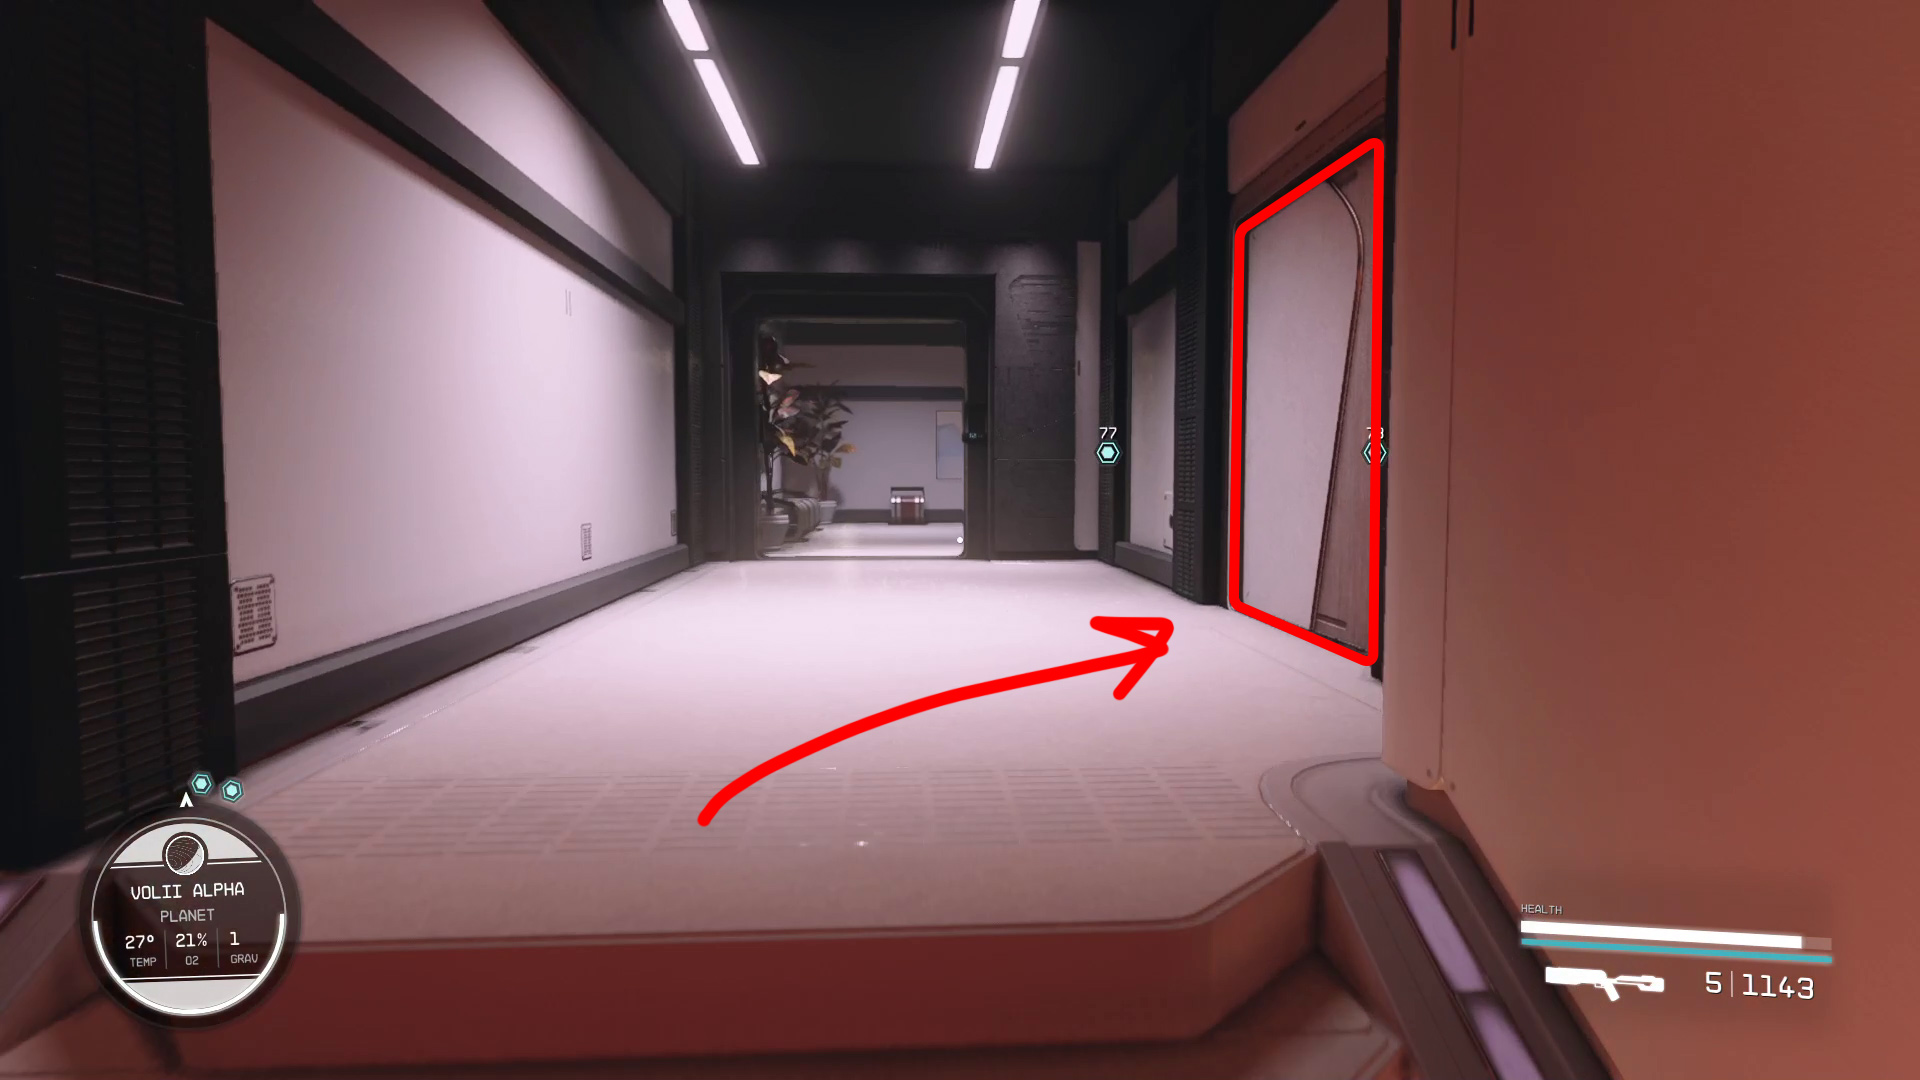
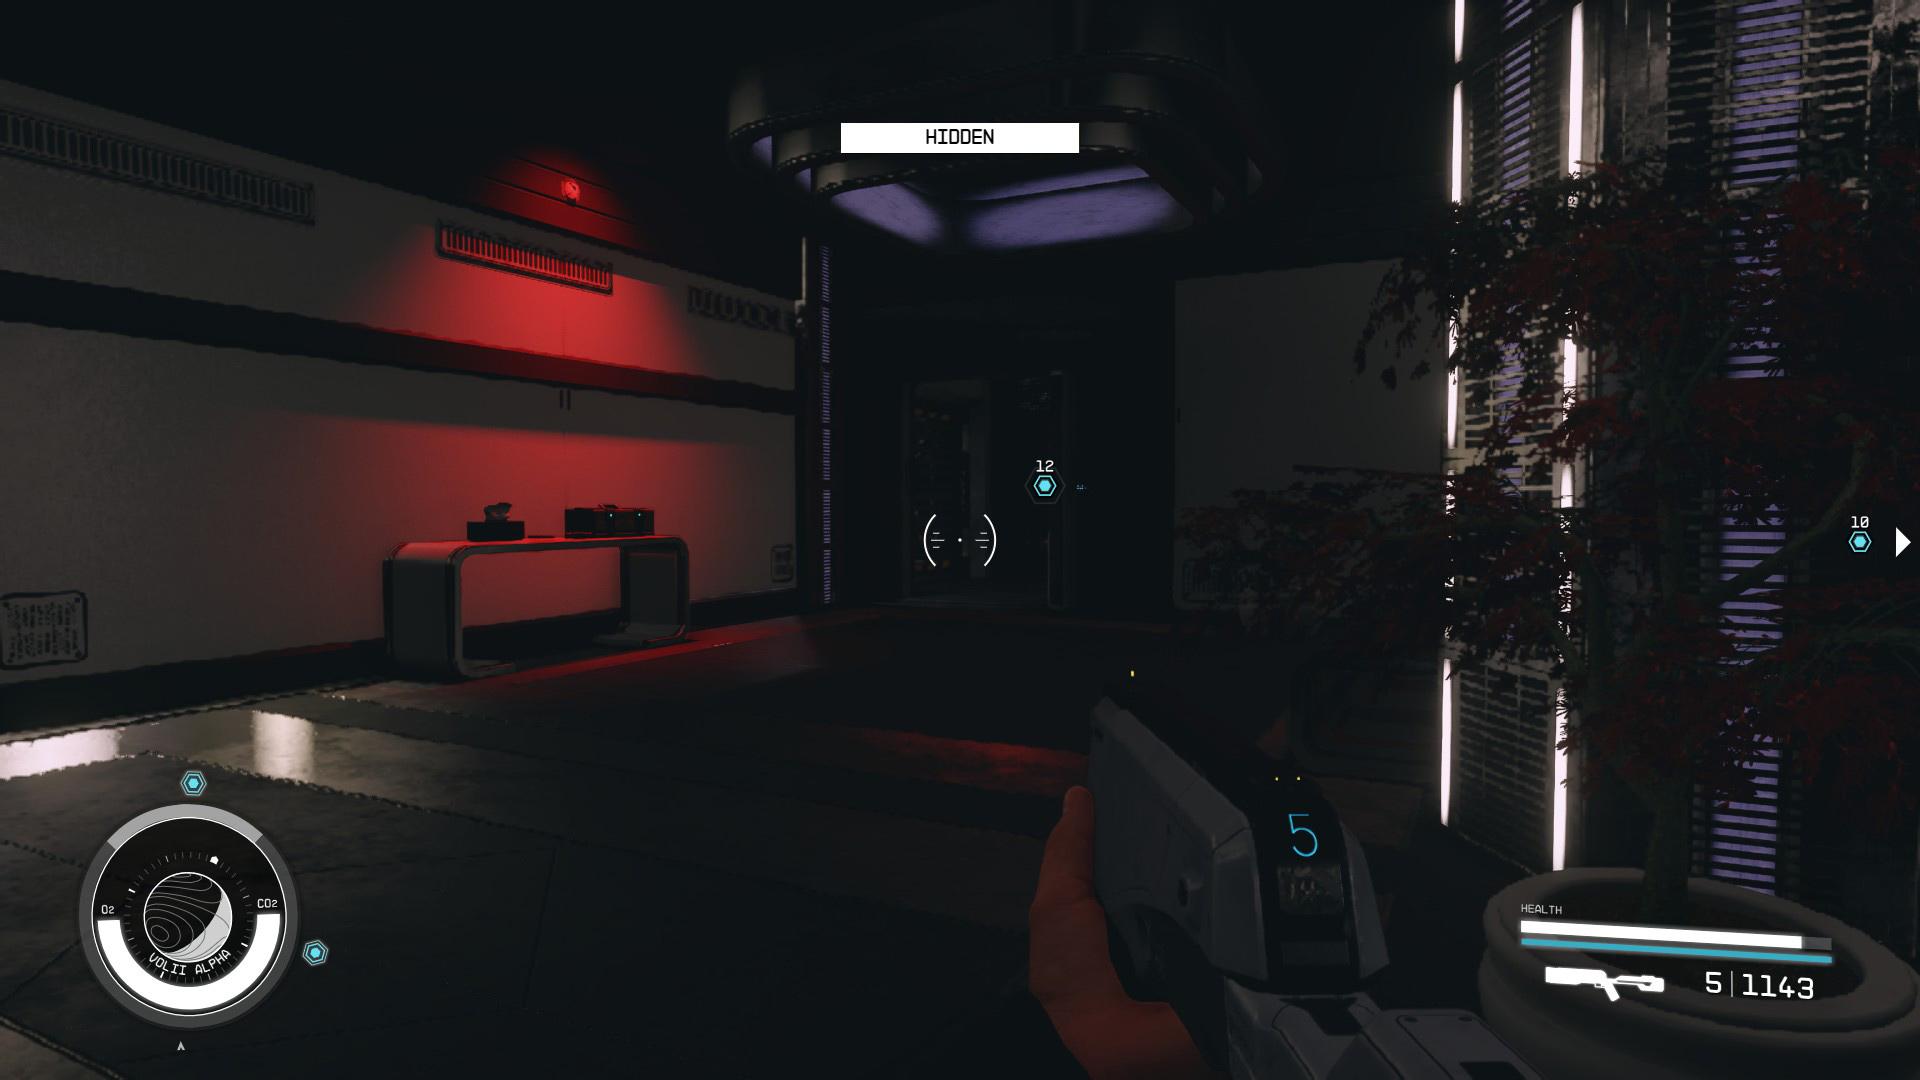
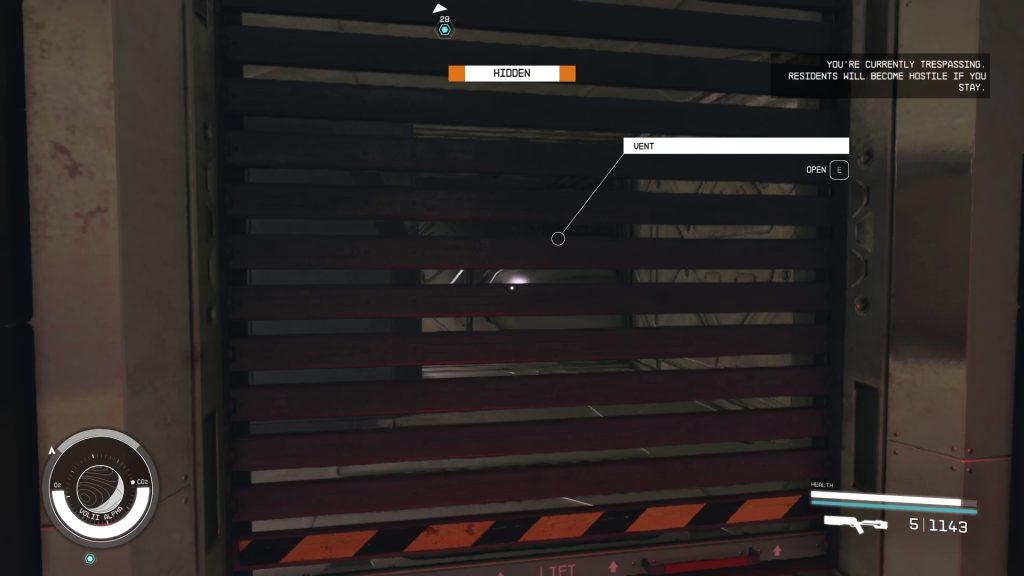
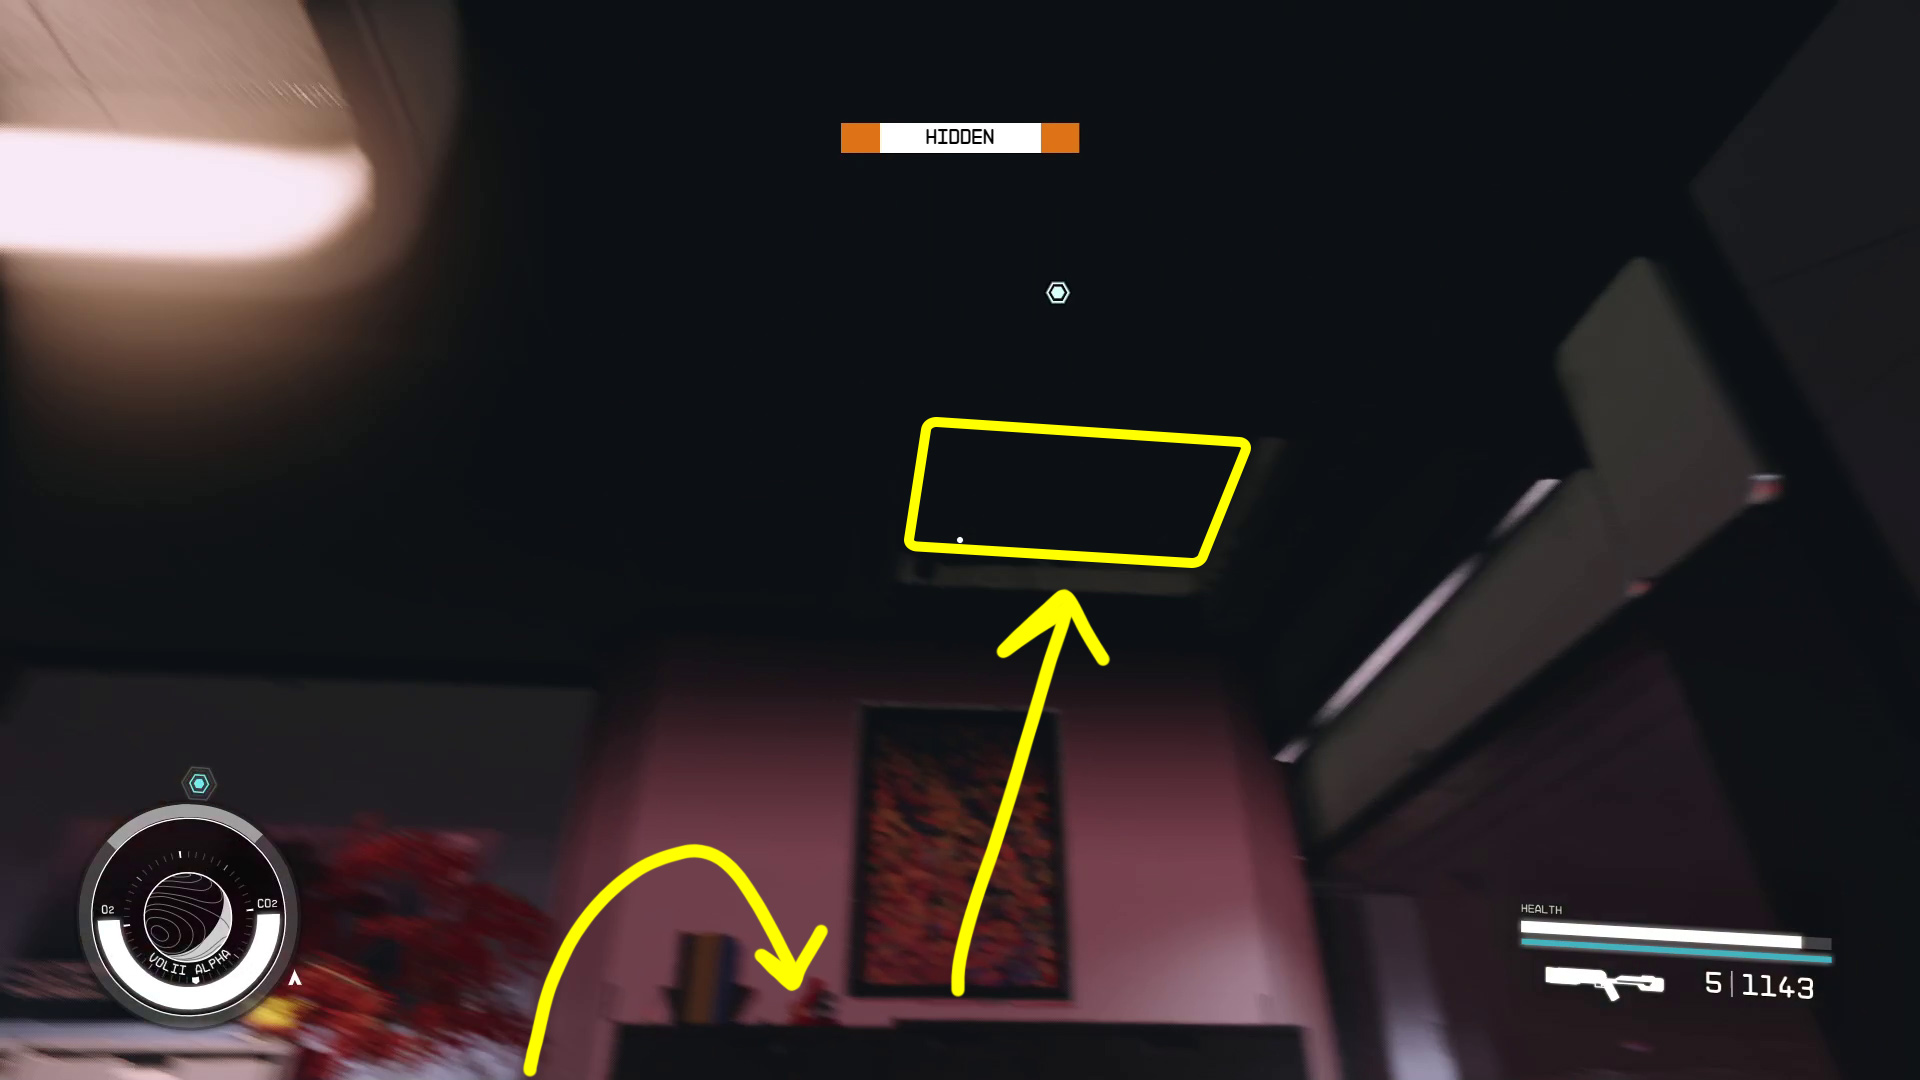
The “door” you found leads to a vent — go forward, and on your right will be a vent you can open, allowing you to drop down into the next room. Just ahead are some boxes you can jump on, and from there into another vent (Image 8); there’s a storage container on the boxes, and another right as you enter the vent. Upon entering the vent, you’ll see a switch ahead (Image 9) — interact with it to turn off the lights in this area, making sneaking a bit easier.
Image 8Image 9
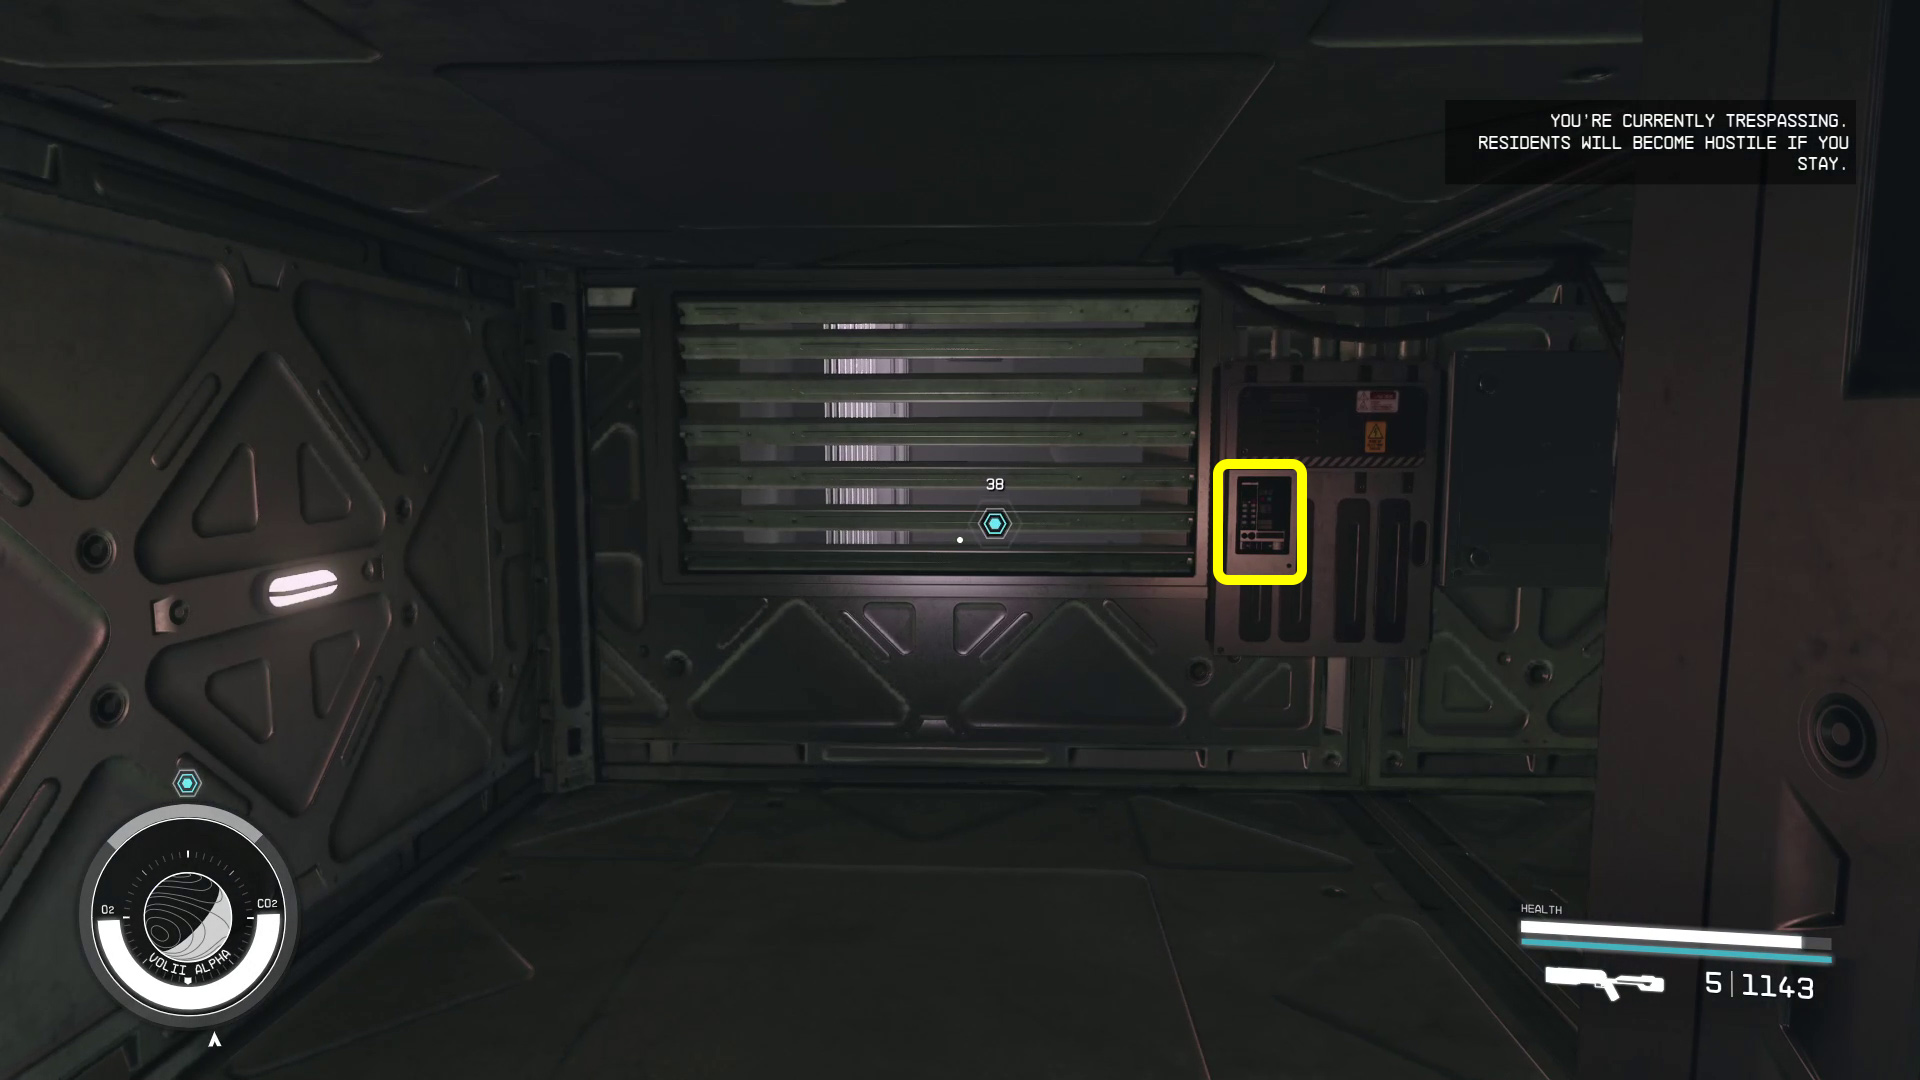
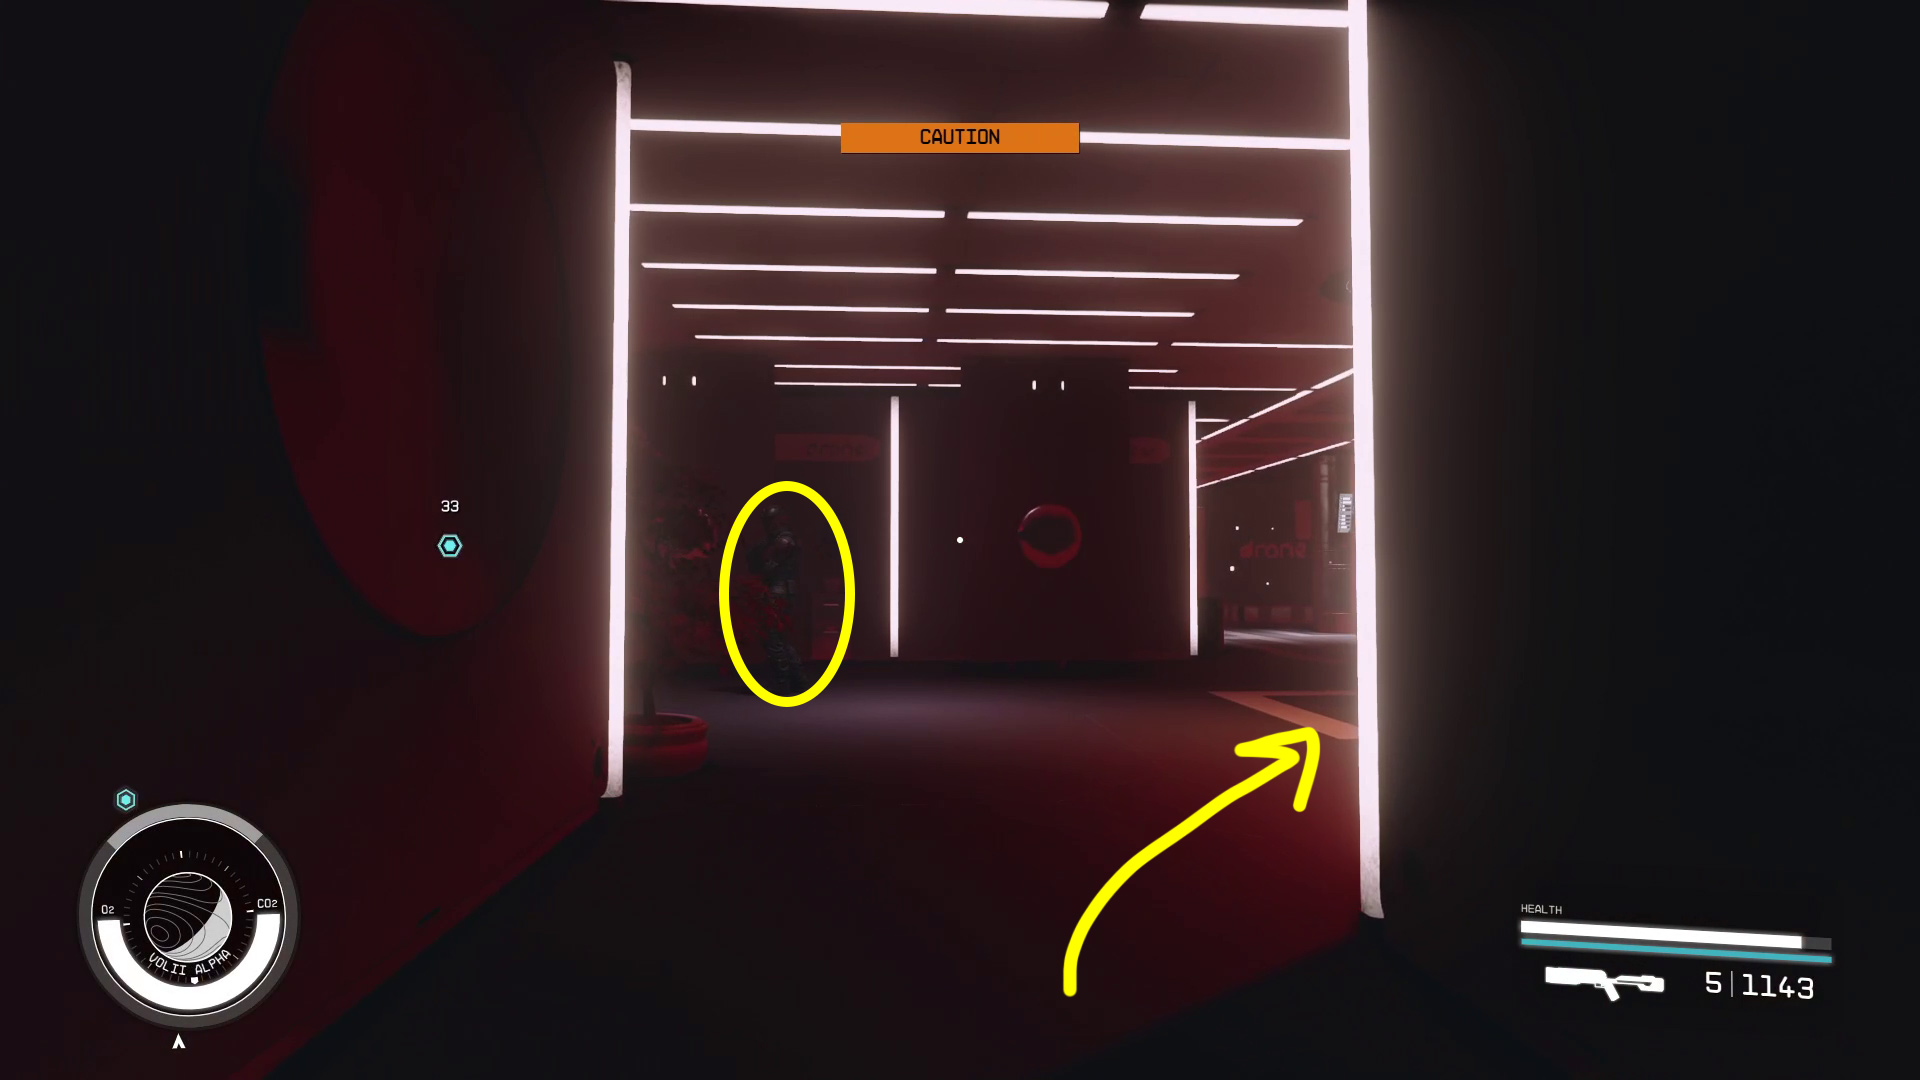
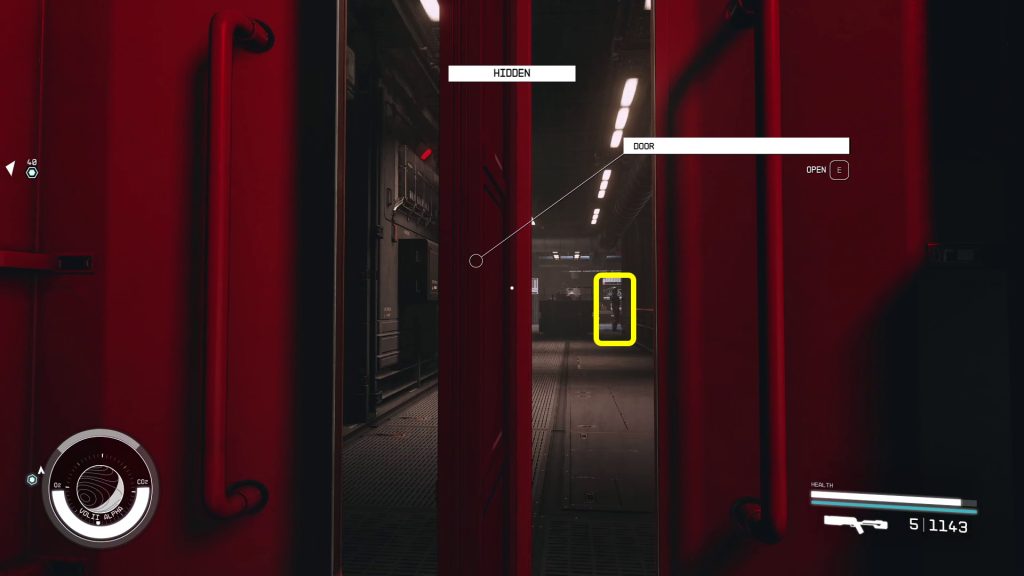
From the switch, go right, then take the next left and drop down the square hole in the vent floor. You’ll be in a storage closet — start sneaking, then open the door and go left, where you’ll encounter your first guard (Image 10). Stay to the right of the column and continue past the guard, then go left into the next area. On your right is a control panel (Image 11) — interact with it and select “Run Drome Demo” to send the drone out on its demo. This will distract the nearby guards.
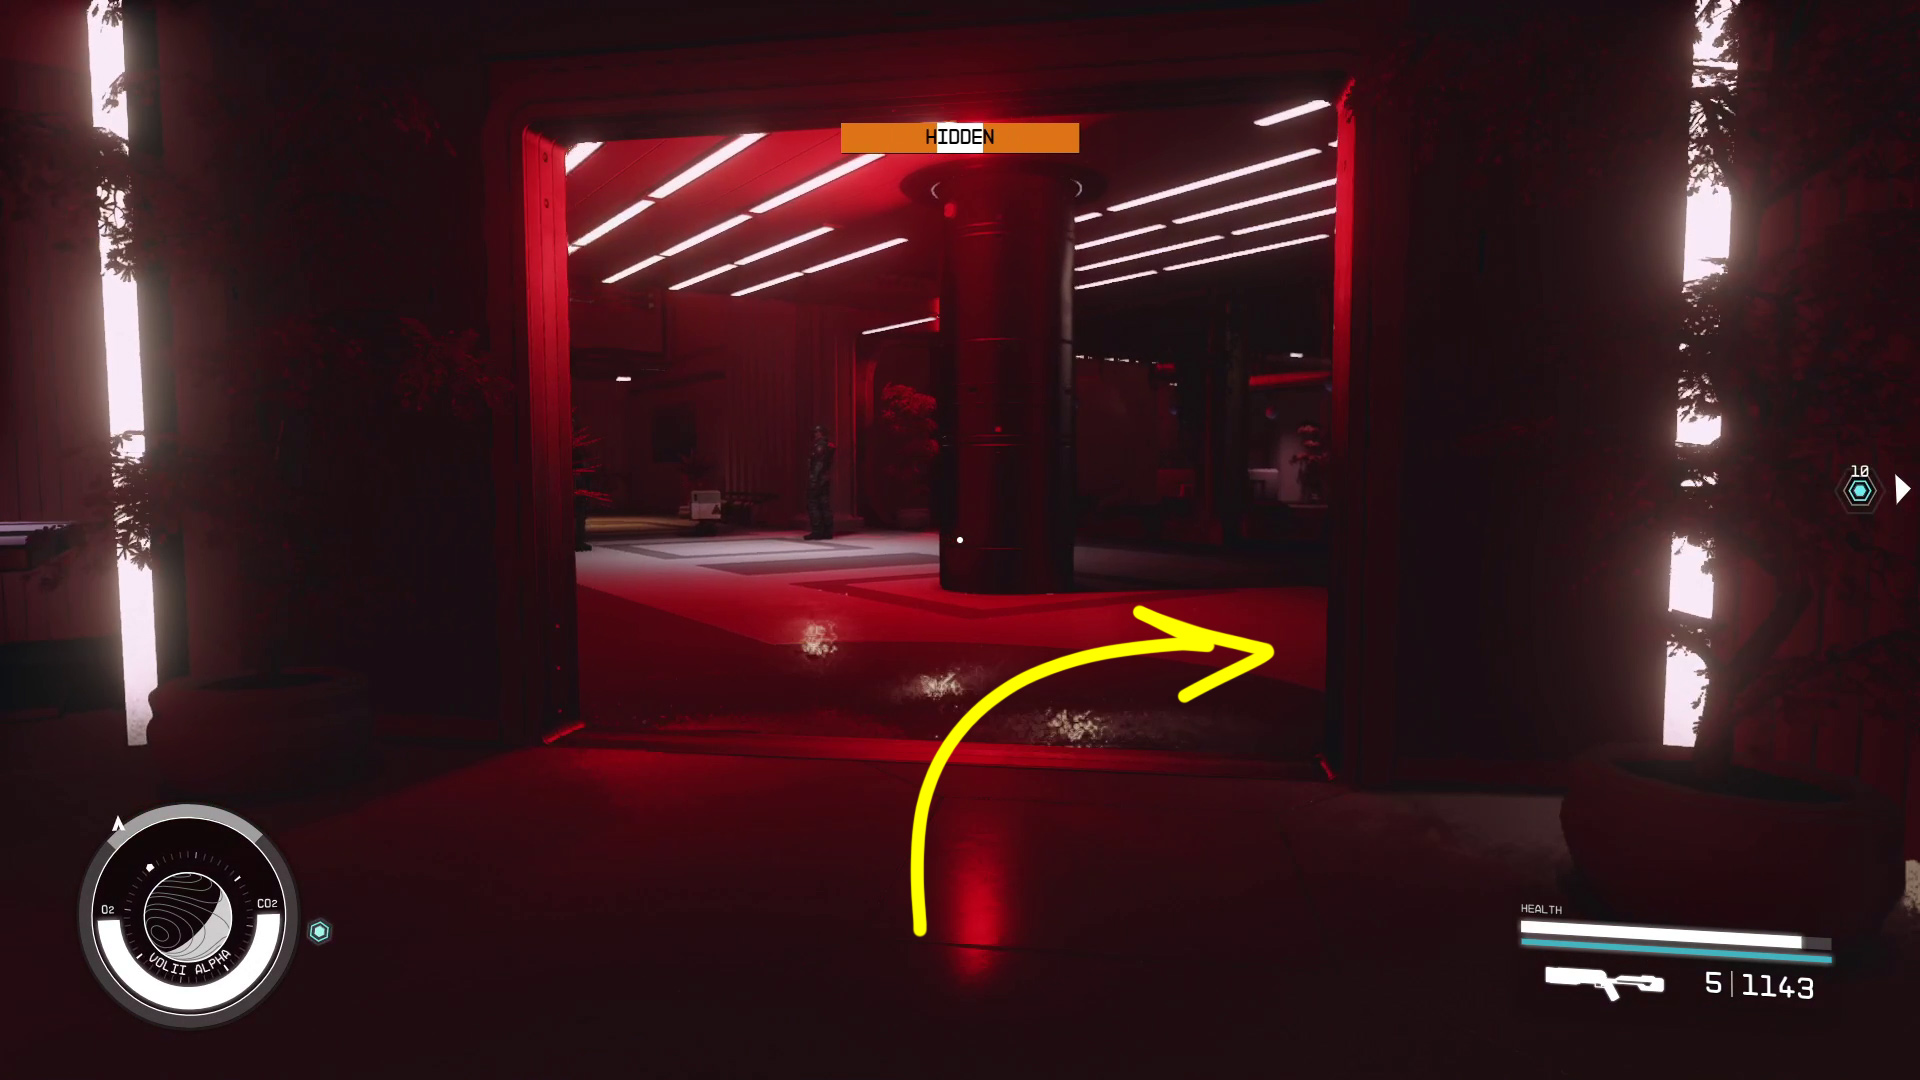
Wait for the drone to roll out, then head in that direction and go right (Image 12) — once you turn right, you’ll see the objective marker floating in midair near a doorway. Head over to it, turn right, and you’ll see stairs ahead. Go all the way up the stairs, and at the top go through the door on your right (Image 13).
Image 12Image 13
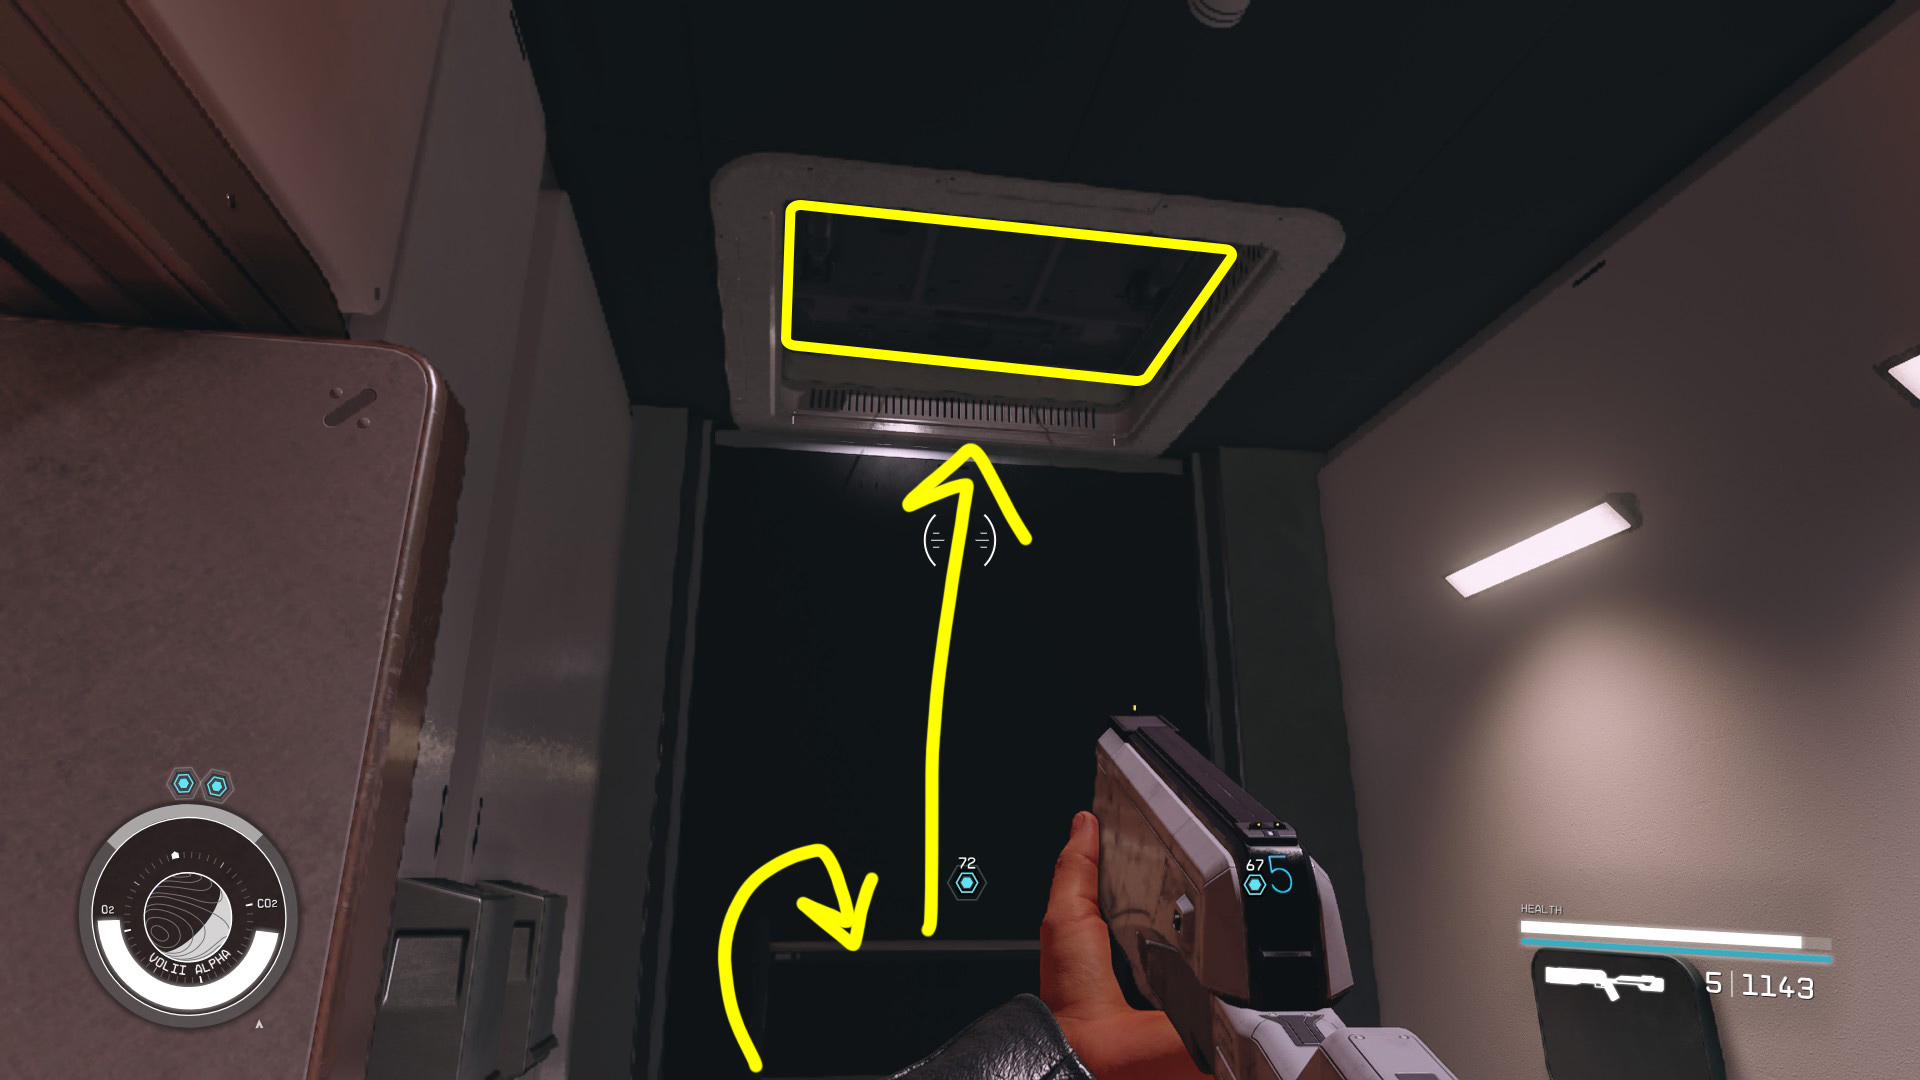
Immediately upon entering the bathroom, turn left, jump on the shelf, and then open and climb through the hatch into the vent (Image 14). Just ahead on the left is another light switch you can use to make things dark (Image 15). From the light switch panel, turn right and continue further into the vent until you can go left and through another hatch (Image 16).
Image 14Image 15Image 16
You’ll drop down into a café. Look toward the objective markers and you’ll see a hall, and hopefully a patrolling guard. If not, you’ll need to wait until the guard shows up, then heads back down the hall away from you — when they do, you can go into Camden’s office (Image 17).
Close the door behind you, then interact with the computer indicated by the objective marker and select the “Rover” option on the desktop. Then go back over to the door, hide next to it, and open it. Wait for the guard to be facing back the way you came, then leave the office and go right, then continue towards the objective marker (Image 18).
Image 17Image 18
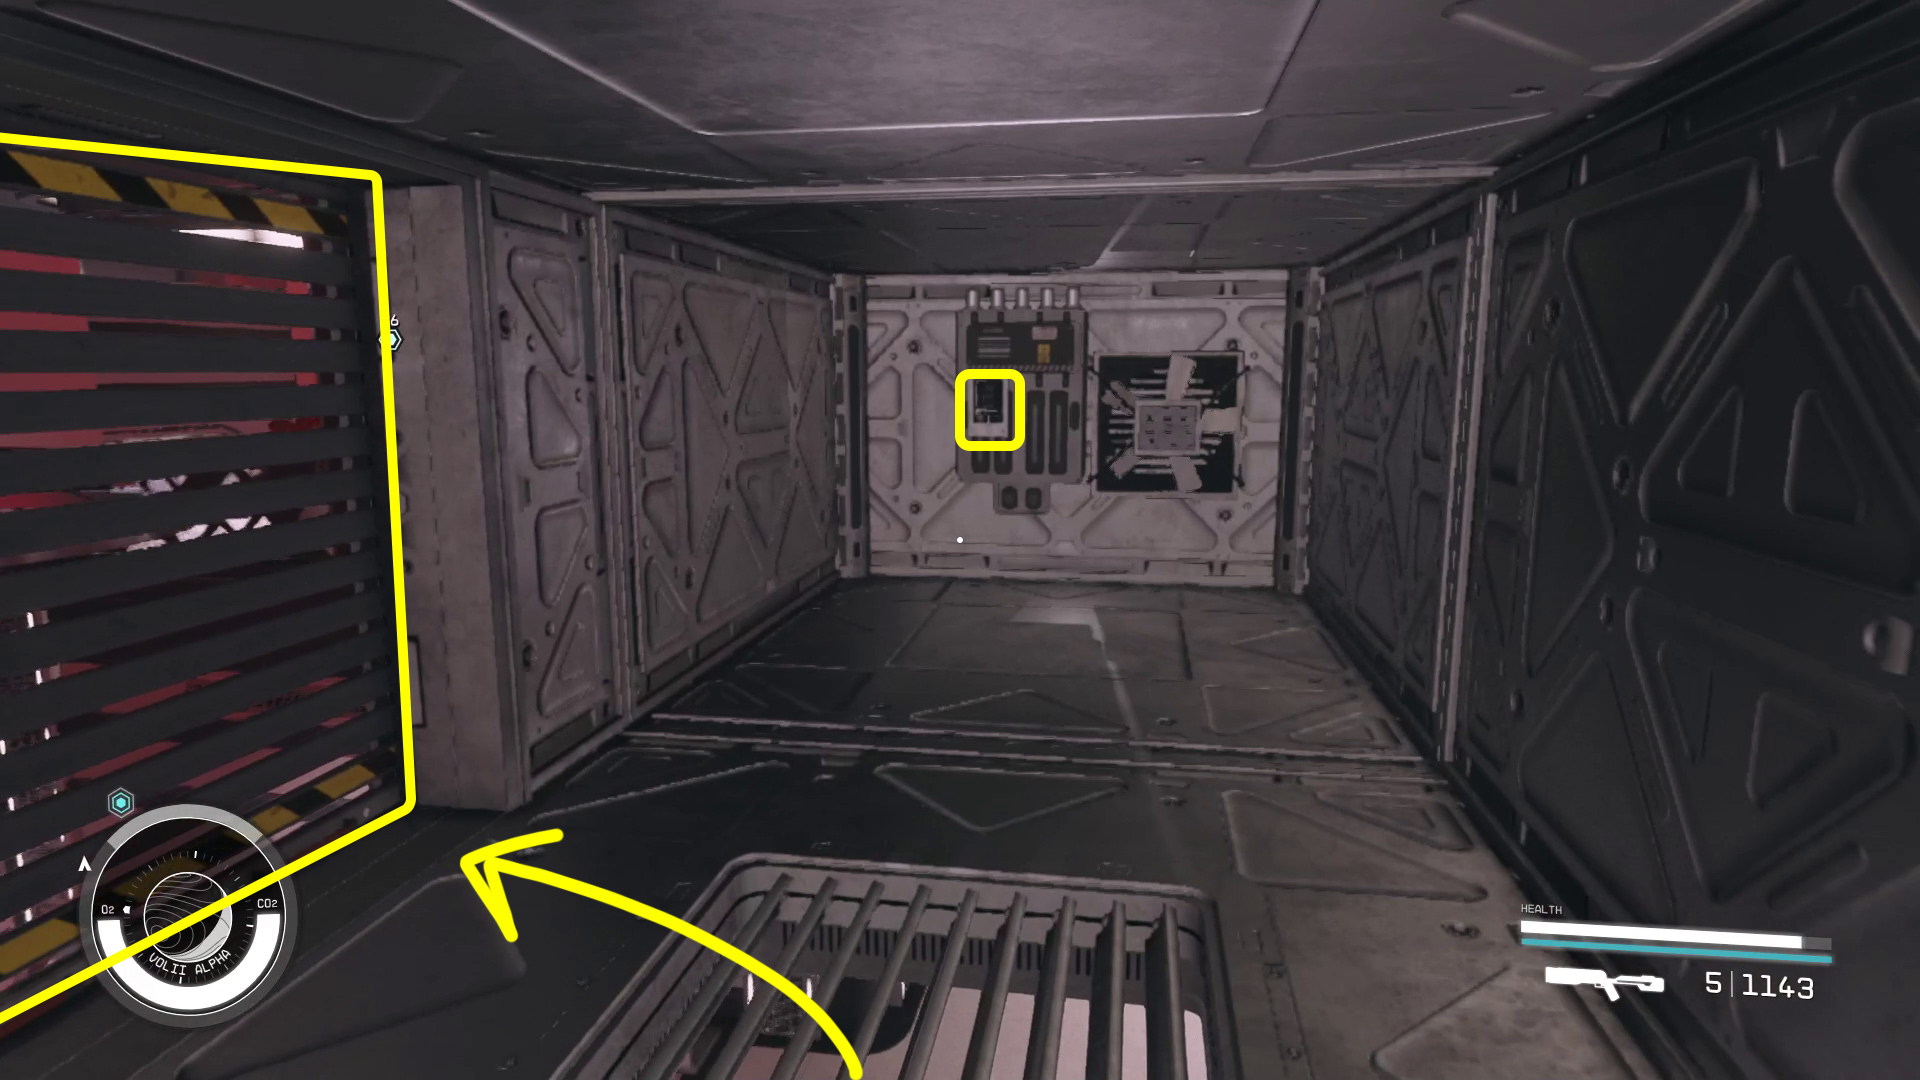
There’s some loot on the table on the left in Image 18, so grab it before opening the large vent (Image 19) and heading inside. In the vent, you’ll need to climb a few times to continue, but it’s a one-way path to a hole that drop you into a tiny closet. There’s a safe on the shelf you can loot, and once that’s done, you should peek through the window in the door (Image 20) and wait for the guard you can see to leave (if you can’t see them now, wait for them to show up, then leave, and then you can move forward).
Image 19Image 20
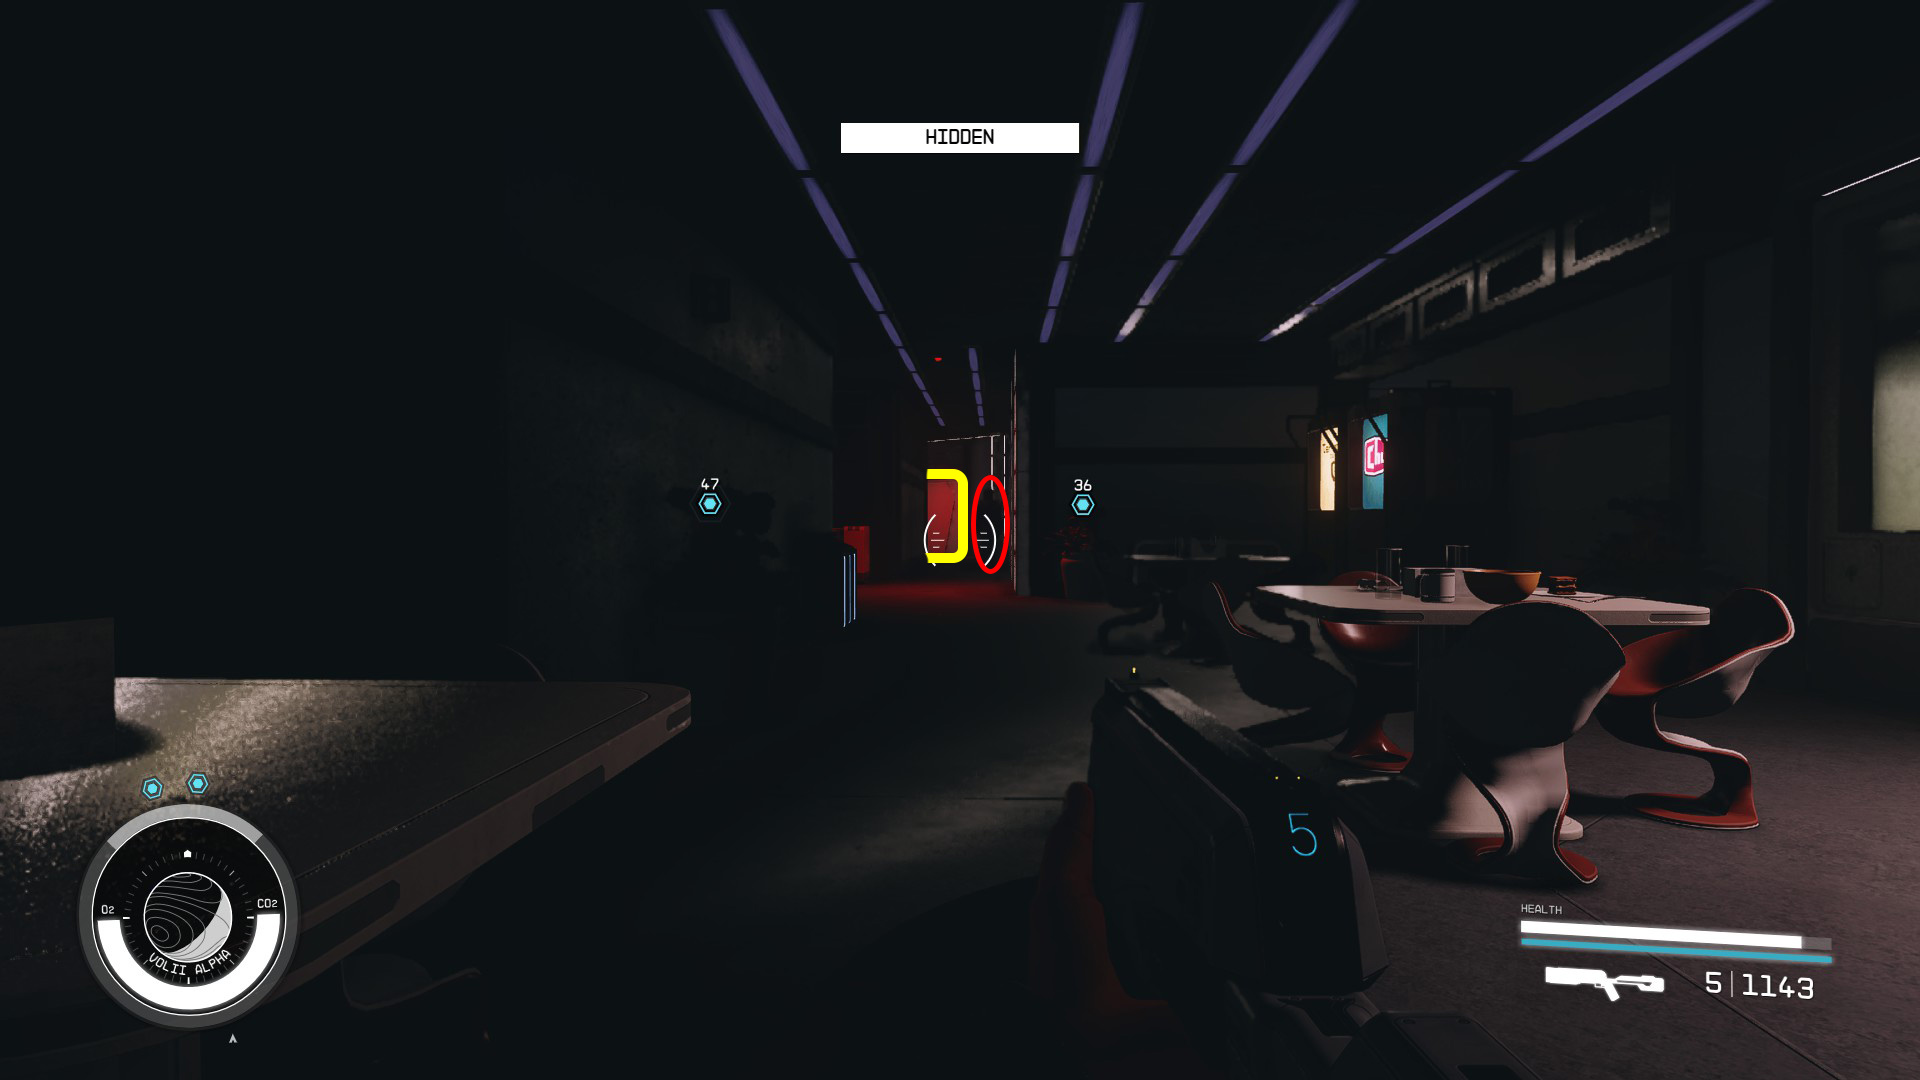
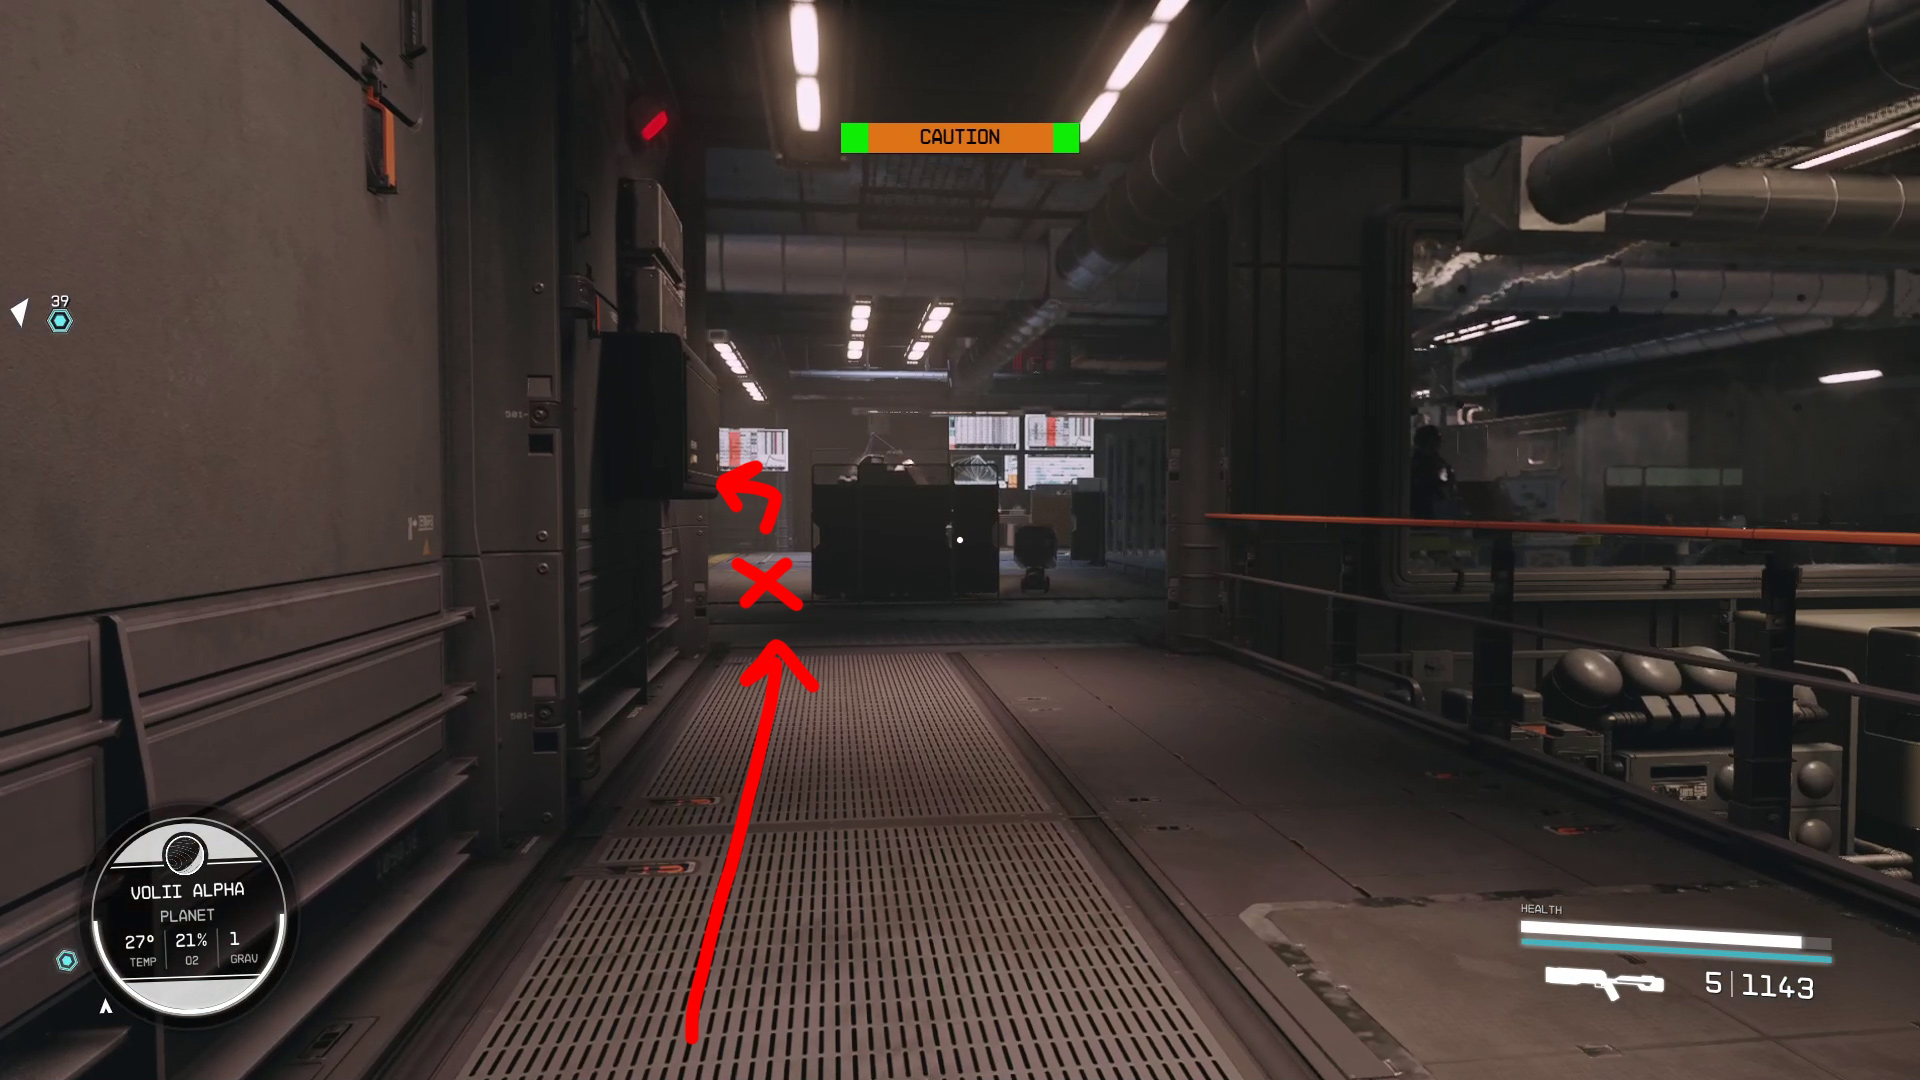
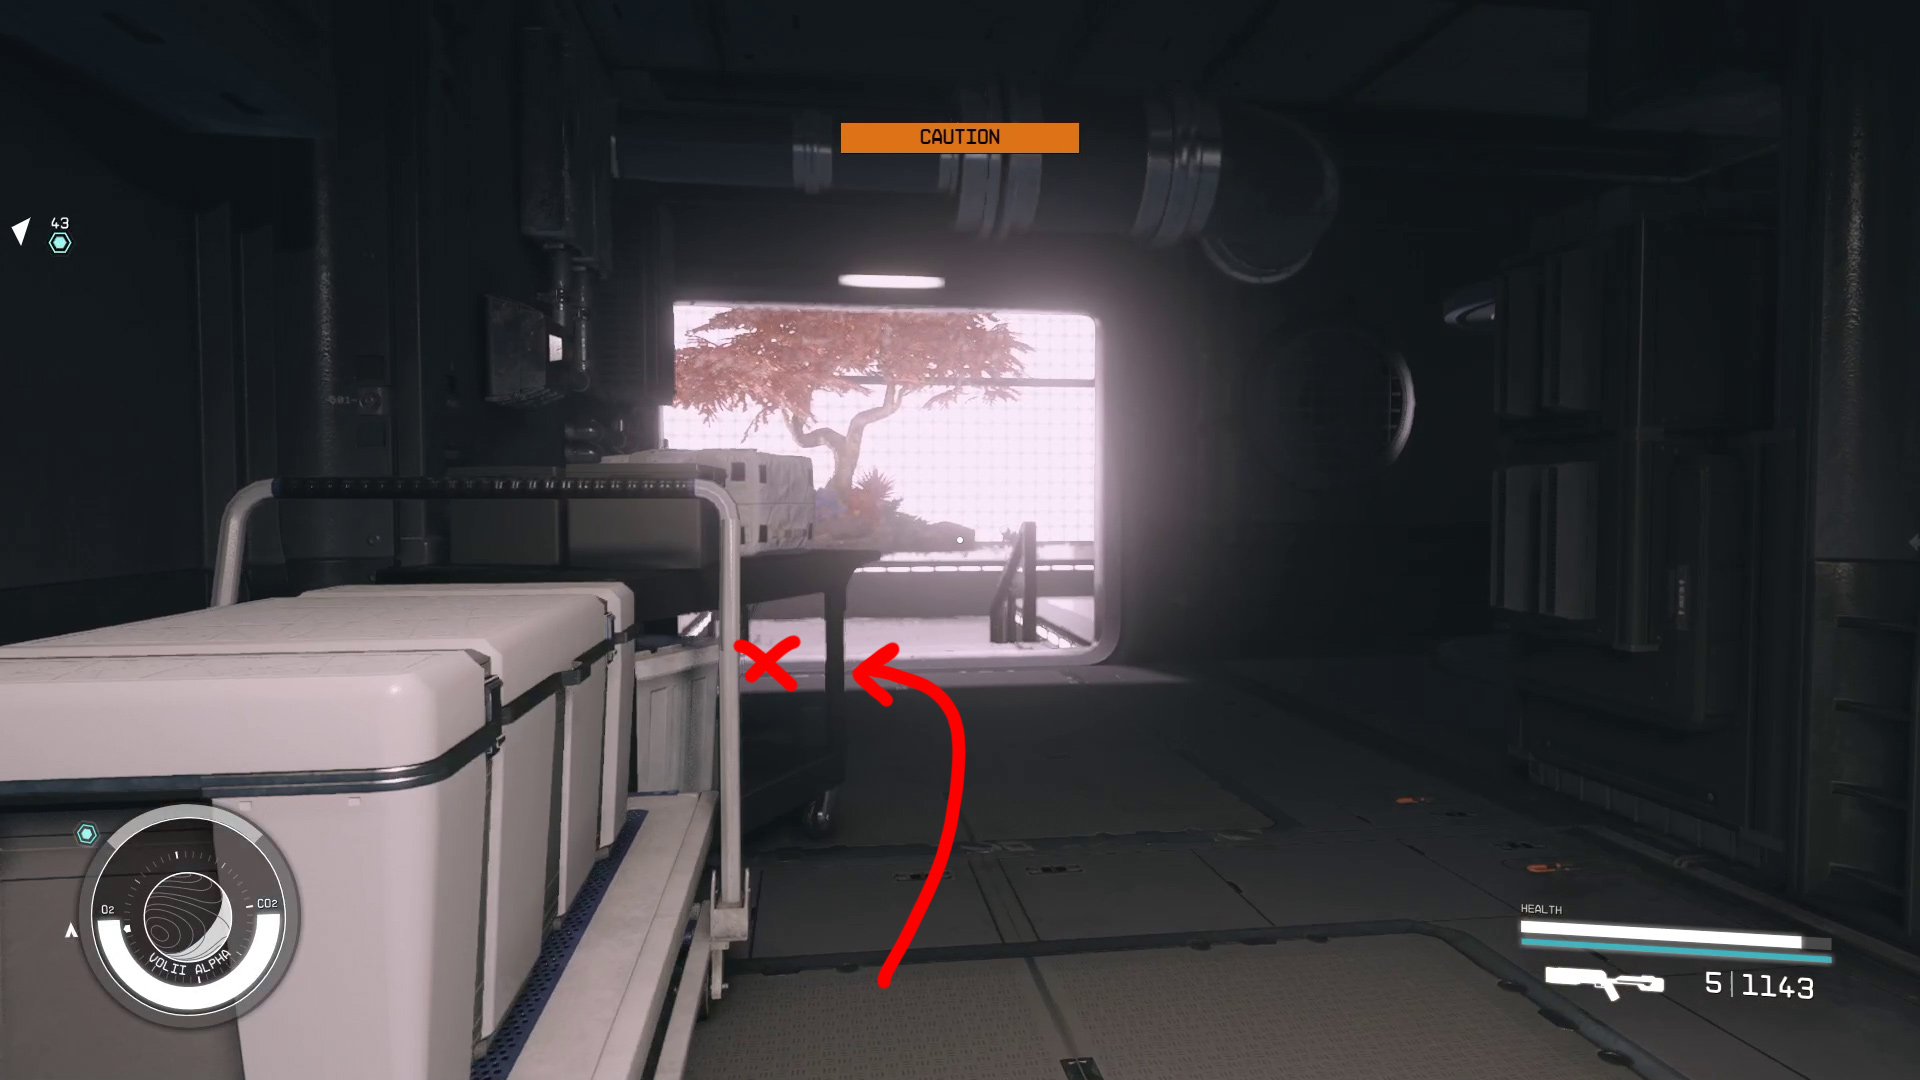
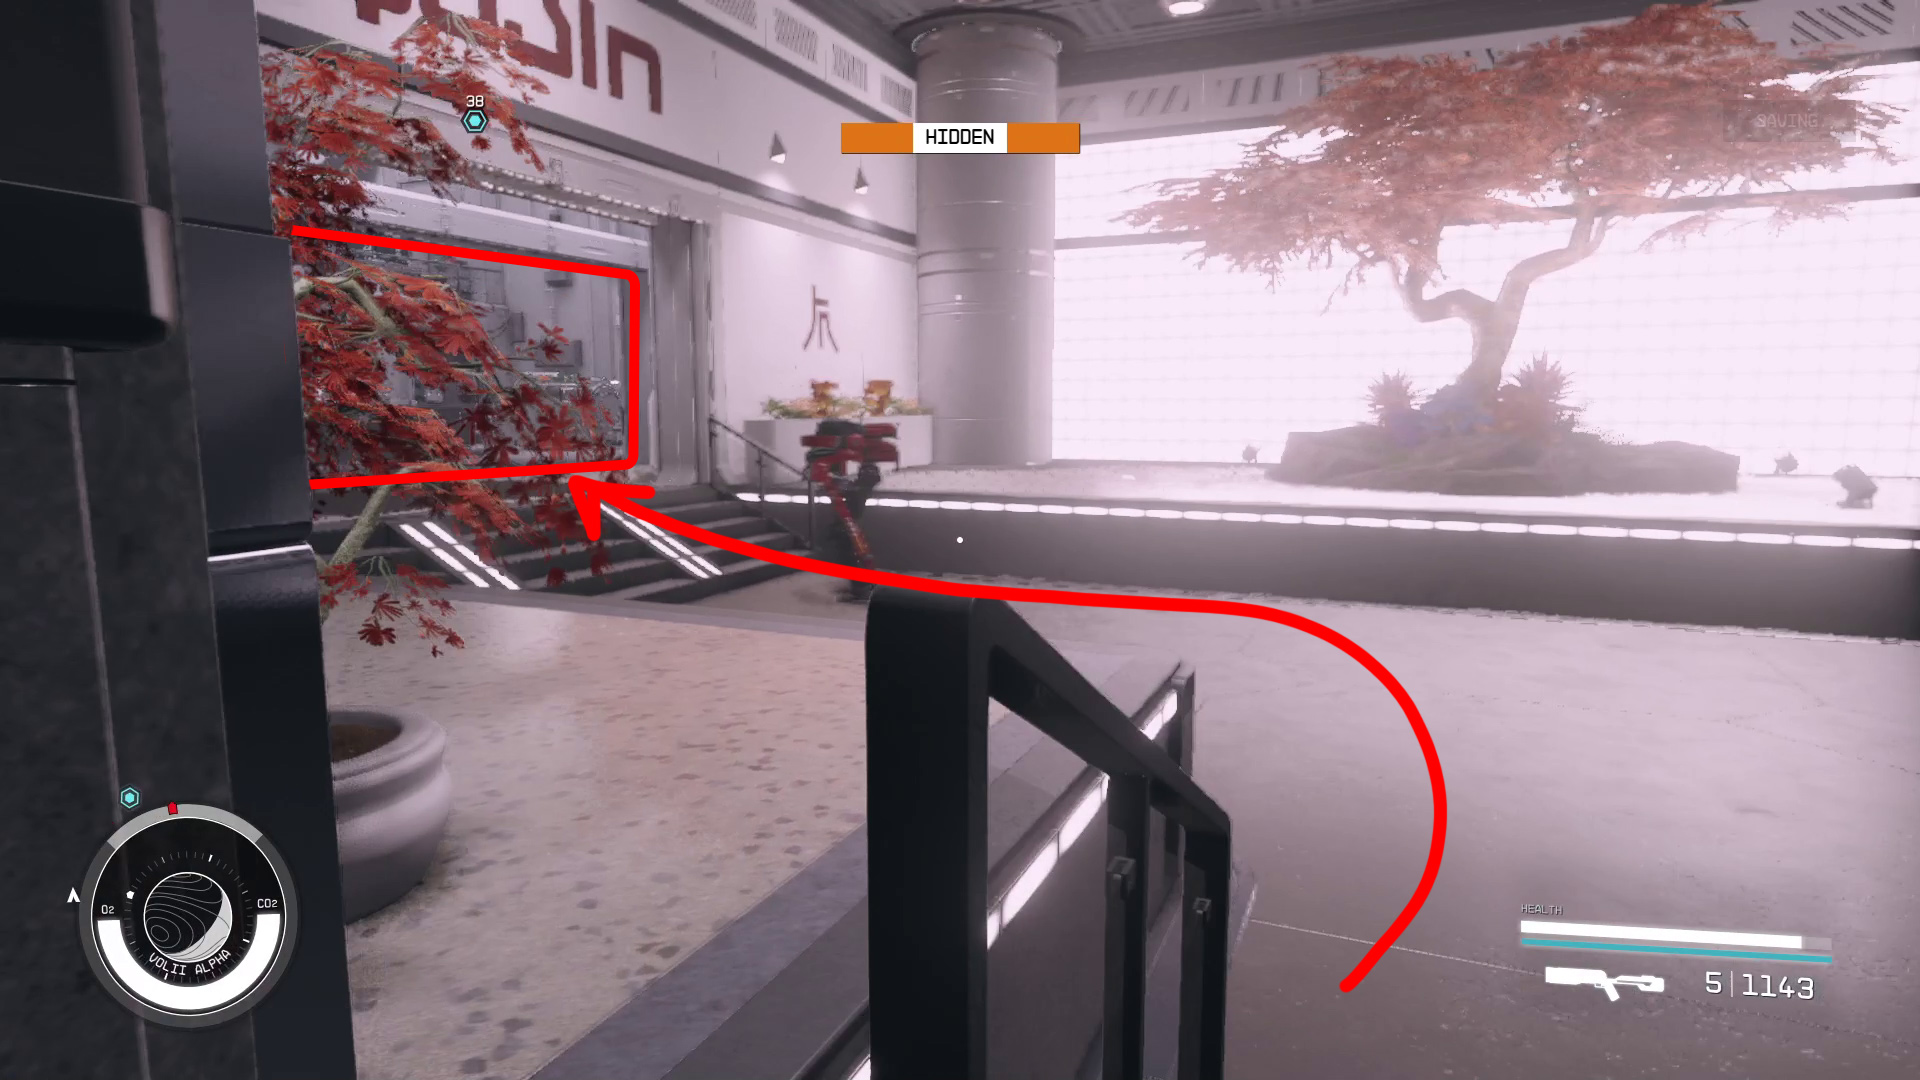
Continue forward until you reach the X indicated in Image 21 — you’ll want to save here, as this next bit can be tricky. There’s a guard around the corner to your right, but they’re pretty hard to spot on their patrol route. See if you can wait for them to be walking away from the hallway you want to go down (top arrow Image 21), then take a left and head down the hallway, hugging the left wall and getting behind the tray at the end of the hall ASAP (Image 22). Here, wait for the patrolling robot to go to the right, and then head through the door on the left (Image 23).
Image 21Image 22Image 23
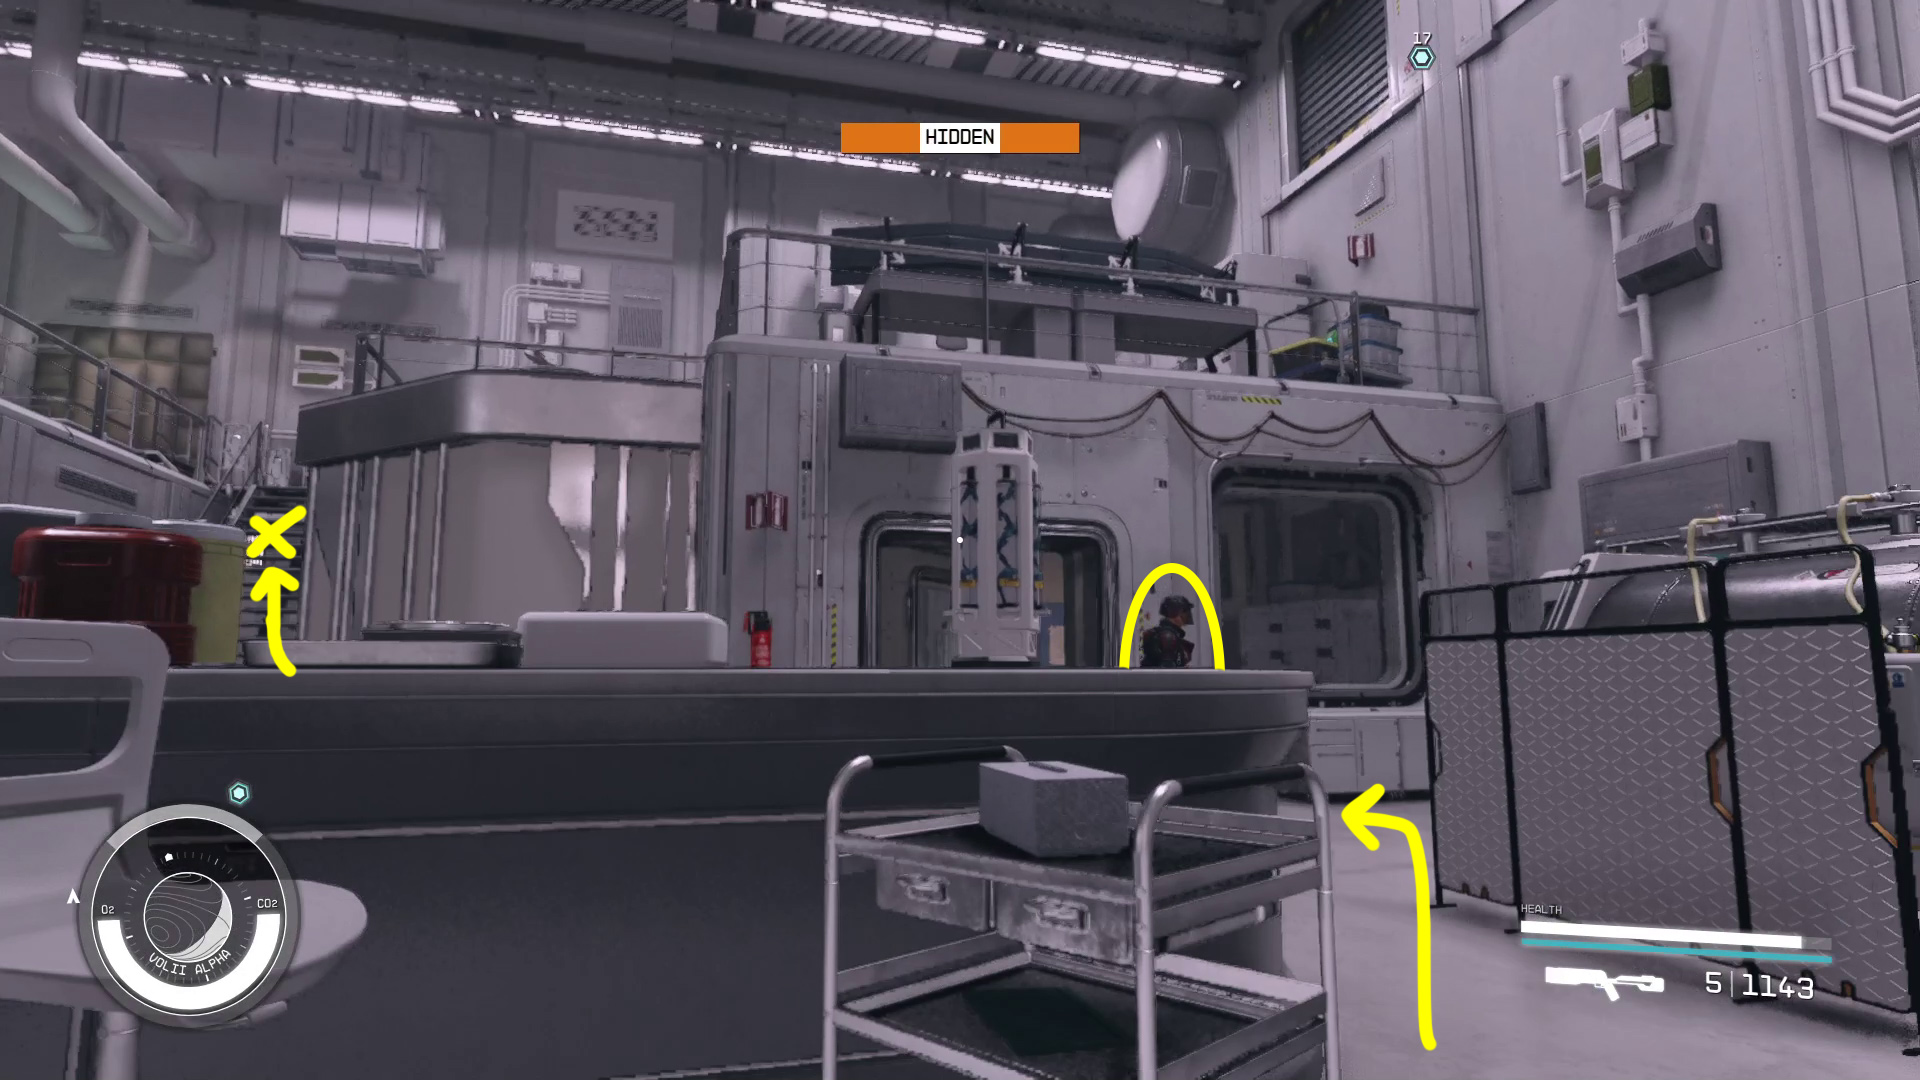
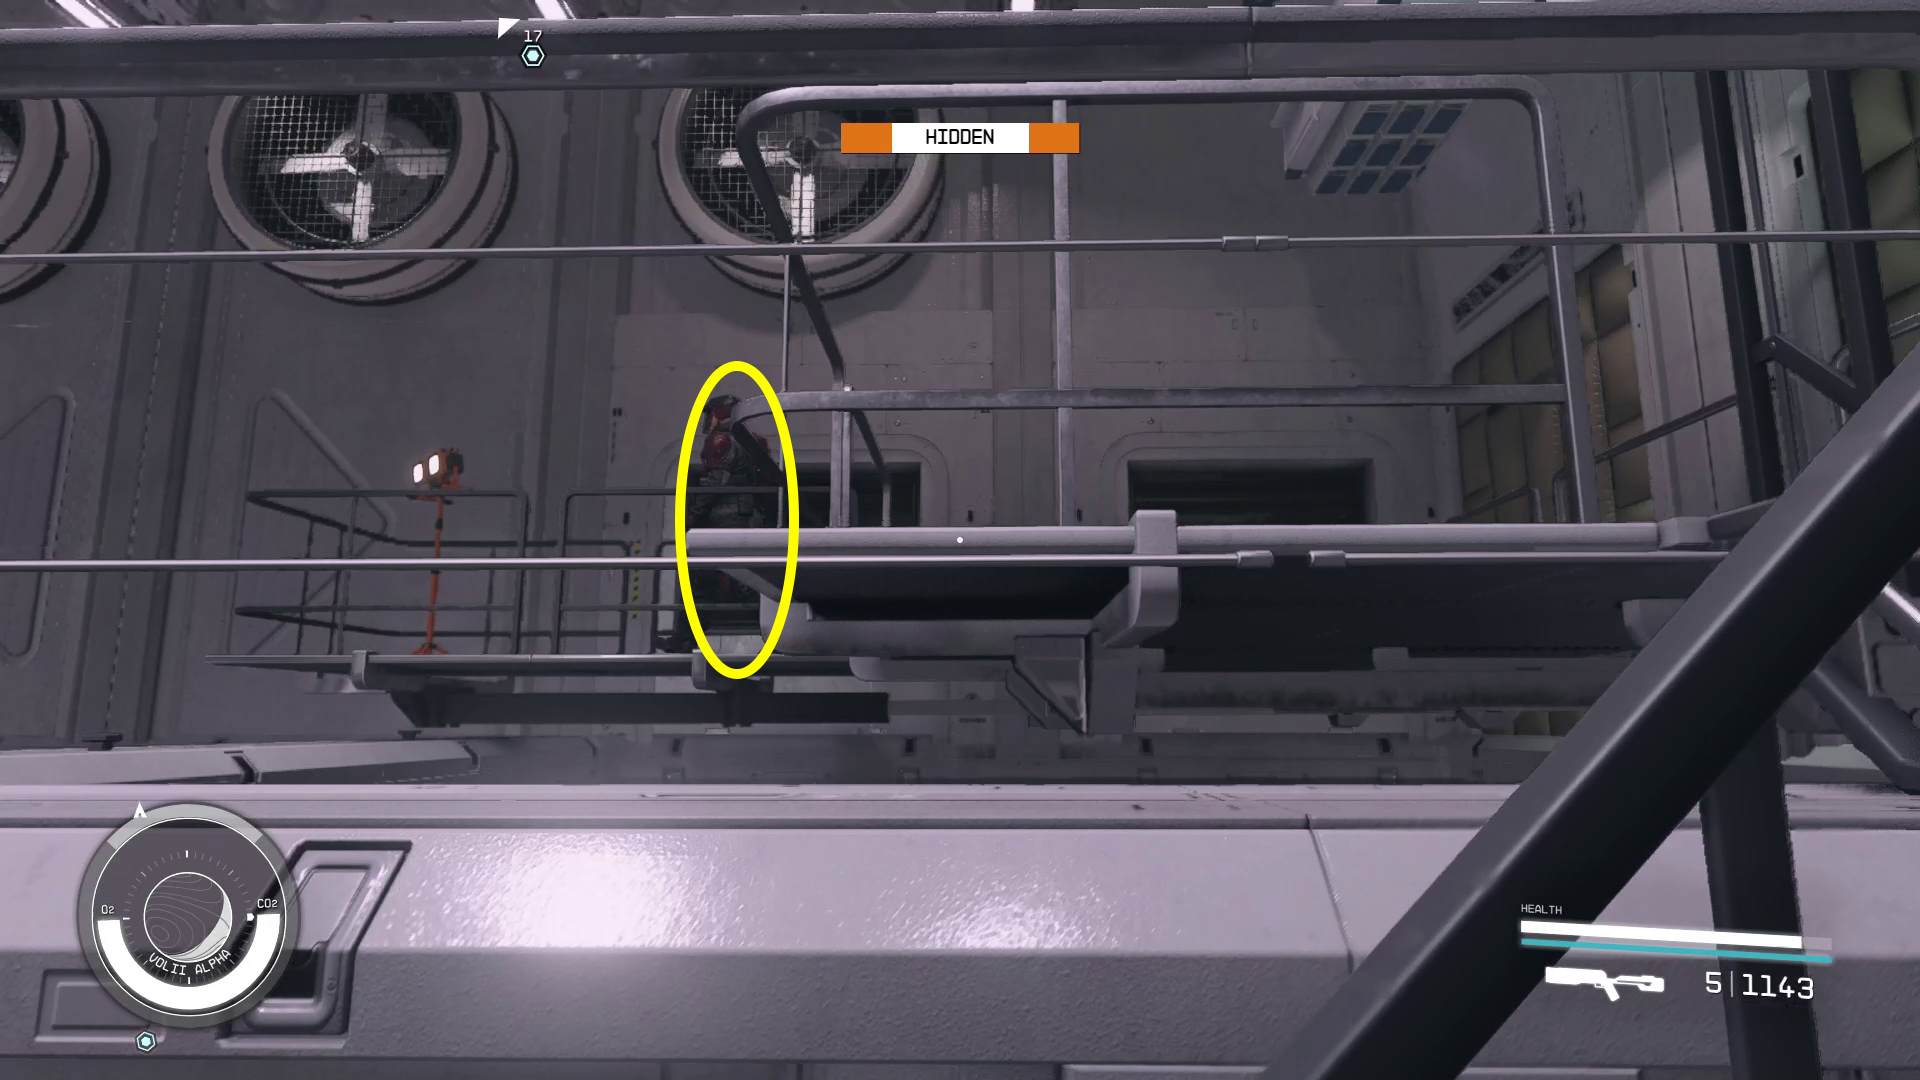
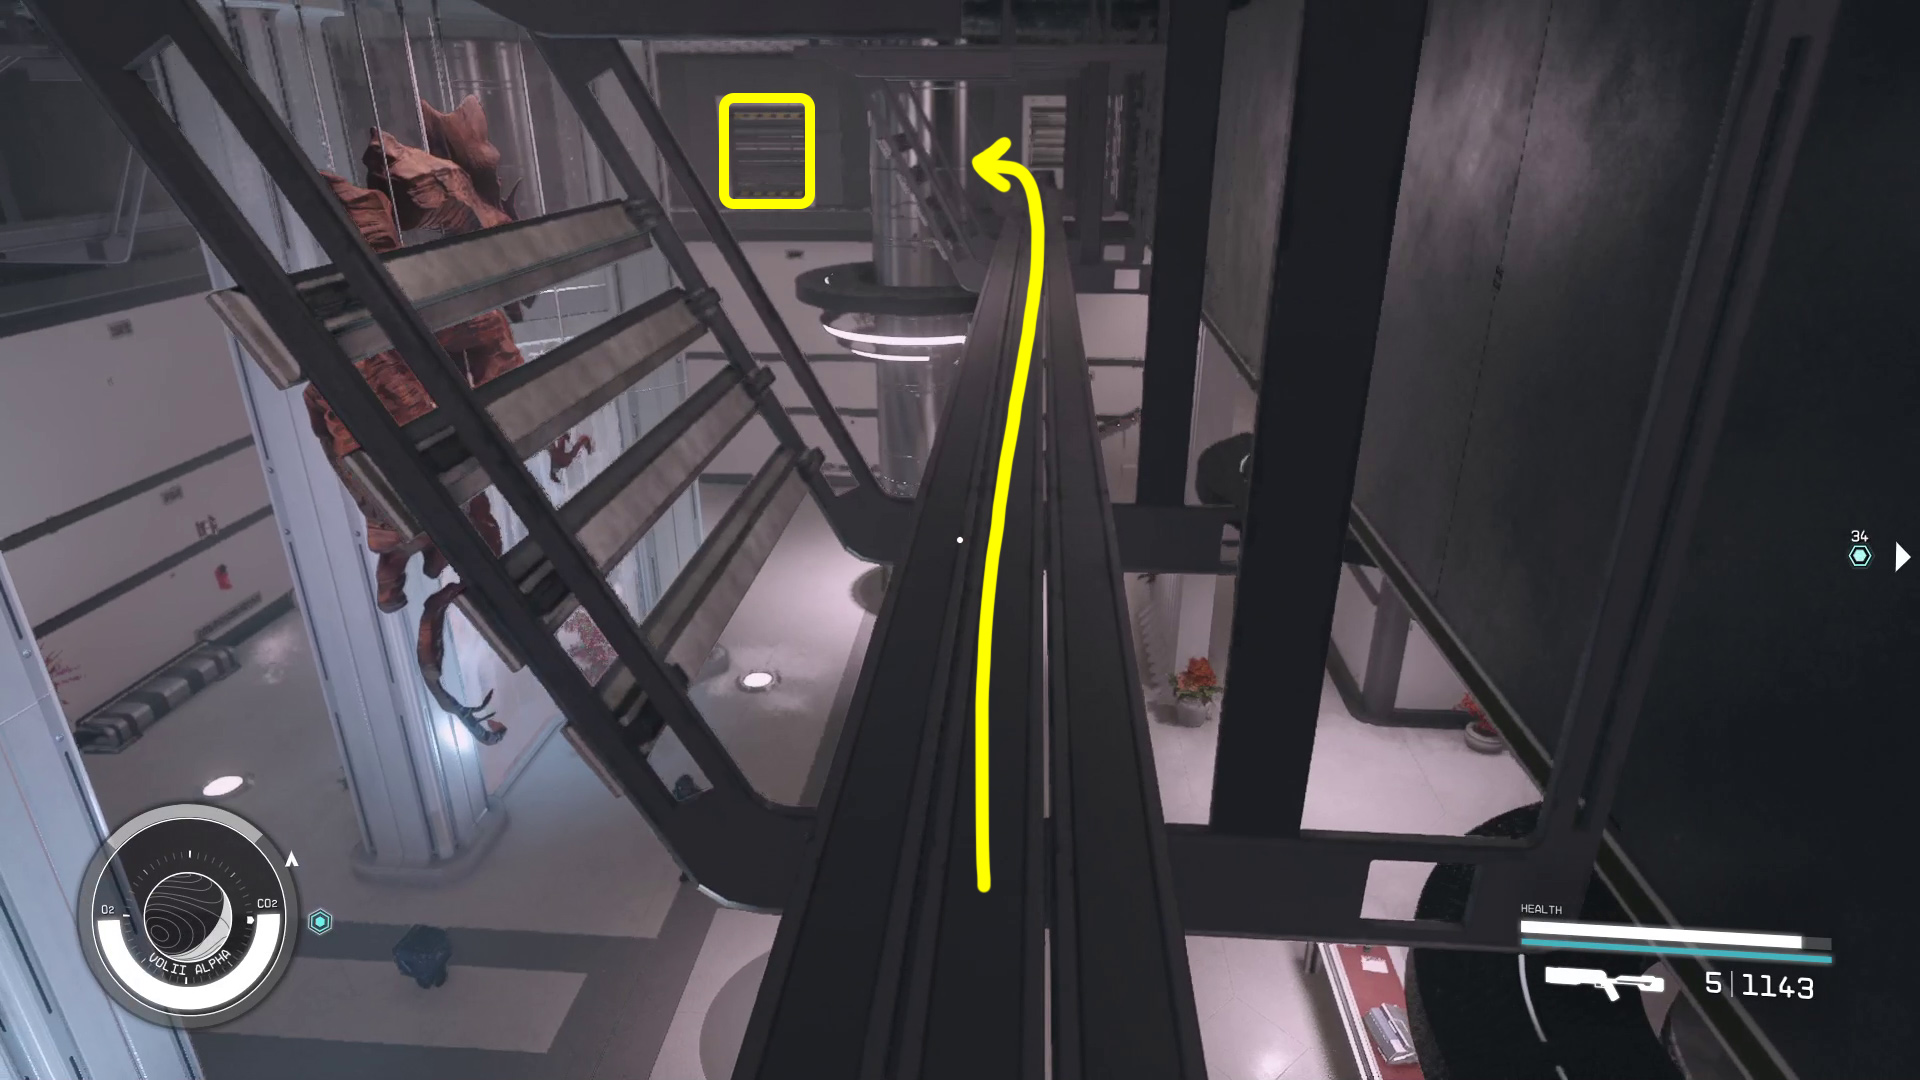
In the next room, hide behind the counter and wait for the guard on the ground floor to move to your right (Image 24), then go partway up the stairs — you’ll probably want to save again at this point — and slowly creep up the stairs and look for the guard on the left. If he’s looking toward you, go back down the stairs! Eventually he’ll move away from the stairs (Image 25), at which point you can go up the stairs, go right, and then jump on the crate and go into the vent (Image 26).
Image 24Image 25Image 26
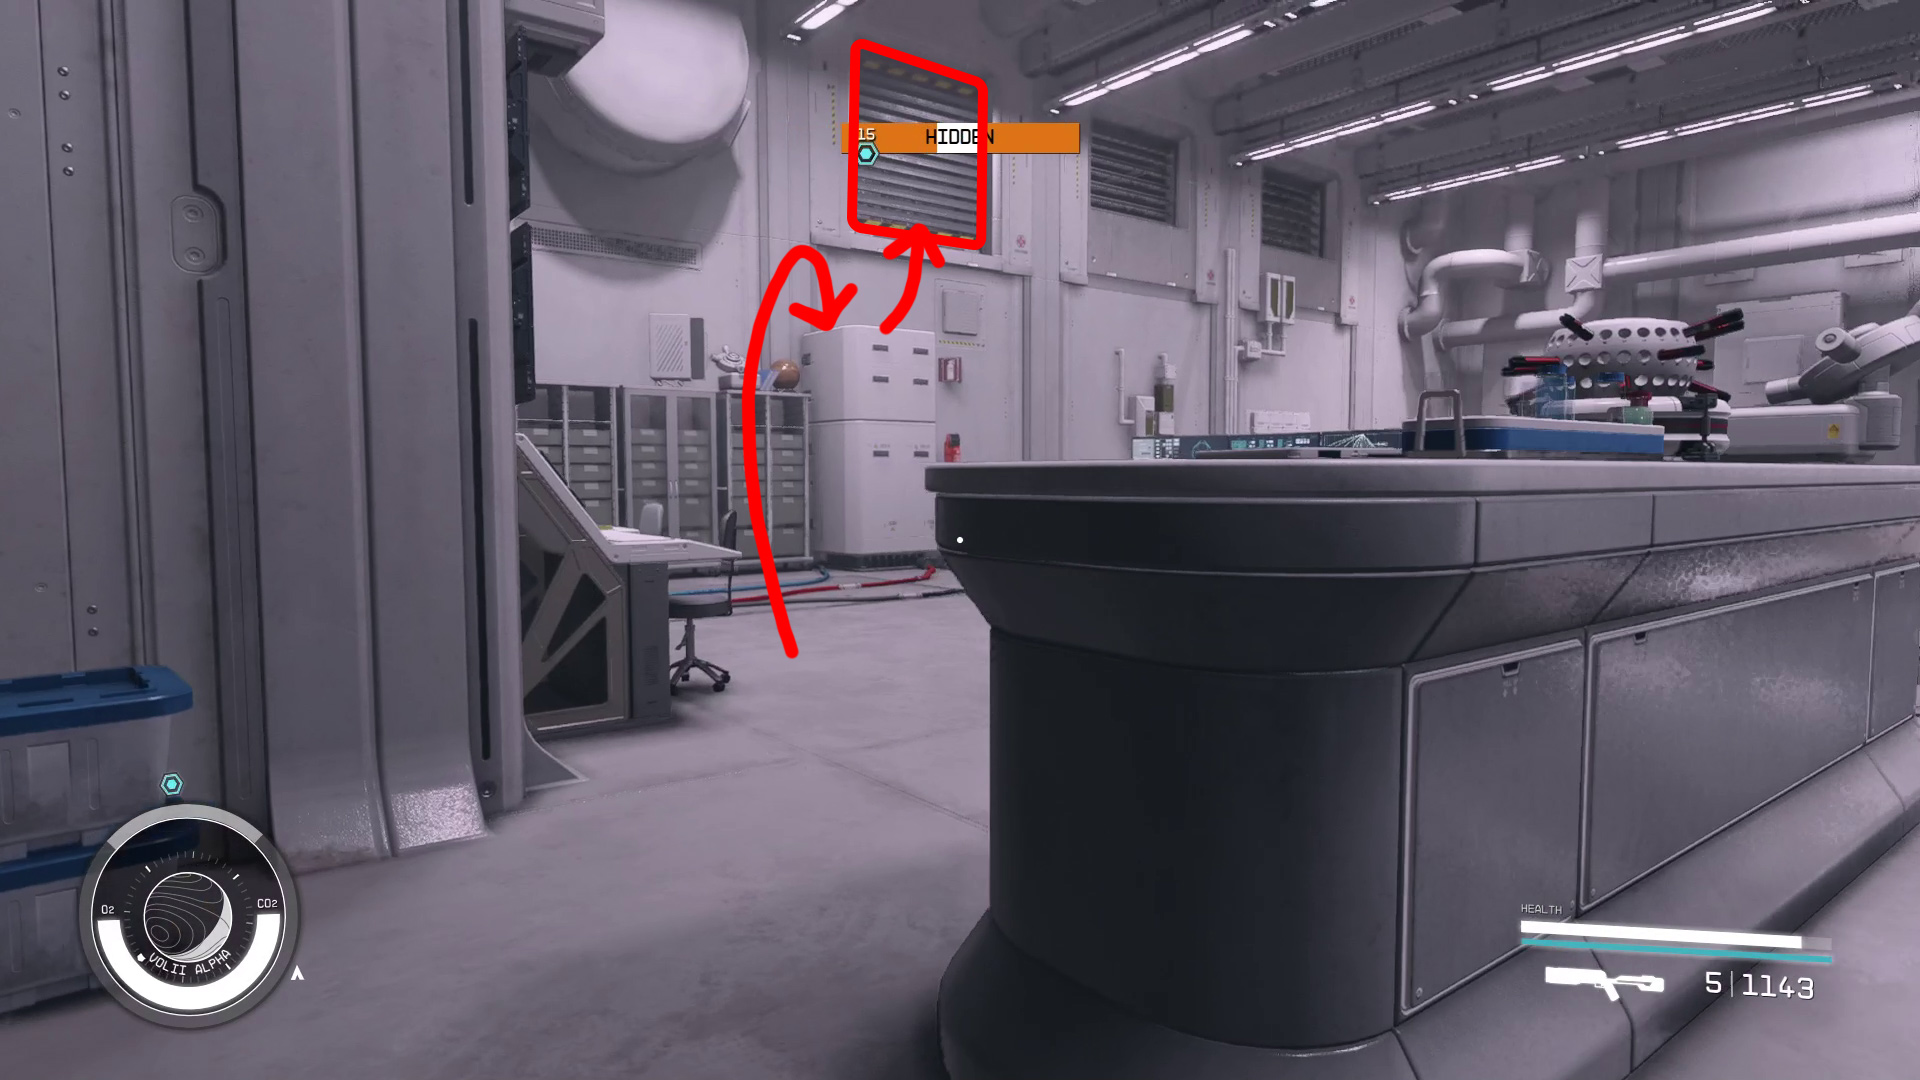
In the vent, continue forward, and when you reach the top of the ramp-like incline, go through the vent on your right. Continue out and onto the beam that traverses the room, and then head through the vent on the other side (Image 27). Go through the vent, and you’ll find the exit and another light switch you can use to make things dark (Image 28).
Image 27Image 28
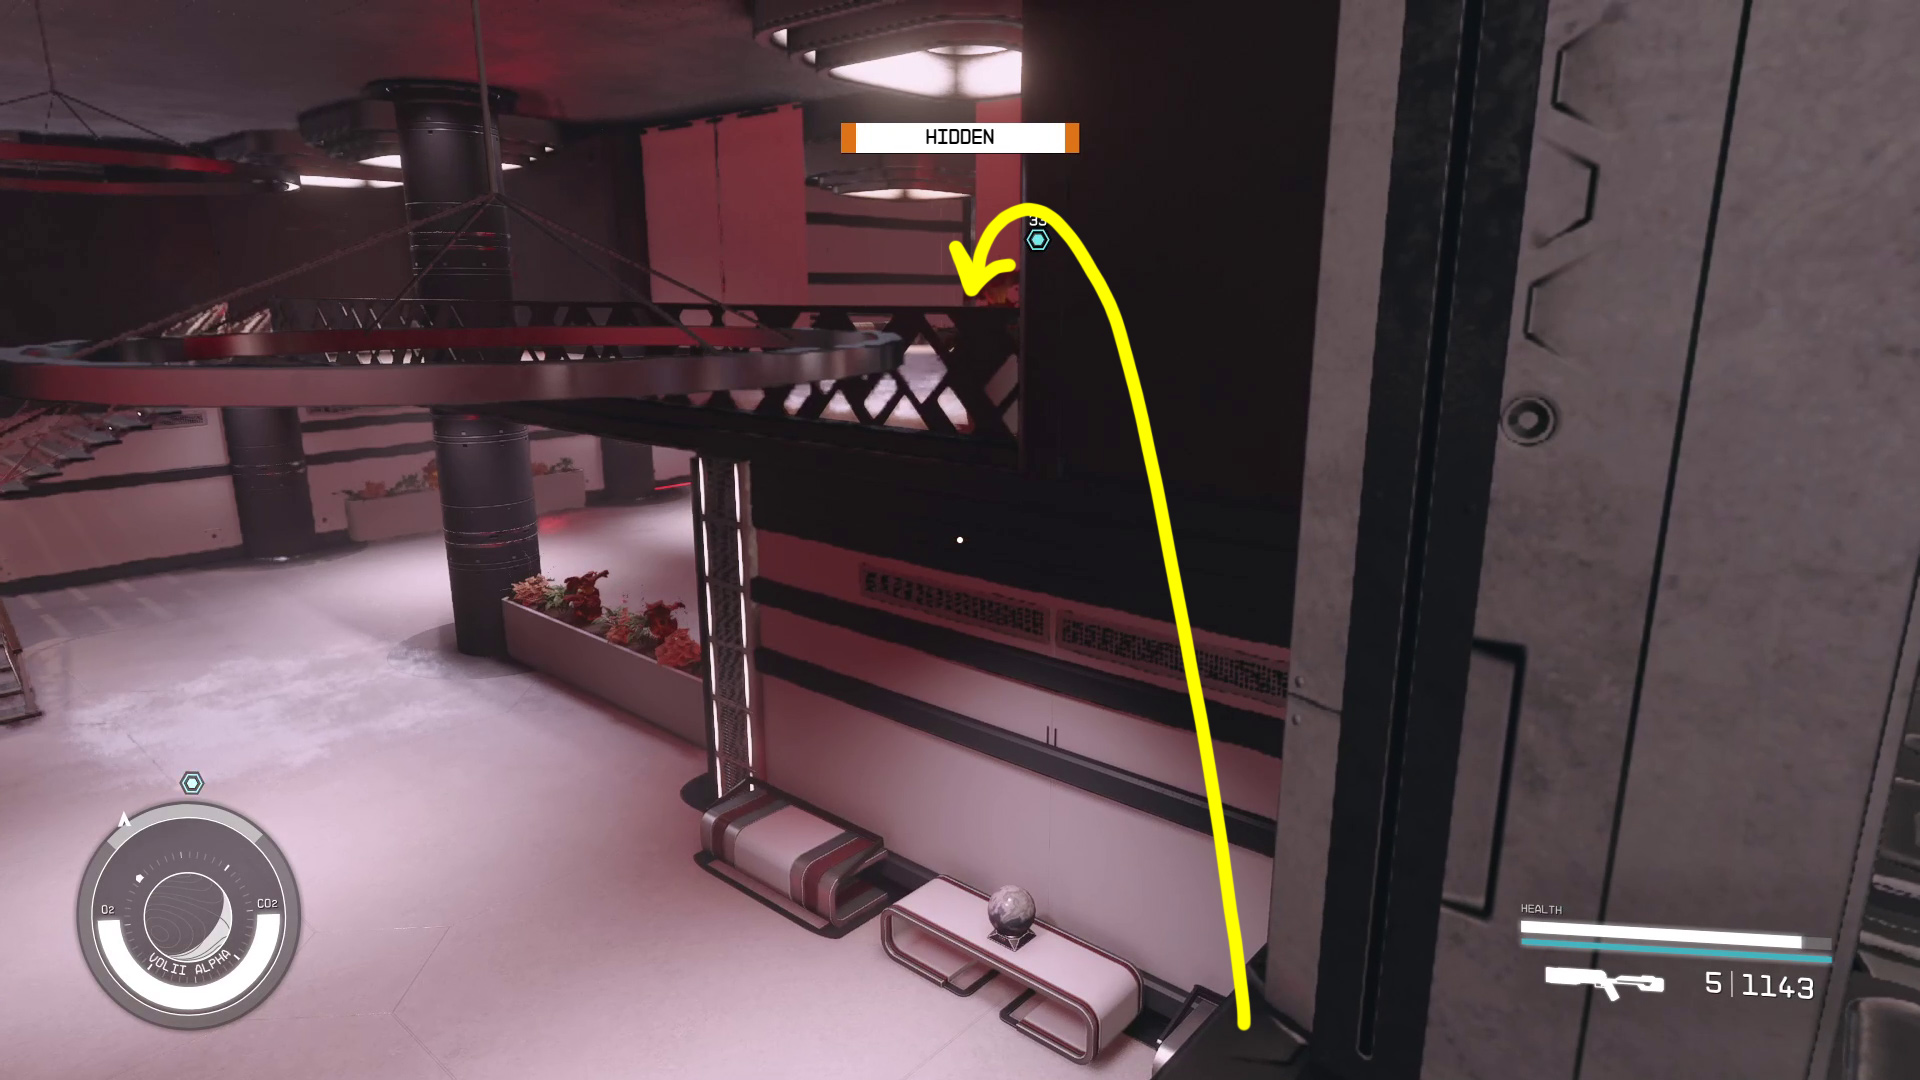
From the vent, you can jump and boostpack your way to the balcony (Image 29), and then hide behind the right-hand screen. Wait for the guard (Image 30) to walk into the corner in classic video-game-guard fashion, and then go into Ularu’s office.
Image 29Image 30
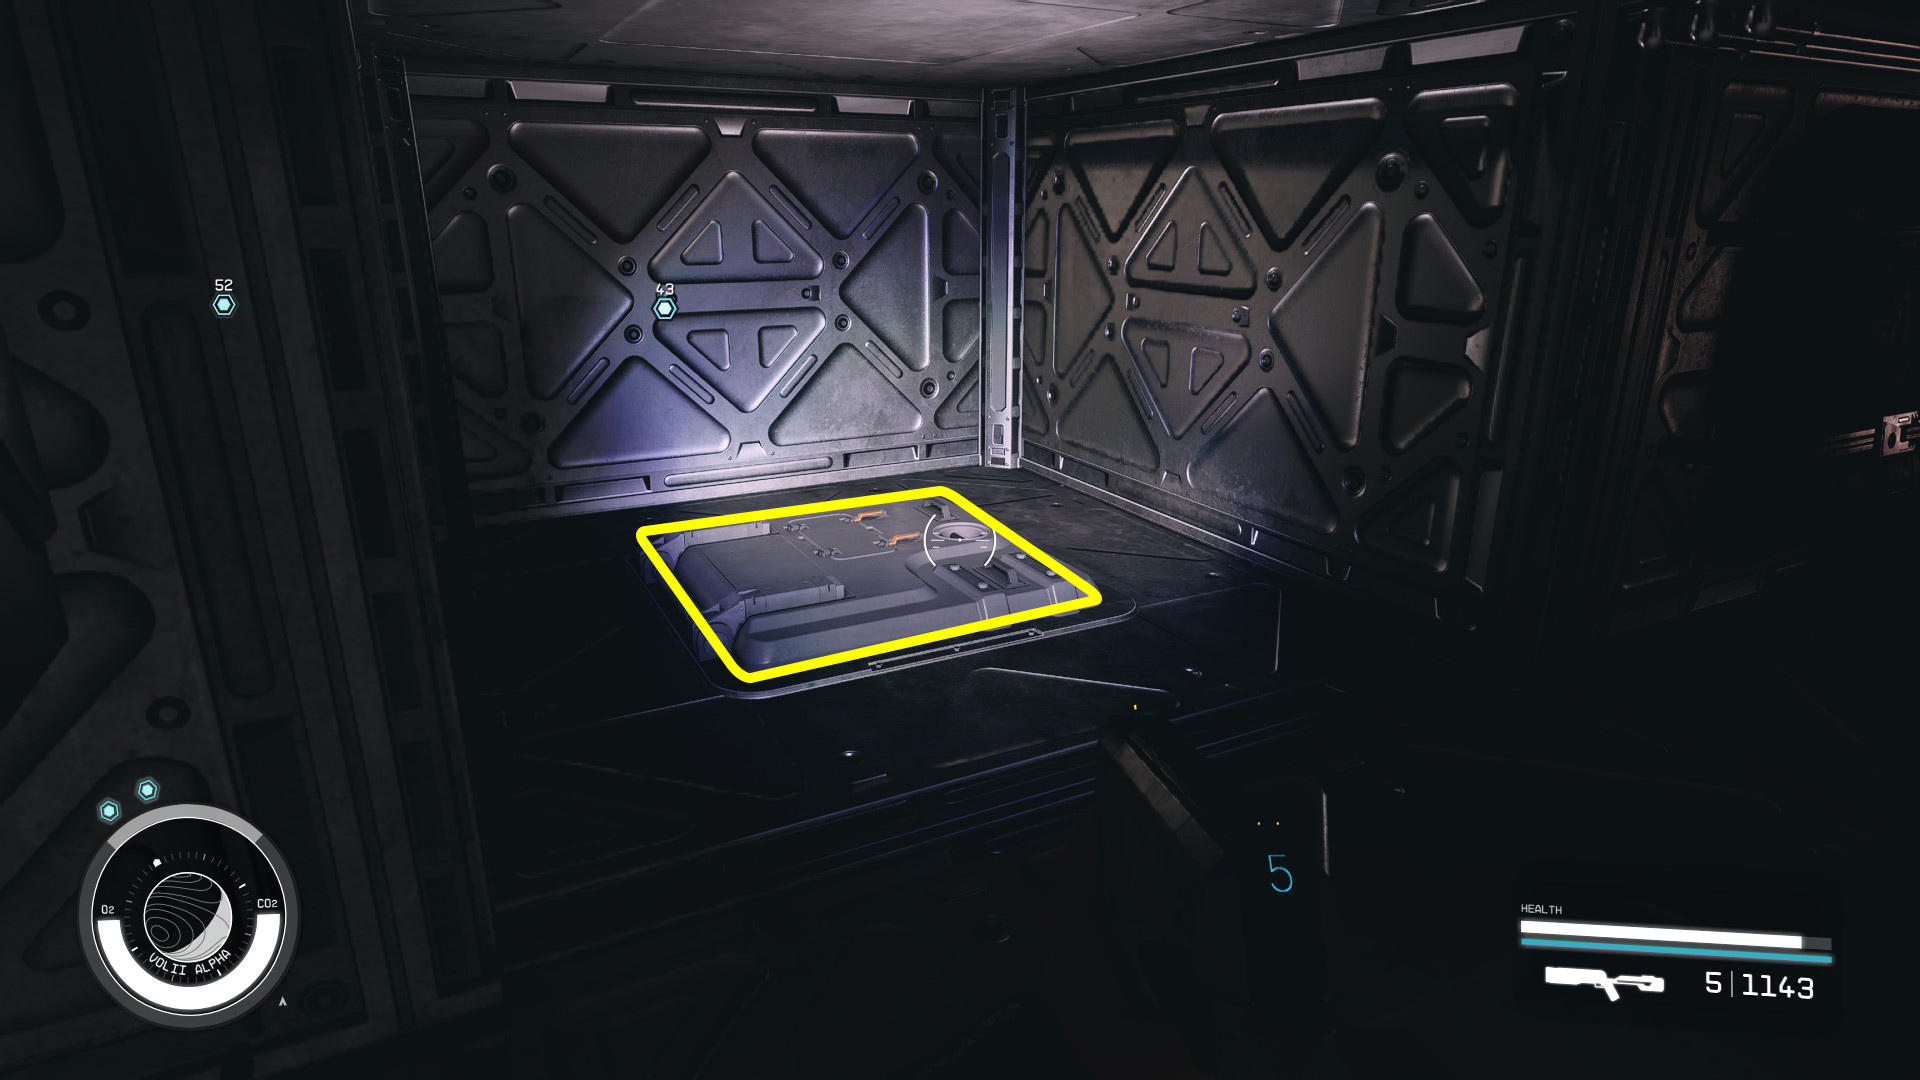
Use the computer in the office indicated by the objective marker, and select “Rover” on the desktop. Then jump up onto the nearby file cabinets, and from there into the vent (Image 31), which is helpfully indicated by the objective marker. In the vent, go down the ramp and straight, then take a right to exit Ryujin Tower (you can use your scanner in the vent if you get turned around).
Image 31
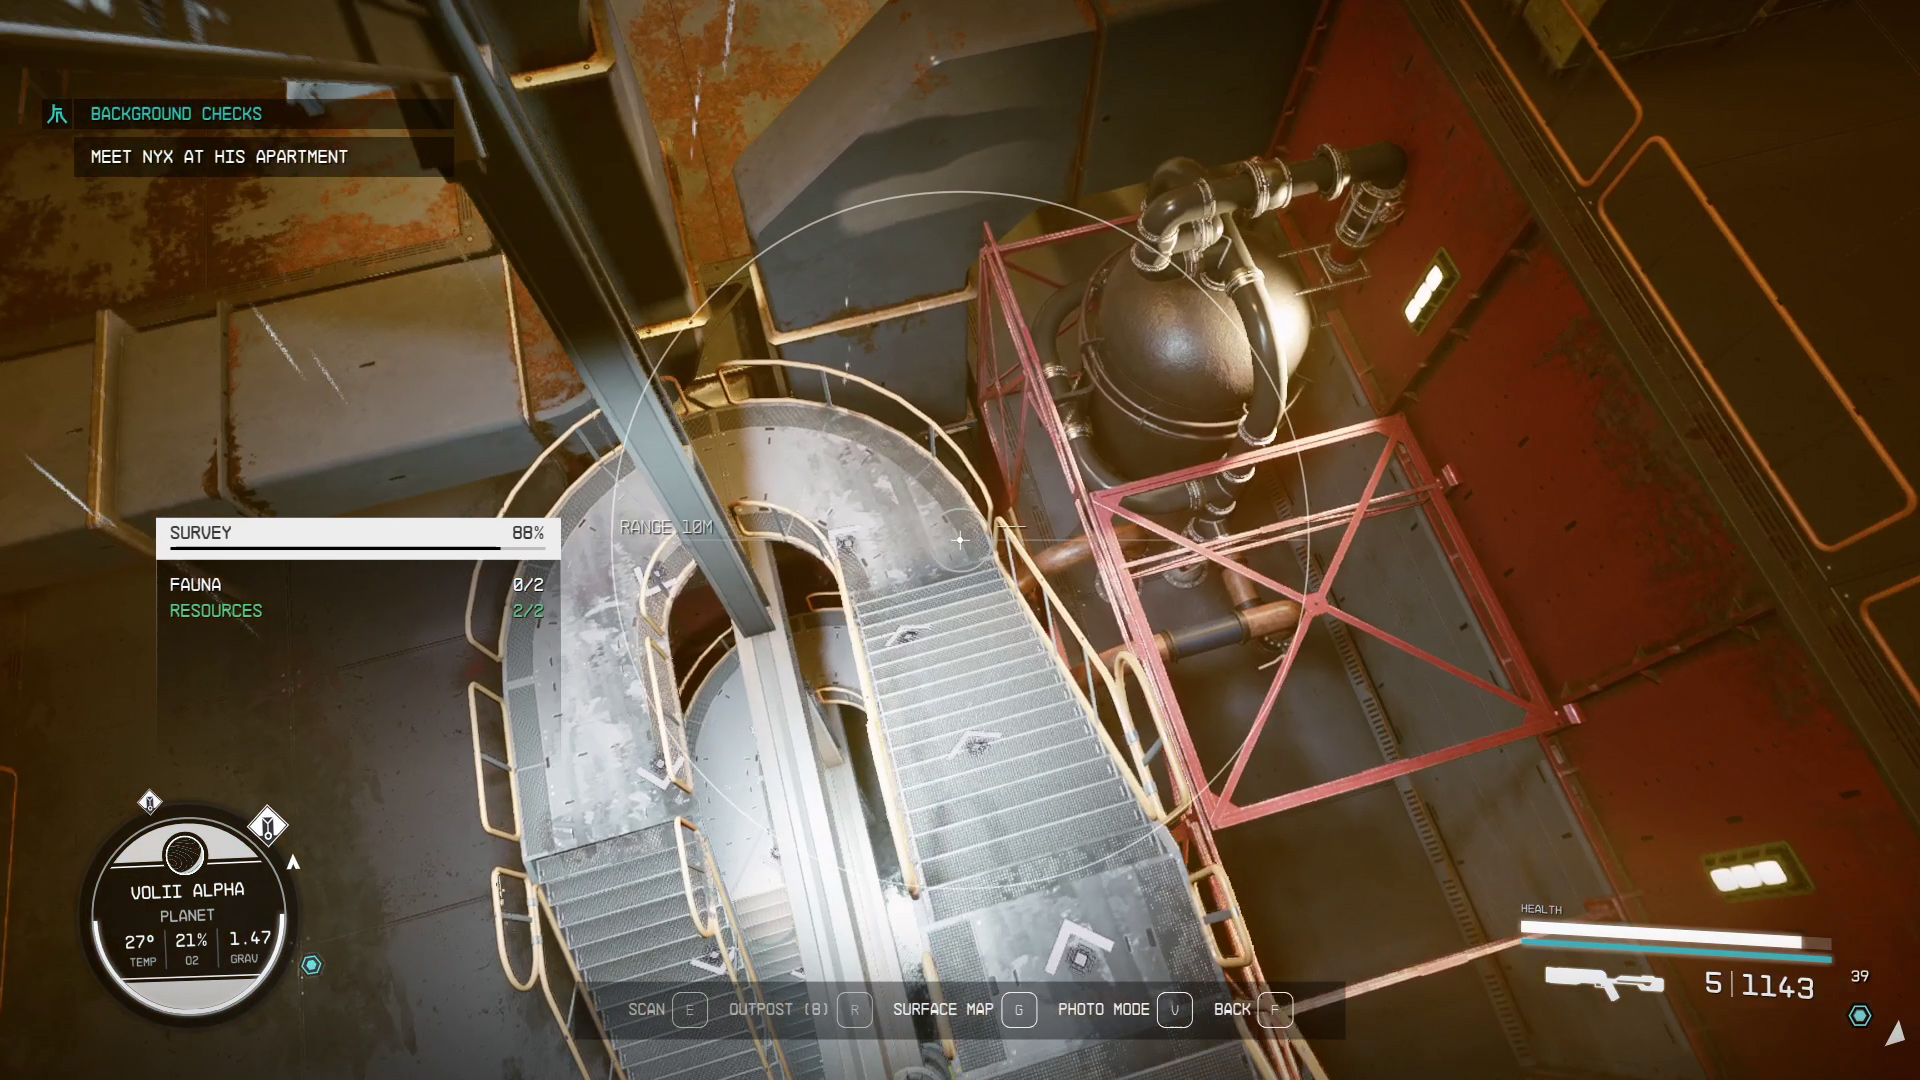
Meet Nyx at His Apartment
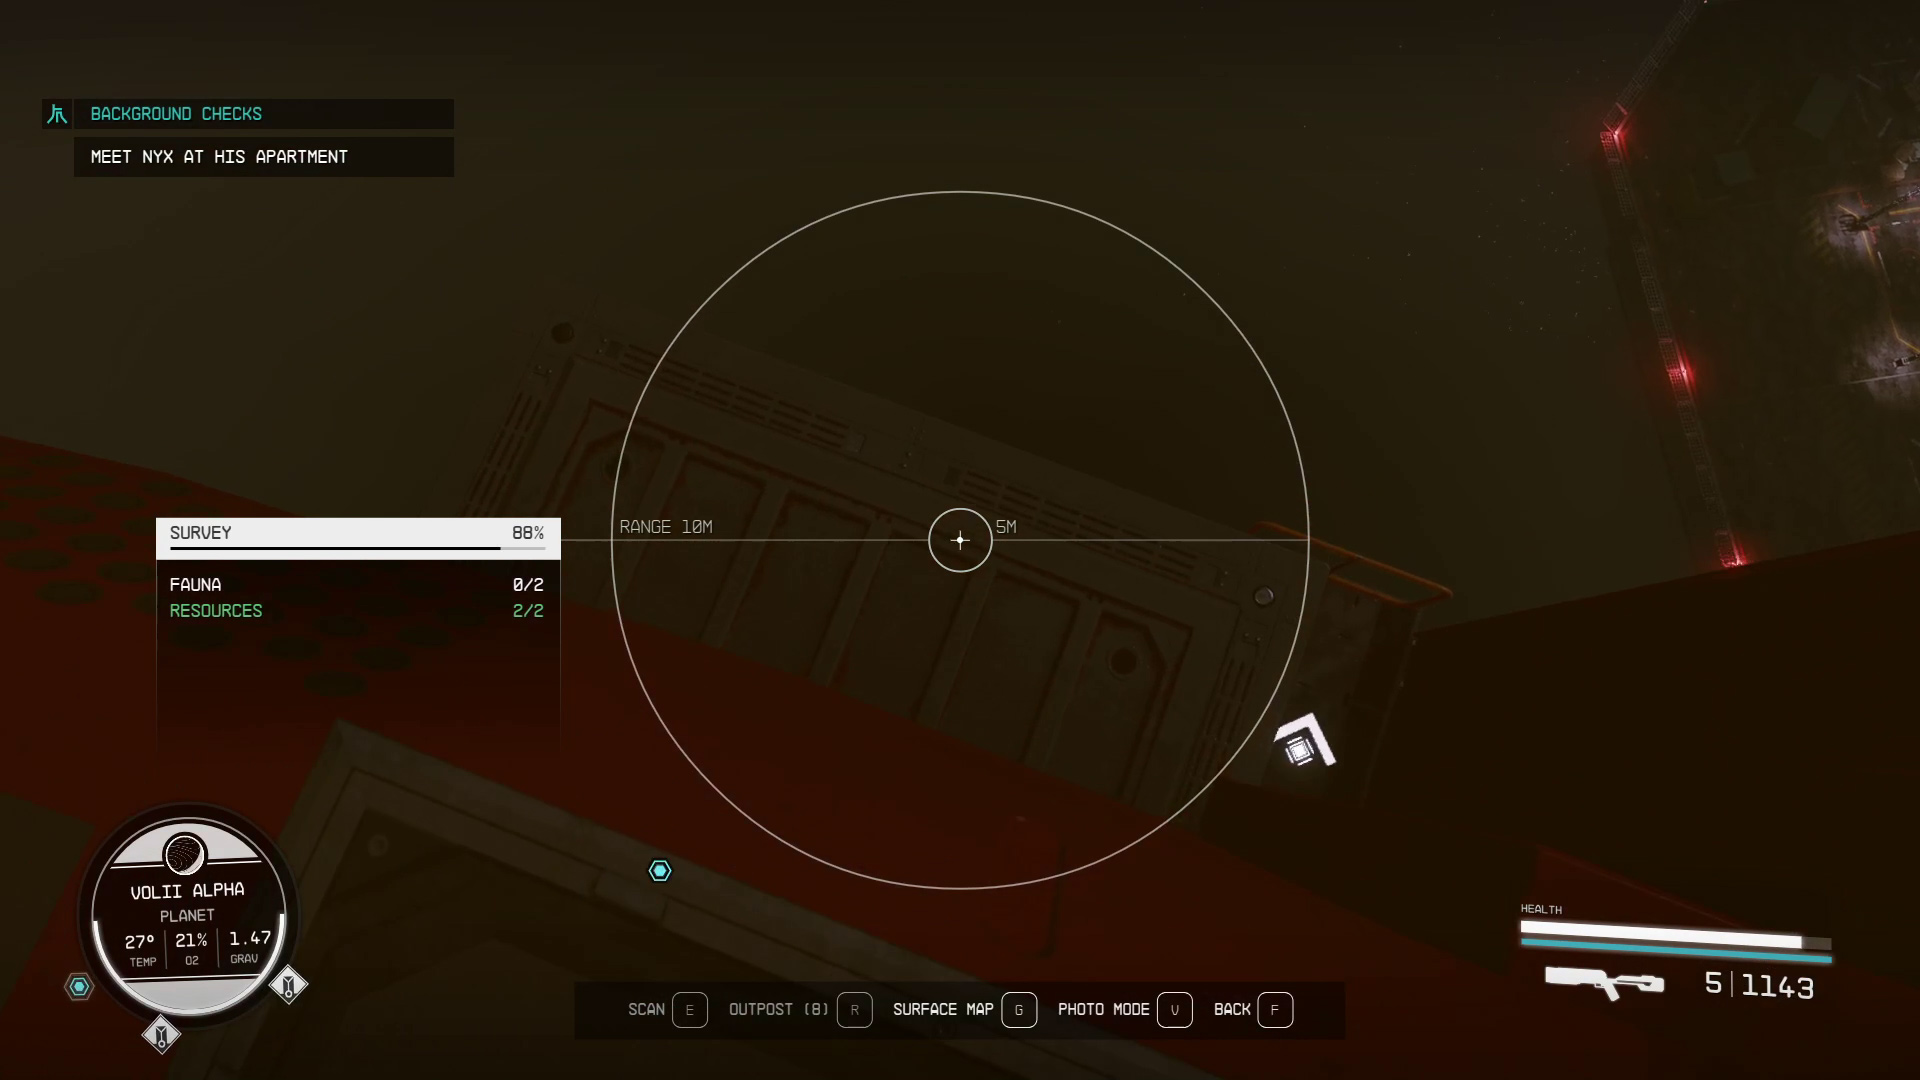
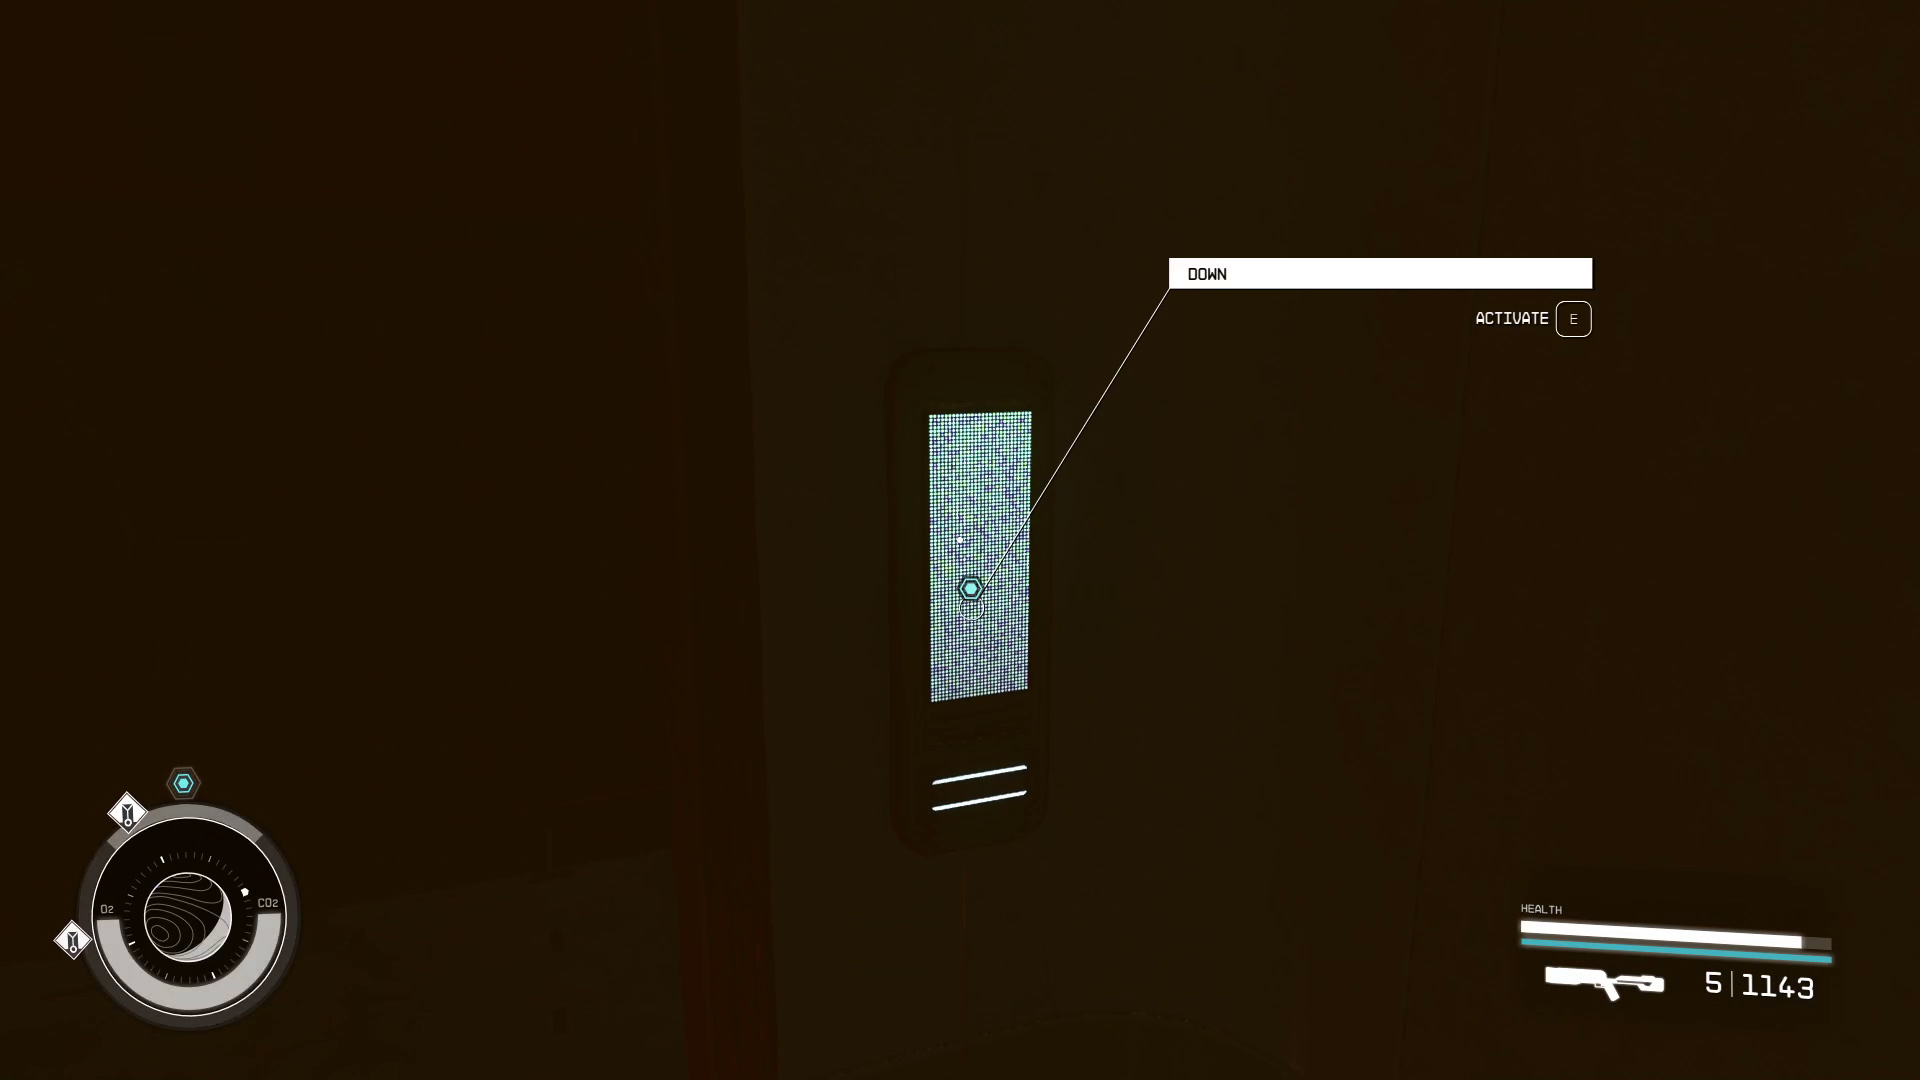
Back outside, you’ve got a long hike to Nyx’s place. Fortunately, the hand scanner can lead you all the way there! Make sure you loot the crates found right as you exit Ryujin Tower, and then start heading to Nyx. The scanner will lead you off the edge of the rooftop (Image 32), and to an elevator that simply takes you “Down” (Image 33).
Image 32Image 33
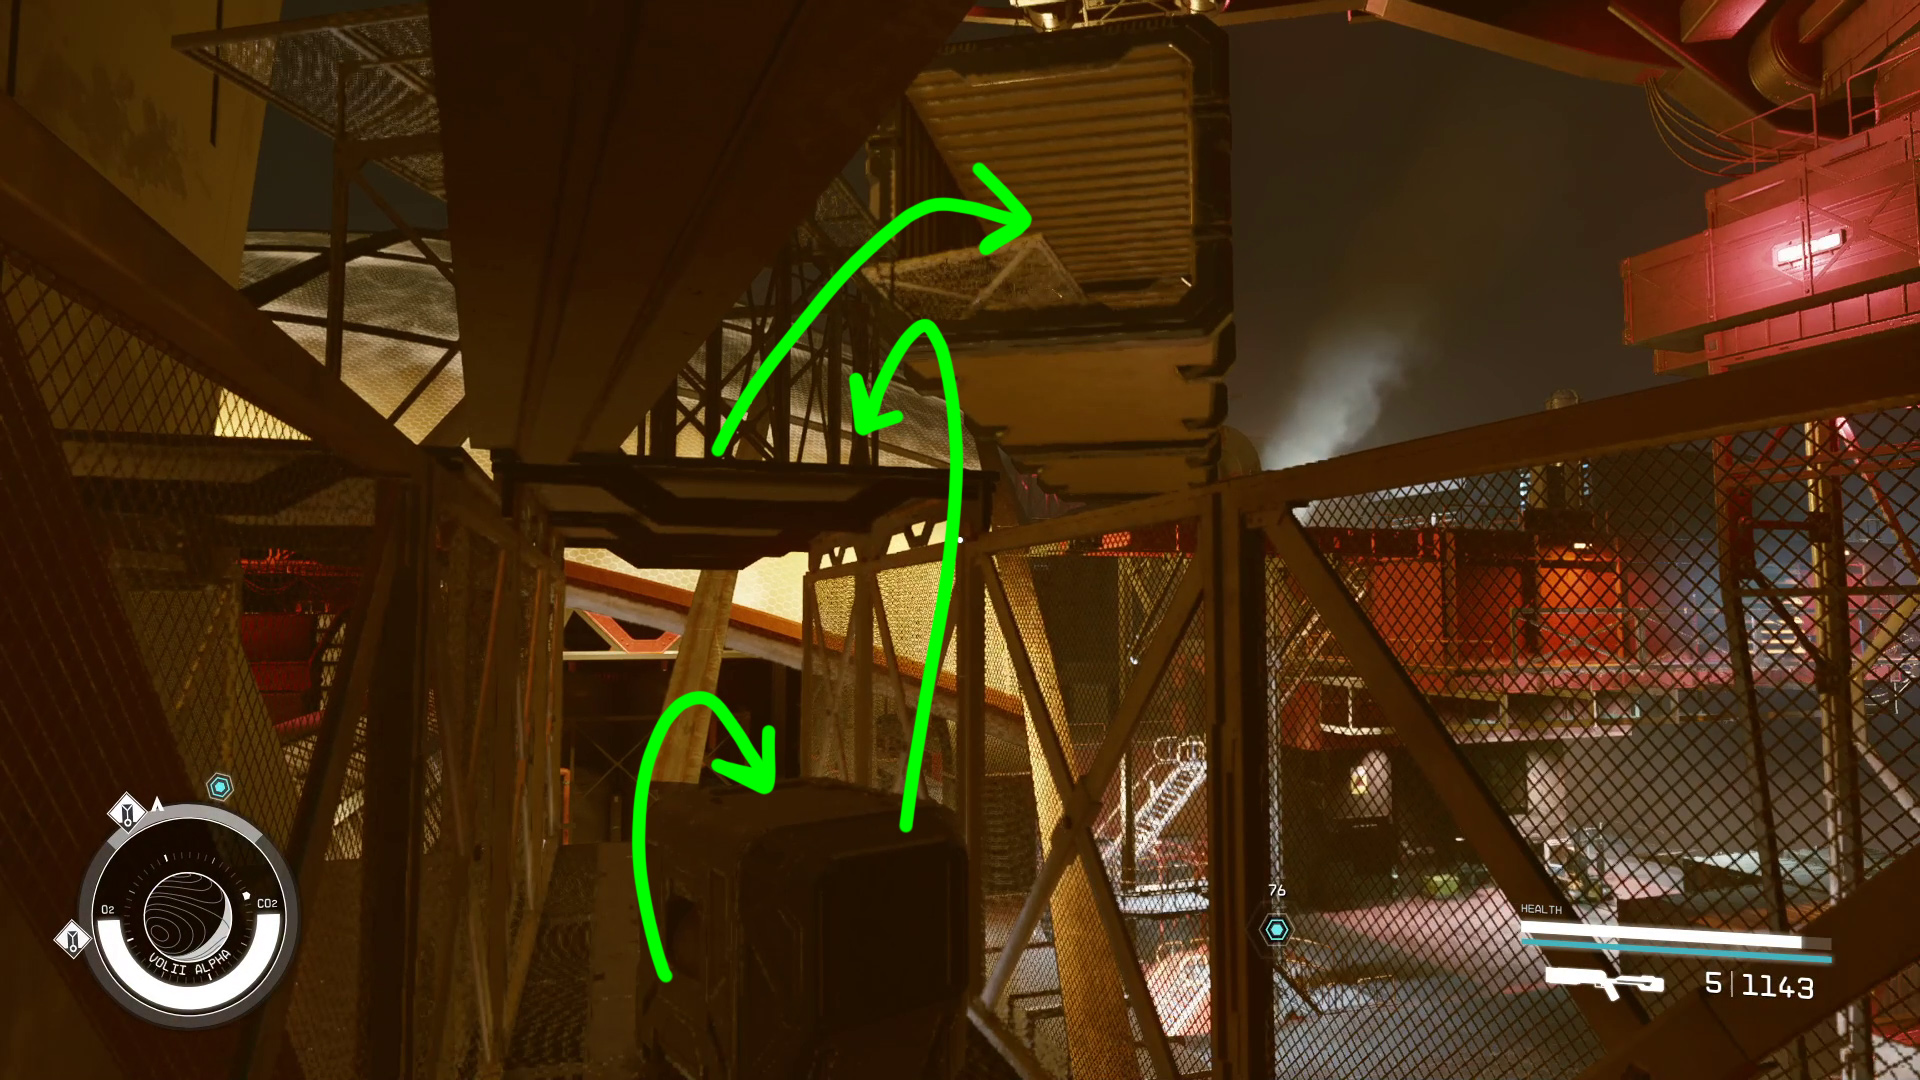
Upon exiting the elevator, you’ll see a switch just ahead — activate it to open up a gate, then go through when it opens and drop down, then cross the makeshift bridge you took on your way into Ryujin Tower (Image 34). The scanner will guide you to and down a bunch of stairs, but you can save some time by simply falling next to the stairs and using your boostpack before you hit the ground (Image 35).
Image 34Image 35
Talk to Nyx / Wait for Nyx
Keep following the scanner arrows and you’ll eventually reach the entrance to Nyx’s apartment. Enter, and then speak with him. Pick whatever response you want, and then he’ll take the data and go hack into it. Wait for him to finish, and stand near him so the next conversation starts when he’s done. Wrap up the second conversation with him, and you can be on your way.
Return to Dalton at Ryujin Tower
Fast travel back to the Neon Core, and from there return to Ryujin Tower. Strangely, using your Mission Log will take you to the Neon landing pad, so you’ll need to manually select the Neon Core if you want to fast travel as close to Ryujin Tower as possible. Once you’re back in the tower, take the elevator to the Executive Offices, and use your scanner to find Dalton’s office.
Talk to Dalton / Wait for Dalton
Just like with Nyx, you can say whatever you want to Dalton, then wait for him to look at the data, and when the second conversation begins you can again say whatever you want to him. Once the second conversation finishes, you’ll be done with this mission! Next up, an awkward encounter with your former boss.
Unabashed FromSoftware fanboy still learning to take his time with games (and everything else, really). The time he doesn't spend on games is spent on music, books, or occasionally going outside.