If you read our guide on ‘How to Build a Ship‘, then you might be wondering what the best parts are for your ship. After all, no one wants to make a sub-par space-faring vessel. When you enter the ship building / upgrading screen, it can be quite daunting because there are so many numbers and stats for each part. However, once you dig in, you’ll find the game does a good job relaying to you in the interfacewhich parts are better. Let us show you what we mean.
This guide goes into great detail on all the key aspects of ship parts — if you’re just here to see the lists of best parts, skip ahead to the Best Ship Parts section of the guide.
Best Place to Shop for Ship Parts
When you are just starting out, and you want to upgrade parts, the best places are definitely the major cities – New Atlantis, Akila City, and Neon. Each spot has different parts, which can make it frustrating if you just want the best right away. However, if you have the resources, we suggest building your own large landing pad at a settlement. This is hands down the best option because it will be stocked with most available parts. However, there will still be parts (like the engine Poseidon DT230 Engine) that can only be bought at Ship Services in major cities, so it’s best to still shop around from time to time.
Building supplies and resources can be purchased at general stores in big cities
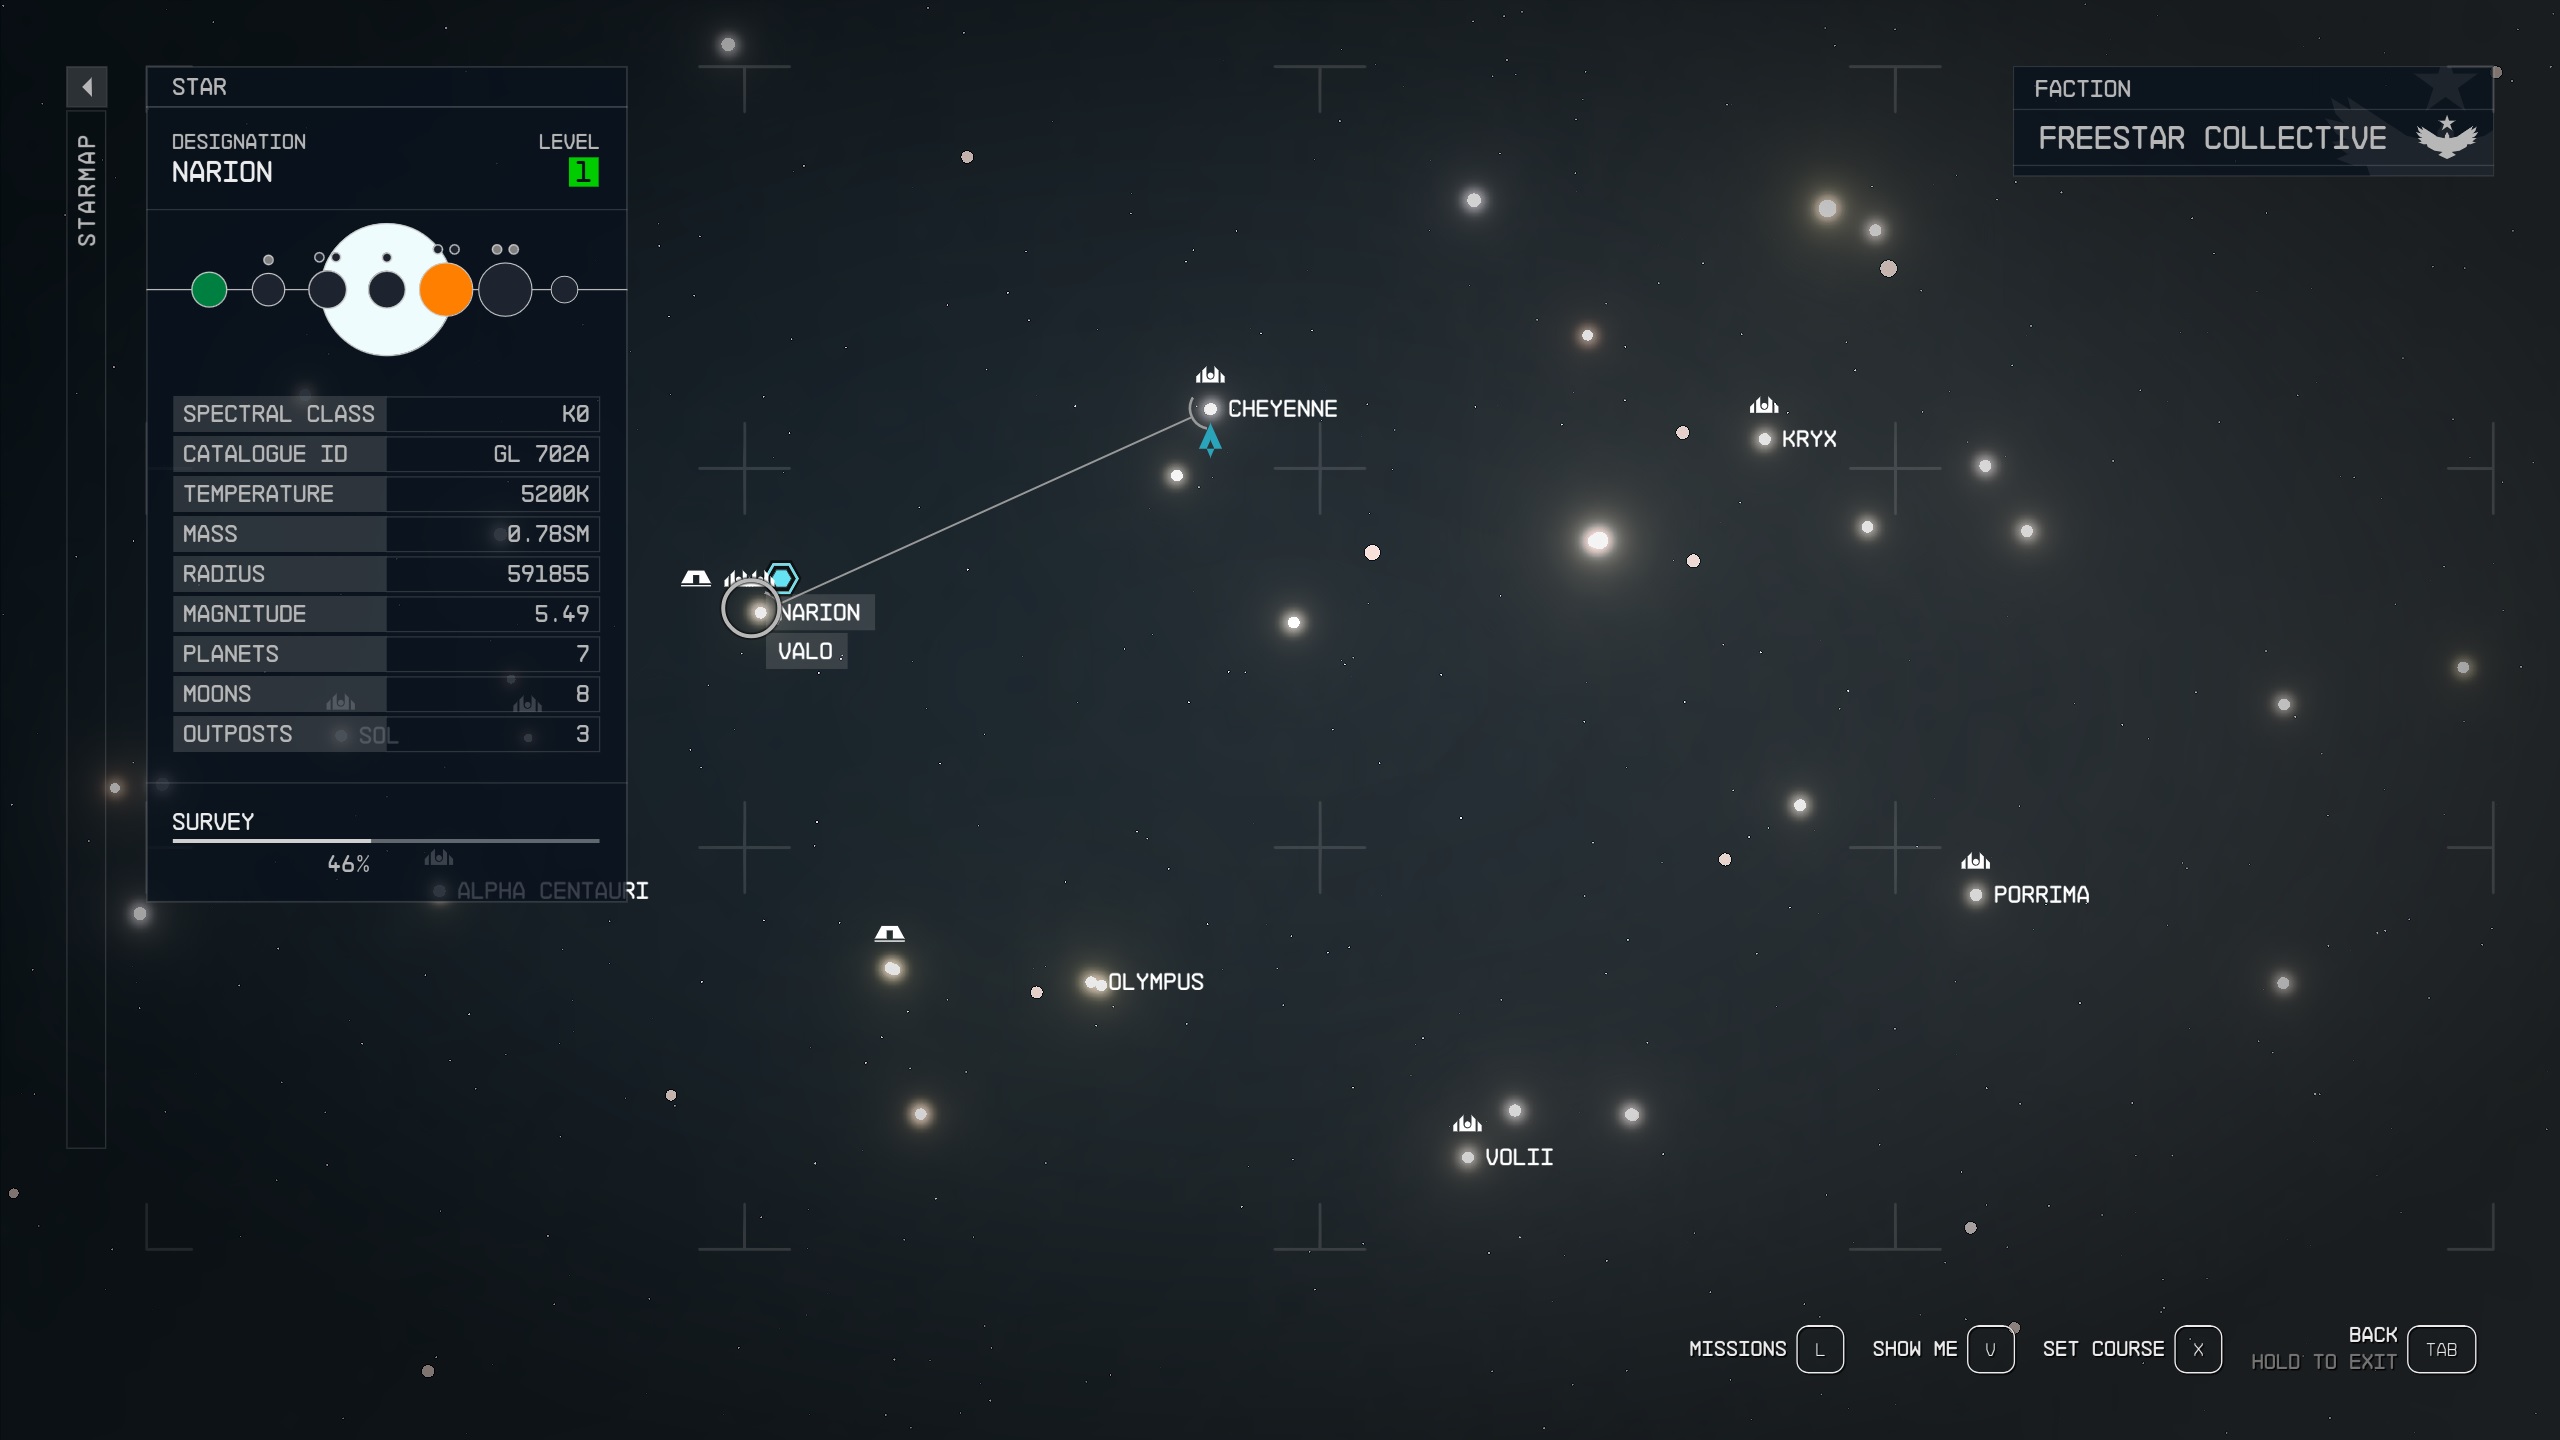
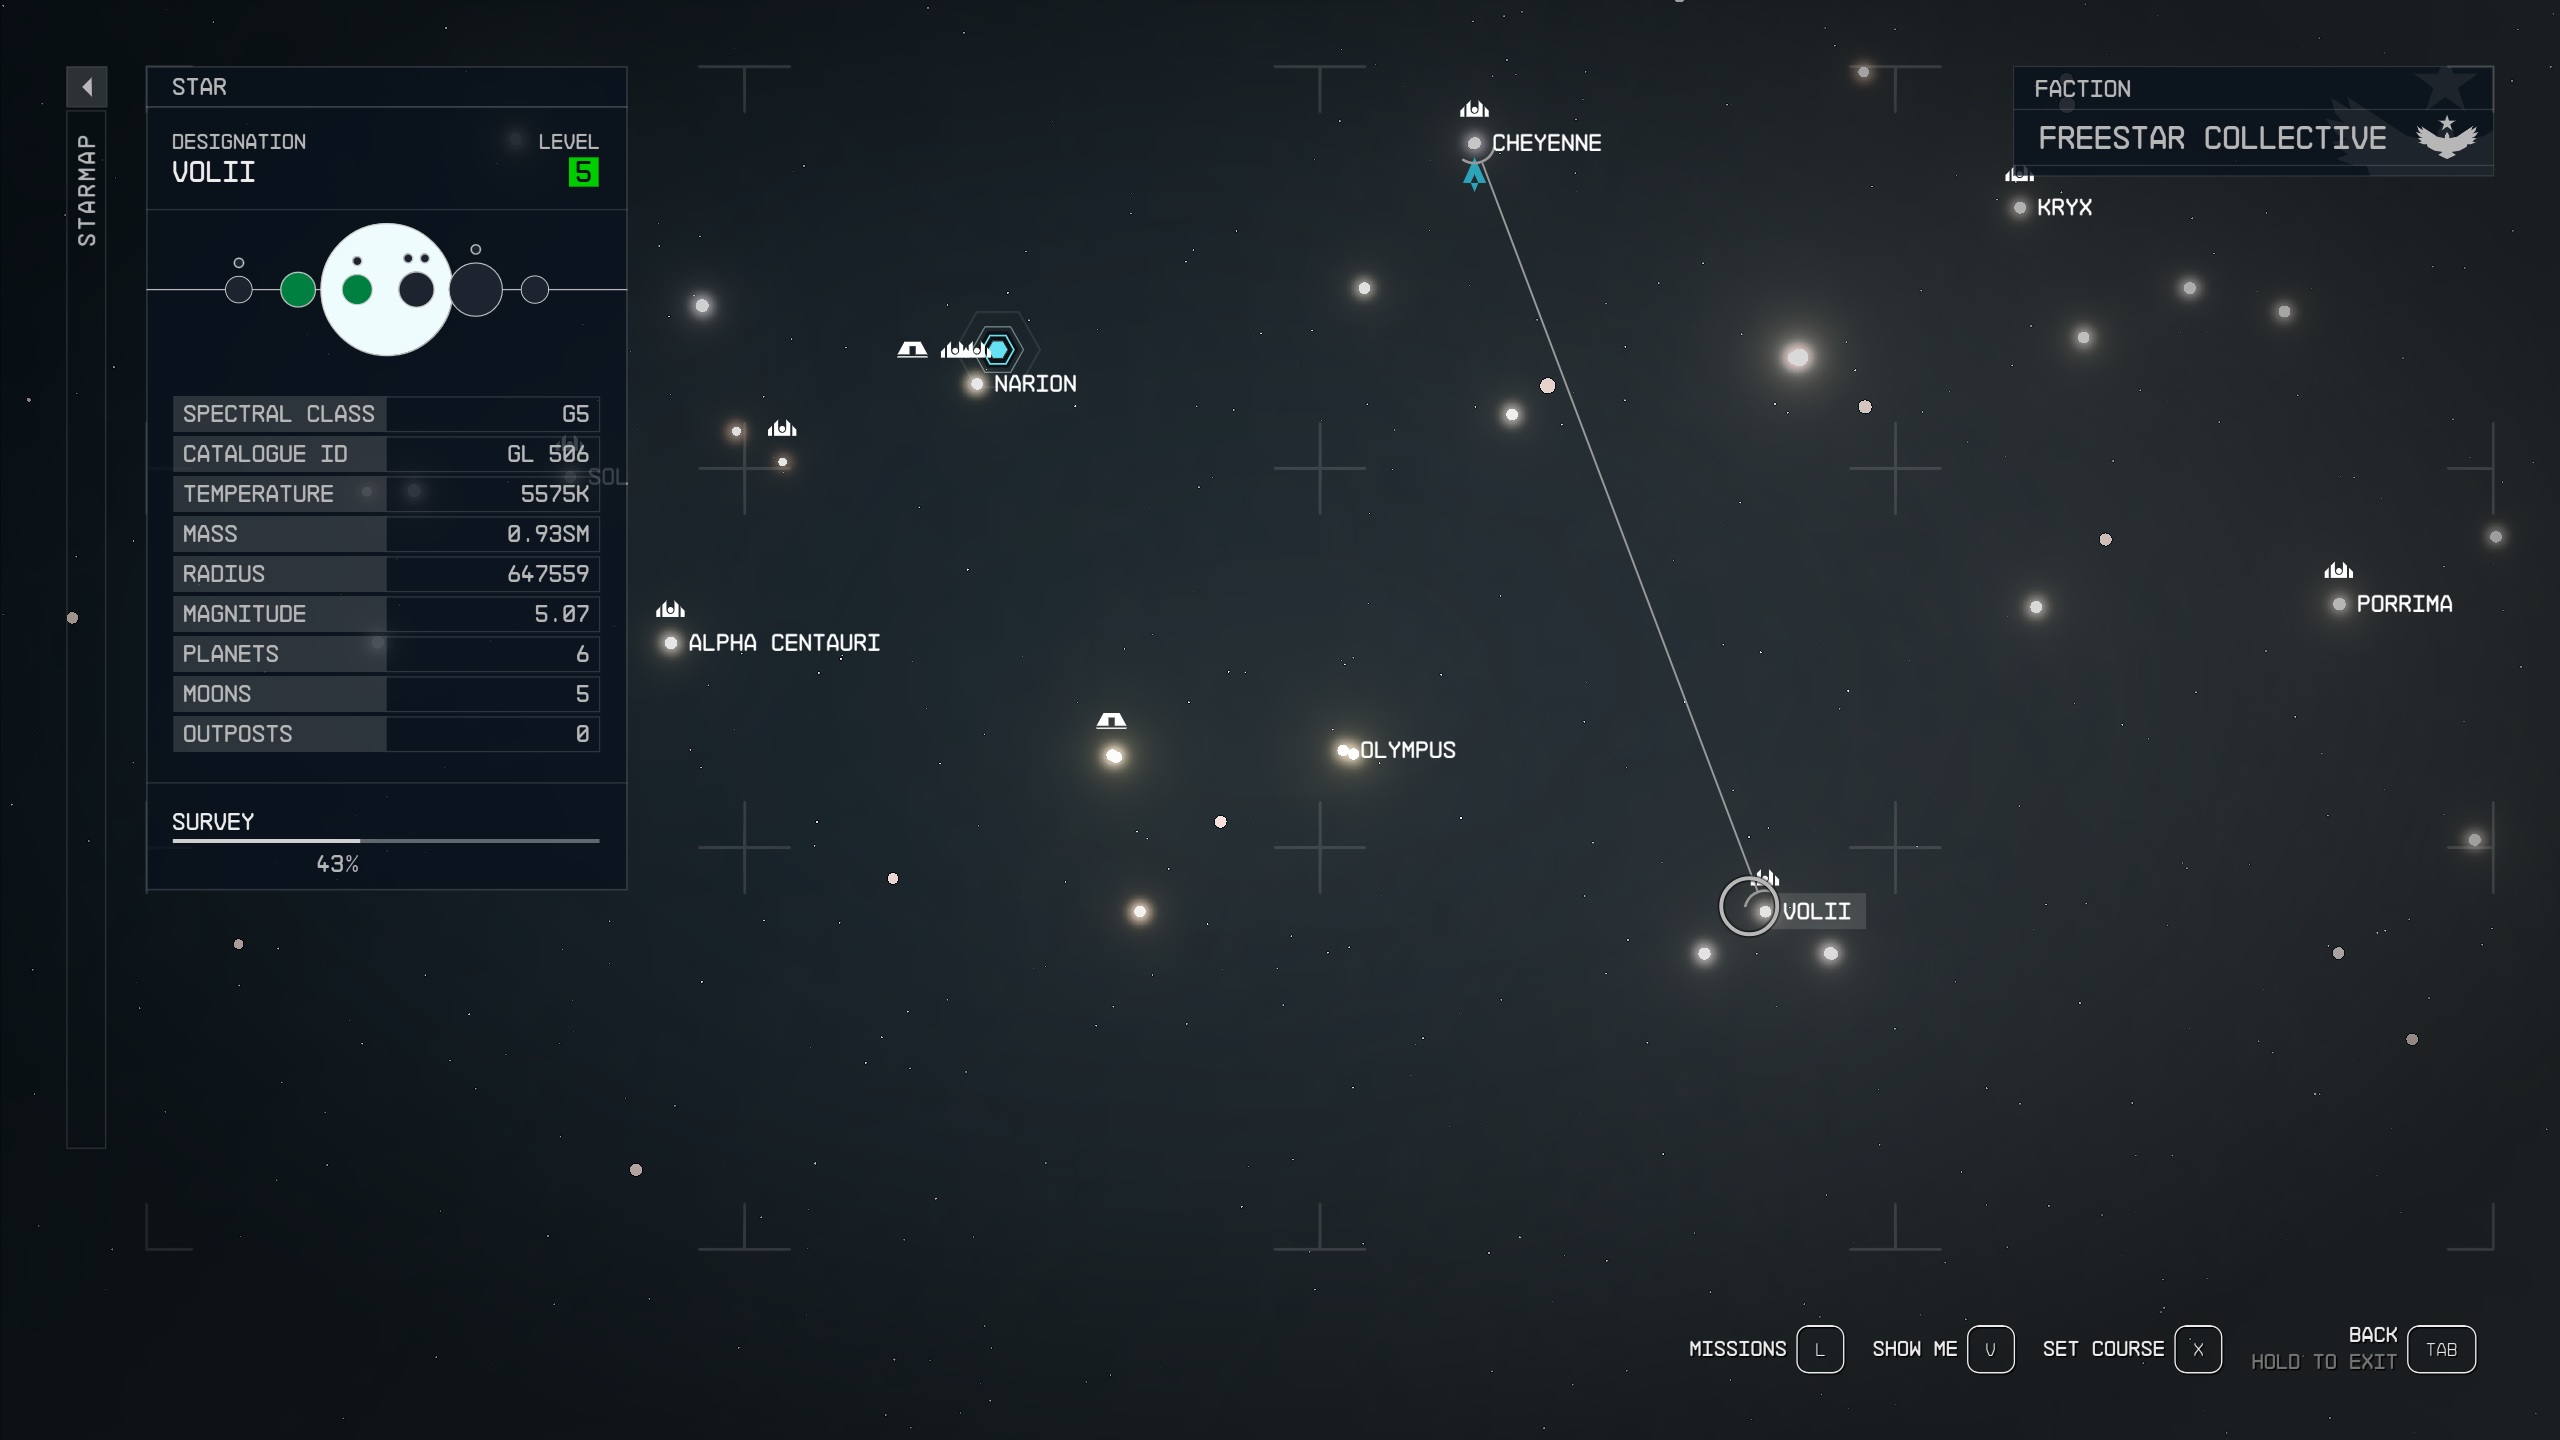
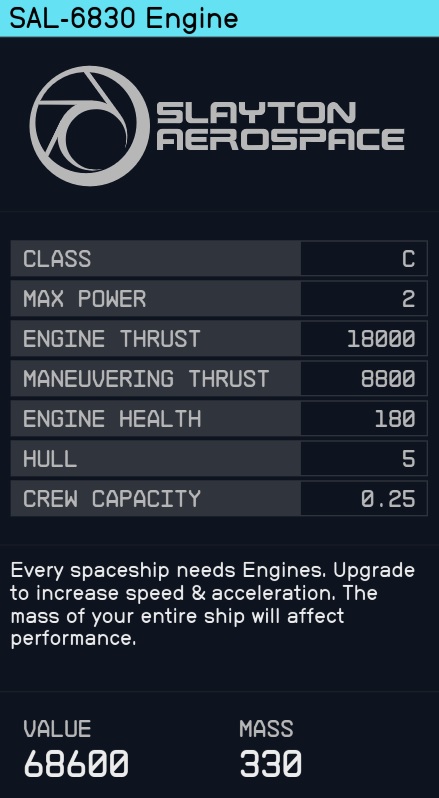
That being said, there are also shipyards owned by parts manufacturers that have exclusive parts. You will want to swing by these locations whenever you see one in a system to make sure there aren’t any upgrades for your ship. For example, the Stroud-Eklund Staryard in the Narion system has the most powerful engine available, the SAL-6830. Here’s a list of ship manufacturers and staryards (that have parts) and their location:
Hopetown, Polvo (Planet), Valo System
Stroud-Eklund Staryard, Dalvik (Spacestation in moon’s orbit), Narion System
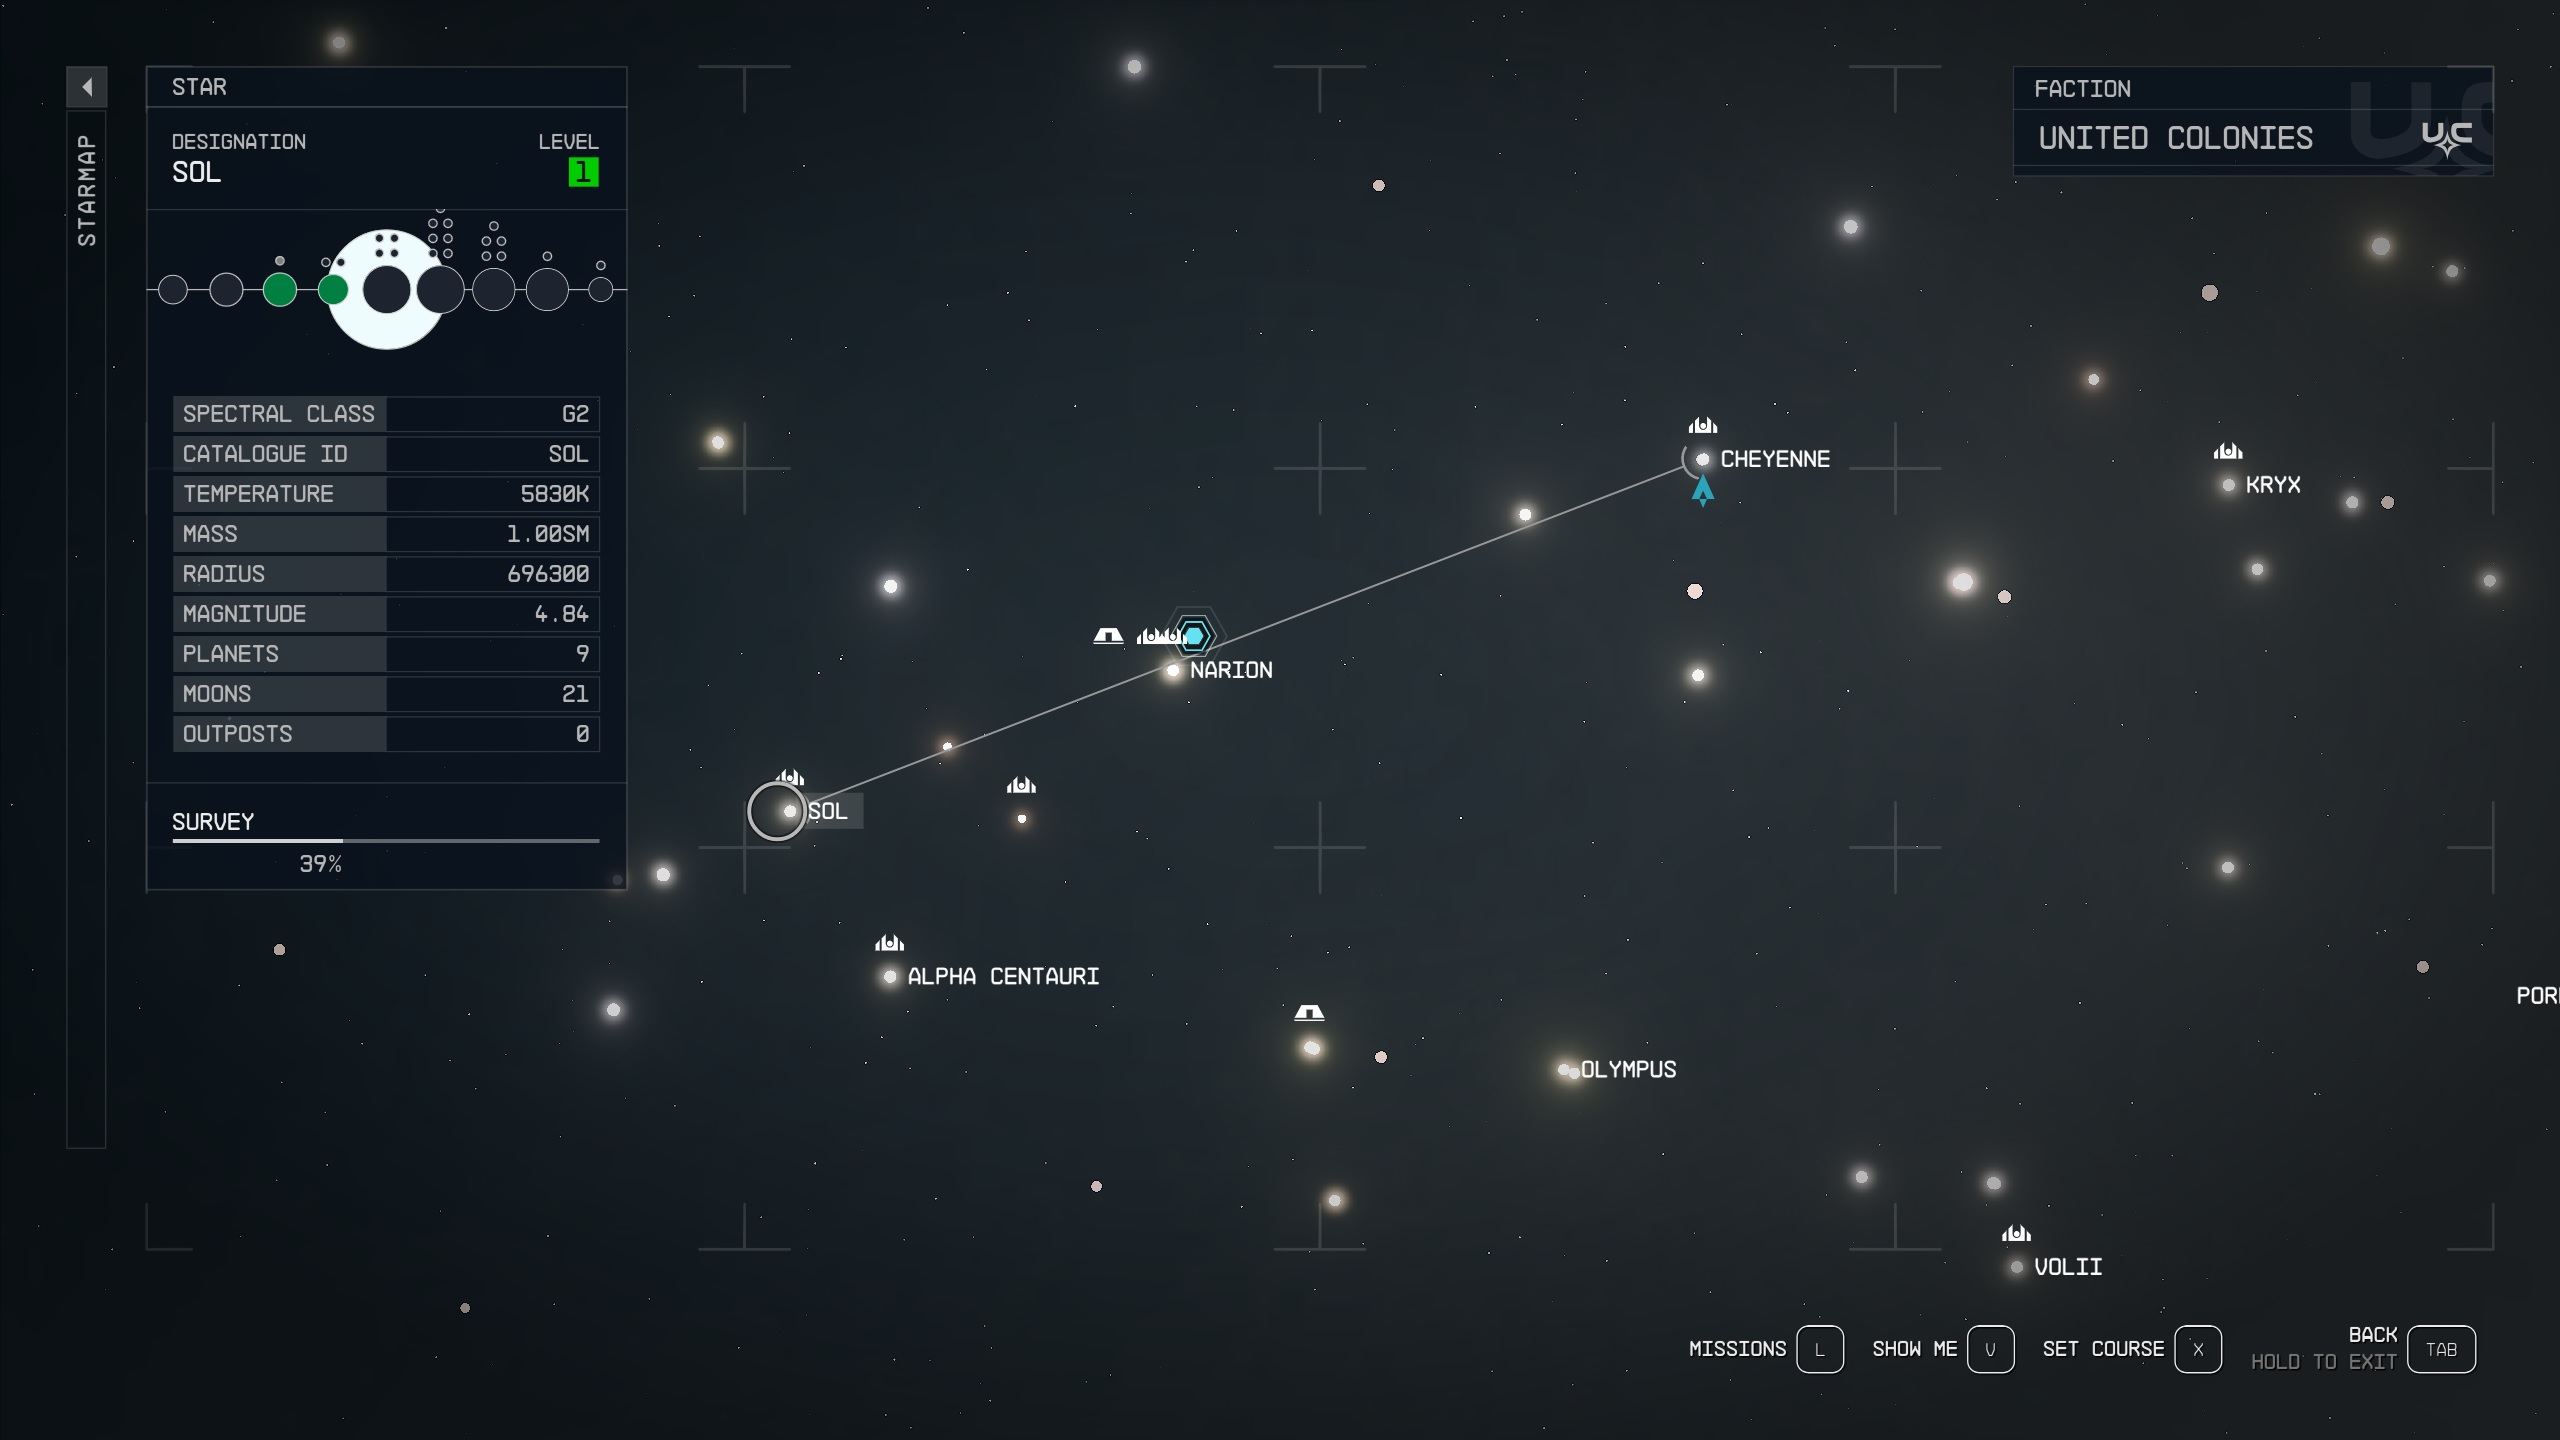
Deimos, Mars (Spacestation in orbit), Sol System
Taiyo Astroneering, Ryujin Tower in Neon (City), Volii Alpha (planet), Volii System
Stroud-Eklund, HopetownDeimosTaiyo Astroneering
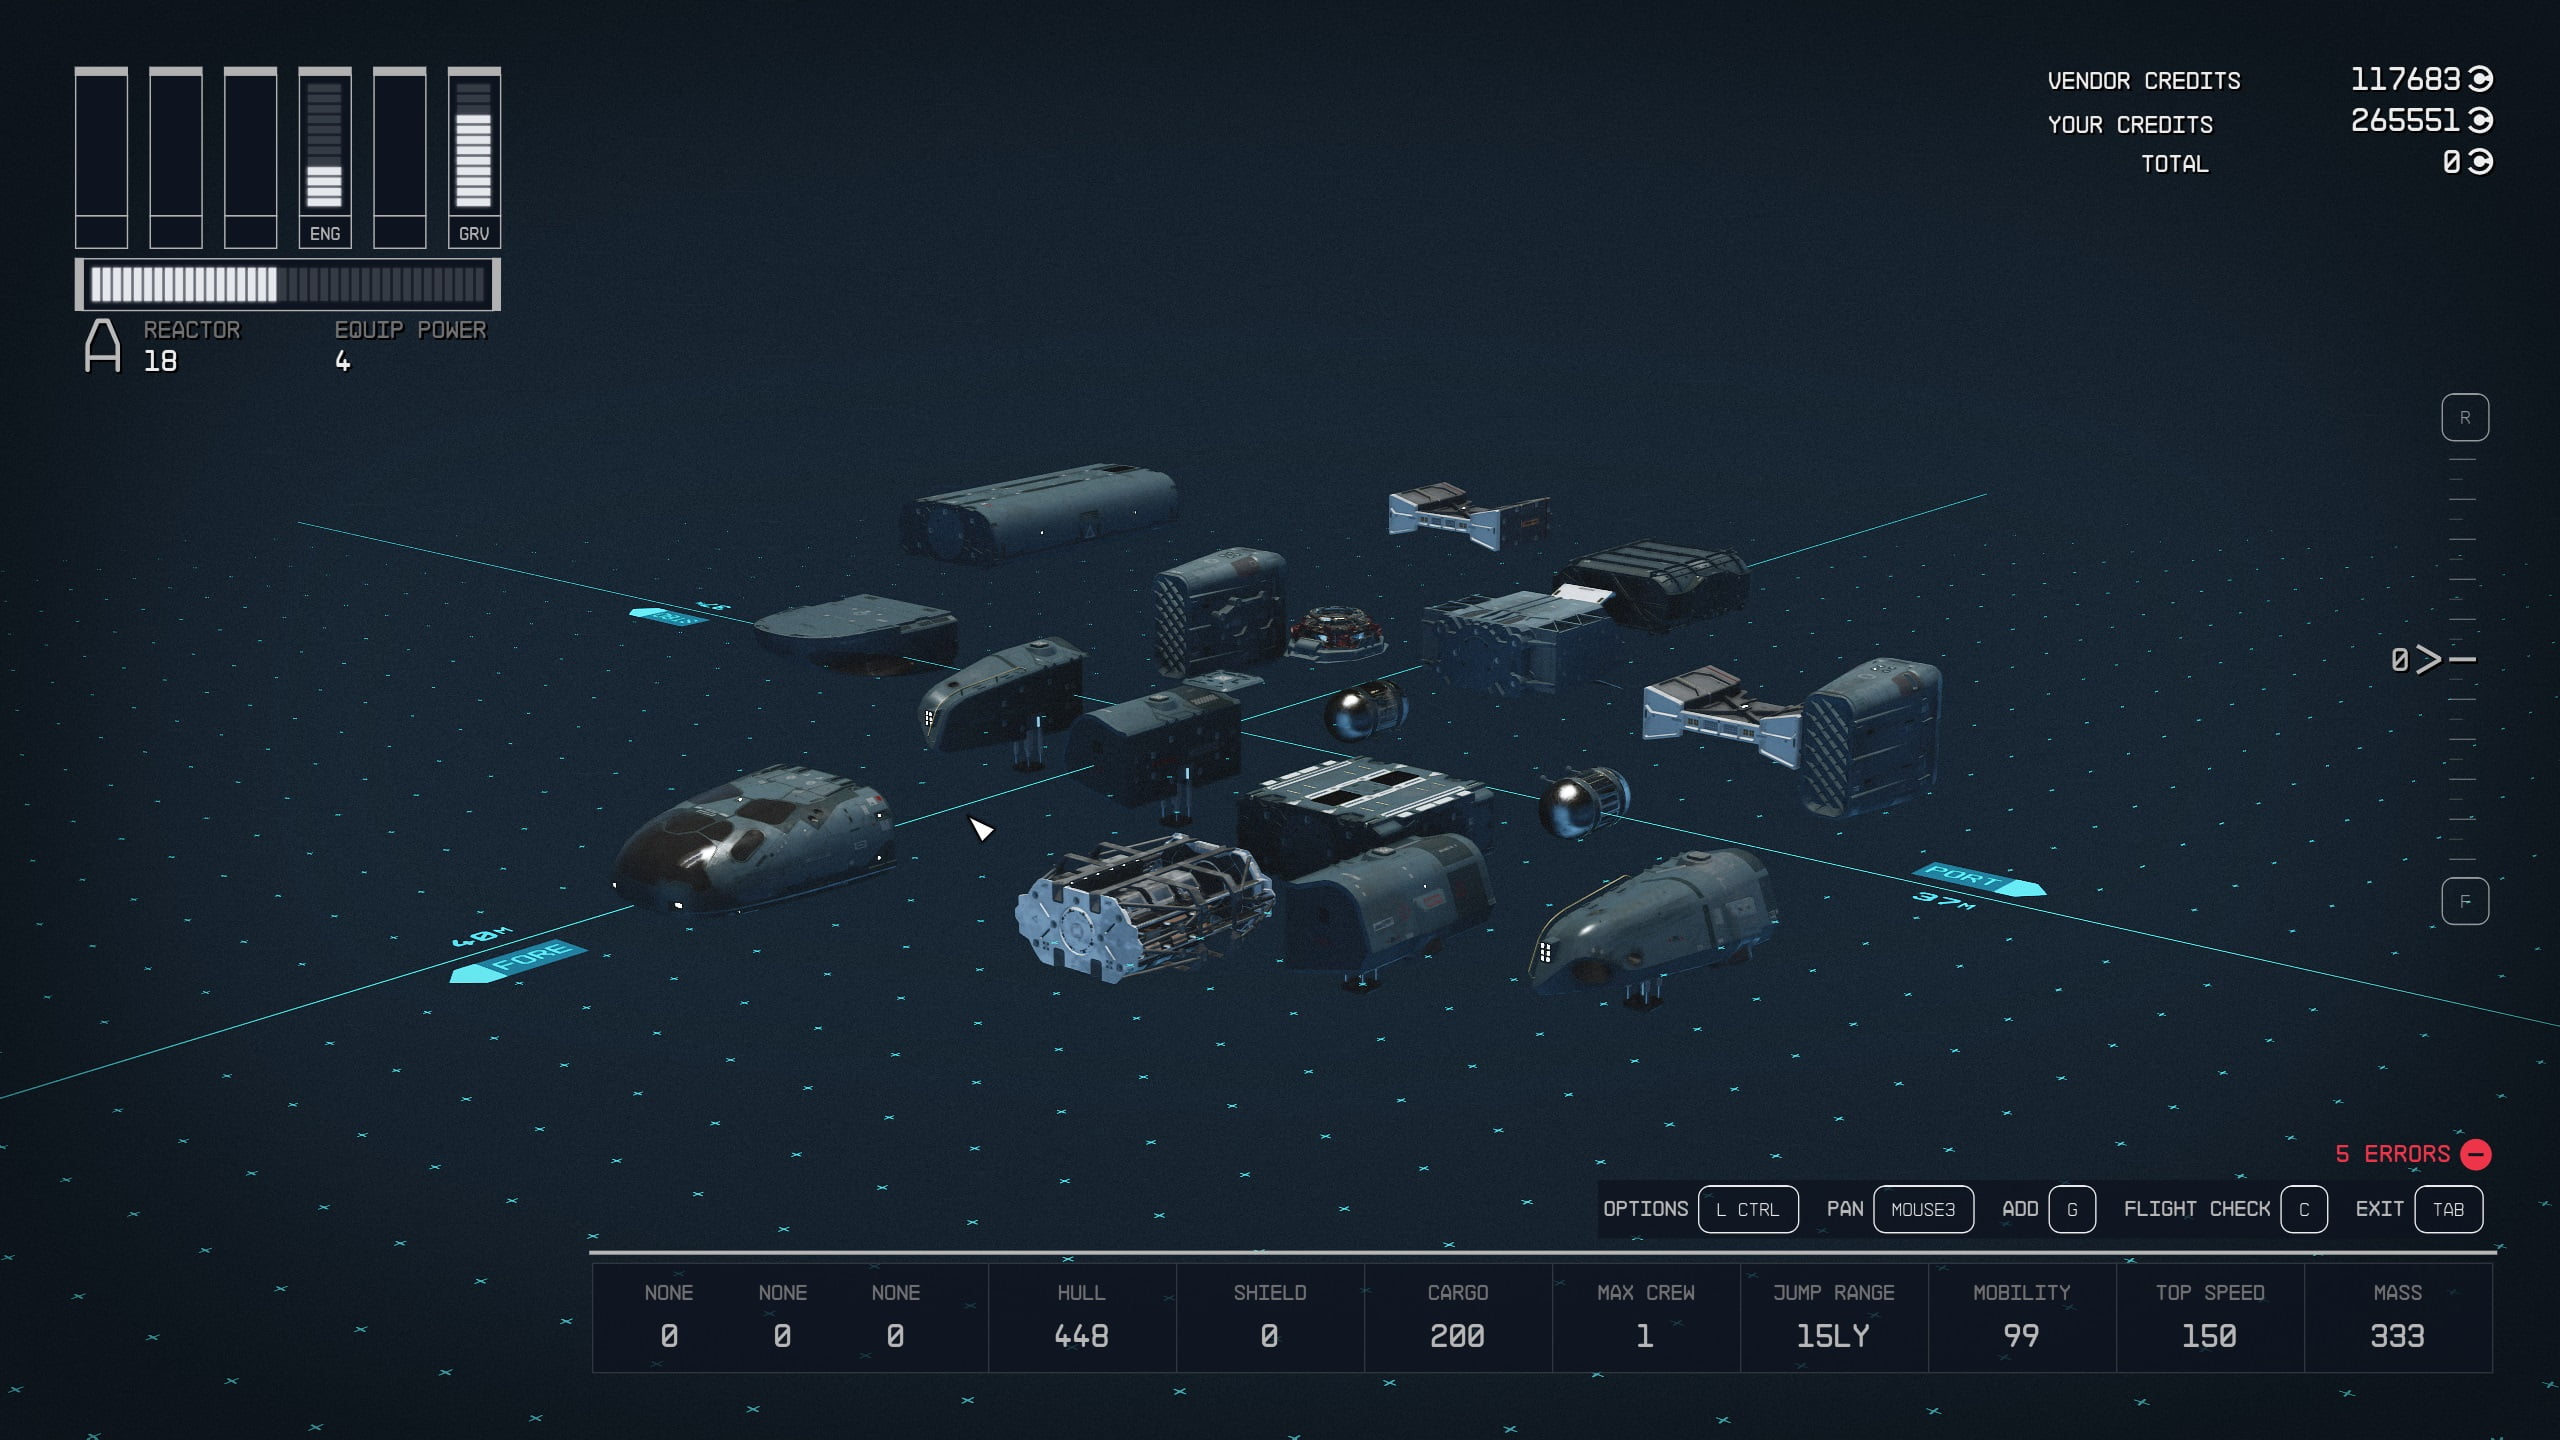
Ship Stats and Upgrading
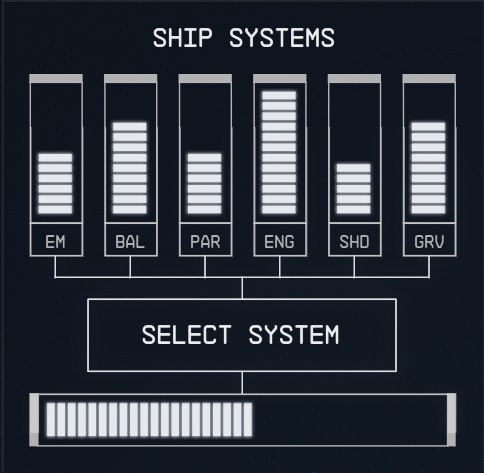
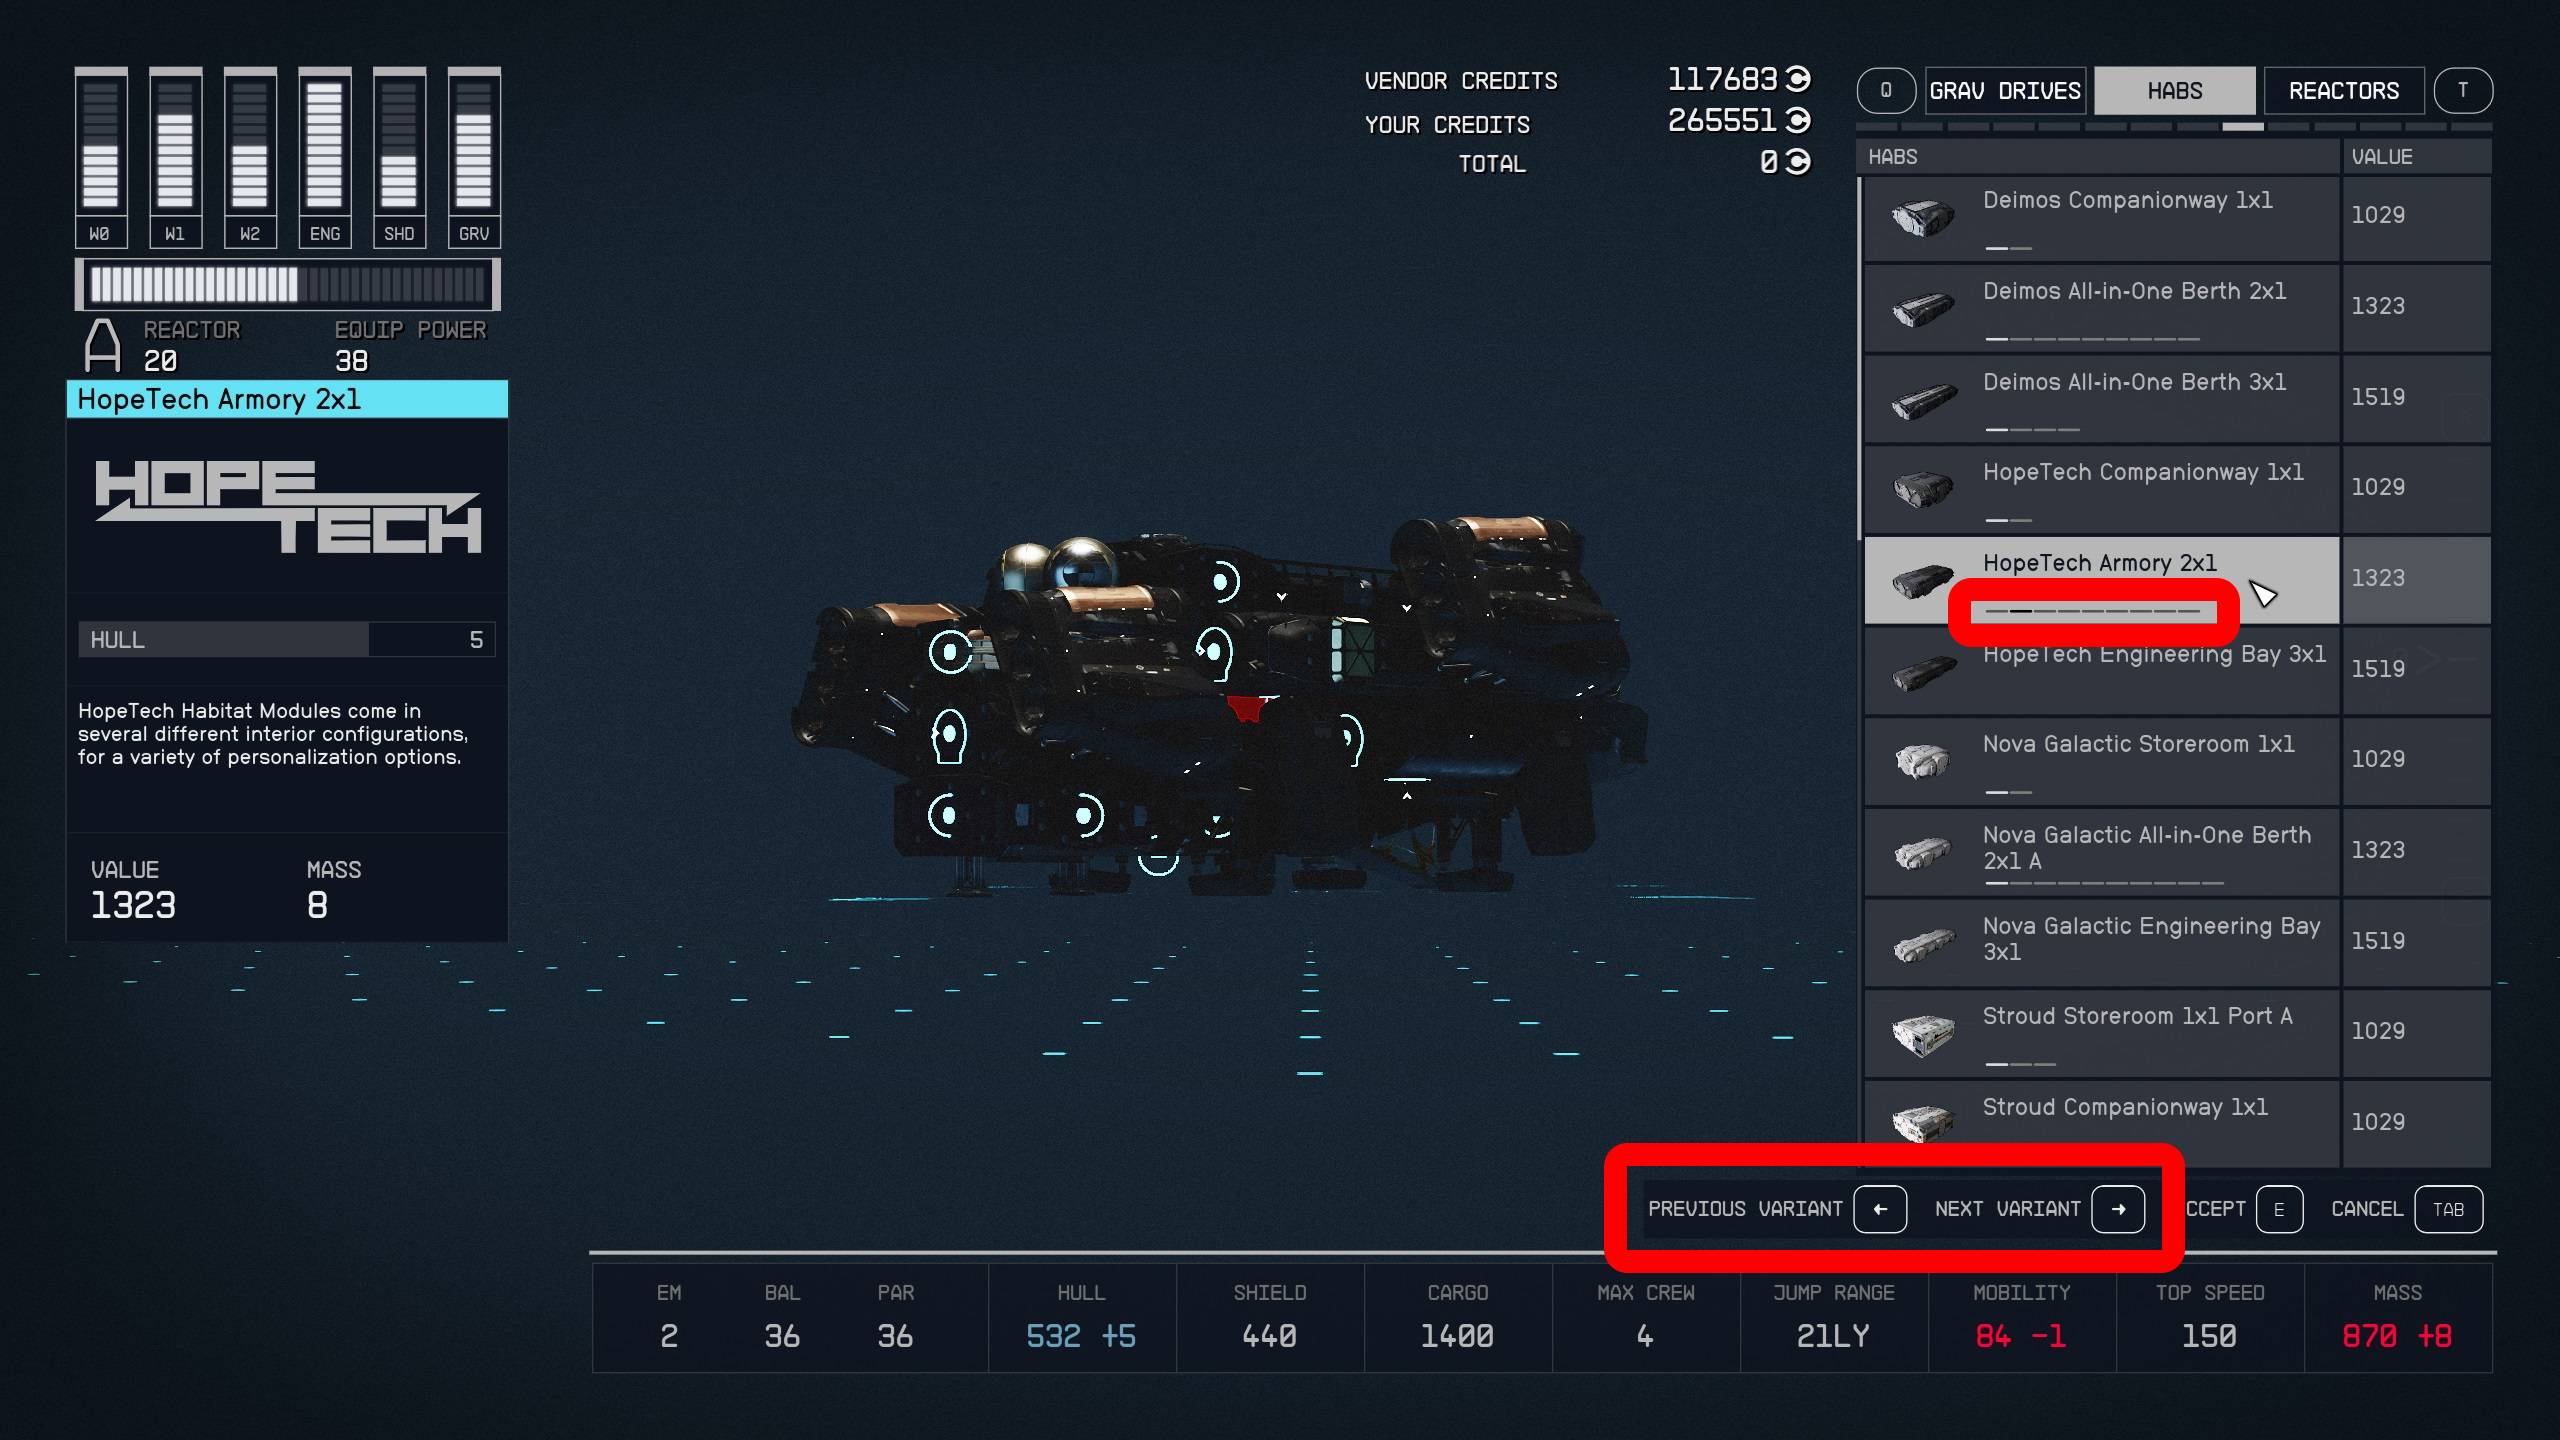
We’ll start with the main systems of the ship because that is likely what players see first and think about when upgrading and choosing better parts. The three columns on the left side represent your ship’s weapons, and the three on the right are the engines (ENG), shields (SHD), and grav drive (GRV). While you’re flying your ship, the weapons will be labeled with what type of weapon is in that slot, meaning they can be labeled in a variety of ways. For example, the columns might say PAR, BLA, MSL, which stands for Particle, Ballistics (cannons), and Missiles. On the other hand, when upgrading, they will be labeled with the slot number, W0, W1, and W2.
Systems on systems
When you are browsing available parts, you’ll notice that the bars on the columns will go up and down. This indicates how much power the part needs to function at 100%. Generally speaking, the more power that a part takes, the better it is. Another pretty obvious indicator is the price – you get what you pay for. We found that looking at the most expensive parts first was a good way to see what premium gets you. If you can’t afford it, then you can start looking at the mid-price options.
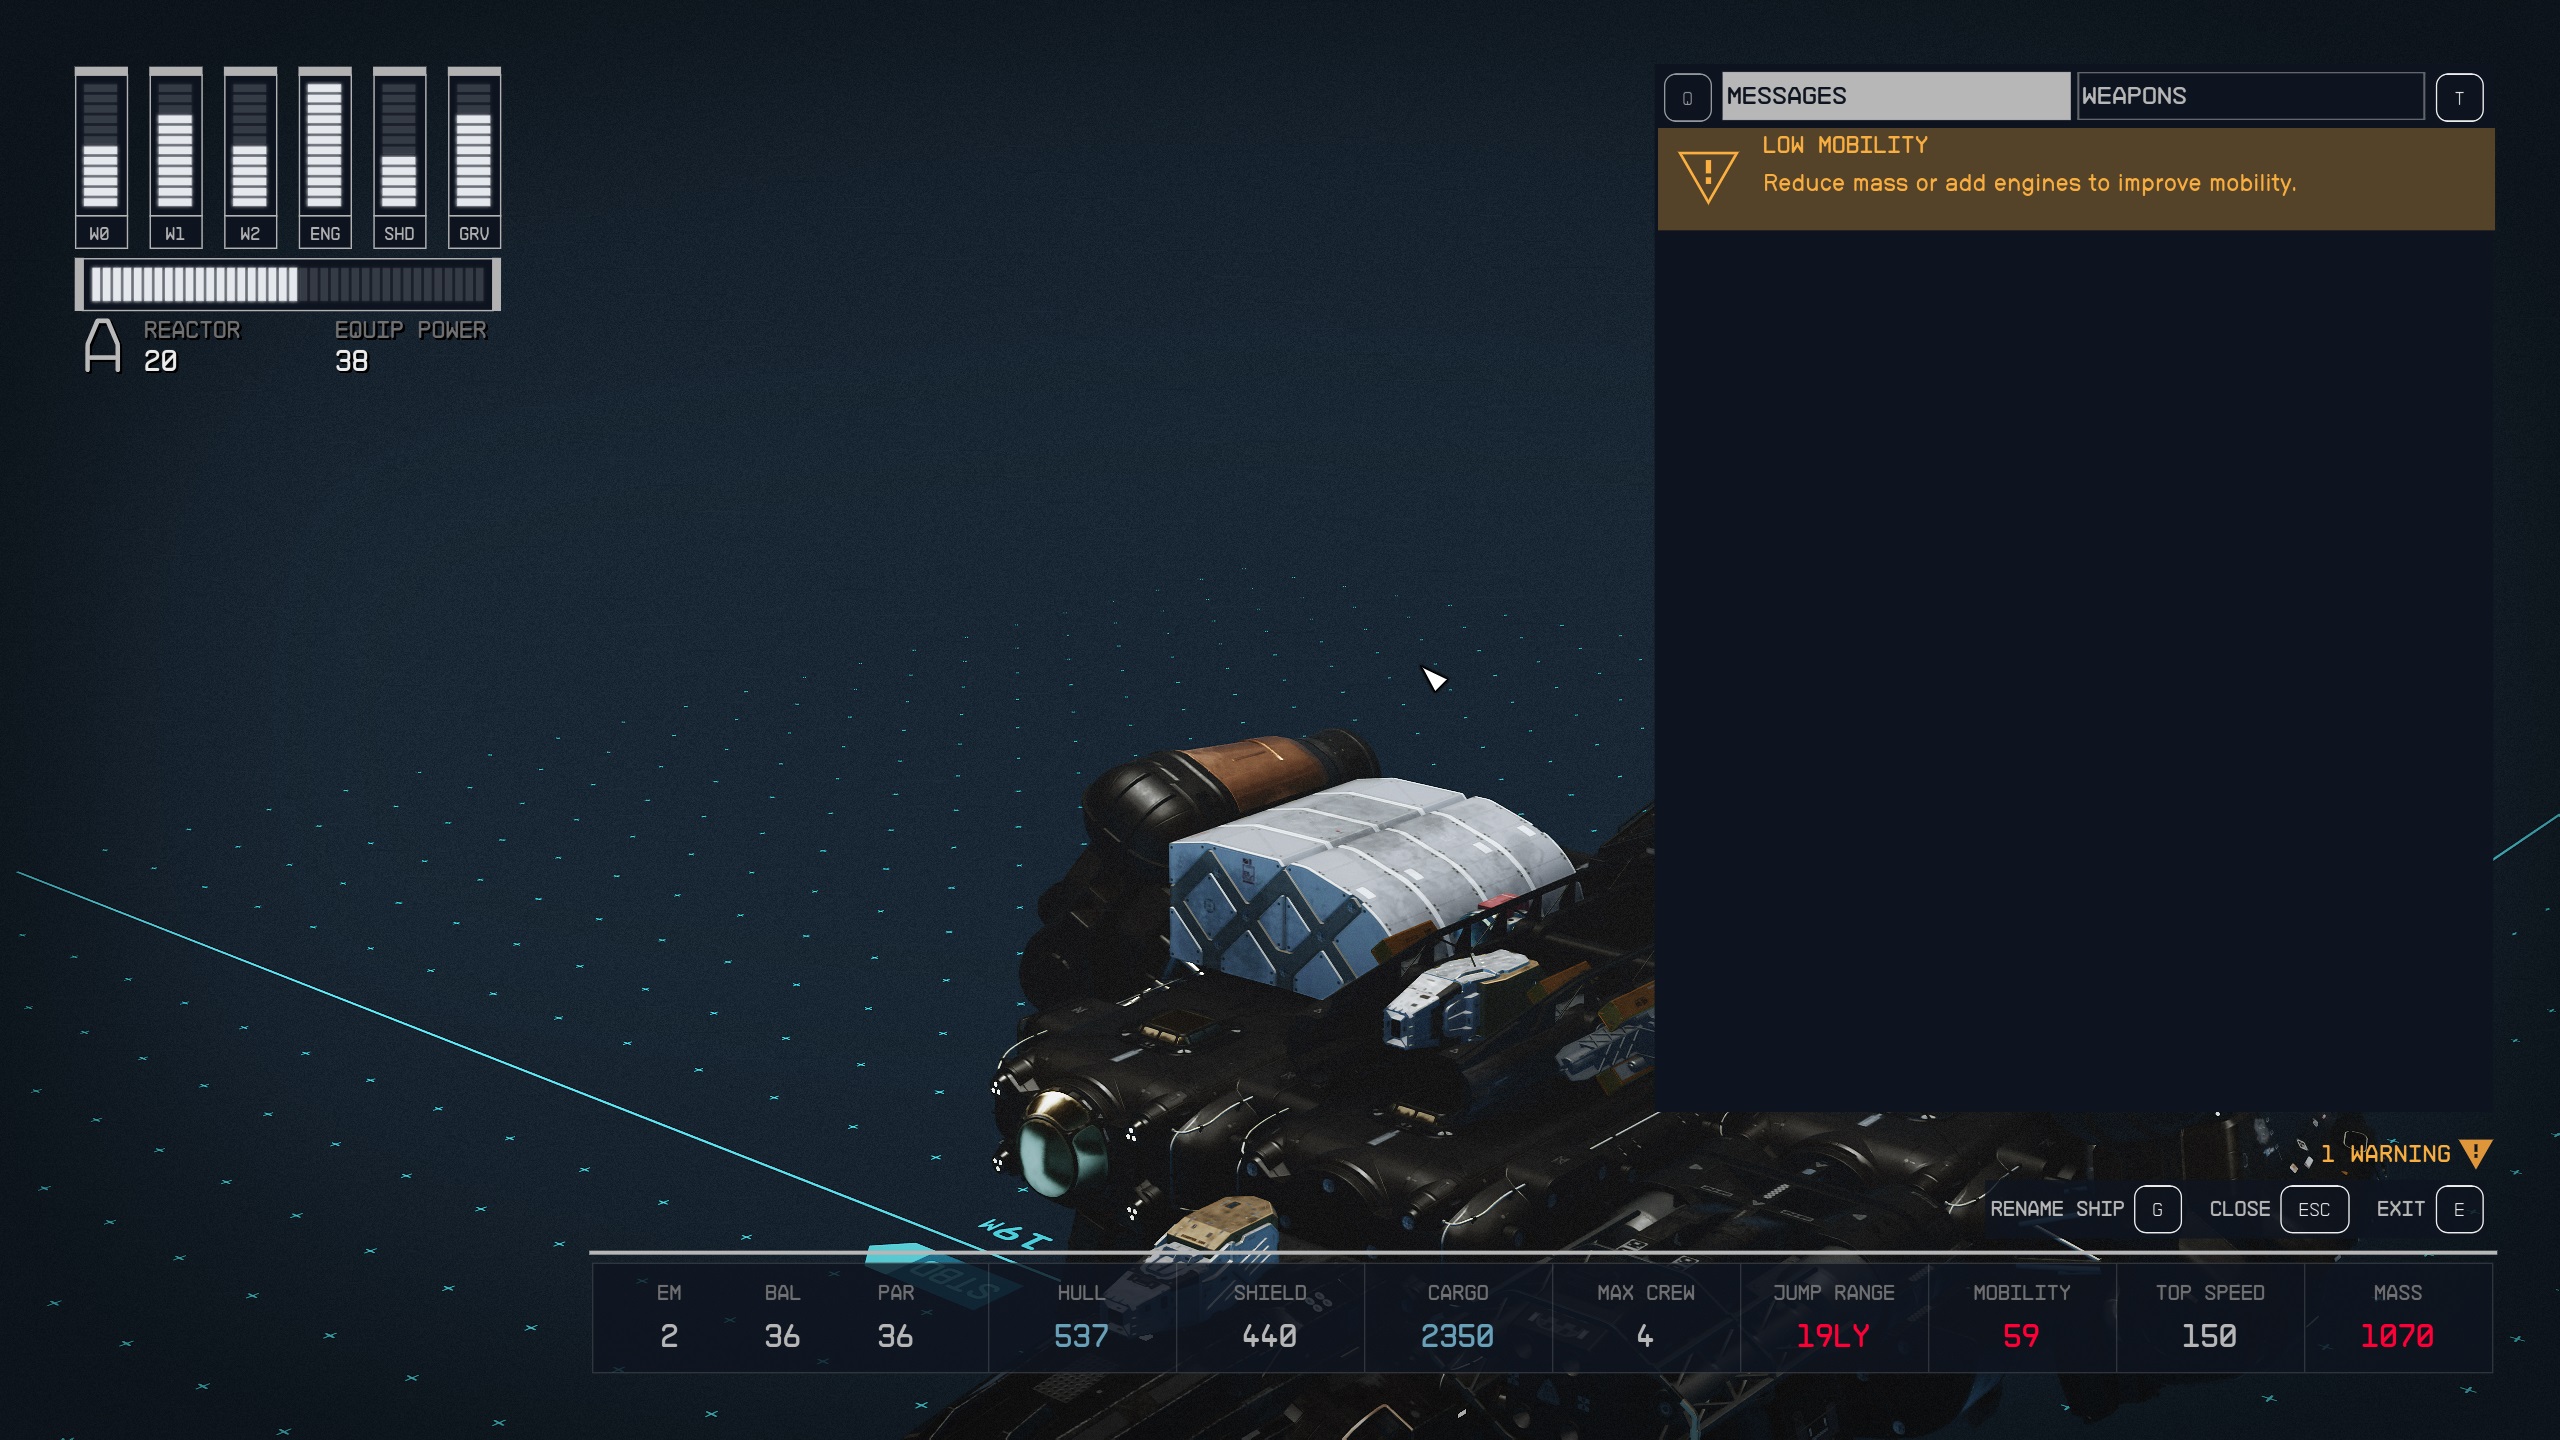
You do need to be careful, though, because sometimes there will be hidden costs associated with keeping your ship ‘Nominal’. Let’s use an example: you buy the most expensive Grav Drive, but it has more ‘Mass’ than your previous one. Then your Flight Check tells you that you might want to add more engines to keep your ship mobile. Now you need to add more Habs, so you have a spot for more engines. You can see how upgrading can snowball quickly, especially if you’re just hunting for the best parts.
Keep an eye on your mass
This is where we get into the scary group of numbers at the bottom of the building / upgrading screen. The big limiter, as we saw in the example above, is the ship’s mass (bottom-right number). If this exceeds a certain threshold, then you will have to add more engines, or replace them with better ones, so your ship can move. It’s easy to tell when any of these numbers are sub-nominal because they will go red. When they’re white, they’re nominal, and when they’re blue, they’re optimal. Let’s look at each of these bottom specs in turn and talk about how they affect your ship:
Weapons – These are the three farthest left stats, and they represent the hull damage that each weapon does.
Hull – This is your ship’s health.
Shield – The level of shield protection on your ship.
Cargo – How much space is in the Cargo Hold.
Max Crew – The number a crew mates that can be on the ship.
Jump Range – The number of light years that your ship can grav jump.
Mobility – The Maneuverability of your ship.
Top Speed – The highest maximum speed of your ship (while boosting).
Mass – The size of your ship.
For this ship, the Hull is optimal, while the mobility and mass are sub-nominal
Skills and Ship Parts
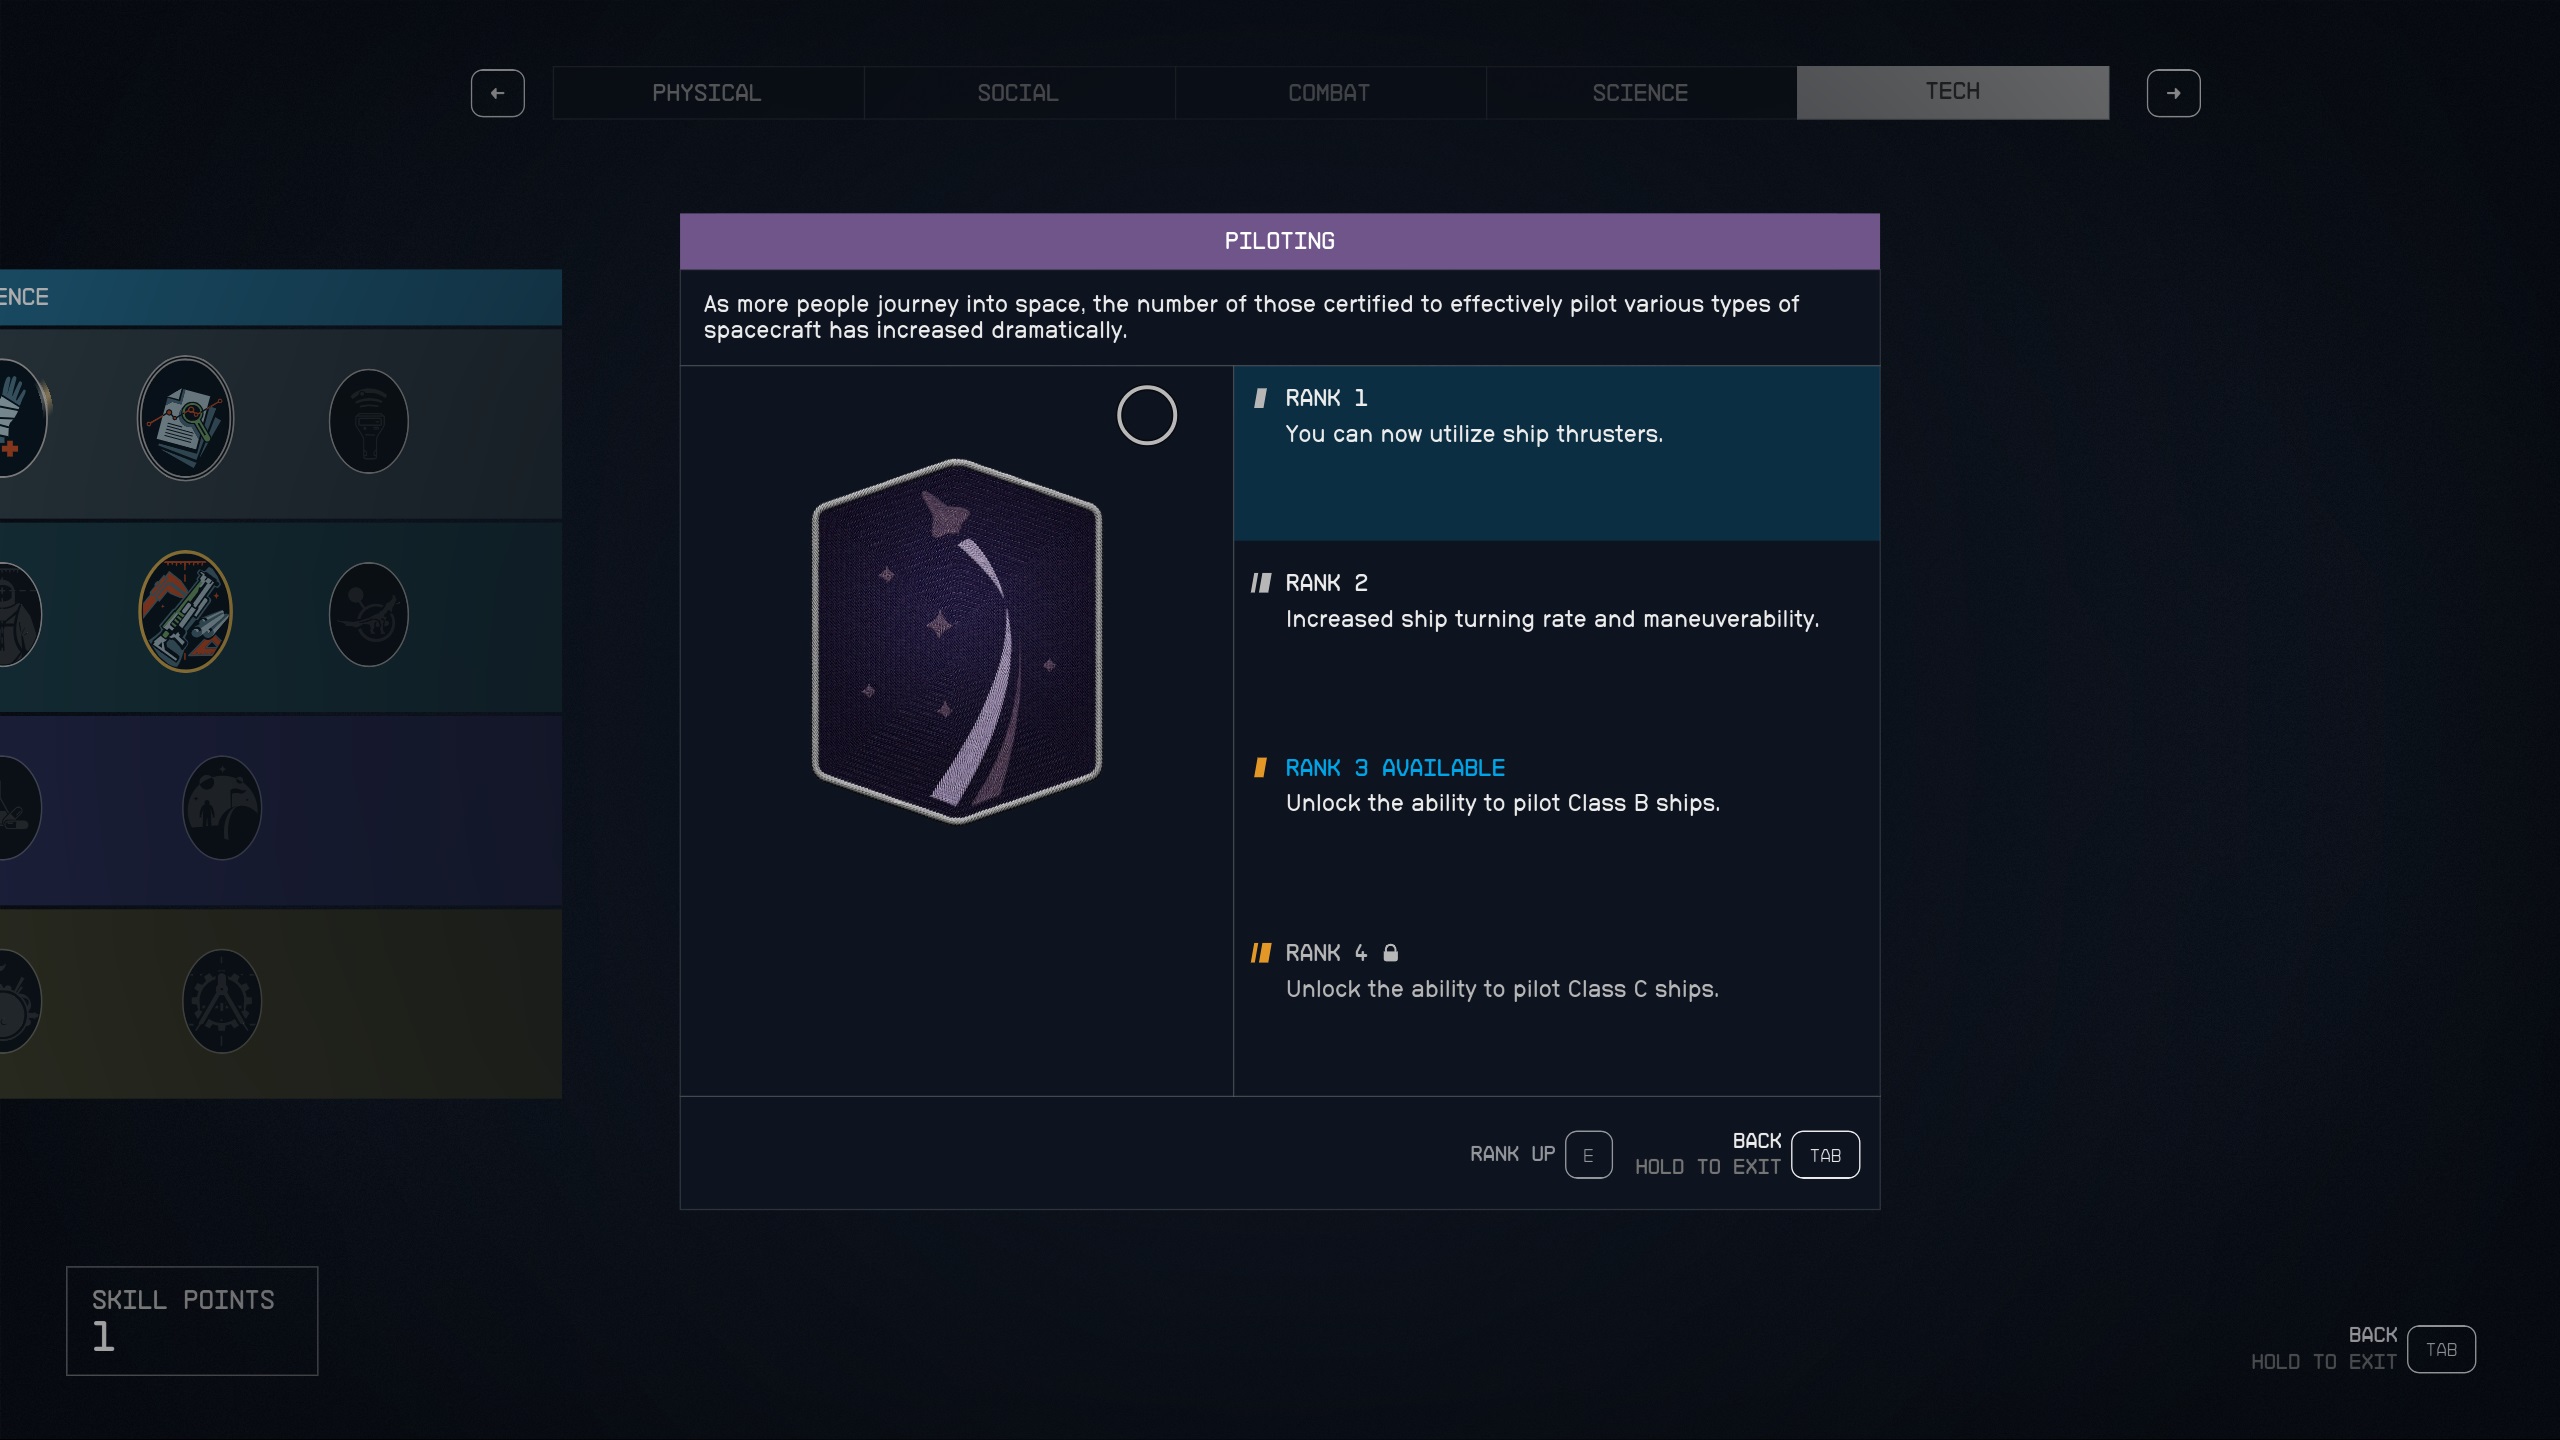
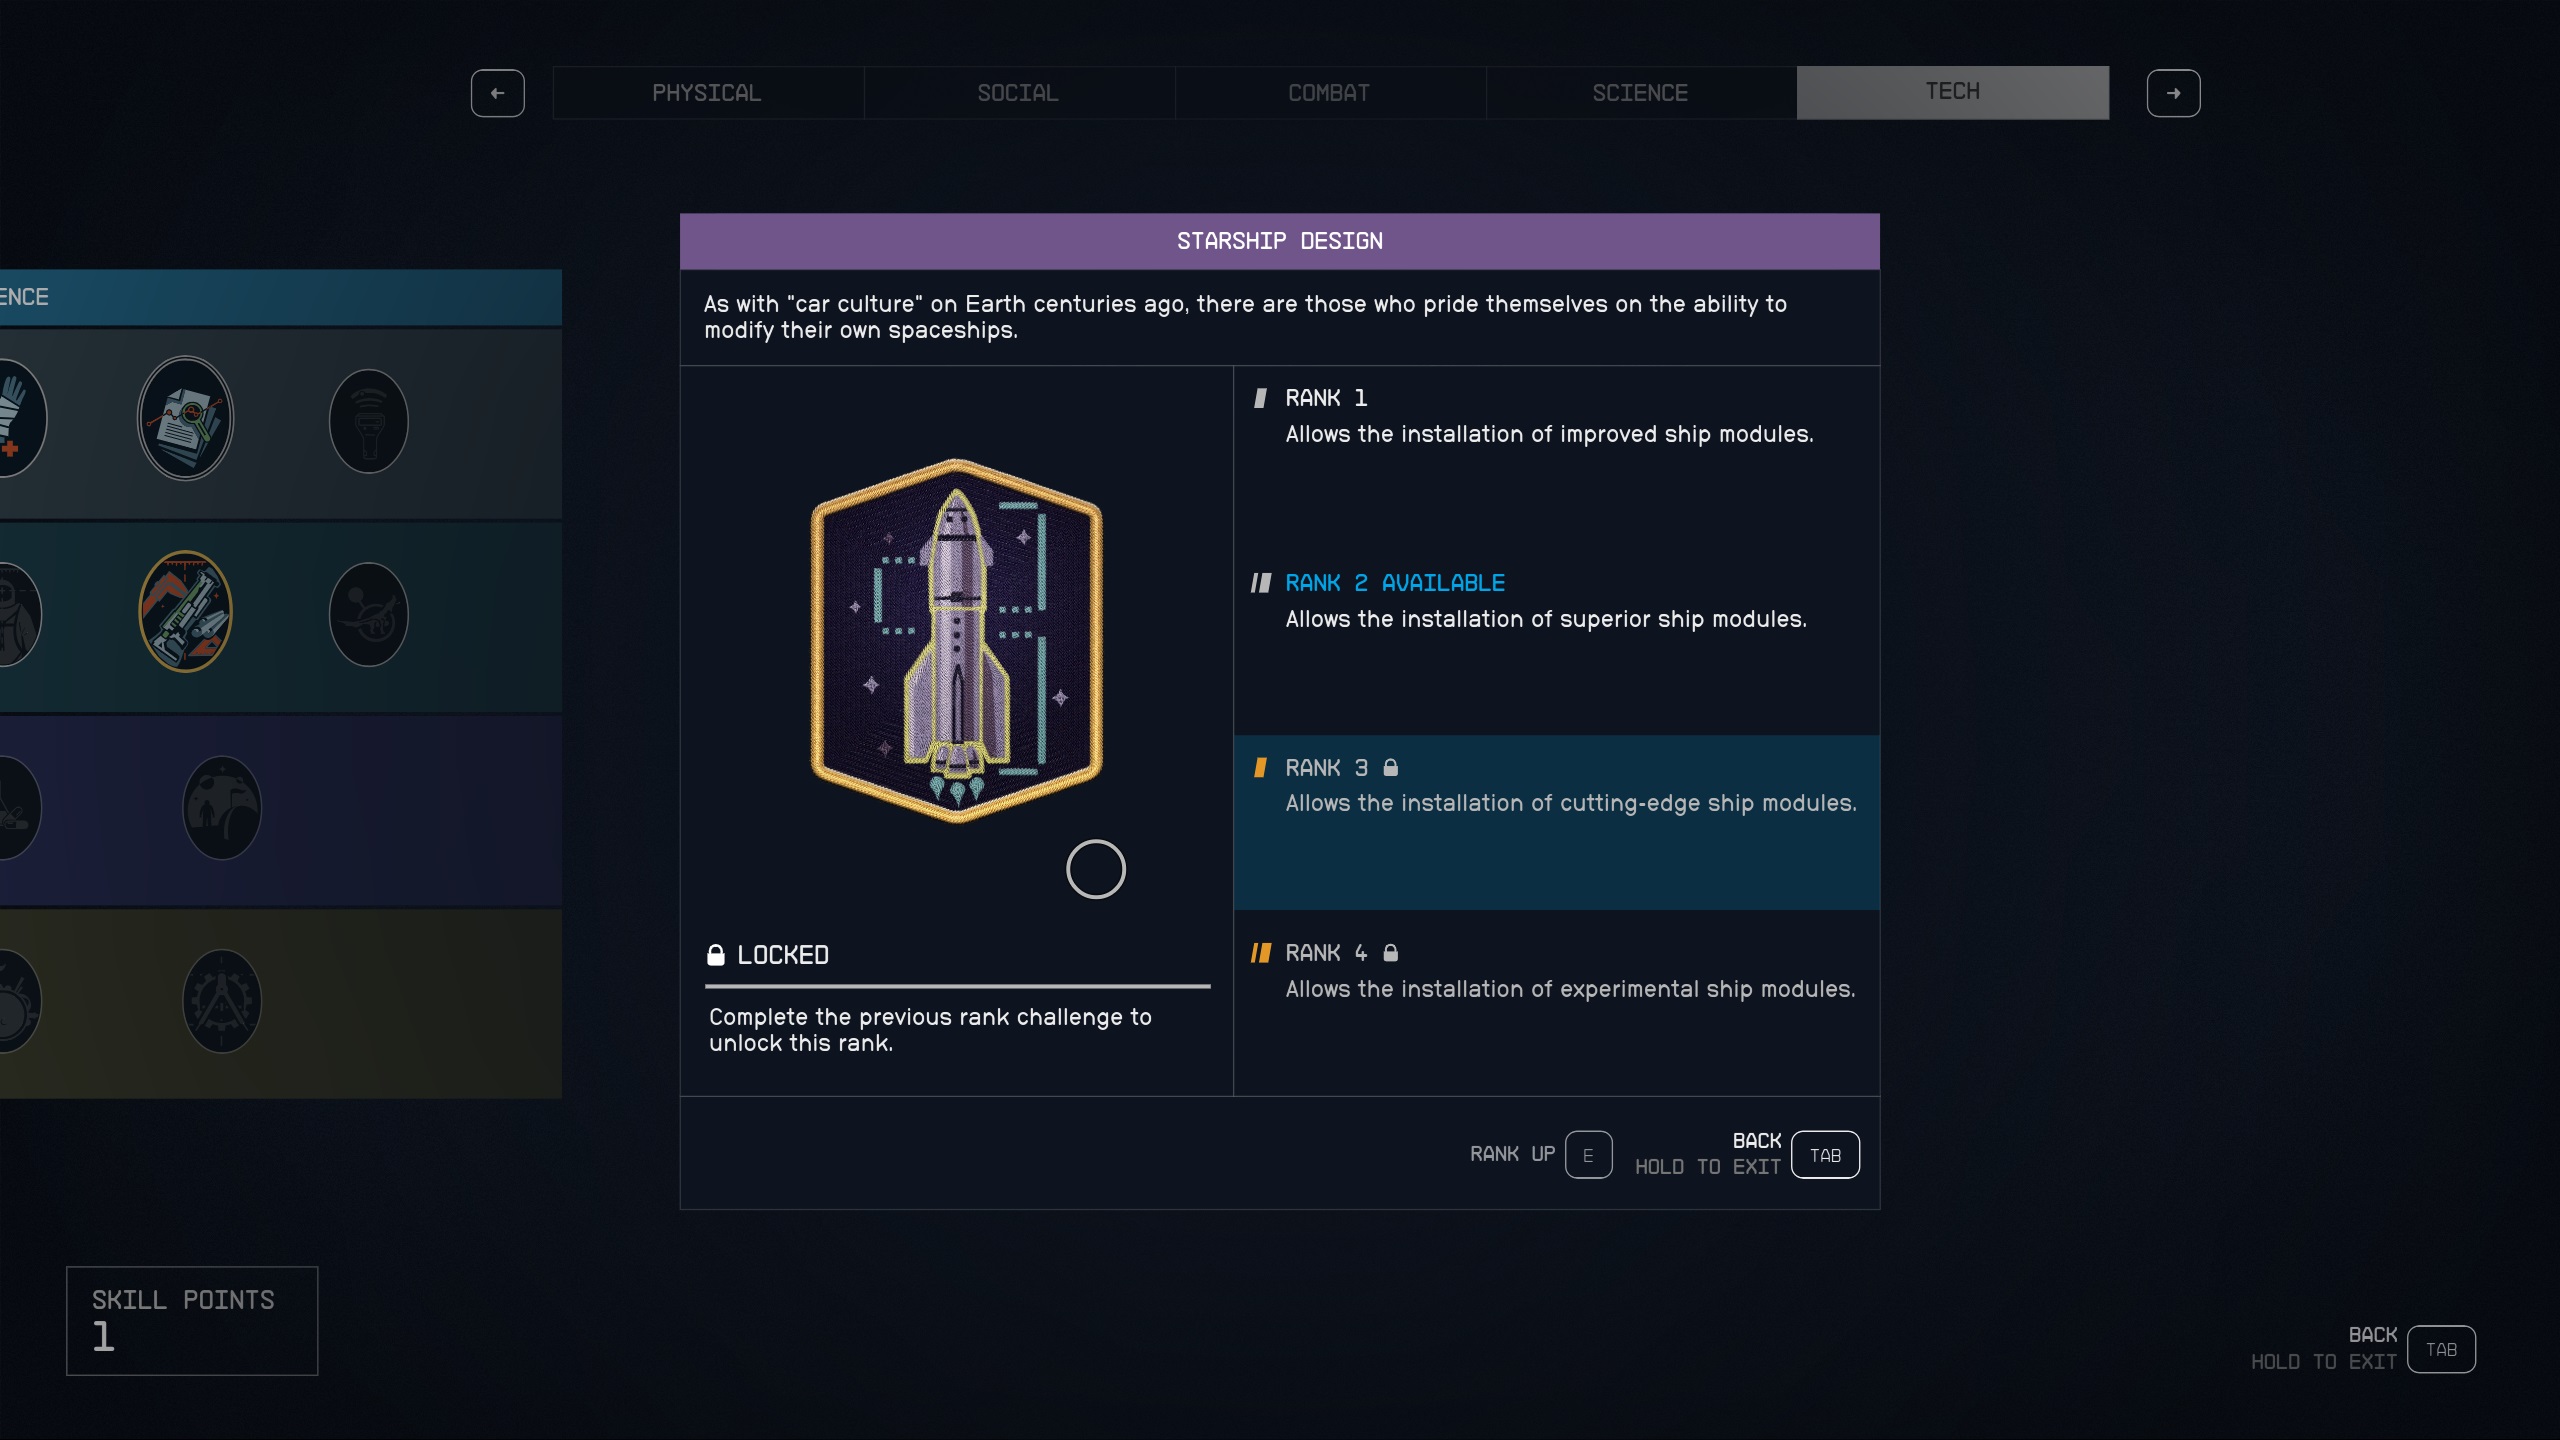
It wouldn’t be an RPG if there wasn’t some kind of progression with the game’s mechanics, and the ship system is no different. There are about ten different skills that affect different aspects of a ship, but there are only two that change what ships and ship parts are available to players. The best ships and parts are locked behind certain skills that the player will have to acquire. The first is the Piloting skill. After ranking it up, the player will be able to pilot higher classes of ships. These ships (and their parts) are better, if not outright, then in at least one or two noticeable ways.
Must be nice getting those upper-class ships
The other skill is Starship Design; it allows players to attach better parts to their ship. The better parts are not necessarily of a different class, so even if you are sticking with Class-A ships (the first class), you will want this skill to get better upgrades. While neither of these skills are mandatory for tinkering with ships, those of you that are more interested in having the best ship out there will want to invest in them.
You can throw a lot of skill points into ship stuff
Best Ship Parts
There is only one common trait that every part on a ship shares, and that’s that they take up mass. Similarly, almost every part (except structural parts) add to your ship’s Hull stat. Other than those, parts are unique and can drastically influence different stats and systems on your ship. Of course, there are better and worse parts, but a lot of optimizing will come down to what skills you have available, and what kind of ship you want. Here’s a list of each type of ship part:
Cockpit
Engine
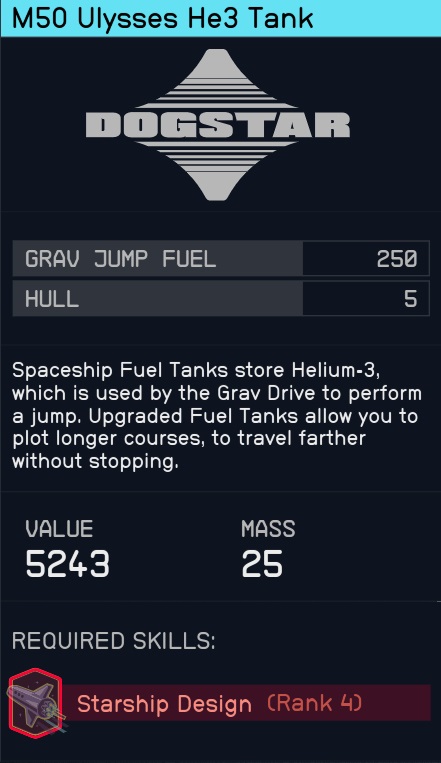
Fuel Tank
Landing Gear
Landing Bay
Weapons
Habs
Reactor
Structures
Grav Drive
Shield Generator
Cargo Bay
Docker
As you level up, more and more ship parts become available to your character – parts trickle in at most level ups. Consequently, we will give the best parts list for each category at certain character levels. Let’s go through each of these main categories of ship part and talk about their properties, preferable configurations, and best parts.
Shields
Shields are a fairly linear progression as you unlock them through the levels. They do become substantially better as you unlock more parts through Starship Design, and higher classes of ships with Piloting. However, there are a couple instances, like at level 25, where the class-B option is actually better than the class-C. Showing that for some parts, it can pay off to level up those skills more slowly.
Class B Shield – 11T Defender Shield Generator [requires Piloting Rank 3]
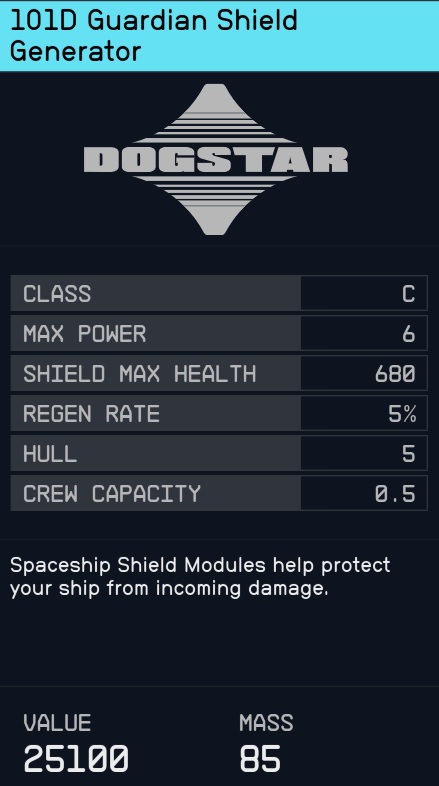
Class C Shield – 101D Guardian Shield Generator [requires Piloting Rank 4]
Class A Shield – Deflector SG-35 Shield Deflector [requires Starship Design Rank 4]
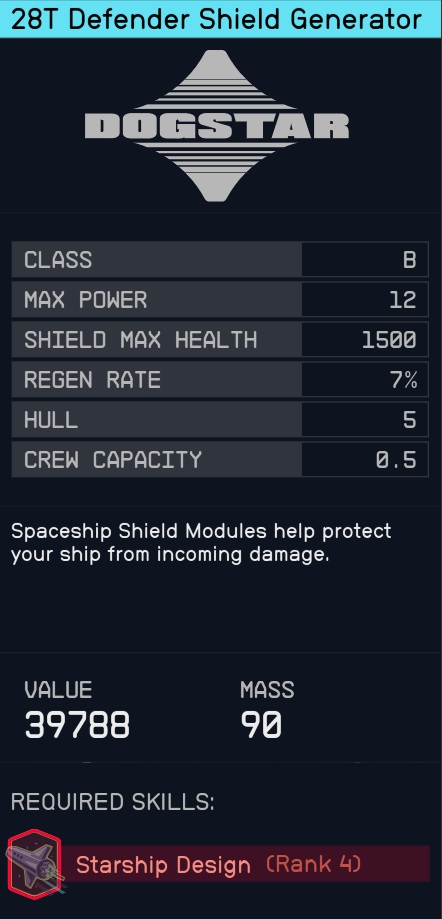
Class B Shield – 28T Defender Shield Generator [requires Piloting Rank 3, Starship Design Rank 4]
Class C Shield – Assurance SG-1000 Shield Generator [requires Piloting Rank 4]
Class A Shield – Deflector SG-35 Shield Deflector [requires Starship Design Rank 4]
Class B Shield – 28T Defender Shield Generator [requires Piloting Rank 3, Starship Design Rank 4]
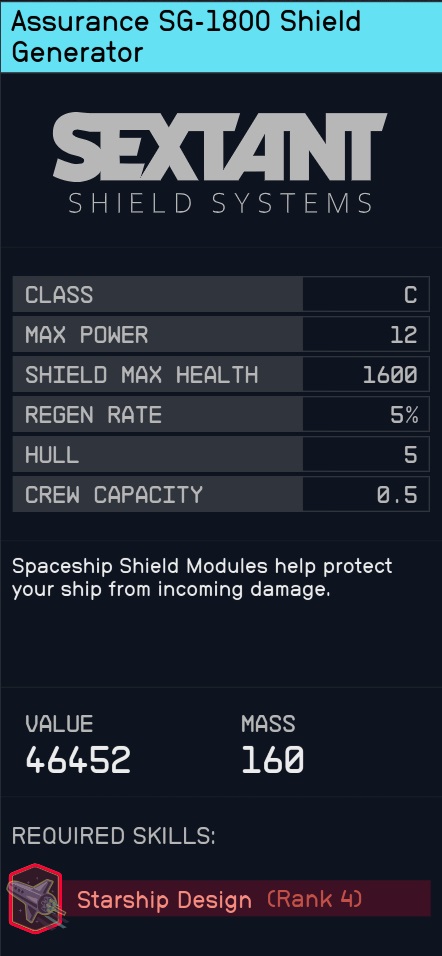
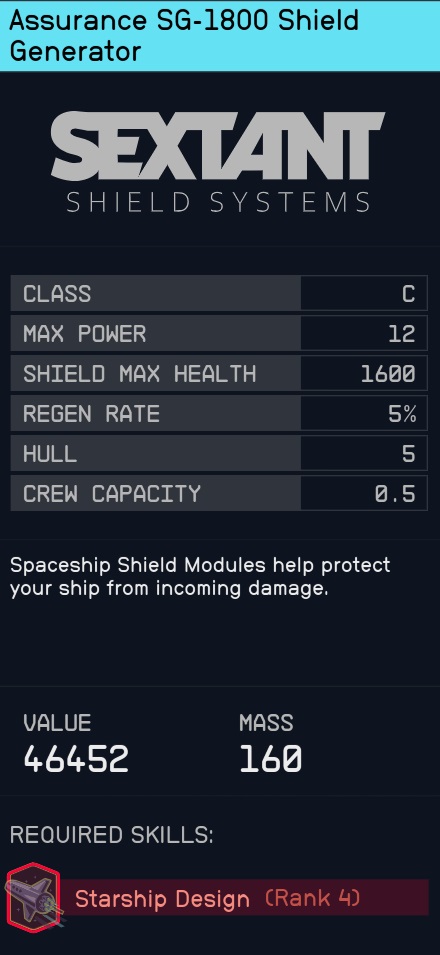
Class C Shield – Assurance SG-1800 Shield Generator [requires Piloting Rank 4, Starship Design Rank 4]
Class A Shield – Deflector SG-60 Shield Deflector [requires Starship Design Rank 4]
Class B Shield – 28T Defender Shield Generator [requires Piloting Rank 3, Starship Design Rank 4]
Class C Shield – Assurance SG-1800 Shield Generator [requires Piloting Rank 4, Starship Design Rank 4]
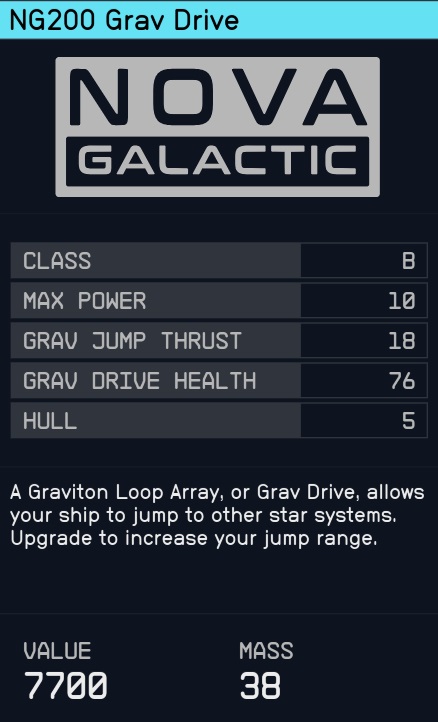
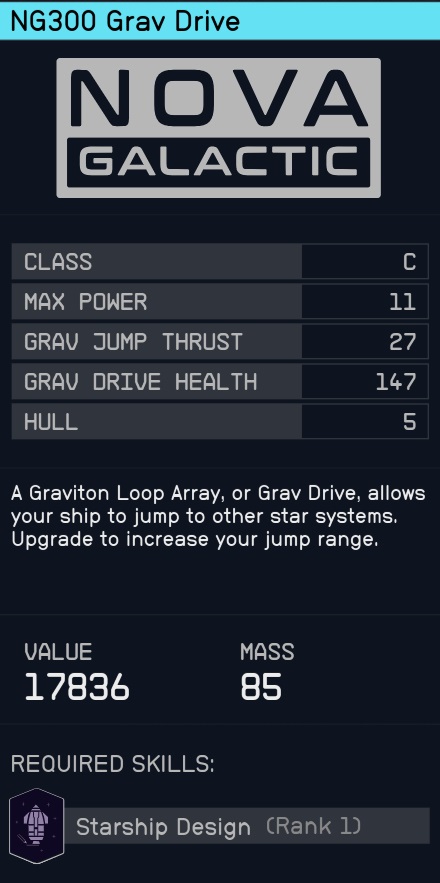
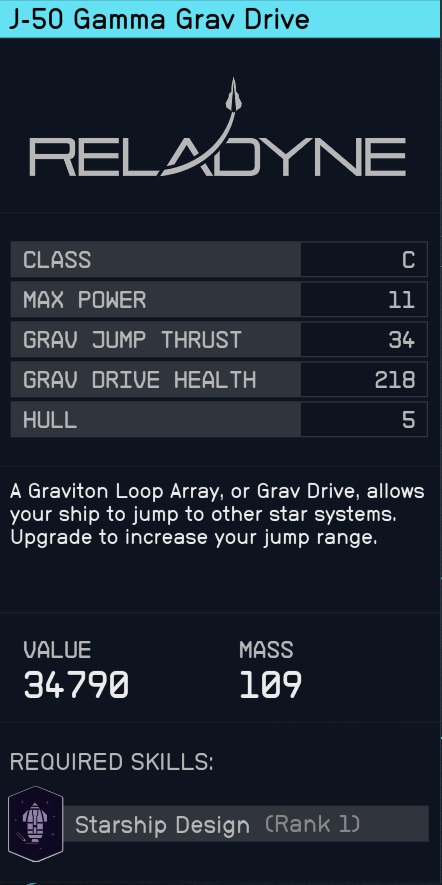
Grav Drive
Grav Drives become better in almost every way when jumping classes. Max power and Grav Jump Thrust will increase your max jump range; Hull and the Grav Drive health affect ship and system durability.
Class A Grav Drive – R-4000 Alpha Grav Drive [requires Starship Design Rank 2]
Class B Grav Drive – RD-3000 Beta Grav Drive [requires Piloting Rank 3, Starship Design Rank 2]
Class C Grav Drive – J-50 Gamma Grav Drive [requires Piloting Rank 4, Starship Design Rank 1]
Class A Grav Drive – R-4000 Alpha Grav Drive [requires Starship Design Rank 2]
Class B Grav Drive – RD-3000 Beta Grav Drive [requires Piloting Rank 3, Starship Design Rank 2]
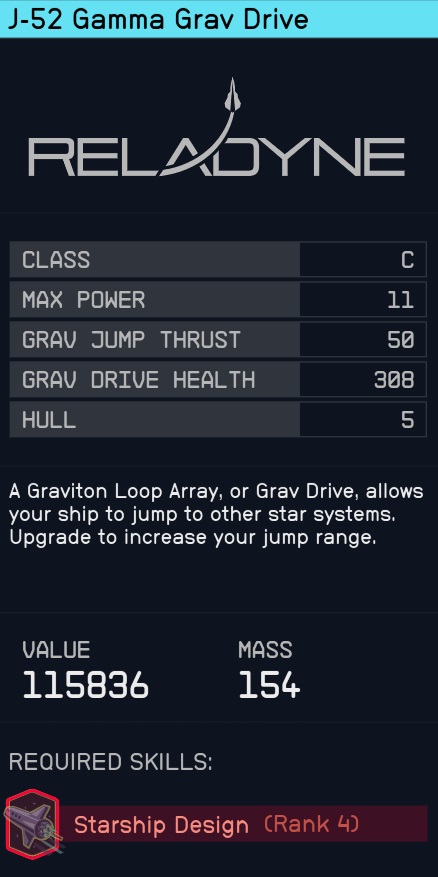
Class C Grav Drive – J-52 Gamma Grav Drive [requires Piloting Rank 4, Starship Design Rank 4]
Reactor
Reactors are very interesting due to the fact that at some (lower) levels you don’t get a lot more power generated the higher the class of ship. Instead, the repair rate and reactor health is what increases, making your higher-classed ship more resilient (but with more mass). At those later levels, you will really start to see a big difference in ‘Power Generated’ between ship classes. A good way to increase a reactor’s energy output is to invest in the Aneutronic Fusion skill.
*Not available at outpost landing pad *Available at Hopetown on Polvo in Valo System
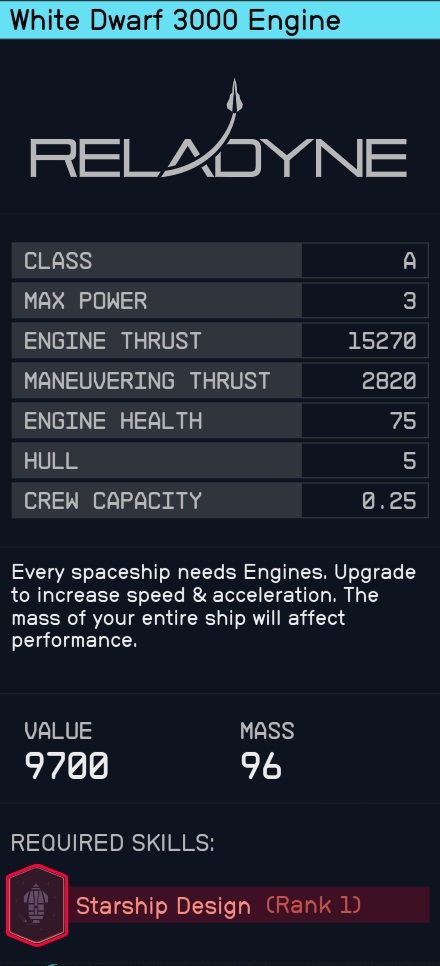
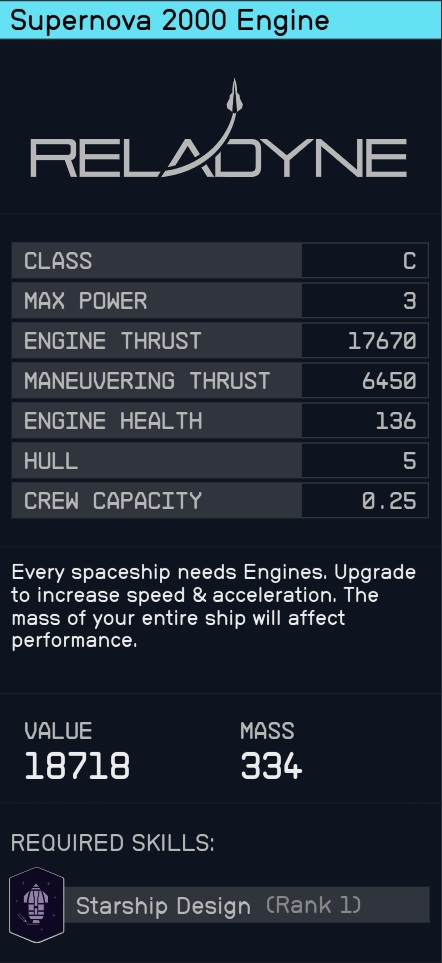
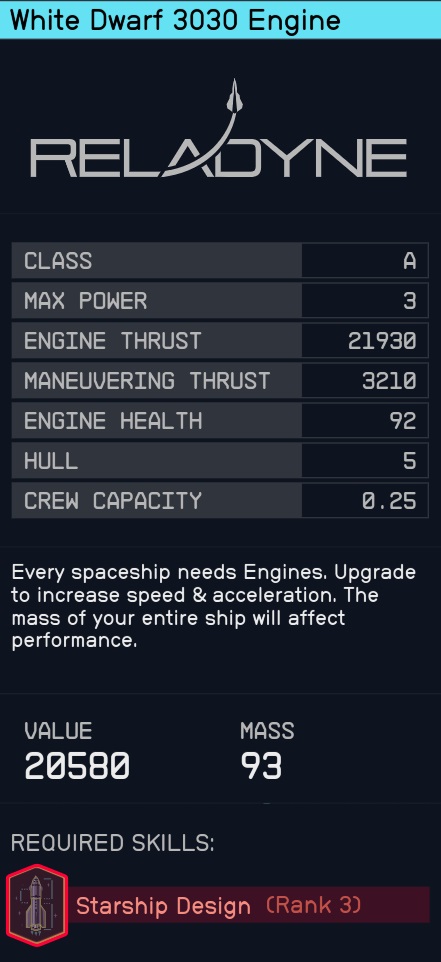
Engines
Engines are similar to reactors in that the more premium parts won’t change much in the way of ‘engine thrust’ (speed) between different classes – actually, class-A is usually the fastest. They will, however, receive a considerable improvement to ‘engine health’ and ‘maneuvering thrust’, which will make them handle better and take more hits. There are also some instances where there are two engines that are very similar, but one might have more mobility and the other require less power. We found that mobility, and dodging attacks and missiles, is more advantageous, so we listed those engines as the best.
Class C Engine – SAL-6830 Engine [requires Piloting Rank 4]*
*Available at Stroud-Eklund Staryard in the Narion System after finishing the quest, All That Money Can Buy. Note: Slayton CEO must survive quest.
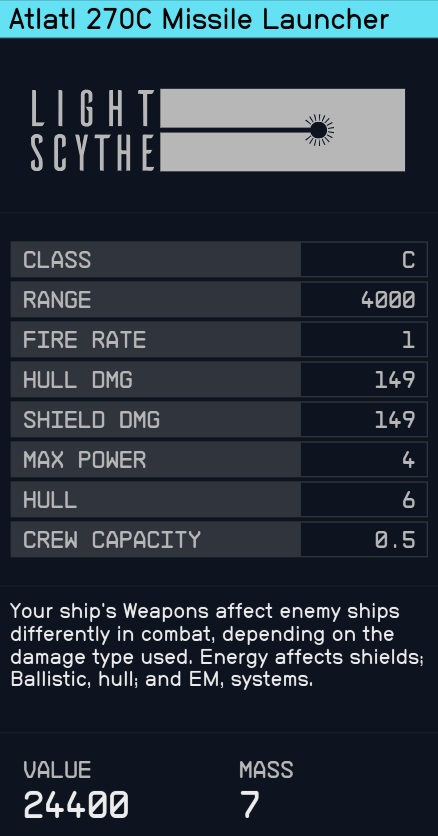
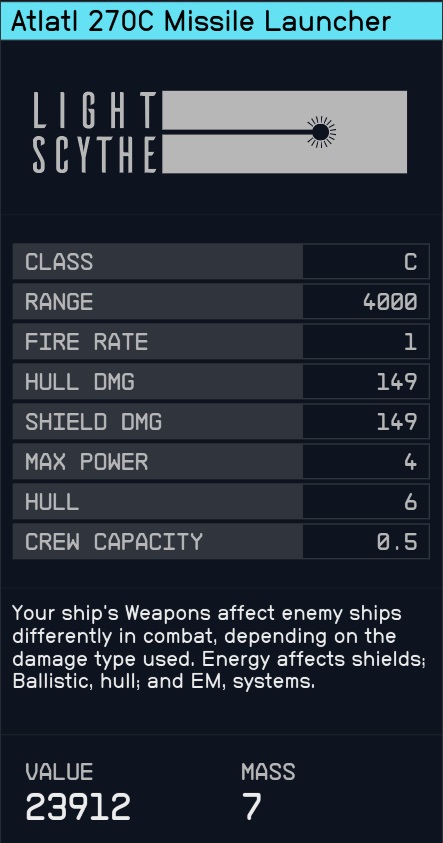
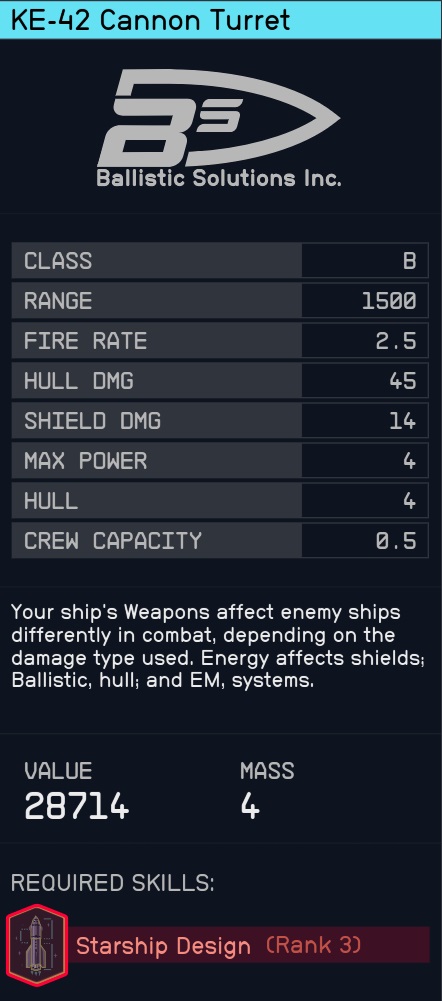
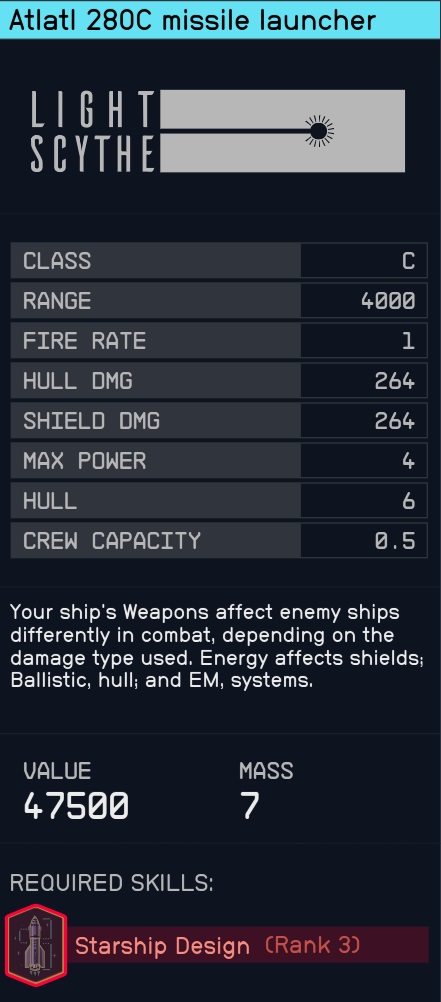
Weapons
Weapons are really the most difficult to characterize because there are not only different types, but they also serve different functions. Don’t forget that if you’re building, you can attach multiples of the same exact weapon for more firepower. The different types of weapons are as follows:
Missiles (MSL) – Effective against shields and hulls, but slow reload.
Ballistics (BAL) – Effective against hulls, not shields
Lasers (LAS) – Super effective against shields, not hulls.
Electromagnetic (EM) – Super effective against ship systems.
Particle (PAR) – Effective against both shields and hulls.
As you can see, there can be any number of weapon combinations. If you want to board enemy ships, then including an EM weapon on board is recommended. PAR weapons are more expensive and become much more powerful with higher classed ships, the advantage being you don’t have to switch between weapon types. Ultimately, your weapon choice will come down to how you play and what type of ship you want.
*Not available at outpost landing pad *Available in Akila City
Cargo
Cargo receives some much better cosmetic options with the first rank up in Starship Design. For all the options, you basically get more space for adding more mass to your ship. The nicer ones give ships more cargo in a single container, as opposed to attaching several to your ship, saving on connectors. There are also shielded cargo bays that help smuggle contraband. All in all, cargo bays are pretty subjective depending on how large of a cargo hold you want.
Most Cargo – Caravel V103 Cargo Hold [requires Starship Design Rank 1]
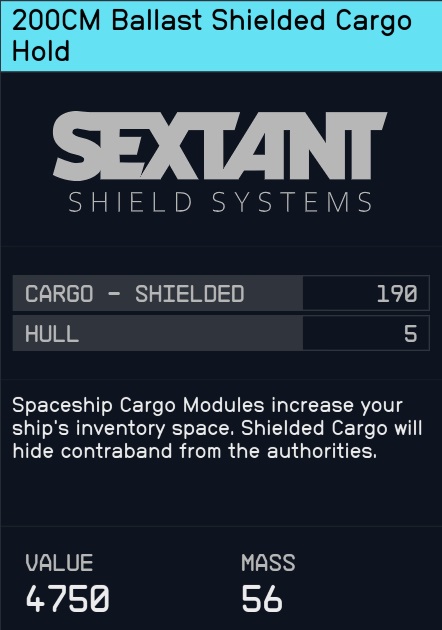
Most Shielded Cargo – 200CM Ballast Shielded Cargo Hold
Most Cargo – Galleon S203 Cargo Hold [requires Starship Design Rank 2]
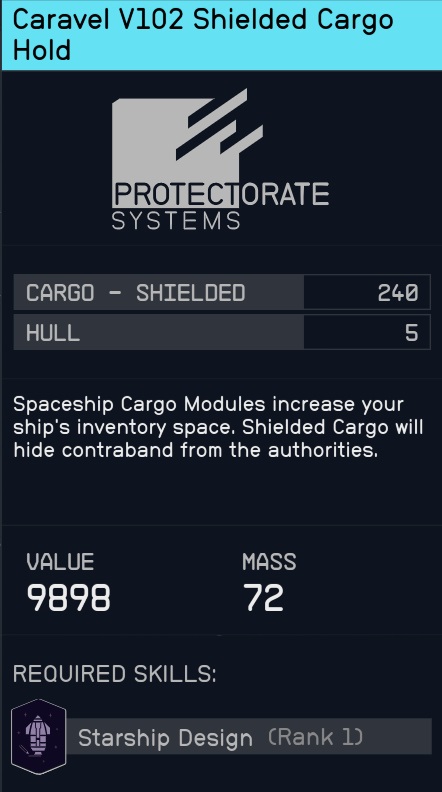
Most Shielded Cargo – Caravel V102 Shielded Cargo Hold [requires Starship Design Rank 1]
Most Cargo – Galleon S204 Cargo Hold [requires Starship Design Rank 3]
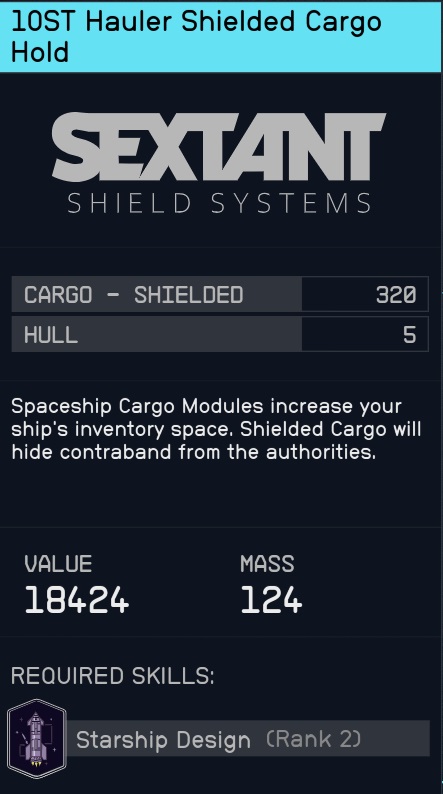
Most Shielded Cargo – 10ST Hauler Shielded Cargo Hold [requires Starship Design Rank 2]
Most Cargo – Galleon S204 Cargo Hold [requires Starship Design Rank 3]
Most Shielded Cargo – 10ST Hauler Shielded Cargo Hold [requires Starship Design Rank 2]
Fuel Tanks
Fuel Tanks are pretty simple, in that the more money you spend on one, the more light years you can jump. The real difference you get for buying premium, and investing Starship Design skill points, is less mass.
Docker, Structures, Habs, Landing Gear, Landing Bay, and Cockpit
These are all mostly aesthetically different, with more premium parts giving some extra hull points. Players shouldn’t be too concerned about them unless they want a specific look or feel while building a ship. Otherwise, the main effects that a Cockpit and Habs will have on a ship is how much crew can be aboard. This stat is further augmented by the Ship Command skill, which allows you to have more crew.
You can change the variant of some parts
We hope this guide was helpful, and that it made upgrading your ship a little easier to figure out. Did you find any parts that made all the difference? Tell us about them in the comments!
Share this article:
Kelson H.
Kelson is a spud head from out west. He is most happy when holding a milky tea with too much honey and playing a sprawling role playing game or reading a fantasy novel. His video game tastes vary but his main genres are looter shooters, RPGs, and real time strategy games.
That hunk of junk? Just kidding, we agree that it is better than the X-300 (even though it’s cheaper). Like we mentioned in the article, mobility is a better choice than the added Engine Health. Thank you for bringing this to our attention! We will change the article right away. We were using the outpost landing pad for most of our testing and analysis, and this particular part doesn’t seem to be available there – only at cities like Cydonia and New Atlantis. Something we will have to change in the shopping section of the guide. Again, appreciate it!
Goose
1 year ago
I believe the SAL-6830, although prohibitively expensive is in fact the best engine in the game. It can be found at the stroud enkland shipyard, I can see it at level 29.
Can’t seem to edit, but it is only 2 power, so you can have 6 of them. If you multiply 6x this engines stats it is better than 3x the DT230, only problem is the added mass. I believe the added power should balance out for the mass, although you would have to add more landing gears most likely.
“Talk to me, Goose.” You know? Like Top Gun”¦ Never mind. This is a great lesson on reactor space and max power playing a big factor when comparing stats. You’re absolutely right, it would be a more powerful engine when factoring in the power slots used. We’ll update the guide, and thank you for informing us!
hey i see that you guys didn’t end up adding the SAL-6830, or atleast i can’t see it. You should add it as stat wise it is the best engine but do note that it is unlocked during the quest “all that money can buy” if you don’t kill the slayton ceo.
Hello! Thank you for catching that mistake. The correct engine, 6830, should show now. I’m surprised that it doesn’t require the Starship Design skill at all.
I think it’s because it’s unlocked through a quest as a “secret reward” so that if you complete the quest correctly at a low level you get a sweet engine that you can use
The added power doesn’t balance out the mass, at least for me. Six of these produce a significant decrease in maneuverability compared to three of the DT220s (don’t have DT230s yet)
Faeloce
1 year ago
Hey,
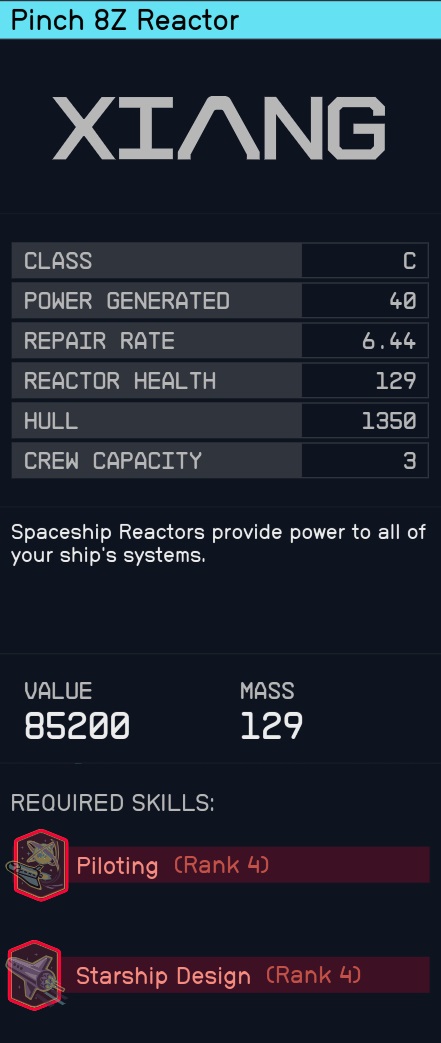
You have the reactor Pinch 8Z from Xiang who have slighly better stats. ;3
It’s me again.. X’D
On the W0 weapon slot for C class spaceship, you can have better laser with the Alpha Obliterator 250 MeV.
3 can be used at the same time (to reach 12 power consumption) and they can shoot at a 1.5 ROF with 160.23 dmg, for total damage of 721.
The PBO 174 Auto can be installed 4 time (3X4 power consumption) and can shoot at a 6 ROF with 27.23 dmg, for a total of 653.
The range is also slightly better 4225 against 3900. ;3
Oh! That’s a good one! We had to go to Akila City to find the Alpha Obliterator Turret. Should’ve known, those cowboys always have the best weapons. But why use two particle weapons, with the Obliterator in one slot and the PBO-300 in another? Just for over the top damage, or alternating between them?
My guess would be because you drain each weapon bank individually,
It allows for massive alpha strikes,
you could have all 3 banks as long range particle beam groups (all have to be different types, even auto) but you could leave one, or even two banks underpowered as most dogfights will be over in seconds
Hi,Sorry i haven’t see your answer.As Xanthus imagined, this combination offer a huge burst of damages and allow me to easily swap on of weapon model with one for non lethal missions. ^^
I’ll add that you can have a better engine if you perform well in a mission for Shroud CEO, the SAL 6830.I usually pair two of them with two DT230.The only issue with the SAL serie is the ratio weight/power delivered, but the ratio consumption/power is unmatched.


What about the poseidon DT230 engine?
That hunk of junk? Just kidding, we agree that it is better than the X-300 (even though it’s cheaper). Like we mentioned in the article, mobility is a better choice than the added Engine Health. Thank you for bringing this to our attention! We will change the article right away. We were using the outpost landing pad for most of our testing and analysis, and this particular part doesn’t seem to be available there – only at cities like Cydonia and New Atlantis. Something we will have to change in the shopping section of the guide. Again, appreciate it!
I believe the SAL-6830, although prohibitively expensive is in fact the best engine in the game. It can be found at the stroud enkland shipyard, I can see it at level 29.
Can’t seem to edit, but it is only 2 power, so you can have 6 of them. If you multiply 6x this engines stats it is better than 3x the DT230, only problem is the added mass. I believe the added power should balance out for the mass, although you would have to add more landing gears most likely.
“Talk to me, Goose.” You know? Like Top Gun”¦ Never mind. This is a great lesson on reactor space and max power playing a big factor when comparing stats. You’re absolutely right, it would be a more powerful engine when factoring in the power slots used. We’ll update the guide, and thank you for informing us!
hey i see that you guys didn’t end up adding the SAL-6830, or atleast i can’t see it. You should add it as stat wise it is the best engine but do note that it is unlocked during the quest “all that money can buy” if you don’t kill the slayton ceo.
Hello! Thank you for catching that mistake. The correct engine, 6830, should show now. I’m surprised that it doesn’t require the Starship Design skill at all.
I think it’s because it’s unlocked through a quest as a “secret reward” so that if you complete the quest correctly at a low level you get a sweet engine that you can use
The added power doesn’t balance out the mass, at least for me. Six of these produce a significant decrease in maneuverability compared to three of the DT220s (don’t have DT230s yet)
Hey,
You have the reactor Pinch 8Z from Xiang who have slighly better stats. ;3
Ah oui, vous avez raison. Nous avons oublié de changer l’image”¯! Merci”¯! We changed the image to show the updated réacteur. Thank you for pointing that out!
It’s me again.. X’D
On the W0 weapon slot for C class spaceship, you can have better laser with the Alpha Obliterator 250 MeV.
3 can be used at the same time (to reach 12 power consumption) and they can shoot at a 1.5 ROF with 160.23 dmg, for total damage of 721.
The PBO 174 Auto can be installed 4 time (3X4 power consumption) and can shoot at a 6 ROF with 27.23 dmg, for a total of 653.
The range is also slightly better 4225 against 3900. ;3
I also use the Auto PBO-300 for the second weapon slot. ^^
Oh! That’s a good one! We had to go to Akila City to find the Alpha Obliterator Turret. Should’ve known, those cowboys always have the best weapons. But why use two particle weapons, with the Obliterator in one slot and the PBO-300 in another? Just for over the top damage, or alternating between them?
My guess would be because you drain each weapon bank individually,
It allows for massive alpha strikes,
you could have all 3 banks as long range particle beam groups (all have to be different types, even auto) but you could leave one, or even two banks underpowered as most dogfights will be over in seconds
Hi,Sorry i haven’t see your answer.As Xanthus imagined, this combination offer a huge burst of damages and allow me to easily swap on of weapon model with one for non lethal missions. ^^
I’ll add that you can have a better engine if you perform well in a mission for Shroud CEO, the SAL 6830.I usually pair two of them with two DT230.The only issue with the SAL serie is the ratio weight/power delivered, but the ratio consumption/power is unmatched.
Crap i’ve forgot that you’ve allready spoke about the SAL 6830, don’t mind it. ^^”
(I haven,’t been able to edit my post. :x)