Finally, some good frackin’ espionage. While this Ryujin faction mission walkthrough still contains some fetching and questing, you also get a chance to see some action, and/or make some actual decisions about how to handle your assignment. The storyline for this faction also begins in earnest with this mission.
You can use your Hand Scanner to find your way to Ularu’s office in this section.
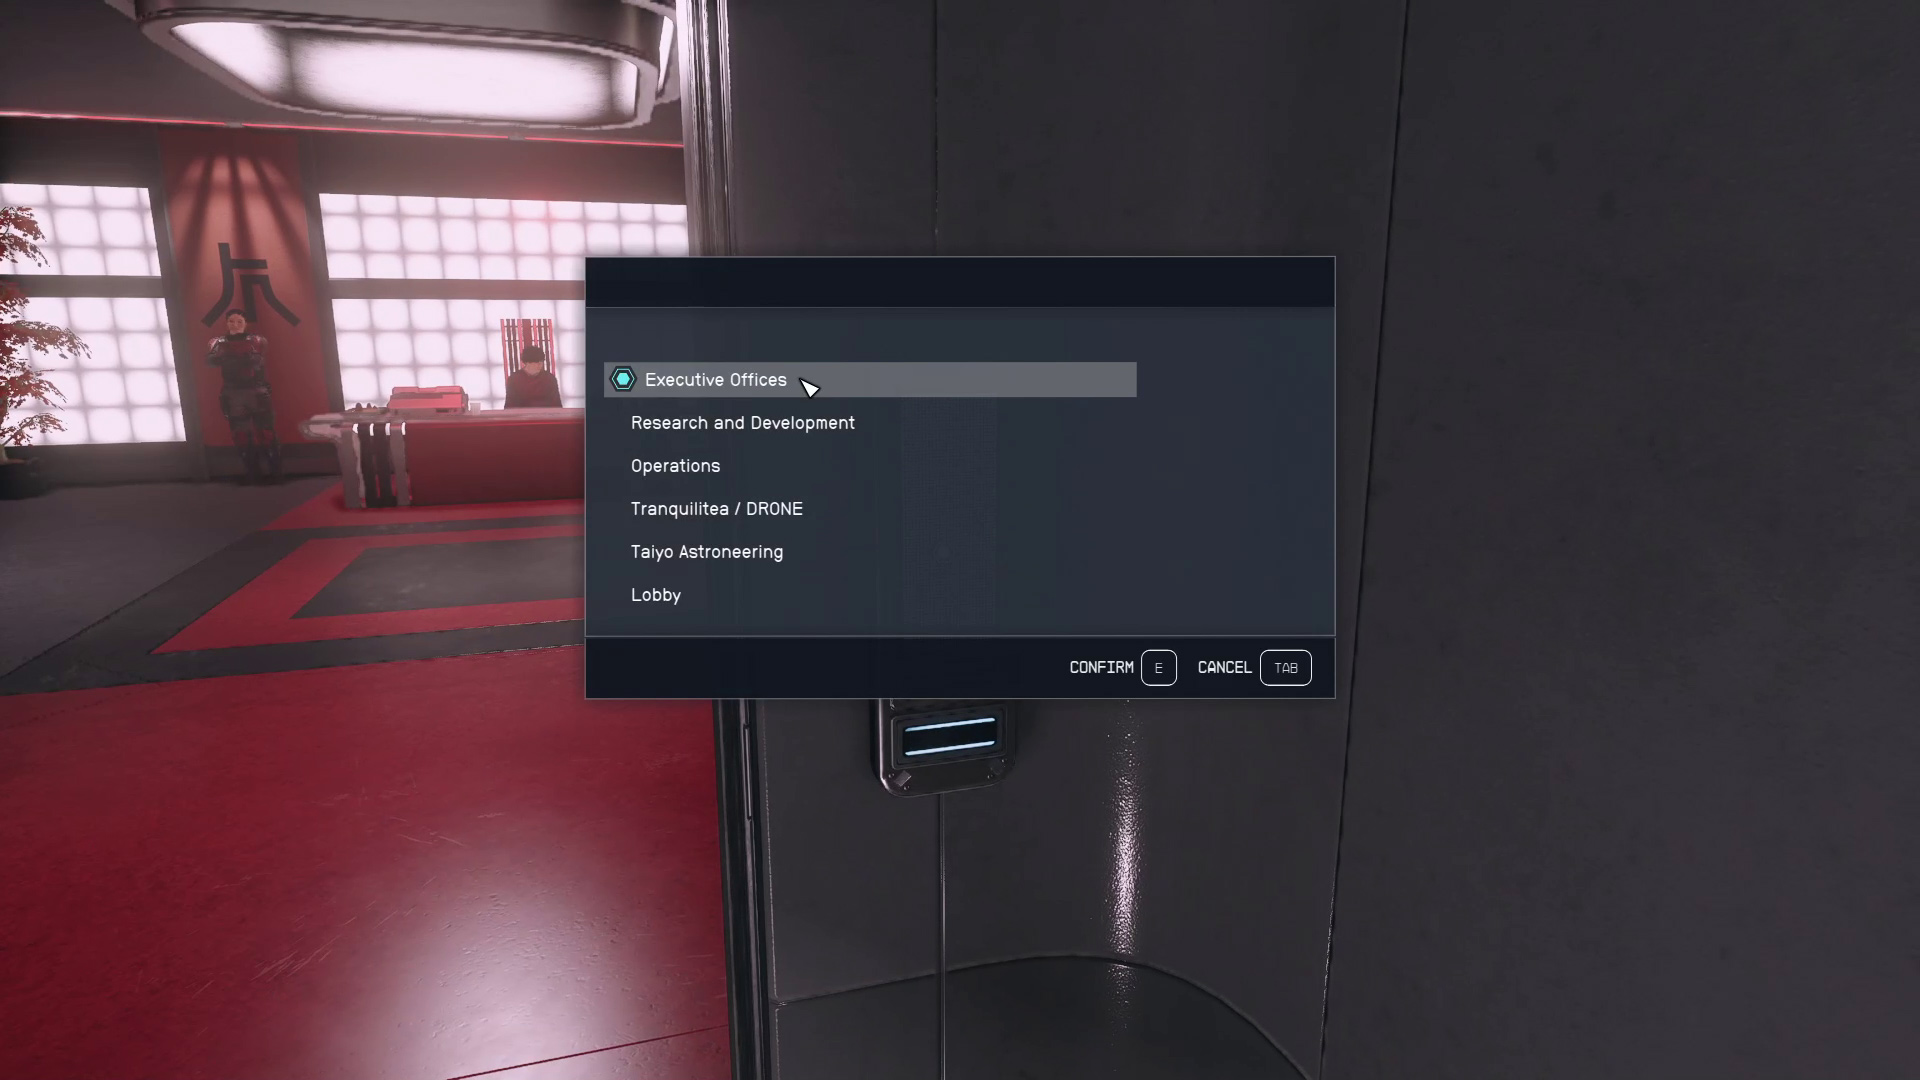
This Ryujin mission begins like all the previous ones did, by you talking to a woman in an office in Ryujin Tower — only this time, it’s a different woman, and it’s on the Executive Floor! Whether you’re starting in Imogene’s office or not, you can go to the Ryujin Tower elevator and use it to go to the Executive Offices (Image 1). Then use your scanner and follow the white arrows — you’ll go up two sets of stairs, and then around the corner will be Ularu’s office.
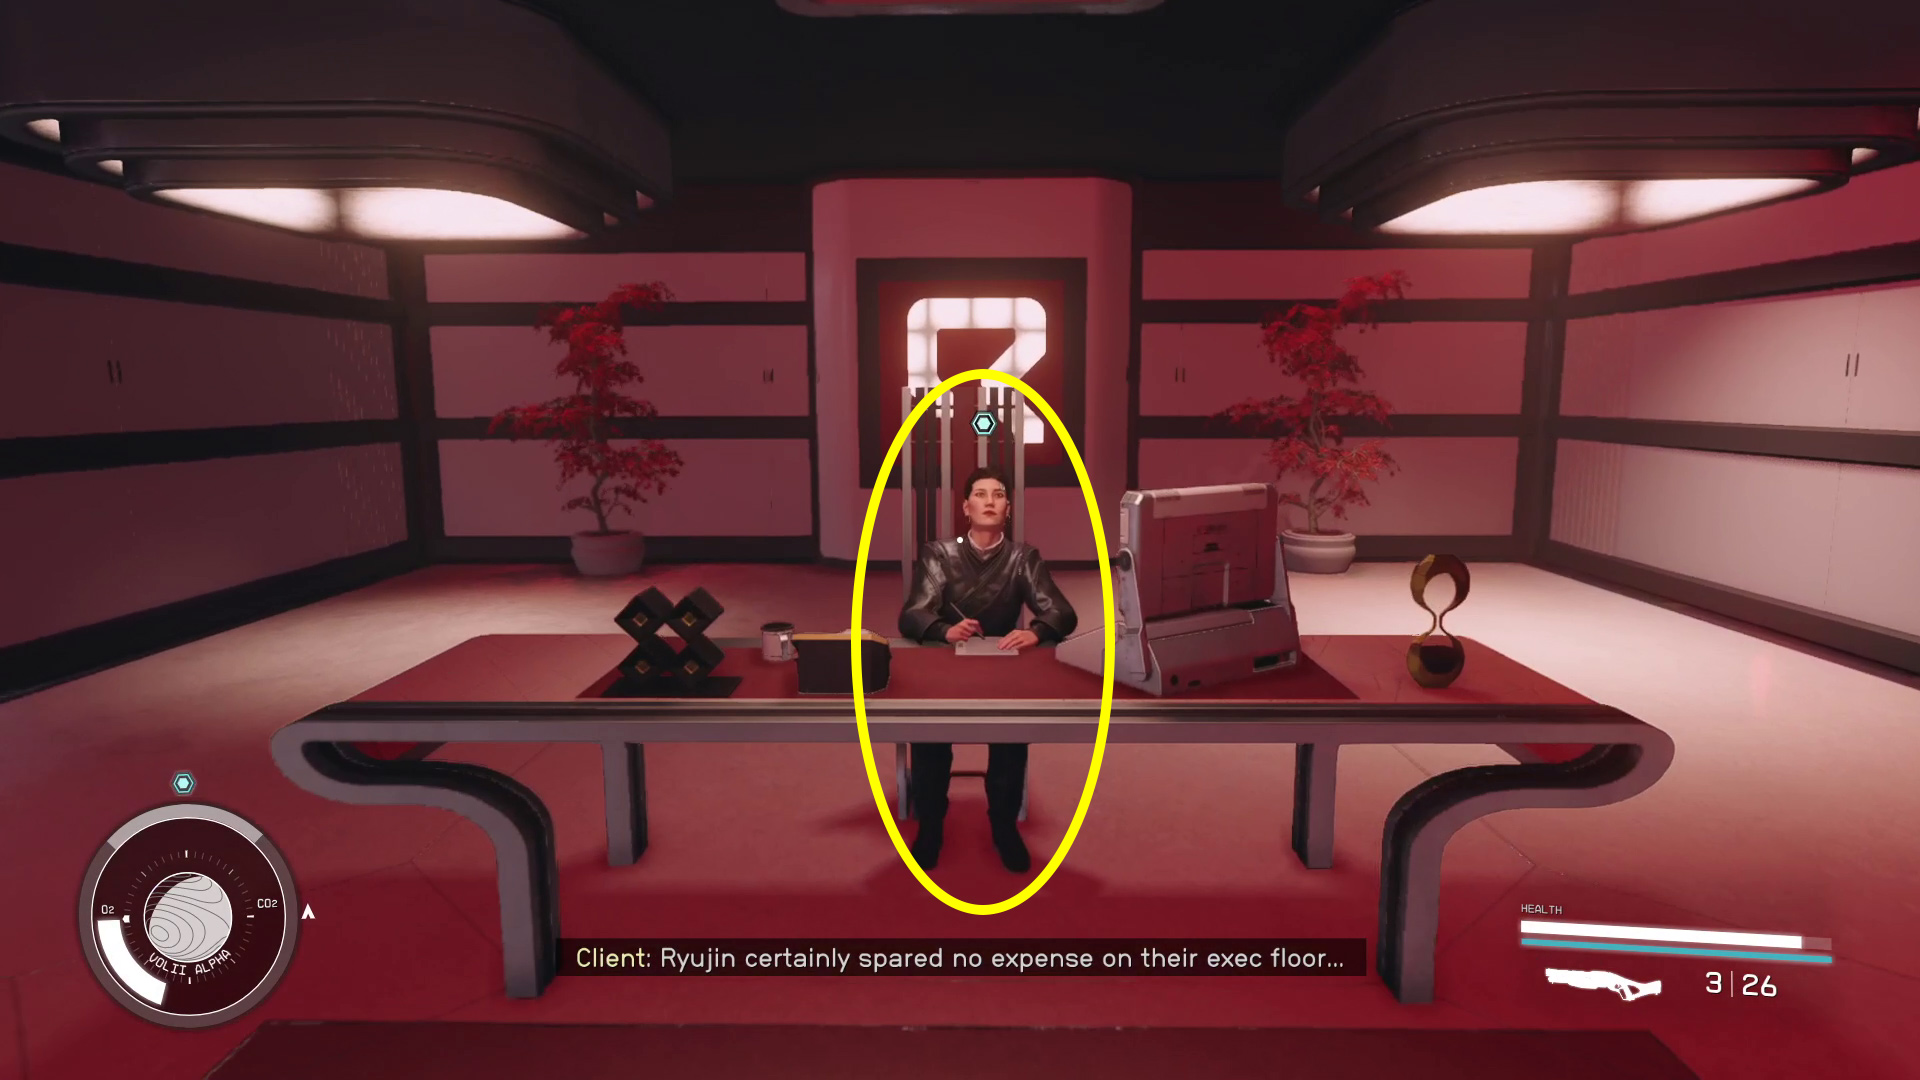
When you get close enough to Ularu’s office, your objective will change to “Talk to Maeve”, at which point you can turn back to the reception desk and do exactly that (Image 2).
Image 1Image 2
Wait For/Meet Ularu Chen
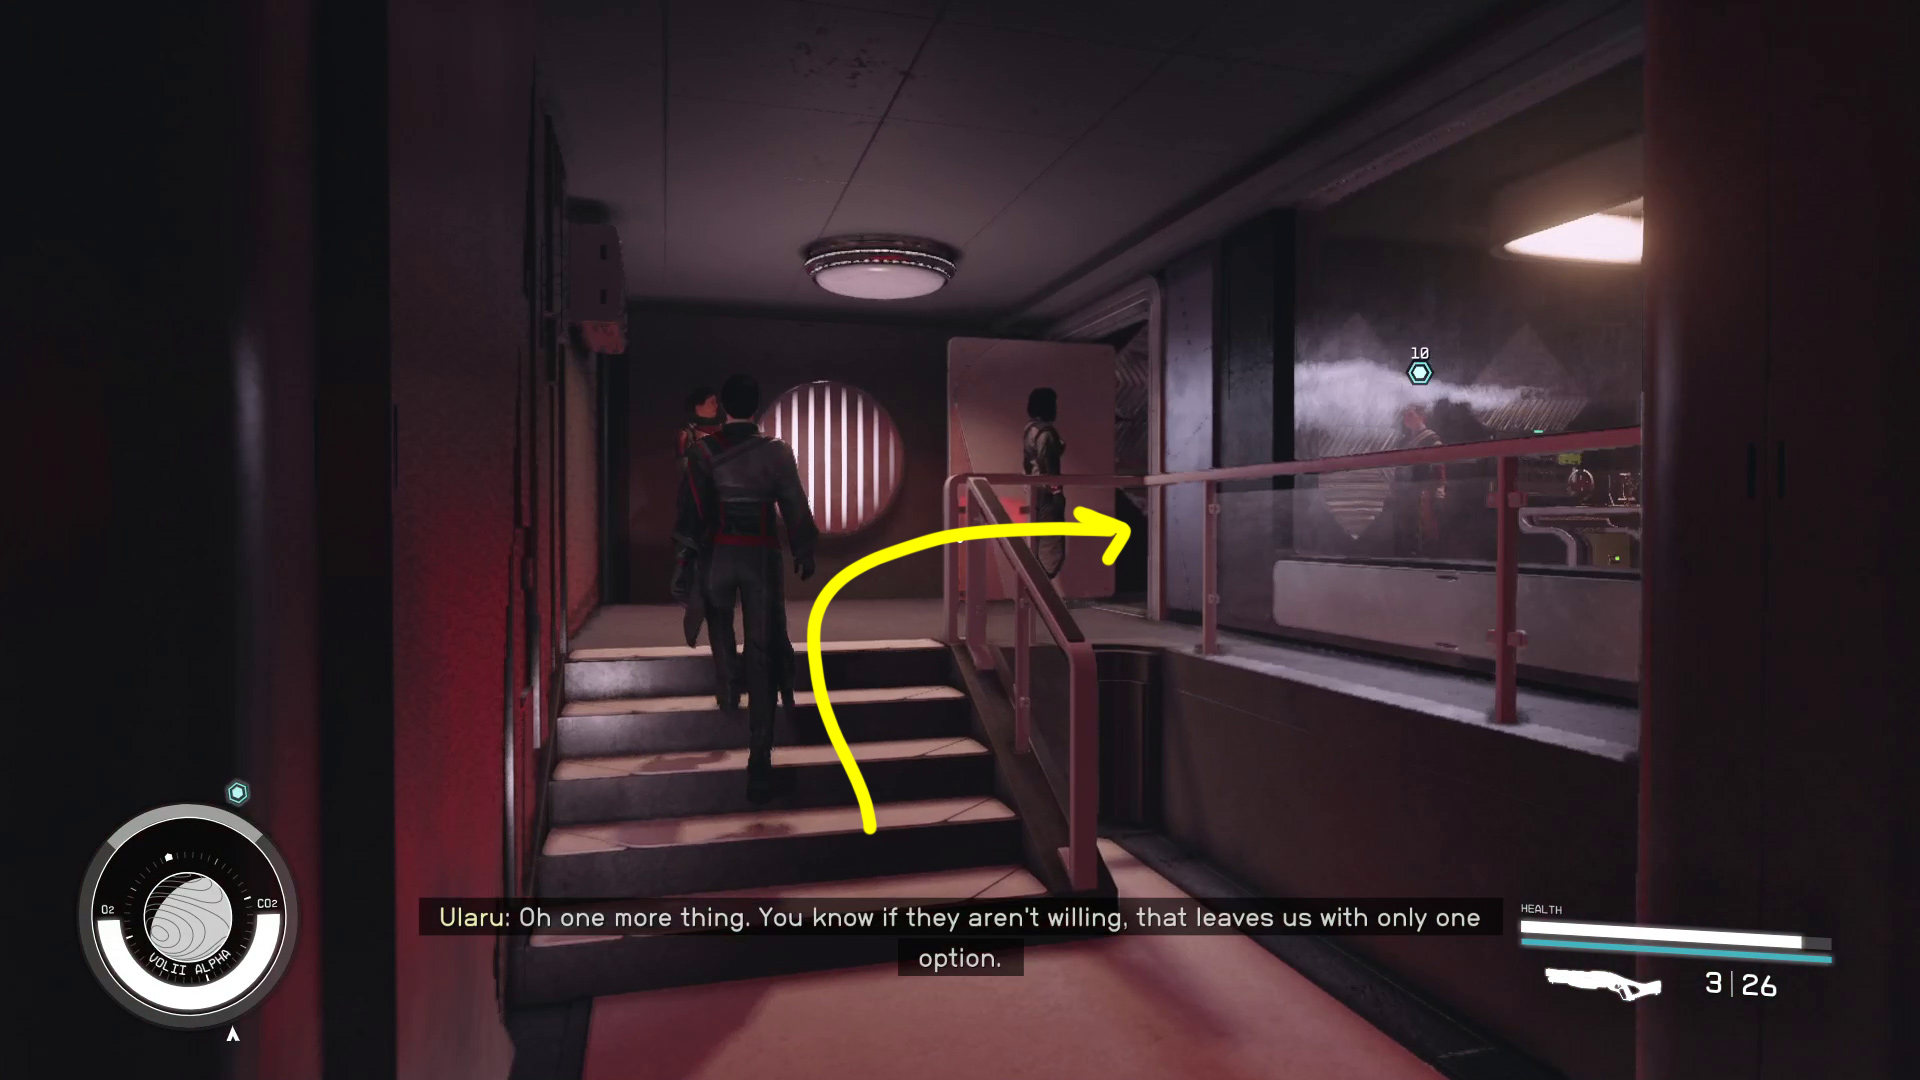
Say what you like to Maeve, Imogene will arrive, and then you’ll both need to make your way up the nearby stairs to Ularu’s office (Image 3). Stand close to her so that your conversation will trigger as soon as she’s done with her previous meeting. Handle the conversation with Ularu however you please.
Image 3 – Waiting for Ularu
Travel to Cydonia on Mars in the Sol System
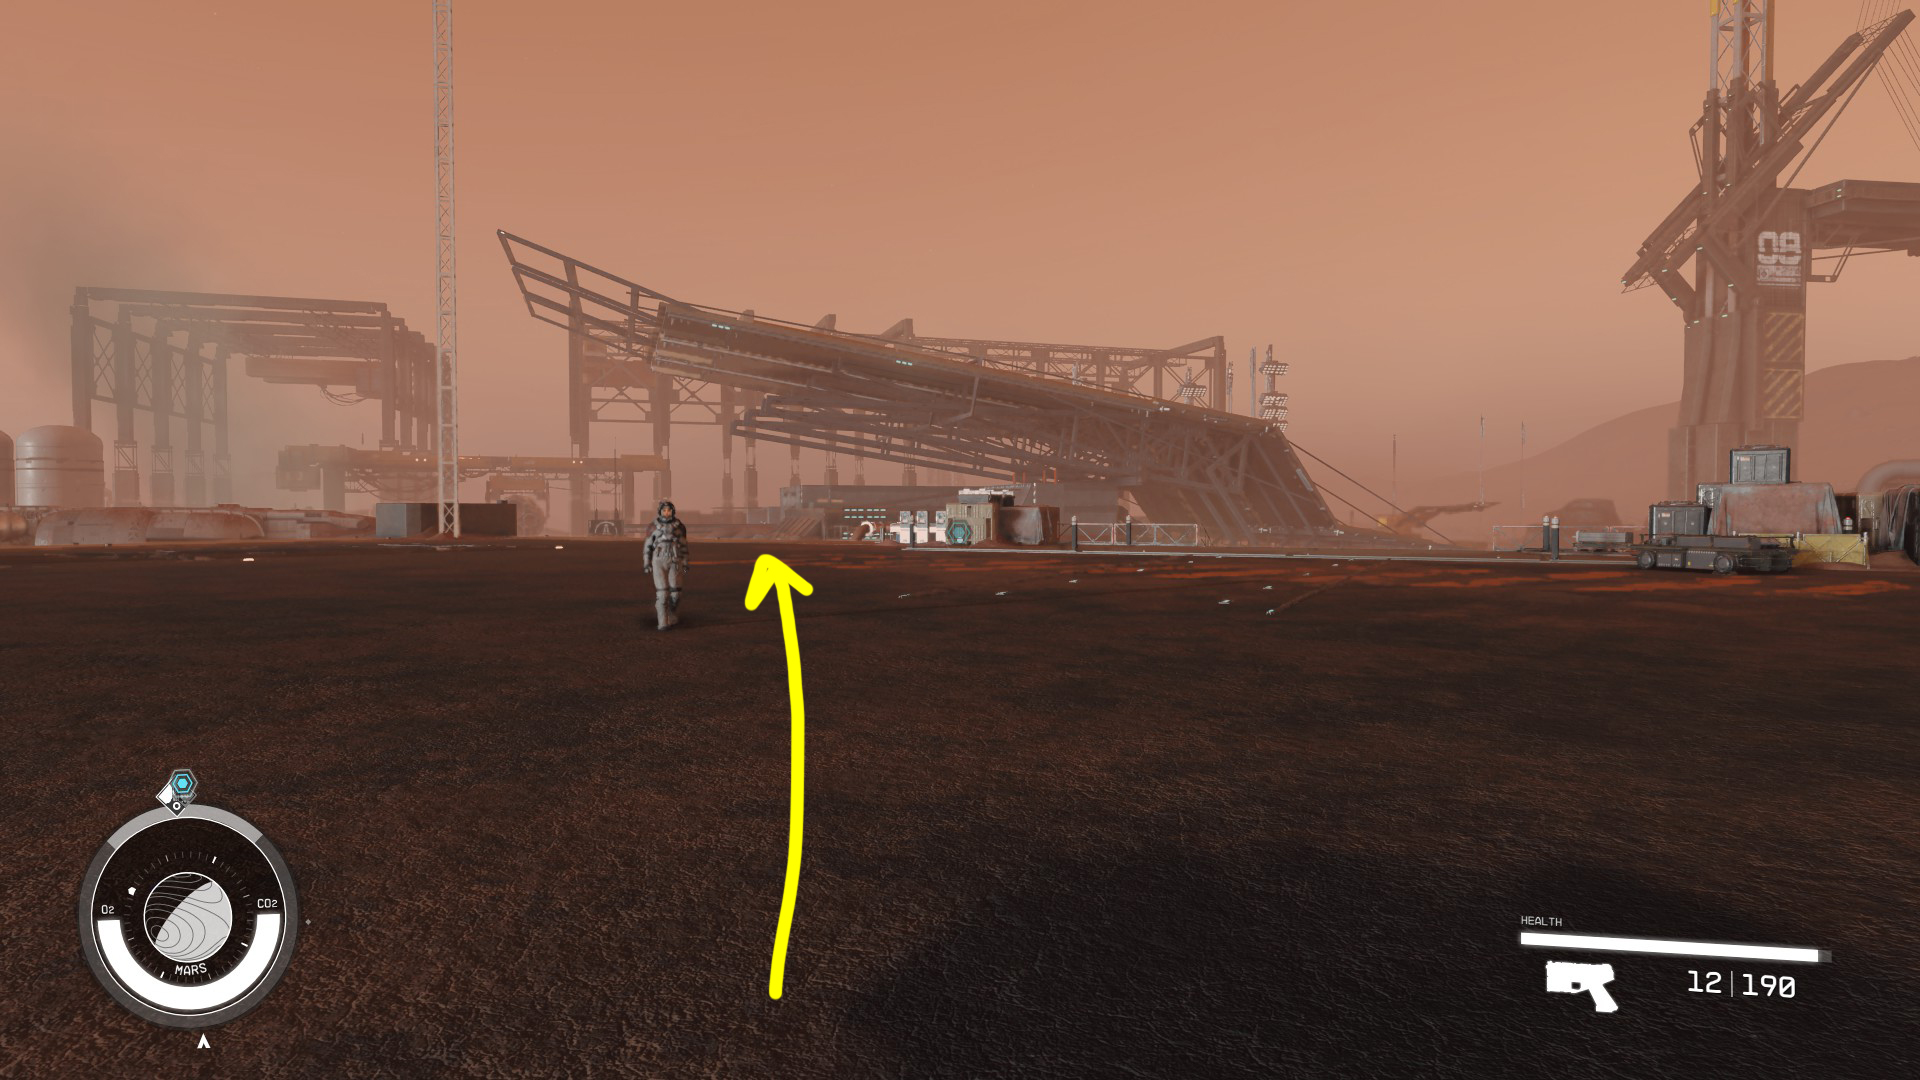
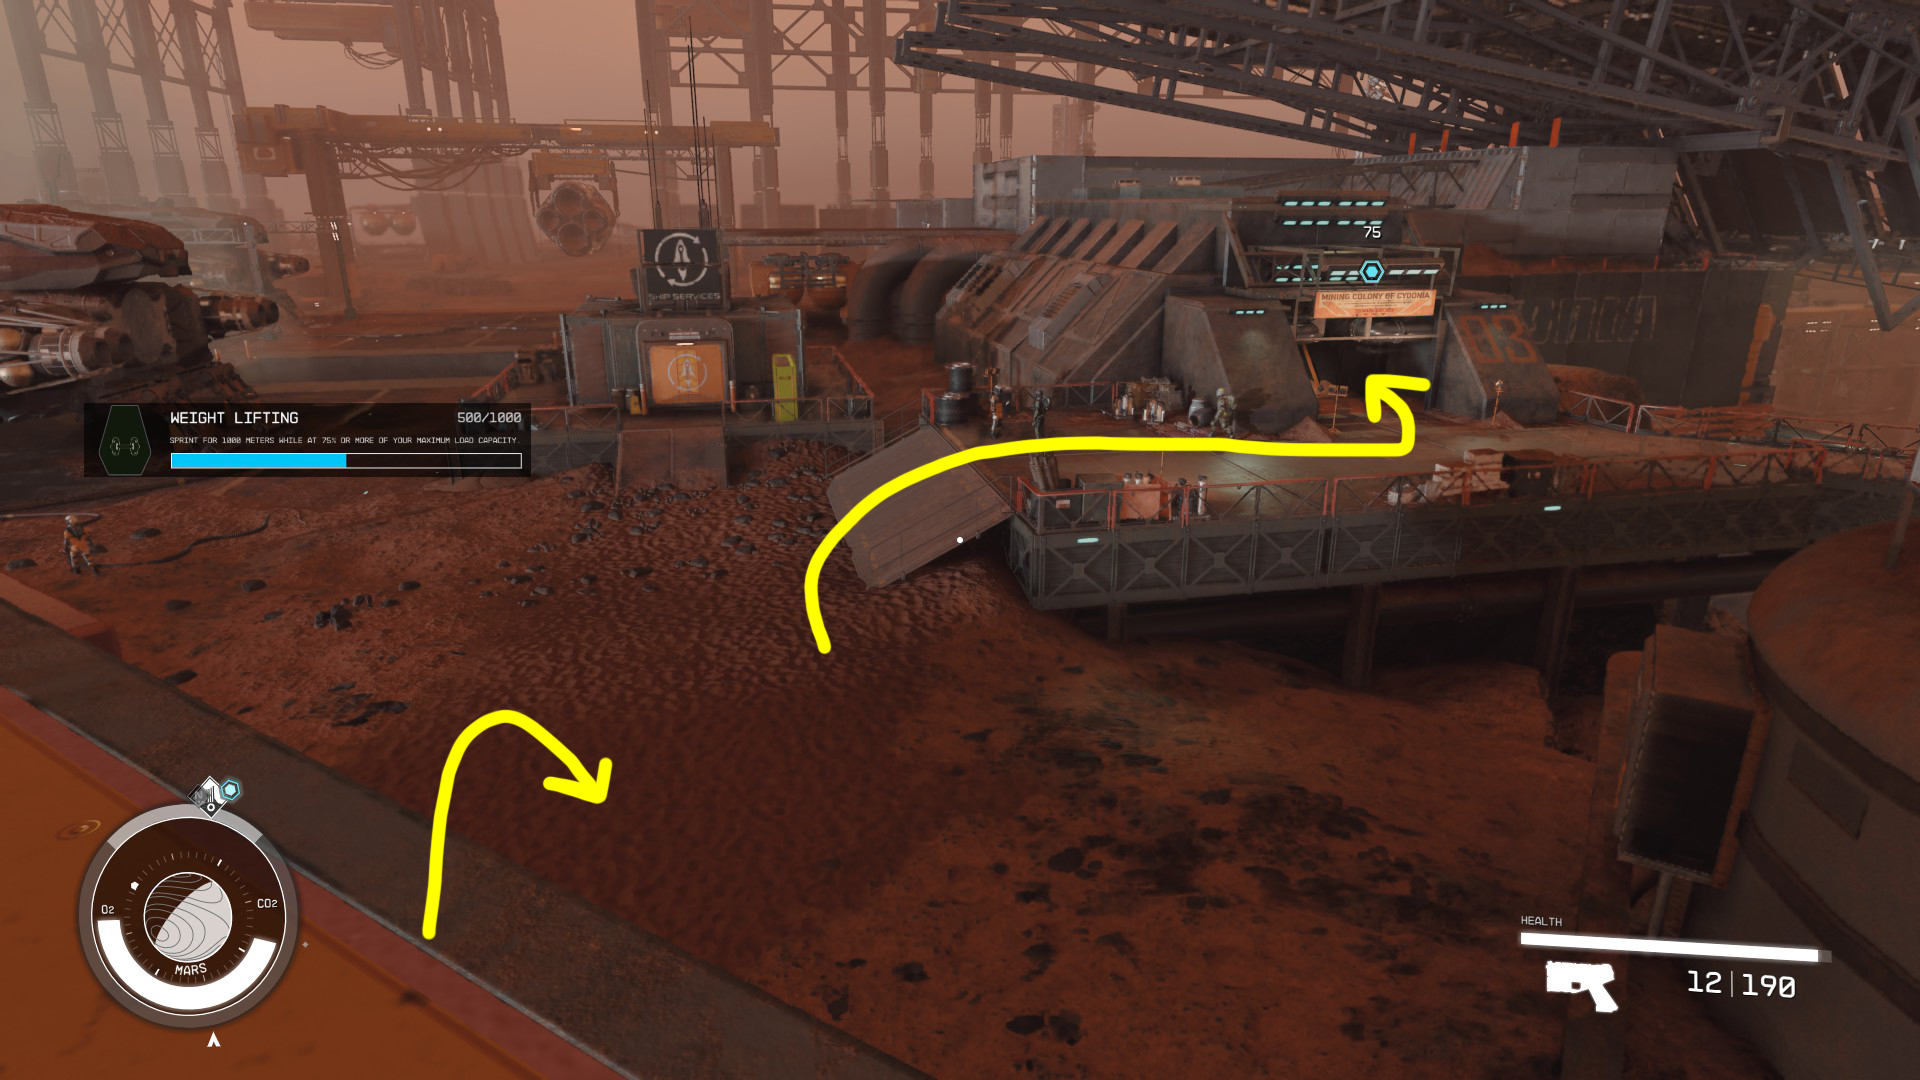
It’s likely you’ve already been to Cydonia in the mission The Old Neighborhood, but if you’re one of those players who doesn’t touch the main quest for the first 60 hours, you may not be able to fast travel directly to Cydonia’s entrance. If that’s the case, you’ll need to grav jump to Mars orbit, then land at Cydonia. Upon landing, head towards the slope-roofed structure indicated in Image 4, then follow the Image 5 route and go through the tunnel to find the main entrance to Cydonia – Central Hub.
Image 4Image 5
Rendezvous with Simon Ryczek
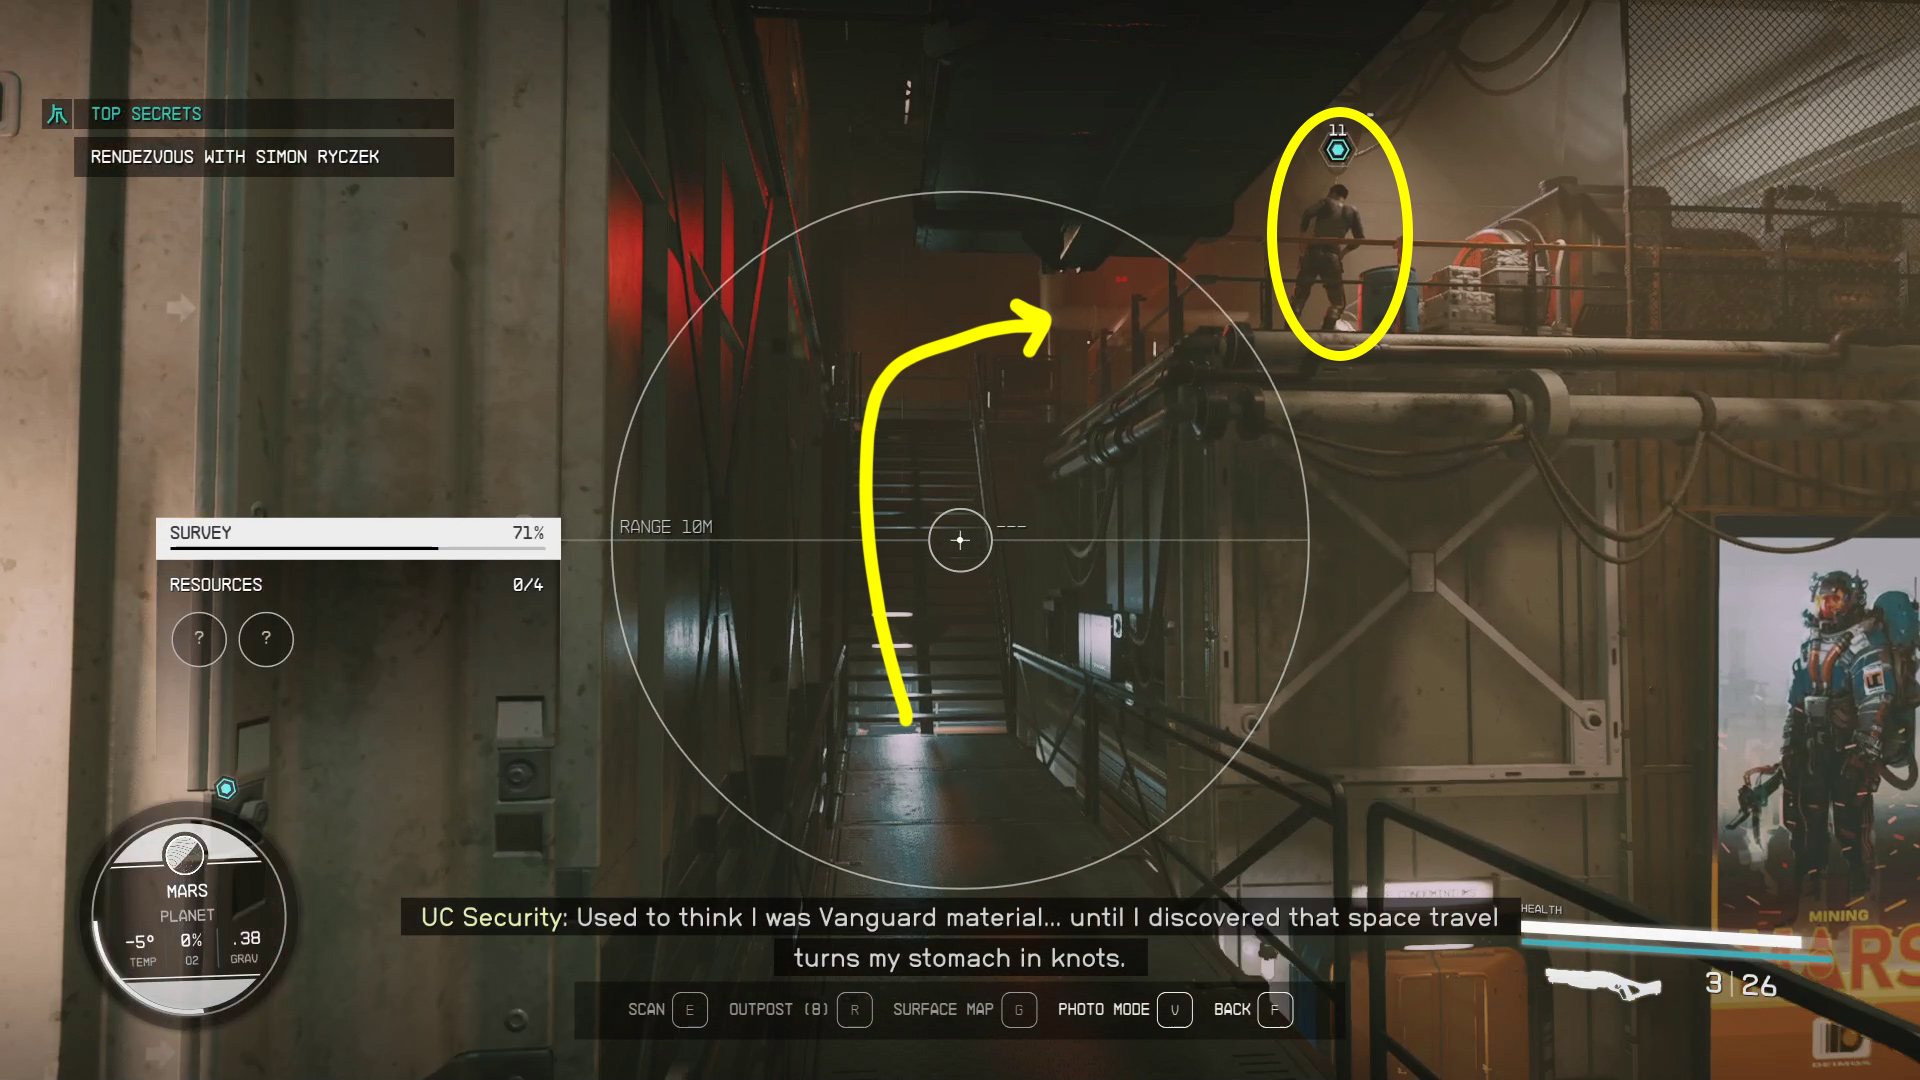
Once in Cydonia, you can use your Scanner to make your way to Simon — you’ll be led down the colony’s main “street”, and then around a corner and up some stairs is Simon (Image 6). Talk to him, say whatever you want until he says “looks like the Galactic Raiders are the number one pick for the Universal Championship this year”, at which point you need to reply “Razor derby is the only real sport”.
Image 6 – Simon’s location in Cydonia
He’ll then give you the option of paying for the information, or performing a side job for him. You can pay 10,000 credits, [Persuade] him down to 8,000, do the side job (or kill him and take the data slate, but this last option brings the whole city down on top of you and is strictly for murder-hobos).
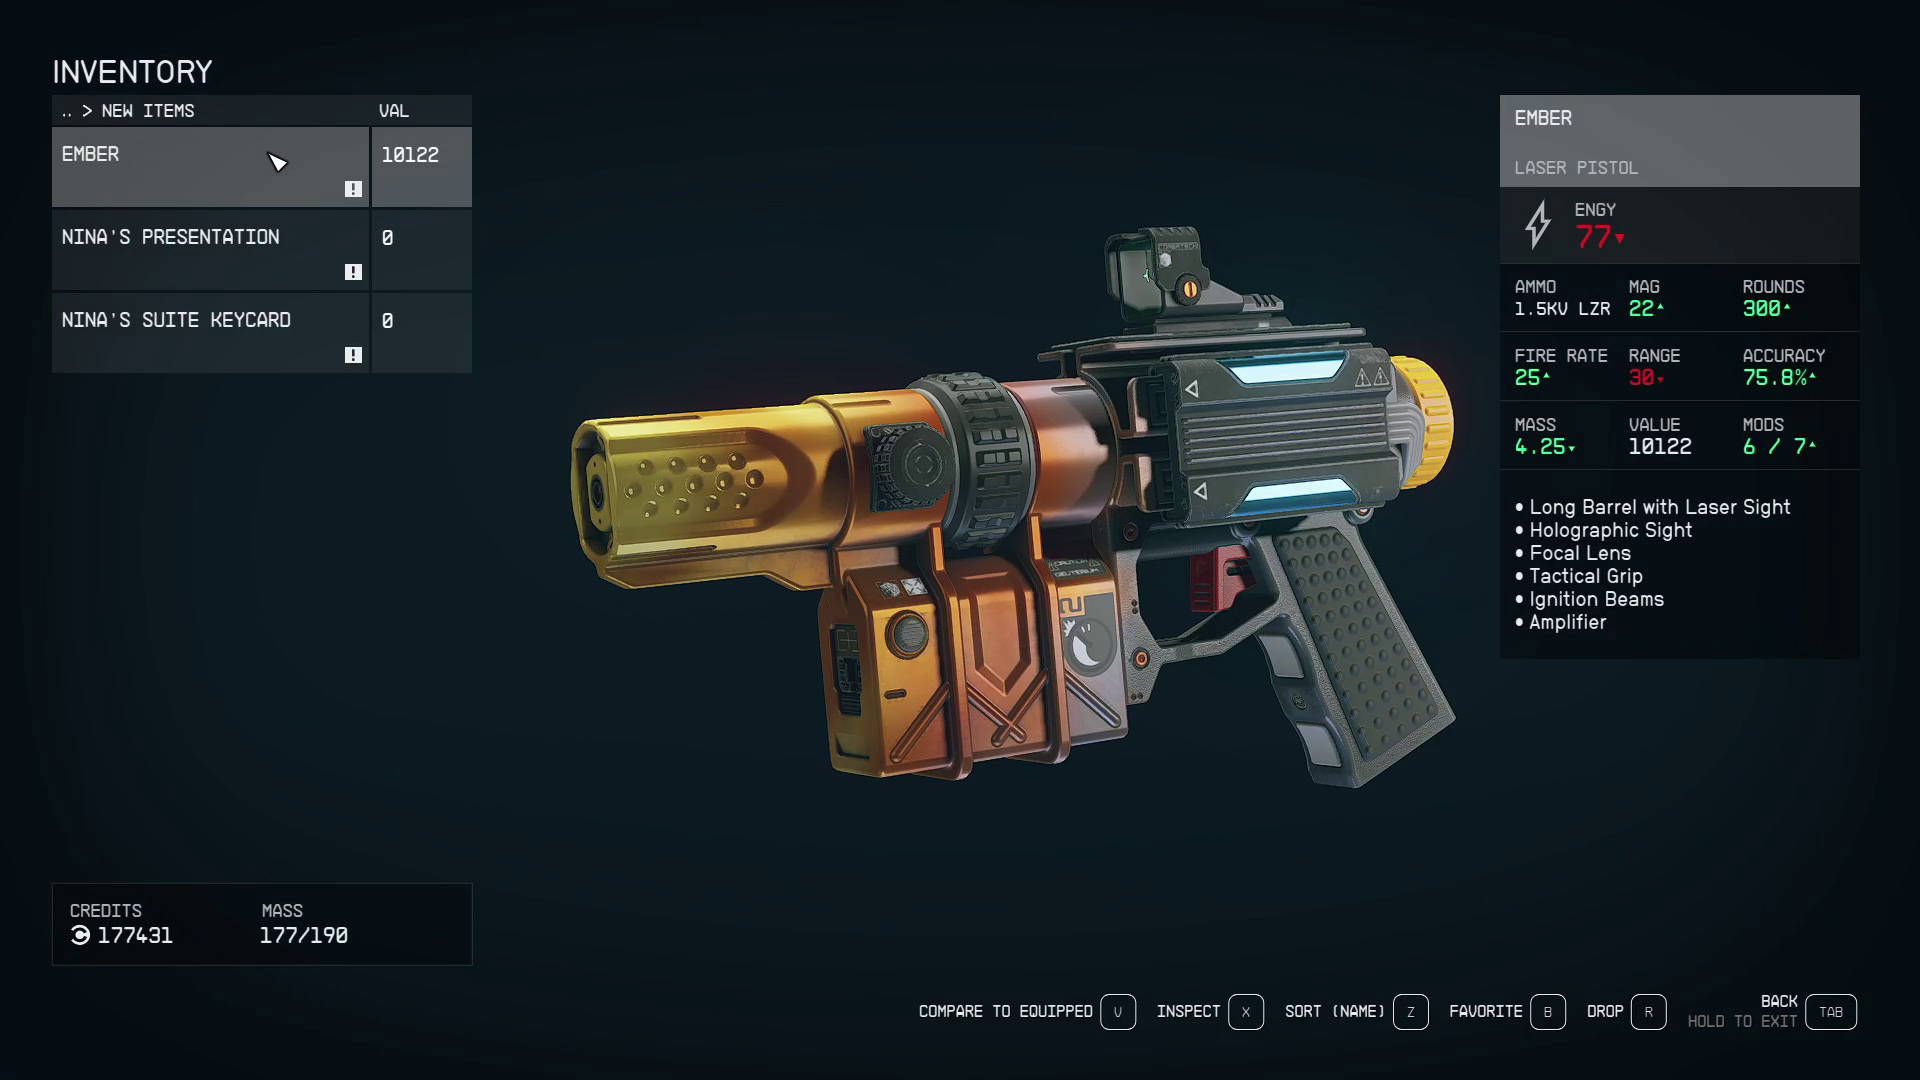
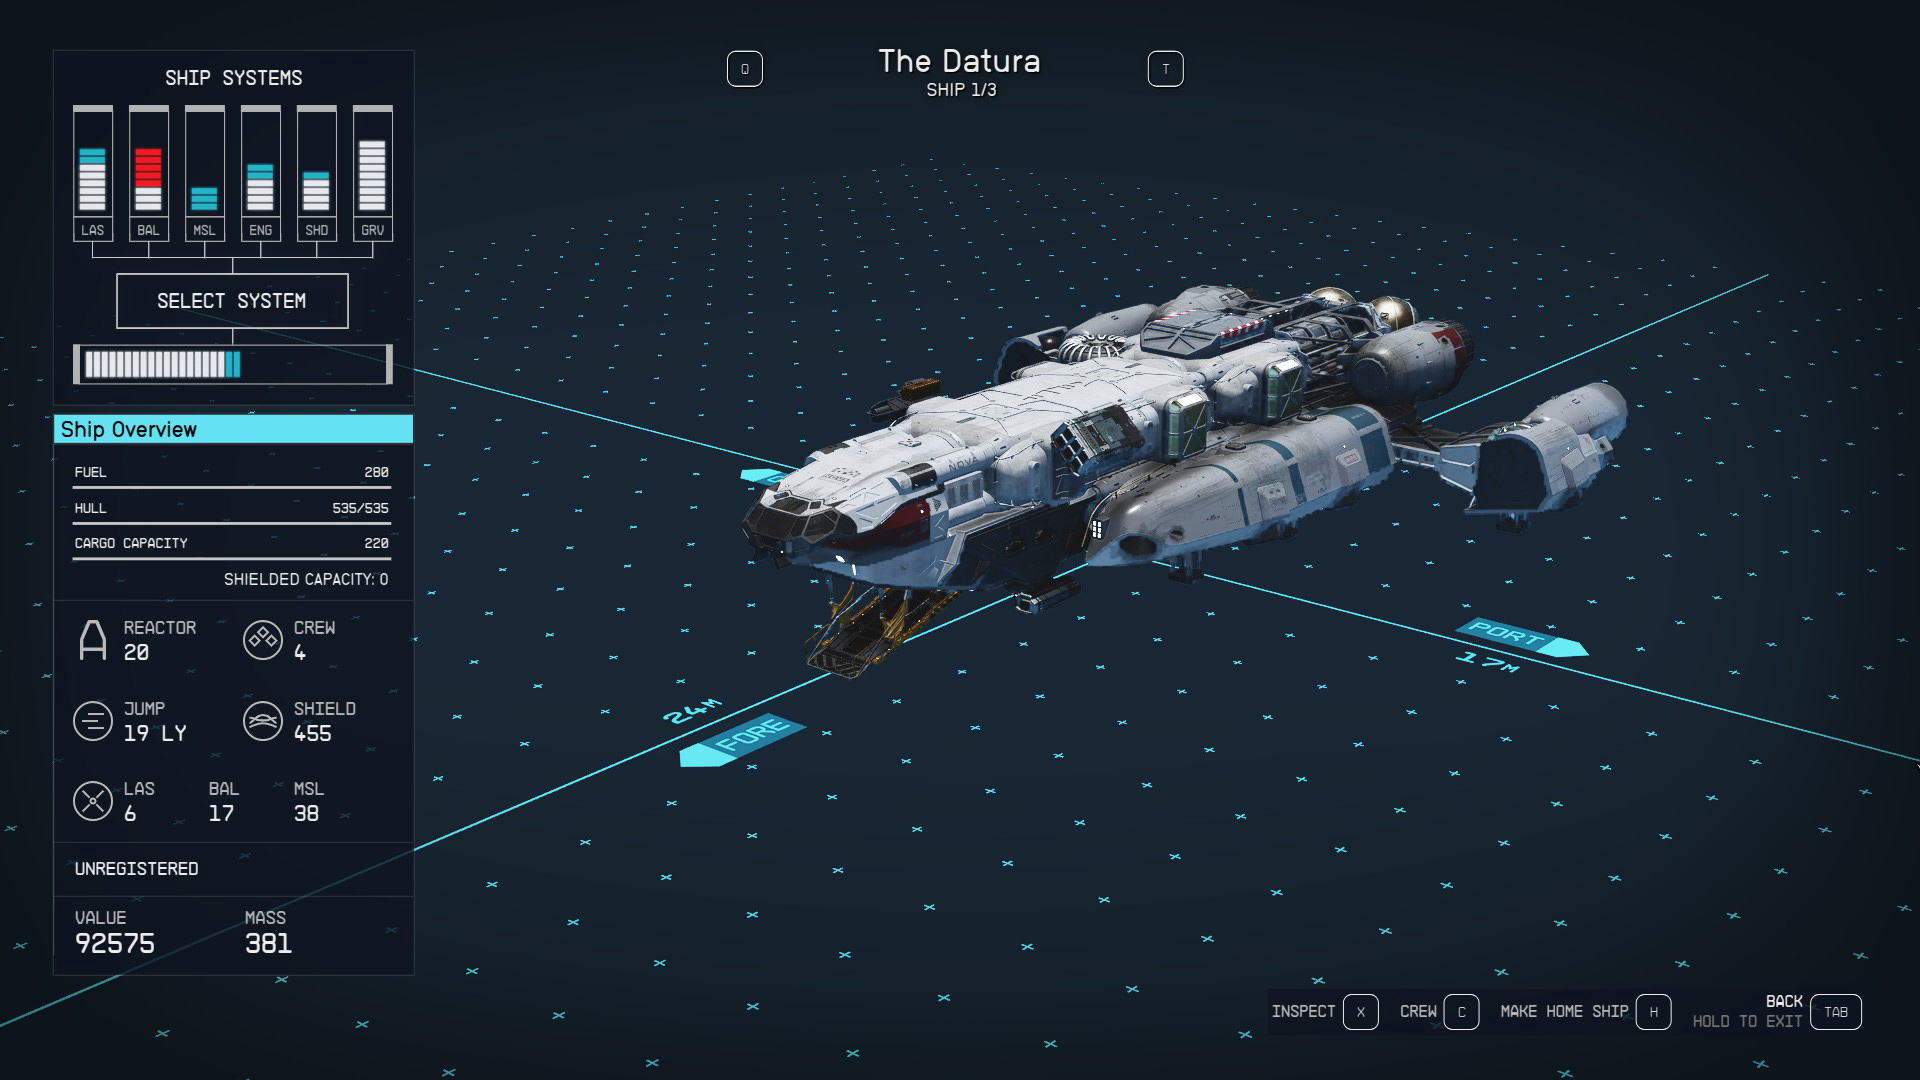
The side job has a few possible outcomes, including acquiring both a unique pistol, Ember (Image 7) and unique ship, The Datura (Image 8) — but obviously doing the side job will extend the time required to complete the mission, so if you’re in a hurry to finish you may just want to pay Simon.
Image 7Image 8
If you choose not to do the side job, skip to the section “Listen to the Audio File/Read Stanley McMIllan’s File”.
Find the Datura in Saturn’s Orbit
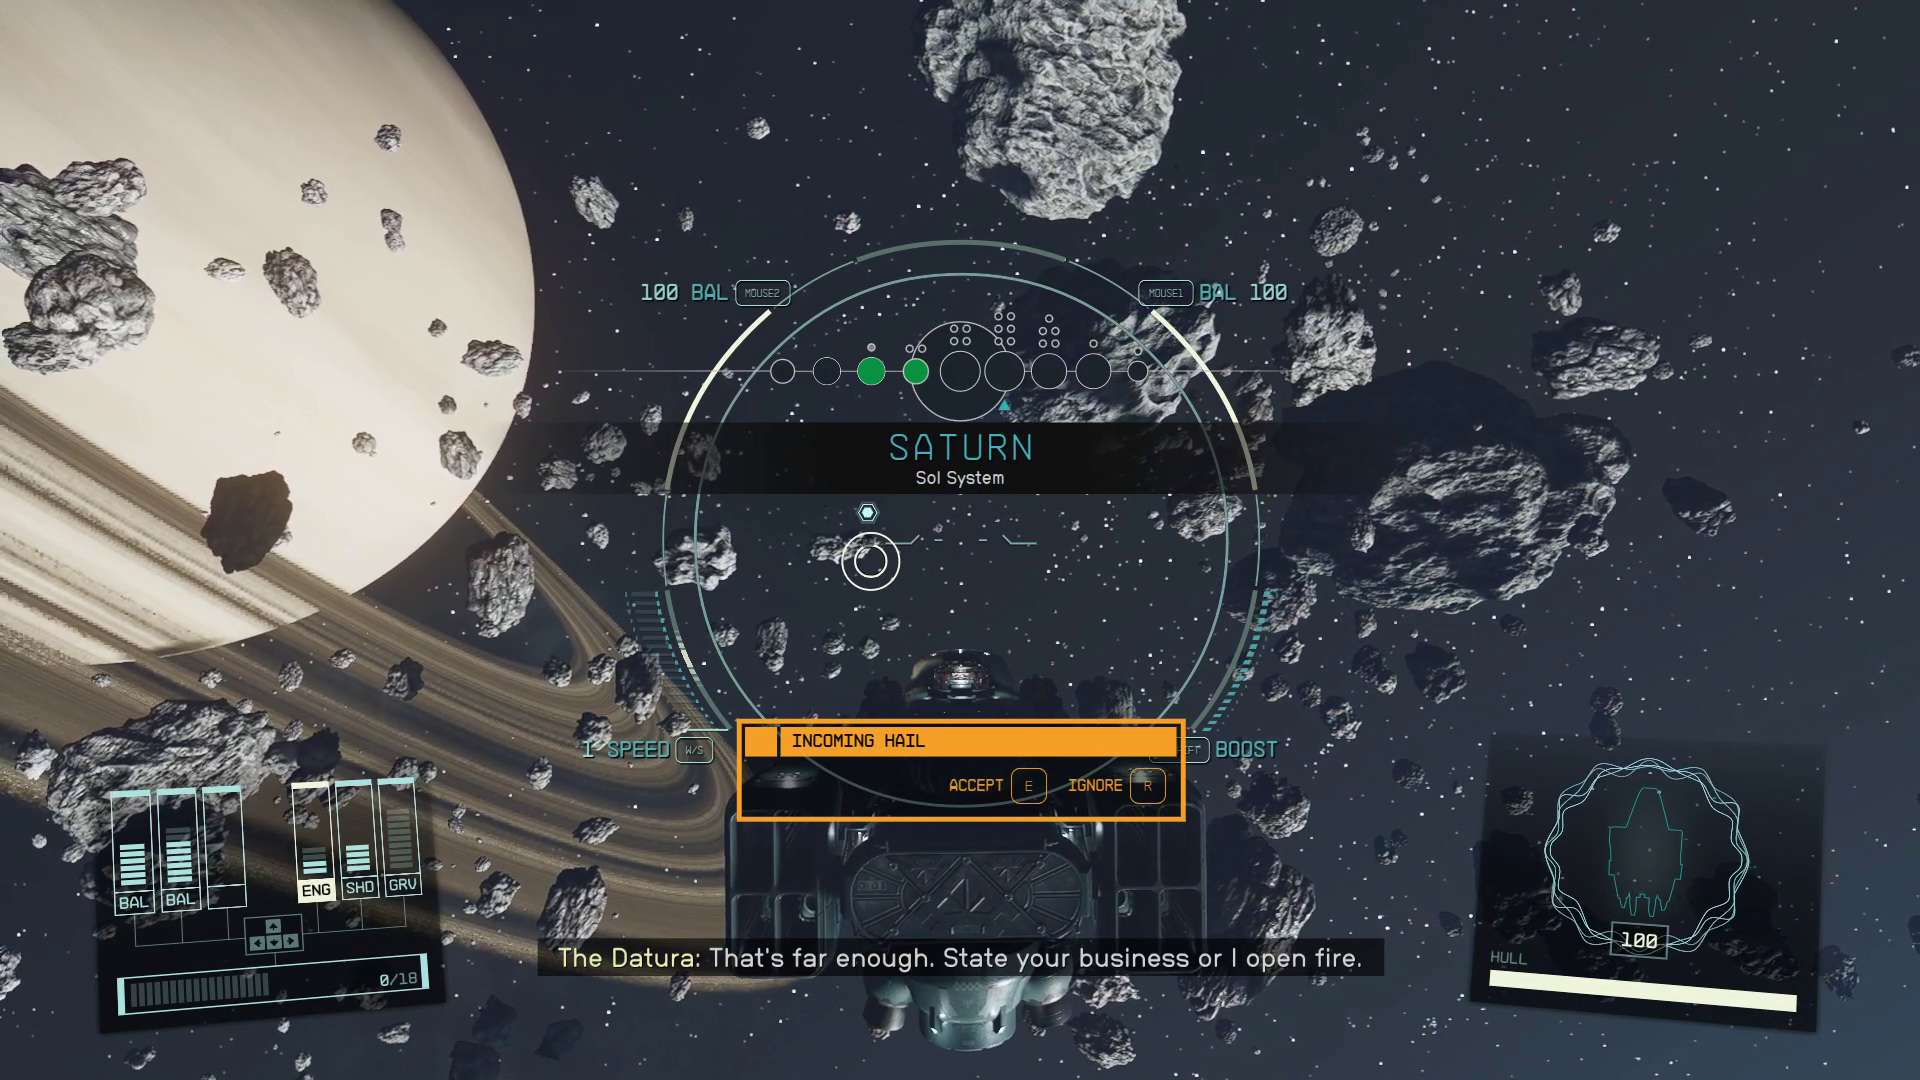
If you choose to do the side job, the first step is traveling to orbit of Saturn, which is convenient since we’re already in the Sol system. Use your Mission Log to set a course and grav jump to Saturn, where you’ll immediately be hailed by The Datura.
Talk to Malai
At this point, you have a few options:
Ignore the hail (or choose [Attack]) and destroy The Datura – naturally, this lets you get the Ember but not the ship (you’ll have to loot the wreckage to get the Ember)
Accept the hail and pick one of the many diplomatic dialog options, then board the ship
Kill Malai on her ship – this lets you take her ship
[Persuade] Malai on the ship – this lets you avoid killing Malai, and still earns you the gun
Dock with the Datura
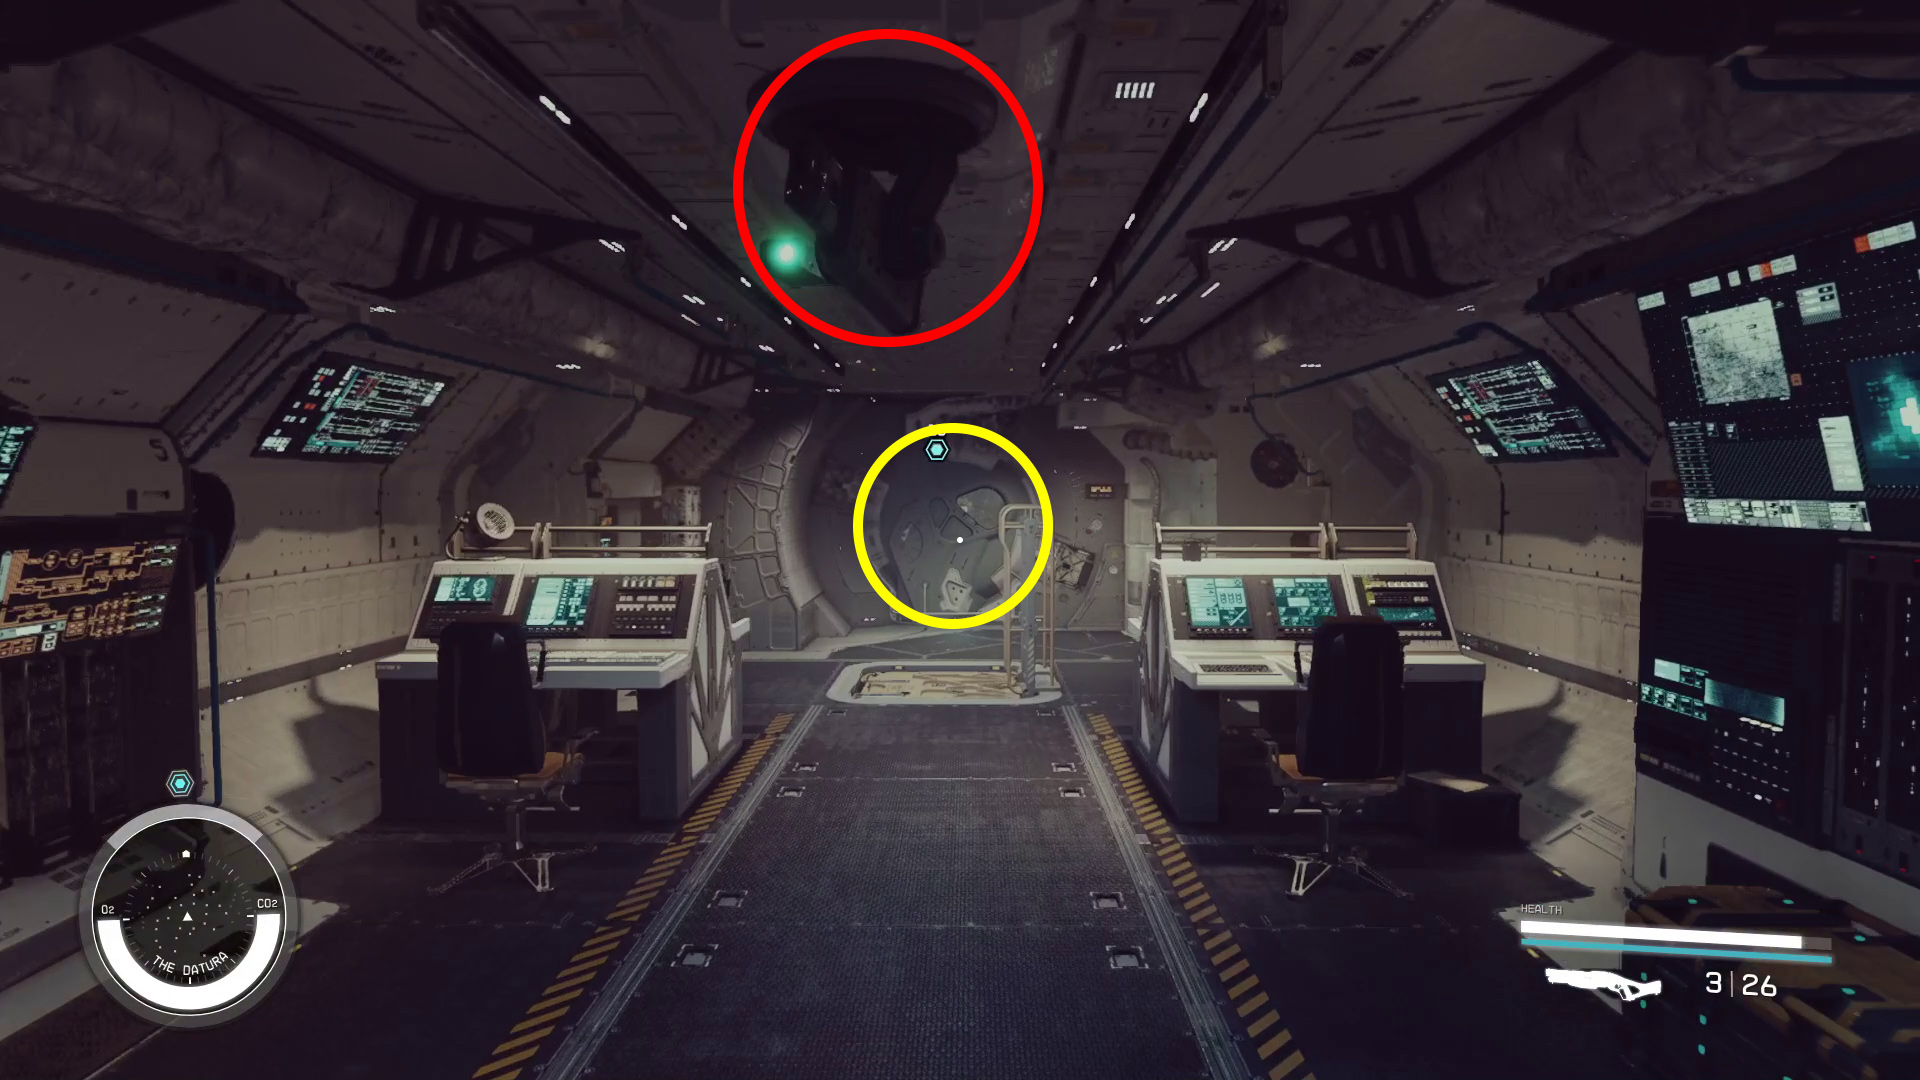
If you board The Datura, it’s easy to find Malai — just go around the ladder and then through both hatches. If you fight Malai on her ship, she dies pretty quickly (despite planning to kill you, for some reason she chooses not to wear a suit). Still, it’s best to close the second hatch behind you so the ship’s internal turret doesn’t fire at you (Image 9).
Image 9 – The turret and the second hatch on The Datura
Return to Simon in Cydonia
However you retrieve the Ember, once you have it you’ll need to fast travel back to Cydonia (this time you’ll be able to fast travel right to the entrance tunnel), and return to Simon. Handle the conversation with him however you like — he’ll let you keep Ember, and give you two files and a data slate.
Listen to the Audio File/Read Stanley McMIllan’s File
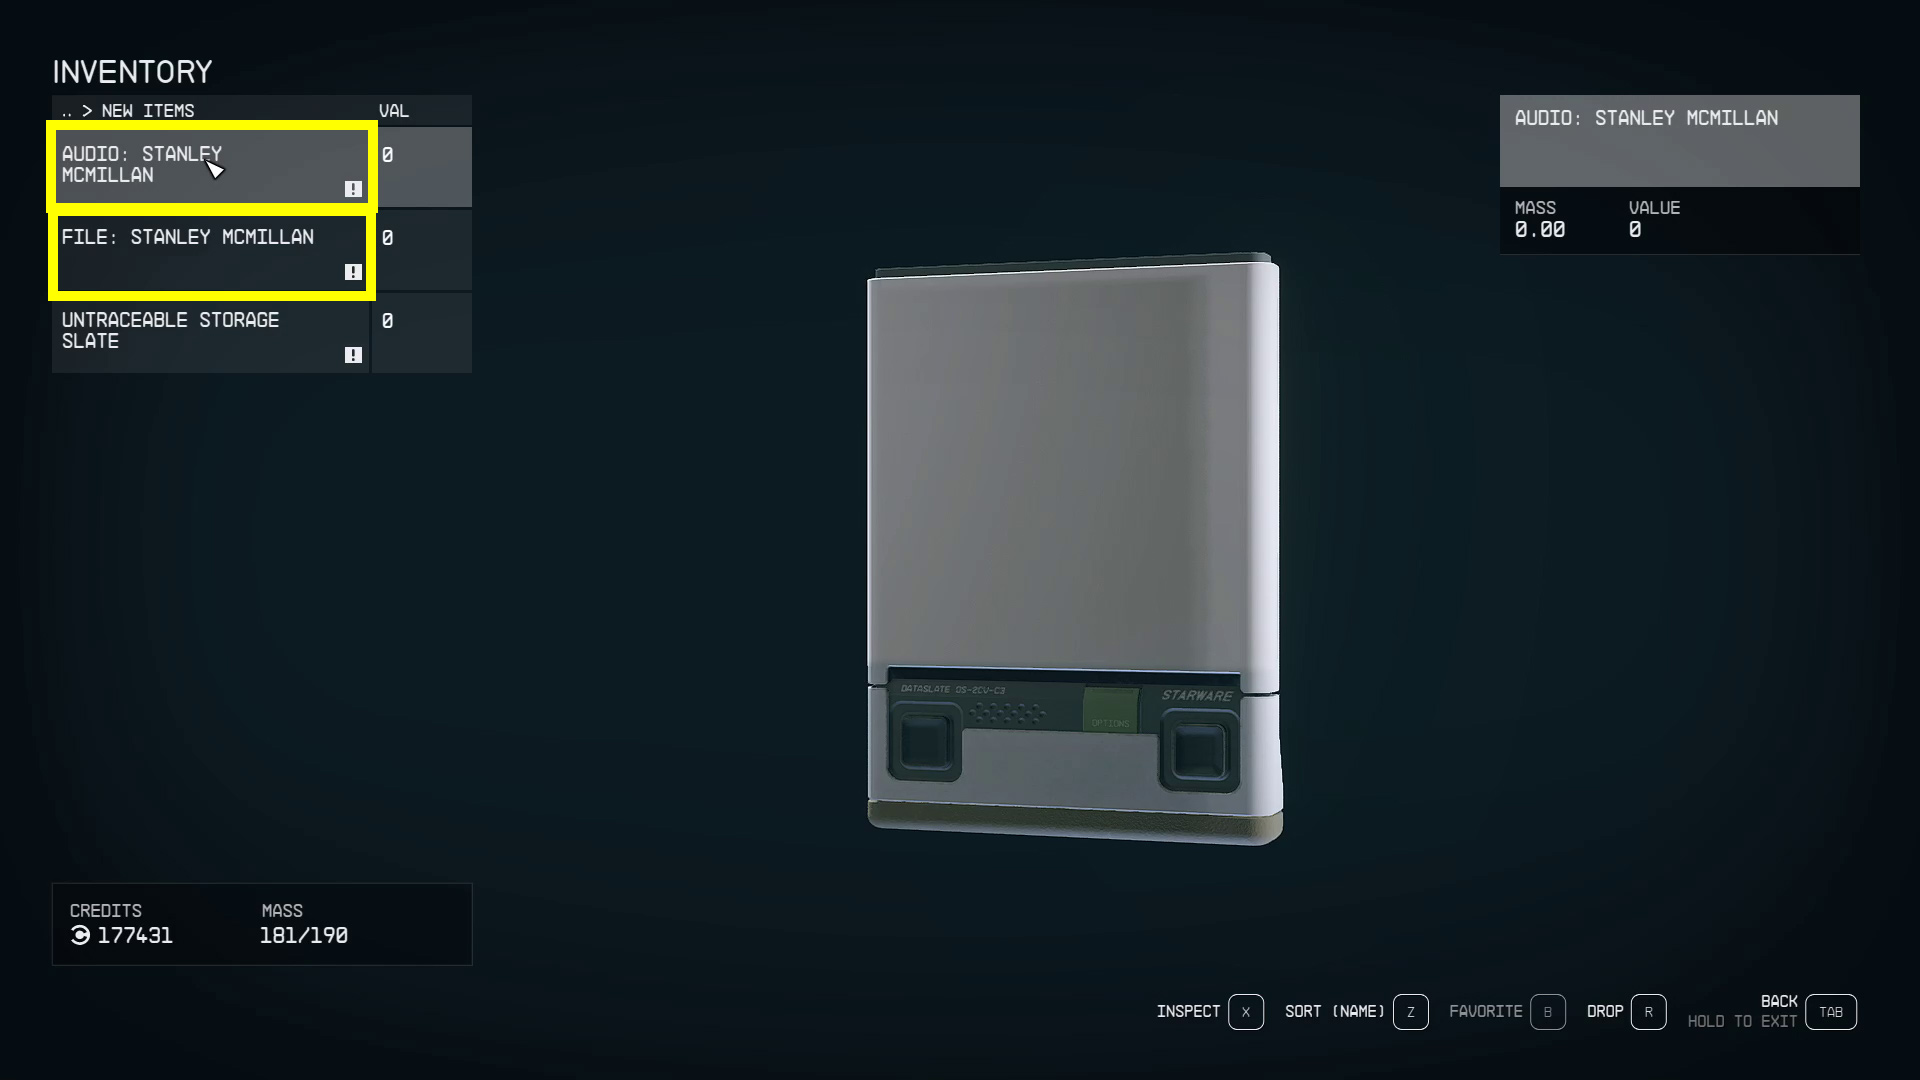
Go to the New Items category in your inventory, then listen to both the Audio file on Stanley and open the text File (Image 10). Note that you just have to open each file — it’s not necessary to listen to or read the whole thing. You can pay attention if you want, but the info you need will be given in the following section of this walkthrough.
Image 10 – The two files you need to listen to/read
Retrieve the Project Dominion Files
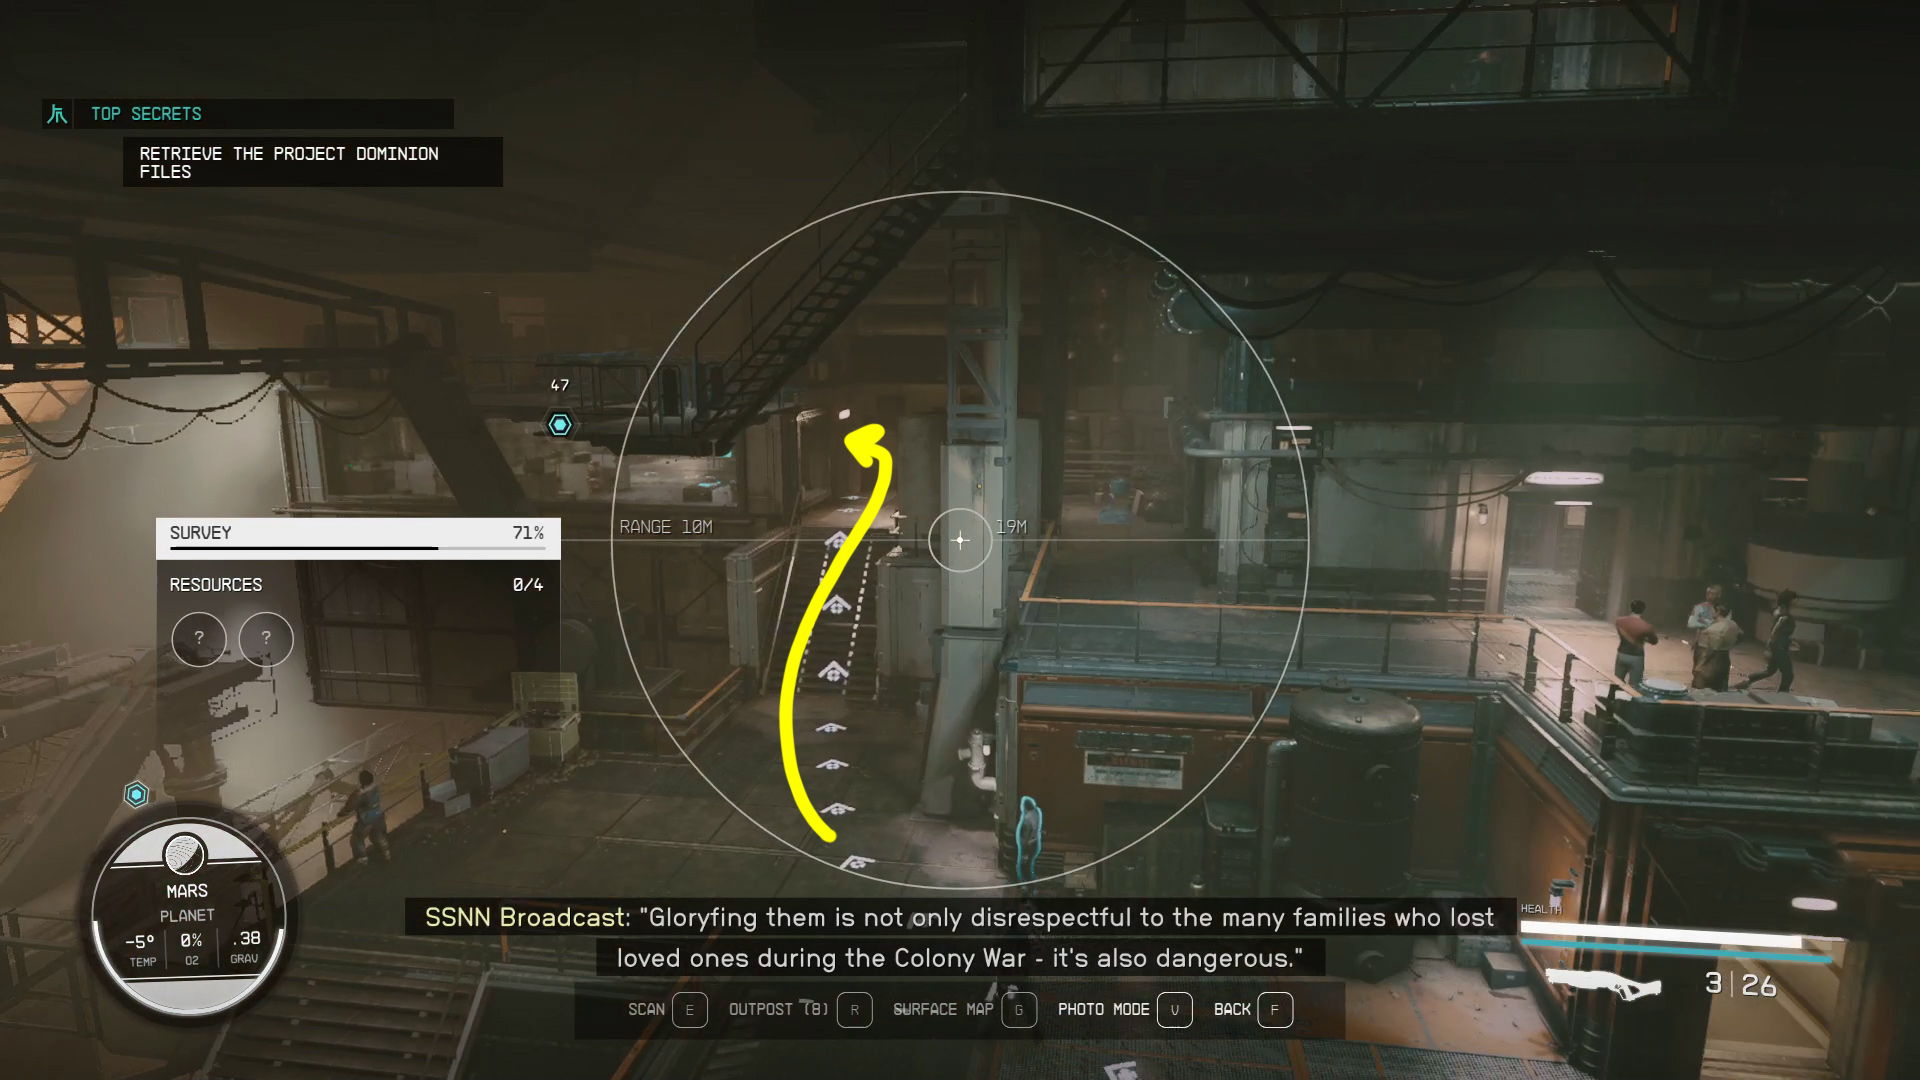
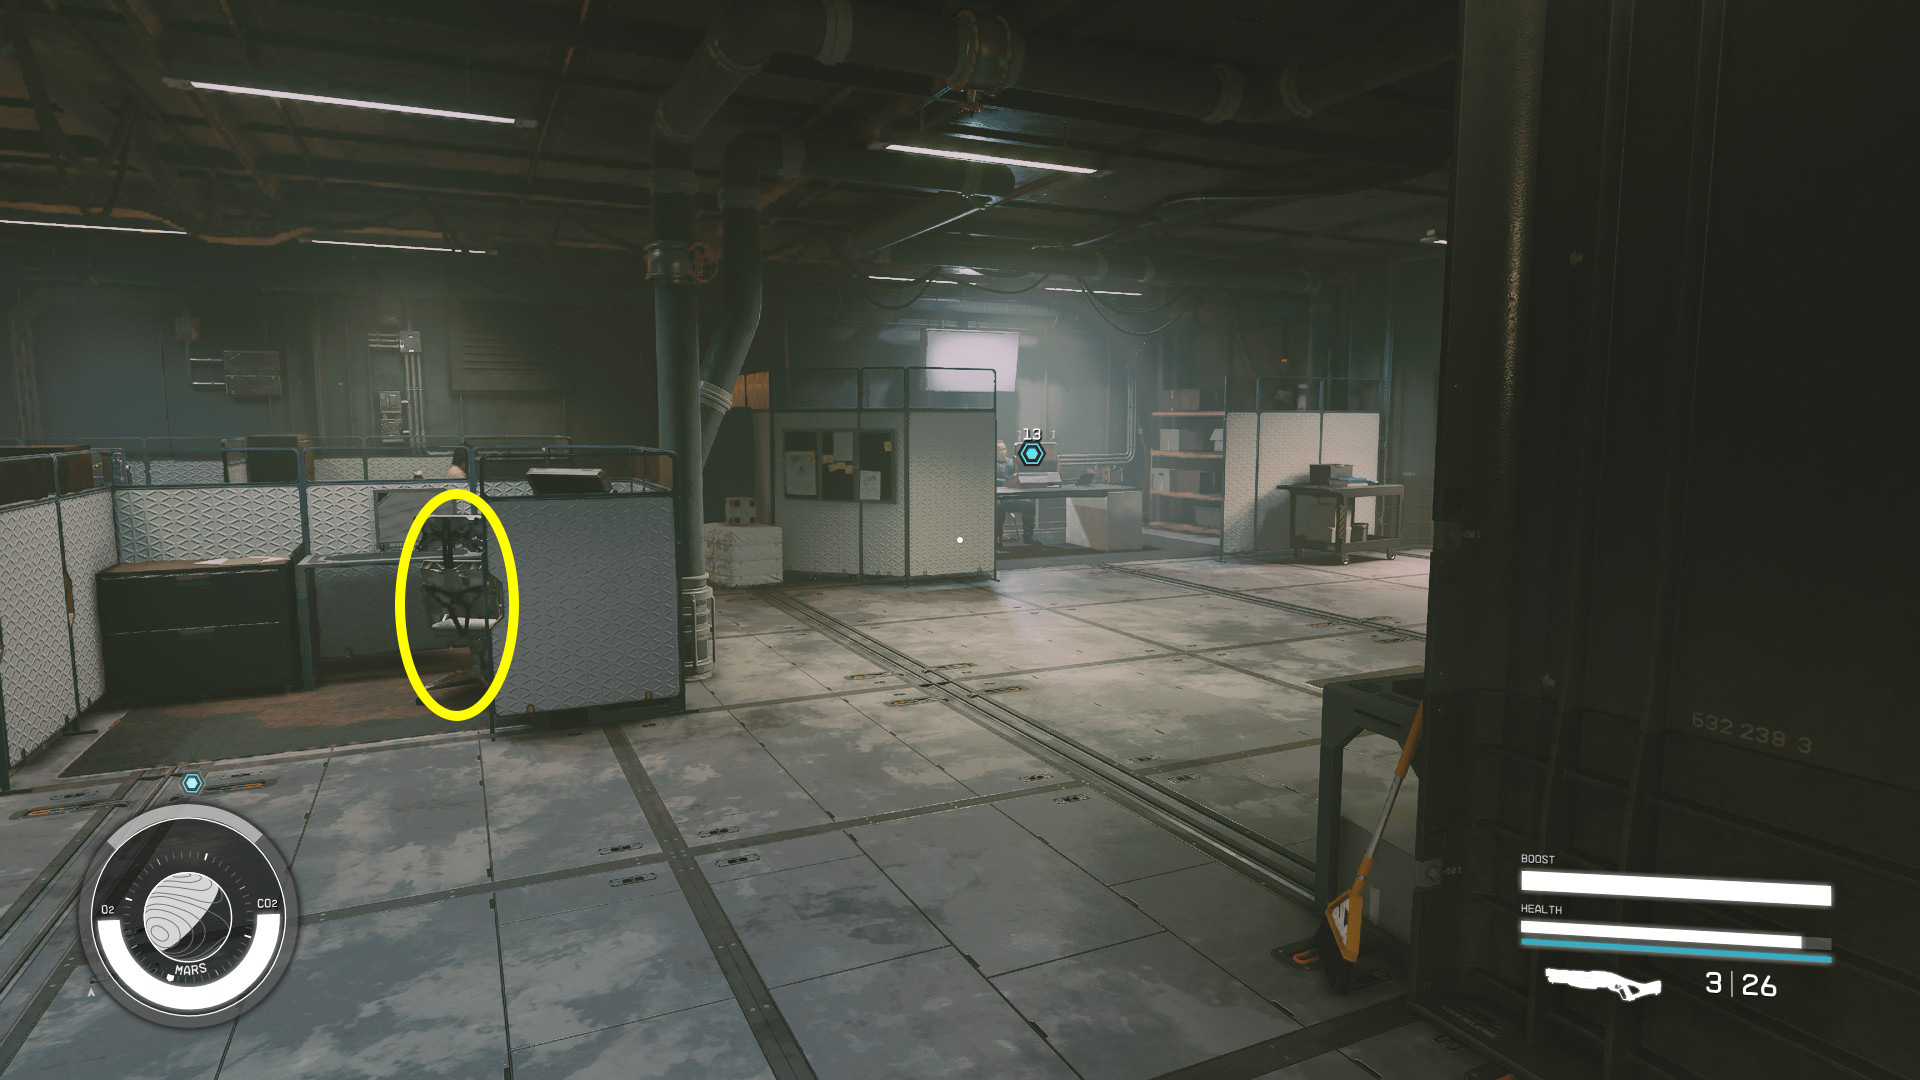
Once again, you’ll be able to use the Scanner to find your next objective, which is just across from where Simon is (Image 11). In the office where Stanley works is a computer indicated by the objective marker — that’s your next objective. However, if Stanley is currently at work, you’ll need to wait for him to leave before you can get on the computer. Use the nearby empty chair (Image 12) and wait until either 12:00 or 18:00 local time (these times are one hour later than the file on him suggests, but he seems to take his sweet time leaving).
Image 11Image 12
After Stanley leaves, go over to his computer, crouch and make sure you’re Hidden, and then hack into it (by picking the lock). On the desktop, select “Deimos Staryards Presentation” and then “Project Dominion” — at this point, you’ll have to select “Yes” and then pick another lock to gain access to the files. After picking the lock, you can select “Download Files”.
Return to Ularu at Ryujin Tower
Files downloaded, it’s time to return yet again to Ryujin Tower. Take the elevator to the Executive Offices, then use your scanner to find your way back to Ularu’s office. She’ll be in her chair — walk up and speak to her, then select one of the [Give Slate] dialog choices; finish the convo however you like.
Follow Ularu / Talk to Masako Imada
When the conversation finishes, Ularu will lead you over to her boss’ office, so follow her past reception and then wait in front of Masako’s desk. After a brief conversation between the two women, Masako will speak to you — as always, handle the conversation as you see fit.
When it ends, you’ll receive your rewards, and your next assignment!
Unabashed FromSoftware fanboy still learning to take his time with games (and everything else, really). The time he doesn't spend on games is spent on music, books, or occasionally going outside.