Absolute Power is a fun little mission that is slightly more stealth heavy than the missions leading up to it. Something that hasn’t changed, though, is the mission structure: meet the contact, get the thing, choose contact’s fate, report back.
While the last mission, The Best There Is, also had a lot of stealth, you could use a disguise. In contrast, most of this mission will see you actually sneaking around guards, but it is honestly an easy stealth mission if you know where you’re going. Of course,there is once again the option to forgo the stealth and shoot all hostiles, but you will get kicked out of SysDef if you do – a good option for swashbuckling scalawags. This guide will not have a shooting route, as it’s the same path as stealth, aside from the unadulterated violence.
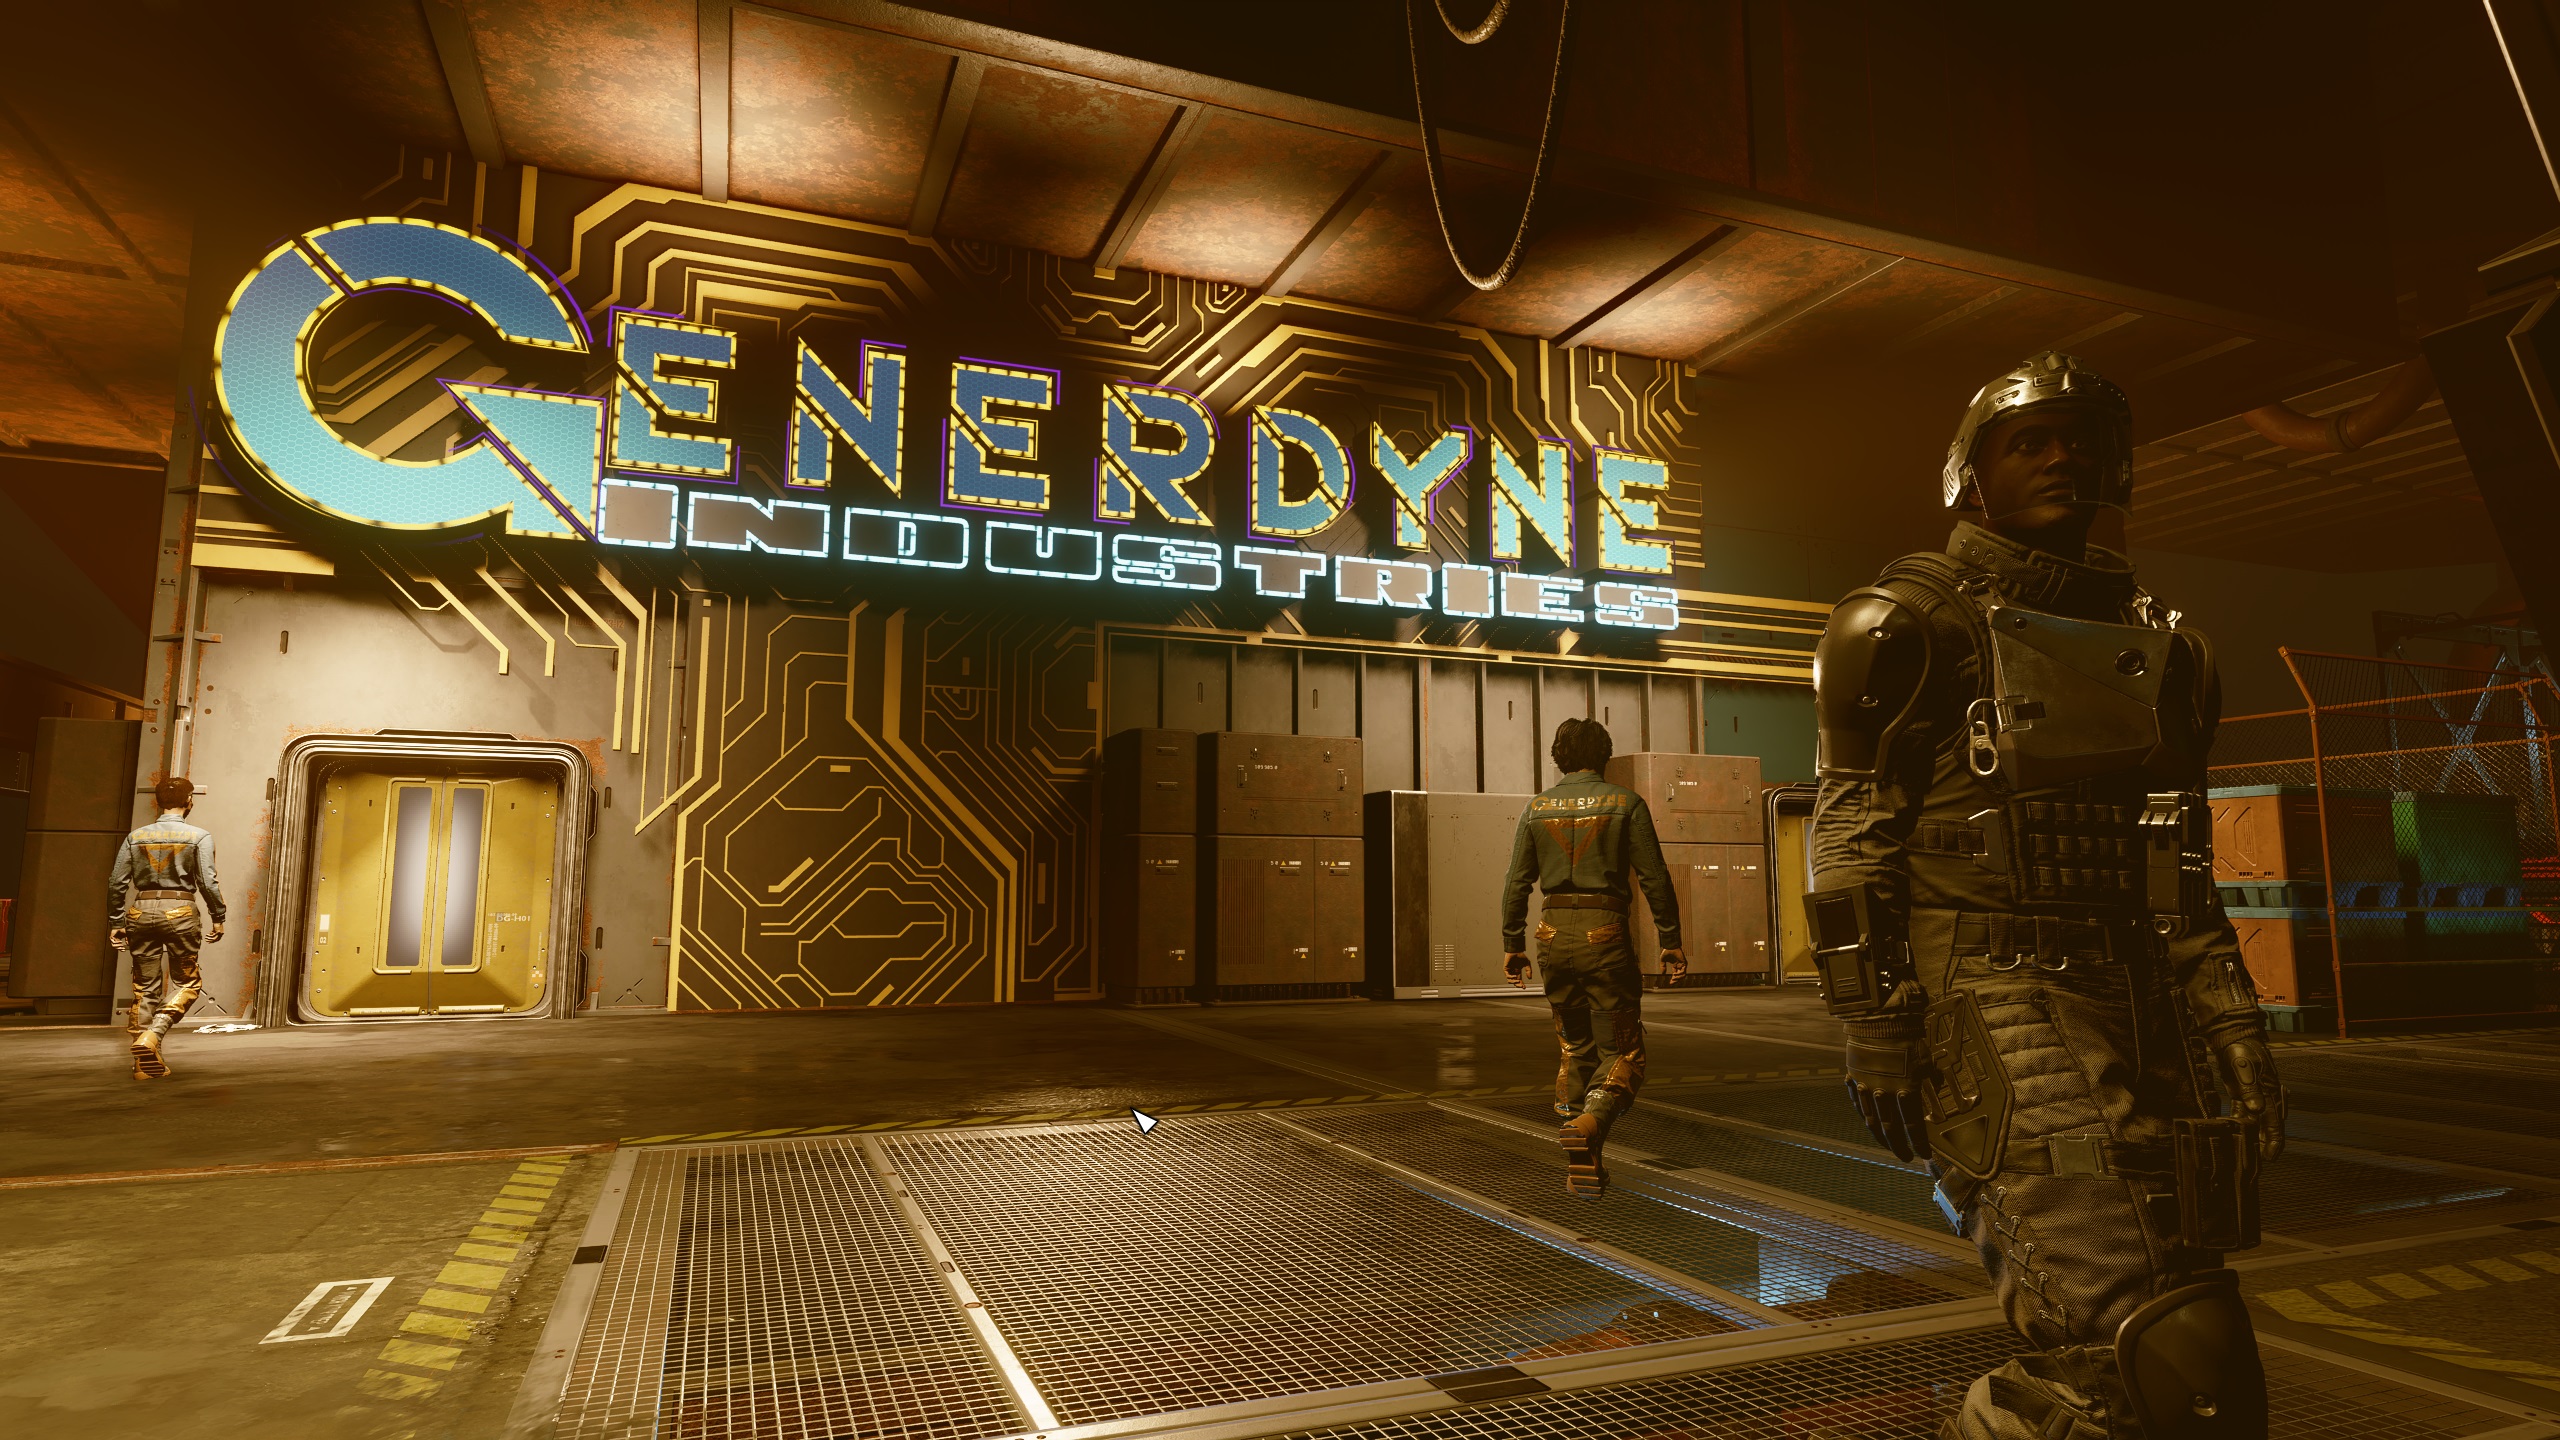
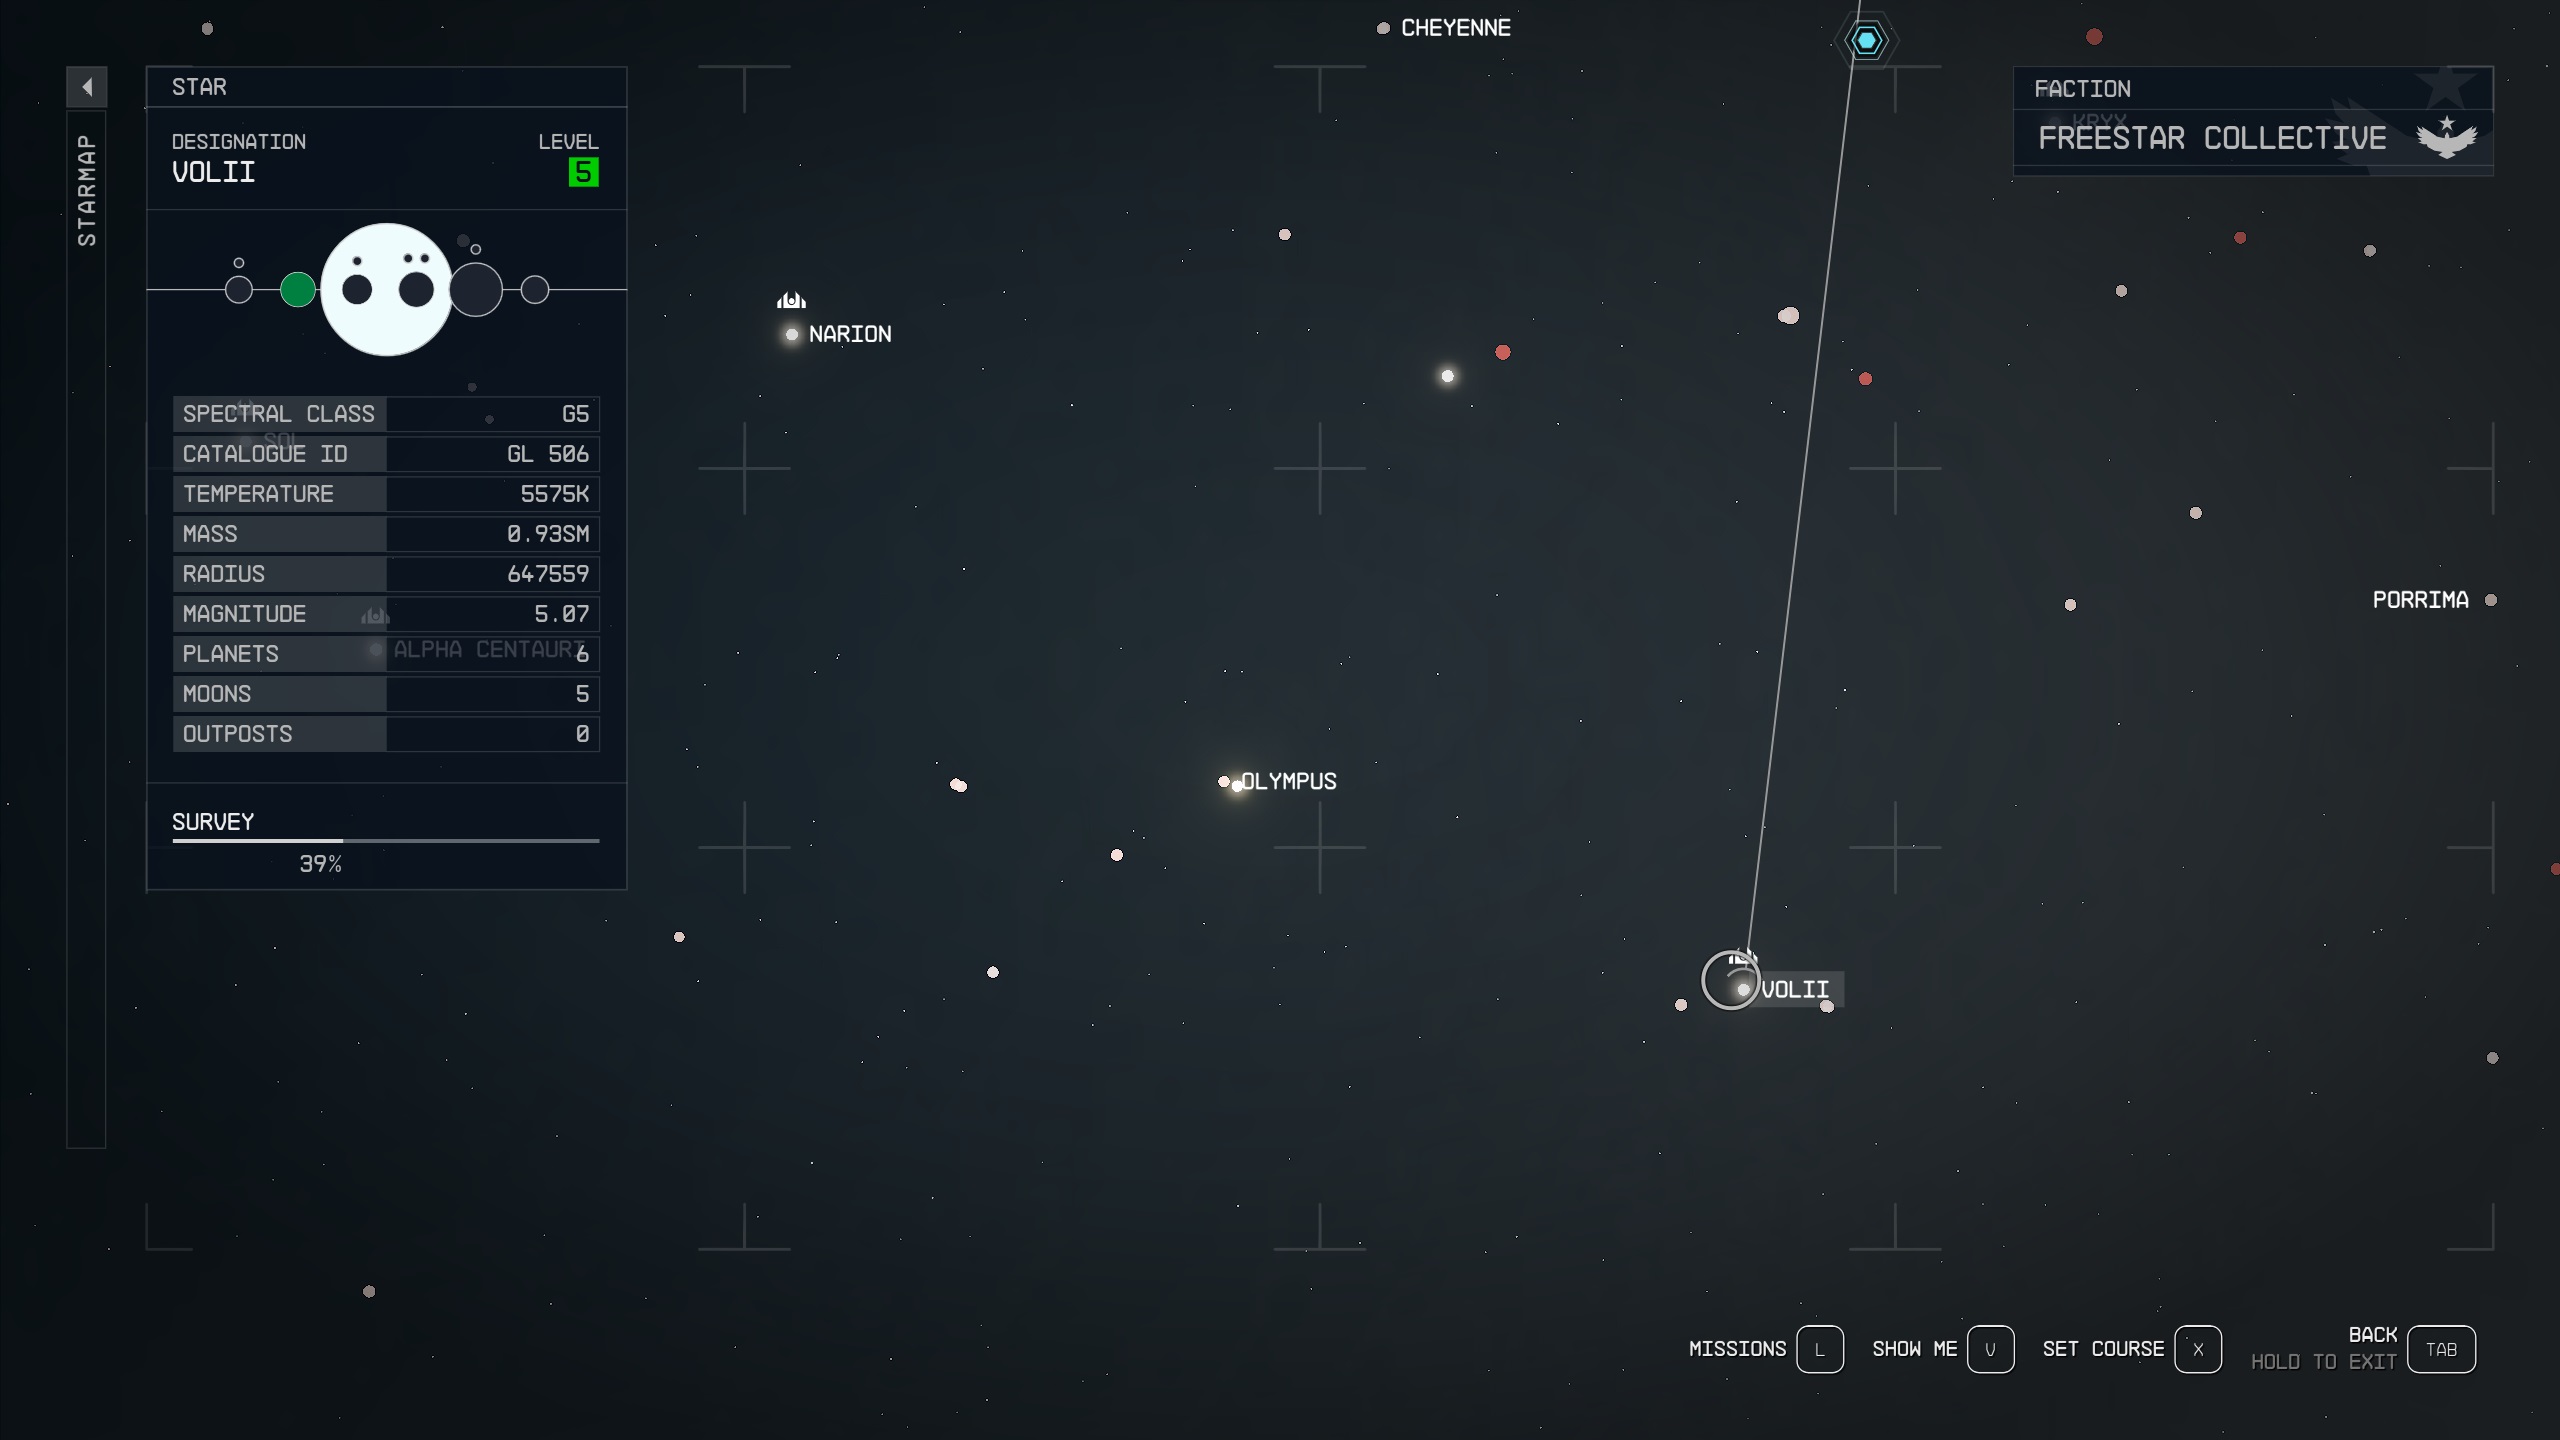
Neon is one of the larger cities in Starfield, and it is located in the Volii System, which is in the bottom right of your star map (Image 1). If it’s your first time traveling into the city, then you’ll have to land at the star port and go through the security checkpoint (Image 2).
Image 1Image 2
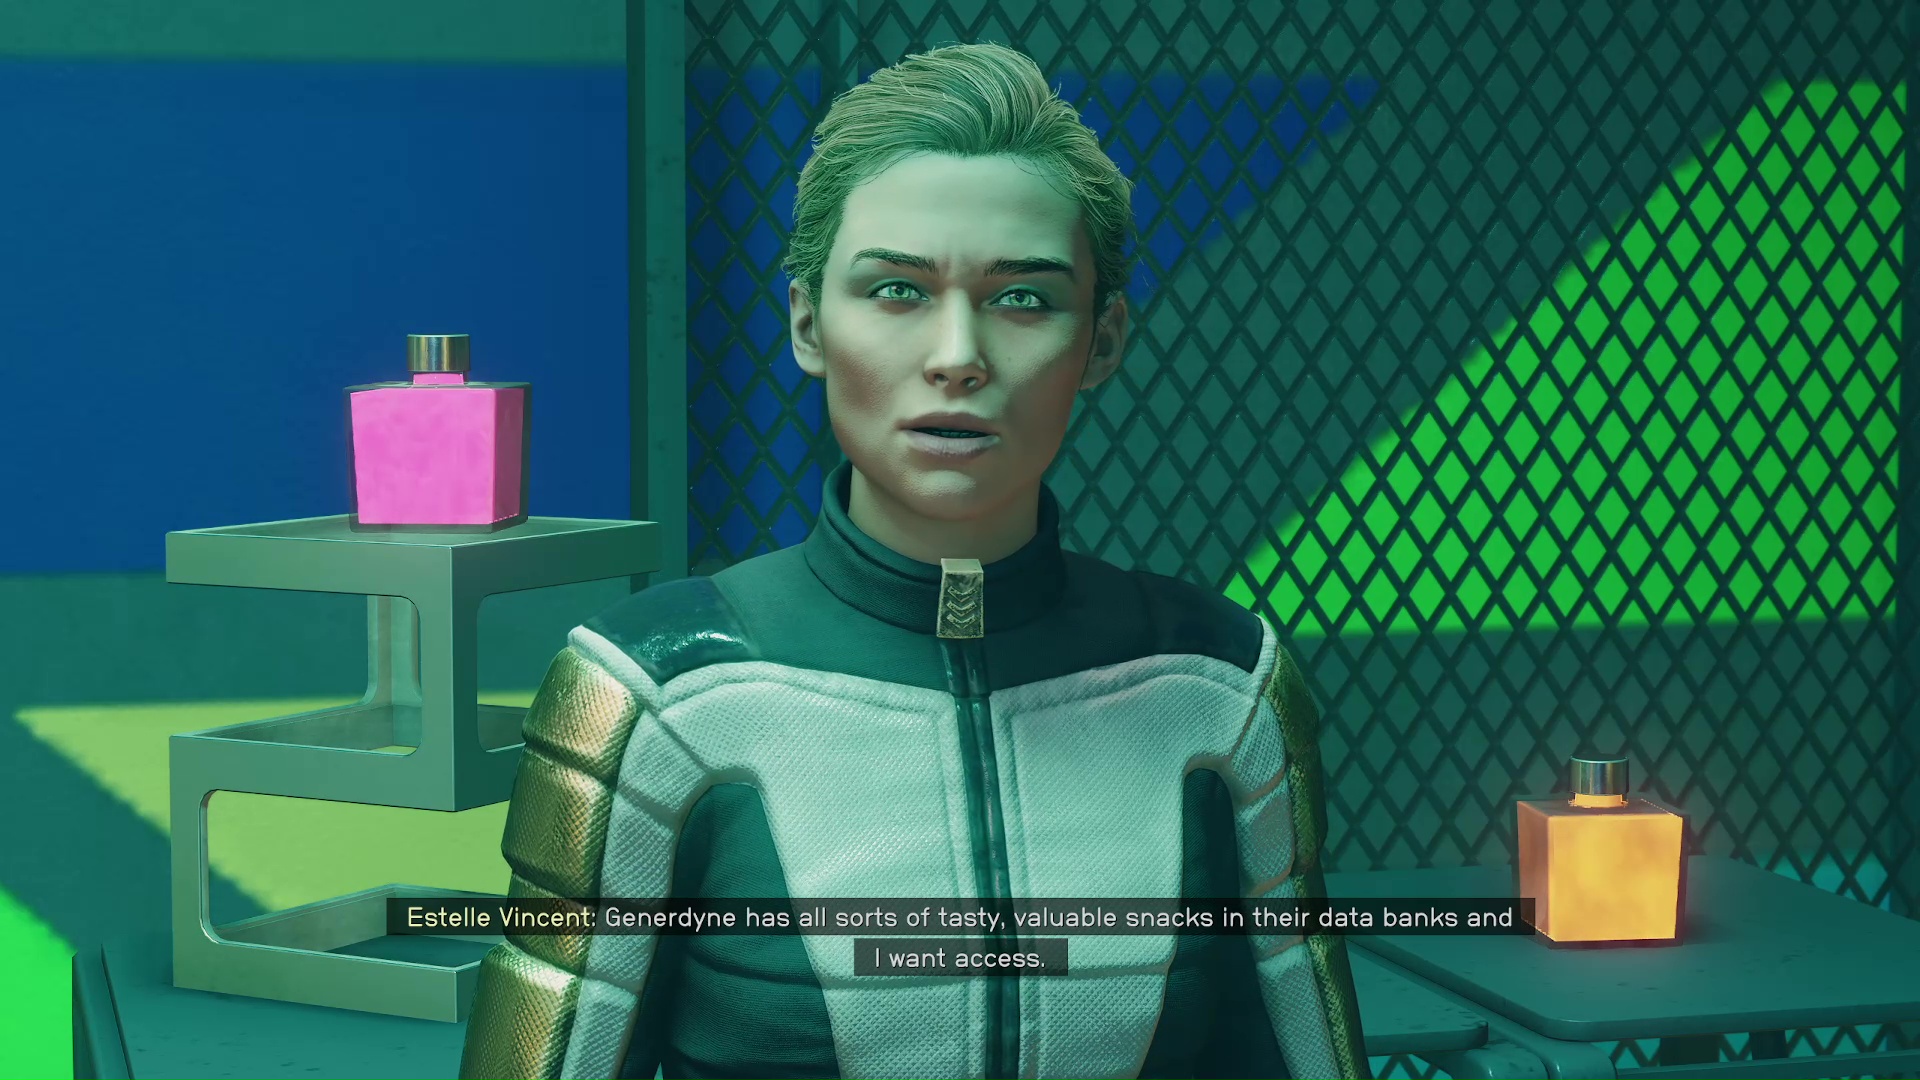
When you get to the City Core, you will see your above a side street that has a sign above it that reads ‘Ebbside’ (Image 3). Keep following the into Madame Sauvage’s Place, then head upstairs, and chat with Estelle Vincent. She will be skeptical of your skills, but ultimately give you the details of the plan, and also recruit you to upload a virus for her (Image 4).
Image 3Image 4
Locate Evidence to Extort Ayumi Komiko (Optional)
You will next have to gain entrance into Generdyne, which is where Ayumi Komiko comes into the picture. You will also notice that you have a second, optional objective; you can go to her office to find some incriminating information. It is worth the trek to the tower office because you’ll hear some context about the mission, but to gain the blackmail info you will have to pass either a persuasion check, or pick a master lock.
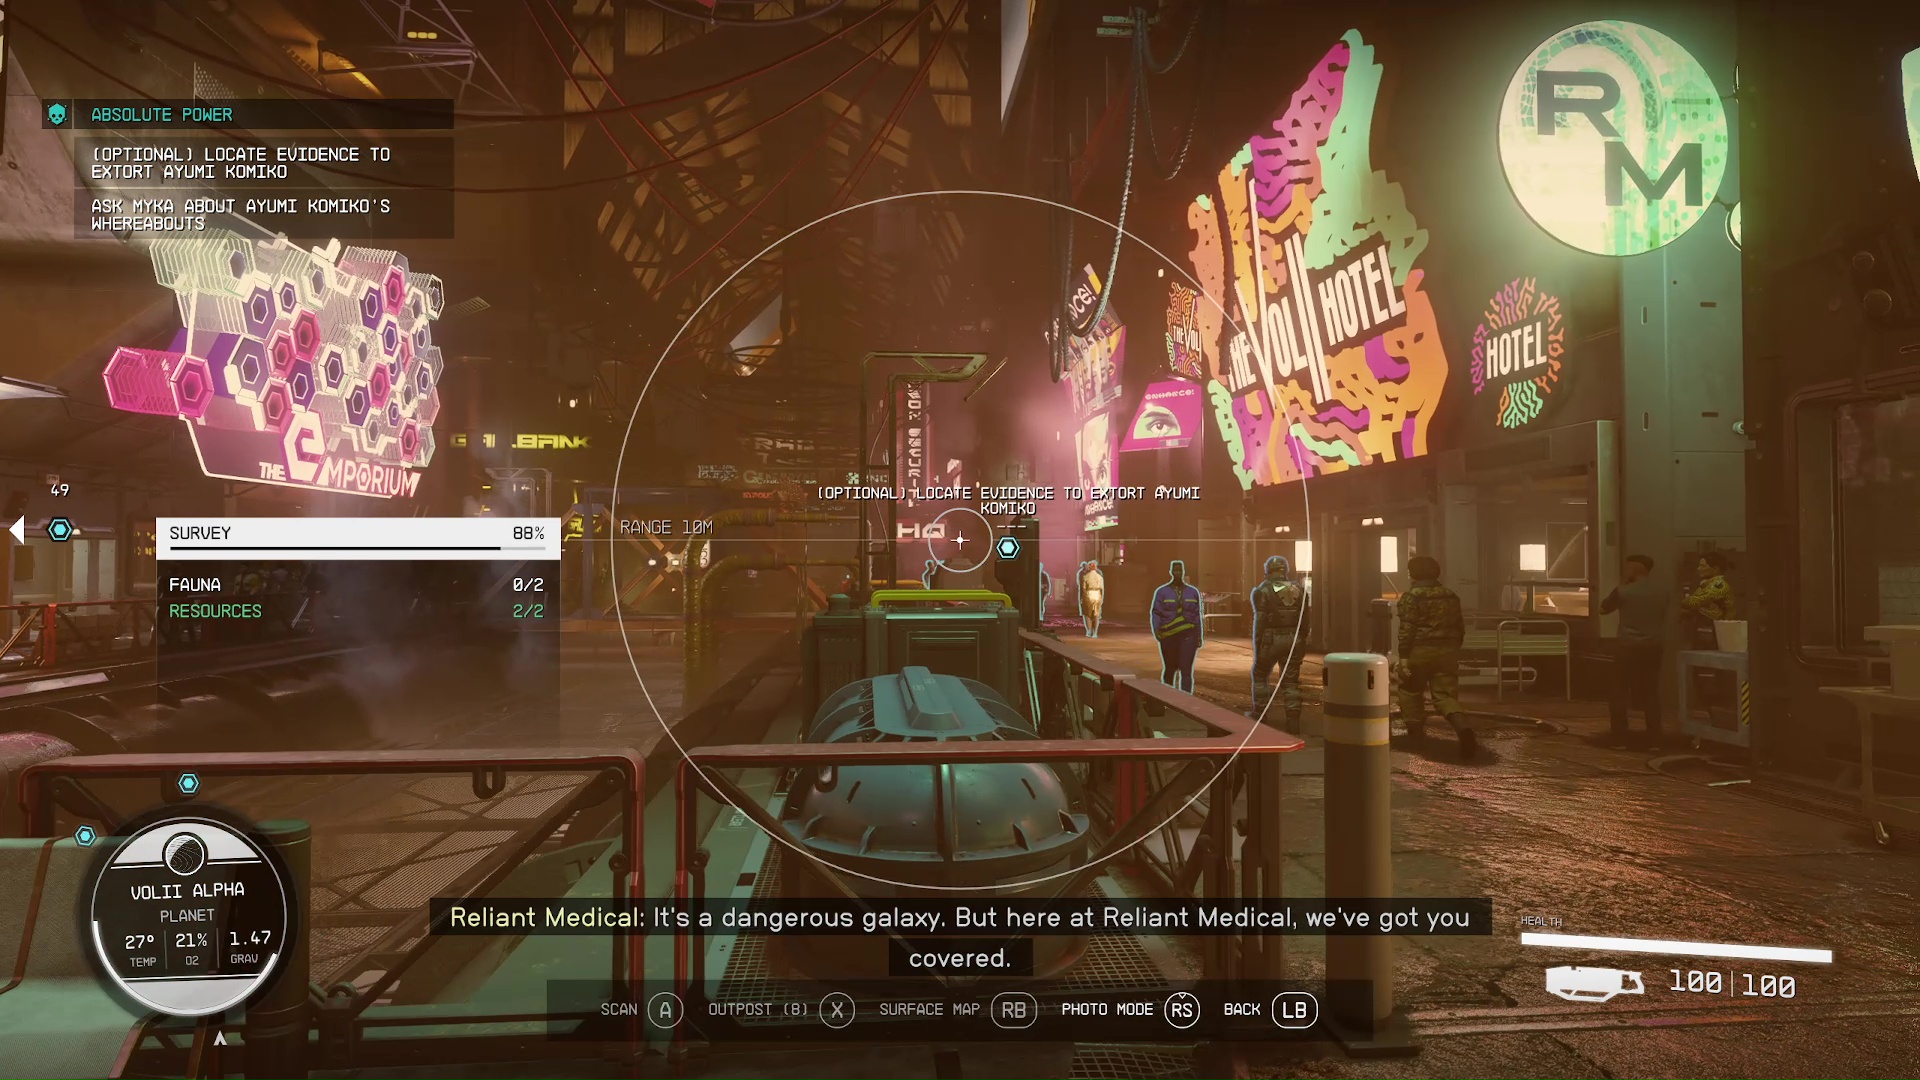
Use your scanner to make sure that you go to the correct (Image 5) – it’ll lead you to the trade tower elevator. When you arrive at the lobby, you’ll be met by Ji Nashida. He will break down the corporate situation at Generdyne, then you will have the opportunity to ask about his boss. This is where you can try to persuade him to help you (Image 6). If you succeed, then he will unlock the safe in her office, which has incriminating evidence.
Image 5Image 6
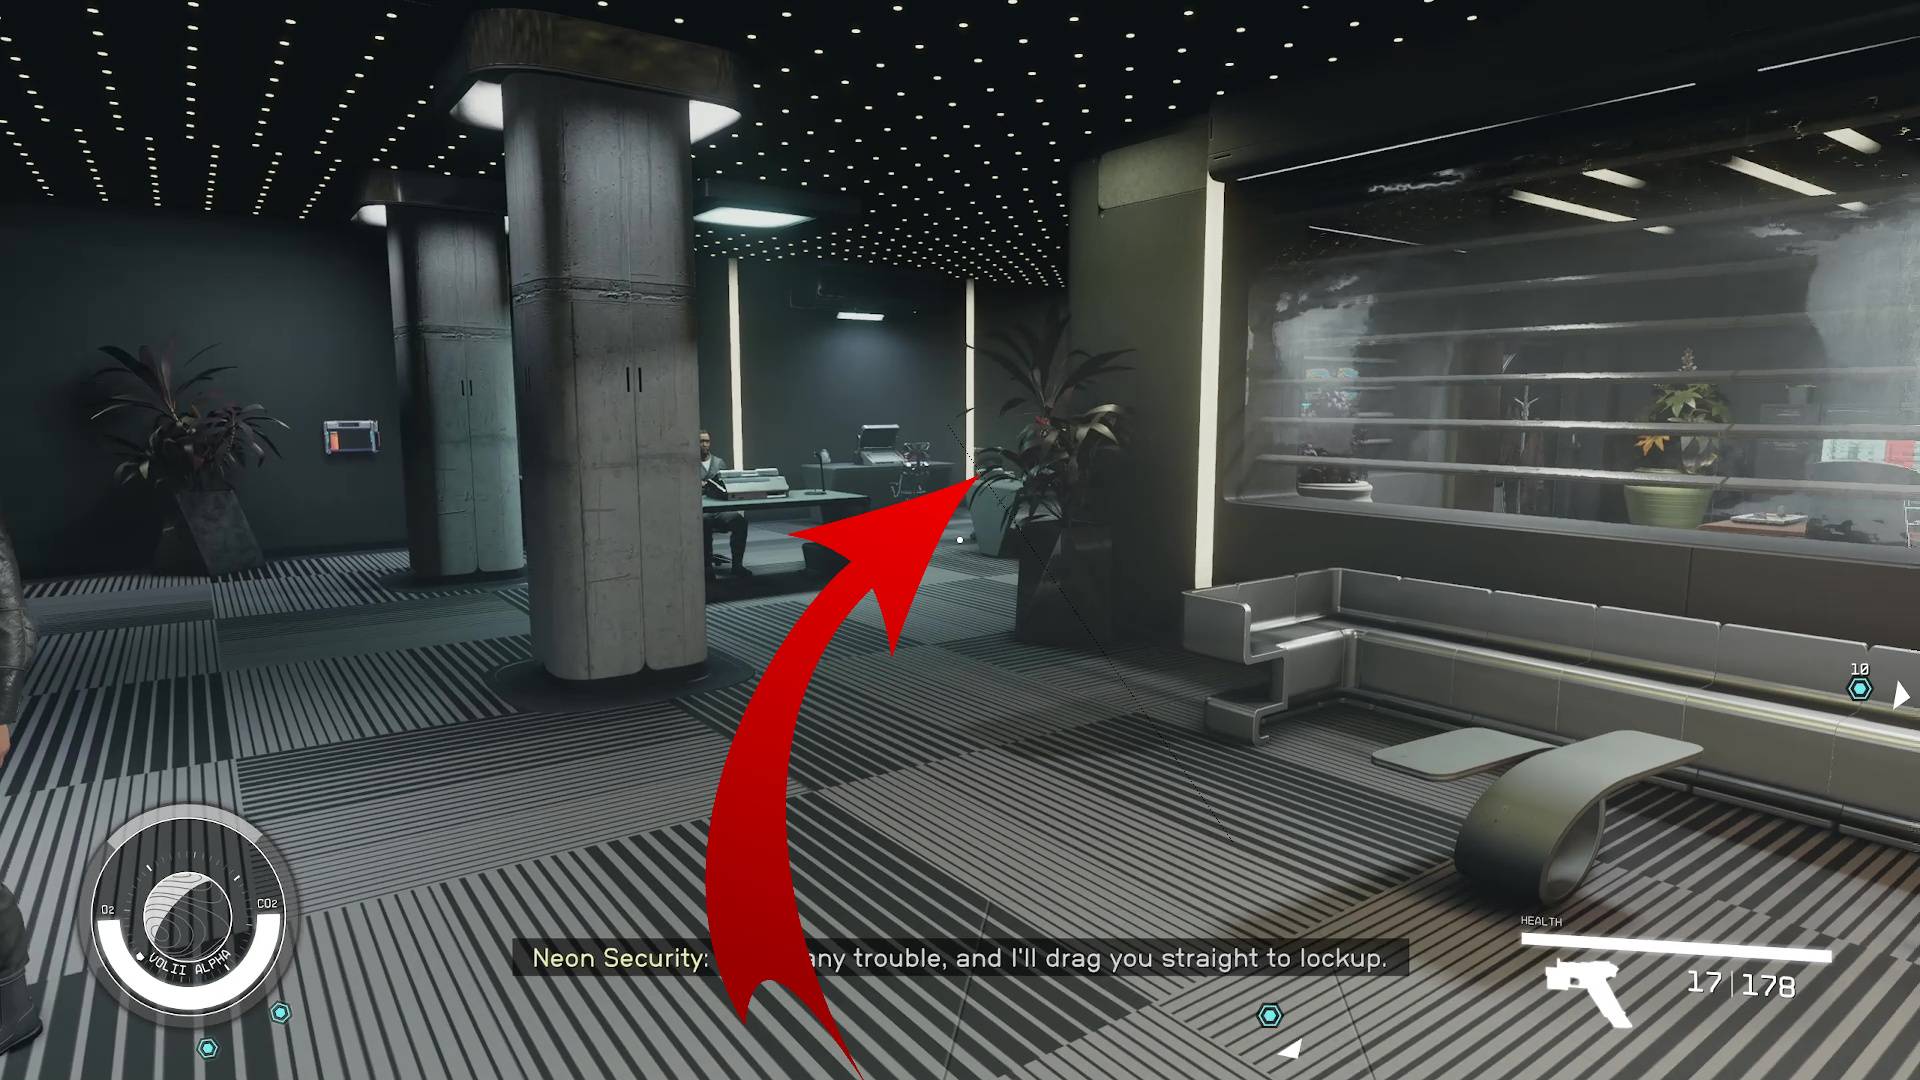
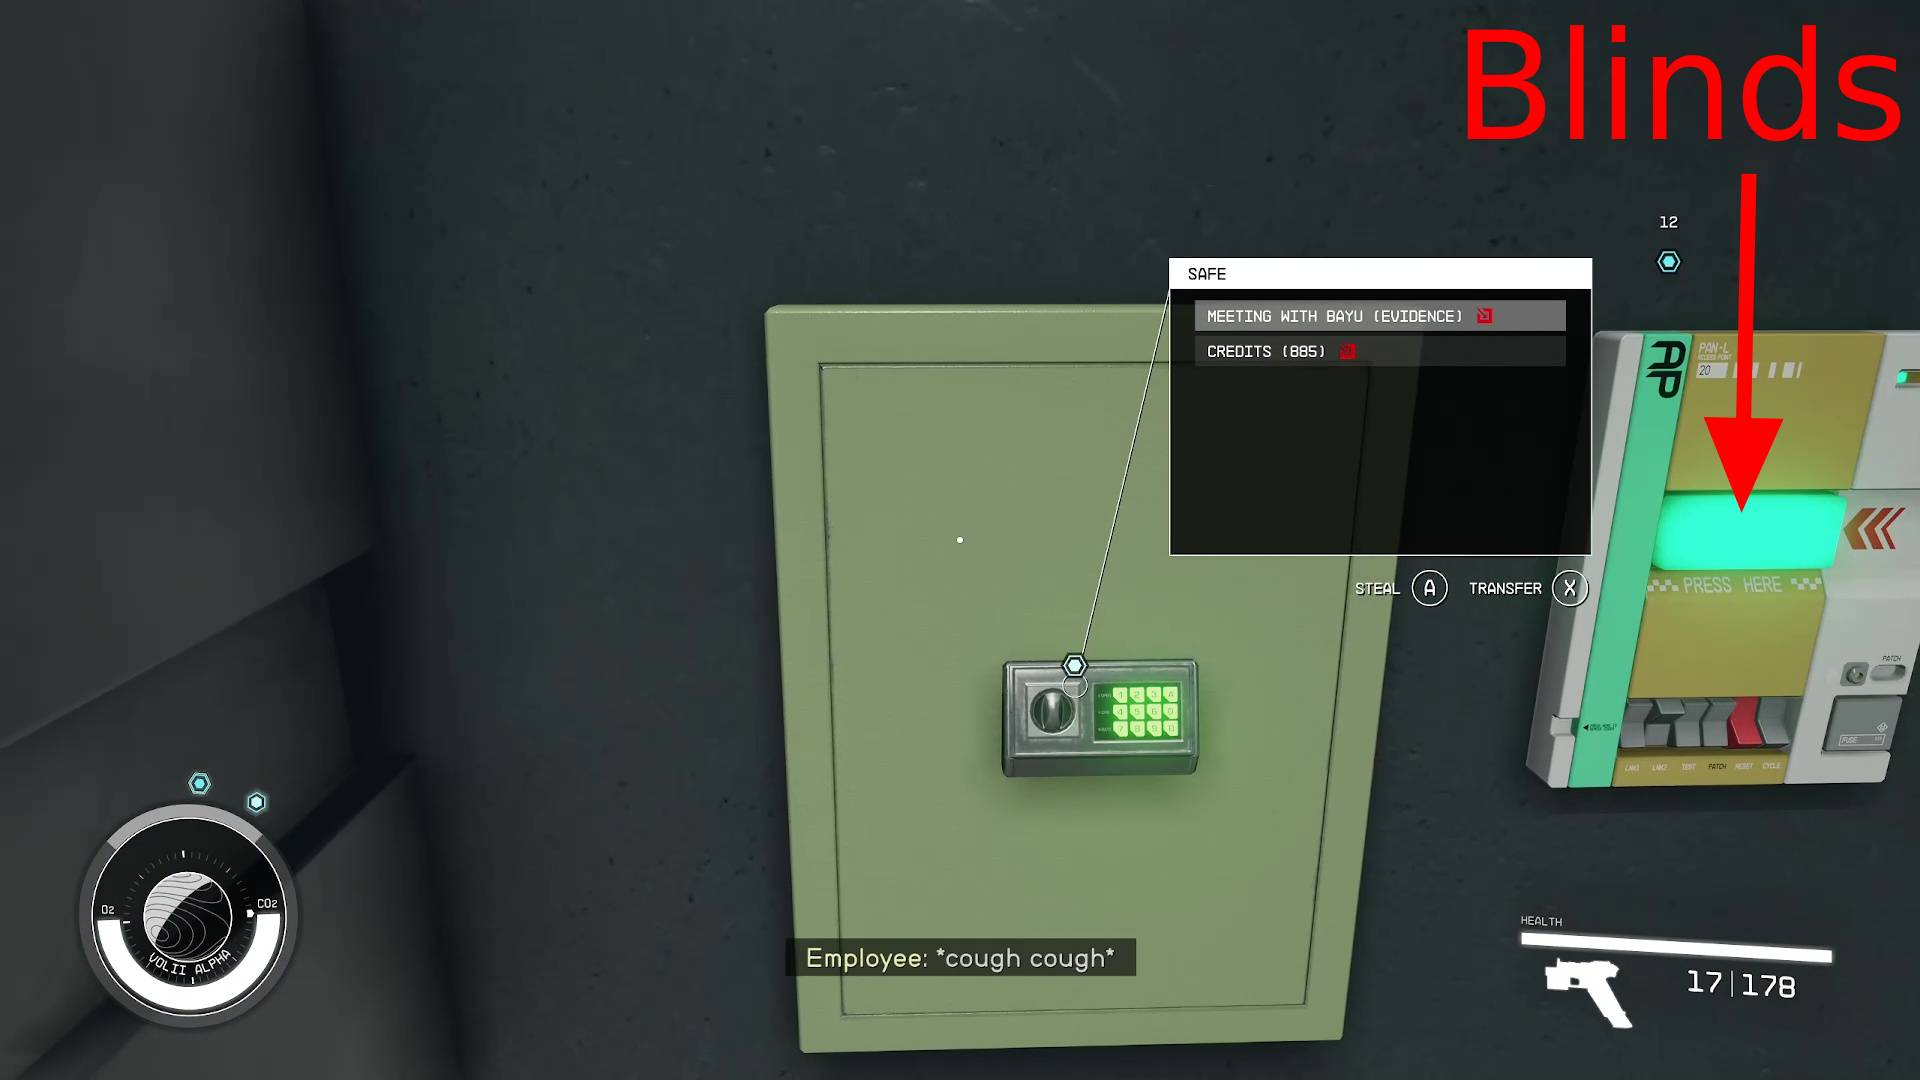
On the other hand, if you fail in trying to persuade Ji, then go through the lobby and turn right to go into her office (Image 7). Close the door behind you, then use the panel next to the safe to close the blinds so no one can see you inside the office (Image 8). If you have a high security level, then you can pick the master-level lock to acquire the evidence. This evidence is also part of the Burden of Proof mission.
Image 7Image 8
Ask Myka About Ayumi Komiko’s Whereabouts
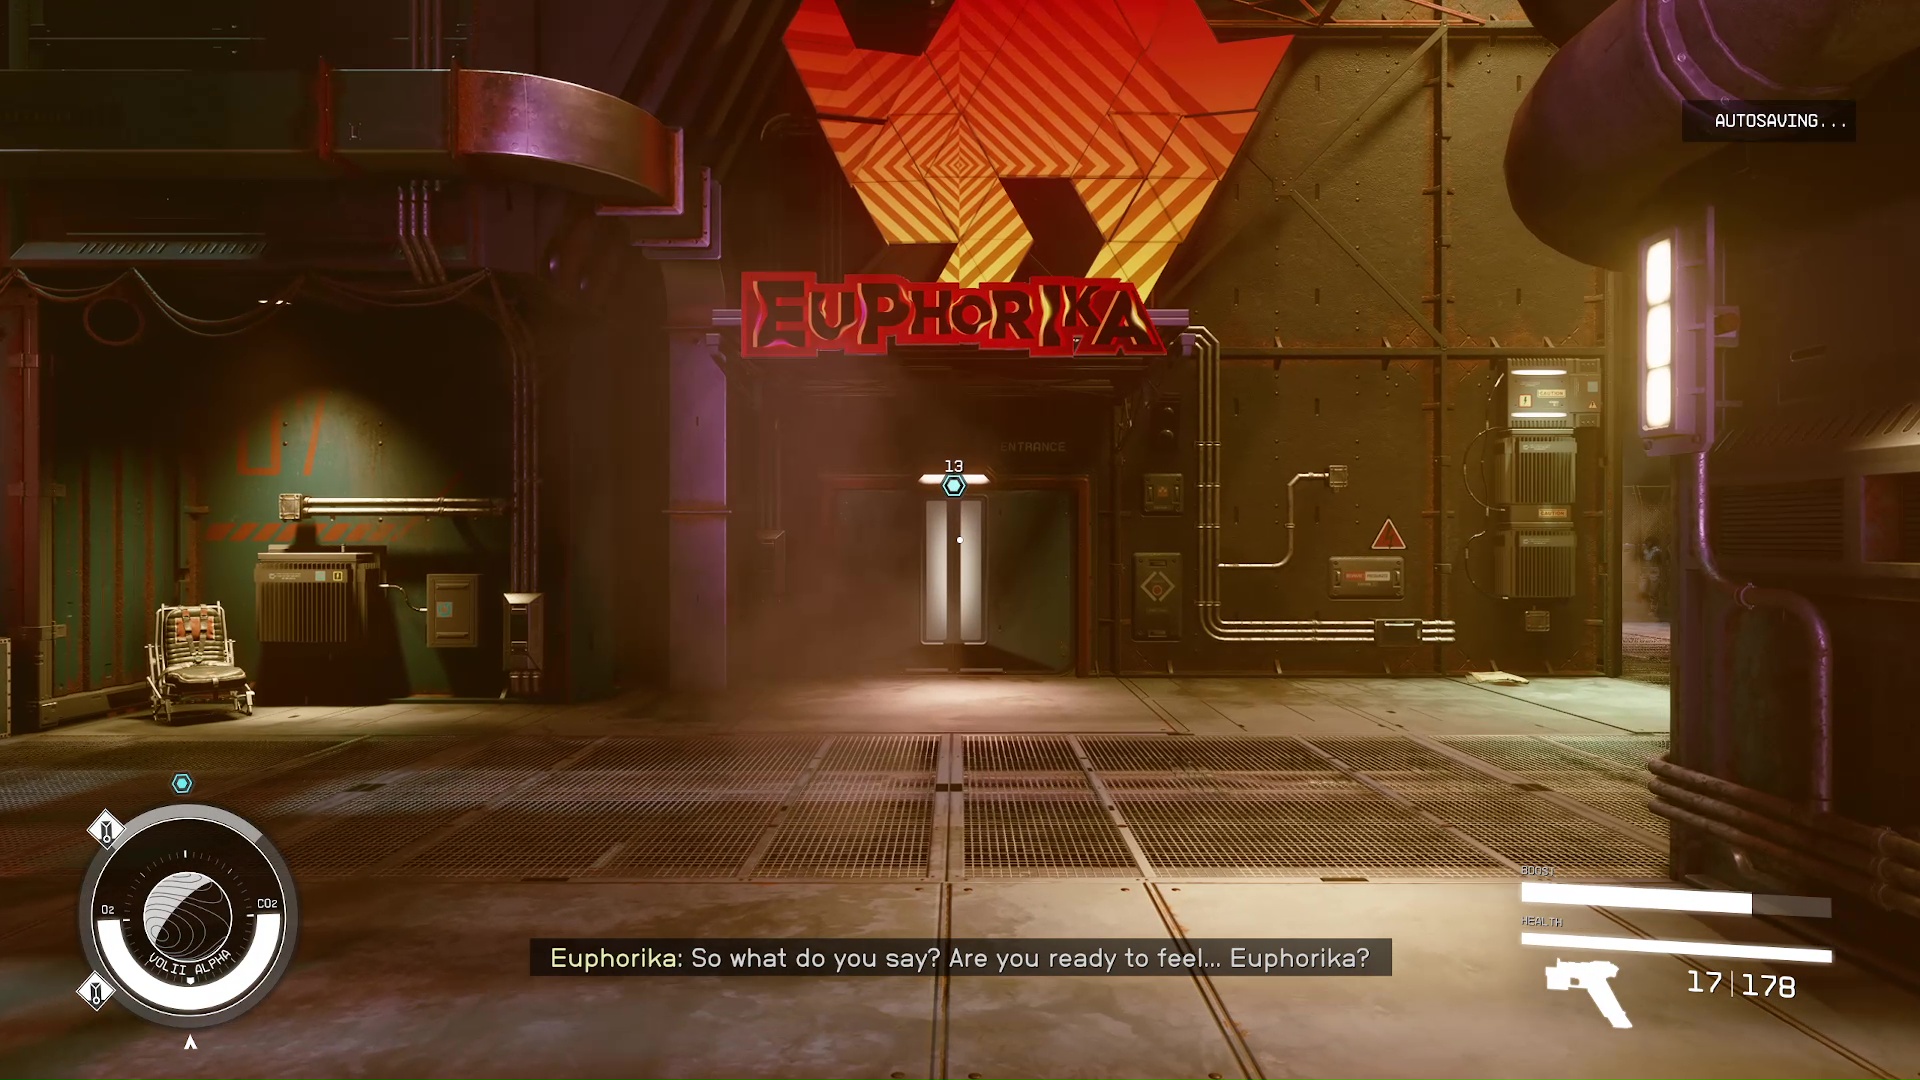
The main objective for this part is making Ayumi give you a way into Generdyne. Follow the to the other side of Ebbside, and it will lead you to an exclusive club, Euphorika (Image 9). Myka is behind the bar; she will tell you that Ayumi is in the members’ lounge, which you will have to pay 5000 credits to enter (Image 10). We couldn’t find a way out of paying this fee; you can’t pickpocket the key off her, and the other dialogue options didn’t alter the outcome.
Image 9Image 10
Ayumi’s Offer (Evidence)
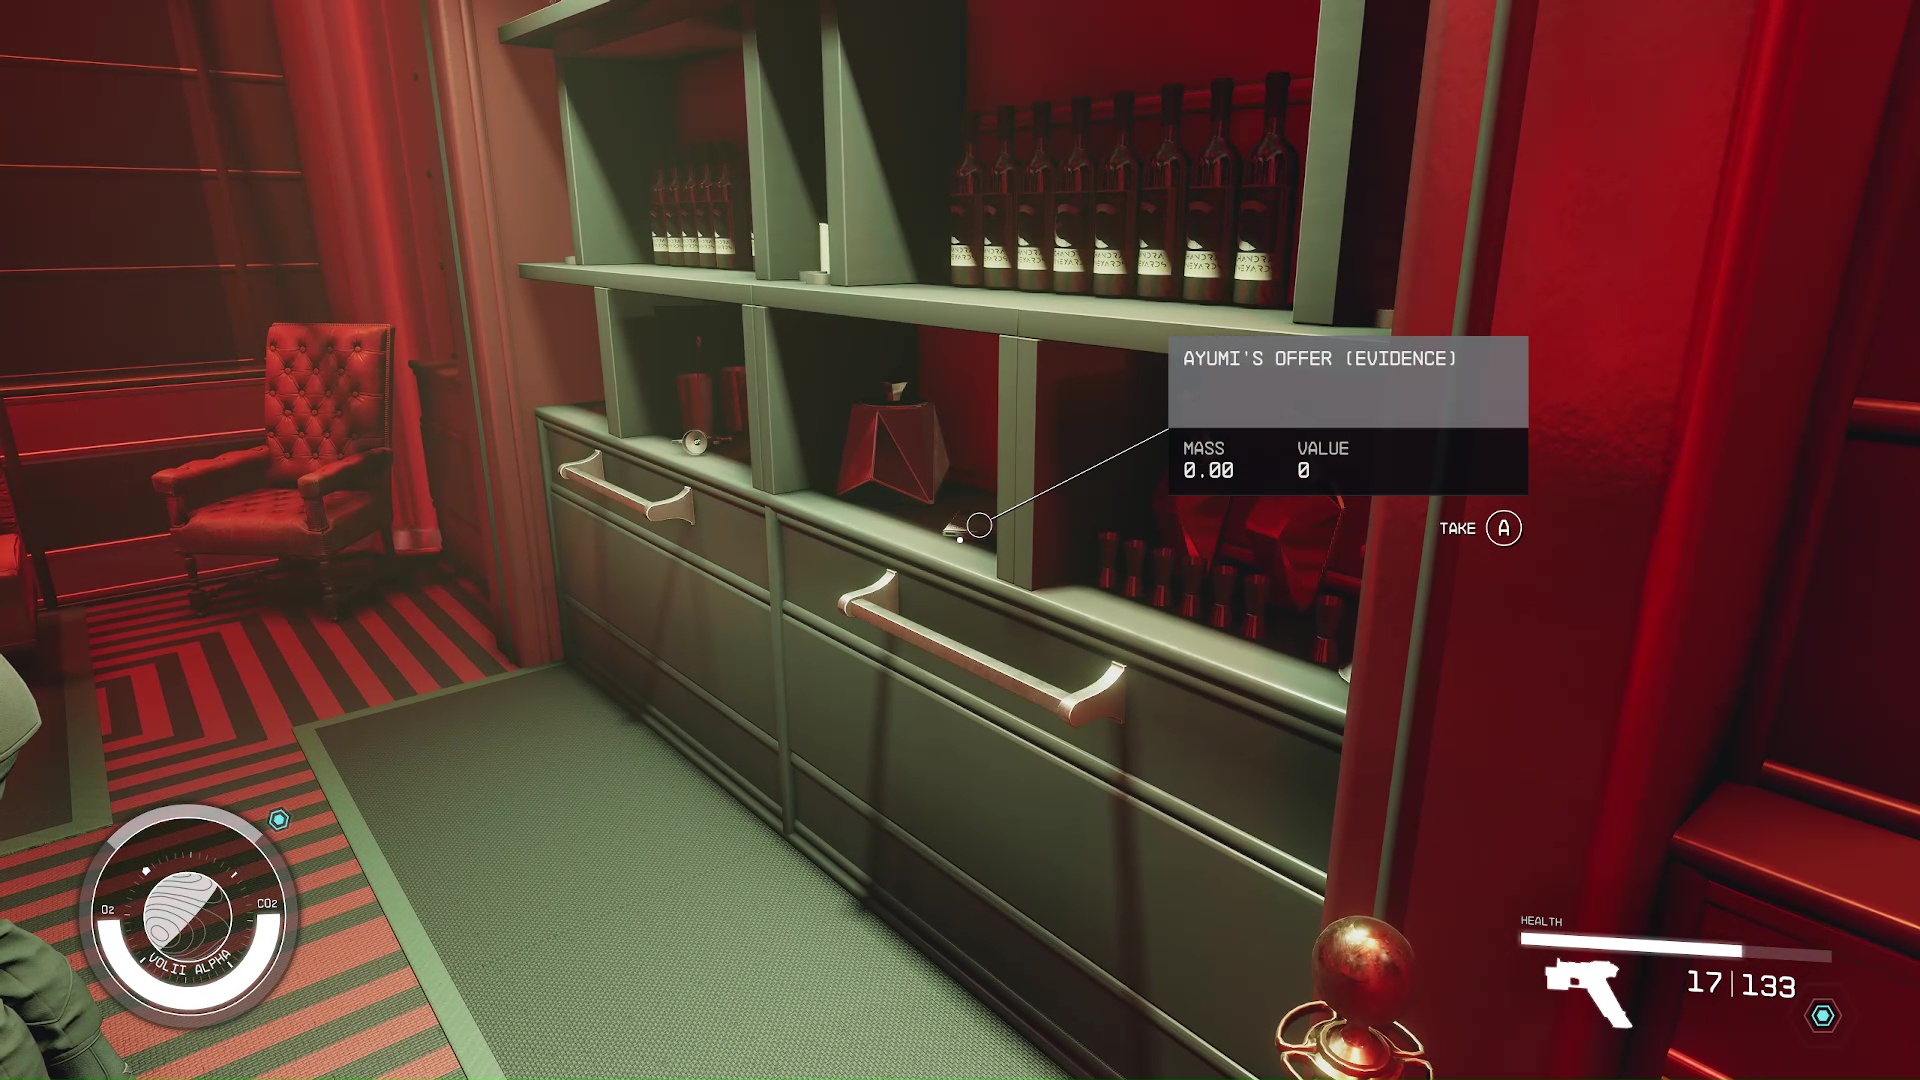
Now that you have access to the members’ lounge, head up the stairs in Euphorika, but don’t talk to Ayumi yet. Instead, take a look behind the bar on the counter. Here, you will find a piece of evidence for the Burden of Proof mission, that’ll come in handy if you are helping SysDef (Image 11).
Image 11
Acquire the Generdyne Passkey from Ayumi Komiko
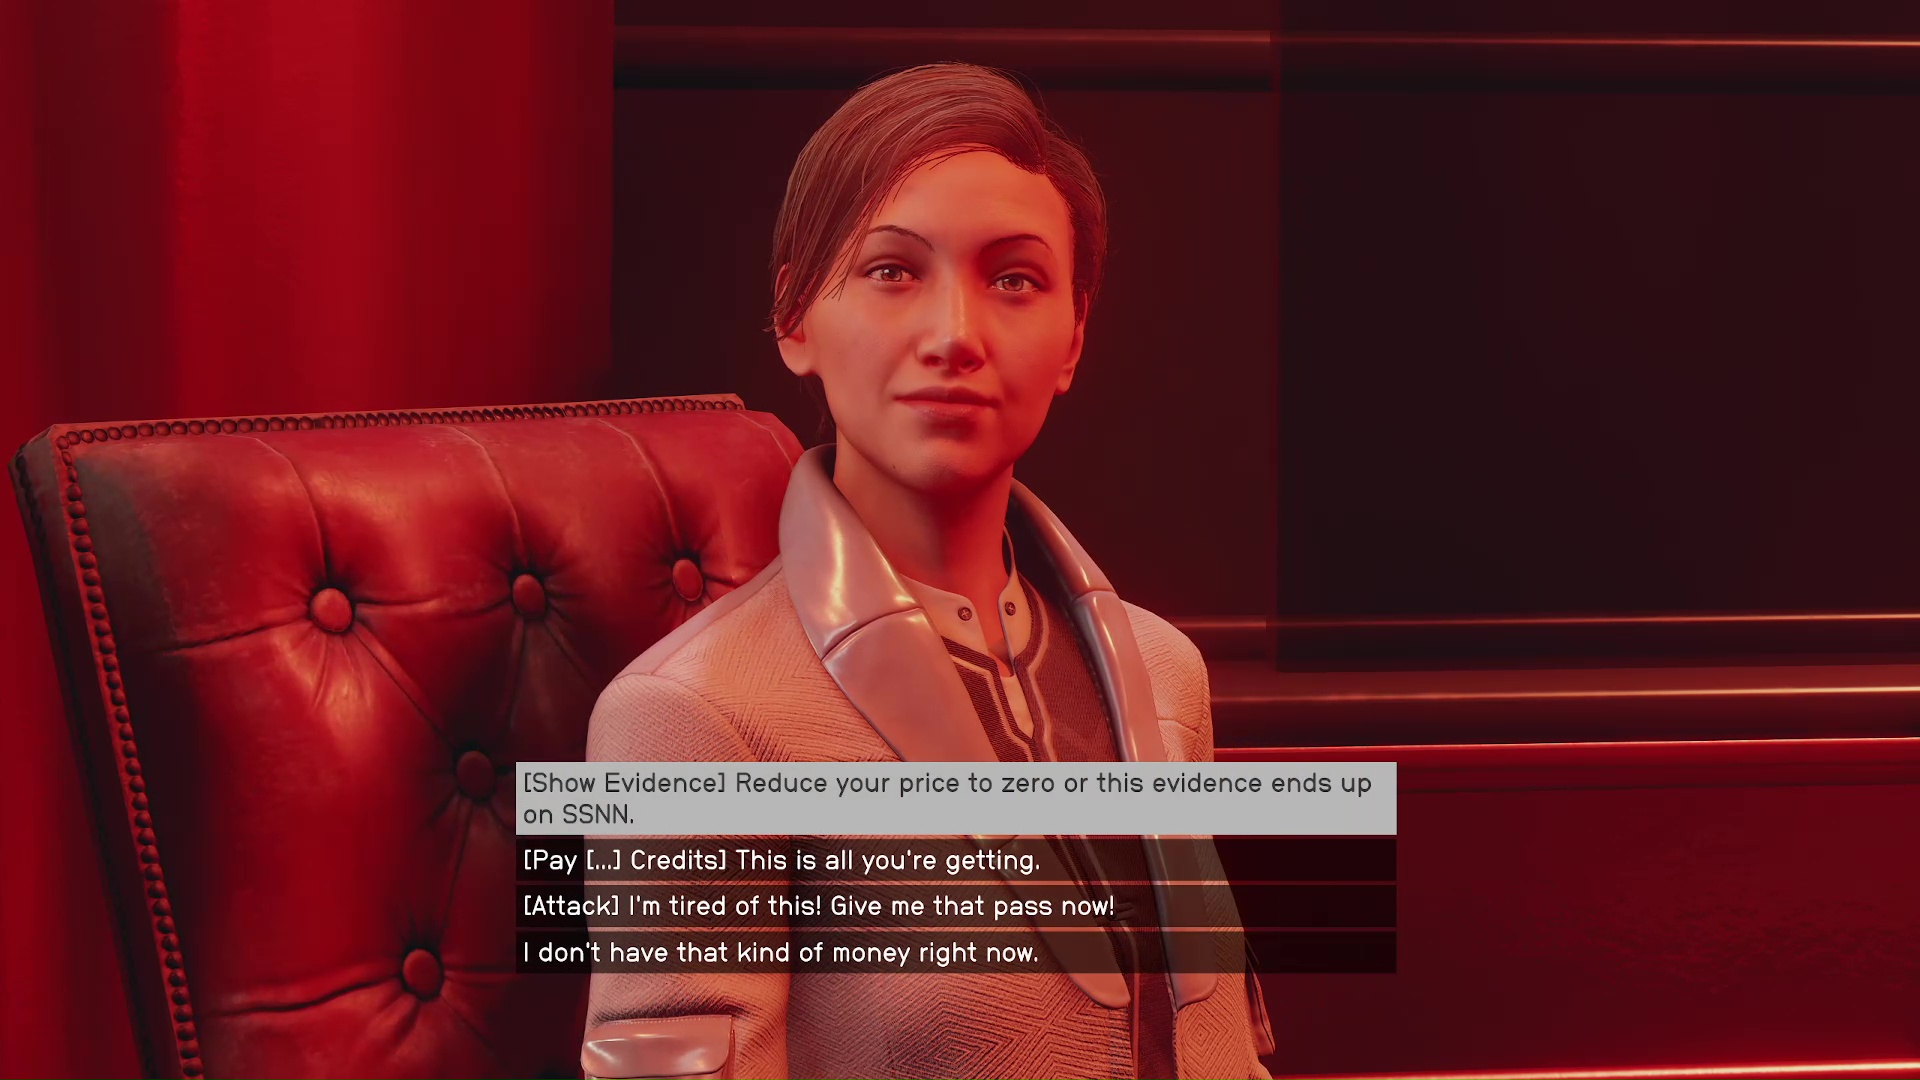
When you chat with Ayumi in the back members’ lounge, there are three ways you can get the passkey, and one of them is dependent on whether you did the optional task of grabbing the extortion information (Image 12). The three ways are:
Paying her 4000 credits – If you try to intimidate her by claiming to be Crimson Fleet, then the dialogue will end with her saying that you can pay her.
Killing her and taking the passkey – She has bodyguards, but they’re not that tough. Also, guards won’t be notified.
Extorting her with evidence – if you stole evidence from her office safe (see above / Image 8), you can get her to give you the passkey.
Image 12
Both extorting her and killing her are listed as optional missions objectives, but paying her will have to be discovered through dialogue.
Enter Generdyne Through the Storage Entrance
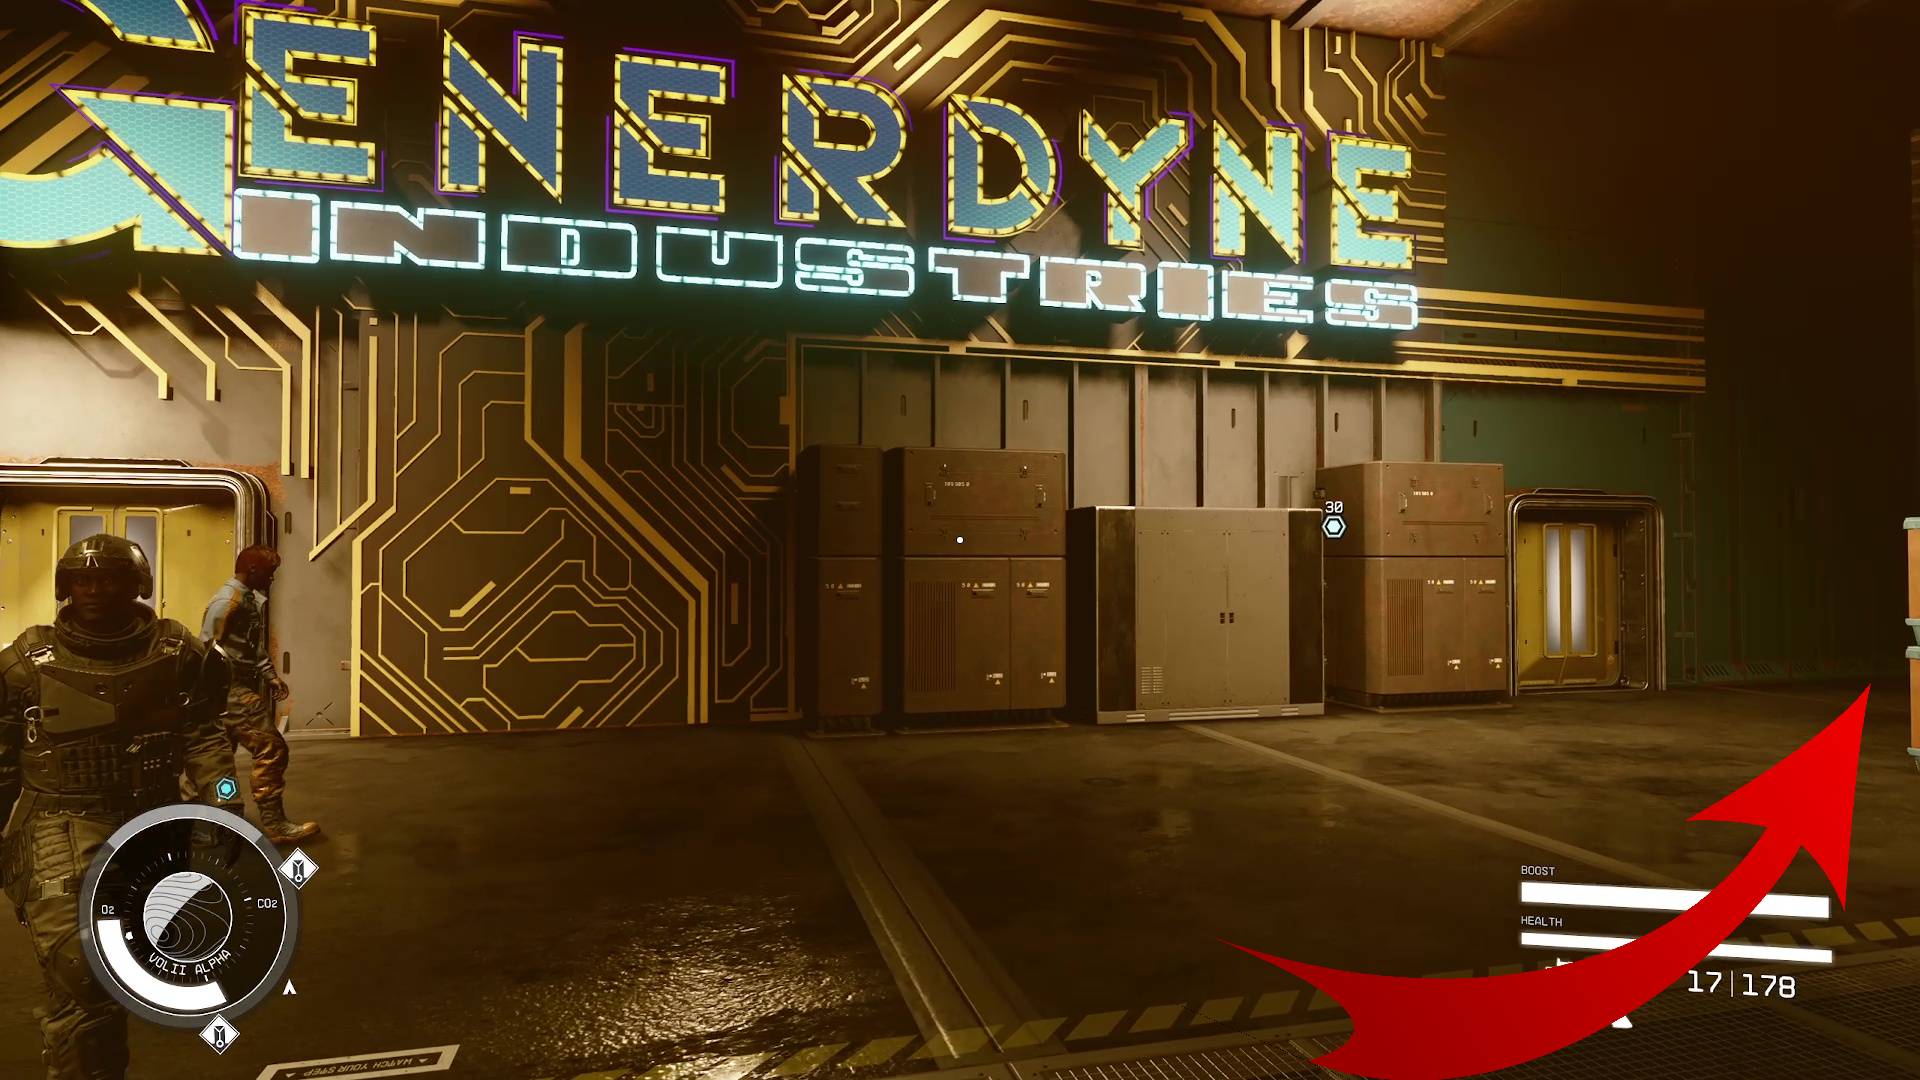
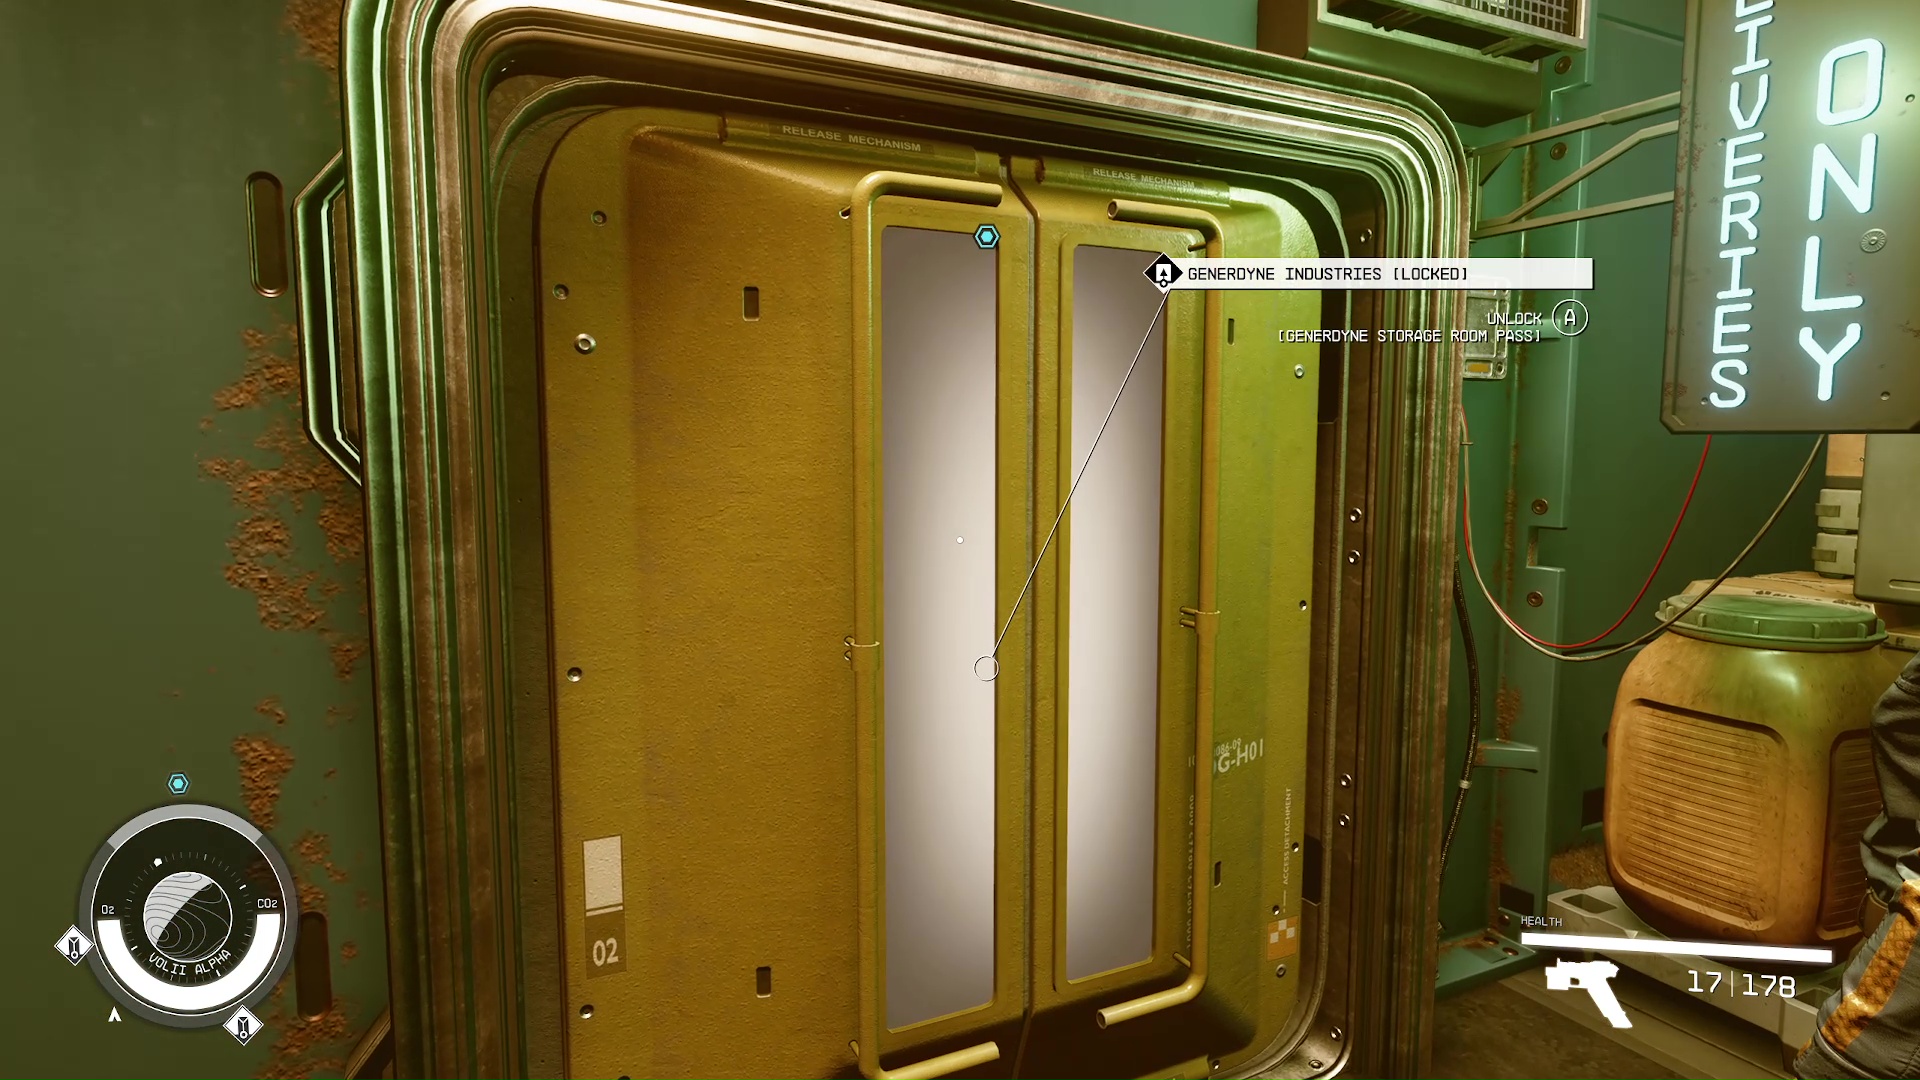
Let the guide you to the underbelly, then continue on till it leads to the right side of the Generdyne building (Image 13). Around the side, you will see a door that can only be opened with the passkey (Image 14).
Image 13Image 14
Proceed to the Generdyne Power Core
Now we are in the sneak zone, so you will want to put your stealth pants on, and you will want to save the game often. Unfortunately, you can’t follow your scanner for these next objectives, as the path it gives you isn’t the stealth path. However, if you are just shooting your way through the mission, then you can simply follow the scanner without any problems.
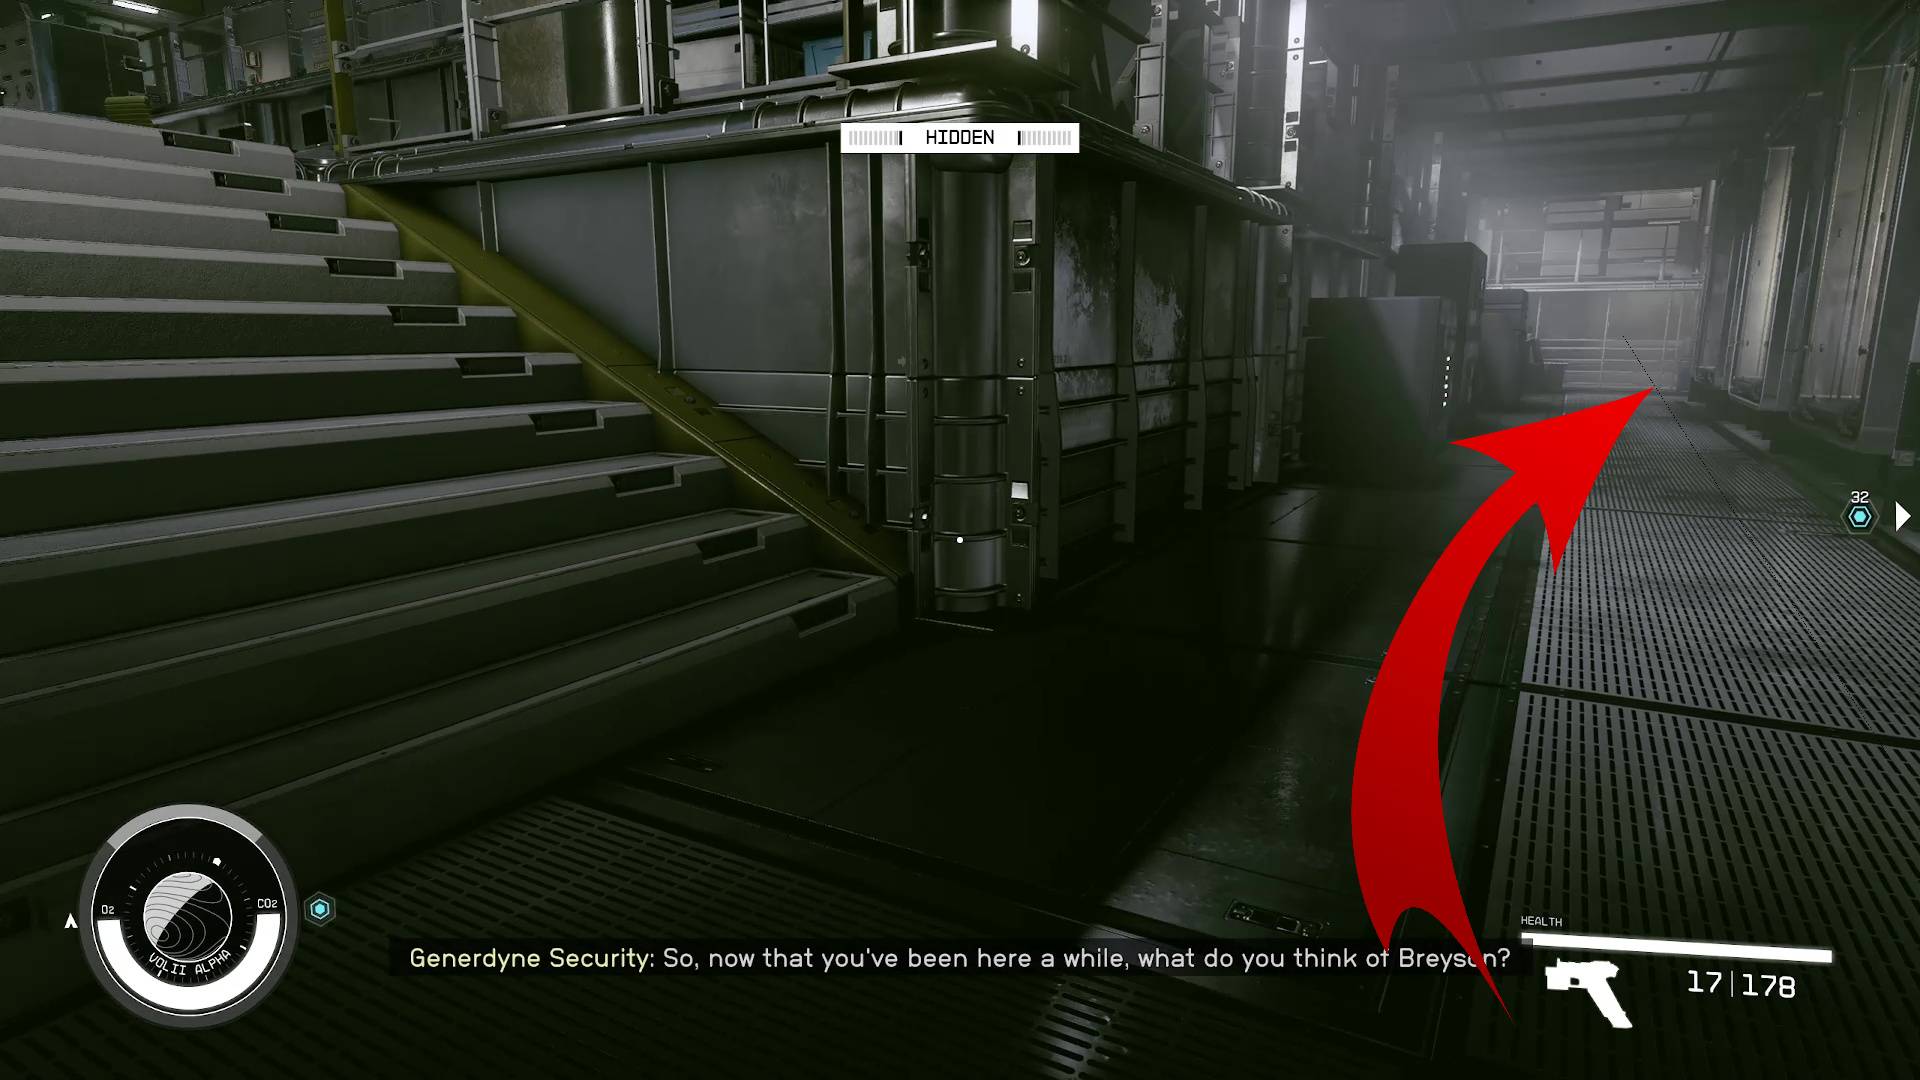
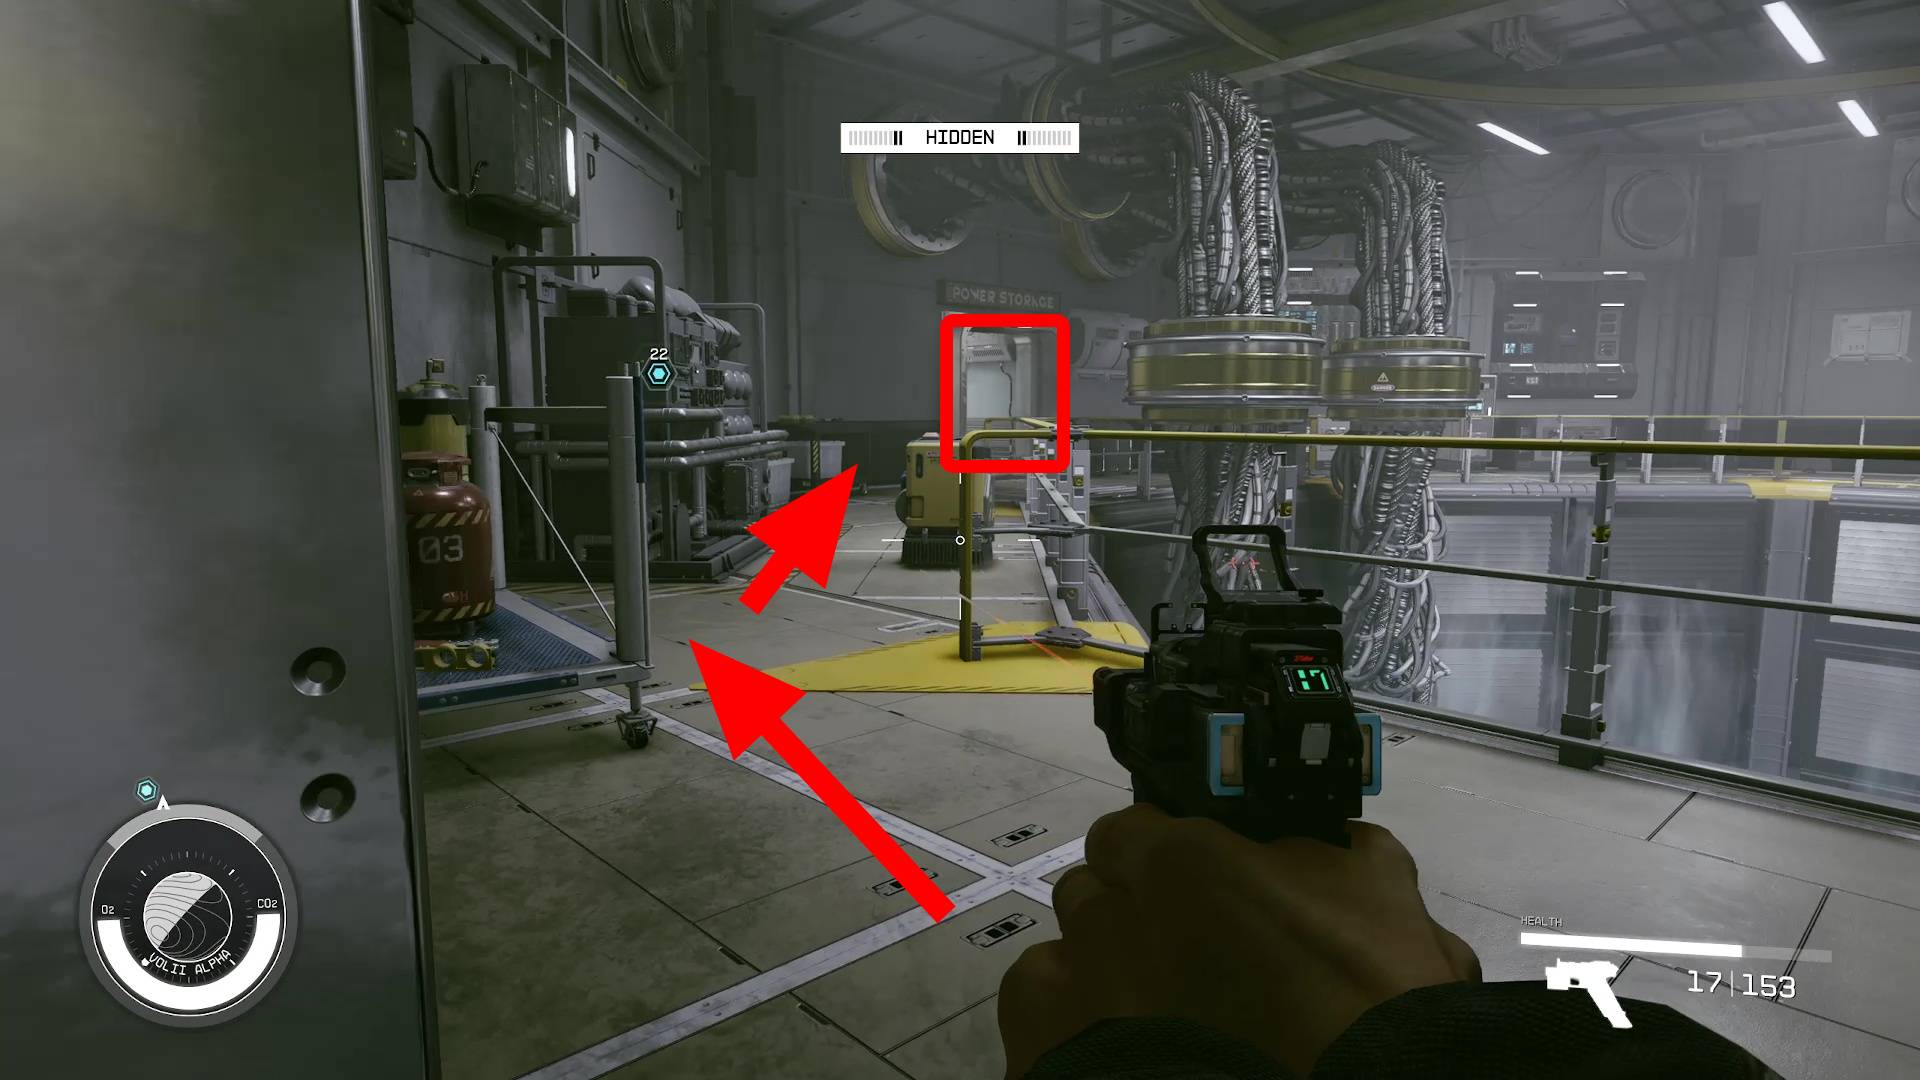
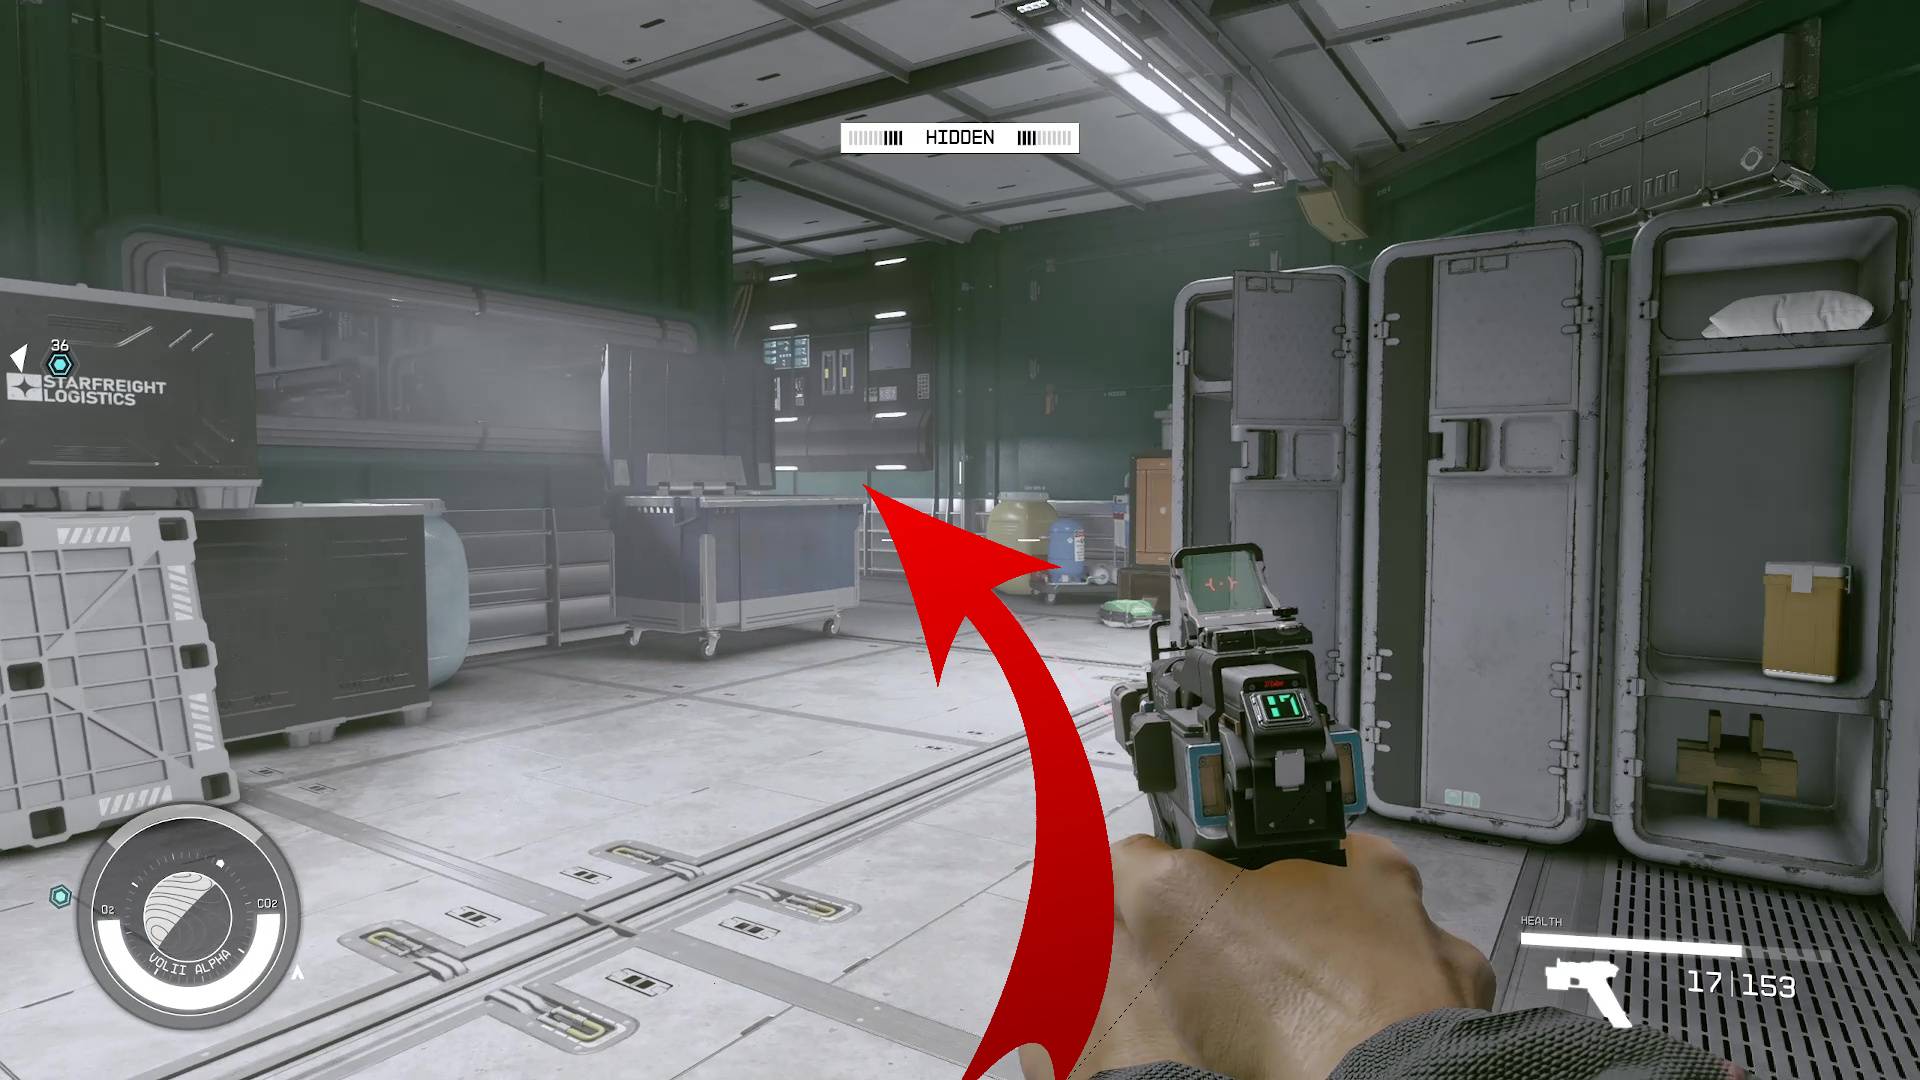
When you come through the door, you will see a vent off to your right (Image 15); open it up and head through. Sneaking out of the vent, you will see stairs up to your left and a path by a window to your right, stay to the right (Image 16).
Image 15Image 16
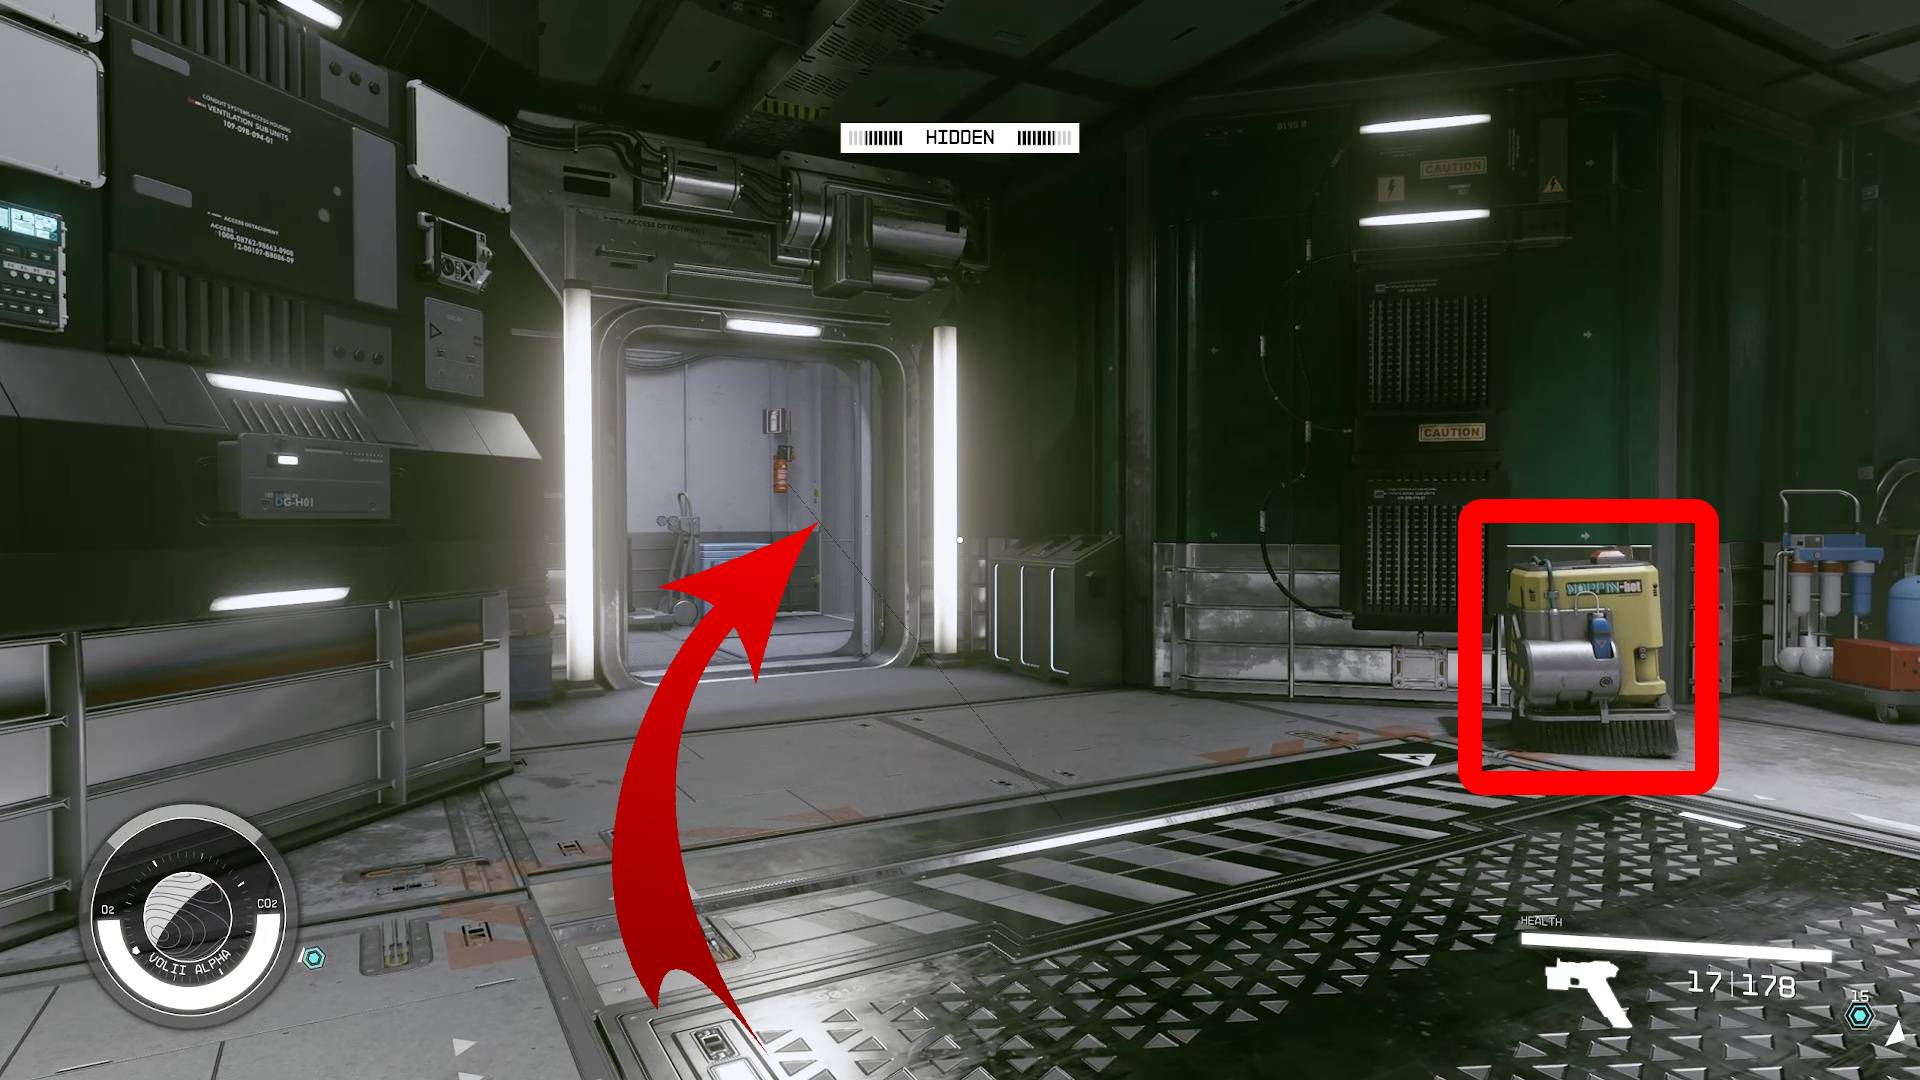
You will hear some conversation from the workers above you. Follow the path to the right, and it will go up some stairs. There will be a door there (Image 17), open it and go through. You will see a little box-shaped cleaning robot in this hallway. It will ‘detect’ you while you’re sneaking, but it won’t raise the alarm (Image 18). You will see a lot of these little robots while sneaking, just ignore them. Next, Go through the doorway to your left (Image 18).
Image 17Image 18
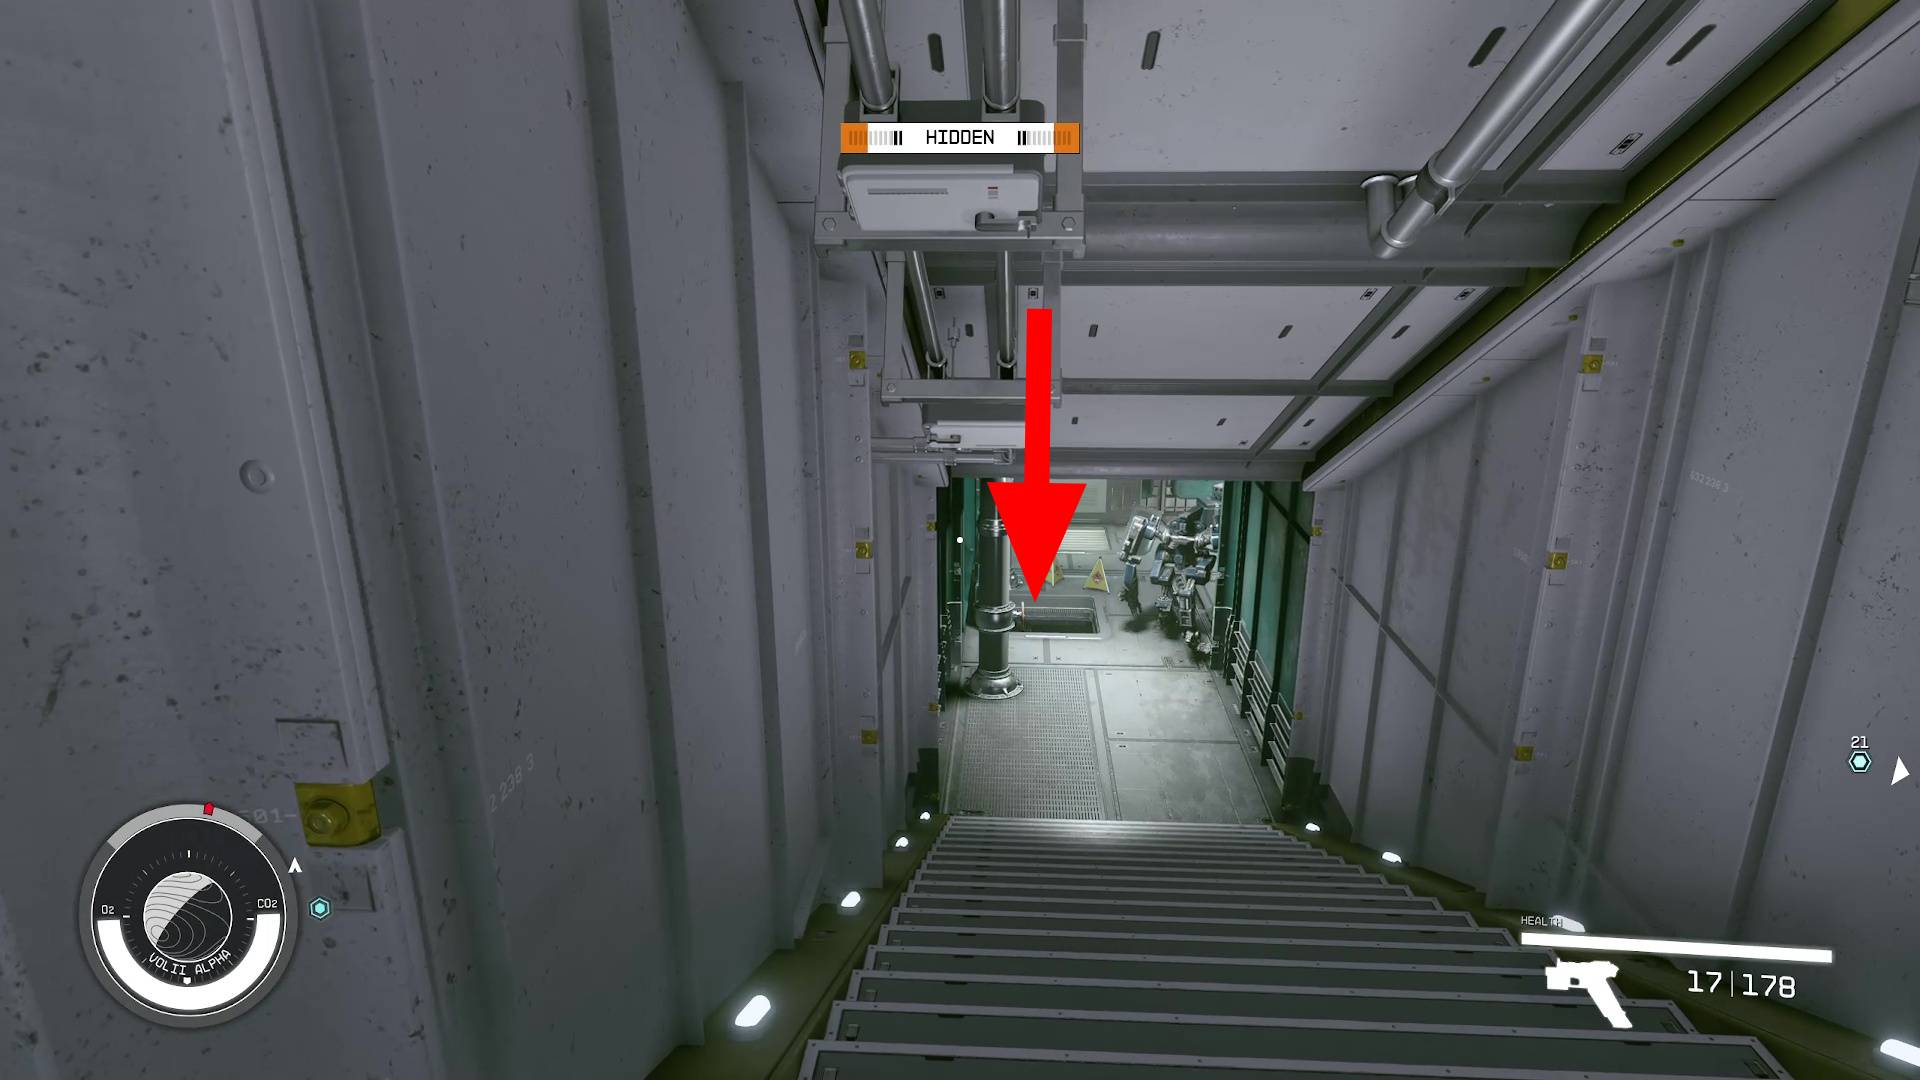
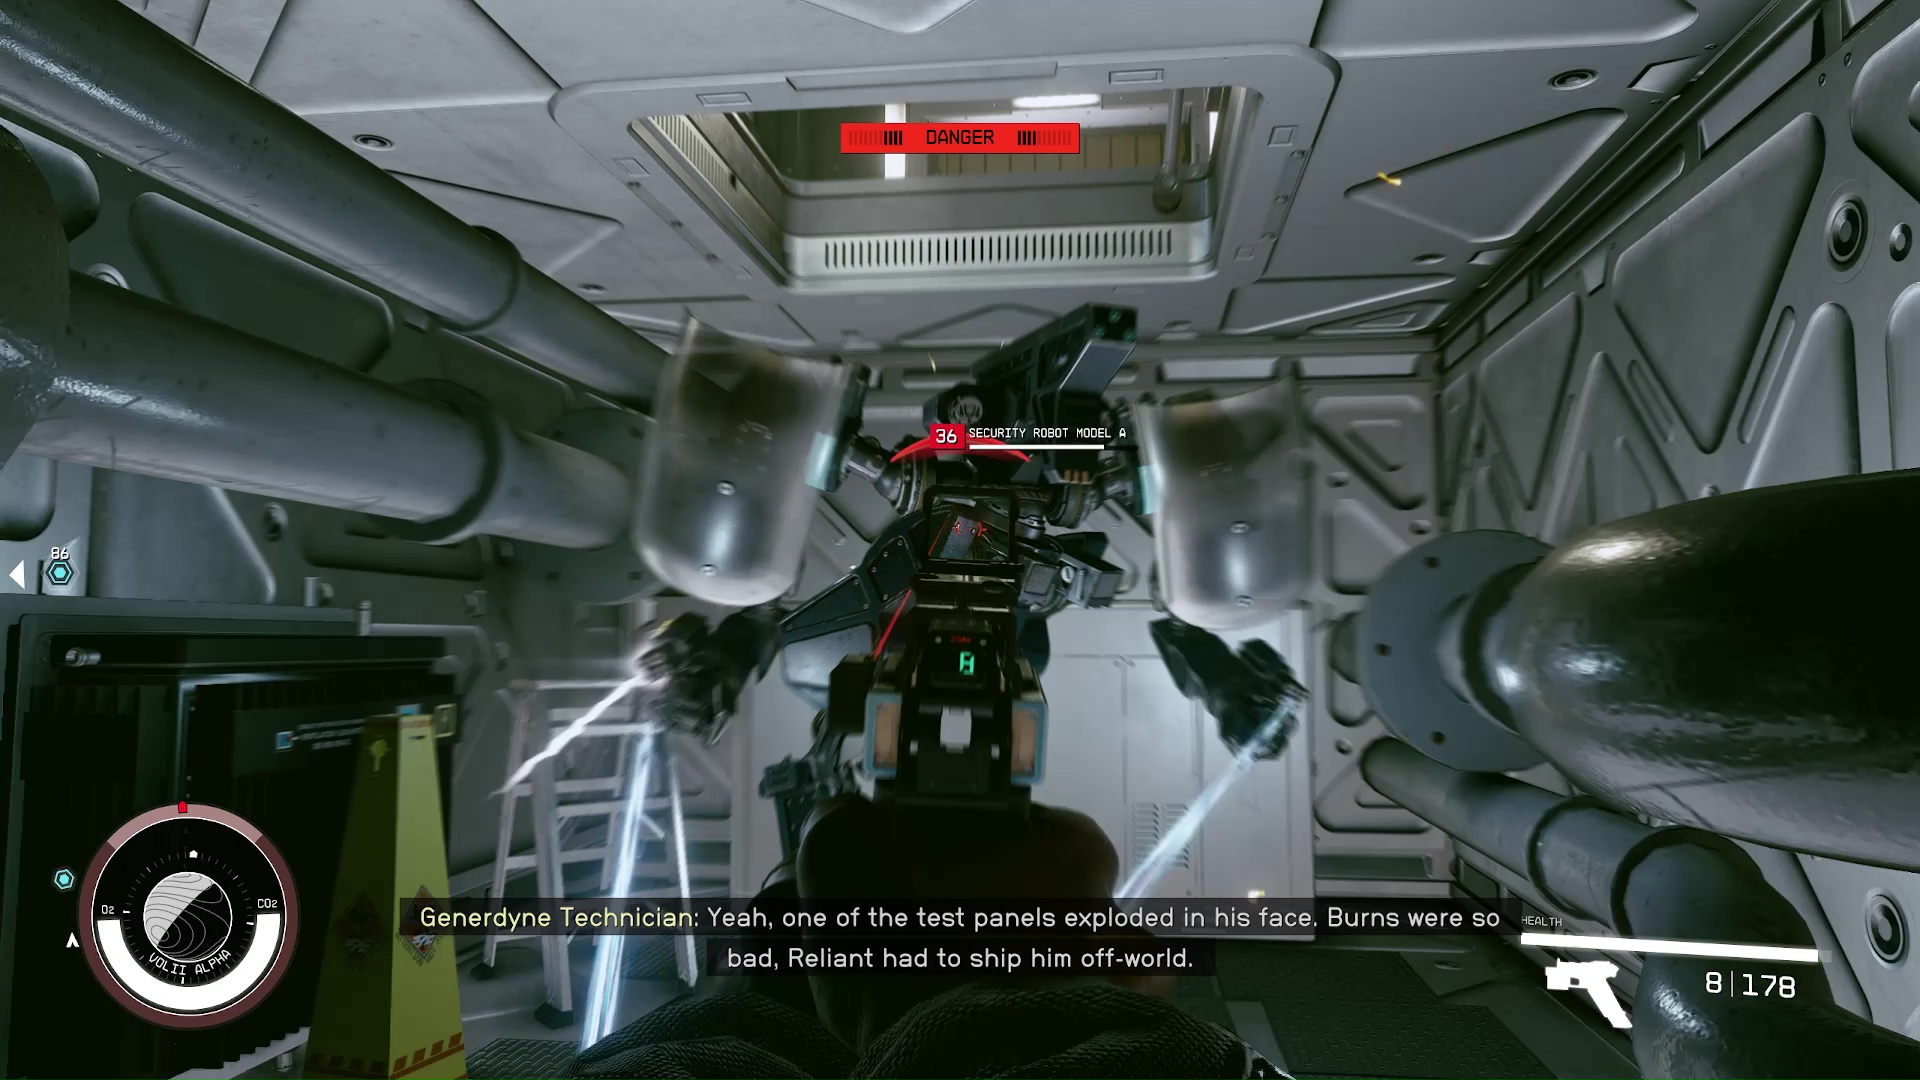
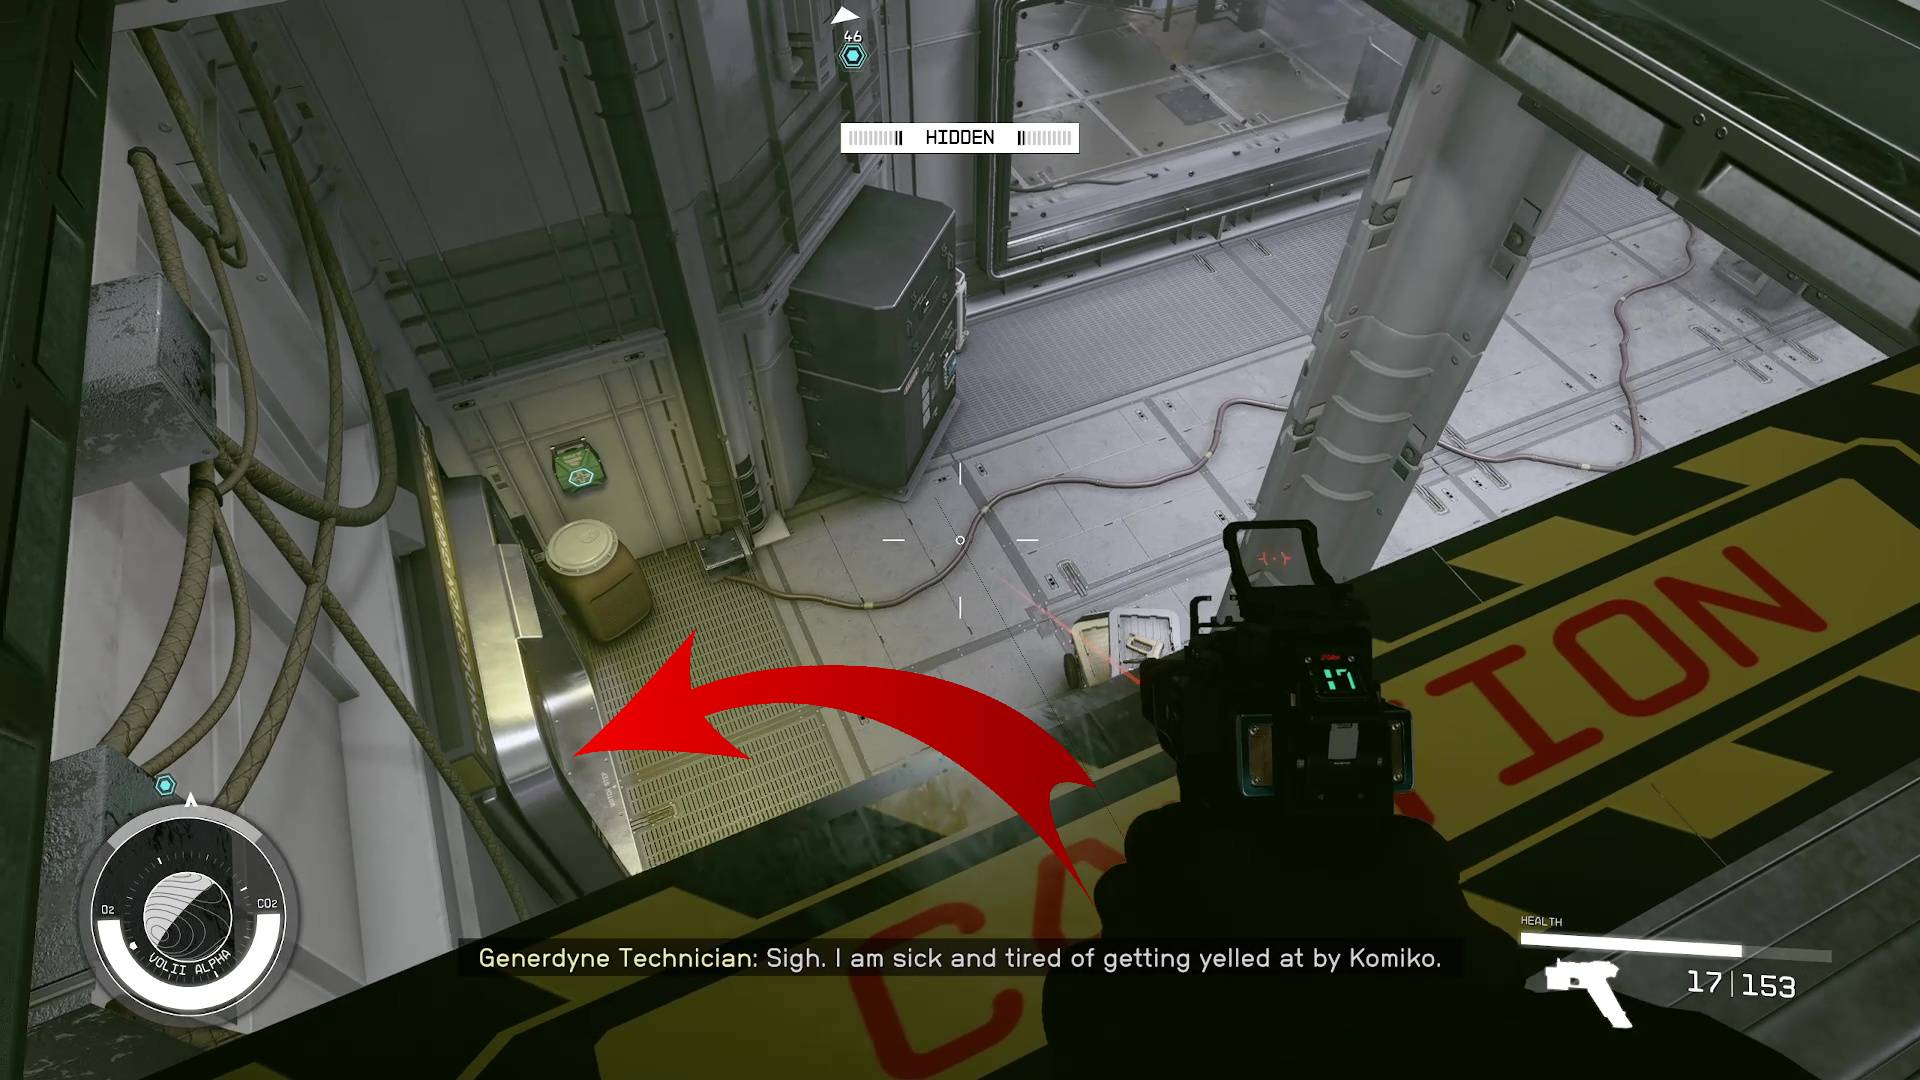
From there, you will be at the top of a set of stairs, and at the bottom of those stairs will be a guard robot – it should be walking away from you. Go down the stairs and hop into the vent (Image 19). Follow the small tunnel under the hallway until the end, where you can open a hatch above you. Don’t jump through the hatch immediately, though. Wait for the robot to turn around and start heading the other direction, otherwise you’ll be detected, and it will shoot at you. If you are detected by the robot, you can kill it without raising the alarm or getting kicked out of SysDef (Image 20).
Image 19Image 20
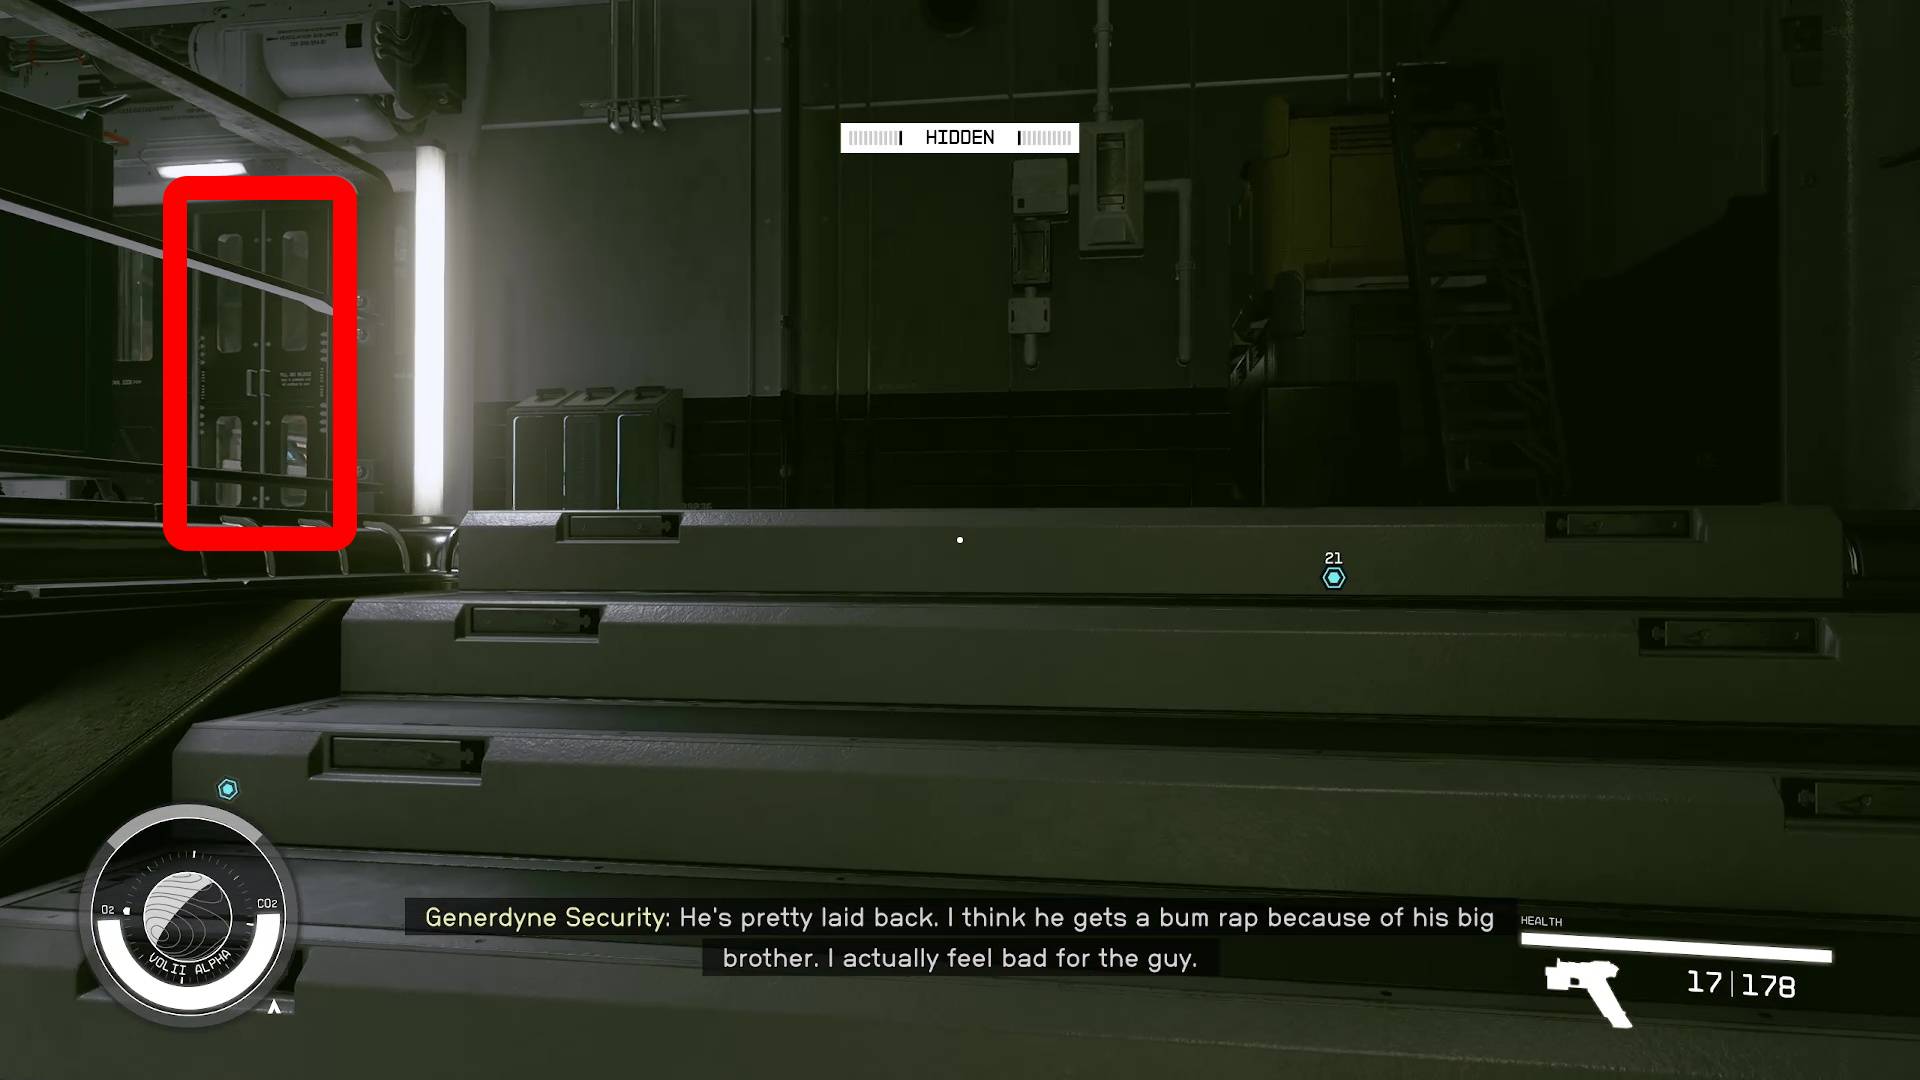
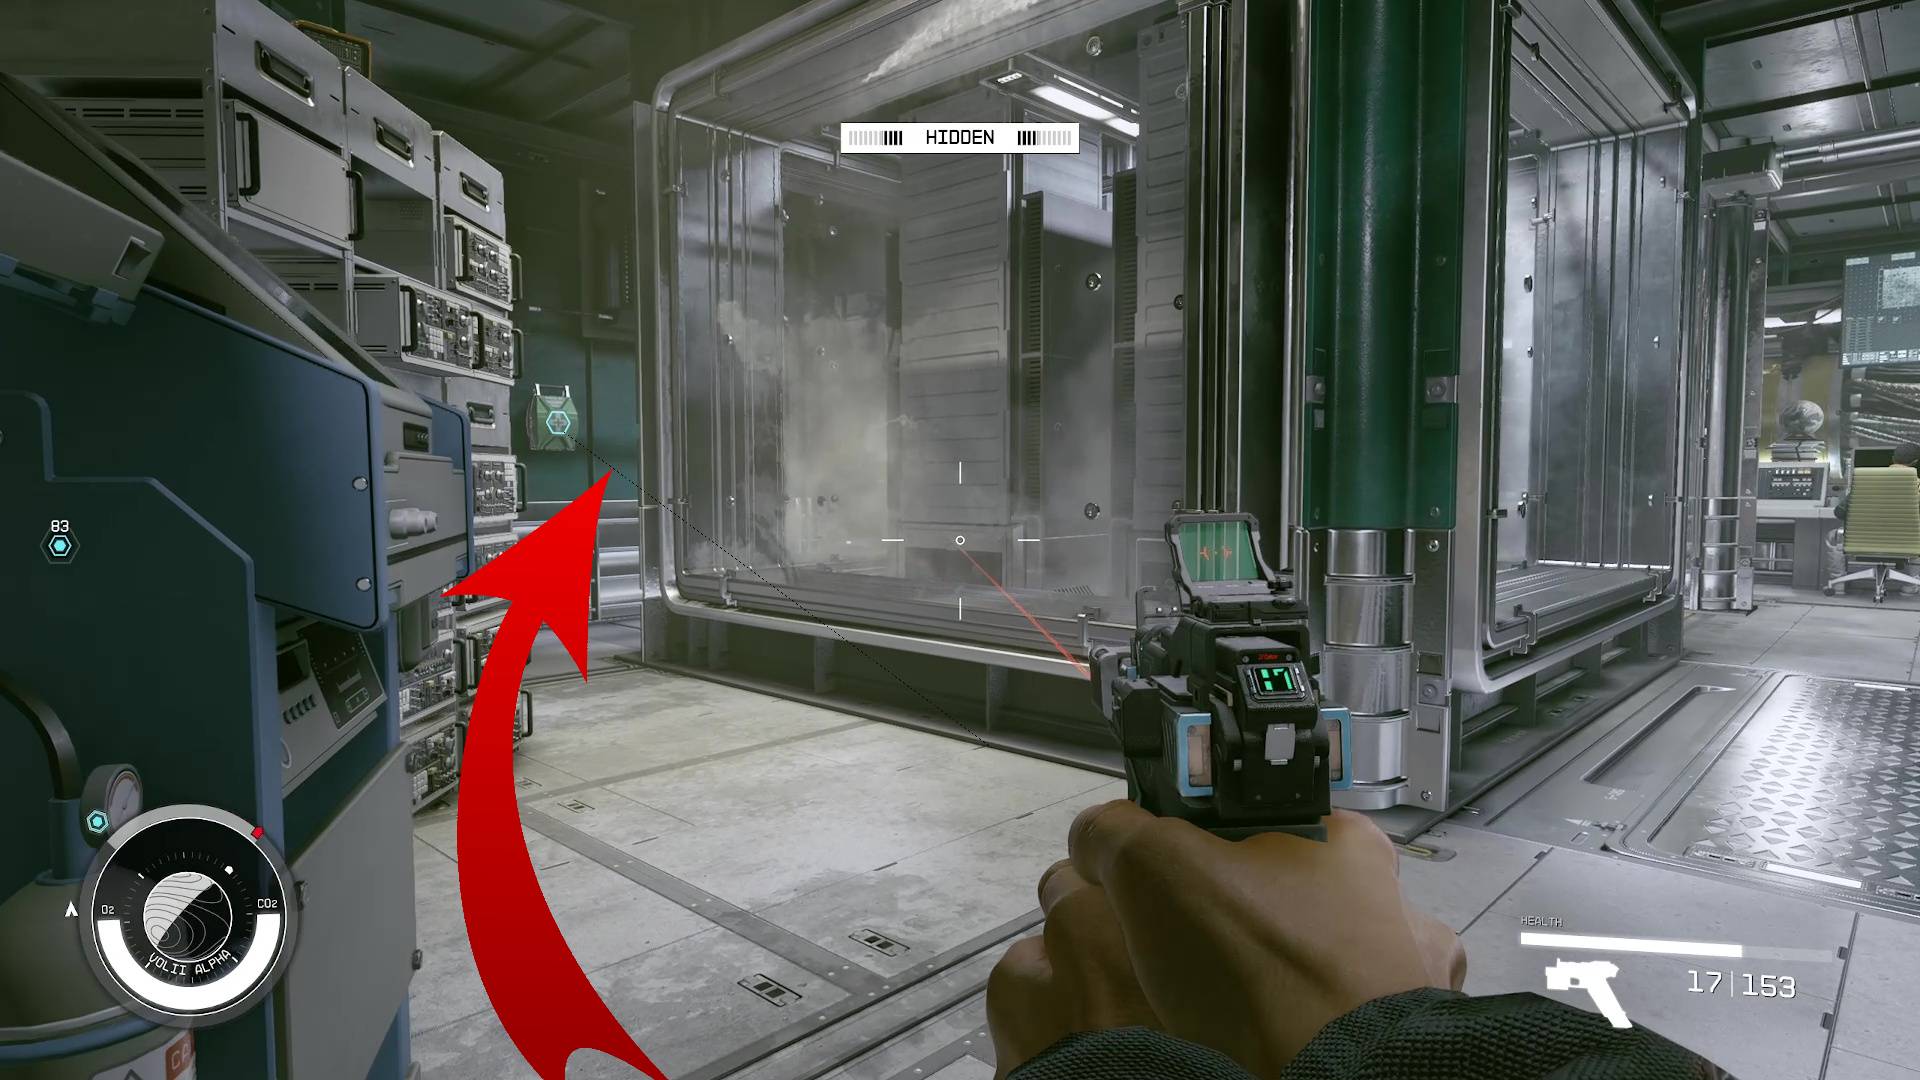
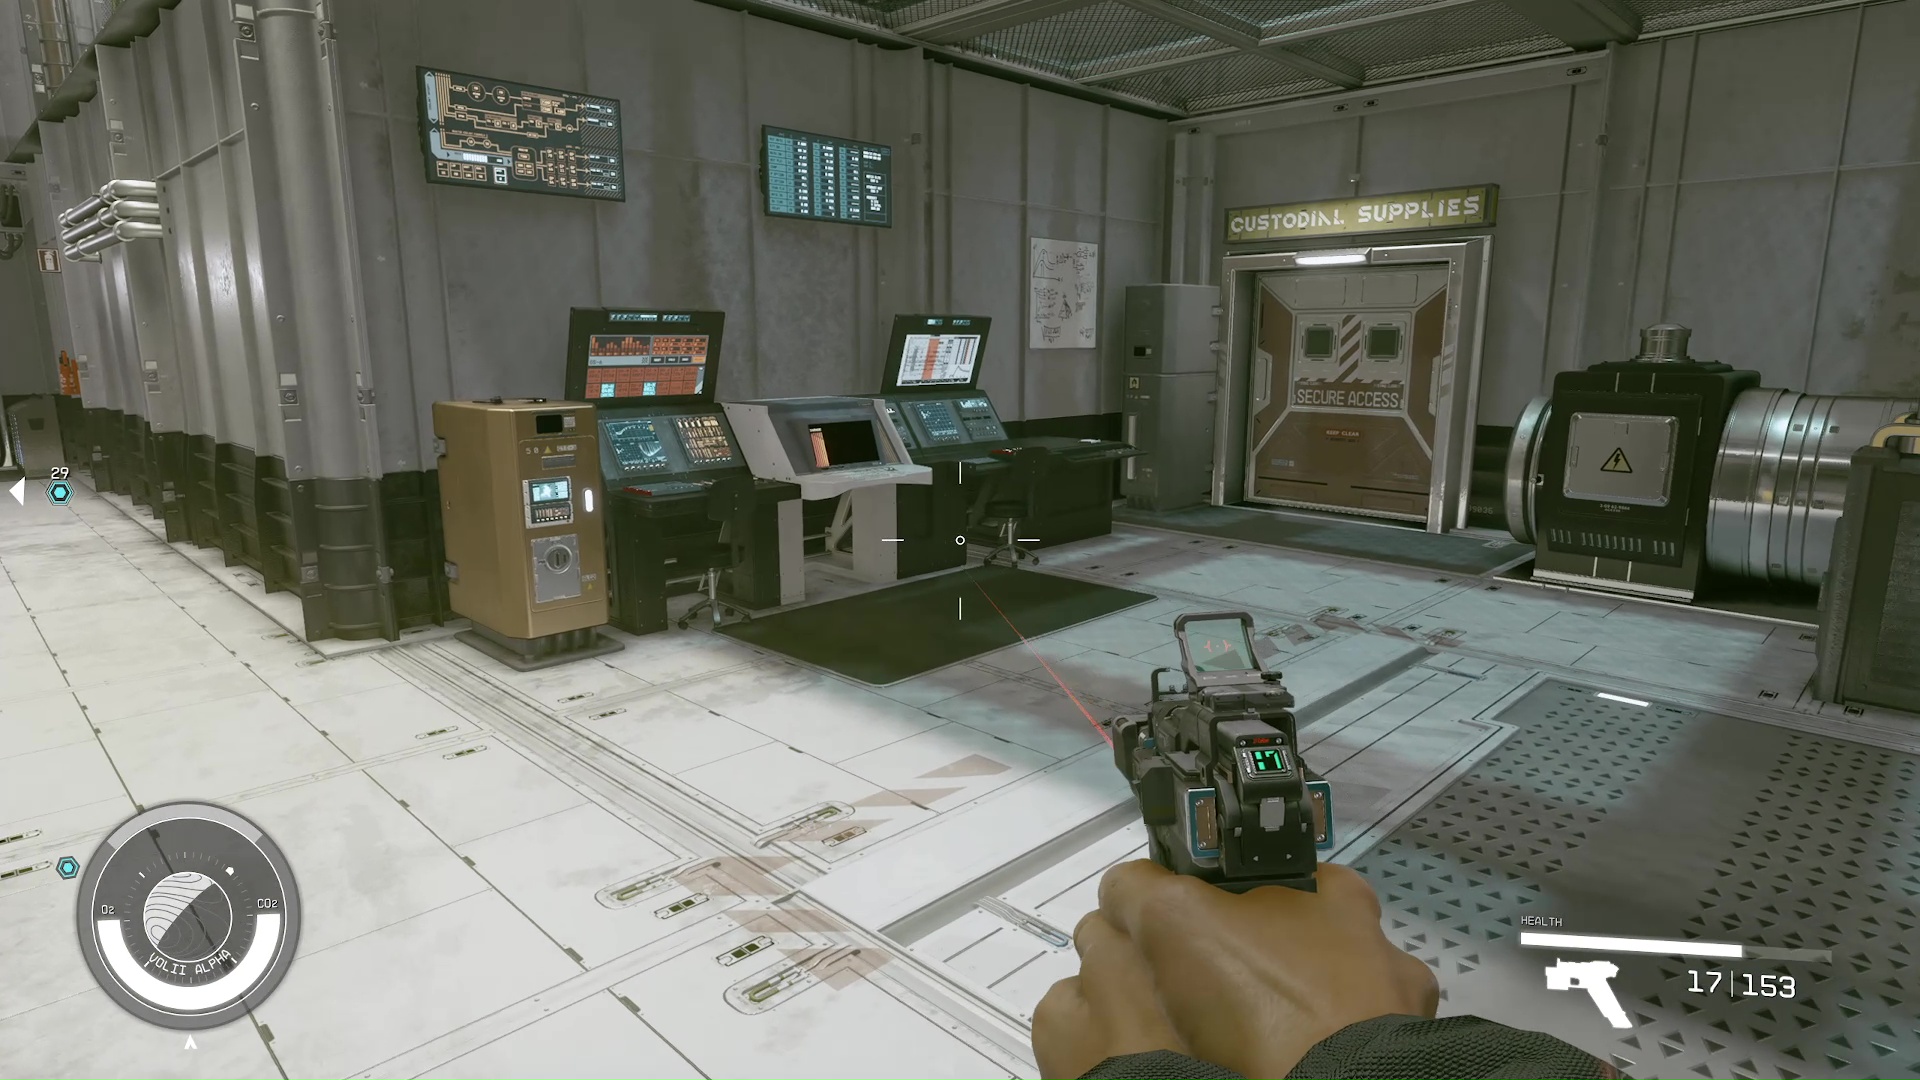
Out of the vent, this is a good spot to quickly save the game before continuing. When you’re ready, meander through the door by the vent, and you will see some people working at their computers. To your left will be a large pillar with glass windows — sneak around it to avoid detection (Image 21). The next couple hallways are empty and there aren’t any turns. You will see a locked door you can pick open with the computer labeled ‘Custodial Supplies’ but it isn’t a shortcut (Image 22).
Image 21Image 22
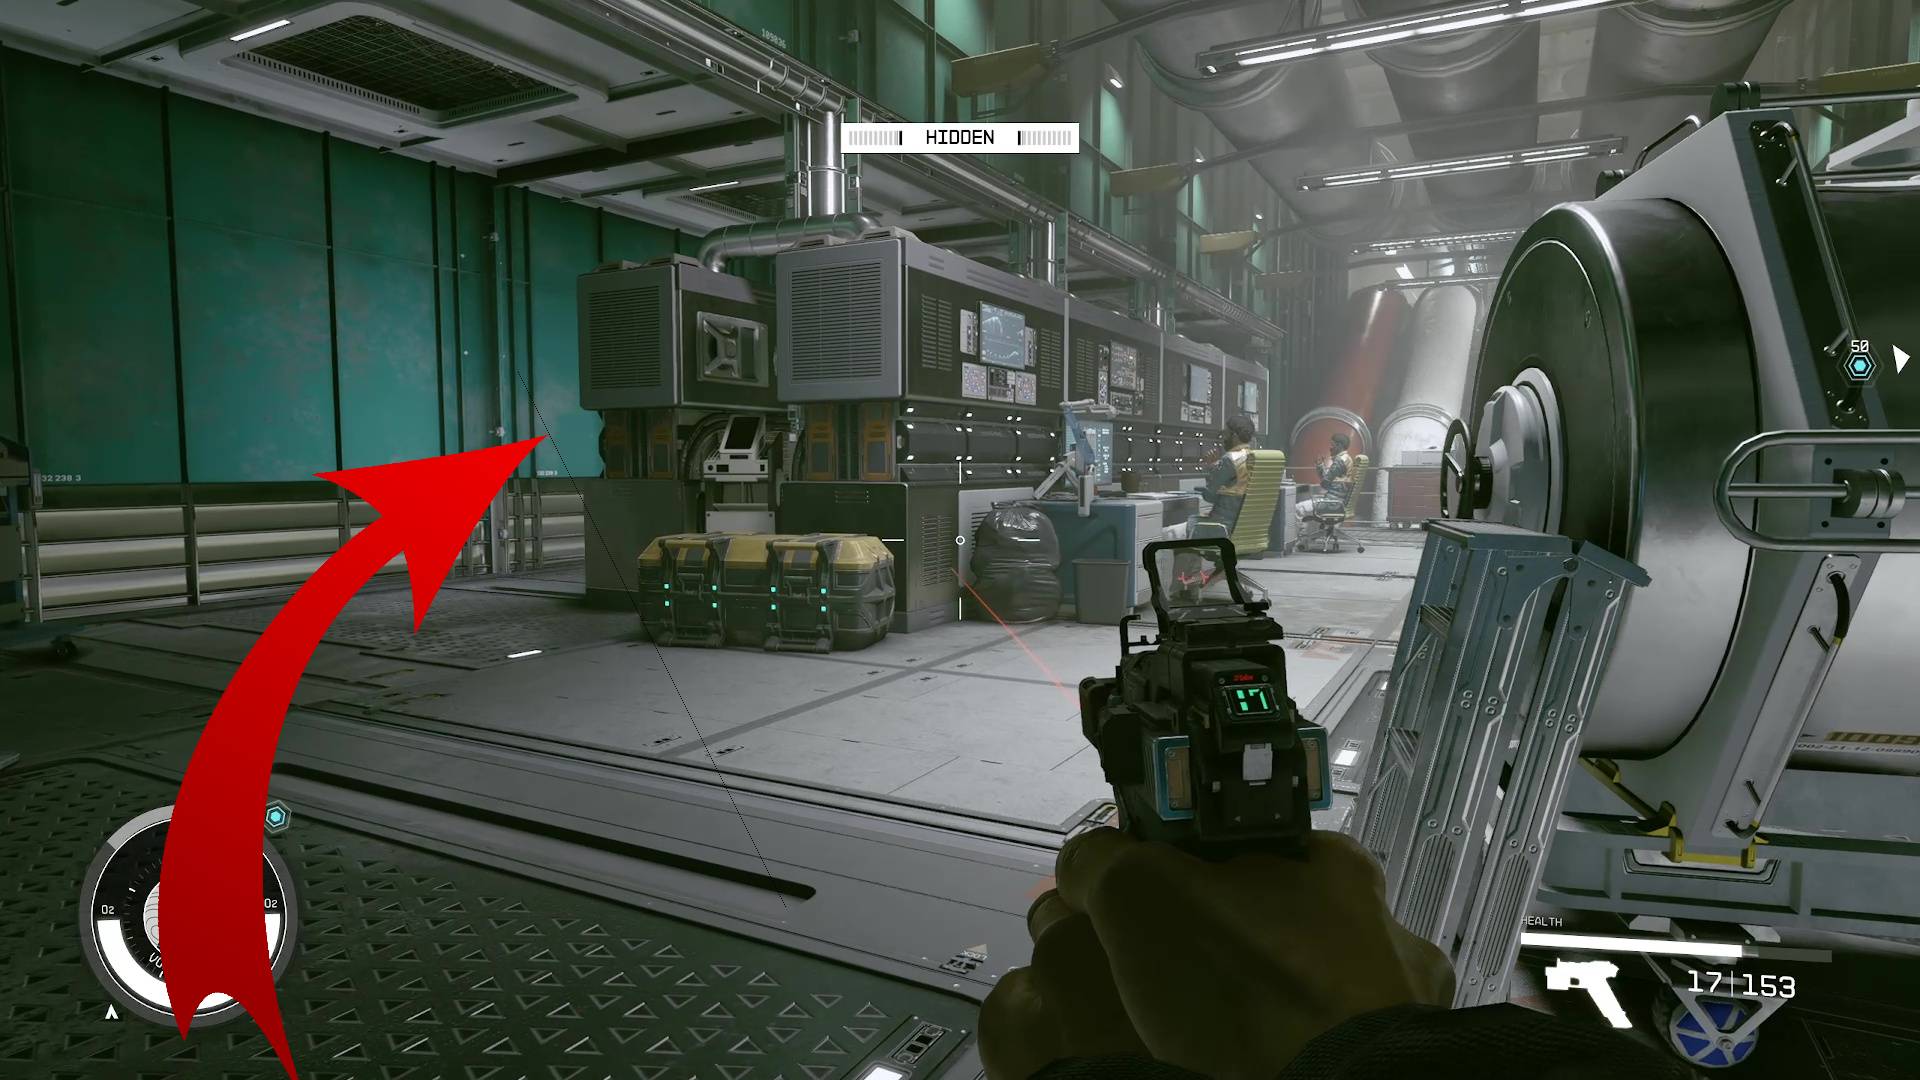
At the end of the hall, you will go through a door, then you’ll see some workers at their computers with a guard patrolling (Image 23). Sneak across the room and behind their workstations, then you will see a vent you can use to go further (Image 24).
Image 23Image 24
Follow the inside of the vent up the slope. Take this opportunity to save your game again. Be very careful opening the vent door to leave, because there is a guard that patrols, and it’s easy for him to spot you. When it’s clear, cross the room and go into the other vent that’s in the corner (Image 25). Follow this vent tunnel until you come to a drop; below you will go through the door to the left (Image 26).
Image 25Image 26
The hallway you enter after dropping down is a good place to save the game; you’re one sneak away from the power core, you don’t want to redo all that stealth. At the end of the hall, you’ll be in a big chamber with cables leading downward. Go left here, and hug the wall (Image 27). It is possible for you to be spotted from the window. Sneak quickly over to the door with a above it, and go in.
Image 27
Obtain the Conduction Grid Data
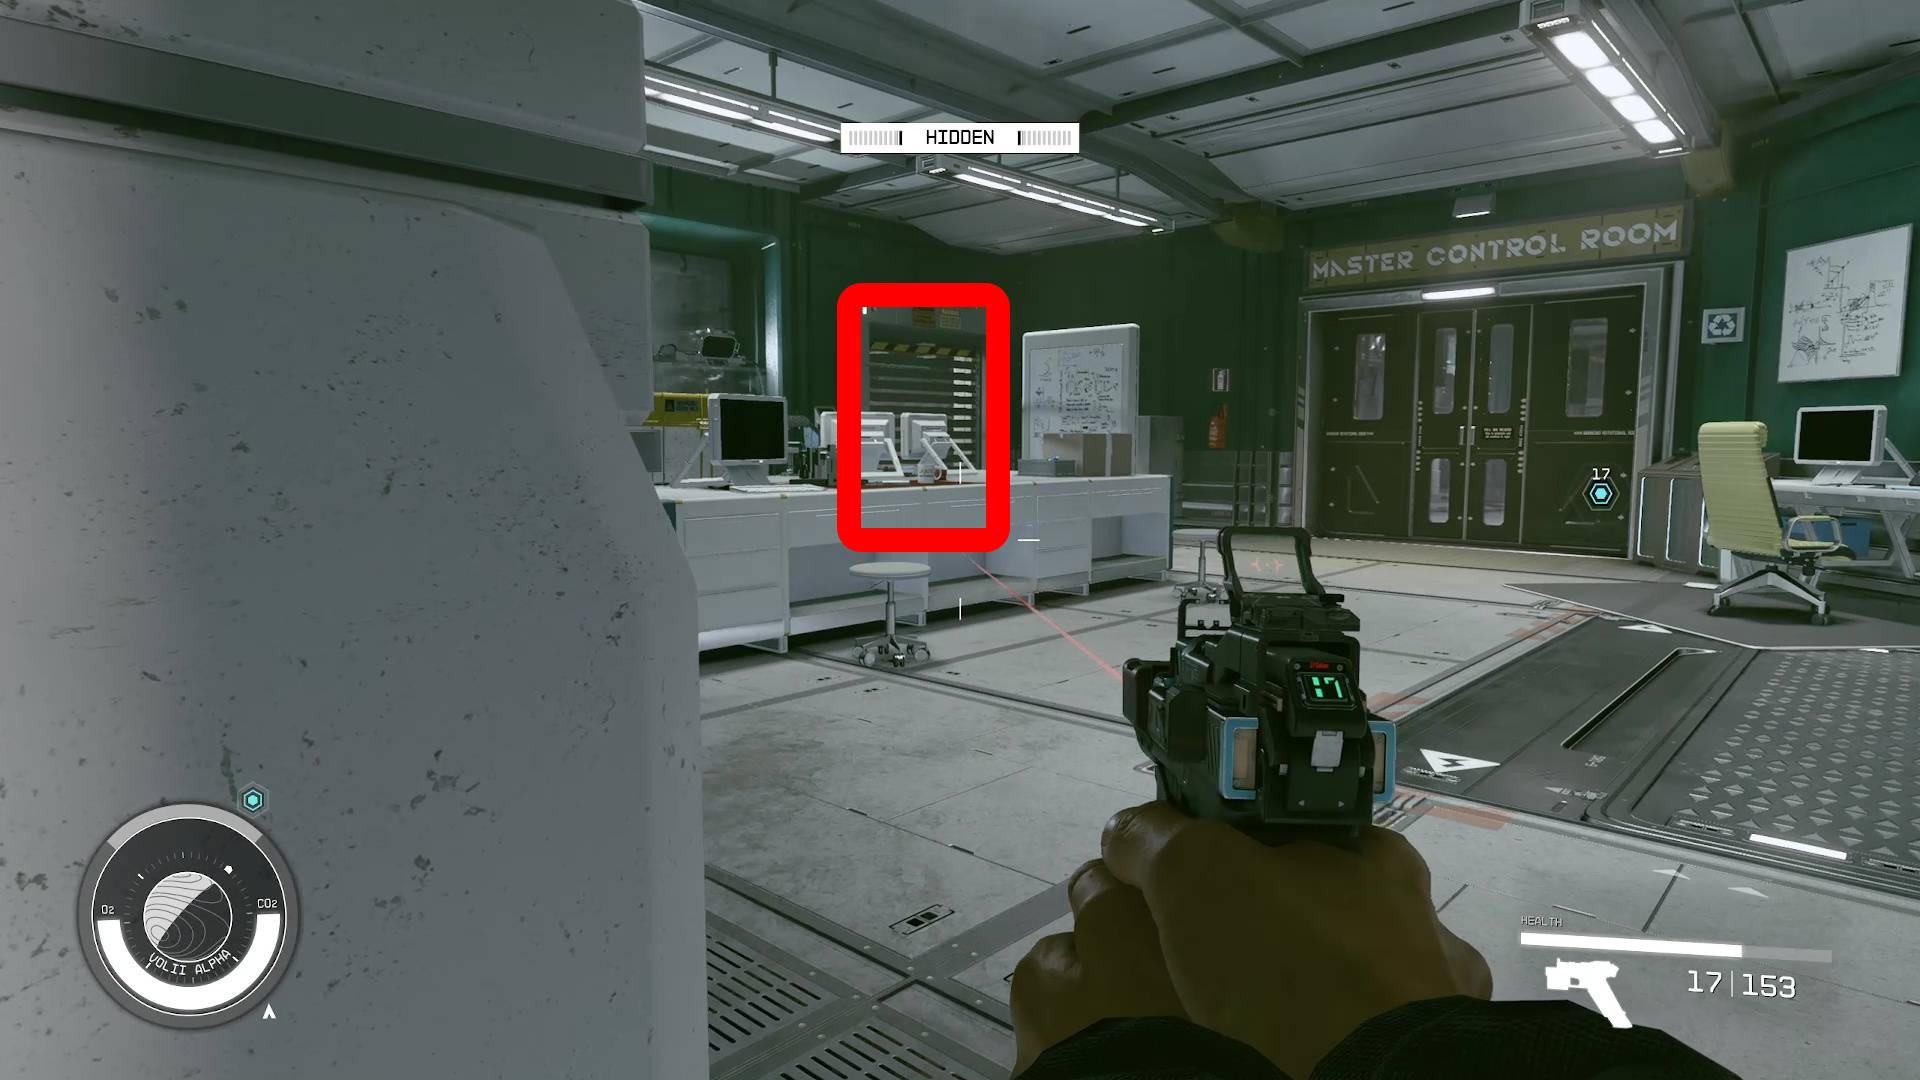
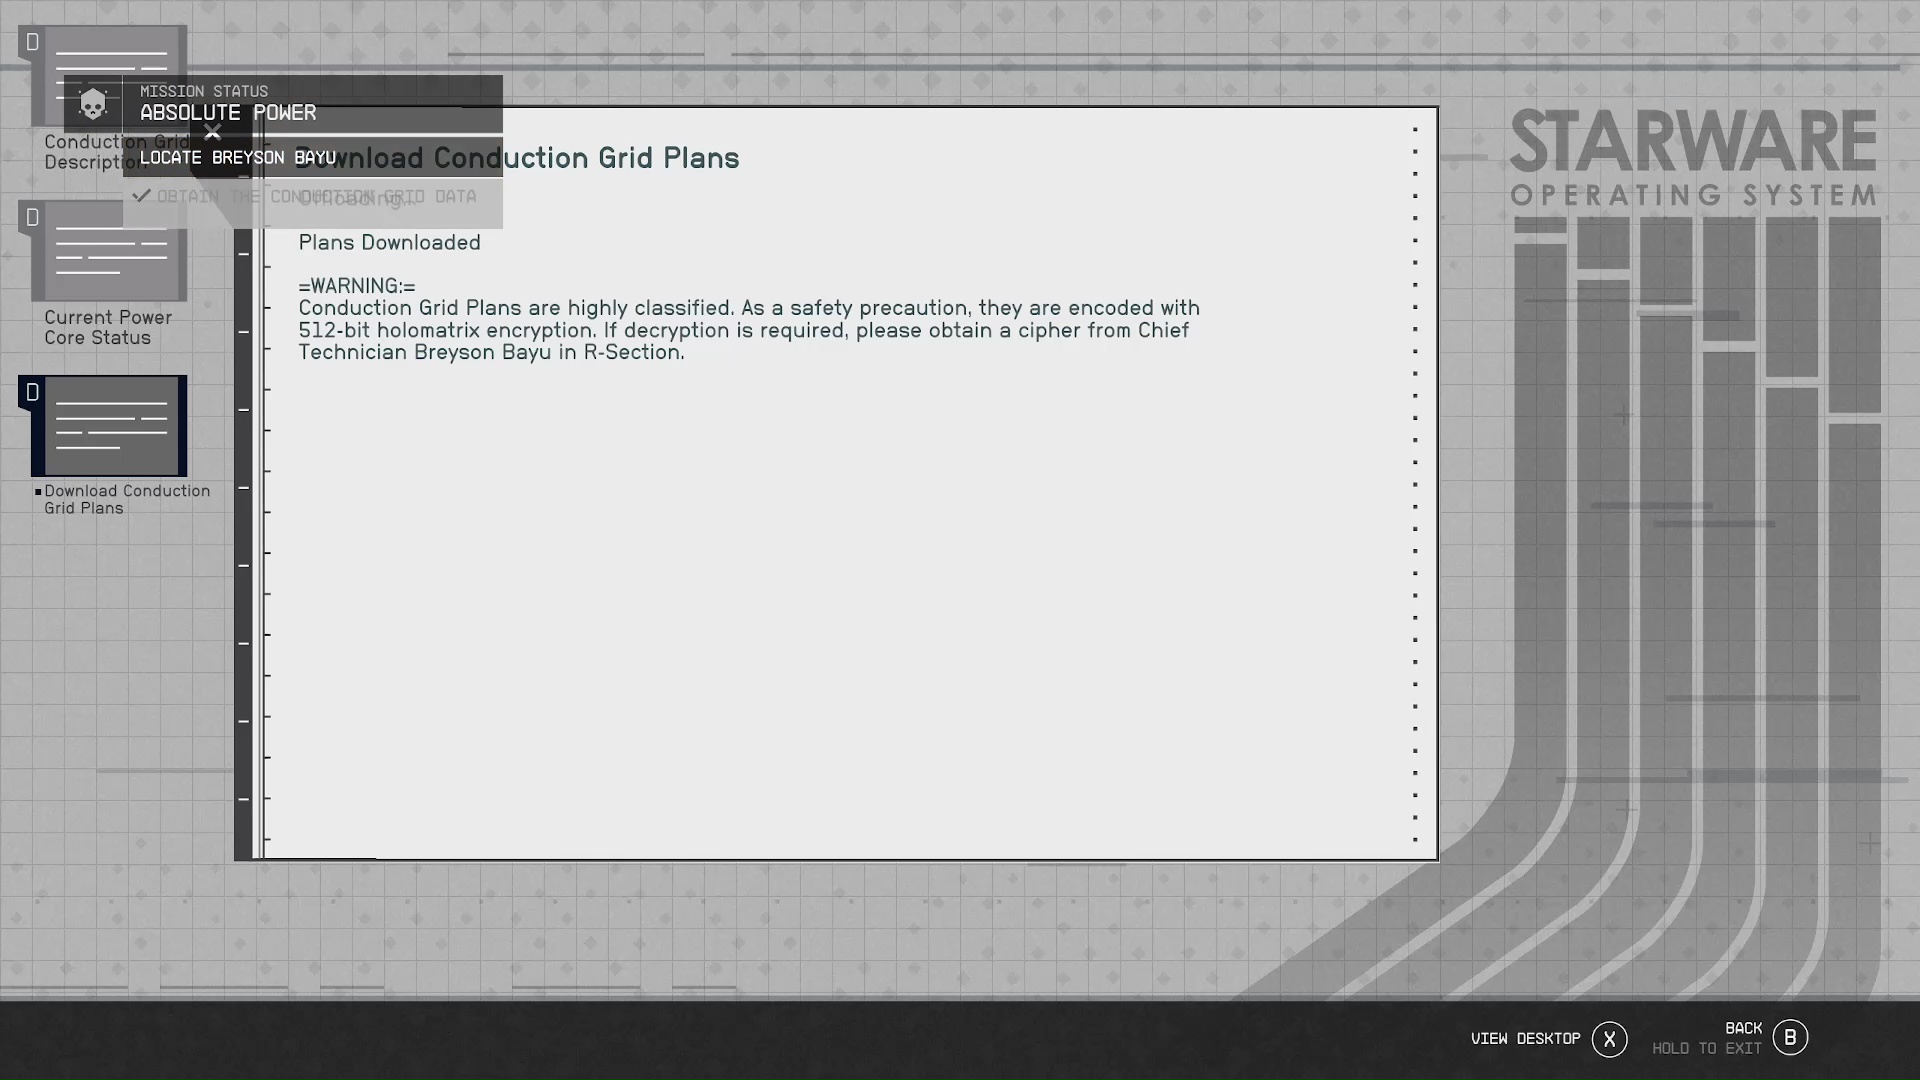
In this next room, you don’t need to worry about sneaking – no enemies to catch you. Go up to the Power Core Computer and click on ‘Download Conduction Grid Plans‘ (Image 28) Unfortunately, these plans are encrypted, so you’ll have to find Breyson Bayu.
Image 28
Locate Breyson Bayu
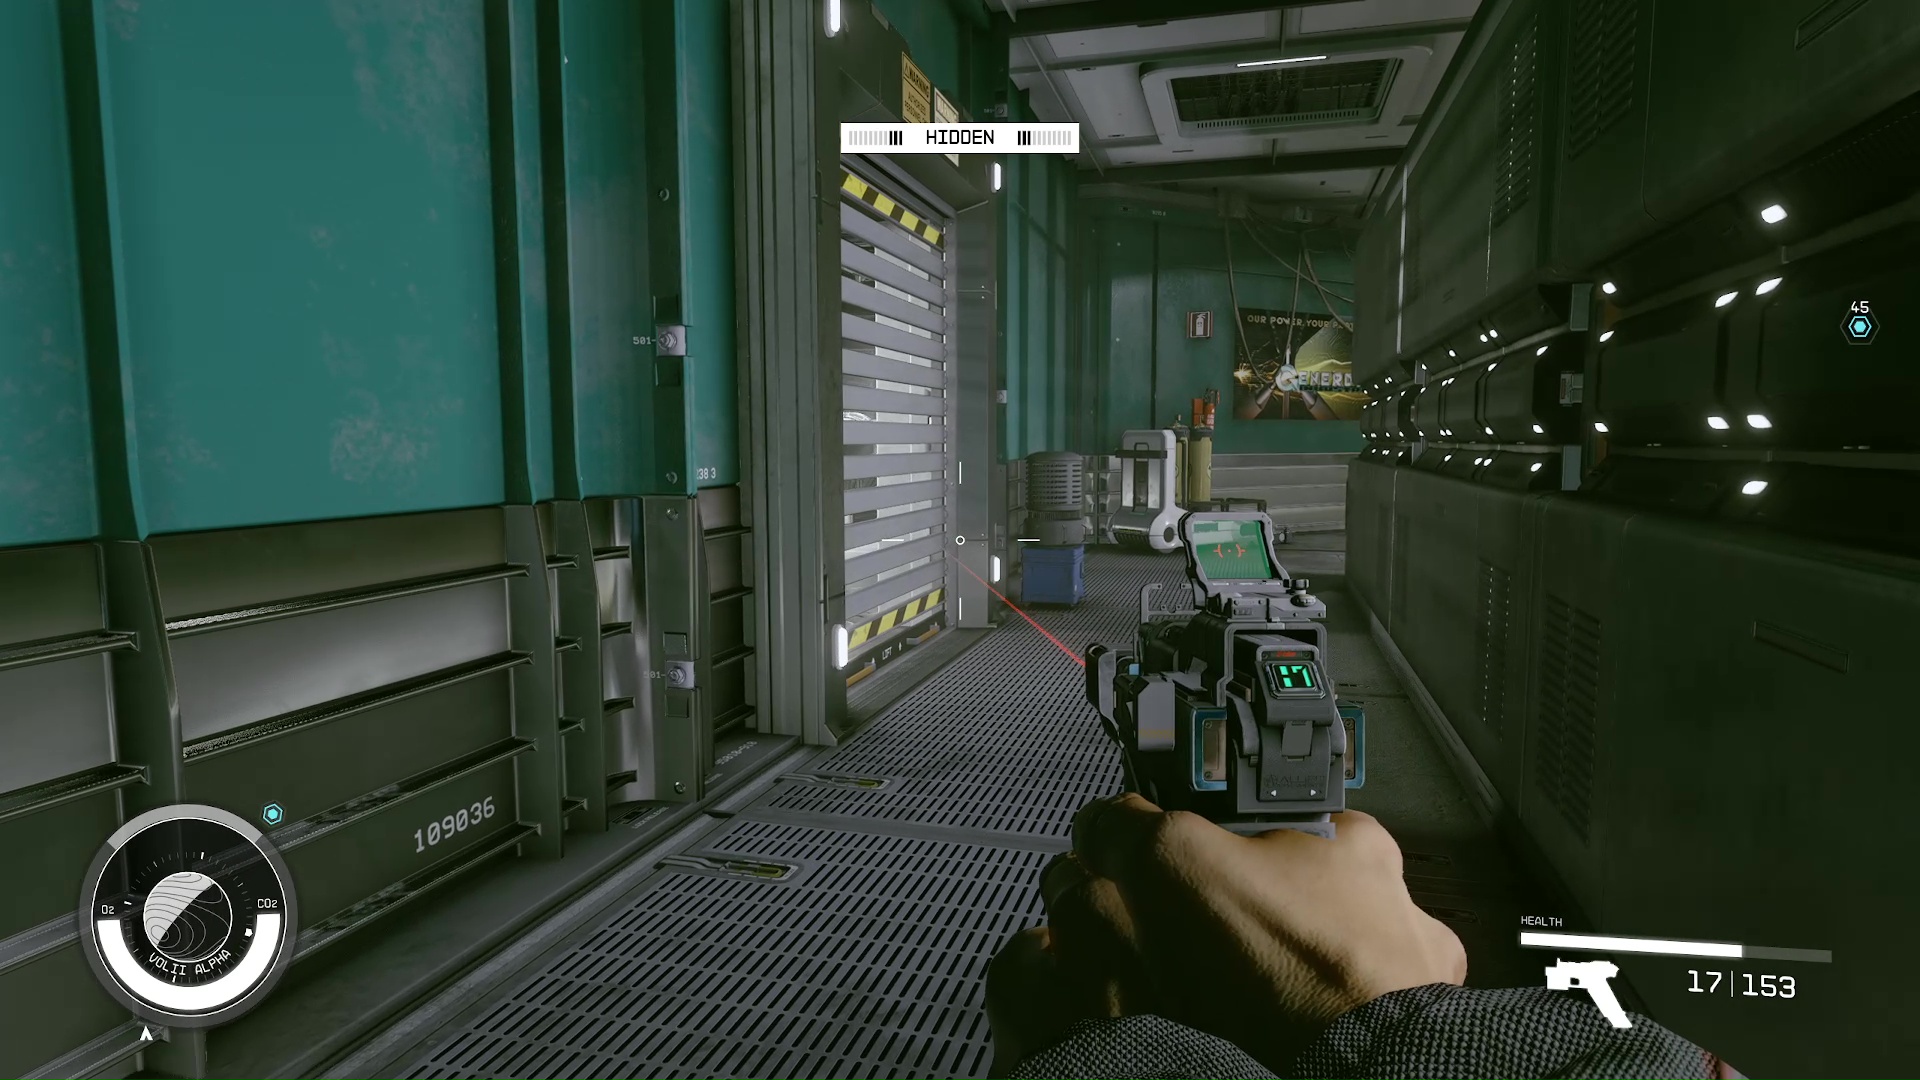
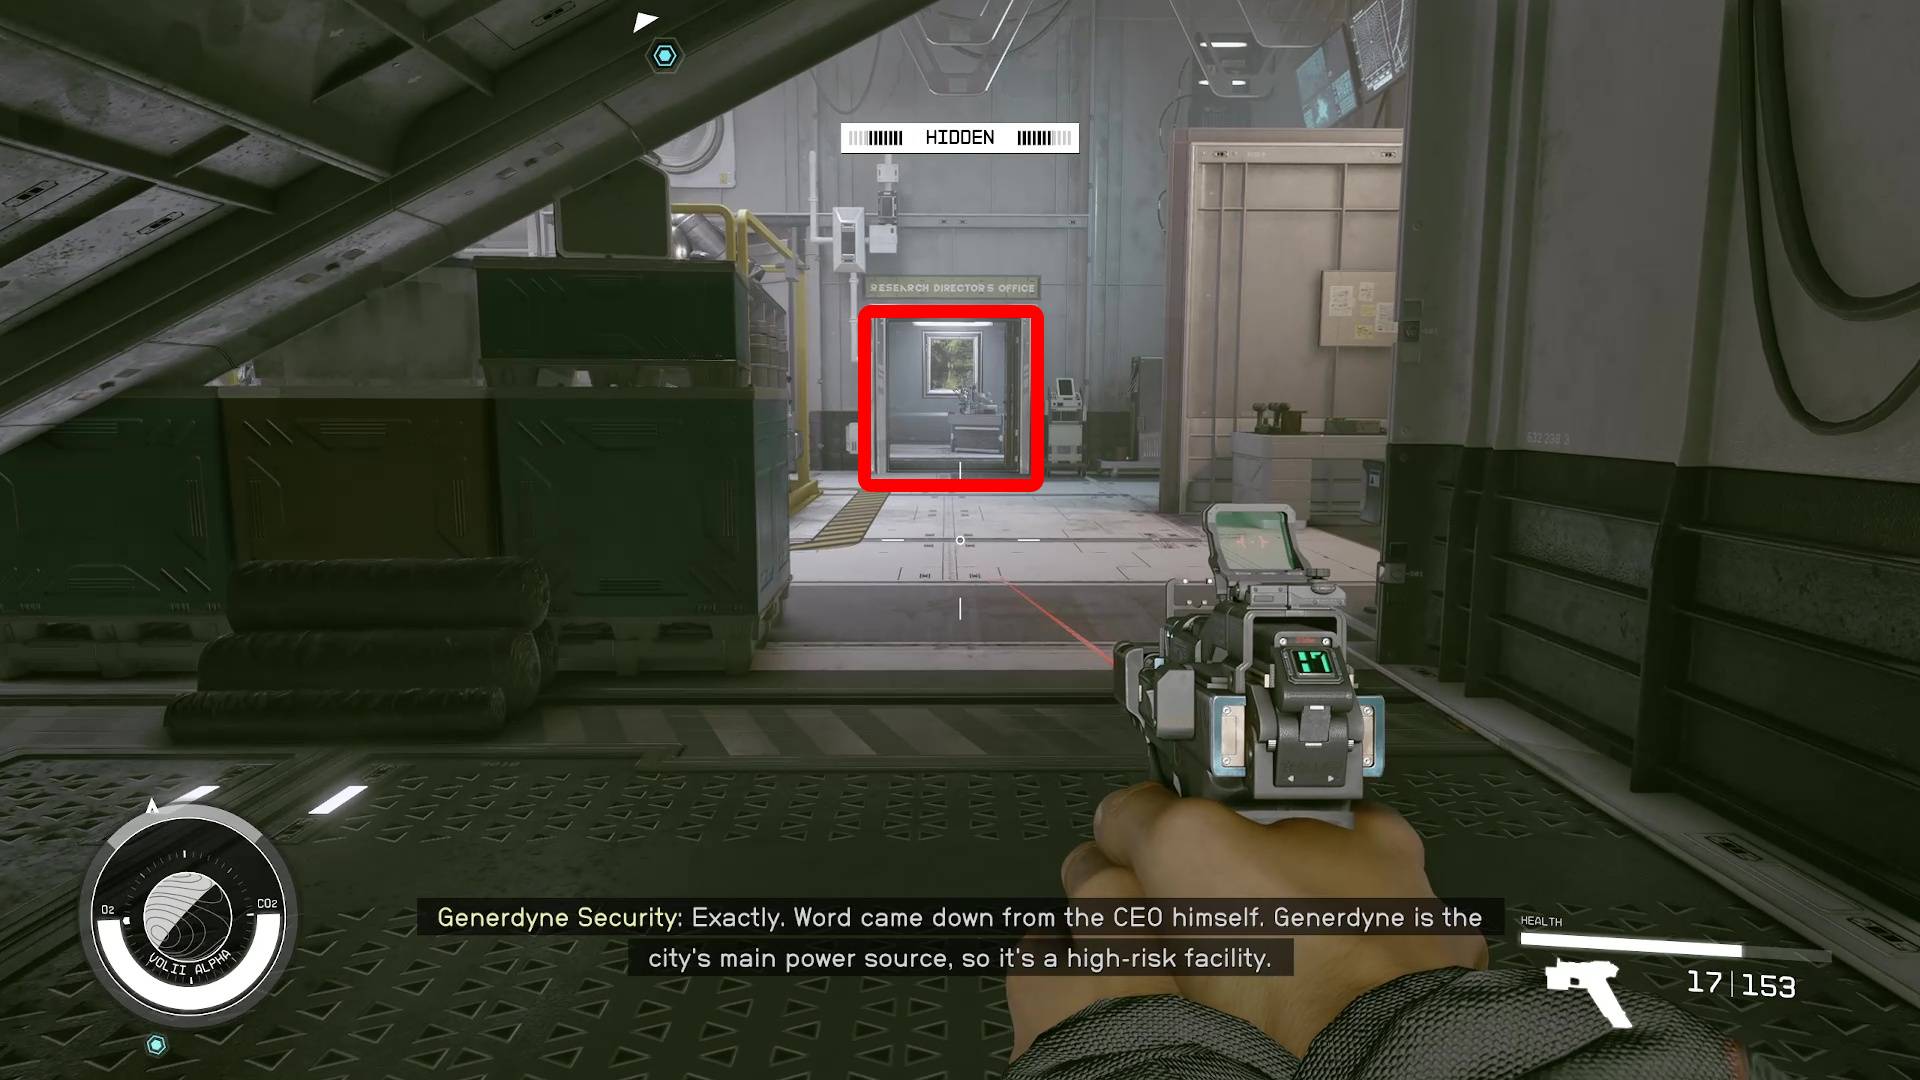
Save the game, then let the guide you out of the power core. You will come to a door after a short walk. Make sure you have started crouch sneaking again, then open the door and follow the hallway to the right (Image 29). At the end of the hallway is another vent, go through it and at the end you will see the ‘Research Director’s Office’ (Image 30).
Image 29Image 30
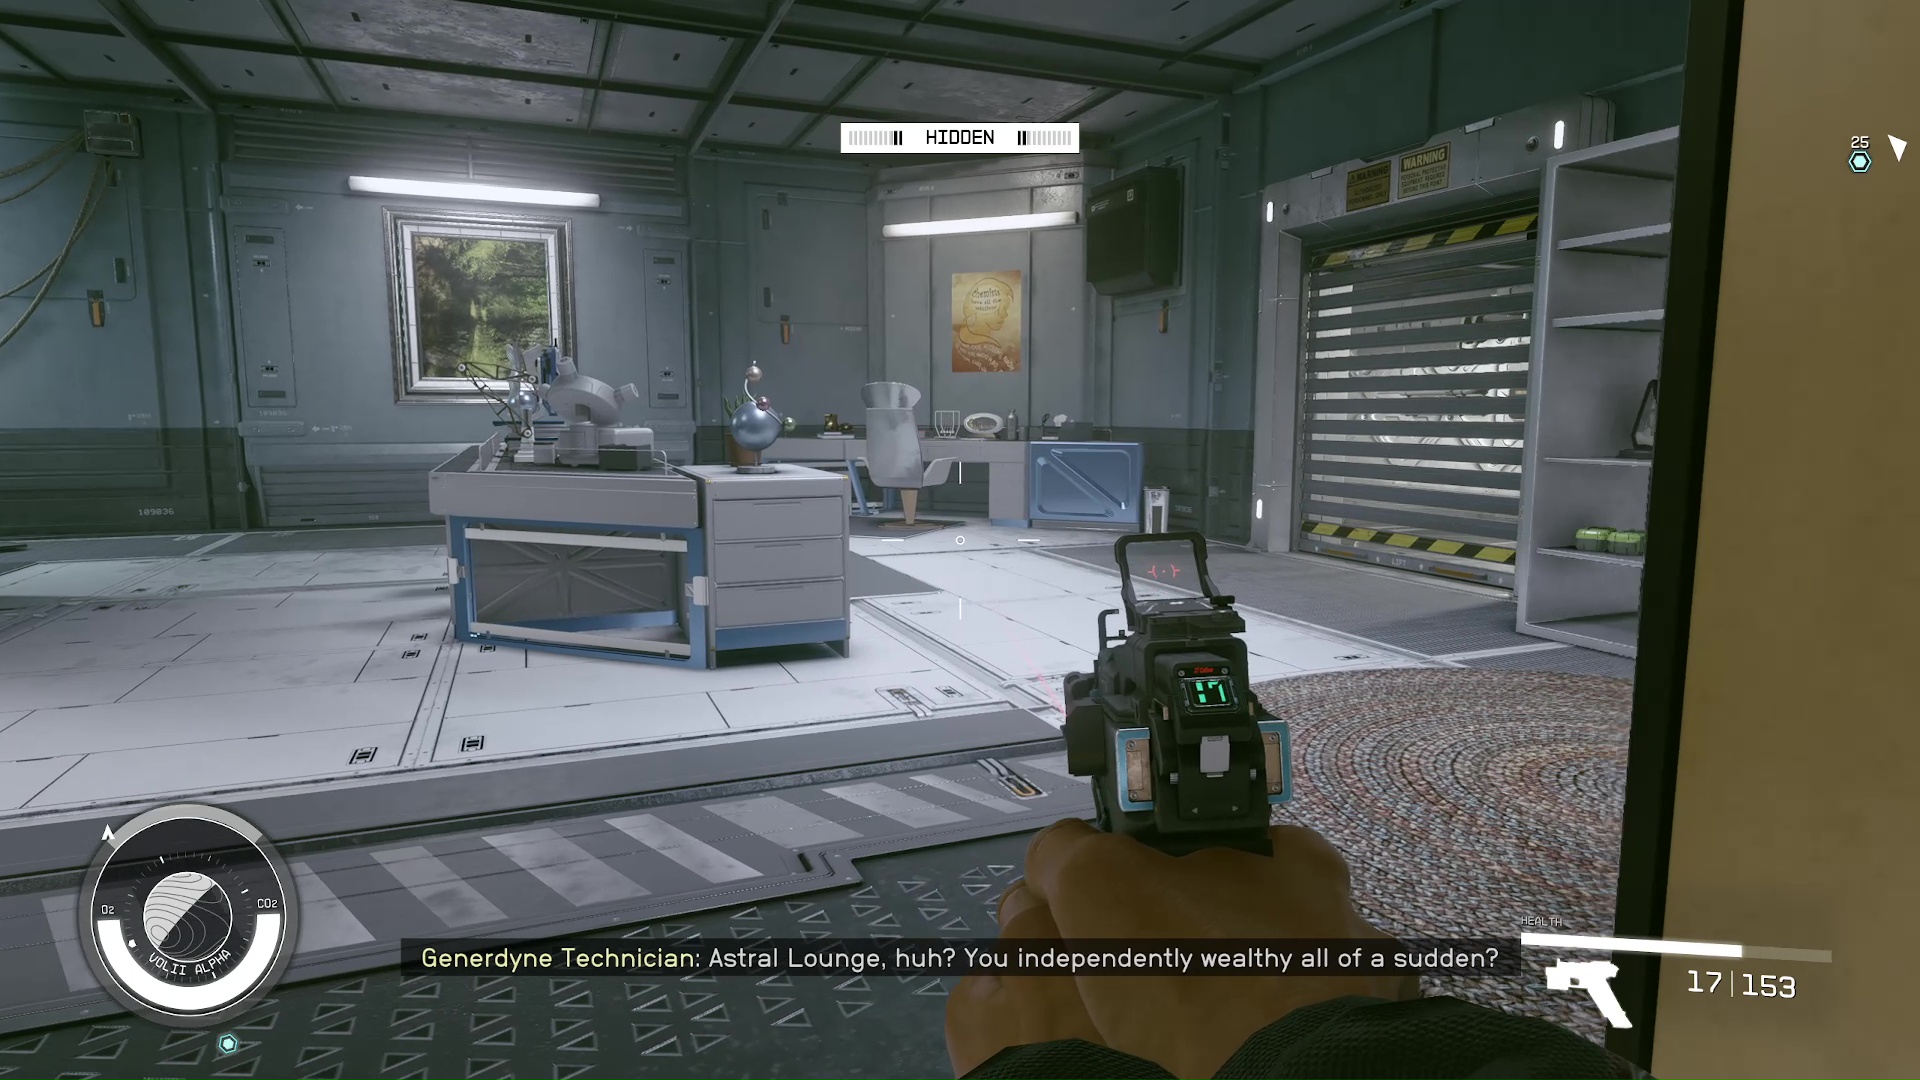
Sneak over to the office, then quickly go into the vent to the right next to the desk (Image 31). Don’t explore this room, because you will be seen through the glass. Follow this vent and when you leave, you will see Breyson Beyu’s office (Image 32).
Image 31Image 32
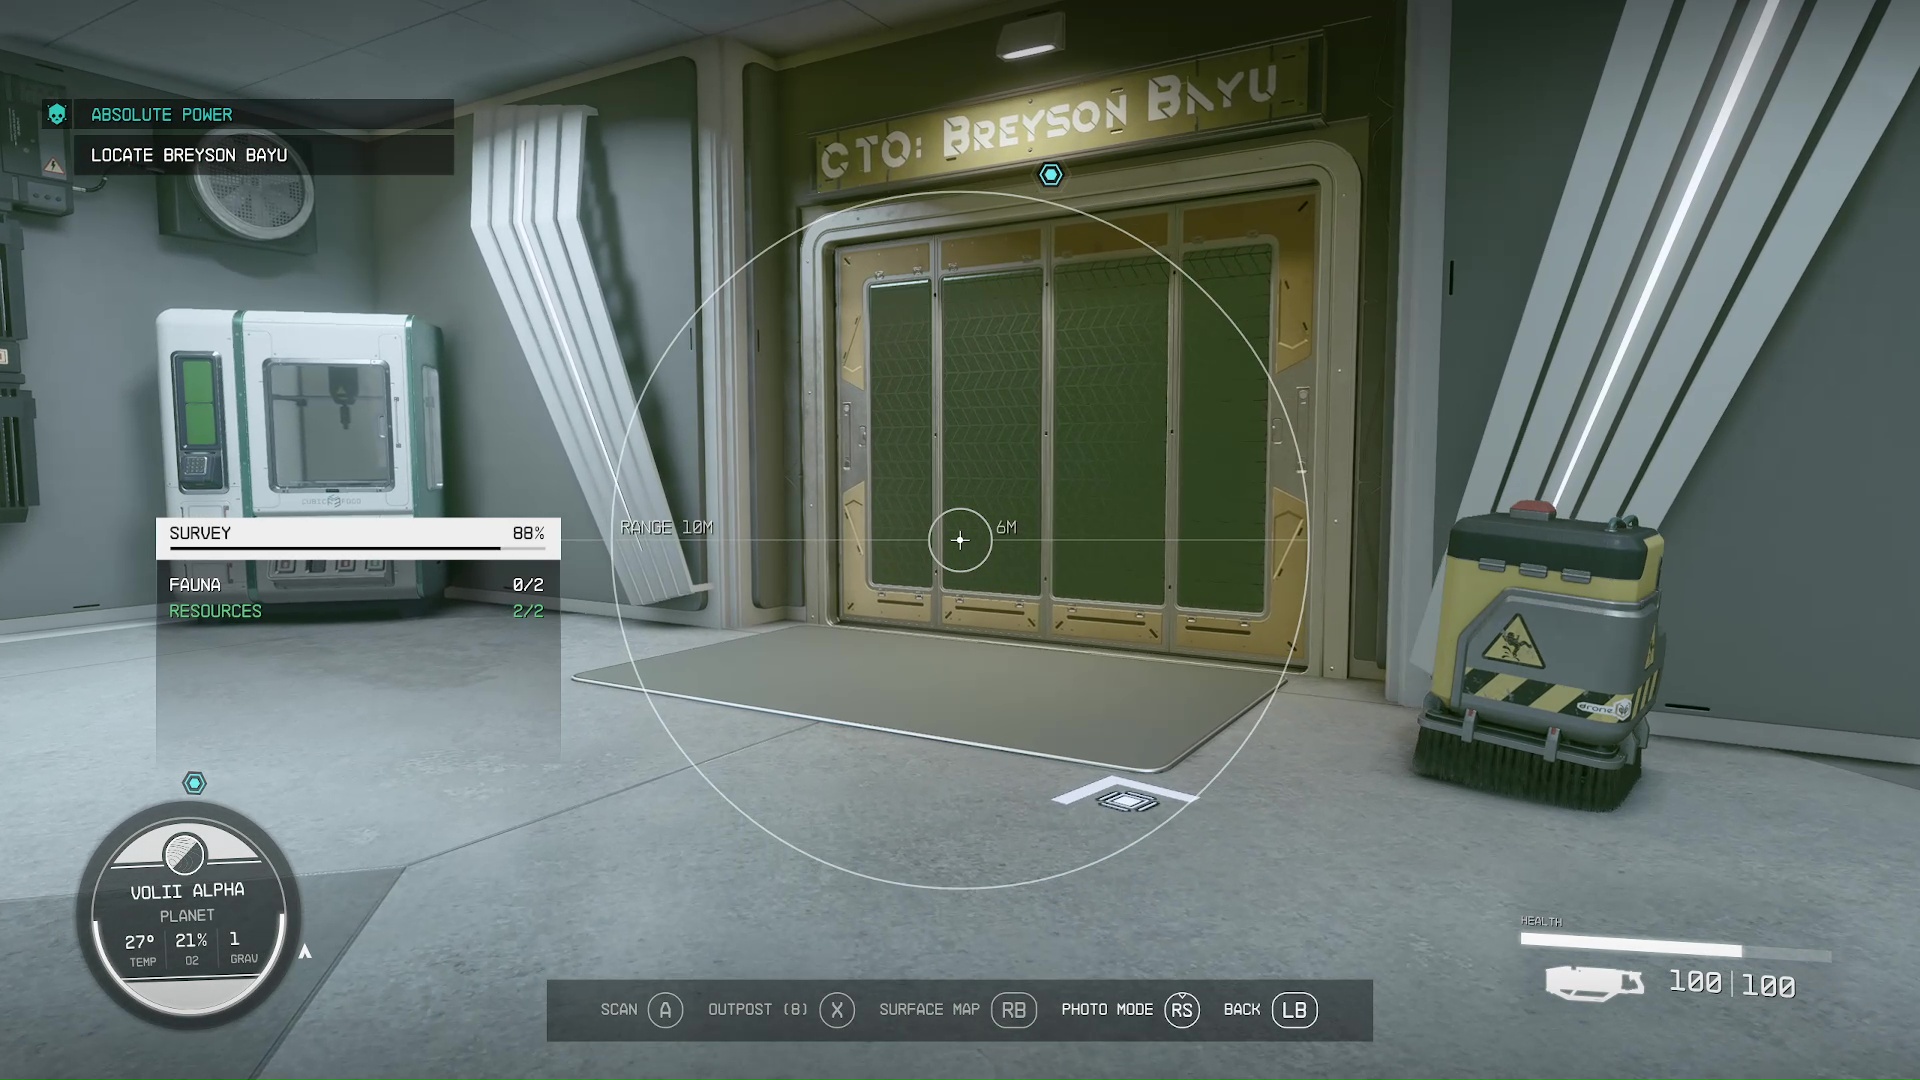
Gain the Encryption Cypher from Breyson Bayu
Breyson will either be sitting calmly behind his desk, or (if you shot your way there) standing in the middle of the room with his hands up. Speak with him, and he will let you have the cypher to get back at his brother. You can also question him more to get a better picture of their relationship.
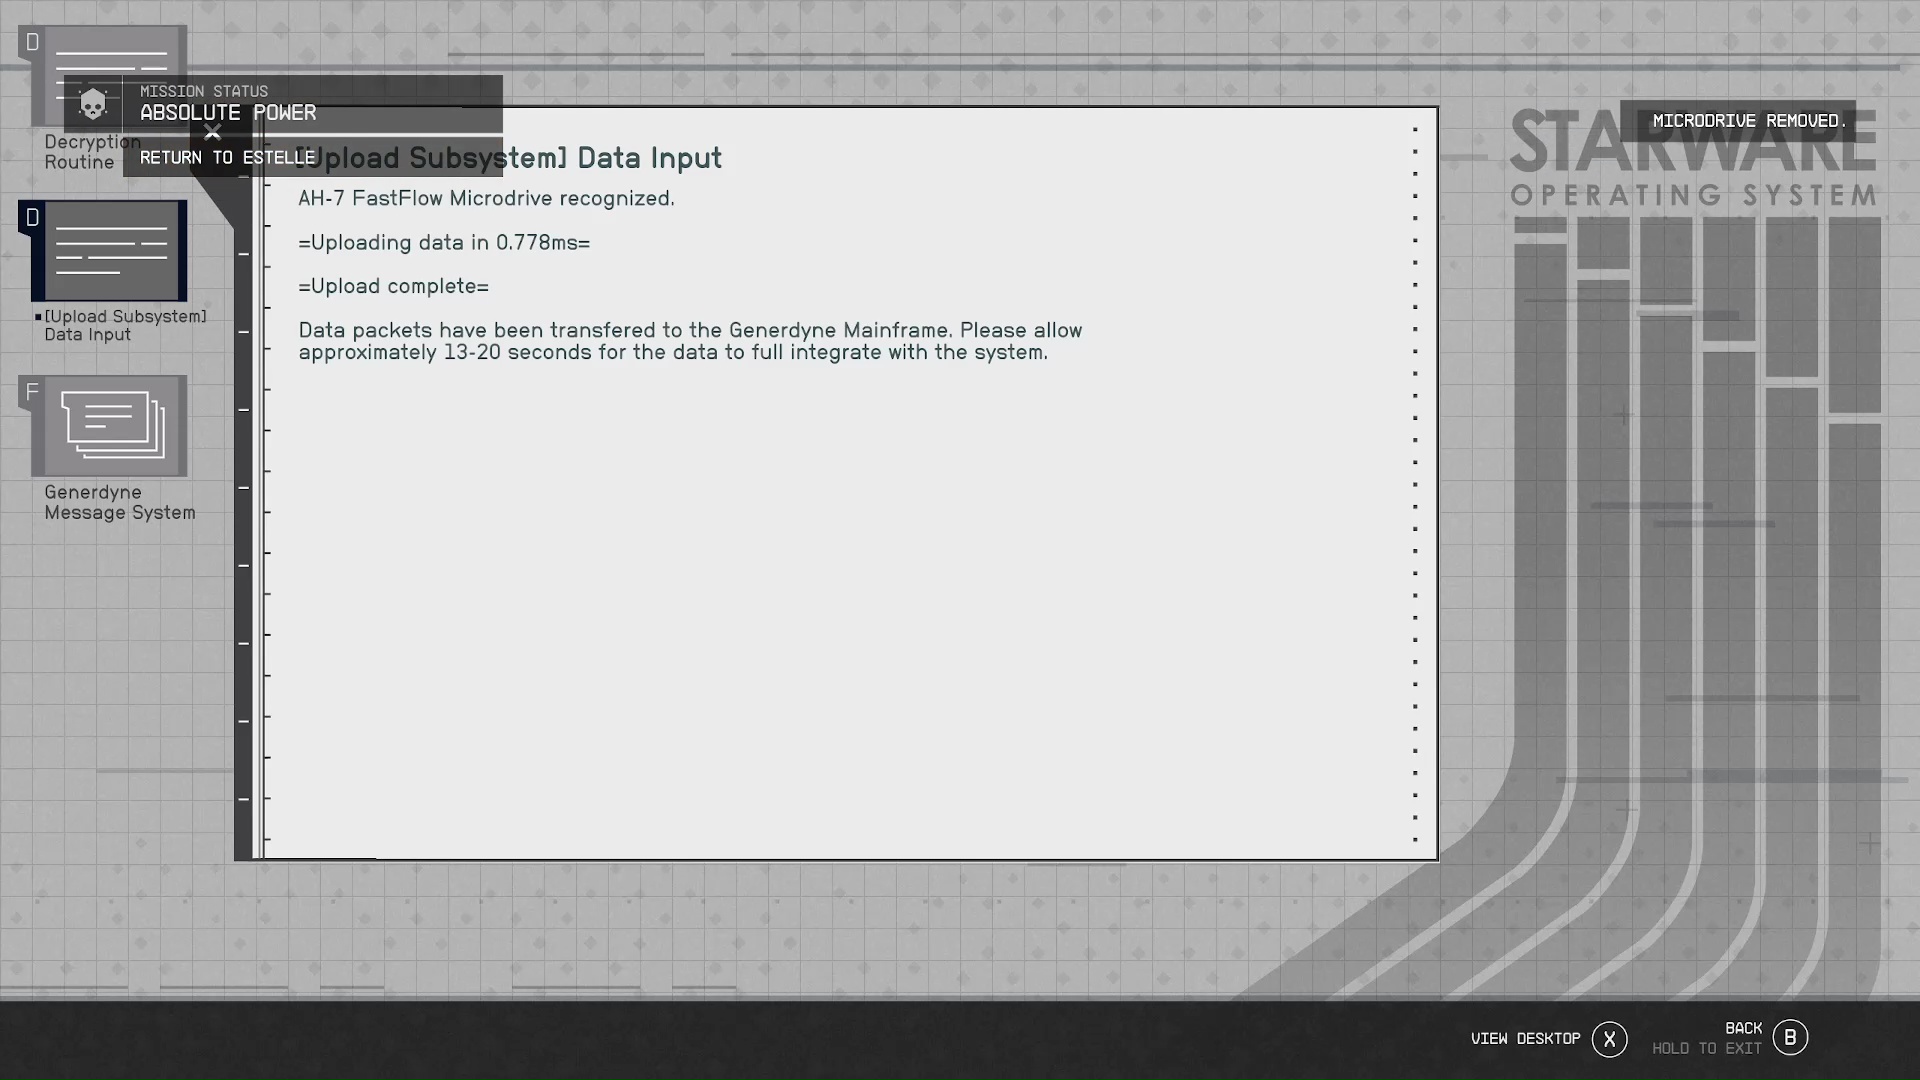
With his code, you can go to his computer and decrypt the encryption on the conduction grid plans. At the computer, click on ‘Decryption Routine‘, then click ‘[Upload Subsystem] Data Input‘ to upload Estelle’s Virus (Image 33).
Image 33
Return to Estelle
Now comes the part where you choose the fate of your contact, who on this mission is Estelle. Follow the to the elevator in the back of Breyson’s office. It will drop you off right in front of The Astral Lounge. Head inside to the VIP area for the planned meetup you have with Estelle.
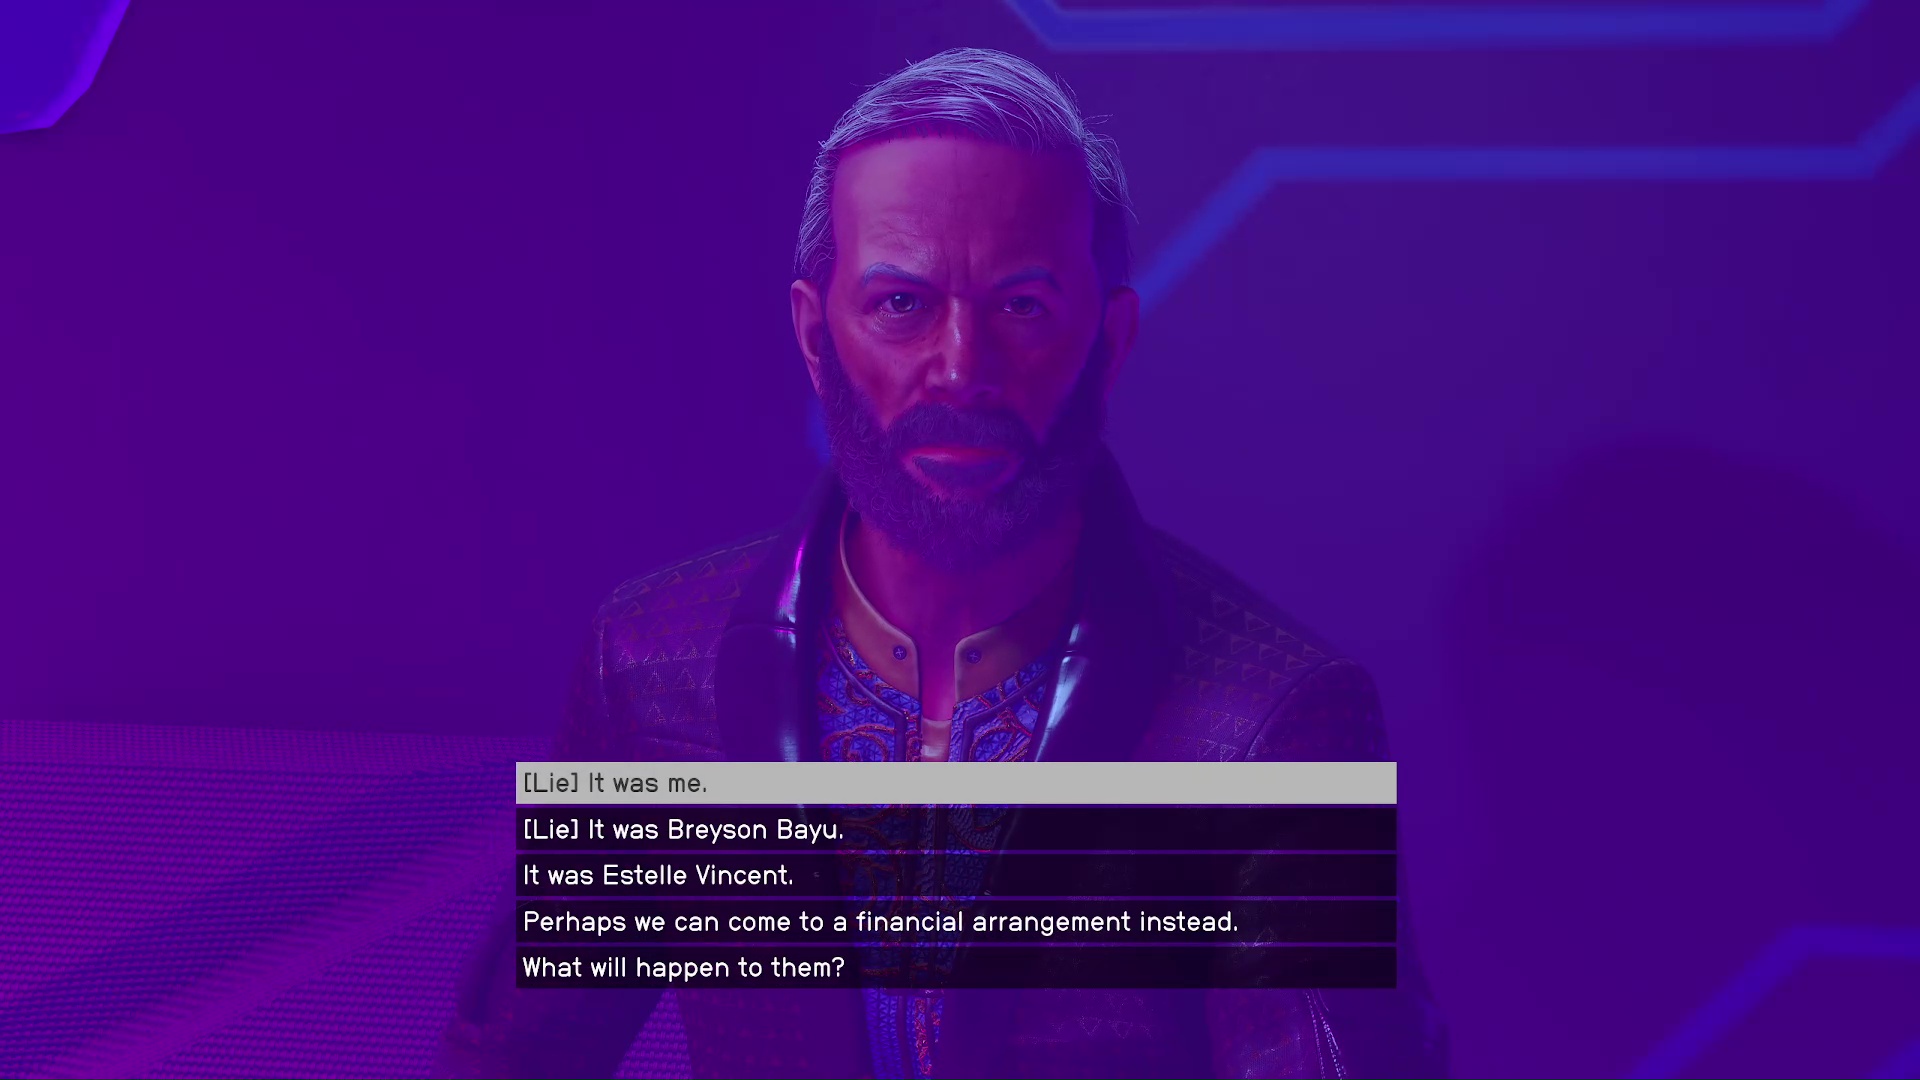
Surprisingly, it will not be Estelle that you meet, Benjamin Bayu will be waiting for you in her place. Chat with him anyway you like, but eventually he will ask who your source is and who asked you to upload the virus (Image 34). You have three options to respond:
Breyson Bayu – Benjamin will kill him.
Estelle Vincent – Benjamin will kill her.
You – Benjamin will say he is framing you for murder, but that doesn’t seem to happen (might be a glitch).
Image 34
Allow us to save you the ammunition; you can’t kill Benjamin after talking to him.
Locate Estelle at Madame Sauvage’s Place
Note: This actually won’t be a mission step if you threw Estelle under the bus, probably because she is swimming with the giant fishes. You will just return to The Key.
Now that you’ve spoken with the head honcho, go back to Ebbside and find Estelle in Madame Sauvage’s.
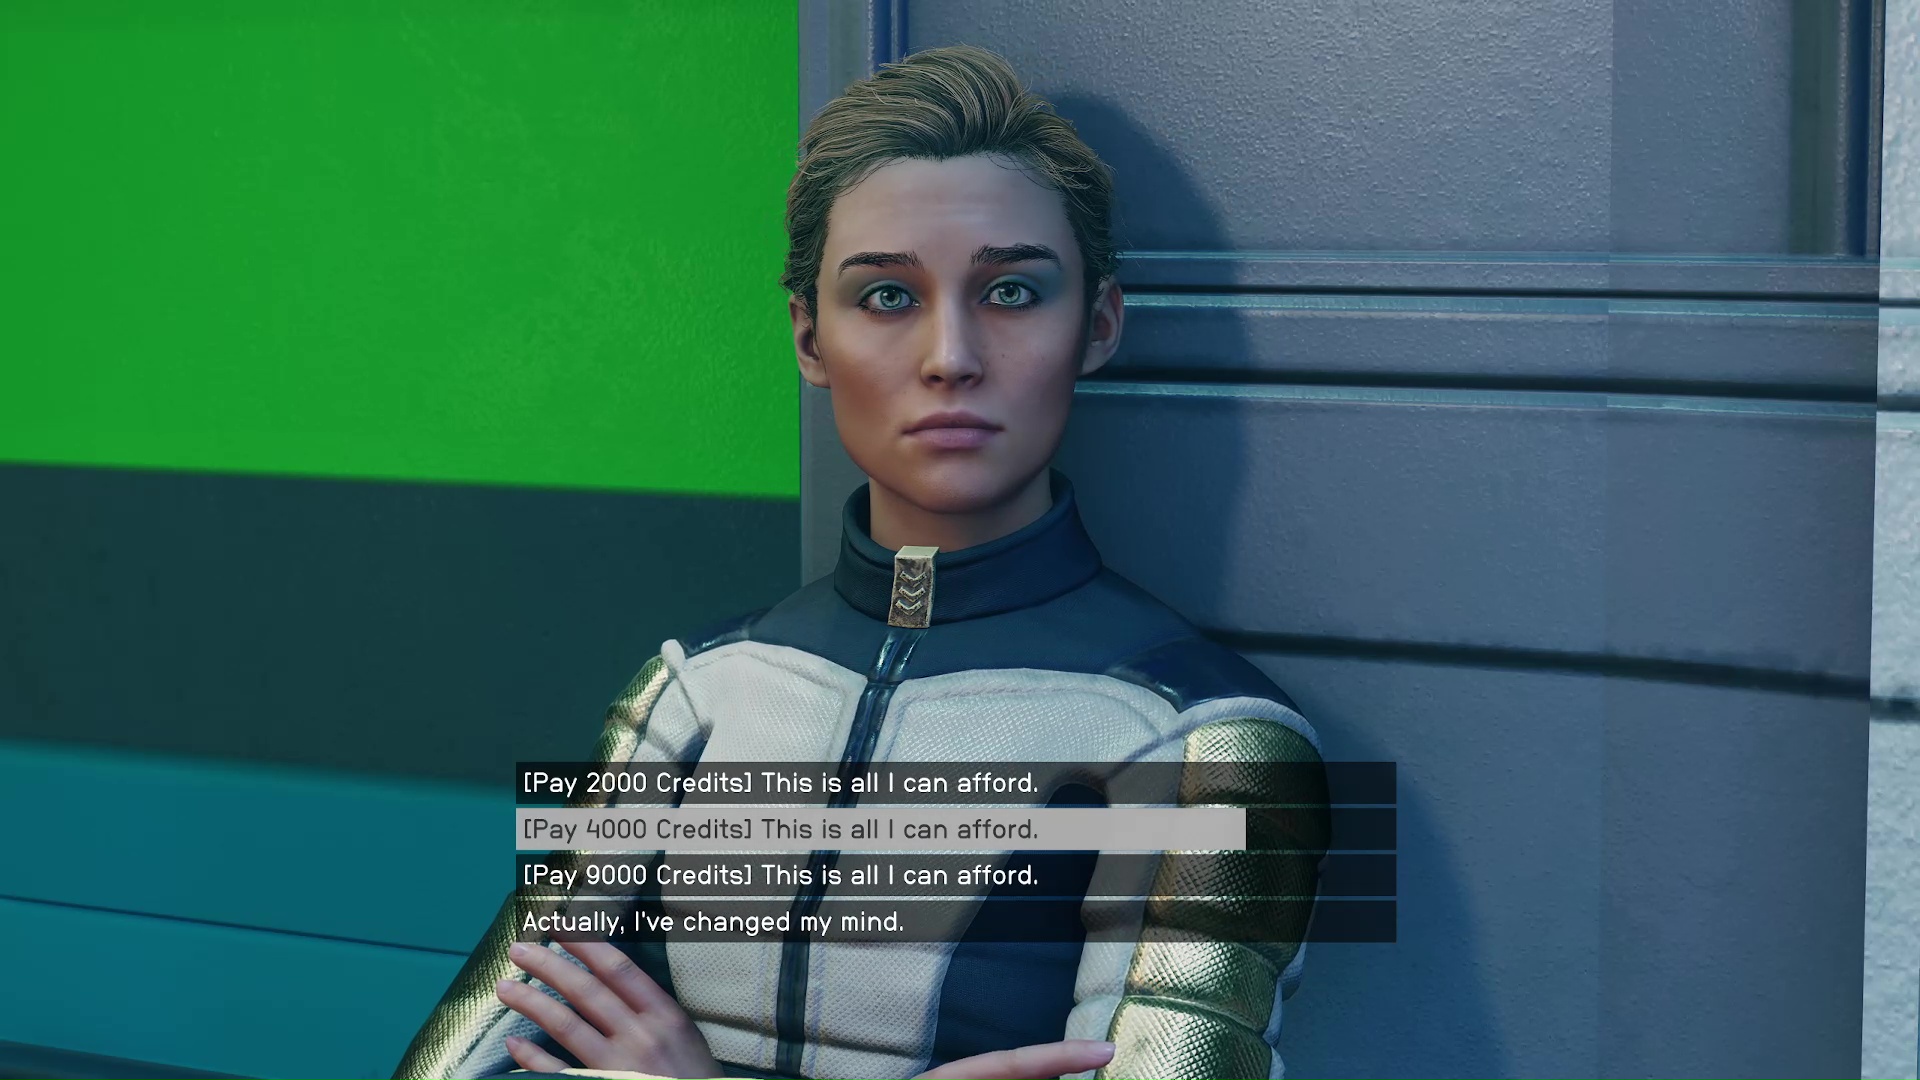
She won’t be upstairs; Estelle will actually be lying low in the room behind the bar. When you talk to her, she will thank you for not disclosing her as your contact to Bayu. She will then say that she is in debt from her plan falling through, and would appreciate a cut of the mission. There are two things you can do:
Give her any amount of money – She will be happy and stay in the Fleet.
Don’t give her money – She will tell you that she’s leaving the Fleet.
Image 35
This won’t really matter if you turn in evidence against her to SysDef because she will be arrested, but if you want to have some help fighting SysDef on the last mission, then throw some credits her way.
The Big Score (Evidence)
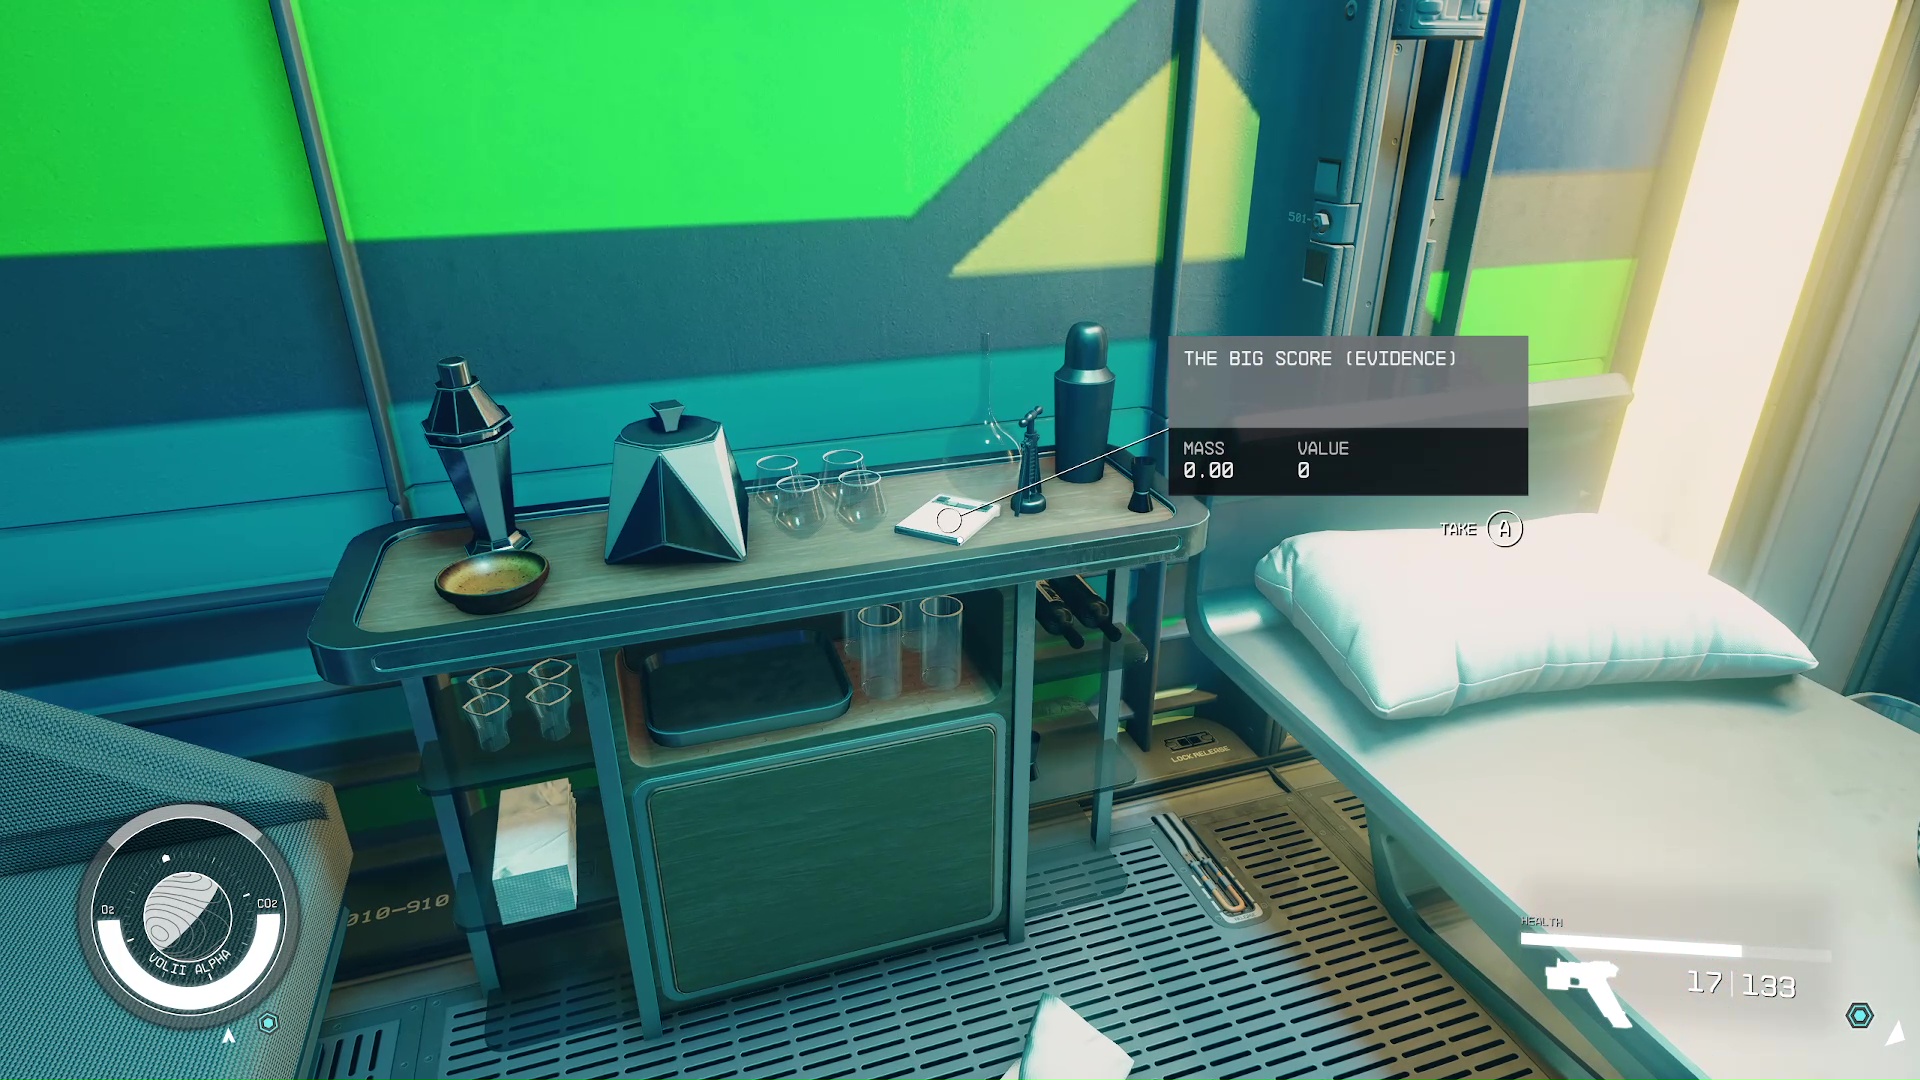
After you have chatted with Estelle, turn around and on the night stand of this room is a piece of evidence that you can use against her for the mission, Burden of Proof.
Image 36
Return to the Key
Upon returning to The Key, you will actually be met by Naeva right at the airlock. She will tell you that Delgado needs to speak with you right away at Ship Service. You will then be paid, and you will get a new mission.
Kelson is a spud head from out west. He is most happy when holding a milky tea with too much honey and playing a sprawling role playing game or reading a fantasy novel. His video game tastes vary but his main genres are looter shooters, RPGs, and real time strategy games.