This Crimson Fleet faction mission can be very different depending on whether or not you’re working for SysDef, but the bottom line is that you need the GalBank credentials to find out where The Legacy ship was lost. If you want to stay on SysDef’s good side, then you will do a lot of running around to avoid killing anyone in this walkthrough. On the other hand, you can just roll in there and blast the executive, then run back to your ship in a blaze of glory. Overall, it’s not as long as the previous mission, but it is similar in that there is another pirate that will be helping you, and you can (again) choose their fate with the Crimson Fleet.
The first thing you will want to do is prepare for this mission. Preparations will be different depending on how you plan on handling it:
Credits – If you’re planning on resolving this mission peacefully, then you will have to bribe at least some folks. Making sure you have at least 6000 credits will cover everything.
Guns and Ammo – If you don’t want to do the leg work, you’re playing as a baddie, or you want to tank your relationship with SysDef, you can just blast your way through this mission.
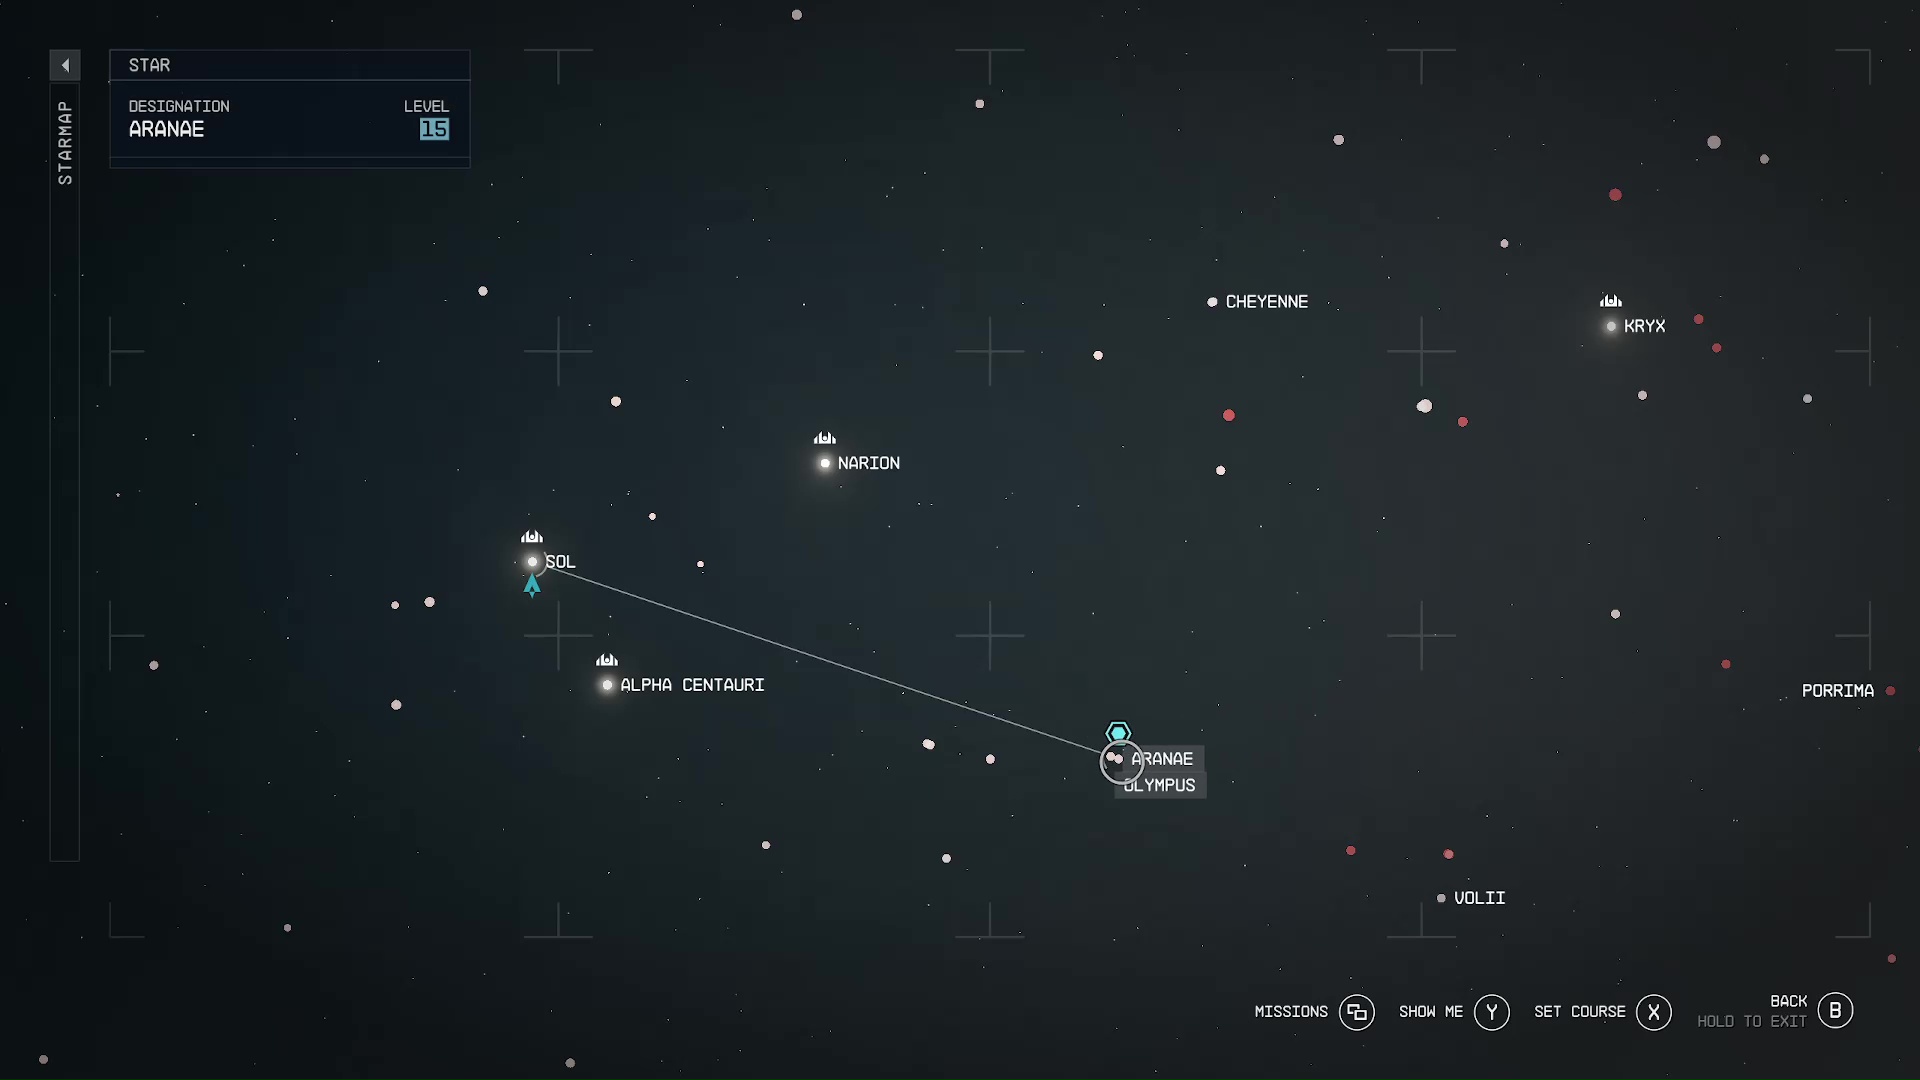
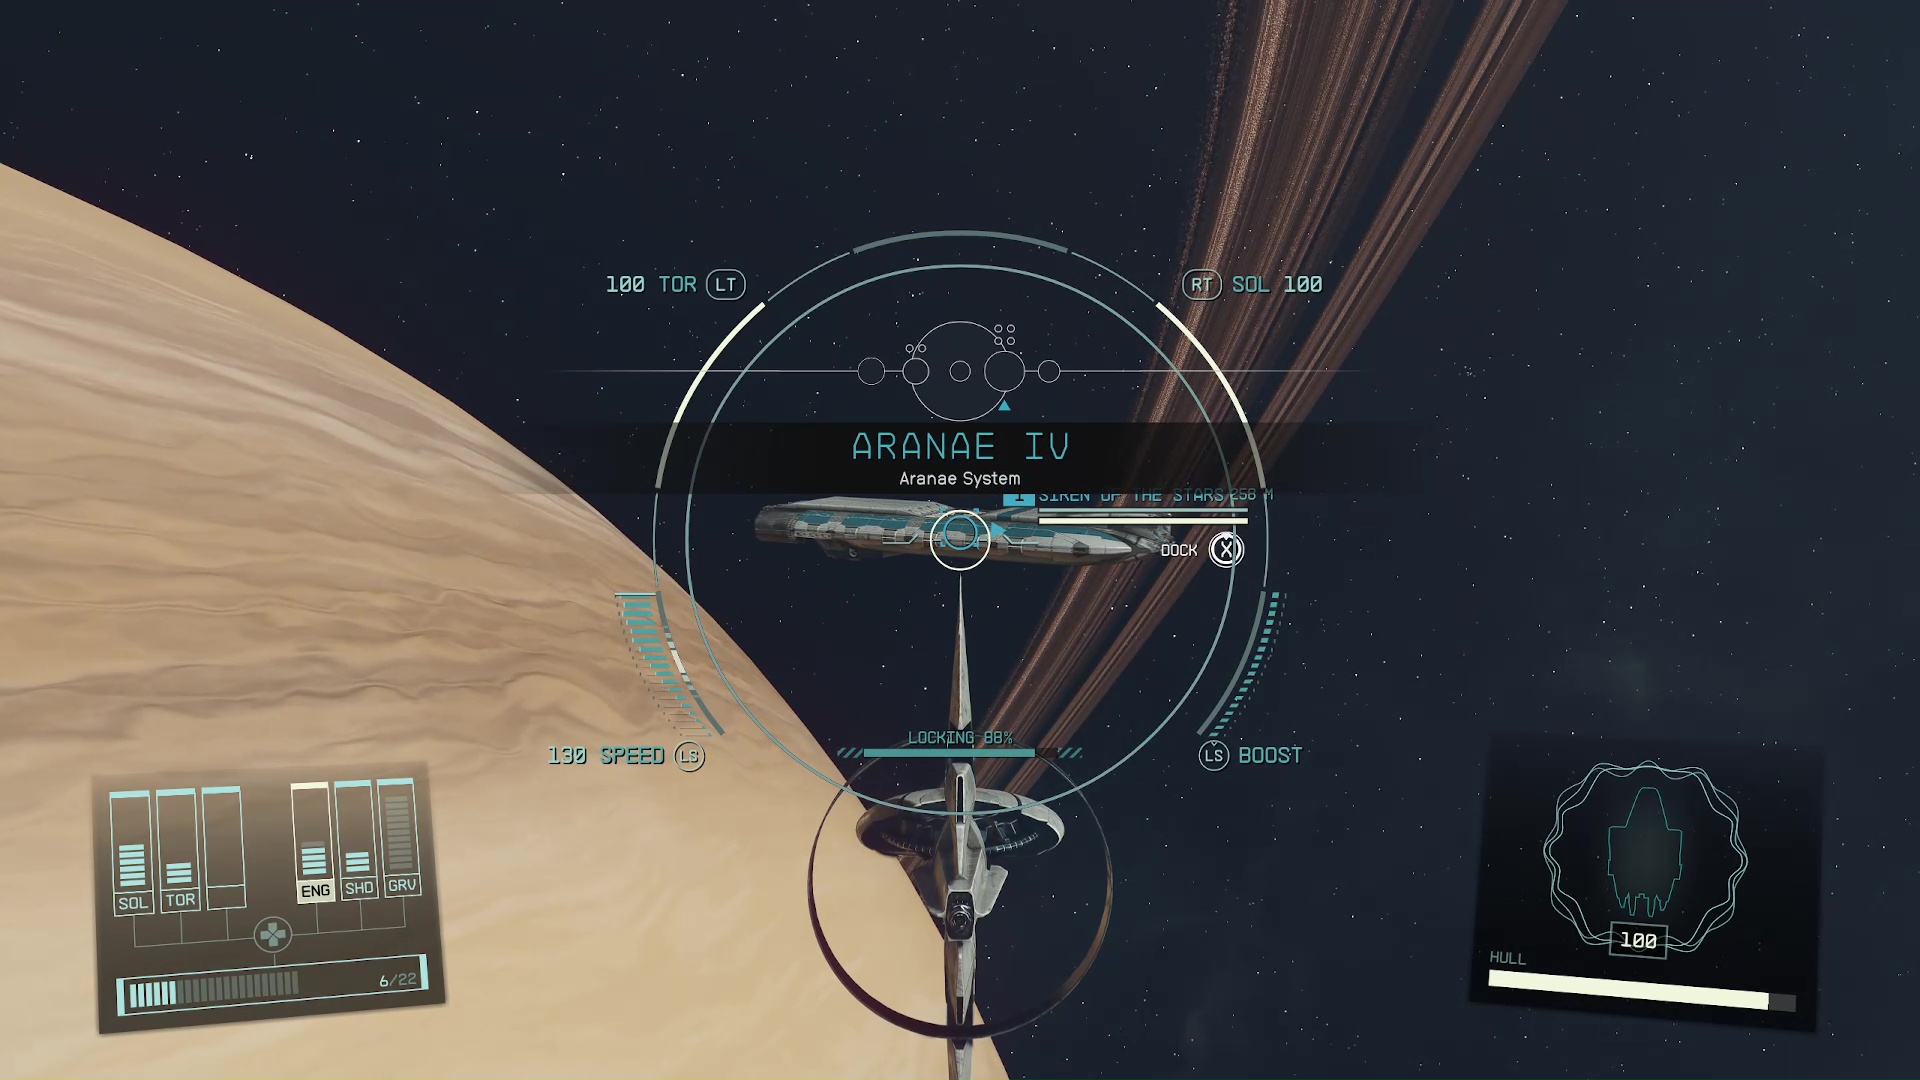
Next, it’s time to get aboard the luxurious cruise liner, Siren of the Stars. Make sure you are tracking the mission in your missions tab, then travel to the Aranae system (Image 1). If you just fast travel to the system, it should spit you out right in front of the cruise ship, and then all you have to do is dock with it (Image 2).
Image 1Image 2
Speak with Evgeny Rokov
The captain of the cruise liner (who also happens to be a Crimson Fleet dropout) is Rokov. He will be just inside the airlock entrance waiting to give you the run-down (Image 3). You can be mean or friendly to him, but the conversation ends the same. The real difference this conversation can make is how much you get paid at the end of the mission.
If you refuse to inform him about Naeva’s plan to steal the award, then you will get a bigger cut (3000 more credits). However, he does make the theft much easier, and he is the only way to steal the ES award if you fail in a specific persuasion attempt
Image 3
Evidence in Rokov’s Room
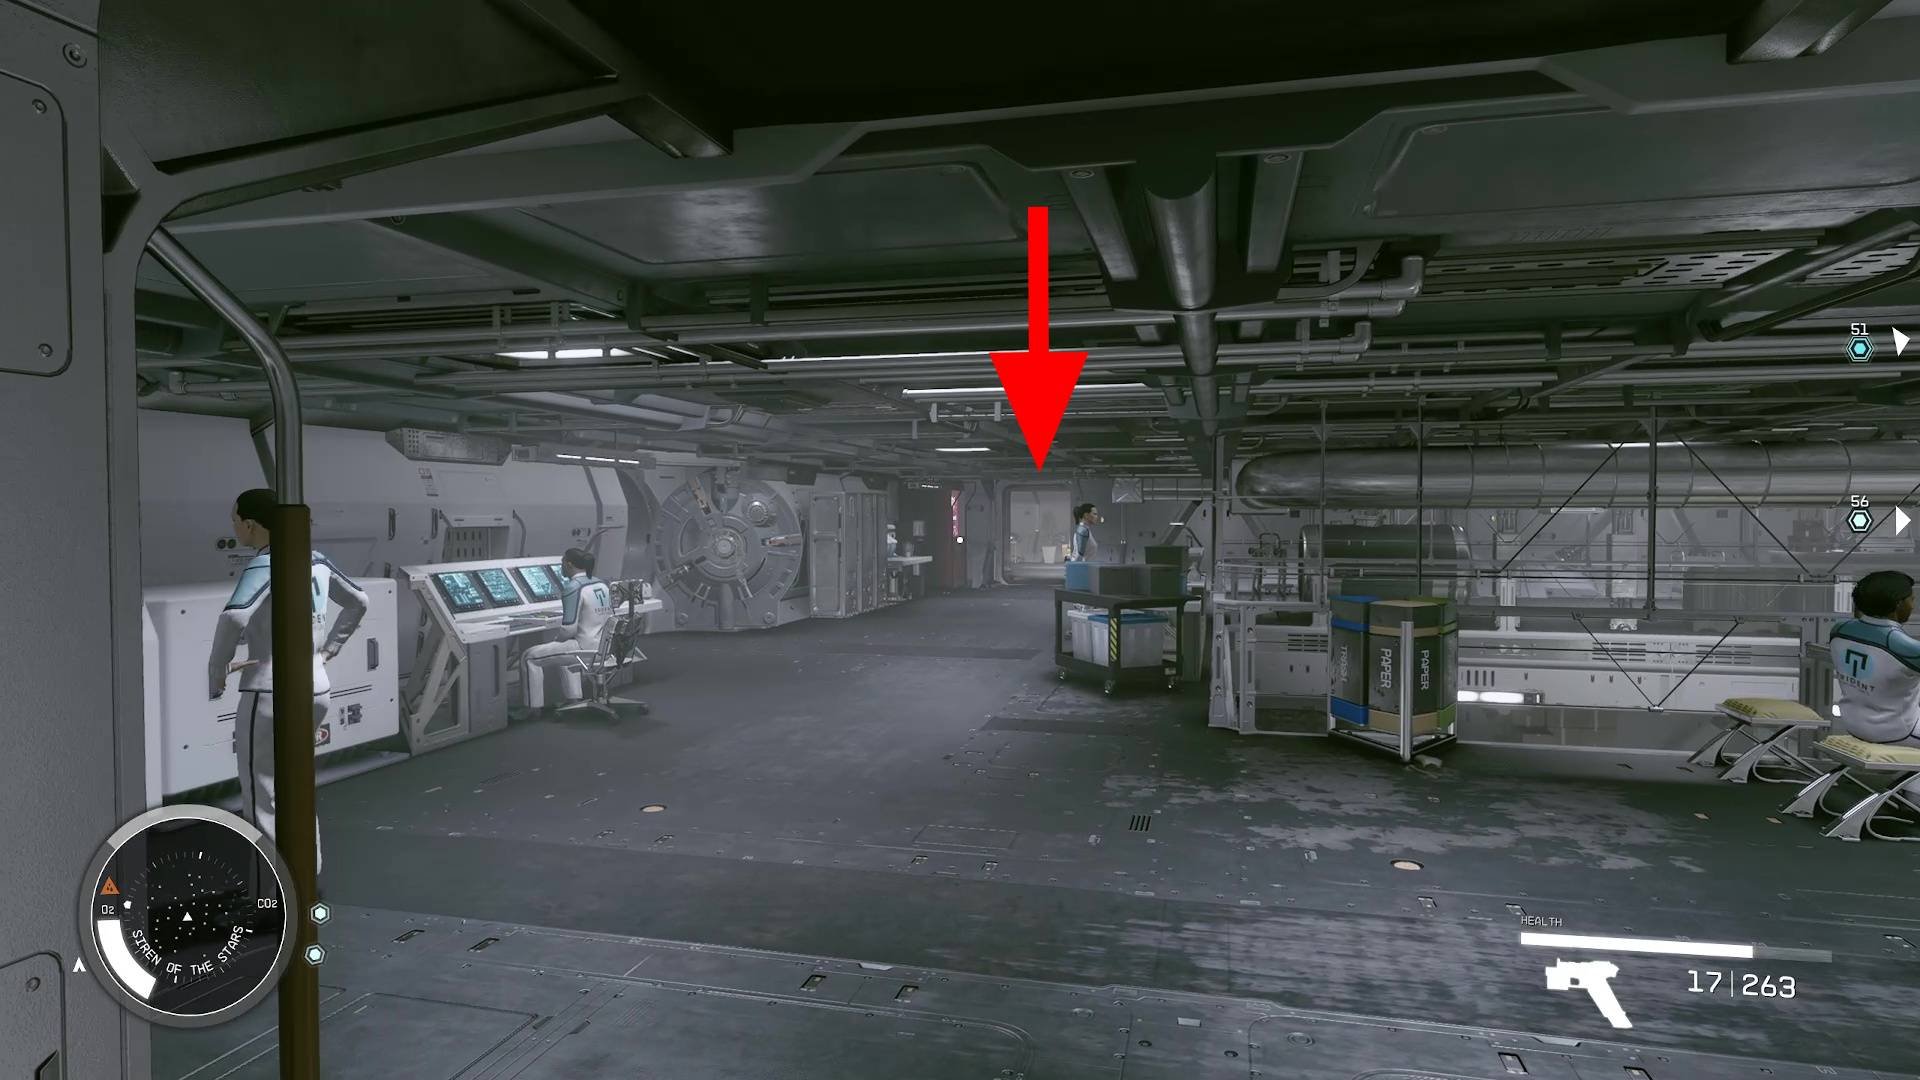
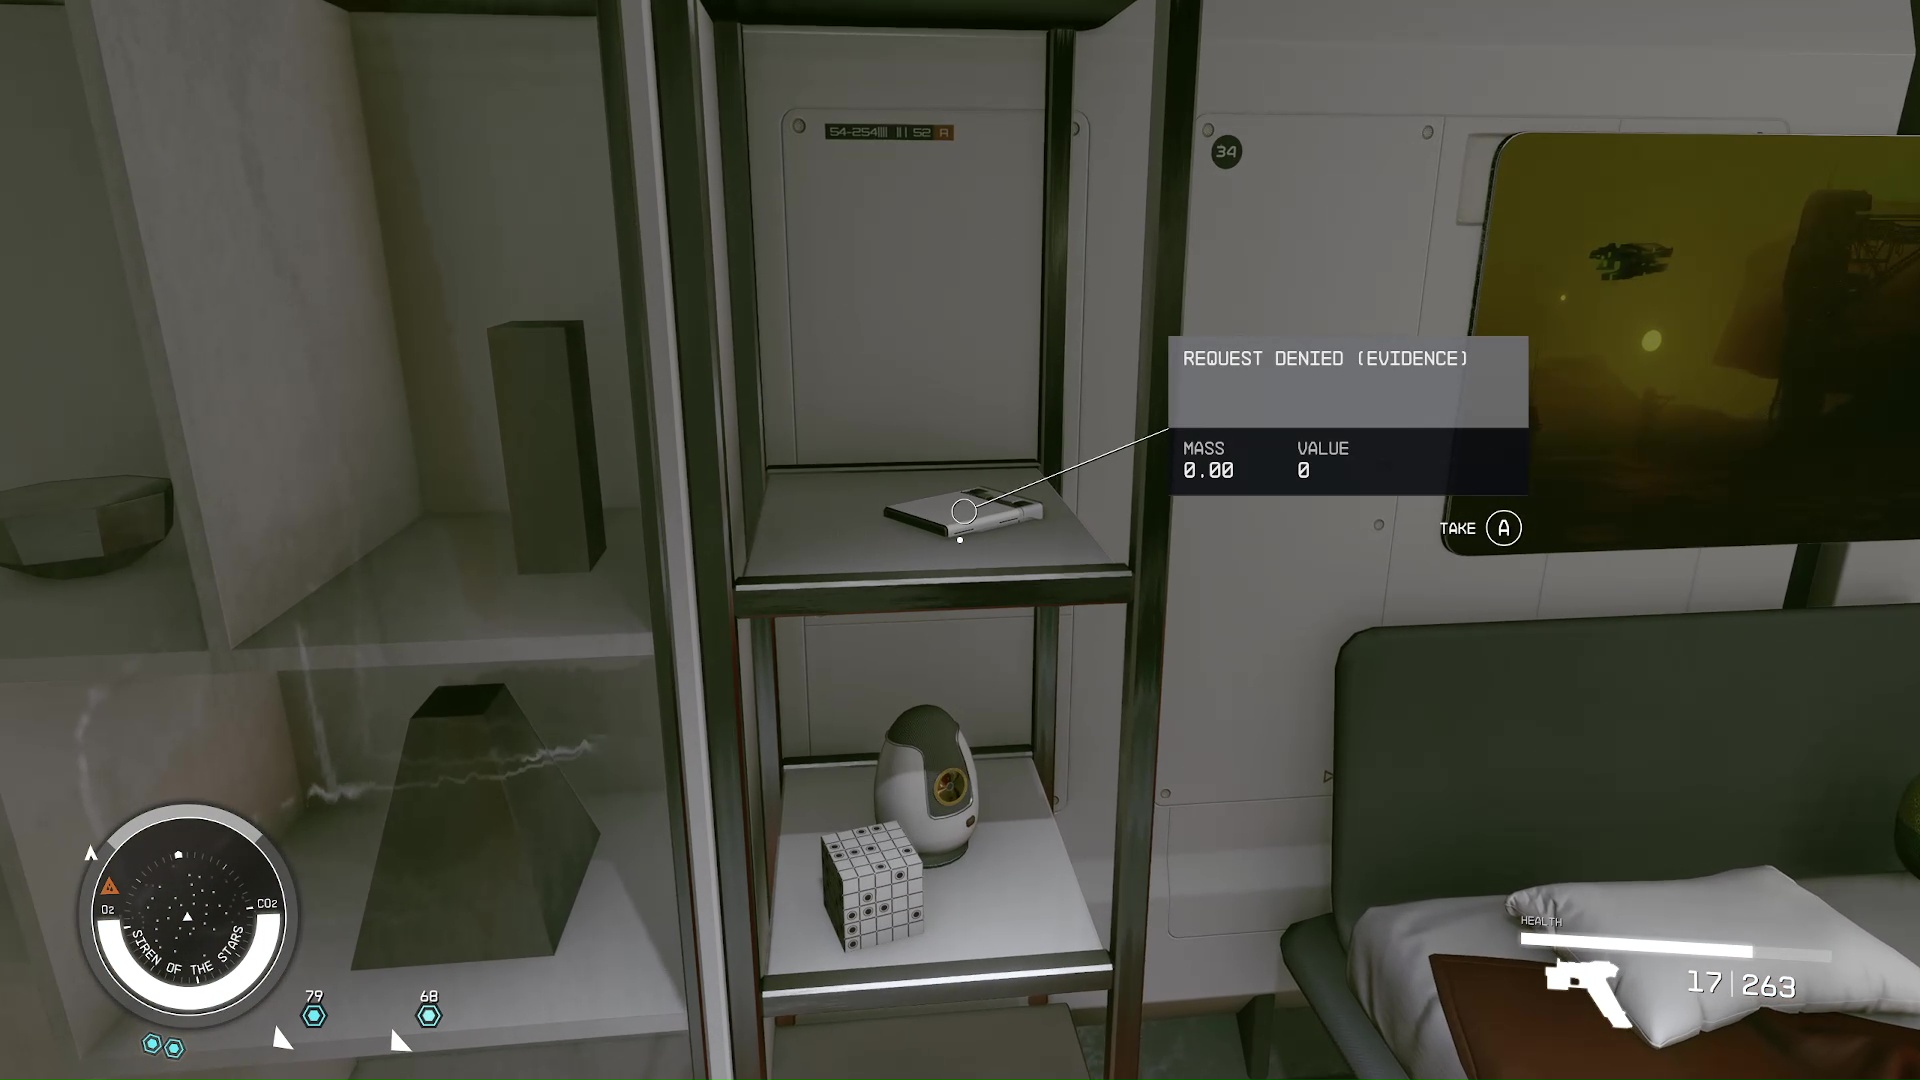
This ship is big, and it is easy to get lost. Luckily, for the main mission steps (and the optional ones) you can use your scanner to lead you. If you’re tracking the mission, and you pull out your scanner, arrows will show you where to go. However, there is one piece of evidence for the Burden of Proof mission that your scanner won’t lead you to, and it’s in Rokov’s room.
After speaking with Rokov, go up the stairs that are past him to the left. At the top of the stairs, you will see a room across the way in the left corner; this is Rokov’s room (Image 4). Walk inside and on the shelf to the left of the bed is the recording (Image 5).
Image 4Image 5
Steal the ES Award (Optional)
The optional part of this mission is stealing the ES Award for Naeva. It’s not very difficult, and it’s an easy way to earn back the credits that you will potentially lose from bribing people. If you decide not to do it, it’s not a big deal. Naeva will be upset, but she usually is, so she’ll be fine.
Speak to Sheila About the ES Award
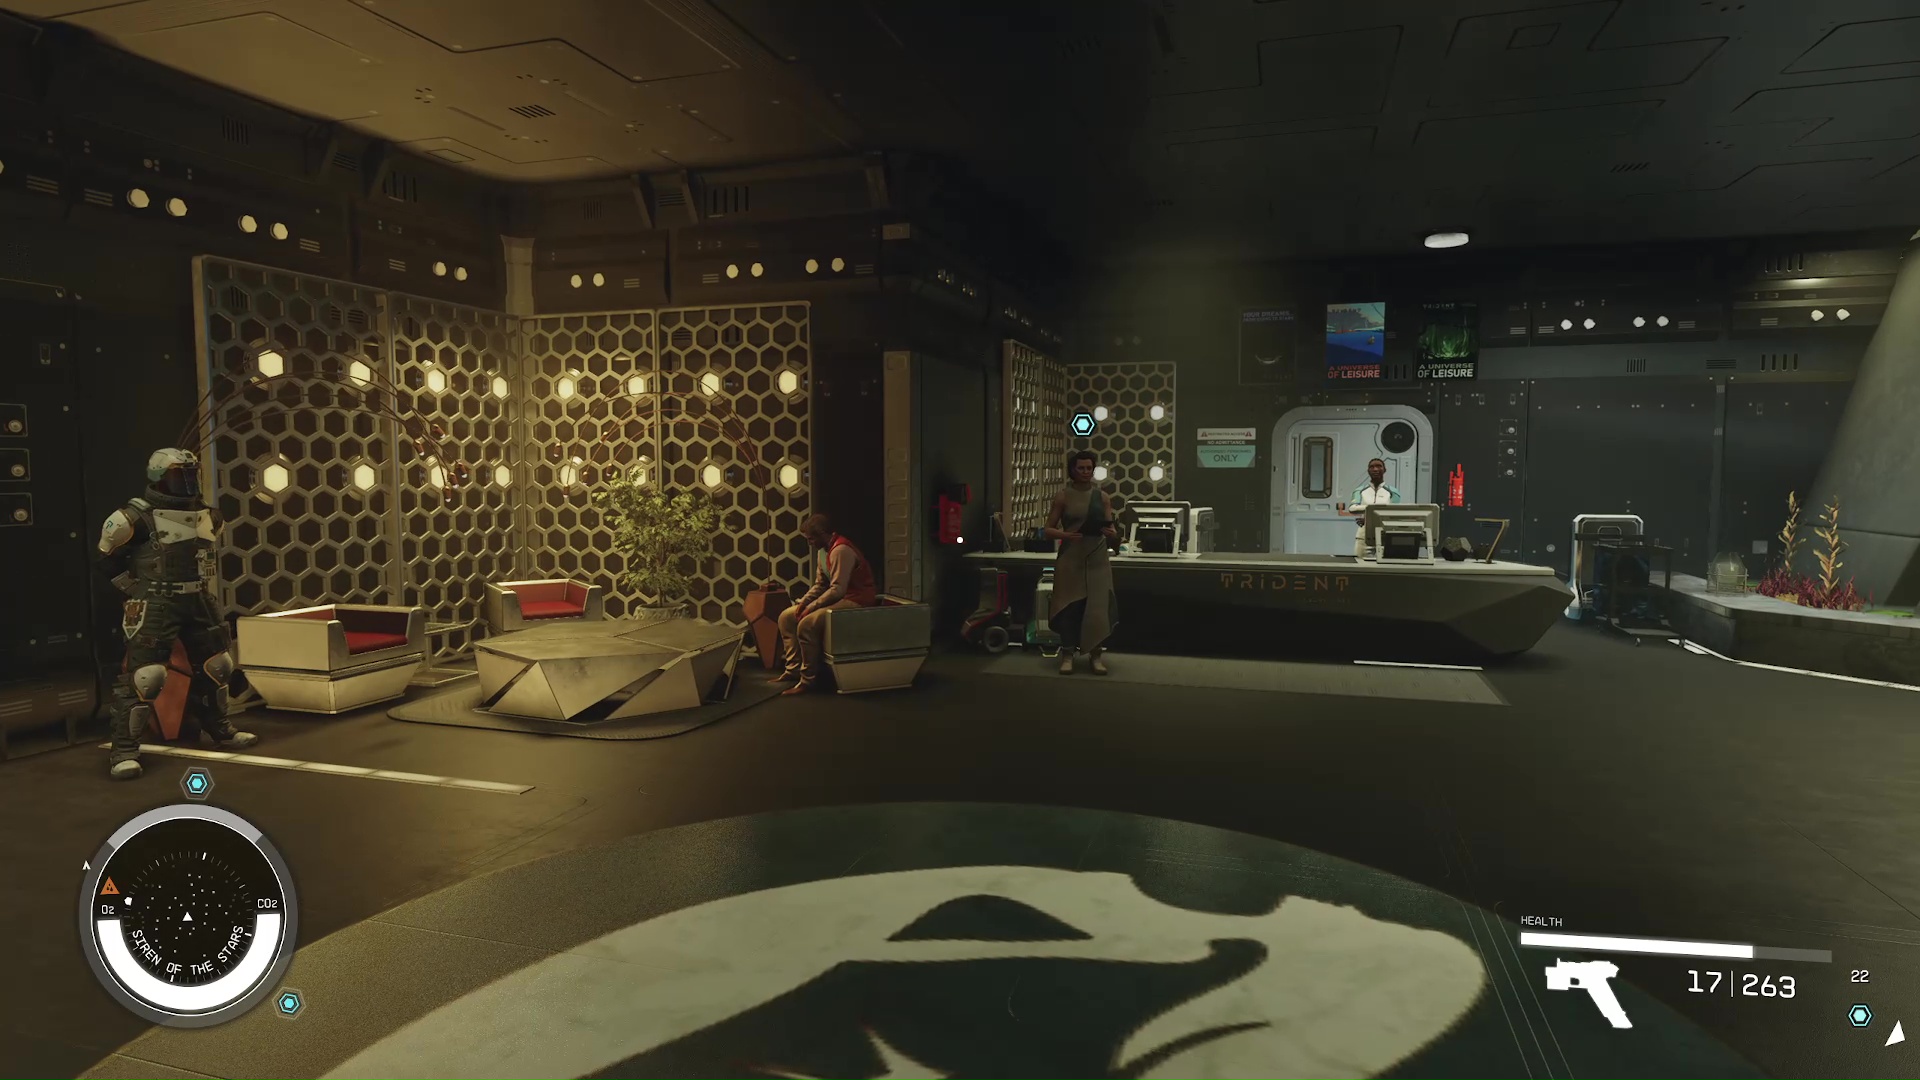
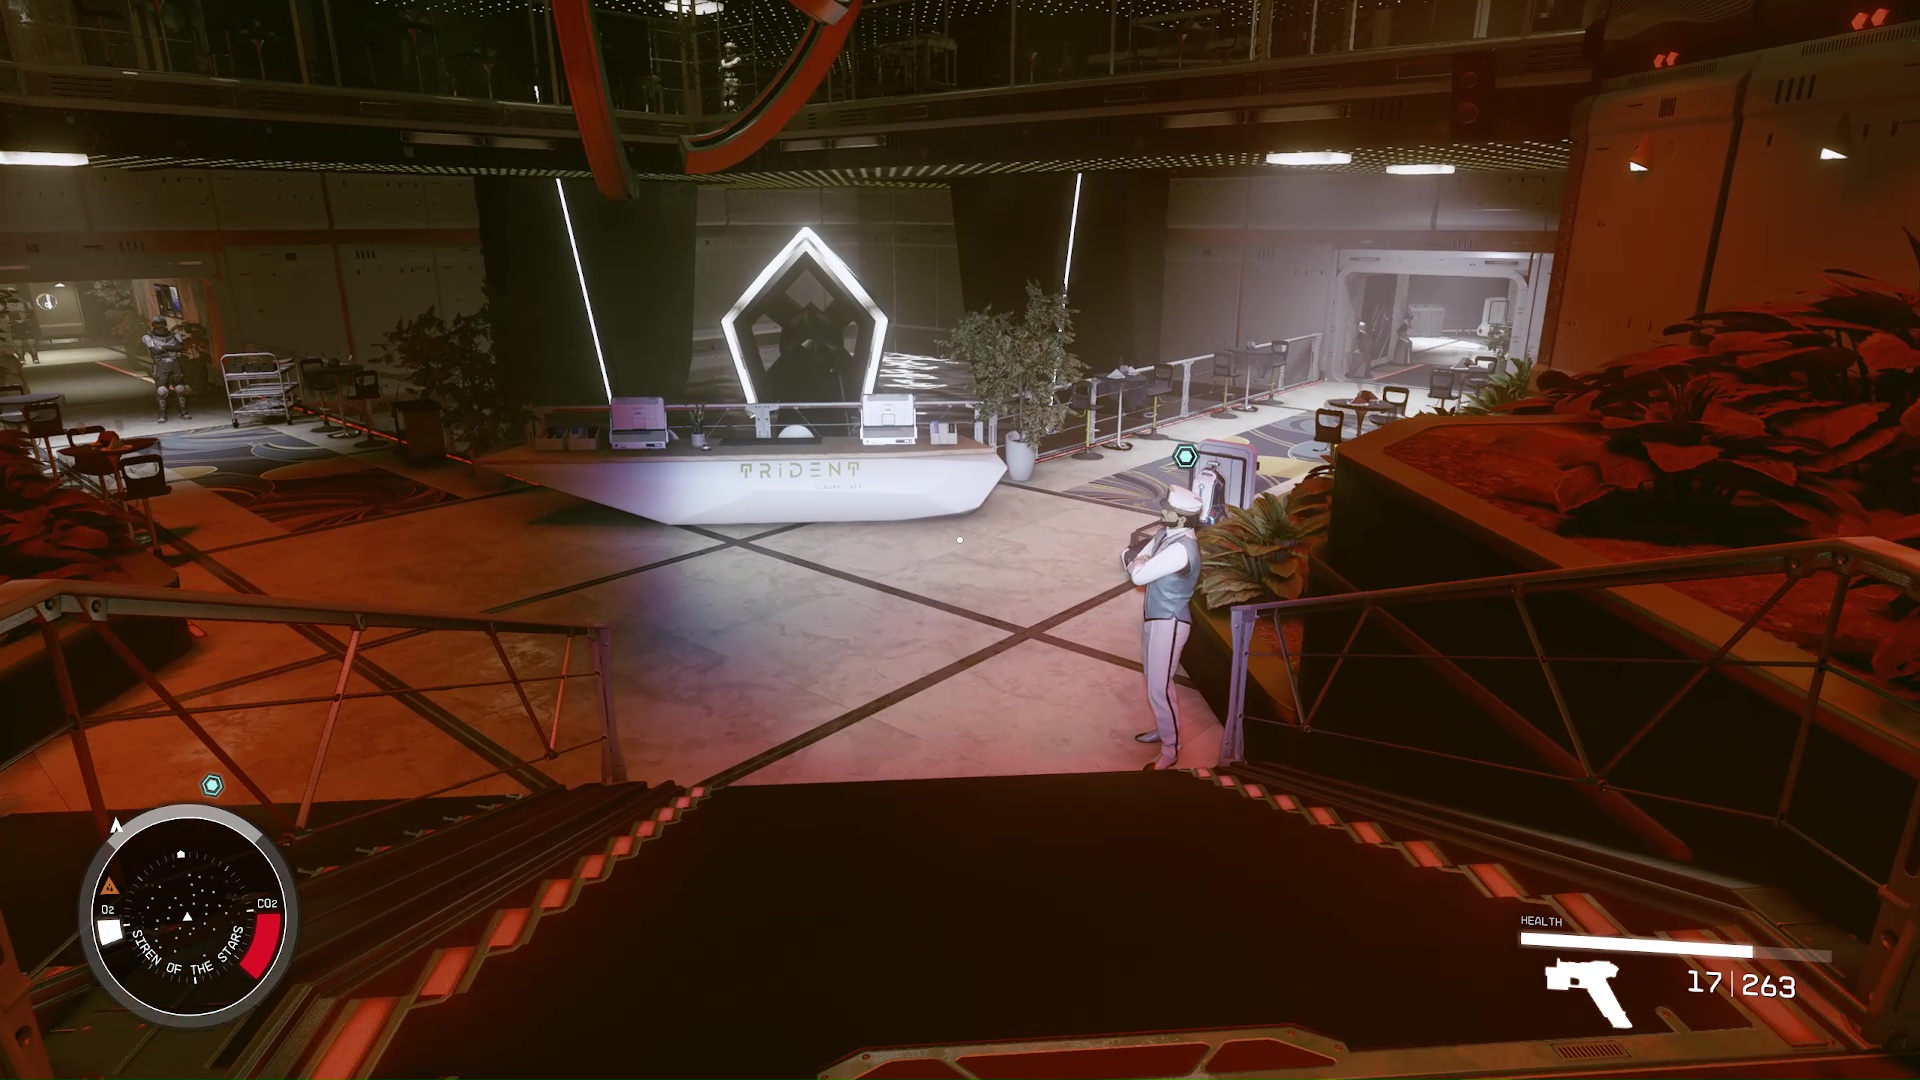
Follow your scanner to the Star View Room, which you can enter with the pass that Rokov gave you. Upstairs, you can find Sheila, who is responsible for the award. She is standing next to the Trident help desk (Image 6). Ask her about the award; you’ll find out that it’s being kept at the Purser’s Office.
Image 6
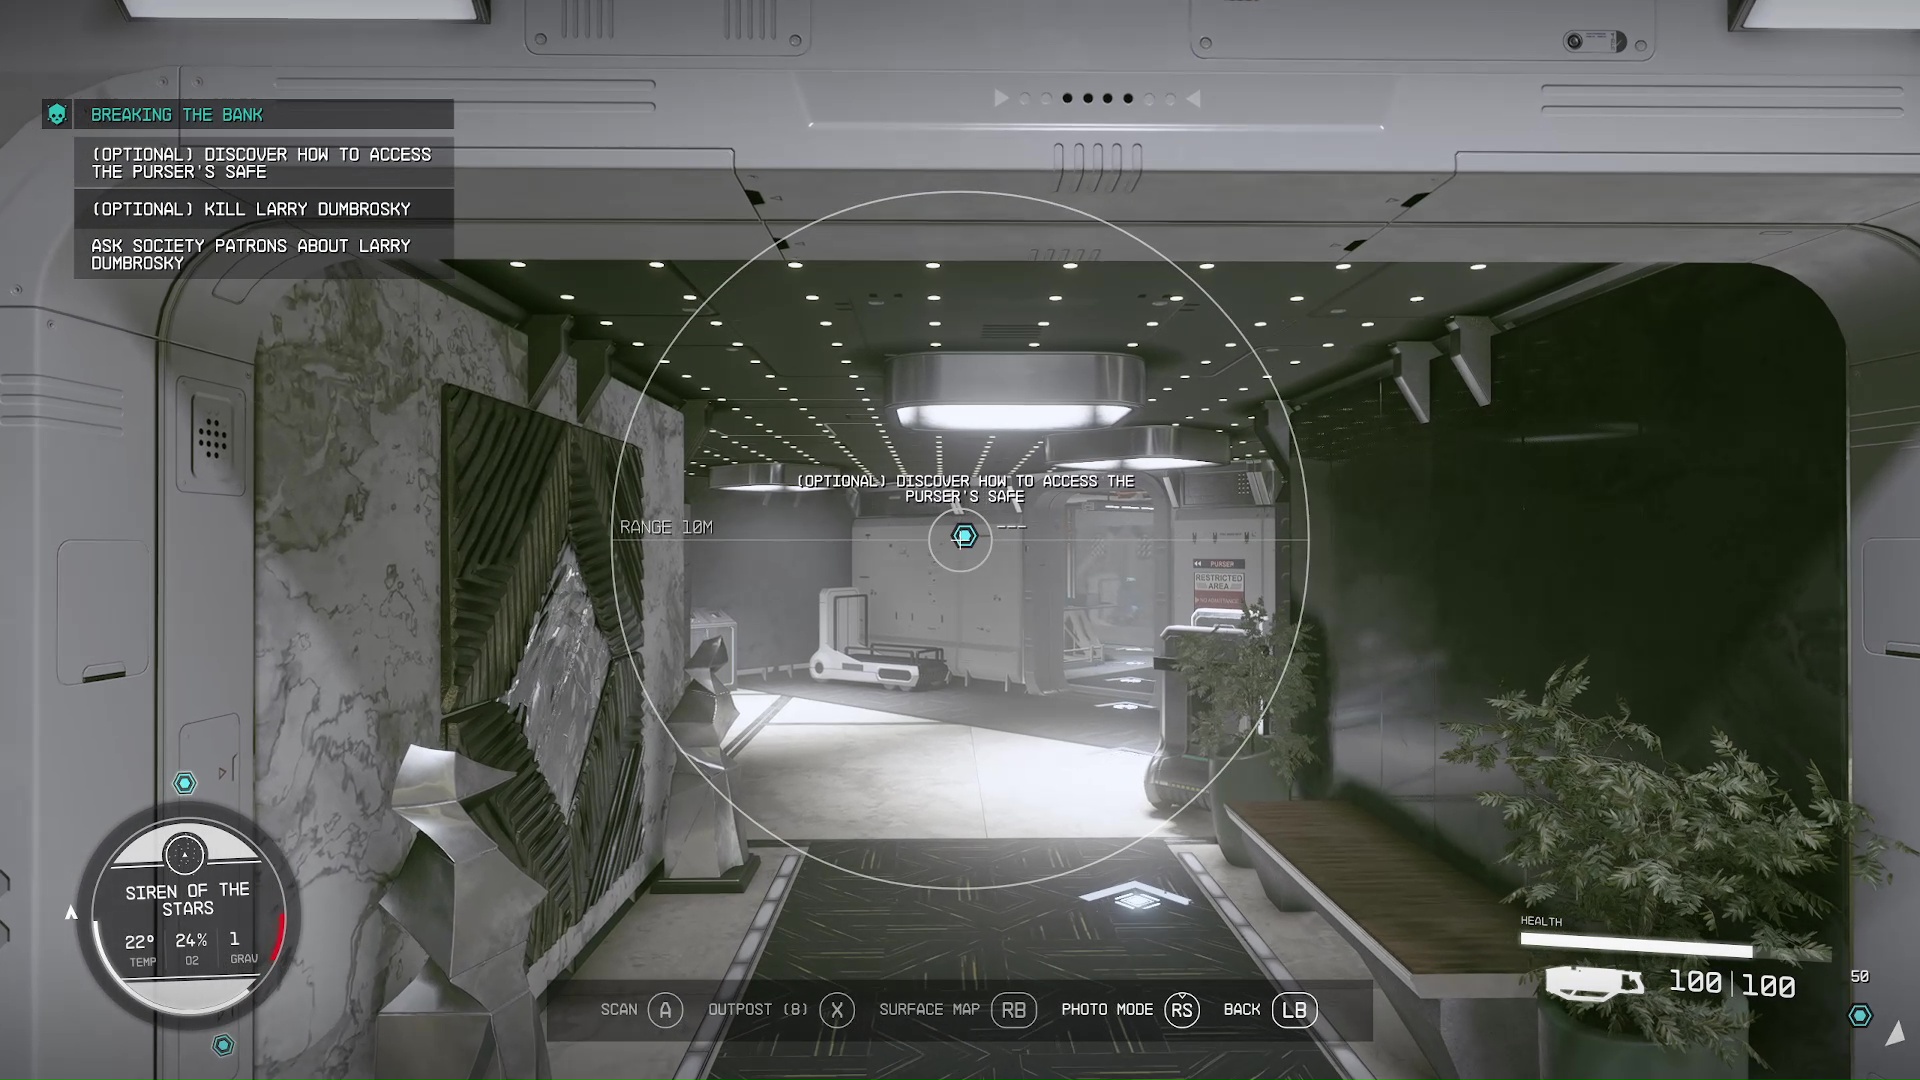
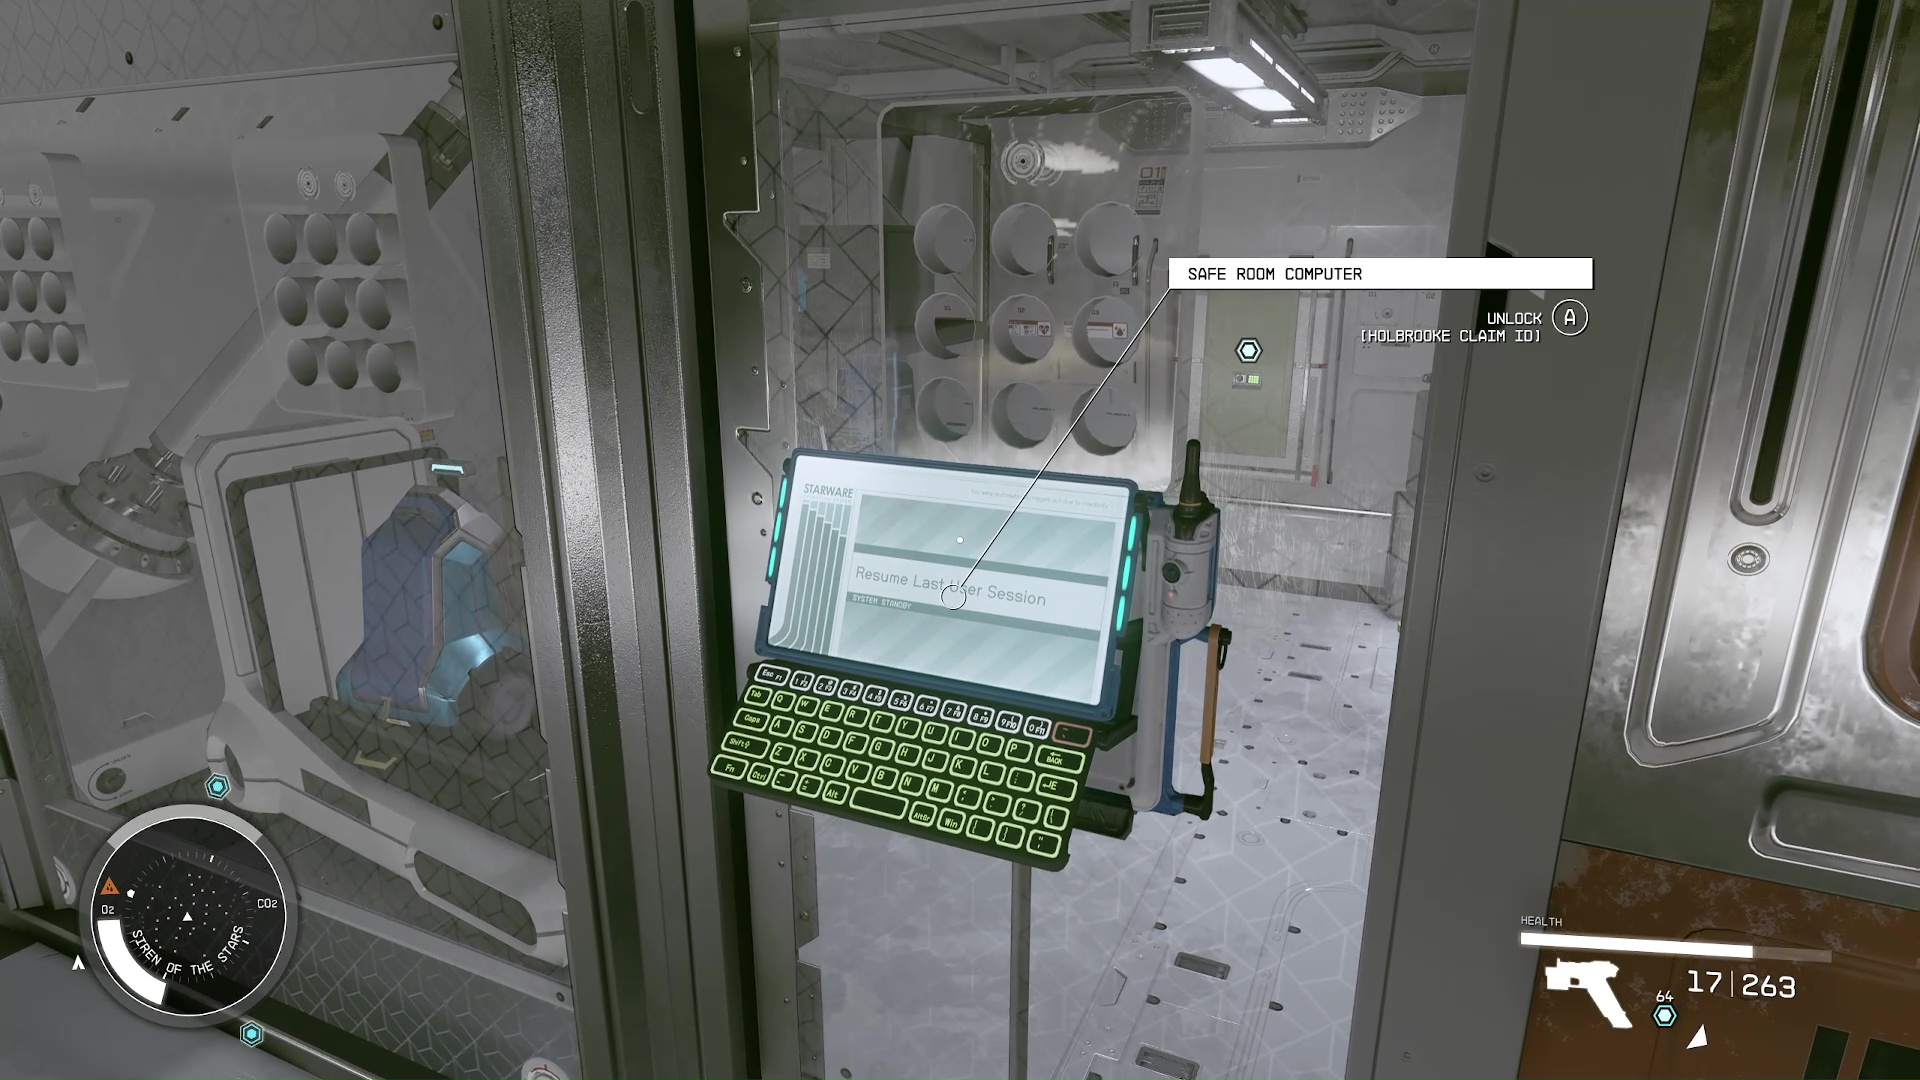
Discover How to Access the Purser’s Safe
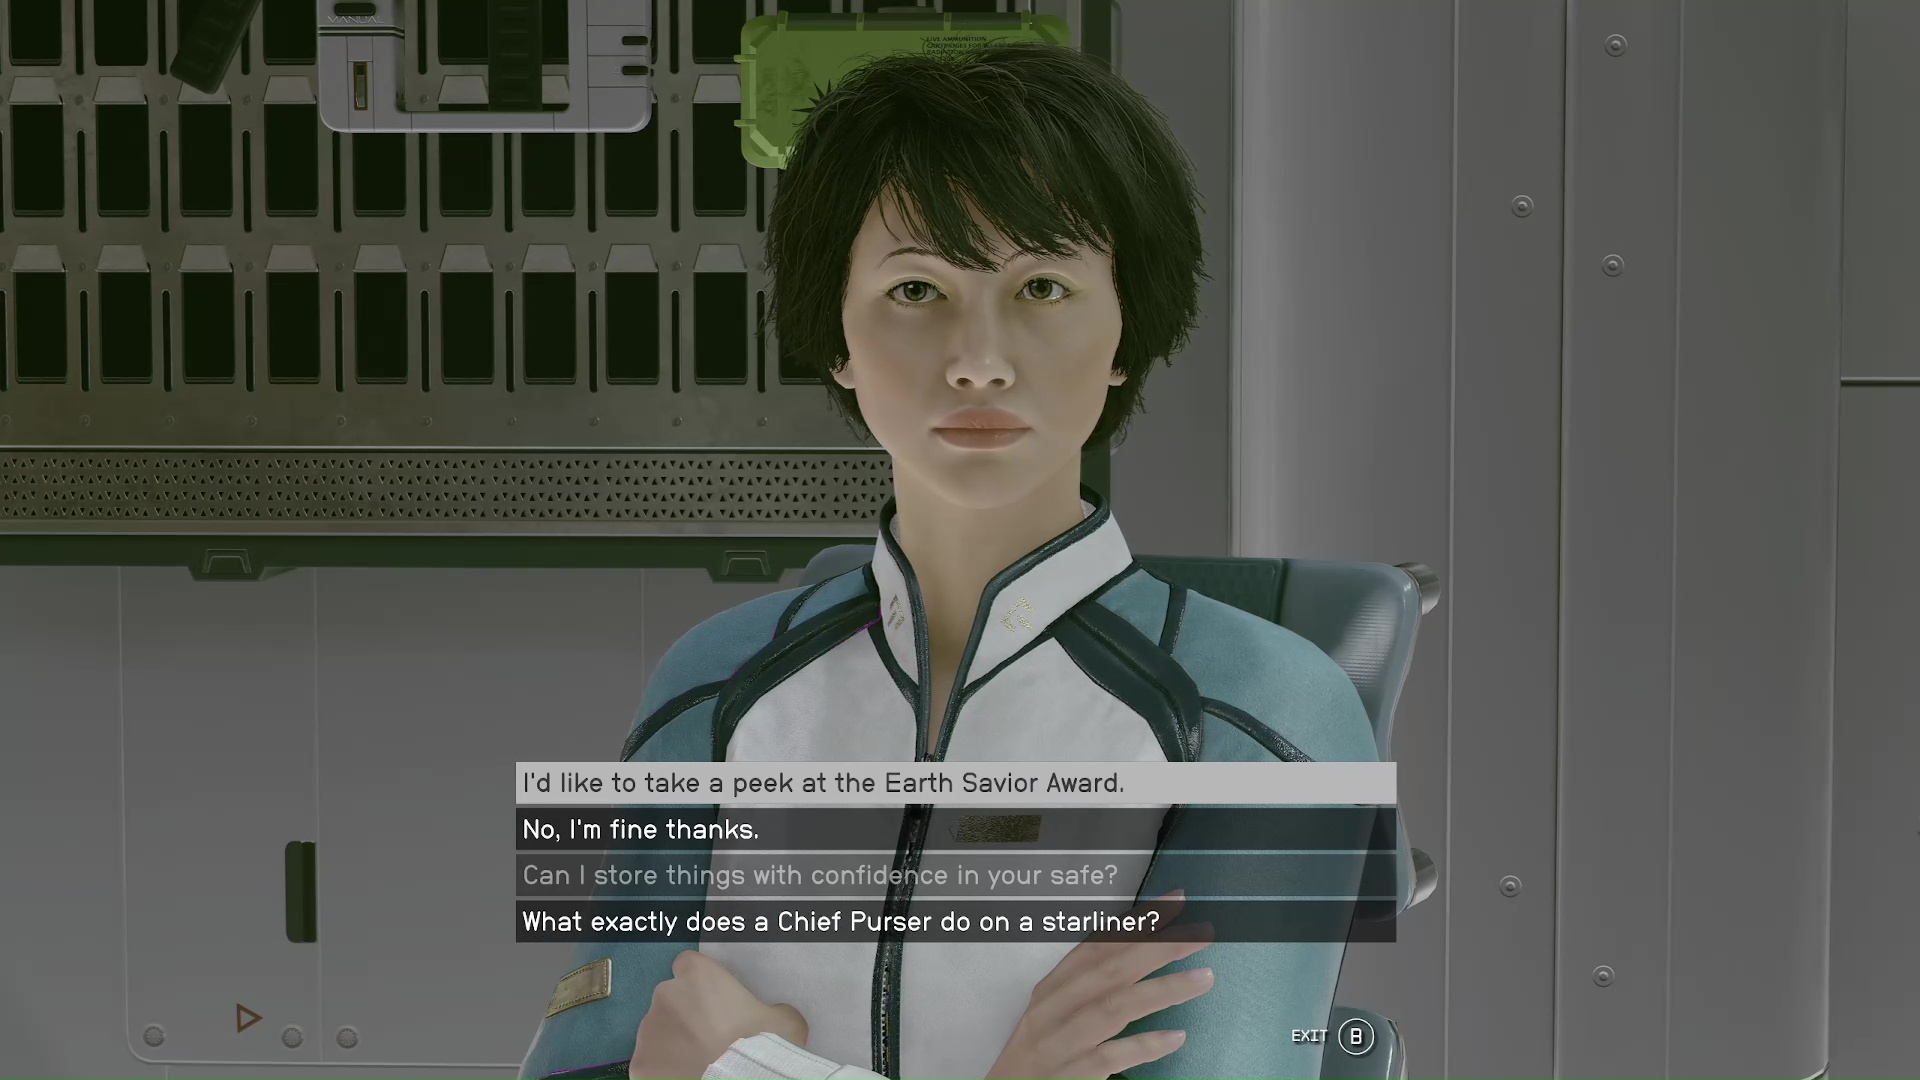
You can turn left after talking to Sheila and go through the door to the Guest Suites. Then, follow your scanner to the Purser’s Office, which is on the bottom level to the right (Image 7). Go ahead and tell the Purser, “I’d like to take a peek at the Earth Savior Award.” (Image 8) She’ll let you know that you need the claim ID to get into the vault. Consequently, you will have to go back to Sheila who has the claim ID.
Image 7Image 8
Acquire the ES Award Claim ID
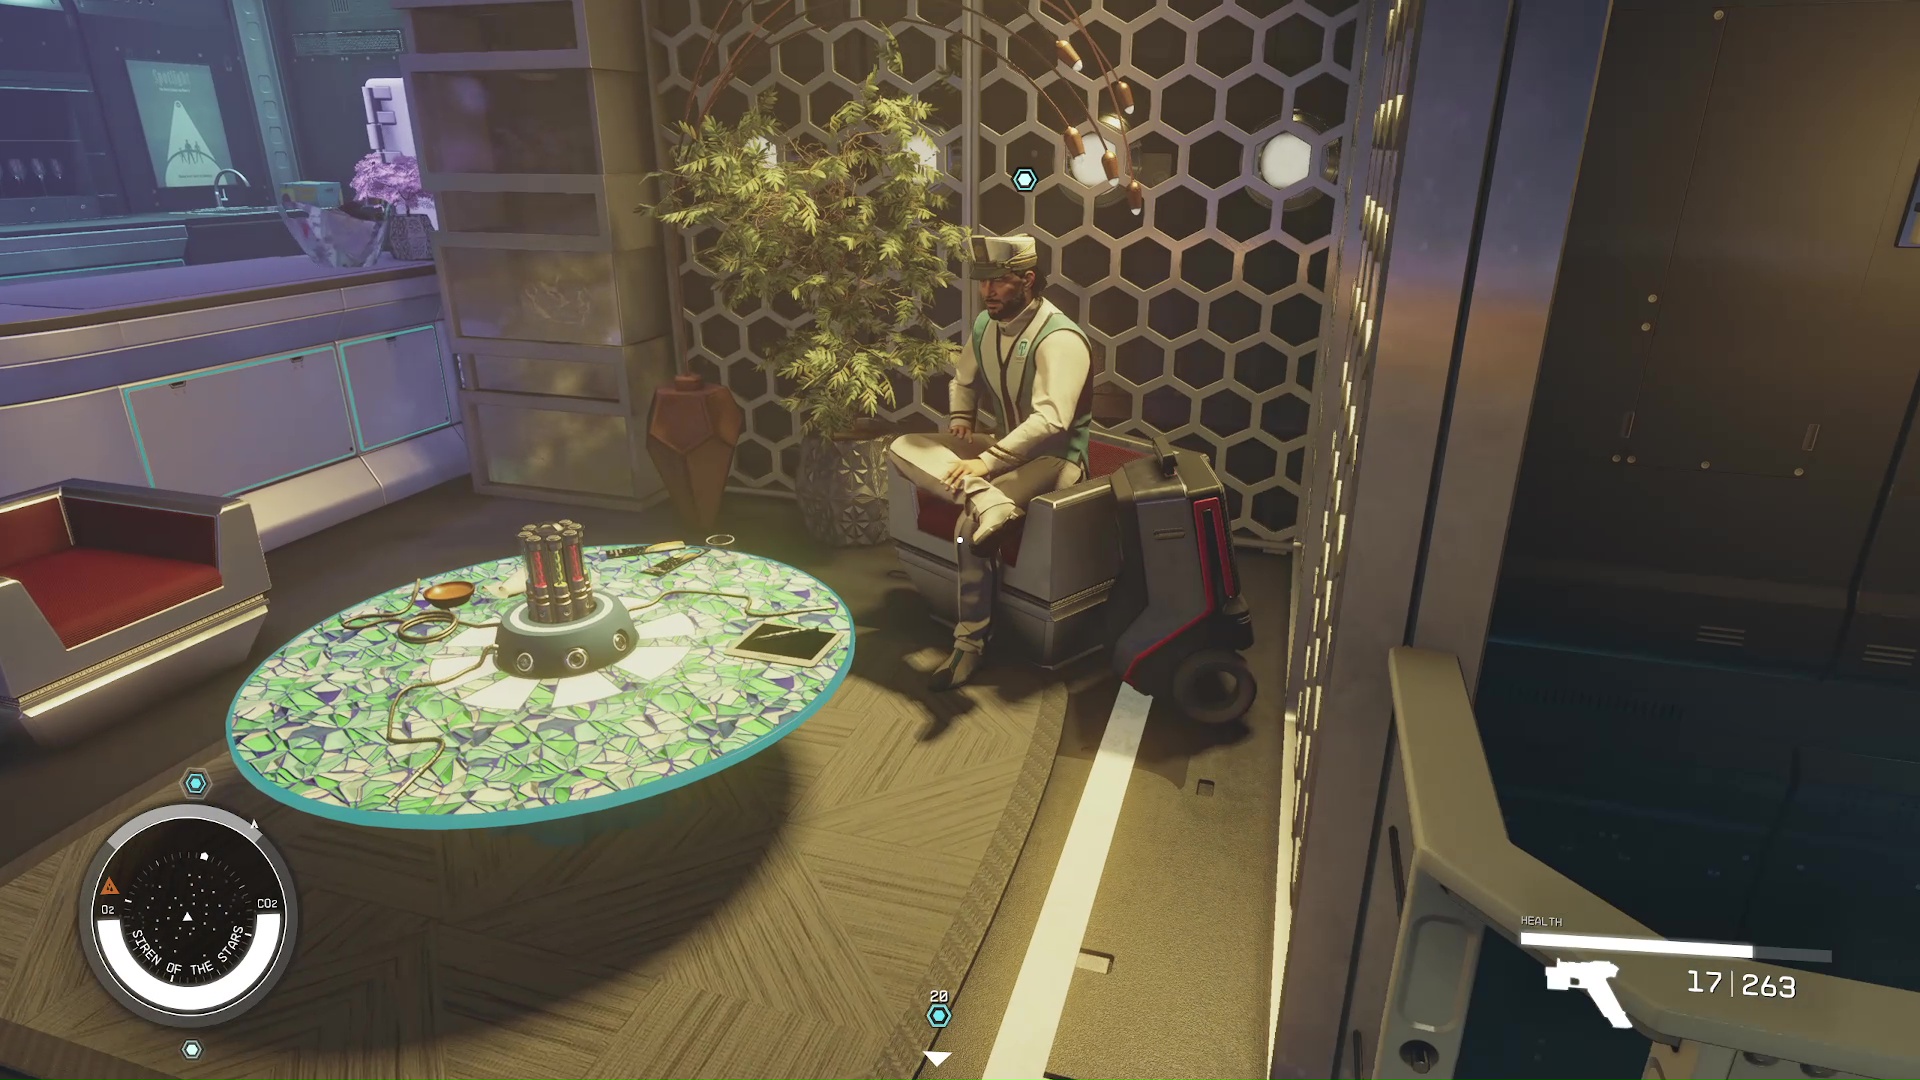
Go back to Sheila and try to persuade her to give you the ID. Unfortunately, you can’t pickpocket her for it, and you won’t find it in her guest room. If you fail in persuading her, then you need to ask Rokov for some help. He is on the top level, too. If you’re looking at Sheila, he is behind you sitting down by a bar (Image 9).
Image 9
Remember that if you ask for his help, then you will be cut out of some money. Yet, if you failed to persuade her, then you don’t have any other options. Ask him to help, and he will give you dirt to use on Sheila to get the ID.
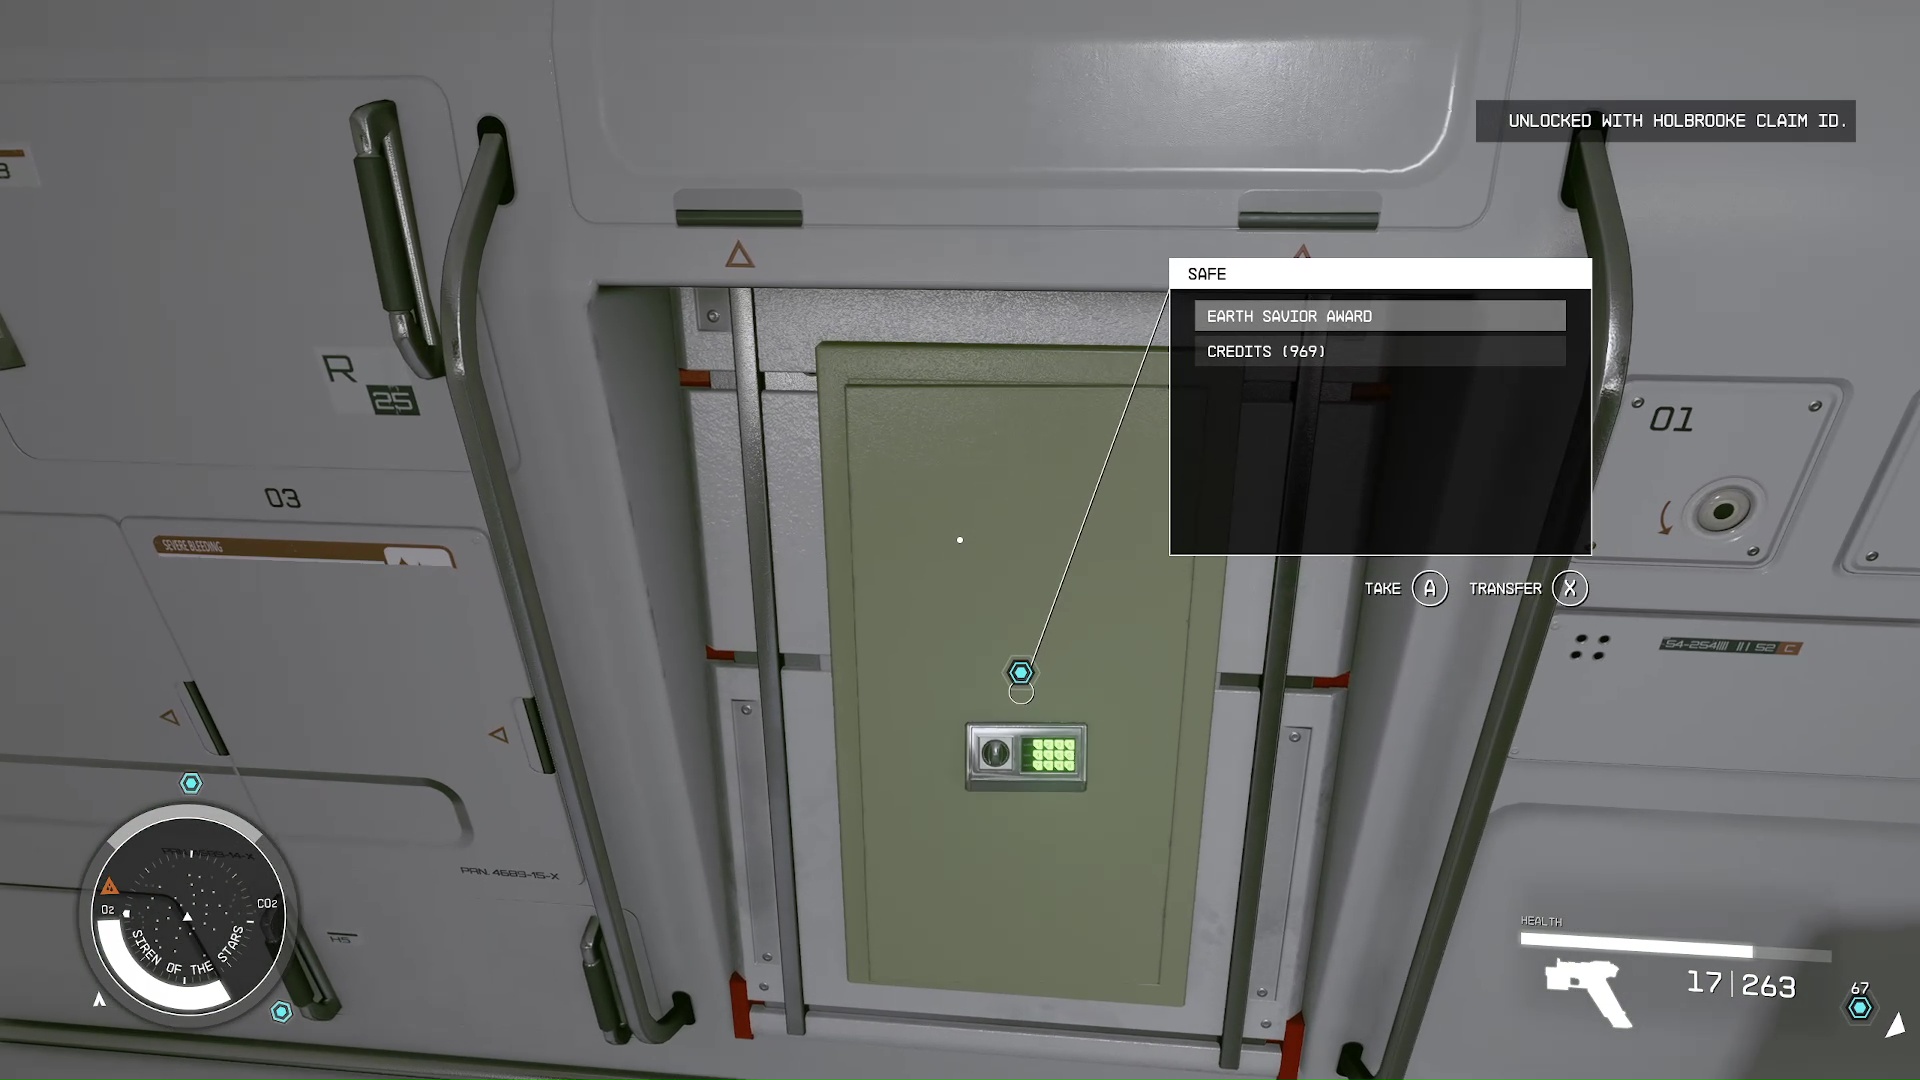
Steal the ES Award
Now, you just need to head back to the Purser’s Office. No need to be stealthy in front of the Purser. Just walk right up, put the ID into the computer by the door (Image 10), and grab the award in the safe (Image 11). Naeva will be happy, and you’ll get a nice wad of cash.
Image 10Image 11
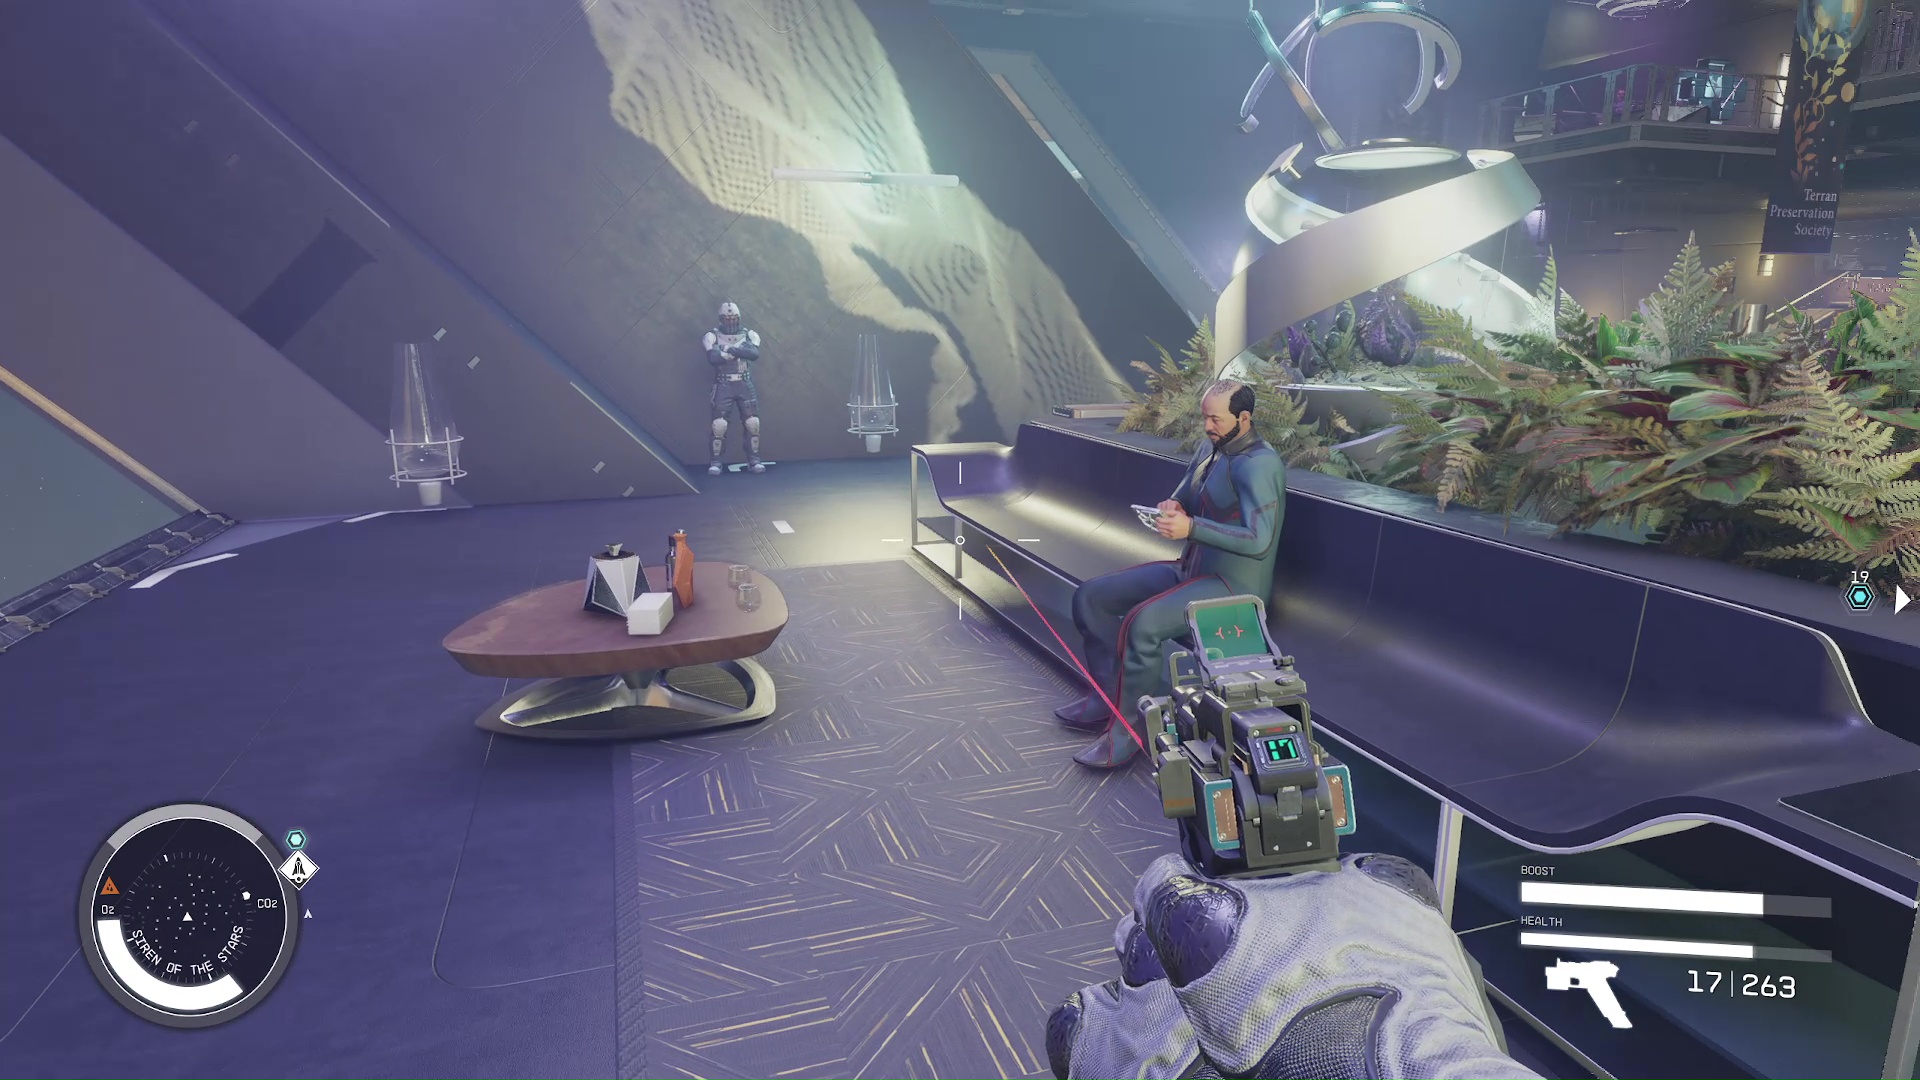
Kill Larry Dumbrosky (Optional)
This is the alternative way of finishing the mission, and we must say that it is much quicker if you’re in a hurry. What’s more, there is no sneaky way of killing Larry. The ship’s security will be notified – no matter how you kill him.
He’s not hard to find; as soon as you’re in the Star View Room, you can find him past all the patrons up on the raised area, sitting on a bench by the giant window (Image 12). Make sure you save your game before killing him, because you will be vastly outnumbered by guards. After you shoot him, don’t forget to loot the GalBank credentials off his body (Image 13).
Image 12Image 13
Locate and Speak to Rokov
It won’t matter if you try to limit damage from here on out, so you might as well shoot everyone who gets in your way for the XP as you escape. The guards aren’t all you have to worry about either, the crew will also shoot at you when you’re going through their quarters.
Rokov will be right next to where your ship is docked (Image 14). Blast your way all the way back there, then talk to him. You can choose to be nice to him or not, then he’ll tell you he’s leaving to join back up with the Crimson Fleet.
Image 14
To continue the guide for this route, skip to Proceed to New Atlantis and GalBank
Ask Society Patrons About Larry Dumbroski
If you actually have a conscience, want to stay on SysDef’s side, or don’t feel like taking on an entire cruise liner’s worth of guards, then let’s look at the path where you don’t murder the exec. First thing you need to do is question the patrons about Larry.
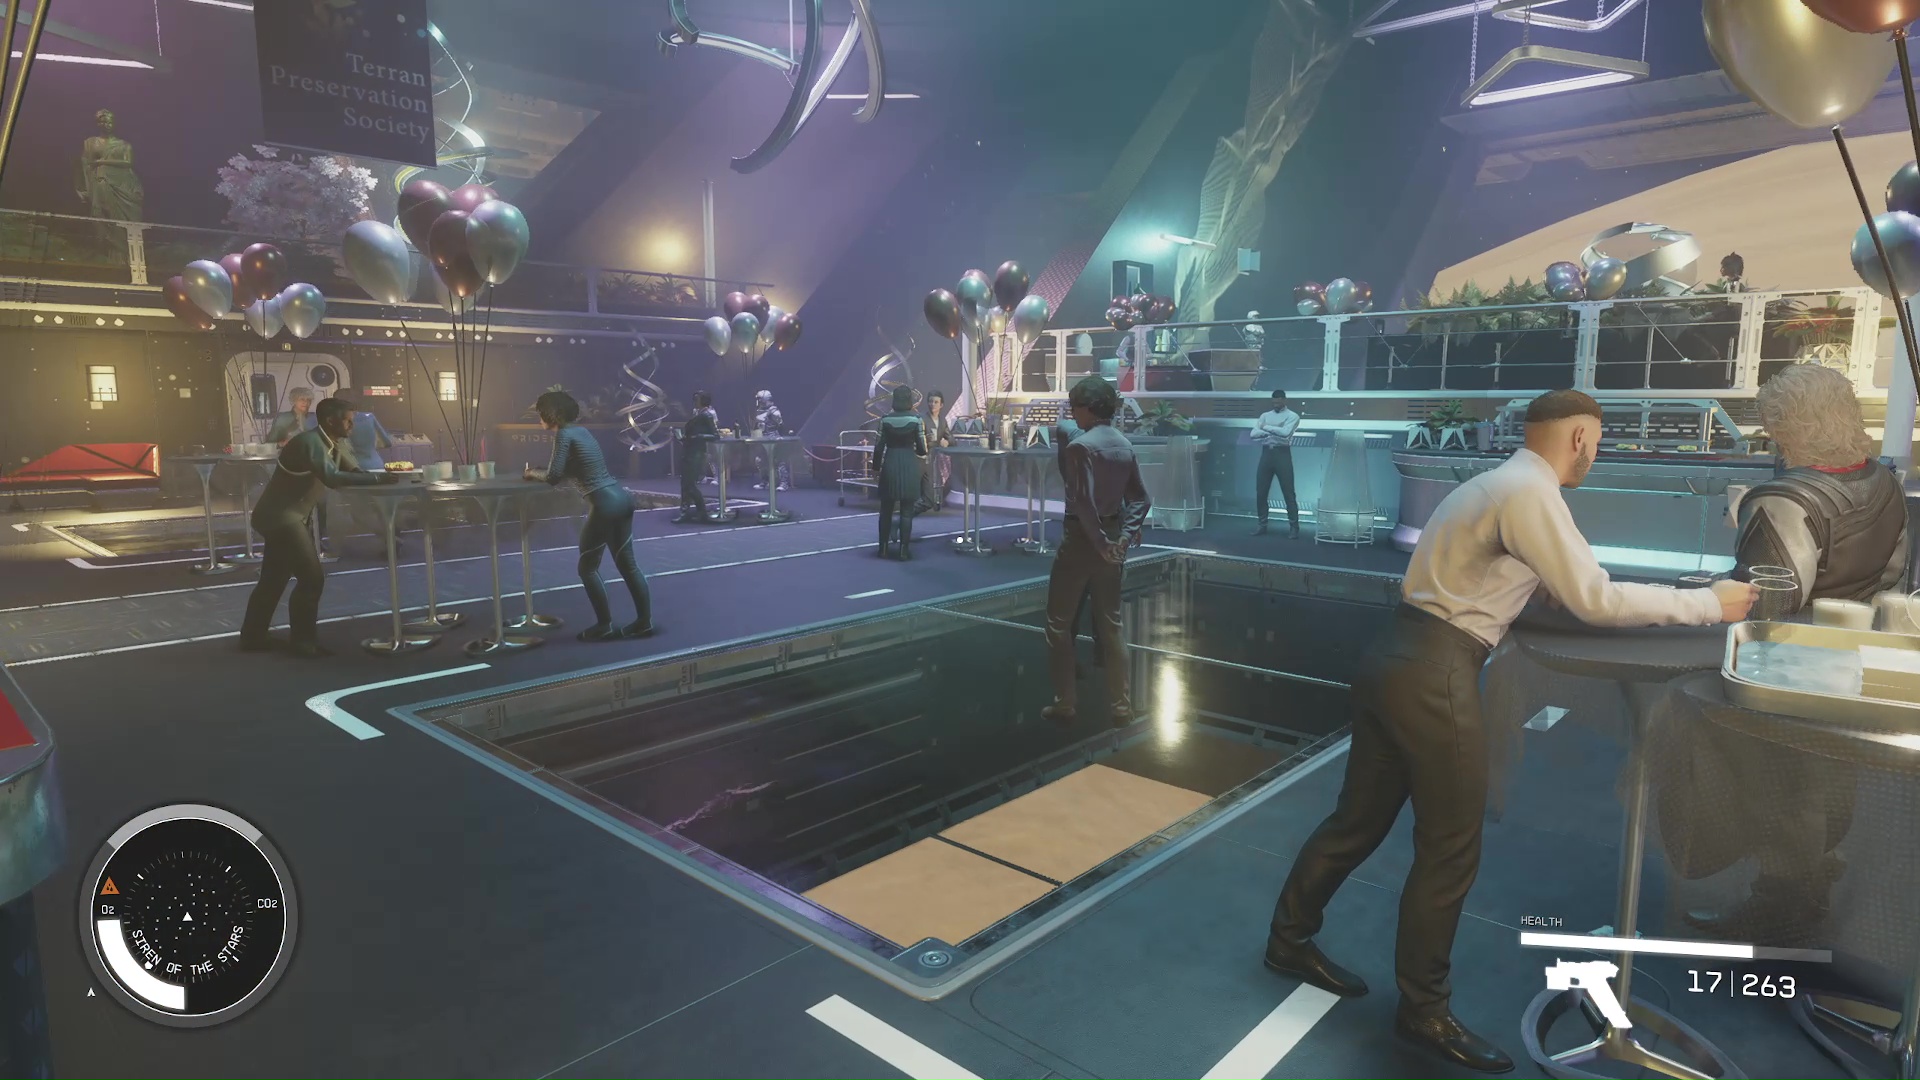
All the patrons are in the Star View Room, standing by all the tables with balloons (Image 15). After questioning about four patrons, one of them will tell you that Larry is having an affair with another low level exec named Klaudia Swist (Image 16).
Image 15Image 16
Speak to Klaudia Swist
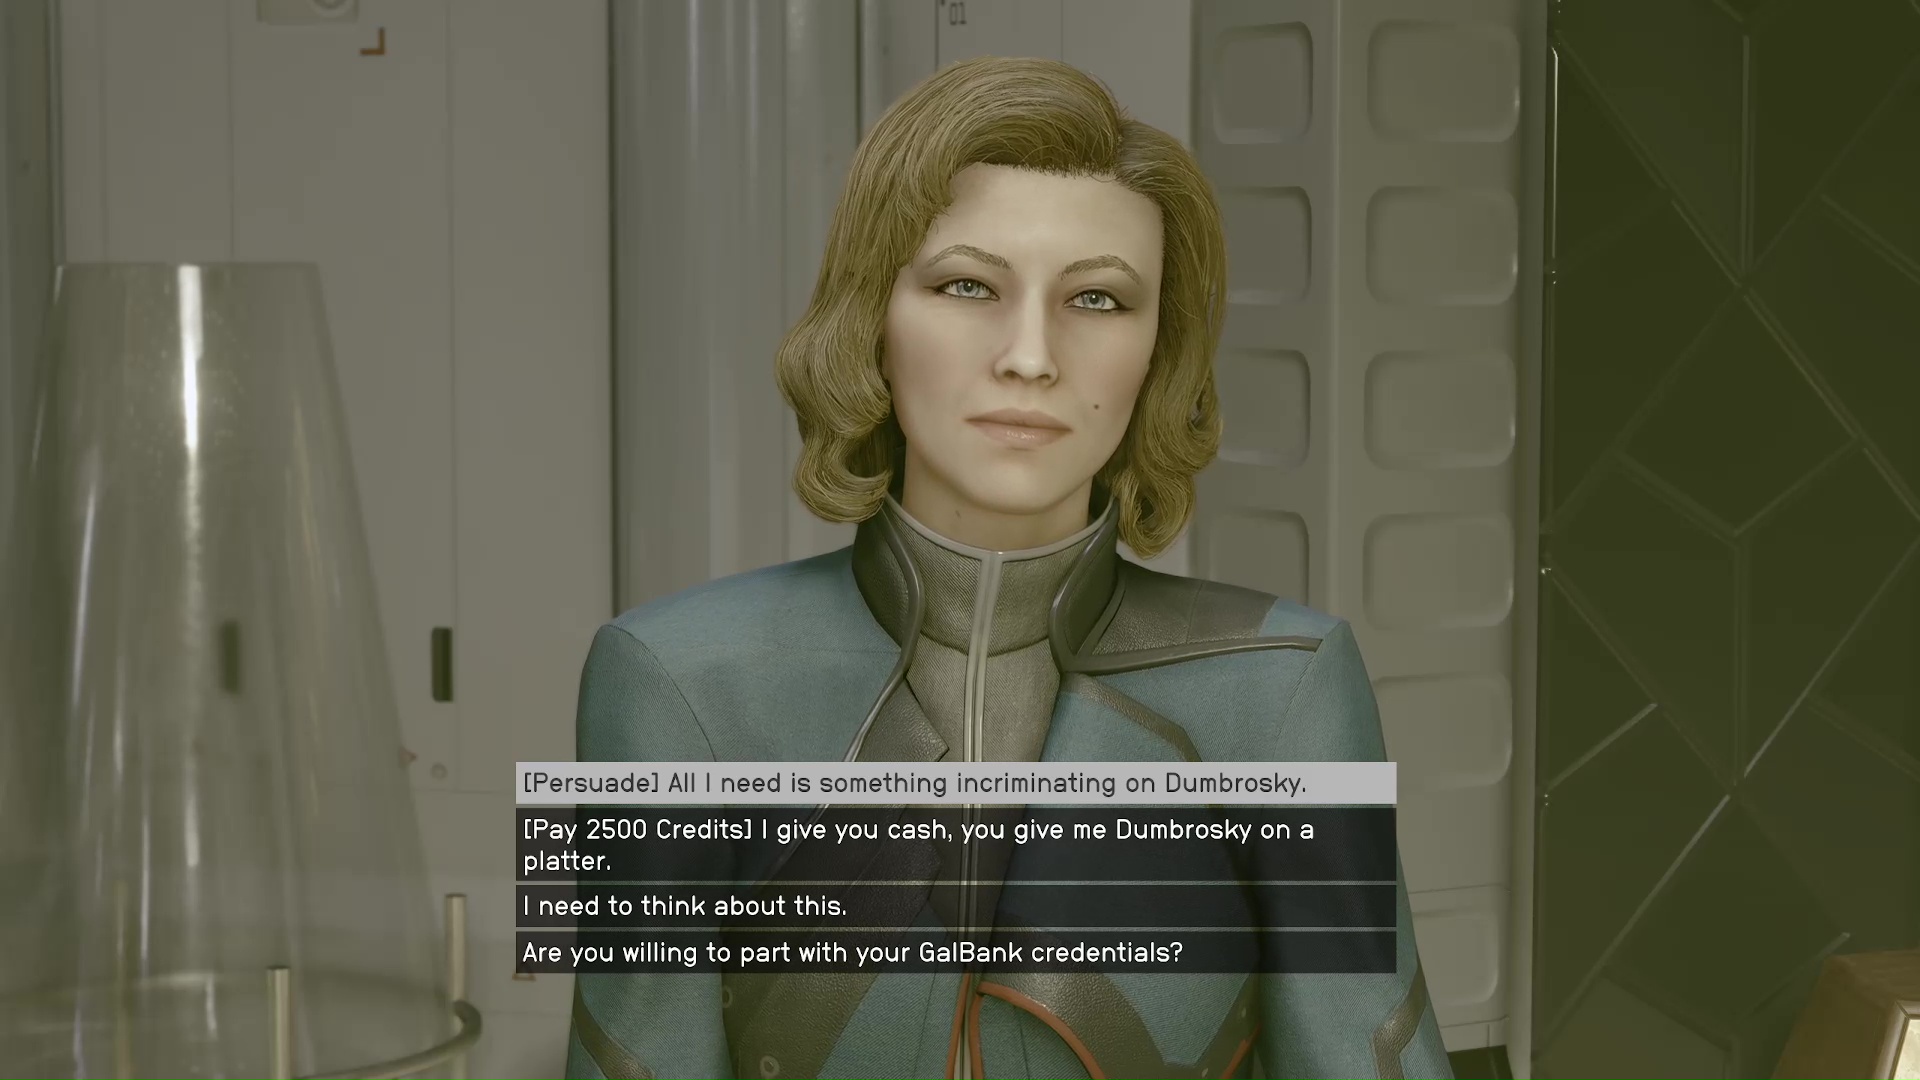
Klaudia isn’t in the star view room, but you can find her in the guest suites. Follow your scanner so you don’t get lost, then tell her you know about her and Dumbroski. She’ll be willing to cooperate with you if you can persuade her, and if that doesn’t work, you can bribe her (Image 17). She will then let you in on a scheme that she, Dumbroski, and Gabriel Vera are doing.
Image 17
Speak to Gabriel Vera
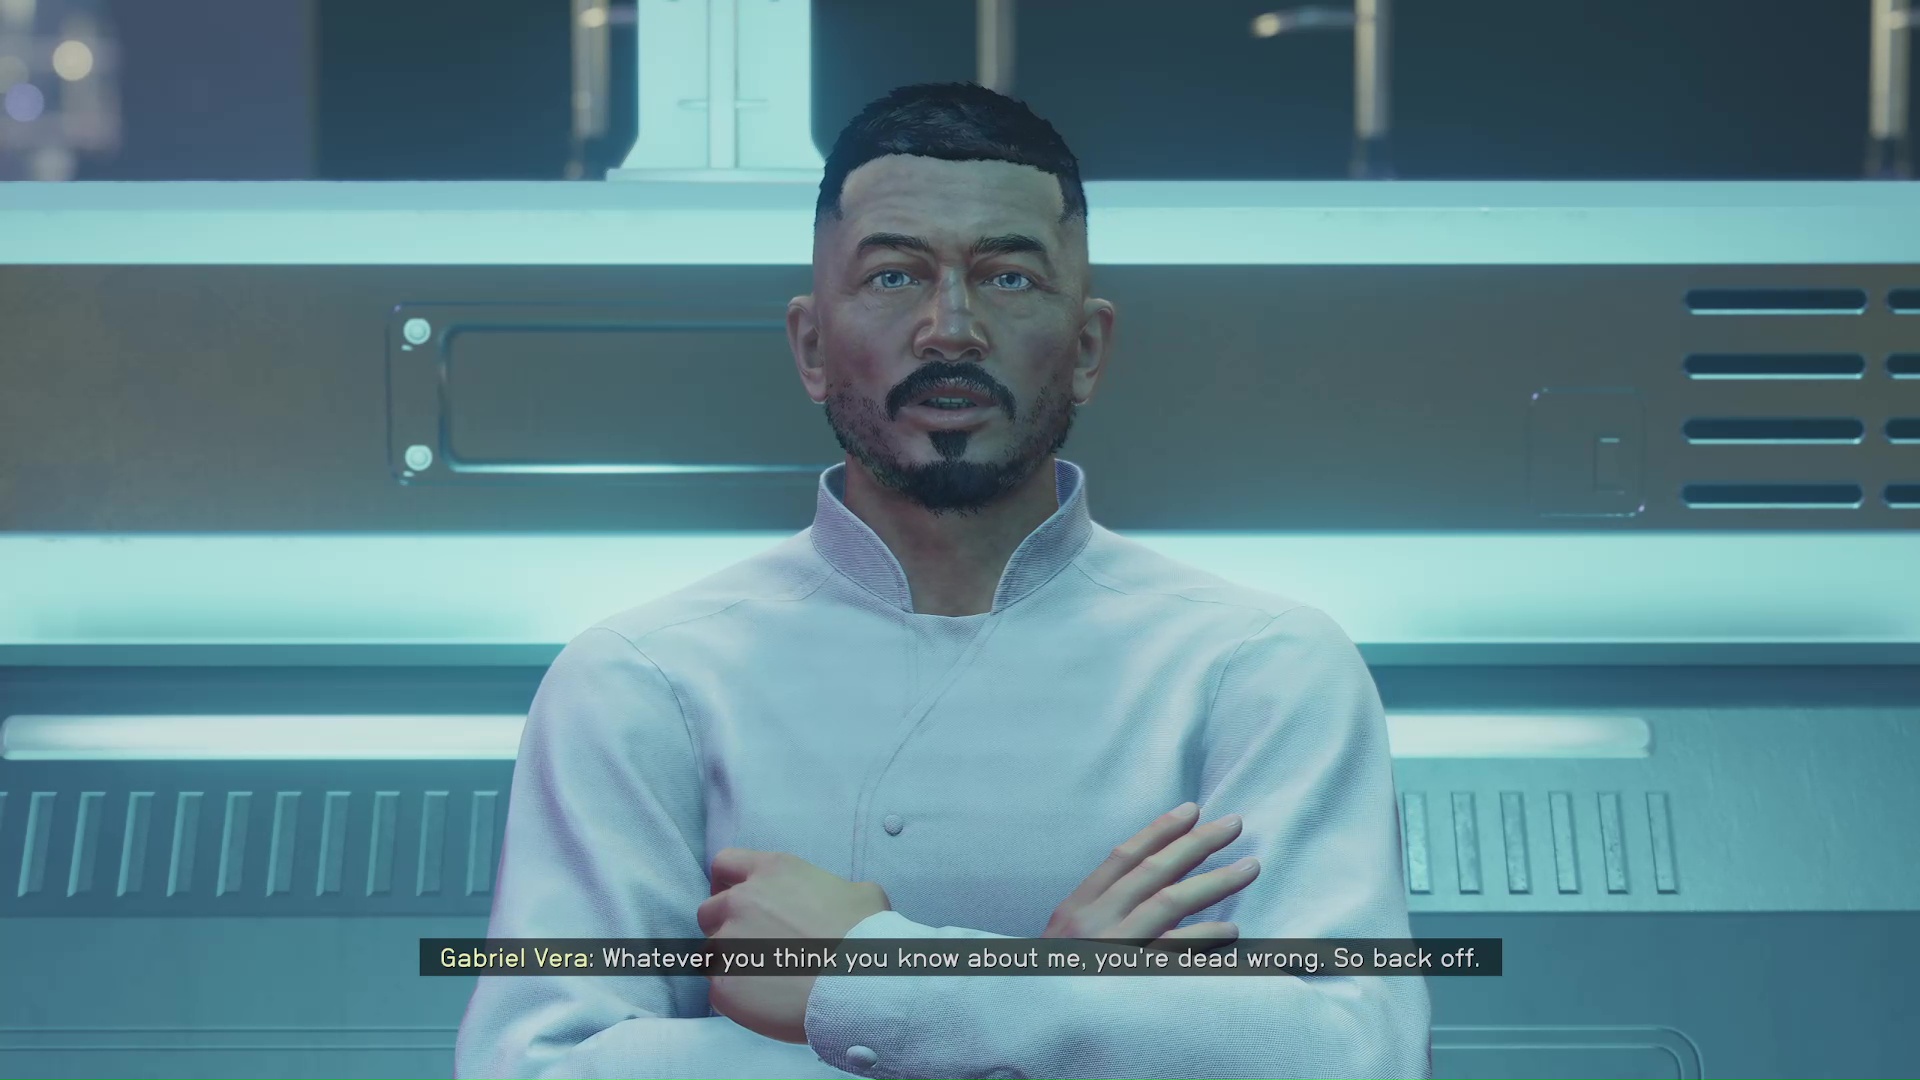
The next step is to see if you can gain some leverage with Gabriel Vera. He is back in the Star View Room, in the middle of all the patrons (Image 18). No matter what you say, Vera won’t budge. It’s time to take drastic measures.
Image 18
Return to Evgeny Rokov
Rokov is up on the higher level of the Star View Room, sitting by the bar. When you talk to him, he proposes that you tamper with the life support systems for the entire ship to activate a lockdown; that way you can talk to Vera alone in his room to get the information on Larry Dumbroski.
Speak to Chief Engineer Sandin
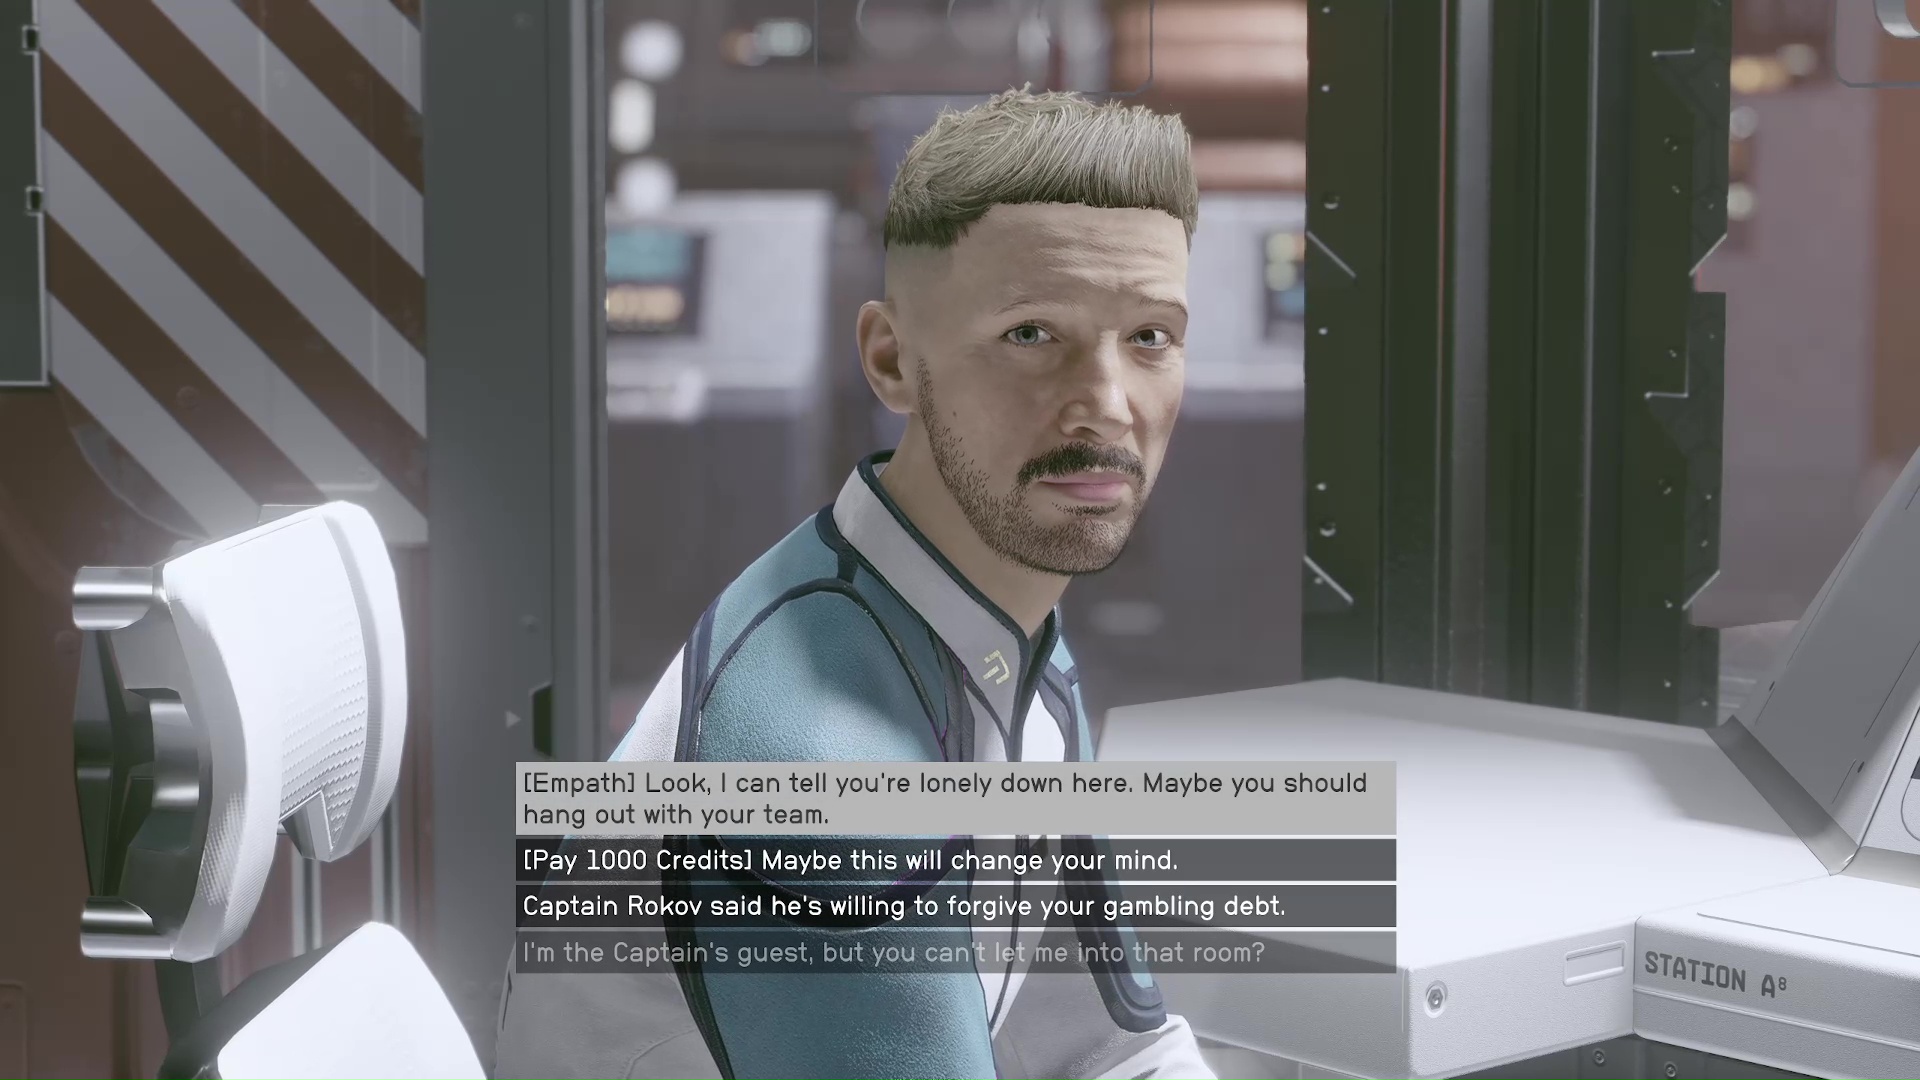
The door to engineering is next to the patrons on the lower level (the scanner will lead you there). Sandrin will be surprised to see you. First, see if you have any skills like Empath that grant dialog options to persuade him to let you into life support. If not, you can tell him that Rokov will forgive his gambling debts (Image 19)
Image 19
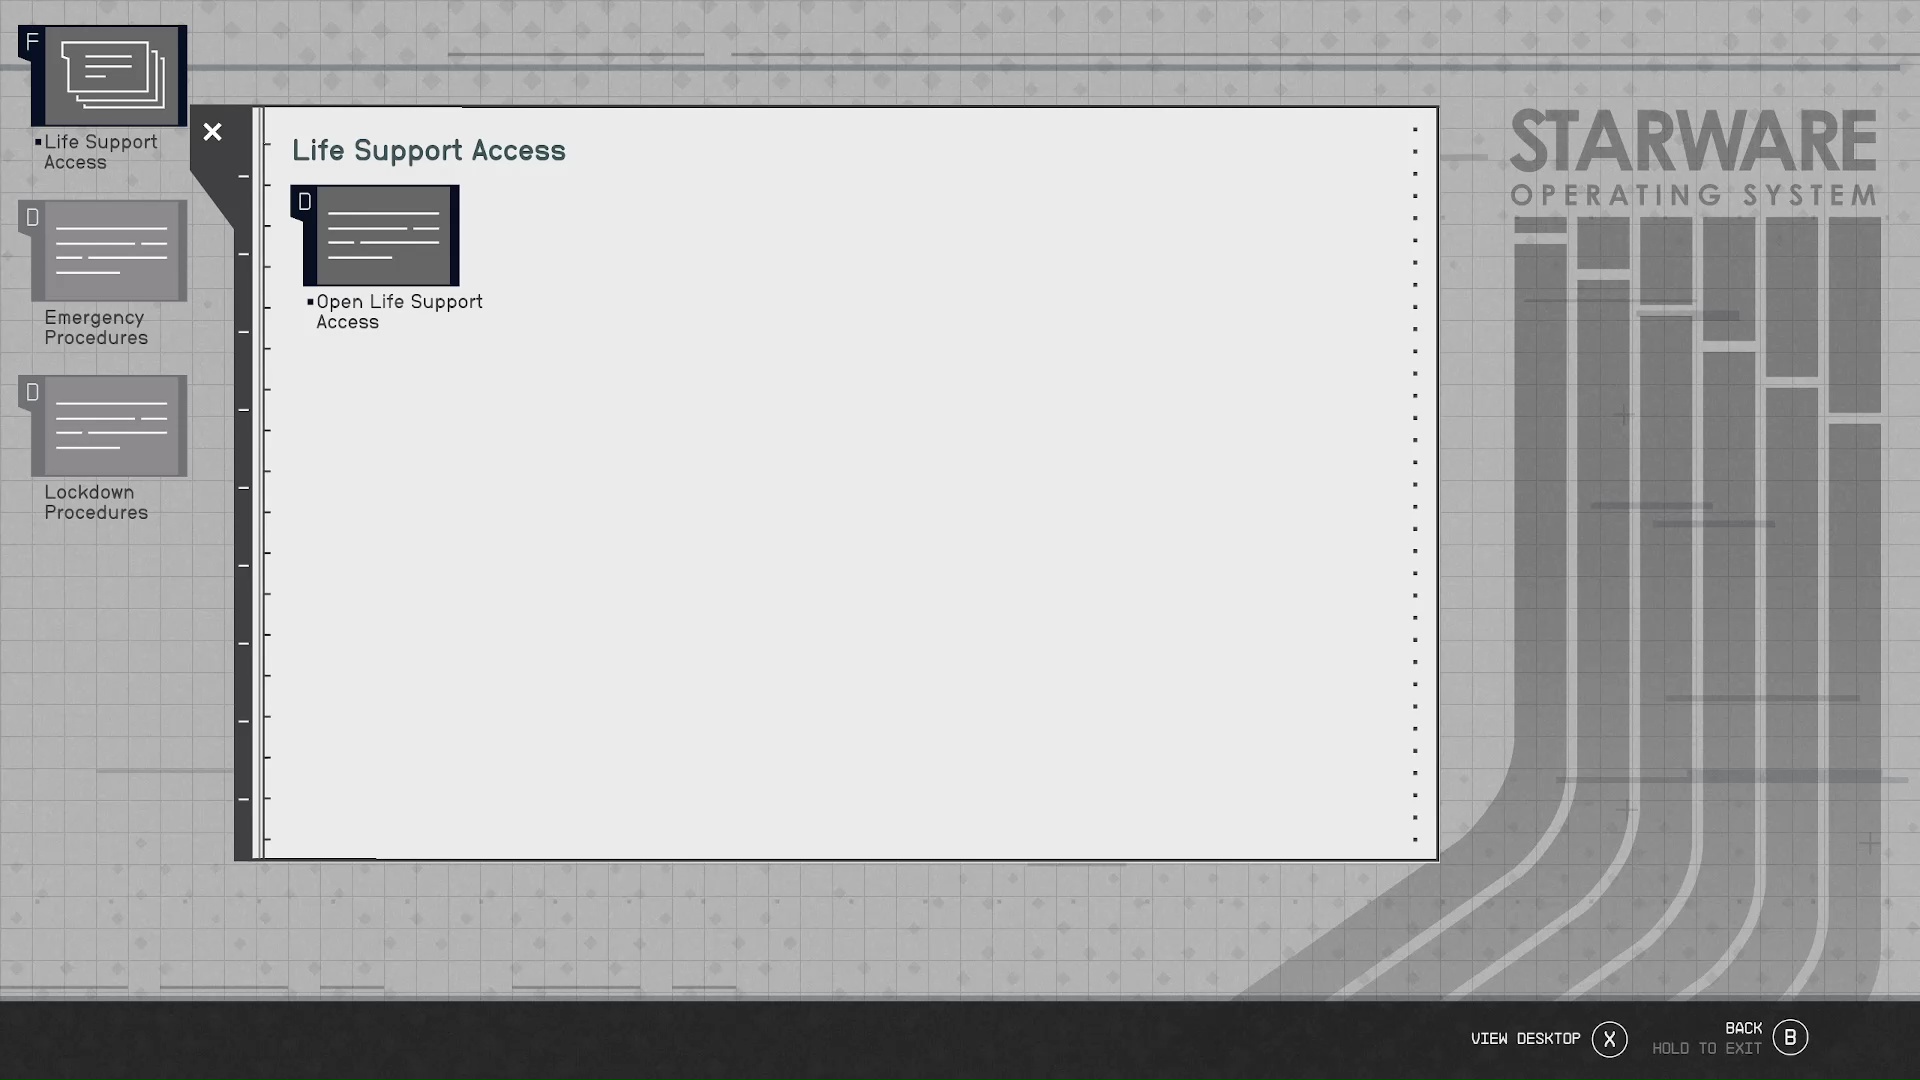
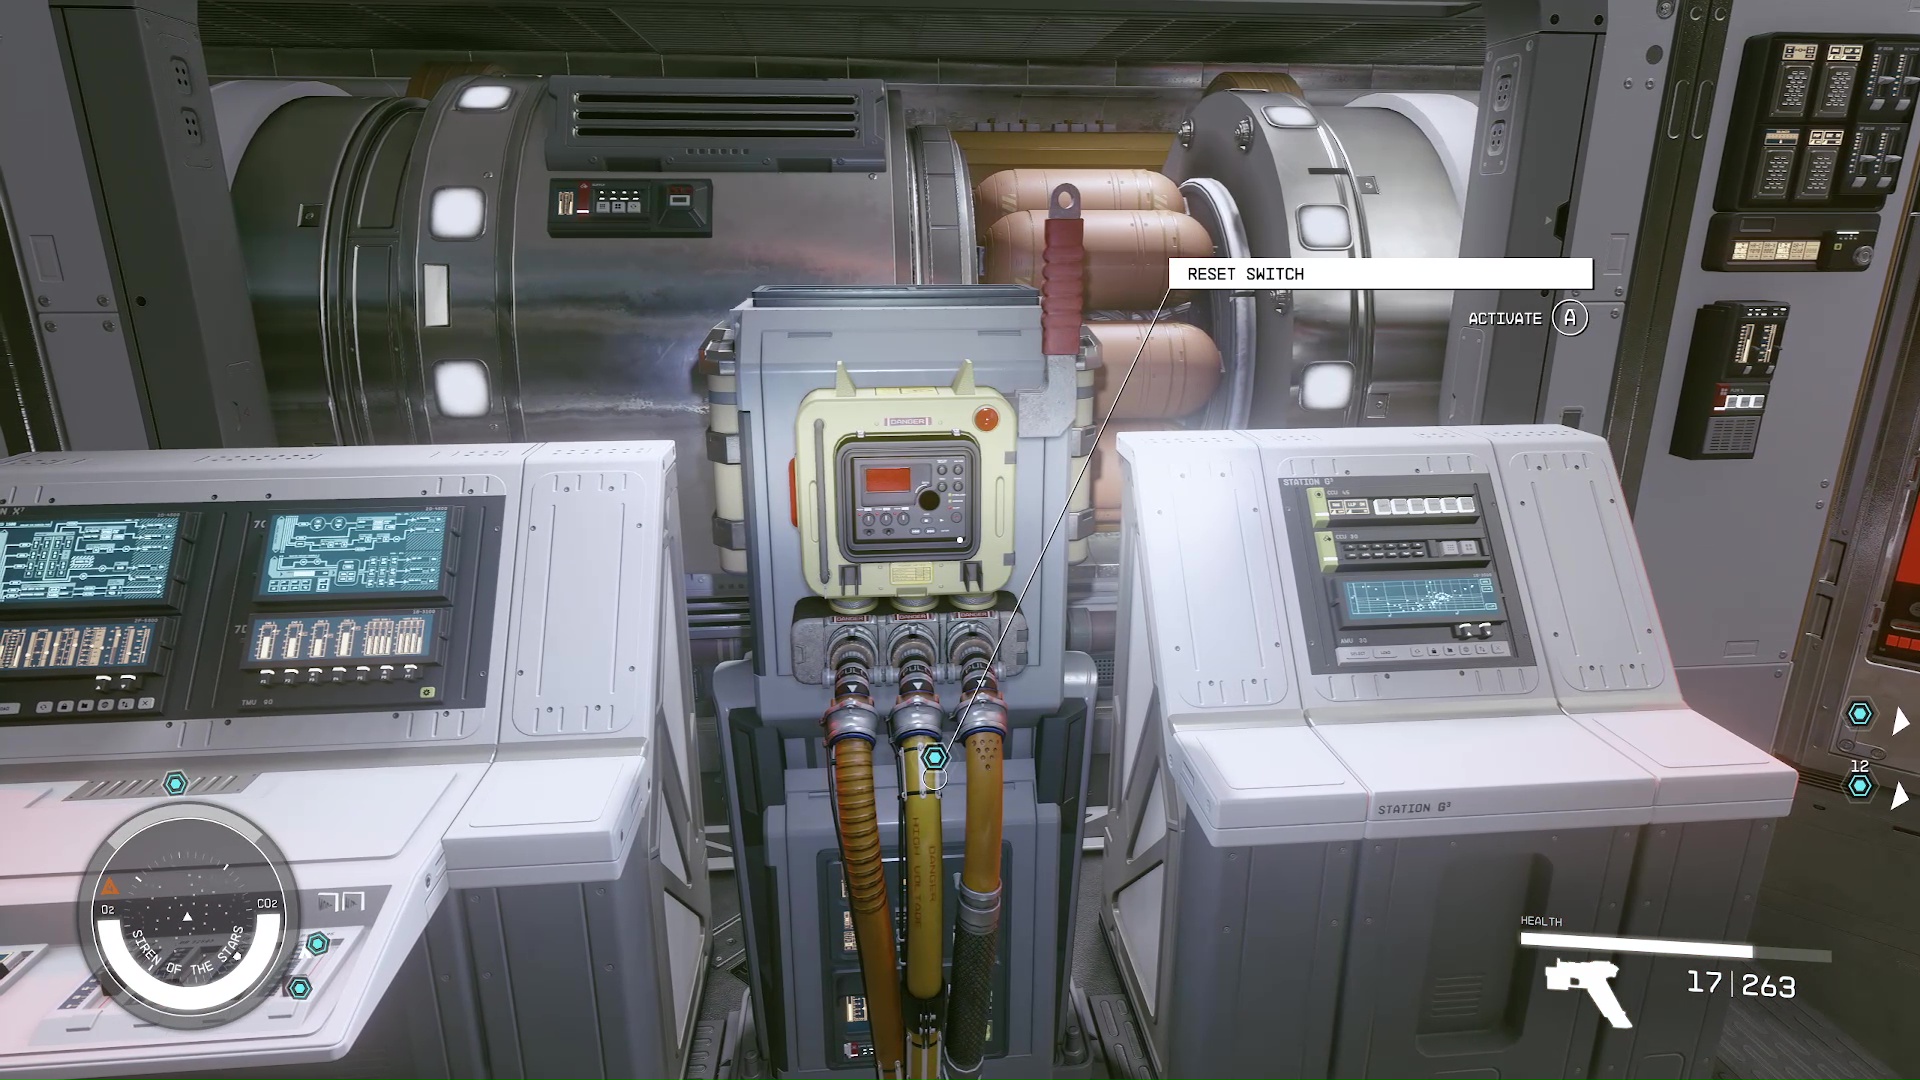
Gain Entry to the Life Support Systems and Disable Them
Sandin will give you his badge and leave. Now you can use his computer to open the door by going, ‘Life Support Access’–>’Open Life Support Access’ (Image 20). With the door open, go to each of the three life support switches and reset them (Image 21). This will trigger the lockdown, and thankfully not kill everyone on board.
Image 20Image 21
Confront Gabriel Vera in his Cabin
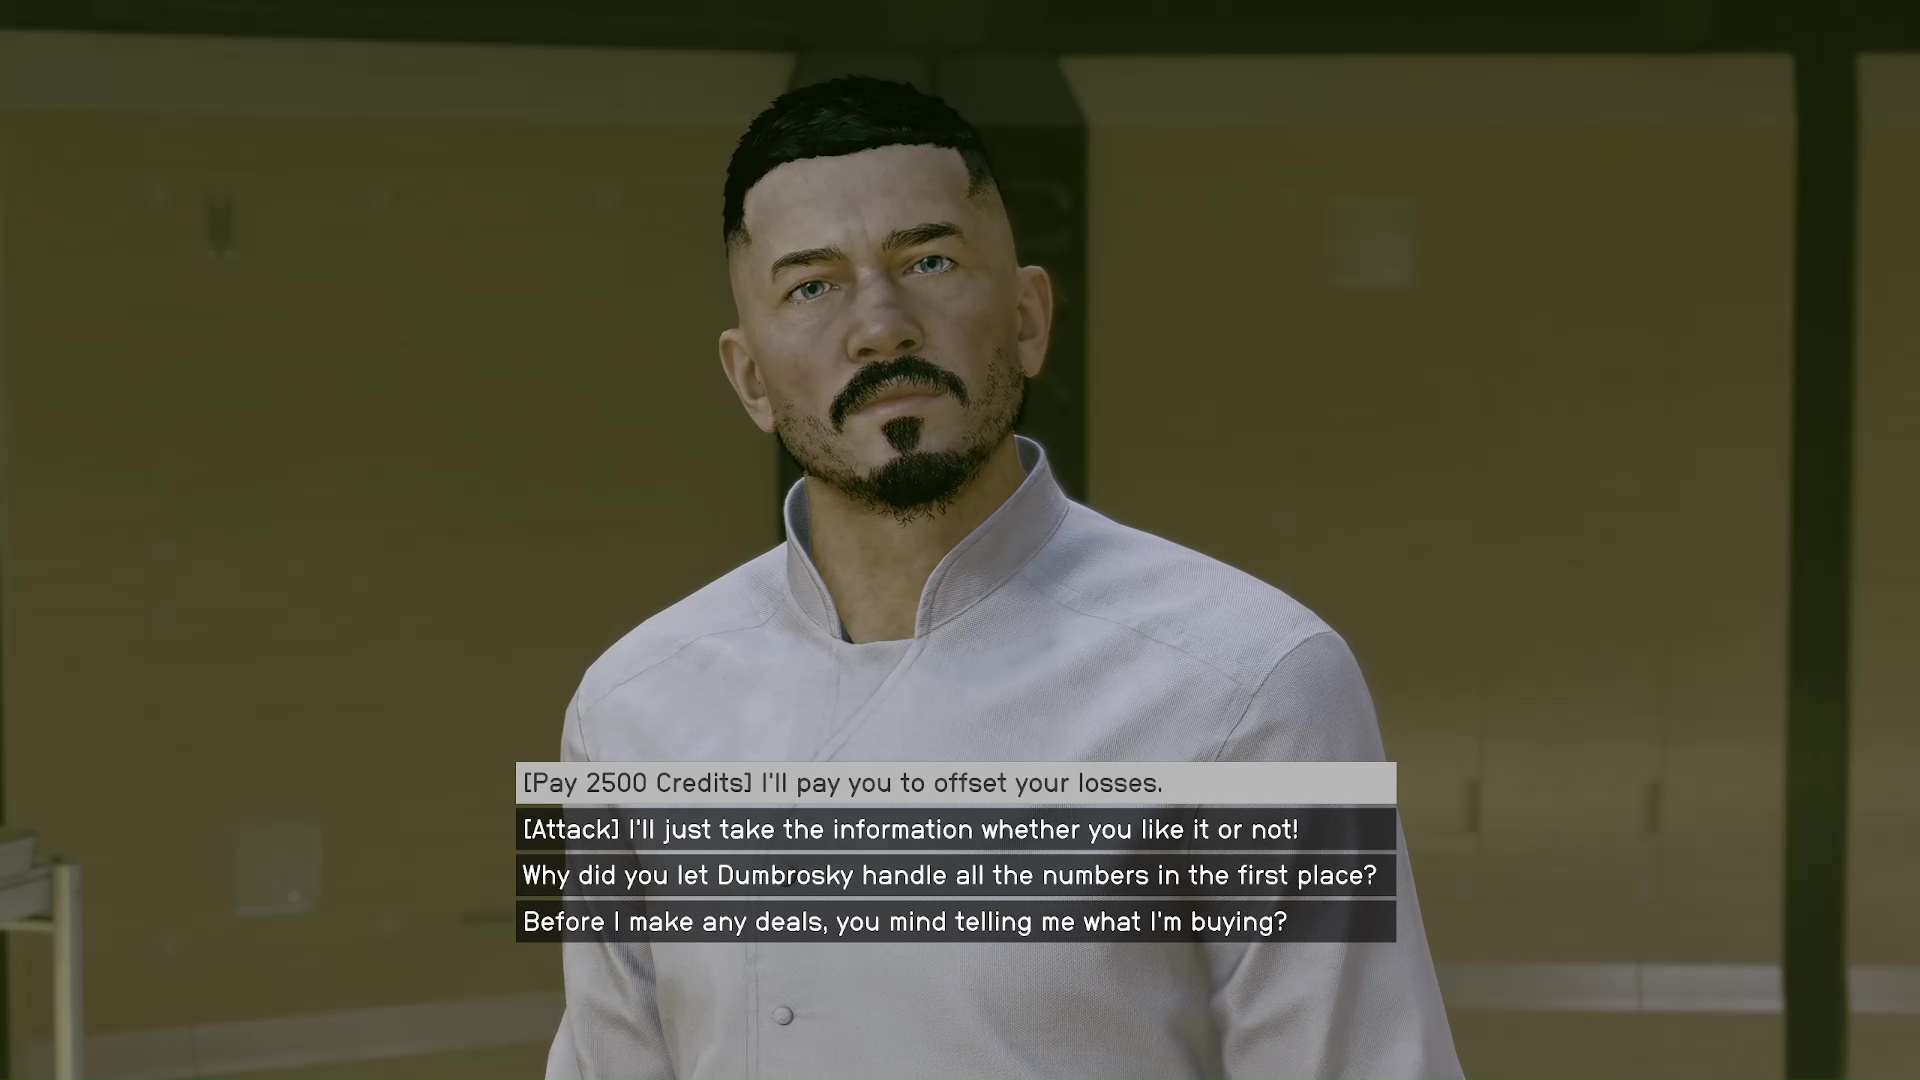
Back to the guest suites! Even though it seems like a crisis, none of the guards will bother you. Follow your nifty scanner to Vera’s room, which is on the lower level to the right, past the Purser’s Office. After telling him that Dumbroski is playing him, you can offer to bribe him for incriminating evidence. It costs 2500 credits, but it is also evidence for the mission, Burden of Proof (Image 22).
Image 22
Note that you also have the option of attacking Vera and taking the evidence off his body. However, just like with killing Larry, all the guards will be notified, and you will have to blast your way to Dumbroksi to get his credentials, then your ship. As a result, we recommend just paying the bribe.
Confront Larry Dumbroski
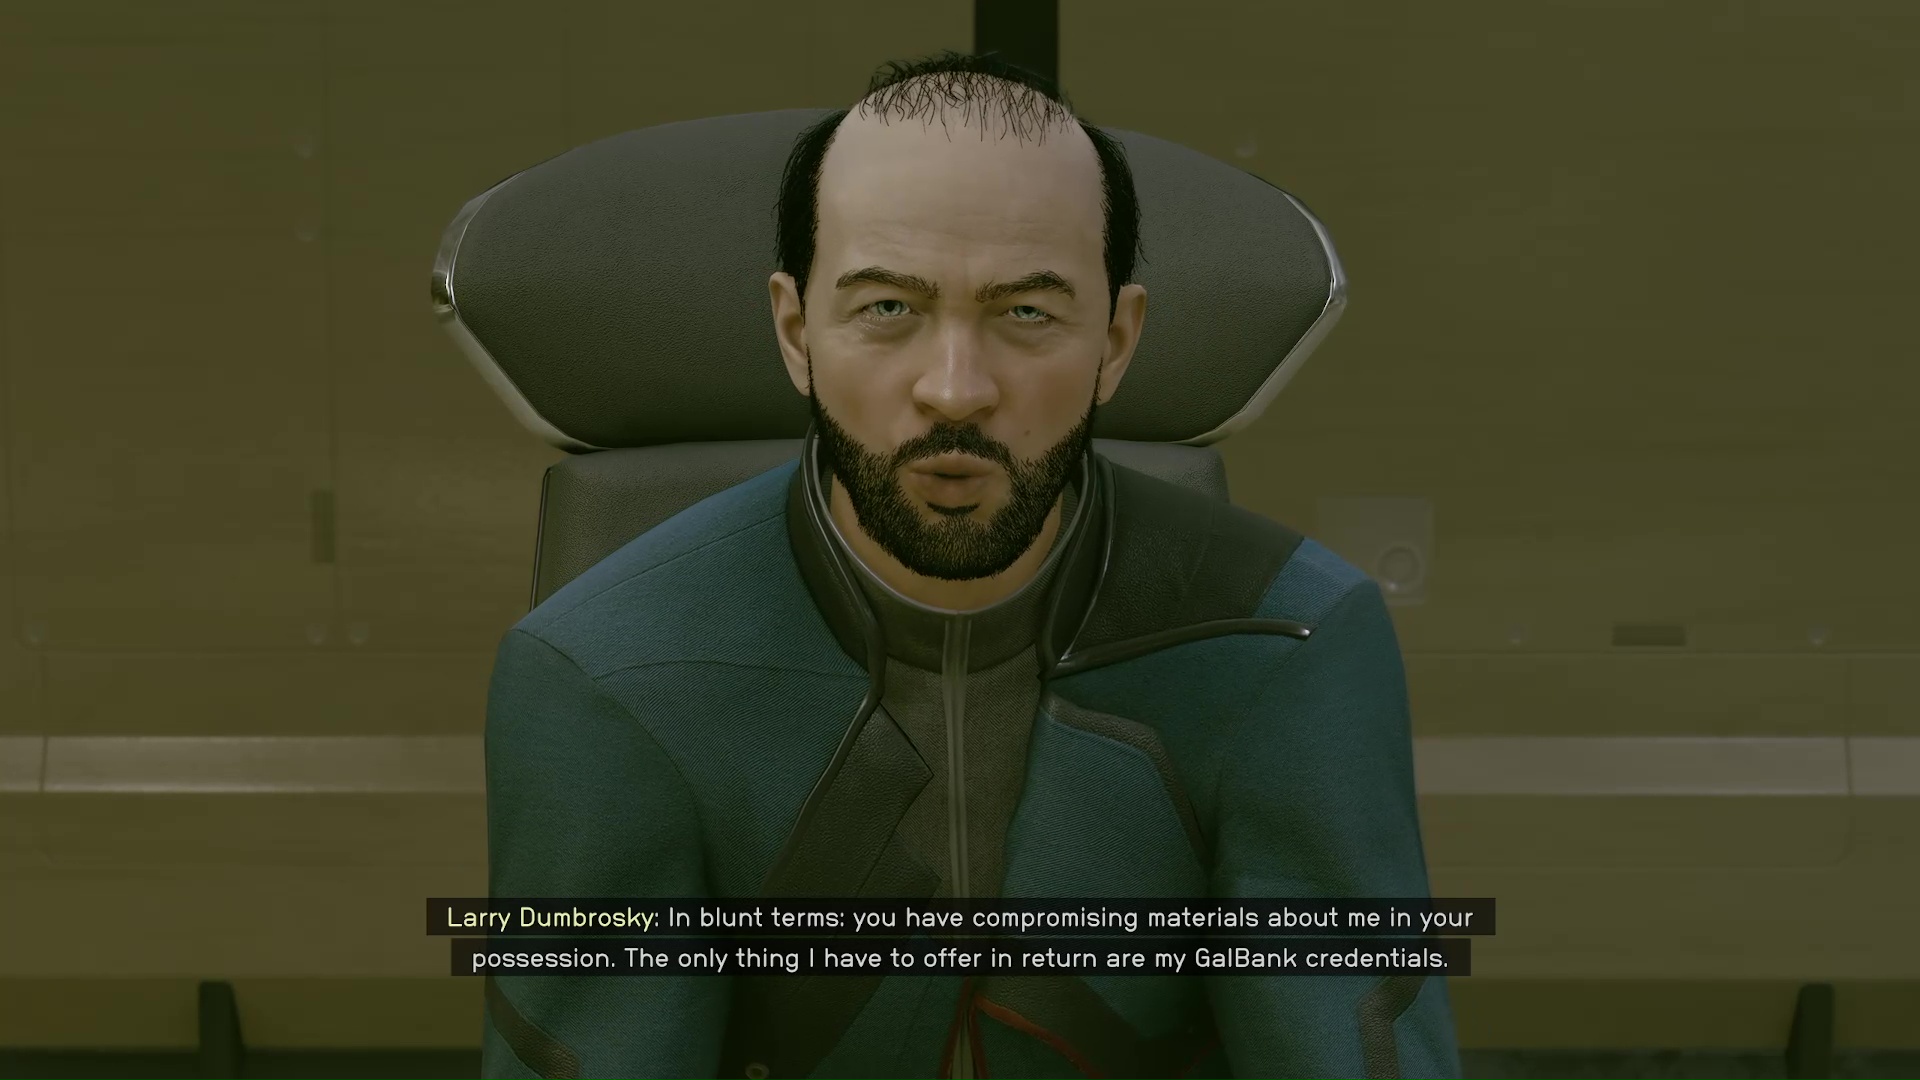
Ol’ Larry will be in his guest suite rooms, which are on the upper level and down the hall. He has already deduced what you’ve been doing and what you want. He will hand over his credentials for the incriminating evidence (Image 23). Again, you could attack him here, but you could’ve done that at the very start, and you went through all this trouble (see Kill Larry Dumbroski above).
Image 23
Return to Evgeny Rokov and Leave the Ship
Rokov will be at the stairs between the lower and upper levels of the guest suites (Image 24). Be nice to him during the chat if you want him to rejoin the Crimson Fleet. After the conversation, you can head back through the crew quarters to your ship. It can be like a maze, so use your scanner if needed. Also, there will be a lot less crew now, so you can steal stuff if you want.
Image 24
Proceed to New Atlantis and GalBank
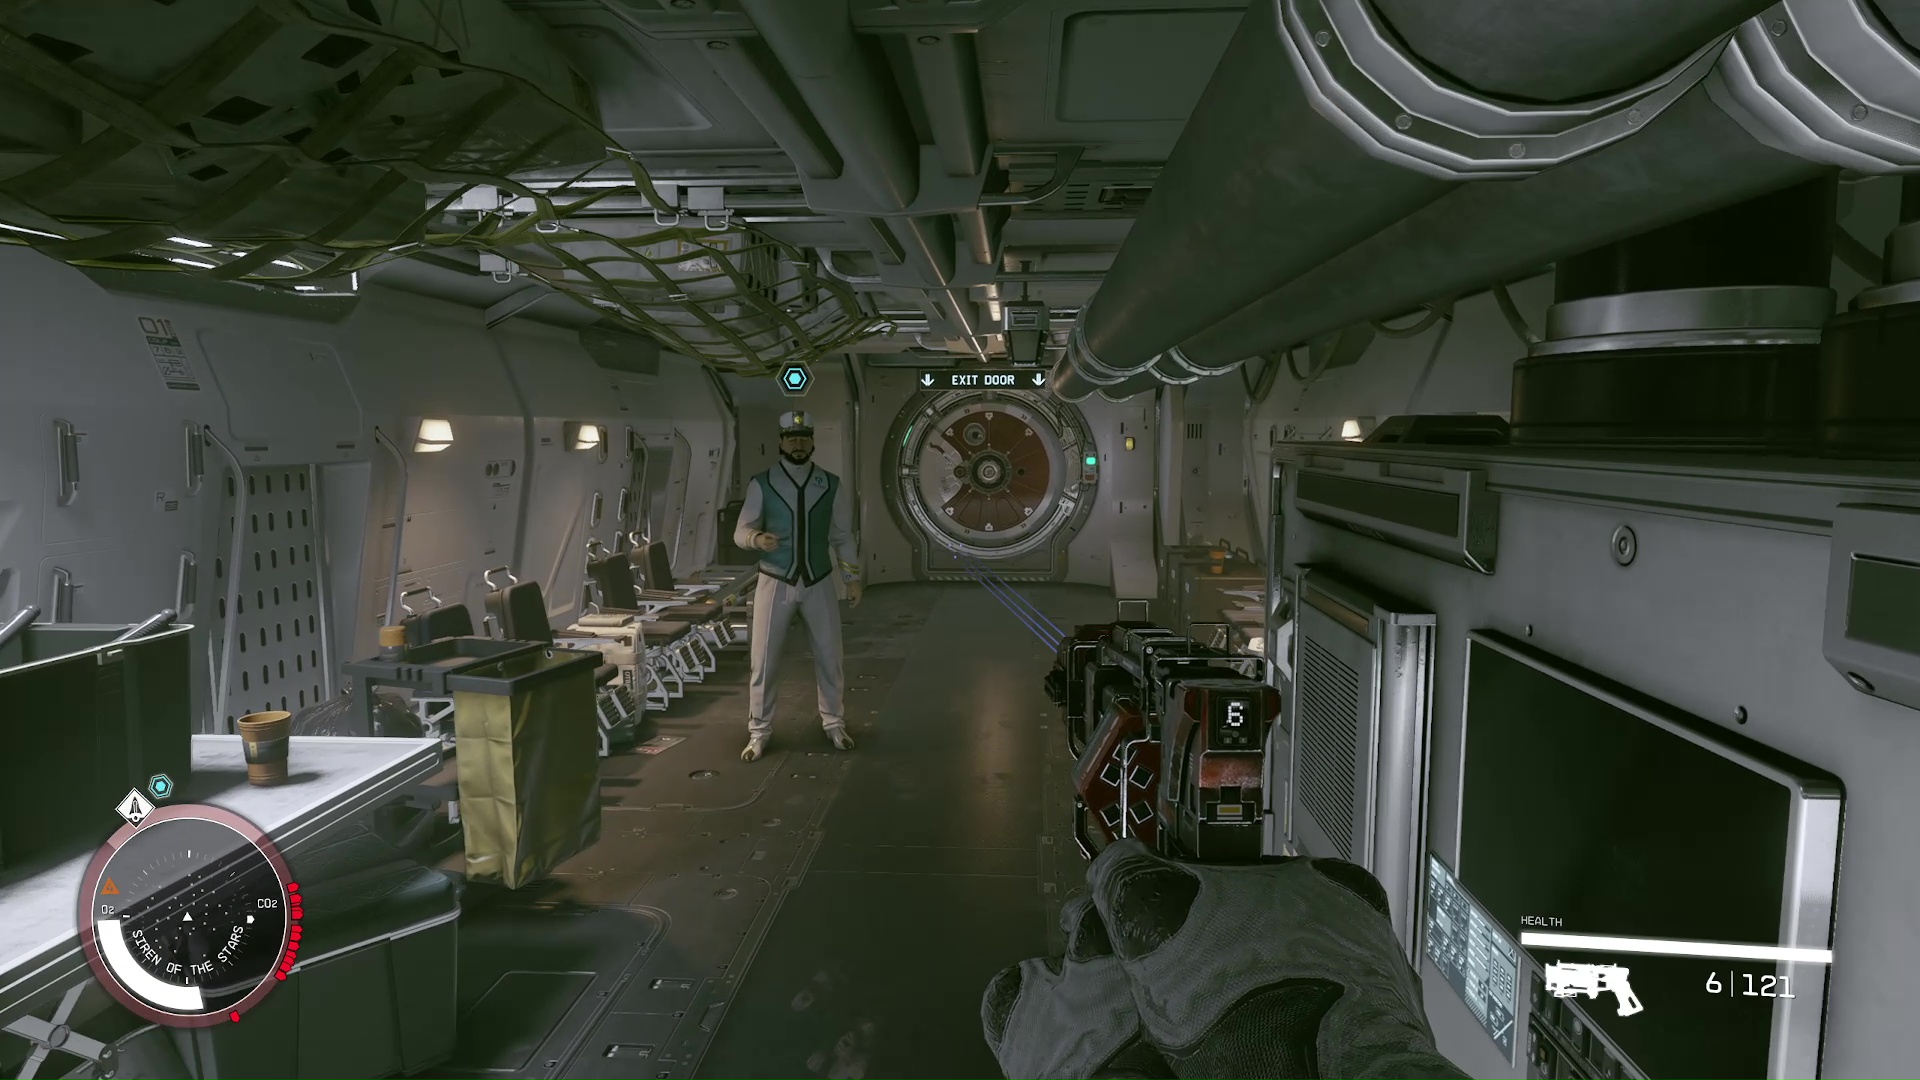
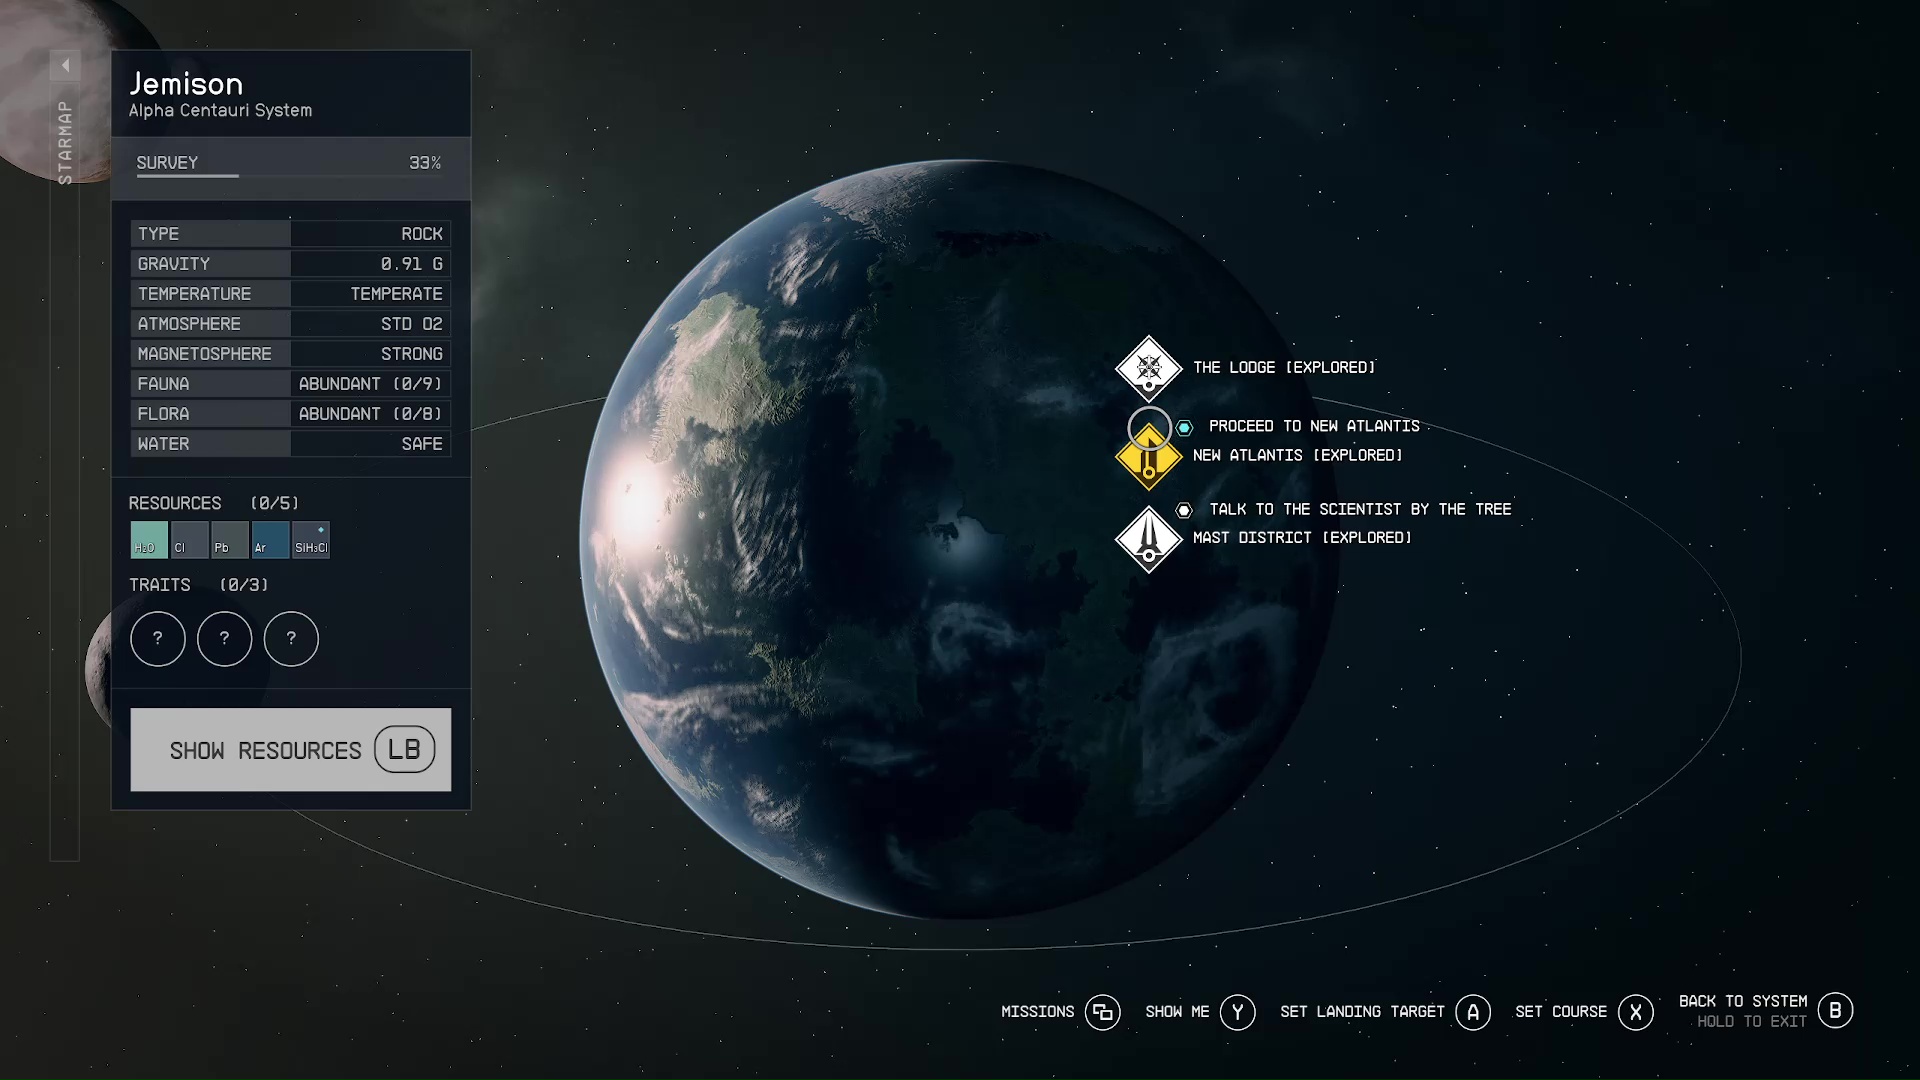
For the final step of the mission, you need to go to New Atlantis to access the GalBank archives (Image 25). If you have the fast travel point, you can go directly to the Financial District of New Atlantis, or you can just land and follow your scanner to the public transit.
Image 25Image 26
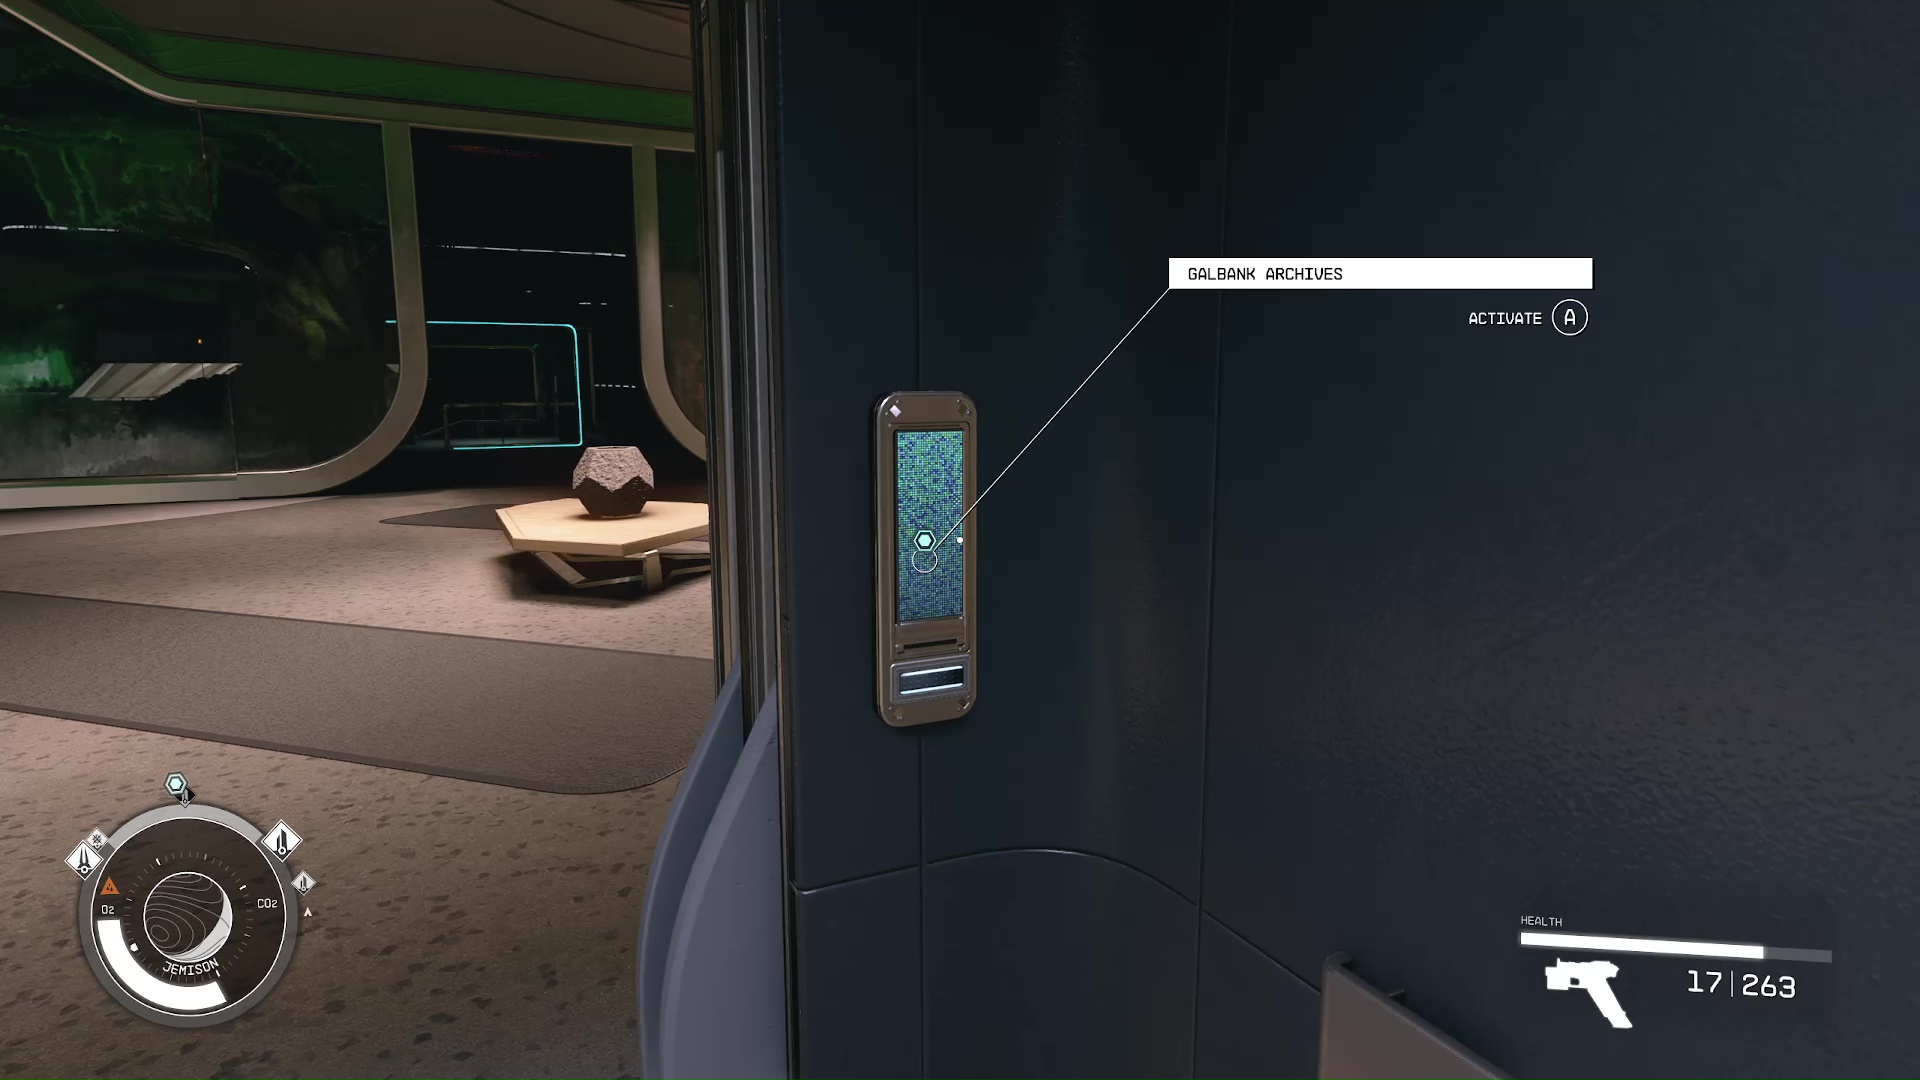
Once you’re at the Financial District, follow your scanner to the giant GalBank building. Once there, take the elevator down to the archives (Image 26).
Deal with the GalBank Guard and the Ecliptic Mercenaries
Just a little more action before you can get what you came for. Save your game before you talk to the guard and give him your credentials; he will seem very scared, and you can remark on it. When you enter the archives, Ecliptic mercenaries will attack you.
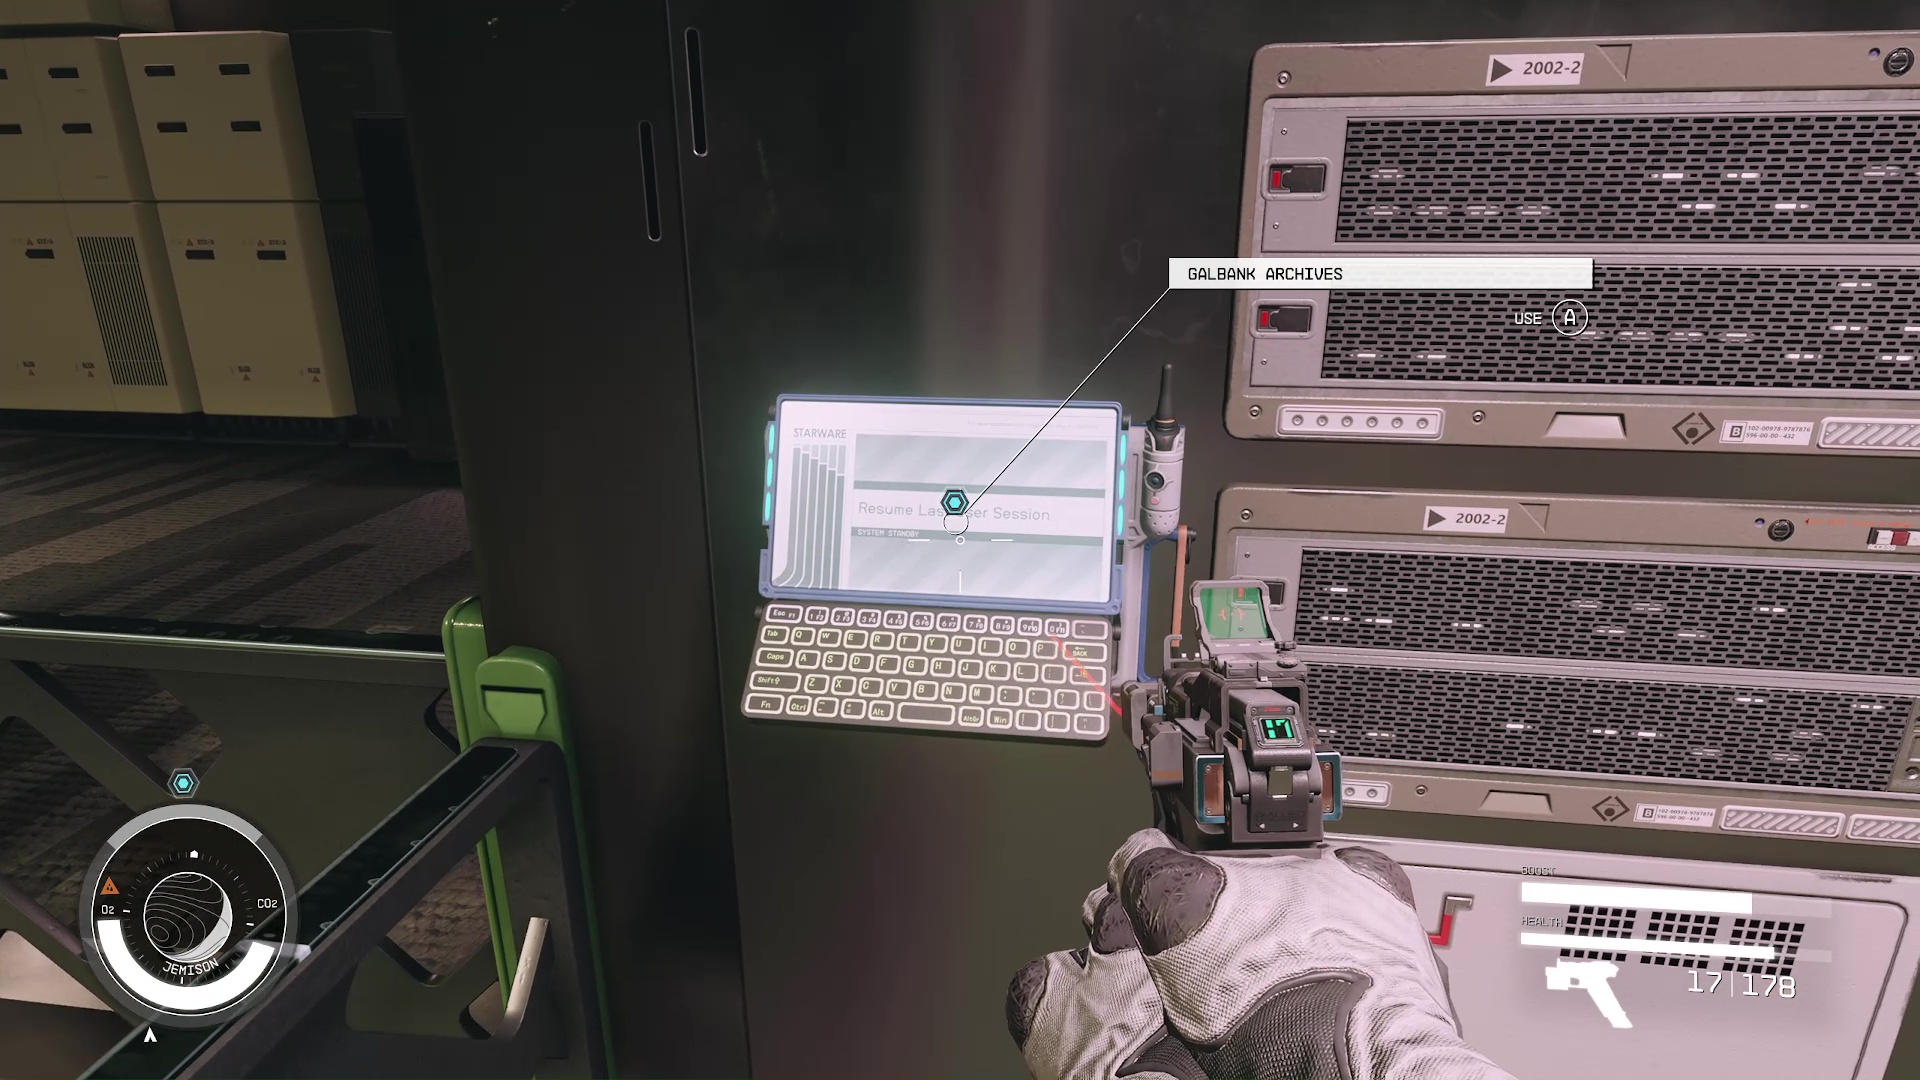
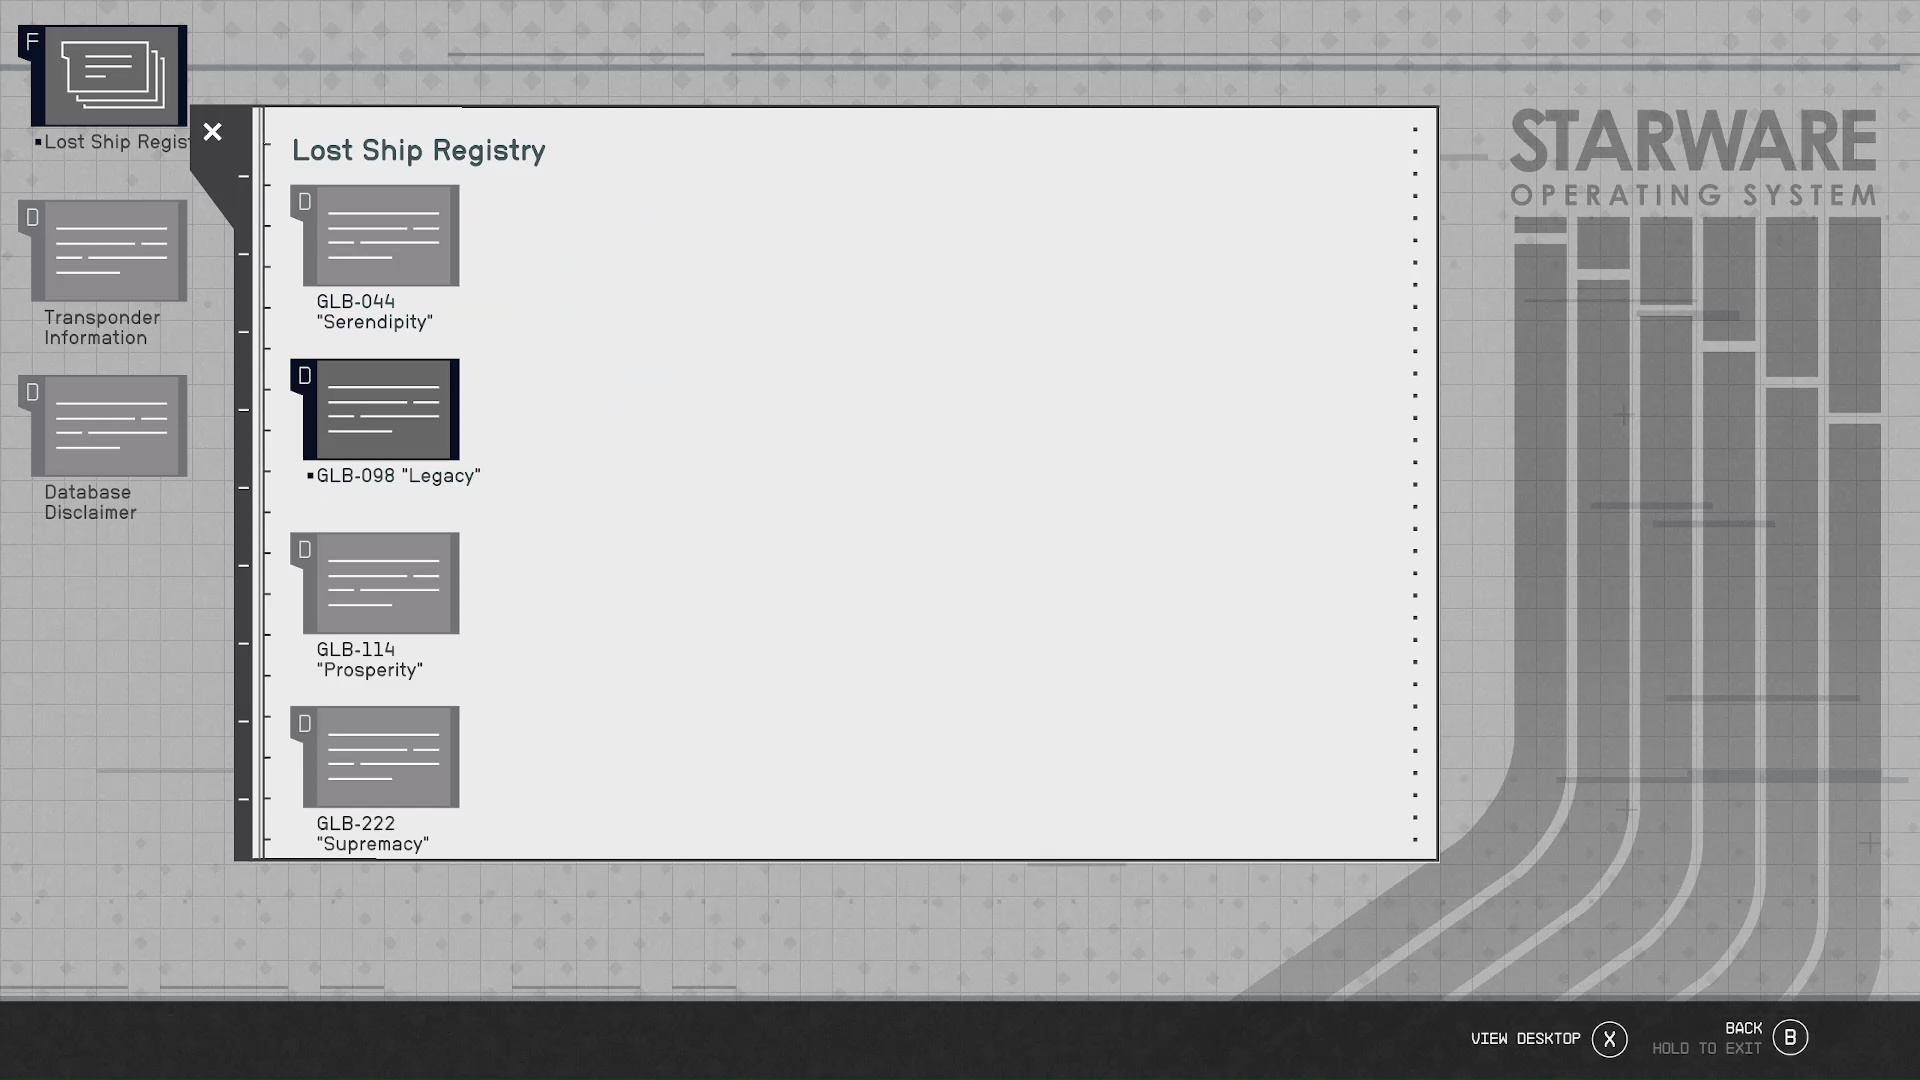
It’s not too hard of a fight if you stick to cover and take them out one at a time. After killing them, go to the computer on the top level (Image 27). You will want to search by going ‘Lost Ship Registry’–>’GLB-098 “Legacy”‘(Image 27).
Image 27Image 28
Return to the Key and Report to Delgado
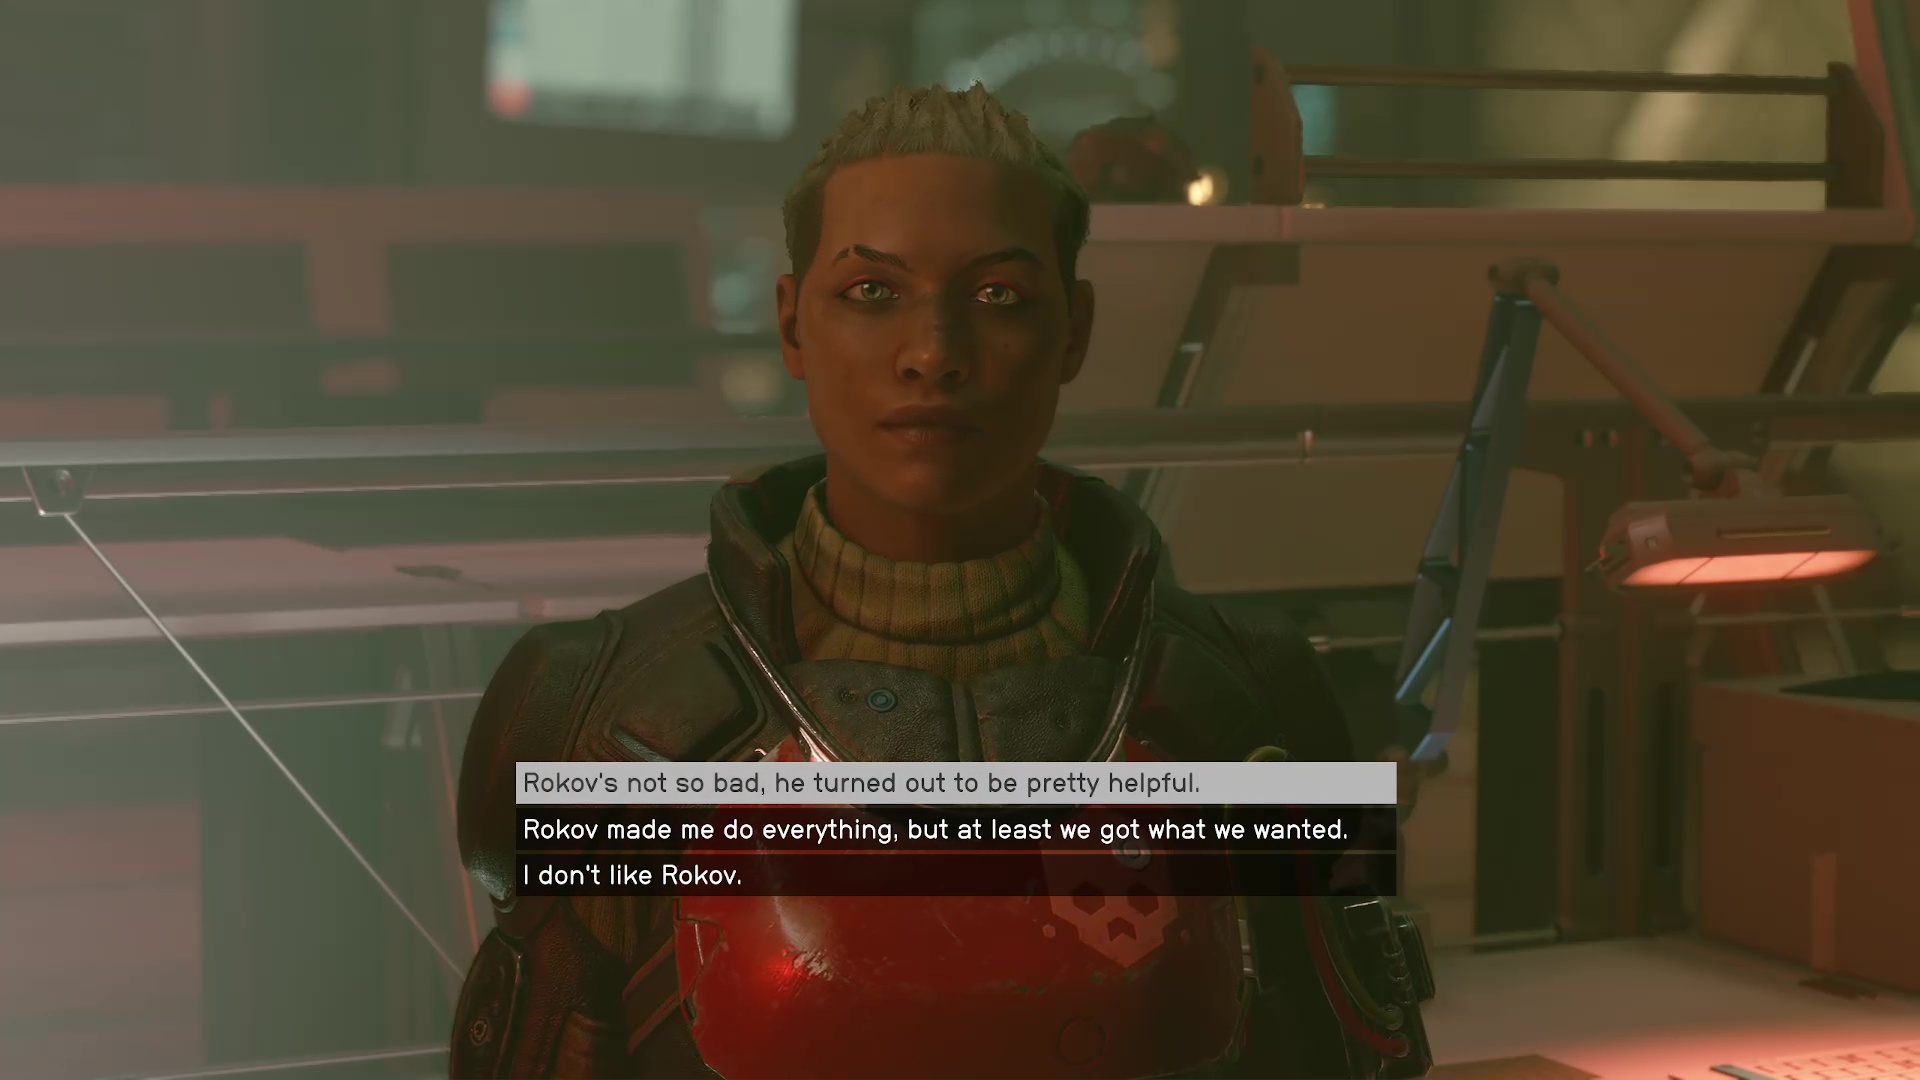
Once again, you will travel back to the pirate stronghold, The Key, and report your good news to Delgado. He’s still in the command center in the upper level. The main choice you can make in this conversation is whether Rokov gets back into the Fleet. If you tell Delgado that “Rokov’s not so bad, he turned out to be pretty helpful” (Image 29), then he let Rokov back into the Crimson Fleet.
Image 29
Like always, Delgado will hatch another wacky scheme for the next mission. This one involves stealing some top secret tech from the UC.
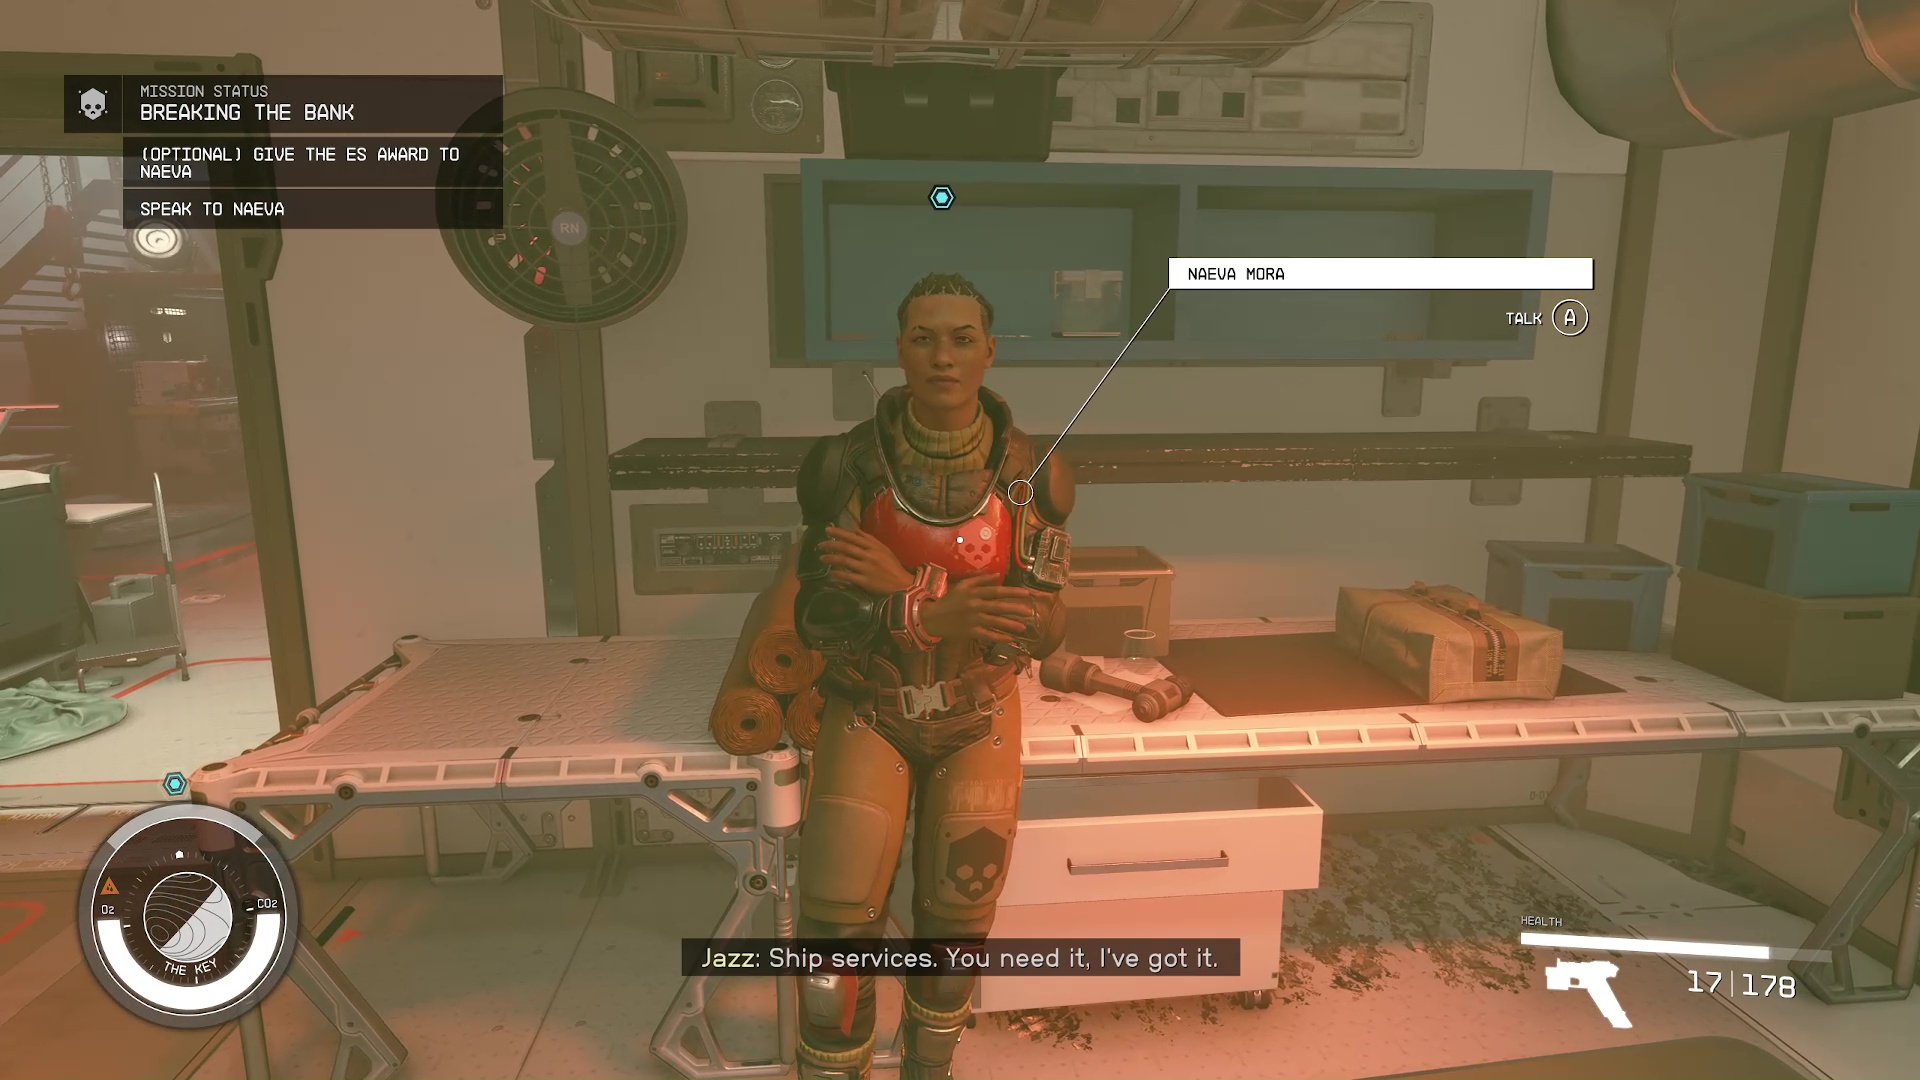
Follow and Report to Naeva
After coming up with a plan, you will follow Naeva down to ship services. There she will inquire about the side gig she gave you, i.e, stealing the award (Image 30). There are several outcomes that could happen here:
She will be disappointed that you didn’t steal it, and you will get less money.
You’ll give her the award and get paid 3000 credits. She said she would’ve paid you more if you didn’t tell Rokov.
You’ll give her the award and she will pay you 6000 credits.
You can lie to her, and hang onto the reward and sell it yourself. Naeva won’t give you any mission rewards.
Image 30
Report Mission Progress on UC Vigilance
This step is only required to complete the mission if you’re still working for SysDef.
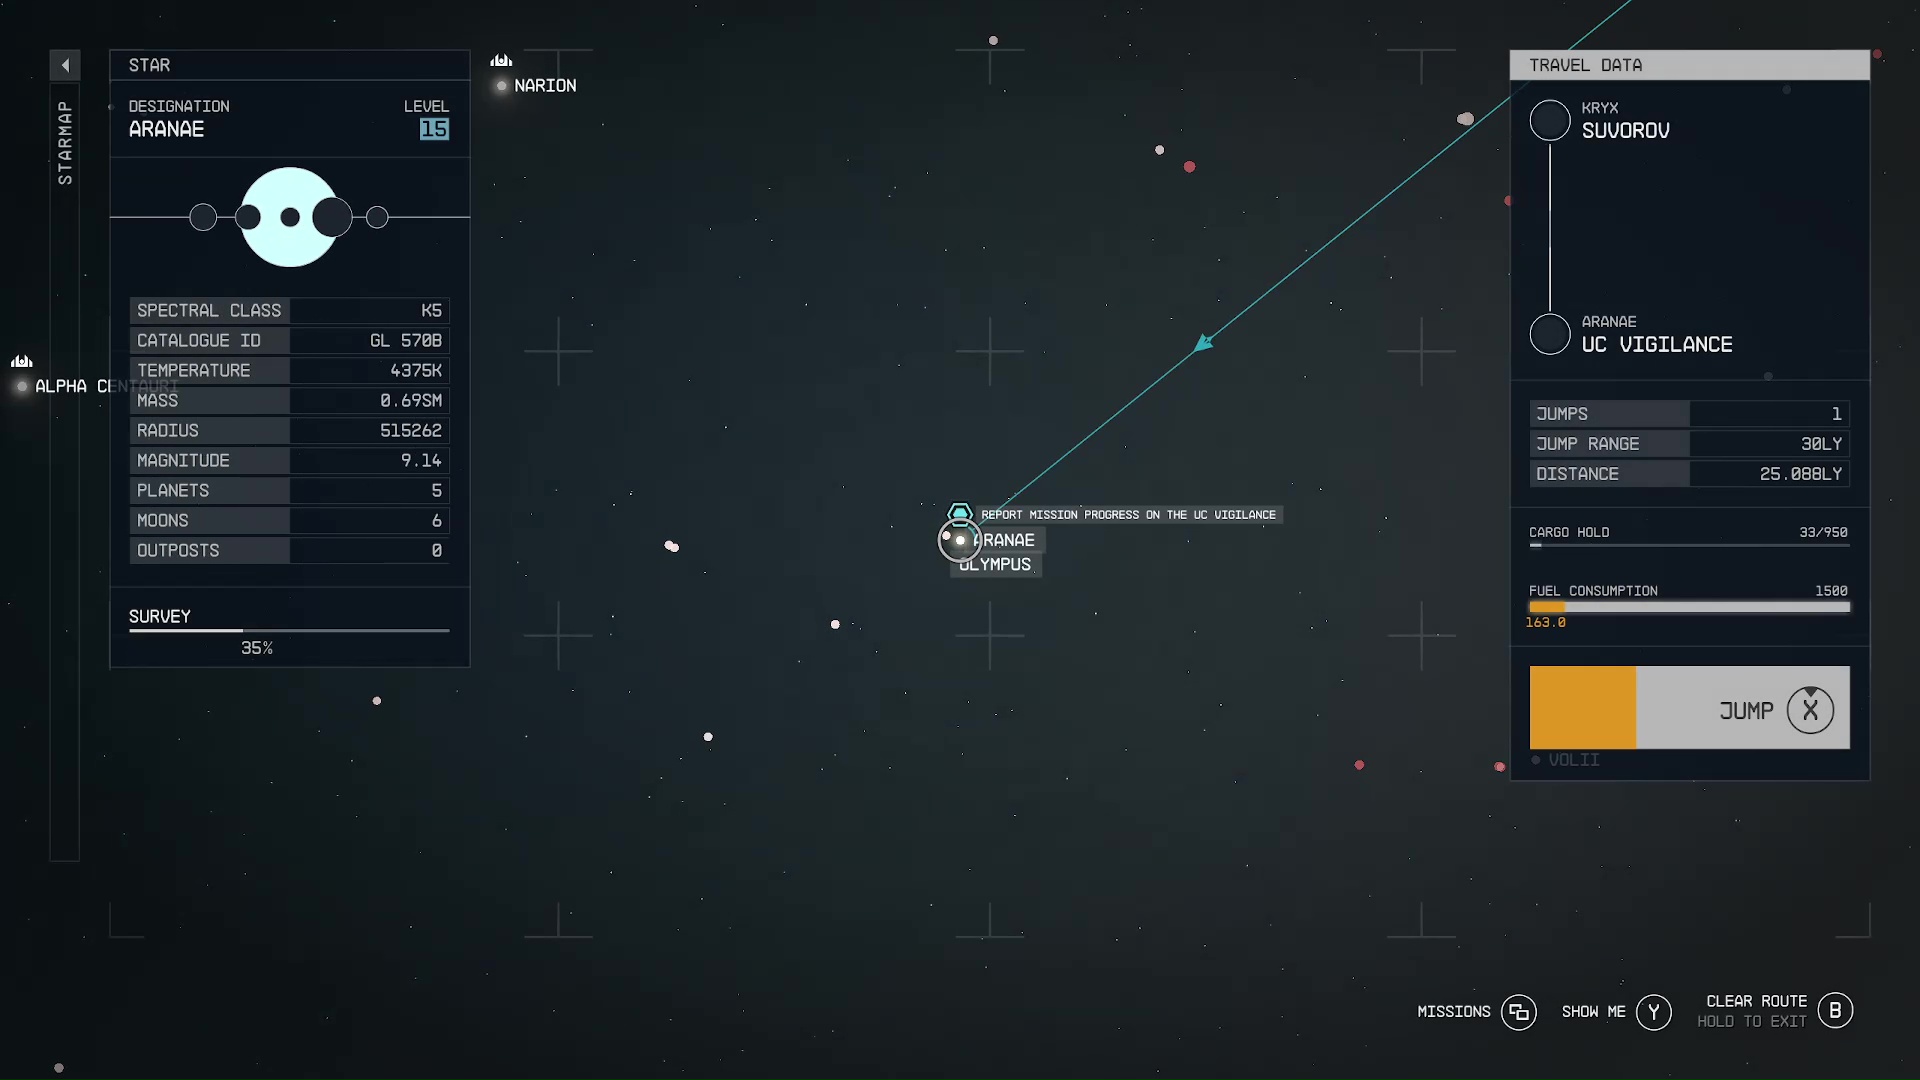
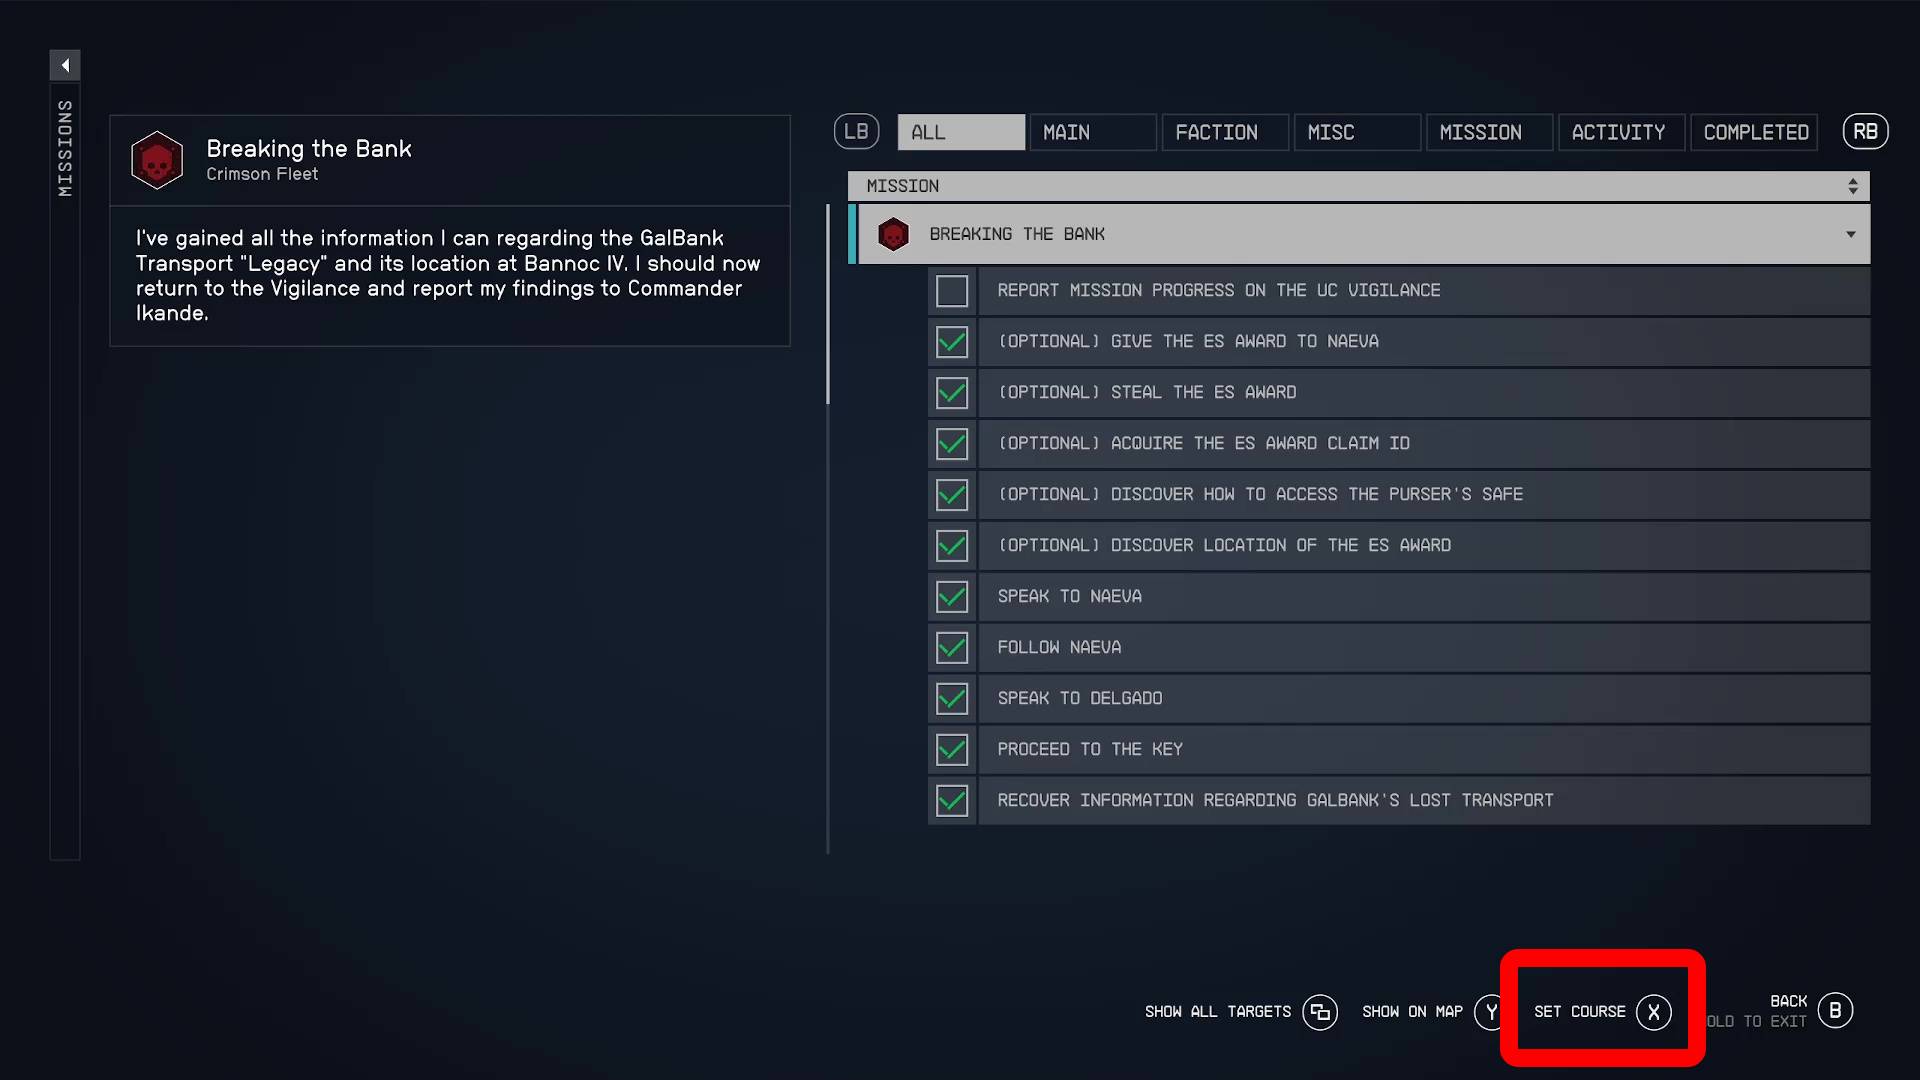
These mission structures are pretty consistent at this point. For the final step, you have to debrief Commander Ikande on the UC Vigilance. There is one new thing, though, the ship is now in the same system you were just in, the Aranae System (Image 31). We find the quickest way to fast travel is to just click on ‘Set Course’ under the missions screen (Image 32)
Image 31Image 32
If you ended up killing Dumbroski, then Ikande will be livid. He will kick you out of SysDef and they will become your enemy. If you handled the heist peacefully, then he will tell you to stay the course and try to steal the Com Spike. As always, use this opportunity to turn in the evidence you gathered to Lieutenant Toft for the Burden of Proof mission.
Kelson is a spud head from out west. He is most happy when holding a milky tea with too much honey and playing a sprawling role playing game or reading a fantasy novel. His video game tastes vary but his main genres are looter shooters, RPGs, and real time strategy games.