Note: During our playthrough of this mission, the objective marker was buggy, and we found that we had to open and close the Mission log, or reselect the current mission, to get the objective icon to actually display the current objective.
If you’re playing a character that tries to avoid combat, it’s a good idea to bring Sarah Morgan as your follower for this mission — she can get you through an optional combat encounter without costing you a big stack of credits.
Return to Vectera
This mission starts on Vectera, so use your Mission log to set course for the planet/landing zone — you’ll be landing at the Argos Extractors Mining Outpost, which is where you began the game.
Talk to Lin
Once you land, exit your ship and walk to the end of the landing pad ramp, where you’ll find Lin. A conversation will begin, and Lin will tell you what happened to Barrett (and Heller). At one point, you’ll be able to choose the dialog option “That doesn’t sound good” — doing so will earn you some points with Sarah Morgan, if she’s your companion. Continue the conversation until it ends.
Fix the Comms Computer
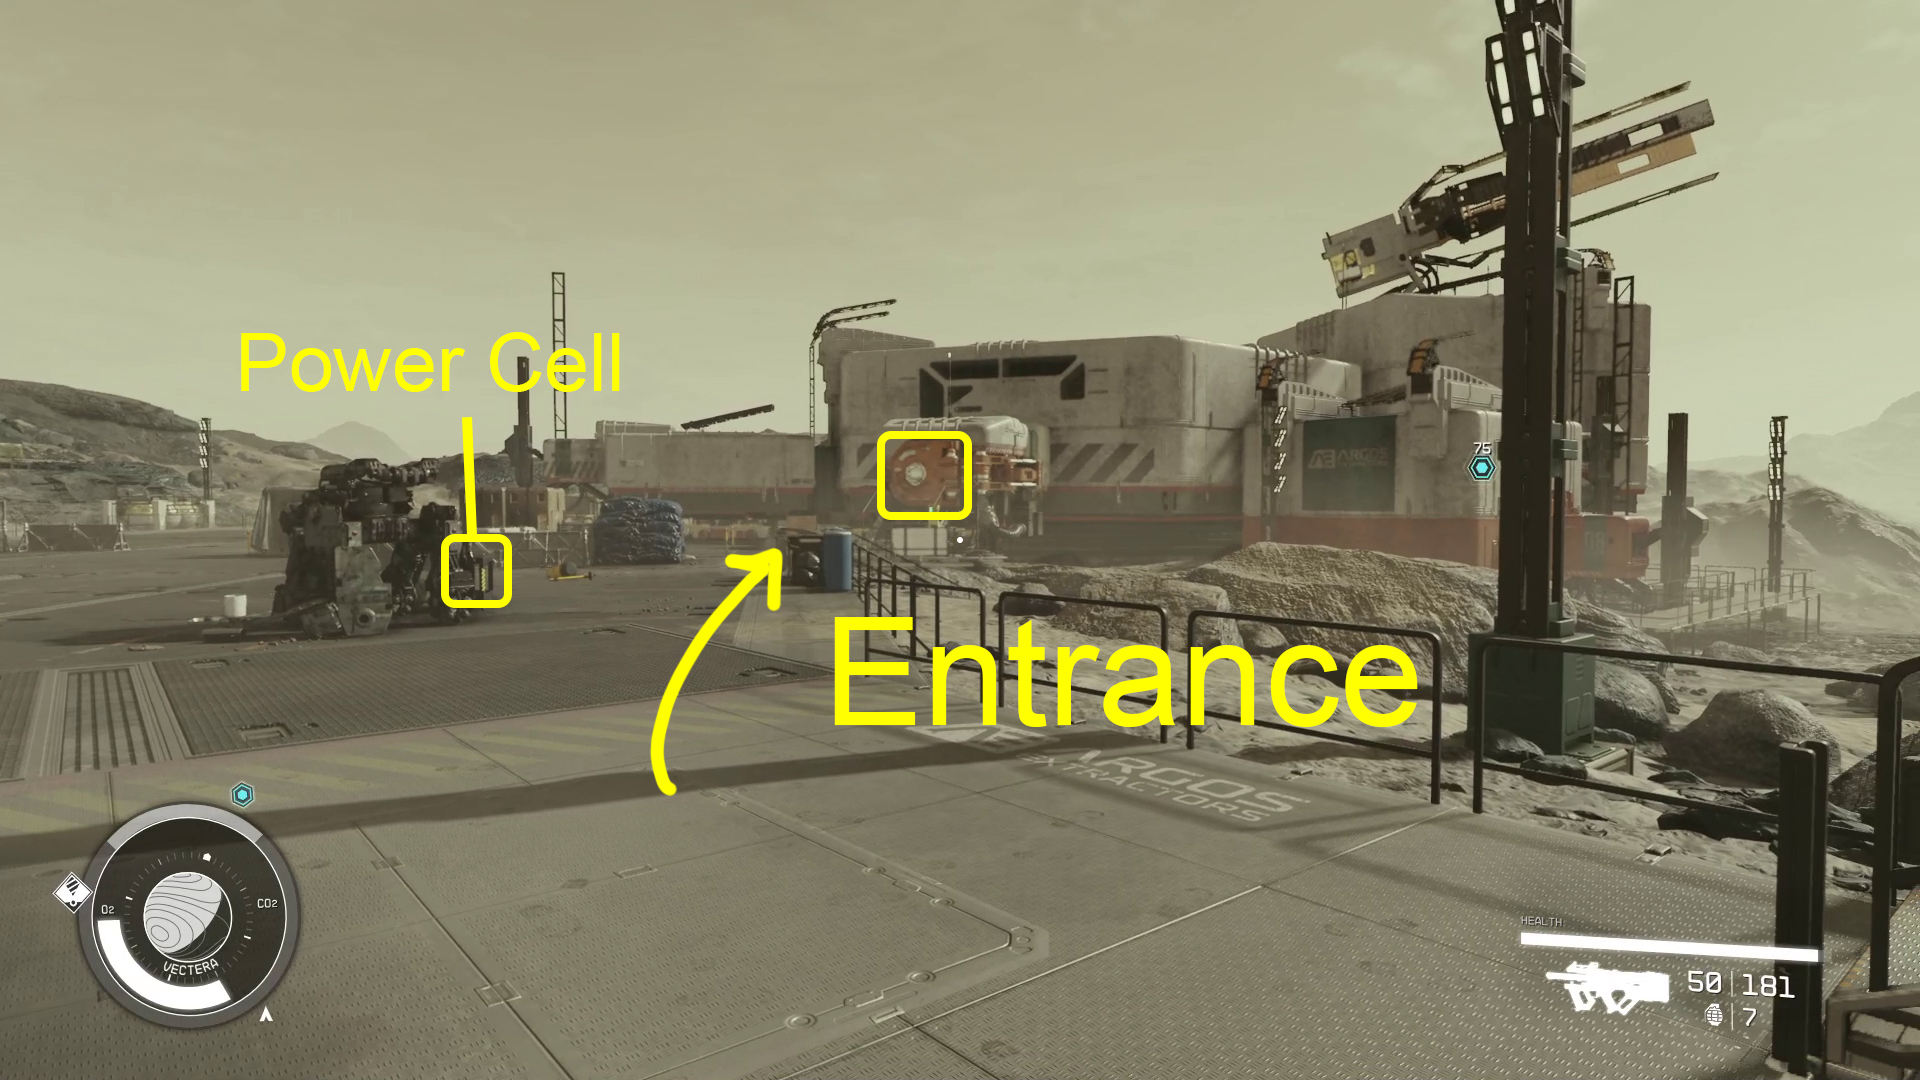
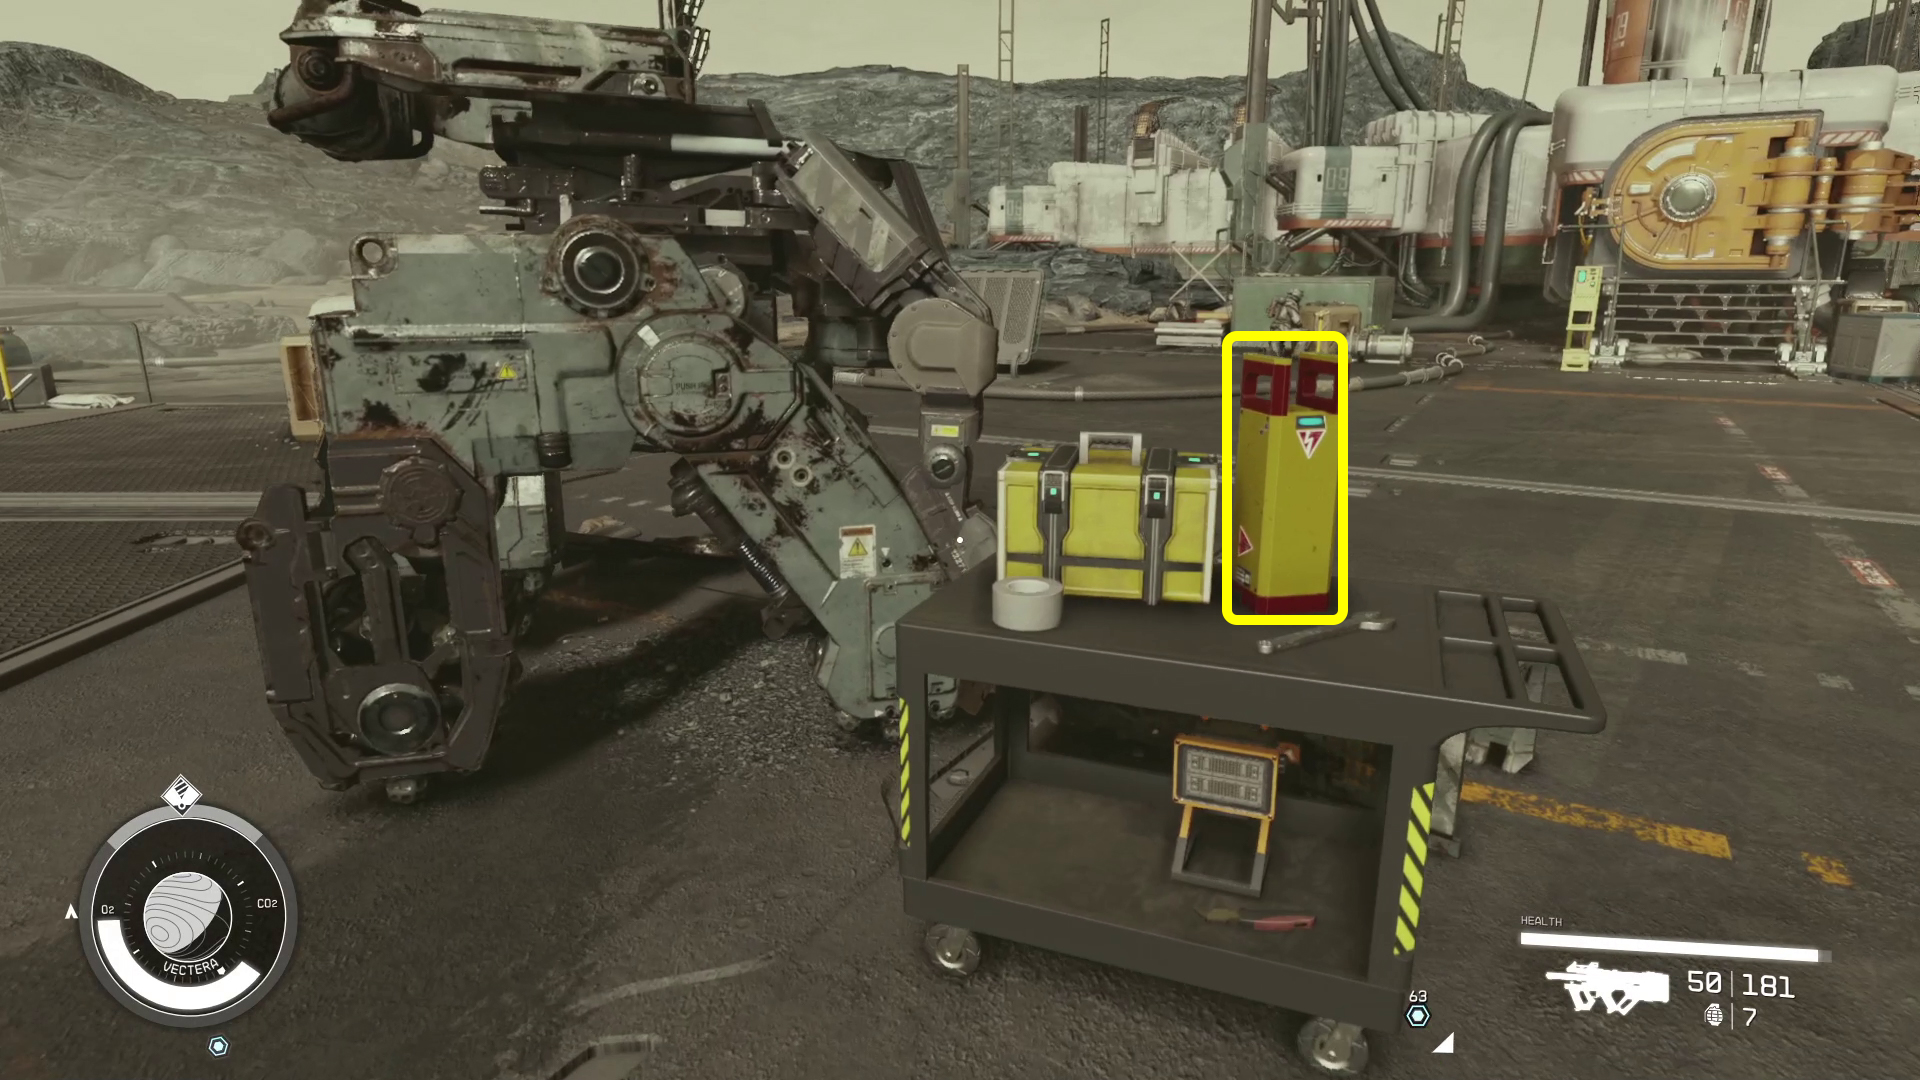
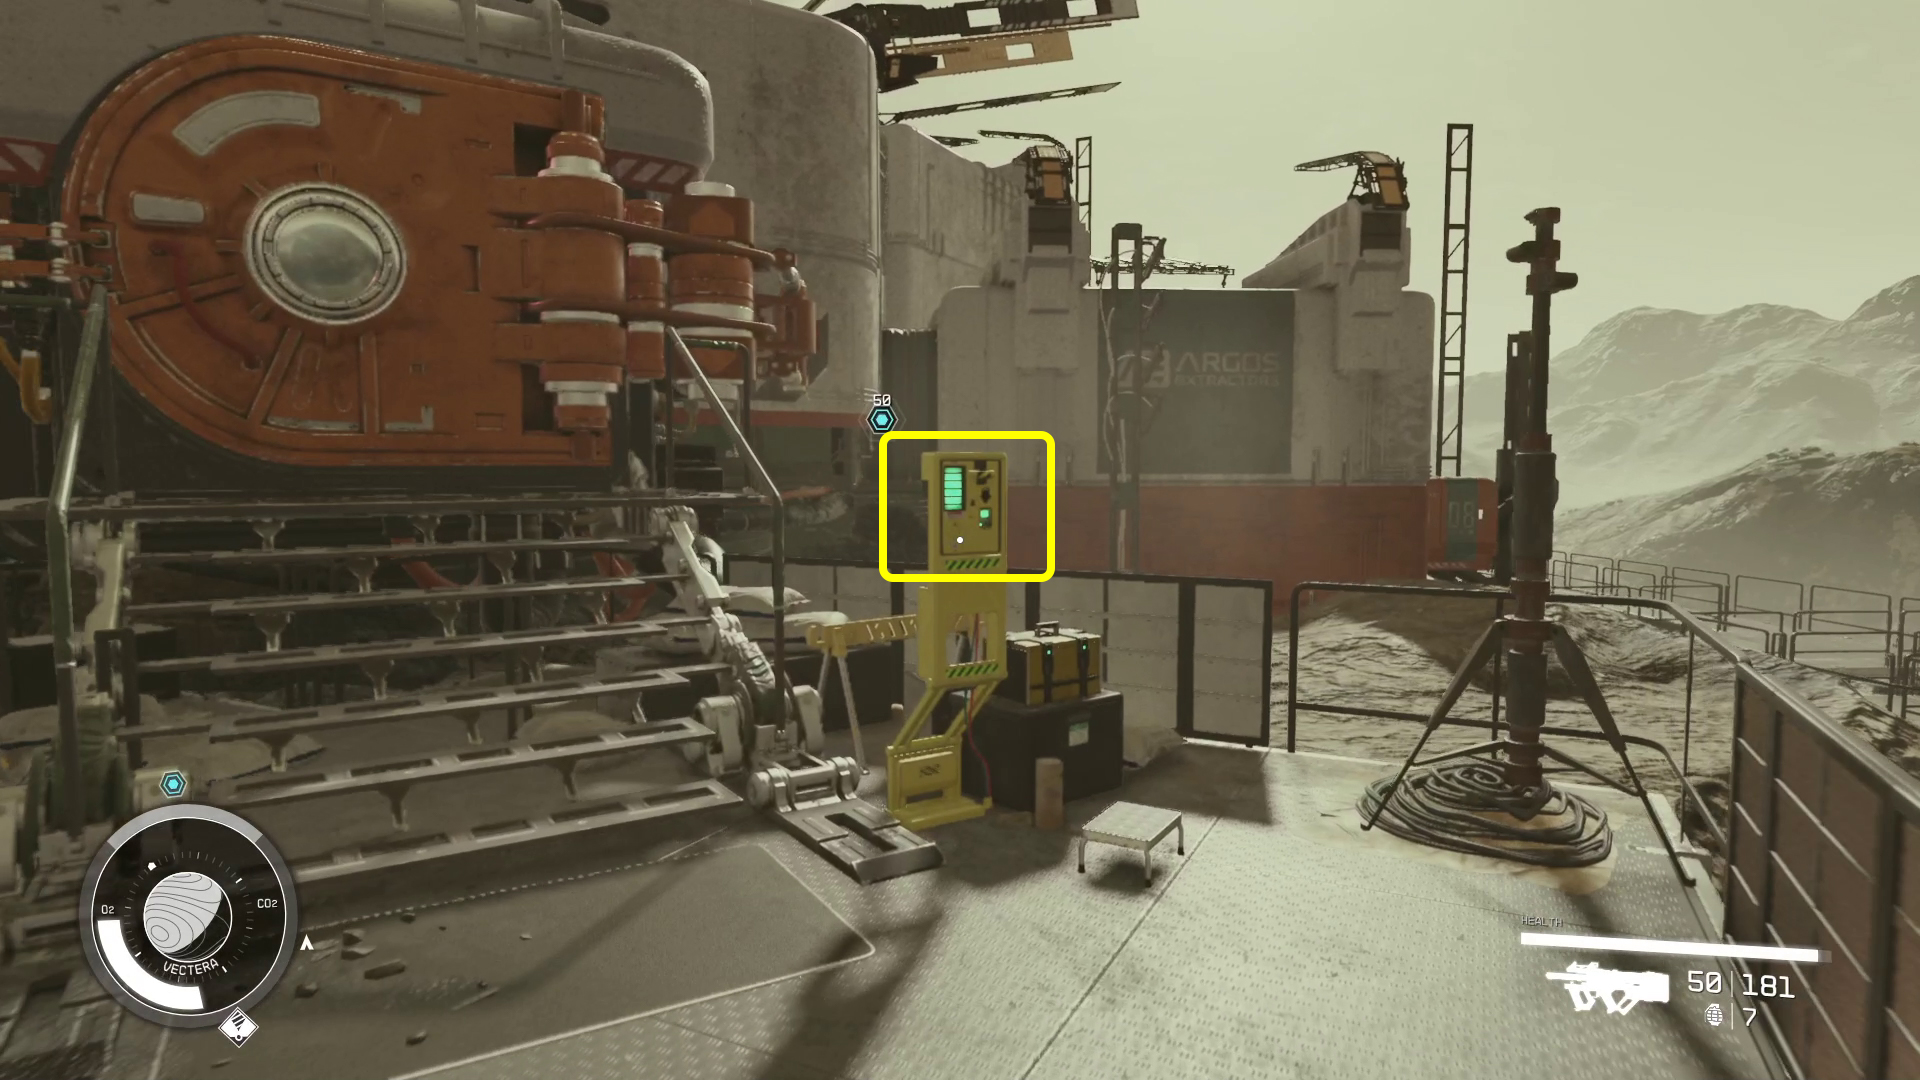
After talking to Lin, you’ll need to head into the communications building (Image 1). Before you do so, however, make sure you grab the Emergency Power Cell from the table near grey robot-looking equipment (Image 1.1). Then continue to the building — you’ll need to interact with the switch (Image 2), and then the hatch will open and you can head inside.
Image 1Image 1.1Image 2
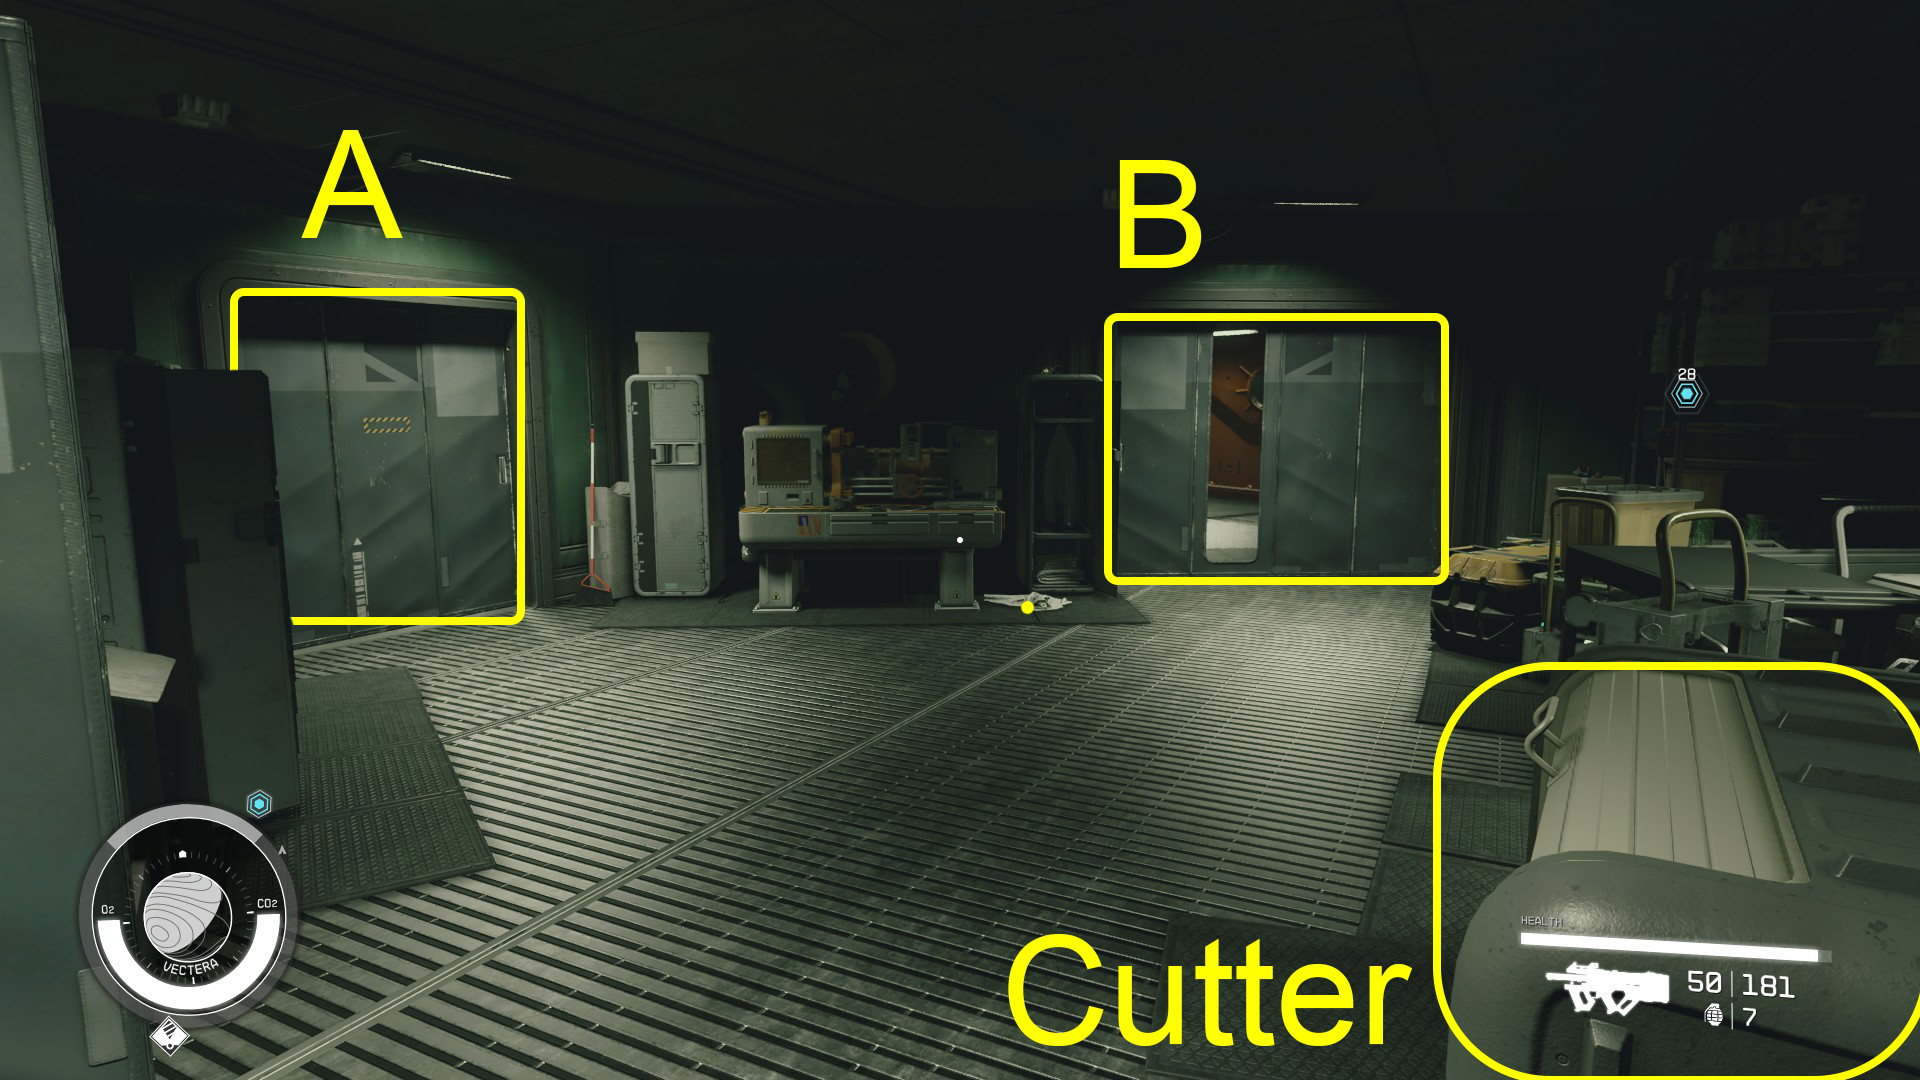
You’ll enter an airlock, and to proceed you’ll have to hit the switch on the right-hand wall — this will close the door behind you, and open the one ahead. You’ll enter an office — grab all the junk you want, then head through the door into the next room. On the floor ahead is a Cutter Case with a unique item: Heller’s Cutter, so make sure you snag it. This room also contains some lockers, a storage crate on the floor, and some loot on the shelving. There’s a door at the far end of the room (Image 3B), but before you head through it, head through the left-hand door (3A) into an office.
Image 3
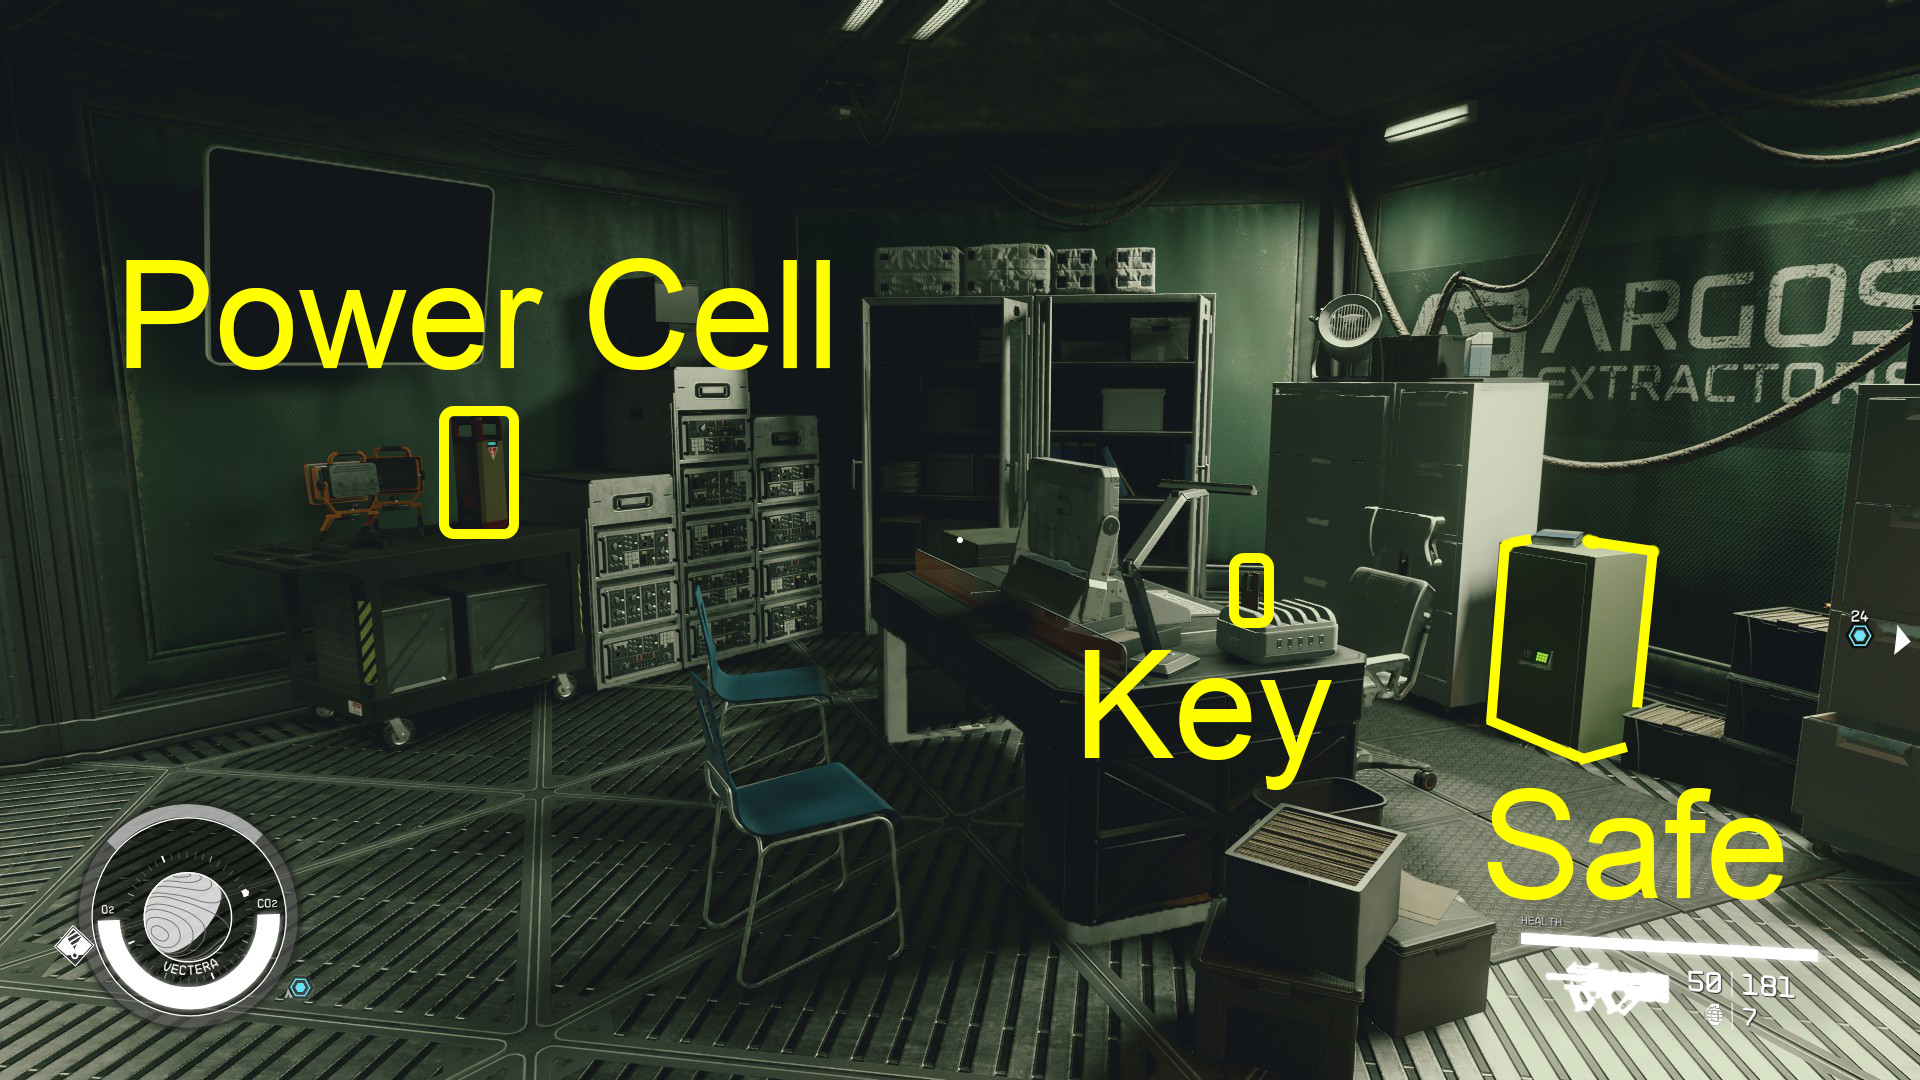
Inside, you’ll find plenty more junk to loot, plus three specific items of note: a key to the control room, the second power cell, and an expert level safe (Image 4). There’s also a valuable book on top of the safe you can grab even if you aren’t a lockpicking master. If you have high enough Security to unlock the safe, the power cell doesn’t matter — otherwise, make sure you grab it before heading back into the previous room. Before going through door 3B, players without the Security skill will also want to snag the third power cell from the nearby shelf (Image 5).
Image 4Image 5
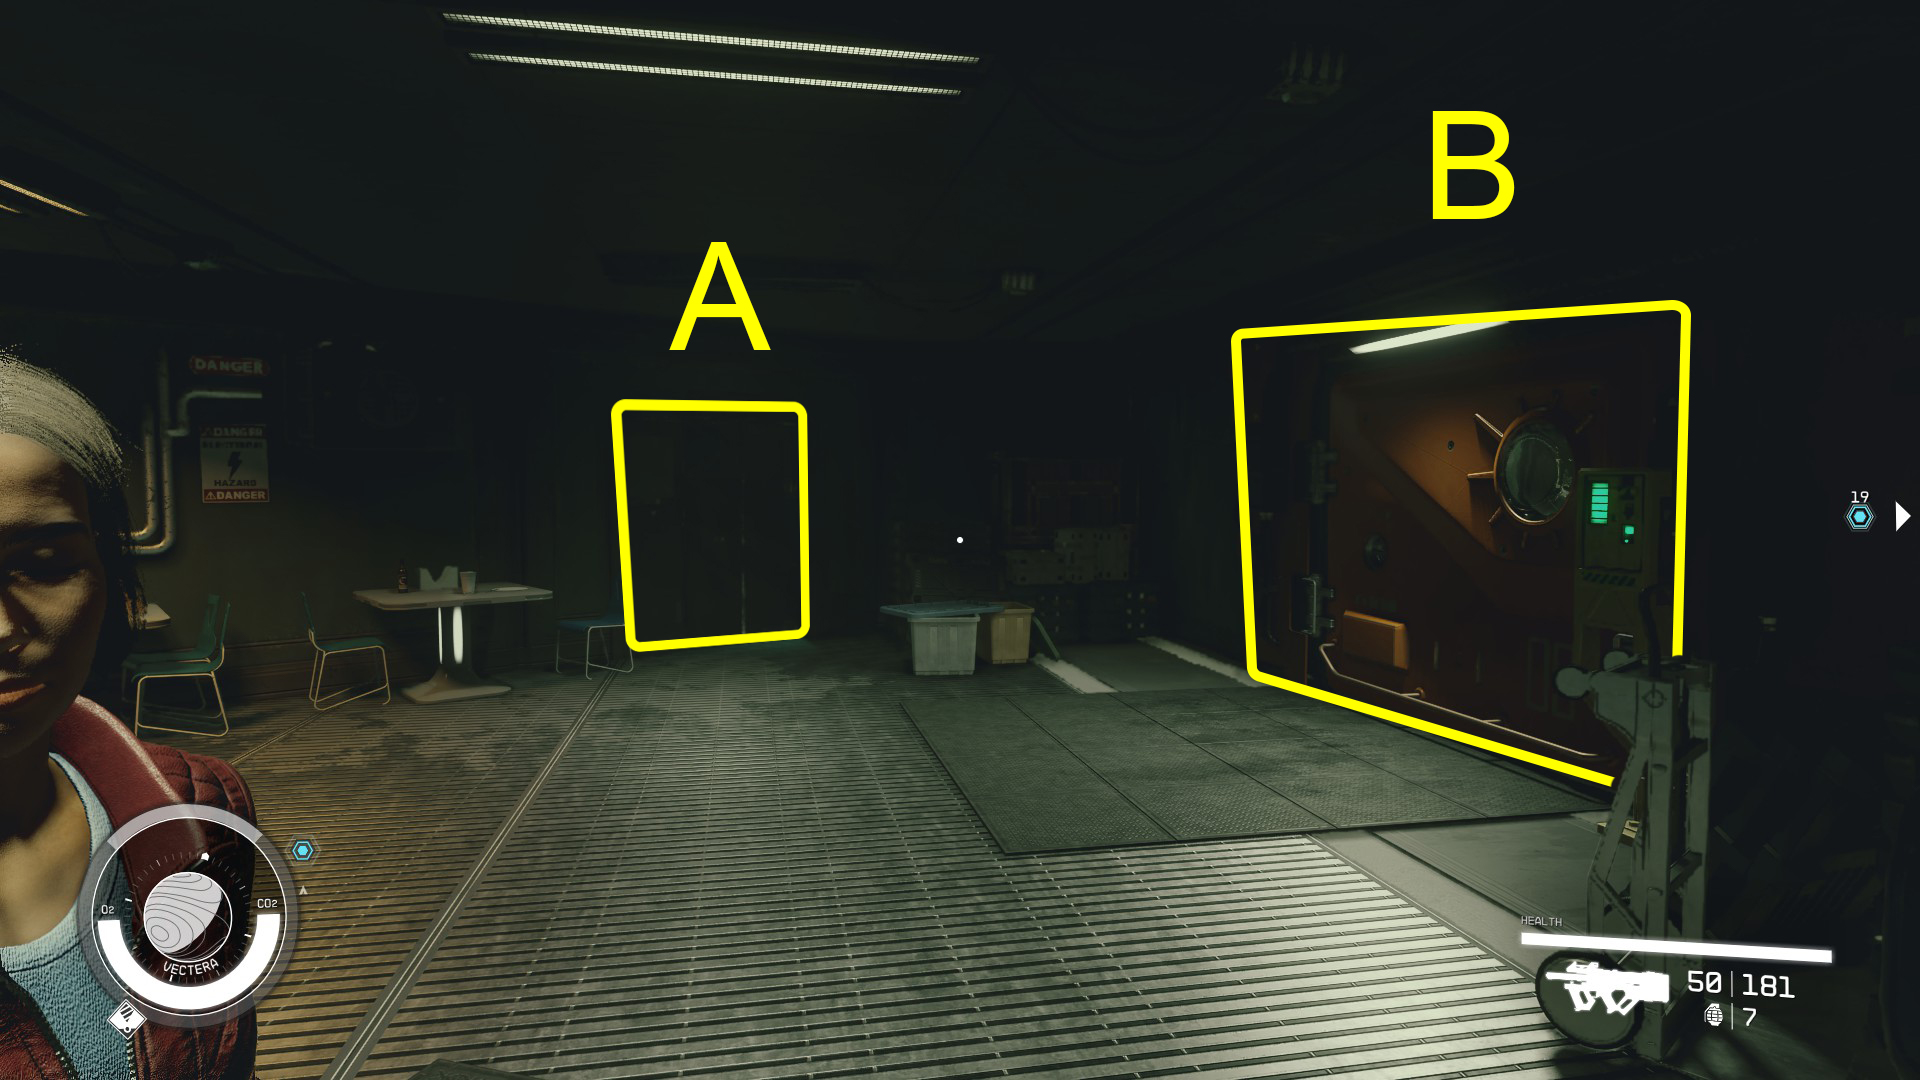
Through door 3B you’ll find another hatch that requires a switch to open it — but we aren’t going through it yet. Grab whatever you want from the nearby tables, then go through the very-hard-to-see-without-your-flashlight door (Image 6A) to enter the dormitory. There’s lots to loot in here — don’t miss the Trackers Primer 05 Magazine on the table between the second set of bunks. There are two doors in the dorms that lead to a bathroom and a shower — both have plenty to grab. Once you’re done looting the dorm area, head back into the previous room, throw the switch, and then go through the now-open door 6B.
Image 6
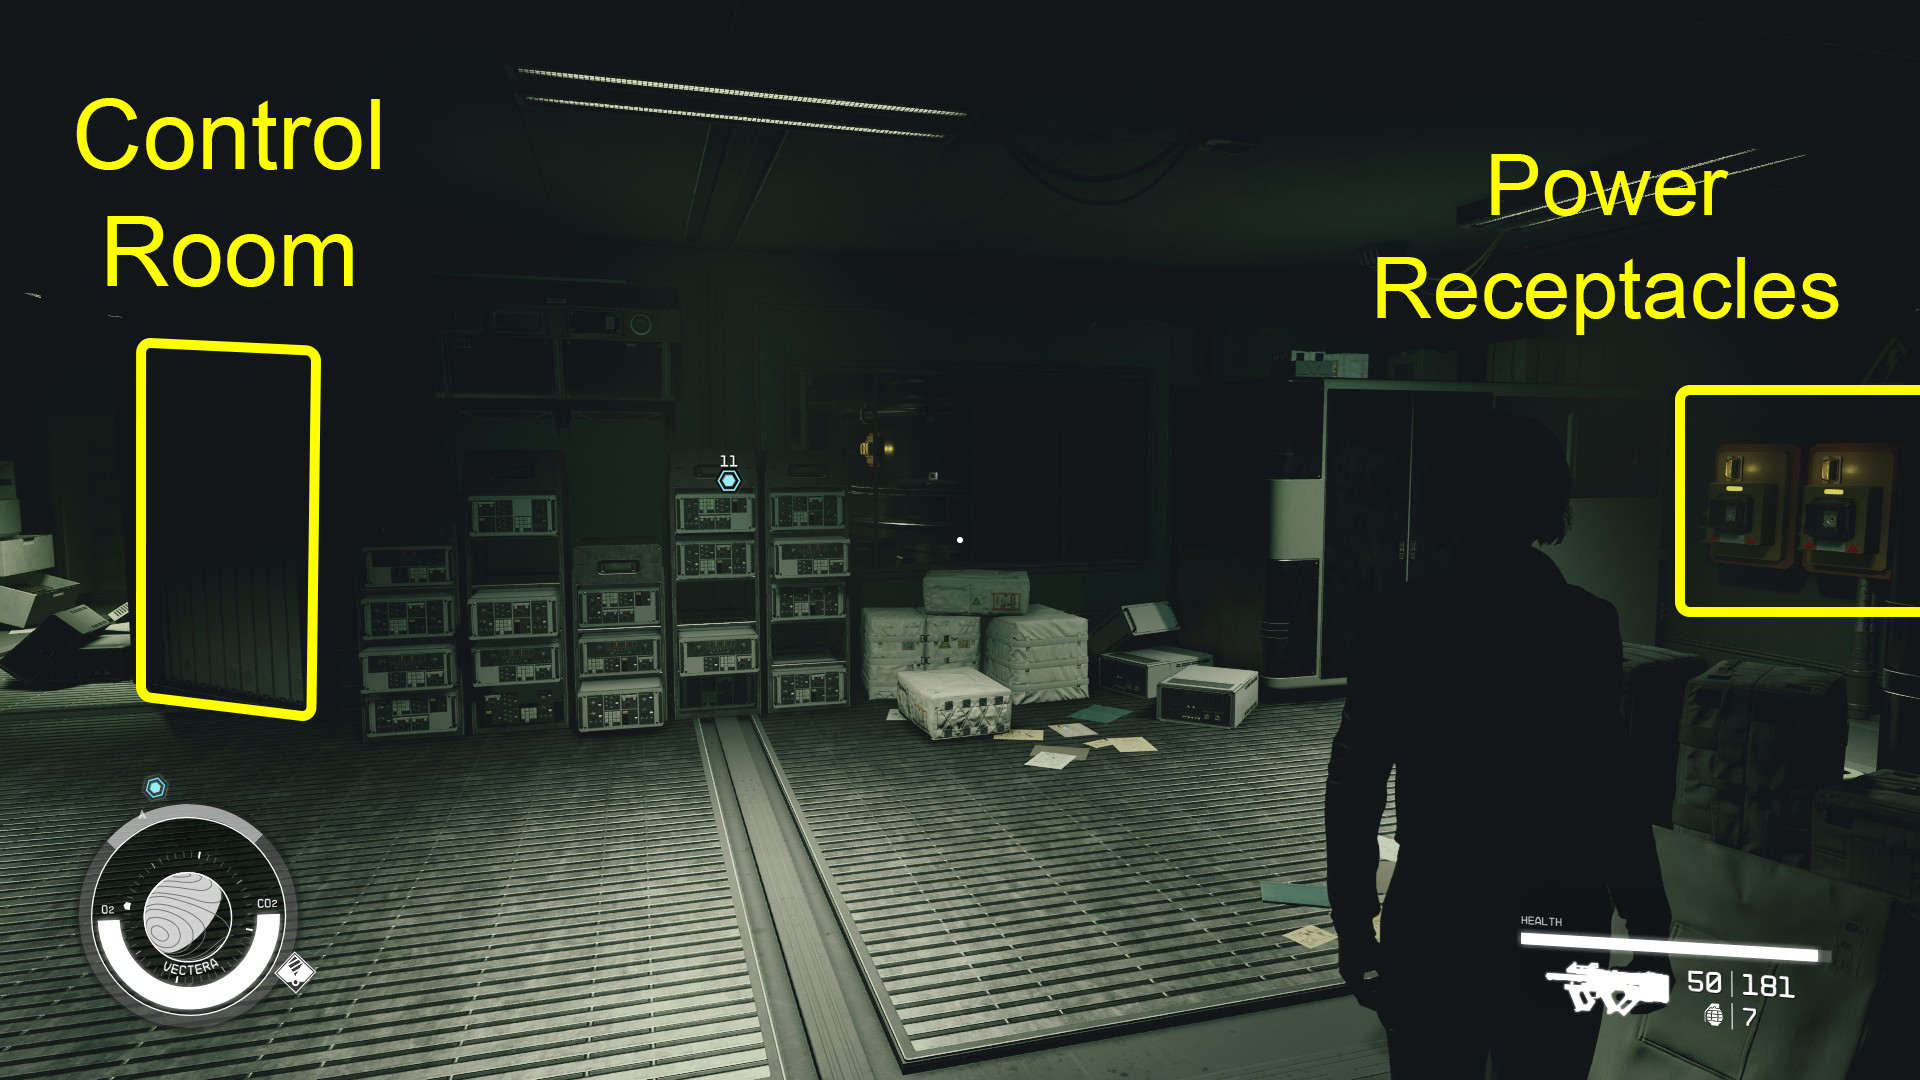
If you don’t have Security leveled yet, turn right upon entering this room, and you’ll see three square sockets in the wall — these are the Power Receptacles. Walk up to them and press the indicated button to place the three Emergency Power Cells you collected earlier into each socket. Then proceed through the door to the control room, which you can unlock using the key you found in the office.
Image 7
Find a Clue to Barrett’s Location
In the control room, interact with the Communications Computer on the desk, and then:
If you put in the three power cells: Open the “Emergency Transmission” folder.
If you skipped the power cells: Choose the [Security] option from the dialog box the computer gives you, and then go into your inventory, and find and listen to the Emergency Transmission 01 (it should be in your New Items).
Return to Lin
Retrace your steps to the airlock, and use the switch to open the door to the outside. Use your objective marker to find Lin, as she’ll be wandering around the exterior of the facility. Talk to her, and tell her “I found a transmission…”
At the end of the conversation with her, she’ll mention that she might want to join your crew. Speak with her again after the first dialogue ends, and you’ll be able to recruit her — she’s got 3 ranks in Outpost Management, which can end up very useful.
Travel to [Planet]/Find Barrett and Heller
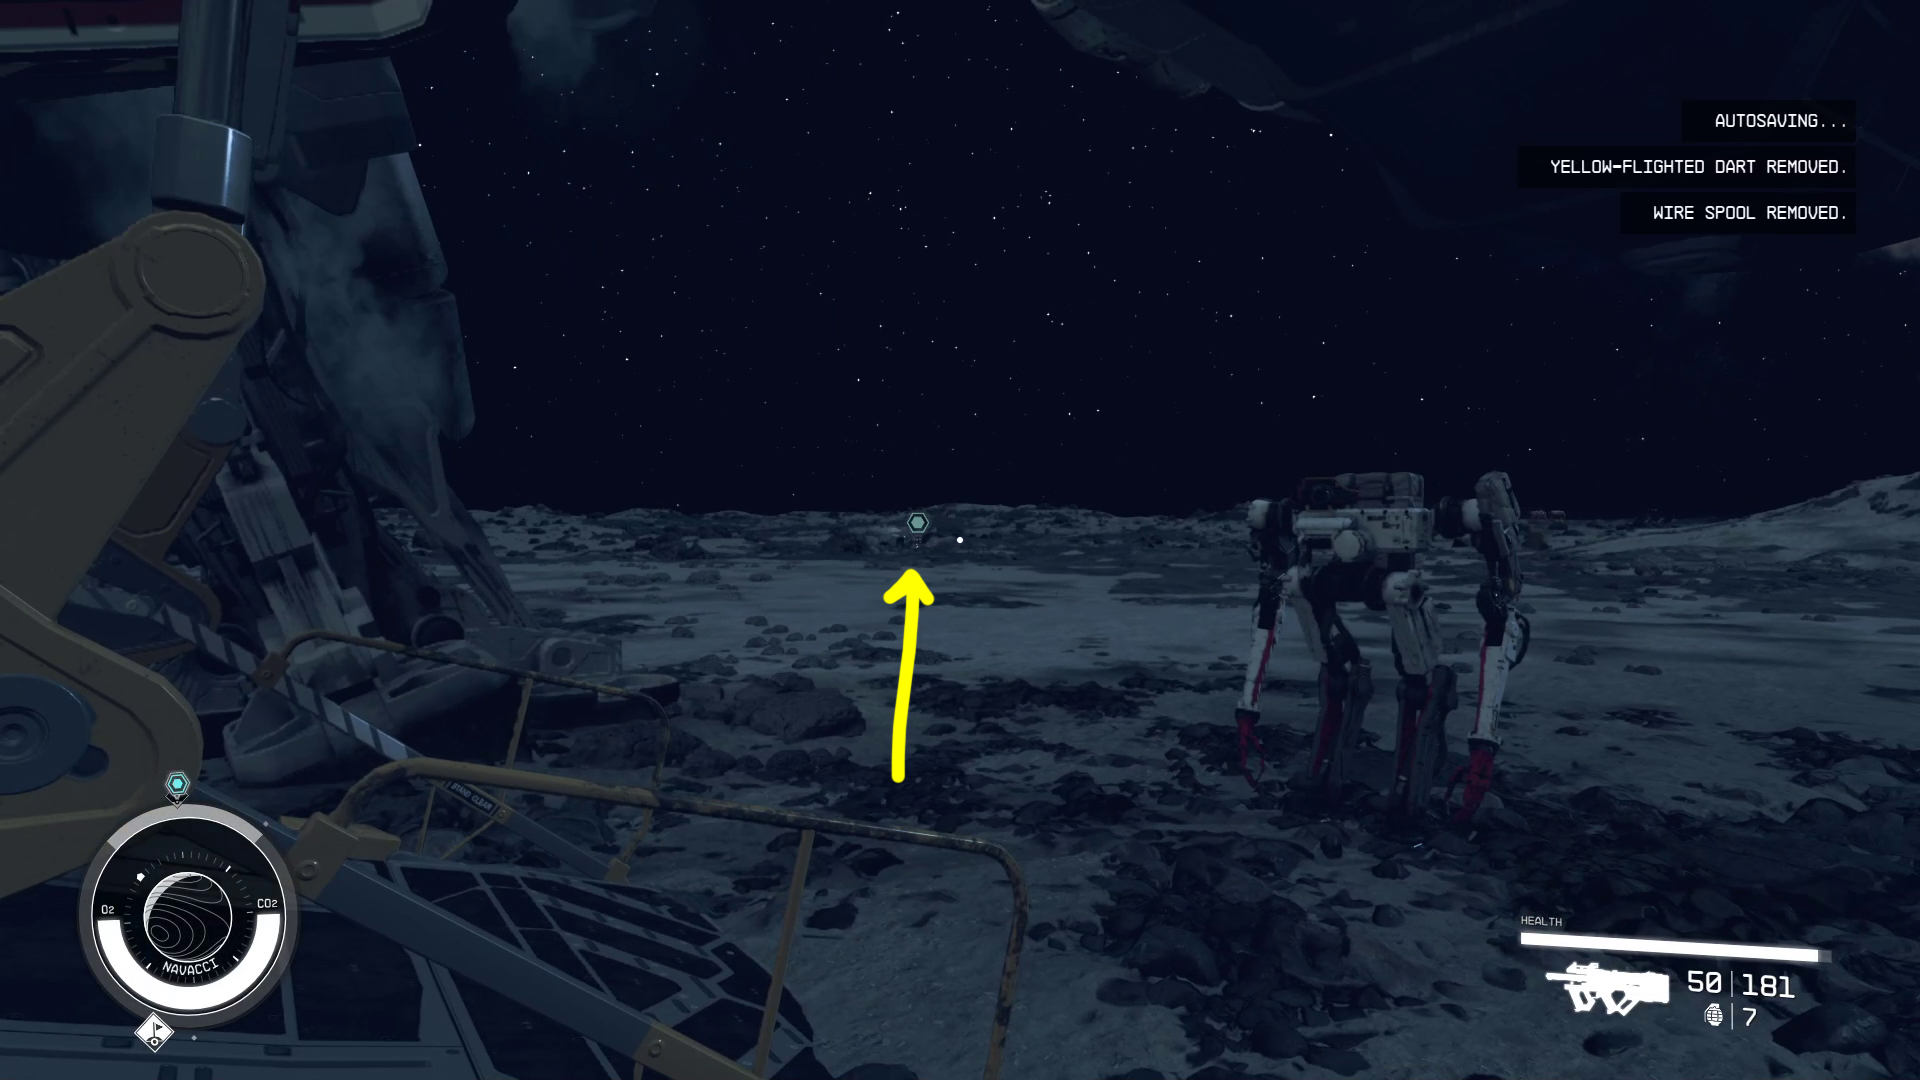
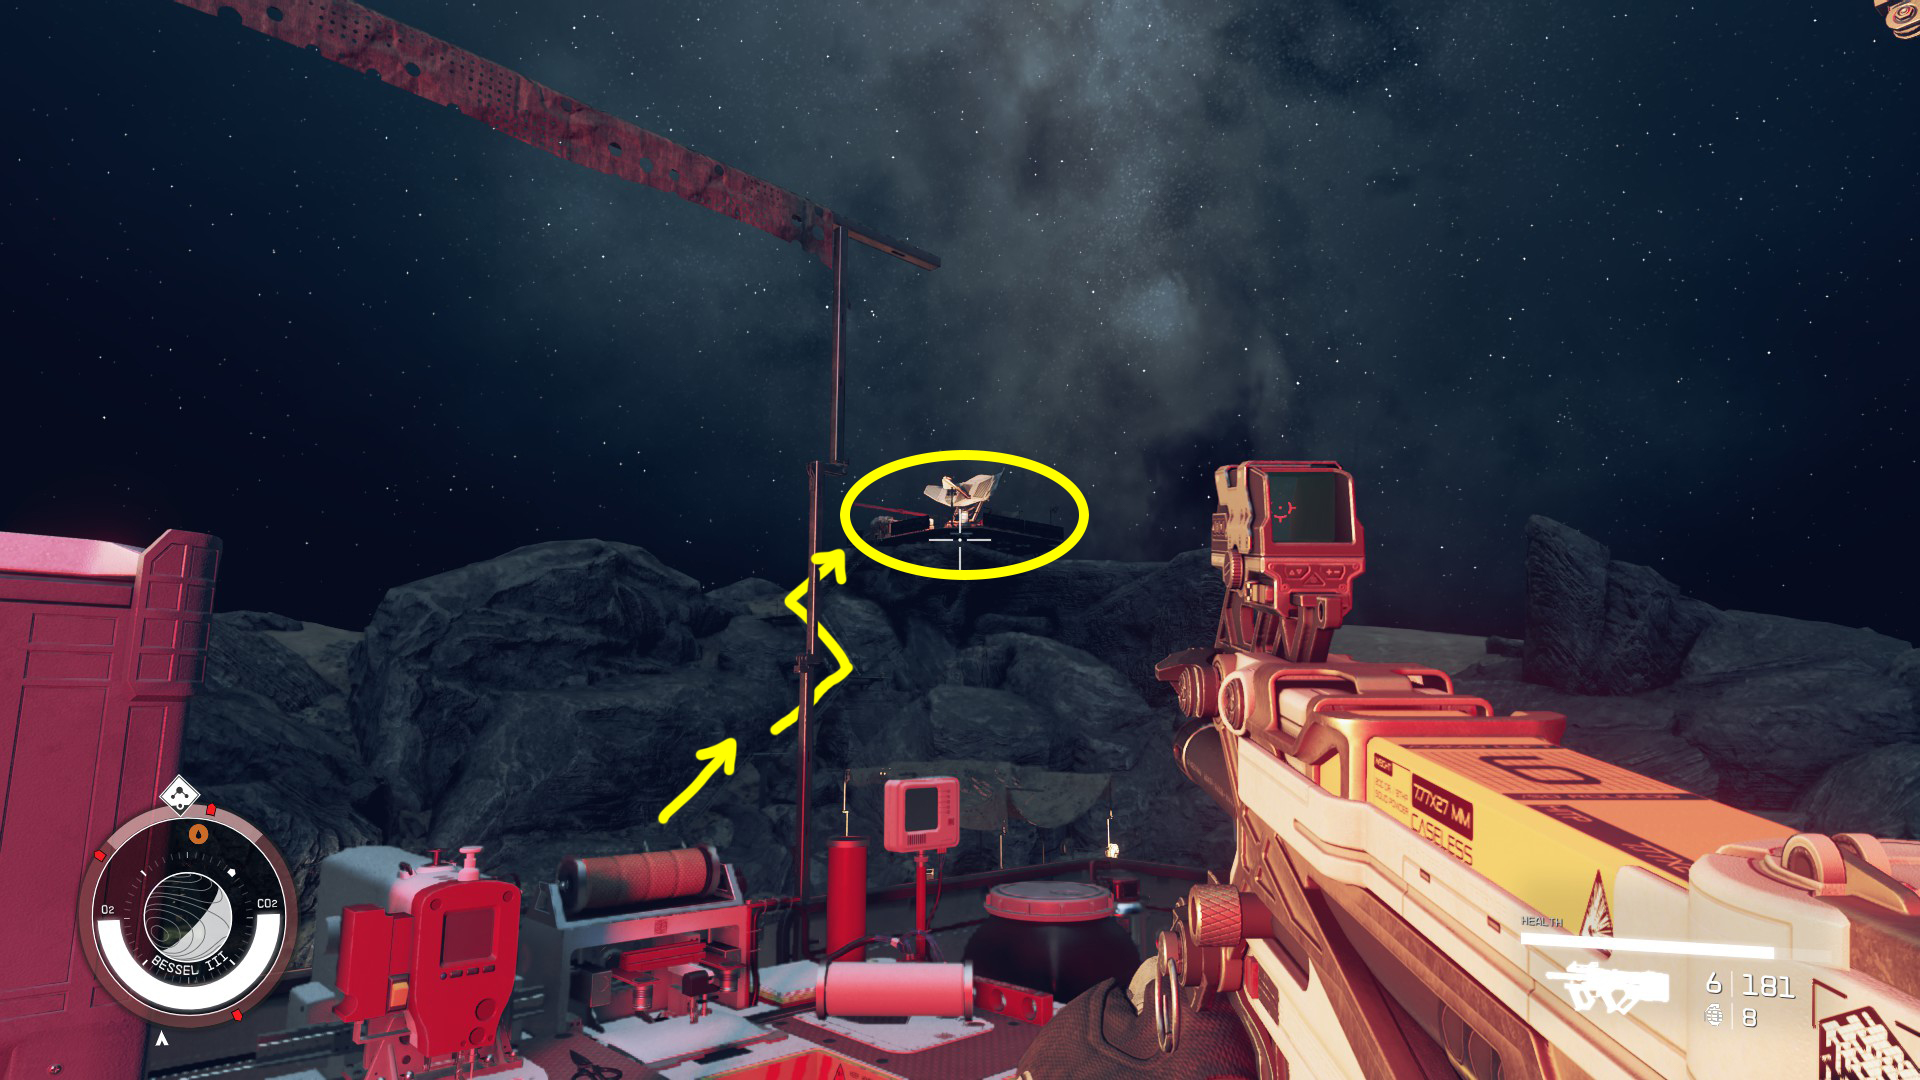
Thanks to the transmission you found from Barrett, you now have a destination — a randomly selected planet. You can use your Mission log to fast travel directly into orbit. Once in orbit of [planet], you can use your Mission log again to set another course, landing on the planet near the Crashed Ship. (There was debris nearby when we grav jumped in, so if you see any arrows on your targeting reticle, go loot the debris before landing.) Upon exiting your ship, go left from the ramp towards the objective marker (Image 7).
Image 7
Enjoy the lower gravity and jump around as you make your way over to the crashed ship, which you’ll reach fairly quickly. On the right side of the ship, you’ll find Heller.
Talk to Heller/Listen to Emergency Transmission 02/Travel to Bessel III
Speak with Heller, and he’ll do his best to tell you what happened. Don’t tease him if Sarah Morgan is with you, as she won’t like it. Once you finish the conversation with Heller, you’ll need to go into your inventory, go to New Items, and then listen to Emergency Transmission 02. Grab the consumables near where Heller was lying, then use your Mission log to fast travel to Bessel III.
Like Lin, you can speak with Heller again after finishing the initial conversation, and recruit him. He’s got rank 3 in Outpost Engineering, making him another good pickup if you want to build any outposts.
Rescue Barrett
Once in orbit of Bessel III, use your Mission log to fast travel to the planet, landing at the Ransacked Research Outpost. Your character apparently has no sense of stealth, as you’ll touch done right outside the outpost, which pirates are now in control of. Fortunately, none of them seem to notice you landing, so you’ll be able to sneak into the base if you like. (Even if you’re just going to go in shooting, it’s still best to avoid the front gate.)
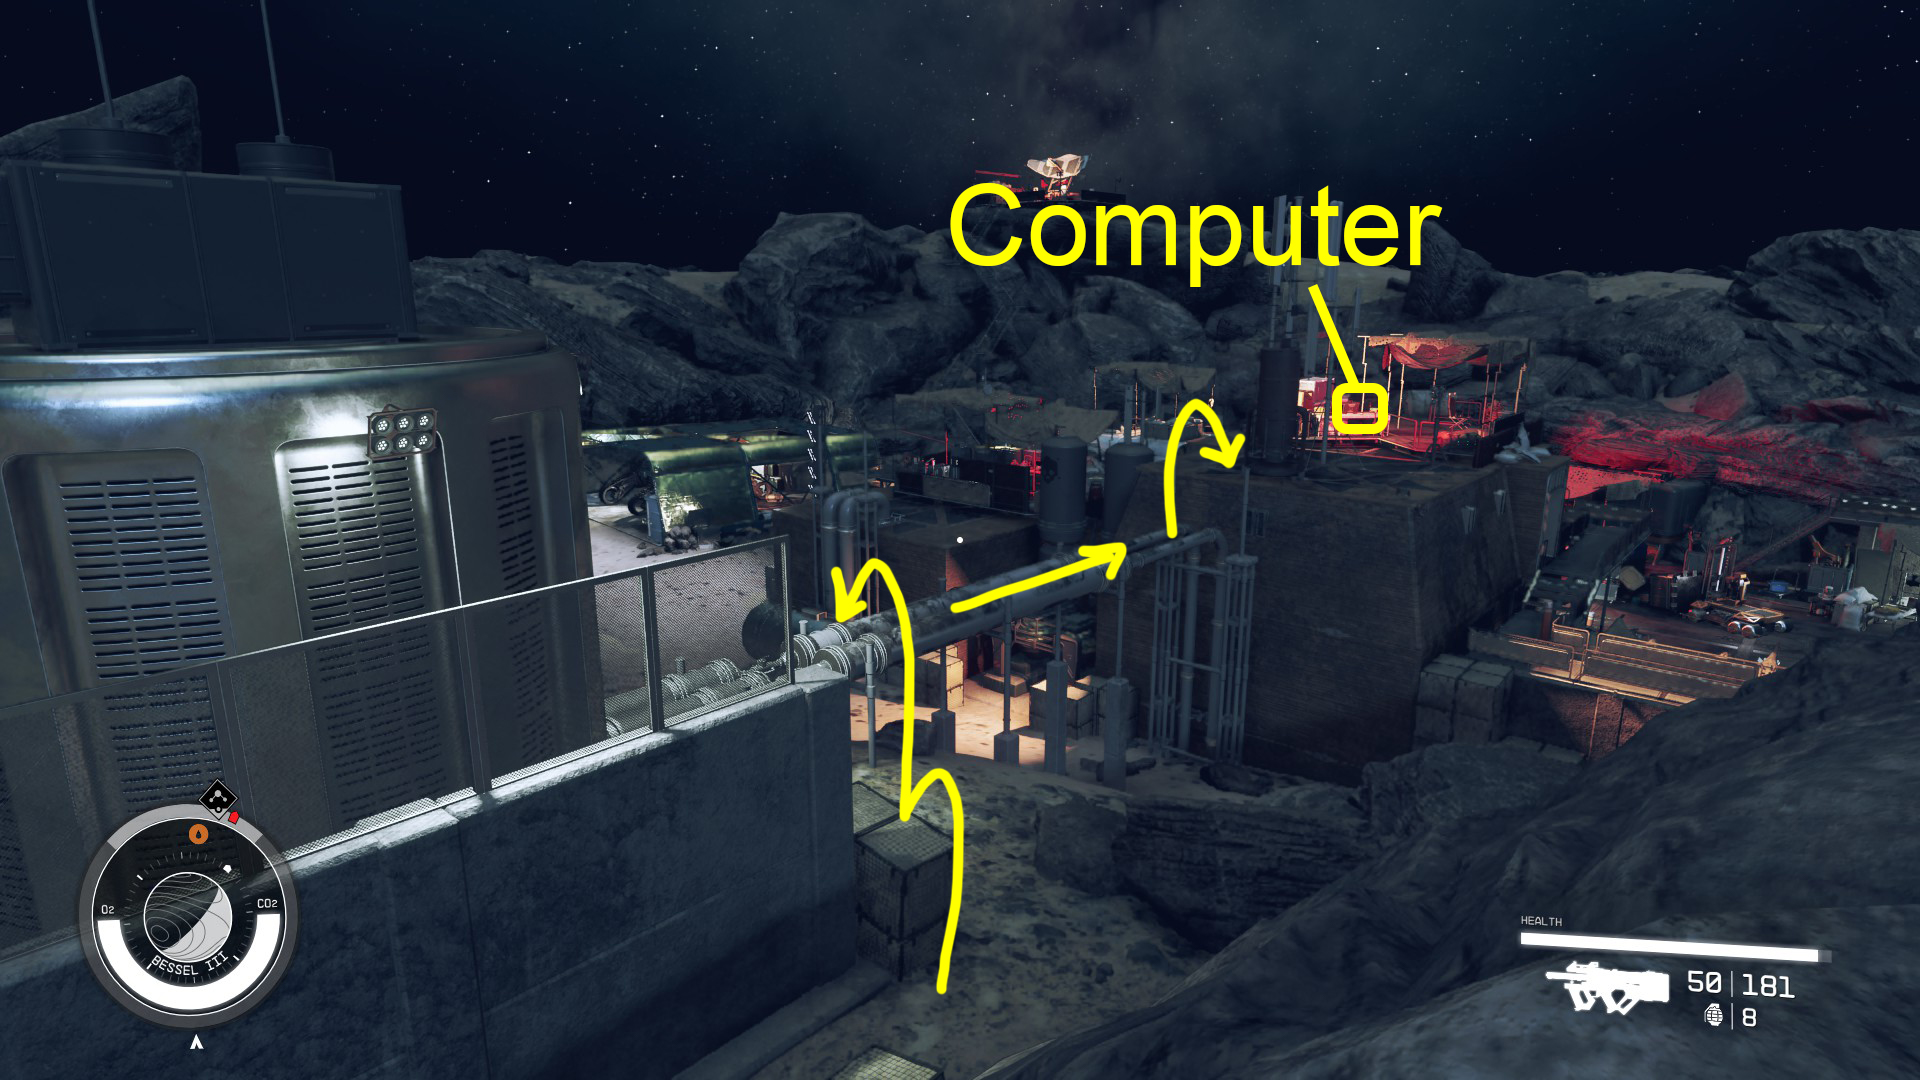
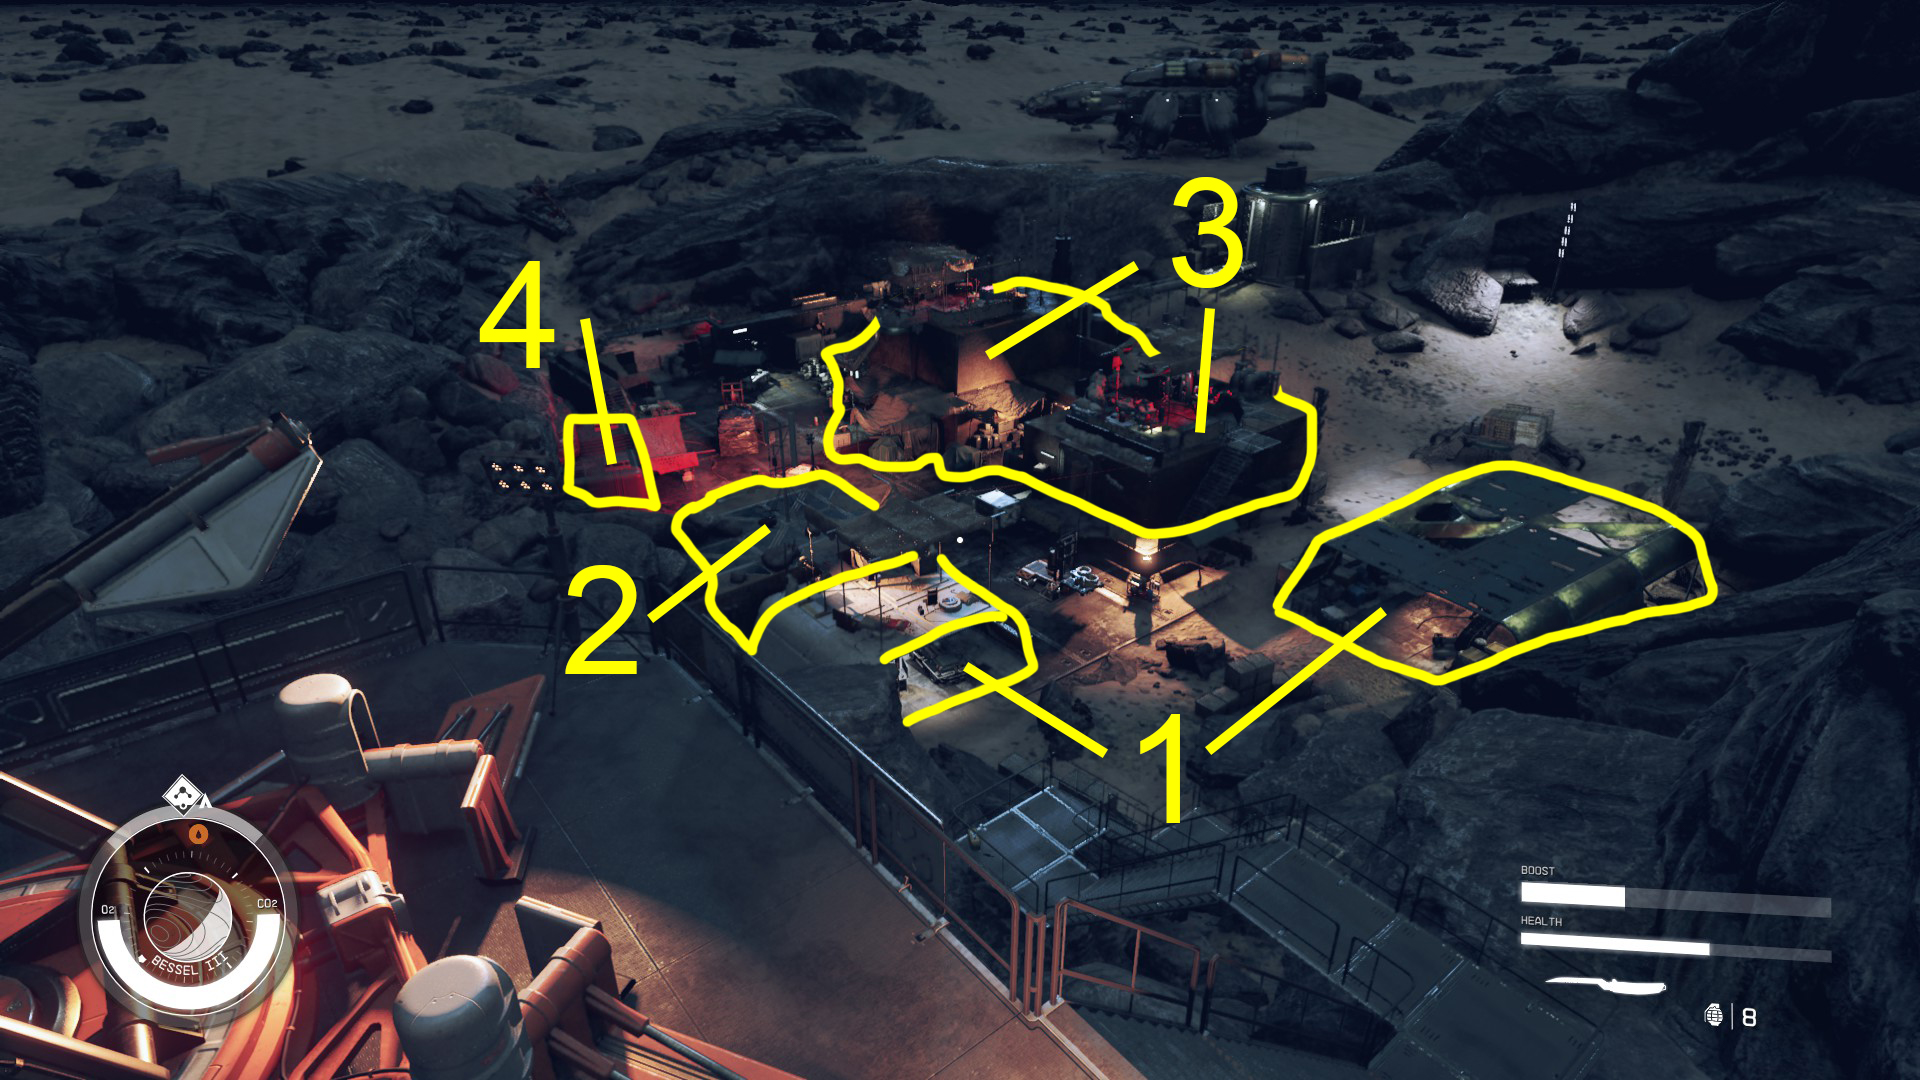
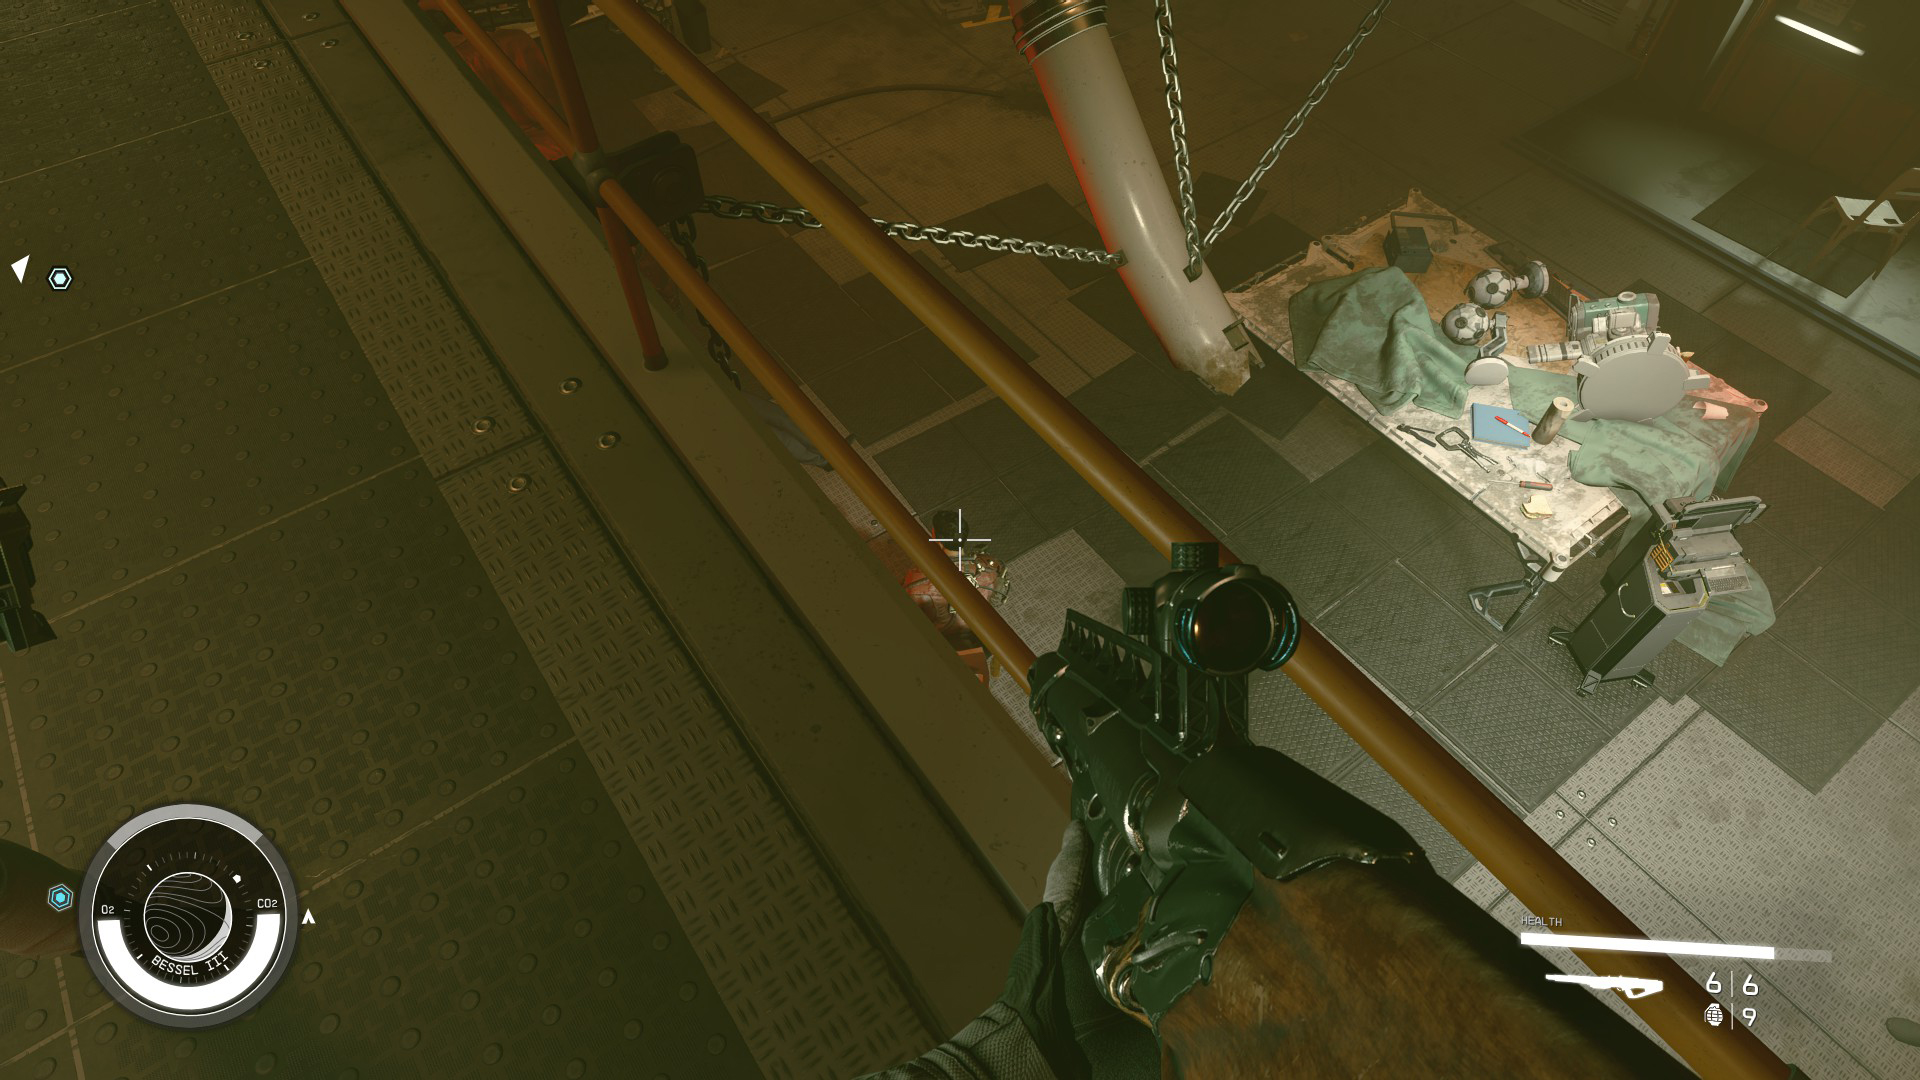
From your ship, go left (Image 8) and jump up onto the rocks. From here, you’ll be able to make your way into the base without going through the main entrance my jumping onto a set of pipes that leads to a roof (Image 9). The small structure to the left of where you can jump on the pipes has a bit of loot on the other side, so check there before proceeding across the pipe to the rooftop. There should be one enemy there, so take them out and then quickly interact with the computer on the table.
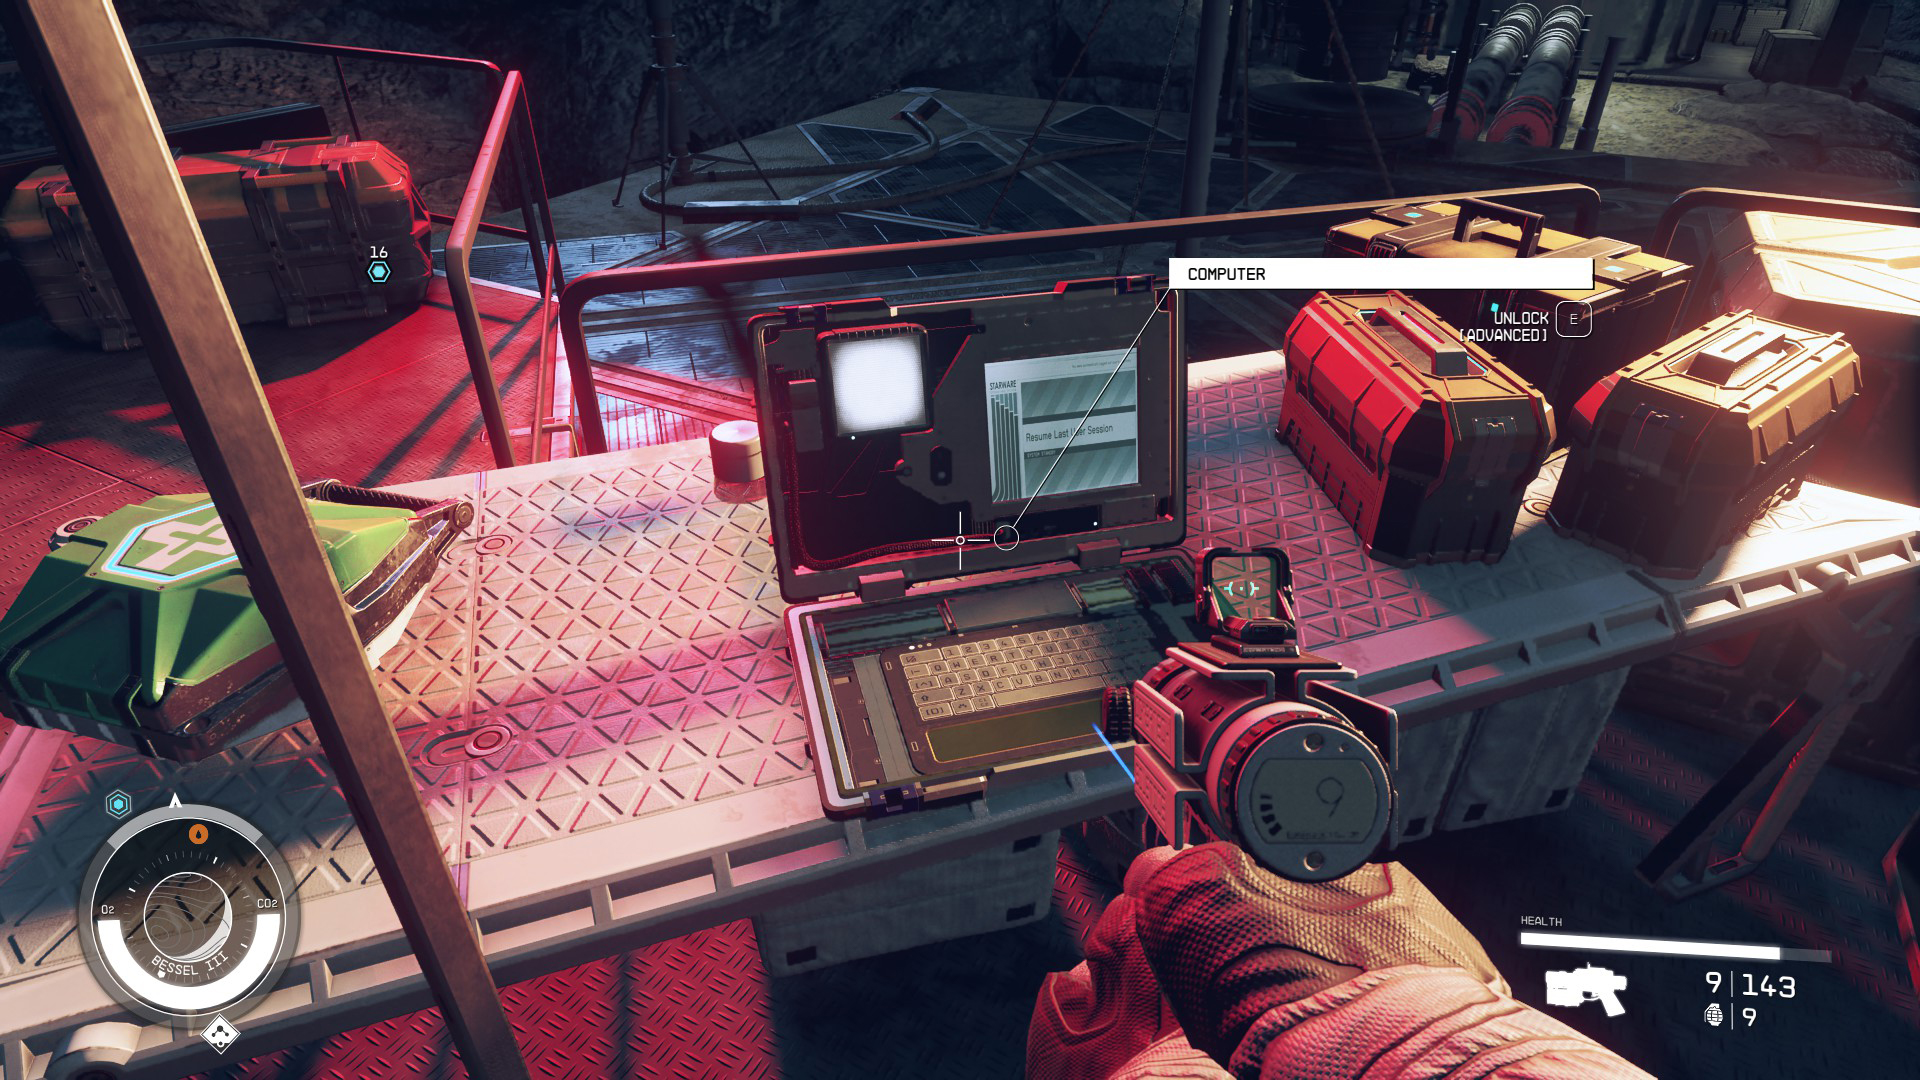
If you have at least one rank in Security (every character benefits from grabbing it, so you should), you can hack the turret control systems computer (Image 10) on the roof. By selecting “Update Friend/Foe Settings” on the Remote Turret Control, you’ll set the turrets to attack the pirates. While the turrets and the pirates battle, it should be easy to eliminate all the visible enemies. If you can’t hack the turrets, you’re at least in a good position to fight, since you have the high ground.
Image 8Image 9Image 10
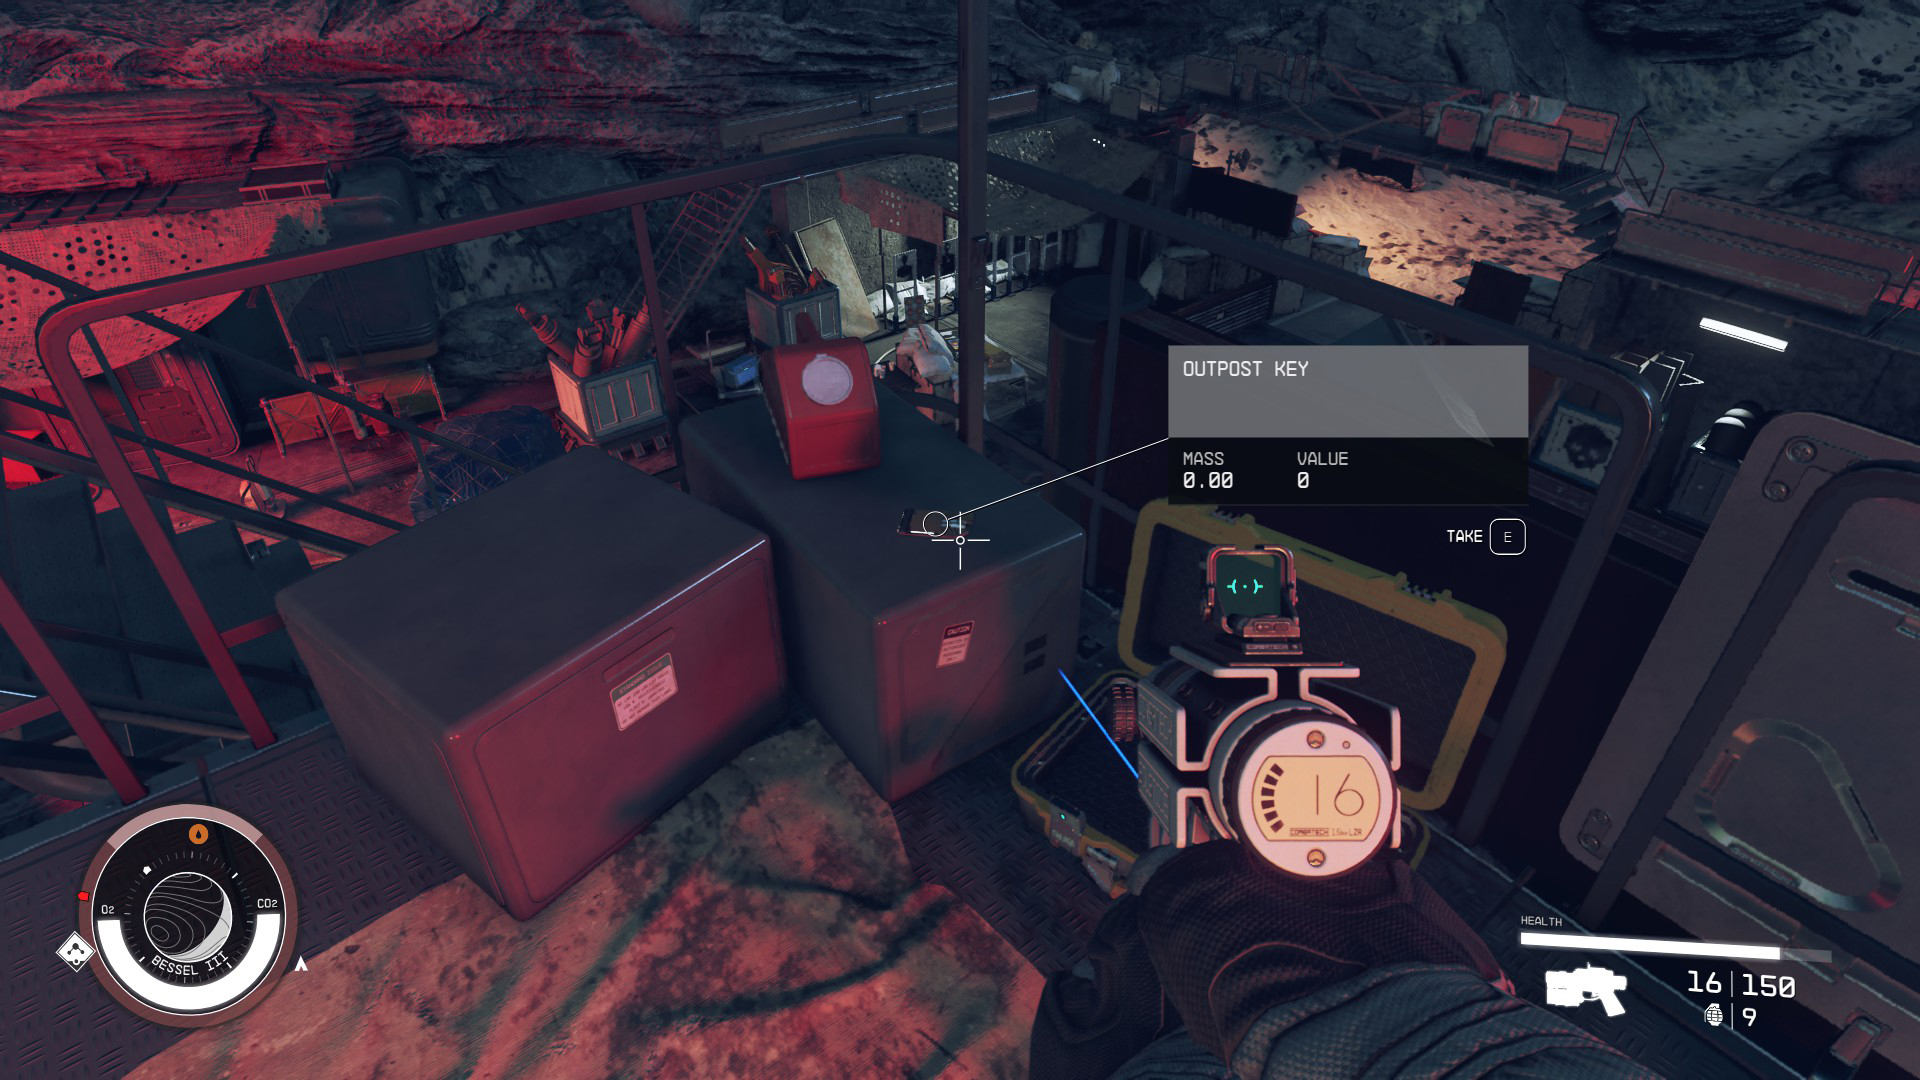
Turn left from the computer, and grab the Outpost Key sitting on a nearby crate (Image 11). Once that’s done, you’ll want to head up to the platform on the high ground (Image 12), where a powerful enemy is probably sniping you from. Even if you haven’t totally cleared the area, you should be able to sprint up the steps and fight this foe 1-on-1 — he drops some good loot, and there are a few other goodies in crates near him, so it’s well worth the effort (plus it means he’ll stop shooting you while you clear the rest of the compound).
Image 11Image 12
As an added benefit, from up here we can see the whole compound. Rather than detail every single section, at this point we’ll just note all of the areas, so you can make sure you loot them all. You’ll very likely find enemies both in buildings 2 and 3, so be ready.
Two outdoor covered storage areas that have a bit of loot — of particular note is the roof of the left-hand storage area, where we found a few plushies.
This building’s entrance is on the other side of the structure (relative to the image below), and opens with the Outpost Key. It’s one large room — upon entering, there’s a safe on the shelves to the left that’ll open with the same key.
This is really one large structure, and regardless of where you enter, you’ll be able to explore the interior of the whole thing. However, there are two distinct rooftop sections, so make sure you loot both.
This is the entrance to the Crimson Fleet Outpost.
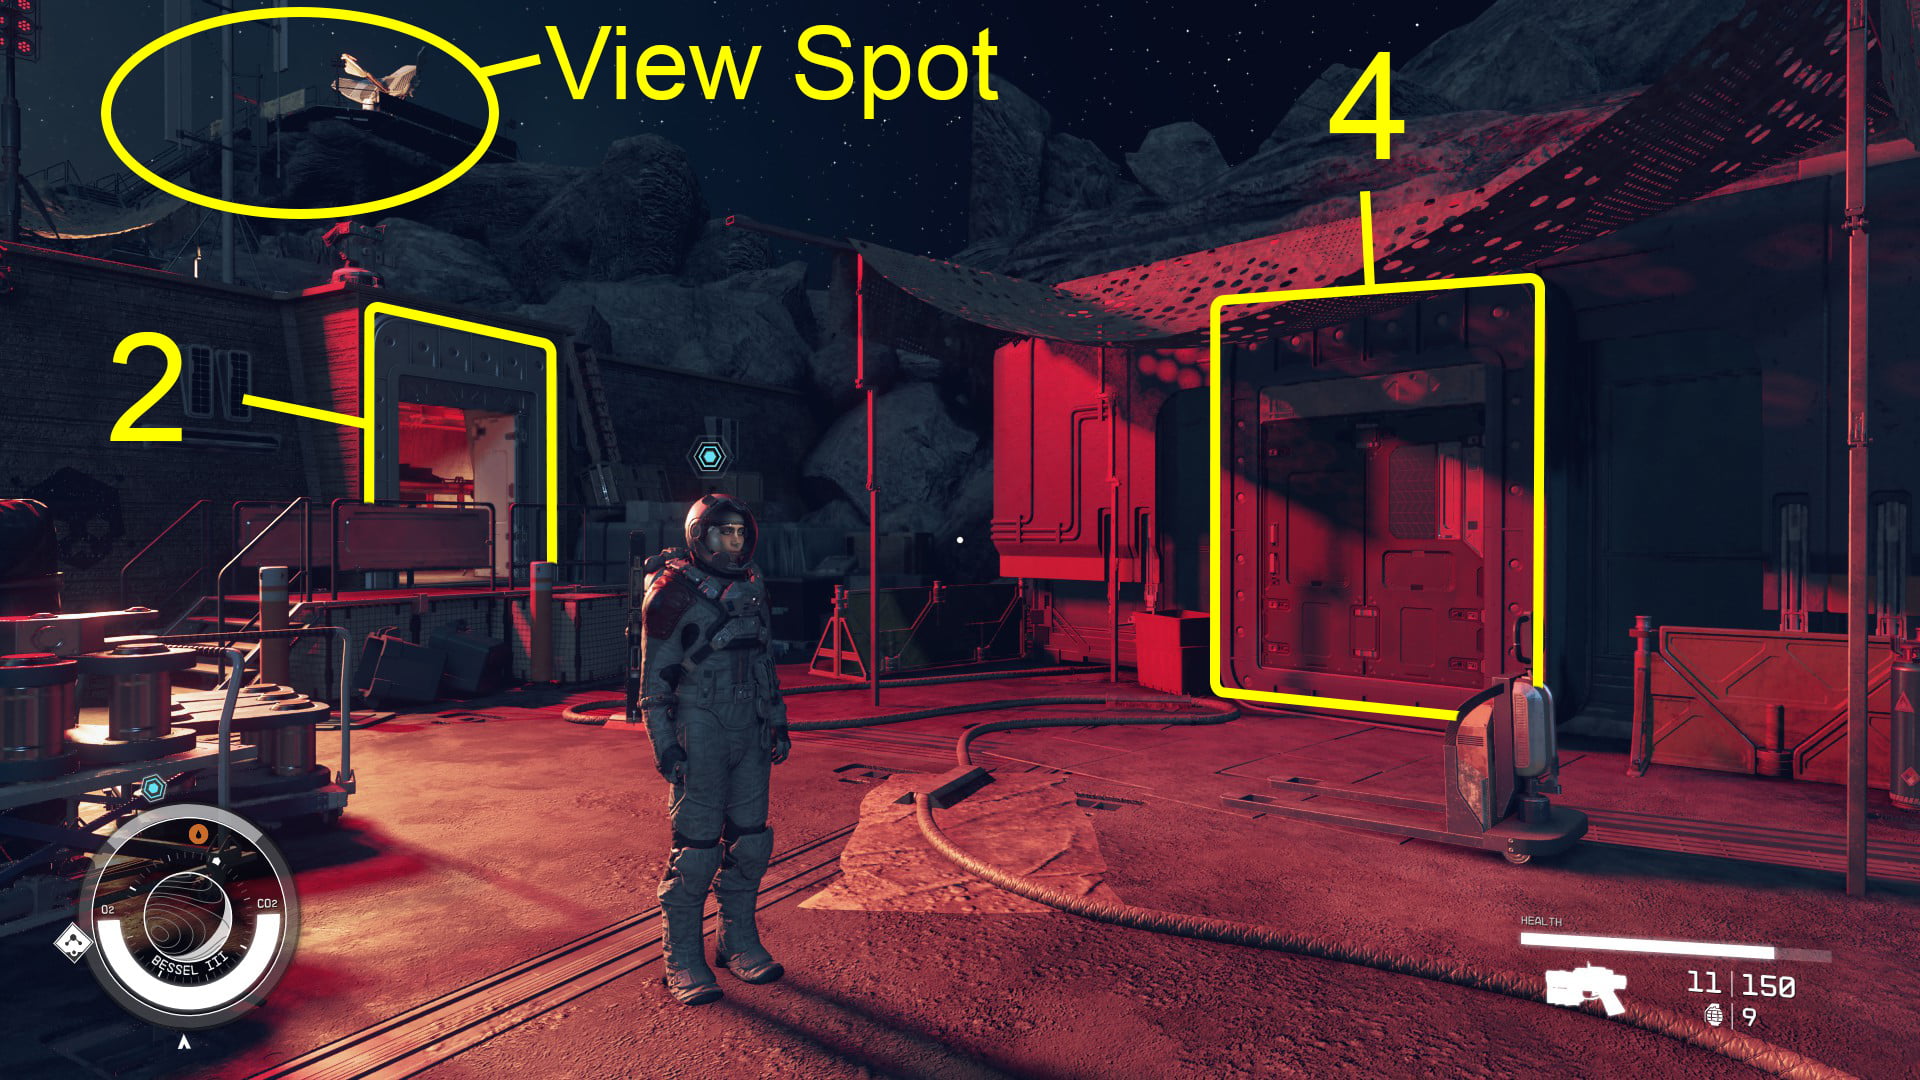
Image 13 – I can see my ship from here!
To make the entrance to the outpost easier to find, here’s another angle of 2 and 4 from the ground, with the high ground tower visible.
Image 15 – another perspective
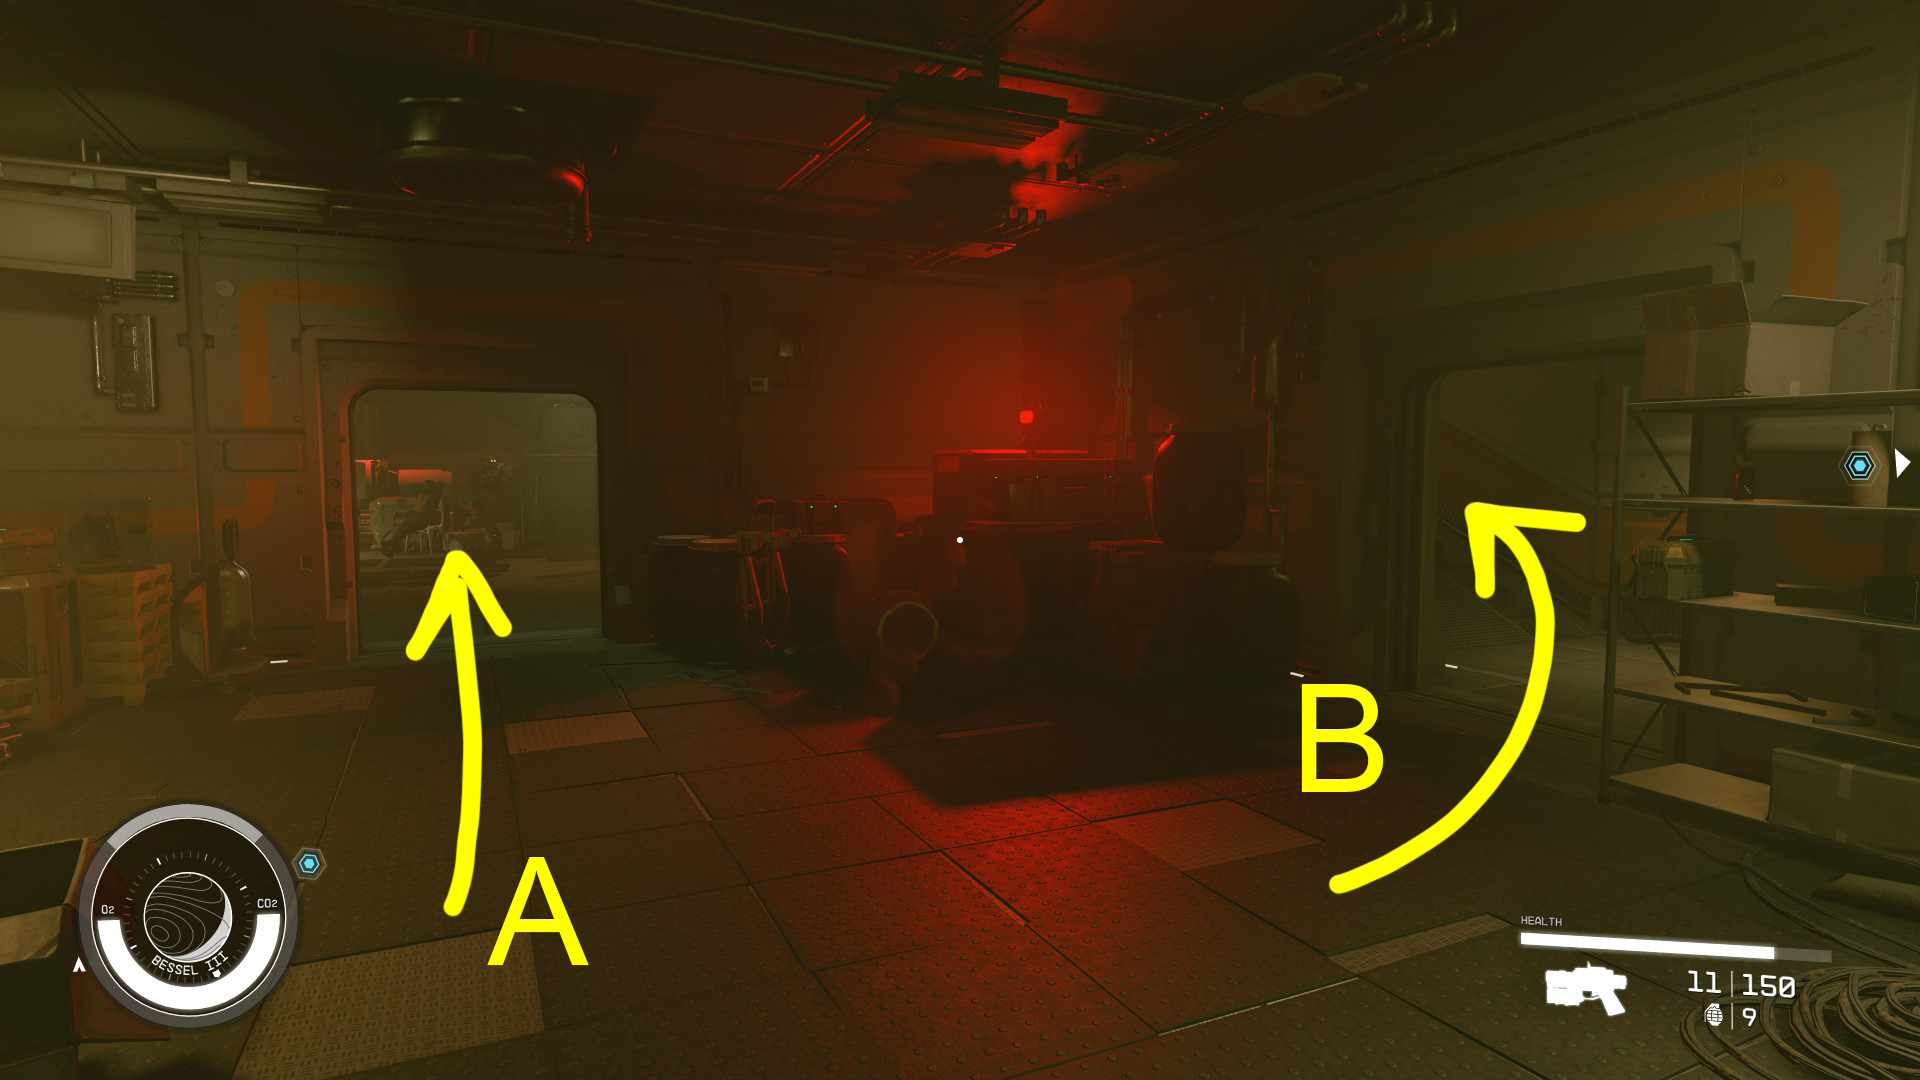
Once you’ve looted to your heart’s content, enter door 15.4, which leads to the Crimson Fleet Outpost. There’s only one way to go once inside, so continue forward, past the glass window — through which you can see Barrett and his captors — and down the next set of stairs. You’ll come to a room where you can turn left and go into the main chamber, or continue to another set of stairs that will take you to a balcony that overlooks the main chamber (Image 15). If you want to attempt to settle things peacefully, take path A and start the conversation with Barrett.
If you want to choose violence, take path B, and continue as far as you can — you’ll end up on a balcony above the pirates and Barrett. Make sure you loot the military crate at the far end of the balcony, as it might even have something useful for the combat you’re about to start. From up here (Image 16), you can easily get headshots on Matsura the Grim (the leader of the pirates) and his bodyguards.
Whatever you decide, loot the room in Image 15 before doing anything else, as there are quite a few weapon cases and other goodies to find.
Image 15Image 16
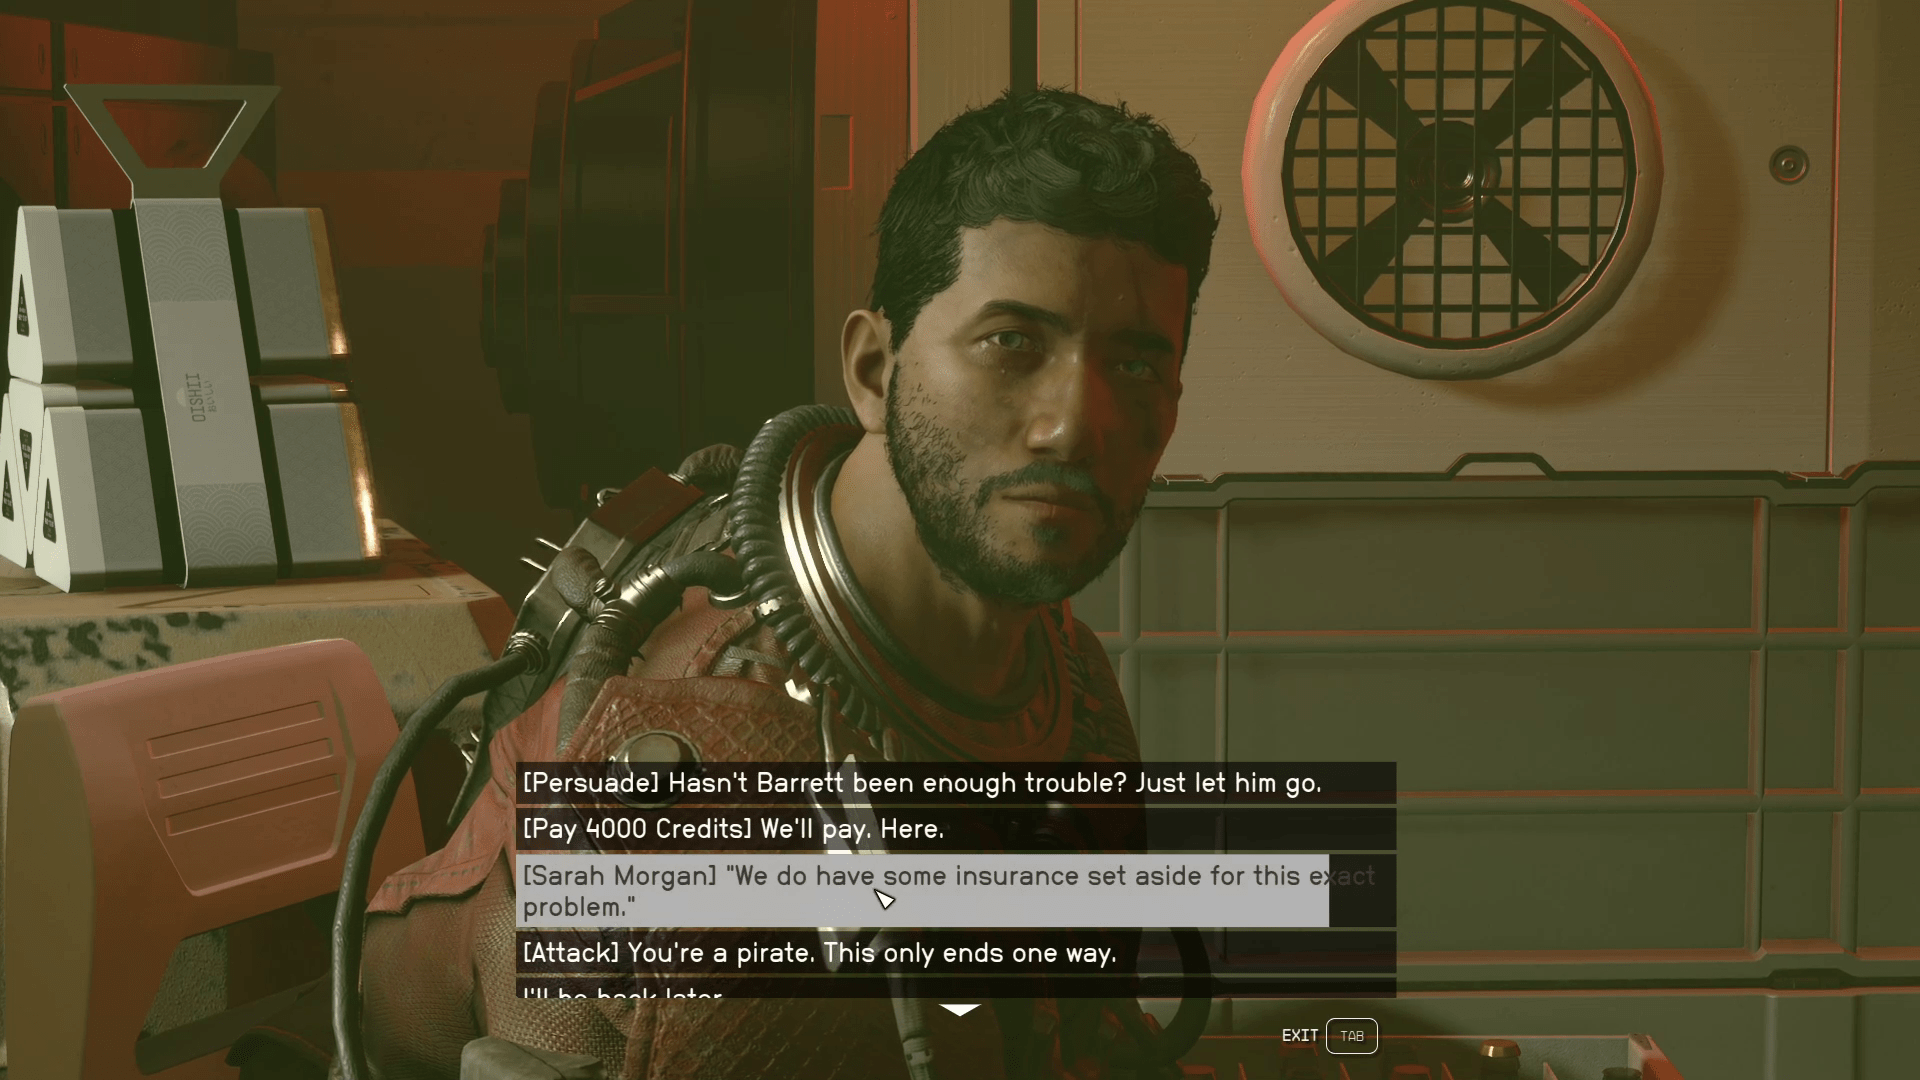
If you walk into the room via path 15A, a conversation will start. Continue the conversation until you get presented with the 3 options + “I’ll be back later” (Image 17). Hopefully, you brought Sarah Morgan with you, as the [Sarah Morgan] option doesn’t cost you anything (though presumably it costs Constellation 4000 credits). If not, you can try to [Persuade] the pirate leader to let Barrett go. If that fails, you can pay the 4,000 credits, or you can [Attack] — but if you’re going to do that, you might as well say “I’ll be back later”, and go up to the balcony as indicated in 15B; you’ll be in a much better tactical position that way.
Image 17
Return to the Lodge/Enter the Library/Wait for Barrett/Talk to Barrett
However you handle the situation, you’ll now have a newly freed Barrett in tow. Retrace your steps and leave the Crimson Fleet Outpost, then fast travel back to the Lodge on New Atlantis. Head into the lodge, and continue into the library. A conversation will ensue, you’ll need to talk to Barrett to end the mission. Finish your conversation with him — if you pick “Traveling together sounds good to me” he’ll join your crew and be your active companion. If you say “I think it’s better if we go our own ways” instead, you can still ask him to join your crew in the future.
What to Do Next
As always, there’s a ton of options in Starfield, with plenty of Side Missions and other activities available. If you want to continue the main quest, however, the two remaining quests we unlocked after completing The Old Neighborhood are all easy enough to do at this point — so our next mission will be The Empty Nest!
Unabashed FromSoftware fanboy still learning to take his time with games (and everything else, really). The time he doesn't spend on games is spent on music, books, or occasionally going outside.