Now that you and the Crimson Fleet know where the Legacy is, you need to find a piece of tech that will let you track the ship’s signal – enter the ComSpike. You will have to smuggle yourself onto a UC space station, then either blast or sneak your way through to acquire the prototype.
There are quite a few ways to accomplish this mission, but they mainly revolve around whether you’re shooting or sneaking. Due to this, you’ll find two distinct routes in this walkthrough for acquiring the prototype: one for shooting, and the other for sneaking. Something to note: just like the last mission, you will be kicked out of SysDef (if you’re still snitching) if you kill anyone.
Due to this guide’s length and various paths to completion, please use the Contents tool at the top of this page if you need help with a specific part.
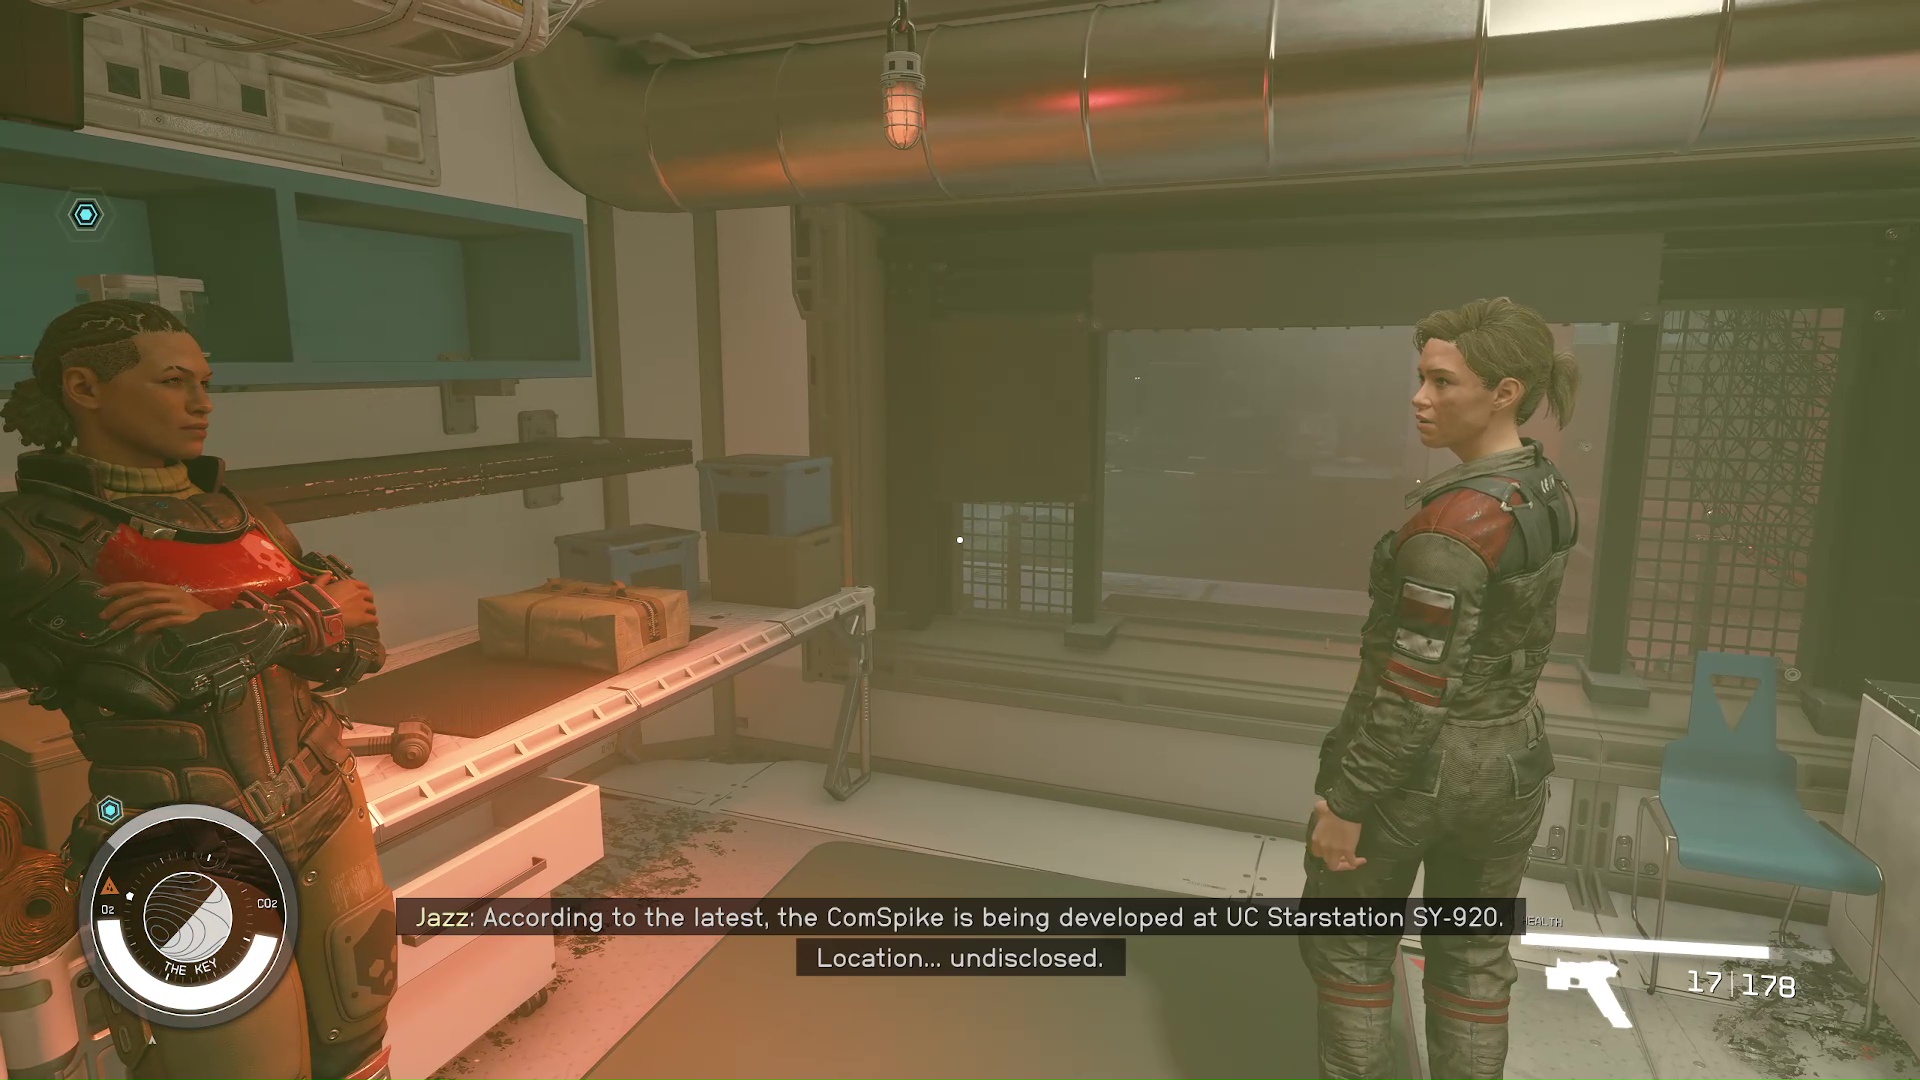
Whether you finished the last mission aboard the Vigilance, or The Key, the next step is talking to Naeva and Jasmine in ship services on the Key (Image 1). If you don’t know where that is, just follow the or the scanner guide arrows. Ship services is just past the shuttle bays on the left.
Image 1
After you listen to Jasmine, Naeva will tell you to travel to New Atlantis. The Crimson Fleet has a smuggler in the city that will be able to get you on board the space station, SY-920.
Meet Huan Daiyu in New Atlantis
While you’re on New Atlantis, it’s a good time to make sure you have plenty of ammunition if you plan on being a straight-up pirate, or some digipicks if you’re going to be sneaky.
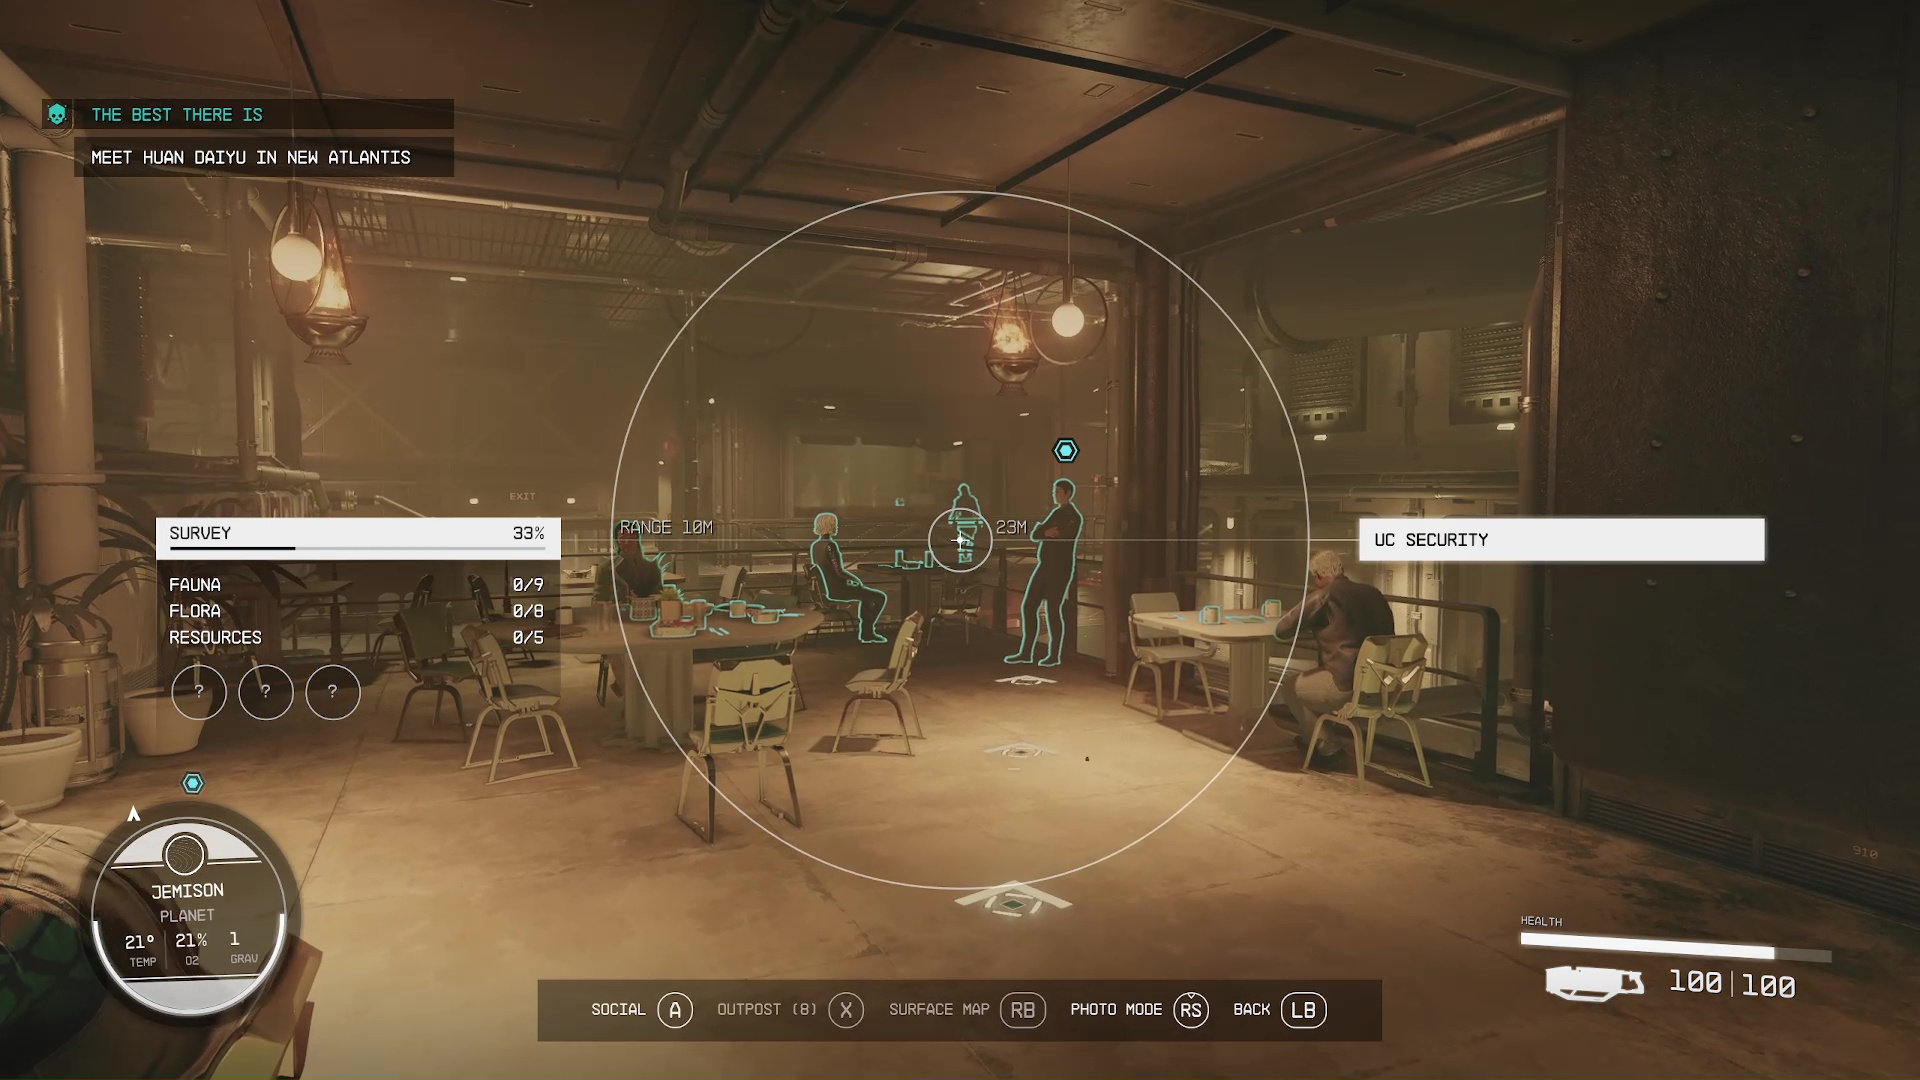
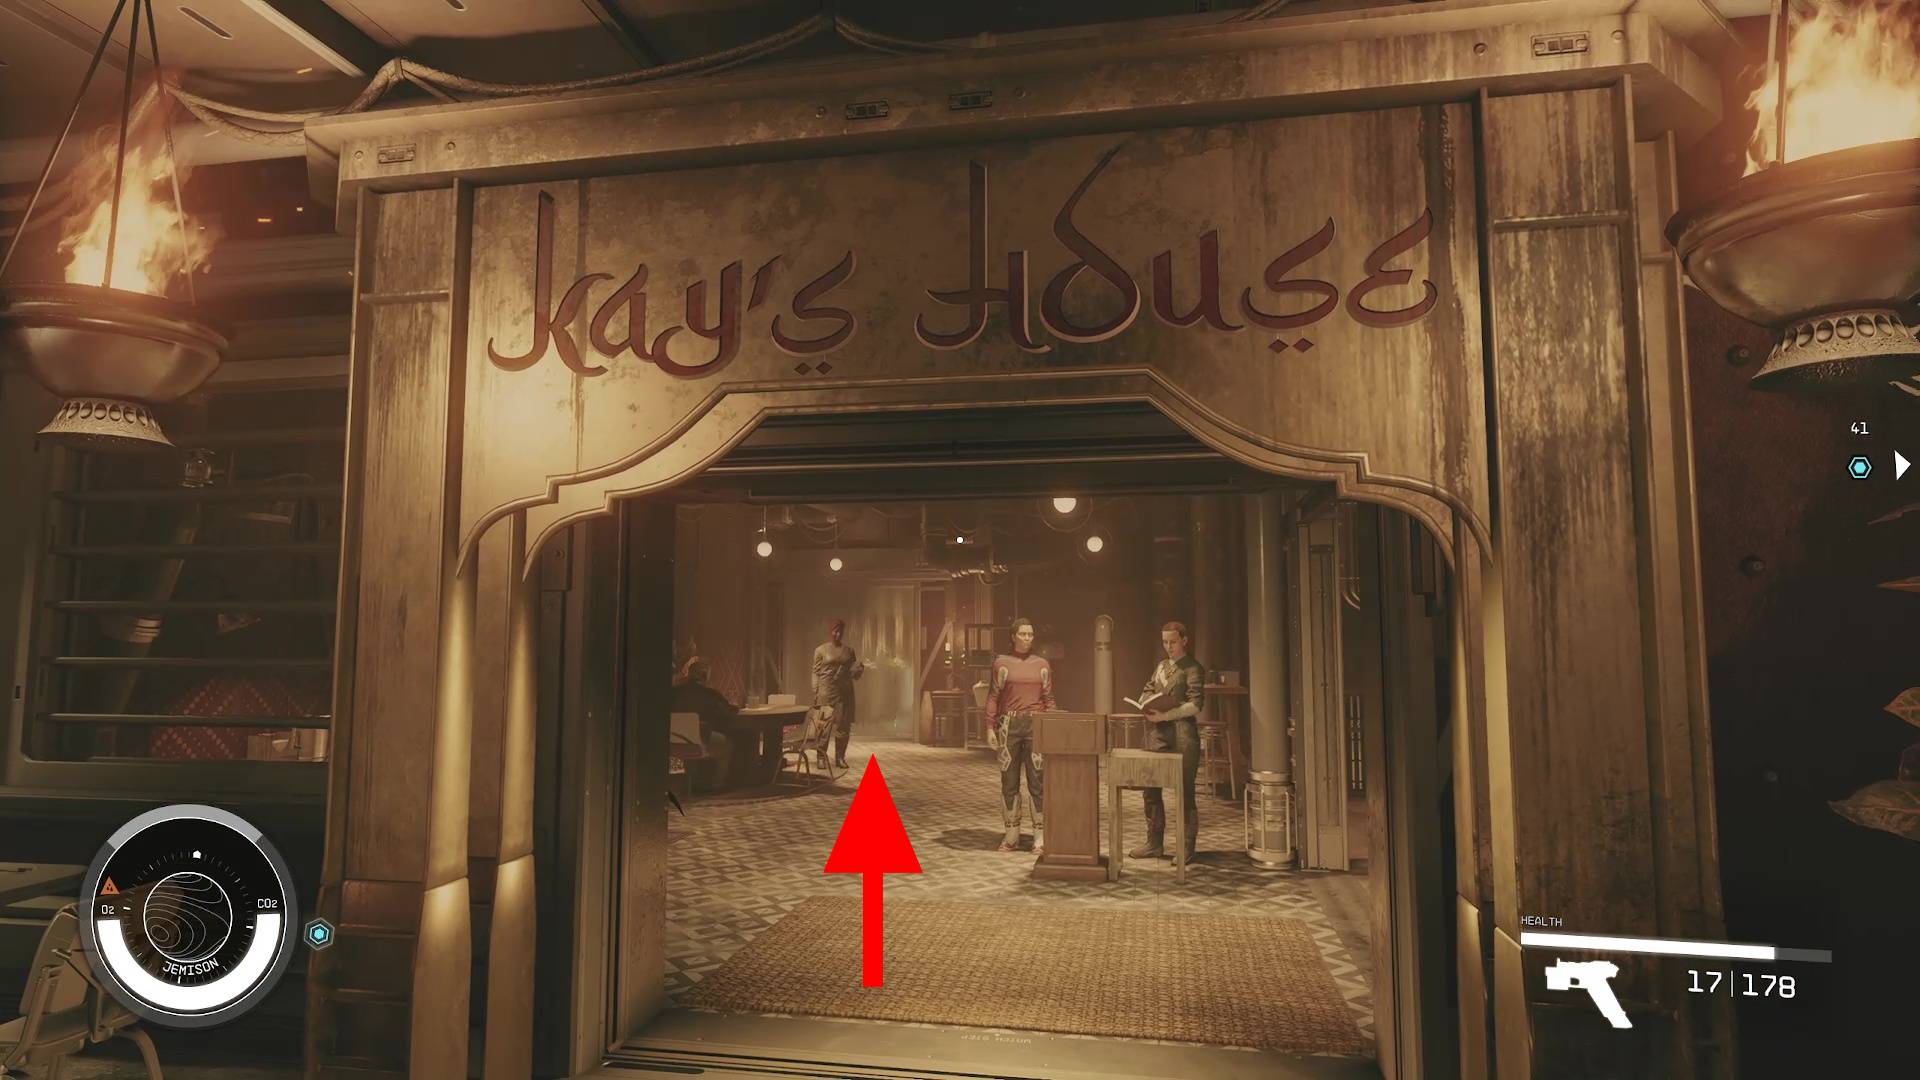
Travel to New Atlantis in the Alpha Centauri System (Image 2). Just land at the spaceport; it’s a short walk to where you’ll meet Huan. Follow your scanner, and it will lead you down to The Well, then to the balcony above Kay’s House where Huan is waiting for you (Image 3).
Image 2Image 3
Talk to Huan and she will lay the ground rules for flying with her. After the chat, she invites you to meet her aboard her ship, the Jade Swan.
Evidence Against Huan
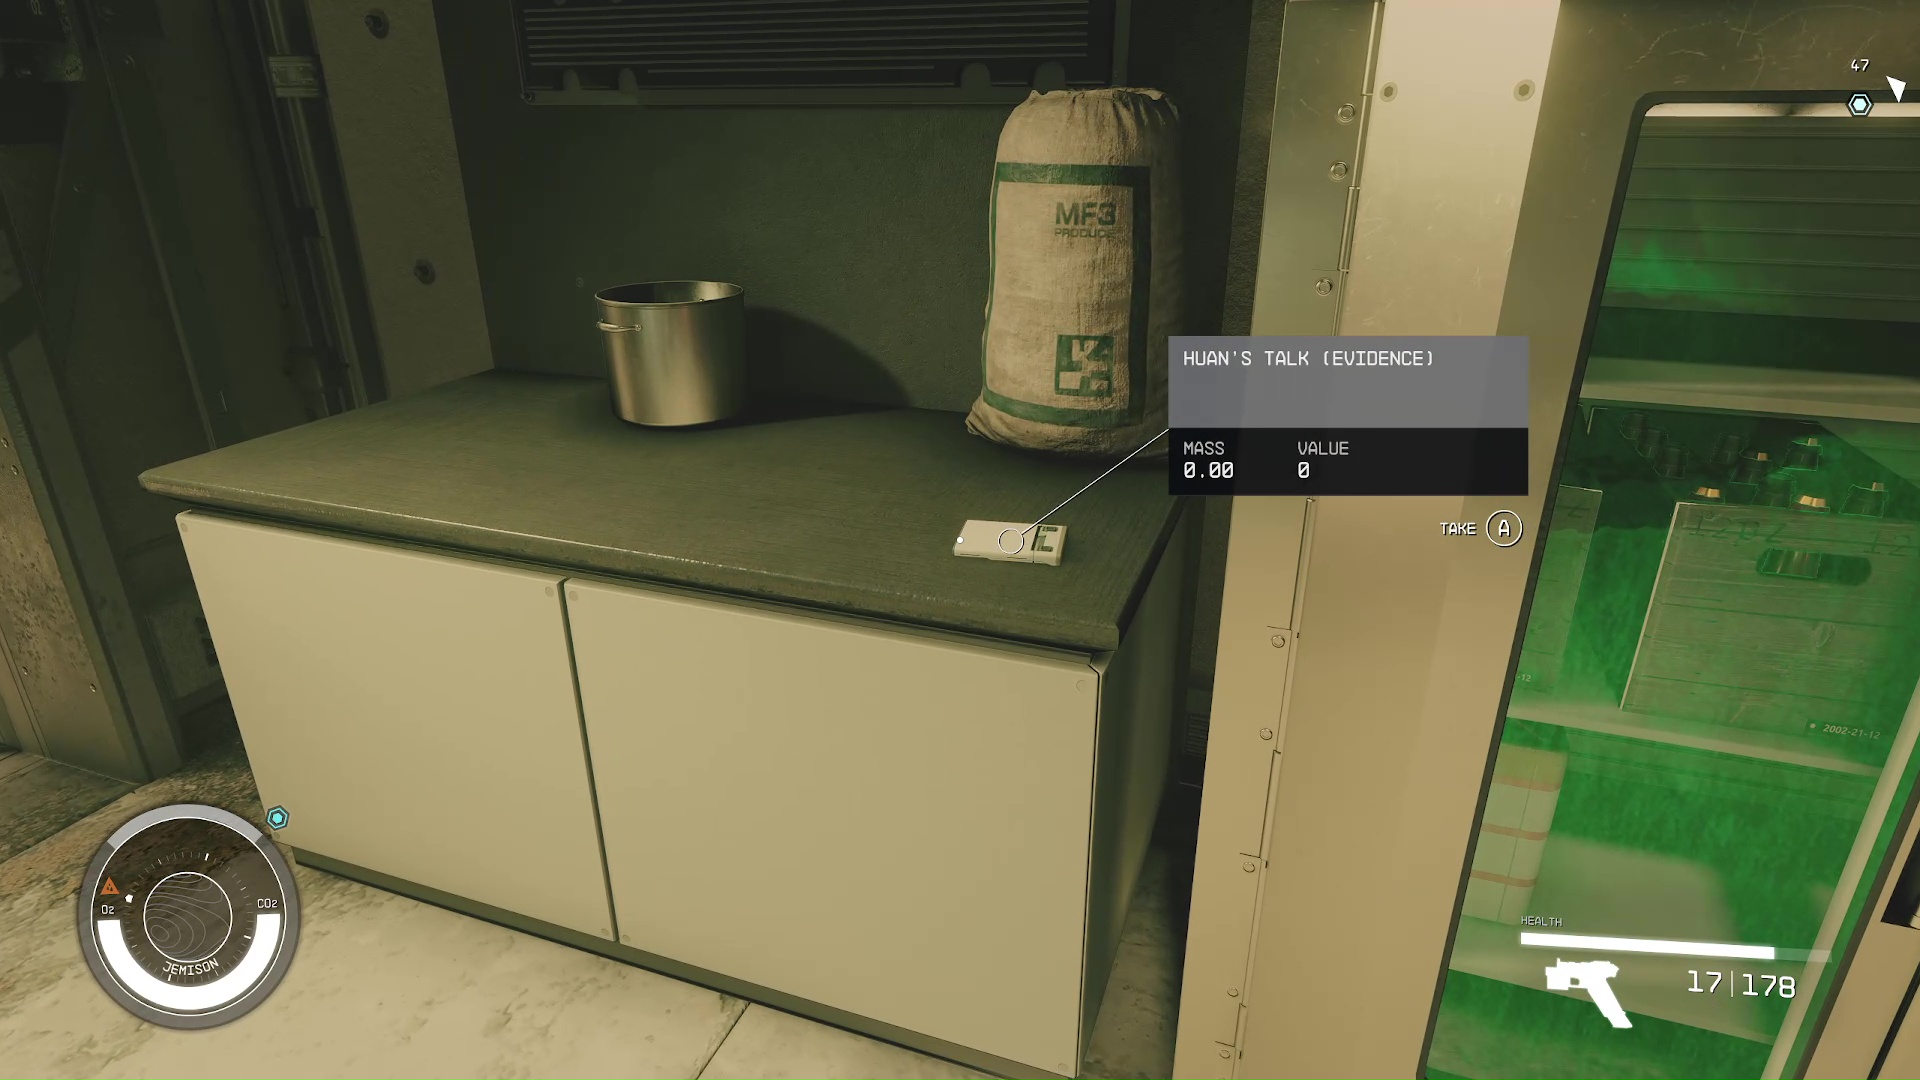
If you’re collecting evidence for Toft and the Burden of Proofmission, then go downstairs to the main level of Kay’s House right after you talk to Huan. In the back of the restaurant, behind some plastic flaps, is the kitchen (Image 4). To your right, when you walk into the kitchen, is the evidence on the counter (Image 5).
Image 4Image 5
Meet Huan at The Jade Swan
Now, you can board the smuggler’s ship. Go back to the spaceport, and where you normally head to the right to go to your ship, hang a left and you will see the Jade Swan (Image 6). Board the ship, then find Huan on the bridge. It’s a little confusing, so use your scanner to lead you to the bridge (Image 7) – the ladder to the upper level is in the back.
Image 6Image 7
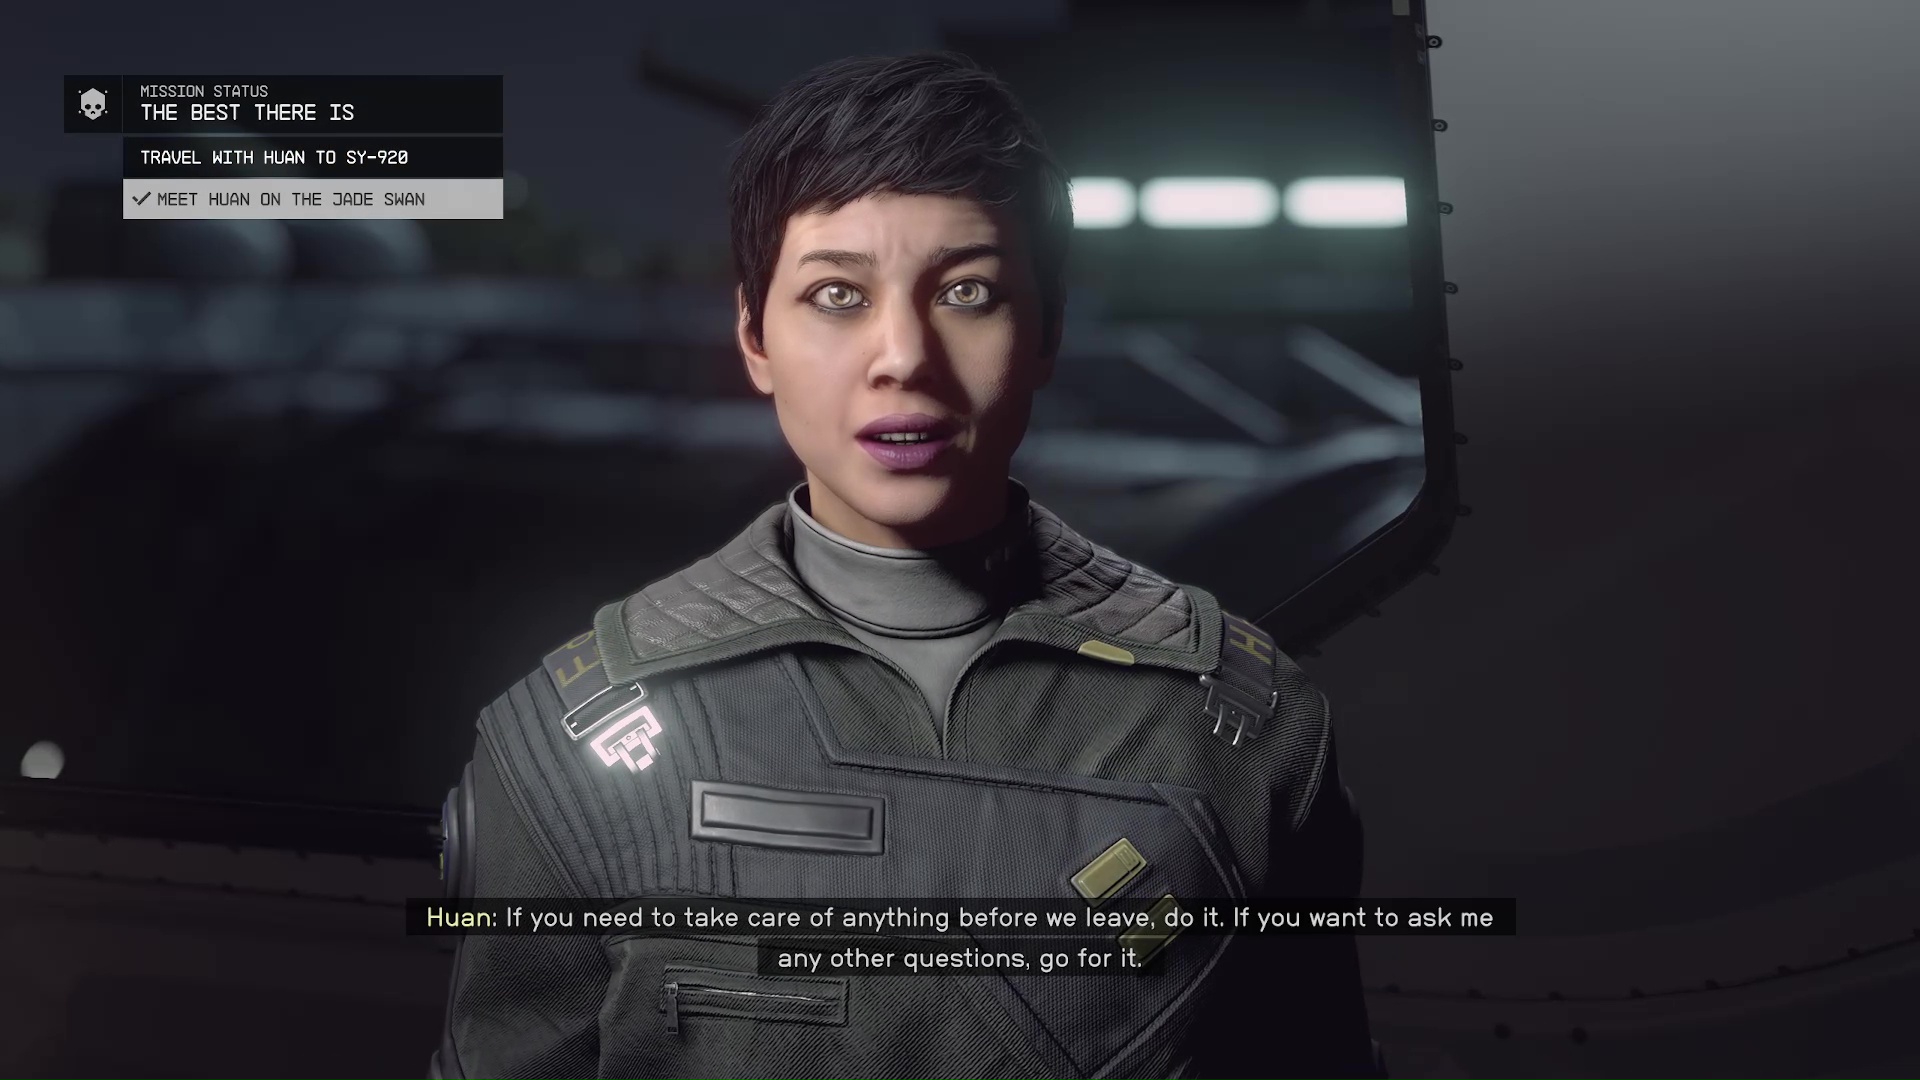
When you talk to Huan, she will make it clear that you can’t come back until you finish the mission (Image 8). If you didn’t load up on ammo earlier, now’s your last chance. When you’re ready, let her know and you’ll take off.
Image 8
Speak to Huan
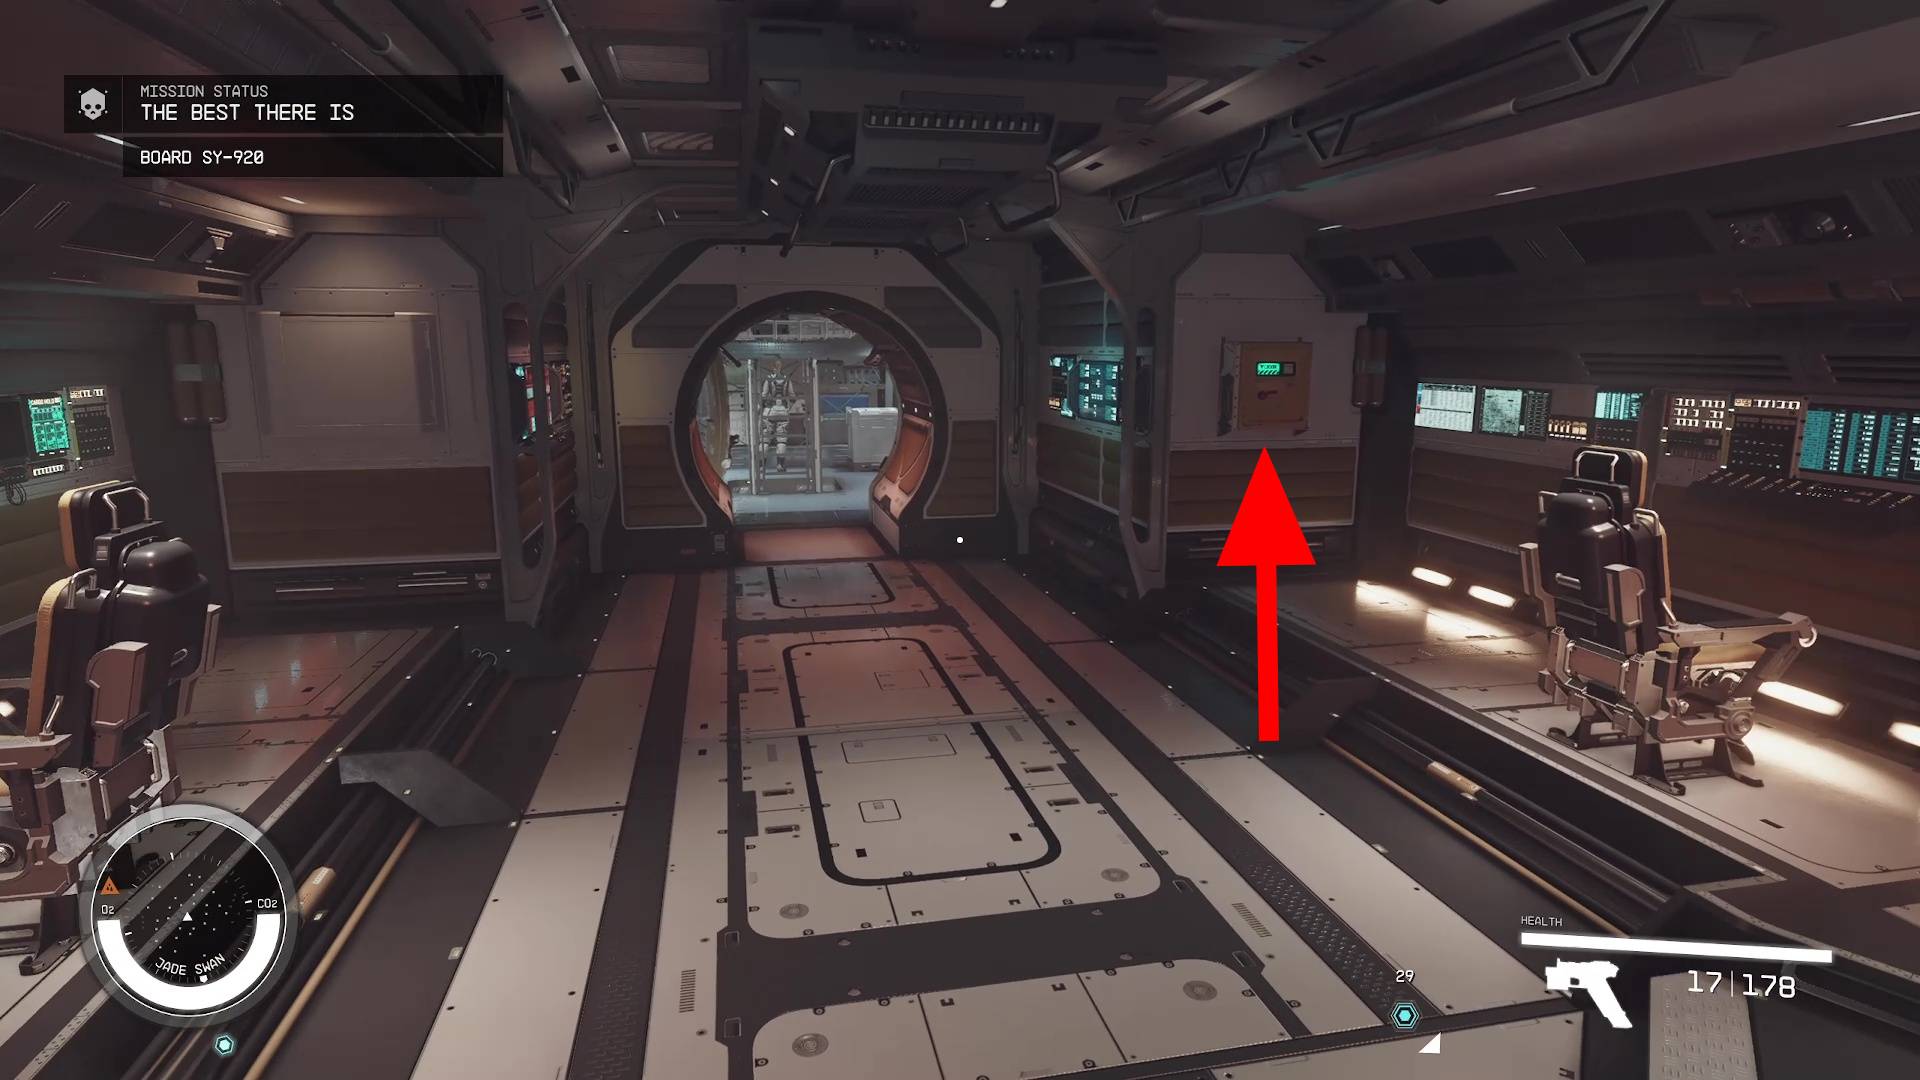
You’ll automatically fly in the Jade Swan to the station, and the pilot will dock. Huan will beckon you over to give you the game plan. Basically, if there’s trouble, she’s not waiting around for you. She will also be giving you updates at intercoms during the mission. Before you leave the ship, loot the captain’s locker on the bridge, Huan won’t mind and there’s a lot of credits (Image 9)!
Image 9
Here’s where you’ll need to decide if you want to do things the shooty way, or the sneaky way. If you want to go in guns blazing, read on, otherwise skip ahead to “The Stealth Route”.
The Shooting Route
Follow the to board the station. Now that you’re on board, you can simply start blasting your way through the station. This won’t affect Huan, if you were worried about your fellow pirate. If you ever need guidance during these many firefights, just follow the .
Enter the Command Bay
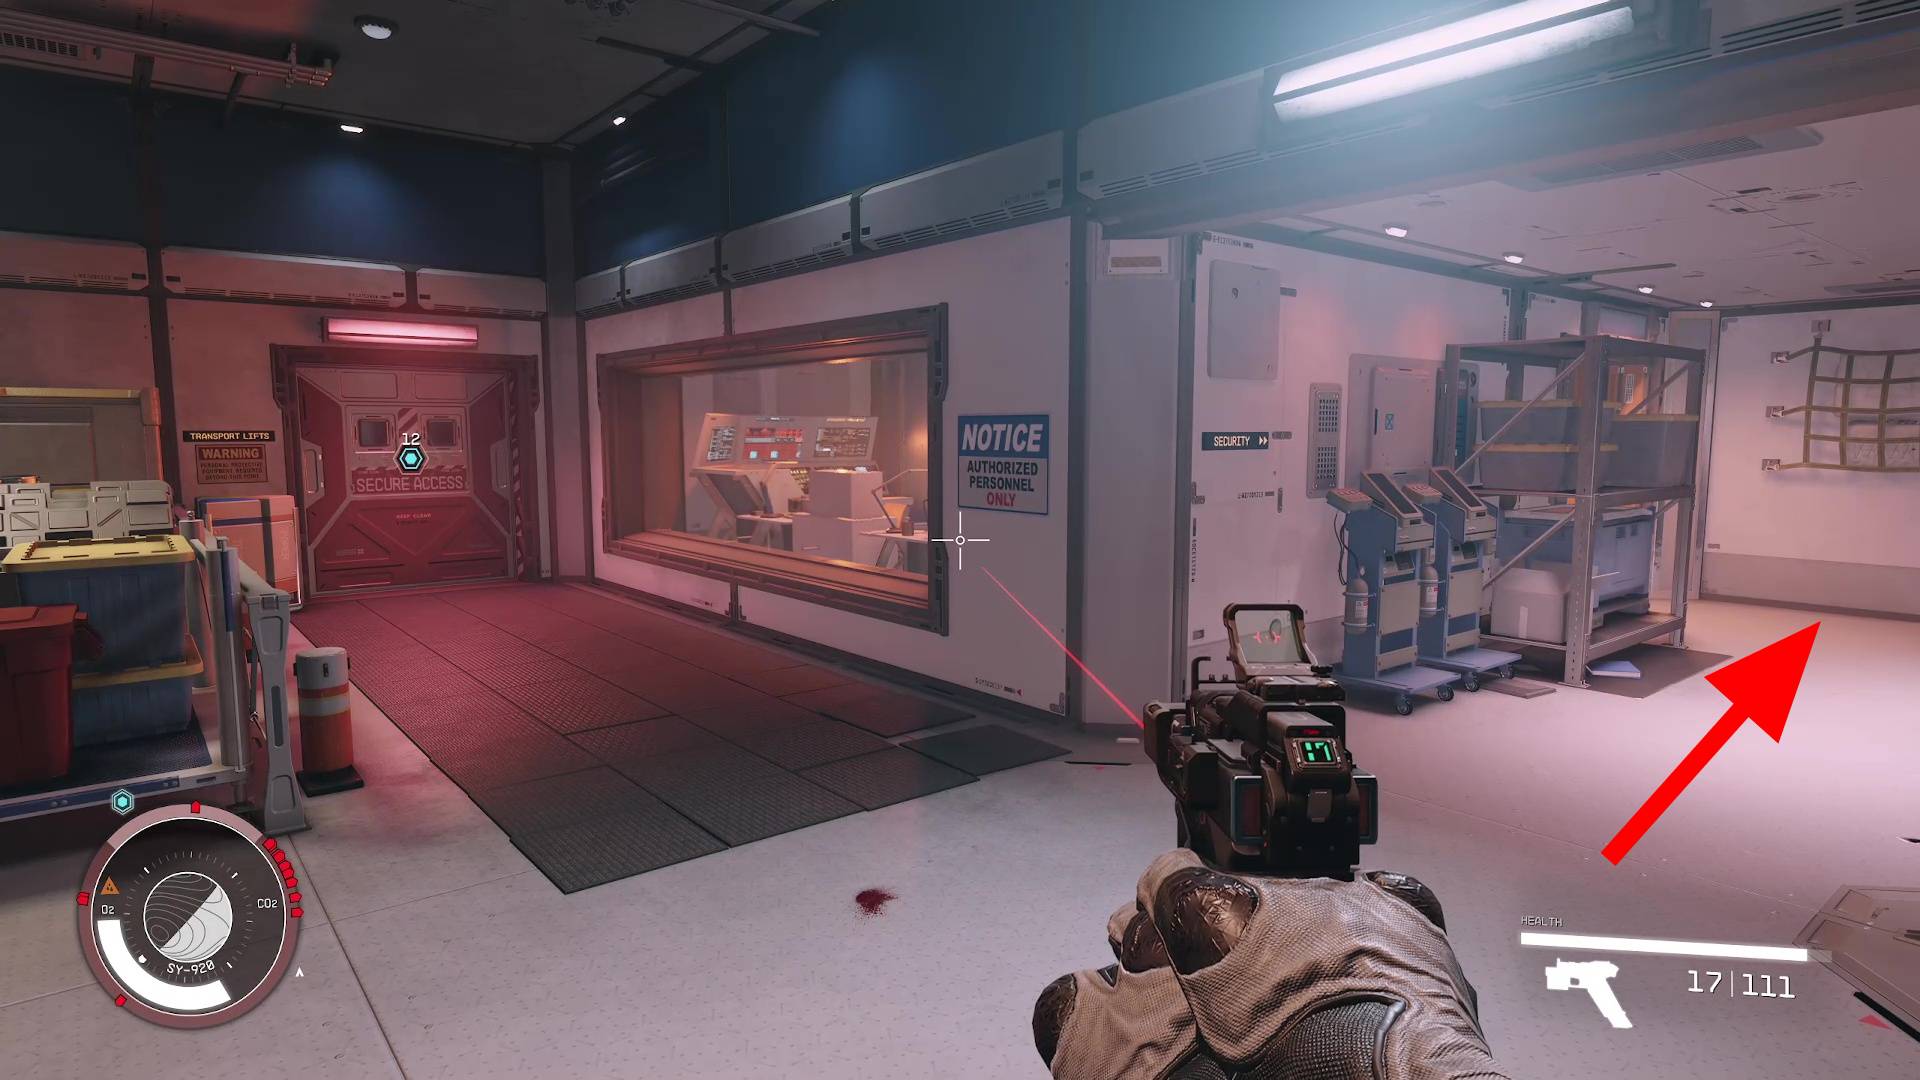
The first impediment is the checkpoint in the next room. The checkpoint leads to the command bay, but it’s locked. You need to go into the security room, right next to the door (Image 10).
Image 10
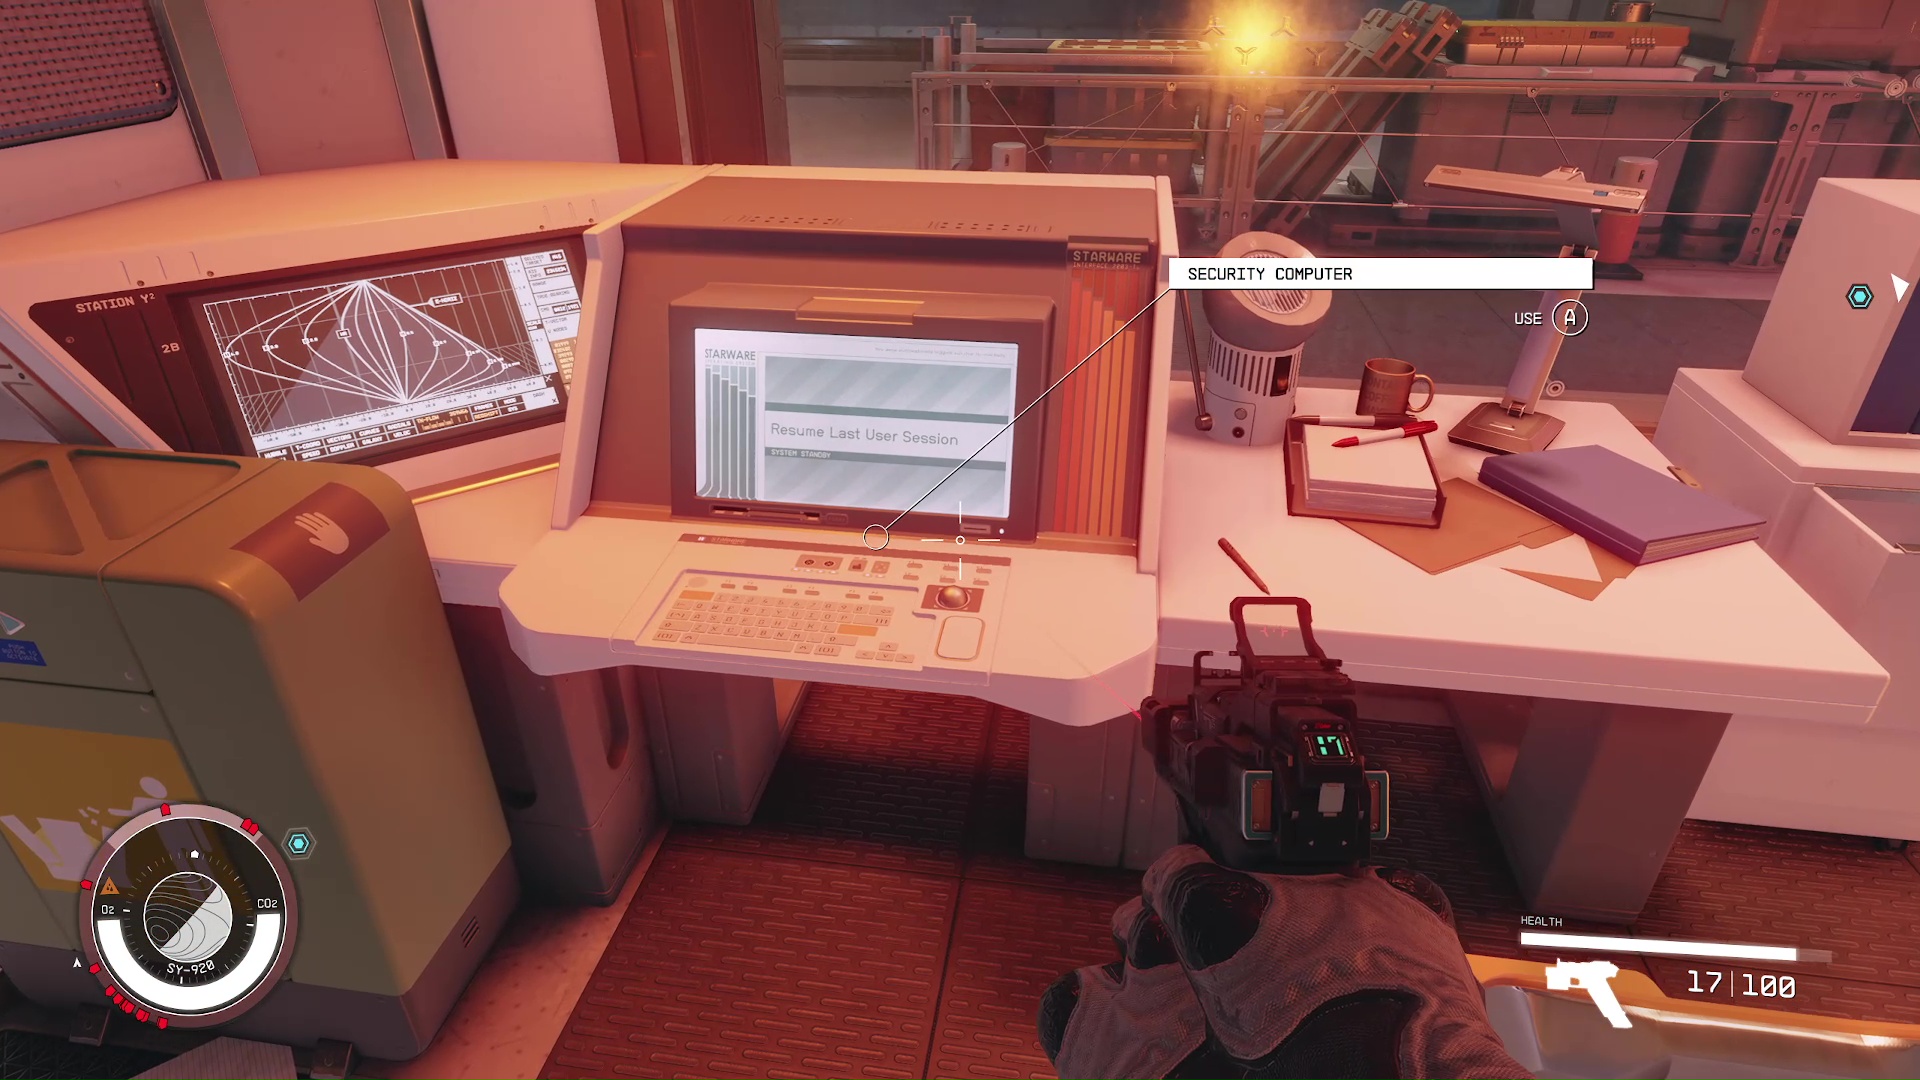
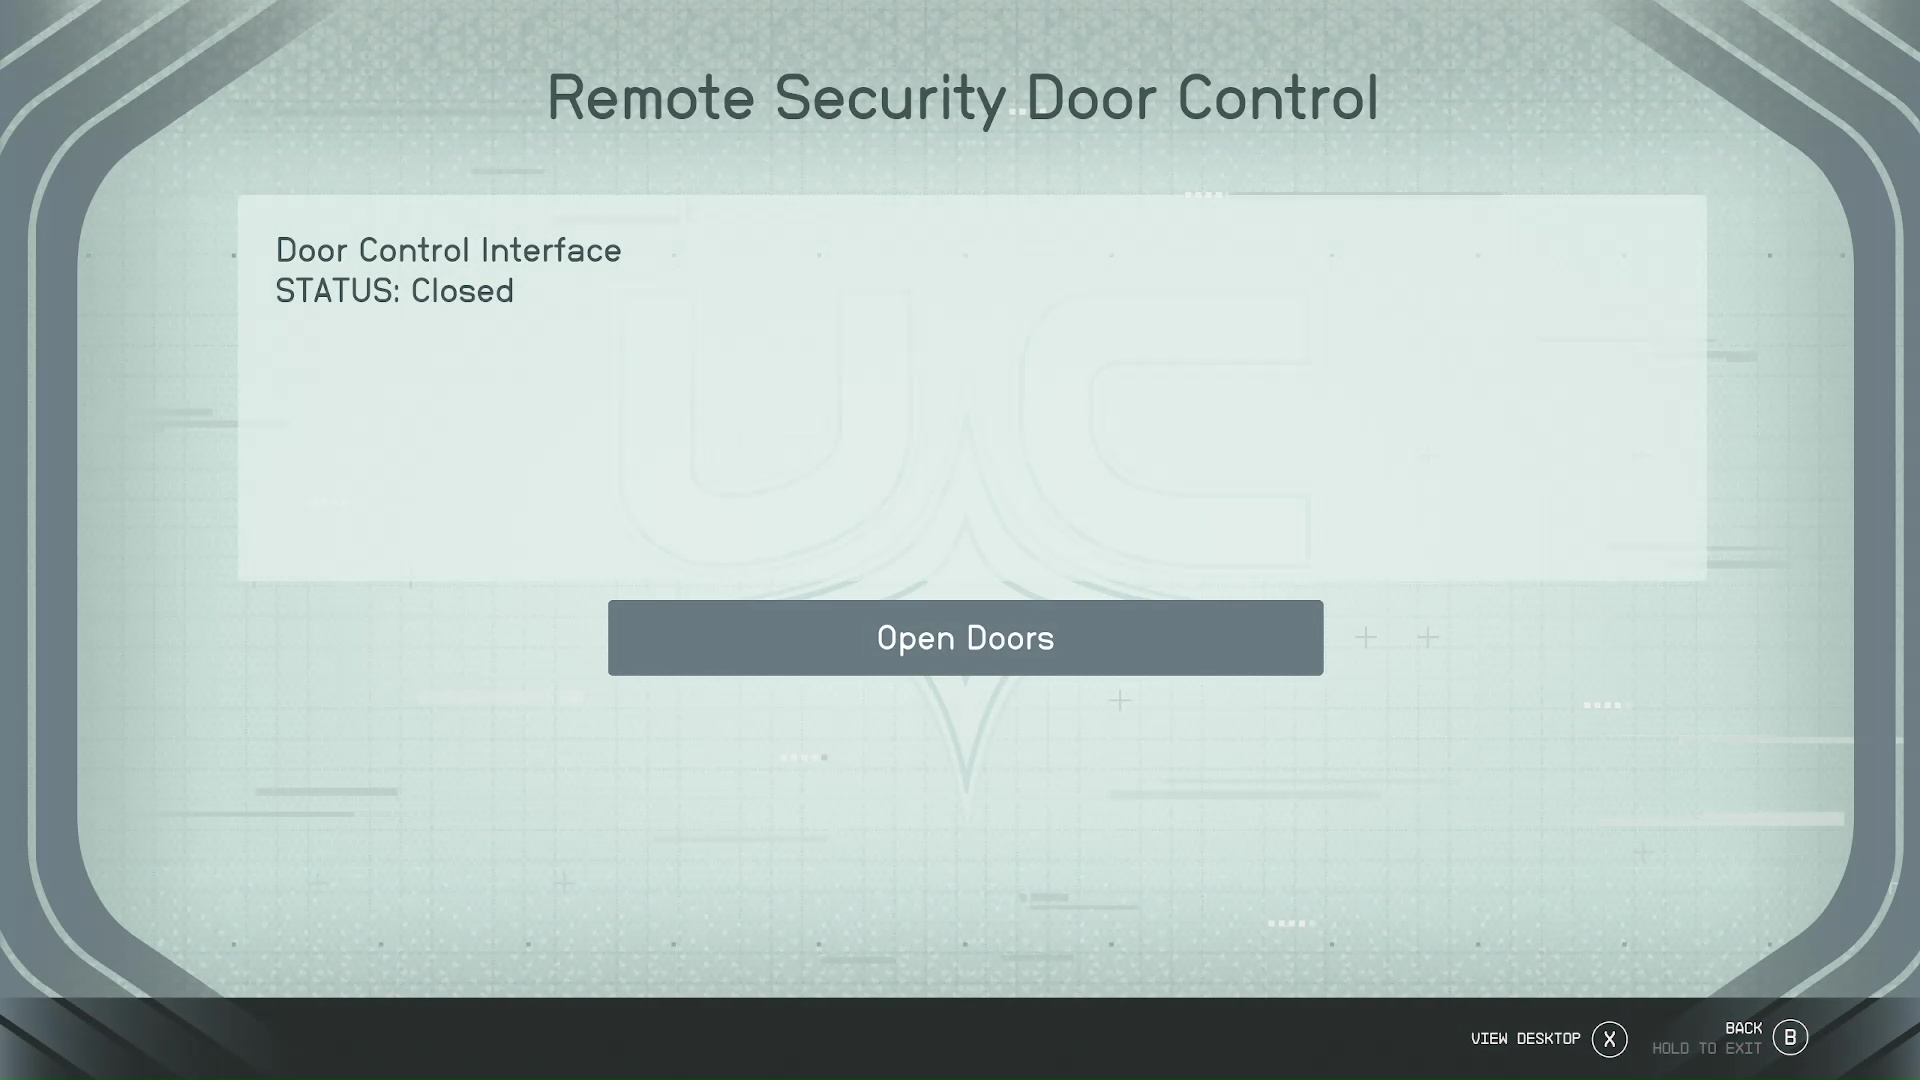
There will be a guard inside, so kill him. His computer is right next to the glass (Image 11). When you’re on the computer, navigate to ‘Remote Security Door Control’–>’Open Doors’ (Image 12) You can also grab Ensign Ngata’s Uniform on the counter next to the computer – it might come in handy.
Image 11Image 12
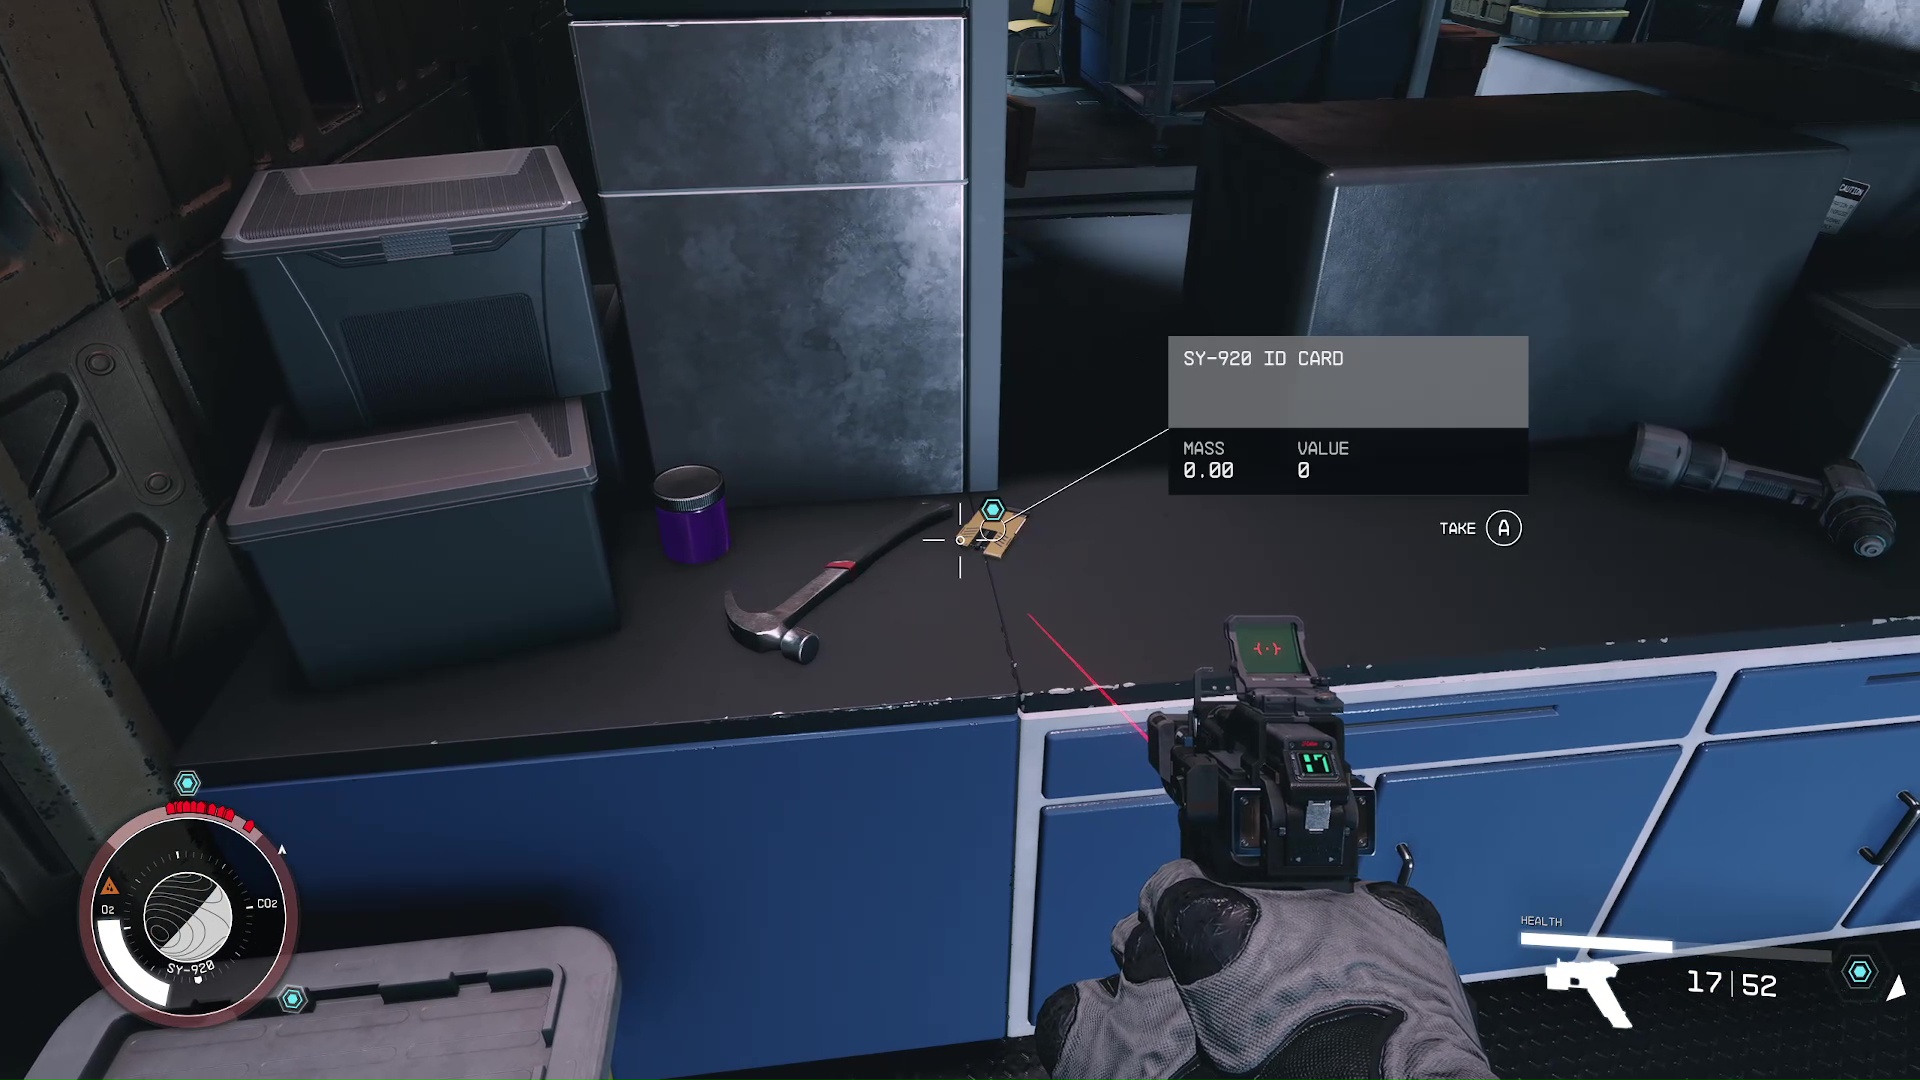
Go through the doors you just unlocked, and dispatch the two turrets and guard in the room. When you enter the room, your mission will update that you’ve found an ID Card; the card is on a work bench by the elevator (Image 13). With the card in your possession, you can put it in the card reader and take the elevator to the command bay (Image 14).
Image 13Image 14
Find Information on the ComSpike
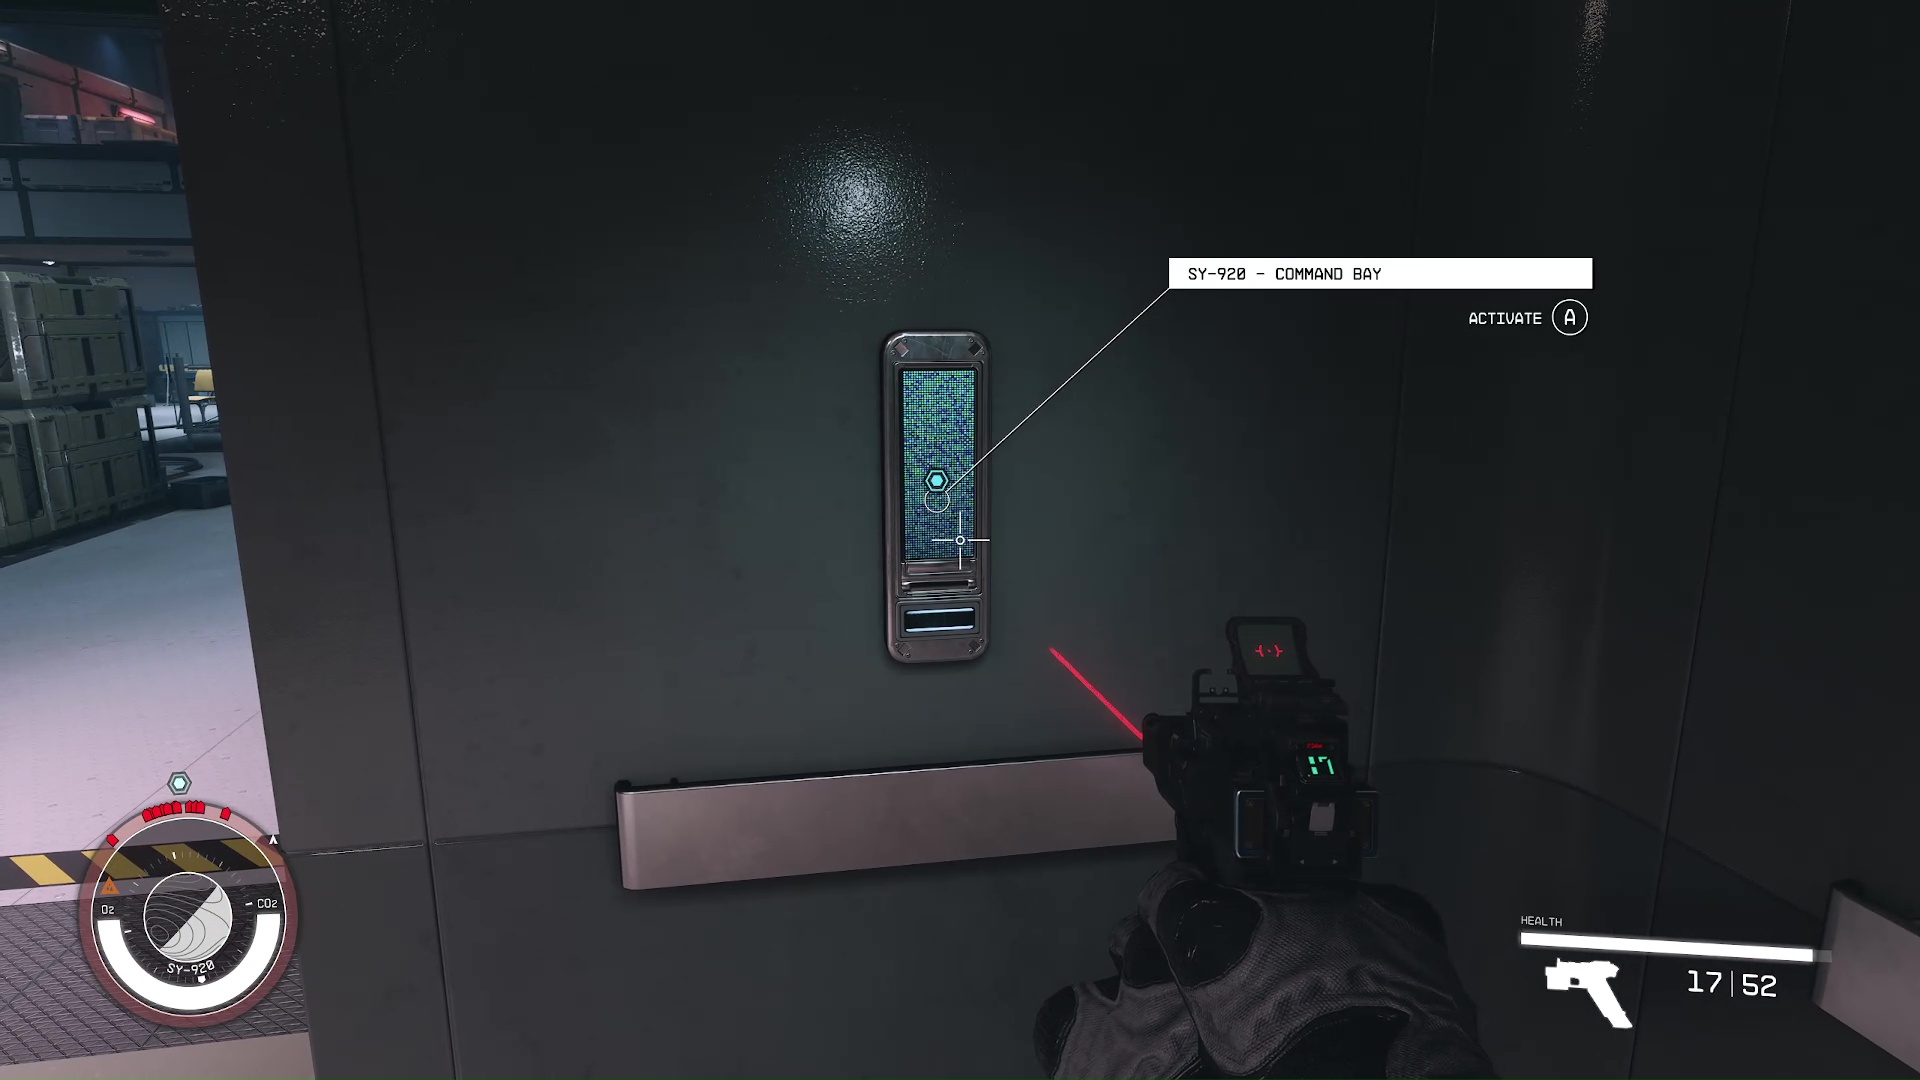
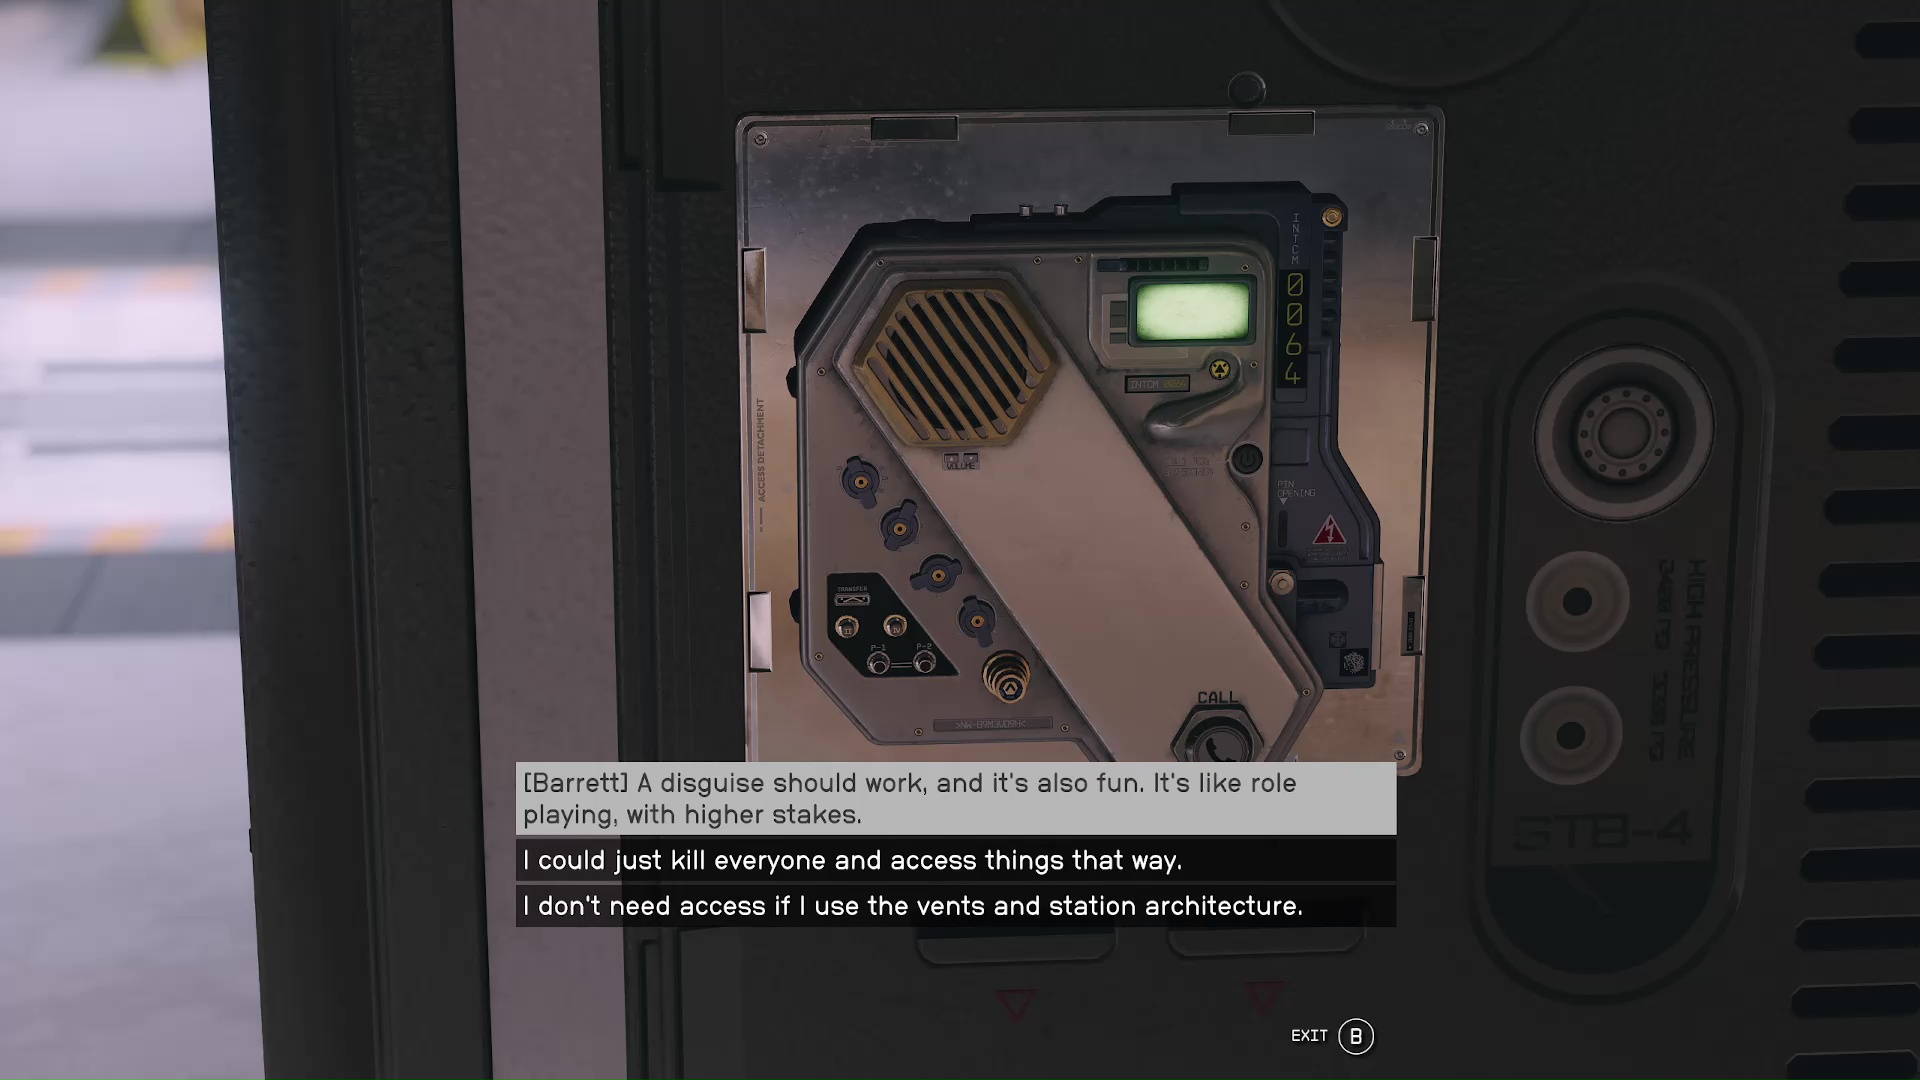
Exiting the elevator, you’ll see an intercom that you can use to talk to Huan (Image 15). She will update you that data on the ComSpike is in the archives – go figure. Strangely enough, if you want, you can actually continue the mission in stealth. The UC must not have funding for walkie-talkies.
Image 15
This might be a practical option if you weren’t prepared for this tough of enemies, or you’re low on supplies. Be advised that if you had problems with the last part, then you will definitely have more issues. Just slap on Ensign Ngata’s Uniform and none of the guards will mess with you.
If you want to continue this guide in stealth, then skip down to ‘Obtain a Clearance Code and Find Information on the ComSpike’.
Back to the blasting! There are no hidden objectives in this section, just follow your scanner. The will lead you to the security room; the silly guard will come out to attack you instead of staying behind his locked door. In the Command Bay, you’ll neutralize Commander Natara, then move onto the archives.
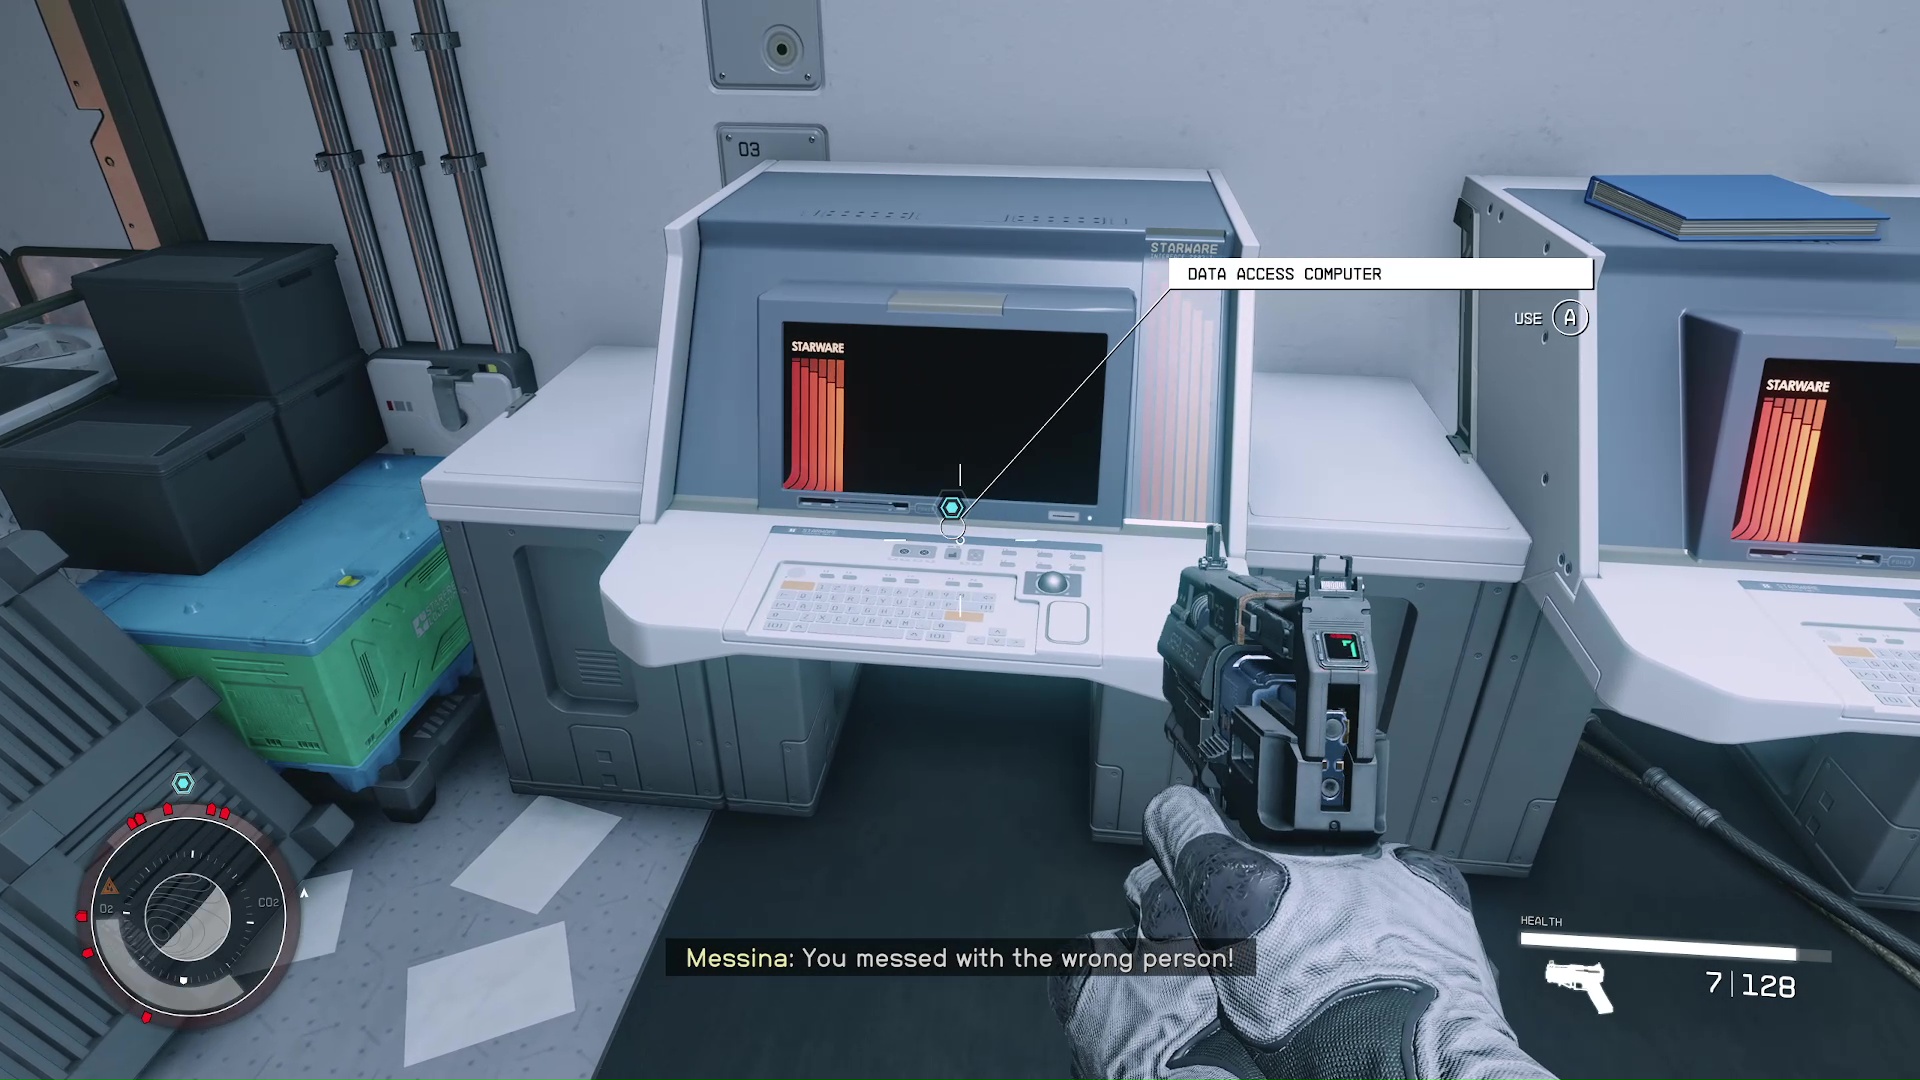
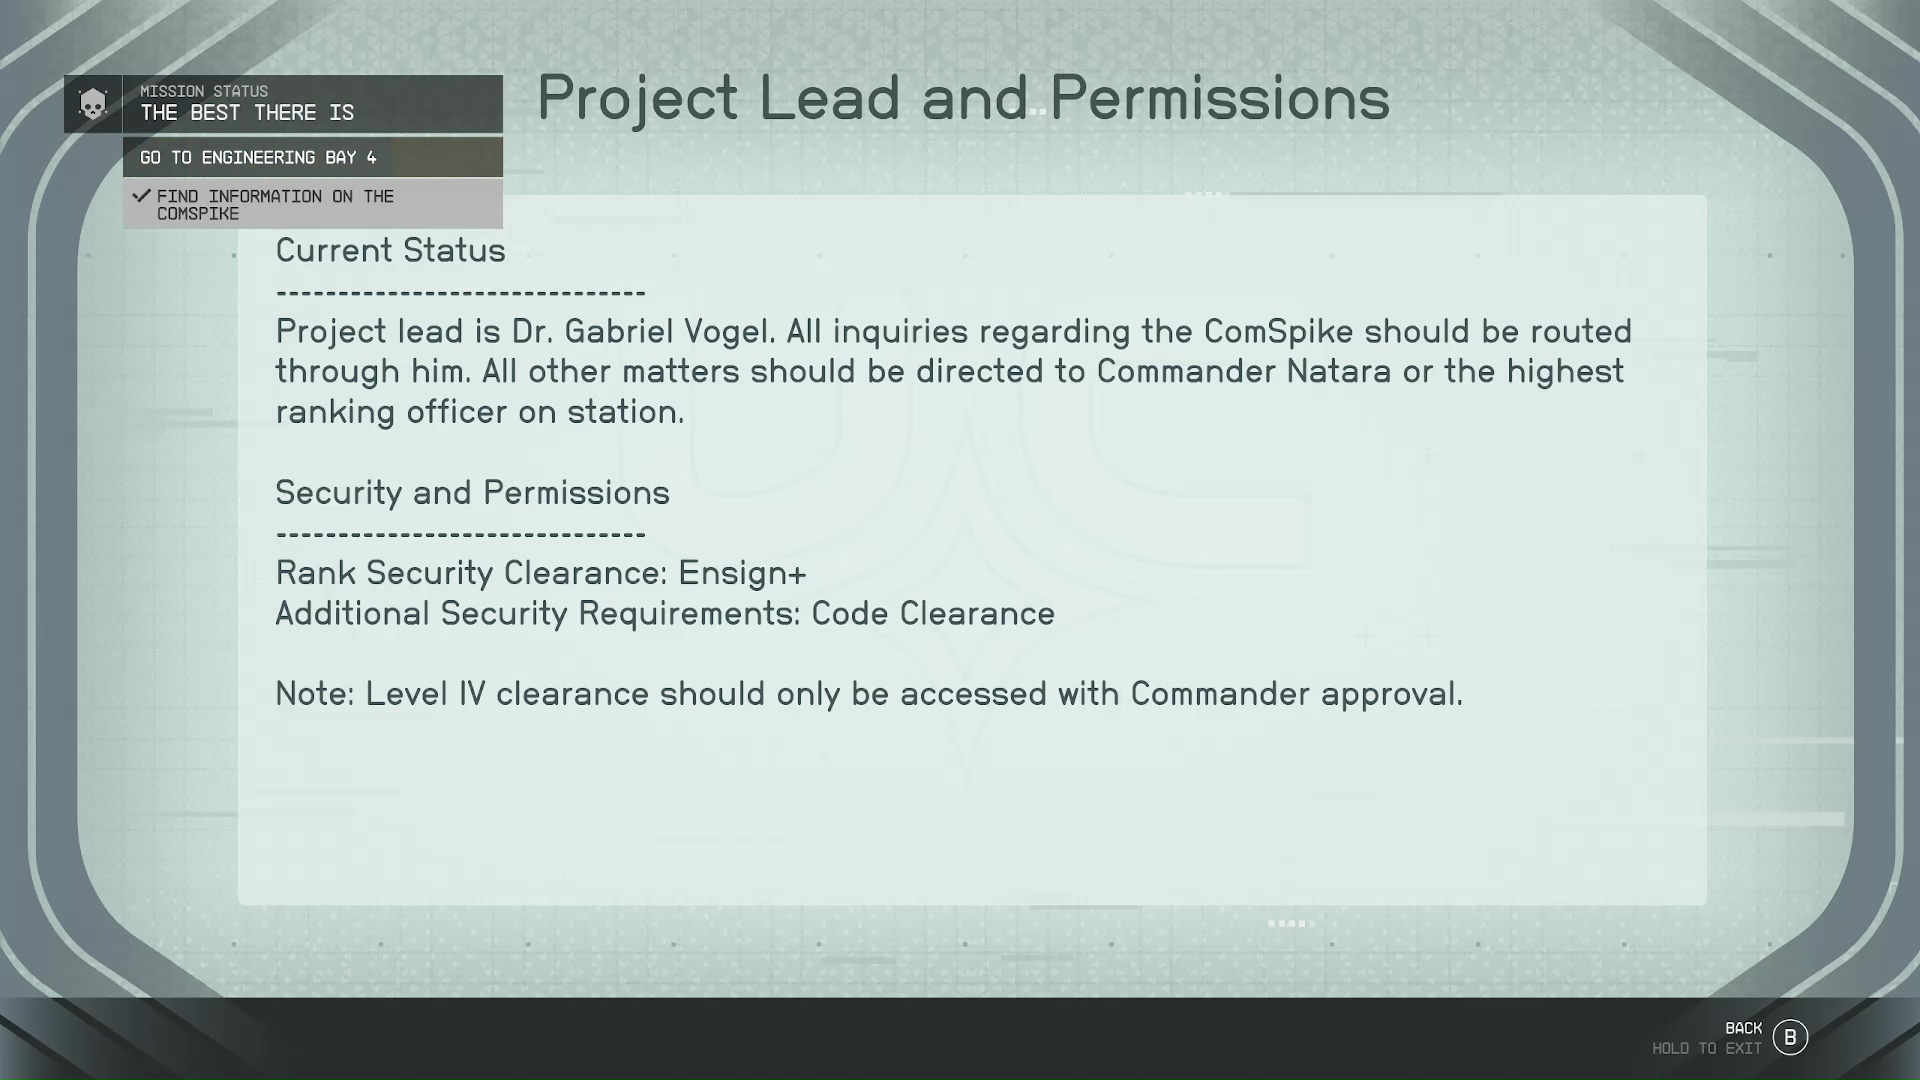
In the archives, you’ll find the Data Access Computer (Image 16). Navigate through the files like so: ‘Projects’–>’UCE-86 ComSpike’–>’Upgrade Security Clearance’–>’Project Lead and Permissions’ (Image 17).
Image 16Image 17
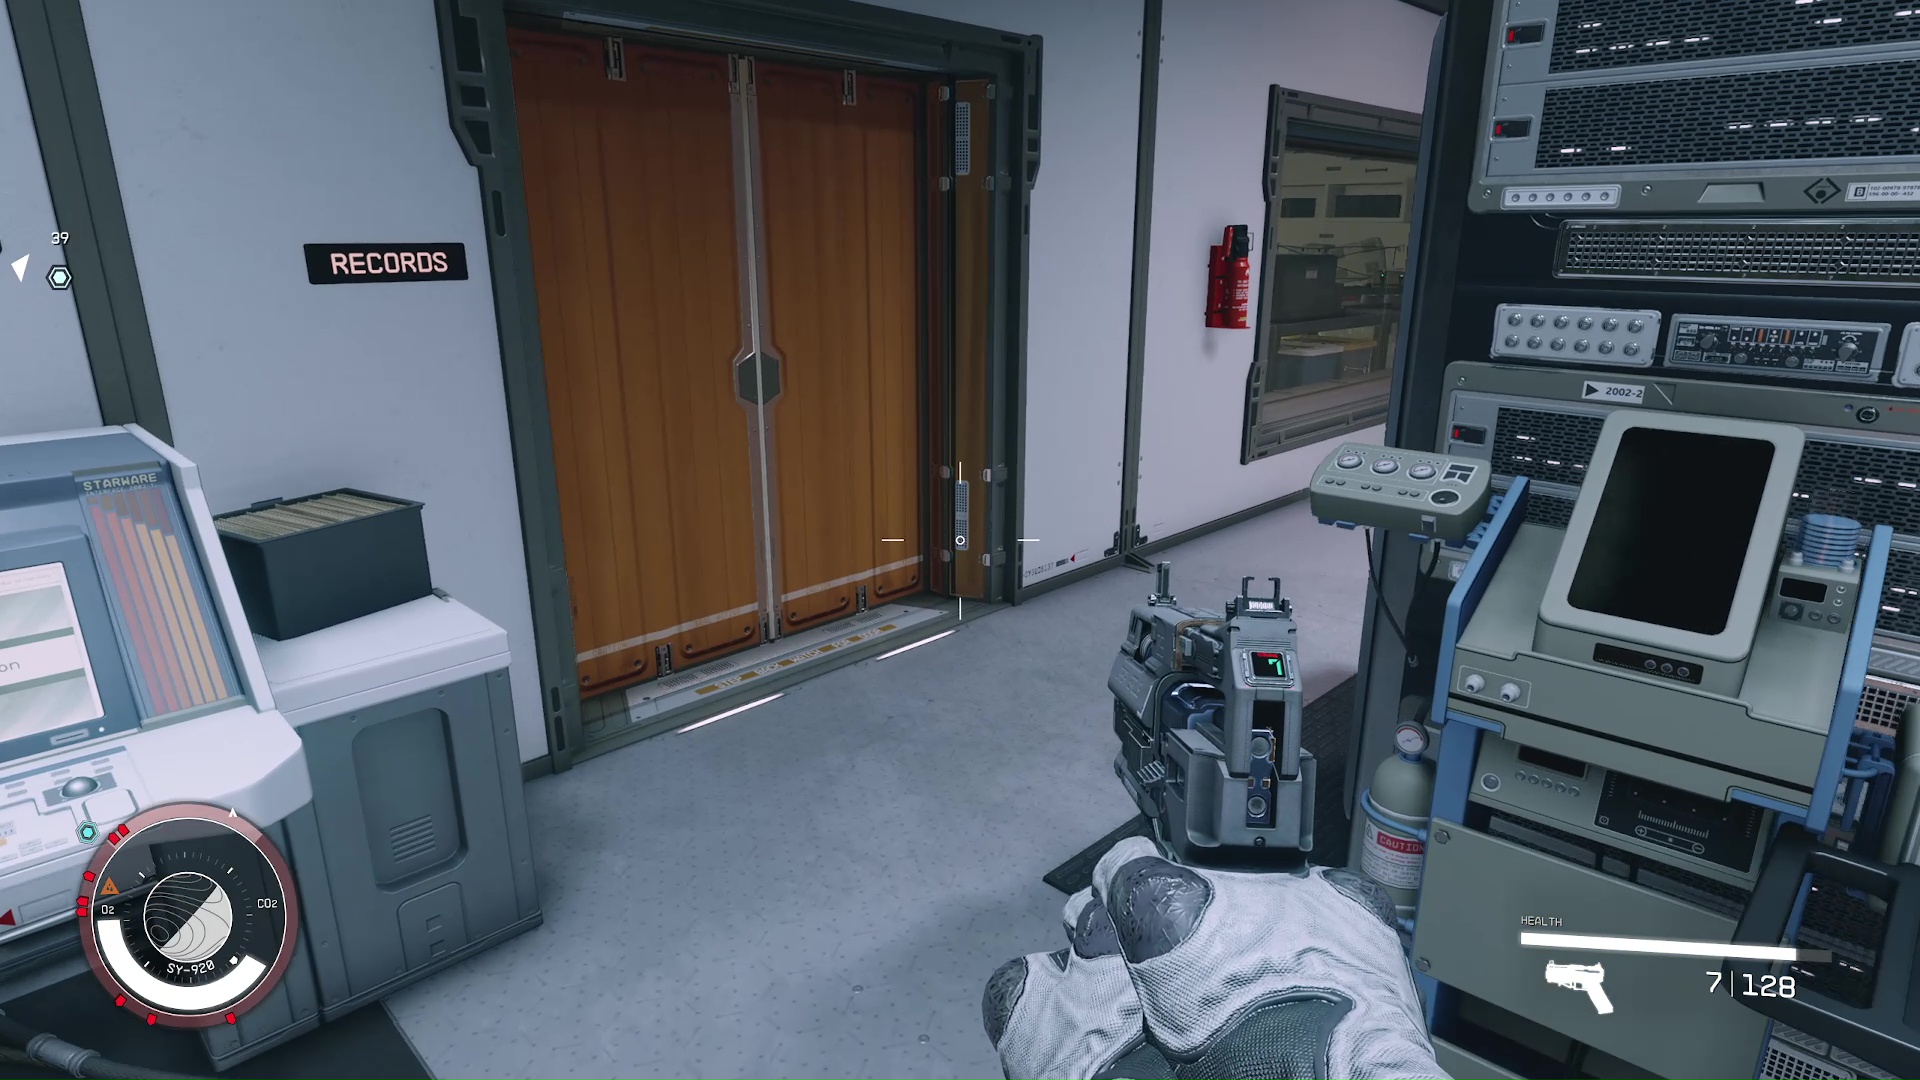
Go to Engineering Bay 4
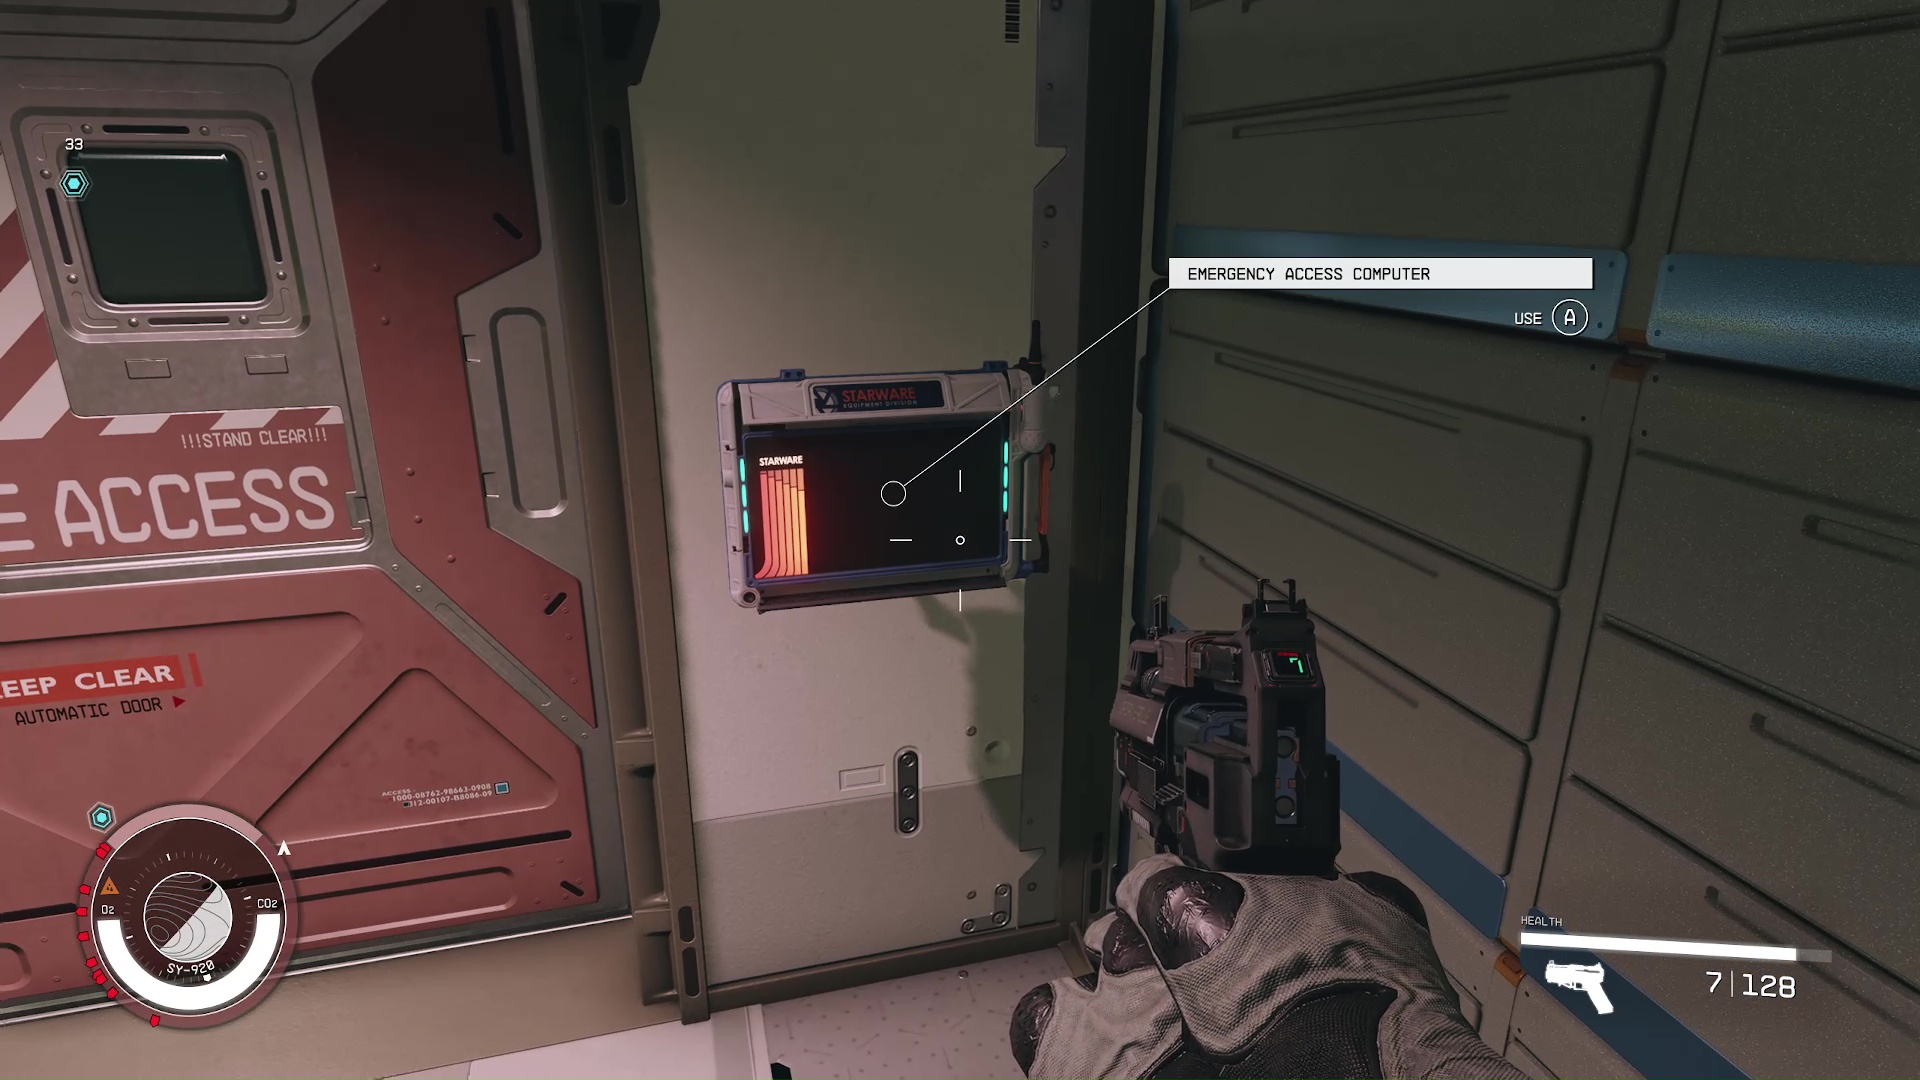
To your right is a door to records (Image 18); you can go through here to the elevators. Inside is a computer that opens the emergency door (Image 19).
Image 18Image 19
Take a left inside the door and fight your way through the next couple rooms, following the , and you’ll arrive at the transport lifts. Take the back right elevator to Engineering Bay 4.
Locate the ComSpike
Again, you could switch over to stealth after getting to Engineering Bay 4 if you want, but there’s really no point in our opinion.
If you want to switch over to stealth, then skip down to ‘Find an Intercom and Speak to Huan‘.
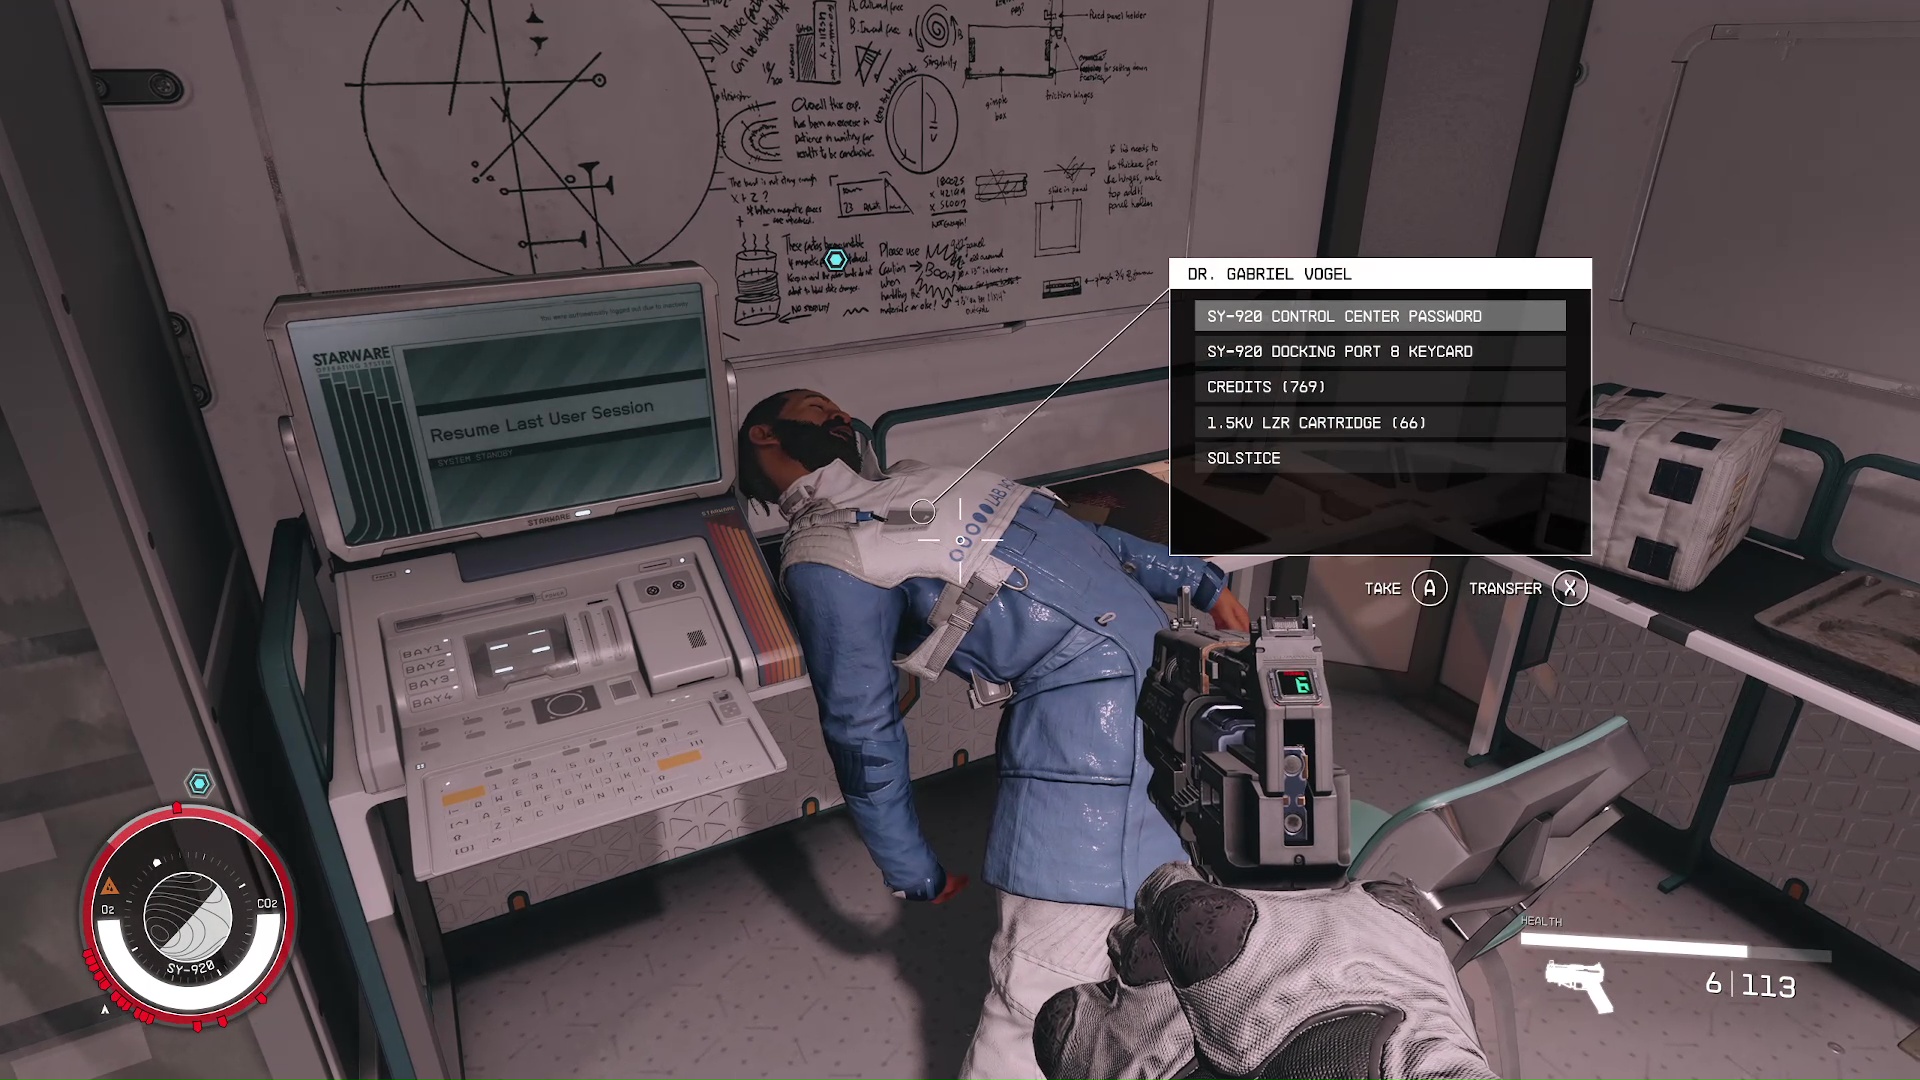
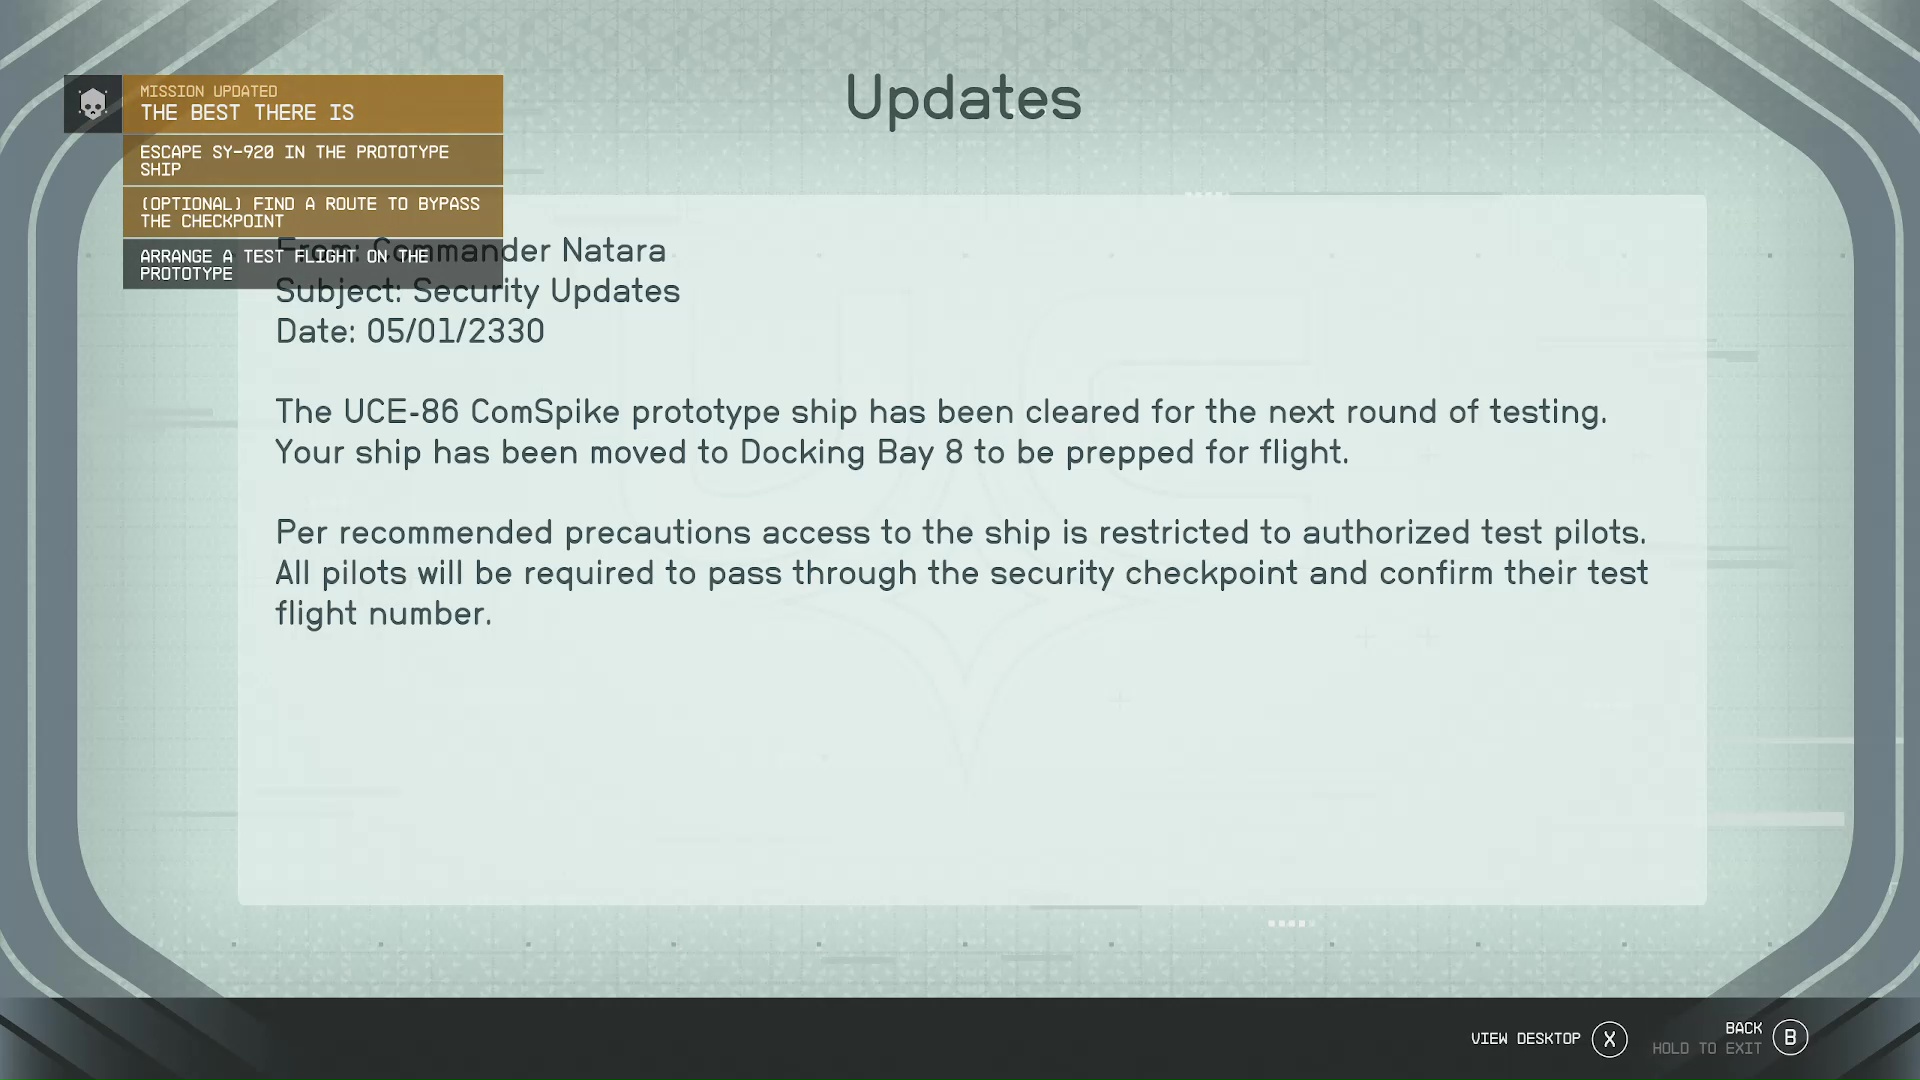
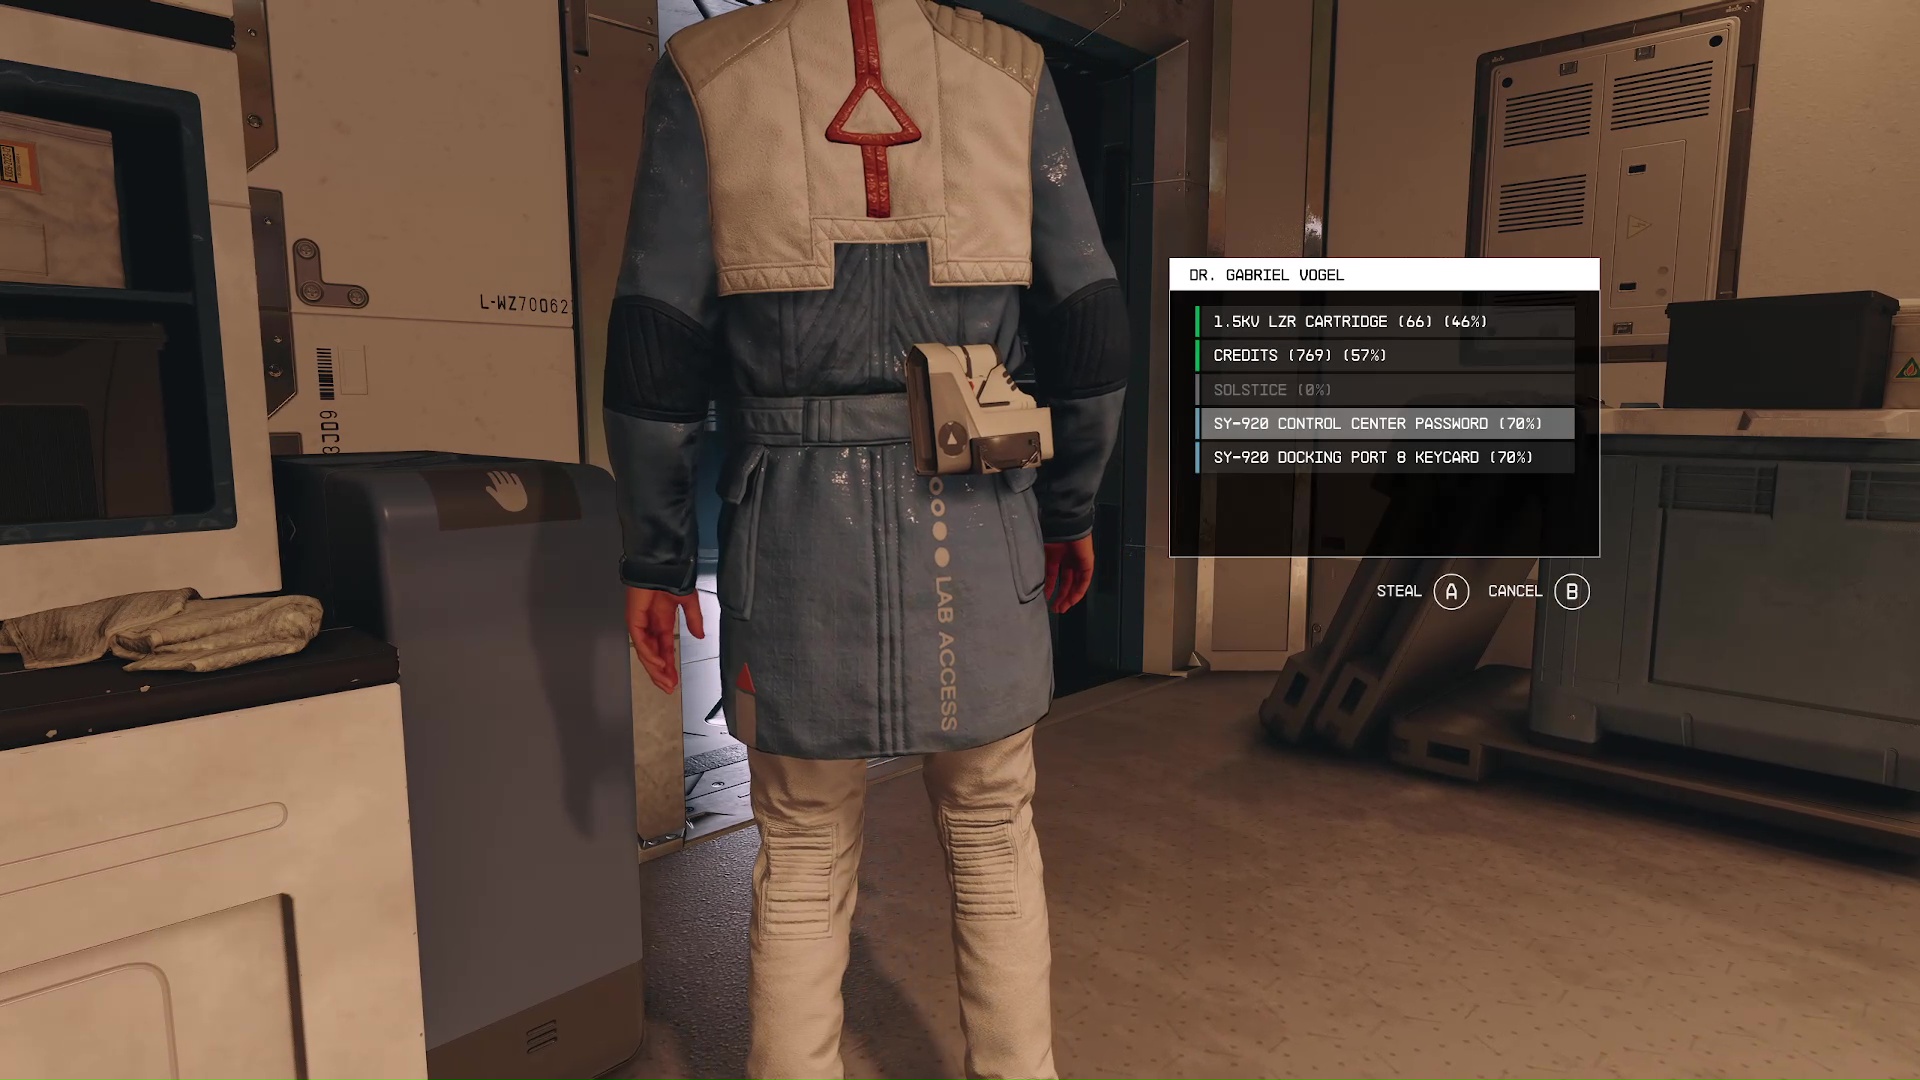
Follow the down the stairs and into Dr. Gabriel Vogel’s Office. Kill the doctor, and grab the SY-920 Control Center Password and the SY-920 Docking Port 8 Keycard (Image 20). Next, jump on his computer and go to: ‘ComSpike Project’–>’Updates’ (Image 21).
Image 20Image 21
Evidence in Doc’s Office
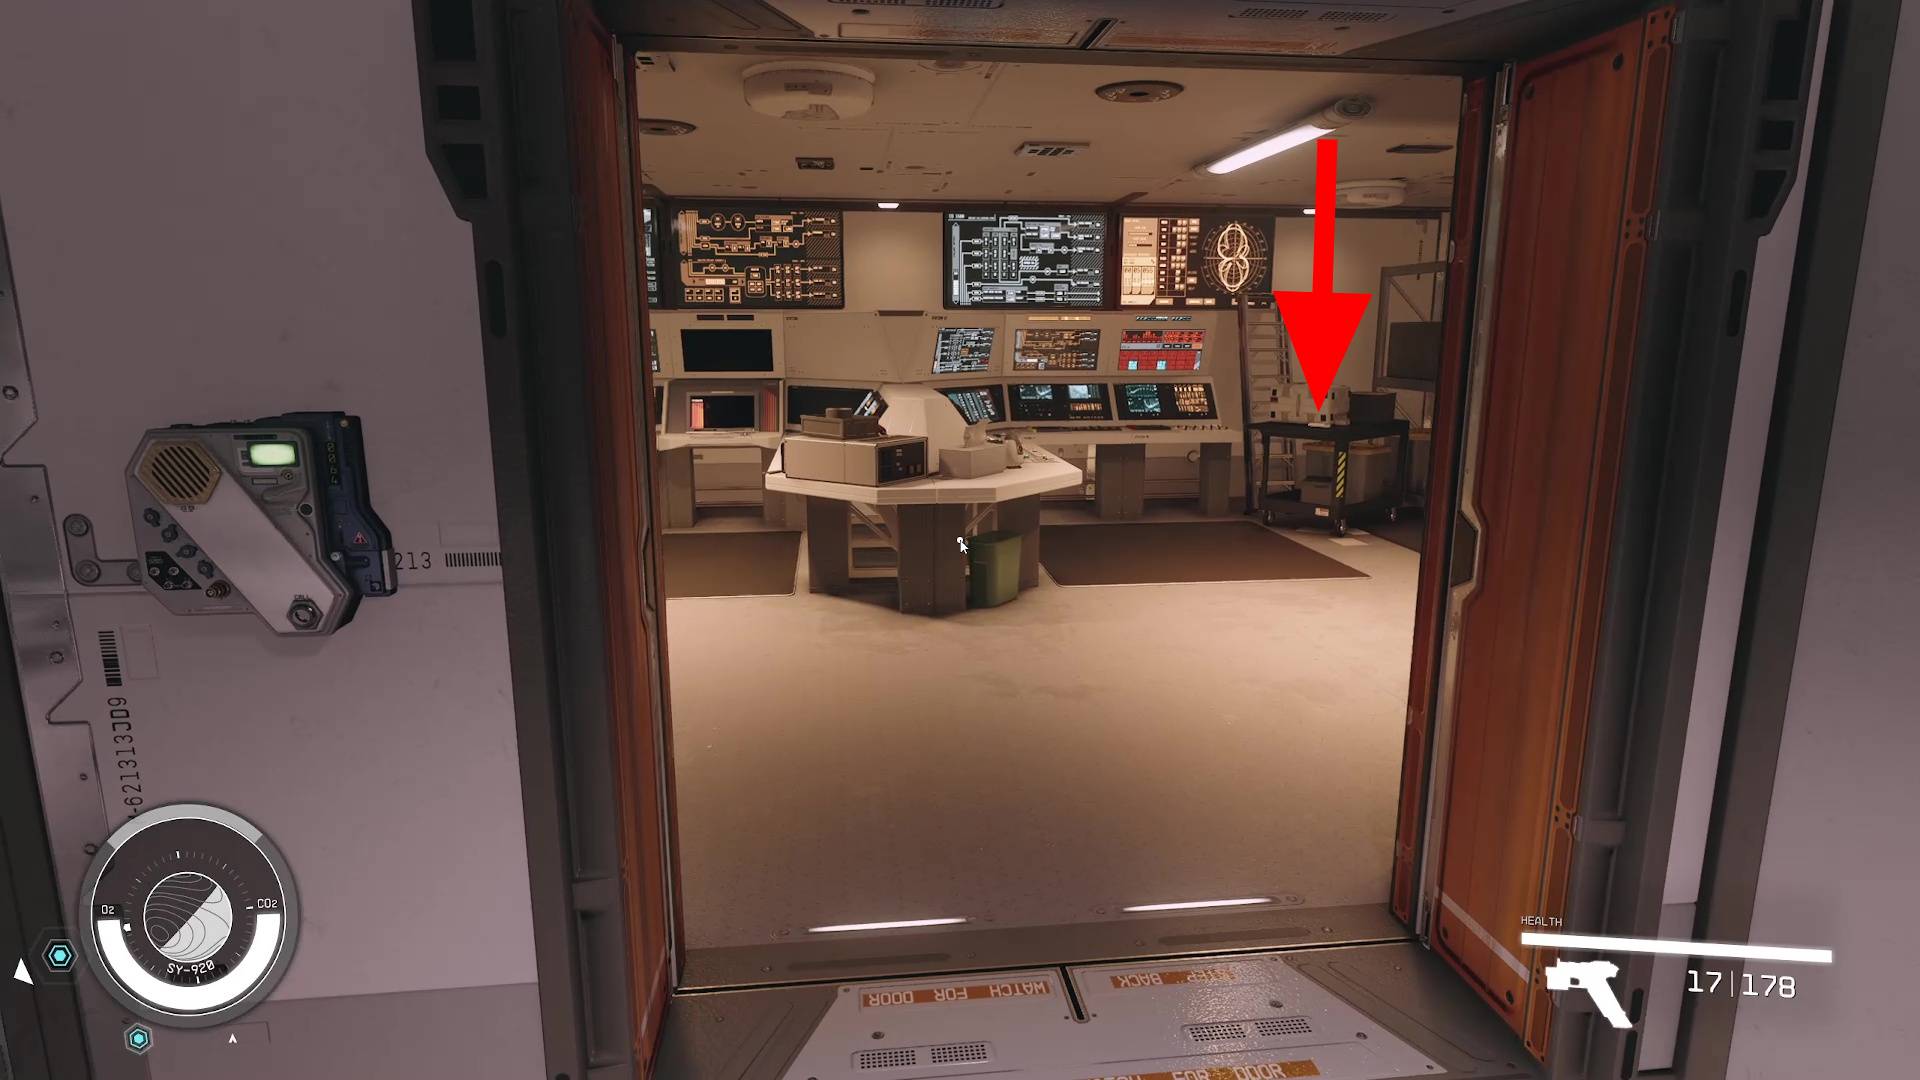
Before you leave the office, go through the door in the back. There is a piece of evidence for the Burden of Proof mission on the cart to your right in this room (Image 22).
Image 22
Escape SY-920 in the Prototype Ship
There are two ways to get to the ship’s hanger. The first way is killing the security officer at the checkpoint and using his computer to open the door (like you did with the first checkpoint). The security office is just outside the doctor’s office. If the door to the security office is locked, just shoot some people around and it will unlock.
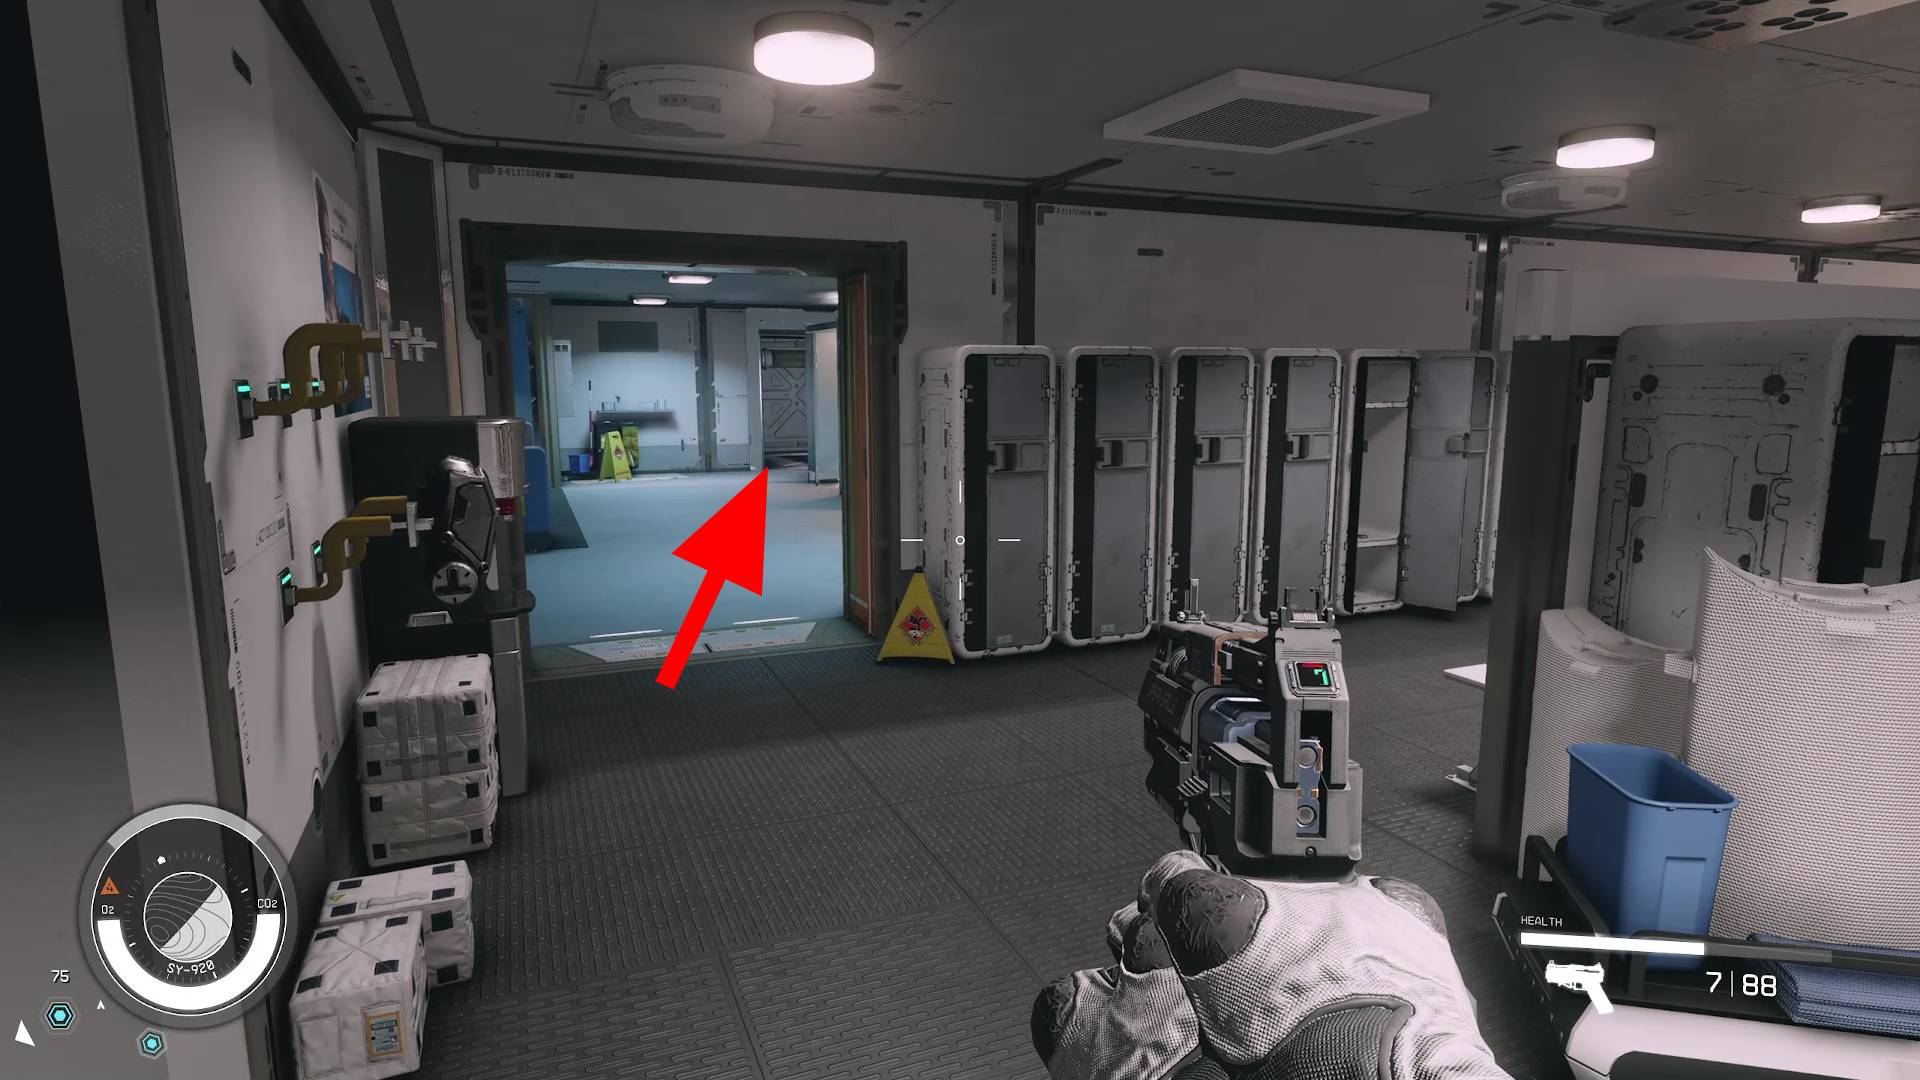
The second way is through the vent in the bathroom. Take a right out of the Doctor’s office and follow signs for lockers / bathrooms. The vent is in the back of the bathrooms (Image 23).
Image 23
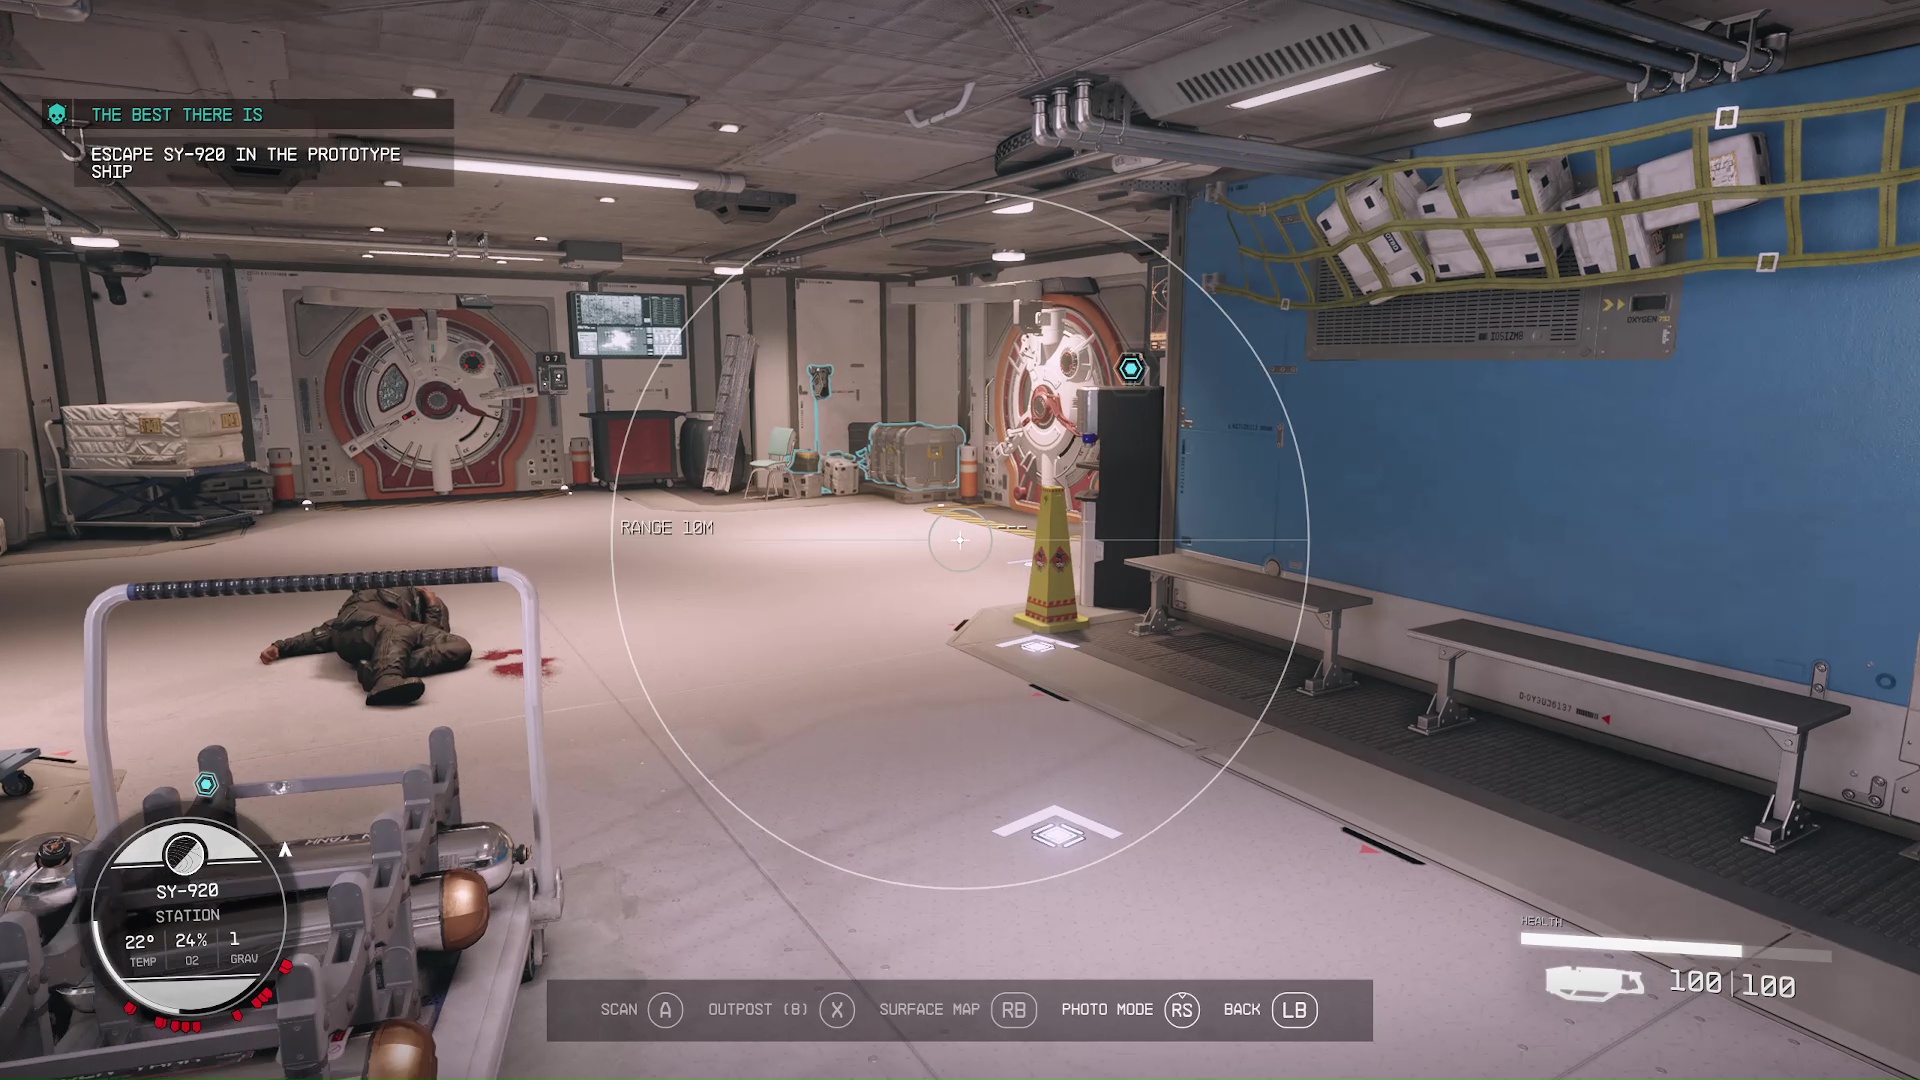
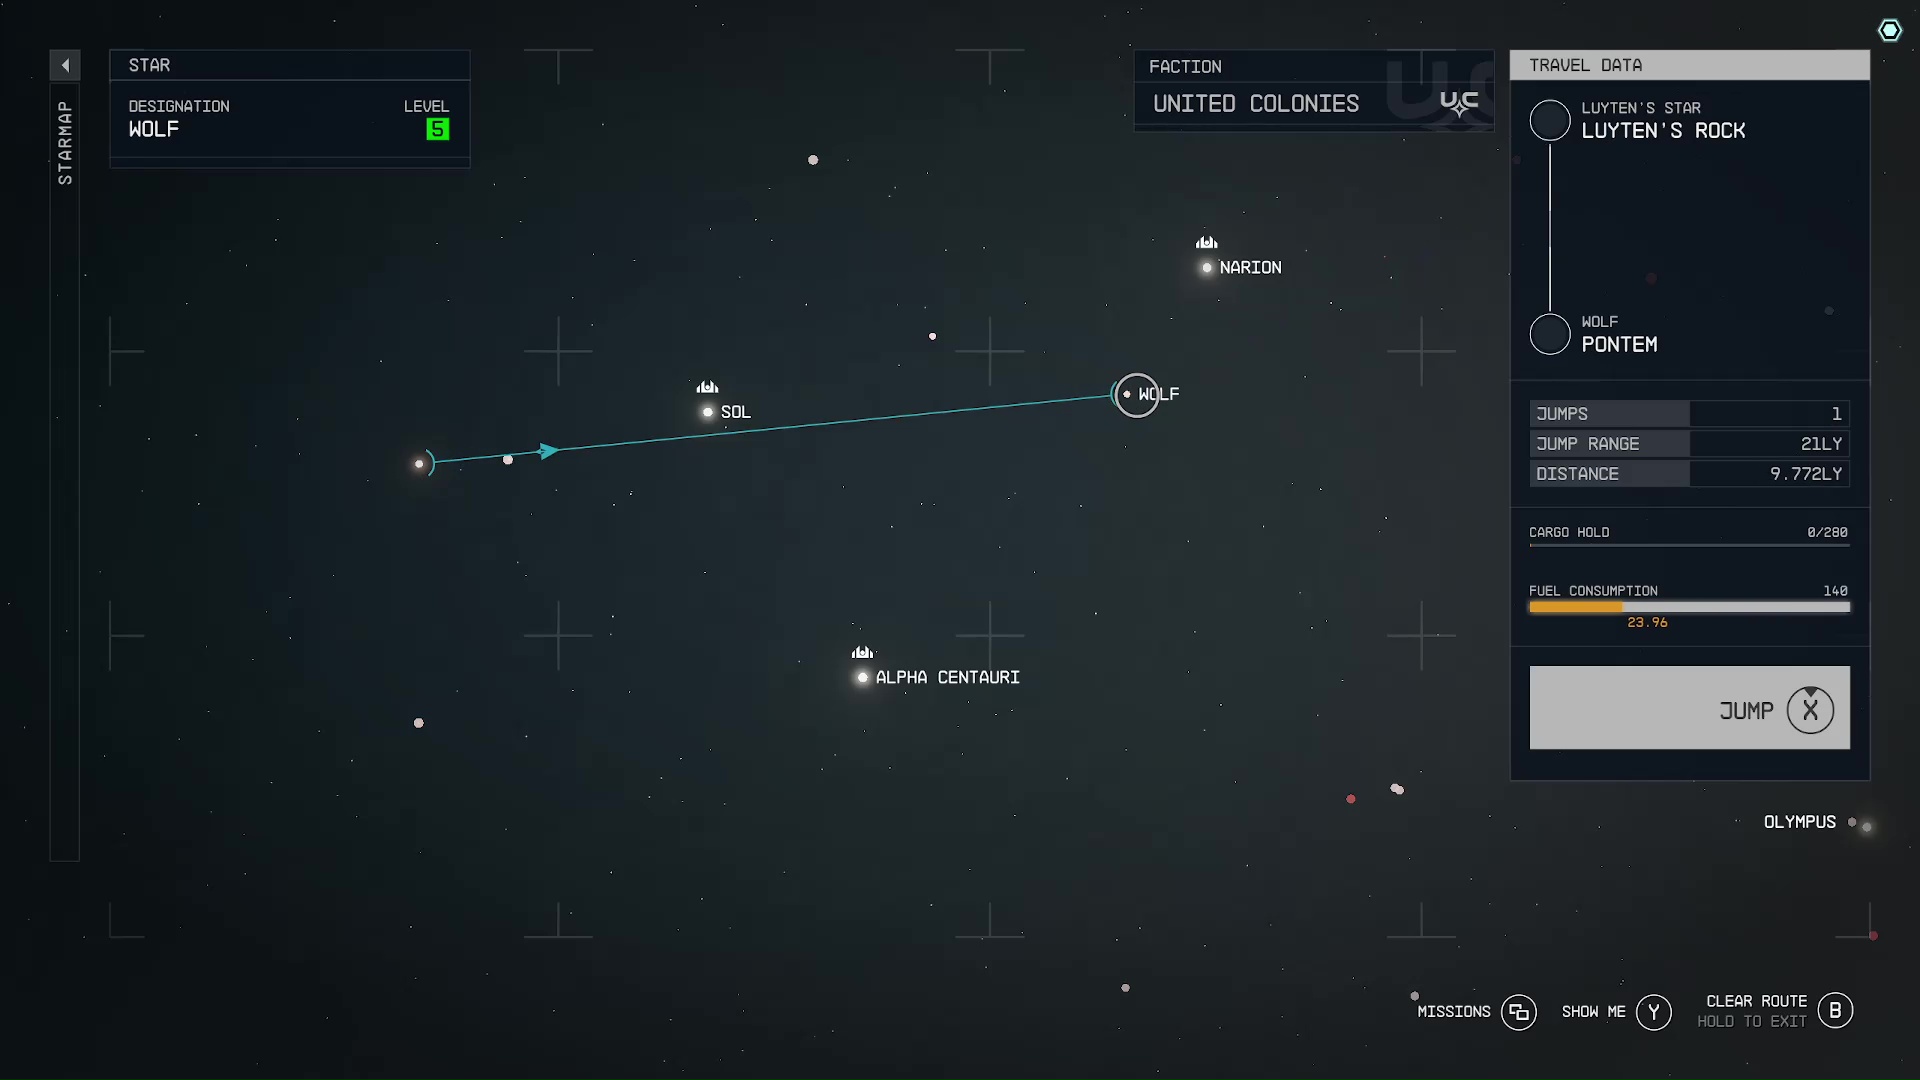
Once you’re in the hangar, all you have to do is fight your way to the ship. If you need direction, just use your scanner, and it’ll guide you to the airlock (Image 24). Get in the ship’s pilot seat, and undock from the station. As soon as you’re free of the station, immediately go to your star map and grav jump out of the area. We couldn’t go straight to The Key because we didn’t know the route — we had to jump to Wolf first (Image 25).
Image 24Image 25
To continue this guide to the end, skip down to ‘Return to The Key and Speak to Delgado’.
The Stealth Route
Most players will likely be going the stealthy route, as it’s obligatory for SysDef, and it takes a lot of ammunition to kill all those marines. It isn’t very difficult sneaking around, but there are a couple areas where you might get stuck. Let’s pick it up from when you dock and board SY-920.
Board SY-920 and Gain Access to the Barracks to Find a Uniform
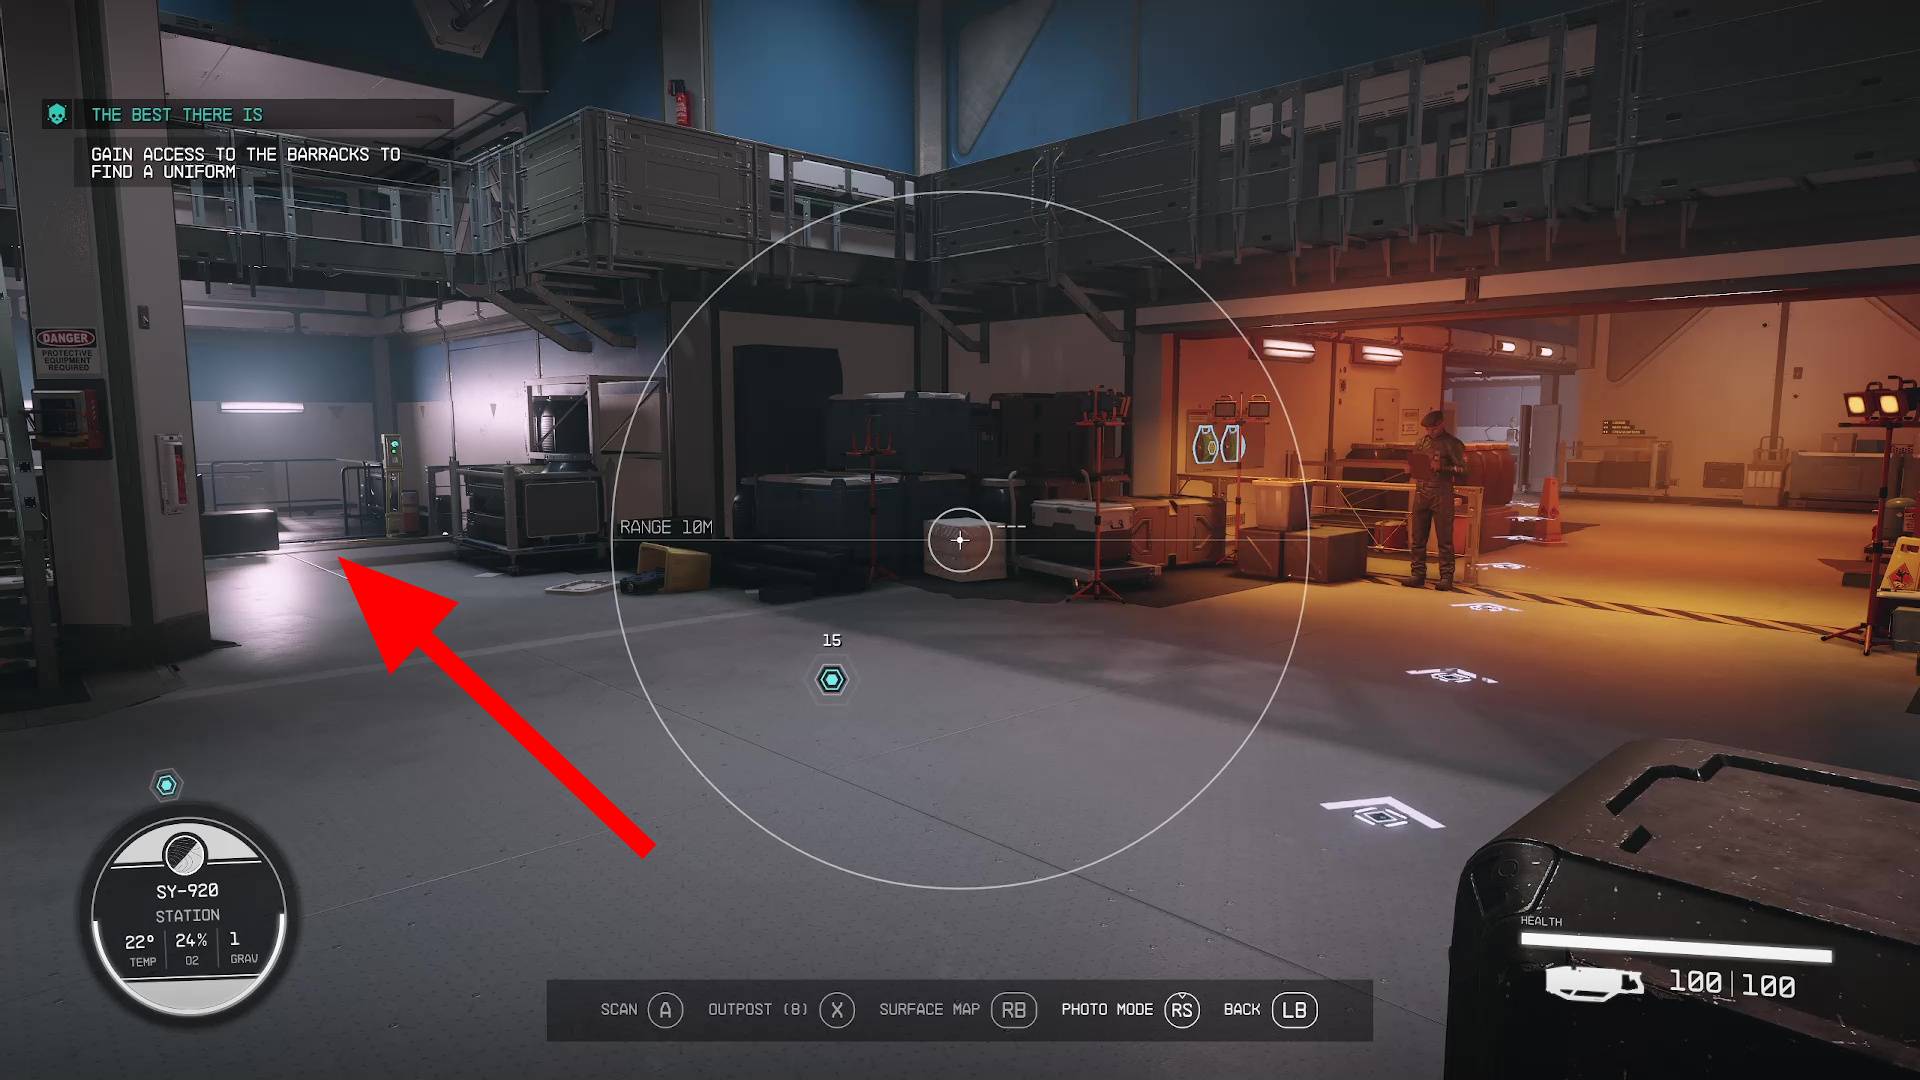
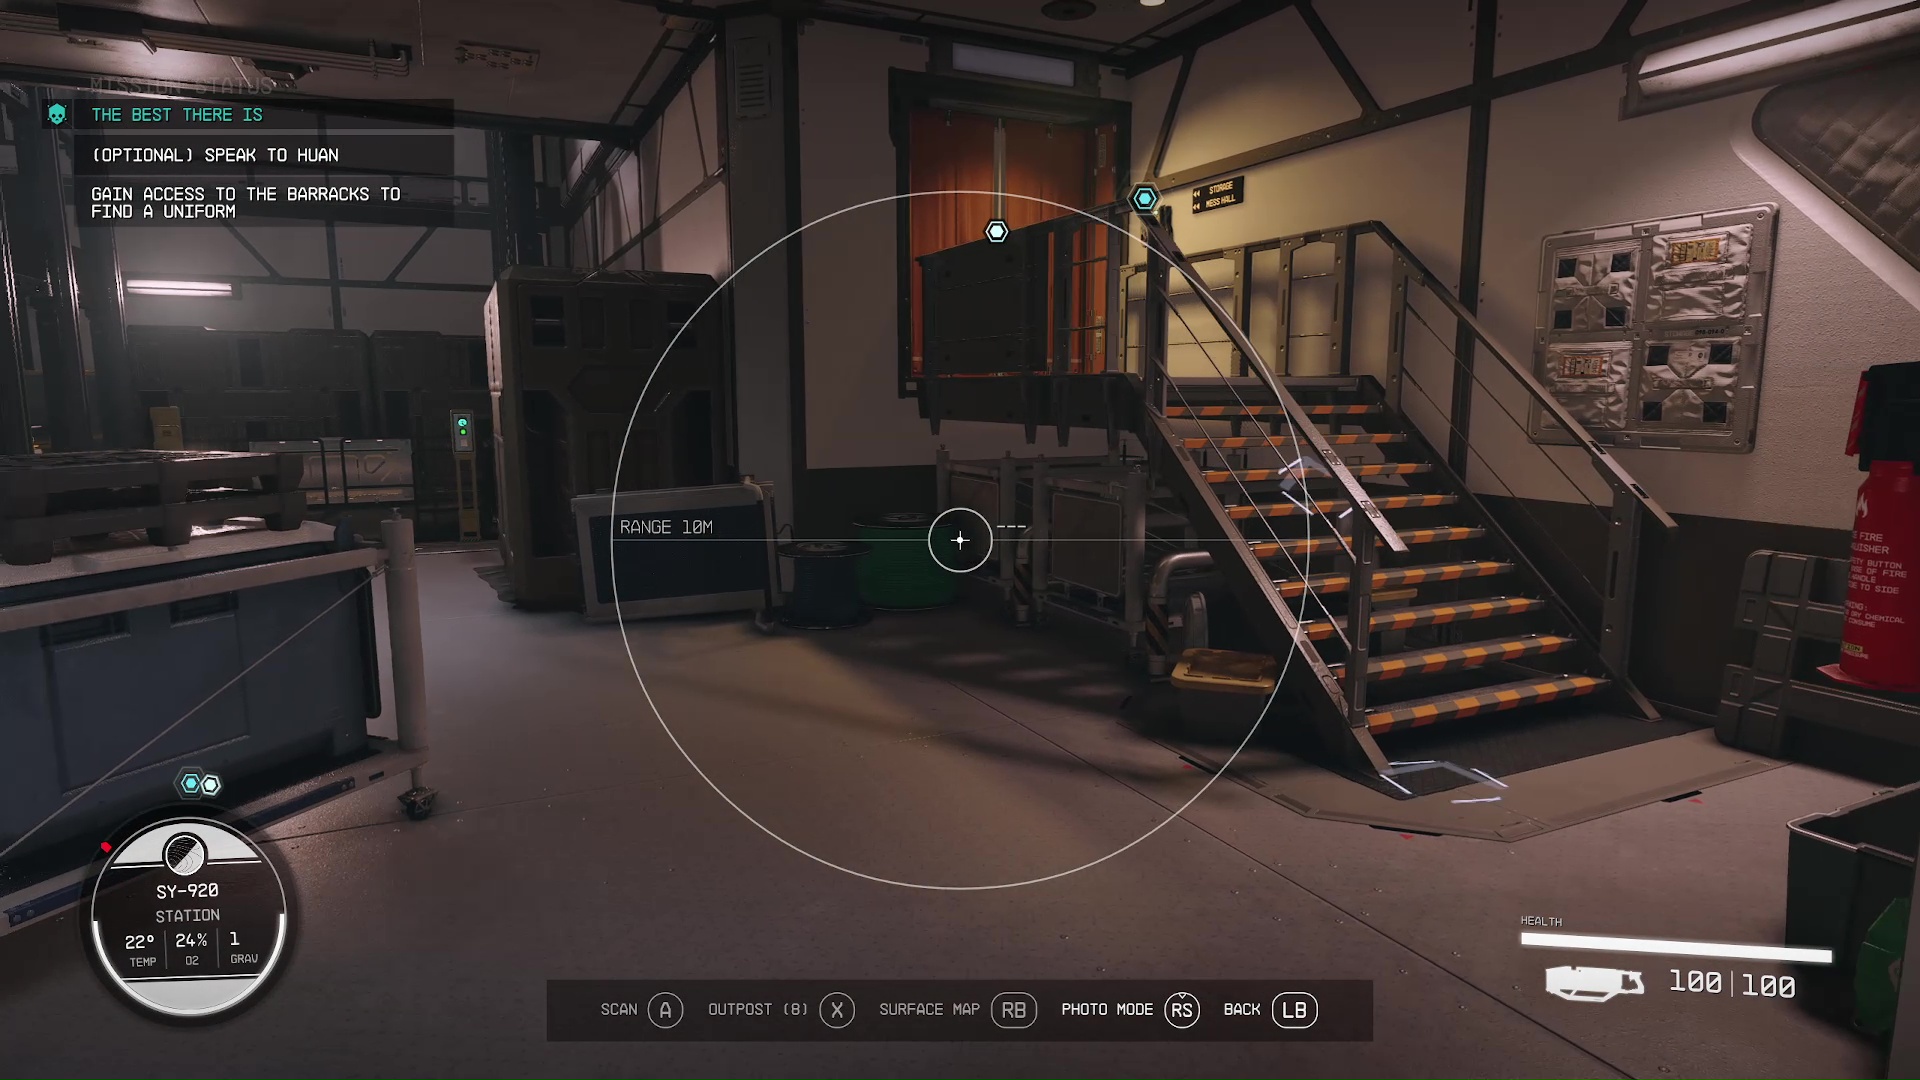
Follow the to board the station. If you follow your scanner, it will lead you to a guard that you can try to persuade to let you through to the barracks. However, if you fail this persuasion, then you will need to take the lift nearby down below (Image 26). After you take the lift down, you’ll see the intercom to talk to Huan on your left, and the door that leads to the barracks (Image 27). You will have to pick the lock to the door with a digipick.
Image 26Image 27
Find an Ensign Uniform
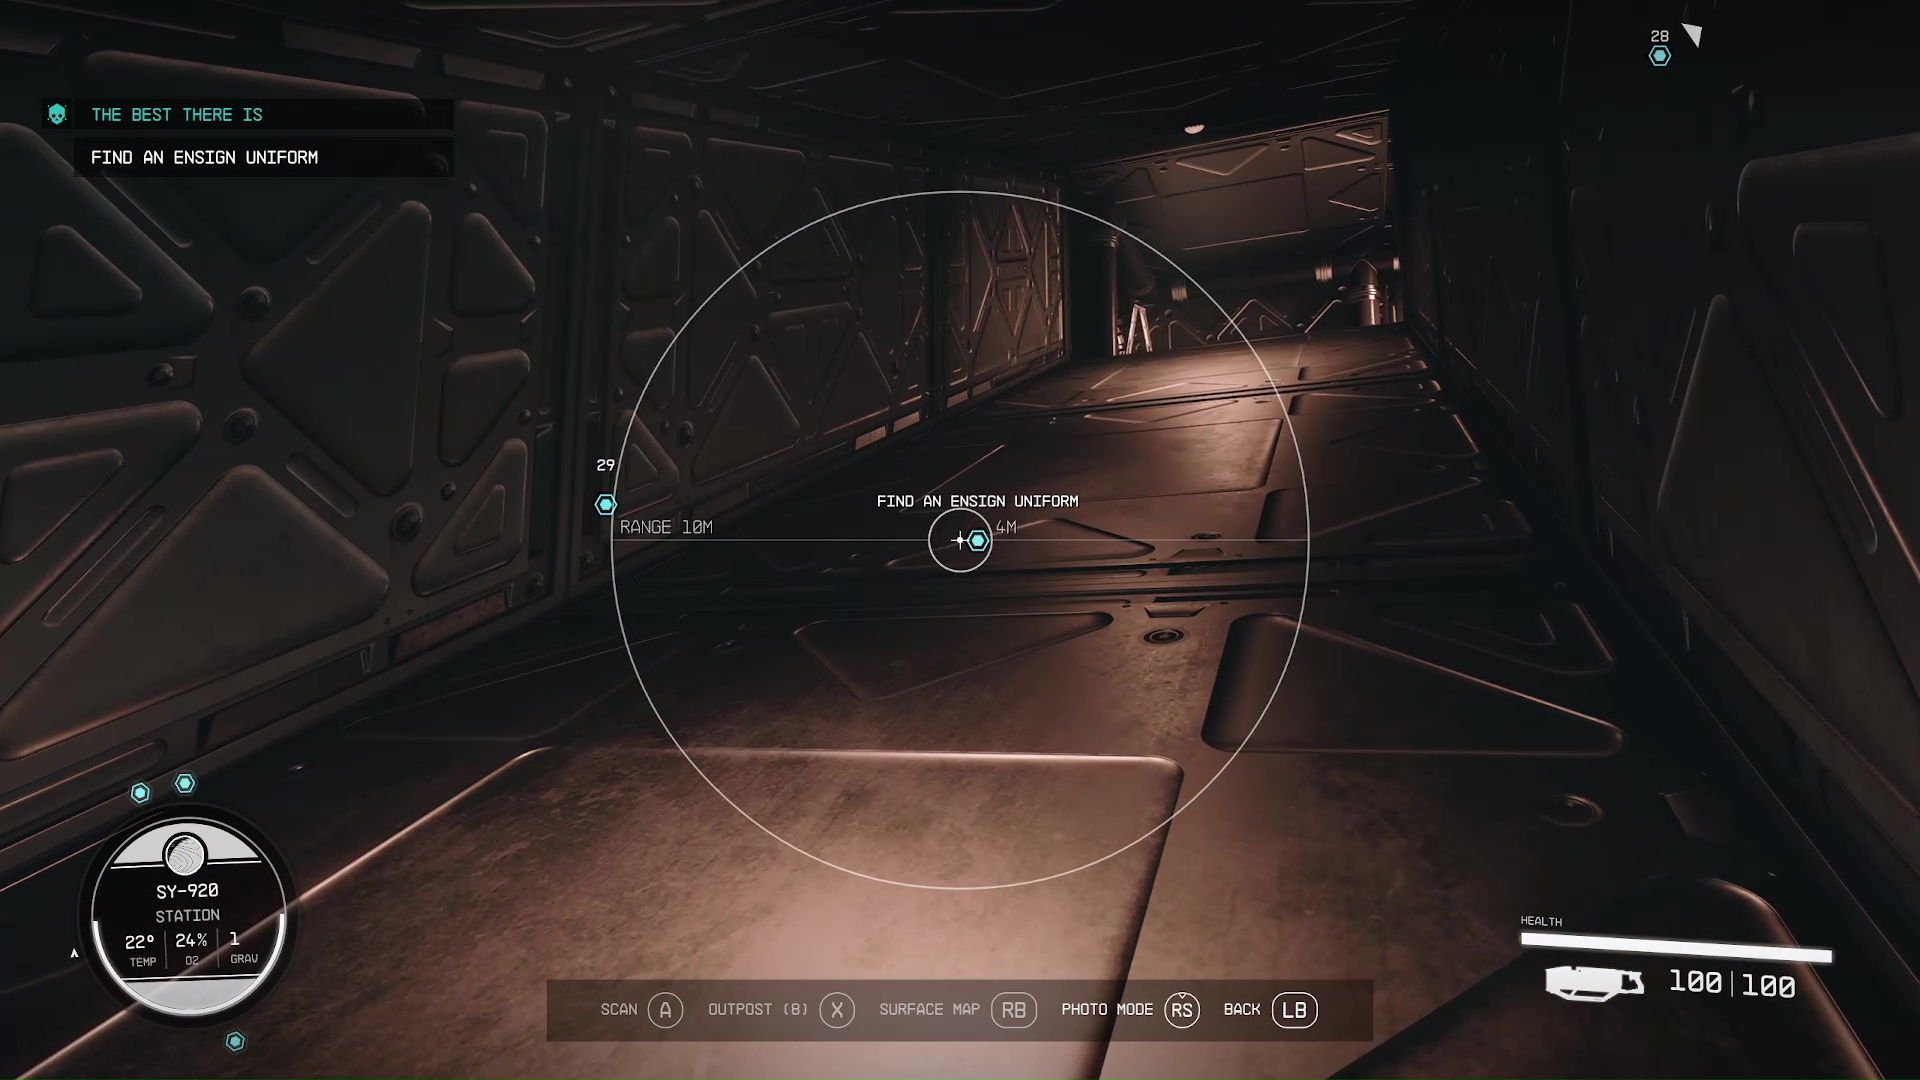
Past the door, follow the to the vent. Save the game once you’re inside the vent in case you get caught. You will receive multiple markers to follow after walking a little through the duct. The first vent opening is actually the most difficult; it is the way to steal an ID to sneak into the elevator. We don’t recommend this, instead continue up the slope in the vent to steal a uniform (Image 28).
Image 28
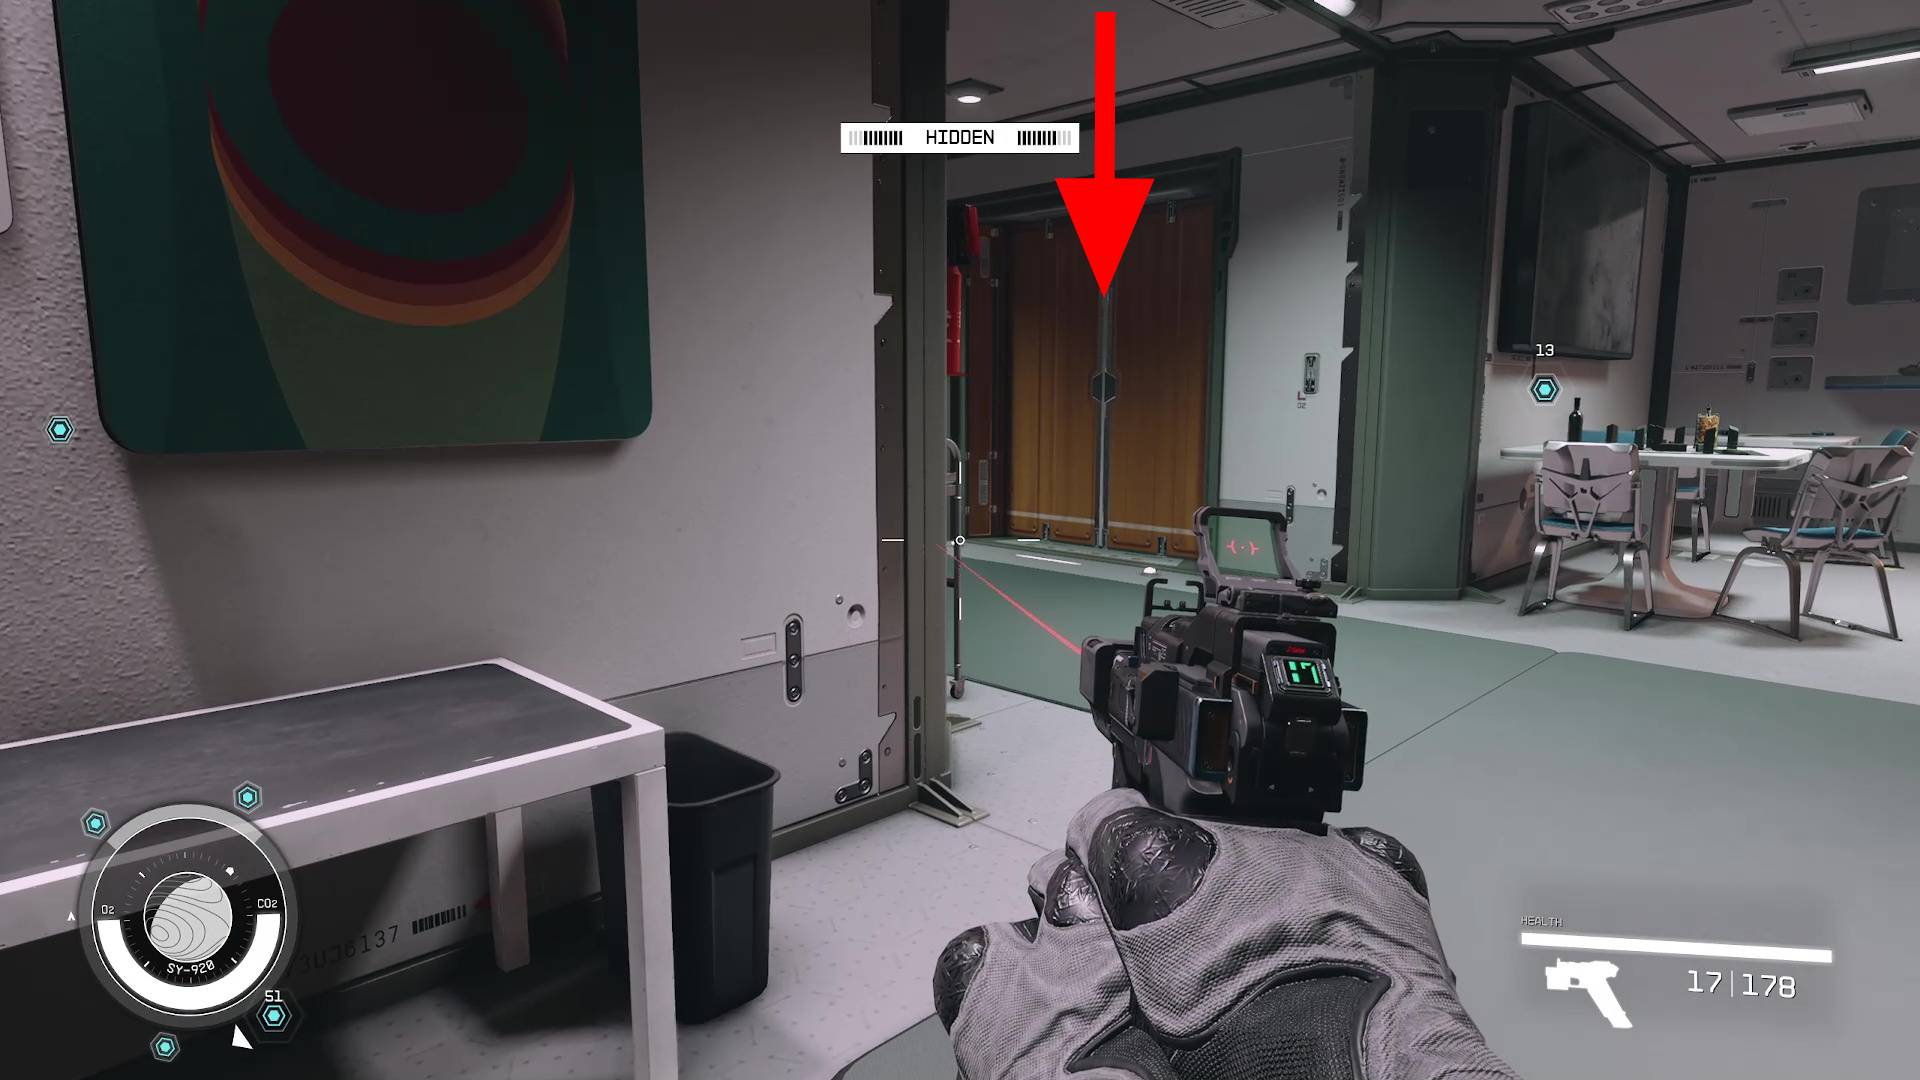
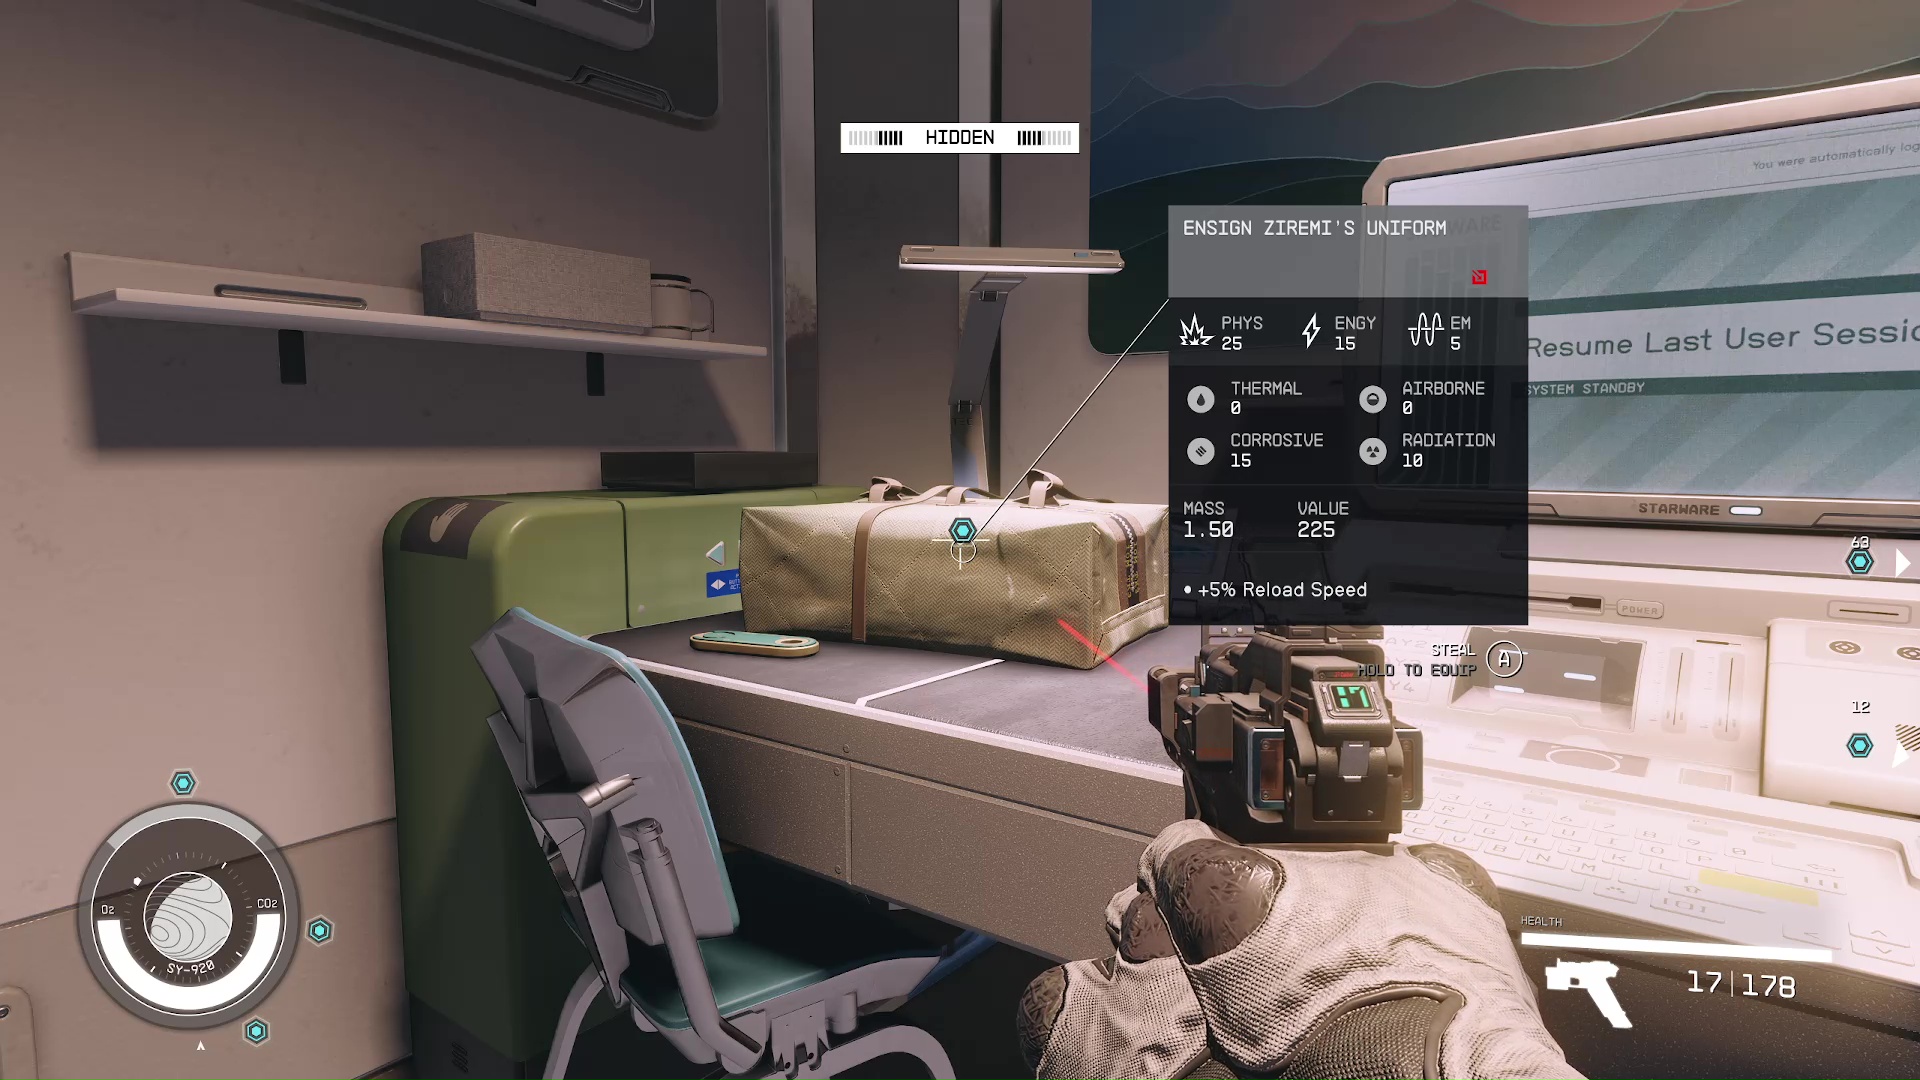
When you leave the vent, you will be in the bathroom. Go out the bathroom door, then go right. There is a guard patrolling, so be careful and check your corners. There’s a door at the next corner (Image 29), go inside and grab Ensign Ziremi’s Uniform (Image 30).
Image 29Image 30
Enter the Command Bay
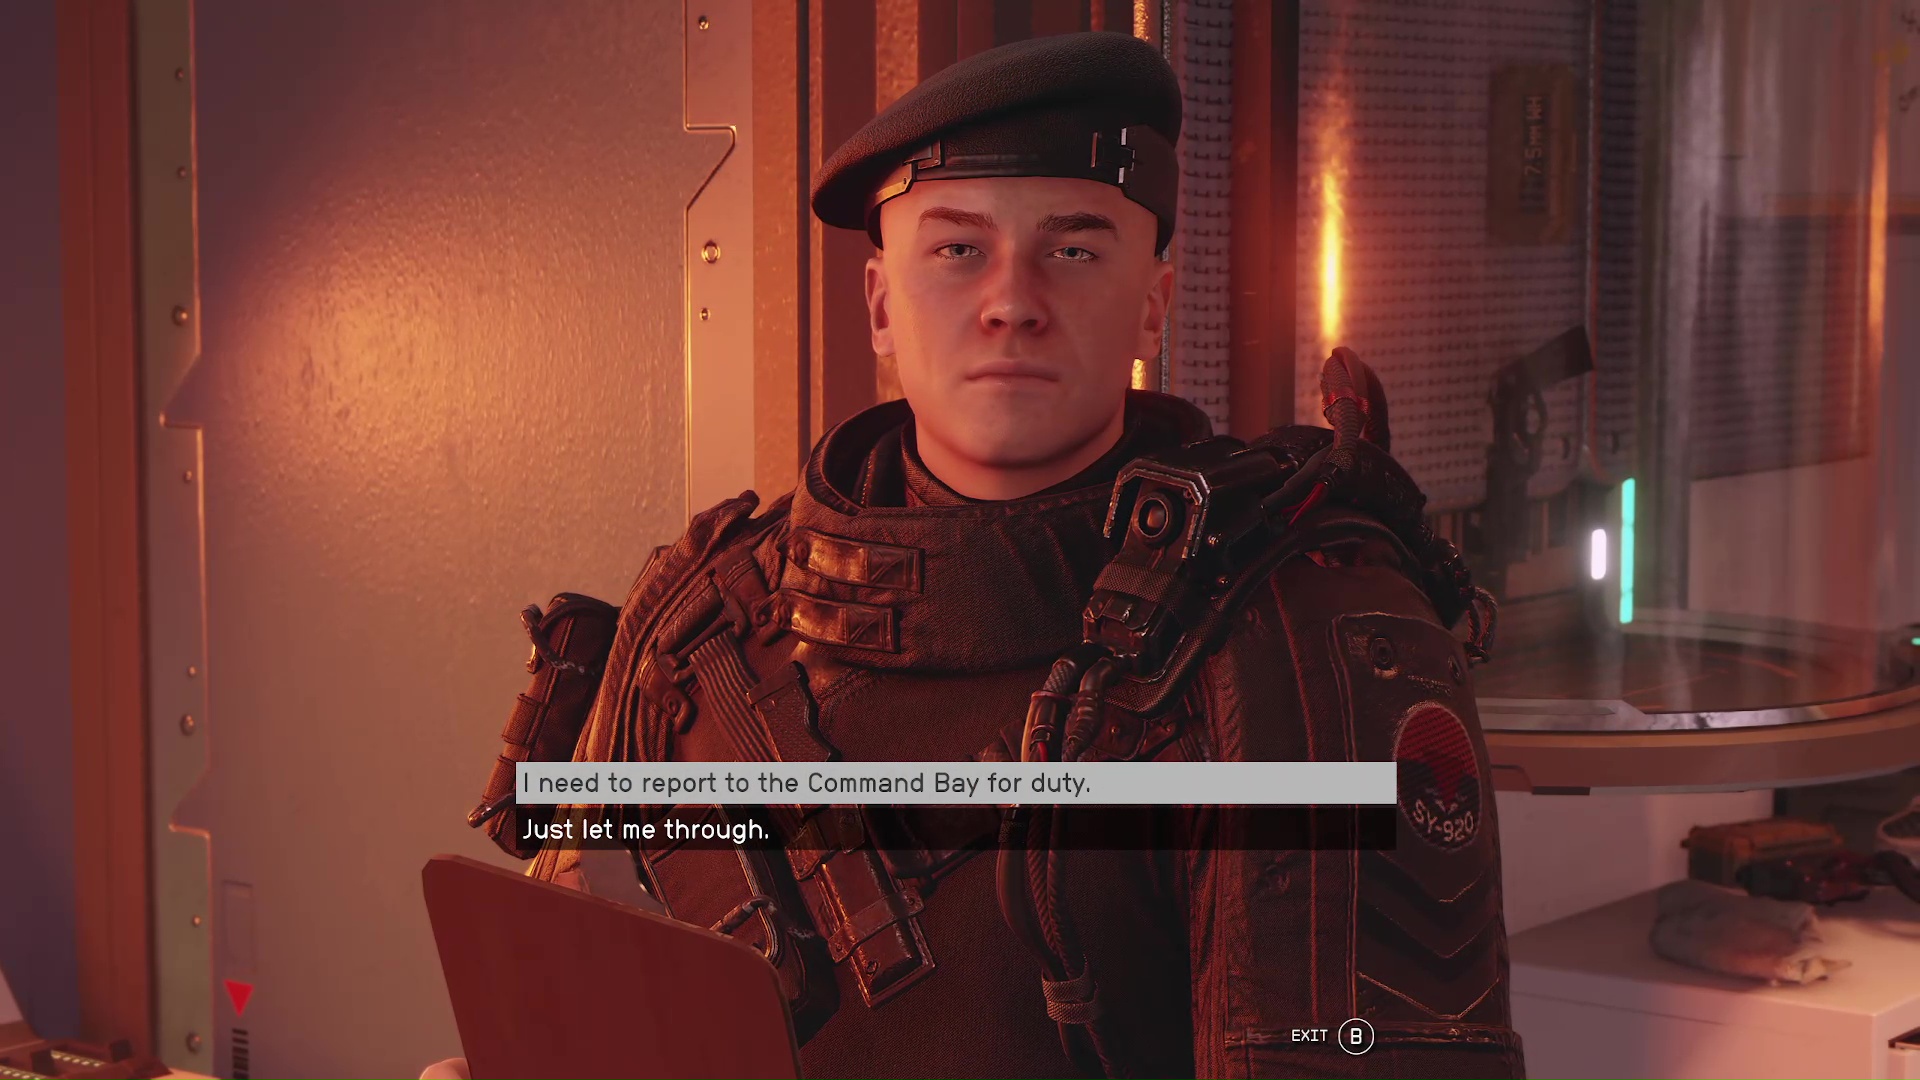
Slip into the uniform, and now you can move around the area freely. Follow your scanner to the security door, then tell the guard that you’re reporting to the command bay (Image 31). He’ll let you in as long as you’re wearing an ensign uniform.
Image 31
Head into the next room, and use the key card to take the elevator down to the command bay.
Obtain a Clearance Code and Find Information on the ComSpike
You will see an intercom when you leave the elevator; use it to talk to Huan. She’ll be happy that you’ve avoided detection, and tell you that info on the ComSpike can be found in the archives. Before you can go to the archives, though, you will need a clearance code.
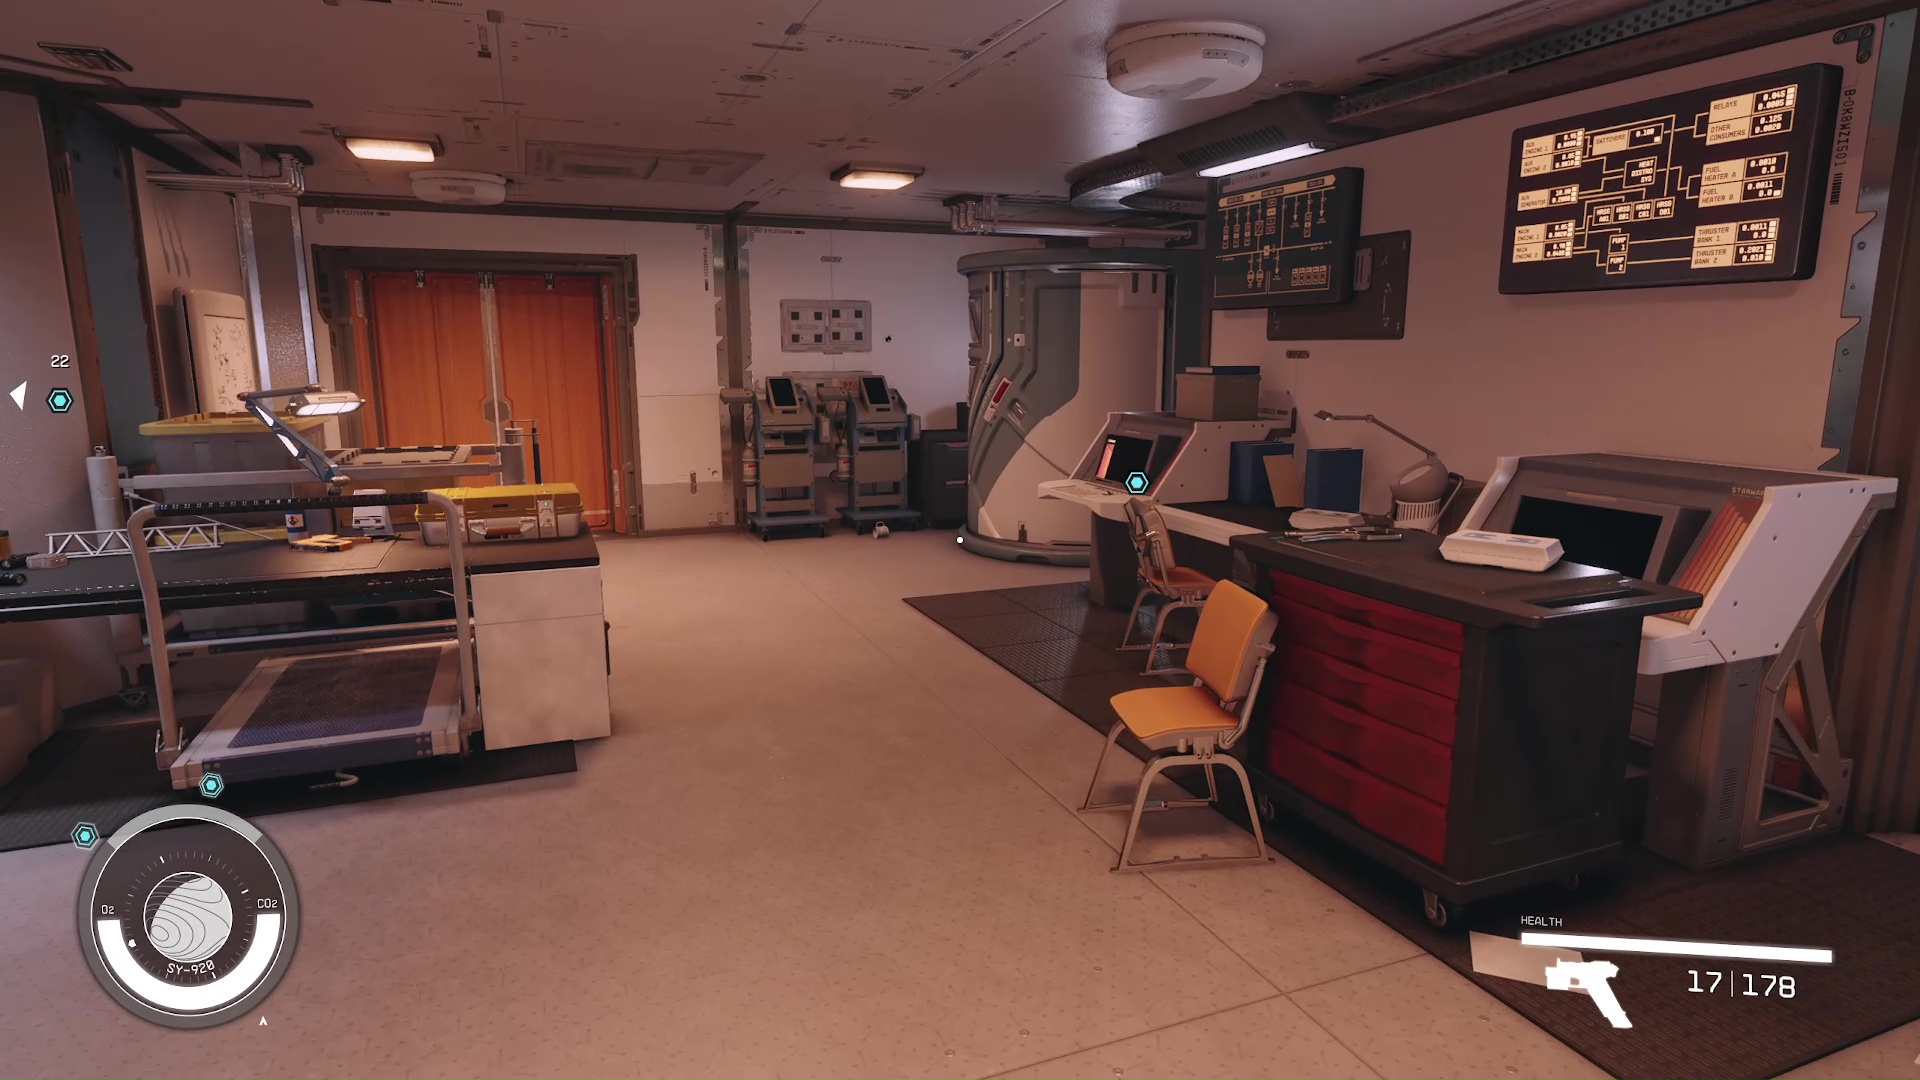
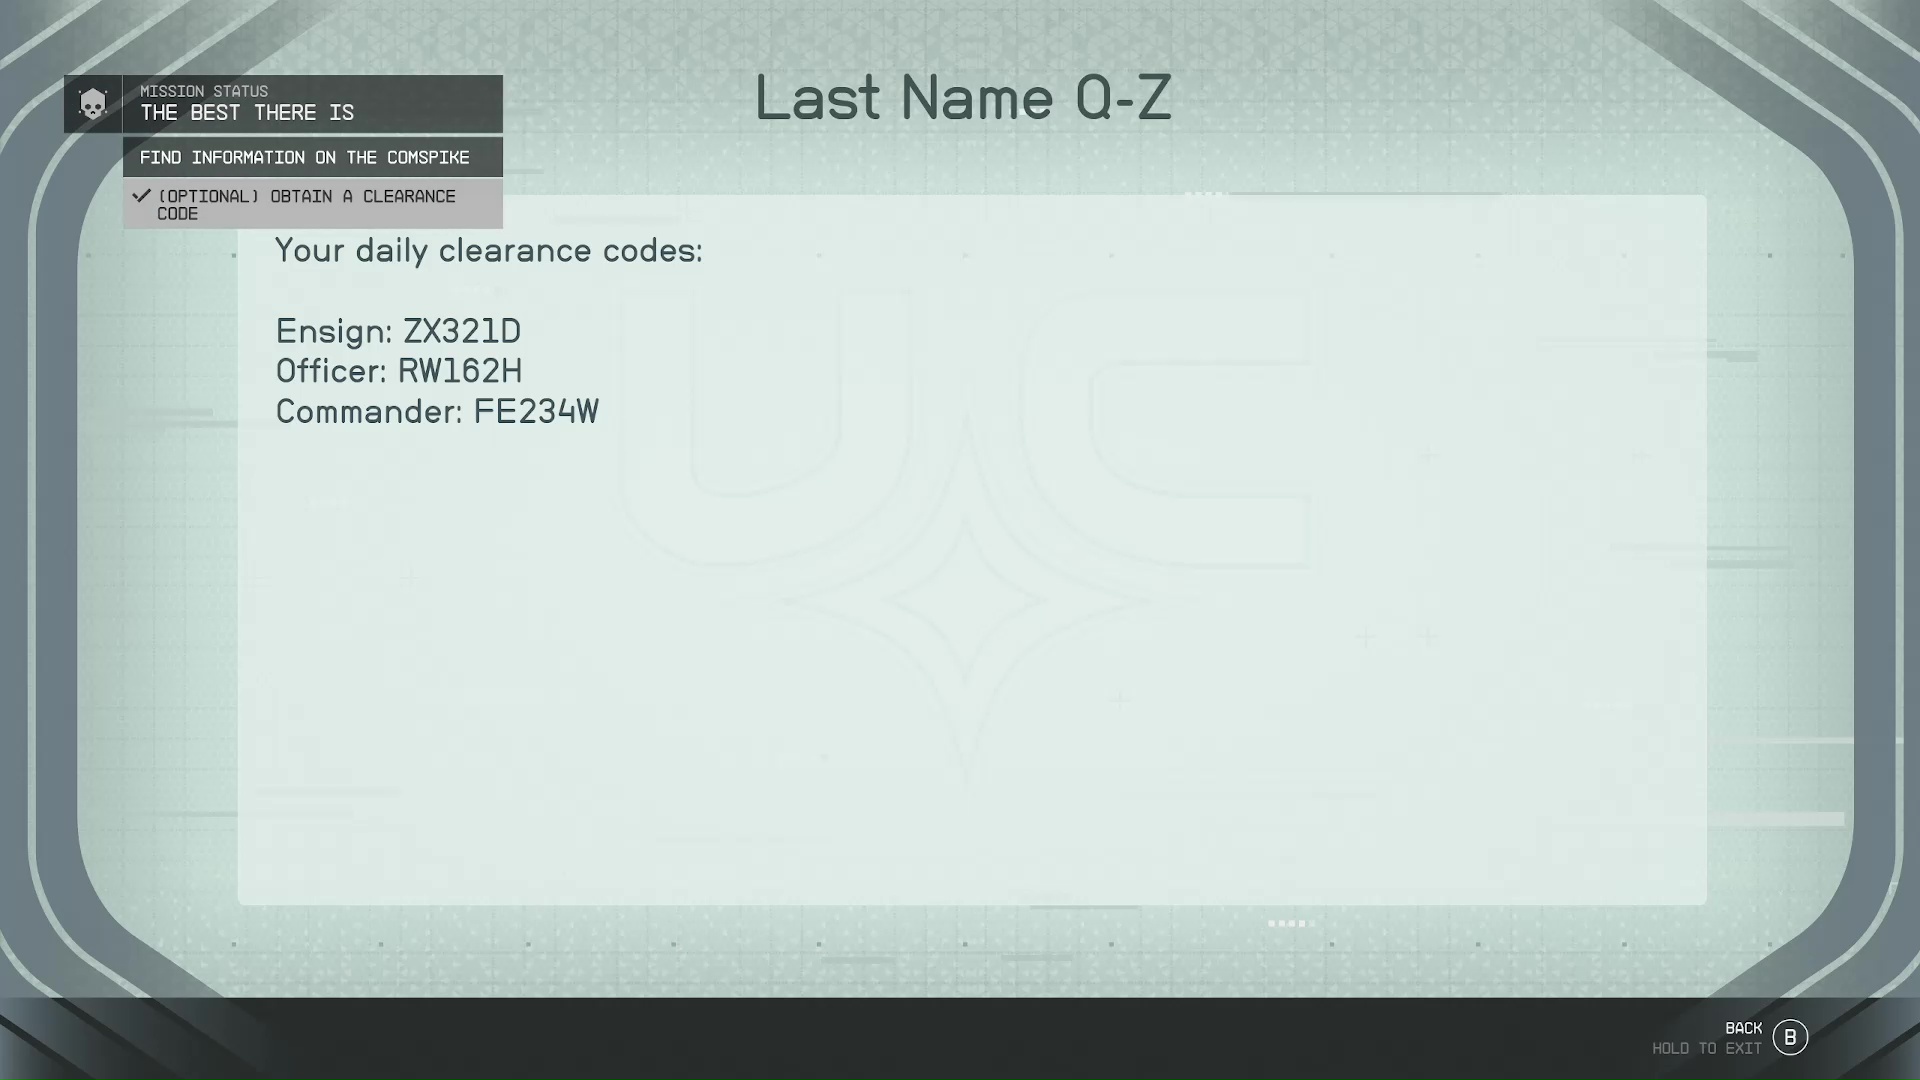
You will see a off to your left. Go around the corner to the left, past the vending machines, and you will be in the security room. There is a computer here that you can access after unlocking it with a digipick (Image 32). On the computer, click on ‘Last Name Q-Z’; you will see that your code is: Ensign: ZX321D, because you’re wearing Ensign Ziremi’s Uniform (Image 33).
Image 32Image 33
Note that if you stole a different Ensign Uniform, then you will have to remember a different code.
Follow the back out into the first room, and veer left to go through another security checkpoint. When you go through, be sure to give the guard the correct code! Afterward, you will be in the command bay. Across the big room is the door to archives.
Go left after entering, and you will see a Data Access Computer (Image 34). Navigate through the files like so: ‘Projects’–>’UCE-86 ComSpike’–>’Upgrade Security Clearance’–>’Project Lead and Permissions’ (Image 35).
Image 34Image 35
Go to Engineering Bay 4
If you look to your right, you will see the door to records (Image 36); you can go out through here. Inside is a computer that you can use to open the emergency door (Image 37). After it’s open, take a left and go through the door, then follow your scanner to the transport lifts. The lift to Engineering Bay 4 is the back right one.
Image 36Image 37
Find an Intercom and Speak to Huan
Once again, there will be an intercom where you get off the elevator. Huan will tell you that she is done unloading cargo, and she is leaving. She will stay in orbit and wait for you, but you have to find your own ship to leave the station.
Grab the Evidence and Locate the ComSpike
Leave the lifts and follow your scanner around the corner and down the stairs to Dr. Gabriel Vogel’s Office. Before speaking with him, go through the door in the back of his office. There is a piece of evidence on the cart to your right for the mission Burden of Proof (Image 38).
Image 38
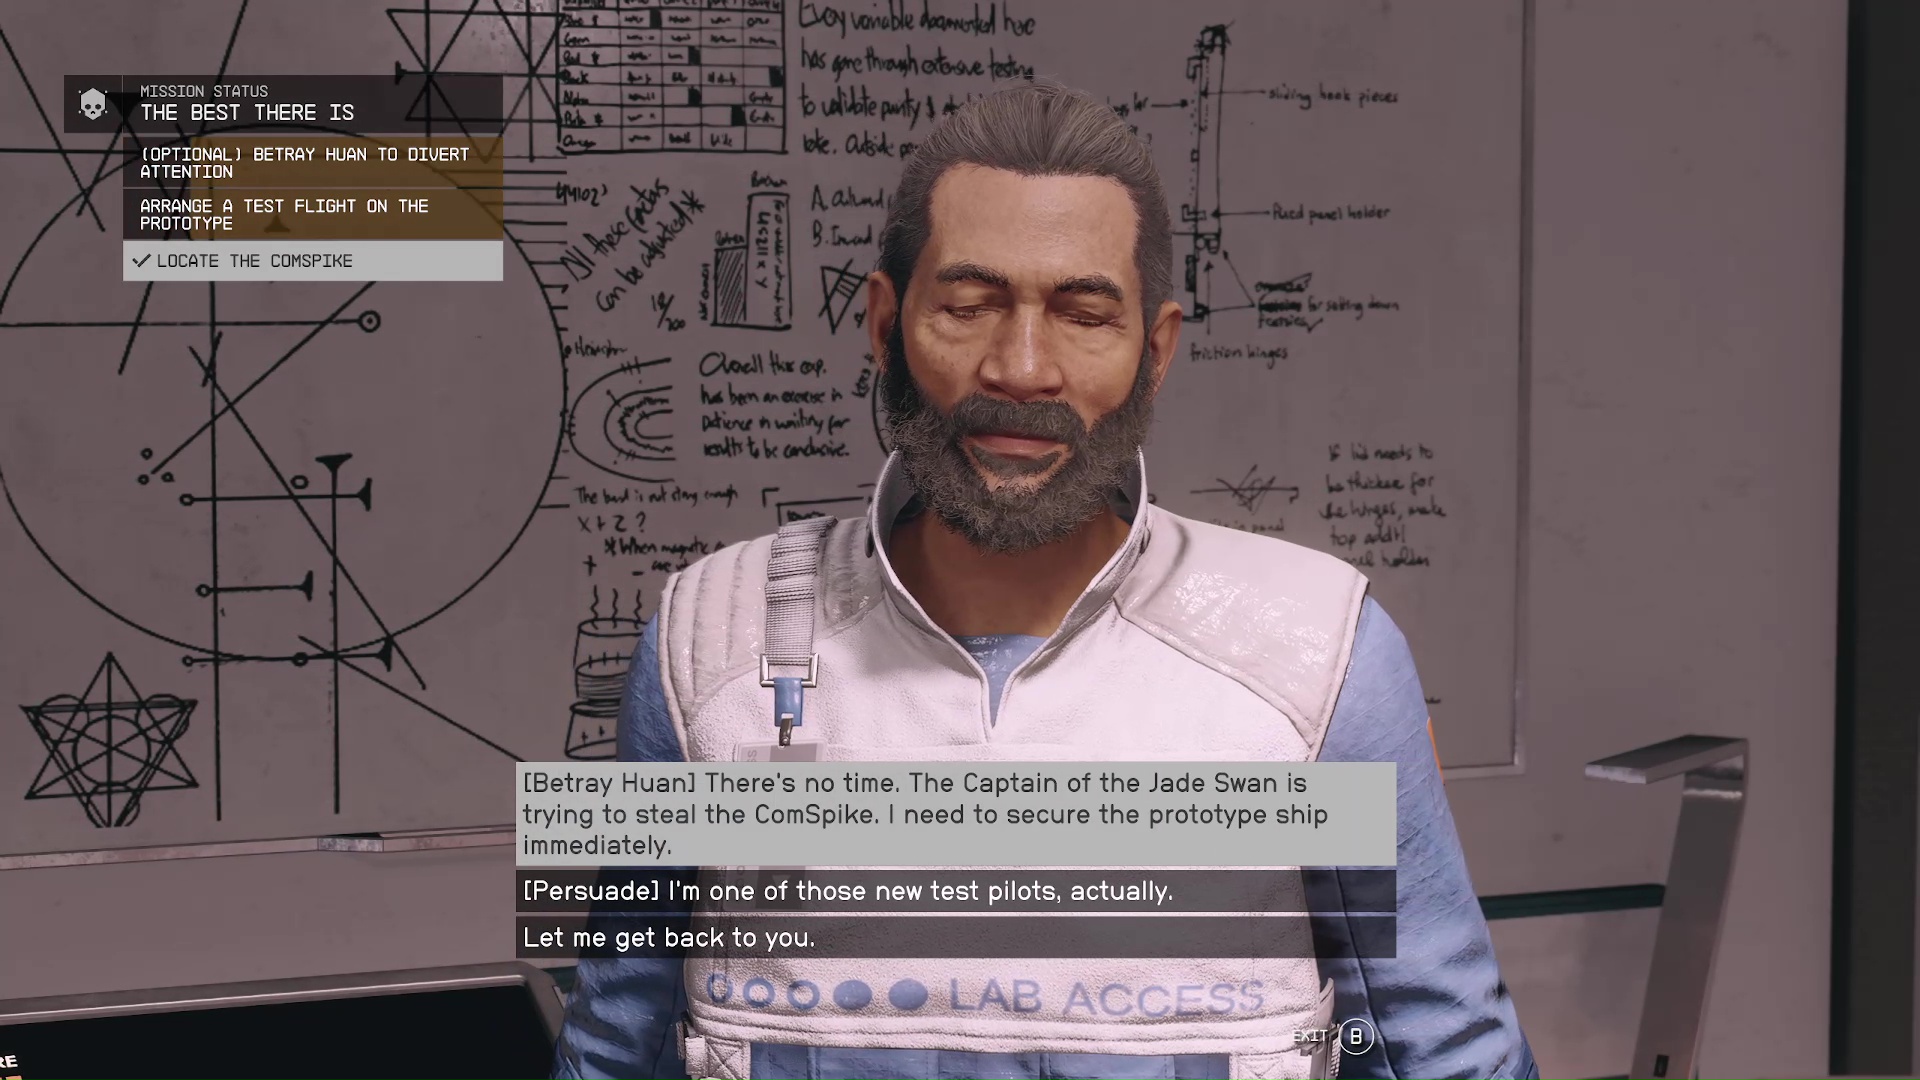
If you want to make sure you get a specific ending with Huan, then save before speaking to the eccentric scientist. Tell him that you’re with security, and here to pick up the ComSpike, and he will disclose that the prototype is actually a ship, and they need test pilots.
This is where you have an opportunity to persuade him that you are a pilot (Image 39). If you fail, then you have four options:
Shoot your way out – see ‘Locate the ComSpike’ under ‘The Shooting Route’ in the earlier section of the guide. This will get you kicked out of SysDef if you’re on their side.
Full Stealth – This path is difficult and high risk. It requires you to pickpocket the doctor and possibly persuade guards.
Betray Huan – Tell the doctor that Huan is trying to steal the ComSpike. He will let you go to secure and test flight the ComSpike yourself while Huan is chased away.
Save Scum – Reload the game to before you speak to the doctor and retry the persuasion attempt. Do This until you succeed and he lets you pilot the prototype ship.
Image 39
Escape SY-920 in the Prototype Ship (Test Pilot)
Since there are several ways for you to end up test piloting the prototype off the station (persuading scientist, betraying Huan, and save scumming), let’s go over that first. After speaking with the Doctor, he will give you the flight control password, and the keycard to get to the ship. With those things acquired, you just need the pilot suit.
Find a Pilot Uniform
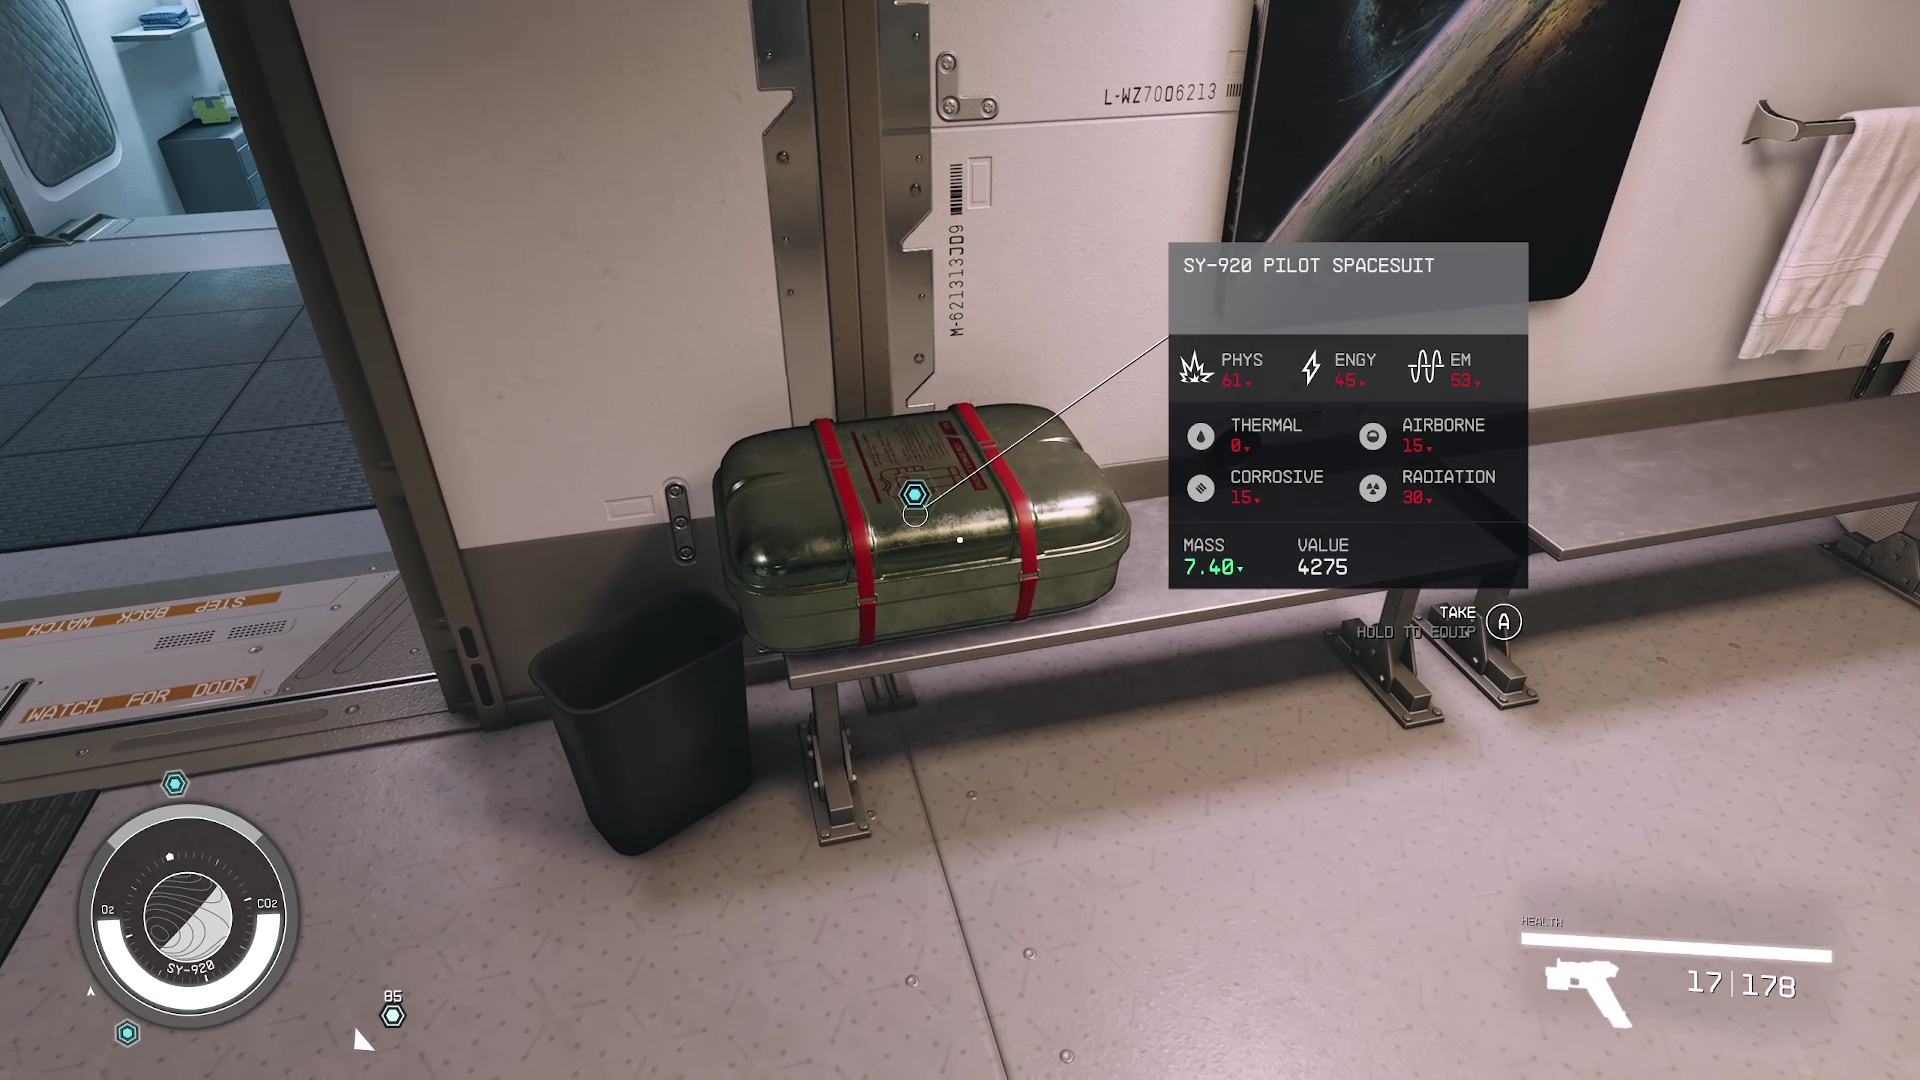
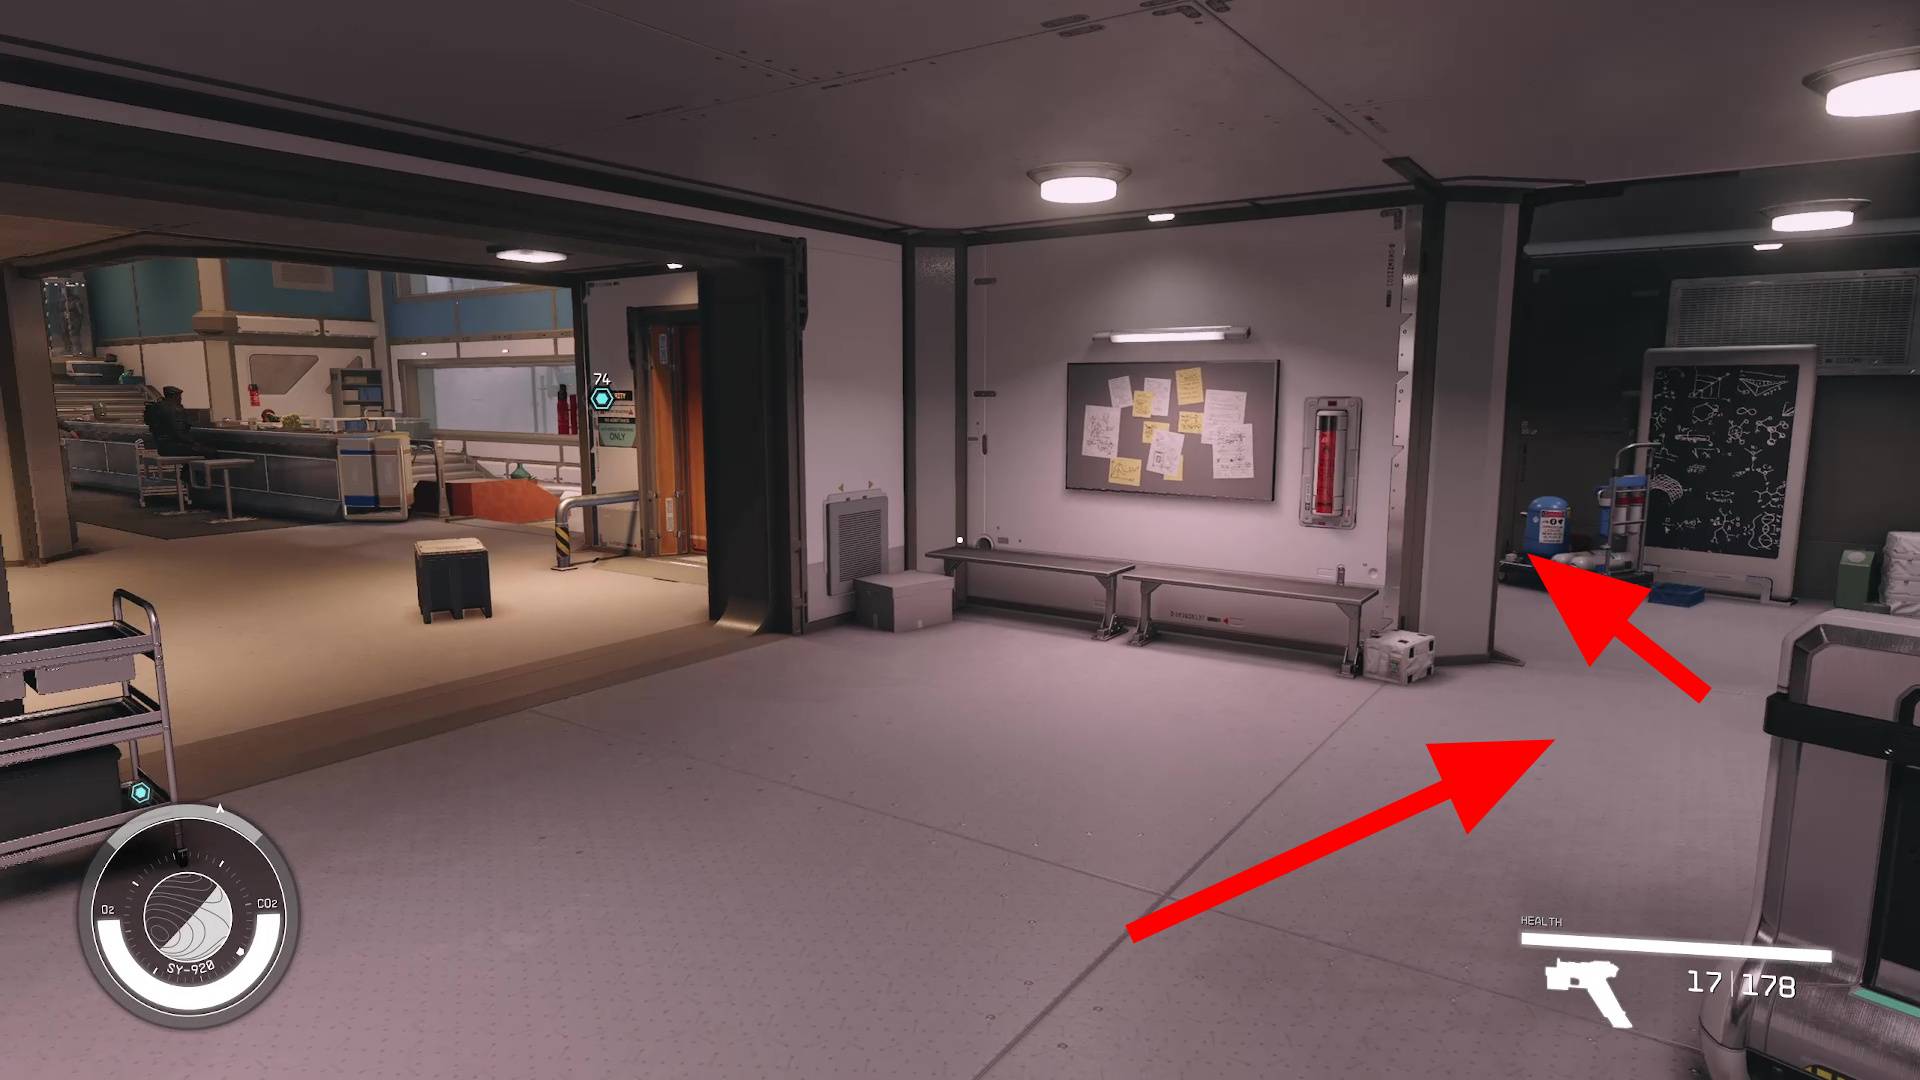
Leave his office and go right, following the signs for ‘Lockers’ and ‘Restroom’. There will also be a above the uniform in the lockers to guide you to it (Image 40). Snatch it up, and put it on, so you are disguised as a pilot. Go back out of the lockers, and you will see a security checkpoint leading to the hangers (Image 41). Tell the guard that you have a test flight coming up, and they will let you through.
Image 40Image 41
Schedule a Test Flight
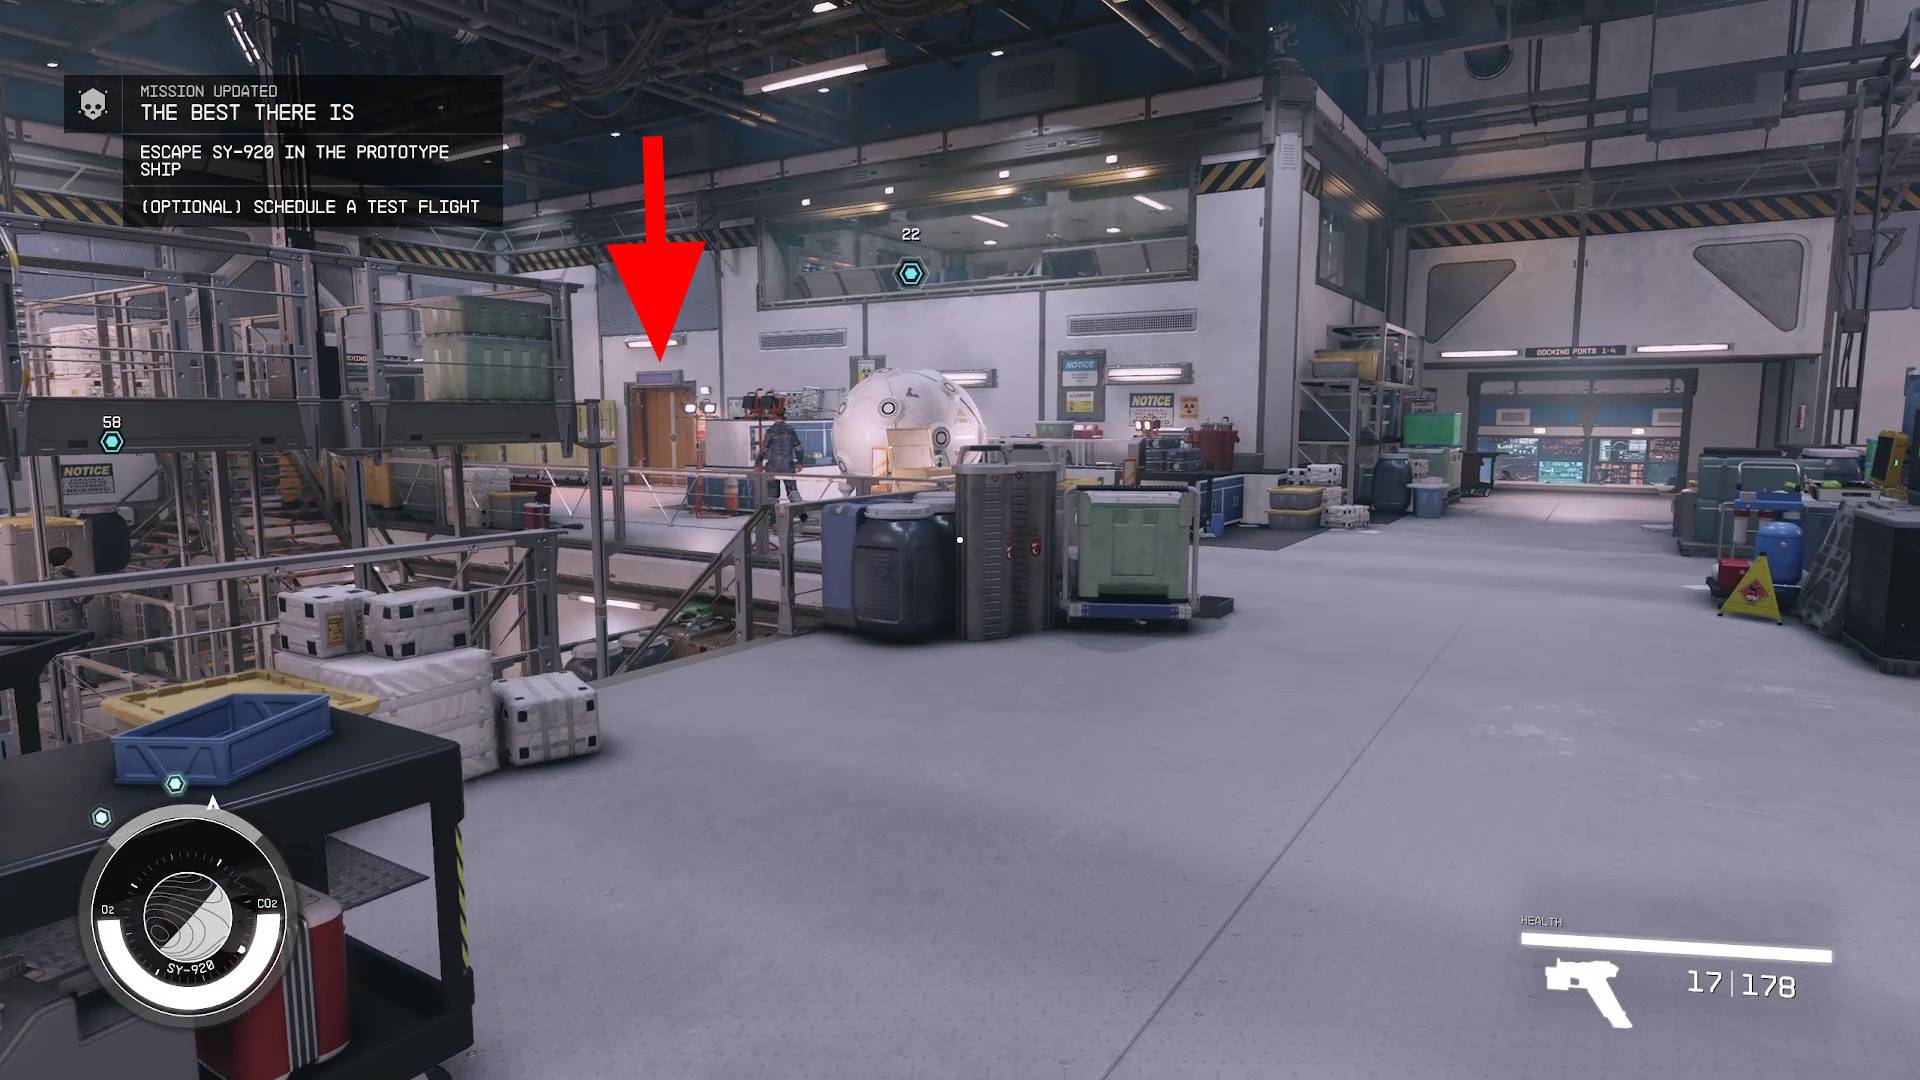
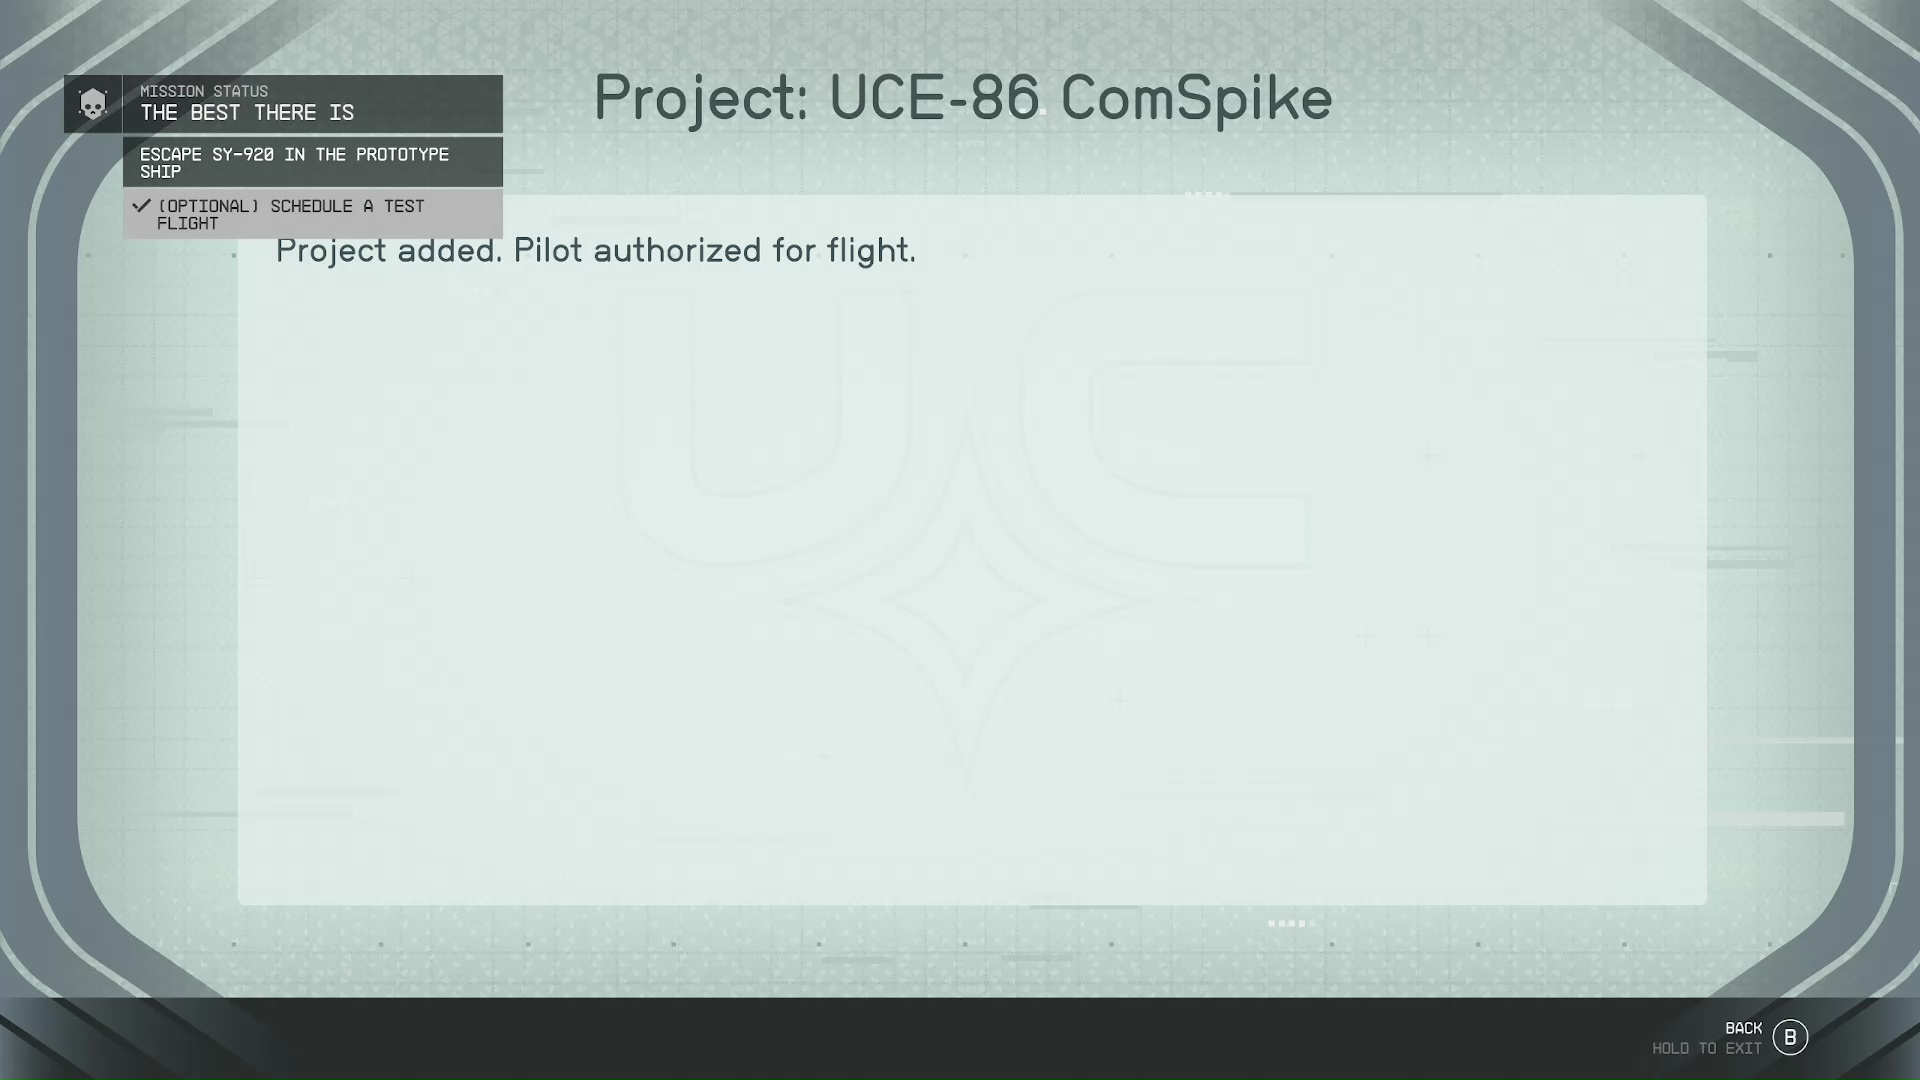
Once in the hanger, you should schedule a test flight. You will see a above at the elevated area in the hanger (Image 42). There’s no risk to doing this task, and it results in no one chasing you when you’re fleeing – a clean getaway. At the Flight Control Computer, click on ‘Select Project to Add’–>’Project: UCE-86 ComSpike’ (Image 43).
Image 42Image 43
Having done that, all that’s left is following the to hanger bay 8, getting into the ship’s cockpit, undocking, and flying the prototype to The Key.
To continue this guide to the end, skip down to ‘Return to The Key and Speak to Delgado’.
Escape SY-920 in the Prototype Ship (Full Stealth)
This is probably the hardest way to end this mission, and the risk of failure is high unless you have excellent persuasion, sneak, and pickpocket. Also, if you are sided with SysDef, then betraying Huan won’t matter, so you might as well double-cross her instead of trying this path.
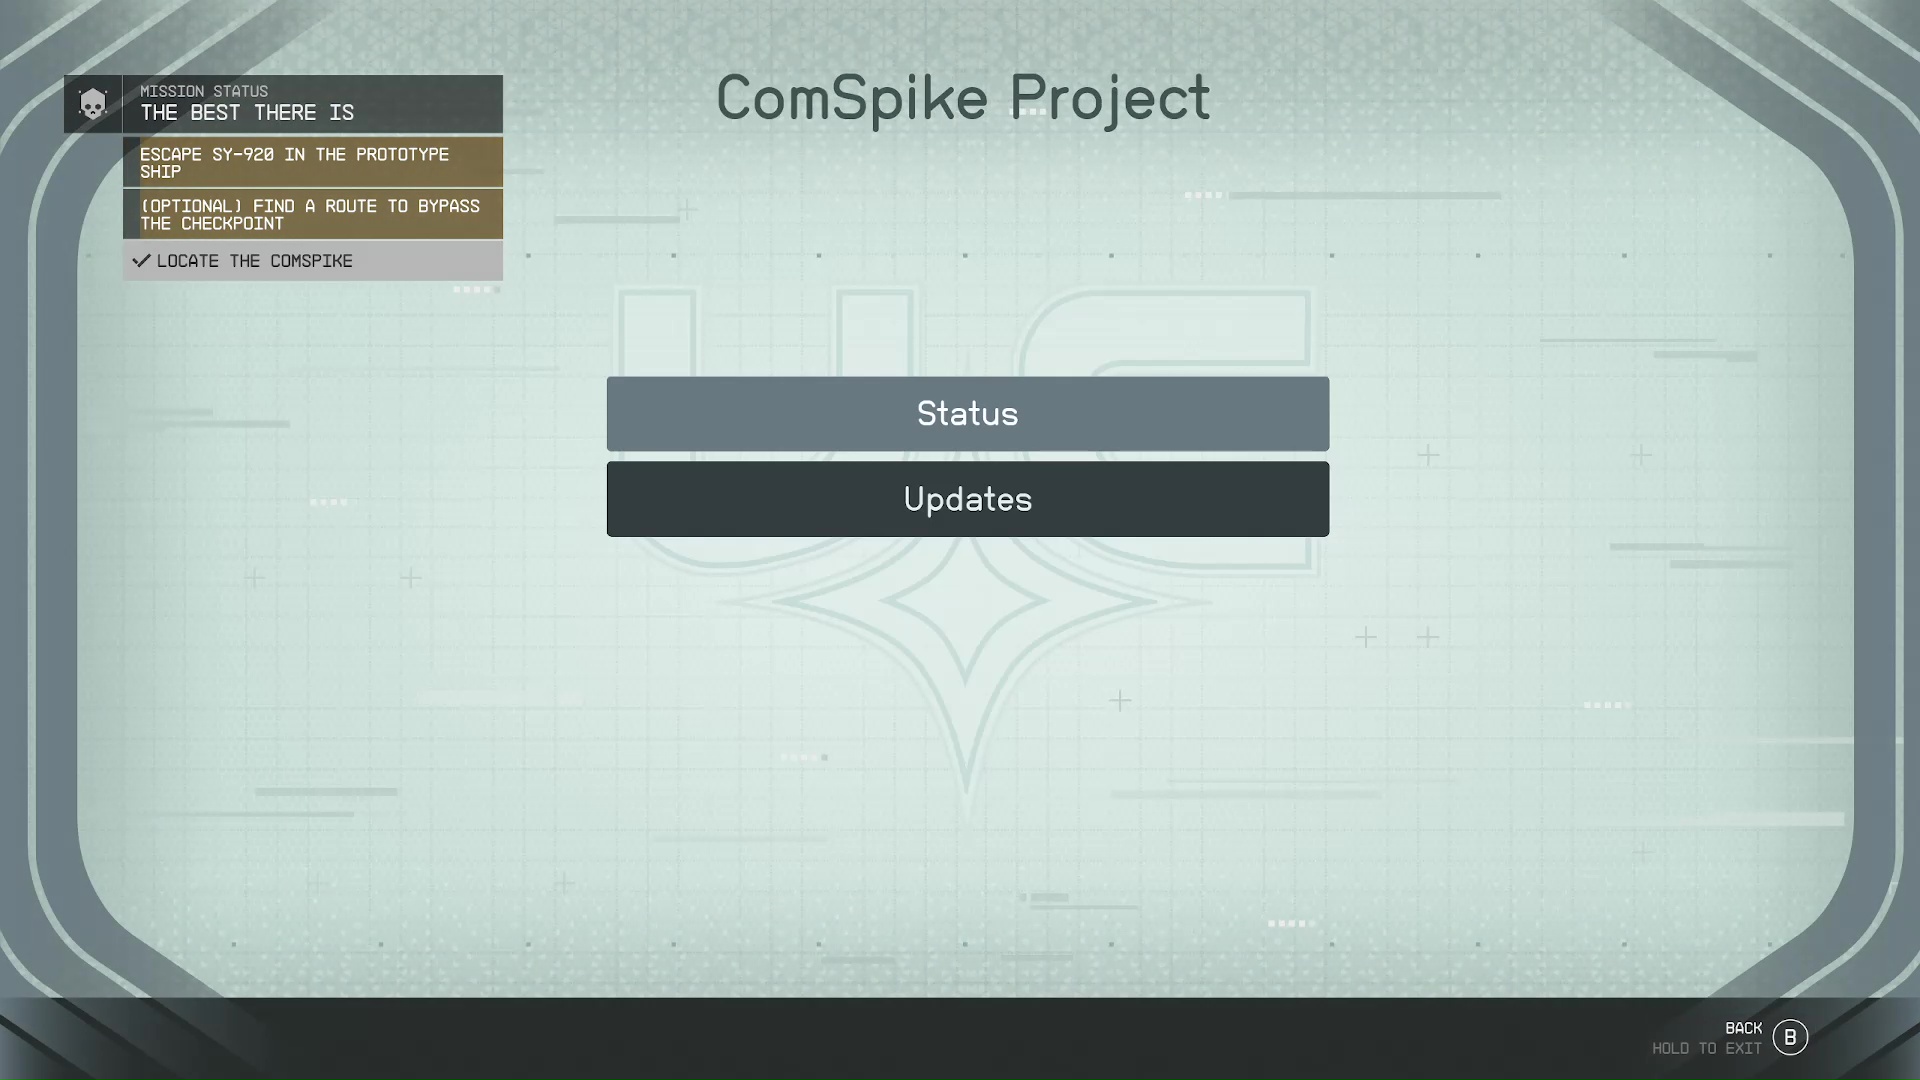
First, you have to pickpocket the Dr. Gabriel Vogel and steal the flight control password and the keycard (Image 44). Close the door to his office and take your time sneaking up behind him, since he moves around a lot. When the items are in your possession, you can go to either of his computers and click on ‘Updates’ to locate the ComSpike (Image 45).
Image 44Image 45
Find a Route to Bypass the Checkpoint
Since you have everything you need, you just have to sneak through the vent into the hanger. However, be careful from here on out, because all the guards will start looking for someone suspicious. If you are questioned, you have to pass a persuasion check or enter into combat.
The vent is located in the restroom by the lockers (Image 46), which is to the right when you’re leaving the doctor’s office. There is a pilot in the lockers, and he will stop you for questioning, so avoid him!
Image 46
In the hanger, you will want to simply beeline to hanger 8; it is marked with a . You might be tempted to use the password to schedule a test flight, but you will be questioned if you go up to flight control – don’t risk it. There is one last guard in the hallway leading to the ship. Wait for a good time to go around him unseen, then you can get to the airlock of the ship.
After you get onto the ship, and undock, you will want to immediately go to your star map and grav jump to another system. If you don’t, your ship will be shot down.
Return to The Key and Speak to Delgado
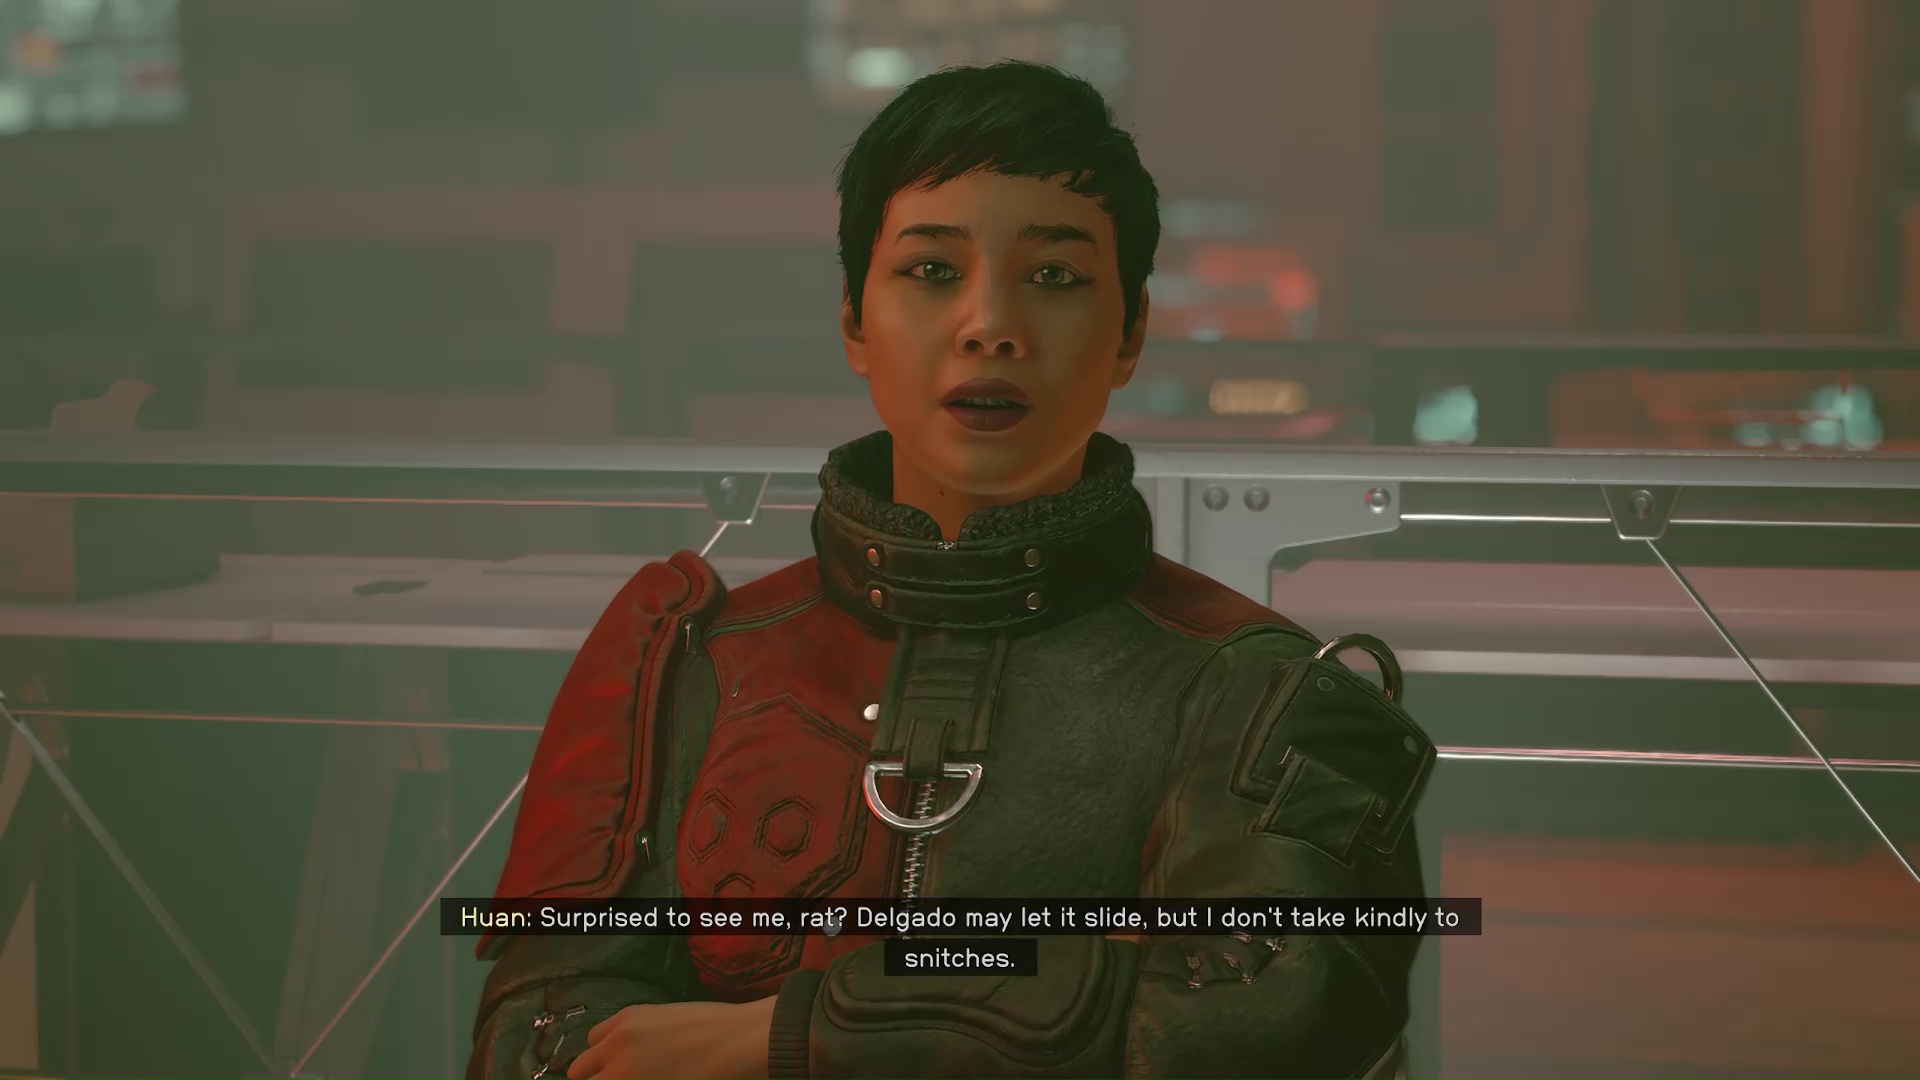
It might take you a couple of jumps to get to The Key if you don’t know the space routes. After you have docked and gone to the central area, you will either have a marker to go to the Last Nova or up to the command center. Both of these paths lead to Huan, who will either buy you a drink at the bar (Image 47), or call you out for betraying her (Image 48).
Image 47Image 48
When Huan’s conversation is over, head up to talk to Delgado. He doesn’t care if you double-crossed Huan, he’ll just be happy that you have the ComSpike. Get all the details for the next mission (stealing more stuff on Neon), then you can leave.
Proceed to the UC Vigilance
If you’re still sided with UC SysDef, then you will have to go and report to Commander Ikande. The Vigilance will have moved again, so make sure you use your mission page to plot the course. If you shot up the station, then you will be kicked out of SysDef. Funny enough, when you get kicked out: you still get paid, you’re only in jail for one day, and you don’t lose any XP.
If you did the mission stealthily, then he will be happy. Like always, you can use this time aboard the Vigilance to turn in your two new pieces of evidence to Toft for the Burden of Proof mission.
Kelson is a spud head from out west. He is most happy when holding a milky tea with too much honey and playing a sprawling role playing game or reading a fantasy novel. His video game tastes vary but his main genres are looter shooters, RPGs, and real time strategy games.