In this story mission walkthrough, we’ll guide you through a jaunt across the Sol system, in which Sarah Morgan helps you hunt for another mysterious artifact.
This quest begins in New Atlantis, in the MAST District — specifically, in the Constellation Lodge. Since you’ve already completed One Small Step, you can easily fast travel to the Lodge by setting a course via the Mission Log. You’ll wind up outside the lodge, and you can head inside and find Sarah to begin the mission — as long as you’ve got the mission selected, she’ll be highlighted by the blue objective marker.
Talk to Sarah
Once you find her, speak with her and choose the first dialog option, “I’m ready”. After a few more dialog options, Sarah will say she’s sticking with you, and you’ll get a warning that “Sarah will be locked as your follower if you continue”. To actually start the mission, select “Got it. You and me until we get that Artifact”. You’ll go through a bit more dialogue, and then it’s time to head to MAST headquarters.
If you haven’t already, make sure you put Vasco on your crew before leaving the Lodge — assign him to the Frontier and he’ll provide some nice buffs to your ship systems.
Talk to Sarah’s Contact
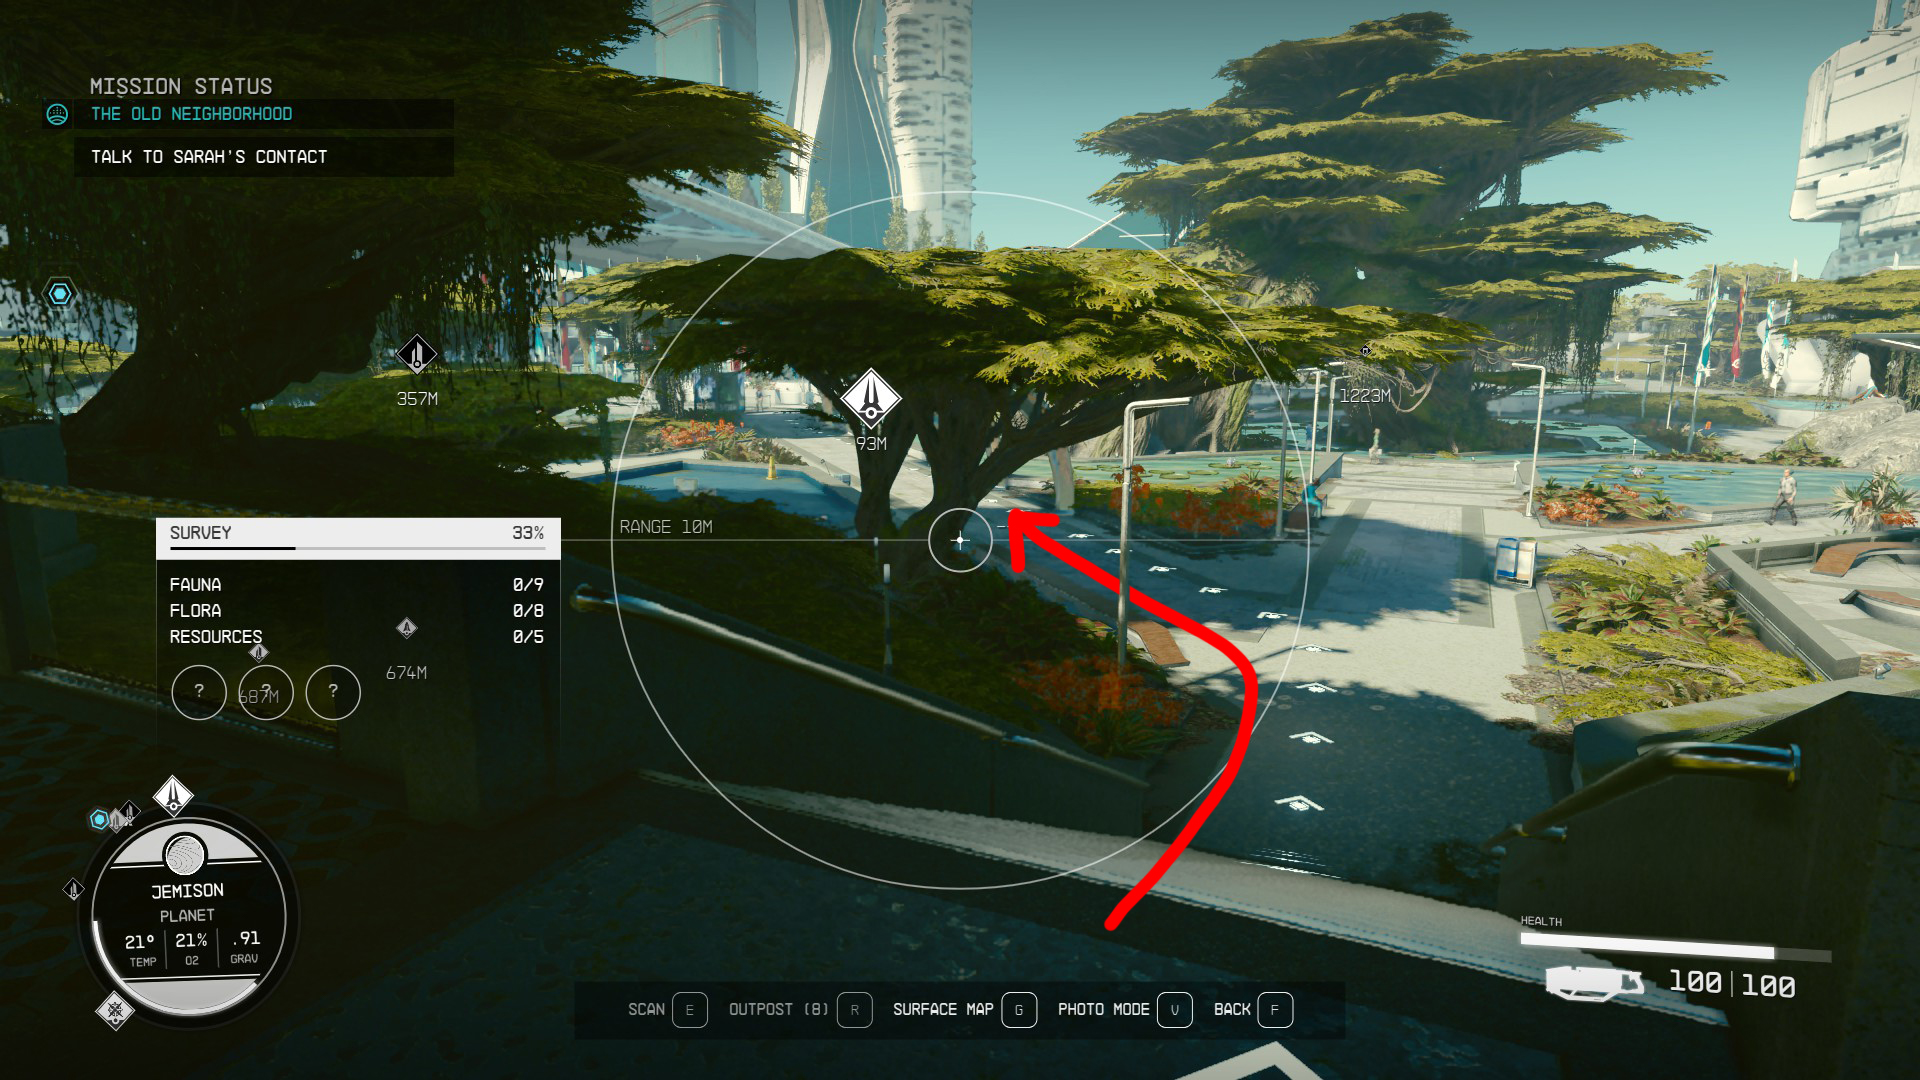
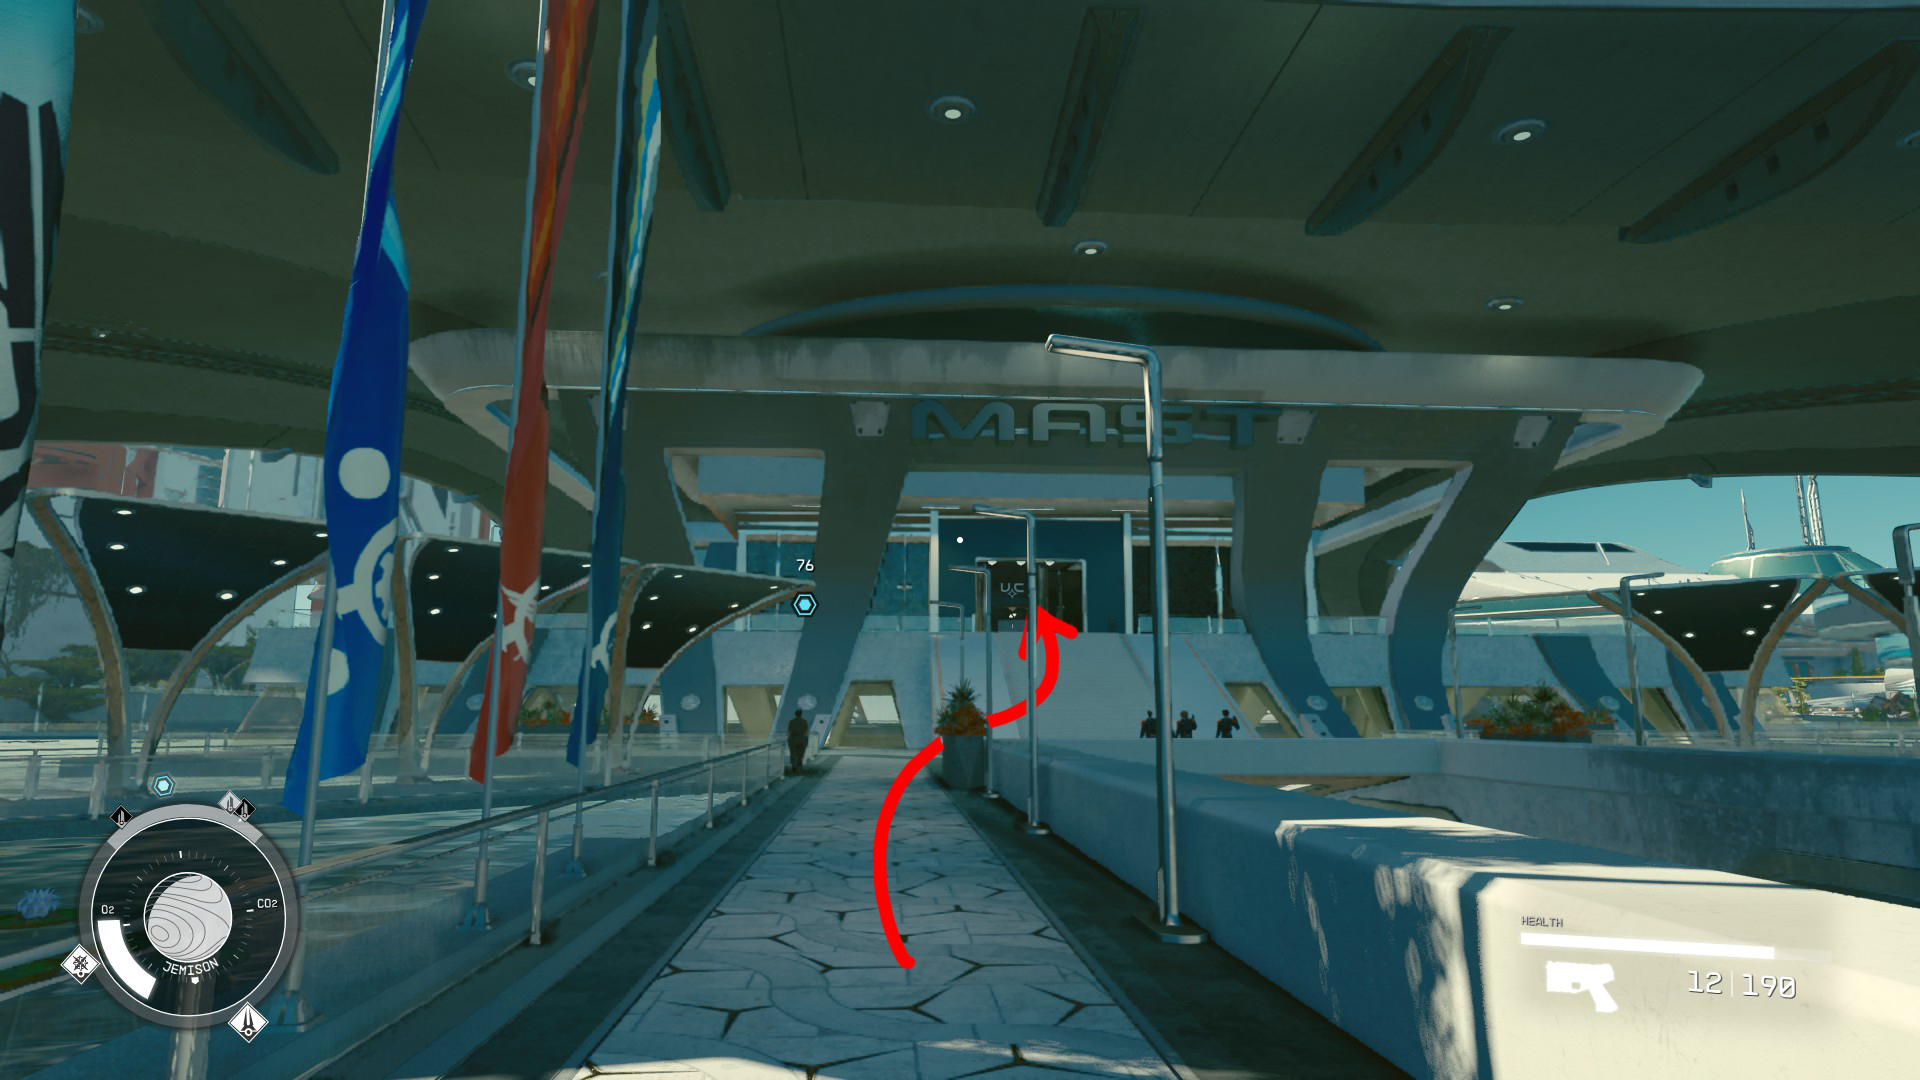
You’re in charge now, so lead the way out of the Lodge, following the objective marker. Outside, you’ll want to take a right where the path forks (Image 1), and then continue heading generally towards the objective marker, down the stairs (Image 2) and towards the large MAST headquarters building (Image 3). As always, if you get lost, just pull out your scanner ( /) and look for the white arrows on the ground!
Image 1Image 2Image 3
Inside MAST, turn left and walk over to the desk, where you’ll find Commander John Tuala. When you speak with him, he’ll ask if you want to join the Vanguard (for more info, see Supra Et Ultra). You can chat with John about the Vanguard, but eventually you’ll need to pick a dialog option that gets John to tell you what he knows — he’ll give you some info on a Vanguard volunteer named Moara, who patrols the Sol system. Again, there are a few options to progress the dialog — keep talking with John as long as you want, and eventually you’ll be able to thank him/say you’re leaving, and end the conversation (and your mission objective will update.
Ask About Moara in Cydonia
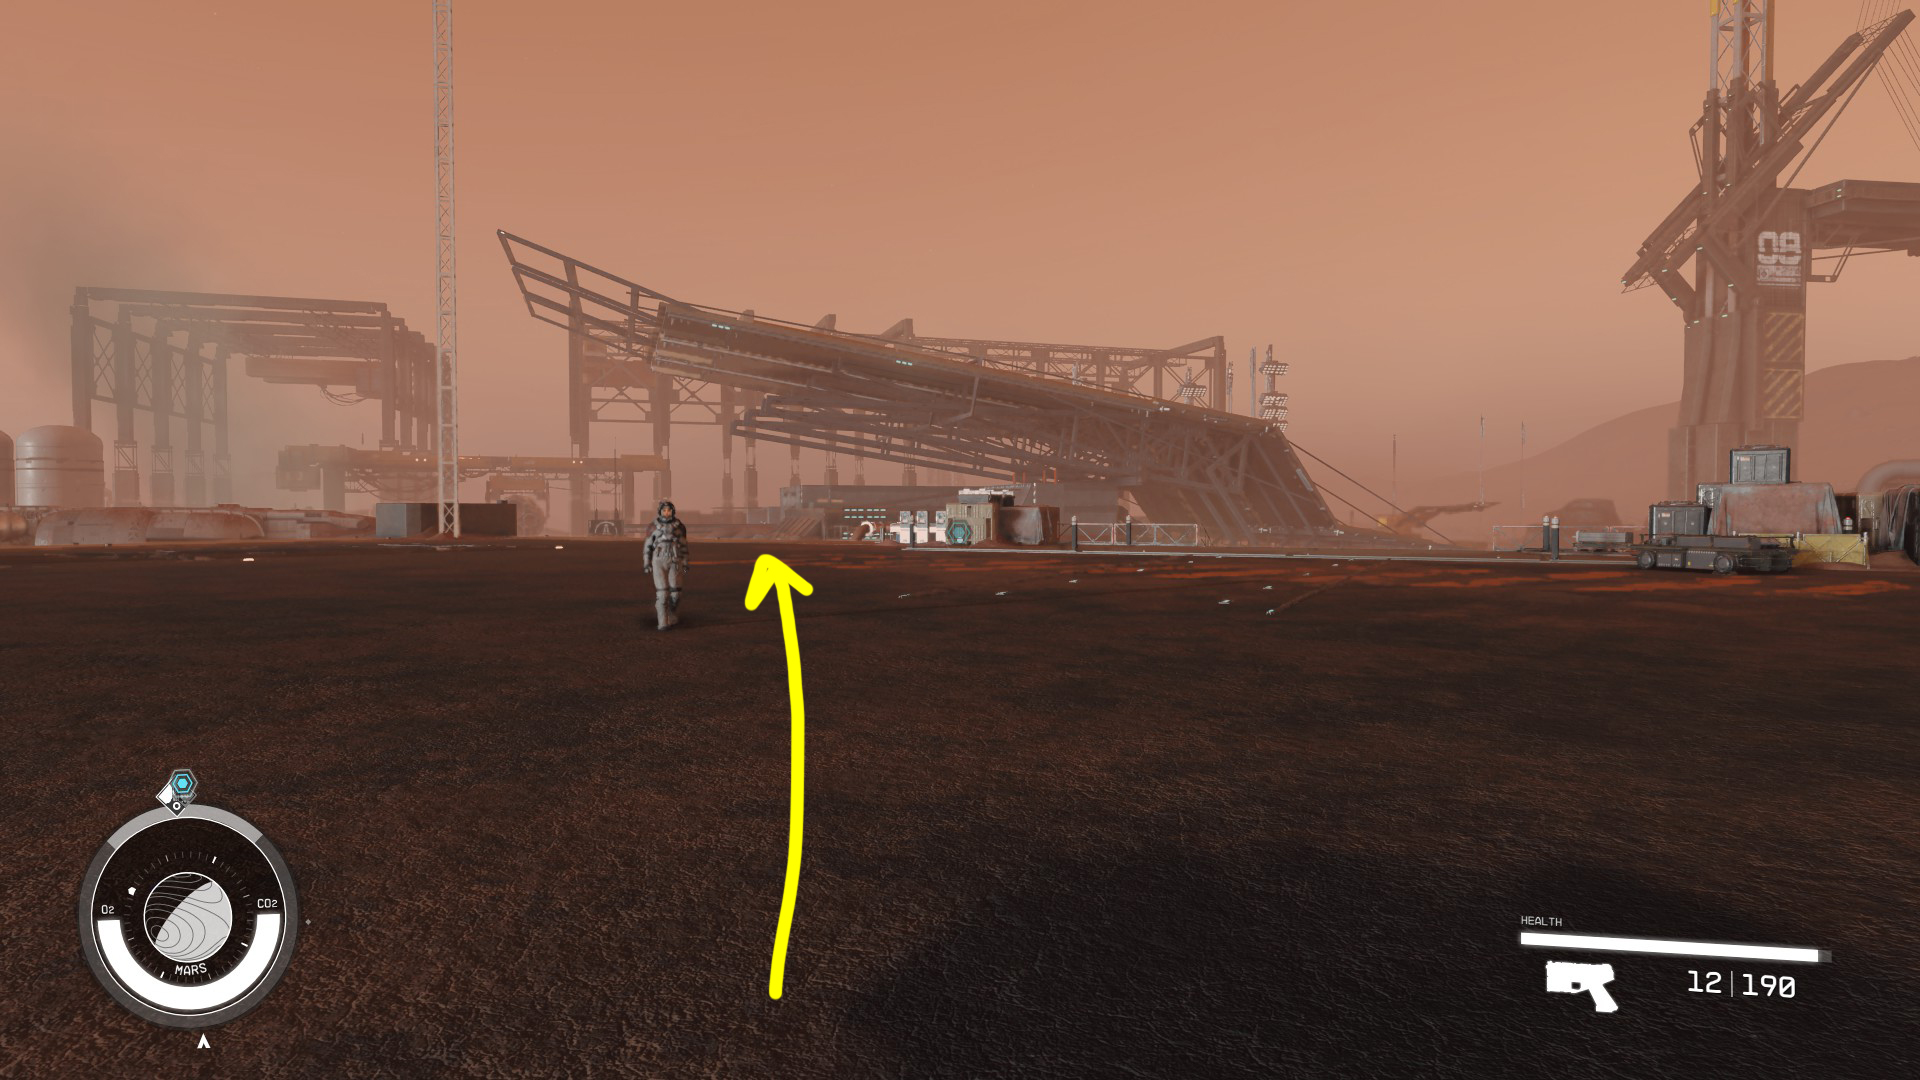
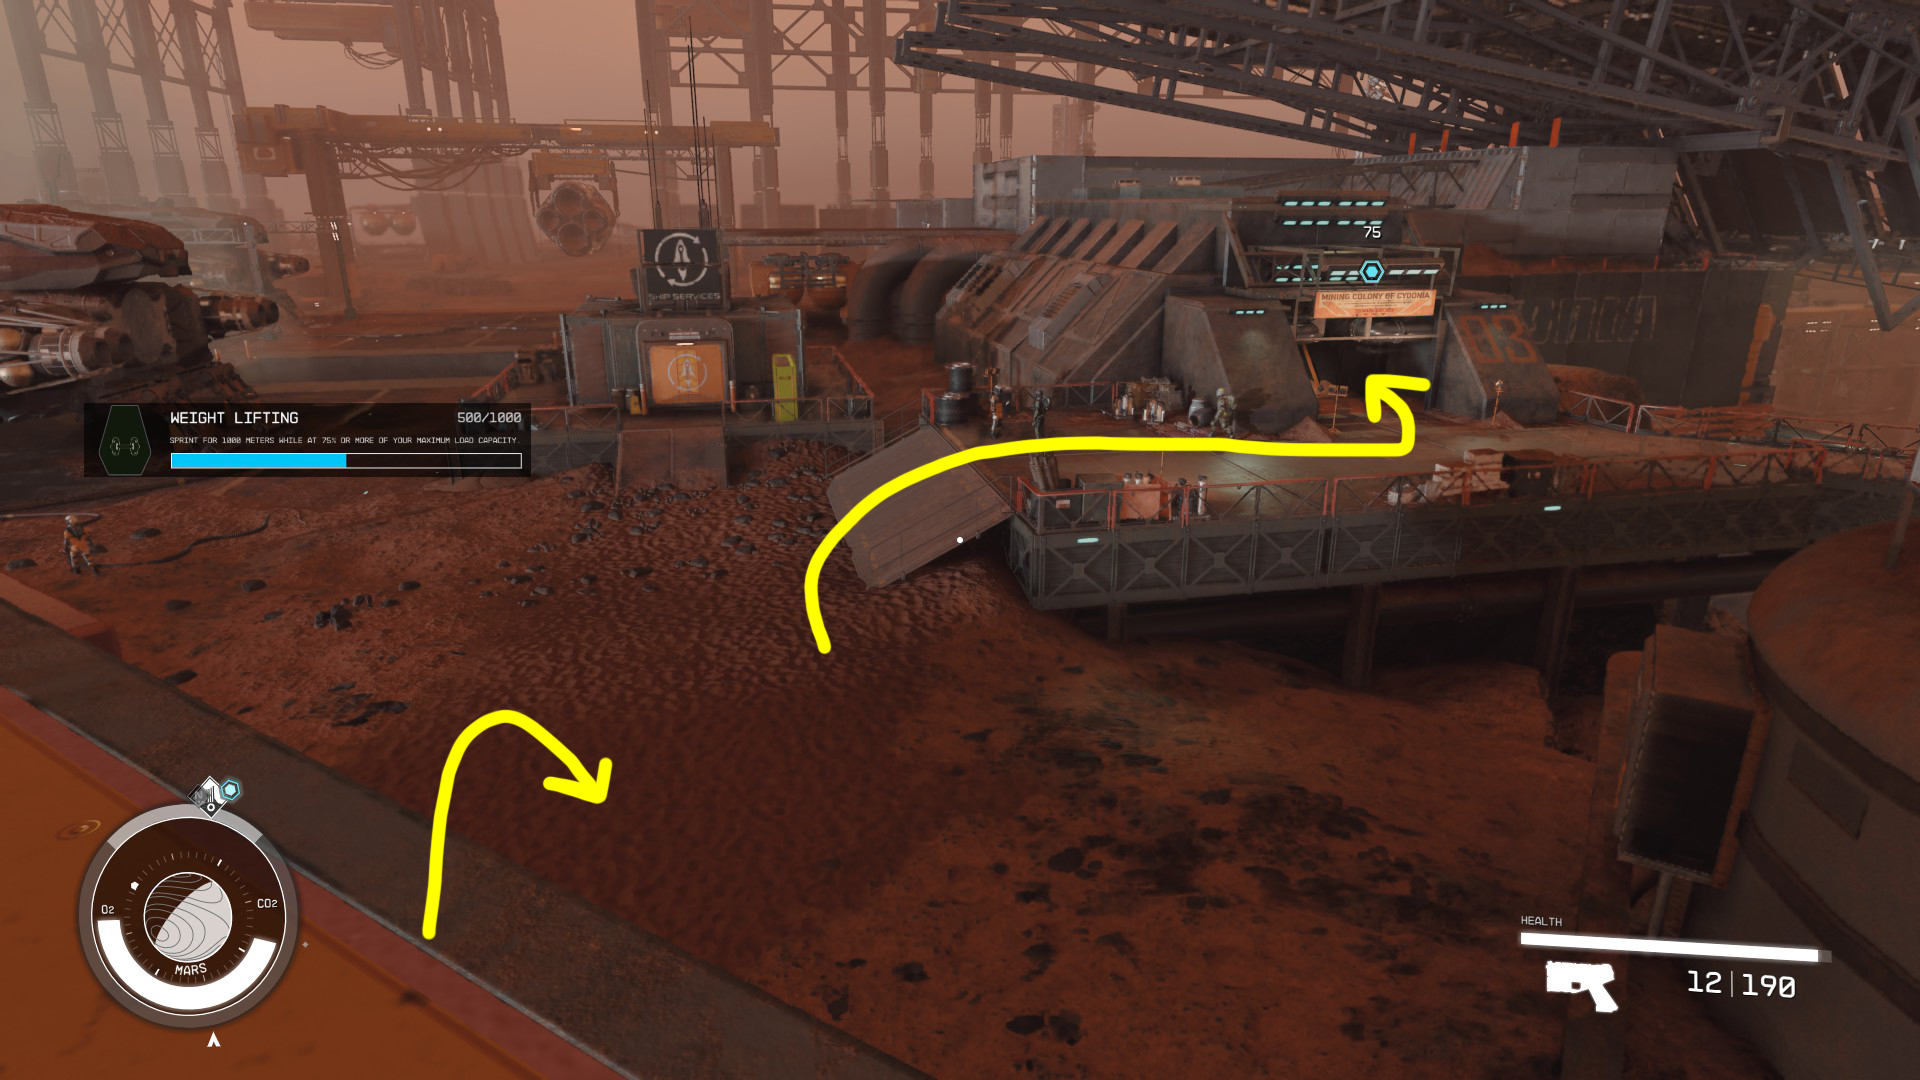
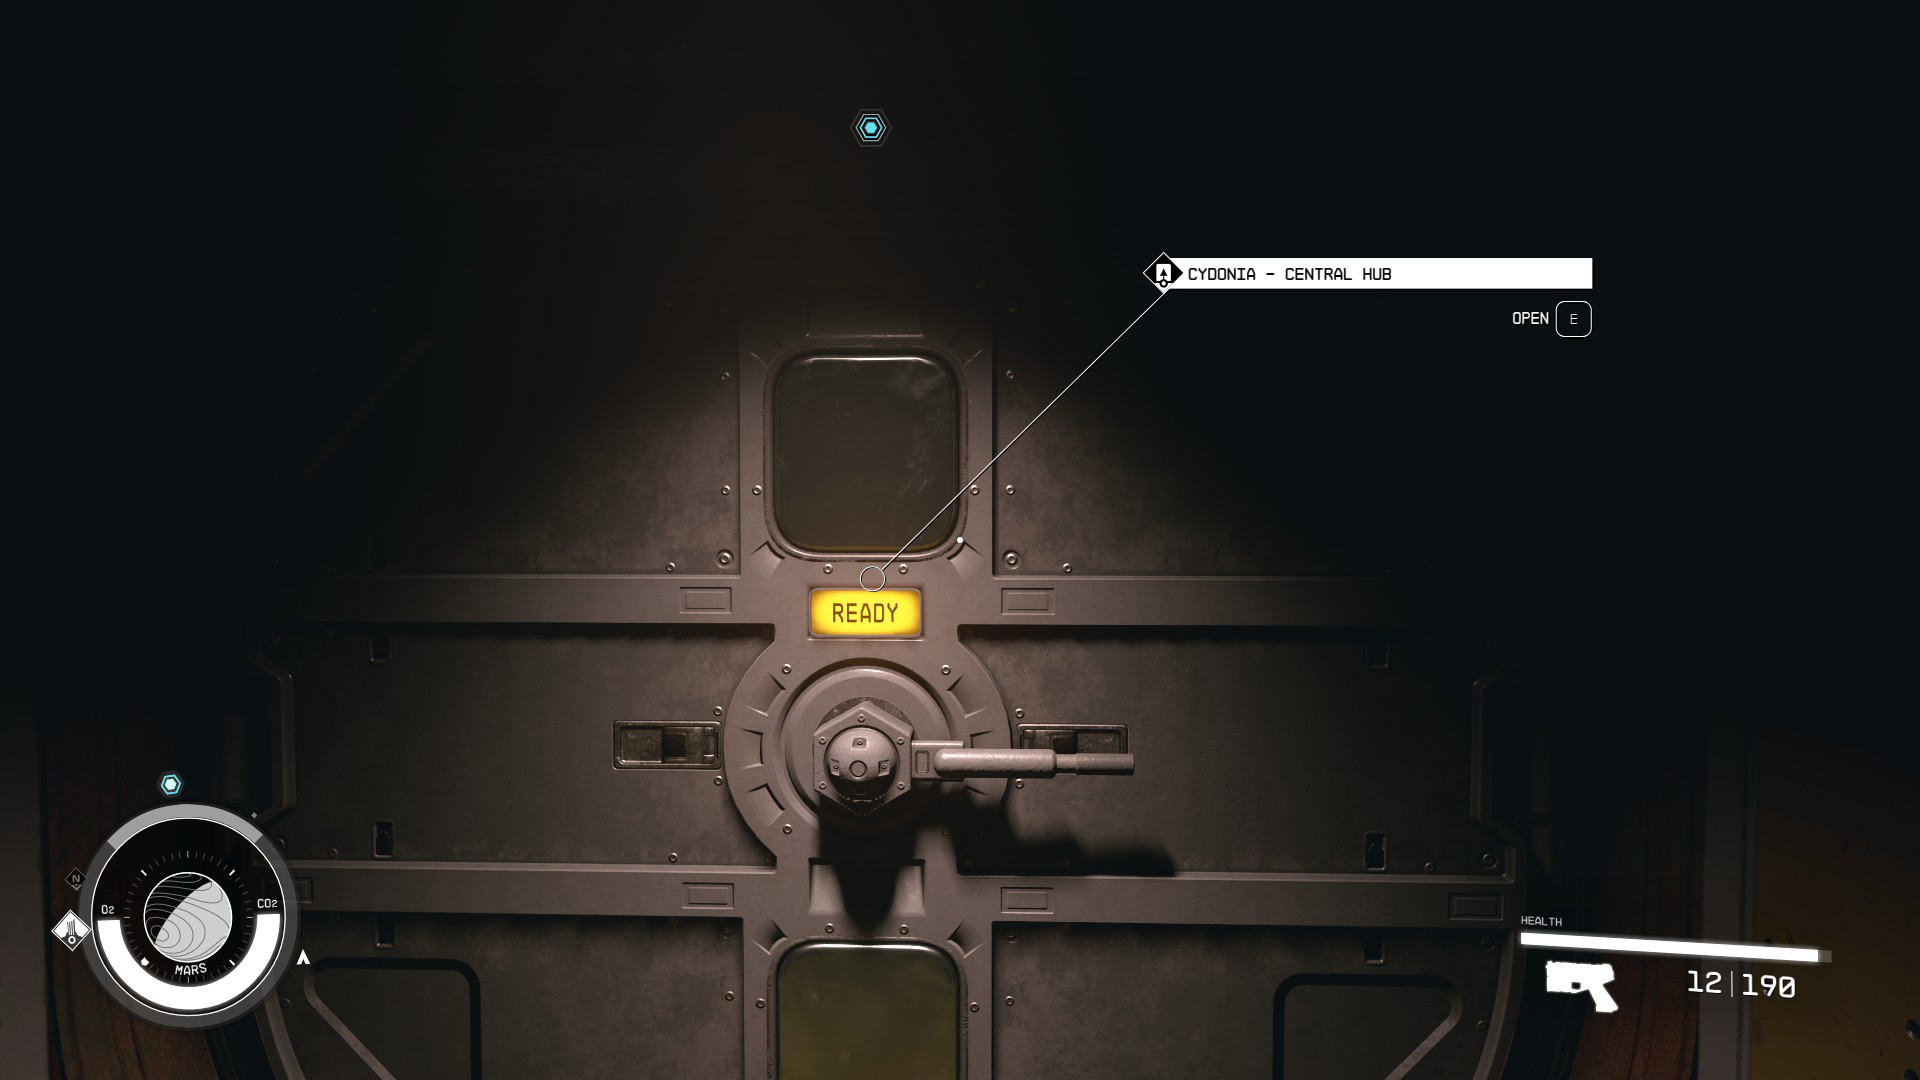
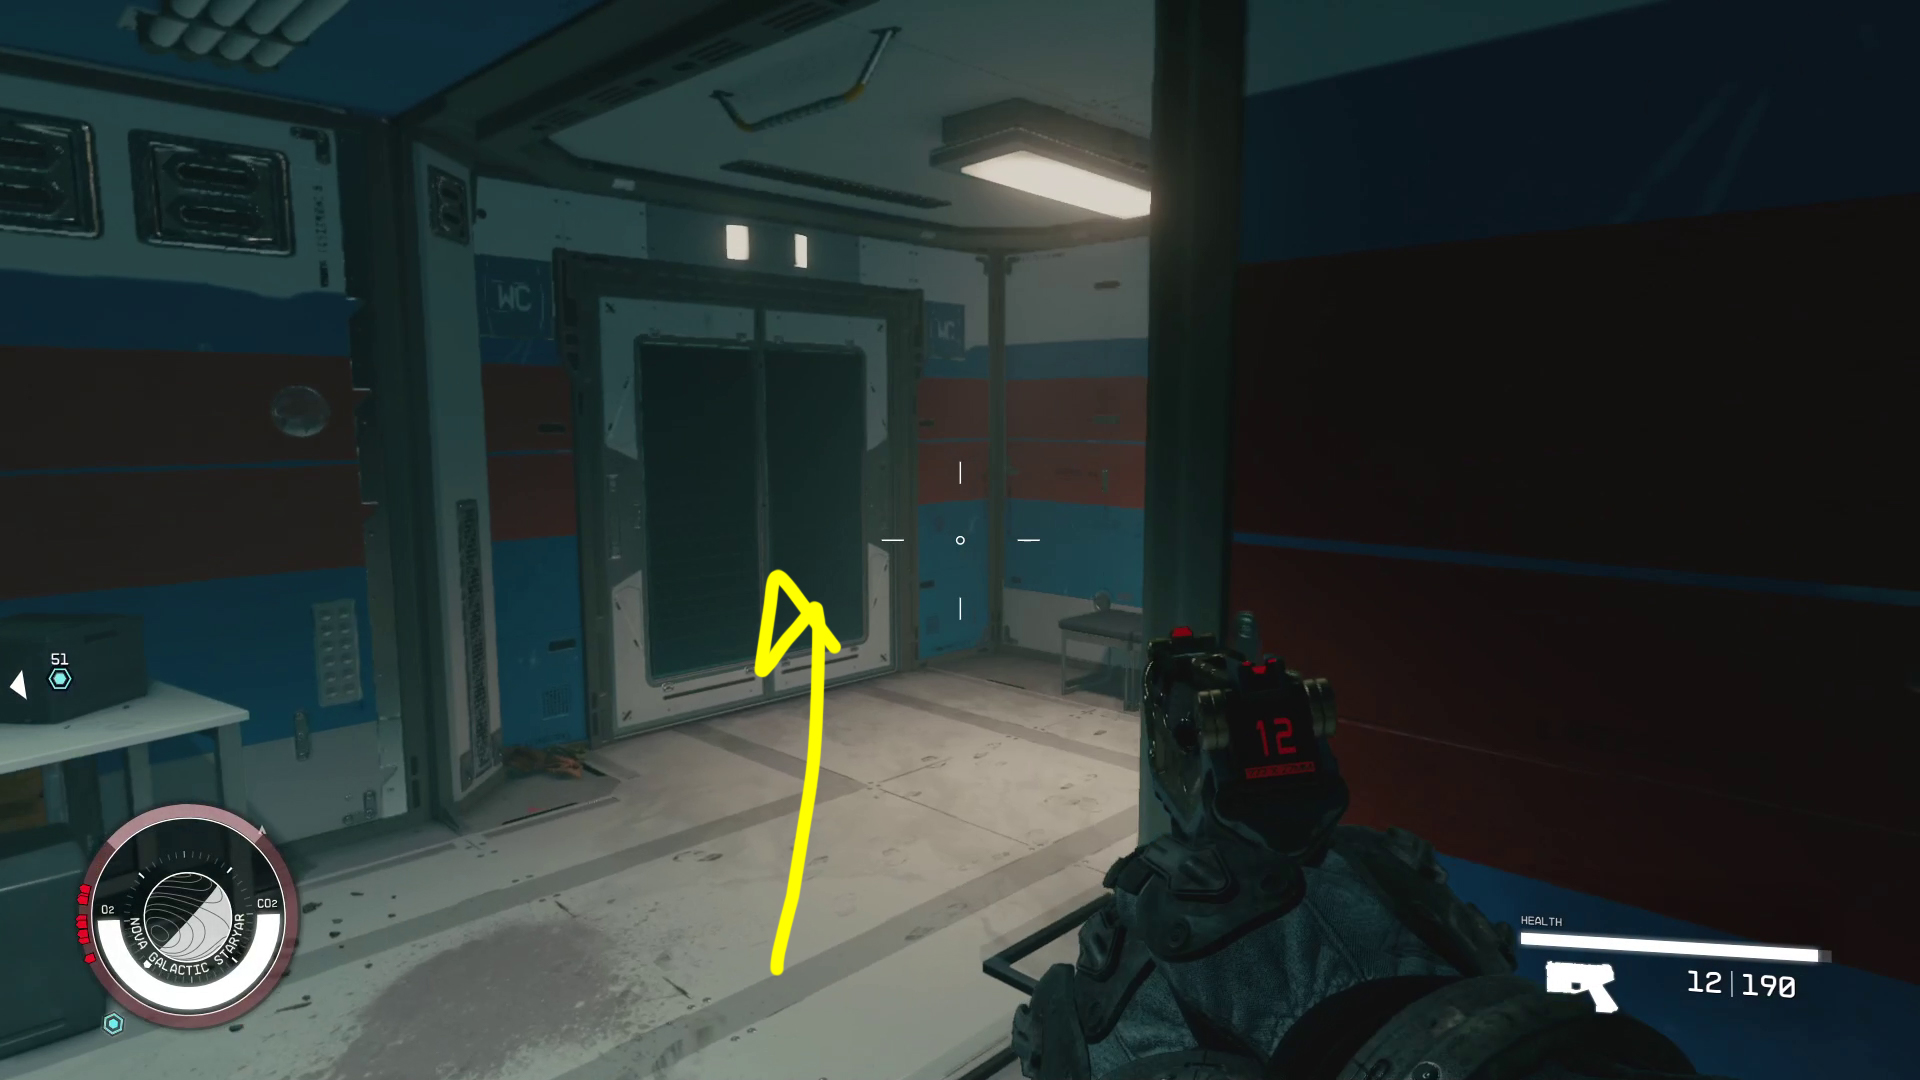
Open your Mission Log, select The Old Neighborhood, hit the Set Course button, then hold the Jump button to travel to the Sol system. After jumping, you’ll be scanned — once you’re cleared to land, repeat the process of opening your mission log and setting a course, then land on the planet. Exit your ship, and then decide if you want to take the scenic route or not. If you want to check out a bit of the planet, follow the course your scanner gives you — otherwise, head slightly left across the landing pad (Image 4), then jump down and go into the tunnel marked “To main airlock” (Image 5) and go through the door at the end of the tunnel (Image 6).
Image 4Image 5Image 6
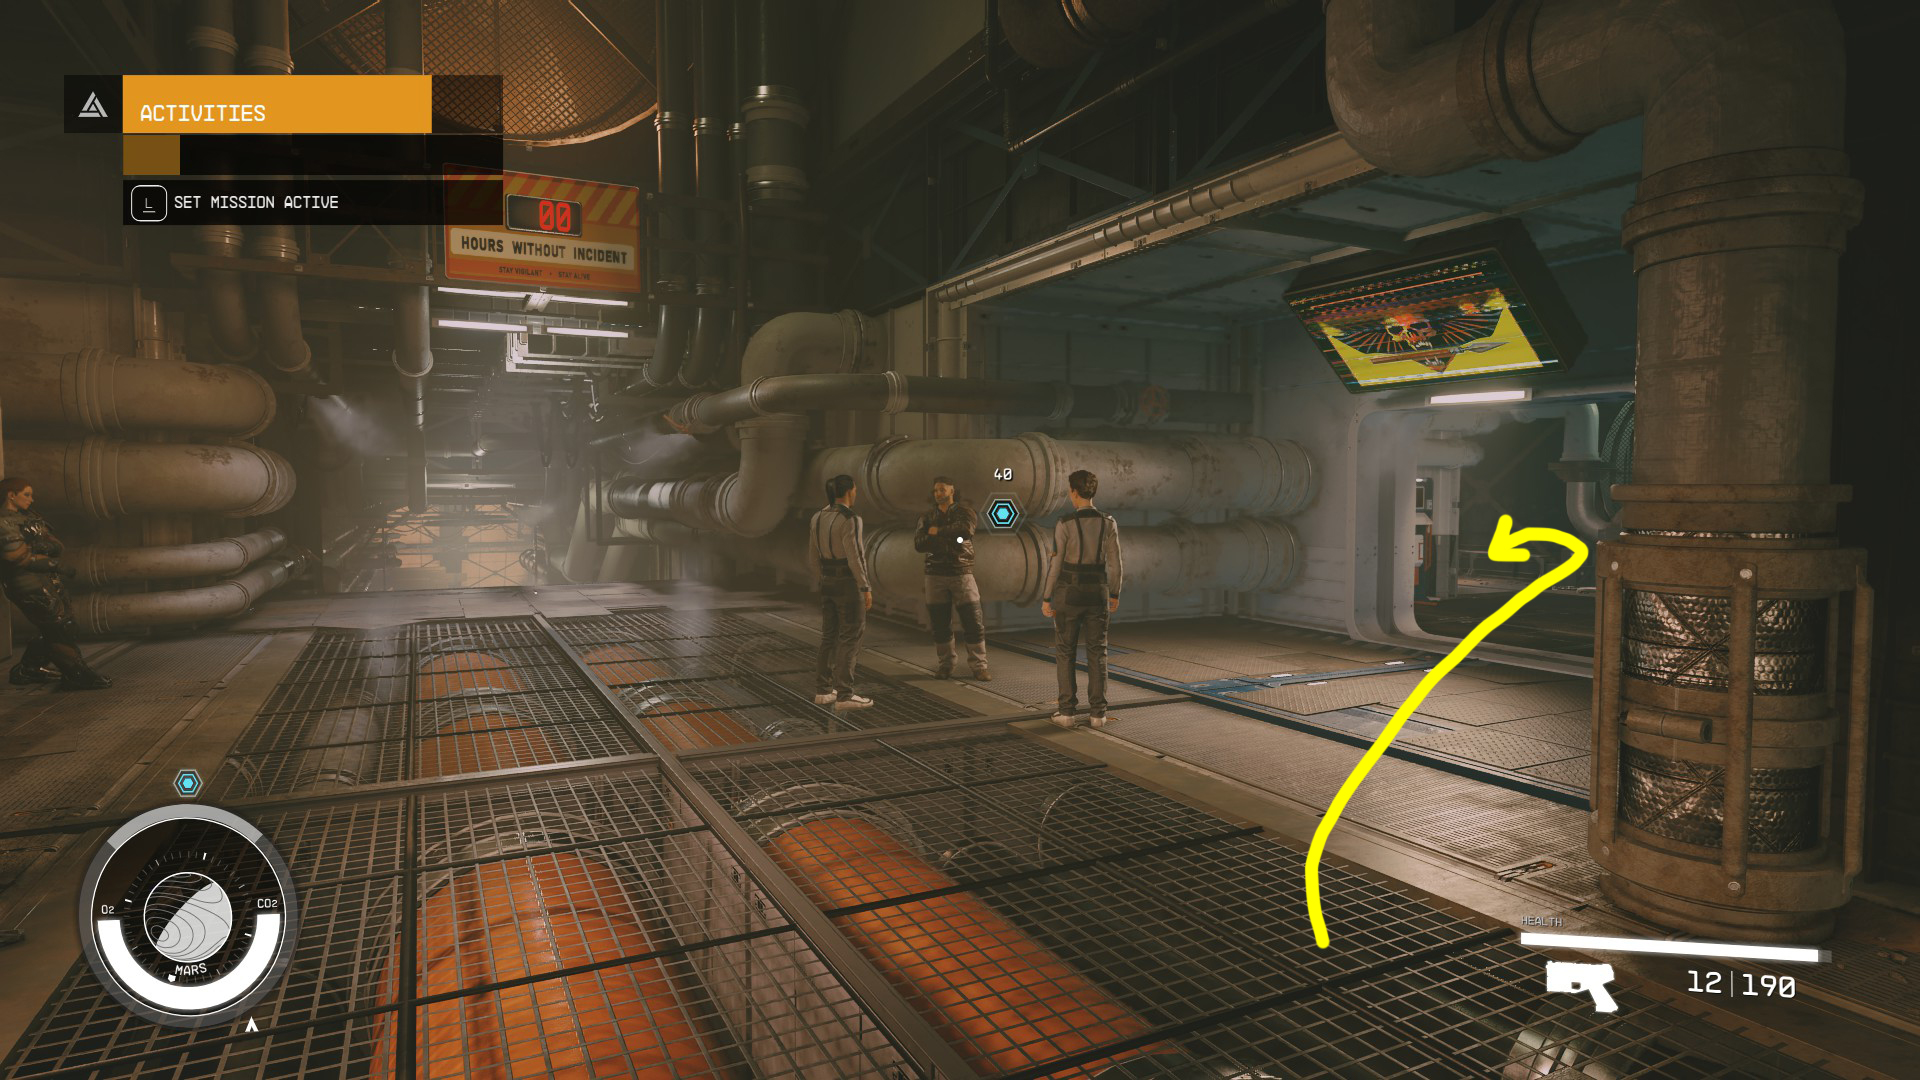
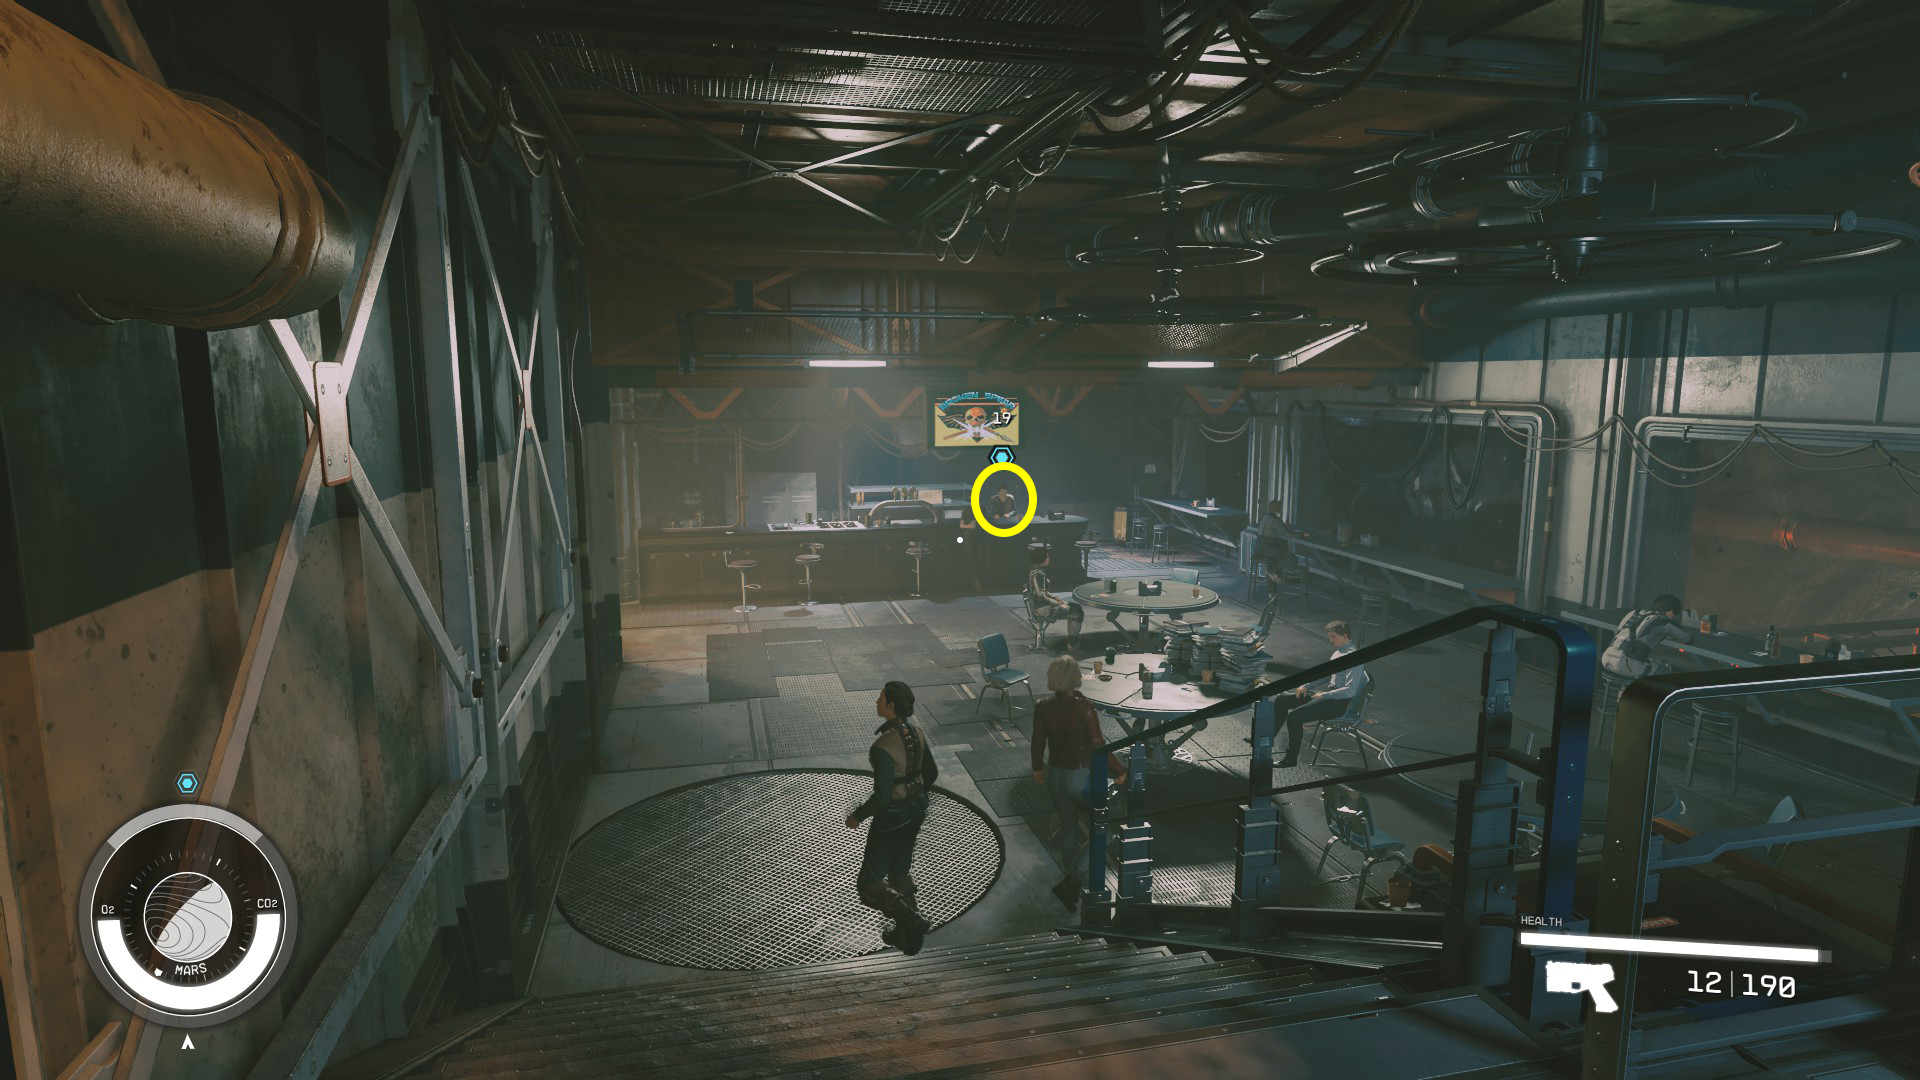
Inside, continue forwards until you can turn right into the Broken Spear (Image 7). Inside the bar, go left down the stairs, and speak to the bartender Jack (Image 8). (Save scummers will want to quicksave before speaking with Jack).
Image 7Image 8
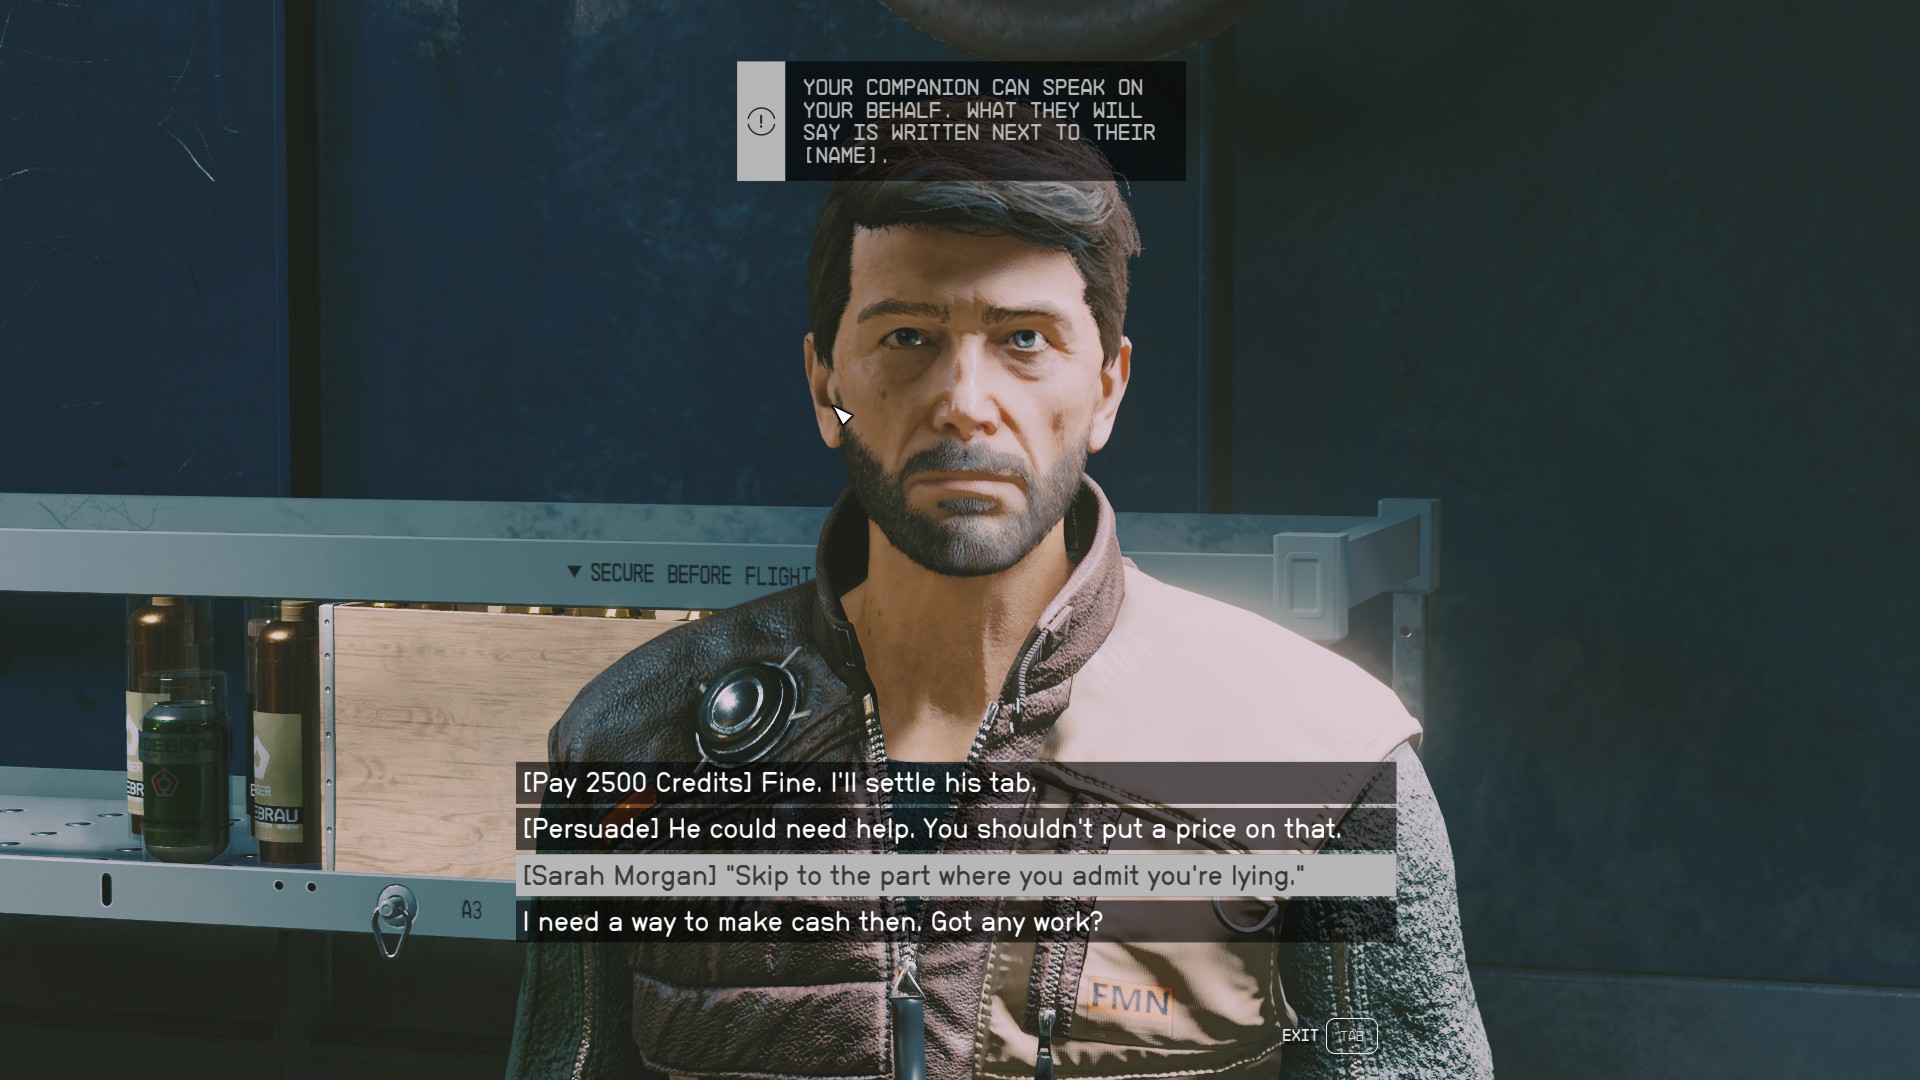
Select the dialog option “I’m looking for a Vanguard named Moara” He’ll tell you Moara is missing — pick one of the first three dialog options, and then you’ll have to decide how to handle the situation (Image 9).
First, pick the [Sarah Morgan] option (this will improve your relationship with her) and she’ll talk him down to 1,000 credits — but don’t pay him! Instead, select the [Persuade] option — if you succeed, you’ll get the information for free, plus 10 XP. If you fail, and don’t want to reload a save, you’ll need to pay him the 1,000 credits.
Image 9
Go to Venus
You know the drill — open your mission log again, select the current quest, and set course for Venus. When you arrive, you’ll find that Va’ruun Zealots are in orbit of the planet. Ask Sarah any questions you like, and then it’s time to check out the satellite.
Examine the Satellite
Note: If you have the Serpent’s Embrace trait, you will get the unique dialog option “Distract them with a litany of faith” if you are detected by the zealots, so you don’t have to be as careful.
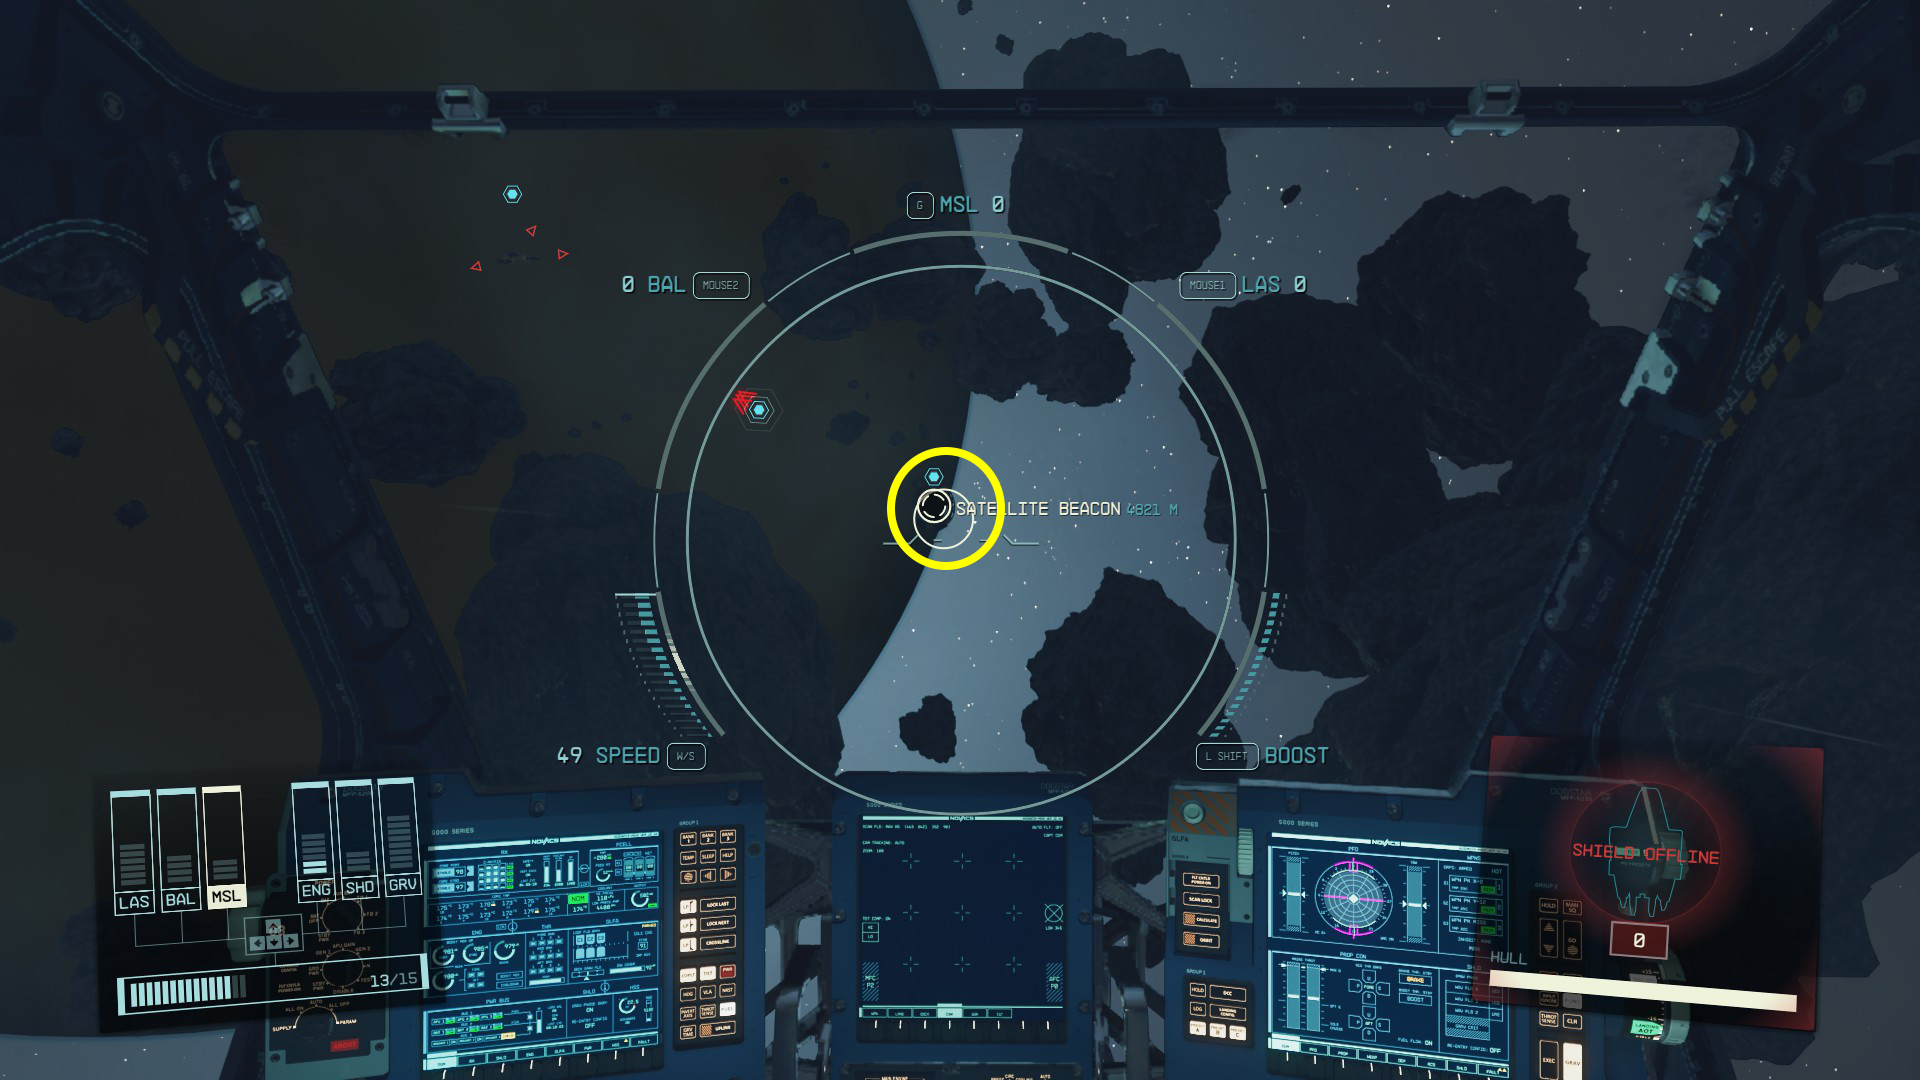
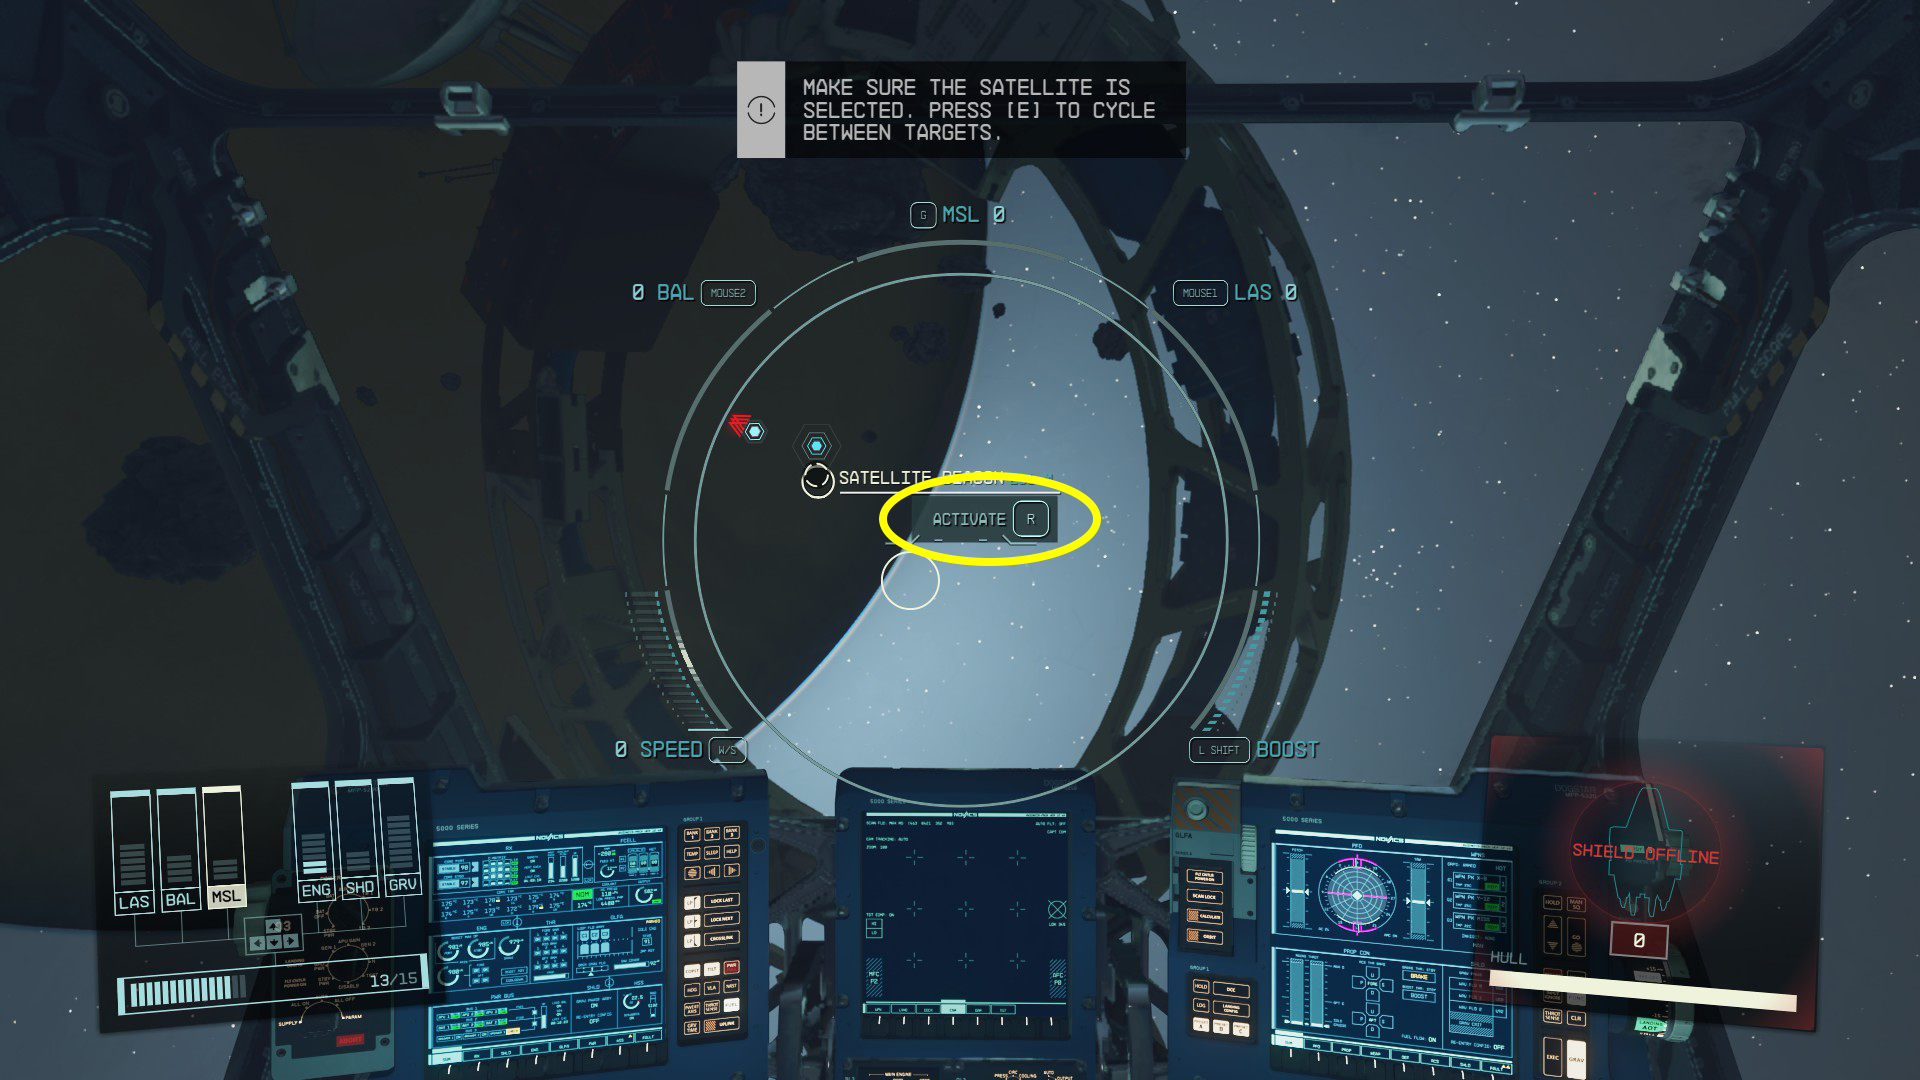
The Va’Ruun zealots are in level 14 ships, so it’s best to avoid fighting them. Instead, do as Sarah suggests and power down all of your systems except for 1 or 2 points in your engines — this will make you hard to detect. With 2 points in engines, you should be able to fly straight towards the satellite (Image 10) at full speed, even using your boosters, without being detected. Make sure you have the satellite targeted (press / / ) and then, once close enough, you can hit the indicated button to activate the satellite (Image 11).
Image 10Image 11
Go to Nova Galactic Staryard
The data you download will suggest you need to go to the Nova Galactic Staryard, so use your mission log to set a course and travel to Luna. When you arrive, you’ll talk with Sarah briefly, and then it’s time to dock with the staryard.
You’ll notice that one of the dialog options is about wanting to walk on the moon. If you like, you can take a break from your mission to land on the moon and jump around — the view of Earth is pretty sad, though.
Dock with Nova Galactic Staryard
Put full power into your engines, accelerate to max speed, and boost over to the staryard (Image 12). As with the satellite, you’ll need to target it. Once you’re close enough, and you have it targeted, you’ll be able to dock by holding / / .
Find Any Clues About Moara
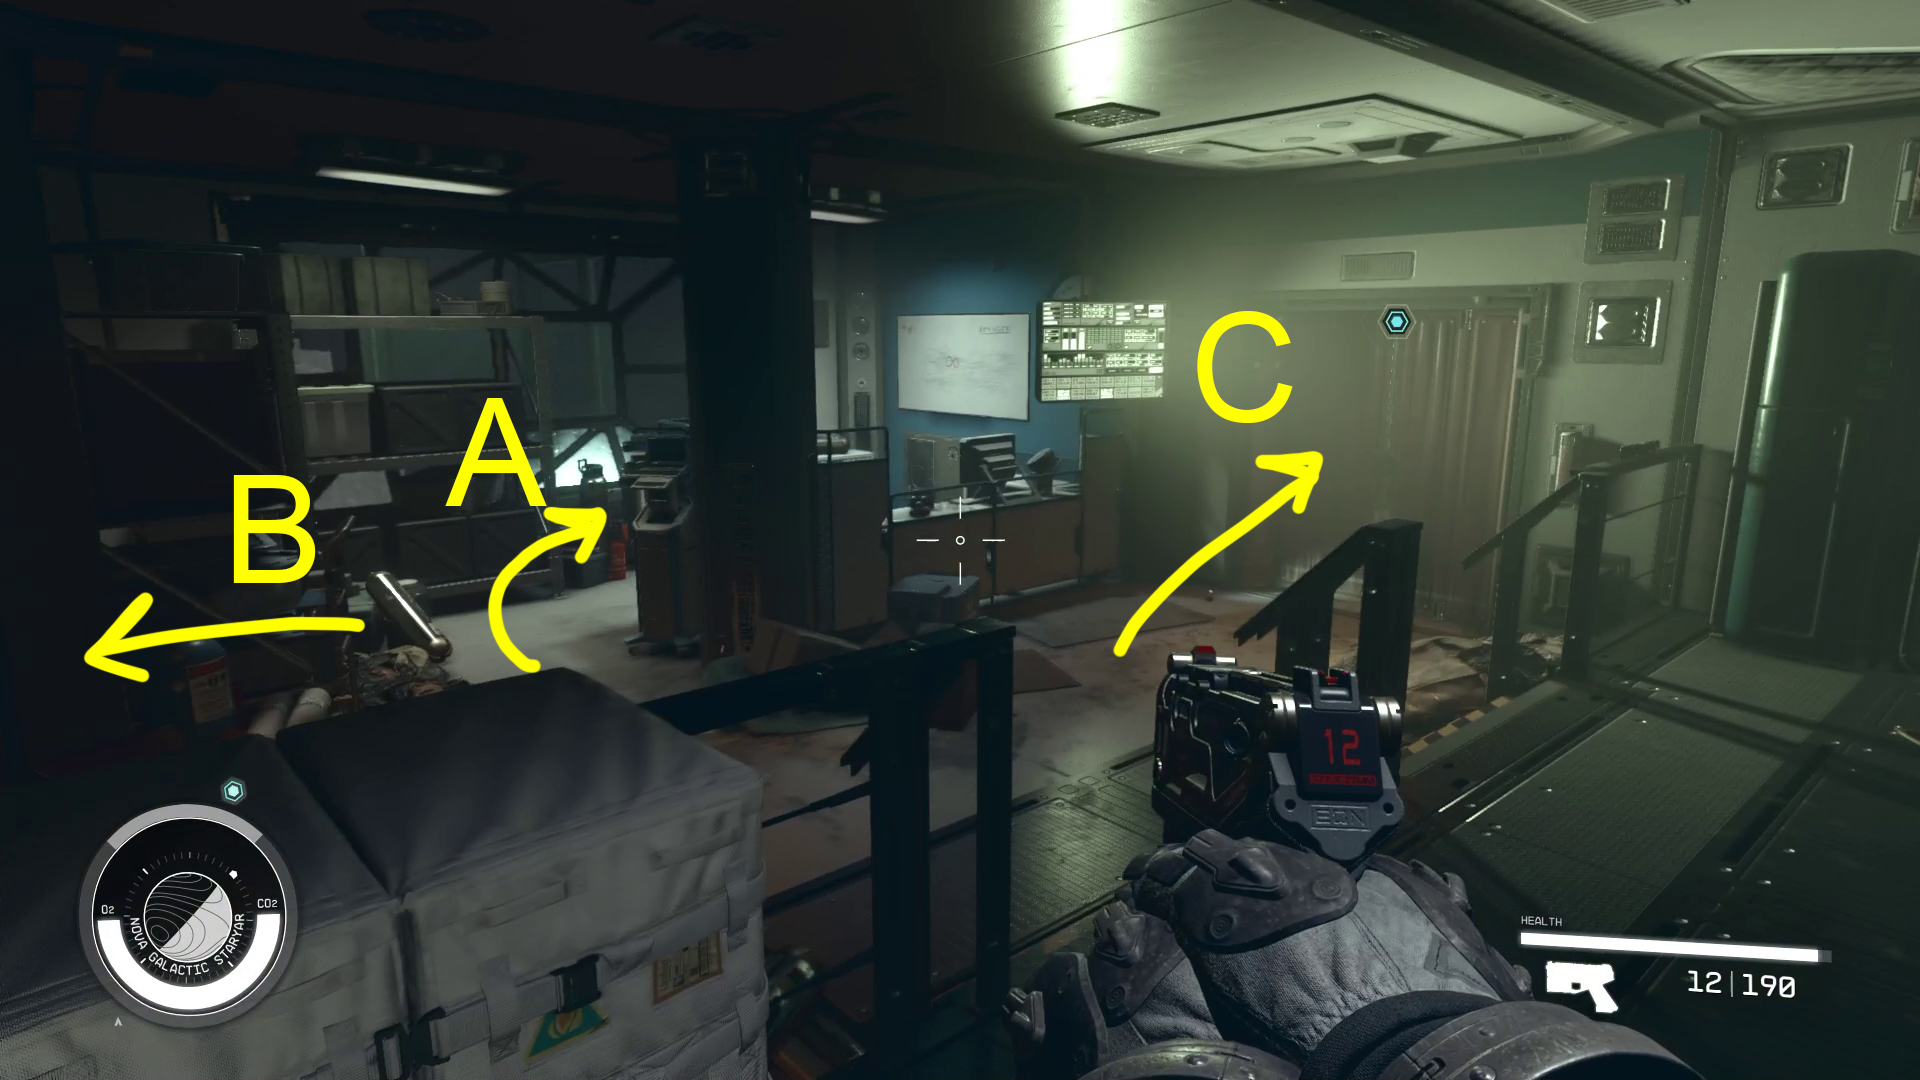
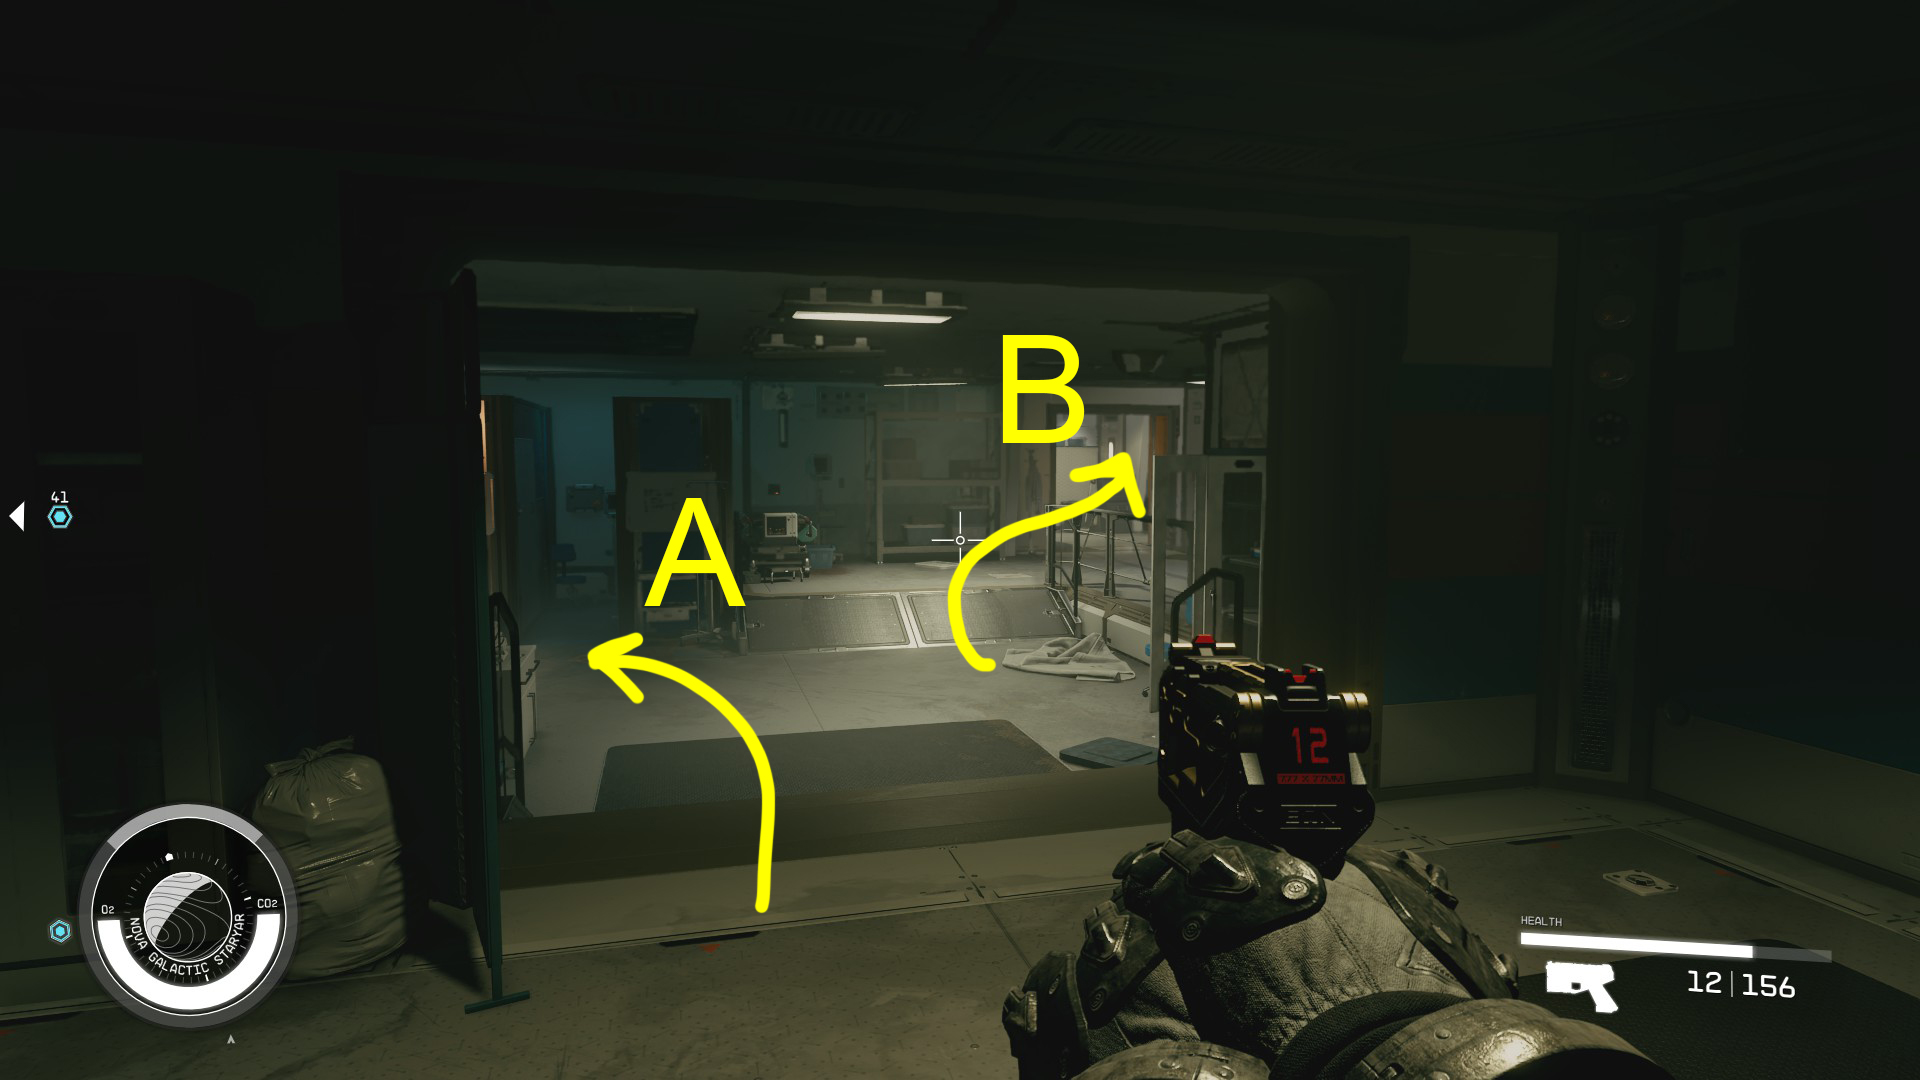
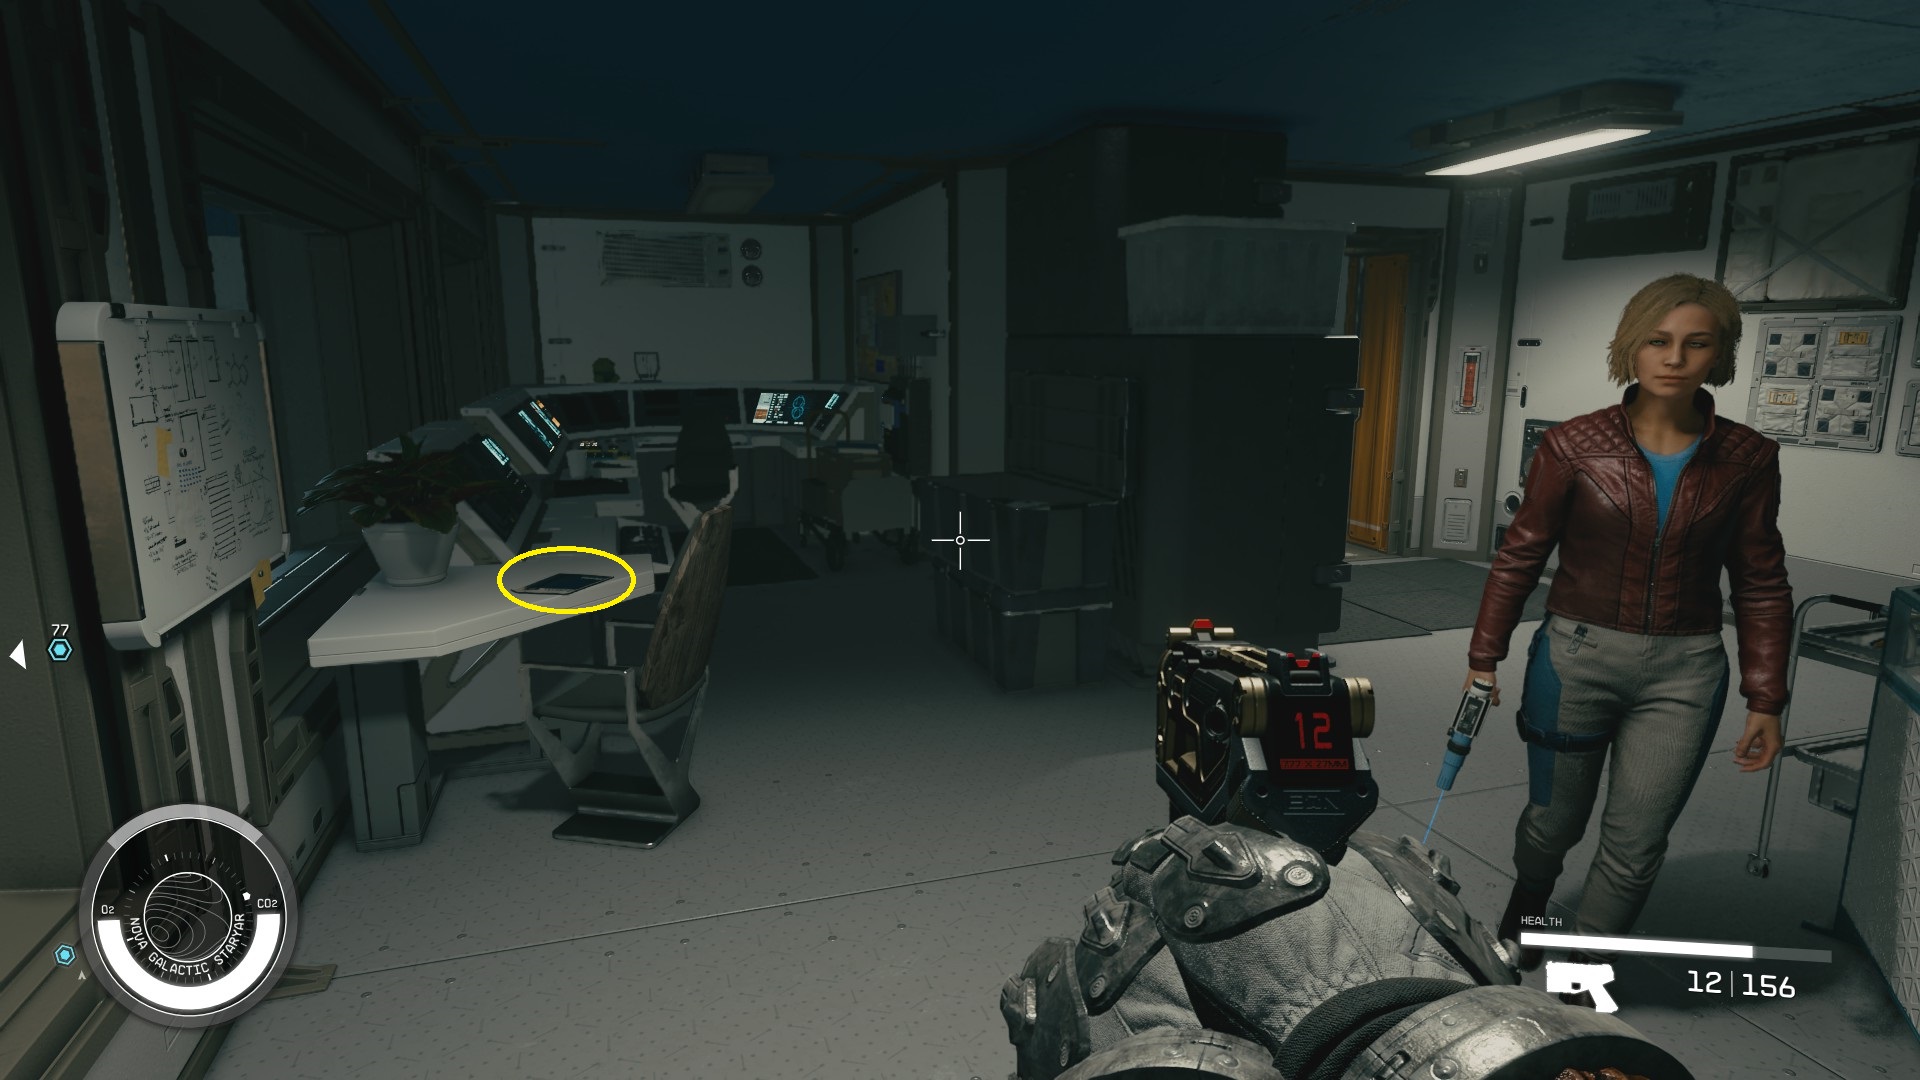
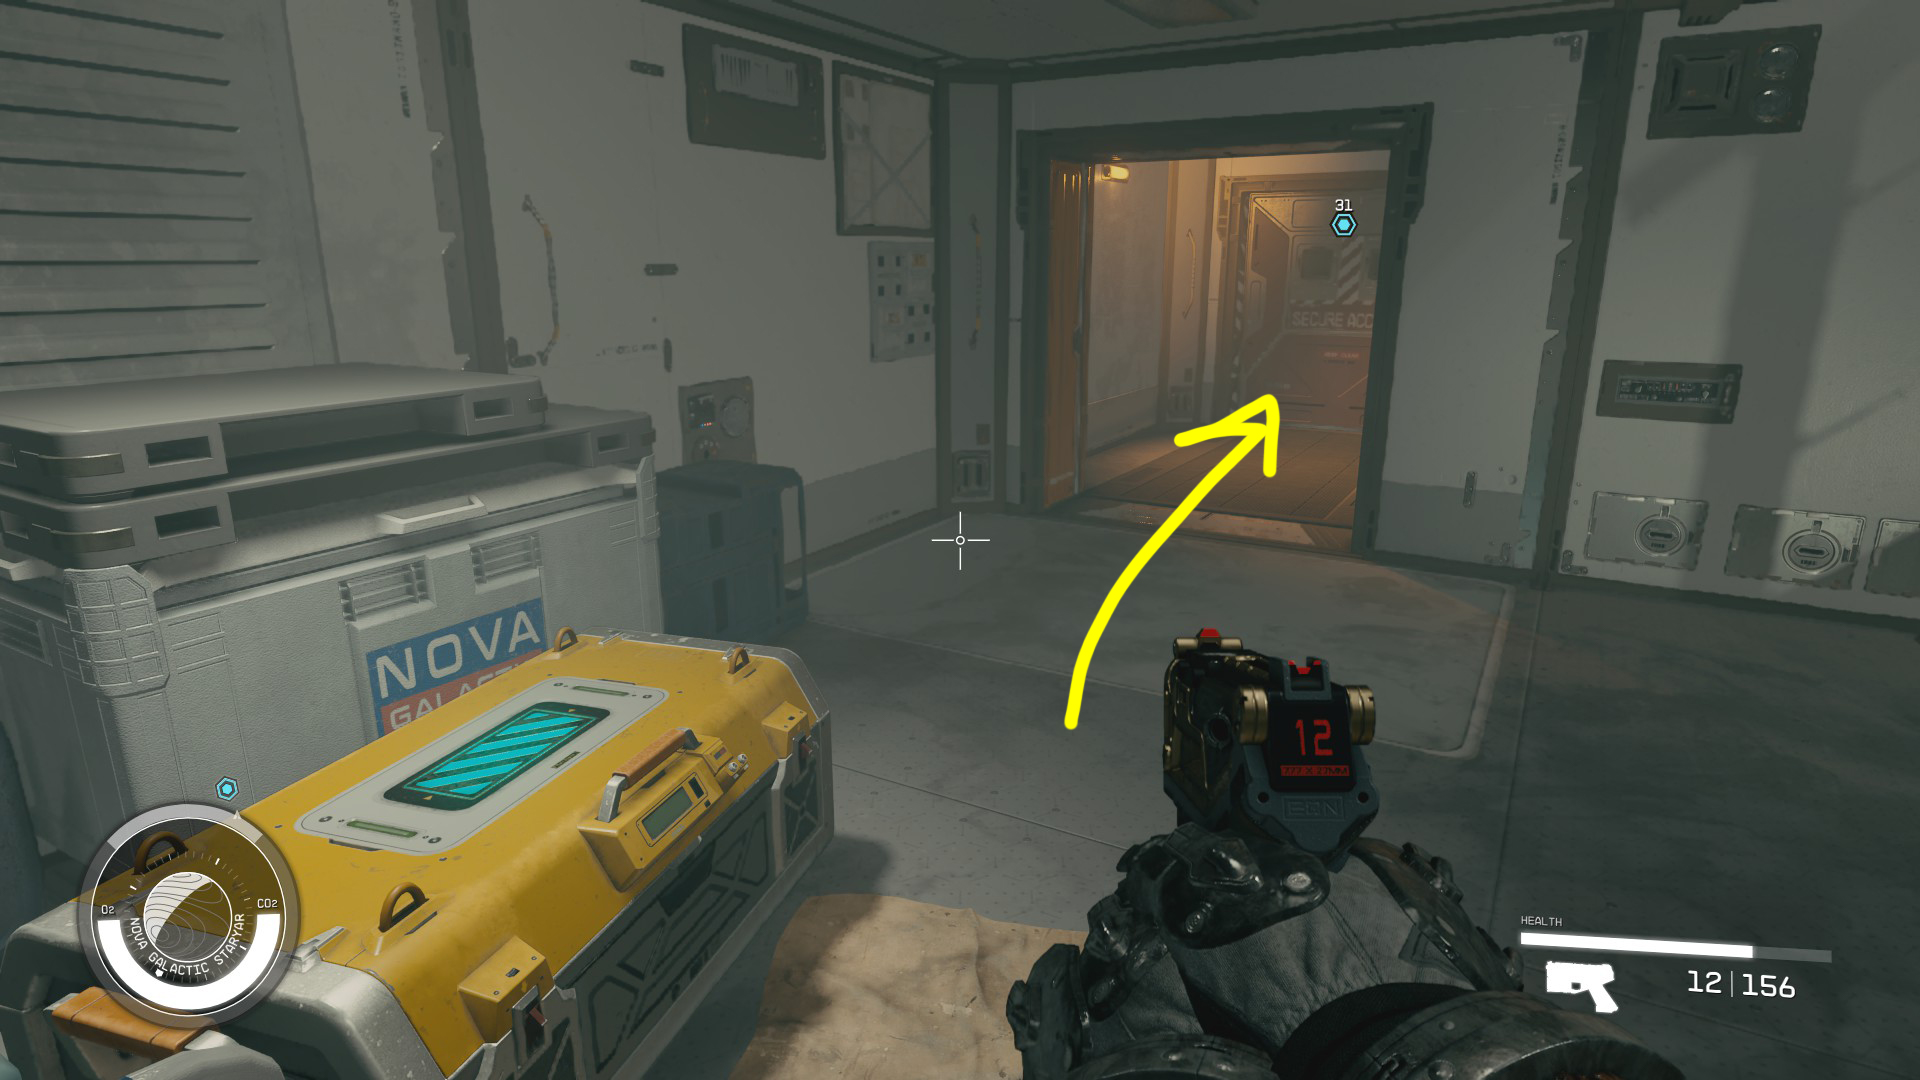
When the docking cutscene ends, you need to hold the indicated button to Board the station. On the station, proceed forwards into the first room, where you’ll find a few corpses to loot, plus a lot of lockers to open. Make sure you loot behind the desk (Image 12A), where you should find a digipick on the desk. If you have a point in Security, you can pick the lock of the door to the left of the stairs (Image 12B) — inside is a respectable amount of credits, healing items, ammo, and weapons (make sure you check all the lockers!). When you’re ready, head through the door to enter the station proper (Image 12C).
Image 12
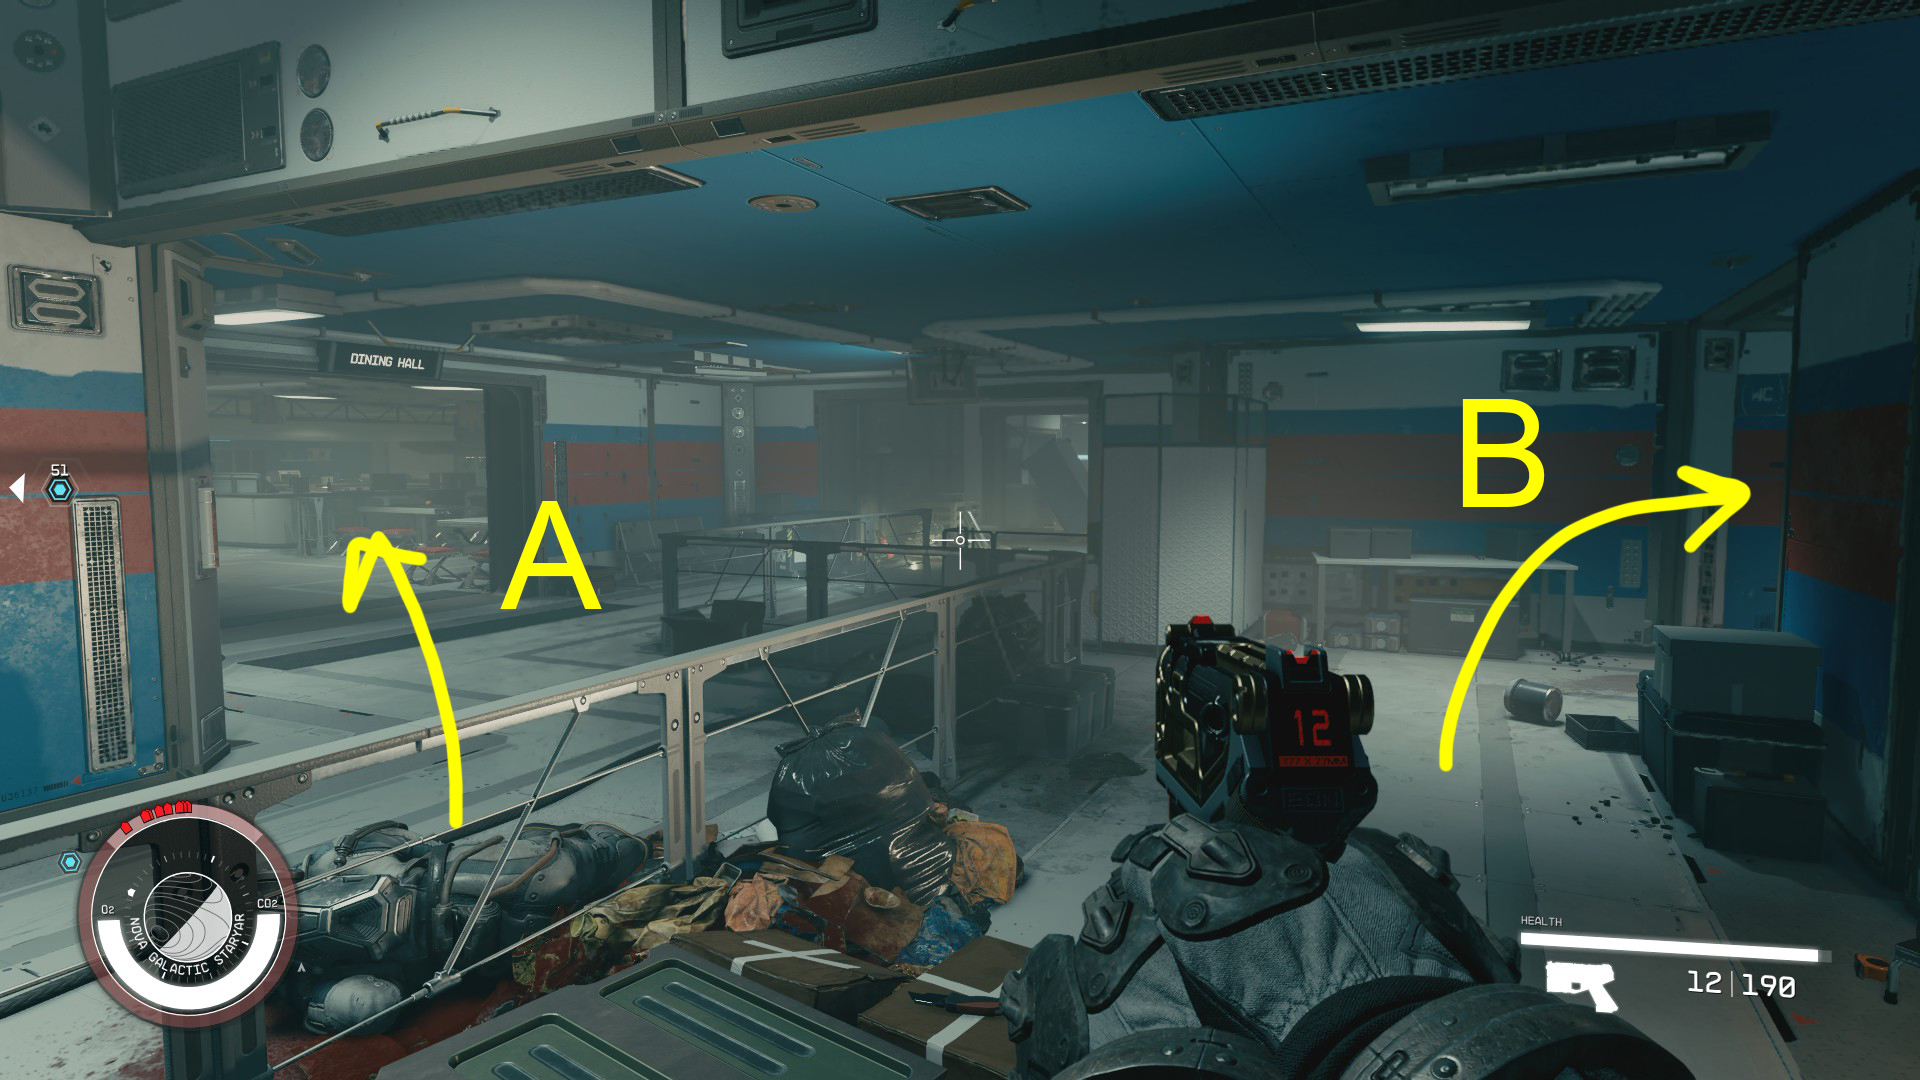
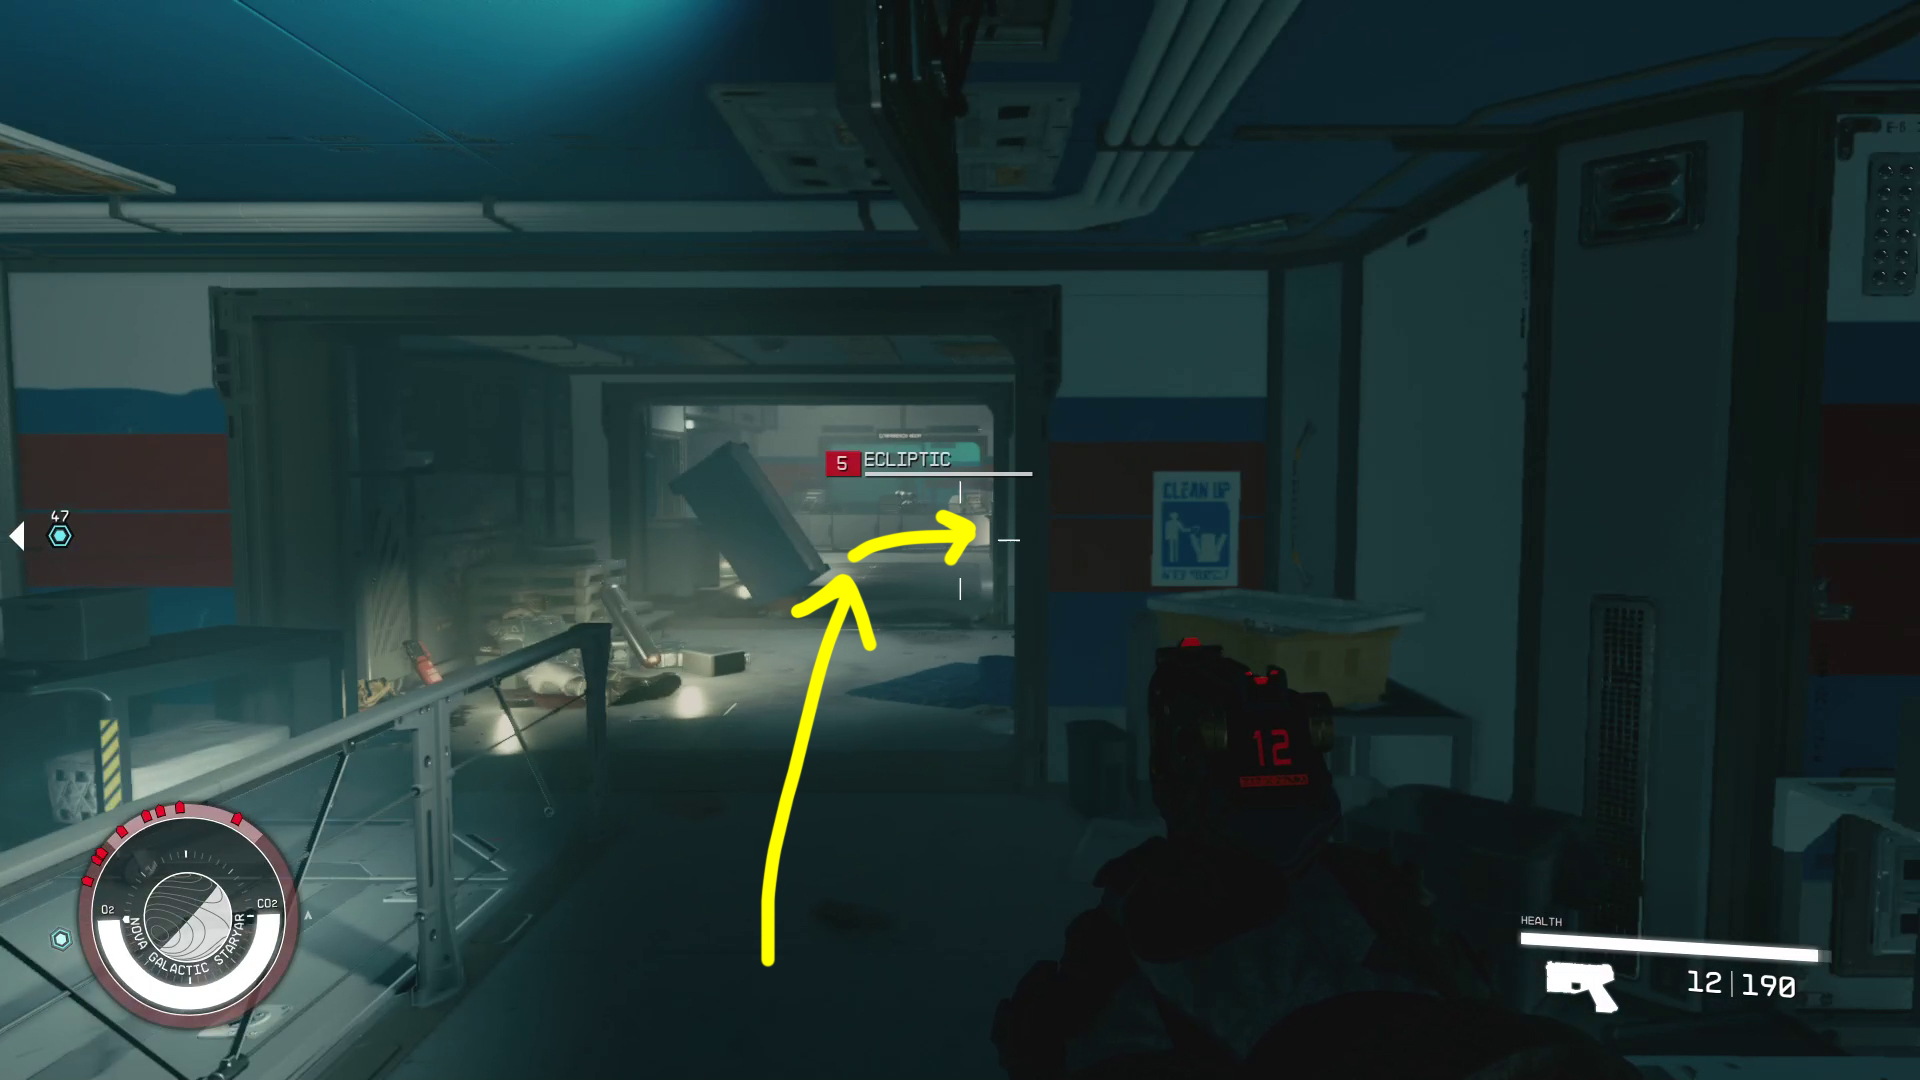
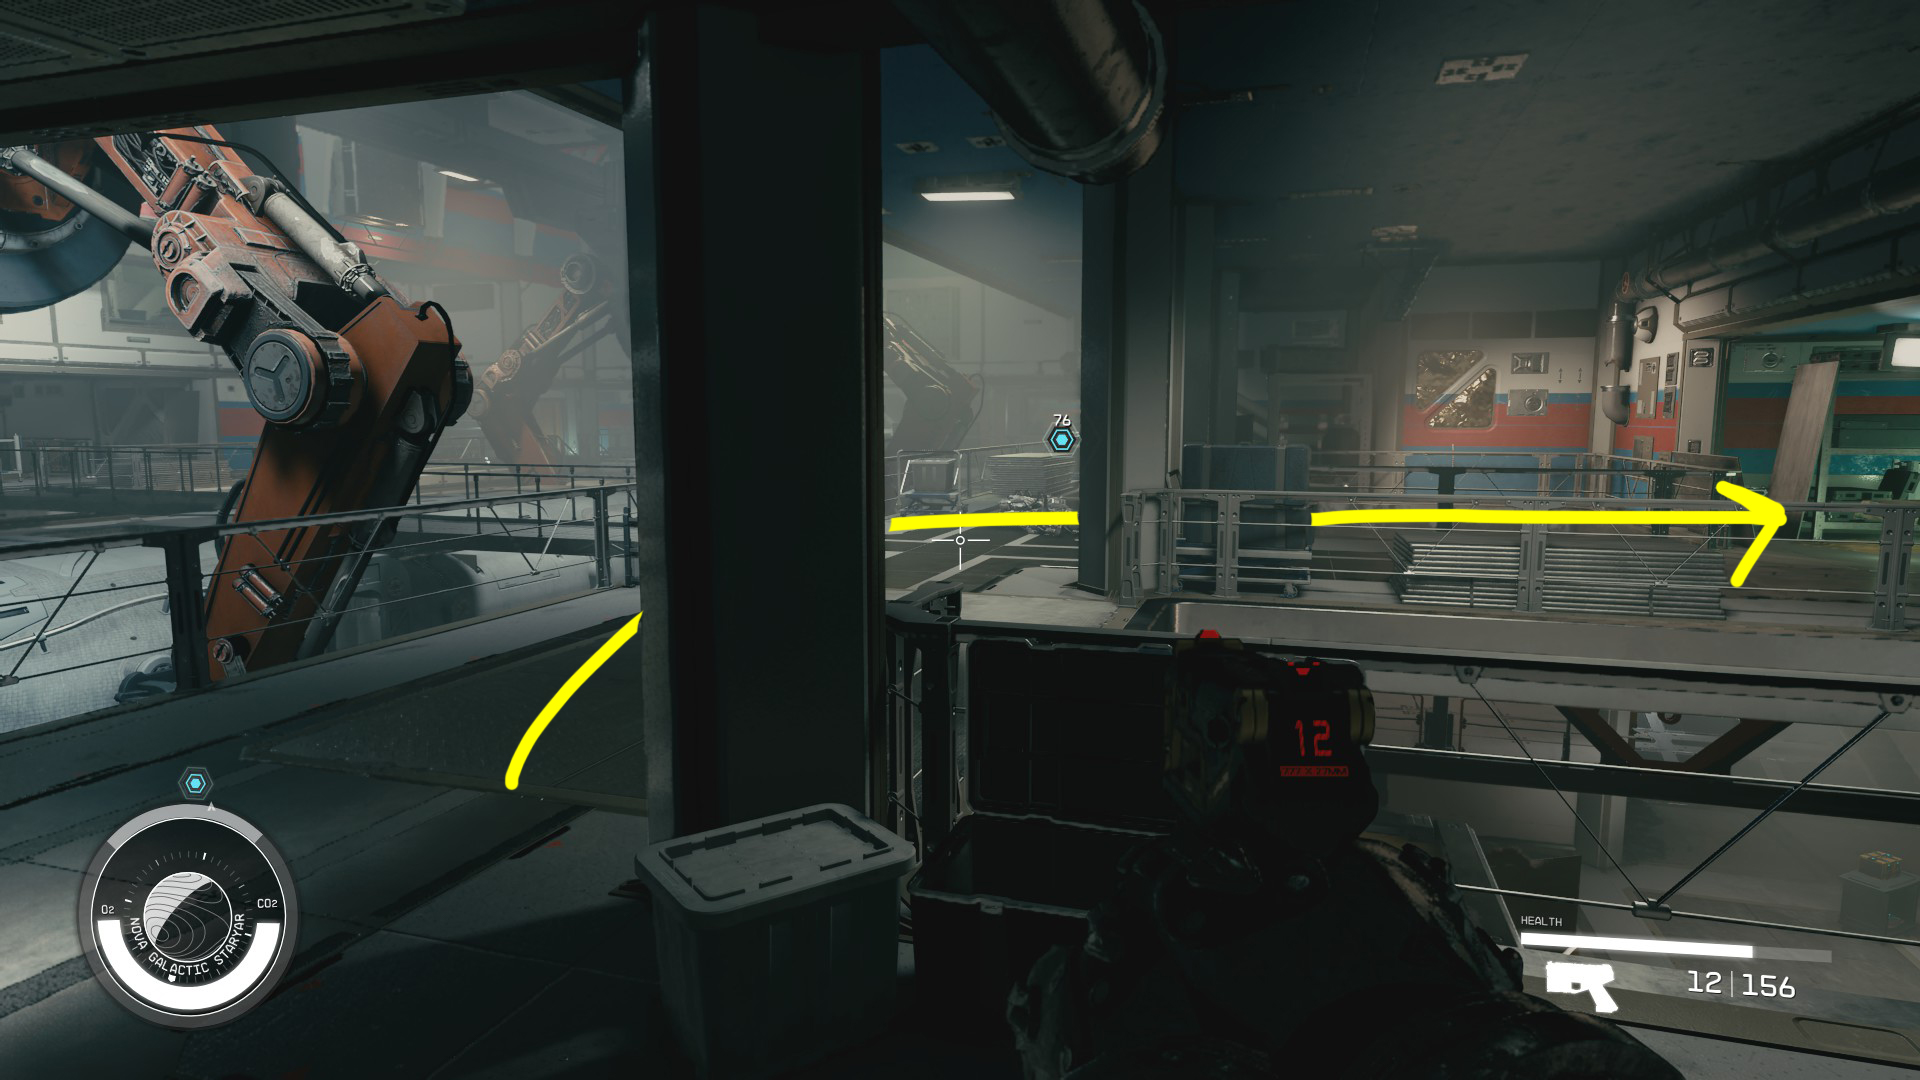
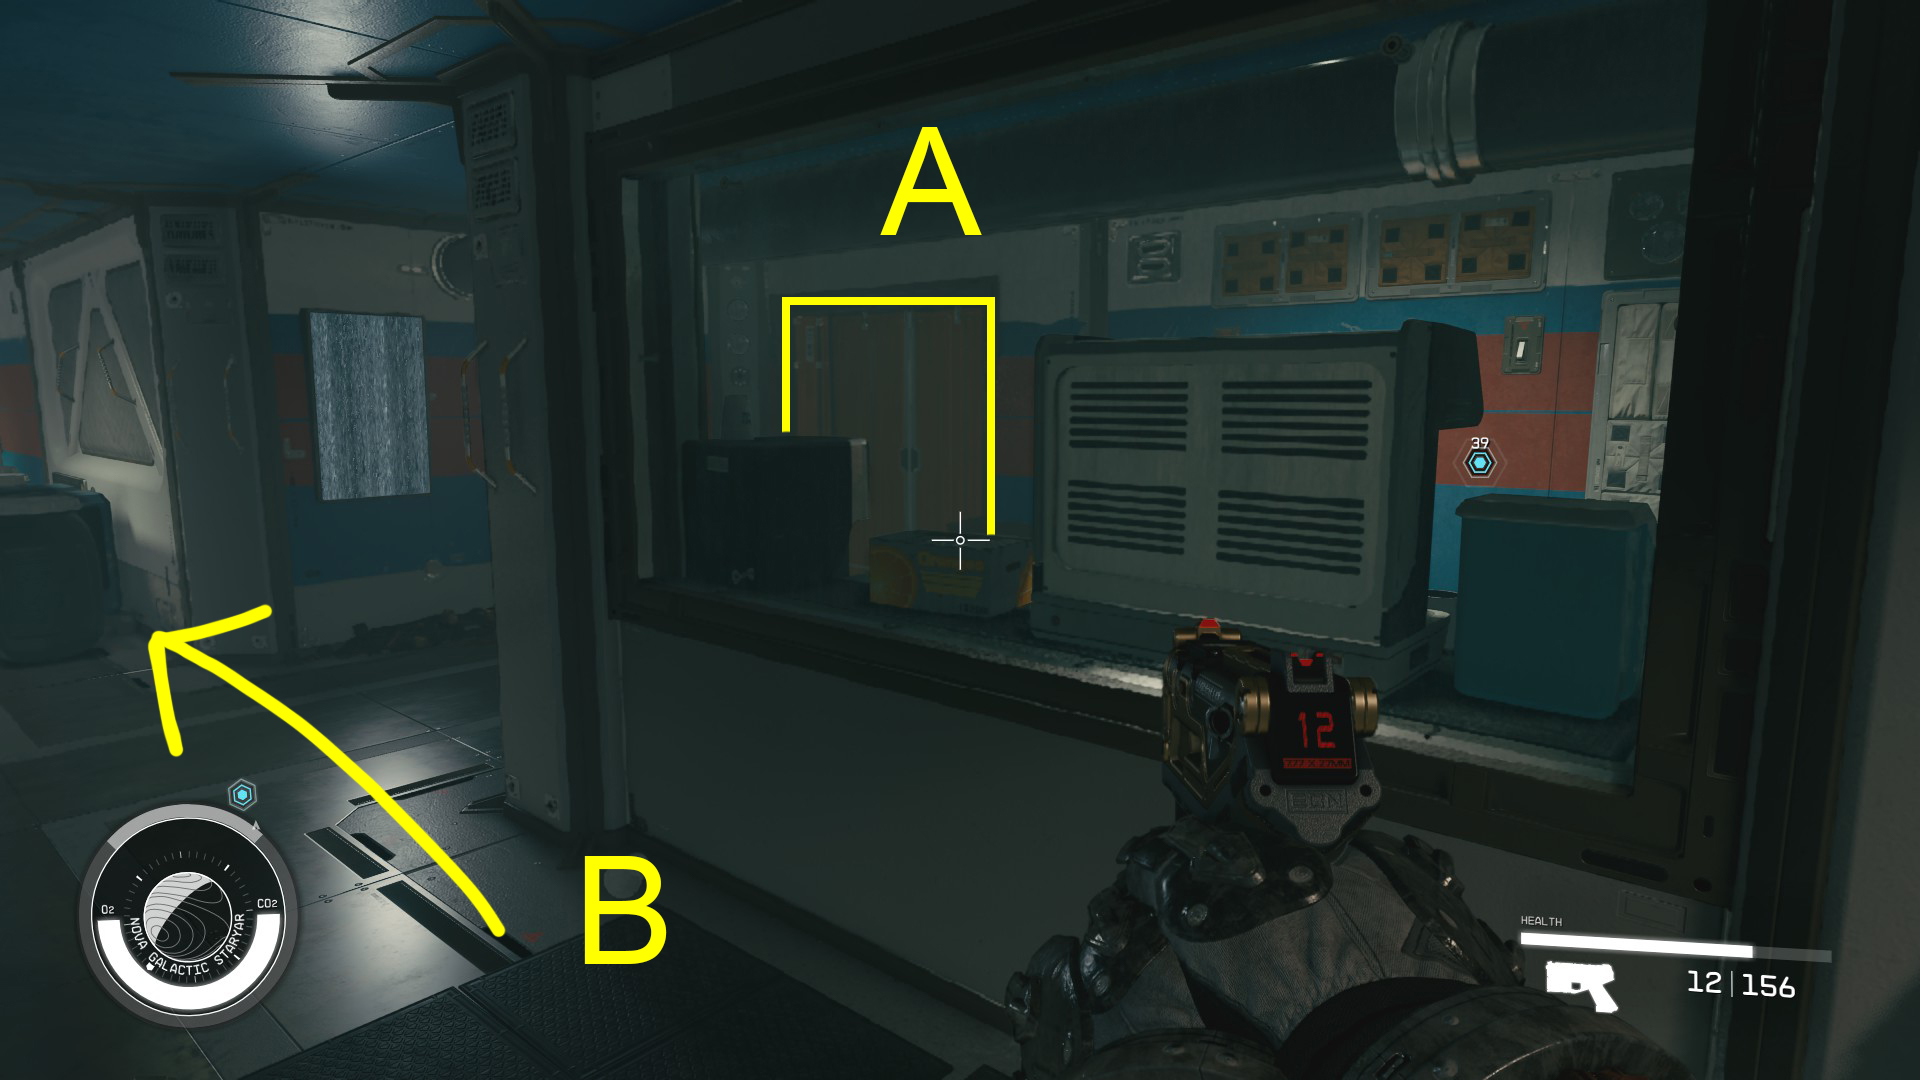
Once you load into the next area, you should start by looting the corpse and the shelves to your left. Then turn around and head to the other side of the room, where you’ll see a few paths you can take (Image 13). First, take out the enemy in the Dining Hall (13A) and loot the area, then head out of the dining hall through the doorway across the hall (Image 13B/14) to enter the bathroom.
Image 13Image 14
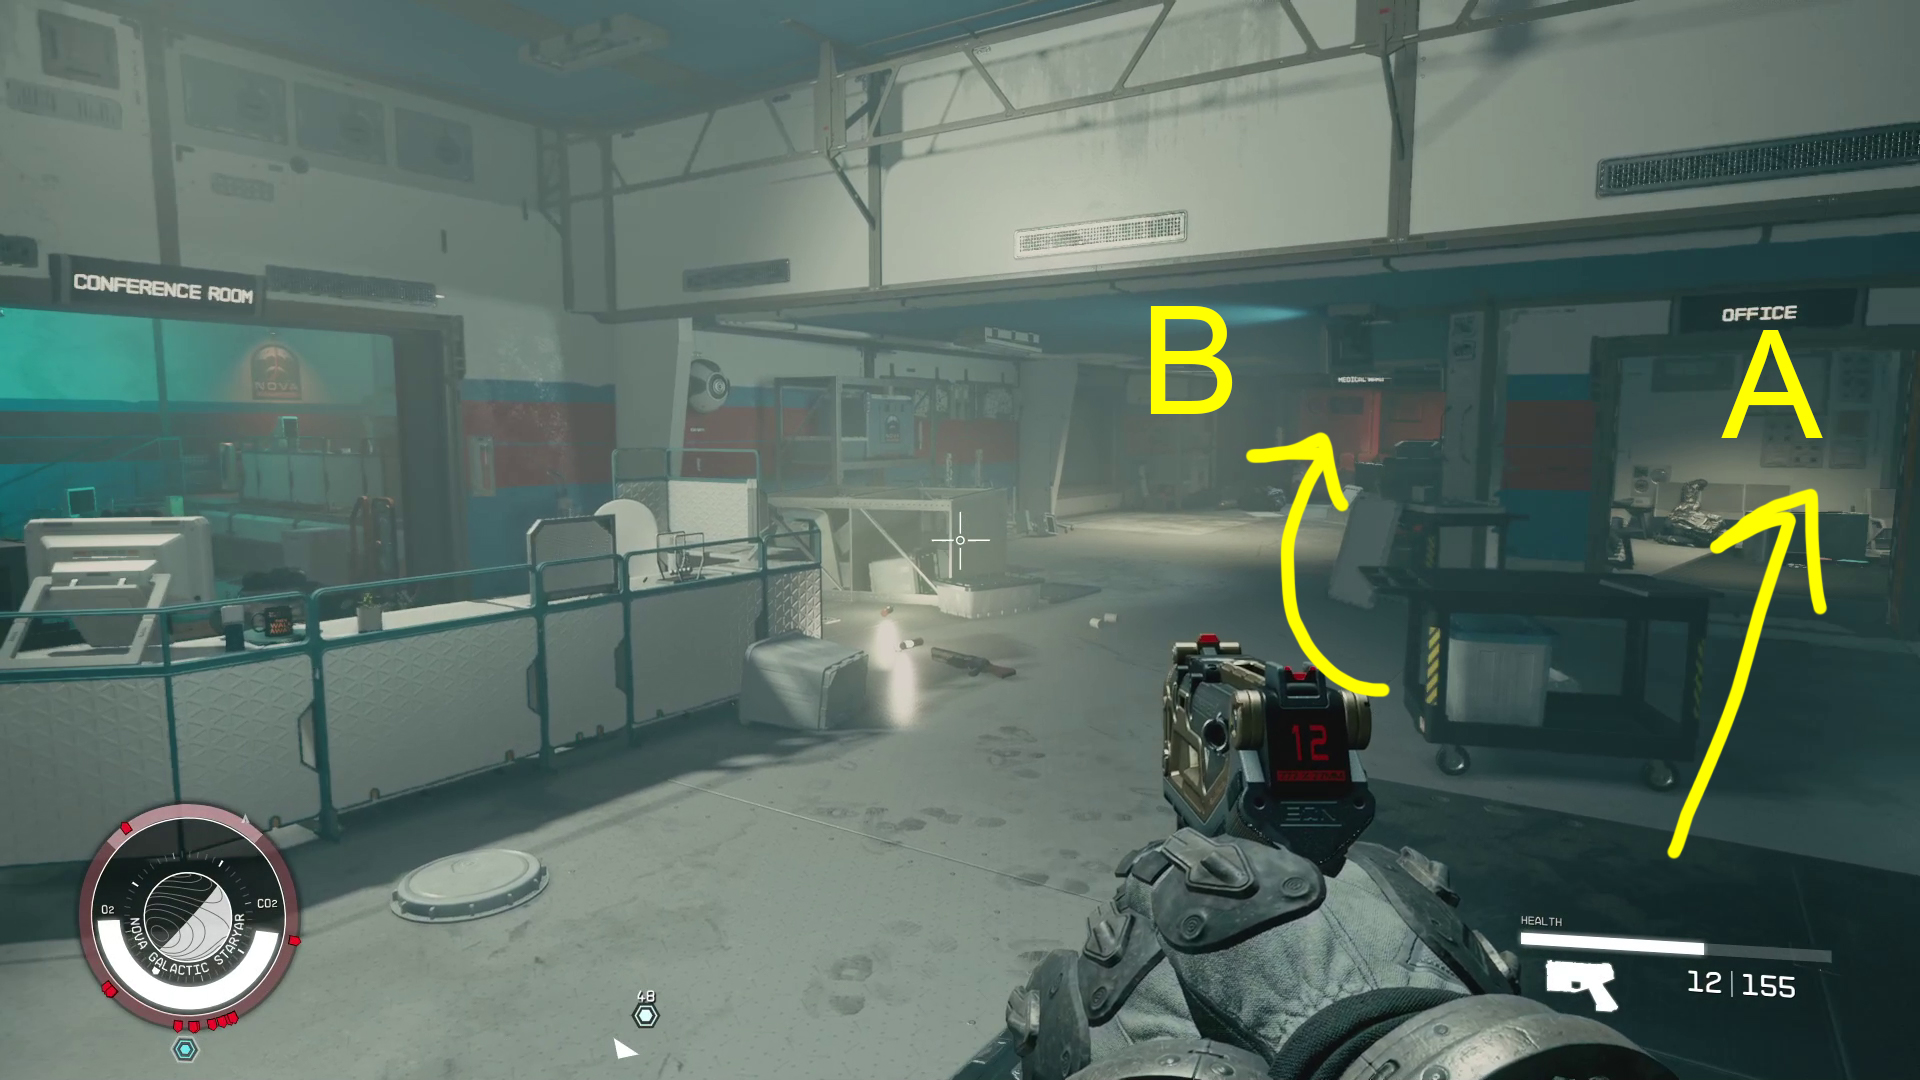
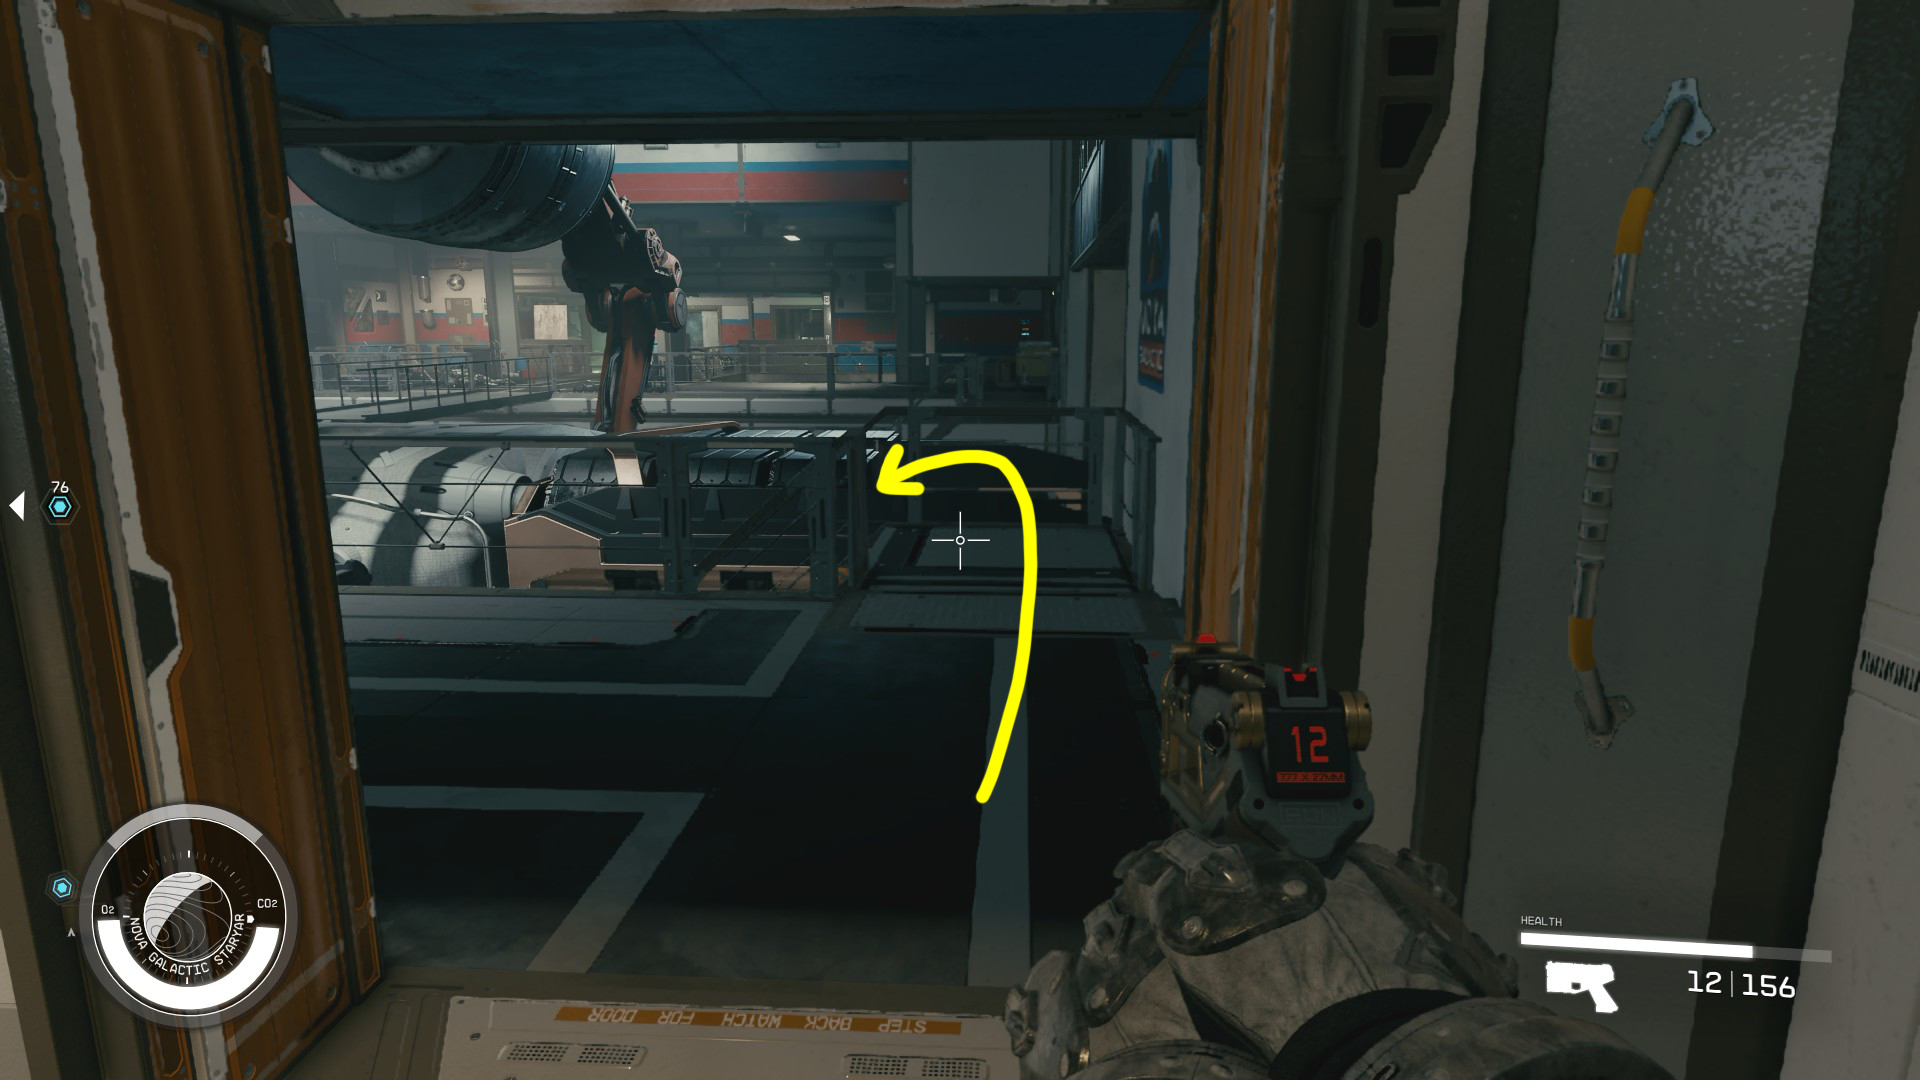
Loot anything you like, but especially the corpse in the far stall. Then leave the bathroom and go right, and you’ll likely see a gunfight between the Ecliptic and the Spacers. Wade into the fray and take out all the enemies here (Image 15), then take your first right into the office (Image 16A). Loot all the corpses and anything else you like, making sure you continue to the back of the office. Then leave the office and continue down the hallway as indicated in Image 16B, into the Medical Ward.
Image 15Image 16
While looting corpses, you’ll find the “Secret Outpost!” slate. Go into your inventory and read the slate to start the mission Mantis.
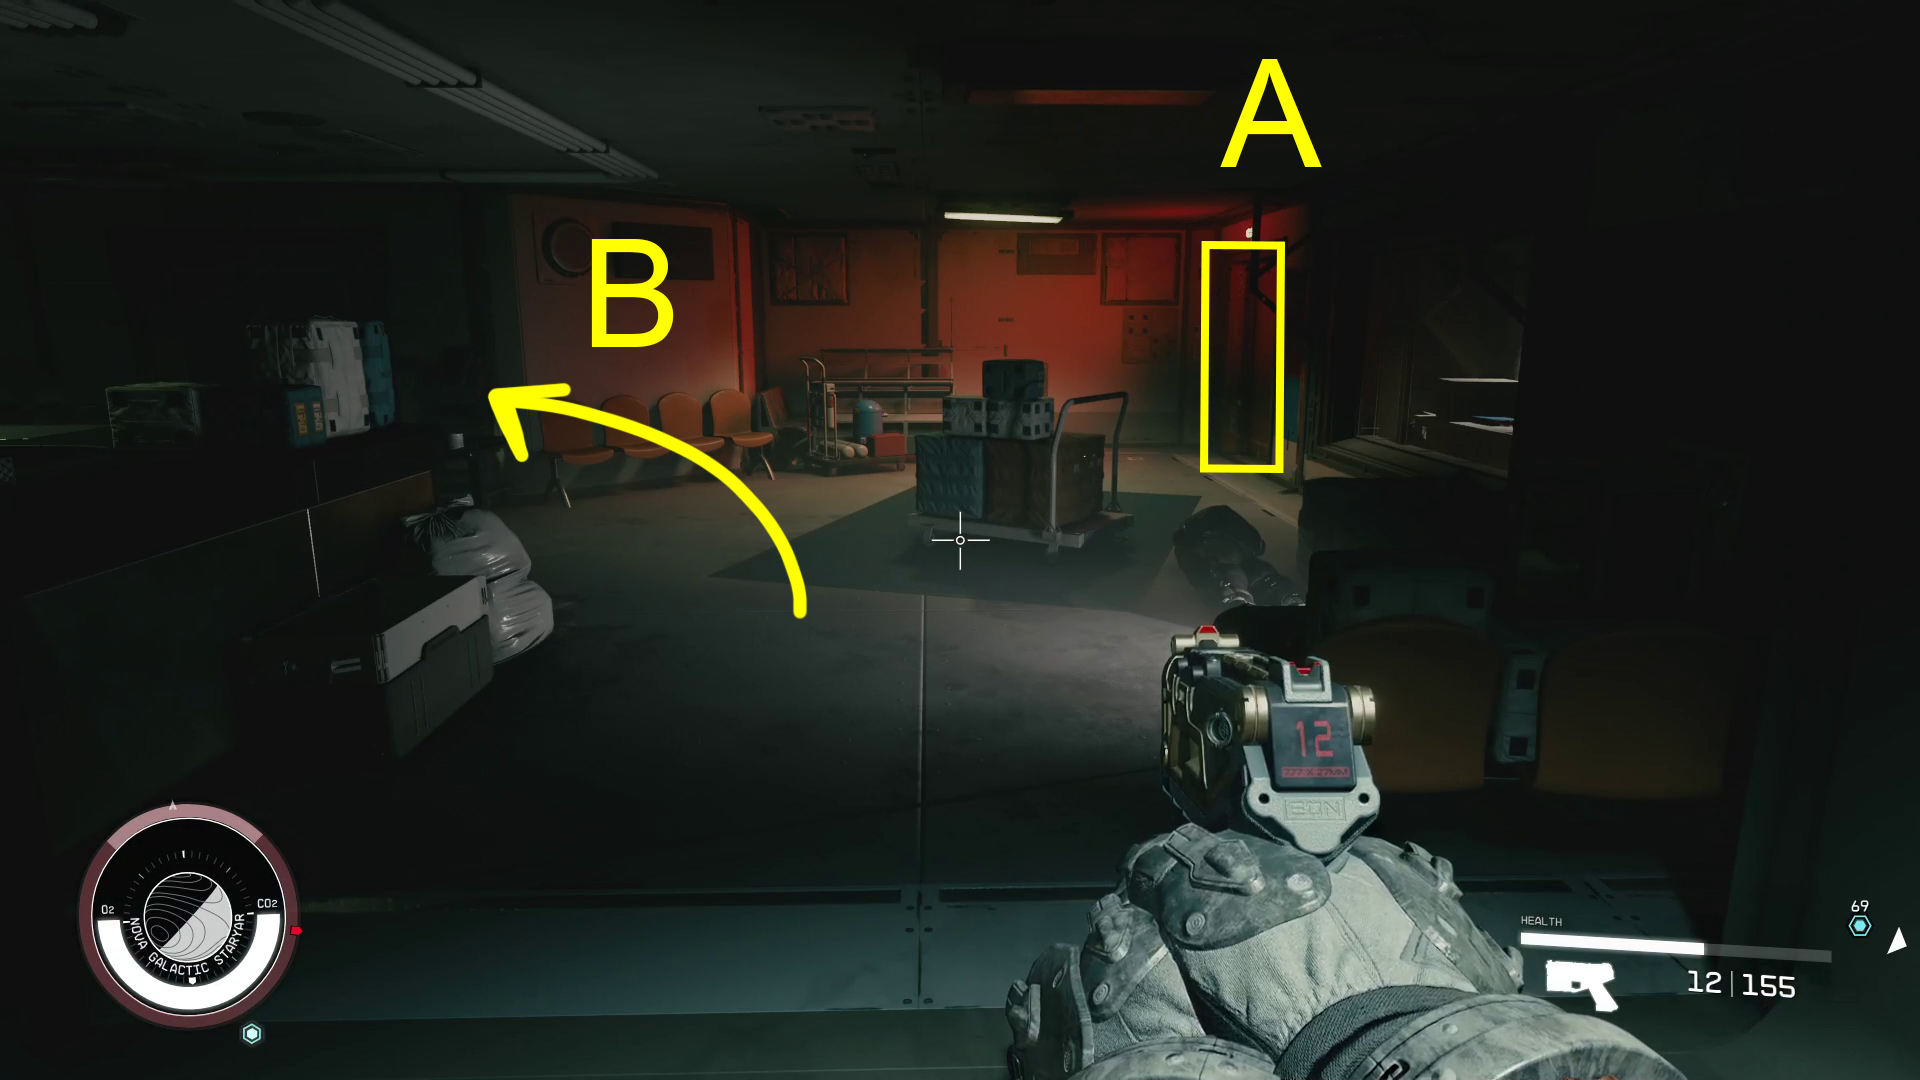
At the end of the hall is a locked door (Image 17A) — you can theoretically pick it, but you probably don’t have the Security rank, and we’ll grab the key just a bit. Go left (Image 17B) and loot all the stuff in the hallway, then enter the room on the right at the far end of the hallway and loot everything inside. Leave the room and go through the doorway across the hall — take care, as enemies may appear ahead of you. First, loot all the stuff on the left side of the room (18A), and then go up the ramp and through the doorway(18B).
Image 17Image 18
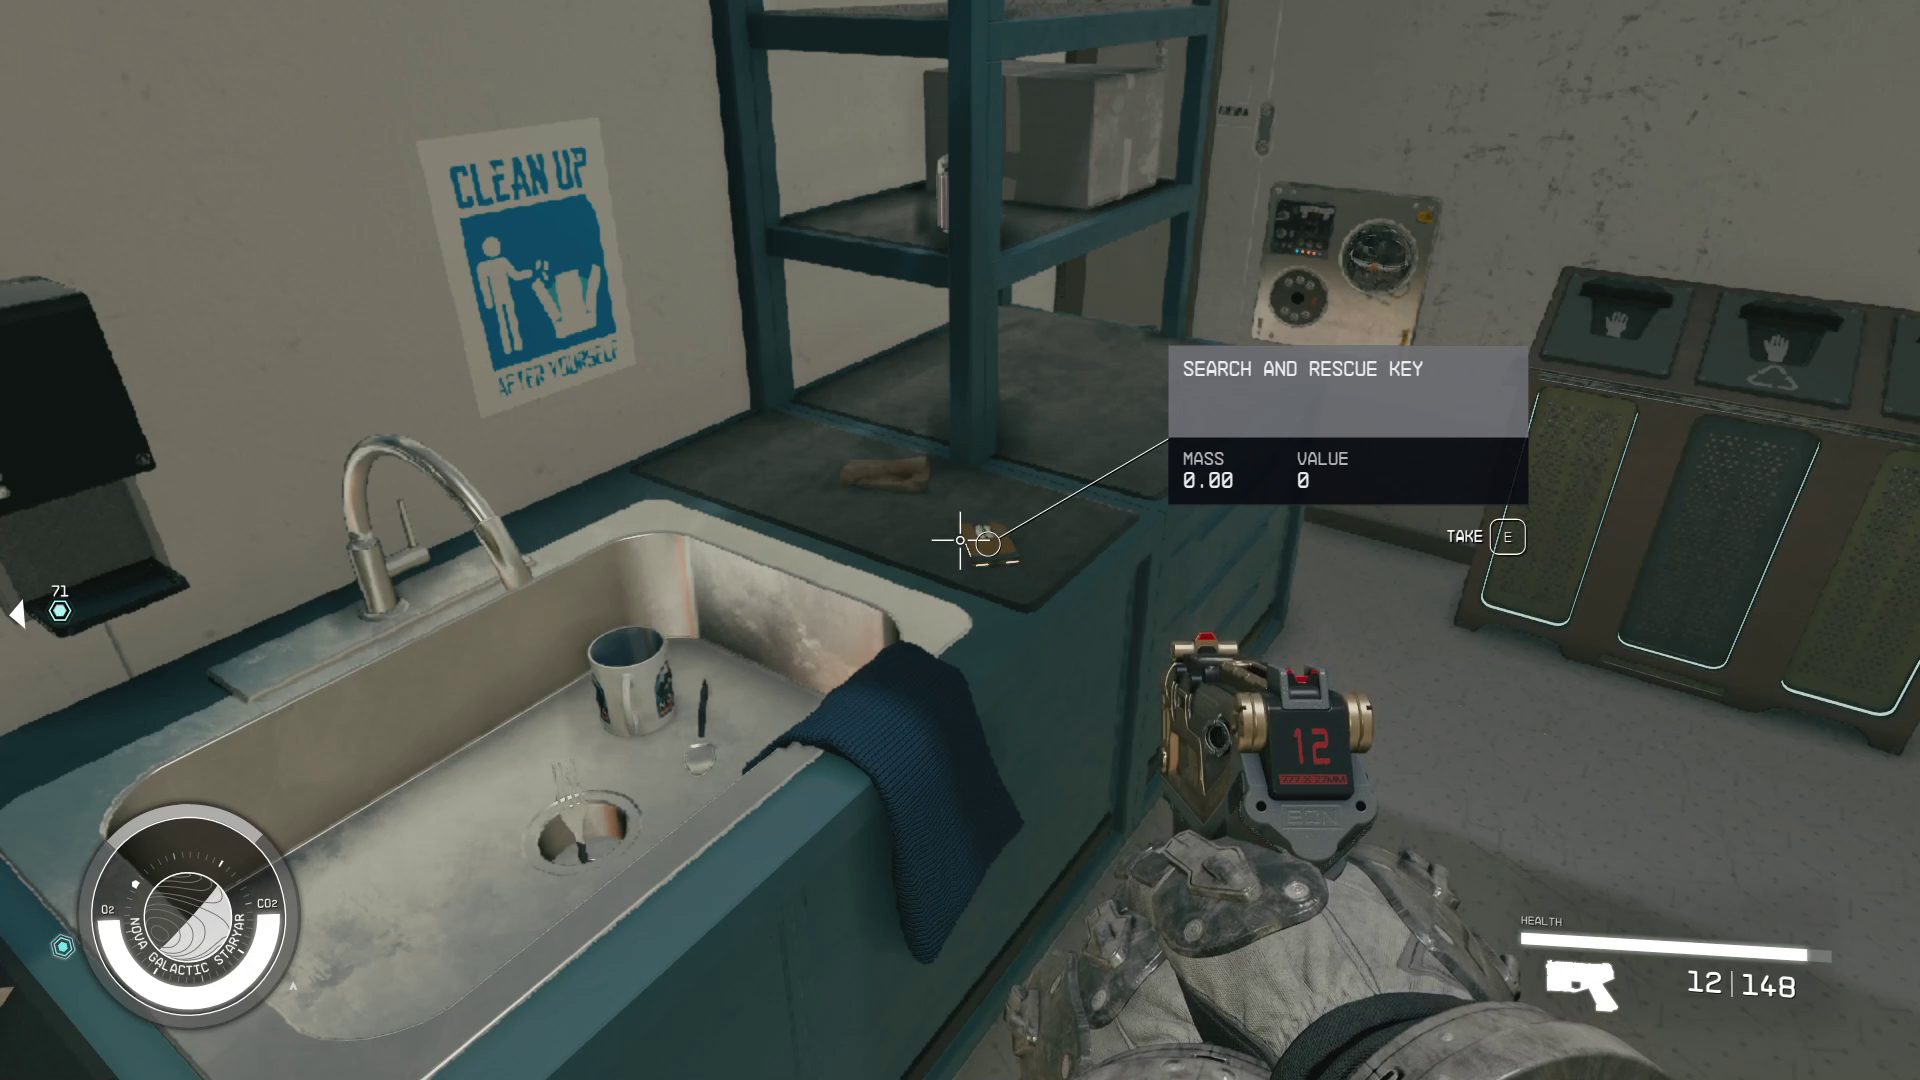
Here, you’ll find a decent amount of stuff to loot; at the sink, you’ll find the Search and Rescue Key (Image 19) that opens the locked door (Image 17A). From the sink, turn around and open the door that’s right in front of you to find the last room to loot in the Medical Ward. Make sure you open the door to the operating room, as there are valuable objects inside.
That done, you can backtrack to the locked door (17A) and open it. Take care to grab everything in the room, especially the Storage Crate in the smaller room found in the back of the main room you unlocked. Leave the room you unlocked with the Search and Rescue key and turn left to leave the Medical Ward (Image 20). Take your first right into the Conference Room, and make sure you comb this room as well, as there’s a decent amount of things to grab.
Image 19Image 20
At the other end of the conference room, there’s a doorway that leads back into the main hall. Here, you’ll see signs for Security and Control Room (Image 21) — go into the Security room first and loot it. Enemies will probably attack you as you enter the hall, so be ready. On your right as you head into Security is a medpack on the wall — don’t miss the ammo crates on the shelves further into the room.
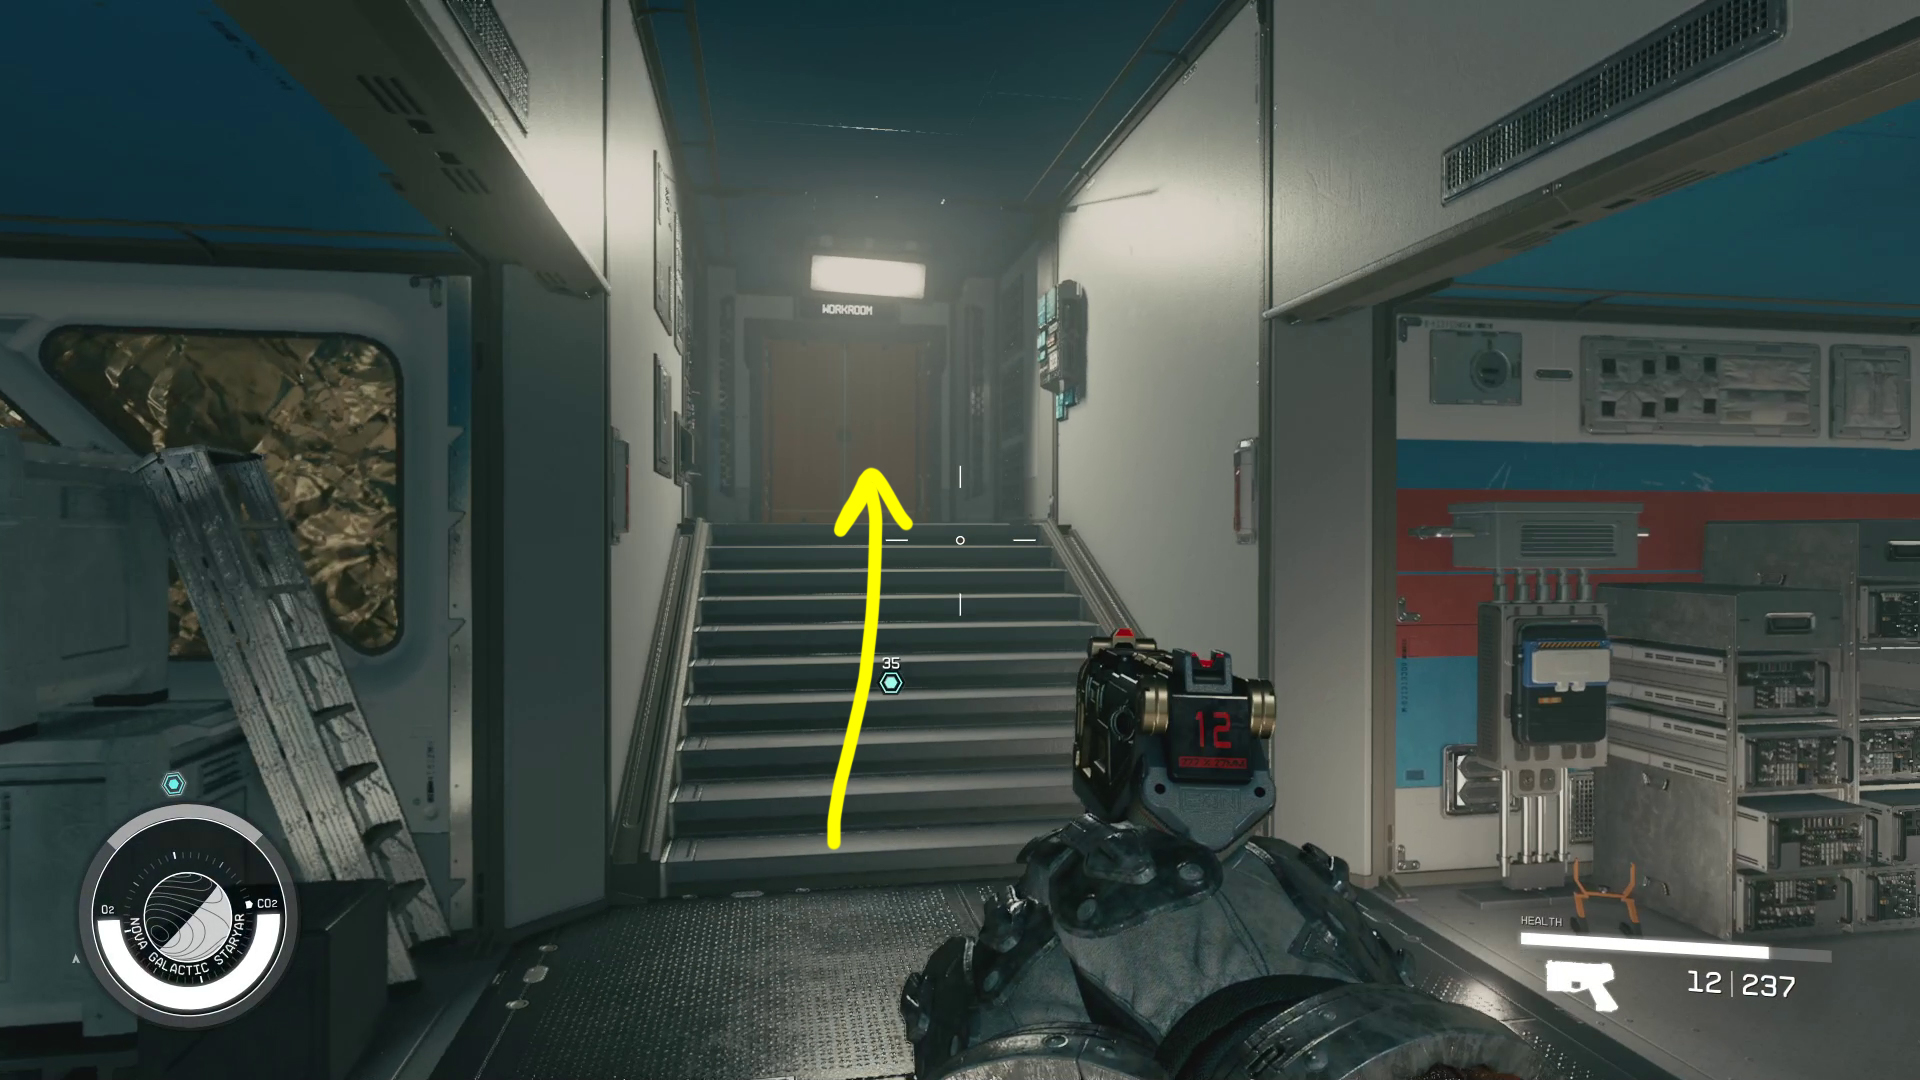
Now go through the doorway marked Control Room, and head up the stairs. Just ahead is the control room — it’s full of enemies, so go slow and eliminate them all. Once you’ve cleared the room, make your way in a loop around the first floor of this area, collecting loot. Ignore the doorway to the Work Room — we’ll head there last. After clearing the first floor, go up the stairs and do the exact same thing on the second floor, watching out for any enemy stragglers. That done, you can head back to where you came up the stairs and then head through the nearby doorway marked Work Room (Image 22).
Image 21Image 22
In the next area, there’s a locked door on the left, but it tends to not have much in it. Across from the locked door is a hallway — continue down it, and through the next door, then through the next room, where you’ll find a Nova Galactic Manual on the desk. Grab it and continue down the stairs. You can start sneaking at the bottom of the stairs and ambush the first enemy you come across.
Nova Galactic Manual location
If you need to heal, or if you have any Aid items that give you damage resistance or other useful combat buffs, now would be a good time to heal/use them — the Work Room is where you’ll fight the toughest battle of this mission. There are numerous canisters on the catwalk you’ll be walking out onto, so avoid standing near them, and make sure you target them if enemies stand next to them. Don’t rush into the room, but instead slowly go from cover to cover, taking out enemies as they appear. One of the enemies — Ecliptic Merc — can spawn at a very high level, so be extra careful when taking them on. They spawned at level 12 in our playthrough, and were significantly tougher than their comrades.
After defeating the enemies near when you entered the work room, head forward and then go right across the small walkway (Image 23), go through the door there, and loot the room. Head back across the walkway and take a right, continuing forward — more enemies will continue to appear, so be aware of your surroundings. At the far end of the catwalk is a food station with a glass panel, and a door on the far wall (Image 24A). This is the door you may to exit the area later, so note it for now, loot the stuff on the nearby counter, and continue around the edge of the room (24B).
Image 23Image 24
Straight ahead is another door — the room beyond has a chest you can loot. There’s another room on the opposite end of the same wall you should loot as well. You’ll pass some stairs on your right; these lead into the Control Room we already looted, so you can skip them and continue to the door on the other end of the room. Once you loot it, leave the room and head down the stairs to the first floor (Image 25)
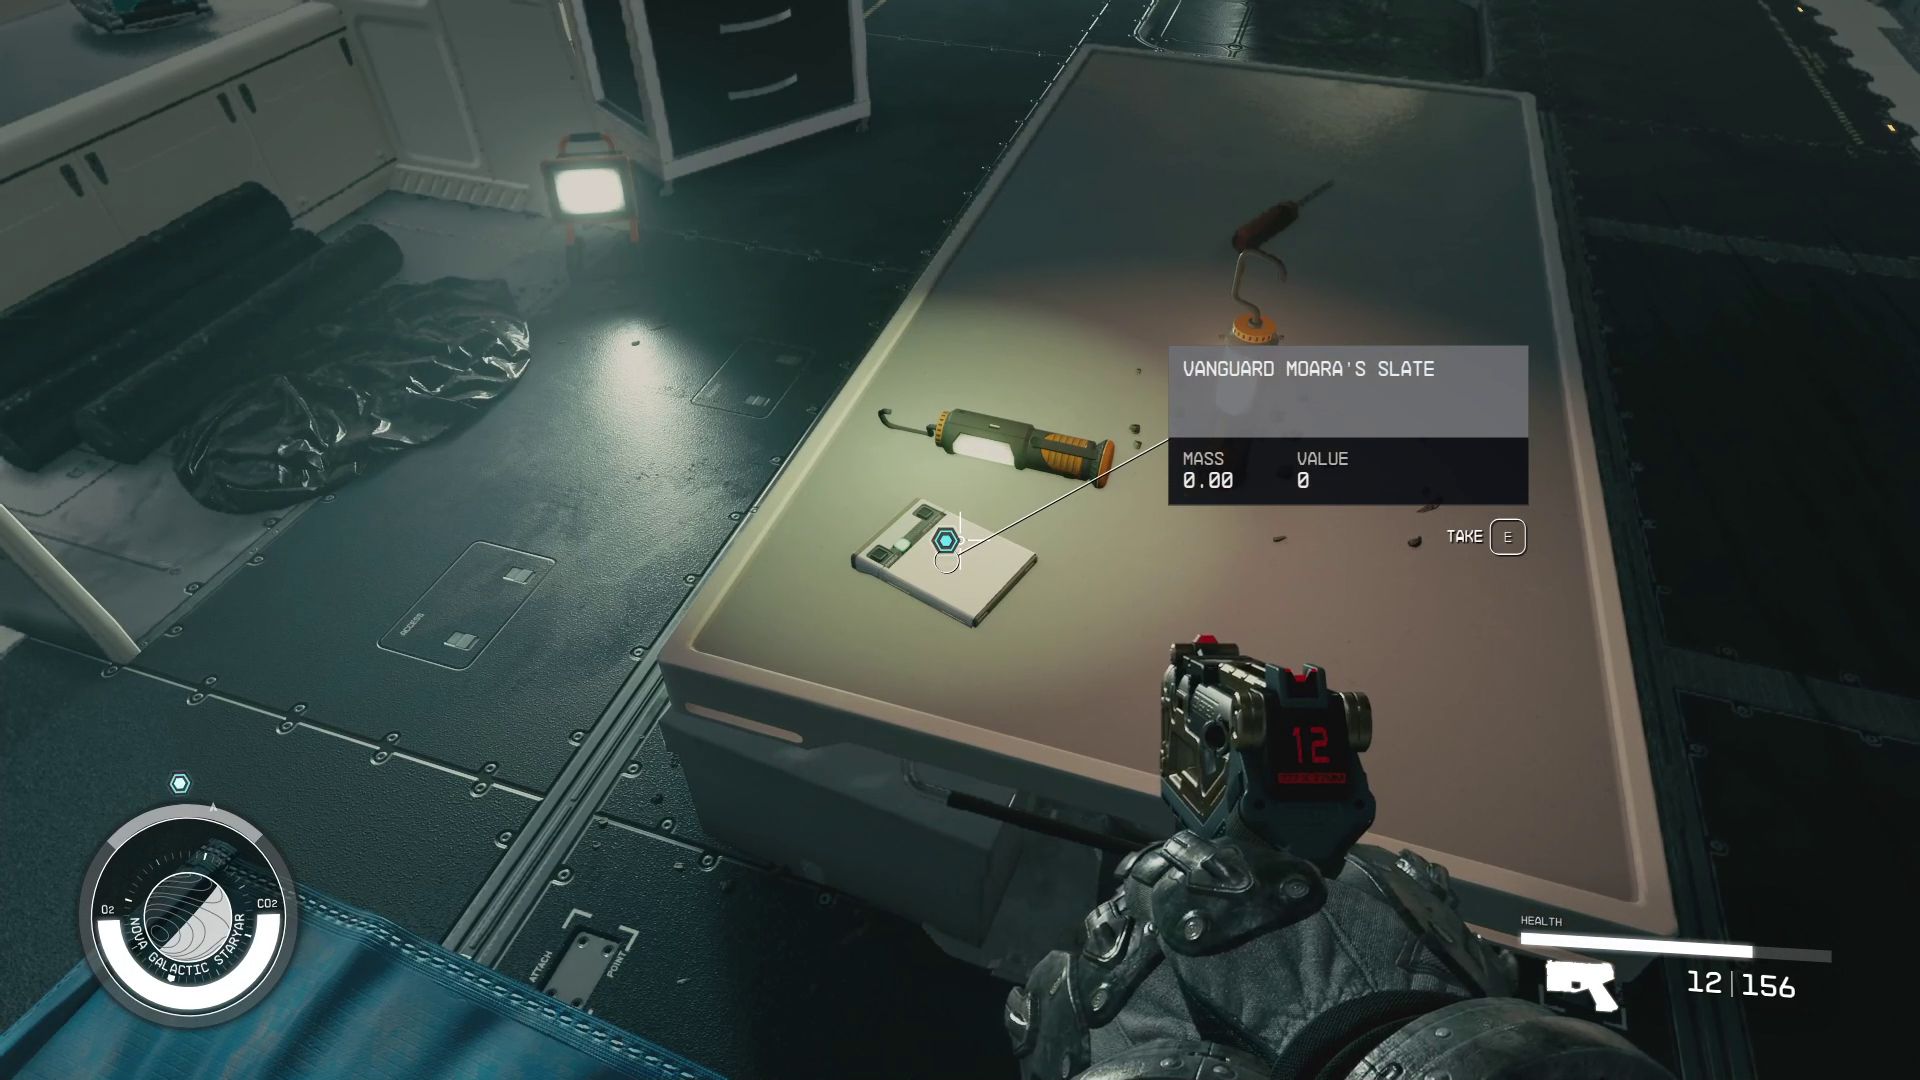
At this point you’ll probably have cleared most of the enemies, but just in case, be cautious as you head to the ground floor. In the center of the room is a ship (your objective marker should be inside of it) — head up the stairs that lead inside, loot all the useful stuff from the surfaces, and then grab Vanguard Moara’s Slate from the table in the center of the ship (Image 26).
Image 25Image 26
Go to Neptune
If you just want to leave now, you can retrace your steps, back up to the second level of the room and back the way you came, to the door we noted earlier (Image 24A), then continue down the stairs and follow the objective marker to an exit that leads to the ship.
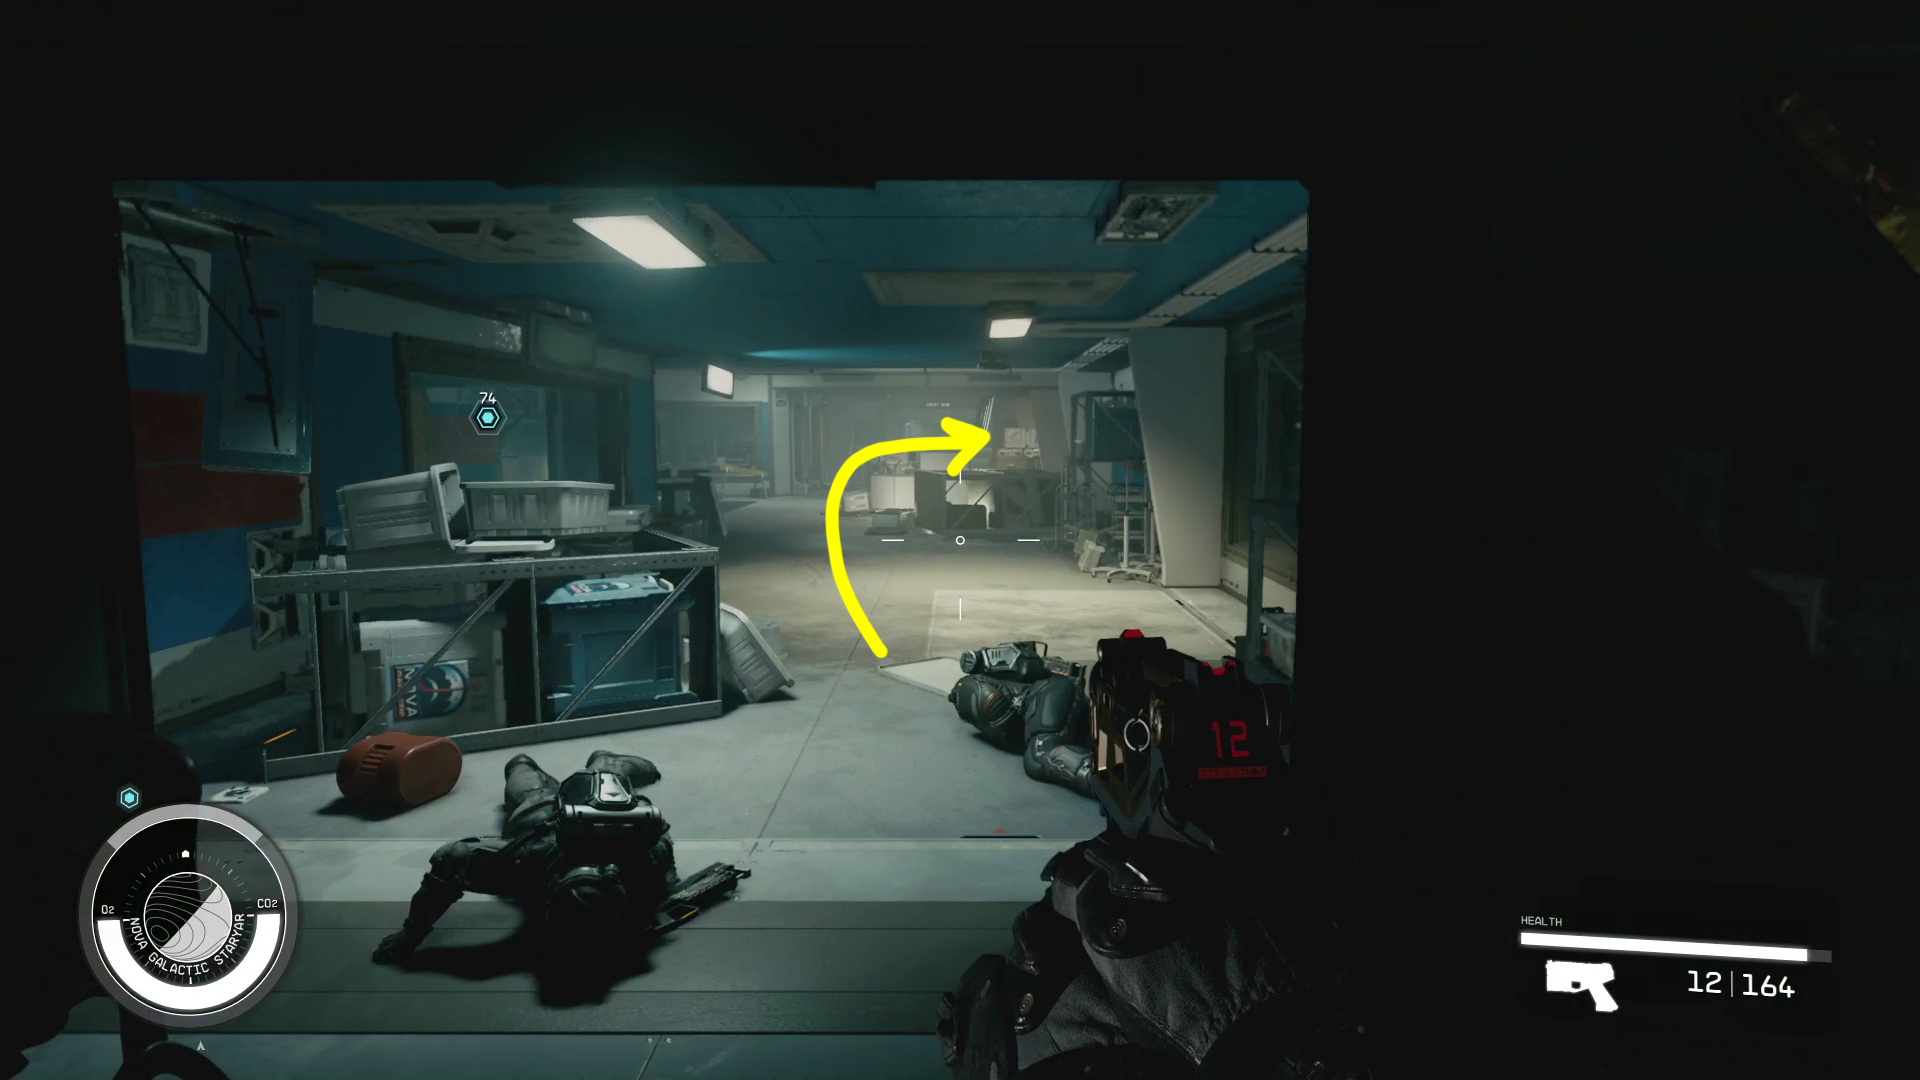
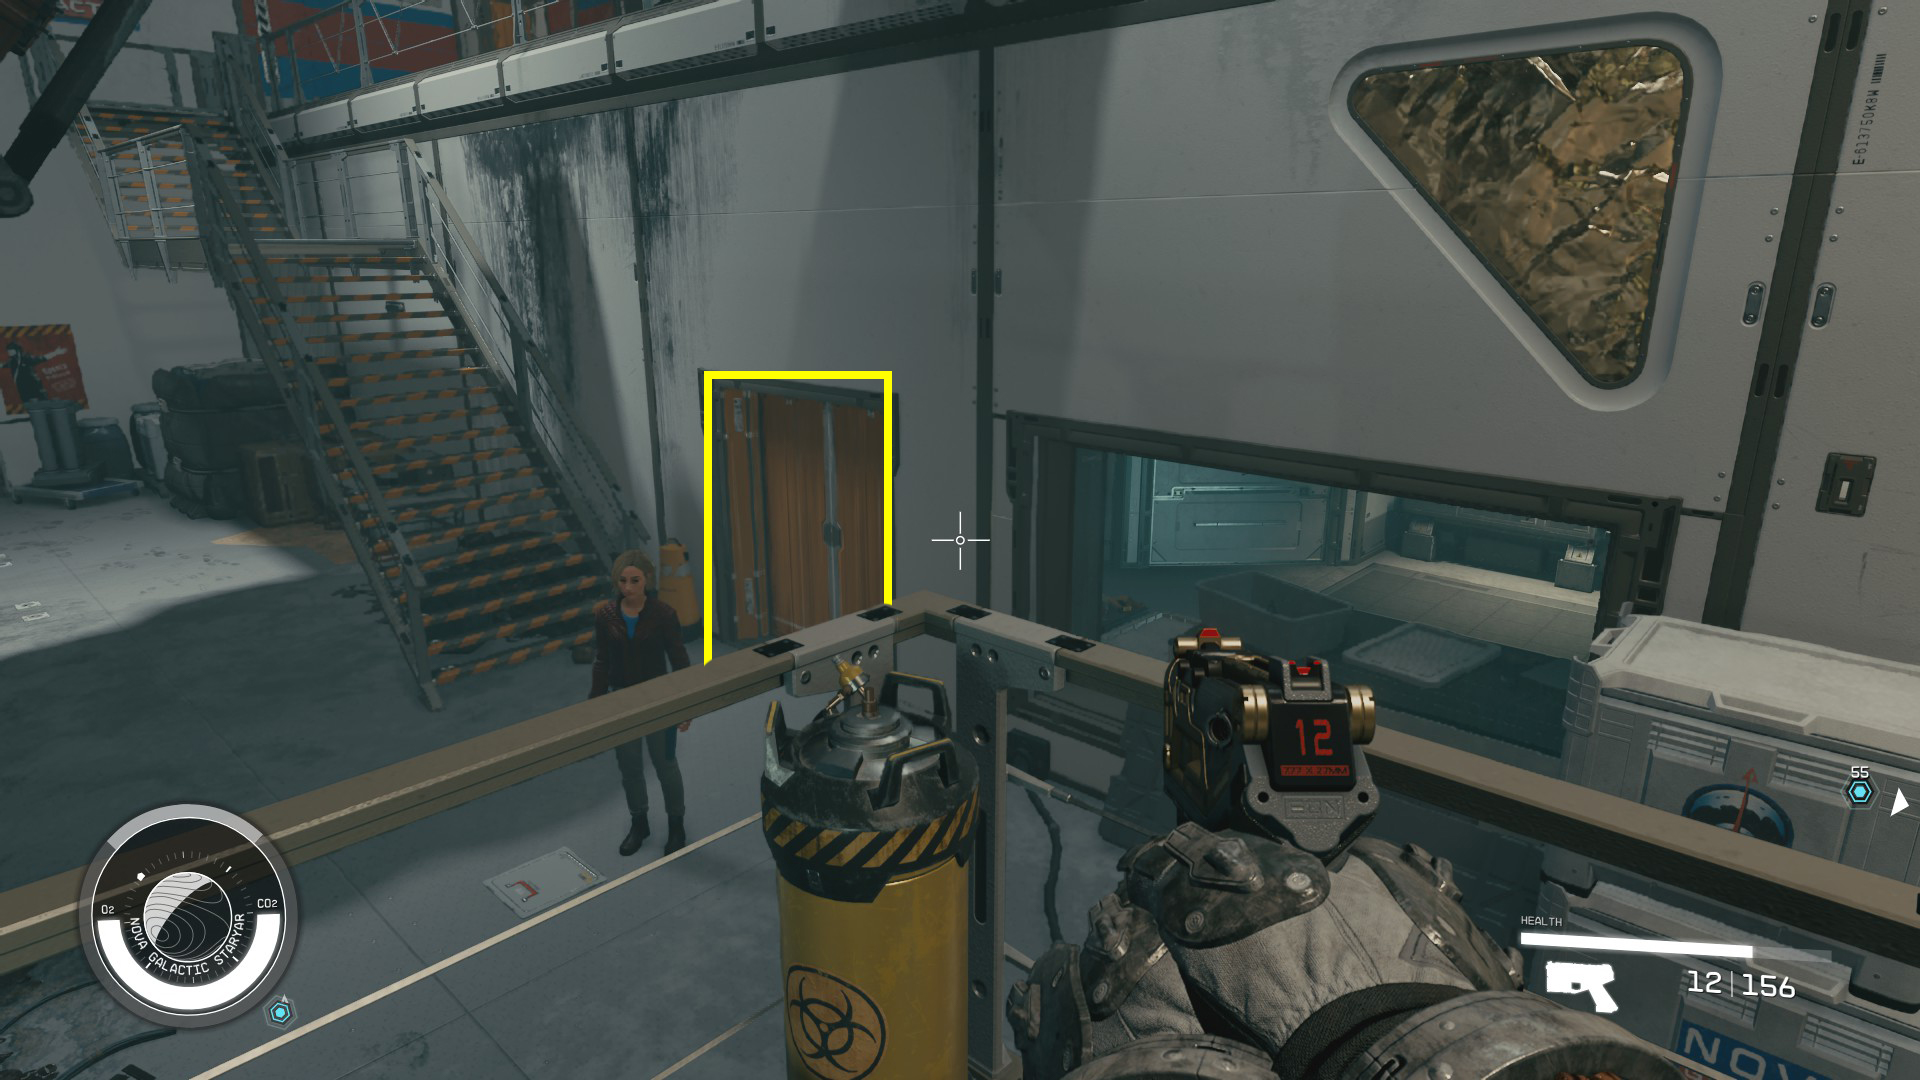
If you want to collect even more loot, however, go back the way you came, but instead of going up the stairs, enter the room to the right of the stairs that contains a few upgrade tables (Image 27). Loot and continue through this room, and you’ll exit it at the far wall. Continue circling the Work Room, keeping the wall on your left as you proceed — enter each door you find and loot the room, then leave, turn left, and continue to the next door. Eventually, you’ll come to the door in Image 28, which will let us leave the Work Room.
Image 27Image 28
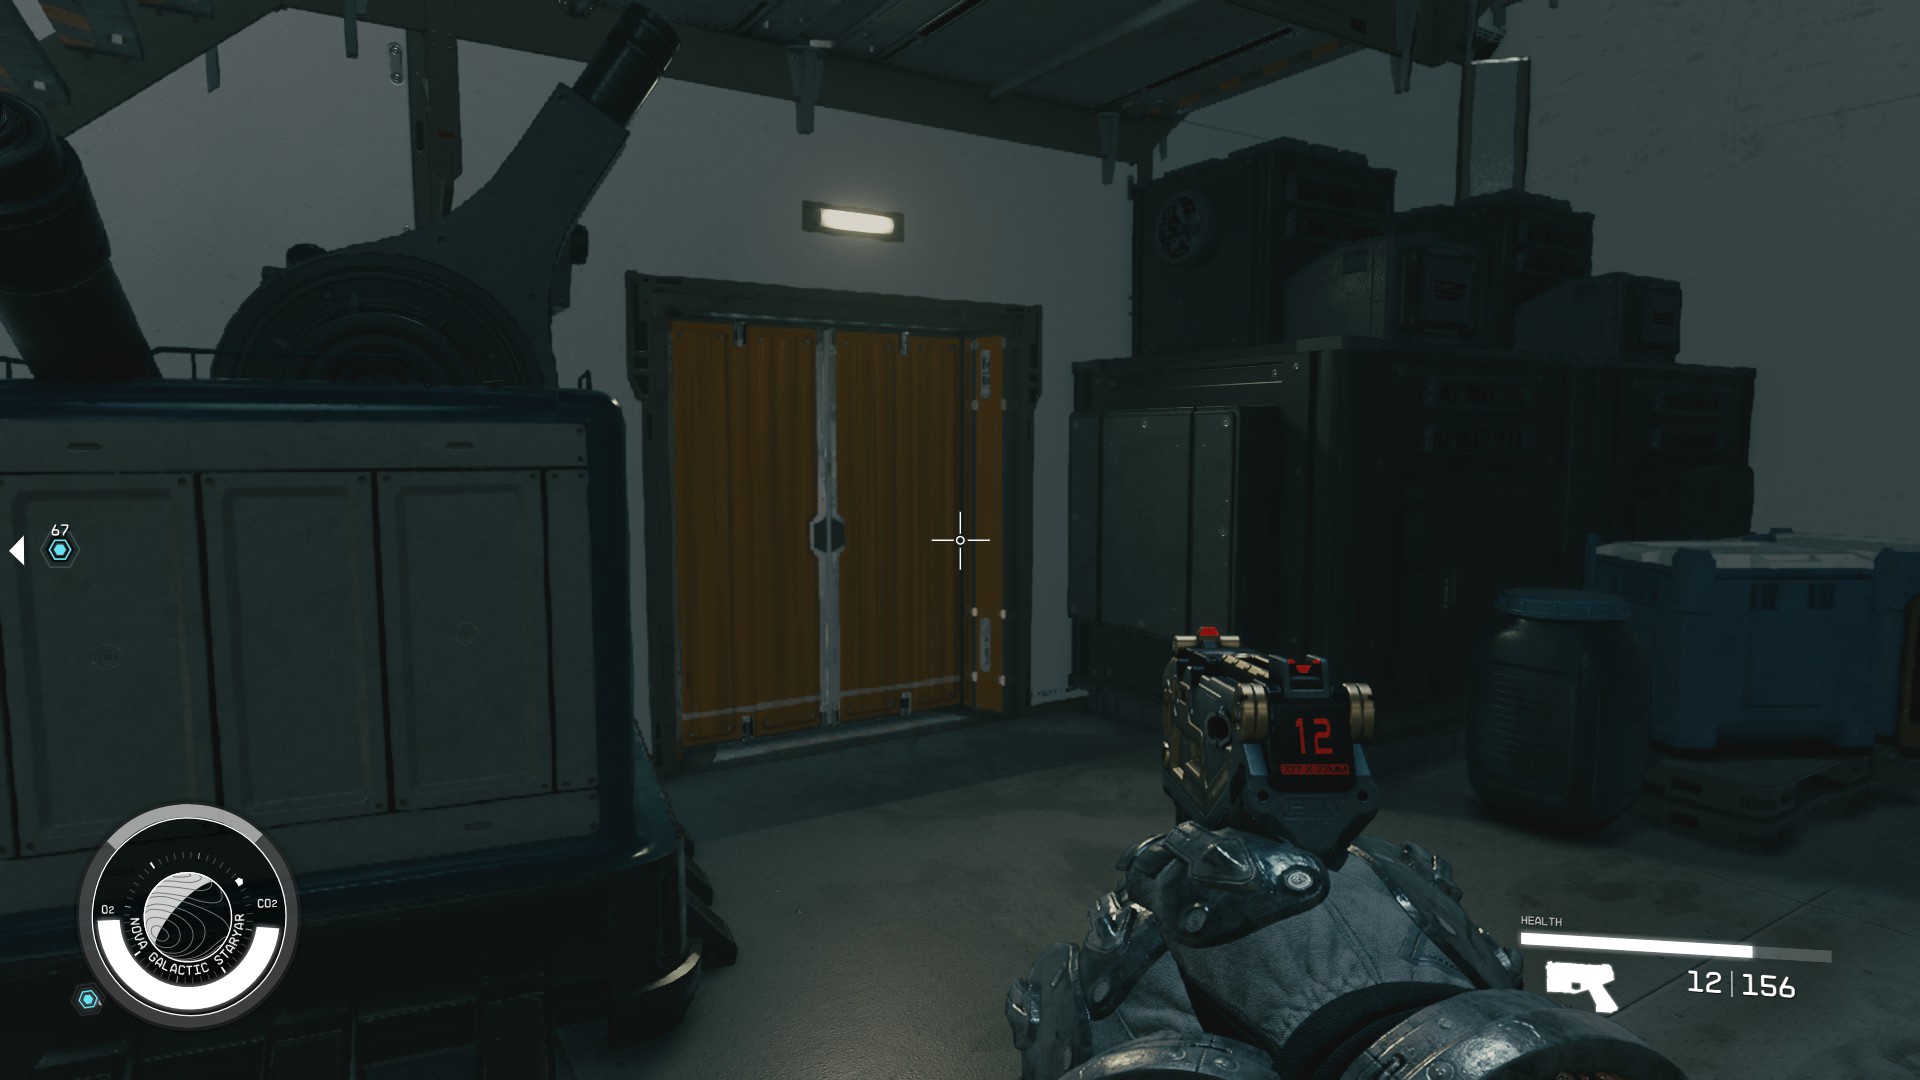
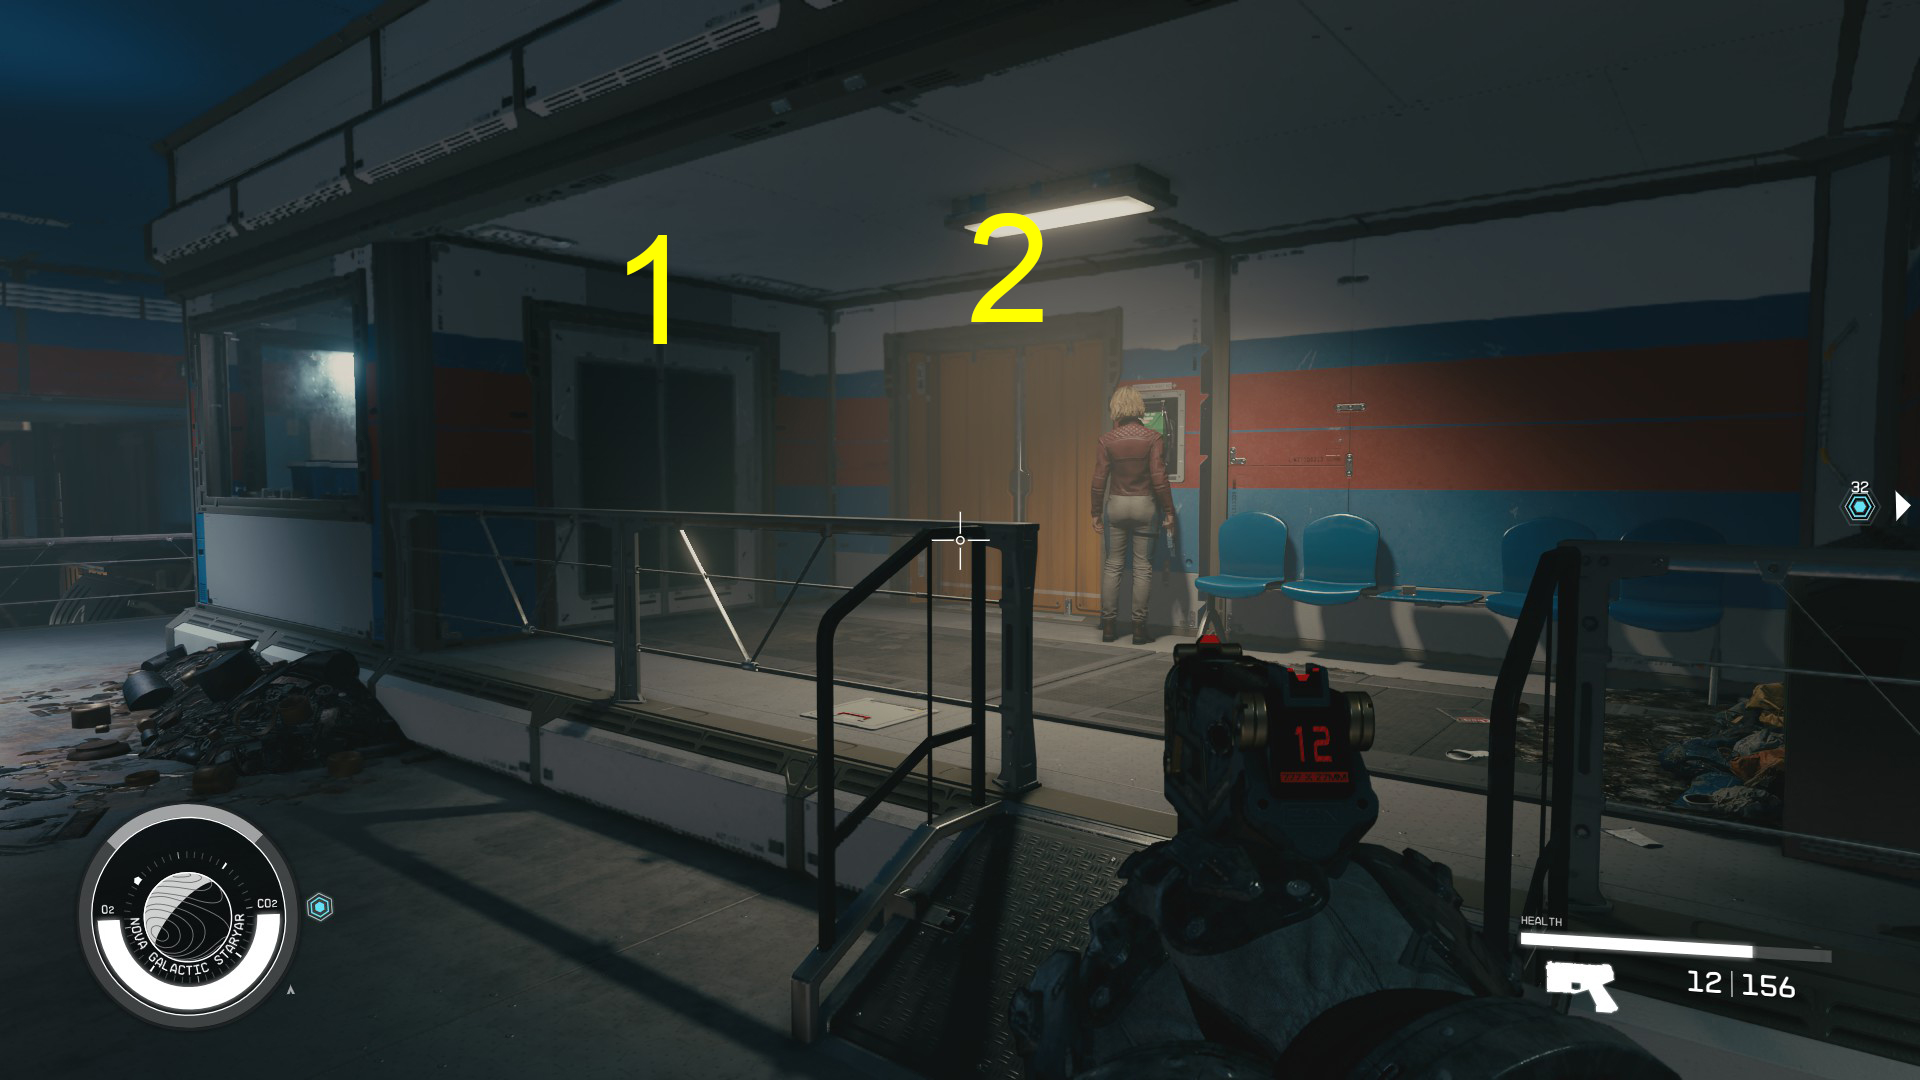
Loot your way through the large storage area just ahead, making sure you don’t miss the crate in the yellow cargo container. Head up the two ramps and turn left, and you’ll see a couple of doorways (Image 28) — loot the room on the left, then continue through the right-hand room, where you’ll find a chest on the floor with a valuable item. Past the chest is a door you can open with a nearby switch on the wall (Image 29) — head through and the exit will be just ahead.
Image 28Image 29
Continue through the next area, following the objective marker to return to your ship. Press the Cockpit button at the hatch to go directly to the pilot’s seat, and then you can use the Mission Log to fast travel to Neptune.
Approach the Ship
Upon arriving in orbit of Neptune, you’ll see your objective marker ahead — it marks the location of Moara’s ship. Before heading towards it, make sure you have full power to your shields, as well as power distributed to all your weapons systems. Target the ship as you approach. When you get close enough to the ship, it will open fire and take evasive action.
Evade Fire/Damage Moara’s Ship/Dock with Moara’s Ship
Start taking down the ship’s shields, and once you do so, begin firing ballistic weapons as well. Sarah will tell you to disable its engines — usually, you’d need the Targeting Control Systems skill to attack a specific system, but in this mission you can just reduce the HP bar to zero and that will count. Once you’ve disabled the ship, you can approach it and dock, then hold the Board button to board the ship.
Clear Moara’s Ship of Hostiles/Get the Key
Upon entering Moara’s ship, turn left and go through the door to the living quarters, where you’ll find plenty of stuff to loot. You can even take a 1-hour nap in his bed, which will let you earn a bit of extra XP for the next bit (thanks to the Rested buff). Then go back to where you entered and head through the other door, where you’ll find some baddies.
This bit is straightforward, as Moara’s ship from here to the cockpit is basically one long, curvy tunnel. Slowly make your way from cover to cover, eliminating each enemy you encounter, and looting what you please. The final enemy you kill will have Moara’s Ship Key, so loot it from them and then continue forward to the cockpit, which the key will unlock.
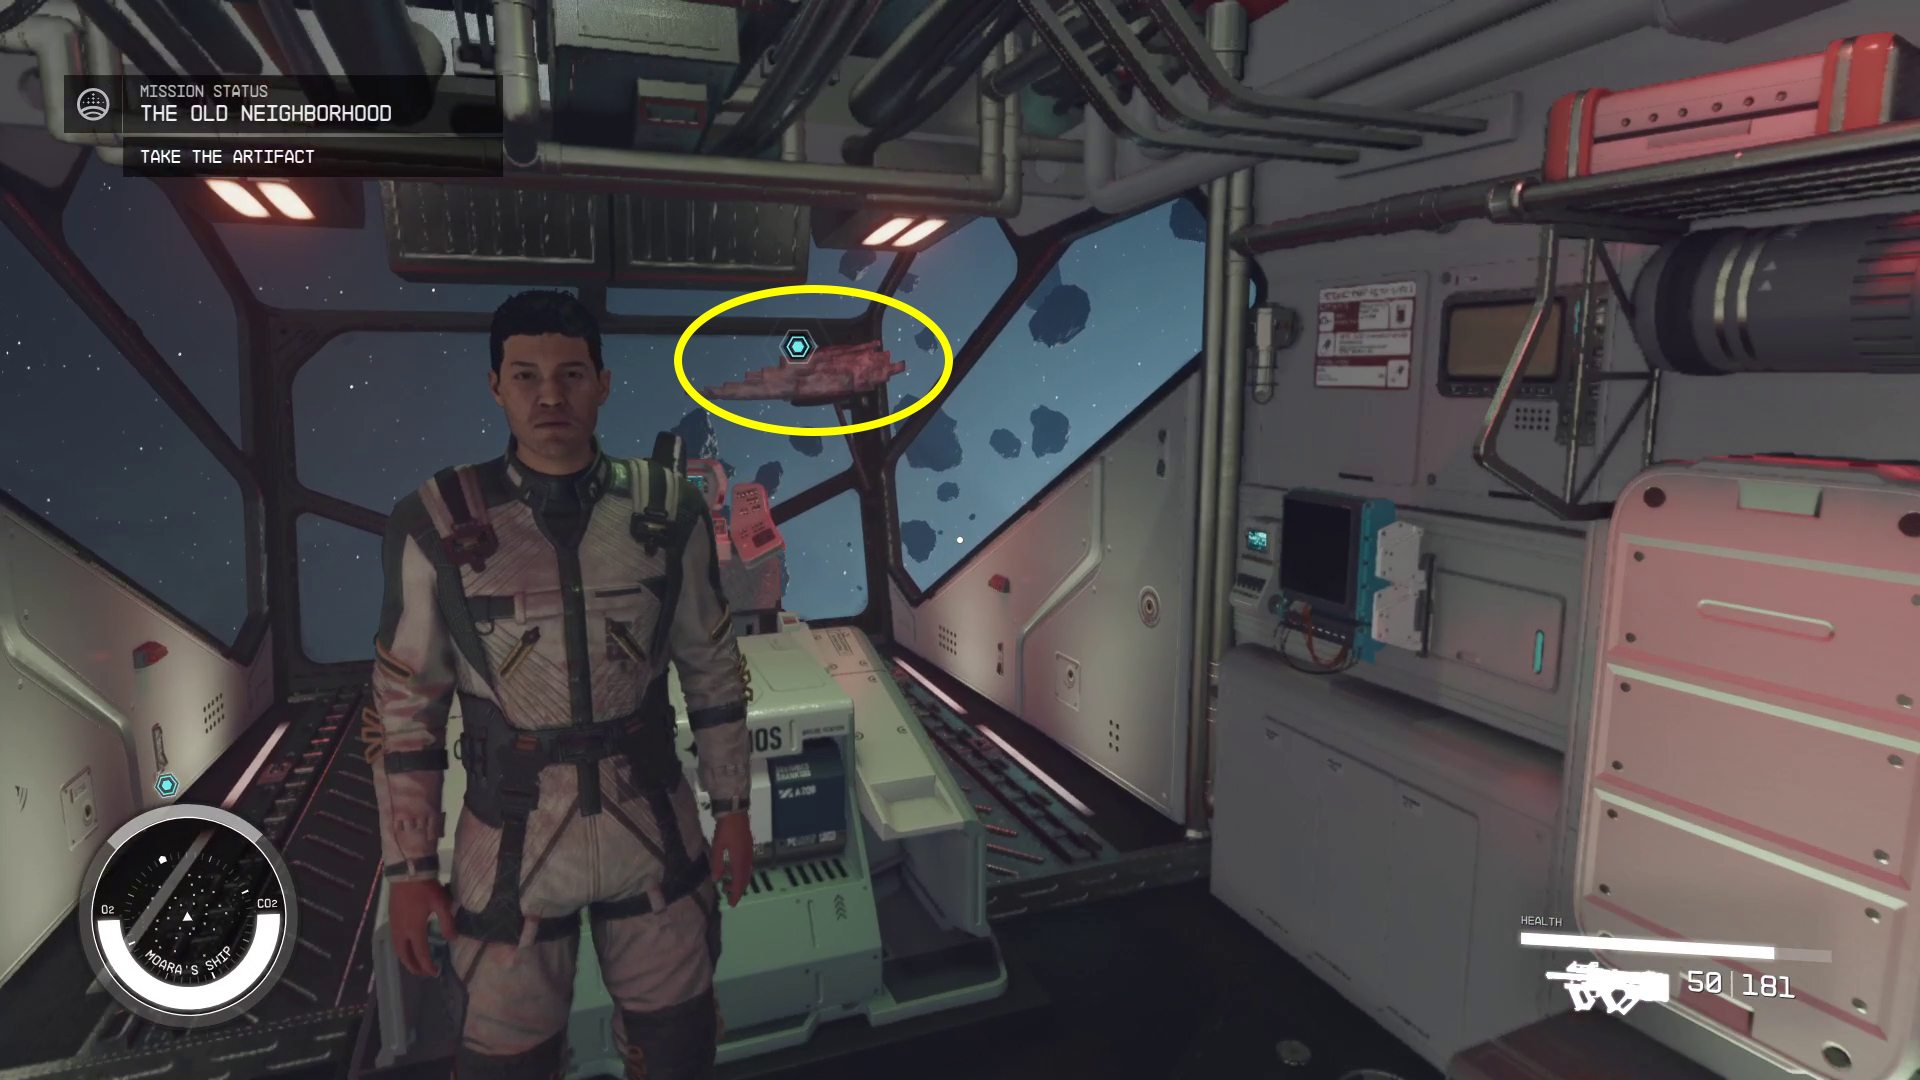
Talk to Moara/Take the Artifact/Return to the Lodge
Just ahead is Moara — walk close enough and a conversation will begin. Once you finish talking to him, you’ll be able to grab Artifact Beta, which is just behind Moara. Sadly, you can’t fast travel from here, so jog on back the way you came and return to your ship, then undock. Once you’ve undocked, use the Mission log to fast travel back to the lodge, then head inside and continue into the library.
Surely there’s some kind of space law about having view-obstructing artifacts in your cockpit…
Add the Artifact/Wait for Sarah/Talk to Sarah
Head to the weird projecter-table-thing in the center of the library — once you’re close enough, you’ll be able to press the indicated button to Activate the Artifact Collection, adding the latest artifact. Listen to the conversation, and then Sarah will speak with you again, welcoming you as a full member of Constellation. Fair warning, if you pick the sassy “I expected champagne” dialog option, Sarah will dislike it. But if you pick “It’s an honor to be a part of this,” she’ll like it. You’ll also be able to decide to continue working with her (having her as your companion), or telling her you work better alone — you can always change this later.
What to Do Next
You’ve unlocked three new story missions, so they are all good options for next steps:
Alternatively, the Mantis mission will net you a sweet ship and suit set, or you could tool around on New Atlantis doing odd jobs if you want a break from space action.
We thought Barrett was a great character, so our next stop will be Vectera!
Unabashed FromSoftware fanboy still learning to take his time with games (and everything else, really). The time he doesn't spend on games is spent on music, books, or occasionally going outside.